
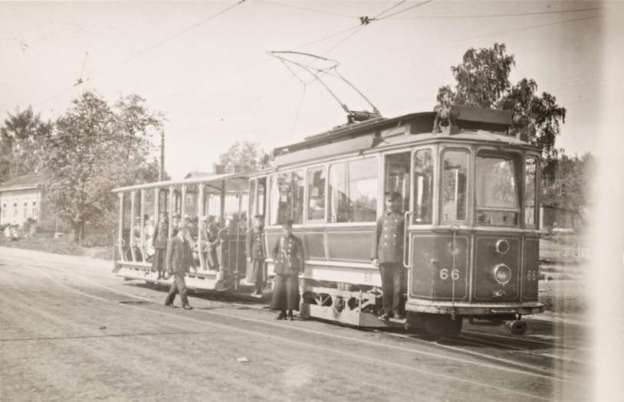
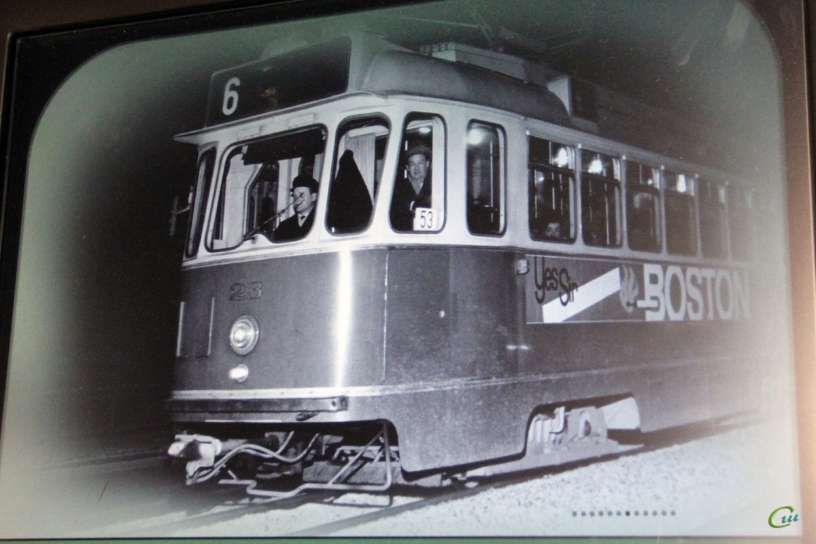
The featured image for this article is the pikkuruotsalainen (“Little Swede”) tram, built by ASEA in Sweden. Together with its open summer trailer, they became a beloved pair on city tracks. The breezy trailers were especially popular on hot days, so much so that passengers sometimes clung to the running boards or jumped off before the tram had fully stopped. Though open trailers were meant only for summer use, wartime shortages forced them into winter service under tarpaulins. Their final flourish came during the Helsinki Olympics in 1952, when crowds crammed aboard one last time before the trailers disappeared from daily traffic, © Helsinki City Museum, Public Domain. [19]
A short letter from Kaj Arnold Larsen, Engineer of Helsinki Tramways was published in The Modern Tramway in June 1951. [1]
It seems that the editors of The Modern Tramway were delighted when examples that bucked the seemingly overwhelming trend of closures could be cited.
K. A. Larsen wrote:
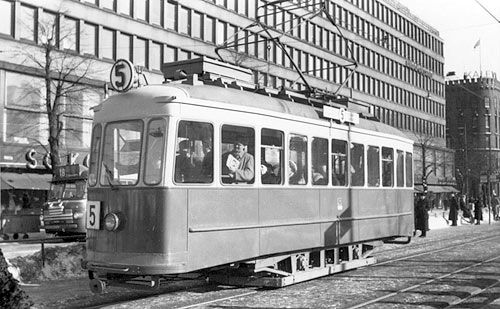
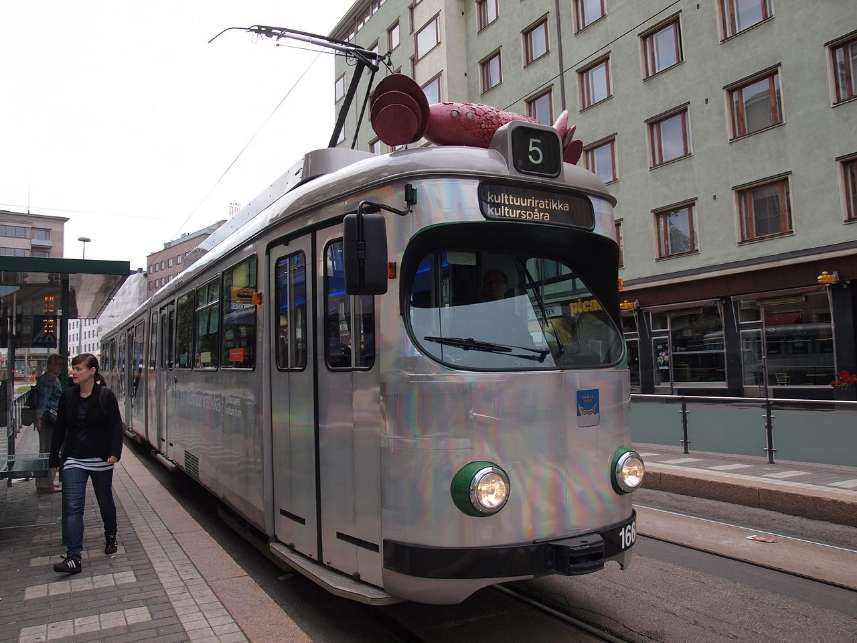
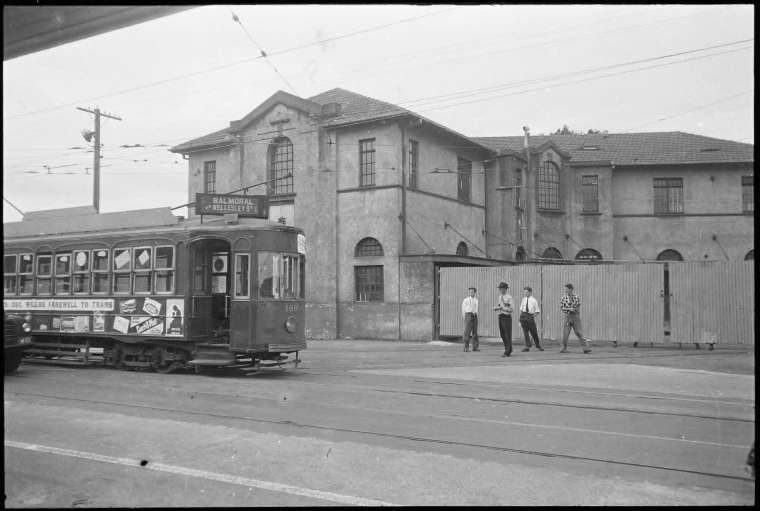
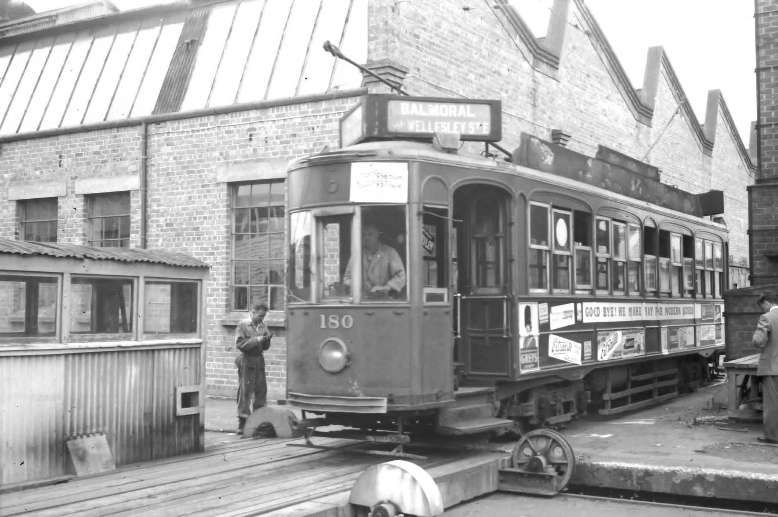
“Service 5 of the Helsinki (Finland) tramway system passes through the centre of the city, traversing the narrow Alexander Street for part of its distance. The passenger frequency in 1948 was 12.5 passengers per car kilometre. In June, 1949, tramway operation of this route ceased and diesel buses were substituted as it was thought that bus operation would be more economical and would speed up the traffic flow. Staff economy was to be effected by using eight buses (i.e., eight drivers and eight conductors) instead of six trams, each with its own trailer (six drivers and twelve conductors). It was soon found that 15 buses, with a total crew of 30. and a 2-minute headway instead of the trams 5-minute headway, were necessary. Street parking had to be forbidden in Alexander Street as the congestion in rush hours was making impossible the working of the 60-seater diesel buses through the street. Even without street parking, the situation was not noticeably relieved.
Faced with this object lesson, the authorities wisely decided to restore the tram service along the route as soon as sufficient cars were available. Trams are now running again, and the traffic is moving without difficulty.
Next year the Helsinki tramways will take delivery of a number of new bogie tramcars of a design which combines the best features of P.C.C. and modern Swiss practice. These cars will have a passenger capacity of 100 and a maximum speed of 38 m.p.h. They will be used with one or two trailers and will replace 30-year-old cars. Extensions to the tramway system are planned and headways are to be decreased.” [1]
Larsen concludes:
“We shall then be able to show the public that higher speed and better acceleration and deceleration can be obtained with trams than with buses and that without bad odour and poisonous gases. We are not unaware of the advantages of oil and trolley-buses and we use them on suitable routes.” [1]
In the 21st century, the Helsinki Tram network are part of the public transport system organised by Helsinki Regional Transport Authority and operated by Metropolitan Area Transport Ltd (Finnish: Pääkaupunkiseudun Kaupunkiliikenne Oy) in Helsinki. The trams are the main means of transport in the city centre. 56.8 million trips were made on the system in 2019. In addition to the older tram network, there is a single light rail line that was opened in October 2023. Although technically compatible with the tram network, the light rail line is separate from the city centre tram network. [2]

Public transport in Helsinki was initiated in 1888 by Helsingin omnibussiosakeyhtiö, using horse-drawn omnibuses. “In 1889, Helsingin Omnibussiosakeyhtiö acquired the right to construct tram lines. The next year, the company changed its name in Helsingin raitiotie- ja omnibussiosakeyhtiö (abbreviated HRO). Electric traction was considered as a power source for the new system, but due to lack of funds, and the city council’s negative attitude towards electric trams, the decision was made to use horse-drawn trams instead. The new system was built to a track gauge of 1,000 mm. Test traffic started in December 1890, but the network wasn’t officially opened until June 1891. The capacity of the horse tram system soon proved insufficient, but the conversion to electrified trams was postponed until the price of electrification of the network reached lower levels.” [16] At this time, the network was 8.5 kilometres in length.
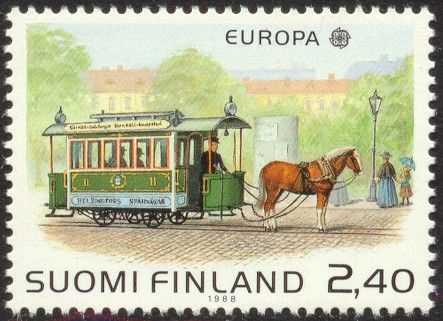
A 1988 Finnish postage stamp depicting a horse-drawn tram in Helsinki 1890-1900, © Posti-ja telelaitos and made available as Public Domain. [5]
“In the latter half of the 1890s, Julius Tallberg acquired the right to construct an orbital tram system around the city that would have linked the existing HRO lines and parts of the city not covered by the HRO lines. After negotiations, Tallberg and his associates transferred the construction permit of the orbital line to the HRO in return for a large number of HRO stock shares.” [16]
“In 1897, HRO received the right to construct an electrified tramway into Helsinki. A call for bids was sent out the following year, and the contract was awarded to the Germany-based O.L. Kummer.” [16] Under the contract, Kummer were required to build and electrify the new network and provide the trams to be used on it. In addition, Kummer had to run the system for up to 3 years to prove the quality of its work. Running the system, resulted in significant profits for Kummer and, as a result, by 1901, HRO had assumed responsibility for operating the tram network. The four lines of the developing network after electrification were all single-track.
Although the single-track lines proved to be inadequate it was some time before the HRO was willing to fund the conversion. In 1906, “the company applied for and received permission to convert their track network into double-track. The contract also specified certain lines that HRO had to operate, as well as certain extensions that had to be built.” [16]
“The contract for converting the tram network into double track was awarded to the Swedish ASEA. Conversion work began in 1908 and was completed in 1910. From 1908 until 1919, ASEA also supplied the HRO with a total of 78 trams and 70 trailers.” [16]
“ASEA (Allmänna Svenska Elektriska Aktiebolaget) was a Swedish industrial company founded in 1883 in Västerås. Renowned for electrical engineering and infrastructure, it produced early industrial robots, transformers, [trams,] and locomotives.” [4]
In 1909, the network expanded to include the island of Kulosaari – a private line owned by Brändö Spårvägsaktiebolag
In 1913, a tram line reached Alppila. In 1914, the network was also expanded into Taka-Töölö and Hermanni.
Another private line (built by Aktiebolaget M.G. Stenius) linked the existing HRO tracks in Töölö to Munkkiniemi and Haaga.
“In 1926, HRO acquired Aktiebolaget M.G. Stenius and, two years later, Brändö Spårvägsaktiebolag also passed into HRO ownership. As a result, HRO again became the sole owner and operator of trams in Helsinki.” [16]
“The tram network reached its apex in 1930, when the network covered a larger area than ever before, … there were 14 lines in operation.” [16]
“At the end of 1944 the City of Helsinki acquired the entirety of HRO, which now became a municipal transport authority under the name Helsingin Kaupungin Liikennelaitos (HKL)” [16]
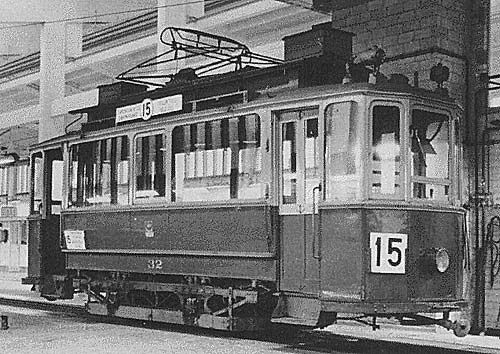
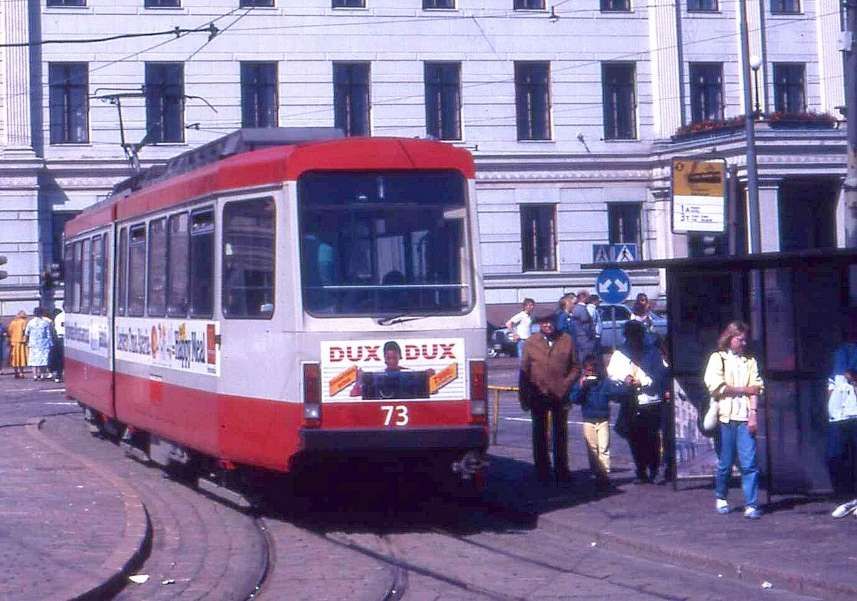
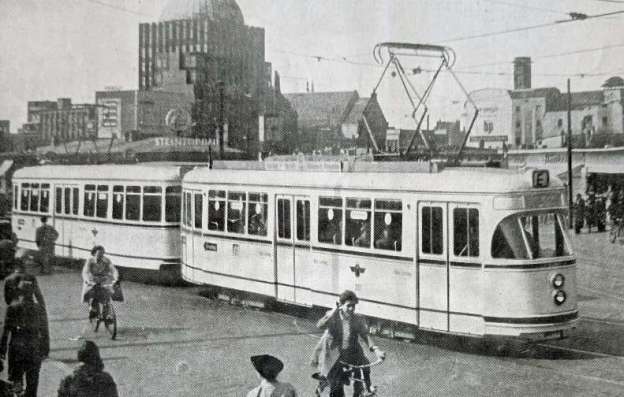
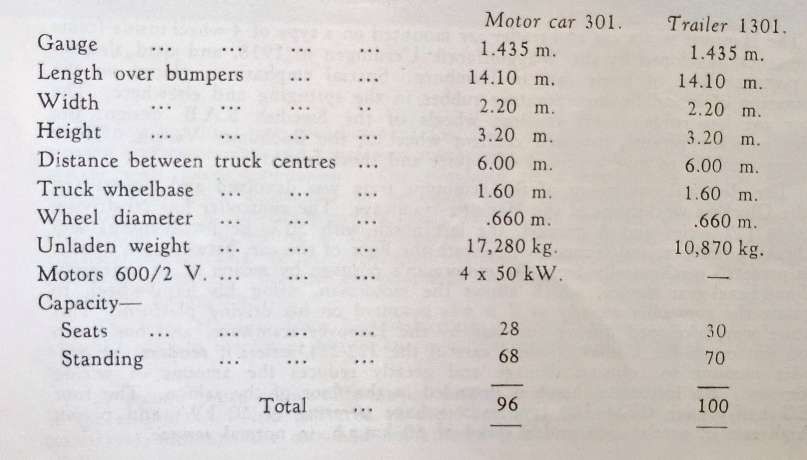
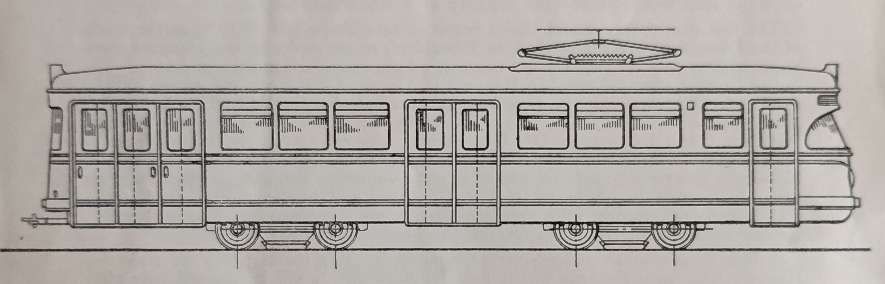
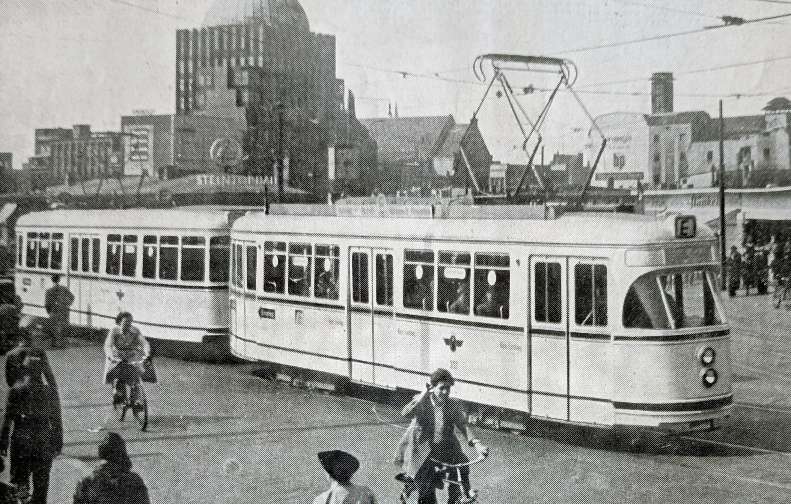
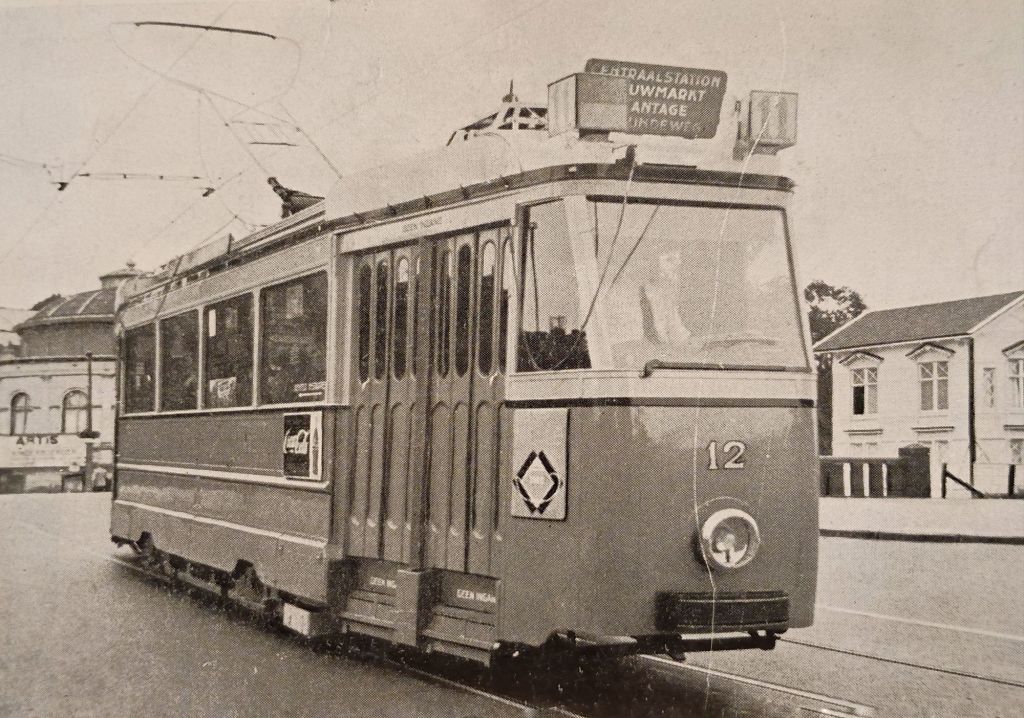
“During the 1950s a total of 105 Finnish-built double-bogie trams (Karia types HM IV and HM V, Valmet types RM 1 and RM 3) were delivered to the HKL.” [16]
The Karia HM IV was a Finnish-built tram delivered in the mid-1950s, © Kari Paavola (2004), permission to use here has been requested. [8]
Two other images of the Karia HM IV can be found on these links:
https://transphoto.org/photo/527278
https://transphoto.org/photo/527279
The Karia HM IV was a classic Finnish-built tram that operated in Helsinki during the 1950s and 1960s. Delivered in the mid-1950s, these double-bogie “Mustang” derivatives were foundational in modernizing Helsinki’s local public transport network before the introduction of the modern tram fleets.
Despite the experience of the ‘experiment’ reported by The Modern Tramway in 1951. Helsinki planned on the gradual removal of its trams. … “During the 1960s all plans for expanding the tram network were put on hold while resources were concentrated on the planning of the metro and additional bus connections. At the same time plans were drawn for the termination of the tram network by the year 2000. In 1969 Helsinki city council made the decision that in the future tramlines would be confined to the inner city, while the metro would serve the suburban areas; the tram system would be terminated, at earliest in the year 2000. This decision required the acquisition of new trams to replace the last two-axle trams, the oldest of which dated from the 1920s. Originally the plan was to acquire fairly new second-hand articulated Duewag GT6 trams from Copenhagen, but the deal fell through and in the end new articulated trams were acquired from Valmet (type Nr I) in 1973–1975. These trams were planned to be the last trams to be acquired for traffic in Helsinki.” [16]
The ‘Valmet Nr I’ trams are articulated six-axle vehicles built at the Valmet aircraft factory between 1973 and 1975, they are based on the German Düwag GT6 design. About 50 of these iconic high-floor vehicles remain in regular service across the city’s network. [13]
“During the early 1970s the decision to terminate the tram system was reconsidered and eventually reversed. In 1976, the tram network was expanded for the first time since 1955, when the new connection into Itä-Pasila was opened (then line 2, present line 7). Another expansion was opened in 1980, when tracks in Katajanokka were expanded eastward to a new residential area (then line 5, present line 4). In 1981 another group of articulated trams, based on the Nr I type, were ordered from Valmet. Classified as Nr II, these trams were delivered between 1983 and 1987, allowing the withdrawal of the majority of the 1950s-built trams (types HM IV and RM 1 in their entirety), as well as withdrawal of all trailers.” [16]
“In 1985 the tram network was extended to West Pasila (line 7). In the mid-1980s the tram lines were radically reorganised: line 5 was closed down and the routes of lines 2, 3B, 3T, 4, 7A, 7B, 8 and 10 altered to a smaller or larger degree.” [16]
“The next expansion of the network occurred in 1991, when the connection from Ruskeasuo to Pikku Huopalahti was opened (line 10). In the 1990s wide-ranging plans were made for expansion and improvement of the tram system. These included the Jokeri orbital light rail line connecting Itäkeskus to Leppävaara, extensions of the system to Munkkivuori, Koskela, Viikki, Malmi, Arabianranta and to the harbour areas Jätkäsaari, Munkkisaari and Kalasatama, which were to be freed from shipping activities and to become brownfield sites for residential and office development. In addition to the extensions, the plans included a partially tunneled light rail line linking Erottaja to Pasila via Töölö.” [16]
In 1999, Helsinki purchased a fleet of low-floor Variotram trams from Adtranz (which became Bombardier in 2001). The new generation trams suffered from persistent technical difficulties and the whole batch has to be returned to Germany. To cover their absence the city purchased ten second-hand trams from Mannheim, Germany.
Wikipedia informs us that, “The purchase of the Bombardier trams was never completed due to the reliability problems. Instead, a deal was reached that required Bombardier to keep a certain minimum number of trams in operation. Bombardier opened its own depot in Helsinki for this purpose in mid-2008.” [16]
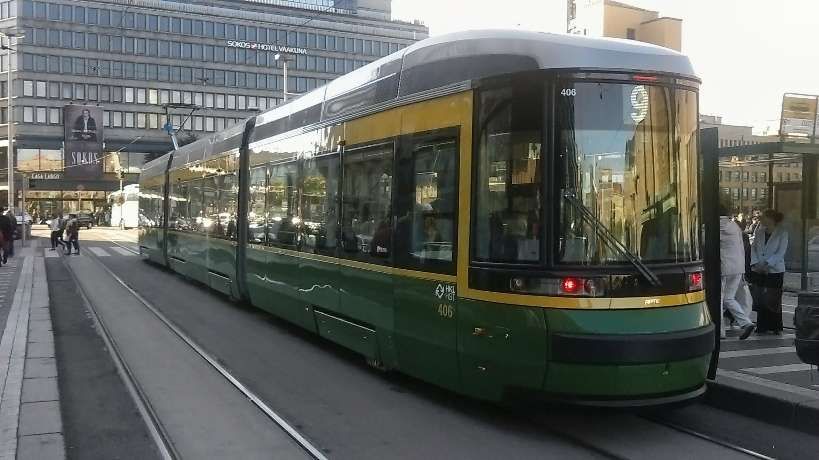
The purchase of a new series of 40 low-floor trams was initiated in 2007, and the trams were eventually ordered from the Finnish manufacturer Transtech in December 2010. Two photographs of these trams appear below. …
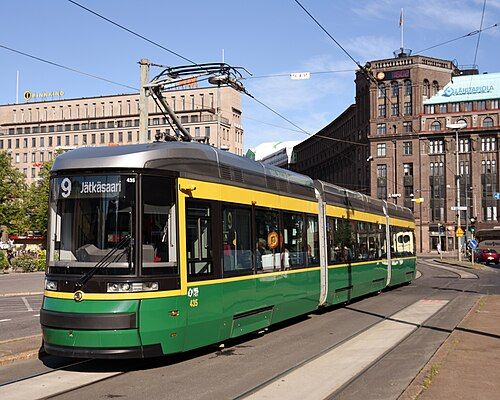
“The extension of the network from Arabia into the new residential development area in Arabianranta (lines 6 and 8) was … opened in 2004. Line 6 was extended from Arabia to Arabianranta in 2004 and line 8 from St. Paul’s church in 2007. The new number 9 line opened on 10th August 2008, connecting Kolmikulma in central Helsinki to East-Pasila and replacing bus line number 17, albeit having been truncated from both ends compared to the initially planned version. This marked the opening of the first new tram line in Helsinki since the (re-)opening of line 2 in 1976.” [16]
“The first phase of the extension of line 8 to Jätkäsaari was opened on 1st January 2012, and the extension of line 9 to the ferry terminal in Jätkäsaari via Kamppi on 13th August 2012.” [16]
Some interesting trams need to be noted:
- From the autumn of 2010 to December 2012, a Culture Tram was operated for limited hours on three days of the week (Wed, Thu, Fri) on the additional line no. 5, whose route ran from Ooppera to Linjat via Rautatientori. The Culture Tram had various art exhibitions and performances on board. Highlights included performances by the singers of the Finnish National Opera and concerts as a part of the Flow Festival. The tram is an eight-axle Duewag tram, originally purchased from Mannheim, Germany, and refurbished specifically for this purpose. It is retained as part the fleet and available on charter basis for events that could use the equipment installed in it. [16]
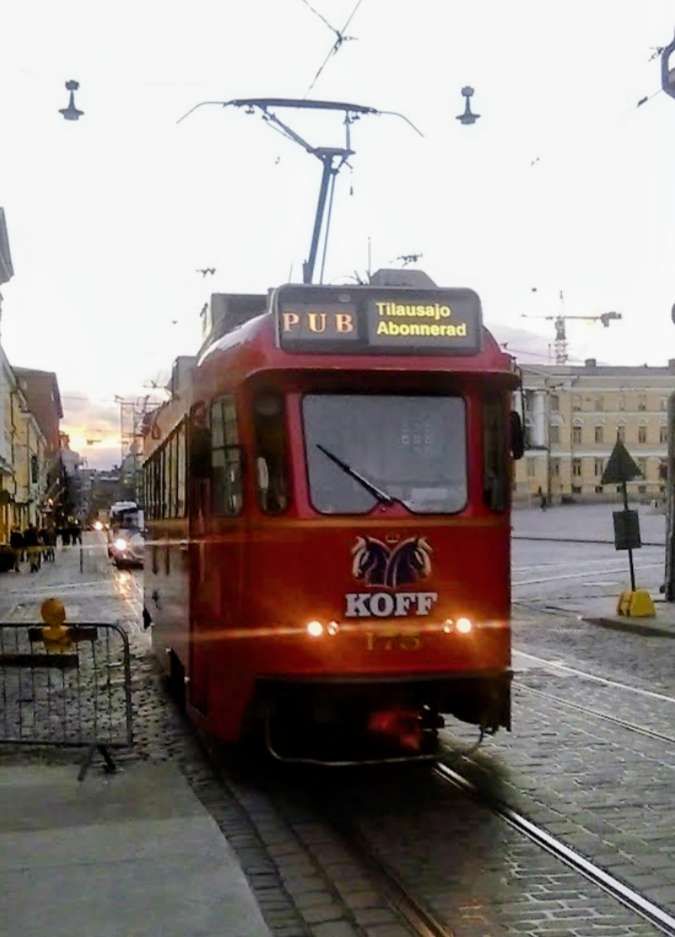
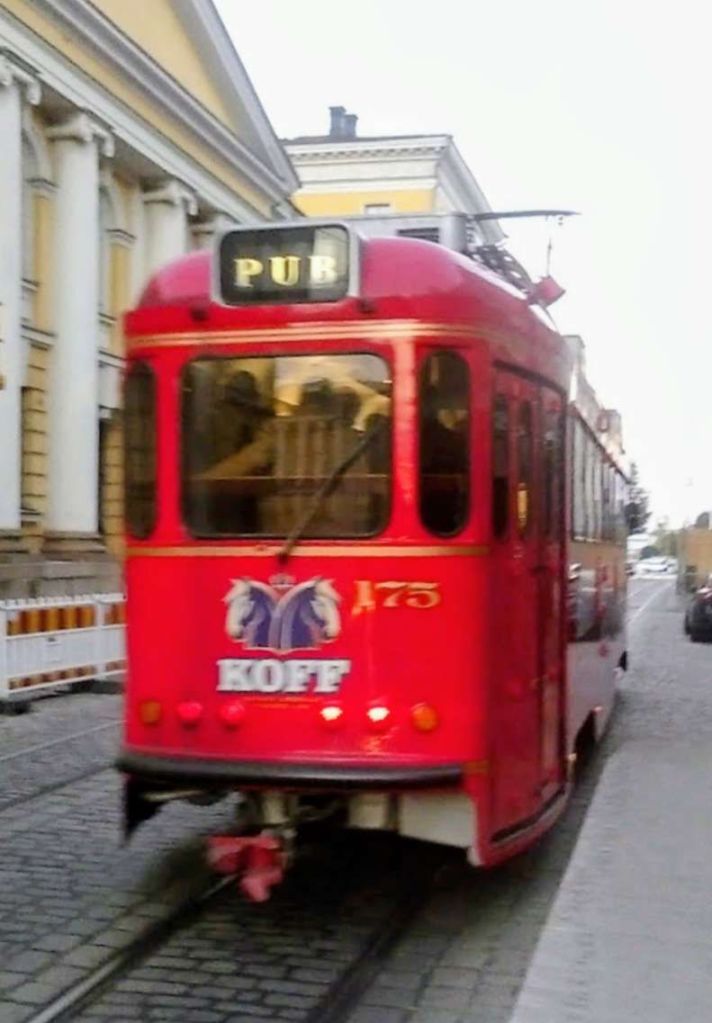
- The Pub Tram – Spårakoff is currently under renovation and temporarily unavailable. It is a tram converted into a pub, touring the central sights of Helsinki city centre. The ride features beer, wine, cider, refreshments, fun and great views. There is even a toilet on board. It is an historic HM V type tram converted to be used as a bar! Two photographs appear below. …
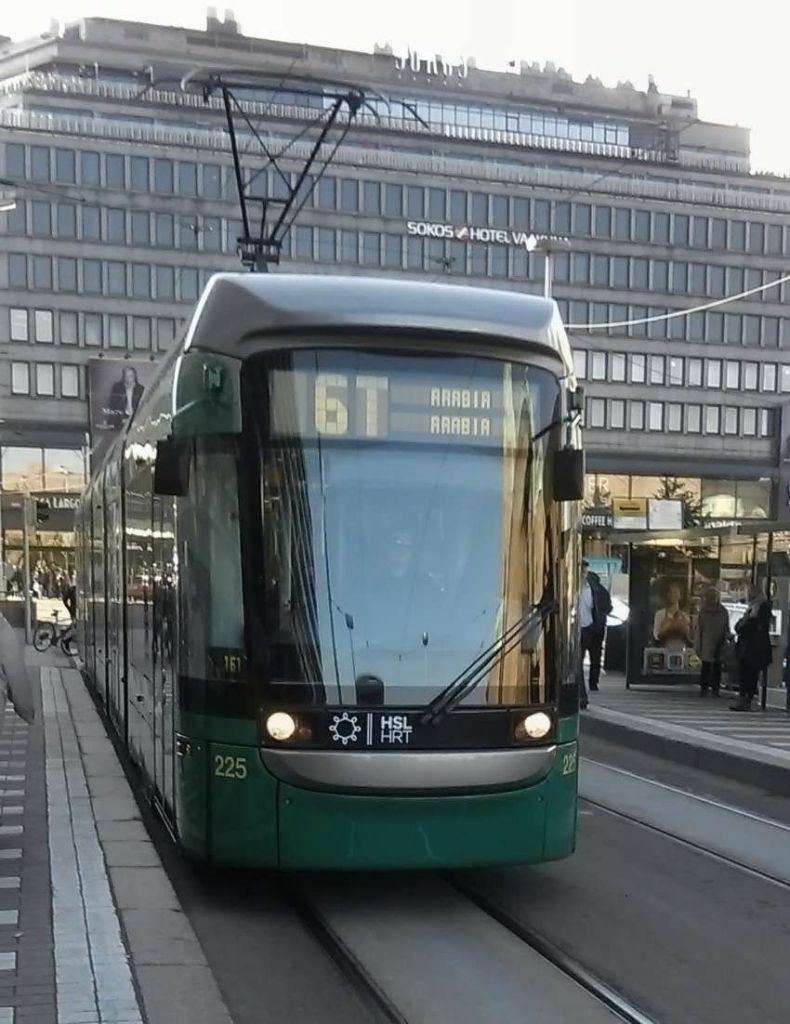
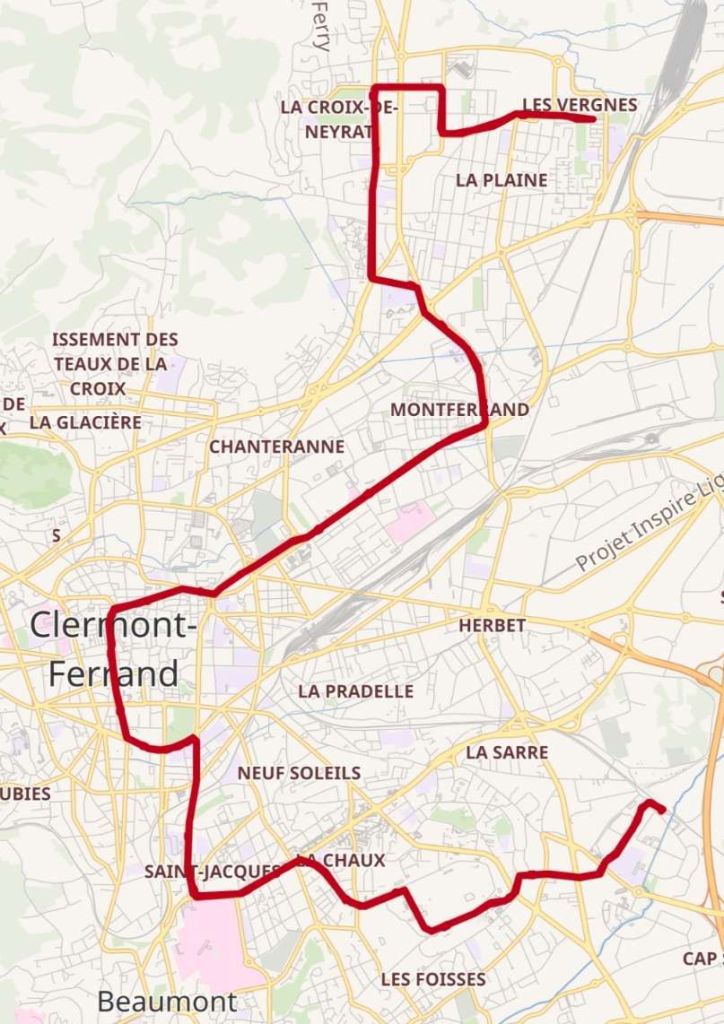
“As of 2 September 2024, the network consists of 11 individually numbered city centre tram lines and one numbered light rail line. Lines 1 and 8 operate on a slightly different route during weekends when they go to the West Harbour terminal, indicated with a “T” suffix on the line number. Lines 3N and 9N are operated on a slightly modified line 3 and 9 route respectively during night time. The light rail line 15 is currently the only tram line in Helsinki to also reach the neighbouring city of Espoo, all other lines travel inside Helsinki only.” [2]
References
- K. A. Larsen; Reinstatement of a Street Tramway Route in Helsinki; in The Modern Tramway, Volume 14. No. 162, June 1951, p 138.
- https://en.wikipedia.org/wiki/Trams_in_Helsinki, accessed on 17th May 2026.
- https://www.reddit.com/r/TransitDiagrams/comments/14ft4sz/map_of_the_tram_system_of_my_hometown_helsuinki_in, accessed on 17th May 2026.
- https://en.wikipedia.org/wiki/ASEA, accessed on 17th May 2026.
- https://commons.wikimedia.org/wiki/File:Horse-Tram-1988.jpg, accessed on 17th May 2026.
- https://en.wikipedia.org/wiki/History_of_trams_in_Helsinki#/media/File%3ATram_2_in_Helsinki.jpg, accessed on 17th May 2026.
- https://commons.wikimedia.org/wiki/File:HM_I_tram_Helsinki.jpg, accessed on 17th May 2026.
- https://phototrans.eu/14,55273,0.html, accessed on 17th May 2026.
- https://commons.wikimedia.org/wiki/File:RM1_Kamppi_2009-04-03.jpg, accessed on 17th May 2026.
- https://commons.wikimedia.org/wiki/File:MLNRV_Hakaniemi_2010-05-03.JPG, accessed on 17th May 2026
- https://www.finna.fi/Record/hkm.674CAE85-12DF-4246-B249-596DF1703379, accessed on 17th May 2026.
- https://en.wikipedia.org/wiki/Valmet_Nr_I#/media/File%3ANr_I_34_in_Hakaniemi.jpg, accessed on 17th May 2026.
- https://en.wikipedia.org/wiki/Valmet_Nr_I, accessed on 17th May 2026.
- https://en.wikipedia.org/wiki/Trams_in_Helsinki#/media/File%3AHKL_HST_Artic_435%2C_Kaivokatu%2C_2019_(04).jpg, accessed on 17th May 2026.
- https://en.wikipedia.org/wiki/History_of_trams_in_Helsinki#/media/File%3ANrII_tram_in_Helsinki_in_1987.jpg, accessed on 17th May 2026.
- https://en.wikipedia.org/wiki/History_of_trams_in_Helsinki, accessed on 27th May 2026.
- https://en.wikipedia.org/wiki/History_of_trams_in_Helsinki#/media/File%3AHelsinki_Culture_Tram_from_the_outside.jpg, accessed on 17th May 2026.
- https://www.raflaamo.fi/en/restaurant/helsinki/sparakoff, accessed on 17th May 2026.
- https://finland.fi/life-society/trams-carry-the-future-in-helsinki-and-elsewhere-in-finland, accessed on 21st May 2026.


.jpg)
#/media/File%3AT_Lightrail_an_der_Station_Square_03.jpg)
?wprov=rarw1#/media/File%3ARed_Line_Car%2C_Beechview%2C_2015-09-10%2C_02.jpg)
?wprov=rarw1#/media/File%3ASilver_Line_(cropped).jpg)
.jpg)
#/media/File%3ATramway-electrique-Clermont-Ferrand-cp.jpg)
#/media/File%3AELD_3497_-_CLERMONT-FD_-_Place_de_Jaude_-_Vue_prise_de_l'Hotel_de_la_Poste_(D%C3%A9tail).JPG)