Following on from an article written in May 2023, after a visit to Howth, which can be read here, [1] I found an article about the Tramway by C. L. Fry in the March 1951 issue of The Modern Tramway. [2]
The May 2023 article covers the route of the line in some detail.
“A very delightful summer outing can be had by availing oneself of the excellent service operated by the Great Northern Railway (Ireland) on its Dublin local line from Amiens Street Station to Howth. Perhaps the best way would be to leave the train at Sutton Station and there board a G.N.R. Hill of Howth tram which leaves Sutton Station, and winds its way round and over the Hill. The tramway at its summit reaches a height of 350 feet above sea level. From the top of the Hill, and the tramway goes almost to the top (560 ft.) it is possible to see the Mountains of Mourne on the north side, the Wicklow Hills on the south side, and the wonderful view of Dublin Bay and Bray Head. The view at night time, with the reflection of millions of lights glittering in the sea across the bay is equally marvellous. For 1s. 6d., a ticket may be purchased to include a trip by railcar to the tramway terminus and then by the tramway round and over the Head, and back to Dublin by diesel railcar.” [2: p50]
“The tramway, which is single line throughout, runs mainly in a reserved right-of-way, about one-third of this being on the side of the road. The track is laid with standard type bull head rails, with the wooden keys on the inside so that it is only necessary for the milesman to walk the line once to see if all the keys are tight. There is, however, about a half-mile of standard tramway grooved rail from Sutton Cross to the foreshore near St. Finton’s – one of the first calling places after Sutton Cross. This track, of course, is sunk in the carriageway. There are many passing-places on the line, and each one of these is signalled to the next passing-place by the driver, thereby preventing a car from the opposite direction entering the single line section, though cars may follow in the same section. The line is 5.25 miles long and starts from the railway station at Sutton and ends at Howth railway station.
“It is at Sutton that the car sheds, fitting shop, and former power station are situated (power is now taken from the Electricity Supply Board); the voltage is 550 d.c. The car shed has three lines side by side and a point of interest is the fact that there is a 3-way overhead frog with a moveable tongue, which is hand-operated from the base of the post, so that the trolley will take the correct wire to go into the sheds.
“This tramway was opened on 7th June 1901, and is now the only electric tramway in the Irish Republic. Within a couple of years of the opening day, the Company had eleven bogie tramcars, all of which are still working more or less in the same condition as when first built. Nos. 1-8 were built by the Brush Engineering Co., are mounted on Brill maximum-traction trucks, and have vestibuled platforms. They are 31ft. 4in. long by 7ft. 6in. wide, and carry 30 passengers in the saloon, and 37 on the upper deck. They are painted blue and cream. Nos. 9 and 10 were built by Milnes, are rather larger, and are mounted on Peckham maximum-traction trucks. They are painted in the standard mahogany colours of the G.N.R.(I) carriages. These cars are unusual, insofar as they have a combination of ‘knife-board’ and transverse seats downstairs, to enable people to admire the beautiful scenery to be seen on this journey. Seating capacity is 33 in the saloon, and 40 on the upper deck: the cars have vestibule ends, and are 33ft. long and 7ft. 6in. wide. All ten cars on this tramway have open tops. The trolley poles are mounted on the extreme side (the sea-side) of the tramcar. Car No. 11 is a works vehicle; it is really a wagon with a tower at one end used for repairing the overhead. The trolley in this case is mounted on the centre line of the roof at the opposite end from the tower. This car is mounted on Brill maximum traction trucks, and is 24ft. 3in. long and 7ft. 3in. wide.” [2: p50-51]
“All the passenger trams are fitted with air brakes, which are charged with compressed air to 75lb. per square inch at the car sheds every morning. They also have regenerative and hand brakes for control on the very steep hills on which they operate, the gradings being as steep as 1 in 16.25. Nos. 1-8 are fitted with electric heaters downstairs.
“While the Dublin United Tramway [D. U. T.] Company’s line was operating to Howth, there were two extremely unusual features:
“(1) Although both tramways were built to the standard Irish railway gauge of 5ft. 3in. and at Sutton Cross cars of the G.N.R. tramways crossed the D.U.T. on the same level, there was no point or other physical connection to enable cars of the two Companies to interchange. The G.N.R. single overhead wire was fitted with insulators on both sides of the two D.U.T. overhead wires at this crossing, the actual length of G.N.R.(I) wire taking D.U.T. current being about 6ft.
“(2) At Howth the G.N.R. Tramway again crossed the D.U.T., but this time on an over bridge, the G.N.R.(I) descending to the level of the D.U.T. Again there was no physical connection.
“Incidentally, of course, this is the level of the railway station at Howth. The tramway is on one side of the railway platform. The railway journey from Sutton is but 2 miles” [2: p51-52]
“Another item of interest in the fact that the overhead consists of a single wire from the Summit to Howth while it is double all the way (with the exception of the old D.U.T. crossing already referred to) in the other direction to Sutton.
“The tramway has, on the whole, been very well maintained by the G.N.R. Extensive renewals of track have taken place quite recently and overhead posts which have corroded owing to the action of sea air have had steel bars inserted and have been filled with concrete.
Some ten years or so ago buses were operated for a short time but were withdrawn as the tramway service was more suitable owing to the hilly nature of the line. Today, the position unfortunately is rather uncertain, and while a splendid service is operated in the summer, the number of passengers using the service in the winter enables only a skeleton service to be operated.
“Regarding the future of this delightful tramway, one thing is certain, that Mr. G. B. Howden, General Manager, G.N.R.(I) and also General Manager of Coras Iompair Eireann, who has done his best to maintain every branch line, will, I have no doubt, do all in his power to keep this line open as long as traffic warrants it.” [2: p52]
The featured image for this article is a line drawing of a drive system from a Hamburg Metro Car, an SKF DT4. [5] … AC traction motors (commonly induction motors) are the standard for modern trams, replacing older DC motors to provide higher efficiency, better reliability, and reduced maintenance. These motors, often running at 60–200 kW, power the bogies and enable regenerative braking to feed energy back into the overhead line. They are controlled by variable-frequency inverters for smooth acceleration.
The Modern Tramway of February 1951 carried an article by ‘Eltee’ entitled ‘Traction Motor Trends’ about the recent changes in electric motors in trams. [1: p33-34]
“The present trend towards the use of lightweight high-speed electric motors for traction purposes, a trend exemplified at its best by the motors used in in the P.C.C. cars in America, and those of similar design now being introduced at Blackpool and and Glasgow and on the Continent, justifiably prompts the query as to why motors were not, in the past, built as they are today. There are actually several reasons for this, some highly technical, but one of the more important is that the need for efficient ventilation of motors was not sufficiently appreciated in the early days.
“When a motor is running and current is passing through its conductors these conductors are heated by the passage of current, just as are the conductors of an electric stove though much less so. The power represented by this heat is lost to the motor, and called the ‘copper loss’. Another source of loss is the rotation of the armature in the motor magnetic field; the alternating magnetism through the armature caused by its rotation brings about power losses in armature iron, which also appear as heat. In running, then, the motor gets heated, and if there were no means of dissipating this heat the motor would get hotter and hotter until something melted.
“In practice this does not happen, as the motor casing is in contact with the air around it, and when the casing is hot it loses heat to this air, doing so all the more readily when the car it is driving is moving and there is a certain amount of draught. Many years ago this was the only way of cooling the tramway motor, hence a large motor had to be used simply to ensure that there was enough casing area to dissipate the heat generated. Some additional armature cooling was given by the provision of axial ducts in the armature, aided by a few radial ducts. In this way some slight fanning action was given by the moving armature, swirling the air in the motor casing and conveying the heat from the armature more readily to the outside casing for dissipation into the atmosphere.
“A later development introduced what is now known as ‘series ventilation’, the self-ventilated motor being introduced about 1910. In such a motor a fan is mounted on the non-commutator end of the armature, and two sets of openings are made in the same end of the motor casing. The fan draws air through the armature axial ducts when the motor is running and expels it through one of the casing openings; this assists to keep the armature cool. This air, in the first place, is drawn in through the other set of openings and over the field coils before turning round and entering the armature ducts; in this way the field also is kept cool, but the ventilation of the armature suffers because the air is already somewhat warmed by its passage over the field coils.
“A further development, common from about 1920 onwards, is known as ‘parallel ventilation’, in which there are two parallel air streams through the motor. A twin fan is fitted to the non-commutator end of the armature, and openings made in both ends of the motor casing. The fan draws a stream of cool air over the commutator, round the armature surface and over the field coils before expelling it. The other half of the fan draws an air stream under the commutator and through the armature axial ducts, thus keeping the interior of the armature cool and dissipating most of the iron losses effectively.
“With a motor as efficiently ventilated as this it is possible to ‘force’ the motor more without its getting too hot; that is, in more technical language, a motor can have a higher rated power. Consideration of the above method of ventilation readily shows that if the motor armature rotates more quickly the attached fan will draw more air through it, ventilate it even more thoroughly, and permit even more ‘forcing’ by the passage of greater currents. This, in essence, explains the present trend towards motors of high rotational speed; the efficient ventilation possible on such motors permits more power to be passed through them than through motors of similar size with less effective ventilation.
“The above being understood, two further points are worthy of emphasis. One is that the greatest losses occur in a motor when it is starting and running slowly; the best ventilation occurs when it is running quickly. Cars on a town route will thus need bigger motors than similar cars on an interurban route on which there is a lot of free running, providing their maximum speeds are equal. The second point is that, if motors have been used on a service on which their capabilities are being fully employed the gear ratio must not be altered, because, although the speed of the cars can thereby be improved, such a measure will not only increase the currents passed through the motor (for more power will be required from the motor) but will also decrease the average speed of rotation of the motor. resulting increased “losses” and impaired ventilation will both tend to raise the operating temperature of the motor. and so reduce its life, unless it was known that hitherto it had been used well below its capacity and was operating at relatively low temperatures.” [1: p33-34]
Since ‘Eltee’ was writing at the beginning of the 1950s, much has changed!
Improvements in the ventilation of tramcar electric motors since 1950 have centred on a move away from traditional forced-air cooling in direct current (DC) motors to advanced, sealed, and integrated systems used with modern AC traction, enhancing reliability and reducing maintenance. [2][3]
Modern three-phase AC motors allow for lighter, more compact, and more powerful motors. These motors are often less sensitive to heat and easier to cool than older designs. [2][3]
Modern tram design integrates motors directly into the bogies, with ventilation systems designed as part of the overall low-floor, compact carriage architecture, ensuring better cooling airflow in restricted spaces. [3]
Many modern motors are now completely enclosed, utilizing improved heat sinking and specialized cooling fan designs rather than drawing in outside air, reducing the impact of dust and water on electrical components. [2][3]
The use of GTO-inverters and modern power electronics reduces motor heat generation compared to older resistor-controlled DC motors, reducing the load on ventilation systems. [2][3]
Improved insulation materials allow motors to operate safely at higher temperatures, reducing the strain on the cooling systems and improving longevity. [2][3]
Modern electric trams utilize motors to generate electricity during braking, returning power to the grid or charging on-board batteries/supercapacitors. The use of battery-power and on-board storage can allow trams to pass through city centres or other sensitive areas without overhead wires. [3][4]
Electric motors are ideal for rapid urban transport because their higher torque at low speeds allows speedy departures from stops on a network. It also allows tramcars to handle hilly terrain better than internal combustion engines.
Electric motors are roughly 90% efficient at converting energy into motion. In contrast, diesel engines lose about 60-70% of fuel energy as heat. [4]
Additionally, unlike internal combustion engined vehicles that consume fuel while stopped, electric trams use virtually no power when stationary. [4]
AC motors have been shown to improve reliability and decrease downtime compared to traditional DC motors. But they have significantly lower maintenance needs than internal combustion engines, having far fewer moving parts and not needing oil changes, spark plugs, filters, and complex exhaust systems. The high torque of electric motors at low speeds eliminates the need for heavy, expensive multi-stage gearboxes common in internal combustion engined vehicles. [4]
Trams typically have a service life of about 30 years, roughly double that of diesel-powered buses. They typically produce no local pollutants like nitrogen oxides or particulates, which is critical for city air quality and meeting climate targets. Electric propulsion is significantly quieter than internal combustion engines, reducing noise pollution in densely populated areas. In addition, electricity can be generated from various sources, including renewable energy (wind, solar, hydro), making the system future-proof as the power grid decarbonizes. [4]
Increasingly in an urban environment public transport is heading underground. Because they emit no exhaust fumes, electric trams can safely operate in tunnels and underground stations where diesel engines cannot.
Internal flexibility is increased as the need for bulky and heavy engines and fuel tanks is eliminated. The net gain is a more friendly user experience, faster loading and unloading at stops and increased passenger capacity. [4]
It is not surprising that many cities around the UK, and across the world, are seeking to reintroduce trams and to increase the size of their networks.
References
‘Eltee’; Traction Motor Trends; in The Modern Tramway Volume 14 No. 158; The Tramway and Light Railway League, February 1951, p33-34.
Limestone had been shipped from Carnlough for some time, but the trade was small, and declining. It was for this purpose that Gibbons [7] built a pier. Jimmy Irvine tells us that, at Carnlough, “There had been a ‘hurry’, or gravitational inclined plane at the quarry to assist in bringing down stone to the head of the Croft or Gortin Road as it was then called. From there it came on to the pier by cart. Of the pier, Lieut. John Chaytor wrote in 1832, ‘There is a quay at the north east end of the town which has been for some yeans in a state of dilapidation. Small craft from 15 to 20 tons can come in here,’ and he added, ‘Some are in the habit of shipping limestone to Scotland where they barter it for coal . . . but not to such an extent as in the town and neighbourhood of Glenarm. [8] Vessels calling at Glenarm, however, had to stand out in the bay and be loaded by lighter. The new projected Carnlough Harbour would allow ships to enter a basin which would not only offer them protection in times of storm, but would permit their being loaded direct from trucks, thereby ensuring a speedy turnaround.” [9]
A mineral railway and enlarged harbour were constructed in 1853/1854 with a first significant cargo of limestone leaving the Carnlough harbour for Scotland in mid-August 1854.
Jimmy Irvine continues: “Exactly nine months after the work first began Wilson [10] wrote, ‘I have this day loaded a vessel of Limestone from the end of the new quay. I had the stone brought down from the quarries by carts, but it will not pay to do so.’ (8.8.1854). The shipping of this load brought an immediate order from the recipients. Messrs. Tennent of Glasgow for 10,000 tons of stone.” [9]
Wilson encountered serious problems in constructing the harbour. A significant band of harder rock was encountered at what was to be the harbour entrance. It was some years before larger shops were able to enter the harbour. During that time only smaller ships could be loaded efficiently at the harbour walls. The larger ships had to be served by lighters taking limestone out to deeper water.
Carnlough Harbour as it appears on the 6″ Ordnance Survey of 1903, published in 1906. Two bridges carried the railway over Harbour Road and High Street. [13]The harbour in 2026. [Google Maps, April 2026]An aerial view of the route of the railway into the harbour area, looking Southwest over the harbour. From the bridge over Harbour Road, the line curves round to run at high level adjacent to the harbour wall where ‘drops’ were operated to load shipping with limestone, (c) Gareth Rowan, 2020. [Google Maps, April 2026]A view of the high level ‘plateau’ which house rail sidings, ‘drops and later, tippers. This photograph looks Southeast across the harbour from Harbour Road. [Google Maps, April 2026]Carnlough Harbour seen from the Northeast in the early 20th century, (c) Public Domain. [14]
The story of the harbour is a litany of different problems: [9]
The band of rock already noted;
A 2 year period to get the limestone ‘drops’ working effectively;
A sand bar developing which further restricted access to the harbour;
15 months wait for a dredger;
“In February 1860, part of the South Pier carrying the railway and one of the shoots, collapsed into the water. There was a difference of some 30 feet between the top of the pier and the floor of the basin, where the foundations had given way. Watson took charge of the repairs and by October, With the help of divers, he had rebuilt the fallen masonry and cleared the basin of debris.” [9]
In April 1862, Wilson that “the harbour has filled up nearly two feet since the dredger was at work and we are now obliged to have resource to the old system of shipping outside in lighters.” [9]
Another long wait occurred until a dredger could be permanently allocated to the harbour.
Problems were also encountered with the rail inclines. Only on the upper part of the railway could the loaded trucks pull up the empties, so that horse-drawing was still necessary on the lower. Robert Watson, an engineer from Seaham was brought in to see what he could do. He arrived in March 1856, and two months later Wilson wrote, “I am happy to say Watson has succeeded admirably in making it self acting, superseding the use of Horse work in drawing up the empty wagons.” (9.5.1856). [9]
Wilson sought to diversify to increase income. He began to burn lime in the small kiln (17.12.1855). By keeping careful accounts he soon found that he could sell at a profit. Armed with this knowledge, he urged the building of lime kilns as part of the development scheme. These were authorised at a cost of £600 and the railway to them at another £577. “Watson thought of a plan whereby trucks would be hoisted up to feed the kiln instead of running on an incline, thus saving almost £300.” [9]
McGuigan wrote that, “kilns for burning the limestone, and a mill for manufacturing whiting, were erected.” [1: p792] In fact, the project was so successful that once lime burning began in August, 1857, in a short time a further two kilns had to be built, making five in all. [9]
McGuigan tells us that the kilns “flourished until the second decade of the [20th] century, when the general industrial depression, coupled with the decrease in the use of lime mortar for building and the decline of the iron smelting industry on the west coast of Great Britain, caused the demand for limestone and burnt lime to drop. The kilns ceased operating, but fortunately there arose a demand for crushed lime for agricultural purposes and this kept the undertaking going during the lean years.” [1: p792] In 1954, that product still formed the major portion of the works output, and McGuigan reported that recently the demand for raw limestone had increased. …
The lines running over these bridges were dual gauge, accommodating both narrow-gauge and standard-gauge traffic. The narrow-gauge line to Tullyoughter Quarry is dealt with later in this article.
The line to Gortin Quarry and Creggan Quarry
J. H. McGuigan tells us that “The original railway was of single track, about a mile in length, running inland on a gradient of 1 in 25 from the harbour to Gortin Quarry. This line [was] still in use [in 1954], except for the final 150 yd. or so, which was abandoned when the quarry became worked out [in around 1929/1939].” [1: p782]
The original railway extended from the harbour, through the site of Whiting Mill and on to Gortin Quarry. This is an extract from the 6″ Ordnance Survey of 1903, published in 1906. [13]The line continues Northwest and up a steep incline towards Gortin Quarry. [13]The line continued uphill and to the Northwest. [13]Very close now to Gortin Quarry, the track arrangements at the top of the incline are evident in the top-right corner of this image. The line to Creggan Quarry leaves at 90° to the line from Carnlough and exits this map extract at the top. [13]This map extract shows the arrangement of the track work at the entrance to Gortin Quarry. [13]
“In the meantime, quarrying had extended northwards, and a second line, about half a mile in length, was constructed on a 1 in 7 gradient at a right angle to, and as an extension of, the original line. This also continue[d] in use [in 1954], giving a total of about one-and-a-half miles [then] working. The gauge [was] 4 ft. 8.5 in., rather unusual in Ireland.” [1: p782]
The line was originally operated by gravity and horse power but this was later replaced by cables with a winding house over at least part of the route. [2]
The line to Creggan Quarry left the lower incline at 90°, running Northeast. [13]Gortin Quarry was served by a short internal railway. [13]
McGuigan noted, in 1954, that the first section of about 750 yards, “from the harbour to a point about 500 yd. above the mill, [was] worked by a single cable and winding engine, the loaded trucks descending to the harbour by gravity but
attached to the haulage cable and therefore under the control of the engine driver. Empty trucks at the harbour [were] then coupled to the cable in place of the loaded ones and hauled up by the winder. Until the middle of 1952, the winding engine was steam-operated, and strongly resembled a ship’s winch. It had two cylinders, each 6 in. dia. by 11 in. stroke; the drum was 34 in. dia., with a brake drum 48 in. dia. on the same shaft, and was manufactured by Alexander Chapman & Company of Glasgow. Steam was supplied by a vertical cross-tube boiler 10 ft. high and 4 ft. dia. In 1952, the unit was electrified by the s
imple expedient of removing both connecting-rods, fitting a vee-belt pulley in place of one crank, and installing a 35-h.p. three-phase electric motor with vee-belt drive.” [1: p792-793]
Trucks on the standard-gauge track attached to the cable from the winding engine. The cable passed overhead to an idling drum before returning to ground level. [1: p794]
Above the powered rope-worked incline another 650 yard self-acting rope-worked incline operated with the weight of descending wagons lifting empties. That incline was “single track with a passing loop at the middle. The haulage cable passe[d] round a drum 8 ft. 6 in. dia. in a pit at the top of the incline. The drum rotate[d] about a roughly vertical axle and [was] provided with a hand-operated band-brake by which the speed of the trucks [was] controlled. To avoid the two portions of the cable becoming crossed, the ascending rake of trucks [had] to travel on the same side of the passing loop as that used by the previous descending rake, and this entail[ed] throwing the points at each end of the loop after every run. A man [travelled] on the rear truck of each rake, and as these approach[ed] the passing loop the brakeman reduce[d] speed. Each man then dismount[ed] as his rake enter[ed] the loop, [threw] the points when the last truck of the entering rake [had] passed, and board[ed] the last vehicle of the emerging rake on which he return[ed] to his base.” [1: p793]
At the top of the incline, the next section, left at an angle of about 90°, the connection was made by means of a turntable, a square crossing and a cut-off line. McGuigan said in 1954: “Loaded trucks from the upper incline travel via the cut-off line to a dead end, from which they reverse on to the lower incline. Empty trucks from the lower line are turned on the turntable and enter the upper incline over the square crossing with the track used by loaded vehicles.” [1: p793]
McGuigan continued his narrative: “From this point to the terminus (approximately half a mile) the line is worked as two consecutive gravity inclines, similar to that just described, a siding and a turntable adjacent to the brake-drum of the lower incline giving access to the working face of the neighbouring Creggan Quarry via a fan of tracks along which the trucks are manhandled.” [1: p793]
“Some 100 yd. above this point, the second incline enter[ed] a cutting about 100 ft. deep in which [was] the passing loop, and then passe[d] through a concrete-lined tunnel about 100 yd. long from which it emerge[d] to the upper quarry.” [1: p795]
McGuigan continued, in his article, to talk through the signalling arrangements in use on the line. One of the disc signals mentioned can be seen in the monochrome image above. “Disc signals, each consisting of a board about 3 ft. 6 in. square, painted black with a white disc on one side, and mounted on a wooden post arranged to turn about a vertical axis, [were] provided at the top and bottom of each incline. The heights of the posts [varied] from about 4 ft. to 25 ft., according to position. The normal aspect of the signal [was] with the board parallel to the track, that is with the disc invisible to a person on the track. When a rake of trucks, usually six vehicles, [was] ready to depart from one end of an incline the operator there turn[ed] his signal to exhibit its disc to the operator at the other end. When the latter [had] ascertained that the rake at his end [was] ready, he turn[ed] his signal and exhibit[ed] its disc in acknowledgment. The brakeman or engine man, as the case may be, then release[d] the brake and allow[ed] the run to take place.” [1: p795]
Whiting Mill and its Rails
Whiting Mill as shown on the 6″ Ordnance Survey of 1903, published in 1906. Notice the array of tracks close to the mill, the line heading West-northwest ran to the base of the first incline. The line running South-southwest is the 3ft 6in-gauge line to the quarry at Tullyoughter which is discussed below. It is worth comparing this map extract with the one immediately below. [13]Whiting Mill as shown on the 6″ Ordnance Survey of 1931, published in 1933. Notice that the buildings have been enlarged, that the track layout in the yard is more simple and that the line which used to serve the quarry at Tullyoughter has gone. [12]
The Narrow-gauge line to Tullyoughter Quarry
McGuigan continued: “About 1890, presumably because of a boom in the limestone business, a quarry was opened at Tullyaughter, about two miles south of Whiting Mill, and a 3 ft. 6 in. gauge, single-track railway was laid thence. The addition of a third rail to the existing line allowed trucks of limestone to pass directly from the quarry to the harbour. The new line crossed the Carnlough River on a timber trestle bridge, and then, about half a mile further on, crossed the Ballymena-Carnlough road on the level. Gates to close the ends of the railway when trains were not passing were provided there, and a man was employed to operate them and exhibit a red flag to road traffic when a train was approaching.” [1: p795]
The first length of the 3ft 6in-gauge line from Whiting Mill to the quarry at Tullyoughter bridged the Carnlough River and ran down the West side of Harphall House. [13]
The route of the line is shown on the satellite image on the right above as a red line. this applies along the route of this 3ft 6in line and to the satellite images below. [Google Maps, April 2026]
The next length of the line ran behind the properties which face out onto the A2, [13]
The line continues South at the rear of what were single properties facing the A2 but now replaced by small estates. [13]
The railway ran along the West bank of the Glencloy River. It passed to the West of Bay Cottage, [13]
The next extract from the NLS 6″ OS mapping takes us to the bottom of the OS sheet. … [13]
The line to the edge of the OS sheet. [13]
The next three sections of the line are shown on the next OS sheet. … [15]
The next length of the railway is on the next Ordnance Survey sheet. [15]
A very similar length of the line as shown on the adjacent OS mapping. [Google Maps, April 2026]
The length from the Level-Crossing to Tullyoughter. [15]
The next images show the last length of the line and its terminus in Tulluoughter Quarry. … [16]
The line terminates at Tullyoughter Quarry, [15]
McGuigan says: “The line from the mill to the quarry was on a rising gradient of about 1 in 50, and was worked by gravity and horses until a steam locomotive was acquired in 1898. This was a 0-4-0 side tank engine, named Otter, built in 1896 by Andrew Barclay, Sons & Company, of Kilmarnock, and had 7 in. by 14 in. outside cylinders, 2 ft. 1 in. wheels, and a wheelbase of 3 ft. 9 in. The heating surface was 145 sq. ft., the grate area 3.5 sq. ft., and the working pressure, 140 lb. per sq. in. The engine was provided with a cab, and the fuel bunker was in part of the right-hand tank. Otter hauled loads of about 20 trucks. Work at Tullyaughter Quarry ceased about 1922, and the line between it and the mill was lifted about 1924. Otter continued to work in the mill yard and at the harbour till about 1930, after which it lay derelict until it was sold for scrap and cut up in July, 1951.” [1: p795]
Writing in 1954, McGuigan goes on to talk about rolling stock on the line: “Rolling stock at present consists of about 80 trucks for the 4 ft. 8 in. gauge. and 13 for the 3 ft. 6 in. gauge. The former have timber frames and steel bodies 7 ft. 8 in. long, 4 ft. wide, and 2 ft. 10 in. deep. The wheelbase is 3 it. 5 in., and wheel diameter in some cases 2 ft. 6 in., and in others 2 ft. The narrow-gauge vehicles consist of seven trucks with bodies and six flats, and are of all-wooden construction, except for wheels and fittings. Both broad-and narrow-gauge trucks are designed for end tipping, and have one end arranged to swing outwards on a hinge just above the top edge. The narrow-gauge stock is used exclusively for the transport of finely ground products from the mill to the harbour, the flats are used for bagged material. An agricultural tractor acts as locomotive between the harbour and the mill, and does shunting work. The track layout at the harbour is triangular, and includes sidings of each gauge, three-rail mixed-gauge sidings, and one four-rail mixed-gauge track leading to four turntables which serve the chutes down which the limestone is delivered into the holds of the steamers.” [1: p795]
McGuigan then talks of planned modernisation of the railway with new sidings serving a new crushing plant, “the provision of an electrically operated wagon-tippler, and the electrification of the winding-engine all indicat[ing] that, unlike some public railways in Ireland which are in decline, the Carnlough Railway [was] entering its second century in a spirit of rejuvenation.” [1: p795]
An Aerial Ropeway for the The Sulphate of Ammonia Co. Ltd. (Carnlough)
Perhaps of additional interest is another industrial concern in the vicinity. In the early 1900s an American and a German, Messrs. H.C. Woltrick and G.W. Mottram, who had arrived in England in 1899 “to demonstrate the process for the production of white lead by electrolysis, … had ventured to [Co. Antrim] where they discovered … that the mountain behind Carnlough, in the townland of Harphall, was particularly rich in the type of peat from which ammonia could be extracted. Thus the venture began and a limited syndicate was formed to carry on the work.” [11]
“Early in 1904 the business was taken over by the Chemical Proprietory Co. Ltd. with a capital of £100,000. Woltrick and Mottram remained directors and it was not long before this new company … ran into difficulties. It was reconstructed as Chemicals Ltd. in late 1904.” [11]
The Company needed to transport peat, in an efficient manner, down the side of the mountain. Their chosen solution was an aerial ropeway. They negotiated an agreement with the local landowner and “early in 1905 a dining-room and huts for sleeping were erected [on] the mountain; and an office, staff house and retorts were built at the foot of the mountain at … the ‘Low Station’. The aerial ropeway, supported by 24 trestles in a straight line down the mountain side and over the Cranny River to the Low Station was also built.” [11]
“The aerial ropeway was to carry numerous buckets which were to circulate continuously in a clockwise direction up and down the mountain side. They would be loaded with peat at the top of the mountain and carry it down to the Low Station to be unloaded and burned in the large retorts. Tools such as stone hammers and peat knives were purchased to aid the workers cut the peat. Some 200 people were employed.” [11]
“Railway lines 7 feet wide resting on 12 foot sleepers were laid [across the bog on the mountain]. Side lines were laid in conjunction with the main line. The peats were stacked beside the lines and then loaded onto wagons on the main line which were drawn by an engine called ‘Moor Hen’ to the head of the aerial ropeway. Here they were transferred into buckets and taken by cable to the Low Station at Drumahoe … where they were emptied into the large retorts lined with lead and burned using sulphuric acid. From here the produce was loaded in granule form into trucks and sent down to the harbour for export.” [11]
After a few months, “Chemicals Ltd. went into liquidation for lack of capital. It was reconstructed as the Sulphate of Ammonia Company with a capital of £125,000 and for the next two years things went well without any hitches.” [11]
Early in 1908 production was almost at a standstill due to the decreasing ammonia content of the peat and the lack of further capital. The company ceased trading and “the aerial ropeway… was purchased by a Cumberland coal mining company. Under the direction of Hugh and Thomas Wilson it was re-erected at St. Bee’s Head.” [11]
References
J. H. McGuigan; Carnlough Limestone Railway and Harbour; in The Railway Magazine, Tothill Press, London, November 1954, p792-795.
Phillip Gibbons was master of a smack from Westport, Co.Sligo. Late in the eighteenth century he pulled in at Glenarm where, foresaking the sea, he married Anne, daughter of Nicholas Stewart, the Earl of Antrim’s agent. Through his marriage he became possessed of, amongst other properties, the townland of Carnlough North, where they resided. He was a sort of farmer-contractor, prepared to undertake any work for the betterment of the district. He died about 1815.
The Ordnance Survey Memoirs for the Parish of Ardclinis: see “The Glynns” Vol I, page 31.
In the Summer of 2024, my wife and I visited Giants’ Causeway as part of a few days meandering along the North coast of Ireland. When reading a series of older copies of the Modern Tramway, I came across an article written in 1950. … The Modern Tramway of September 1950 featured an article by D. G. Evans about one of the very early electric tramways – The Giants’ Causeway and Portrush Tramway. His article is quoted in full in this article.
Wikipedia tells us that The Giants’ Causeway, Portrush, & Bush Valley Railway & Tramway was a “pioneering 3 ft (914 mm) narrow gauge electric railway operating between Portrush and the Giant’s Causeway on the coast of County Antrim, Northern Ireland. The line, 9 1⁄4 miles (14.9 km) long, was hailed at its opening as ‘the first long electric tramway in the world’. [2] The Giant’s Causeway and Bushmills Railway today operates diesel and steam tourist trains over part of the Tramway’s former course.” [3]
The Giants’ Causeway, Portrush, & Bush Valley Railway & Tramway. [24]
Writing in 1950, Evans says that:
“The recent decision of the shareholders to close down the Giant’s Causeway tramway was sad news to those who knew the line and can recall the pleasure of breezy rides along the cliff tops in the qua’nt cars that had seen but little change since their first day of operation. The line was the first tramway in the United Kingdom to be operated by electricity and the current was produced by a hydro- electric power station at Walkmills, one mile from the Bushmills terminus. A waterfall on the river Bush was the source of the hydro-electric power.
Opened from Portrush station to Bushmills in January, 1883, the line was extended to the ultimate terminus at Giant’s Causeway in 1887. The original current collection was from a side conductor rail 17in. above ground and 22in. from the inside running rail. This method was of course unsuited to a street tramway and the portion of the line which ran in the centre of the street through the town of Portrush was therefore worked by steam tram engines of the usual vertical boiler pattern. This method of operation of the first half-mile of the tramway persisted until 1899, when a change over to the overhead trolley system was made. From that date until 1915 the steam tram engines were retained for use during the peak traffic periods in the summer at which time the original power station proved inadequate for the needs of the system.” [1: p185]
Wikipedia gives some of the background to the opening of the line: “The Giant’s Causeway Tramway came about through the enthusiasm of William Atcheson Traill, M.A.Ing., of Ballylough (1844–1934), together with his brother Dr Anthony Traill, who between them undertook most of the promotion and fundraising for the line. W.A. Traill was a man with not only an interest in railways but also a keen interest in technological developments in engineering. The Act of Parliament incorporating ‘The Giant’s Causeway, Portrush, and Bush Valley Railway and Tramway Company’ was passed on 26th August 1880. It authorised a tramway from Portrush to Bushmills and a railway from there to join the Ballycastle Railway (also 3 ft. gauge) at Dervock. The only section of the railway never built was a short spur at Dervock. [5] The Dervock section was abandoned by an 1885 Act, which authorised extension from Bushmills to the Causeway.” [3][6]
“At the Berlin Trade Fair of 1879 Siemens was demonstrating the first railway electrification system and it was that which led the British branch of the firm to be commissioned to incorporate this new technology into the Giant’s Causeway Tramway venture. Sir William Siemens (1823–83) was briefly a Director and Siemens Brothers of London were appointed electrical engineers to the company, their representative being Dr Edward Hopkinson, who later went on to work on the Bessbrook and Newry Tramway and the City & South London Railway. Surveying and civil engineering work was carried out by Edward Price, son of the eminent Irish civil engineer James Price.” [3]
“The line was the world’s first to be powered by hydroelectricity, something that was later developed at Bessbrook and in Switzerland. Traill built a generating station at Walkmill Falls (24 feet (7.3 m)) head), near Bushmills, installing 104 horsepower (78 kW) Alcott water turbines to produce up to 250 volts at 100 amps of electrical power for his line. Later 160 horsepower (120 kW) turbines were installed. [8] This building, although without its equipment, is still in existence.” [3]
“Because of legal problems over water rights, erection of the Walkmills turbines was delayed and when the first section of the tramway, from Portrush to Bushmills, was opened on 29th January 1883 some of the timetabled passenger traffic was handled by steam tram engines which were in any case necessary on the town section in Portrush where it was impossible to provide electric power since this was originally fed to the trains via an elevated third rail which ran alongside the line. Therefore, a 25 horsepower (19 kW) steam generator was installed at the Portrush depot, [9] (by 1936 replaced by a 550 volt diesel generator for the Portrush-Dunluce section).” [3]
“The ceremonial opening, using electric traction, took place on 28th September 1883 although a full scheduled electric service did not begin until 5th November and steam locomotives remained available for use until at least 1926.” [3] In 1897, of the annual mileage travelled, “17,797 miles (28,641 km) were steam operated and 4,721 miles (7,598 km) electric. In 1901 the figures were 7,423 miles (11,946 km) and 23,550 miles (37,900 km) respectively. Very little use of steam was made after 1916.” [3]
Evans tells us that:
“In 1915, the Portrush power plant was installed and the two remaining steam engines were kept as stand-by equipment for use in the event of electricity failures. They were finally sold in 1930 to a public works contractor.
The voltage was 550 d.c., the Portrush plant supplying the Portrush-Dunluce section and the original station outside Bushmills the remainder of the line. Laid to the 3ft. gauge, the line was 7.5 miles in length, single track throughout with loops at irregular intervals.
The loops were normally run through on the landward line, the other line being used only when it was necessary to pass another car. All points (except those at the Portrush terminus which were tramway section) were of light railway type, controlled by dolly-weighted point levers which normally held the rails set for the direct (or landward) line.” [1: p185]
Wikipedia tells us that “the section from Bushmills to the Giants’ Causeway opened on 1st July 1887. In 1895, a cyclist died of electric shock after coming into contact with the conductor rail. At the subsequent inquiry it was revealed that the line voltage varied from an average of 290 V up to 360 V, and the company agreed to a temporary reduction in the voltage, which limited the number of services that could be electrically worked. The third rail was replaced by overhead electric wire using side poles from 26th July 1899, apparently initially at 250 V. Voltage drop remained a problem and the tram was the subject of a song by the Irish Rovers which comments on its slow speed. The song was written by Hugh Speers of Bushmills. [10] After upgrading of the Bushmills generating station in 1907 it was possible to produce a 550 V output.” [3]
Evans continues:
“As the wiring was double and followed the rails through the gantry type standards at loops, it followed that the trolley pole had to be changed from the wire normally used (the landward wire) to the seaward wire when a loop wasto be used pass another tram. The writer has often seen this trolley changing performed whilst the cars her were at full speed on a downward grade and has marvelled at the dexterity with which the trolley wheel was placed on the opposite wire. The operation was also seen when the cars were descending the long hill outside Portrush. It seemed usual to lower the trolley bo boom west of White Rocks loop to the Holyrood Hotel. and coast from a point just West of White Rocks loop to the Holyrood Hotel.
The Portrush terminus was outside the N.C.C. (formerly B. & N.C.R.) station and consisted of a run-round loop and lay-by siding in Eglinton Street. At one time there was a short branch which diverged just beyond the loop and ran down to the Harbour, but this was taken up about 1893.” [1: p185-186]
“For a short distance, the line ran due north before turning in a 75-degree curve into Causeway Street. The single track was of tramway section rails as far as the outskirts of the town. From a point near the depot the line was laid on flat-bottom light railway track on the seaward side of the Portrush-Bushmills road. The depot consisted of a dead end road with a permanent way yard at one side. The auxiliary power station was also here. This power station had a modern diesel plant installed in latter years.
After leaving the depot the line ran through open country on its roadside reservation. Climbing steadily, it passed the famous Royal Links and at White Rocks gained the cliff tops. Onward to Dunluce, the trams ran close to the sea and in places the cliffs fell almost sheer from the trackside. There can be no doubt that the tramway, with its open toast-rack cars, was the best means of appreciating this wild and rugged coast.” [1: p186]
“Before reaching Dunluce, the tramway climbed to its highest point at Clooney Hill. This section, nearly 200ft, above the sea, abounded in sharp curves, gradients of 1 in 40 and even a short stretch of 1 in 30.
Beyond Dunluce, the line ran inland for a short distance below Gallows Hill, reaching the coast again at its most spectacular point. Here one could gaze down 140ft. to the foam-covered rocks below. From this point the line again ran inland and after three more passing loops reached Bushmills, a village known for its whisky. Bushmills had a light railway station provided with waiting room, luggage office and lavatories.” [1: p,186-187]
“At one side of the station yard is a small tram shed with accommodation for two cars. The line to the car shed is of interest in that it was to have formed the beginning of an extension to Dervock on the 3ft. gauge Ballycastle Railway. It was with a view to through running with the latter railway that the narrow gauge was adopted for the electric line. The owners wisely decided that an extension to the Causeway would probably be more remunerative.
From Bushmills the line was completely private right-of-way and negotiated cuttings and embankments of railway proportions. After passing a loop, the Bushfoot Golf Links request halt was reached. Soon after this, the line crossed the Bush river by the impressive Victoria Jubilee Bridge, a three-span structure so named because it was erected in 1887.” [1: p187]
“On the other side of the bridge the line passed through sandhills and rabbit warrens, reaching the coast again and following it for a short distance before finally turning inland for the last time. There were two loops between the Victoria Bridge and the terminus; the layout at this latter point consisted of a run-round loop and a siding. The passenger accommodation was unpretentious, consisting merely of a shelter. The tourist had still almost a mile to walk before reaching the Causeway itself, and here, as is usual in such places, he has to pay for admission.” [1: p187]
This extract from the 6″ Ordnance Survey shows the remaining length of the line. The terminus is shown in the top-right of the image. [23]
Discover Portrush describes the last part of the journey, thus: “the tram would run behind Black Rock Strand for about half a mile before turning right and climbing towards the Causeway Terminal. On the left passengers would see Runkerry House, a fine red sandstone house constructed in a striking location. Then part of the McNaughten Estate, occupied by two unmarried McNaughten ladies – later it became a home for the elderly after being passed to the government in lieu of death duties. Later still, it became an outward bound centre and is now divided into apartments.” [21]
The next three views show the modern preservation line’s buildings in the early 21st century.
The first of these three views shows the approach to the stationary from the Southwest.vThe second is a panorama of the station site and the third looks into the Station site from the East. [Google Streetview, September 2011]
Operation
Evans describes the operation of the original line:
“The somewhat tortuous route along the cliff tops gave the line a reputation for scenery rather than speed, but high speeds were frequently attained on the long falling gradient between White Rocks and the Portrush depot.
When the full summer service was operating, the lengthy sections between passing loops rendered operation difficult, and, as some of the loops were not visible from each other, boy signallers were employed. These boys were supplied with white and red flags which they would display to the drivers from a convenient vantage point, the red flag calling on an eastbound car and the white a westbound
The small shed at Bushmills was used by the morning tram from the village which left, with a load of school children and others, to journey into Portrush before the main service started from the depot The winter service was extremely meagre and did not continue beyond Bushmills out to the Causeway unless three or more passengers booked through to that point. During the summer peaks five sets (of one motor car and two trailers) were often in operation at one time.” [1: p187-188]
Wikipedia tells us that “Traill, a former geological surveyor, expected a considerable mineral traffic between quarries along the line and Portrush harbour, and there was originally a goods branch into the main square of Bushmills. However, this traffic fell away, the narrow gauge harbour branch being taken up when the Northern Counties station was opened in 1893, [11] and for most of its life the line primarily served tourists visiting the Causeway. From 1925/26 the line was closed down during each winter.” [3]
“Increased patronage, partly from military traffic, during World War II meant a brief revival of winter services, but receipts were becoming inadequate to support maintenance of the company’s ageing assets, and the line did not reopen after the end of the 1949 season (last day of regular service 30th September 1949), [12] and was subsequently dismantled.” [3]
Nos. 20-23 (toast-rack motor-cars with canopies, originally completely open).
No. 24 (vestibuled motor-car, Peckham pendulum truck, originally double deck 3ft 6in. gauge car and purchased as such from Dunfermline and District Traction Co., August, 1937. It had longitudinal cushioned seats).” [1: p188]
Wikipedia expands somewhat on the rolling-stock record provided by Evans: “the original cars were built by the Midland Railway Carriage and Wagon Company and were later followed by 5 examples from GEC, each with 2 x 20 horsepower (15 kW) British Thomson-Houston motors, and also a Peckham car. There were a maximum of six electric power cars owned at any one time, all being single-truck, single-deck vehicles with both enclosed and “toast rack” examples; typically these would haul several 4-wheel “toast rack” trailers, of which there were 15. There were four steam tram engines, ordered from Wilkinson of Wigan. They had vertical boilers, weighed 7 tons and burnt coke. No.2 was scrapped in 1899, No.1 converted to a ballast wagon in 1910 and Nos. 3 (Dunluce Castle) and 4 (Brian Boroihme) were sold in 1930 for the River Bann Navigation works near Portstewart.” [3][11]
“In 1938 a final electric tram was added to the stock as number 24. This vehicle was formerly a double deck Dunfermline and District Tramways car which was both re-gauged and extensively modified to become a single decker with enclosed ends for the Giants Causeway route.” [3][14]
The modified Dunfermline tram which was given the number 24. It was once a double-deck tram and ran originally on a different gauge. [21]
“A power car and trailer are restored at the Ulster Folk and Transport Museum, Cultra and another power car is in the care of the National Transport Museum of Ireland at Howth.” [3]
Full details of the steam locomotives can be found here. [17]
Evans concludes:
“The disappearance of this historic tramway, which changed so little in its 66 years of operation, yet provided a useful amenity, and an attraction for tourists, will be mourned by many and the line will be greatly missed by holidaymakers who have in previous years enjoyed rides along its scenic coastal route.” [1: p188]
The editor of The Modern Tramway commented: “We understand that a conference of local authorities is being held to urge the Government to subsidise the Giants Causeway line to the amount of £2,000 a year, so that it may be carried on as a tourist attraction. This is a move that commands our support, but we submit that the modernisation of the line might after a while actually render the subsidy unnecessary.” [1: p188]
Preservation
The Giants’ Causeway and Bushmills Railway was later constructed over the final two miles (3.2 km) of the Tramway and carried its first passengers at Easter 2002. Trains were running at least until the end of 2024. [3][13]
The Giant’s Causeway and Bushmills Railway (GC&BR) is a 3 ft (914 mm) narrow gauge heritage railway operating between the Giant’s Causeway and Bushmills. It “uses equipment originally assembled by Lord O’Neill for a tourist line at Shane’s Castle, Country Antrim, which closed in 1994. The idea of using this to revive part of the Tramway was largely conceived and promoted by David Laing. The Giant’s Causeway and Bushmills Railway Company is a not-for-profit organisation with charitable status. Clearance of the trackbed commenced at the end of 1999 and the railway carried its first passengers at Easter 2002.” [27]
“On 10th July 2010 the railway took delivery of a specially customised 4 coach diesel multiple unit capable of accommodating up to 90 passengers. Manufactured by Severn Lamb UK Ltd., it was designed to enhance the visitor experience to the North Antrim Coast and to recreate, in so far as was possible, the passenger experience of the original hydro electric tram. Commissioning of the new rolling stock by the manufacturers began on Monday 12 July with the inaugural journey three days later. The DMU is powered by a Kubota V3600-E3 engine and shares the line with the previous steam rolling stock. All vehicles run on bogies. The power vehicle is on the Causeway side and is shorter (4 windows) than the three trailers (5 windows).” [27]
Rolling Stock
In addition to the 4-coach DMU, the line has three locomotives and a number of coaches.
The Locomotives owned by the preservation line. [27]
References
D. G. Evans; The Giants’ Causeway and Portrush Tramway; in The Modern Tramway Vol. 13 No. 153, London, September 1950, p185-188.
Railway Times; 22nd September 1883. (Cited by the article at Reference No. 3)
The featured image above shows one of the last tram journeys in Belfast. This tram is travelling along Castle Place on 27th February 1954, heading for Ardoyne Depot. [7]
In ‘The Modern Tramway’ of August 1953, [1] there was a report of an expedition by members of the Light Railway Transport League in June 1953 which toured a number of Ireland’s Light Railways. [1: p150-155] The visits included:
CIE., Tralee and Dingle section, 3 ft. 0 in. Steam.
Irish Turf Board, Clonsast bog railway … 3 ft. 0 in. Steam & diesel.
In 1953, this represented all the remaining Irish narrow gauge railways and tramways, with the exception of the derelict Schull and Skibbereen and Ballycastle lines and certain industrial lines (Guinness Brewery, British Aluminium Company, several Irish Turf Board lines and a few others) The Lough Swilly and Tralee and Dingle railways were both to close in the summer of 1953.
The tour commenced in Belfast on Saturday, 6th June and the morning was spent on the Belfast Bangor section of UTA, which was served by 3-car diesel trains. In the afternoon, a tour of Belfast Corporation Tramways ran from the Mountpottinger Depot in an old tram (No. 340). It was noted that tramcars and track on the Belfast network were in a very poor state. Belfast had just purchased 100 surplus London buses which would hasten the closure of the tramway network.
A visit to the Hill of Howth Tramway consumed much of the next day.
On the Cavan and Leitrim, the tour party travelled behind 2-4-2T No. 12L. The train consisted “two open platform coaches and a sting of vans, some of which were detached and shunted at Mohill.” [1: p152] The description of the time on the Cavan & Leitrim continued: “At Ballinamore our coach was transferred to another, smaller train behind 4-4-0 tank locomotive No. 31, complete with cowcatcher for the roadside journey, to Arigna. This line is the last roadside steam tramway with passenger service in the whole of the British Isles, and is kept open by reason of the fact that it serves the Arigna coal mines. The speed is quite brisk, despite some really abrupt curves and switchback gradients, but the journey was cut short by an encounter with a road vehicle at Mahanagh (Shannon Crossing), through no fault of the train crew.” [1: p152]
After a short hiatus while a policeman from Drumshambo took everyone’s particulars the tour continued to Manorhamilton and then to Enniskillen and Fintona Junction where they enjoyed a short return journey on the newly reconditioned Fintona horse tram (G.N.R. No. 381), continuing later to Omagh and then Derry (Londonderry).
From Derry, the tour party travelled to the border behind 4-6-2T No 15. This loco was replaced by 4-6-2T No. 10 for the remainder of the outward journey to Buncrana. The article continues: “The return journey from Buncrana was run as a mixed train. At Pennyburn sheds were locomotives Nos. 2, 4, 5, 6 and 8 – Nos. 5 and 6 are 4-8-4 tanks, the most powerful locomotives ever built for the Irish narrow gauge.” [1: p152]
The article reported that at the time of the visit, Derry had “four quite separate railway termini, each served by a different company and linked only by mixed gauge tracks laid along the quays and across the lower deck of the Craigavon Bridge. One railway, the 3 ft. gauge Londonderry and Lough Swilly, is to close down very shortly, and the special 3-coach passenger train provided on 9th June to take the L.R.T.L.-I.RR.S. party to Buncrana and back is likely to be the last; regular passenger service ceased in 1948.” [1: p152]
After a morning spent on the Lough Swilly, the party travelled to Strabane to explore parts of the Co. Donegal Railways system. They were taken from Strabane to Stranorlar in Railcar No. 19 and toured the company’s workshop. They noted what at the time was “probably the oldest surviving railcar in the British Isles, a small 8-seater built as an inspection car in 1906 and fitted latterly with a Ford engine for use in pass- enger service; it [was] still in working order, and … stored at Stranorlar together with the Directors’ Saloon, which [was] still used once per year for an annual inspection by representatives of the Joint Committee. The locomotive shed housed two locomotives in startling brick-red livery as [were] the coaches and railcars.” [1: p153]
From Stranorlar, Railcar No. 19 took the party non-stop through Barnesmore Gap to Donegal town, where it coupled with Railcar No. 10 and ran on to Killybegs. Returning to Donegal town the party transferred to a train of “Railbus No. 14, observation saloon No. 30 and trailer No. 1 for the last section to Ballyshannon, which ran fast to Rossnowlagh Friary halt and there picked up about 70 churchgoers from the Tuesday evening service at the Fransiscan Friary, some of whom were subsequently set down at their cottages along the line.” [1: p153]
Wednesday, 10th June started with a long cross-country journey to Ennis for a visit to the West Clare section. In 1952, the section had received 4 new railcars and a demonstration run between Ennis and Kilkee was provided for the tour group.
The following day saw the group travelling on the Tralee and Dingle Railway. By this date only monthly trains timed for the Dingle Fair were timetabled. The visit was on a Thursday and a special train was provided. 2-6-0T No. 8 took charge of two bogie vans fitted with new wooden benches and a few from the station platforms. The journey to Dingle took more than three hours and was followed by a return journey which also lasted longer than three hours and included a marvellous view of the sun setting over Tralee Bay.
Other visits followed before the tour returned to Dublin. None of which quite measured up to their experiences on the Tralee and Dingle!
Associated news carried by The Modern Tramway in the same issue of the journal included:
The end of the Londonderry and Lough Swilly
“The Londonderry and Lough Swilly Railway, a light railway, which together with the Burtonport Extension, was once Ireland’s largest narrow gauge railway (99 miles of route) closed finally on 1st August. At its fullest extent, the line once extended from Londonderry to Burtonport with a long branch to Cardonagh. The Company, unlike its railcar-minded neighbour, the County Donegal Railway, decided that its future lay on the roads, and in 1929 began to operate buses, closing the railway between Buncrana and Carndonagh six years later. The Gweedore Burtonport section was closed on 3rd June, 1940 and the Letterkenny-Gweedore section in 1949. Occasional passenger trains during the holiday season, to relieve double-deck buses, ran to Buncrana until August, 1951.” [1: p159]
Belfast
“The General Manager stated recently that in conformity with the policy of abandoning tramcar operation at the earliest possible date, tramway repairs and maintenance have been reduced to the minimum consistent with safety. The Queen’s Road tramway will not be replaced by trolleybuses but by motorbuses as the movement of large pieces of machinery to and from the shipyard is inconvenienced by overhead wires (in the past the tramway wires have occasionally been temporarily removed to allow “out-of-gauge” loads to pass along this way). During June and July the following tramcars were withdrawn and scrapped: [300, 301, 320, 337, 338, 340, 341, 369, 392, 394, 400, 413, 415, 419, 428].” [1: 159-160]
Late News from Ireland
“Two steam-worked light railways visited during the Irish Tour have just been finally closed. On the Tralee and Dingle Railway, the last train ran on Wednesday 22nd July, to collect wagons from Dingle station yard. On the Londonderry and Lough Swilly Railway, the last goods train was due to run on 10th August.” [1: p160]
At the end of a fortnight’s holiday in Co. Donegal my wife and I had 3 nights staying close to Dublin. We chose to stay in Howth as it was at the Northern end of the DART, but perhaps also because of its history and particularly for the Hill of Howth Tramway, or to give it it’s formal title, “The Sutton and Howth Electric Tramway.” The tramway should not be confused with the Clontaff and Hill of Howth Tramroad.
The Tramway served Howth Head, near Dublin. The termini were at Sutton railway station, by the entrance to the peninsula, and Howth railway station by the village and harbour of Howth.
The tramway operated from 17th June 1901 to 31st May 1959 and was run by the Great Northern Railway (Ireland) (GNR(I)), which viewed it as a way to bring more customers to its railway stations at Sutton and Howth. The tramway replaced a horse bus service, which had run since 1867. [1][2]
When it opened, “the Hill of Howth Tramway had eight trams, open-top 67-seaters built by Brush of Loughborough. … Traction current at 550 volts dc was drawn from the overhead wires by conventional trolleypoles. … In 1902, two further trams … were obtained. Nos. 9 and 10 were 73 seaters built by Milnes, the firm which also supplied Dublin’s first electric trams in 1896. There were 41 seats upstairs and 32 inside seats.” [9]
“The tramway also had a freight and engineering car, No. 11, built in 1903. This … had a cab at each end, with a wagon body between. No. 11 also had a maintenance tower and at least in its later years was fitted with a telephone which could be connected into the wires along the line.” [9]
“Around 1918, the original crimson lake and ivory livery gave way to varnished grained teak. When the colours changed again around 1930 to blue and cream, Nos. 9 and 10, being used so seldom, remained in teak. Reasons for their lack of use included [an] awkward seating layout and a tendency to derail because the motors were outside the wheelbase. Furthermore, cross springs were not fitted between the bogies: when these were added in the fifties, their performance improved. By then these two cars were in constant demand and the invariable choice of the many enthusiast groups visiting the line in its twilight years.” [9]
“No. 9 was the last tram to run in public service on the Hill of Howth on 31st May 1959, and thus the last to operate anywhere in Ireland. Following the closure, No. 10 was sent to Britain’s National Tramway Museum at Crich in Derbyshire, while No. 2 went to California and No. 4 to Belfast. Due to vandalism and apathy, No. 9 was the only survivor of three cars set aside for inclusion in a future museum” [9] at the National Transport Museum at Howth Desmesne.
“On 1 October 1958, Córas Iompair Éireann (CIÉ) took over GNR(I)’s operations in the Republic of Ireland, including the Howth Tram. [7: p32] A year later, the tramway was closed down. It was initially replaced by two CIÉ bus routes – numbers 87 (Sutton to Ceanchor Road) and 88 (Howth to Windgate Road). [8] Two routes were necessary, as several narrow hill curves were not passable by the buses used. Eventually, sections of the disused tram route between the Baily post office and the Summit were expanded to form an extension of Carrickbrack Road; this enabled a single bus route (number 88) to be used.” [1]
The area was then served by the 31, 31a and 31b bus routes, which operated from Abbey Street in the city centre. In winter, icy roads on the hill occasionally cause the bus service to be suspended, unlike the tram, which ran in all weather conditions. A public footpath now follows the tram route between Howth station and the Summit.
It is important not to confuse the Hill of Howth Tramway with the Clontarf and Hill of Howth Tramroad, a completely different company which ran trams from Dublin to Howth.
The Clontarf and Hill of Howth Tramroad Company (C&HoHT) “operated a tram service from central Dublin via Dollymount in Clontarf to Howth Harbour in the Dublin area of Ireland from 1900 to 1941. Formed in the 1880s, it was a separate entity from the other Dublin tramways, notably the Dublin United Tramways Company (DUTC), but worked closely with the latter, who owned the line as far as Dollymount, for most of its operating existence.” [5]
A horse-drawn or steam tram service for the Howth area was first proposed in 1883, by the Great Northern Railway (Ireland) (GNR), to bring more passengers to Howth and/or Sutton railway stations. The Clontarf and Hill of Howth Tramroad Company (C&HofHT) raised the idea of a circular line around Howth Hill. “Neither idea progressed, not least because the slopes of the hill were too steep to be safe for horses, or practical for steam power, though a line may have been considered using a viaduct over Balscadden Bay, just beyond Howth village, to keep gradients within the range of steam propulsion.” [5]
In 1890, the C&HofHT sought an Order in Council to allow it to build a tram line from Howth Harbour to Dublin’s fish market. It was intended that the line should have “a gauge of 3 feet, with lines running from Mary’s Lane past Halston Street to Capel Street, and then along Parnell Street and Summerhill, through Ballybough, Fairview, Killester and Raheny, then along the coast through the fields of Kilbarrack to Sutton and Howth. While this matter did not proceed, the company developed two new proposals after the DUTC received permission to electrify its lines. The proposed lines, at a gauge of 5 feet 3 inches, were from the DUTC’s terminus in the Clontarf area, via the hamlet of Raheny-on-the-Strand and Sutton, to Howth Harbour, and from the Summit on Howth Hill down past Howth Station and the Howth Estate to the gates of Claremont. The GNR made a two-part counter proposal, seeking to electrify their railway line from Amiens Street Station to either Sutton or Howth, and to provide a circular tram line, with connections at Sutton Cross and Howth, and with the trams able to move all the way to Dublin’s centre. The C&HofHT added a third element to their proposal, for a tram line from Sutton Cross to the Summit, and the GNR then objected to the whole package, and won. The GNR then received permission for its proposed circular line, which became the Hill of Howth Tramway, and dropped the idea of electrification from the peninsula to Amiens St., and so of trams through-running around Howth and to the city centre.”
The C&HofHT eventually received “permission for a line from the DUTC’s depot at what had become Dollymount in Clontarf to Howth Harbour, and this was enshrined in a Private Local Act of 1898, The Clontarf and Hill of Howth Tramroad Bill, 61 & 62 Victoria I, cap. clxxxii. This Act had its Second Reading on 3 March, and on 18 July was the subject of debate about the possible insertion of a clause requiring the purchase of rolling stock from England, the promoters having expressed a preference for buying from the DUTC, or failing that, from the United States. The bill was returned to the House of Lords on 26 July, and later completed its passage.” [5][6]
Construction costs ultimately came to £71,624. Much of the work was “straightforward, allowing for the challenges of building at the water’s edge, but there were difficulties with Lord Ardilaun, the Guinness heir, whose estate of St. Anne’s ran to the coast where the line was to be laid. At the time, there was no coastal road, and Lord Ardilaun sought multiple conditions in return for removing objections to the project. He received most of what he sought, including the provision that the trams would not stop along the margin of his property, and line construction proceeded. The line opened on 26 July 1900.” [5]
The company purchased twelve large tram cars (larger than those of the DUTC) “for its operations, each seating 74 passengers, 29 inside and 45 on the upper deck. The enclosed lower deck had a driver’s cab, and separate areas for each of First, Second and Third Class. The journey from Nelson’s Pillar to Howth took 45 minutes, and the price for much of the operating period was 2 shillings and 6 pence.” [5]
The C&HofHT approached Howth on the main road across the isthmus, ran close to St. Mary’s Church and to the railway station, under the viaduct which carried the actual Hill of Howth Tramway, before running along the Harbour wall. [10]A C&HofHT approaching the terminus at Howth on the main road and passing under the viaduct carrying the Sutton and Howth Electric Tramway just as a tram is crossing that viaduct. This photograph was shared on the Old Howth Photos Facebook Group on 7th March 2021 by Liam McLoughlin. [28]The terminus of the C&HofHT was at the East end of Harbour Road close to the Martello Tower at the landward end of the East Pier. [10]Looking East along the harbour wall towards the terminus of the C&HofHT. This image was shared by Hugh Walsh on the Old Howth Photos Facebook Group on 22nd February 2023. [14]A C&HofHT tram standing at the terminus at the landward end of the East Pier at Howth. This photograph was shared on the Old Howth Photos Facebook Group on 12th October 2020 by Liam McLoughlin. [31]Another C&HofHT tram standing at the terminus. This photograph was shared on the Old Howth Photos Facebook Group on 13th March 2020 by Liam McLoughlin. [33]
“During the 1930s, the line became unprofitable, and when the GNR put forward a proposal to run a competing bus service on the Howth Road, and launch a bus to Malahide, the Board of the C&HofHT offered to end their service if the GNR agreed not to run a bus to Malahide. The line ceased operation on 29th March 1941, with the last tram to Howth, No. 294, departing Nelson’s Pillar at 11.45 pm, driven by Dick Ward. The company was wound-up on 1st July 1941, and the remaining tram cars were transferred to the DUTC’s Dalkey route, where they served until that line closed in 1949.” [5]
As we have noted already the Hill of Howth Tramway was more correctly called the ‘Sutton and Howth Electric Tramway‘. It was GNR(I) owned but made little or no profit for the Company. When Córas Iompair Éireann (CIÉ) took over GNR(I)’s operations in the Republic of Ireland, it reviewed all of the lines (including this tramway) over which it took control and the Howth Tram was replaced by buses within 8 months. It’s removal opened the way for the construction of a housing estate over a length of the route from Howth to the Summit Station. As we will see, this makes it difficult to be precise about the course of the line over that length. Much of the rest of the line can be followed relatively easily, either on foot or in a car.
The Routeof the Hill of Howth Tramway
The Ordnance Survey of Ireland (OSi) have relatively recently released both a 6″ and a 25″ national survey from the early 20th century. We will follow the route of the tramway as shown on the 25″ beginning at Howth and finishing at Sutton.
On this 25″ OSi map extract the ‘headshunt’ of the Hill of Howth Tramway can be seen running alongside the GNR(I) lines from the Claremont Hotel into Howth Railway Station. The C&HofHT can be seen as a single track tramway with a passing loop on the bed to the East of the Manse. [10]That headshunt was long, seemingly much longer than necessary. It certainly provided some storage space for the trams owned by the Tramway. This is a second extract showing the Tramway from the 25″ OSi mapping. [10]This next extract from the 25″ OSi mapping shows the terminus of the GNR(I) line. The Hill of Howth Tramway can be seen running to the rear of the railway station platform and then turning away onto the viaduct which took it over the Harbour Road. [10]A very similar area as shown on Google Maps satellite imagery in 2023. [Google Maps, 8th May 2023]
The photograph above shows Tram No. 3 about to leave Howth Station for Sutton via Summit Halt. This image is embedded here from David Bradley’s webpages with his kind permission. [13]
Looking West from the end of the platform at Howth Station. a single tramway line ran parallel to the main GNR(I) lines for some distance beyond the Signal Box before it was lifted with the rest of the tramway tracks. [My photograph, 8th May 2023]This view of the GNR(I) station at Howth from close to the signal Box, looking East, shows the tram stop backing onto the platform. This photograph was shared on the Old Howth Photos Facebook Group on 22nd December 2020 by Shay Larkin. [27]A view from adjacent to the Signal Box in 2023, looking East along what was once the tram line. [My photograph, 8th May 2023]Tram No. 2 and a sister tram at Howth Station. This image was shared by Liam McLoughlin on the Old Howth Photos Facebook Group on 6th October 2015. [18]Tram No. 4 at Howth Station. This image was shared by Hugh Walsh on the Old Howth Photos Facebook Group on 22nd February 2023. [19]A particularly crisp image of Tram No. 6 at Howth (c) Eamon J. Martin and shared by him on the Old Howth photos Facebook Group on 28th December 2021 [20]Howth Station with the tram stop backing onto the GNR(I) platform. This photo was shared by Liam McLoughlin in the Old Howth Photos Facebook Group on 22nd August 2020. [24]A similar view of Howth Station, this time in colour. This picture was shared by Liam McLoughlin on the Old Howth Photos Facebook Group on 4th October 2015. [25]Tram No. 6 at Howth Station. The Signal Box beyond the tram faces out onto the platform of the GNR(I) Station at Howth. This photo was shared by Liam McLoughlin on the Old Howth Photos Facebook Group on 8th April 2020. [26]Tram No. 7 leaving Howth Station with a service for Sutton via the Summit of the Hill of Howth. This photo was shared by Liam McLoughlin on the Old Howth Photos Facebook Group on 4th October 2015. [25]Tram No. 3 arriving at Howth Station just having crossed the viaduct. This photo was shared by Lorenzo Caira on the Old Howth Photos Facebook Group on 4th October 2015. [36]Tram No. 1 comes off the viaduct on its way to the terminus at Howth Station. This picture was shared on the Old Howth Photos Facebook Group by Liam McLoughlin on 25th August 2020. [34]Looking along the viaduct at Howth from the GNR(I) Railway Station. This photo was shared by Lorenzo Caira on the Old Howth Photos Facebook Group on 4th October 2015. [35]The Hill of Howth Tramway Viaduct facing West towards Sutton. This photograph was taken in 1902 early in the life of the tramway. [11]The Hill and of Howth Tramway Viaduct facing East towards the Harbour. This photograph was taken in March 1959 shortly before the closure of the line. It is in the public domain and is held by the National Library of Ireland and shared by them on Flickr [12]Given the vehicle visble under the viaduct this photo dates from the era when only trams No. 9 and No. 10 remained in the teak livery mentioned above. This probably means that the tram on the viaduct is No. 9 or No. 10. This photo was shared by Liam McLoughlin on the Old Howth Photos Facebook Group on 17th June 2021. It was also shared by Gary Hitchcock on the same Group on 1st March 2019, he dates the photo as being taken sometime in 1959. [37]Looking East under the viaduct in the 1950s. This photograph was shared by Liam McLoughlin on the old Howth Photos Facebook Group on 7th January 2016. [38]The viaduct, looking West. This must have been taken very early in a morning as there is no sign of any road or tramway users/vehicles. This photo was shared by Liam McLoughlin on the Old Howth Photos Facebook Group on 17th June 2021. [39]Looking across the R105 along the line of the old viaduct (from the South). [My photograph, 8th May 2023]The abutment of the viaduct hidden by the advertising hoarding. [My photograph, 8th May 2023]This extract from the 25″ OSi mapping shows the old tramway running away to the South after crossing the Viaduct. [10]Google Maps staellite imagery for the same area shows a footpath on the alignment of the old tramway. The length of the footpath which follows this length of the tramway is shown in photographs below. [Google Maps, 8th May 2023]After a short steep length of footpath from the R105 the footpath joins the formation of the old tramway which curves away to the South.[My photograph, 8th May 2023]These two photographs show that curve which brings the tramway onto a southerly path. [My photographs, 8th May 2023]The old tramway route heading South, viewed from the North. [My photograph, 8th May 2023] The footpath continues South. [My photograph, 8th May 2023]And again, looking South. [My photograph, 8th May 2023]A view back along the tramway looking North. The fencing is the boundary of Howth Deer Park. [My photograph, 8th May 2023]Looking South once again, with the Deer Park on the right. [My photograph, 8th May 2023]And again, further South and looking South. [My photograph, 8th May 2023]This view looks Southeast alongside the line of the tramway which at this point has begun to curve to the East through the back gardens of properties built after its demise which are on the left of this image behind the trees. The footpath leaves the tramway at this point. A housing estate has been built over the line of the old tramway from this point. [My photograph, 8th May 2023]Looking back along the old tramway route as it begins to curve to the East. Behind the camera, the footpath heads South away from the tramway, which at this point is approximately under the hedging to the right of the photograph. [My photograph, 8th May 2023]The 25″ OSI mapping shows the tramway curving first to the East and then back to the Southwest. [10]The satellite imagery from RialMapOnline.com becomes very useful from this point on as it maps the old tramway over the satellite image of the 1960s estate. The footpath, in grey, can be seen diverting away South from the line of the tramway as it turns East. [4]Tram No. 6 heads North towards the Howth terminus. The deer park is behind the trees to the left. The tram is just about to enter the straight length of line which bordered the deer park. This image was shared by Liam McLoughlin on the Old Howth Photos Facebook Group on 6th October 2015. [21]Tram No. 4 in the final livery version is heading North towards the camera and Howth Station. The passing loop seen here is not shown on the early OSi 25″ mapping that is available. The school in this image also postdates the mapping. This image was shared by Liam McLoughlin on the Old Howth Photos Facebook Group on 8th April 2020. [16]Looking Northeast on Grace O’Malley Drive with the school on the right. The green line superimposed on the photograph illustrates the line of the tramway. [Google Streetview, July 2019]This photo is taken looking down the line towards Howth. The low white wall prominent in this image can be seen beyond Tram No. 4 in the photograph of that tram in the last but one image. This image was shared by Liam McLoughlin on the Old Howth Photos Facebook Group on 22nd August 2020. [22]The 25″ OSi mapping then shows another sharp curve which swept the old line back again towards the East. [10]The same area in the 21st century. The Deer Park is to the left of the image. [4}Looking Northeast on another length of Grace O’Malley Drive. The green line superimposed on the photograph illustrates the line of the tramway. [Google Streetview, July 2019]Tram No. 6 in its earliest livery climbing through the curves on its way to the Summit. It is probably travelling along what became Balkill Park. This image was shared by Liam McLoughlin on the Old Howth Photos Facebook Group on 8th April 2020. [17]Looking North on Balkill Park. The old tramway route seems to skirt the left side of the end of terrace above, continuing to bear right through its garden and the properties on Grace O’Malley Drive behind. [Google Streetview, July 2019]Turning through 180° to look South, Balkill Park follows the line of the old tramway. [Google Streetview, July 2019]This next extract from the 25″ OSi mapping shows the tramway crossing Balglass Road at a level crossing. [10]The same area as shown on the map extract above as it appears on RailMapOnline.com. [4]Looking East-southeast from Balkill Park across Balglass Road/Balkill Road. at the junction the route of the old tramway heads East-southeast. [Google Streetview, July 2019]An unidentified tram crossing Basglass on 31st May 1959, (c) Barry Lacy. This image was shared on the Old Howth Photos Facebook Group by Kevin Rickard on 27th September 2020. [15]Very approximately the same view as the monochrome image above but in the 21st century. The route of the old tramway is indicated by the green line. [Google Streetview, July 2019]Looking ahead to the Southeast along the route of the old tramway from the junction of Balkill Park with Balglass Road/Balkill Road. [My photograph, 7th May 2023]Looking back towards Howth along the line of the old tramway with Balkill Park ahead. [My photograph, 7th May 2023]The 25″ OSi mapping shows that the next passing point on the line was Dungriffan Halt which was situated to the North of Dungriffin Road between Cliff House and Boggeen Lane. [10]The same area in the 21st century shows a similar road layout and the footpath following the route of the old tramway. [4]Looking Southwest towards what was the location of Dungriffan Road Halt. [My photograph, 7th May 2023]Trams passing each other at the next halt on the route, Dungriffan Road Halt. This photo was shared on the Old Howth Photos Facebook Group by Lorenzo Caira on 9th January 2022. [23]Tram No. 7 seems to be leaving Dungriffan Road Halt heading South towards the Summit Inn. This photo was shared on the Old Howth Photos Facebook Group on 6th October 2015 by Liam McLoughlin. [43]Looking Southeast into the site of what was Dungriffan Road Halt. [My photograph, 7th May 2023]The location of Dungriffan Road Halt as it appears in the 21st century. This view looks Southeast from the centre of the Halt towards Dungriffin Road. [My photograph, 7th May 2023]Looking South across Dungriffin Road. [My photograph, 7th May 2023]Looking back North across Dungriffin Road. [My photograph, 7th May 2023]The view South from Dungriffin Road in 2019. [Google Streetview, July 2019]This image shows an unidentified tram heading South towards the Summit Inn from Howth. It was shared on the Old Howth Photos Facebook Group by Lorenzo Caira on 4th October 2015. [44]This view looks back towards Howth. Another unidentified tram heads towards the Summit Inn. This photo was shared on the Old Howth Photos Facebook Group by Lorenzo Caira on 4th October 2015. [40]This view looks North down this length of tramway and appears to show Tram No. 6 heading South towards the Summit of Howth Hill. This photo was shared on the Old Howth Photos Facebook Group by Liam McLoughlin on 6th October 2015. [41]The view South along the line of the old tramway between Dungriffin Road and Grey’s Lane. [My photograph, 7th May 2023]Looking South across Grey’s Lane. [My photograph, 7th May 2023]The view Northwest along Grey’s Lane across the line of the old tramway. [Google Streetview, July 2019]Looking North across Grey’s Lane. [My photograph, 7th May 2023]The next length of the tramway Southeast from Grey’s Lane as shown on the 25″ OSi mapping. [10]The same area as shown by RailMapOnline.com. [4]Looking South along the line of the old tramway a 100 metres or so from Grey’s Lane. [My photograph, 7th May 2023]Looking South along the line of the old tramway a 100 metres or so further from Grey’s Lane. [My photograph, 7th May 2023]In this extract from the OSi mapping the old tramway first crosses Kitestown Road and then turns to cross what was Lighthouse Road and in the 21st century is called Balkill Road. The Summit was reached after crossing Lighthouse Road. [10]The same area as shown on the map extract above as it appears on RailMapOnline.com. The new road is the route of the R105, Carrickbrack Road, which from this point follows the line of the old tramway. [4]Looking North along the line of the old tramway across Kitestown Road. [My photograph, 7th May 2023]Looking Southeast along Kitestown Road across the line of the old tramway. [Google Streetview, July 2019]Looking Southeast from Kitestown Road along the line of the old tramway. [Google Streetview, July 2019]Looking North along the line of the old tramway from the junction of Balkill Road and Carrickbrack Road. [My photograph, 7th May 2023]The view Southwest along Carrickbrack Road (R105). The green line marks the route of the old tramway. [Google Streetview, July 2019]The Summit Cafe. This photo was shared on the Old Howth Photos Facebook Group by Liam McLoughlin on 6th October 2015. [42]The Summit Inn in the 21st century. [Google Streetview, July 2019]Two trams pass at the Summit. Tram No. 3 is heading for Howth and Tram No. 4 for Sutton. This picture was shared on the Old Howth Photos Facebook Group on 7th September 2016 by Liam McLoughlin. [49]In this image it is trams Nos. 6 and 7 passing at Summit Station with No. 6 heading for Howth and No. 7 for Sutton. This photo was shared on the Old Howth Photos Facebook Group on 4th October 2015 by Lorenzo Caira. [47]Tram No. 10 at the Summit Station. This picture was shared by Dermot Kane on the Old Howth Photos Facebook Group on 2nd June 2020. It looks Northeast along Carrickbrack Road. The Summit Inn is visible on the right of the picture. (R105). [50]A similar view at the Summit in the 2020s. The Summit Inn is visible on the right of both this and the colour photograph above. The single storey building near the centre of this image can be seen behind the tram in the last image. [Google Streetview, March 2023]What looks like Tram No. 6 at the Summit Station heading for Sutton with two unidentifiable trams behind. This image was shared on the Old Howth Photos Facebook Group on 4th October 2015 by Lorenzo Caira. [46]Looking Northeast again at the Summit with Tram No. 1 in the foreground, heading for Howth and an unidentifiable sister tram beyond, heading for Sutton. This photo was shared on the Old Howth Photos Facebook Group by Lorenzo Caira on 4th October 2015. [45]Looking Northeast at the Summit Station with Tram No. 10 waiting to set off for Howth. This photograph was shared on the Old Howth Photos Facebook Group on 6th October 2015 by Liam McLoughlin. [48]
The Summit was the usual tourist stop and was accessed either from Howth or from Sutton. Having reached the Summit from Howth, we now start the journey down to Sutton.
Trams left Summit Station in a Southerly direction. The road to the East of the line is Thormanby Road which was not suitable for the bus service which replaced the trams on the closure of the line. [10]The same area as that covered on the map extract above. This time as it appears on the satellite imagery on RailMapOnline.com. This length of Carrickbrack Road was constructed after the closure of the line. [4]This next extract from the 25″ OSi mapping shows the line continuing South. [10]The same area in 21st century. Carrickbrack Road continues to follow the route of the old tramway. [4]This next extract from the 25″ OSi mapping shows the next passing point on the line which was at the point the line met Thormanby Road. [10]The same area as it appears on RailMapOnline.com’s satellite imagery. [4]The confluence of the old tramway and Thormanby Road. The passing point on the OSi mapping is just off the image to the left. The picture was shared on the Old Howth Photos Facebook Group by Lorenzo Caira on 4th October 2015. [56]Tram No. 3 at the same location. The passing loop is just visible beyond the tram. The building on the right appears on the postcard image above. This image was shared on the Old Howth Photos Facebook Group on 9th October 2019 by Padraig Druimeanach. [55]The same location again, after the lifting of the tramway tracks and before the construction of Carrickbrack Road. This image was shared on the Old Howth Photos Facebook Group on 25th February 2020. [53]The Tramroad continues in a westerly direction towards the Stella Maris Convent, as shown on the 25″ OSi mapping. [10]The same area on RailMapOnline.com. [4]The same location in the 21st century, Carrickbrack Road (R105) eventually replaced the old tramway. [Google Streetview, March 2023]Stella Maris Convent (Glenavena) owned land on both sides of the old tramway. The tramway was carried over the driveway on a stone arch bridge with retaining walls extending upwards on each side. [10]Approximately the same area as portrayed in the map extract above. [4]The tramway leaving Thormanby Road/Carrickbrack Road and crossing the stone arch bridge over the driveway.Tram No. 7 travelling to the Summit from Sutton is about to cross Thormanby Road/Old Carrickbrack Road. This image was shared by John Maguire on the Old Howth Photos Facebook Group on 22nd January 2021. John tells me that the wall still has the hinges in place for the gate that can be seen in this image. [82]Looking West on Carrickbrack Road, the high wall on the left behind the speed limit sign is the same wall as shown in the monochrome images above. [Google Streetview, March 2023]About 100 metres West of the last photograph, this is the route the tramway was followed, alongside the high wall. [Google Streetview, March 2023]The full height wall and bridge carrying the tramway. The tram in this image is in almost exactly the same position as the one in the monochrome image above. This image was shared on the Old Howth Photos Facebook Group by Shay Larkin on 3rd March 2017. [51]The next length of the tramway on the 25″ OSi mapping. [10]And a further length of the tramway on the 25″ OSi mapping. [10]RailMapOnline.com shows the area covered by the two map extracts above. [4]Looking West along Carrickbrack Road towards the location of Baily’s Post Office Halt which was sited just beyond the location of the bend ahead. [Google Streetview, March 2023]The next passing loop at Baily Post Office Halt. [10]The new Carrickbrack Road somewhat smooths out the tramway alignment through the site of Baily’s Post Office Halt. [4]Tram No. 9 at the Baily Post Office Halt. This image was taken facing Southeast and was shared on the Old Howth Photos Facebook Group by Liam McLoughlin on 23rd October 2018. [52]Tram No. 1 at Baily’s Post Office Halt. This picture is taken facing West through the location of the Halt and was shared on the Old Howth Photos Facebook Group on 3rd March 2017 by Shay Larkin. [54]Looking West through the location of Baily’s Post Office Halt in 2023. [Google Streetview, March 2023]Looking East through the location of Baily’s Post Office Halt in 2010. [Google Streetview, July 2010]The tramway continued Northwest from Baily’s Post Office Halt. The 25″OSi map extract shows that from this point the old Carrickbrack Road ran alongside the old tramway, with the tramway on its South side. [10]The tramway continues Northwest on its way towards Sutton. [10]This RailMapOnline.com satellite image shows the length of the old Tramroad covered by the two map extracts above. [4]Looking Northwest from the location of Baily’s Post Office Halt along Carrickbrack Road in 2010. [Google Streetview, July 2010]And again, further to the Northwest. A passing loop can be seen to the Northwest of Rockfell. This was the Barren Hill Halt. [10]This extract from RailMapOnline.com’s satellite imagery shows much the same area as that in the map extract above. [4]Two trams pass at Barren Hill Halt. The nearest tram appears to be No. 6, the tram heading towards the camera is either No. 9 or No. 10 ( both of which retained the teak livery through to the closure of the line. The picture was shared on the Old Howth Photos Facebook Group on 15th October 2020 by Phil Hanlon. [57]The view Northwest through the site of Barren Hill Halt in the 21st century. [Google Streetview, March 2023]The 25″ OSi mapping continues to show the tramway heading Northwest for Sutton, at this point, before curving round to a northerly trajectory. [10]The next passing loop was just to the North of St. Fintan’s Well. [10]This extract from RailMapOnline.com covers the combined length of the two map extracts above, from Barren Hill Halt to the location of St. Fintan’s Halt. [4]Tram No. 3 at St. Fintan’s Halt, looking South. This photo was shared on the Old Howth Photos Facebook Group on 6th October 2015 by Liam McLoughlin. [58]The tramway continued Northwest running alongside St. Fintan’s Graveyard. Another passing loop can be seen at the top of this extract from the 25″ OSi mapping. [10]Tram No. 4 in the passing loop mentioned in the notes to the OSi map extract above, heading for Howth. This photo was shared on the Old Howth Photos Facebook Group on 9th October 2015 by Liam McLoughlin. [59]The tramway continues heading Northwest. [10]And again, the tramway runs on towards Sutton in a northwesterly direction. [10]This extract from RailMapOnline.com covers the same length of the old line as the two map extracts above. [4]This next extract from the 25″OSi mapping shows the passing loop adjacent to Strand Road. [10]This RailMapOnline image shows the ame area as the 25″ OSi map extract above. The Strand Halt is in the bottomright corner of each image. [4]Tram No. 10 sits at the Strand Road Halt on its way Southeast towards the Summit of the Hill of Howth. This image was shared on the Old Howth Photos Facebook Group on 22nd February 2023 by Hugh Walsh [61]The tram in this picture is just to the Northwest of the Strand Road Halt. It is difficult to make out whether it is travelling towards Howth (ahead via the Summit of the Hill of Howth) or Sutton (behind the camera). The photo was shared on the Old Howth Photos Facebook Group on 6th October 2015 by Liam McLoughlin. [62]This image is not clear enough to be able to give the tram number. The tram pictured has just left the Strand Halt heading for Sutton. The image was shared on the Old Howth Photos Facebook Group on 18th December 2015 by Liam McLoughlin. [60]Bus No. 31 heading for Sutton at a similar location after the closure of the tramway. This image was shared on the Old Howth Photos Facebook Group on 9th April 2017 by Liam McLoughlin. [63]The tramway ran Northwest along the South side of Carrickbrack Road with the water on its left. [10]it continued alongside the road heading towards the Strand Hotel. Both these map extracts are from the 25″ OSi mapping. [10]This extract from the satellite imagery on RailMapOnline.com shows the length of the tramway route covered in the two map extracts above. [4]Sutton Cross as shown on the 15″ OSi mapping. Its tramway halt was immediately to the Northwest of the junction. It can be seen on the top-left of this extract. [10]A similar area on RailMapOnline.com. As throughout this article the green line represents the Hill of Howth Tramway, the yellow line indicates the route of the Clontaff and Hill of Howth Tramroad. [4]Looking through Sutton Cross junction from the Southeast. The halt can be seen ahead. This image was shared on the Old Howth Photos Facebook Group on 18th December 2015 by Liam McLoughlin. [64]A tram crosses the main road at Sutton Cross. The road to Howth is ahead of the camera. This photo was shared on the Old Howth Photos Facebook Group by Liam McLoughlin on 12th October 2016. [67]The view along the R105 towards Howth taken from a similar location to the photograph above. [Google Streetview, November 2022]Tram No. 3 just setting off from the Sutton Cross Halt. It appears to have just met and passed another tram heading towards Sutton Railway Station. That tram can be seen in the distance on its way to the terminus. This photo was shared on the Old Howth Photos Facebook Group by Liam McLoughlin on 28th August 2017. [65]The site of Sutton Cross Halt in the 21st century. This view looks along Station Road from the junction at Sutton Cross. [Google Streetview, May 2021]A tram has just crossed the main road at Sutton Cross and is entering the Halt on its way to Sutton Railway Station. This photo was shared on the Old Howth Photos Facebook Group by Liam McLoughlin on 3rd December 2018. [69]Tram No. 1 is just leaving Suttion Cross Halt and will cross the main raod before heading for the Hill of Howth. This photo was shared on the Old Howth Photos Facebook Group by Lorenzo Caira on 4th October 2015 [70]Tram No. 5 sits in the loop at Sutton Cross Halt. Given the height of the photographer it is likely that they are at the front of the top deck of another tram which has left Sutton Railway Station on its way to the Hill of Howth and eventually to the Howth terminus of the line. This photo was shared on the Old Howth Photos Facebook Group by Liam McLoughlin on 21st March 2018. [66]Tram No. 3 at Sutton Cross Halt heading towards Howth via the Hill of Howth. This image looks to have been taken from the top deck of another tram waiting in the loop at Sutton Cross, looking toward the terminus at Sutton Railway Station. It was shared on the Old Howth Photos Facebook Group by Hugh Walsh on 22nd February 2023. [68]This extract from the 25″ OSI mapping shows the final approach to the terminus at Sutton Railway Station. [10]A similar length of Station Road Sutton as it is shown on Google Maps in 21st century. The tramway ran along the South side of the road. [Google Maps, May 2023]The view Northwest on Station Road in 2023. [Google Streetview, March 2023]The end of the line, or the beginning of the line, depending on your perspective! This last extract from the 25″ OSi mapping shows the GNR(I) railway station at Sutton, the Tramway Depot and the Electricity Generating Station built for the Tramway. [10] The same area in the 21st century. [Google Streetview, May 2023]Thye approach to Sutton Station from the Southeast on Station Road (R106). The tramway lines are represented by the green line superimposed onto the photo. The station building is much as it was when trams were running. The road is probably a little wider. The signal box is still present (in dark green on the left of this image). [Google Streetview, March 2023]
The photograph above shows a tram running parallel to Station Road with Sutton Cross 200 yards to the right and Sutton Station 25 yards to the left on the opposite side of the road. This photo is embedded here from David Bradley’s webpageswith his kind permission. [29]
Looking Southeast from close to the point where trams would swing to their right to cross Station Road and enter the tram terminus which sat directly alongside the GNR(I) Railway Station at Sutton. Sutton Cross is some distance ahead of the camera. The photo was shared on the Old Howth Photos Facebook Group by Phil Hanlon on 15th December 2020. [76]Tram No. 6 or No.8 is just setting off from the Sutton terminus towards Sutton Cross. This photo was shared on the Old Howth Photos Facebook Group by Liam McLoughlin on 5th August 2019. [75]Sutton Railway Station with a tram approaching on the Sutton and Howth Electric Tramway. This photograph looks East from what is now the R106. The photo was taken in 1902. [30]The view of the station approach from adjacent to the level crossing gates in 2023. While the tram tracks are long gone, the station building is very similar in appearance to that shown on the 1902 image above. [My photograph, 8th May 2023]Tram No. 6 waits at the Sutton Terminus before setting off towards Sutton Cross. This photo was shared on the Old Howth Photos Facebook Group by Lorenzo Caira on 4th October 2015. [79]Sutton terminus once again, this time on the final day of the service. There is a suggestion in the notes under the photo that this is the final tram on that day. It may have been, although the numbers waiting toclimb aboard suggest that there may be other trams in the depot waiting to move forward to take a full load of passengers. This photo was shared on the Old Howth Photos Facebook Group by by Hugh Walsh on 22nd February 2023. [71]Tram No. 1 leaves the depot and prepares to cross Station Road as it heads for the terminus at the railway station. This photo was shared on the Old Howth Photos Facebook Group by Hugh Walsh on 22nd February 2023. [71]The 21st century view alongside the signal box looking to where the Tram depot was sited. [Google Streetview, March 2023]Tram No. 10 leaves the depot and is about to cross Station Road to enter service at the tram terminus at Sutton Railway Station. This photo was shared on the Old Howth Photos Facebook Group by Lorenzo Caira on 4th October 2015. [74]Tram No 10 retained its teak livery until the end of the network’s life, as did Tram No. 9. Tram No. 10 is waiting for the tram to the right of the picture to clear the road from the terminus, before setting off from the depot to collect passengers. This photo was shared on the Old Howth Photos Facebook Group by Lorenzo Caira on 4th October 2015. [78]The road crossing at the West end of Sutton Station. The tram depot was immediately West of the Station. This image was shared by Liam McLoughlin on the Old Howth Photos Facebook Group on 3rd July 2017. [32]Tram No. 6 sits outside the shed in the tram depot waiting to go out on service. This photo was shared on the Old Howth Photos Facebook Group by Liam McLoughlin on 13th December 2020. [73]Two other trams (no. 1 and No. 3) sit outside the shed in the tramway depot. GNR(I) main line carriages sit in the siding adjacent to the shed. This image was shared on the Old Howth Photos Facebook Group by Liam McLoughlin on16th June 2019. [72]Tram No 10 is being wheeled out of the shed by hand. This photo was taken after closure and after the removal of overhead power lines. It was shared on the Old Howth Photos Facebook Group by by Hugh Walsh on 22nd February 2023. [71]Tram No. 9 in its teak livery sits in front of sister trams inside the shed at the Tramway depot. This photo was shared on the Old Howth Photos Facebook Group by Liam McLoughlin on 10th January 2016. [81]Another view of the interior of the shed at the tramway depot. The rather odd looking tram on what seems to be the central road is Tram No. 11 which was used for maintenance work on the network. This photo was shared on the Old Howth Photos Facebook Group by Padraig Druimeanach on 15th October 2019. [77]Tram No. 11 out at work on the network at St. Fintan’s. This photo was shared on the Old Howth Photos Facebook Group by Liam McLoughlin on 9th October 2015. [80]The Tramway Depot seen from the East with the Electricity Generating Station behind. This image was probably taken after the closure of the network. It was shared by Liam McLoughlin on the Old Howth Photos Facebook Group on 7th March 2021. [31]
As we have noted already the Hill of Howth Tramway was GNR(I) owned but made little or no profit for the Company. When the nationalised compnay, Córas Iompair Éireann (CIÉ) took over GNR(I)’s operations in the Republic of Ireland on 1st October 1958, it reviewed all of the lines (including this tramway) over which it took control and the Howth Tram was replaced by buses within 8 months!
London: Hansard, vol. 62, c. 1291 – 26 July 1898, House of Lords Sitting, Private Bill Business, “Returned from the Commons agreed to, with Amendments, ‘Clontarf and Hill of Howth Tramroad Bill'”
Michael Corcoran; Through Streets Broad and Narrow — Dublin’s Trams; The Sir John T. Gilbert Commemorative Lecture, Dublin City Public Libraries, 2008.
Hill Of Howth Tramway Closure; in Irish Railfans’ News. Railway Preservation Society of Ireland. Volume 5 No. 3; 6th July 1959.
The featured image above shows Fintona Railway Station from Main Street, Fintona in June 1957, (c) Wilson Adams. The image is used here under the Creative Commons Attribution-Share Alike 2.0 Generic license (CC BY-SA 2.0). [7]
The Londonderry and Enniskillen Railway [2] opened the railway station in Fintona on 5th June 1853. A short time after the Londonderry to Enniskillen Railway completed its mainline to Enniskillen (in 1854 [2]). mainline services were withdrawn from Fintona (in 1856 [1]), and the link to Fintona became a branch from the mainline at Fintona Junction railway station. [3] Most passenger services on this branch line were then provided by a horse-drawn tram car. [1] Since the line’s closure, the tram has been preserved at the Ulster Folk and Transport Museum at Cultra, County Down. [2]
Wikipedia notes that the branch line to Fintona was taken over by the Great Northern Railway (Ireland) in 1883 when it took control of the Londonderry and Enniskillen Railway. [1]
The branch-line and the station at Fintona were closed on 1 October 1957. [1] The whole area comprising the Fintona Train station is now a car park and public toilet. [4]
As we have noted, “Passenger services on the half mile Fintona branch were worked by horse traction throughout the 104 years of its existence up to closure in 1957.” [4]
Timetables were worked out on what a horse could reasonably be expected to achieve. This meant that rail authorities “allowed 10 minutes for the slightly downhill trip to Fintona, and 15 minutes for the return working. Seven trips per day were scheduled in summer 1951.” [5]
The tramcar which was used for the majority of the life of the service, “entered service in 1883, had longitudinal seating, back to back on the upper deck and with seats facing each other on the lower deck. Originally the latter was divided into 1st and 2nd class, and the top deck was 3rd class. The car is estimated to have covered 125,000 miles in its ambulation’s on the branch.” [5]
“Goods wagons for Fintona were worked by a steam engine which, in later years at least, made a return trip in the morning before passenger services started.” [5]
The Line between Fintona and Fintona Junction
The first image below shows the route of the line on an extract from the GSGS maps of 1941-1943 produced by the British War Office at a scale of 1″ to 1 mile. [6] The second picture is a matching 21st century satellite image which shows how little of both the mainline and the branch remain in the 21st century.
The Fintona Branch: a map extract from the British War Office (G.S.G.S 4136) 1″ to the mile survey published 1941-1943. [6]The location of the Fintona Branch on modern satellite imagery. [6]A similar area on the Satellite imagery with the route of the mainline (The Londonderry and Enniskillen Railway) and the alignment of the Fintona Branch illustrated by redlines. [6])
Fintona Junction
The next image below shows the approach road to what was Fintona Junction Railway Station from the B46. Immediately to the right of this road was a level-crossing which took the mainline across the B46. The Londonderry and Enniskillen Railway ran under the location of the bungalow on the right, parallel to the station approach road.
The access road shown above now only provides access to a farm. At one time it was the public access to the junction station.
Fintona Junction Station site. The line of the railway to Enniskillin can be seen crossing the B46, Dromore Road in the bottom left of this satellite image. The line to Fintona is indicative rather then accurate. [Google Maps]Fintona Junction: GNR 4-4-0 goods engine No.73 of Class ‘P’ stands in the bay, having shunted its train to await the passing of the two passenger trains of the evening of August Bank Holiday Saturday, 1954. [12]A Still image from a 1950s cinefilm which shows the signal box, station sign and porters trolleys at Fintona Junction, (c) The Huntley Archives, Film No.96367. [13]
The line
AS we have already noted, the journey from Fintona Junction to Fintona Railway Station was timetabled as just a 10 minute journey. The tram was usually waiting for connections at Fintona Junction as in the first picture below.
The view from the mainline of Fintona Junction Station. The tram is waiting to offer a connection for the train arriving from Londonderry, (c) J.W. Armstrong/ARPT – this link is to the image as held on Ernie’s Railway Archive on Flickr. [8]The tram for Fintona with horse”Dick” (apparently all the horses used on the service were called ‘Dick’) waiting with the branch connection at Fintona Junction, while PPs class 4-4-0 No.44 arrives with 1.45pm Omagh – Enniskillen local train (c) L.King,5th July 1955. [4]Fintona Junction Railway Station in April 1964 (c) Roger Joanes. The image is included here under a creative Commons Licence, Attribution-NonCommercial-NoDerivs 2.0 Generic (CC BY-NC-ND 2.0). [9]
In the picture above the line can be seen to be in a shallow cutting soon after leaving the railway station. As can be seen below, this was a very shallow and short cutting.
Lookin ahead down the line from Fintona Junction in the 1950s, (c) The Huntley Film Archive Film No. 96367. [13]The tram transporting military personnel leaves Fintona Junction and runs along the section of track being inspected in the image above, (c) Mr Gallagher c1941-45. [4]Now just beyond the cutting mentioned above. The line continues to curve towards Fintona, (c) The Huntley Film Archive Film No. 96367. [13]Leaning out of the tram window, we can see the line continuing to curve westwards, just ahead, shrubs are beginning to encroach on the line, (c) The Huntley Film Archive Film No. 96367. [13]This satellite image shows the current landscape around the next section of the old railway linejust south of the junction station. [Google Maps]A hazy view from the top deck of the tram looking back along the line towards Fintona junction, (c) The Huntley Film Archive Film No. 96367. [13]Postcard View circa 1930 which shows the tram rounding the curve after leaving Fintona Junction Station on the way to Fintona. It is in the midst of the shrubs mentioned above, (c) Public Domain. [1]A little further ahead along the line is again in a shallow cutting, (c) The Huntley Film Archive Film No. 96367. [13]The next length of the line sees the old railway leave the curve and straighten up heading for Fintona in a southeasterly direction. [Google Maps]Over this next length of the old railway it is much more difficult to determine the precise alignment of the line. The redline cannot be taken as accurate in anyway. The vast majority of the buildings shown to the southwest of the line all postdate the removal of the old railway. [Google Maps]The north end of Sherwood Close. The old railway probably ran approximately on the line of the green fence between the two properties shown here. [Google Streetview]A view from the north on Ashfield Gardens. The farm access track referred to on the image appears in the bottom right of the satellite image above. It can also be seen at the top left of the satellite image below. [Google Streetview]This final satellite image shows the approximate line of the railway as it enters the station throat and runs through to the terminus buffer stops. The station used to front onto Main Street. The area is now the premises of Lisdergan Butchery (https://lisderganbutchery.com), Eurospar and the town car park. The building which fronts onto Main Street being Fintona’s public toilets. [Google Maps]A short distance further along the line, the land has dropped away once again and the station at Fintona is in sight, (c) The Huntley Film Archive Film No. 96367. [13]
The view Southeast towards Fintona Station from along the line. The permanent way between the two rails is filled with earth up to sleeper level or just above to create a suitable surface for the horse. Notice how, at the point ahead, hoof marks show that the horse has avoided crossing the switch rail until the last possible moment, (c) Ernie’s Railway Archive – this link is to the image as held on Ernie’s Railway Archive on Flickr. [8]Arriving at Fintona. The tram is a few yards closer to the station than it was in the image above, (c) David Bradley, September 1957. [4]Closer again to the station platform now. Do not be deceived by the platform visible close to the camera, this was a goods loading point which is described on the plan below as ‘The Beach’, (c) The Huntley Film Archive Film No. 96367. [13]We are now close-in to the covered station platform at Fintona. This a picture of the Railway Station in April 1964 a good few years after the closure of the line, (c) Roger Joanes. The image is included here under a creative Commons Licence, Attribution-NonCommercial-NoDerivs 2.0 Generic (CC BY-NC-ND 2.0). [9]A similar image to the Roger Joanes’ photograph above, this time in colour. As the vegetation encroachment is greater on this image it is probably a summer-time image. [Public Domain] [11] A plan of Fintona Railway Station as shown on the Irish Railway Modellers Forum. It is taken from from Norman Johnston’s book on the Tram, “The Fintona Horse Tram.” [10]Fintona Railway Station as shown at the head of this article, (c) Wlison Adams. The image is included here under The image is included here under a creative Commons Licence (CC BY-SA 2.0). [14]This is approximately the same view but taken in 2007. (c) Kenneth Allen. The image is included here under The image is included here under a creative Commons Licence (CC BY-SA 2.0). [15]Approximately the same location but this time in June 2021. The toilet block has been replaced with something which looks a little more as though it belongs in the heart of Fintona. [Google Streetview]
The Return Journey to Fintona Junction
Just a few photographs now which show the return journey to Fintona Junction.
The line’s horse stands in Fintona station ready to depat with a baggage truck and the tramcar in 1926. This consist does not appear in any other images but it is how the tram is displayed in the Museum at Cultra, (c )the Tramway and Light Railway Society. The image was seen on the Tramway Badges and Buttons website. [16]“Dick” leaving Fintona with the 4.14pm to Fintona Junction, (c) N.W.Sprinks taken on 25th June 1952. [4]
The journey back from Fintona to Fintona Junction on 26th June 1952 (c) Ernie’s Railway Archive. This link is to the image as held on Ernie’s Railway Archive on Flickr. [8]
And finally. …
After closure of the line, Fintona’s tram was preserved and now sits in Ulster Transport Museum, Cultra.
Fintona’s tram on display in Ulster Transport Museum, Cultra. [11]

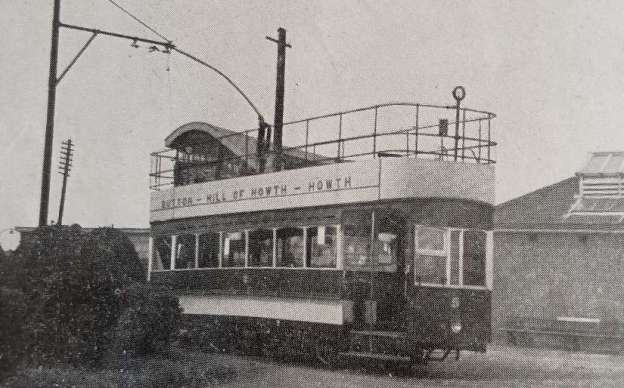
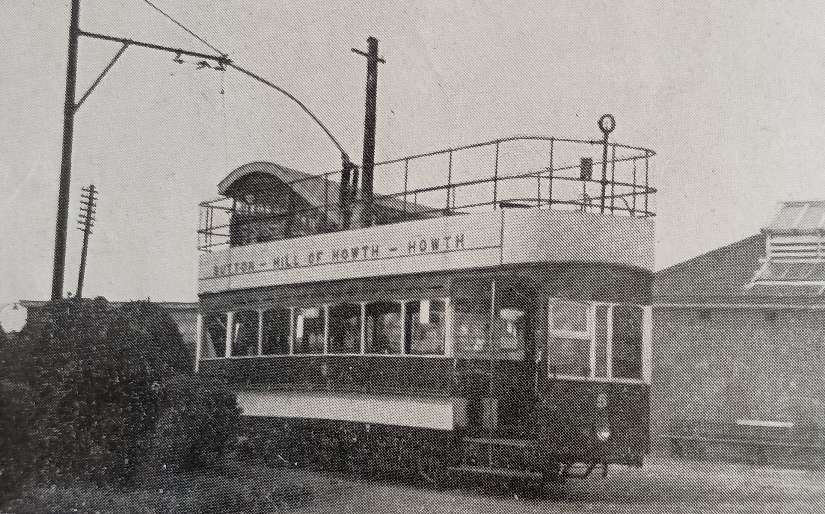
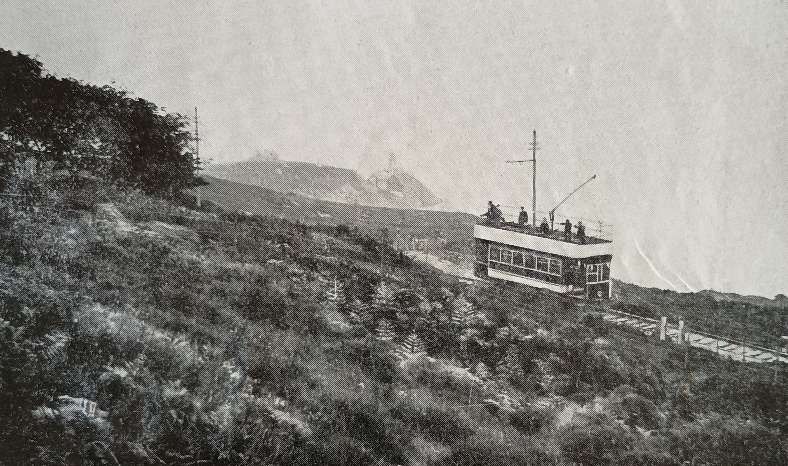
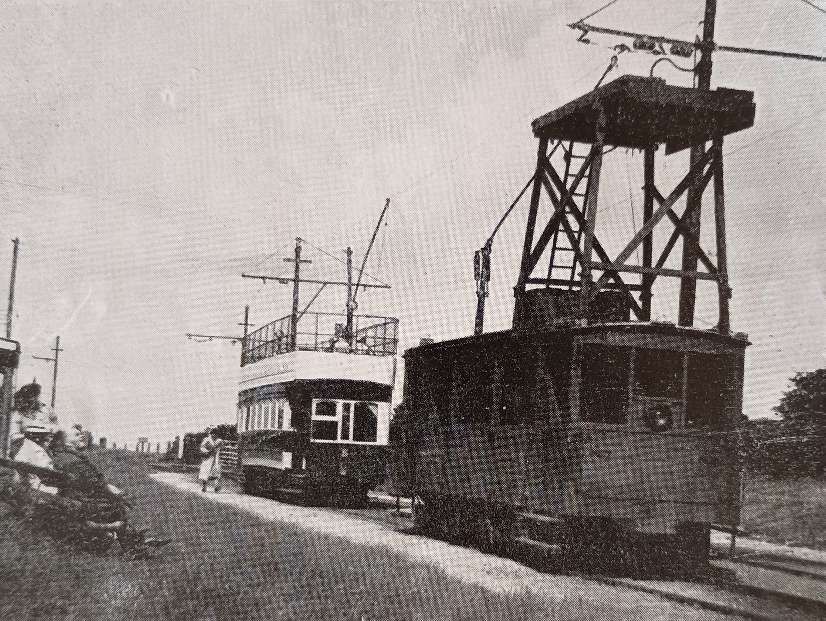
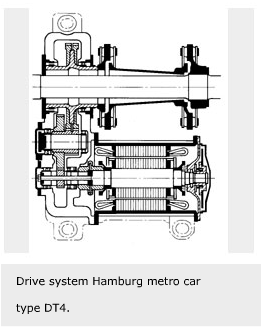
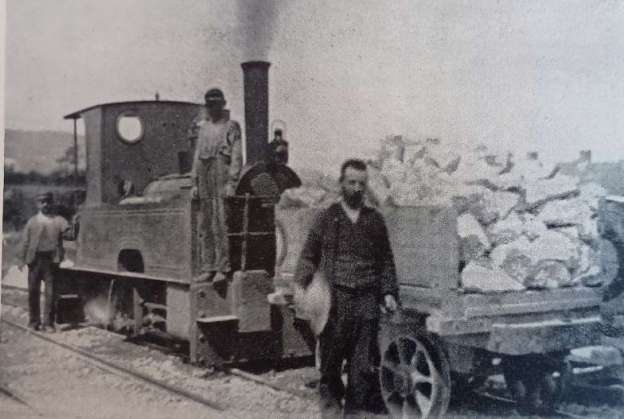
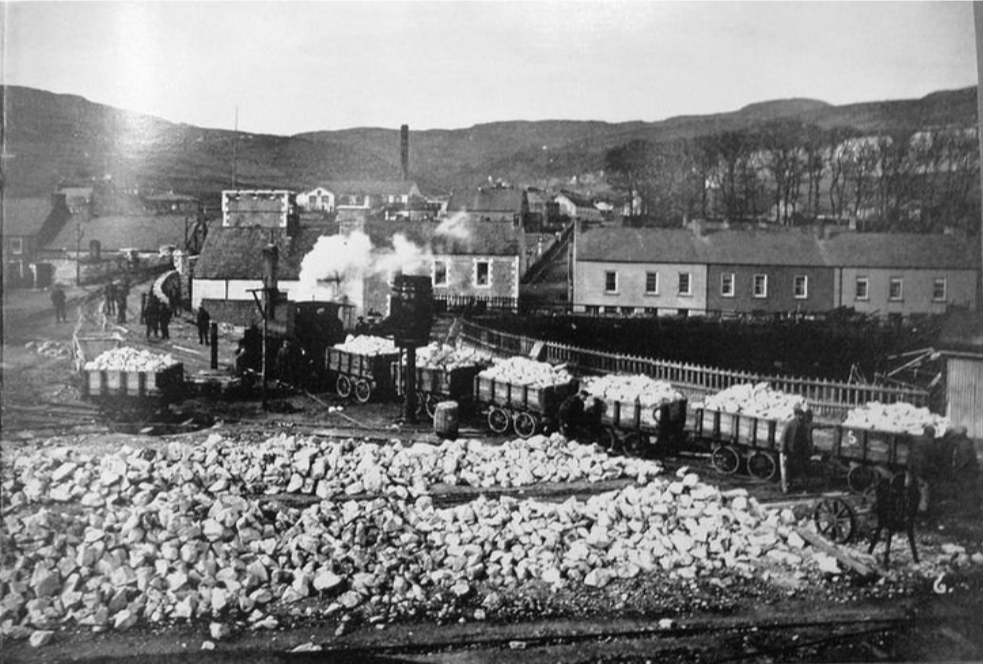
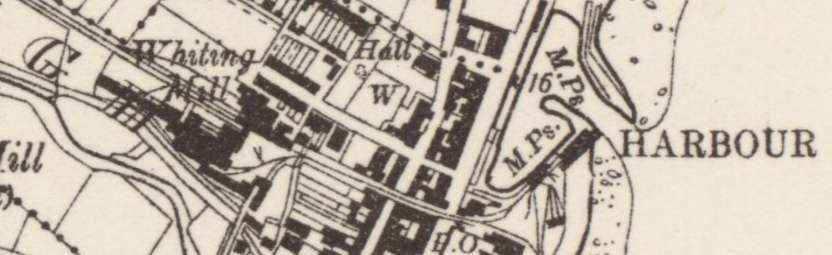
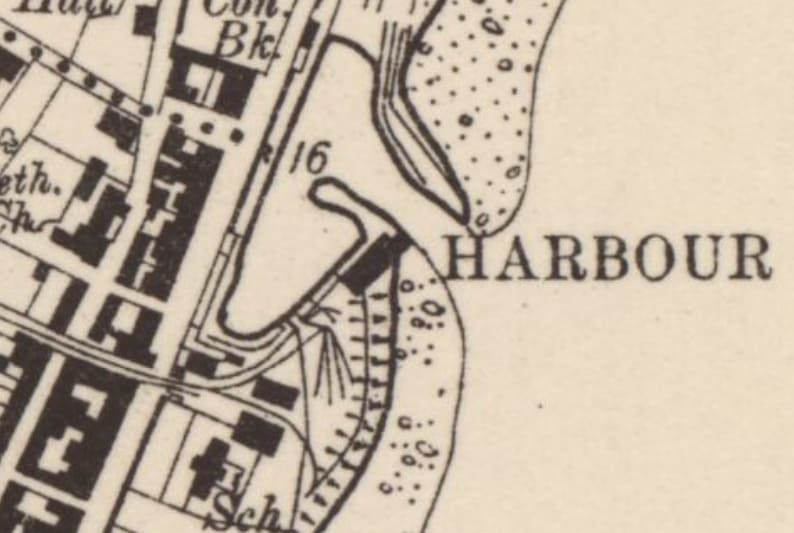
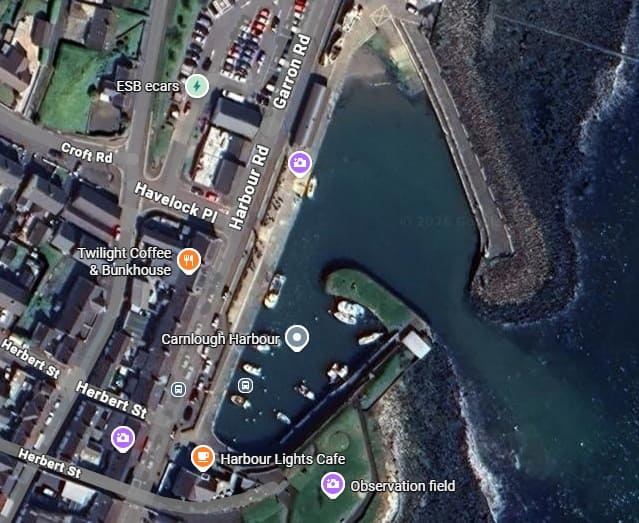
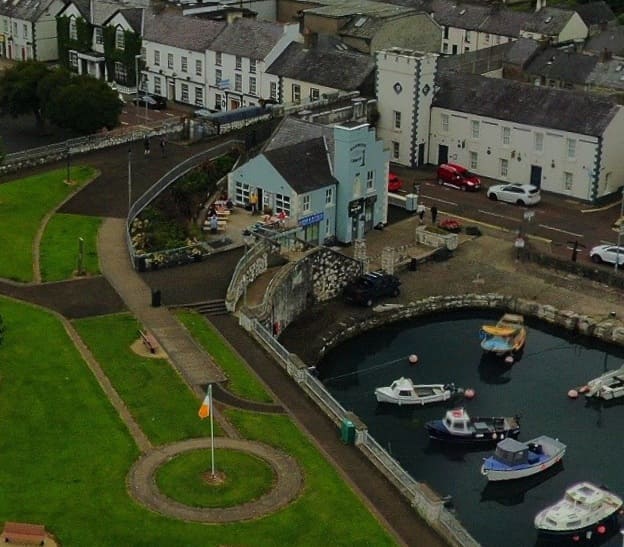
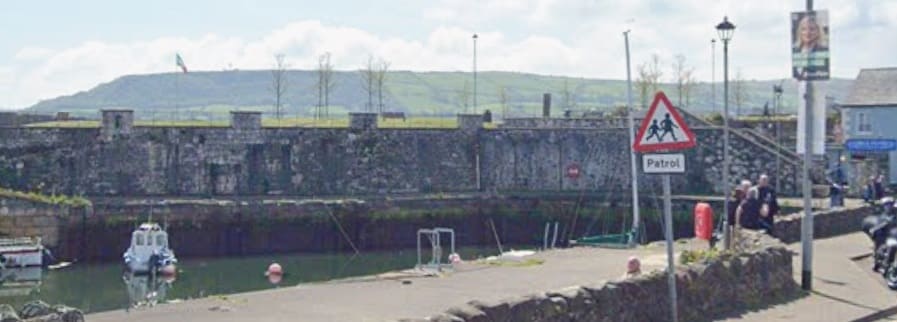
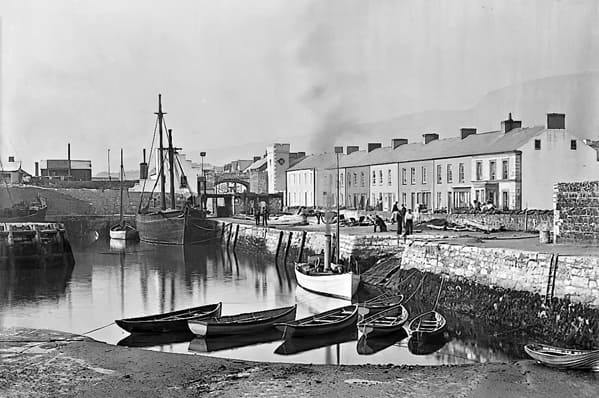
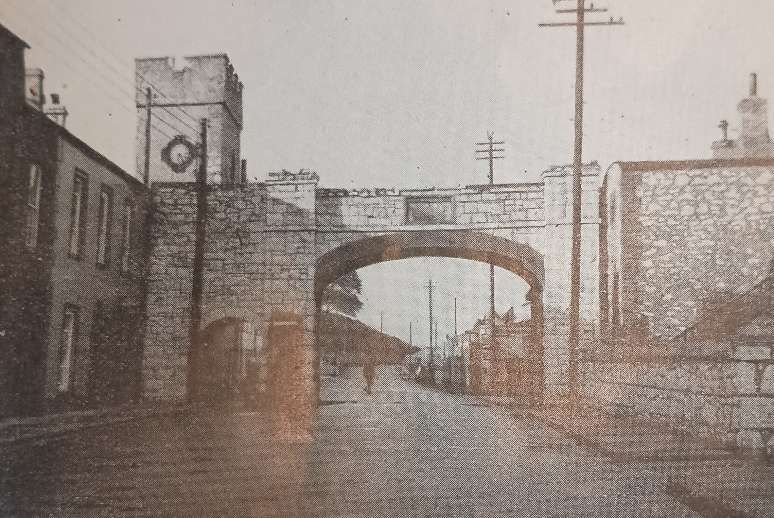
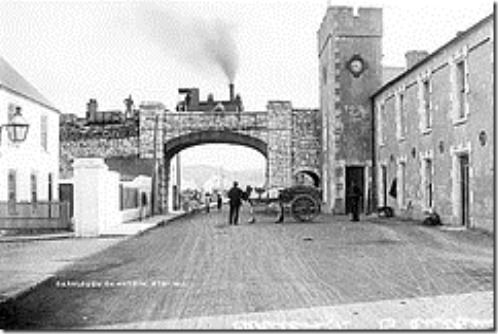
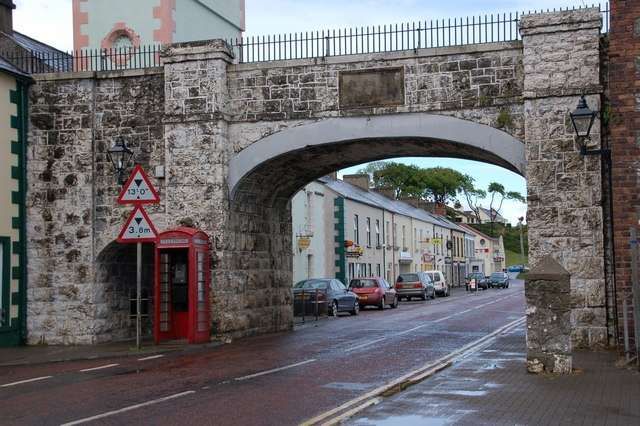
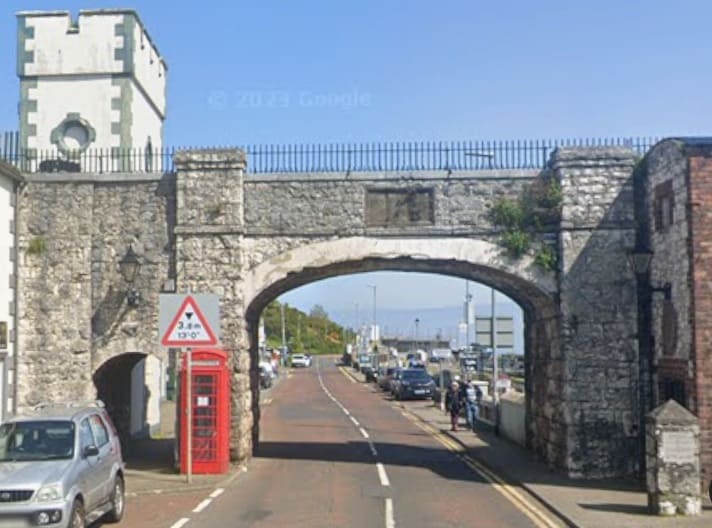
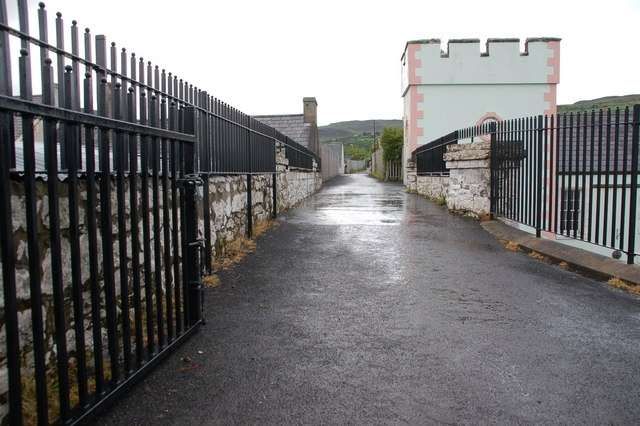
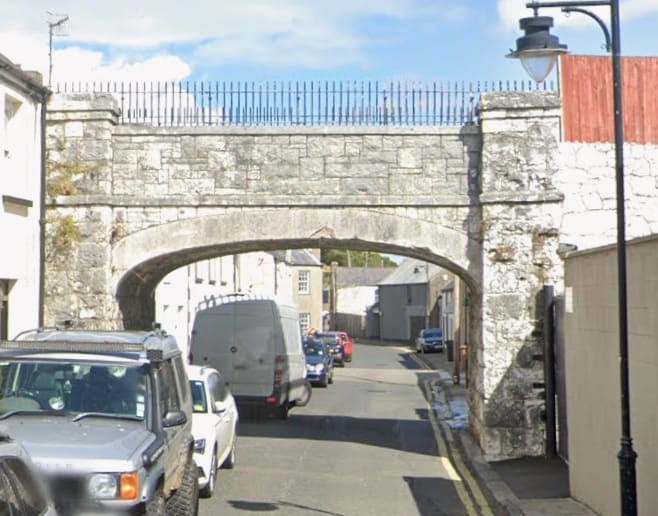
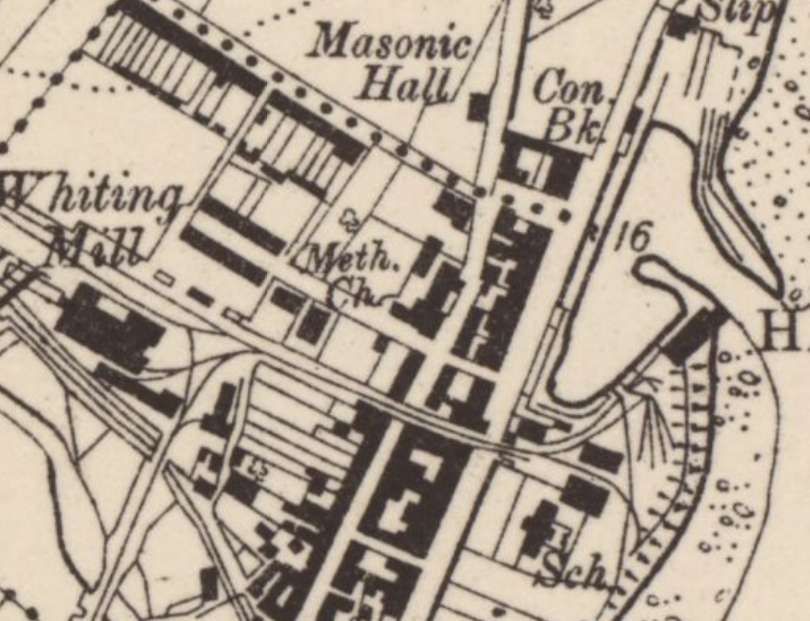

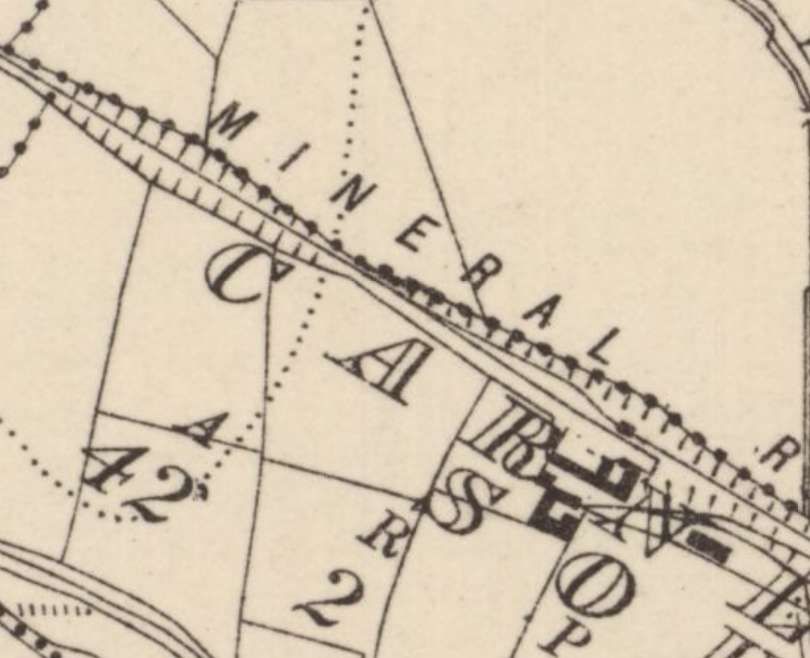
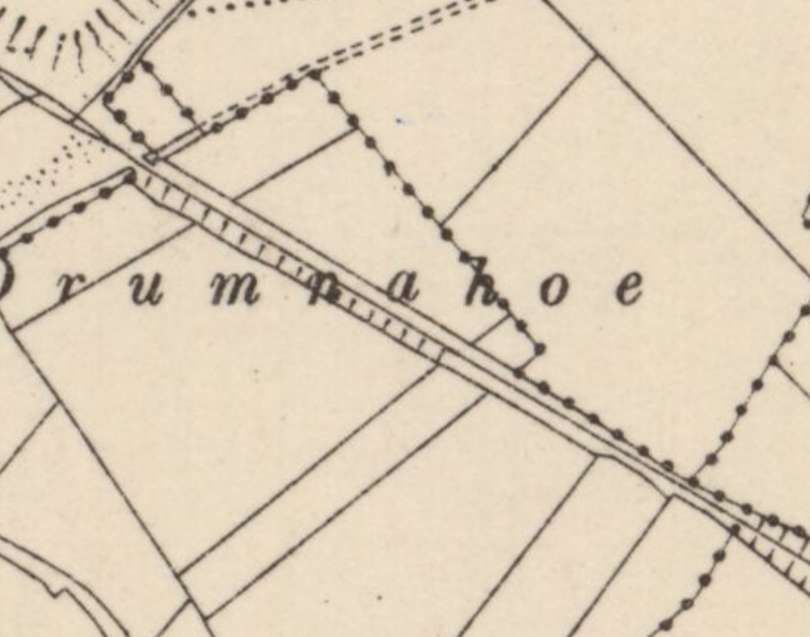
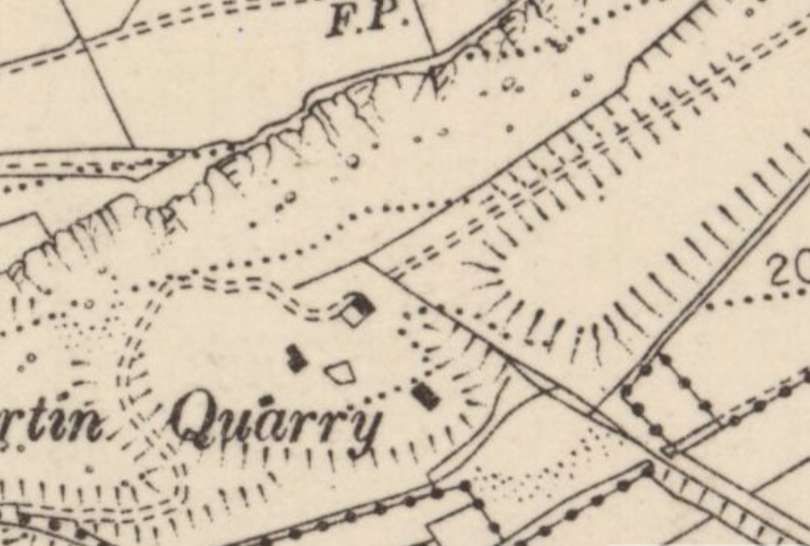
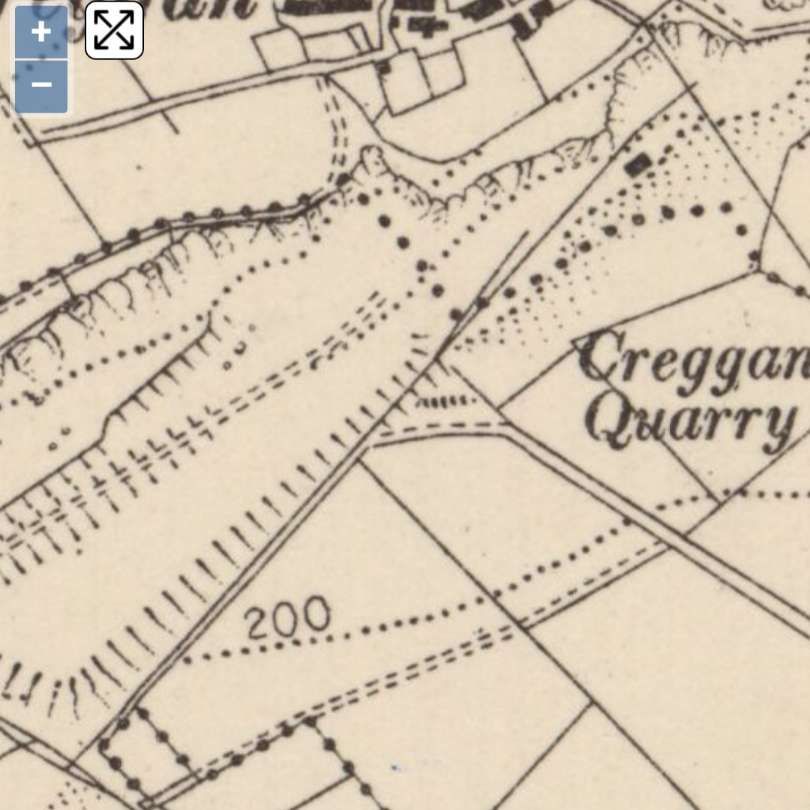
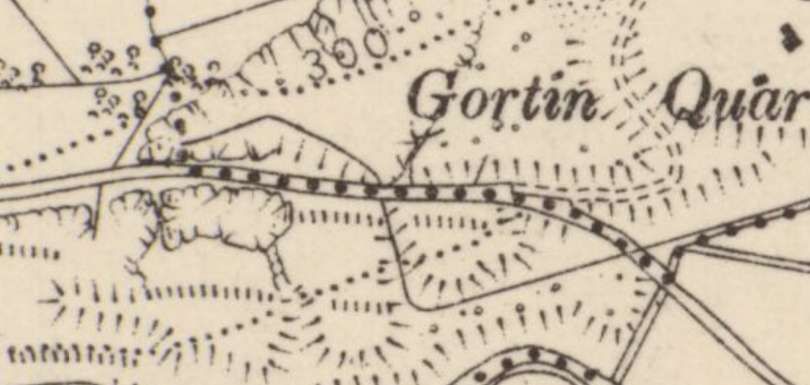
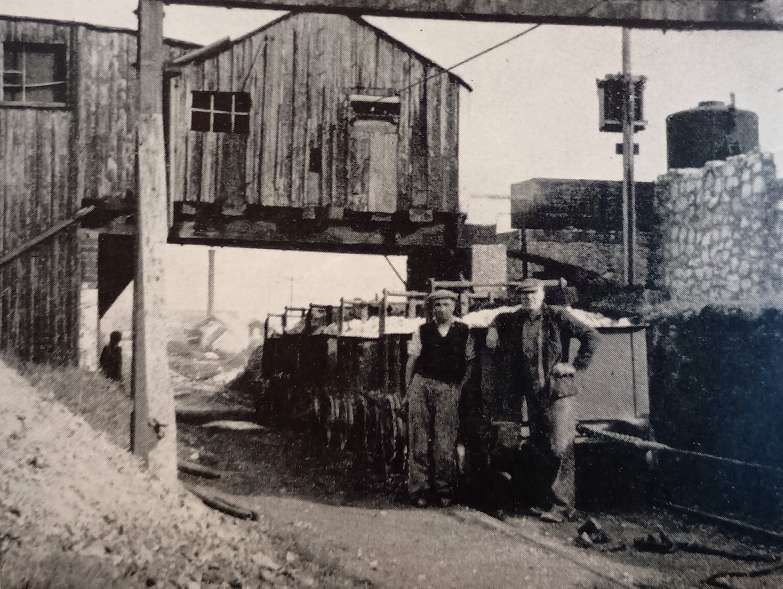
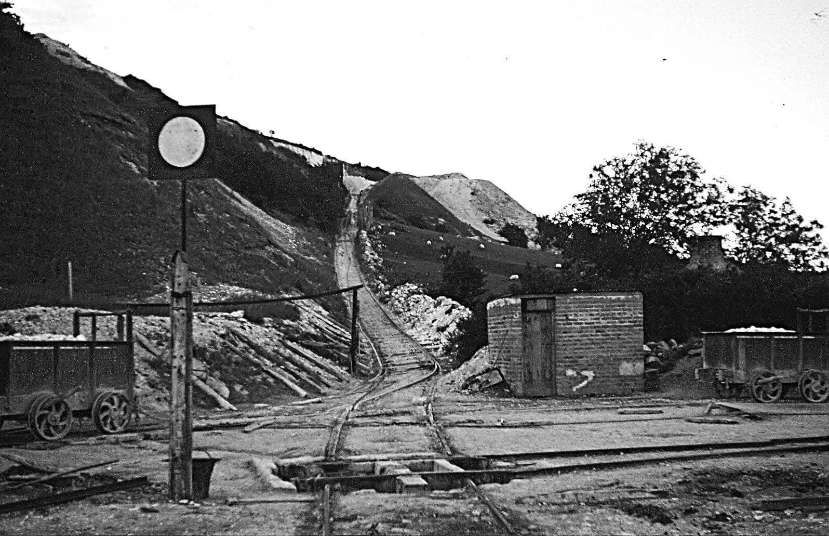
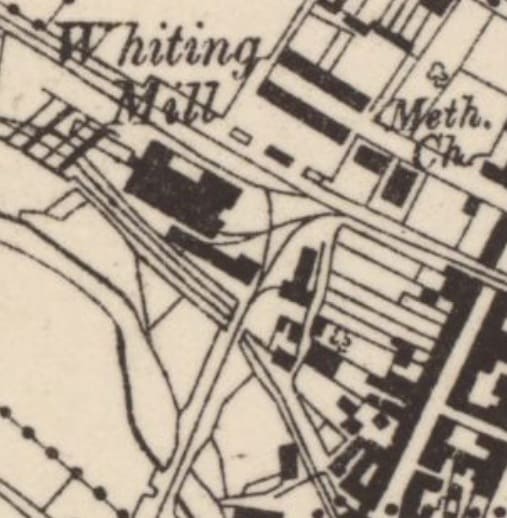
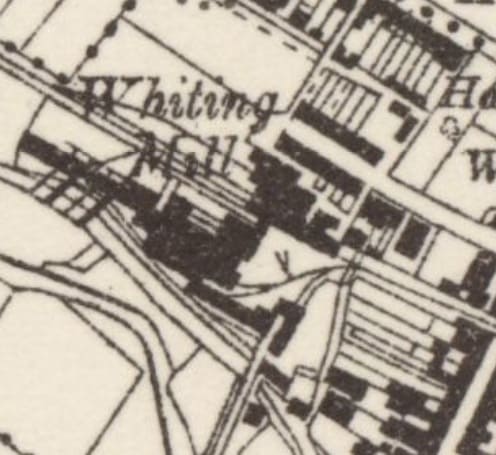
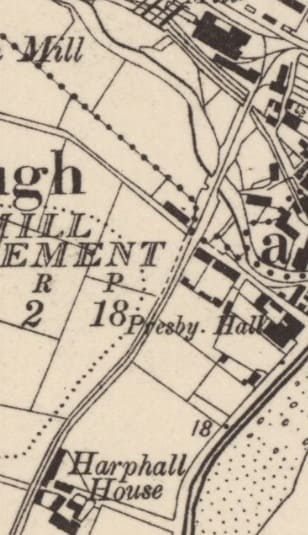
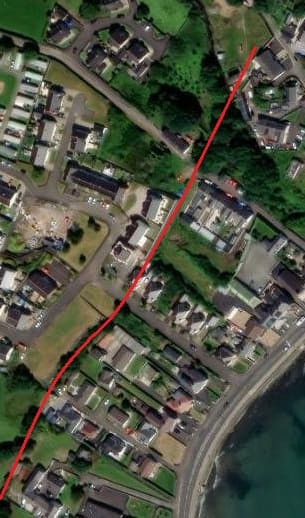
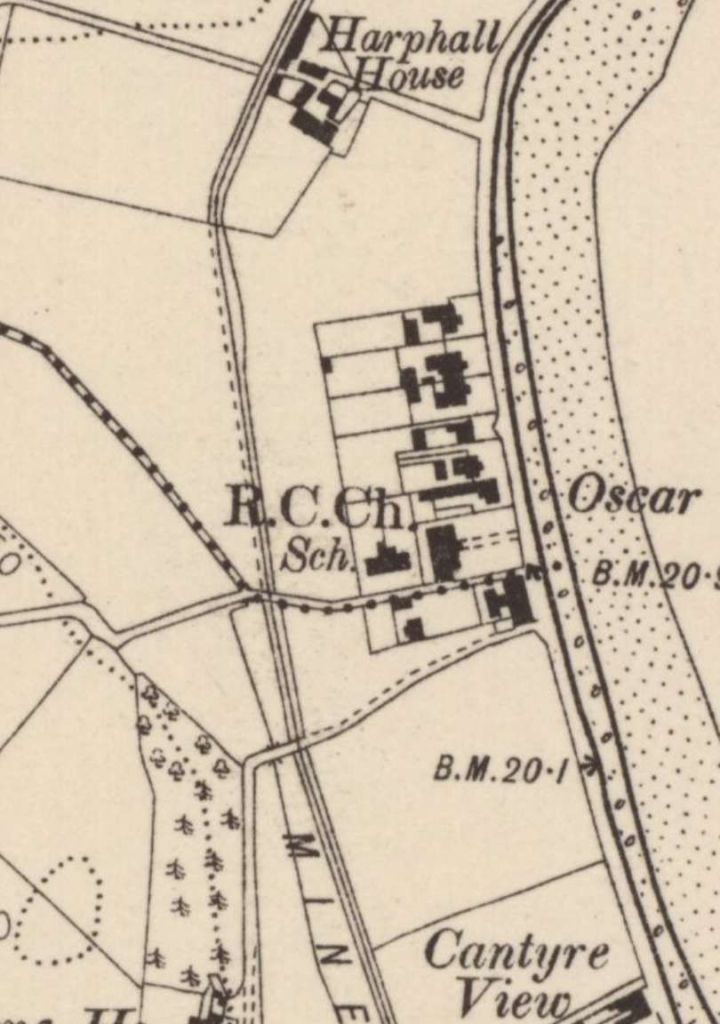
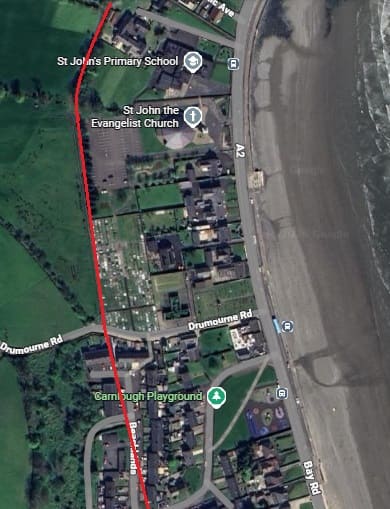
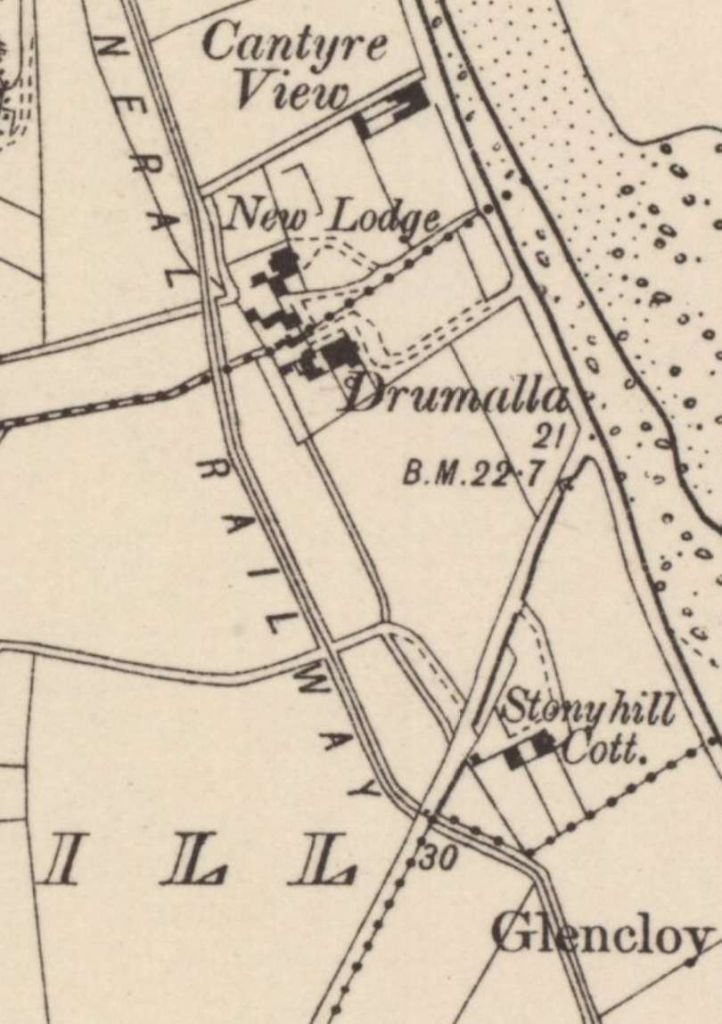

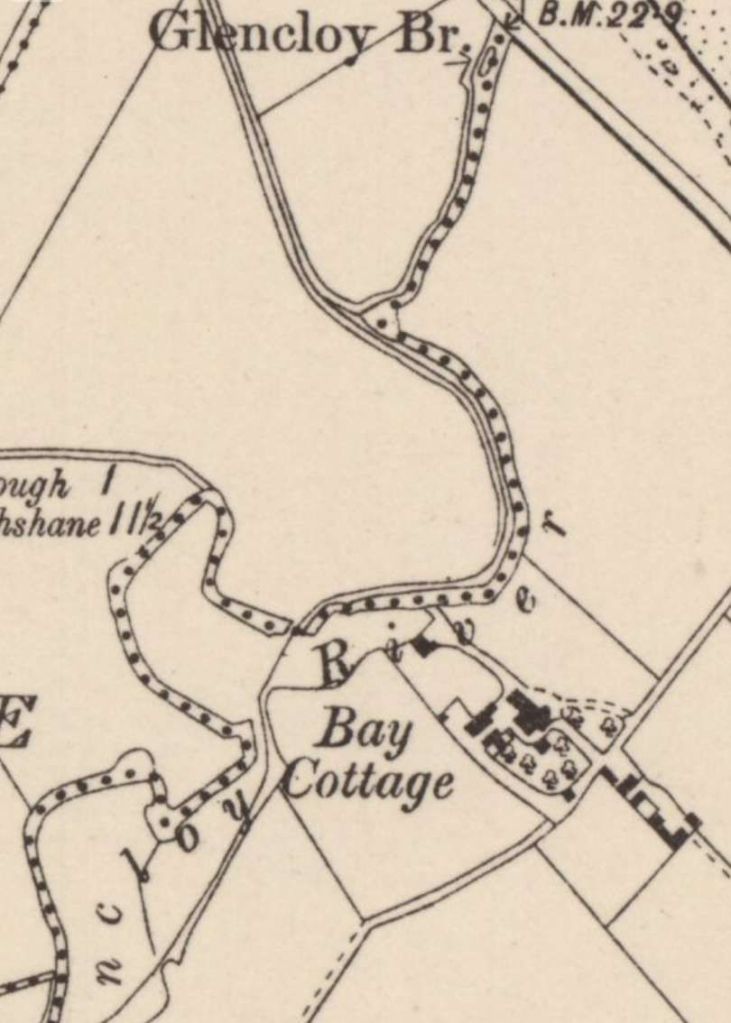
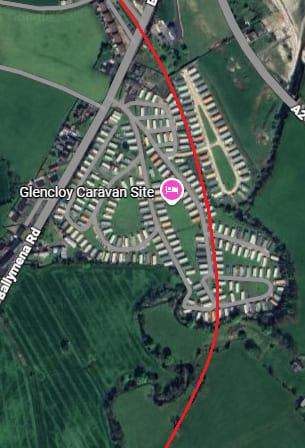
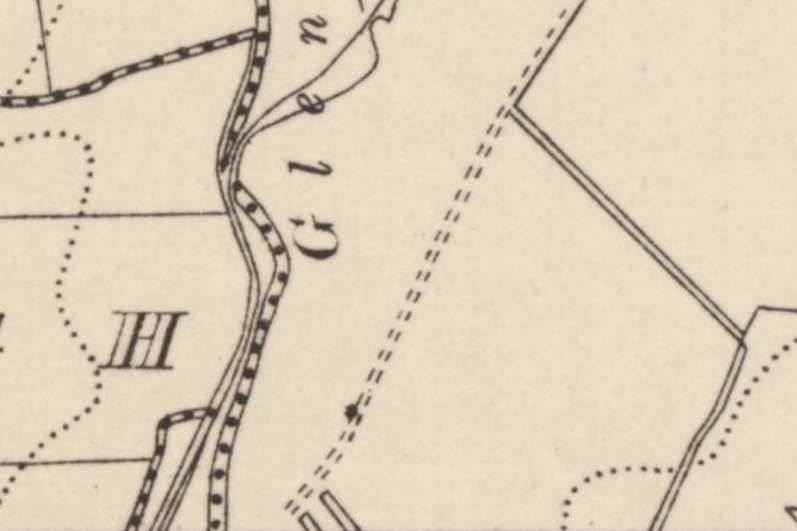
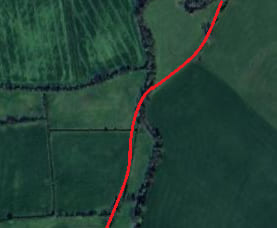
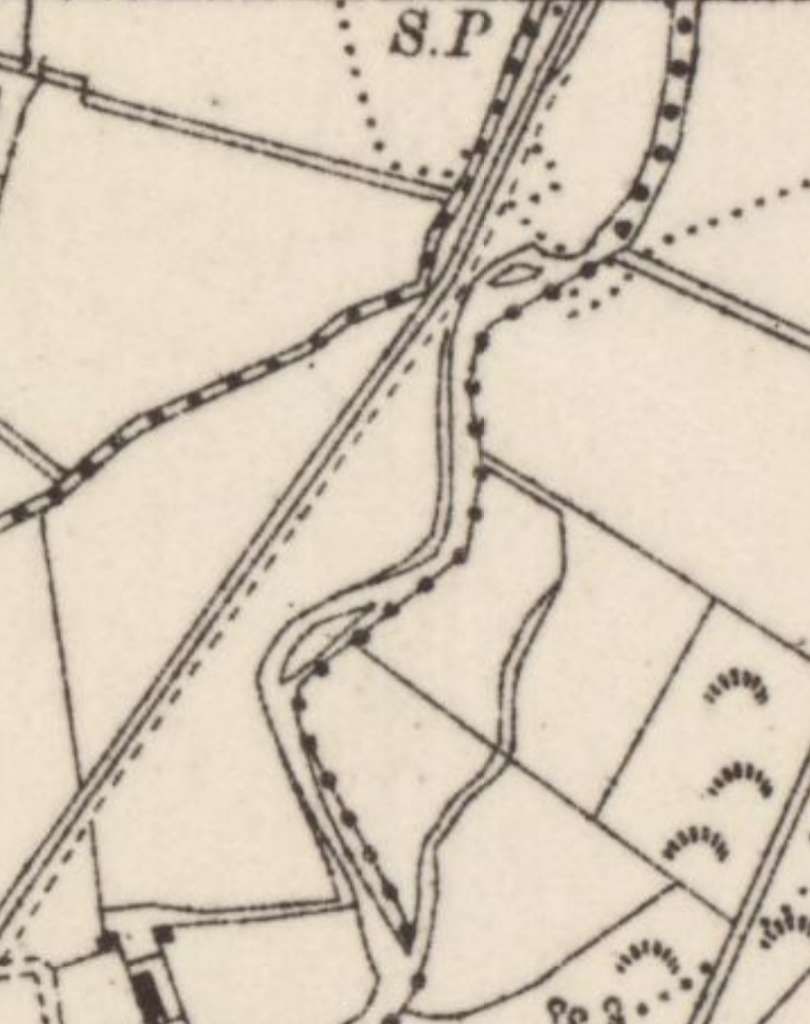
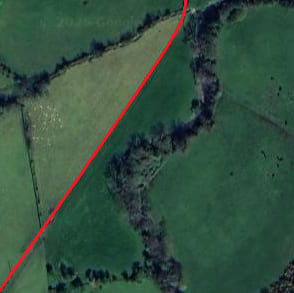
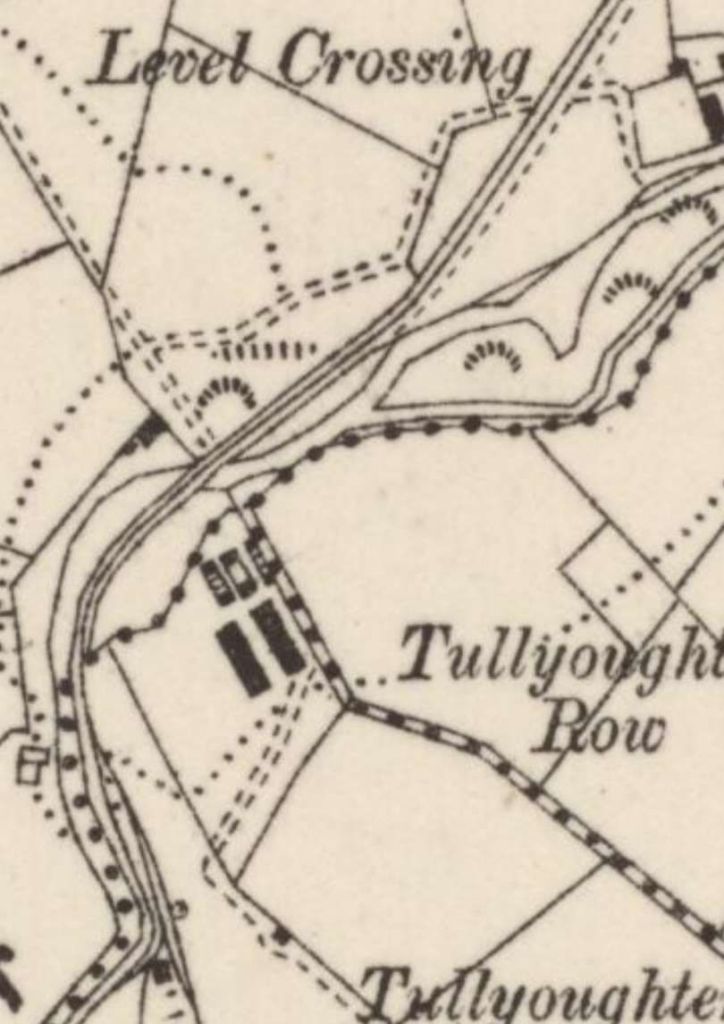
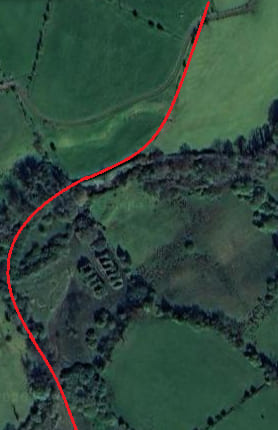
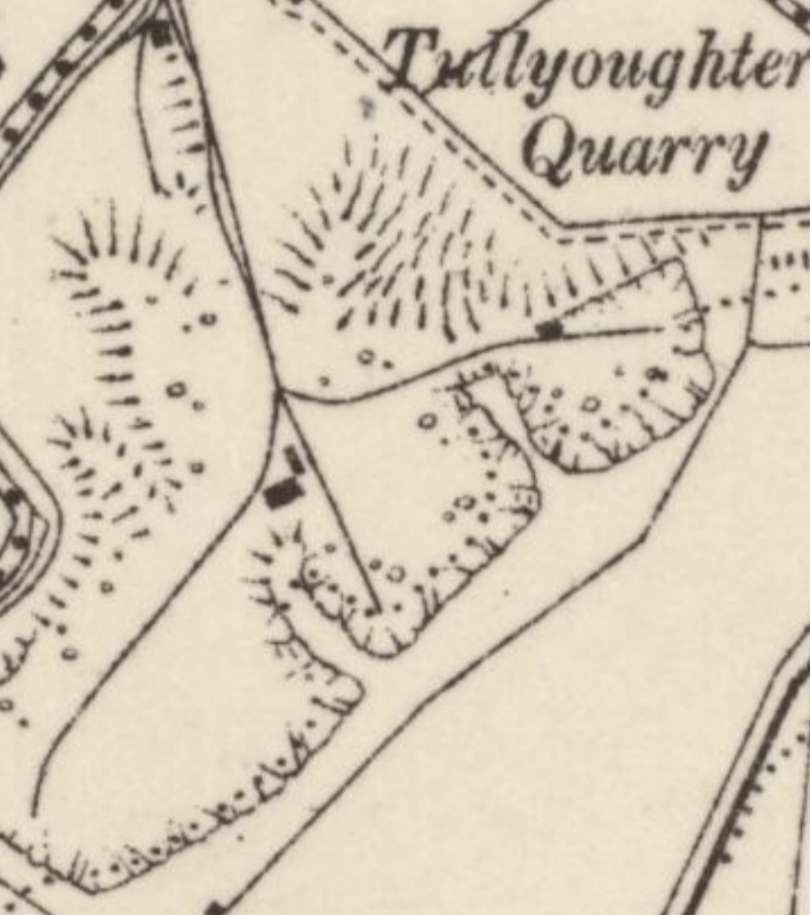
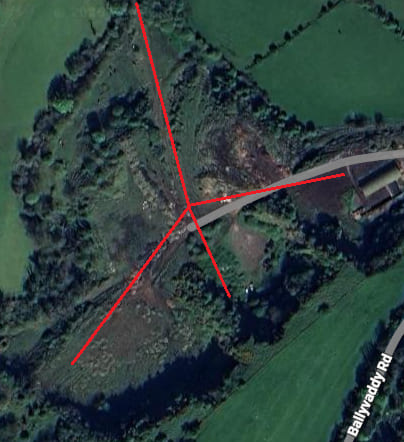
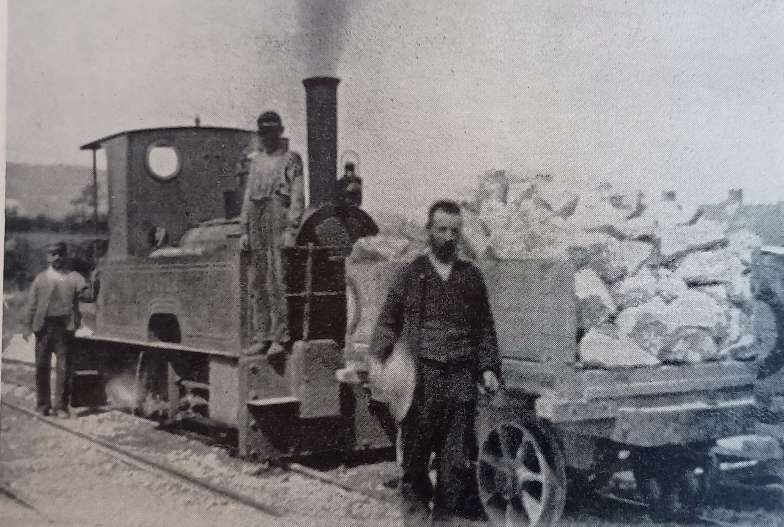
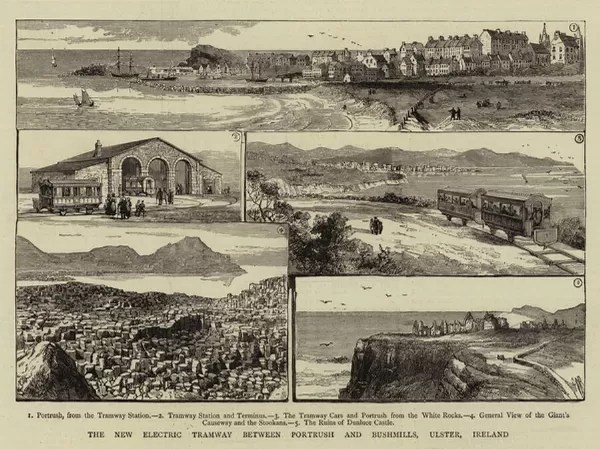
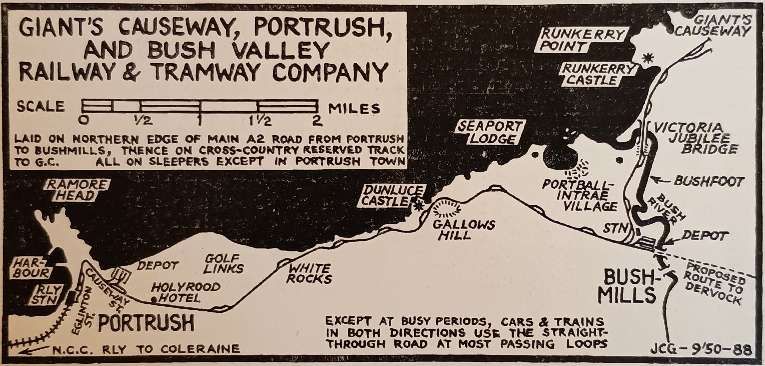

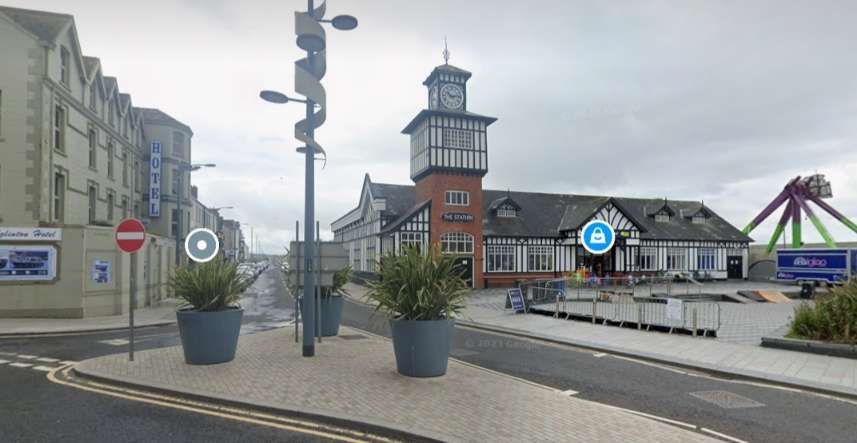
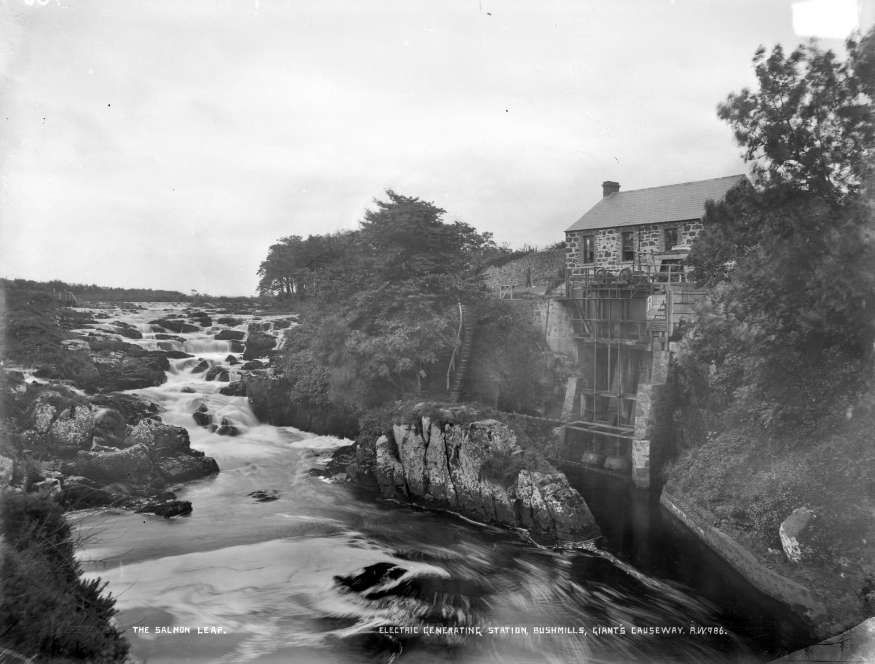

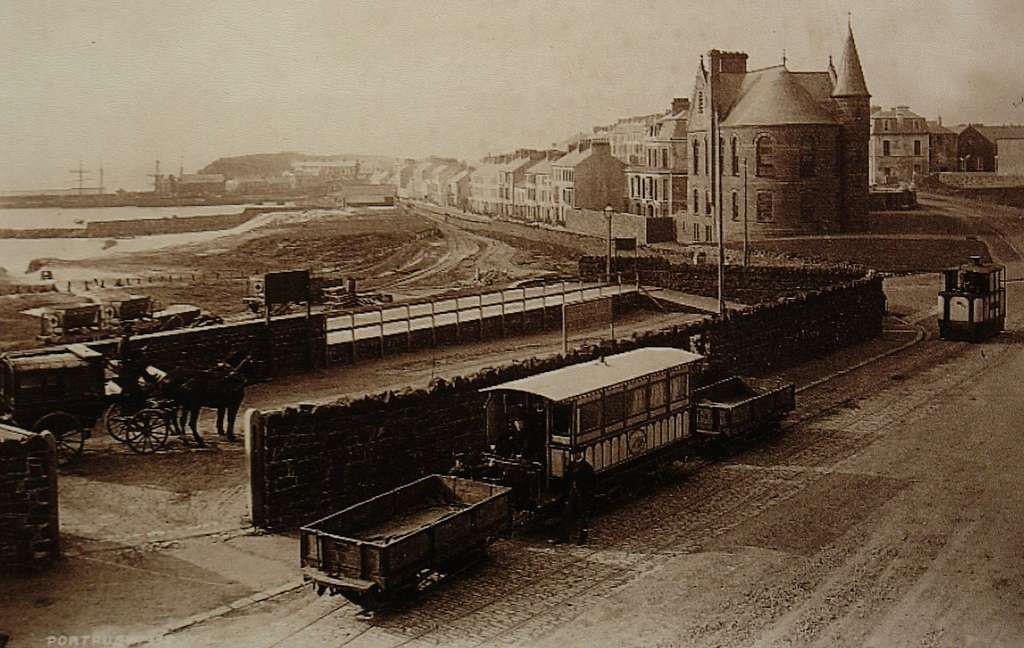
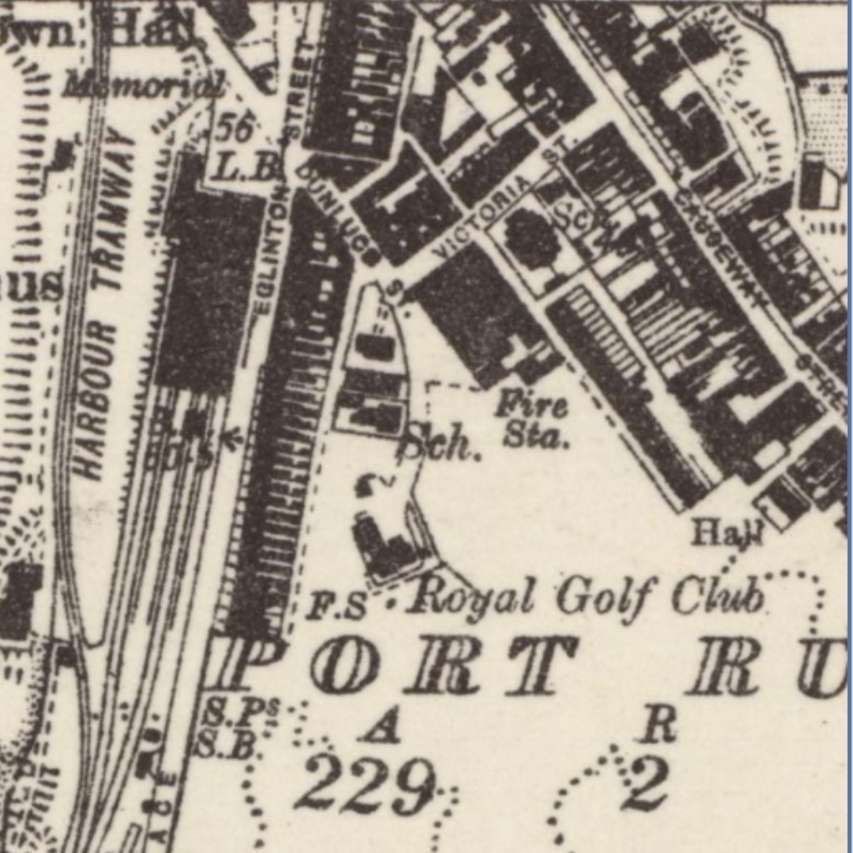
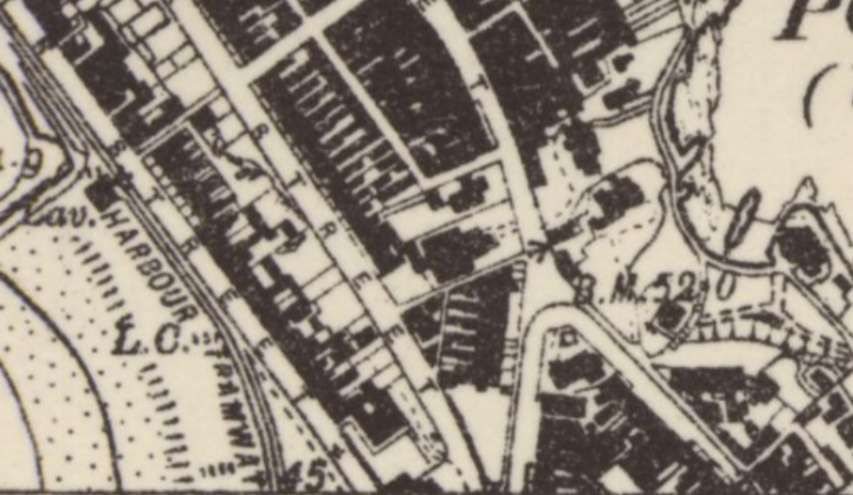
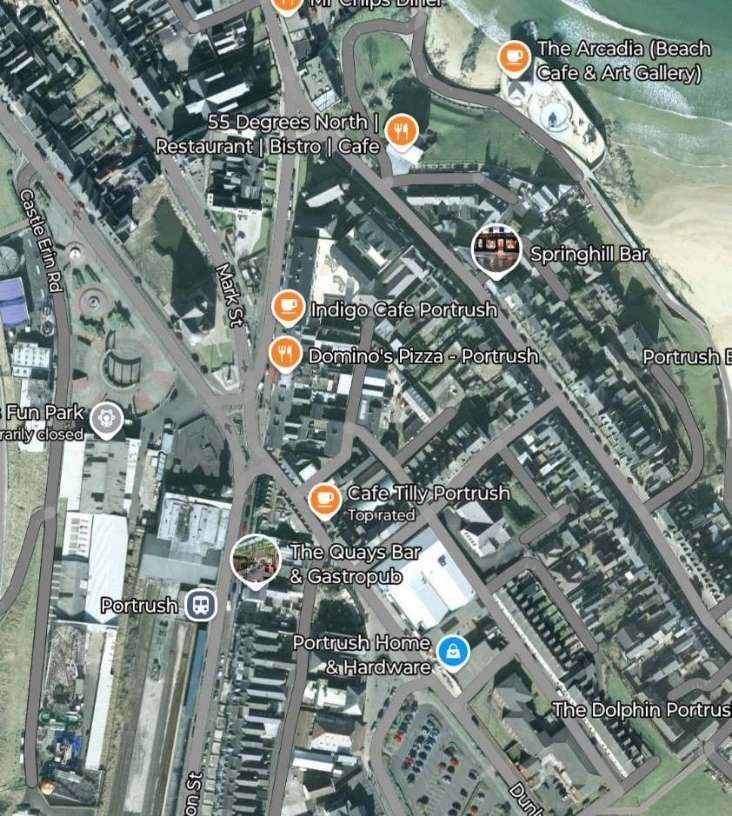
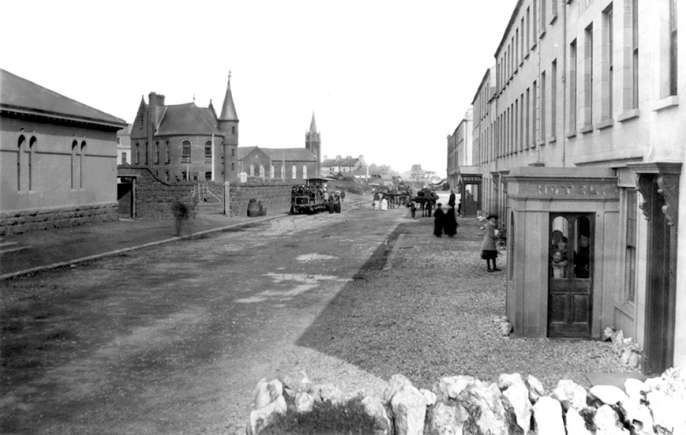
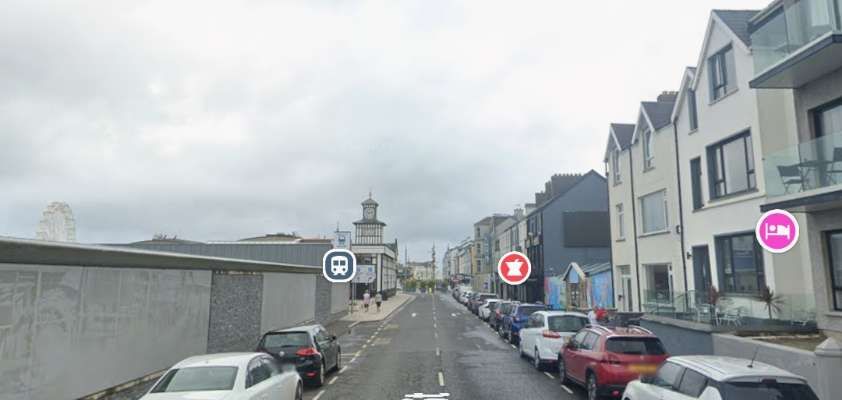
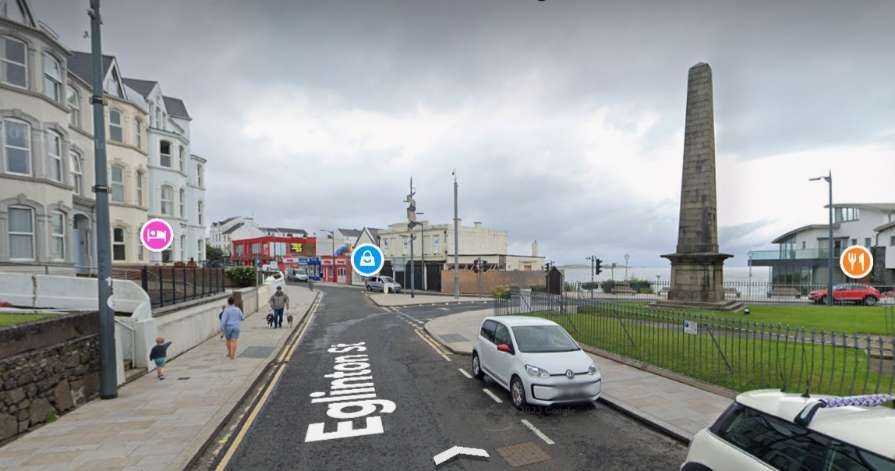
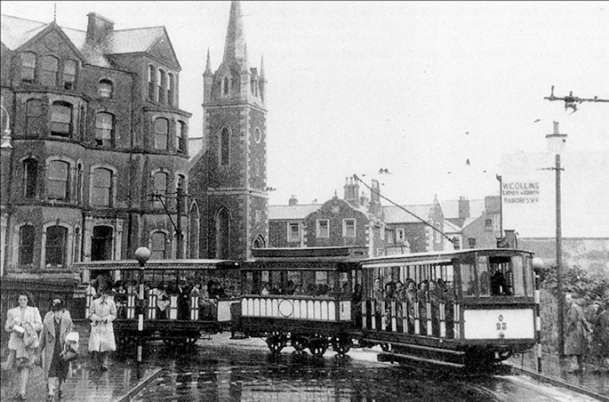
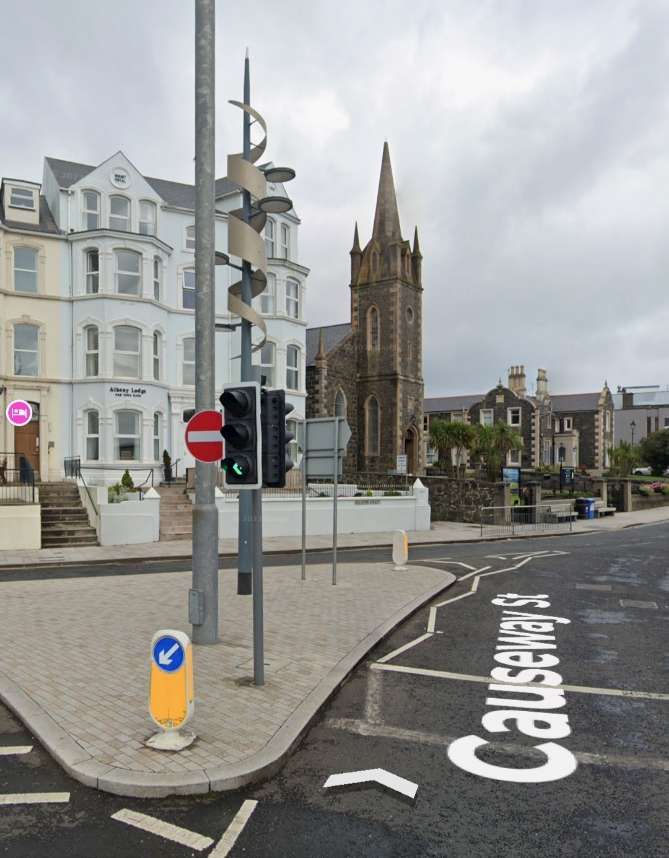
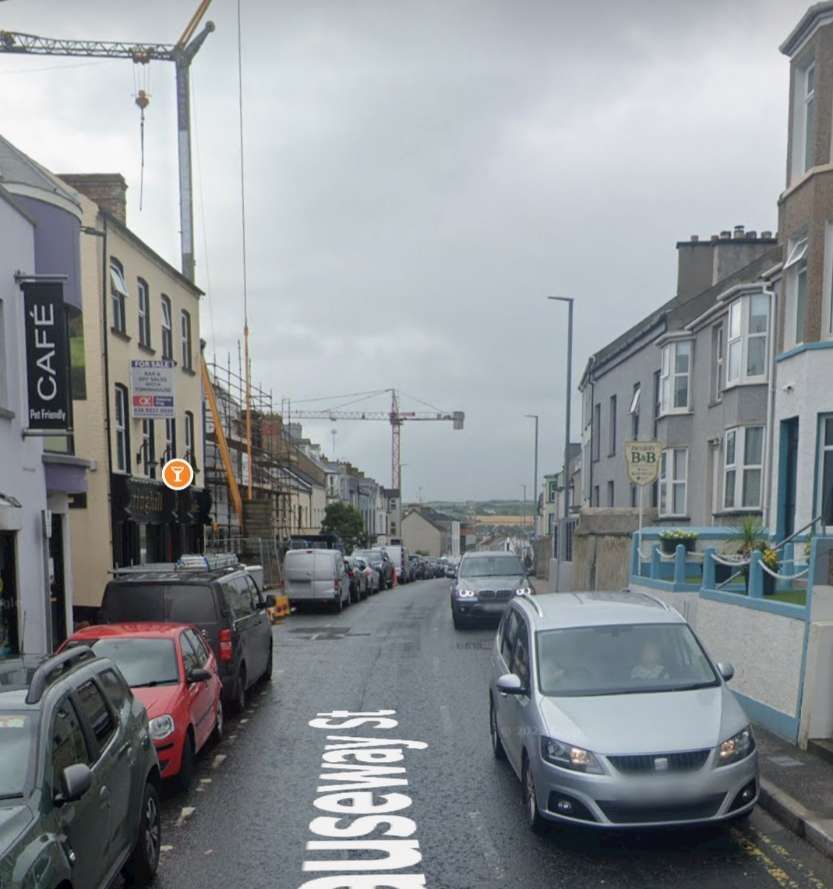
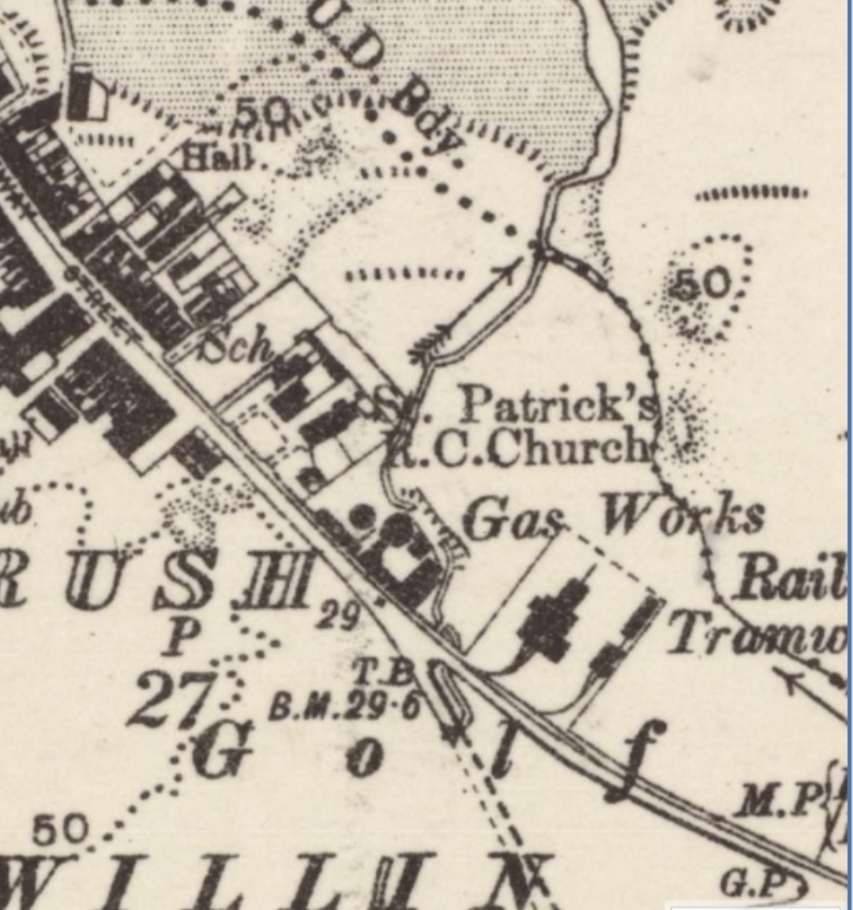
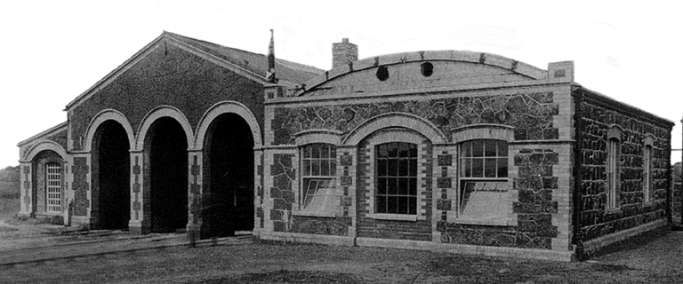
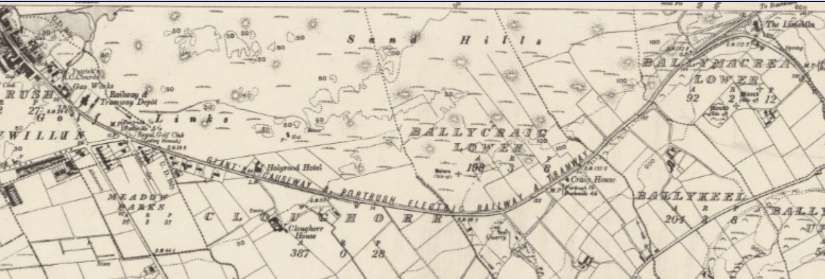
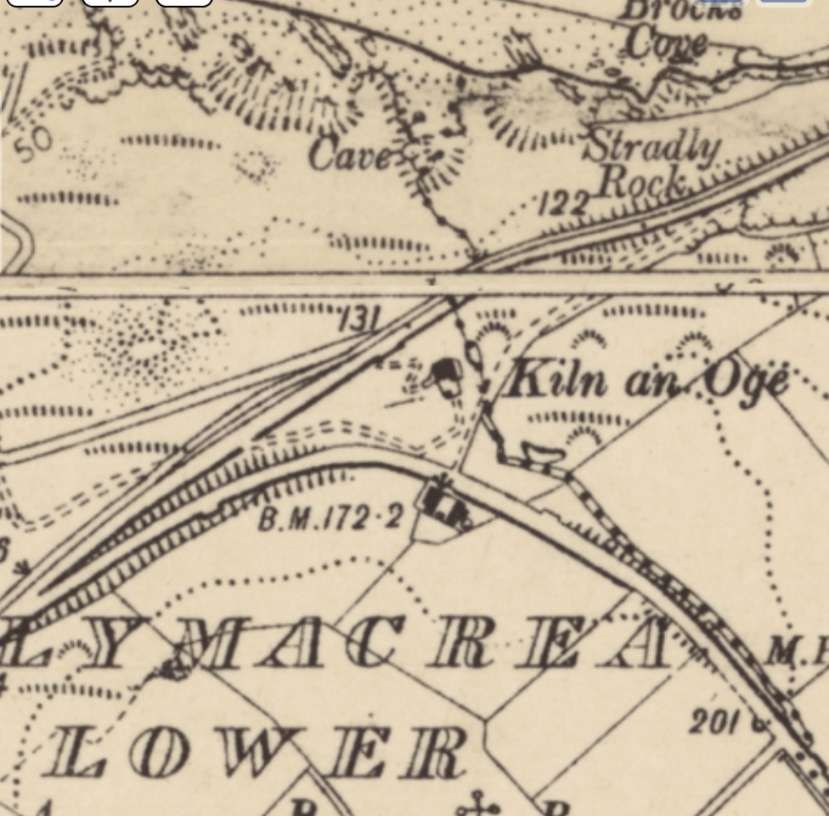
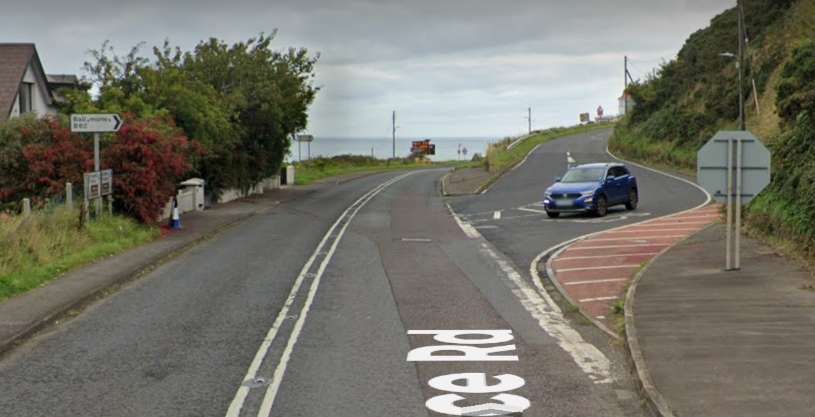

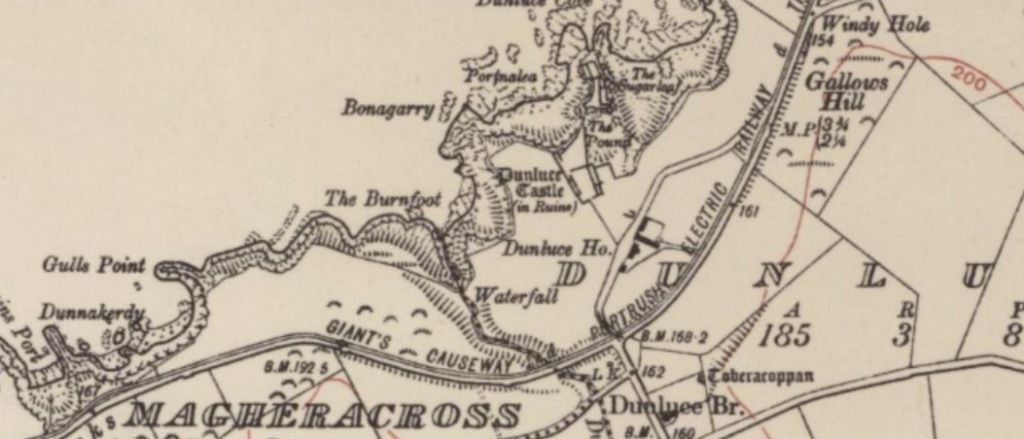
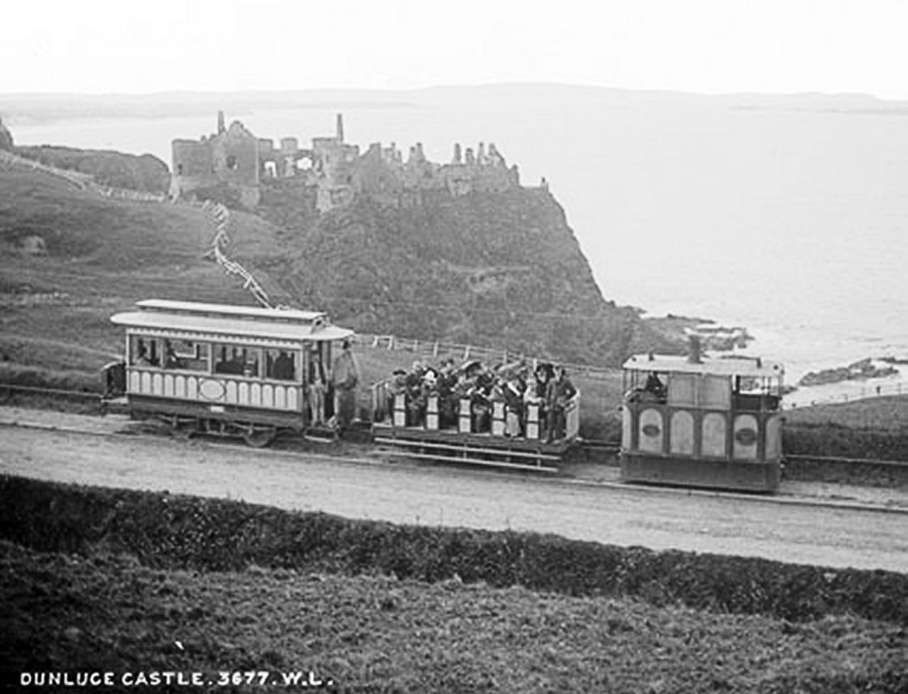
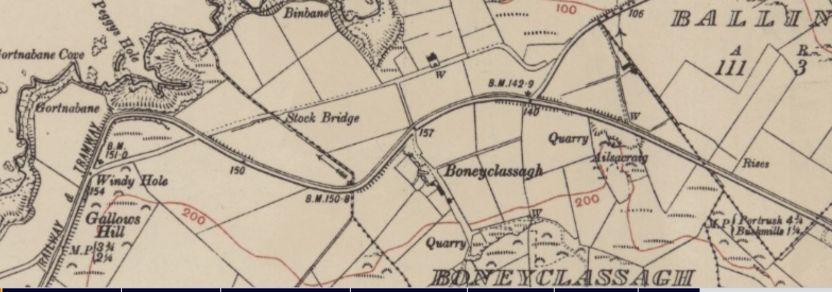
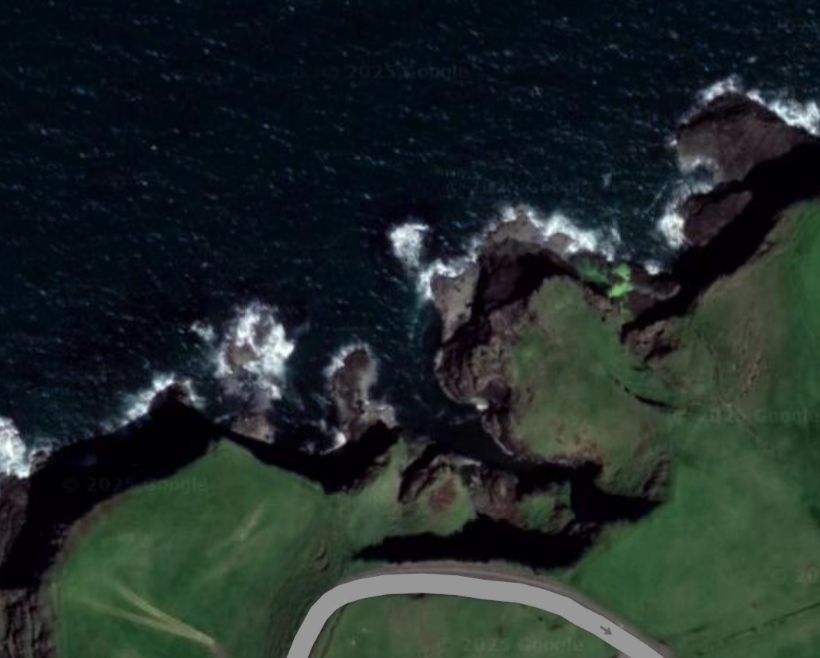
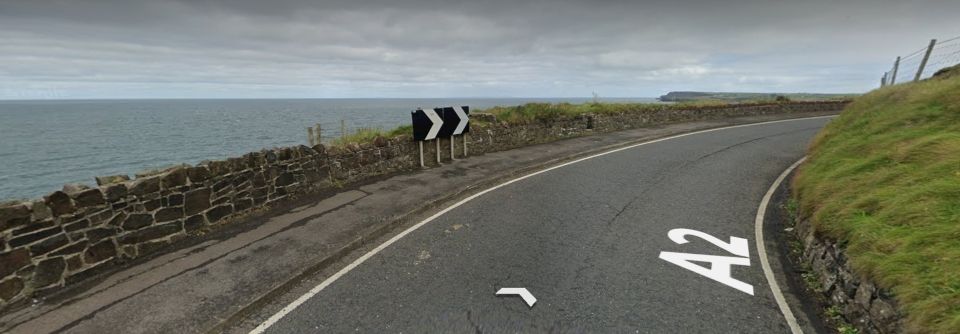
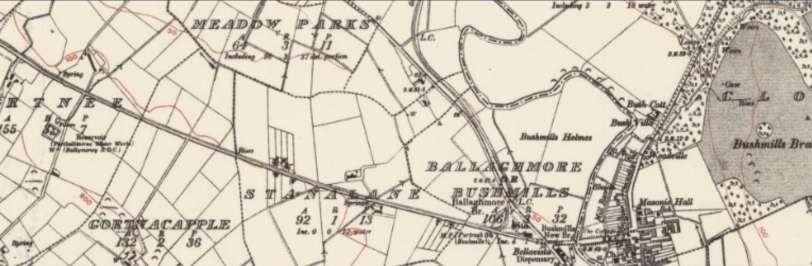
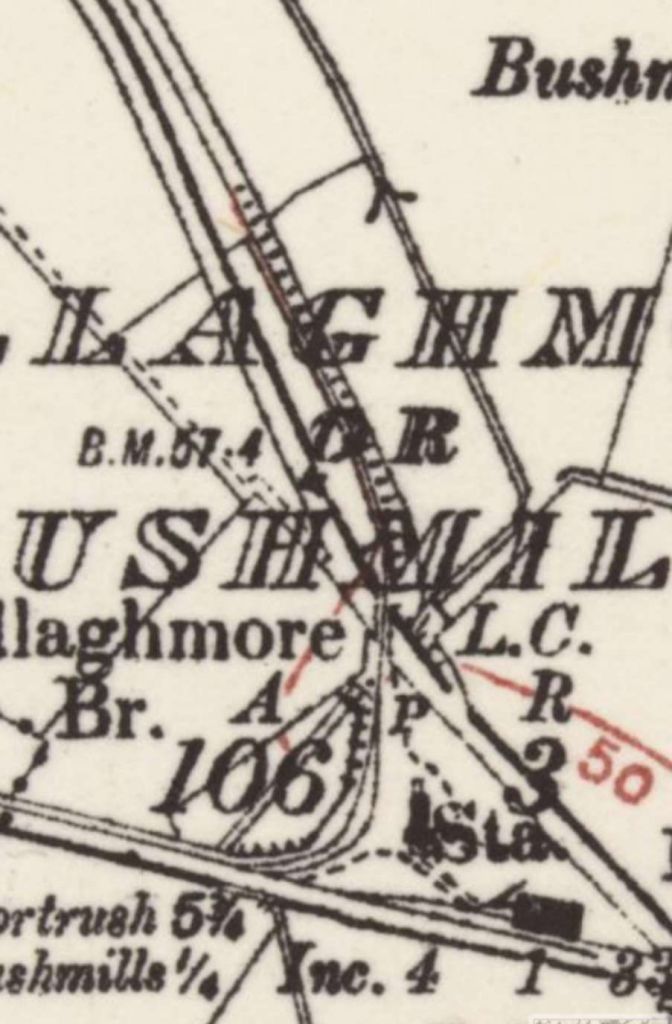
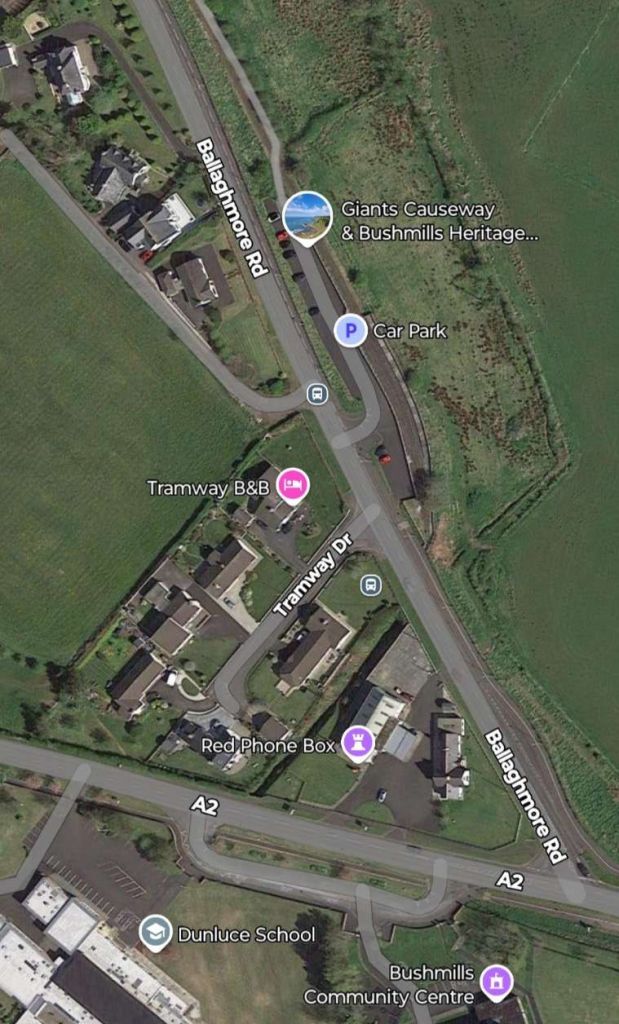
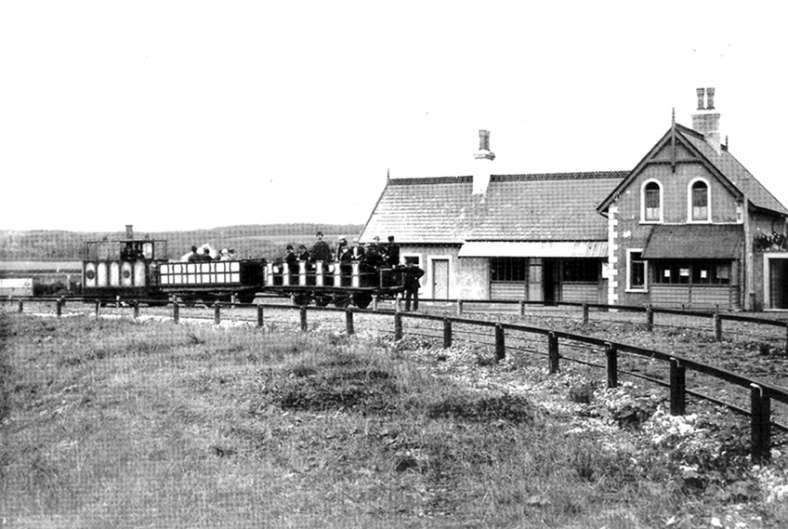
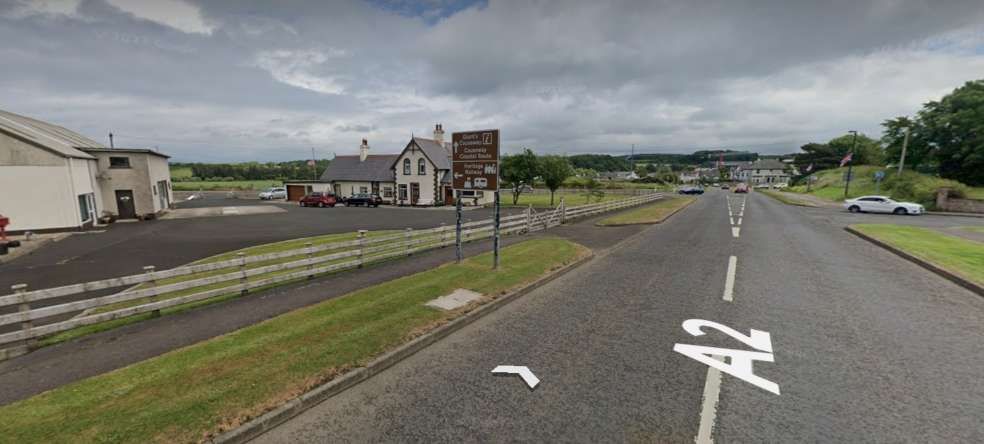
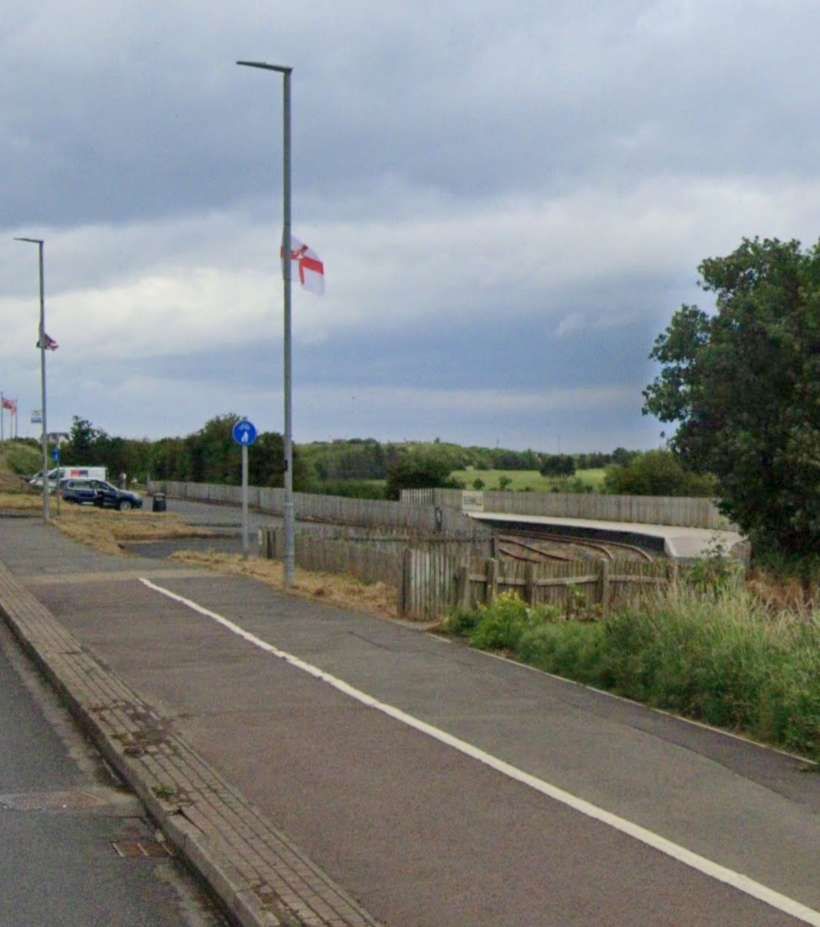
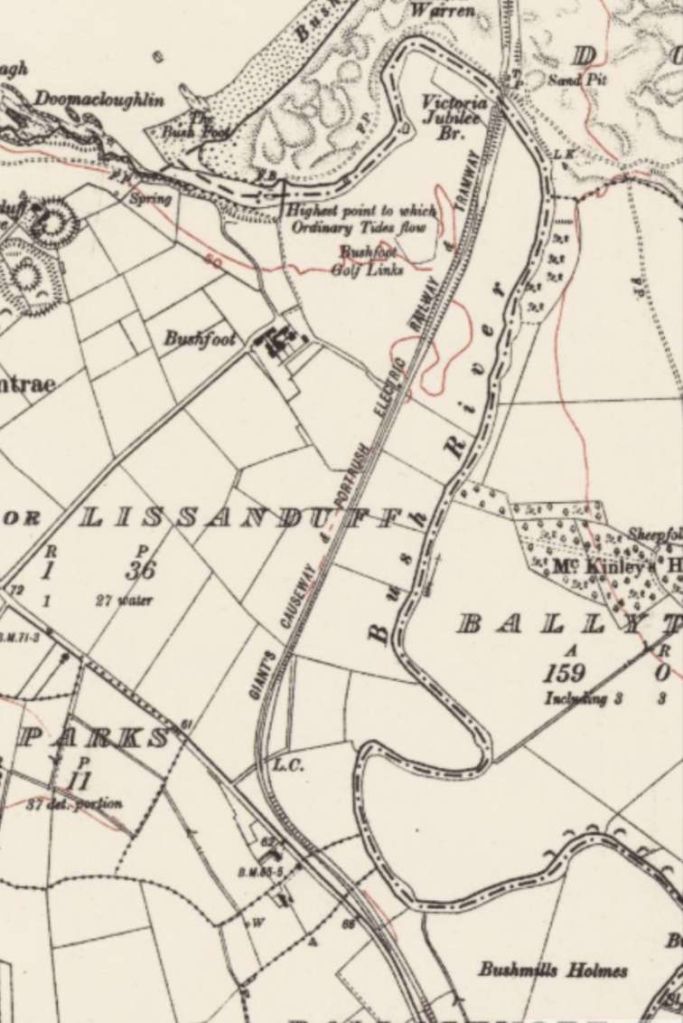

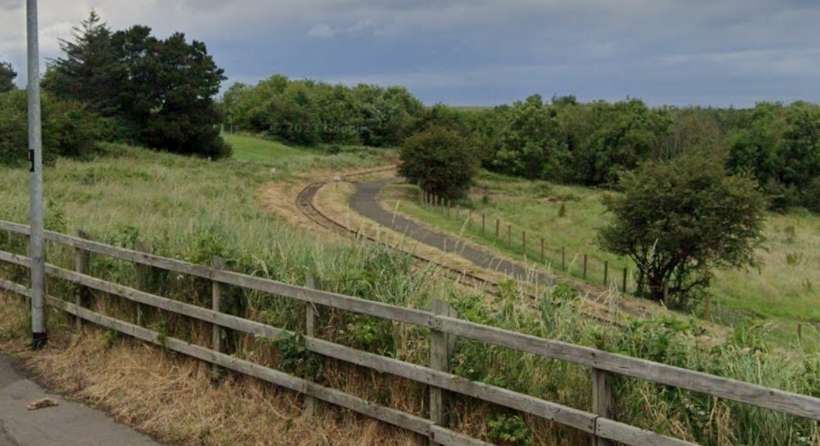
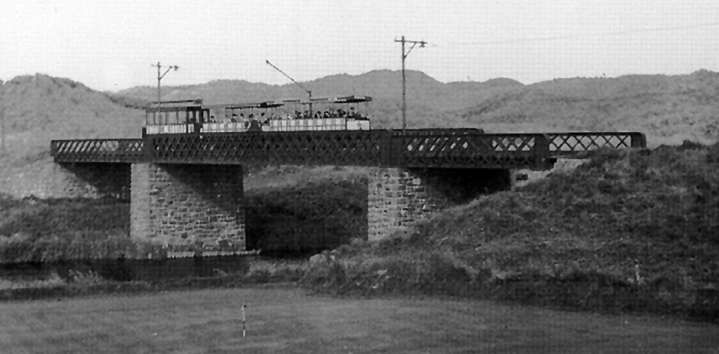
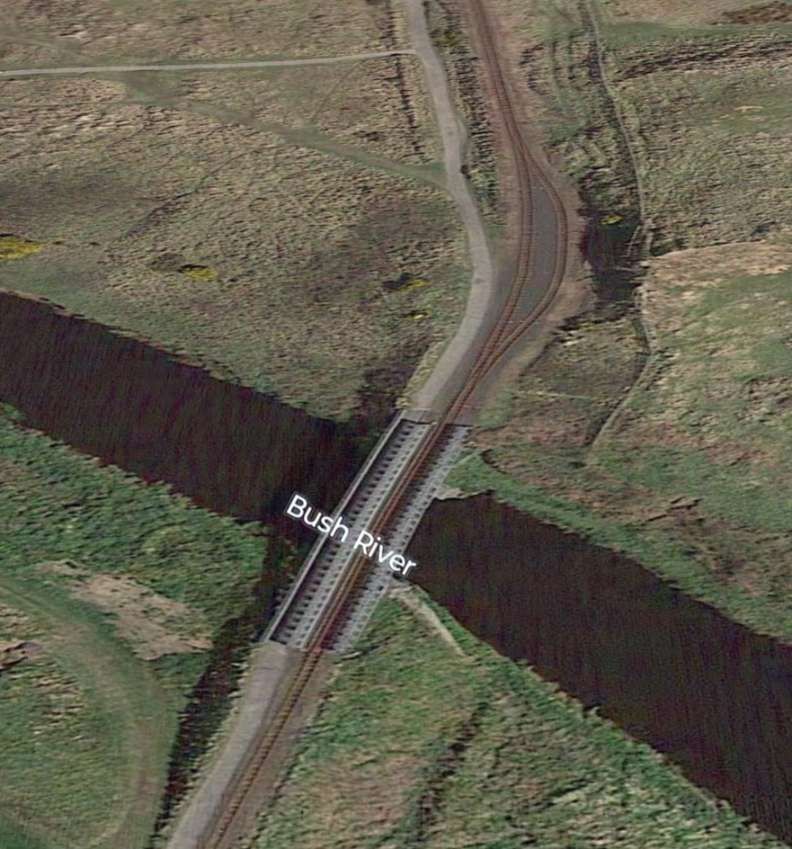
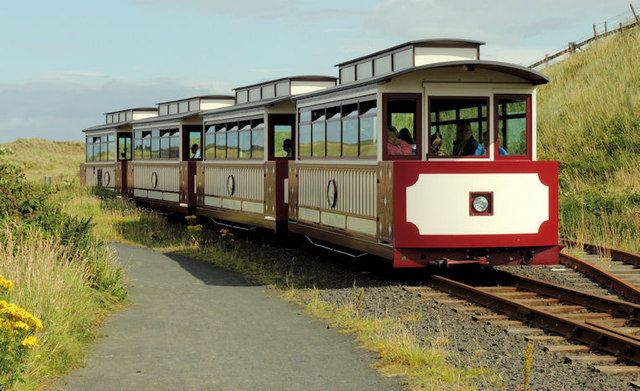
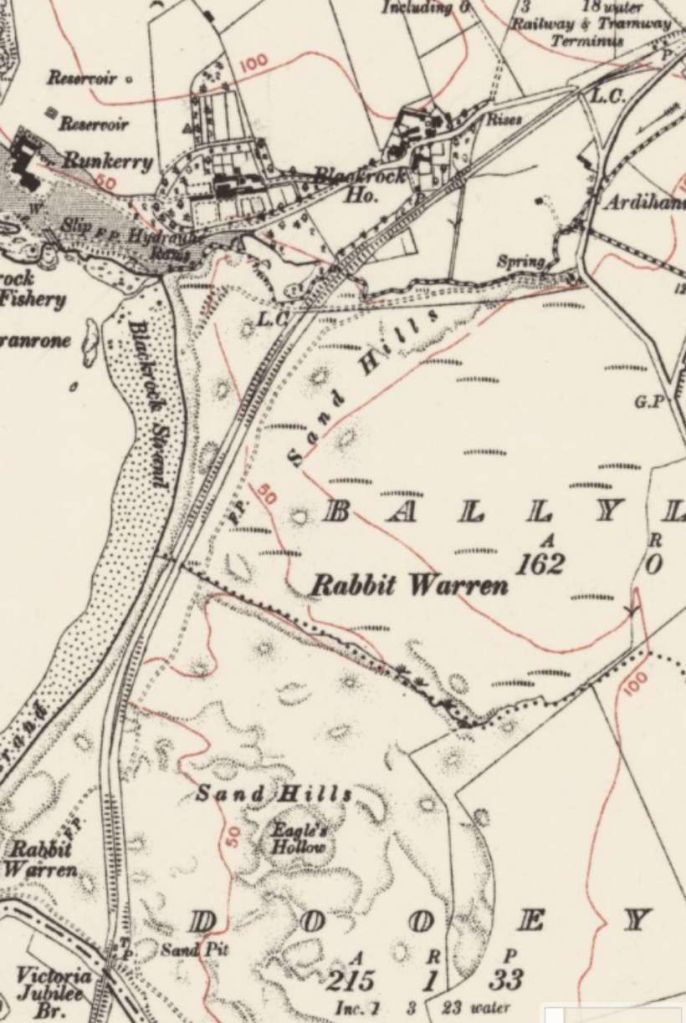

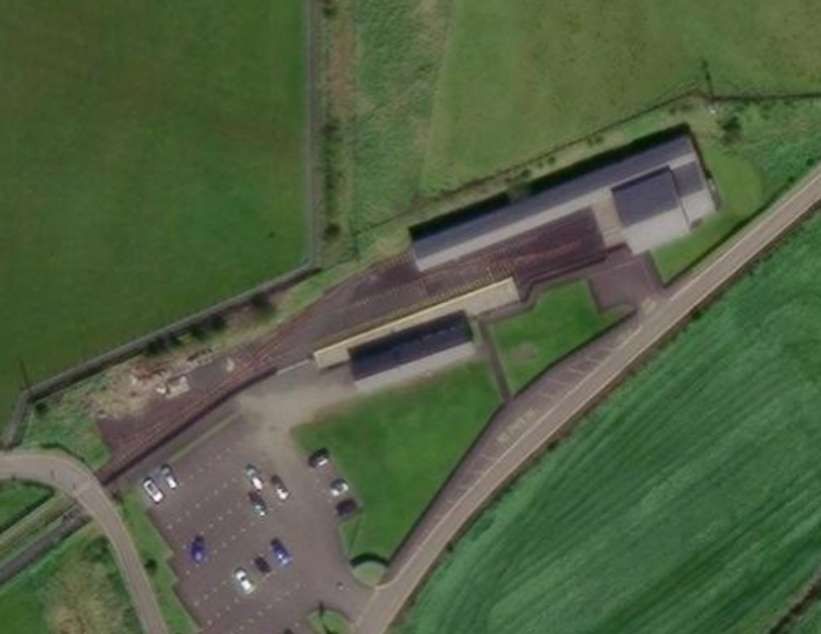

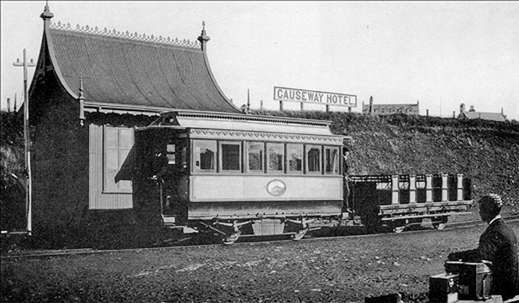
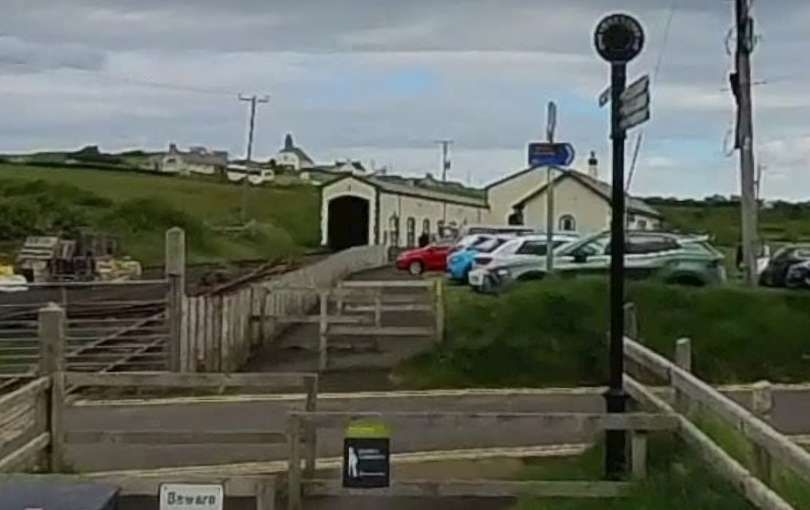
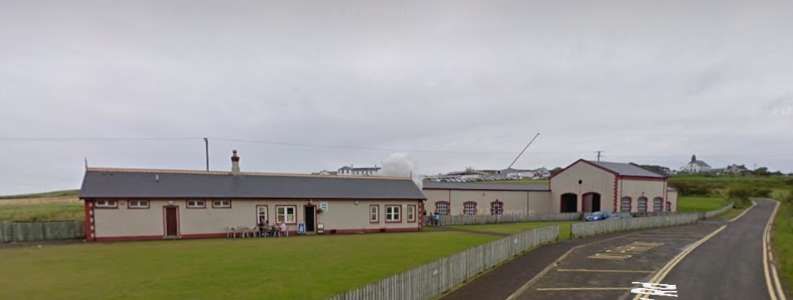
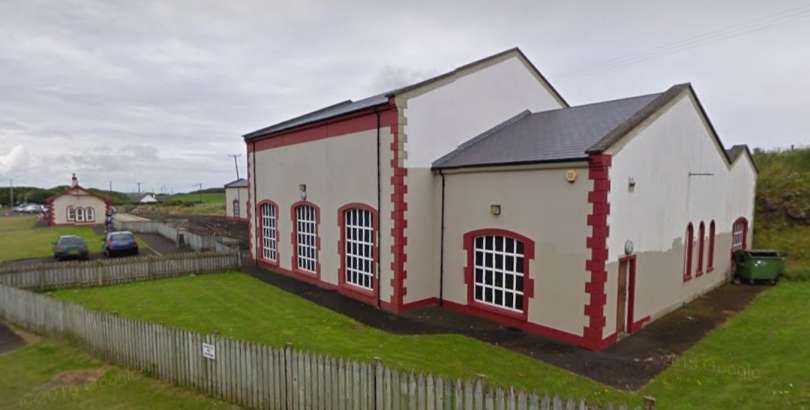
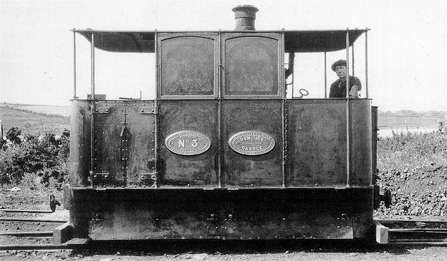

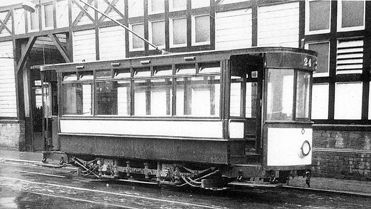
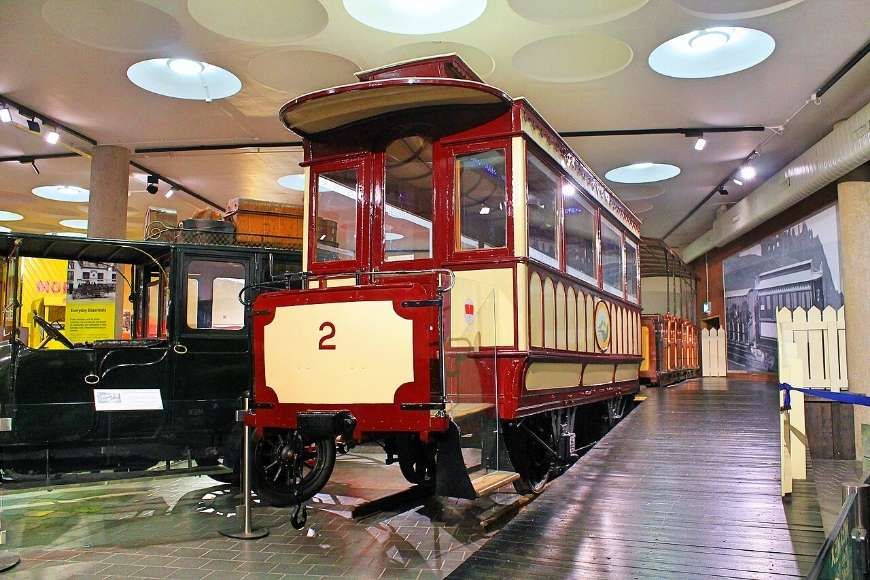
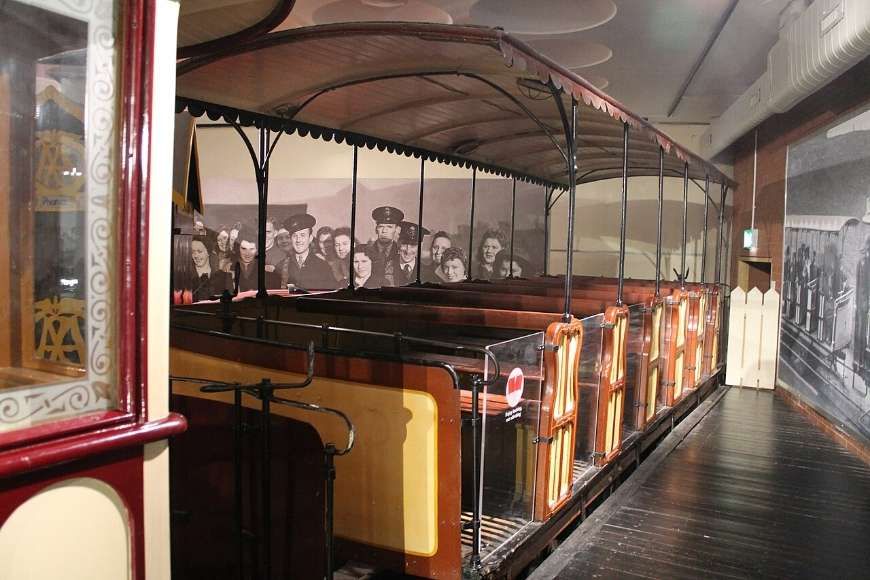
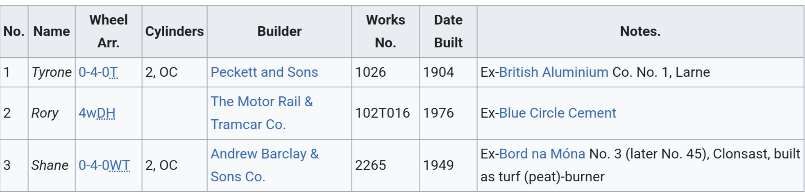

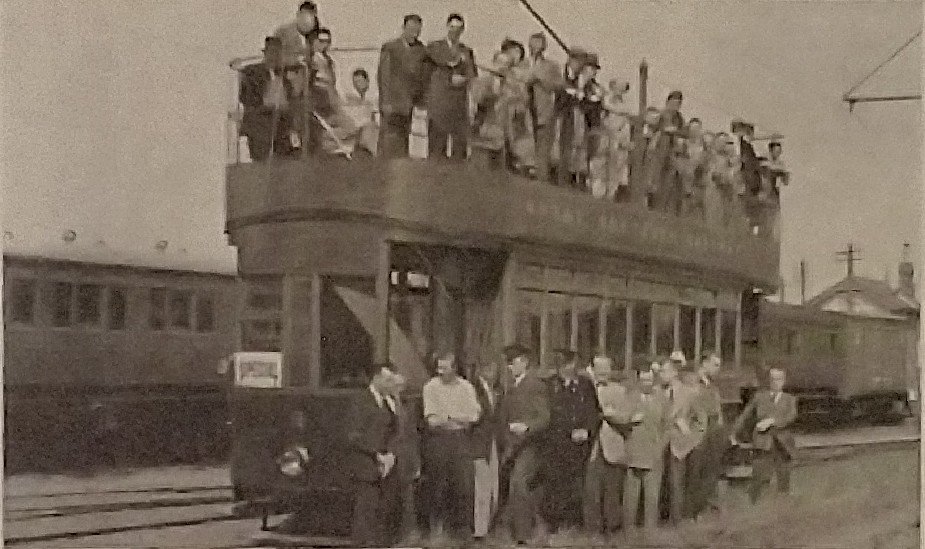
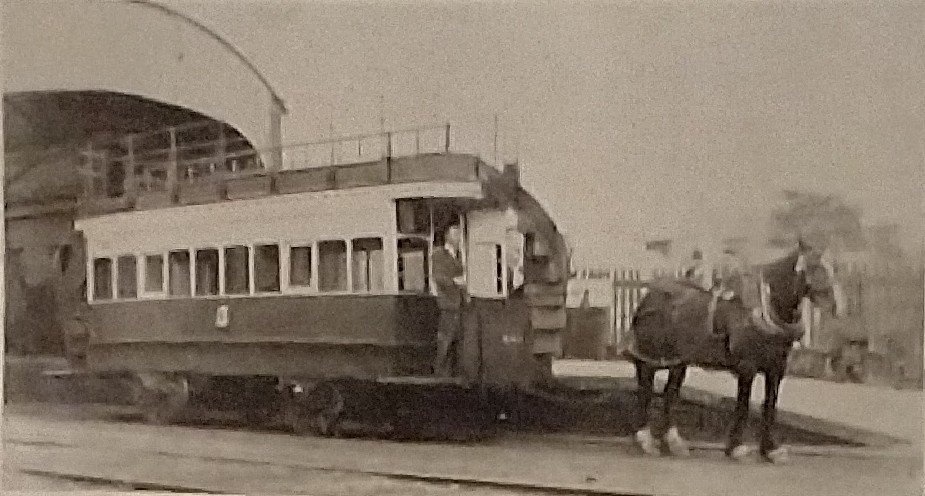
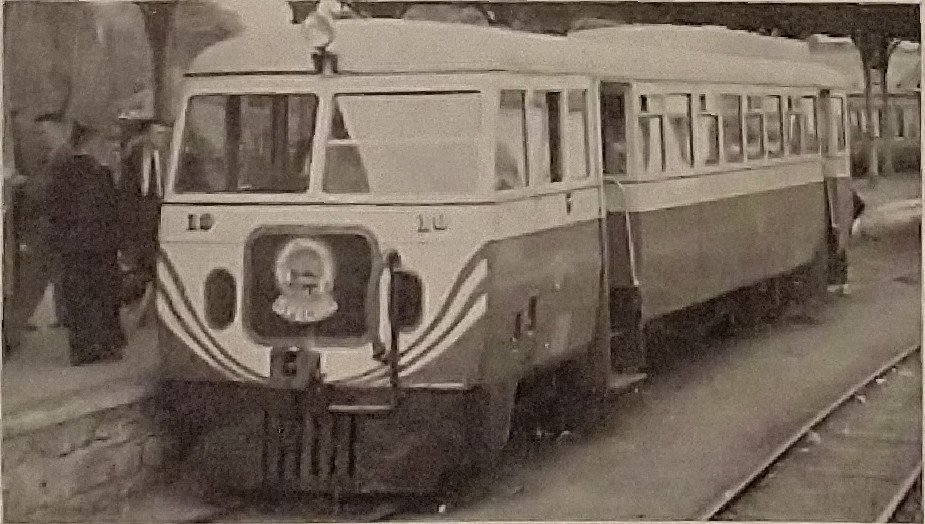
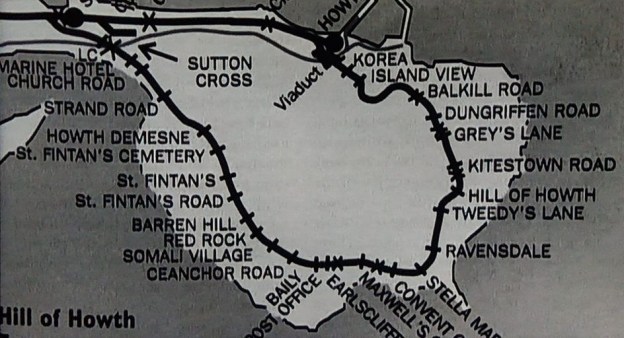
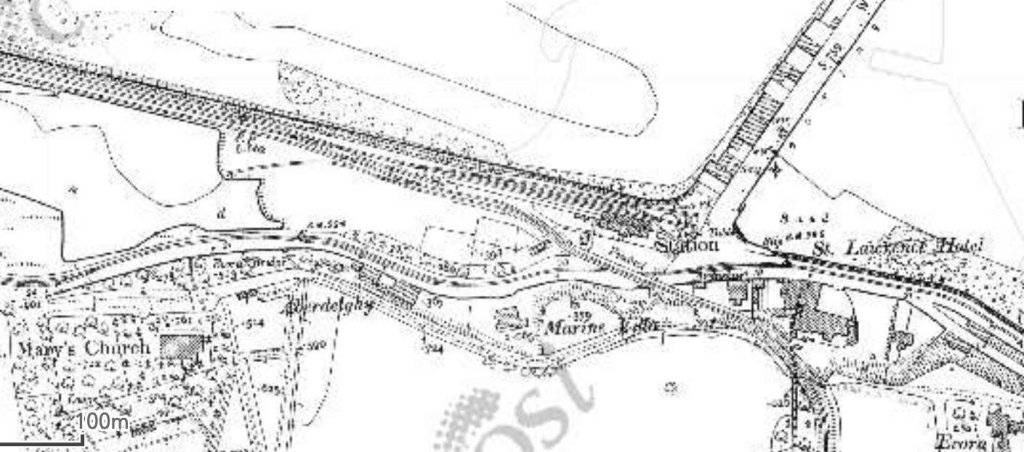
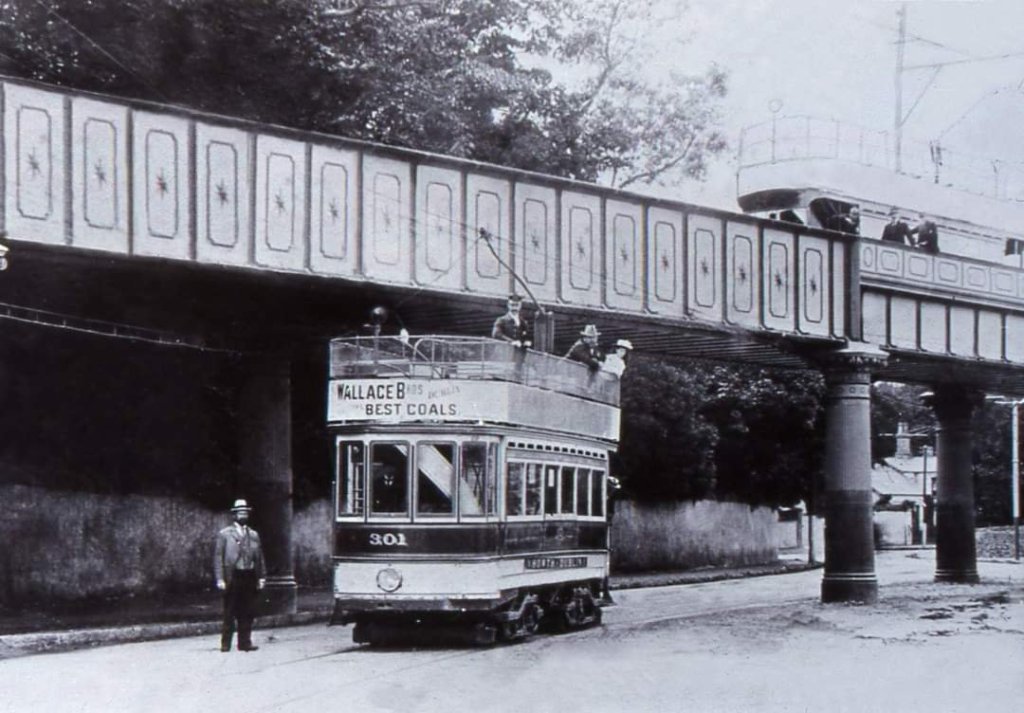
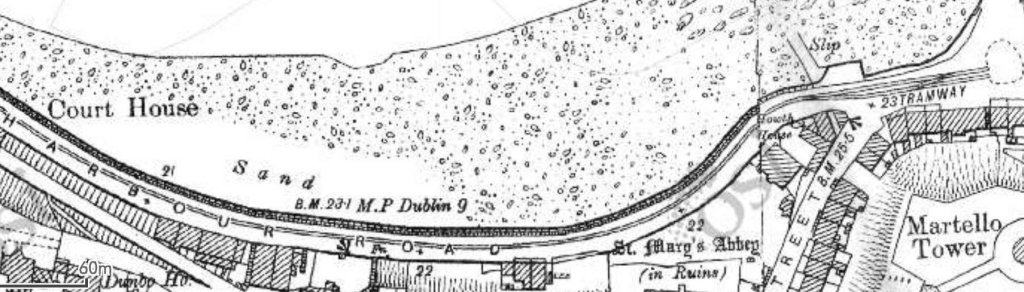
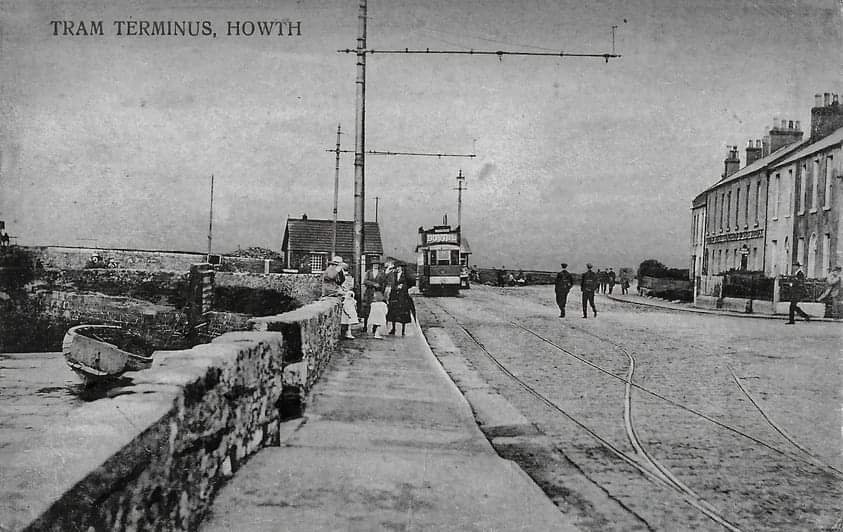
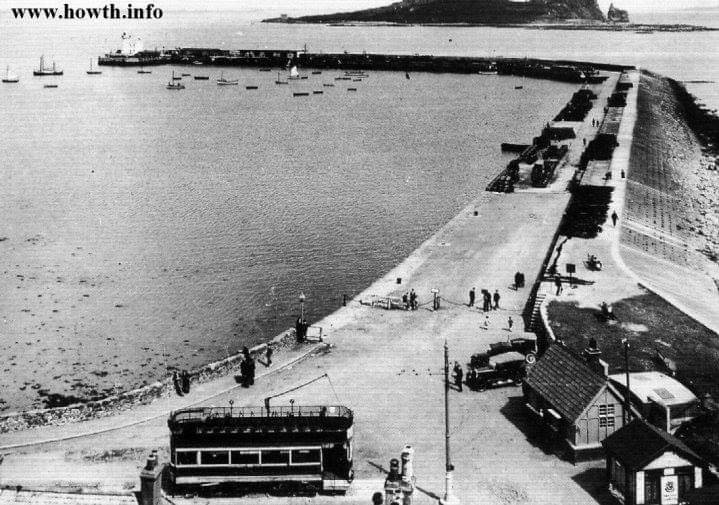
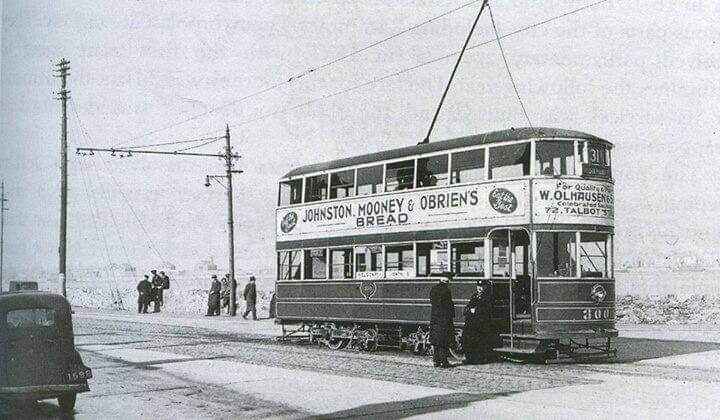
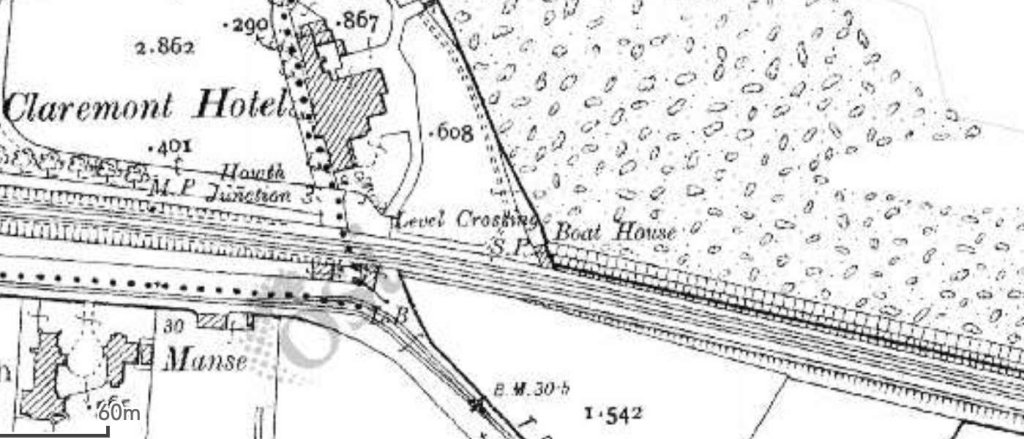
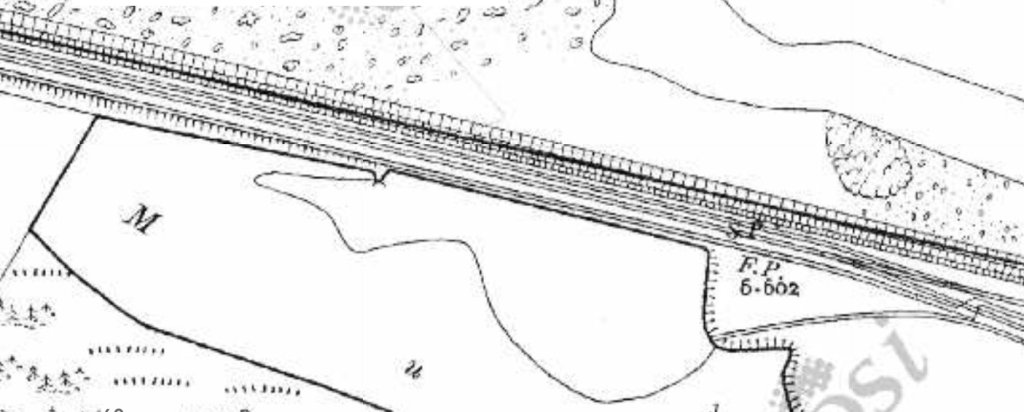
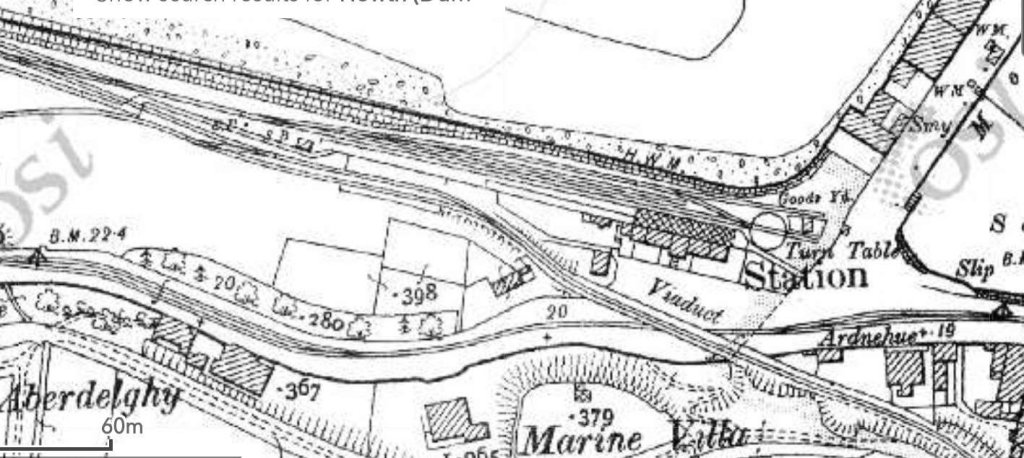


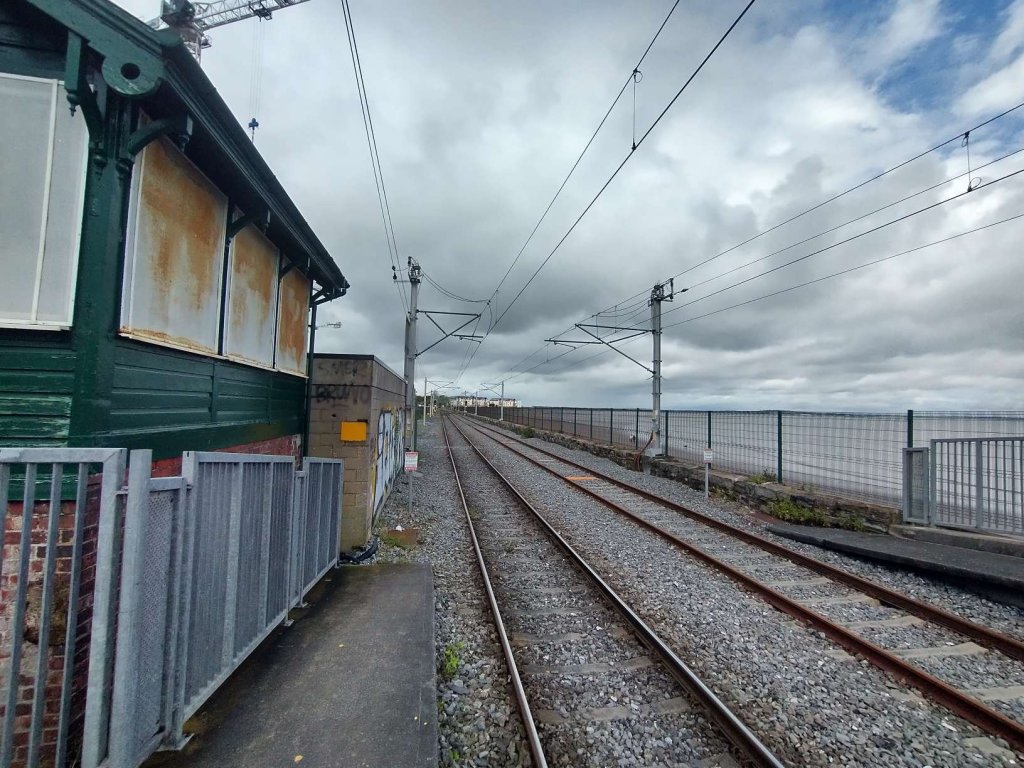
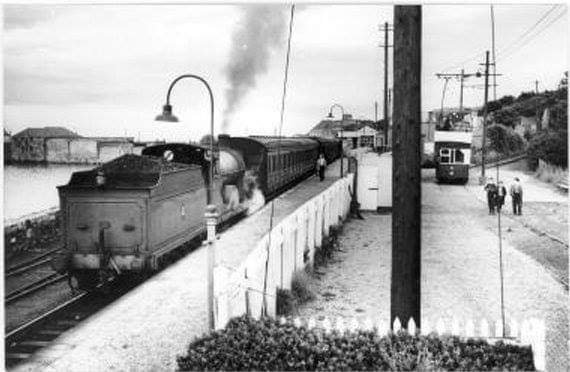
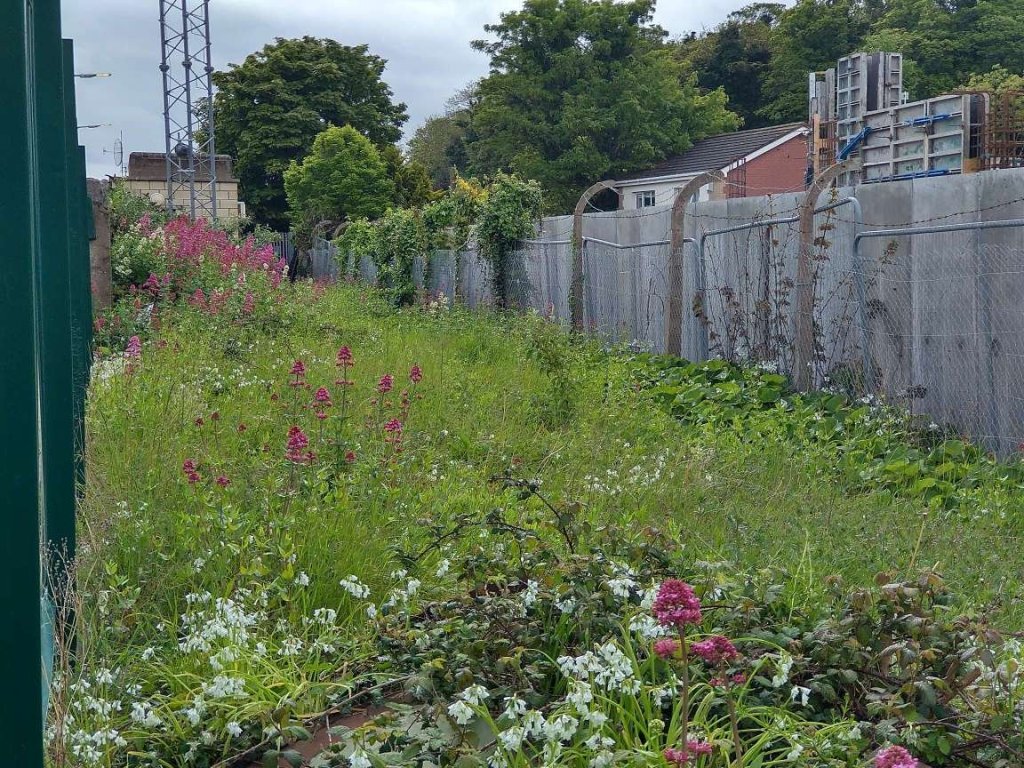
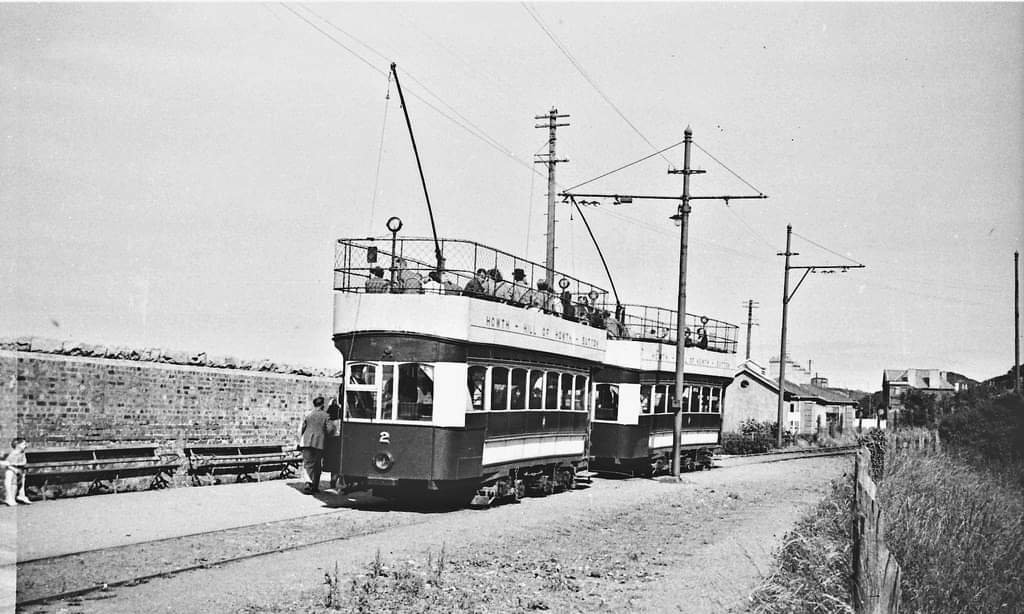
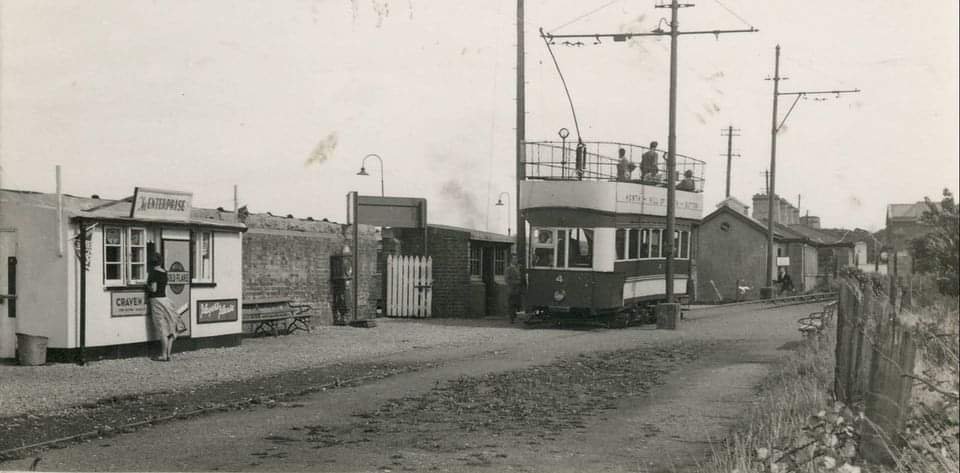
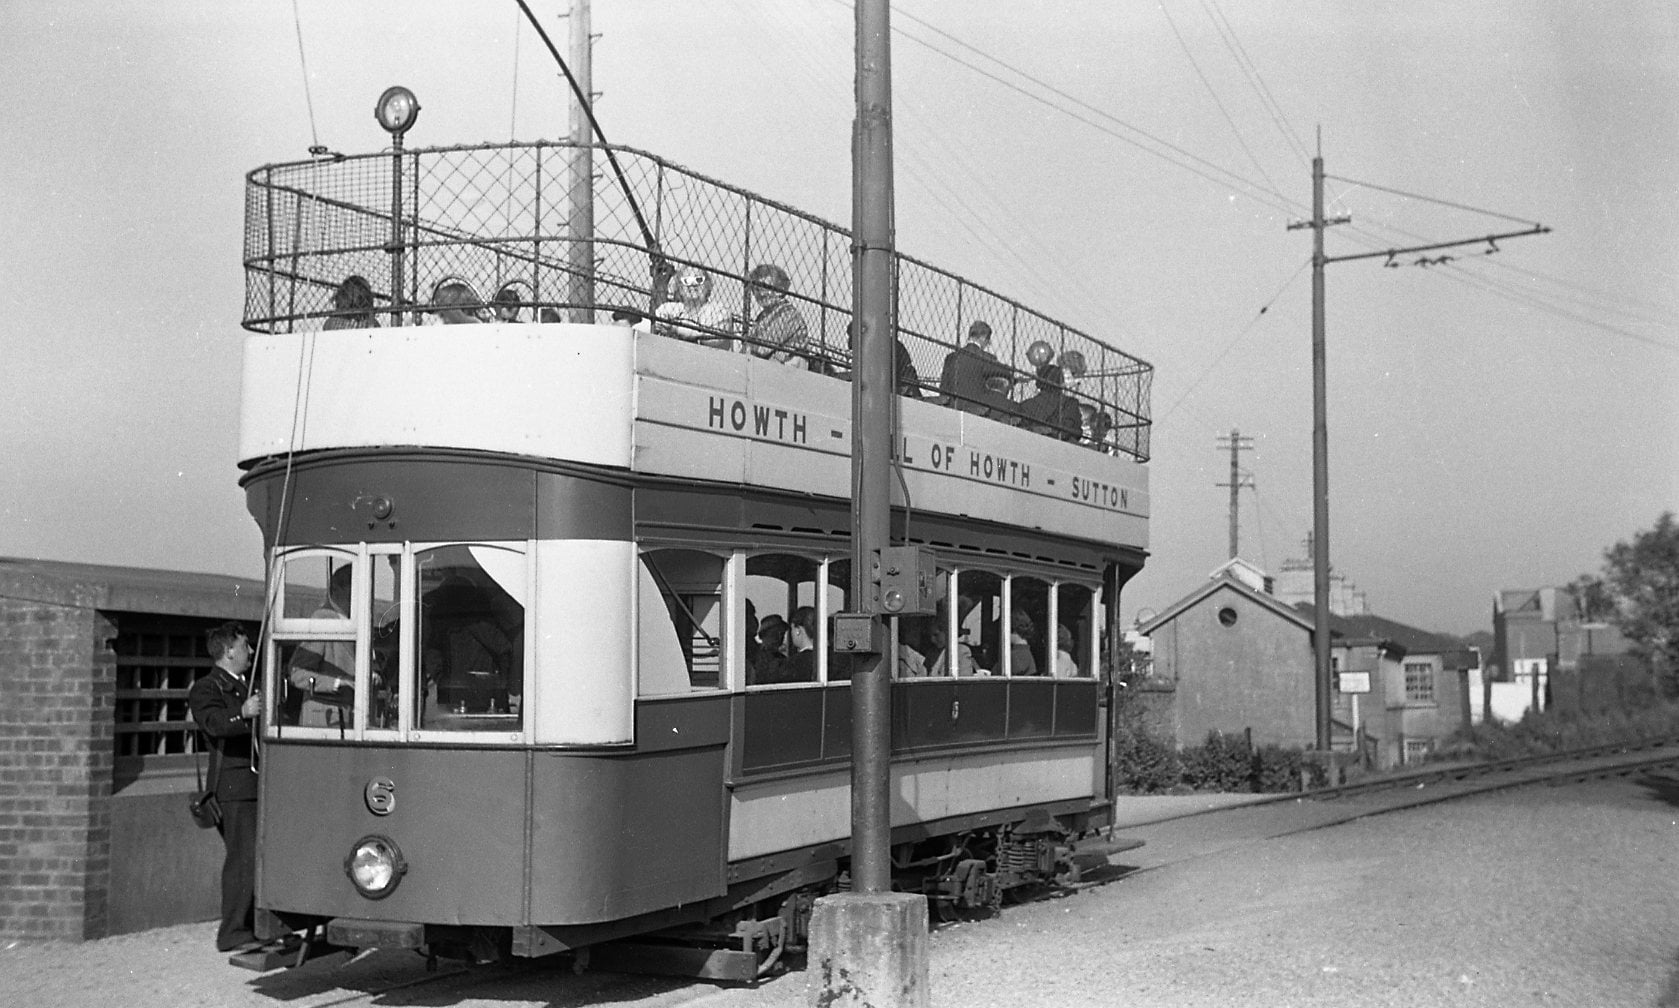
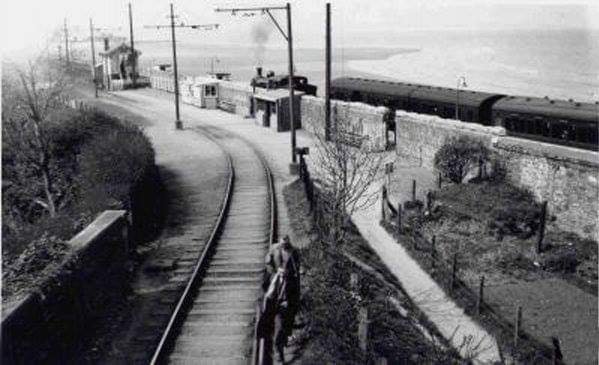
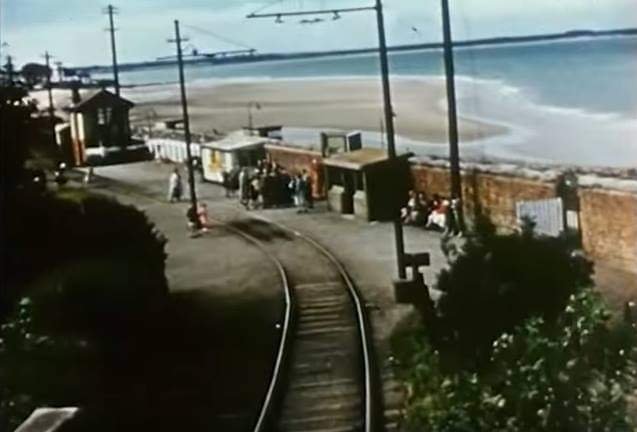
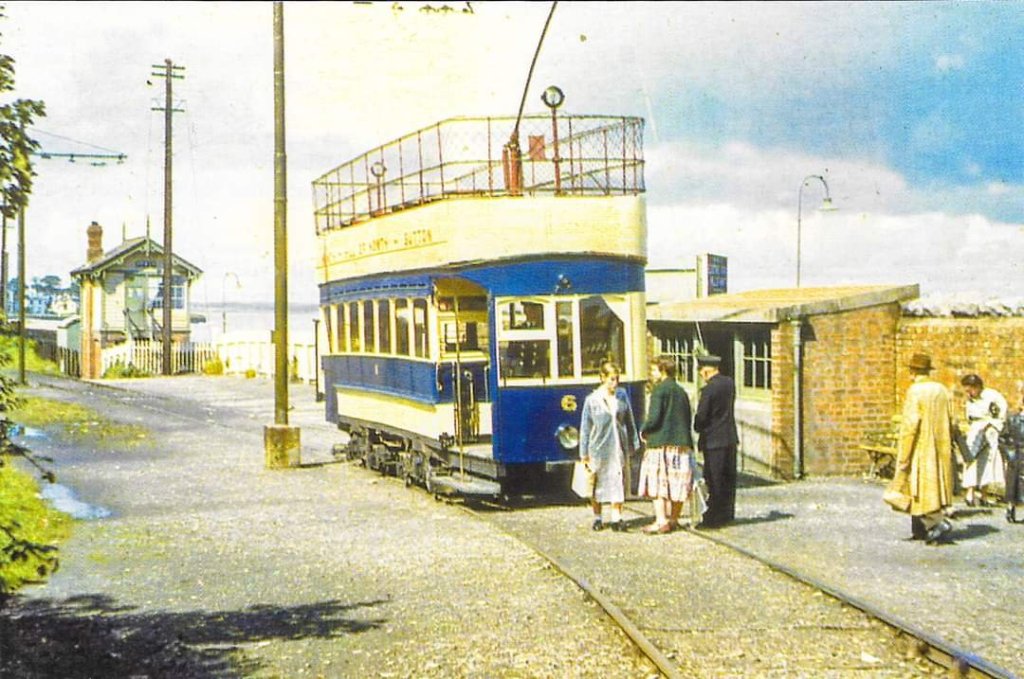

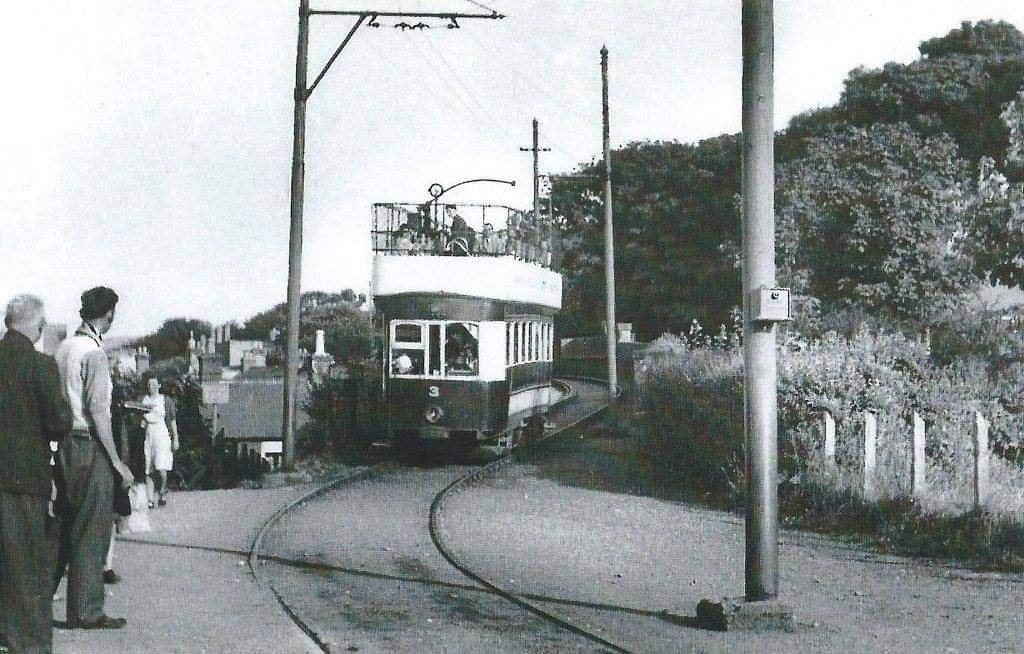
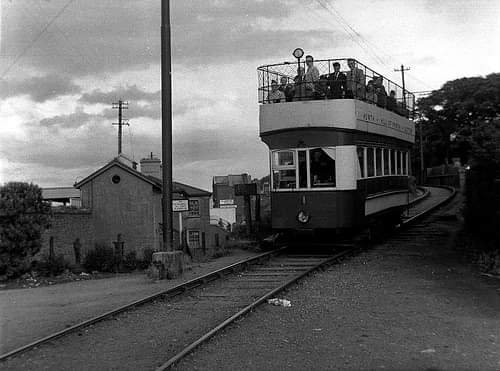
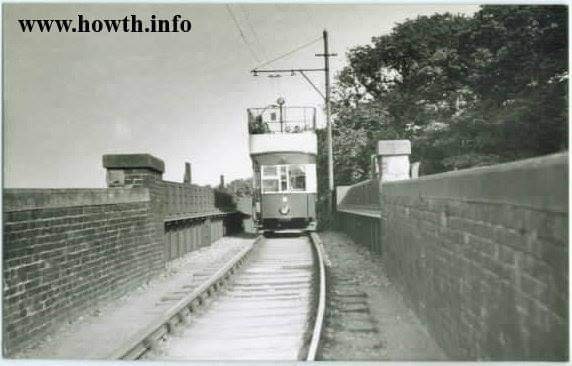
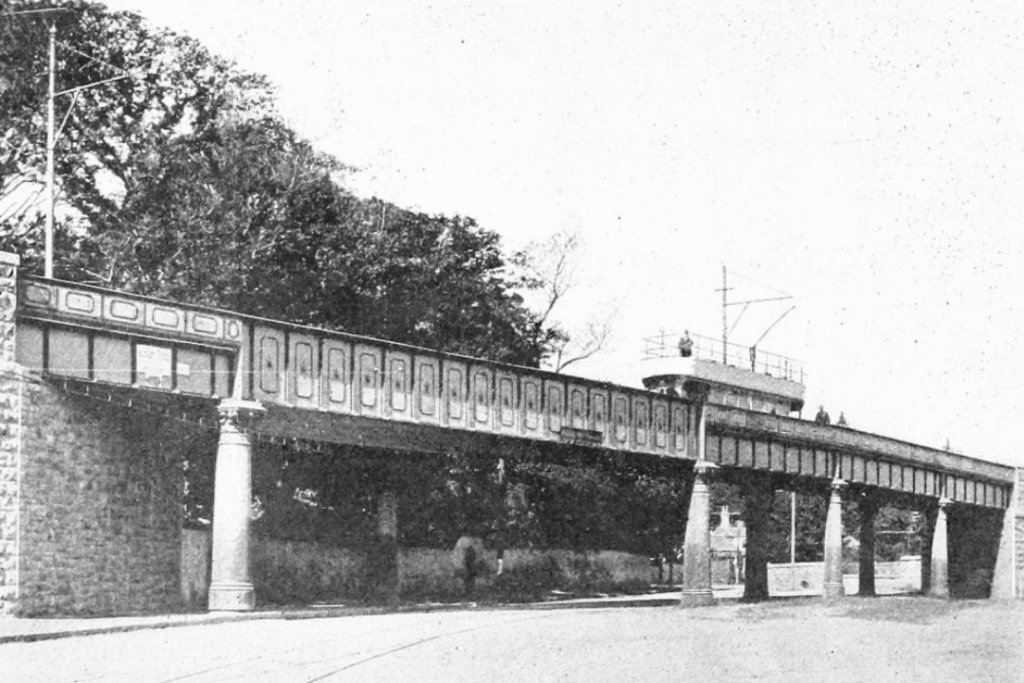
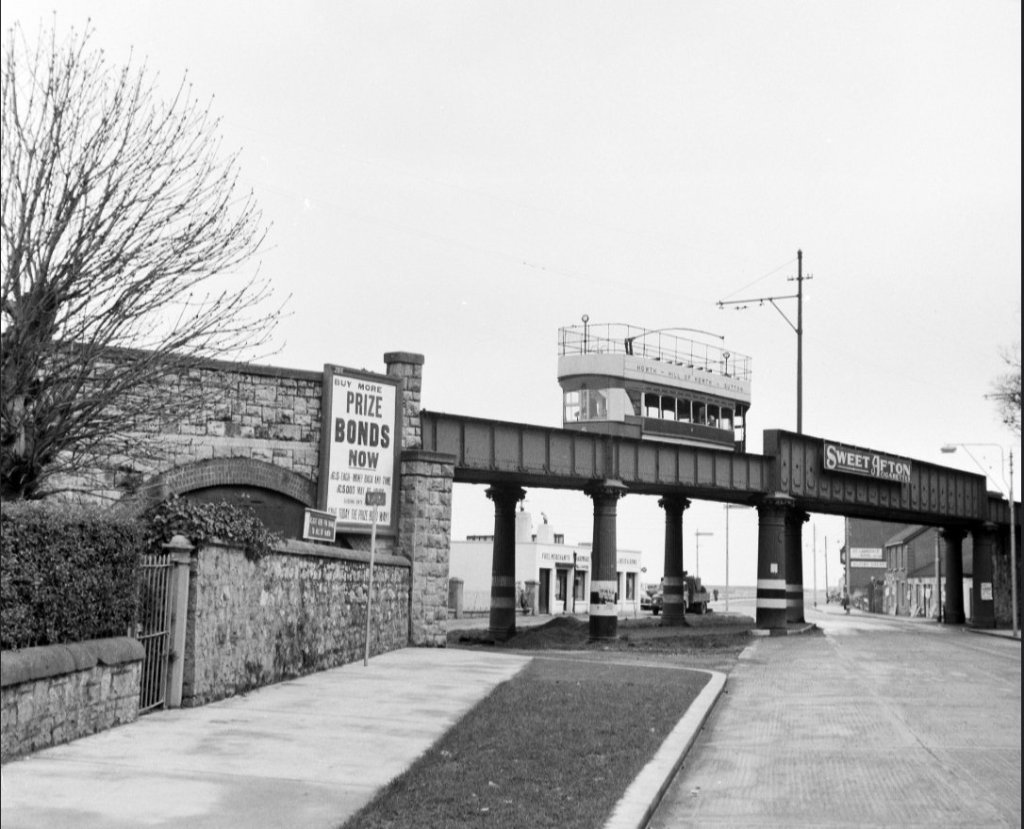

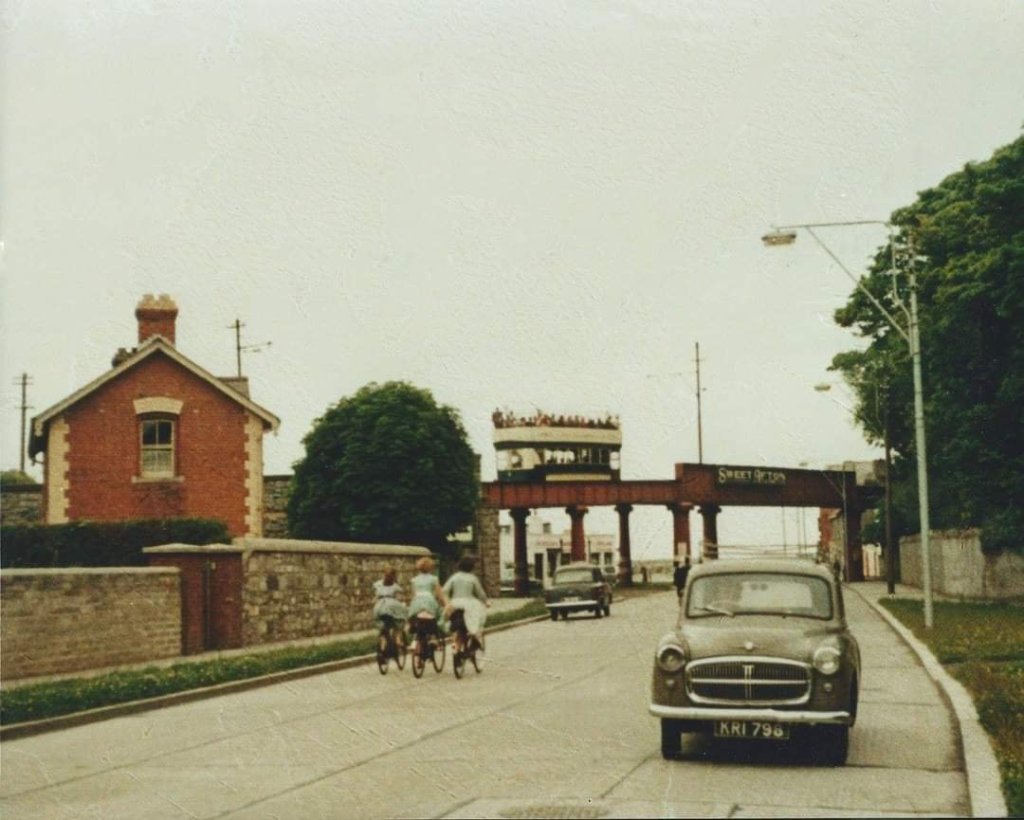
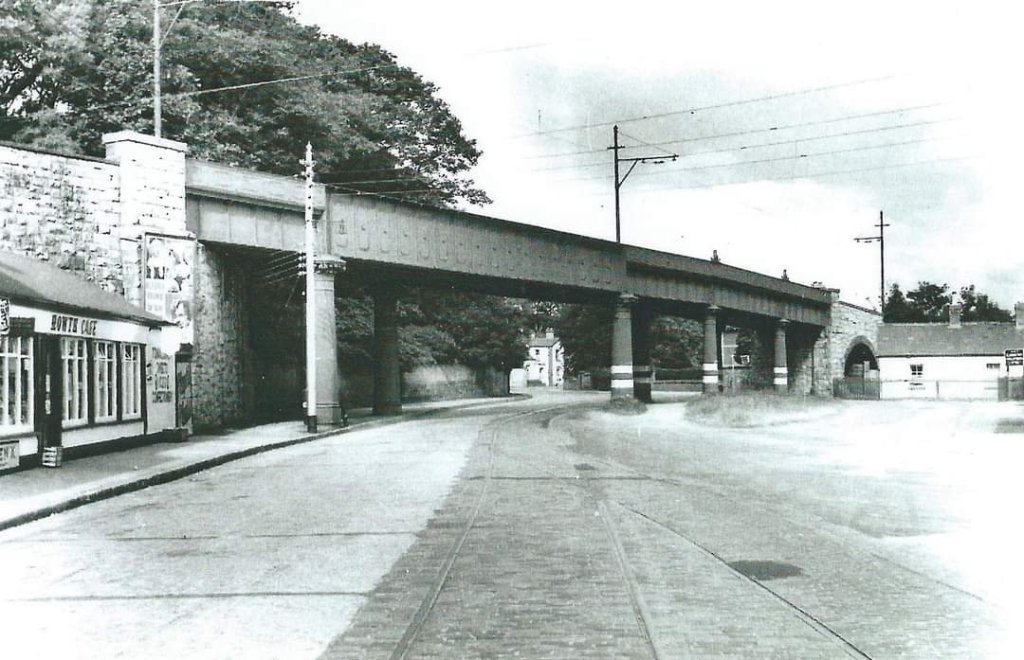

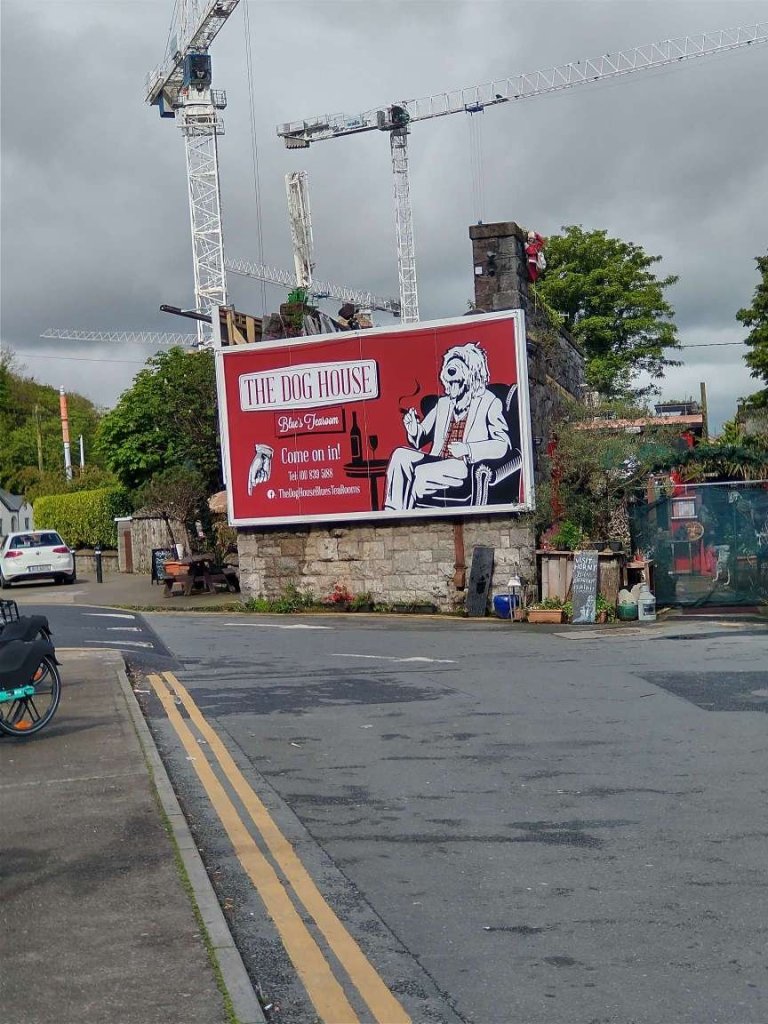
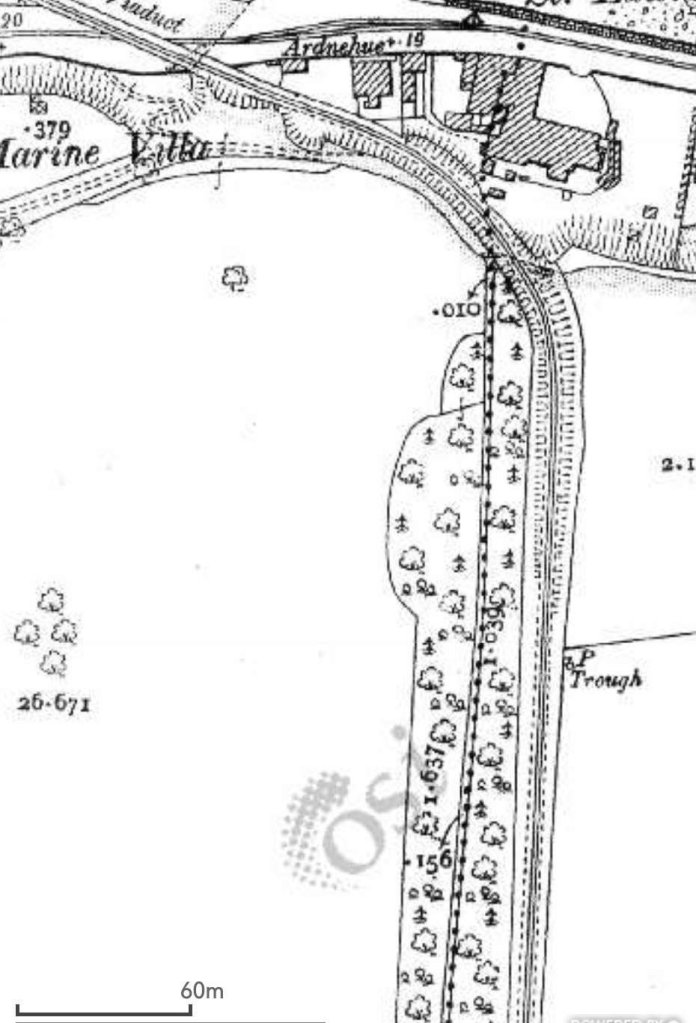
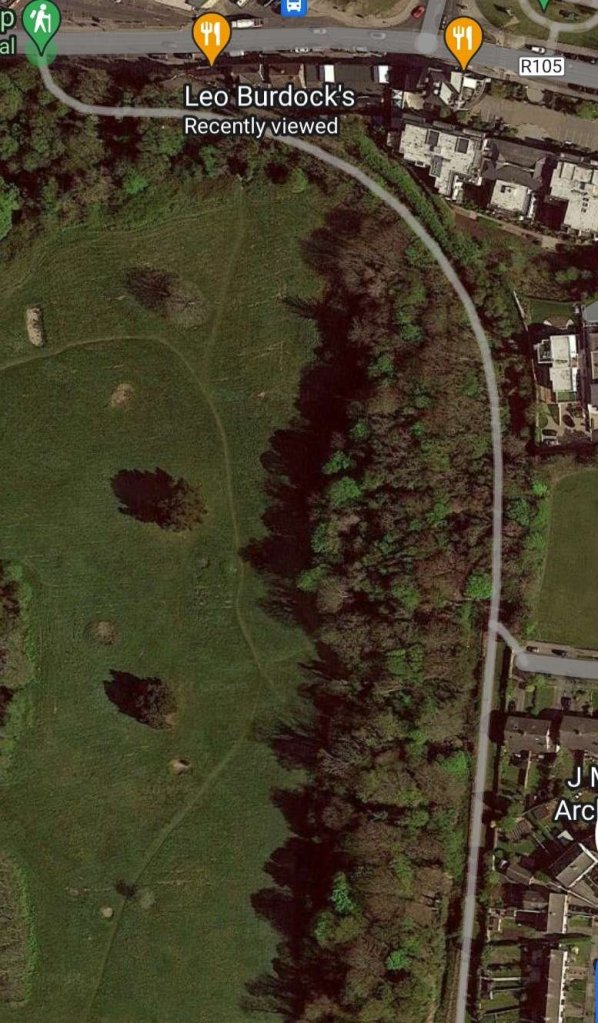
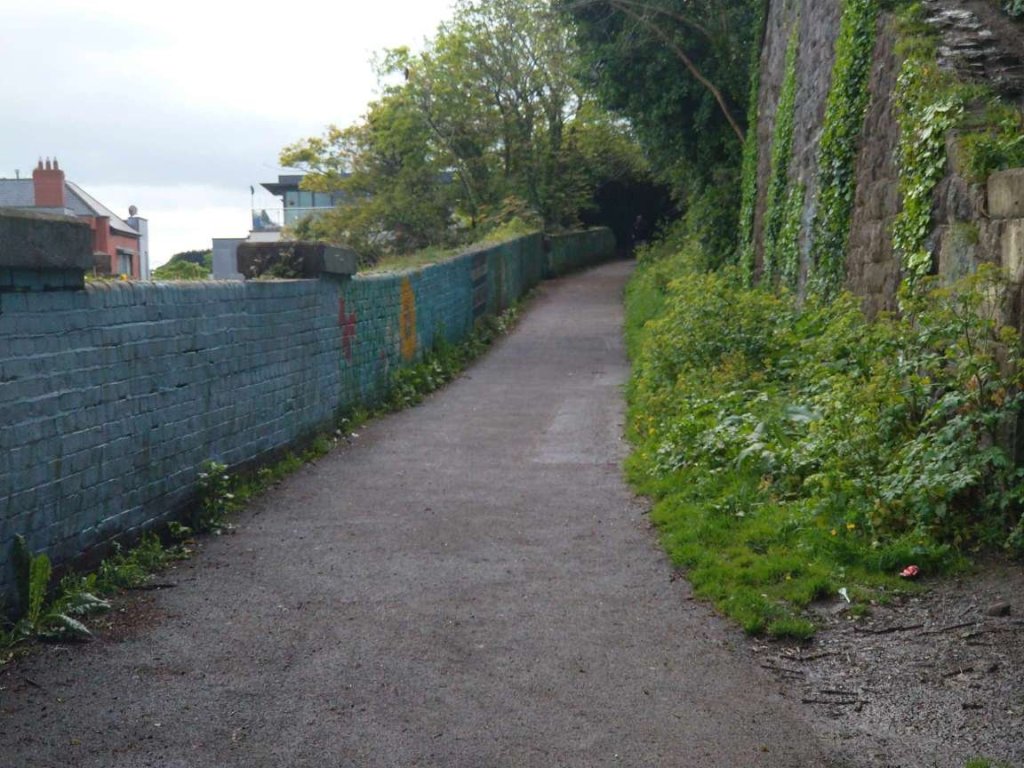
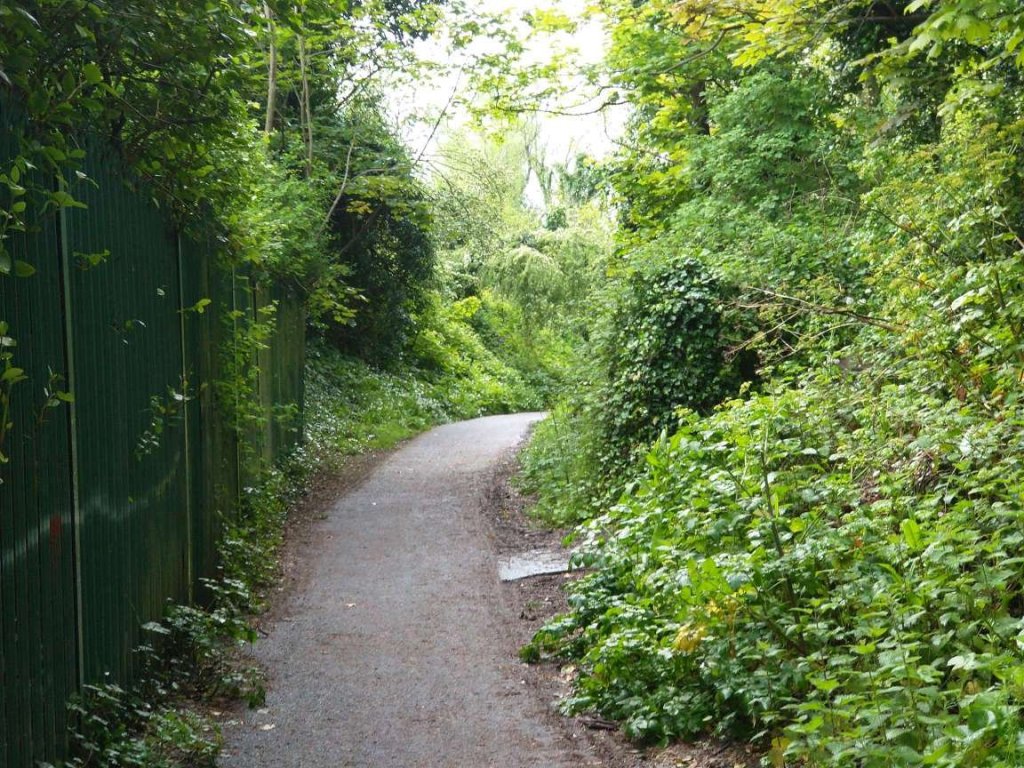
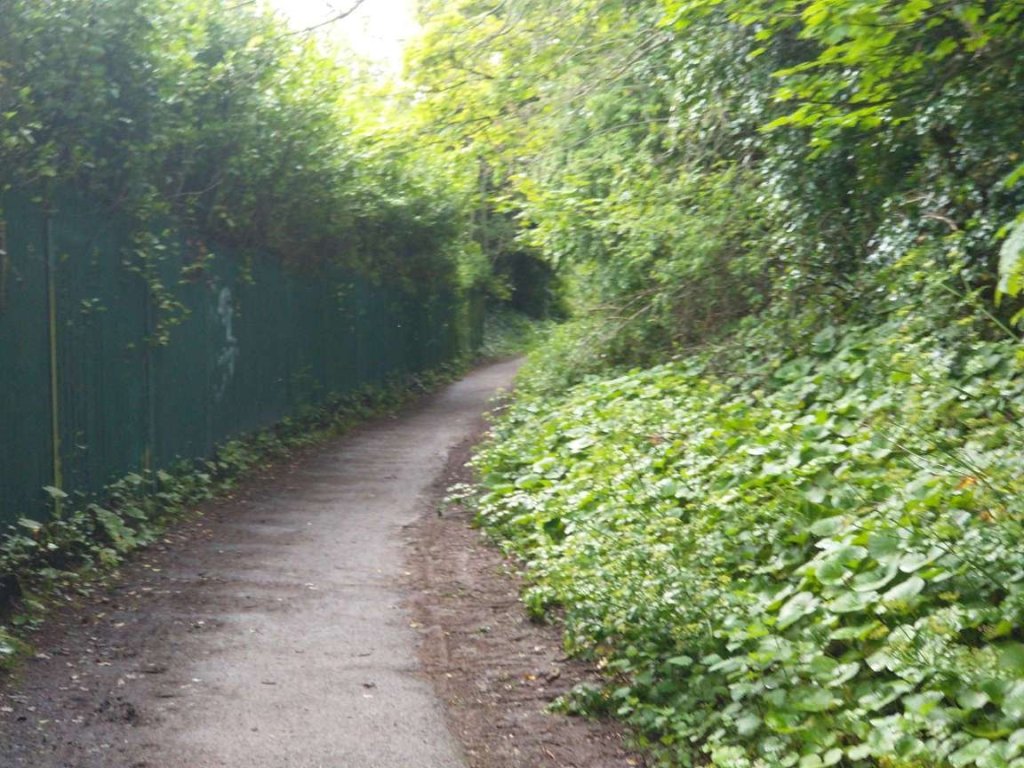
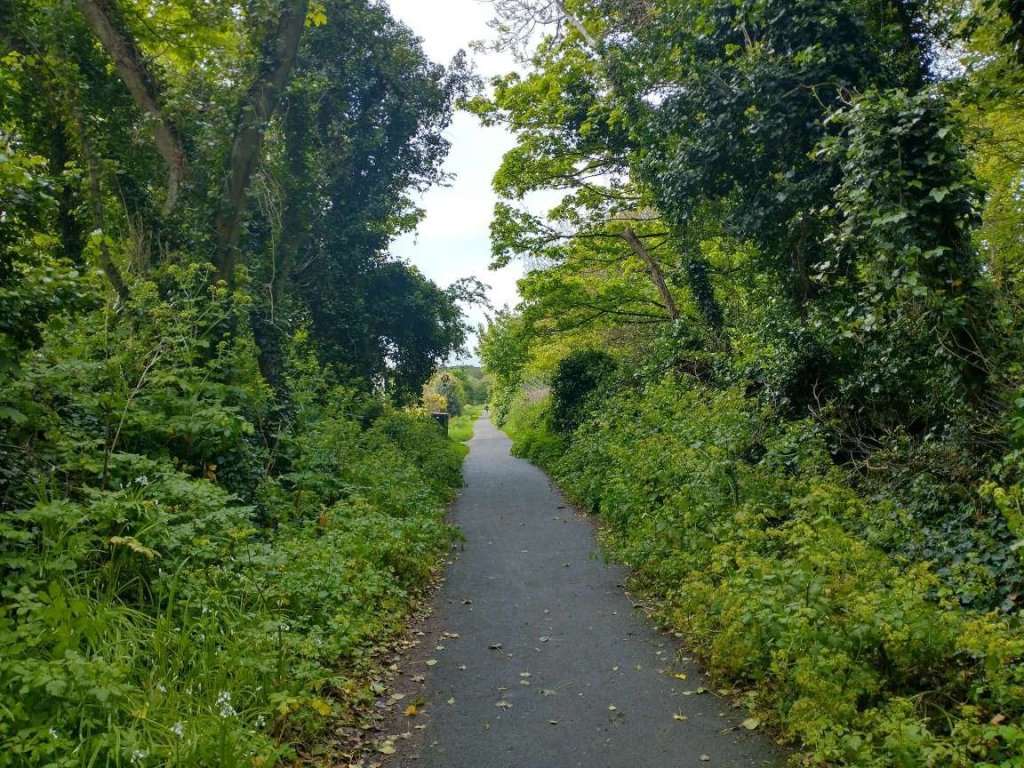
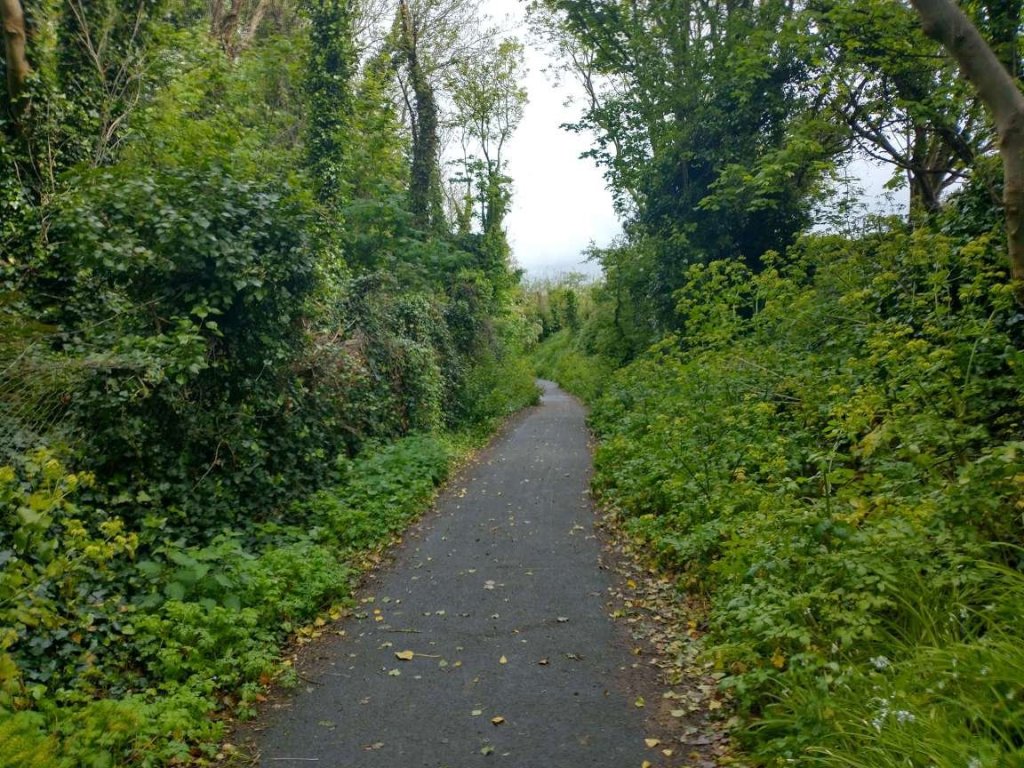
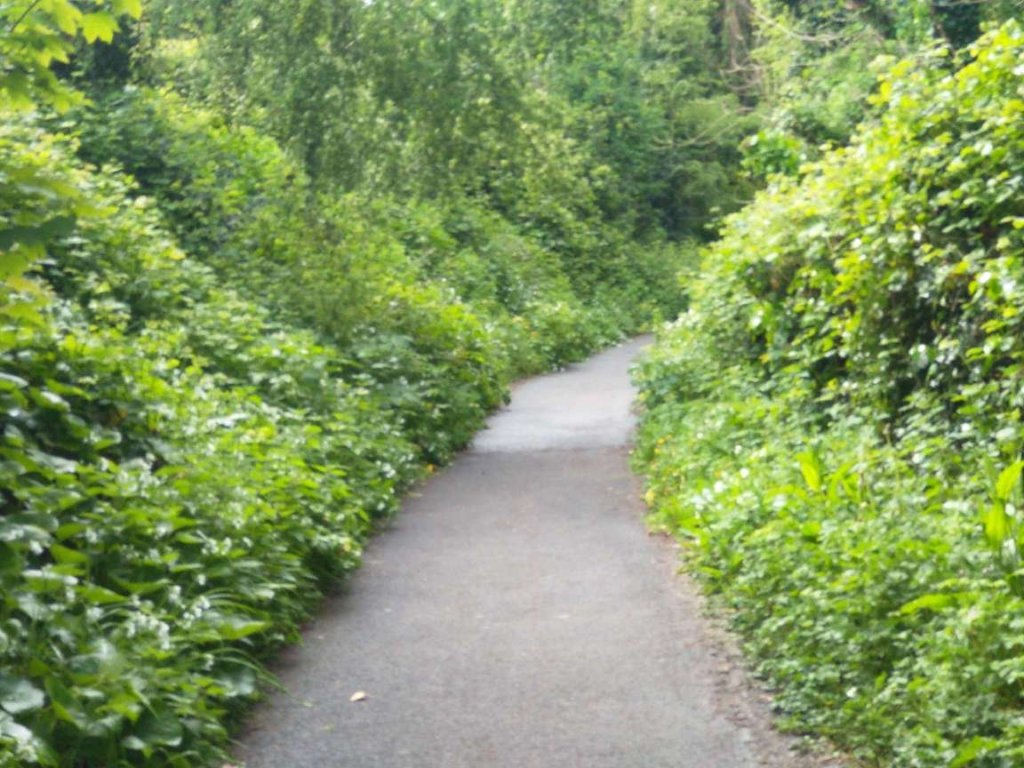
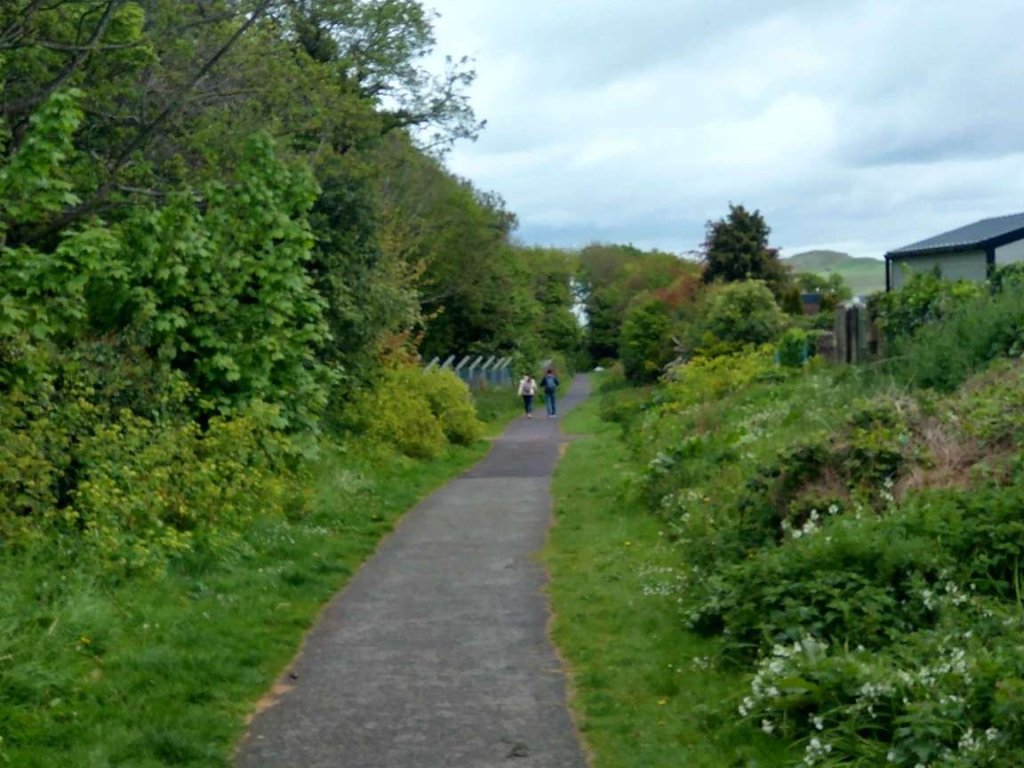
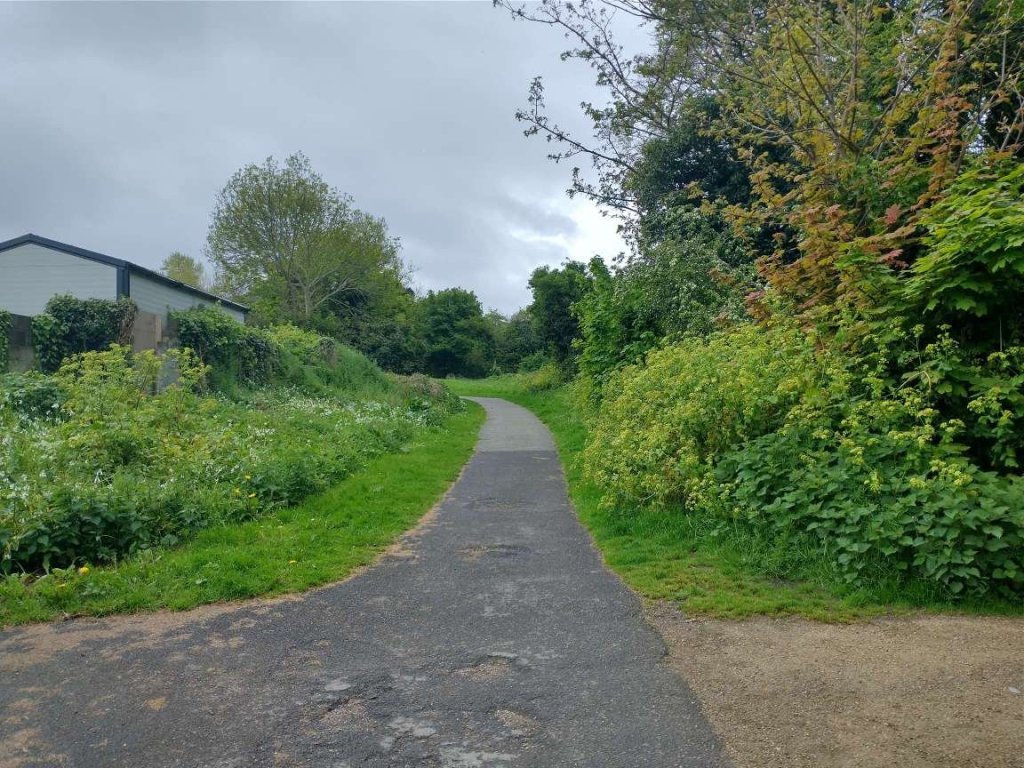
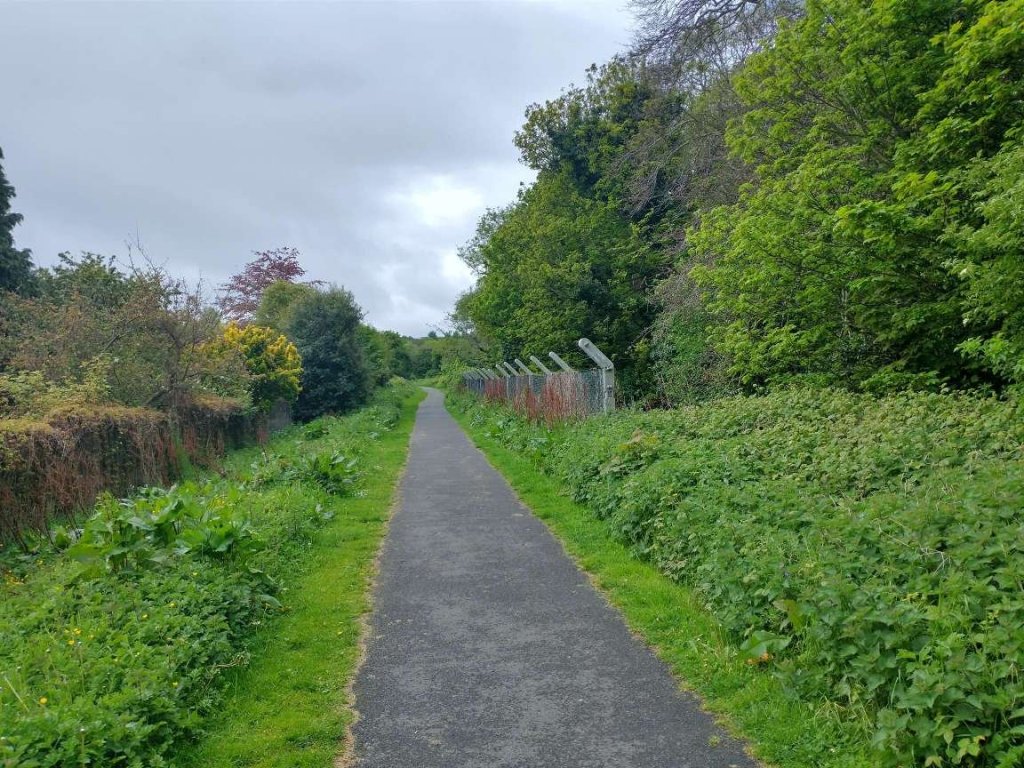
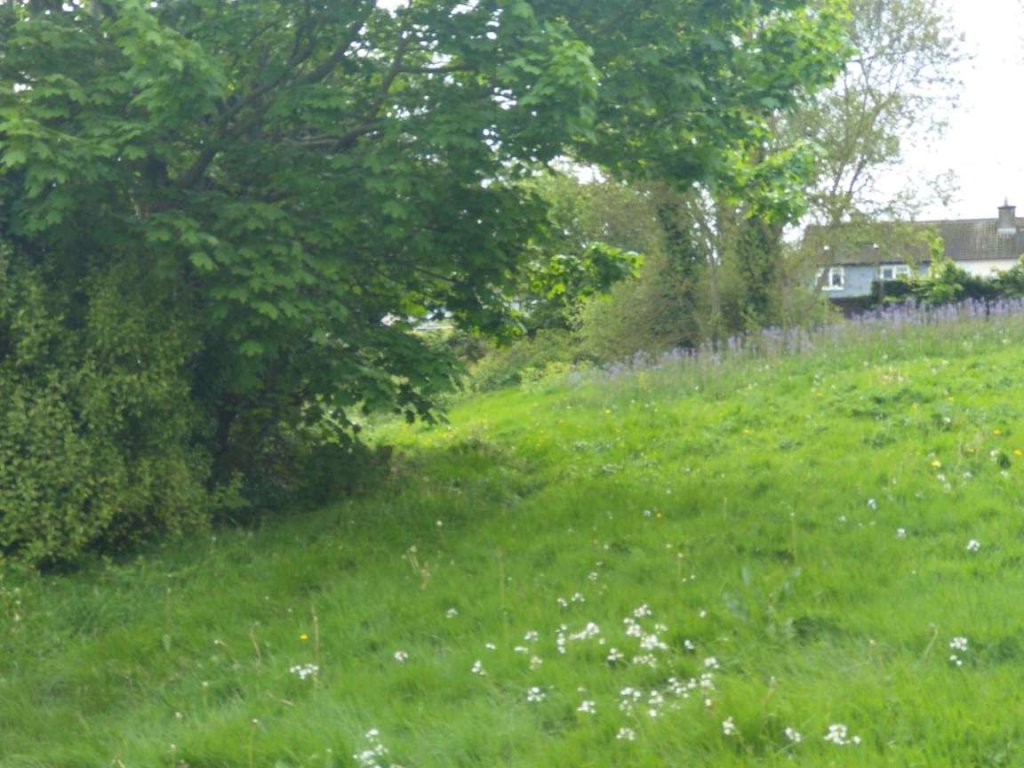
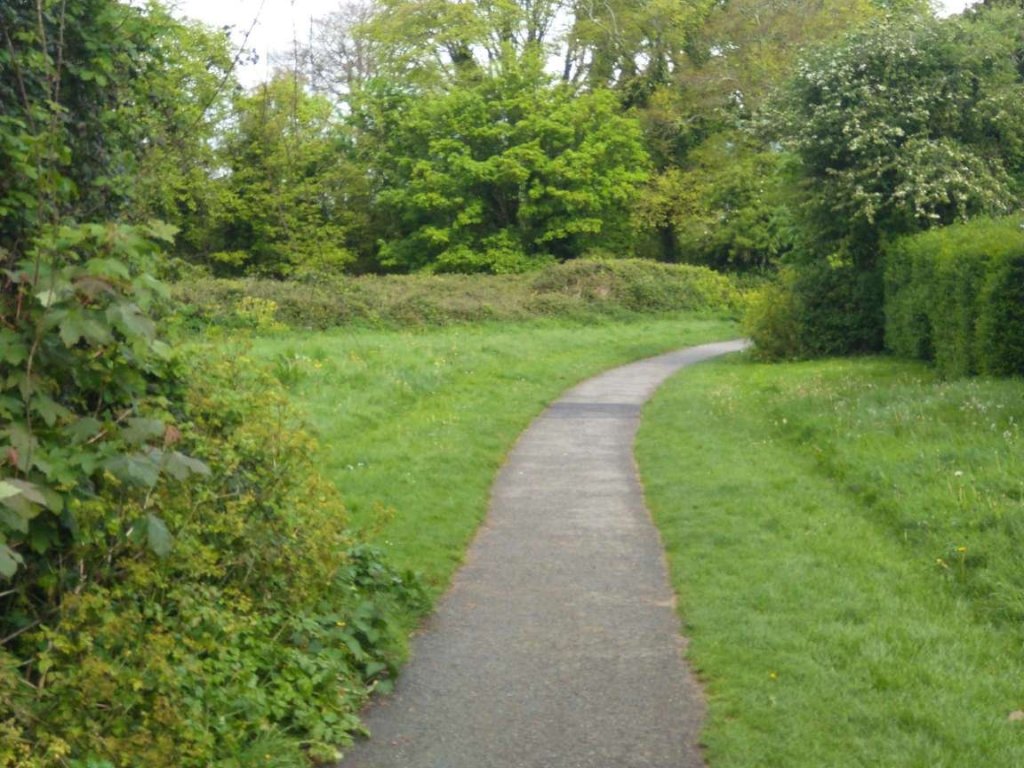
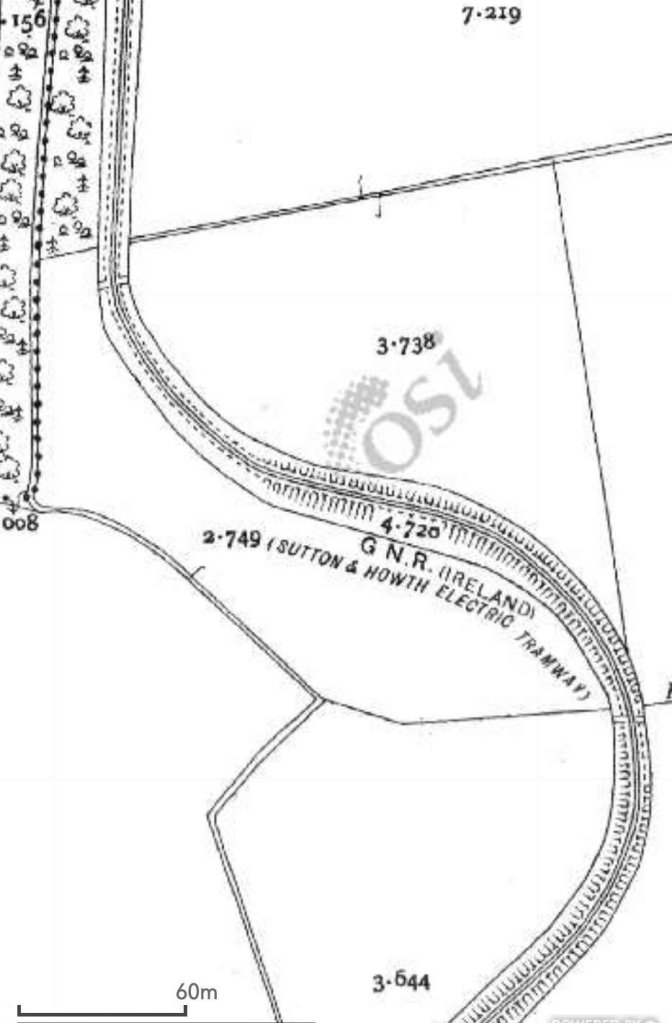
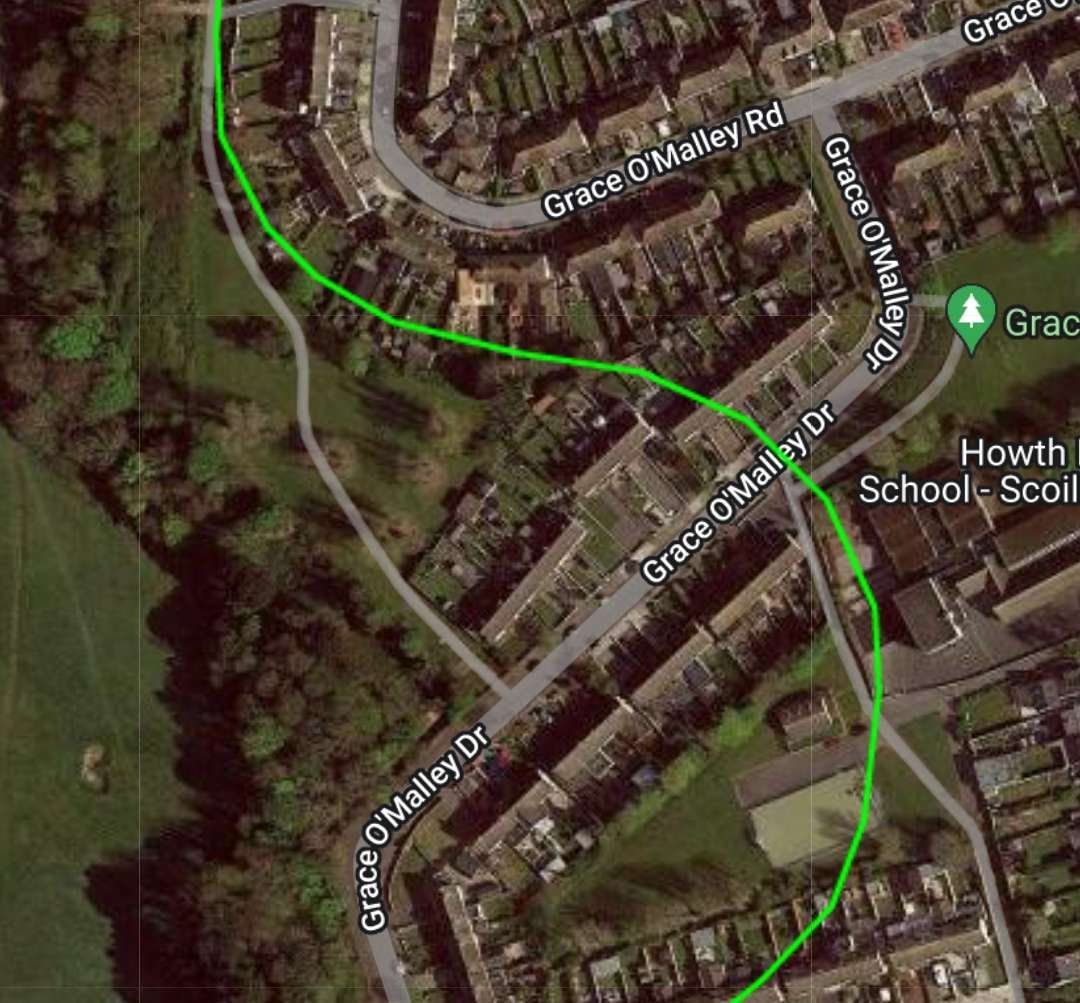
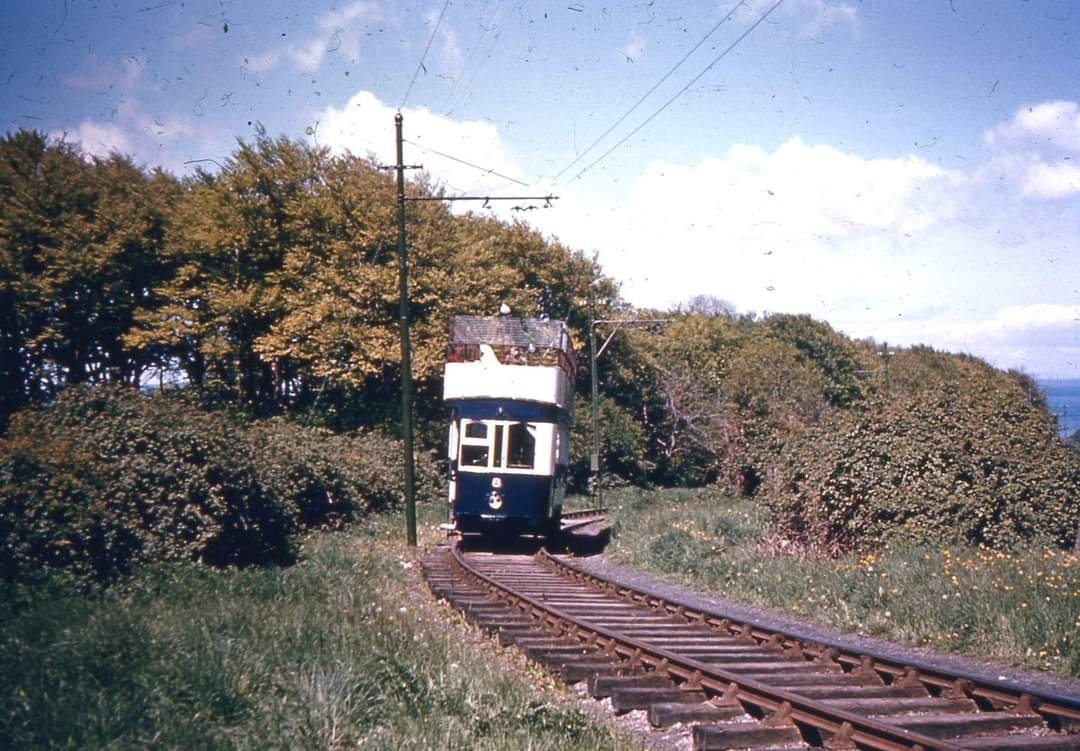
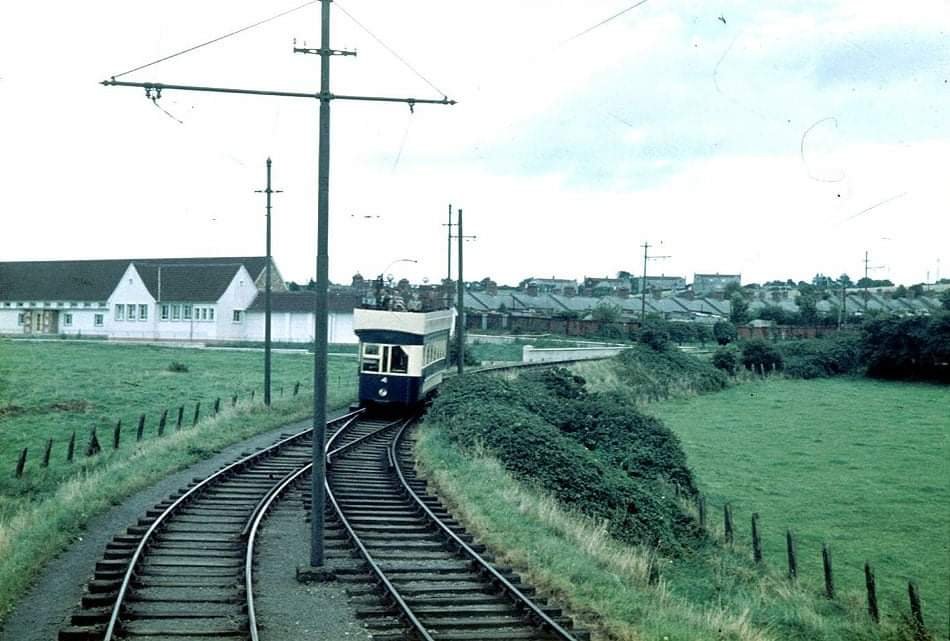
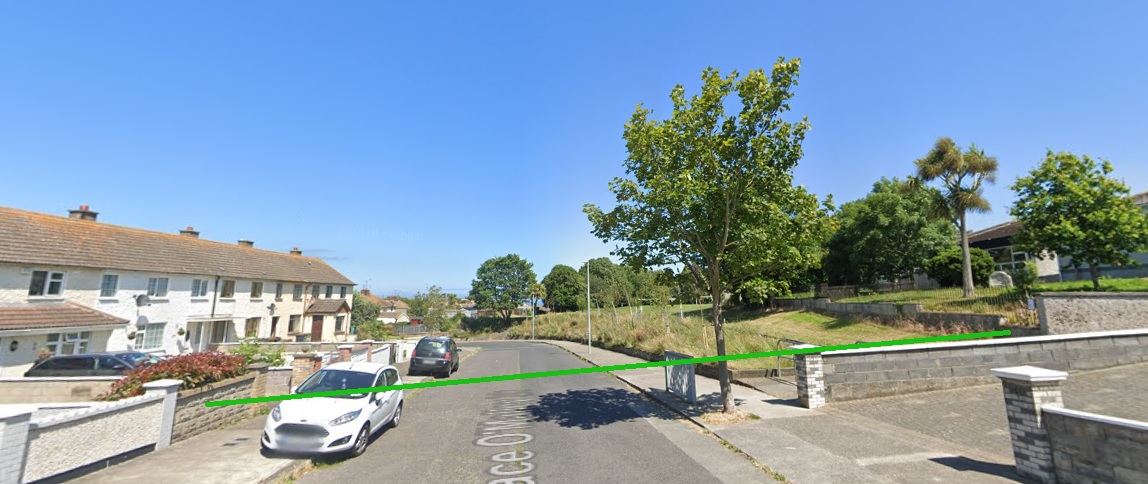
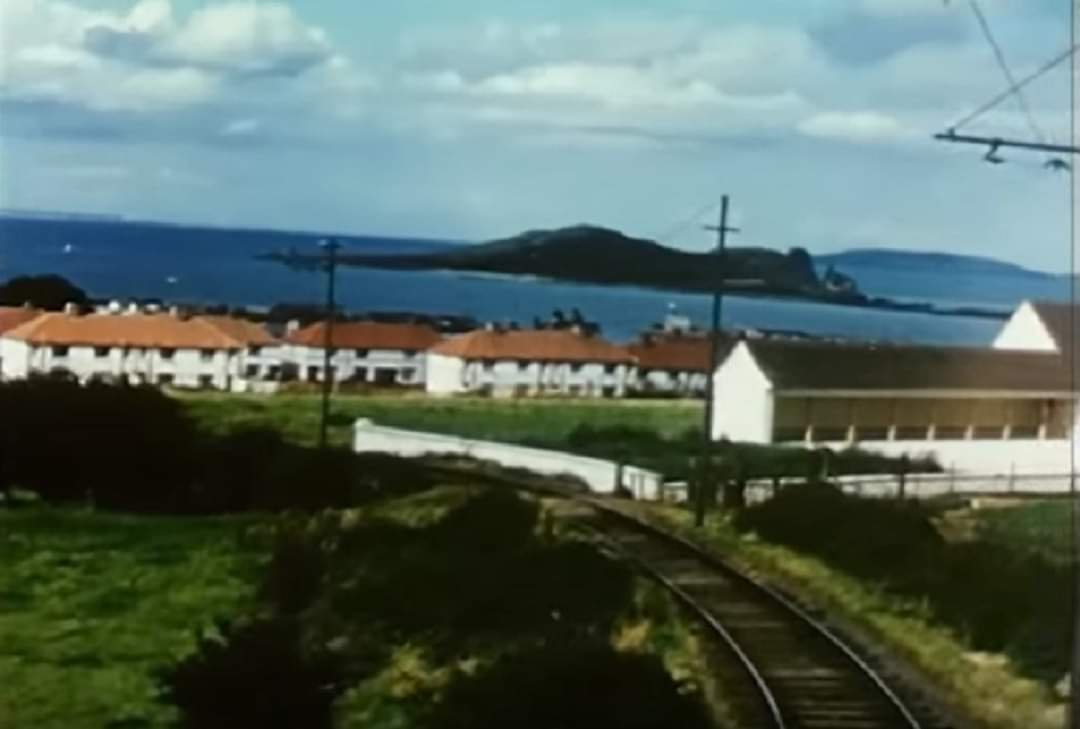
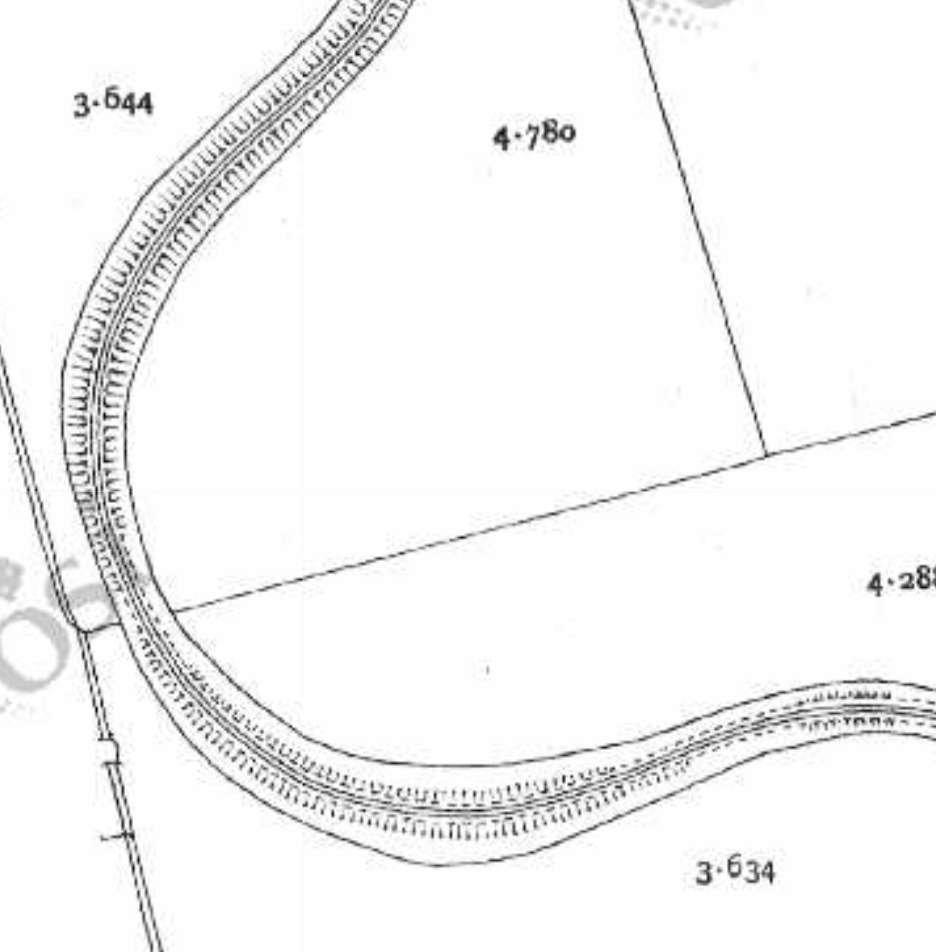
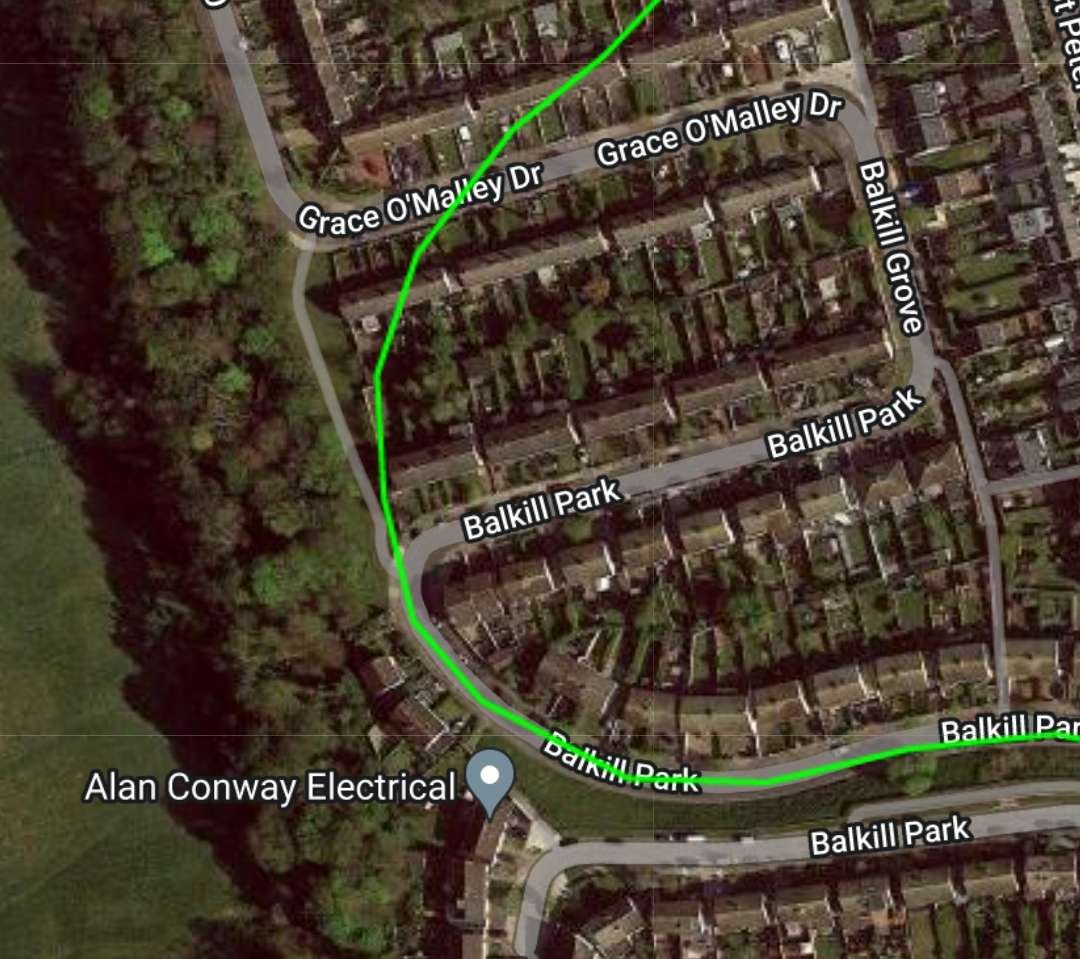
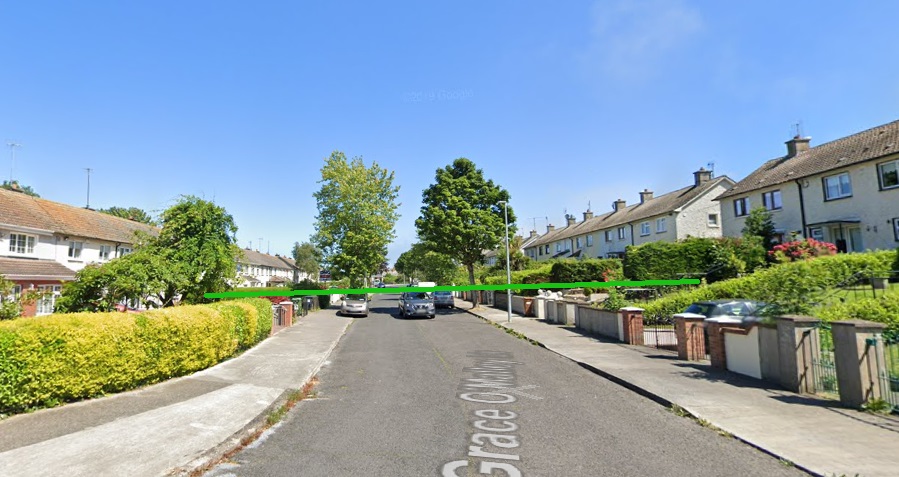
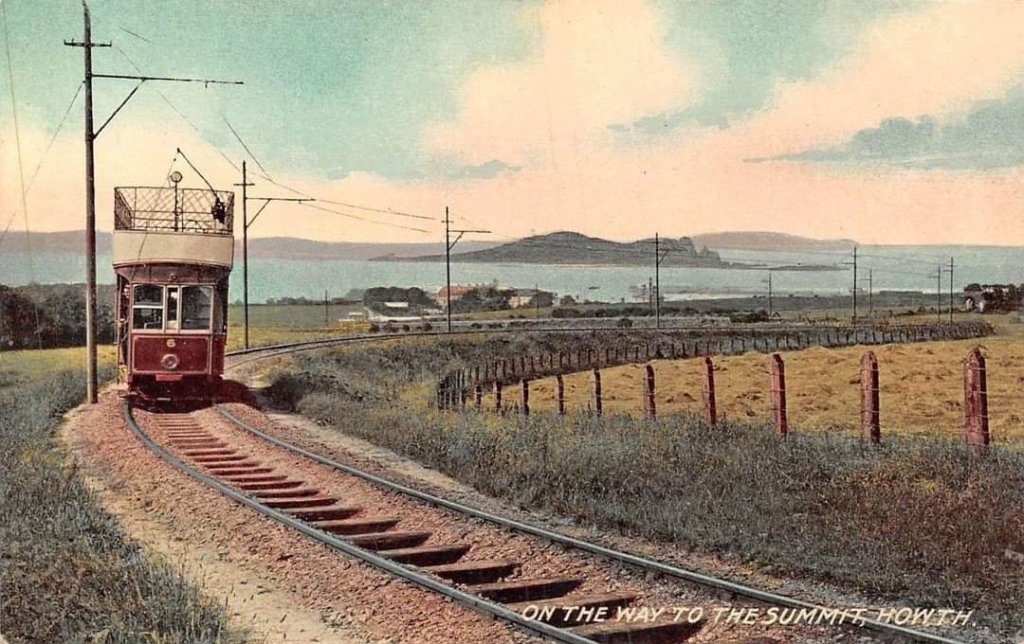
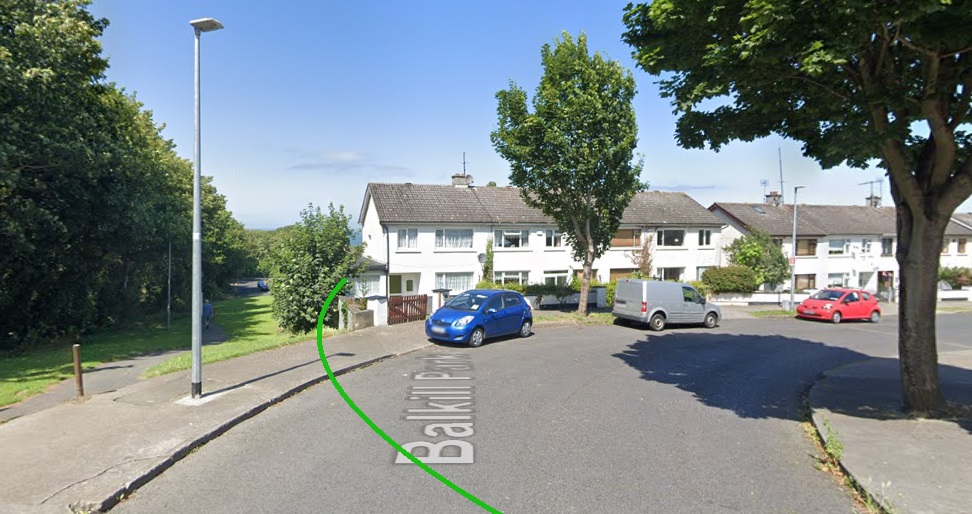
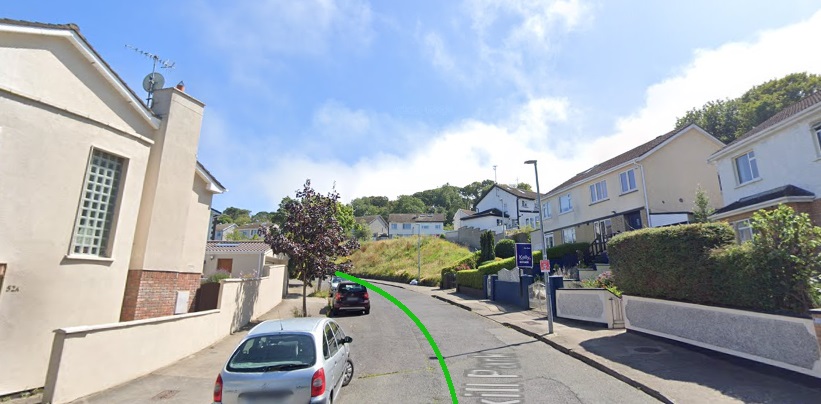
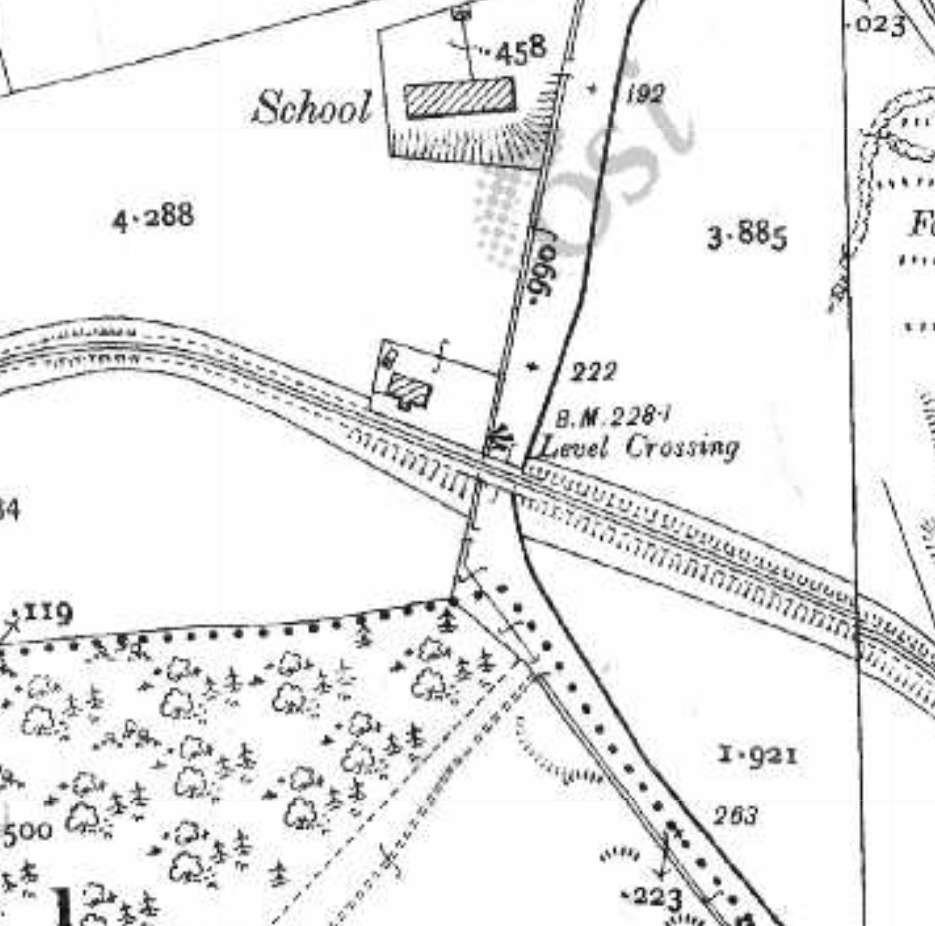
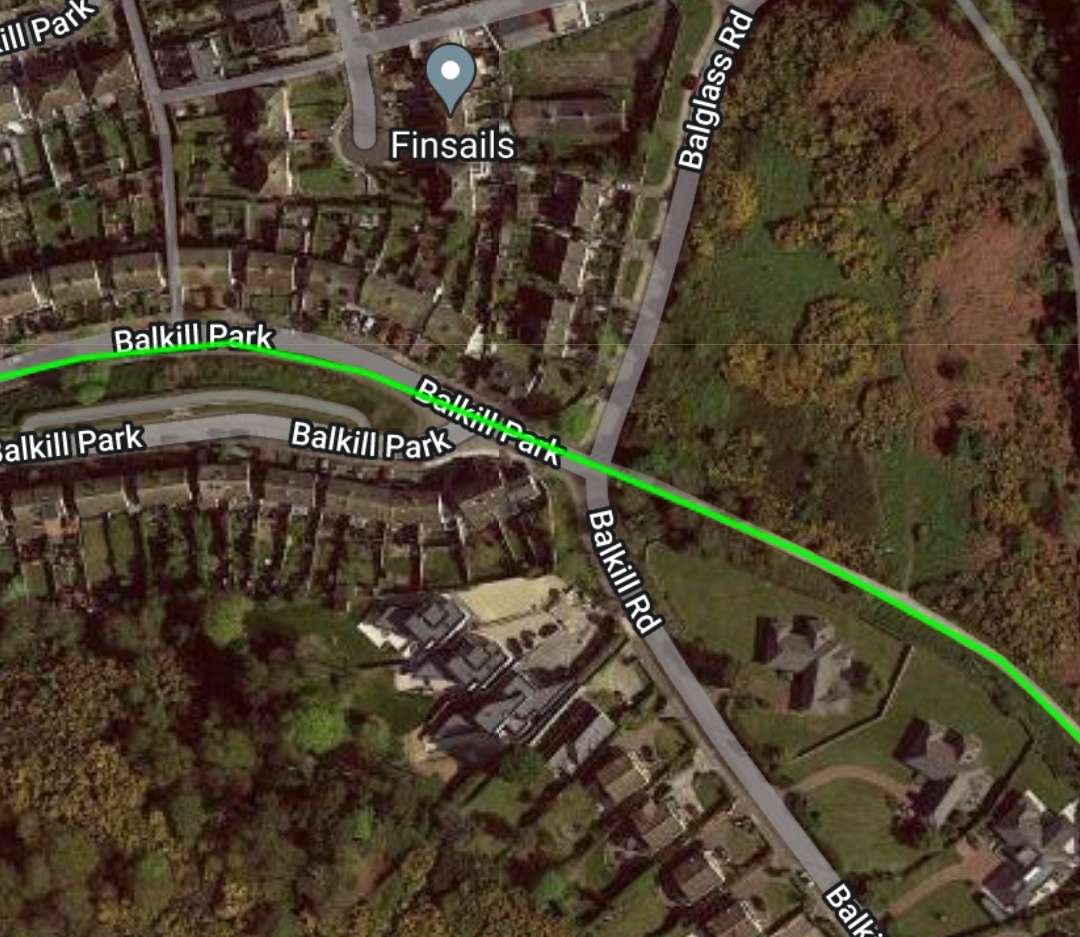
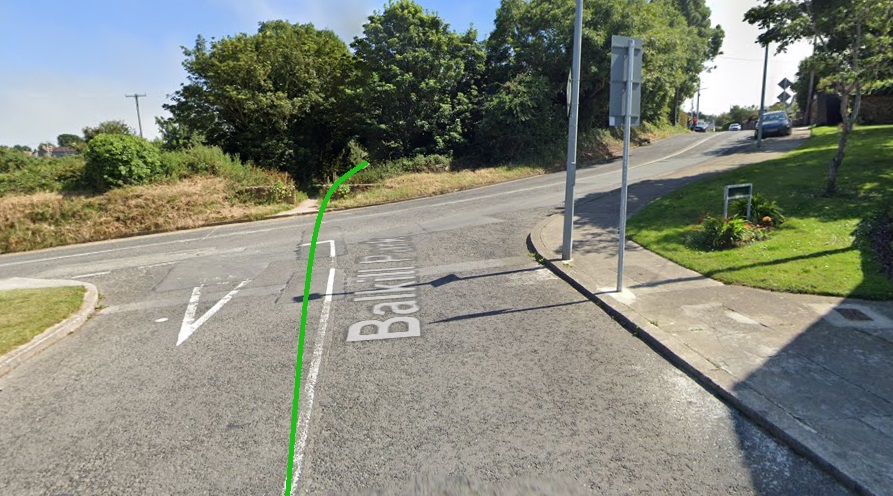
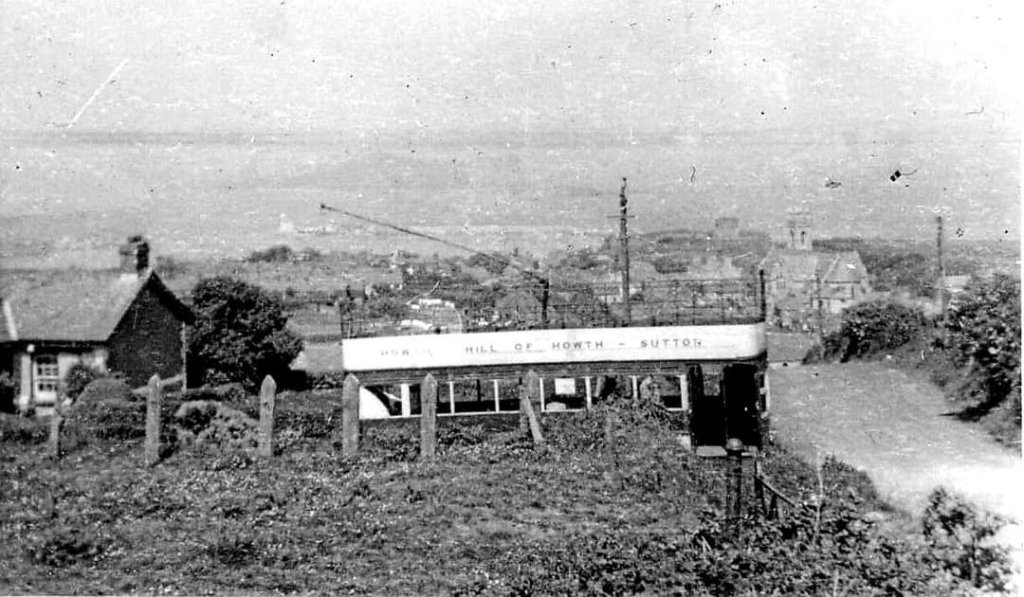
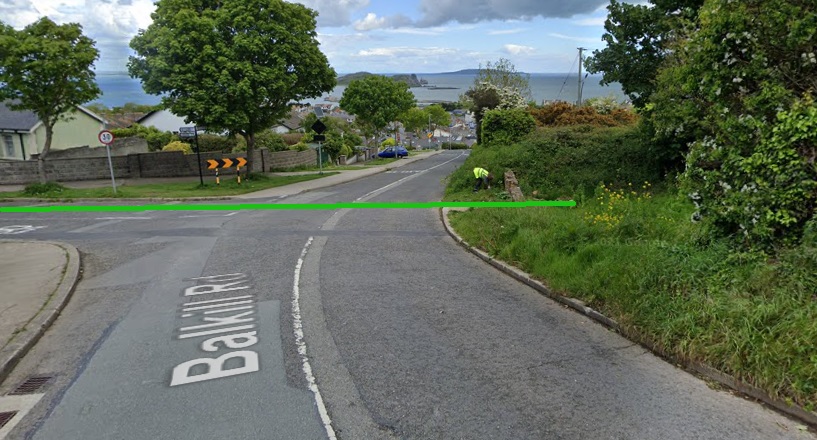
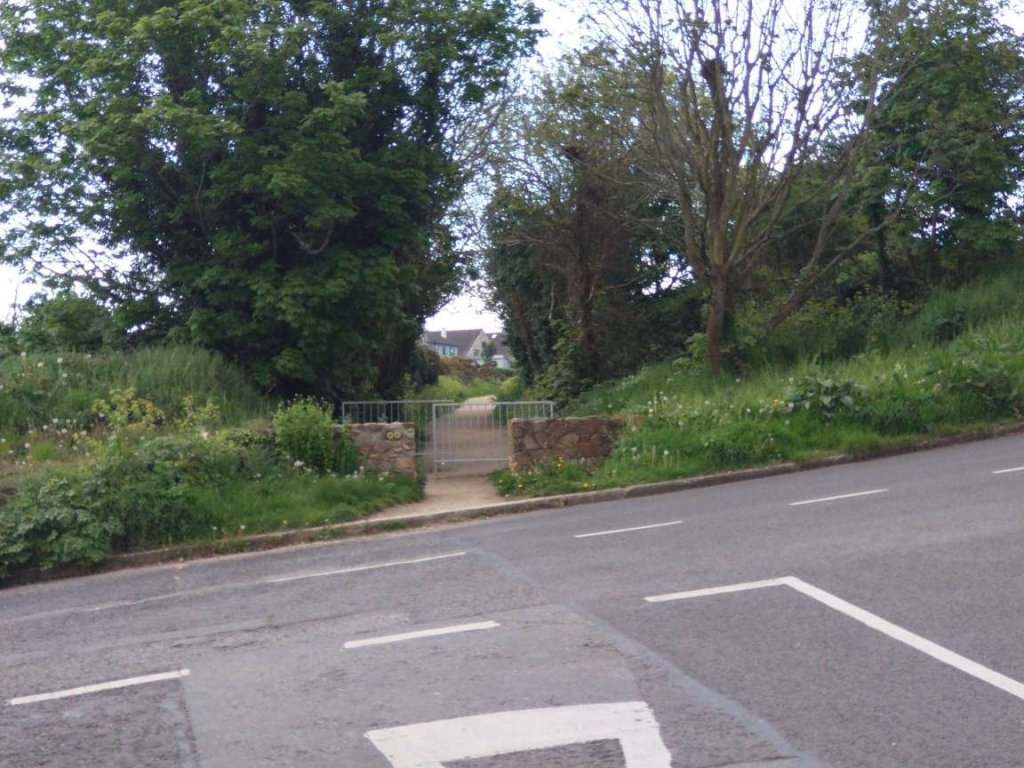
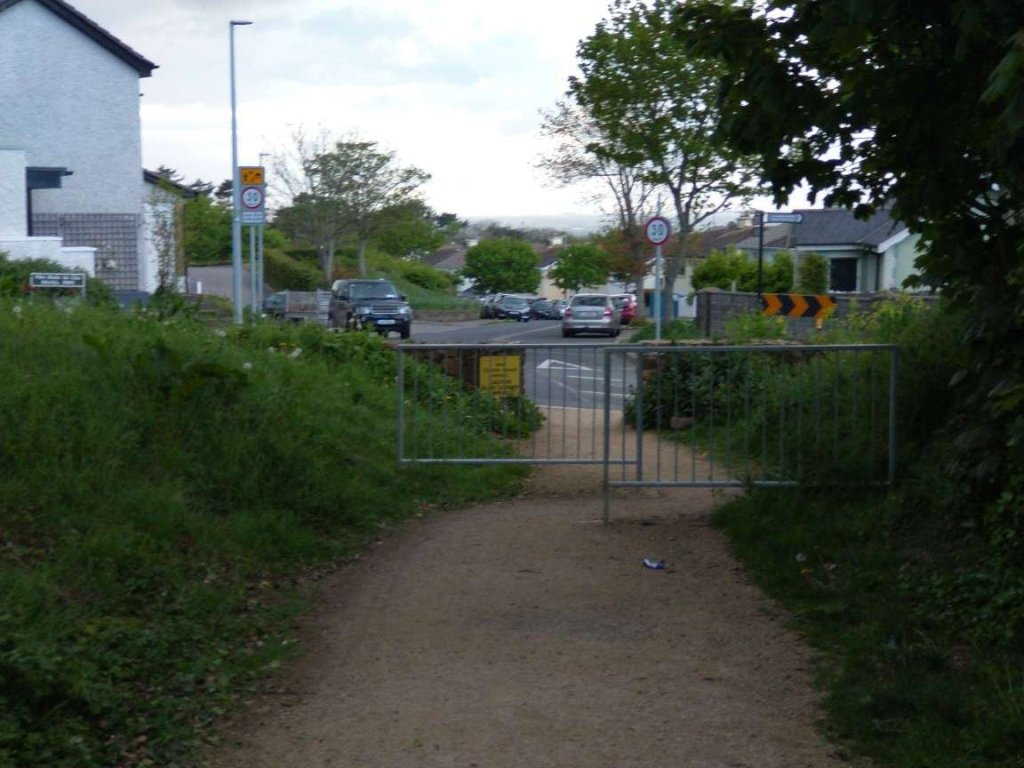
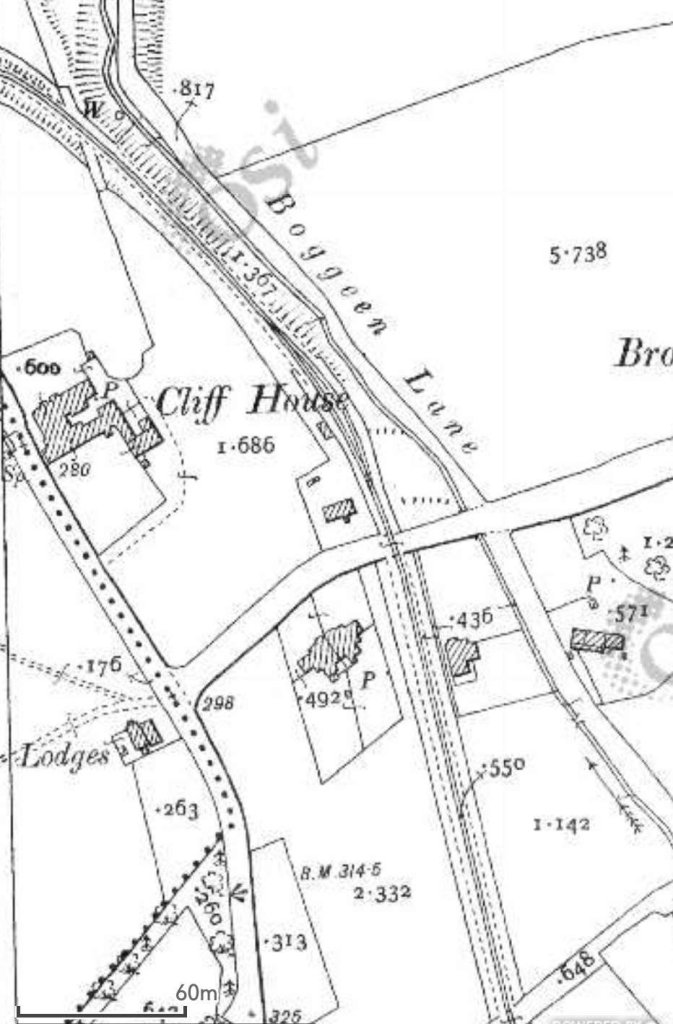
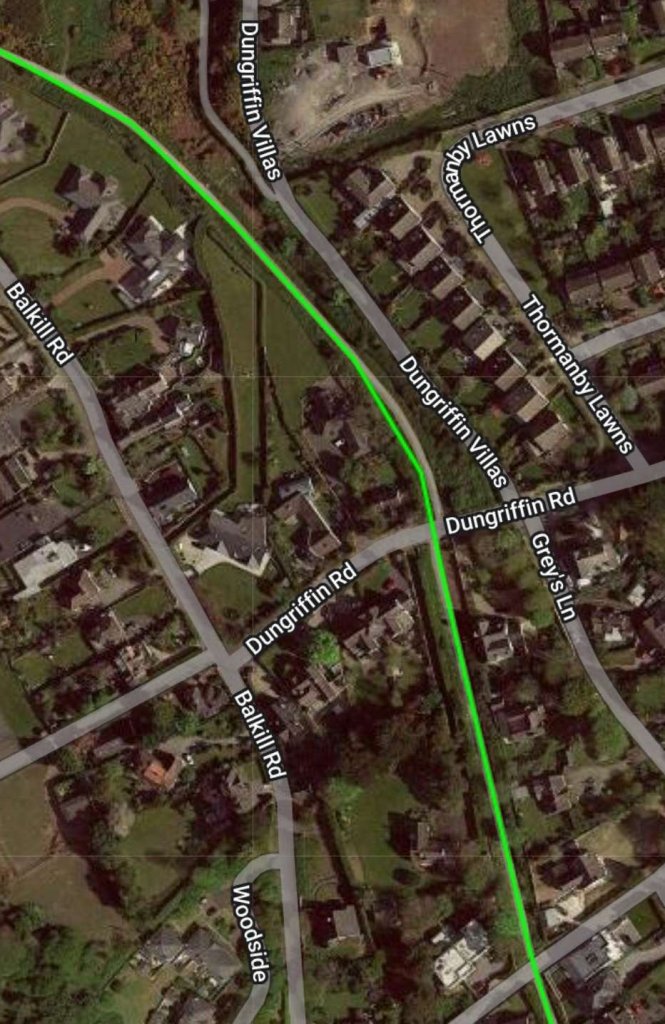

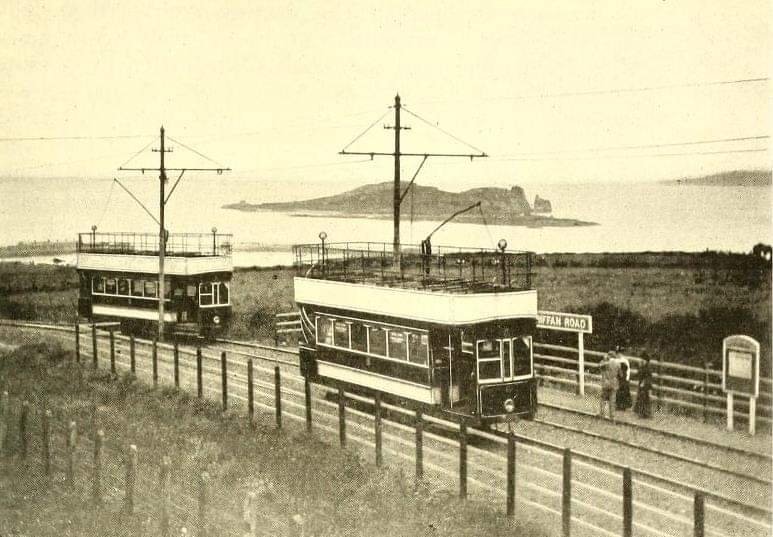


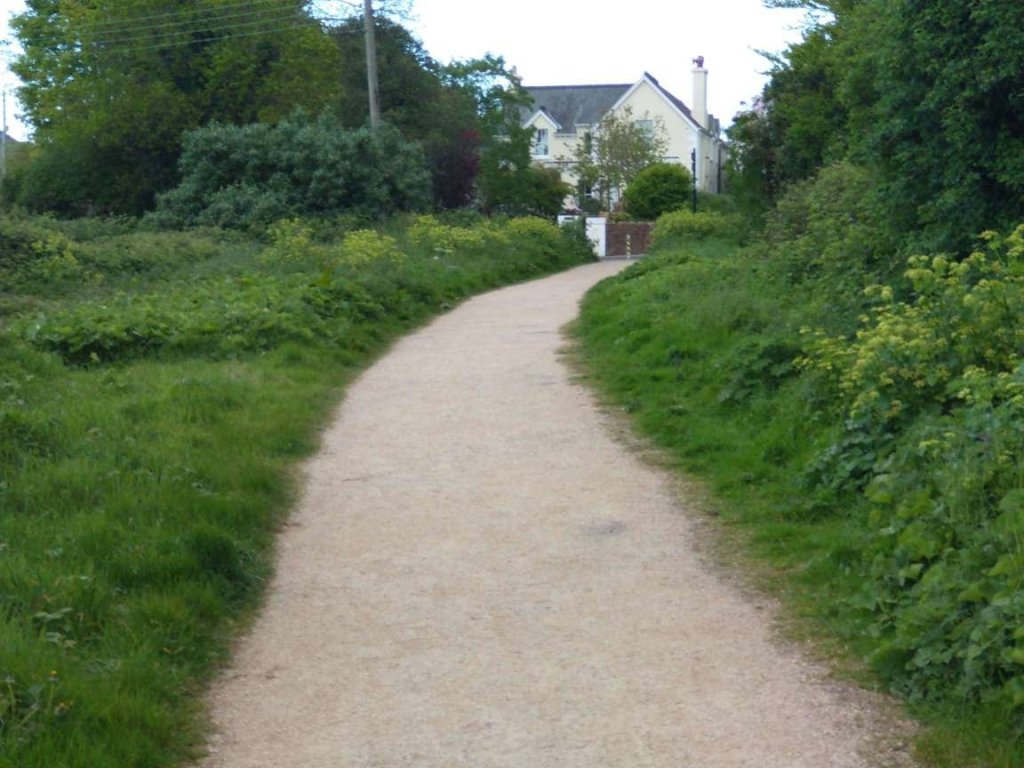


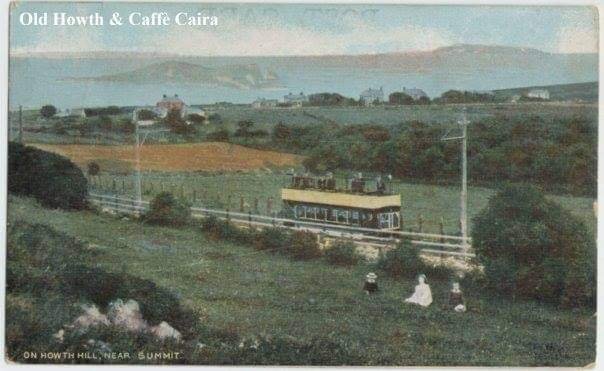
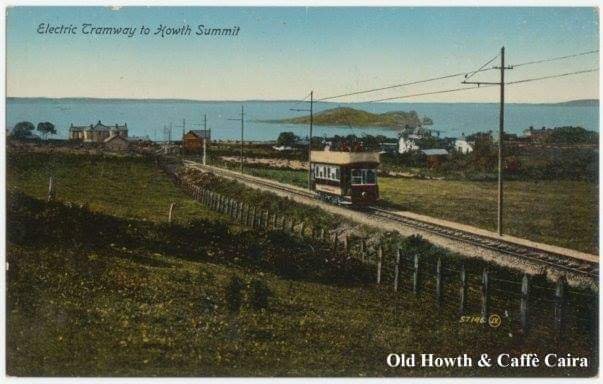
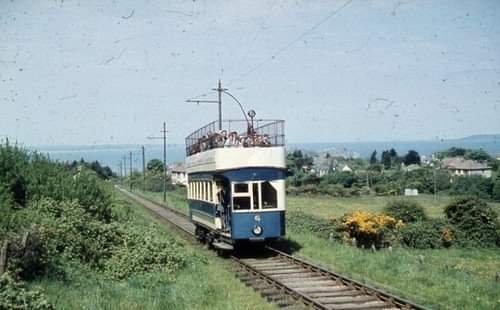
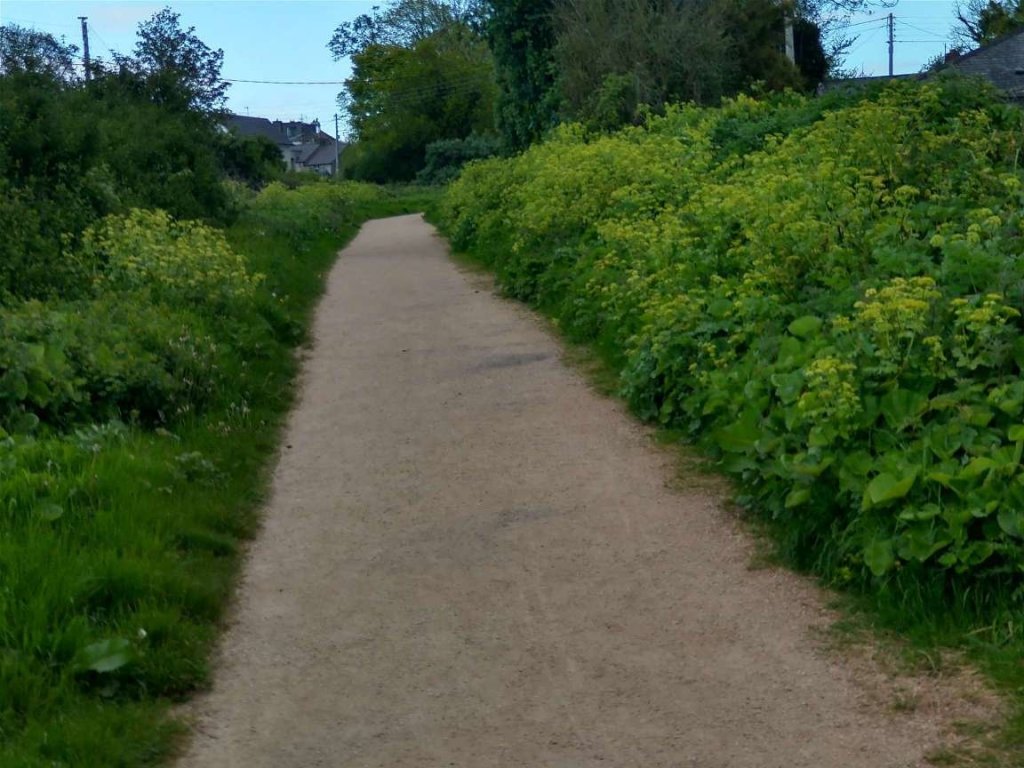
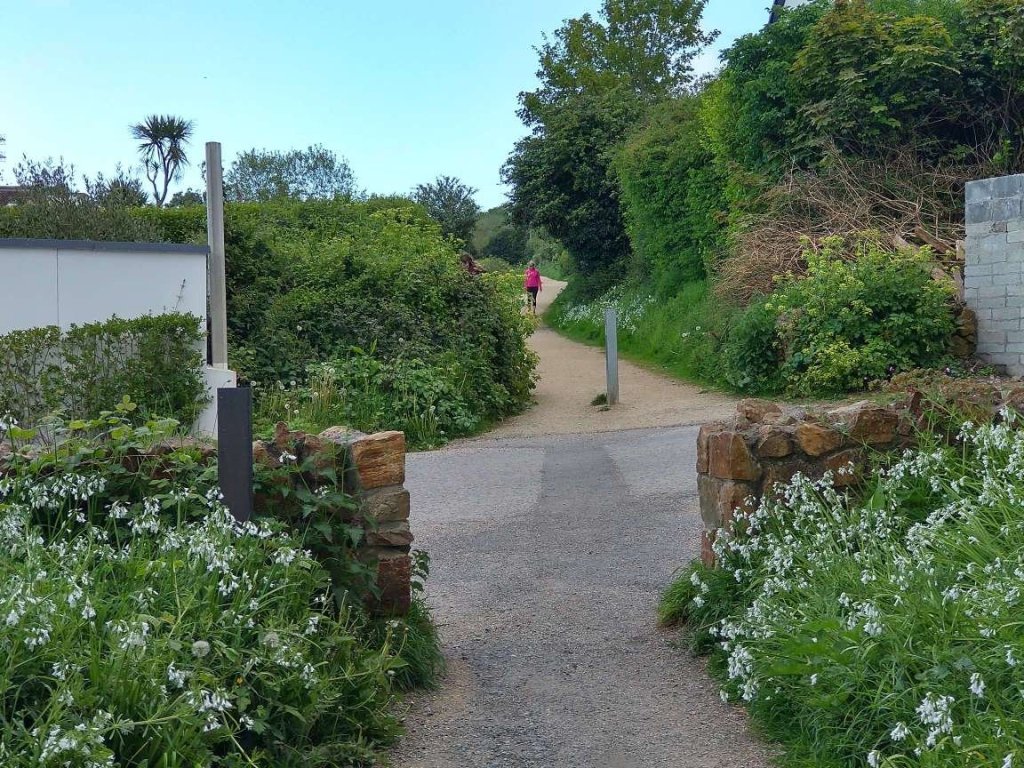
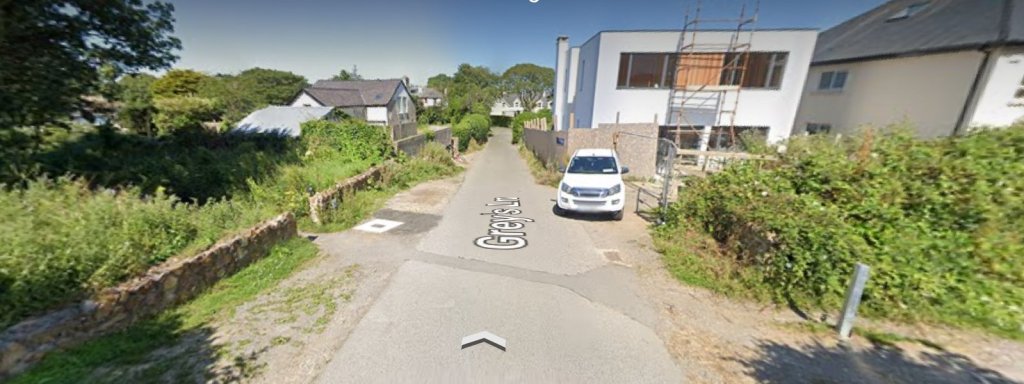
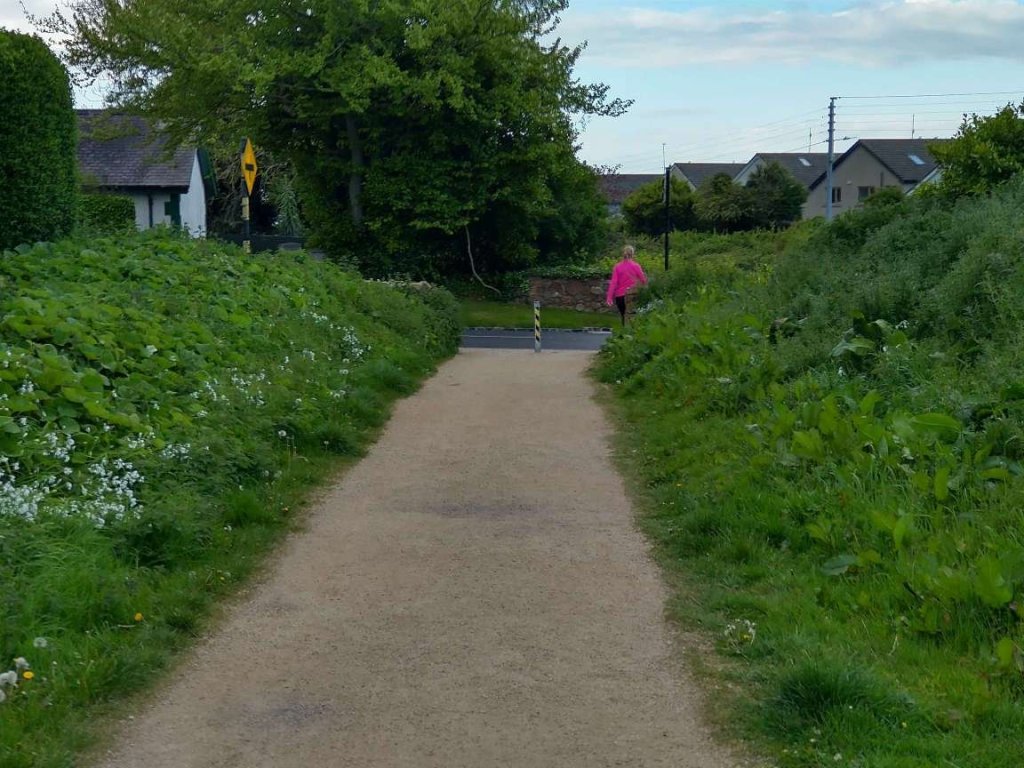
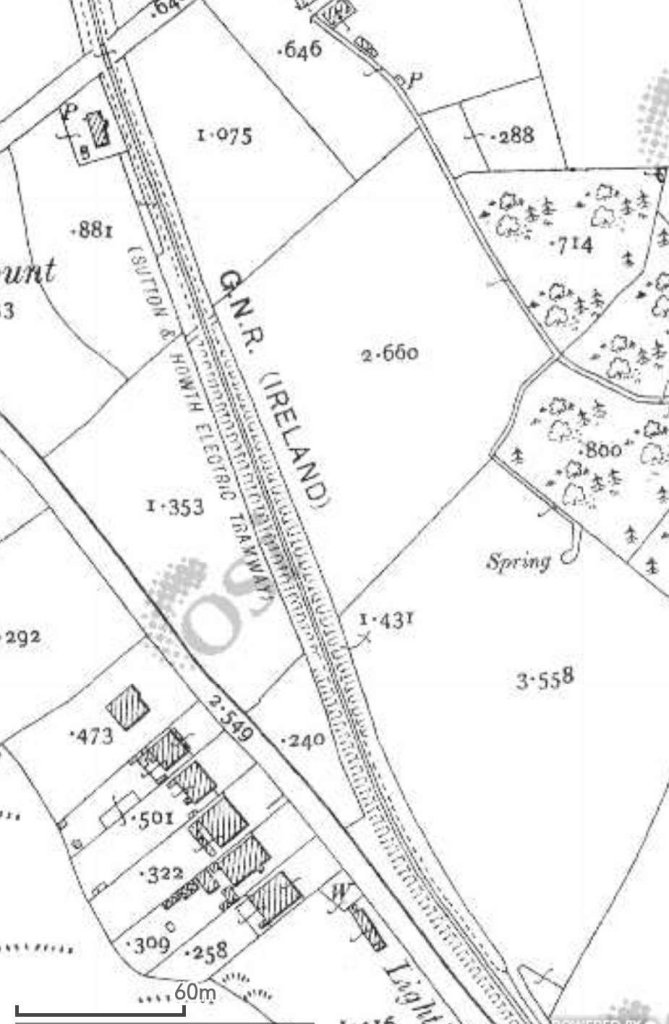
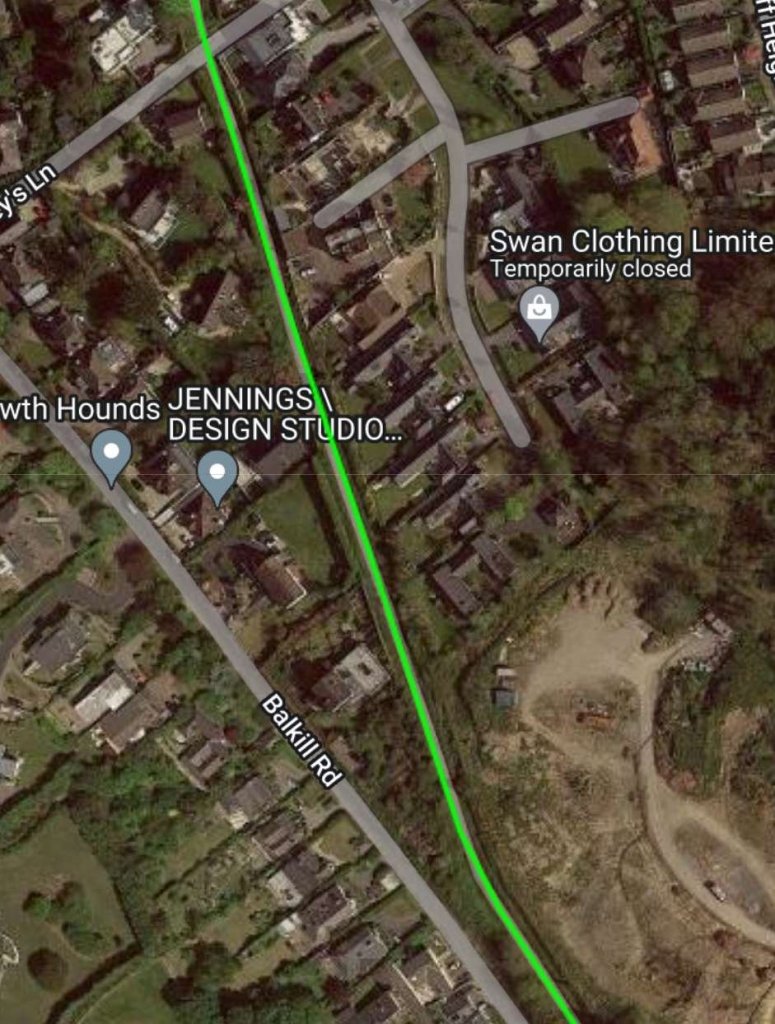
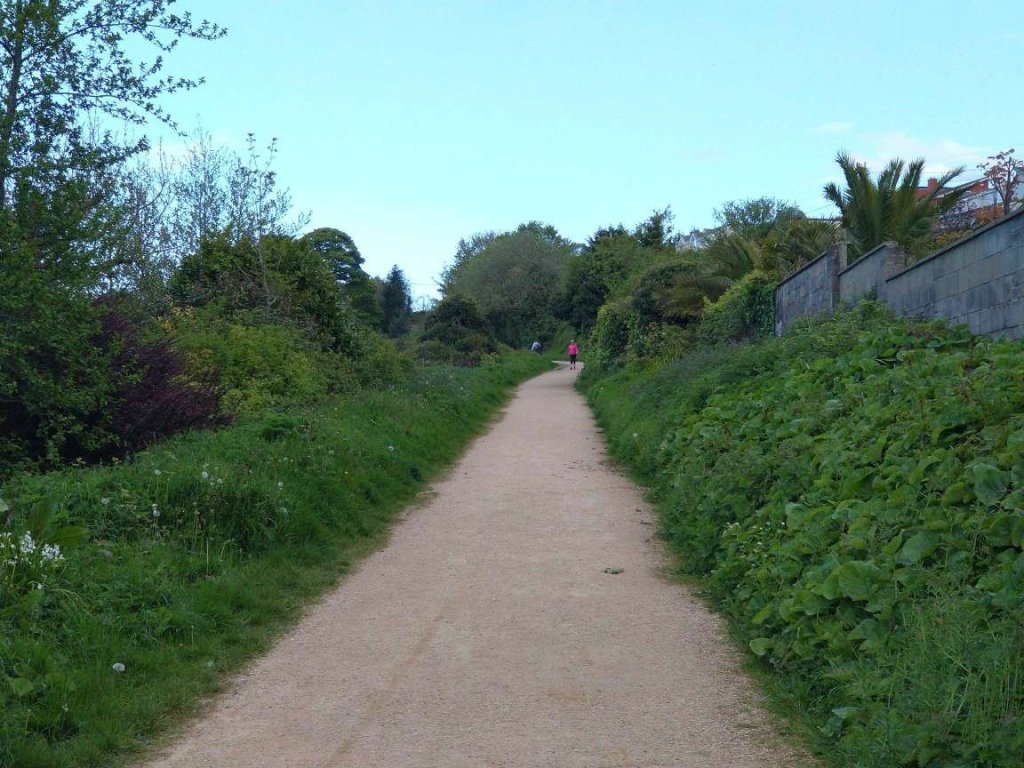
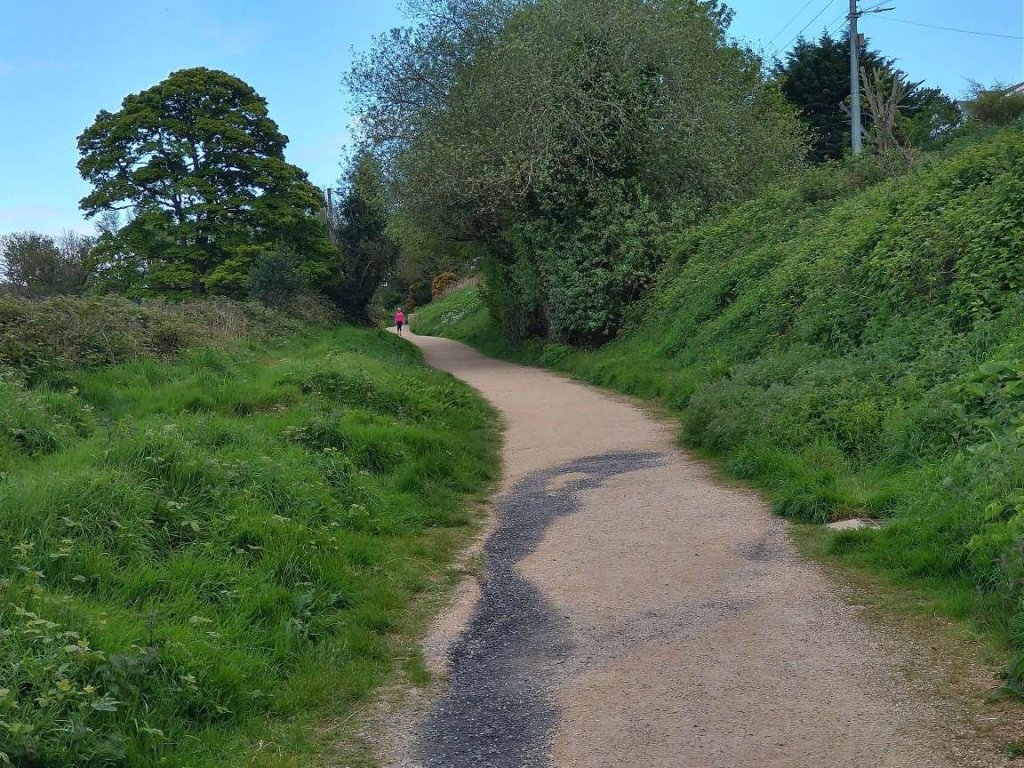
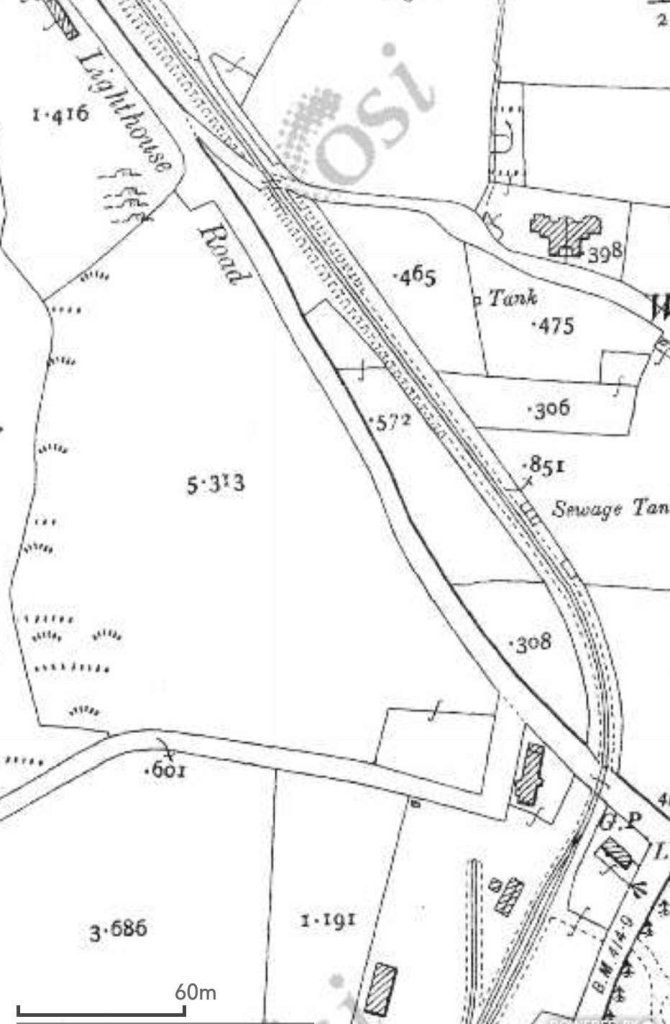
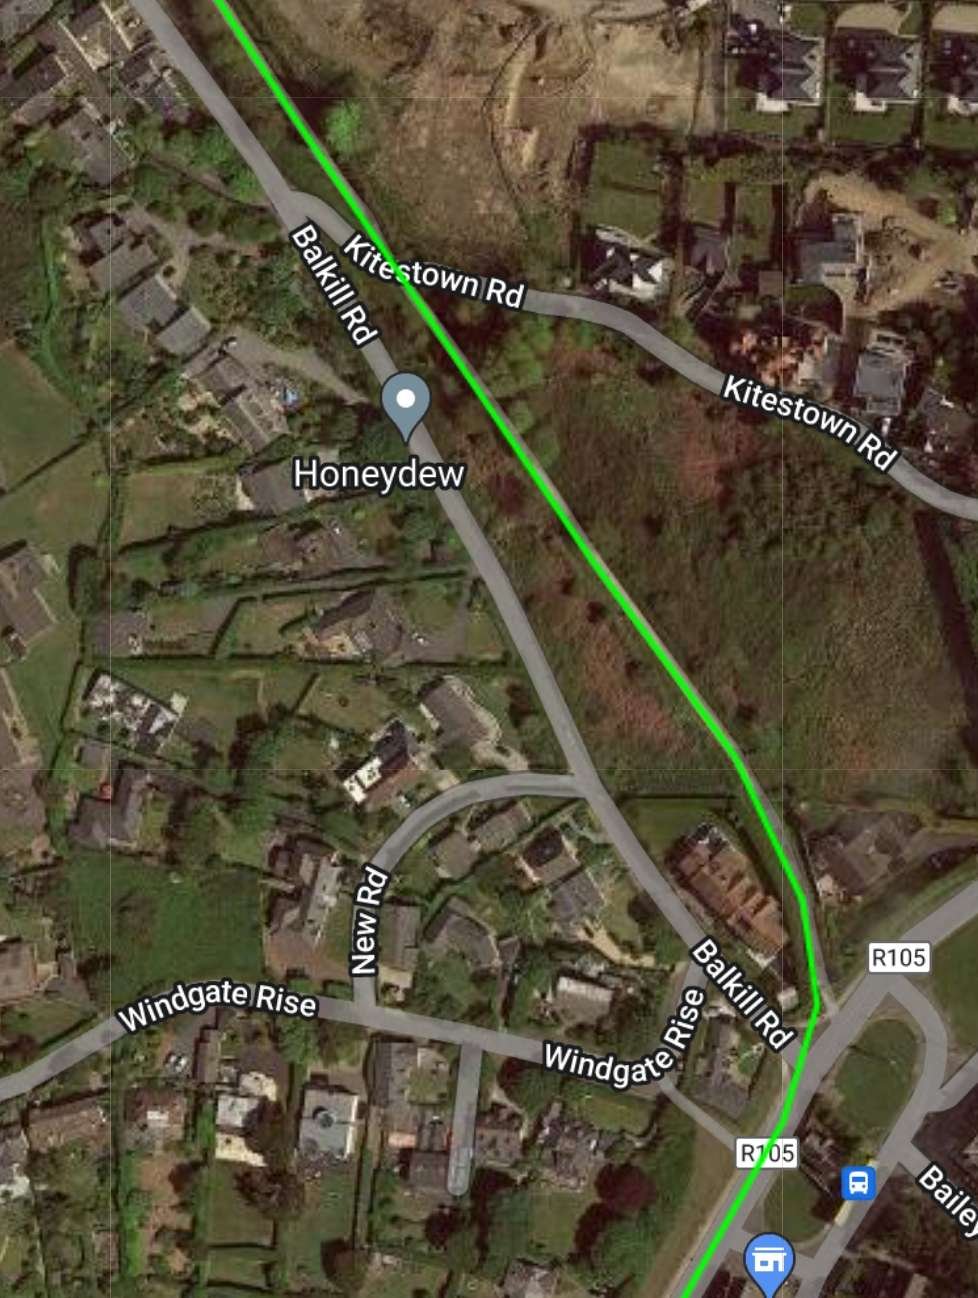
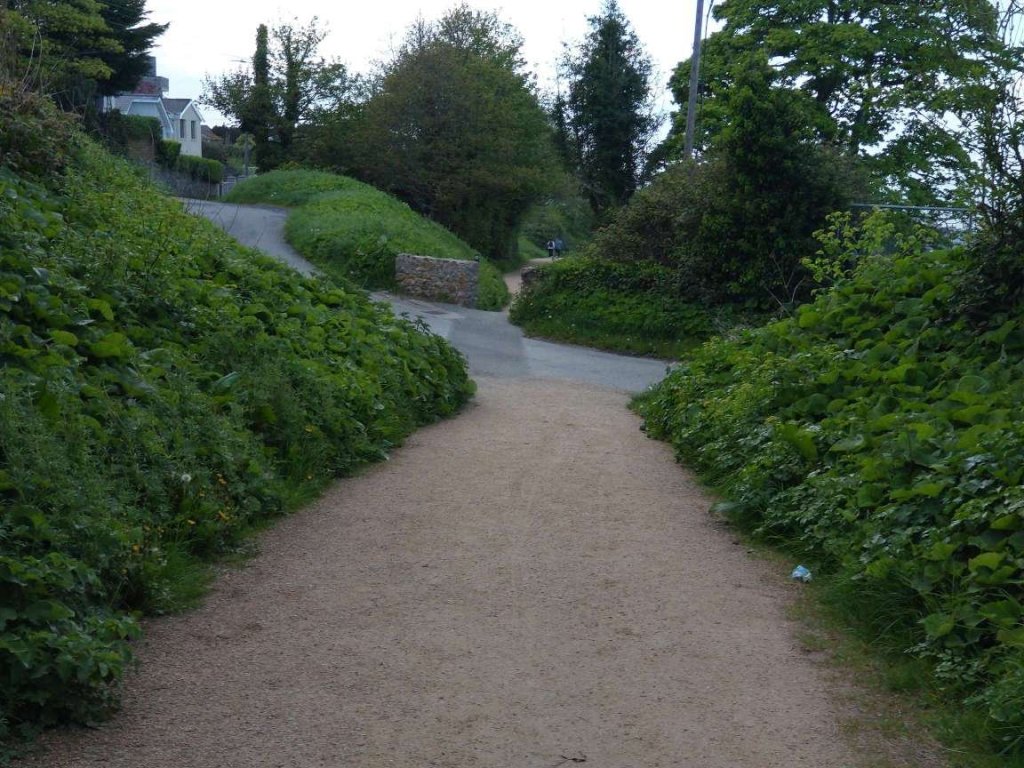
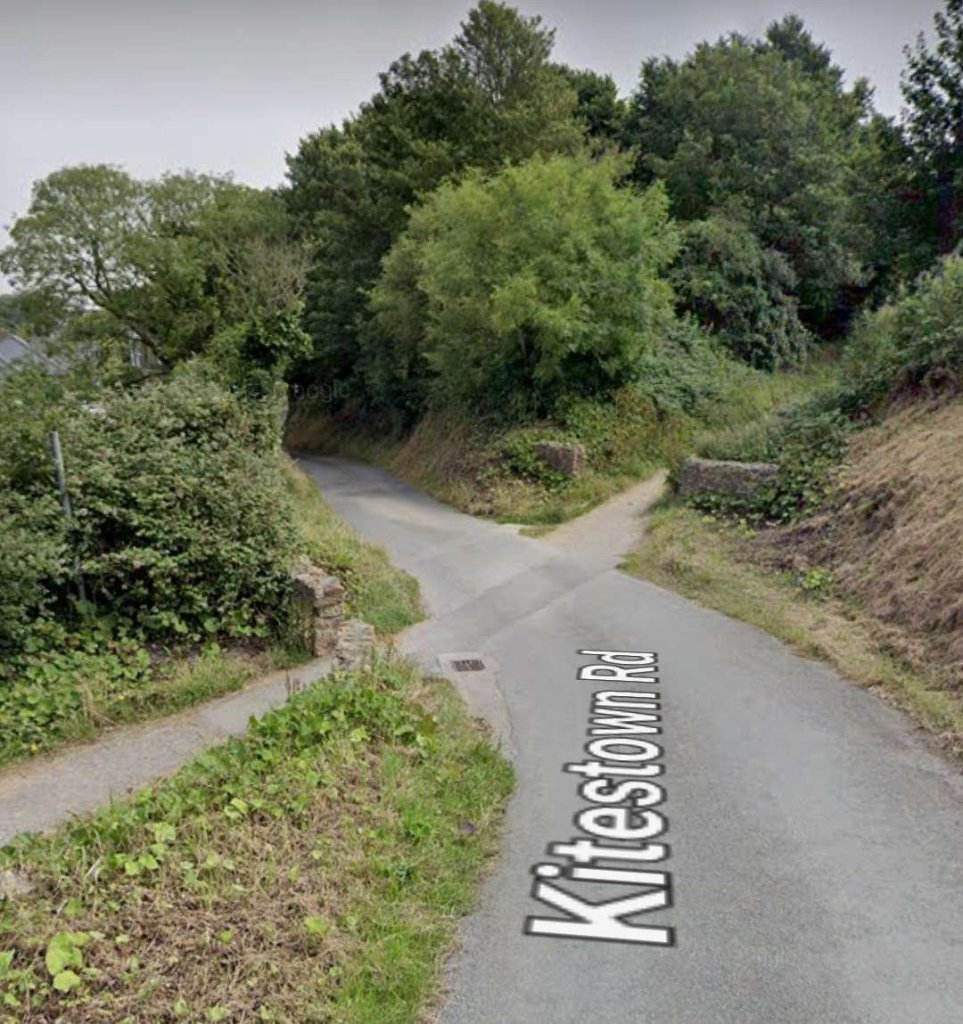
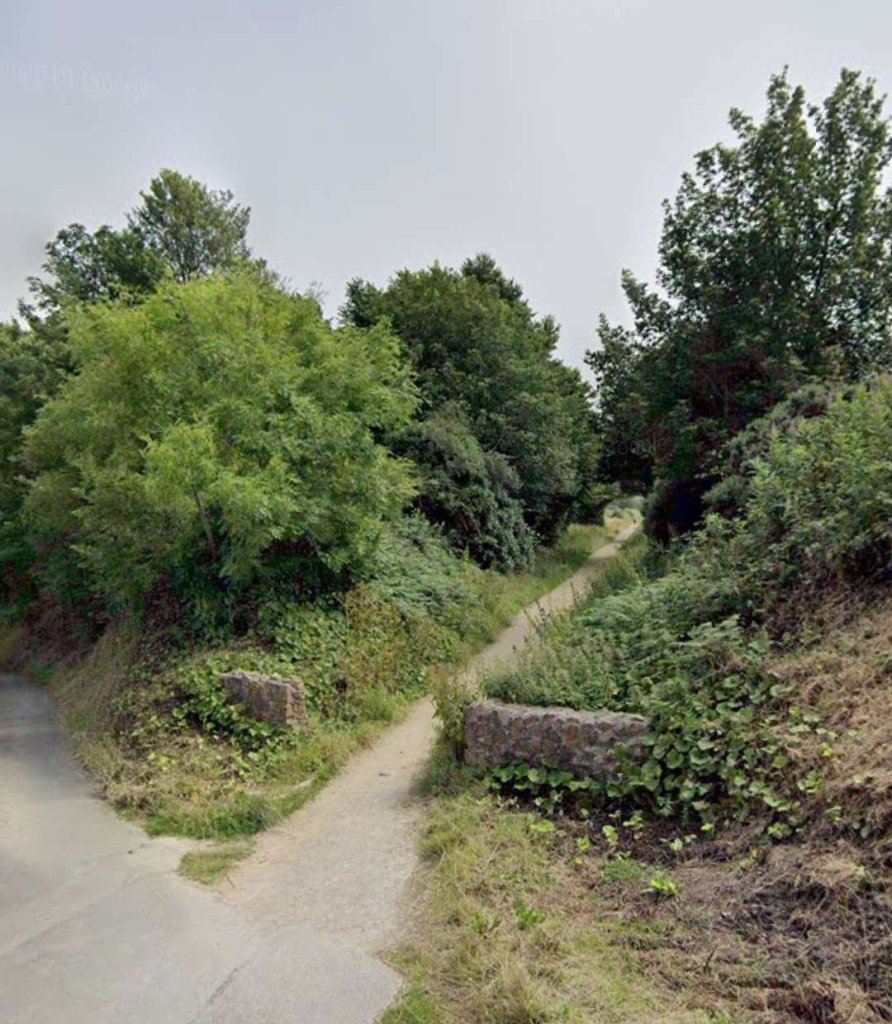
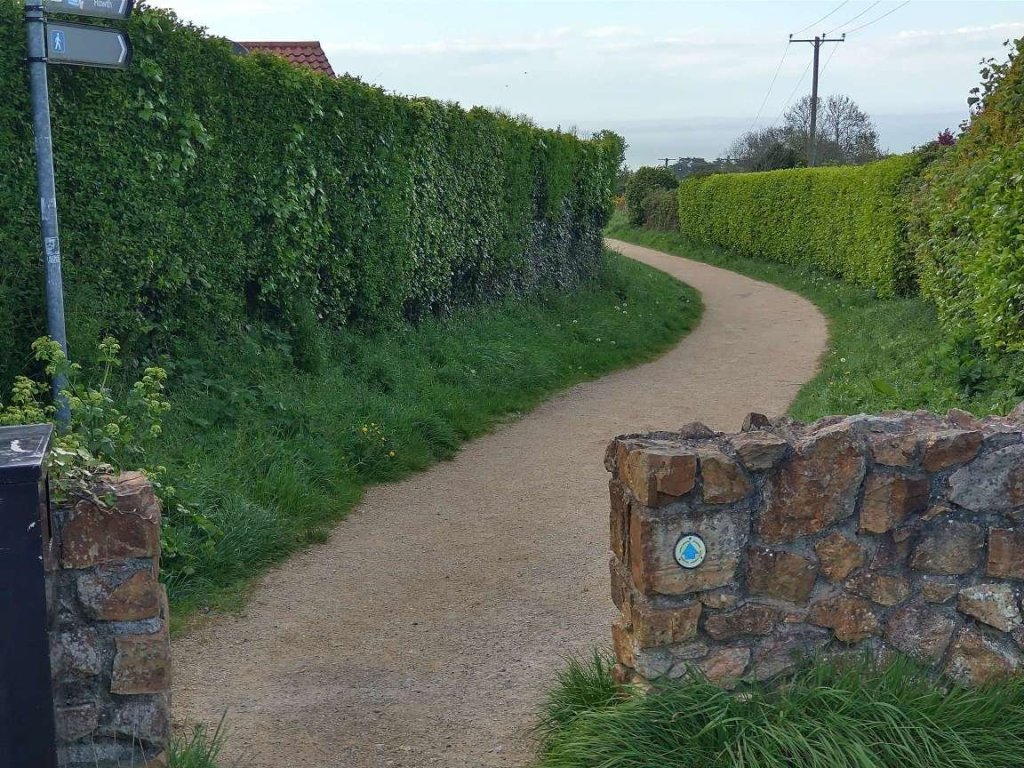
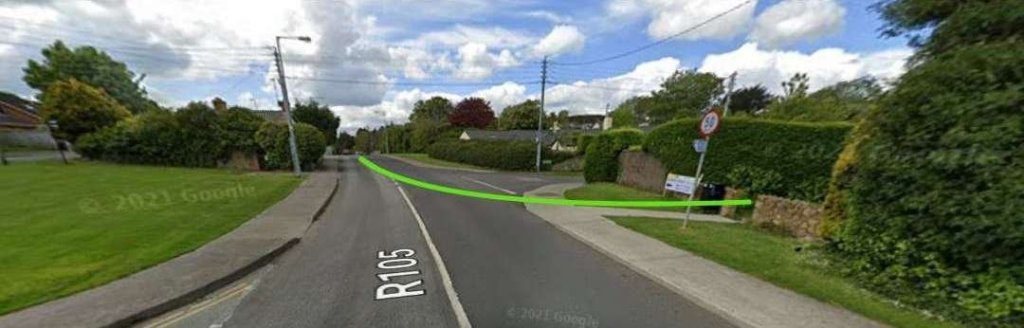
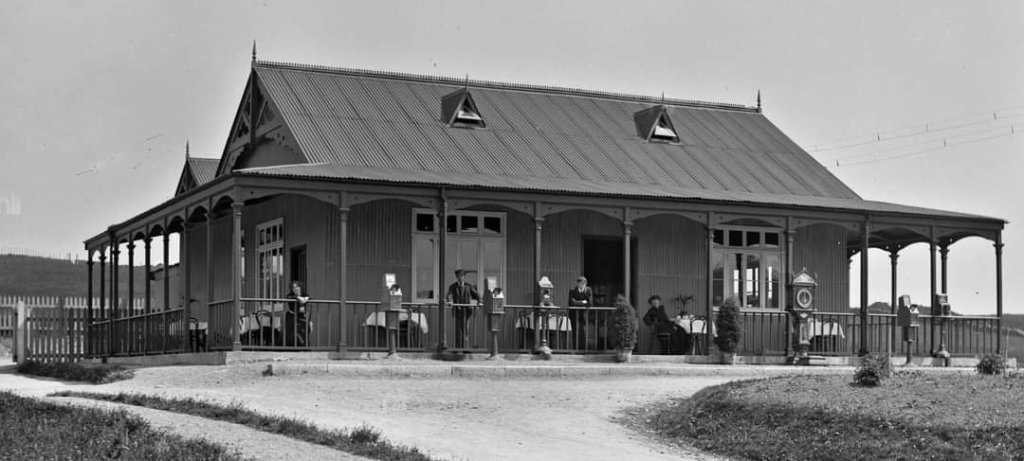
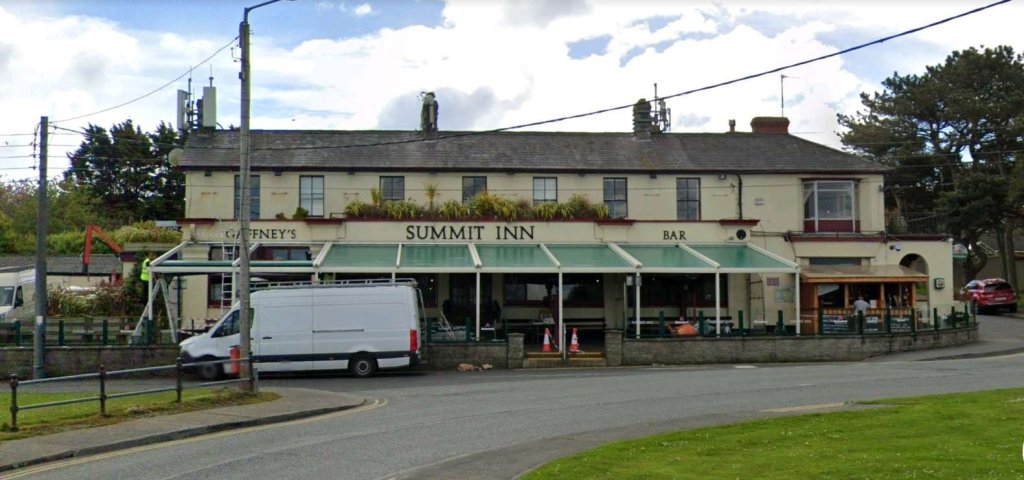
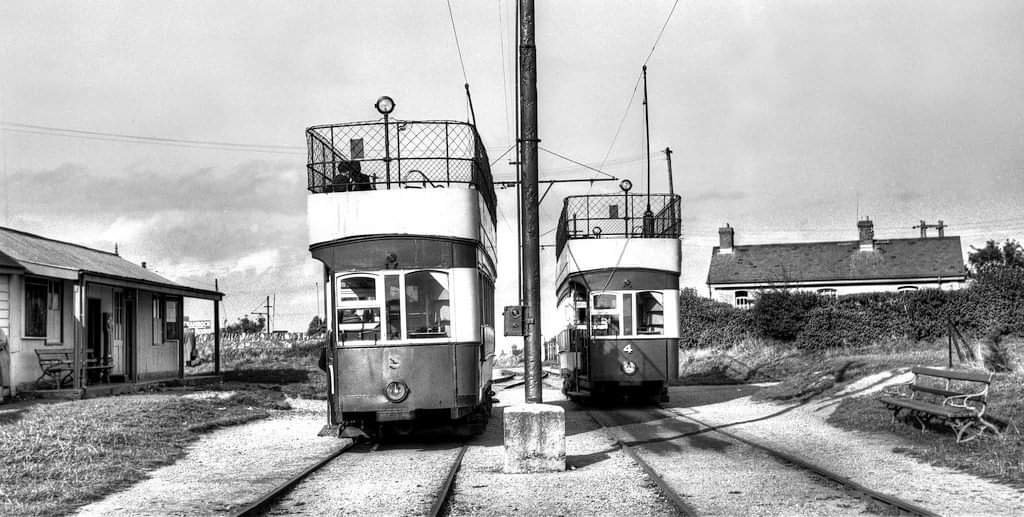
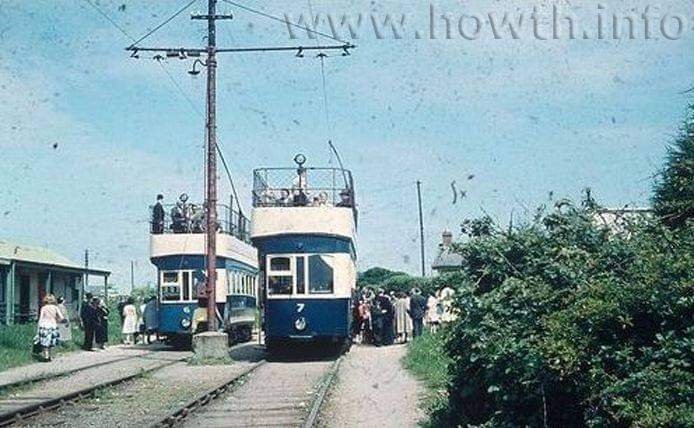
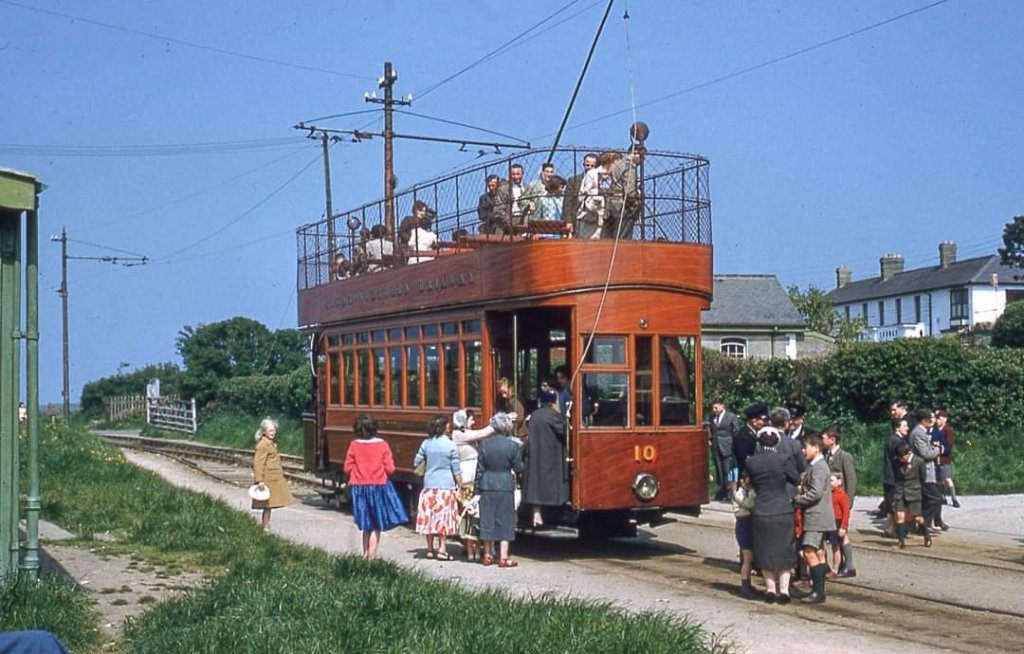
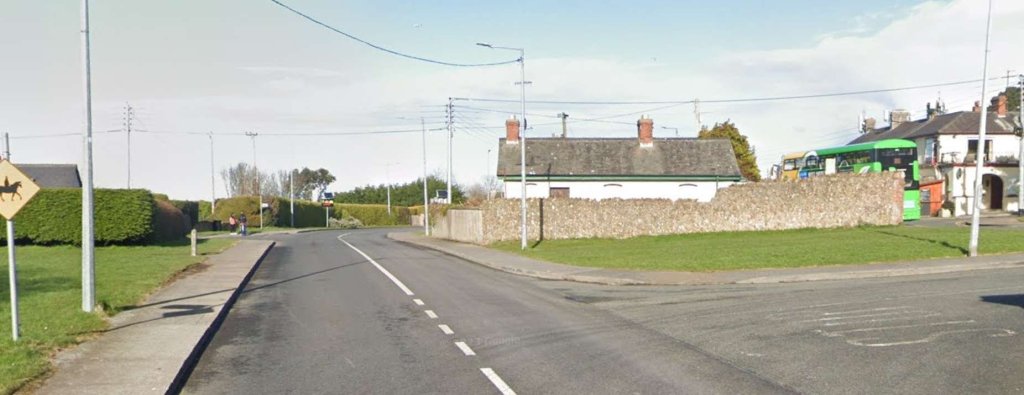

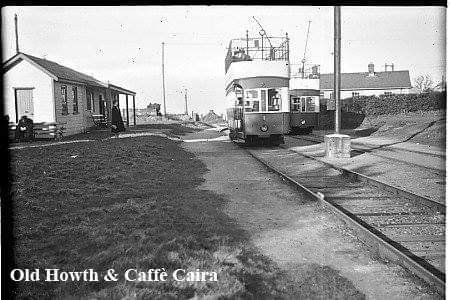
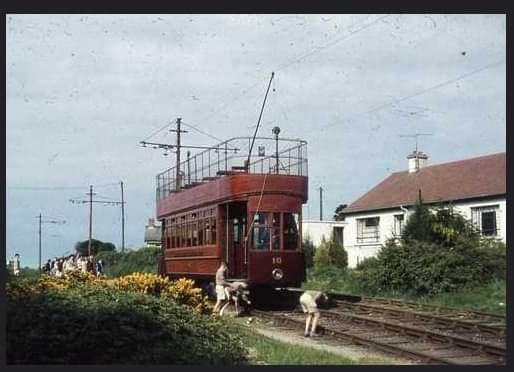
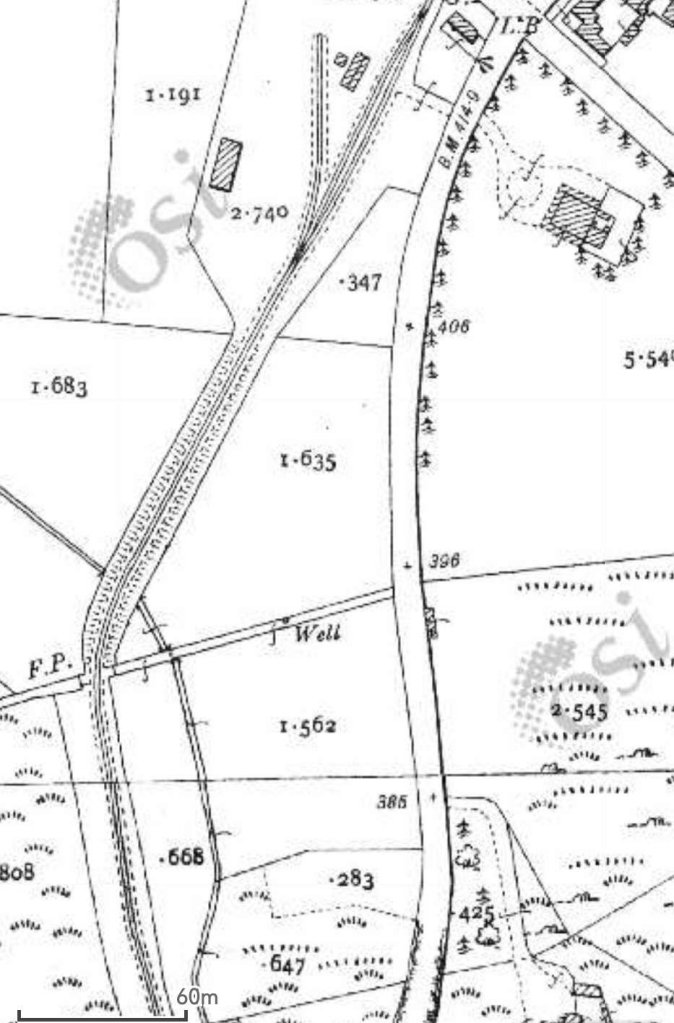
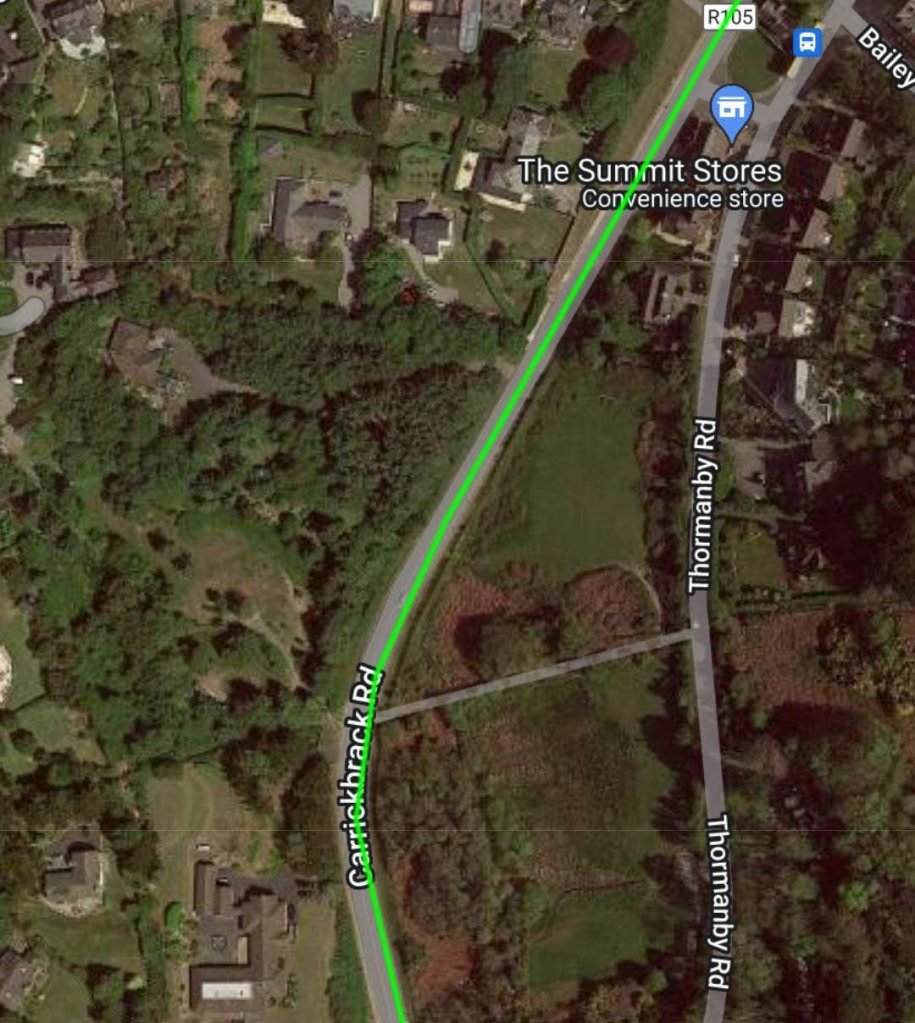
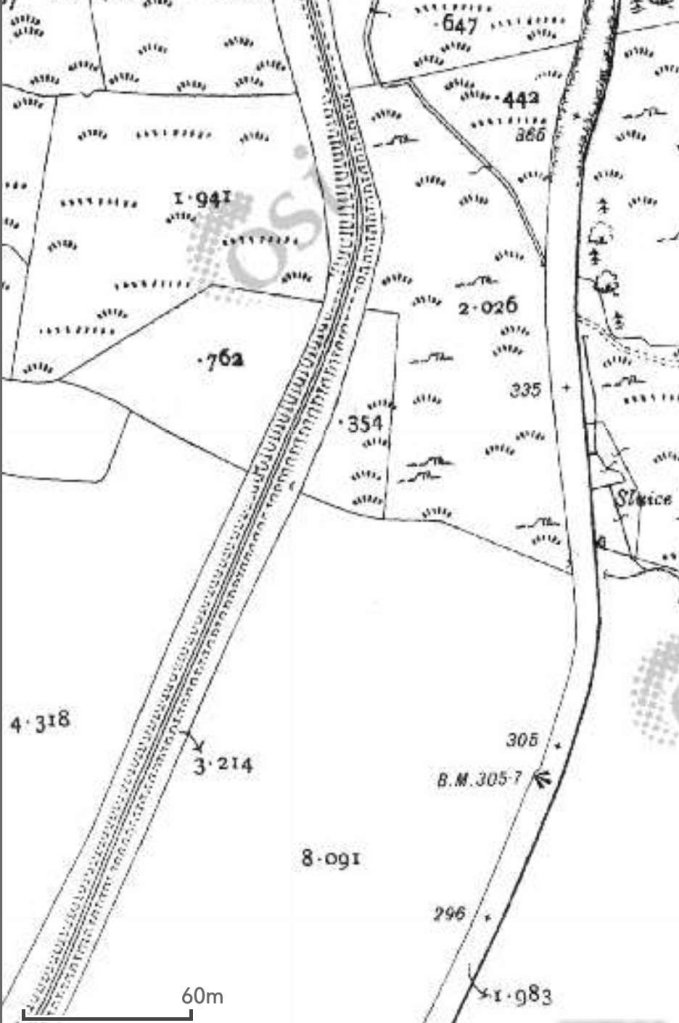
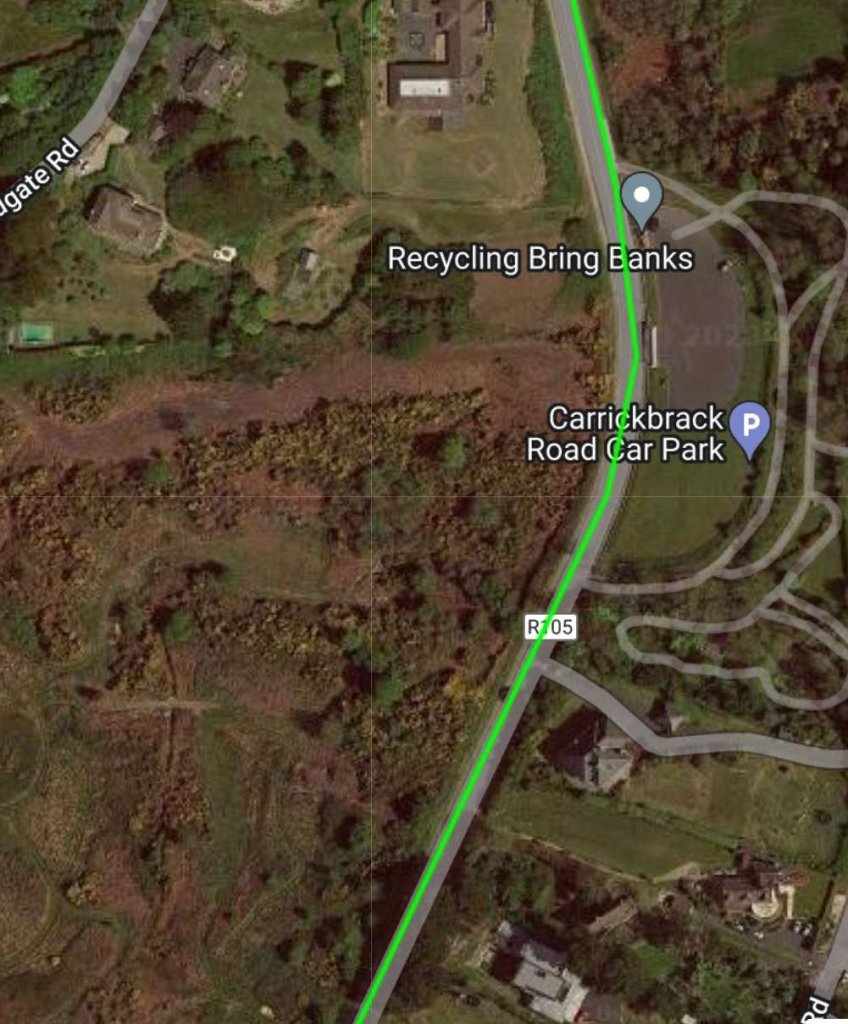

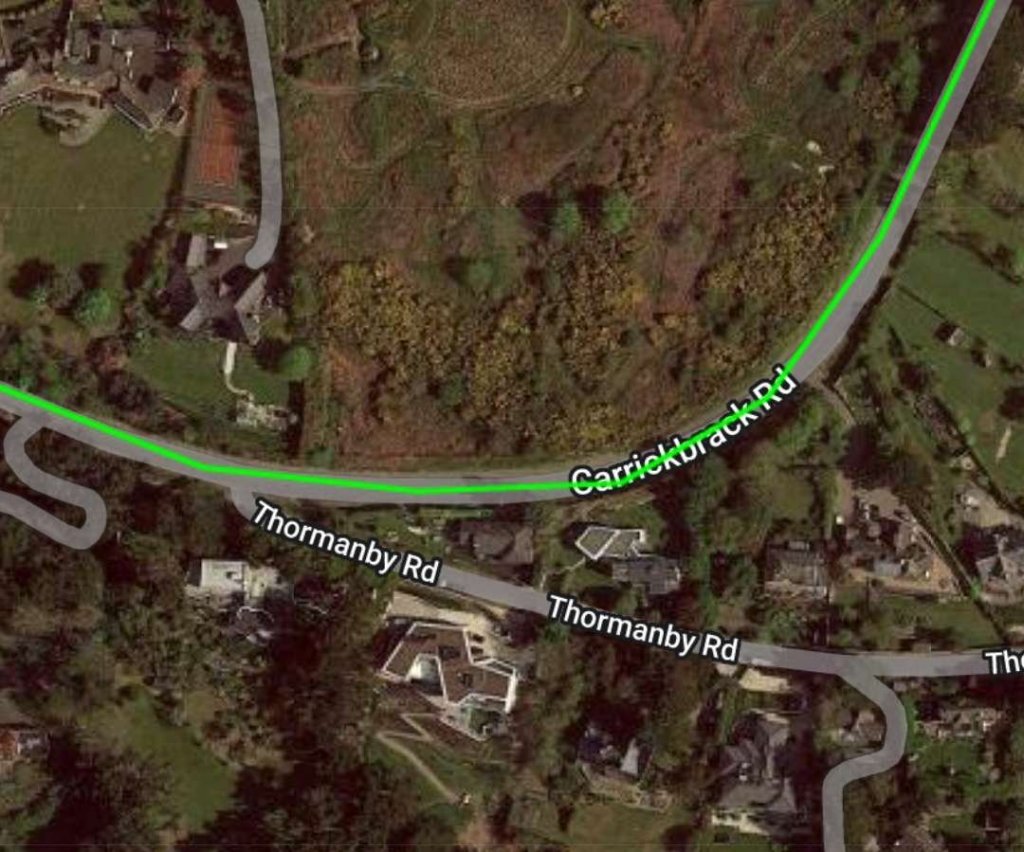
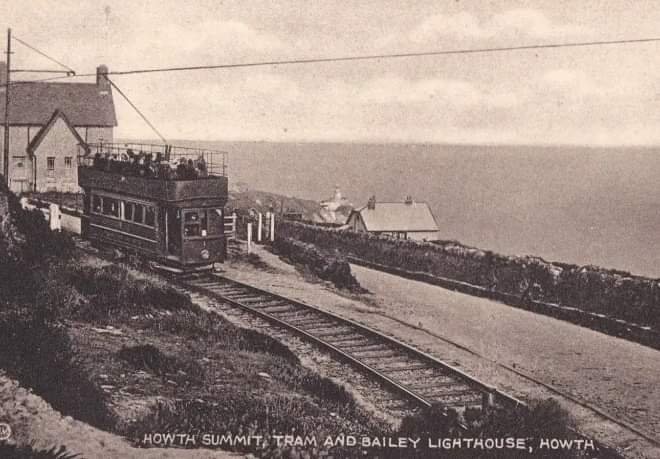
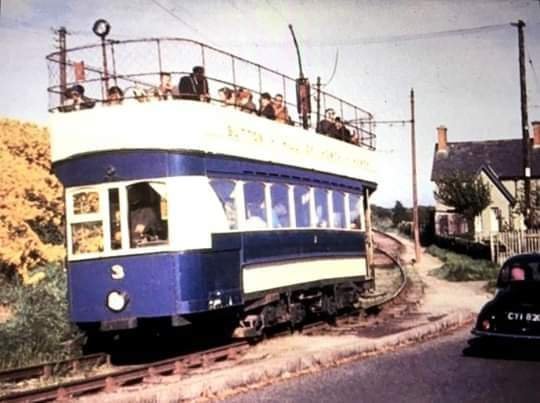
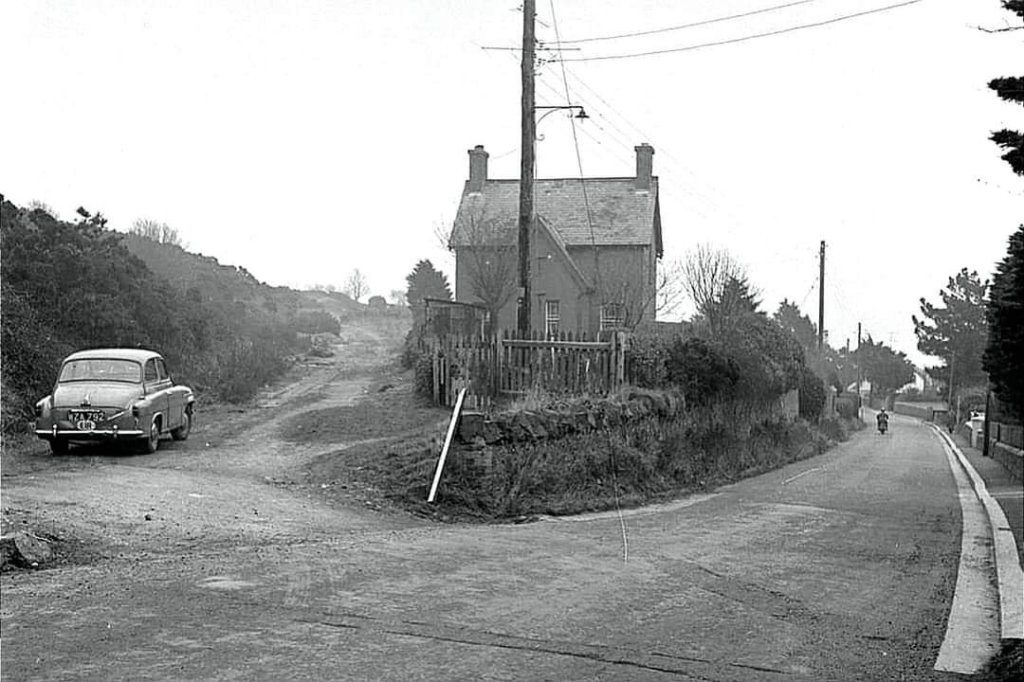
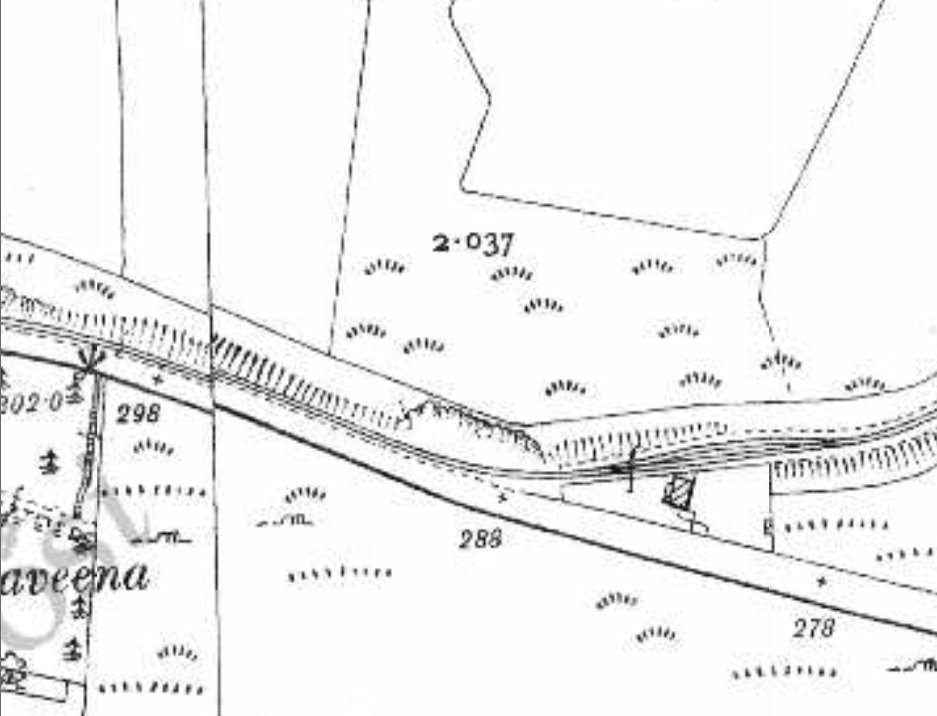
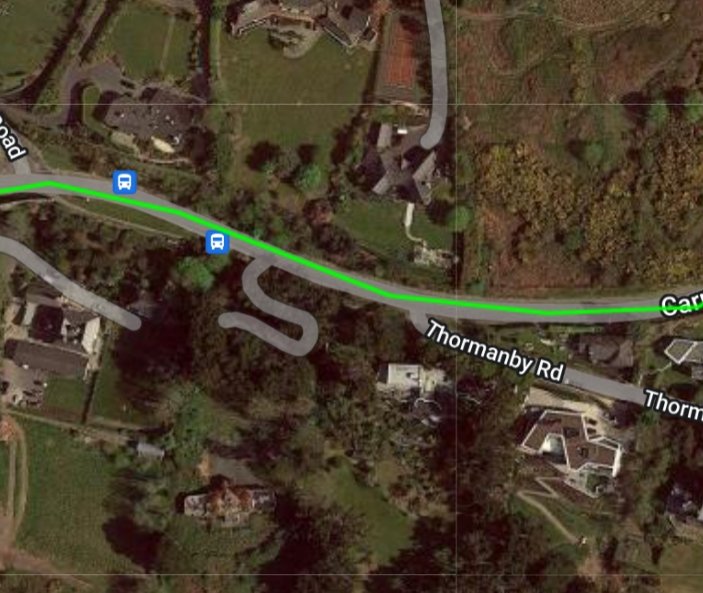
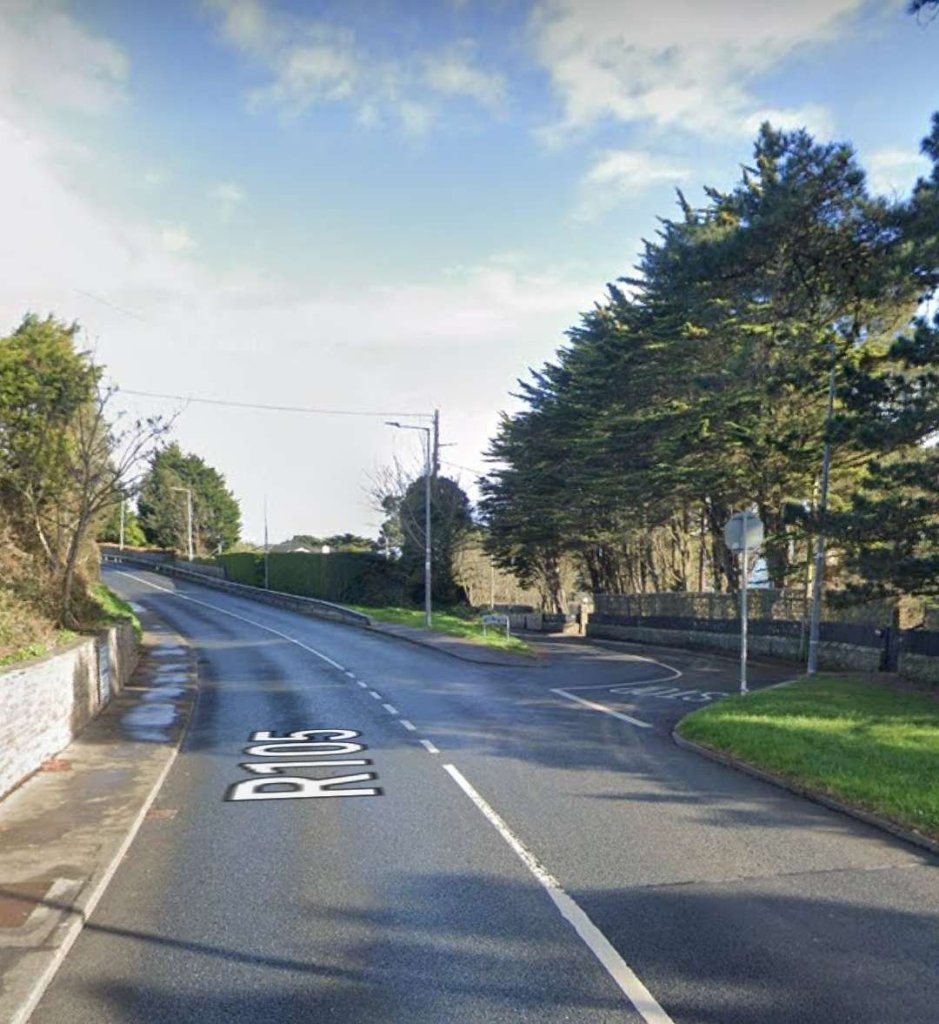

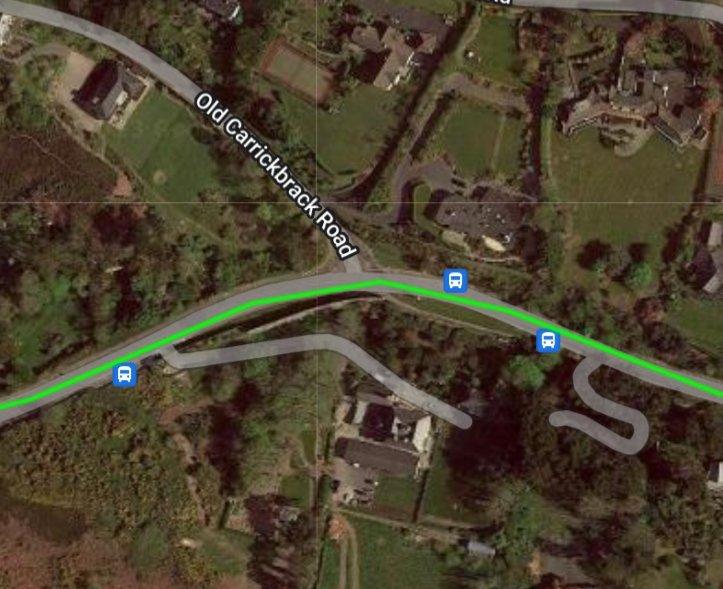
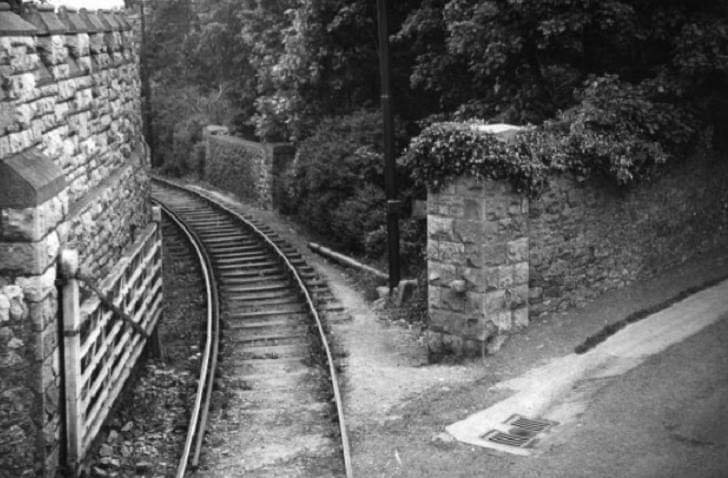
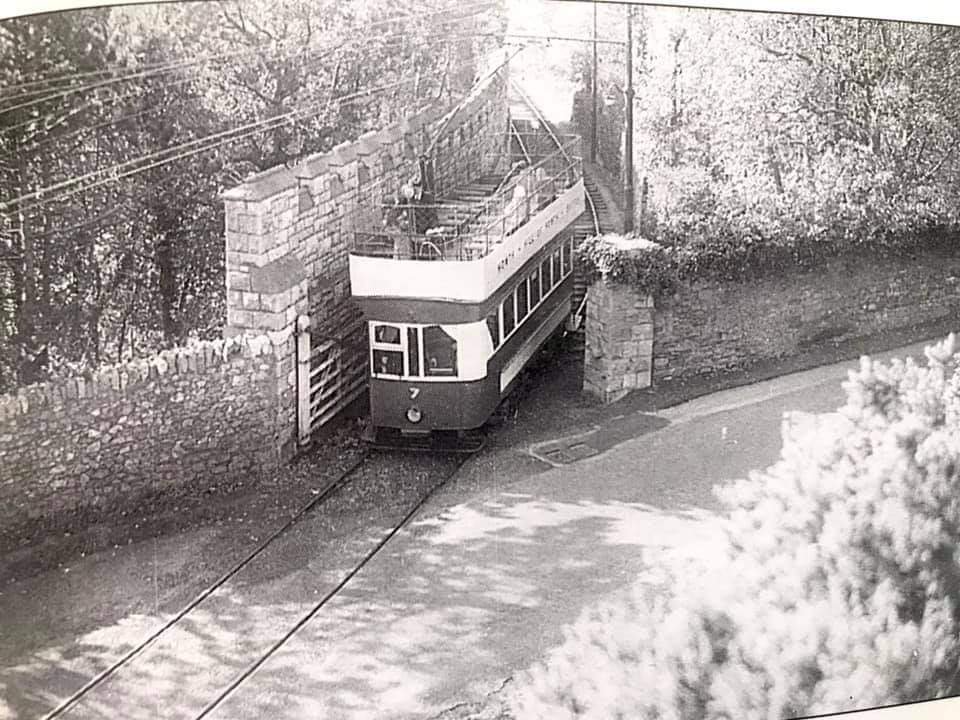
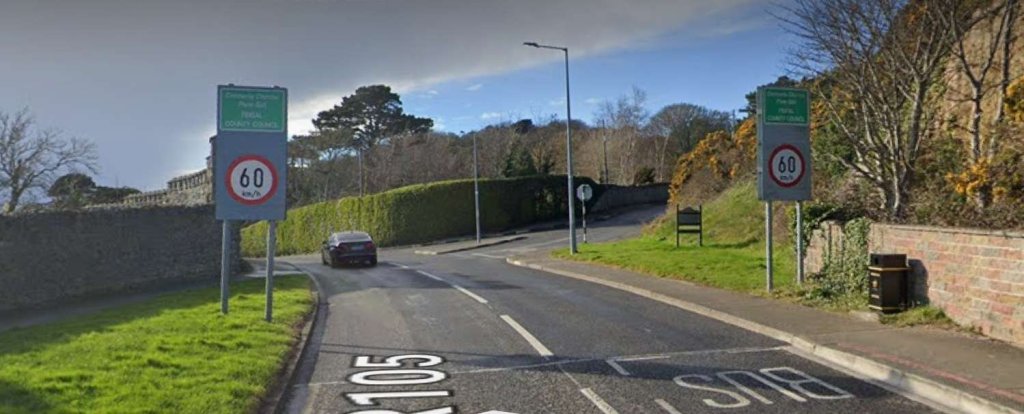
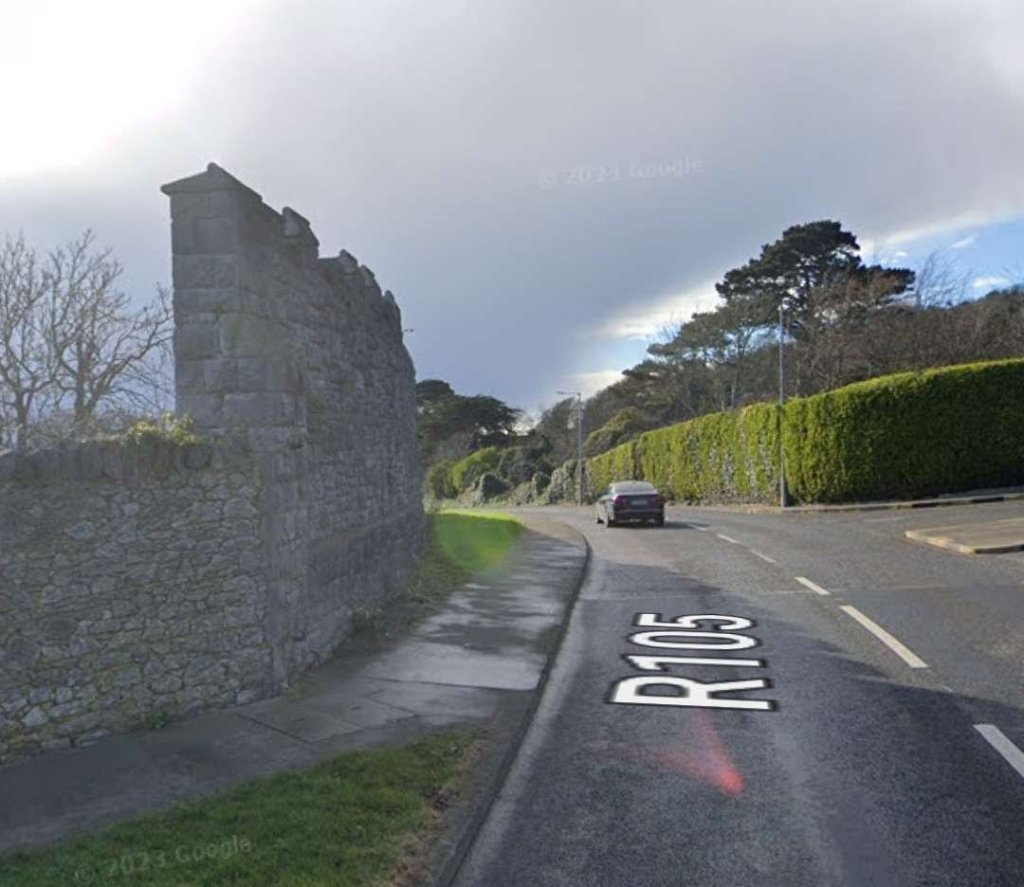
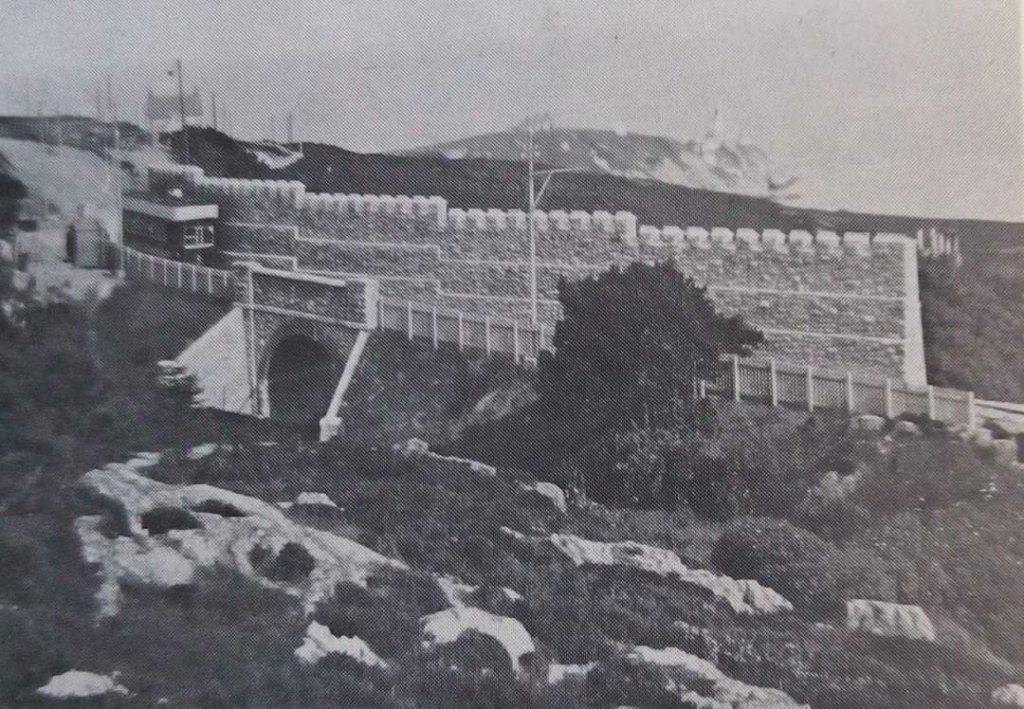
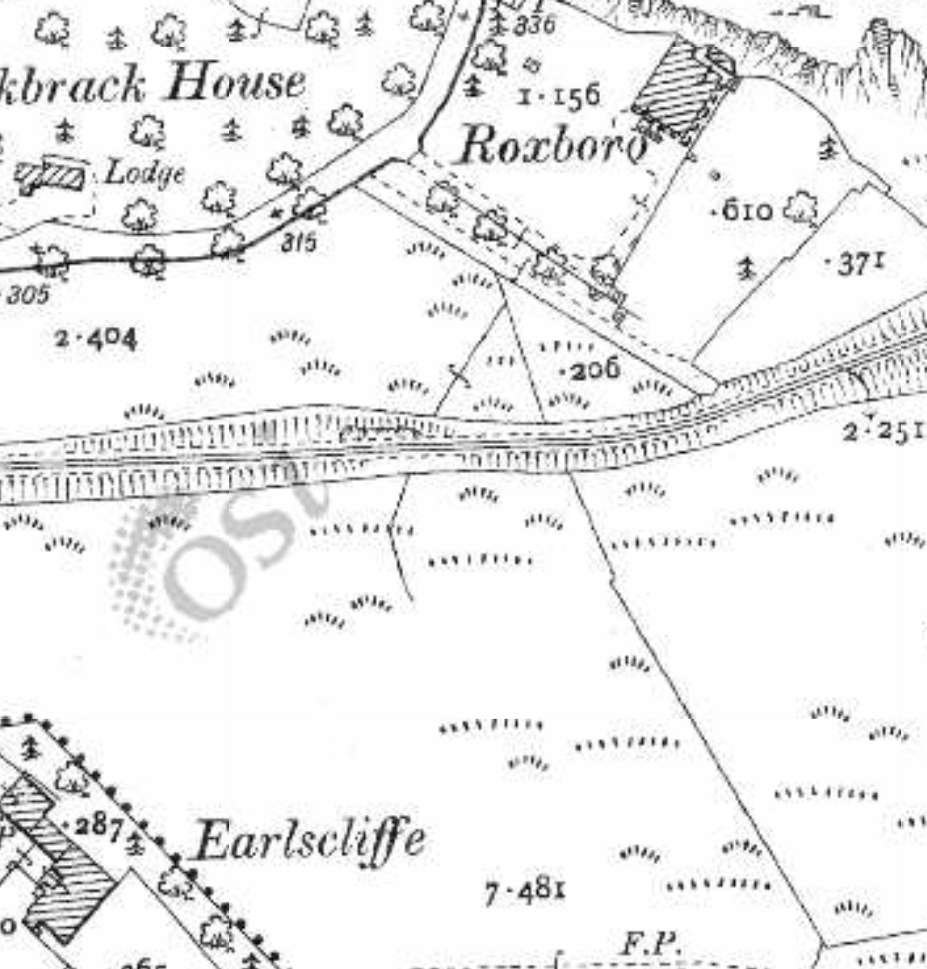
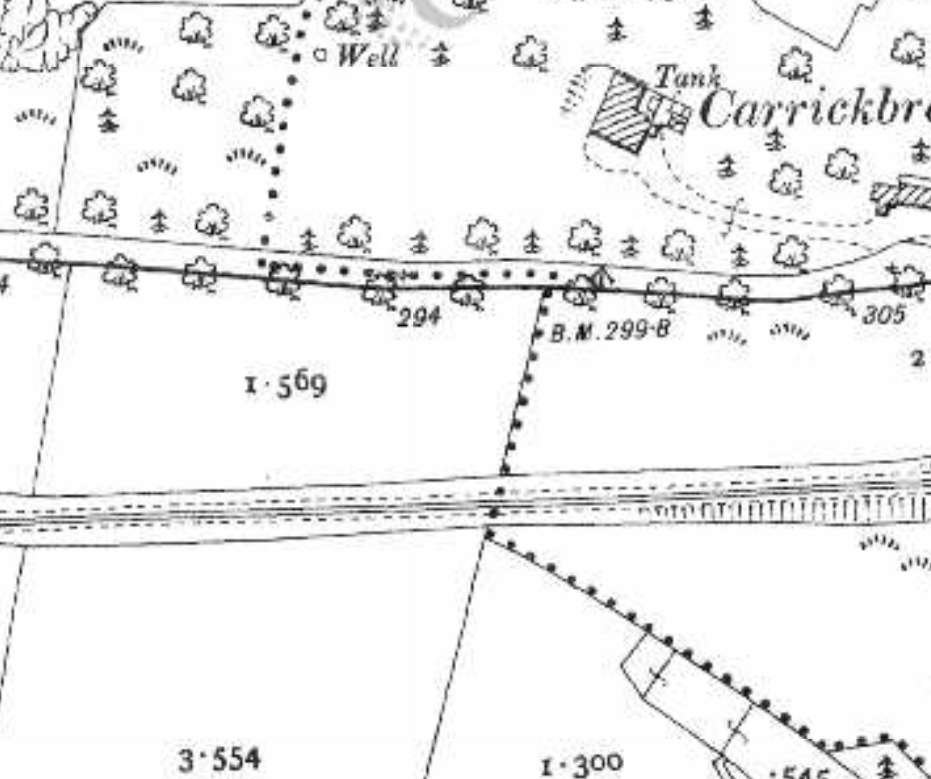
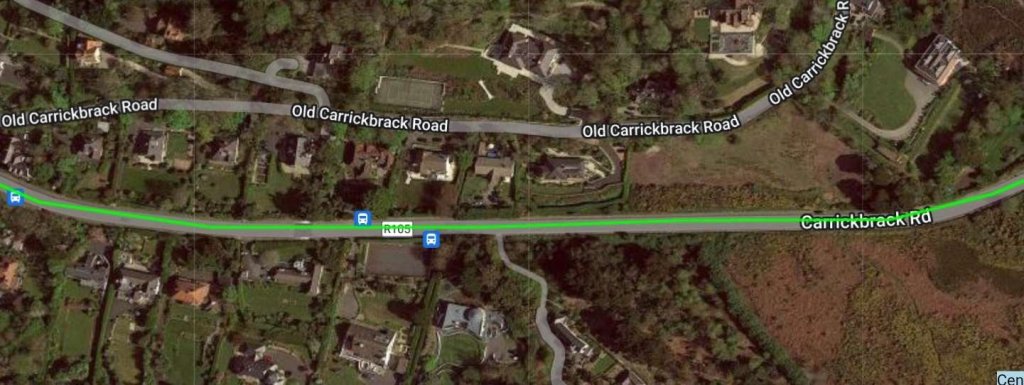
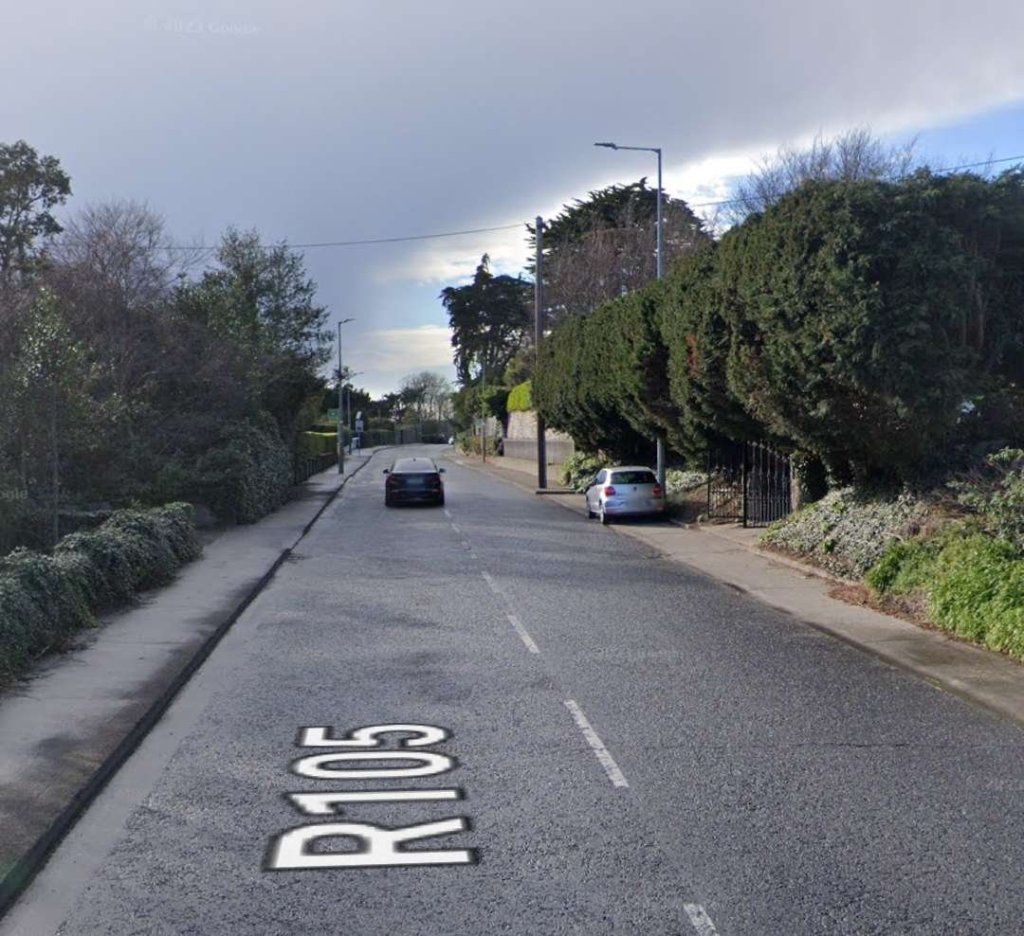
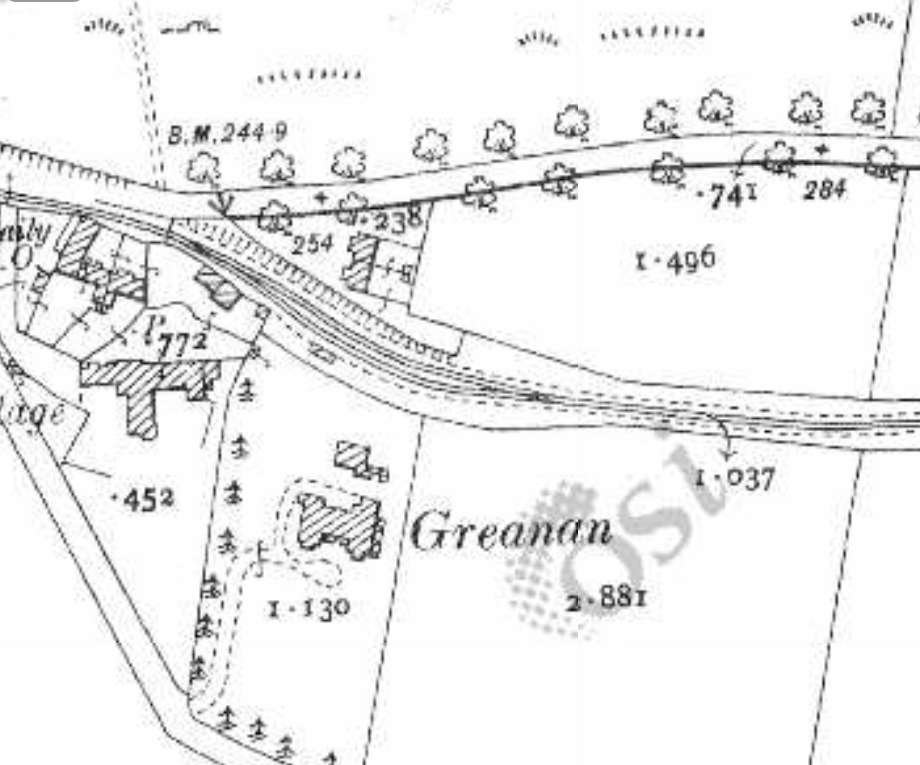
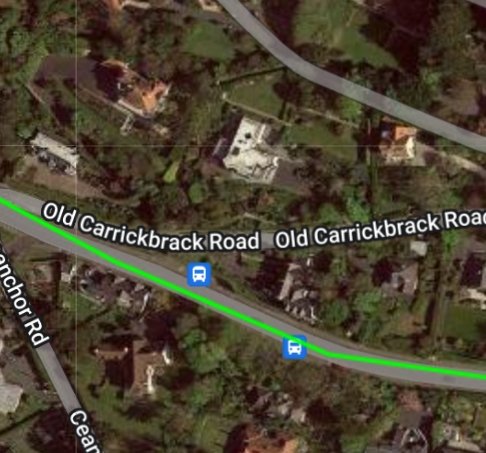
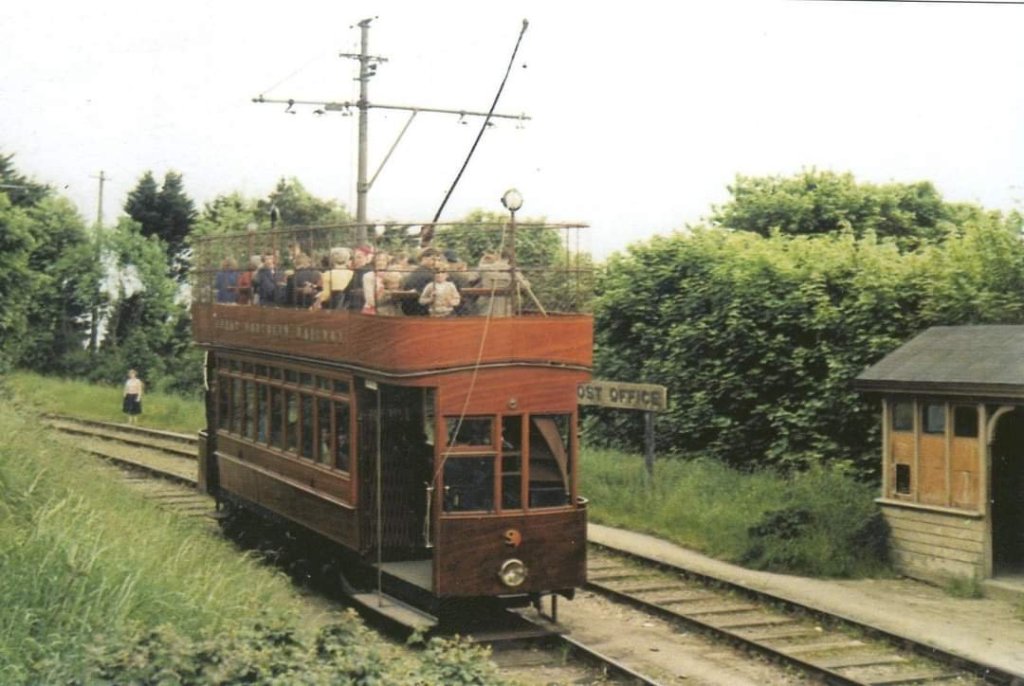
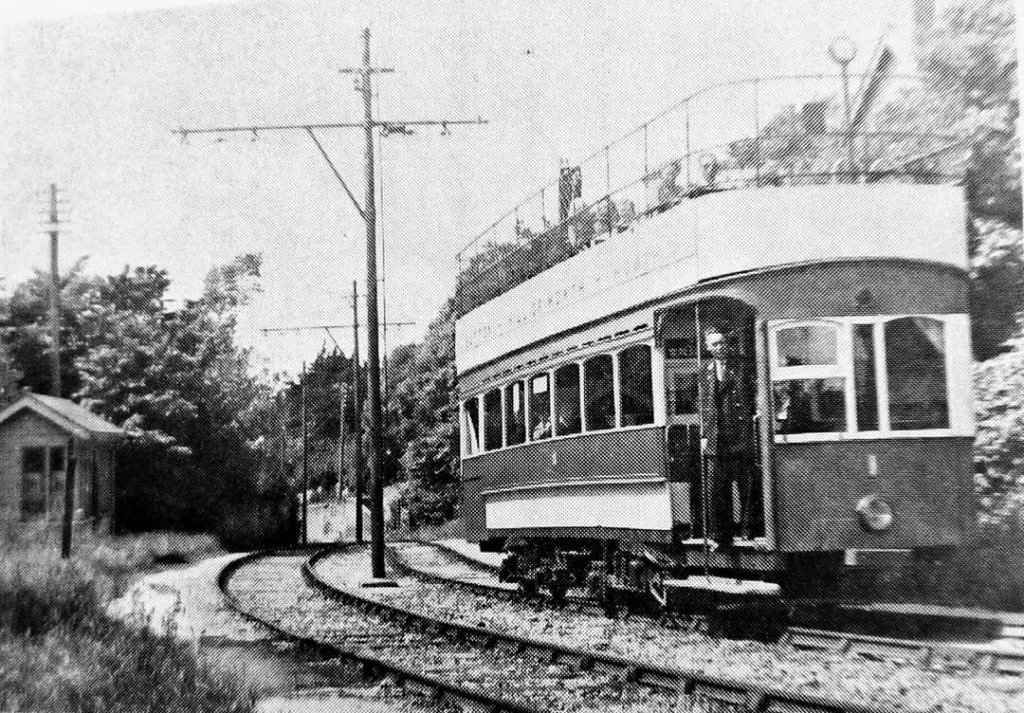
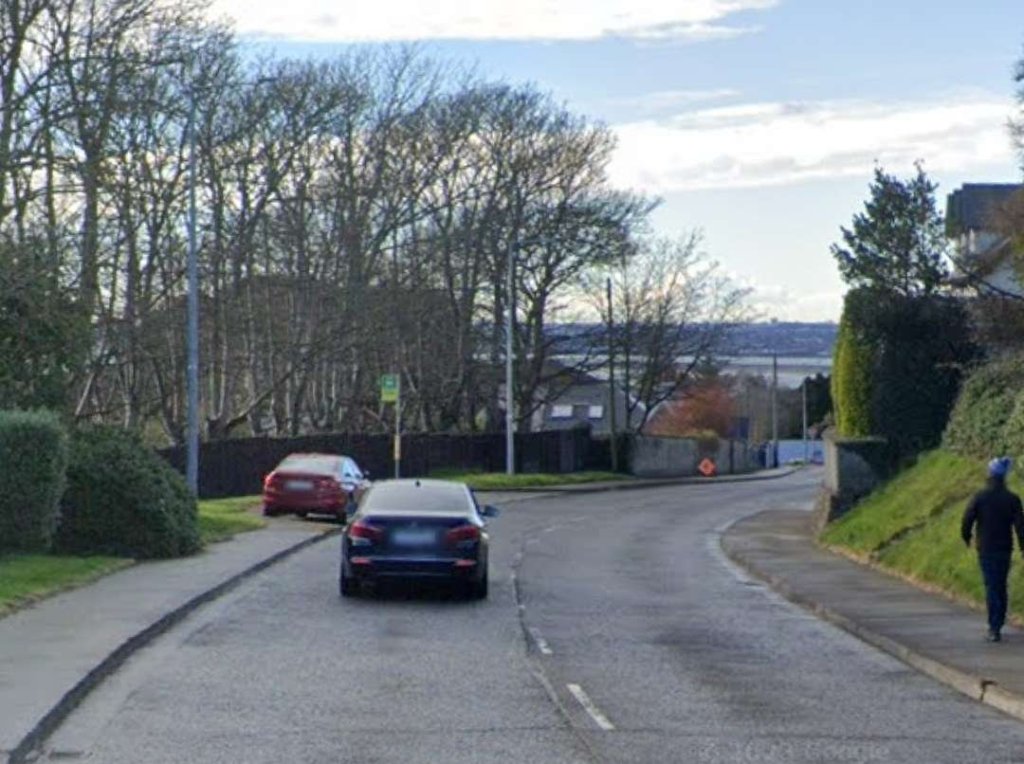
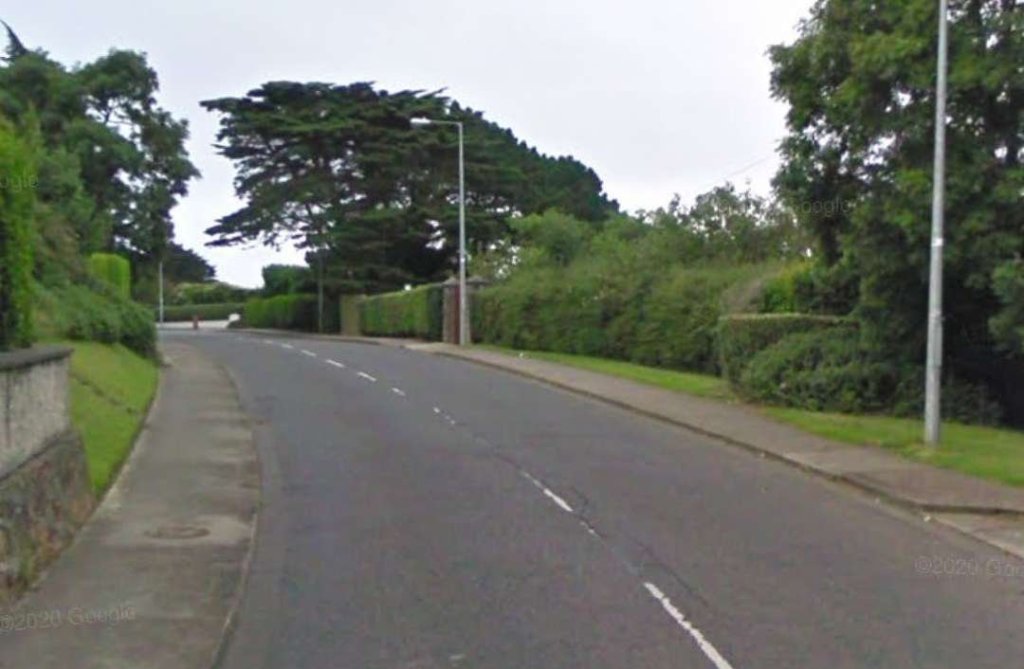
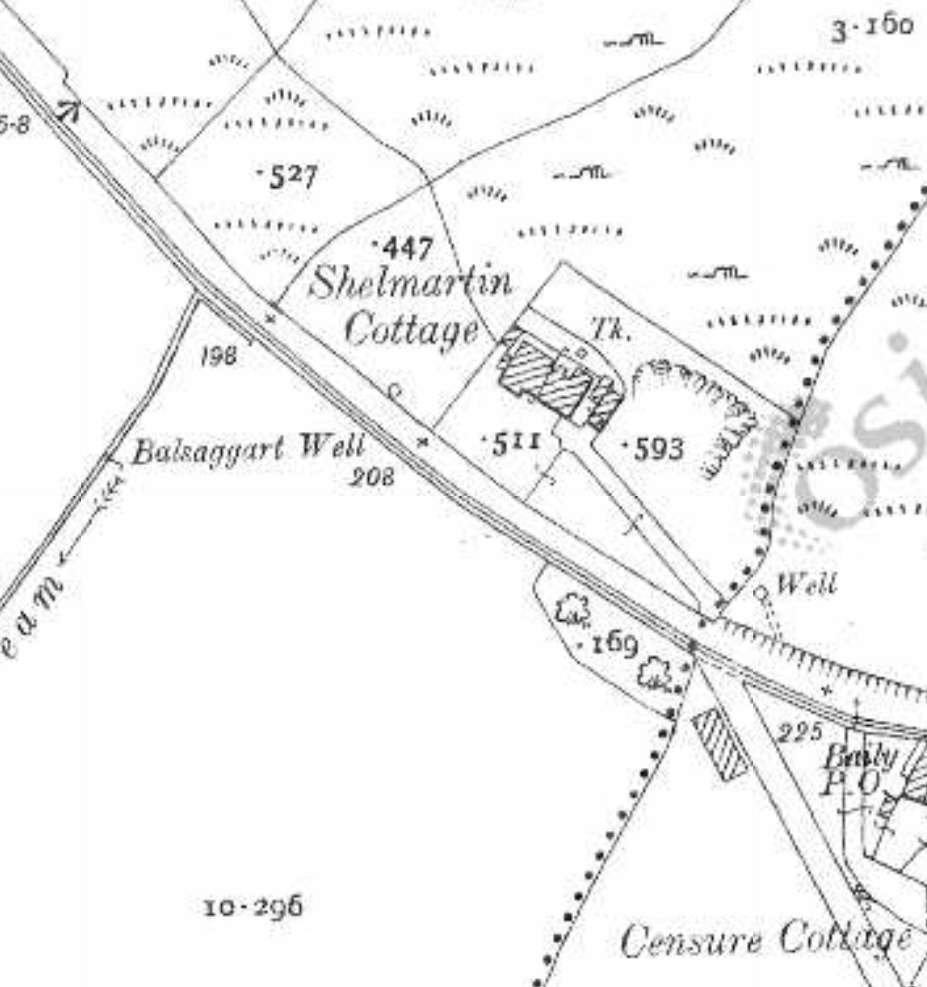


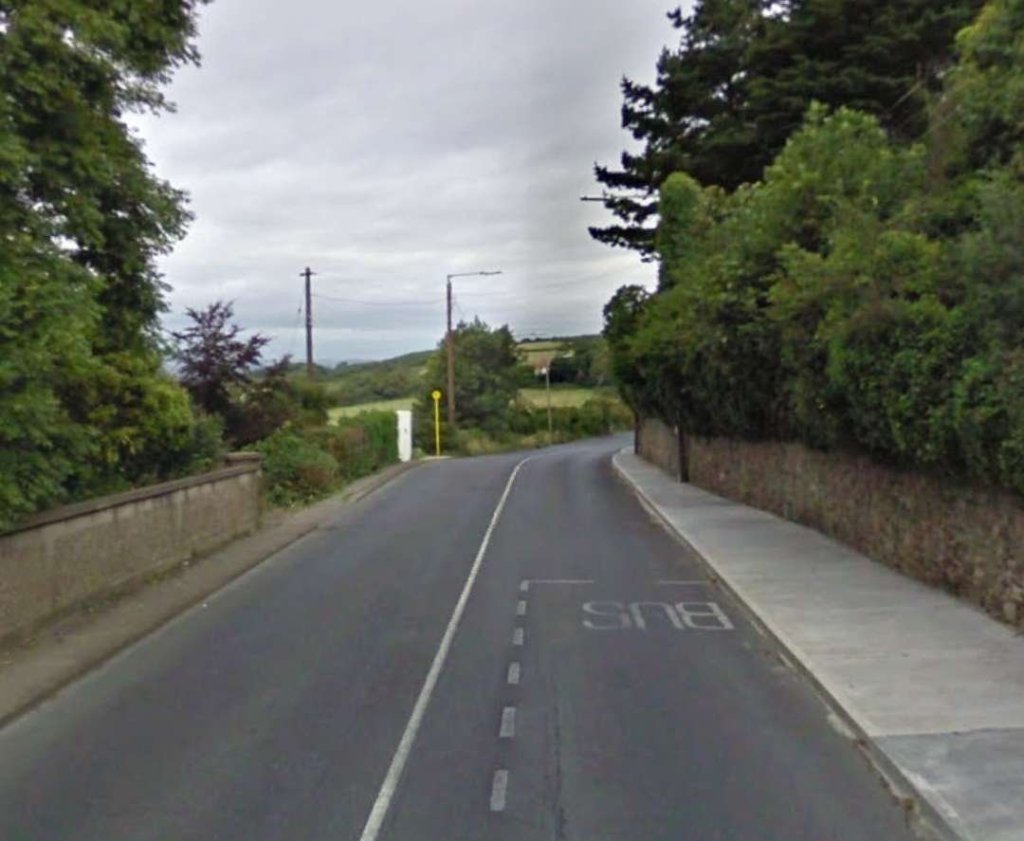
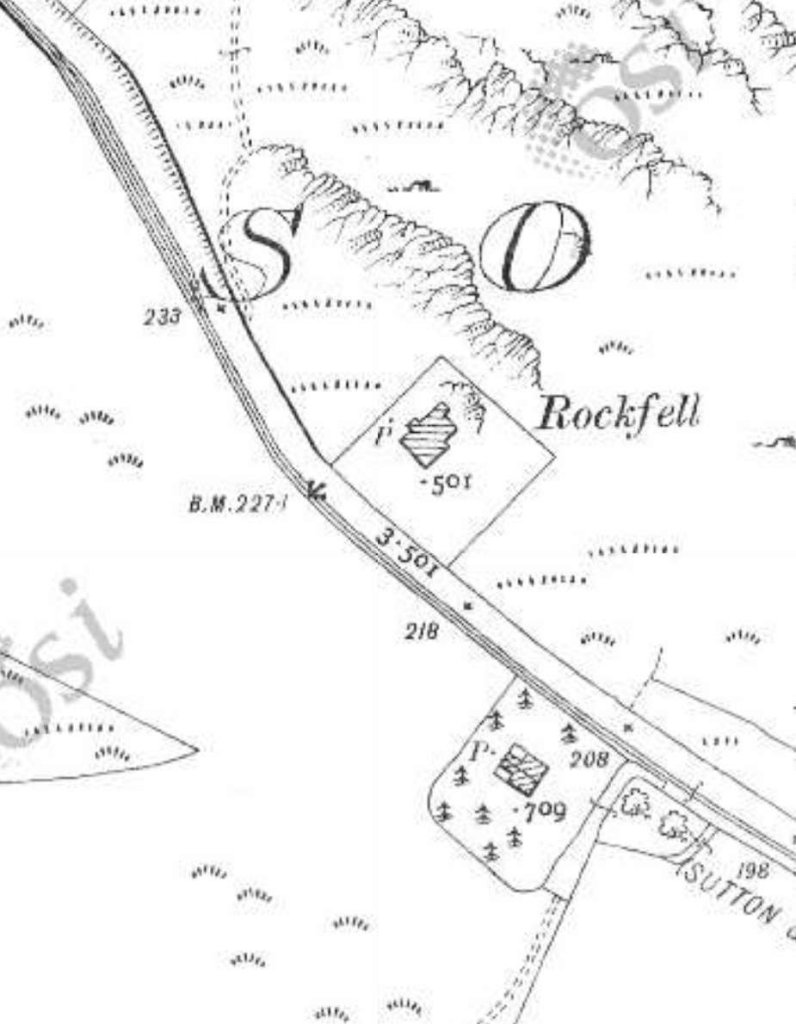
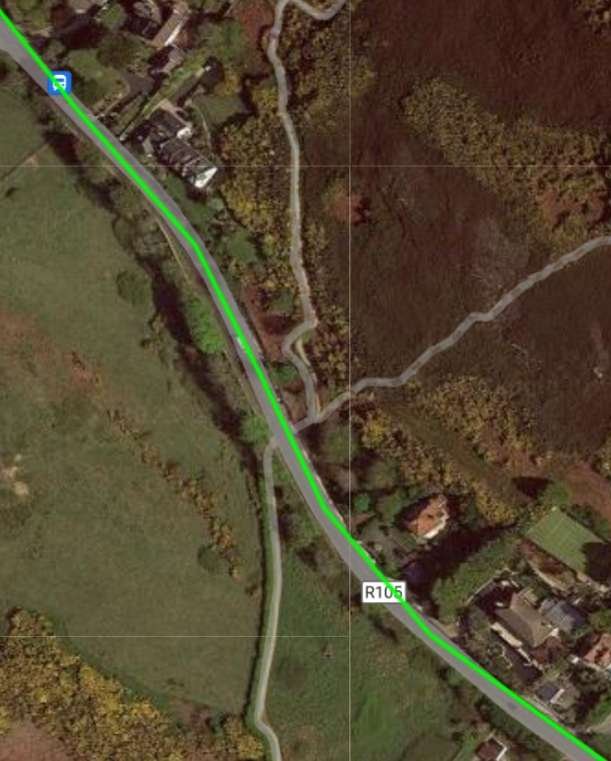

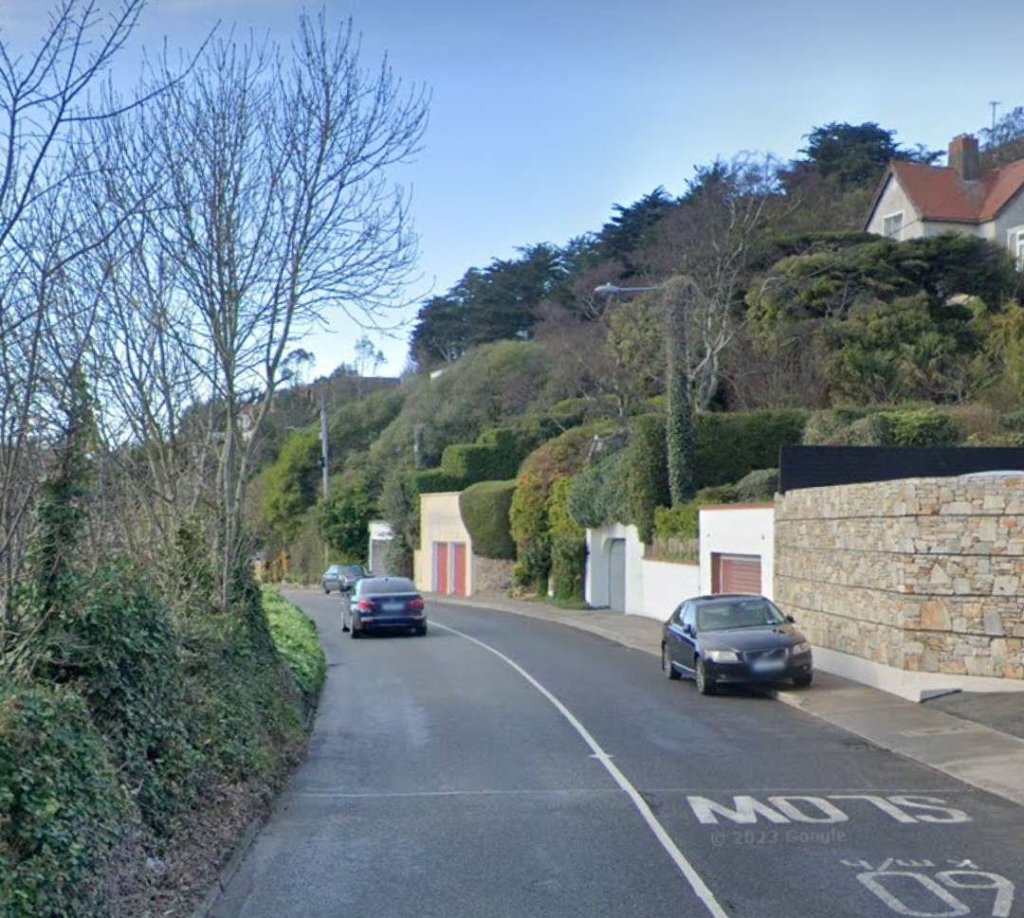
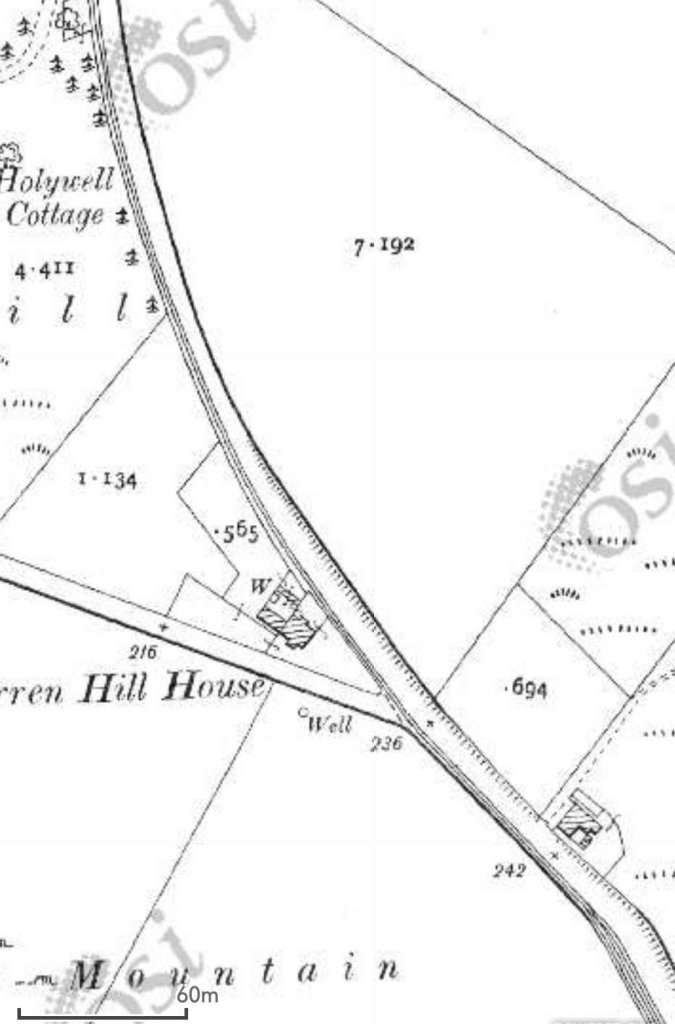
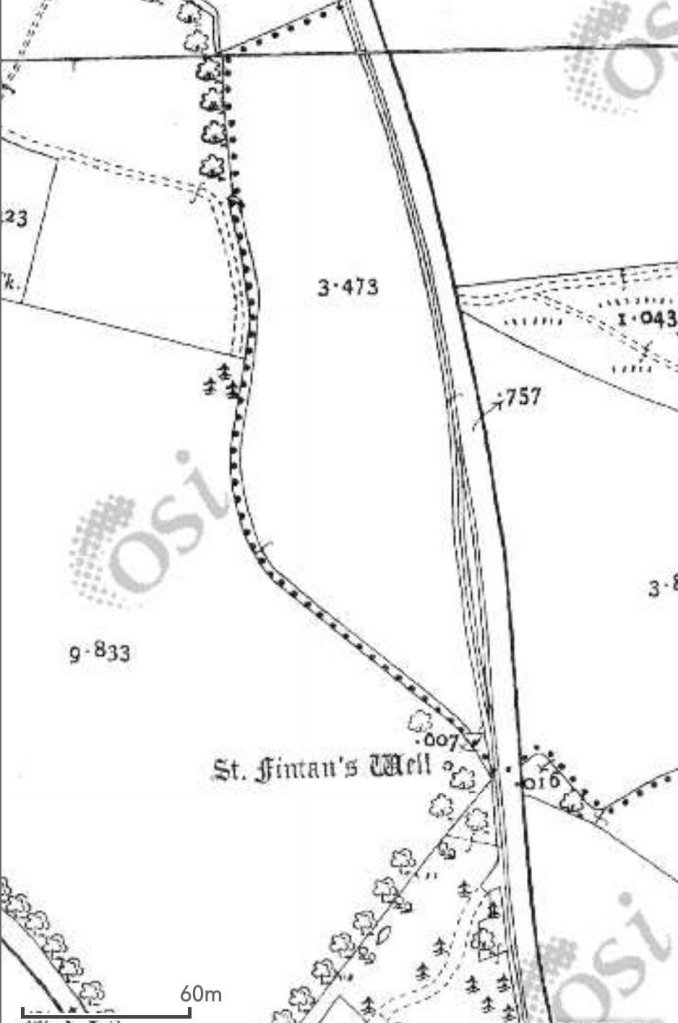
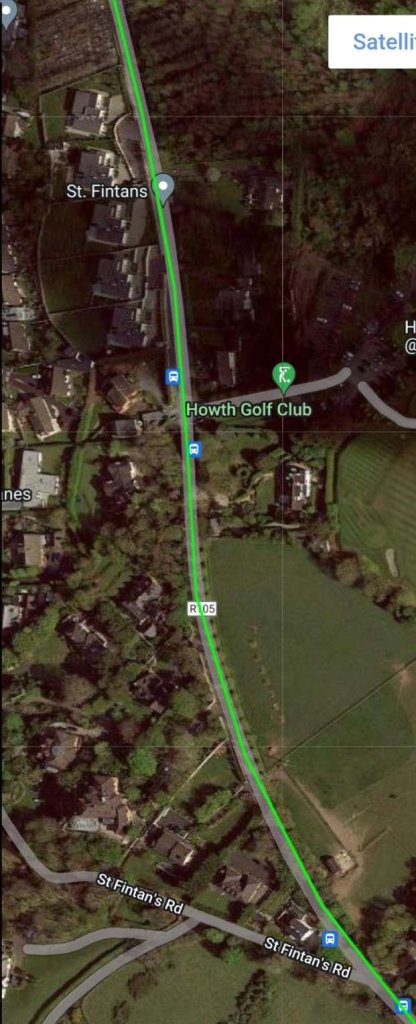
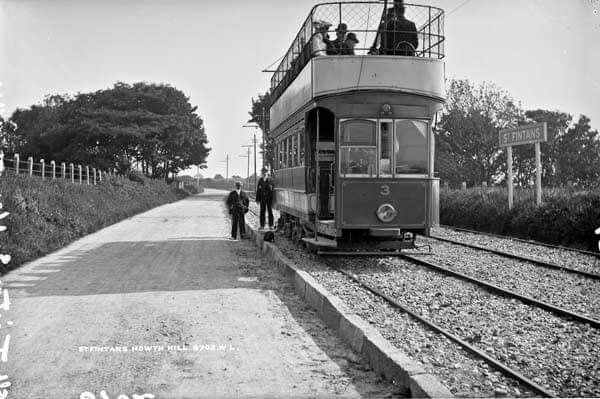
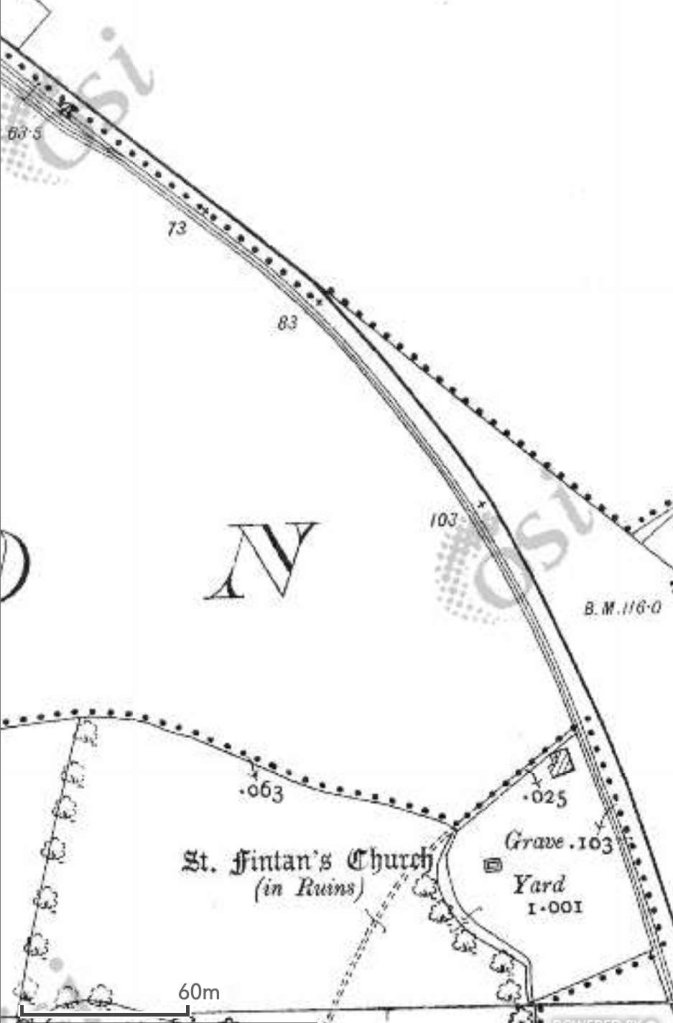
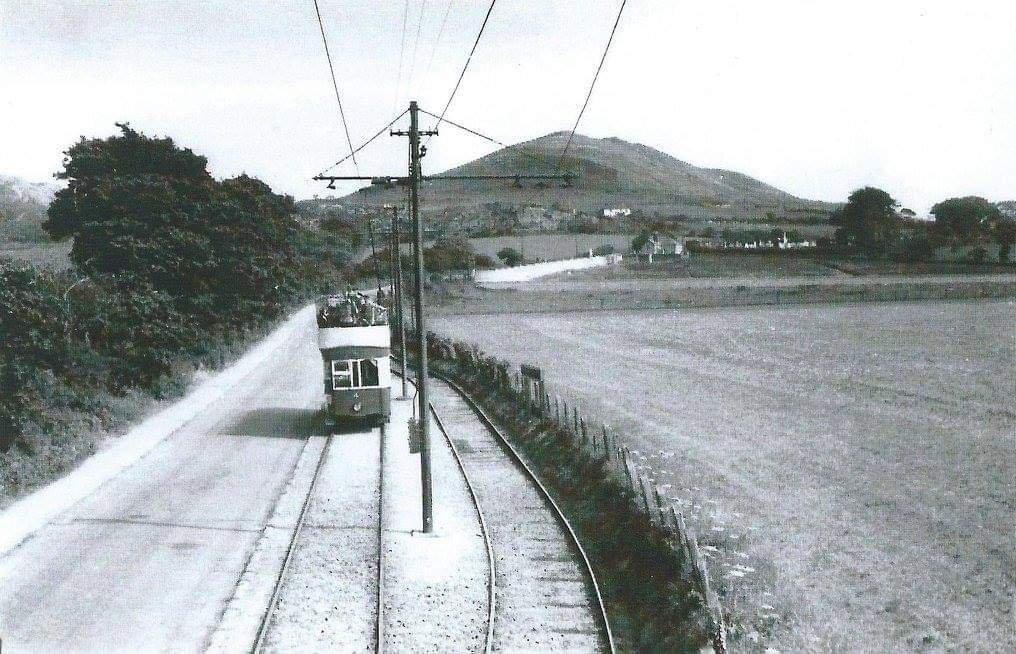
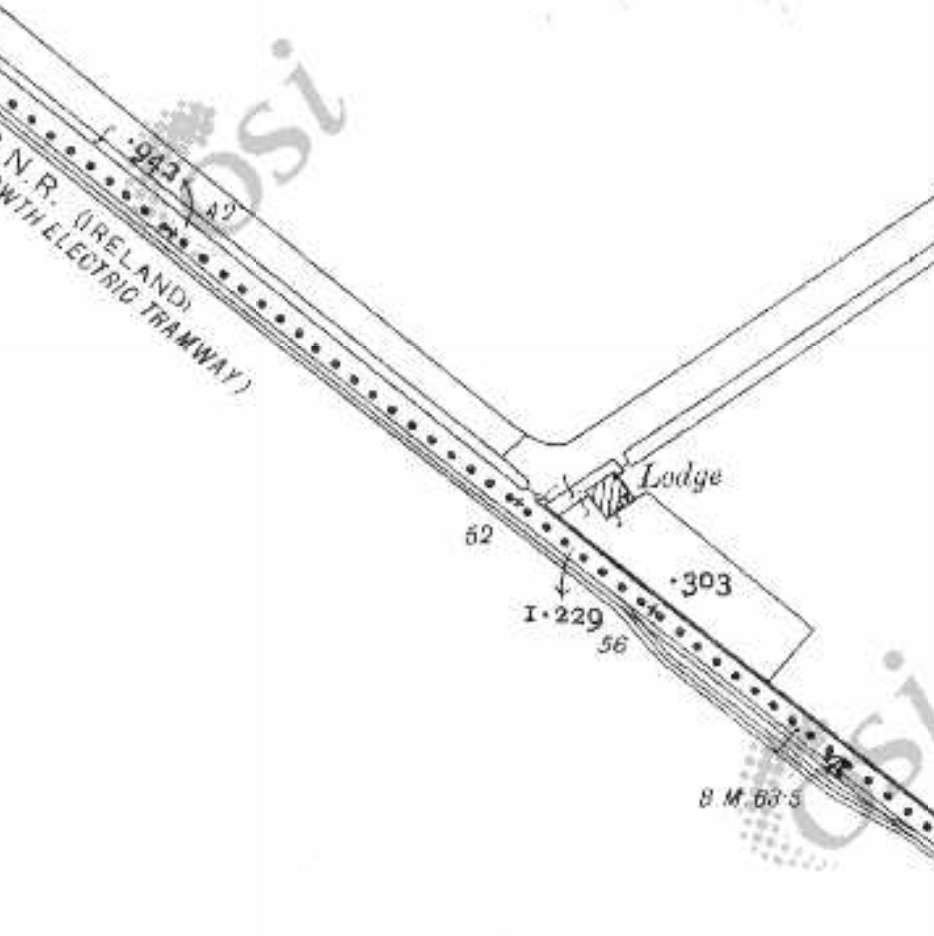
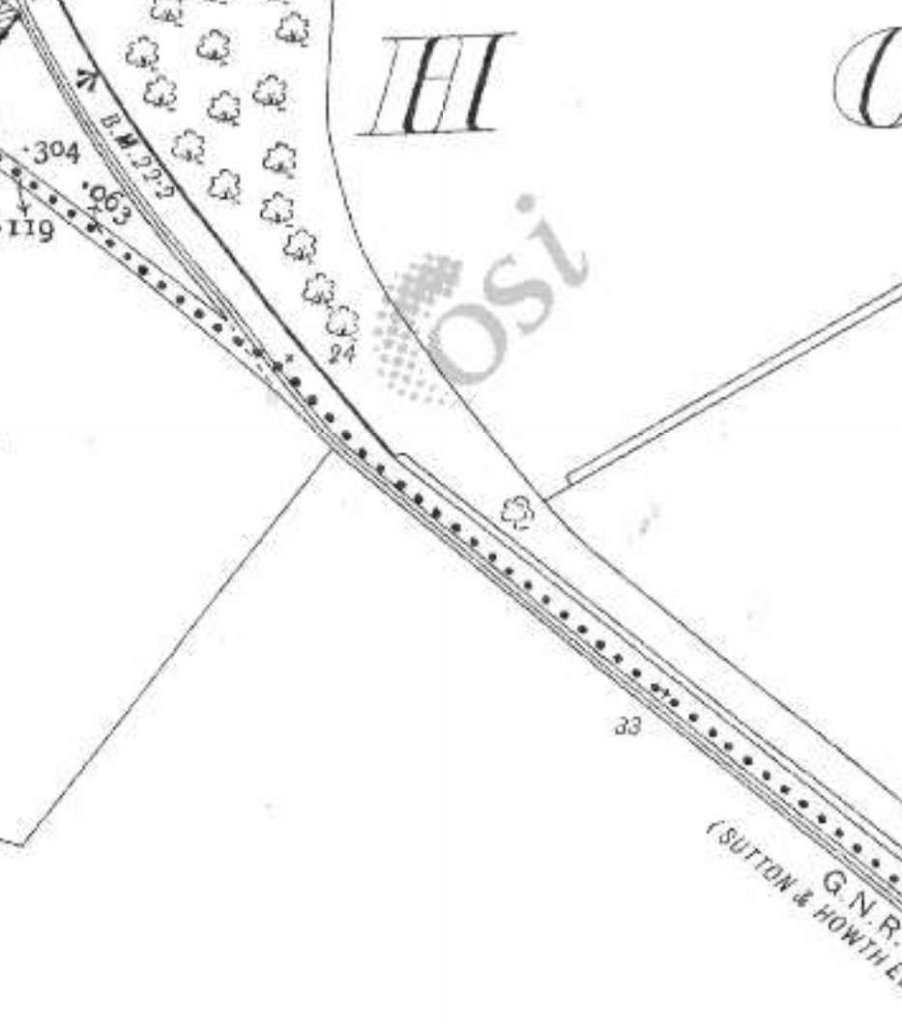

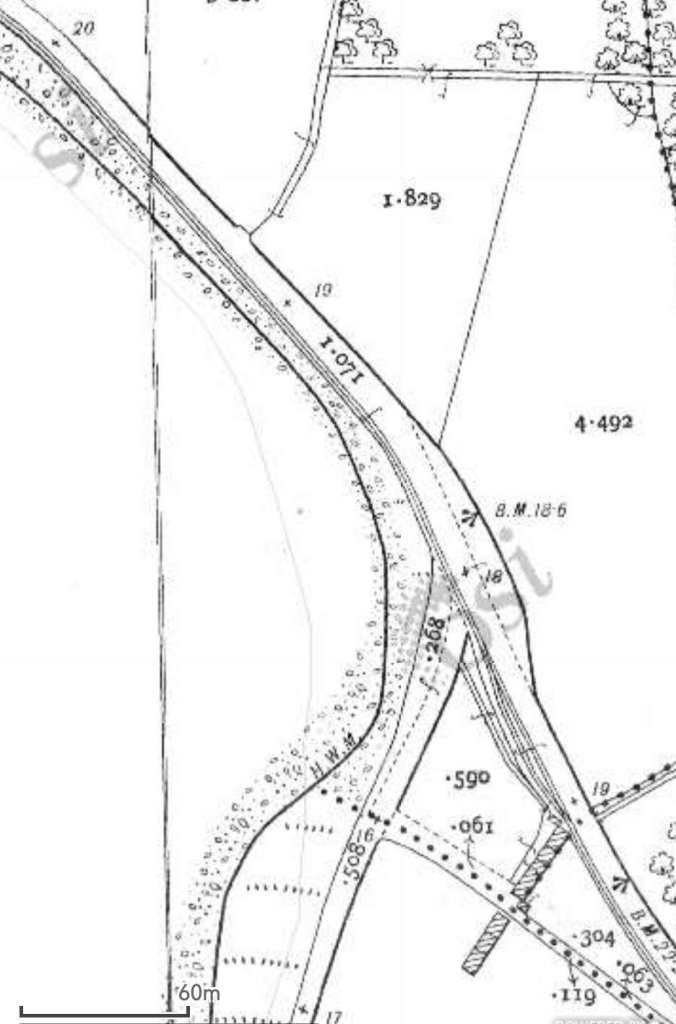
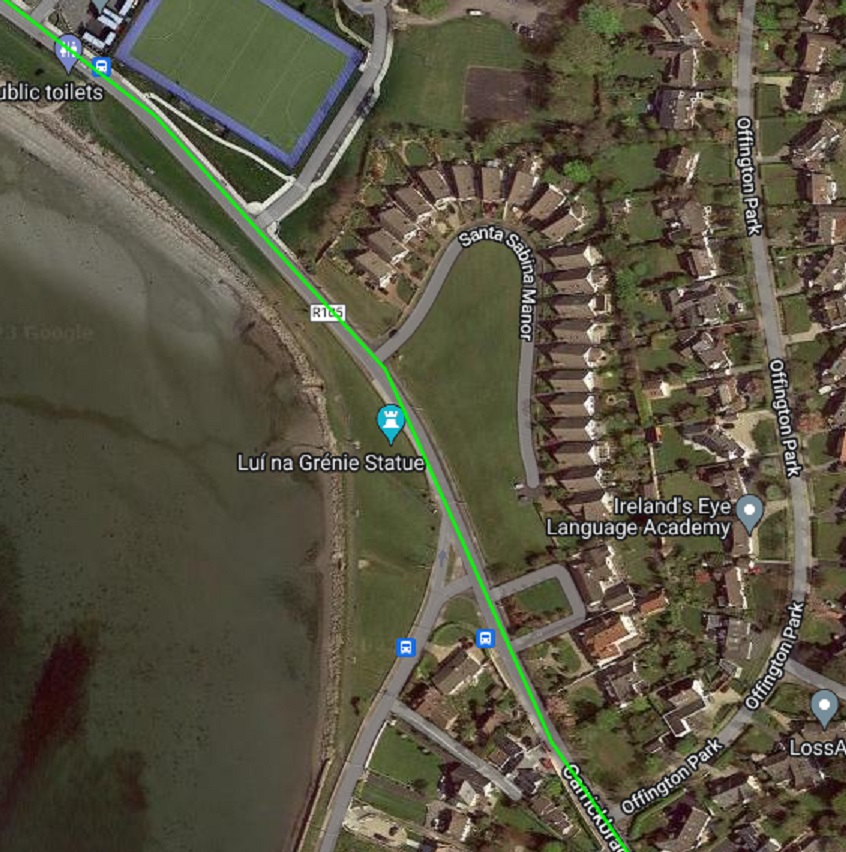
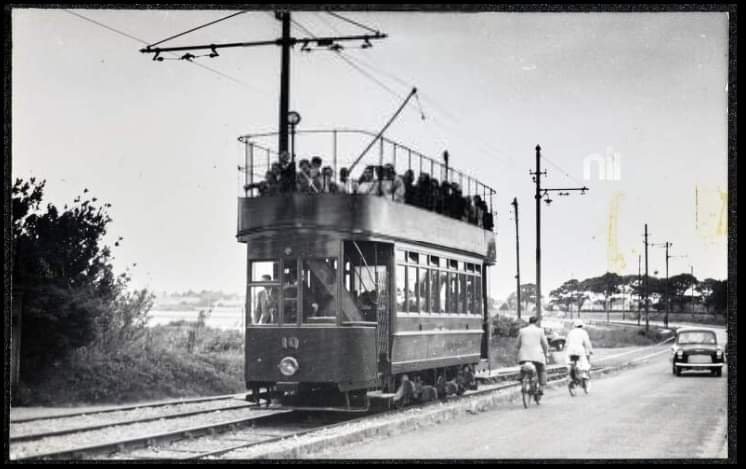


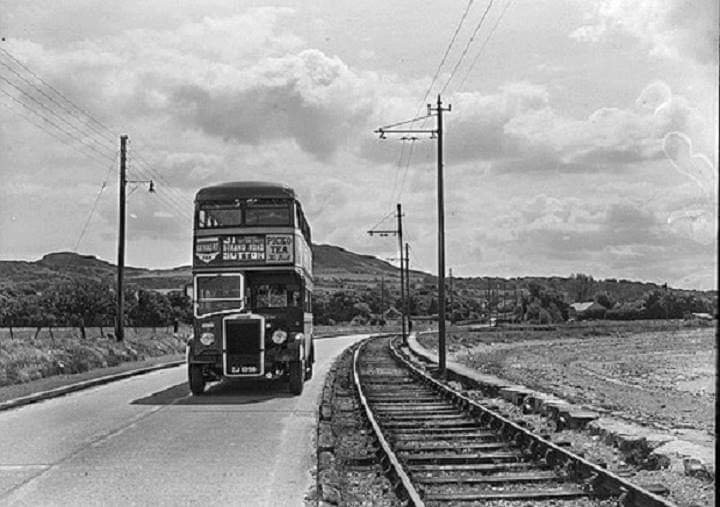

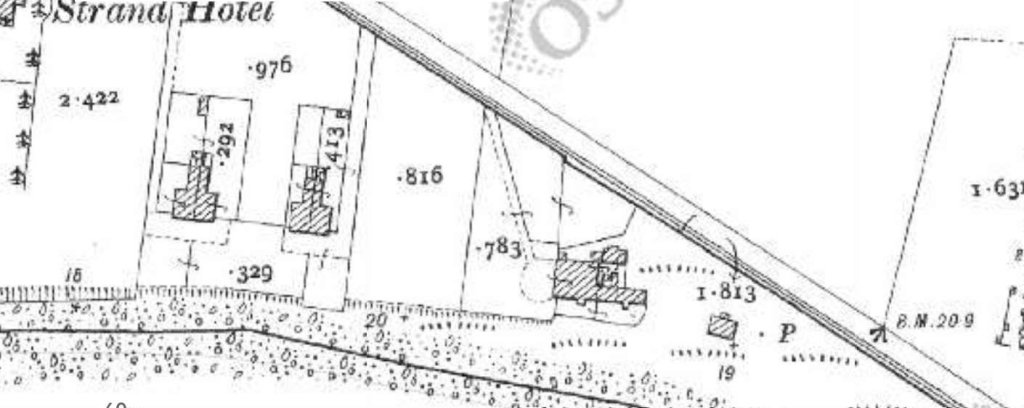

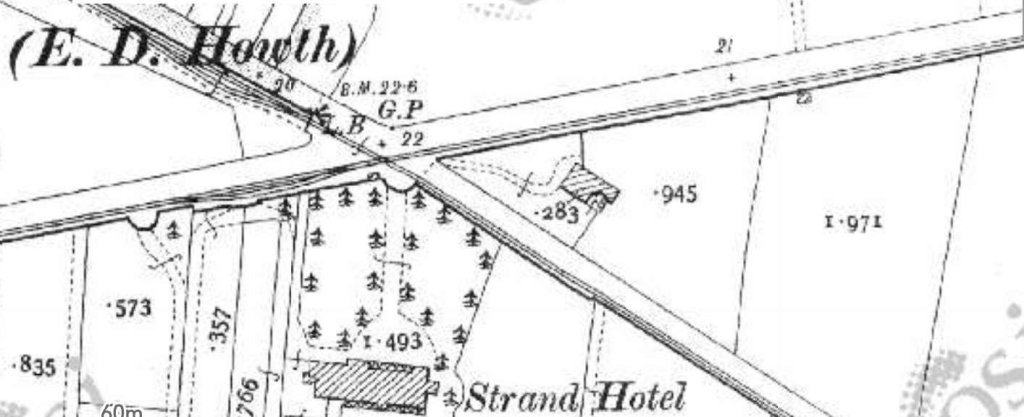
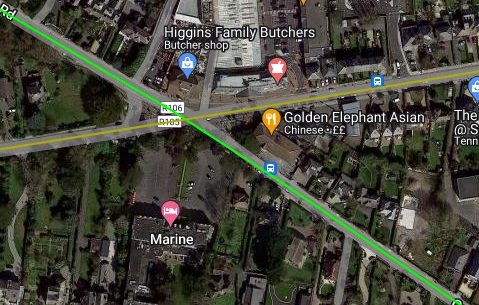
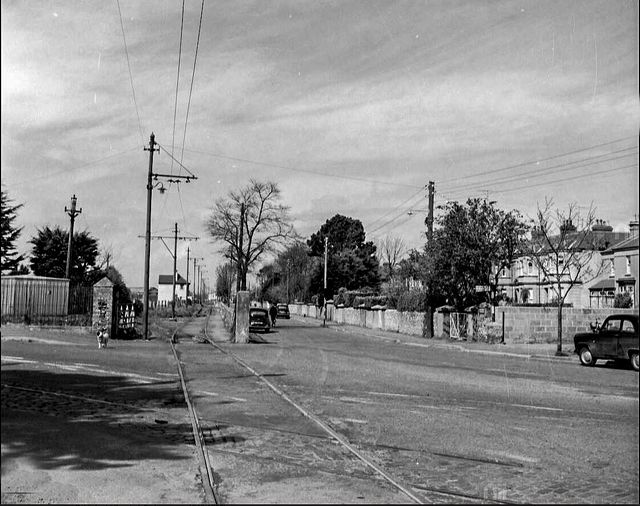
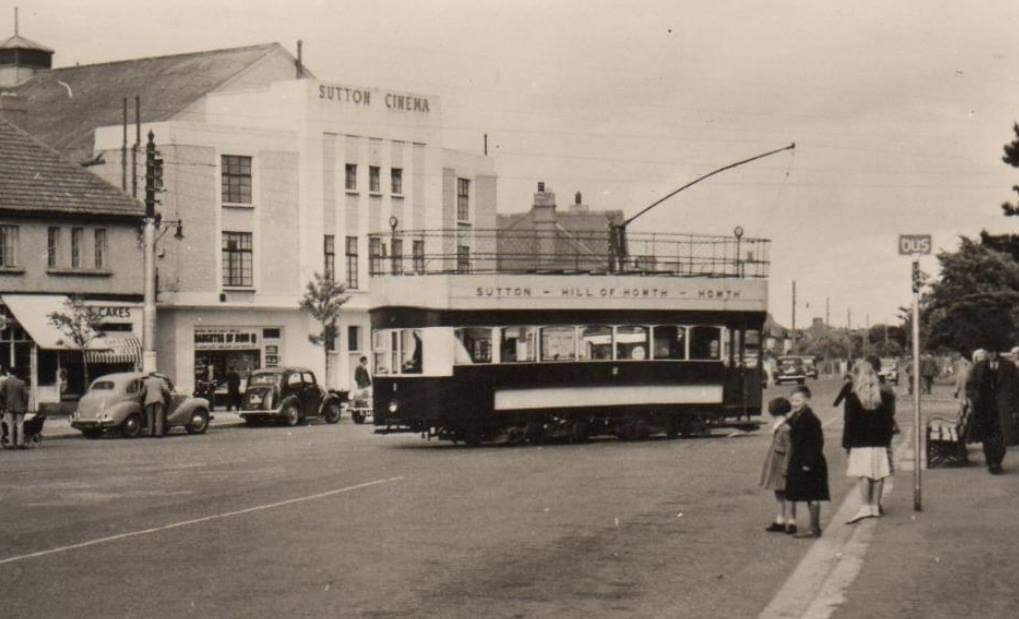
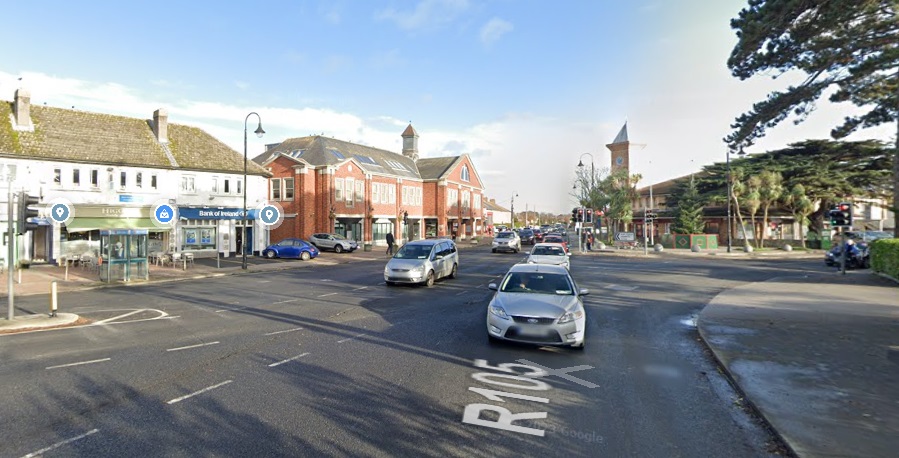

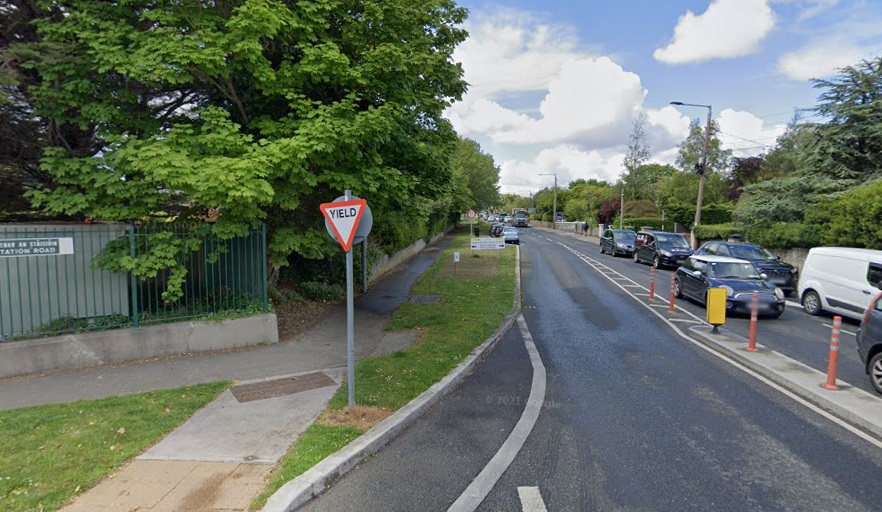
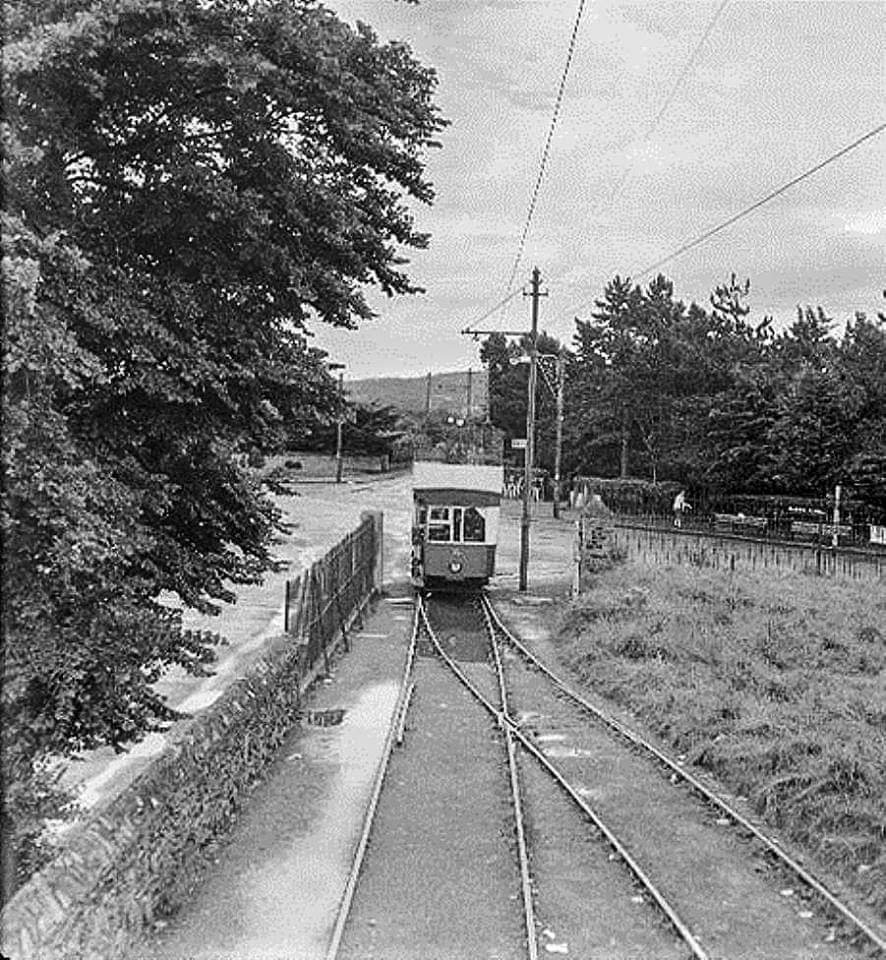
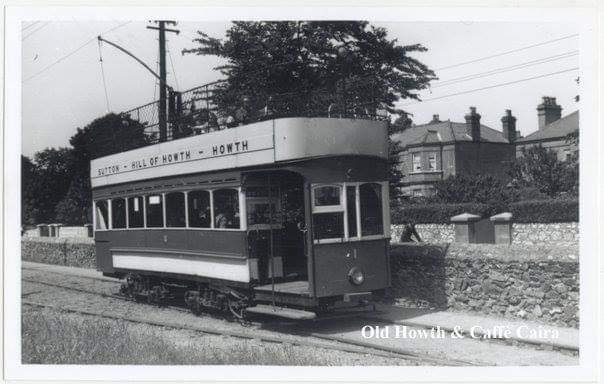
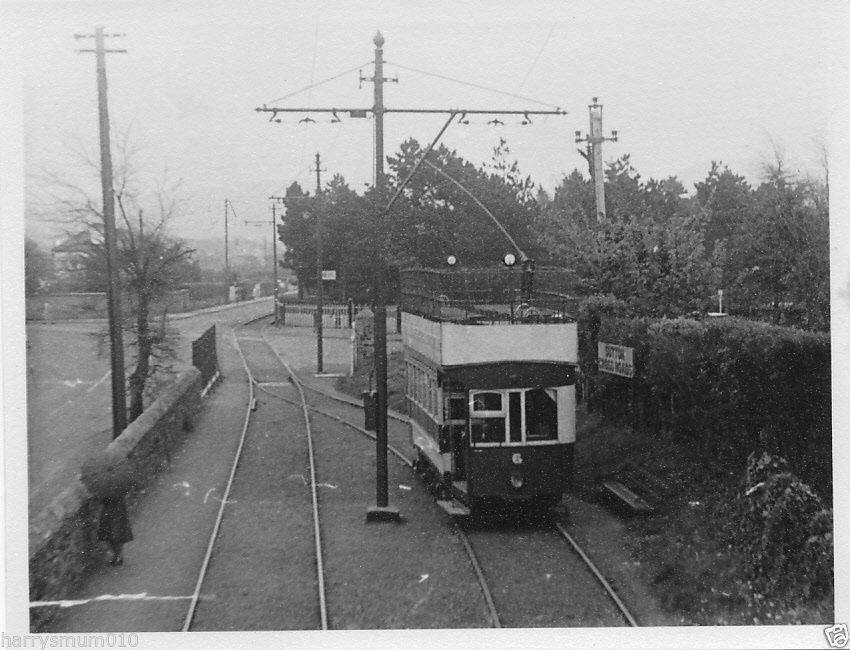
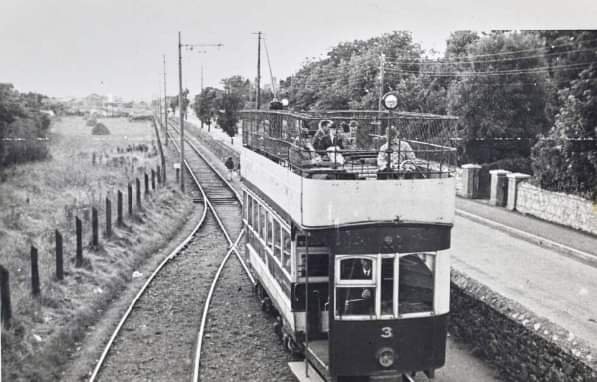
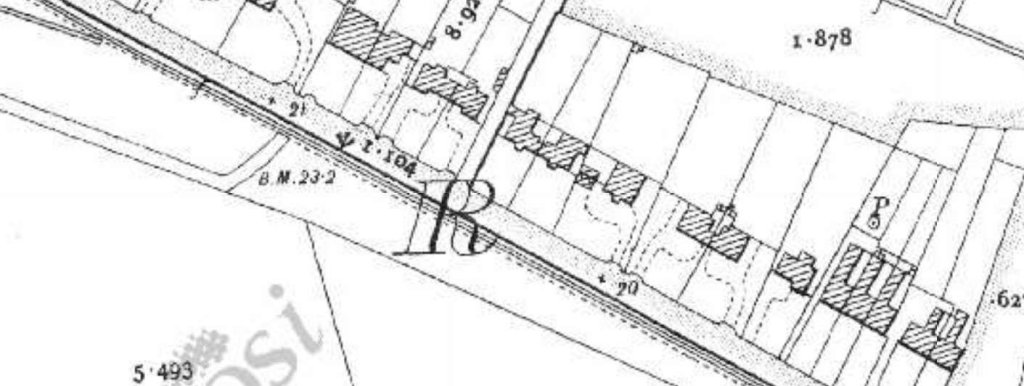
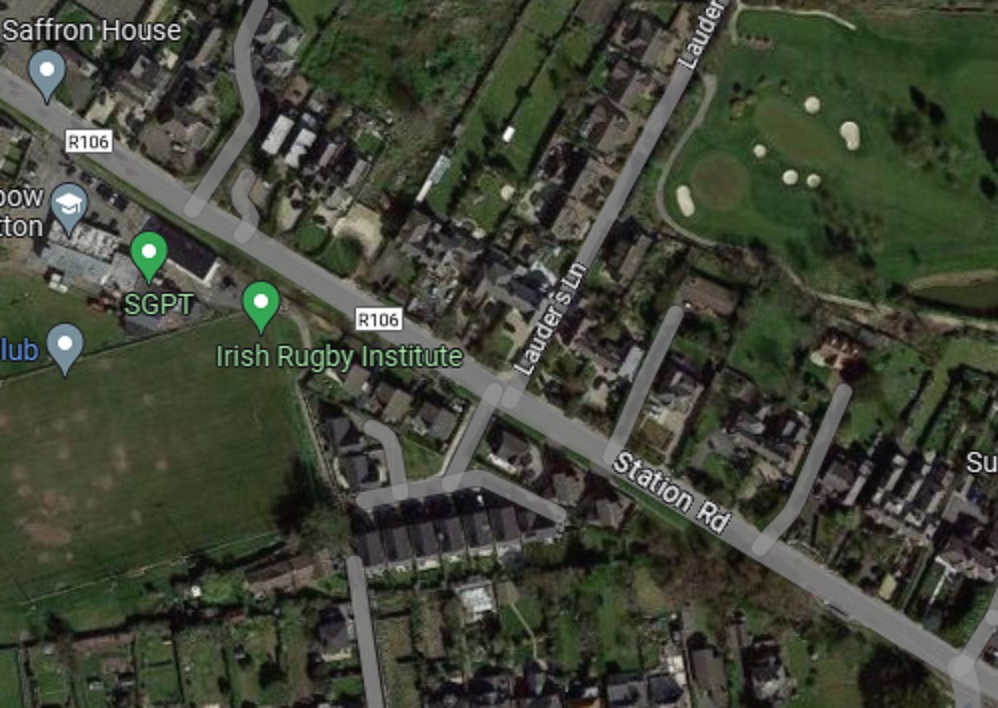
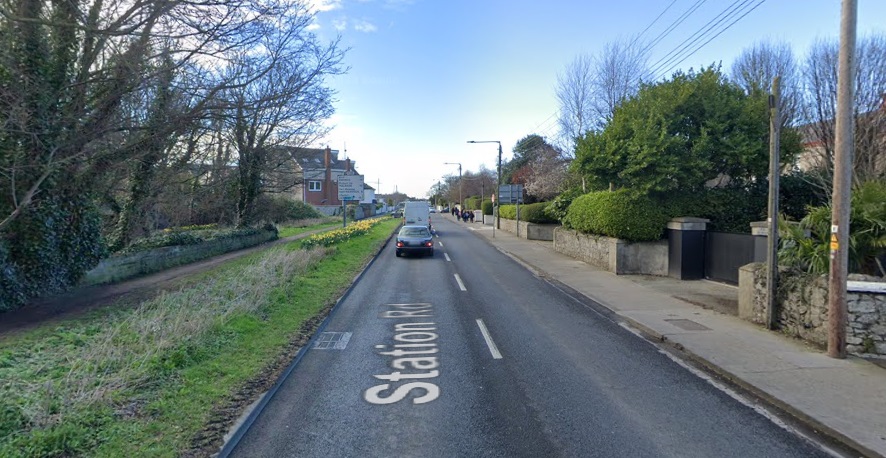
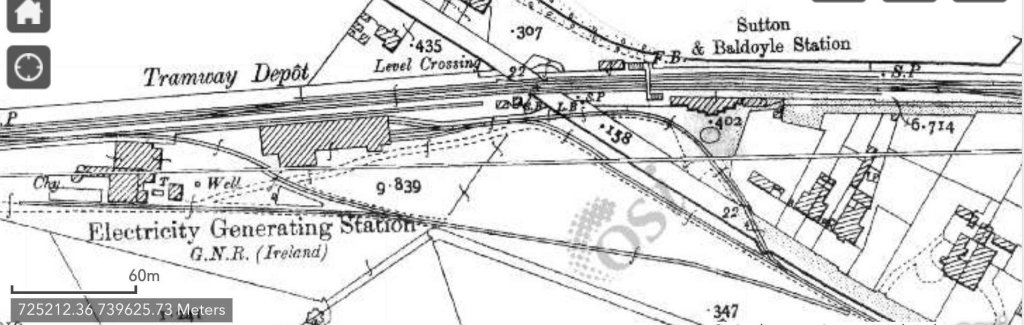
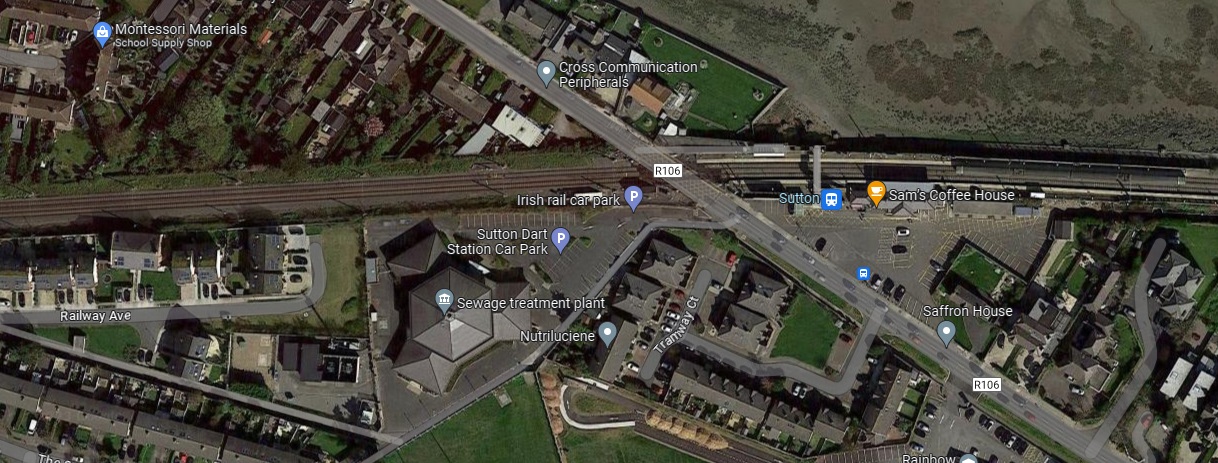
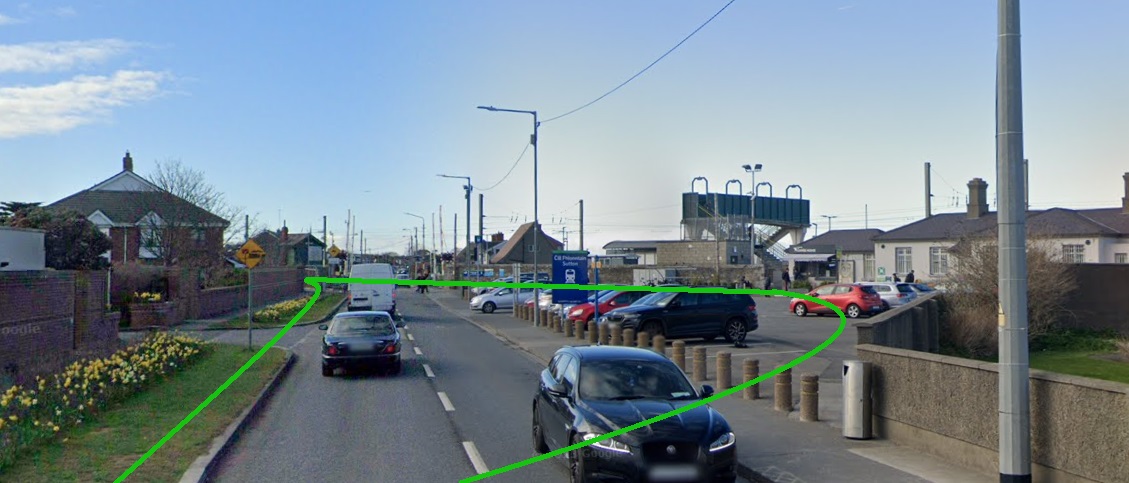
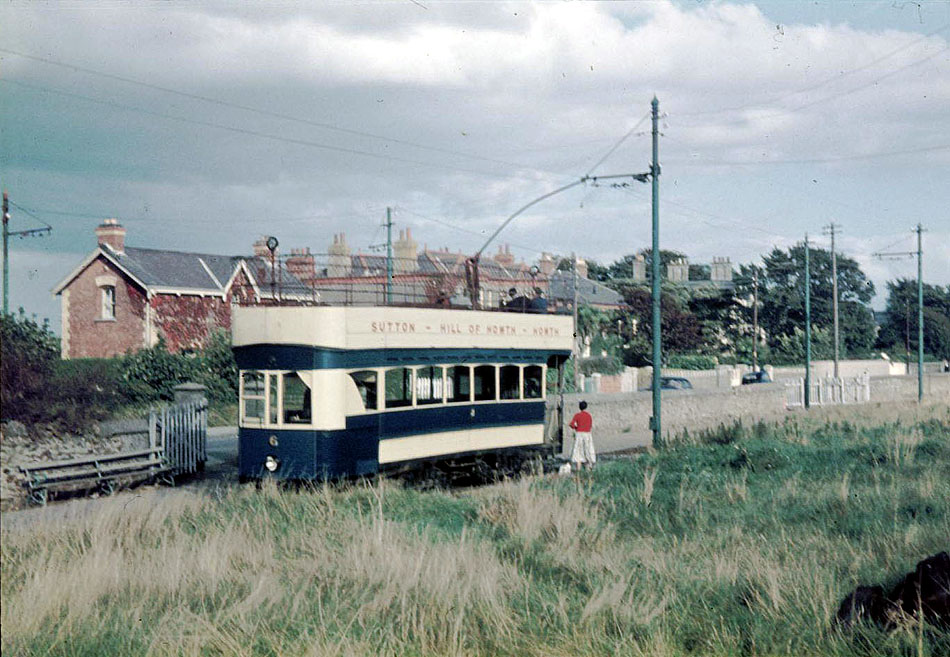
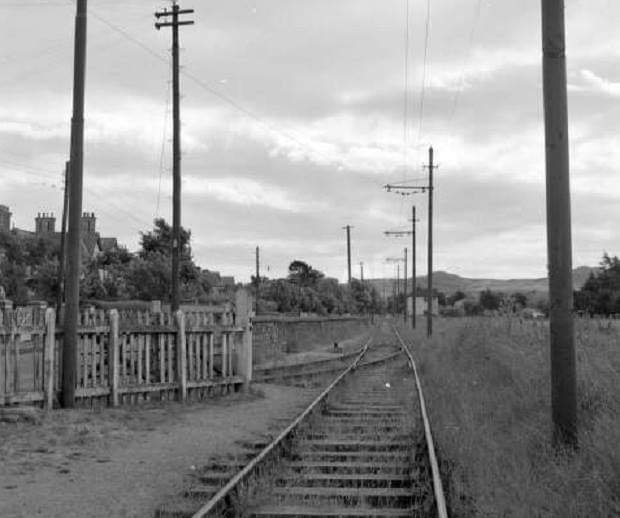
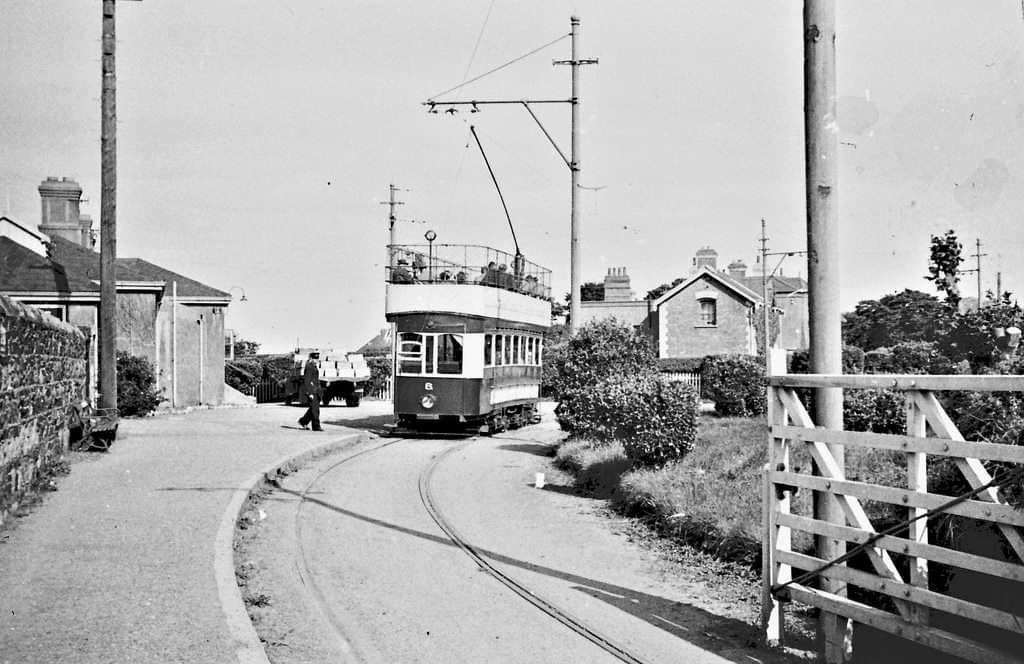

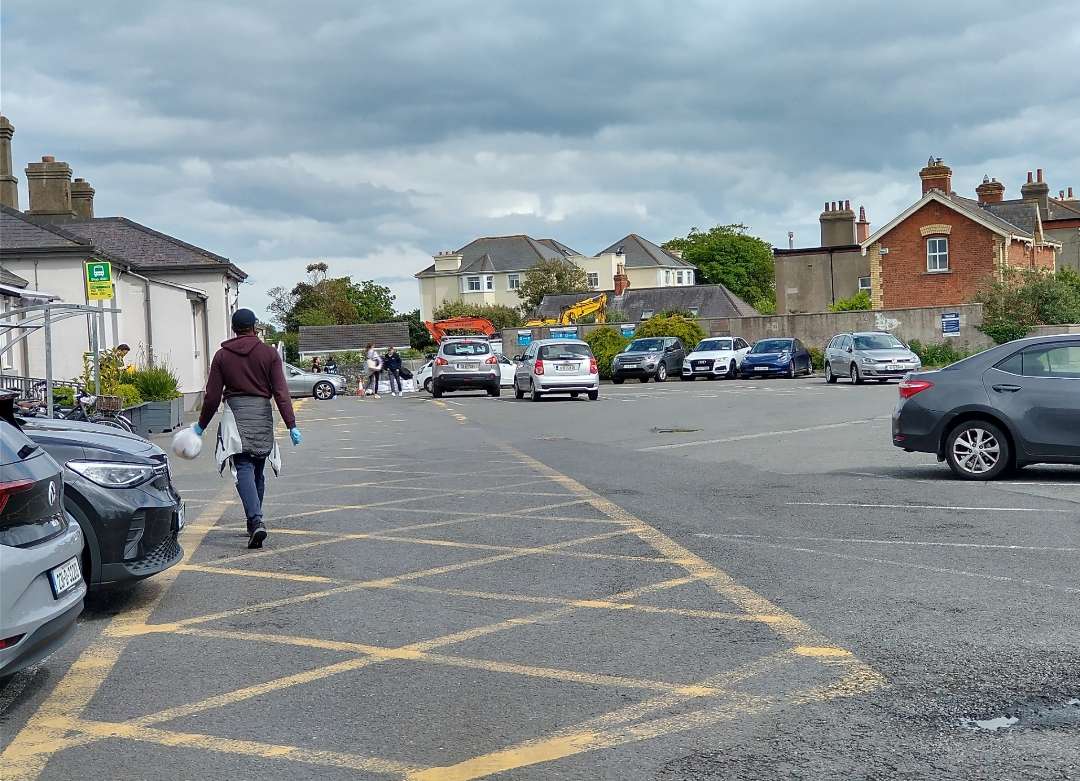
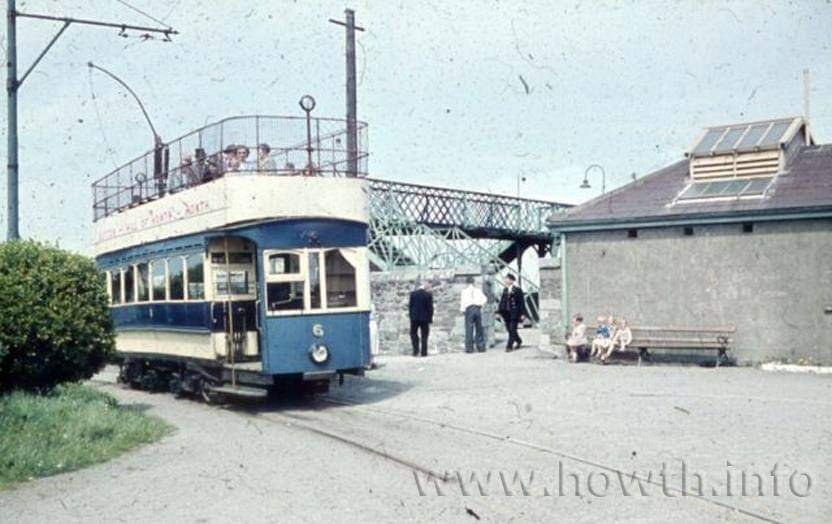
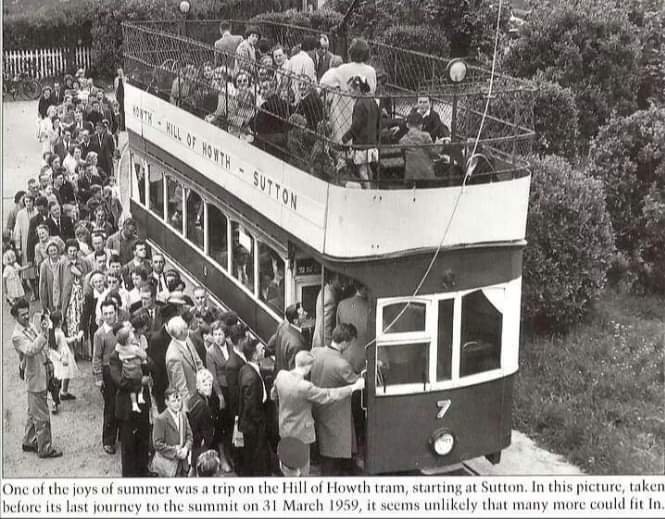
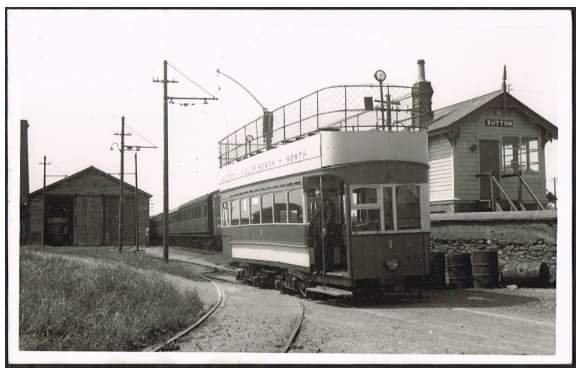
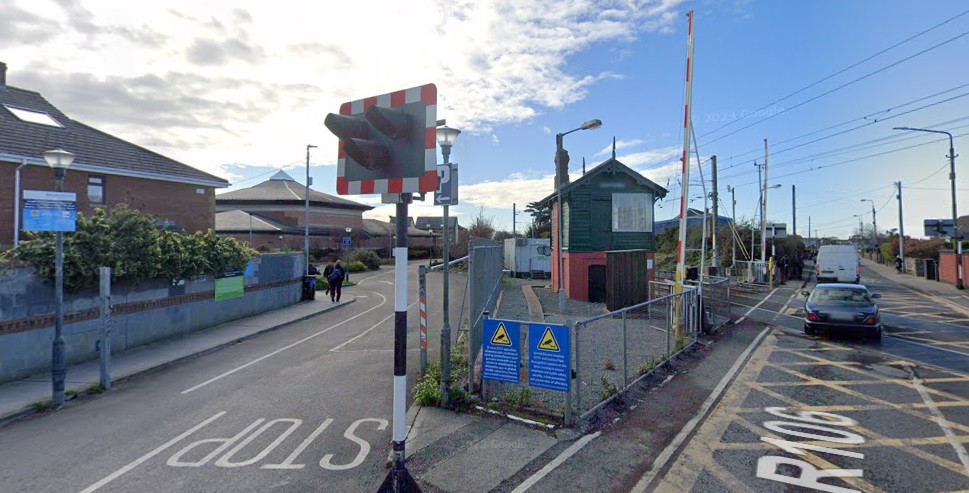
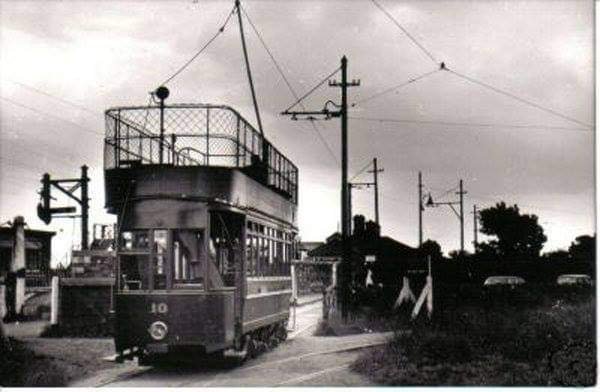
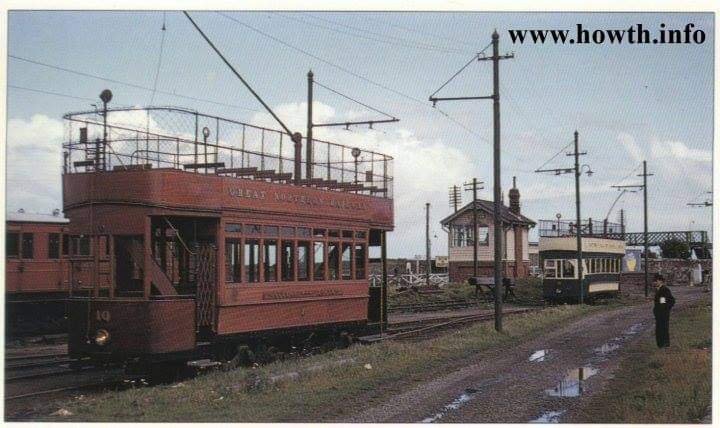
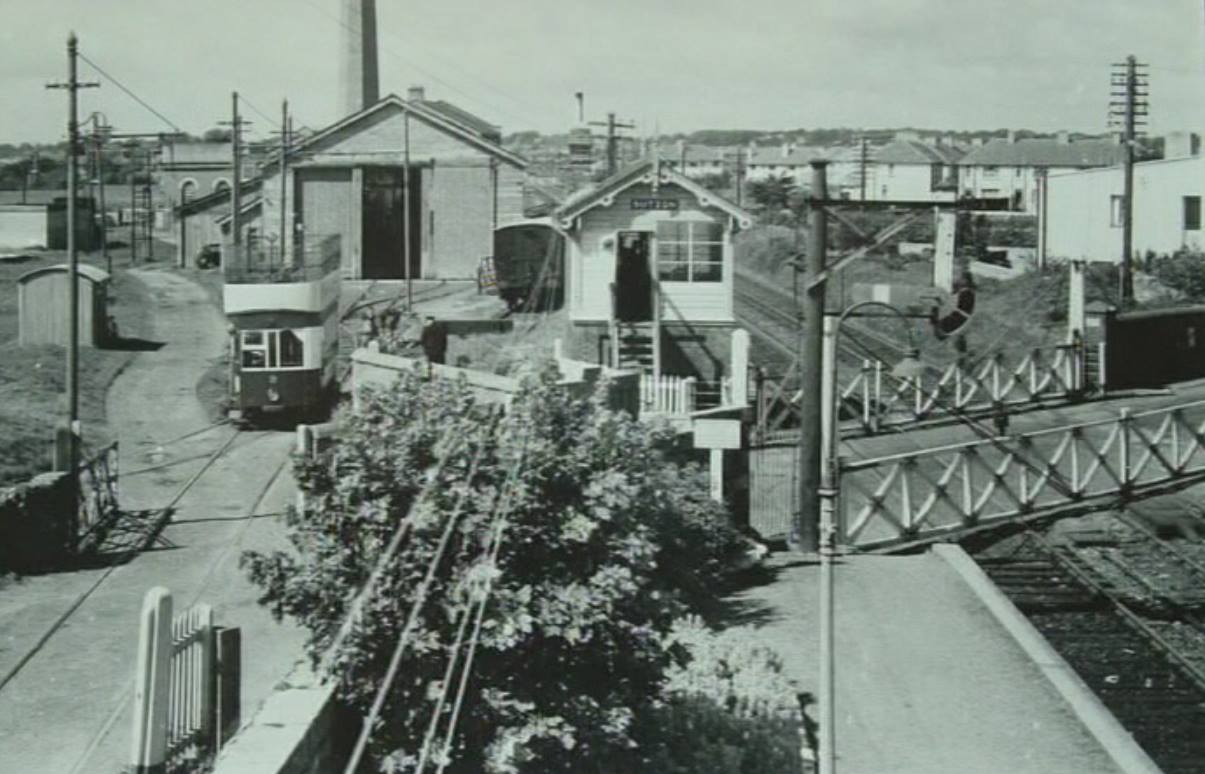

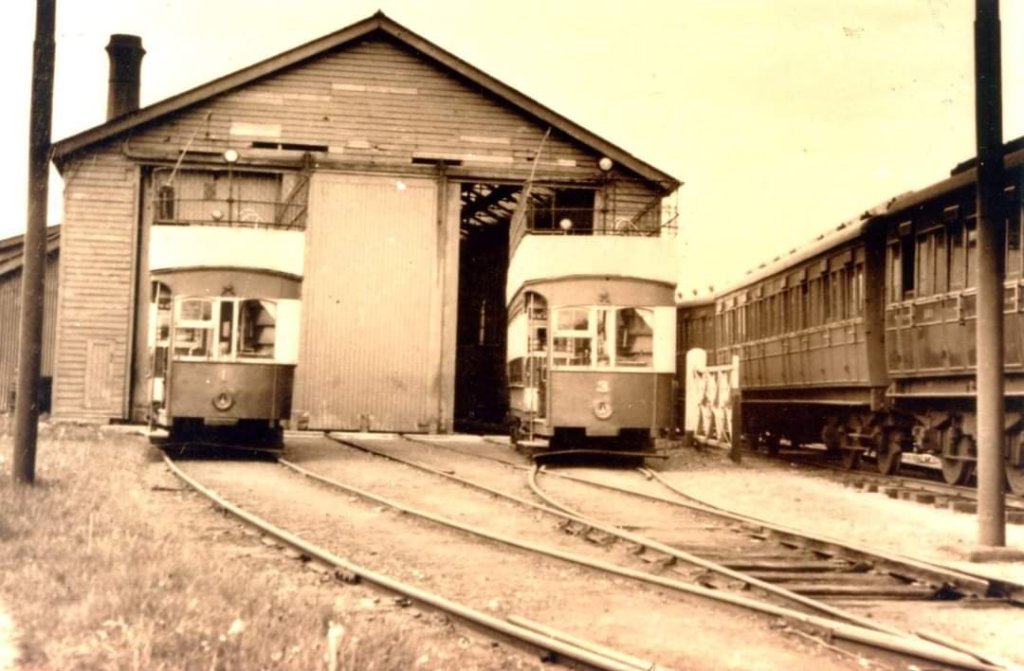
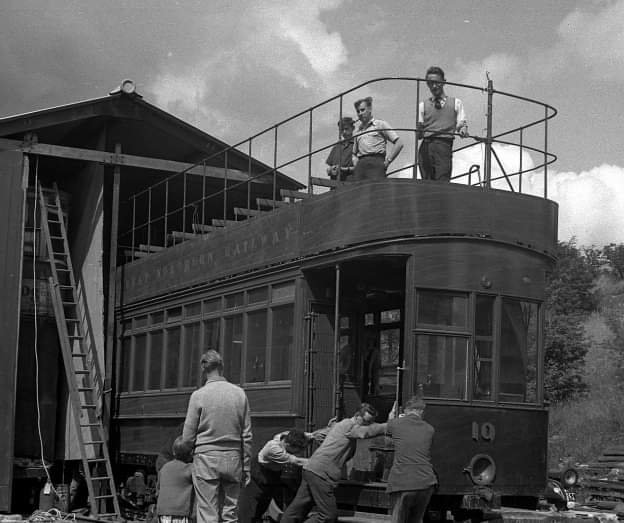
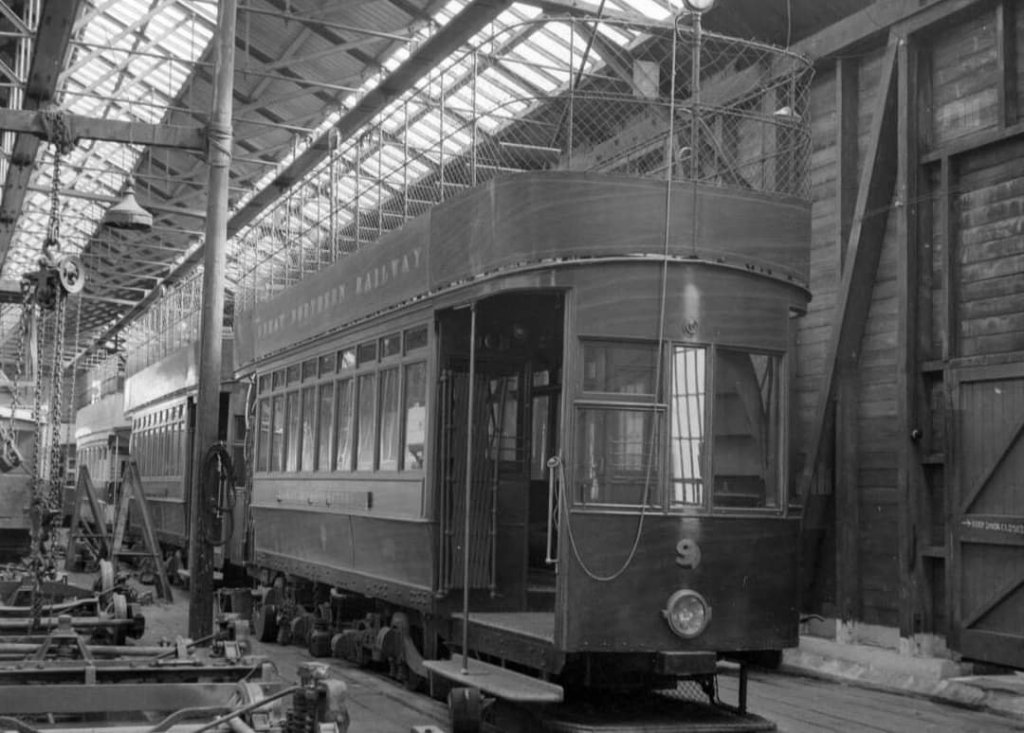
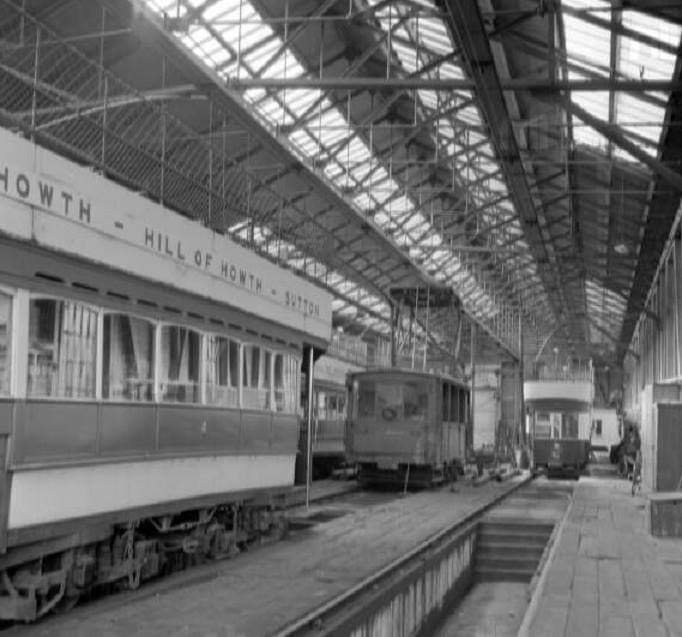
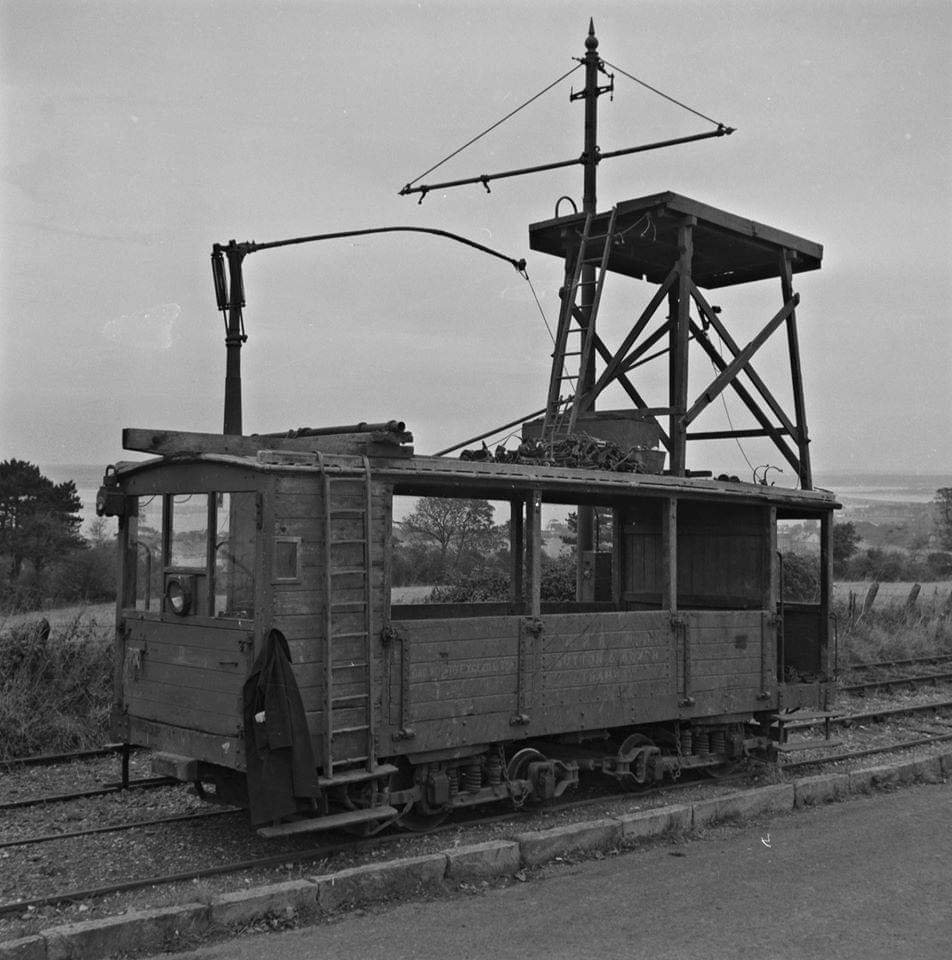
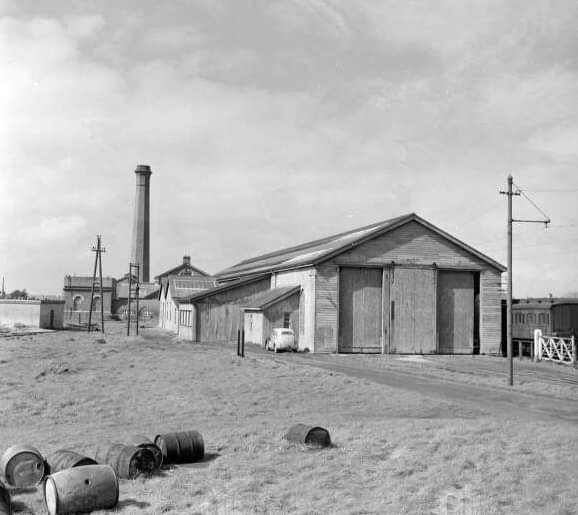
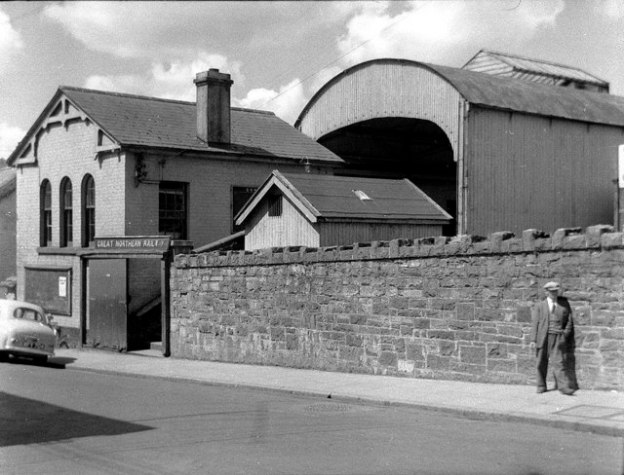
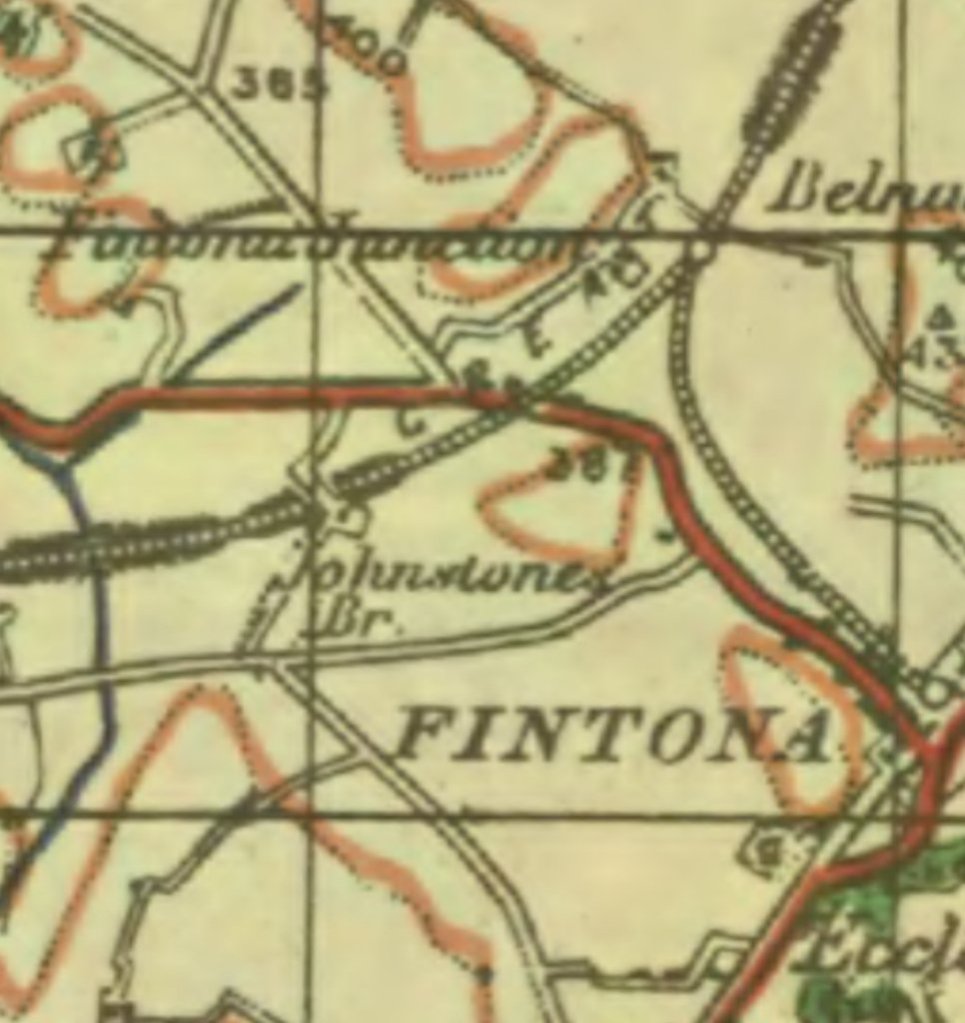
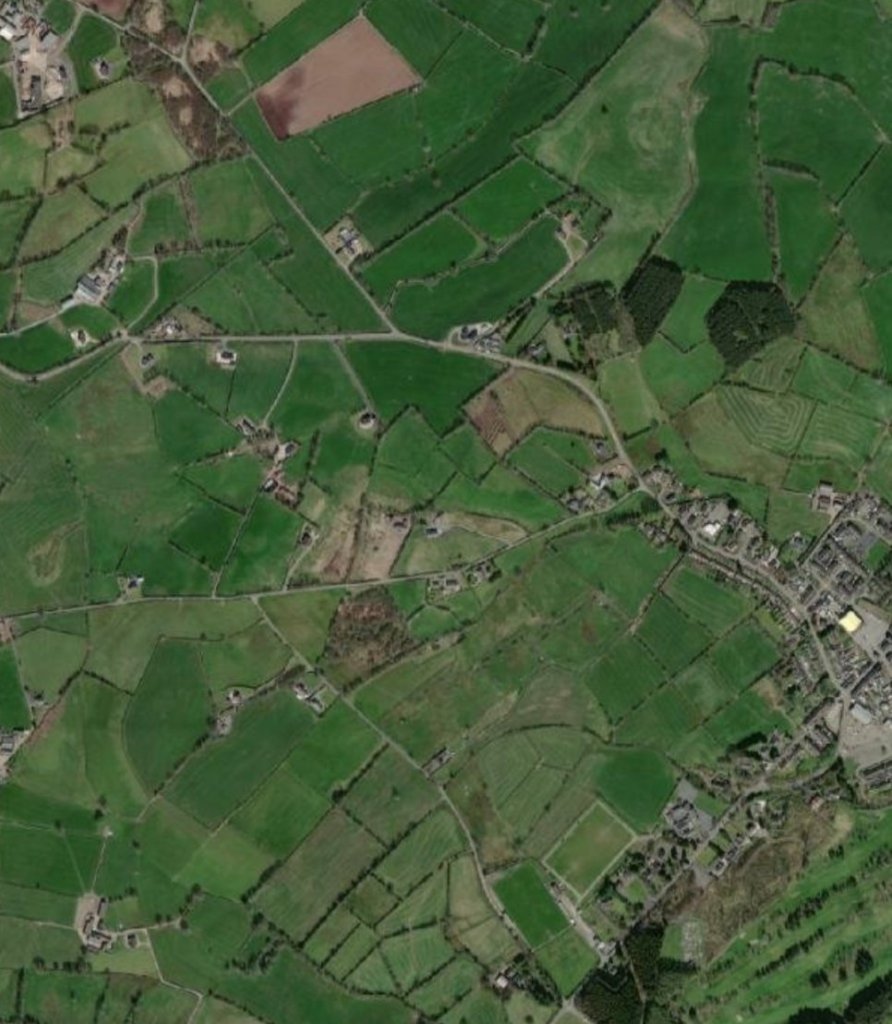
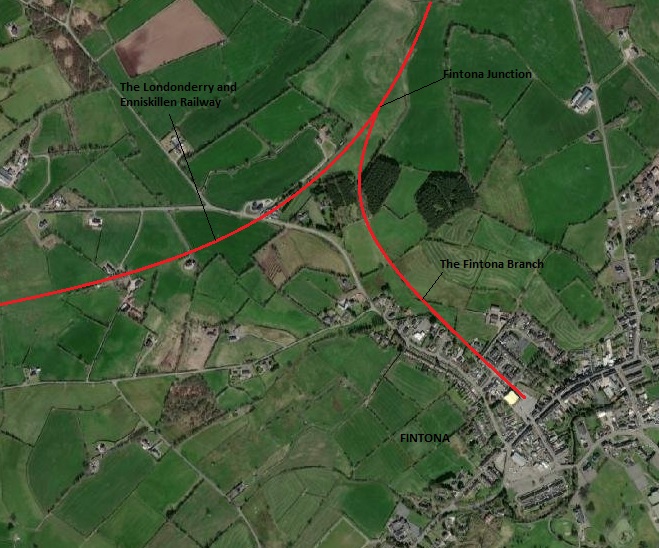
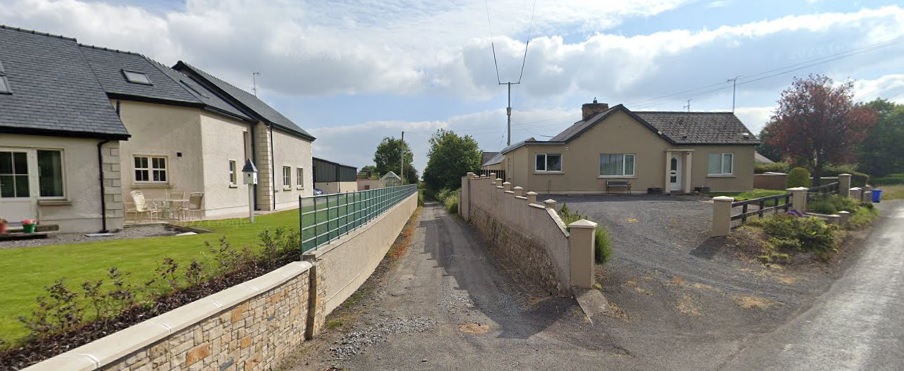

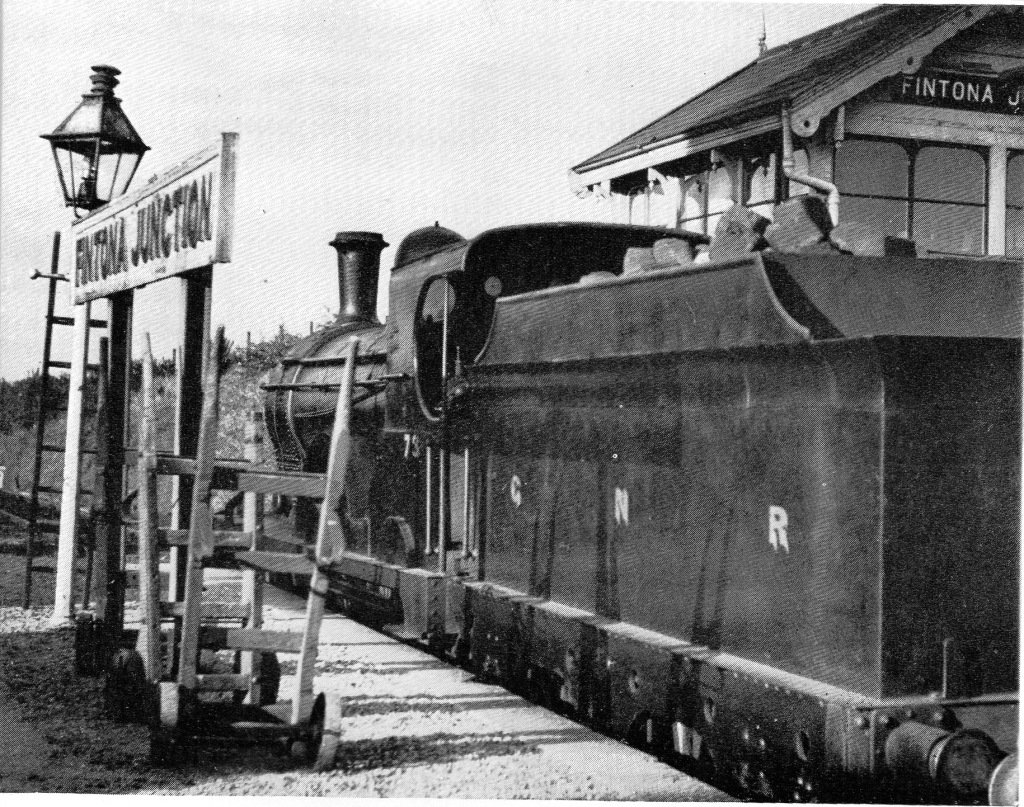
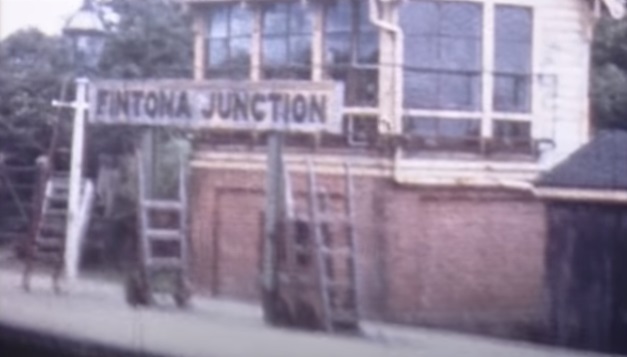

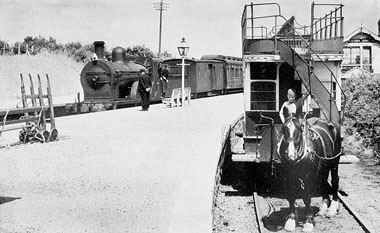
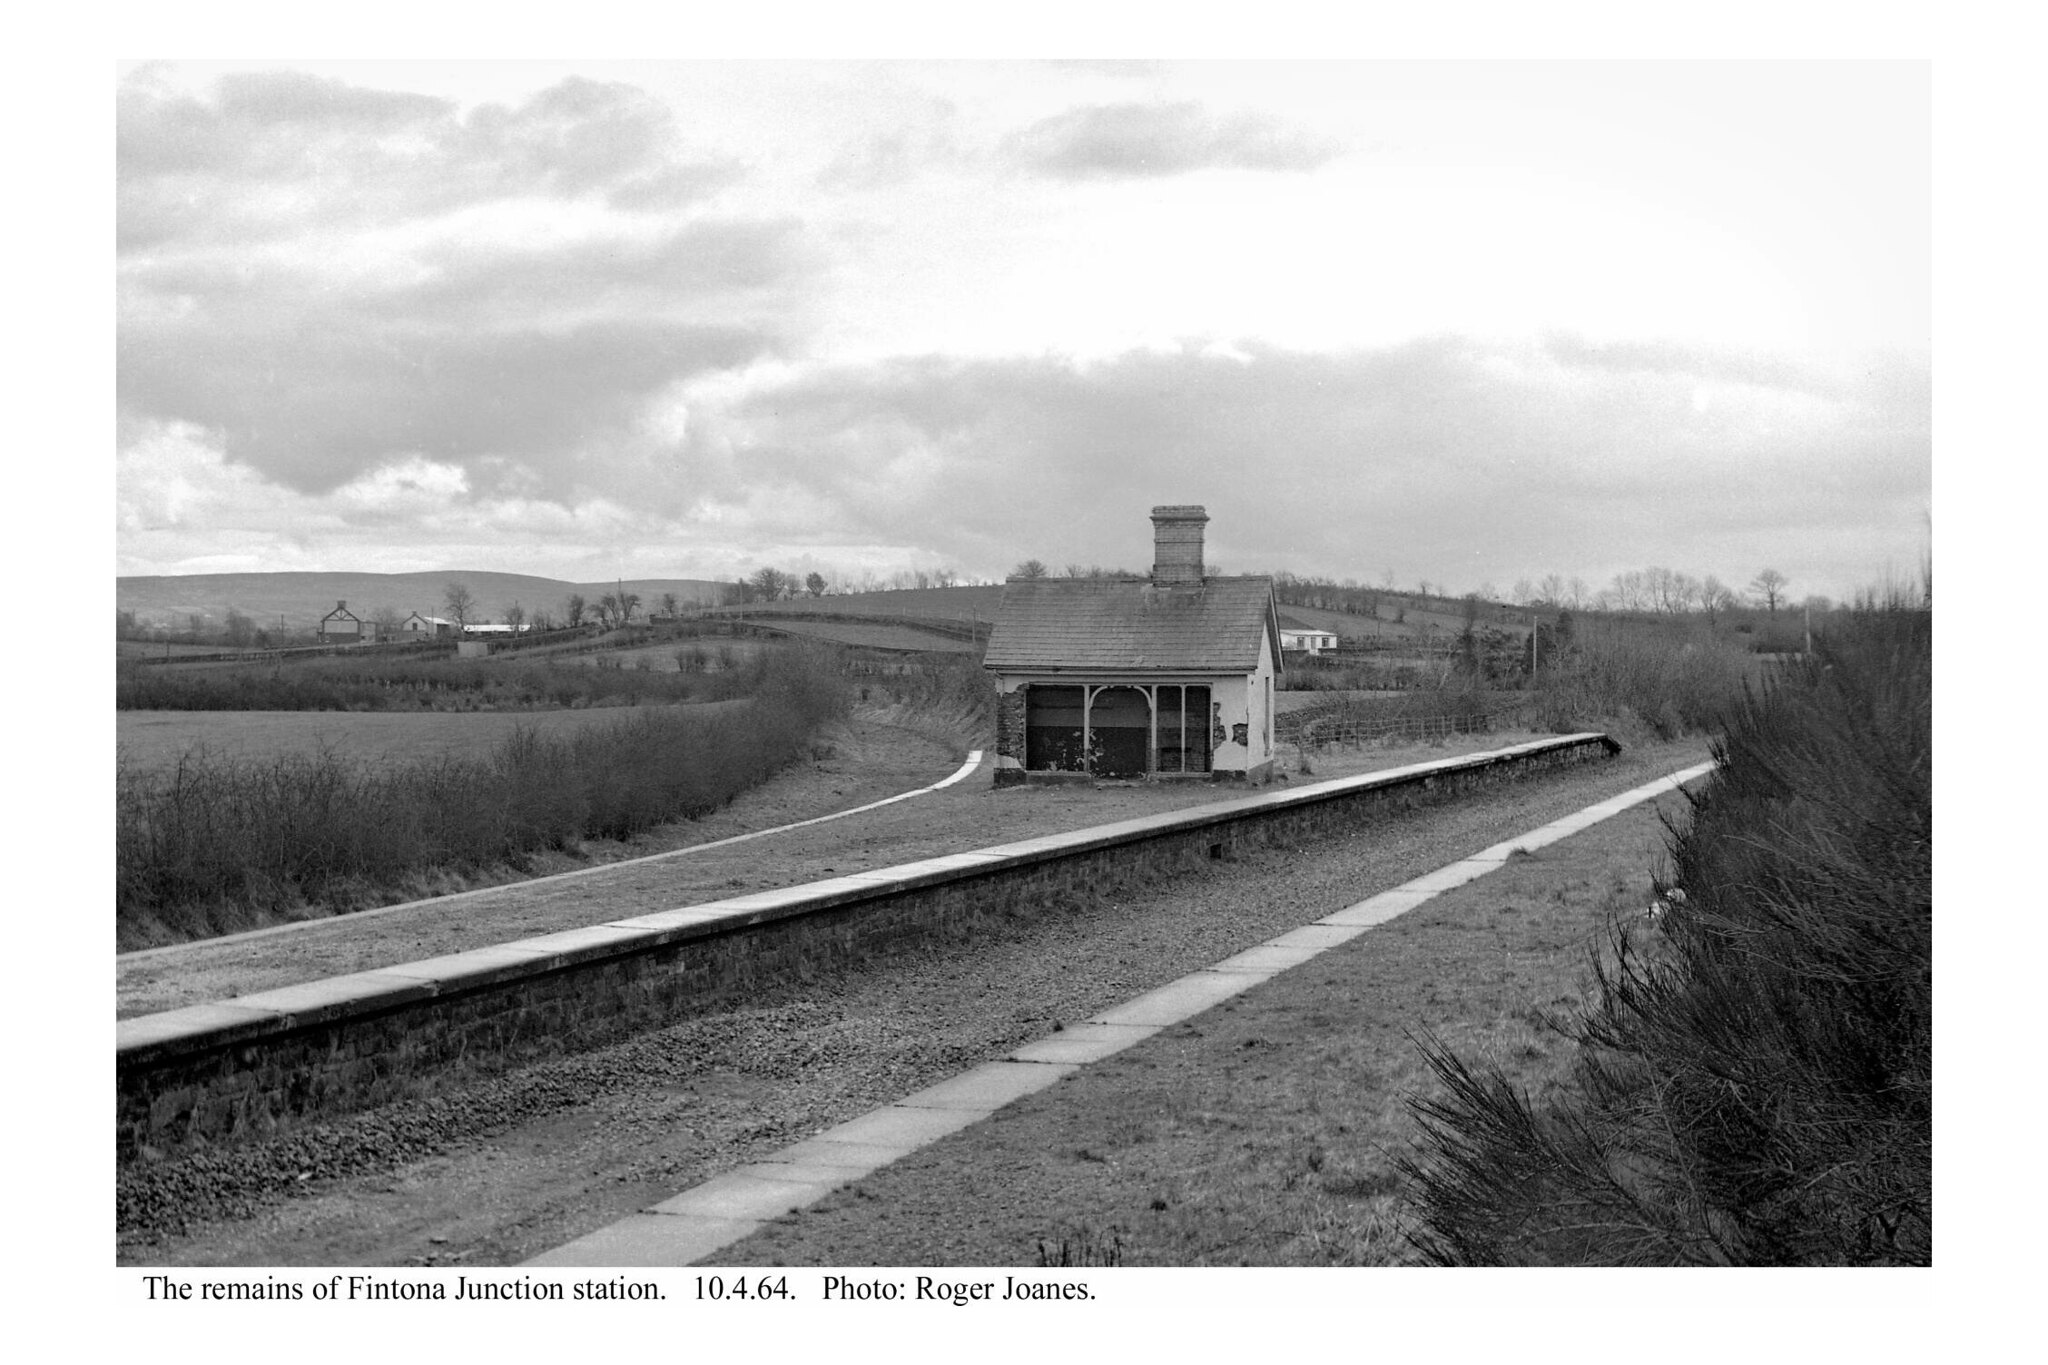
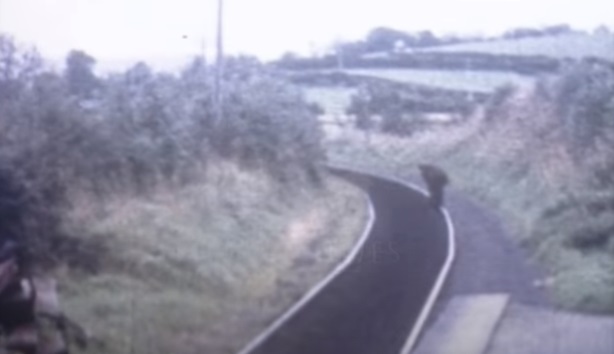
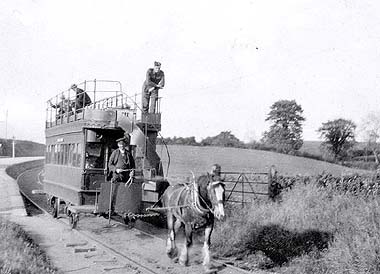

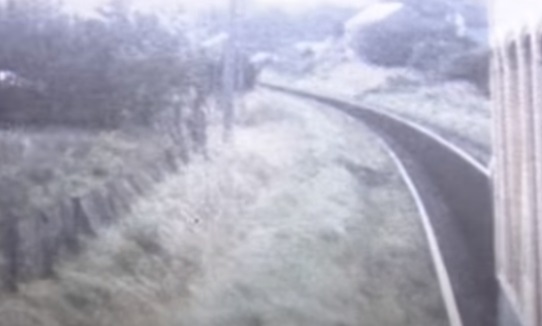
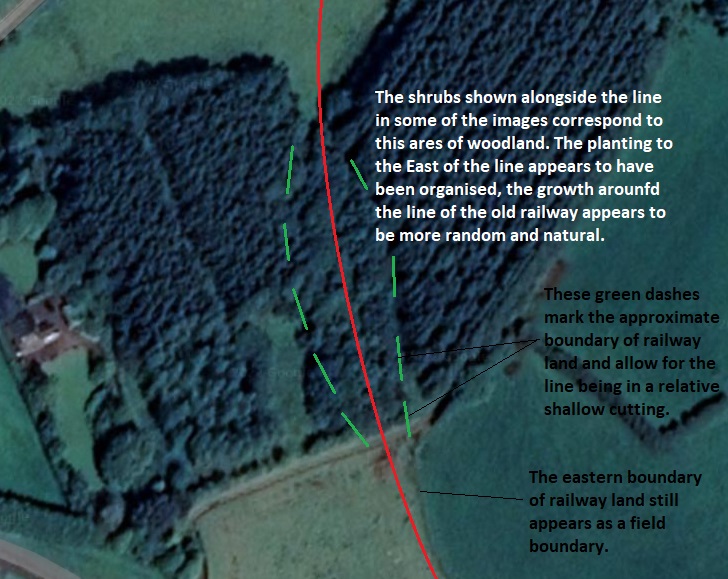
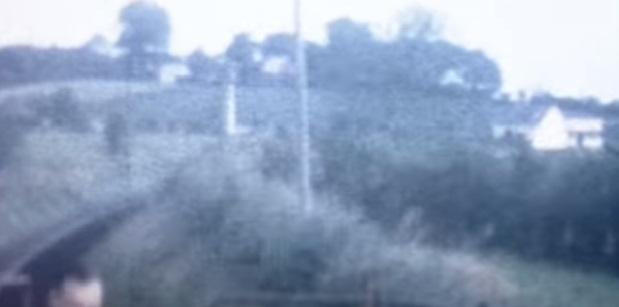

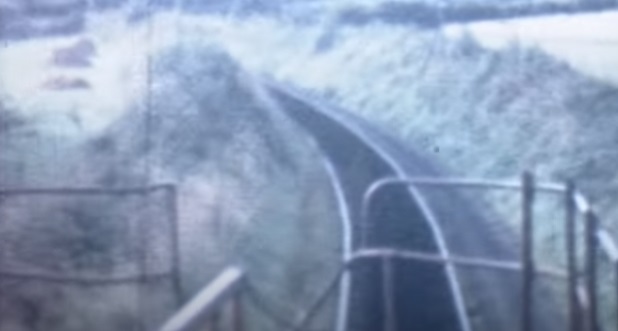
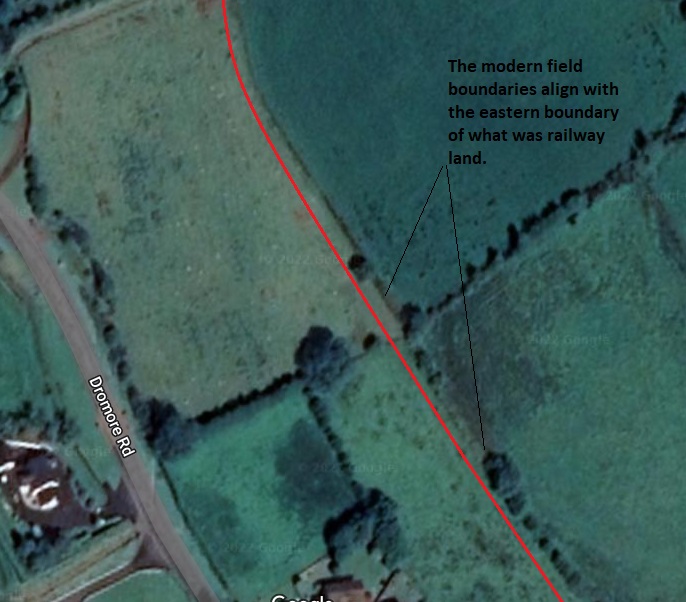
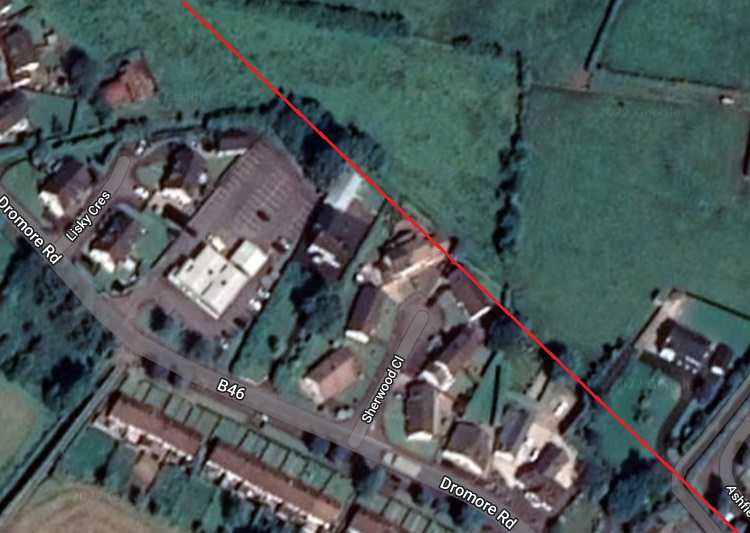
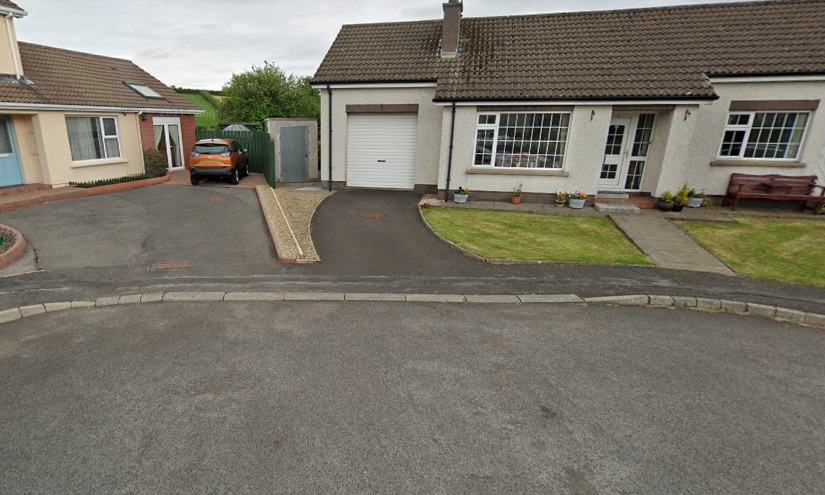
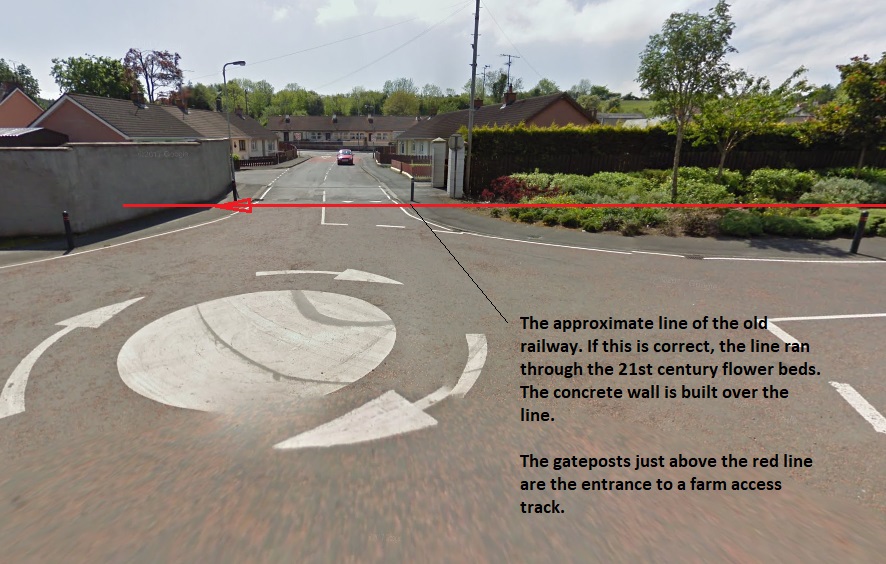
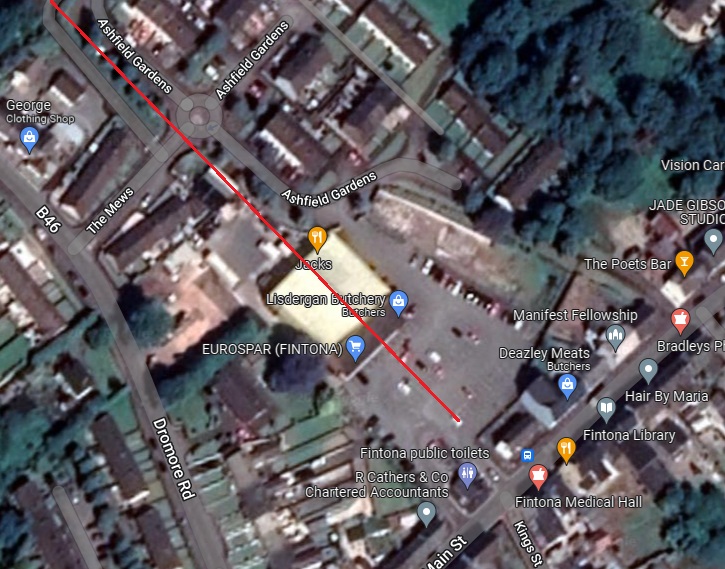
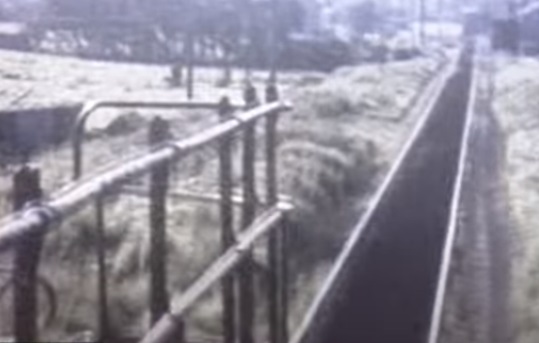
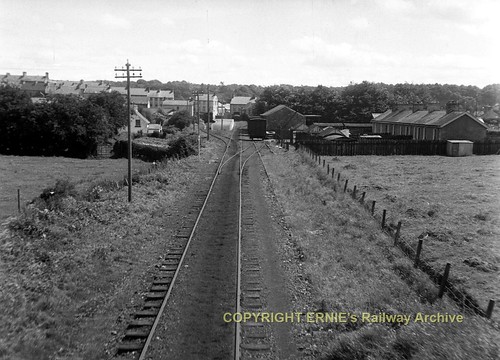
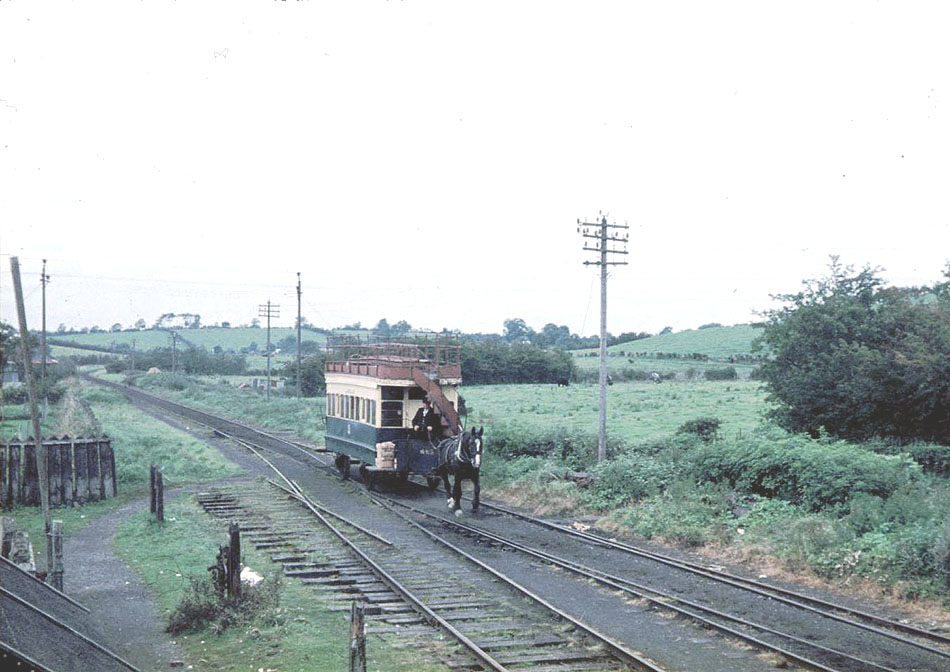
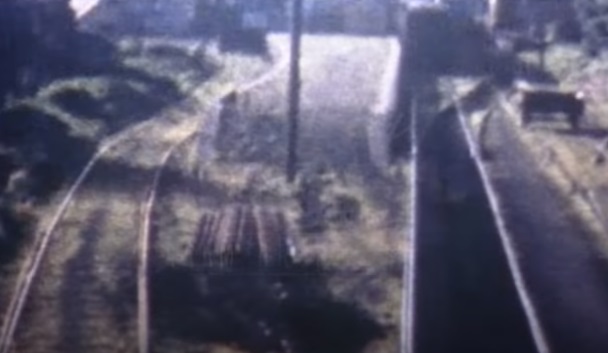
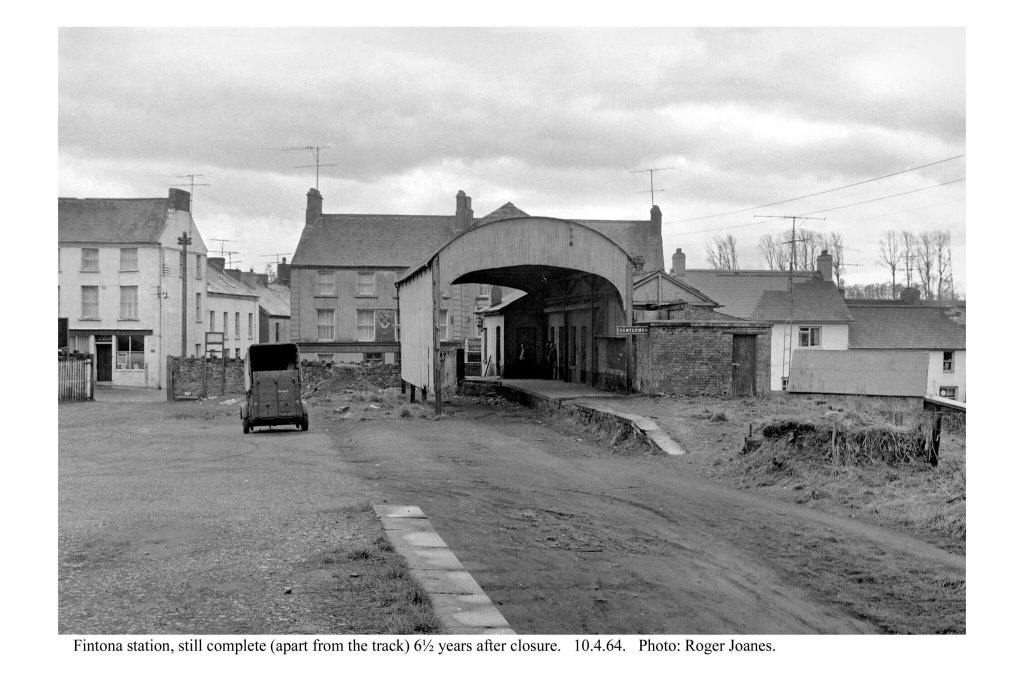


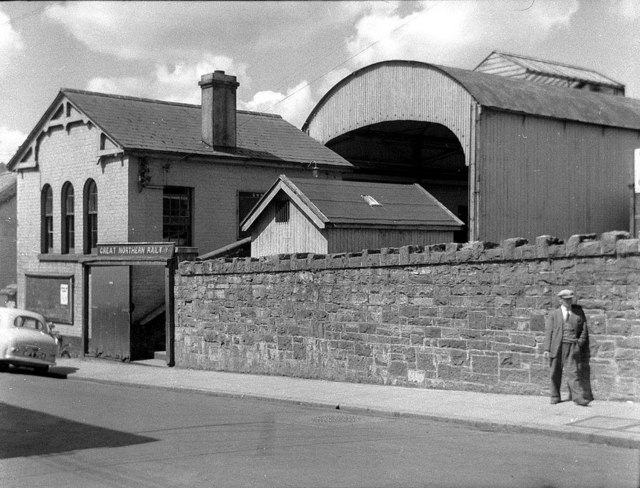
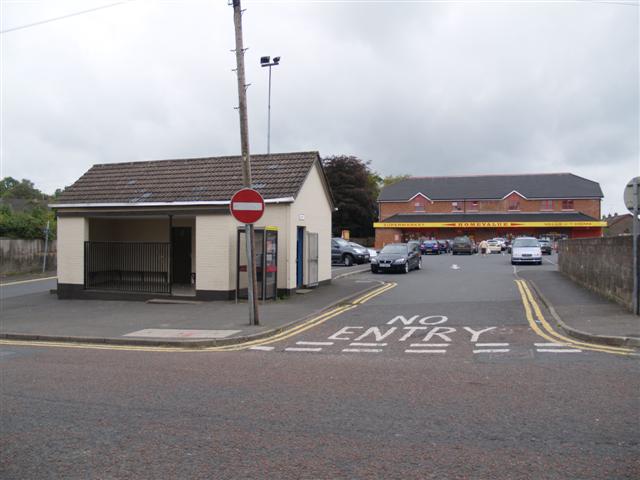
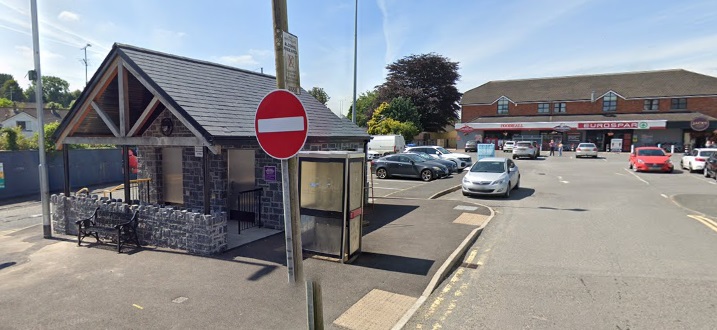
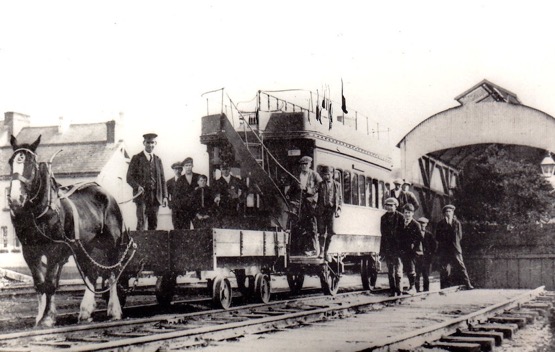
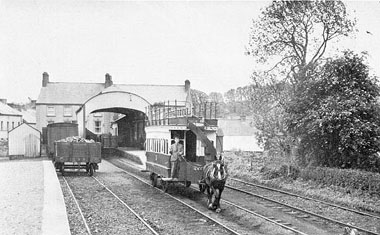
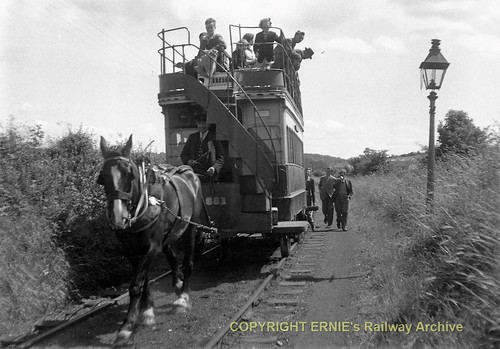

