The Humber Arm Railway linked an earlier canal branch (which ran from the Newport Branch of the Shropshire Union Canal at Kynnersley to a wharf at Lubstree close to The Humbers, a small hamlet North of the old LNWR mainline through Donnington and on the North side of Venning Barracks, the base of the 11th Signal Brigade and Headquarters West Midlands, part of the British Army’s 3rd UK Division.) with the Lilleshall Company’s private rail network. [1]
The Canal was opened to traffic in May 1844 and was initially served by a tramway which ran from Lubstree Wharf to Lodge Furnaces. Between the Canal and the tramway the distance from the Shropshire Union Canal to Lodge Furnaces was about 4 miles (1 mile of canal and 3 miles of tramway).
The canal arm was authorised by an Act of parliament in 1827. If built at that time it would have been part of the Birmingham and Liverpool Junction Canal. Its successor was the Shropshire Union Canal. It seems that the Duke of Sutherland landowner and influential partner in the Lilleshall Company built both the canal arm and the associated tramway. [2: p41]
Charles Hadfield notes that two branches were authorized from canal serving Newport, “one to Edgmond that was never built, and one, to be a cut with 7 locks or a tramroad, to Lilleshall. This, on a different line and without locks, became the Humber Arm, … leading to the Marquess of Stafford’s Lubstree wharf, which opened for business in 1844.” [29: p185]
The six map extracts immediately below are mostly taken from the 25 inch Ordnance Survey of 1881/1882 and they show the full length of the canal. Traffic on the Humber Arm ended in 1922, when the fifth Duke of Sutherland closed the wharf and the railway line to Lilleshall. [3]
The junction of the Shropshire Union Canal Newport Branch and the Humber Arm which was just a few tens of metres to the South of the aqueduct shown above. The junction was to the East of Kynnersley. The Humber Arm heads Southeast from the Newport Branch. very little changed at this location from the opening to the closing of the Humber Arm. This map comes from the 1901 25″ Ordnance Survey. The following three images are extracts from the next sheet from the Ordnance Survey of 1881.[4]Three successive map extracts cover the length of the Humber Branch (Humber Arm of the Shropshire Union Canal) which appears to the bottom left of the relevant 1881 Ordnance Survey sheet. [5]The remainder of the Canal Arm is on the next 25″ Ordnance Survey sheet to the South which was published in 1882. This length brings the canal to the North end of Lubstree Wharf. [6]The Canal Wharf at Lubstree. 25″ Ordnance Survey of 1882. [6]Approximately the same area as shown on the last map extract above as it appears on the RailMapOnline.com satellite imagery. The purple lines are the approximate line of the Mineral Railway that replaced the tramway we will following first. Satellite imagery shows nothing of the Canal Arm to the North of this image. Heading to the North from here, the line if the canal traverses open fields and then Aqueduct plantation. The trees in the plantation obscure any direct evidence of the old canal arm from above and, similarly, the location of its junction with the Shropshire Union Canal Newport Branch. [10]
While it is true that direct evidence of canal remains cannot be seen, tree growth differs along the line of the two old canals as this next satellite image from Google Maps shows.
Tree growth patterns highlight both the line of the Humber Arm and the Shropshire Union Canal Newport Branch. [Google Maps, July 2023]
Derelict structures once sat adjacent to the remaining length of canal at Lubstree Wharf.
The West elevation of the Engine Shed. [13]The Engine Shed at the top end of the remaining length of canal close to the bridge which used to span the Humber Arm but which now forms a scenic break with no canal beyond. [18]The view South from the ‘bridge’ alongside the Engine Shed in the mid 20th century. The remaining length of the canal alongside Lubstree Wharf was not always full of water. [19]The view South from alongside the Engine Shed down the line of the tramway/railway which served the Wharf. [13]The transhipment shed at Lubstree Wharf in the 20th century before major deterioration set in and the roof was lost. [16]The transhipment shed early in the 21st century before reconstruction started. [17]Looking North-northwest from Humber Lane the remaining length of the canal can be seen to the right of the centre if this image. The Goods Shed which appears on the map extract and satellite image above can be seen to the left of the young tree close to the camera. It appears to be being refurbished. [Google Streetview, June 2022]
The site was advertised for sale online by Barbers Rural Estate Agents with planning permission, granted on 31st January 2019. [13] At the time the above image was taken (June 2022) the old Goods Shed/transfer facility was being refurbished as a dwelling. The three images below come from the Estate Agent’s site and show what the architect planned for the Goods Shed and the Engine Shed.
The proposed dwelling built out of the remains of the Goods Shed. [13]The computer-aided 3-D design drawings look very realistic. This image shows the planned refurbishment of the Goods Shed, the remaining length of the canal, and in the distance a refurbished Engine Shed! [13]The proposed refurbishment of the Engine Shed adjacent to the bridge which once spanned the Canal, but which now forms a ‘scenic-break’. The is no canal to the North of the bridge. [13]
The tramway was replaced by a standard-gauge railway as part of the Lilleshall Company’s network of private railways in 1870.
The Tramway
I have not been able to find earlier maps than the 1881/1882 Ordnance Survey that would show the tramway. It is, however, reasonable to assume that, at least as far as the tunnel under the LNWR mainline, the railway was built on the formation of the old tramway. The last map extract above shows the terminus of the railway (which would have also been the tramway terminus) alongside the canal wharf, the next series of map extracts show the railway (and so also the route of the tramway), running South to pass under the LNWR railway line.
The Humbers hamlet at the end of Lubstree Wharf. The end of the canal can be seen in the top-left of the extract. The tramway/railway crossed the lane through the hamlet at the end of the canal. The Humber Brook runs to the South side of the tramway/railway. [6]These two extracts from RailMapOnline’s satellite imagery cover the same length of the tramway/railway as the map extract above. [10]A wide-angle view looking West-southwest along Humber Lane. The tramway/railway crossed the lane closer to the camera than the bridge which carried Humber Lane across Humber Brook. [Google Streetview, June 2022]The camera is just to the East of the bridge over Humber Brook and is looking Southeast. The brickwork to the right edge of the picture is the end of the parapet of the bridge carrying the lane across the brook. The tramway/railway used to run along the modern driveway, heading Southeast. [Google Streetview, June 2022]This photograph is taken from a point further to the East along Humber Lane. The old tramway/railway ran just beyond the vegetation on the left of the image and behind the properties visible in the right of the picture. [Google Streetview, June 2022]The old tramway/railway continued in a South-southeast direction. [6]Again, this RailMapOnline satellite image shows roughly the same length of line as the map extract above. [10]The old tramway/railway continued following the East bank if the Humber Brook. [6]This satellite image shows the same length of line as the map extract above. [10]This map extract shows the old tramway/railway turning towards the Southeast. The Humber Brook turns away to the West. An open drain crosses under the railway and runs parallel to the old tramway/railway as it heads Southeast. [6]A similar area to that shown on the top-left of the map extract above. The purple line indicating the route of the old tramway/railway is crossed by other purple lines which mark later rails serving MOD Donnington. [10]This RailMapOnline covers approximately the same length of line as the bottom-right quadrant of the last map extract and the top-left quadrant of the map extract below. [10]The old tramway/railway turns once again to the South-southeast and is shadowed by one arm of the open drain. [6]This satellite image extends just a little further to the South than the map extract above. [10]Two map extracts showing the South-southeast trajectory of the line as it came closer to the LNWR mainline. The next map extract takes the tramway/railway on to another 25″ map sheet. [6]The approach to the point where the LNWR line crossed the route of the tramway/railway. [7]A series of three extracts from RailMapOnline’s satellite imagery which bring the purple line to approximately the position as the bottom of the last map extract above. The gate into MOD Donnington can be picked out under the purple line adjacent to the Babcock building. [10]Looking North through the gates to MOD Donnington the road running North-northwest (directly ahead of the camera) from the gate follows the line of the old tramway/railway. [Google Streetview, June 2022]Looking South-southeast from a very similar location. The bridge ahead carries the A518 over the access road to MOD Donnington. It is at the same location as the bridge which carried the old LNWR mainline over the old tramway/railway. [Google Streetview, June 2022]This extract from the 1882 25″ Ordnance Survey shows the point at which the LNWR bridged the Lilleshall Company’s tramway/railway. It also shows the old tramway route continuing to the South-southeast and the later standard-gauge mineral curving round to the Northeast to run parallel to the LNWR main line. [7]This final RailMapOnline satellite image shows the features noted on map extract above and shows the dramatic changes which have occurred in the immediate vicinity of the old tramway. The tramway route is not followed by RailMapOnline South-southeast of Wellington Road. [10]Looking North-northwest towards the bridge carrying the A518 across the entrance road to MOD Donnington. As we have already noted, the bridge is at the same location as that which carried the LNWR line over the old tramway/railway. The road leading under the bridge to the site gates of MOD Donnington follows the line of the old tramway/railway. The camera is at the approximate location where the old tramway route separated from the newer mineral railway. The mineral railway curved away to the right of this image after passing under the old bridge. [Google Streetview, June 2022]
The last map extract above shows the route of the old tramway extending South-southeast from the LNWR mainline with the more modern standard-gauge mineral railway curving round after passing under the mainline and climbing on a gradient of about 1 in 77 to run alongside the LNWR line.
This image is a further extract from the 25″ 1881/1882 Ordnance Survey. It shows the route of the old tramway crossing what became Wellington Road and continuing along what became Wrekin Drive. [7]
South of this point the old tramway continued in a South-southeasterly direction. It crossed what became Wellington Road as can be seen below on the next extract from the 1881/1882 25″ Ordnance Survey. As can also be seen on the map extract, South of the road the old tramway formation was by 1882 being used as a road/track. Which ultimately became Wrekin Drive.
The next two satellite images are taken from the ESRI images provided by the National Library of Scotland. They show the long straight length of the tramway route which is followed by modern roads.
This satellite image is taken from the ESRI image set supplied by the National Library of Scotland. The road shown running North-northwest to South-southeast across the centre of the image follows the formation of the old tramway/railway. In the bottom right of the image a bridge carries the modern A518 over the road just mentioned. That bridge and the A518 are on the line of the old LNWR mainline through Donnington. The bridge is at the same location as the bridge carrying the LNWR line over the tramway/mineral railway. [8]At the same scale as the satellite image above, this ESRI image shows the road with continues to follow the route of the old tramway. The later mineral railway turned away to the East in the top left of this image, rising to run alongside the old LNWR mainline. The smaller of the two roundabouts was built over the line of the old tramway. The road running South-southeast from the roundabout is Wrekin Drive which was also built over the line of the old tramway. [9]Looking South-southeast across the smaller of the two roundabouts mentioned above. Wrekin Drive is the road directly ahead of the camera and it follows the line of the old tramway. [Google Streetview, June 2022]
The on-going tramway route is followed on the 25″ Map extracts below but as a smaller scale than the images above. It passed Donnington Wood Farm and crossed Queens Road and then following the route of what became St.George’s Road it crossed the Donnington Wood Canal. At this point the map extract shows that the tramway tracks remained in place to serve an old ironstone mine/shaft.
It was then only a short distance further south that the tramway met the wider network of tramways in the Donnington area.
A first smaller-scale extract from the 25″ Ordnance Survey of 1882. [7]Following Wrekin Drive to the South on Google Streetview, the road entering the image from the left is Turreff Avenue. [Google Streetview, June 2022]Wrekin Drive heading towards its junction with Queen Road/Oakengates Road, still on the line of the old tramway. [Google Streetview, June 2022]This 25″ map extract from the 1882 Ordnance Survey shows (centre-top) the point at which the old tramway route crossed what is now the junction between Wrekin Drive and Queens Road/Oakengates Road. From this point on the road name changes to St. George’s Road. In the bottom-left the crossing point over the Donnington Wood Canal can be seen with tramway rails still in place to serve the Ironstone shaft which appears centre-bottom of the extract. [7]This extract from Google Maps covers the length of the old tramway route from the North edge of the extract above to the South edge of the next map extract below. [Google Maps, July 2023]This extract from the RailMapOnline satellite imagery shows the old tramway in turquoise overlaid on St. George’s Road and Lodge Road. [10]The view South from Wrekin Drive onto St. George’s Road at the crossroads with Queen’s Road and Oakengates Road. [Google Streetview, June 2022]The view South across the point where the old tramway crossed the Donnington Wood Canal. The road on the right is High Mount which follows the old canal towpath. The canal itself is long-gone. [Google Streetview, June 2022]Further to the South, the connection is made between the tramway crossing the Canal and the wider tramway network. The road entering the bottom the extract and running Northeast toward the tramway is now St. George’s Road. Its extension to the East of the tramway is Bradley Road. The tramway curves round from what is now the South-southeast bound St. George’s Road onto what is now Lodge Road. [7]As St. George’s Road veers to the right to meet the roundabout ahead the old tramway alignment runs through the bus stop and trees parallel to the footpath on the left of the image. [Google Streetview, June 2022]The old tramway crossed what is now Bradley road and then turned to the left along what is now Lodge Road, joining the wider tramway network. [Google Streetview, June 2022]The view Southeast from the roundabout along Lodge Road. The old tramway ran on the South side of the road. [Google Streetview, June 2022]The tramway followed the South side of what became Lodge Road. [7]The tramway and Lodge Road only just touched the top-right corner of this 25″ OS sheet published in 1882. [14]This RailMapOnline image shows the approximate route of the tramway from the modern roundabout and across Donnington Wood Way heading towards Old Lodge Furnaces in what is now Glanville Country Park. Its Eastern edge is in approximately the same location as the Eastern edge of the OS map extract immediately above. The turquoise line running left to right across the image is the approximate line of the tramway. The 1882 OS map extracts show the line running within the carriageway, but on the South side, of Lodge Road. [10] Lodge Road looking East. The track on the left is an arm of Lodge Road. Ahead the road is gated and now-a-days narrows to a tarmacked footpath leading towards Donnington Wood Way. [Google Streetview, July 2018]Looking West along Lodge Road footpath from a point 30 metres or so beyond the gate. [My photograph, 27th July 2023]Looking East along Lodge Road towards Donnington Wood Way. [My photograph, 27th July 2023]Looking back West along Lodge Road from the pelican crossing on Donnington Wood Way. [My photograph, 27th July 2023]Looking East across Donnington Wood Way from the same location. The bollards on the opposite side of the road mark the continuing line of Lodge Road and the old tramway. [My photograph, 27th July 2023]Travelling further to the East and on the next OS sheet, the tramway continues East-southeast along Lodge Road which is shown as a relatively wide track. [15]This image from RailMapOnline covers a similar length of the tramway as does the OS map extract above. [10]Looking Southeast from Donnington Wood Way along the route of the tramway. In the past Lodge Road was a wider track, the tramway continued to run just inside the South verge of the track. [Google Streetview, June 2022]Looking back along the line of the old tramway towards the modern Donnington Wood Way. [My photograph, 27th July 2023]Turning through 180°, this is the view Southeast along the line of the tramway. [My photograph, 27th July 2023]Around 100metres further to the Southeast, this is the view back towards Donnington Wood Way. [My photograph, 27th July 2023]And again, Turning through 180°, this is the view Southeast towards Old Lodge Furnaces. [My photograph, 27th July 2023]At the bottom-right of the satellite image above, and at the top-left of the satellite image below, this is the view along the line of the old tramway where it crosses Granville Road. The line ran through the trees ahead curving round a little towards the South but still generally on a Southeast bearing. [My photograph, 27th July 2023]This next map extract from the 25″Ordnance Survey published in 1882 shows the line curving round to the Southeast and passing a series of spoil heaps before arriving at the site of Old Lodge Furnaces. [15]This RailMapOnline image is approximately the same width as the map extract above. The tramway route we have been following enters top-left and runs diagonally across to the right edge of the image. Modern industry now occupied the Western part of the Old Lodge Furnaces site. [10] The site of Old Lodge Furnaces as it appears on the 25″Ordnance Survey of 1882. The tramway enters the site at the bottom-left of this map extract. [15]Covering approximately the same area as the map extract above, this image, from the RailMapOnline satellite imagery shows the area of Old Lodge Furnaces as it appears in the 21st century. The turquoise lines are tramways, the purple lines are the later standard-gauge Mineral Railways of the Lilleshall Company. [10]This is a close-up of part of an information board in Glanville Country Park. It shows Old Lodge Furnaces as they would have appeared when the tramways provided for their transport needs. The view is from the Northeast. [My photograph, 27th July 2023]
This is as far as we follow the old tramway which served the Humber Arm, as the tramways near Old Lodge Furnaces will be covered in greater detail elsewhere. It is worth noting that a significant investment was made in the transport facilities at the site which depended, while open, on a series of tramway branches to supply the furnaces and to take away the iron that they produced.
Old Lodge Furnaces. [21]
The Friends of Granville Country Park’s website provides a general introduction to the history of the Old Lodge Furnaces: … [22]
In 1824 the company brought into blast two new furnaces near the site of the Old Lodge. They were named the Old Lodge furnaces because of their proximity to the site of an old hunting lodge which was demolished in 1820. In March 1825 the Lilleshall Company paid the Coalbrookdale Company £2392 for (presumably) a Blast Engine. George Roden, a stonemason from the Nabb, was paid £425 in 1825 and £777 and 5 shillings in 1826 for erecting loading ramps and the retaining walls. In 1830 the Donnington Wood and the Old Lodge ironworks together produced 15,110 tons. A third furnace was added in 1846 and two more in 1859.
New blast beam engines, manufactured by the Lilleshall Company, were installed in 1862 and the height of the furnaces was increased from 50 to 71 feet at about the same time. Limestone came, via the canal, from the Lilleshall quarries and the coal (coke) and iron stone from the local pits via an extensive system of tramways, some of which, were later converted to standard gauge railways. The 1882 map show this series of transport plateways to transport the materials to the top of the furnace, and remove pig iron the furnace bottom.
The Old Lodge Furnaces produced cold-blast pig iron of the finest quality, but eventually it could not compete with cheaper iron made elsewhere and in 1888 the last of the Old Lodge furnaces was blown out 1888. The furnaces were demolished in 1905 by Thomas Molineaux Jnr, including a tall chimney 140 feet high by 13 feet diameter, known locally as “The Lodge Stack”. In 1956 the stone was reused for St Mathew’s Church. Thereafter the company concentrated all its iron and steel making at Priorslee. [22]
The Mineral Railway
We return now the the overbridge which carried the LNWR over the tramway and the later mineral railway which curved round to the East after passing under the bridge. The length from Lubstree Wharf to the LNWR overbridge is covered above. Charles Hadfield explains that in 1870, anxious to save money on the Trench Incline, the Canal company “agreed to lease Lubstree wharf on the Humber Arm of the Newport branch from the Duke of Sutherland and pay a wharfage rate of 0.5d/ton, so that the coal and other traffic from Lilleshall could be shipped there. To carry it, 30 boats were taken from the company’s fleet, and others ordered to replace them. New accommodation was provided, and a railway line built from Lubstree to the Lilleshall Company’s works.” [29: p239]
However, by 1880, “the Humber Arm was only carrying fluxing stone, though two years before the iron ore toll from Ellesmere Port had been specially reduced for the Lilleshall Co. Negotiations for its better use followed, and the [canal] company agreed to take 300-400 tons a week of limestone and 100-150 tons of ore at agreed rates. The Shropshire Union also hoped for a coal trade outwards, and pig-iron to be carried for transhipment to the L.N.W.R. Business seems to have remained brisk for some time after that, for in 1891, when the wharf lease was renewed, another siding was built. In 1905 it was renewed for another fourteen years.” [29: p242]
David Clarke the photographer of the image above is also the author of a book about the Railways in the Telford Area published by the Crowood Press. You can find a review of the book on this link.
The canal route can be followed on the Captain Ahab’s Watery Tales blog, so there is no need to repeat it here. [27] The remaining length of the mineral railway to Muxton Bridge Colliery is covered below.
This sequence of 9 extracts from RailMapOnline.com show the same length of the mineral railway as covered by the Ordnance Survey extract above the sequence. [10]Looking Southeast along Cookson Close from a point close to the roundabout on Donnington Wood Way. The old tramway ran through the trees to the right of the fence visible in this image. It ran at a higher level. [Google Streetview, June 2022]Further Southeast, this view looks East along Cookson Close. The old tramway was at a higher level. Its route runs beyond the fence and trees at the right of this image. [Google Streetview, June 2022]Cookson Close curves round towards the Northeast before reaching a modern development boundary. A short footpath takes us to Jarrett Walk. This photograph is taken at the point where we join Jarrett Walk and looks Northeast. The old tramway route ran at a higher level beyond the fence and trees to the right of this image. [Google Streetview, June 2022]As we reach the far boundary of this development, Jarrett Walk turns away to the Northwest. The old tramway route continues ahead parallel to but beyond the fence to the right and at a higher level. [Google Streetview This next extract from the 1881 25″ Ordnance Survey shows Muxtonbridge Colliery, which was served by the mineral railway, Muxtonbridge Farm and the Donnington Wood Canal arm meandering its way Northeast towards Lilleshall Grove Lilyshall Abbey and Lilyhurst Road. [26]These last two extracts from RailMapOnline.com show the last length of the mineral railway that served Muxtonbridge Colliery. [10]
Both Waxhill Barracks Collery and Muxtonbridge Colliery closed at around the same time at the turn of the 20th century. [22] Muxtonbridge Colliery was active from 1890 to 1905. Waxhill Barracks Colliery had a longer life, 1818 to 1900.
The remains of Muxton Bridge Colliery pumping engine house is a listed ancient monument. [28]
We have now looked beyond the immediate length of the Humber Arm of the Newport Branch of the Shropshire Union Canal and the Lilleshall Company’s tramways and mineral railways in the immediate area of the canal arm. We have covered the old tramway between the Canal and Old Lodge Furnaces and a significant length of the later Mineral Railway, so as to get an impression of the area that the Lubstree Wharf served when it was active.
The featured image above was colourised by Simon Alun Hark. It makes the engine house and the mechanisms associated with the inclined plane so real. [14]
This schematic representation of the Shropshire Tub Boat Canals is helpful in clarifying the extent of the network. It shows the locations of all the inclined planes on the system. These are marked with a red arrowhead which in each case highlights the direction of the lift. The Trench Branch and Incline were in important link in the journey between the Shropshire Union Canal and the River Severn at Coalport, linking the Newport Canal to the Shropshire Canal. [10]
P. Whitehead [11] provides approximate statistics for the inclined planes on the Shropshire Canal as follows:
Lilleshall Inclined Plane: 123 yds long, 43 ft. This replaced an earlier vertical lift in a shaft and tunnel system. [11]
I first came across an example of these inclined planes before moving to East Shropshire. We drive past the Hay Incline when travelling by a circuitous route from Manchester to Ludlow. At the time I wrote a couple of short articles for my blog:
This article focuses on the Trench Inclined Plane which was built by the Shrewsbury Canal Company in 1792 after it took over the Wombridge Canal. The Wombridge Canal was a tub-boat canal in Shropshire, England, built to carry coal and iron ore from mines in the area to the furnaces where the iron was extracted. It opened in 1788. Trench Inclined Plane remained in operation until 1921, becoming the last operational canal inclined plane in the country. The canal had been little used since 1919, and closed with the closure of the plane. [15] [16]
The Inclined Plane consisted of twin railway tracks, each with a cradle in which a single tub-boat was carried. An engine and engine house were built at the top of the incline to provide power to the Incline. It was supplied by the Coalbrookdale Company and was replaced in 1842 by a new engine that lasted for 79 years, until the final demise of the incline on 31 August 1921. The remaining structural elements of the incline were remove in 1968 as part of the Telford New Town developments. [15][17]
The engine’s main function was to lift the tub boats I cradles out of the canal at the top of the incline over the end wall of the canal. The rails of the inclined plane ran up out of the canal and then down the main length of the Inclined Plane. Generally, the working traffic was in the downward direction of the incline, and was counterbalanced by empty tub-boats returning up to the top level. [17] This meant that little power was needed for the operation of the main length of the incline.
Incidentally, “a prominent feature near the top of the incline was the Wombridge Pumping Engine house. This was a Cornish type, with a tall chimney, and was erected in 1858, to pump water from the mines. The main cylinder was 60 inches (150 cm) in diameter, with a 10-foot (3.0 m) stroke, and it lifted water from a depth of around 600 feet (180 m). The engine developed 250 hp (190 kW) and normally ran slowly, raising 3,338 imperial gallons (15.17 m3) of water per minute, in three strokes. When running at maximum speed, it could achieve eleven strokes per minute.” [18]
These two images were shared by Brian Edwards on the Shropshire Past and Present Facebook Group in late August 2022. [20]
Maps and Illustrations of the Inclined Plane
The Trench Branch Canal left the Shrewsbury and Newport Canal at Wappenshall Junction.
An extract from the 1901 6″ Ordnance Survey which shows the Shrewsbury and Newport Canal (Shropshire Union Canal) running East-West, albeit in something of a ‘V’-shape with the Trench Branch running to the Southeast, off the bottom edge of the extract. [21]The same location on the ESRI satellite imagery provided by the National Library of Scotland. [21]Wappenshall Junction seen from the Northwest.[Google Earth, 2022]A much earlier view of Wappenshall Junction. The Trench Branch leaves this scene through the bridge on the far-right of the image which leads to Wappenshall Lock. [22]
The Trench Branch ran across open fields until it reached the industrial areas near Trench. The first length passed under Wappenshall Bridge, through Wappenshall and Britton Lock, Kinley Bridge, Wheat Leasows Bridge and Lock, Shucks and Peaty Locks, Hadleypark Bridge and Lock, Turnip Lock and Wittingham Bridge before reaching Baker’s Lock/Basin and Castle Iron Works, Hadley.
Richard Foxcroft provides a plan of the Shropshire Canals on ‘Exploring Telford’ a website which focusses on the industrial history of the area which is now Telford, particularly the canals and railways. An extract is shown below. [23]
The line of the northern end of Trench Branch of the Shropshire Canal as shown on ‘Exploring Telford’ [23]
I followed this length or the Trench Branch on the morning of 31st August 2022. Much of the route is on private land and where this is the case, the old canal has been reintegrated into its surroundings.
Access to the canal basin at Wappenshall Junction is at present restrict to site personnel only as the basin and associated structures are under going restoration.
Wappenhall Junction warehouses are undergoing restoration as is the canal basin. [My photograph, 31st August 2022] Grant funding has been provided and work is being undertaken predominantly by volunteers from the Shrewsbury & Newport Canals Trust [24]These new build properties front onto the line of the canal which is illustrated using a red line. The wall in the foreground is the wingwall of the arch-bridge which used to carry the village road over the canal. [My photograph, 31st August 2022]The village lane used to be carried on this structure. Closure of the branch-canal provided the opportunity to realign the road both horizontally and vertically. [My photograph, 31st August 2022]
South of Wappenshall was the Wappenshall Lock. Access to the lock was not possible. No access was possible to Britton Lock nor to Kinley Bridge. The location of Wheat Leasowes Bridge and Lock were easily found as they lie on the road between Preston upon the Weald Moors and Leegomery Round-about on the A442, ‘Queensway’.
The three images above were all taken on 31st August 2022. In sequence, they show: the view North along the line of the old canal which is marked by the field-ditch which remains alongside the hedge in this image; the view South across the road; and finally a view which shows a length of the old canal which is now in the garden of the property in the second image and which still retains water. [My photographs, 31st August 2022]
The length of canal visible in the garden of the property above was the length between the two locks, Wheat Leasowes Bridge Lock and Shucks Lock. The property concerned appears to be an extended lock-keeper’s cottage.
The 6″ OS Map of 1881, published in 1887 shows the bridge and the two locks. The road can clearly be seen to deviate to miss the lock on its alignment and it is unsurprising that once the canal became redundant, the road was realigned. [25]21st century satellite image covering roughly the same area as the map extract above. The lock-keeper’s cottage appears to have been extended. The open area of the canal falls within the curtilage of that property. [26]An extract from the 6″ 1901 OS Map published in 1902 which shows Peaty Lock and Hadleypark Bridge and Lock. [27]A 21st century satellite image of the same area as above, with the locations of the key features marked. [27]The alignment of the old canal at the point it crosses the modern A442, Queensway. Pety Lock was located just to the North of the new road. [My photograph, 31st August 2022]The overgrown route of the old canal to the South of the A442. It retains very little water but the channel is visible here for some distance. [My photograph, 31st August 2022]A picture of Hadleypark Lock taken from the location of the old bridge over the Canal at this point. [My photograph, 31st August 2022]Looking back to the North at the guillotine lock gate arrangement used on the Shropshire Canal.This is the guillotine lock gate mechanism at Turnip Lock. [May photograph, 31st August 2022]
These three images also come from Turnip Lock. The first shows the recess in the locak wall down which the gate slides. The remaining two images show the lock walls, first looking South towards Trench and then looking North towards Wappenshall. [My photographs, 31st August 2022]
Turnip Lock and then Whittingham Bridge appear on the 6″ OS Map of 1901 before the canal them bends towards the East aand passes Baker’s Lock and Basin and the site of Castle Iron Works. [28]The same area on the ESRI satellite imagery. The ochre line shows the approximate limit of public access. The canal runs through the Hadley Castle Business Park. Moveero (part of GKN) occupies the large buildings which sit over the site of the Castle Iron Works. [28][29] The Shropshire Star announced in April 2022, that GKN would be investing a further £20million in the site. [30]The 6″ OS Map shows the canal turning first to the East and then back towards the Southeast as it approached Trench Pool. [31]The line of the canal is highlighted through the industrial areas. Remnants can be seen in the top-left of this image and the alignment is, apart for where under modern structures or roads, still highlighted by a ribbon of deciduous trees. The A442 appears again in the form of the gyratory towards the right-side of this extract from the satellite imagery. Trench Pool appears on the extreme right [31]Trench Inclined Plane as it appears on the 1874 6″ OS Map. Trench Pool was used to store water for the canal system. The Shropshire Union Canal connects to the incline from the West via the Shrewsbury & Newport Canal. At the top of the incline there was a short stub branch to Wombridge Ironworks and a longer ‘Trench Branch’ or ‘Wombridge Canal’ which connected to the Donnington Wood and Coalport branches of the Shropshire Canal. [9]Trench Inclined Plane in 1901 as shown on the 25″ OS Map. Note the location of the bridge over the canal just to the South of Trench Pool, West of the Shropshire Arms. A photograph of that bridge appears below. [8]This extract from satellite imagery 9ESRI) shows the approximate location of the Inclined Plane and it engine house. [32]The bridge over the old canal at the bottom of Trench Inclined Plane. It linked the site of the Shropshire Ironworks with Trench Pool. This colourised photograph was shared by Simon Alan Hark on the Telford Memories Facebook Group on 9th August 2021. [12]
The following colourised photographs give an excellent idea of what the Inclined Plane was like and how it worked. They have been colourised by Simon Alun Hark.
The canal length covered by this article is shown on this plan based on the Ordnance Survey Explorer map of the area. The plan is from an article by Andy Tidy on his blog, Captain Ahab’s Watery Tales. His excellent blog is worth reading. [8]
There were two inclined planes on this length of the Shropshire Canal, both are shown on this plan. Two previous articles cover the Hay Inclined Plane at Coalport which took tub boats down to the wharves alongside the River Severn. These can be found by following these links:
The Windmill Inclined Plane is buried under modern development.
There is more about both these inclined planes below.
Immediately South of Stirchley Iron Works there was a loop in the line of the canal which meant that it was on a tighter curvature than the engineers for the later LNWR Coalport Branch were happy with. The 6″ Ordnance Survey of 1881 shows that length of the canal running alongside the railway.
A short distance South of Stirchley Lane, the Canal entered a 281 yard long tunnel – Stirchley Tunnel. When the railway was built, the tunnel was opened out into a cutting. At this location the Ordnance Survey mapping above shows a rock face to the West side of the railway which highlights the location of the erstwhile tunnel.
A short distance beyond the location of the bridge in the above photo the canal route to the River Severn branches away to the left (East), the arm of the canal running to the West towards Horsehay continues South for a short distance before turning West across the old Bridgnorth turnpike road. The OS Map below shows both of the two arms of the Canal.
This extract from the 6″ OS mapping of 1881 shows the new railways which post-dated the Canal and has the old canal routes superimposed. Note the canal incline close to Windmill Farm and the branch running to the West from ‘Aqueduct’. The aqueduct which carried this arm over the old turnpike road can be seen on the extract. It gave a name to the hamlet immediately next to it. As will be seen from the satellite image below, Madeley Court Station is long gone. The GWR Madeley Branch remains in the early 21st century as it was used for merry-go-round coal trains serving Ironbridge Power Station until the power station closed. [1][2]A Google Maps satellite image extract showing approximately the same area as the OS map extract above. Sketched onto the satellite image are: the very approximate canal routes in blue; the length of the LNWR branch which is not used by the Silkin Way in red; and the old Bridgnorth Road alignment in black. The diversion of the Silkin Way was required with the building of the A4169 and the removal of the bridge deck where the LNWR Coalport Branch line crossed the GWR Madeley Branch. There are no features on the ground in the 21st century to define the line of the old canal as it passed through the are now called Brookside. The old road bridge next to Madeley Court Railway Station remains and carries the diverted Silkin Way across what was the GWR Madeley Branch. Towards the top of this satellite image Southall Road crosses the old railway by means of the bridge shown below. [3]
It is worth emphasising that the lines drawn above are only approximate, particularly in the case of the old Shropshire Canal. A somewhat more accurate alignment for the Canal is shown, length-by-length in the side-by-side images below
Looking Southwest across the aqueduct along what would have been the line of the branch canal. After crossing the turnpike road on this aqueduct, the branch canal turned sharply to the North before heading West towards Lightmoor. [My photograph, 2nd March 2023]Looking Northeast across the aqueduct along what would have been the line of the branch canal heading towards what is now the centre of Telford. [My photograph, 2nd March 2023]Looking Southeast along what was the turnpike road to Bridgnorth, through the arch of the aqueduct which was built in around 1792. [My photograph, 2nd March 2023]Looking Northwest towards modern-day Telford along what was once the Bridgnorth turnpike road. [My photograph, 2nd March 2023]The plaque placed on the aqueduct after its restoration in 2001, (c) Neil Brittain, 19th March 2013. [4]
The branch canal will be for another article. In this article we are following the route to the River Severn.
Aqueduct Village to the River Severn
Just South of the tunnel, the Canal to the Severn turned away to the East from the branch over the aqueduct. The 6″ Ordnance Survey of 1881 above shows the remains of the Canal, first heading East, then curving round to the South before turning East then South-southeast.
As it turned South-southeast it reached the head of the Windmill Inclined Plane which was 600yds long and had a 125 ft rise. [7]
Following the route of the Canal on the ground in the 21st century is difficult as the topography has changed significantly and the majority of the line is built over. Establishing the actual route is difficult, even with the aid of modern mapping tools available through the National Library of Scotland (NLS). The side-by-side option on the NLS website enables a line to be transferred with some accuracy. You will see that in producing the line on the ESRI image above I misjudged the alignment of the curves when transferring them from the 6″ Ordnance Survey of 1881 onto the ESRI imagery from the NLS. The side-by-side images permit the cursor to appear on both the map and the satellite image at the same time.
This first side-by-side image shows the length of the Canal which turns away from the later railway route. I have only mapped the actual length shows on the Ordnance Survey rather than try to interpret the line over the open fields of the map, or the housing in the satellite image. [10]
The four Streetview immediately below show the approximate points where the old canal alignment crosses modern roads. The first shows Aqueduct Lane just to the North of Chapmans Close and at the point where a modern access to the Silkin Way meets the lane.
Looking North on Aqueduct Lane just to the North of Chapmans Close. Aqueduct Lane was a highway in the mid 19th century and must have bridged the old canal. Nothing is known about any structure at this location. The Silkin Way is off to the left of the image and is at a significantly lower level than Aqueduct Lane. [Google Streetview, June 2022]Looking North at the bend in Lambeth Drive. The blue line is the approximate route of the old canal transposed from the side-by-side image above. The passageway immediatly alongside the blue line is not a public right of way, it merely provides access to a property behind the conifer that is prominent in the image. [Google Streetview, June 2022]Further East on Lambeth Drive the old canal’s route curve across the junction and will soon cross Brookside Avenue which is a short distance behind the camera. [Google Streetview, June 2022]Looking Northeast along Brookside Avenue at its junction with Lambeth Drive. The old canal’s route curves sharply round to the South. [Google Streetview, June 2022]
As we noted above, I have not tried to accurately plot the line of the old canal where it does not show on th Ordnance Survey mapping. The next length shown on the mapping is covered on the next side-by-side image below and includes the top part of the Windmill Inclined plane. The route of the incline is defined by the field boundary shown on the OS map.
This second side-by-side image shows the next mapped length of the old canal as it reaches the head on the incline adjacent to Windmill Farm. Once again, very little of the old topography remains and the area has seen significant housing development. [11]Looking East on one of the arms of Bishopdale with the approximate line of the old canal shown in blue. [Google Streetview, June 2022]Looking North on Bishopdale with the approximate line of the old canal shown by the blue line. [Google Streetview, June 2022]Looking to the East along the most southerly part of Brookside Avenue with the old canal route marked by the blue line. As the side-by-side image above shows, we are now a good distance down the Windmill Inclined Plane and it is impossible to be sure of the relative levels of the old canal incline and the modern road.
As we have already noted Windmill Inclined Plane was 6ooft long and saw a drop in levels towards the River Severn of 125ft. We have no pictures of the incline but we do have pictures of another incline on the Shropshire Canal which survived for a little longer and we have the Hay Incline to see in the 21st century. Photos have survived of Trench Incline while it was still operational.
Trench Inclined Plane was covered in another article on this site:
The original photos of Trench Incline were monochrome but modern technology now allows those images to be colourised. The images below hopefully give a good idea of what Windmill Inclined Plane might also have been like in operation. The images were colourised by Simon Alun Hark and shared by him on his Shropshire Nostalgia and Film Facebook Group. [12]
This extract from the 6″ Ordnance Survey shows Trench Inclined Plane close to the Shropshire Oron Works. Trench Pool is to the Northwest of the incline. The incline is marked as a tramway on the map extract. [13]Trench Inclined Plane viewed from the West with the Blue Pig (formerly the Shropshire Arms) Public House on the left of the image. At the top of the incline two different buildings are visible. The one at the top of the incline was the engine house for the incline. [14]The Engine House at the top of the Trench Inclined Plane. [15]Looking down the Trench Inclined Plane to the West. The Shropshire Iron Works (Trench Iron Works on later mapping) are immediately at the bottom of the incline on the left. Castle Car Works are further ahead. [16]The Trench Inclined Plane once again. This image shows how the iron tob boats were transported up and down the incline. At either end of the incline was a pool into which the cradles which carried the tub boats were submerged. Once a tub boats was positioned over the cradle it was picked up by the cradle which left the pool to climb or descend the incline. At the opposite end of the incline the process was reversed. [17]
These Canal Inclined Planes were a much more effective method of lifting the tub boats over significant height gains than would have been a series of canal locks. While these were expedient with tub boats, they would have been impractical for narrow boats which were of a much greater length.
A history of the inclined planes on the Shropshire Canal is provided by P. Whitehead in an article online which is entitled ‘Shropshire Tub Boat Canals‘. [18]
This hand-traced drawing which focusses on the tramways/tramroads serving Madeley Court Furnaces is part of a series included in research published by R.F. Savage and L.D.W. Smith entitled, The Waggon-ways and Plate-ways of East Shropshire. It shows the line of the Windmill Inclined Plane and the canal which it served continuing South towards the River Severn. [19: p179]This extract from the 6″ Ordnance Survey of 1881, published in 1888, shows the Shropshire Canal at the bottom of the Windmill Inclined Plane. The road crossing the canal is the Bridgnorth turnpike road. There are two Wharves show on the extract, one of which was accessed by means of an inclined plane from Kemberton and Halesfield collieries to the East, which is not shown on Savage & Smith’s traced drawing above. They do show a short length of tramroad running along the turnpike road on the West side of the canal. Although not coloured blue on this map extract, there was a canal basin at Tweedale. Its outline can be seen to the East of the Bridgnorth road just South of the Inn. [20]
Bradshaw and Jenkins tell us that “the canal was closed between Wrockwardine Wood and the bottom of the Windmill Hill inclined plane on 1st June 1858, although isolated sections of the waterway remained in use for many years thereafter.” [21: p169]
These side-by-side images show the Tweedale area with the old incline (shown in blue on the satellite image) running down from the location of Windmill Farm to a point close to the old Bridgnorth turnpike road. From this point South the canal remained open after the construction of the LNWR Coalport Branch. The OS Map used in these images is the 1901 6″ survey. The Inn, the canal basin and the warehouse at its western end no longer appear on the map. [22]The Three Furnaces Pub in Tweedale is on the East side of Bridgnorth Road. Behind it are the remains of a colliery slag-heap. That colliery waste built up over the years and swallowed the bottom end of the Windmill Inclined Plane. [My photograph, 21st March 2023]Google Maps satellite image showing the location of the canal bridge and the line of the old canal. [Google Maps, 21st March 2023]looking South down Bridgnorth Road across the ols canal alignment (shown in blue). The canal bridge was removed and the road was realigned. [My photograph, 21st March 2023]Looking North along the line of the canal across Bridgnorth Road. [My photograph, 21st March 2023]Looking South along the line of the canal from the junction of Tweedale North (Court Works Industrial Estate) and Bridgnorth Road. [My photograph, 21st March 2023]We noted when looking at the side-by-side images above that the 1901 Ordnance Survey did not show Tweedale Canal Basin. This image, from 1954, shows that the Basin was still present as late as the middle of the 20th century. The photo was shared on the Telford Memories Facebook Group by Marcus Keane on 16th January 2017. [23] A similar photograph, taken in 1957 from a point closer to tha abandoned tub boat can be found in Ivor Brown’s book “The East Shropshire Coalfields.” Ivor Brown writes: “Much still remained of the colliery canal and tramway systems in the 1950s. This view shows the basin for turning and loading boats at Halesfield Mine with a sunken tub boat and a crane stump remaining. While this tub boat was made of wood, some were of iron and one of these can still be seen at the Blists Hill Museum.” [24: p43]Further South, the canal continued in a generally southerly direction. Its route buried under the Tweedale Industrial Estate. [My photograph, 21st March 2023]Tweedale Basin and Wharf were to be found to the East of Bridgnorth Road under what, in the 21st century, is a dense canopy of trees. [Google Maps, 21st March 2023]Looking North across Tweedale along the line of the old canal. The building on the right is used by Bu Industrial Components Ltd. [My photograph, 21st March 2023]Looking South across Tweedale along the line of the canal. The building ahead is let out as a series of small units. Mmy photograph, 21st March 2023]We are now facing North at the back of the site in the last photograph on a footpath which from this point follows the line of the old canal. [My photograph, 21st March 2023]Looking to the South from the same location as the previous photo. This footpath follows the line of the old canal. [My photograph, 21st March 2023]Once again facing South along the line of the old canal The conifers ahead are adjacent to Prince Street, Madeley. There was a bridge over the canal at this location which is shown on the first monochrome image below. [My photograph, 21st March 2023]This extract from the 6″ Ordnance Survey of 1881, published in 1888, shows the Shropshire Canal as it passed under Prince Street and Hills Lane (later Queen Street). Also worthy of note on this map extract are Madeley Gas Works on the West bank of the canal and Hillslane Colliery on the East bank. The slag heaps for Hillslane Colliery were on both sides of the canal. The colliery and its slag heaps were served by an internal tramway/plateway which included a bridge over the canal. The canalat this point is beginning to close in on the line of the LNWR Coalport Branch. Madeley Market Station on that line can be seen on the bottom-left of this map extract. [20]Looking back to the North from the location of Prince Street Bridge along the line of the old canal which is followed by the footpath. The corrugated -iron- building on the right of this image is a remnant from the 1930s. It can be seen on the first monochrome aerial image below. [My photograph, 21st March 2023]Looking North across the location of Prince Street Bridge with the route of the canal shown by the blue line. [My photograph, 21st March 2023]This aerial image is an extract from a photograph on Historic England’s Britain From Above website. The reference number is EPW061719. This extract shows Prince Street Canal Bridge. The corrugated-iron building mentioned above can be seen in this image to the right of the canal. [26]Redevelopment of Madeley has resulted in the provision of a new road extending East out of the town centre, Kemberton Road. This photo is taken looking South across Kemberton Road and shows the line of the old canal. [My photograph, 21st March 2023]Looking back North towards Kemberton Road. [My photograph, 21st March 2023]This image is also an extract from the same aerial image as that showing Prince Street Bridge above. It was taken facing to the North. The photograph was part of a survey undertaken in 1939 and can be found on Historic England’s Britain from Above website. This picture features the Gas Works off Queen Street and the area around it in Madeley, and includes the Queen Street Canal Bridge, (c) Historic England, Britain From Above (EPW061719). [26]Looking South from the same location along the footpath/cycle way which follows the line of the canal at this location. [My photograph, 21st March 2023]Looking South towards Queen Street to the location of Queen Street canal bridge. The roofline straddling the route of the old canal is the JW Kingdom Hall. [My photograph, 21st March 2023]Looking North from the location of Queen Street bridge. The route of the old canal runs away from the camera behind the bus-stop. [My photograph, 21st March 2023]Just to the South of Queen Street the Jehovah’s Witnesses Kingdom Hall occupies the site of the old Gas Works and straddles the line of the canal. [My photograph, 21st March 2023]This extract from another aerial image, this time facing Southeast, shows the canal (running diagonally across the image from the bottom-centre to the right) heading away from the Gas Works to the South. The image has been affected by flare, hence the lighter shaded band running from centre-bottom towards the top-left, The trapezoidal area of scrubland which dominates the image is the site of the old Hillslane Colliery. (c) Historic England, Britain From Above (EPW061721). [27]This view looks back to the North along the line of the old canal. Hillslane Colliery would have been to the right of the canal. The higher ground to the left of the image was the spoil heap for the old colliery and was reached by a bridge carrying a tramway across the canal. The line of the tramway between Hill Lane Colliery and Shawfield Colliery would have been Just off to the right of the picture. That tramway appears on the OS map extract below. [My photograph, 21st March 2023]The 1901 6″ Ordnance Survey published in 1902 shows the canal running Southwest from adjacent to the Gas Works in Madeley. Hillslane Colliery is now named ‘Hills Lane Colliery’ but has recently become disused. The old tramway bridge across the canal remains. Further South a Cement Mill can be seen on the West bank of the canal, adjacent to the towpath. A bridge over the canal is shown at this point. Further South again, is a Corn Mill to the West of the Canal and Shawfield Colliery, also, by 1901, disused. Both collieries were linked to the Blists Hill Site which is just off the extract to the Southwest. Northeast of Shawfield Colliery there was another bridge across the canal. [25]Turning though a half-circle and looking South along the line of the canal. The blue line gives the approximate line of the canal, the red line, that of the old tramway which followed the canal from Hill Lane Colliery towards Blists Hill Furnaces. [My photograph, 21st March 2023]Further South again we can see the approximate parallel routes of the old canal and tramway. [My photograph, 21st March 2023]Further South again we can see the approximate parallel routes of the old canal and tramway. [My photograph, 21st March 2023]This photograph looks back along the line of the canal and tramway towards the erstwhile Madeley Gas Works. The trees on the line of the canal and tramway are those which appear across their line in the photograph above. [My photograph, 21st March 2023]Looking to the Southwest from the same point, along the approximate line of the tramway. The old canal ran parallel to the tramway but a little away to the right and probably at a lower level. [My photograph, 21st March 2023]Further Southwest and looking to the Southwest, the approximate line of the tramway is followed by the metalled path which begins to curve round to the right. The old canal ran parallel to the tramway but a little away to the right and at a lower level. The blue line suggests this but the actual line of the canal would have been lower down the embankment which is covered by vegetation. [My photograph, 21st March 2023]The 1881 Ordnance Survey again shows Shawfield Colliery with its local tramway network and another bridge across the canal to access spoil heaps to the Northwest of the canal. In 1881 it already also had a tramway leading down to the Brick and Tile Works and the Blists Hill furnaces.This Google Maps satellite image covers approximately the same area as the OS map extract above. Blists Hill; Furnaces are actually right on the bottom edge of this image, to the left.We are now at around the same point as the top-edge of the OS map extract above where the canal enters that extract. The route of the canal becomes a little more obvious as we walk towards the Blists Hill site a few hundred metres ahead. The area to the right of this image is holding water and very much appears to be the line of the canal. the next photo has a glimpse of the water in the marshy bottom of the canal. [My photograph, 21sy March 2023]Looking to the Southwest, in the bottom-right of this image there is a glimpse of water in the bottom of the old canal. [My photograph, 21st March 2023]Again looking Southwest, the old canal bed enters this image at the bottom-right. The old tramway is just off the left of the image. [My photograph, 21st March 2023]Looking Northeast at the same point as in the last photo. Water can be seen in the canal (on the left) and the footpath follows the old tramway. [My photograph, 21st March 2023]A panoramic image looking Southwest at the same location, shows the tramway on the left and the canal on the right. [My photograph, 21st March 2023]Here we have reached the Blists Hill Car park, this photo looks back Northeast along the line of the canal. [My photograph, 21st March 2023]Turning a half-circle again, this is the view to the Southwest from the same location. The carpark covers both the route of the old canal and much of the site of an old Brick and Tile Works. The main Blists Hill site is beyond the car park. [My photograph, 21st March 2023]The information board at the same location shows the line of the old canal. Our route above followed the westside of Sutton Way to a point close to the Subway and then the dotted line following the Southeast bank of the old canal. [My photograph, 21st March 2023]The canal features strongly in this artist-drawn aerial view of the Blists Hill Site. The car parks for the site are off the left of the image. The canal can be seen curving round the hillside following the contours until it reaches the Hay Inclined Plane which is indicated at the top-right of the image. [28]The tub boat display at Blists Hill Victorian Museum. [My photograph, 8th April 2022]Madeley Wood Brick & Tile Works buildings at Blists Hill. [My photograph, 8th April 2022]The canal at Blists Hill, viewed from the Northeast. [My photograph, 8th April 2022]The canal again, this time from the towpath with the wharf crane close to the camera. [My photograph, 8th April 2022]The view Northeast along the canal towpath giving a close view of the crane and pithead installed as part of the museum. [My photograph, 8th April 2022]A broader view Northeast along the canal towpath. [My photograph, 8th April 2022]Another 100 metres or so along the canal towpath. This is an image from TripAdvisor. [29]On the 6″ Ordnance Survey of 1881/1882, from a point close to Blists Hill furnaces the canal is shown heading South until just before reaching the Hay Inclined Plane it turned to the Southeast. [20]
The canal curved round to the top of the Hay Inclined Plane. The next map extract shows the full extent of the Hay Inclined Plane.
A further extract from the 6″ Ordnance Survey of 1881/1882 showing the full extent of the Hay Inclined Plane, its bridge over the LNWR Coalport Branch, and the Bridge carrying Coalport High Street over the incline. [32]An extract from Google Maps which shows the location of the Hay Incline in relation to the modern Blists Hill Victorian Town. The line of the canal above the Incline is marked clearly. [Google Maps, 30th March 2023]
The Incline is covered in two short articles which can be found here and here. A few pictures will suffice as part of this article. …
The Hay Inclined Plane in its original condition in the late 19th century when it was still in use.
The structures at the top of the incline are in good condition.
The rope on the track on the right shows that a tub boat has recently descended the inline on that track.
This picture was shared on the Memories of Shropshire Facebook Group by Stephen Williams on 25th January 2020.
The top of the Hay Inclined Plane seen from the Southwest. The canal which saw tub boats brought to the top of the incline is immediately behind the visible brickwork on the left side of the image. The engine house was to the right. Its chimney is visible, top-right. [My photograph, 8th April 2022]A panoramic view of the engine house at the top of the Hay Inclined Plane. [My photograph, 8th April 2023]The view South down the Hay Incline towards the River Severn. The rails, chairs and sleepers are the product of a 20th century restoration and not original to the incline. [My photograph, 8th April 2022]The bridge carrying the incline over what was the LNWR Coalport Branch. This picture is taken looking East along the line of the old railway which became the footpath and cycleway named The Silkin Way after Lewis Silkin, the Minister responsible for the post-war Labour Government’s New Towns Act, 1946. Dawley New Town was designated in 1963 but expanded and renamed Telford in 1968. The Town Park to Coalport section of the route was opened by Prime Minister, Jim Callaghan, in 1977. [33][My photograph, 29th March 2023]The plaque placed on the bridge with the opening of the Silkin Way. [My photograph, 29th March 2023]The bridge carry Coalport High Street over the Hay Incline. [My photograph, 17th February 2023]A panoramic photograph which shows the sharp bend in the canal at the bottom of the incline. From this point East, the Canal ran parallel to the River Severn and wharves allowed the loading and unloading of tub boats and vessels on the River Severn. [My photograph, 17th February 2023]The reamining length of the canal is illustrated on this extract from the 6″ Ordnance Survey of 1881/1882, published in 1883. By the time of this map, as we have already noted, the LNWR Coalport Branch ha effectively superseded the canal. Of note are the factories either side of the canal which formed Coalport China Works, the end on connection between the canal and one of the sidings at Coalport Station, and the presence of the GWR Severn Valley line on the South bank of the River Servern. [32] This Google Maps extract shows the base on the Hay Inclined Plane and the truncated length of the canal alongside the River Severn. The Silkin Way marks the line of the old LNWR Coalport Branch. [Google Maps, 3rd April 2023]Coalport China Museum and Youth Hostel in 2016, looking Southeast along the last section of the canal. Both sets of buildings were once Chins Factories. The Youth Hostel is on the left, the Museum on the right, (c) Adrian Snood and used here under a Creative Commons Licence (CC BY-NC 2.0) [30]From a location further to the Southeast, looking back Northwest towards the Hay Incline, (c) Diamond Geezer and used here under a Creative Commons Licence (CC BY-NC-ND 2.0). [31]
R.F. Savage & L.D.W. Smith; The Waggon-ways and Plate-ways of East Shropshire, Birmingham School of Architecture, 1965. An original document is held by the Archive Office of the Ironbridge Gorge Museum Trust.
The Coalport Branch of the Shropshire Canal appears on the schematic plan below. The tub boat canals were linked to the Shropshire Union Canal via the Newport Canal (the Shrewsbury and Newport Canal).
This schematic representation of the Shropshire Tub Boat Canals is helpful in clarifying the extent of the network. It shows the locations of all the inclined planes on the system. These are marked with a red arrowhead which in each case highlights the direction of the lift. The Trench Branch and Incline were in important link in the journey between the Shropshire Union Canal and the River Severn at Coalport, linking the Newport Canal to the Wombridge Canal which became a part of the Shropshire Canal. [2]
An Act of Parliament dated 11th June 1788 enabled the construction of the Shropshire Canal. It was opened along nearly its full length by 1791 and served the major ironworks and collieries in its immediate vicinity. These included “the Snedshill and Priors Lee Furnaces, the Lilleshall Company’s early mines, the Madeley Court Ironworks, Blists Hill Furnaces and the Coalbrookedale Company.” [24: p 167]
The Shropshire Canal was blighted by subsidence throughout its life. Many of the mines in the area were shallow workings only had short working lives and, once the reserves that they exploited were exhausted, were abandoned. Their demise often resulted in water loss from the canal, a problem which could not be addressed quickly. Of more substantial difficulty were the occasions when subsidence led to more significant structural damage to the waterways and their associated inclined planes.
Initially, the majority of the loads carried by the canal were transported only short distances between industrial sites in the immediate area. Over time, first coal and pig iron and later other products were dispatched to a variety of destinations outside the area. An inclined plane (the Hay Inclined Plane) linked the Canal to the River Severn. See:
Coalport grew significantly as a result of this trade and “within a few years two potteries, a rope works and a chain works opened there.” [24: p167]
A length of the canal from Trench to Shrewsbury was open by 1797, but it remained isolated from the rest of the canal network until 1835, when the Birmingham and Liverpool Junction Canal built the Newport Branch from Norbury Junction to a new junction with the Shrewsbury Canal at Wappenshall. [1]
The Trench Branch brought the Canal to the top of Trench Inclined Plane, that length of canal and the Inclined Plane are covered in an article which can be found here:
At the top of the incline a junction was made with the Wombridge Canal which is marked as a continuation of the Trench Branch on OS Maps.
The Wombridge Canal opened in 1788, and parts of it were taken over by the Shrewsbury Canal Company in 1792, who built the inclined plane at Trench. It lowered tub-boats 75 feet (23 m), and remained in operation until 1921, becoming the last operational canal inclined plane in the country. The canal had been little used since 1919, and closed with the closure of the plane. [3]
As the schematic plan of the Shropshire Canal network above shows, from the top of Trench Inclined Plane (Wombridge Wharf) tub-boats could be taken in two different directions. Turn to the South and it was only a short journey to Wombridge Iron Works. This short length of the canal is shown on an extract from the 6″ Ordnance Survey of 1881 below. …
Trench Inclined Plane enters this map extract from the 6″ OS Map of 1881 (published in 1887] in the top-left corner. Wombridge Ironworks are shown in the bottom-right of the image. Wombridge Collieries appear close to the centre of the map. Wombridge Ironworks where extended, before the time of the Ordnance Survey, across the line of what was a slightly longer canal arm. [5]This is an extract from a wider plan of the Shropshire Canal network included on the website, ‘Exploring Telford’. It shows a longer length of the canal South of Trench Inclined Plane, running on passed Wombridge Iron Works, Wombridge Forge and on to Wombridge Farm. The website ‘Exploring Telford’ [21] was developed by Richard Foxcroft. Richard, sadly died in 2018, I have been unable to contact anyone about his website. The plan from which this extract is taken appears on the Homepage of ‘Exploring Telford’. [21] The line shown on this computer generated drawing matches well with the drawing included immediately below and which was sourced from British History Online [22]Wombridge and Priorslee in the 1840s. The area of interest to us here is in the top-left of the image around Wombridge. That area is enlarged below. [22]An enlarged extract from the plan above. In the 1840s, the canal arm which extended South of Trench Inclined Plane was already truncated with short lengths isolated from the network still in use. [22] British History Online indicates that this length of the canal (South of Wombridge Ironworks) was probably abandoned by 1819. [23]
Northeast of Trench Inclined Plane the Wombridge Canal linked across to Old Yard Junction. Here the Donnington Wood Canal continued Northeast and the Coalport Branch ran to the South.
Travelling South on the Coalport Branch Canal, tub-boats would have immediately encountered Wrockwardine Wood Inclined Plane.
Construction of the Wrockwardine Wood Inclined Plane took place in 1791 after the Ironmaster, John Wilkinson petitioned Parliament to extend the Shropshire Canal from Snedshill to form a junction with the Donnington Wood Canal. [4]
P. Whitehead [11] provides approximate figures for the inclined planes on the Shropshire Canal as follows:
Wrockwardine Wood Inclined Plane: 350yds long, 120ft rise. Or 316yds long, 113ft 2in rise. (But note the information provided by British History Online below and reference [17] which gives different dimensions again.
Windmill Inclined Plane: 600yds long, 125 ft rise.
Lilleshall Inclined Plane: 123 yds long, 43 ft. This replaced an earlier vertical lift in a shaft and tunnel system. [11]
The Coalport Branch continued South. The majority of its route is picked up on John Rennie’s plan showing the proposed route of his Shrewsbury & Wolverhampton Railway which predated the construction of the LNWR’s Coalport Branch.
An extract from a plan drafted by John Rennie in 1844 showing the proposed route of the Shrewsbury and Wolverhampton Railway through Wellington and Shiffnal [Shifnal]. This plan predates the LNWR’s construction of its Coalport Branch. The Shropshire Canal can be seen clearly at the centre of the extract. This plan is held by the Shropshire Archive Ref. X6008/201 and is included here with their kind permission. The original map is at a 1″ to 1 mile scale. [10]An enlarged extract taken from the image immediately above. The extract shows the top of the Trench Inclined Plane in its top-left corner with the Wombridge Canal running sinuously East towards the canal junction from where the Donnington Canal heads Northeast and the Coalport Branch runs to the South. The Coalport Branch crosses the line of the proposed railway just to the Northwest of Priorslee, where a branch canal can be seen heading to the West. This is the Ketley Canal. Coalport Branch then runs parallel to the intended railway for a short distance before turning South along the East side of Dawley. Just to the Southwest of Stirchley it passes through a tunnel and at a junction divides into two. One arm runs to the South of Great Dawley in a generally Westerly direction. The other branch heads to the Southeast before encountering Windmill Inclined Plane to the Northeast of Madeley Court. From here it heads South towards the Hay Inclined Plane and the River Severn both of which are off John Rennie’s plan to the South. [10]
The route of the Canal can be picked out in greater detail on the 6″ Ordnance Survey which was completed in 1881 and published in 1888. By this time the LNWR’s Coalport Branch had been built and the canal can only been where it had not been replaced by the railway. There are, however, some very short sections of the canal still visible alongside the railway route even into the 21st century.
Wrockwardine Wood, north-east of Oakengates town centre, was originally a detached piece of woodland, later a township, belonging to the manor and parish of Wrockwardine, the rest of which lay 7 km. to the west. British History Online provides a history and a plan of the area. The plan (reproduced below) clearly shows the Inclined Plane. “An inclined plane on the Shropshire Canal rose 122 ft. in 320 yd. from the junction to a summit level on Cockshutt Piece. The Shropshire Canal closed in 1857, the Shrewsbury c. 1921. [19] An underground level, perhaps navigable, ran between Donnington Wood furnaces and the area north-west of the Nabb by c. 1800. [20]” [17]
The 1847 plan of Wrockwardine Wood as provided by British History Online. It shows the Inclined Plane to the right-side of the map slightly above the centre line. The high point of the Inclined Plane was at the Northeast end where it left the Wombridge/Donnington Wood Canals at the Old Yard Junction. This map is enlarged below. [17]Wrockwardine Wood Inclined Plane. [17]Another extract from the 6″ Ordnance Survey of 1881. The Canal route can more easily be seen on this image as, although disused, significant length were still holding water in 1881 and are coloured blue. Oakengates is on the West side of the Canal and Snedshill Ironworks can be made out at the bottom edge of the map extract. [6]I have drawn the approximate alignment if the canal onto this image. The curved edge of Wrockwardine Wood one-third along the top edge of this ESRI (NLS) satellite image extract from the left defines the point at which the canal alignment enters this image. It curves round to the Southeast, running on the Northeast side of the A442 which dominates the centre of the image. It runs along the line of the lower portion of Willows Road before running South through the modern site of Fitchett (Redland) Business Park (which sits alongside the first designated length of the Silkin Way) and then across the A442 alongside what was once Snedshill Ironworks. The line is defined by the western edge of the woodland on the West side if the A442, the East side of the Reynolds Drive estate and the tree line in Madin Park. [13]The 1881 6″ Ordnance Survey shows a section of canal alongside Snedshill Iron Works still ‘in water’. South of the Works and before reaching what was for many years the A5 Trunk Road. The newer Coalport Branch began to run along the line of the old canal. One of the Works sidings followed the line of the canal to join the LNWR branch. The red-dashed line approximately indicates the route of the canal. The blue-dashed line is the approximate route of the old Ketley Branch canal. [6]
The Loop adjacent to, and South of, Malinslee Railway Station
The Canal bed behind Malinslee Railway Station buildings in 1962. This image was shared on the Telford Memories Facebook Group by Marcus Keane on 27th February 2022. [14]An extract from the 1881 Ordnance Survey, published in 1882 showing the area to the South of Dark Lane. Little Dark Lane Colliery to the immediate West of the Station was still in use at the time of this survey. The standard-gauge siding to the West of the Station buildings can be seen on this extract as serving a tramroad wharf, as can the longer siding to the South. Tramroads are not the subject of this article, but given that the tramroads shown seem to only serve the Little Dark Lane Colliery and the Dark Lane Foundry, the traffic on these lines may have either been horse-powered or even man-powered. When the Canal was active a wharf would have existed on the West side of the canal. [25]A further extract from the 1881 6″ Ordnance Survey, showing the next length of the canal. The route of the old canal is indicated approximately by the light blue dashed line. [25]The next extract from the 6″ Ordnance Survey of 1881 takes the canal as far South as Stirchley Ironworks. There are a myriad of tramroad sidings shown at the time of the 1881 survey. Many of these are associated with Oldpark Iron Works and they fill the space between the old canal route and the Works. Most of these will not have been present in the period while the canal was active. As we will see below, there was at least one tramroad bridge across the canal in the time before the canal was replaced by the LNWR Coalport Branch. [25]
The Loop near Stirchley Ironworks
Andy Tidy surveyed the route of the Coalport Branch of the Shropshire Canal in March 2012. He highlighted two areas worthy of note. The first adjacent to Hinkshay/Stirchley Pools and the second to the South of Dawley and Stirchley Railway Station where the Canal was in tunnel during its working life. [15]
Adjacent to the Hinkshay Pools, the Canal alignment deviated from the formation of the later Railway. Andy Tidy provided a plan (below) of the location which I have annotated with the key features he refers to. His pictures of the canal deviation can be seen here. [15]
Andy Tidy says: “No sooner has the line moved off the modern Silkin Way than it is in water, first in the undergrowth but then as it passes the first reservoir the bed squeezes through the foundations of a collapsed bridge and on into open water. … The towpath sits on a narrow strand of land between the canal and the Stirchley Pools Reservoir, a pretty spot which is carefully maintained as a nature reserve. This clear stretch of canal is haunting and as you walk under the shade of the trees you almost expect to meet a horse plodding the other way towing a string of loaded tub boats. … All too soon this enduring stretch of canal slides back into the railway bed, all traces are lost at it passes through the recently rebuilt Stirchley Station.” [15]Looking North along the Silkin Way, this is the Stirchley Ironworks Bridge which crossed the Canal and later the railway. Stirchley Ironworks were on the left-hand side of the photograph, on the far side of the bridge. [My photograph, April 2022]This picture shows the length of the canal on the map above. It was shared by Andy Rose on the Telford Memories Facebook Group in February 2022. [18]
The remaining length of the canal to the South of Stirchley Iron Works is covered in a second article which can be found on this link:
A P Baggs, D C Cox, Jessie McFall, P A Stamper and A J L Winchester; Wrockwardine Wood, in A History of the County of Shropshire: Volume 11, Telford, ed. G C Baugh and C R Elrington (London, 1985), pp. 323-326. British History Online http://www.british-history.ac.uk/vch/salop/vol11/pp323-326, accessed on 29th August 2022.
This photograph was shared as a comment by Andy Rose on a group post by Marcus Keane dated 27th February 2022 which showed the length of the Shropshire Canal bed directly behind Malinslee Railway Station; https://m.facebook.com/groups/674238619260811/permalink/7378452445506028, accessed on 29th August 2022.
References provided in Reference [17] C. Hadfield; Canals of W. Midlands (1969), 40, 151, 251, 328-9; I.G.M.T., Lilleshall Co. colln. 106, 110; Trinder, Ind. Rev. Salop. (1981), 76, 84-5, 153.
Reference provided in Reference [17] Shropshire Records Office 691/1; Salop. News Sheet, xvii. 7-8.
A P Baggs, D C Cox, Jessie McFall, P A Stamper and A J L Winchester; Wombridge: Growth of settlement, in A History of the County of Shropshire: Volume 11, Telford, ed. G C Baugh and C R Elrington (London, 1985), pp. 285-289. British History Online http://www.british-history.ac.uk/vch/salop/vol11/pp285-289; accessed on 2nd September 2022.
A P Baggs, D C Cox, Jessie McFall, P A Stamper and A J L Winchester; Wombridge: Communications, in A History of the County of Shropshire: Volume 11, Telford, ed. G C Baugh and C R Elrington (London, 1985), pp. 284-285. British History Online http://www.british-history.ac.uk/vch/salop/vol11/pp284-285; accessed on 2nd September 2022.
Bob Yate; The Shropshire Union Railway – Stafford to Shrewsbury including the Coalport Branch (OL129); Oakwood Press, Usk, Monmouthshire, 2003.

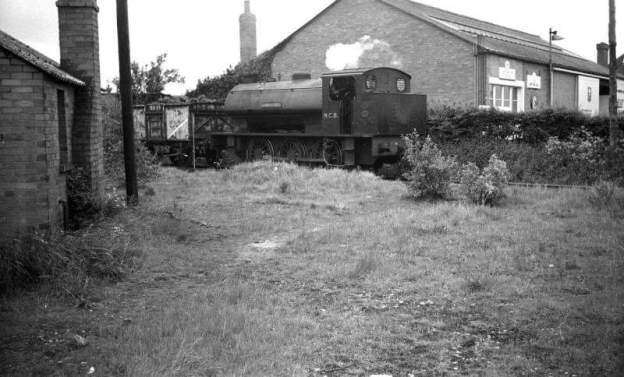
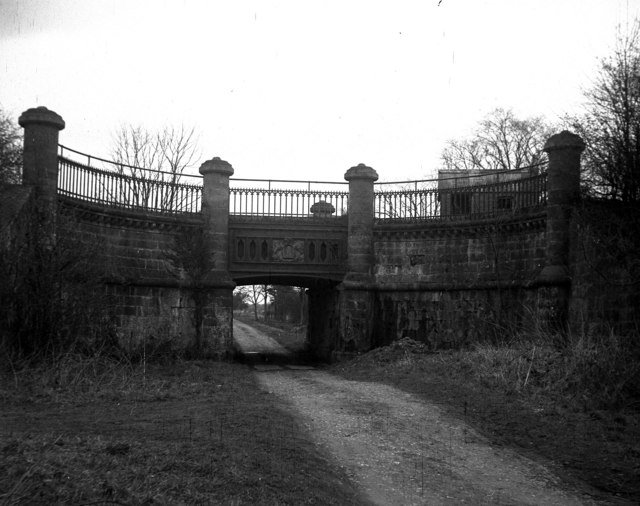
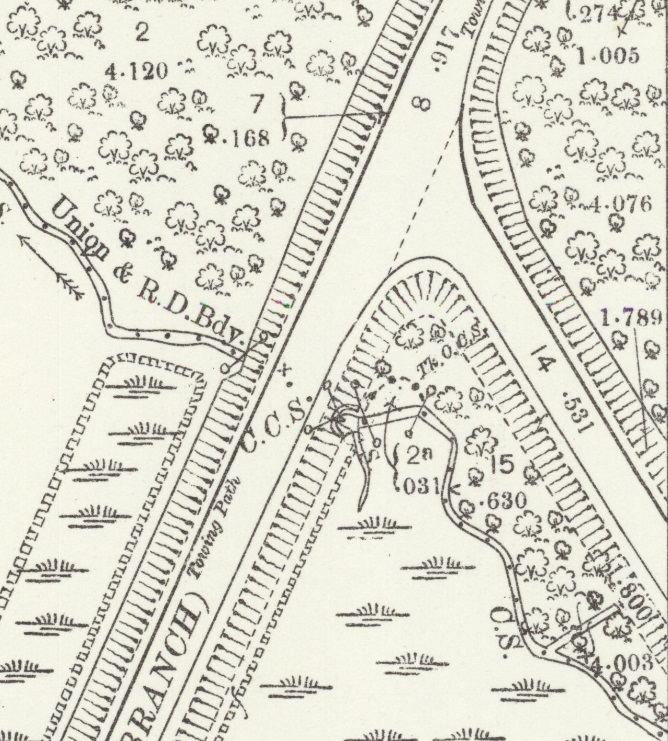
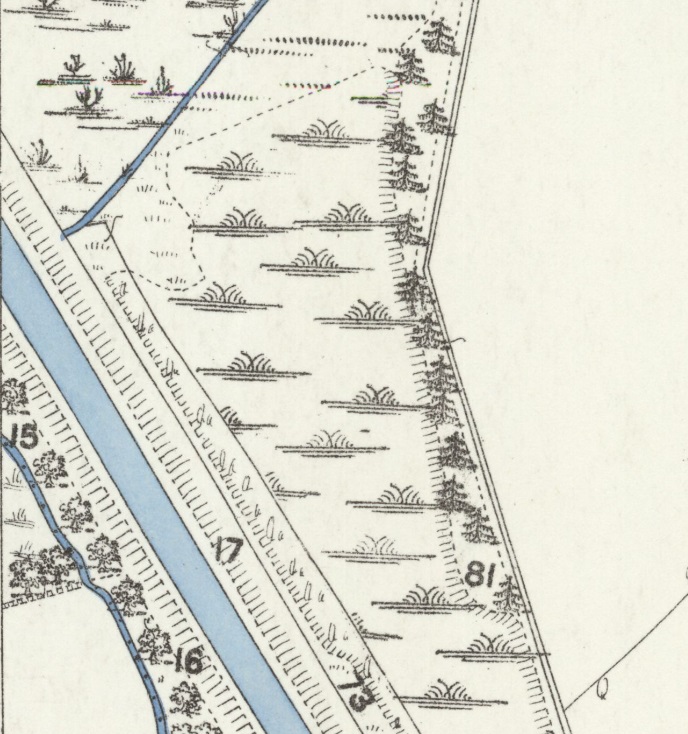
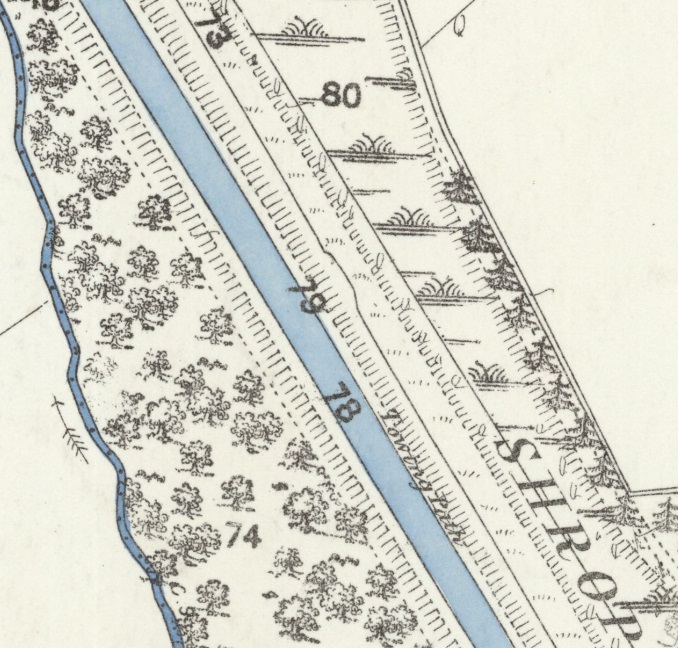
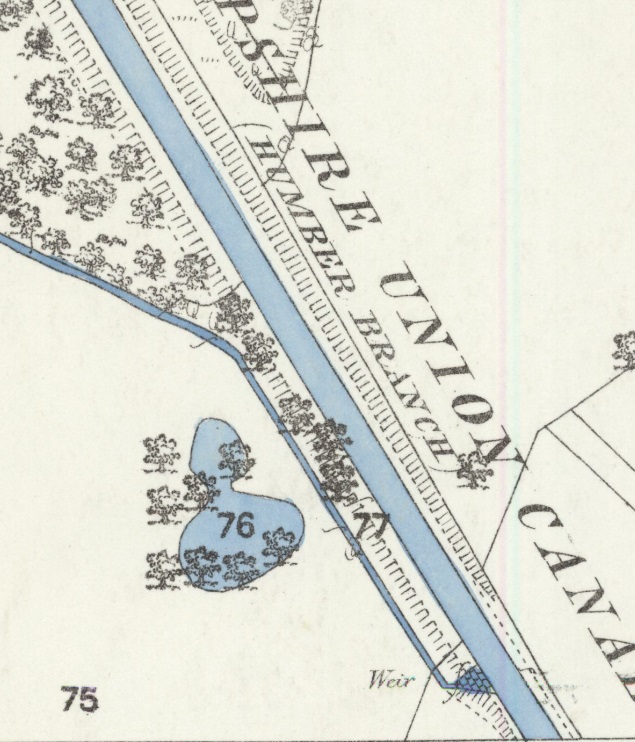
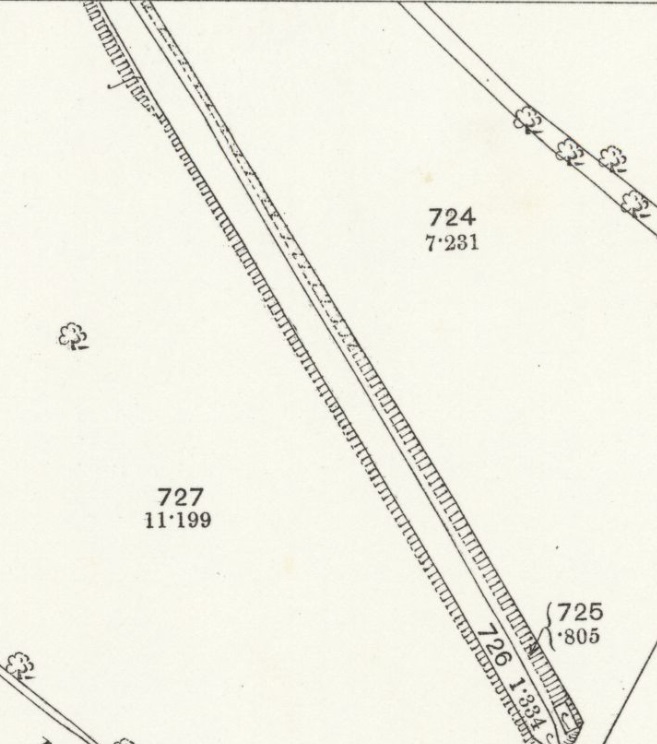
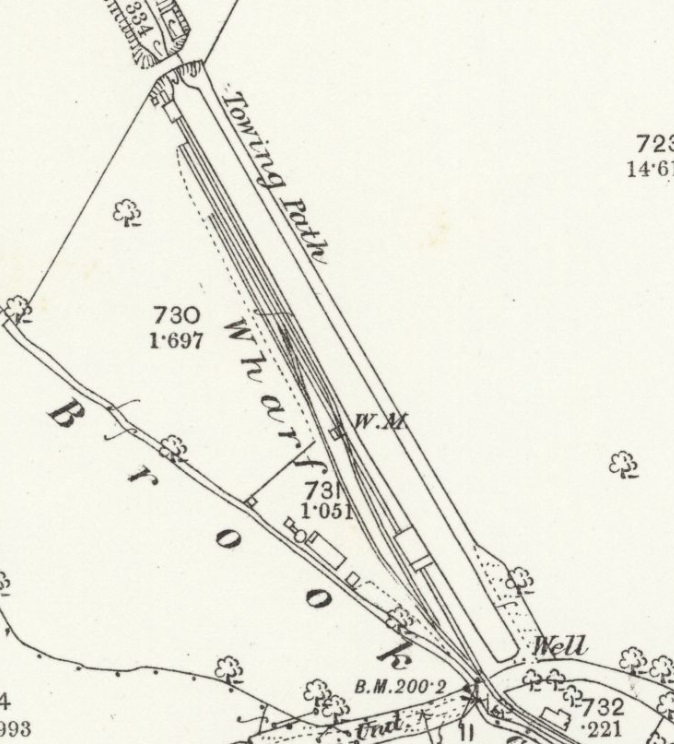
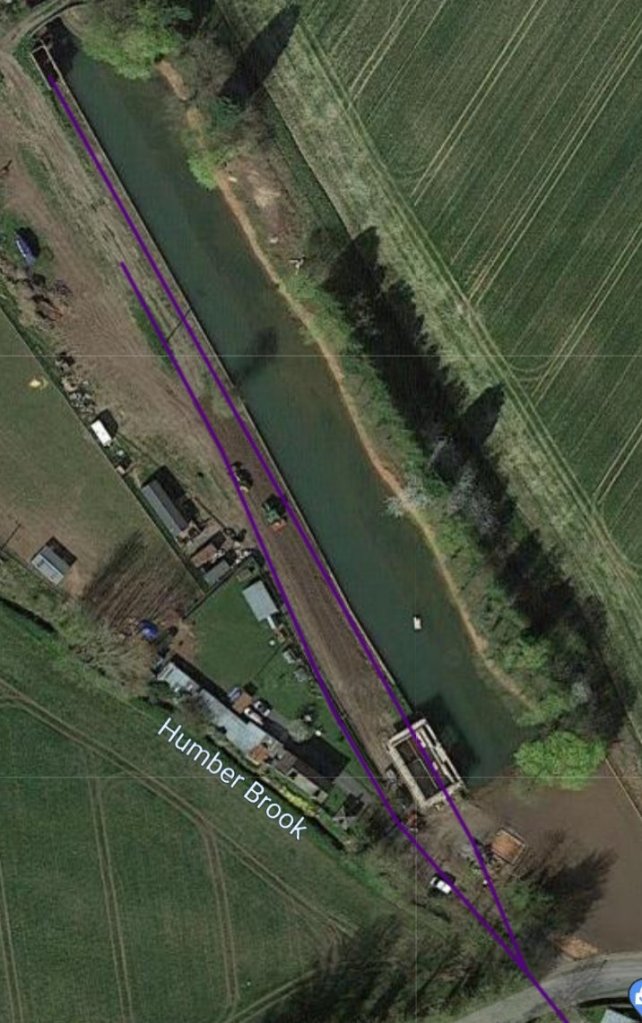
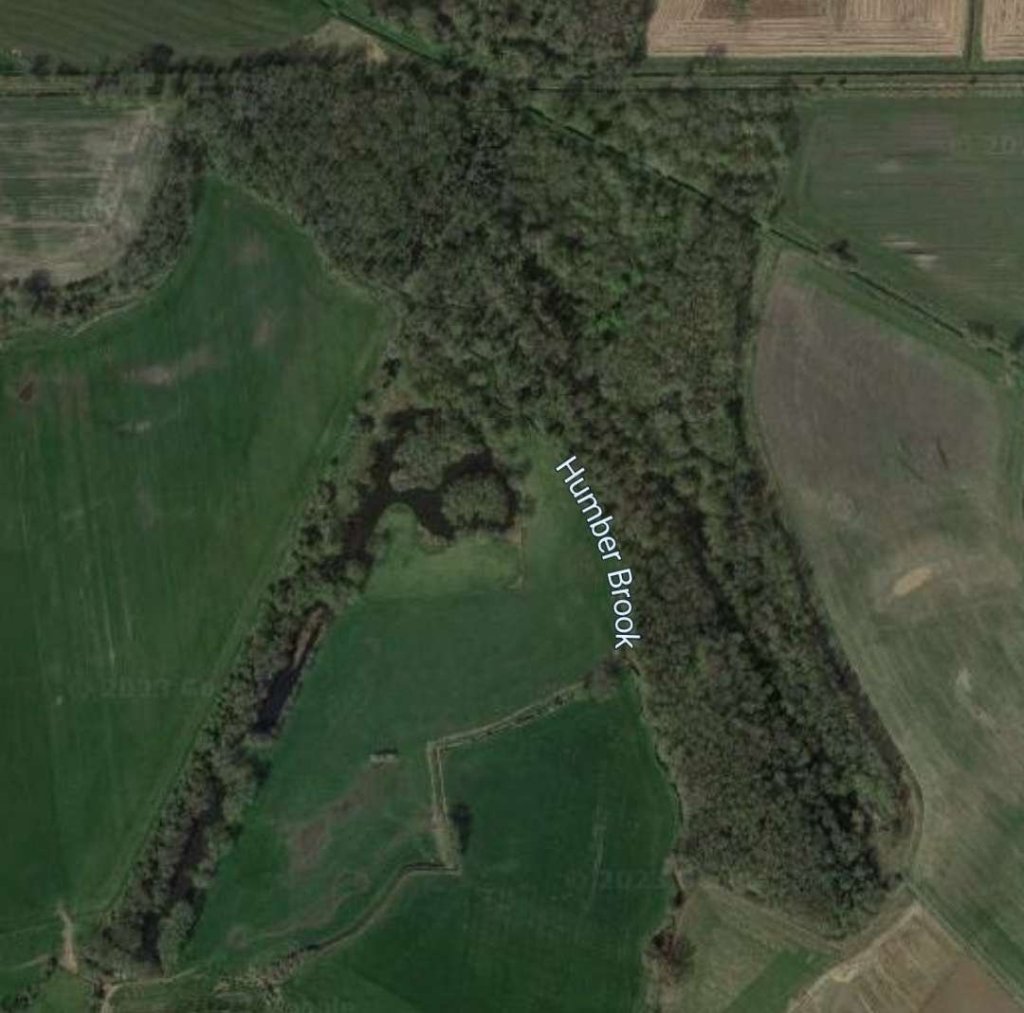

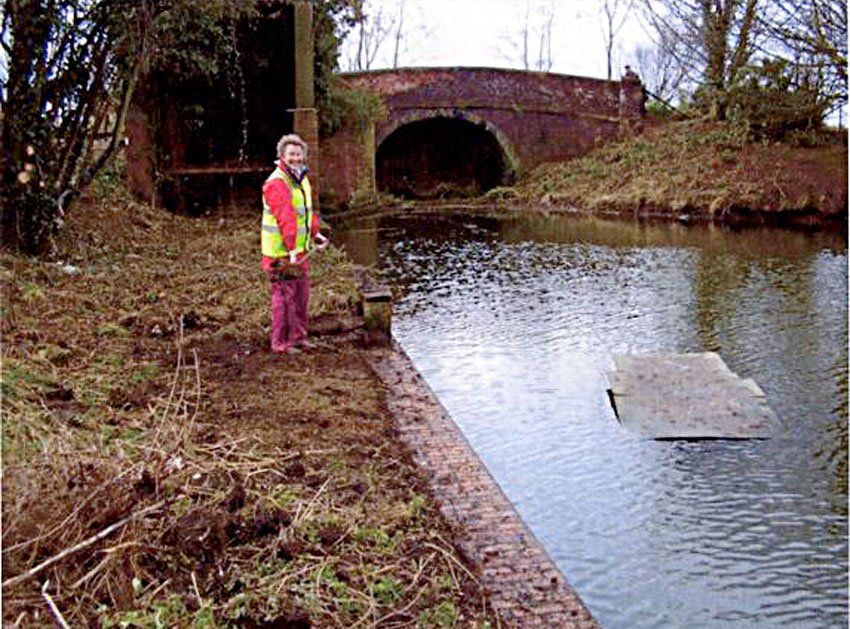

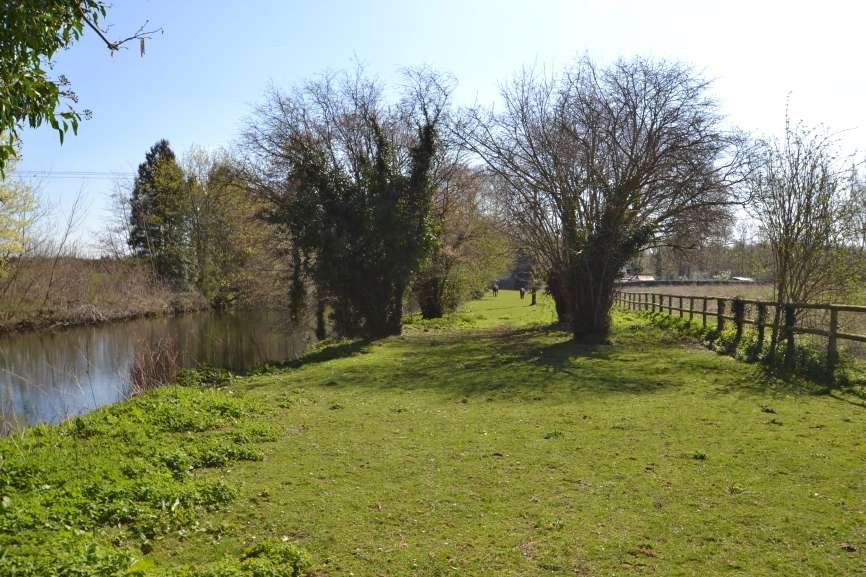
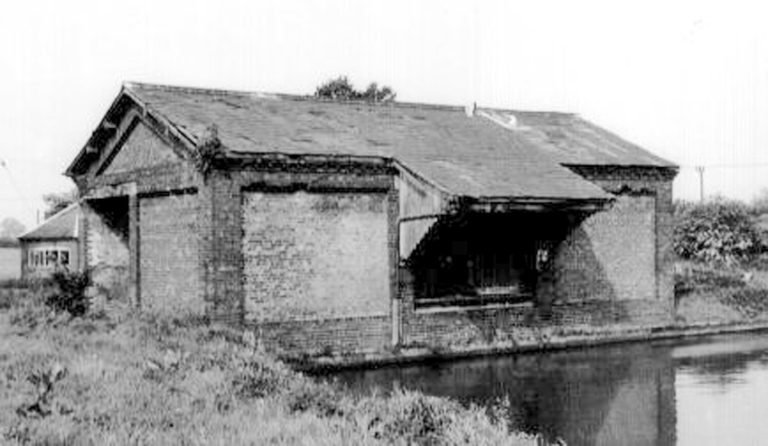
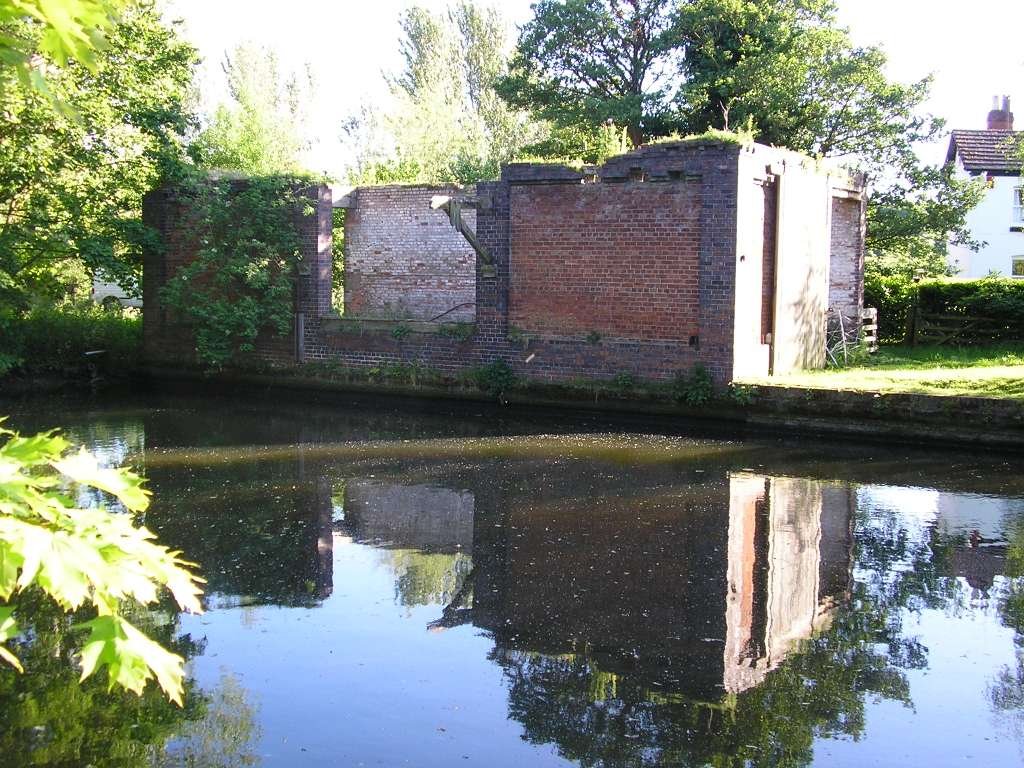
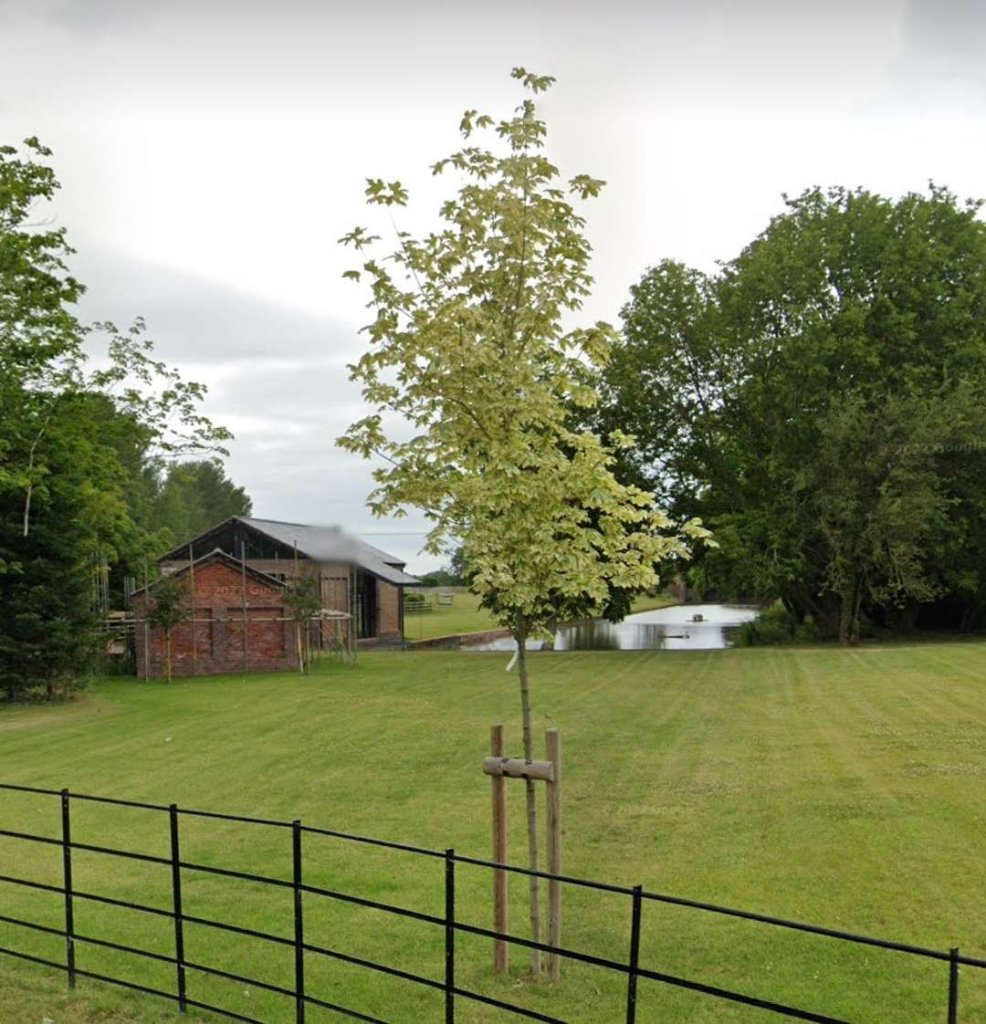
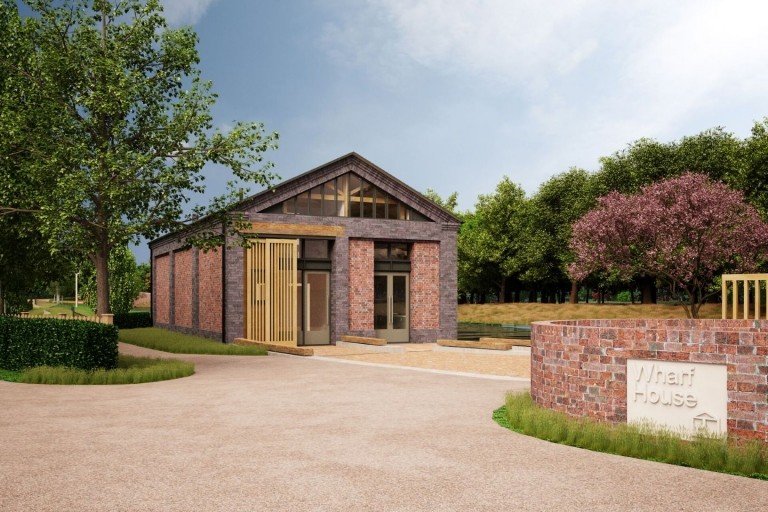

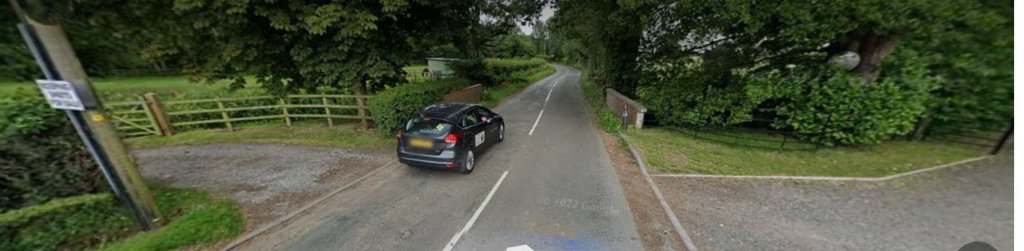
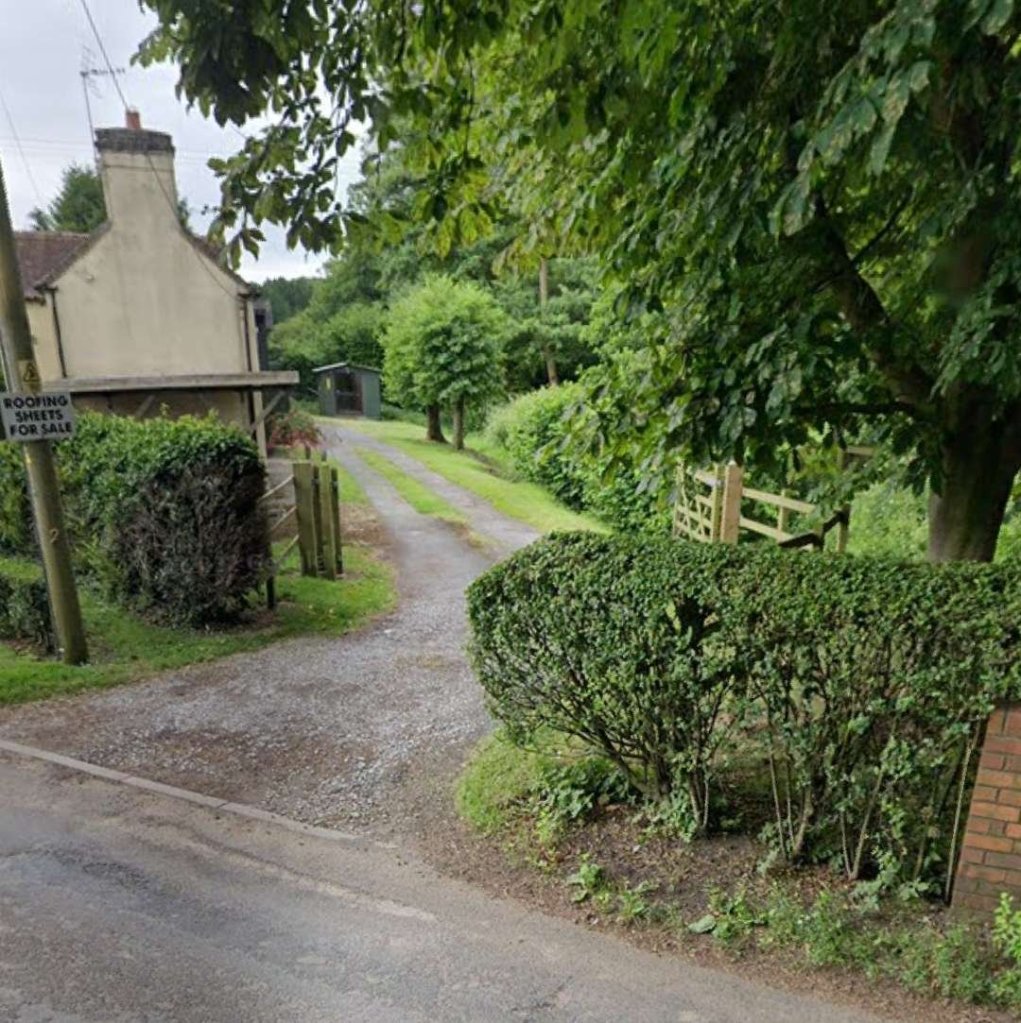
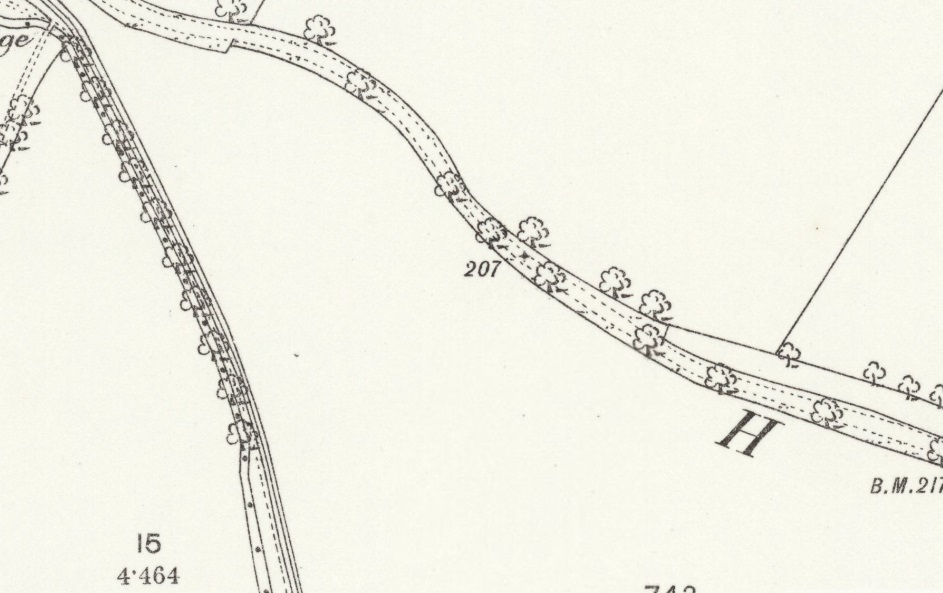
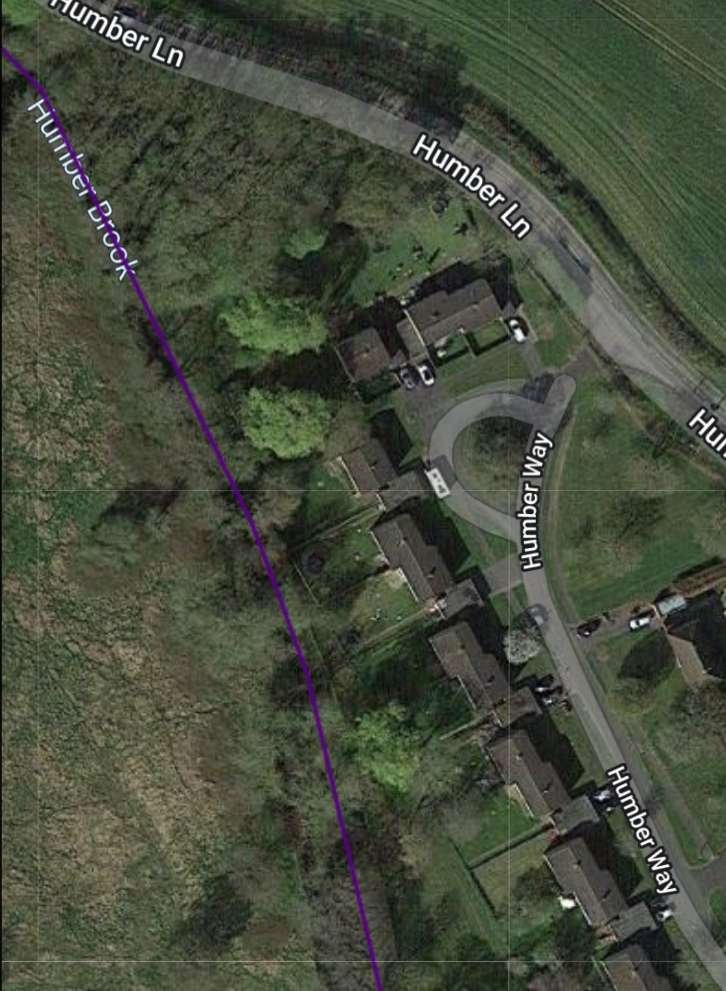
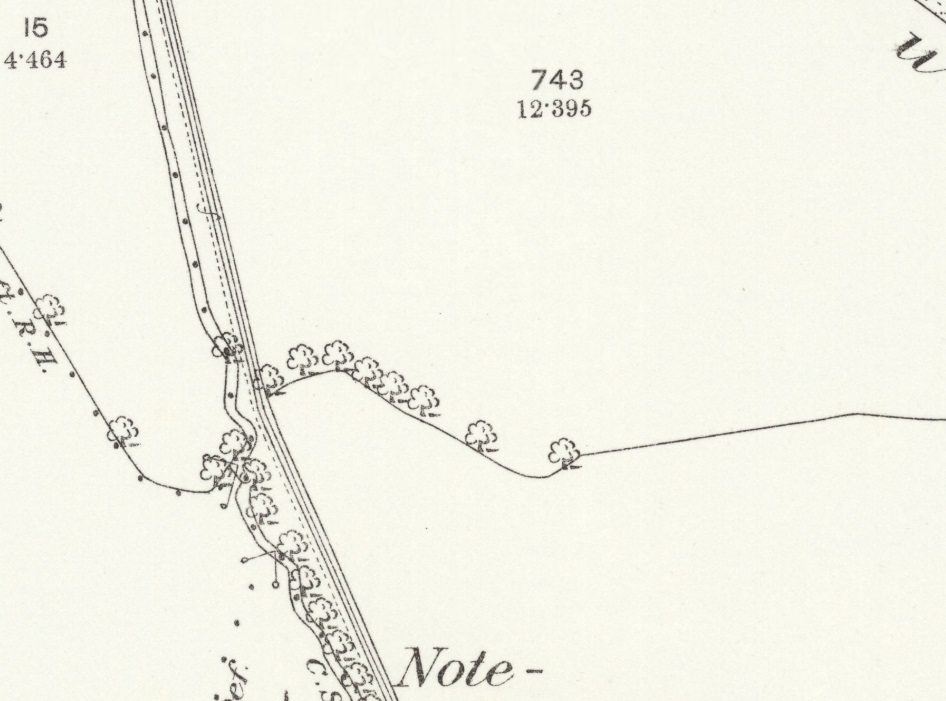
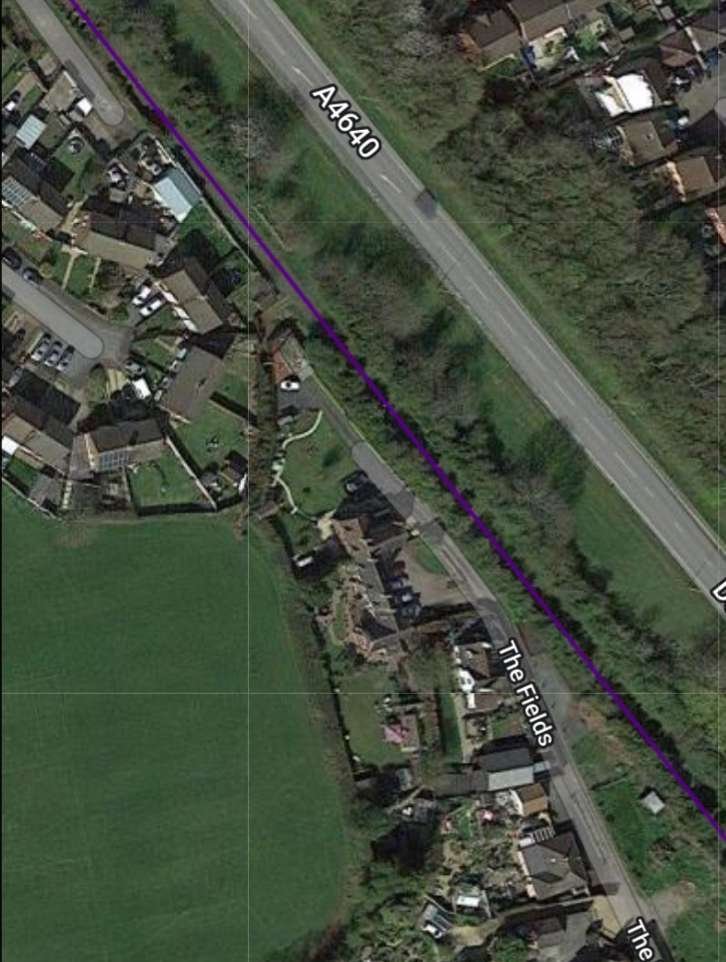
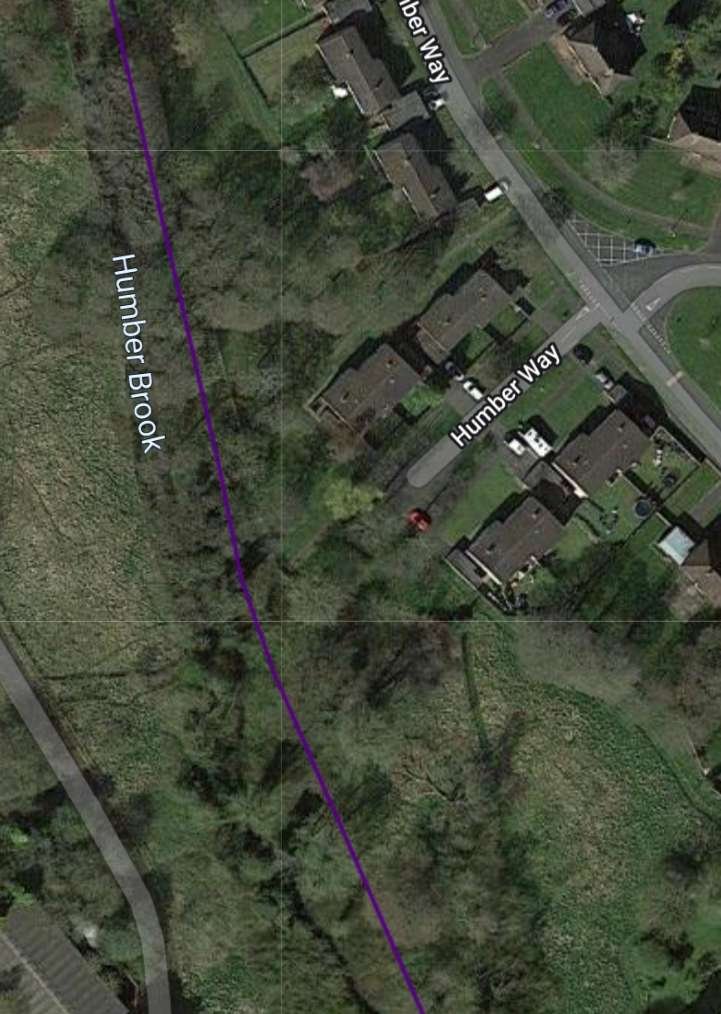
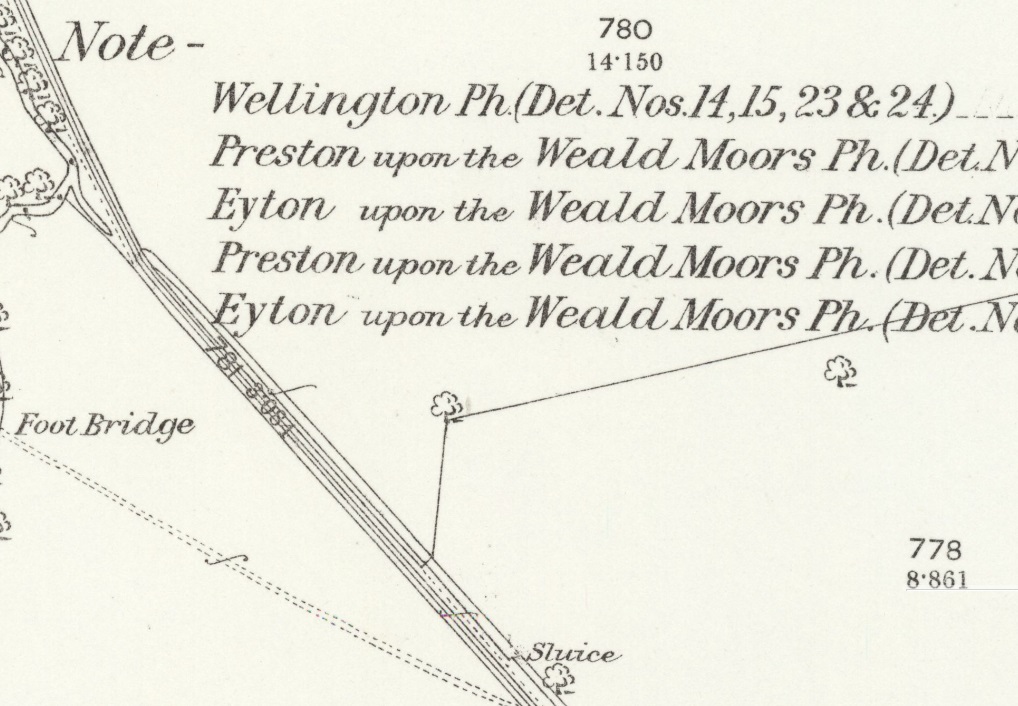
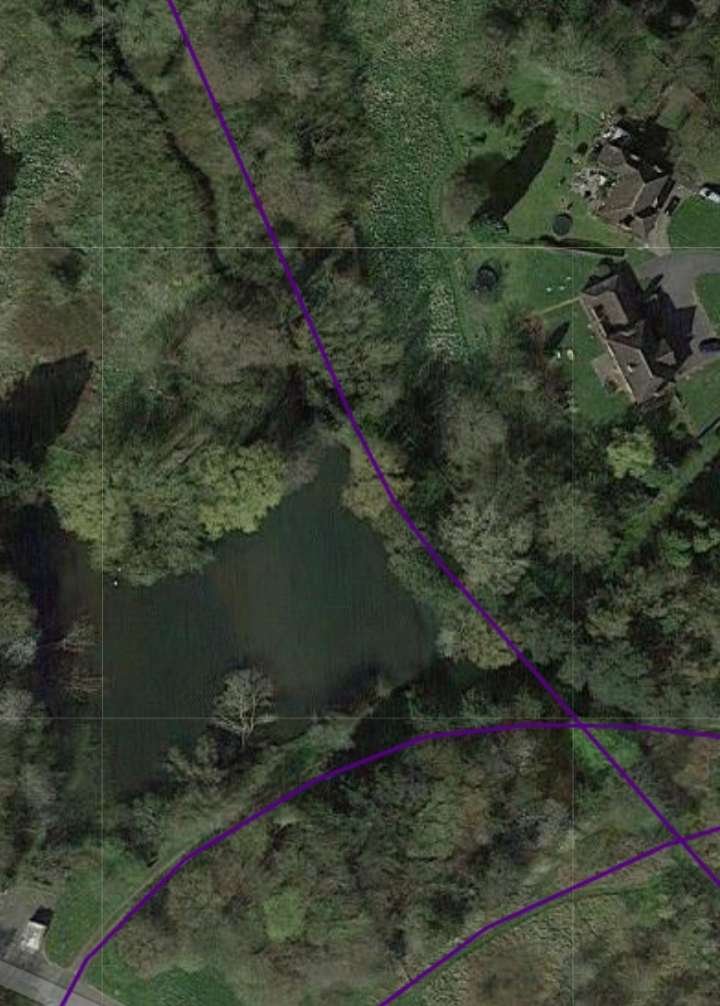
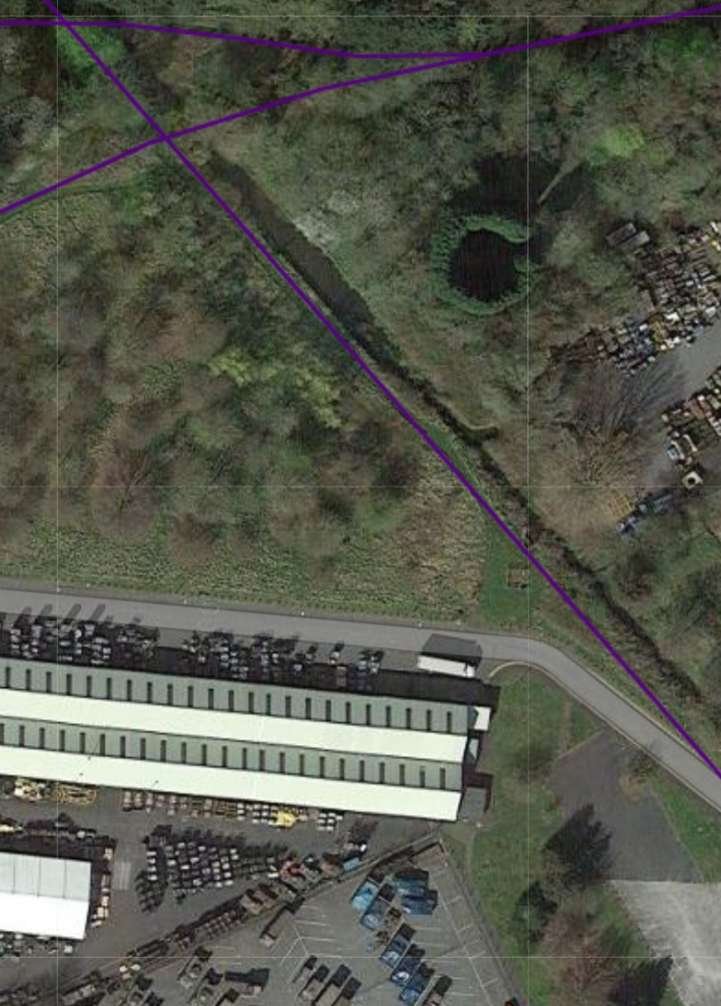
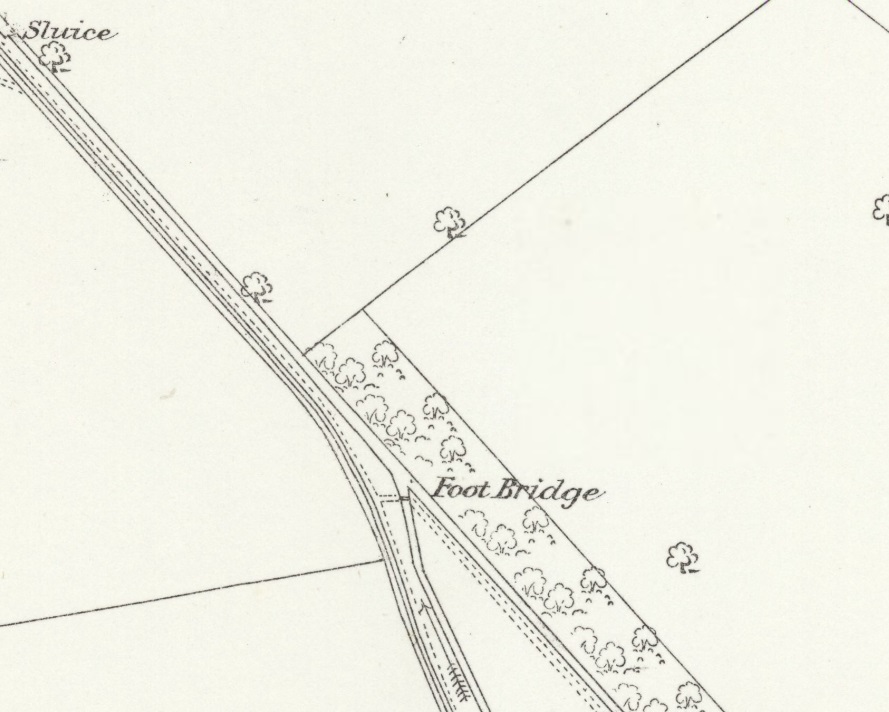
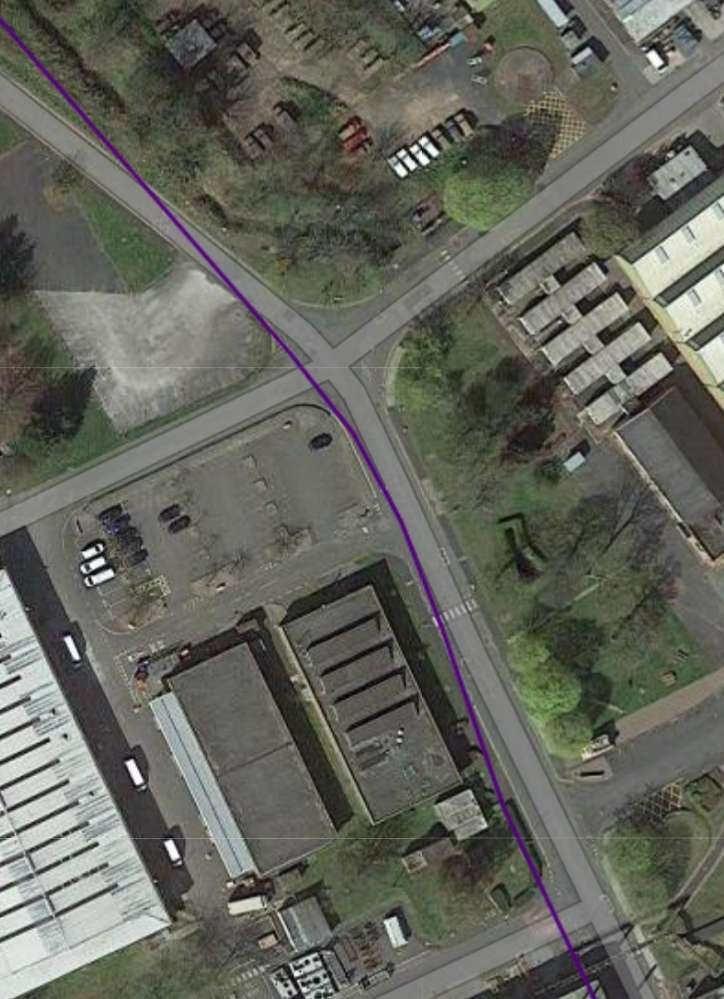
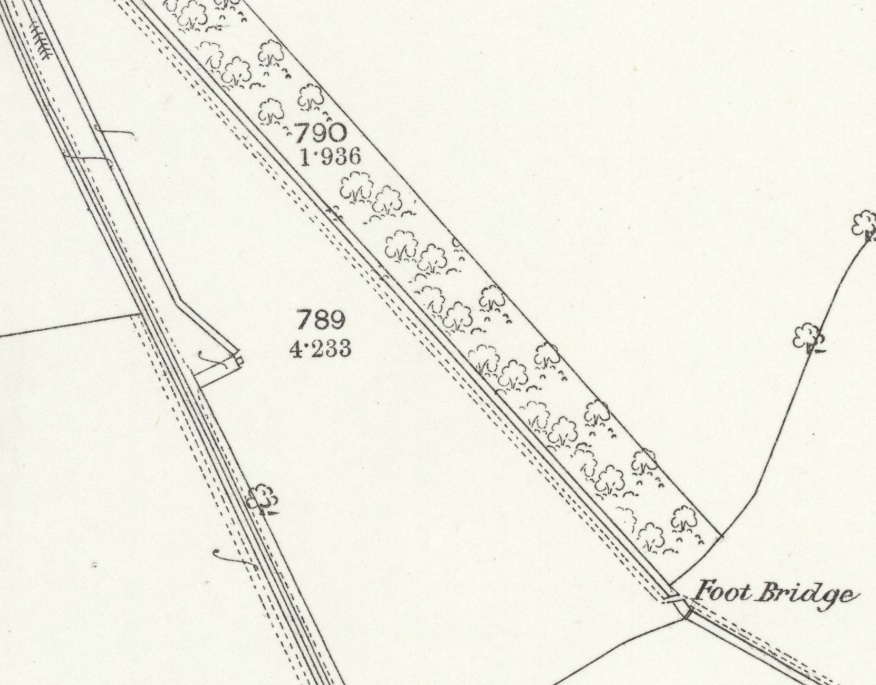
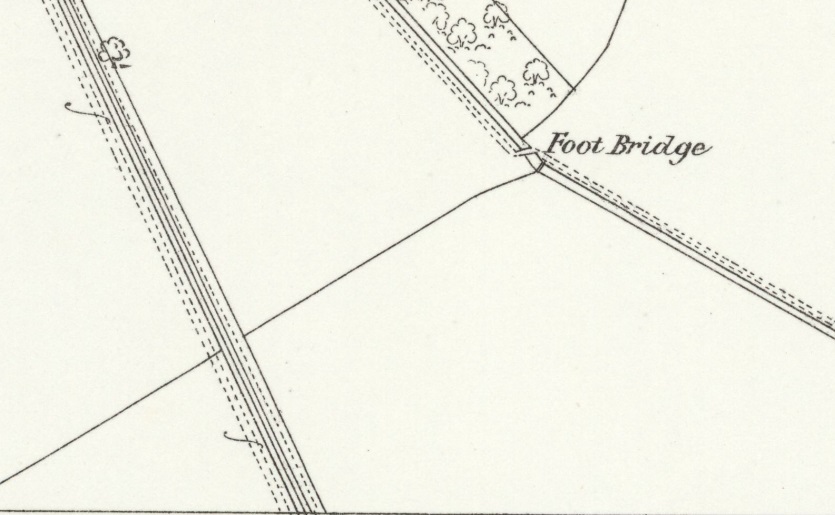
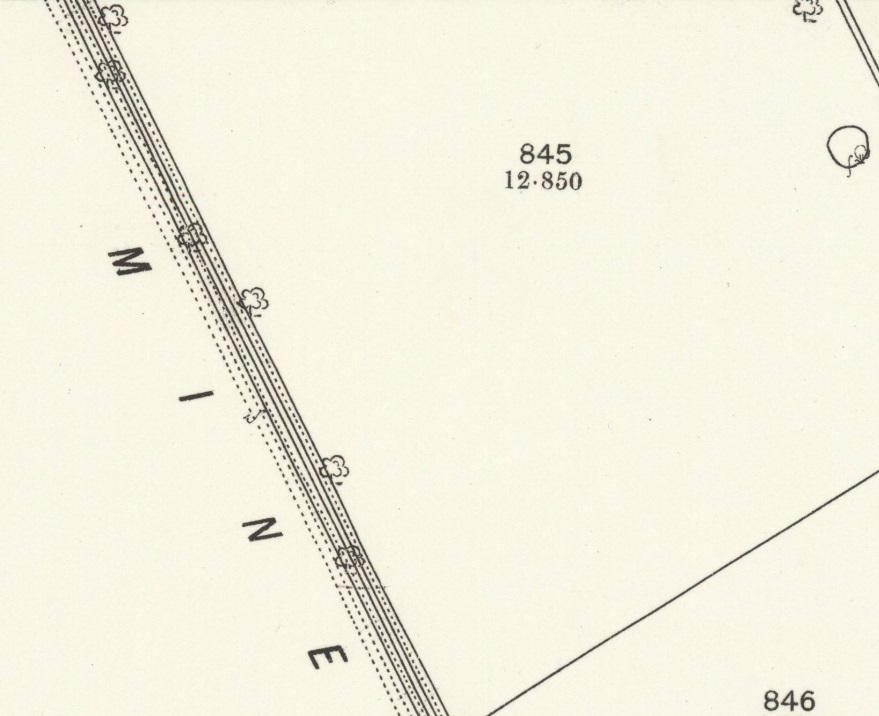
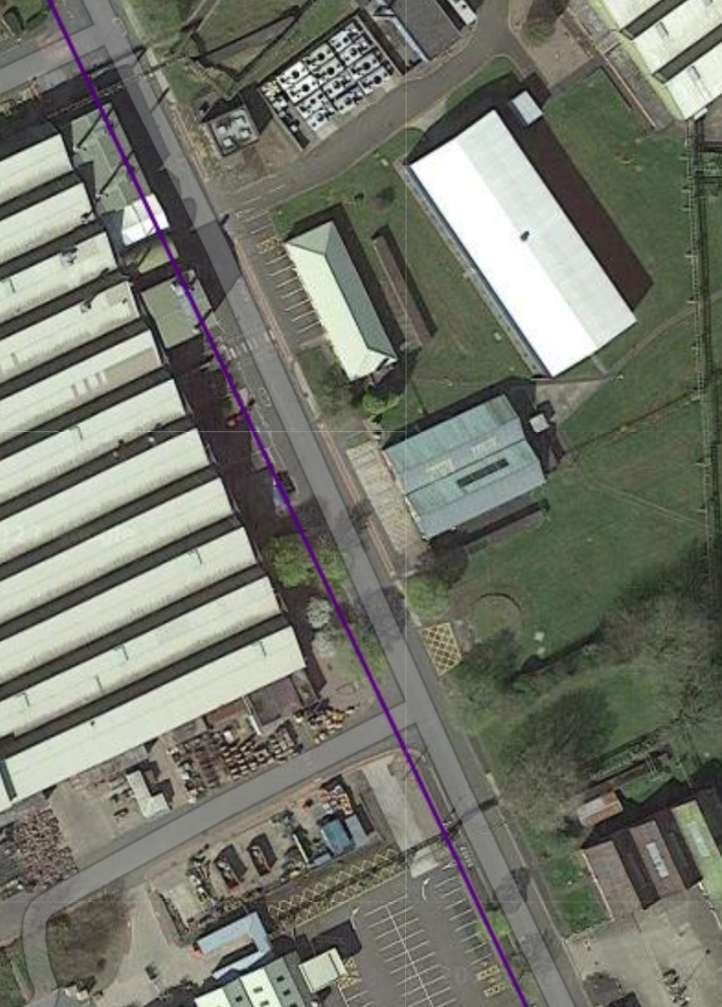
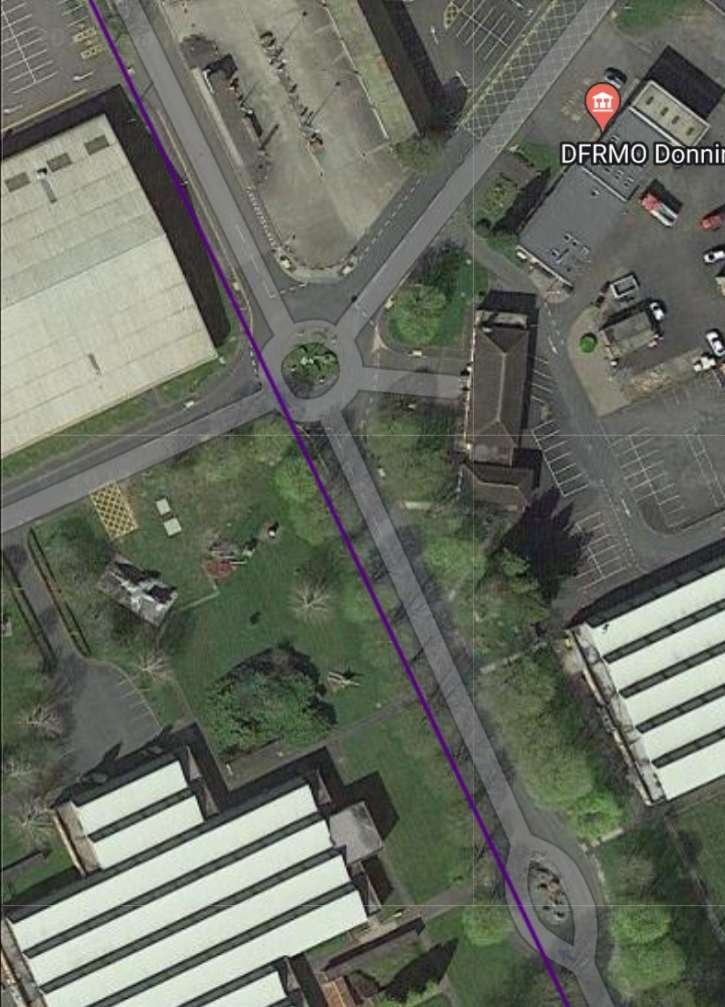
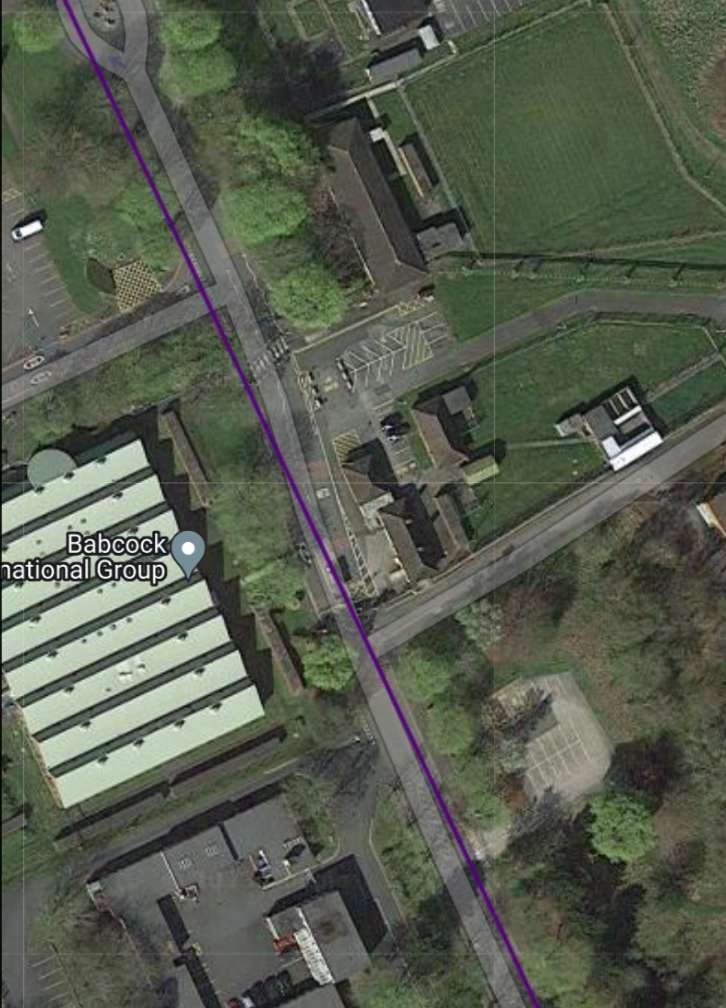

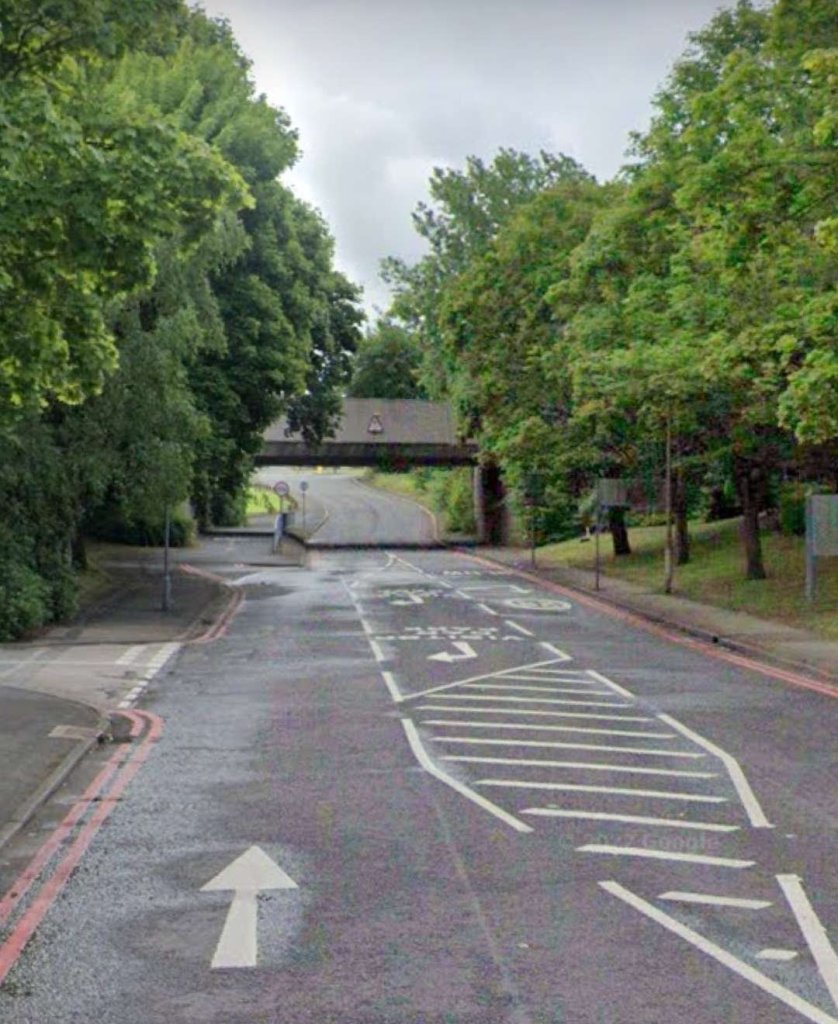

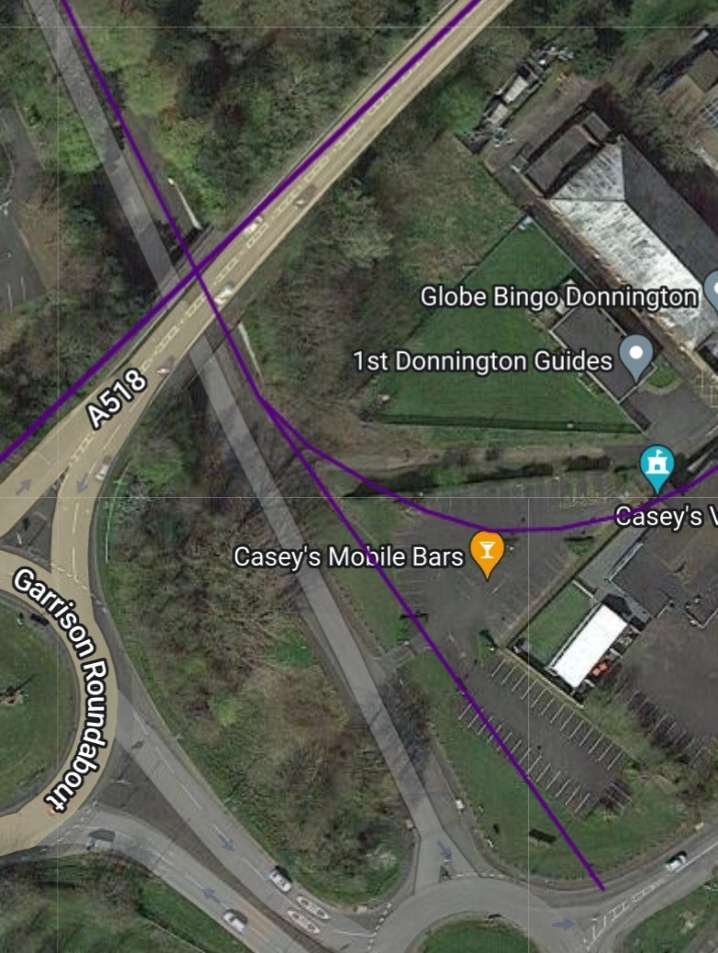
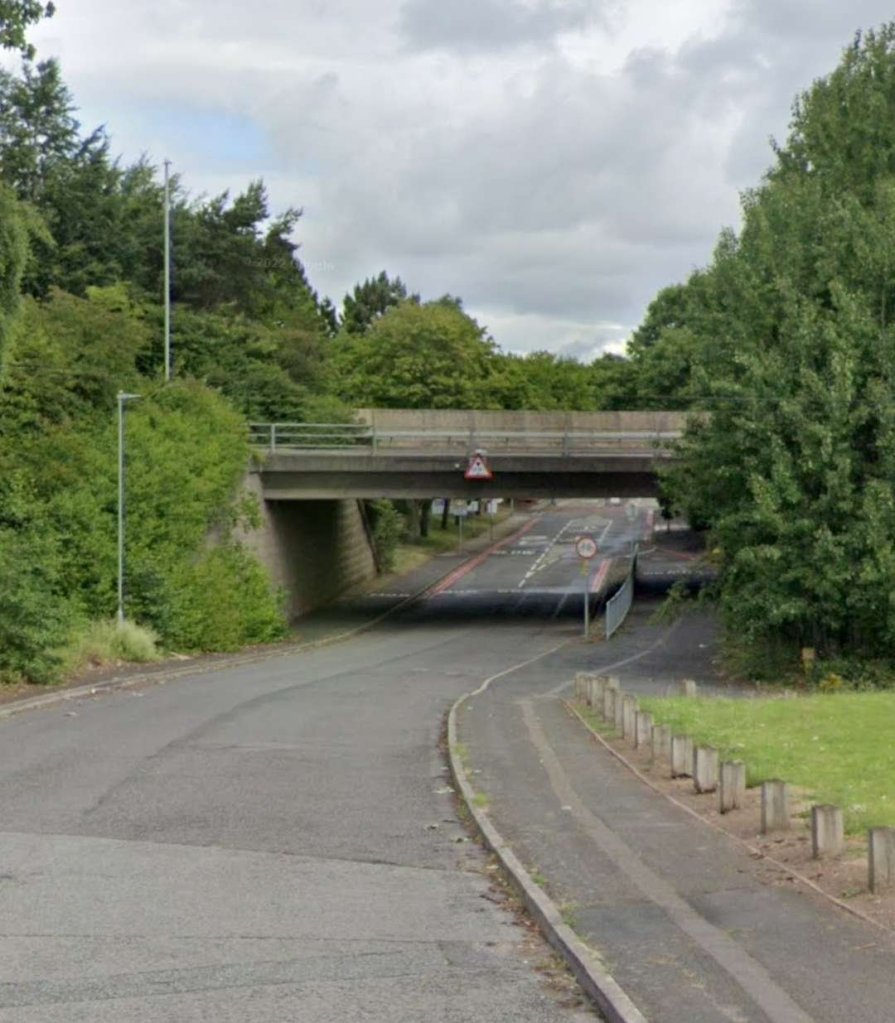
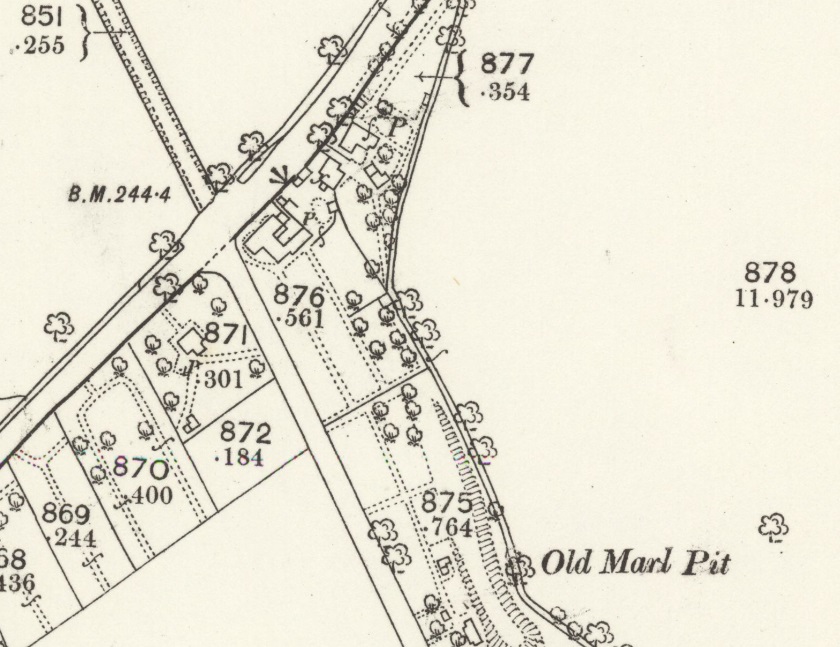
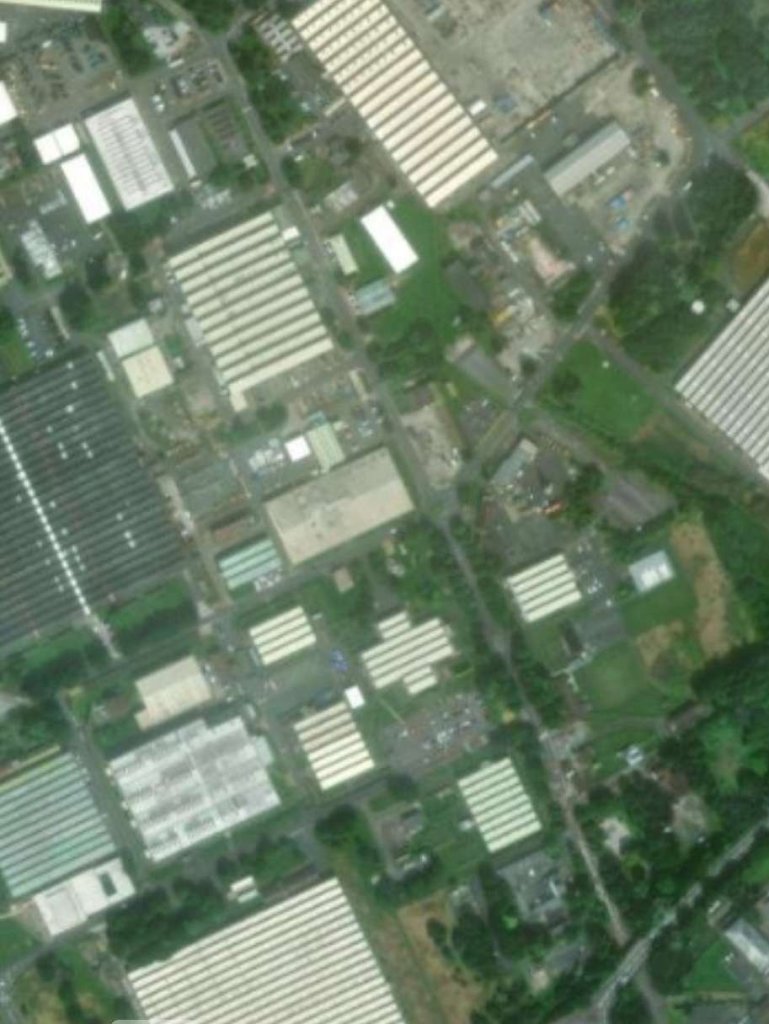

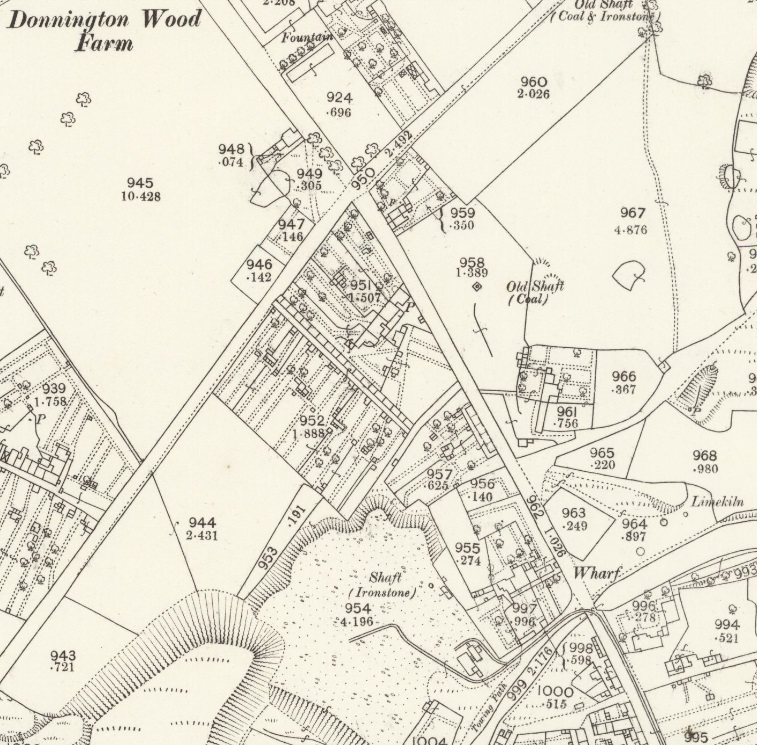
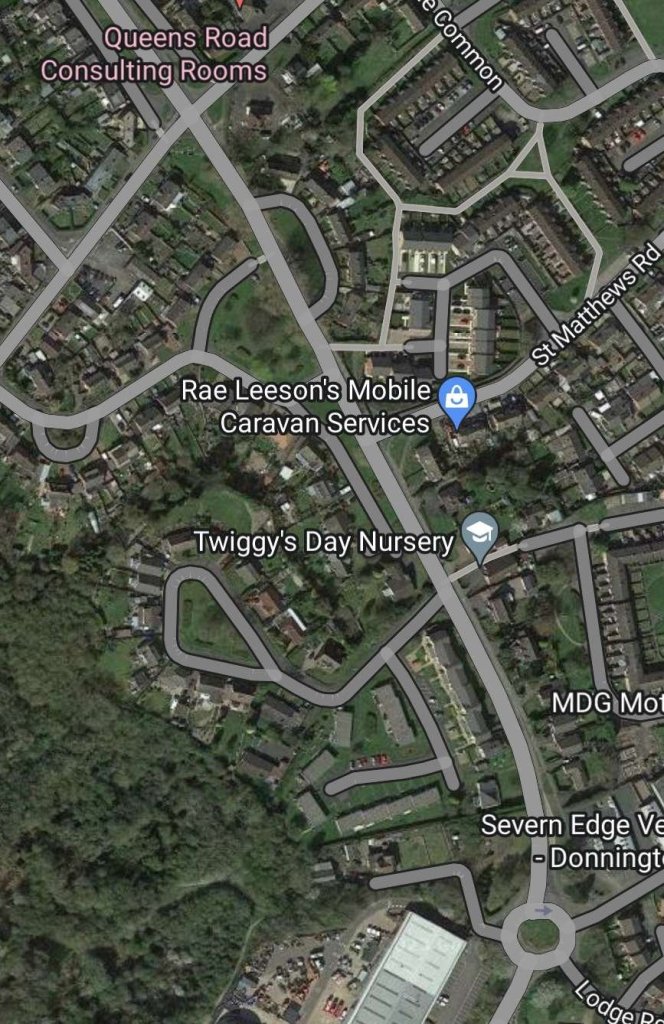
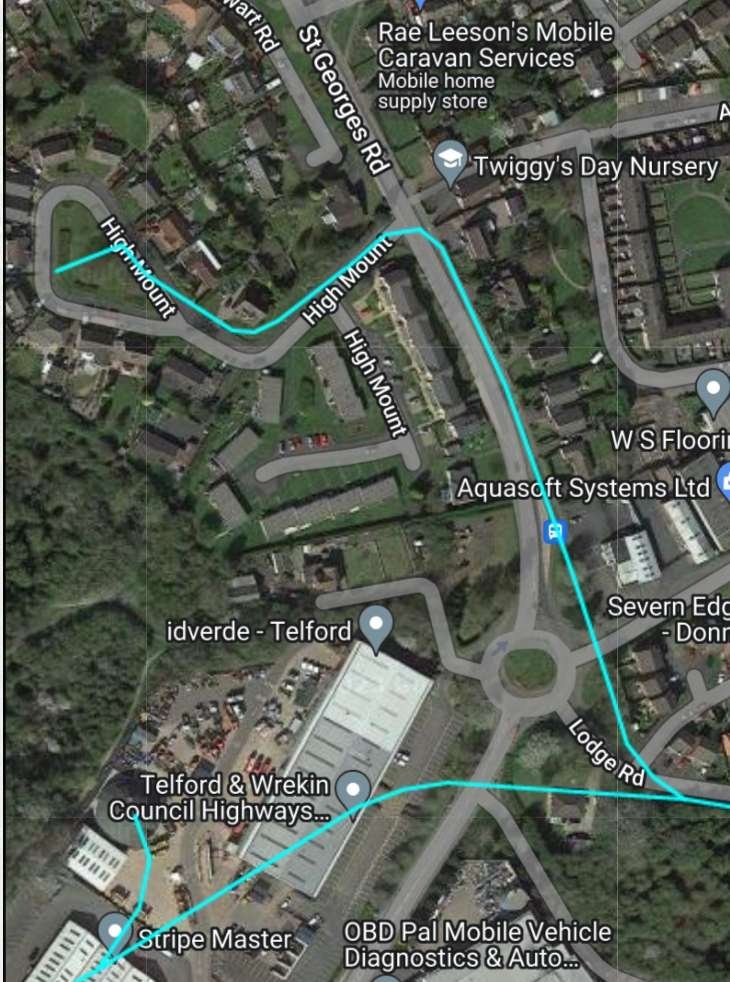
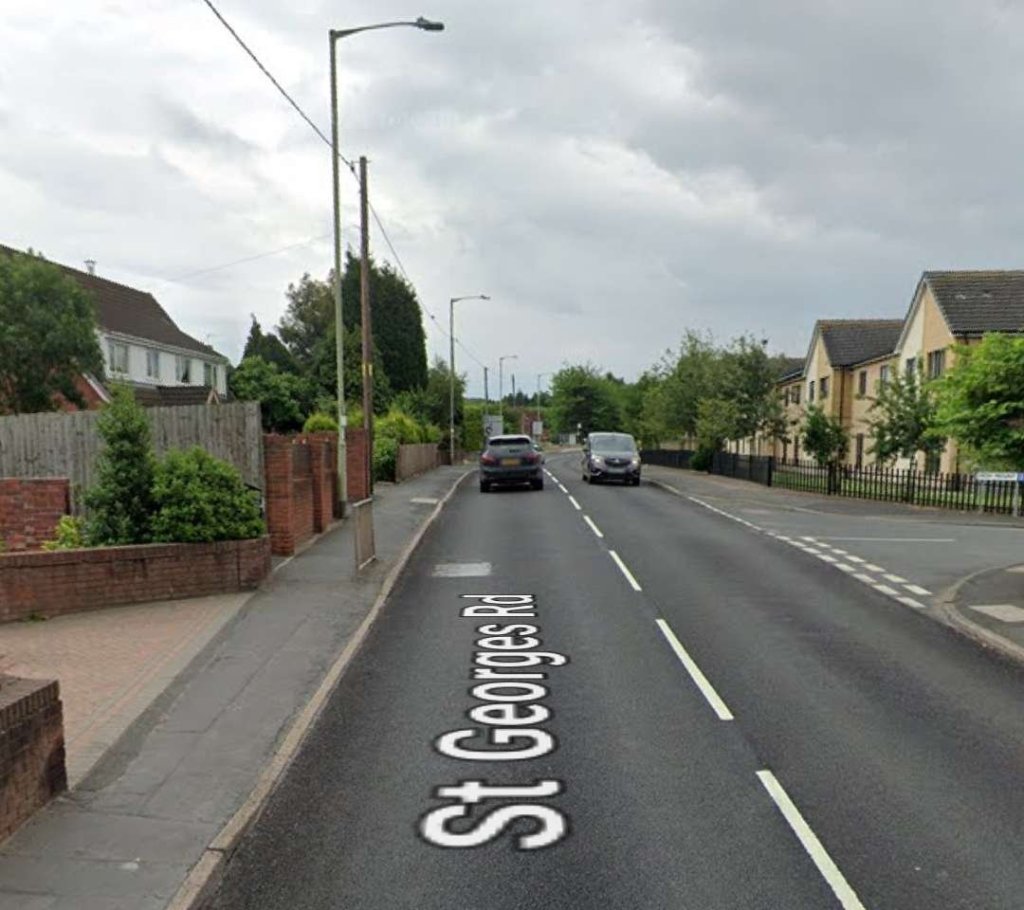
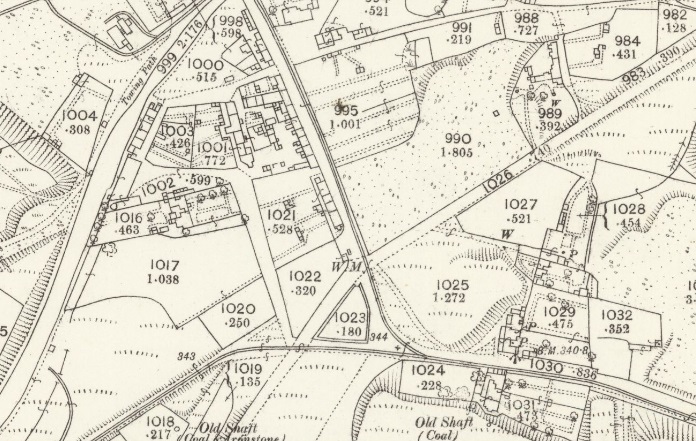
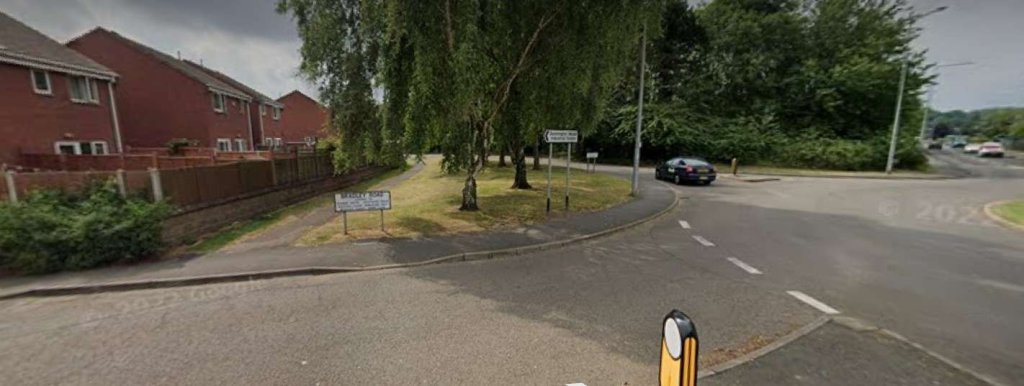
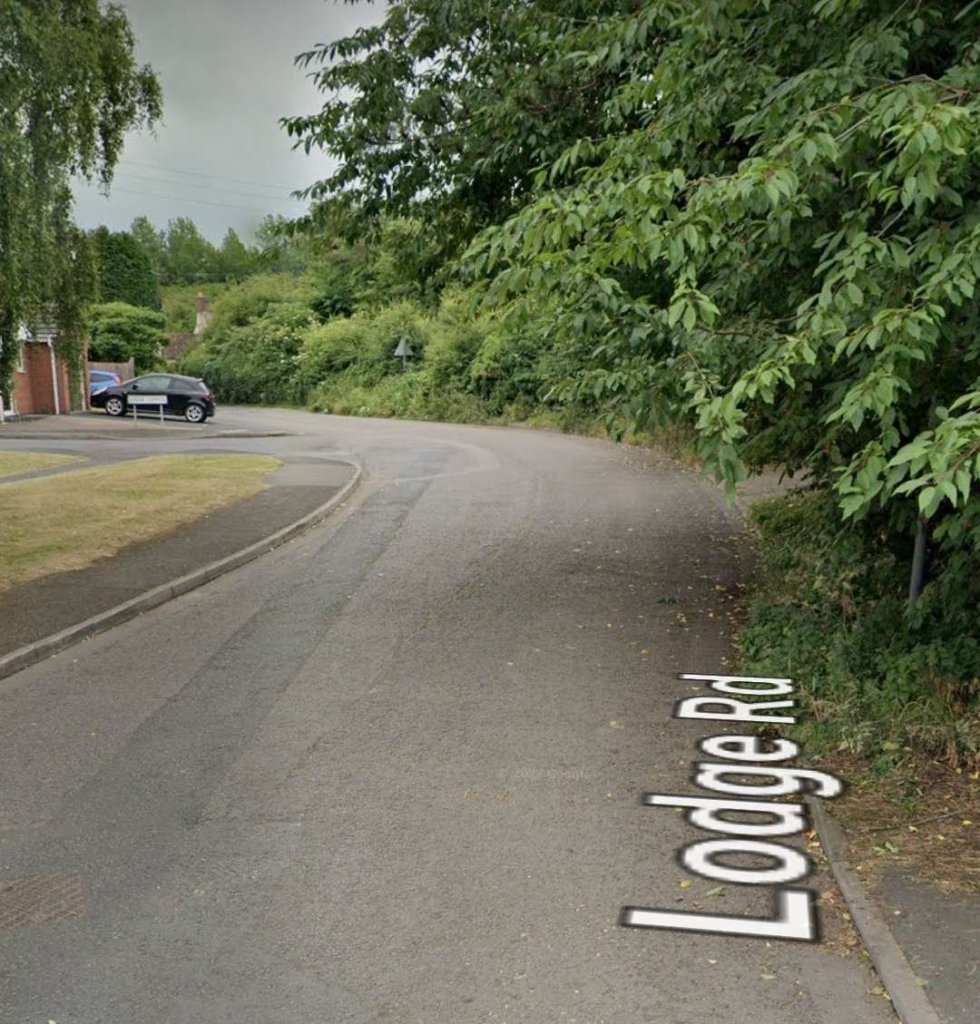
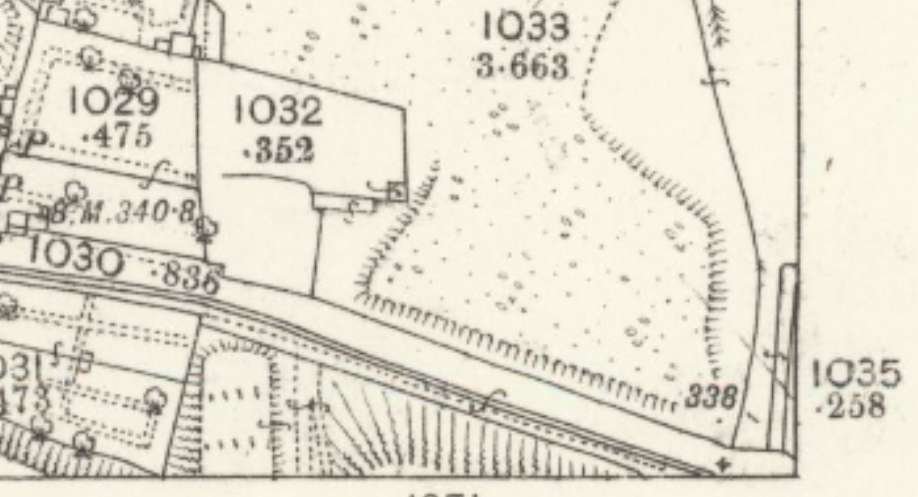
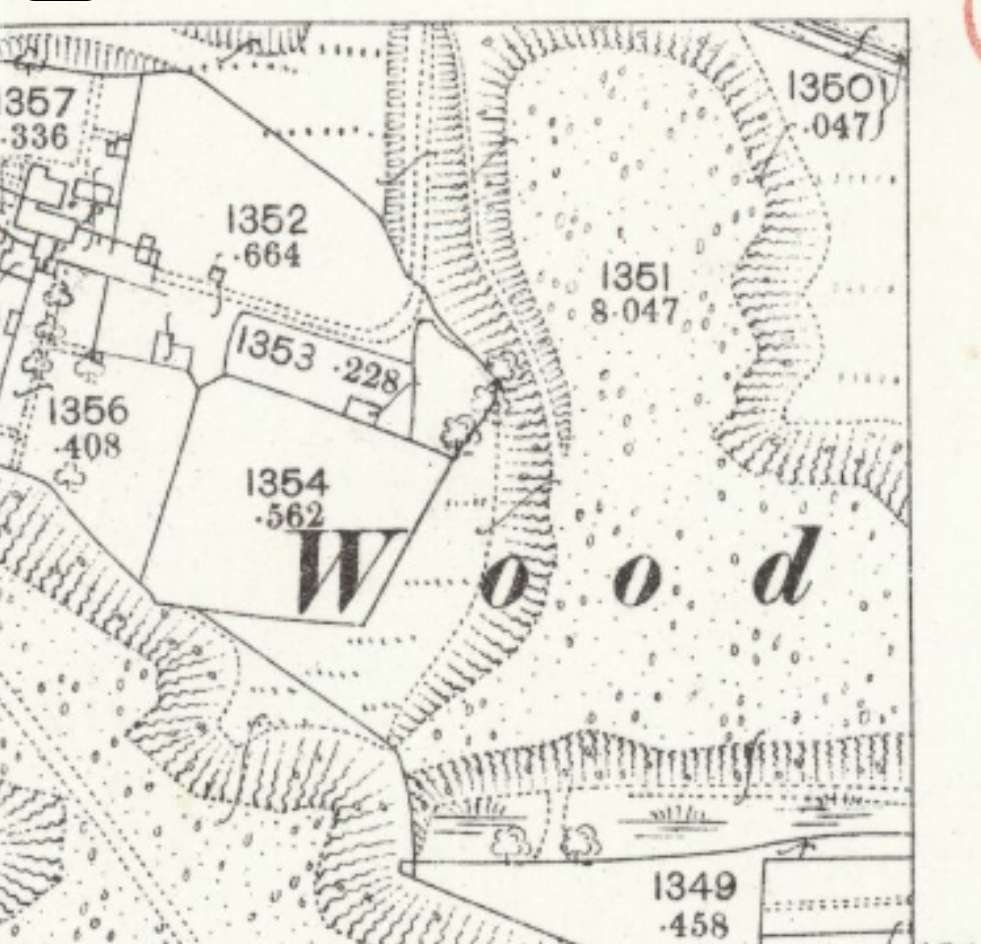
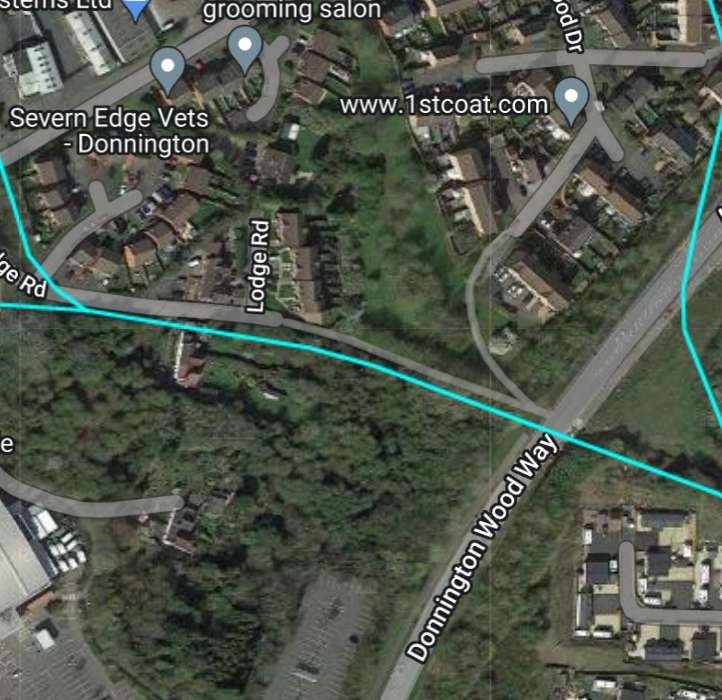
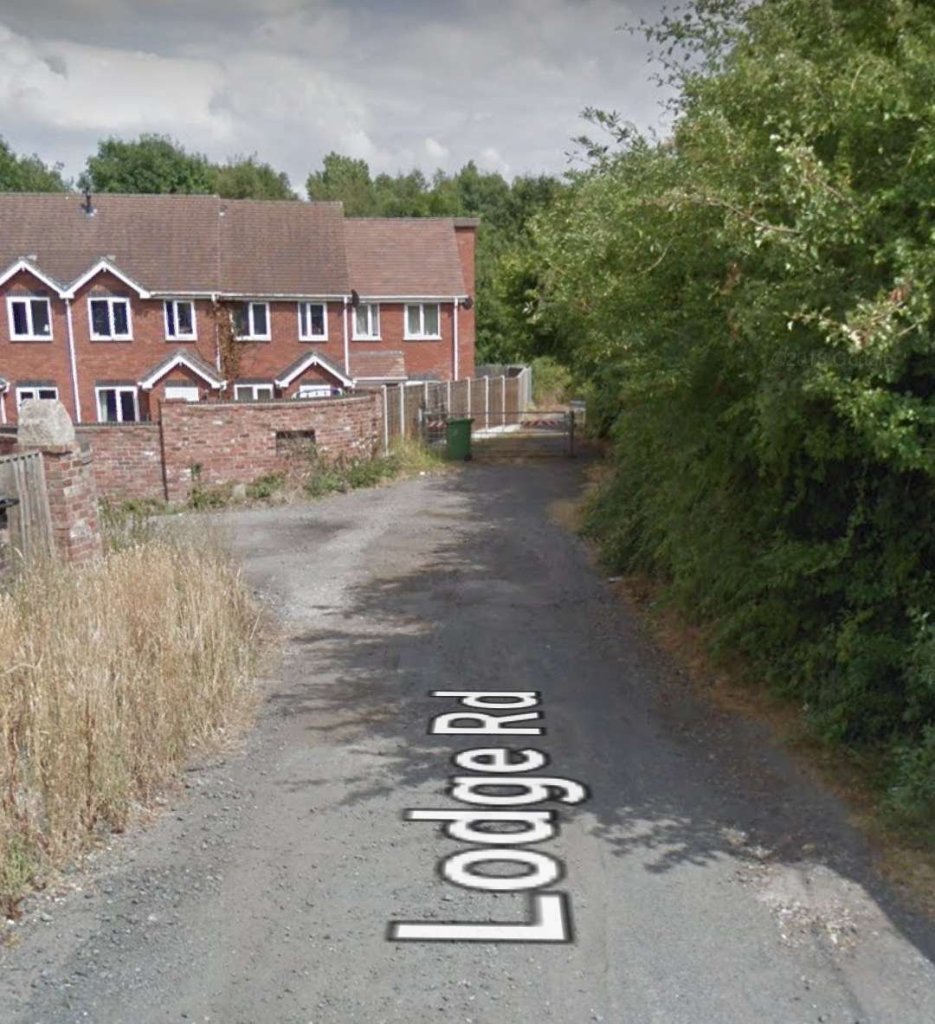
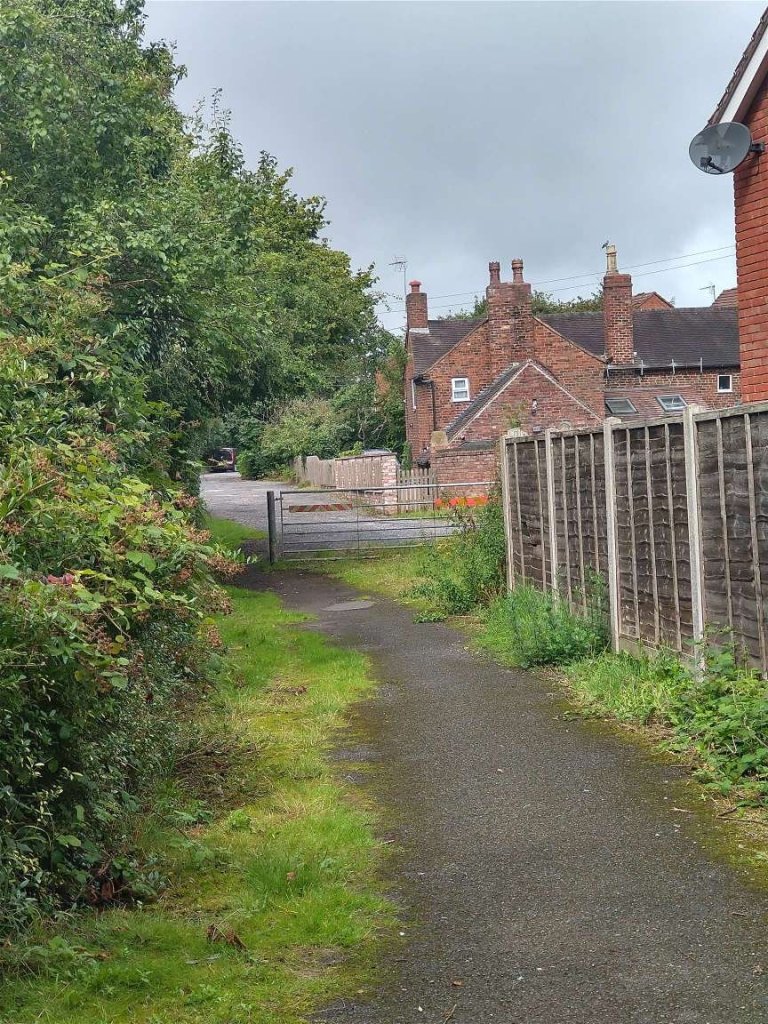
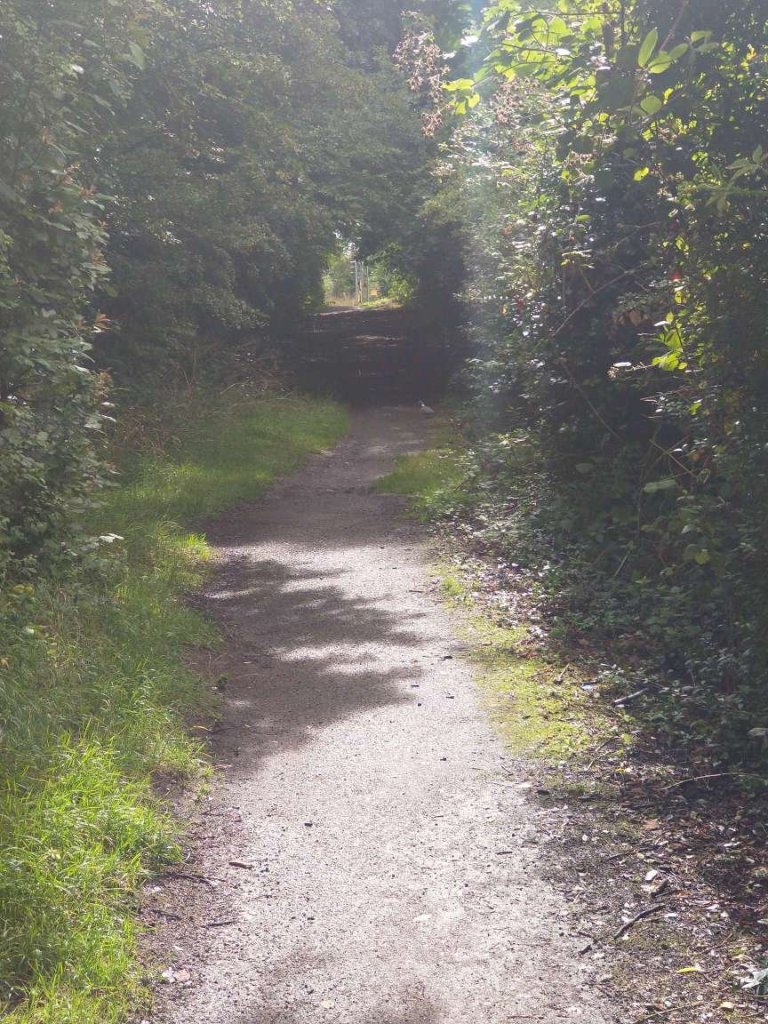
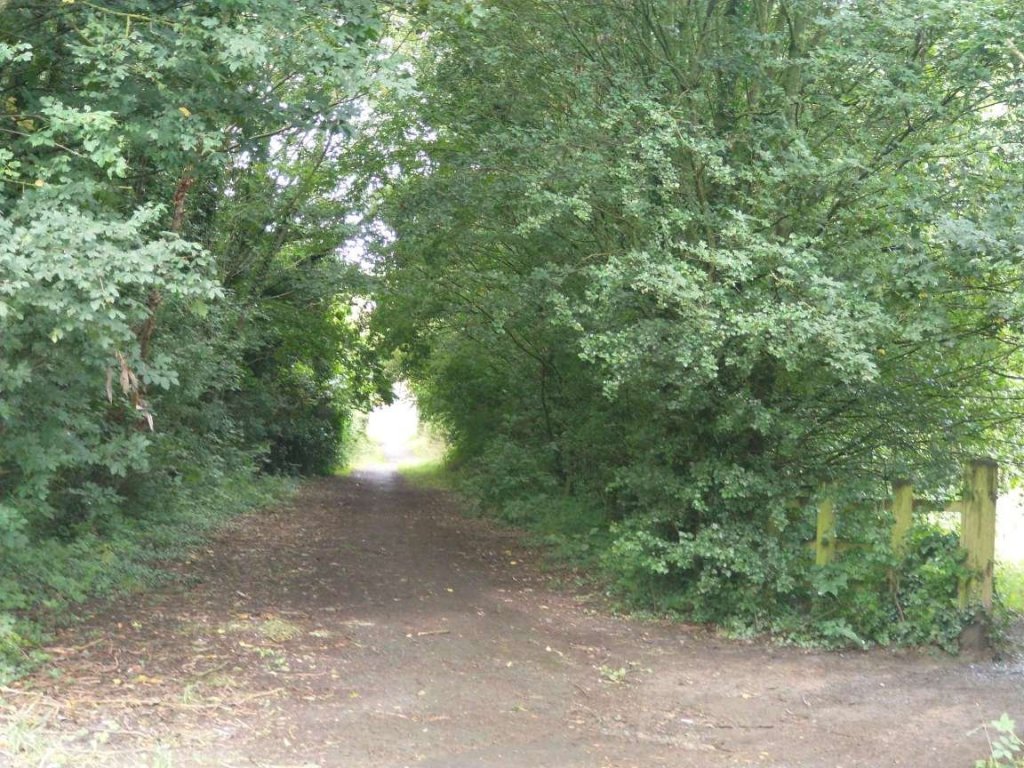
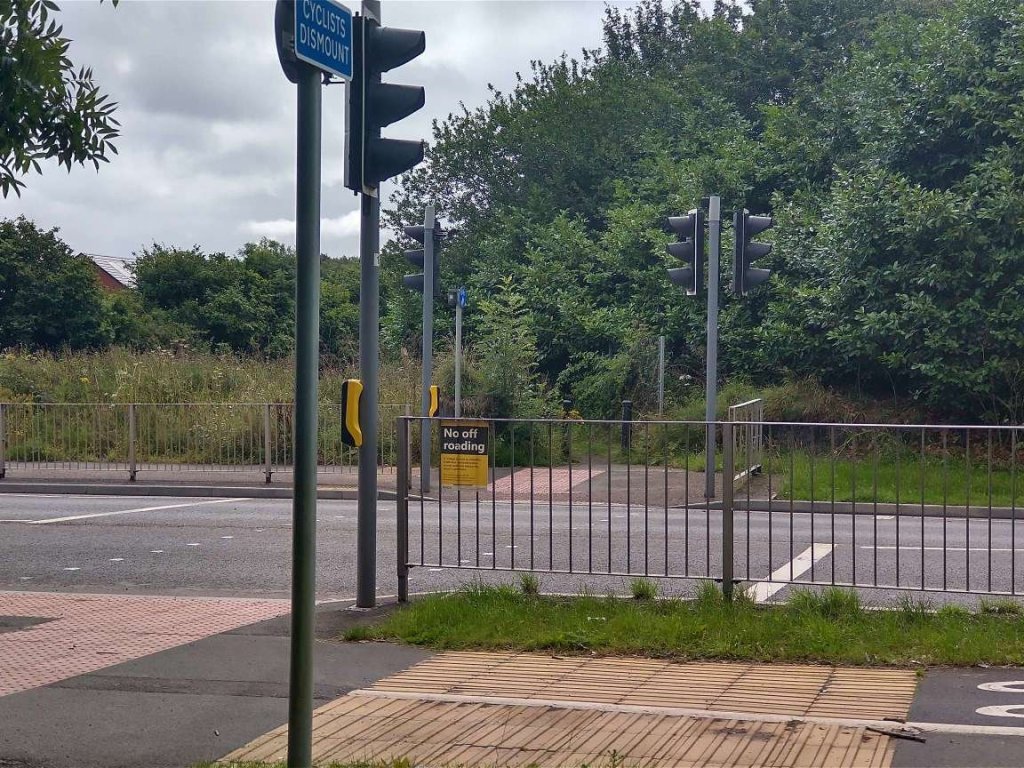
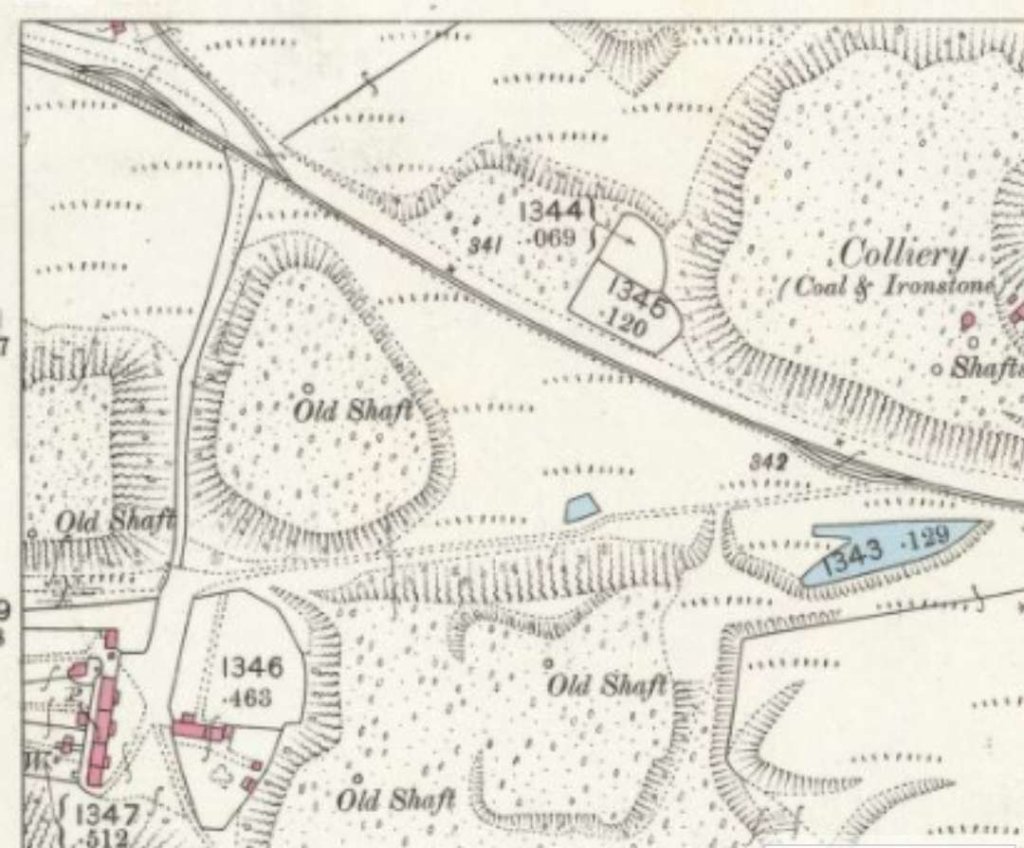
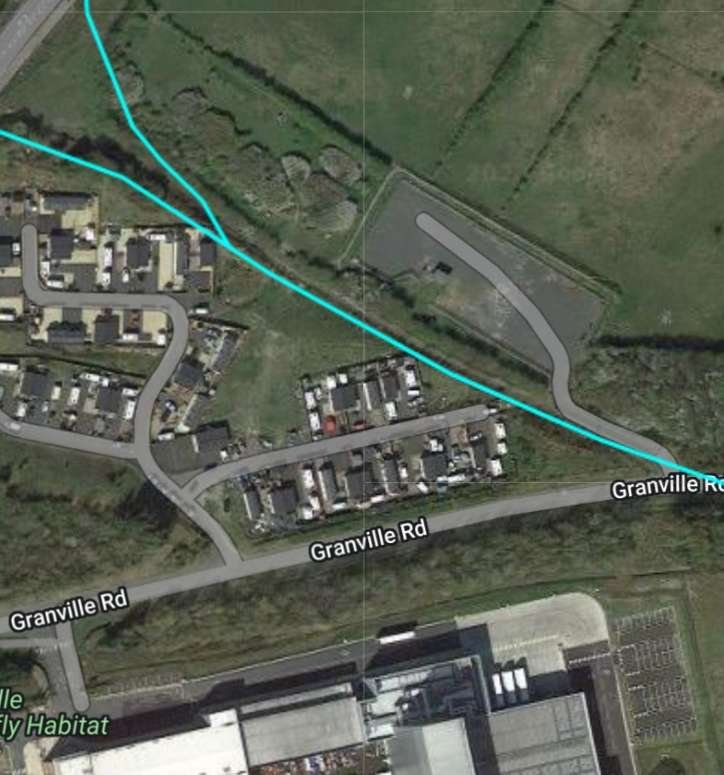
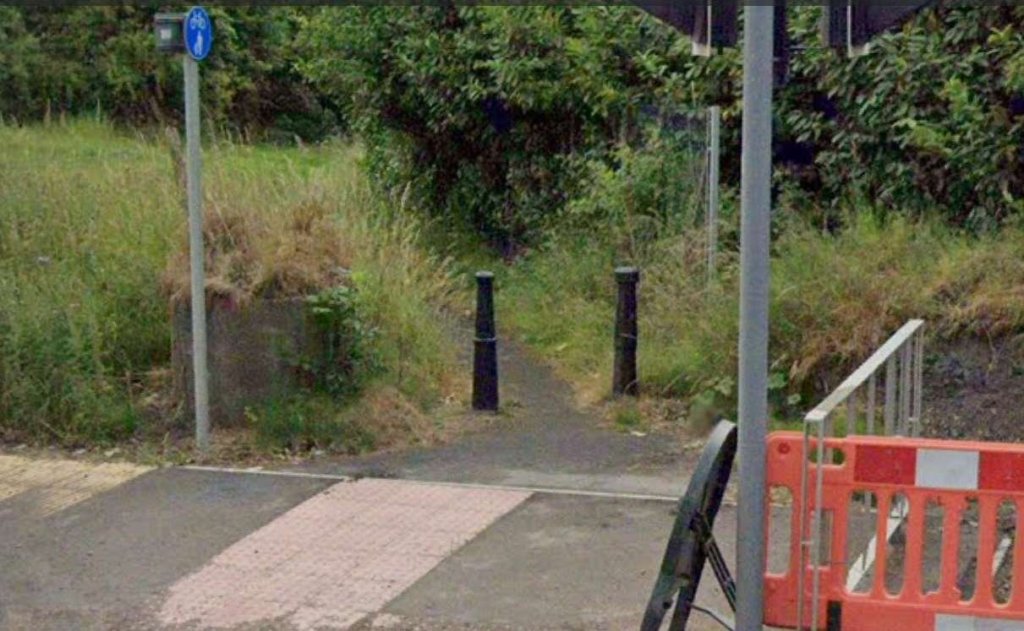
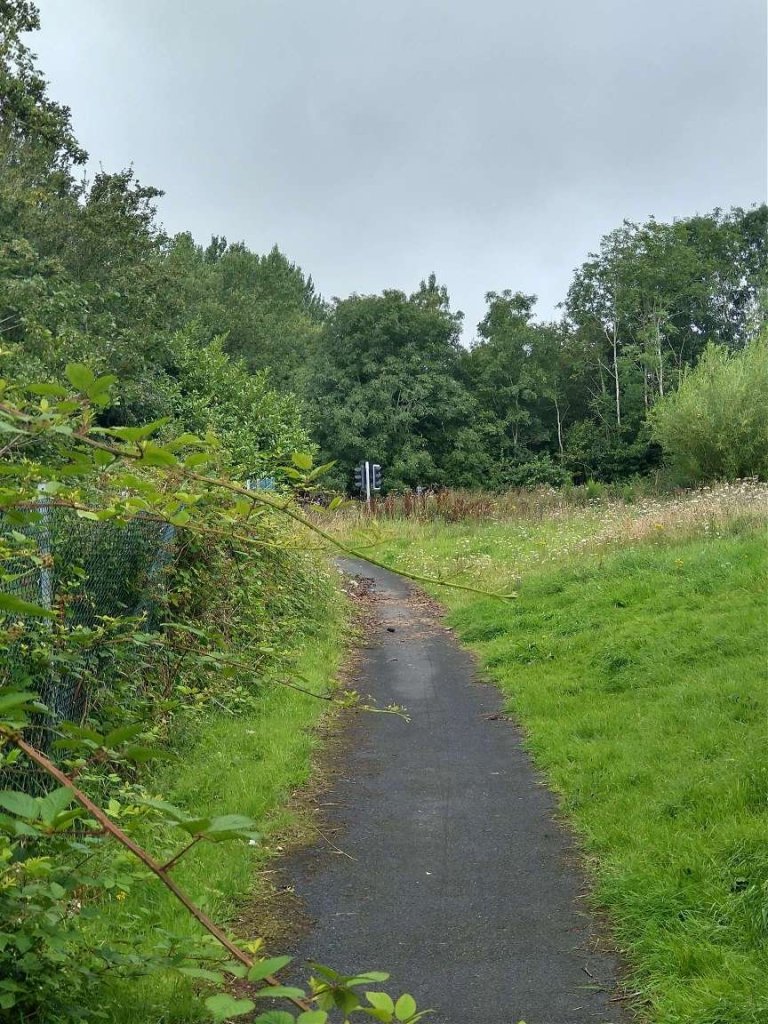
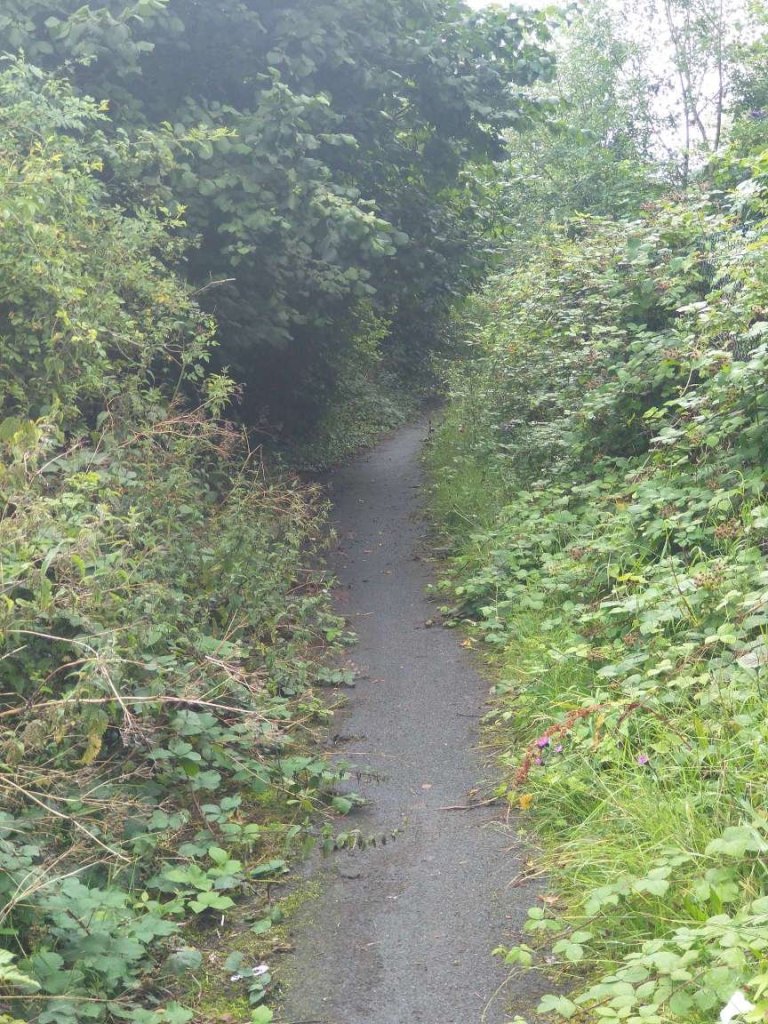
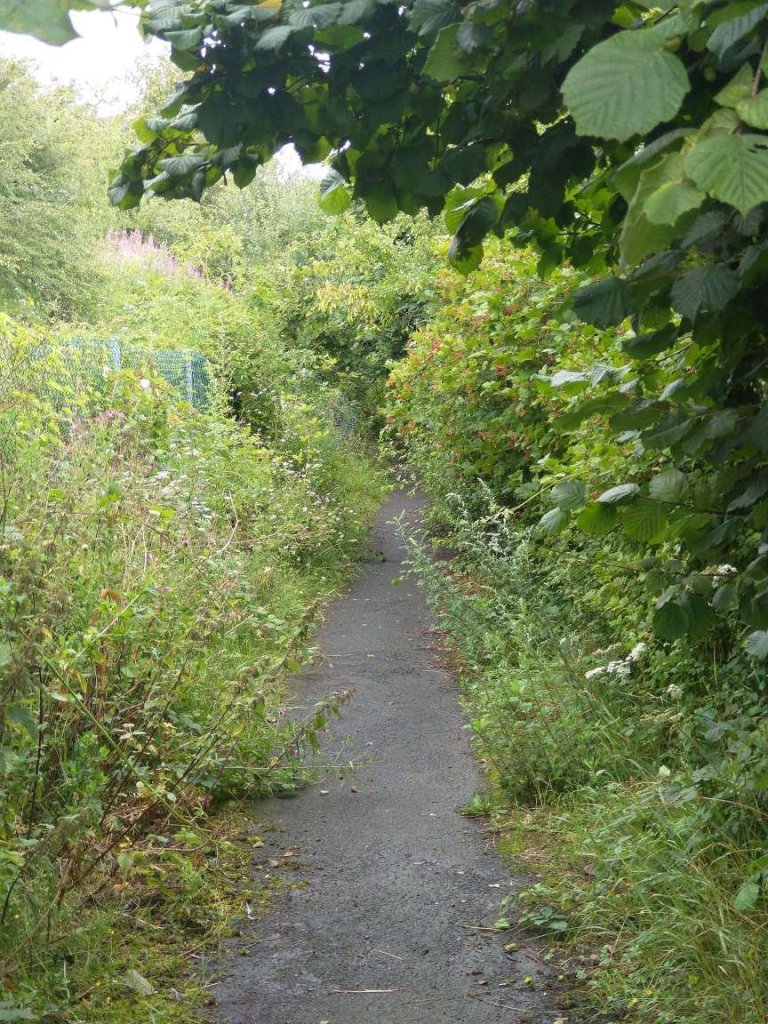
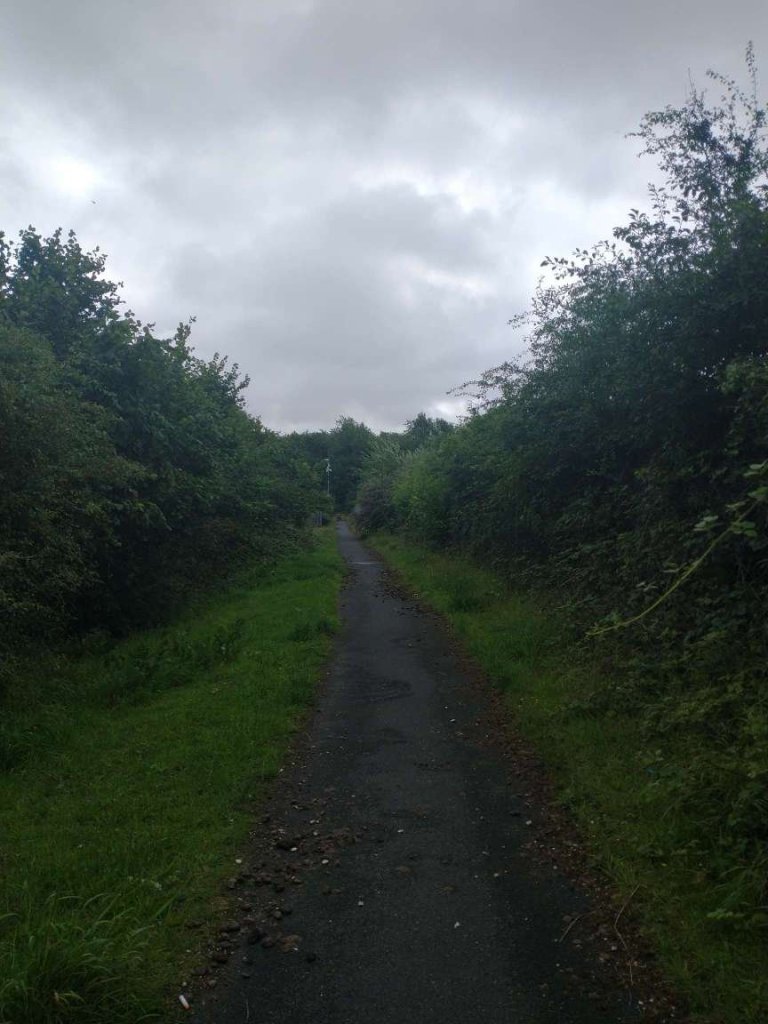
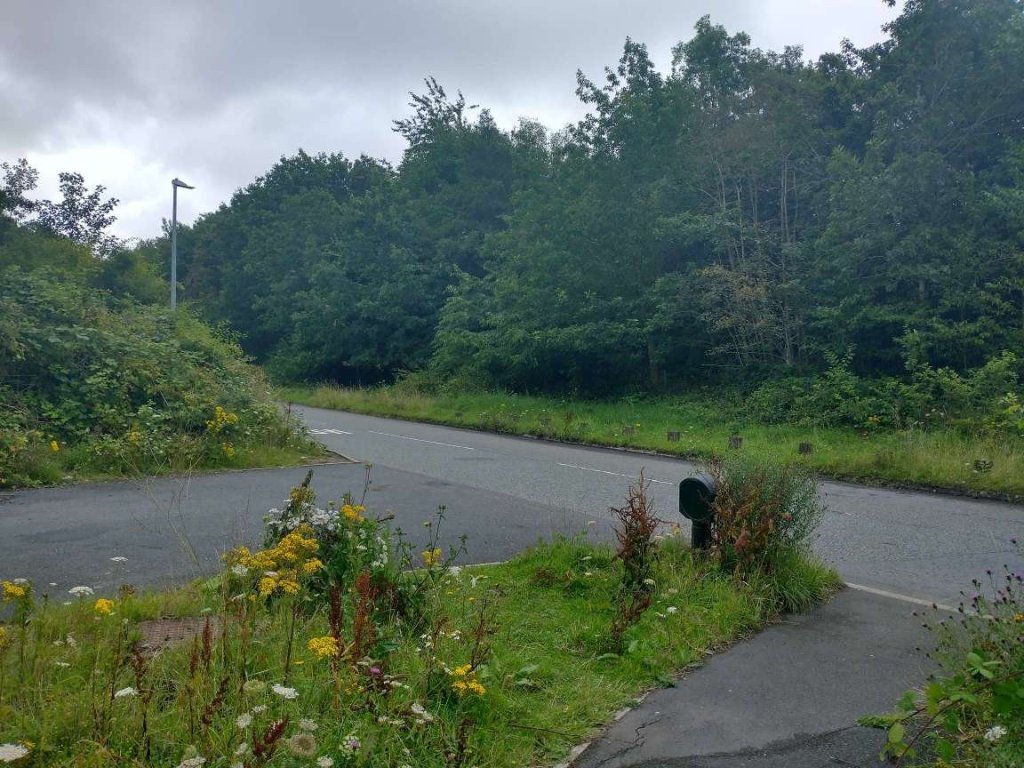
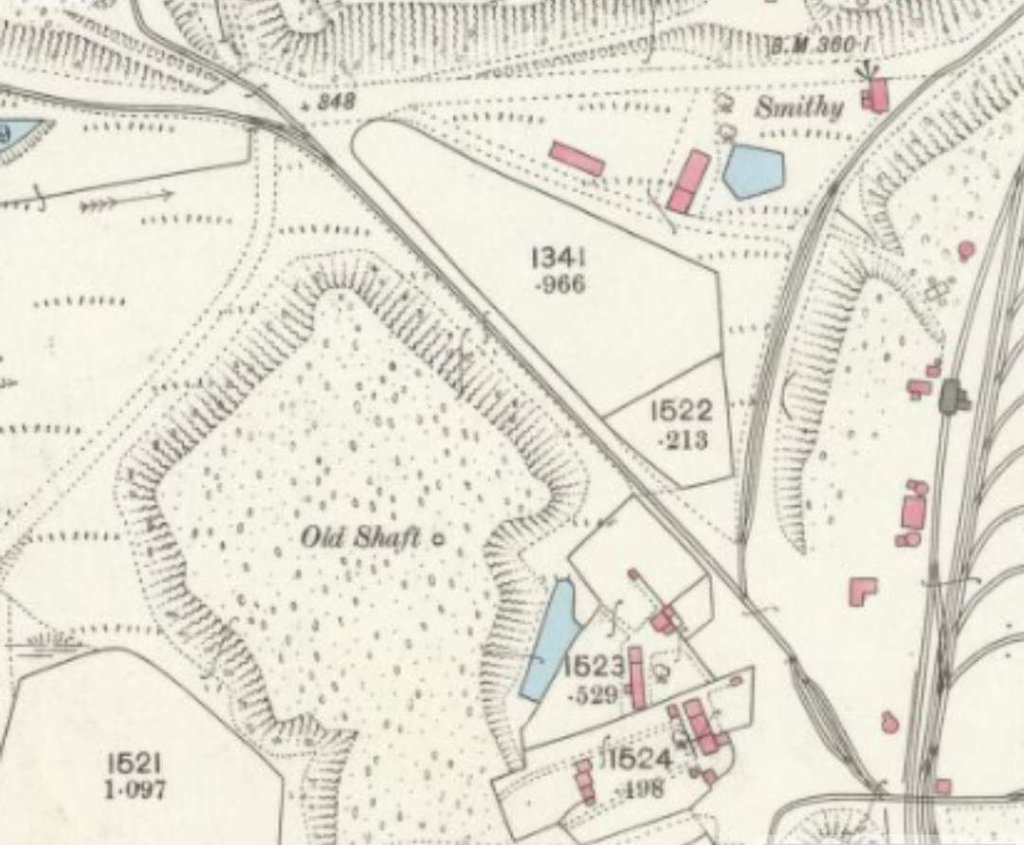
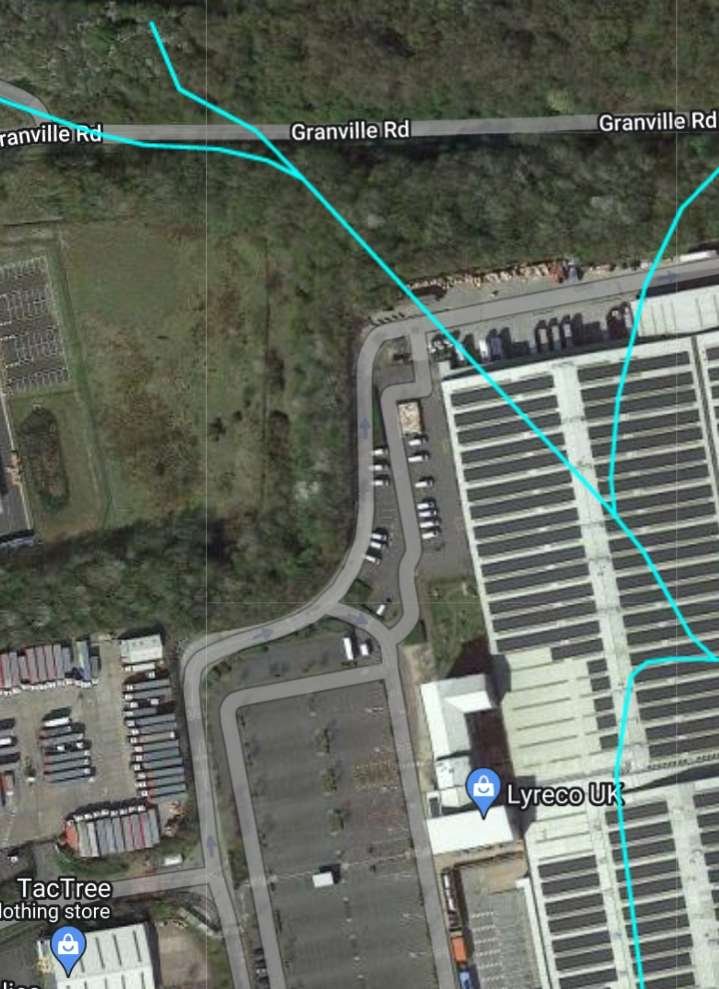
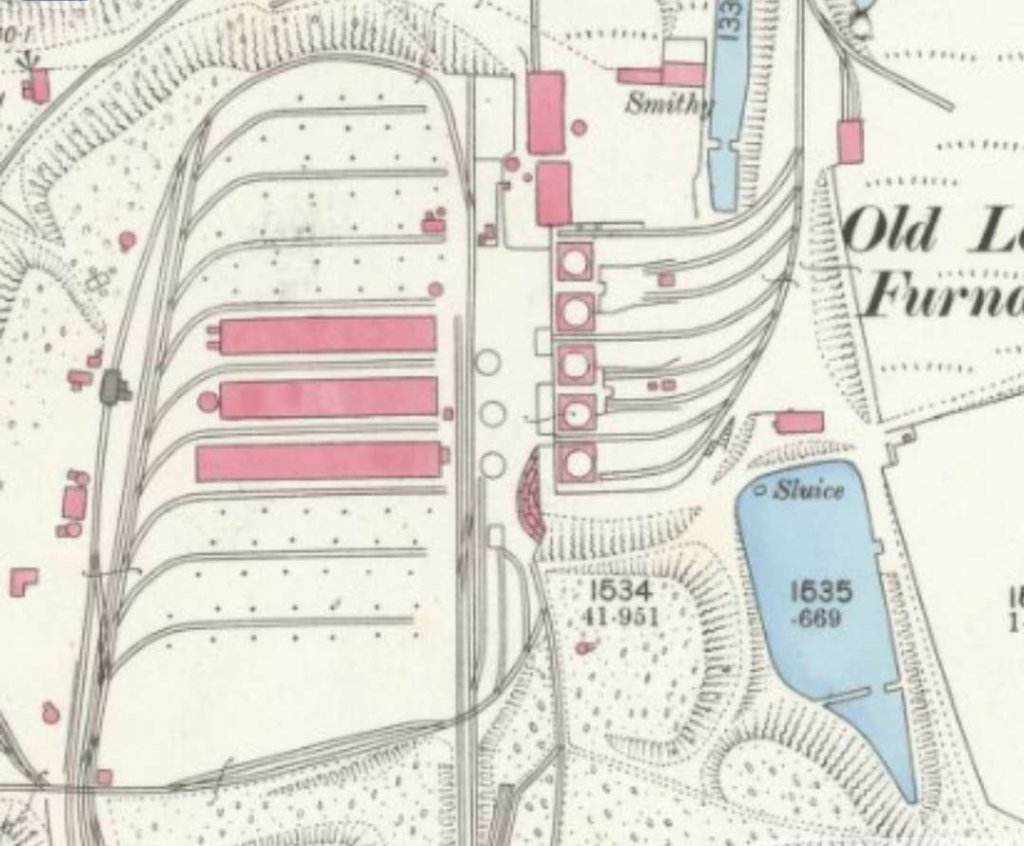
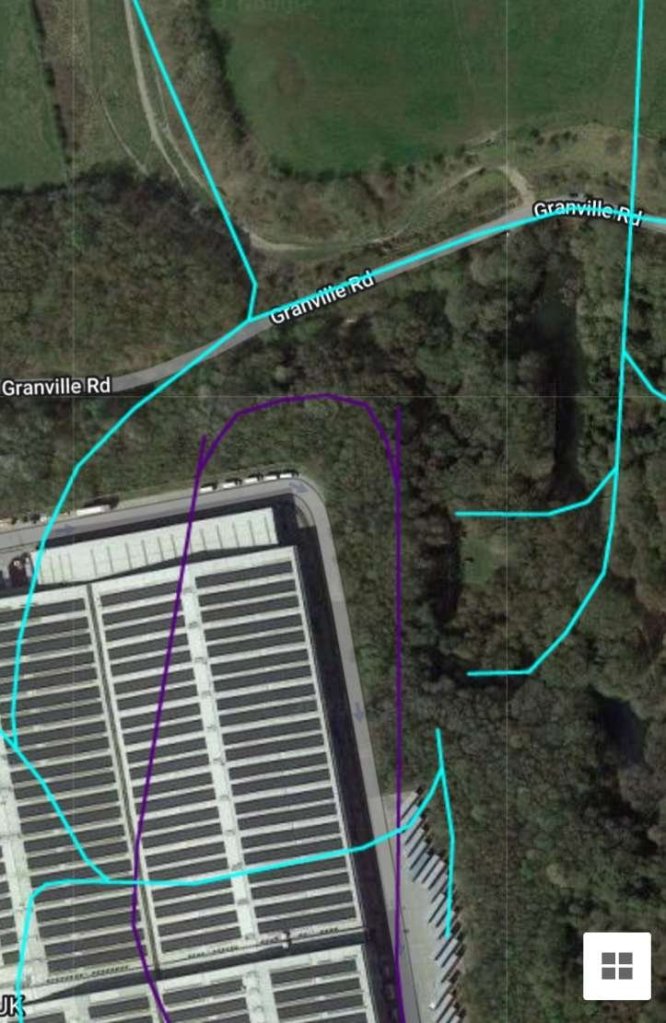
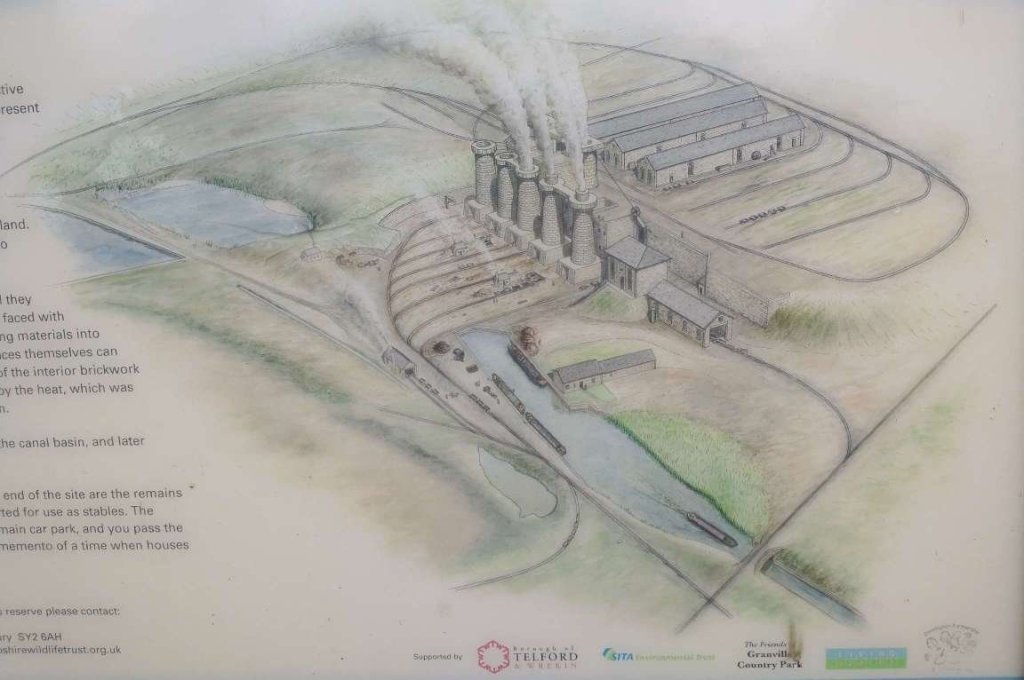

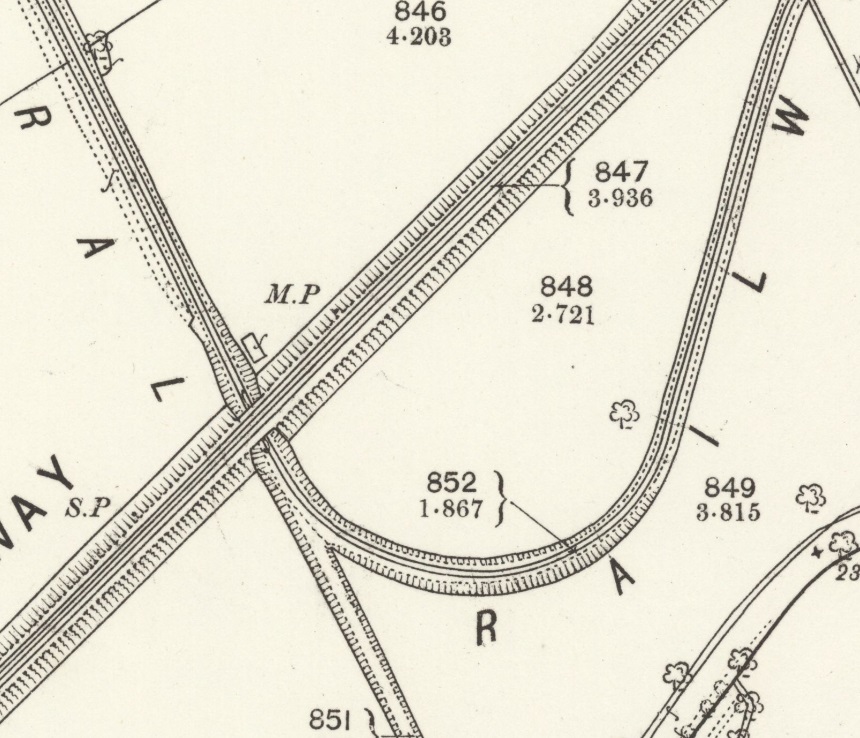

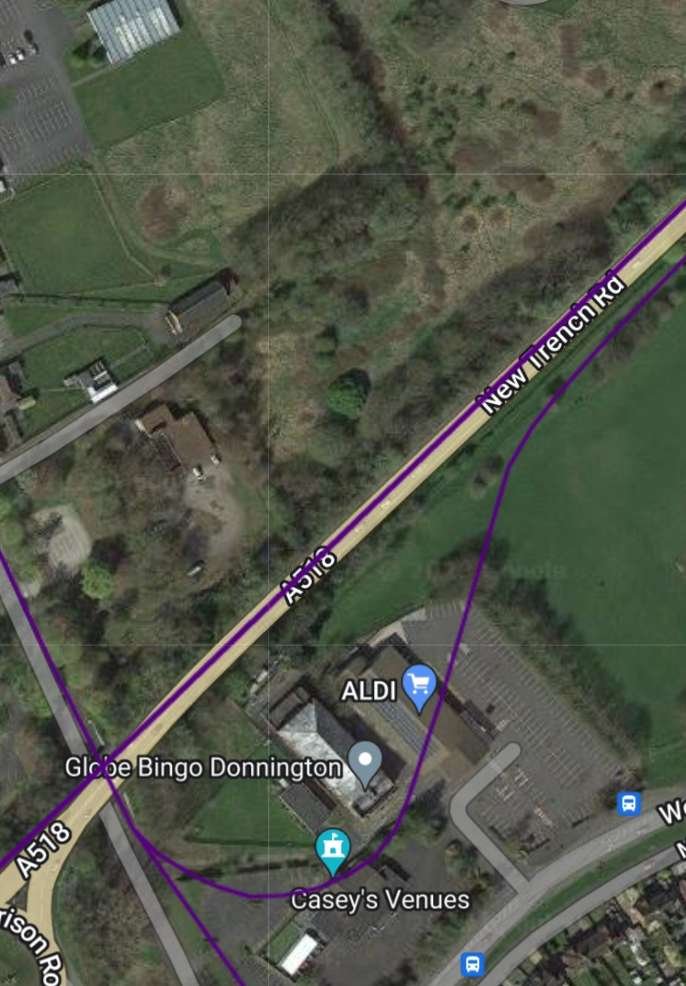
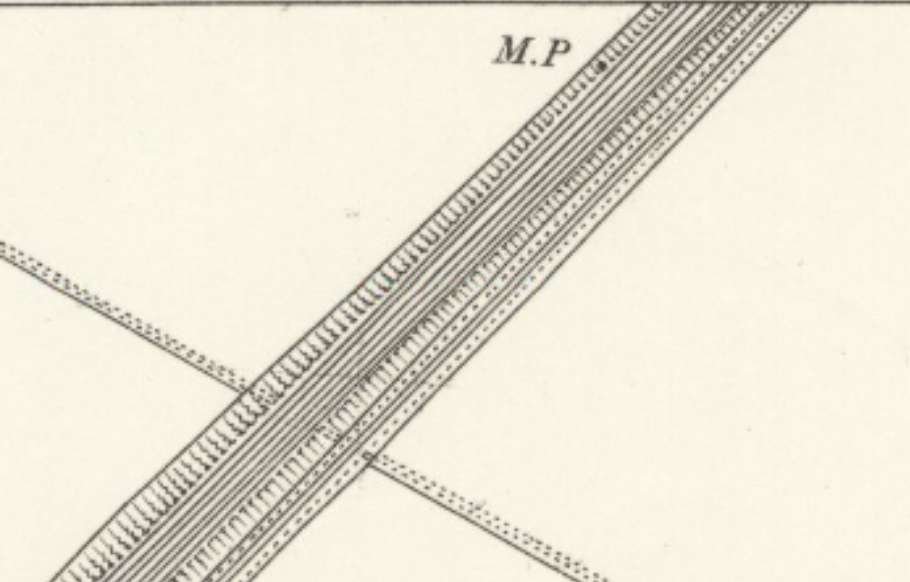
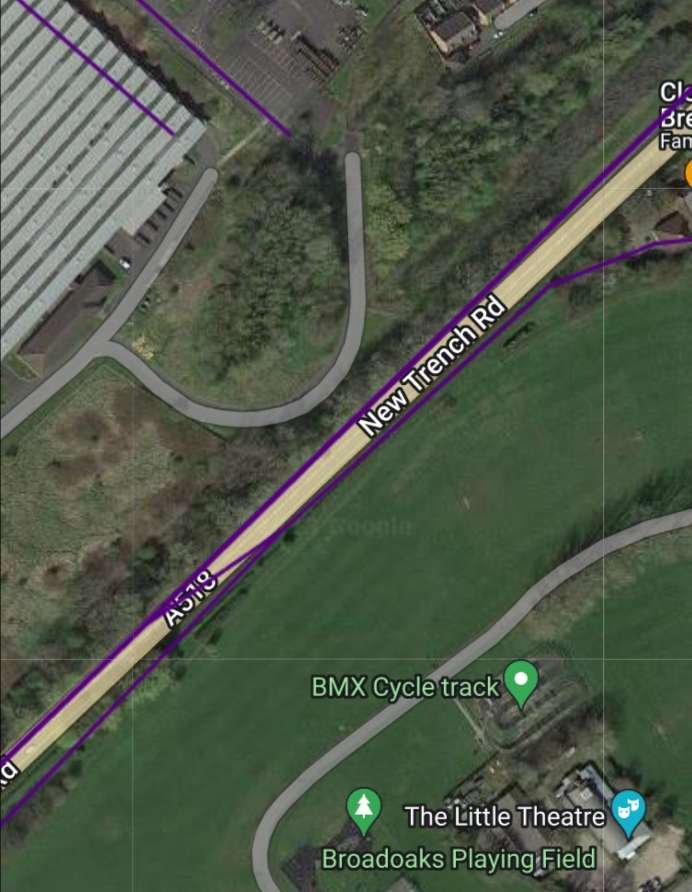
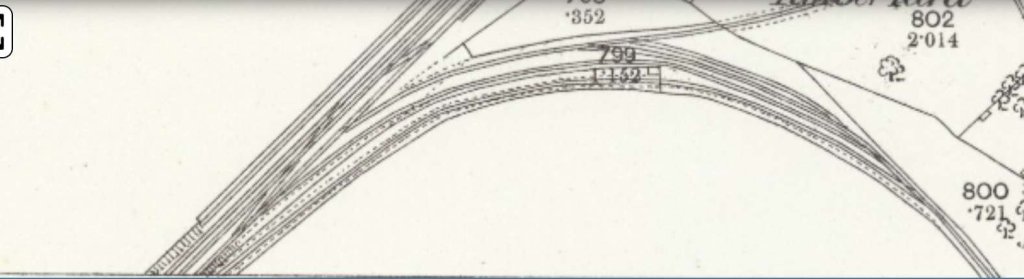


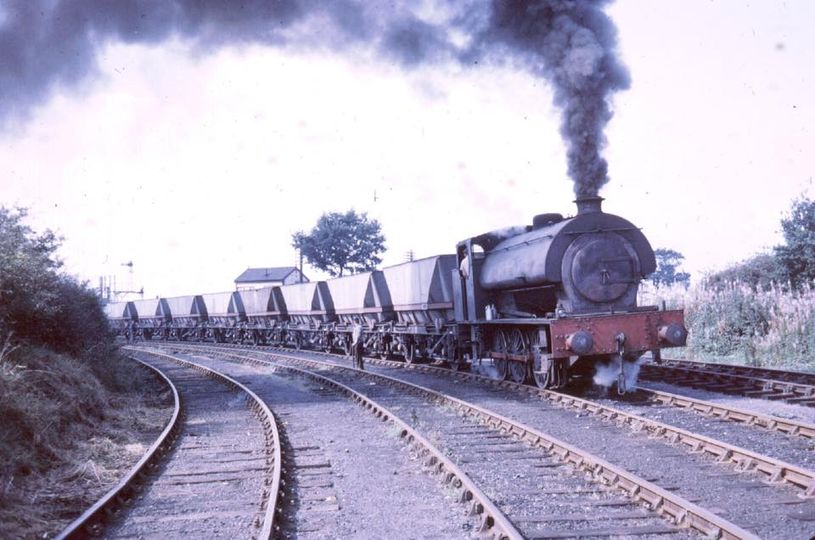
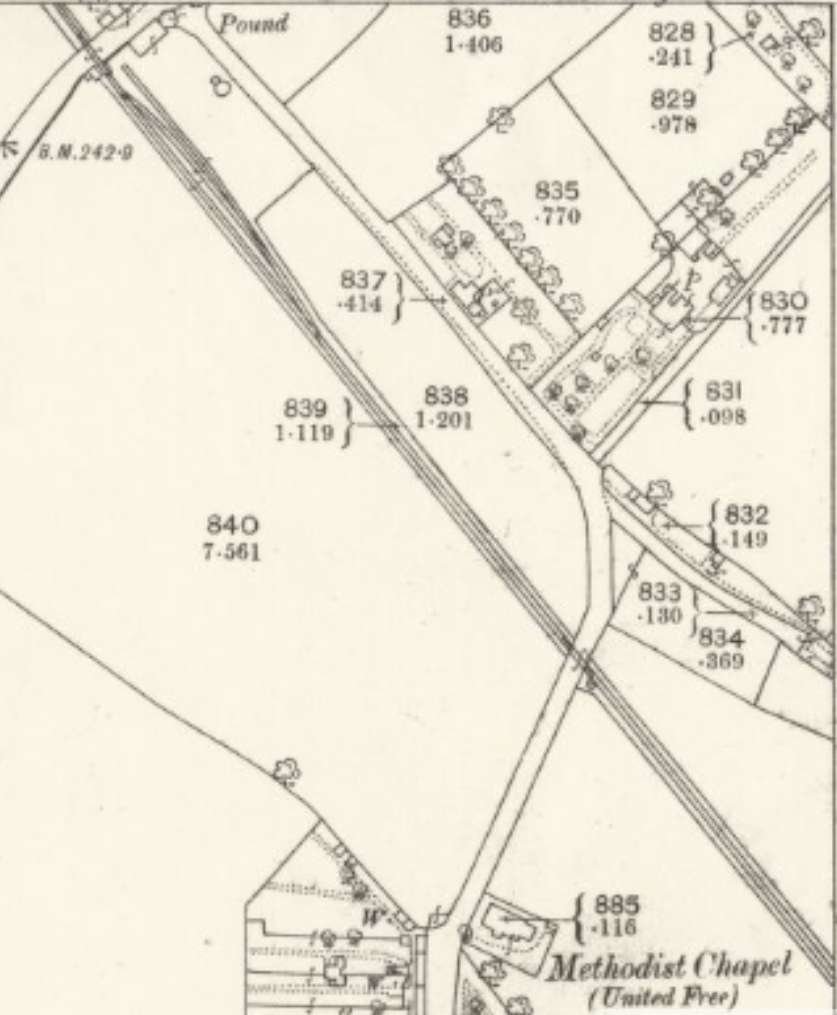
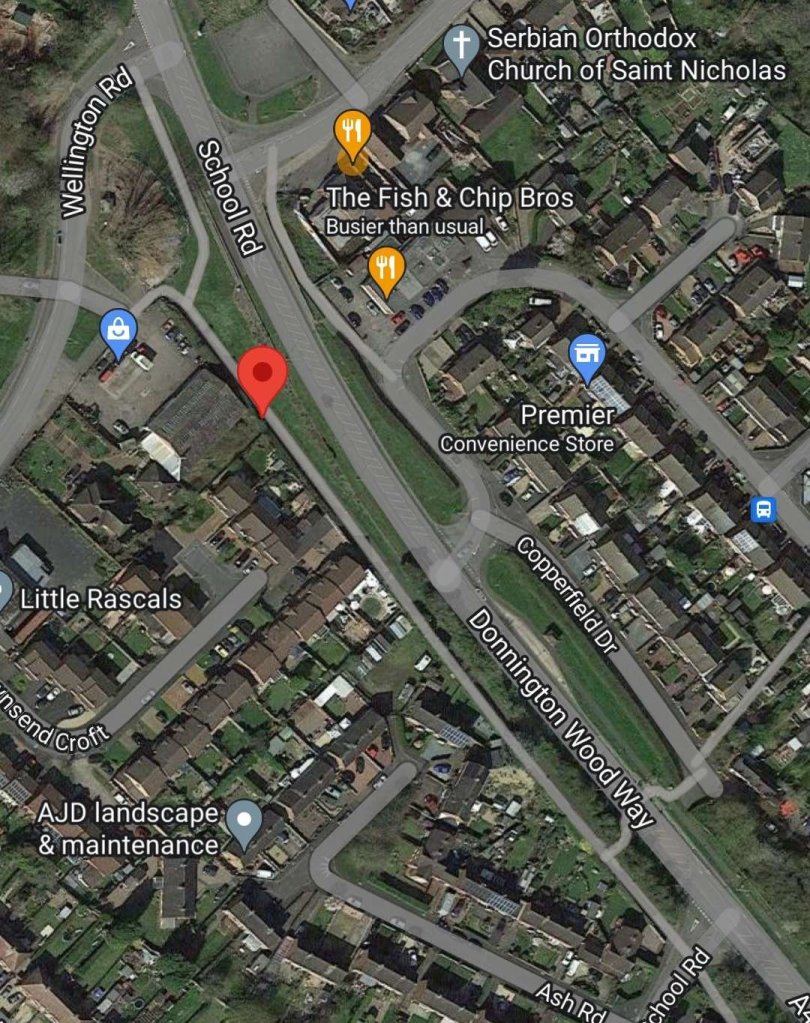
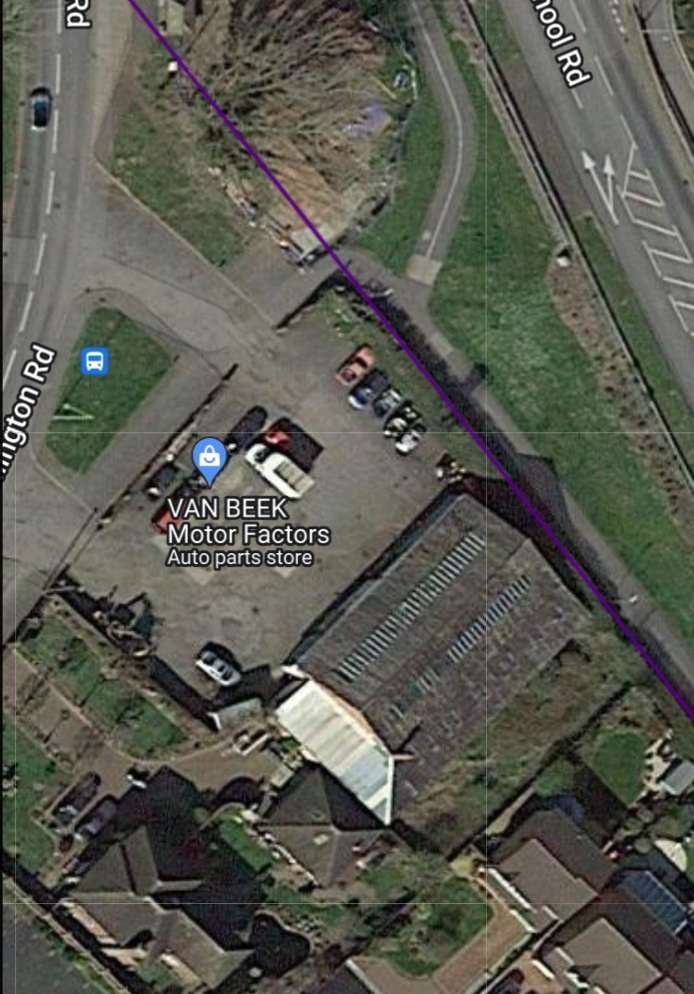
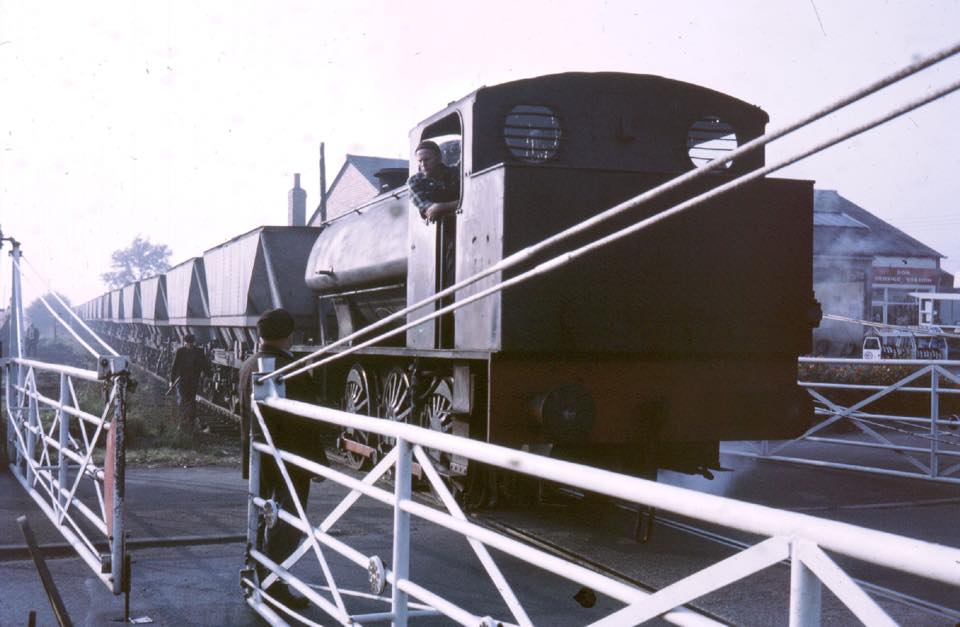
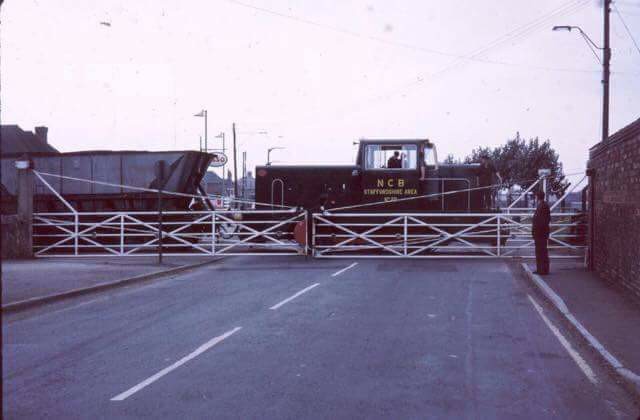
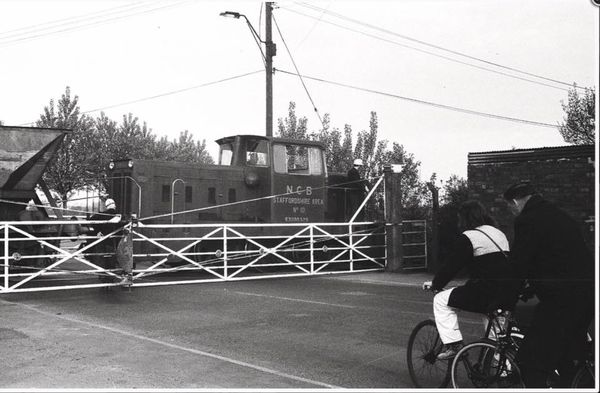


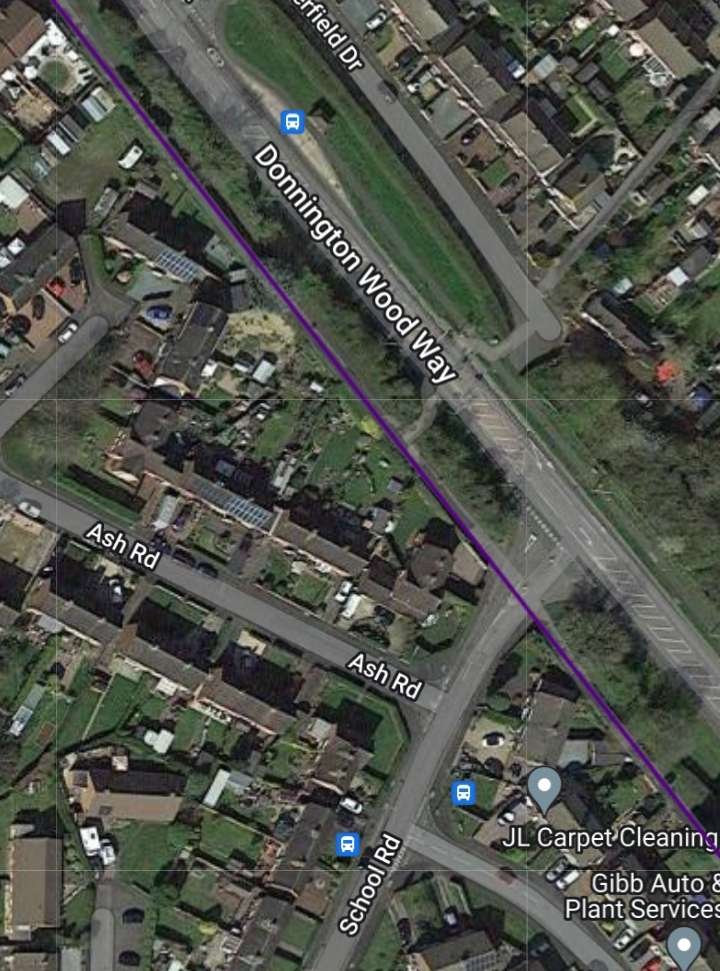
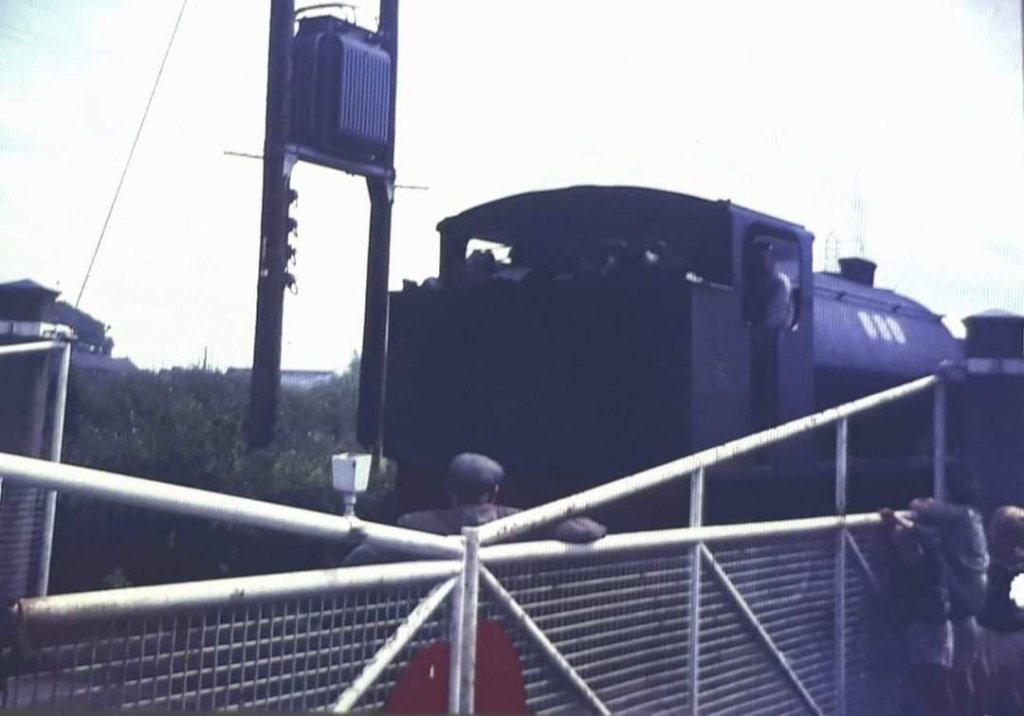
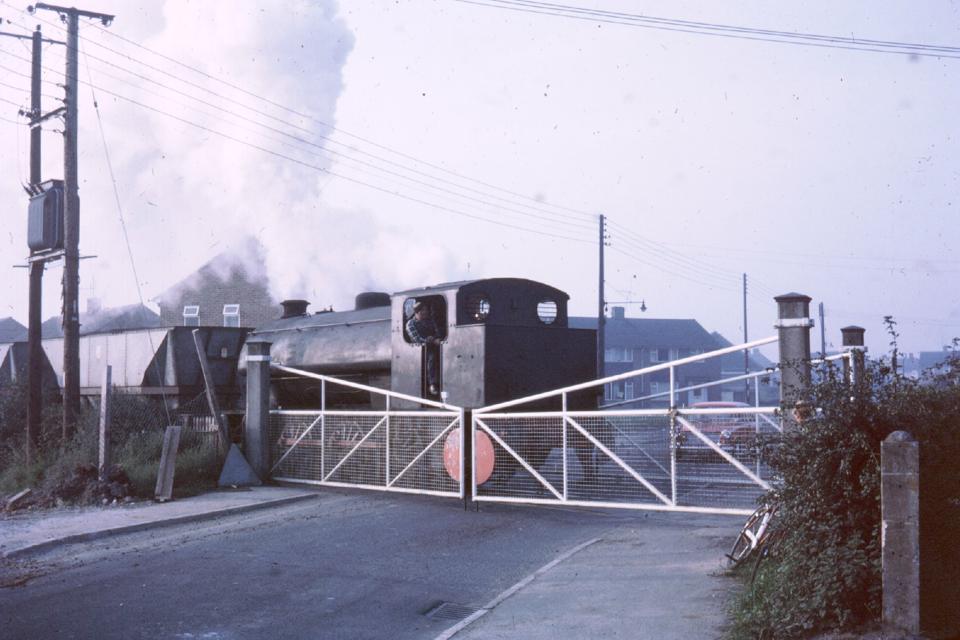
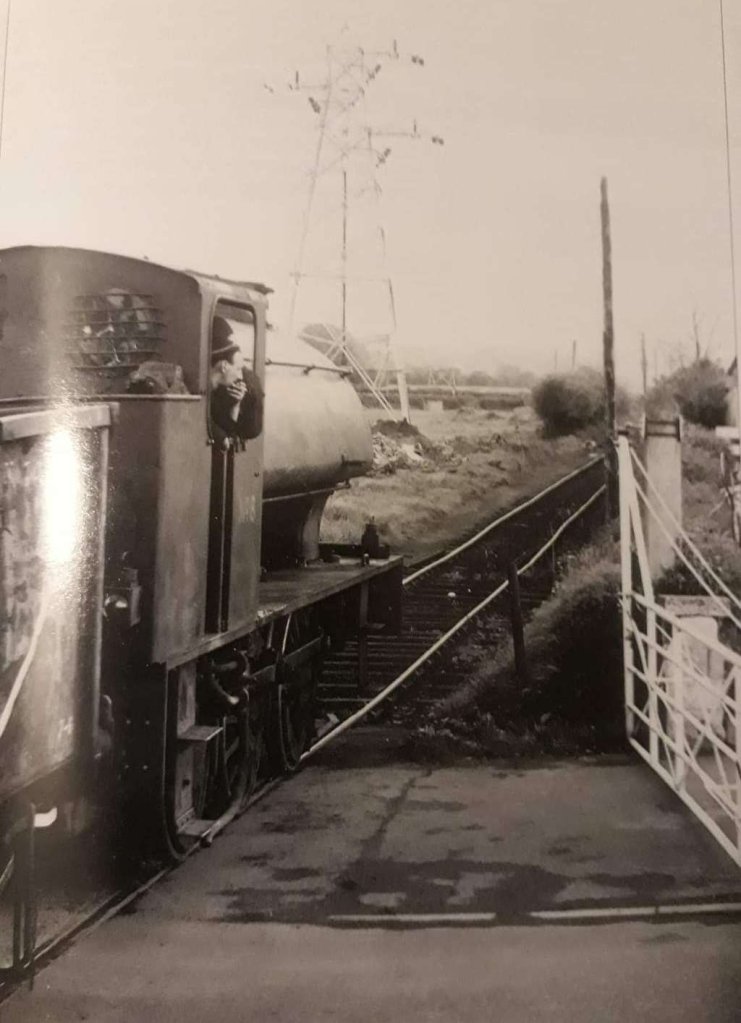
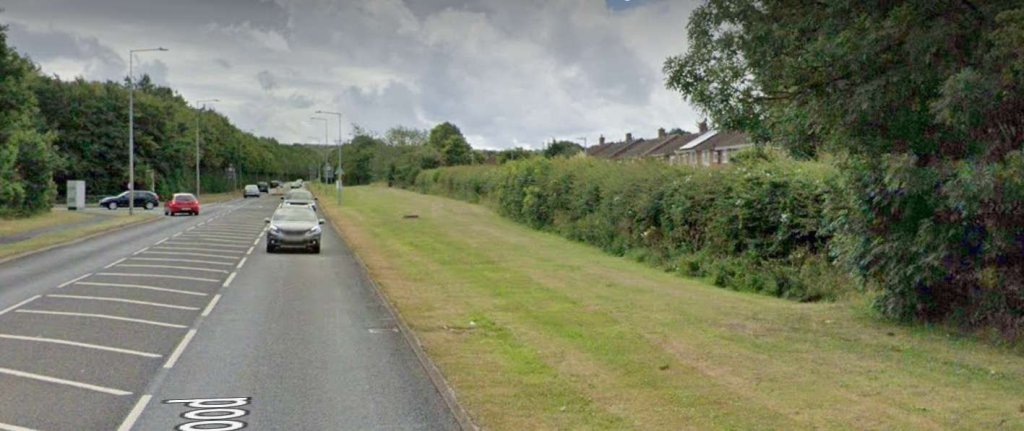

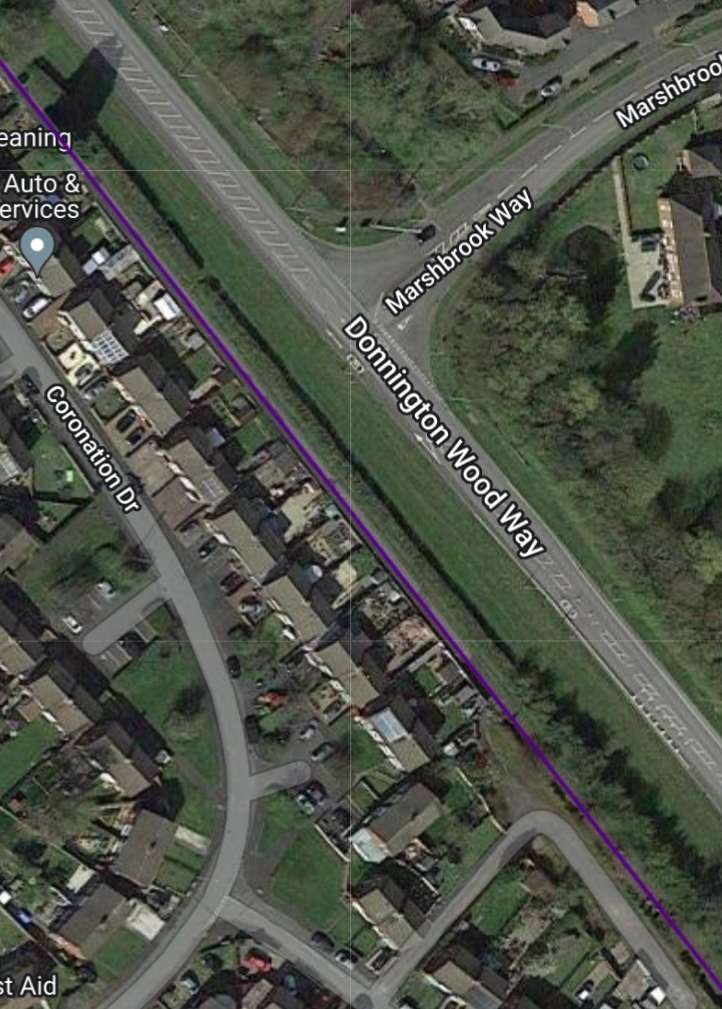
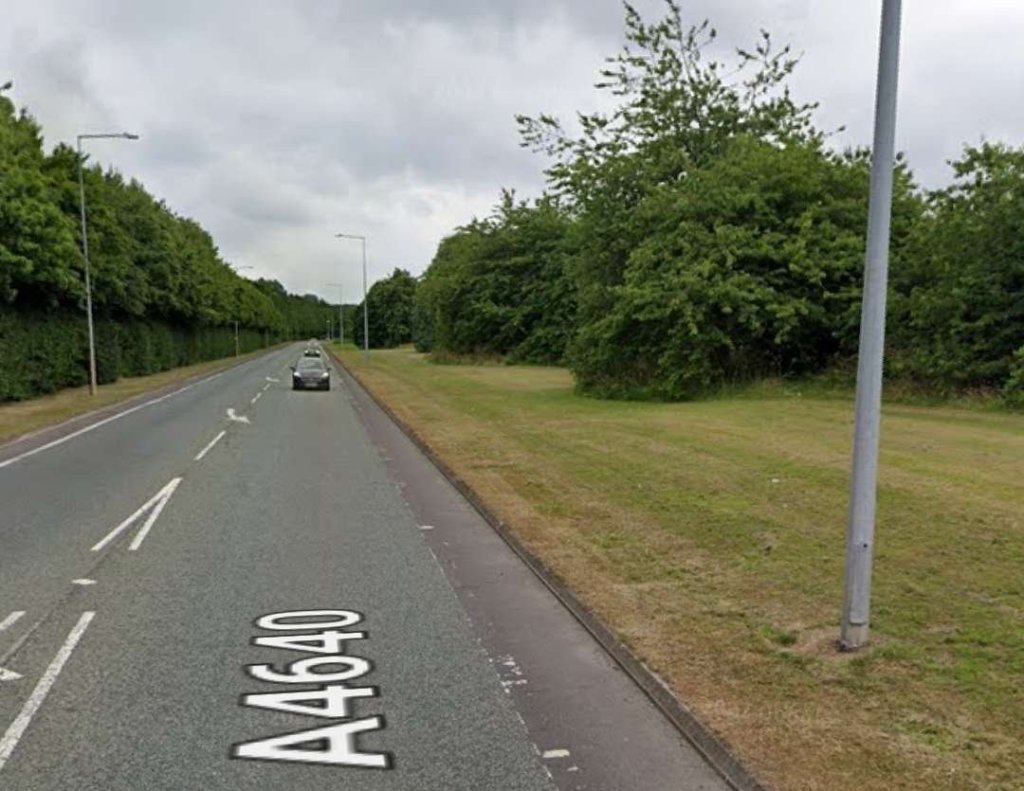

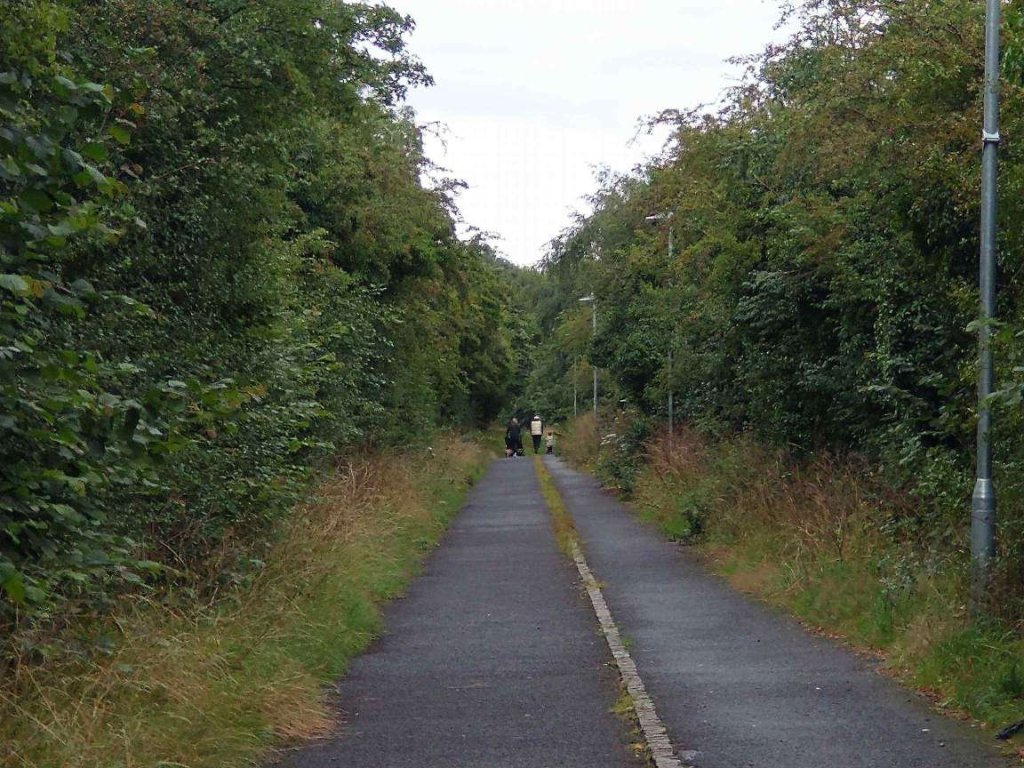
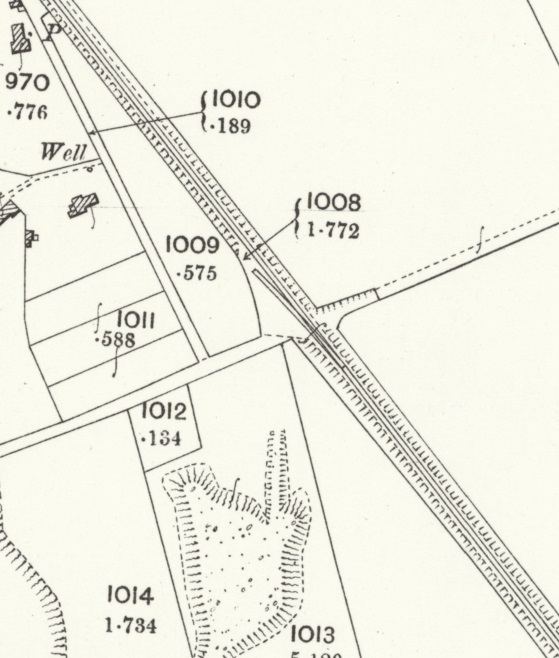
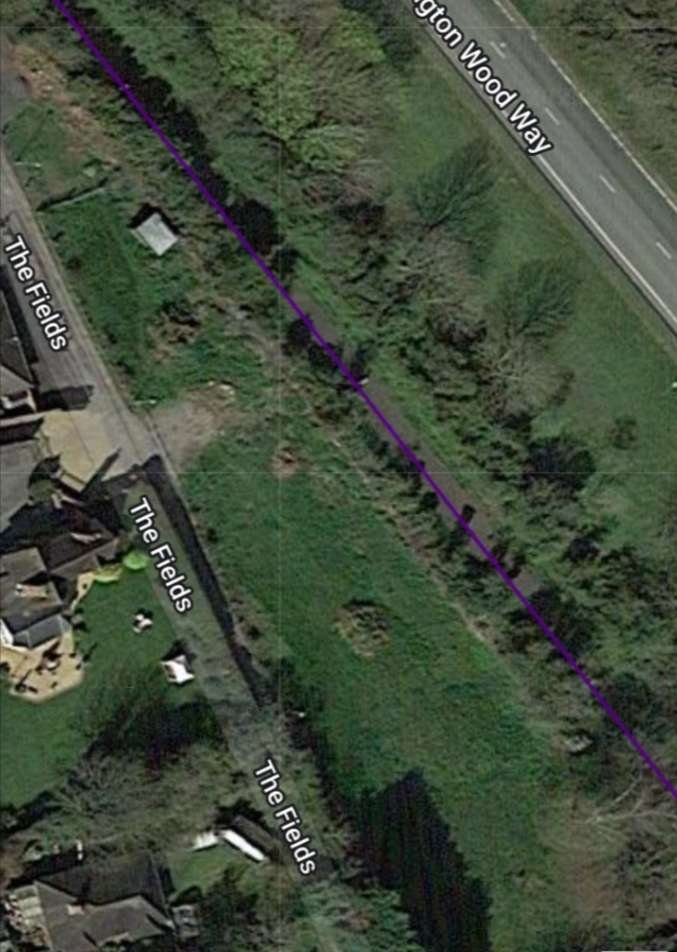

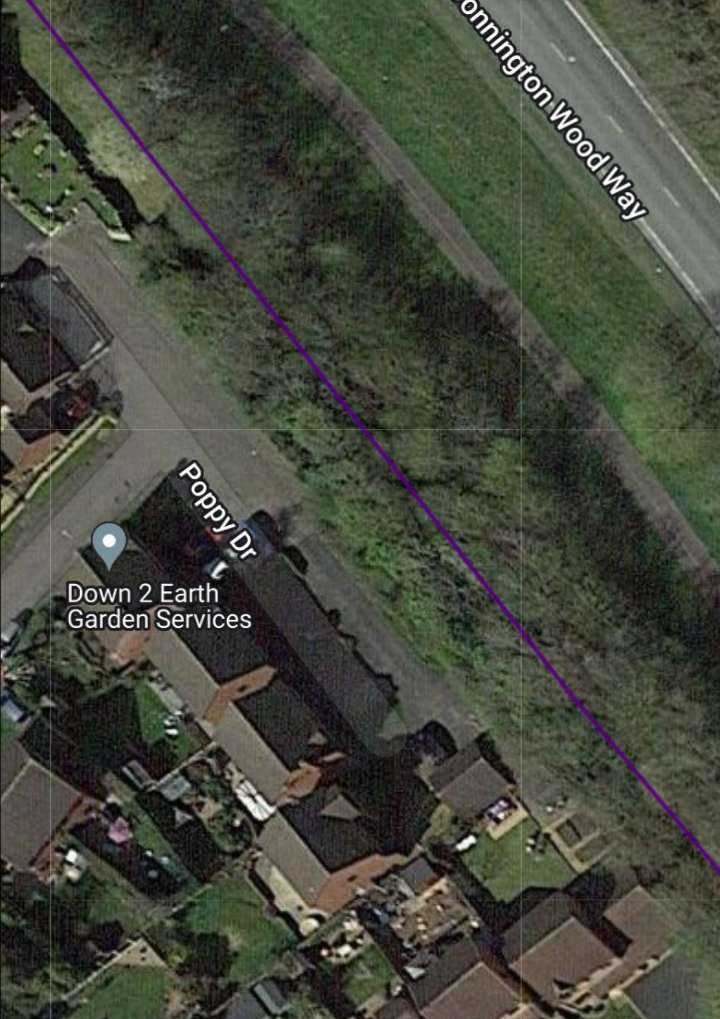
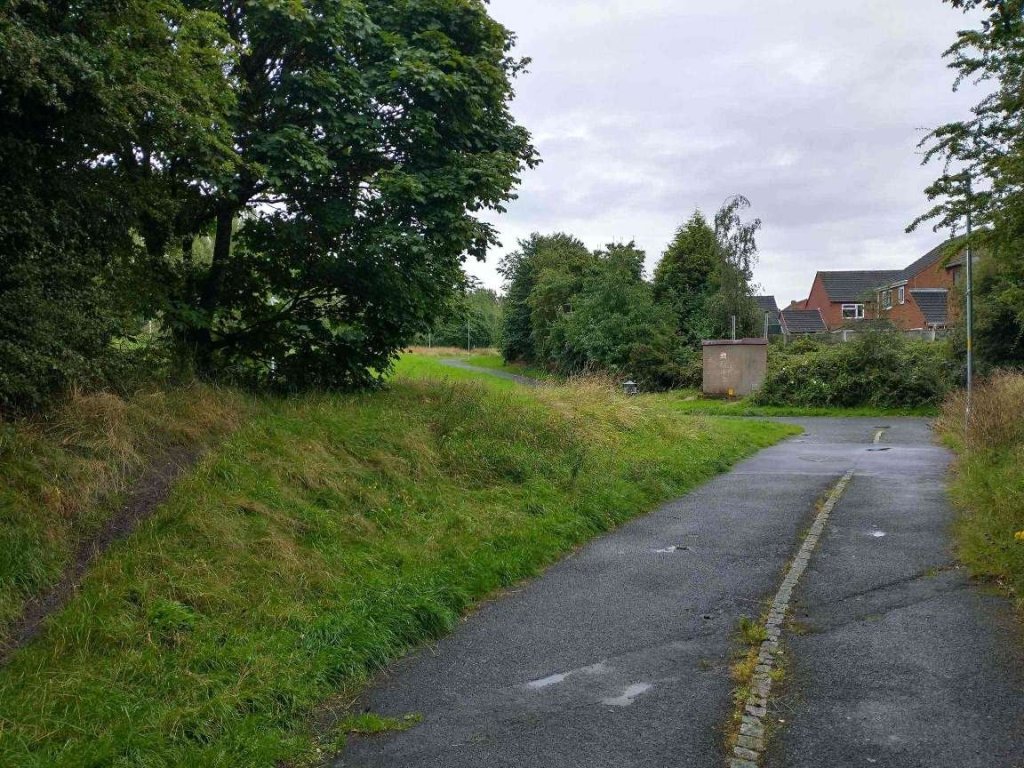
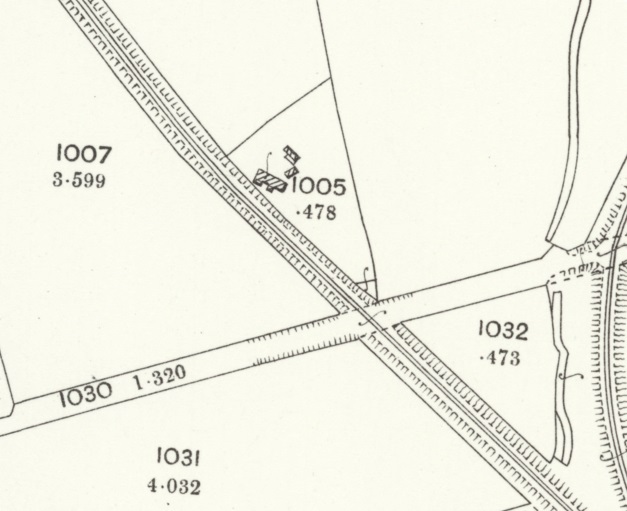

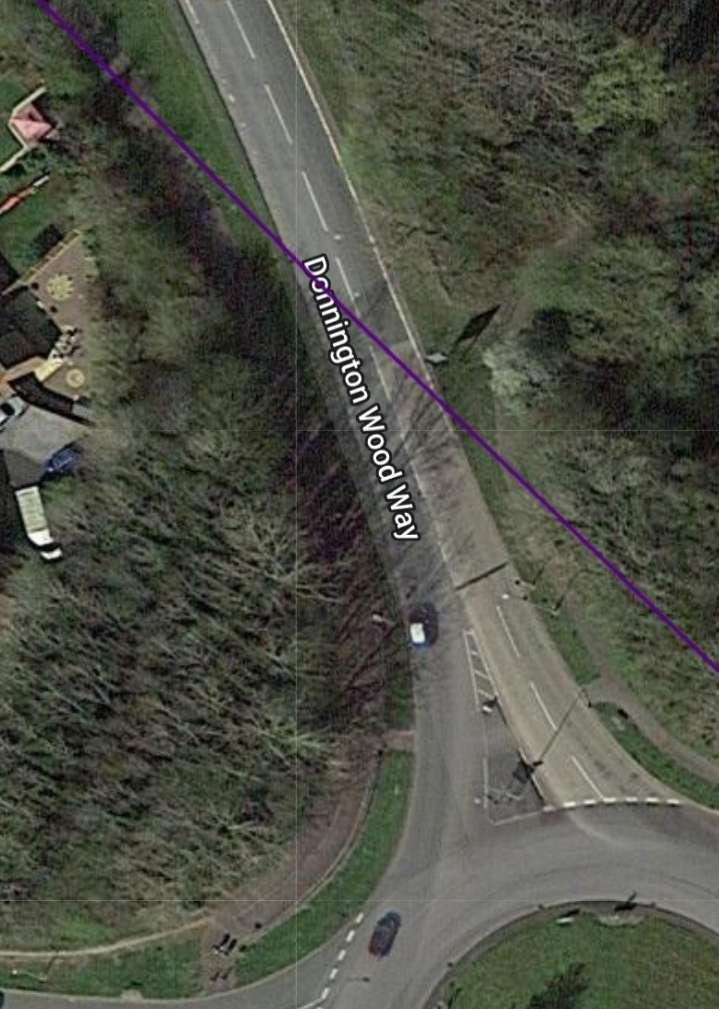
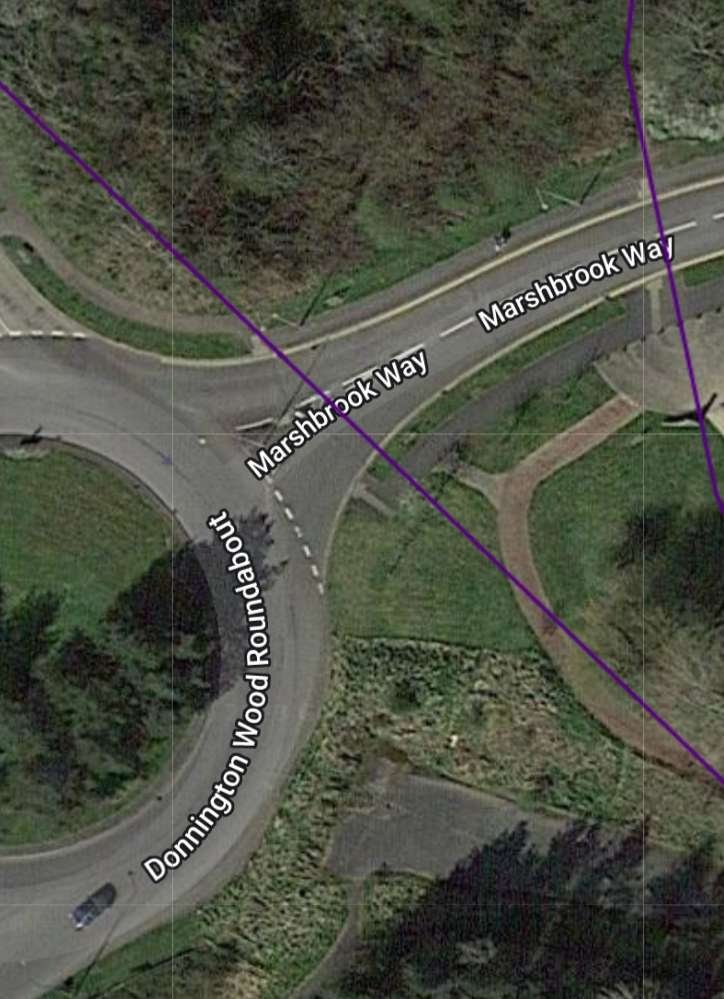
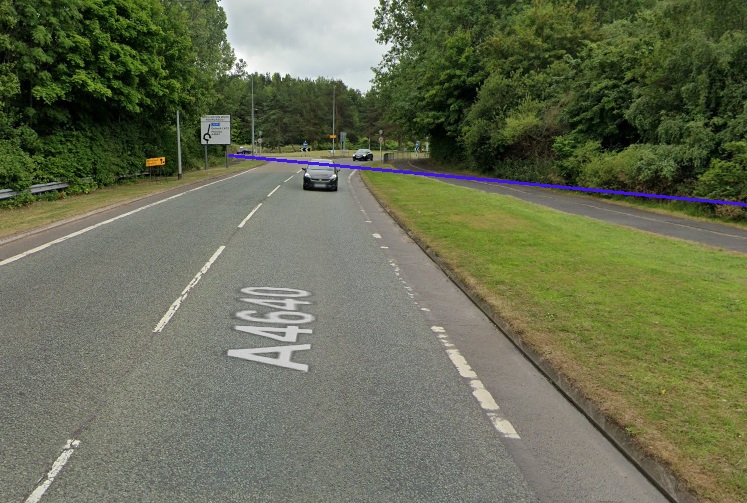
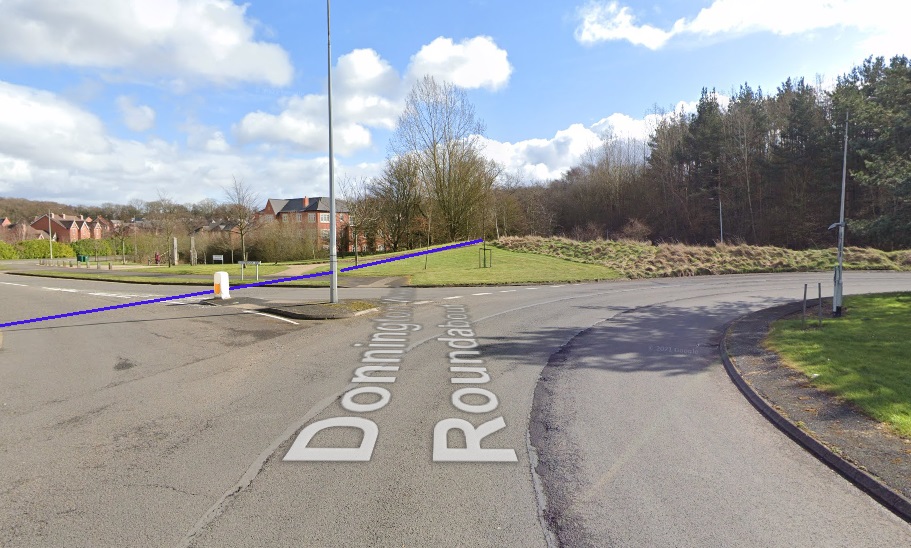

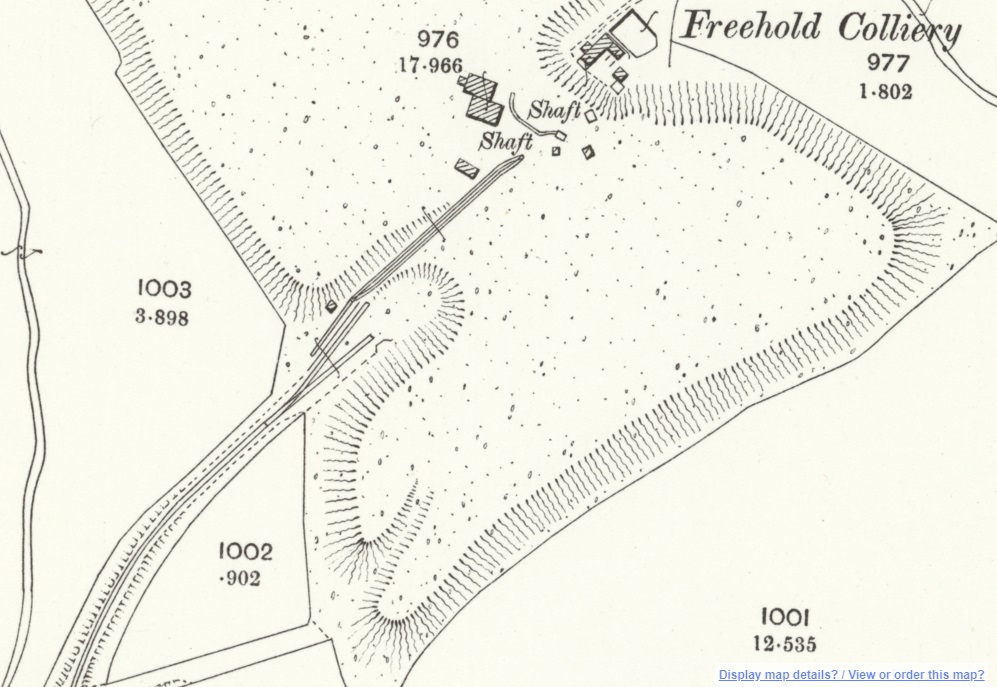


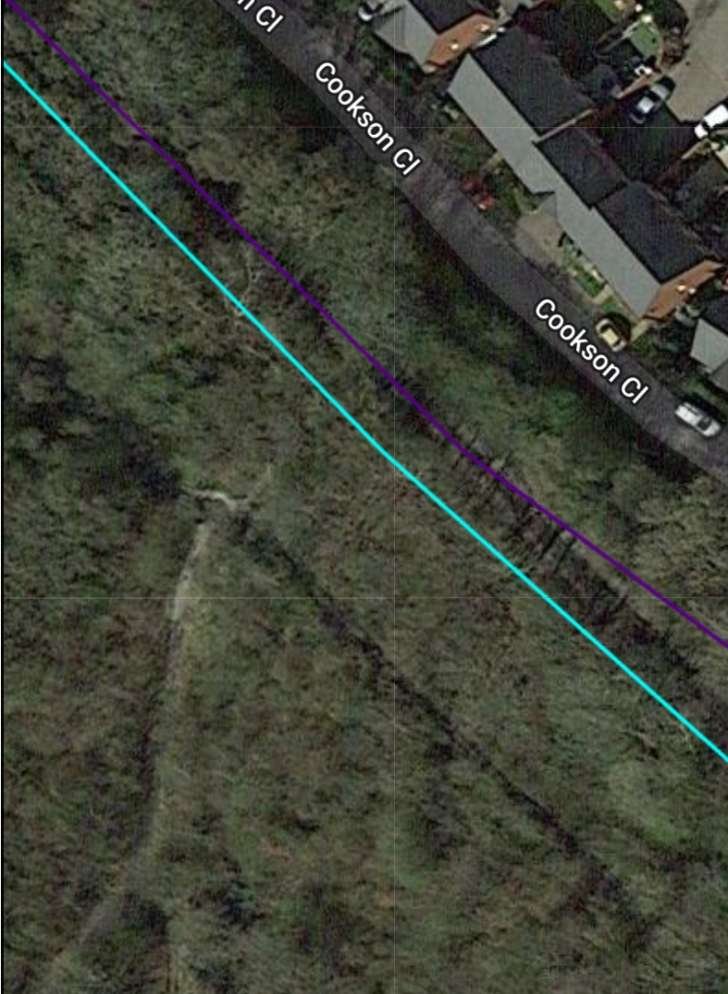

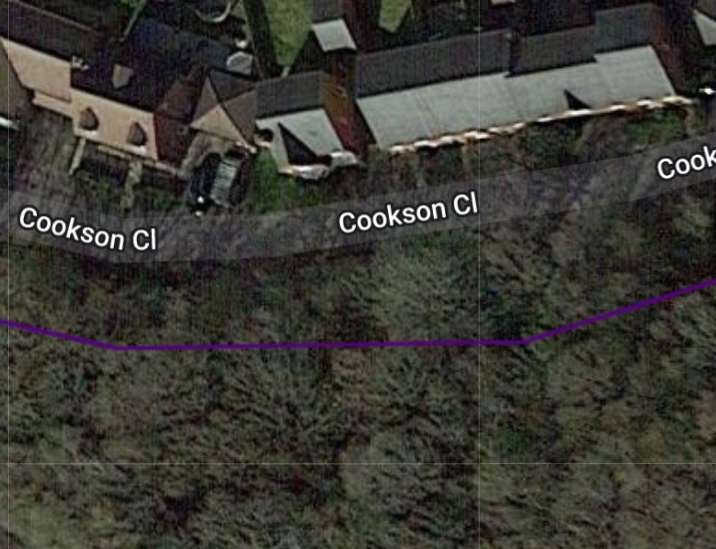
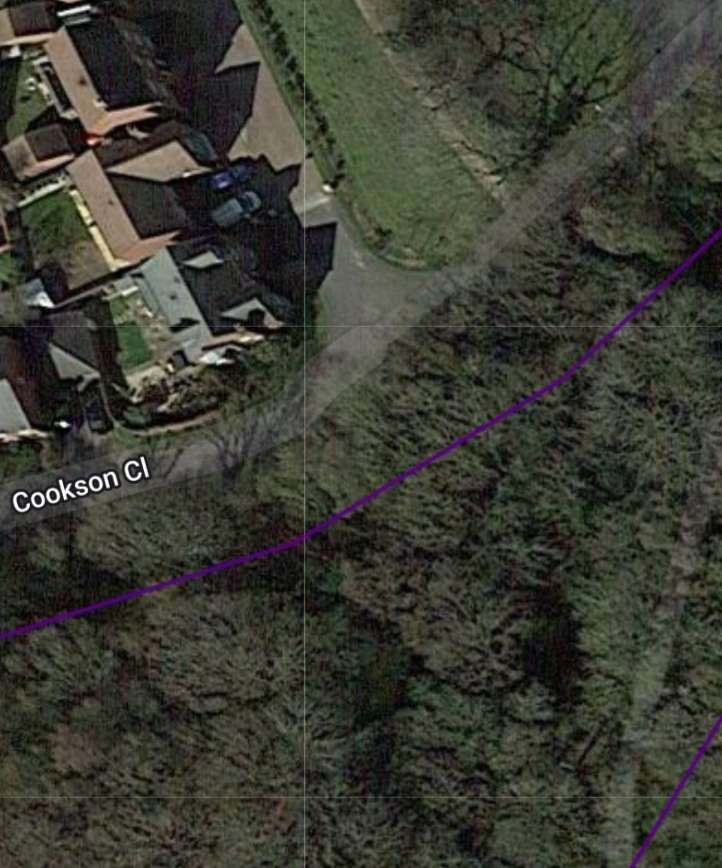
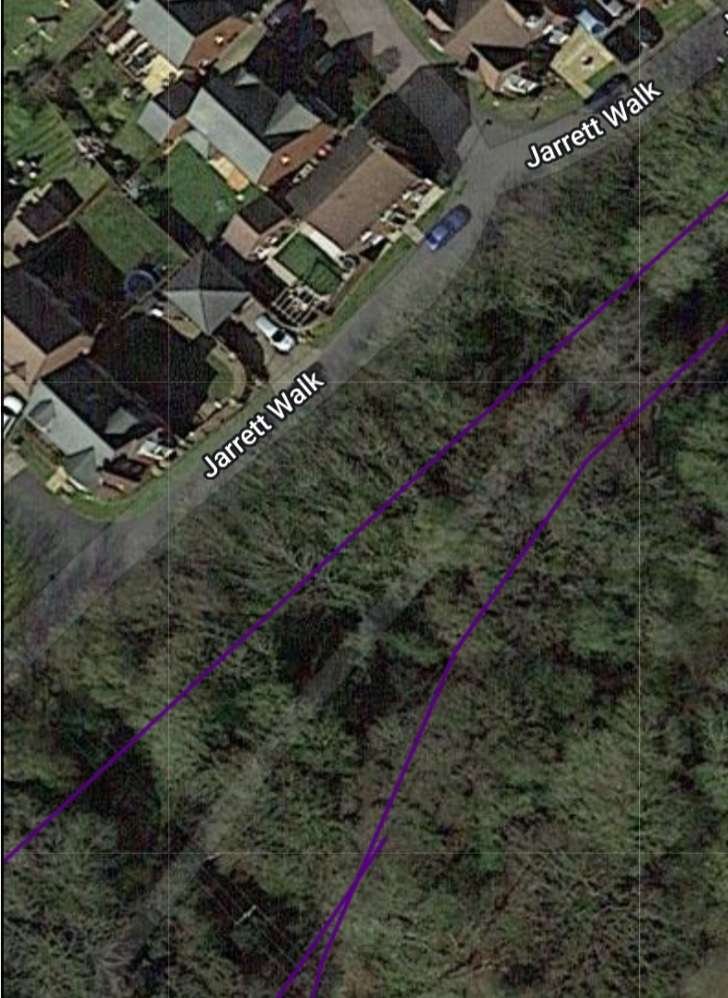
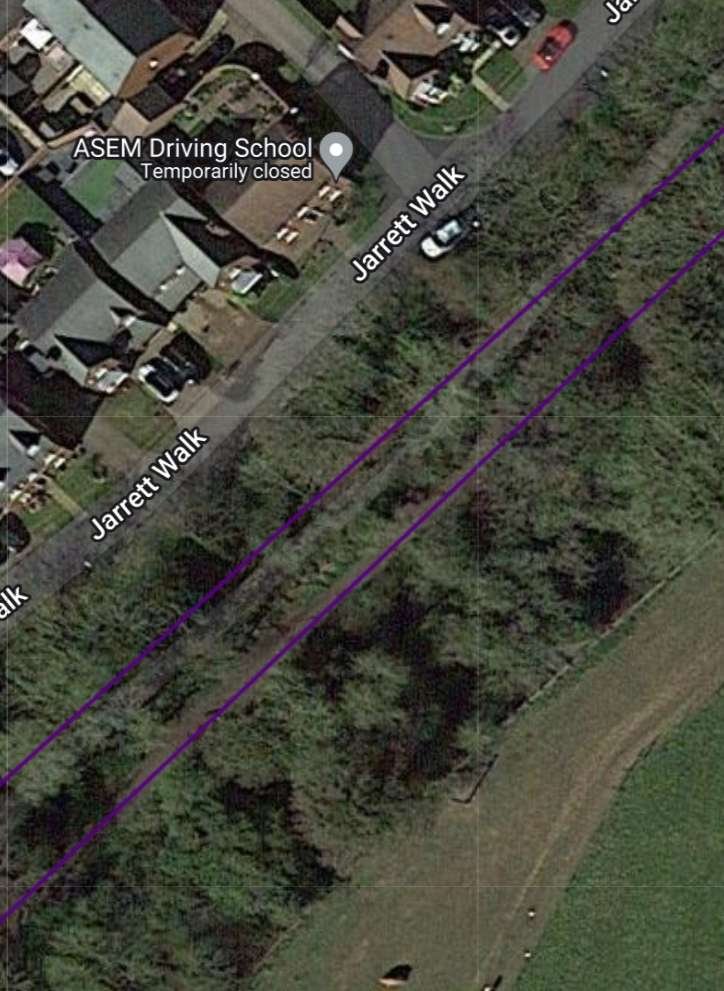
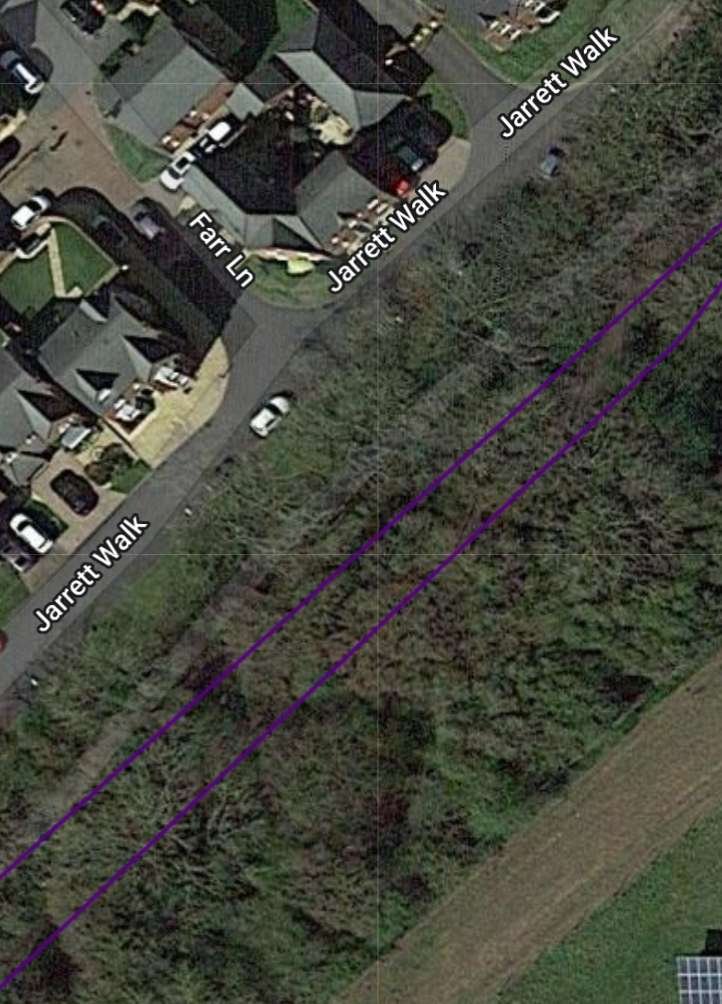
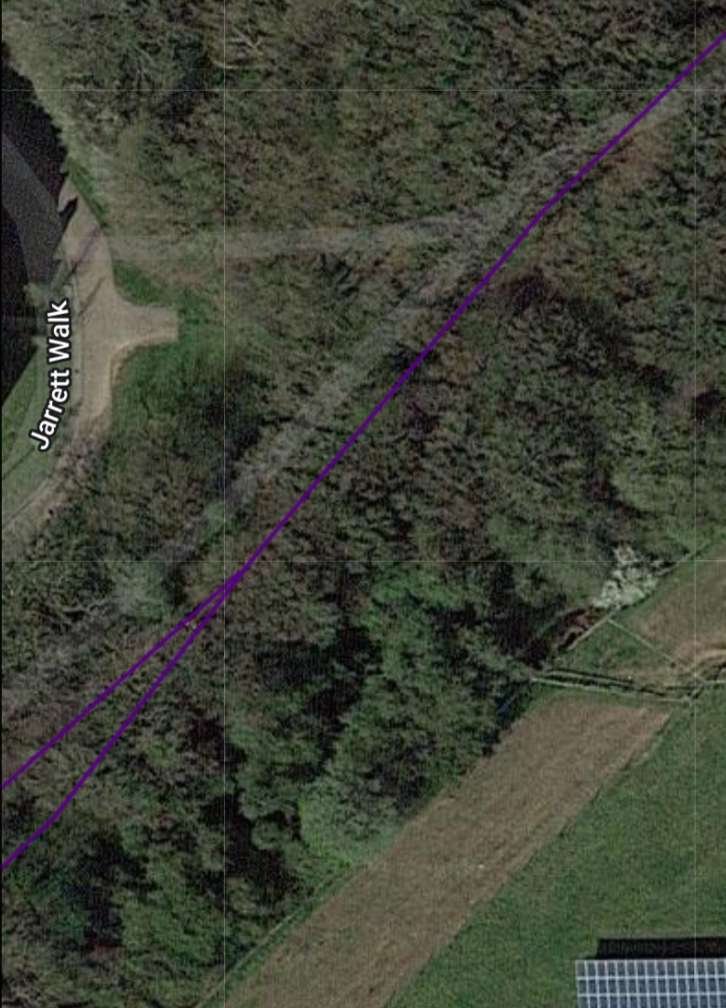
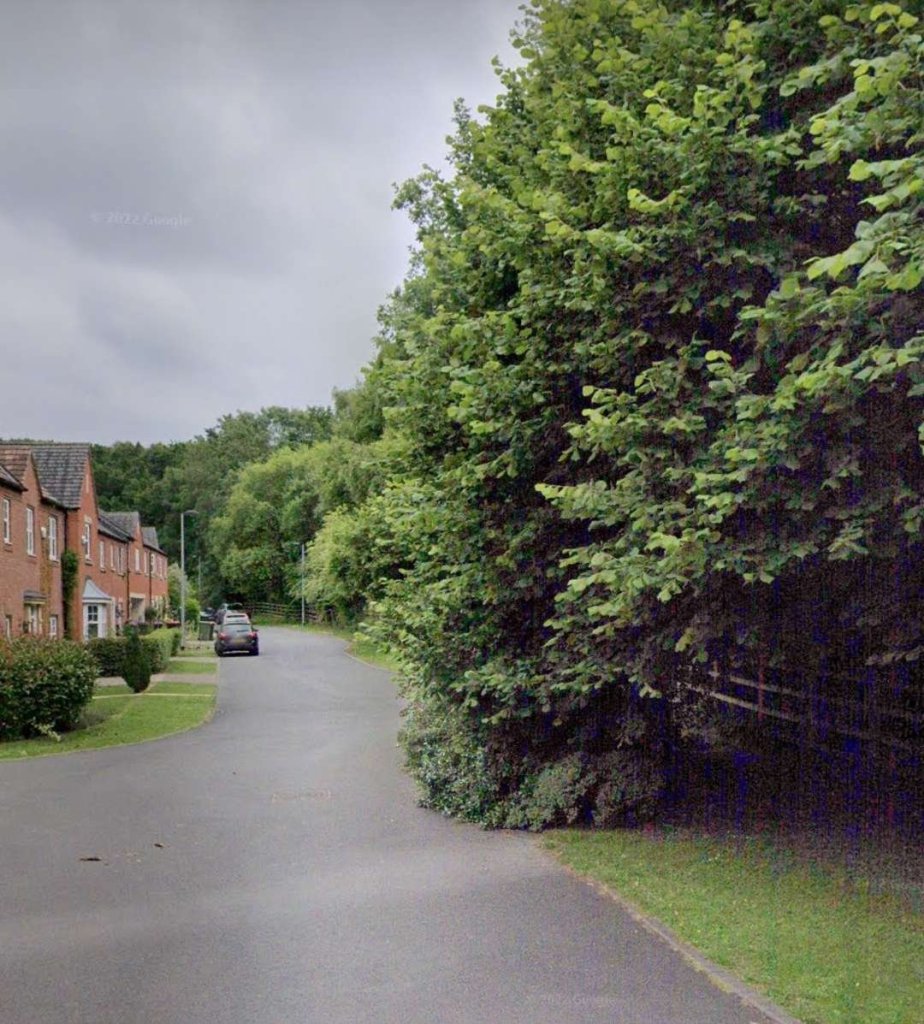

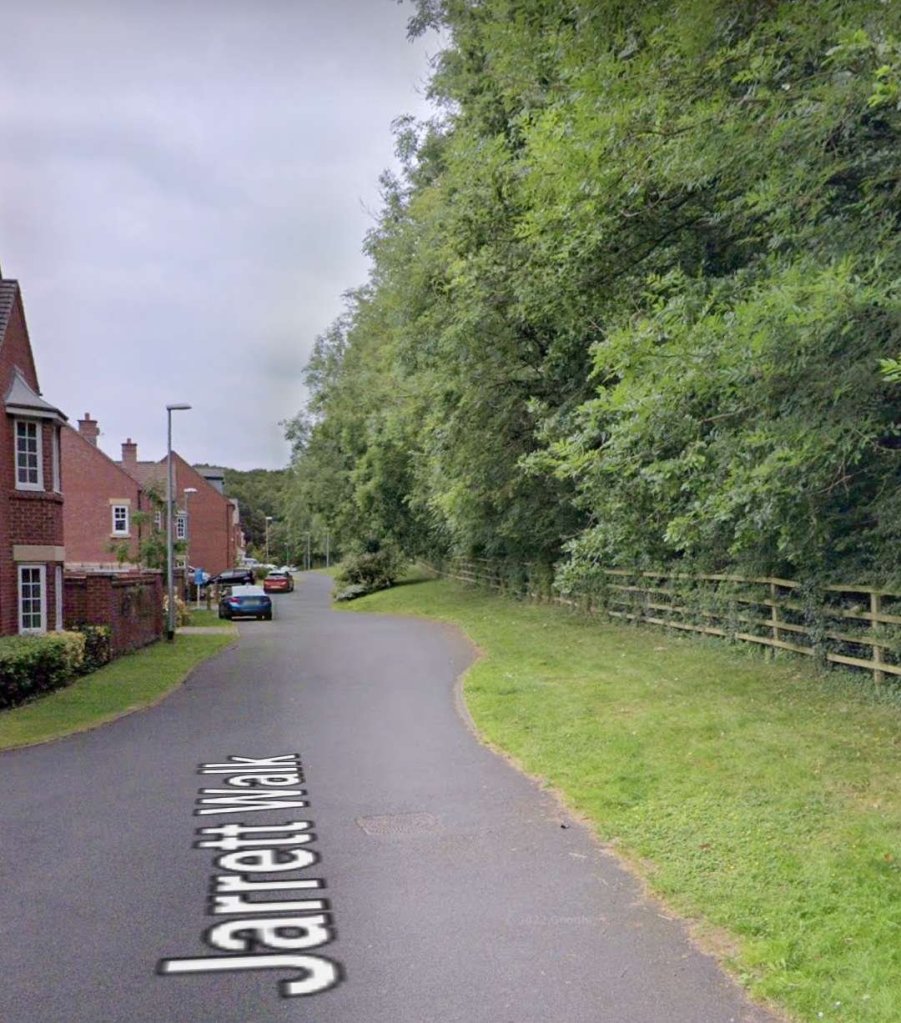

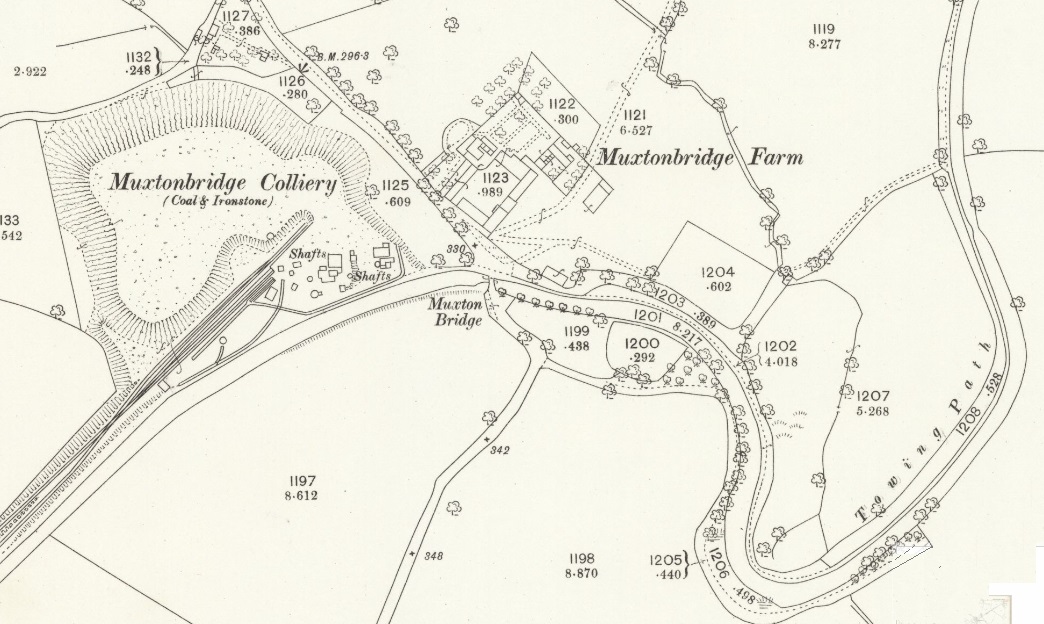
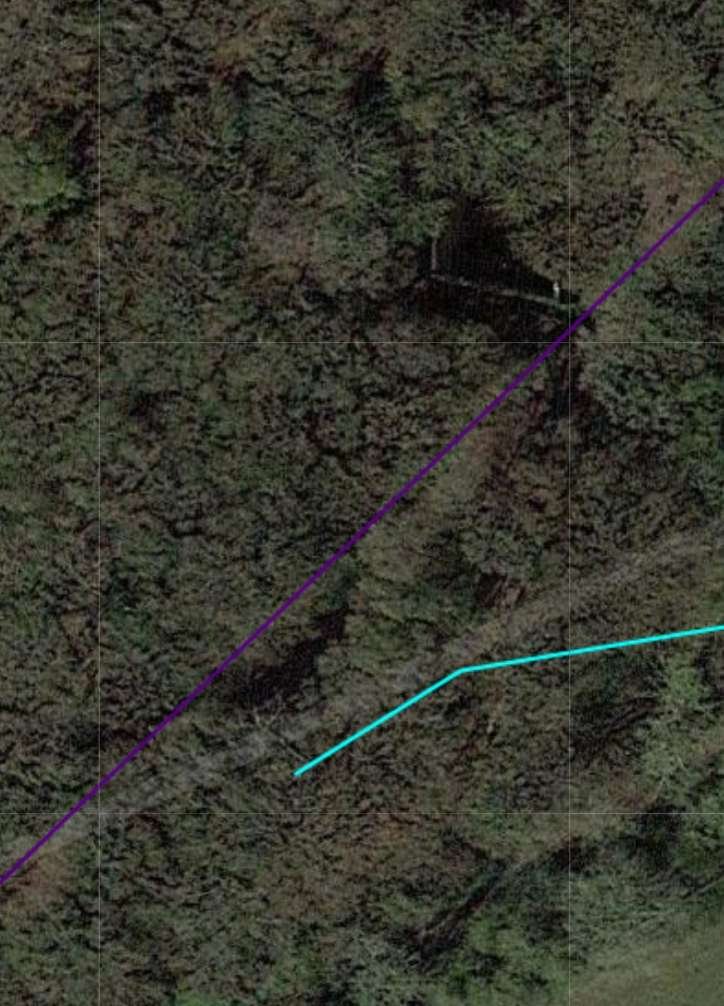
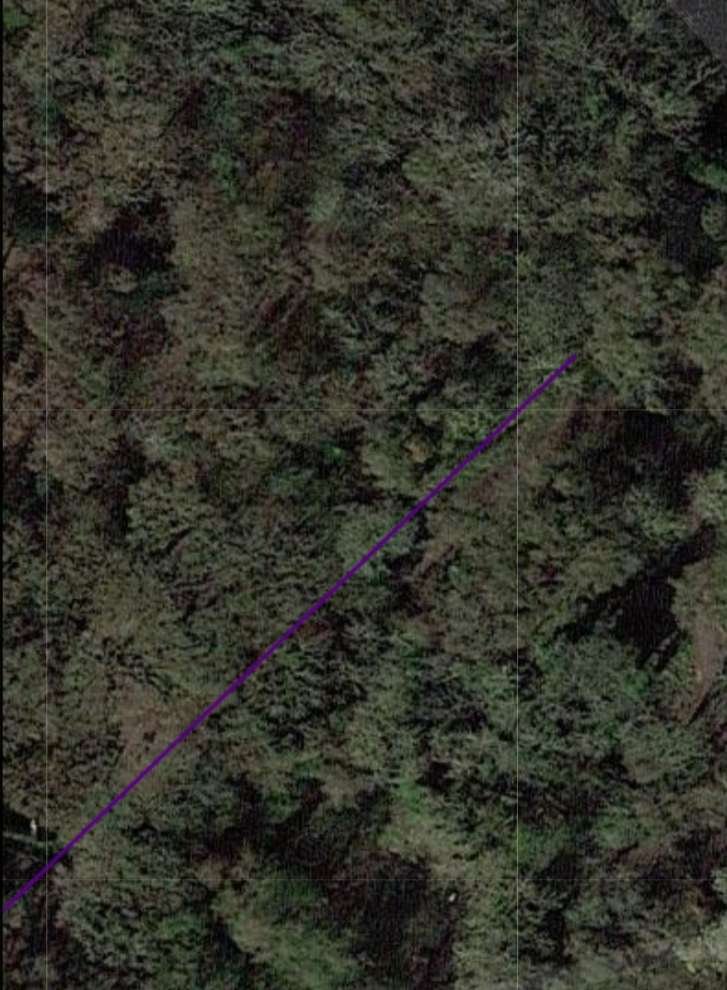
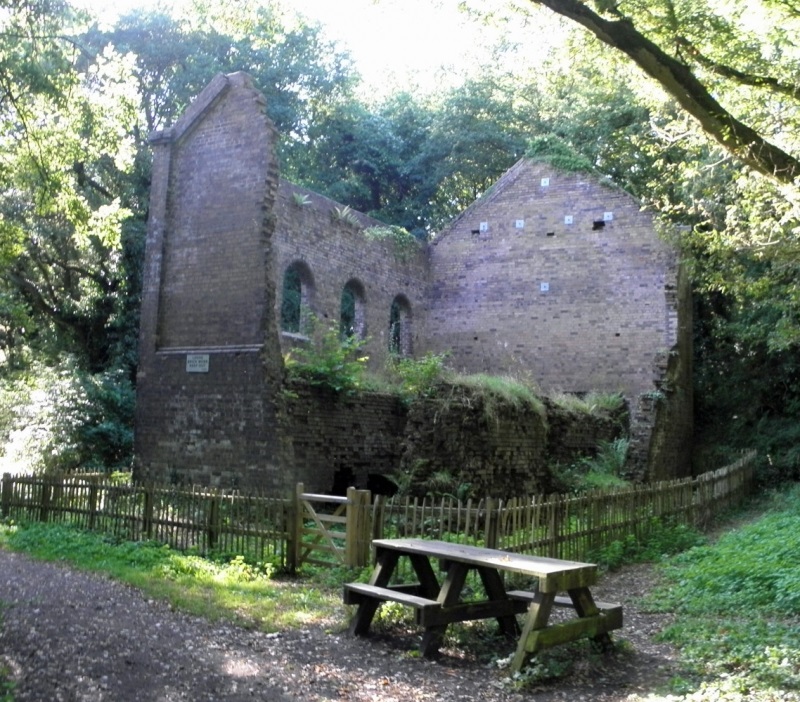


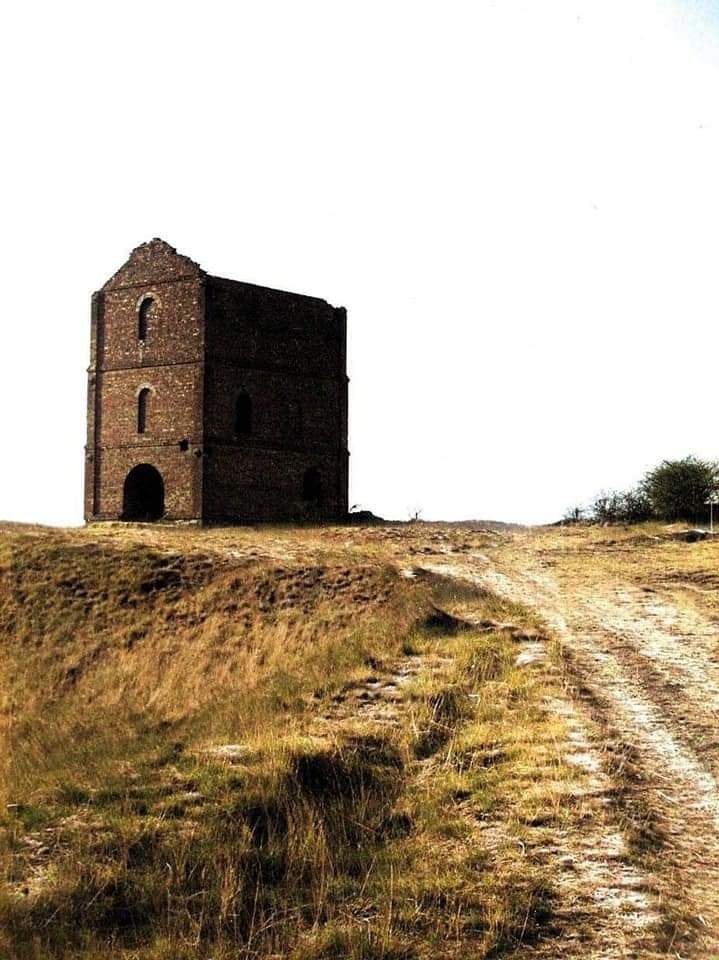

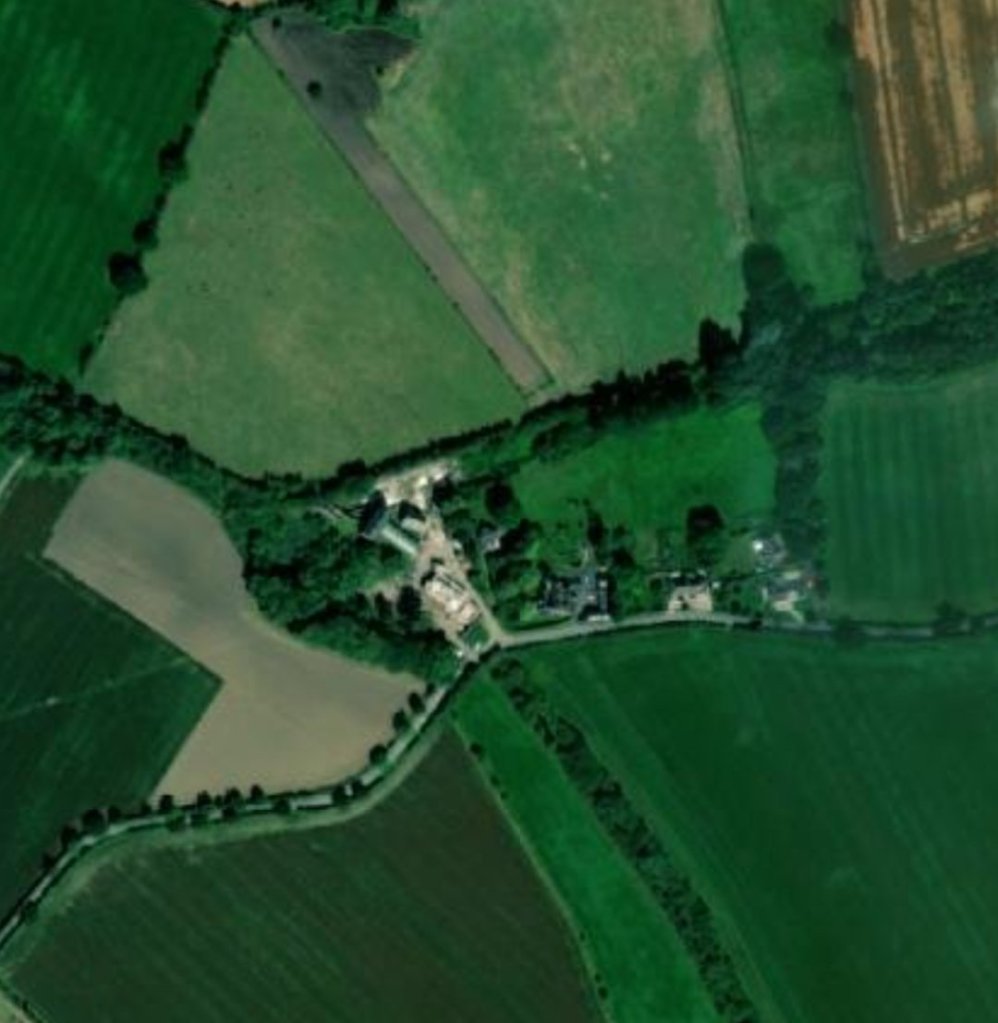
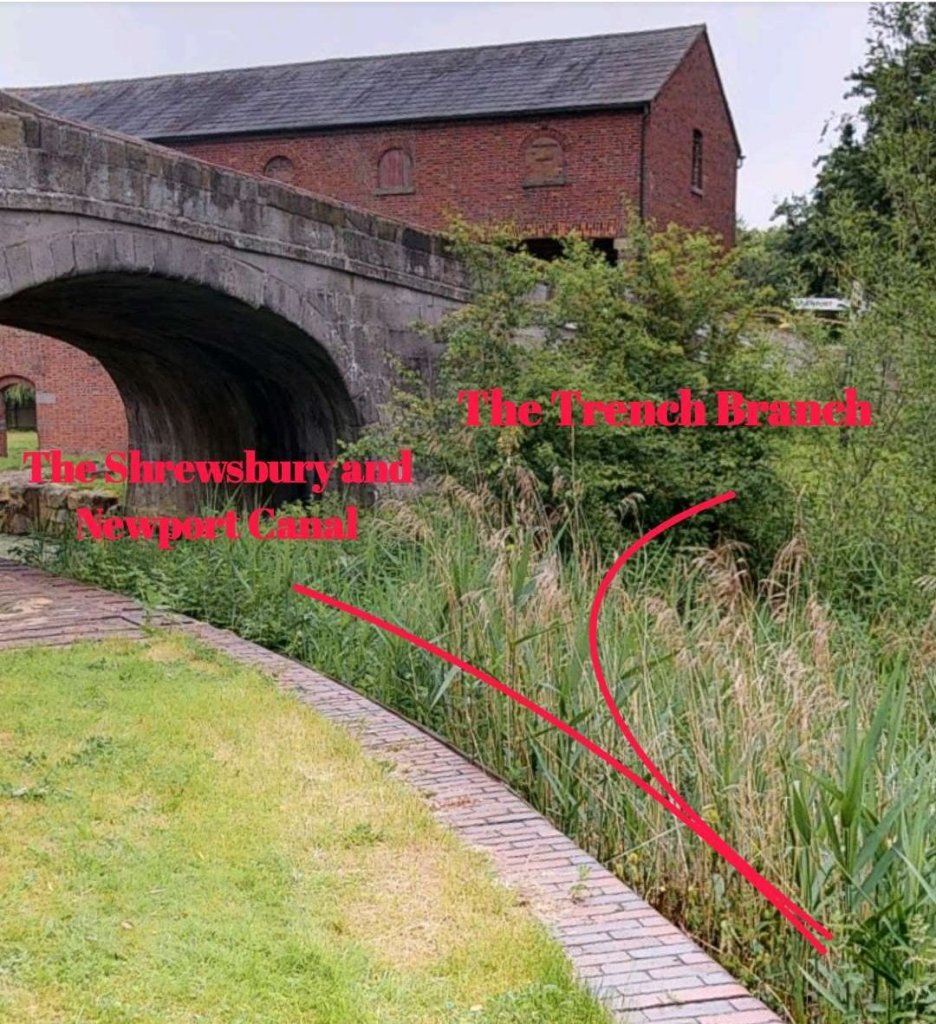
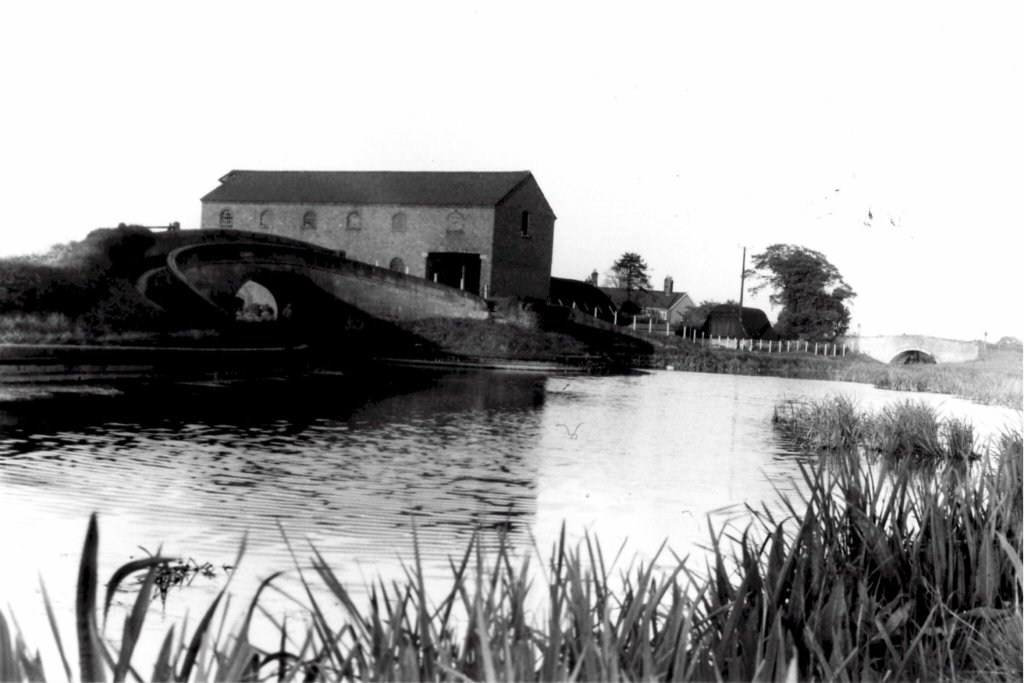
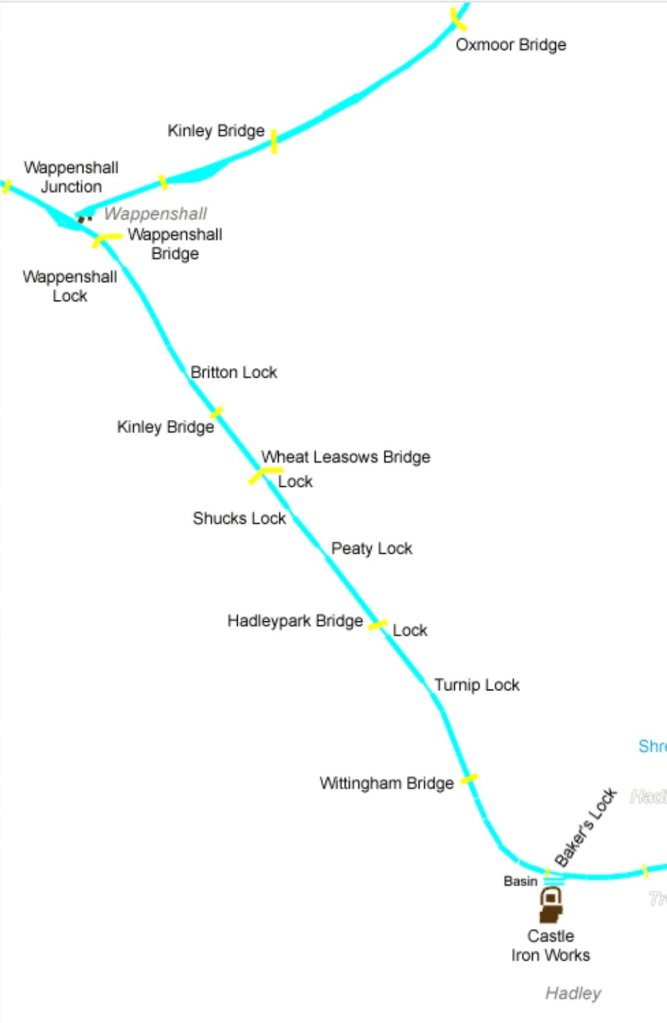
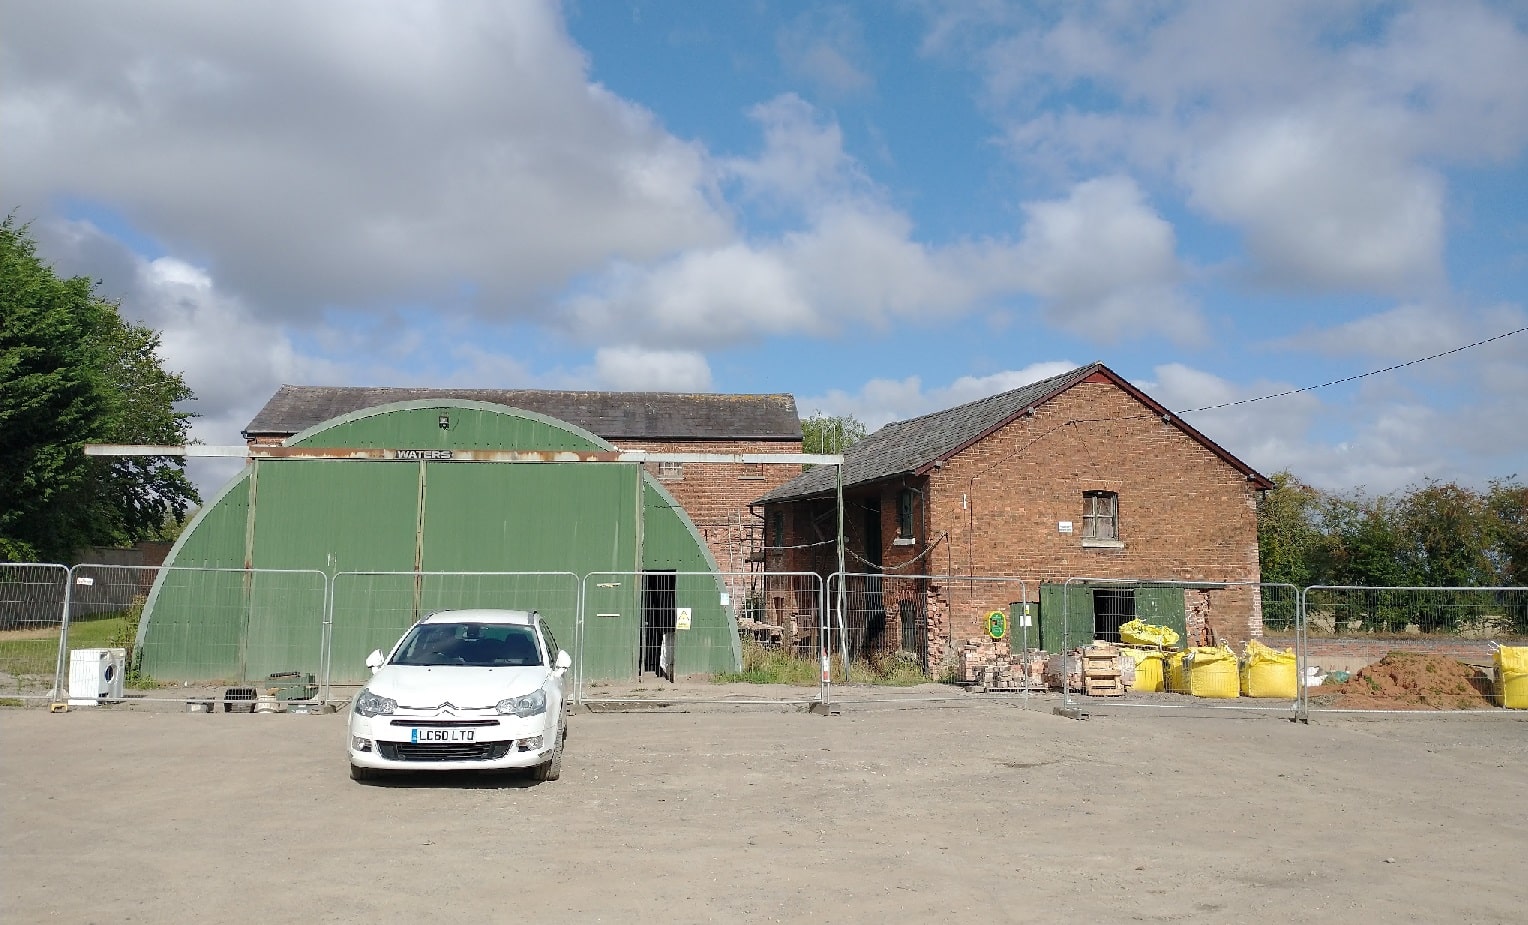
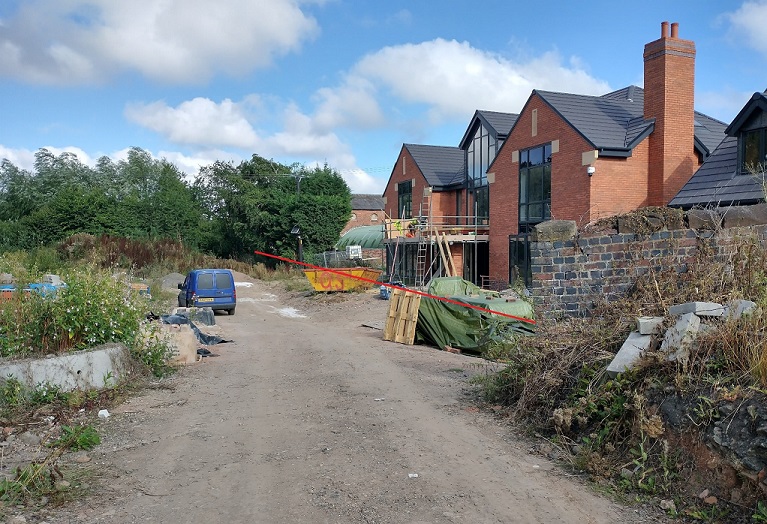
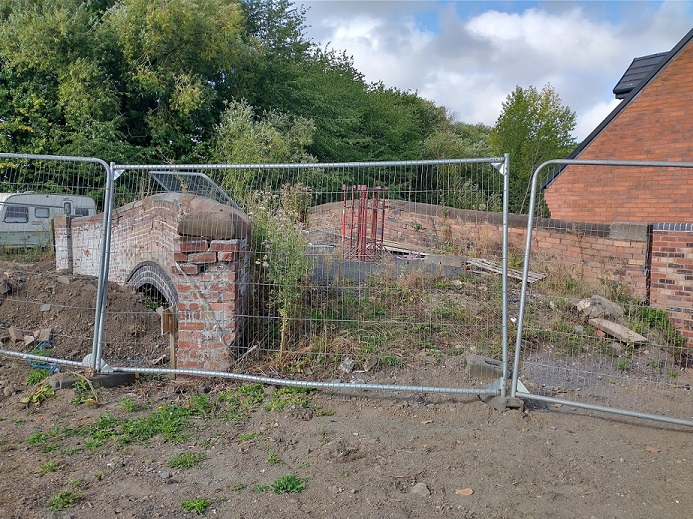
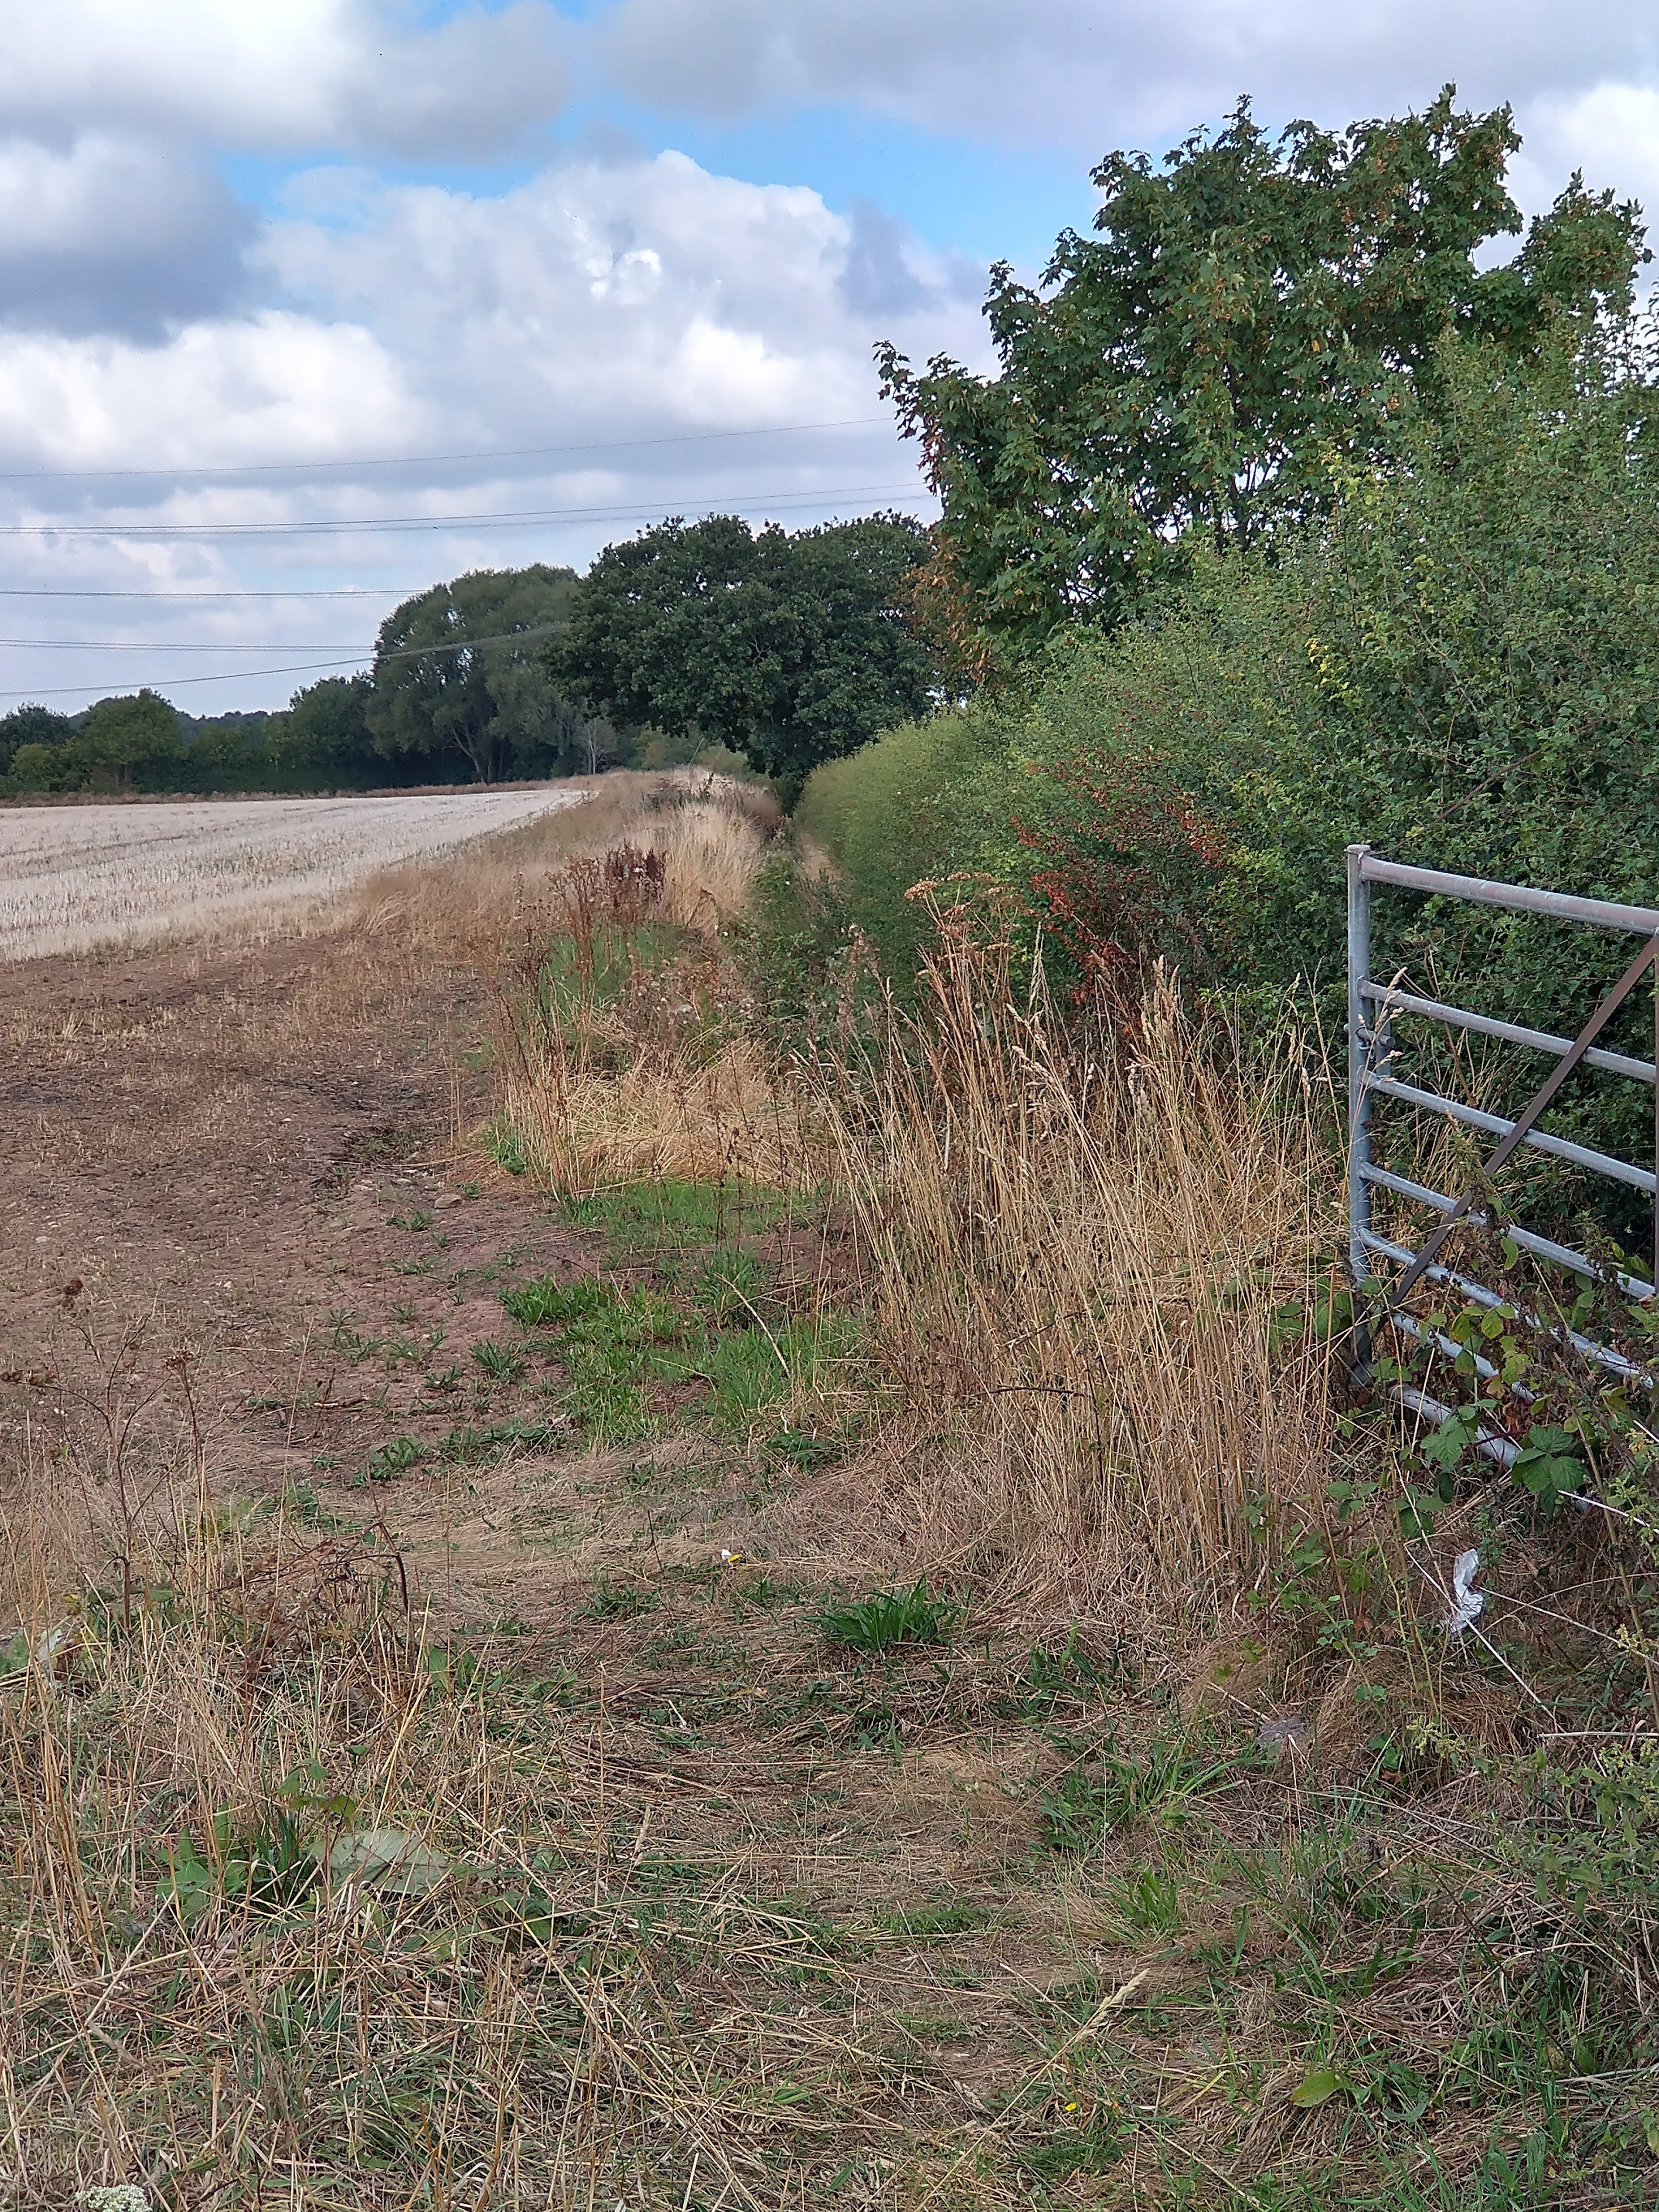
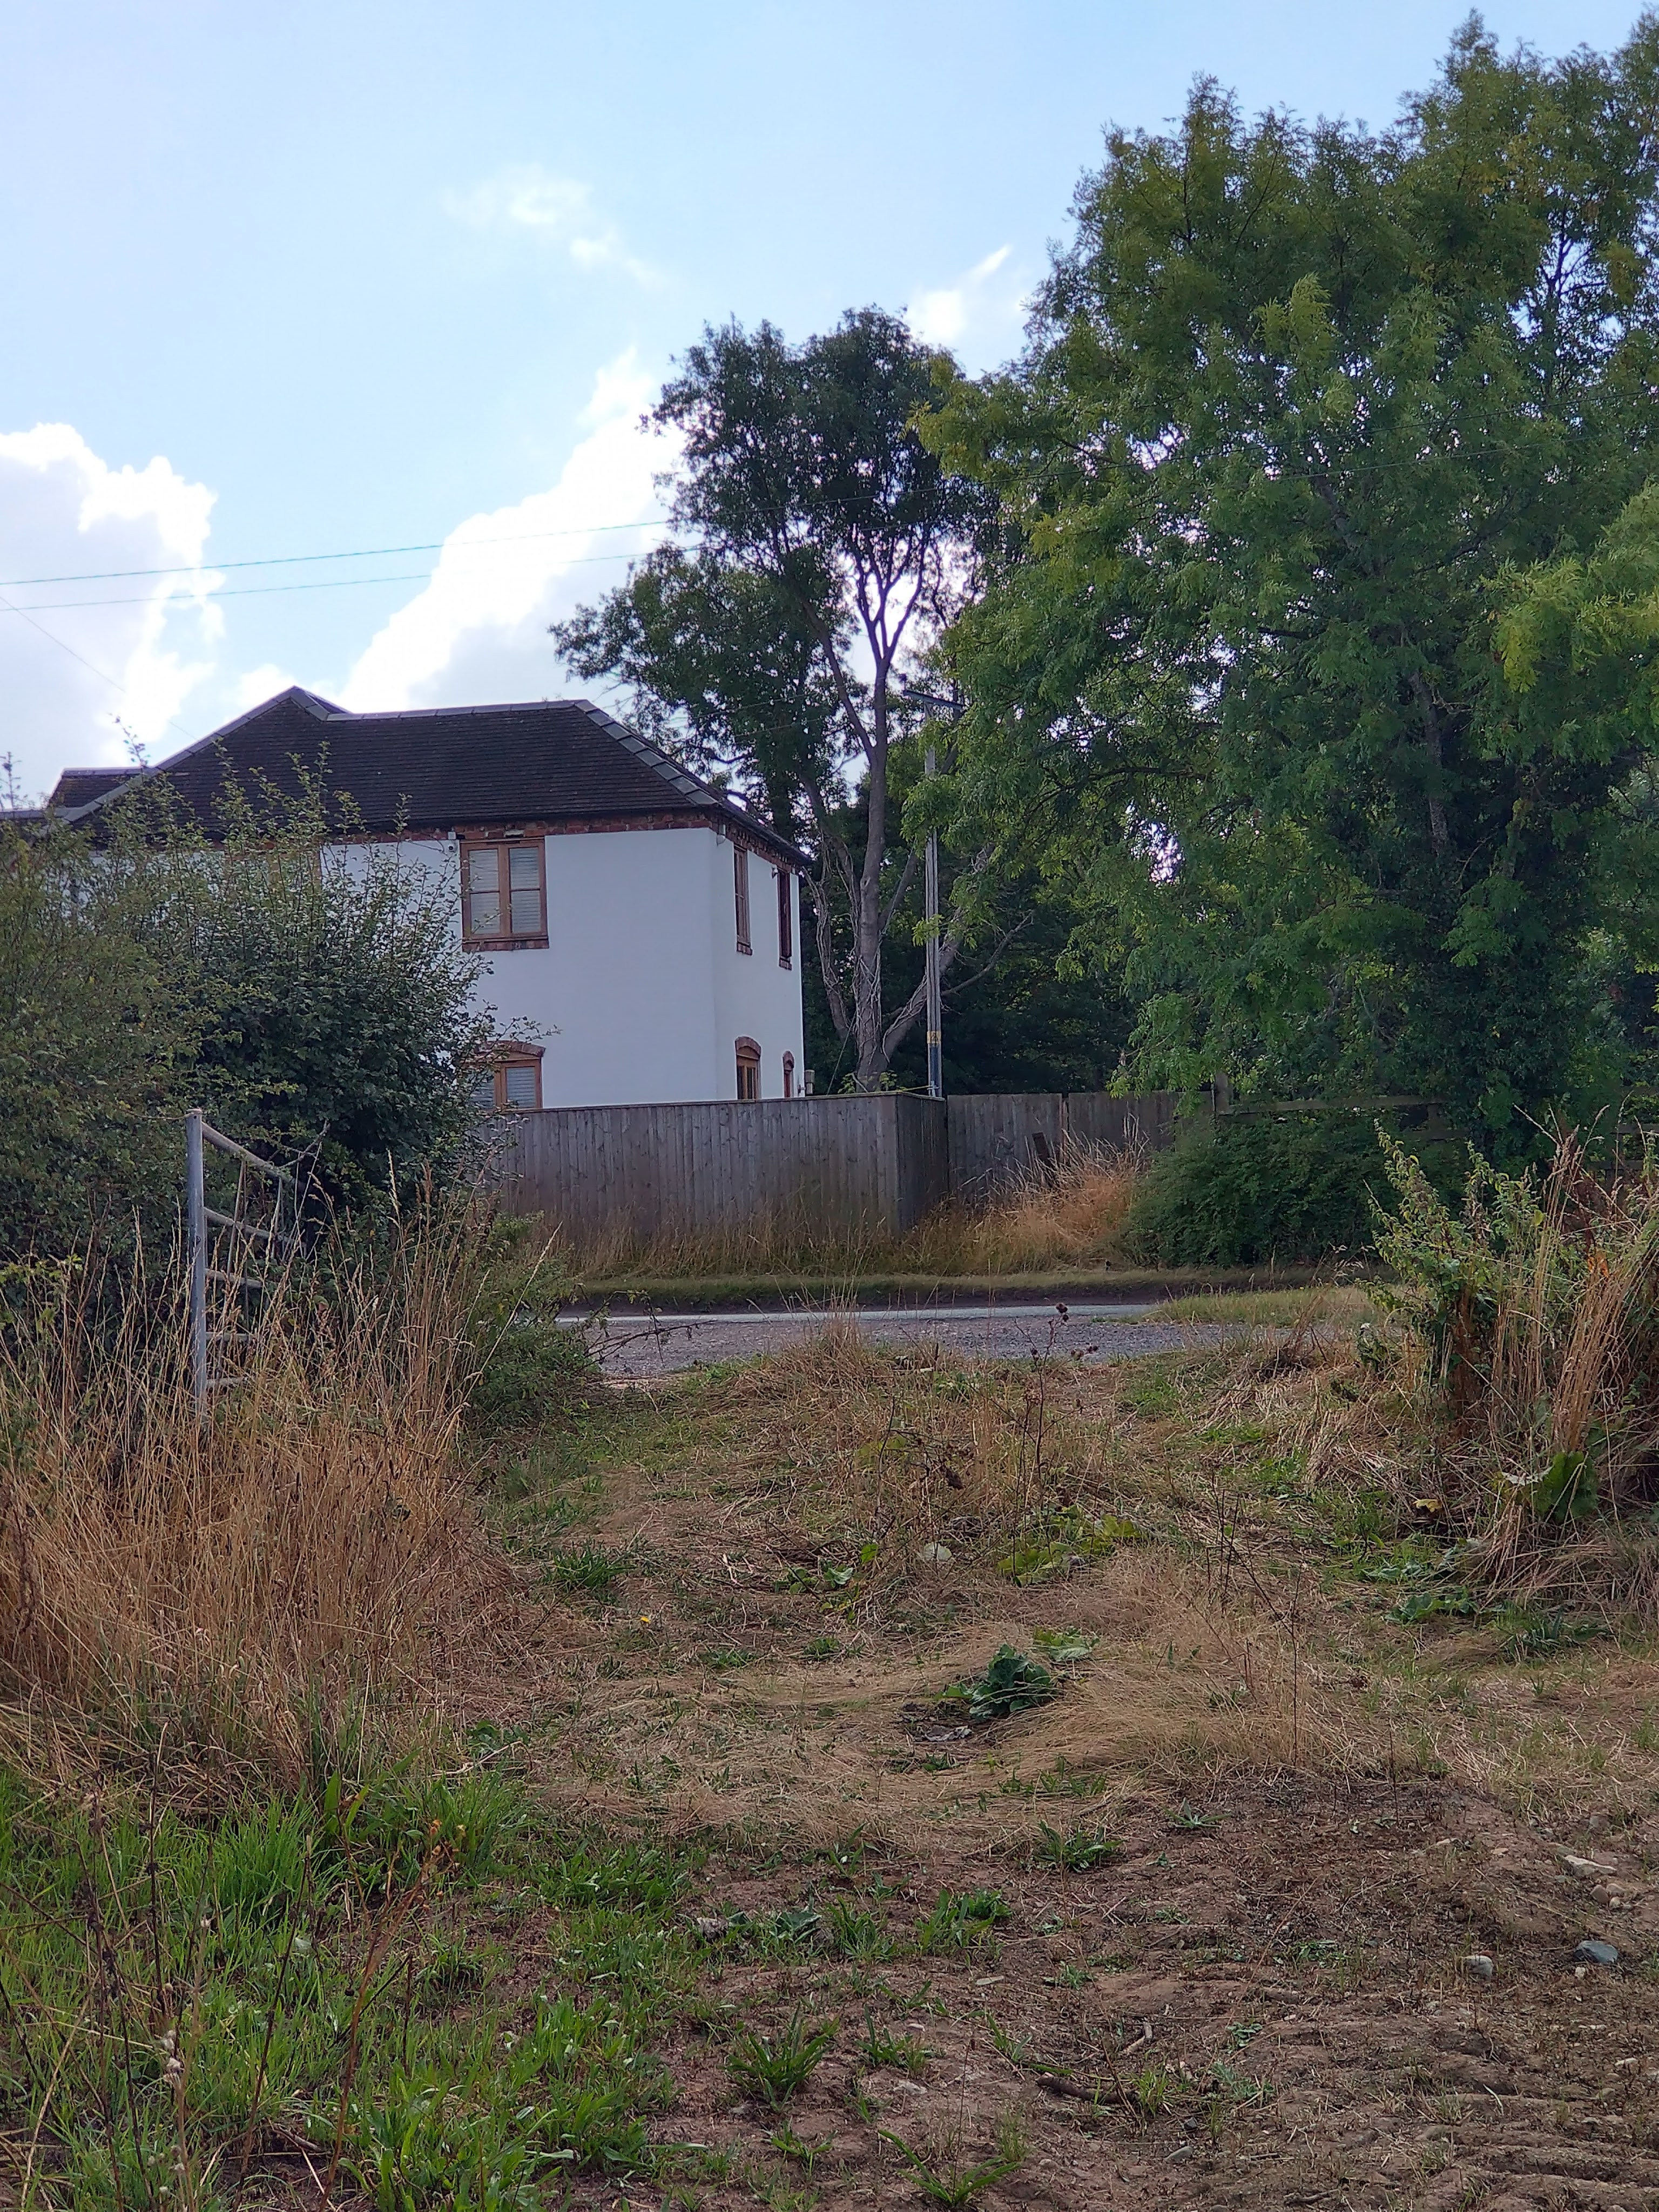
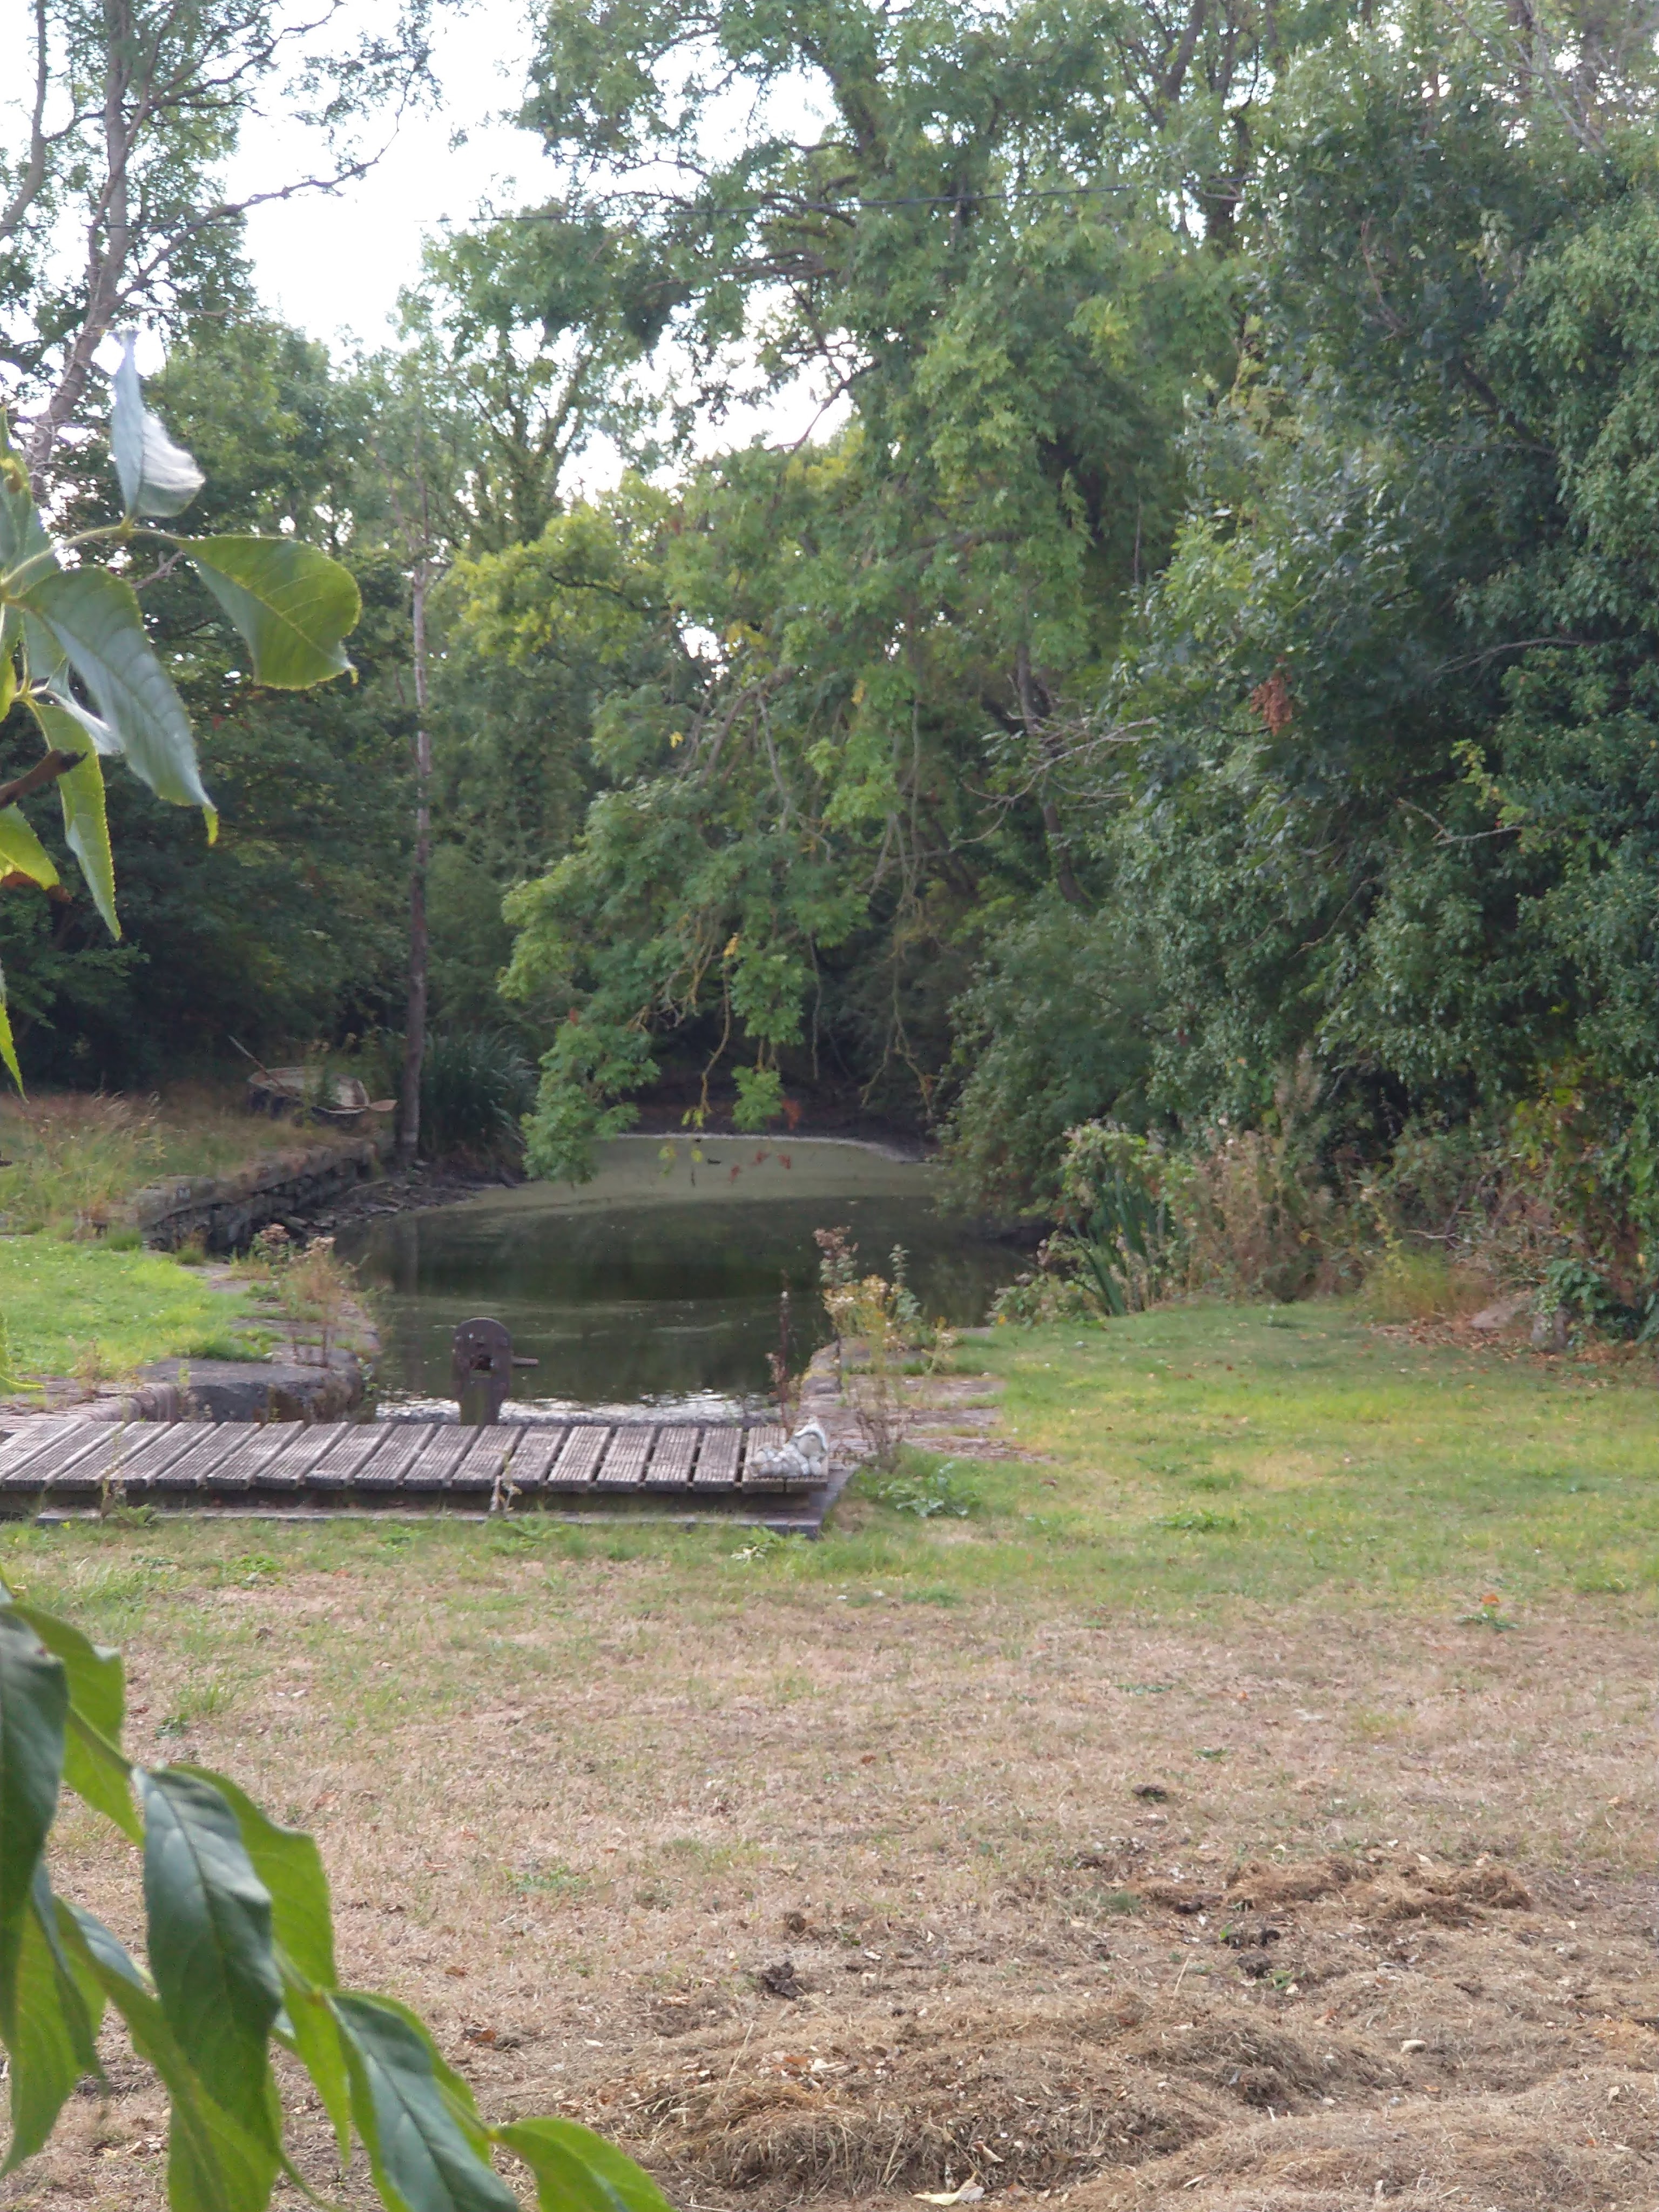
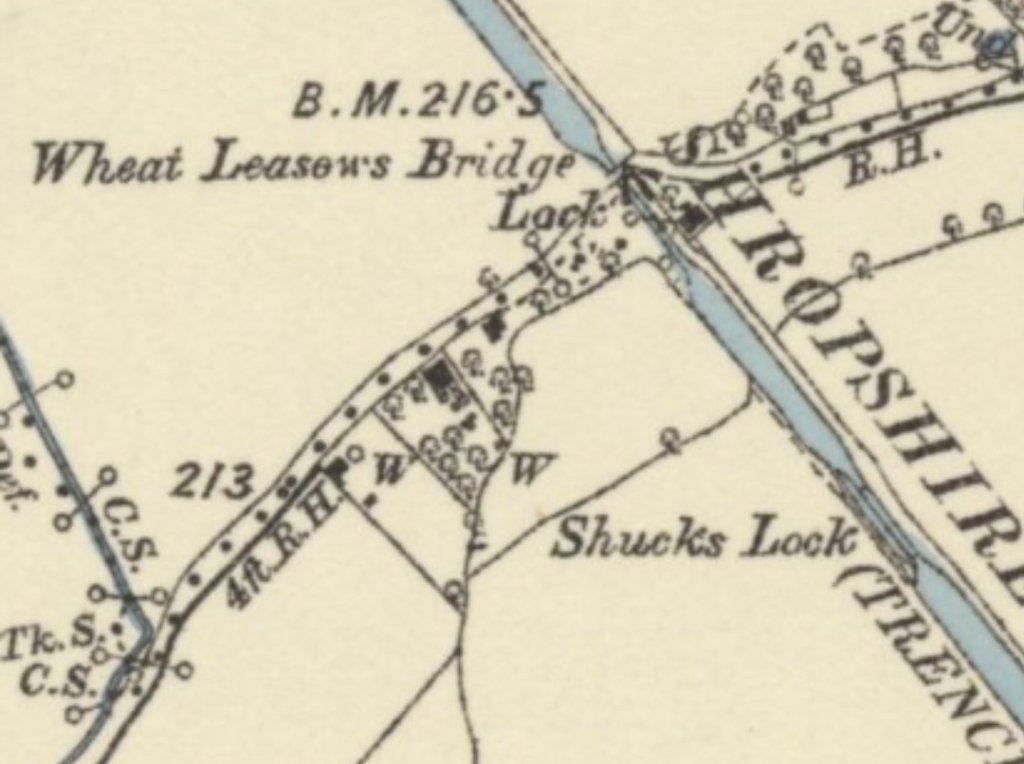
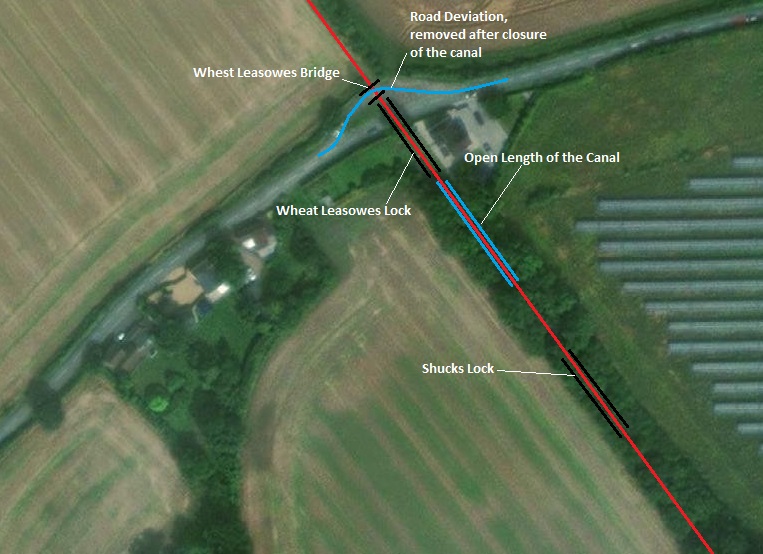
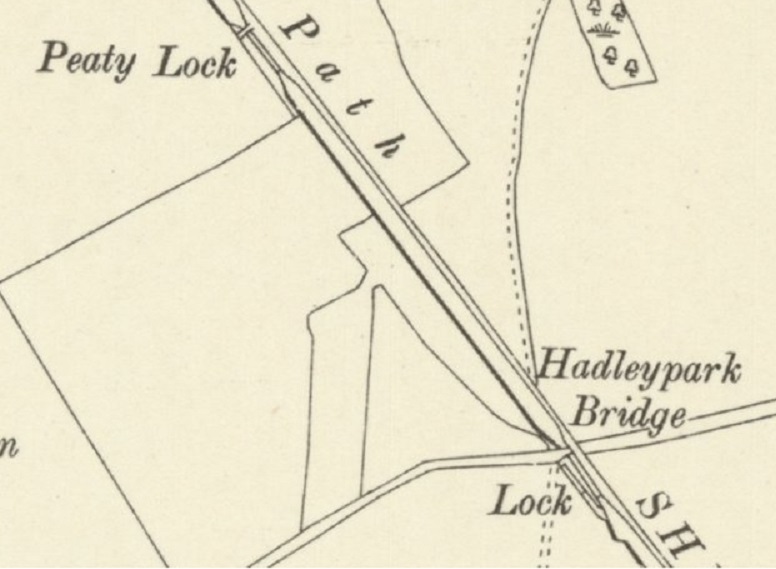
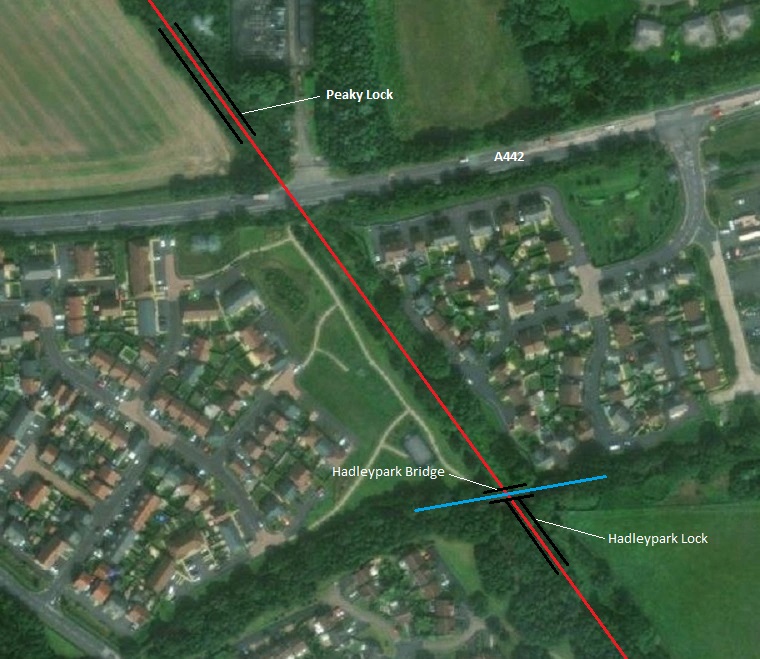
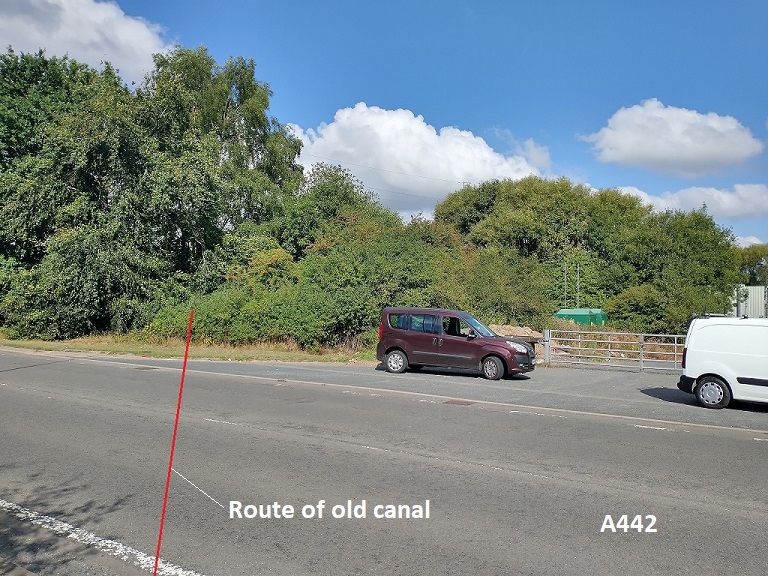
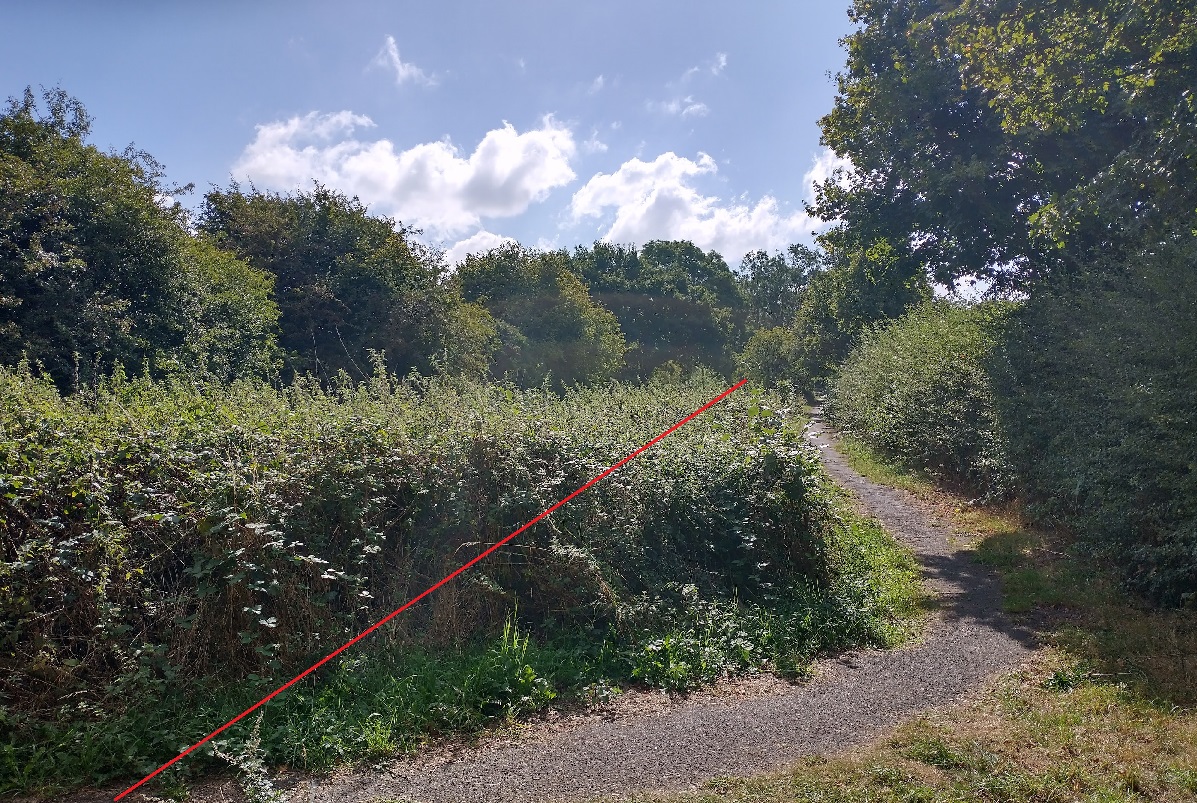
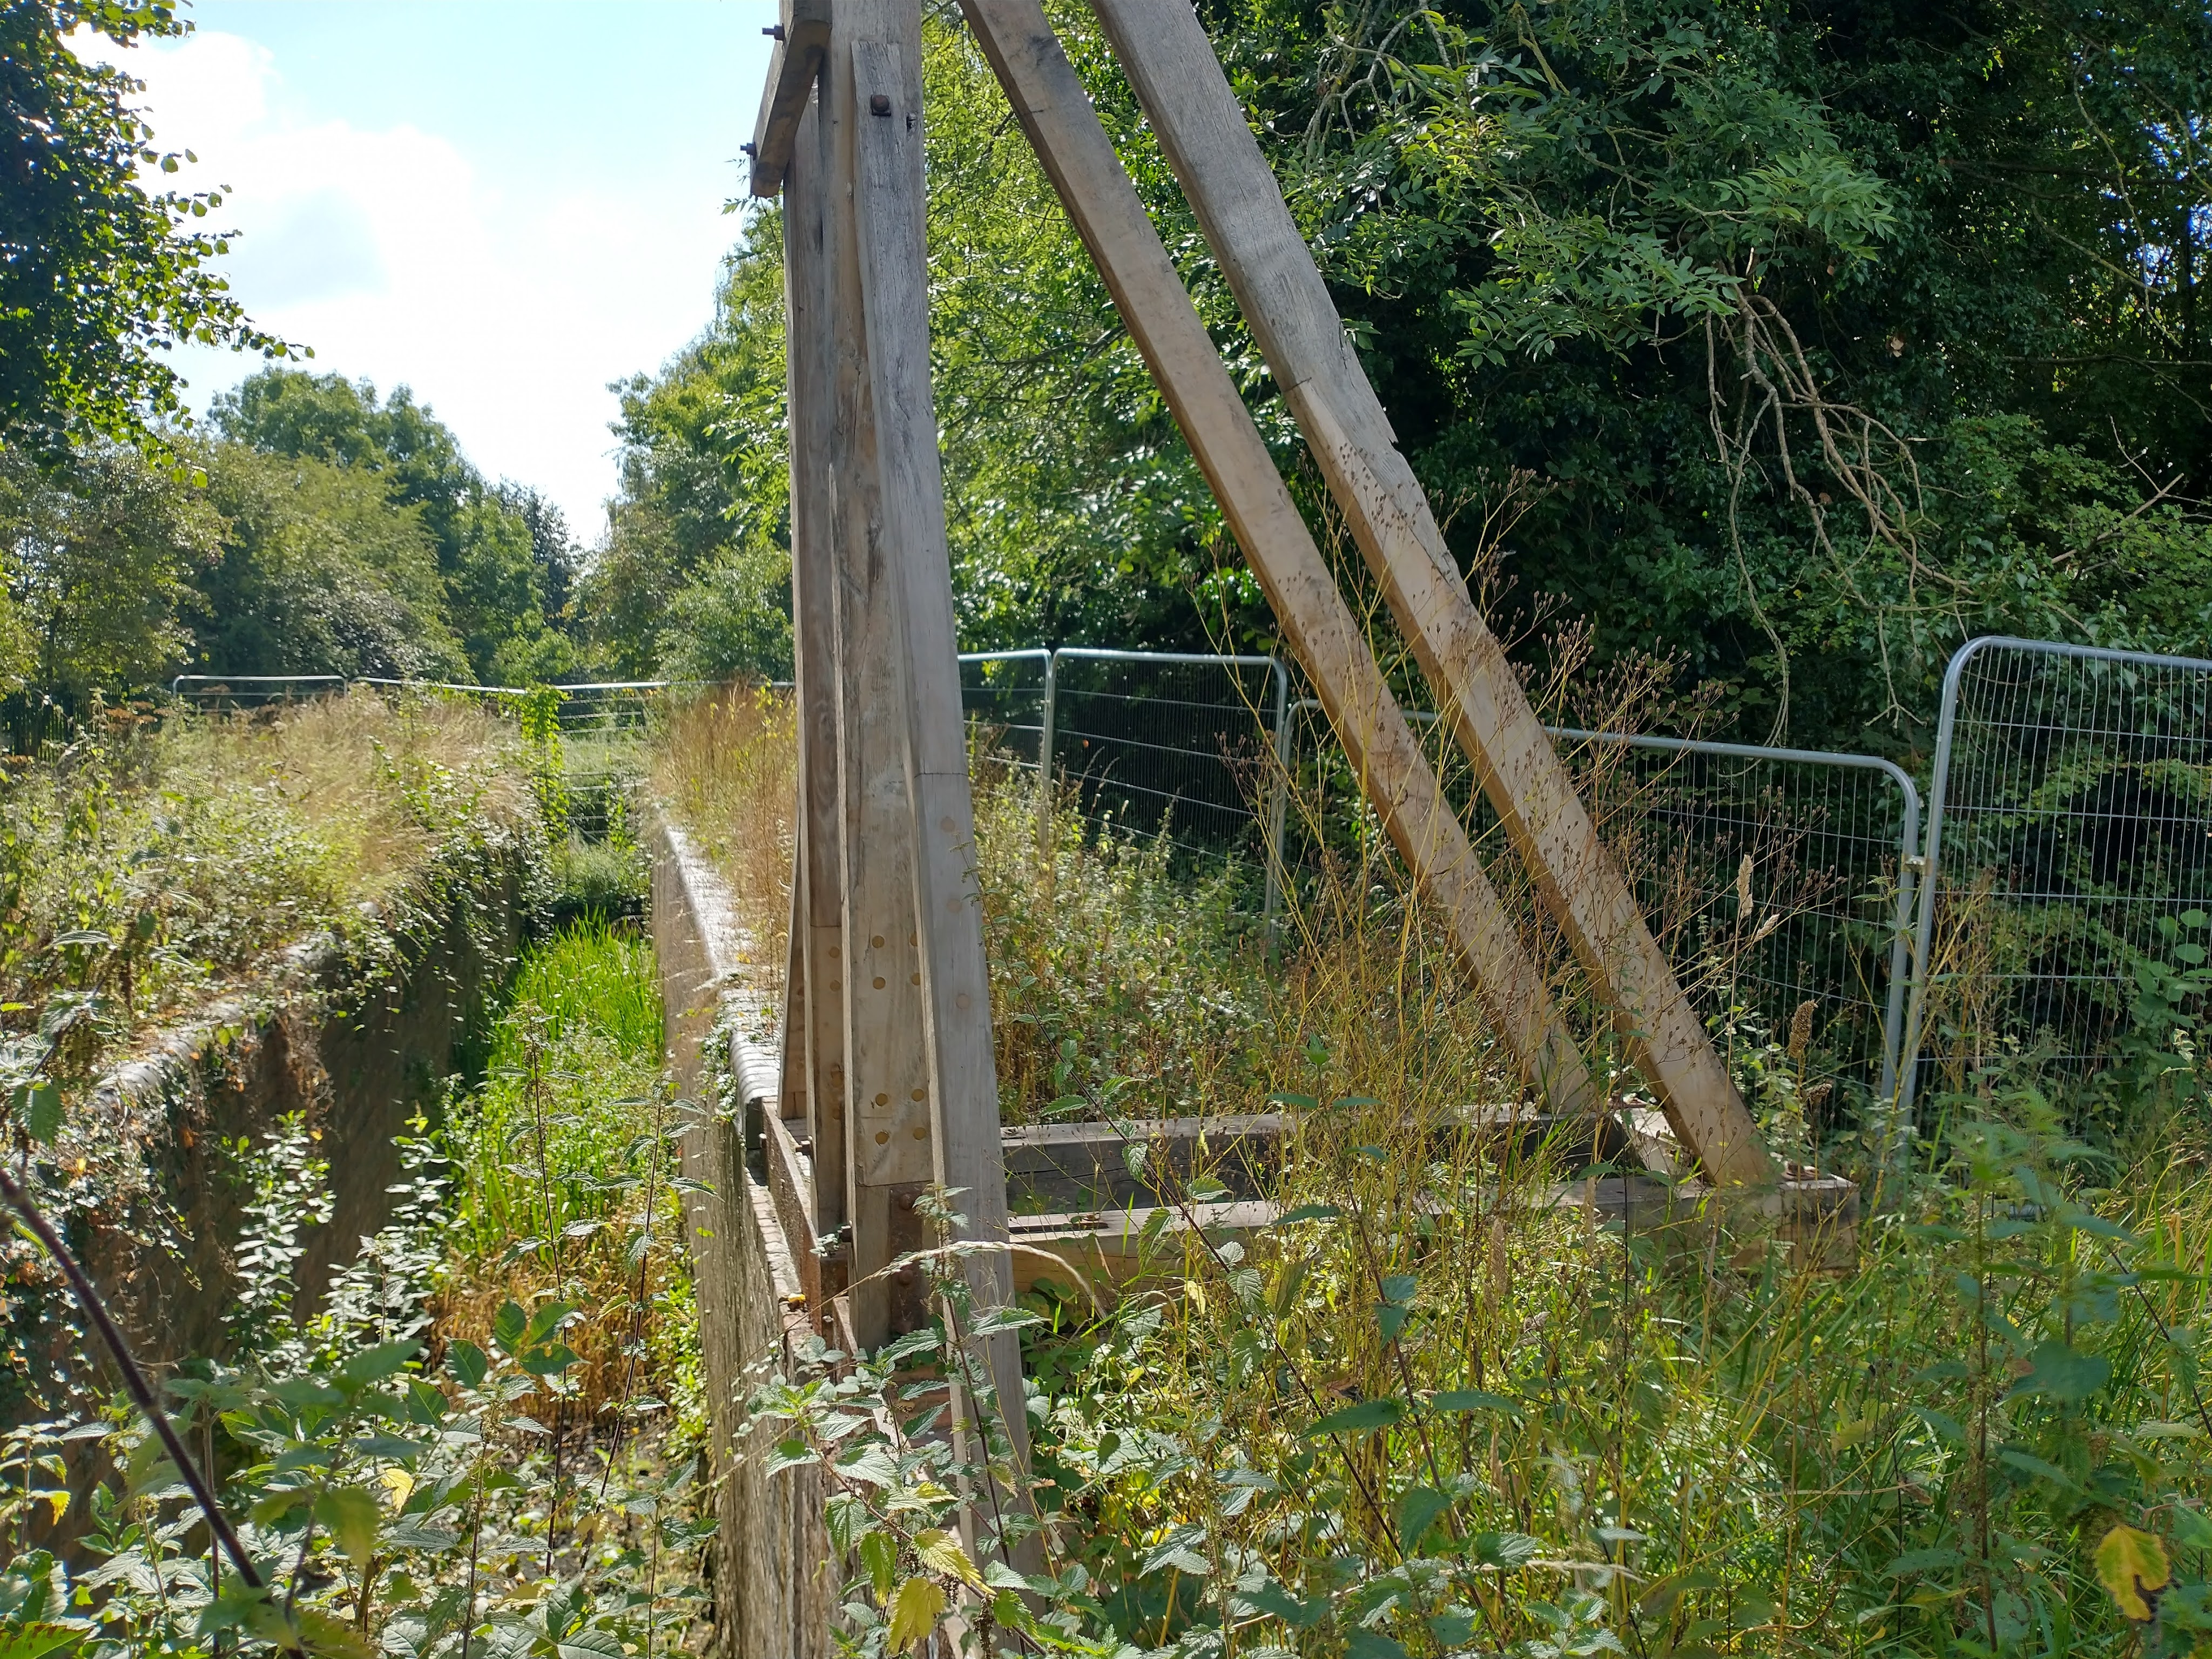
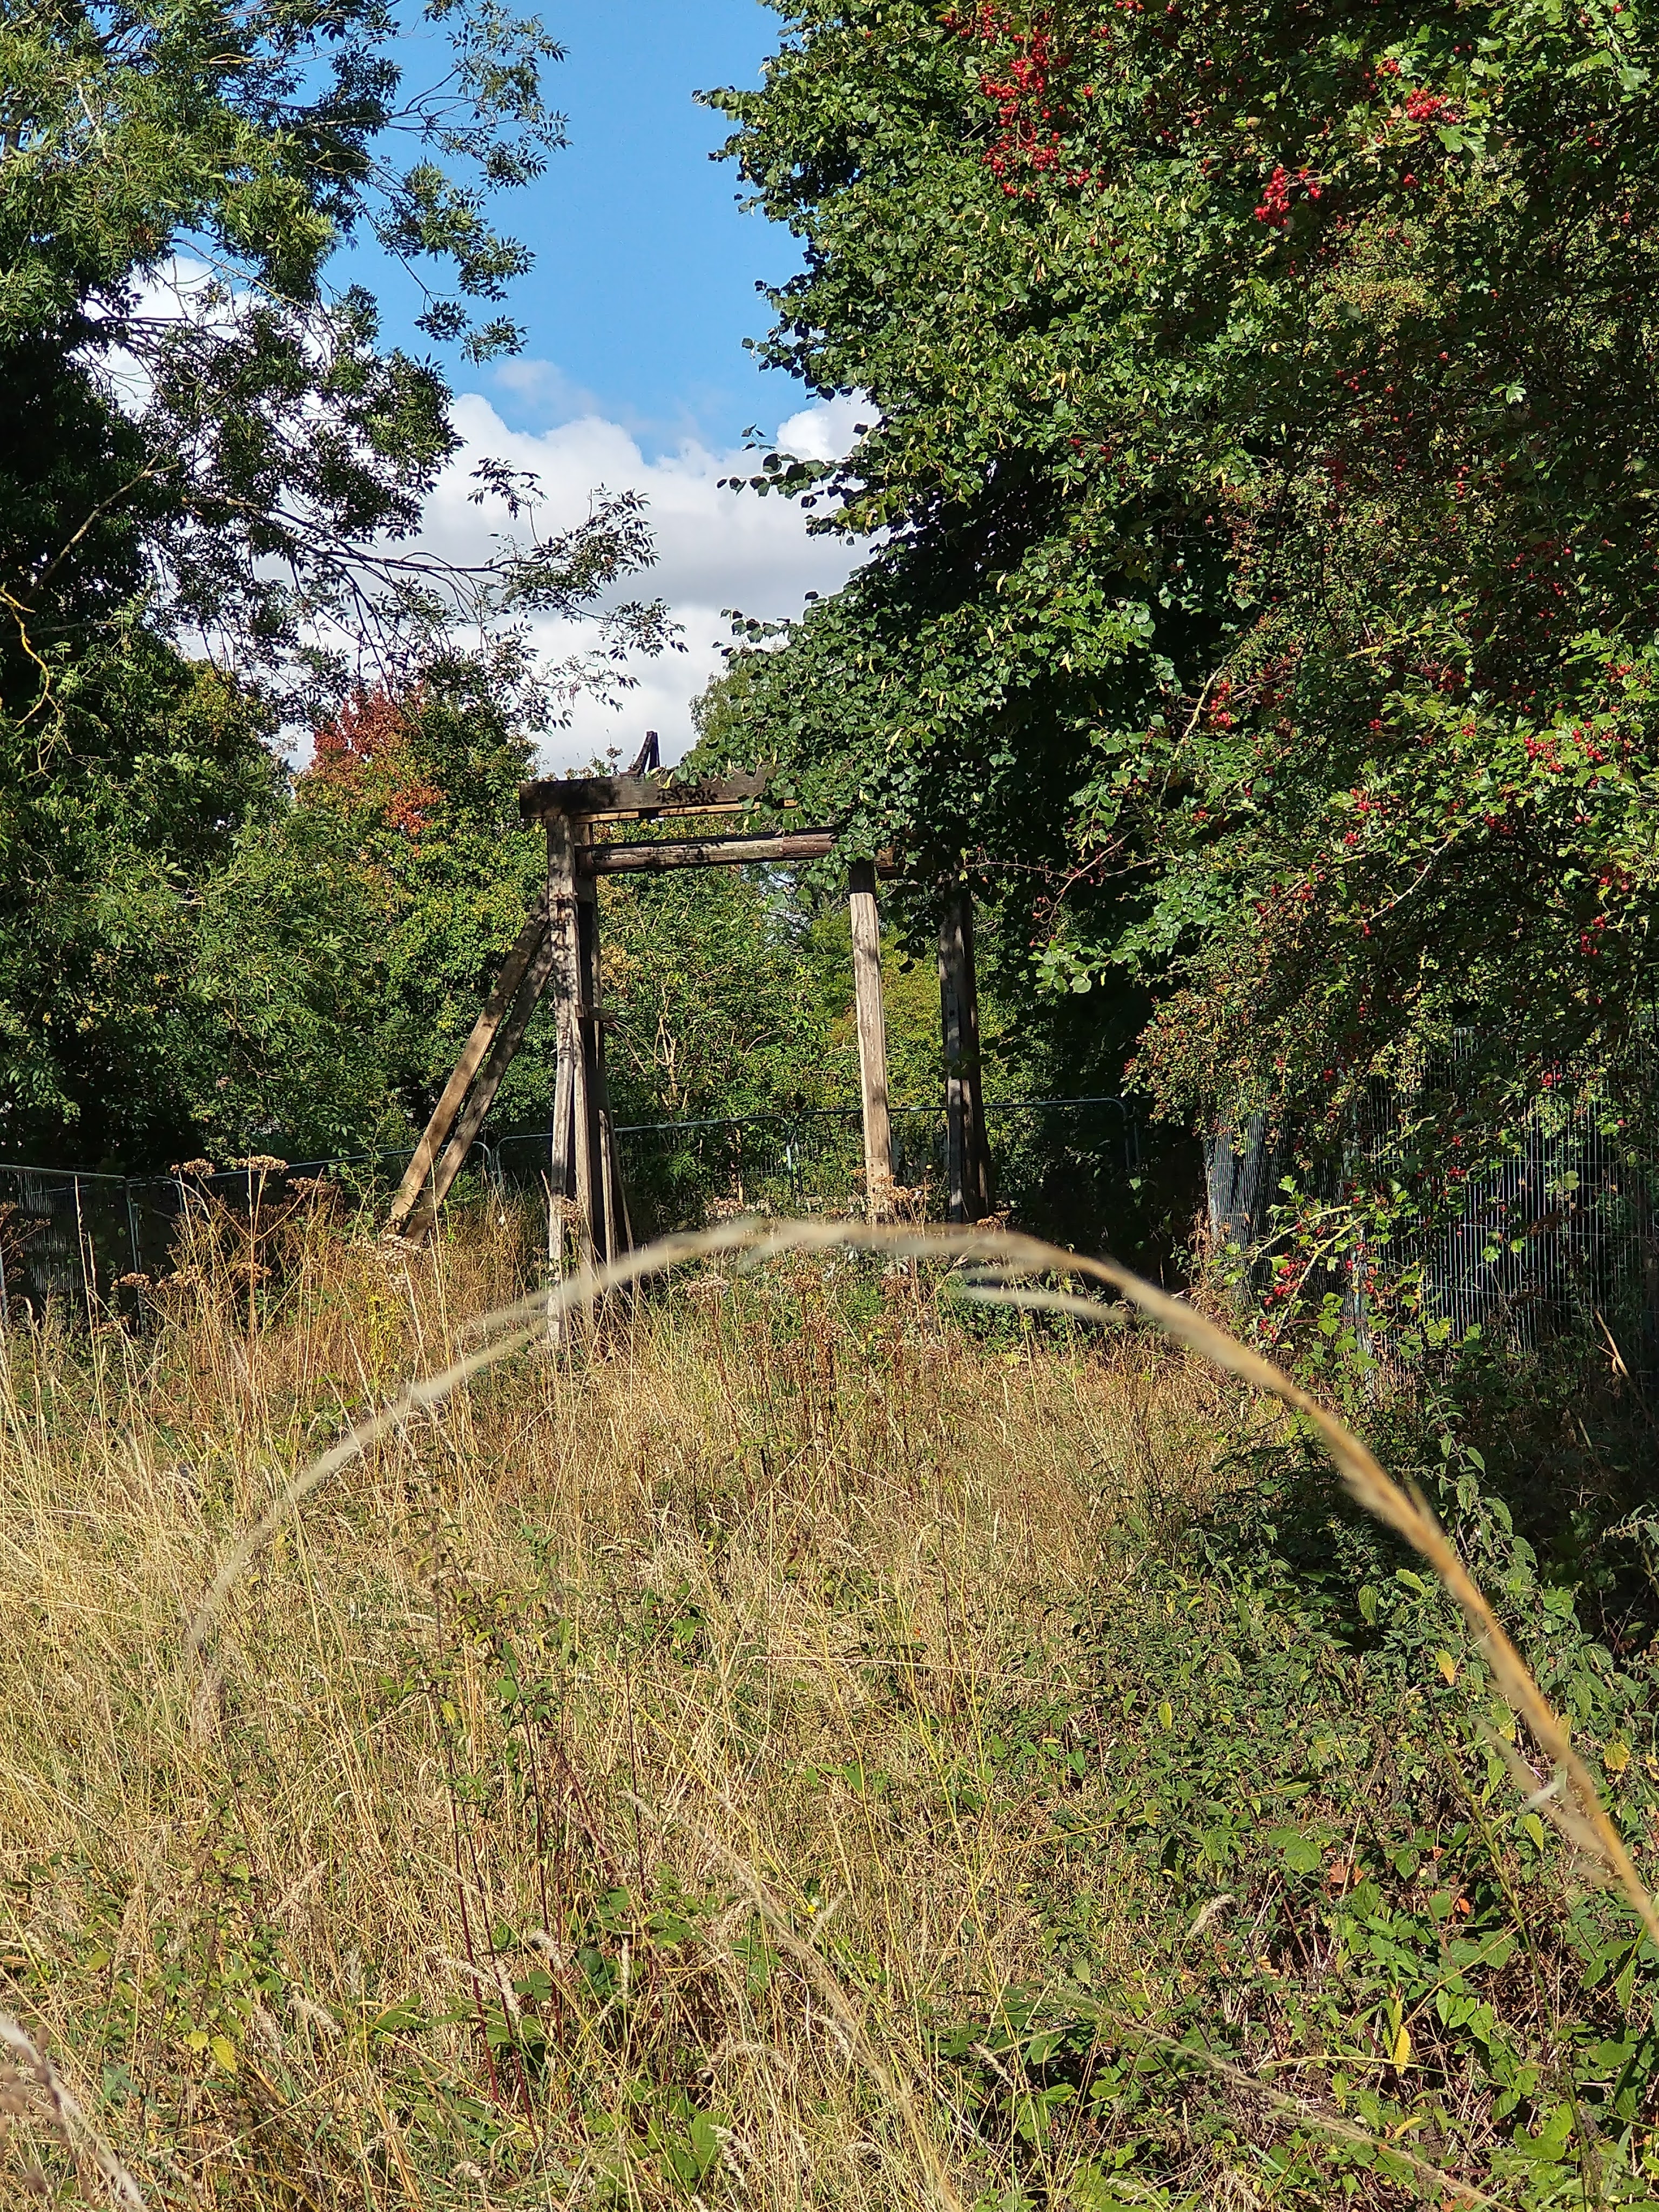
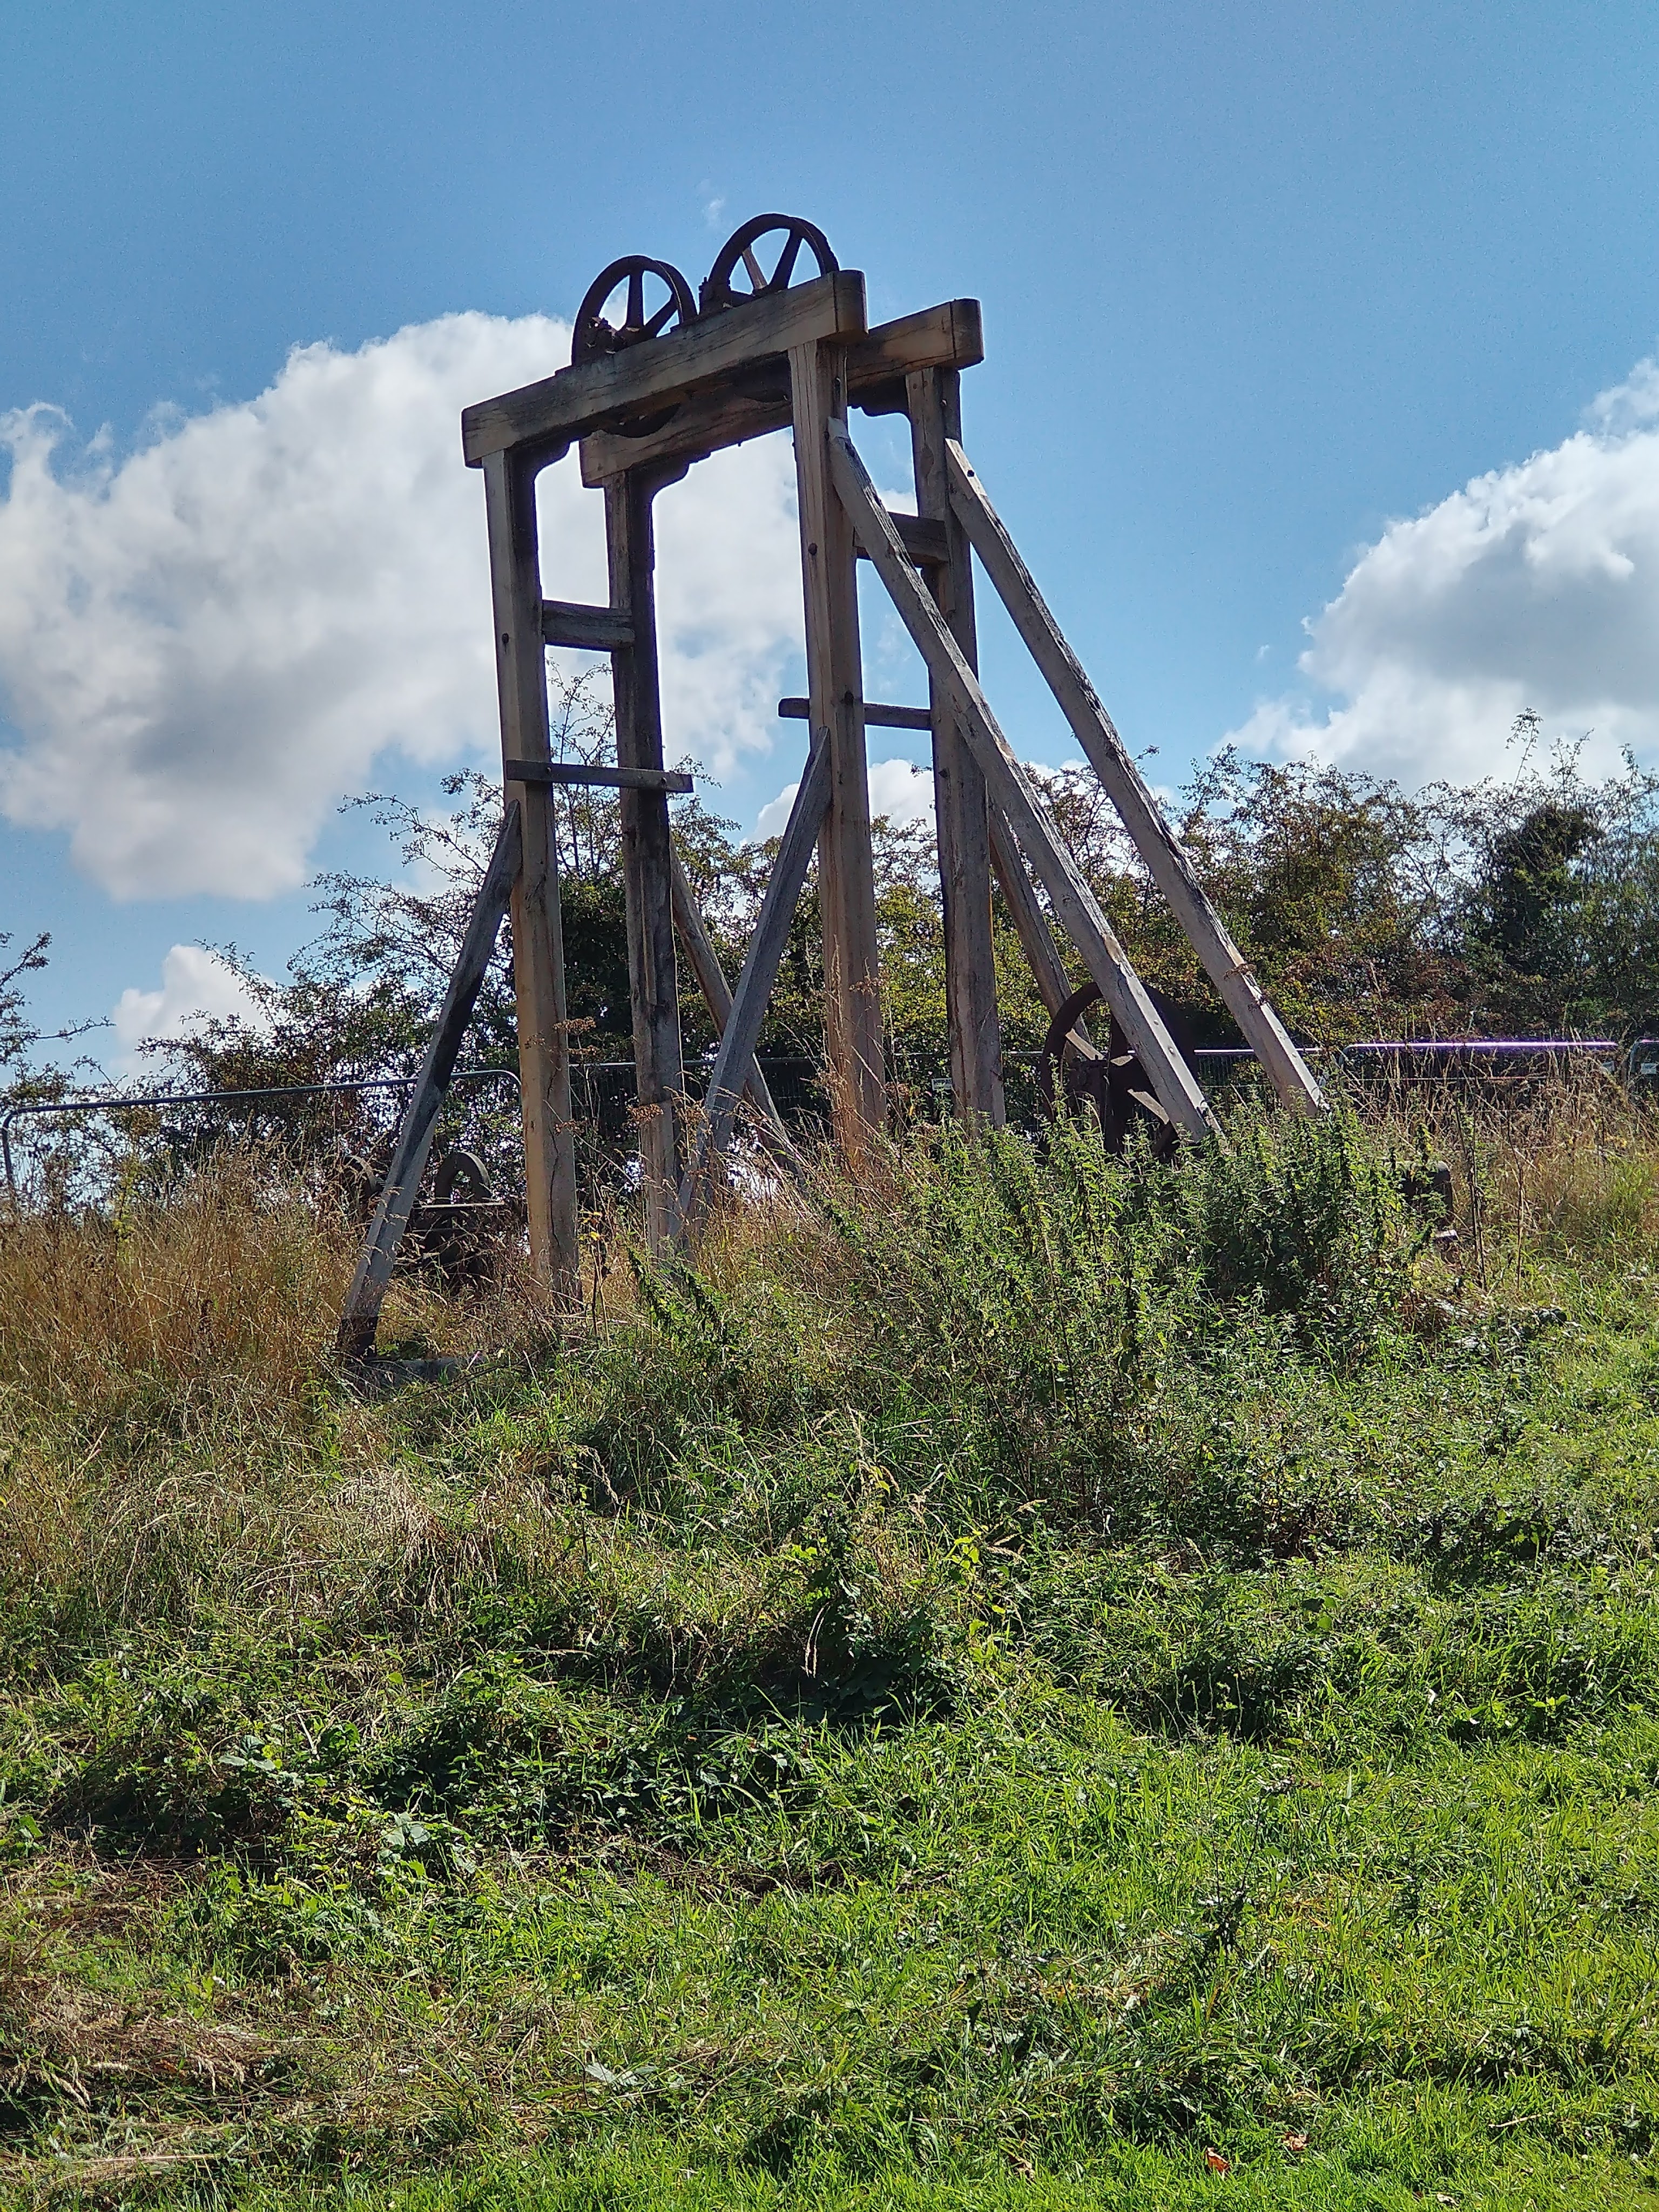

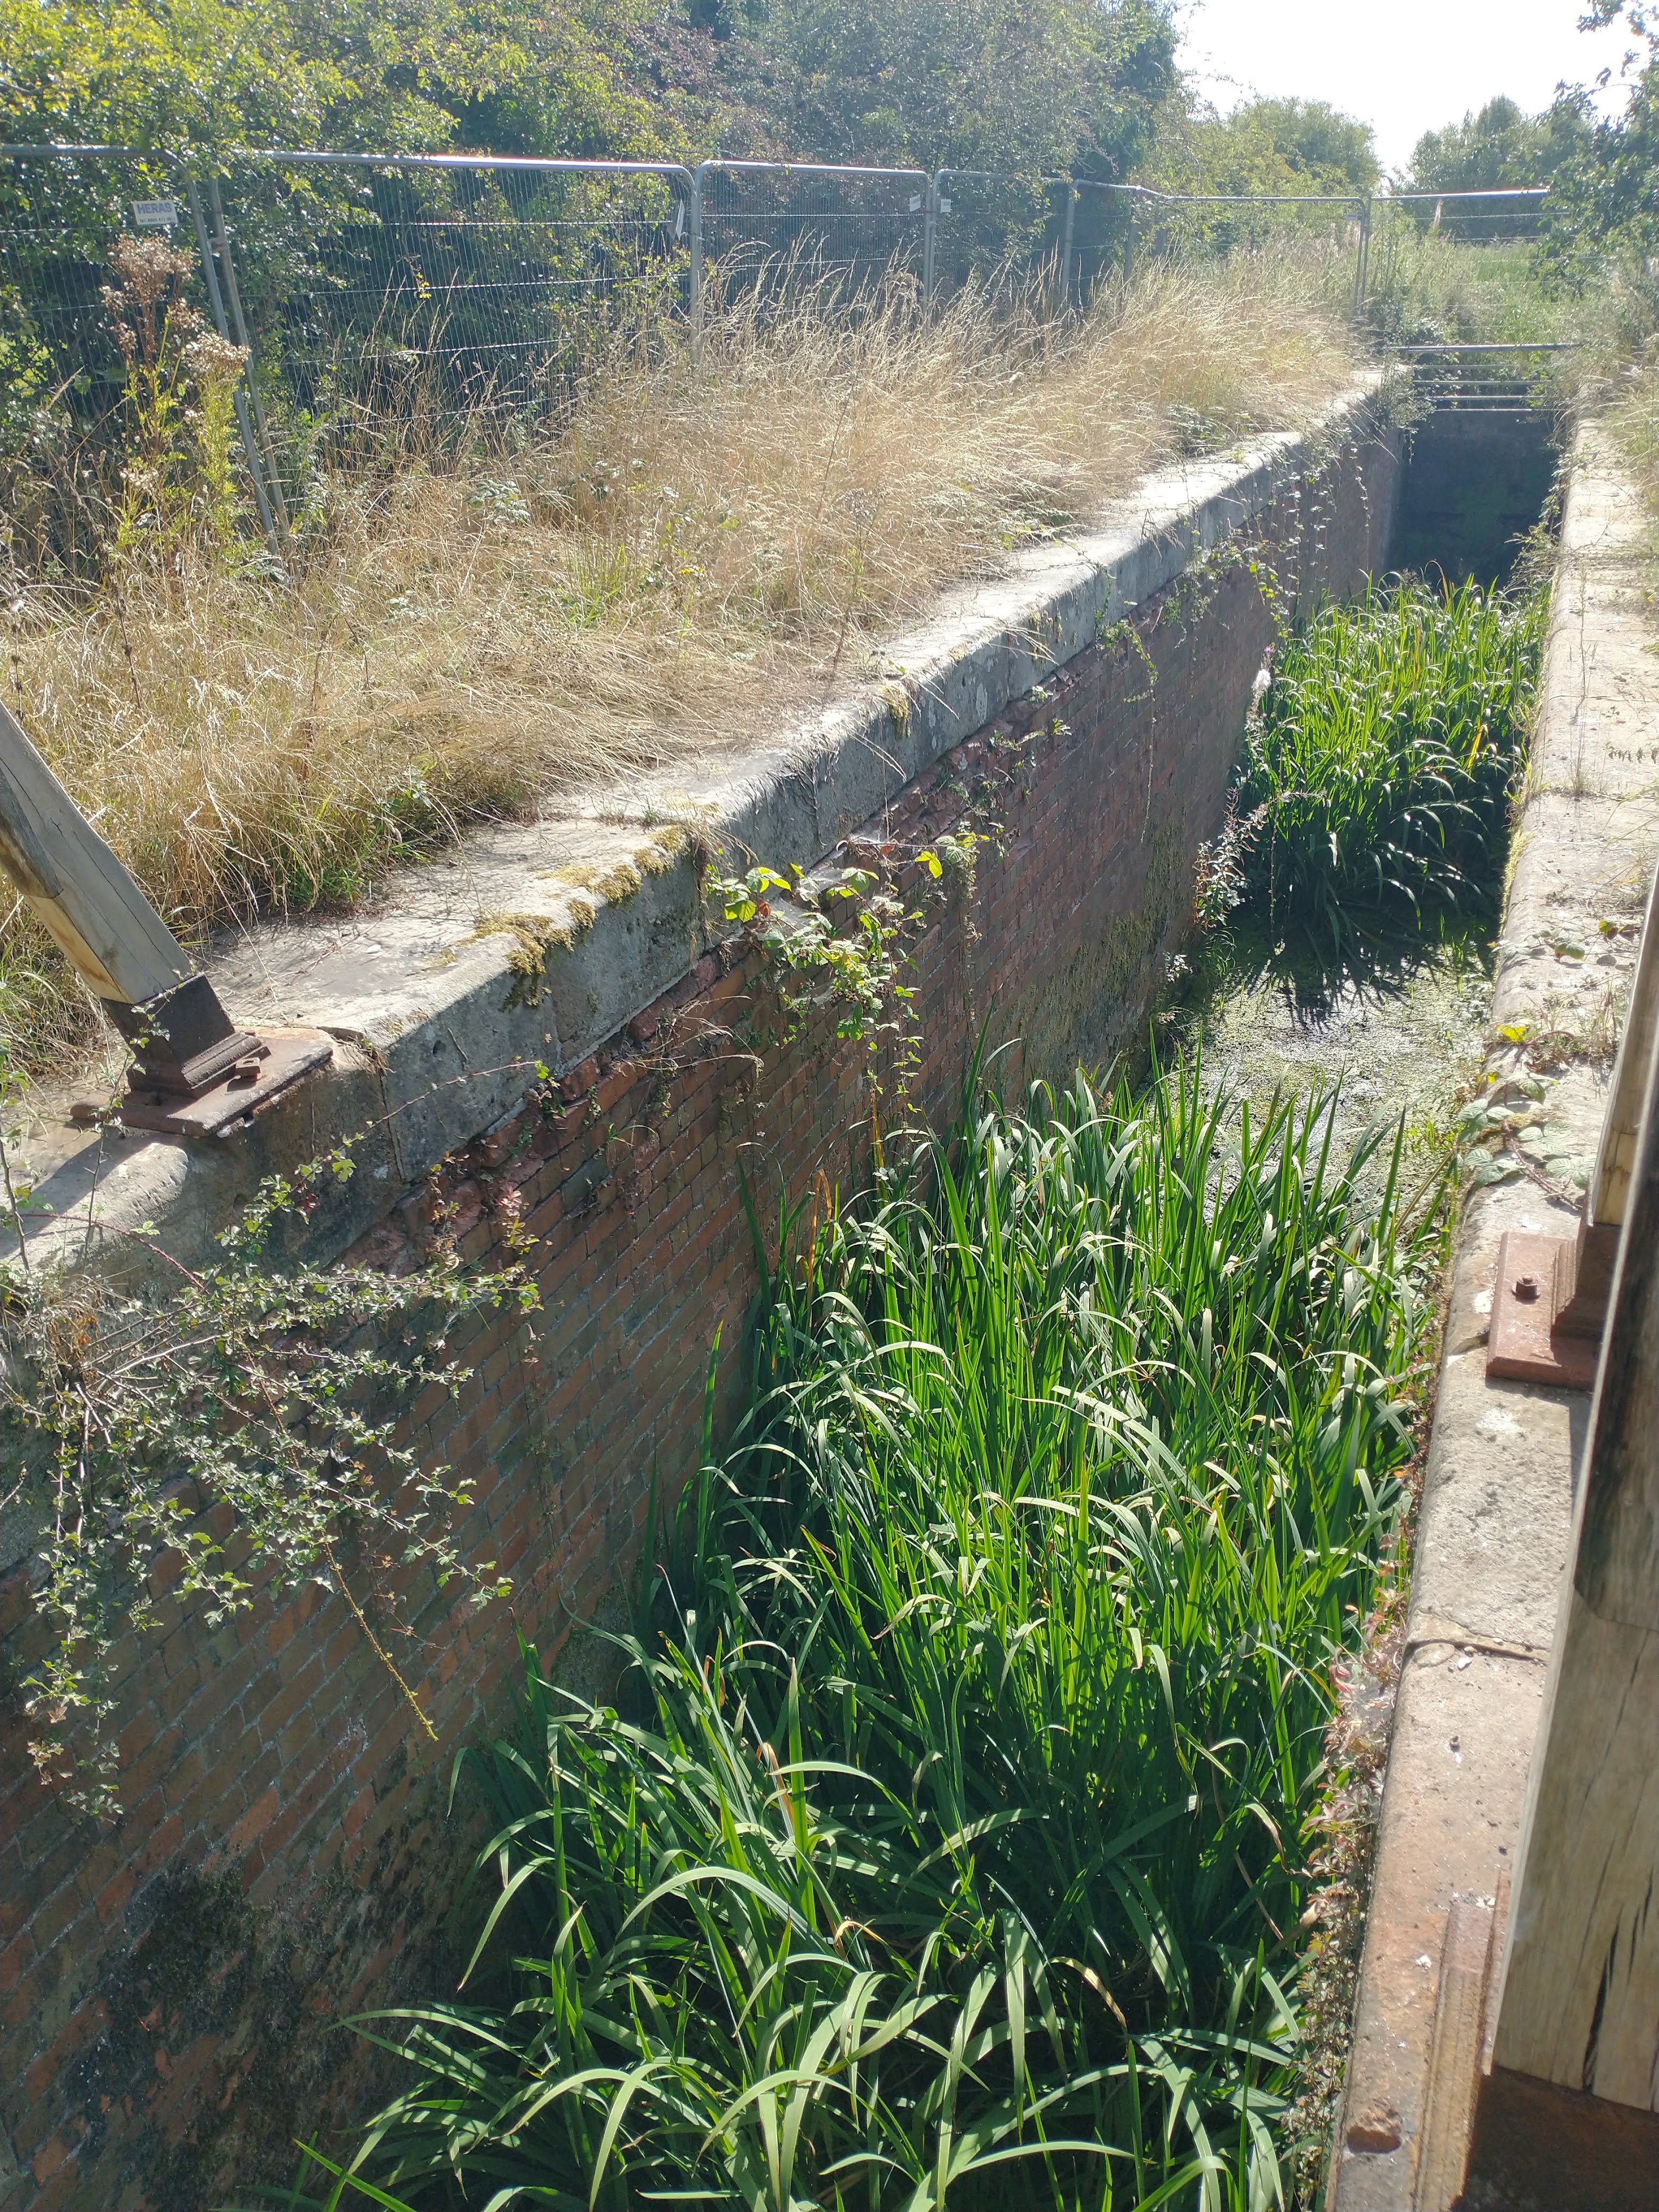
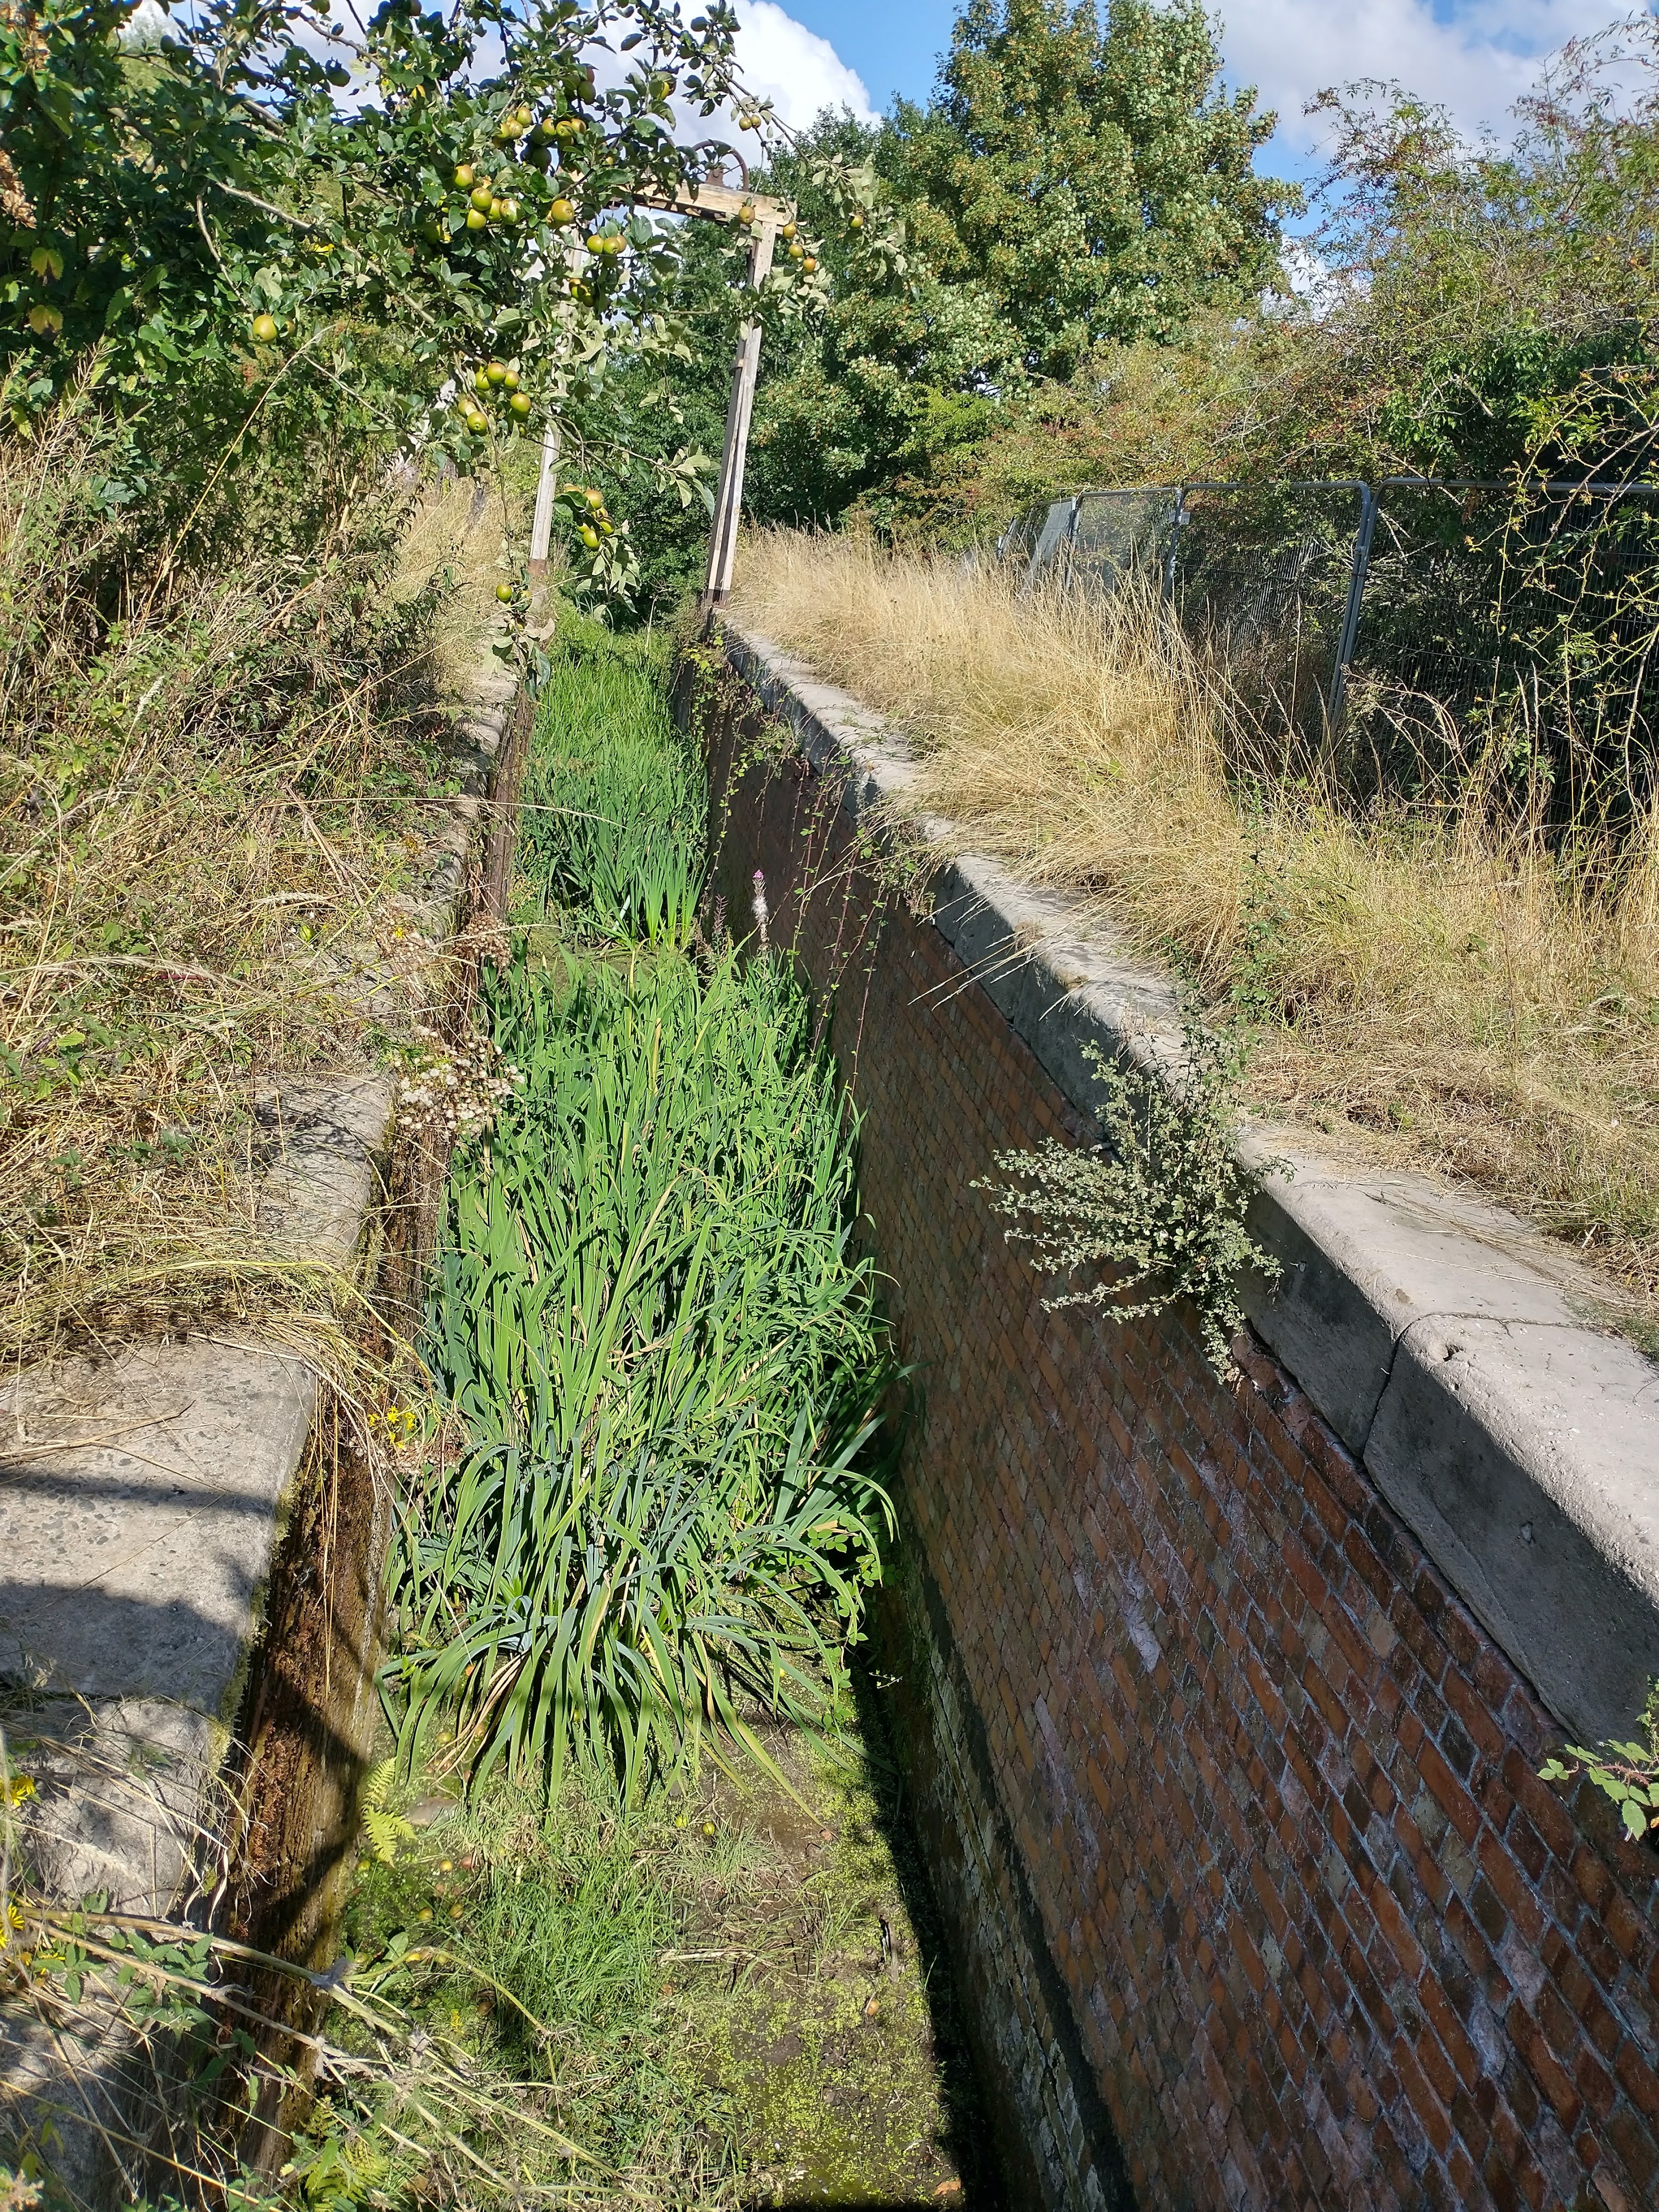
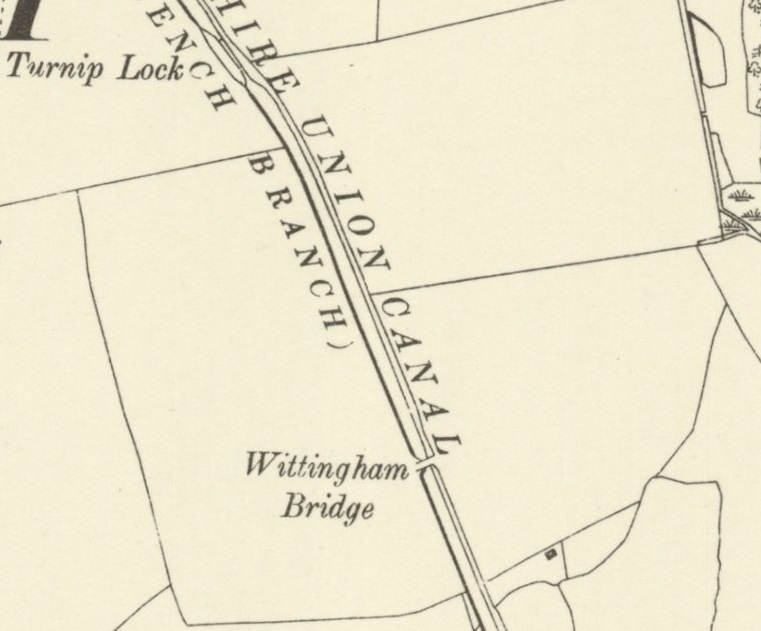
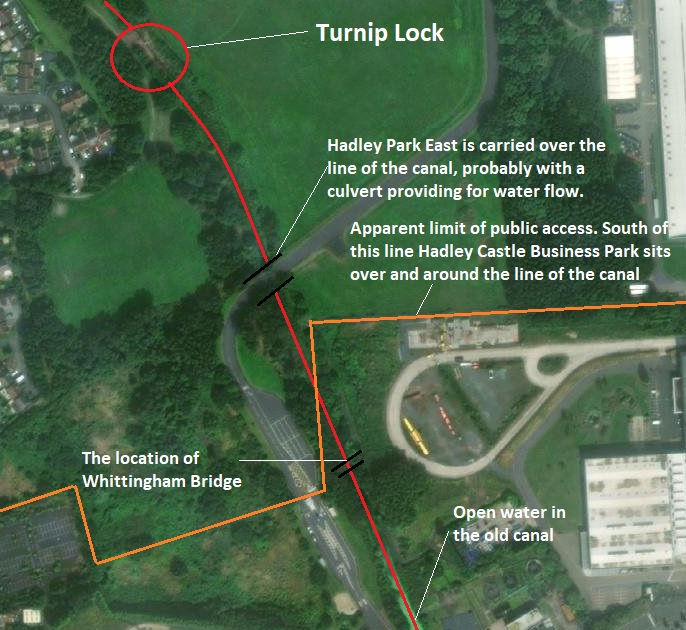
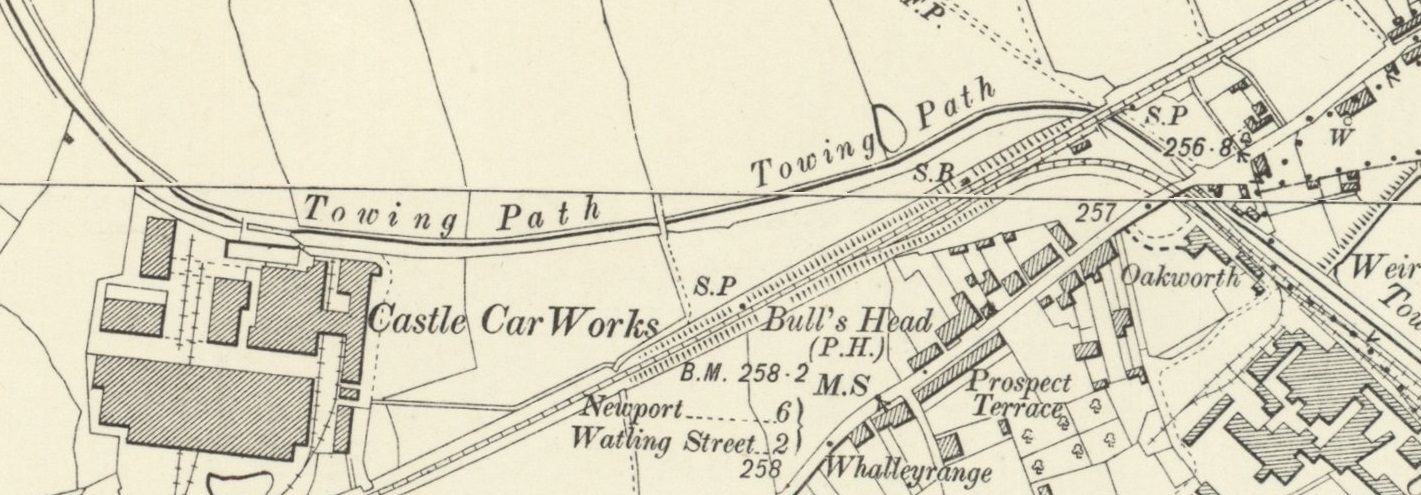
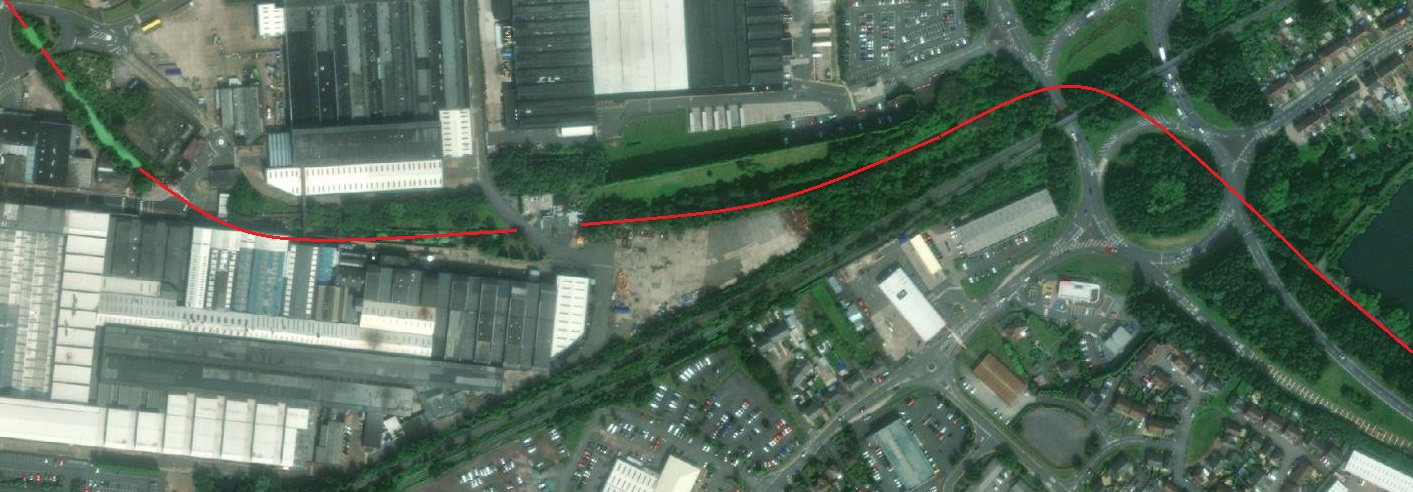
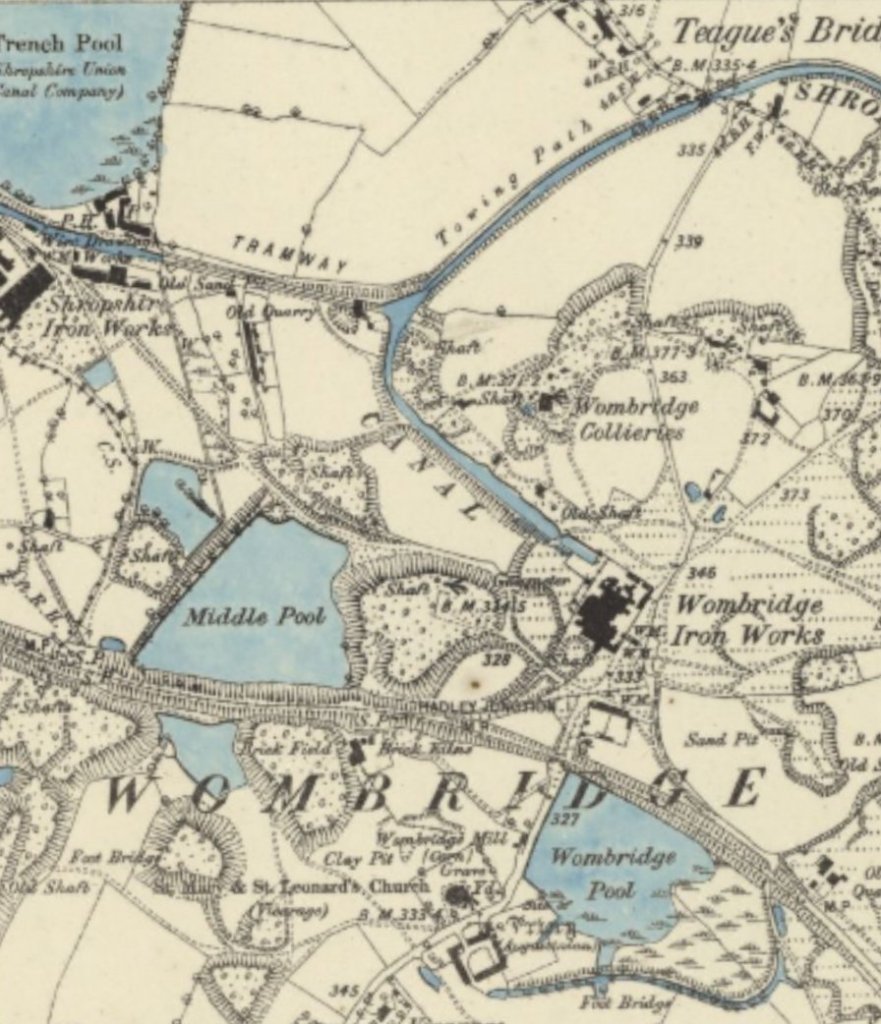
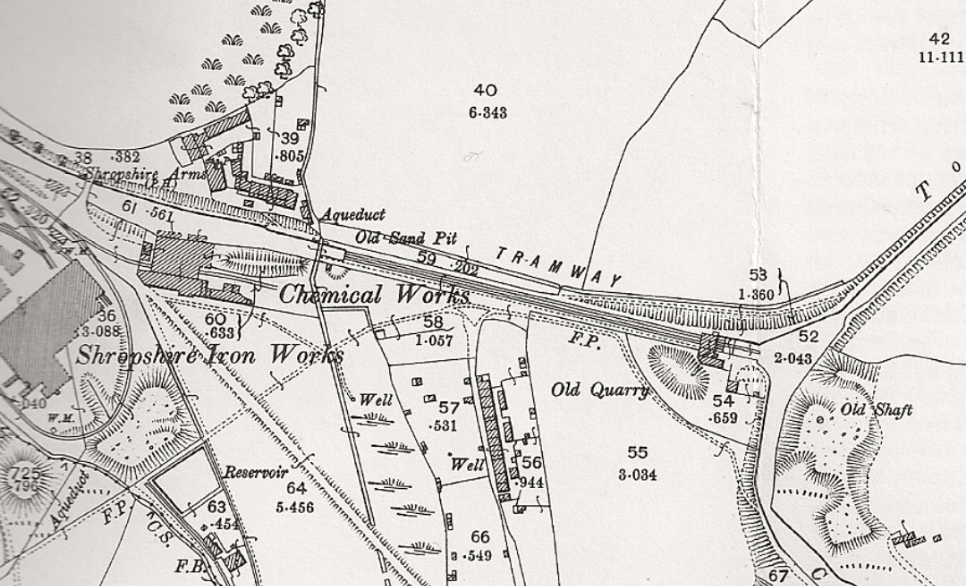
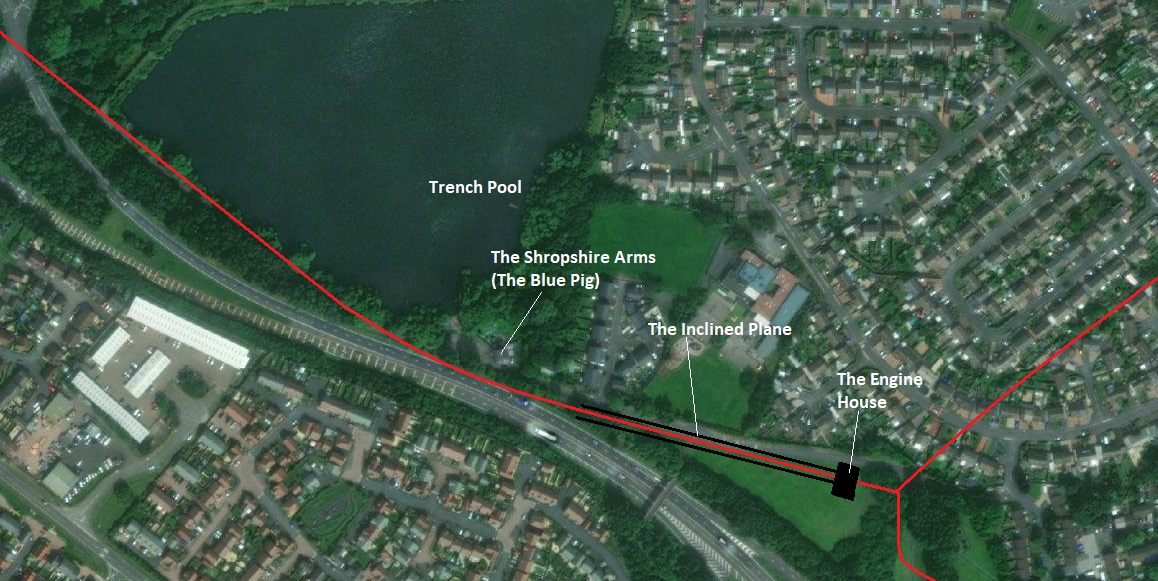
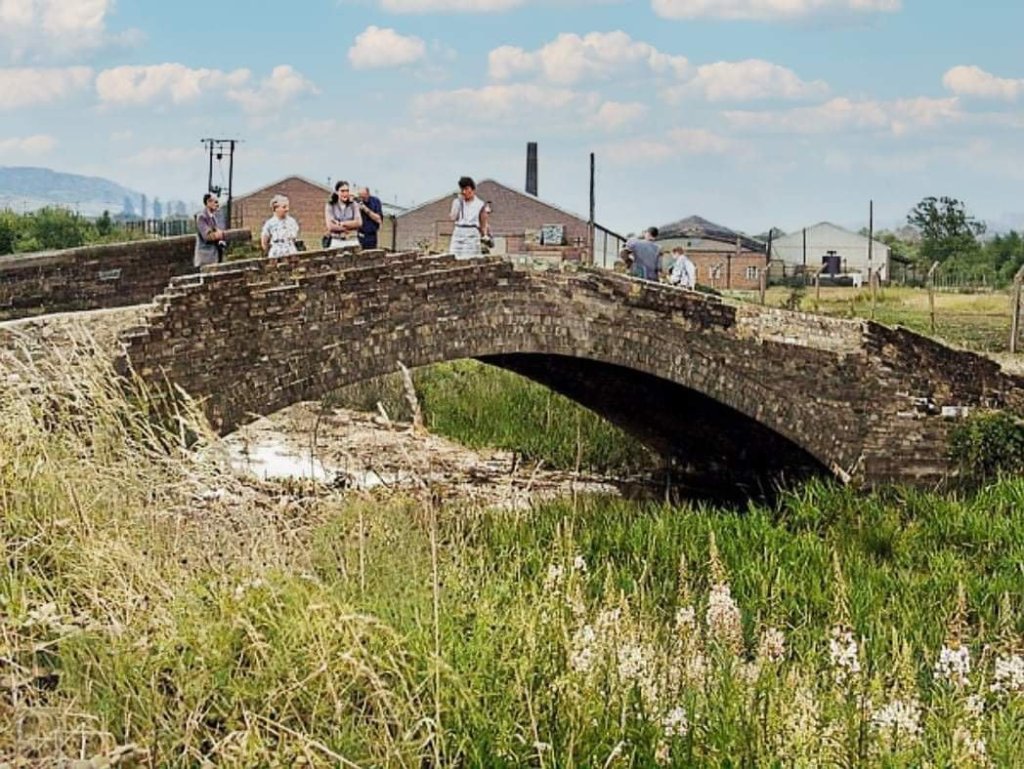
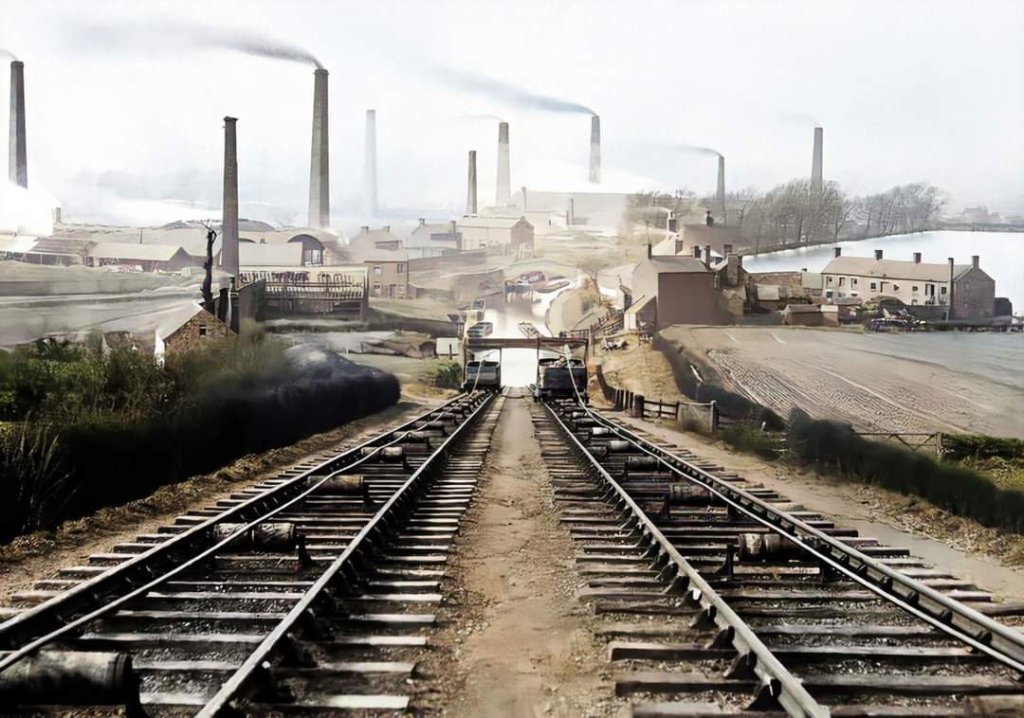
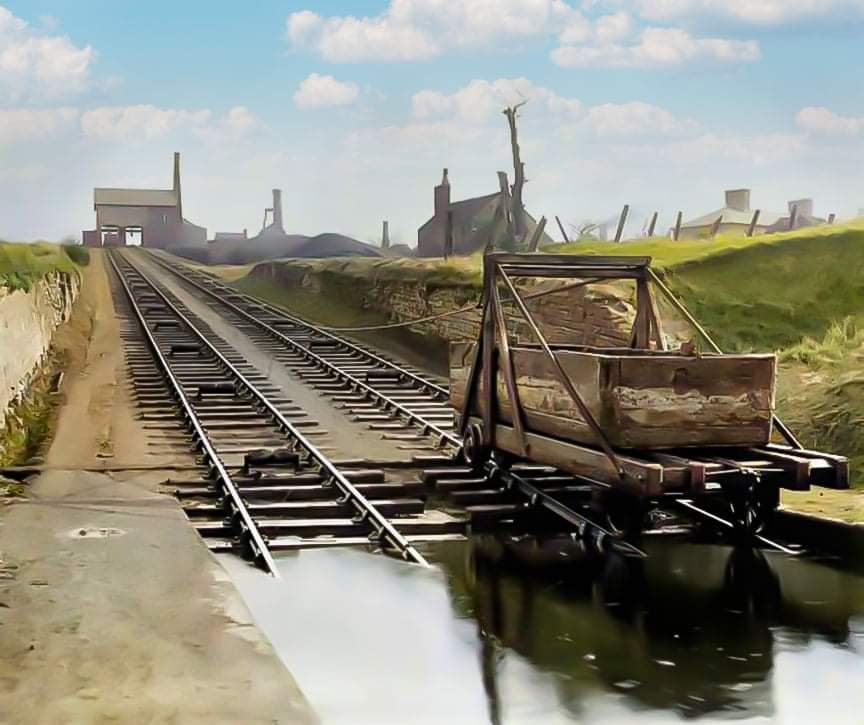
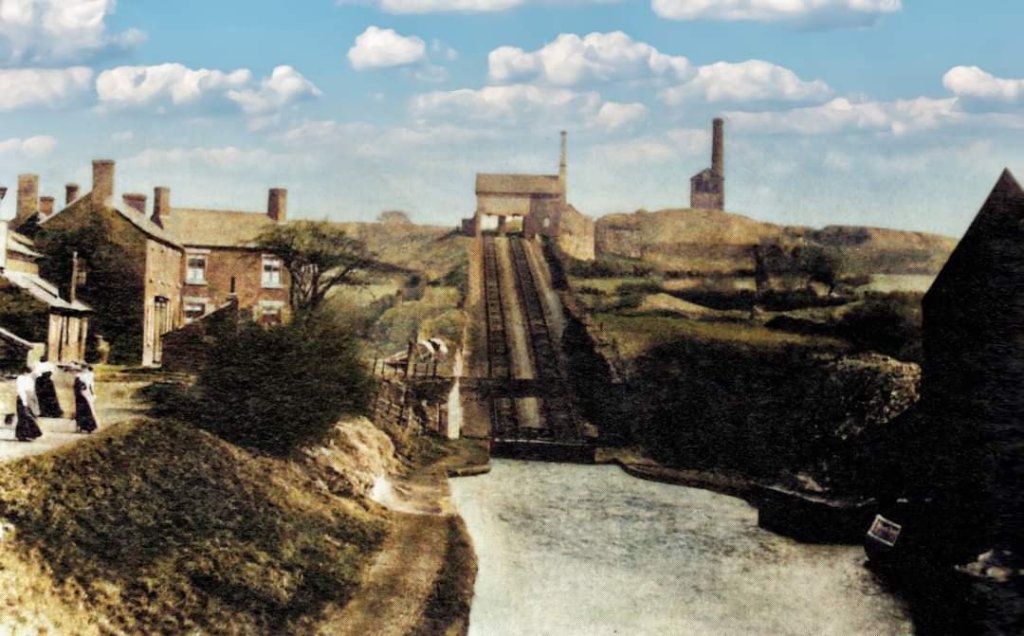
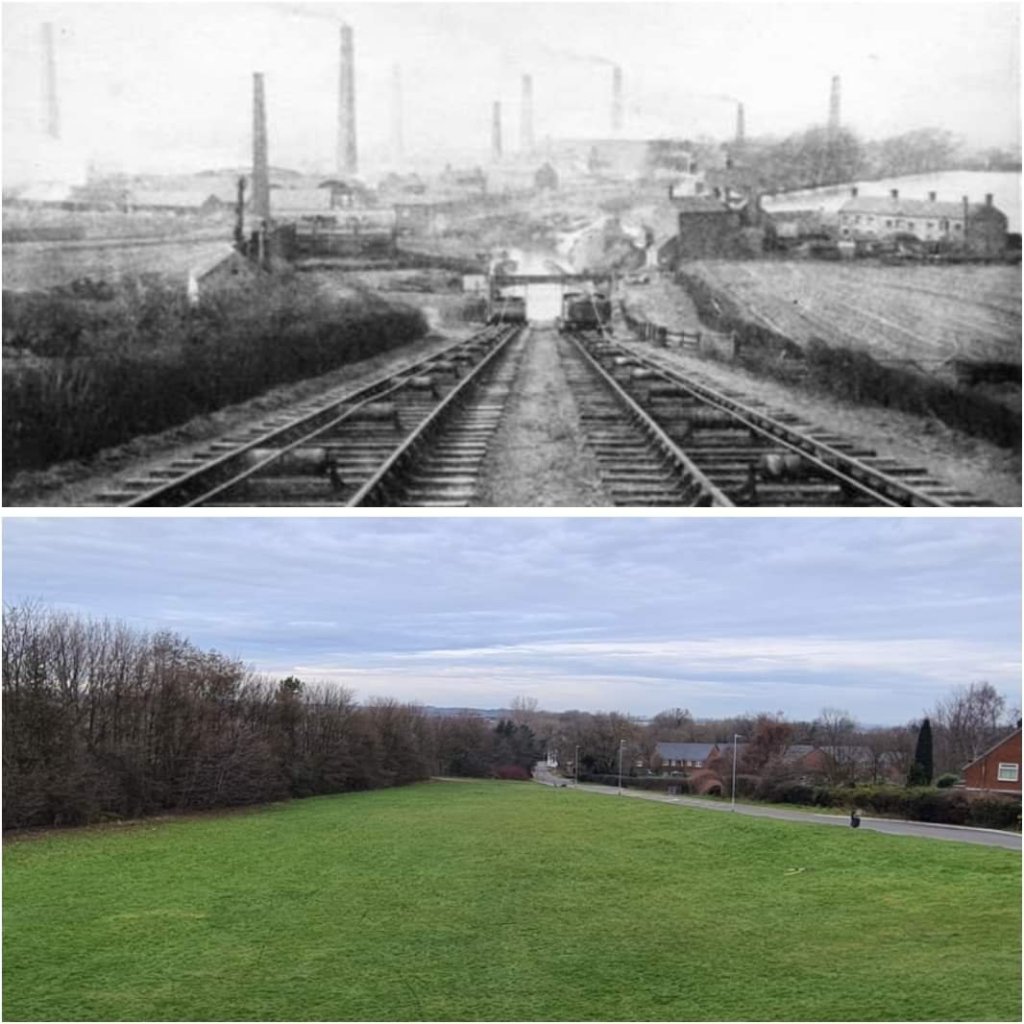
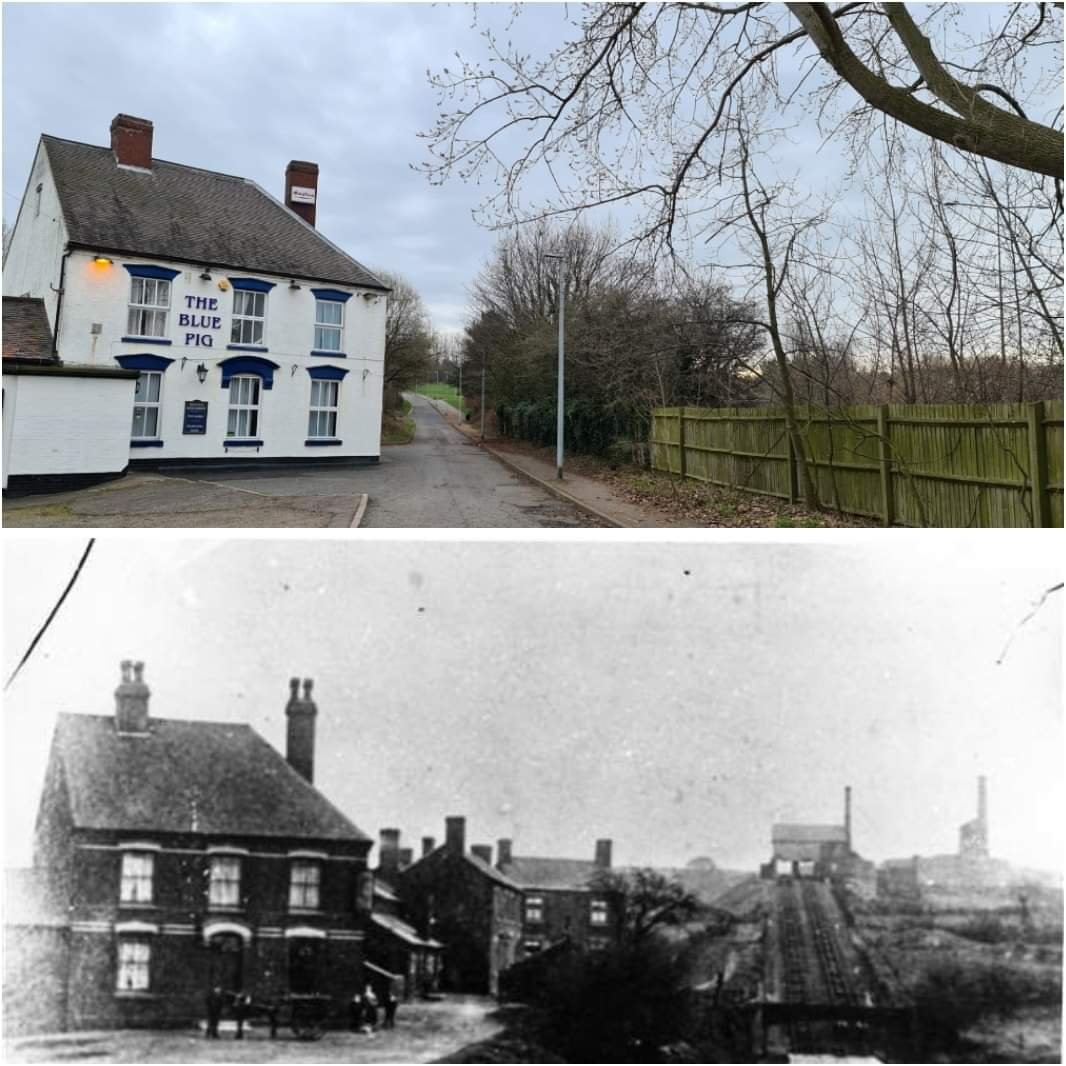
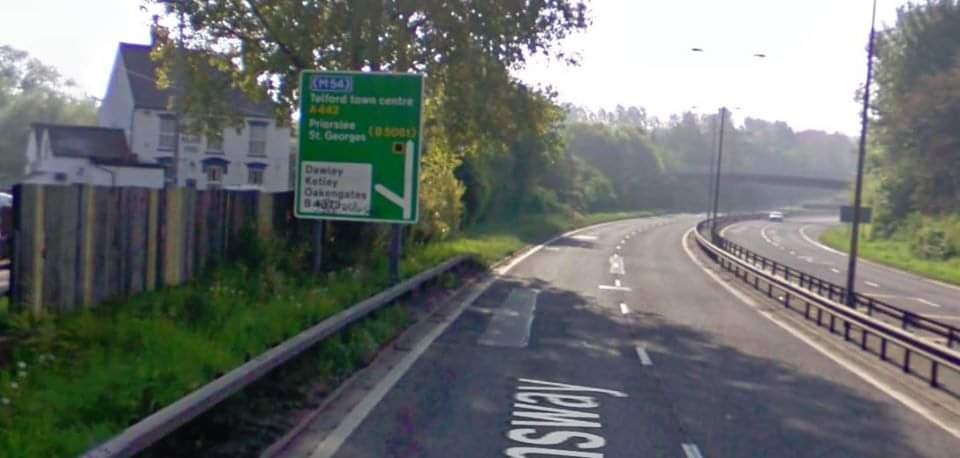
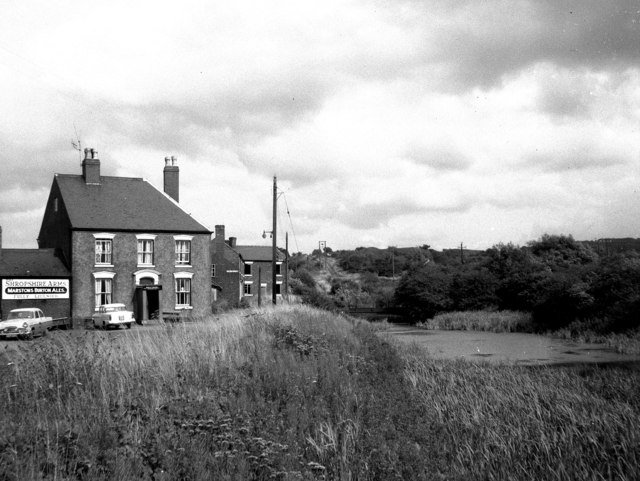


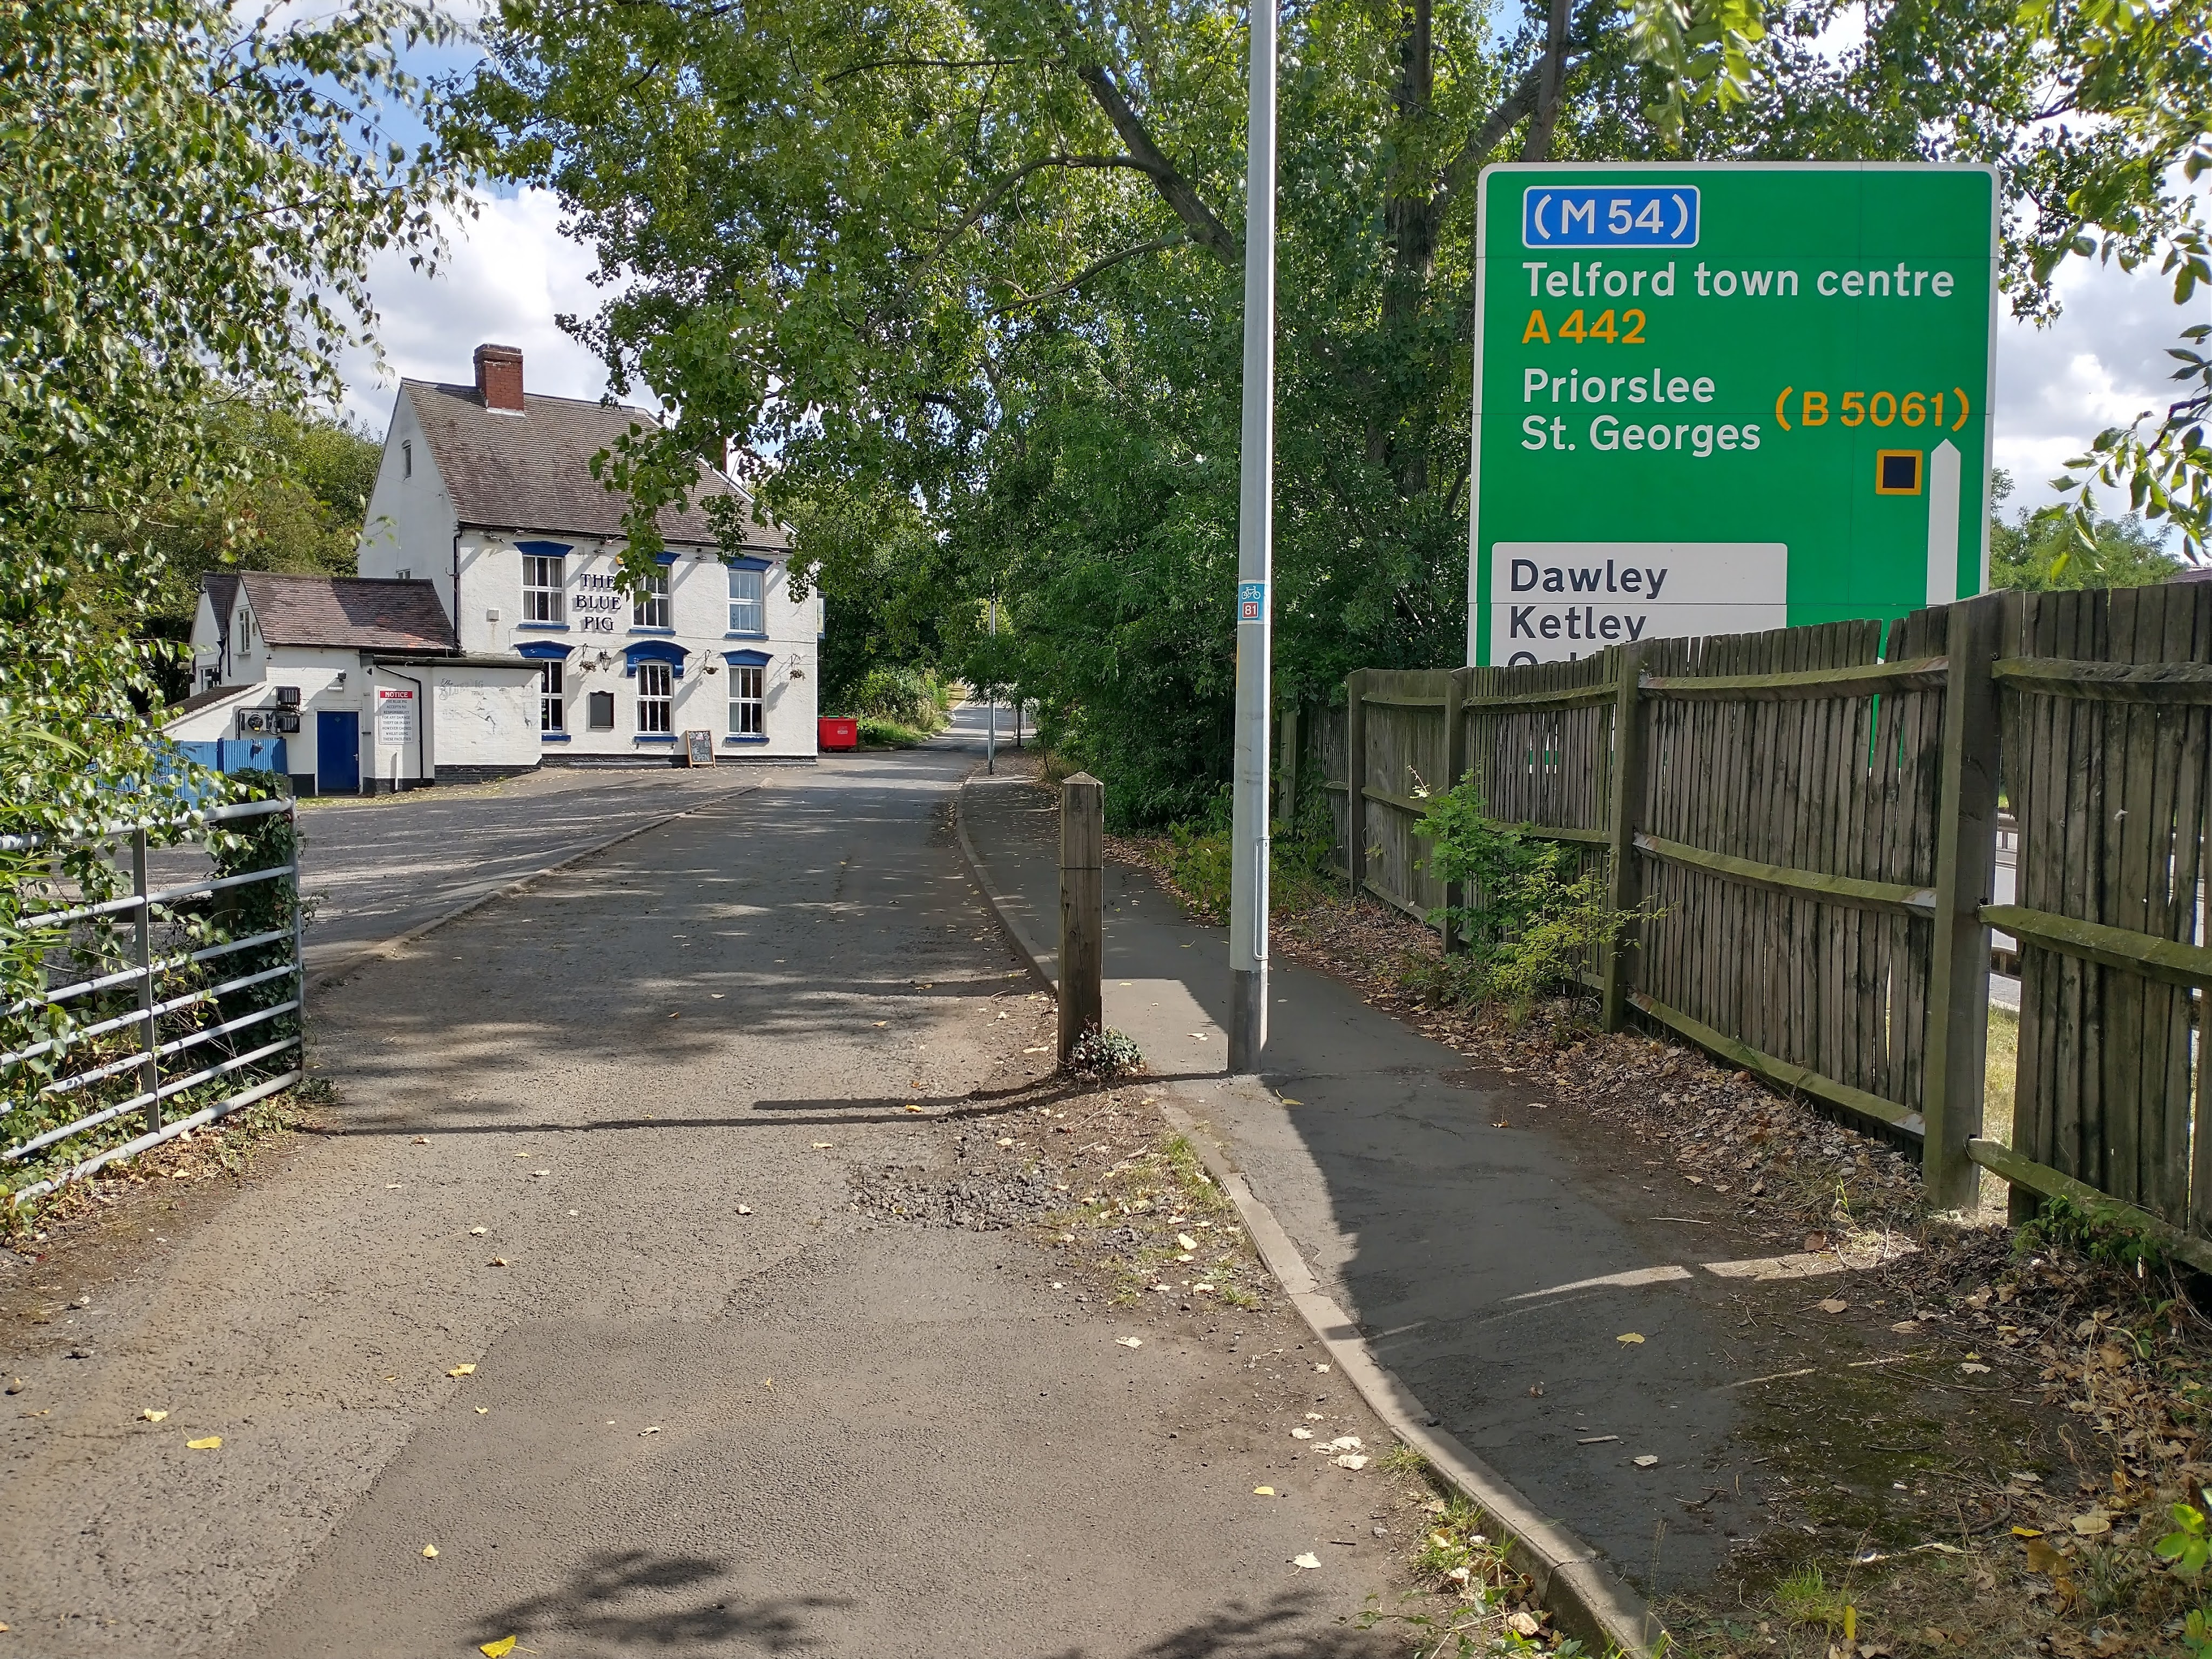

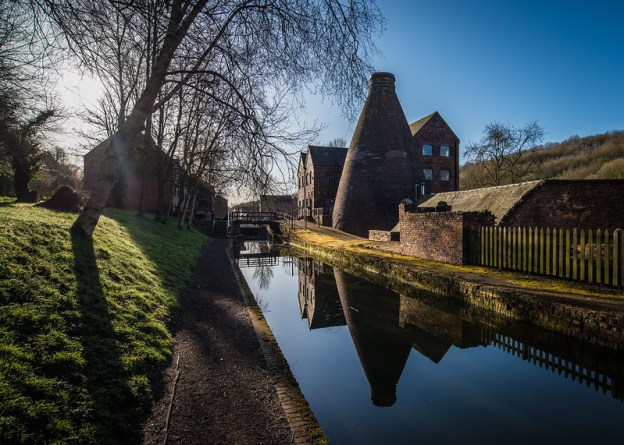
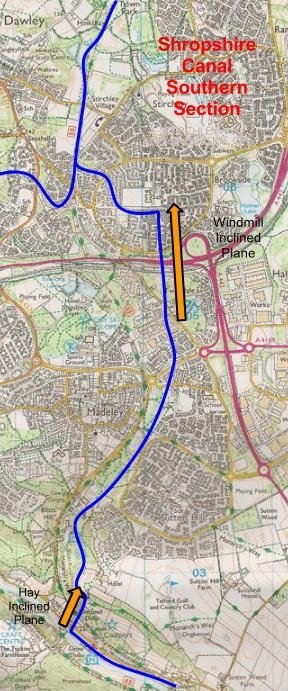
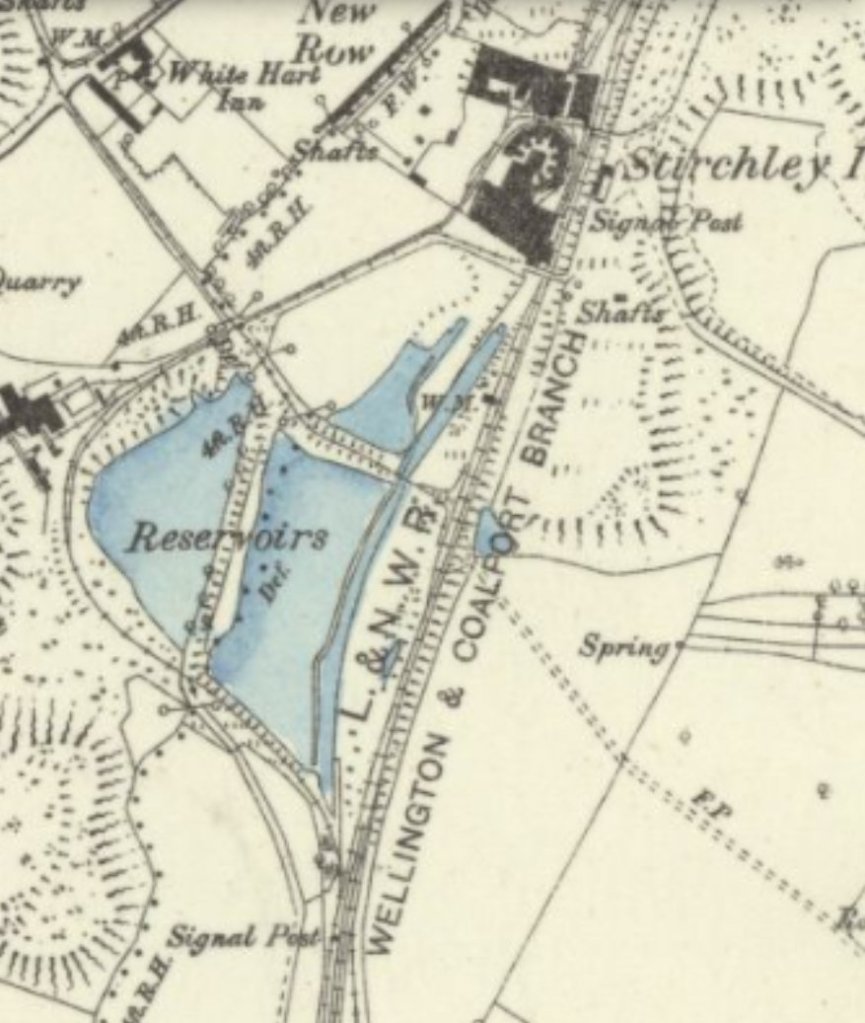
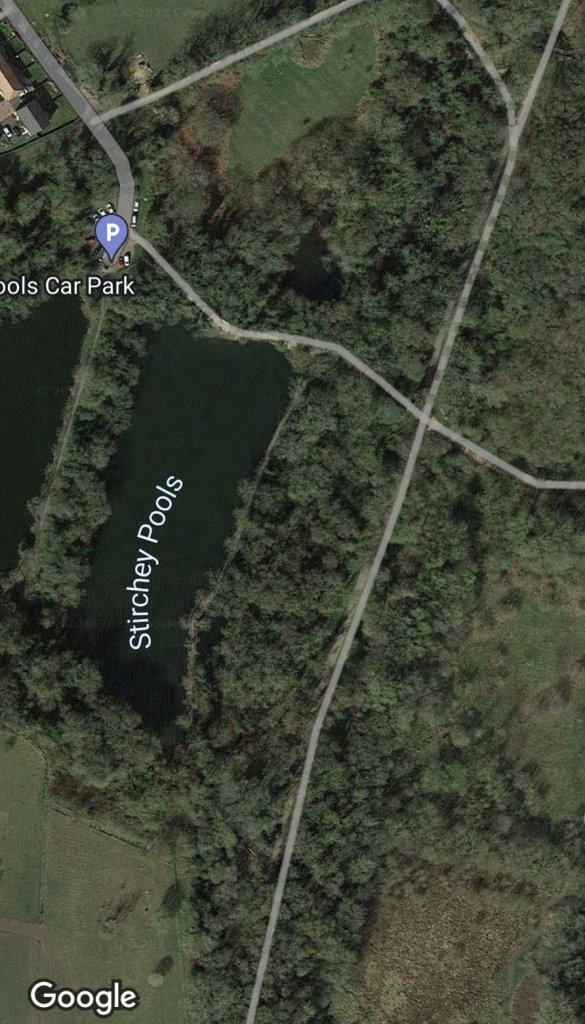

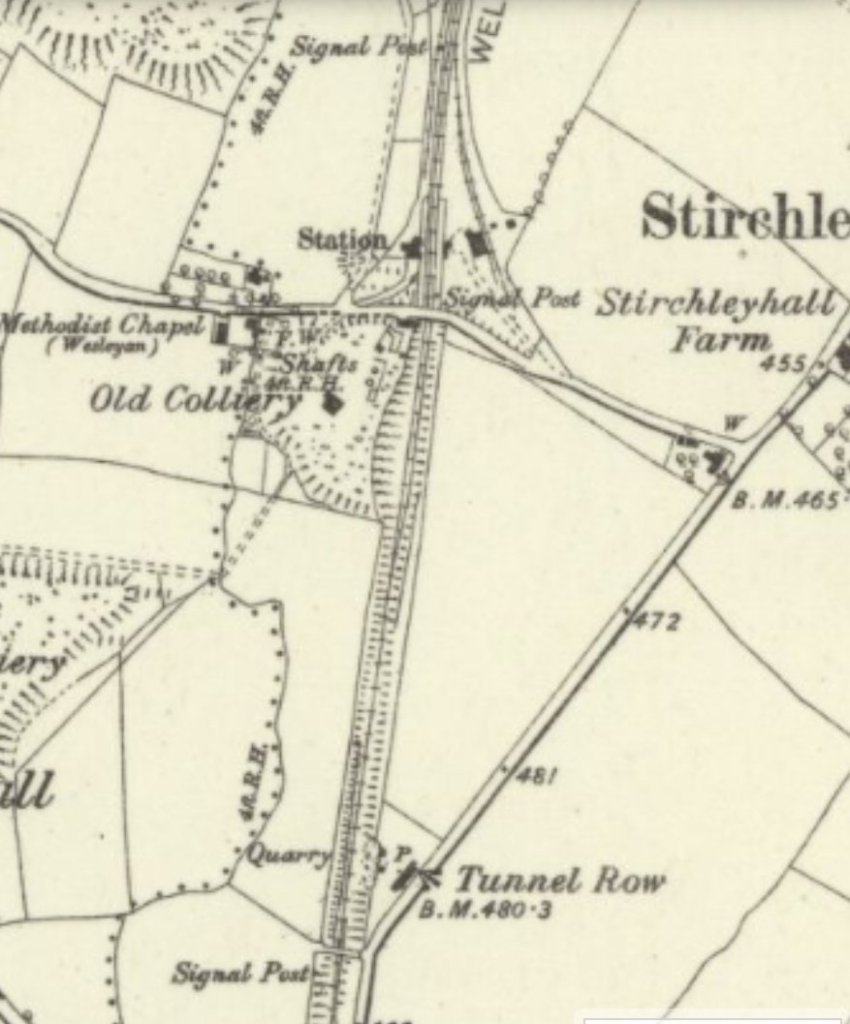
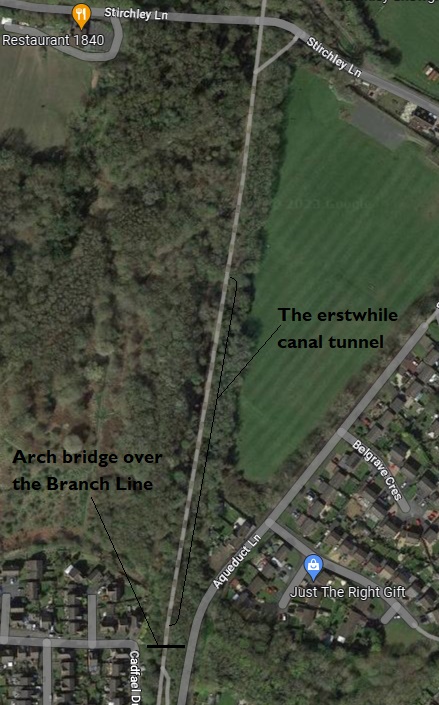

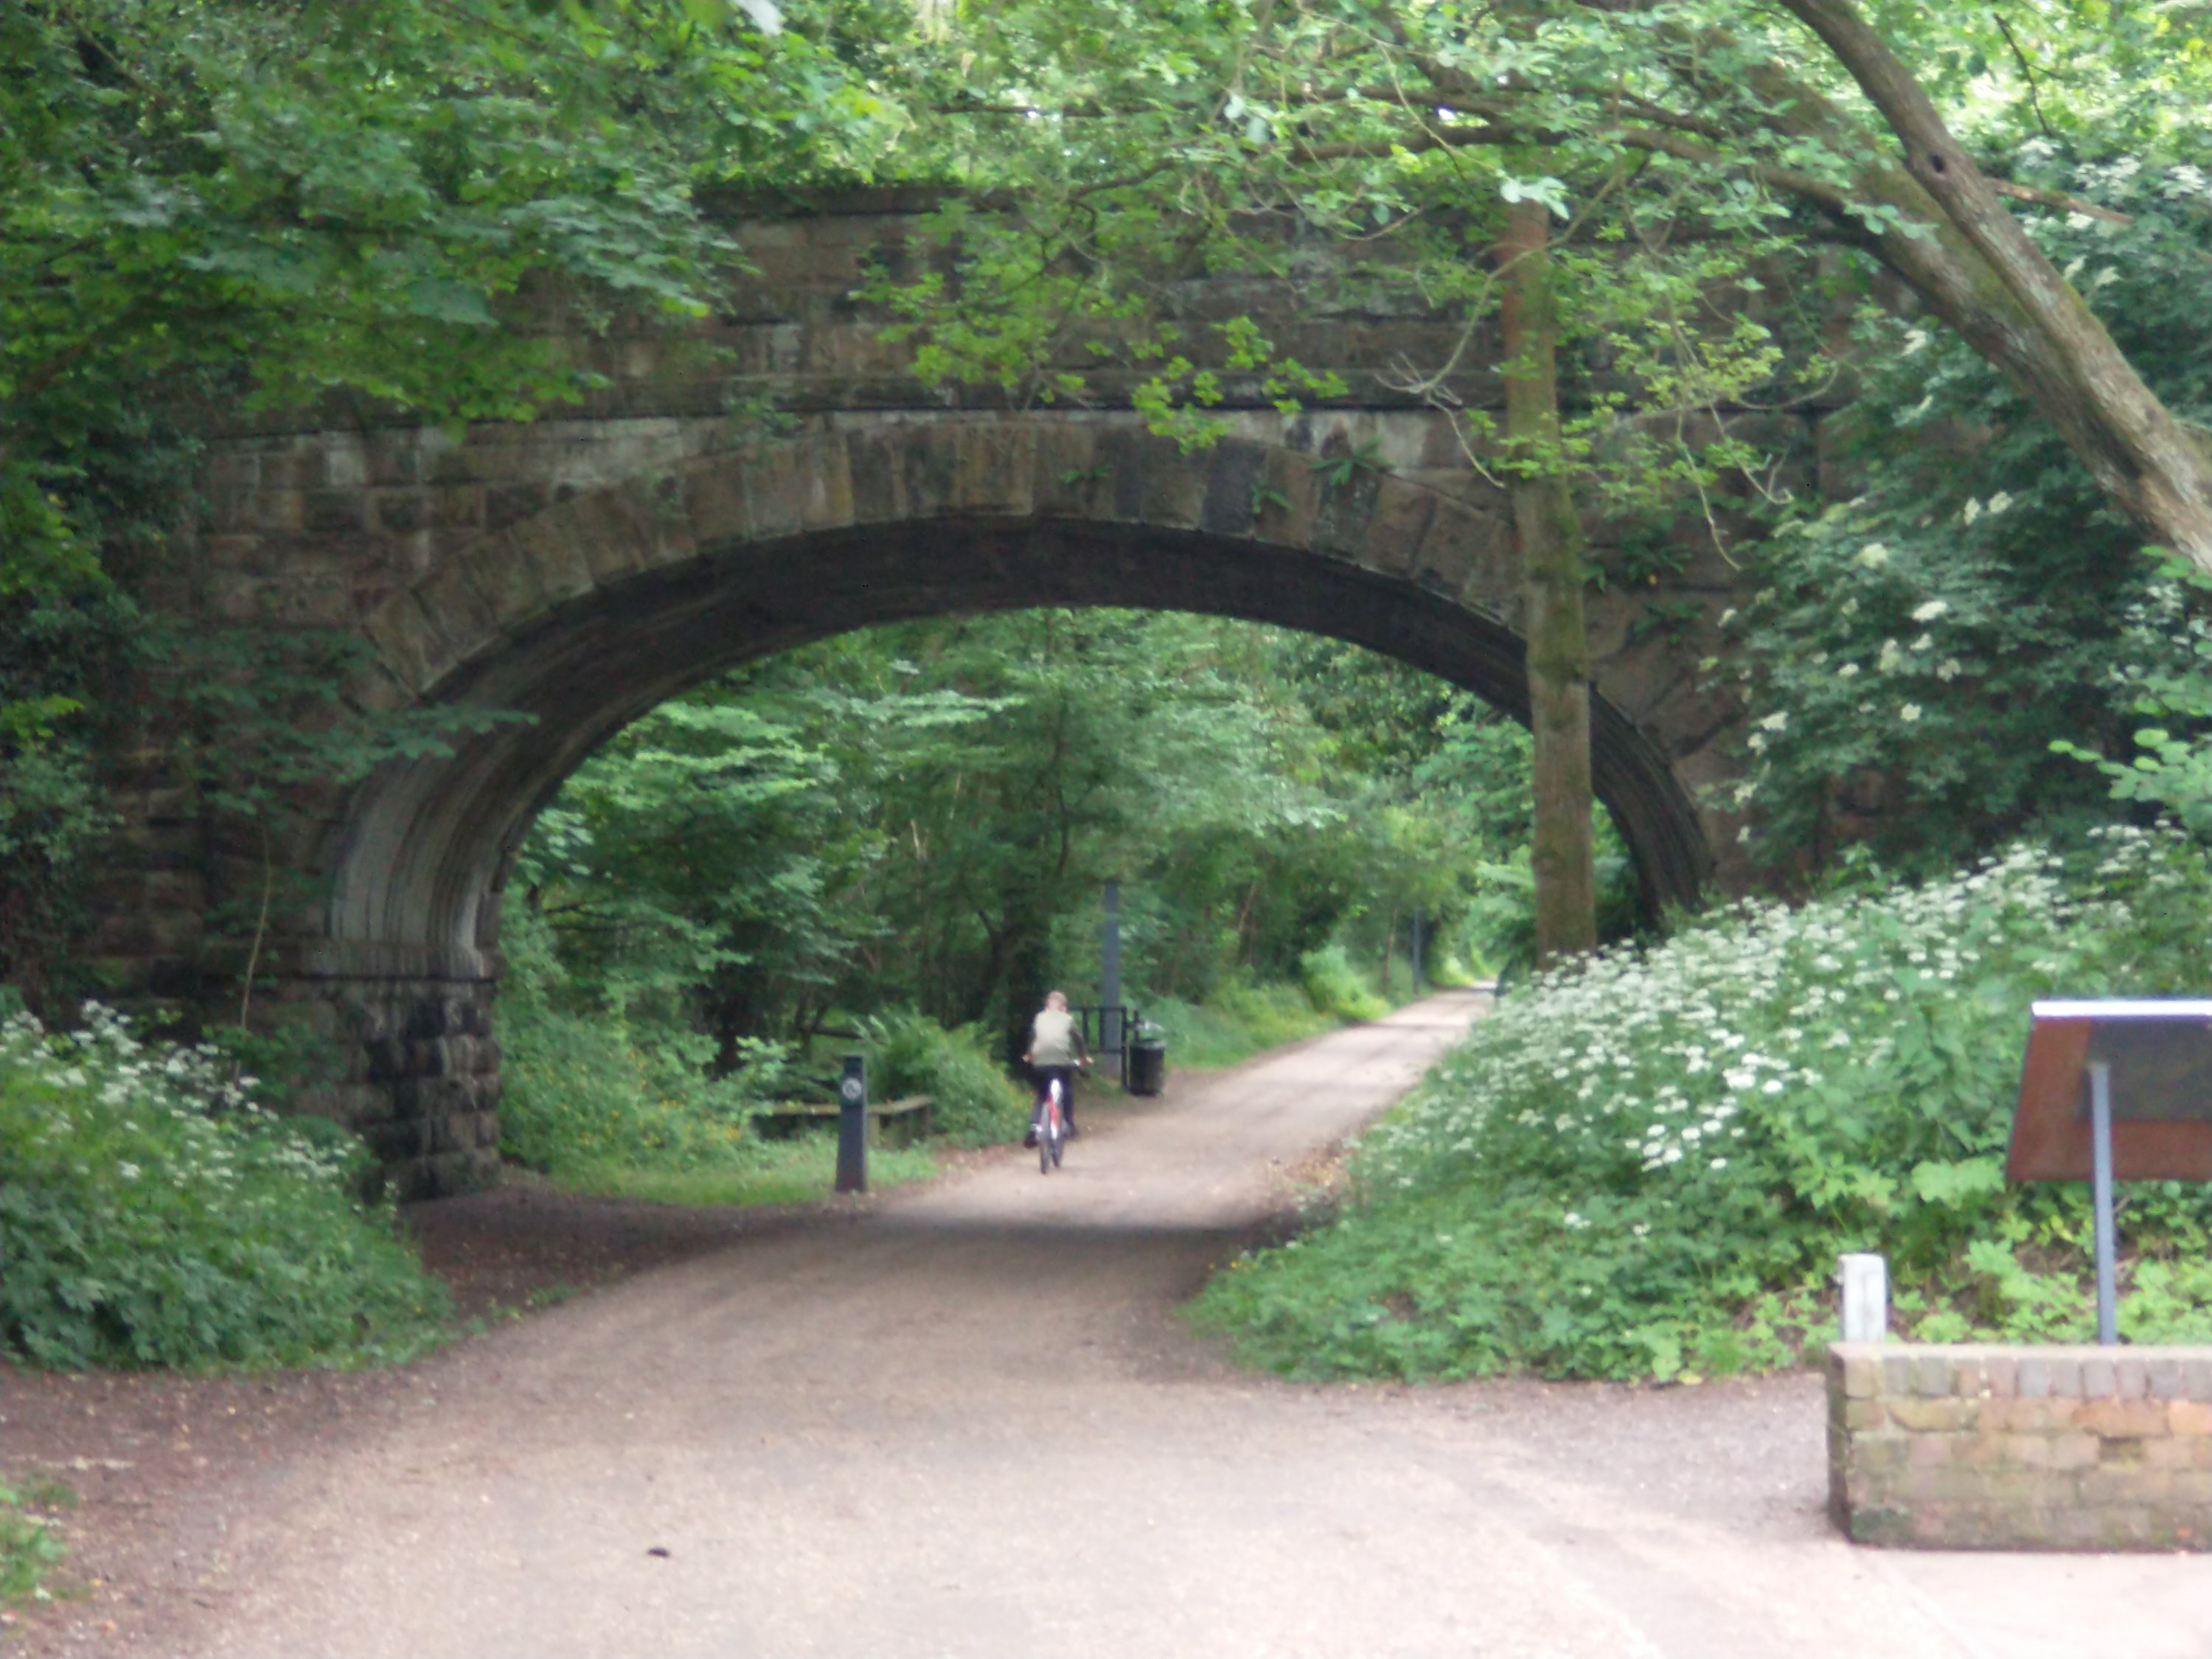
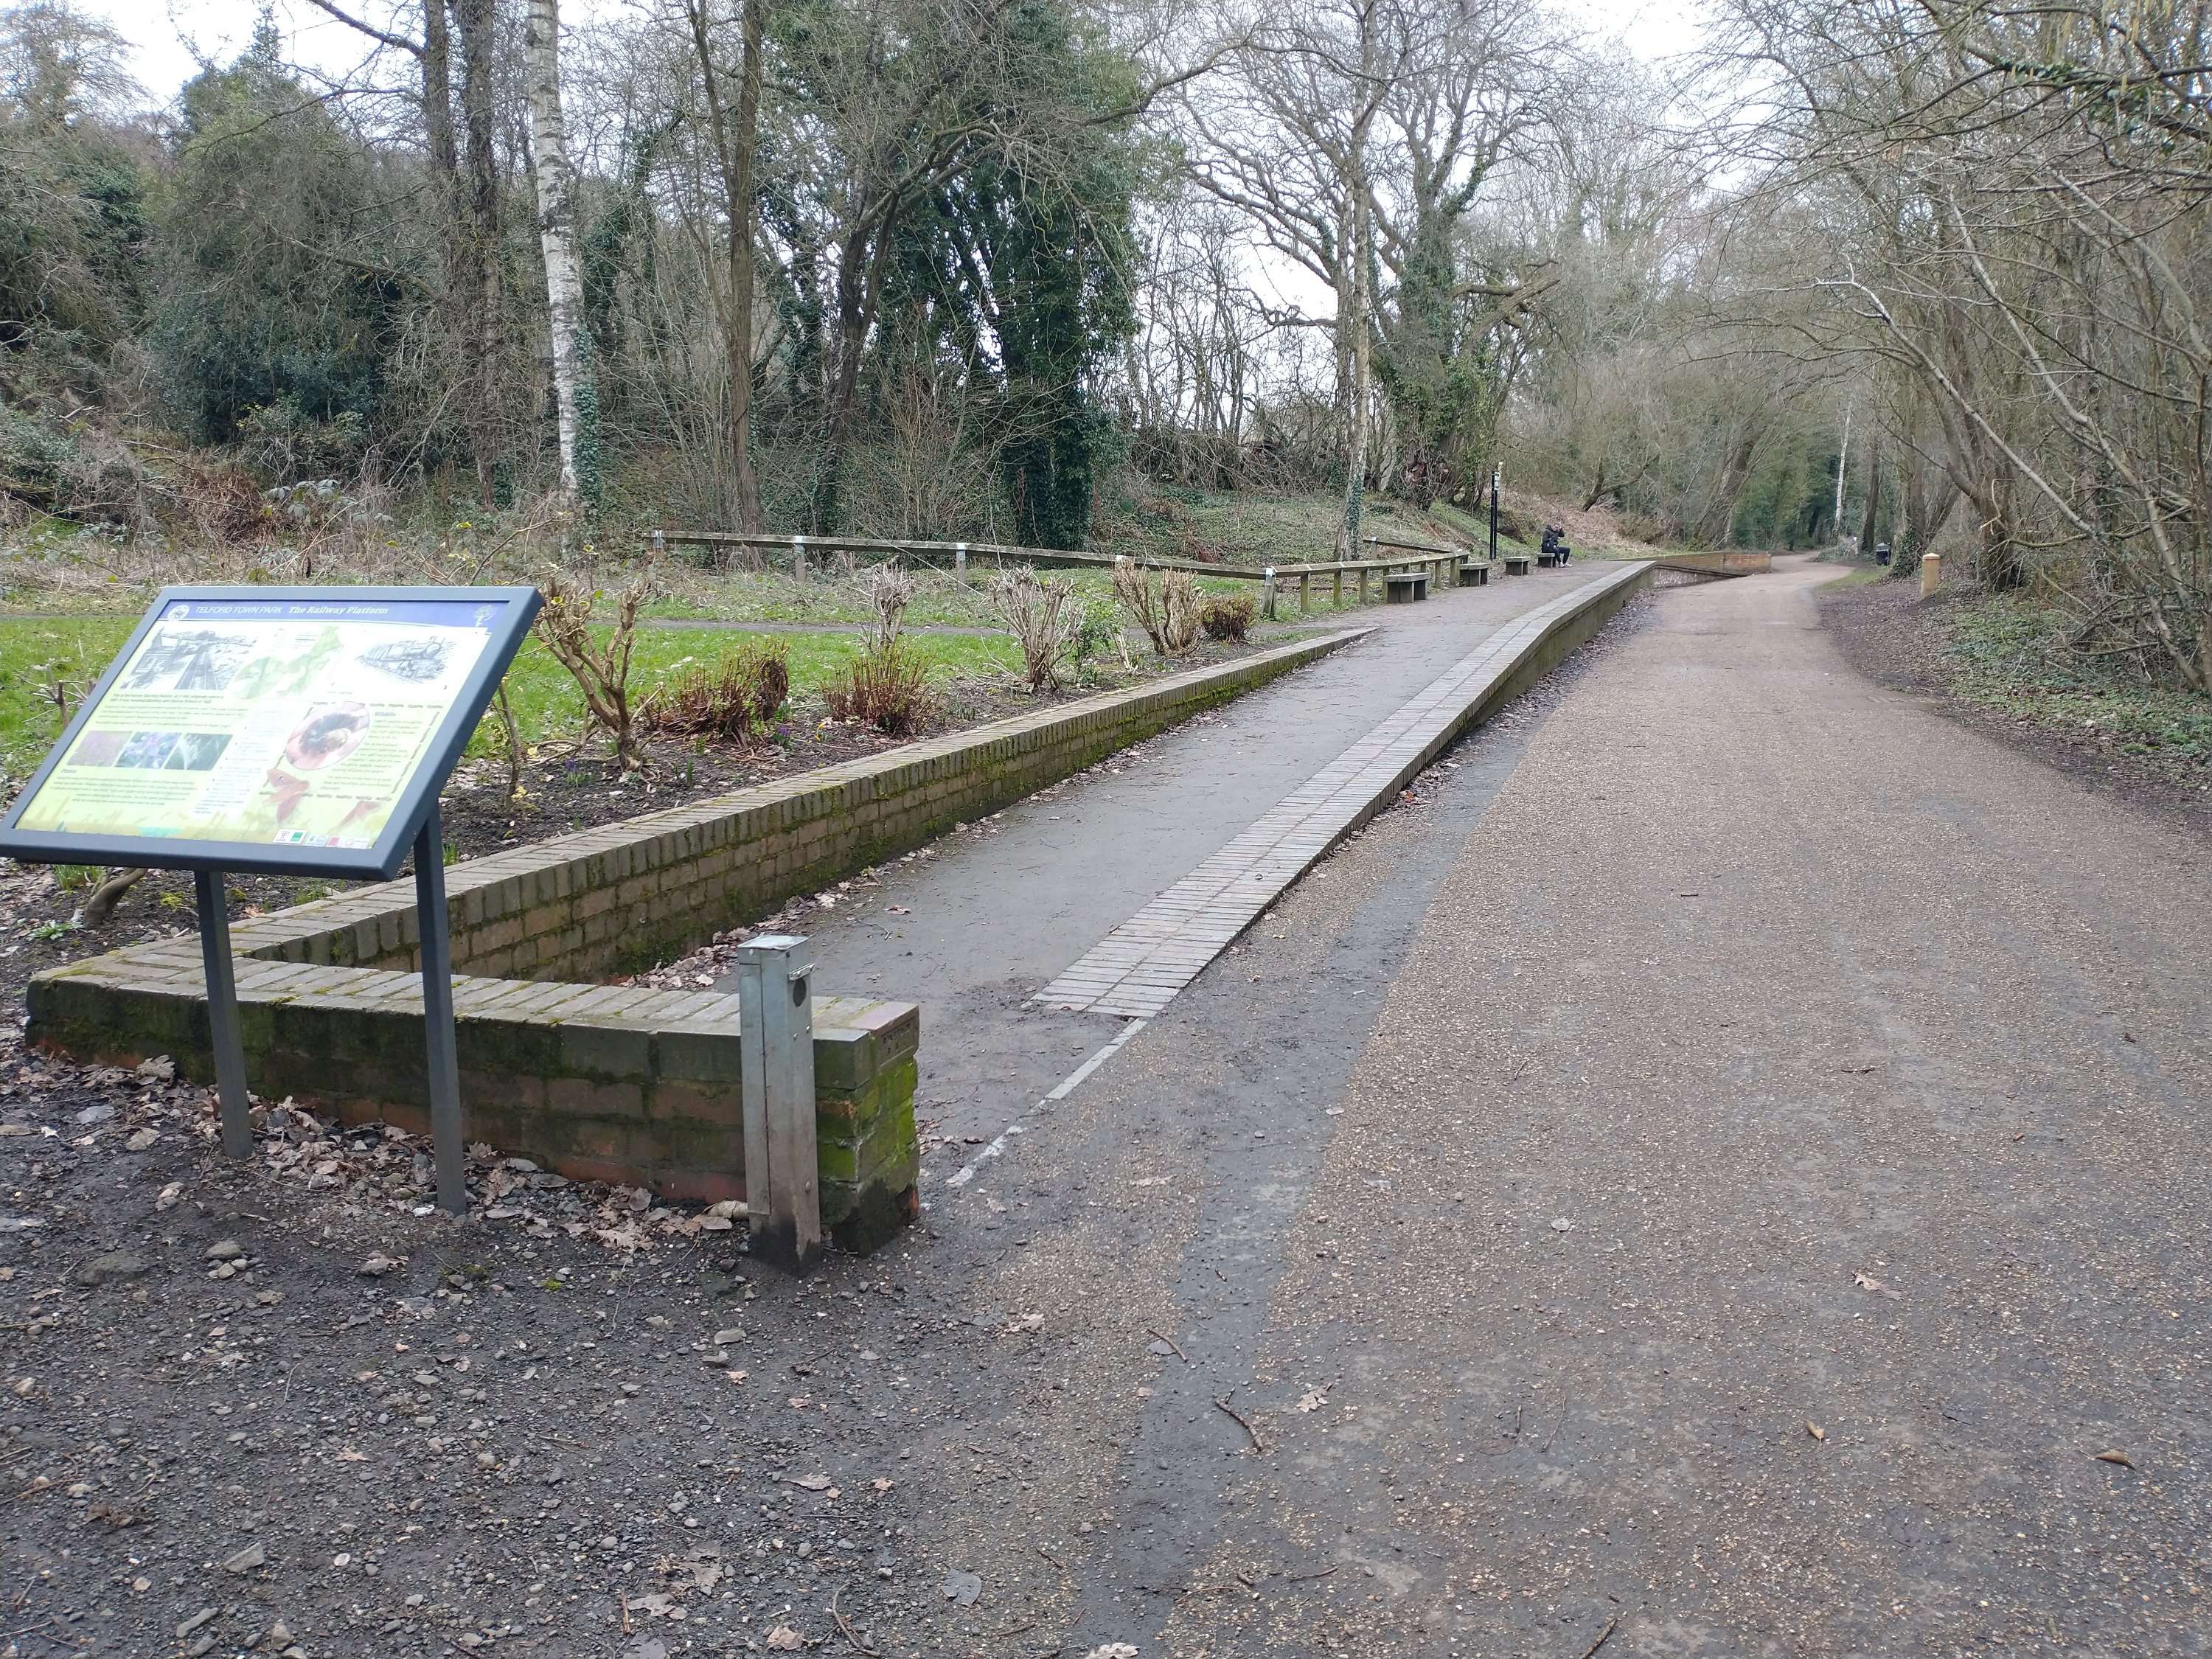
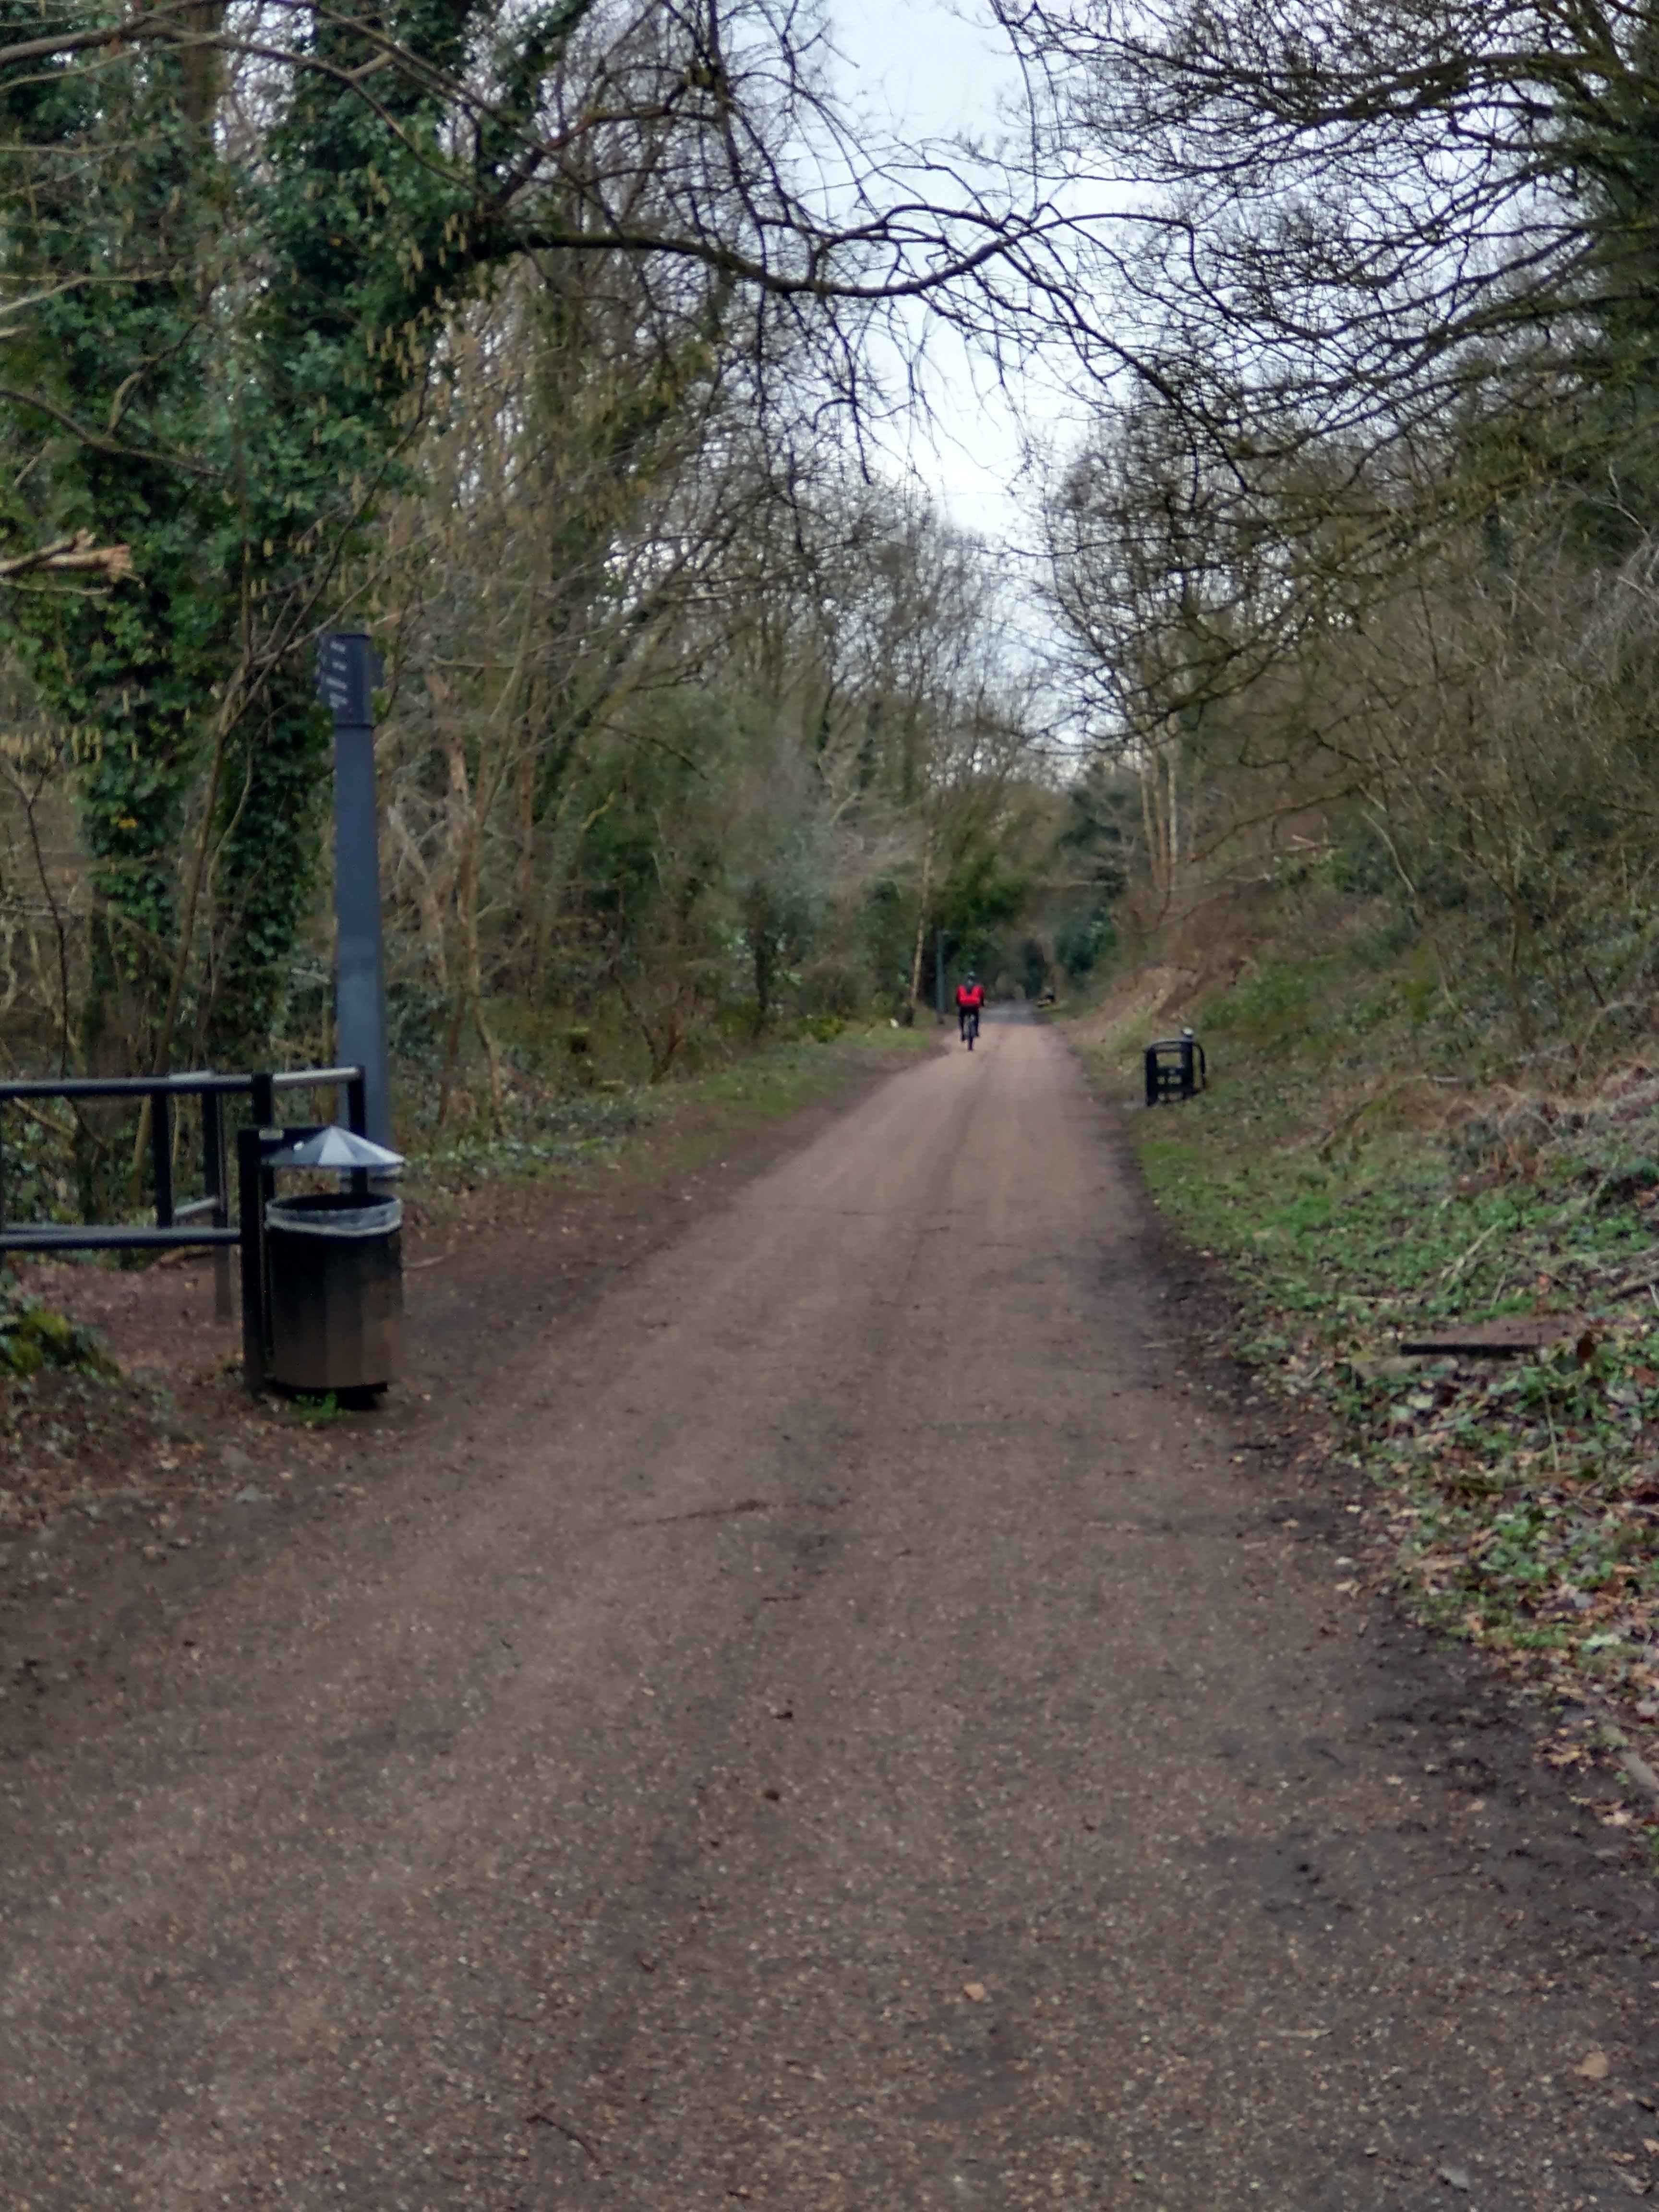
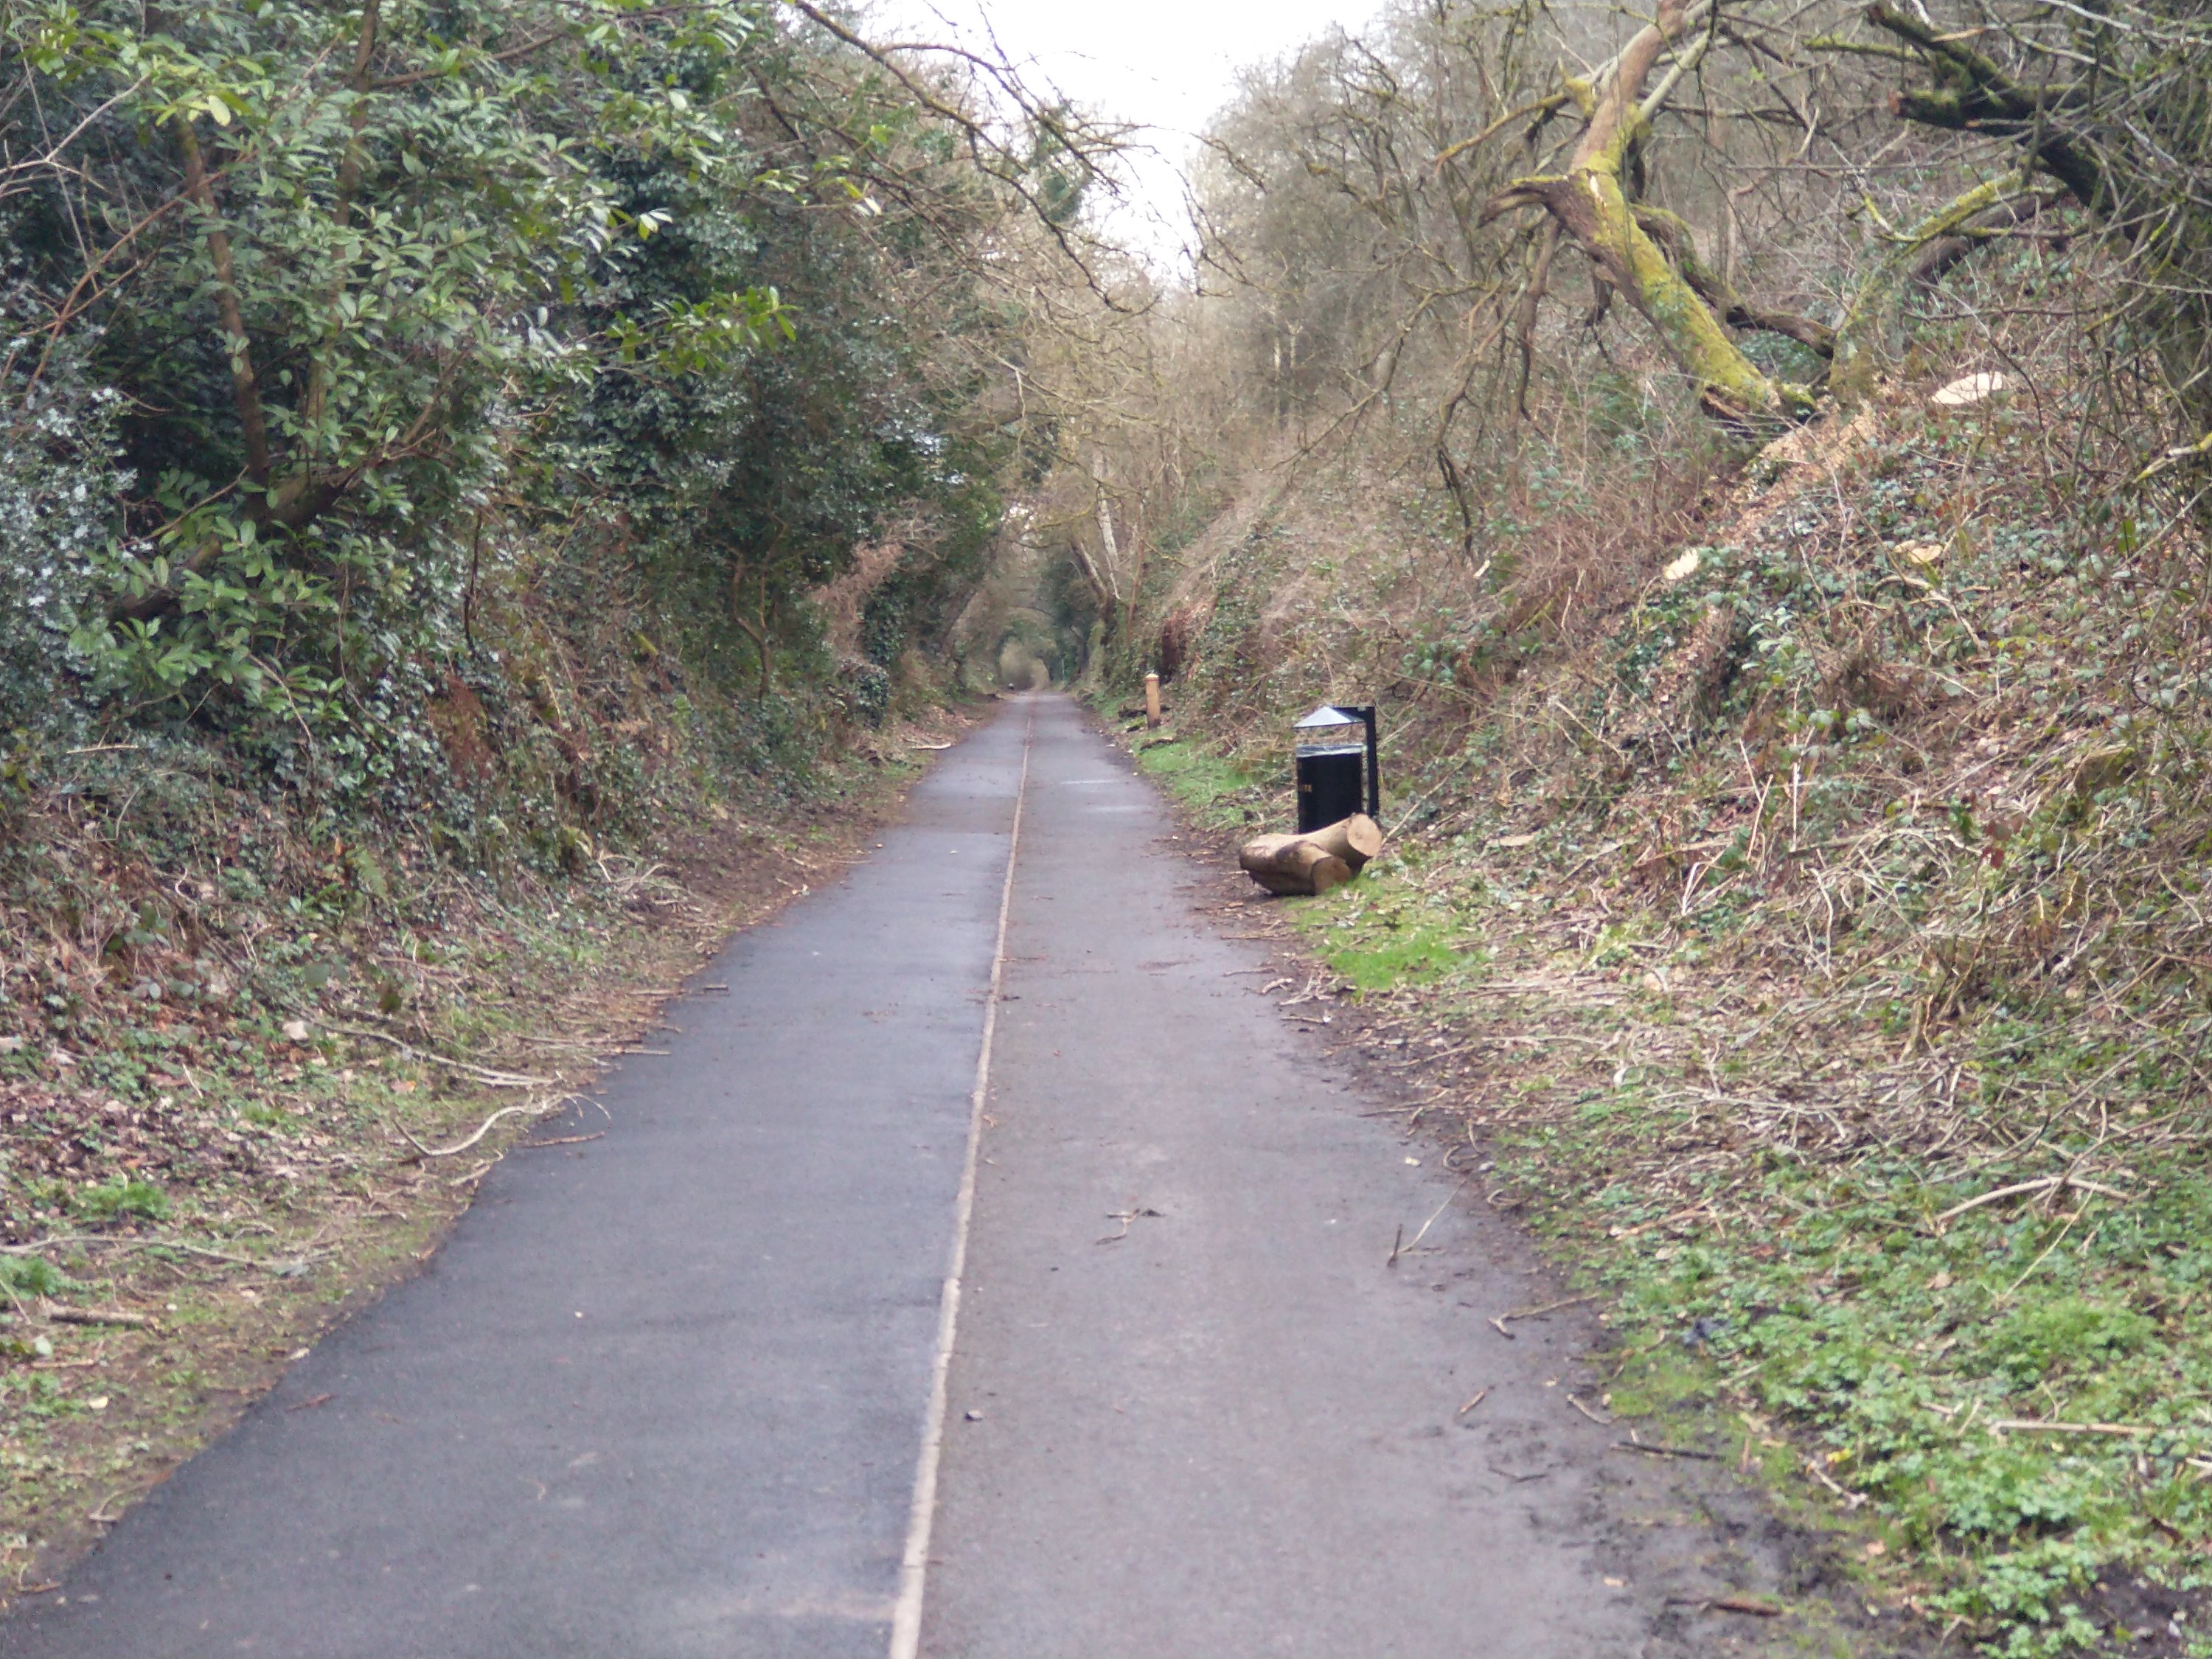
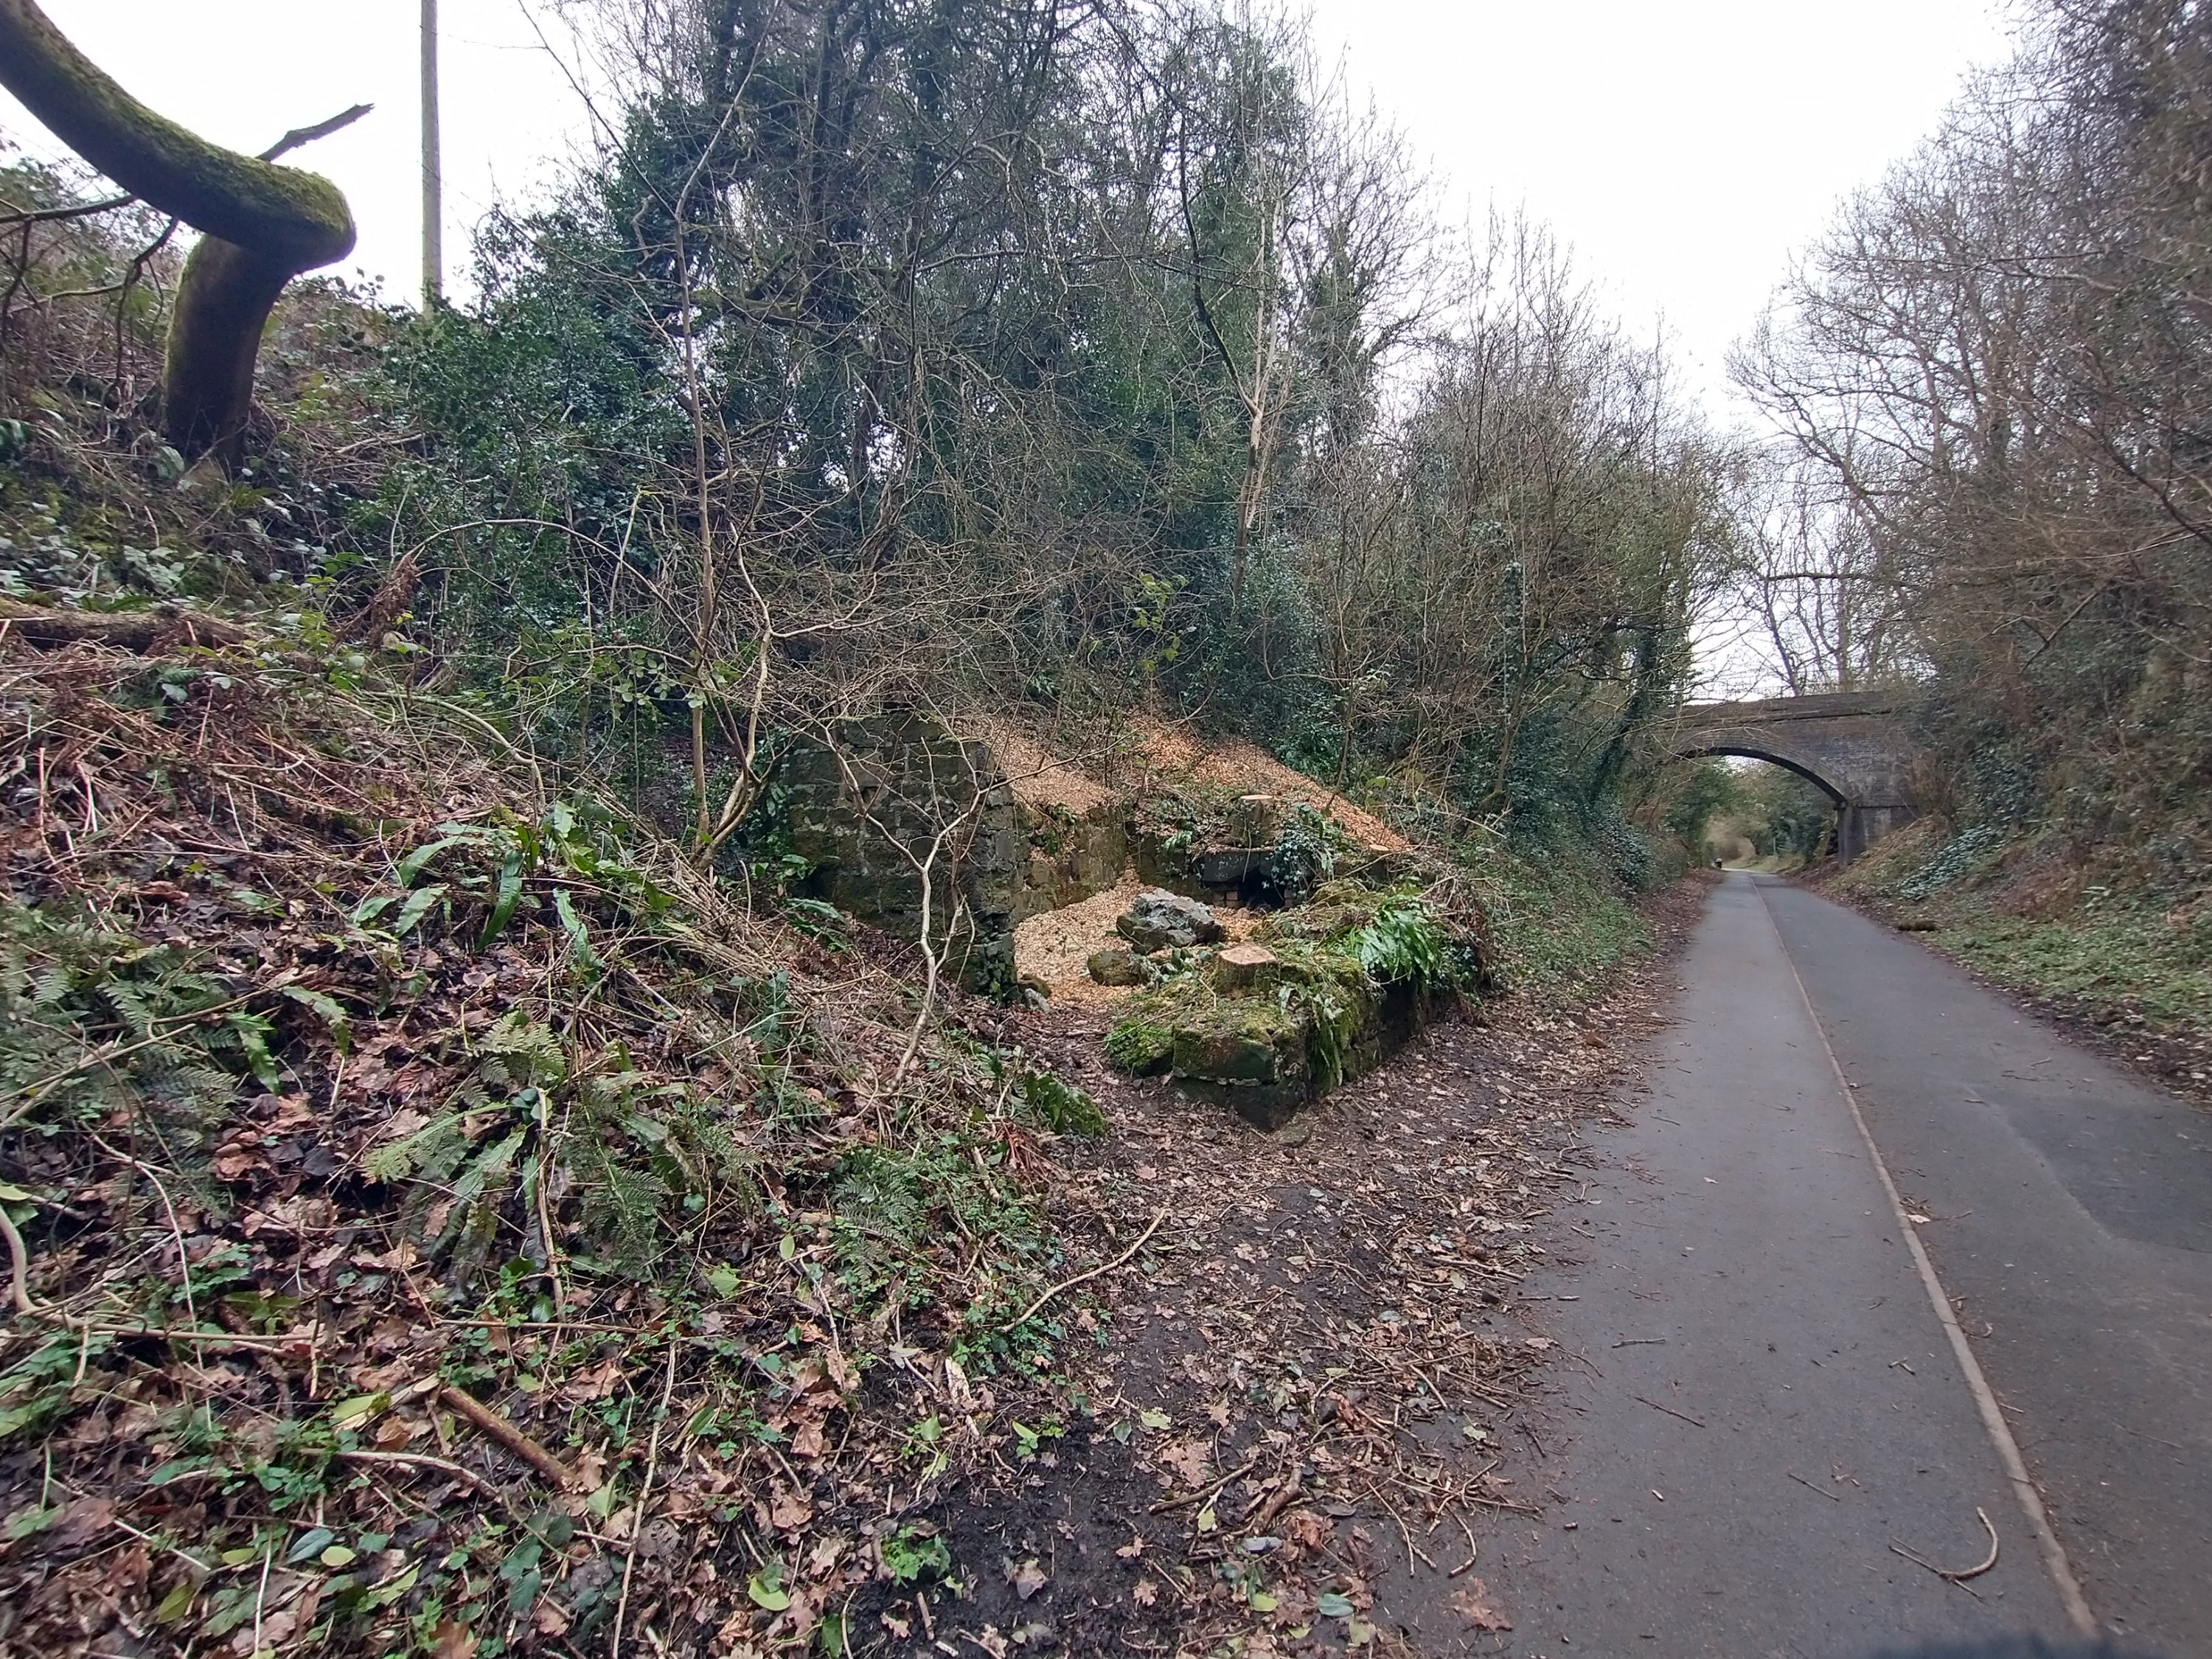
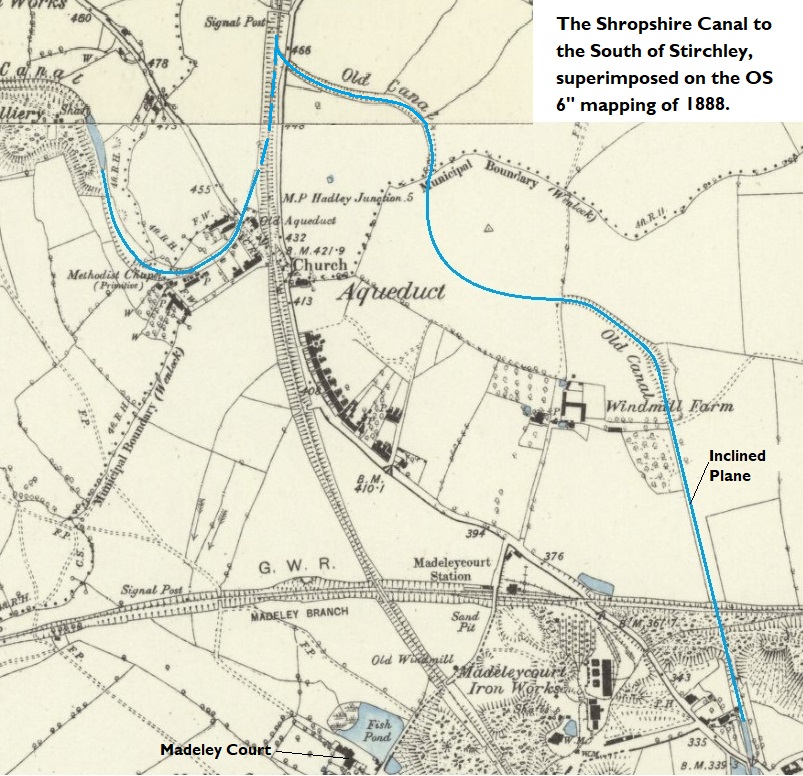
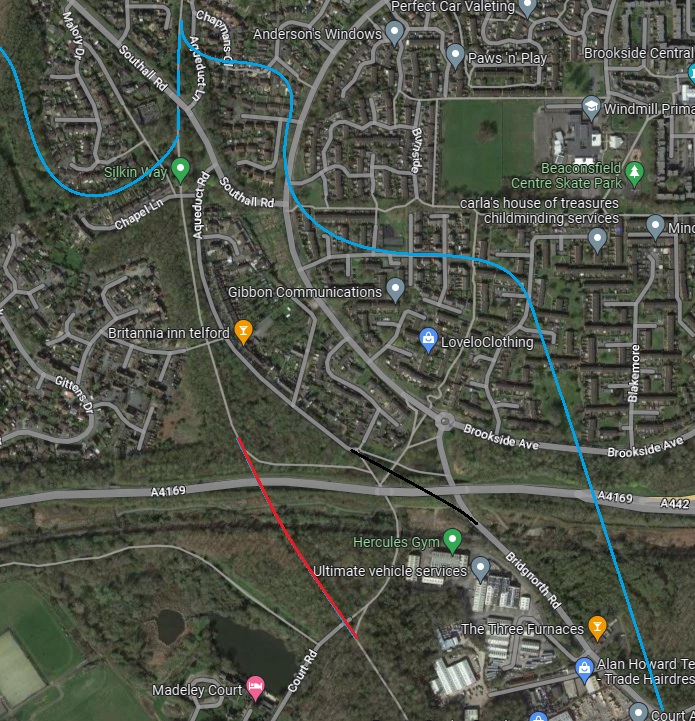
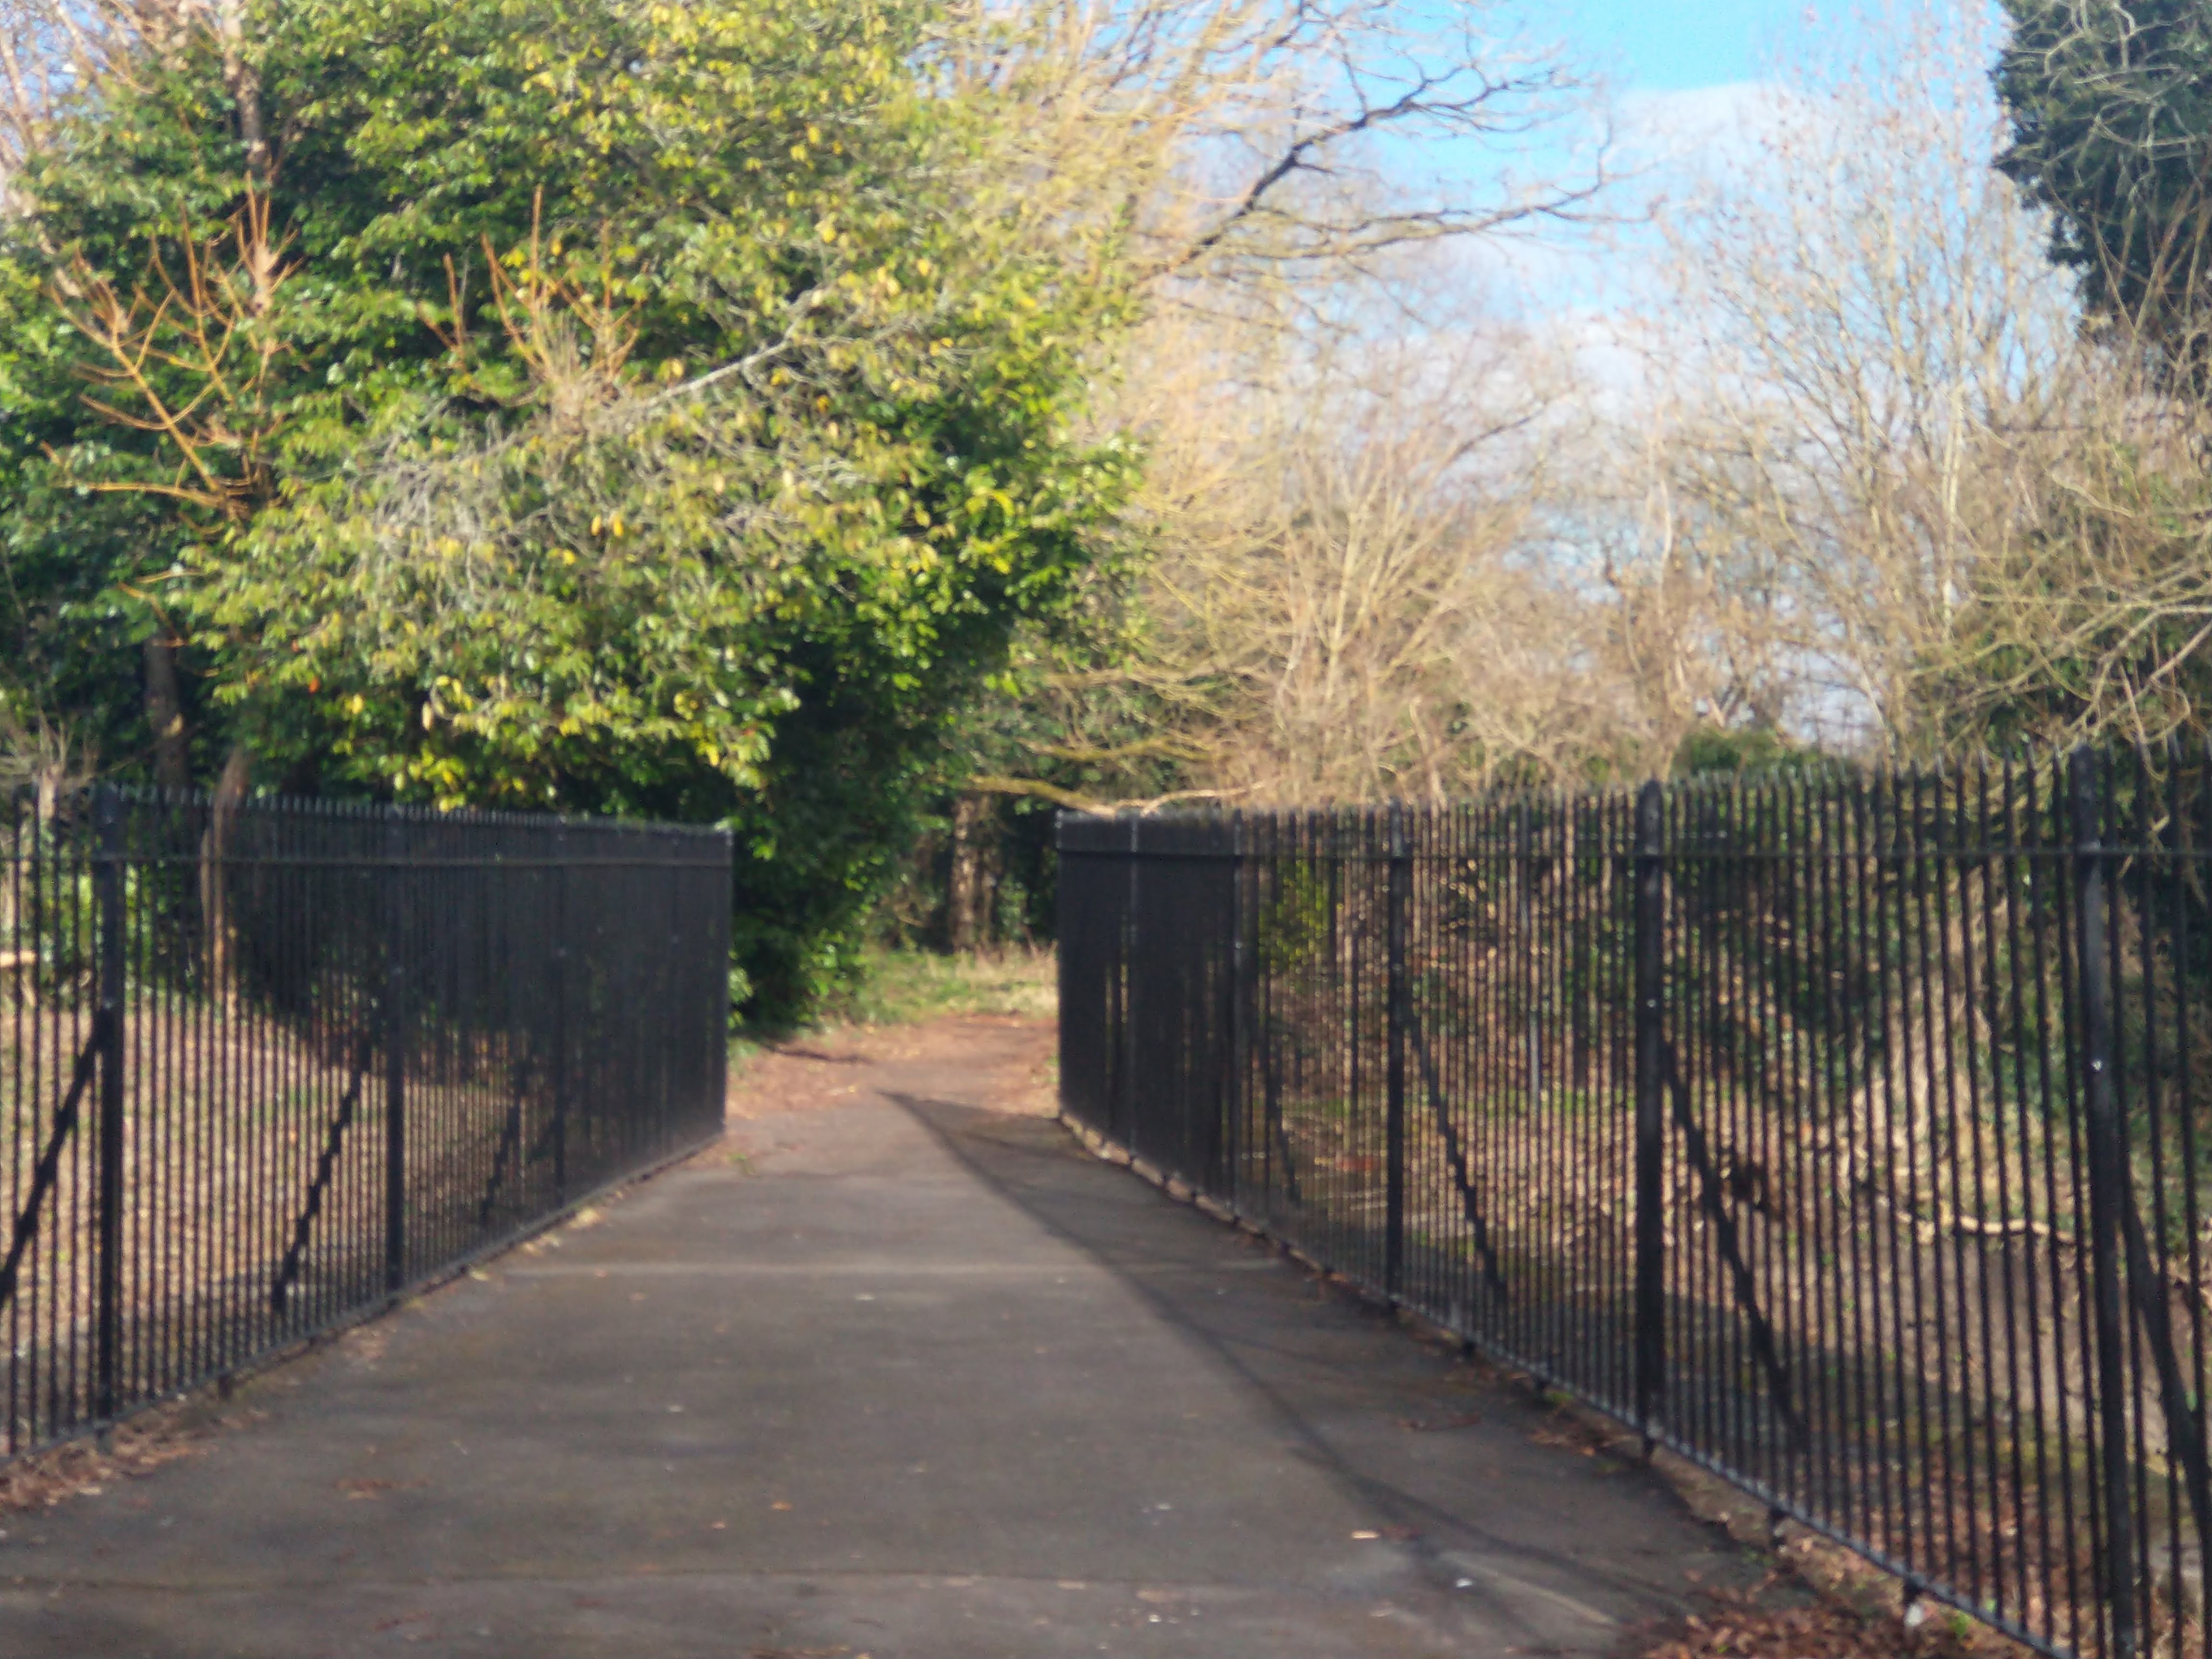
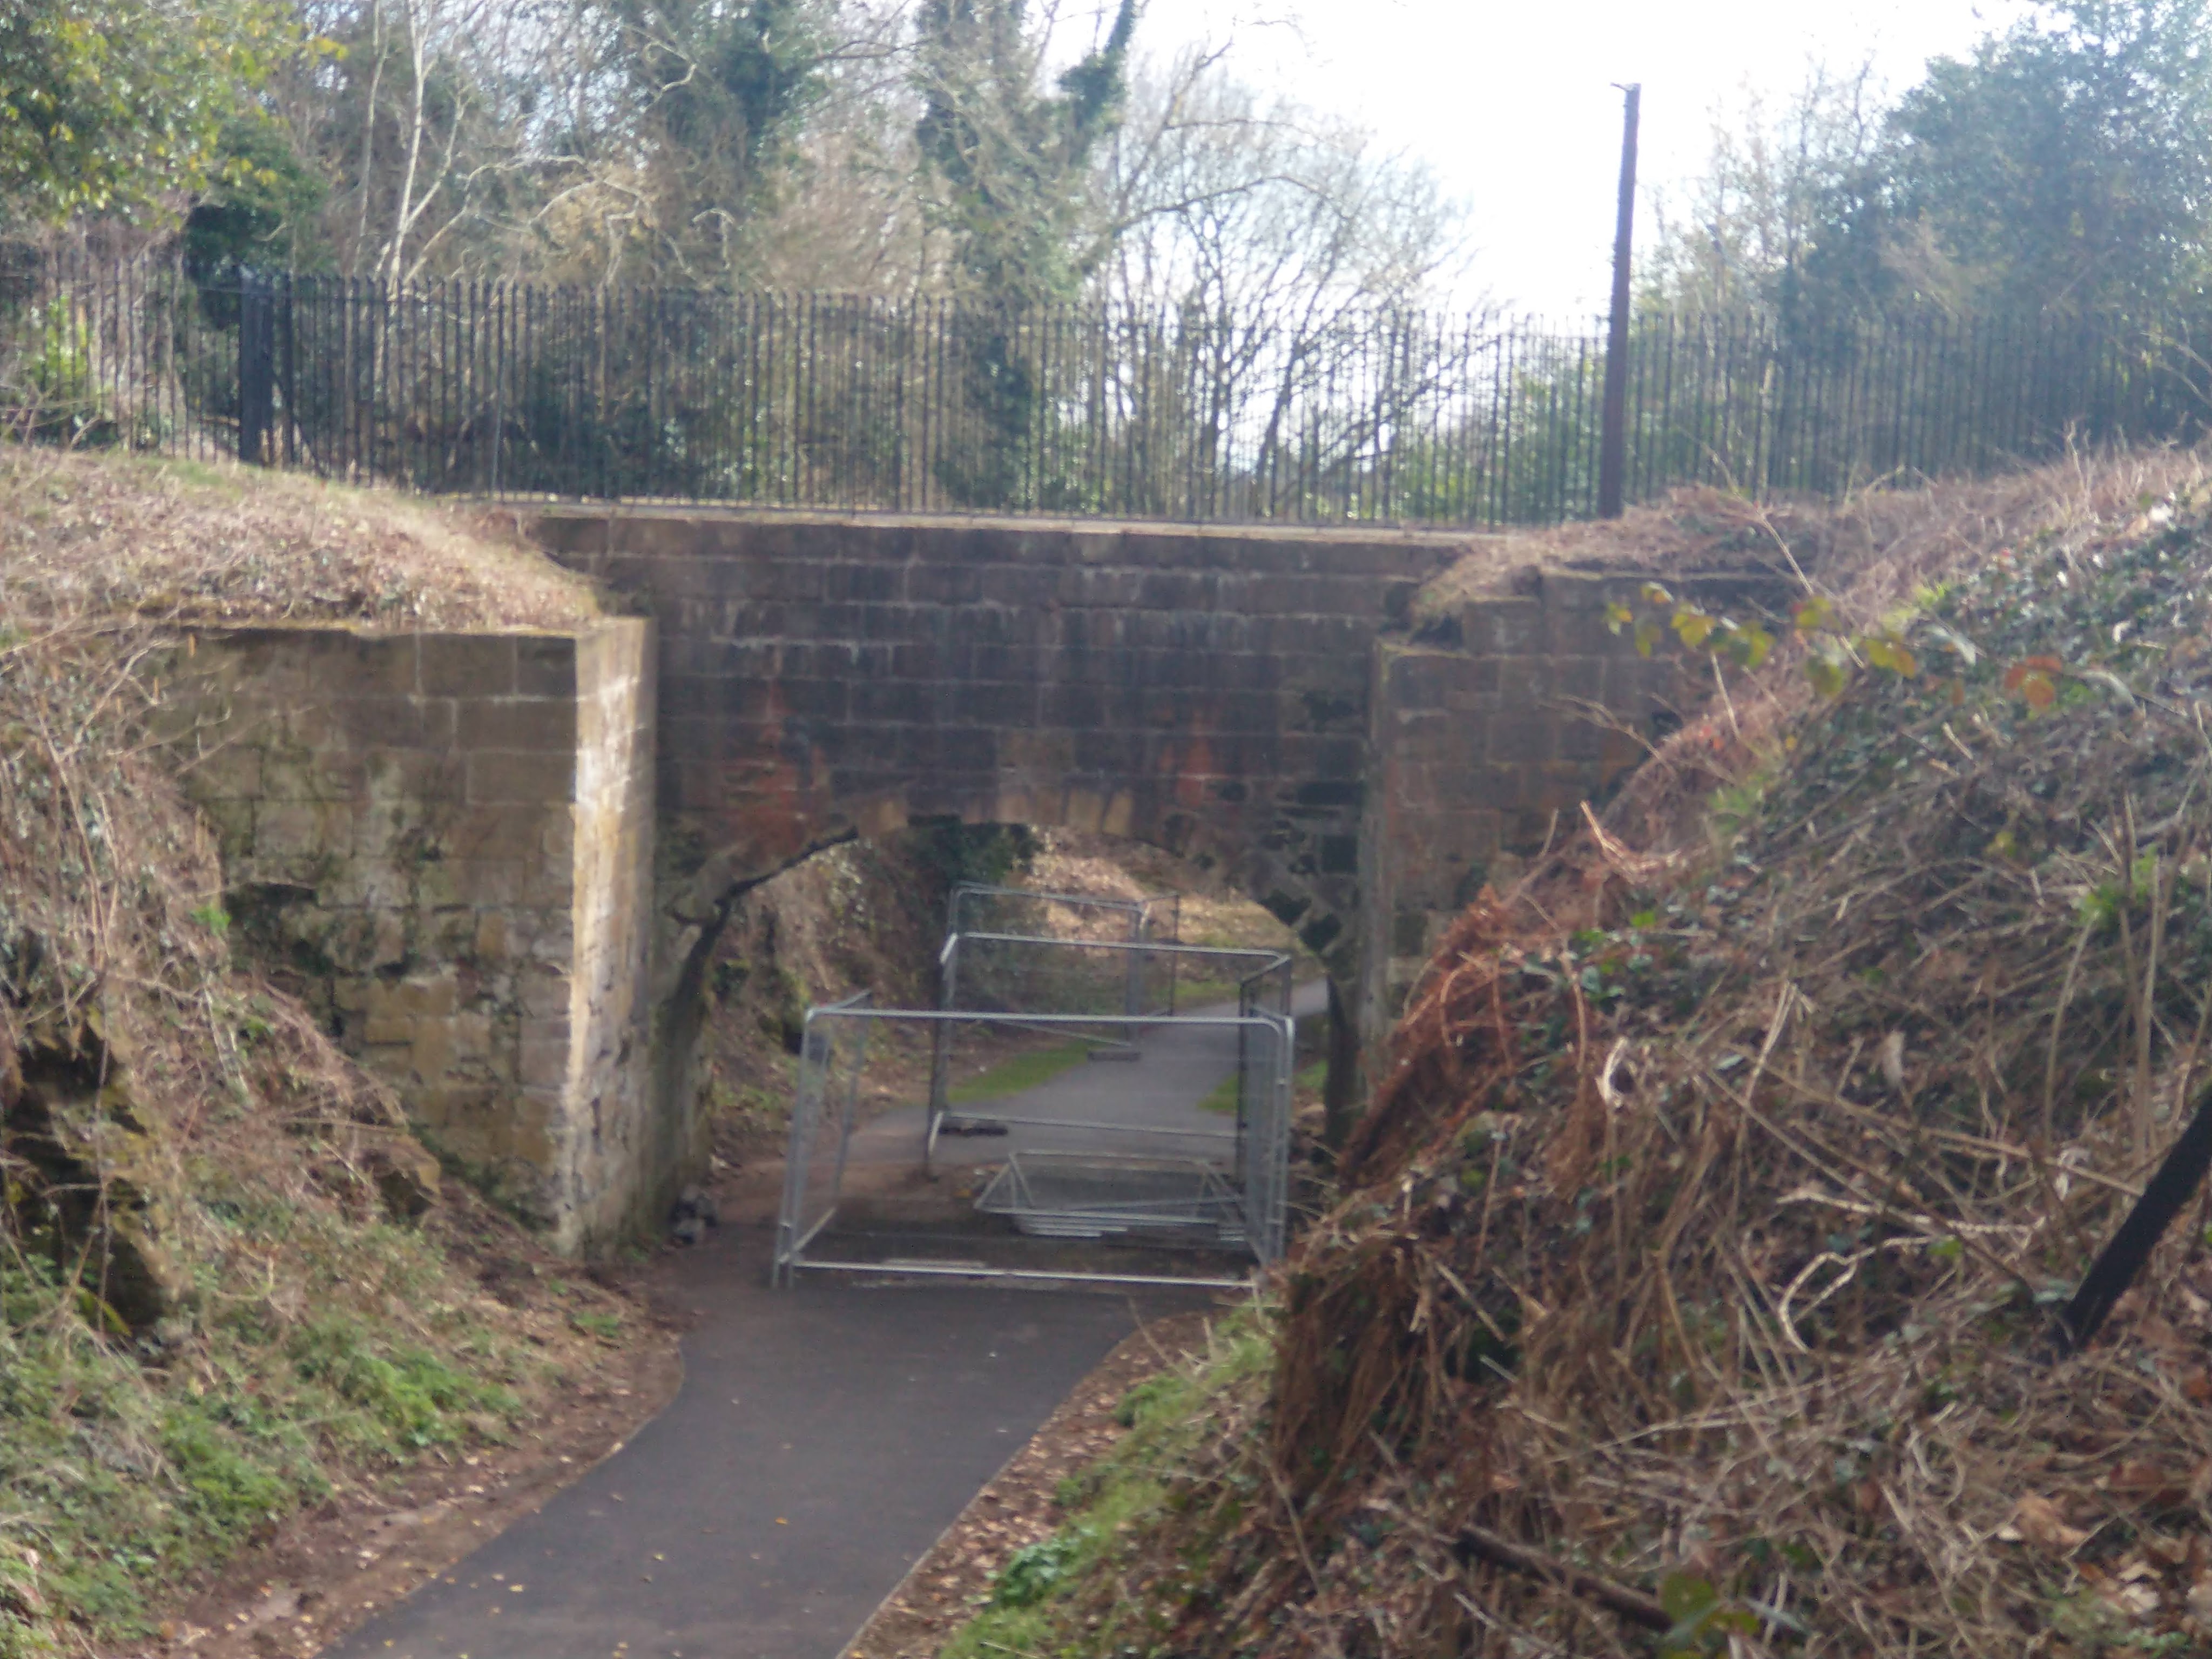
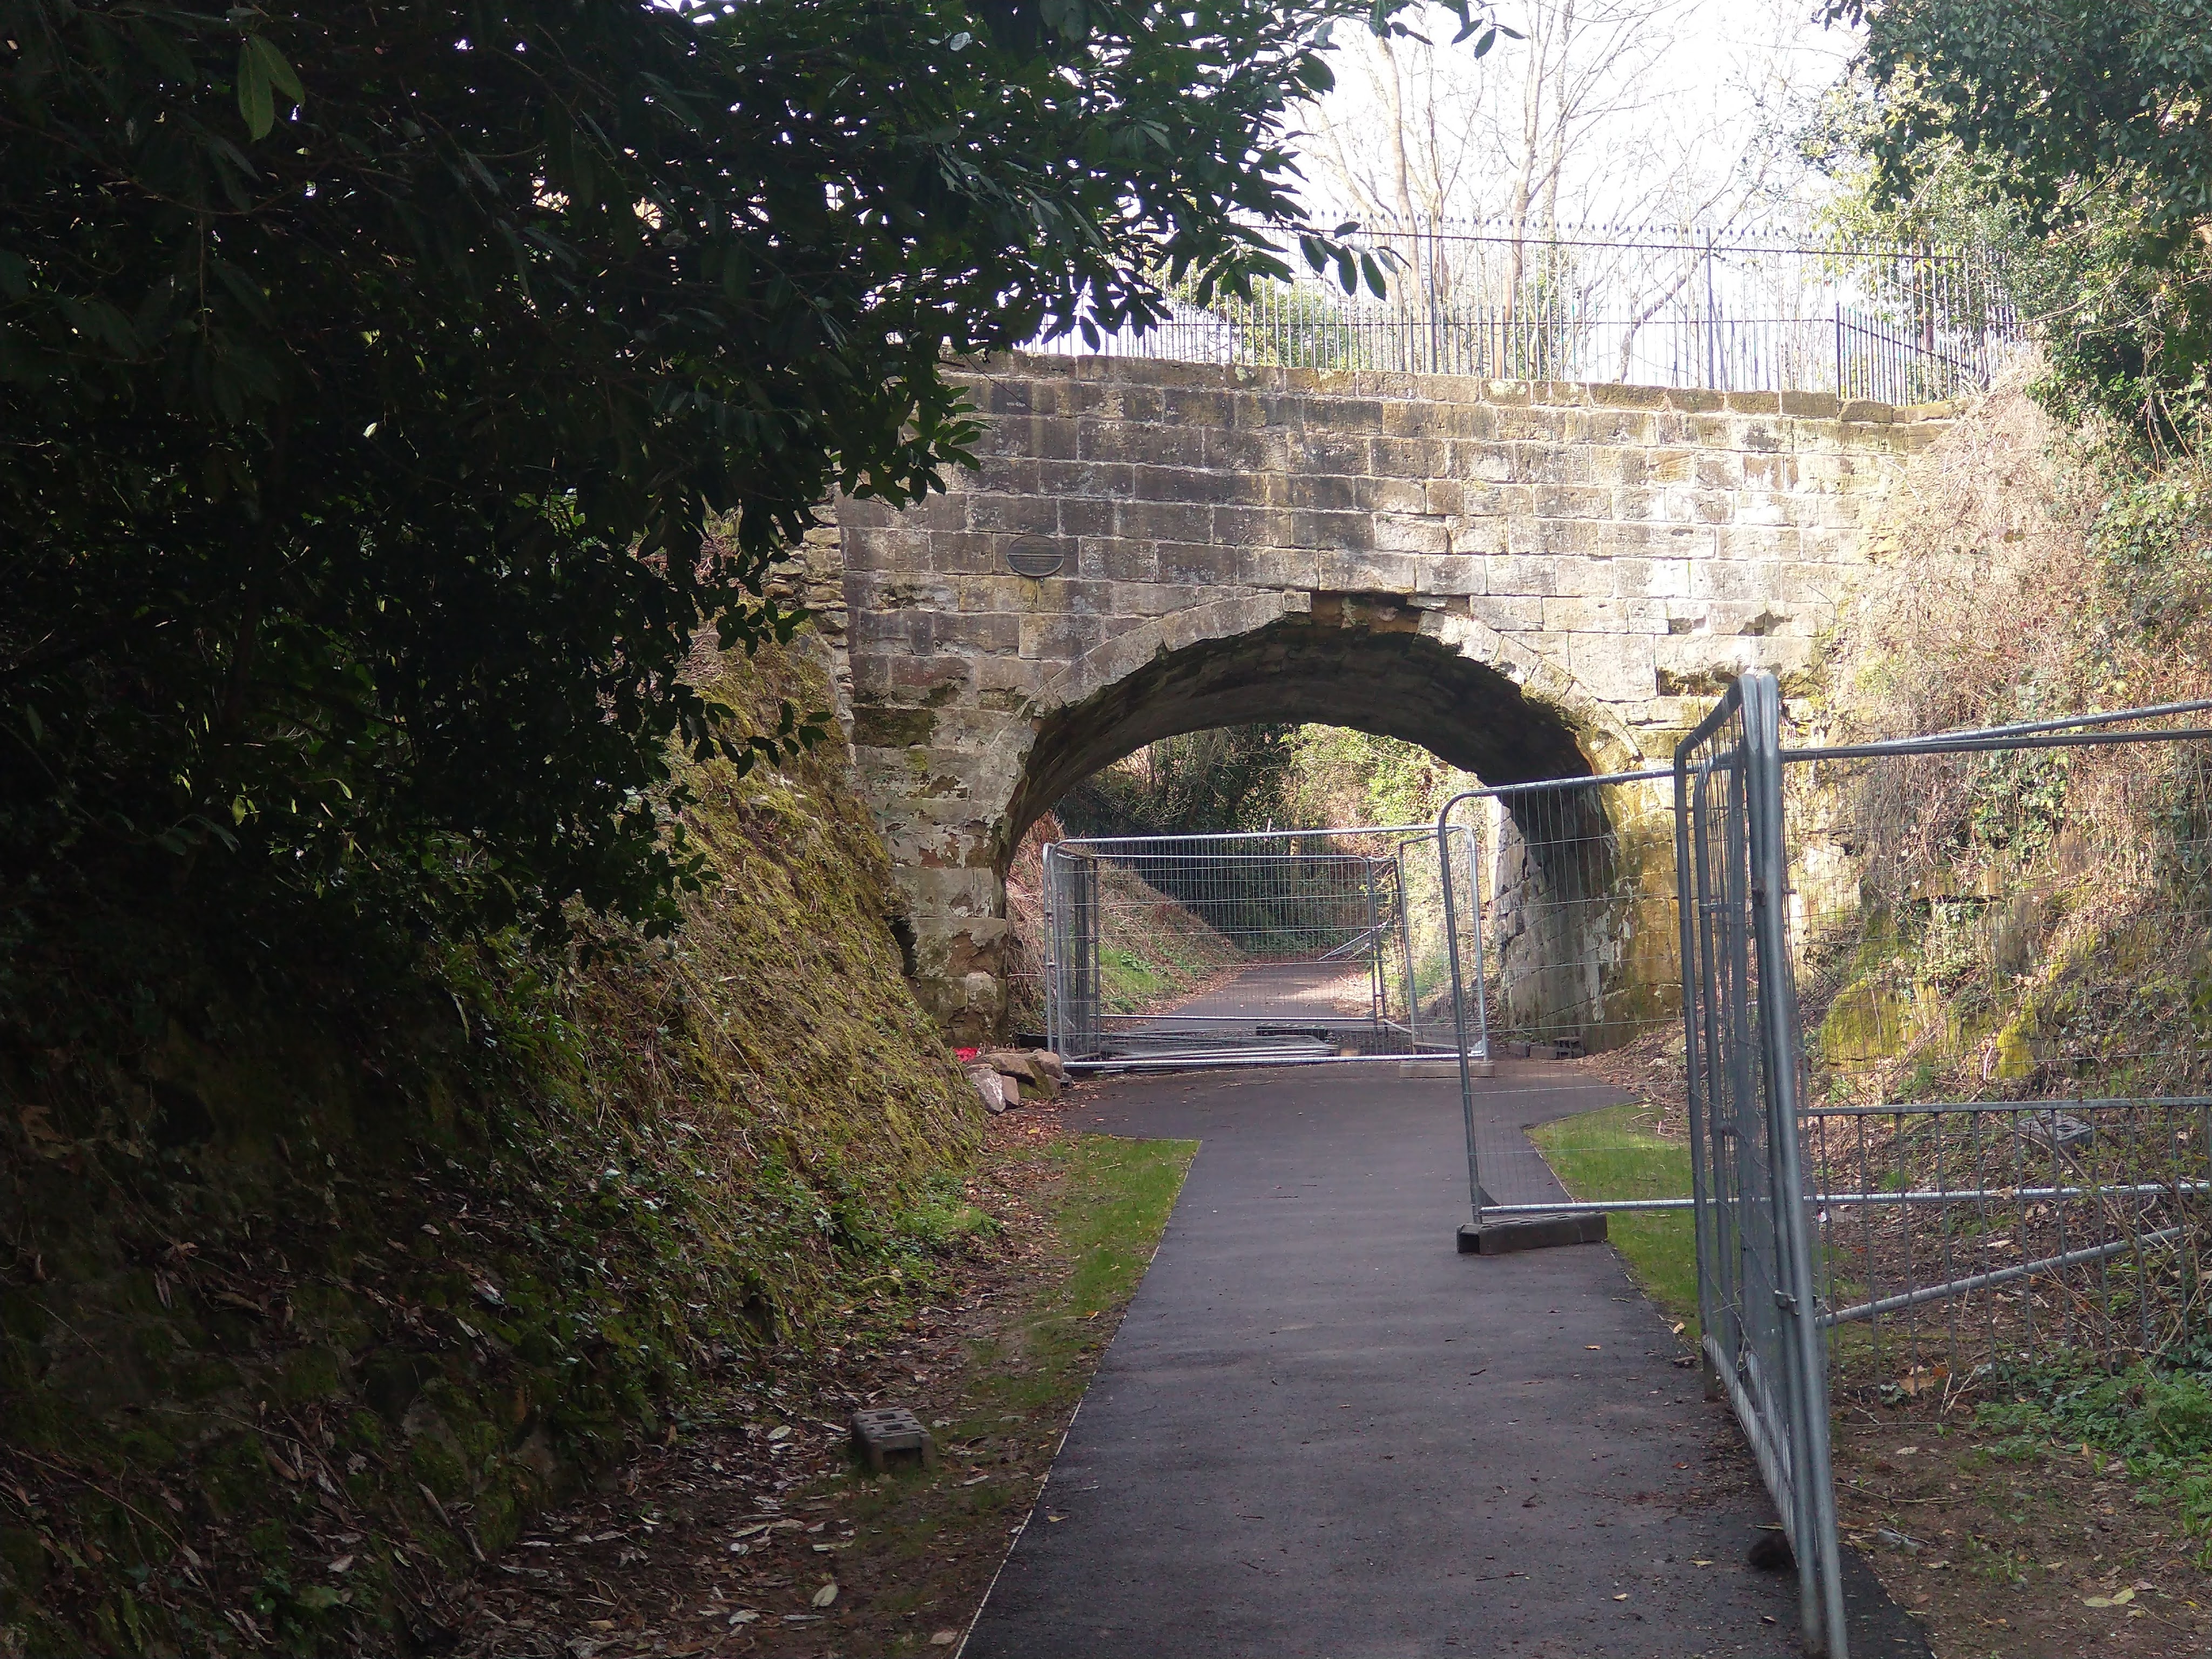
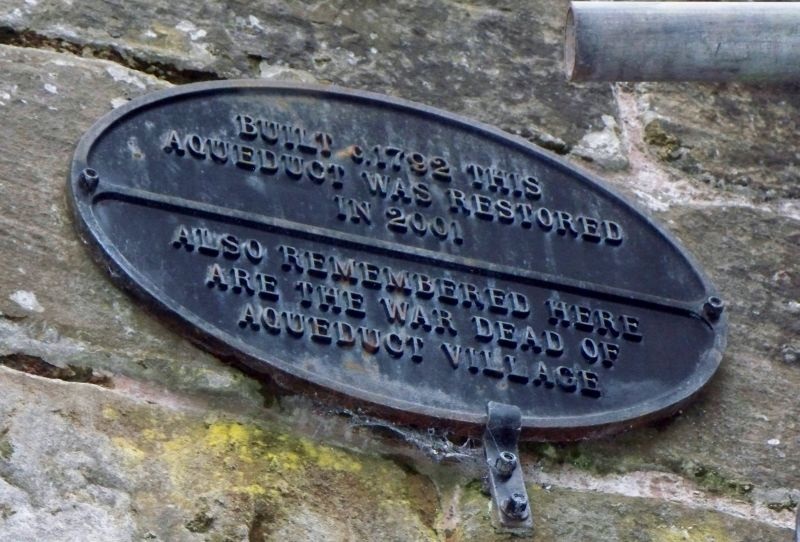
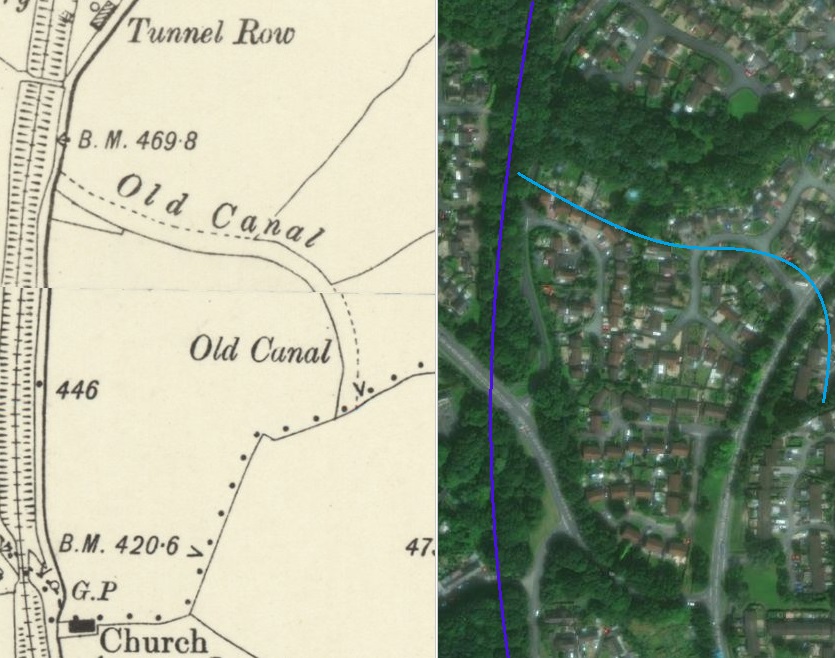
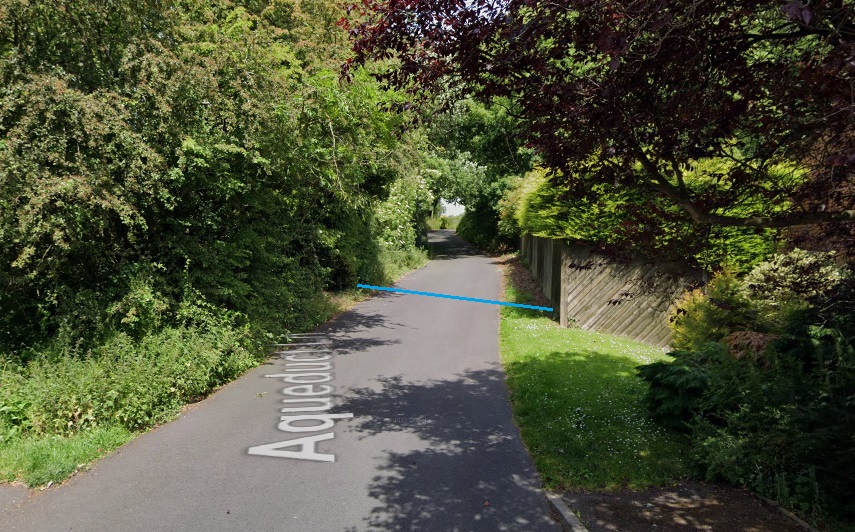
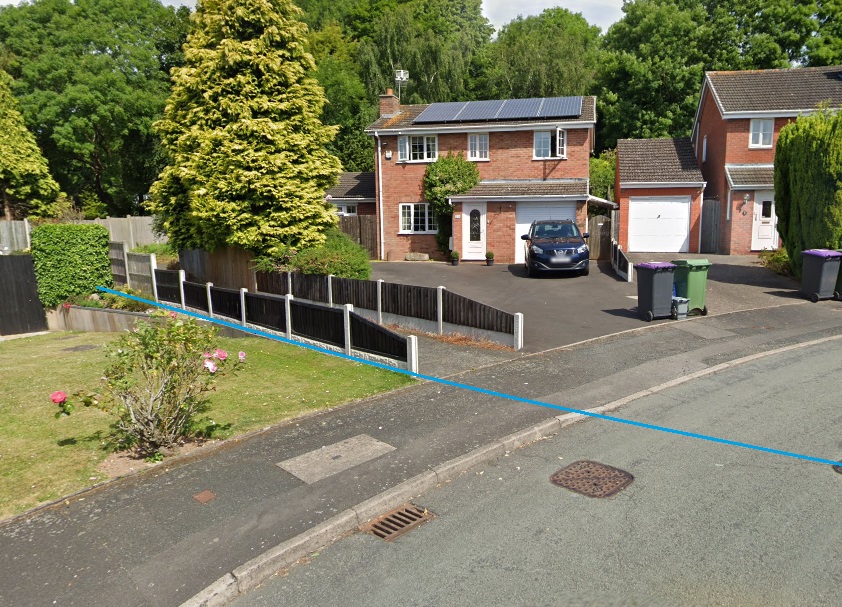
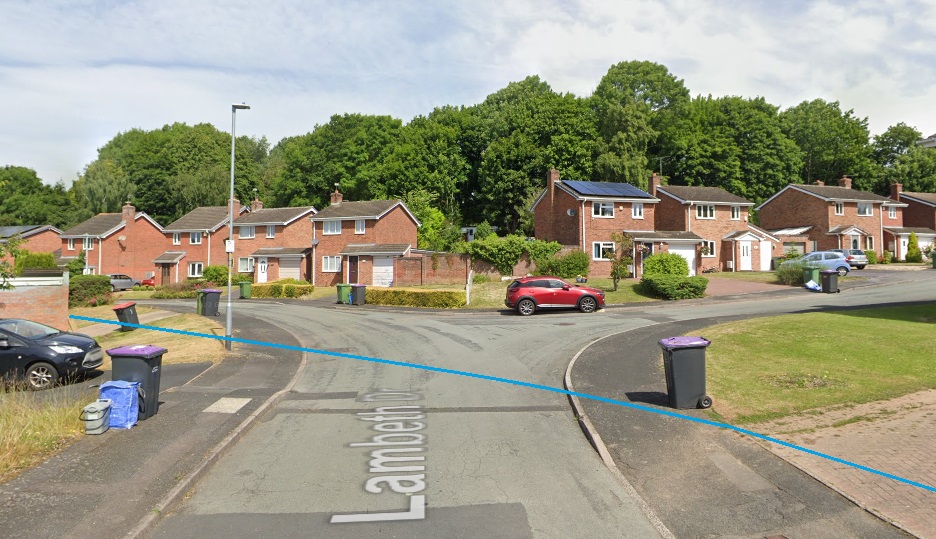
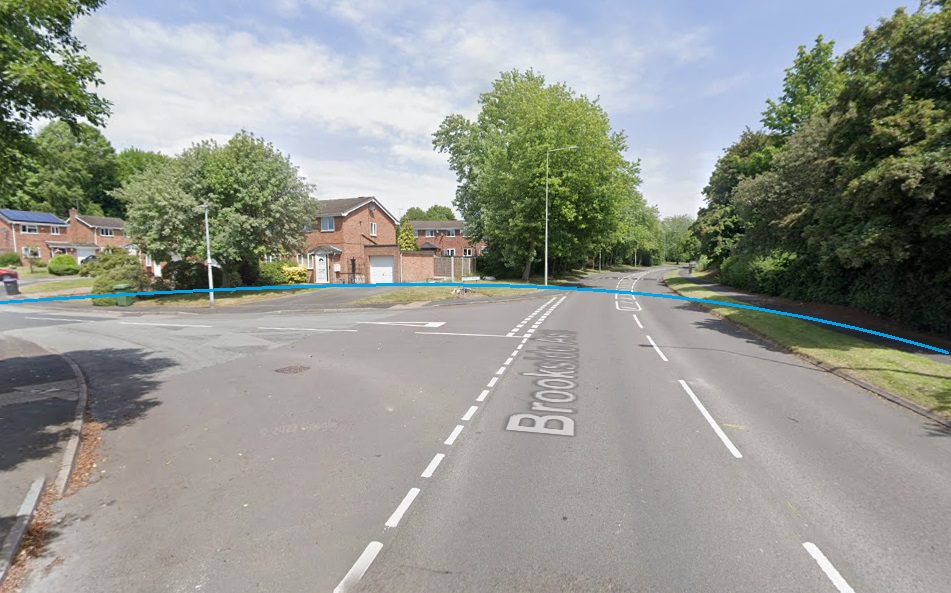
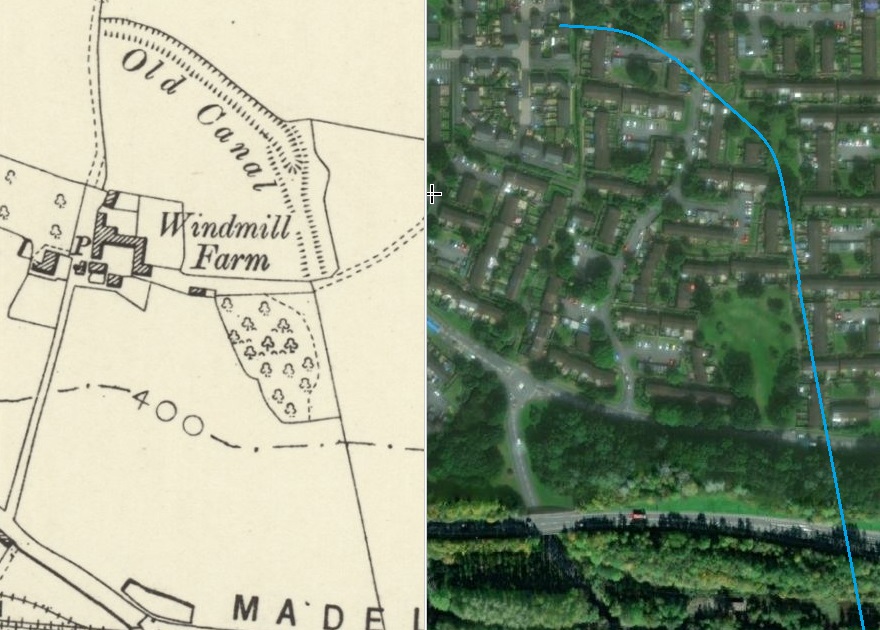
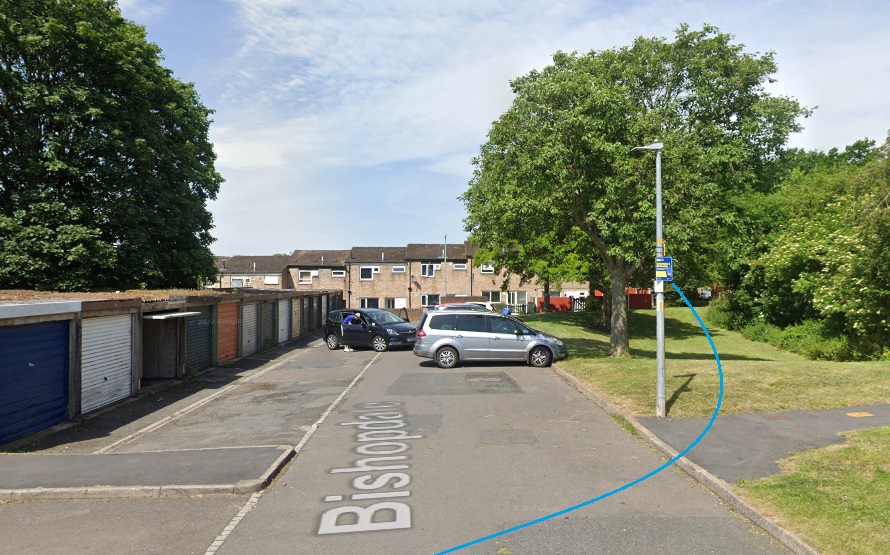
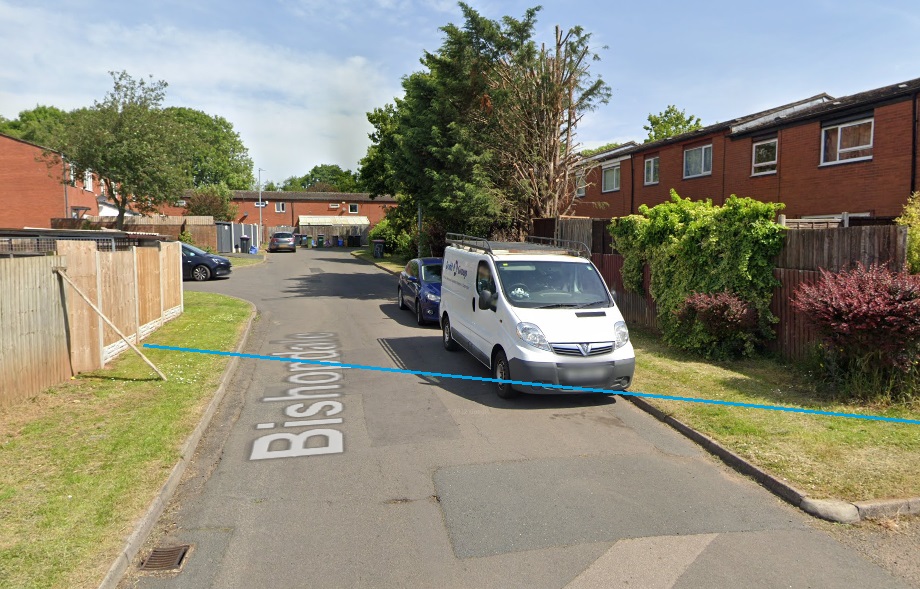
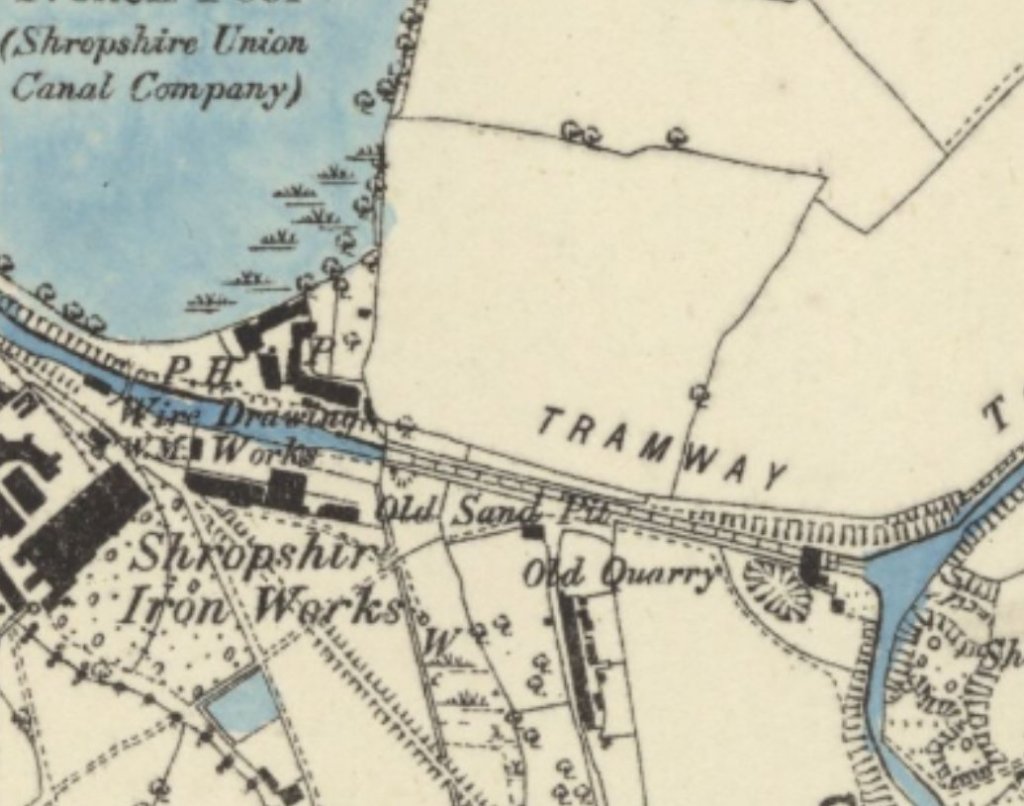
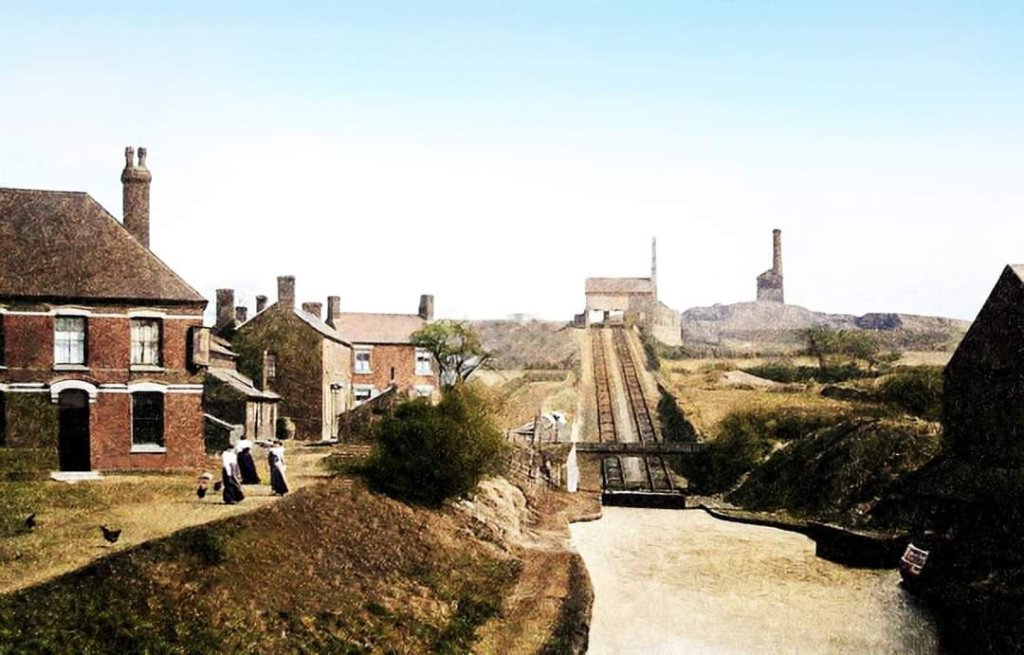
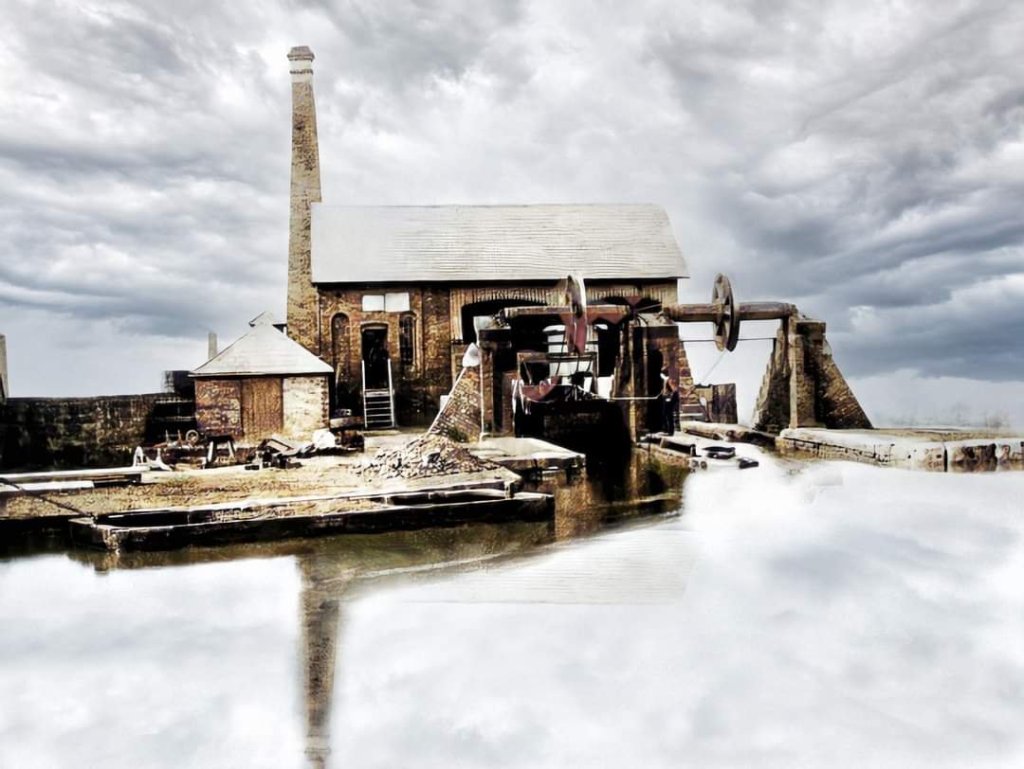
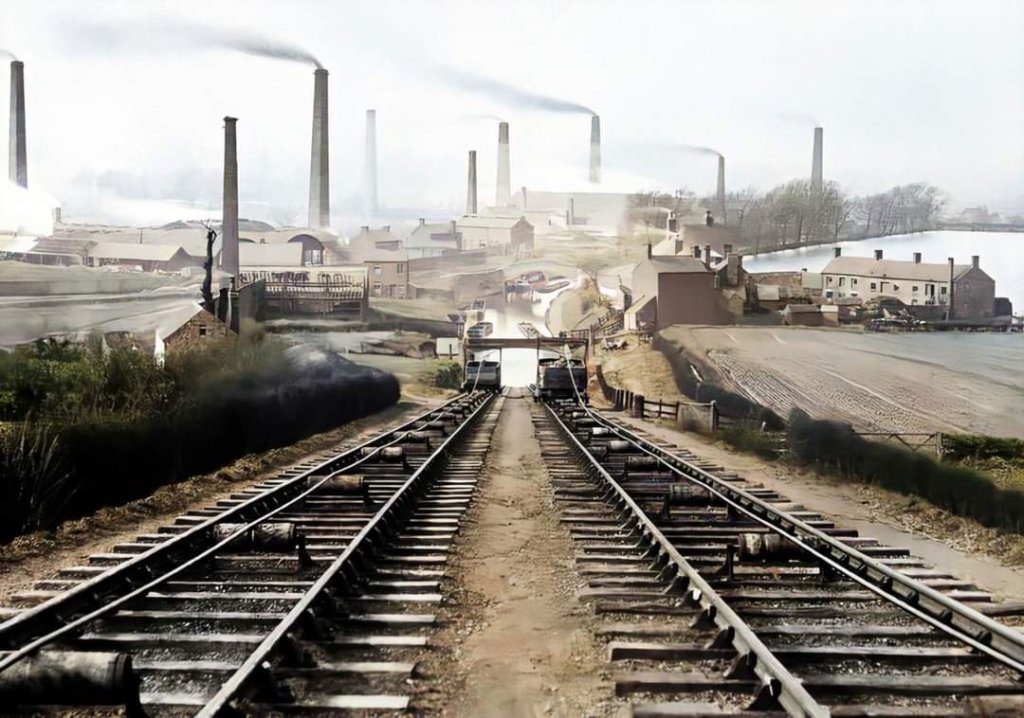

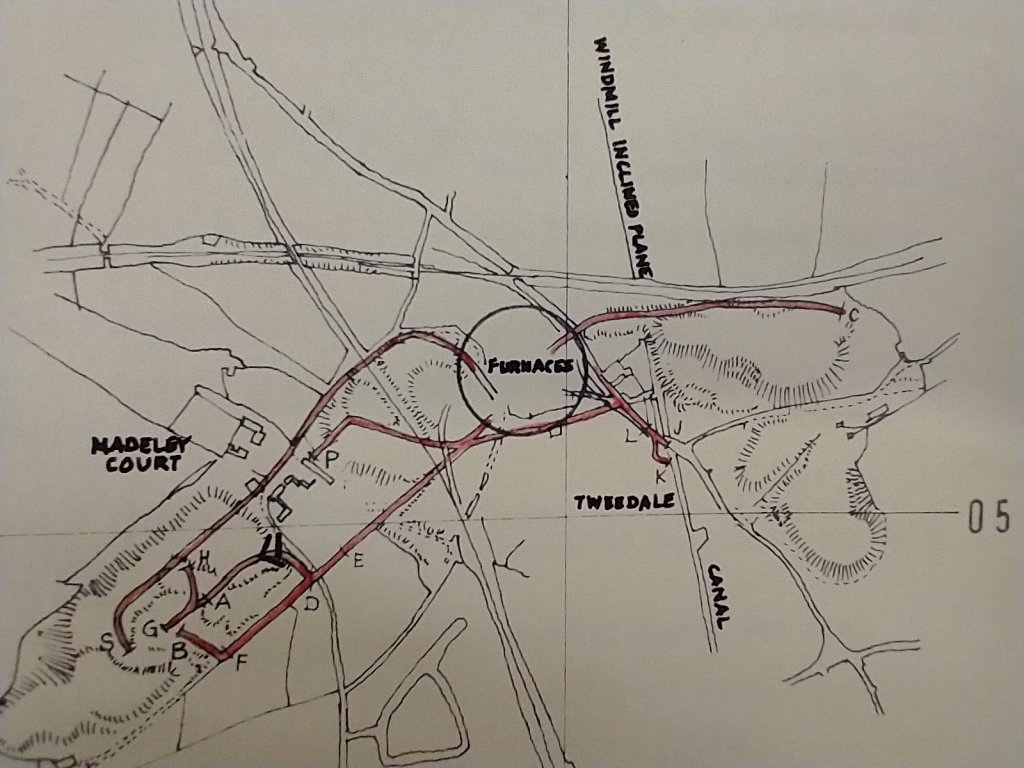
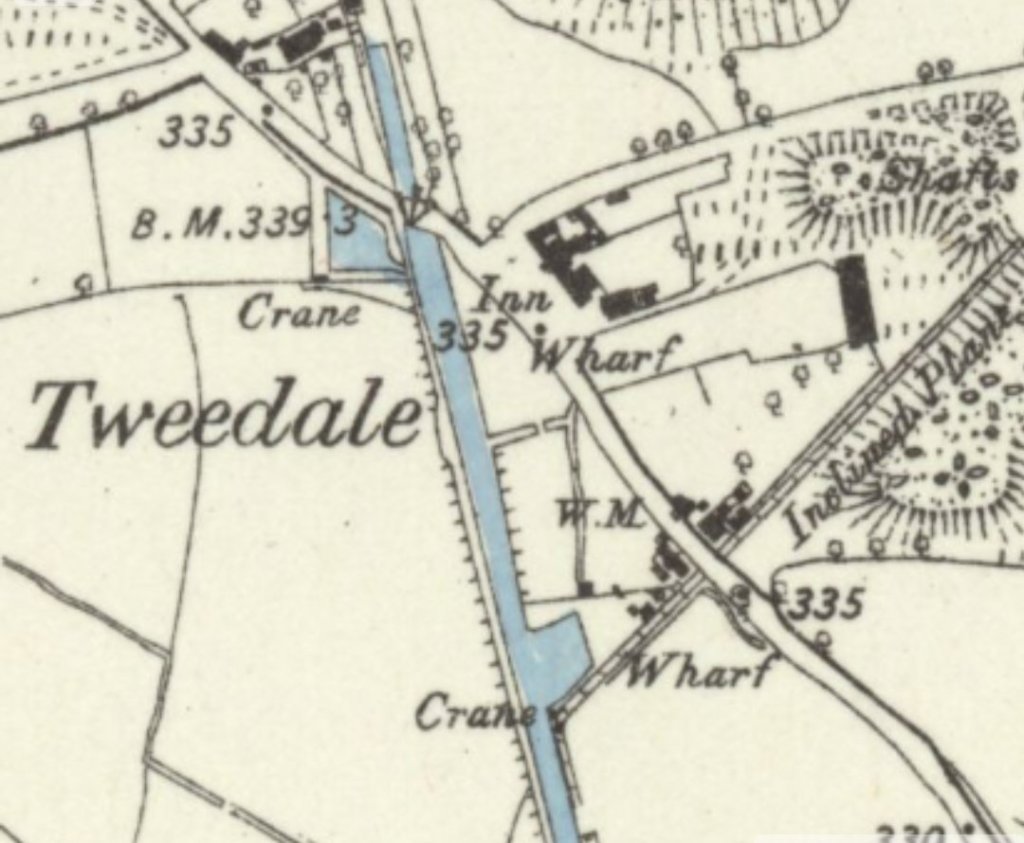
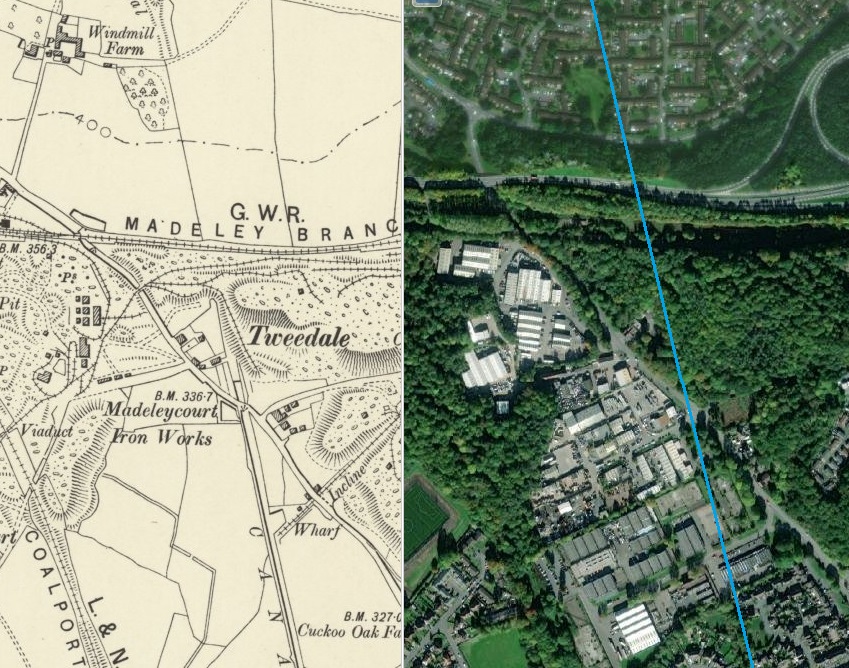
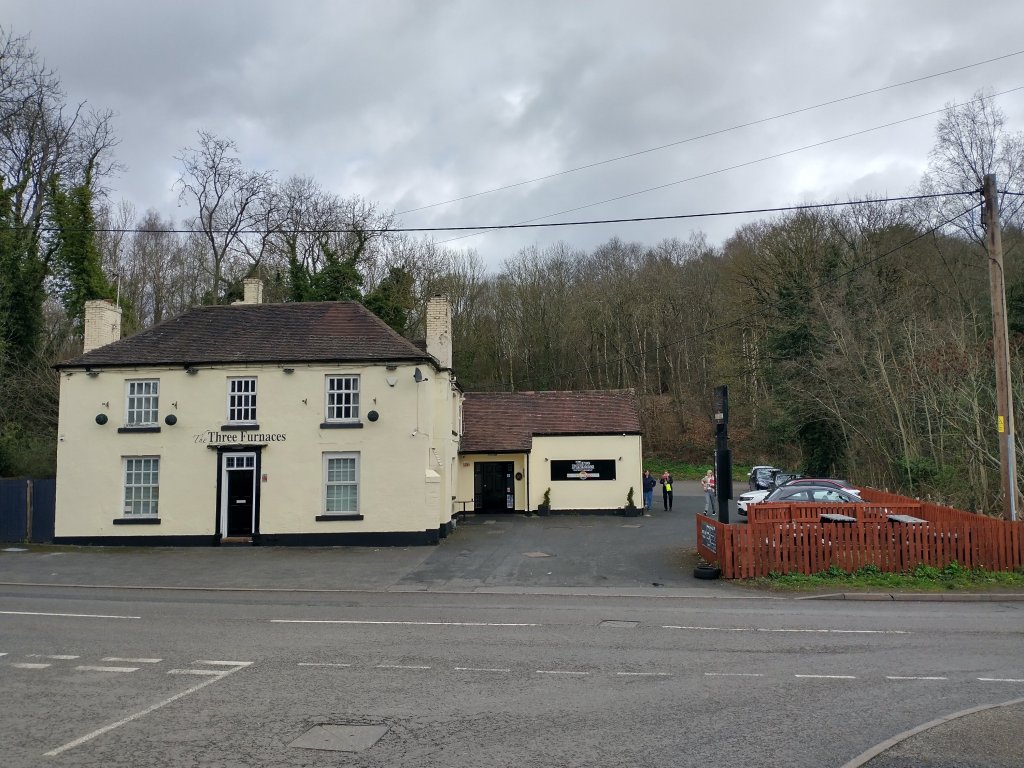
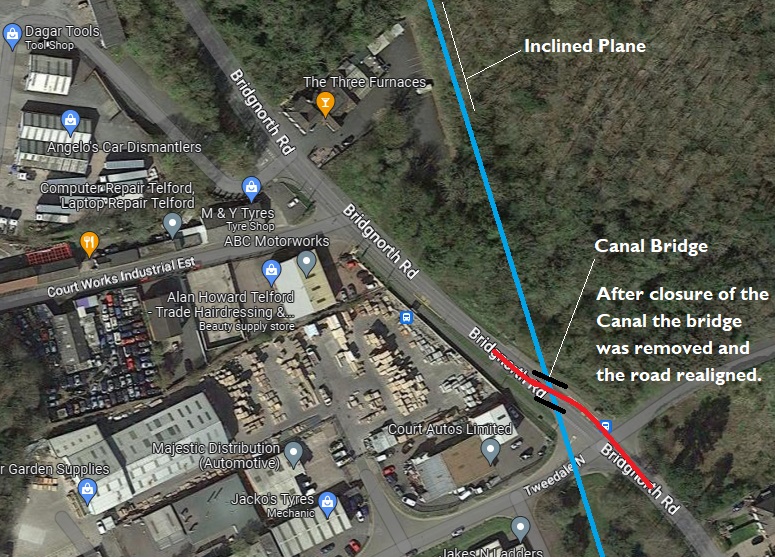
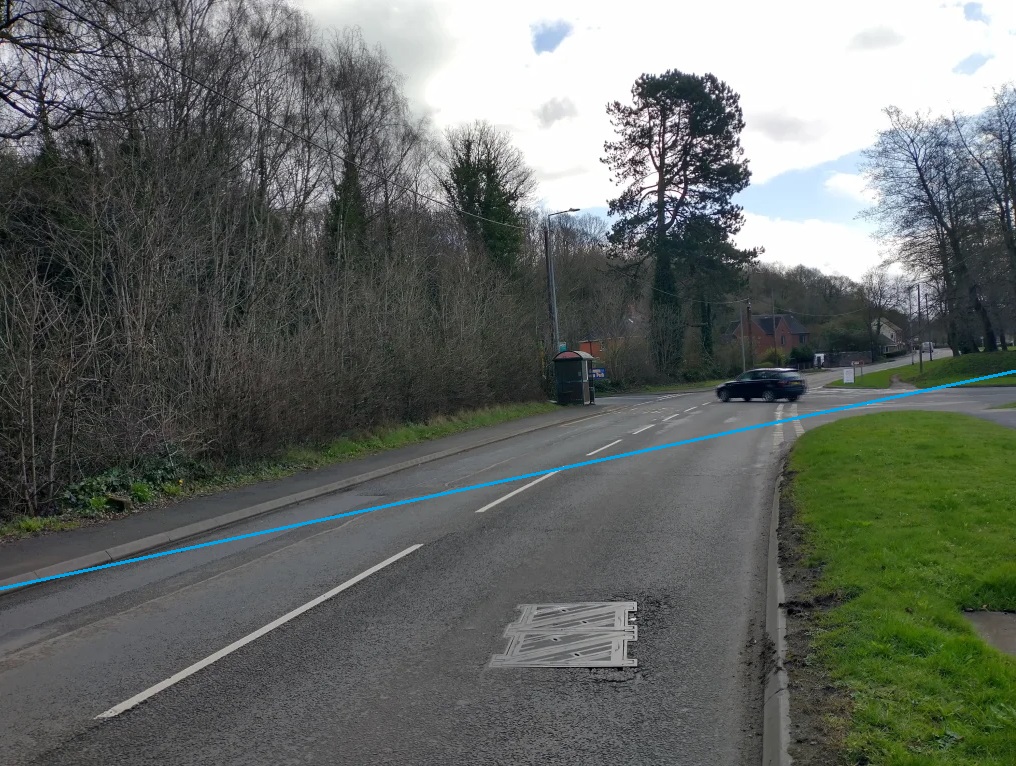
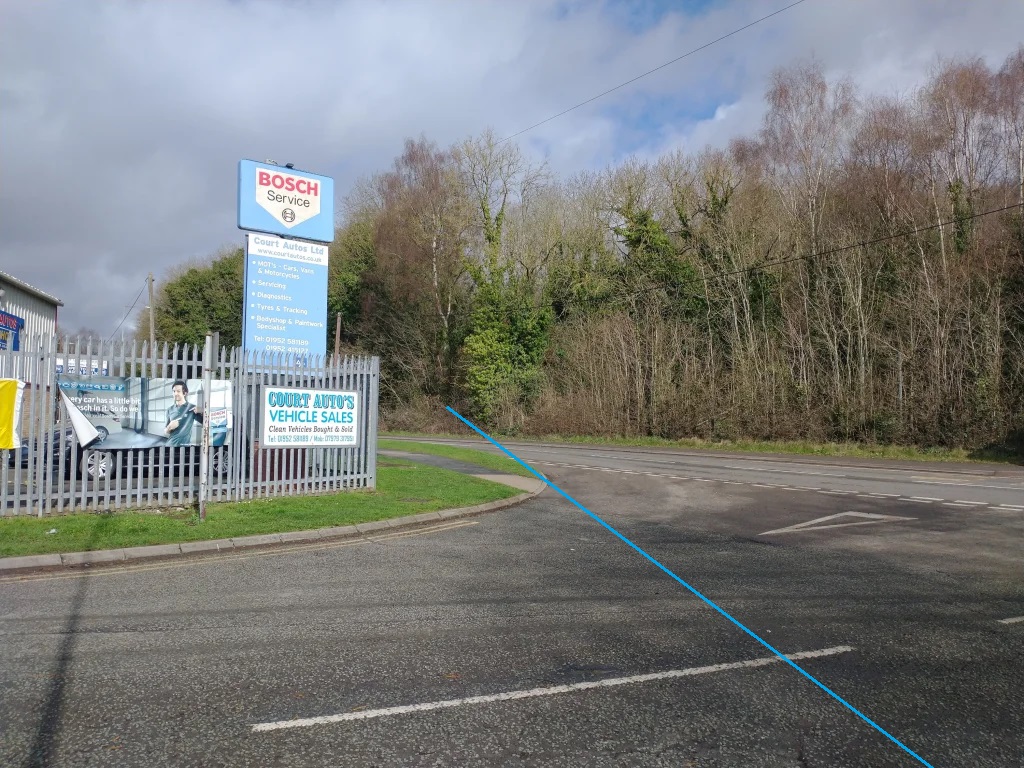

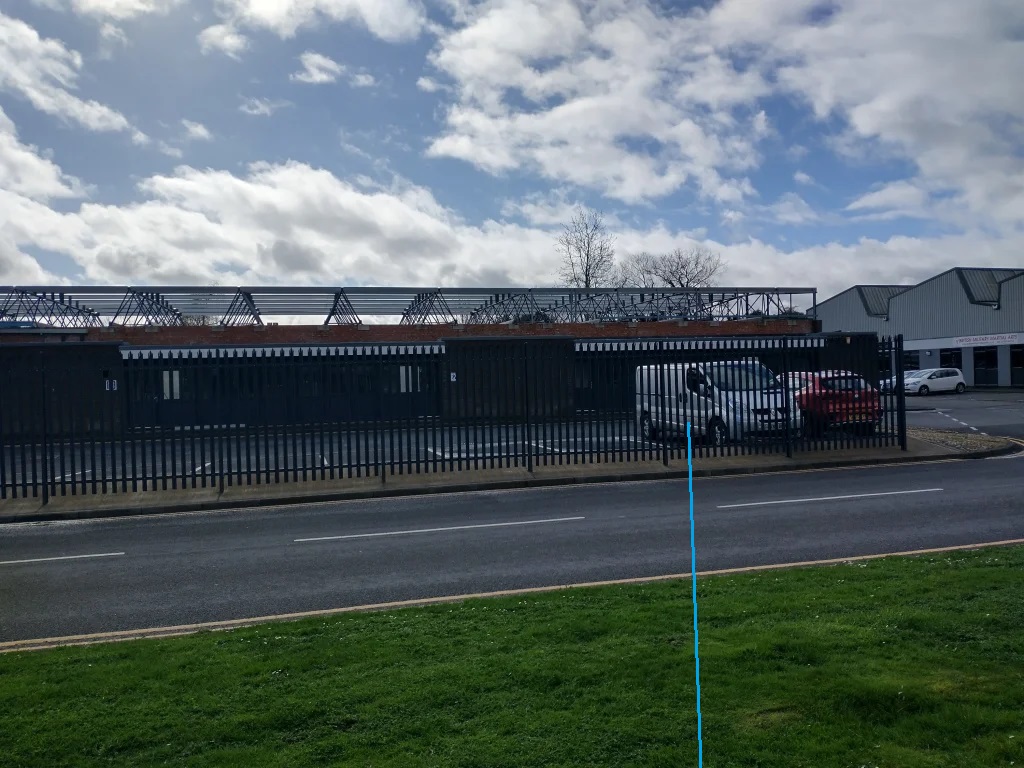
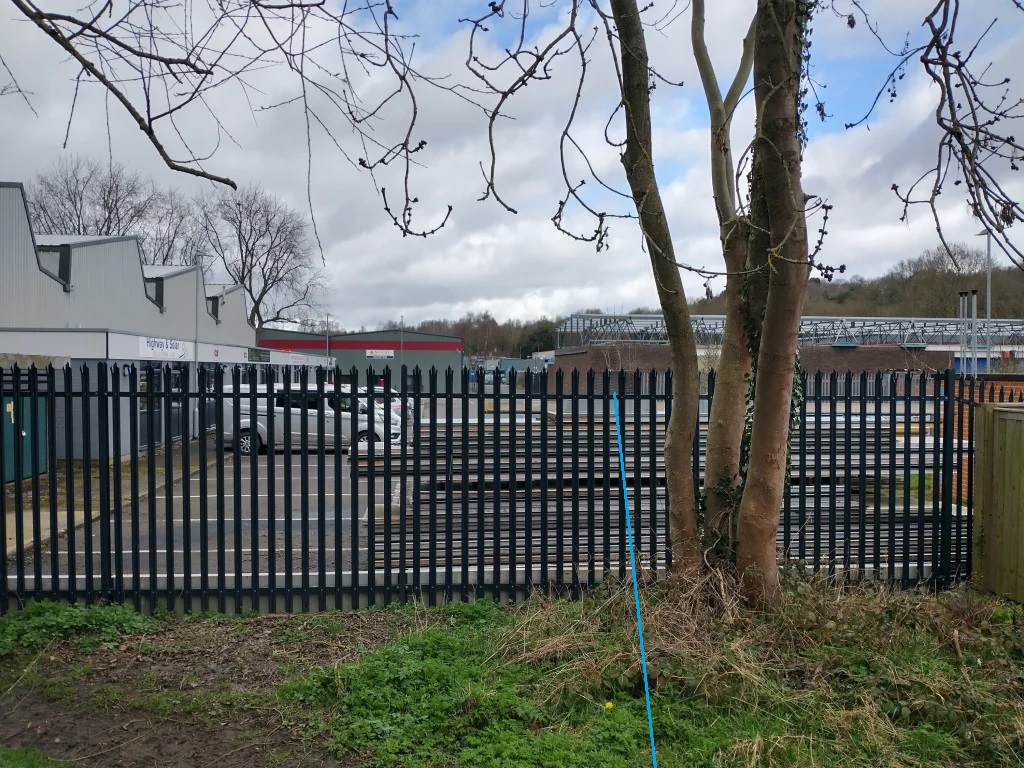
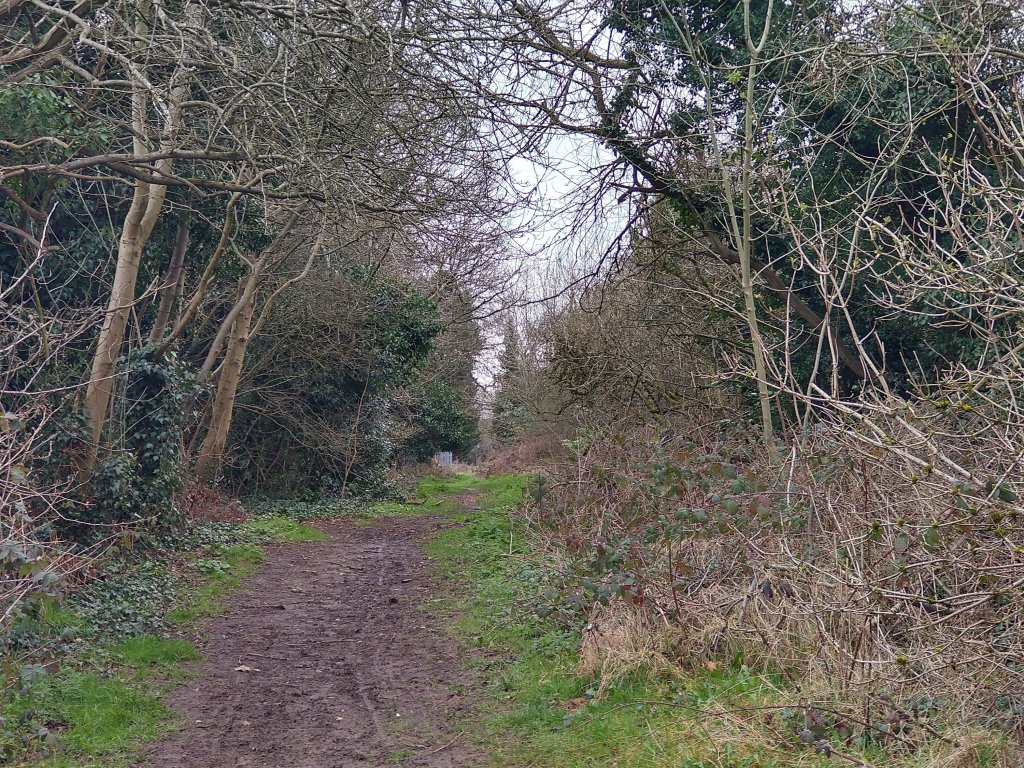
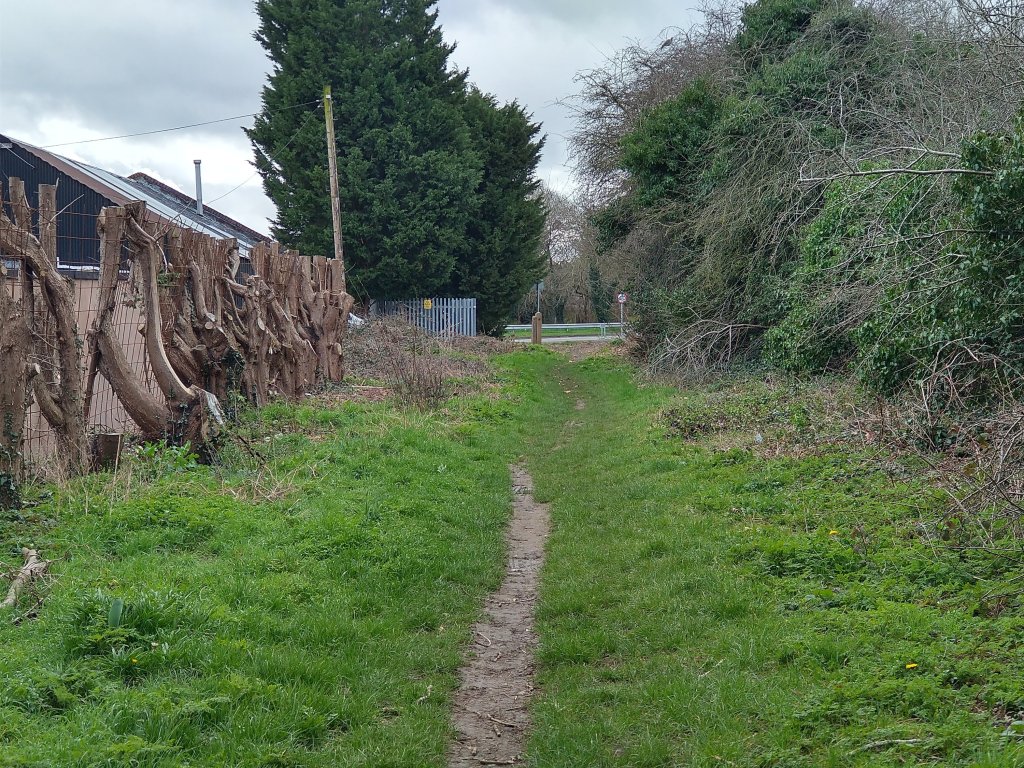
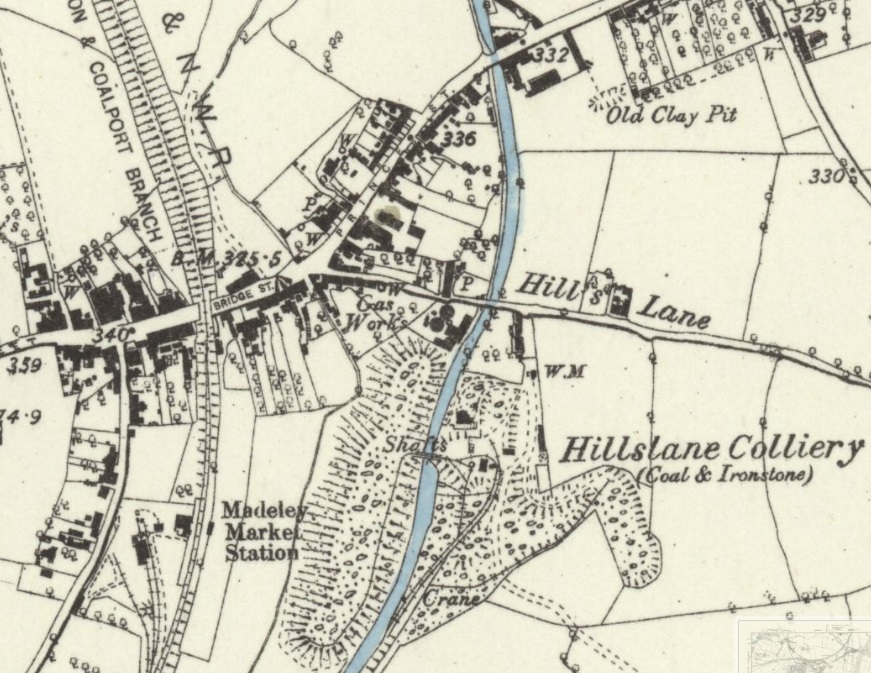
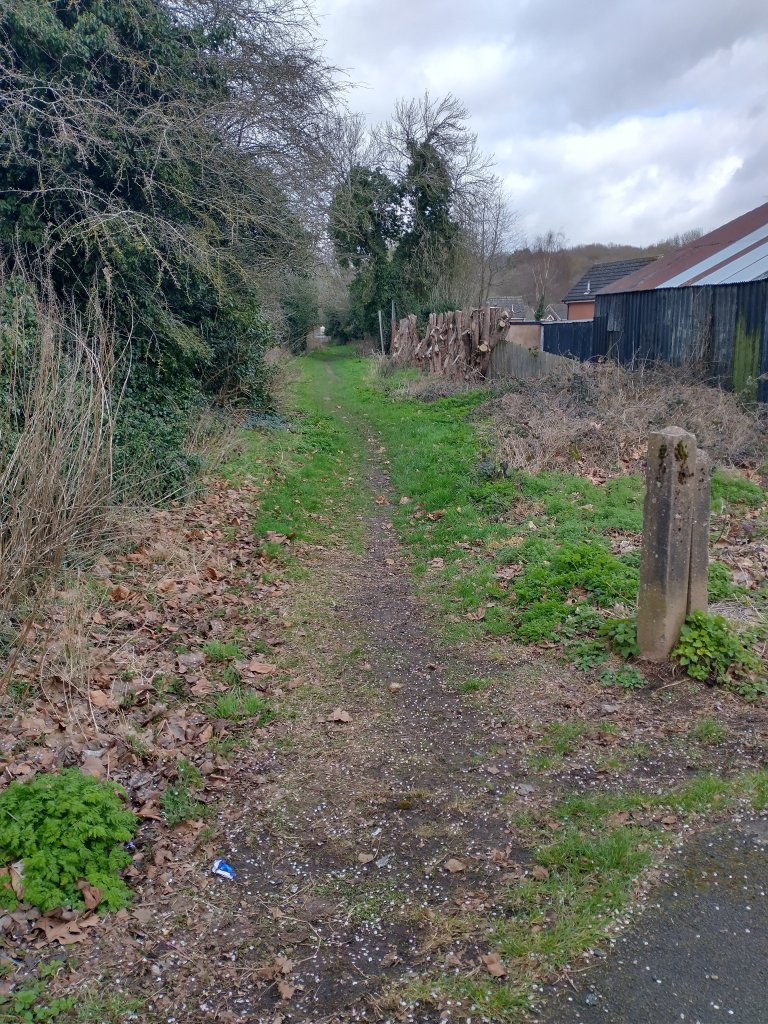
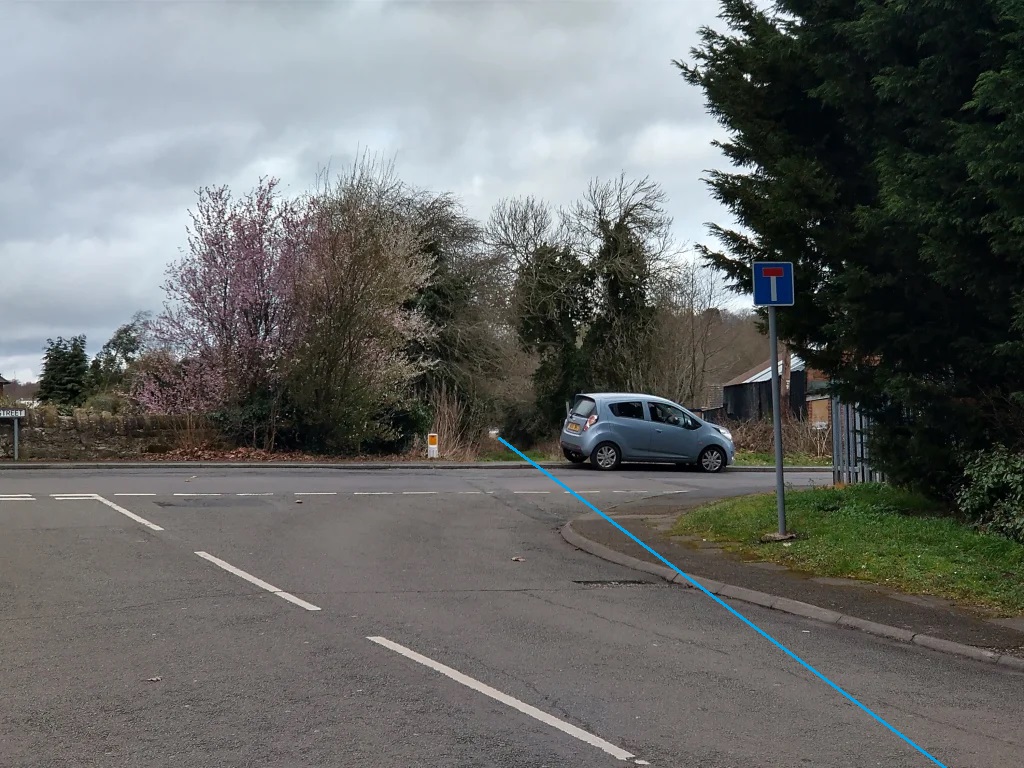


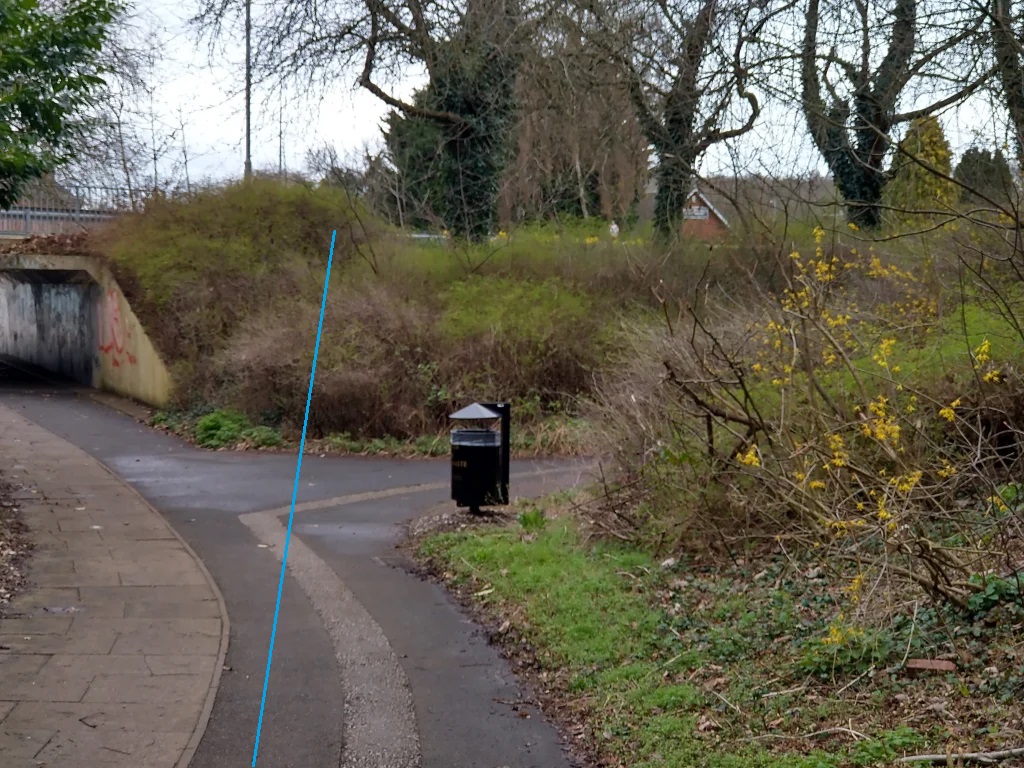

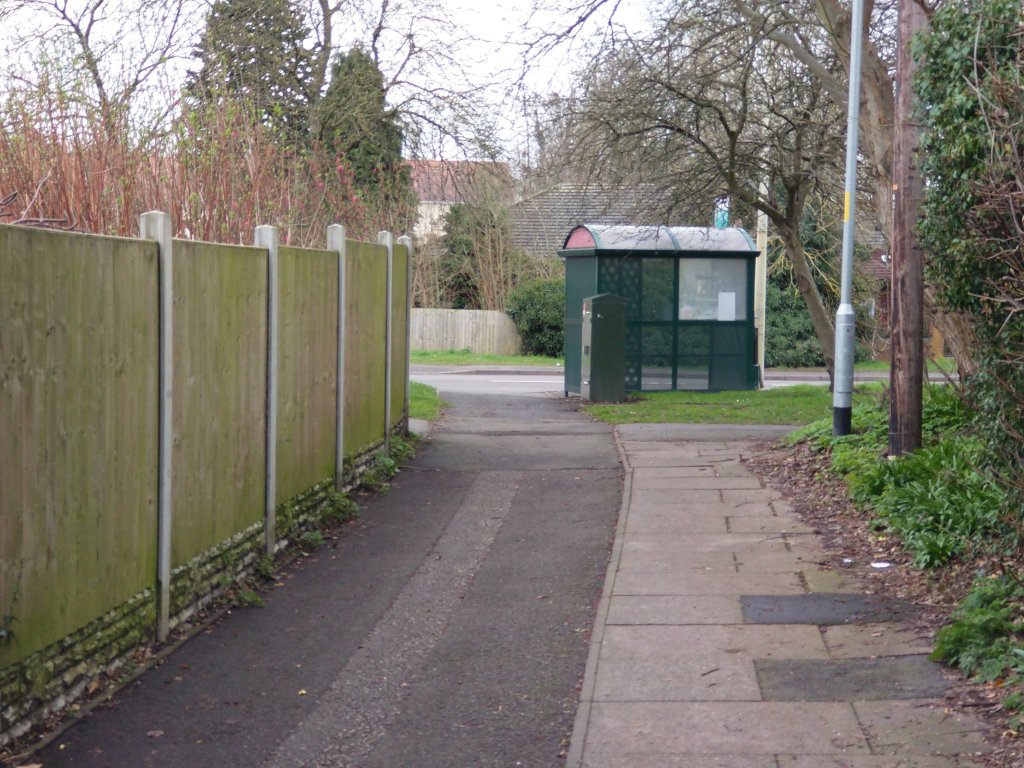
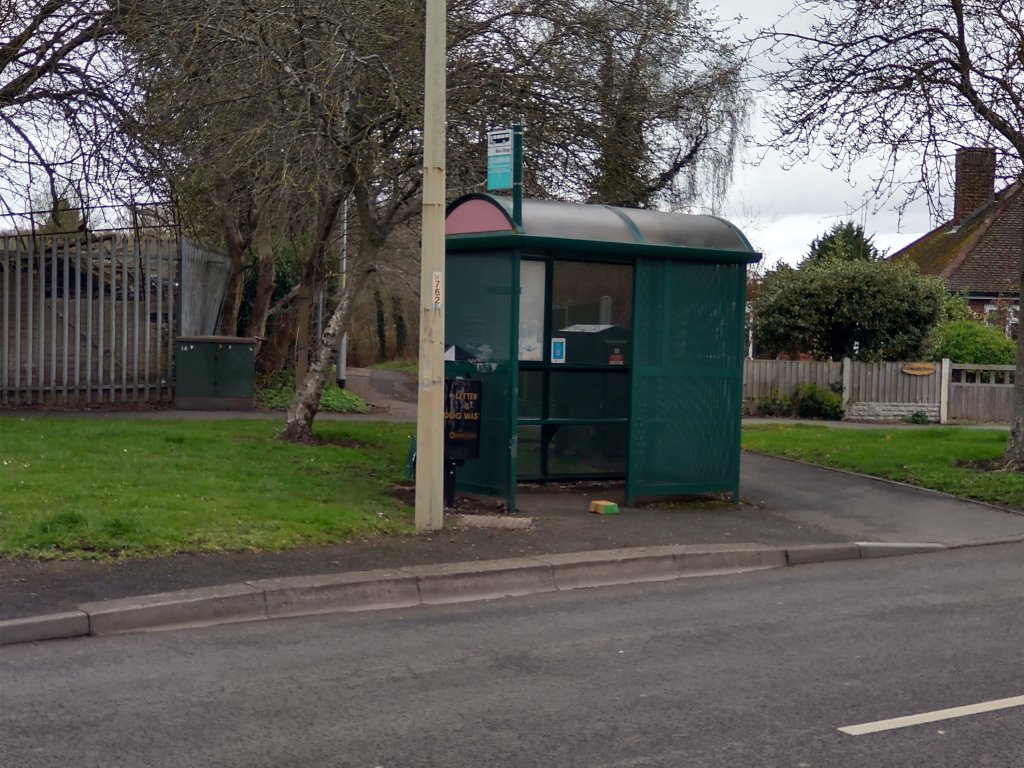
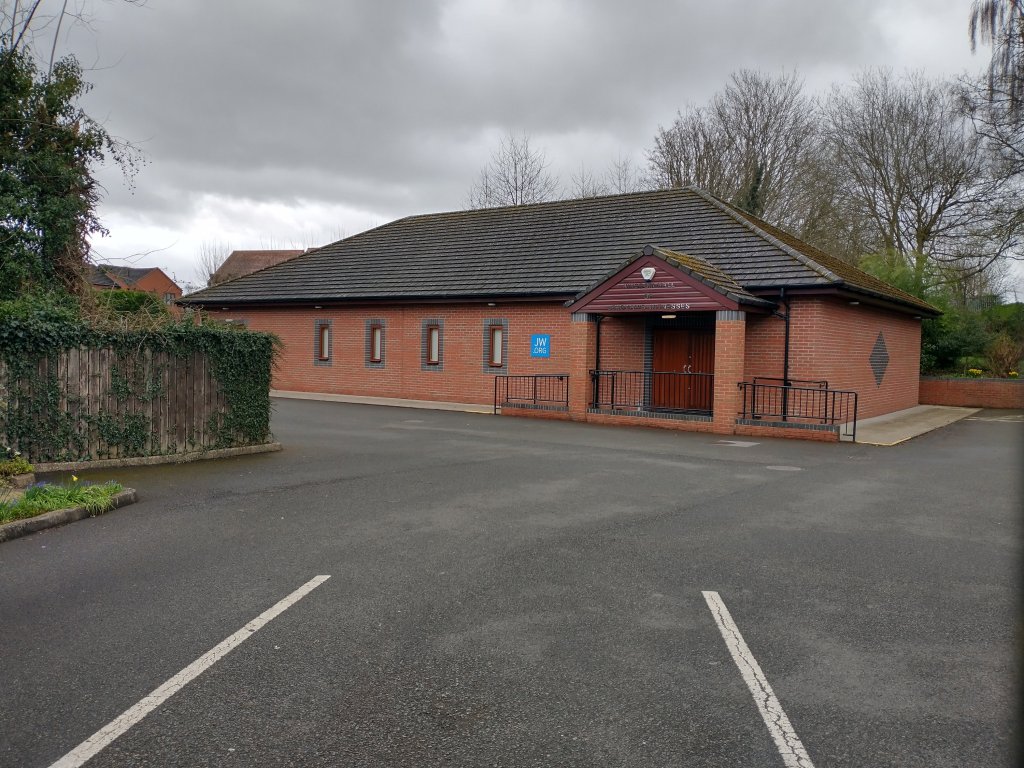
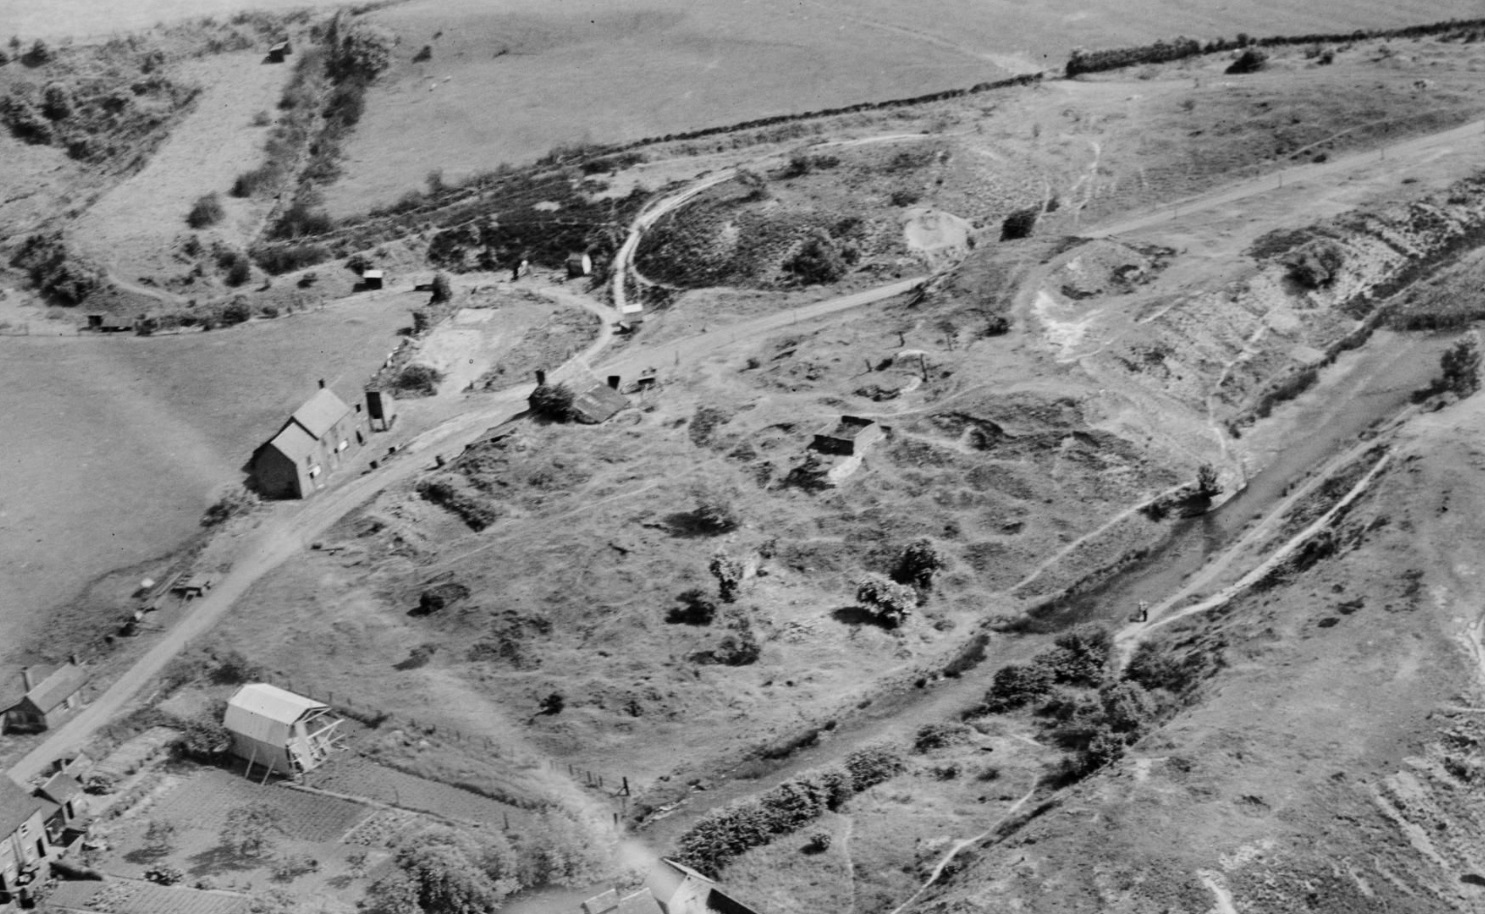
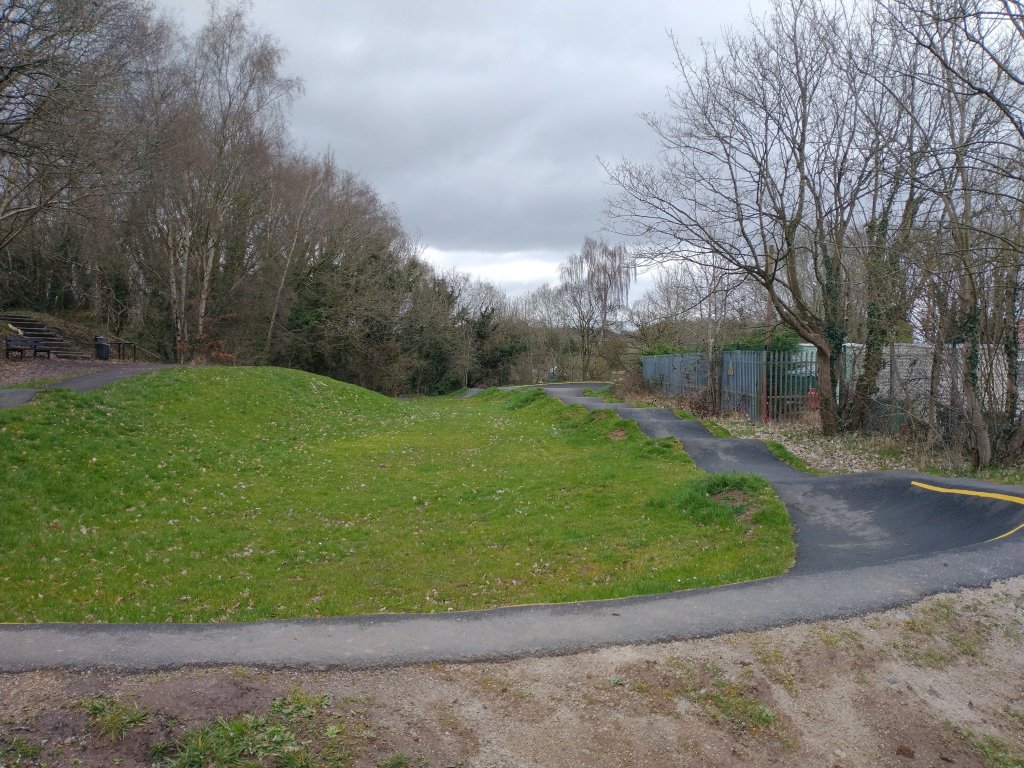

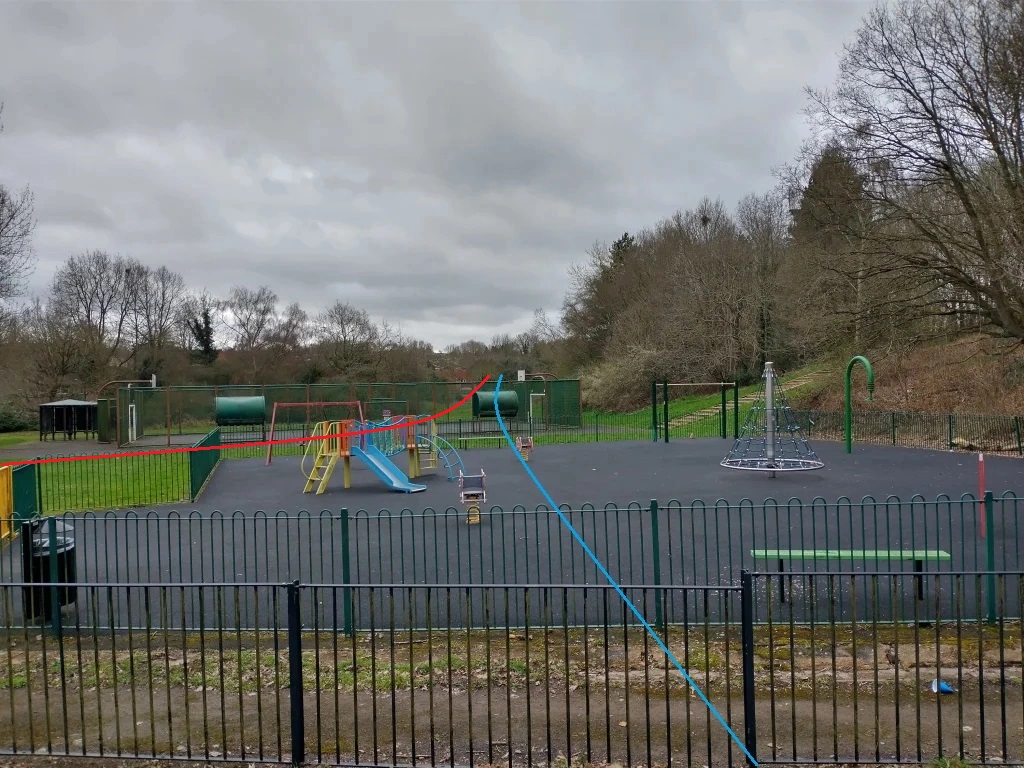

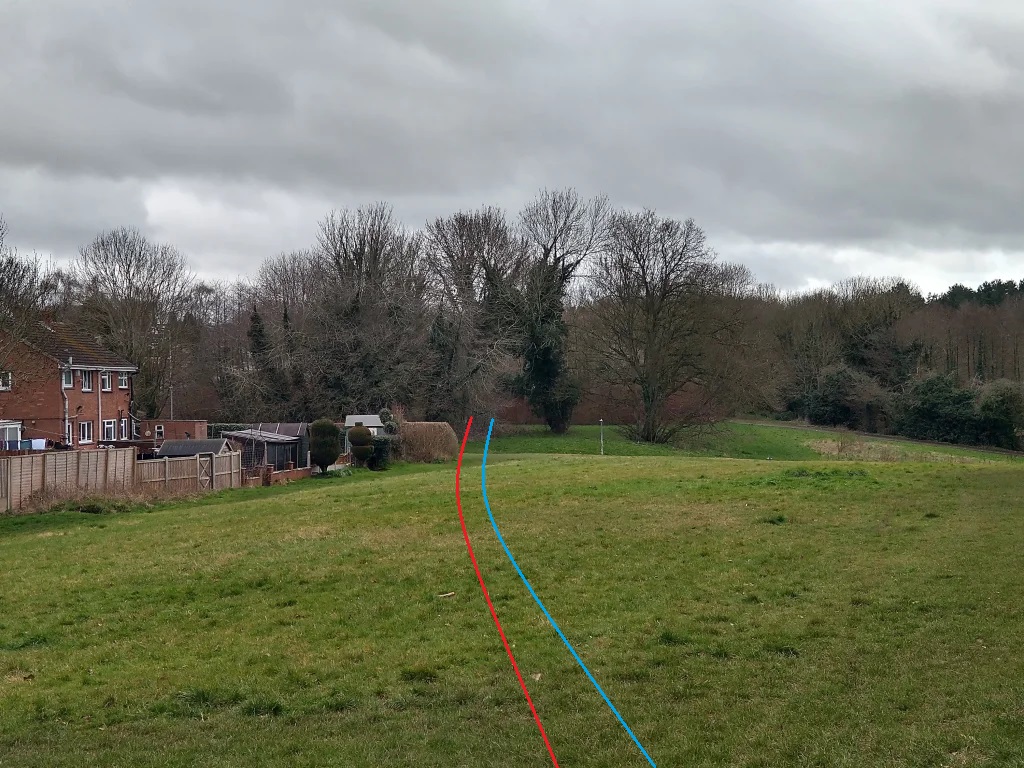
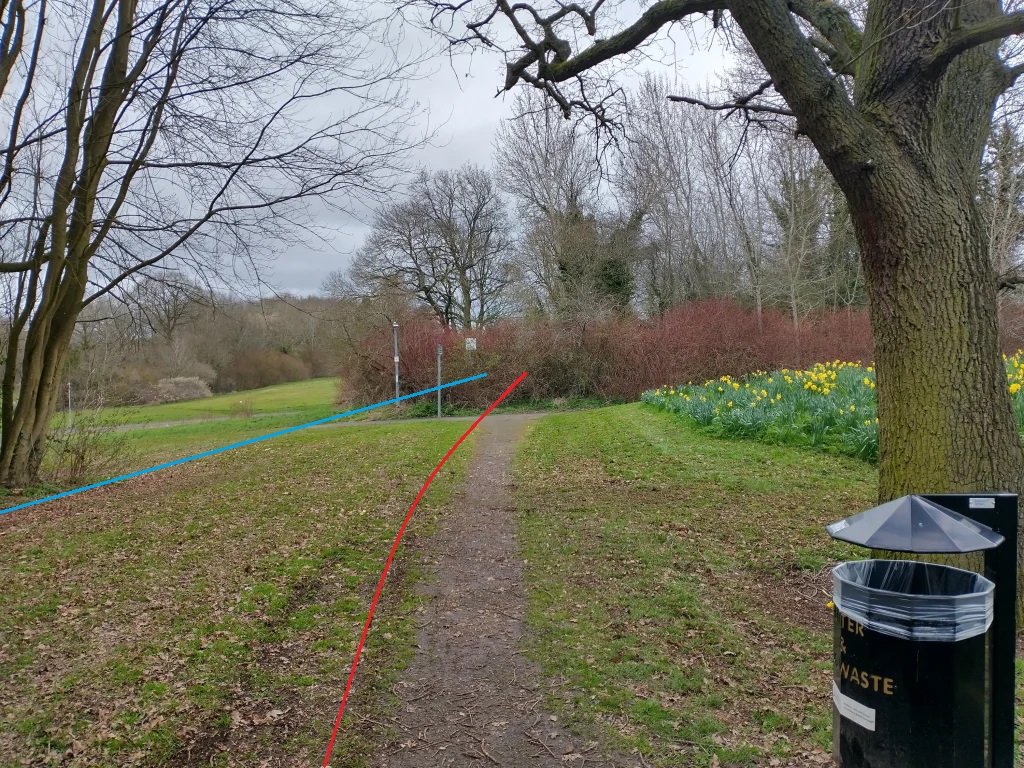
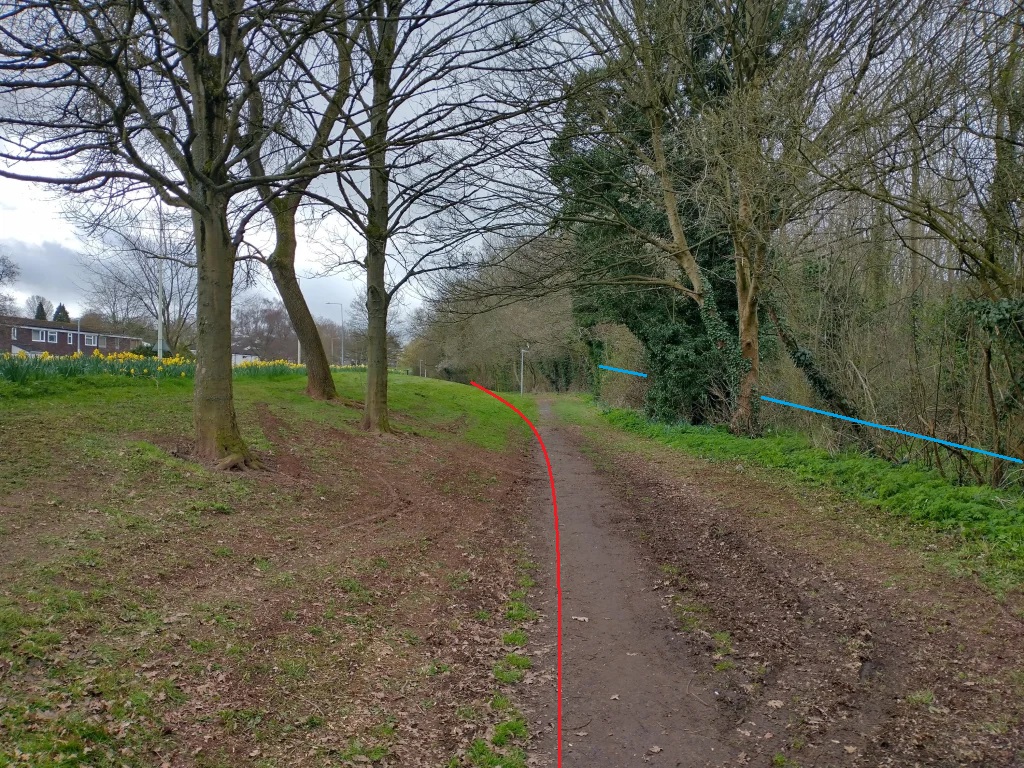
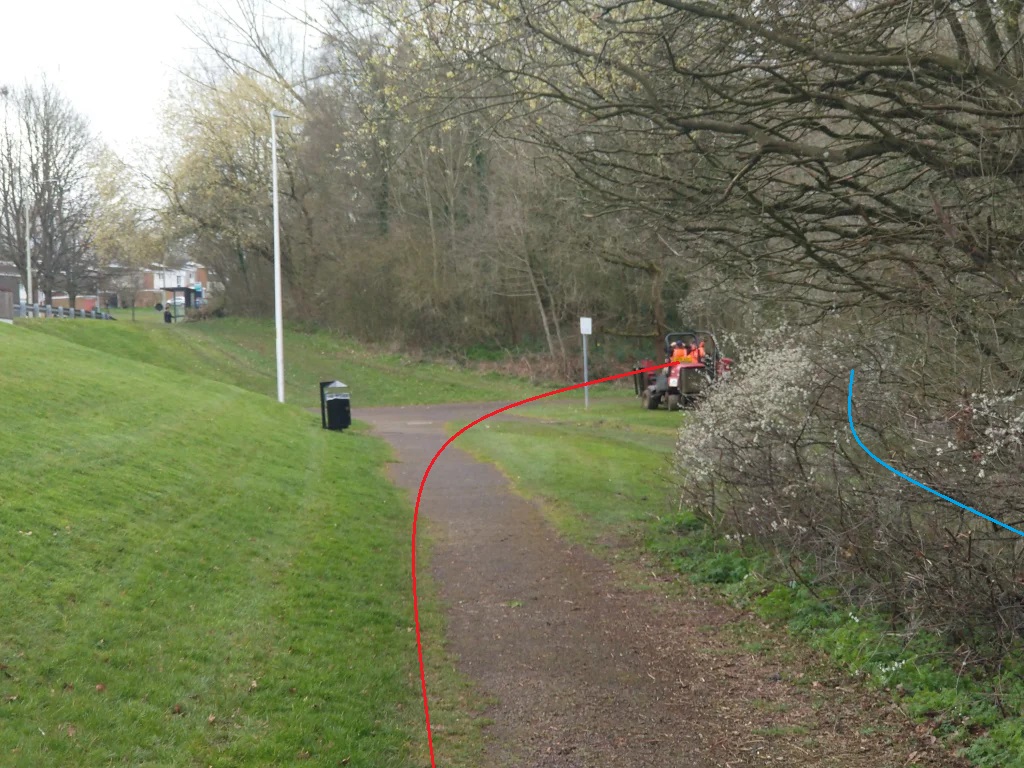
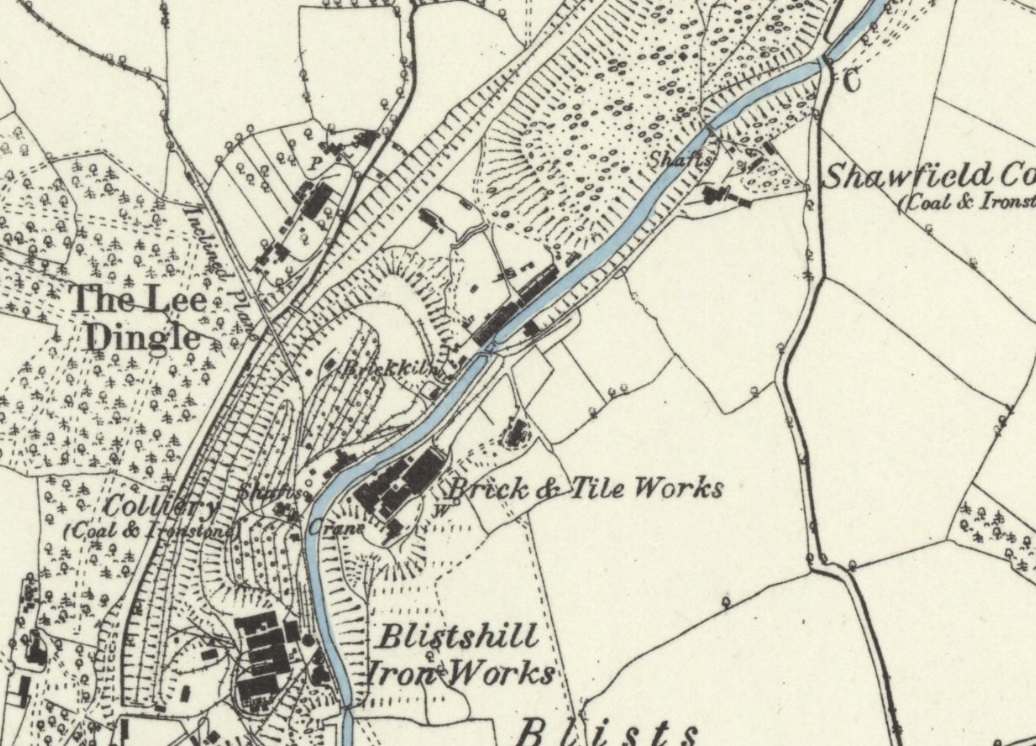
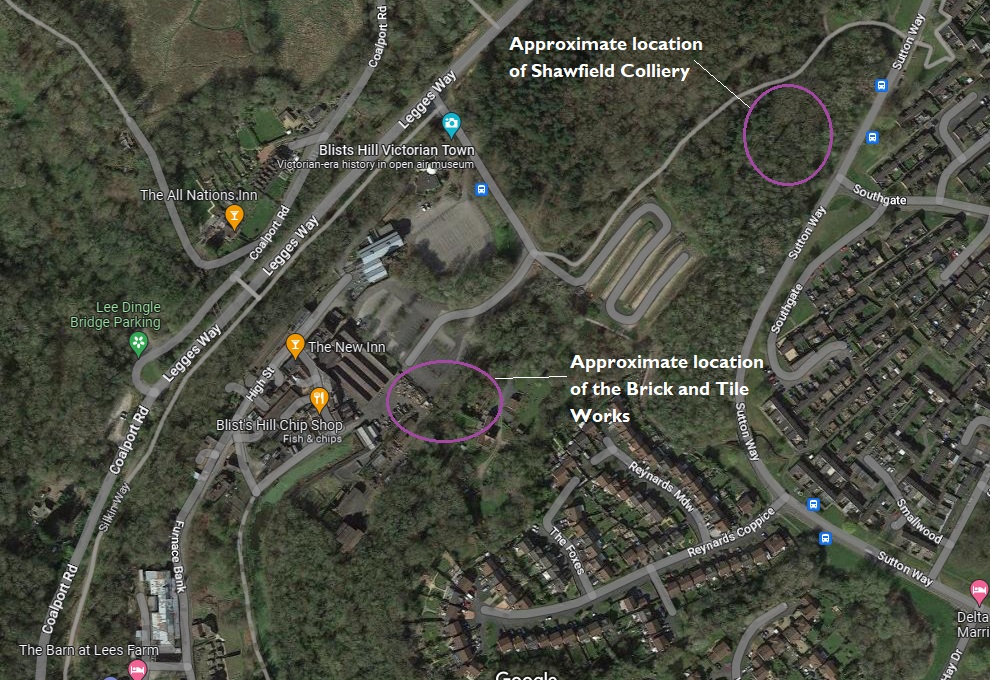
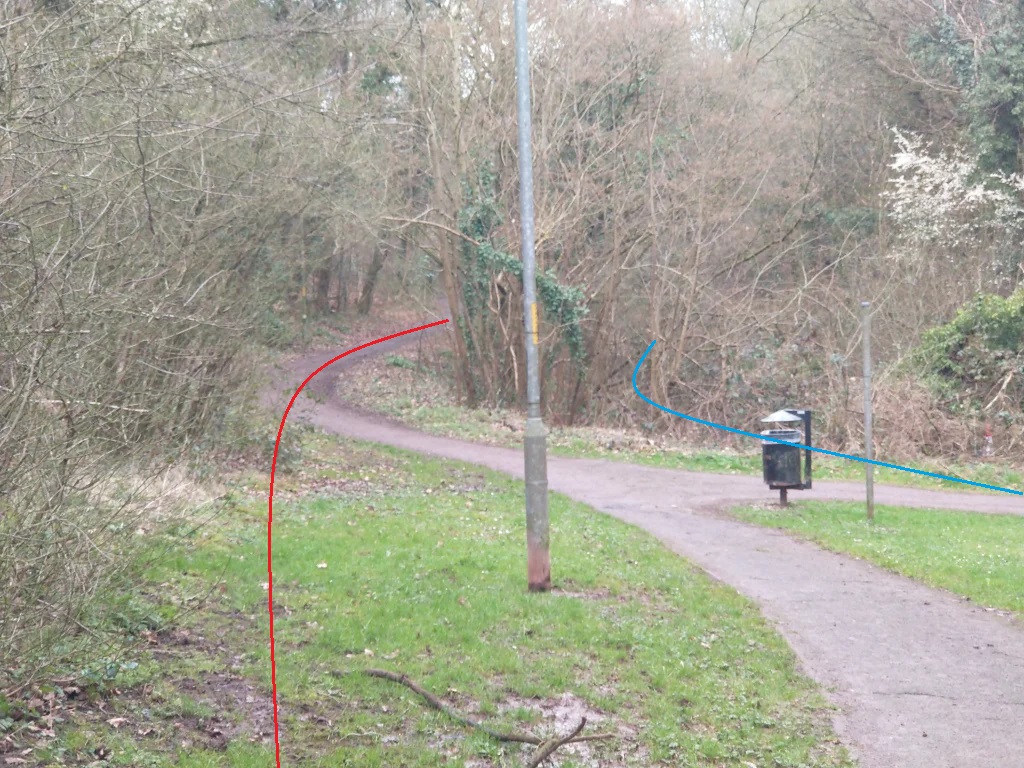
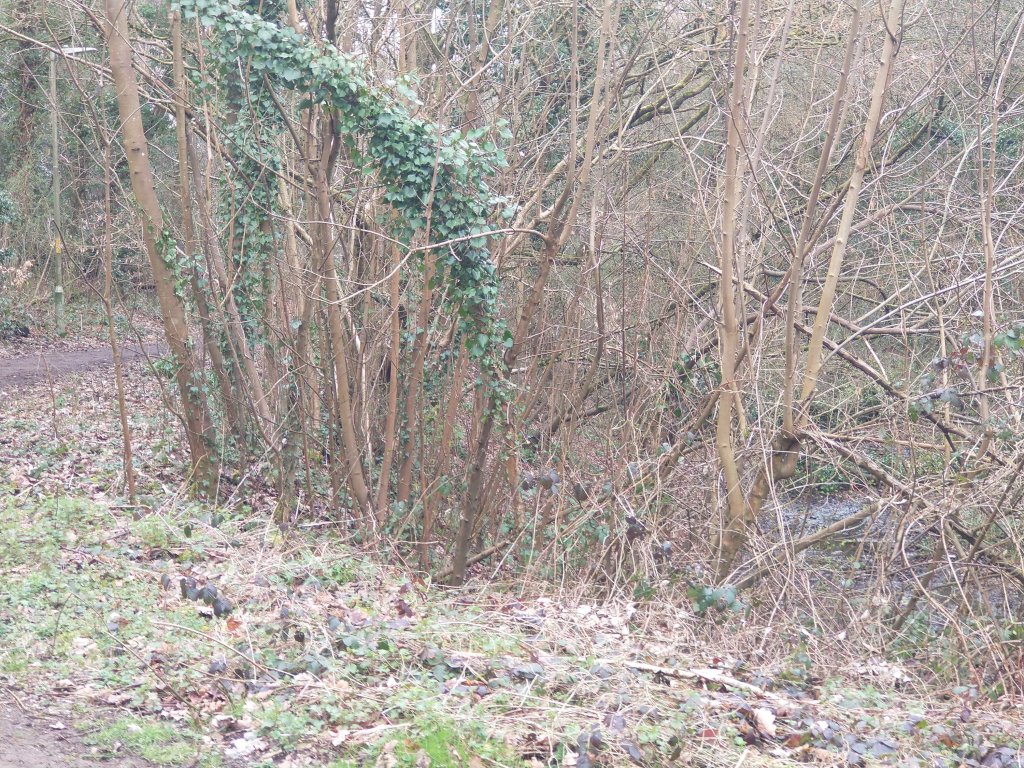
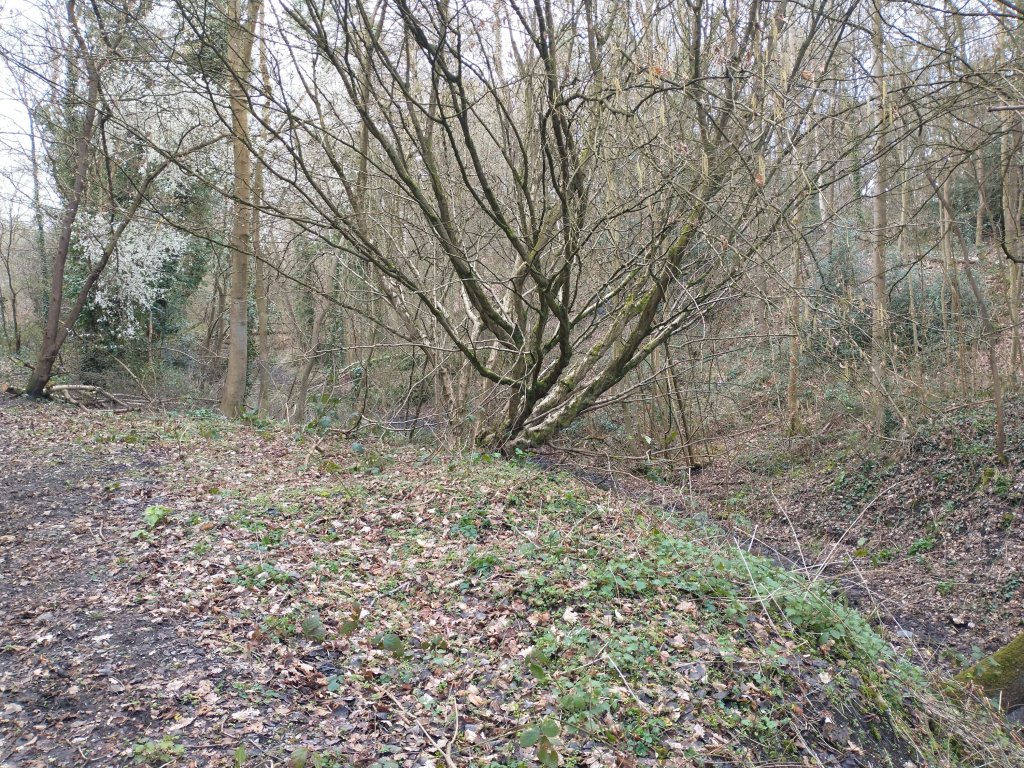
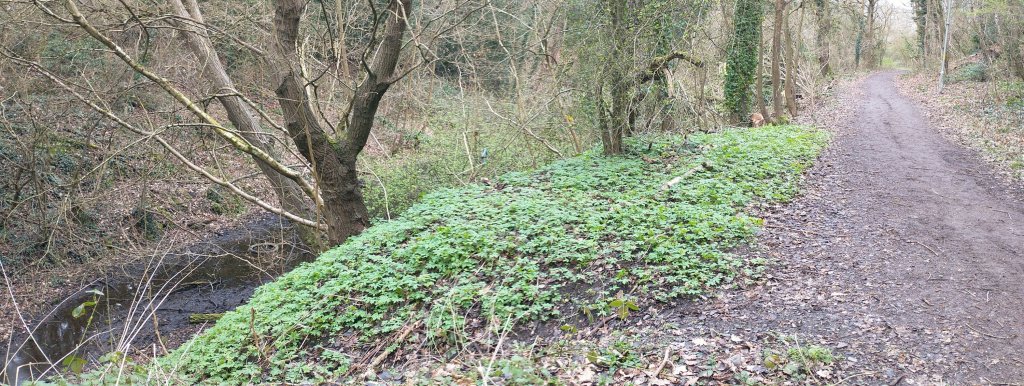
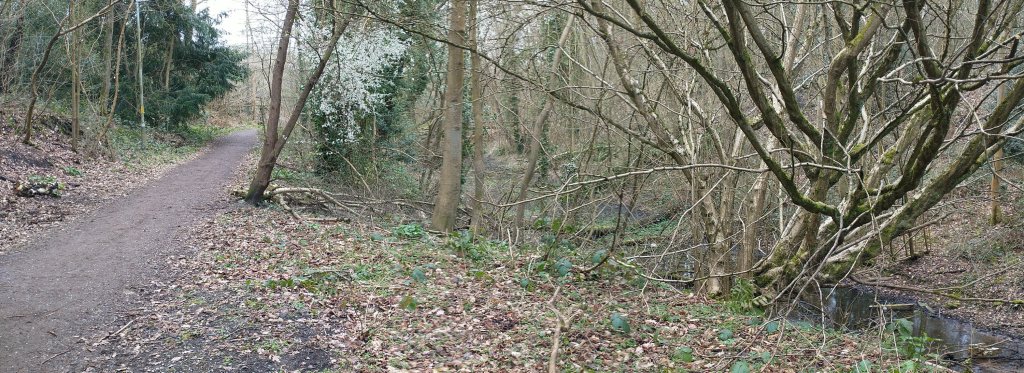
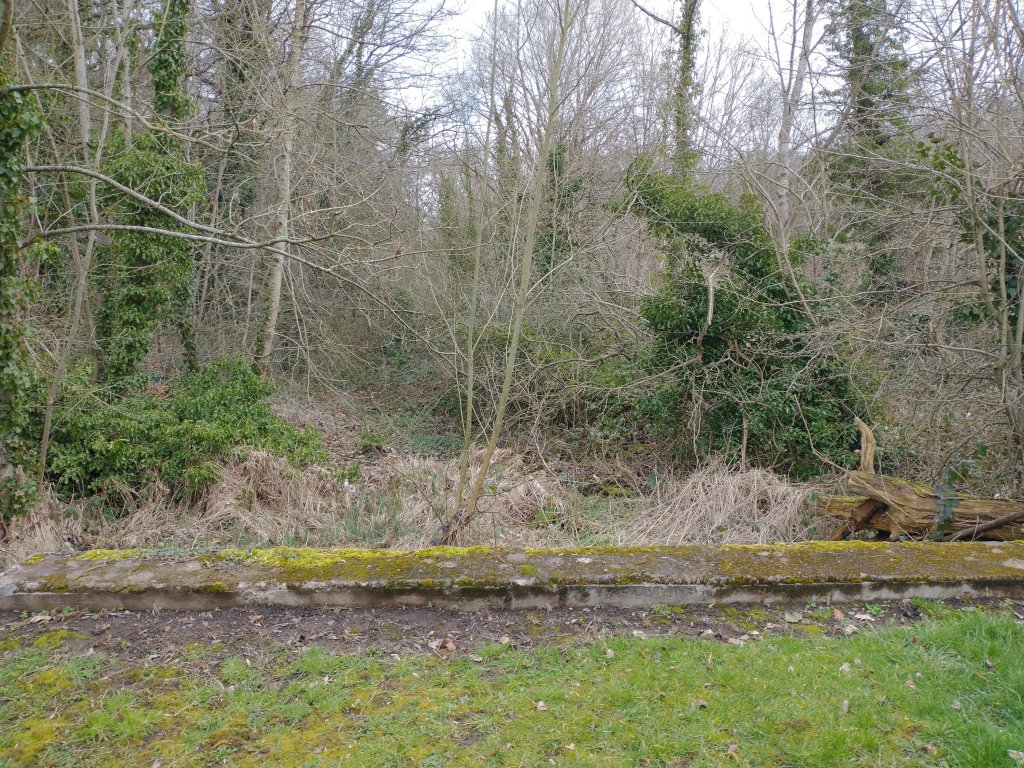
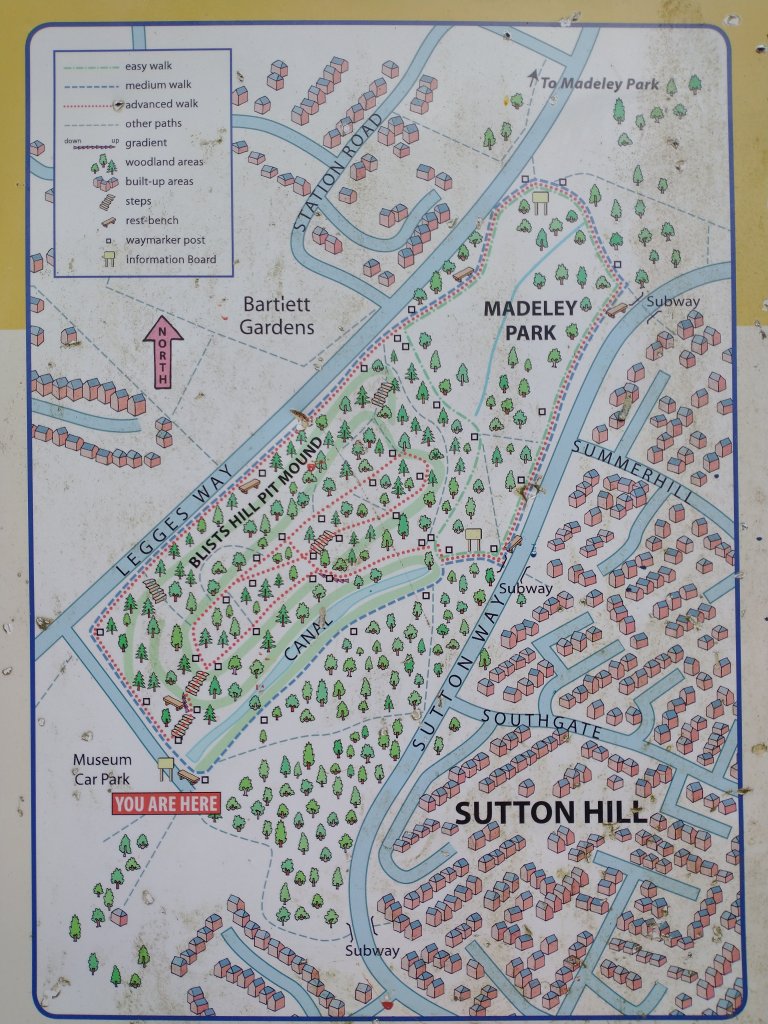
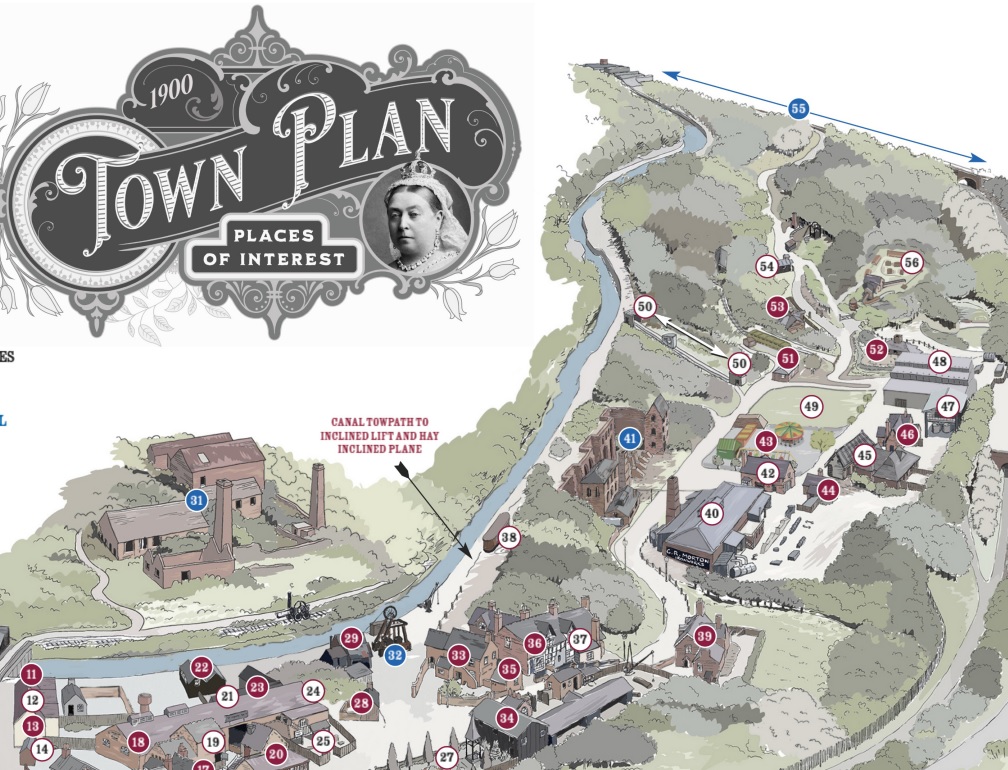
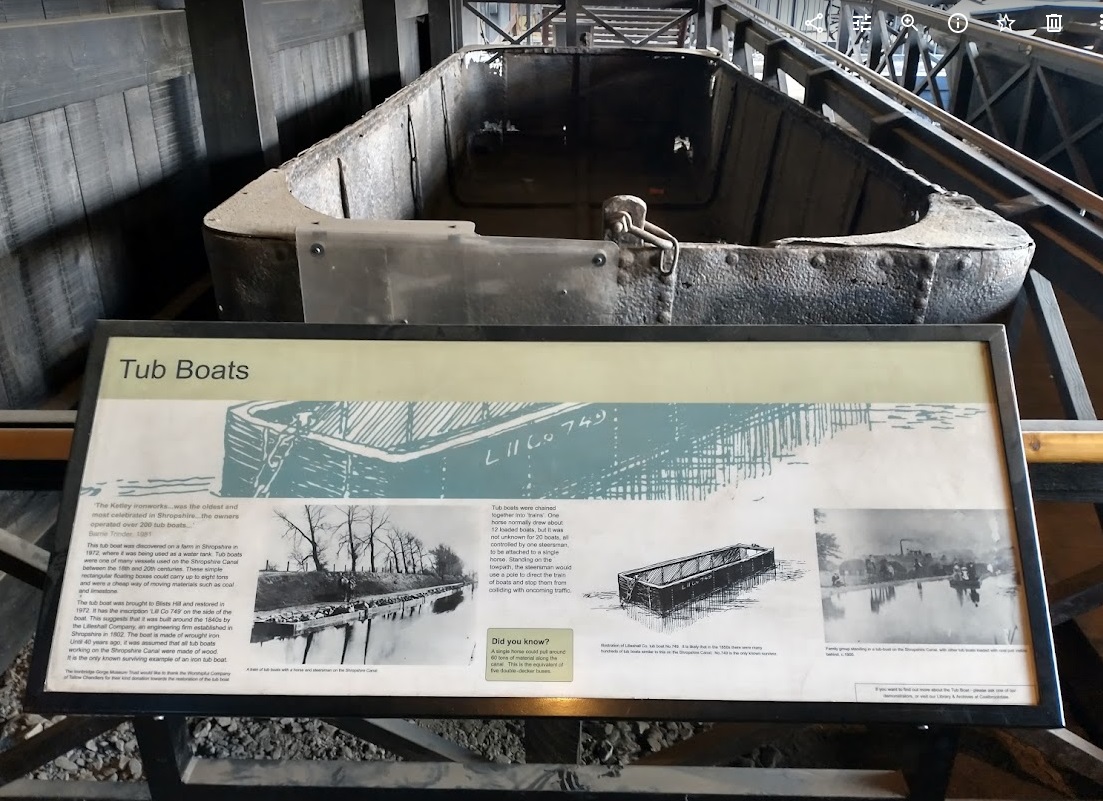
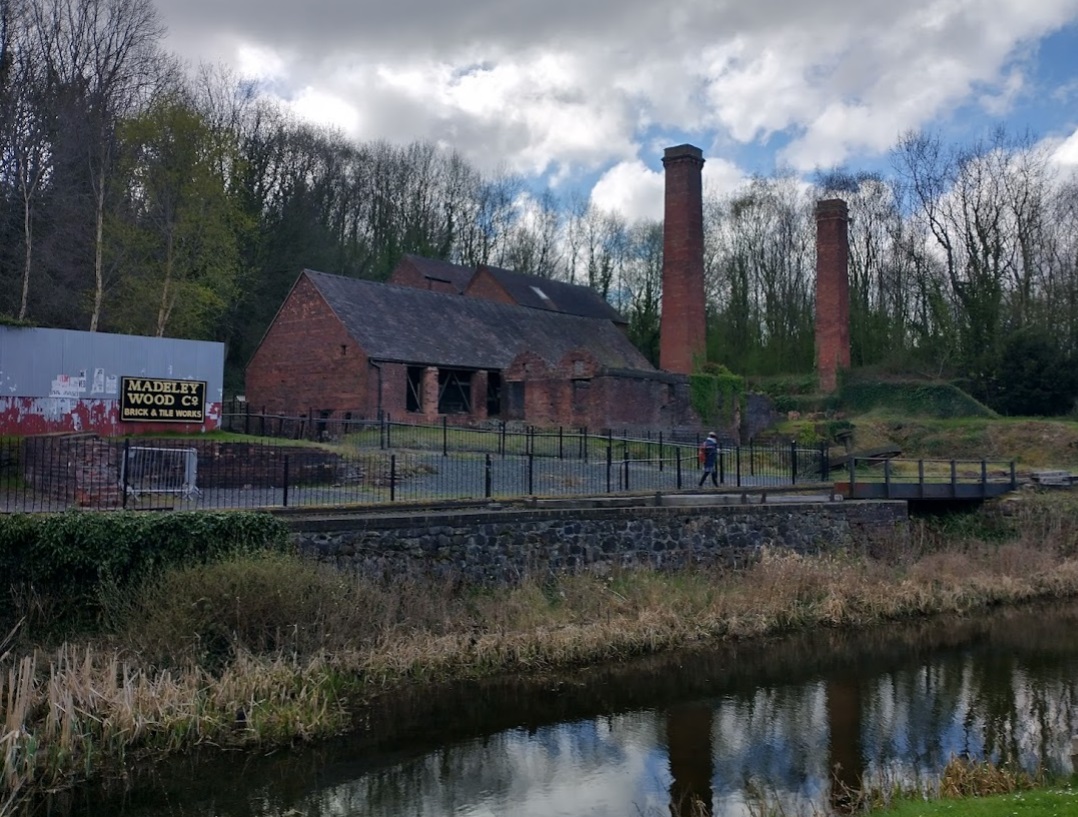
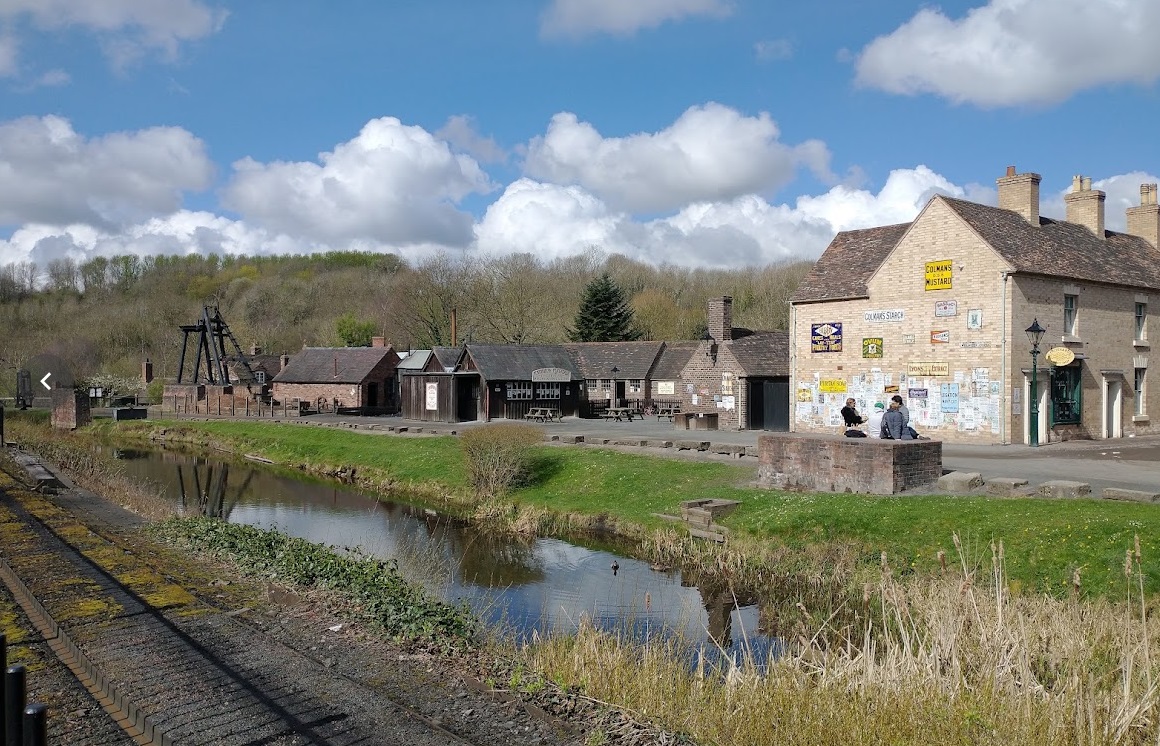
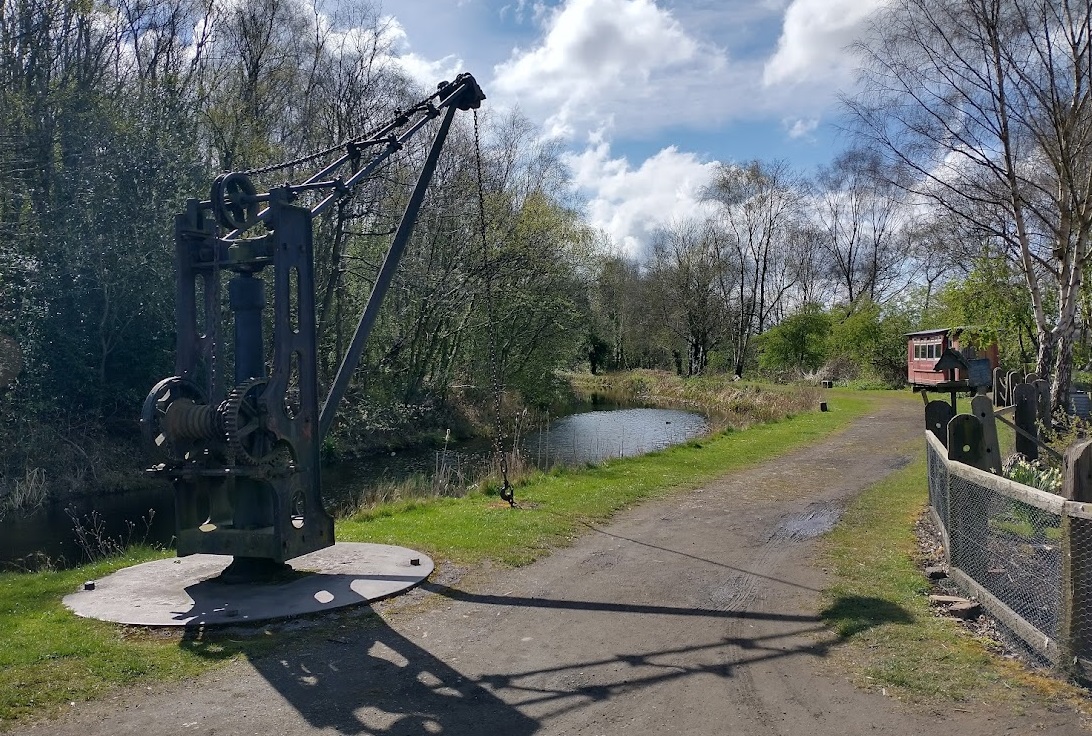
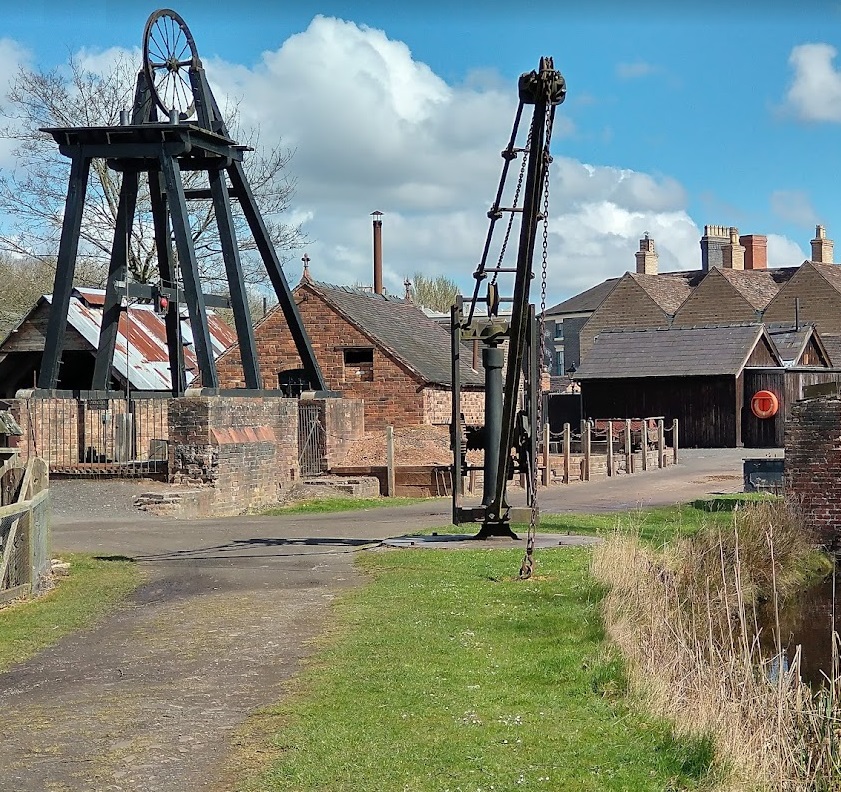
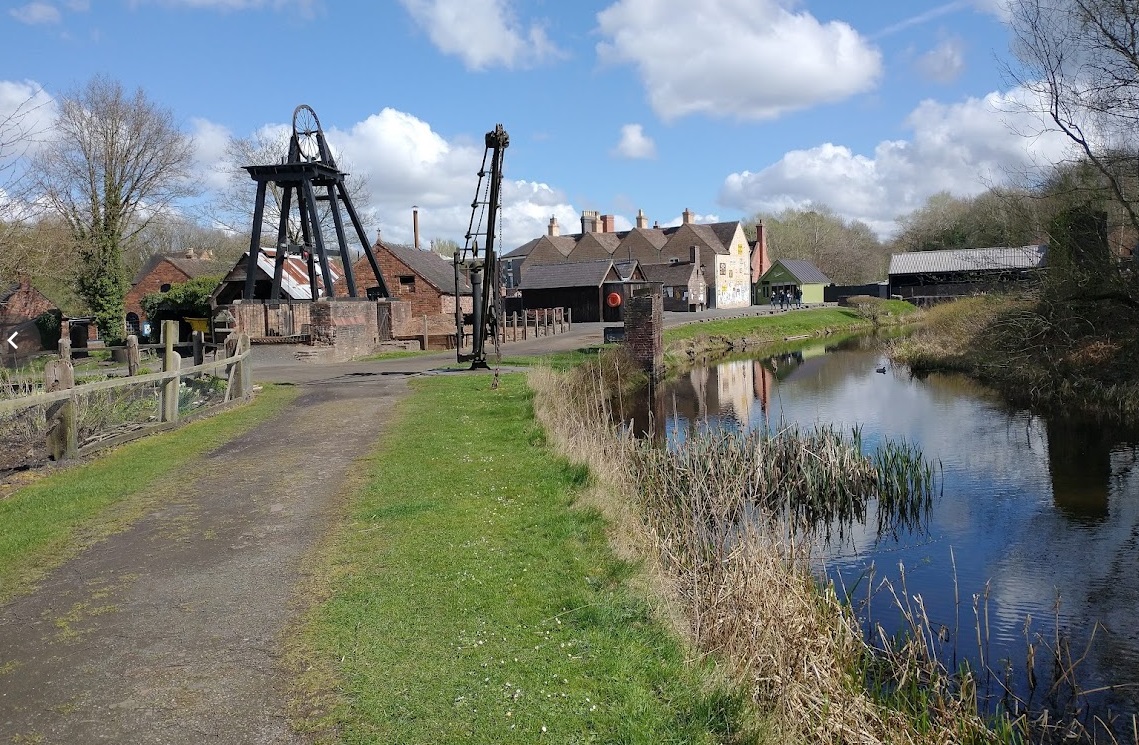
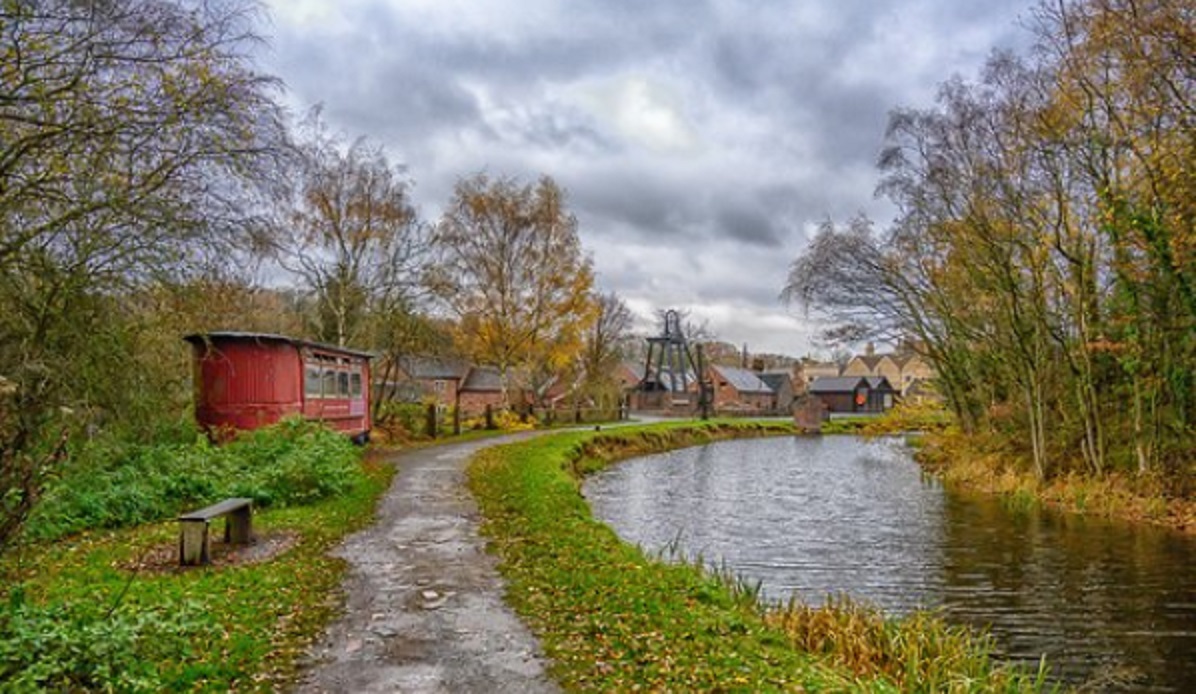

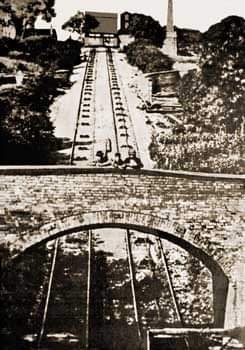
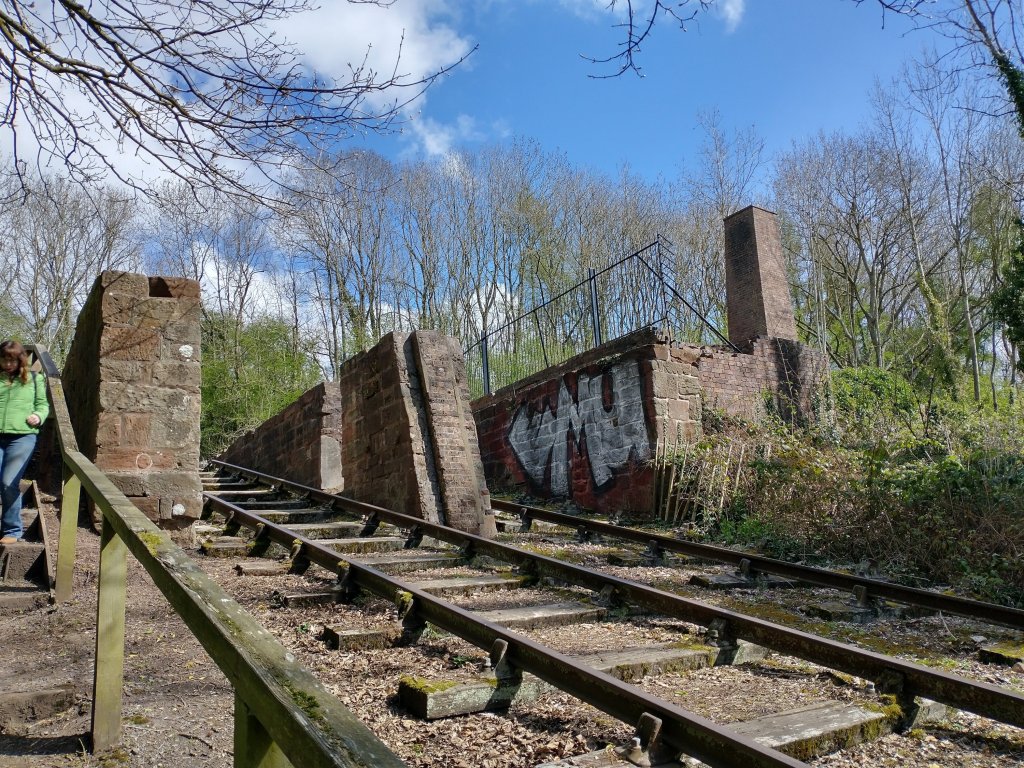

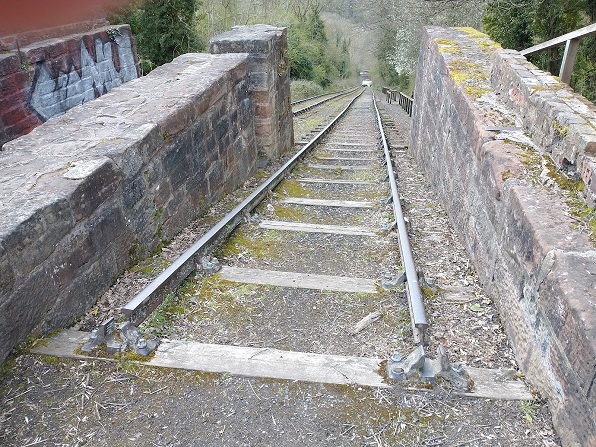
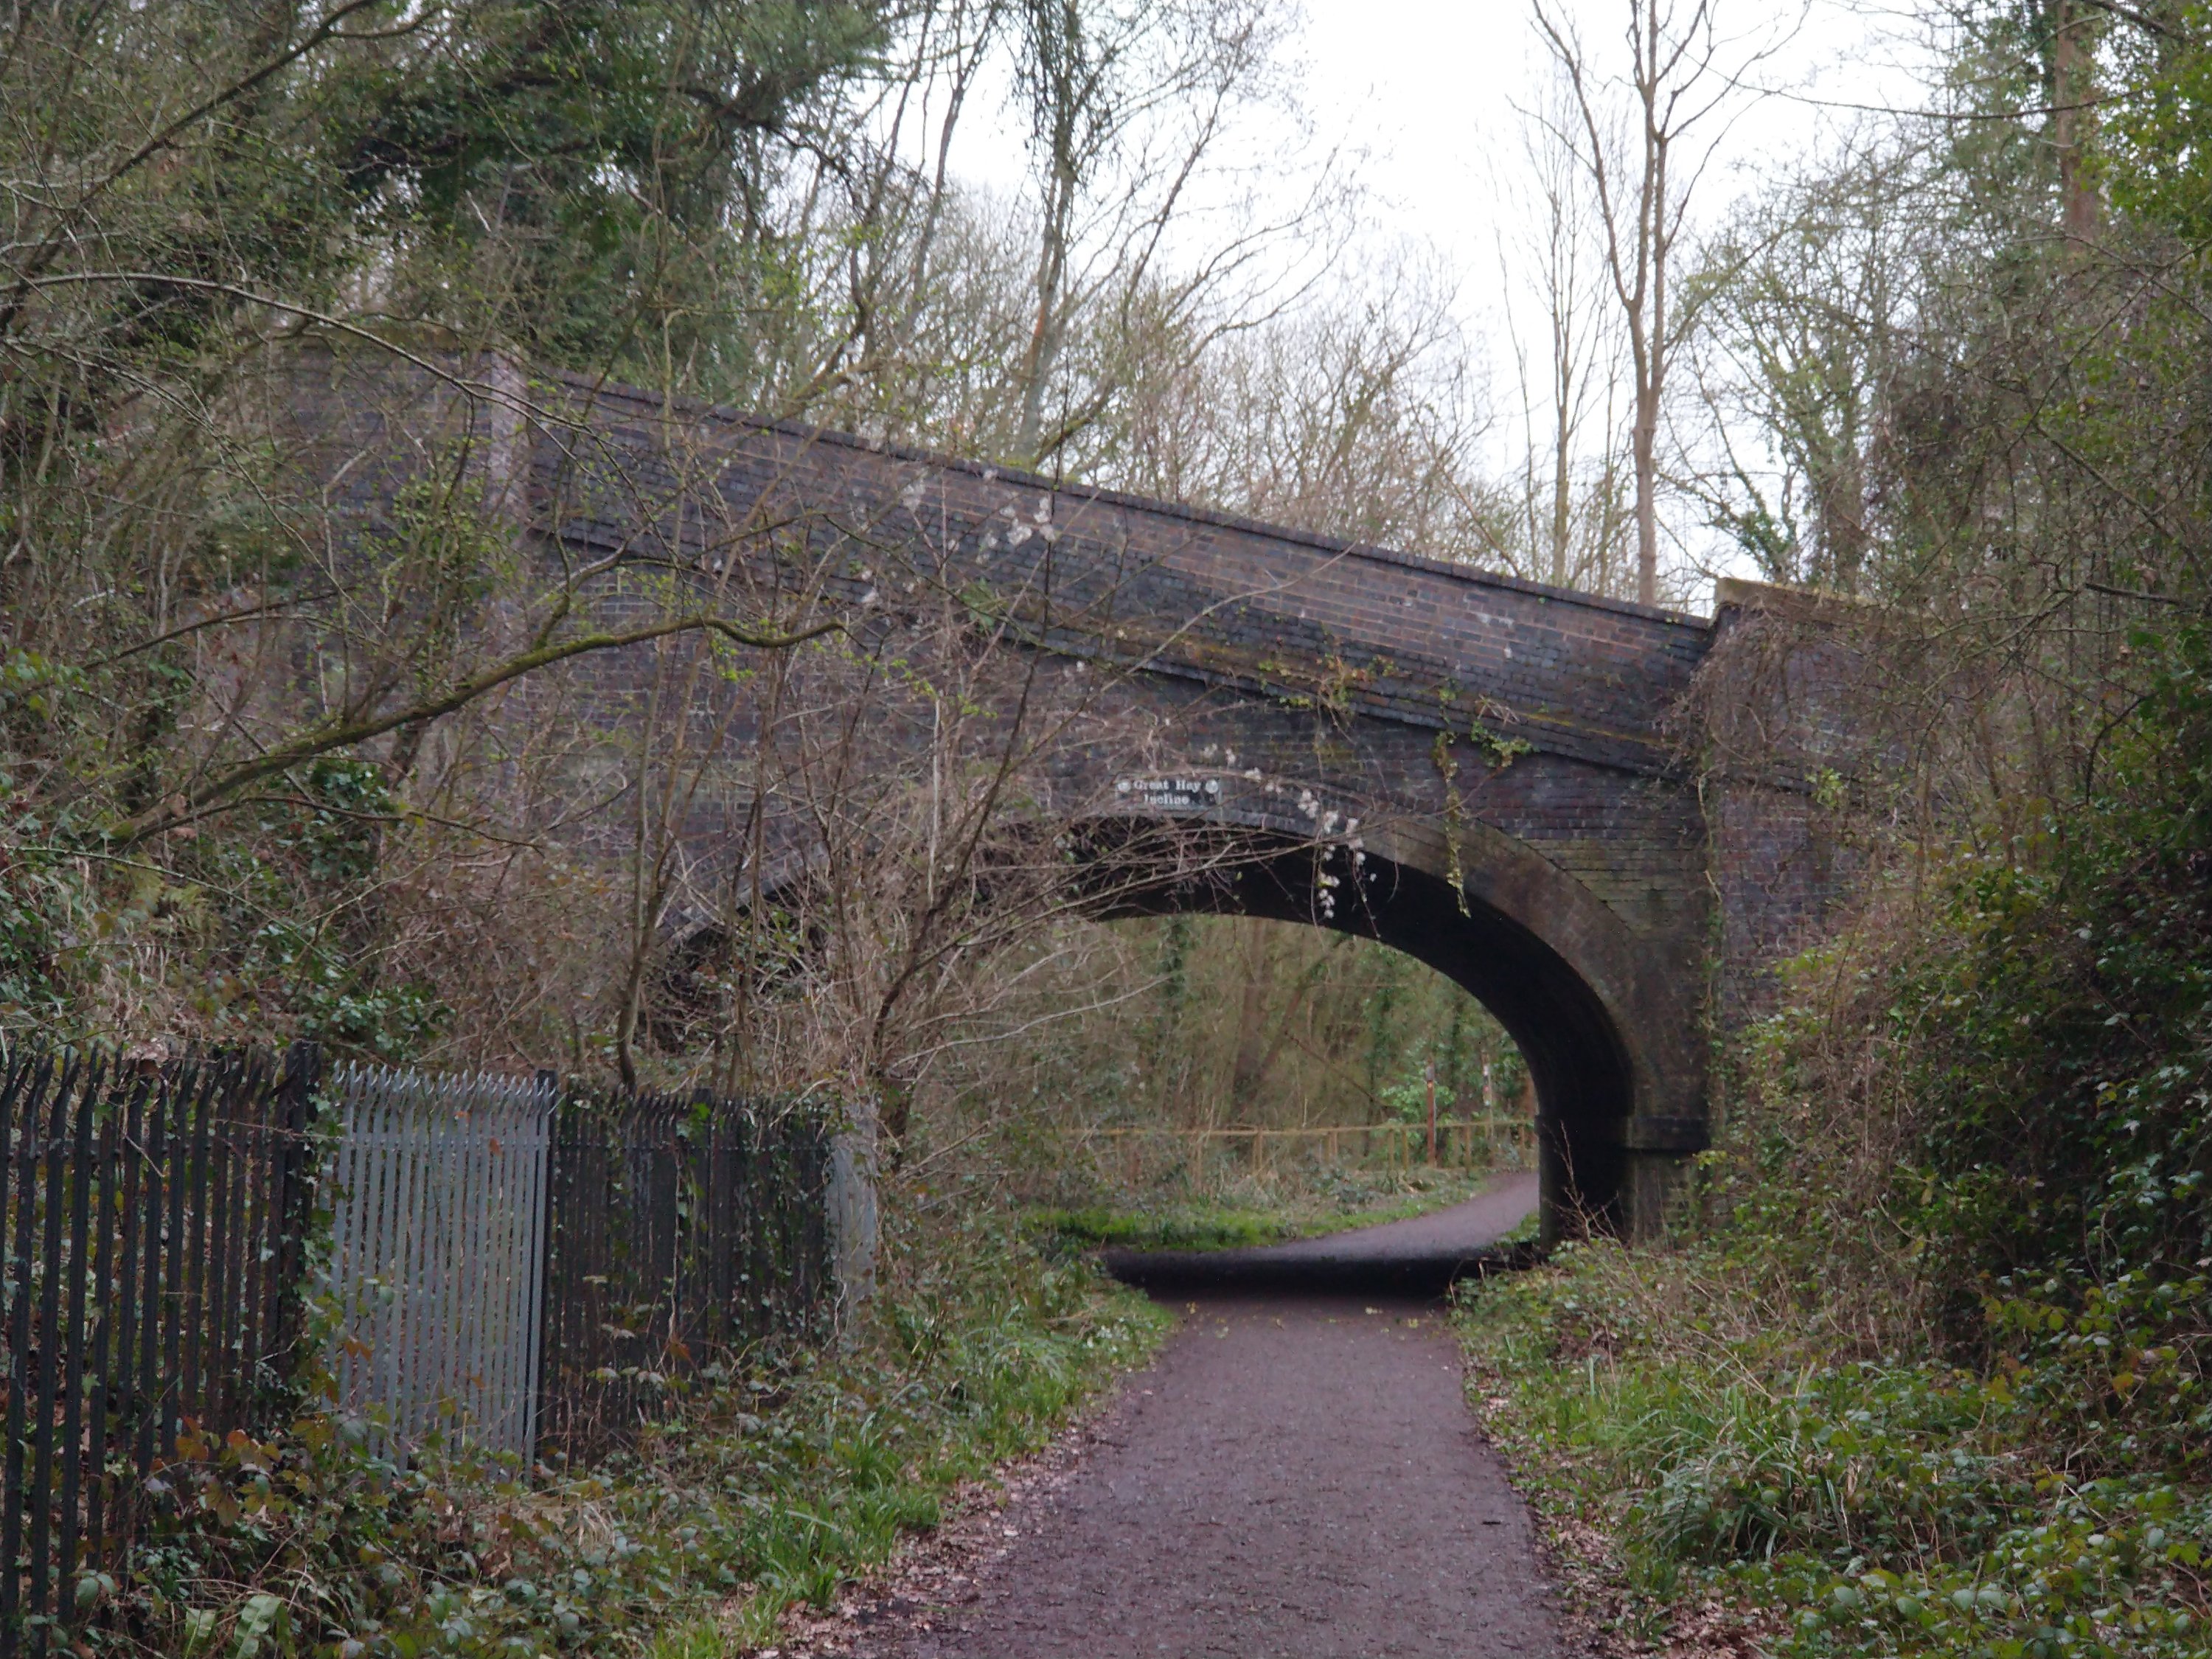
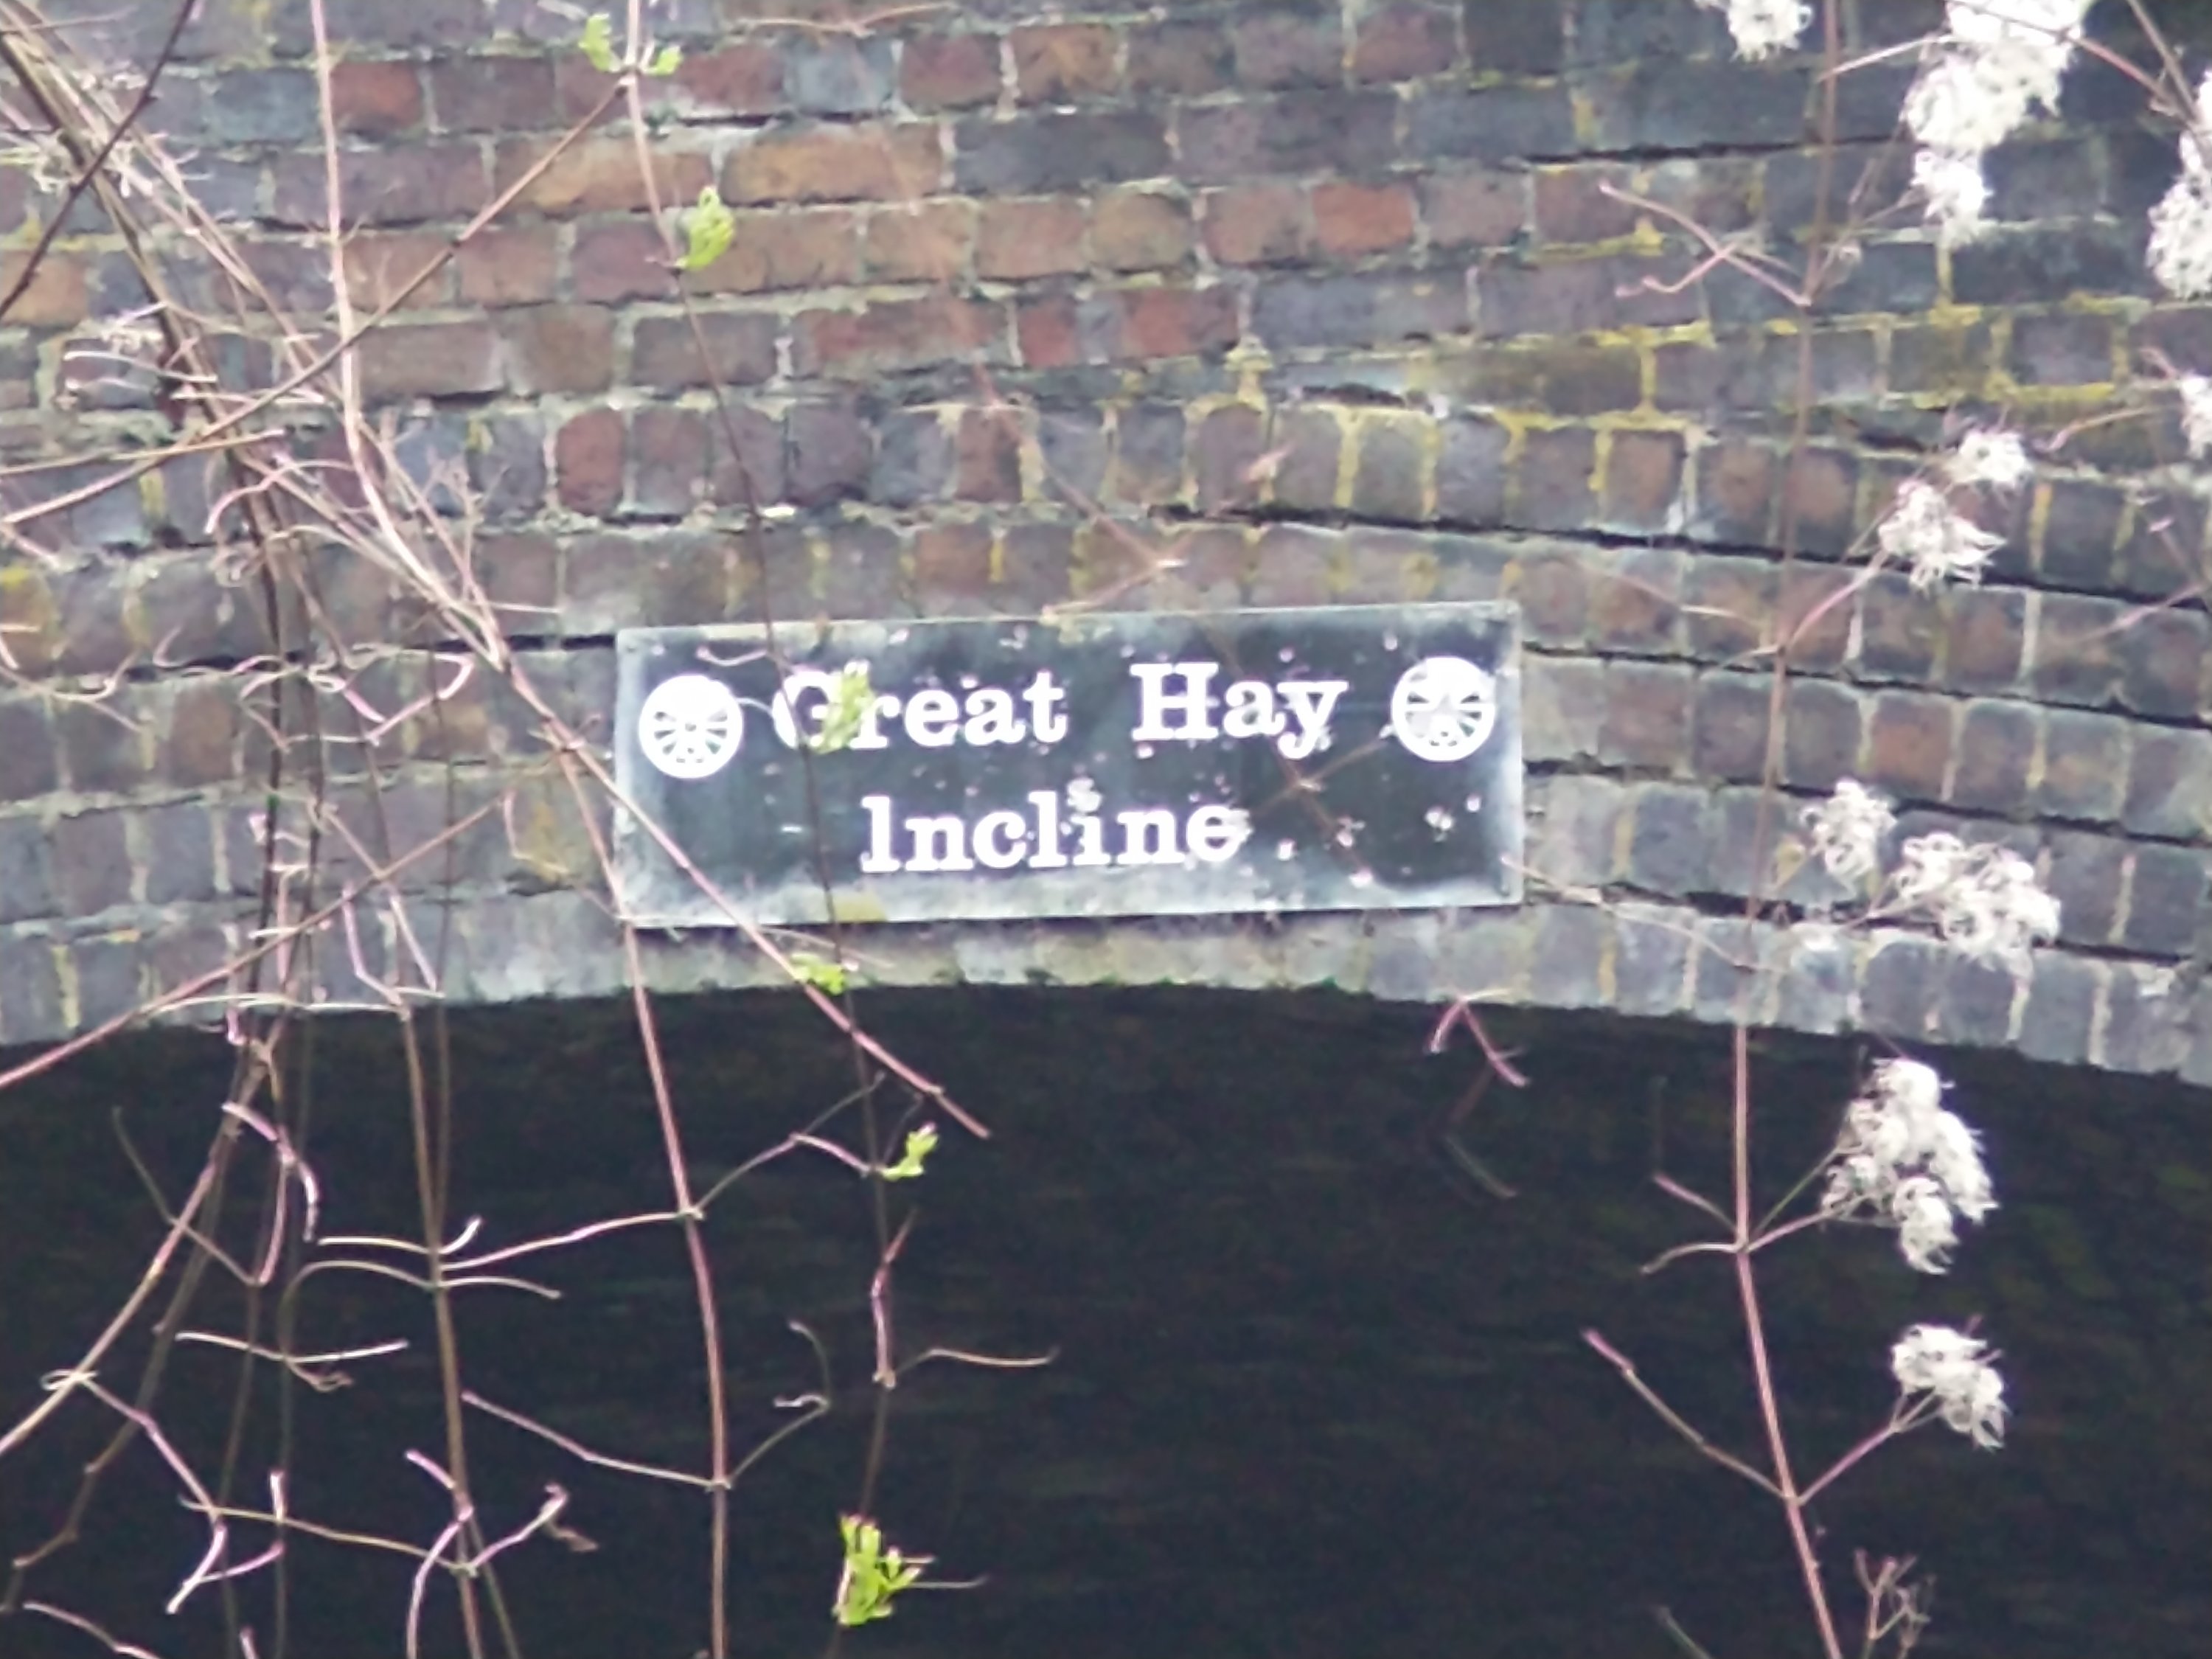

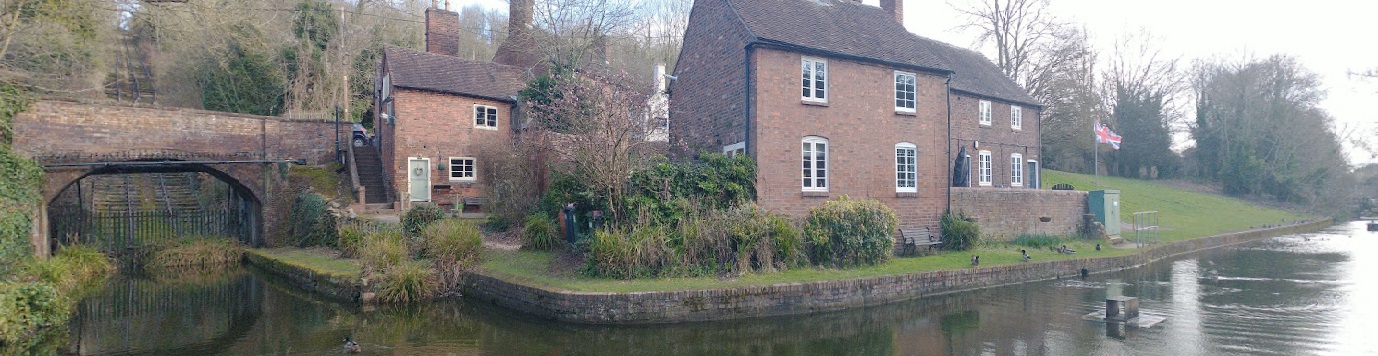
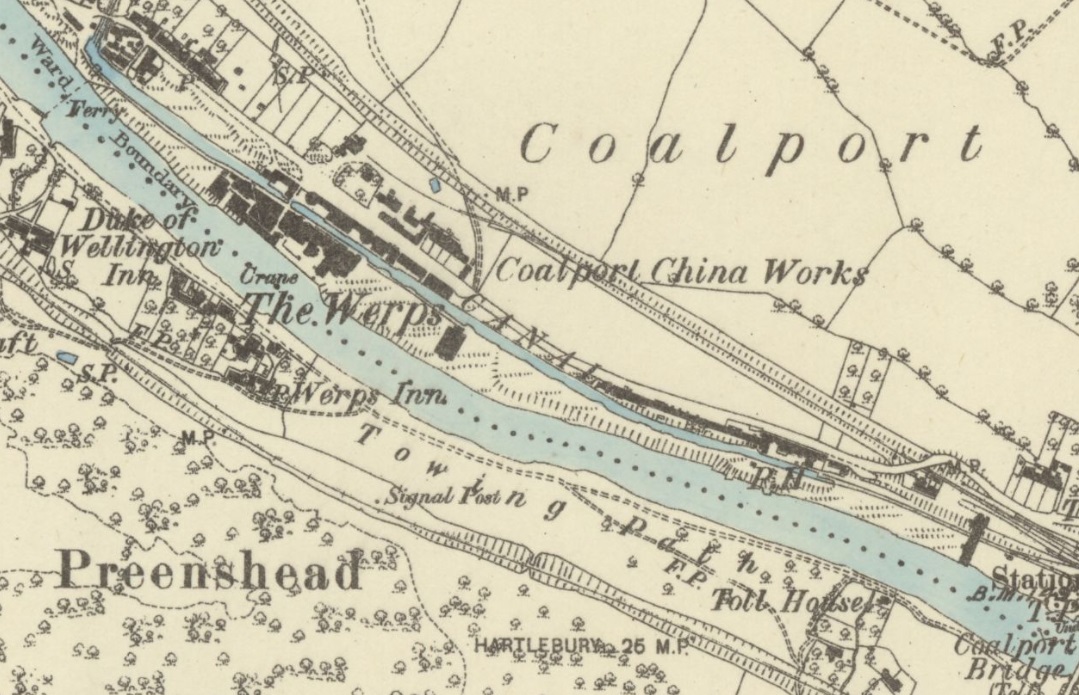
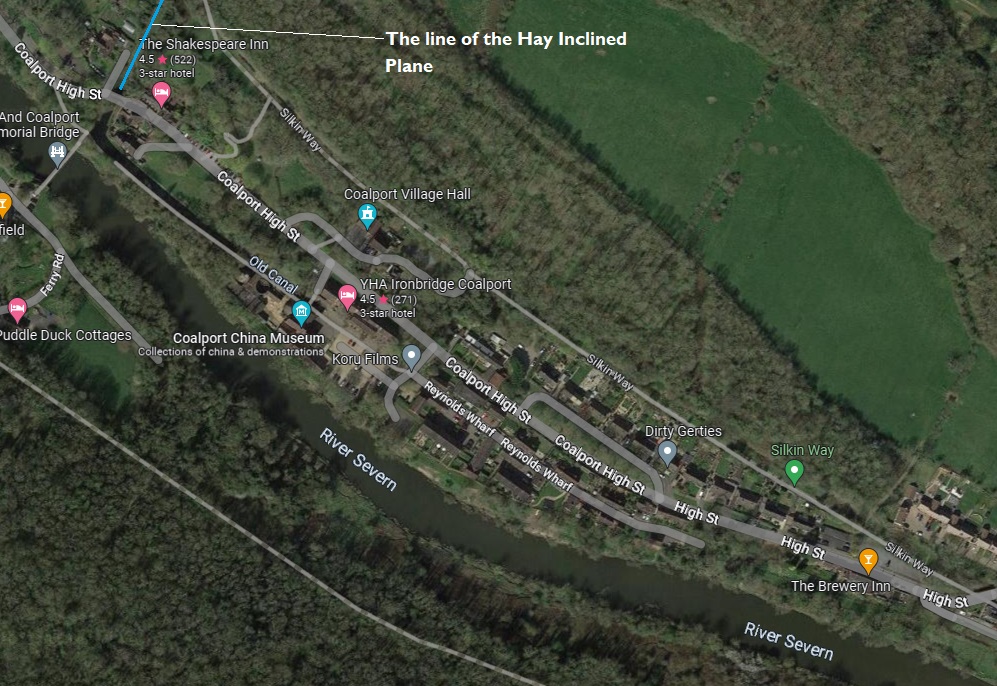

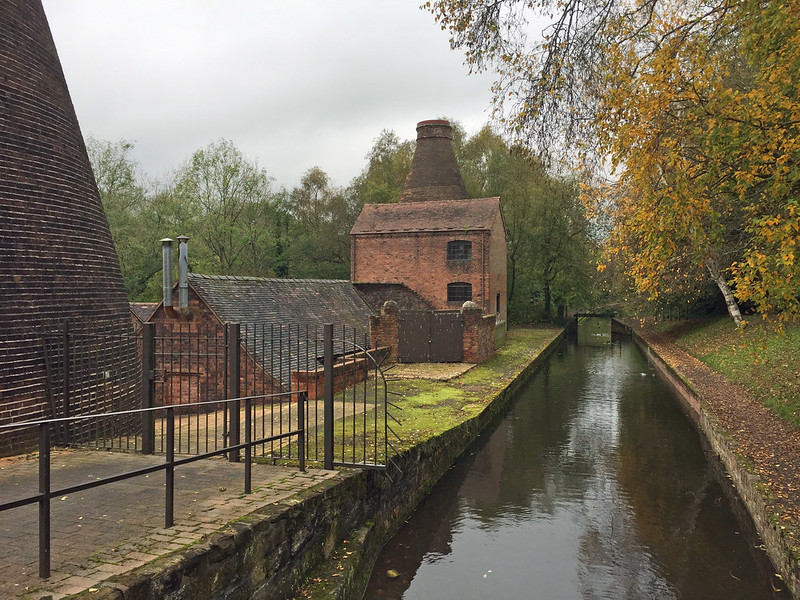
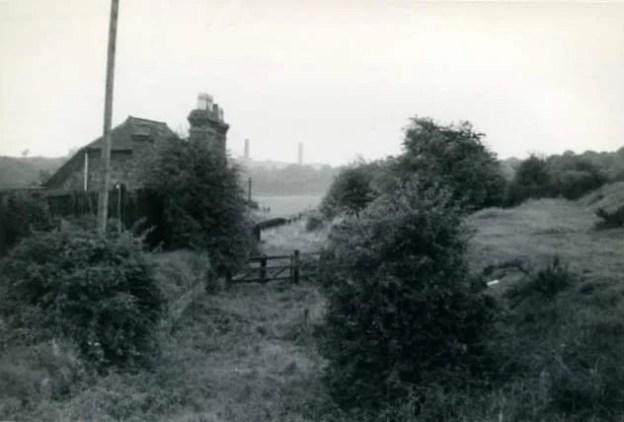
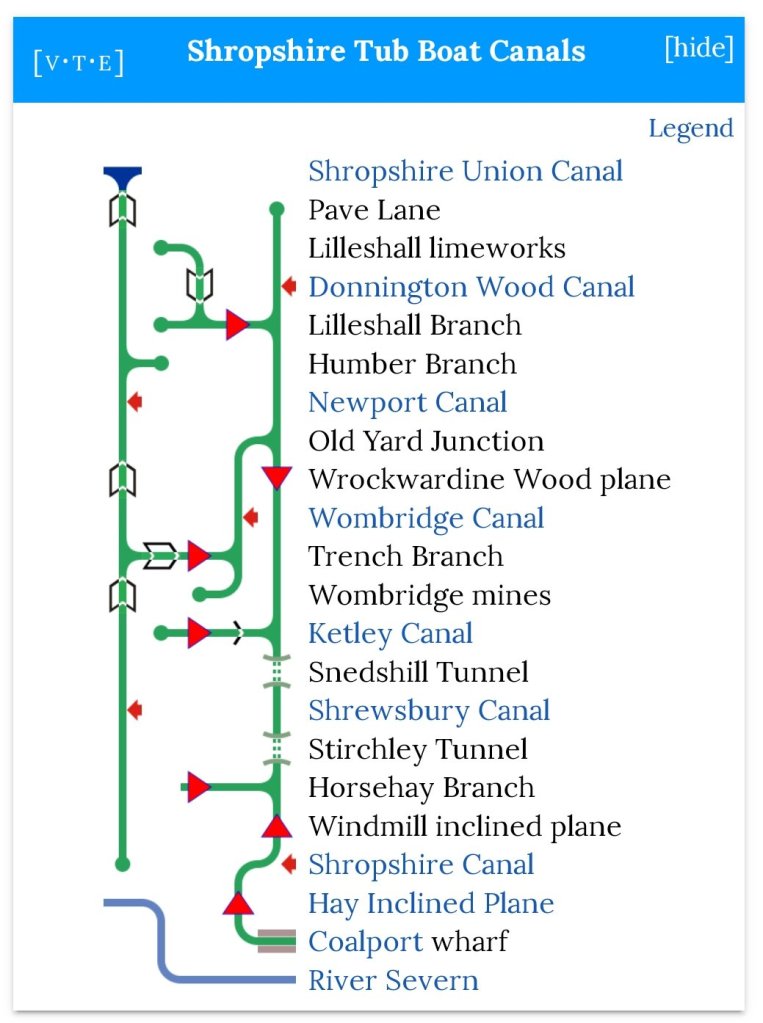

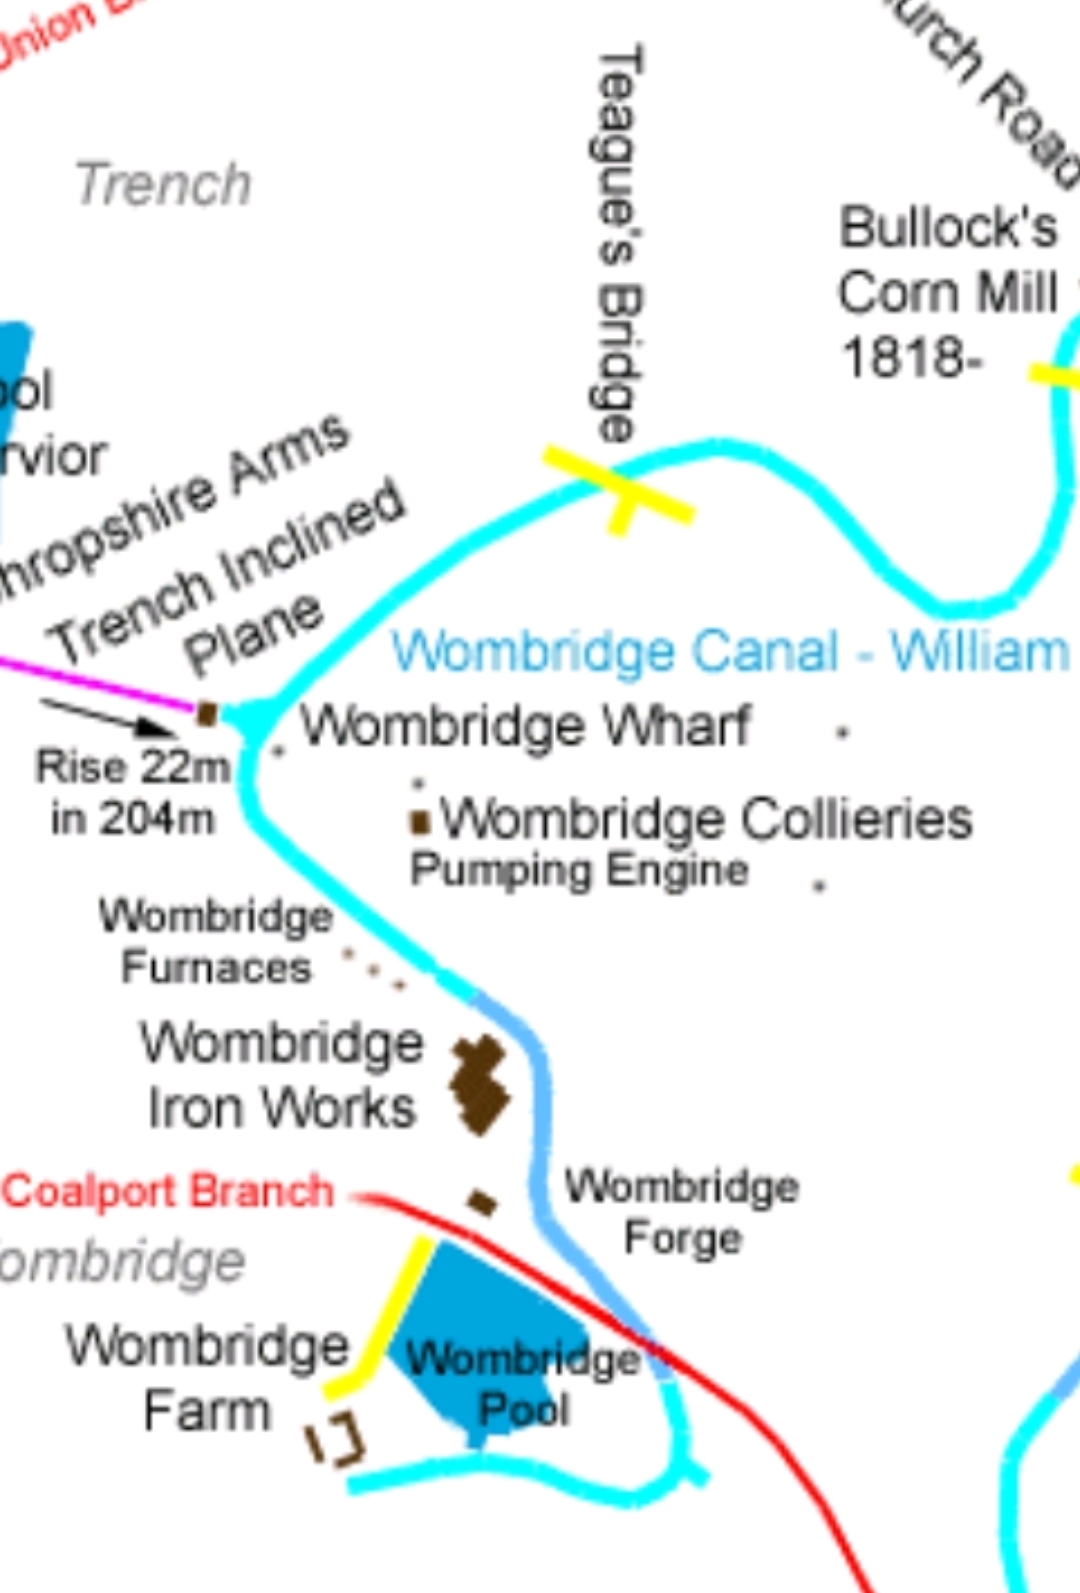

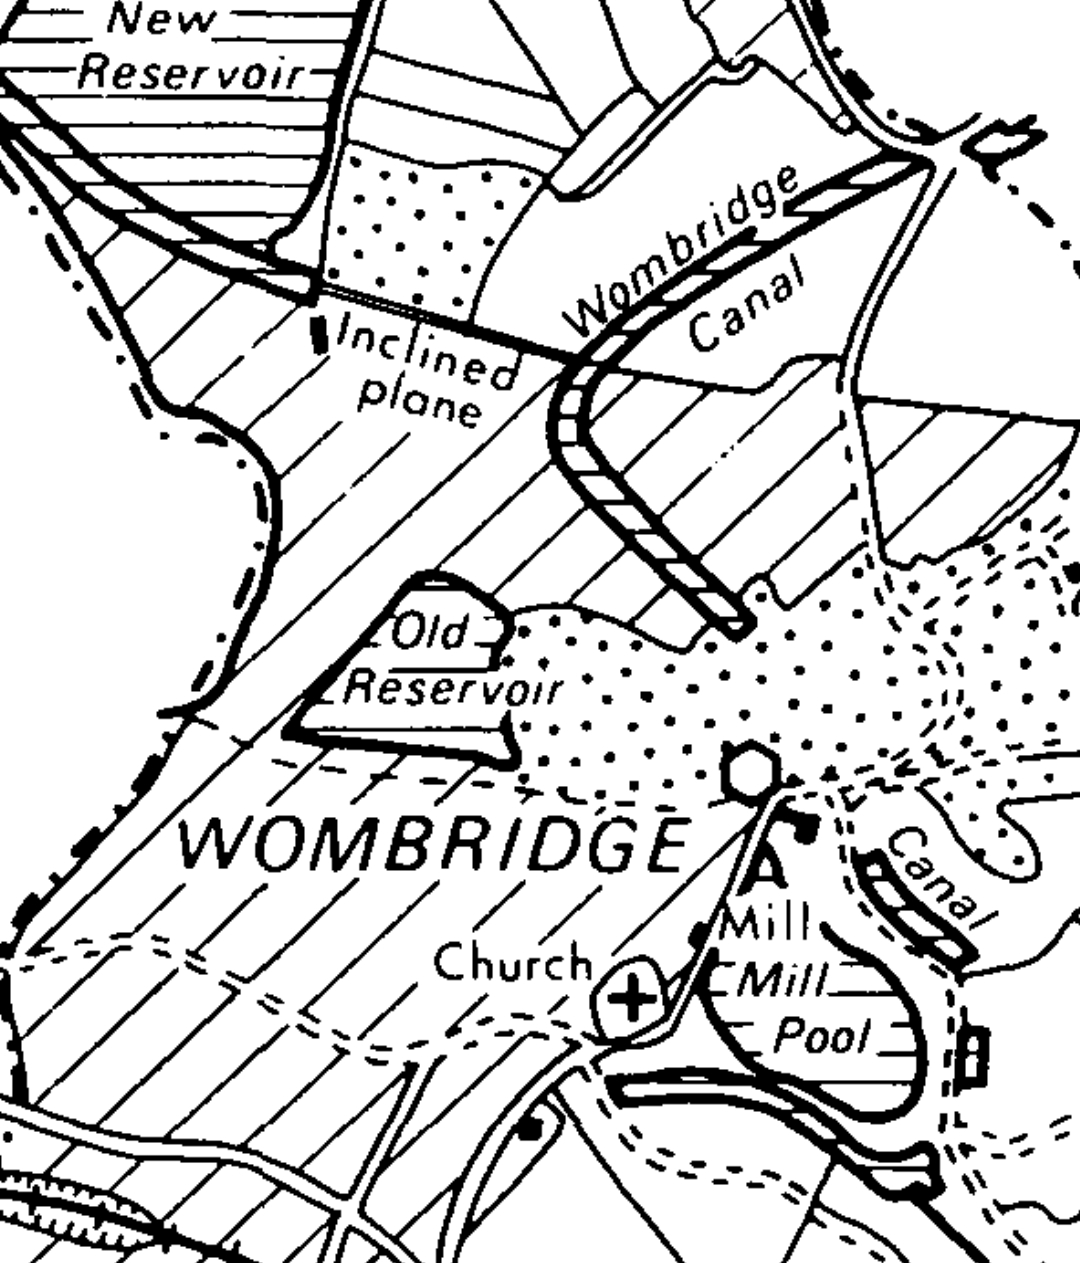
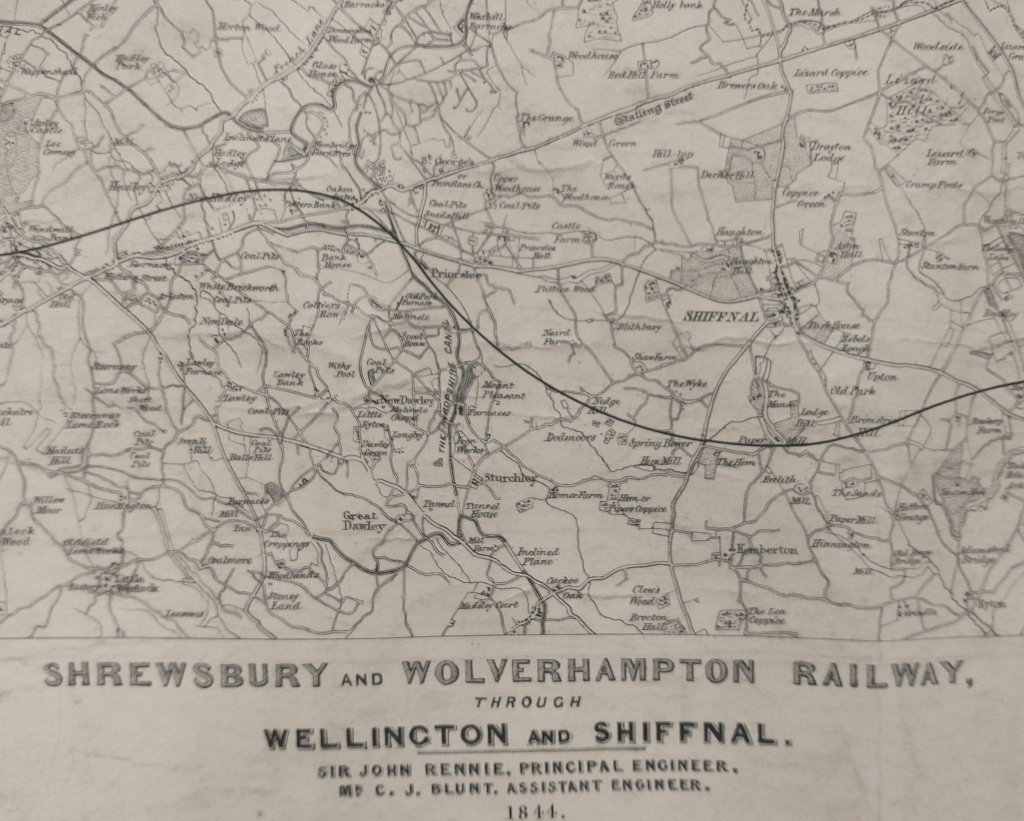
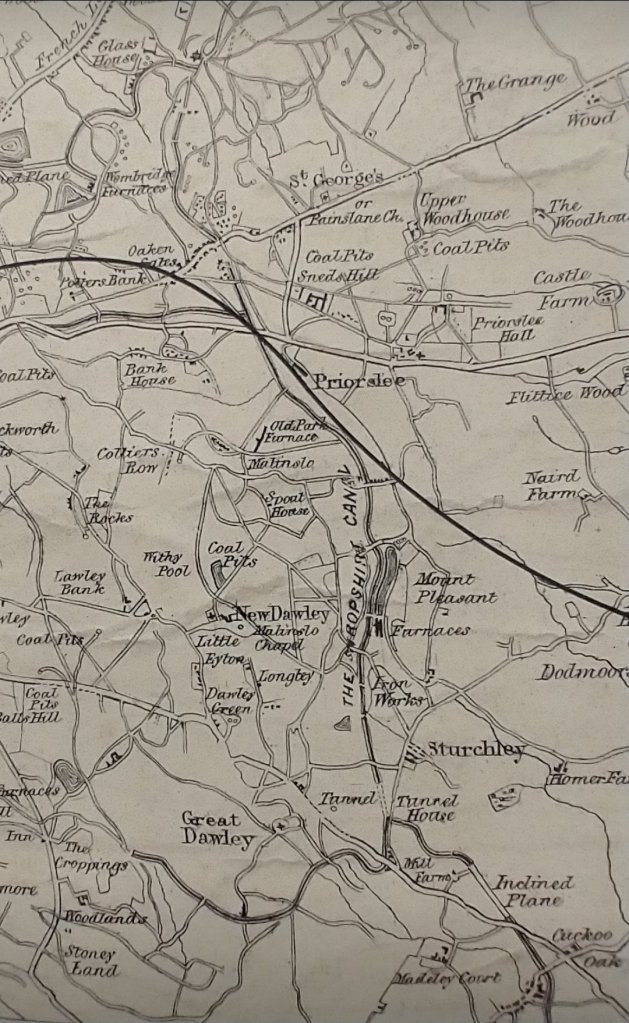
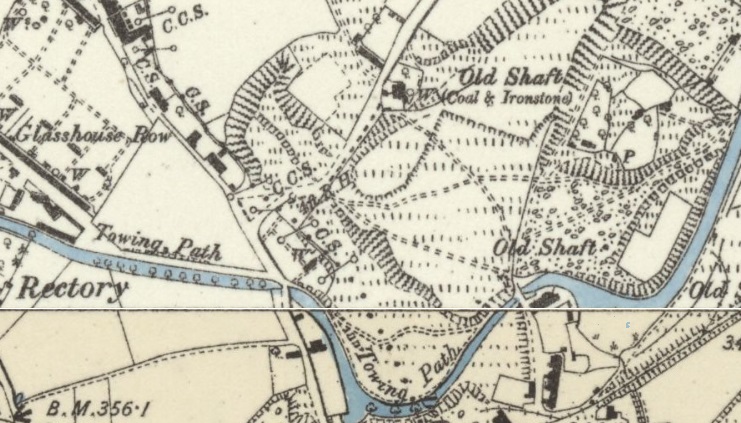
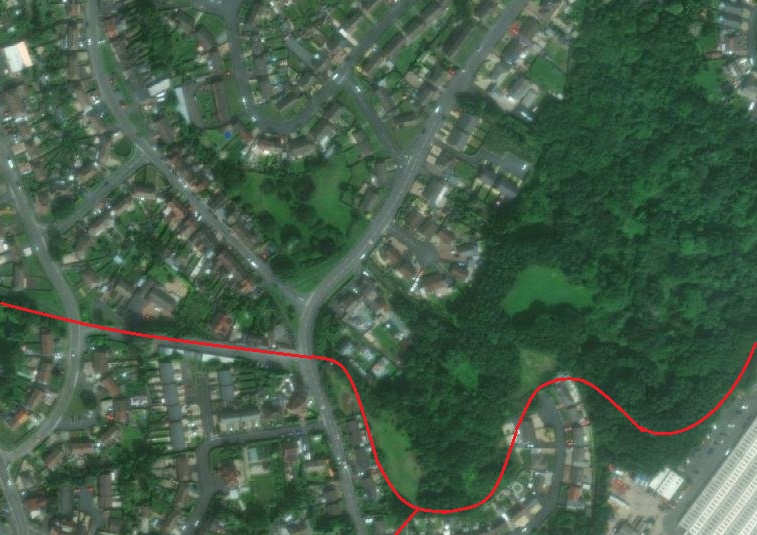
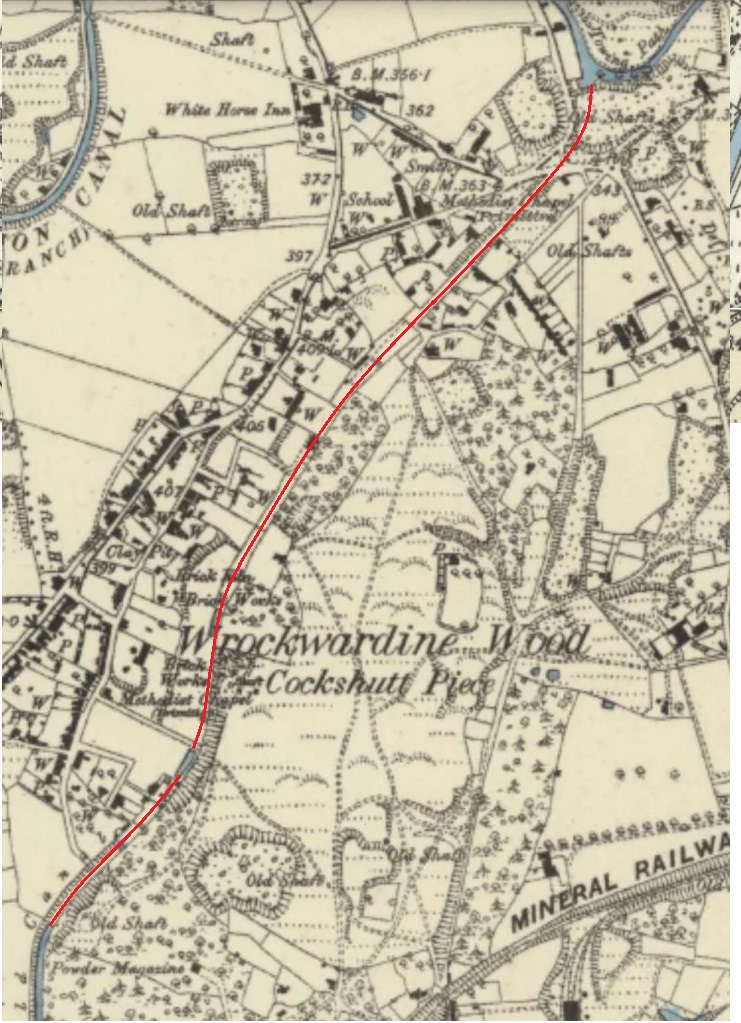
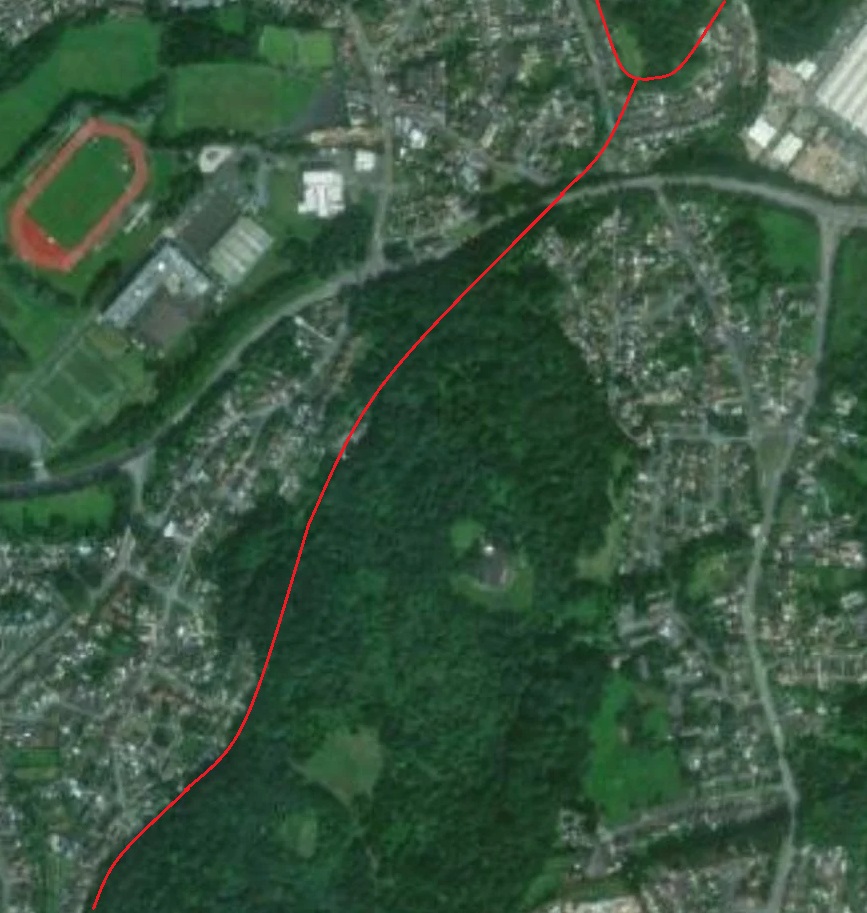
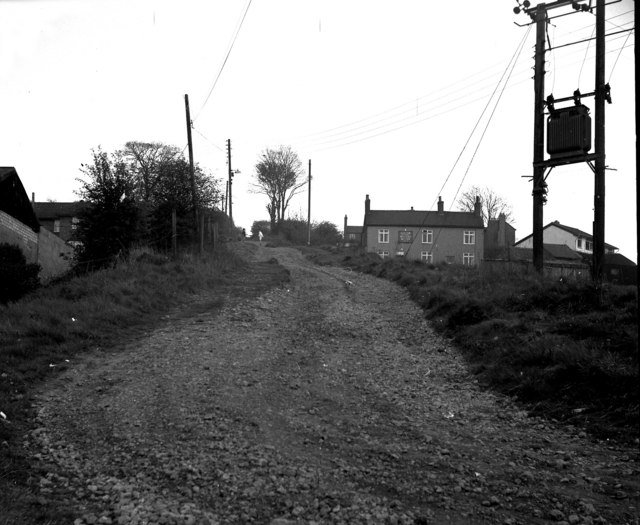
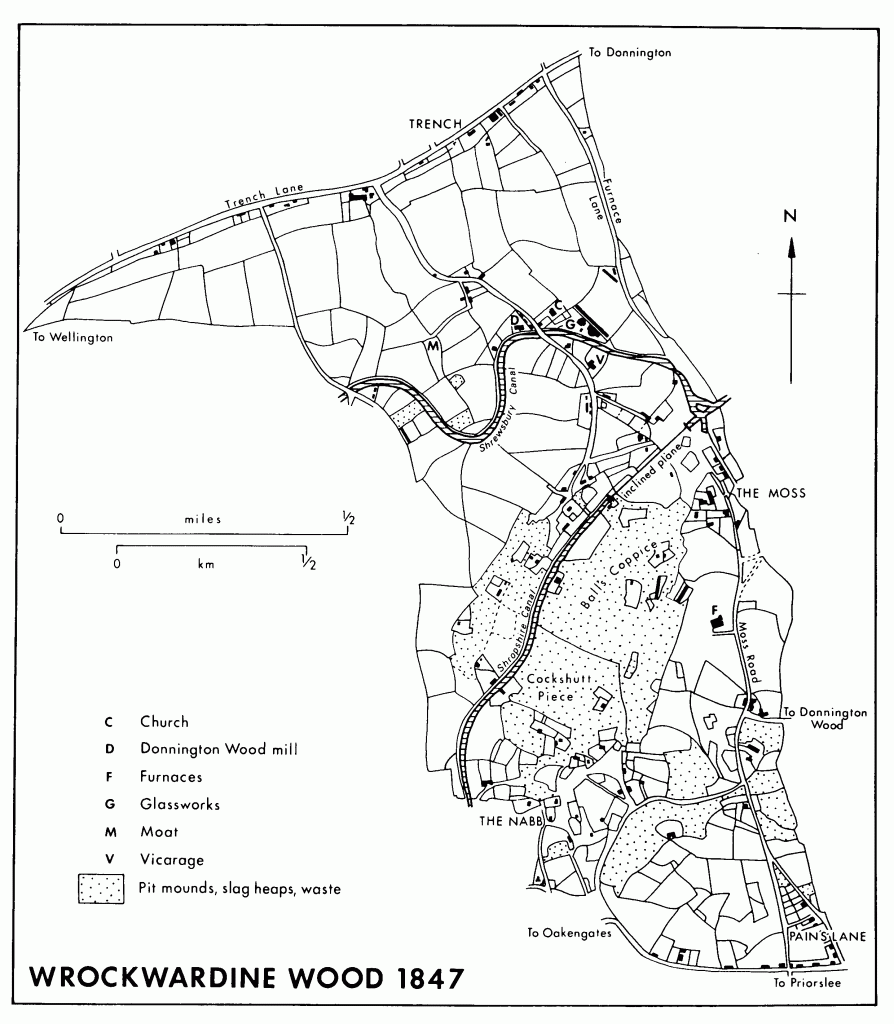
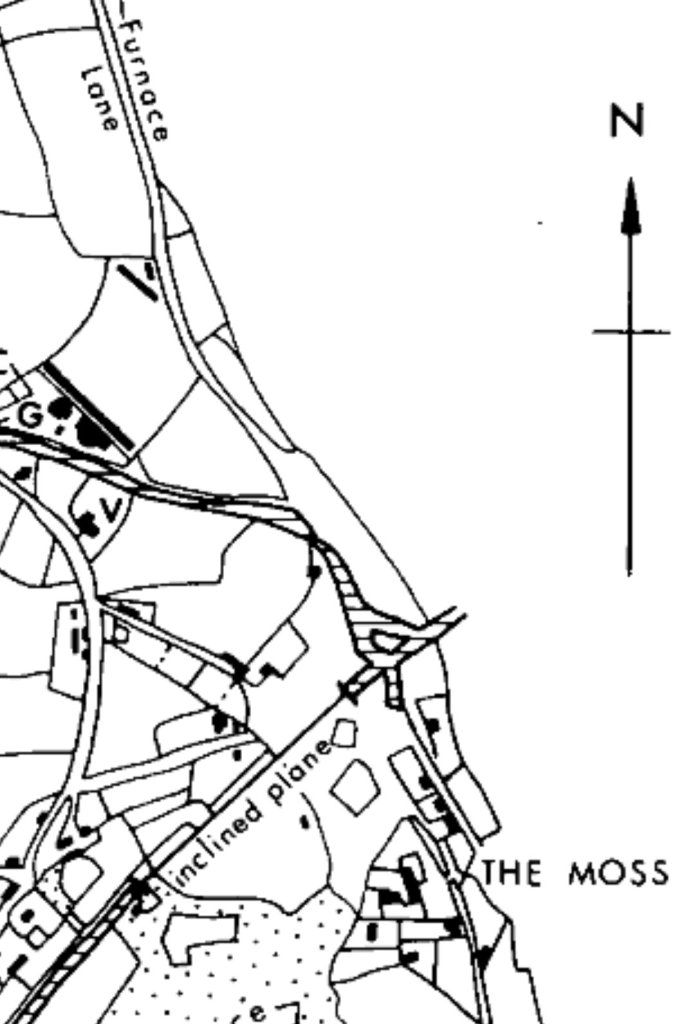
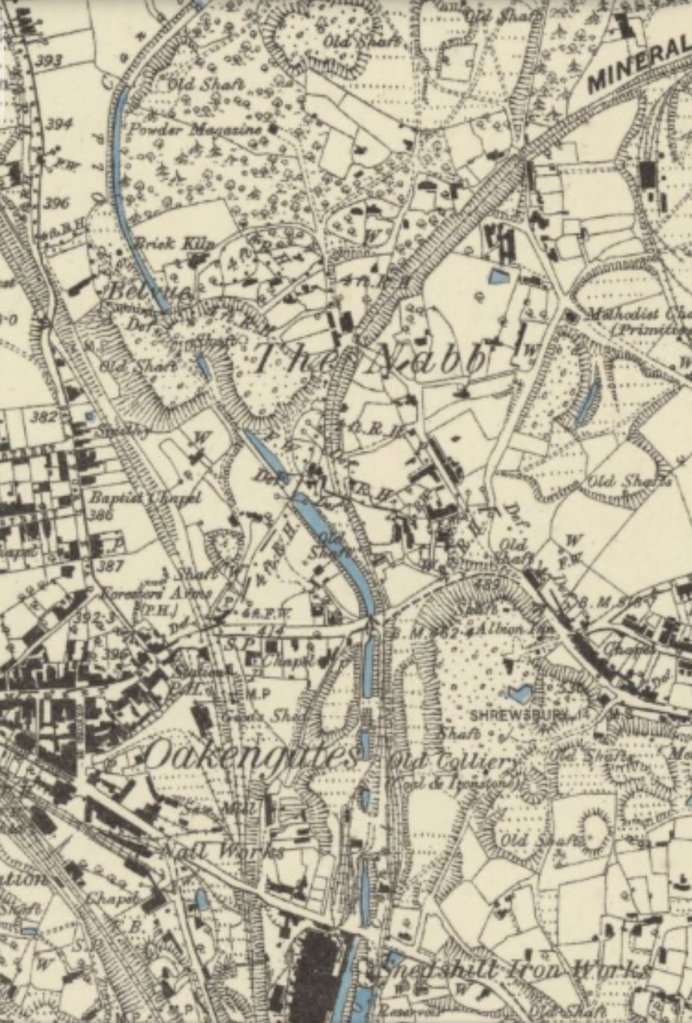
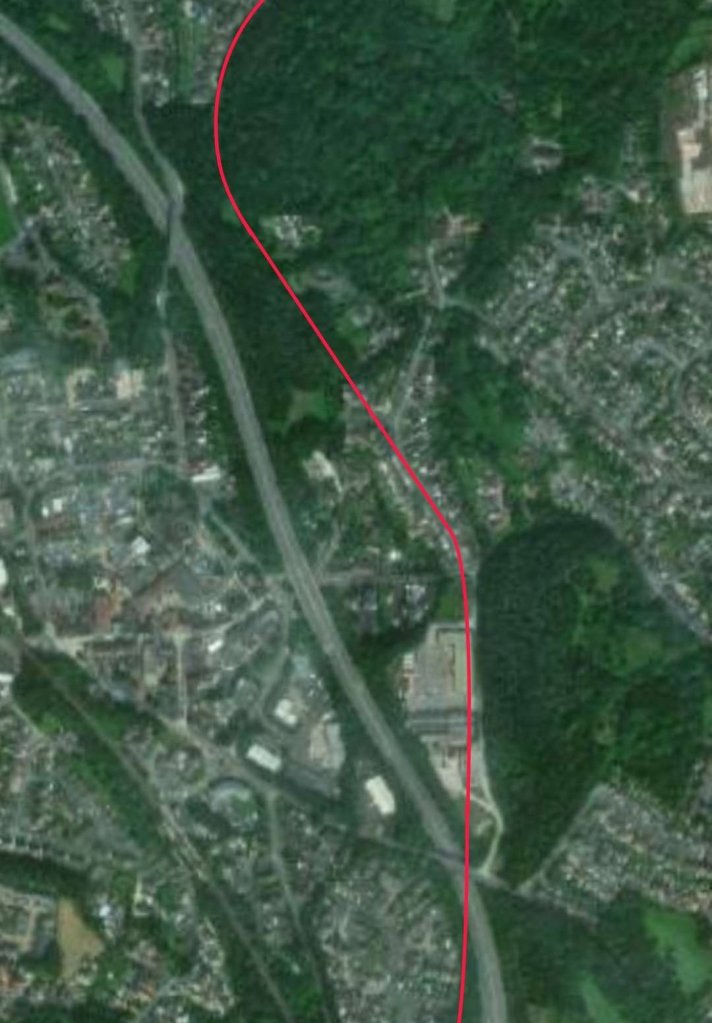
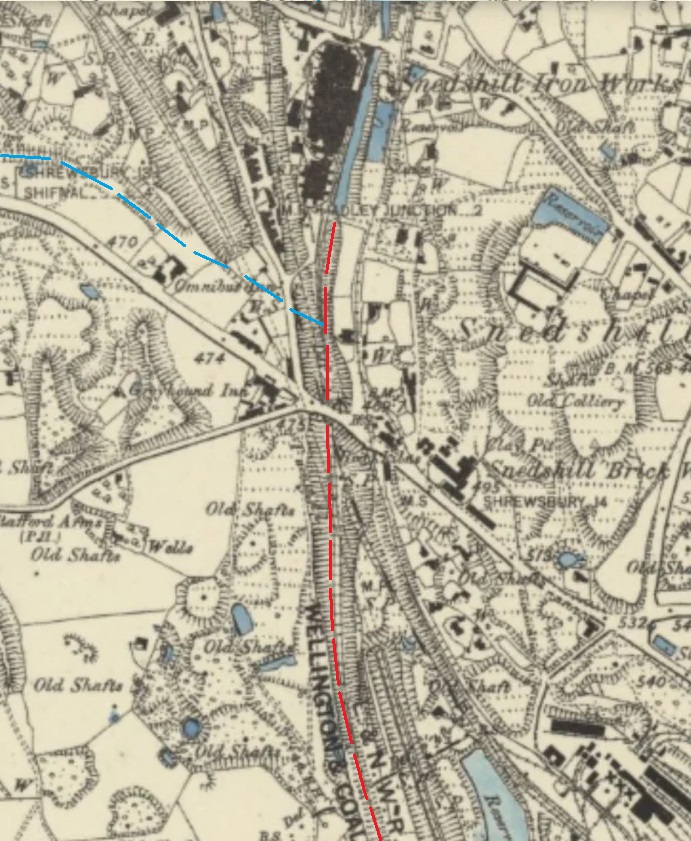
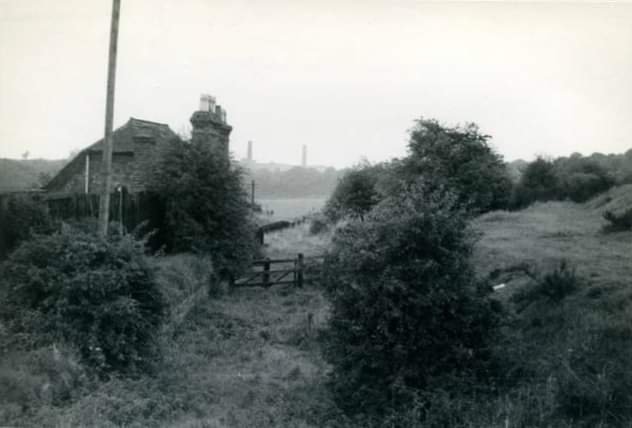
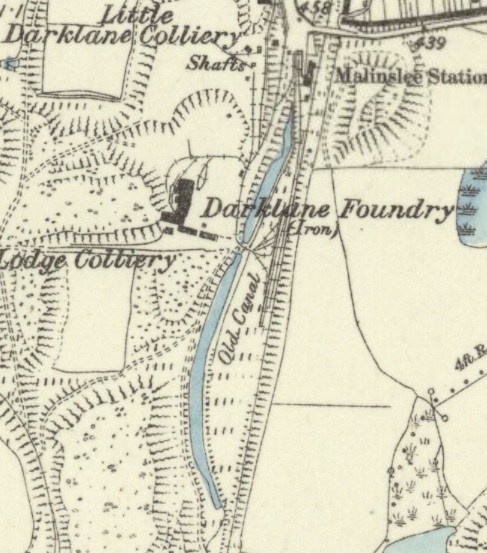
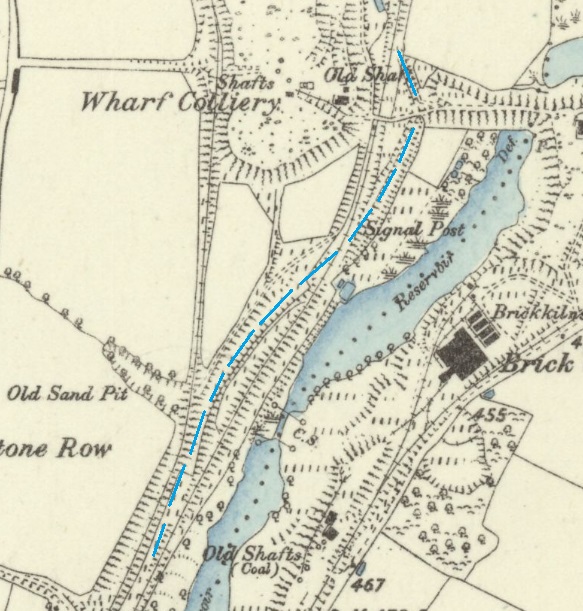
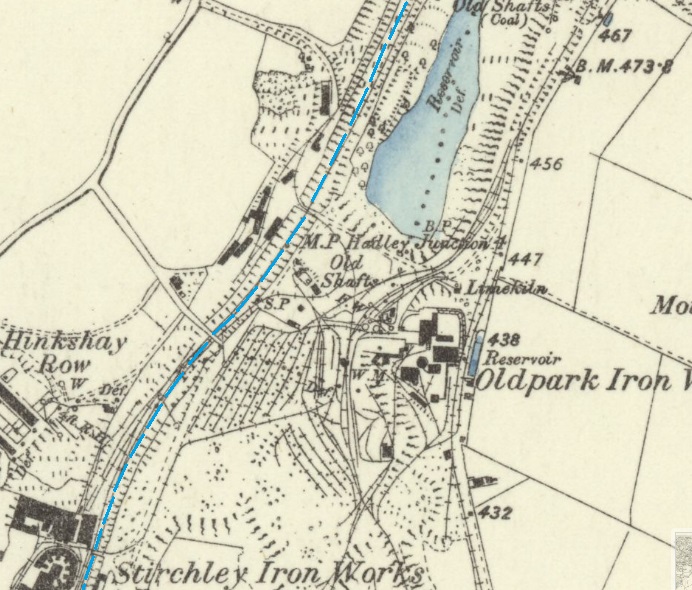
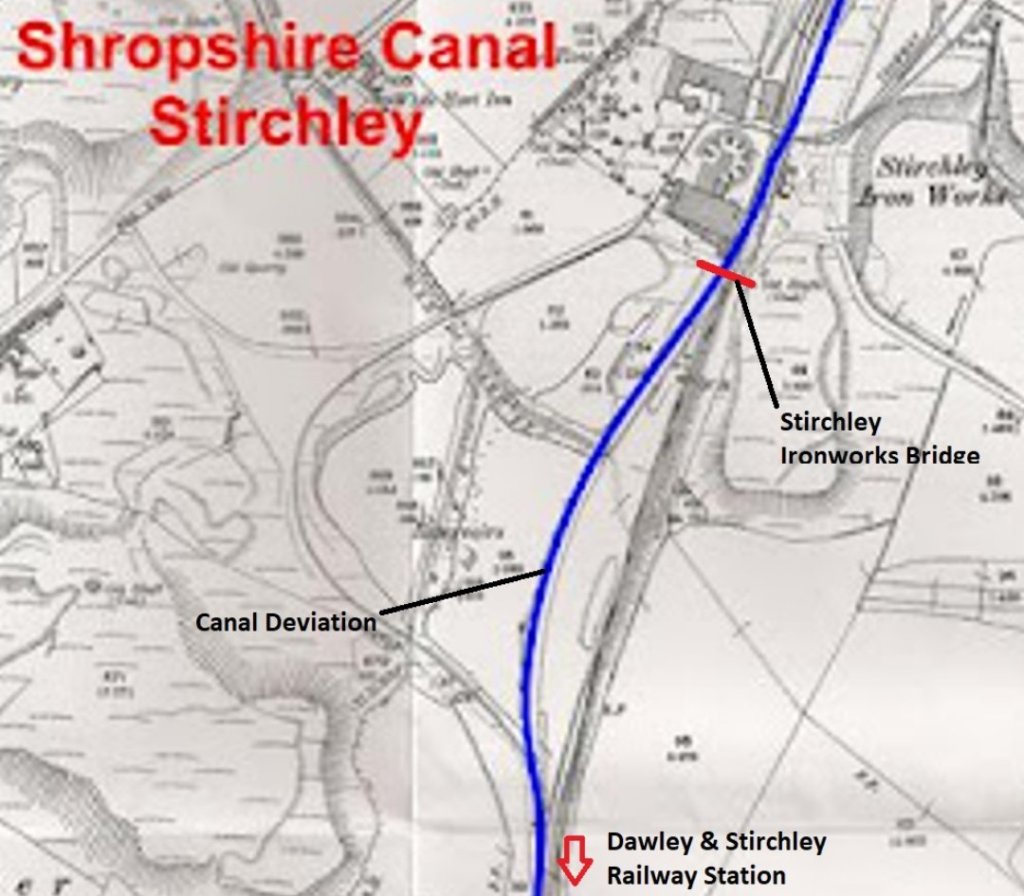

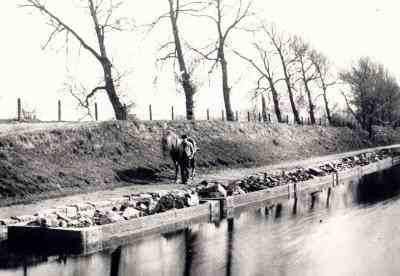

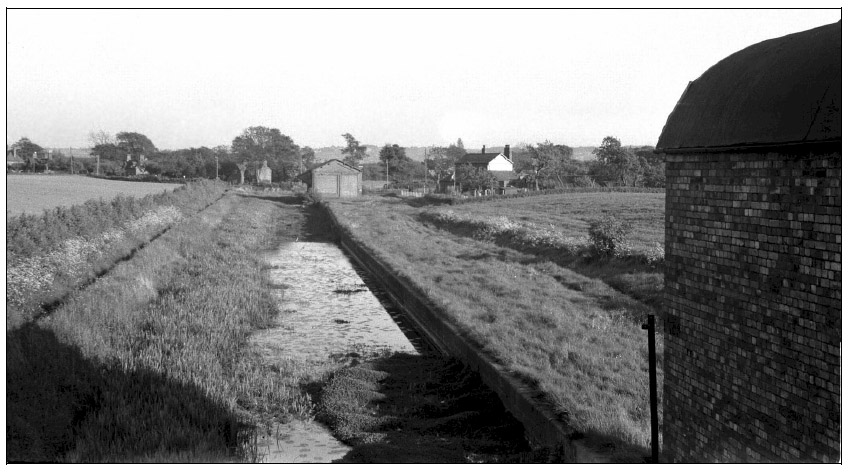