How often have you sat in a room with a group of friends and realised that you’ve lost track of what they’re talking about? Like you’ve dozed off for a bit and the conversation has dramatically changed direction. How did you feel? It can be a quite lonely or confusing experience.
I don’t have many Manchester United memories, except perhaps the famous cup final in 1979. Being an Arsenal supporter, I remember the excitement of Arsenal’s 3-2 win in the FA Cup that year.
However, there is one United memory that sticks in the mind. An episode which I was reminded of recently on facebook when someone posted a clip about times not to leave the room to put the kettle on. I had been watching the Manchester United/Bayern Munich UEFA Champions League Final on TV. The match took place in the Nou Camp Stadium.
I had to go out to do a Baptism visit, there was perhaps only a minute or two to go and United were losing 1-0, they were on the rack and going nowhere. The result was a foregone conclusion – Bayern Munich had obviously won the cup.
I wasn’t out that long, but I missed the key last minutes of the match. When I got back, I couldn’t believe what people were saying. United had scored twice in the last minute – they’d won. I wasn’t there – and if there hadn’t been independent accreditation of the victory, I would not have believed what people were telling me!!!
Whether we wake after having dozed off in a crowded room, or we were just not there when a key event happened – we easily feel ostracized and left out. No matter what anyone says, it still feels that way.
We’re not told why Thomas wasn’t in the upper room that first Easter evening when Jesus visited his disciples. We could spend time trying to imagine where he was – but we won’t! Suffice to say, he missed the key event, the turning point, the moment that changed defeat into victory. And how did he respond? In exactly the same way as most of us would have done. …
Thomas couldn’t believe what the others told him. I doubt any of us would have done under those same circumstances. … Seeing is believing – but so is sharing in an experience with others. Thomas not only didn’t see what happened, he was left out of the experience that everyone else shared. He was in a lonely place, wanting to believe, wanting to share in everyone else’s happiness, but unable to do so. He hadn’t been there, he hadn’t seen Jesus.
Thomas’ reactions and feelings are understandable. And as we read the story we can see that Jesus thought so too. he provided aa repeat of the same encounter – one in which Thomas could share. Jesus gently reminded Thomas of his outburst – no indignant rebuke, just words which drew Thomas back to faith. Thomas’ response is one of the clearest statements of Jesus’ divinity in the Bible. Having seen the truth of the resurrection he cannot but exclaim, “My Lord and my God!”
The next 3 verses are important, they are pivotal to John’s message:
Jesus said to him, “Have you believed because you have seen me? Blessed are those who have not seen and yet have come to believe.” …. Now Jesus did many other signs in the presence of his disciples, which are not written in this book. But these are written so that you may come to believe that Jesus is the Messiah, the Son of God, and that through believing you may have life in his name.
John has led his readers through a story – a story which allows those readers to meet Jesus and begin to understand who he is. It’s a journey of discovery, one in which we can identify with the different characters, feel their emotions, struggle with them to understand what Jesus is doing and saying. Thomas’ words are the culmination, the pinnacle of the story – the point where even the strongest of doubters expresses faith. Jesus response is not just for Thomas’ ears, not just for the disciples, but for all who read John’s Gospel in coming generations. “Don’t think,” says Jesus, “that the disciples were in some way special because they saw all these events first hand. Rather, blessed are those who read the stories and encounter Christ through the work of his Spirit in their lives and the lives of those around them.”
“Blessed,” says Jesus, “are all who read this Gospel, who struggle with doubts & come to believe that he is the Son of God.”
We’ve not missed out on the party, we can still be part of the events which changed defeat into victory. We too can own the risen Jesus as our Lord.
This is good news – particularly for those of us who struggle with doubt; for those of us who’d like to believe more strongly than we do; for those of us who see other people’s faith, or the joy they seem to experience in their Christian life, and feel that we are somehow missing out. The story of Thomas is important because it embraces doubt.
The story is also important because it embraces change. Everything is different, Jesus was dead and is now alive. This changes everything – nothing can now be the same. Thomas struggles to accept the new situation. For so many of us change is difficult to handle, yet it is happening all the time. We need to continue to engage with the communities around our churches, looking for new ways to serve, new ways to make Christ known and to bring hope where there is despair. We need to accept that the future for the Church of England is one with significantly less stipendiary clergy – perhaps one third less in numbers in ten years time – and we need to imagine new forms of ministry both lay and ordained, new ways of being church. Nothing is the same as it was, nothing will be the same as it was, and we want to shout out the loudest “No!” that we can manage.
There are two key things we need to take away from this passage.
First – it’s OK to be honest – don’t pretend that everything is OK when it isn’t,. Don’t manufacture faith if it isn’t there. We can express our fears and we can express our doubts. In fact expressing our fear and our doubt is often, like it was for Thomas, the first step to faith.
Second – this story of doubt and faith is made the crowning moment of John’s Gospel – the pinnacle – Jesus reaching out to his loyal but doubting and fearful follower, not in anger but in love. Thomas’ exclamation, “My Lord and my God!” is the point at which John choses to rest his case. Honest struggling with change, honest struggling through doubt towards faith is given the highest honour in John’s Gospel.
So, don’t be discouraged if the pace of change or the circumstances we face are a struggle. Don’t be discouraged if believing is a struggle.
For many football fans, winning or losing is a life or death issue. But here we go beyond issues of life or death, we’re concerned with eternity.
Be encouraged as you struggle to be faithful in an ever changing context, when at times everything you hold dear seems threatened. Be encouraged as you struggle to believe, for the story of Thomas makes clear that God loves the open and honest doubter.
Easter – looking into the blackness of Good Friday – then the celebrations of Easter Sunday and the resurrection. Children off school for 2 weeks. The relief when they went back to school!
Then there’s all the personal issues that we each face day by day.
The issues that we face as churches … getting ready for the AGM, inviting people to stand for key church roles, asking people to join the electoral roll. … It can be a chaotic time. There’s enough of a cocktail of different things to leave us all exhausted, or confused.
In our Gospel reading two people are struggling to get on with their lives amid the confusion of that first few days after the first Easter.
Good Friday’s sense of despair has been turned on its head by strange rumours of resurrection. Women running from the tomb to the disciples, Peter and John running to the tomb. People running backwards and forwards, rumour and counter-rumour, no one sure just what to believe.
And as they walk on the road to Emmaus, weary, sad and confused; perhaps we can feel some sympathy for them. As they trudge along they are trying between them to make some sense of what has happened. … And then we read these words. “While they were talking Jesus himself came near and went with them.”
As the story unfolds and as their journey progresses we read that their hearts begin to burn within them as they listen to him talk. At first he is a stranger to them, they don’t recognise him, but then, just before he leaves them they see him break bread and in an instant their eyes are opened and they see the risen Lord Jesus for who he is.
Some of us might recognise something of the story reflected in our own lives. We feel drawn to faith but at the same time it all seems a bit of a mystery. If so, then we are on the road with these two people. … Others of us might see the confusion and depression of the two travellers as part of our story. If so, we too are on the road with them. … … Some of us know the story of faith quite well, but the journey we’re on has become long and tedious and it is so hard to see the destination. If so, we too are on the road with those two disciples.
Others of us are struggling with what is happening around us, the pace of change, the seeming lack of real direction, trouble in our relationships, vandalism on our streets and roads, our fear which at times threatens to overwhelm us. If so, yes, we too are on that same road with those two disciples.
Whether because we are in this together or because it is true for us as an individual – all of us in some way are on this journey with the two friends going to Emmaus.
In the midst of everything – before we are even sure who it is, there is someone walking along the road with us – a seeming stranger – if we knew the end of our own story, perhaps we’d know who it is – but now we cannot recognise him. As we talk together or as we sit quietly; as we have coffee after our service; as we worship together; as we go out into the world or sit at home unable to go out; as we pray with faith or as we struggle to believe. Jesus himself comes near and goes with us.
And as we continue on our journey of life, unsure what the future holds, even if we don’t recognise him, Jesus himself walks with us.
Just as those friends on the road to Emmaus discovered him in the breaking of bread – so we have the opportunity each Sunday to encounter Jesus not only as the unknown friend on the road – but as the one who welcomes us with nail torn hands into the warm embrace of God’s love. And in the Communion in which we share, we take him, in some mysterious, unfathomable way, into our lives and he becomes one with us in soul and body.
I invite you to close your eyes, take a few moments now in silence to imagine yourself walking on a journey. It might be no more than walking to the shops with all that is on your mind, whatever is going on in your life at the moment. It might be a favourite walk, which allows you to breathe in the midst of a busy life, ……………………………….
In your mind’s eye, as you walk, see the stranger approach you and walk quietly alongside you on the road. …………………………..
Walk with him, enjoy in your imagination talking to them as you walk, and listening to them as they speak. ………………………………
And before you open your eyes and we move on with our service, say these words to that stranger. …………………
“Lord, make yourself known to me in the bread and the wine today.” Amen.
Transport for Greater Manchester (TfGM) has indicated that it is considering a plan to extending the already proposed East Didsbury to Stockport extension of the Metrolink tram network. The extension would utilise the underused railway line between Stockport and Denton.
Talk is of utilising tram-train technology on this possible new extension.
Should this proposal be approved it would link Stockport to Tameside and could also provide a link to Manchester Airport
The Mayor of Greater Manchester, Andy Burnham spoke of bold plans to deliver a decade of growth for Greater Manchester. He said that “developing the Bee Network and delivering better bus, tram and train connections will be fundamental to [that] growth story.” [2]
He continued: “For too long, Denton has been overlooked and by working up the tram-train option to connect Denton and the wider area to the Metrolink is a big step toward unlocking opportunities for local residents and businesses. … We’re committed to extending Metrolink to Stockport and beyond as part of our efforts to connect all our districts to the tram network and delivering a truly integrated transport network for everyone.” [2]
TfGM is already working with Stockport Council to develop a business case for bringing trams to Stockport. The Strategic Outline Case [4] – the first step in the process – is exploring a ‘core’ extension from the existing Metrolink stop at East Didsbury to Stockport town centre. The extension through Denton is not part of those ‘core’ proposals but, “as part of the work on the business case, TfGM is also considering how this may unlock future extensions. One option being worked up includes using tram-train technology – where services can run on both tram and train tracks – to run beyond Stockport town centre along the Denton rail line, connecting the area firmly into the wider Metrolink network including links to Tameside and Manchester Airport.” [2]
Good progress has been made on the first stage of the Stockport Metrolink extension business case, with TfGM now working to complete all required technical work ahead of submission to the Department for Transport in early 2026. Construction on the ‘core’ element of the project could begin by the end of the decade, if approvals and funding are acquired.
Andrew Gwynne, MP for Gorton & Denton, said: “For years I’ve campaigned, alongside the local community, for improved transport links to Denton and across the constituency. I’m delighted that as part of the Metrolink extension plans, TfGM are looking seriously at using the rail line as an option for tram-train services. … Improved connectivity is key to opening up opportunities for our people and communities, and supporting the growth ambitions across the city region.”
Navendu Mishra, MP for Stockport, said: “Since my election to the House of Commons in December 2019, I have been pushing the Government to fund the extension of Manchester’s Metrolink tram network into my constituency of Stockport, and I thank the Secretary of State for Transport, the Chancellor and Transport for Greater Manchester for backing the extension to our town centre. … This will be a significant boost for Stockport’s connectivity and local economy, helping people to get to work, school and healthcare appointments more easily and sustainably as well as unlocking new homes and jobs.” [2]
Leader of Tameside Council, Cllr Eleanor Wills, said: “The options being developed to utilise the Denton rail line to expand Metrolink and better connect Ashton to Manchester Airport via Stockport have the potential to be truly transformational. … The Ashton Mayoral Development Zone is an exciting and vital opportunity to unlock Ashton’s potential, providing new homes and quality jobs. With even better transport links we can set ourselves up to for good growth for many years to come.” [2]
Leader of Stockport Council, Cllr Mark Roberts, said: “I’ve always said when it comes to MetroLink that it should be ‘Next Stop Stockport not Last Stop Stockport’ to the help deliver the ambition we have -the delivery of Metrolink and improving public transport connectivity across the borough and Greater Manchester is something we can all get behind.” [2]
TfGM says: “With Greater Manchester embarking on a decade of good growth, the city region is committed through the Greater Manchester Strategy to developing a transport system for a global city region – with 90% of people within a five-minute walk of a bus or tram that comes at least every 30 minutes.” [2]
In June 2025, the government awarded Greater Manchester £2.5 billion through Transport for the City Regions funding for a pipeline of projects including a tram line to Stockport and tram-train services connecting Oldham, Rochdale, Heywood and Bury, new Metrolink stops and modern new interchanges. … The £2.5 billion is part of a package of investment Greater Manchester is seeking to deliver its growth ambitions in full – with the city region seeking to work collaboratively with Government on exploring new funding models for major transport and other infrastructure projects. [3] As of December 2025, Metrolink is the UK’s largest light rail network, with 99 stops connecting seven of the 10 boroughs of Greater Manchester. Record numbers of people are also getting onboard, with 45.6 million trips made in 2024 – up from 33.5m trips in 2022. [2]
The £2.5 billion investment for the Greater Manchester city-region is targetted at enabling the Bee network become fully-electric, zero-emission public transport system by 2030. Local rail lines will be brought into the Bee Network by 2030, fully integrated bike, bus, tram and train travel for the first time outside London. New electric buses, tram lines, tram stops and transport interchanges are among pipeline of projects which will deliver far-reaching benefits across Greater Manchester. Mayor Andy Burnham said that further progress on the next phase of the Bee Network will now be delivered at an unrelenting pace.
Greater Manchester will create an all-electric local public transport network:
Greater Manchester will bring rail into the Bee Network. “Local rail lines will be integrated with the Bee Network, … the move will see major improvements to stations, including making more fully accessible, as well as capped fares.” [3]
Greater Manchester will deliver major projects to drive green growth. “A pipeline of transport projects – including a tram line to Stockport and tram-train services connecting Oldham, Rochdale, Heywood and Bury, new Metrolink stops and modern new interchanges – will support the delivery of thousands of new homes, skilled jobs and green growth.” [3]
Greater Manchester’s current transport strategy is made up of a number of documents, including:
Greater Manchester Transport Strategy 2040.
A Five-Year Transport Delivery Plan 2021-2026 (including 10 local implementation plans).
Several supporting sub-strategies that all contribute to meeting regional transport ambitions and building the Bee Network.
In 2025, Greater Manchester are currently working on a new strategy – the Greater Manchester Transport Strategy 2050 – that will replace the current documents. [5]
You can find out more about the Greater Manchester Transport Strategy 2040 using these links:
The Greater Manchester Transport Strategy 2050 has been promoted by Mayor Andy Burnham. [8]
“Plans for a subway network in the city centre could become reality by 2050 if Greater Manchester makes good on ambitions set out within its latest rail strategy. … The 48-page strategy sets out a roadmap for the city region’s rail network, which needs to expand to keep pace with a growing population. … Among the highlights is the intention to develop an underground network by 2050.” [8]
“Starting at Piccadilly, where the city wishes to create a subterranean through-station as part of Northern Powerhouse Rail, the underground would provide increased network capacity without significant land take. … Taking Metrolink below ground [could] also minimise the disruption that would be caused if works were to take place at street level and push Manchester towards its target of doubling the number of intercity trips made by rail.” [8]
“The ripple effects of taking the network underground include easing the pressure on the Castlefield Corridor, ‘one of the most overburdened rail routes in the country’, according to the strategy.” [8]
The underground plan is just one part of the strategy for the city-region strategy that also includes upgrading stations, introducing tram-train technology on existing rail lines to widen the Metrolink’s reach, and delivering the Northern Arc – a new line between Manchester and Liverpool that would ultimately form part of Northern Powerhouse Rail. Land around rail hubs in the city region, including a huge development opportunity at Piccadilly similar in scale to that at Kings Cross, could support the delivery 75,000 new homes and unlock £90bn in economic uplift across the North West by 2050.
According to Andy Burnham, “Greater Manchester’s rail network plays a vital role in supporting [its] communities, powering [its] economy, and opening doors to opportunity – but for long has been held back from its true potential. … The way projects and services are planned and delivered is changing, with long needed reform giving the city-region a once-in-a-generation opportunity to reshape rail for Greater Manchester.” [8]
A year after the rail vision was unveiled a more simplified fare system on the Bee Network was announced. Andy Burnham said: “Simplifying rail fares is a key first step in making train travel easier and more accessible and the key to bringing local rail services into the Bee Network from December 2026. … Greater Manchester has a proud railway heritage, and our vision, developed with the industry, is about ensuring that everyone in our city-region can benefit from better connections, more reliable services, and a transport network that meets the needs of future generations.” [8]
Sitting beneath the city-region strategy is the more local SEMMMS (South-East Manchester Multi-Modal Strategy) which was settled in 2001 and the much later SEMMMS Refresh (2018) which identified measures required to meet future transportation needs in the Southeast of the city region centred on Stockport. These measures included: Metrolink/tram-train routes to Marple, Stockport town centre, the airport and Hazel Grove; segregated bus routes and bus priority schemes; improved rail services and new/ improved rail stations; new roads e.g. A6 to M60 Relief Road; new and improved walking and cycling routes and facilities on and off the highway; improved public realm in the district and local centres; creation of connected neighbourhoods that encourage the use of more sustainable forms of transport; the provision of transportation infrastructure needed to be supported by the introduction of smarter choices to encourage the use of sustainable transport. [9][10][11]
An extract from the TfGM plan for transport, looking forward towards 2040. It is intended that a tram-train service will run North from Stockport through Reddish, Denton and Guide Bridge to Ashton-under-Lyne. A similar service is planned to connect from Manchester Airport through Cheadle to Hazel Grove with a link North into Stockport to connect with the line through Denton. This schematic plan also shows the link from East Didsbury into Stockport. [12]
And finally …
Railway-News.com reported on 10th December 2025 that on 9th December 2025, TfGM Launched a Consultation on Future of Public Transport. The consultation invites people who live, work, travel, visit or study in Greater Manchester to help shape the future of the city region’s travel network by giving their views on the new GM Transport Strategy 2050, as well as the GM Transport Delivery Plan (2027-37). [13]
The proposed Plan will set out a framework “for how the Bee Network might be utilised to help Greater Manchester continue to become the growth capital of the UK through to 2050, whilst also addressing inequality and creating a greener city region.” [13]
The Consultation will run until 9th March 2026.
Backed by 2.5 billion GBP in government funding; TfGM’s plans “aim to deliver a number of transport projects through to the 2030s, resulting in what TfGM intends to be a world-class transport system. They will support both overall economic growth and the delivery of the new £1 billion Greater Manchester Good Growth Fund, which will in turn pump-prime a set of projects, drive growth and generation and ensure equal spending across the city region as a whole.” [13]
“The Bee Network is set to begin incorporating rail services by 2028, with TfGM aiming to provide 90% of the city region with five-minute access to a bus or tram that arrives at least every 30 minutes.” [13]
“GM transport strategy and delivery plans include keeping the local transport network safe and reliable via the renewal and maintenance of roads, Metrolink network and rail facilities; simplifying of fares, ticketing, bus services and introduction of new stops and services, as well as interchanges, Metrolink lines and expanded walking, wheeling and cycling networks; and the transformation of all local rail lines by incorporating them into the Bee Network.” [13]
“A detailed delivery programme listing schemes is set out in the GM Transport Delivery Plan 2027 – 2037, which is split into three phases, along with works in the regional centre and a wider ongoing set of works across the city region.” [13]
In addition to online feedback; a series of face-to-face drop-in sessions are planned to take place across Greater Manchester. The documents which are available to read online through clicking on these links:
For an overview of both documents, please click here. [16]
TfGM want to hear from anyone with an interest in the future of transport in Greater Manchester. They outline how you can respond here. [17] The deadline for participation is 9th March 2026.
Returning to where this article started, this is what the consultation draft of the Greater Manchester Transport Strategy 2050 document says about Stockport:
“Stockport town centre: Over the last decade, Stockport Council has spearheaded a £1bn transformation of its town centre. One of the UK’s largest town centre regeneration programmes, it has enabled the town to buck the trend of decline, with successful schemes across leisure, commercial and residential uses. Since 2019 Stockport Mayoral Development Corporation (MDC) has played a powerful role in accelerating this transformation, delivering a residential led masterplan for Stockport Town Centre West. The MDC is a radical new approach to tackling future housing need and the changing role of town centres, delivered through a unique collaboration between the GM Mayor and Stockport Council. It brings together powers devolved to the Greater Manchester Mayor, combined with strong local leadership from Stockport Council and the long-term commitment of the government’s housing agency, Homes England, to deliver an ambitious vision for the future of Stockport town centre. Over the past 6 years in collaboration with its many partner organisations the MDC moved from innovative concept to proven delivery vehicle, with over 170,000 sq. ft. new Grade A offices at Stockport Exchange, 1,200 new homes completed or on site and a state-of-the-art new transport Interchange with two-acre rooftop park. Reflecting this success and the Council’s continued growth ambitions, in 2025 the Council and GMCA agreed to expand the boundary of the MDC to cover the whole of the town centre and doubling its housing target to 8,000 homes by 2040.” [14]
A Strategic Outline Case (SOC) is the first part of developing a business case for major infrastructure projects. The two further stages are the Outline Business Case (OBC) followed by the Full Business Case (FBC). In the case of extending Metrolink to Stockport approval is required from the Department for Transport (DfT) to progress through each stage.
While on holiday in September 2021, I was reading older copies of the magazine BackTrack from the turn of the millennium, from, at that time, Atlantic Publishers. (More recent editions are published by Pendragon Publishing.)
Volume 14 No. 3, March 2000 included an article by Jeffrey Wells [1] about the Micklehurst Loop (p142ff). Wells highlighted the congestion which led to the development of the LNWR line between Huddersfield and Stalybridge which was opened in 1849. The single-line ‘Nicholson Tunnel’ was the first impediment to the free flow of traffic. This was rectified with the construction by 1870 of the ‘Nelson Tunnel’. “Both tunnels were in use by 24th April 1871 following a period extending from the previous February when only the ‘Nelson Tunnel’ was in use during repairs to the ‘Nicholson Tunnel’.” ( p142)
Wells goes on to explain that ongoing problems with congestion between Stalybridge and Diggle led to alleviating alternatives being considered. Quadrupling of the line was ruled out on grounds of inadequate space.
The LNWR first addressed the length of line to the West of Stalybridge when it opened (in 1876) a line from Heaton Norris to Guide Bridge. It then decided that the construction of an alleviating relief line between Stalybridge and Diggle was the only feasible solution to congestion. The Act authorising the construction of the relief line received authorisation on 3rd July 1879. The route was in two parts – Railway No. 1 was the Hooley Hill Line “which left Denton Junction and joined the MSLR at Dukinfield Junction and Railway No. 2, the Micklehurst Loop Line stretching from Diggle to Stalybridge.” (p143)
Later, the LNWR opened its Stalybridge Junction Railway (1st August 1893) which provided a first link from Heaton Norris to Stalybridge.
The cost of the Micklehurst Loop was estimated at £213,000. The successful tender from Messrs. Taylor and Thomson of Manchester was £177,949 8s 2d. The work was completed and the line opened on 1st May 1886.
Wells talks of three utilities being connected to the Loop. …
The first was a 3ft gauge tramway which served the construction of high level reservoirs. Exchange sidings and the tramway were completed in 1908, “six contractor’s locomotives plied between the sidings at Roaches and a suitable stopping place short of the site.” (p146)
The second was the allocation, in 1916, of 26 acres of land between Stalybridge and Mossley for the construction of a power station. The plant finally opened in January 1927 and Millbrook Sidings were enlarged to accommodate a number of sidings. In addition, “In the 1930s the coal was moved from the sidings by a conveyor which passed under the line. This was later followed by an overhead steel-braced conveyor which stood on tall concrete piers.” (p146) In the summer of 2021 part of the conveyor structure remains standing as does the cavernous goods she’d which graced the sidings. In 2021, the sidings area at Millbrook was heavily overgrown with substantial trees having colonised the site. Plans were afoot for redevelopment of the area and some clearance and regrading had taken place.
The final utility which Wells points out was connected to the Loop was Mossley Corporation Gas Works. “The Works had its own internal rail layout and a complement of small standard gauge locomotives.” (p146) Movements in and out of the site were controlled by Friesland Gas Sidings signal box.
Some excellent monochrome photographs accompany the article, one of which is included here.
This excellent black and white study shows a Fowler 0-8-0 7F tender locomotive proceeding tender first towards Stalybridge. The caption above misidentifies the location. The goods shed visible on the right of the image is actually Micklehurst goods shed. It remains visible today on the site of a pallet works which occupies the old railway sidings. Two of these large goods sheds remain standing, this at Micklehurst and the one referred to in the caption above at Millbrook. As noted by Wells, the Millbrook shed was in a parlous state in 2021.
The article is also accompanied by two diagrammatic representations of the Loop line and the other lines referred to in the text. One of these maps is included here.
In a letter to BackTrack magazine carried in the June 2000 edition Vernon Heron points out that the reservoir tramway shown meeting the Loop line North of the Gas Works actually served exchange sidings near to half a mile South of the Gas Works. [2]
To finish his article, Wells points out that the Loop line suffered a gradual demise with passenger stations closing in the years prior to the end of the Great War. Rumours of final closure attended every significant maintenance problem on the line as the condition of the line’s brick bridges and viaducts began to deteriorate. The last train was to run on Sunday 30th October 1966 with the line gradually being dismantled in the following ten years. The final portion closed when Hartshead Power Station closed. That portion was dismantled in the late 1970s, 1980s and 1990s.
Jeffrey Wells completed his study of the line in the next edition of the magazine with a short series of pictures of Diggle Station which stood at the Western end of the Standedge tunnels. [3]
References
Jeffrey Wells; The Micklehurst Loop Line; in BackTrack Vol. 14 No. 3, Atlantic Transport Publishers, March 2000, p142ff.
Vernon Heron; The Micklehurst Loop; in Readers’ Forum in BackTrack Vol. 14 No. 6, Atlantic Transport Publishers, June 2000, p370.
Jeffrey Wells; Through the Lens at Diggle; in BackTrack Vol. 14 No. 4, Atlantic Transport Publishers, April 2000, p235ff.
I am indebted to Alan Young for a number of the images in these articles about the Micklehurst Loop. This is his drawing of the Loop which appears at the head of his article about the Loop on the Disused Stations website. It is used with his kind permission, (c) Alan Young. [7]
During January 2021, my wife and I walked the majority of the length of the Micklehurst Loop from Stalybridge to Diggle. This was the goods relieving line for the main Stalybridge to Huddersfield railway line. It had been hoped to alleviate congestion by making the mainline into a 4-track railway but the geography mitigated against this and a route on the other side of the Tame Valley was chosen instead.
The maps used in this sequence of articles are predominantly 25″ OS Maps from 1896 through to 1922 and have been sourced from the National Library of Scotland. [1] There are a number of websites which focus on the Loop which are excellent. The sites concerned are noted immediately below and the relevant link can be found in the references section of this page or by clicking on the highlighted text here:
The most detailed treatment of the line and its stations can be found on the Disused Stations – Site Records website. The particular pages on that site which cover the Loop were provided by Alan Young. One page covers the route and pages covering each of the stations can be accessed from that page. [7]
Particularly good for old photographs of the Loop is the Table 38 webpage about the railway. [9]
The first articles about the Micklehurst Loop can be found at:
There is a series of addenda to these articles which include additional material found or shared with me after the drafting of the relevant article. These can be found on the following links:
In my perambulations around the internet, I have also encountered a series of videos (on YouTube) which start from the Northern end of the line. 5 videos cover the length of the line in 2020 and a separate video covers some of the structures on the line. These videos are easily available on YouTube. This is the first [3] in the series:
Part 4 – Chew Valley Road, Greenfield to Diggle
We continue our journey travelling North from Chew Valley Road. The images immediately below appear at the end of the last article about the line which finished at Chew Valley Road. …………..
Man marking Ordnance Survey minor control revision point with an arrow on Chew Valley Road in Greenfield. The photograph looks Southeast along the Northern pavement of the road with the arch-bridge which carried the Micklehurst Loop visible in the background, (c) Manchester Libraries. [2]
Corner of Greenfield Conservative Club, converted to housing in 2019. The bridge visible carries the Micklehurst Loop line over Chew Valley Road. This view is also looking to the South east but on the opposite side of Chew Valley Road, (c) Manchester Libraries. [3]
Greenfield Viaduct. [4]
We finished the last length of the Micklehurst Loop at Chew Valley Road in Greenfield.
In concluding, we saw a couple of older postcard images of Greenfield Viaduct, the second of which looks along Chew Valley Road towards the Southeast, and a 21st century Google Streetview image of the point at which the Loop crossed Chew Valley Road.
Old Postcard Image looking past Wellington Mills and along Chew Valley Road to the Southeast. Greenfield Viaduct appears on the right side of the image, there is then a short section of embankment before the arched bridge over Chew Valley Road. Bentfield Mill sits behind the Viaduct. The line was on embankment to the Northeast of Chew Valley Road, to the left of this image. [5]
Chew Valley Road at the point where the Micklehurst Loop crossed the road by means of an arched bridge. The trees sit where the bridge abutments once sat! (Google Streetview.)
We get ready to set off on this last length of the Loop by looking at a few images of Chew Valley Road Bridge which I found on the “Greenfieldgoneby” Facebook group. [15]
The adjacent image looks from the Southeast along Chew Valley Road. [16]
The second image is taken from the same direction and a little closer to the bridge. The first was a winter-time shot, the second was taken in the summer. [17]
The third, below, is taken from the Northwest and shows the Conservative Club on the right side. [18]
This final image of the bridge before we begin our journey, is also taken from the Northwest, but from much closer to the bridge. [19]
An extract from the 25″ OS Maps from the early 20th Century. Chew Valley Road appears in the bottom left of the extract. [1]
Satellite image of approximately the same area in the 21st century (Google Maps).
Looking Northeast from Chew Valley Road in the 21st century along what would have been the line of the Micklehurst Loop (My Photograph – 25th January 2021)
Wellington Mills – the postcard above and the extract from the OS Mapping show Wellington Mills to the West of the railway in Greenfield. The mills were built in 1852 for Shaw, Son and Lees cotton Spinners who traded until 1858 and were succeeded by N. Broadbent and Sons. When Broadbent ceased trading the mills were left unused for 6 years (from 1932 to 1938). 1938 saw part of the buildings used as a general engineering works and in 1941 the rest of the premises were opened up with the installation of 362 looms by the fabric weaver B. Kershaw. [6]
The railway embankment between Chew Valley Road and Higher Arthurs has been regraded to tie in with surrounding land. (My photograph – 25th January 2021).
In the years up to 1946 the engineering section of the mill produced engine parts for bombers. It was then used for storage, first by the Navy and then by the British Wool Board. In 1946 the buildings and land were purchased by William Oddy. He transferred his woolen carding and mule spinning operations form Shipley to Greenfield. The Knoll Spinning Company was formed at this time. It seems that 362 looms were installed at this time. The company ceased trading in the 1990s and the mill again became vacant. [8]
The approach to Higher Arthurs in the 21st century – the original bridge has been removed. The railway embankment can be see rising ahead (My Photograph – January 2021).
Huddersfield Narrow Canal – along this stretch of the Loop the Canal is conspicuous by its absence. Having followed the Eastern valley side and hence having been very close to the Loop at times on the way up from Stalybridge, the Canal crossed both the Tame valley and the River Tame in the Friezland area. Through Greenfield and Uppermill it followed the line of the older mainline railway on the West side of the valley. The River Tame can just be made out in the Northwest corner of the map extract above running on the Southeast side of Frenches Dye Works. The Canal was on the northwest side of the Works.
Frenches Dye Works – Owen Ashmore, in The Industrial Archaeology of Northwest England, notes the existence of this Dye Works but as having been closed at the time of his survey – “At Frenches … is [the] site of [a] former Dye Works built on [the] site of [an] early 18C fulling mill.” [10: p130]
Our walk along the line of the Micklehurst Loop took us across Chew Valley Road and Higher Arthurs on 25th January 2021. Just to the north of Higher Arthurs, we had to choose between scrambling up the embankment face seen just beyond the dwarf wall which is all that is left of the abutment of the bridge which carried the Loop over the lane, or a short walk along Carr Lane to access the track-bed along the approved walking route. We chose the latter and joined the route of the old line a few tens of metres ahead of the steep track shown in the picture.
This slightly blurred image from the Saddleworthgoneby Facebook Group shows the bridge which carried the Loop over High Arthurs. A double-headed mineral train is travelling North on the Loop. The road in the foreground is Carr Lane. The photographer is not known. [60]
The old railway continued Northeast from Higher Arthurs curving gradually round towards a Northerly direction. At the time the map below was drawn, there was a footbridge carrying a footpath from Wellington Terrace across to Kinders Lane and Fur Lane Farm. This footbridge was a narrow blue-brick arched bridge. It remains in place in the 21st century. These next two pictures show it from track-bed level.
The footbridge is a two span blue-brick arch bridge. This picture is taken looking North toward Uppermill Station, (My photograph – 25th January 2021).
The footbridge again, this time looking South towards Greenfield, (Photograph taken by Jo Farnworth – 25th January 2021).
The track-bed continues to curve round towards the North.
The Micklehurst Loop track-bed approaching Uppermill Goods Yard, (My photograph – 25th January 2021).
An extract from the 25″ OS Mapping of the early 20th century. [1]
The same area on modern satellite imagery, (Google Maps). The encroachment of modern housing in significant.
The next map extract shows the immediate approach to what was Uppermill Goods Yard. The goods yard was protected on it southern boundary by another accommodation bridge which provided access to Ballgrove from Uppermill. On Google maps this bridge can be seen to carry Rush Hill Road.
This next extract from the 25″ OS Mapping shows the approach to Uppermill Goods Yard from the South. [1]
The same area as the map above, shown on modern satellite imagery. The site of the Goods Yard has been replaced by Uppermill Sports Club.
Northbound Goods approaching Rush Hill Road Bridge to the South of Uppermill Goods Yard. [25]
This image also appears on the ‘Disused Stations’ website, where Alan Young comments: “In the late 1940s a Leeds-bound goods train is seen from Rush Hill Road bridge approaching the goods station at Uppermill. The locomotive is Bowen-Cooke-designed ex-LNWR 7F 0-8-0, built at Crewe works in August 1896. Numbered 9020 by the LMS, and previously 2540 in LNWR ownership, she continued to work as British Railways No.49020 until October 1961 when she was withdrawn from 10A, Wigan Springs Branch shed, and cut up the same month at Crewe works – Photo by Jim Davenport.” [26]
A view from the East of Rush Hill Road as it crosses the line of the Micklehurst Loop – the blue brick parapets are almost hidden by summer vegetation, (Google Streetview).
Rush Hill Road Bridge Northern parapet taken from the Western end of the bridge, (Google Streetview).
Rush Hill Road Bridge was strengthened using and Armco Arch with stone backfill when the route of the line was turned into a linear walkway, This view looks forward into the former Uppermill Goods Yard, (My photograph – 25th January 2021).
Looking north along the route of the Micklehurst Loop from Rush Hill Road Bridge, (My photograph – 6th April 2021).
Looking back to the South along the line of the Micklehurst Loop through Rush Hill Road Bridge, (My photograph – 25th January 2021).
Once closed, Uppermill Goods Shed was demolished and the tracks were lifted. In the 21st century, the site is used for a variety of sporting interests. The route of the old line crosses the carpark facilities of the sports centre and continues to the North. Before following it, we take a look at some images of the goods facilities on the Loop at Uppermill.
Uppermill Goods Shed from across the Tame Valley [11]
The Uppermill Goods Yard from the West. In front of it there is a game of cricket taking place – from the “Saddleworthgoneby” Facebook group. [20]
This image also appears on the ‘Disused Stations’ website, where Alan Young comments: A view of “Uppermill goods station looking east c1937. A cricket match appears to be in progress on the ground to the left. The goods warehouse dominates the scene, built on a generous scale, as were those at the other Micklehurst Loop stations. The single storey section of the warehouse contains offices and toilet facilities. The sidings are occupied by numerous wagons. New houses can be seen beyond the railway, on Bankside Avenue – Photo from Peter Fox ‘Old Saddleworth’ collection.” [26]
The Uppermill Goods Yard taken from the Southeast. Saddleworth Viaduct can be seen to the right side of the image. This picture was also sourced from the “Saddleworthgoneby” Facebook group. [21]
The above image also appears on the ‘Disused Stations’ website. On that site Alan Young comments: This is “Uppermill goods station, looking north-west from near Ballgrove. This view (circa 1905) highlights the goods warehouse, a commodious structure in engineering brick. Some rakes of goods and mineral wagons occupy the sidings. A traction engine is standing in the yard (left). Uppermill (or Saddleworth) Viaduct is seen on the original Huddersfield-Manchester route which runs parallel to the Micklehurst Loop. Den and Ladcastle quarries, both in operation at this time, are excavated into the distant hill – Photo from Peter Fox ‘Old Saddleworth’ collection.” [26]
The Micklehurst Loop was designed to take pressure of the original line in the Tame Valley by separating Goods from Passenger traffic. This relatively shorts goods train is travelling South past Uppermill Goods Yard and Shed. Another image from the “Saddleworthgoneby” Facebook Group. [22]
The above image also appears on the ‘Disused Stations’ website. On that site Alan Young comments: “At all four stations on the Micklehurst Loop the passenger and goods facilities were some distance apart. This northward view from Rush Hill Road bridge is of the goods yard at Uppermill, and the passenger station is ahead but out of sight. The tall, brick-built warehouse on the left was a standard feature of these goods stations. On 5 June 1958 ex-WD 2-8-0 No.90671 is hauling loaded coal wagons southbound from Diggle (dep 5.55pm) to Heaton Norris (Stockport). The Riddles-designed locomotive was produced from 1943 for the War Department and entered British Railways service in 1948, based initially at 73C, Hither Green shed in Kent. She was withdrawn from 26F, Lees Oldham shed, on 30 September 1963 and cut up at Crewe works the following December – Photo by B Hilton.” [26]
A short parcel working passes Uppermill Goods Yard travelling South. The photograph includes an excellent shot of the Yard Signal Box. Another image from the “Saddleworthgoneby” Facebook group. [23]
An OS 25″ Series Map extract from the turn of the 20th century which centres on the Station building at Uppermill. [1]
Approximately the same area from satellite imagery in the 21st century, (Google Maps).
Uppermill in the 1920s. The Loop Line intrudes onto the photograph in the bottom left. The Passenger Station was just off the image to the left The Mill in the foreground adjacent to the Mill Pond is Albion Cotton Mill which appears on the 25″ OS Map extract above. Station Road leave the left side of the image beyond Albion Mill. Church Road runs under the bridge in the bottom left of the picture. [13]
Looking East across the Tame Valley from above the main line with the Loop Line visible in the distance. Uppermill Station and platforms can be made out just to the right of centre and just above mid-height in the image. [14]
Uppermill Railway Station building in the late 20th century. Another image from the “Saddleworthgoneby” Facebook group. [24]
Uppermill Passenger Station sat adjacent to the Station Road Bridge but at low level. Steps led up to wooden platforms which were sited to the North of the brick-built Passenger facilities. That arrangement can be picked out on the large image immediately above. The solid wooden area which looks a little out of place is the rear of the platform shelter on the Northbound side of the Loop.
The larger image above also appears on the ‘Disused Stations’ website. Alan Young, on that site comments: This is “a panoramic view eastwards across the old Diggle-Stalybridge line (with train) towards Uppermill c1910. In the village are Victoria Mill (cotton), lower left, with Alexandra Mill (cotton) on its right and Dam Head Mill (cotton spinning) in its dominant position beside Church Road. A little right of centre in the distance the platforms and waiting sheds of Uppermill station on the Micklehurst Loop can be seen, with the station building to the right, at a lower level close to the railway bridge. … Photo from Peter Fox ‘Old Saddleworth’ collection.” [26]
In this view from the West across Uppermill, Buckley Mill and Damhead Mill can be seen on the left and right of the image respectively. Behind Damhead Mill, the platform structures of Uppermill Station can be picked out. [31]
Uppermill Passenger Station Building, Station Road, Uppermill in the 21st century, (My photograph – 25th January 2021)
The Passenger Station Building was of the same design as others on the Loop Line. The front faces of these buildings were built in red-brick the side and rear walls in blue engineering brick. The building is in private hands. Station Road passed under the Loop Line immediately adjacent to the Station building as shown on the panorama below.
Uppermill Passenger Station building sat immediately next to Station Road in Uppermill. The line was originally carried across Station Road on a girder bridge. In this view in 2021 the modern footpath/cycleway is carried across Station Road on a laminated hardwood timber structure, (My photograph – 25th January 2021).
An extract from EPW016500, an image held by ‘Britain From Above’ on their website. The Loop Line and Uppermill Station can be seen at the top of the image. The remains of the ramp structures leading to the platforms can be made out on this photograph. The building at the bottom centre of the image is Albion Mill, (c) Britain From Above. [27]
Station Road Bridge in the 21st century, (My photograph – 25th January 2021).
In the text above a number of mills are mentioned:
Church Road Bridge in the 21st century. By January 2021, the footbridge crossing Church Road was removed because of defects, (My photograph).
Albion Mill – was a cotton mill, built circa 1854 [28] which is listed in the ‘1891 Worrall’s Cotton Spinners Directory’ along with Spring Hill Mill, Waterhead as belonging to John Lees. [29] The Mill has been converted to apartments.
Alexandra Mill – was a cotton mill “built in 1860 by flannel manufacturers J.Bradbury & Co. This four-storey stone built mill has had many uses over the years. In the mid 1980s it was a craft centre which was divided into small units. Today the mill, on the banks of the River Tame, has been converted into stylish living apartments. For reference, a 2-bedroom fourth floor flat was on the market for £199,950 in March 2009.” [28]
Church Road Bridge North abutment, (My photograph – 25th January 2021).
Dam Head Mill – was also known as Willow Bank Mill. [28] Neither this mill nor Alexandra Mill seem to be listed in the ‘1891 Worrall’s Cotton Spinners Directory’. [29]
Victoria Mill – was a cotton mill and housed Ellis Meanock, cotton spinners and manufacturers. [29] The mill has been demolished but what were outbuildings remain and house the Saddleworth Museum and Art Gallery. [28][30]
Church Road Bridge – South abutment, (My photograph – 25th January 2021).
Continuing North from Uppermill Station, the Line passed two further Mills and two relatively large houses.
Buckley Mill and Buckley New Mill sat either side of Uppermill High Street, neither is mentioned by Wikipedia [28] or Grace’s Guide [29]. They were owned by the Kenworthy family and produced flannels and shawls.
Two larger private dwellings stand out on the 25″ Map below and are relatively typical of a number of properties around Uppermill.
Another extract from the 25″ OS Survey maps from around the turn of the 20th century. Buckley Woollen Mill and Buckley New Mill (with buildings straddling the River Tame) can be seen to the West of the Loop Line. Fernthorpe and Hawthorpe Halls can be picked out to the East of the line. [1]
Fernthorpe Hall, Uppermill
Fernthorpe Hall – is now a series of luxury apartments.
Hawthorpe Hall, Uppermill
Hawthorpe Hall – is now two separate semi-detached family homes.
They both can be made out on the satellite image below.
It is now only a short distance to what was the mouth of Butterhouse Tunnel, named after Butter House which sat almost directly over the tunnel.
The next 25″ Map extract shows the tunnel mouth and also shows how the mainline and the Loop are now gradually moving towards each other as they travel North by Northeast. Brownhill Quarry and Saddleworth Station can be seen on the left side of the extract.
The Northern part of Uppermill which includes Saddleworth School. Both Fernthorpe and Hawthorpe Halls can be seen among trees and lawns to the East of the Loop Line, (Google Maps).
Another 25″ OS Map extract shows the last section of the Loop to the South of Butterhouse Tunnel. Saddleworth Station on the Mainline can also be seen on the left of the extract. [1]
North of Uppermill the Loop line began to curve round towards the Northeast and entered Butterhouse Tunnel. The most southerly portal of the tunnel has been infilled, (Google Maps).
The Micklehurst Loop Line in 1900 – this picture shows the line just before it entered Butterhouse Tunnel. In the background is Pickhill Clough. Photographer not known. [12]
The formation of the Micklehurst Loop North of Church Road, (My Photograph – 25th January 2021)
Google Maps satellite image in the vicinity of the South Portal of Butterhouse Tunnel. The line of the Micklehurst Loop through the tunnel is marked in red, the footpath/bridleway route in light blue.
North of Church Road we regained the old railway formation and walked North past Saddleworth School.
A short trek beyond Saddleworth School along the gentle gradient of the old Loop and approaching Ryefields Drive the public bridleway is forced away from the Line of the Micklehurst Loop as first the cutting and bridge under Ryefields Drive and then the tunnel portal have been infilled.
Once the footpath/bridleway separated from the old line and our walking route took us across Ryefields Drive at road level and then on towards Brownhill Lane. A left turn before reaching the junction of Brownhill Lane and Butterhouse Lane and Butter House.
It can be seen on the adjacent satellite image that two roadway lengths bear the name Ryefields Drive, both of which provide access to Rye Fields and that these are linked by the bridleway which also bears the name Ryefields Drive.
Rye Fields which sat above the Old Loop to the East is still occupied today. It is a Grade II listed 18th century structure. [32]
Butter House is similarly a Grade II 18th century property. [33]
But we are getting ahead of ourselves. …. The lower arm of Ryefields Drive crossed the Loop on a girder bridge, very soon after this the old railway entered Butterhouse Tunnel. I have so far only found one image relating to either of these structures. It is not reproduced hear for copyright reasons. It can be found in a short article carried on the Saddleworth Independent website in an article by Peter Fox entitled “History: Saddleworth by Rail – Part 2.” [43] The second image in the article on that webpage is a view taken from inside the South Portal of Butterhouse Tunnel looking towards the bridge which carried Ryefields Drive.
We then walked along Butterhouse Lane before following a footpath which led off the the left which brought us out close to the Northeastern portal of Butterhouse Tunnel. That portal is still open and the tunnel can be accessed from the track-bed if desired. [34]
Butterhouse Tunnel appears on this next extract from the 25″ OS Map series from the turn of the 20th century. [1]
Roughly the same area as in the map extract above, (Google Maps).
25″ OS Map extract from the turn of the 20th century, the main Huddersfield Line and the Loop run side by side towards Diggle. The point at which the footpath crossed under the rail lines appears just to the Soputh of the Works [1]
The Micklehurst Loop ran alongside the mainline towards Diggle Junction, (Google Maps)
This image comes from the Saddleworthgoneby Facebook Group and shows the point at which the Micklehurst Loop (on the left) meets the Mainline. Photographer not known. [47]
Butterhouse Tunnel North Portal, (My photograph – 25th January 2021).
The footpath that we used can be seen entering the above map extract from the bottom right and then turning North-northeast to run parallel to the railway. We left the footpath at the point where it turns North and wandered South toward the Tunnel portal.
North of the tunnel portal, the Loop left its cutting behind and ran alongside the main Huddersfield Line towards Diggle.
What was a 4-track line was (and is) closely followed by the Huddersfield Narrow Canal over this next length.
The 25″ OS Map extract above shows that at the time of its drafting the Dobcross Loom Works were rail served. The Dobcross Loom Works was built in 1860 and was set over a 22-acre site. [40] It still features a Grade II Listed building known locally as ‘The Cathedral’ which houses a Gothic clock tower. [35]
During the Great War, the factory doubled up as a munitions factory to assist with the war effort. Later, during the Second World War it helped create parts for Russian submarines to help counter the U-boat threat. [35]
The Loom Works closed in 1967 [35] and was then (in 1969) used for 37 years until 2006, as the home of Shaw’s Pallet Works, reputedly one of the largest pallet works in Europe. [40]
The Daily Mail [35] reported on the site just before it was demolished to make way for a new secondary school – Saddleworth School. Their report is online and includes some excellent picture of the works and its interior prior to demolition. Further excellent pictures can be found on the www.28dayslater.co.uk website. [36]
The works are shown from the air on the monochrome aerial photograph below in 1926. They have been significantly extended compared to the buildings on the 25″ OS Mapping.
The Micklehurst Loop, the mainline to Huddersfield and the Huddersfield Narrow Canal can all be seen behind the Works and careful inspection also reveals the Works sidings. There is an added bonus of a goods train on the Northbound Loop line. Diggle Brook meanders in front of the Works.
There are a sequence of extracts from that image which focus on specific elements: The mainline railway; the canal and sidings and finally a grainy picture of private owner wagons in the Works sidings.
rail-online.co.uk carries an excellent photograph of the 4-track railway line to the North of the Loom Works in around 1964. It shows the siding drifting away to the west of the mainline and on the right side of the image the bridge over the Huddersfield Narrow Canal which gave access to the Works can also be seen. [39]
An extract from photograph EPW016481 held by Historic England – Dobcross Loom Works in 1926 looking across the site from the West. The Micklehurst Loop, the mainline to Huddersfield and the Huddersfield Narrow Canal can be seen behind the Works and careful inspection also reveals the Works sidings. There is a goods train on the Northbound Loop line, (c) Britain from Above. [38]
An extract from the image above which focusses on the Goods train on the Loop. It must have been a colourful sight with a significant range of different wagon liveries. Sadly the locomotive is not visible, (c) Britain from Above. [38]
Another extract from EPW016481, this time focussing on the Works sidings and the Canal. The bridge to the sidings from the mainline can be seen on the left of the extract. Three private owner wagons sit centre stage on the apparently sloping siding, (c) Britian from Above. [38]
Sadly, the photo-definition is not good enough to make out the livery on the wagons, (c) Britain from Above. [38]
There is an excellent short illustrated article about the small locomotive employed at the Loom Works. It is written by Peter Fox and appears in the Saddleworth Historical Society Bulleting Volume 49 No. 4 p128-129. The locomotive was nicknamed the Dobcross Donkey and arrived at the Works in 1931 to replace horse-drawn shunting operations. Parts of the locomotive seem to have been in use in the years prior to the purchase on 3ft gauge lines in Ireland (the Clogher Valley Railway and the Donegal Railways). [49]
Dobcross Loom Works and the Works sidings as shown on the 25″ OS Map from the run of the 20th century. [1]
Ward Lane and Diggle Junction on the 25″ OS Maps from the turn of the 20th century. There was a footbridge crossing the main line a little to the south of Ward Lane. It carried a footpath access from the East to the Canal towpath, immediately to the South of the bridge for the Works sidings. [1]
A similar area to that shown on the 25″ map extract above. The footbridge can still be made out to the southwest of Ravenstones Drive. Grandpa Green’s is a very popular destination which can create significant car traffic, (Google Maps).
There is an excellent monochrome image in the Brian Hilton collection which looks North from the footbridge on the 25″ OS map extract above and visible in the image below and shows the junction between the Works siding and the mainline and provides an excellent view of Ward Lane Bridge and has a hint of the pointwork of Diggle Junction beyond. Not included here for copyright reasons. [48]
This image comes from the Saddleworthgoneby Facebook Group. [46] Rebuilt Patriot approaches Diggle Junction on the mainline passing a L&Y ‘A’ Class idling in a siding adjacent to the Loop lines. The footbridge visible on both the 25″ OS map and the satellite image can be seen clearly against the haze. The bridge carrying the Works siding over the Huddersfield Narrow canal can be made out in the middle distance above the train. The photographer is standing on Ward Lane Bridge. Photographer not known. [44]
Also from the Saddleworthgoneby Facebook Group but now in the blue-grey livery era and with the Loop line lifted this view is taken from the footbridge in the image above. Photographer not known. [45]
Diggle Junction was the site of a significant accident in 1923. This photograph is taken from Ward Lane Bridge. There seem to be a lot of people watching the recovery operation! The footbridge South of Ward Lane can be seen on the right of the image. The photographer not known. [64]
Diggle Junction was the point at which the Loop joined the main Huddersfield line before passing through Diggle Station and on into Standedge Tunnels. There was a relatively complex series of points which allowed access to the different lines to the North, and into the Works sidings to the South. Ward Lane spanned the tracks at this point. Diggle Junction was the scene of a significant rail accident in 1923, one picture of the aftermath of the accident is shown above. Full details of the accident can be found in an article by Alan Schofield in the Saddleworth Historical Society Bulletin Volume 43 No. 1 of Spring 2013. [41]
The complexity of Diggle Junction can be seen on this 25″ OS Map extract from the turn of the 20th Century. [1]
As far as the railway layout is concerned, things are far less complex in the 21st century, (Google Maps).
Another photograph from Saddleworthgoneby Facebook Group. A view Northwest from Ward Lane Bridge. The chimney is that of Warth Mills which appear on both the 25″ and 1:2,500 OS map extracts (above and below). The buildings are still standing in 21st century. Photographer not known. [50]
Warth Mill in the 21st century, (c) Paul Anderson (Warth Mill Diggle – CC BY-SA 2.0). [52]
An early image, also from Saddleworthgoneby. Warth Mill is centre stage and the railway can be seen running right to left Southwest to Northeast roughly halfway up the image. Sadly the resolution is not good enough to focus in on the railway. Photographer not known. [56]
Warth Mill was constructed in 1919 in its present form, although there was an earlier, smaller mill on the site beforehand. It was acquired by the Tanner family in 1928 and in its prime was producing 50 tons of tyre fabric for the automotive industry every week. The building is now in use by a range of small industrial concerns – a café and a catering school are of most interest to me! Until recently Wooly Knits had a factory shop int he building, [61]
This 1:2,500 OS Map extract from 1932 shows that between the turn of the 20th century and the 1930s the number of sidings provided at Diggle increased significantly on both sides of the running lines. This map comes from the Disused Stations Website and is used with the kind permission of Alan Young. [51]
Another image from Saddleworthgoneby. A short distance along the line from the last monochrome image was Diggle Junction Signal Box. [53]
Another image from Saddleworthgoneby. An Austerity 2-8-0 in charge of a train of mineral wagons comes out of the gloom adjacent to Diggle Junction Signal Box. Photographer not known. [54]
Also from Saddleworthgoneby. The same location again, this time in colour in the mid- to late1960s with a Jubliee in charge of a rake of marron stock. The first coach appears to be LNER Gresley stock. The others appear to be Mark 1 stock. Photographer not known. [55]
Saddleworthgoneby again – although monochrome this is a much later image. The Sidings on both sides of the main line and the Micklehurst Loop lines have seemingly recently been removed. Photographer not known. [57]
A final 25″ OS Map extract shows Diggle Station and the Tunnel mouths of Standedge Tunnels – a double bore carries the modern mainline and two single bores used to carry two other lines under the Pennines. [1]
And in the 21st century, (Google Maps)
Saddleworthgoneby again, a very early image looking across the railway towards Sam Road with Harrop Green behind. The photograph was taken from the South. The photographer is not known. There appears to be a goods shed in the sidings on the near side of the mainline which does not appear on either of the OS Map extracts of the location. [58]
Another early image also from Saddleworthgoneby. It is a view from Station Road across the throat of Diggle station from the North. The shows the good shed to better advantage. The buildings beyond the railway make up the hamlet of Kiln Green. The mill chimney is on the left of the image. The photographer is not known. [59]
Kiln Green Mill was a Works that produced Ceramyl. It is marked as such on the 25″ OS Map from the turn of the 20th century. Ceramyl appears to be a hard synthetic product used in bathroom fittings – mainly basins and baths. Most modern references to the product on the internet are from Europe or North America. The word does not appear in the majority of on-line English dictionaries, but it was clearly being produced in Kiln Green early in the 20th century.
Diggle Station sat at the mouth of the Standedge Tunnels. 4 tracks ran through the Pennine Hills in Tunnel between Diggle and Marsden in West Yorkshire. The first tunnel was completed in 1848 and was large enough for just one railway track. The second was completed in 1871 and was also single-bore. The third tunnel was large enough for two tracks and was completed in 1894. It is the double-track tunnel which remains open in the early 21st century. [62]
Diggle Station was “opened in 1849 along with the first rail tunnel and closed to passenger traffic in 1968. The station features on the Diggle Community Association Website. [65]
This photograph is carried by the Diggle Community Association Website. In addition to facts about the station, their comments include the following: “There is an indication of how small Diggle used to be. In the background, the fields below Harrop Edge are obviously used for farming. Today there are houses along Devon Close and Dorset Avenue. Note also the chimney at Wharf mill. The bridge crossing the railway is still in use today and a car has just turned round the corner at the top of Sam Road. The fields to the right of the car are now occupied by houses on Clydesdale Rise. Just to the right of the steam train is an expanse of water, which is the canal lagoon used for turning barges around.” [65]
In its heyday, the station had platforms serving all four lines but little trace remains of it today—all of the buildings and much of platforms having been demolished.” [63]
The next two monochrome photographs were carried by the Saddleworthgoneby Facebook group. They show trains leaving two of the different tunnel bores, with the third bore visible in the first of the two images.
An image rom the Saddleworthgoneby Facebook Group. It shows a goods train emerging from one of the two single-bore tunnels and immediately into Diggle Station. The photographer is not known. [66]
Another Saddleworthgoneby Facebook Group photograph. This one shows a passenger train breaking out into the summer light from the double-bore tunnel which is still in use in the 21st century. The platforms of Diggle station begin at the tunnel portal. Again, the photographer is not known. [67]
And another Saddleworthgoneby Facebook Group image which shows the southwest end of the platforms. The picture was taken from a point just to the Southwest of the station footbridge which was, in turn, just to the the Southwest of the road bridge. On the left of the image the goods shed can be seen behind a row of mineral wagons. The photographer is not known. [68]
Saddleworthgonebay Facebook Group also provided this photograph taken from the station approach road (Station Road/Sam Road) which shows the footbridge and road bridge and also shows the small station building at high level next to the road and carried on girders over the most easterly of the tracks at the station which was a terminus line. The photographer is again not known. [69]
The next sequence of photographs were taken in April 2021 and show the condition of the station site in the 21st century. The first three pictures are from Google Streetview. The subsequent images are my own photographs.
Looking Southeast across Station Road bridge in Diggle, (Google Streetview).
Looking Northwest along Station Road Bridge in Diggle, (Google Streetview).
Looking Northeast towards the double-bore tunnel still in use, (Google Streetview).
A similar view of the single-bore tunnel but this time taken in the 21st century, (My photograph – 9th April 2021).
The double-bore tunnel on 9th April 2021, (My photograph).
A panorama which shows the relative positions of the three tunnel bores. The two single-bore tunnels are marked by the yellow panels, (My photograph – 9th April 2021).
A 21st century view along the line of the old station footbridge, (My photograph – 9th April 2021).
The view Southwest along the railway on 9th April 2021, (My photograph).
Mary Magdalene is in the Garden of the Tomb – mourning the loss of the person who turned her life around. The one who loved her when no one else did. The one who brought her healing when she was filled with demons and mentally disturbed. The one who gave her dignity. The one who made her feel loved and accepted. But now he was gone, Jesus is gone, he is dead. Nothing can bring him back.
And what makes it worse for Mary is that someone has removed his body, stolen his body. She no longer has somewhere to go, somewhere to express her grief, somewhere to place her memories. For her, this theft, this desecration, is the greatest of cruelty – it brings despair.
At Easter we celebrate the resurrection of Jesus. So easily, we rush past Good Friday and the long hours of Saturday, we rush past the pain of death and mourning and move as quickly as possible to the resurrection. It is uncomfortable to stay too long with death, with the cross – we prefer to think about new life, new hope – about resurrection.
The story of Mary in the Garden of the Tomb reminds us of the pain of grief, but it also of the need to allow grief to run its course. However much we long for the darkness to pass, for the feelings of anger, of guilt, of despair to go away, we cannot just brush them under a carpet of false hope. Nor can we talk glibly of the Christian hope of resurrection without experiencing the reality of loss.
If we are not careful, as Christians, we become so concerned to emphasise resurrection hope that we forget that it has always been a hope borne through the pain of death and loss. Resurrection can only follow death and loss – just as it did on that first Easter morning. Our resurrection hope is not just a general hope of resurrection, nor is it just about heaven, nor is it a denial of the reality and power of death,.
Christian hope of resurrection is specific and personal it relates to me and those I love. It is not an abstract, general, hope of resurrection.
Christian resurrection hope does not deny the reality and power of death. It is, in fact, is born in the midst of death, Calvary precedes Easter, and in a very real sense over this Easter season we are called to feel something of the power of death, to struggle with the disciples through death, through the uncertainty and fear for the future that Jesus’ death left them with. It is, in a very real way, intended to be a struggle for us to move through Good Friday into Easter Saturday and then on to Easter Day and ultimately, finally, resurrection hope. Hope born out of death.
Christian hope is for now as much as for the future, the impossible is possible with God, new things can be born out of the shell of the old, new things can spring to life, the phoenix can rise from the ashes of despair. We can be renewed, made new, have new life now, as individuals and as communities. This too is resurrection hope.
Mary Magdalene discovered resurrection hope not through dismissing her grief and putting on a brave face, but rather in her grief – Jesus himself drew alongside her, he reached out to her with one word of comfort – “Mary.” Hope, real hope, was born from the darkness of despair. This was no false dawn that would fade, this was a new day in which the brightness of the sun would warm Mary’s heart.
In some words that have at times been very special for Jo and me. Isaiah promised Israel:
“When you pass through the waters I will be with you, and through rivers they shall not overwhelm you.” ‘I will stand with you’ says Isaiah, speaking for God, ‘I will stand with you in the pain, … you are not alone’.
For Mary, resurrection still meant loss – Mary could never have Jesus back as she had known him. “Do not hold on to me,” he says. “Do not keep clinging onto me.” Mourning and grief are about letting go – letting go because we have confidence that we can trust our loved ones to God – letting go because we cannot hold on to them, letting go because we also trust in God’s love for us.
Jesus resurrection does not deny death, it fulfils it. Jesus resurrection assures us of all God=s promises not to leave us or forsake us – neither in life nor in death will he let us go. He draws near to us in darkness and despair, he speaks our name and gently draws us to himself where true hope begins.
One of the early experiences I remember well is watching Doctor Who. I always sat on the settee, with a cushion close at hand – and when things seemed to be getting to frightening I’d bring the cushion up to my face and peep over the top. If things looked really bad I’d hide behind the back of the settee – peeping out occasionally – with my imagination running riot!
I’ve carried this forward into adult life – some friends and I went to the cinema to watch Braveheart. The film has some very graphic and dramatic battle scenes. I was unaware of how I was responding. Each time an axe hit someone’s torso I was apparently jumping in my seat. At one point, I looked along the row of friends to find that they were all watching me rather than the screen.
I always get engrossed in what I’m watching on TV or at the cinema – and I find that I can usually anticipate the story line. My imagination works overtime – and if I’m not careful when I am watching TV, I find that the anticipation has got the better of me – I’ve got up from my seat and left the room. Before I even realize what I’m doing, I am in the kitchen putting the kettle on to boil! In some things we watch on TV it is easy to get ahead of the action, anticipate what is going to happen and react accordingly.
We have a similar, but greater, problem with Holy Week and the Easter story. We can anticipate everything that is going to happen. It’s not that the plot is predictable or easy to anticipate – for us it’s the problem of hindsight.
We know that Palm Sunday’s jubilation was followed by the despair of Good Friday. We know that the seeming failure of Good Friday was quickly overtaken by the triumph of the first Easter Day. Hindsight is supposed to be beneficial – but in the case of the Easter story it robs us of the possibility of living through the events as they happened.
What was going through the disciple’s minds as they came into Jerusalem on that first Palm Sunday? What was Jesus feeling as he rode into Jerusalem on that donkey? Our danger is that knowing the outcome we minimize the intensity of the events and feelings of Holy Week because we know it turned out OK in the end.
What was Jesus feeling as he entered Jerusalem knowing what the week ahead would hold? Was he was already feeling that overwhelming sense of loneliness that comes when we are completely misunderstood.
How many times had he told his disciples that he was going to Jerusalem to die? How often had they failed to hear what he said?
Palm Sunday dramatizes for us the chasm in understanding which existed between Jesus and everyone around him – his disciples and the happy shouting crowds. … Jesus was alone. Really alone – no one understood what he was doing – no one grasped what was about to happen!
When we talk of Christ’s suffering – we think primarily of the Cross. We miss the agony of the anticipation, the loneliness of the last week of his life. The shame of abandonment and torture. … And because we miss his anguish we minimize the significance of many of the events of that last week. With the benefit of hindsight we rush on to the resurrection – to the good news.
As Jesus repeatedly talks about his death his disciples remain at best confused, at worst oblivious to what he is saying. And the loneliness Jesus felt in the crowd of Palm Sunday, gets replaced by the loneliness of the garden of Gethsemane. Only he can walk this road. No one will walk it with him!
When we grasp this, we will begin to be able to believe that Jesus understands our loneliness. … He knows the loneliness of the cell for those in solitary confinement; those condemned to die for their faith. But more than that – he feels the dark loneliness of depression; he is with us in the loneliness of the hospital bed; he knows the loneliness of watching other people=s pain; and he knows the loneliness of being misunderstood. It=s not just that he cares – he knows what we go through. He is the one that has gone before – he is the one who calls us on – in spite of the darkness or the pain – to continue to serve, to continue to love, to continue to hope.
So, as we live through this Holy Week, lets not get to far ahead of the plot anticipating the final outcome. Let’s rather to the best of our ability stay with the story watching and feeling it unfold. For then, perhaps only then, will we really begin to understand how much God loves us.
While I was writing the second article about the Micklehurst Loop I was contacted by Keith Norgrove. He sent me two pictures which came from a cycle ride along the Huddersfield Narrow Canal Towpath in 1963, one of which was relevant to the length of the Loop covered by my first article. The second image showed the Canal with a view of the Micklehurst Loop including a train climbing towards Diggle with the Saddleworth Moors behind. [1] As far as I can tell, this location is adjacent to the Woodend Mills North of the centre of Mossley.
This picture was taken in 1963 by Keith Norgrove while he was on a cycle ride along the Huddersfield Narrow Canal towpath. The photograph predates by some years the renovation work which took place on the canal. At that time the lock alongside the Woodend Mills in Mossley has been allowed to become nothing much more than a weir on the canal. This view of the old Micklehurst Loop is no longer available because of tree growth, but the Canal has been fully renovated. It has outlasted the Micklehurst Loop and now carries pleasure craft up to the tunnel at Diggle, (c) Keith Norgrove. [1]
Woodend Mills – were built by 1848 by Robert Hyde Buckley, close to his father’s mills. These buildings made up an integrated cotton mill, built in several phases. Historic England say that they are “a near complete example of a first generation integrated cotton mill site, where both weaving and spinning processes were planned from the outset. Before this the two processes had been done on separate sites.” [3]
The close association of mills in the immediate area can be seen on the aerial image below. The lock in the 1963 image above can be seen in front of Woodend Mills.
The layout of the mills as seen in 1947 from the air to the South. Winterford Road Bridge is on the right of the image. The lock in the 1963 photograph is immediately in front of Woodend Mills. [2]
An extract from the 25″ OS Maps showing Woodend Mills and the probable location from which Keith Norgrove took the 1963 picture. [4]
The lock adjacent to Woodend Mills. This picture is taken from a similar location to the one from 1963. The route of the Micklehurst Loop is hidden in the trees ahead. The Moor still looms large. [5]
Mossley Gas Works
Two additional pieces of information on the Gas Works:
First, from an email discussion forum
David Beilby on the IndustrailRailwaySociety@groups.io email discussion group quotes the following from a booklet on the inauguration of the new works by the Rt. Hon. The Earl of Derby K. G. on 22nd June 1931 about the Gas Works which feature in Part 3 of these articles about The Micklehurst Loop.
“The original gasworks was built by the Stalybridge Gas Company in 1862 and located alongside the canal. … In 1884 an agreement was made for the Corporation of Stalybridge and the Mossley Local Board to jointly purchase the company. The Mossley Local Board became Mossley Corporation when Mossley became a Borough in 1885 (and lost its status of being in three counties – Lancashire, Cheshire and Yorkshire). In addition to Mossley the works also supplied much of Saddleworth with gas as well. In 1925 the Borough’ Gas Engineer reported that the best way to improve the plant and increase output was to move to a new site, with rail access also removing the need to transport raw materials and by-products by road to Mossley station.” [6]
He also mentions that the booklet contains “details of a 2′-0” gauge line which was used to move excavated material from site to a central loading point whence it was conveyed by an “Breco” aerial ropeway to the tipping site, the ropeway being 720 yards long. The booklet notes that the railway was worked by petrol locomotives. No contractor is mentioned , despite many suppliers of equipment being acknowledged. It would seem the work was project managed in-house, certainly much of the design work is credited to the gas department.” [6]
“For information, the retorts were horizontal. … It was believed the cubic capacity of these retorts was the greatest in the world at the time. The works were, later, extended. This was anticipated at the design stage as the end wall of the retort house was built using corrugated asbestos.” [6]
“Wagons were unloaded using a rotary wagon tippler supplied by Messrs. Strachan and Henshaw of Bristol which had the patented “Whitehall” clamping mechanism.” [6]
Second from the Saddleworth Historical Society Bulletin
There is an article about the Gas Works in the Summer 1996 edition of the Saddleworth Historical Society Bulletin (Vol. 26, No. 2, p1-5). Sadly, the scanned .pdf of that edition of the bulletin on their website omits two of the 5 pages of the article. [7] The article is by Jeffrey Wells and includes a sketch plan of the Gas Works site. [7: p4]
Mossley Gas Works Sketch Plan, (c) Jeffrey Wells. [7: p4]
References
Keith Norgrove is a contributor to the RMWeb Forum under the pseudonym ‘Grovenor’. Keith’s two pictures (one of which is included here) were a response to my articles about the Micklehurst Loop on that Forum: https://www.rmweb.co.uk/community/index.php?/topic/161854-the-micklehurst-loop, accessed on 15th February 2021.
The Staley and Millbrook Goods Yard in the 21st century, (Google Maps).
Since publishing the first three articles about the Micklehurst Loop. I have had a trickle feed of comments, particularly about the Staley and Millbrook Goods Yard. This short addendum to the first article seeks to bring those items together in one place. It is the fourth addendum to that first post. [1][2]
The adjacent satellite image extracted from Google Maps satellite images shows the Goods Yard and notes some of the key features still on the site in the 21st century. For more comments, please see the notes which follow.
I visited the site again on 5th March 2021 and wandered around among the trees for over an hour.
There is an excellent survey of the Staley and Millbrook Goods Yard and the Hartshead Power Station on the website http://www.28dayslater.co.uk. A number of superb photographs have been collated there. [7]
Further Images of BEA No. 2 0-4-0ST ‘BEANO’
Gerv Wright has kindly sent me two further images of BEA No. 2 0-4-0ST at the end of its working life in 1977 being prepared for and being transported off site. ‘Beano’ was its nickname!
BEA No 2, Jan 1977 (c) Gerv Wright. [3]
BEA No 2, Hartshead, Jan 1977 (c) Gerv Wright. Of additional interest in this picture is the backdrop. The view is taken from the Micklehurst end of the site In front of the good shed is the coal conveyor still apparently at its full extent. Also visible, to the left of the picture, is one of the lighting towers which feature later in this post. [3]
Yard Lights – Concrete Lighting Columns
An on-line acquaintance, Ben Hampson, sent me an image of the Goods Yard via a Facebook group, ‘The History of Mossley (Tameside)’. [4] That image is an excellent view across the site of the Goods Yard when it was still in use and shows three concrete lighting towers as well as the fireless loco in operation. At the back of the scene, the coal handling facilities, the conveyor and the goods shed can be seen peeking out of the gloom. Ben sourced that image via Gary Taylor on ‘The Real Mossley’ Facebook group. [10]
The Staley and Millbrook Goods Yard min operational days. Of interest are the lighting columns and the fireless locomotive, the goods shed, the coal handling facilities and the coal-conveyor, copyright unknown, sourced via Ben Hampson and Gary Taylor from ‘The Real Mossley’ Facebook Group. [11]
A visit to site on 6th March allowed me to see the three towers shown on the above image. These next three photographs were taken on 6th March. They show the towers and give an excellent idea of the appearance of the Yard in 2021!
This is tower No. 1 as identified on the satellite image at the start of this post. The small body of water can be made out immediately beyond the tower. (My photograph – 6th March 2021).
Tower No. 2 on the satellite image above. This photograph is taken from the top of the bank to the South east of the old yard and looks down on the Yard. (My photograph – 6th March 2021).
This photograph shows Tower No. 3 which is close to the remains of the engine shed. The photograph is again taken from the bank above the Yard, (My photograph – 6th March 2021).
The Engine Shed
Ben also asked why I had not included anything in previous posts about the Engine Shed which accommodated the two shunters which worked the site. My only excuse is that I walked past it without working out what it was. So, on 6th March a took a bit of time to pick it out and take photographs.
Reddit.com carries a monochrome photograph of the fireless loco exiting the engine shed, which appears to have been sourced from the Transport Library. I am not certain of the copyright position on this image, so was not planning to include it here, however, when I copy and paste the link it automatically embeds in this post. Clicking on the image takes you directly to the source. [6][8]
Hartshead Power Station owned two locomotives for shunting the yard accessed via the Micklehurst Loop, both are mentioned in the text above. I believe that the 0-4-0ST stands on one of the lanes giving access to the engine shed which is off this image to the left, (c) J. Sutherland. [9]
The next few images are pictures taken on 6th March 2021 which show the engine shed as it is is the 21st century.
This first panorama shows the site of the engine shed from the bank above the old Goods Yard close to the lighting tower (no. 3 above), (My photograph – 6th March 2021.
This second panorama shows the site of the engine shed from track-bed level, (My photograph – 6th March 2021).
A closer shot of the Engine Shed from track-bed level. The churned ground in the foreground is typical of much of the Goods Yard site, which appears to have been used recently as an off-road vehicle playground, (My photograph – 6th March 2021).
Demolition of the Chimneys and Cooling Towers at the Power Station.
A short section of the video below (from 15 minutes to 17 minutes into the video) shows the demolition of the Cooling Towers and Chimneys of Hartshead Power Station. [12]
A check on the copyright of these images on the J.W. Sutherland Collection Site (http://sutherland.davenportstation.org.uk) has been undertaken – they are free to use provided the photographer is credited.
Have you ever experienced what it is like to be an outsider? The first time I went to Uganda in 1994, I had people’s warnings ringing in my ears. “Be careful travelling on the buses.” … “Everyone’ll be out to get what they can from you.” “Don’t walk around on your own at night.” I also had had my own fears about going to a different culture. And, yes, I did feel like an outsider. I was white, everyone else was black. I was treated like an oddity because I was different. A reversal of what many black and Asian people felt in coming here.
You may have experienced something like this – perhaps joining a new club, going to a new job, or a new town/city, going to the hospital for the first time. Unease in unfamiliar surroundings is something many of us experience. Often it isn’t helped by the way that those in the know, those who already belong, behave.
What would it have felt like as a Gentile coming into the temple in Jerusalem for the first time? An unfamiliar place with strange customs. It can’t be too hard to imagine some of the confusion and uncertainty that any Gentile must have felt.
The temple had its barriers even at the best of times – there was the Holy of Holies at the centre – where only God and the occasional male priest could go, next, separated by a richly embroidered curtain was the Holy Place where offerings to God were left by the priests (all of whom were male), next was the court where the altar sat – Jewish men were welcome here – then there was an outer court where Jewish women were allowed, and out beyond this – in the outermost court of the temple Gentiles were permitted. The temple system reinforced these divides, both gender and nationality. A place that was intended to proclaim God’s welcome had become a place where barriers obstructed access to God.
No doubt the Temple was a place of familiarity and comfort for those who attended regularly, particularly Jewish men. Everything had a structure and a place – it was somewhere safe and secure. But those very structures created barriers for others and a hierarchy of access to God. Rather than seeing the different outer courts as places of welcome for the outsider, Jews began to see those courts of lesser significance – and the Gentile Court, rather than being a place for worship, had become a place of business. The place where Gentiles could worship had become a market place.
In our reading, Jesus erupts into this outer court, turning over tables and setting animals and birds free. And his comment in Mark’s version of the story reinforces his concern for the outsider; “It is written,” he says “God’s house will be called a house of prayer for all nations.” The temple, says Jesus, is not to be a barrier to worship but a place of worship. The way the temple is run, the way things are done, needs to draw in the outsider.
Later, Matthew’s Gospel tells us that, at the moment of Jesus death, the curtain in the Temple was torn in two from top to bottom – opening the path for everyone directly into God’s presence. No longer could anyone justify barriers which restricted access to God.
The Jews had allowed their place of worship to become a place that created barriers between God and those who came seeking him.
These short verses In John’s Gospel seem like a window into what it was like in the temple in Jesus’ day. But they are not a window, they are a mirror allowing us to see what we are like, they are a direct challenge to us:
How open are we to welcoming the outsider? Are we as welcoming as we think? What barriers do we place between God and those who seek him? Are we no better than the temple authorities?
How hard is it for new people to get their heads around our liturgy? How keen are we to have people in our services who don’t know what to do? What do we do to help those who are new? In a lot of our churches you can tell who is new … the regulars pick the seats at the back of church. I’m not sure why we see those as the best, but we hardly ever sit on the front row, do we. Often a guest will come into church and see the front seats clear and chose to sit there – anywhere else they’d be the best seats! It is only once the service starts that they realise their mistake – which bit of paper am I supposed to look at now, which book, do I stand or sit at this point in the service? Our guests end up feeling embarrassed. …. Is it any surprise that they choose not to return?
What happens after our services? Who talks to whom? Who seeks to include the outsider? One of our previous suffragan bishops, told a story about his wife Early in his ministry in the Diocese of Manchester he attended one church to preach and his wife went with him. At the end of the service she went to get her coffee and was very politely served and then she stood to one side, quietly drinking her coffee, and no one spoke to her.
When the Bishop introduced her to a few people, one woman said, “If only I’d known you were the Bishop’s wife, I’d have come over to talk to you.”
I wonder whether she had any real idea what she had just said about her own, and her church’s, attitude to the outsider.
How do we respond when children are noisy? How do we cope if someone sits in our regular seat? Do you have baptisms in your main church service? If so, what do you feel about Baptism families? Are we quicker to comment that they are bound not to return – rather than to welcome them, understanding just how alien the service must feel to them? How welcome do we make people feel? Are we really as helpful and welcoming as we=d like to think we are? We need to try to imagine what a newcomer sees and feels as they enter our buildings.
These short verses in our reading challenge each of us to take a step back to look at we do in God’s church, God’s temple. To try to look at what we do through the eyes of the outsider.
Jesus gave priority to the Gentile, to the outsider. He explodes in anger over the ugly barriers that religious people had created almost without thinking.
If nothing else, these short verses in our reading demonstrate that Jesus longs that we and all his followers will give priority, not to our own hopes and desires, but to those of our community and the wider world. Priority to drawing them into relationship with God.

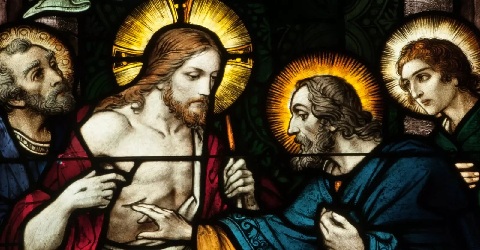


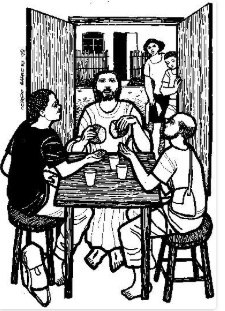

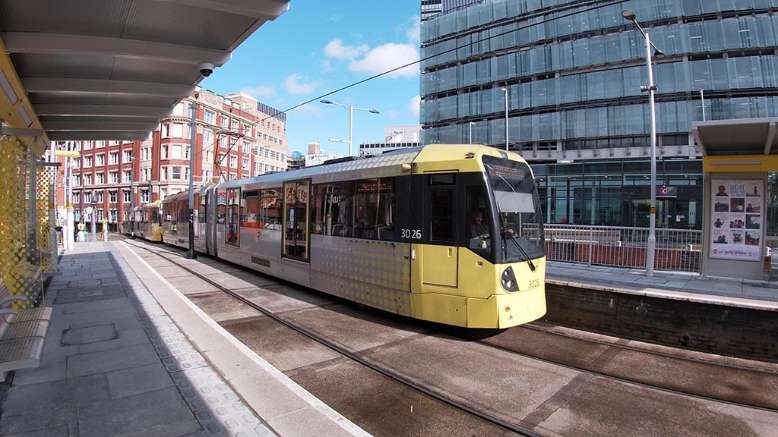

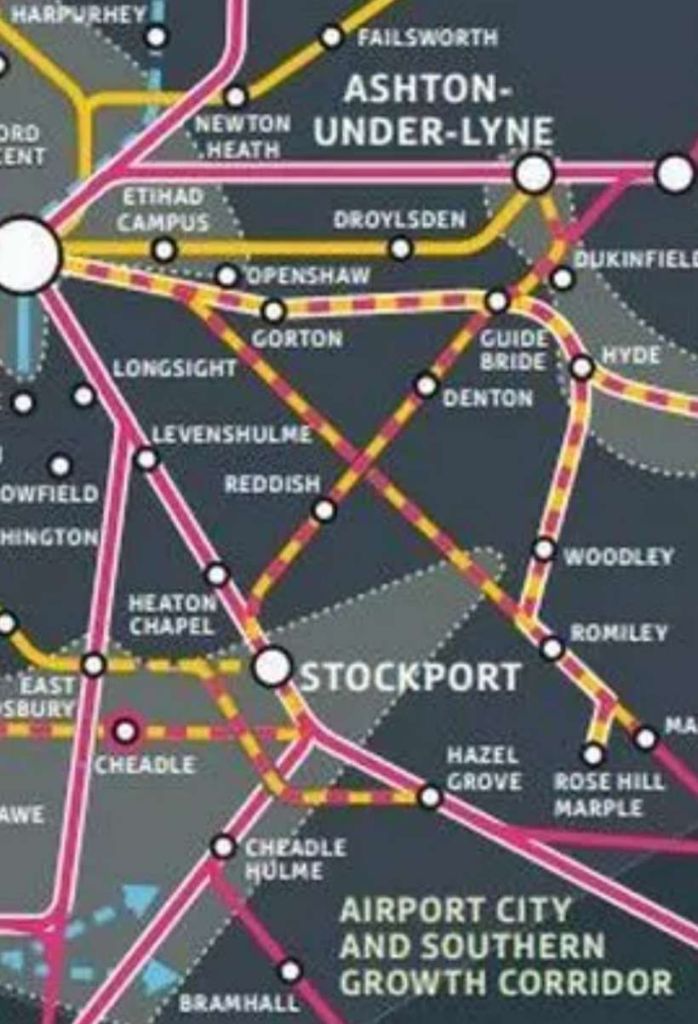
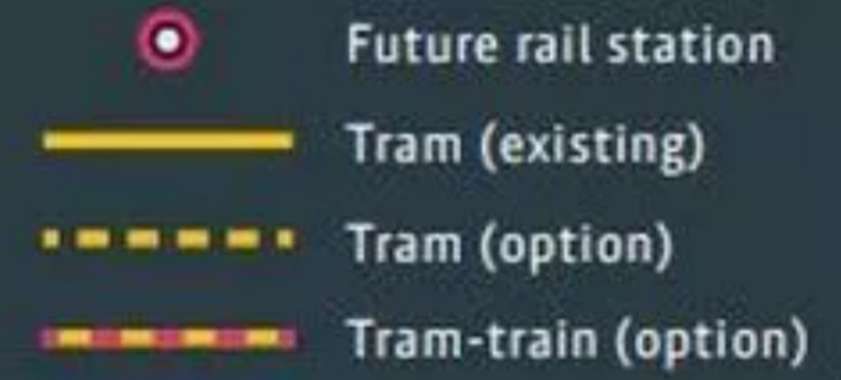
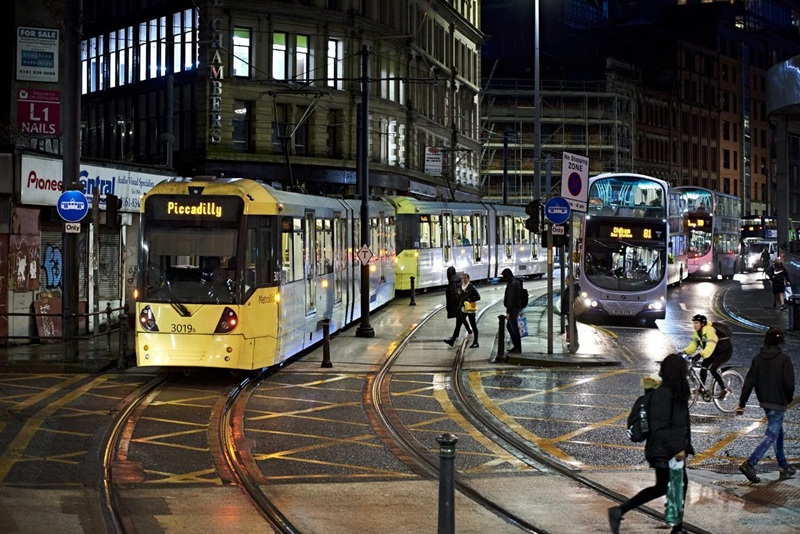
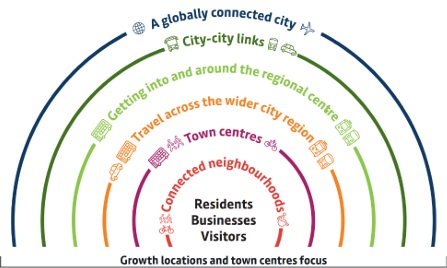

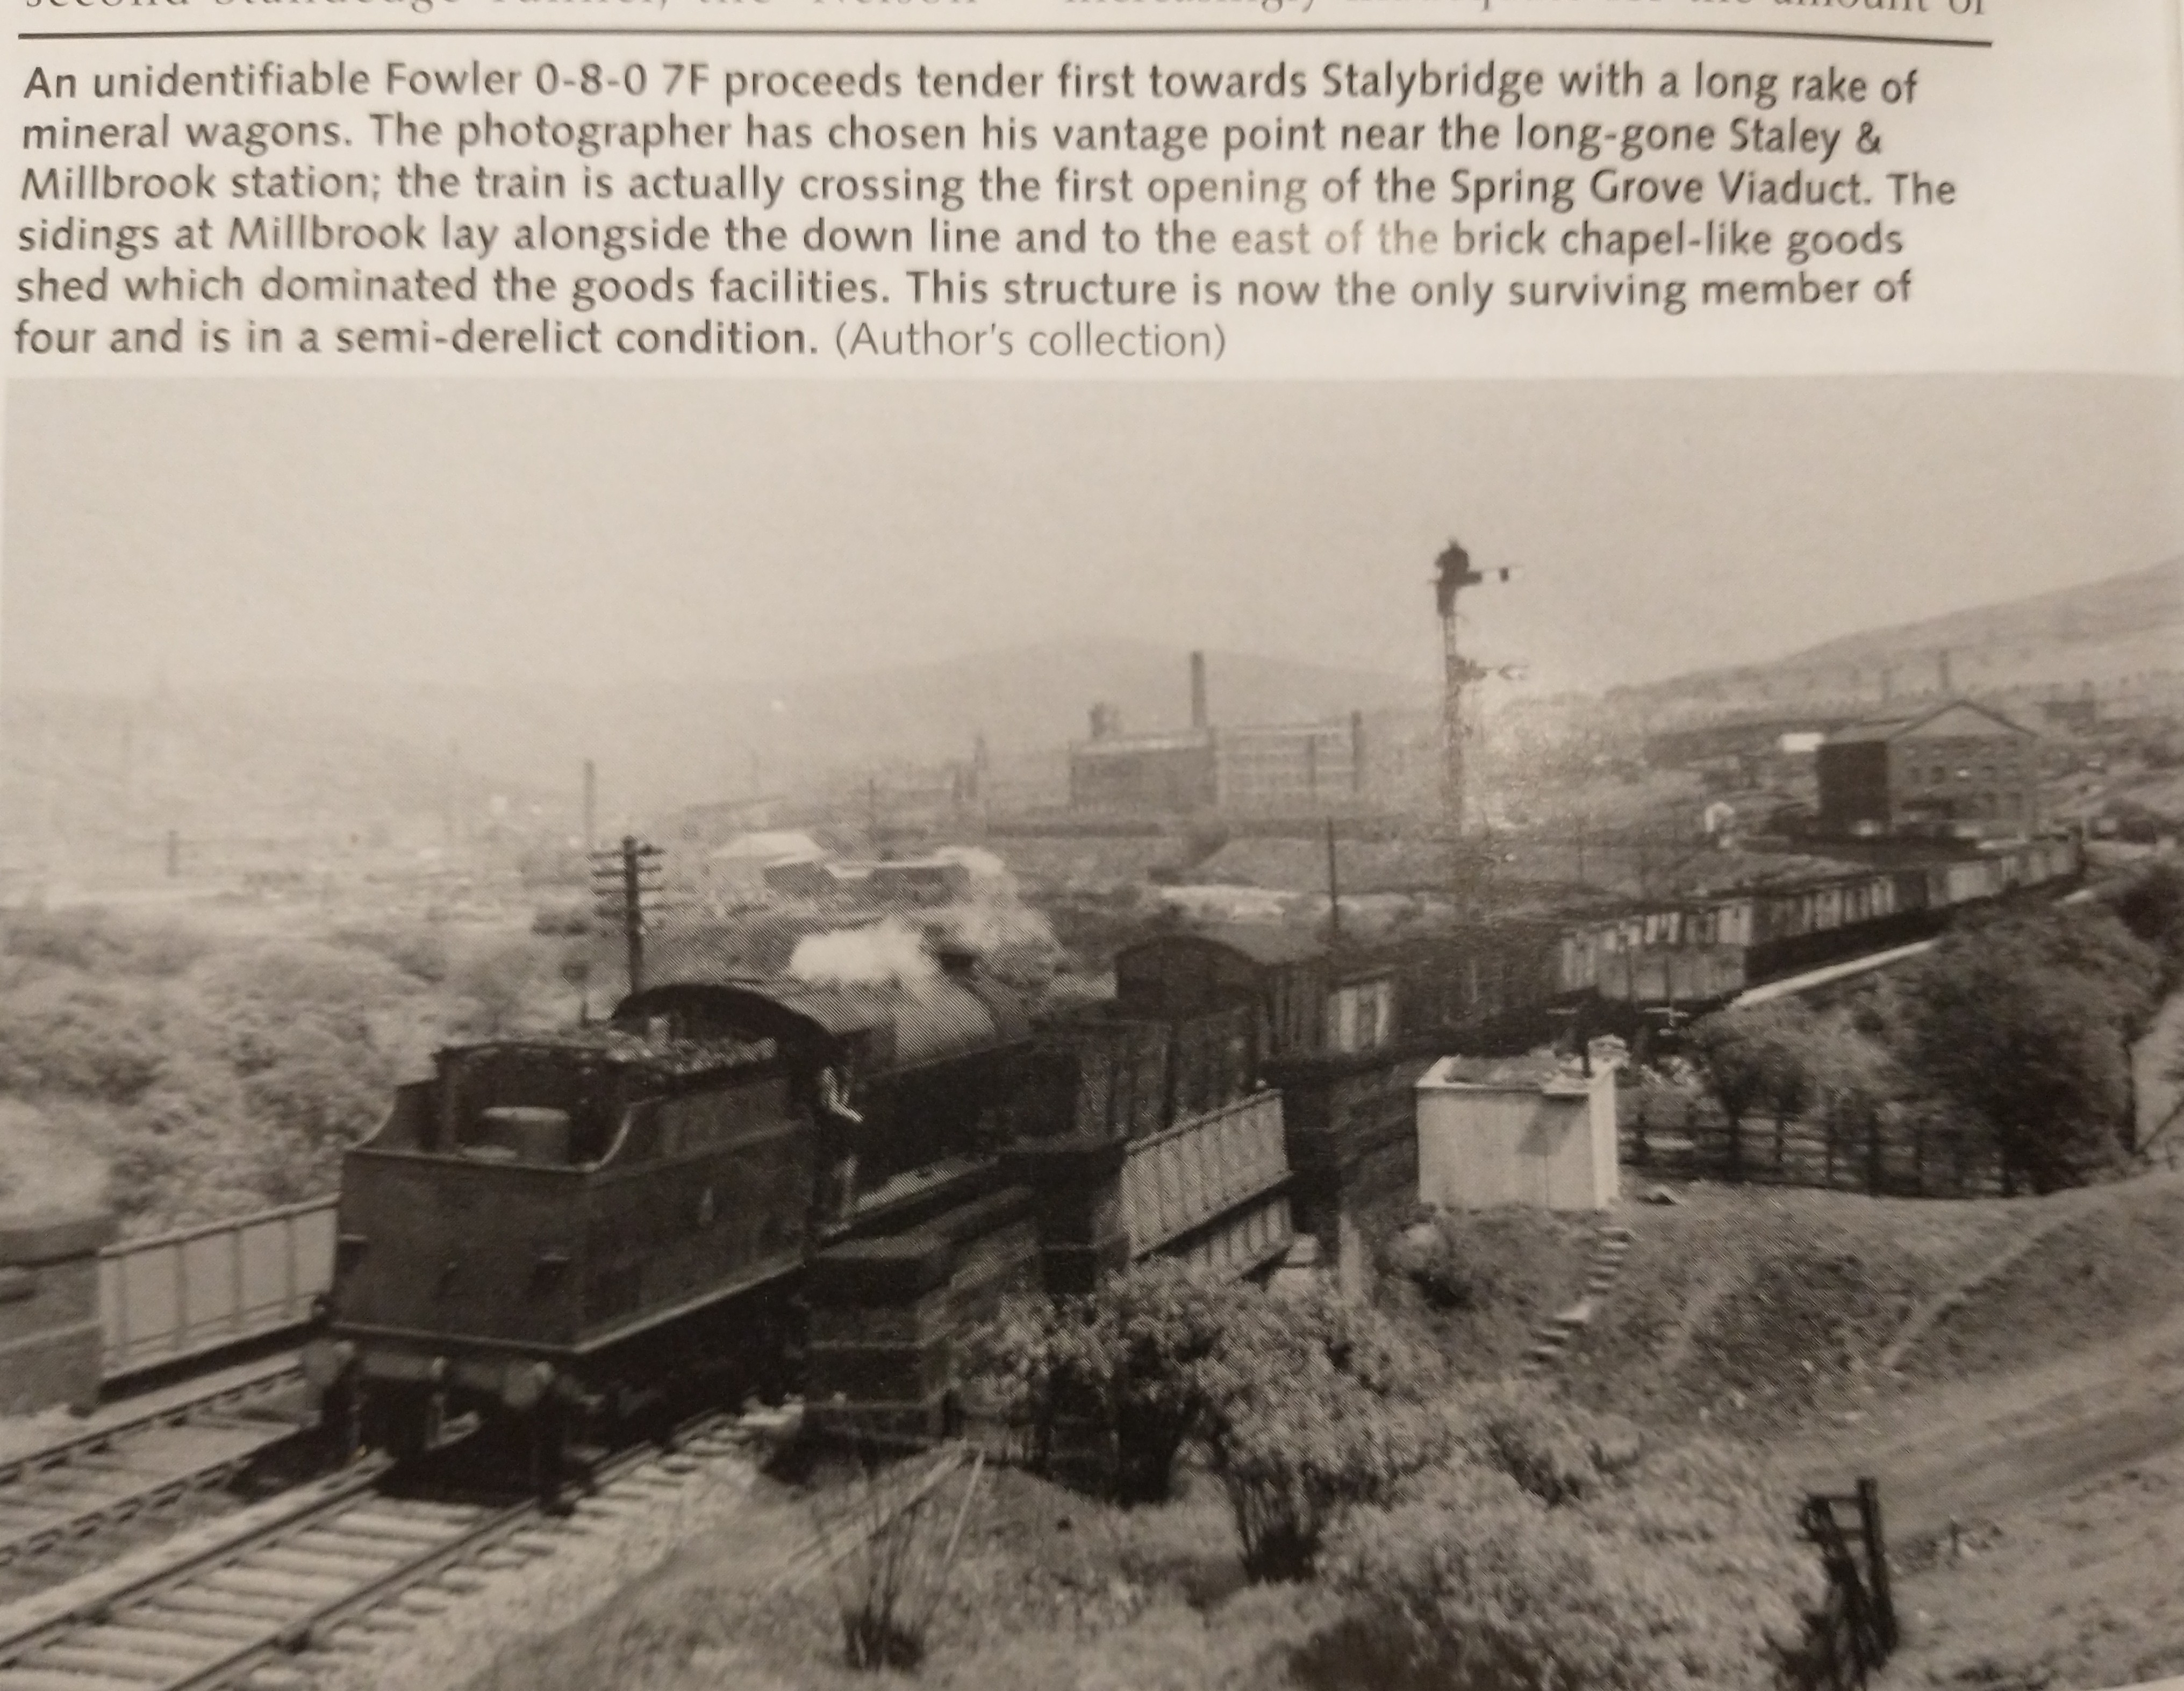
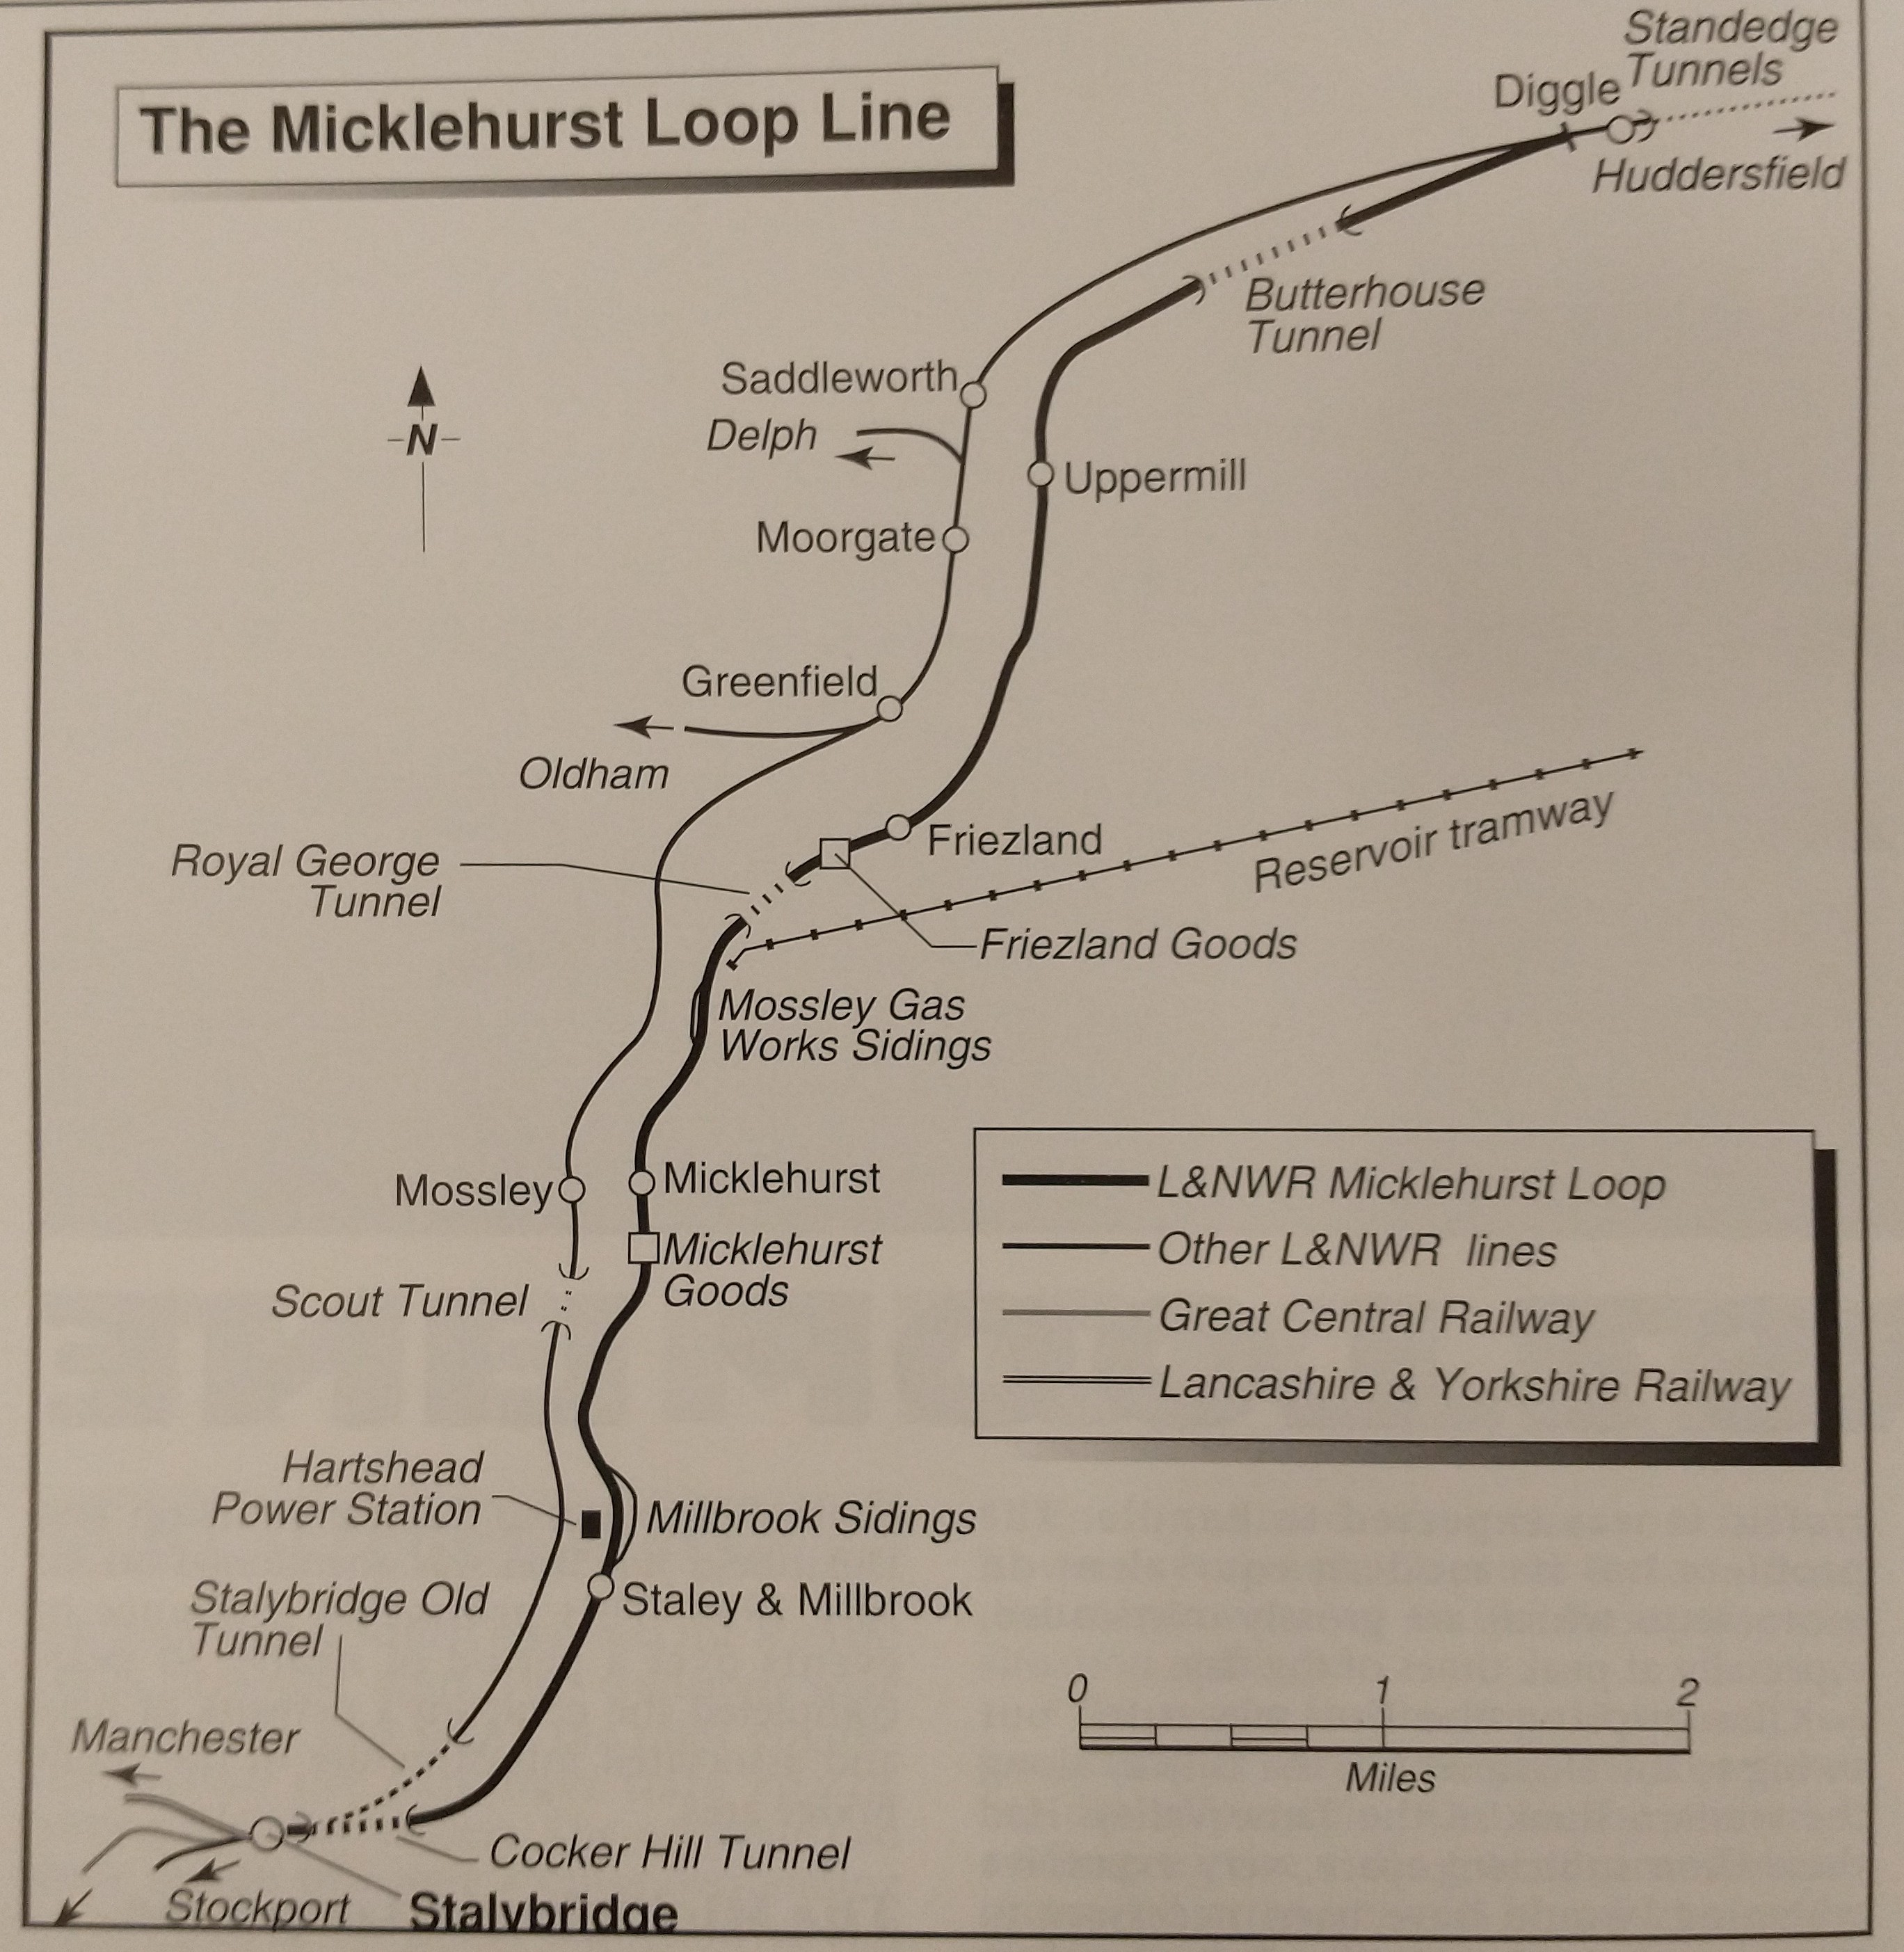
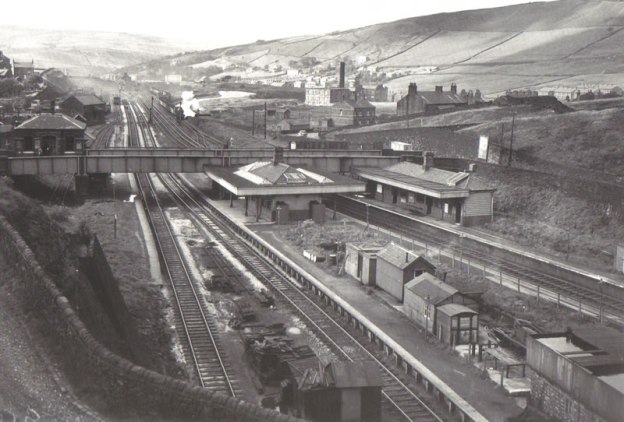
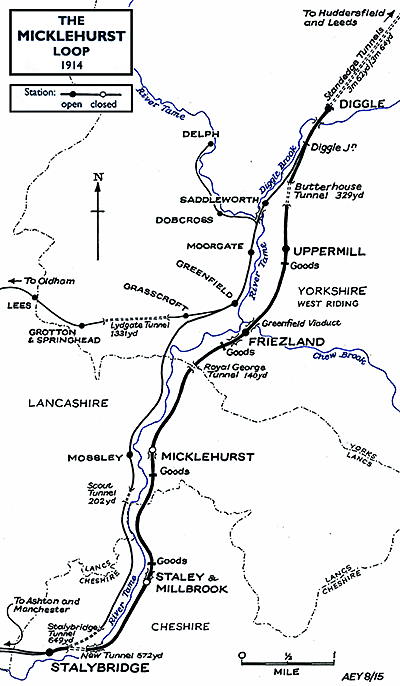
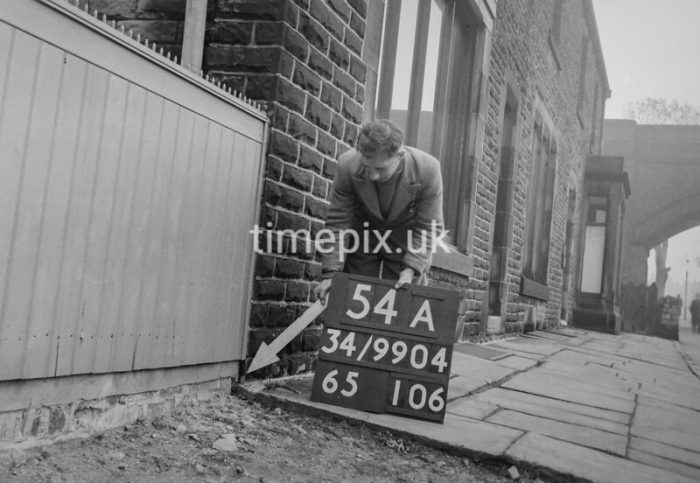
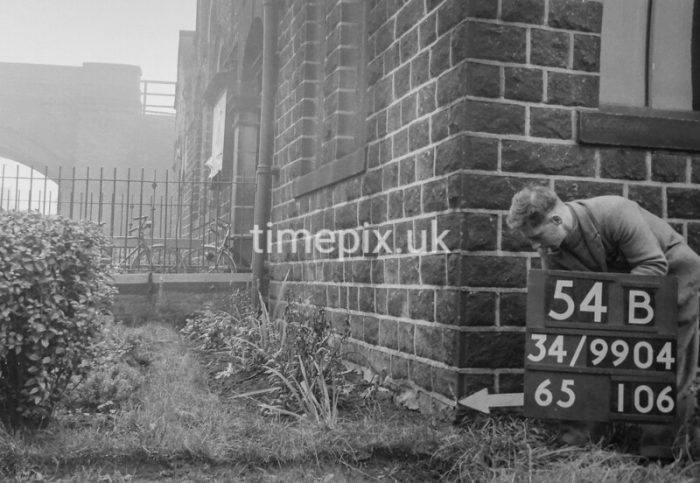
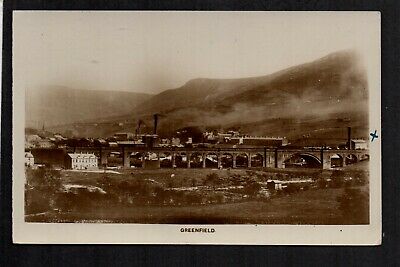
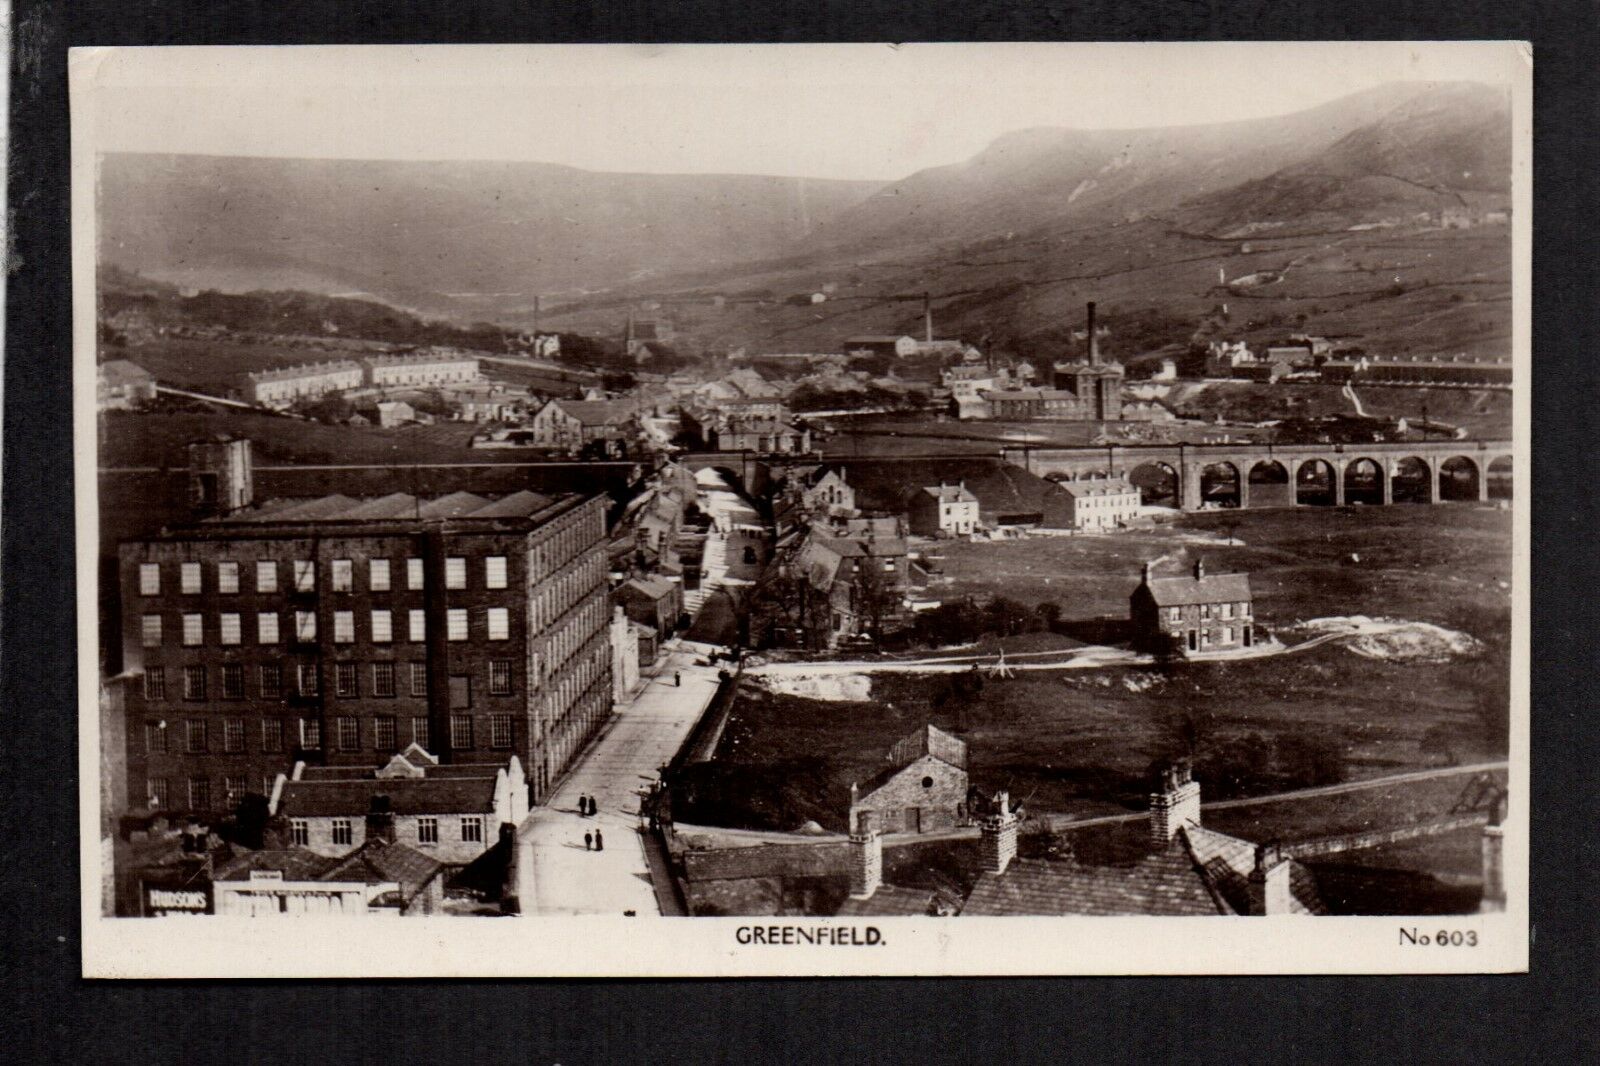
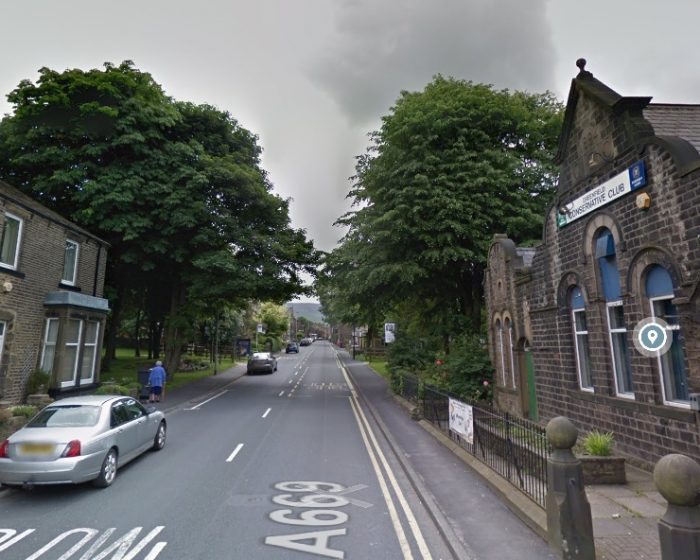
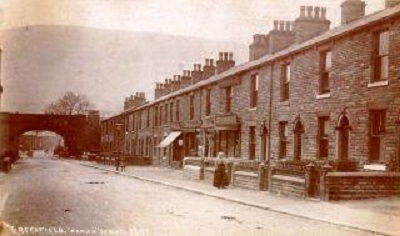 The adjacent image looks from the Southeast along Chew Valley Road. [16]
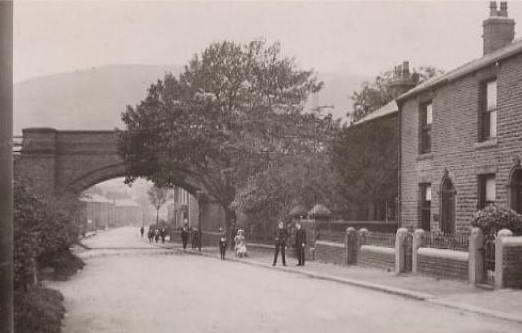
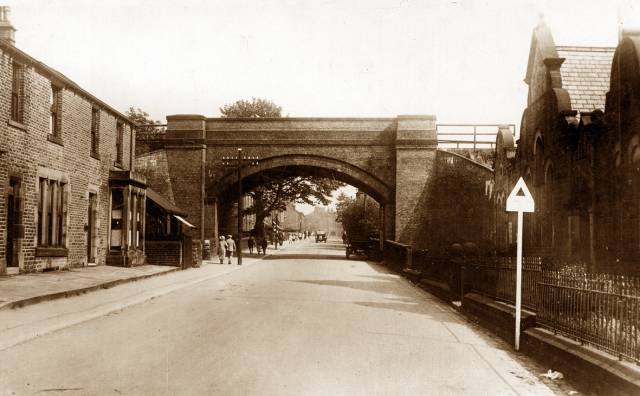 The third, below, is taken from the Northwest and shows the Conservative Club on the right side. [18]
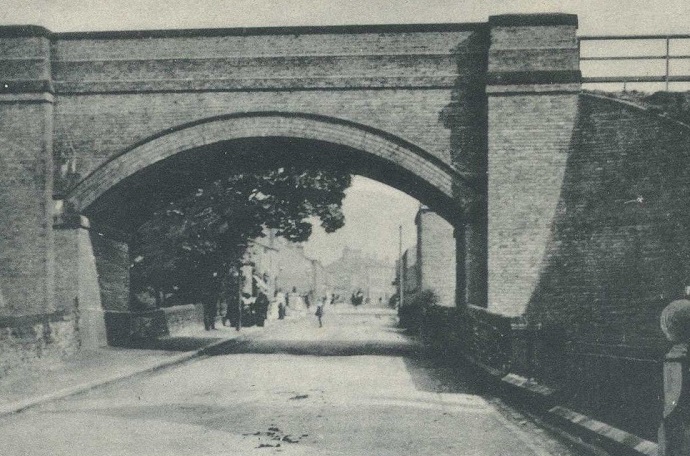
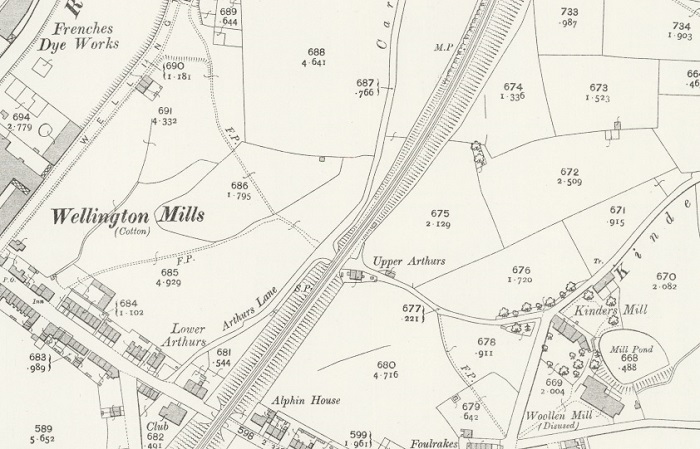
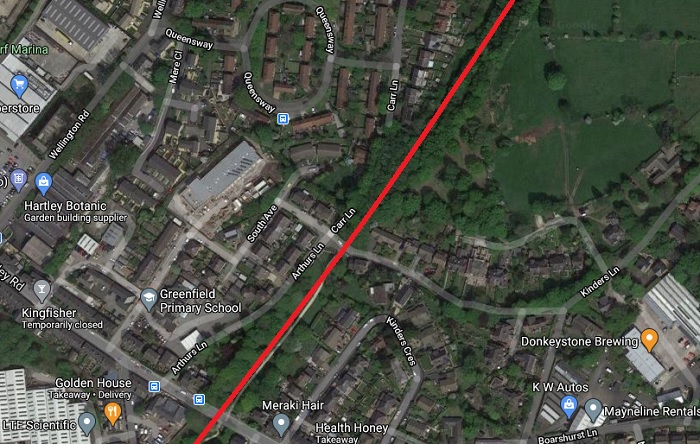
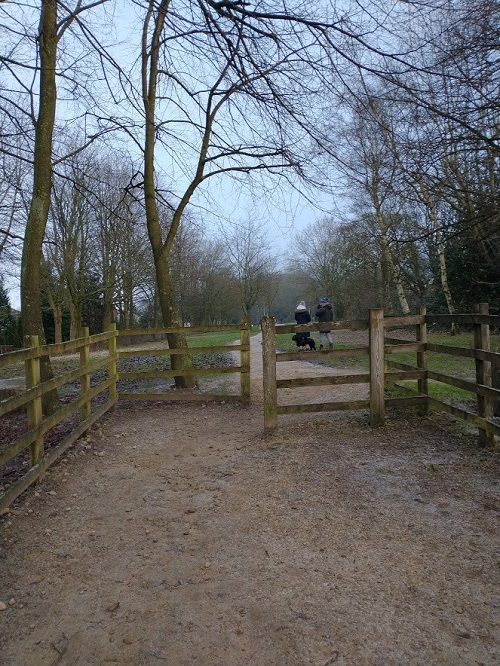
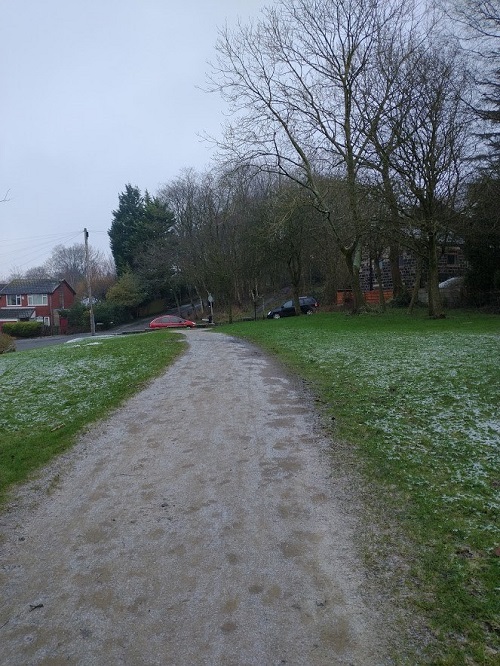
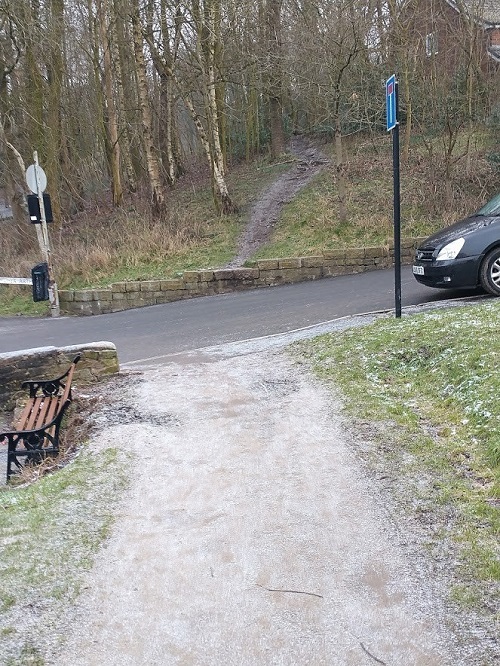
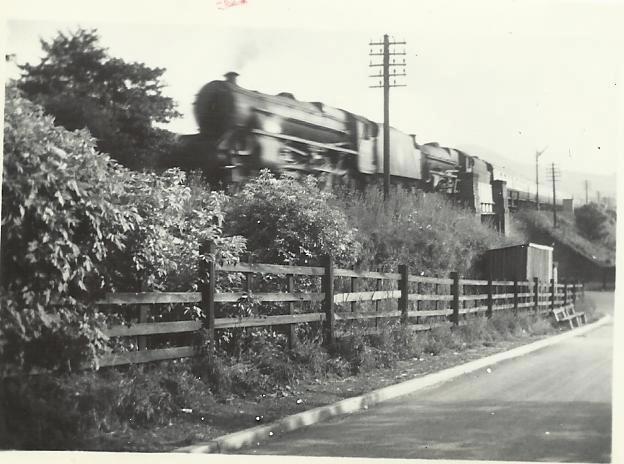
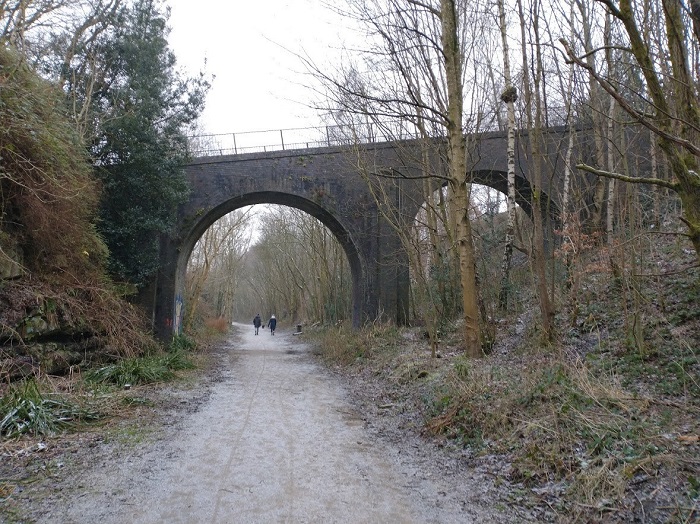
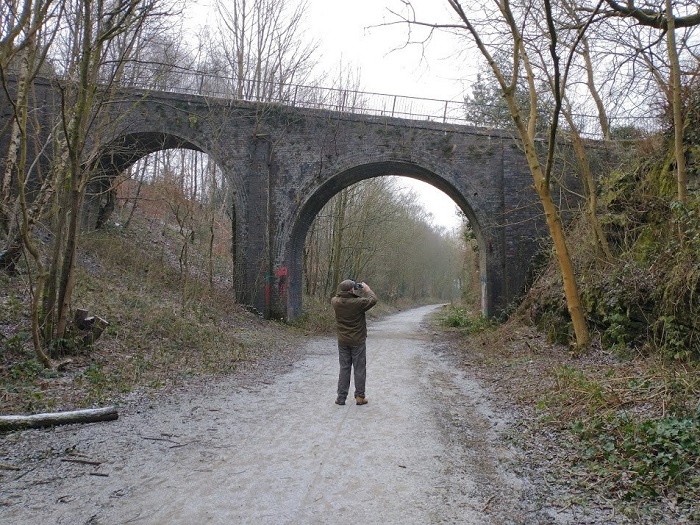
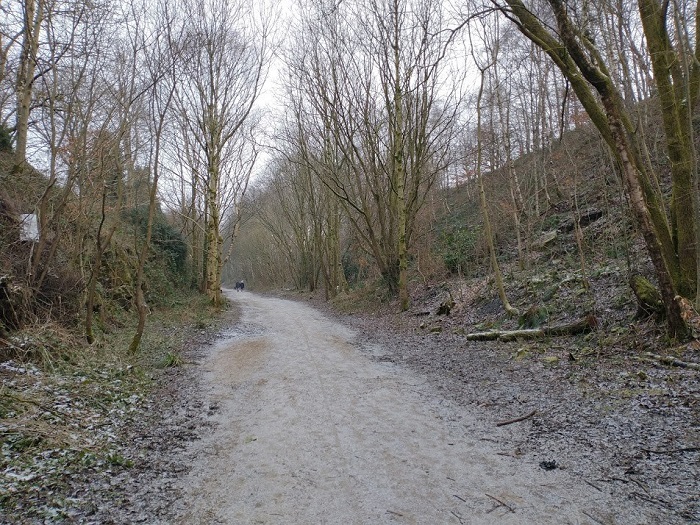
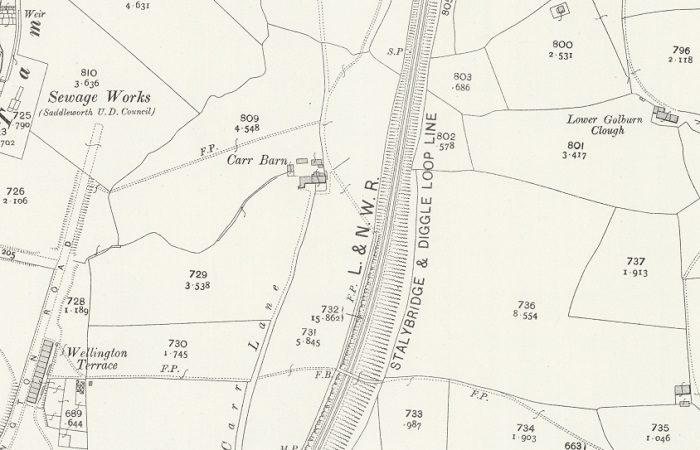
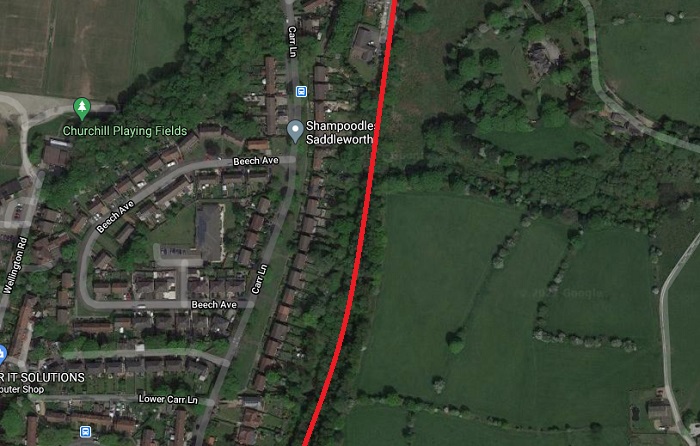
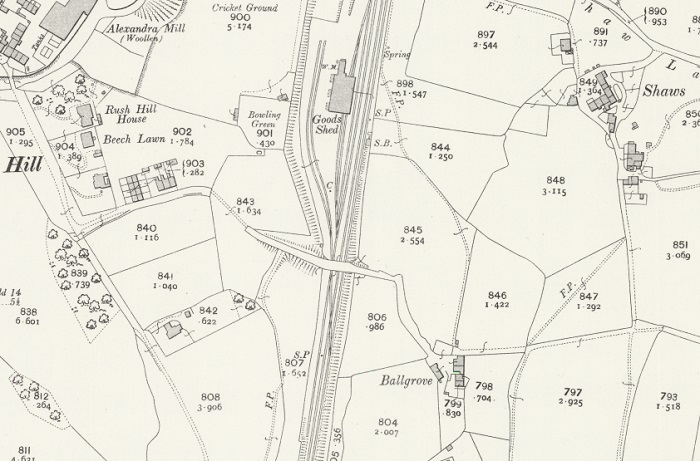

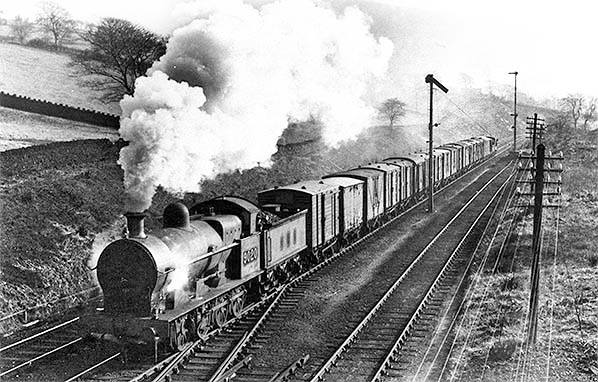
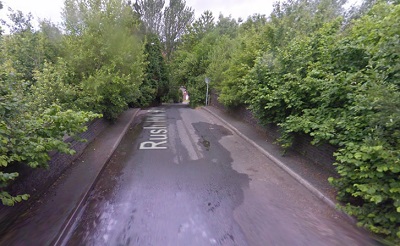
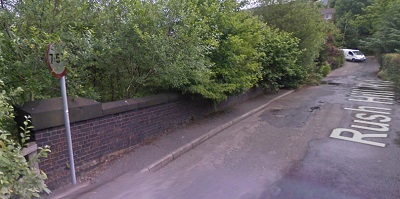
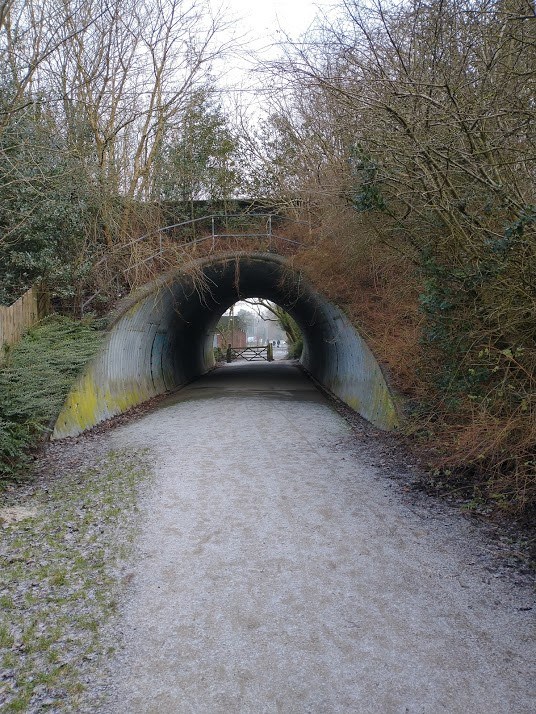
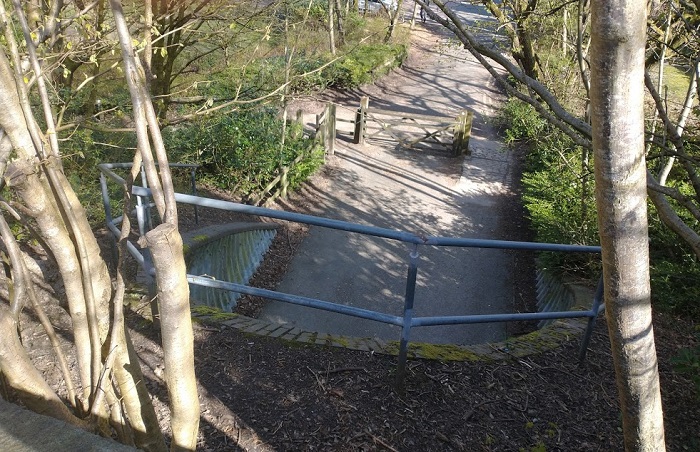
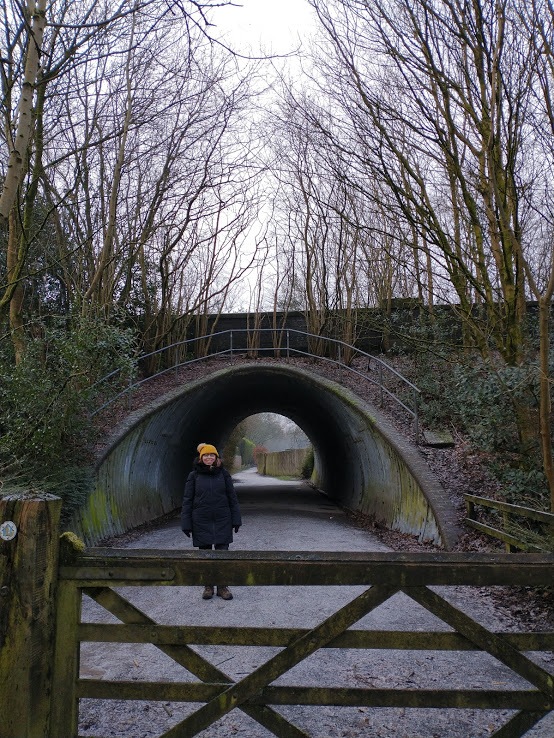
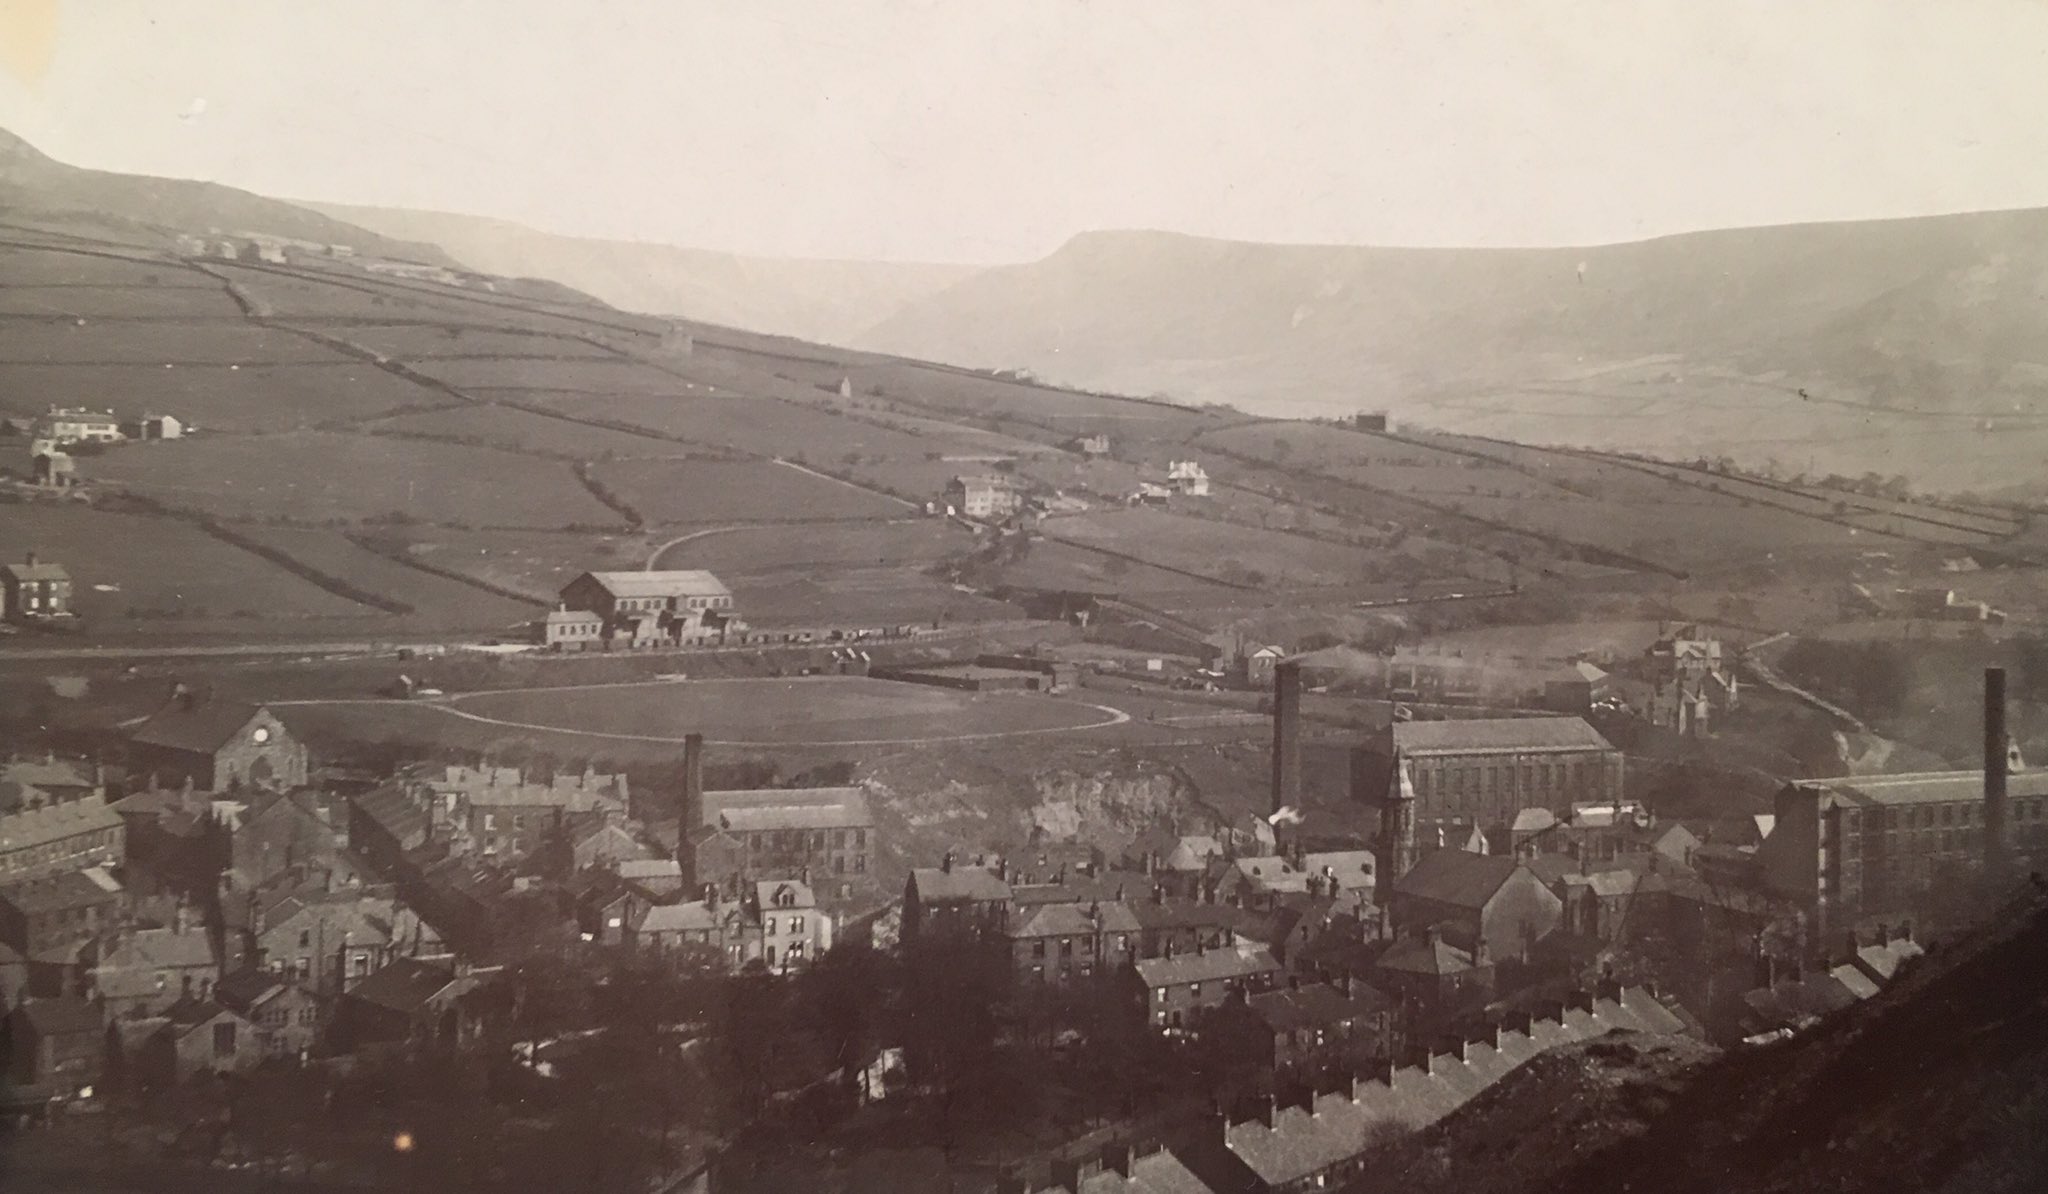
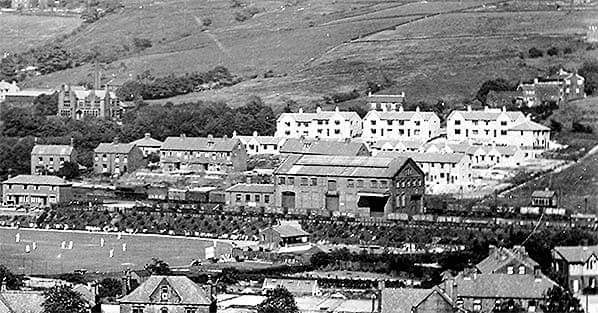
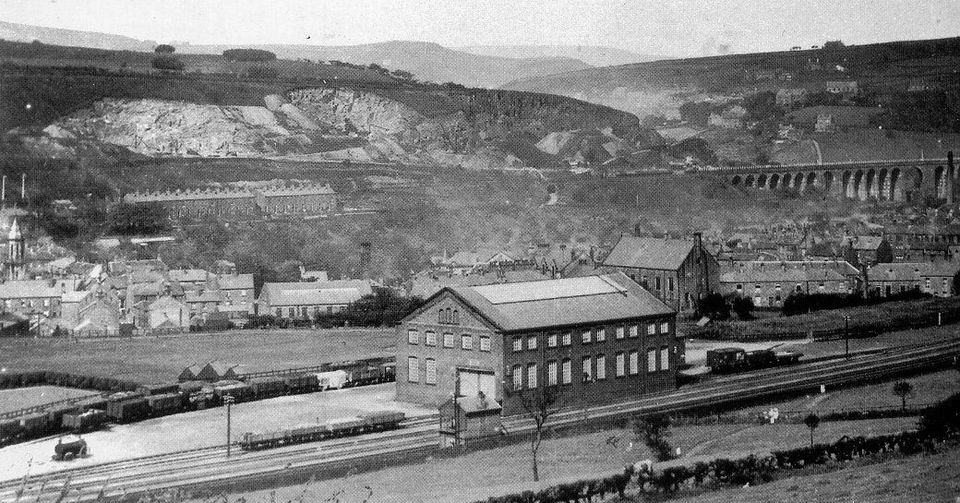
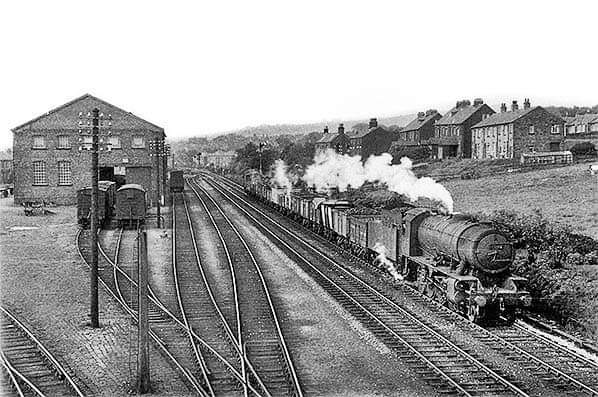
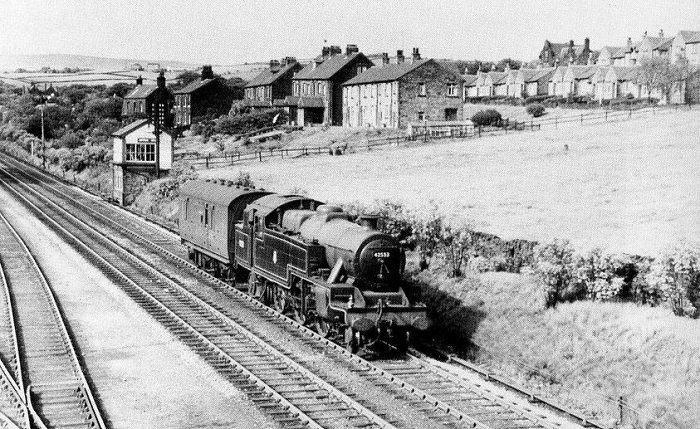
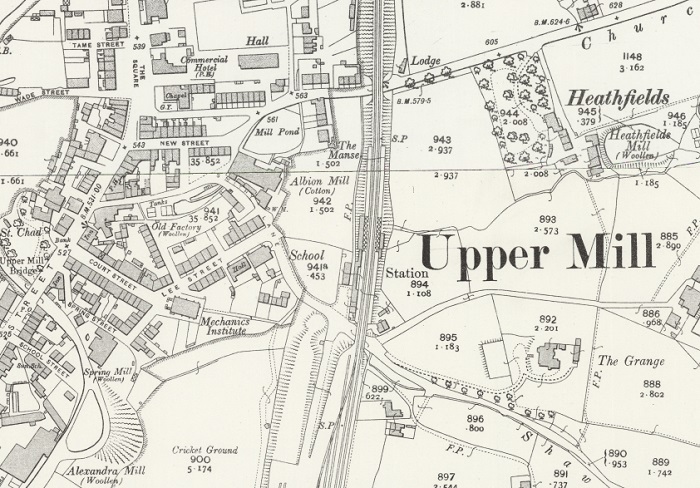
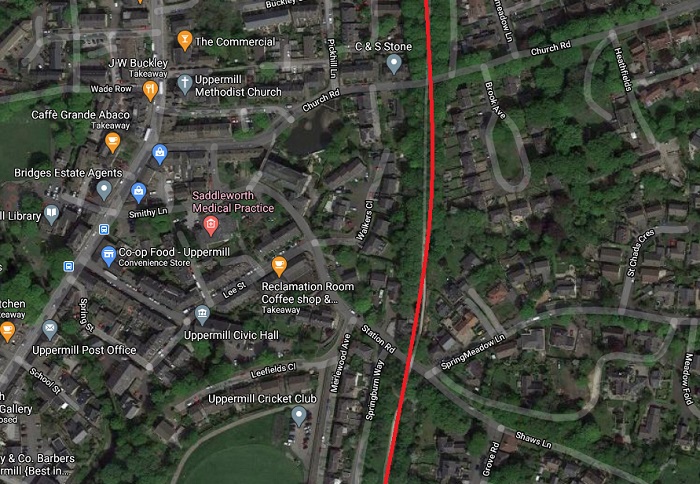
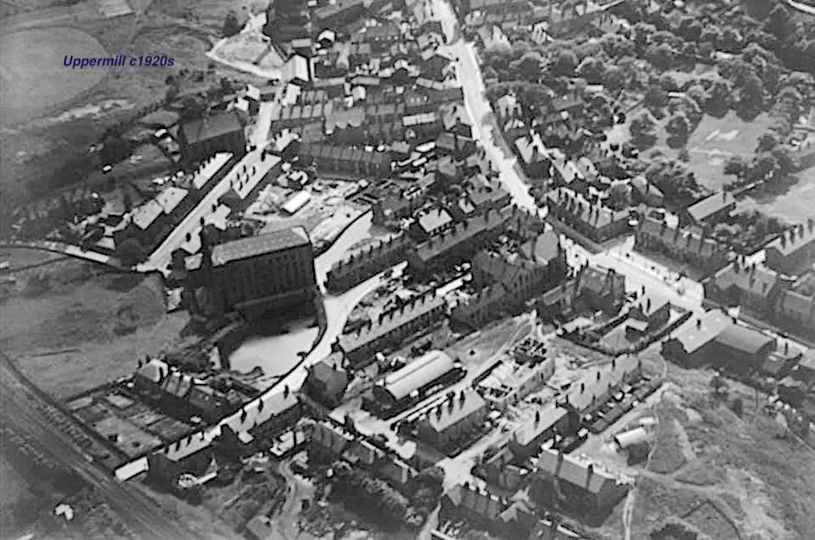
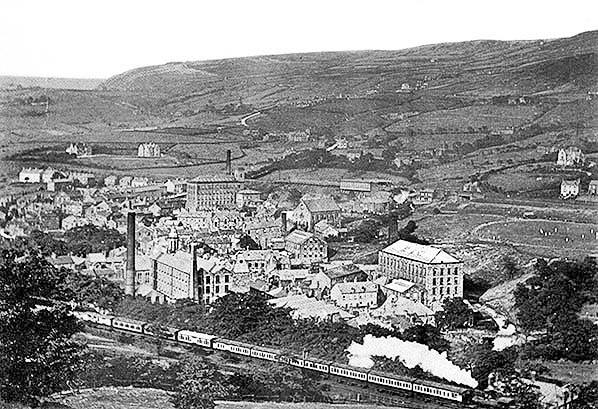

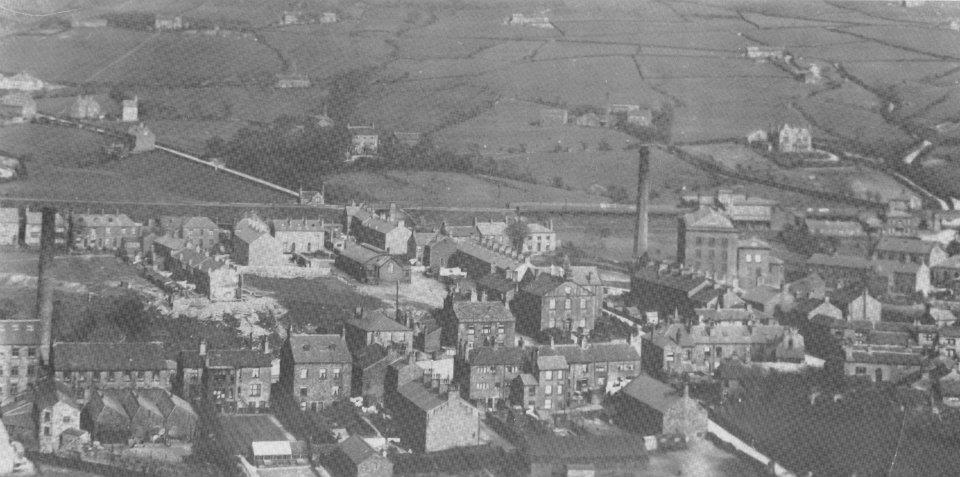
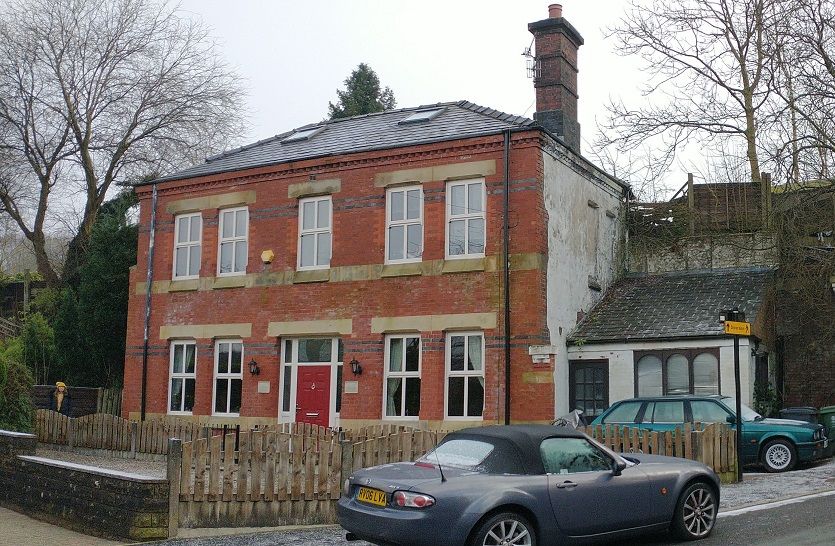
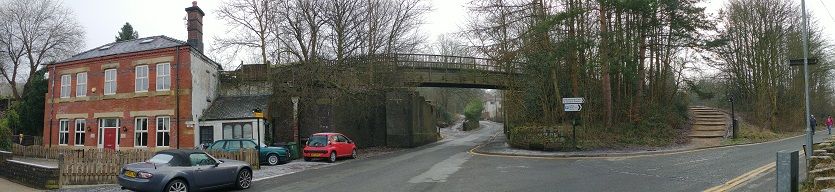
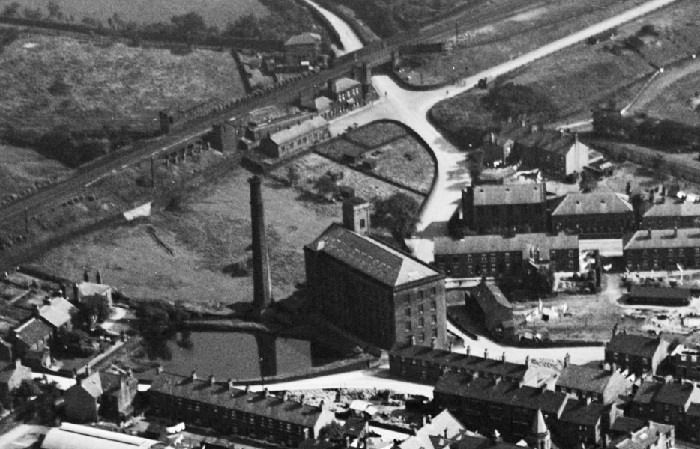
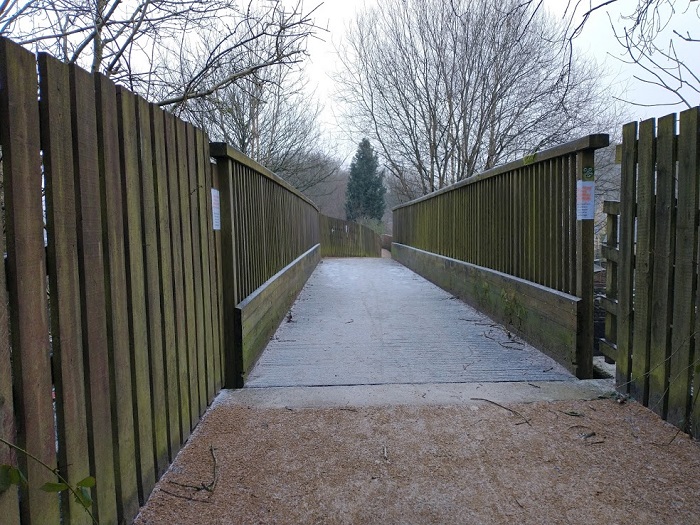
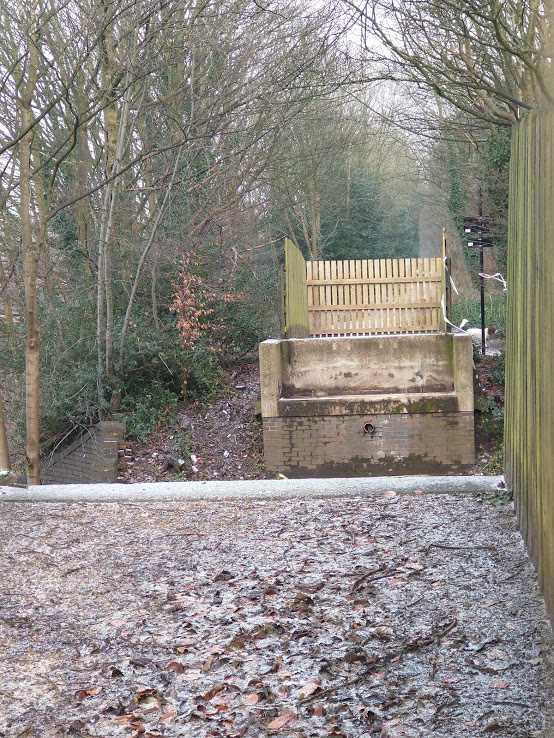
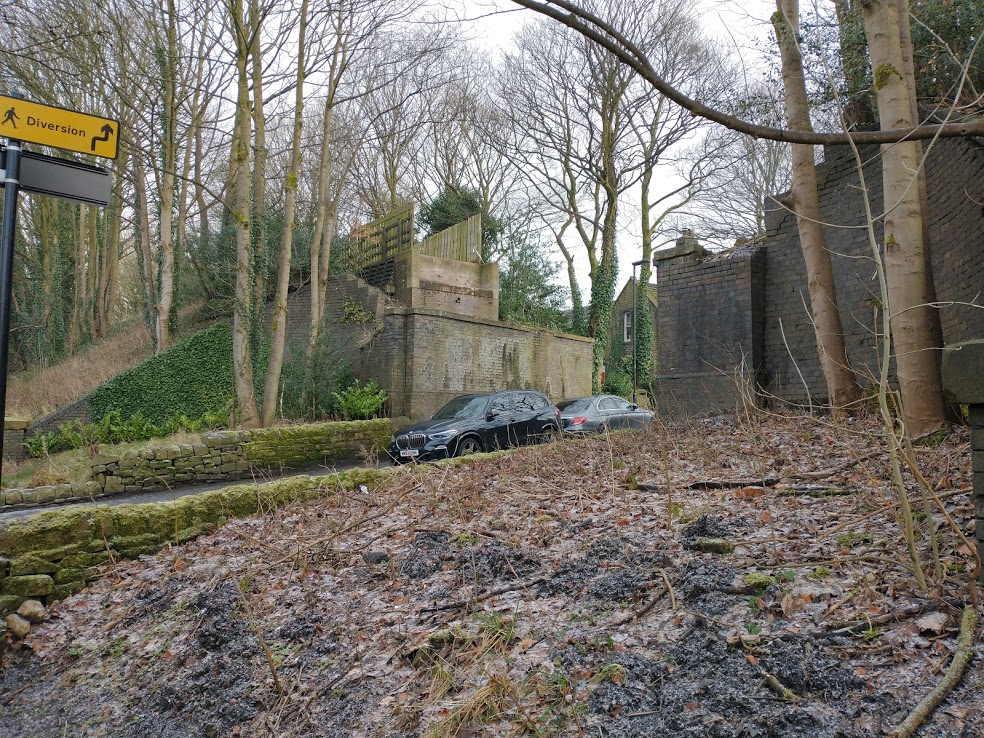
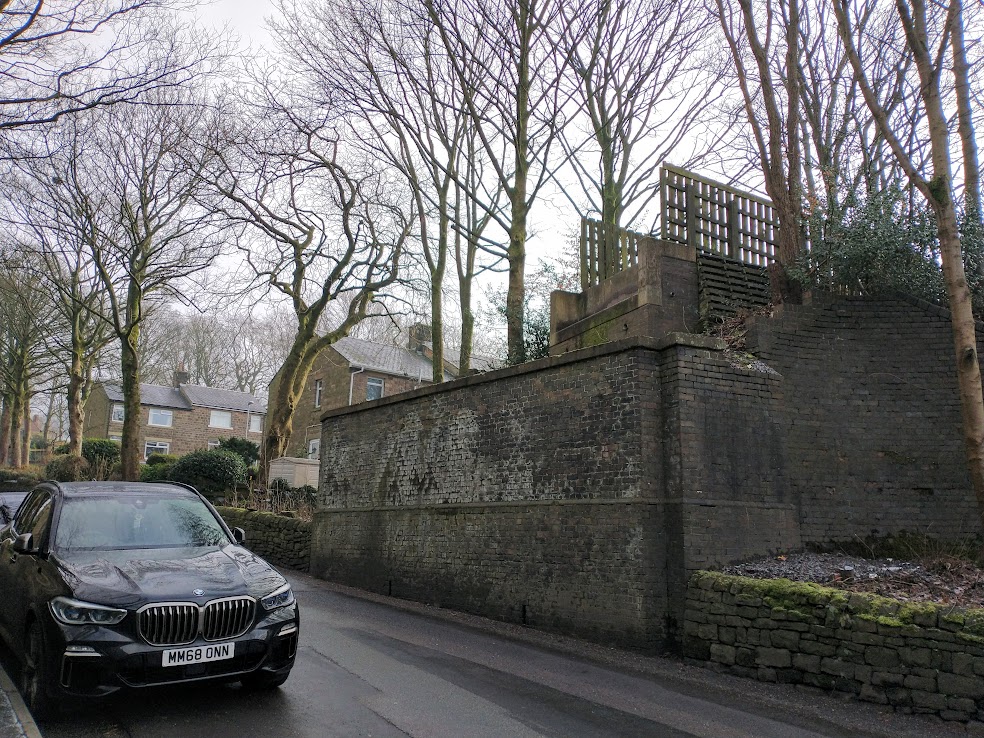
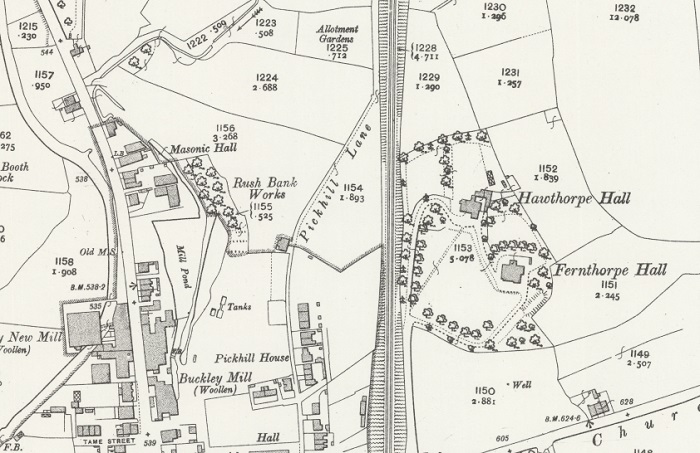
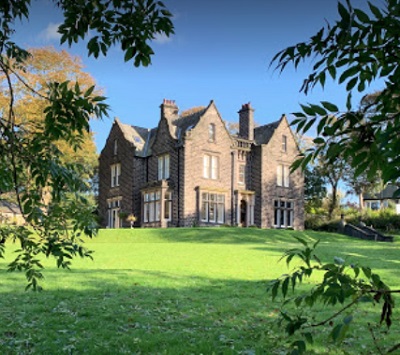
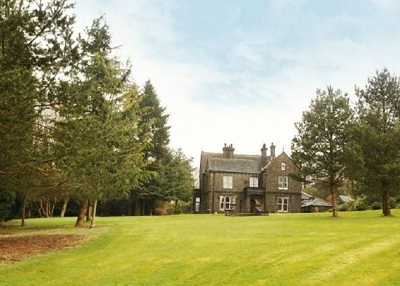
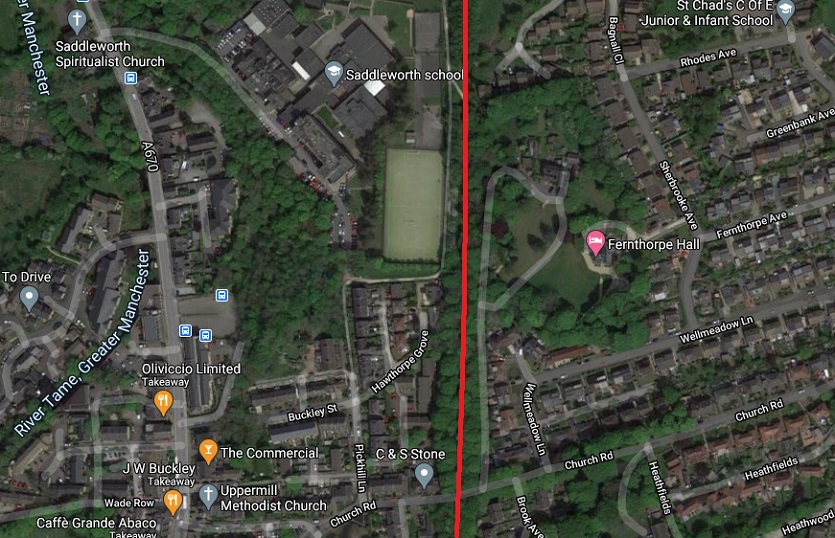
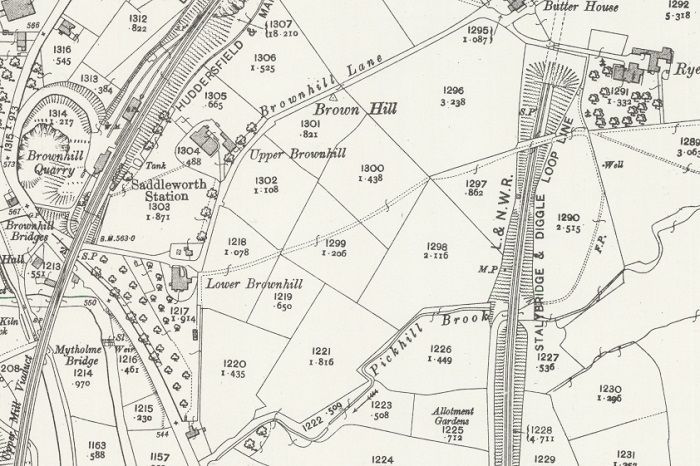
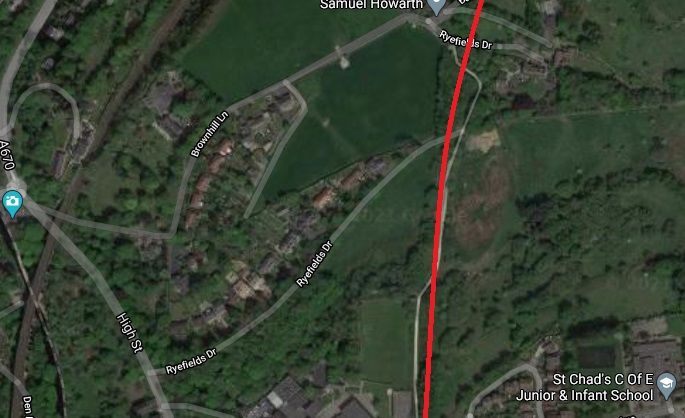
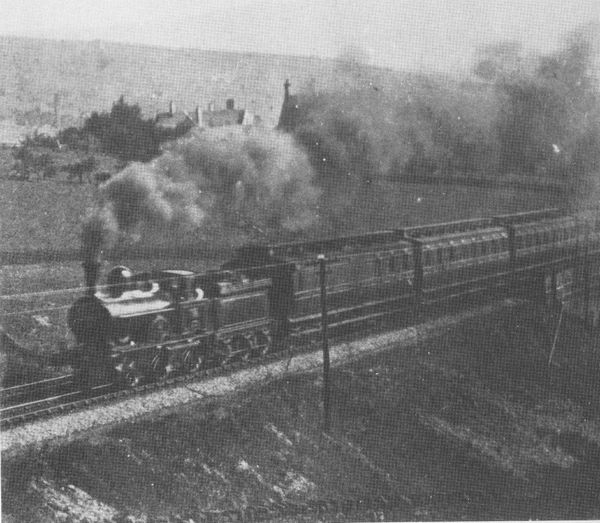
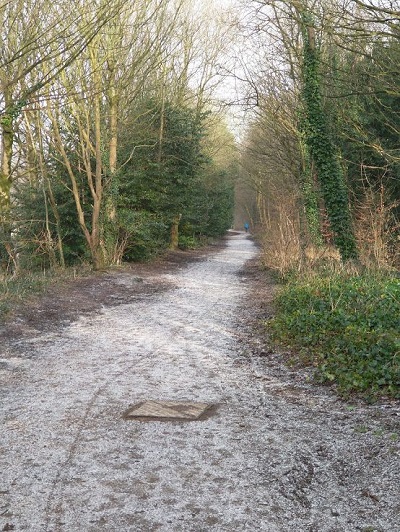
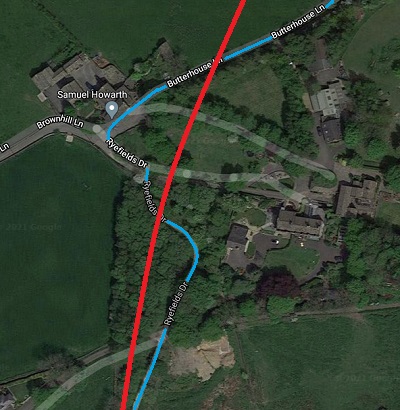
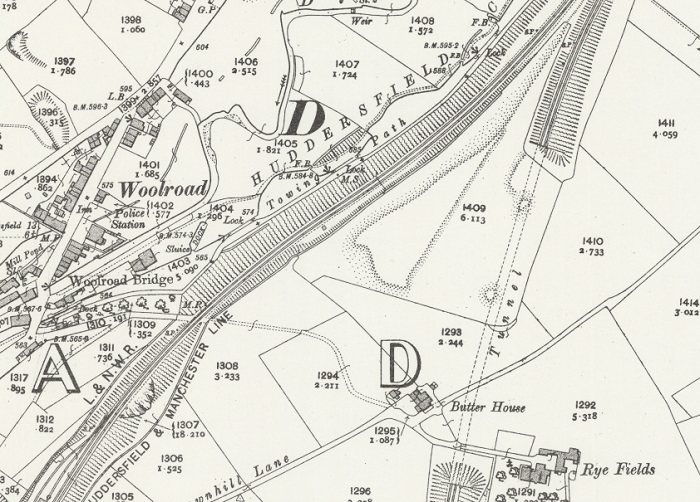
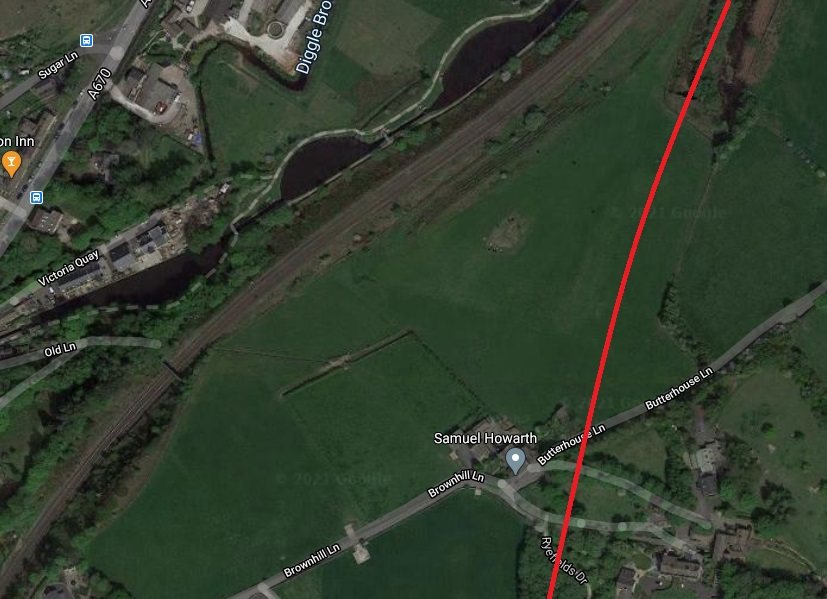
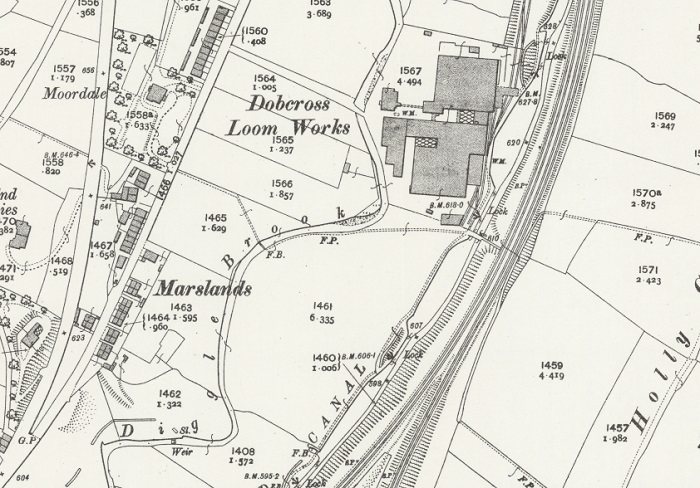
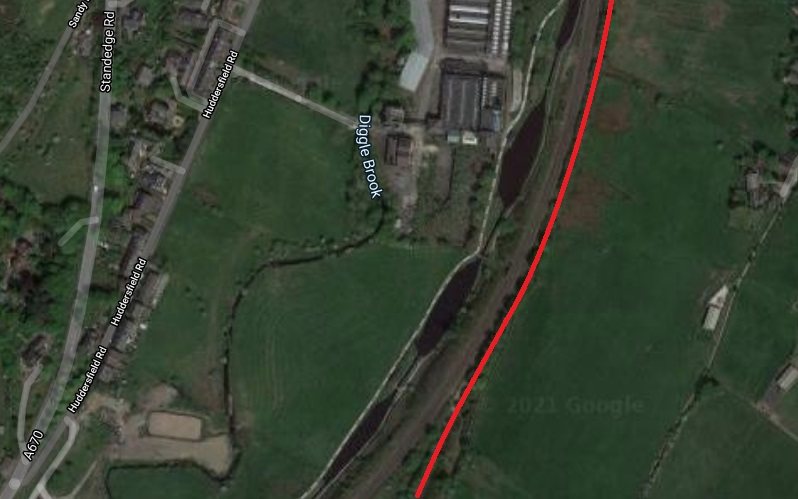
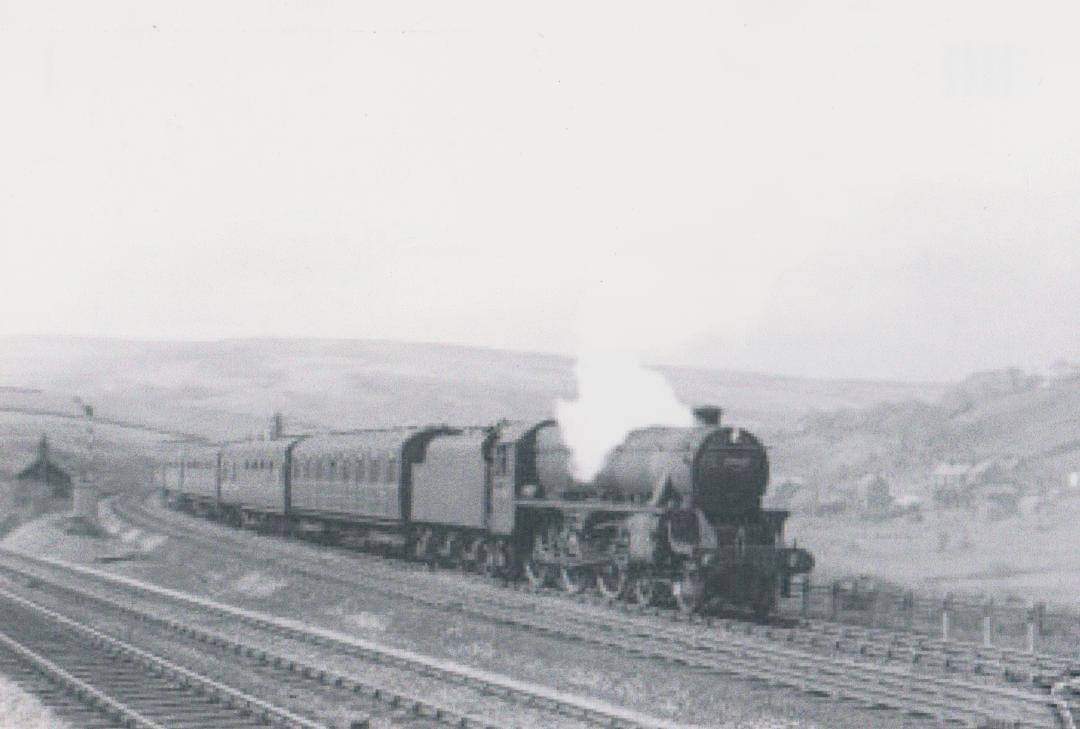
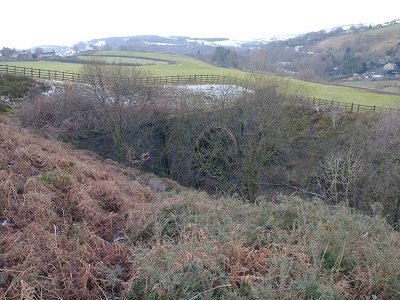
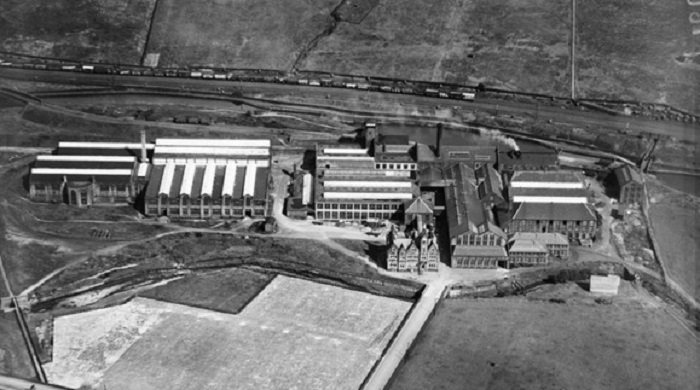
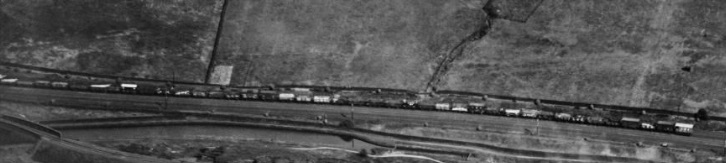
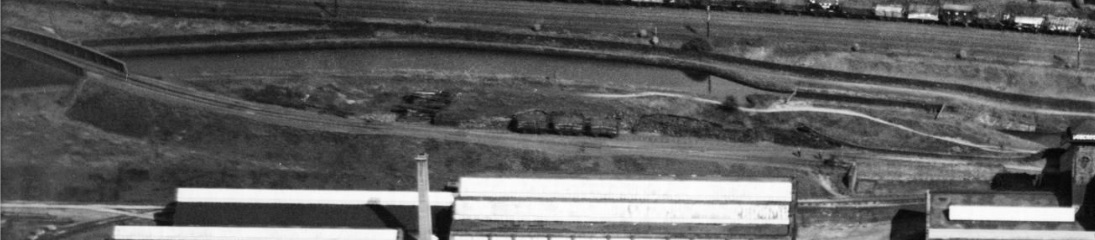

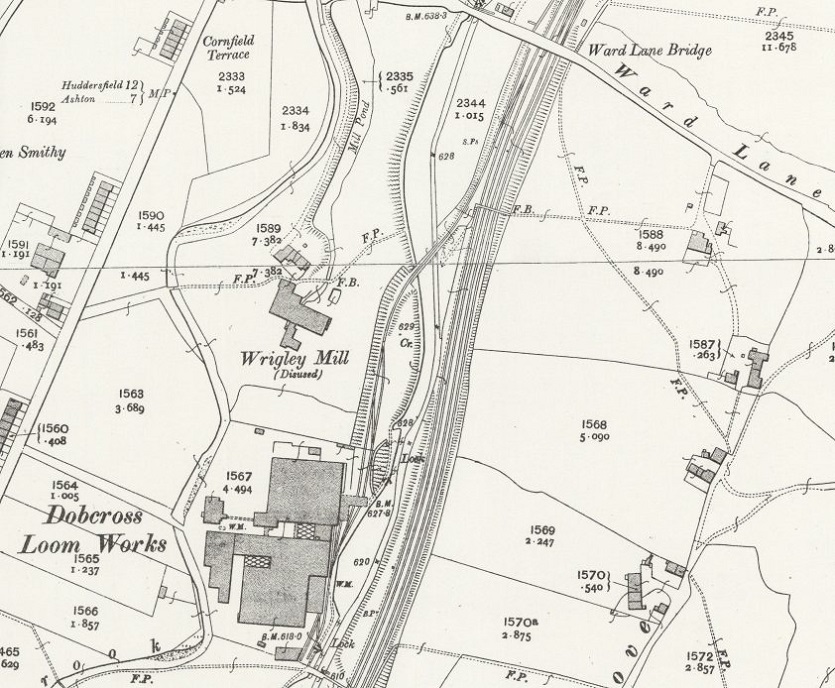
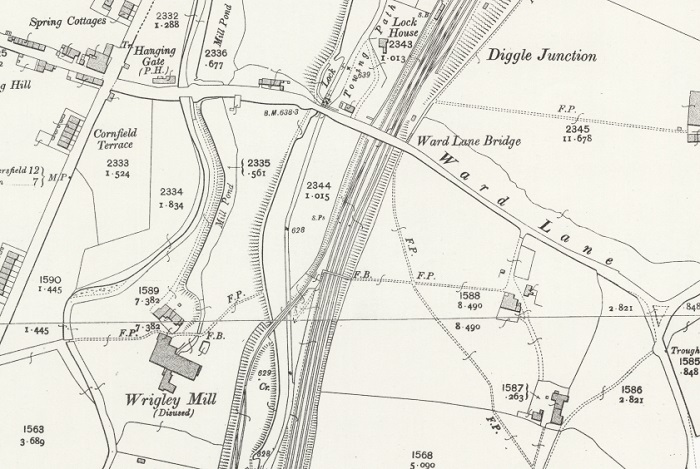
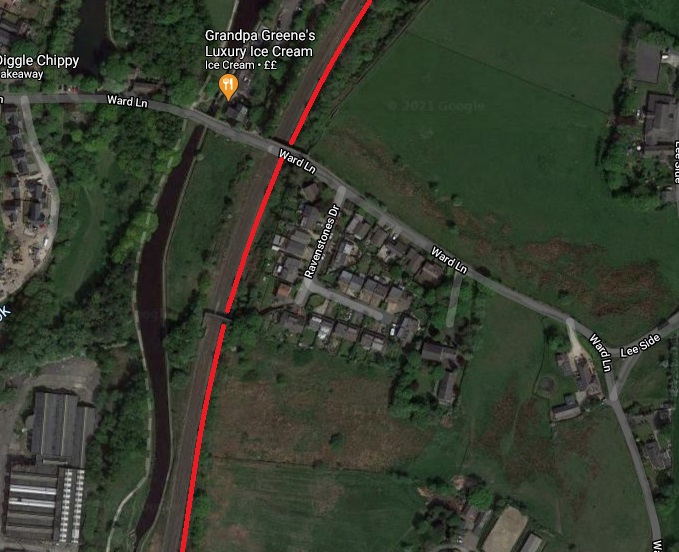
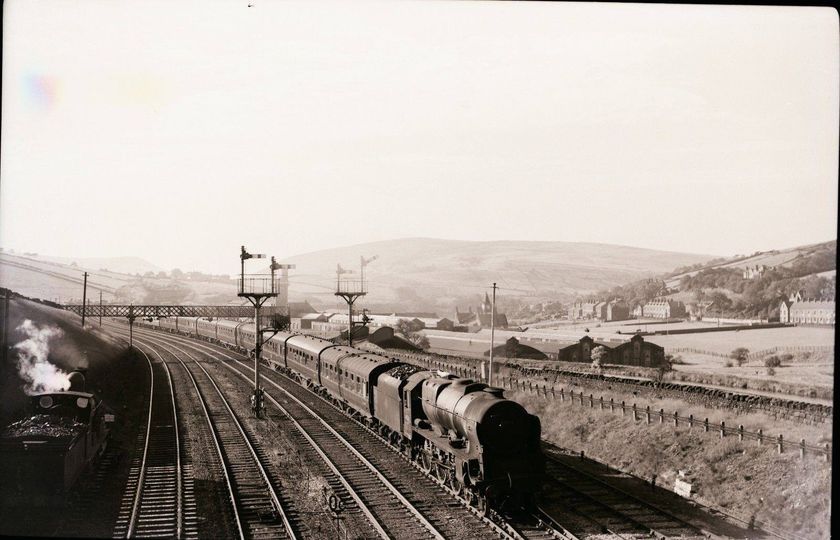
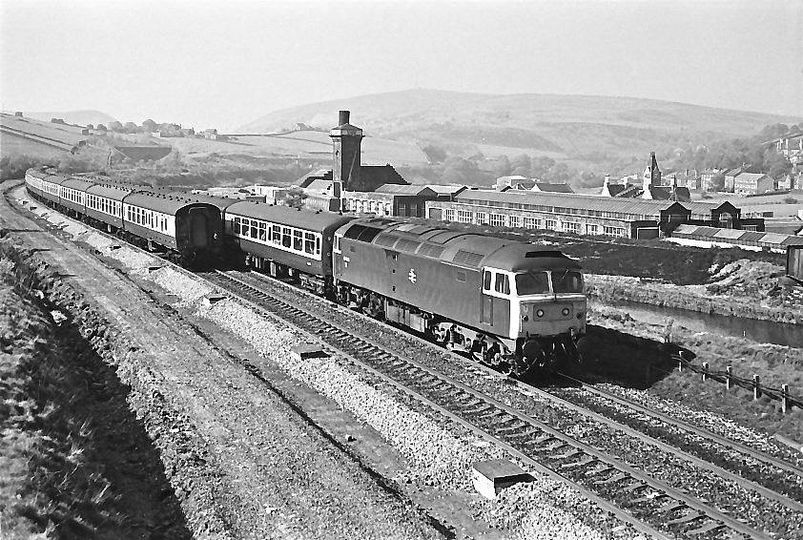
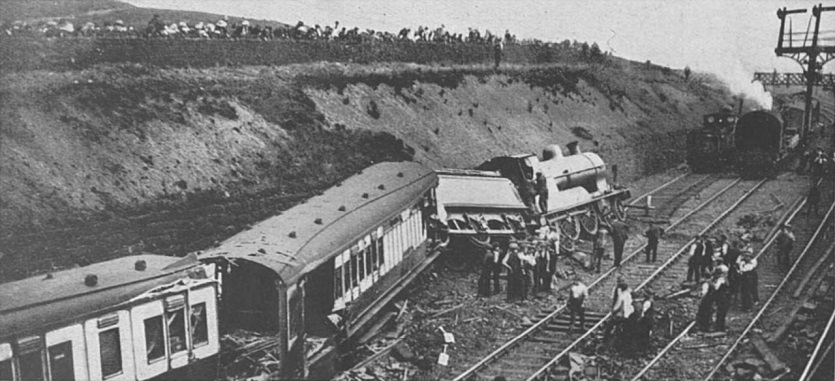
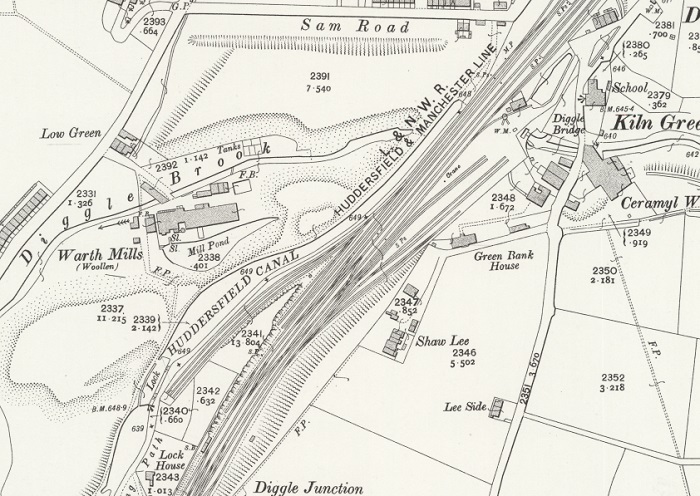
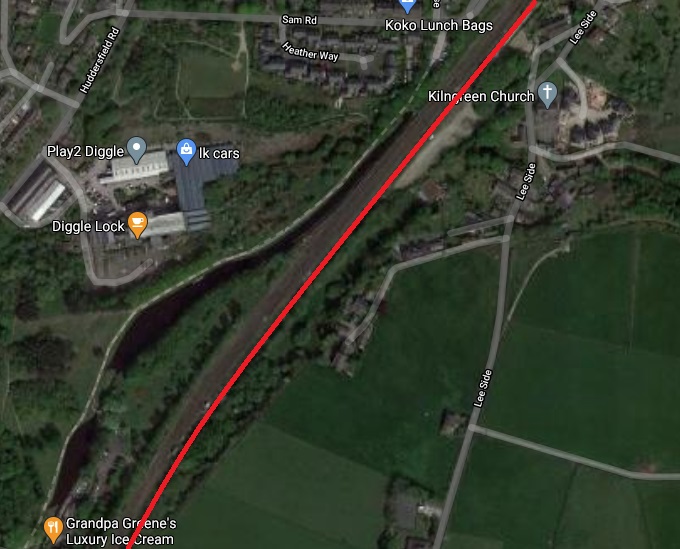
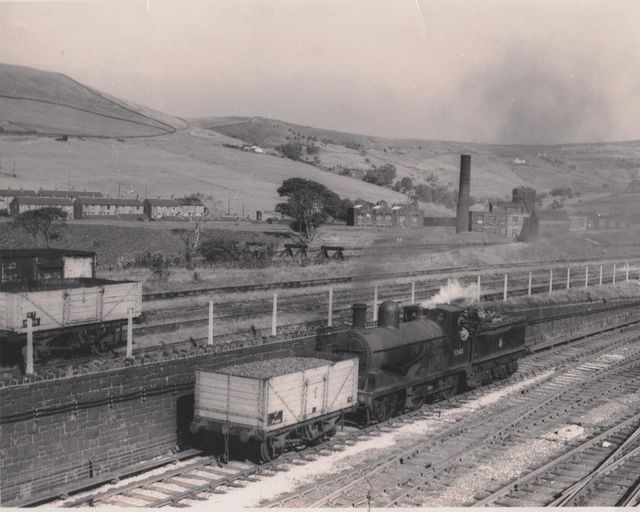
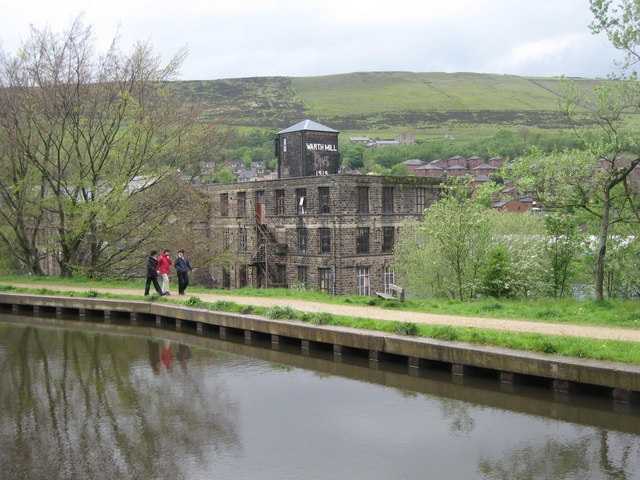
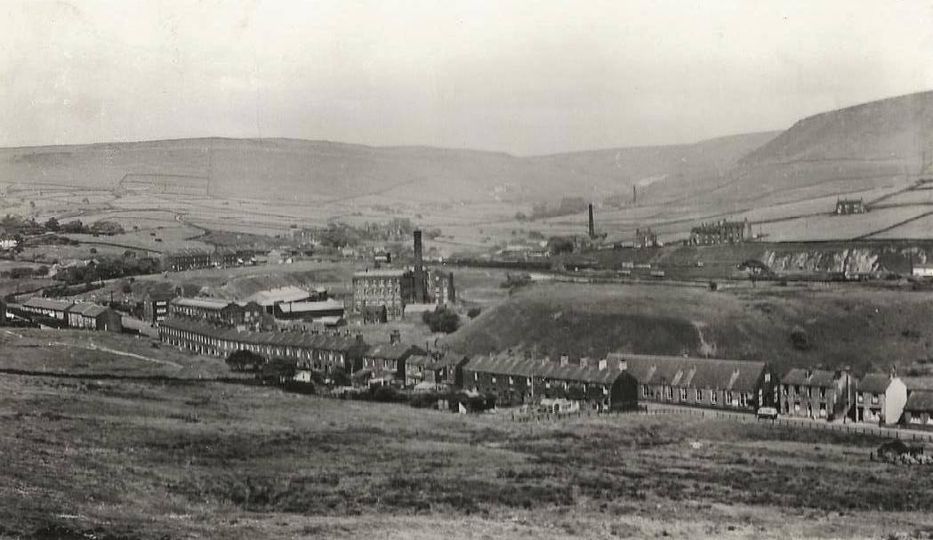
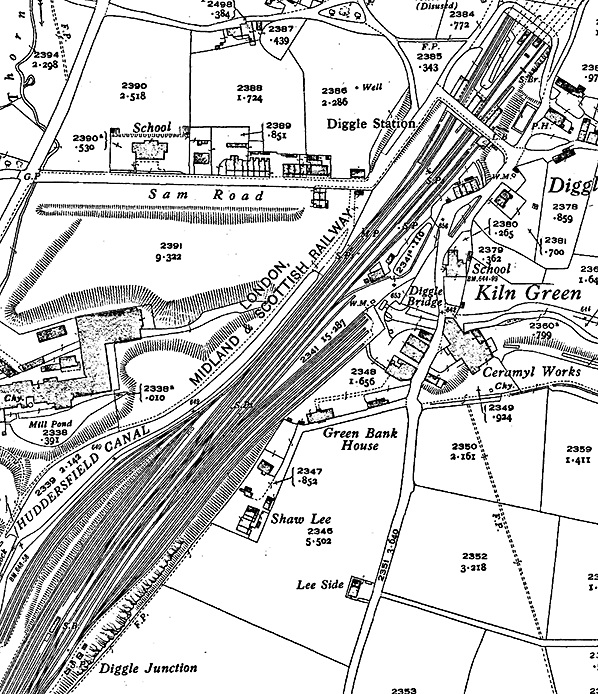
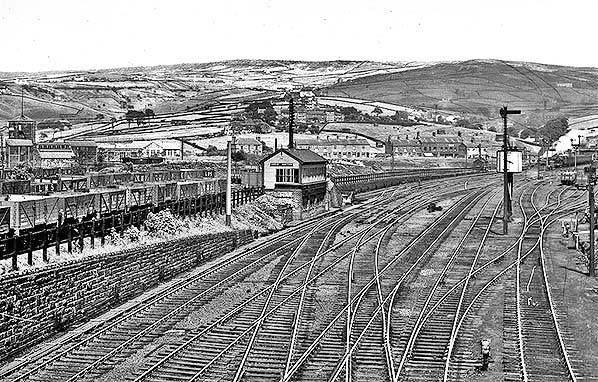
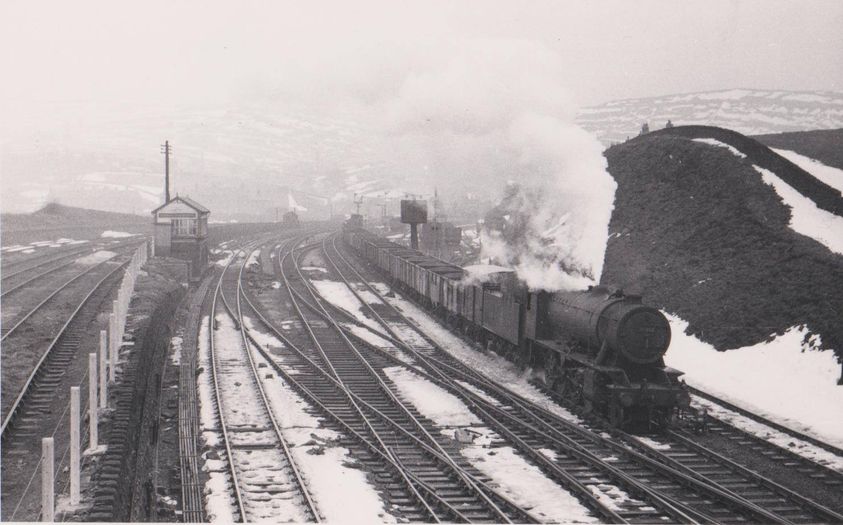
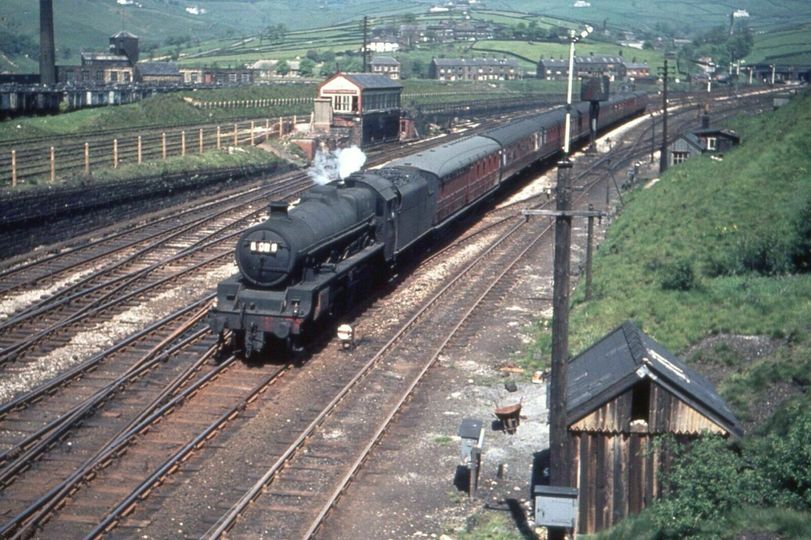
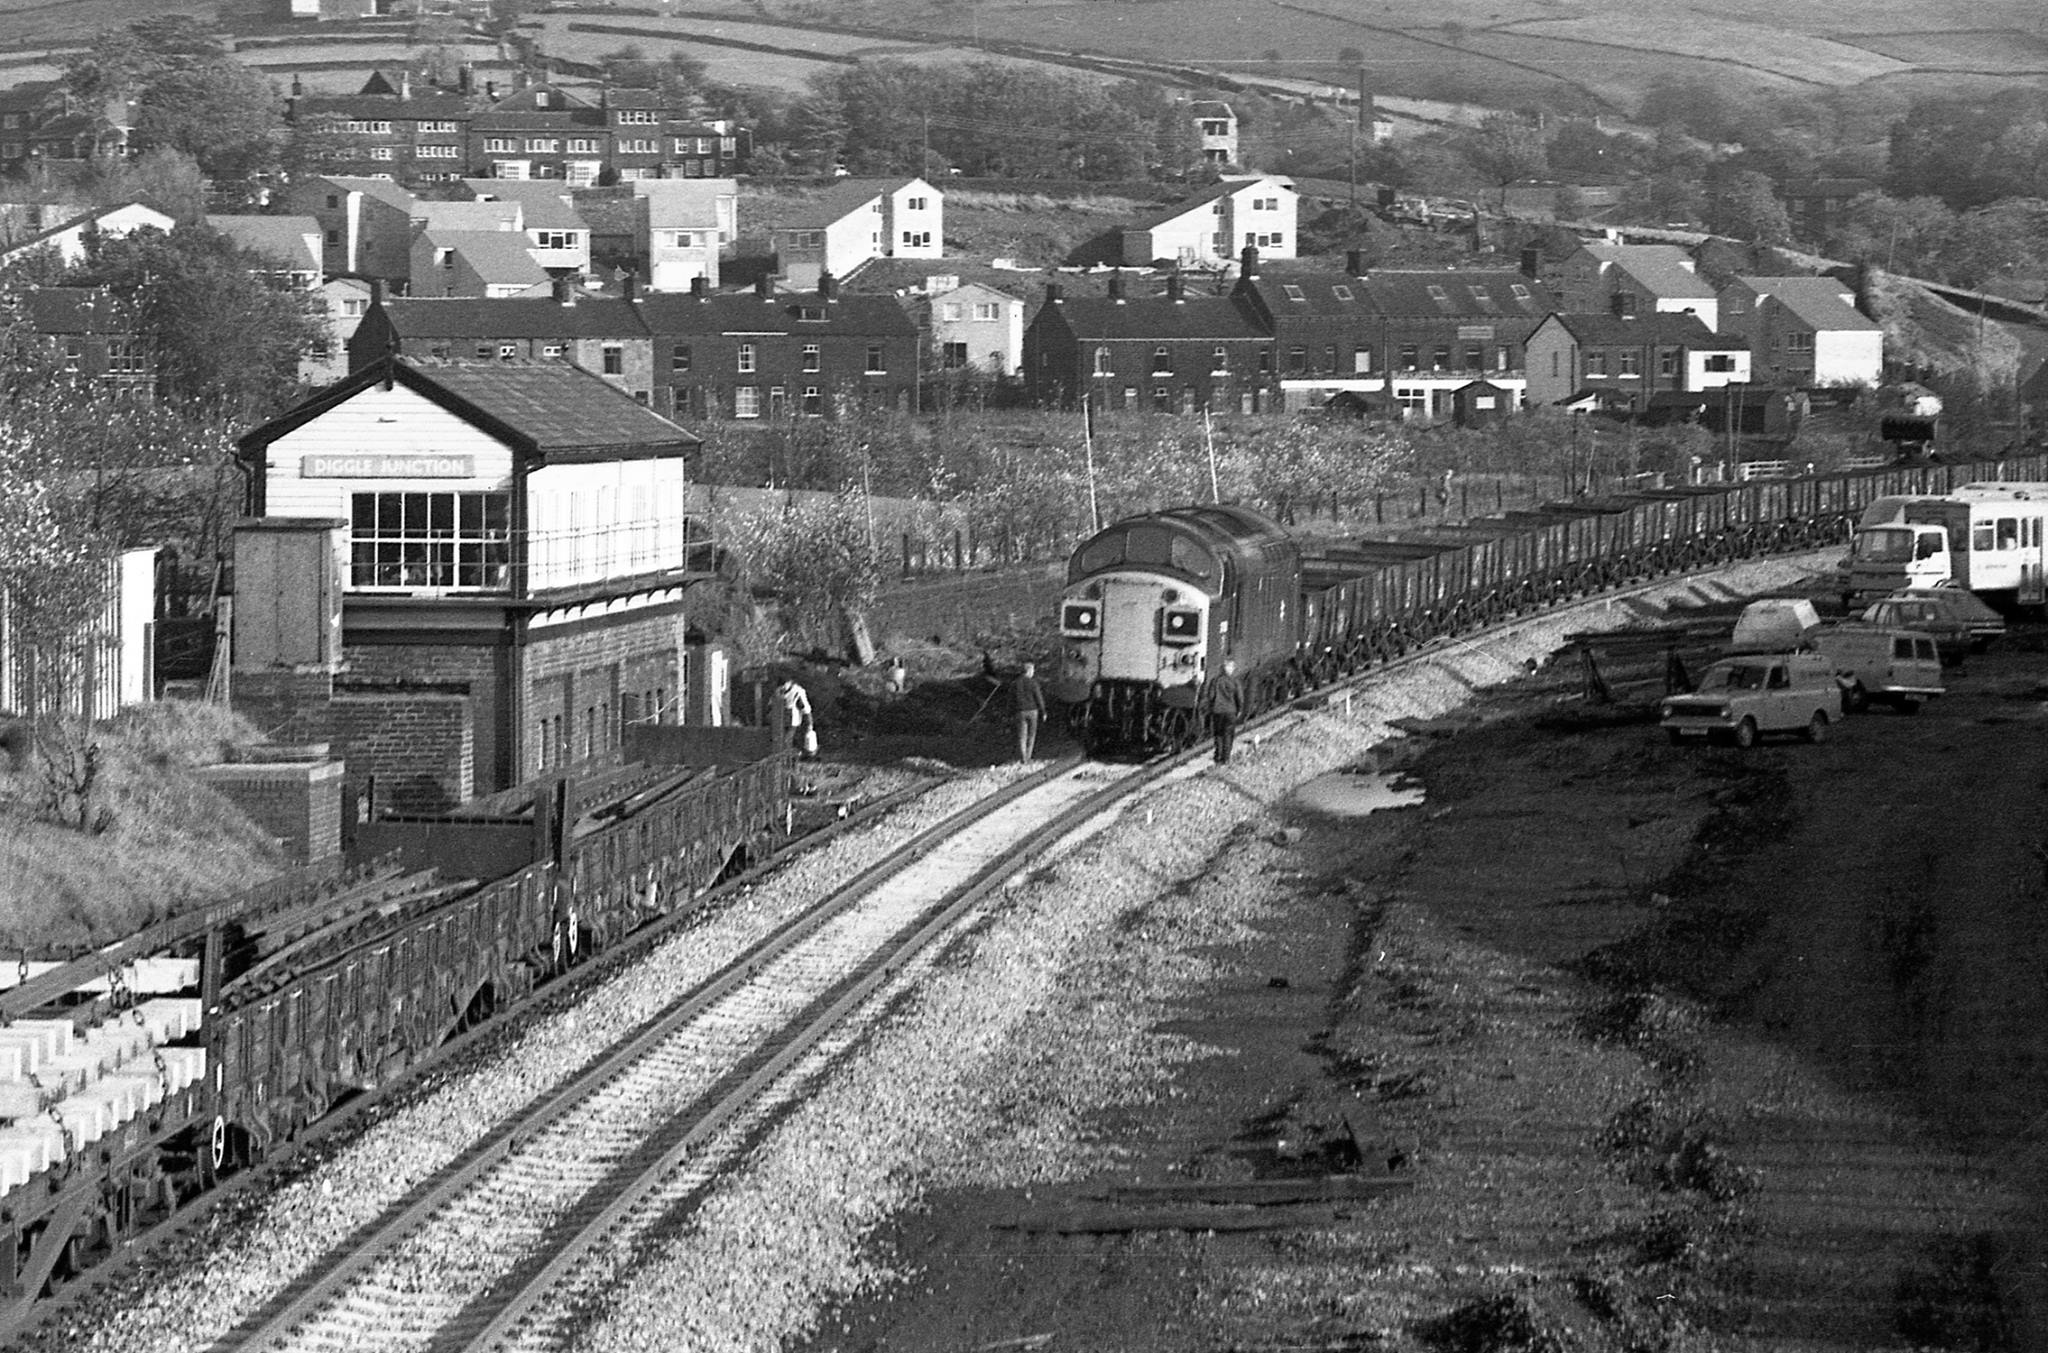
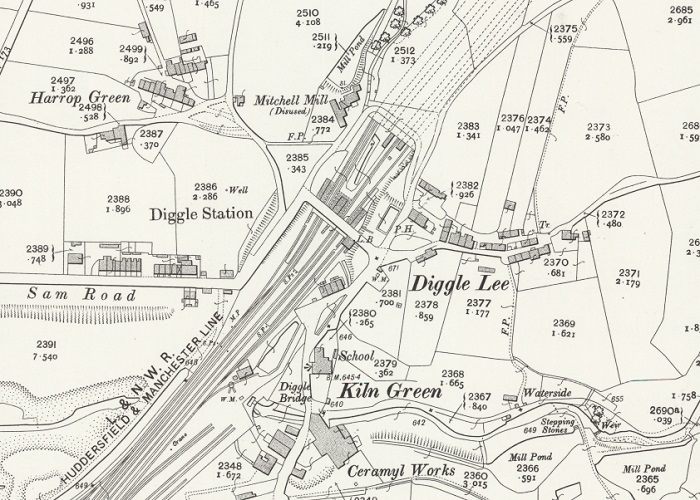
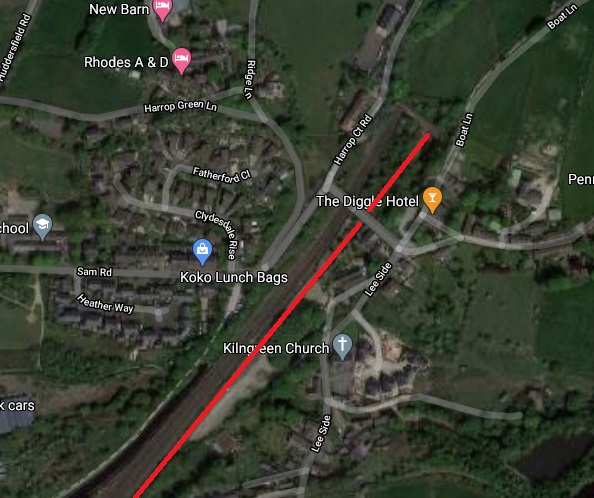
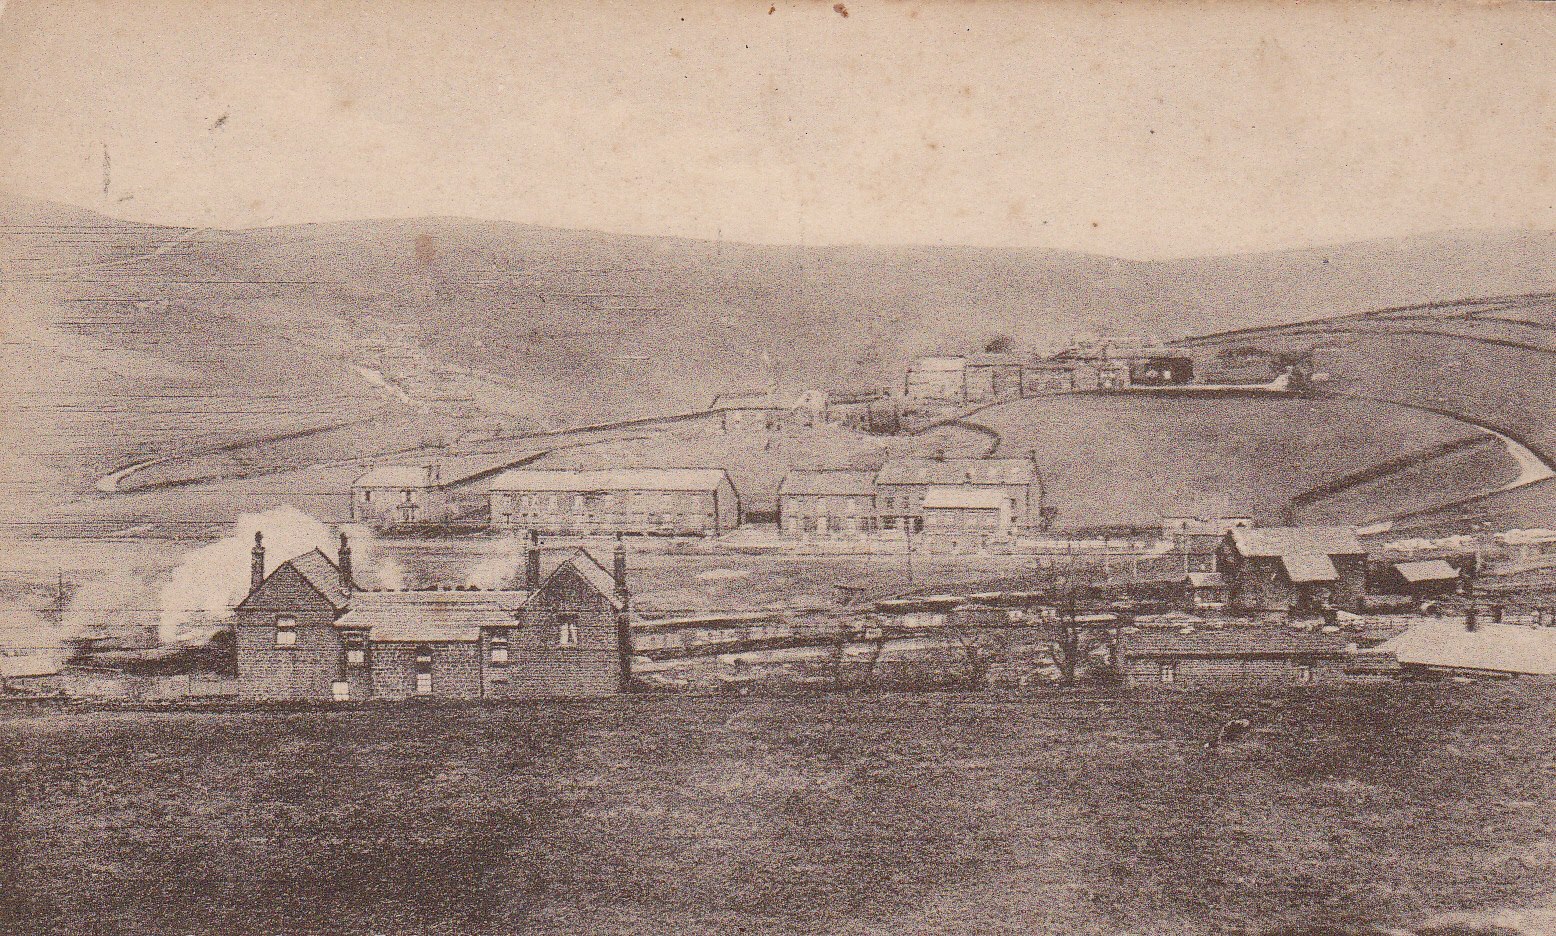
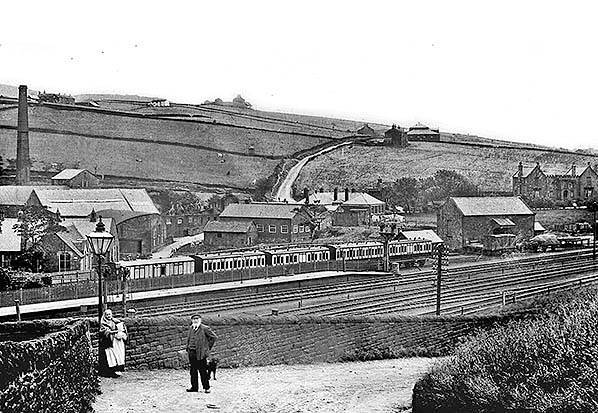

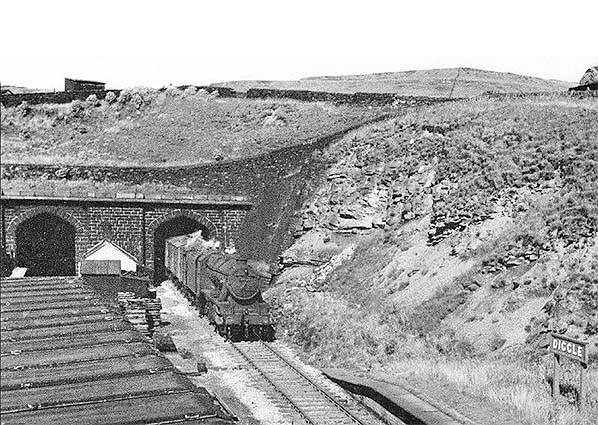
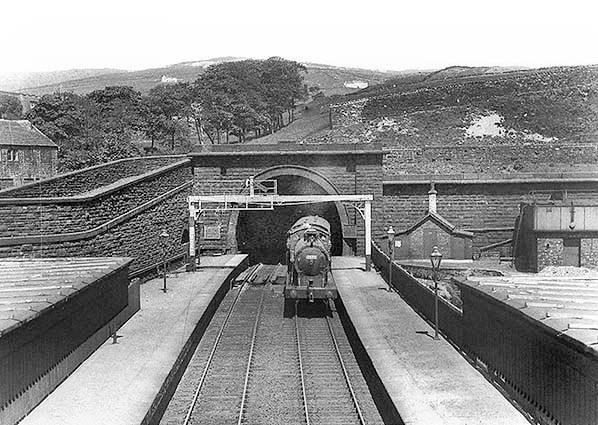

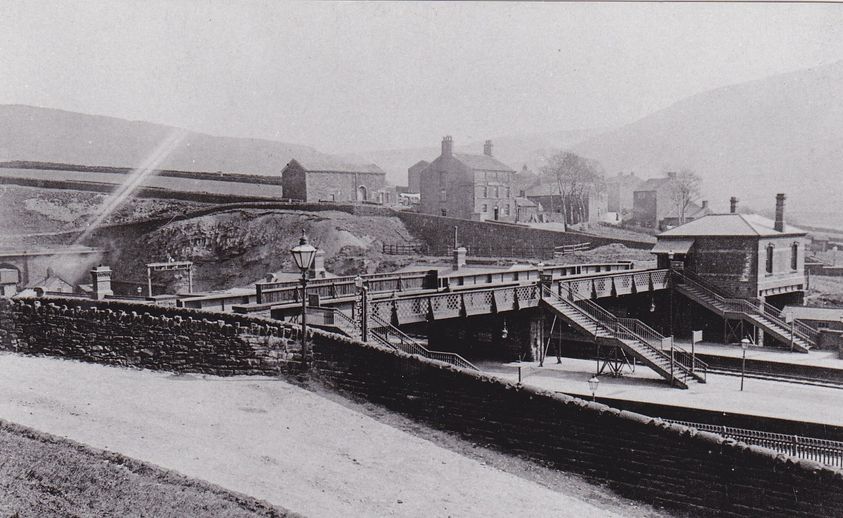
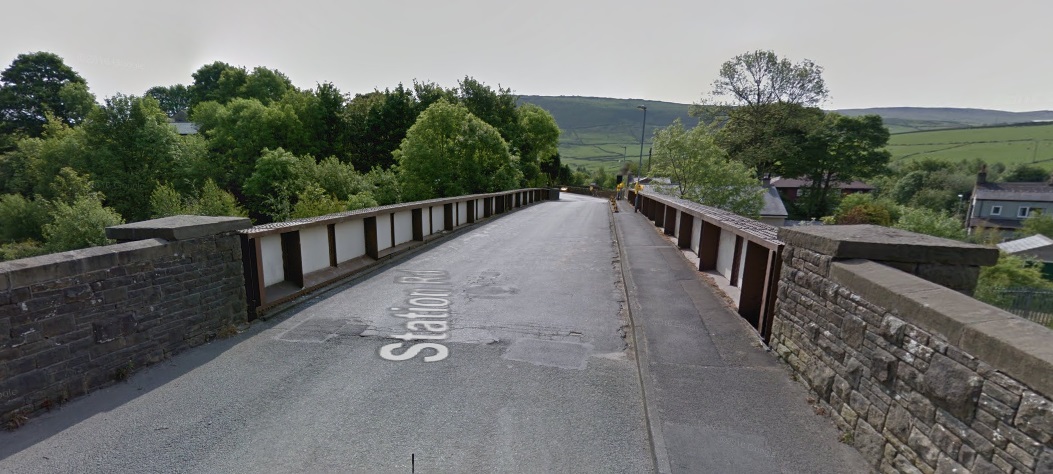
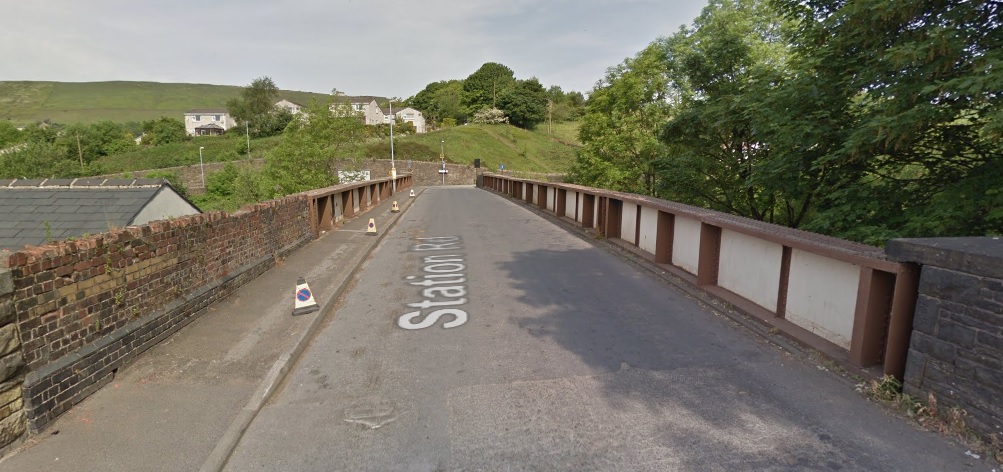
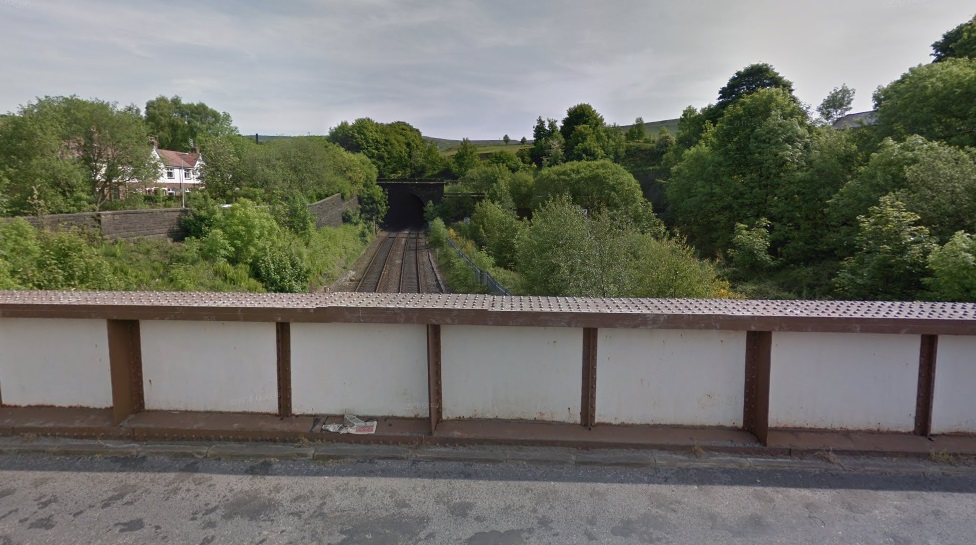
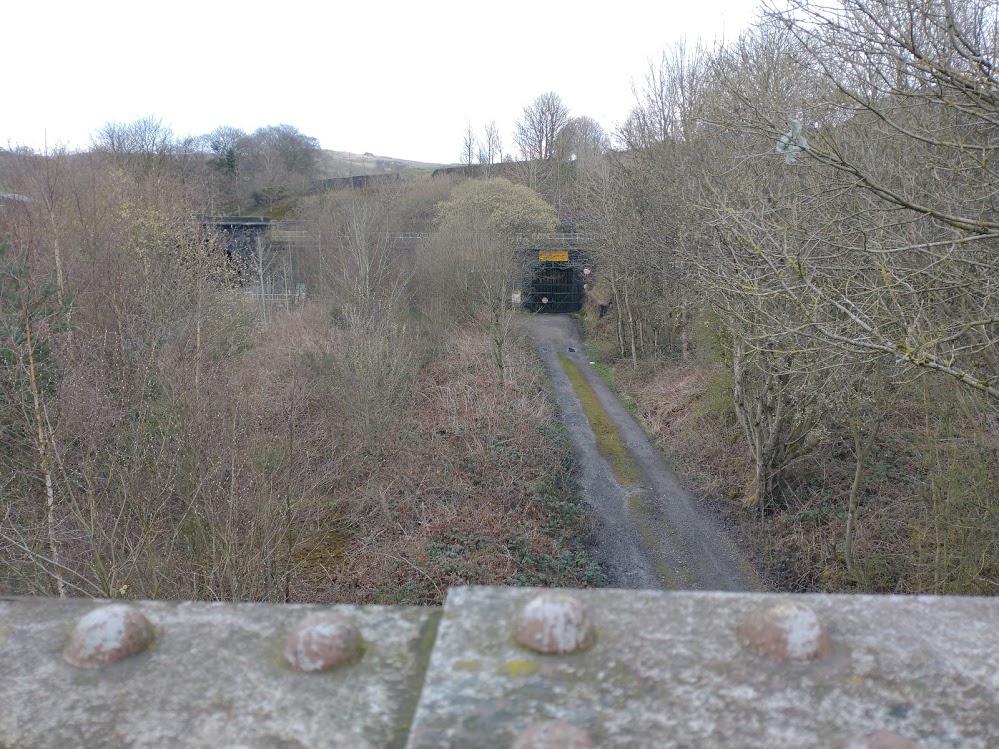
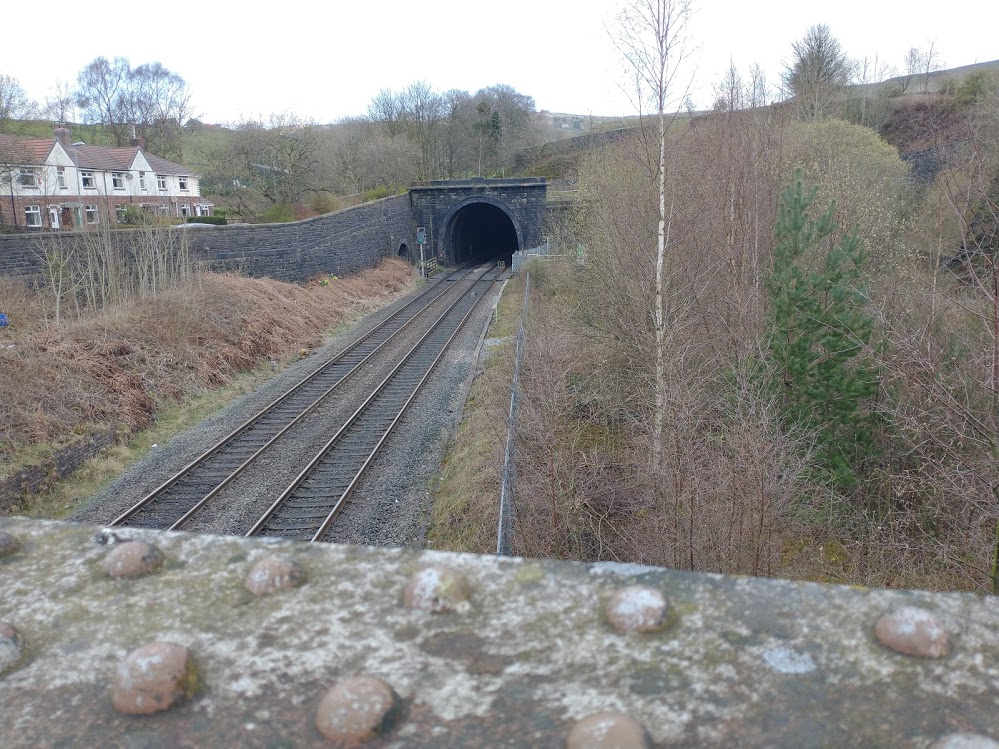

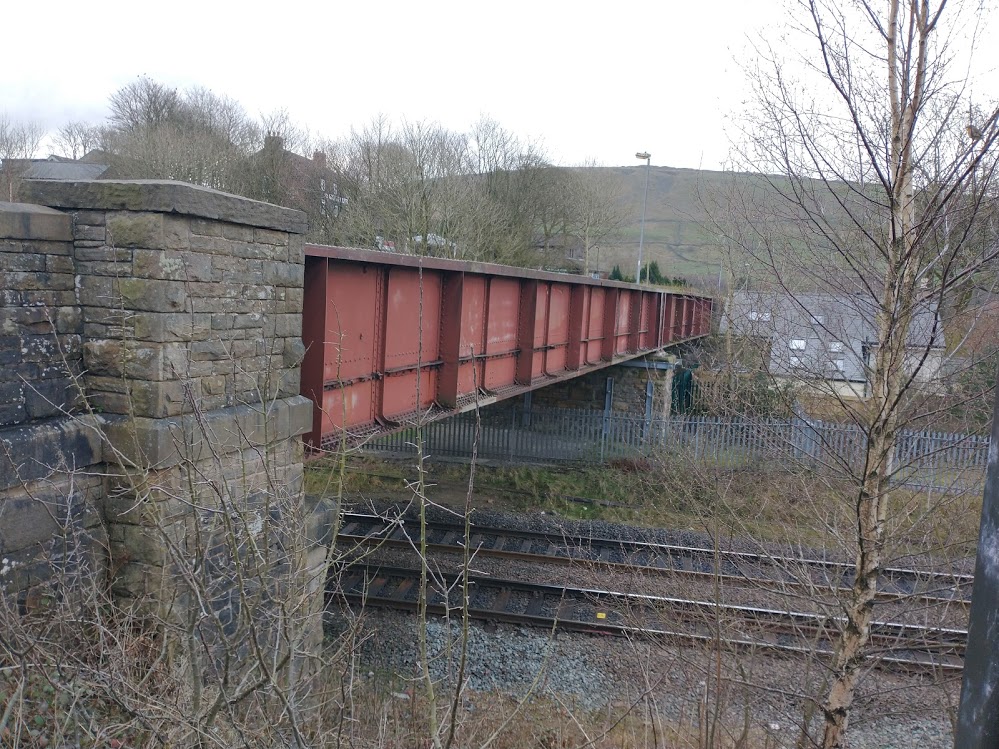
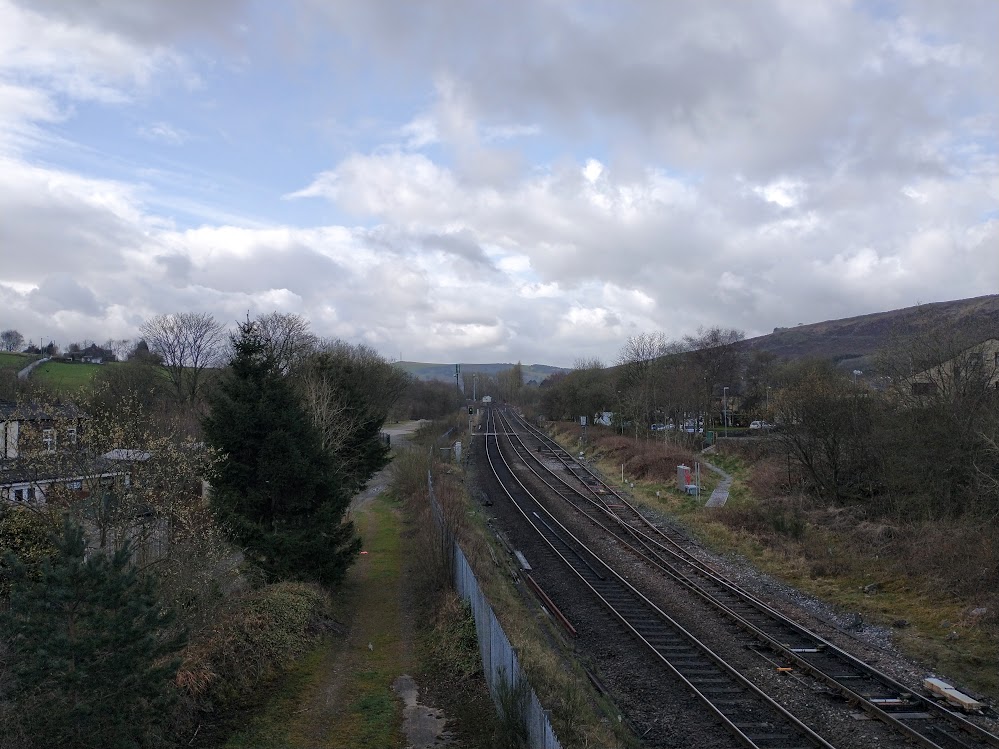
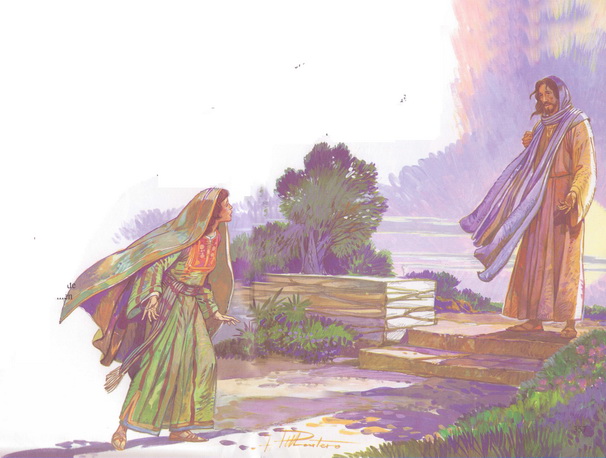

 What was going through the disciple’s minds as they came into Jerusalem on that first Palm Sunday? What was Jesus feeling as he rode into Jerusalem on that donkey? Our danger is that knowing the outcome we minimize the intensity of the events and feelings of Holy Week because we know it turned out OK in the end.
 As Jesus repeatedly talks about his death his disciples remain at best confused, at worst oblivious to what he is saying. And the loneliness Jesus felt in the crowd of Palm Sunday, gets replaced by the loneliness of the garden of Gethsemane. Only he can walk this road. No one will walk it with him!

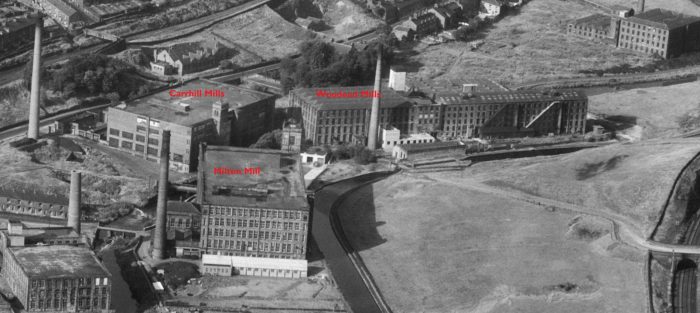
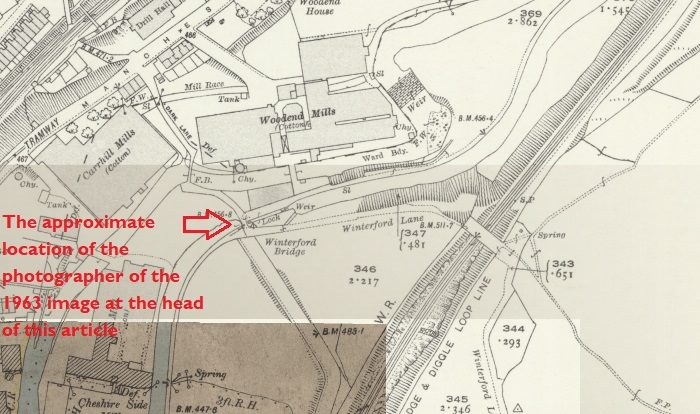
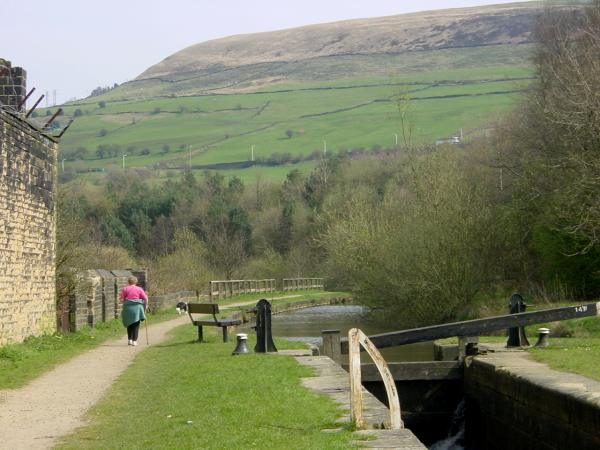
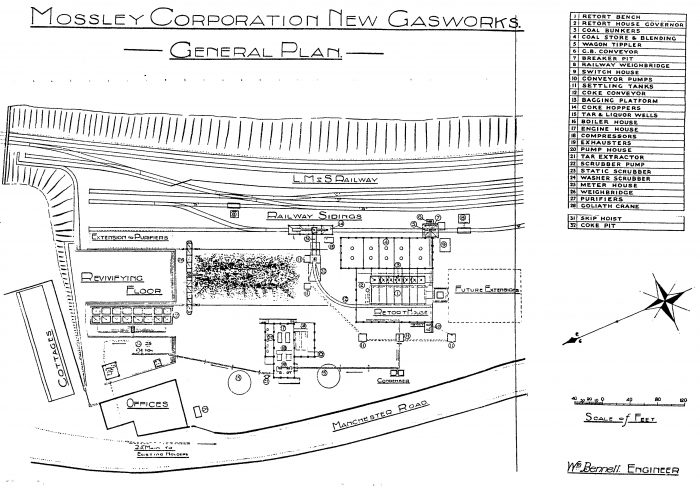

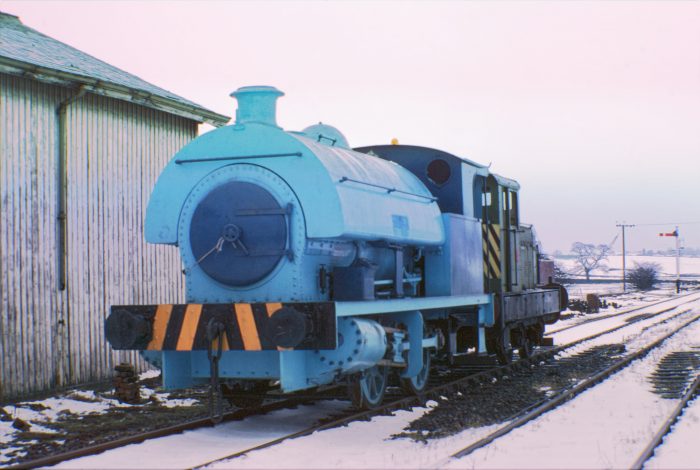
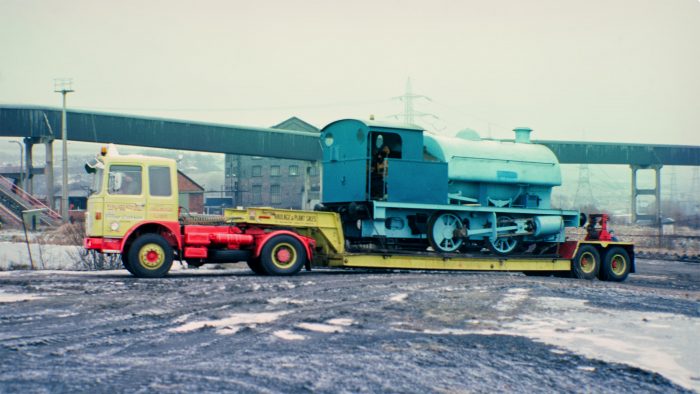
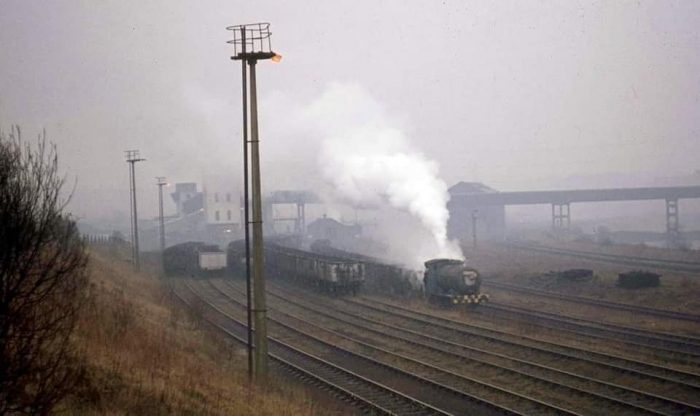

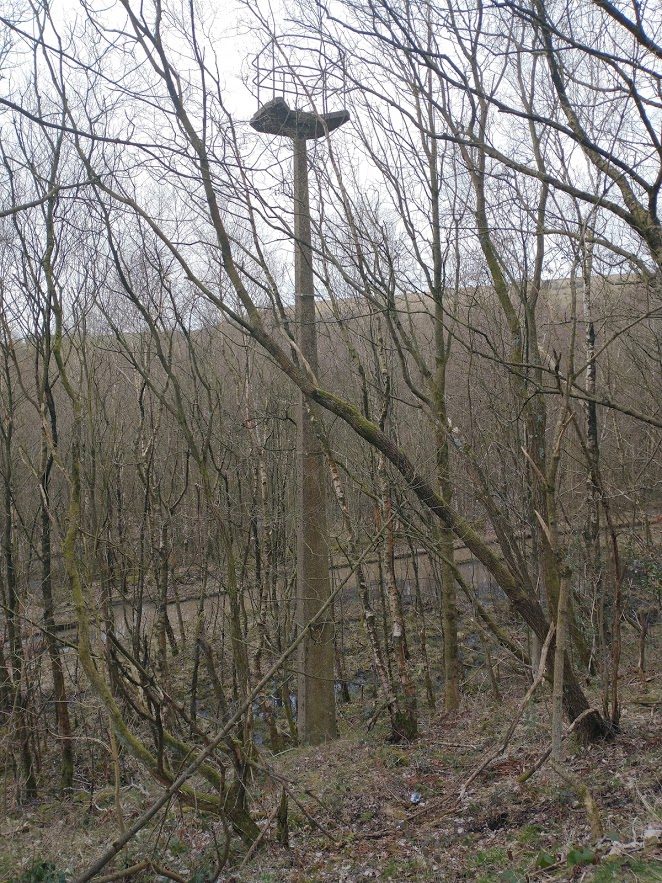
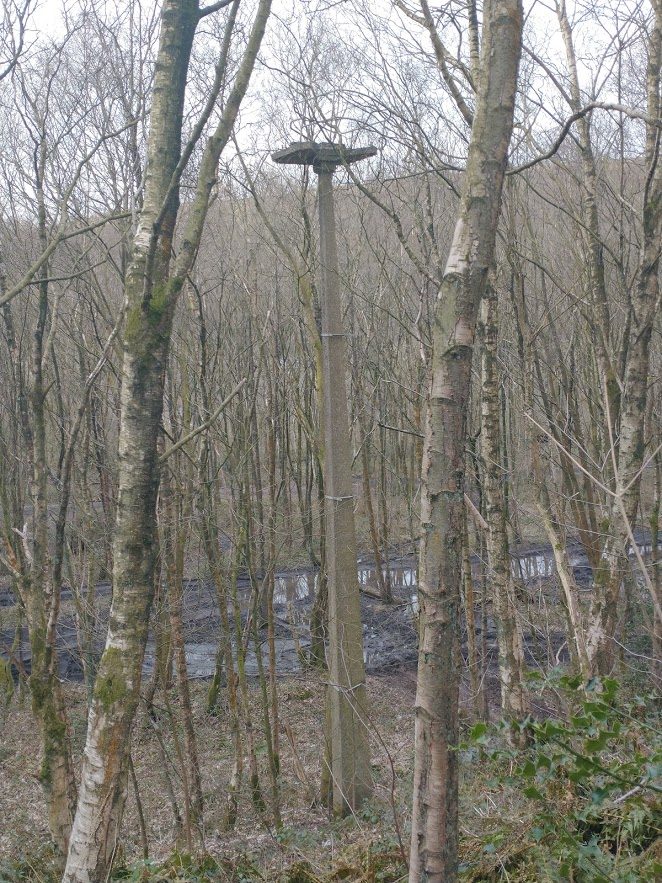
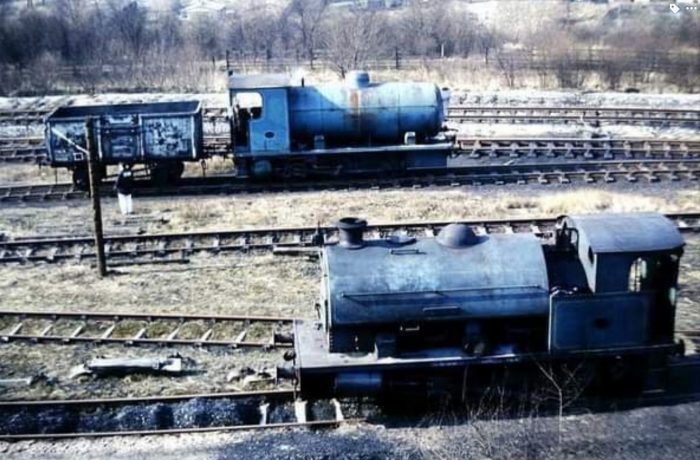
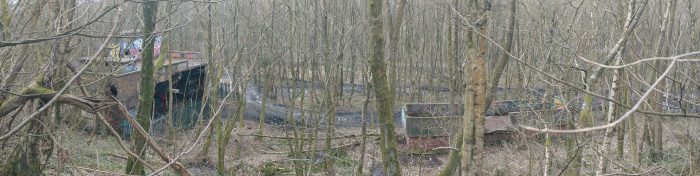

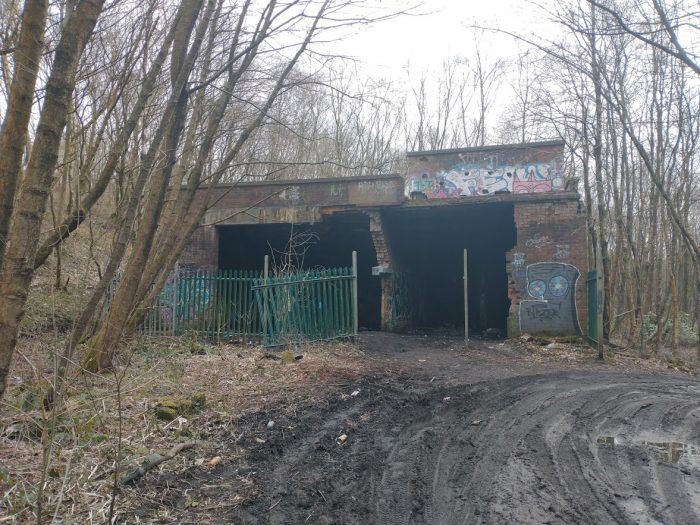


