
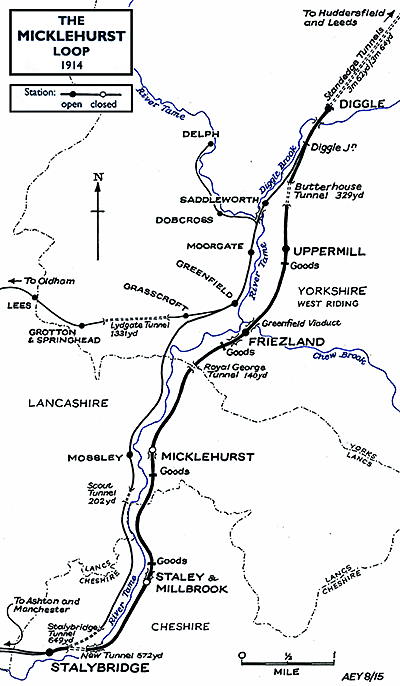
I am indebted to Alan Young for a number of the images in these articles about the Micklehurst Loop. This is his drawing of the Loop which appears at the head of his article about the Loop on the ‘Disused Stations‘ website. It is used with his kind permission, (c) Alan Young. [7]
The maps used in this sequence of articles are predominantly 25″ OS Maps from 1896 through to 1922 and have been sourced from the National Library of Scotland. [1] There are a number of websites which focus on the Loop which are excellent. The sites concerned are noted immediately below and the relevant link can be found in the references section of this page or by clicking on the highlighted text here:
- The most detailed treatment of the line and its stations can be found on the Disused Stations – Site Records website. The particular pages on that site which cover the Loop were provided by Alan Young. One page covers the route and pages covering each of the stations can be accessed from that page. [7]
- Particularly good for old photographs of the Loop is the Table 38 webpage about the railway. [12]
The first article about the Micklehurst Loop can be found at:
There is a series of three addenda to that first article which include a series of photographs relating to the first part of the line from the 1950s, 1960s, 1970s, 1980s and 1990s. These can be found on the following links:
The Micklehurst Loop – Part 1C – Including Hartshead Power Station
Part 2 – Staley & Millbrook Goods Yard to Micklehurst Station
We continue our journey North along the Micklehurst Loop. We start from the Staley and Millbrook Goods Shed which is still standing and which is covered in the articles above. The old loop is still closely following the River Tame and the Huddersfield Narrow Canal. On the map extract below the original Staybridge to Huddersfield line can be seen on the left of the map extract.
An early 25″ OS Map Extract showing the length of the Loop immediately North of the Staley and Millbrook Goods Shed. [1]

Map extract from the 1:25,000 OS Map series which was published in 1951. The earliest arrangement for coal transfer which bridged the canal and river and stopped to the West pf the Loop is shown. Built later and at a higher level a conveyor bridge spanned across the sidings and the river and canal, extending to coal transfer faculties which were constructed on the Northeast side of the sidings. The map extract below shows the new arrangements. There are photographs of the location taken soon after closure on this link:: https://rogerfarnworth.com/2021/02/05/the-micklehurst-loop-part-1a. [2]
An extract from the 1964-65 1: 1,250 OS map. This shows the coal transfer facilities at their fullest extent. This is an extract from an image on the Disused Stations Website and is used here with the kind permission of Alan Young. [3]
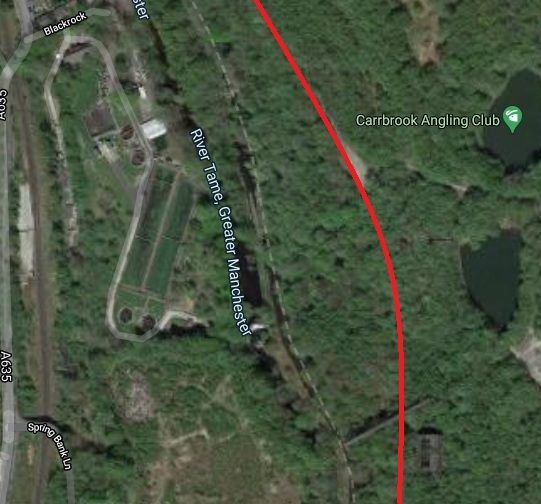
Google Maps satellite image (21st century).
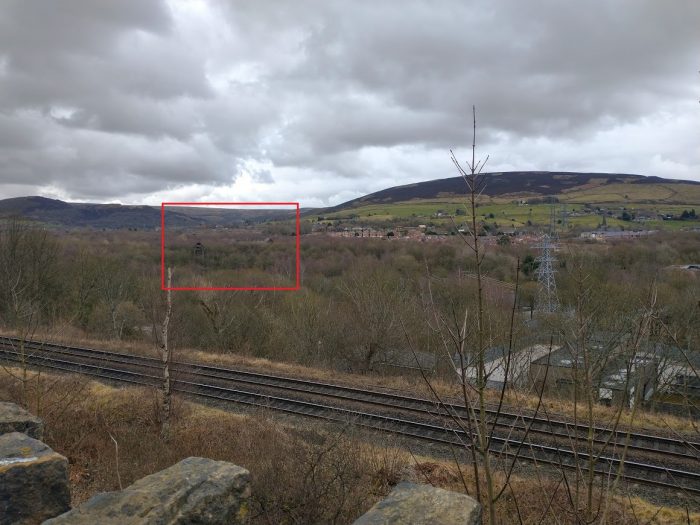
A long-distance view of the goods shed and coal conveyor taken from the footway on Wakefield Road, (My photograph 21st February 2021).
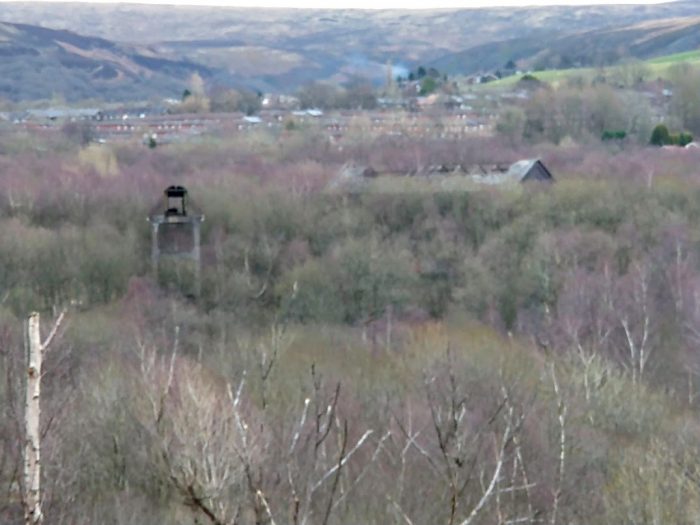
Two telephoto views of the coal conveyor and goods shed, taken from Wakefield Road on the West side of the Tame Valley, (My photographs, 21st February 2021).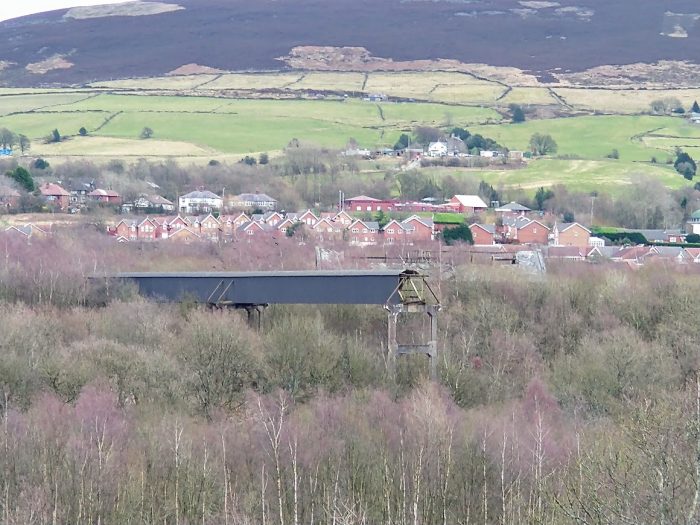
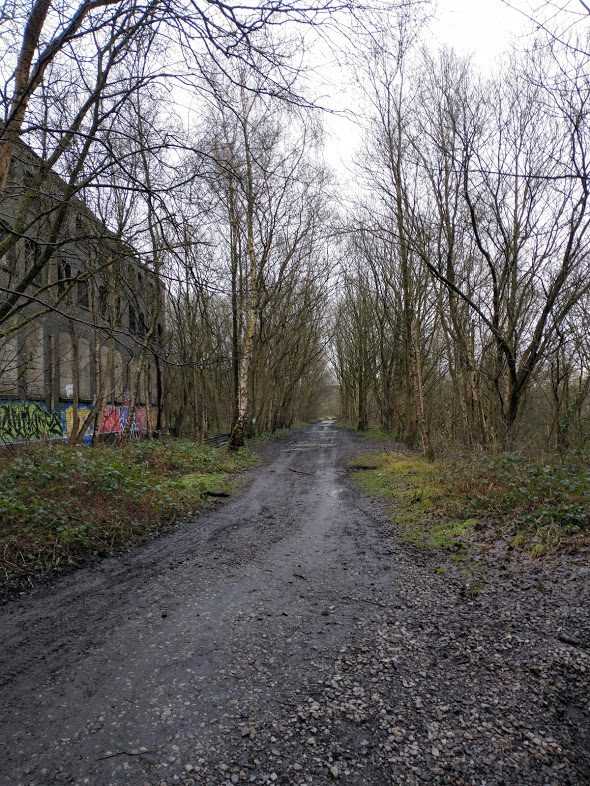
The view South from alongside the Good Shed in 2021shows how much the woodland has encroached around the Goods Shed in the years since closure. (My Photograph, 18th January 2021).

The view North from the same point, looking along what was the old track-bed (My photograph, 18th January 2021).
The satellite image, a few images above, shows the alignment of the old railway in red with the relative locations of the remaining span of the coal conveyor and the shell of the goods shed.
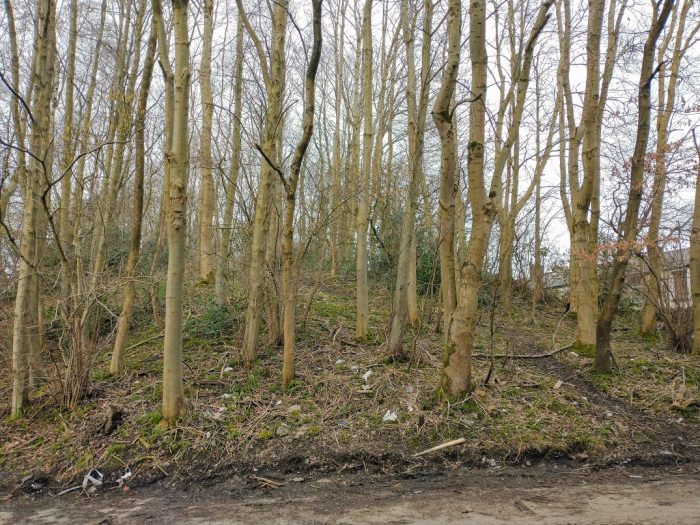
Underfoot the ground along the track alignment was in parts waterlogged but we managed to follow it Northwards in January 2021. A couple of images of the site from January 2021 show just how much the woodland has encroached across the site. These pictures were taken on my mobile phone camera.
Heading North from Staley & Millbrook Goods Shed, the old Loop line curved gradually round following the contours of the East side of the Tame Valley. It first curved a little to the West before swinging back to the Northeast.
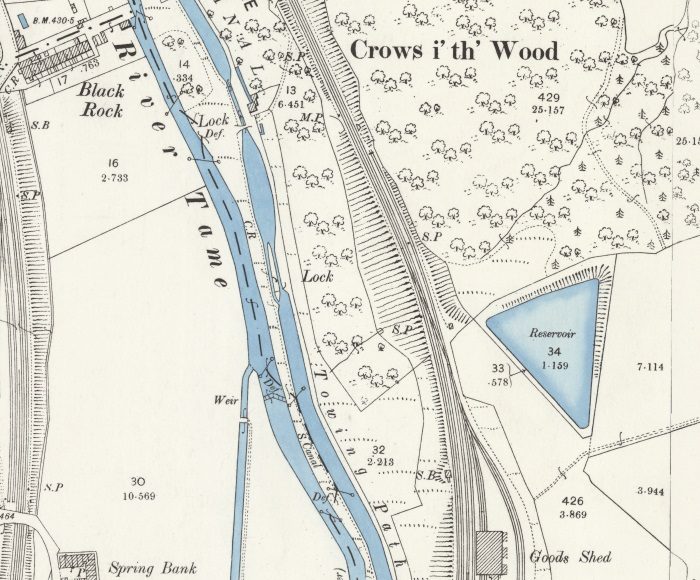
Opposite Black Rock on the West side of the Tame Valley, there was an accommodation bridge carrying a lane above the Loop. It can be seen towards the bottom of the first OS Map extract below. It appears to have given access to the land between the Loop and the Canal. It appears close to the lettering “Crows i’th’ Wood.”
The accommodation bridge appears on both map extracts below but seems no longer to be in place in the 21st century.
We walked along this section of the line and found no evidence of the bridge or its abutments.
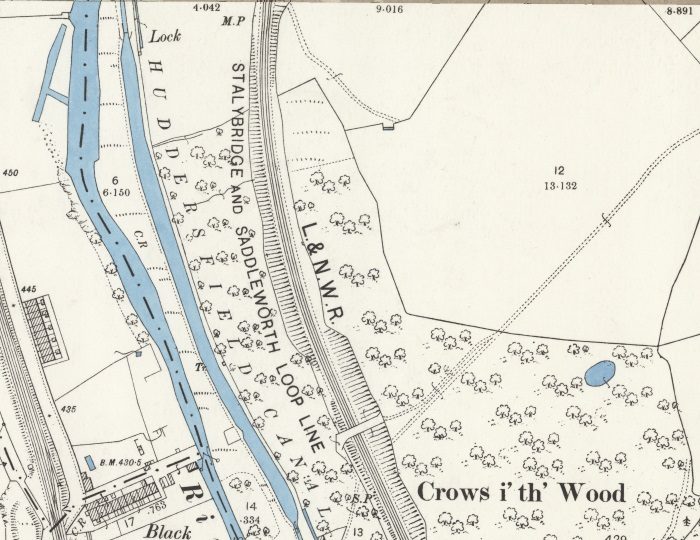
25″ OS Map extract showing the accommodation bridge just to the Northwest of the ‘Crows i’th’ Wood’ lettering. [1]
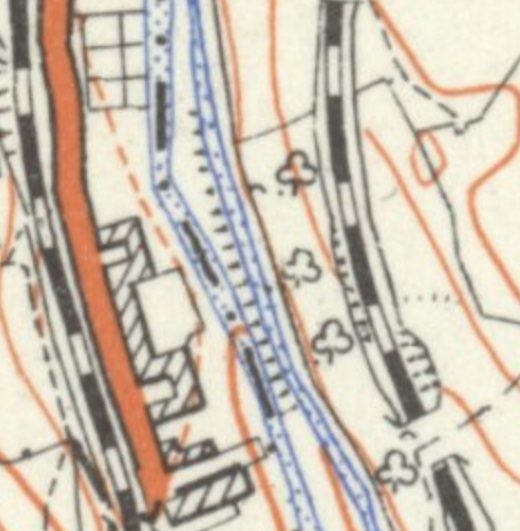
An extract from the 1:25,000 OS Series maps published in 1951. The accommodation bridge shows up more obviously on this extract. [2]
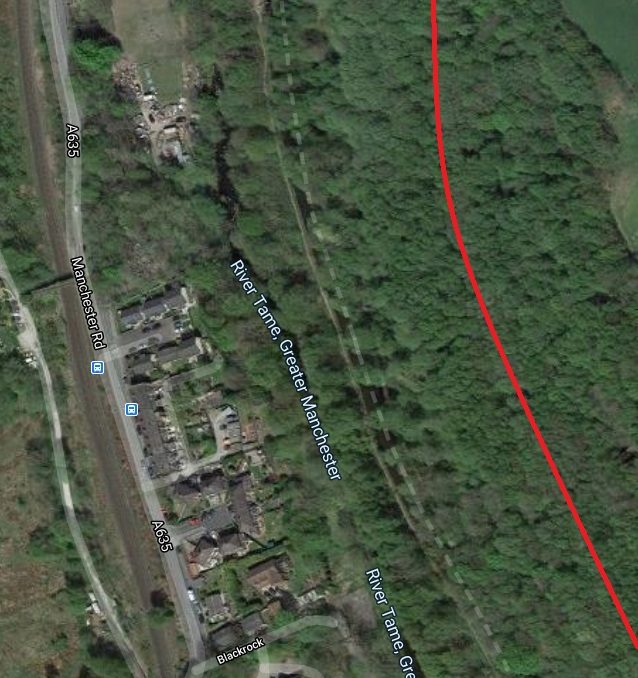
Google Maps Satellite Images extract (21st century).
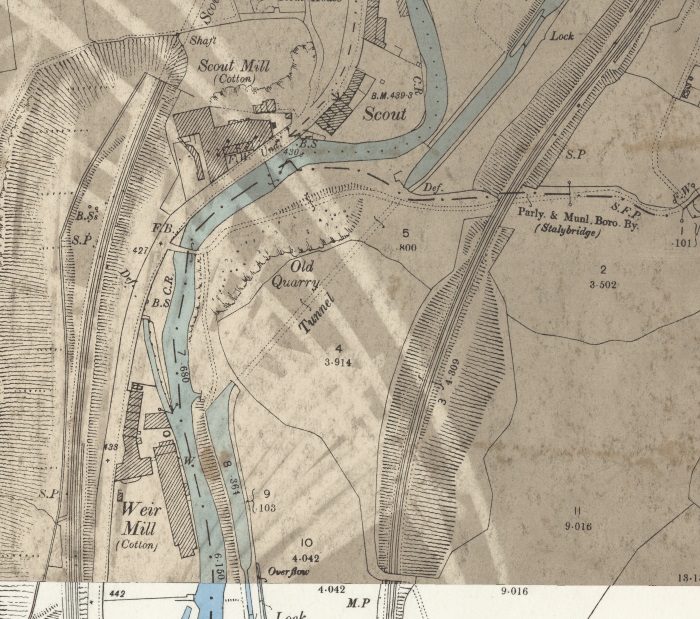
Slightly further up the Tame Valley there were two Cotton Mills – Weir Mill and Scout Mill – both sat on the West bank of the river. Adjacent to Scout Mill was the hamlet of Scout just a short series of terraced houses also sitting on the West bank of the River Tame. Two tunnels were named after the hamlet, one on the main Stalybridge to Huddersfield Line, the other took the Huddersfield Narrow Canal under an outcrop which was used as a quarry. The Micklehurst Loop sat away to the East and after passing under an accommodation bridge curved round through a cutting. That bridge can be seen at the bottom of the map extract below.
25″ OS Map extract. [1]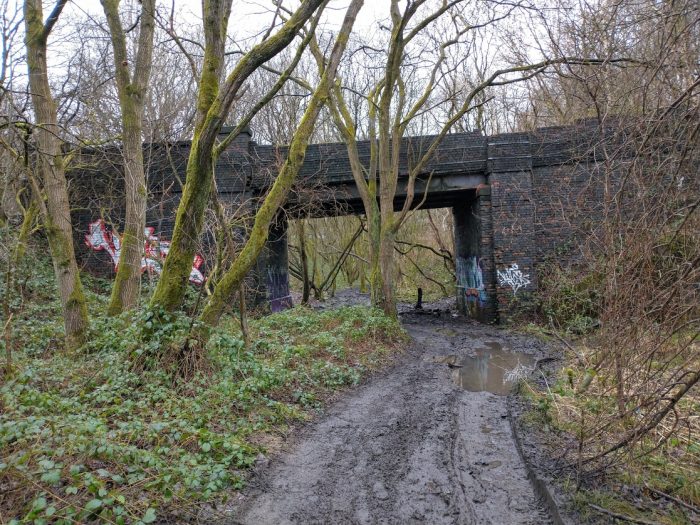 The South facing elevation of the accommodation bridge across the valley from Weir Mill, (My photograph).
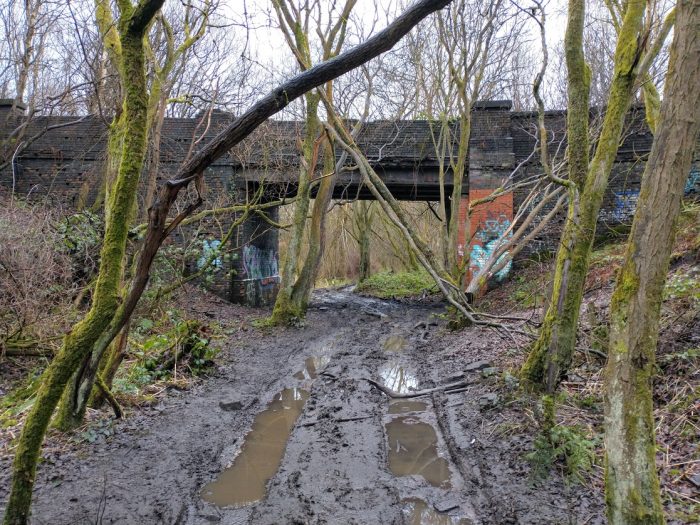 The same bridge looking from the North (My photograph).
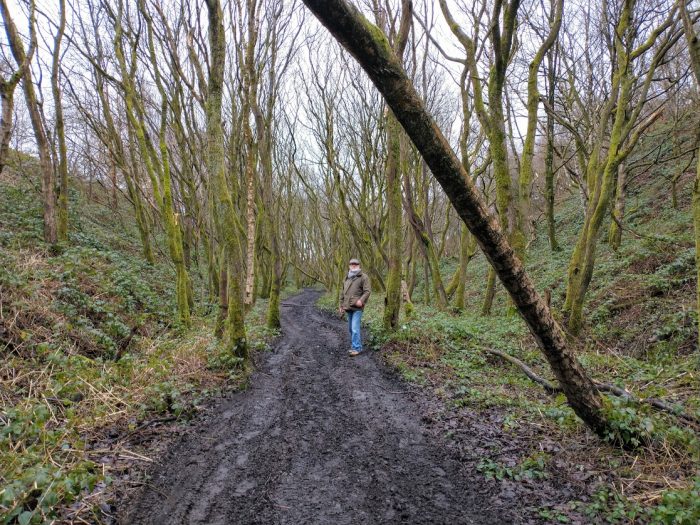 The Loop remained in cutting for some distance North of the accommodation bridge (Photograph – Jo Farnworth)
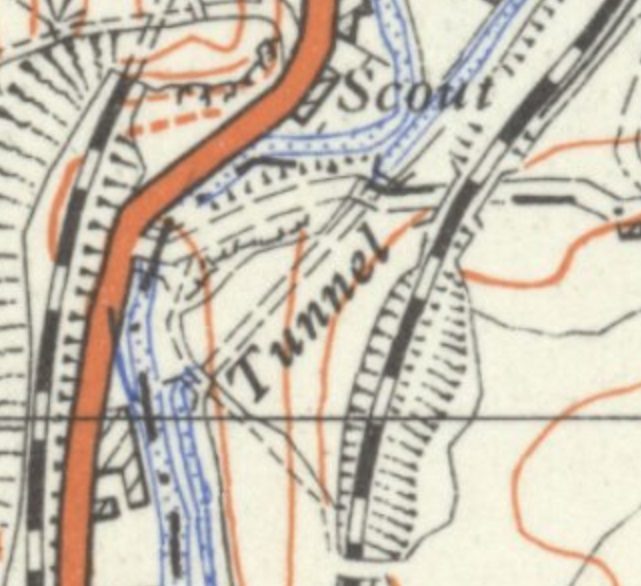
An extract from the 1:25,000 OS Series maps published in 1951. The extract is centred on the Canal Tunnel – Scout Tunnel. [2]

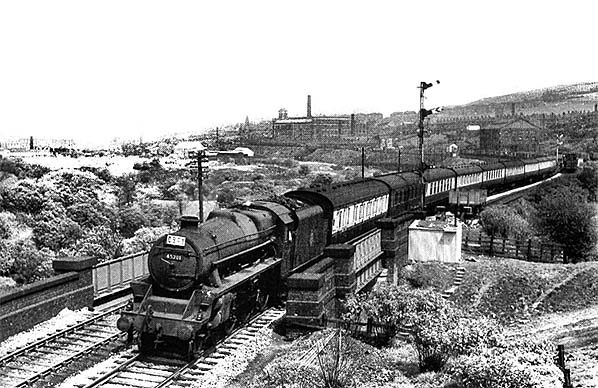
Alan Young notes this bridge as being over a track near Kershaw Hey. He believes that the photograph was taken in the 1950s. Alan Young says: “The Micklehurst Loop continued to carry passenger traffic long after the local stopping trains were withdrawn and closure of the intermediate stations before the end of the First World War. Here, an excursion train to North Wales is seen between Micklehurst and Staley & Millbrook stations, with the warehouse of Micklehurst goods station in the distance, top right. No.45201, a Fowler-designed ‘Black Five’ 4-6-0 locomotive,” is in charge of the train. … “In the distance No.49668, a Fowler-designed 7F 0-8-0, is held with its load of empties at the signals at the southern end of Micklehurst goods yard.” The photograph is included with the kind permission of Alan Young, (c) K. Field. [23]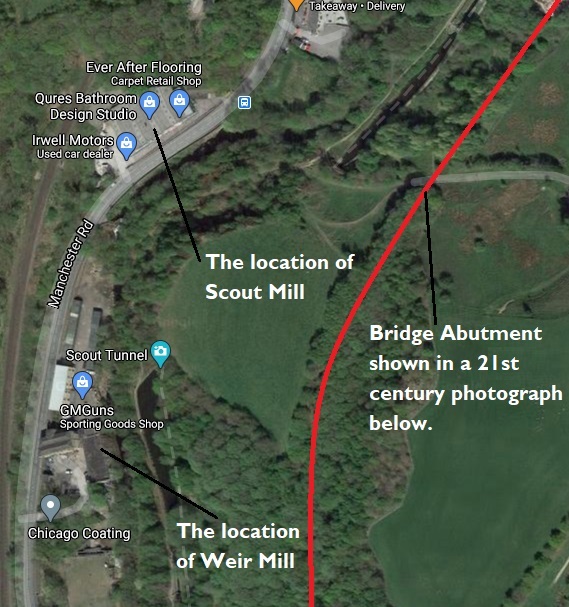 An extract from Google Maps satellite imagery showing the locations of the two Mills and the Bridge referred to in the text.
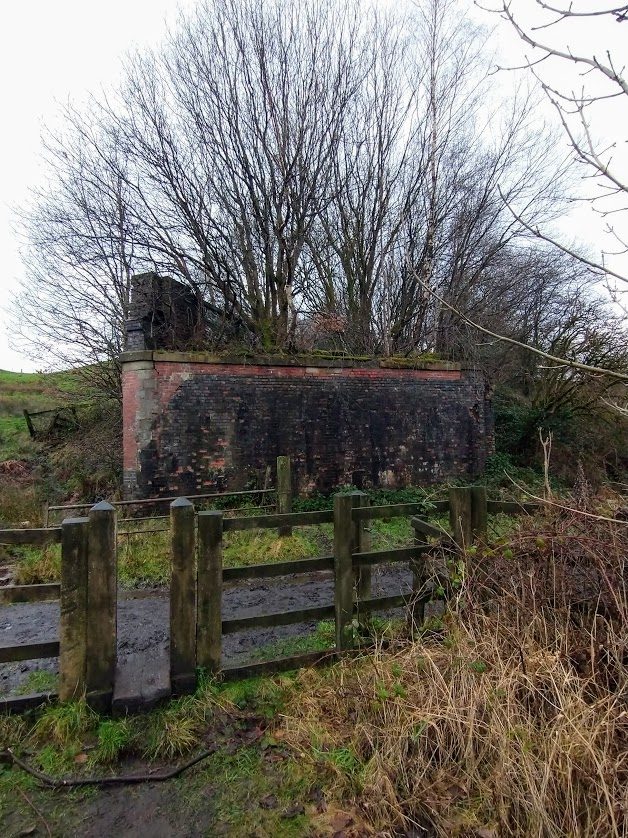
The remaining bridge abutment. The view is taken looking to the South towards Stalybridge, (My photograph).
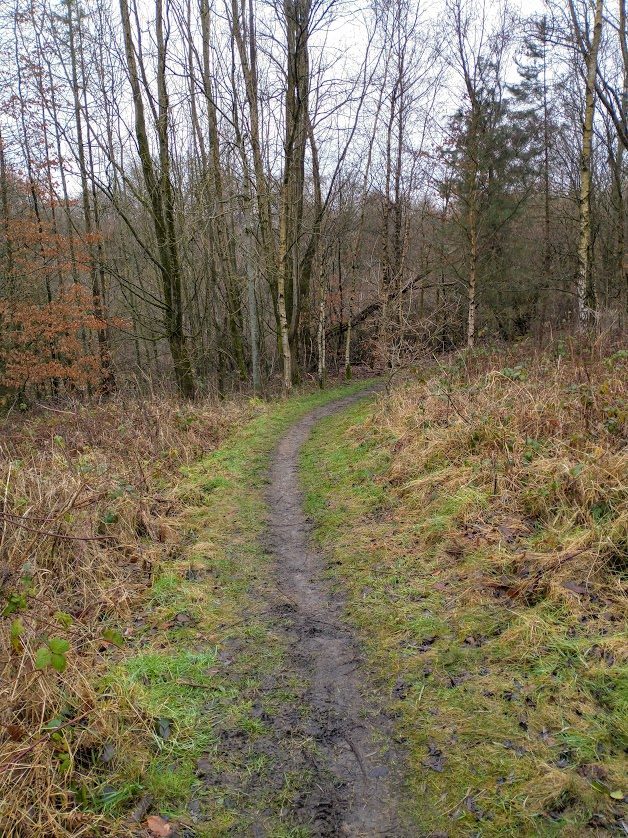
Looking forward along the line towards Micklehurt Station from the same location as the photograph above, (My photograph). The Canal is down to the left of the picture.
The final two pictures at this ;location are monochrome images from the OS Survey in 1952.

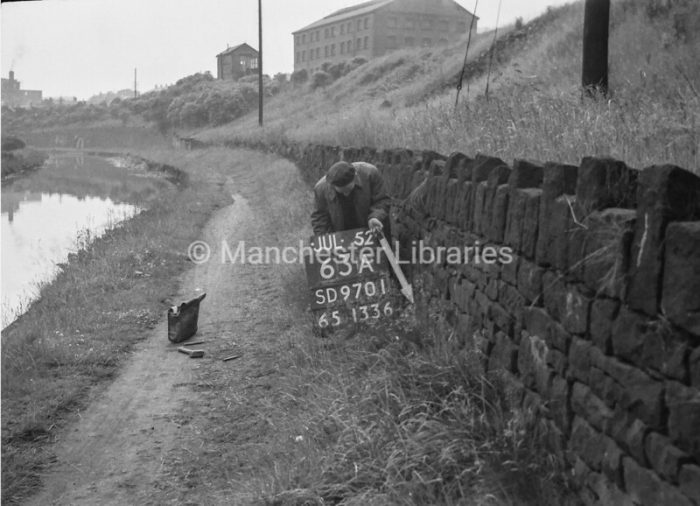
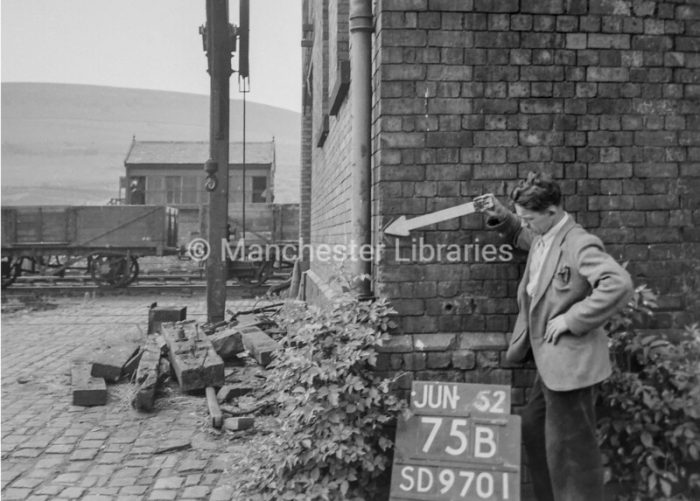
Man marking Ordnance Survey minor control revision point on the Micklehurst Loop at the bridge South of Micklehurst Good Shed. The shed can be seen in the picture, (c) Manchester Libraries. [26]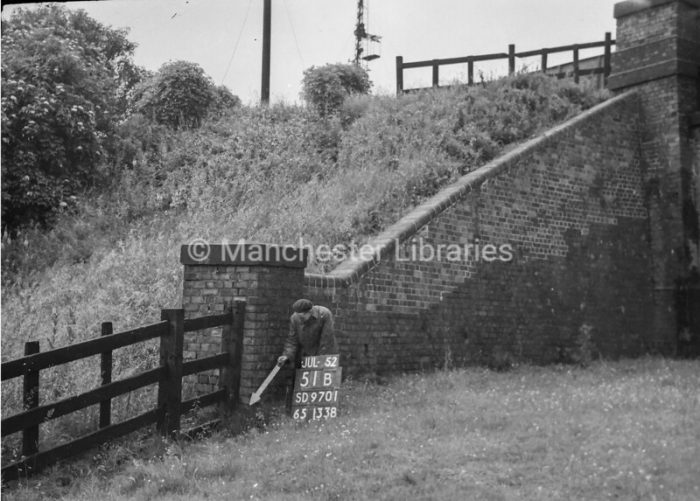 Man marking Ordnance Survey minor control revision pointon bridge wingwall South of Micklehurst Goods Yard in 1952, (c) Manchester Libraries. [26]
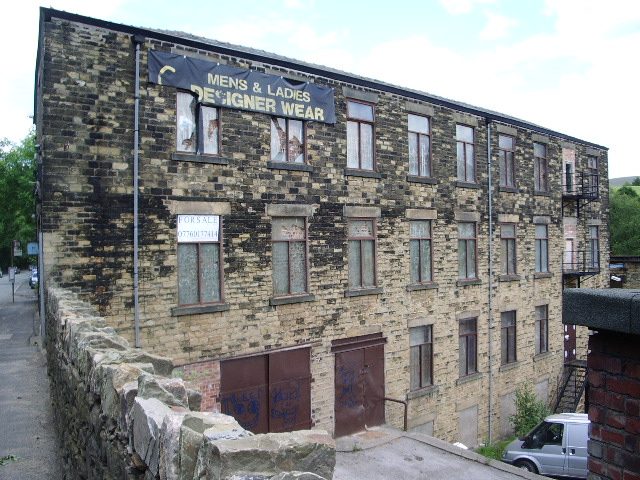
Weir Mill in 2007 © Alexander P Kapp and licensed for reuse under Attribution-ShareAlike 2.0 Generic (CC BY-SA 2.0). [5]
Weir Mill in 2007 © Alexander P Kapp and licensed for reuse under Attribution-ShareAlike 2.0 Generic (CC BY-SA 2.0). [6]
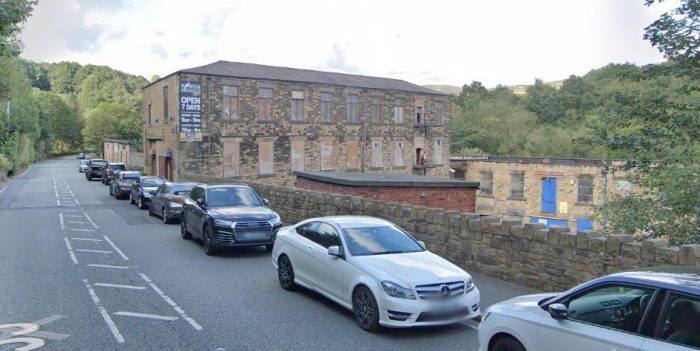
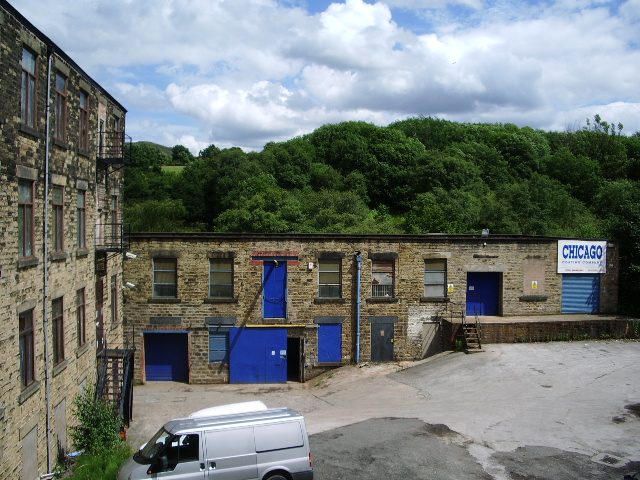
A view of Weir Mill in the 21st century from Manchester Road south of the Mill. (Google Streetview)
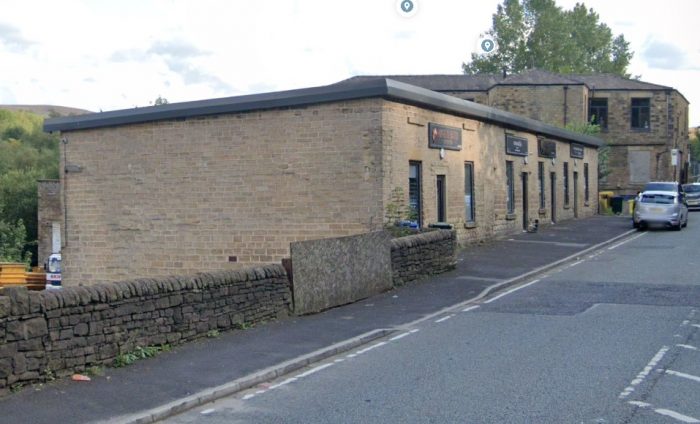
A view of Weir Mill in the 21st century from Manchester Road to the North. (Google Streetview)
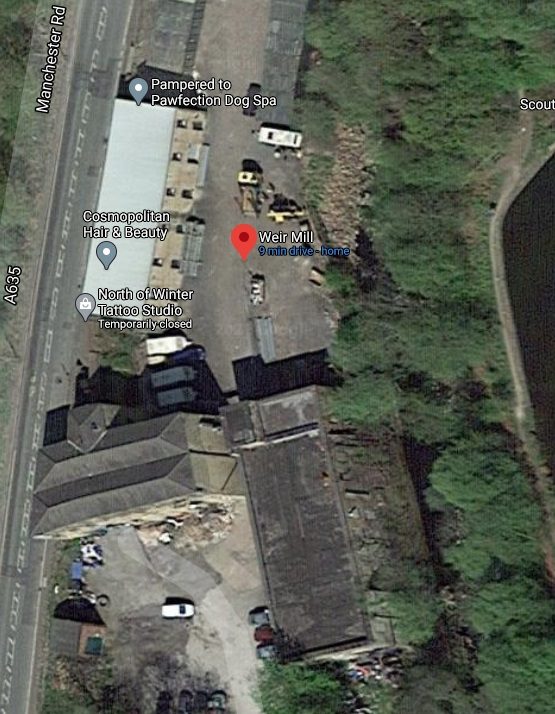
Satellite Image of Weir Mill, (Google Maps).
I have not been able to find any older pictures of Weir Mill, so the final image of the mill is a modern satellite image. In 21st century the mill is tenanted out to a number of different organisations, including: The Vault [11]; Pampered to Pawfection Dog Spa Ltd [13]; Weir Mill Ranges [14]; Masquerade Tattoo Studio [15]; North of Winter; Twenty Five Yards Ltd.
Scout Mill: was also a Cotton Mill. It was owned by John Mayall of Mossley along with Britannia, Southend and Bottom Mills. Together, these mills had 420,000 spindles, they are listed in the 1891 Mossley Directory, and noted by Grace’s Guide as follows: 32’/60′ twist. Pay day second Wed. Telegrams, “Mayall, Mossley.”[9][10] It is shown in its prime in the monochrome image below.
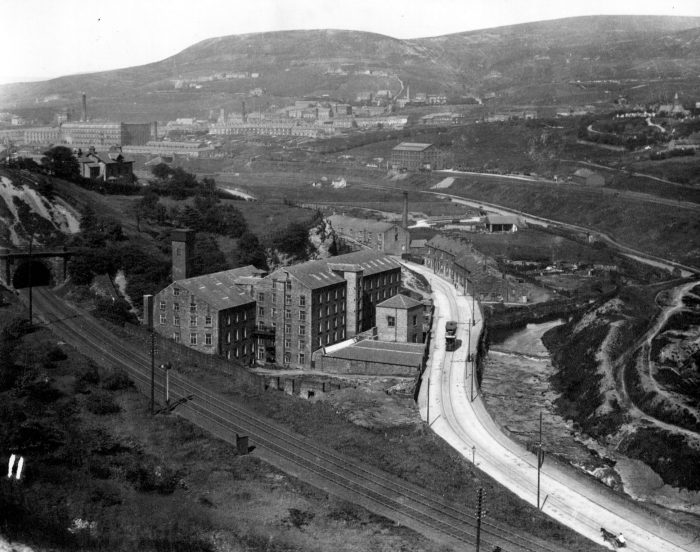
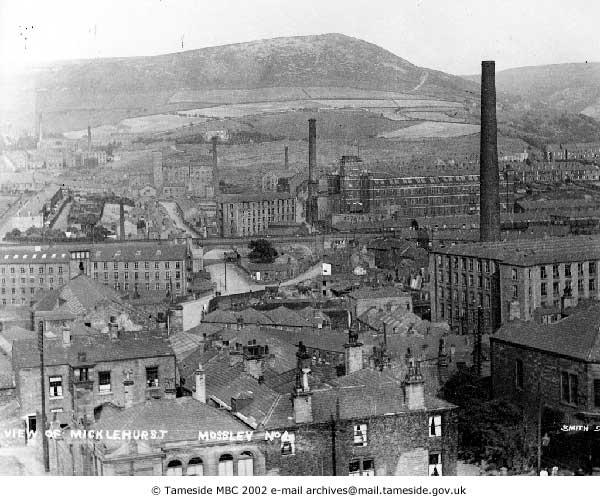
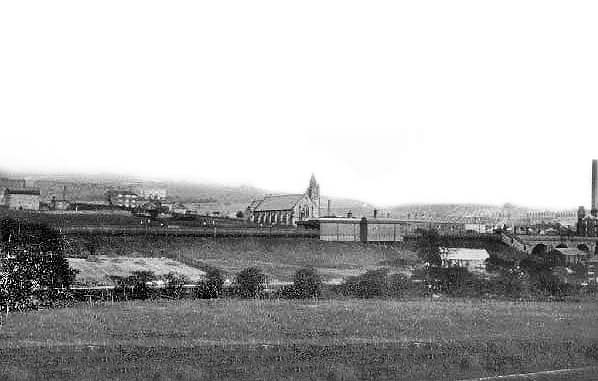
Scout Mill sits in the foreground of this image with the mainline from Stalybridge to Huddersfield entering Scout Tunnel adjacent to the Mill. Close to the Mill, is the small hamlet of Scout and immediately above that, the large Micklehurst Goods Shed on the Micklehurst Loop can be picked out on the far side of the valley. Also visible in this image is a tram running down the centre of Manchester Road and a horse and trap heading for Mossley, (c) Tameside Archive Library. [4]
 The image above is significant for the view it gives us of the Goods facilities in the middle distance. The large Goods Shed is typical of those built along the Micklhurst Loop . The builders clearly anticipated a significant volume of goods traffic from the mills in Mossley.
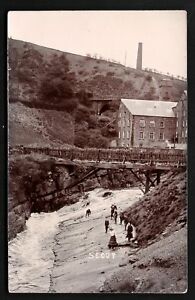
The adjacent image is an early photograph showing Scout Mill from the river bank a little to the right of the edge of the image immediately above. Scout tunnel on the mainline can be picked out centre-top in this image. The foot bridge which appears in the foreground of this image can be seen on the 25″ OS Map extract above. [9][10]
The next three images show the site of Scout Mill in the 21st century. All are from Google Maps/Google Streetview. Modern structures seem to pale into insignificance alongside those built in the past!
A view of ‘New Scout Mill from just to the South along Manchester Road. The tunnel portal is just visible above the modern buildings and to the left, (Google Streetview).
The same buildings but this time from just to the Northeast on Manhcester Road, (Google Streetview).
Satellite image of New Scout Mill, (Google Maps).
Having explored the buildings in the Tame Valley South of Mossley we return to our walk along the Micklehurst Loop.
To the north of the erstwhile bridge over the lane the route of the line entered thick undergrowth and then encountered the boundary fence of R. Plevin & Sons (wood processing and recycling company). which now occupies the site of the Micklehurst Goods Yard. [17] Our walking route was, as a result, along the towpath of the Huddersfield Narrow Canal. In fact, along the length shown in the next monochrome image.
Man marking Ordnance Survey minor control revision close to Micklehurst Goods Yard on the Huddersfield Narrow Canal. The Goods warehouse/shed and the signal cabin are visible, (c) Manchester Libraries. [26]
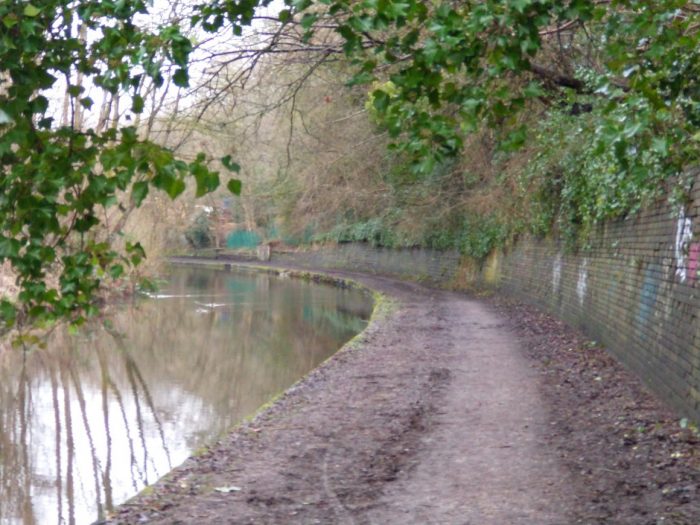
We walked along the towpath of the Huddersfield Narrow Canal. The embankment and retaining structures on the right are those which supported the Loop Line and the Micklehurst Goods Yard above the canal. The location is just to the North of the monochrome image above, (My photograph, 18th January 2021).
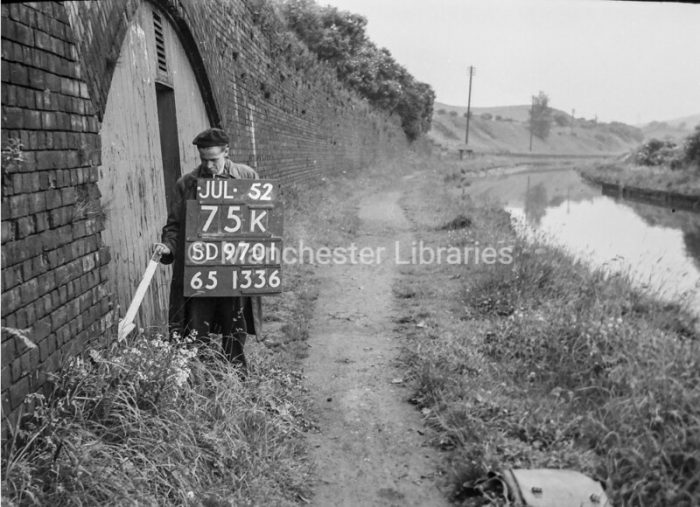
Man marking Ordnance Survey minor control revision point on Huddersfield Narrow Canal towpath, (c) Manchester Libraries. [26]

An extract from the 25″ Series of OS Maps from around the turn of the 20th century. [1]
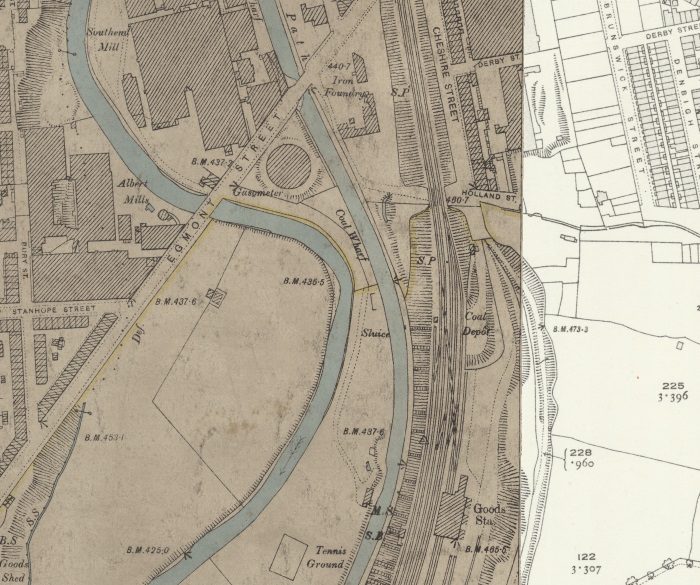
The next length of the line North of Micklehurst Good Shed. [1]
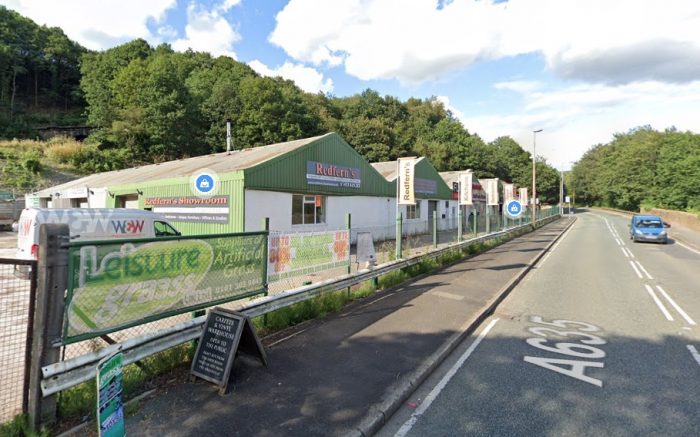
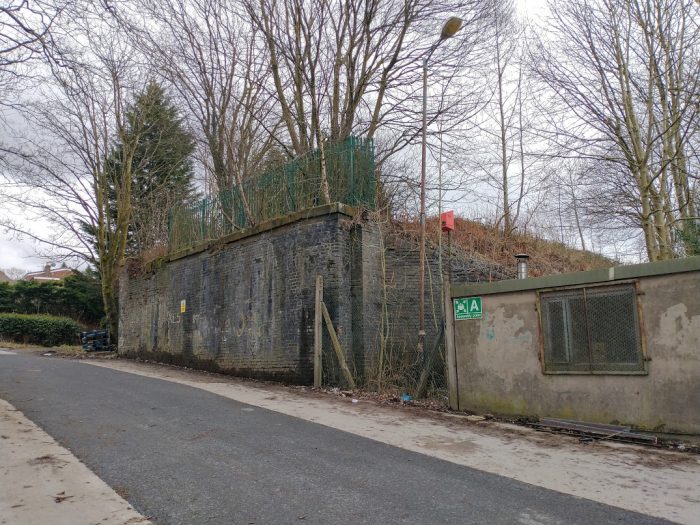
Micklehurst Goods Shed in 2021. This photograph was taken from the closed gates of Plevin’s yard on Sunday 21st February 2021, (My photograph). This shows the gable end of the Shed that is visible in the aerial image below.
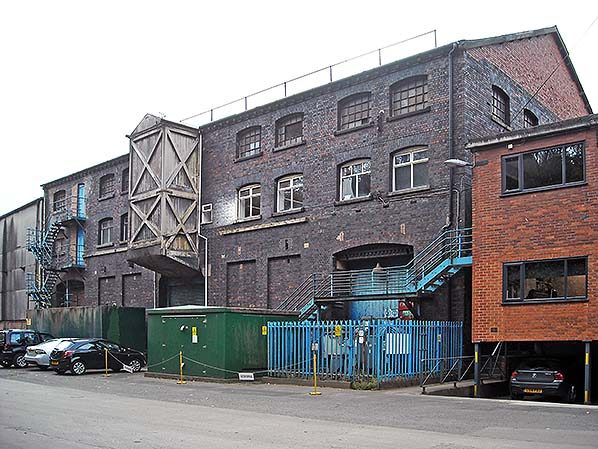
Micklehurst Goods Shed again, this time from inside Plevin’s Yard, (c) Alan Young. Alan comments: “The former Micklehurst goods warehouse, looking south-west in October 2015. It is constructed of the sombre blue engineering brick used by the LNWR for most of the major structures of the Micklehurst Loop, although red brick was preferred for the passenger station buildings. Part of the gable end of this warehouse is of red brick, perhaps evidence of repair. The warehouse is … is flanked by modern buildings. On the western elevation a wooden structure projects from the upper storeys which probably contained a hoist. [23]
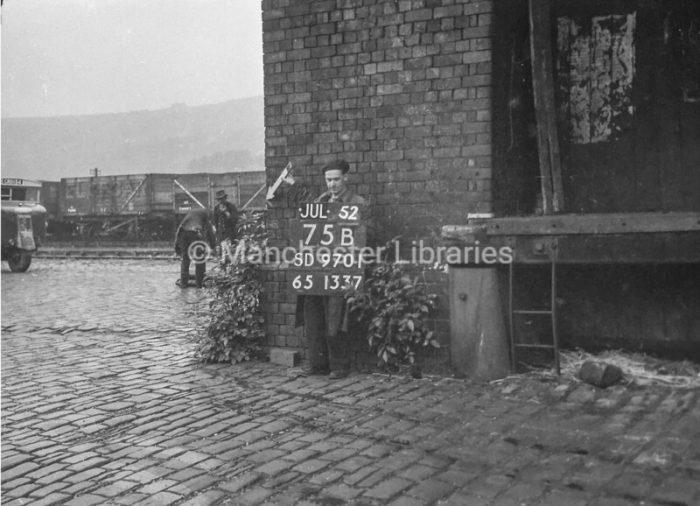
Man marking Ordnance Survey minor control revision point at Micklehurst Goods Shed in July 1952, (c) Manchester Libraries. [26]
Man marking Ordnance Survey minor control revision point at Micklehurst Goods Shed in July 1952, (c) Manchester Libraries. [26]
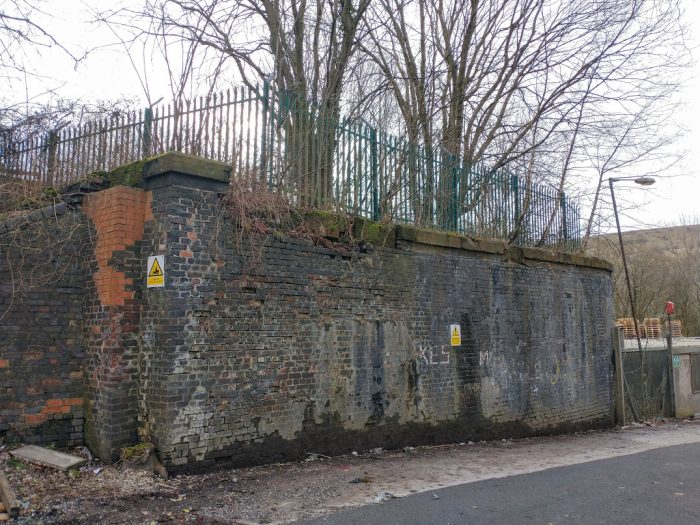
The remaining abutment of the Holland Street bridge taken from the Northeast, (My photograph, Sunday 21st February 2021).
The same bridge abutment from the North West, (My photograph, 21st February 2021).
The railway embankment continued North alongside Cheshire Street, (My photograph, 21st February 2021).
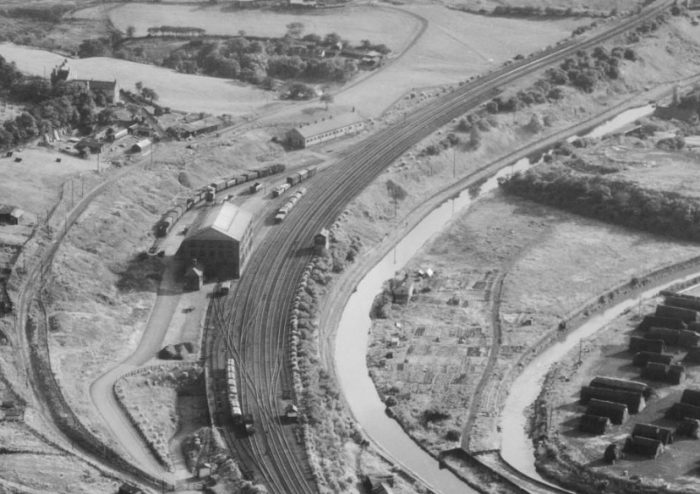
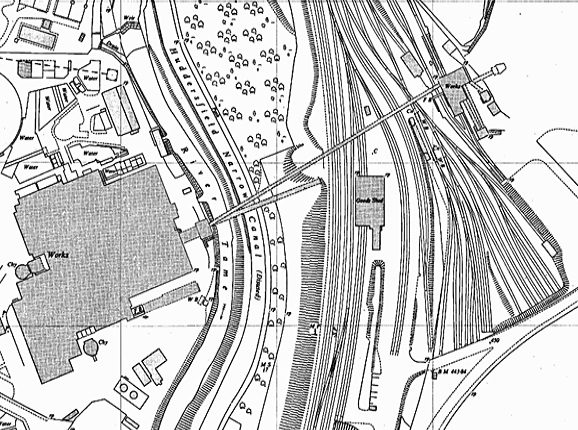
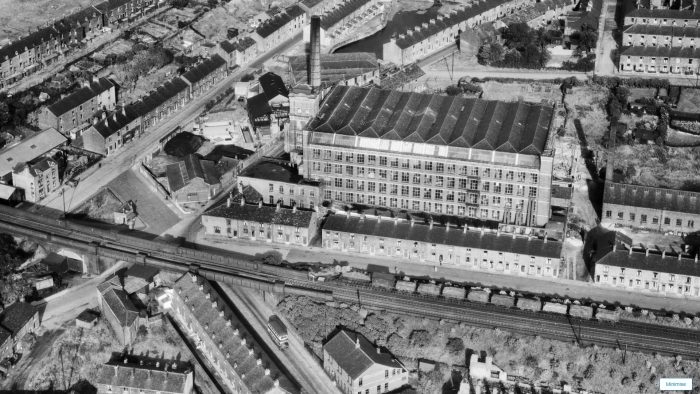
An extract from an aerial image showing Micklehurst Goods Yard. The bridge which is shown being crossed by the Loco No.45201 is in the very top right of this 1947 image. Most of this area is now a part of Plevin’s yard. The image is shared courtesy of BritainFromAbove.org and is from their image reference EAW010807. [16]
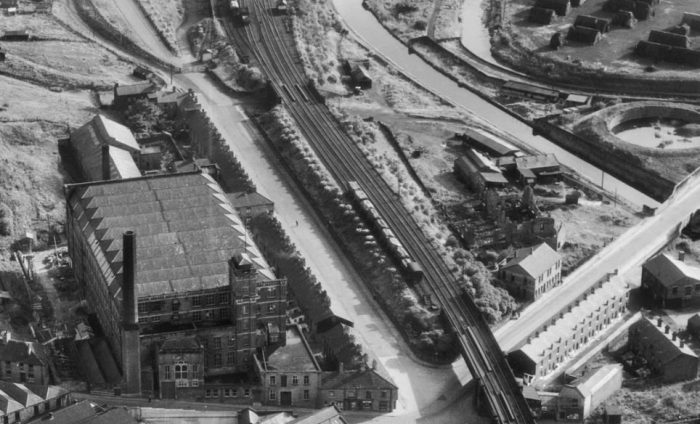
A second extract from Britain From Above’s aerial image No. EAW010807. The mill is Brunswick Mill. The line continued North from Micklehurst Goods Yard and onto a viaduct. [16]
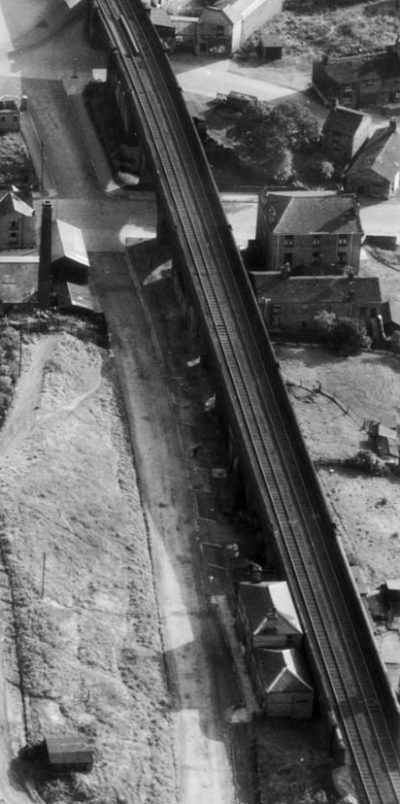
Micklehurst Passenger Station Building appears at the bottom of this extract. By 1947, the platforms which were further to the North of the Station Building (off the bottom of this image) had been removed, as had the canopy which was on the road side of the ticket office (the lower section of the building). [16]
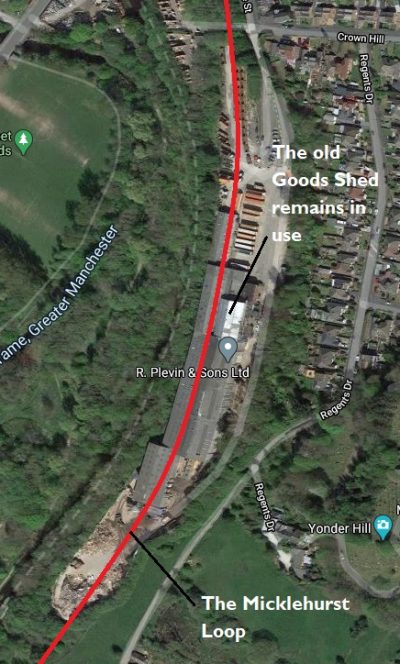
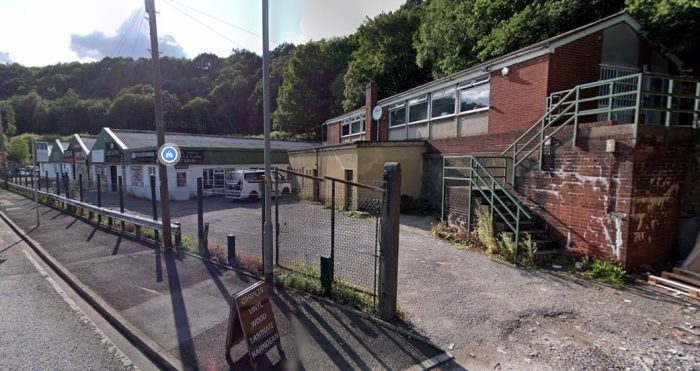
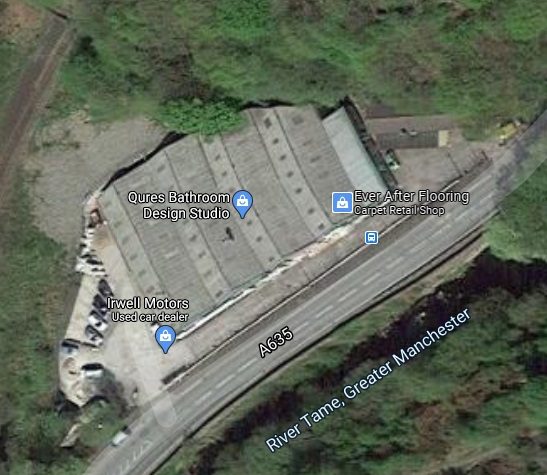
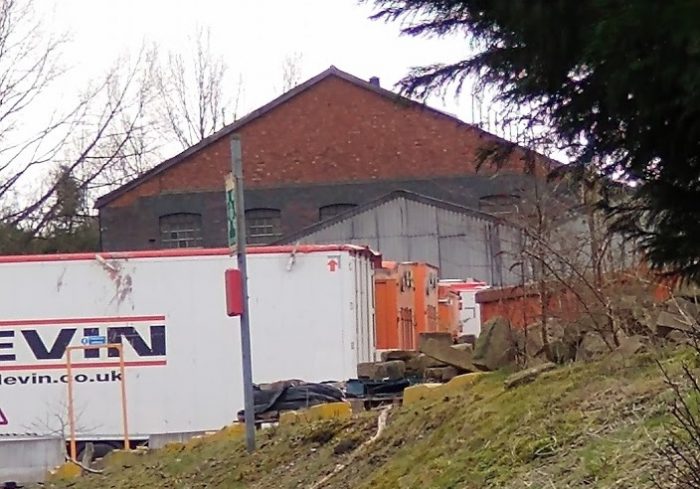
The The site of Micklehurst Goods Yard in the 21st century, now occupied by R. Plevin & Sons (wood processing and recycling company) [17] (Google Maps).
The line continued North. Thismodern staellite image shows the length to Micklehurat Passenger Station, (Google Maps).
These three images, all taken from on aerial photograph show the line in 1947, surprisingly devoid of moving traffic. The last of the sequence shows the passenger building of Micklehurst Station devoid of the canopy which cover the entrance to the ticket office. The station platforms which had been removed by 1947 were sited North of the building – off the bottom of the image.
Alan Young on his pages about the line on the ‘Disused Stations’ Website [23] carries two pictures taken by Jim Davenport which show:
- a northbound goods train passing the Goods Yard in the 1950s with a Stanier-designed Class 8F 2-8-0 locomotive No. 48552 in charge; and,
- A southbound freight, also in the 1950s, pulled by a Fowler F7 0-8-0 locomotive No.49662. The mill in the background of this image is Brunswick Mill.
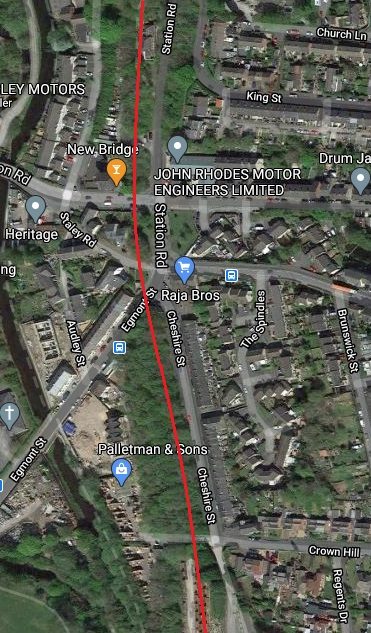
The line North from Micklehurst Good Yard continued across the westerly extension of what is now Crown Hill which at the time was called Holland Street. The unmade road beneath the bridge provided access to a parcel of land between the canal and the railway which was at one time used as an iron foundry. The road parallel to the line on its East side was (and is) Cheshire Street.
Access to Plevin’s modern site is gained from the junction of Crown Hill and Cheshire Street.
Cheshire Street was flanked on its West side by the railway embankment and on its East side by terraced housing, which is still present in the 2020s. The Micklehurst Loop was carried over Egmont Street adjacent to its junction with Cheshire Street by the first span of a viaduct.
Brunwick Mill stood behind the terraced housing on Cheshire Street. It is long-gone and its site has been redeveloped as a housing estate.
Brunswick Mill was a cotton-spinning mill constructed in 1886/1887. It was finally demolished in 1990. [19] Its location can be picked out on the extracts from the 25″ OS Maps both above and below. The housing estate which sits on its site is known as ‘The Spindles’.
Mossley had a significant number of mills which we cannot cover in any detail in this article. However, Southend Mill, River Mill and Albert Mill also stood close to this length of the Loop Line and can be seen on the OS Map extracts on the opposite side of the Huddersfield Narrow Canal.
Southend Mill and River Mill sat adjacent to each other between the River Tame and the Canal. They were owned by John Mayall (along with Bottom Mills just further to the North).
Albert Mill was slightly further to the Southwest along Egmont Street, on the West side of the River Tame.
The River Tame and the Canal threaded their way through what was a heavily industrialised town. Many of the mill buildings have gone. The first monochrome image after the extract from the OS Maps below, gives an impression of what the Micklehurst and Mossley area was like in the early to mid-20th century. The Loop line can be seen at the centre of that image.
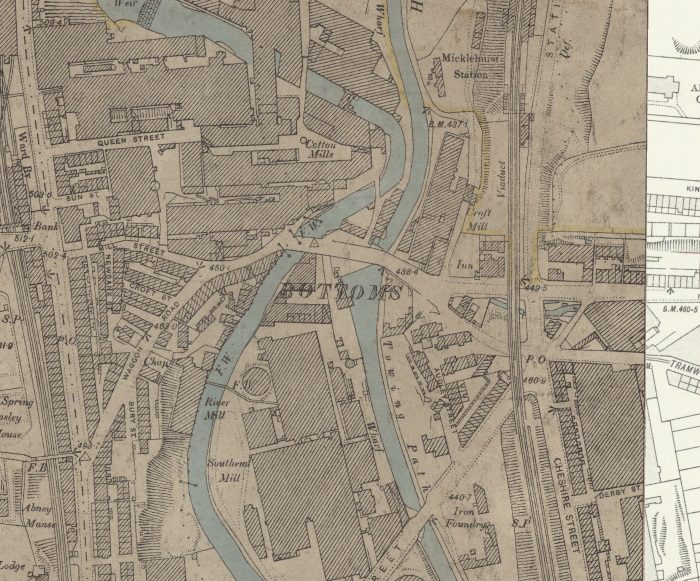
A further extract from the 25″ OS Maps published at around the turn of the 20th century. Micklehurst Station is visible in the top right with its platforms extending off the top of the extract. [1]
AN 1890s view of Micklehurst looking from Mossley along the line of Micklehurst Road. Brunswick Mill can be seen to the right beyond the railway. [22]
- Part of the viaduct over Micklehurst Road, looking West with Station Road on the right just before the span. This picture appears to have been taken as a record of one of the Whit Walks processions; [20] and,
- The same span looking East. [20]
The images below show the Southern half of the Viaduct carrying the Loop Line.
This excellent view of Brunswick Mill is an extract form an aerial image from 1947 available on the ‘Britain From Above’ website. It shows the railway viaduct with its first span across Egmont Street. [18]
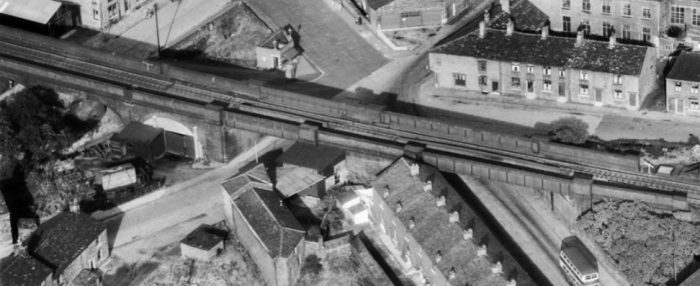
An enlarged view of the railway viaduct taken from the same image. Egmont Street enters from the bottom right, Cheshire Street runs on the far side of the Loop Line, between it and Brusnwick Mill. Micklehurst Road enters from the bottom left. [18]

The Northern half of Micklehurst Viaduct taken from the East. Another etract from a Britain From Above aerial Image (EAW010805). [21]
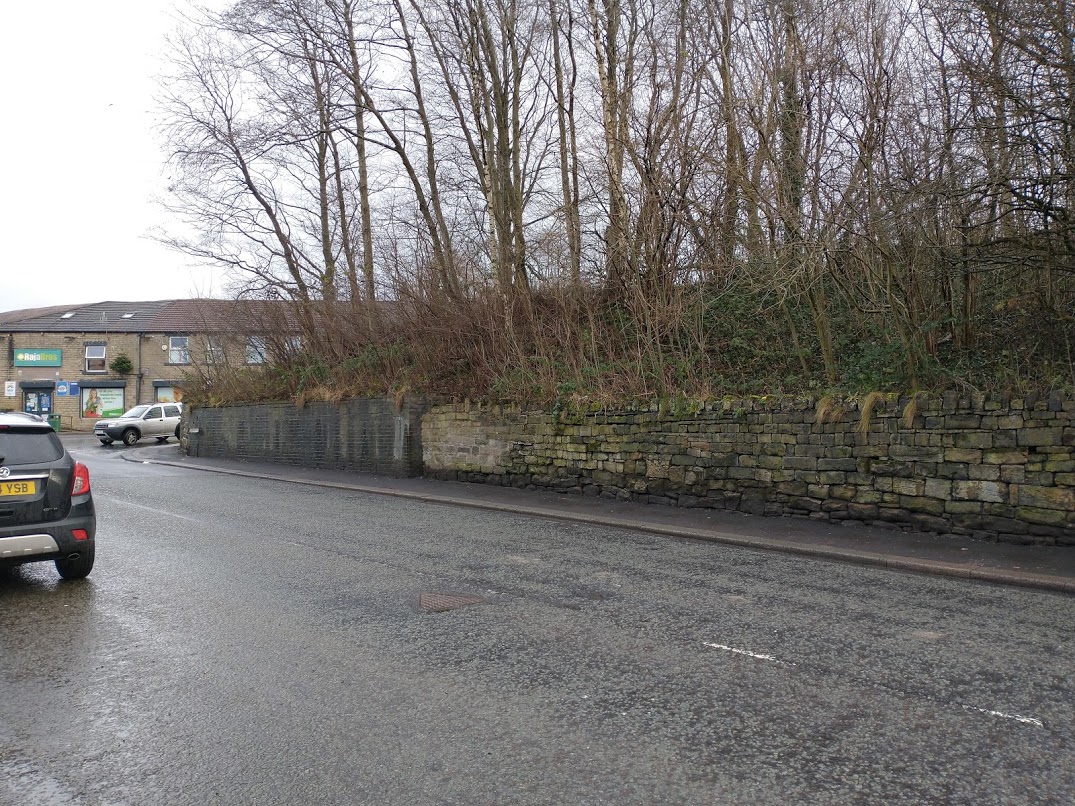
Egmont Street looking from the West at the remains of the abutment to the first span of the Micklehurst Viaduct. The blue brick wall is what is left of the bridge abutment. The road to the right, immediately beyond the abutment wall is Cheshire Street, (My photograph, 18th January 2021).

Looking from the West again, this time along Micklehurst Road towards the location of the Viaduct. An arch span carried the Loop over this road just beyond the New Bridge Inn where the trees are visible on the left side of the road. Station Road goes off to the left just after those trees, (My photograph, 18th January 2021).
We finish this leg of the journey at Micklehurst Passenger Station. First with two images courtesy of Alan Young [23] which he sourced from Tameside Libraries Archives. These are then followed by two modern pictures of the station building which show it as it is today.

Micklehurst Station in 1911, courtesy of Alan Young, (c) Tameside Libraries. [23] Alan comments: “The station closed in 1907. The view is north-west across Station Road. The substantial brick villa is in the style used at all four of the Loop’s stations. In contrast the platforms and their associated buildings are of timber. The use of timber, rather than masonry, for the platforms and their buildings reduced the load that the embankment carried. A generous awning extends over the passenger entrance to the booking hall, with a more modest one over the door of the station house. The stairway up to the platform is covered, and awnings are provided in front of both of the platform buildings. The up platform building (right) was reconstructed after being severely damaged by a fire in 1893 thought to have been caused by a spark from a passing locomotive.” [23]
Micklehurst Station Platform Buildings seen from the West across the Tame Valley in around 1911, courtesy of Alan Young, (c) Tameside Libraries. [23] All Saints’ Church which is now a private dwelling (2021) can be seen behind the platform structres.
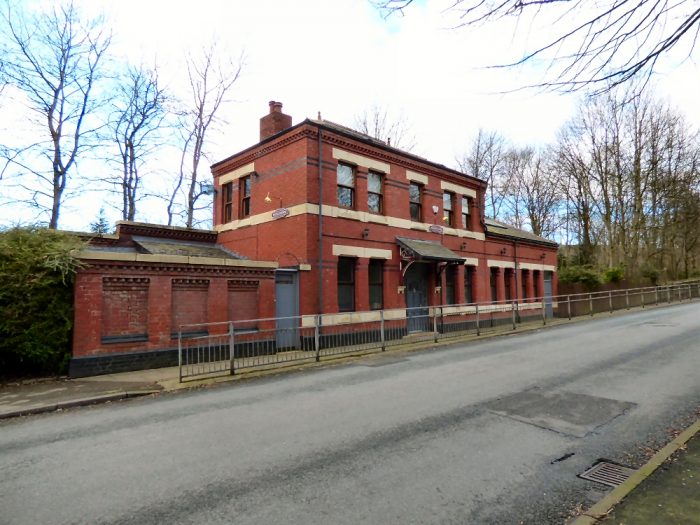
Micklehurst Station Buiding in the 21st century. It stood on the Micklehurst Loop constructed by the LNWR in 1881 and opened in 1886. The passenger service only lasted until 1907. The station platforms were on the embankment at the right side of this image. The area has been re-landscaped since the viaduct was removed.© Gerald England and licensed for reuse – Attribution-ShareAlike 2.0 Generic (CC BY-SA 2.0) . [24]
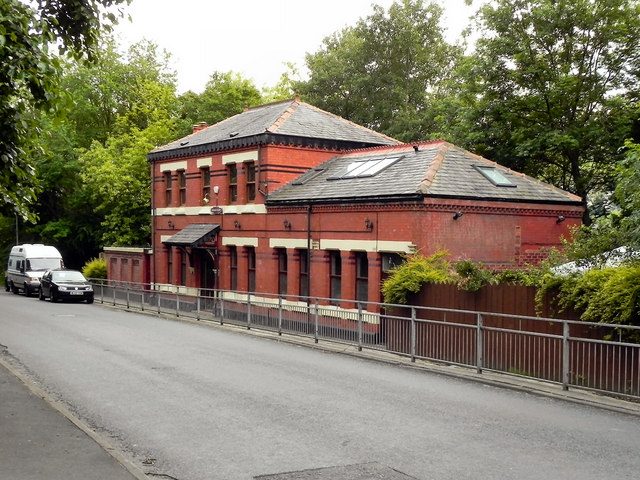
The old Micklehurst Station Building viewed from the North, the station platforms were of to the right of the picture at high level. © David Dixon and licensed for reuse – Attribution-ShareAlike 2.0 Generic (CC BY-SA 2.0) . [25]
- https://maps.nls.uk, accessed on 31st January 2021.
- https://maps.nls.uk/geo/explore/#zoom=17&lat=53.49994&lon=-2.03927&layers=10&b=1, accessed on 9th February 2021.
- http://disused-stations.org.uk/s/staley_and_millbrook/index.shtml, accessed on 9th February 2021.
- https://www.manchestereveningnews.co.uk/incoming/gallery/nostalgia-mill-town-bustling-commuter-10617920, accessed on 10th February 2021.
- https://www.geograph.org.uk/photo/479677, accessed on 10th February 2021.
- https://www.geograph.org.uk/photo/479680, accessed on 10th February 2021.
- http://disused-stations.org.uk/features/micklehurst_loop/index.shtml, accessed on 25th January 2021.
- https://www.gracesguide.co.uk/Weir_Mill_Co, accessed on 10th February 2021.
- https://www.gracesguide.co.uk/Scout_Mill,_Mossley, accessed on 10th February 2021.
- https://www.gracesguide.co.uk/1891_Cotton_Mills_in_Mossley, acccessed on 10th February 2021.
- https://www.facebook.com/Thevaultmossley, accessed on 10th February 2021.
- http://www.table38.steamrailways.com/rail/Micklehurst/micklehurst.htm, accessed on 24th January 2021.
- https://www.facebook.com/pamperedtopawfection, accessed on 10th February 2021.
- https://www.gunmart.net/shooting-advice/news/manchester-airguns-are-pleased-to-announce-their-new-indoor-range, accessed on 10th February 2021.
- https://mossley-greater-manchester.cylex-uk.co.uk/company/masquerade-tattoo-studio-26872680.html, accessed on 10th February 2021.
- https://britainfromabove.org.uk/en/image/EAW010807, accessed on 20th February 2021.
- https://www.plevin.co.uk/our-sites/mossley-manchester, accessed on 20th February 2021.
- https://britainfromabove.org.uk/en/image/EAW010801, accessed on 21st February 2021.
- https://www.uktextilemills.com/brunswick-mill, accessed on 21st February 2021.
- http://www.table38.steamrailways.com/rail/Micklehurst/micklehurst.htm, accessed on 21st February 2021.
- https://britainfromabove.org.uk/en/image/EAW010805, accessed on 21st February 2021.
- https://www.facebook.com/TamesideCouncil/photos/looking-back-mossleyan-1890s-view-of-micklehurst-showing-the-railway-arch-over-m/10157158843343376, accessed on 21st February 2021.
- http://disused-stations.org.uk/m/micklehurst/index1.shtml, accessed on 20th February 2021.
- https://www.geograph.org.uk/photo/4835693, accessed on 10th February 2021.
- https://www.geograph.org.uk/photo/2463584, accessed on 12th February 2021.
- https://www.timepix.uk/PAGES/Top-Line-navigation-pages/n-5PX4Wc/About, accessed on 11th February 2021.

Pingback: The Micklehurst Loop – Part 3 | Roger Farnworth
Pingback: The Micklehurst Loop – Part 1D – Some Miscellaneous Items relating to the area around the Staley and Millbrook Goods Yard. | Roger Farnworth
Pingback: The Micklehurst Loop – Part 4 | Roger Farnworth
Pingback: The Micklehurst Loop again … | Roger Farnworth
Pingback: The Micklehurst Loop – an update at the beginning of 2025 | Roger Farnworth