Very soon after publishing the first article about the Coalport Branch, [7] I was contacted by David Clarke with an offer of relevant photographs from his collection.
David Clarke is the author of a relatively recent book, “The Railways of Telford” which I reviewed soon after we moved to Telford. It was an invaluable first step for me in exploring the railways and plateways (tramroads/tramways) of the area. [1]
In the remaining articles about the Branch, relevant photographs for David’s collection will be included in the main article. As those relevant to Part 1 appeared after its publication, there are two of these and they are included in this addendum to Part 1.
This is a photograph from David Clarke’s collection of Hadley Junction in 1964, looking East towards Donnington. David comments: This photo “shows a long building on the right not shown on the aerial photo you posted. You can just make out some of the fighting vehicles Sankey made for the British Army on the wagons.” I have since been contacted by Ian Martin who tells me that the building is the covered stand along the touchline of the long gone Sankey football stadium. (Thank you, Ian). [3]This image shows an 0-6-0 locomotive (43652) descending towards the Coalport Branch (which just be picked out on the bottom-right of the photo) from the sidings adjacent to Snedshill Iron Works. The Lilleshall Brick and Tile Works at Priorslee can be made out at the top-right of the picture. The Greyhound Bridge carrying the A5 is off the image to the right. 43652 was a 3F locomotive designed by Johnson and built at the Vulcan Foundry. It entered service in 1900 and was scrapped in 1960. At the time of this photograph it was probably based at Burton Shed (17B). [3][4]
In addition to David’s photographs, I have found further images on line which I am permitted to share with you. The first is an aerial image from 1949 of the Castle Car Works at Hadley which incidentally includes Hadley Junction.
This aerial image looking towards the Southeast shows Castle Car Works as they appeared in 1949. The Works was rail-served at this time with an extended siding running to the West of the Works and providing access to sidings on both the South and North sides of the Works. Hadley Junction is visible in the top-right of this image, (c) Copyright Historic England, Britain from Above (EAW027684, 1949). [5]An enlarged extract from the above image focussing on Hadley Junction and its signal box. The sidings alongside the line were used by the Castle Car Works., (c) Copyright Historic England, Britain from Above (EAW027684, 1949). [5]Another extract from the Britain From Above image No. EAW027684. The Hadley Junction signal box it evident top-centre of this image. The extensive sidings alongside the mainline are visible, together with the junction providing access to Castle Works, (c) Copyright Historic England, Britain from Above (EAW027684, 1949). [5]Castle Car Works again, this time the aerial image is taken looking West in 1949. The Works siding running to the West of the Works and providing access to sidings on both the South and North sides of the Works can be seen in full. Hadley Junction is visible in the centre of this image. The bridge over Castle Street can be seen at the bottom-left of this picture. Castle Lane runs left to right across the image, passing under both the line to Coalport and that to Donnington and beyond, (c) Copyright Historic England, Britain from Above (EAW027682, 1949). [6]Castle Street Bridge in 1949, shown at the fullest magnification possible from the aerial image. A slight amount of flare has affected the image at this location, (c) Copyright Historic England, Britain from Above (EAW027682, 1949). [6]
I will add any further images relating to the first article about the Coalport Branch which come to light here.
References
David Clarke; The Railways of Telford; Crowood Press, Marlborough, Wiltshire, 2016.
And the child’s father and mother were amazed at what was being said about him. Then Simeon blessed them and said to his mother Mary, “This child is destined for the falling and the rising of many in Israel, and to be a sign that will be opposed so that the inner thoughts of many will be revealed – and a sword will pierce your own soul too.”
Sunday 15th March 2026 – Luke 2:33-35
An updated reflection. ………….
On Mothering Sunday (Mother’s Day) we give thanks for those who Mother us, for those who today and in years gone by have given themselves to and for us. For those who have made sacrifices so that we might enjoy life. In many communities now, only to say thank you to Mums, is to ignore all those who care for us. In families across our land, grandparents, aunties, uncles, fathers, foster parents and social services carers provide motherly love and care to many children. This is a day when we celebrate all who have and do provide that motherly care.
Luke 2: 33-35 reminds us that loving and caring in this way is a sacrifice of self-giving. A vocation to which many of us are called. A vocation which not only means a daily grind of tiredness and worry, but one which often can involve experiencing the deepest of pain – sometimes because that care is rejected by those we love, sometimes because of the hurt done to those we love and care for.
Mary understood that pain. At the death of her Son, she bore in her body the pain of the cross – she felt the nails being hammered into the wrists of her son, she agonised as she watched him die the most painful of deaths. She had to release her child into God’s eternal care long before his time. And as those things happened, I’m sure she will have felt a mixture of all the emotions a mother can feel – anger, guilt, shame, and deep aching loss. Like any mother, her grief was unbearable.
Mary also understood the joy of motherhood – she watched her precocious child grow to be a wonderful man. She felt the joy of being part of the making of this special son.
Mothers today face all of these emotions. Today we stand with them, pray for them and celebrate their self-giving love. Here, today, we can pledge ourselves again, for another year, to work for the stability of family life, to help those who find the burden of caring too difficult.
As we look around our world today, we reflect on the tremendous burden born by mothers, grandparents and others, in recent years, as they have watched:
many of the healthy younger generation around our world dying for lack of drugs to treat those who are HIV positive;
children dying for nothing other than the lack of clean water, or the cost of a mosquito net;
families still struggling to come to terms with Coronavirus for lack of available, affordable vaccines.
All threats which are again increasing in strength because of cuts made in aid budgets.
We see the burden of care carried by so few for so many children, we see children struggling for lack of food, their carers working night and day to bring in only just enough for survival. We see schools and their staff carrying an increasing burden so as to keep our society working.
In these and other ways today, our celebration of Mothering Sunday is mixed with sadness and mourning.
We are, no doubt, acutely aware of people important to us, whom we have lost and who we wish were still with us.
Our prayers also carry the weight of what we see each day on our televisions and what we know to be true for many around our world. We try, in our worship, to imagine the pain of mothers on both sides of the Ukraine conflict. We struggle to comprehend the depth of loss felt by all parents, but particularly by mothers, who have live today in Iran or Southern Lebanon. We recognise the pain of parents who have lost children in natural disasters around our world.
And we bring all this, the stuff of life in our world, the joy and the struggle, with us as we pray and as we come to Communion. In the midst of many conflicting, painful or joyful feelings, we give thanks for all that our mothers mean to us, all that our mothers have meant to us. And as we quietly remember Jesus’ sacrifice, we seek to understand the pain of those who are suffering for love throughout our world today.
Prayers of Intercession
To the words God who mothers us, please respond … hear our prayer.
As we pray today, we remember that Mothering Sunday celebrates our mother churches. The places where we first met Jesus and committed our lives to serve him, and places like our Cathedrals which have been beacons of love, hope and faith over many centuries. At the start of our prayers, we reflect and give thanks for those wonderful places:
Thank you Loving Lord God, for the churches of our childhood, for the nurture we received in our faith, places where we were encouraged and developed on our faith journey. …. We give thanks too for our Cathedral in Lichfield and its role over many centuries of proclamation of the Gospel and support of those in need.
We pray, Loving God, for those who do not have good memories of childhood, because of abuse and we pray for their healing. May our churches continue to grow in care and love, may we safeguard the young and the vulnerable. And may we lead others to a faith in you.
God who mothers us ….. Hear our prayer.
Loving God, we hold in our hearts our own mothers or others who cared for us in their place. … We endeavour also, Lord, to hold in prayer mothers throughout our world. Mothers in Ukraine and in Russia, mothers in Palestine and Lebanon, mothers in Iran and mothers elsewhere who have suffered the loss of their children. Mothers on the continents of Africa, Asia, South and Central America, and even in our own country who face a daily struggle to feed their children and themselves.
God who mothers us ….. Hear our prayer.
Loving God, we give thanks for all mothers who are nurturing, strong providers and, seeking to fulfil their potential in many different ways. Mothers in Africa, who have become adept farmers; teenage mothers in Uganda developing entrepreneurial skills as seamstresses and hairdressers. Foster mothers and fathers who care for many children who have suffered loss or abuse. Mothers who day by day give of themselves for those that they love.
Loving God, you nurture and care for all. We lift up, and thank you for, the many mothers in our communities.
God who mothers us ….. Hear our prayer.
Loving God we thank you for the reminder today of all those who provide motherly care. We pray for mothers not related by blood; for those who are grieving the loss of their mother; for the mothers, who parent on their own; for those who long to mother but have not been able to have children; for those estranged or separated from their children; for fathers, grandparents and siblings who give motherly care to those they love.
God who mothers us ….. Hear our prayer.
Loving God, we pray for all organisations throughout our world that are working to support, train, and equip mothers from a range of different backgrounds. We pray for individuals in those organisations who walk alongside and support mothers in this community, in Shropshire, across our nation, and throughout our world. … May the help and skills those young parents receive be felt for generations to come.
God who mothers us ….. Hear our prayer.
Loving God, we pray too, O Lord for those in our local community or in our wider circle of family and friendswho are unwell. Draw near to them in their need, bless and nurture them. Bring healing and hope into their lives and the live of those who love them.
God who mothers us ….. Hear our prayer.
Loving God, we remember with thanks those who have shown us motherly love and who are no longer with us. In giving thanks for them, we entrust them once again into your loving arms of mercy, trusting that your love for them is so much deeper than our own. A love which knows no bounds, a love that understands our grief and that reaches into the valley of the shadow of death. A love beyond telling.
We pray that we like them will one day rest in peace and rise which Christ in glory.
God who mothers us ….. Hear our prayer.
Paragraph
Gather us, Loving God, in your embrace just as a hen gathers her chicks under her wings.
Merciful Father accept these prayers for the sake of your Son, our Saviour Jesus Christ. Amen.
Wikipedia provides this schematic map of the Coalport Branch which highlights the key stations and sidings. [17]
History
The history of the Coalport Branch begins with competition between rival rail companies in the area during the mid 1850’s. The GWR had control of the industrial areas of East Shropshire, whereas the LNWR only had access to the area via the Shropshire Canal which ran from Trench down to Coalport. The first article in this short series about the Branch covered the history of the line as well as following the line from its junction with the LNWR main line at Hadley as far as Malins Lee Station. It can be found on this link:
The history of the LNWR branch line is built on the story of the Canal and it is with that story that any investigation should begin. Separate articles cover the route of the Canal. The first of these can be found on this link:
A first extract from the 1901 25″ Ordnance Survey shows Dark Lane village and Malins Lee Railway Station just to the South of Dark Lane. Also evident alongside the LNWR Coalport Branch is a length of the old Coalport Branch of the Shropshire Canal. [43]The same area on the satellite imagery provided by Railmaponline.com. After crossing Dale Acre Way, the route of the old line heads South-southwest across open ground and then over land used for housing development. [44]Malins Lee Station as in appeared in 1932.The photograph seems to have been taken facing South from the bridge which carried Dark Lane over the line. The passenger facilities at the station seem to be a little different to others on the Coalport Branch. It is possible that this might reflect an earlier original use for the two storey element of the building? The station was closed for two years during WW1 as an economy measure and finally closed in 1952 with the line remaining open for goods traffic for more than a decade. Just to the South of the station a single siding which served immediately local industries can be seen. The chimney to the right of the image beyond the station buildings is probably that of Dark Lane Foundry. This picture was shared by Lin Keska on the Telford Memories Facebook Group on 15th August 2018. [45]Marcus Keane shared this composite image on the Telford Memories Facebook Group on 20th July 2014 which shows the location of Malins Lee Station in relation to the modern blocks of flats in Hollinswood. [46]
Malins Lee Railway Station, seen from the Southeast. The bridge over the line to the North of the Station carries Dark Lane. This image is embedded here from an article on the dawleyhistory.com website, (c) Collection of William H. Smith. [47]The Western arm of Downton Court looking North in the 21st century. The Coalport Branch route crosses the field ahead of the camera and then runs underneath the flats at this location. [Google Streetview, June 2022]The Eastern Arm of Downton Court looking Northeast. the purple line again approximates to the route of the old railway, passing under the buildings to the extreme right of the image which front onto Deercote. [Google Streetview, June 2022]K=Looking Southeast along Deercote with the approximate line of the Coalport Branch shown by the purple line. [Google Streetview, June 2022]Looking South on St. Quentin’s Gate with the approximate line of the Branch shown in purple. [Google Streetview, June 2022]
Loops of the Coalport Branch of the Shropshire Canal adjacent to, and South of, Malins Lee Railway Station
The Canal bed behind Malinslee Railway Station buildings in 1962. This image was shared on the Telford Memories Facebook Group by Marcus Keane on 27th February 2022. This view looks to the South along the back of the station buildings. The 25″ OS map extract above shows that at the time of the survey this area had a railway siding in place. The line of the canal curved away from the railway to the West before returning to the same alignment a short distance further South. [48]An extract from the 1881 Ordnance Survey, published in 1882 showing approximately the same area as that on the 25″ survey of 1901. Interestingly this earlier survey uses the name ‘Malinslee’ for the railway station rather than ‘Malins Lee’ as on the 1901 survey. Little Dark Lane Colliery, to the immediate West of the Station was still in use at the time of this survey. The standard-gauge siding to the West of the Station buildings, can be seen on this extract as serving a tramroad wharf, as can the longer siding visible in the 1932 picture above. Tramroads are not the subject of this article, but given that the tramroads shown seem to only serve the Little Dark Lane Colliery and the Dark Lane Foundry, the traffic on these lines may have either been horse-powered or even man-powered. When the Canal was active a wharf would have existed on the West side of the canal. [49]A further extract from the 1881 6″ Ordnance Survey, showing the next length of the railway. The route of the old canal is indicated approximately by the light blue dashed line. [49]A similar length of the railway is shown on this next extract from the 25″ 1901 Ordnance Survey. Of note, is Randlay Brickworks which has a connection to the Coalport Branch and the disused Wharf Colliery which was active in 1881. There is a Mineral Railway running to the West of the Wharf Colliery site and the GWR Stirchley Branch to the Southeast of Randlay Brick Works. [50]The same area on the satellite imagery provided by Railmaponline.com. [44]This image was sent to me as an email attachment by David Clarke in March 2023. It shows the rail siding leading from the LNWR Coalport line to Randlay Brick Works. David Clarke is the author of a relatively recent book, “The Railways of Telford” which I reviewed soon after we moved to Telford. It was an invaluable first step for me in exploring the railways and plateways (tramroads/tramways) of the area. My review of his book can be found here. [58]The route of the Randlay Brickworks Siding in 1962. This image was also sent to me as an email attachment by David Clarke in March 2023.This next extract from the 25″ 1901 Ordnance Survey takes us as far as the Stirchley Iron Works. The buildings can be picked out right at the bottom of the map extract on the left. Of note, is the Wrekin Chemical Works on the site of what was for a time Old Park Ironworks. This is connected both the LNWR Branch line via a tramway bridge over the line and to the GWR Stirchley branch denoted Mineral Railway on the right of the extract. [51]The same area on the satellite imagery provided by Railmaponline.com. Some of the old tramways are shown on this extract. [44]
A Loop of the Coalport Branch of the Shropshire Canal near Stirchley Ironworks
This section of the line on the 1901 25″ Ordnance Survey. [52]This is Railmaponline.com’s representation of the same area as that shown on the OS map extract above. The tramroads around Stirchley/Hinkshay Pools are shown as well as the Coalport Branch. The abandoned loop of the old canal can just about be made out through the trees. [44]
Andy Tidy surveyed the route of the Coalport Branch of the Shropshire Canal in March 2012 the majority of which lies underneath the formation of the LNWR Coalport Branch. He highlighted two areas worthy of note. The first adjacent to Hinkshay/Stirchley Pools and the second to the South of Dawley and Stirchley Railway Station where the Canal was in tunnel during its working life. [15]
Adjacent to the Hinkshay Pools, the Canal alignment deviated from the formation of the later Railway. Andy Tidy provided a plan (below) of the location which I have annotated with the key features he refers to. His pictures of the canal deviation can be seen here. [15]
Andy Tidy says: “No sooner has the line moved off the modern Silkin Way than it is in water, first in the undergrowth but then as it passes the first reservoir the bed squeezes through the foundations of a collapsed bridge and on into open water. … The towpath sits on a narrow strand of land between the canal and the Stirchley Pools Reservoir, a pretty spot which is carefully maintained as a nature reserve. This clear stretch of canal is haunting and as you walk under the shade of the trees you almost expect to meet a horse plodding the other way towing a string of loaded tub boats. … All too soon this enduring stretch of canal slides back into the railway bed, all traces are lost at it passes through the recently rebuilt Stirchley Station.” [15]This picture shows the length of the canal on the map above. It was shared by Andy Rose on the Telford Memories Facebook Group in February 2022. [16]Andy Tidy’s photograph in 2012 of the Stirchley Ironworks Bridge which crossed the Canal and later the railway. Stirchley Ironworks were on the right-hand side of the photographer, on the near side of the bridge, (c) Andy Tidy. [15]A relatively poor photo showing a steam service on the LNWR Coalport Branch heading North. The train has passed through Dawley & Stirchley Railway Station and is heading towards Malins Lee Station with Stirchley Chimney in the background. The picture was shared on the Telford Memories Facebook Group by Marcus Keane on 9th January 2022. [22]
Dawley and Stirchley Railway Station
Dawley and Stirchley railway station was opened in 1861 and closed to passengers in 1952. [3] When it opened, it was given the name ‘Stirchley’. The station was renamed Dawley & Stirchley in 1923, although closed to passengers as early as 1952 the line through the station site was not finally closed to freight until 1964. Although the goods service which originally served Coalport was restricted to only travelling to Dawley and Stirchley Station in 1960.[4][5]
The London and North Western Railway Society comments on the standard-gauge Coalport Branch as follows: “The first half of the route was originally part of the Shropshire Canal which the LNWR bought in 1857 and filled in, the line opening four years later. The passenger service, referred to locally as the Dawley Dodger, consisted of four trains on weekdays, the journey taking 30 minutes. It was withdrawn in 1952 but a string of private sidings between Wellington and Stirchley helped to keep that section open a further twelve years.” [5]
Through Telford Town Park and on through Dawley and Stirchley Station, the old railway line is now part of The Silkin Way. [6][7]
In the first half of the 19th century, before the LNWR branch line was built the tramway had a wharf on the Western bank of the Coalport Branch of the Shropshire Canal which was sited a little to the Northwest of the bottom of the map extract above. When the Coalport Branch of the LNWR was built the tramway was extended a little to run alongside the standard-gauge railway.
The Stirchley Canal Tunneland later Railway Cutting
Immediately South of the overbridge the station loop continued as shown on the 6″ Ordnance Survey (1883) map extract below.
South of Stirchley Lane the station loop continued for some distance. [18]
A very short distance further South, the Canal which preceded the railway entered a 281 yard long tunnel – Stirchley Tunnel. When the railway was built, the tunnel was opened out into a cutting. At this location the Ordnance Survey mapping shows a rock face to the West side of the line.
The location of what was once a canal tunnel but which remains as a disused railway cutting and, in the 21st century, a cycleway and footpath. [18]The Silkin Way to the South of Stirchley Lane as shown on Google Maps in 2023. [28]Looking South along the Silkin Way towards the cutting mentioned above. [My photograph, 2nd March 2023]Continuing to the South along the Silkin Way, we are now in the cutting and facing South. The original canal tunnel at this location was opened out when the railway was built. [My photograph, 2nd March 2023]At various points along the cutting the original canal tunnel’s walls, below arch springing level, can be seen. [My photograph, 2nd March 2023]Beyond the end of the original canal tunnel the railway cutting opens out to have more normal sloping sides. The remains of a railway workmans’ (platelayers) hut sit on the East side of the old line. [My photograph, 2nd March 2023]
There is little remaining of the canal structure at this location. However Andy Tidy points out that cottages adjacent to the site are called ‘Tunnel Cottages’ and that “a careful inspection of the west wall of the cutting reveals the unmistakable curve of the old canal tunnel as it was carved out of solid rock spanning 10ft at the waterline.” [15]
Remnants of Stirchley Canal Tunnel (c) Andy Tidy [15]Looking South along the Silkin Way under the arch bridge at the end of the rock cutting. This bridge carries a footpath in the 21st century. [My photograph, 2nd March 2023]Looking North towards Dawley and Stirchley Station along the Silkin Way under the same arch bridge at the end of the rock cutting. [My photograph, 2nd March 2023]Looking West across the same bridge. [My photograph, 2nd March 2023]
Aqueduct village and the GWR Madeley Branch
The OS Map extract below shows the next length of the branch line. To the South of what had been Stirchley Canal Tunnel there was a canal junction. One arm of the canal turned West and ran across towards Lightmoor, the other arm first turned East and then South down the incline near Windmill Farm. Neither branch survived the coming of the railway. The hamlet of Aqueduct straddled the old turnpike road to Bridgnorth which passed under the canal arm to the West. The aqueduct used to carry the canal is still standing in the 21st century although the old turnpike road is not in use as a modern highway. The railway cut through the village of Aqueduct as shown on the map extract.
This extract from the 6″ OS mapping of 1883 shows the new railways and has the old canal routes superimposed. Note the canal incline close to Windmill Farm and the branch running to the West. The aqueduct which carried this arm over the old turnpike road can be seen on the extract. It gave a name to the hamlet immediately next to it. As will be seen from the satellite image below, Madeley Court Station is long gone. The GWR Madeley Branch remains in the early 21st century as it was used for merry-go-round coal trains serving Ironbridge Power Station until the power station closed. [25][26]A Google Maps satellite image extract showing approximately the same area as the OS map extract above. Sketched onto the satellite image are: the very approximate canal routes in blue; the length of the LNWR branch which is not used by the Silkin Way in red; and the old Bridgnorth Road alignment in black. The diversion of the Silkin Way was required with the building of the A4169 and the removal of the bridge deck where the LNWR Coalport Branch line crossed the GWR Madeley Branch. There are no features on the ground in the 21st century to define the line of the old canal as it passed through the are now called Brookside. The old road bridge next to Madeley Court Railway Station remains and carries the diverted Silkin Way across what was the GWR Madeley Branch. Towards the top of this satellite image Southall Road crosses the old railway by means of the bridge shown below. [29]Looking South along the Silkin Way under Southall Road bridge. [My photograph, 2nd March 2023]Looking North along the Silkin Way under Southall Road bridge. [My photograph, 2nd March 2023]The same bridge from the top of the embankment on the Southwest corner of the bridge. [My photograph, 2nd March 2023]Looking Southwest across Southall Road, this image shows the roadside parapet of the bridge above. [My photograph, 2nd March 2023]
South of Southall Road Chapel Lane crossed the old railway at level.
The point at which Chapel Lane crossed the old railway. This view is taken looking South along the Silkin Way. The aqueduct which carried the old canal arm is off the the right of this image. [My photograph, 2nd March 2023]Looking North from Chapel Lane with the Southall Road bridge in the distance. The aqueduct is off the the left of this photograph about half the distance to Southall Road bridge. [My photograph, 2nd March 2023]Looking Southwest across the aqueduct along what would have been the line of the branch canal. After crossing the turnpike road on this aqueduct, the branch canal turned sharply to the North before heading West towards Lightmoor. [My photograph, 2nd March 2023]Looking Northeast across the aqueduct along what would have been the line of the branch canal heading towards what is now the centre of Telford. [My photograph, 2nd March 2023]Looking Southeast along what was the turnpike road to Bridgnorth, through the arch of the aqueduct which was built in around 1792. [My photograph, 2nd March 2023]Looking Northwest towards modern-day Telford along what was once the Bridgnorth turnpike road. [My photograph, 2nd March 2023]The plaque placed on the aqueduct after its restoration in 2001, (c) Neil Brittain, 19th March 2013. [30]Continuing to the South along the Silkin Way another arched underbridge is encountered. This bridge carried the LNWR Coalport branch over an access road. This view looks South over the bridge. [My photograph, 2nd March 2023]The stone arch underbridge viewed from the West looking towards what was once the main Bridgnorth Road. It is worth noting that some observers have indicated that this is the aqueduct. This is not the case, the bridge was built for the railway and at this point the Coalport Branch is no longer following the old Shropshire Canal. [My photograph, 2nd March 2023] A couple of hundred metres beyond the underbridge, the Silkin Way diverges from the route of the Coalport Branch. At this point the formation of the old line was crossed by the new A4169 and no features remain in the immediate vicinity of the new road. The road is a few tens of meters ahead. The red line shows the route of the old railway. [My photograph, 2nd March 2023]Railmaponline.com shows the are we are looking at with the line Coalport Branch in purple and that of the GWR Madeley branch in turquoise. [44]The same immediate area as shown on the 25″ Ordnance Survey of 1901. Madeley Court just edges onto the map extract in the bottom-left.Madely Court Iron Works is shown active and with a network of tramroads which do not seem to have access to the Coalport Branch. [53]Looking West along the A4169, Queensway at the point where the old railway crossed the line of the road. The formation would have been a little under 2 metres higher than the present road. [Google Streetview, June 2022]
Immediately South of the modern A4169, the old Coalport Branch crossed what was the GWR Madeley Branch. The abutments of the bridge remain and can be seen by trekking from the South towards the still remaining Madeley Branch.
Looking from the South across the Madeley Branch from adjacent to the South abutment of the bridge which carried the Coalport Branch over the Madeley Branch. The graffitied North abutment is visible beyond the railway track. [My photograph, 2nd March 2023]A view of the North abutment from a short distance further to the West. [My photograph, 2nd March 2023]Looking South-southeast from the South abutment of the old bridge along the formation of the Coalport Branch. [My photograph, 2nd March 2023]Just before the diverted Silkin Way re-joins the line of the Coalport Branch, the old railway crossed another stone-arched accommodation Bridge which provided access between Madeley Court and its windmill. The windmill is off to the left, Madeley Court is some distance to the right (West). [My photograph, 2nd March 2023]Madeley Mill alongside the Silkin Way, one cold January in the snow. A short walk under the arch bridge in the background is Madeley Court which is now a hotel. …The arch bridge carries the LNWR Coalport Branch. Just to the East of the line, and shown here, are the remains of a windmill, Madeley Mill. There has been a mill on the site since at least 1702 and the mill was last known to operate in 1840. It was later, apparently, used as a bunkhouse for the railway navvies. No machinery survives. The picture was shared on the Telford Memories Facebook Group by Lin Keska on 19th November 2022. [23]A similar view to that taken in snowy conditions. The Silkin Way is on the left of the picture, the underbridge is directly ahead. [My photograph, 2nd March 2023]While I was wandering around near the old windmill, the sun came out. [My photograph, 2nd March 2023]The underbridge viewed from the West. [My photograph, 2nd March 2023]Madeley Court in 2023 is a Hotel, temporarily in use to house Afghan refugees who worked with the British in Afghanistan. This picture was taken from just to the West of the underbridge in the last photo. [My photograph, 2nd March 2023]
Madeley Court Iron Works
In 1845-6, James Foster built three blast furnaces near the newly opened mines on his Madeley Court estate. They replaced his Wombridge furnaces, and Foster moved workmen and plant from Wombridge to create a modern ironworks. For most of their life only two of the three furnaces were in blast together. All the Madeley Court pig iron was sent to the Fosters’ ironworks in Staffordshire and Worcestershire to be blended with other types for the manufacture of high quality bar. The ironworks ceased working in 1902 but in 1912 were taken over by Thomas Parker, an electrical engineer. He and his son C. H. Parker established Court Works Ltd., a foundry firm which, seventy years later, had long specialized in iron castings for the electrical industry. [54]
The tramroads in this are will feature in a future article in the series about Telford’s tramroads/tramways. An overview of the wider area’s tramroads/tramways/plateways can be found on this link:
Historic England records this Grade II* listed building as being, “Mainly C16 with traces of C13 fabric. Built as a grange to Wenlock Priory. At the Dissolution bought in 1553 by Sir Robert Brooke, Speaker in the House of Commons, and stayed in the Brooke family until early C19. Tenanted by Abraham Darby I from 1709 until his death. Large ashlar house, at time of survey (1980) being restored. Tiled roofs with gables with parapet coping. Large brick shafted chimney stacks. Two-storeys and attics. L-shaped on plan, originally on west wing as well. The north-west hall range extensively rebuilt. Gabled stone attic windows with finials. Large stone mullion transom windows with dripmoulds. Early C17 stone porch to right hand of hall range with moulded round arch and ornate gables with volutes, pediments and strapwork foliage decoration. The east wing contains large C16 timber newel staircase and rooms with bolection moulded panelling and chimney piece.” [39]
Madeley Court, Shropshire as it appeared in the mid 20th century, (c) John Piper (1903-1992). [37] Madeley Court, sketch held by Historic England. [38]Madeley Court, image held by Historic England. [38]Madeley Court, an early 20th century postcard. [40]
Madeley Court to Bridge Street/High Street, Madeley
Returning to the route of the Coalport Branch, we continue to follow the old line in a South-southeasterly direction.
This extract from the 25″ Ordnance Survey of 1901, published in 1902, shows the length of the Coalport Branch from the Madeley Court area to the town of Madeley. Along this length the old railway was on a relatively high embankment. At the bottom-right of the extract it can be seen bridging Bridge Street, Madeley which became Madeley High Street. [55]The same area as shown by Railmaponline.com. [44]These two photographs show the line beginning to curve back from a South-southeast alignment to head South to the East end of Madeley High Street. [My photographs, 6th March 2023]The Madeley bypass is known as Parkway. The old railway was on embankment at this location and the Silkin Way required a concrete structure to span the route on the new road. [My photograph, 6th March 2023]The view East along Parkway on the approach to the roundabout at the East end of Madeley High Street. The bridge was constructed in the late 1960s. [My photograph, 6th March 2023]The Silikn Way approaching the bridge over Madeley High Street. [My photograph, 6th March 2023]
The Coalport Branch crossed Bridge Street on a single-span girder bridge. The road is now known as High Street. These next few pictures show the location through the years.
In a very short distance, the line passed through Madeley Market Station. The line was single through the station and a small goods yard was provided immediately South of the station on the West side of the line.
This photograph was shared as a comment by Andy Rose on a group post by Marcus Keane dated 27th February 2022 which showed the length of the Shropshire Canal bed directly behind Malinslee Railway Station; https://m.facebook.com/groups/674238619260811/permalink/7378452445506028, accessed on 29th August 2022.
Wikipedia provides this schematic map of the Coalport Branch which highlights the key stations and sidings. [3]
History
The history of the Coalport Branch begins with competition between rival rail companies in the area during the mid 1850’s. The GWR had control of the industrial areas of East Shropshire, whereas the LNWR only had access to the area via the Shropshire Canal which ran from Trench down to Coalport.
The Canal was going into disrepair and suffering from water shortages and subsidence. Canals in the area were difficult to maintain as the various mines in the area were causing significant subsidence.
The LNWR decided that it was best to discontinue costly maintenance and instead to build a railway line along the length of the Canal from Hadley to Coalport. Parts of the Canal were converted into railway track bed.
The use of a canal to provide a route for the railway was something that a number of railway companies pursued. In this case, the Canal provided a route for the railway down the East side of Dawley through what is now Telford Town Park, taking it past Aqueduct, Madeley and onto Coalport by the River Severn.
It is important not to confuse the LNWR station at Coalport with that on the opposite bank of the River Severn. The Severn Valley Railway chose to name its station ‘Coalport’ when it was subsequently built. Two stations with the same name on opposite sides of the river.
Eight months later, the LNWR decided to call their station on the north bank of the river Coalport East. It appears that at one time there were ambitious plans to join the two stations together by a bridge. These never came to fruition.
The LNWR branch opened as a single track on 17th June 1861. Unfortunately passenger numbers were low, but passengers were not the main reason for constructing the line. Freight traffic was expected to make the line profitable. The slow speed of the trains was not commensurate to passenger use, neither was the steep incline down to Coalport. Apparently, “some passengers were frightened to go on in case the train didn’t stop at the bottom!” [2]
The passenger service on the line closed on 2nd June 1952. Freight traffic continued until 1964.
The southern section of the line, from the northern end of Telford Town Park is now on the Silkin Way, a walkway named after Lord Silkin who was a pioneer of the Telford New Town development in the 1960’s. The northern length of the line has been lost under the development of the New Town. Part of the northern length of the line, North of Oakengates, is now a section of the A442 dual carriageway.
The Coalport Branch of the Shropshire Canal.
The history of the LNWR railway branch line is built on the story of the Canal and it is with that story that any investigation should begin. A Separate article cover the route of the Canal and the first of these can be found on this link:
Wellington Railway Station to Hadley Railway Station
Wellington Railway Station was the junction station for the Coalport Branch passenger services. The bay platform on the South side of the Wellington Station site was shared with the GWR Coalbrookdale line (Wellington & Severn Junction Railway). The station and the line to its East are covered in the link below:
Coalport East trains left the Shrewsbury to Birmingham line and for a short distance, to Hadley Junction, travelled along the line from Wellington to Stafford. After passing through Hadley Railway Station trains took to the Branch which curved away to the South of the main line.
Hadley Railway Station to Wombridge (Goods)
Experience shows that it is very difficult to plot a line on the ground when significant development has taken place. For the first section of this line the redevelopment from the 1960s into the 21st century has been very significant. In this article I have relied on modern satellite images provided by railmaponline.com. [4] As usual, historic mapping comes from the NLS (National Library of Scotland).
Hadley Railway Station appears on the left of this extract from the 25″ Ordnance Survey of 1901, published in 1902. The trackwork associated with the junction and with Castle Car Works can be seen at the top right of the extract. [60]The same area in the 21st century as shown on the ESRI satellite imagery provided by the NLS. [60]An enlarged extract from the 25″ Ordnance Survey which shows the area immediately around Hadley Station. [61]The same area on the modern satellite imagery of Google Maps. [62]Caren Craft shared the photograph of modern Hadley taking shape on the Hadley History Facebook Group on 26th June 2022. The photo was carried by the Shropshire Star on 15th August 2011. Both of the two railway bridges can be seen on the left of the image carrying the new single track railway line. [80]
Hadley Railway Station served the former Stafford to Shrewsbury Line and was the start of the branch to Coalport. The station was opened in 1849 and closed in 1964. The line through Hadley was closed from 1964, with the last remaining stretches of track being taken up in 1991. In the late 2000s a stretch of track was re-laid to the Telford International Railfreight Park for freight purposes only. [63]
Telford International Railfreight Park (known as TIRFP) is rail freight depot and construction development site located in Donnington to the north of Telford, on the former route of the Stafford to Shrewsbury Line. The terminal was opened in 2009. [64]
The old bridge at Hadley Station viewed from the North. [Google Streetview, June 2022]The old bridge at Hadley Station viewed from the South. [Google Streetview, June 2022]An early view looking North up Station Road under the railway bridge. This image was shared on the Hadley History Facebook Group by Caren Craft on 3rd July 2022. [71]
A later view (1963) of the bridge which was shared on the Hadley History Group by Tony Handley on 22nd March 2021. [73]
An even later image (1986) of the same bridge with the new pedestrian/cycleway bridges in place. This view was shared on the Hadley History Facebook Group by Lynne Purcell on 5th February 2021. [74]
Wombridge Priory was a small Augustinian monastery established in the early 12th century, it was supported by a network of minor nobility and was never a large community. Despite generally good financial management, it fell within the scope of the Suppression of Religious Houses Act 1535 and was dissolved in the following year. [82]
The priory was dedicated to St Leonard. St Leonard was particularly popular in the 12th century following the release of Bohemond I of Antioch, a captured crusader – a circumstance which he seems to have attributed to the saint’s intercession. White Ladies Priory, another Shropshire Augustinian house, was also dedicated to St Leonard, as was the parish church at Bridgnorth, [82] and at a later date, Malinslee Parish Church. Remains of the priory buildings remained visible until the 19th century but are now hidden beneath the churchyard and other development. They were excavated in the 1930s and again in 2011 and 2012. [82]
The church was designated to St. Mary and St. Leonard and was built in 1869 by George Bidlake. It is the fourth church on the site of the Priory.
An aerial view of Wombridge Church with some of the remains of the Priory evident. This photograph was shared on the Telford – The Ultimate Guide Facebook Group by Steve Bowers on 27th February 2023. [83]
The bridge which carried the Coalport Branch over what was once Wombridge Road was demolished to make way for the A442 Queensway.
This photograph was taken during the demolition of the bridge. It is the only photo I have been able to find of the old railway bridge. It appears to have been taken from the South. Headroom would have been quite limited. The photograph was shared by Paul Wheeler on the Telford Memories Facebook Group on 23rd November 2017. [84]
We continue on our journey along the old Coalport Branch with a ground-level shot along the A442 showing the line of the old railway.
Looking Southeast along the A442, Queensway from the Northwest-bound off slip road. The A442 was built over the line of the Coalport branch which was curving along the length ahead towards the Southeast. [Google Streeetview, June 2022]The 25″ Ordnance Survey from the turn of the 20th century again. The important feature on this length of the Coalport Branch was the bridge which carried Stafford Road over the line. [12]Once again, this satellite image covers approximately the same area as that covered by the OS map extract above. The purple line is the route of the Coalport Branch as recorded on railmaponline.com. [4]An image from the Southbound carriageway of the A442 from a position at the top-left of the satellite image above. [Google Streetview, June 2022]From the same Southbound carriageway, the bridge which carries Stafford road over the A442 is visible in the distance. The Coalport Branch followed a tighter curve than the modern road, passing under Stafford Road to the South of the modern bridge over the A442. [Google Streetview, June 2022]Stafford Road, Oakengates looking North across the bridge over the A442. The bridge over the Coalport Branch would have sat just to the South side of the modern A442 in roughly the location indicated by the purple line on the photograph. [Google Streetview, June 2022]
A Brown’s Sentinel bus crosses the Stafford Road bridge in Oakengates in March 1963. For much of his married life, Ron Dean was in the driving seat. And his wife Greta was his conductor. The camera is pointing towards the South. [15]
Stafford Road Bridge again, sometime in the 1960s before the A442, Queensway dual carriageway was built. This was probably taken at the time that a footbridge was being installed alongside the road bridge. The photo is taken facing South along the Brach line. It was shared on the Telford memories Facebook Group by Bear Yeomans on 7th February 2016. [16]Looking North from Stafford Road Bridge along the Coalport Branch towards Hadley Junction. This image was shared on the Oakengates History Facebook Group by Gwyn Thunderwing Hartley on 23rd May 2020. [50]Looking North under Stafford Road Bridge along the Coalport Branch. This image was shared on the Oakengates History Facebook Group by Gwyn Thunderwing Hartley on 30th July 2018. [51]This aerial photo of Oakengates was taken in November 1970. Just to the right of the top-centre of the image, Stafford Road bridge can be seen with the footbridge alongside it. The A442 is not evident, but the Coalport Branch cutting can be followed from the road bridge to the right. This image was shared on the Telford Memories Facebook Group by Marcus Keane on 22nd March 2022. [19]An enlarged extract from the picture immediately above showing Stafford Road bridge in the top-left. [19]This next length of the line takes us through Oakengates Market Street Railway Station and Goods yard. The 25″ Ordnance Survey of 1901, published in 1902 shows the station and goods yard to full advantage. [20]The railmaponline.com satellite image of the same area as in the map extract above. This begins to show how congested the area around Oakengates was with a variety of railway lines and sidings. [4]The level crossing to the immediate North of Oakengates Market Street Station with the gates closed to road traffic to allow the passage of a goods train in the capable hands of a Pannier tank! We are looking East up Station Hill. This view was shared by Gwyn Thunderwing Hartley on the Oakengates History Facebook Group on 10th March 2017. [55]Looking East up Station Hill from Oakengates Market Street Station forecourt. This image was shared by Metsa Vaim EdOrg on the Telford Memories Facebook Group on 2nd November 2019. [26]
This photograph is taken from a point just off the left of the above image and also looks East up Station Hill across the railway line, which was by the time the picture was taken, closed. The image was shared on the Telford memories Facebook Group by Marcus Keane on 13th November 2016. [27]
Oakengates Market Street Station from the East. This image was shared on the Oakengates History Facebook Group by Gwyn Thunderwing Hartley on 29th March 2021. [49]Oakengates Market Street Station as seen from the East on Station Hill, adjacent to the Police Station. This image was shared by Paul Wheeler on the Telford memories Facebook Group on 16th August 2017. [21]A view from almost exactly the same location in 2022. The police station site is on the left of the image, the modern railings in the same location as on the image above. The A442, Queensway, overbridge now dominates the scene. [Google Streetview, June 2022]Looking West into Oakengates after the removal of the passenger facilities at Oakengates Market Street Station. Rails remain in the road. It is possible that this photograph was taken in the late 1950s or the very early 1960s. It was shared on the Oakengates History Facebook Group by Gwyn Thunderwing Hartley on 10th March 2017. [56]This little tableau of three images (one above and two below) were shared on the Oakengates History Facebook Group on 16th July 2019 by Gwyn Thunderwing Hartley. Two of the pictures show the work going on to deal with a derailment of a Pannier Tank. The photographs of the derailment were sent to the Group by John Wood and were taken by Mike Dodd. Gwyn Thunderwing Hartley writes: A “derailment at Oakengates Crossing sometime before 1958. This is the LNWR LMS Rail line Market Street/Station Hill. Pic 3 shows where the then disused Line cuts across the Station Hill Road (the line ran between the Building and the Bus Stop traveling in the direction of Wellington), the building is the old Whitefoots Showroom, this was formerly a Pub, the building you can see the back of in the derailment pic is this same as in Pic 3. Much of this info is from John Wood.” The first picture shows the level crossing gates in the background and was taken looking Southeast with the Goods Yard and erstwhile Station Buildings beyond the Crossing gates to the South. The first of the two pictures below is taken looking North from the crossing gates. [57]HistoryLooking South from the level-crossing at the bottom of Station Hill and the top of Market Street. Market Street Railway Station buildings were off the image on the right. The station platform edge can be seen through the crossing gates. The line curves round passed the Goods Yard, under Canongate Bridge and on towards the A5 at Greyhound Bridge. The photo was shared by Gwyn Thunderwing Hartley on the Oakengates History Facebook Group on 9th November 2019. [58]Oakengates Market Street Station in the 1930s looking North towards Hadley, (c) C.L. Mowat used here with permission from dawleyhistory.com. [81]The view North through Oakengates Goods Yard and Market Street Station. The crossing gates at Station Hill/Market Street appear to be closed to rail traffic. The station building sits to their left in the centre of this image. This image was shared by Paul Wheeler on the Telford memories Facebook Group on 16th August 2017. An equivalent modern view from Canongate is not feasible because the industrial site is now screened by trees. [22]Looking North towards Oakengates Market Street Station through the Goods Yard in 1932. This picture was shared on the Oakengates History Facebook Group by David Bradshaw on 27th November 2016. The goods train is hauled by an unidentified 0‒6‒0 and is passing a Super D 0‒8‒0 waiting in the goods yard. The very sharp curve just apparent on the extreme left is Millington’s timber yard siding. The shed on the left was latterly used by the CWS as a store, (c) C.L. Mowat. [54] [81]Looking North through the area that was Oakengates Market Street Station Goods yard from the Eastern end of Commercial Way. The purple line shows the approximate route of the Coalport Branch. The white building at the centre of this image is the old goods shed now put to a different use! [Google Streetview, June 2022]Looking Southeast from the same location. The mainline of the Coalport Branch would have run along the treeline behind the industrial units. [Google Streetview, June 2022]The view from the Southeast on Canongate. The purple line shows the approximate location of the Coalport Branch which passed under the road by means of a bridge. [Google Streetview, June 2022]Canongate Railway Bridge was a brick-arched structure. It is seen here infilled to support the road above. This image was posted by BruceS on Waymarking.com on 2nd June 2015. [23]Looking North under Canongate Bridge towards Oakengates Market Street Station. This picture was shared on the Oakengates History Facebook Group by Gwyn Thunderwing Hartley on 12th October 2017. [52]An aerial image looking North along the line of the Coalport Branch in 1948. Canongate bridge is in the centre of the image, the Station is towards the top of the image beyond the goods yard, (c) Historic England, Britain from Above (EAW013748). [24]An extract from the above image which shows Canongate, the Goods Yard and the Station in greater detail, (c) Historic England, Britain from Above (EAW013748). [24]The next length of the Coalport Branch took it passed Snedshill Iron Works and into a tight corridor which included the GWR Shrewsbury to Birmingham railway Line, the Coalport Branch and a Mineral Railway. This area is again shown on the 25″ Ordnance Survey of 1901, published in 1902. [26]Railmaponline.com’s satellite imagery shows the same area as in the OS map above as it appears in the 21st century. All the lines mentioned above are included in the overlay to the satellite imagery. [4]Another extract from the aerial image of 1948 which showed Canongate Bridge, this shows the area to the South of Canongate. Snedshill Iron Works are on the right of the image. In the centre of the image are John Maddock and Co.’s works for whom the aerial photographs were taken. Those works do not feature on either the 1901 Ordnance Survey or the modern satellite imagery. [24]Looking North from the A5 bridge over the Coalport branch. Snedshill Ironworks are on the right of the image. The bridge at the centre of the image is the same one that appears at the bottom of the aerial image immediately above. This photograph was shared on the Telford Memories Facebook Group by Paul Wheeler on 18th March 2018. [37]Looking Northwest along Reynolds Drive, Oakengates. The Coalport Branch was in cutting at this location. The purple line gives an idea of its Route. Its route crosses Hawkshaw Close a 100 yards or so to the left, as shown below. [Google Streetview, June 2022]Looking South along Hawkshaw Close, Oakengates with the line of the Coalport Branch shown. As noted above the line was in relatively deep cutting at this location. Google Streetview, June 2022]Looking North from Newlands Road, Oakengates, towards Oakengates Market Street Station. At this point on the line we are a little to the North of the accommodation bridge shown on the 1948 aerial image above. The approximate route of the line is again shown by the purple line. The line was, however, in deep cutting at this location. [Google Streetview, June 2022]Looking South from Newlands Road, Oakengates, along the line of the Coalport Branch which was in deep cutting at this location. The road to the right of this image is Station Road which once ran immediately alongside the old railway line a little further to the South.[Google Streetview, June 2022]Looking North along Station Road across the line of the old railway. Station Road was diverted when the new roundabout (immediately behind the camers) was constructed. The next two monochrome images focus on this location as it was in 1948. [Google Streetview, June 2022]The same length of line, but this time as shown in an aerial image from the Northwest, also taken in 1948. The image features John Maddock’s works with Snedshill Iron Works beyond, (c) Historic England, Britain from Above (EAW013752). [25]A closer view of the top-right of the above image with the Coalport branch heading away to the South. This area saw significant alterations in the later years of the 20th century. The significant bridge carries what is designated the B5061 in the 21st century, but was the A5 Trunk Road. The works immediately beyond the bridge and alongside the A5 are the Lilleshall Company’s Snedshill Brickworks, (c) Historic England, Britain from Above (EAW013752). [25]The 1″ OS Map of 1898, published 1899, shows the location of the bridge. The immediate area is now under the Greyhound Roundabout which sits alongside the A442. [28]Looking Southeast along the A5 towards the Lilleshall works at Priorslee. The dominant building with the curved roof on the left of this image is the Lilleshall Company’s Snedshill Brickworks. The Coalport Branch passed under the bridge at the centre of the image. This phot was shared on the Telford Memories Facebook Group on 23rd February 2014 by Vince Allen. [29]Looking down into the cutting of the Coalport Branch from the East in 1973. The road running across the image is the A5. The arch bridge is the Greyhound Bridge which is eventually replaced by the Greyhound Roundabout. The picture was shared on the Oakengates History Facebook Group by Gwyn Thunderwing Hartley on 14th May 2019. [58]A local collapse of parapet walling alongside the bridge occurred in 1966. The bridge is off to the left of the photograph, the running line of the Coalport Branch just below the image. This press cutting was shared on the Telford Memories Facebook Group by Paul Johnson on 1st March 2014. [30]In this postcard aerial view of Snedshill Brickworks from the West, the Mineral Railway adjacent to the Coalport Branch is visible, crossing the A5 at the bottom edge of the image. The Coalport Branch is just off the bottom of the picture. [32]Snedshill Brickworks again, this time in the 1950s and viewed from the East. The A5 runs away to the right of the image. The cutting of the Coalport Branch runs across from middle-right to middle-left. The A5 bridge over the line is hidden by the Works buildings. This picture was shared on the Telford Memories Facebook Group by Marcus Keane on 26th March 2014. [36]From a similar angle to the last picture but taken from the Lilleshall Brickworks buildings in 1974, this image was carried by the Shropshire Star at the time. The A5 runs diagonally across the shot with the dwarf wall above the arched Greyhound Bridge visible to its right. The cutting of the Coalport Branch runs left to right across the centre of the image. The picture was shared on the Oakengates History Facebook Group on 22nd October 2020 by Gwyn Thunderwing Hartley. [59]
This photo does not have the best of definition, but it is worth including as it shows the view South across the Brickworks before redevelopment work in the area. The Shrewsbury to Birmingham line curves away to the East. The A5 bridge over the Coalport Branch is visible at the bottom of the image. [33]
This aerial image looks to the South at a time of great change in the local landscape. In the bottom-eft of the image, the A5 still runs on its route passed the Snedshill Brickworks and across what was once the Coalport Branch. Greyhound roundabout is under construction. South of the roundabout the mainline from Shrewsbury to Birmingham appears out of its tunnel and the A442 construction alongside it is well advanced. Toward the top of the image is the M54 construction work and in the top-right corner, part of Telford’s new town centre. [33]This aerial image is taken facing North. The Coalport Branch no longer features. Snedshill Brickworks remain and the A442 is not yet completed and there is little or no evidence of it North of Greyhound Roundabout. What will be the Northbound off-slip road from the A442 runs South away from the newly completed Greyhound Roundabout. [33]Looking North under the A5 towards Oakengates, apparently the bridge was known as Greyhound Bridge and gave its name to the roundabout that replaced it. This photo was shared on the Oakengates History Facebook Group by David Bradshaw on 27th November 2016. [54]
From this point South the A442 now occupies the space which once was used by the Coalport Branch. The Northbound slip road from the A442 can be seen following the line of the old railway on the Railmaponlin.com satellite image below.
The 25″ Ordance Survey of 1901, published 1902, shows the Coalport Branch passing over the GWR Shrewsbury to Birmingham main line. The GWR line passed under the area in a deep tunnel with the Coalport Branch above it also in a relative deep cutting. The two lines ran approximately parallel for a short distance. [31]Railmaponline.com shows the same area with the local lines overlaid on the satellite imagery from Google Maps. [4]The view North, back towards Oakengates from the northbound slip road of the A442. [Google Streetview, June 2022]The view South from the same location showing the approximate route of the Coalport Branch. [Google Streetview, June 2022]A little further South along the A442 with the approximate line of the Coalport Branch marked once again. [Google Streetview, June 2022]Further South again, this time the camera is on the southbound carriageway. The Coalport Branch ran approximately along the modern treeline. Beyond the horizon the A442 curves back over the formation of the old line. [Google Streetview, June 2022]Further South again the A442 crosses the line of the Coalport Branch. The next Railmaponline.com satellite image shows that the footbridge in this view is very close to the point where the A442 leaves the formation of the Coalport branch. [Google Streetview, June 2022]This next extract from the 25″ Ordnance Survey of 1902 shows the Shrewsbury to Birmingham line to the East of the Coalport branch and running parallel to it. Both pass under the road leading Northeast out of Hollinswood. The Coalport branch remains in cutting along much of its length on this map extract. [34]The same area on the satellite imagery provided by Railmaponline.com. The purple line shows the route of the Coalport Branch which, from close to the top-left of the image ran along a route immediately adjacent to the modern A442. Hollinswood Road has been replaced by a footbridge over the A442 and the Shrewsbury to Birmingham main line. It is further cut to the Southwest by the M54 and its junction arrangement, just off this image to the bottom-left. [4]Looking North towards Oakengates from the cycle track on the West side of the A442. The approximate route of the Coalport Brnach is indicated by the purple line. [My photograph, 13th March 2023]Looking Southeast from the cycleway alongside the A442. [My photograph, 13th March 2023]Another view looking North, but this time taken from the Footbridge/Cycleway bridge over the A442. [My photograph, 13th March 2023]Looking South from the same bridge with the route of the old railway indicated by the purple line. The bridge ahead carries the M54 over the A442. [My photograph, 13th March 2023]Looking South again, this time from the cycleway/footpath which runs under the M54 bridge over the A442. [My photograph, 13th March 2023]This is now the view South towards the Telford Station footbridge. My photograph, 13th March 2023]A few steps ahead and turning a half-circle, this is the view looking North under the M54 Bridge with the old railway route marked by the same purple line. [My photograph, 13th March 2023]The view South once more showing the line of the old railway. [My photograph, 13th March 2023]Looking North-northwest on Rampart Way under the footbridge leading to Telford Railway Station. The approximate line of the Coalport Branch is shown by the purple line. The M54 runs parallel to and beyond the purple line [Google Streetview, June 2022]Looking to the Southwest under the Station Footbridge with the line of the Old Coalport Branch shown in purple. [Google Streetview, June 2022]Old Dark Lane Colliery and Brickworks appear at the top of the next extract from the 25″ Ordnance Survey of 1901, published in 1902. Dark Lane Village is at the bottom of the image. Dark Lane village was lost as part of the development of Telford. The Branch has turned away from the Shrewsbury to Birmingham line towards the South. [35]The same area on the satellite imagery provided by Railmaponline.com. The route of the old line cuts across the West side of the A442 interchange and then South through housing and across Dale Acre Way. [4]Looking South across Hollinswood Interchange along the line of the Coalport Branch. [Google Streetview, June 2022]Looking East along the northern arm of Dunsheath. The line of the old railway crosses the housing development immediately this side of the black car and the van (approximately)! [Google Streetview, June 2022]Looking East along the southern arm of Dunsheath. The line of the old railway crosses the housing development as shown by the purple line. [Google Streetview, June 2022]
Old Darklane Colliery and Brickworks
The Colliery was opened in 1855 and closed finally in 1885. The owners were: Beriah Botfield (1855-1860]; Leighton and Grenfell (1869-1870); and Haybridge Iron Co. Ltd (1875-1885). [38]
Dark Lane Village
Dark Lane Village was lost in its entirety to the redevelopment which produced Telford. Dark Lane Row and the Methodist Chapel appear at the bottom of the OS map extract above. The remainder of the village features at the top of the OS Map extract below. Malins Lee Station was on the South side of the village. Little Dark Lane Colliery to the West. There were three long rows of cottages which were known locally as: Long Row (about 550ft long and containing 20 houses); Bottom Row (a little over 500ft long and containing 25 houses); and Short Row (nine houses built by the Botfield family in around 1825). A full description of the village and pictures of the buildings can be found on the Dawleyhistory.com website. [39]
The last extract from the 1901 25″ Ordnance Survey in this article covers Dark Lane village and Malins Lee Railway Station. [47]The same area on the satellite imagery provided by Railmaponline.com. After crossing Dale Acre Way, the route of the old line heads South-southwest across open ground and then over land used for housing development. [4]Looking West on Dale Acre Way. the approximate location of the old railway is shown by the purple line. [Google Streetview, June 2022]The view West in the 1960s along Dark Lane the GWR mineral railway was hidden in the dip. The road then rose relatively steeply to cross over the Coalport Branch. The bridge can be seen middle-left of this image. [40]This Streetview image is taken from approximately the same location as the picture immediately above. [Google Streetview, June 2022]This bucolic colour image shows the road featured in the image above but this time from a location adjacent to Bottoms Row, Dark Lane. The bridge over the Coalport Branch can be seen again on the horizon. This photo was shared on the Telford memories Facebook Group by Marcus Keane on 28th February 2023. It was colourised by Simon Alun Hark. [42]This image is taken from the same geographical location as the one immediately above, facing in the same direction. The light blue line indicates the alignment of the old Dark Lane. [Google Streetview, June 2022]This postcard view shows Bottom Row with the Methodist Chapel beyond. The bridge on the right of the image carried Dark Lane over the Coalport Branch. Malins Lee Station was beyond the bridge to the right of the image. A matching modern image is not practical as the camera location is now in the midst of a copse of trees close to the boundary of the exhibition centre car park. [39]
‘The Miner’s Walk‘ website provides more information about the area around Dark Lane village. [41] It includes a hand-drawn overlay of modern roads over the Ordnance Survey of the 1880s.
Malins Lee Station as in appeared in 1932.The photograph seems to have been taken facing South from the bridge which carried Dark Lane over the line. The passenger facilities at the station seem to be a little different to others on the Coalport Branch. The station was closed for two years during WW1 as an economy measure and finally closed in 1952 with the line remaining open for goods traffic for more than a decade. Just to the South of the station was a single siding which served immediately local industries. This picture was shared by Lin Keska on the Telford Memories Facebook Group on 15th August 2018. [45]Marcus Keane shared this composite image on the Telford Memories Facebook Group on 20th July 2014 which shows the location of Malins Lee Station in relation to the modern blocks of flats in Hollinswood. [48]Malins Lee Station once again. This photo seems to have been taken from the filed opposite the station. The tall chimney behind the station was probably that of Dark Lane Foundry. This photograph was shared by Marcus Keane on the Telford memories Facebook Group on 24th January 2018, (c) Ray Farlow, circa 1907. [43]Malins Lee Station passenger facilities. The photograph was shared on Telford Memories Facebook Group by Marcus Keane on 20th September 2017. [44]Malins Lee Station had been closed to passengers for 12 years when this photograph was taken of a goods service on the Coalport Branch. The picture was shared on the Telford memories Facebook Group by Lin Keska on 15th August 2018. [46]
We have reached the end of this article. Two further articles will cover the remaining length of the LNWR Branch to Coalport East. The next article can be found on this link:
The Coalport Branch of the Shropshire Canal appears on the schematic plan below. The tub boat canals were linked to the Shropshire Union Canal via the Newport Canal (the Shrewsbury and Newport Canal).
This schematic representation of the Shropshire Tub Boat Canals is helpful in clarifying the extent of the network. It shows the locations of all the inclined planes on the system. These are marked with a red arrowhead which in each case highlights the direction of the lift. The Trench Branch and Incline were in important link in the journey between the Shropshire Union Canal and the River Severn at Coalport, linking the Newport Canal to the Wombridge Canal which became a part of the Shropshire Canal. [2]
An Act of Parliament dated 11th June 1788 enabled the construction of the Shropshire Canal. It was opened along nearly its full length by 1791 and served the major ironworks and collieries in its immediate vicinity. These included “the Snedshill and Priors Lee Furnaces, the Lilleshall Company’s early mines, the Madeley Court Ironworks, Blists Hill Furnaces and the Coalbrookedale Company.” [24: p 167]
The Shropshire Canal was blighted by subsidence throughout its life. Many of the mines in the area were shallow workings only had short working lives and, once the reserves that they exploited were exhausted, were abandoned. Their demise often resulted in water loss from the canal, a problem which could not be addressed quickly. Of more substantial difficulty were the occasions when subsidence led to more significant structural damage to the waterways and their associated inclined planes.
Initially, the majority of the loads carried by the canal were transported only short distances between industrial sites in the immediate area. Over time, first coal and pig iron and later other products were dispatched to a variety of destinations outside the area. An inclined plane (the Hay Inclined Plane) linked the Canal to the River Severn. See:
Coalport grew significantly as a result of this trade and “within a few years two potteries, a rope works and a chain works opened there.” [24: p167]
A length of the canal from Trench to Shrewsbury was open by 1797, but it remained isolated from the rest of the canal network until 1835, when the Birmingham and Liverpool Junction Canal built the Newport Branch from Norbury Junction to a new junction with the Shrewsbury Canal at Wappenshall. [1]
The Trench Branch brought the Canal to the top of Trench Inclined Plane, that length of canal and the Inclined Plane are covered in an article which can be found here:
At the top of the incline a junction was made with the Wombridge Canal which is marked as a continuation of the Trench Branch on OS Maps.
The Wombridge Canal opened in 1788, and parts of it were taken over by the Shrewsbury Canal Company in 1792, who built the inclined plane at Trench. It lowered tub-boats 75 feet (23 m), and remained in operation until 1921, becoming the last operational canal inclined plane in the country. The canal had been little used since 1919, and closed with the closure of the plane. [3]
As the schematic plan of the Shropshire Canal network above shows, from the top of Trench Inclined Plane (Wombridge Wharf) tub-boats could be taken in two different directions. Turn to the South and it was only a short journey to Wombridge Iron Works. This short length of the canal is shown on an extract from the 6″ Ordnance Survey of 1881 below. …
Trench Inclined Plane enters this map extract from the 6″ OS Map of 1881 (published in 1887] in the top-left corner. Wombridge Ironworks are shown in the bottom-right of the image. Wombridge Collieries appear close to the centre of the map. Wombridge Ironworks where extended, before the time of the Ordnance Survey, across the line of what was a slightly longer canal arm. [5]This is an extract from a wider plan of the Shropshire Canal network included on the website, ‘Exploring Telford’. It shows a longer length of the canal South of Trench Inclined Plane, running on passed Wombridge Iron Works, Wombridge Forge and on to Wombridge Farm. The website ‘Exploring Telford’ [21] was developed by Richard Foxcroft. Richard, sadly died in 2018, I have been unable to contact anyone about his website. The plan from which this extract is taken appears on the Homepage of ‘Exploring Telford’. [21] The line shown on this computer generated drawing matches well with the drawing included immediately below and which was sourced from British History Online [22]Wombridge and Priorslee in the 1840s. The area of interest to us here is in the top-left of the image around Wombridge. That area is enlarged below. [22]An enlarged extract from the plan above. In the 1840s, the canal arm which extended South of Trench Inclined Plane was already truncated with short lengths isolated from the network still in use. [22] British History Online indicates that this length of the canal (South of Wombridge Ironworks) was probably abandoned by 1819. [23]
Northeast of Trench Inclined Plane the Wombridge Canal linked across to Old Yard Junction. Here the Donnington Wood Canal continued Northeast and the Coalport Branch ran to the South.
Travelling South on the Coalport Branch Canal, tub-boats would have immediately encountered Wrockwardine Wood Inclined Plane.
Construction of the Wrockwardine Wood Inclined Plane took place in 1791 after the Ironmaster, John Wilkinson petitioned Parliament to extend the Shropshire Canal from Snedshill to form a junction with the Donnington Wood Canal. [4]
P. Whitehead [11] provides approximate figures for the inclined planes on the Shropshire Canal as follows:
Wrockwardine Wood Inclined Plane: 350yds long, 120ft rise. Or 316yds long, 113ft 2in rise. (But note the information provided by British History Online below and reference [17] which gives different dimensions again.
Windmill Inclined Plane: 600yds long, 125 ft rise.
Lilleshall Inclined Plane: 123 yds long, 43 ft. This replaced an earlier vertical lift in a shaft and tunnel system. [11]
The Coalport Branch continued South. The majority of its route is picked up on John Rennie’s plan showing the proposed route of his Shrewsbury & Wolverhampton Railway which predated the construction of the LNWR’s Coalport Branch.
An extract from a plan drafted by John Rennie in 1844 showing the proposed route of the Shrewsbury and Wolverhampton Railway through Wellington and Shiffnal [Shifnal]. This plan predates the LNWR’s construction of its Coalport Branch. The Shropshire Canal can be seen clearly at the centre of the extract. This plan is held by the Shropshire Archive Ref. X6008/201 and is included here with their kind permission. The original map is at a 1″ to 1 mile scale. [10]An enlarged extract taken from the image immediately above. The extract shows the top of the Trench Inclined Plane in its top-left corner with the Wombridge Canal running sinuously East towards the canal junction from where the Donnington Canal heads Northeast and the Coalport Branch runs to the South. The Coalport Branch crosses the line of the proposed railway just to the Northwest of Priorslee, where a branch canal can be seen heading to the West. This is the Ketley Canal. Coalport Branch then runs parallel to the intended railway for a short distance before turning South along the East side of Dawley. Just to the Southwest of Stirchley it passes through a tunnel and at a junction divides into two. One arm runs to the South of Great Dawley in a generally Westerly direction. The other branch heads to the Southeast before encountering Windmill Inclined Plane to the Northeast of Madeley Court. From here it heads South towards the Hay Inclined Plane and the River Severn both of which are off John Rennie’s plan to the South. [10]
The route of the Canal can be picked out in greater detail on the 6″ Ordnance Survey which was completed in 1881 and published in 1888. By this time the LNWR’s Coalport Branch had been built and the canal can only been where it had not been replaced by the railway. There are, however, some very short sections of the canal still visible alongside the railway route even into the 21st century.
Wrockwardine Wood, north-east of Oakengates town centre, was originally a detached piece of woodland, later a township, belonging to the manor and parish of Wrockwardine, the rest of which lay 7 km. to the west. British History Online provides a history and a plan of the area. The plan (reproduced below) clearly shows the Inclined Plane. “An inclined plane on the Shropshire Canal rose 122 ft. in 320 yd. from the junction to a summit level on Cockshutt Piece. The Shropshire Canal closed in 1857, the Shrewsbury c. 1921. [19] An underground level, perhaps navigable, ran between Donnington Wood furnaces and the area north-west of the Nabb by c. 1800. [20]” [17]
The 1847 plan of Wrockwardine Wood as provided by British History Online. It shows the Inclined Plane to the right-side of the map slightly above the centre line. The high point of the Inclined Plane was at the Northeast end where it left the Wombridge/Donnington Wood Canals at the Old Yard Junction. This map is enlarged below. [17]Wrockwardine Wood Inclined Plane. [17]Another extract from the 6″ Ordnance Survey of 1881. The Canal route can more easily be seen on this image as, although disused, significant length were still holding water in 1881 and are coloured blue. Oakengates is on the West side of the Canal and Snedshill Ironworks can be made out at the bottom edge of the map extract. [6]I have drawn the approximate alignment if the canal onto this image. The curved edge of Wrockwardine Wood one-third along the top edge of this ESRI (NLS) satellite image extract from the left defines the point at which the canal alignment enters this image. It curves round to the Southeast, running on the Northeast side of the A442 which dominates the centre of the image. It runs along the line of the lower portion of Willows Road before running South through the modern site of Fitchett (Redland) Business Park (which sits alongside the first designated length of the Silkin Way) and then across the A442 alongside what was once Snedshill Ironworks. The line is defined by the western edge of the woodland on the West side if the A442, the East side of the Reynolds Drive estate and the tree line in Madin Park. [13]The 1881 6″ Ordnance Survey shows a section of canal alongside Snedshill Iron Works still ‘in water’. South of the Works and before reaching what was for many years the A5 Trunk Road. The newer Coalport Branch began to run along the line of the old canal. One of the Works sidings followed the line of the canal to join the LNWR branch. The red-dashed line approximately indicates the route of the canal. The blue-dashed line is the approximate route of the old Ketley Branch canal. [6]
The Loop adjacent to, and South of, Malinslee Railway Station
The Canal bed behind Malinslee Railway Station buildings in 1962. This image was shared on the Telford Memories Facebook Group by Marcus Keane on 27th February 2022. [14]An extract from the 1881 Ordnance Survey, published in 1882 showing the area to the South of Dark Lane. Little Dark Lane Colliery to the immediate West of the Station was still in use at the time of this survey. The standard-gauge siding to the West of the Station buildings can be seen on this extract as serving a tramroad wharf, as can the longer siding to the South. Tramroads are not the subject of this article, but given that the tramroads shown seem to only serve the Little Dark Lane Colliery and the Dark Lane Foundry, the traffic on these lines may have either been horse-powered or even man-powered. When the Canal was active a wharf would have existed on the West side of the canal. [25]A further extract from the 1881 6″ Ordnance Survey, showing the next length of the canal. The route of the old canal is indicated approximately by the light blue dashed line. [25]The next extract from the 6″ Ordnance Survey of 1881 takes the canal as far South as Stirchley Ironworks. There are a myriad of tramroad sidings shown at the time of the 1881 survey. Many of these are associated with Oldpark Iron Works and they fill the space between the old canal route and the Works. Most of these will not have been present in the period while the canal was active. As we will see below, there was at least one tramroad bridge across the canal in the time before the canal was replaced by the LNWR Coalport Branch. [25]
The Loop near Stirchley Ironworks
Andy Tidy surveyed the route of the Coalport Branch of the Shropshire Canal in March 2012. He highlighted two areas worthy of note. The first adjacent to Hinkshay/Stirchley Pools and the second to the South of Dawley and Stirchley Railway Station where the Canal was in tunnel during its working life. [15]
Adjacent to the Hinkshay Pools, the Canal alignment deviated from the formation of the later Railway. Andy Tidy provided a plan (below) of the location which I have annotated with the key features he refers to. His pictures of the canal deviation can be seen here. [15]
Andy Tidy says: “No sooner has the line moved off the modern Silkin Way than it is in water, first in the undergrowth but then as it passes the first reservoir the bed squeezes through the foundations of a collapsed bridge and on into open water. … The towpath sits on a narrow strand of land between the canal and the Stirchley Pools Reservoir, a pretty spot which is carefully maintained as a nature reserve. This clear stretch of canal is haunting and as you walk under the shade of the trees you almost expect to meet a horse plodding the other way towing a string of loaded tub boats. … All too soon this enduring stretch of canal slides back into the railway bed, all traces are lost at it passes through the recently rebuilt Stirchley Station.” [15]Looking North along the Silkin Way, this is the Stirchley Ironworks Bridge which crossed the Canal and later the railway. Stirchley Ironworks were on the left-hand side of the photograph, on the far side of the bridge. [My photograph, April 2022]This picture shows the length of the canal on the map above. It was shared by Andy Rose on the Telford Memories Facebook Group in February 2022. [18]
The remaining length of the canal to the South of Stirchley Iron Works is covered in a second article which can be found on this link:
A P Baggs, D C Cox, Jessie McFall, P A Stamper and A J L Winchester; Wrockwardine Wood, in A History of the County of Shropshire: Volume 11, Telford, ed. G C Baugh and C R Elrington (London, 1985), pp. 323-326. British History Online http://www.british-history.ac.uk/vch/salop/vol11/pp323-326, accessed on 29th August 2022.
This photograph was shared as a comment by Andy Rose on a group post by Marcus Keane dated 27th February 2022 which showed the length of the Shropshire Canal bed directly behind Malinslee Railway Station; https://m.facebook.com/groups/674238619260811/permalink/7378452445506028, accessed on 29th August 2022.
References provided in Reference [17] C. Hadfield; Canals of W. Midlands (1969), 40, 151, 251, 328-9; I.G.M.T., Lilleshall Co. colln. 106, 110; Trinder, Ind. Rev. Salop. (1981), 76, 84-5, 153.
Reference provided in Reference [17] Shropshire Records Office 691/1; Salop. News Sheet, xvii. 7-8.
A P Baggs, D C Cox, Jessie McFall, P A Stamper and A J L Winchester; Wombridge: Growth of settlement, in A History of the County of Shropshire: Volume 11, Telford, ed. G C Baugh and C R Elrington (London, 1985), pp. 285-289. British History Online http://www.british-history.ac.uk/vch/salop/vol11/pp285-289; accessed on 2nd September 2022.
A P Baggs, D C Cox, Jessie McFall, P A Stamper and A J L Winchester; Wombridge: Communications, in A History of the County of Shropshire: Volume 11, Telford, ed. G C Baugh and C R Elrington (London, 1985), pp. 284-285. British History Online http://www.british-history.ac.uk/vch/salop/vol11/pp284-285; accessed on 2nd September 2022.
Bob Yate; The Shropshire Union Railway – Stafford to Shrewsbury including the Coalport Branch (OL129); Oakwood Press, Usk, Monmouthshire, 2003.
Peter Clowes, in his article in the September 1963 edition of the Railway Magazine wrote: “Rolling down from the Derbyshire hills came the “gang” a train of perhaps 20 wagons, their rough iron bodies piled high with skilfully stacked lumps of grey limestone. They lurched and swayed on the flanged steel track and forced the brakeman in charge of the train to cling firmly to the leading wagon on which he perched. This is how the villagers of the High Peak remember the clattering, dusty Peak Forest Tramway, built by Benjamin Outram, that was part of the life of the district for 125 years.” [1]
He goes on to explain that the tramway was only ever used for goods, no passengers were carried except when company officials undertook tours of inspection. The line carried lime and limestone from Buxton’s quarries and kilns down to the Peak Forest Canal at Bugsworth for ongoing transport on barges to Lancashire and beyond.
Wikipedia provides a sketch map of the route of the tramway which is reproduced below.
Sketch Map of The Peak Forest Tramway. [2]
The Peak Forest Tramway. [18]
The next (adjacent) sketch map is more informative. It was included in a post about the line on the Peak and Northern Footpaths Society website. It shows the locations of a number of key features on the route of the tramway. [18]
Benjamin Outram’s original intentions were to build a canal from Ashton-under-Lyne through to Chapel Milton, now a ‘suburb’ of Chapel-en-le-Frith. [4] He sought and received and Act of Parliament to this effect, dated 28th March 1794. That Act authorised the construction of the canal, which would have been 22 miles long, and the construction of a feeder tramway/plateway from the canal to Load’s Knowle (Dove Holes), near Buxton. Gradients between Chapel Milton and Buxton were severe and unsuited to canal construction.
However, Outram decided to reduce construction costs by terminating the Peak Forest Canal at Bugsworth and building his tramway for the whole of the remaining six miles to Dove Holes. Clowes tells us that, “The line was opened on August 31, 1796, and was an immediate success. Hundreds of tons of stone were brought down to Bugsworth every day. Sometimes there were as many as 20 barges – each with a capacity of 20 tons leaving the village for Lancashire.” [1]
Wikipedia tells us that “the tramway was initially single-track, on a 4 ft 2 in (1,270 mm) gauge, constructed of stone sleeper blocks and L-section cast-iron rails that were fastened directly onto the blocks, in the same manner as [Outram’s] Little Eaton Gangway built for the Derby Canal. The rails, known as gang rails or plates, were provided by Benjamin Outram and Company who also supplied the mineral wagons.” However, in 1803, the significant traffic volumes on the line required the single line to be “made double-track, with the exception of Stodart Tunnel and below Buxton Road Bridge, using the same method of fixing the rails.” [2]
When Outram’s Peak Forest Canal Company was building the Peak Forest Tramway, between 1794 and 1796, it cut into a bed of gritstone by the hamlet of Lower Crist, about 380 yards to the east of the terminus of the Peak Forest Canal at Bugsworth. The stone apparently “had good non-slip properties and was easy to cut because it had no grain. … This bed extended south of the main line of the tramway at Lower Crist and a branch line was made into it. The Company also discovered another deposit of the same stone adjoining the nearby hamlet of Barren Clough, which is situated between Lower Crist and the canal terminus. Consequently, they purchased land there as well but it was another 56 years before Barren Clough Quarry was opened.” [3]
Clowes comments that a considerable trade in this gritstone developed as it was located so close to the Tramway and Canal. “Thousands of 6 in. square setts for the cobbled streets of the country’s growing cities were carried … to the wharfs.” [1]
“Bugsworth a sleepy little village, renamed Buxworth, … became a hive of industry.” [1] [5]
It was originally intended to extend the tramway to Buxton as and when demand for minerals grew. A further extension to Ashopton in the Hope Valley over the Rushup Moors by way of Sparrowpit , Mam Tor and Lose Hill was also planned. “These extensions never materialised and the plans were finally abandoned when the Cromford & High Peak Railway was built in 1830.” [1]
Clowes provided a vivid description of what travelling with the “gang” must have been like. A quite exhilarating experince! “Teams of horses pulled the loaded wagons from the Dove Holes quarries to the highest point of the line about a quarter of a mile away. Here the horses were unhitched. The brakeman gave the “gang” a push and then leaped onto the leading axle pin as the train of anything from 16 to 40 wagons gathered speed. At first the track curved gently through a long limestone cutting, then under the main Buxton to Chapel-en-le-Frith road by means of a stone arch bridge and down into the woods of Barmoor Clough between dry stone walls about 20ft. apart. This section of the line was closely followed by the London & North Western Railway when its spur was constructed from Stockport to Buxton, more than 50 years after the tramway was built. Until the tramway ceased operations in 1920, trains and “gangs” ran alongside each other separated only by a moss-covered wall.” [1]
As we will see in a future article about the line, “where the railway swings left into a tunnel, the tramway continued around the shoulder of a hill that shadows the birch and sycamore clad gorge which plunges down to Blackbrook. … The “gang” ran on down a steady 1-in-60 gradient to marshalling yards at the end of a 900-ft. ridge overlooking Chapel-en-le Frith. Here were workshops, stables, a permanent way store, and other buildings of the tramway company.” [1]
“An inclined plane, 500 yd. long and worked by a wire rope that ran around an 18 ft.-wide wooden drum, controlled the descent of loaded wagons to the foot of the slope. The rope was 2 in. in diameter and weighed six tons. No more than eight wagons were allowed in a run on the incline. The loaded vehicles would be balanced with an appropriate number of empties whenever possible. The weight of the descending wagons pulled the empties up the slope. Sometimes horses were harnessed to the driving drum to provide additional power. If the weight of the wagons became too great and the train started to run away, a lever-operated brake would be applied in the wooden control cabin that stood on stilts just beyond the top of the 1-in-7 incline. Sometimes, however, this proved ineffective. With an ever-increasing roar the wagons would race downhill, then jump the rails and scatter their loads far and wide.” [1]
Clowes narrative continues from the small town of Chapel-en-le-Frith: “After negotiating the plane the “gangs” were reassembled in the Townend sidings and were started again on the journey to Bugsworth under their own momentum. Soon they were clattering across Bowden Lane and through a copse of oak and elm.” [1]
“A mile west of Chapel was Stodhart Tunnel which the wagons entered through a steep sided cutting, the slopes of which were covered with ivy and rhododendron bushes. For 100 yards the “gangs” thundered in darkness. Then they were out into daylight and speeding along the fastest part of the track through Chapel Milton. There were sidings here across the road from the old Spread Eagle Inn-and two or three wagons of lime might be shunted off the main line to await the arrival of local farmers with horse and cart. The tramway continued through the pleasant fields of Bridgeholm, across the Whitehough road and along the banks of Black Brook to Bugsworth. The whole journey might take three hours, allowing for delays on the plane.” [1]
At Bugsworth, the tramway divided into extensive sidings and there were many loading berths. where limestone was tipped into large canal-side storage bays below the level of the track. Clowes tells us that “one of the most interesting features of this inland port was a simple yet ingenious tipping wheel which consisted of two vertical, spoked wheels about 16 ft. high attached to a frame which ran on a special rail track. The frame was pushed over a line of wagons which had been run on to a pier over the canal basin, and a hook was fastened to the end of each wagon in turn. A rope led from the hook over a drum which linked the two main wheels. A man would climb up the spokes of one of the vertical wheels, so making it turn like a human gin. This lifted one end of the wagon off the rails, its hinged end-plate swung open and the contents of the vehicle spilled into the hold of a barge below.” [1]
Bugsworth Basin was surrounded by merchants’ offices and warehouses. The offices housed a series of different merchants supplying limestone, lime, coal and general merchandise. Further buildings housed workshops for track and rolling-stock repair; and stables for a horses which were used to transport goods and wagons back up the line to Dove Holes.
Outram’s plateways used L-shaped flanged track on which the wagons ran. The rails were 4 ft. 2 in. apart and initially made of cast-iron. Each rail was 3 ft. long and weighed 56 lb. Clowes tells us that, “the inner flange was raised 2 in. above the 3 in. wide running surface on which the flat wheels of the wagons ground their way. The rails were secured at the joints by cast-iron chairs which sat on stone block sleepers, each one about 18 in. square. An iron spike with a tapering head was driven through the end of each rail into an oak plug seated inside the sleeper. The clatter of “gangs” passing over these primitive joints must have been fearful and, understandably enough, rail breakages were frequent.” [1]
It wasn’t until the five year period between 1865 and 1870 that the line was relaid with 9 ft. long steel rails. These were rolled at Gorton and fishplates, 1ft 6ins long were used to connect the rails. “Between the stone sleeper blocks was laid a cobbled path which enabled the horses to get a firm grip. The cobbles were raised well above the level of the sleepers, in fact about an inch higher than the rail flange. This arrangement might have helped to guide wagon wheels back on to the track following derailments.” [1]
Clowes explains that wagons used on the tramway were very crudely constructed: “Each weighed between 16 and 20 cwt. when empty, and carried about 2 tons. Three sides of the body were sheets of cast iron held together by iron bands and two large wooden chocks. The fourth side was a hinged iron gate which swung open when the vehicle was tipped to unload its cargo. The body was bolted in farm-cart style to wooden axle beams. The wheels – some were cast iron, others were of wood with wrought-iron tyres – ran loose on iron pins projecting from the axle beams. They were secured by large washers and cotter pins. The “gangs” were coupled together by two short iron chains fastened at each end of the wagon beds. There was no proper braking system. Until the last days of working, the running wagons could be halted only by a perilous practice on the part of the brakeman. He would leap from his perch on the leading axle pin and thrust iron sprags into the spokes of the spinning wheels. This would lock the wheels and skid the “gang” to a stop.” [1]
The Route from Bugsworth to Dove Holes
Peter Clowes has given us a description of the journey from Dove Holes to Bugsworth. [1] As we have already noted, it would have been an exciting ride for the brakesman/ brakesmen in charge of the trams. The journey back up the gradient from Bugsworth to Dove Holes would have been much more of a toil and would have relied on horsepower. The route will be covered in greater detail, illustrated, where possible by contemporary plans and maps. In addition, as many modern photographs as is practical will be included and the journey will probably need to be divided into at least two articles.
Bugsworth Basin is shown below on an extract from the 1898 25″ OS Map which was surveyed in 1896. The concentration of tramway sidings is remarkable and suggests that, in the years before the turn of the 20th century, this was a very dynamic, busy and noisy place!
Bugsworth Basin, the terminus of the Peak Forest Canal, was surrounded by a myriad of tramway sidings. This extract from the 1898 25″ OS Map shows the main basin just to the South of the Navigation Inn. The tramway is shown exiting the extract at the third point down on the right side of the image. The tramway running South-east and leaving the extract in tunnel was the line providing access to the Barren Clough Quarry. That service the Lower Crist Quarry left the Tramway mainline a short distance to the East of the edge of this extract. [7]Approximately the same area in the 21st century. The renovated canal basin is clearly visible. The dual-carriageway visible at the bottom of the satellite image is the A6 Whalley Bridge and Chapel-en-le-Frith by-pass. [8]
“Starting in 1968, volunteers of the Inland Waterways Protection Society restored the canal and basins culminating in the re-opening to navigation in 2005. Now that restoration of navigation has been achieved, improvements and development continues” [9] under the auspices of the Bugsworth Basin Heritage Trust (BBHT). Their plan of the site is shown below.
The BBHT plan of the Bugsworth Basin site. Key: Ground Panel Locations are shown by green dots; Welcome Panels are shown by orange dots; Observation Panels are shown by mauve dots. [10]A schematic model of the Bugsworth Basin at the East end of the Lower Basin. (My photograph, 11th June 2021.)
Before heading east from Bugsworth Basin two particular things are worthy of note:
First, just beyond the Navigation Inn on the North side of the Upper Basin, there is a well-preserved example of a tramway wharf where goods were loaded and unloaded.
Second, the skew arch bridges which carry a branch tramway which served lime kilns.
The two skew-arch bridges which carrried the tramway branch to the lime kilns in 1976. These bridges carried the tramway branch over the Black Brook and a medieval packhorse road. The road bridge is in the foreground the river bridge is beyond. [20]The skew-arch bridge carrying the tramway branch to the limekilns over the old packhorse road. The skew-arch bridge over the Black brook is off to the left of the picture. The tramway mainline ran across the right foreground of the image. (My photograph, 11th June 2021.)The relative locations of Barren Clough Quarry junction and the Skew-arch bridges. [21]
Leaving Bugworth Basin, the Tramway passed to the North of Lower Crist Quarry. Its branch tramway left the mainline to the East of the junction with the limekiln tramway branch as shown below.
25″ 1898 OS Map extract showning The Peak Forest Tramway to the East of Bugsworth Basin. Lower Crist Quarry and its tramways are shown on the South side of the Peak Forest Tramway. Barron Clough Quarry was further to the South and was served by its own tramway which passed through a tunnel as it left Bugsworth Basin. Lower Crist Quarry is, in the 21st century bisected by the A6 dual-carriageway. Little of consequence now remains. [11]
Both the Barren Clough Quarry and the Crist Quarry (and the tunnel which gave access to the Barren Clough Quarry are covered in detail in an article by Peter J. Whitehead, “Crist and Barren Clough Quarries, High Peak, Derbyshire.” [19] It seems as though Barren Clough Quarry was not opened until the Company believed that Christ Quarry was close to exhaustion. Barren Clough was opened 56 years after Crust Quarry. It was served by a single-track tramway branch. The branch “commenced at a point 80 yards to the east of the terminus of the Peak Forest Canal. At a distance of 145 yards from the main line, it entered the tunnel before arriving on the quarry floor. Although the tunnel was relatively short, a vertical shaft was first sunk at a distance of 76 yards from the north portal (just under half way) to enable it to be excavated from four faces at once rather than at each end. When the tunnel was completed this shaft became an airshaft, although this feature was probably unnecessary for such a short tunnel.” [19]
The two quarry branch tramways are shown on the map extract below.
Barren Clough and Crist Quarries and their tramway branches. [11]Tramway routes to the East of Bugsworth Basin, imposed on a recent satellite image. (Google Maps)The location of Barren Clough and Crist Quarries in the 21st century, showing the A6 dual carriageway built in the later years of the 20th century. [Google Maps Satellite Image.]This is how RailMapOnline shows the Tramroad and its various connections over the length we have been looking at. [20]
As the OS Map extract above shows, there was a group of cottages just to the West of the tramway access to Crist Quarry. Those cottages are still in use in 21st Century. The access route to them (shown on the OS Map) has been cut by the A6 Dual Carriageway. They can only now be accessed from Bugsworth Basin.
Further East, the Tramroad follows the South side of Black Brook….
The route is shown on the 6″ Ordnance Survey from the turn of the 20th century. [21]The route of the old tramway is a well-paved/stoned footpath/bridleway for a distance to the East of Bugsworth Basin. [Google Maps]The route continues on the 6″ Ordnance Survey. [22]The route continued alongside Black Brook, although not following the meander around Harbour Cottage. [Google Maps]
Further along the line, it deviated South away from Black Brook so as to pass to the South side of Whitehall Mill.
Whitehall Mill is shown on this extract from the 25″ OS Map of 1898. It had its own tramway connection, with two separate accesses to the tramway. [22]The same area, shown on modern ESRI satellite imagery as provided by the National Library of Scotland (NLS), the Mill has expanded significantly in size and is still in use. It’s site crosses the brook. [22]Approaching Whitehall Mill from the West and looking along the old tramway route. [My photograph, 11th June 2021]Continuing to approach Whitehall Mill from the West along the old tramway route. [My photograph, 11th June 2021]Walking alongside Whitehall Mill from the West along the old tramway route. [My photograph, 11th June 2021]Continuing alongside Whitehall Mill from the West along the old tramway route with part of the site screened from the path by a very tall Leylandii hedge! [My photograph, 11th June 2021]Looking West-southwest back along the old tramway route towards Buxworth with the Whitehall Mill buildings screened by the Leylandii on the right. The Millpond is just off the image to the right. [Google Streetview, March 2021]Looking East-northeast along the line of the old tramway with the Millpond which served Whitehall Mill on the left. [Google Streetview, March 2021] The 25″ Ordnance Survey of 1898 shows the double track tramway continuing on the South side of Black Brook and curing round the village of Whitehough. [23]The same area as shown on the OS map above, as it appears on the ESRI satellite imagery provided by the NLS. [23]Looking West towards Whitehall Mill along the line of the old tramway. [Google Streetview, June 2016]Looking East along the line of the old tramway from the same point as shown in the image above. [Google Streetview, June 2016]The old tramway curved towards the Northeast for a short distance after crossing the minor road leading to Whitehough. [My photograph, 11th June 2021]The old tramway then curved round towards the Southeast before crossing another minor road leading to Whitehough (Whitehough Head Lane). [My photograph, 11th June 2021]Looking Southwest along Whitehough Head Lane towards Whitehough and showing the point at which the old tramway crossed the road at level. [Google Streetview, June 2011]Looking Northeast along Whitehough Head Lane at the point where the old tramway crossed the road. [Google Streetview, June 2016]This next extract from the 25″ OS mapping of 1898, shows the old tramway curving away from its crossing of Whitehough Head Lane. [24]The same area on the ESRI satellite imagery in the 21st century. [24]
Along this length of the tramway the formation of the old tramway is exposed with some of the old stone blocks which secured the tramways rails in position visible. The next sequence of photographs show these blocks.
This sequence of photographs show exposed stone blocks which acted as sleepers for the tramway rails. The images are all taken facing along the tramroad towards Chapel-en-le-Frith. [My photographs, 11th June 2021]
The estate of new housing visible in these pictures is built on the site of Forge Mill. An information board provides details, although the protective Perspex cover to the board has begun to fog over the years.
The information board tells us that the stone blocks were quarried at Crist Quarry, near Bugsworth Basin. Originally, the basic L-shaped rails were laid directly onto the blocks as specified by Benjamin Outram, the engineer of the tramway, but rail breakages were a problem and so, by 1837 the tramway rails were relaid on iron saddles. This is shown in the picture at the bottom-left of the information board. [My photograph, 11th June 2021]
The site of Forge Mill appears on this next extract from the 25″ OS mapping. [27]The same area as shown on the ESRI satellite imagery. [27]
Forge Mill has seen a variety of different uses over the years. The Derbyshire Historic Environment Record list these as:
BLEACH WORKS (Post Medieval – 1540 AD to 1900 AD) MILL POND (Post Medieval – 1540 AD to 1900 AD) WEIR (Post Medieval – 1540 AD to 1900 AD) PAPER MILL (Post Medieval – 1540 AD to 1900 AD) RAILWAY SIDING (Georgian to Victorian – 1800 AD? to 1900 AD) [25]
Information about the site was provided as part of the planning application for the new housing estate on the site of the Works . The document is available on High Peak Council’s website. [26] It confirms that the Forge Mill site was, before redevelopment, known as the Dorma Works. “The site was first developed in the early 1800’s as a paper mill. By the 1900’s the site changed to the production of textiles, a dye and bleach works. The site was sold in the early 20th century to Dorma who produced bed linen and cotton prints.” [26] After the site was purchased in 2005 it remained unoccupied and was largely demolished in 2010.
A siding was provided to link the mill to the tramway. This can be seen on the OS map above.
The 25″ Ordnance Survey of 1898 again. Beyond Forge Mill the route of the old tramway deviates Southward still following Black Brook. By the turn of the 20th century a Sewerage Farm had been constructed between the tramway and the brook. [28] The same area as shown on the 25″OS map extract above. The Sewage Farm is of a more significant size in the 21st century. [28]The next extract from the 25″ Ordnance Survey shows the tramway crossing Charley Lane on the level before beginning to curve back to the Northeast. [29]The modern ESRI satellite imagery shows the A6 dual carriageway embankments crossing the line of the old tramway. [29]The view back along the old tramway route towards Forge Mill. [Google Streetview, March 2021]Another view back along the old tramway route. The camera is sitting in Charley Lane. [Google Streetview, October 2022]The route of the old tramway to the East of Charley Lane now lies under the embankment of the A6 dual carriageway. [Google Streetview, March 2021]
This is a convenient point to finish the first part of our journey along the Peak Forest Tramway. There is, of course, much more to come, but this will need to wait for a future article.
Just to round off details of the old tramway’s history, we return first to Peter Clowes’ article in the Railway Magazine and then to other sources ….
The Gradual Demise of the Tramway
“Fifty years after the line was opened, the owners leased the Peak Forest and Macclesfield Canals – and, of course, the tramway – in perpetuity to the Sheffield, Ashton-under Lyne & Manchester Railway. A Parliamentary Act of 1846 provided for an annuity of £9,325 to be paid to the Peak Forest Canal Company. The railway later became part of the Manchester, Sheffield & Lincolnshire Railway, and in 1883 the canals and tramway were transferred completely to the new owners. The old canal company was dissolved. The Manchester, Sheffield & Lincolnshire Railway became the Great Central Railway in 1897 and was absorbed into the London & North Eastern Railway in 1923.” [1]
A 1925 Act of Parliament led to the closure of both the Peak Forest Tramway and the canal basin at Bugsworth. Clause 54 of Act 15 & 16 George V cap 52, 31st July 1925 was entitled ‘Abandonment of Peak Forest Tramway’. The Act was to empower the London and North Eastern Railway to construct new railways, widening others and to acquire land. It extended the time for the completion of certain works and it permitted the compulsory purchase of certain lands. Clause 54 stated: “The Company may abandon and discontinue their Peak Forest Tramway extending from Chinley to Dove Holes and may hold, sell or dispose of, or apply to the purposes of their undertaking the site and soil of any part of the said tramway so abandoned and discontinued.” [6]
After closure in the mid-1920s, records “made at the Marple Toll Office show that between 17th April 1928 and 12th February 1931 there were 30 deliveries of scrap iron from Bugsworth Basin to Prince’s Dock on the Ashton Canal at Guide Bridge. The total quantity of scrap was 523¼ tons, which averaged 17½ tons per boatload. …. At Prince’s Dock the scrap was transhipped onto the railway and from there it was taken to Sheffield for subsequent melting down. The scrap merchant who dismantled the tramway was T W Ward Ltd of Sheffield and it was melted down by Edgar Allen & Co Ltd, steel manufacturers of Sheffield.” [6]
As we have seen above, it was not until 1968 that work really began on recovering the industrial archaeology of the site and bringing the basin and canal back into navigable use. [9] The BBHT are proud of the replica wagon that they have relatively recently completed. The chassis of which “has been produced by members using traditional techniques, utilising timber cut from redundant oak lock gate balance beams, courtesy of the Canal & River Trust. The body steelwork has been produced by modern laser cutting, again from drawings by one of our volunteers. We have assembled this “kit” and mounted it onto the chassis.” [9] The replica wagon is now on display on the peninsula on the South side of the lower basin arm.
Further Reading
There is some excellent coverage of the Tramway and Bugsworth Basin available both online and in print form. This material includes:
Grahame Boyes and Brian Lamb; ‘The Peak Forest Canal and Railway; an Engineering and Business History’; The Railway & Canal Historical Society, 2012, (ISBN 948 0 901461 59 9). £30.00
Peter Clowes; The Peak Forest Limestone Tramway; in The Railway Magazine, Volume 109, September 1963, p611-617. This article can be accessed via a subscription to The Railway Magazine archives which is available as an add-on to a regular subscription to the magazine.
Since publishing a series of articles about the Micklehurst Loop, I have, over the past couple of years, kept my eye open for interesting shots of the line. This is a selection of these that I have permission to share …. A big thank you to copyright holders/photographers. Their details appear with each image.
The first photograph was taken in the middle of the 20th century. The exact date is unknown. It begins our renewed focus on the Micklehurst Loop by showing a goods train leaving the Loop in Stalybridge. …
This image comes from the collection of Peter James Birchill and was shared by him on the Stalybridge Railway Photos Facebook Group on 25th September 2021. [3] It is shown here with his permission. The photograph shows a goods train in the capable hands of locomotive No. 49536 in BR days leaving the tunnel under Cocker Hill and heading towards Stalybridge Station. No. 49536 was an ex-LMS 0-8-0 Class 7F tender loco which was built in 1929 as part of the first batch of these locomotives built at Crewe in LMS days. It bore the LMS number 9536. These locomotives were derived from an earlier LNWR design of 0-8-0. None of the Class made it into preservation, all being scrapped between 1949 and 1962. As Midlandised versions of the LNWR Class G2 and Class G2A 0-8-0s, their major failing was the Midland design office decision to use axle bearings from the Midland 4F 0-6-0s which were too small for the loads they had to carry. PJBRailwayPhotos [4]A rebuilt ‘Patriot’ on the Micklehurst Loop with a train of coal wagons in the last days of steam, probably bound for Hartshead Power Station. The locomotive is marked with the diagonal yellow stripe which means that it cannot travel under electric wires. Note Old St. George’s Church on Cocker Hill which was an unusual octagonal shape and sat over the 572 yard New Tunnel which trains from Stalybridge Station passed through at the start of their journey on the Loop line. Public Domain, PJBRailwayPhotos. [2]John Marsh writes: “A lucky encounter with a train on the Micklehurst Loop which ran from Stalybridge to Diggle Junction happened on Saturday 20th April 1968. I and some friends were on the way to Disley to photograph a railtour (MRTS/SVRS North West Tour) hauled by a pair of Black 5s. We saw smoke when coming down into Stalybridge from Diggle and realised there was a train going up the Micklehurst Loop. We managed to get to a suitable location just in time to photograph the loaded coal train as it climbed towards Millbrook Sidings on a 1 in 100 stretch and Hartshead Power station. 48549 of Stockport Edgeley (9B) hauled the train. It was transferred to Patricroft (9H) the following month and withdrawn at the end of the month.” (c) John Marsh [1]
These next two photos were taken in the yard opposite Hartshead Power Station and show one of their fireless locos and a more normal steam loco, a 0-4-0ST. The pictures were taken by Keith Chambers who writes:
“I visited Hartshead Power Station as a teenager on 22nd May 1971. We had come up from down south (Woking) to spend a day tracking down surviving steam and had already been to Heaps Bridge and seen a working loco, Colyhurst to see a ‘Jinty’ in steam albeit as a stationary boiler and finished our little tour off at Hartshead. My abiding memory is of being guided by one of the station’s staff up and over the high level conveyor to get to the locos. It was spectacular up there and slightly scary. Being a Saturday afternoon nothing much was happening shunting wise and RSH 7661 was in the back of the engine shed along with the fireless HL 3805. There was however another RSH 0-4-0ST present stored in the sidings. This was works number 7646 of 1950.”
To complete this small section on the Power Station, the next photo shows the overhead conveyor which Keith Chambers refers to.
The truncated version of the overhead conveyor at the site of the now demolished Hartshead Power Station. [5]
As usual, I will continue to keep an eye open for further interesting images which might add to our appreciation of what was primarily an important short goods line but which was also used as a convenient diversion route for passenger trains.
If you want to read the other articles in this series, you can find them on these links:

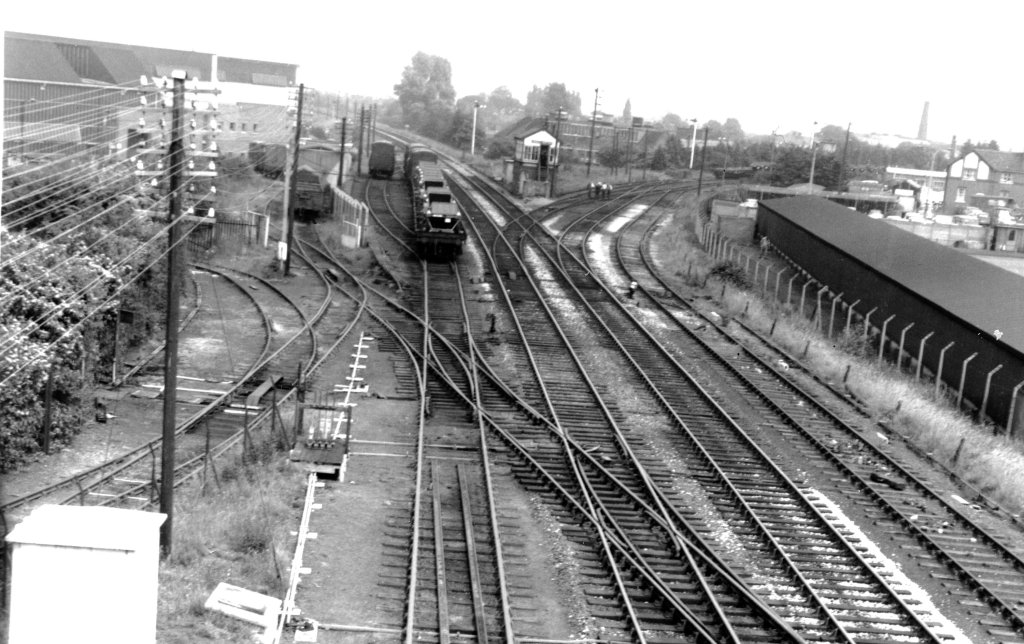

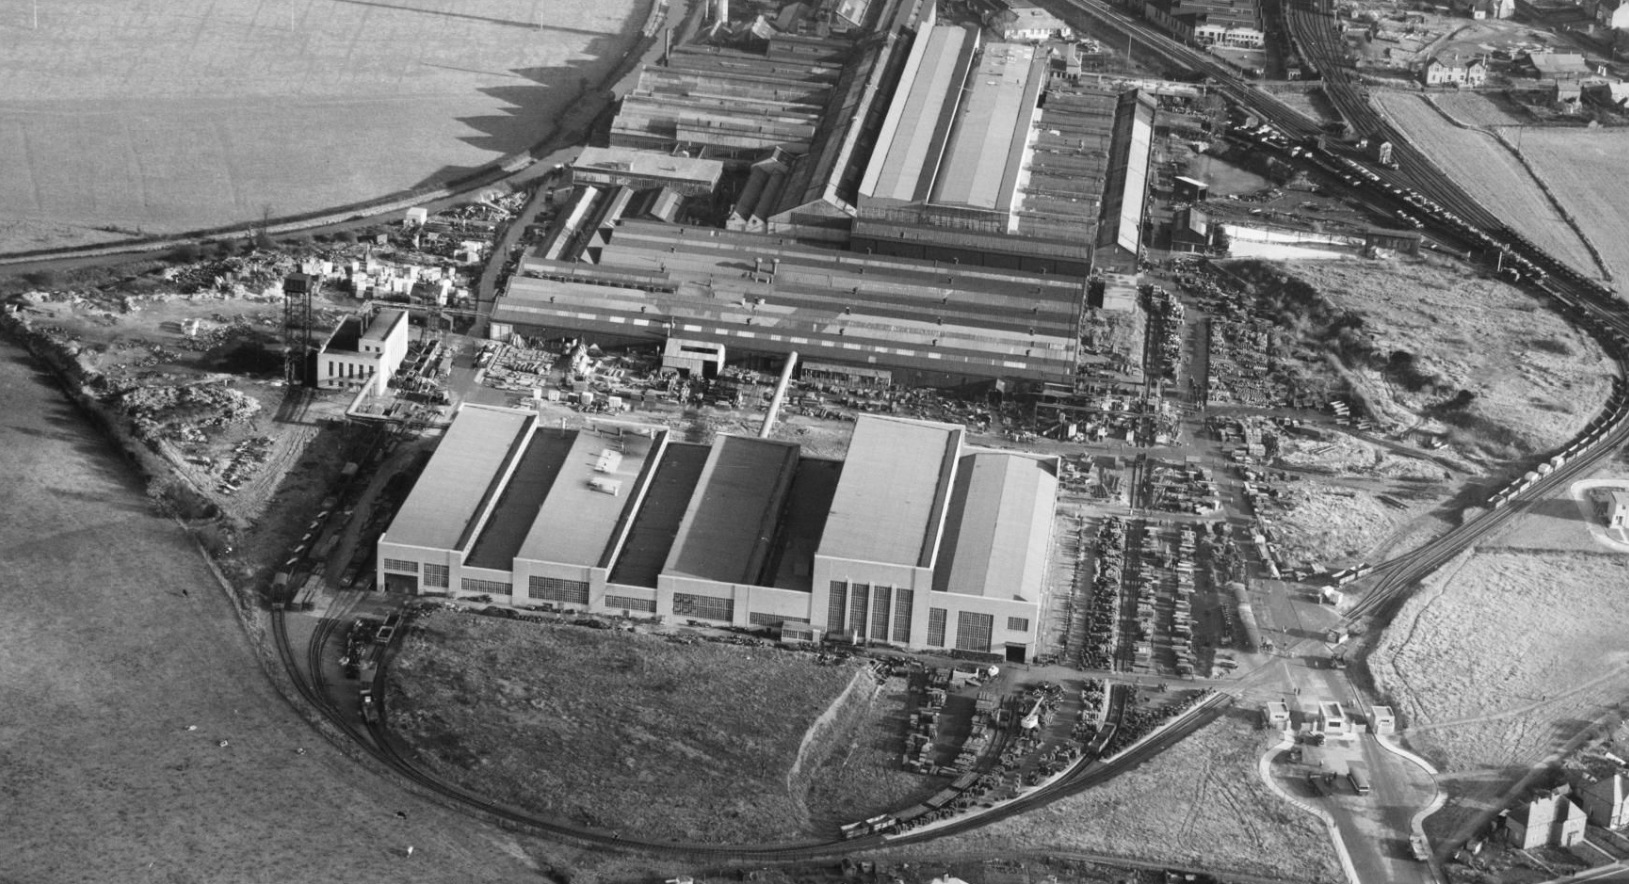
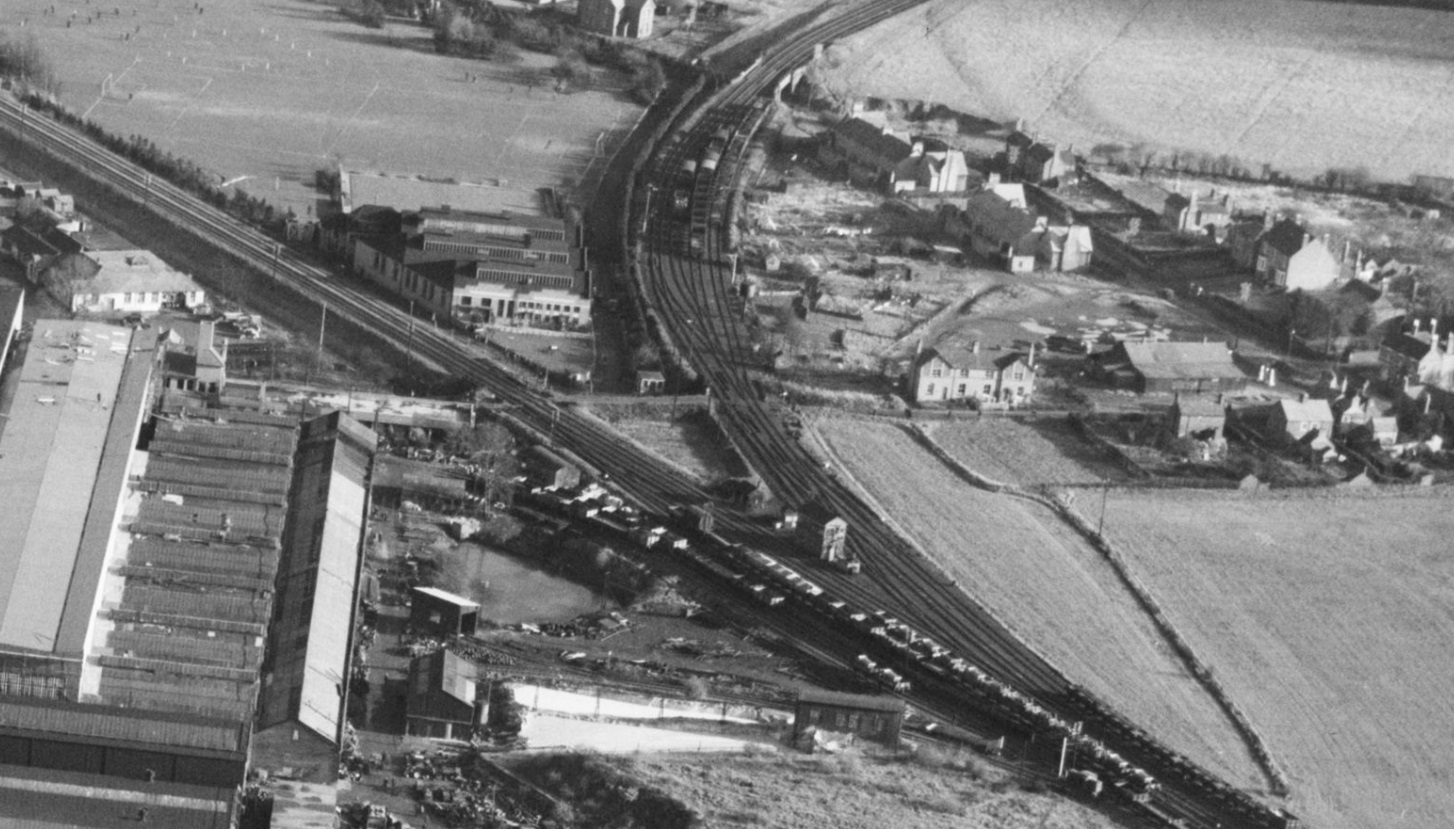
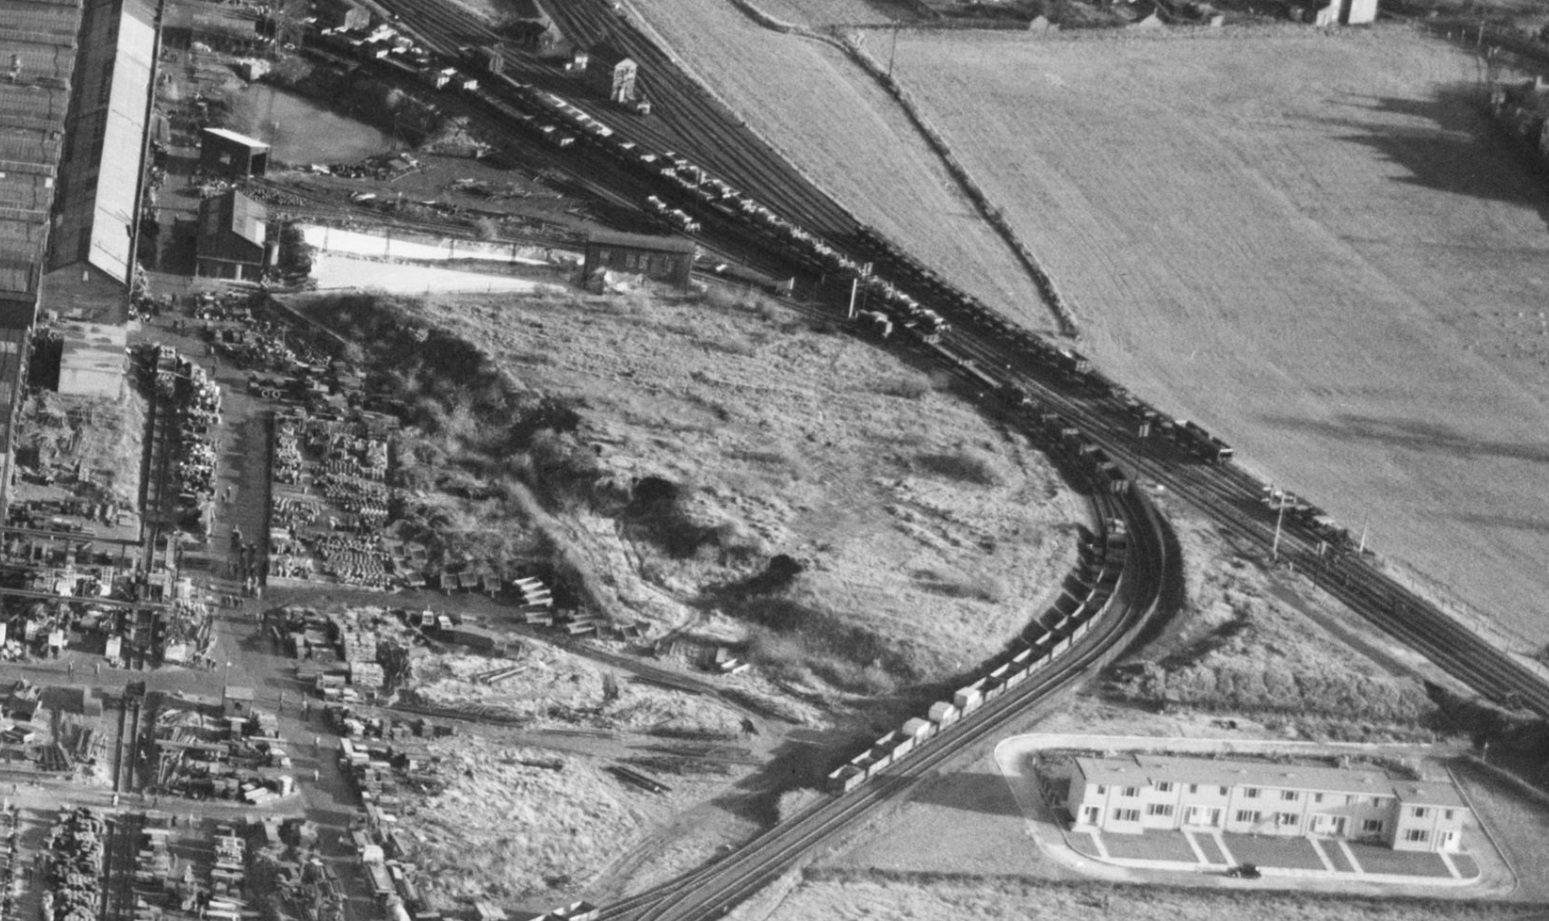


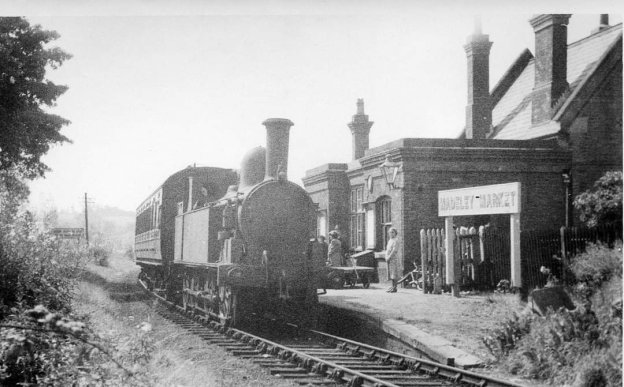
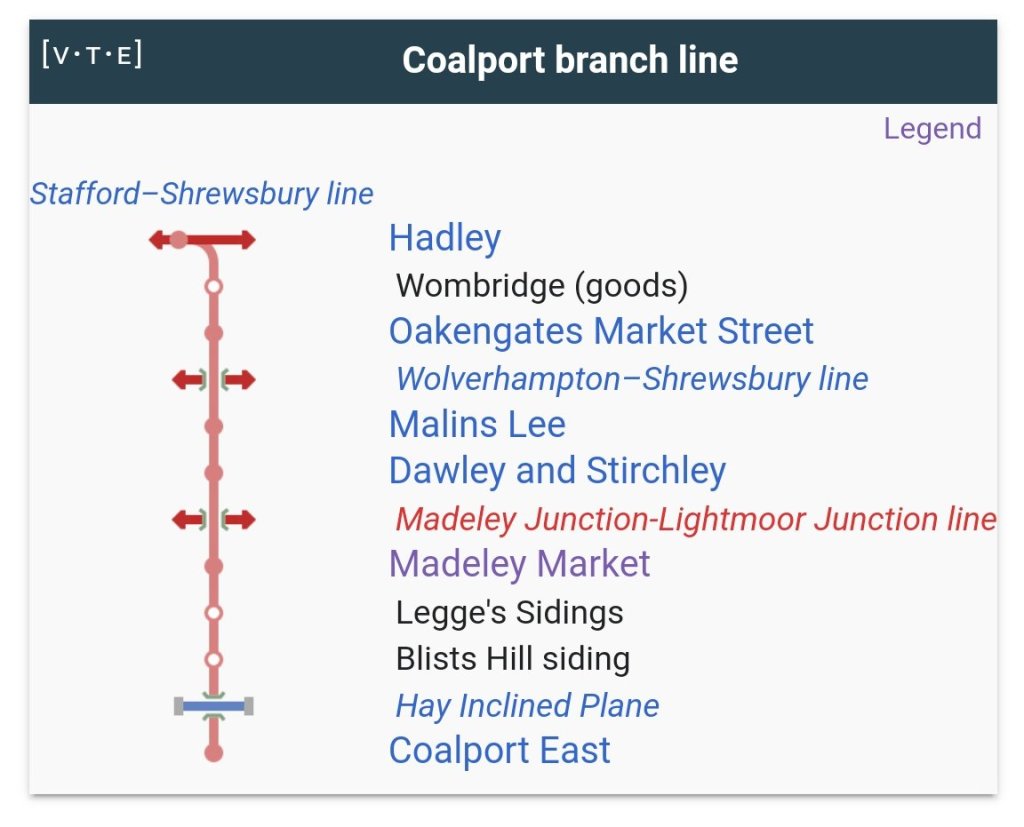
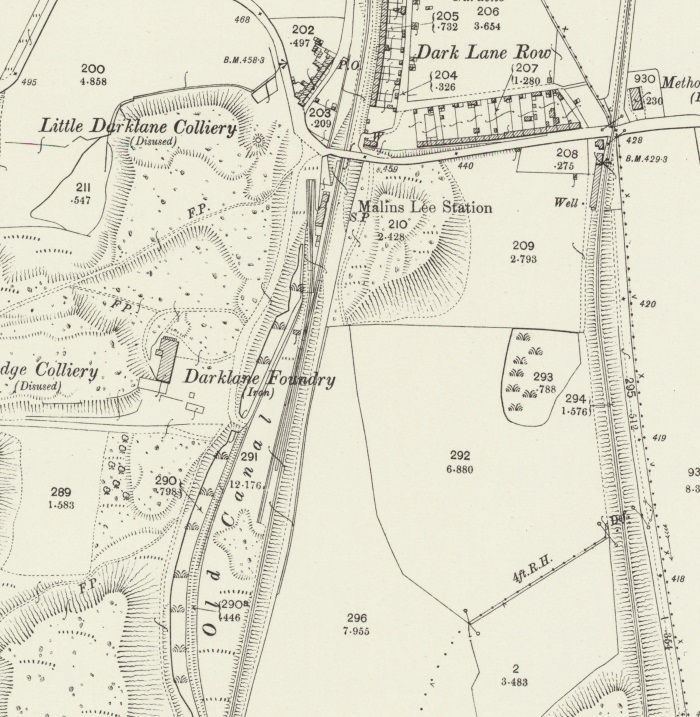
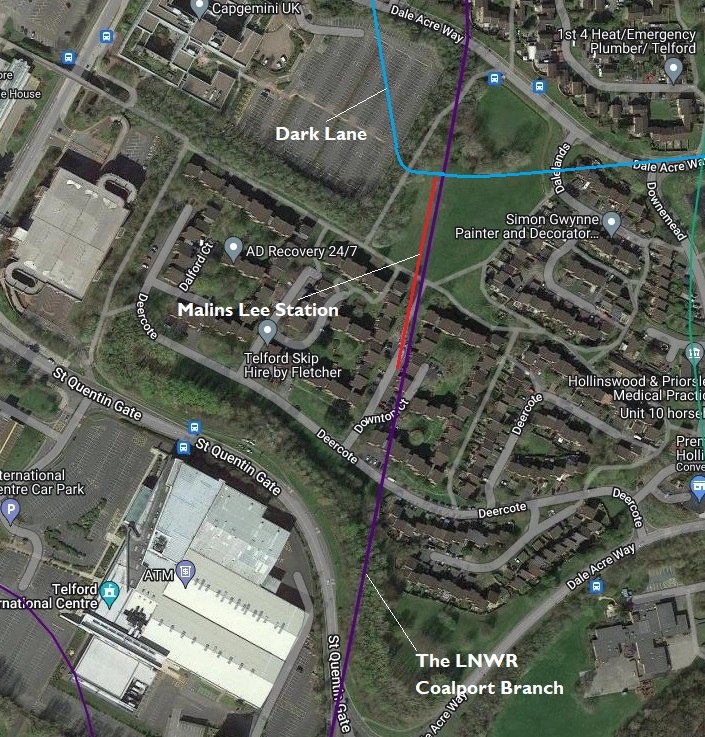
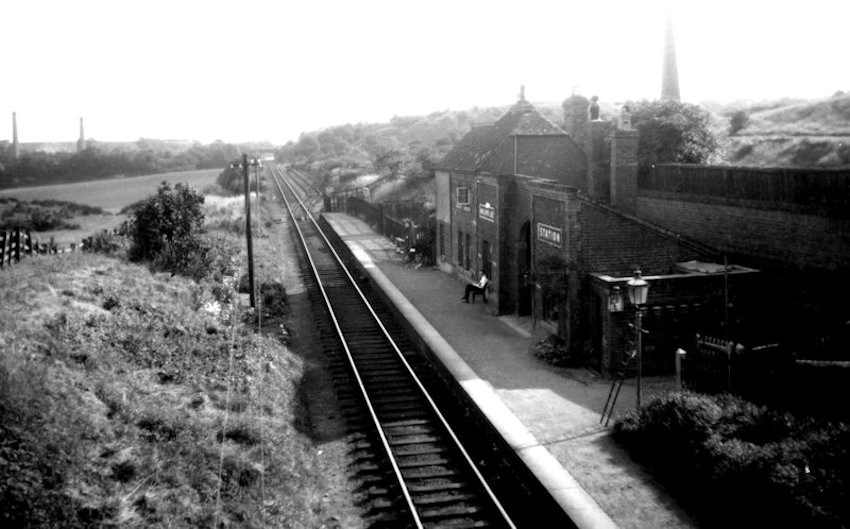
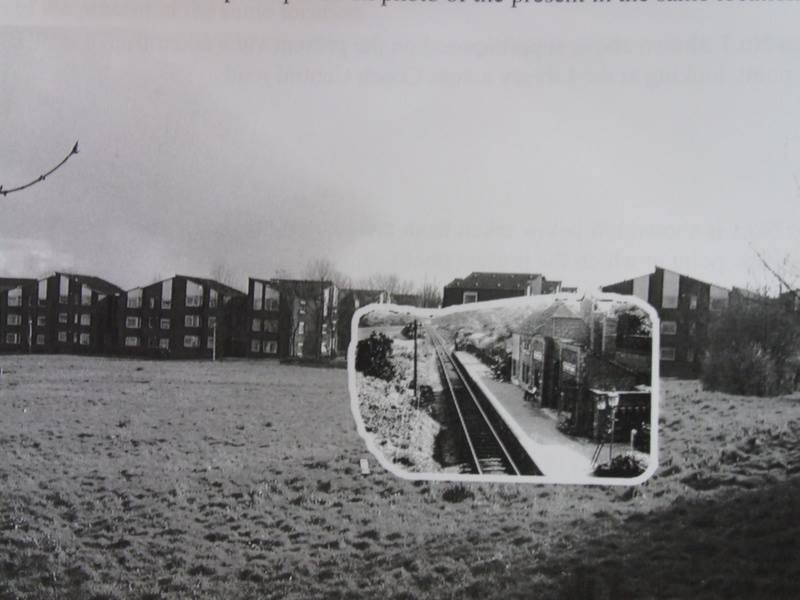
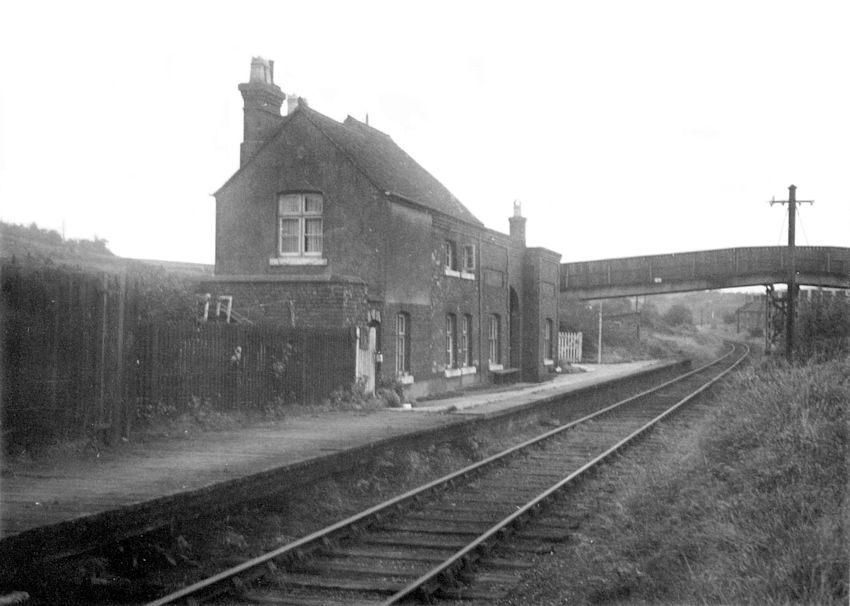
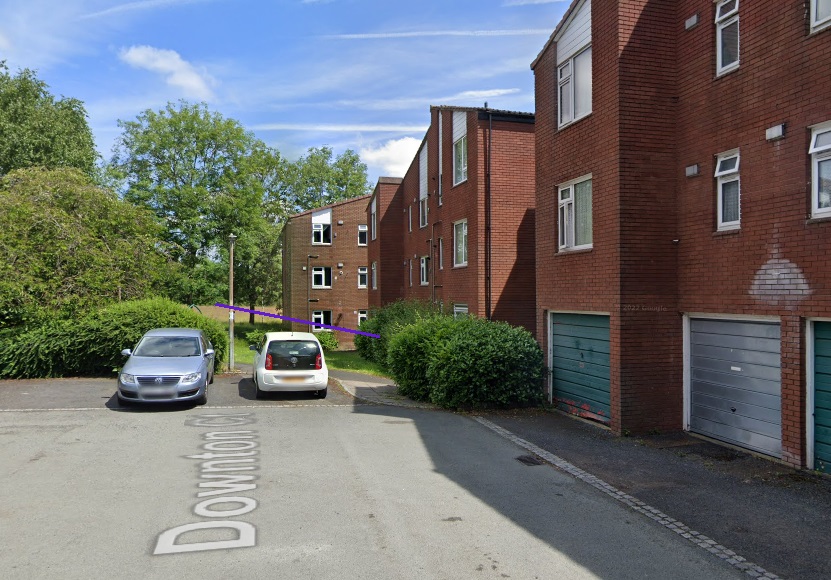
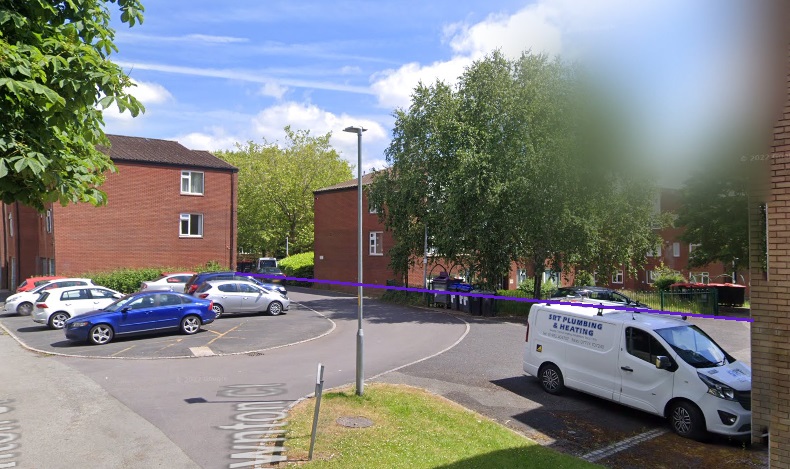
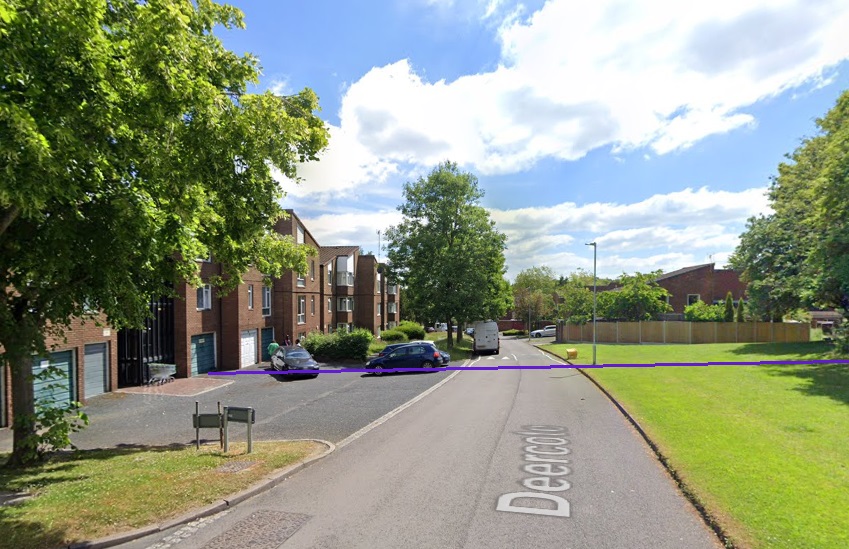


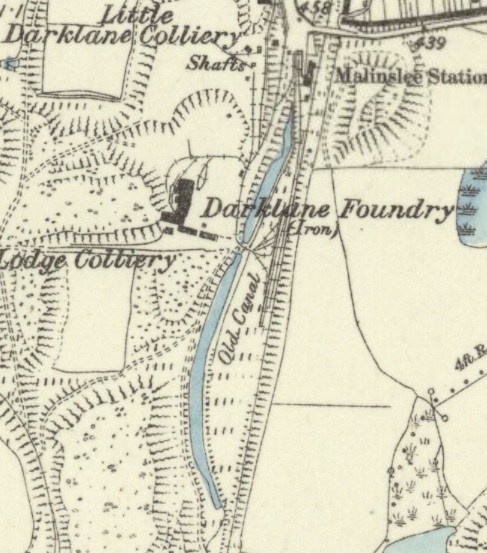
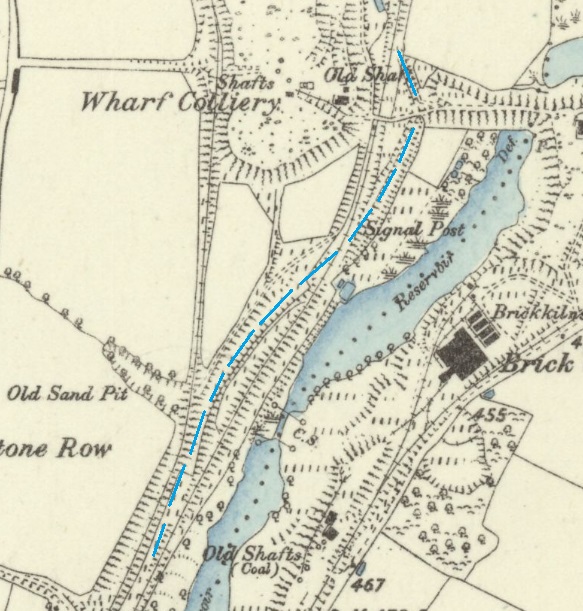
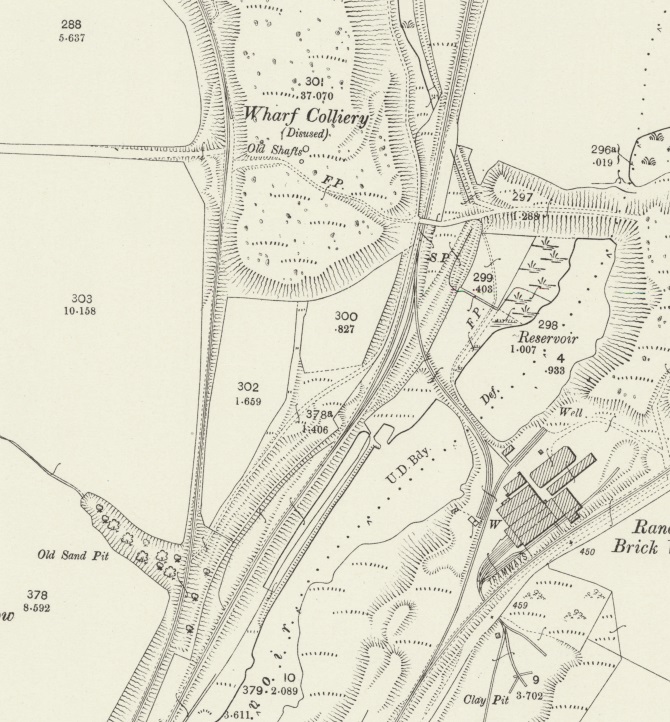
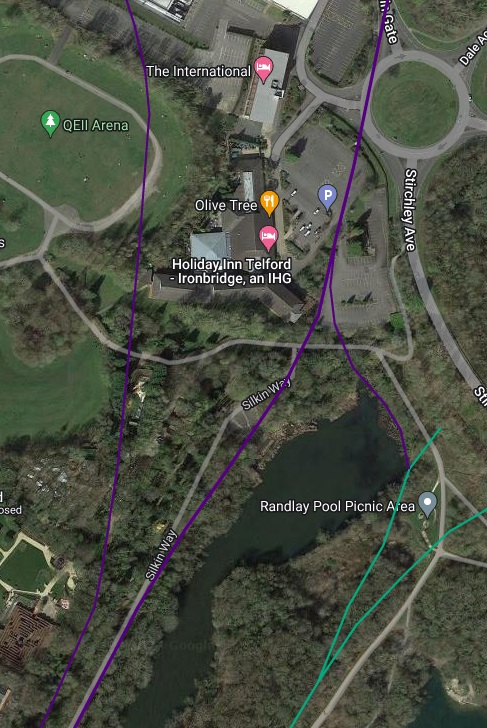
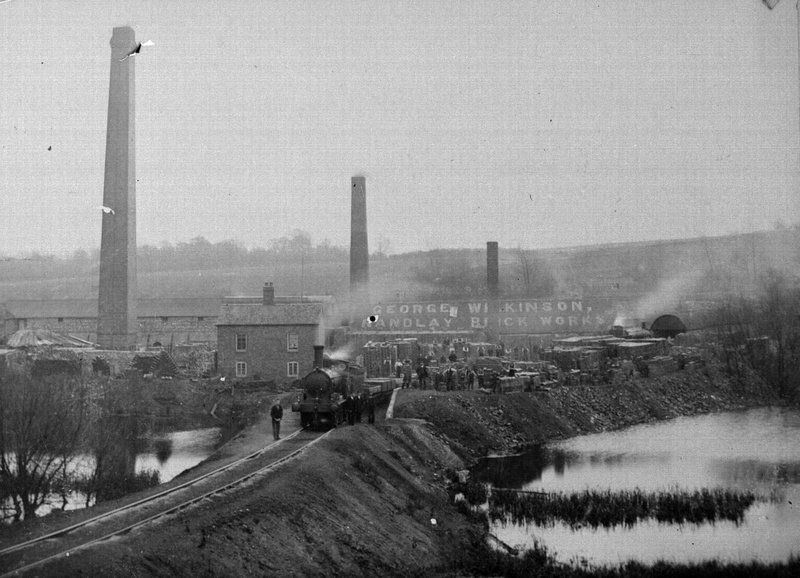
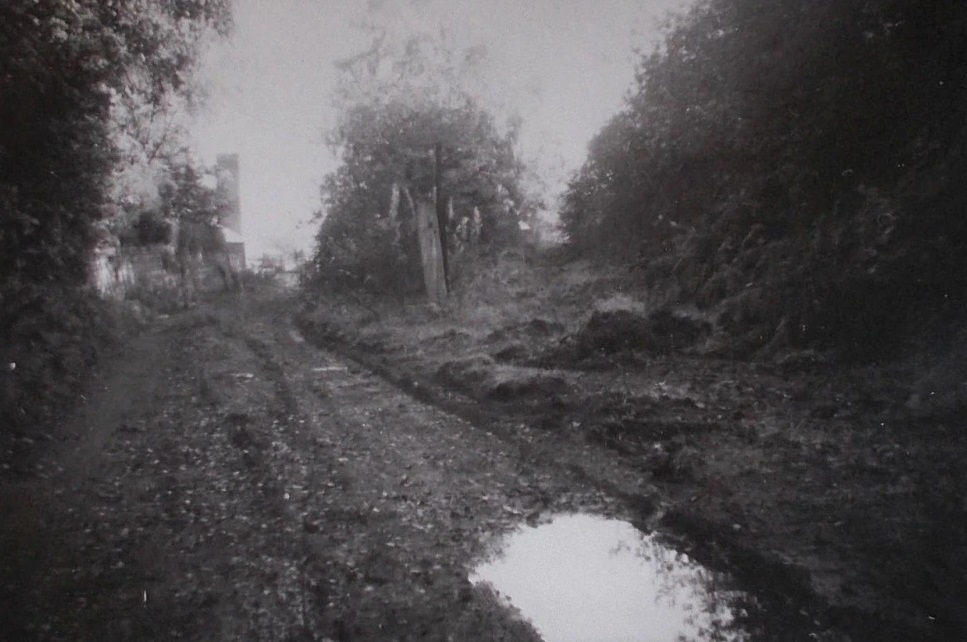
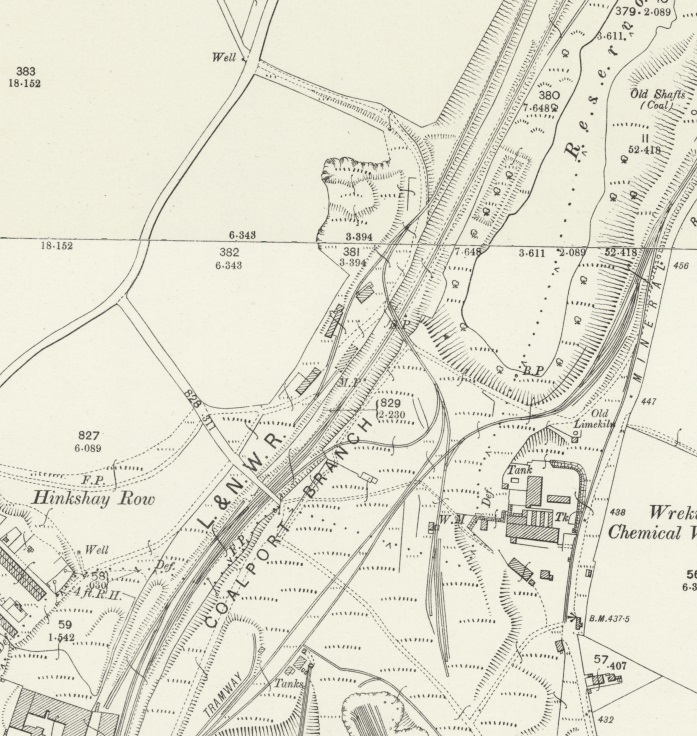
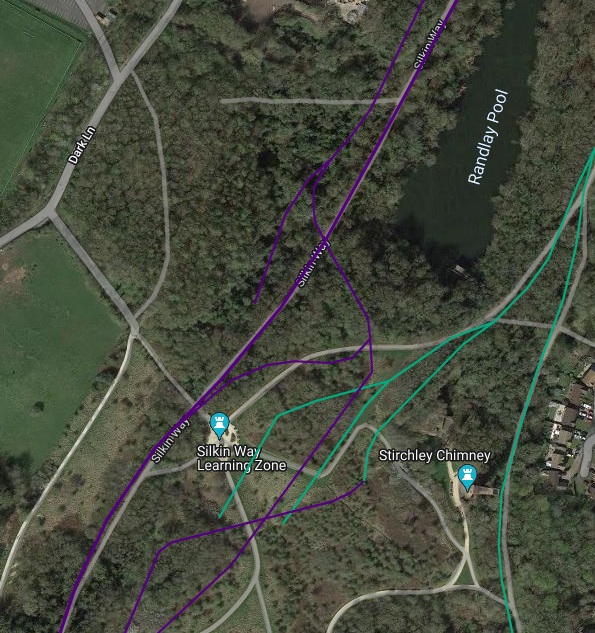
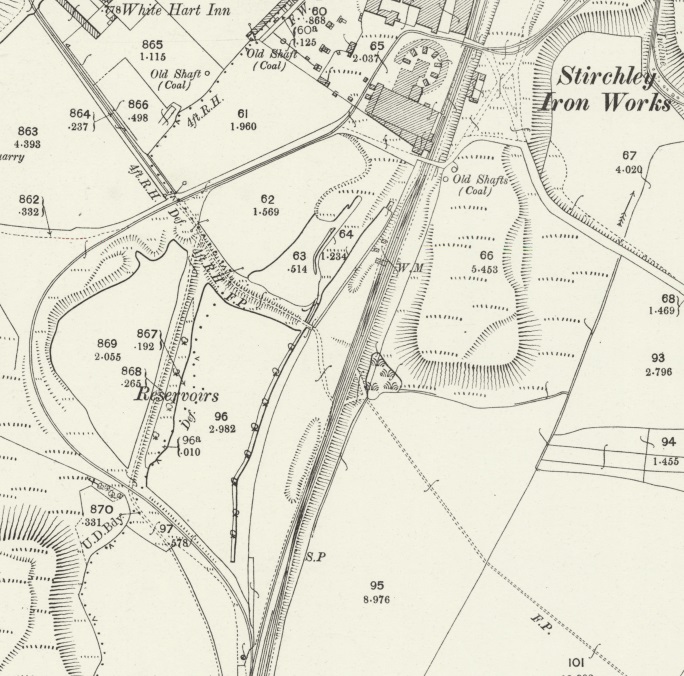
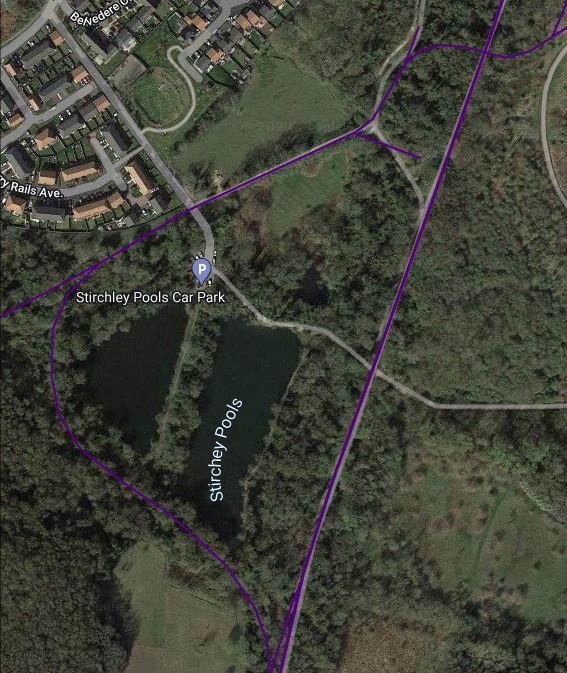

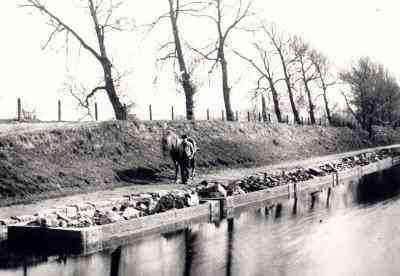
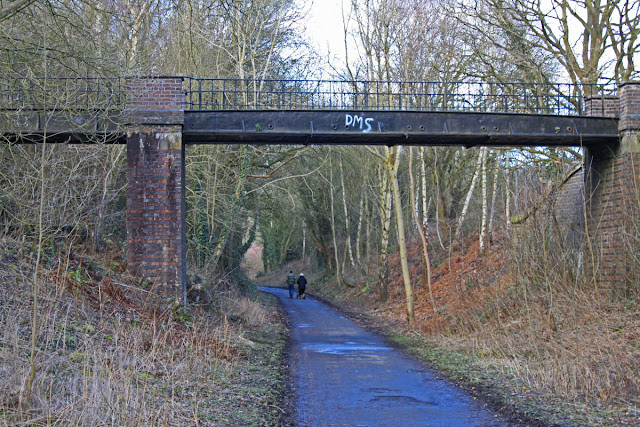

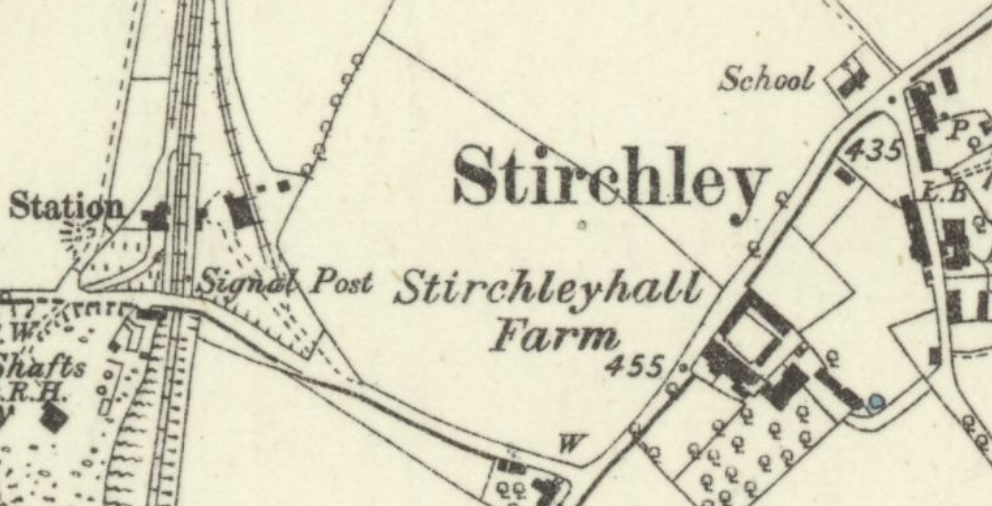
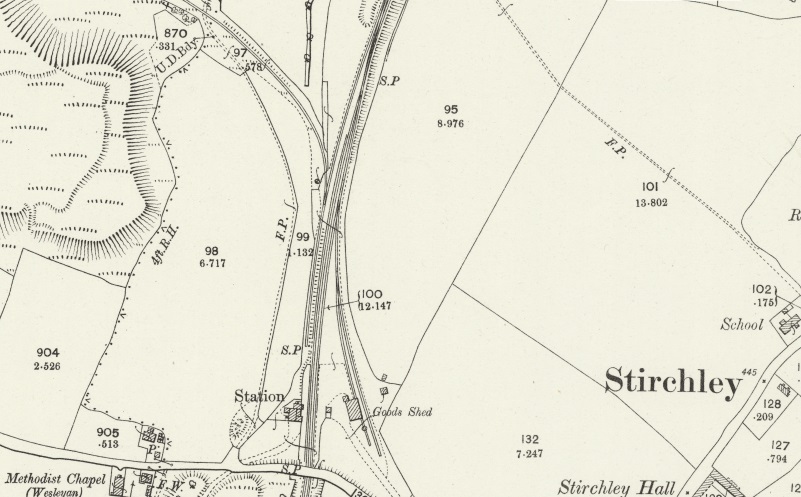
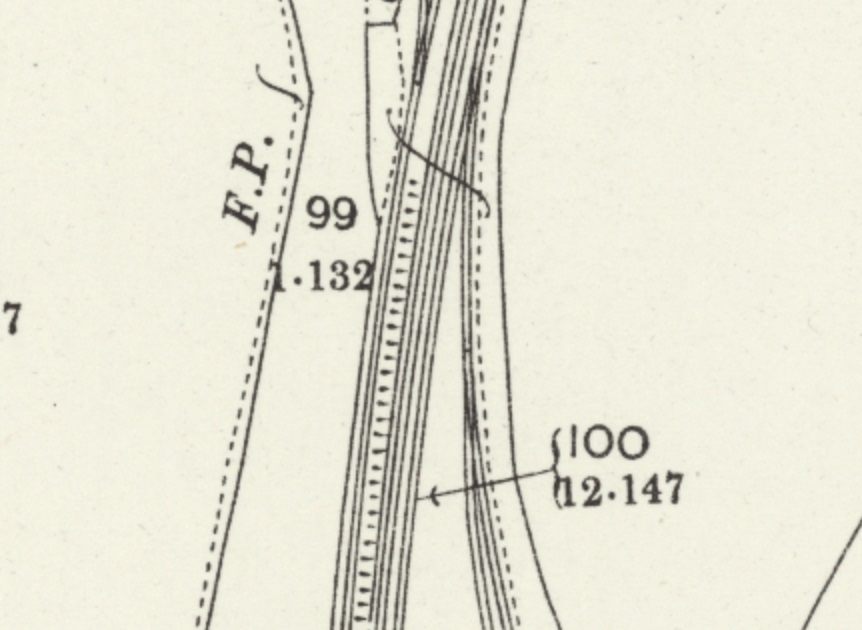
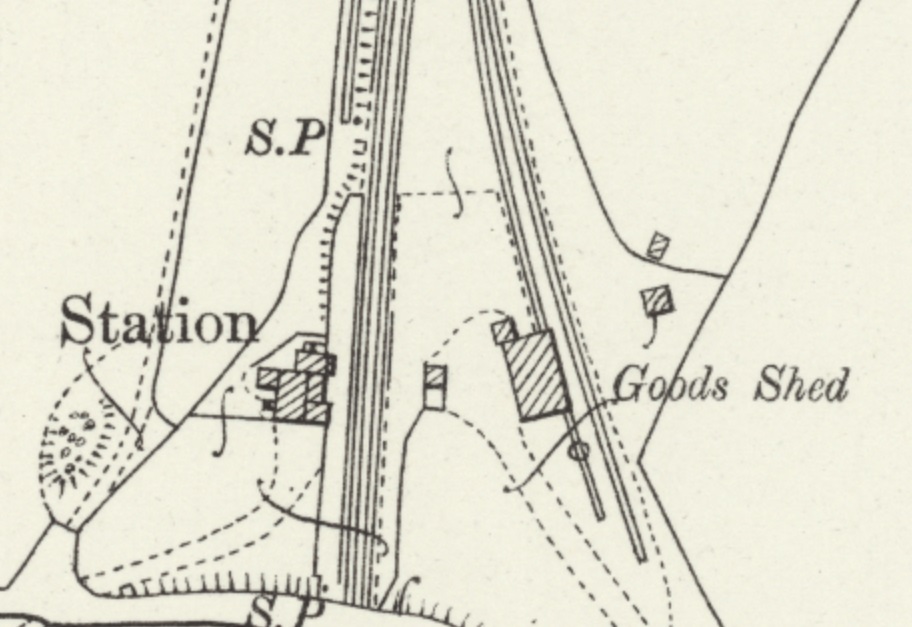
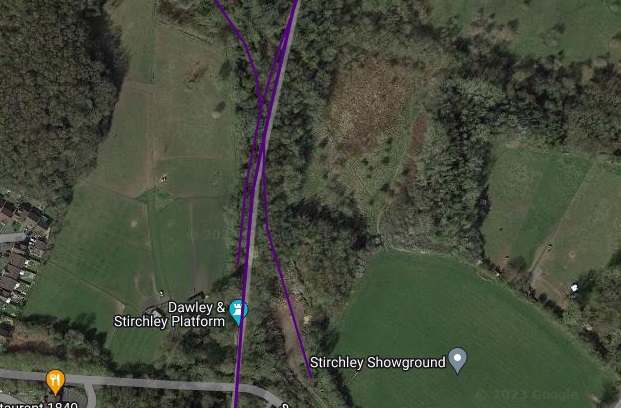
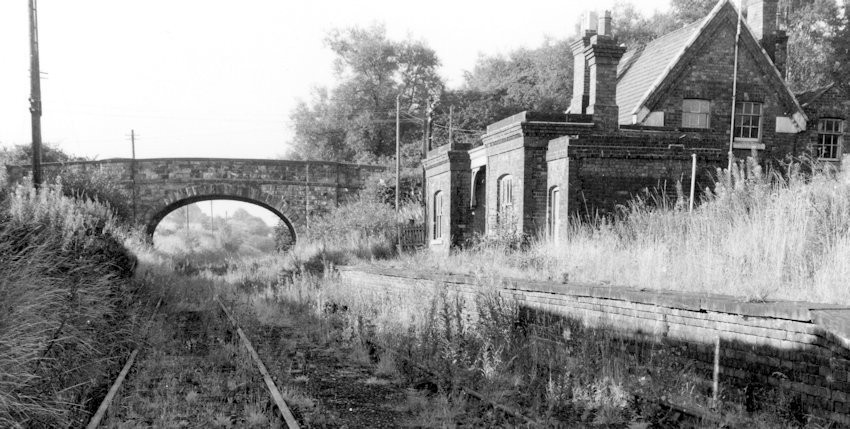
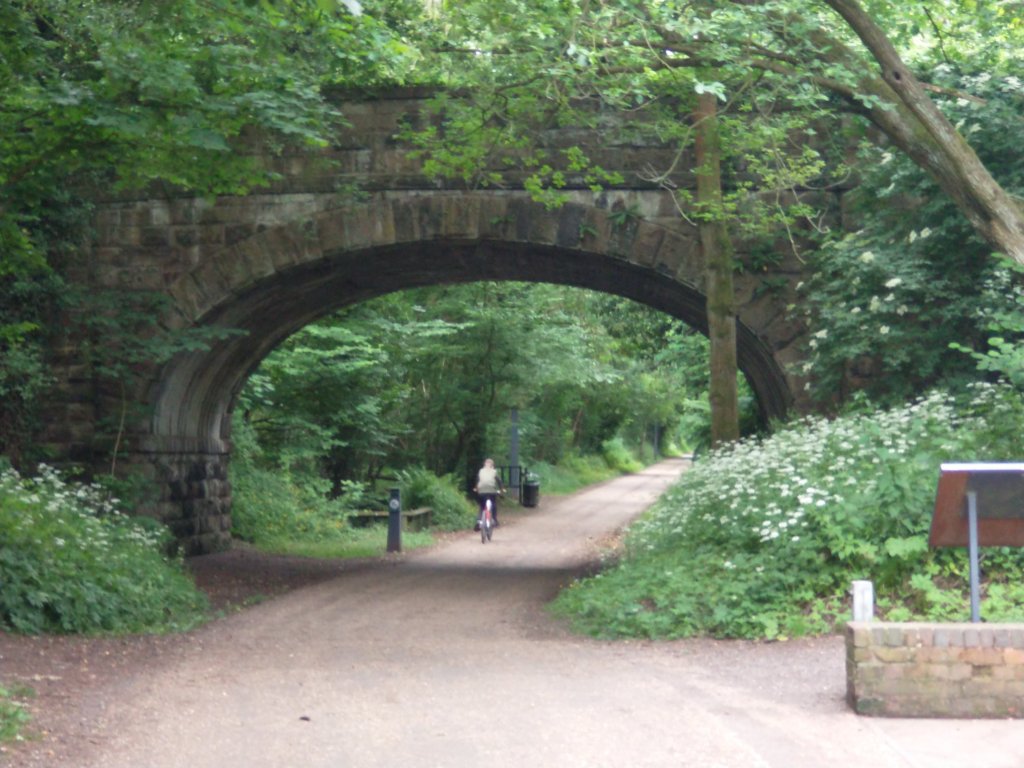

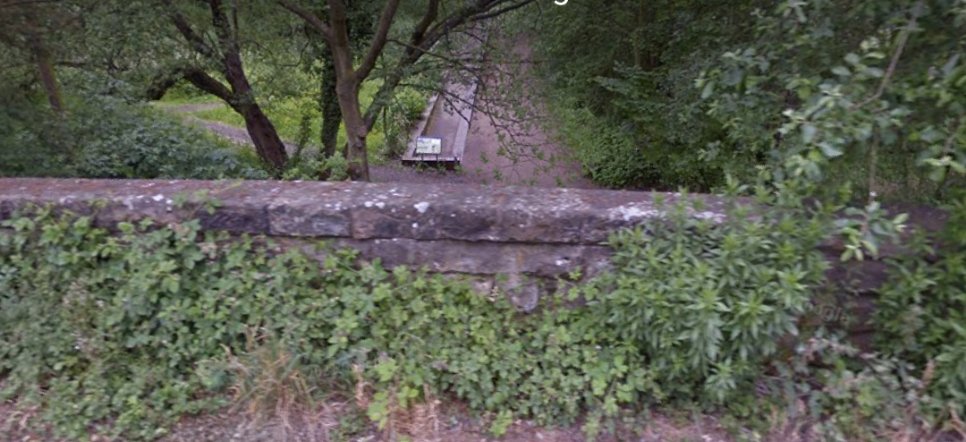
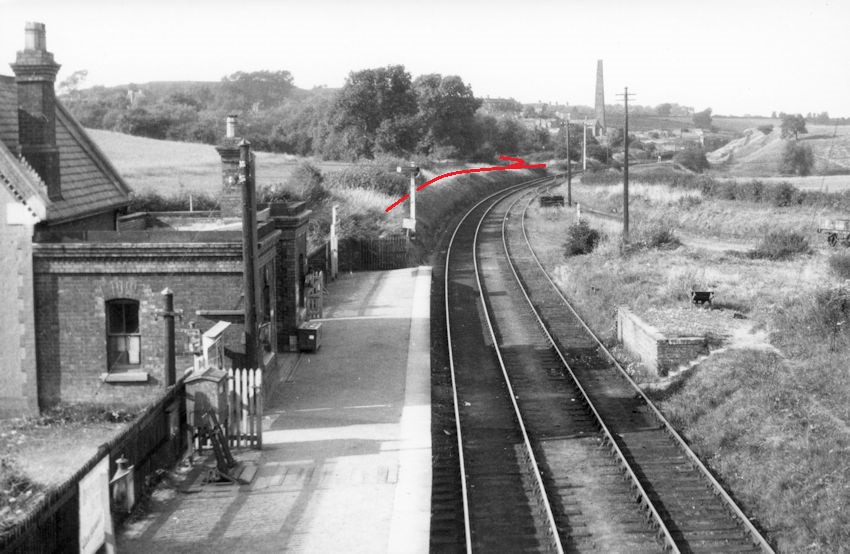
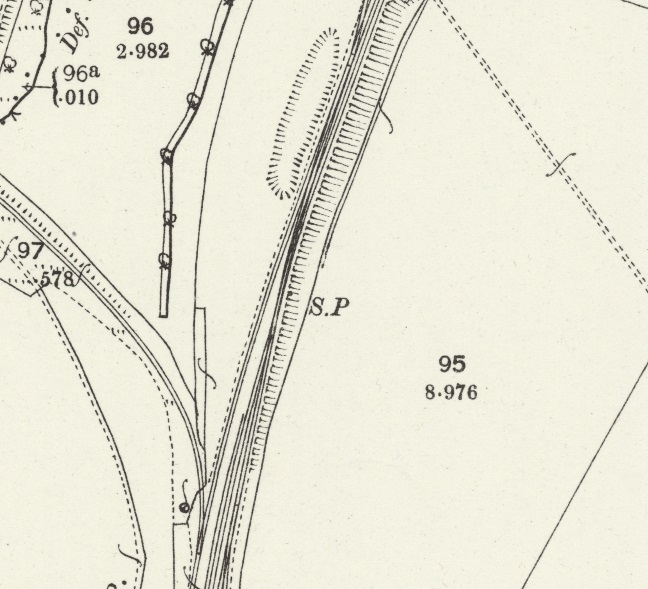
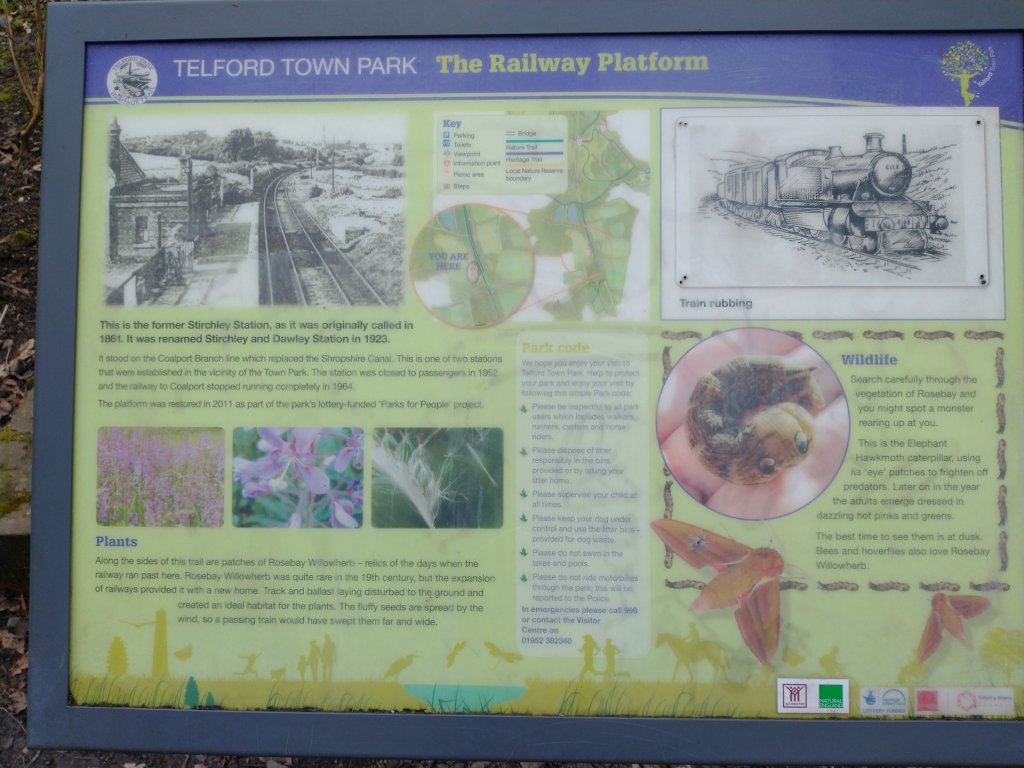
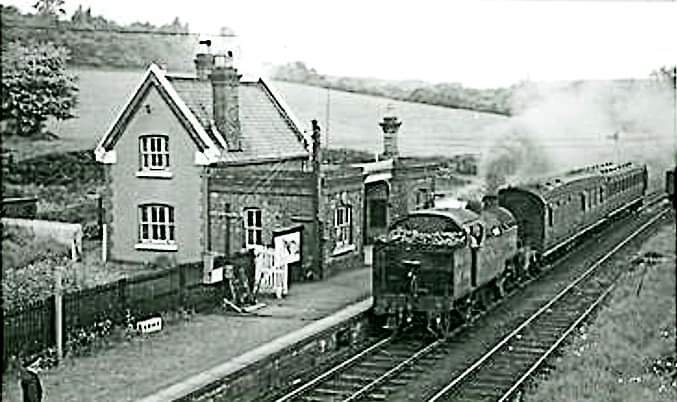
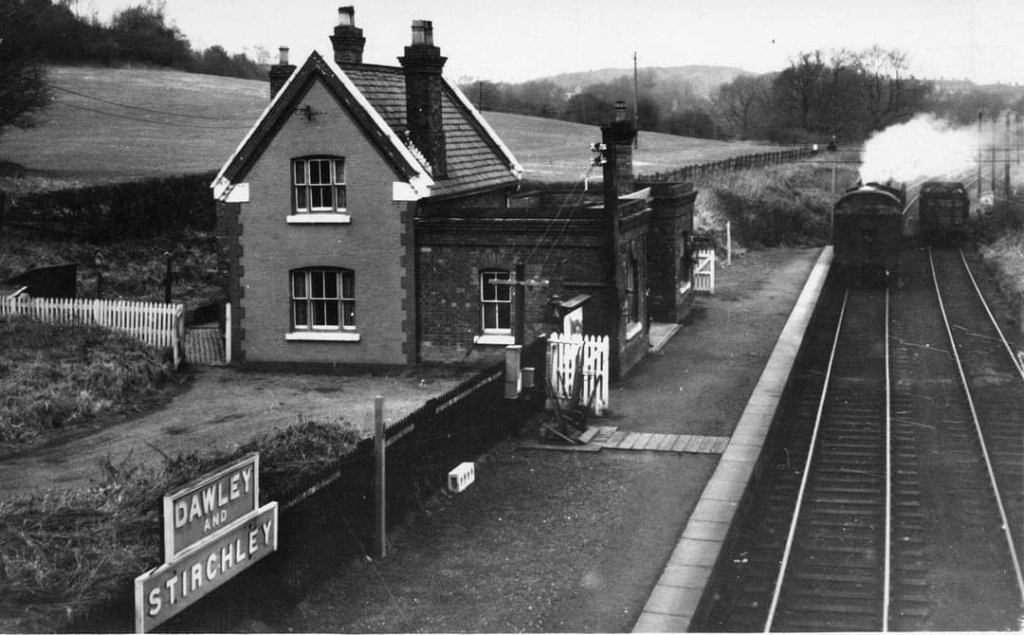
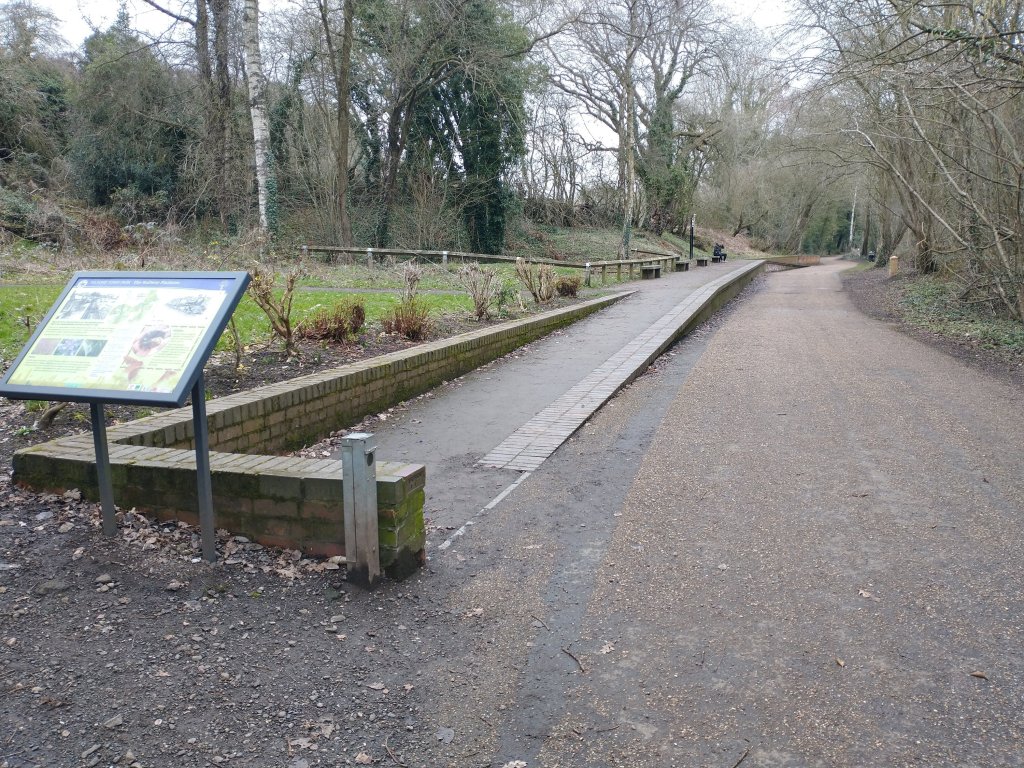
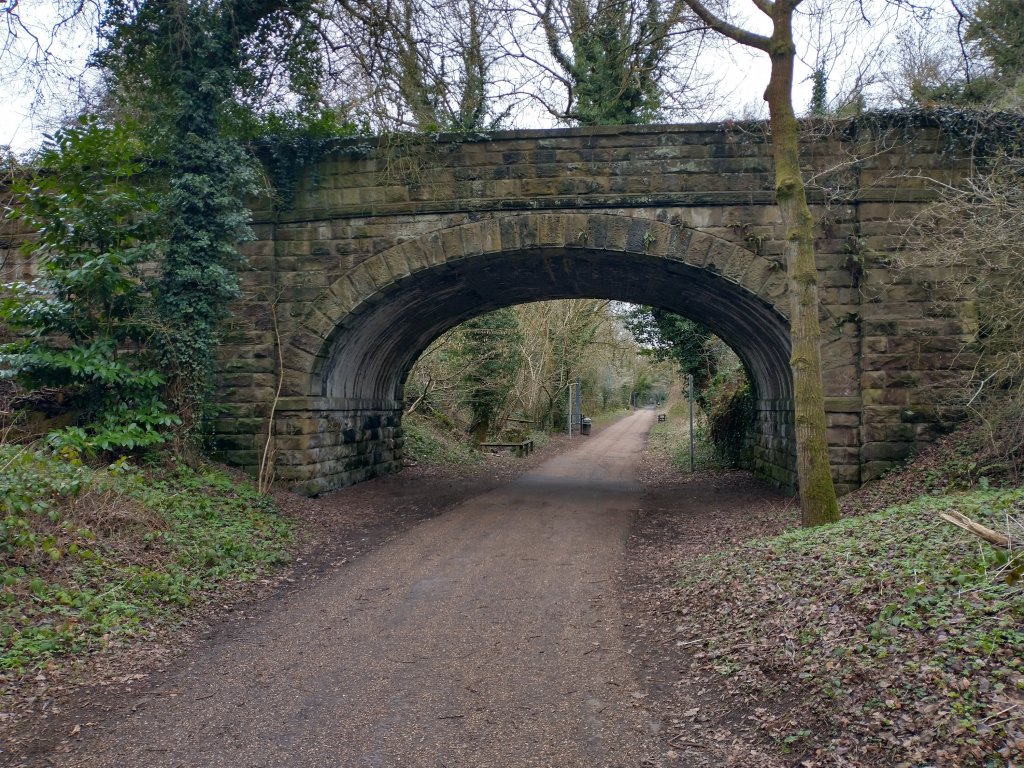
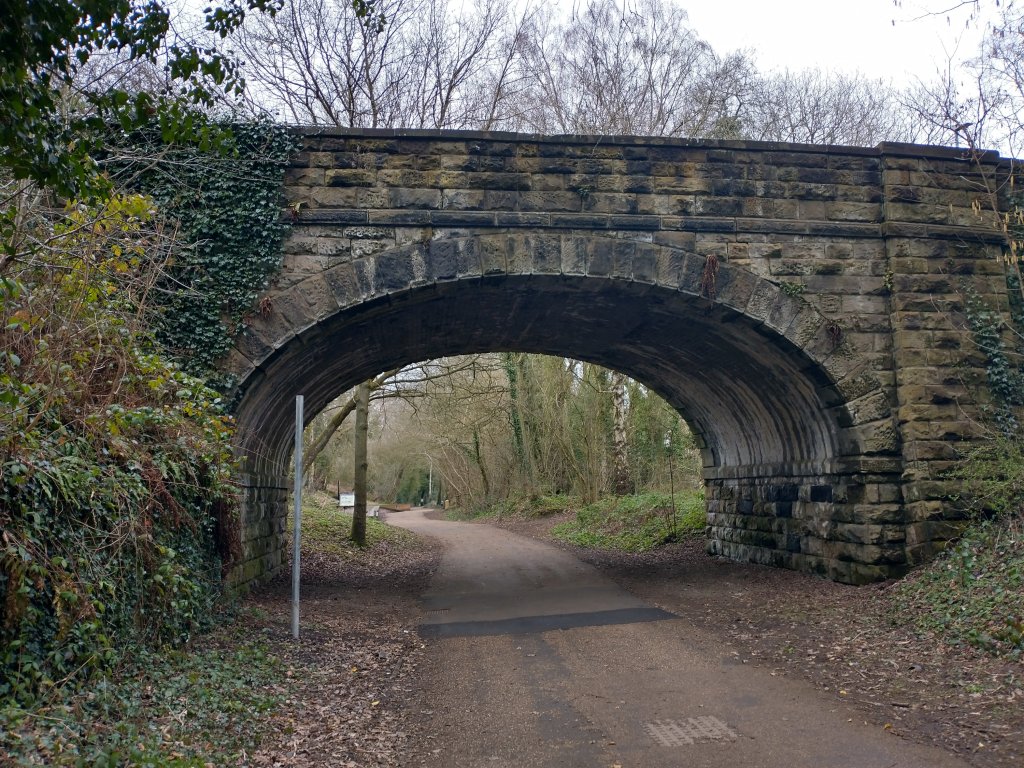

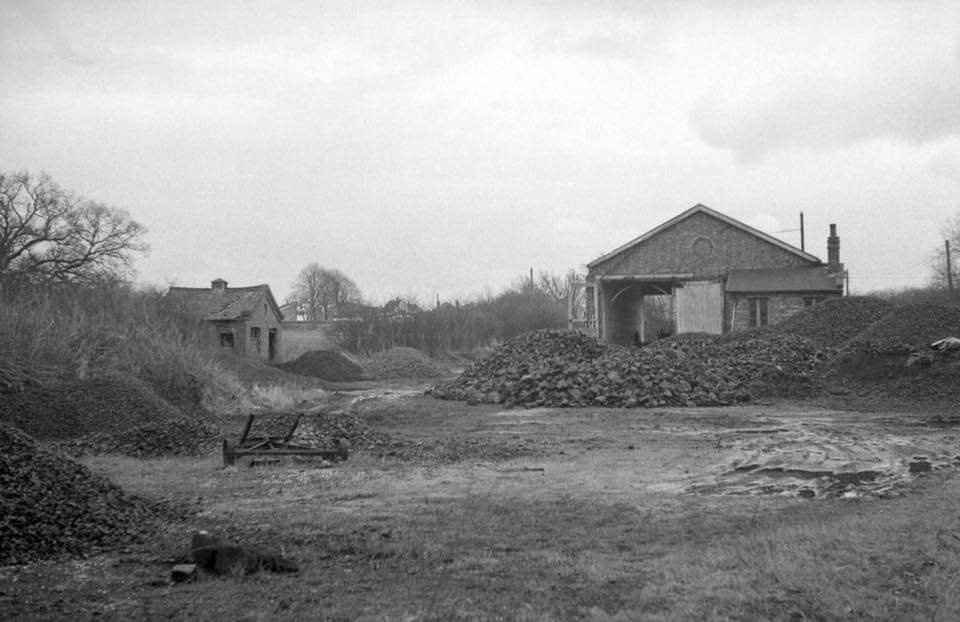
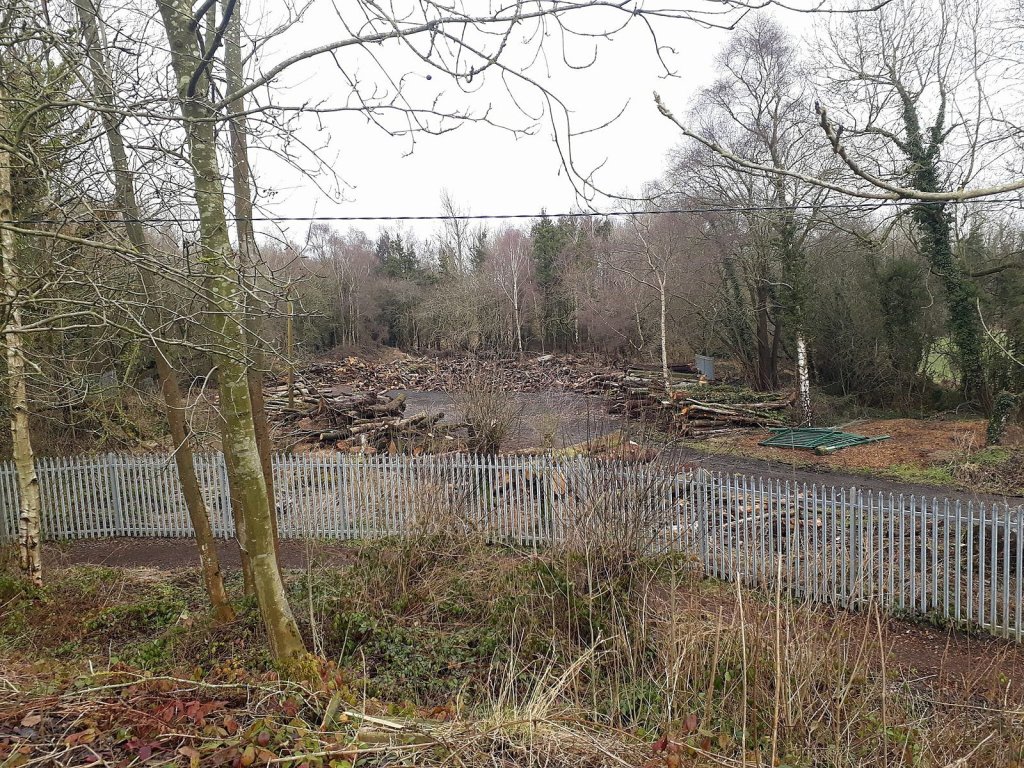
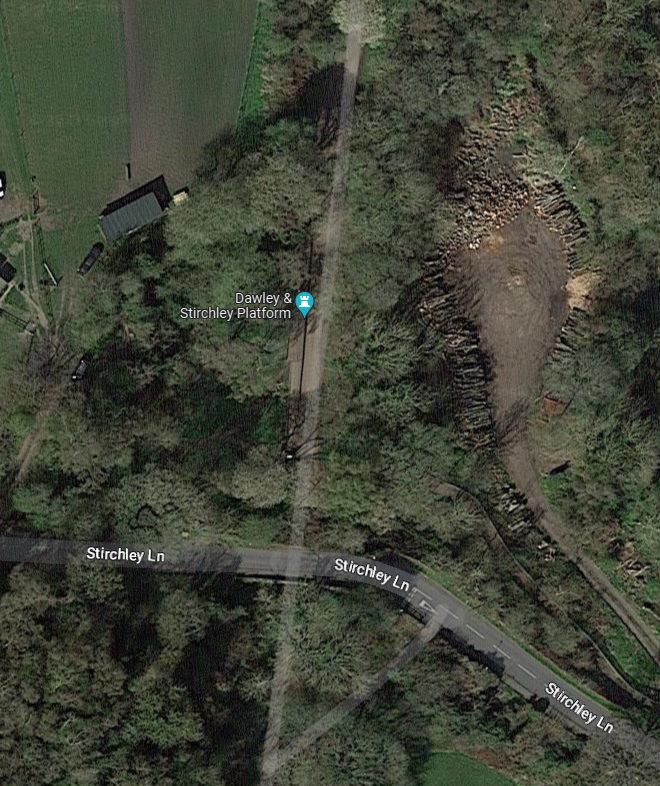
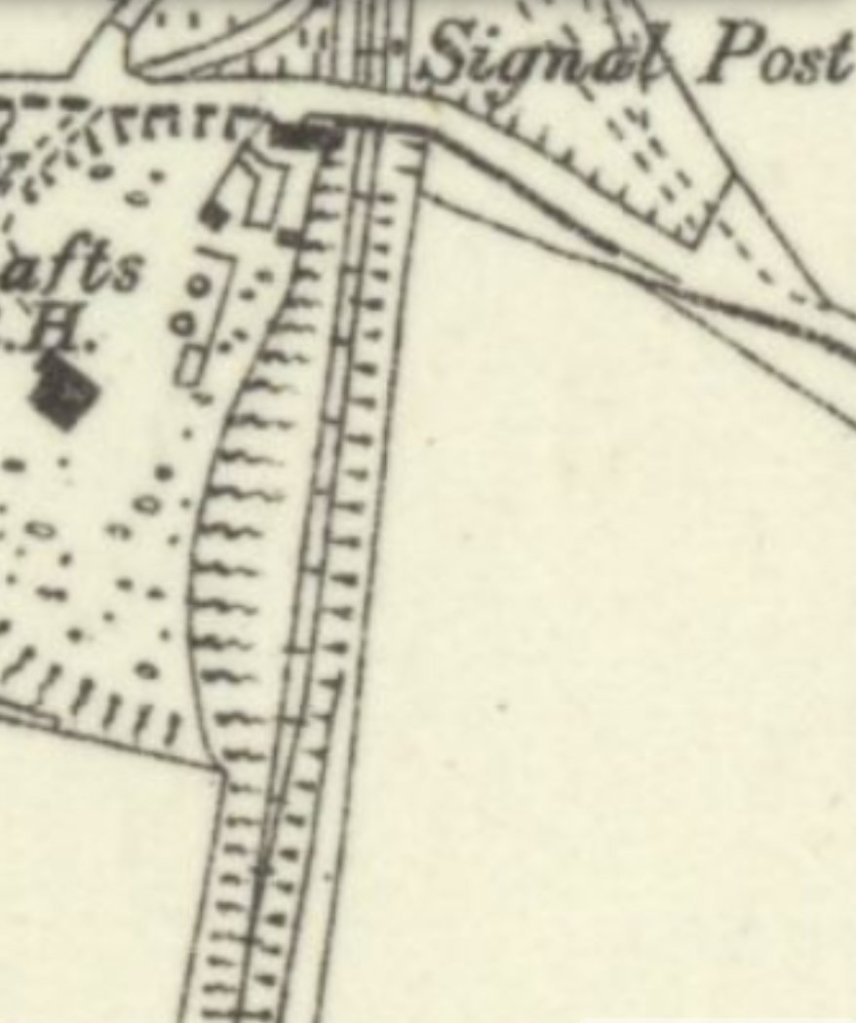
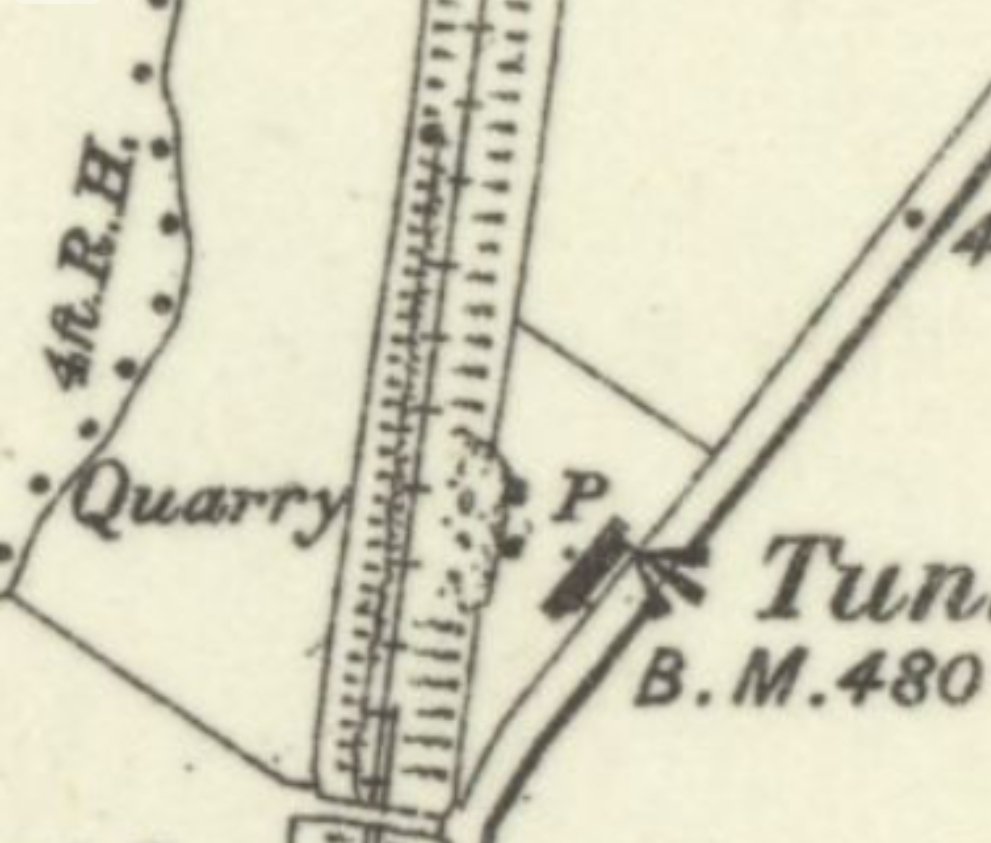
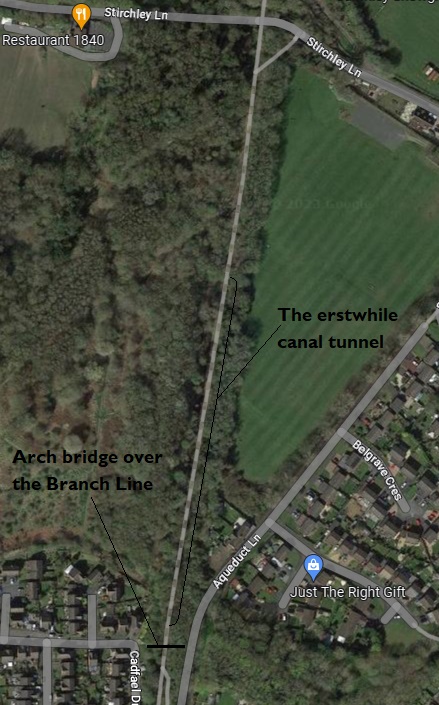
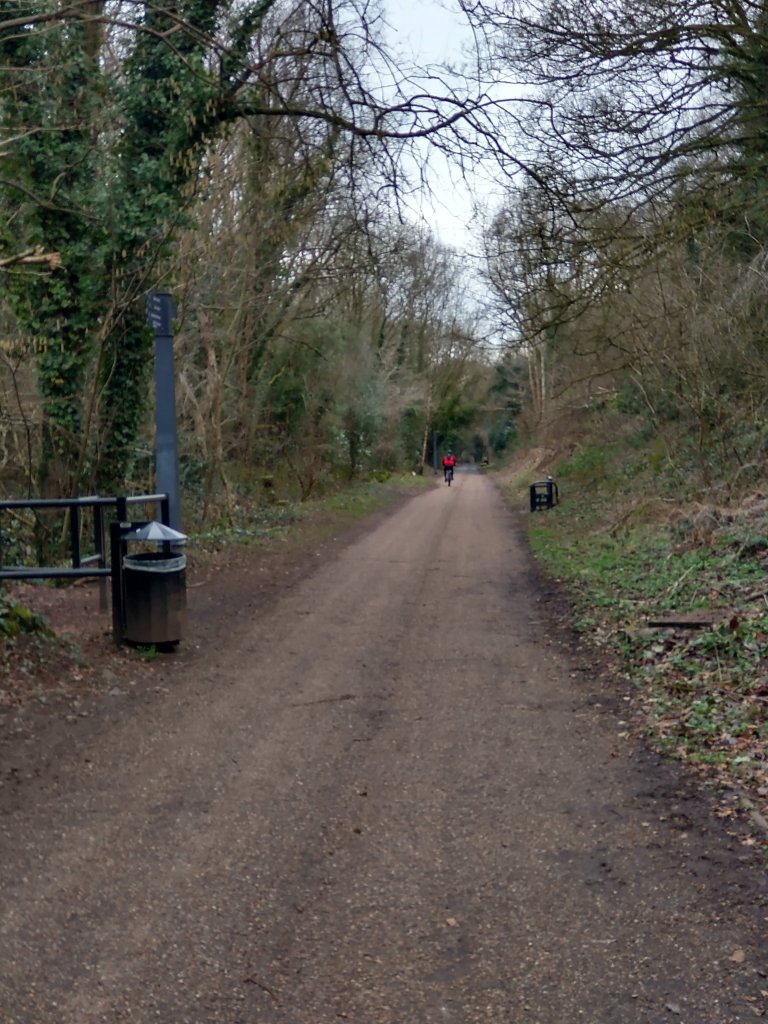
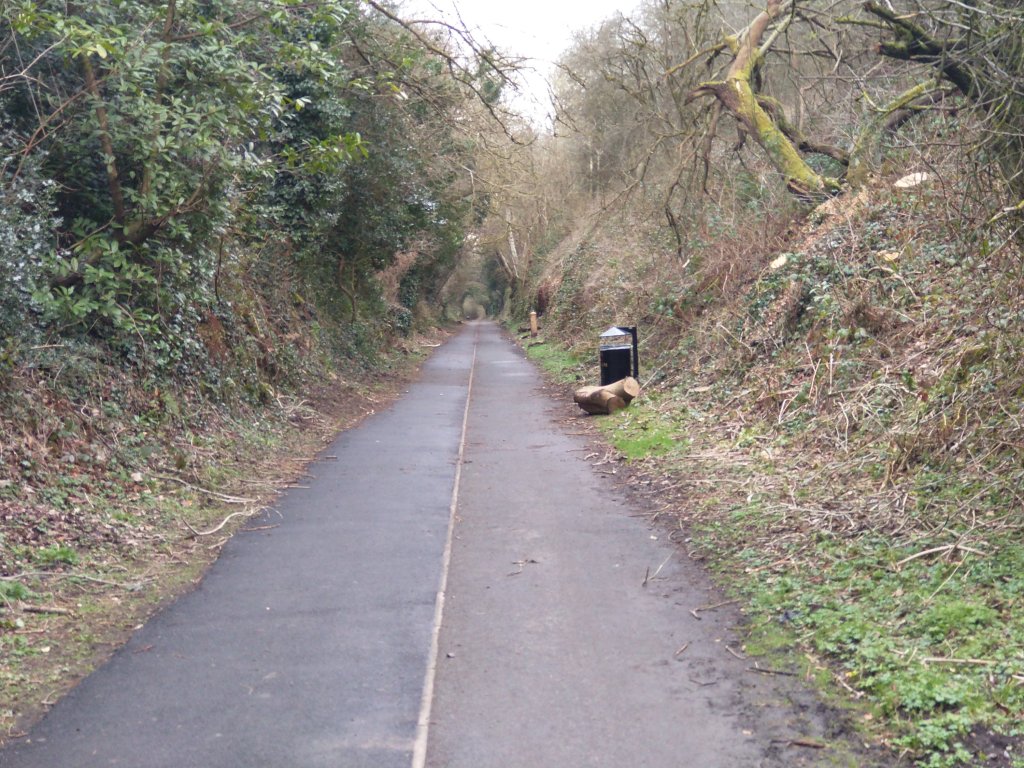
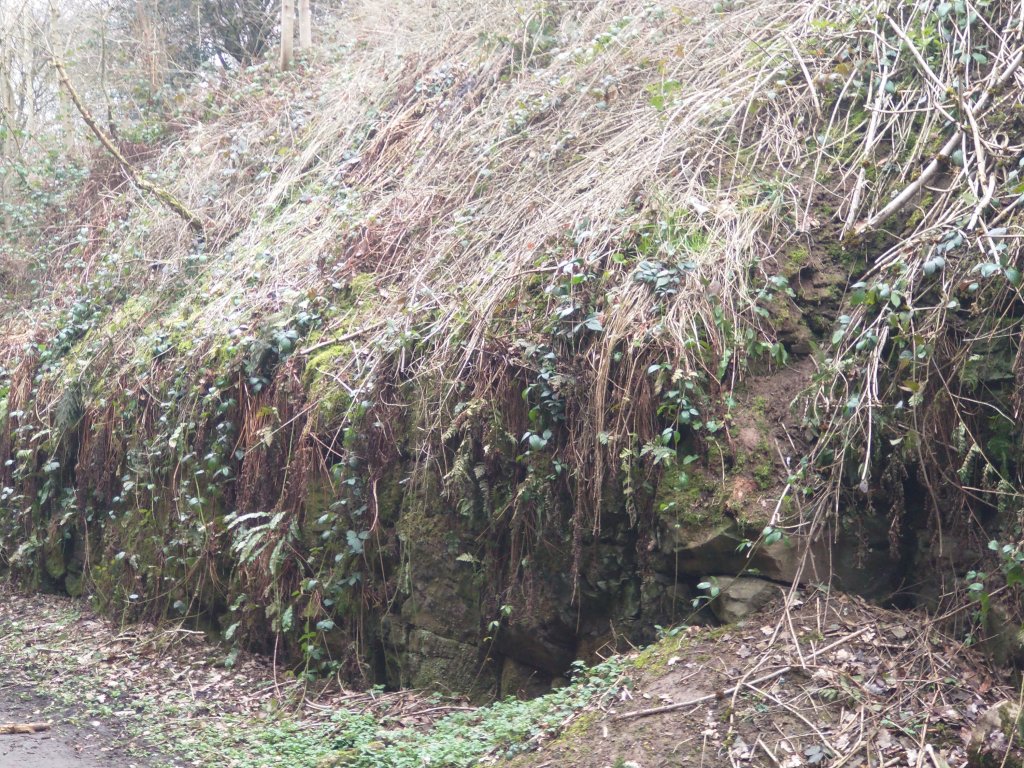
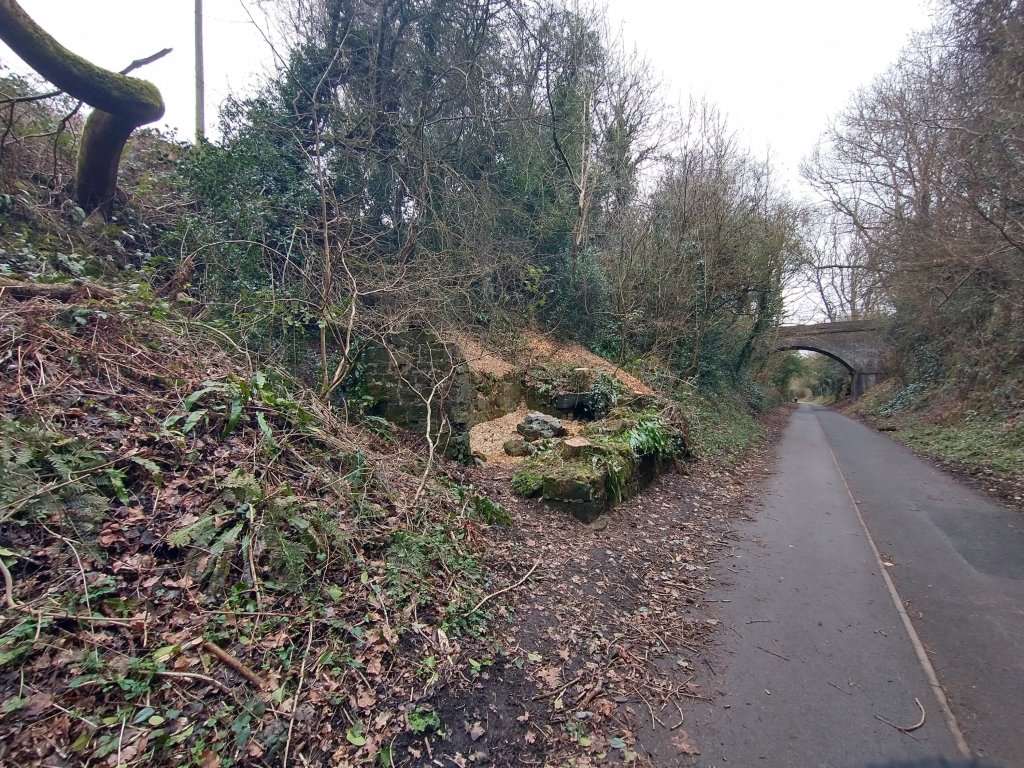
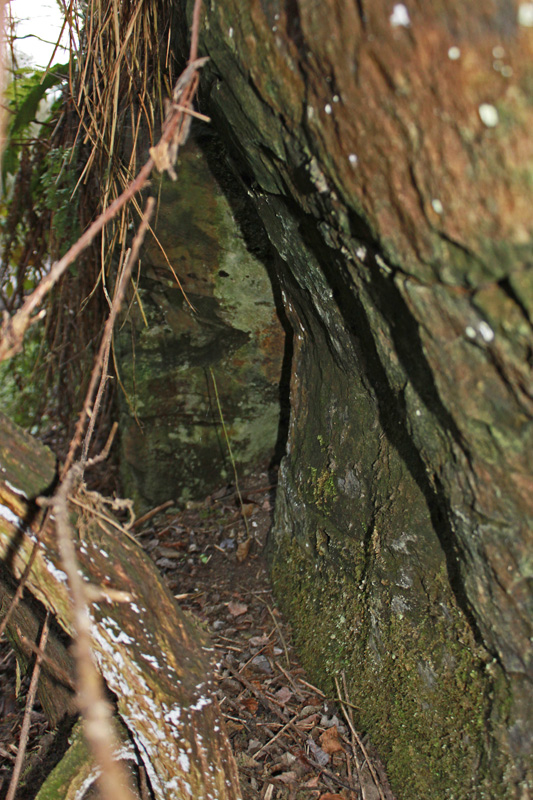
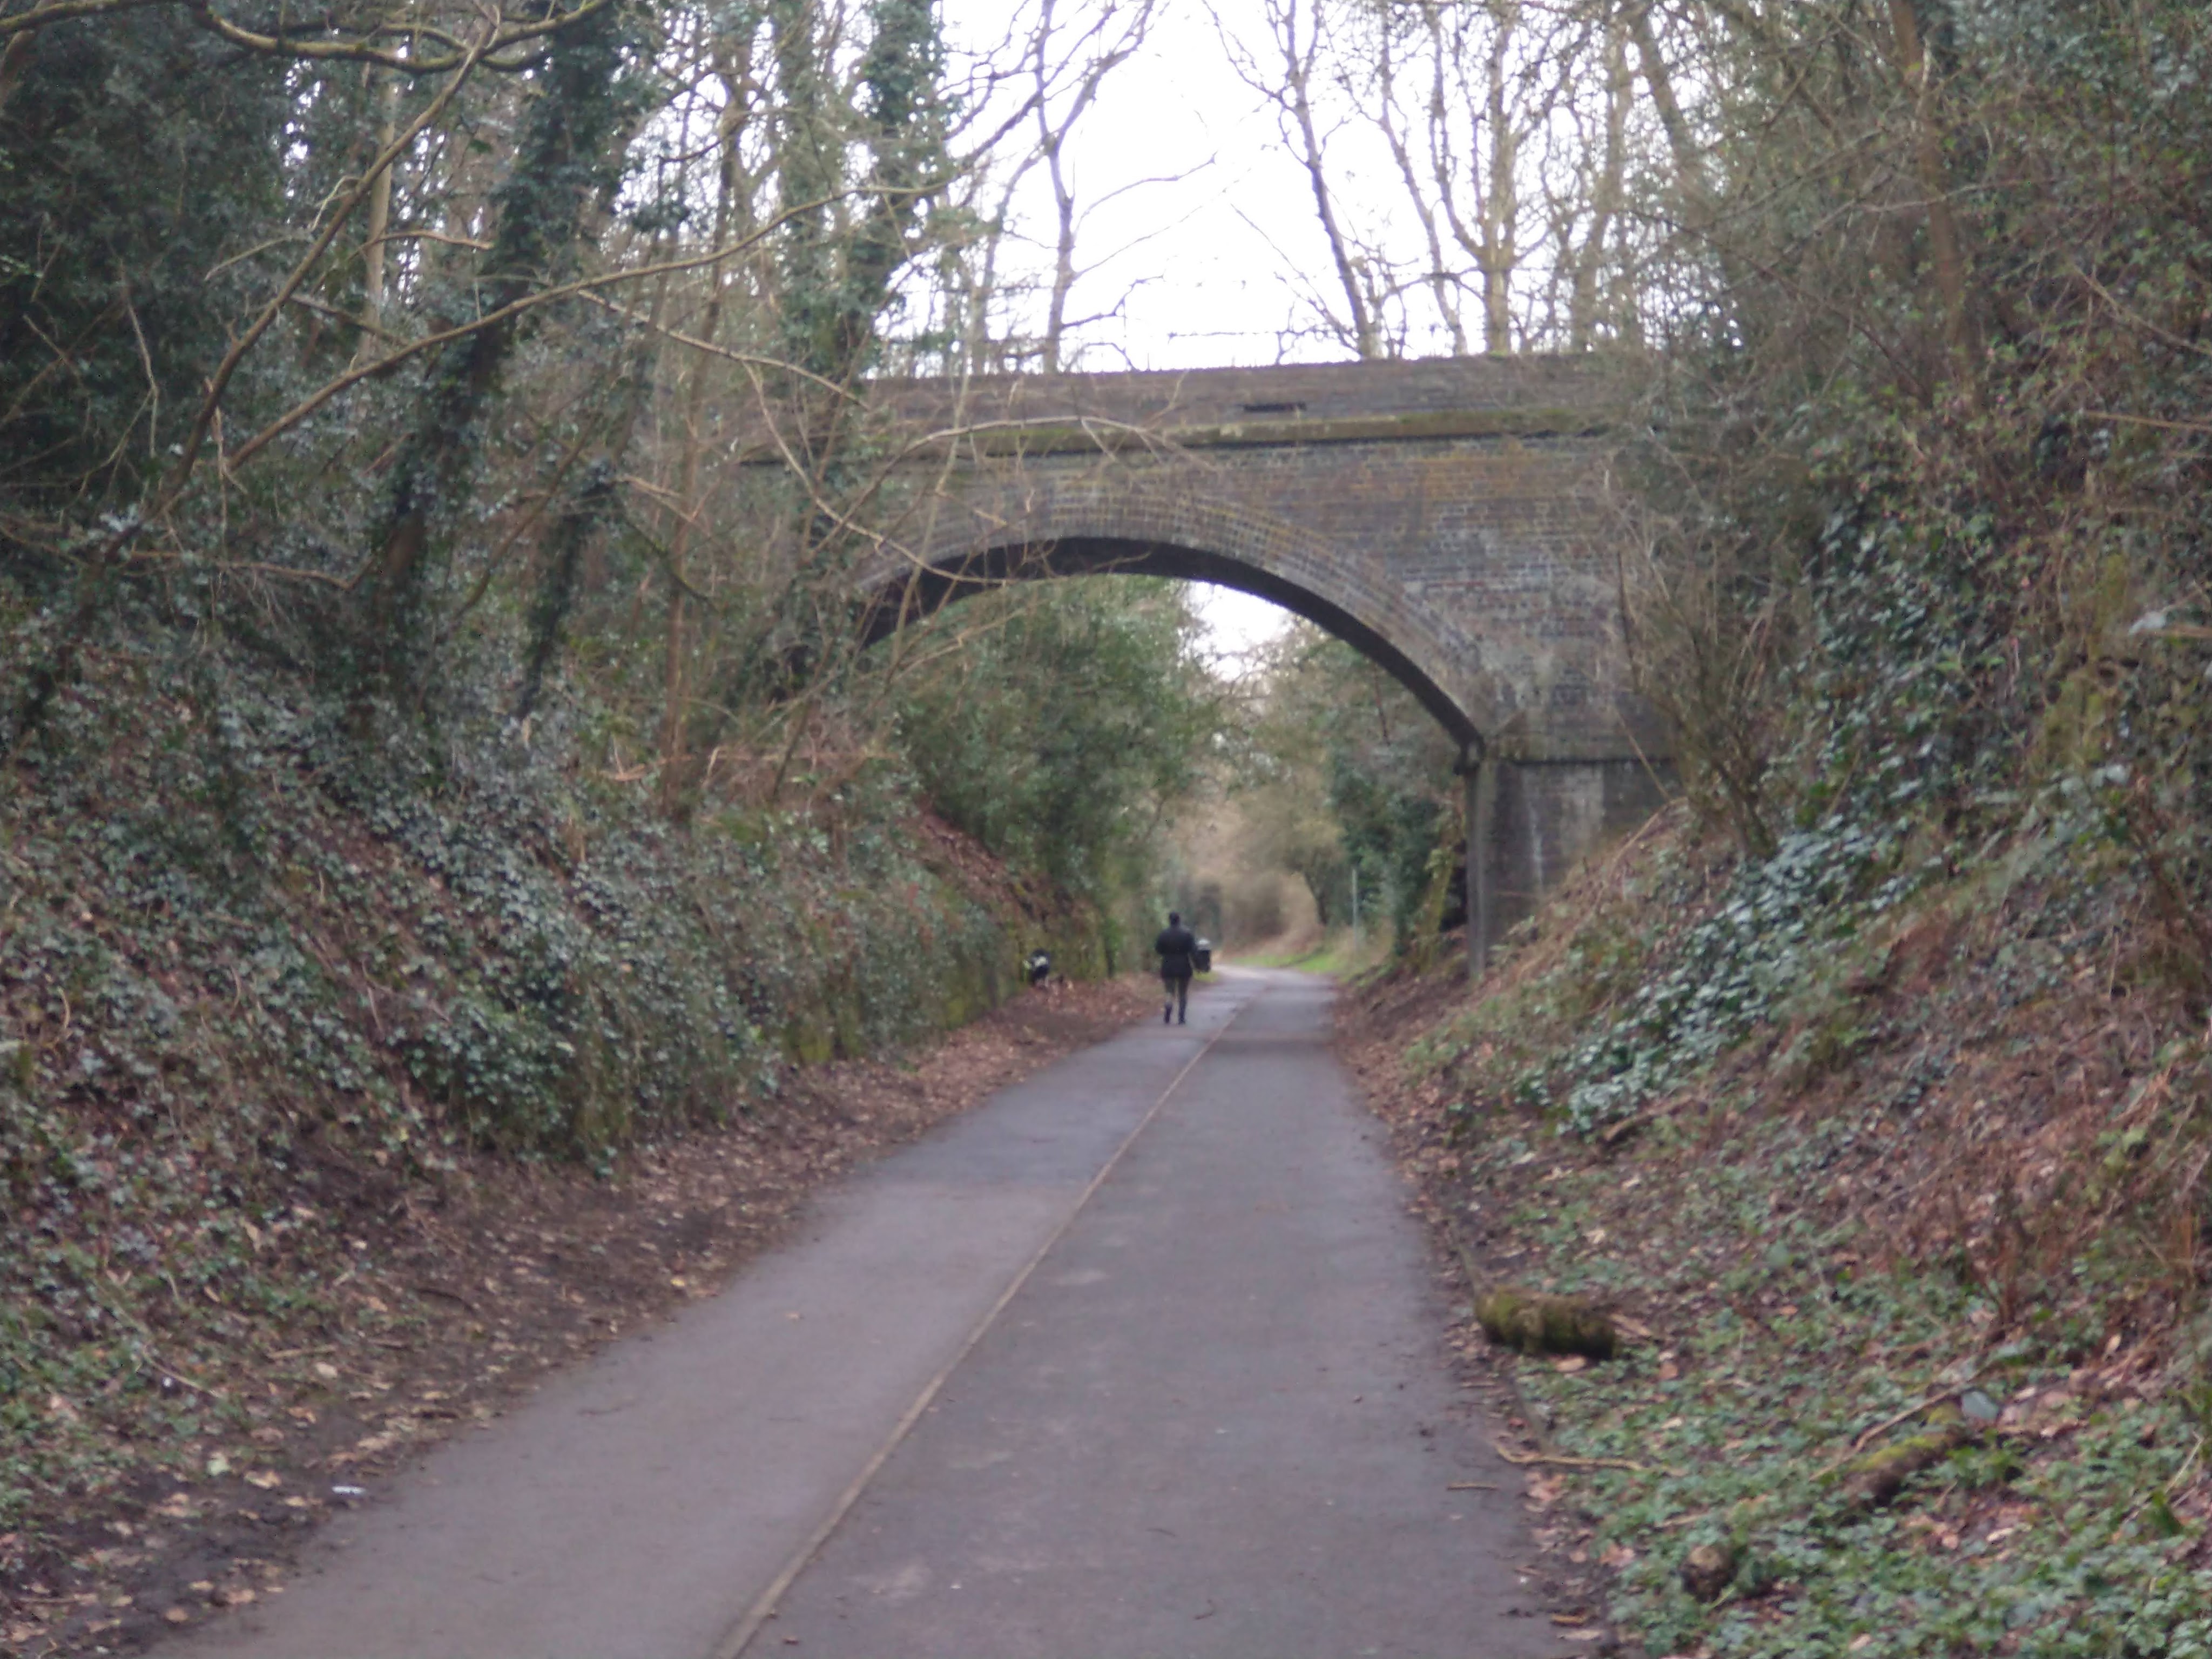
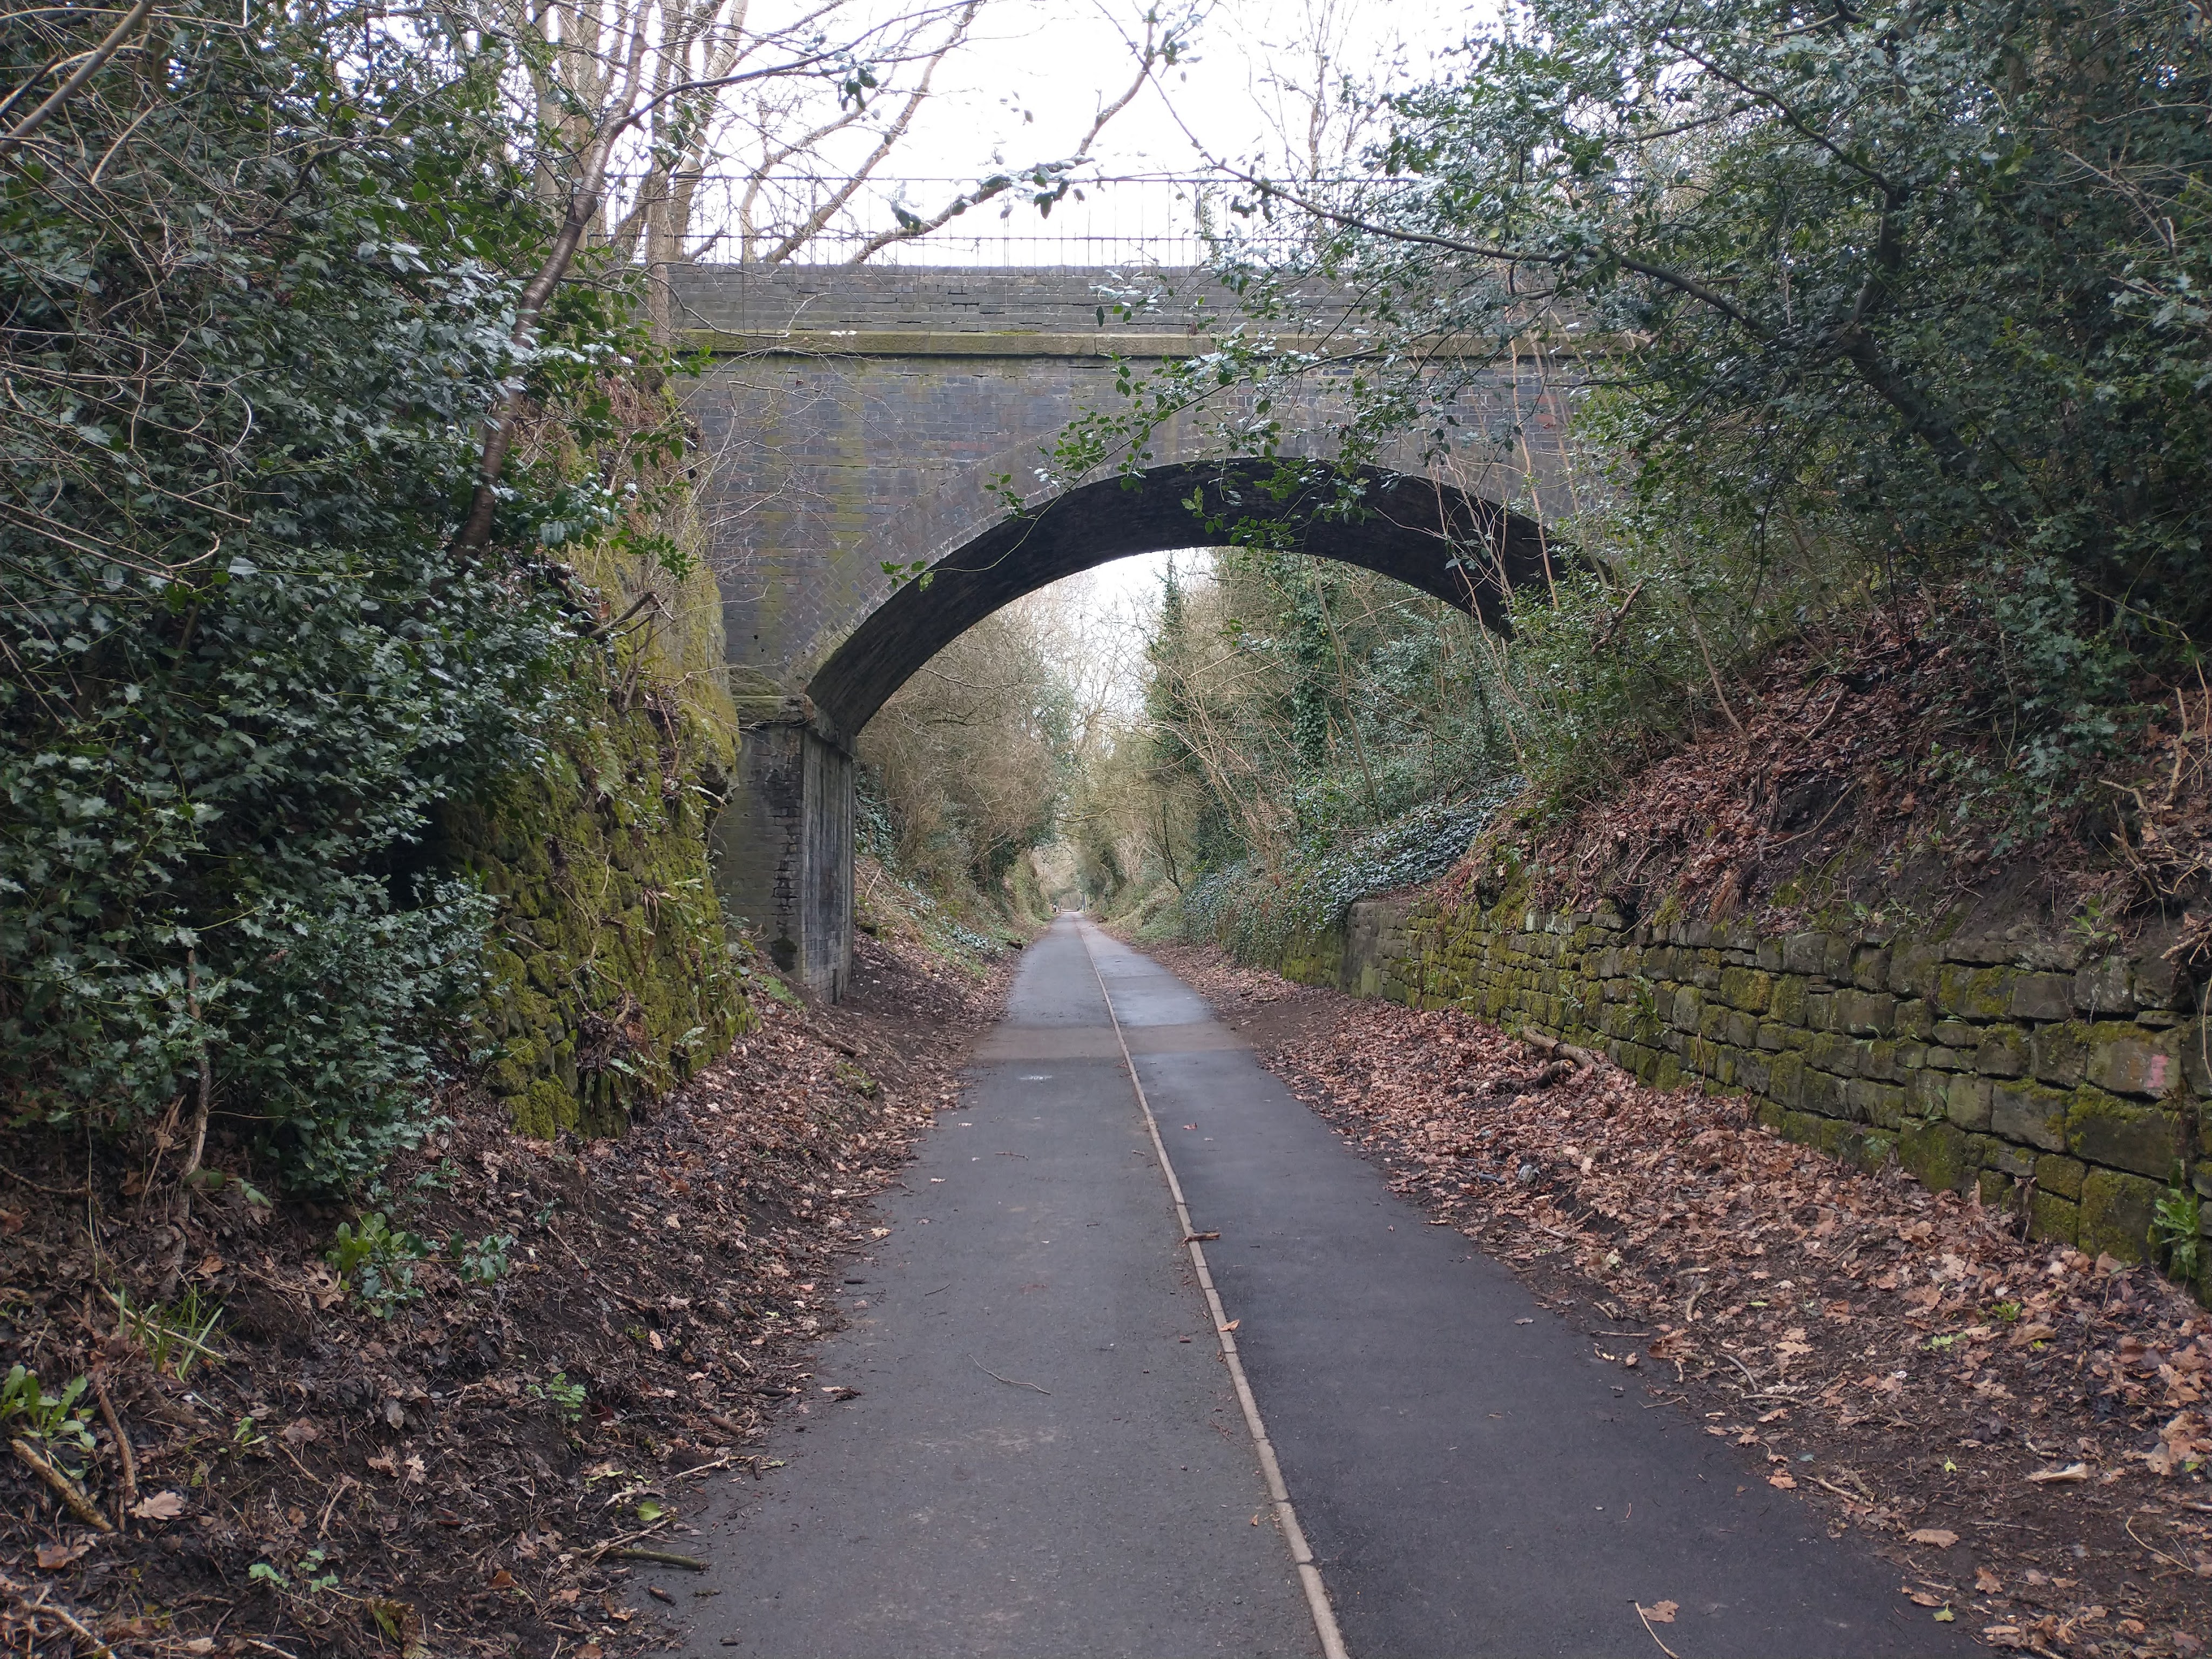
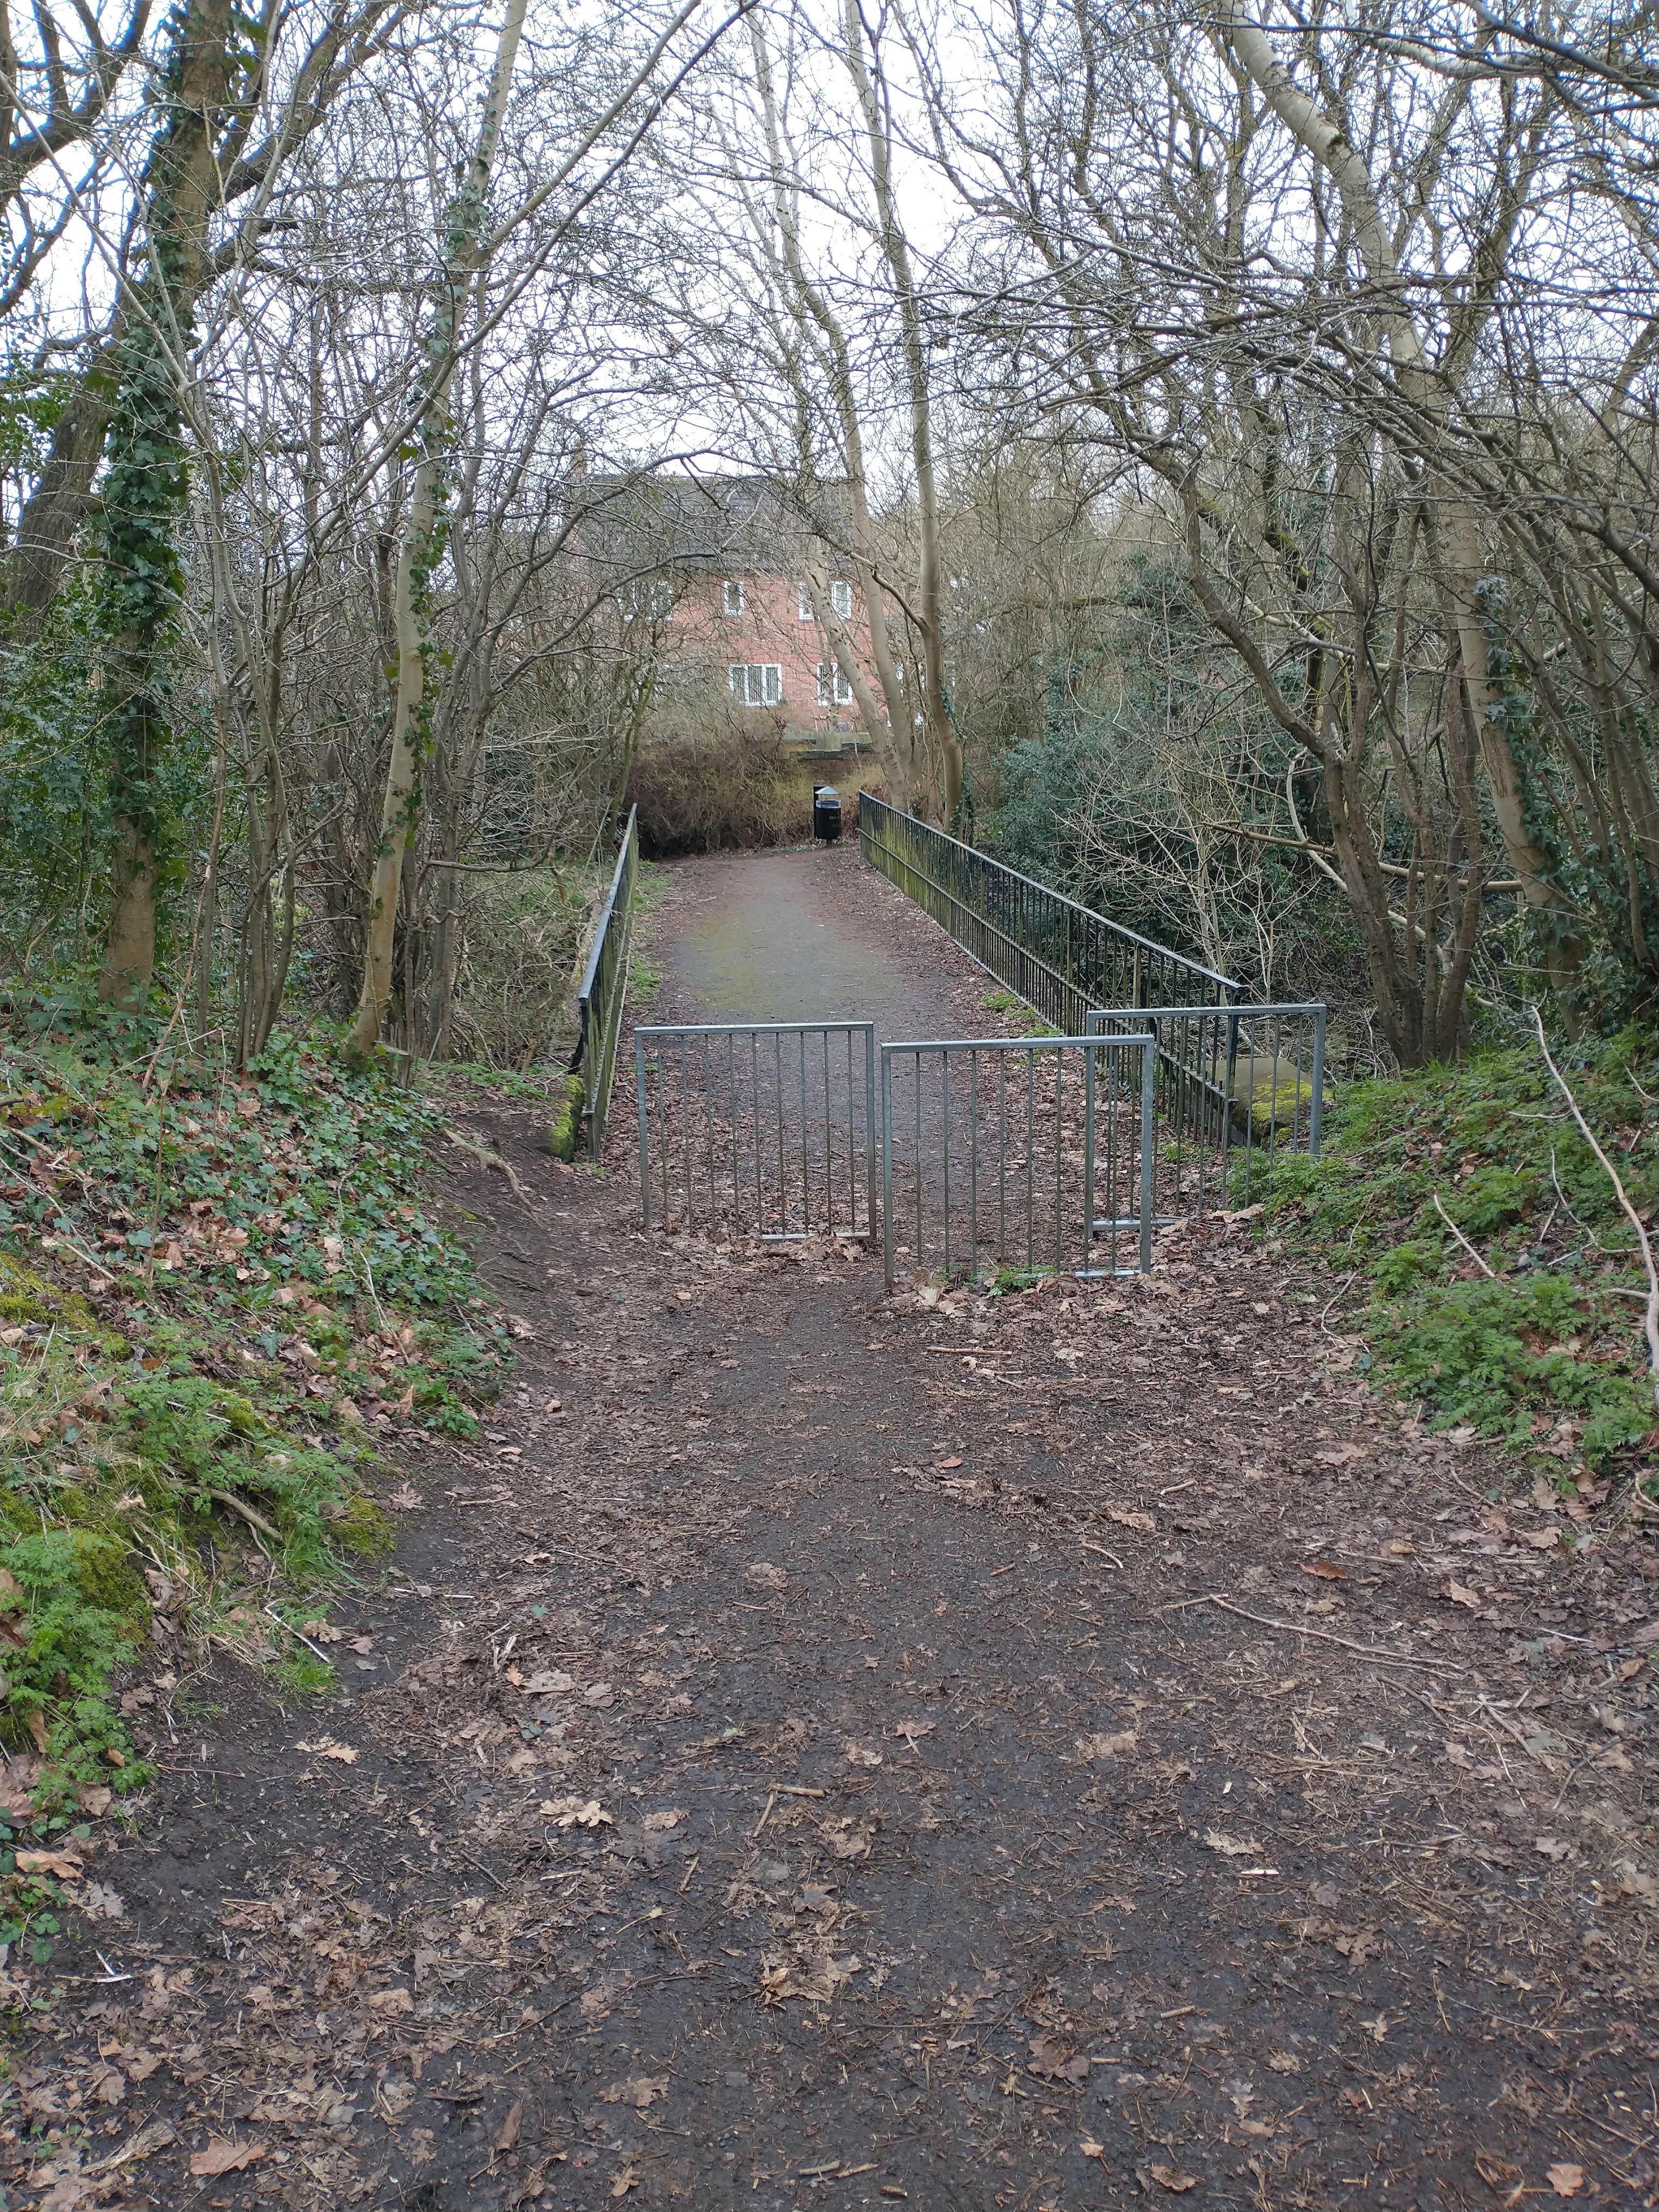
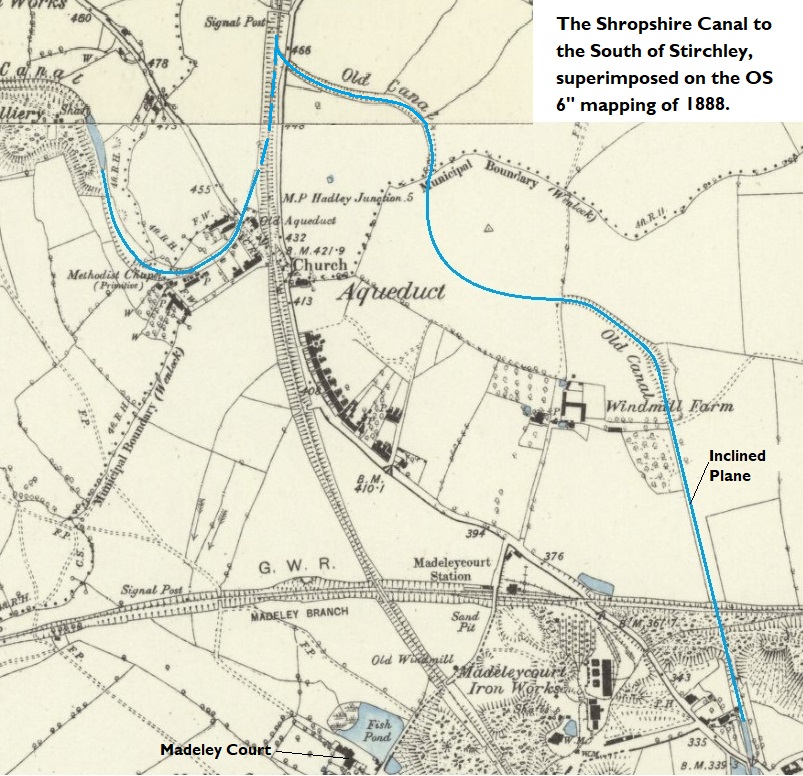
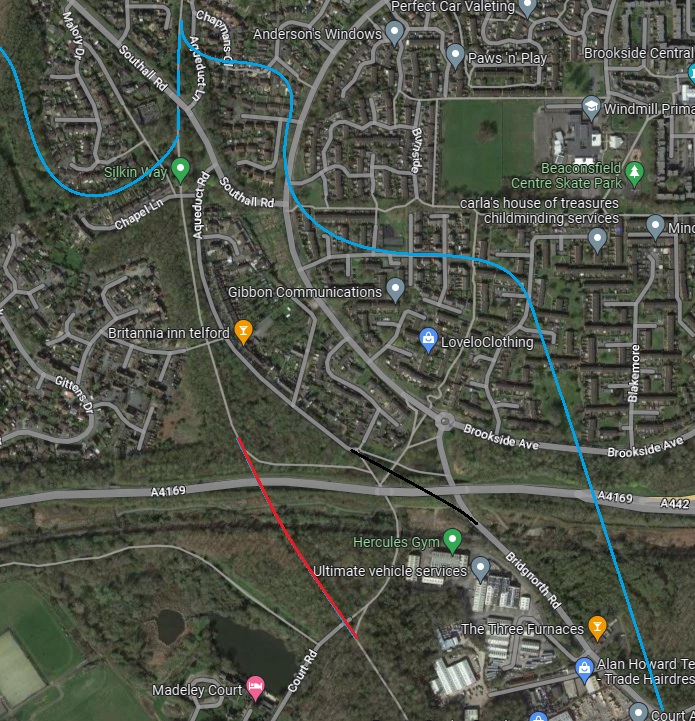
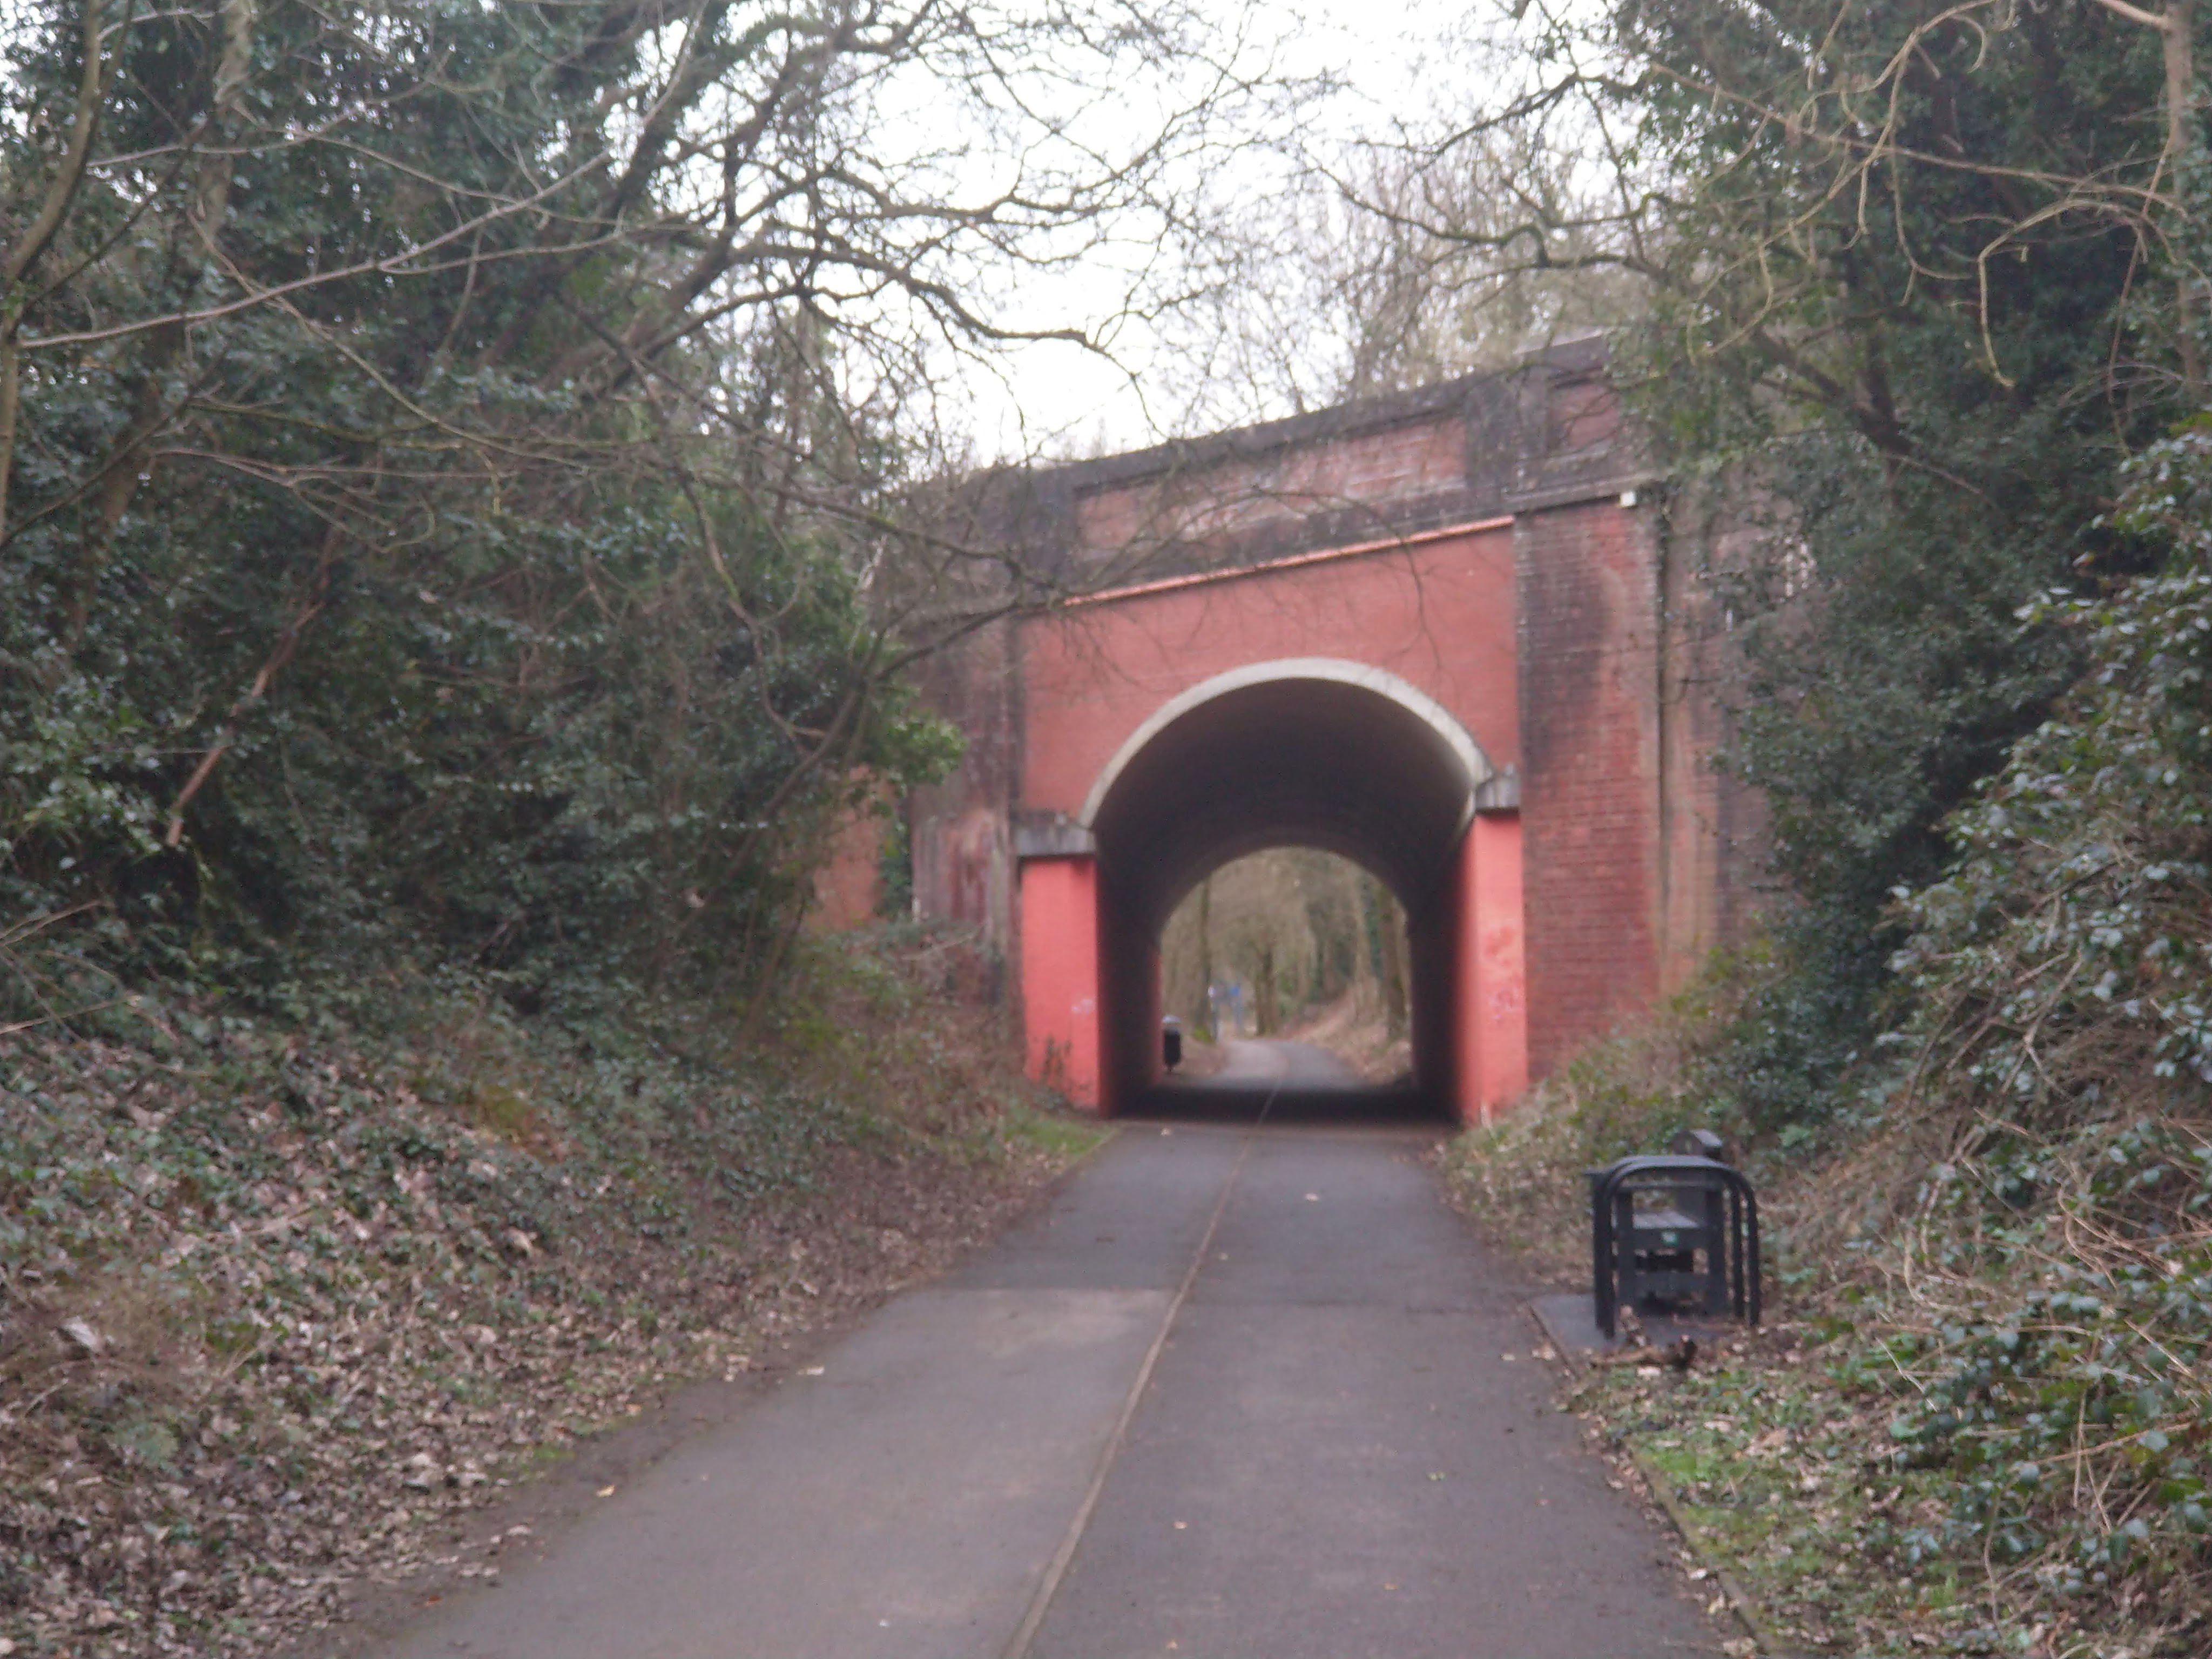
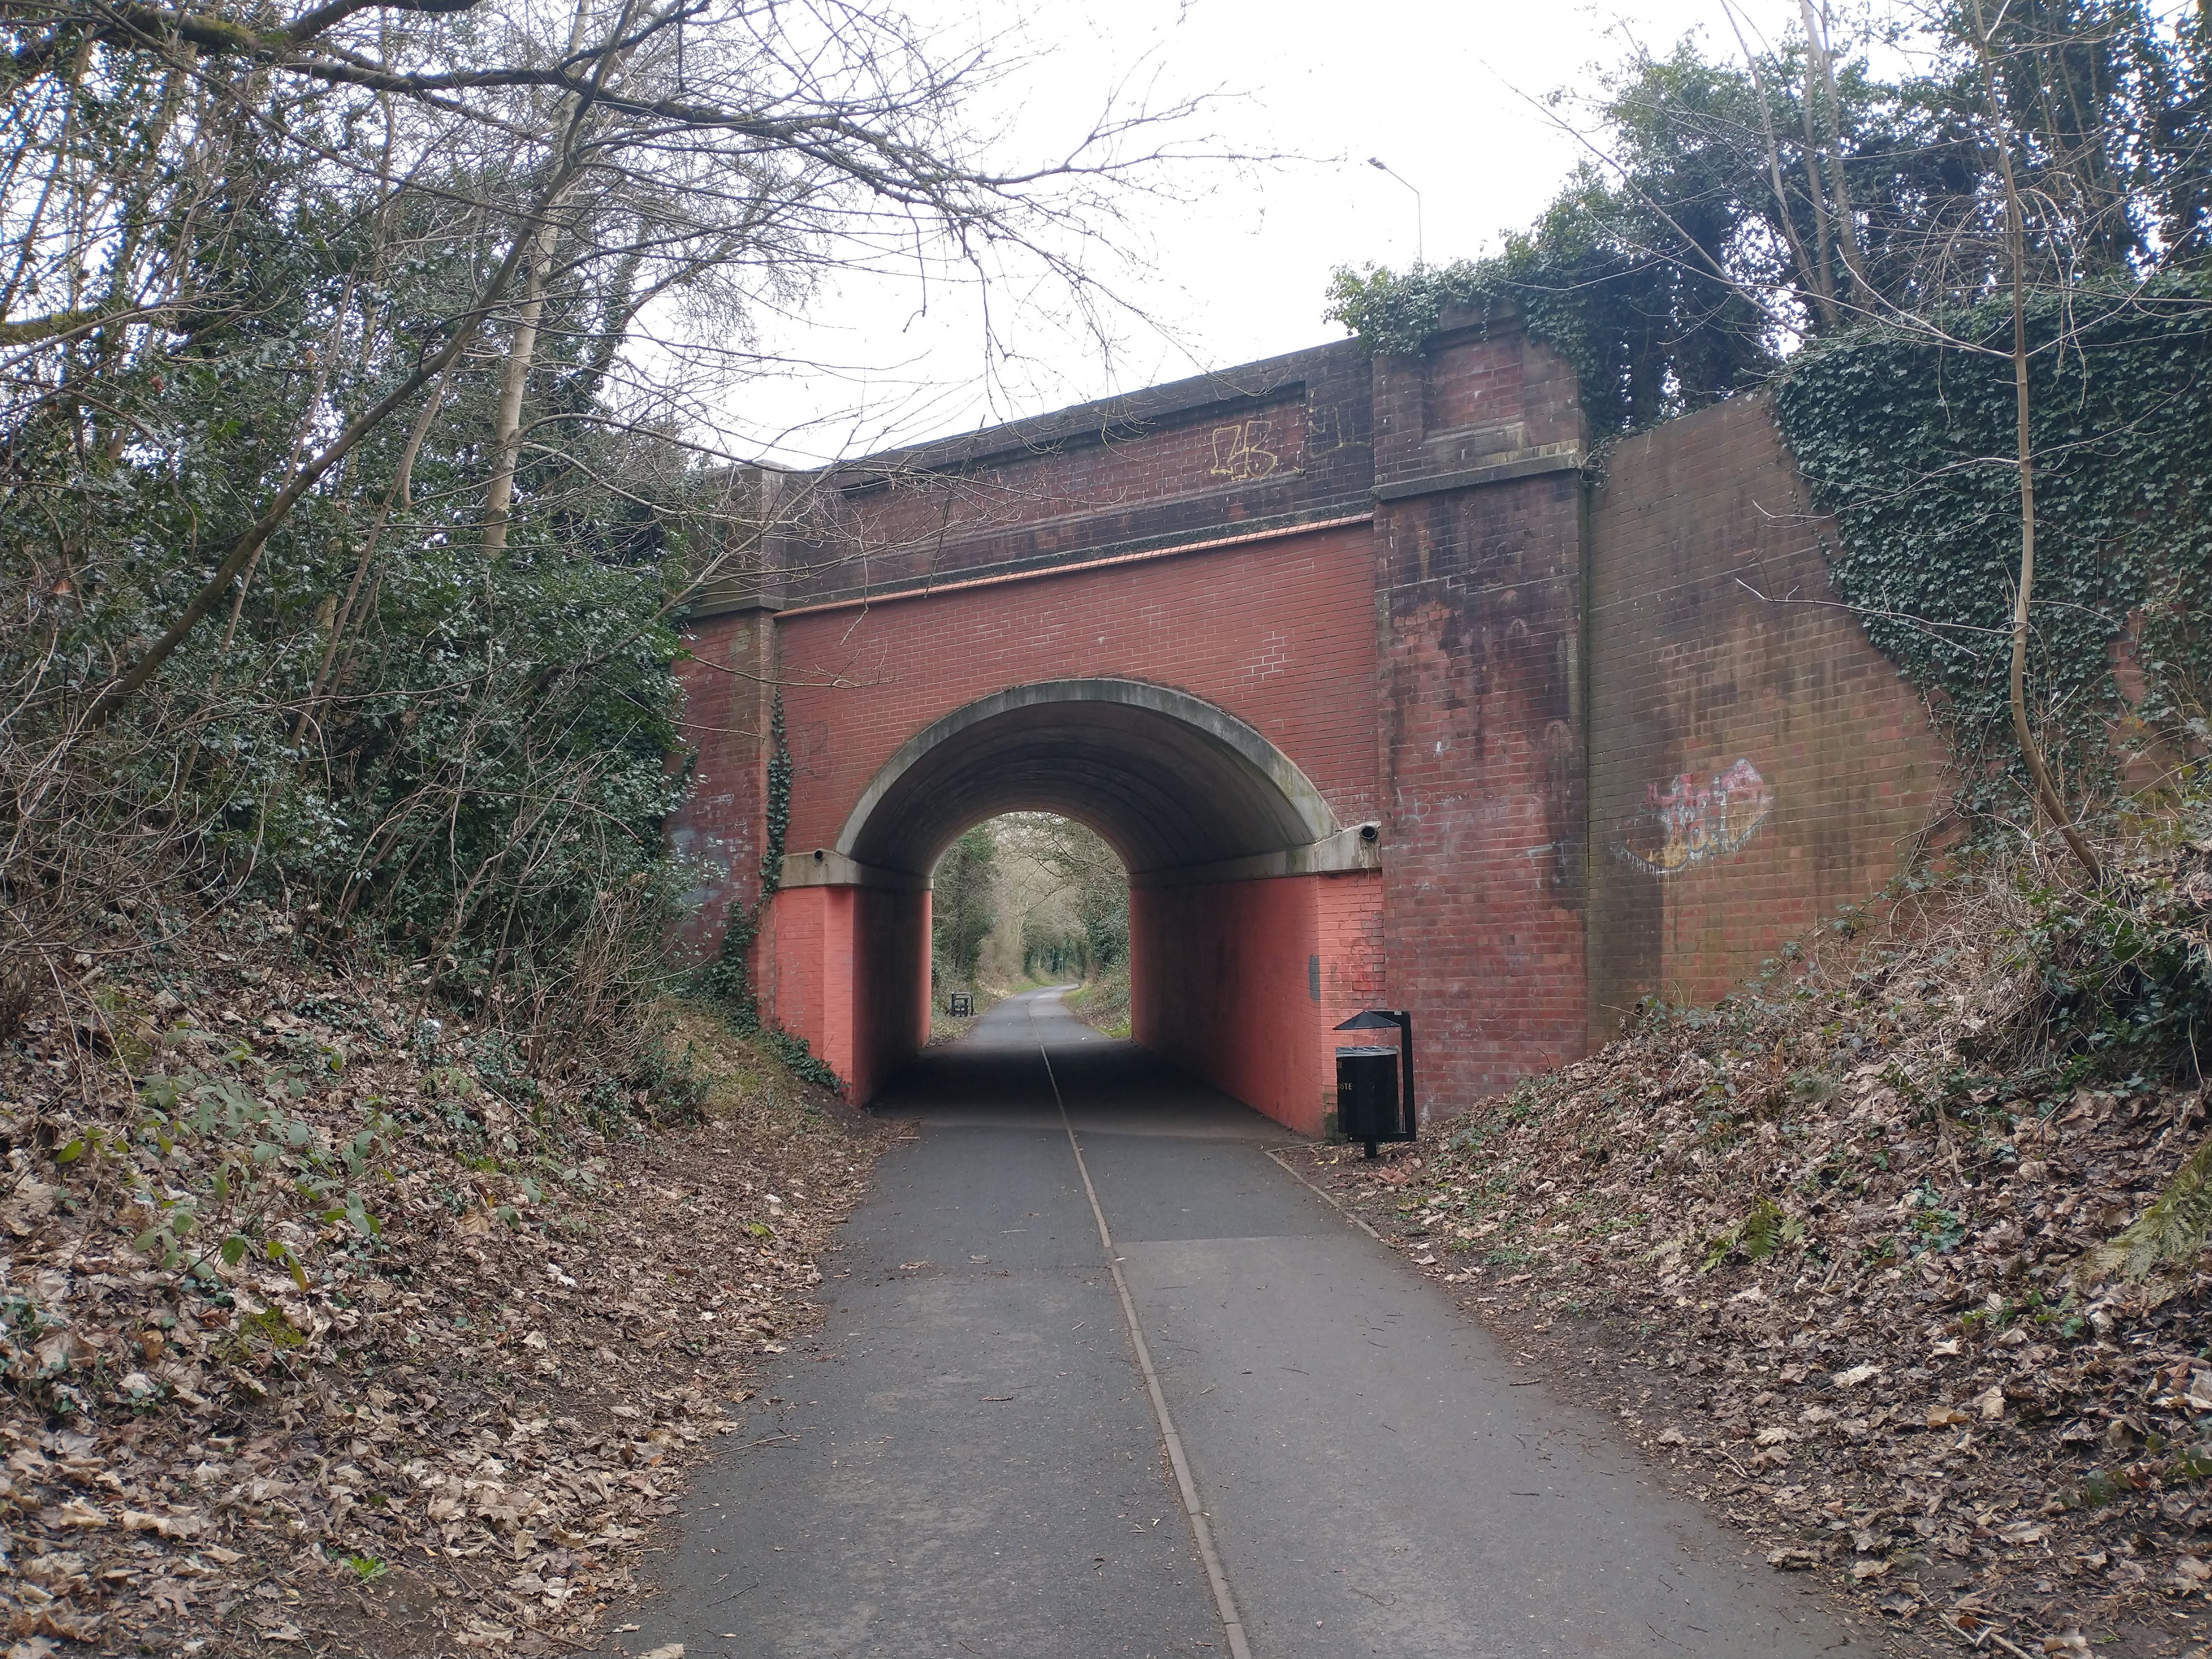
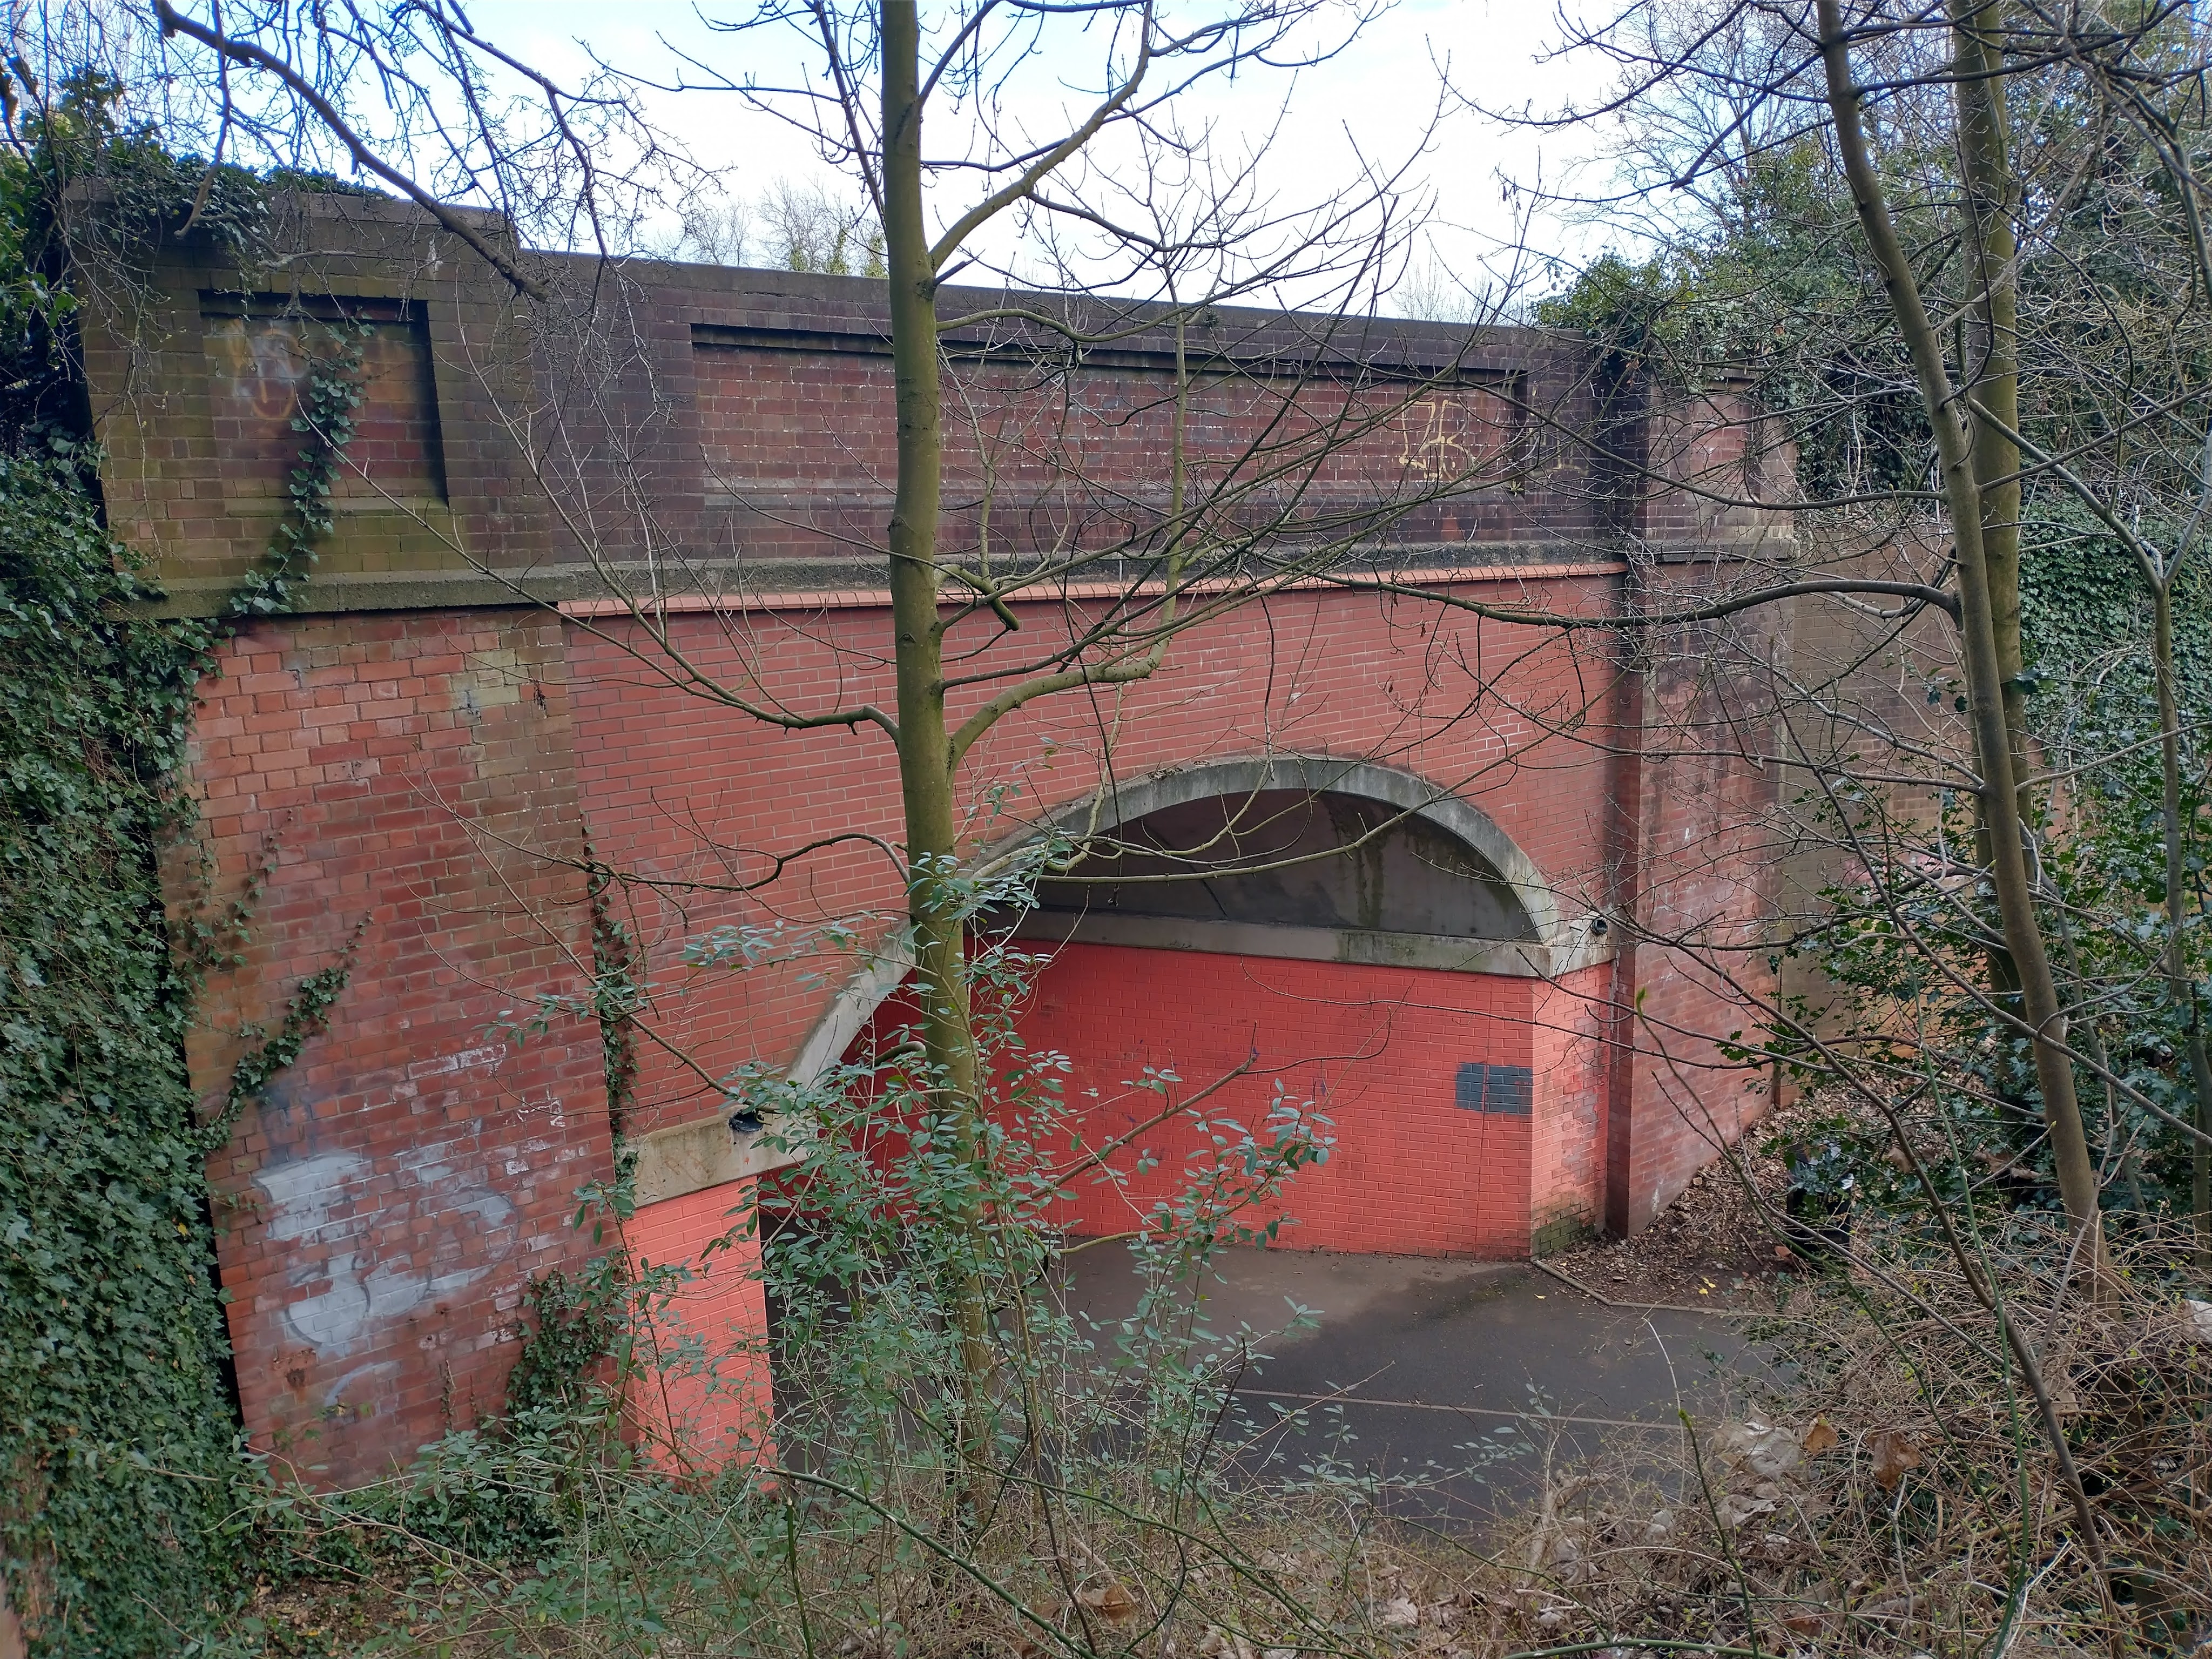

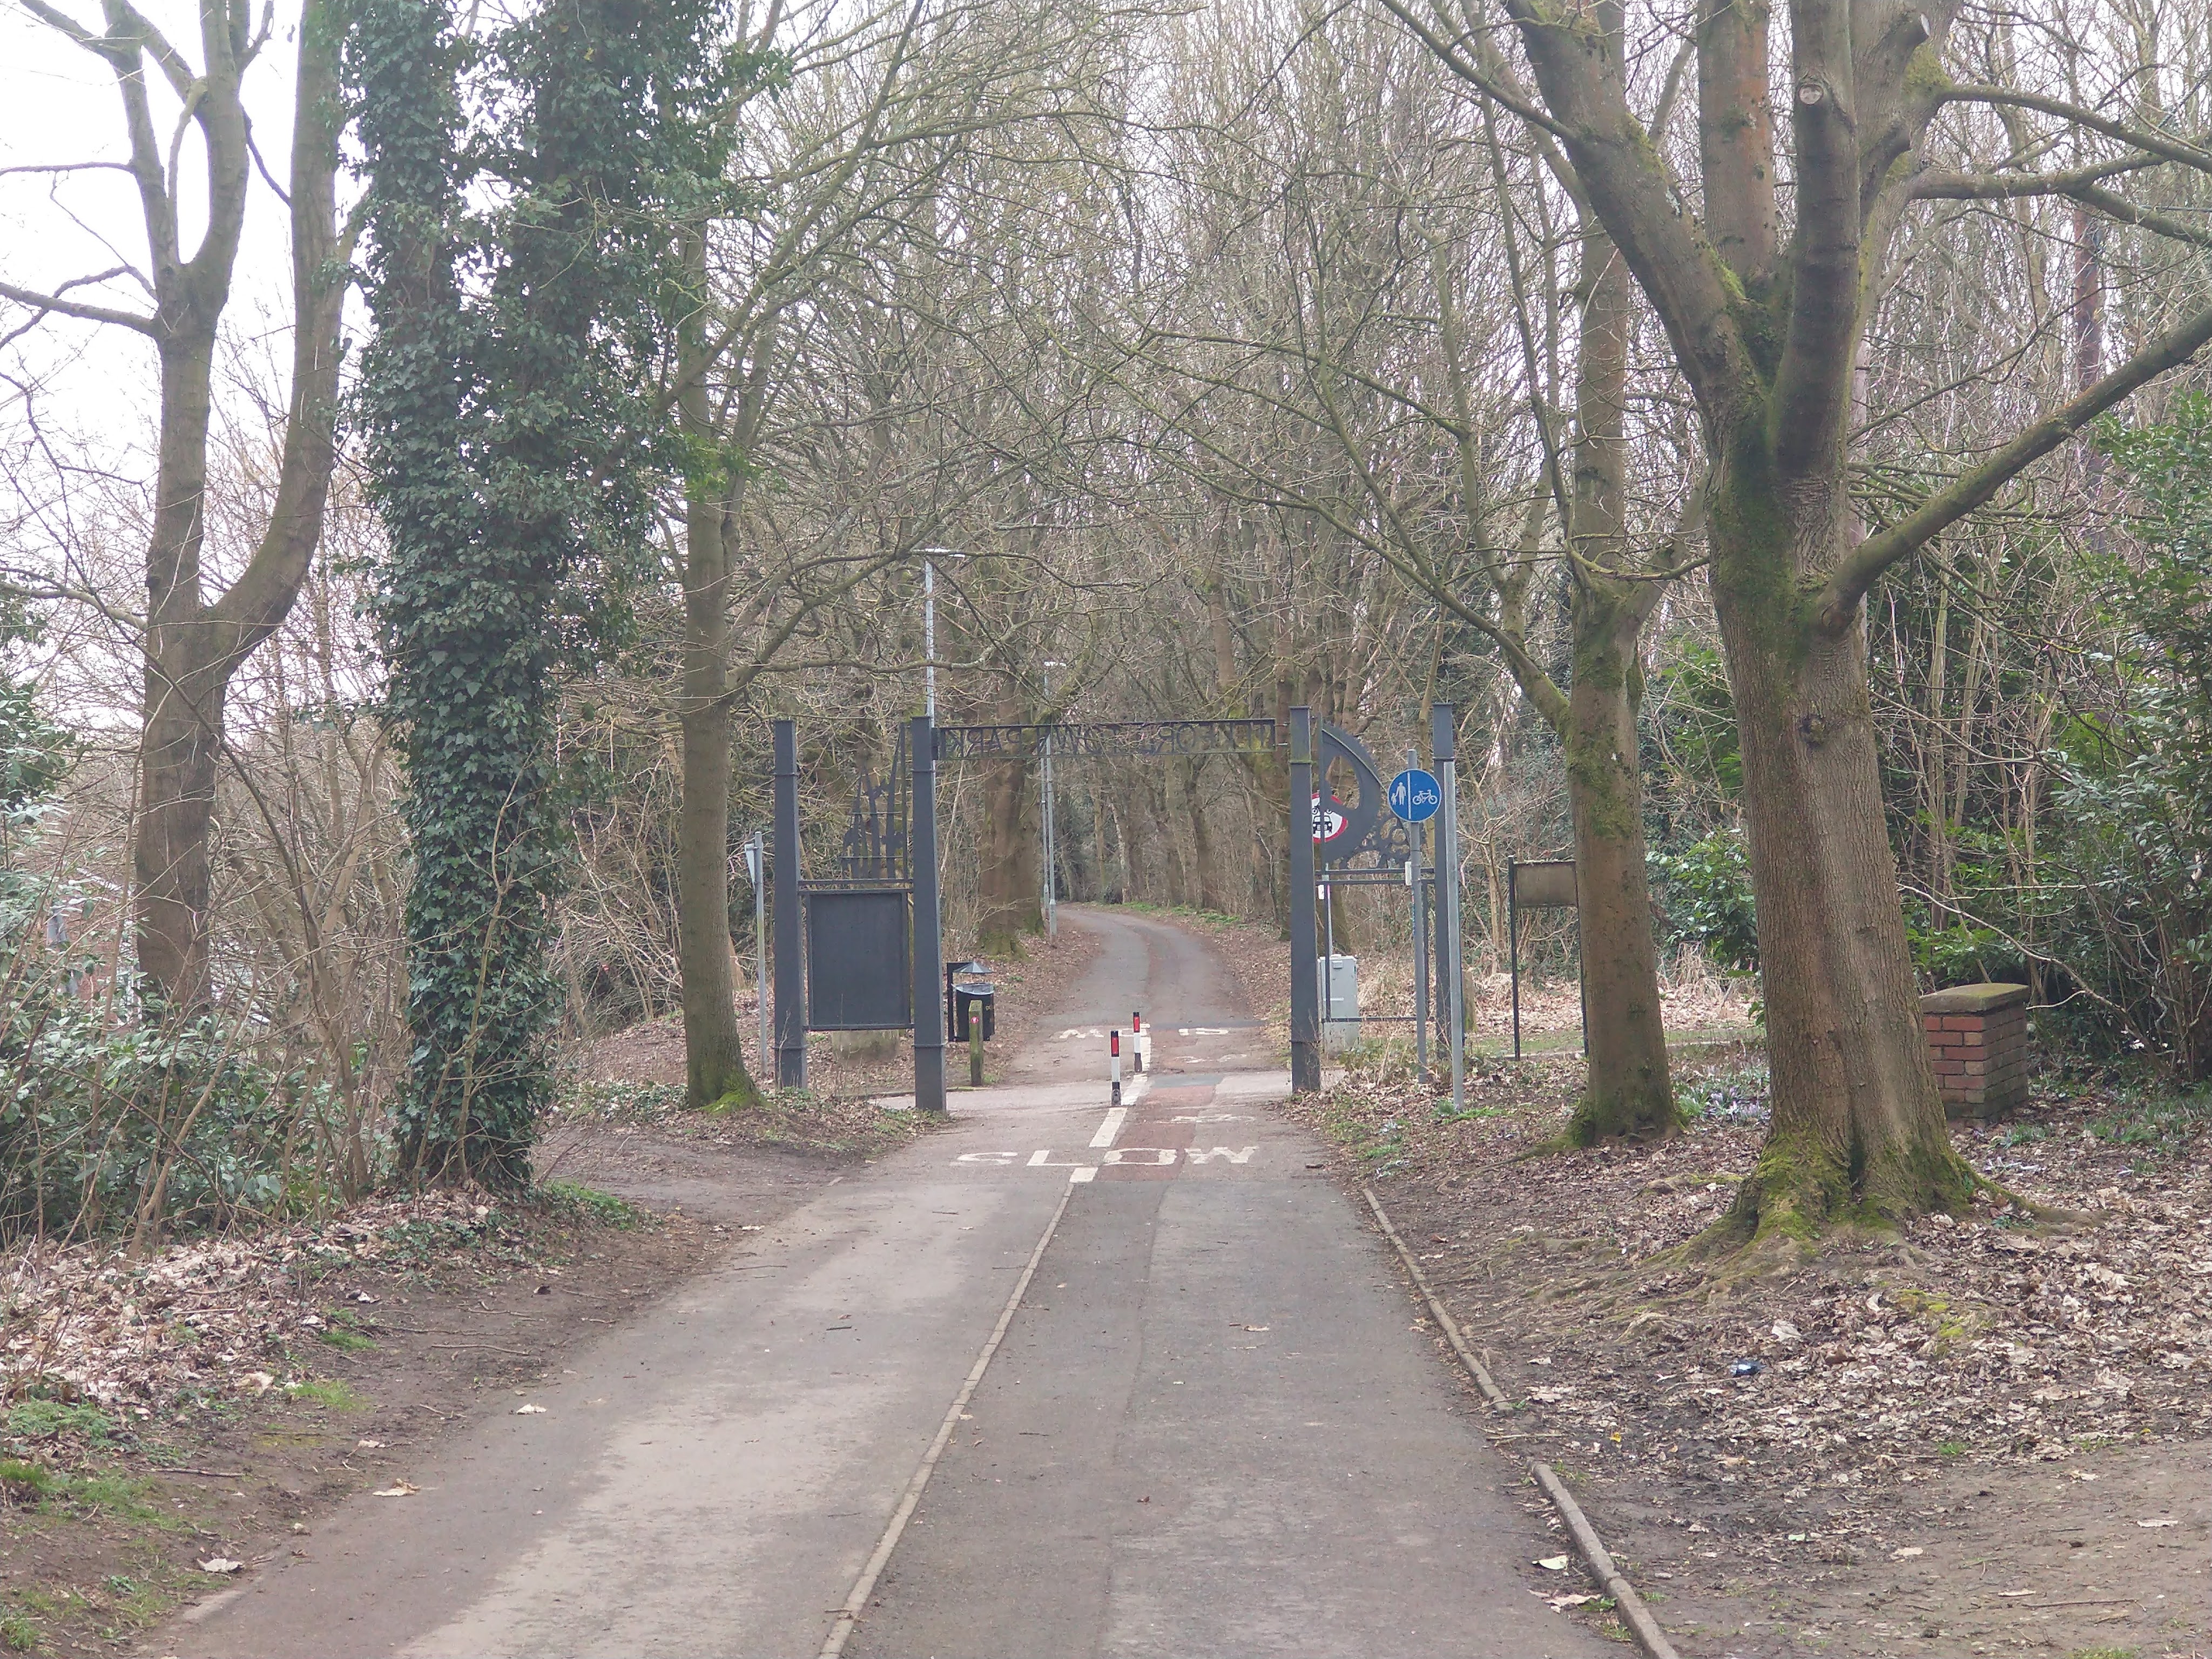
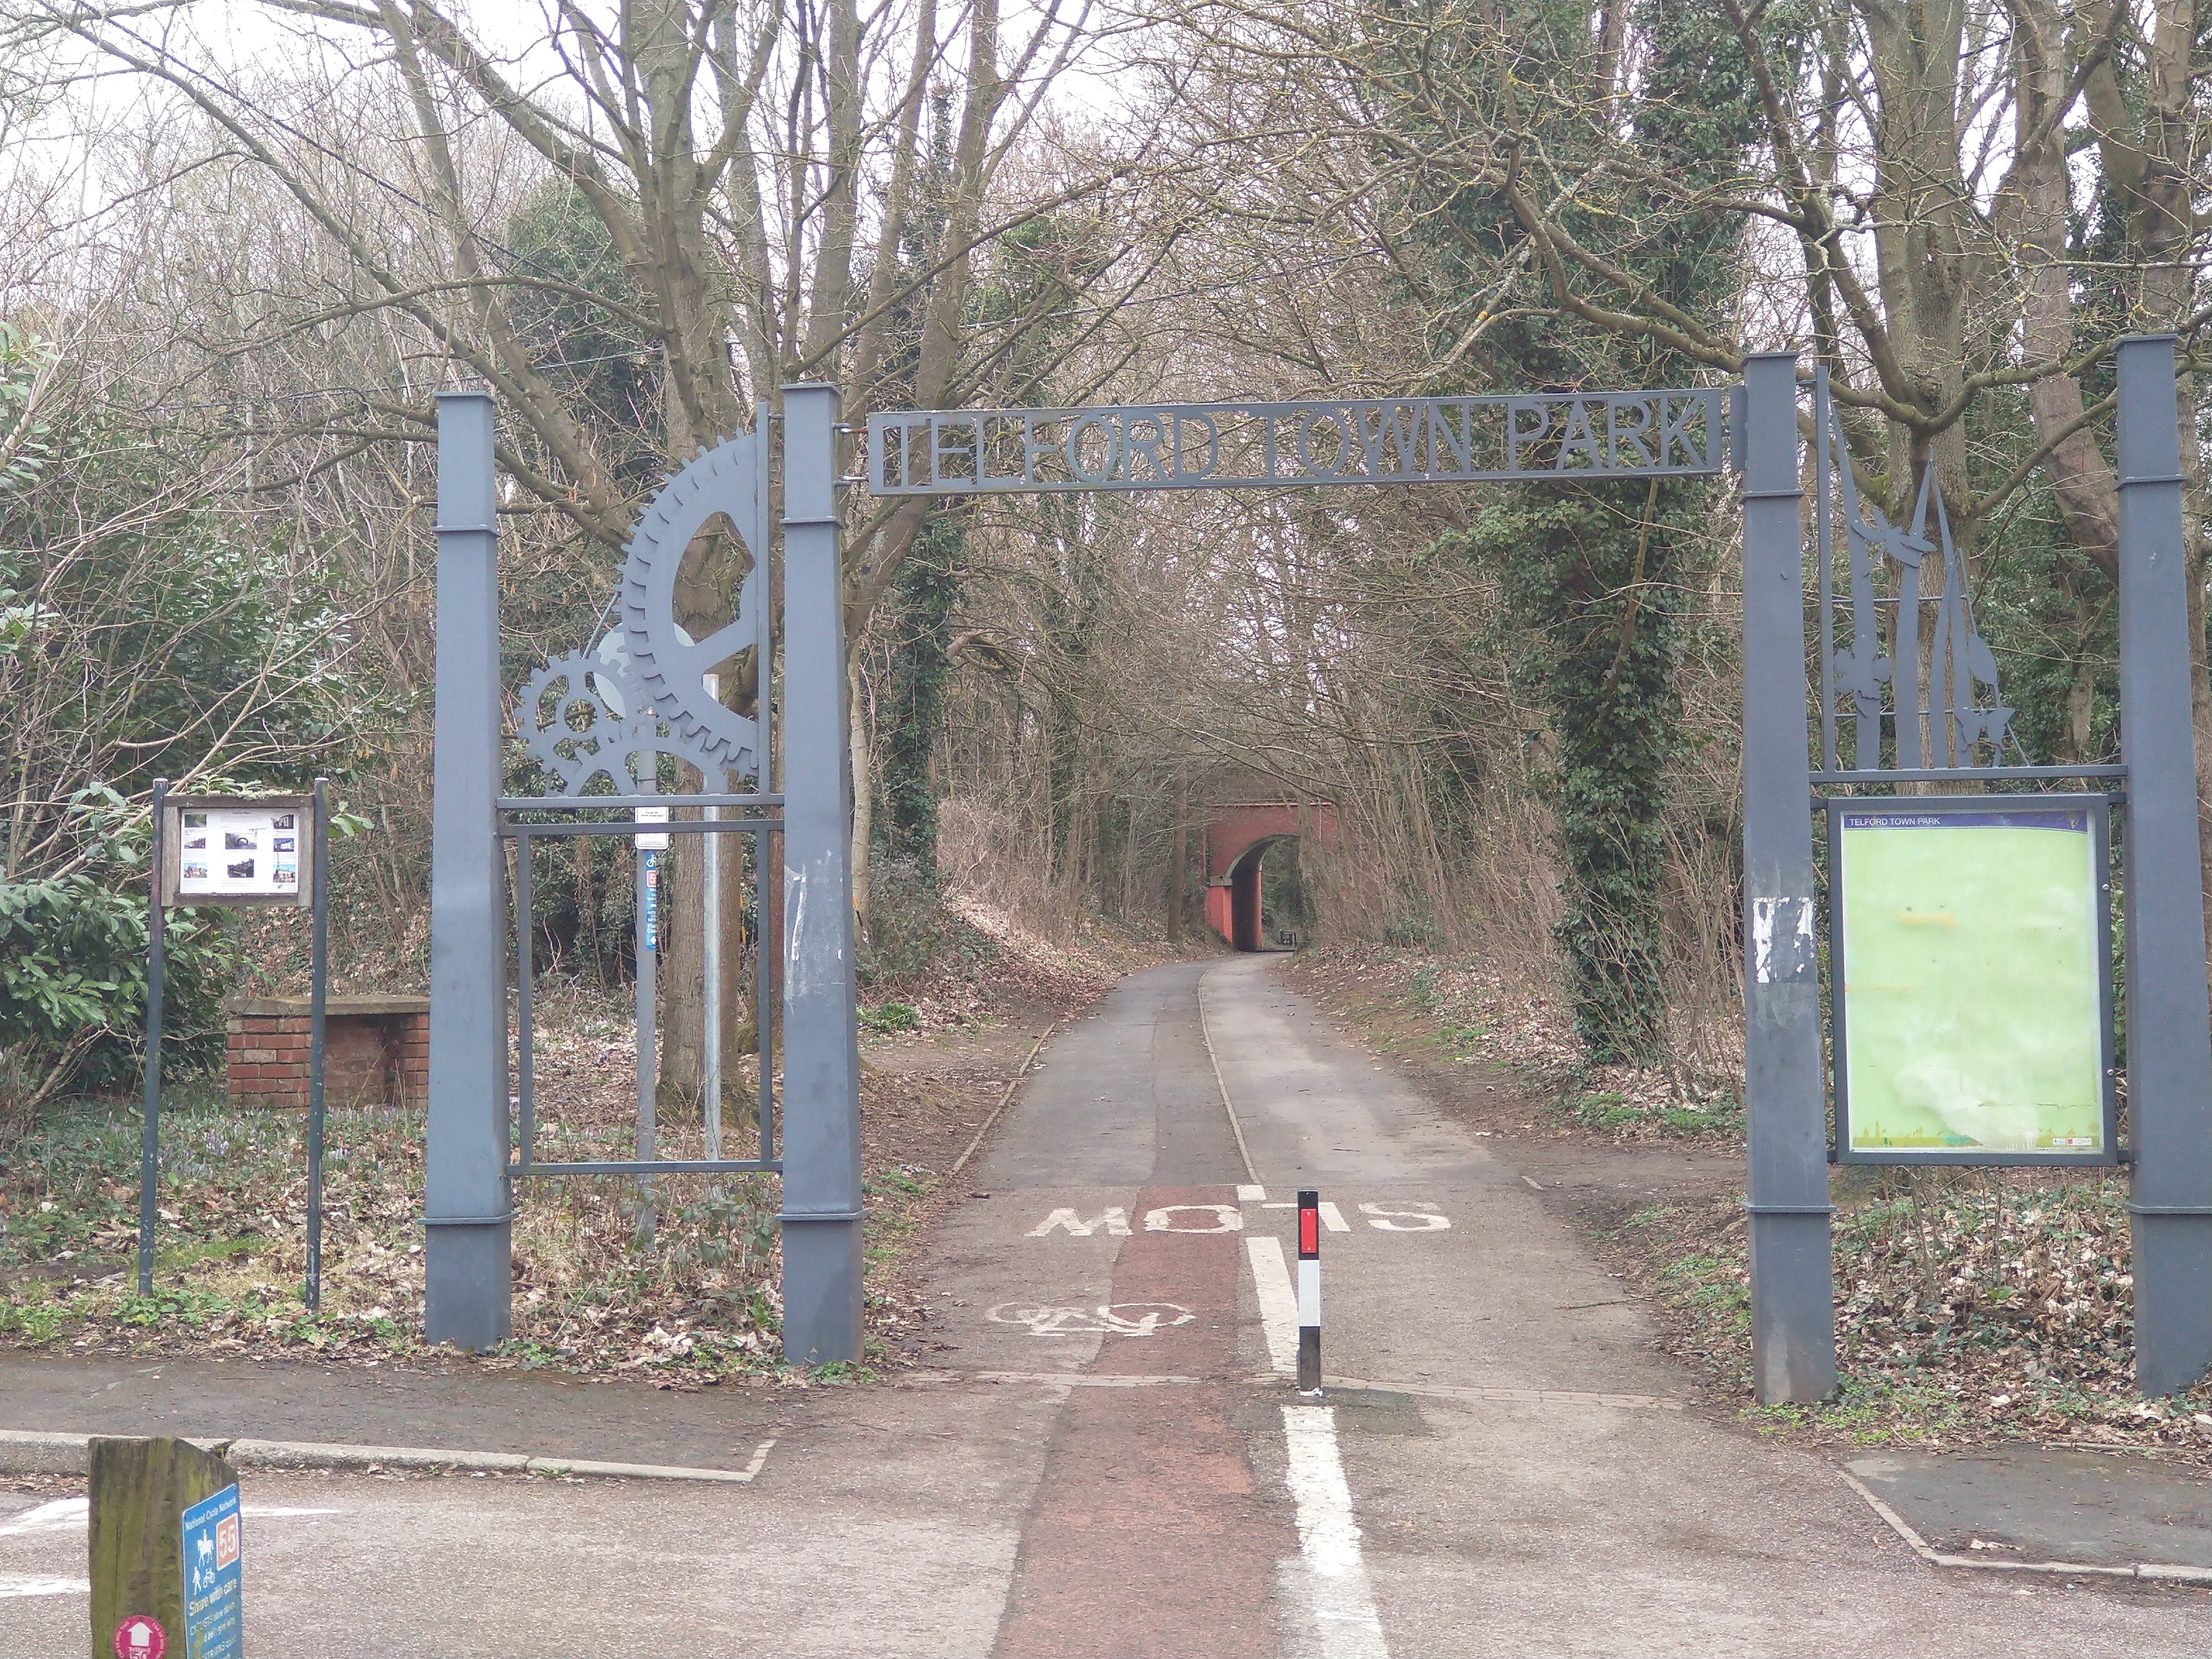
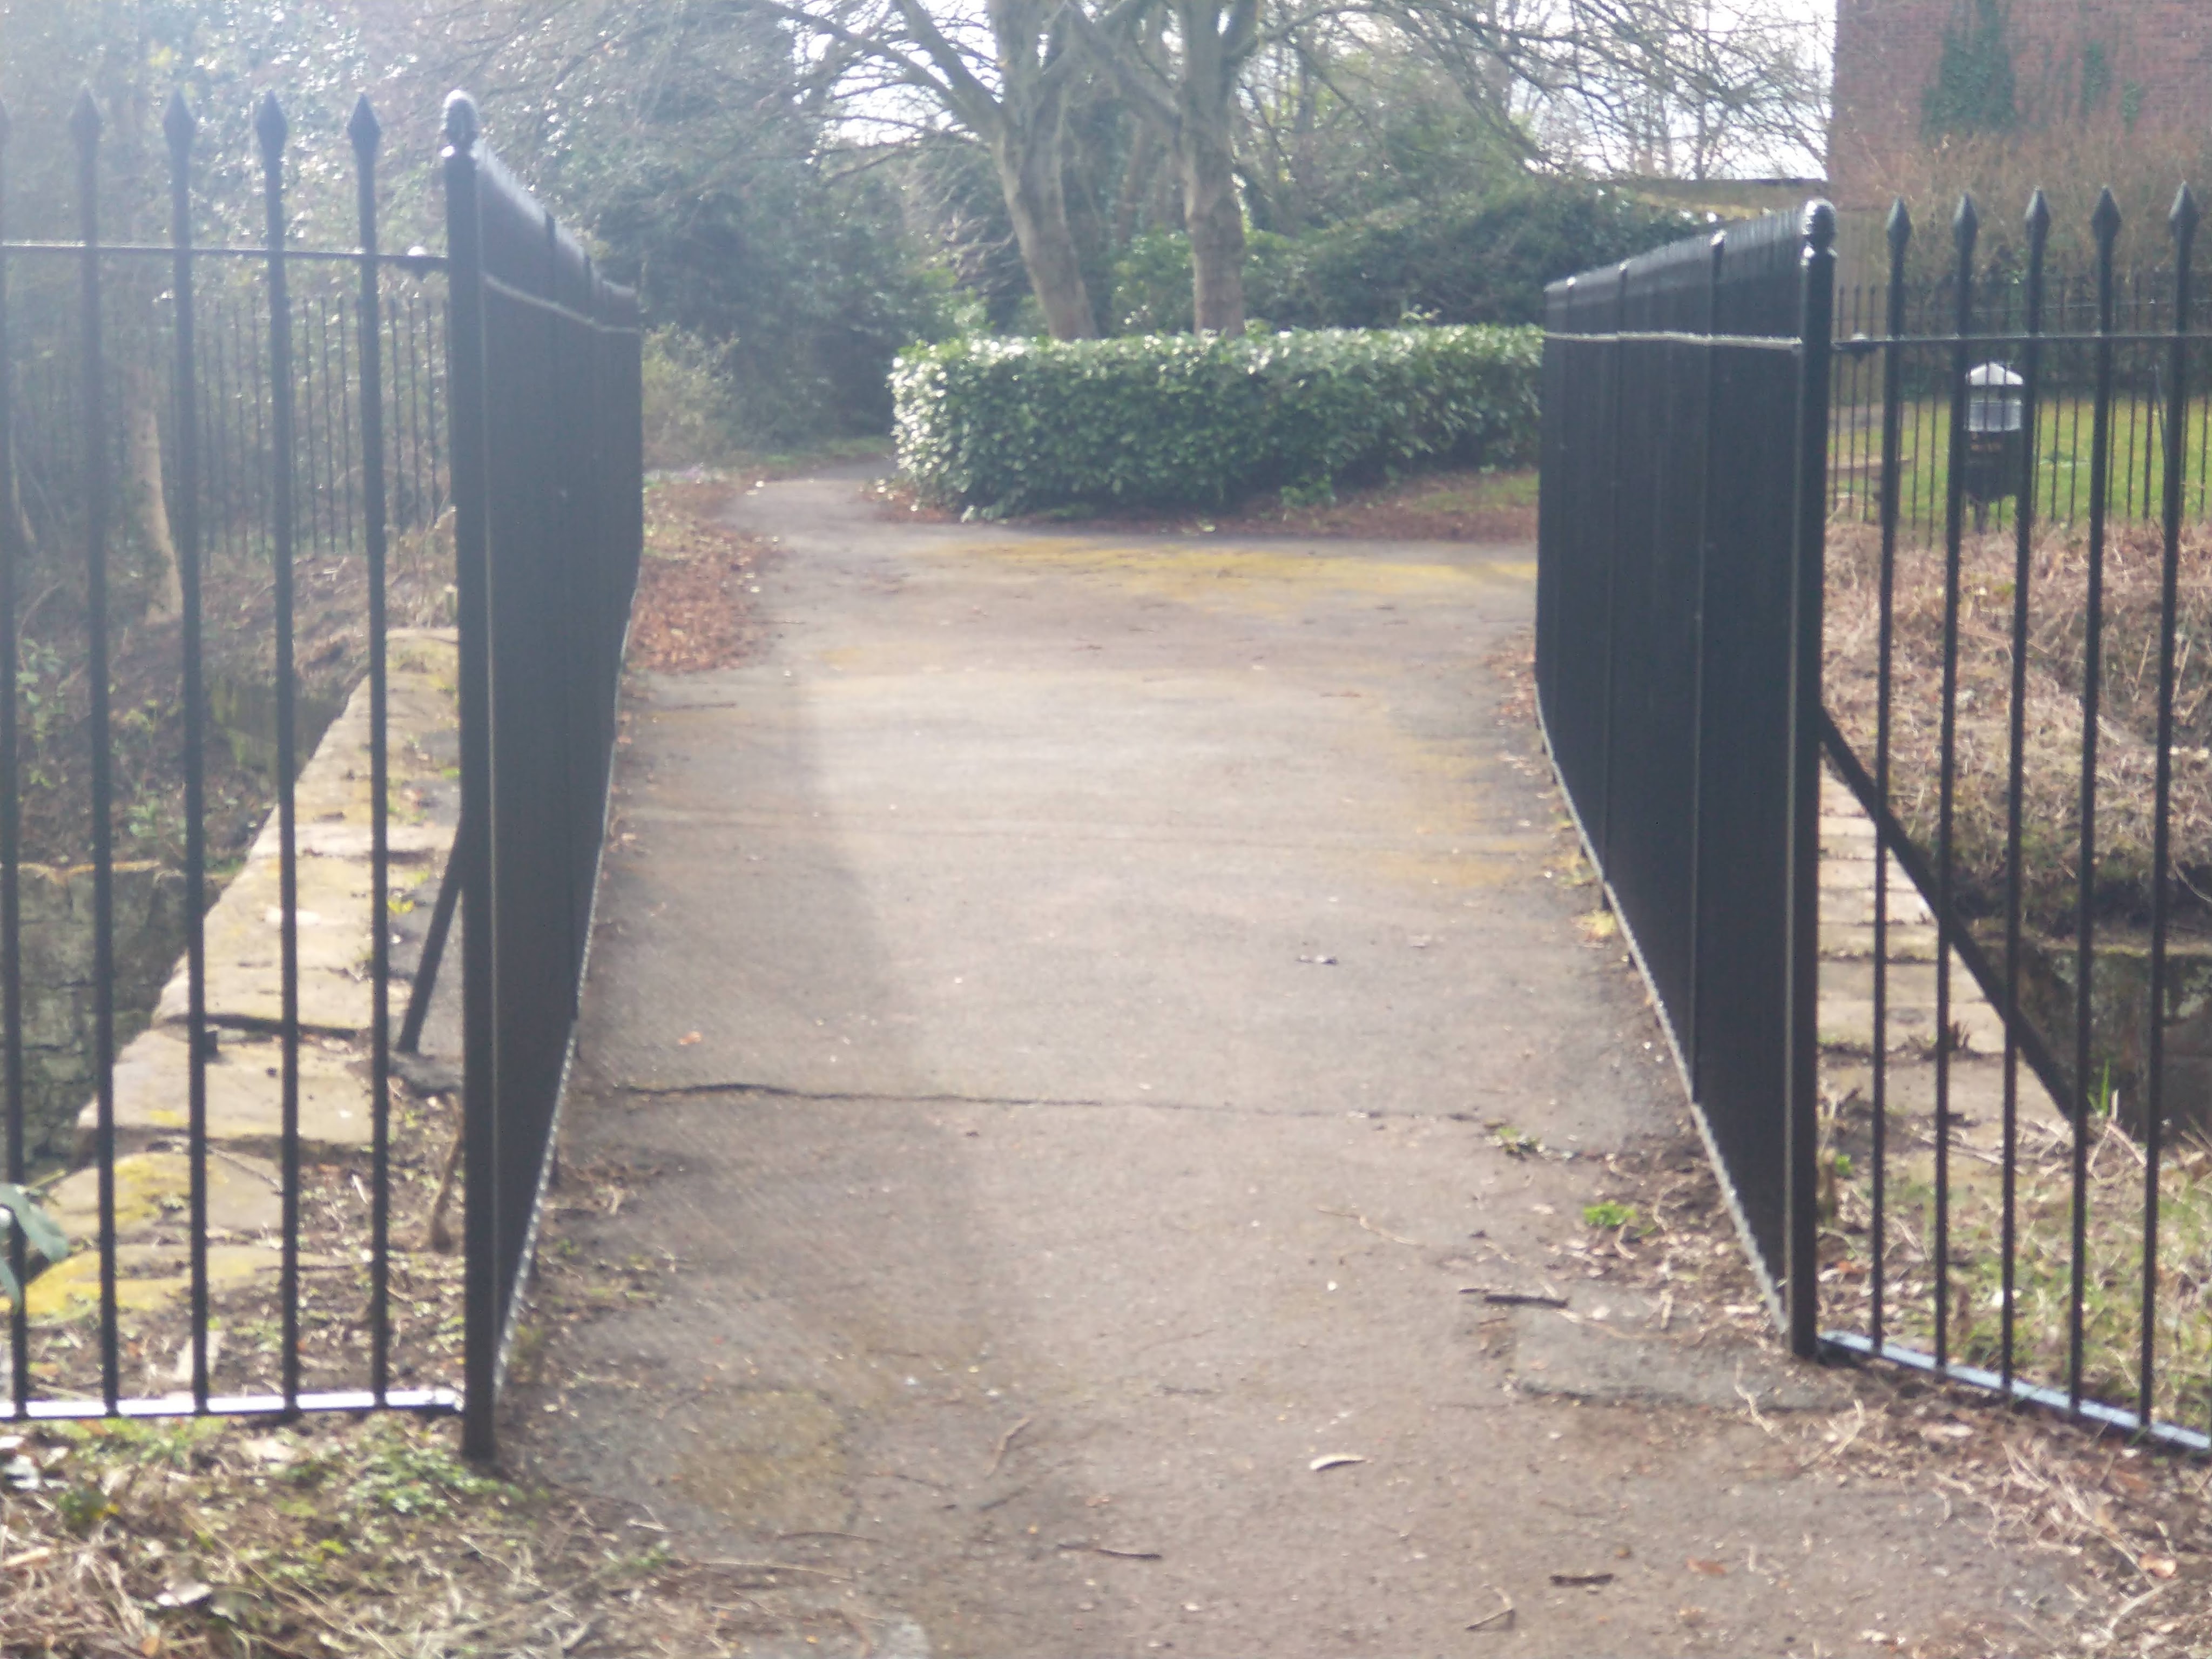
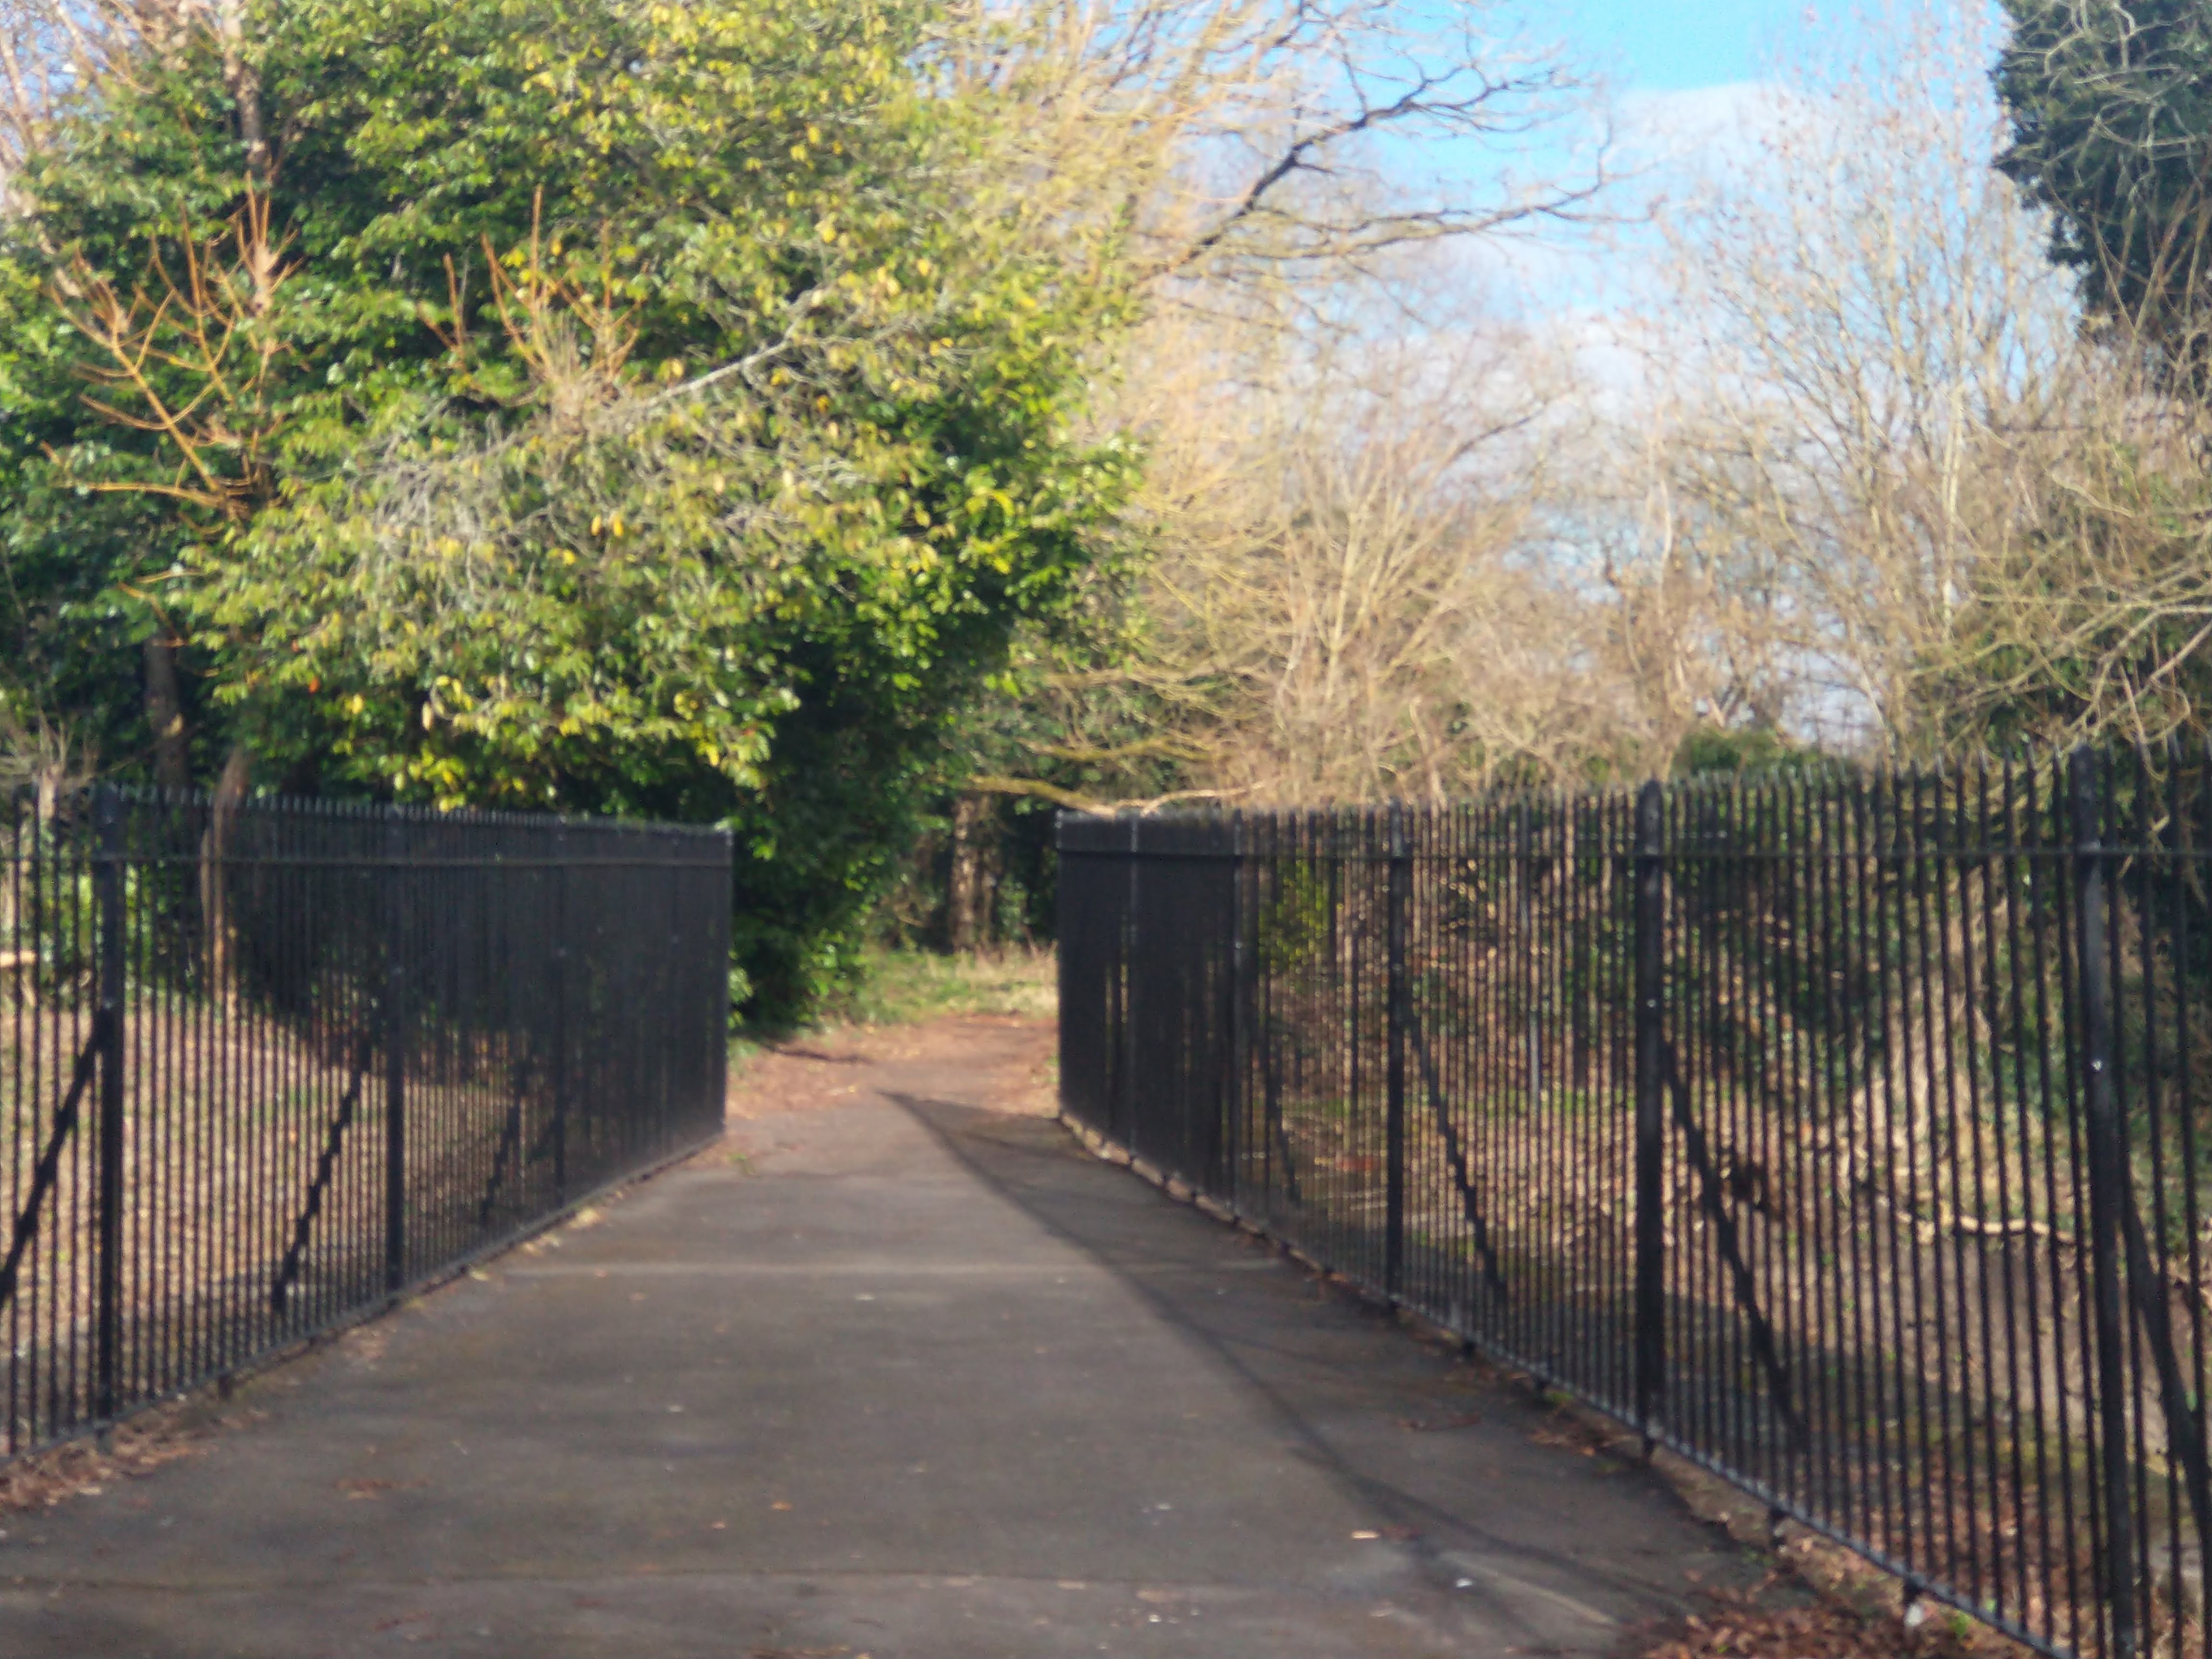
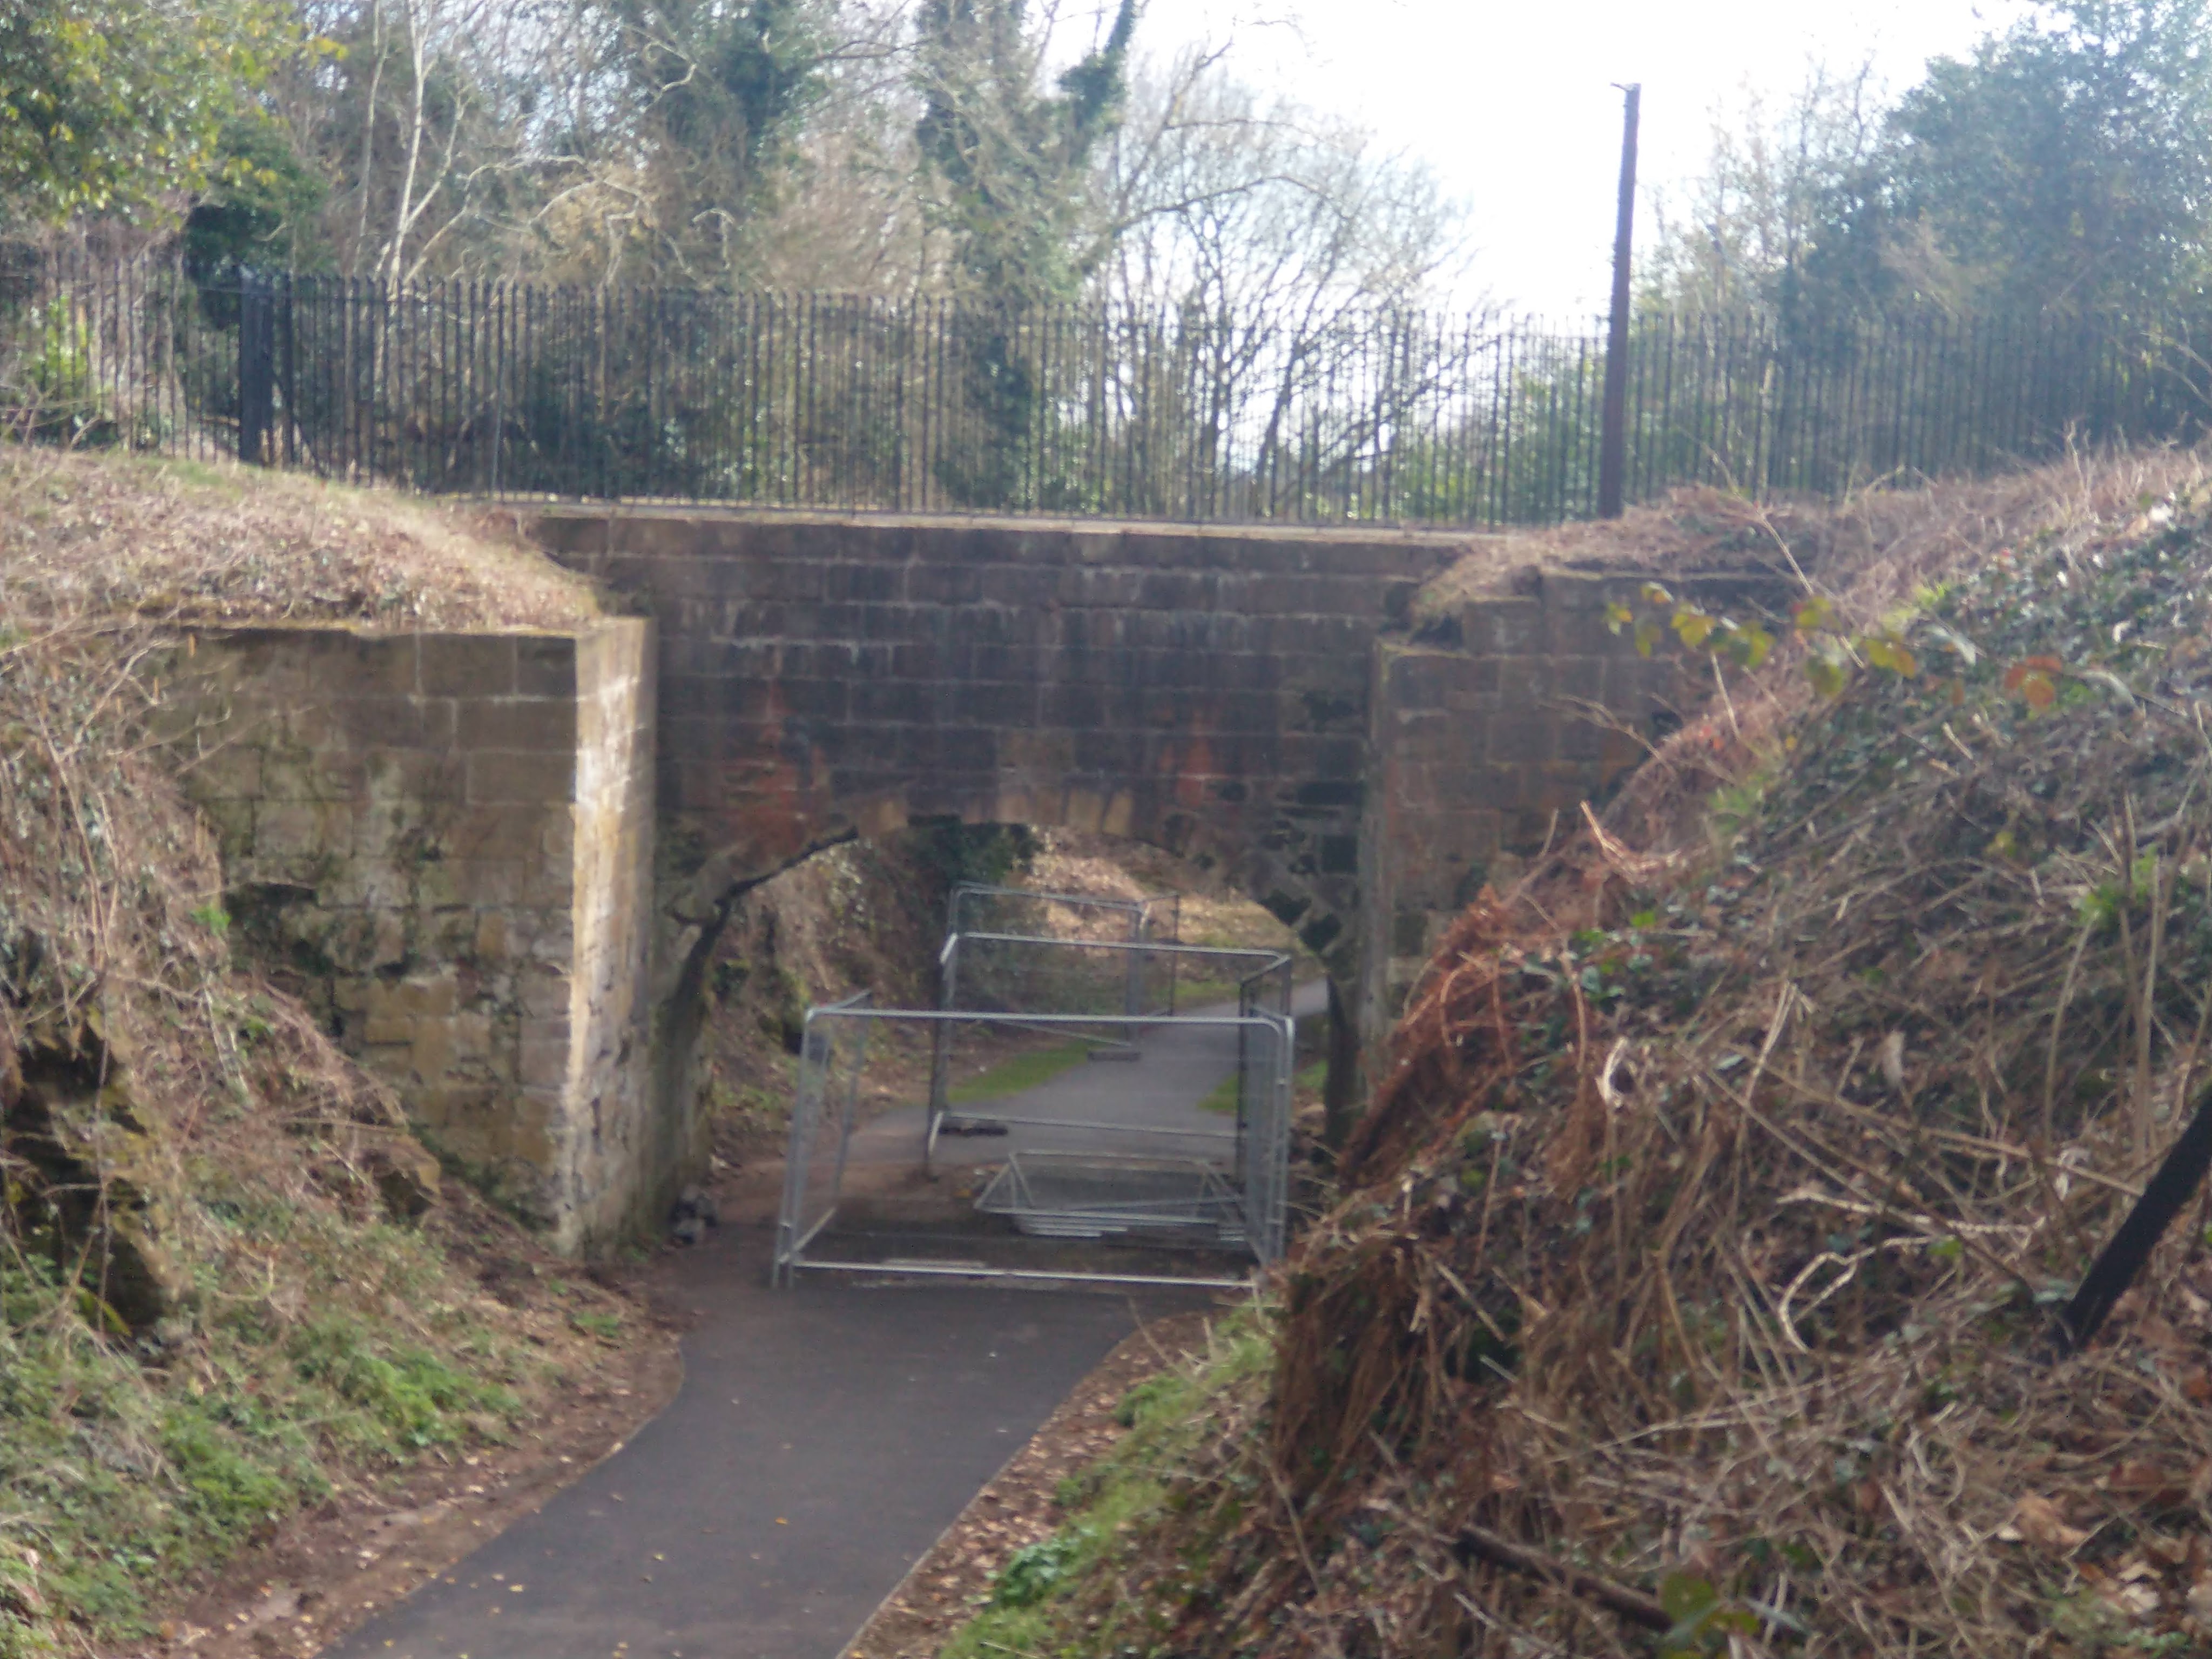
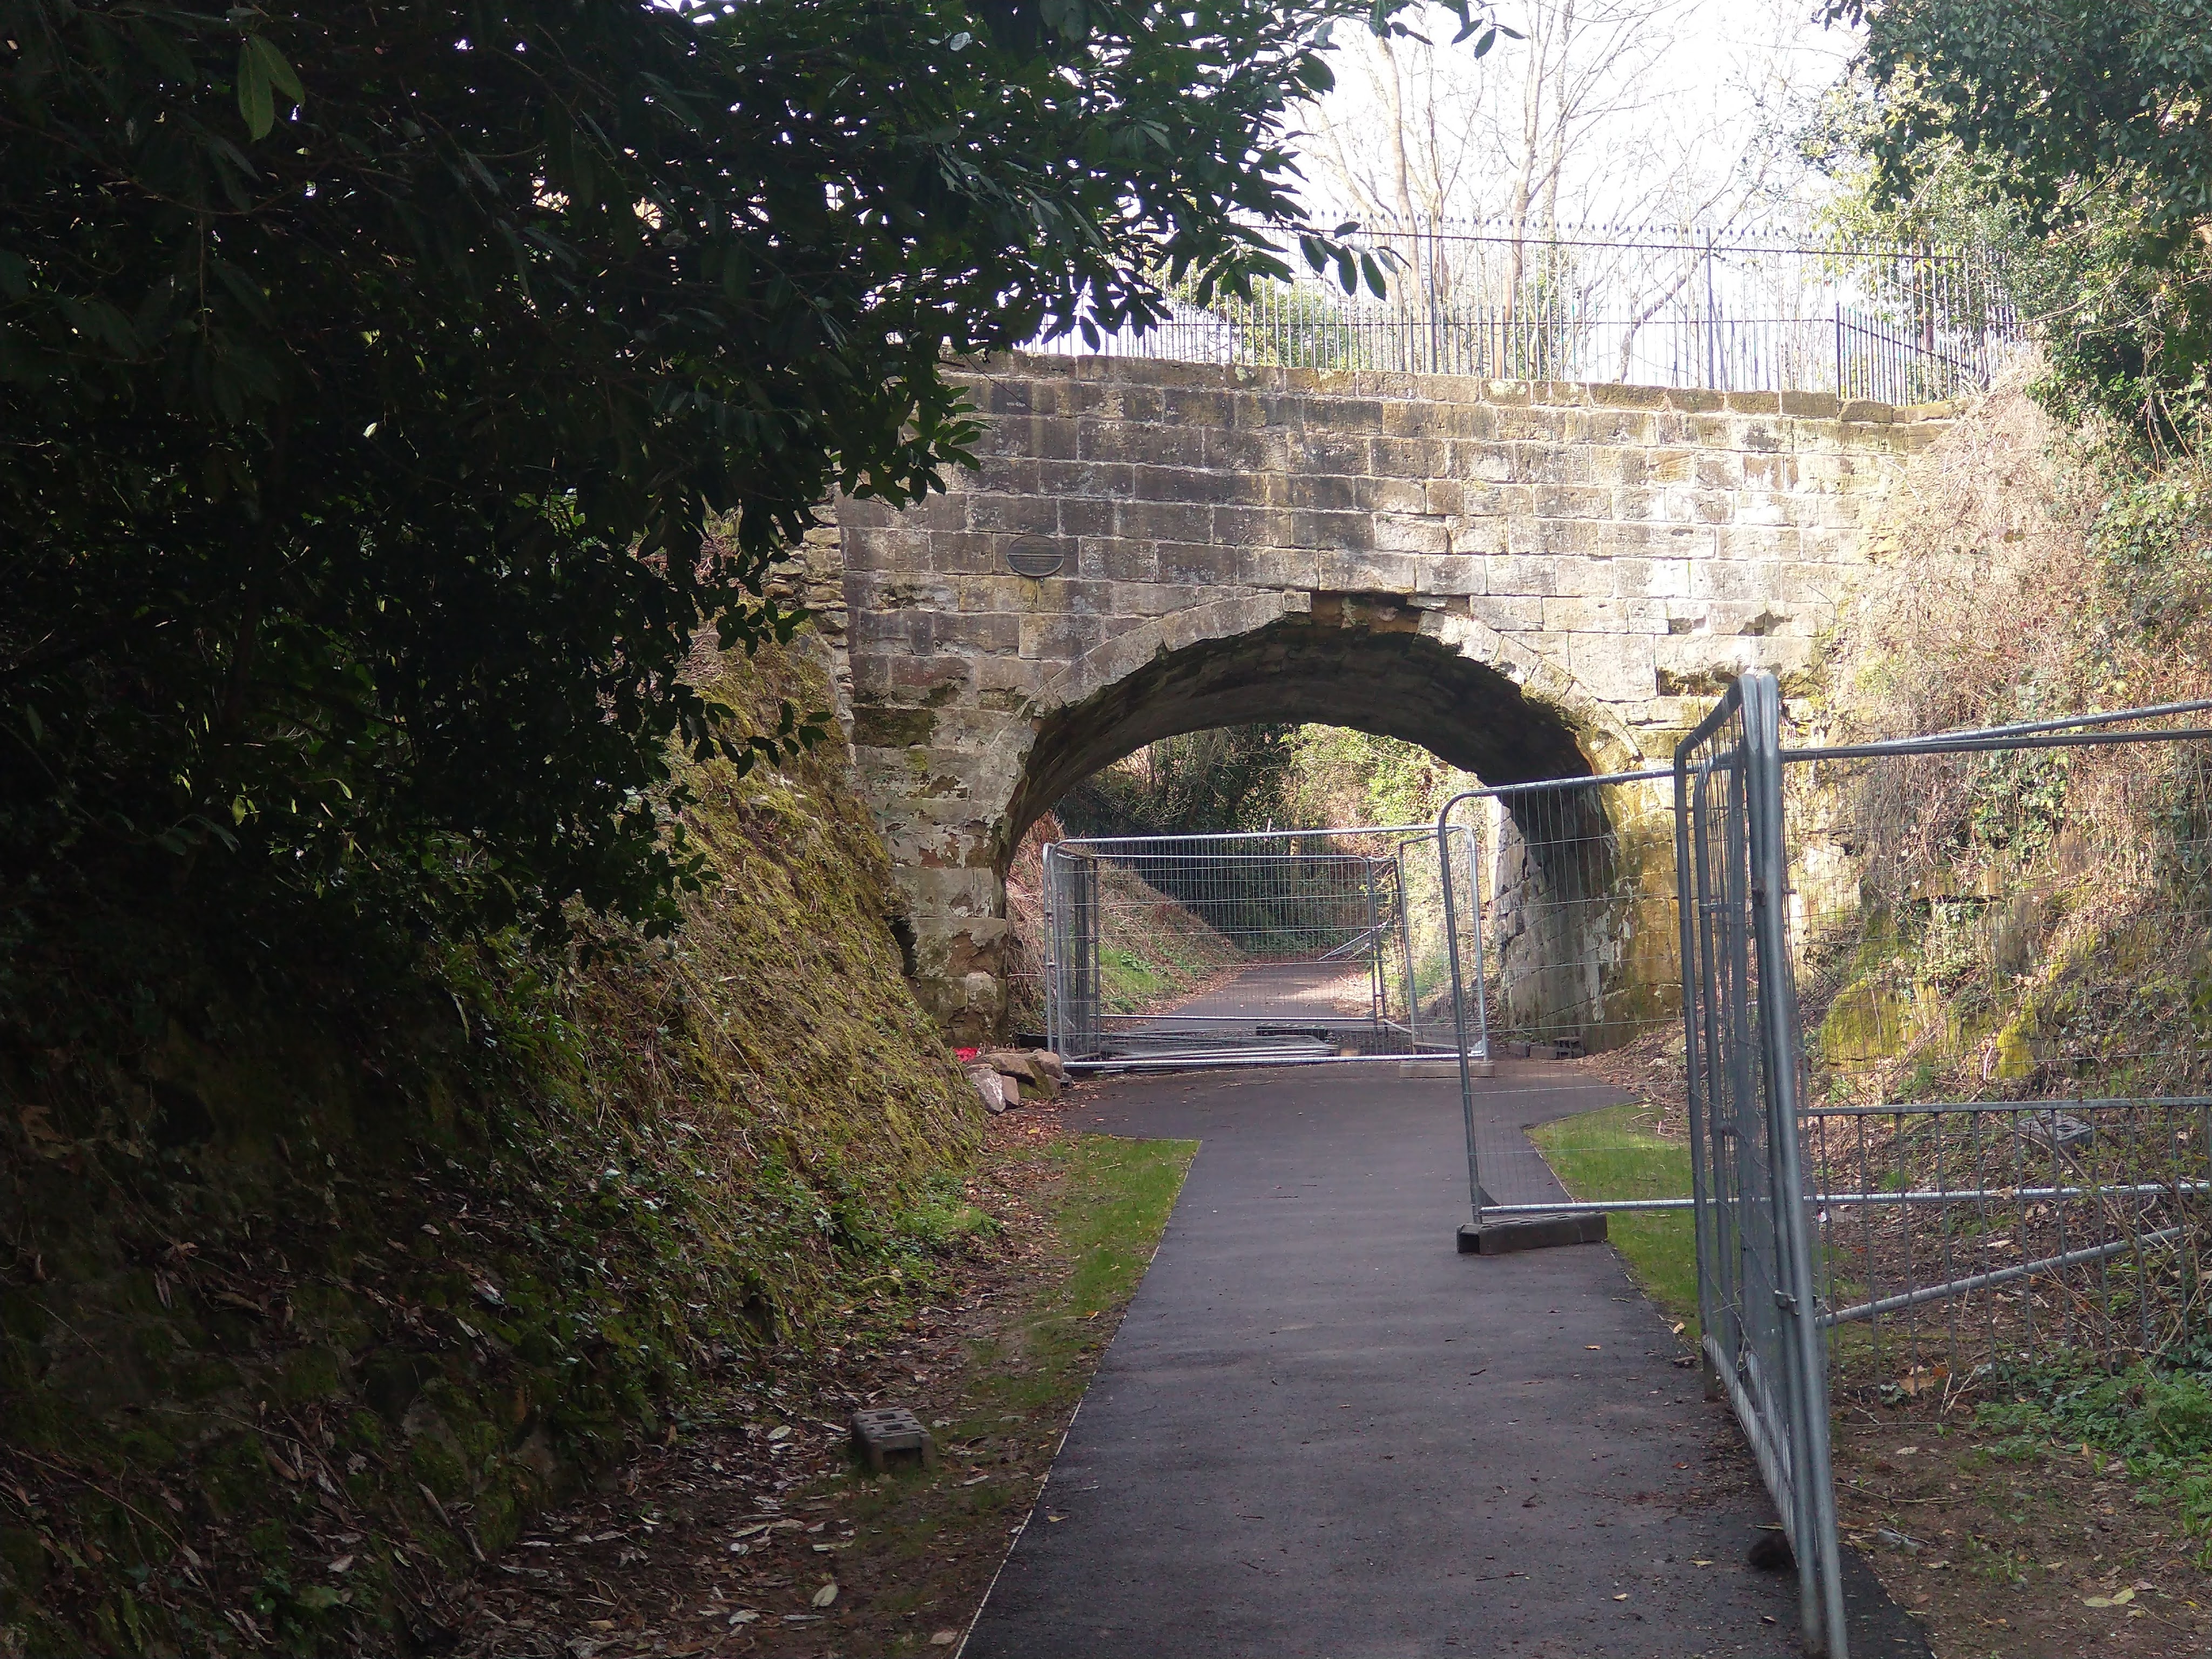
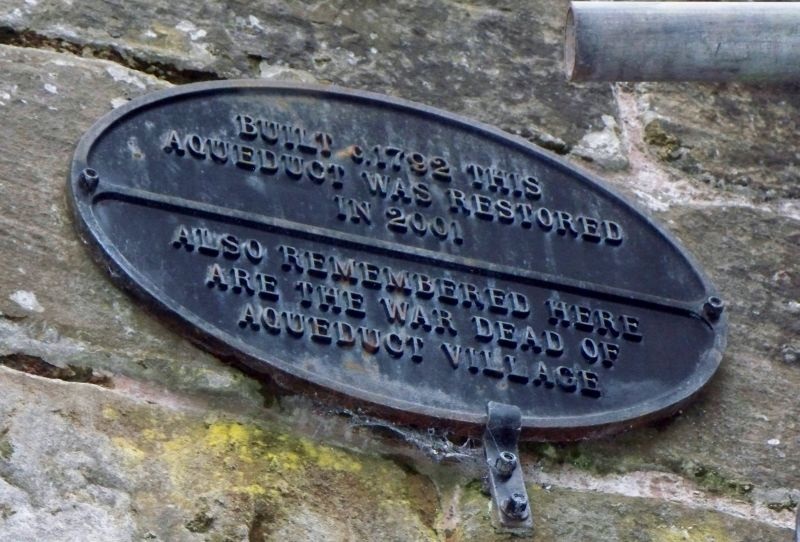
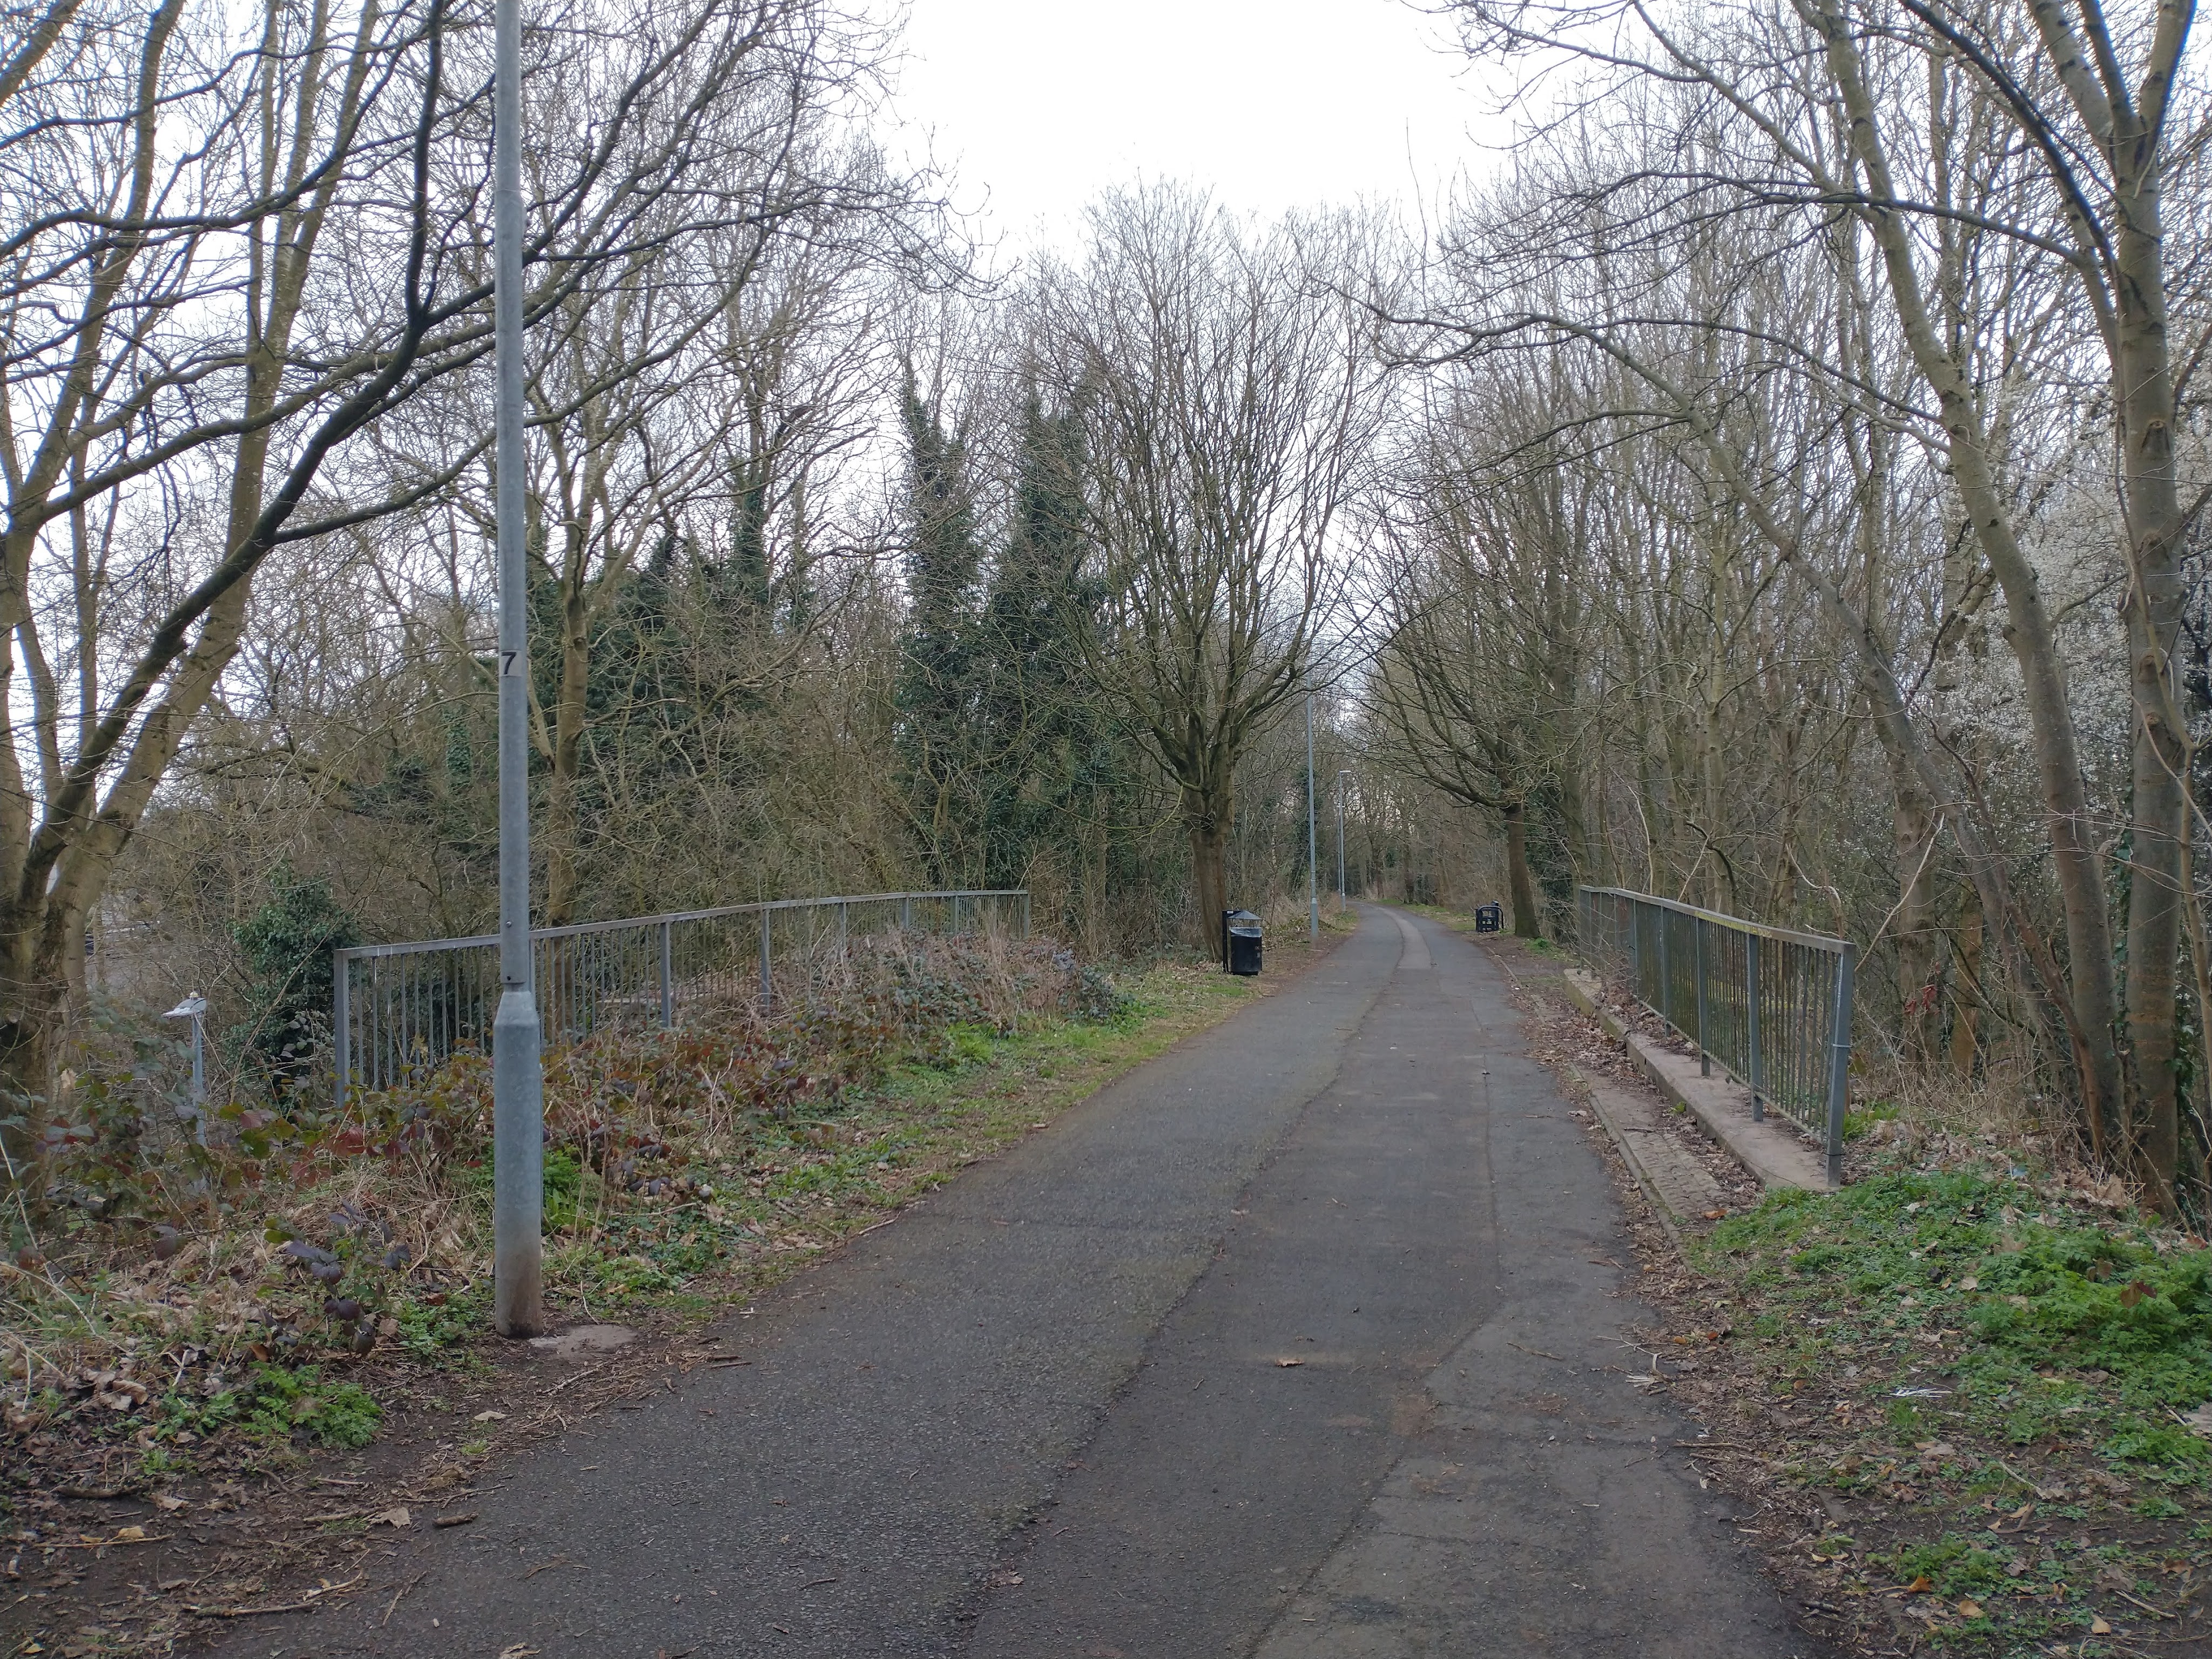
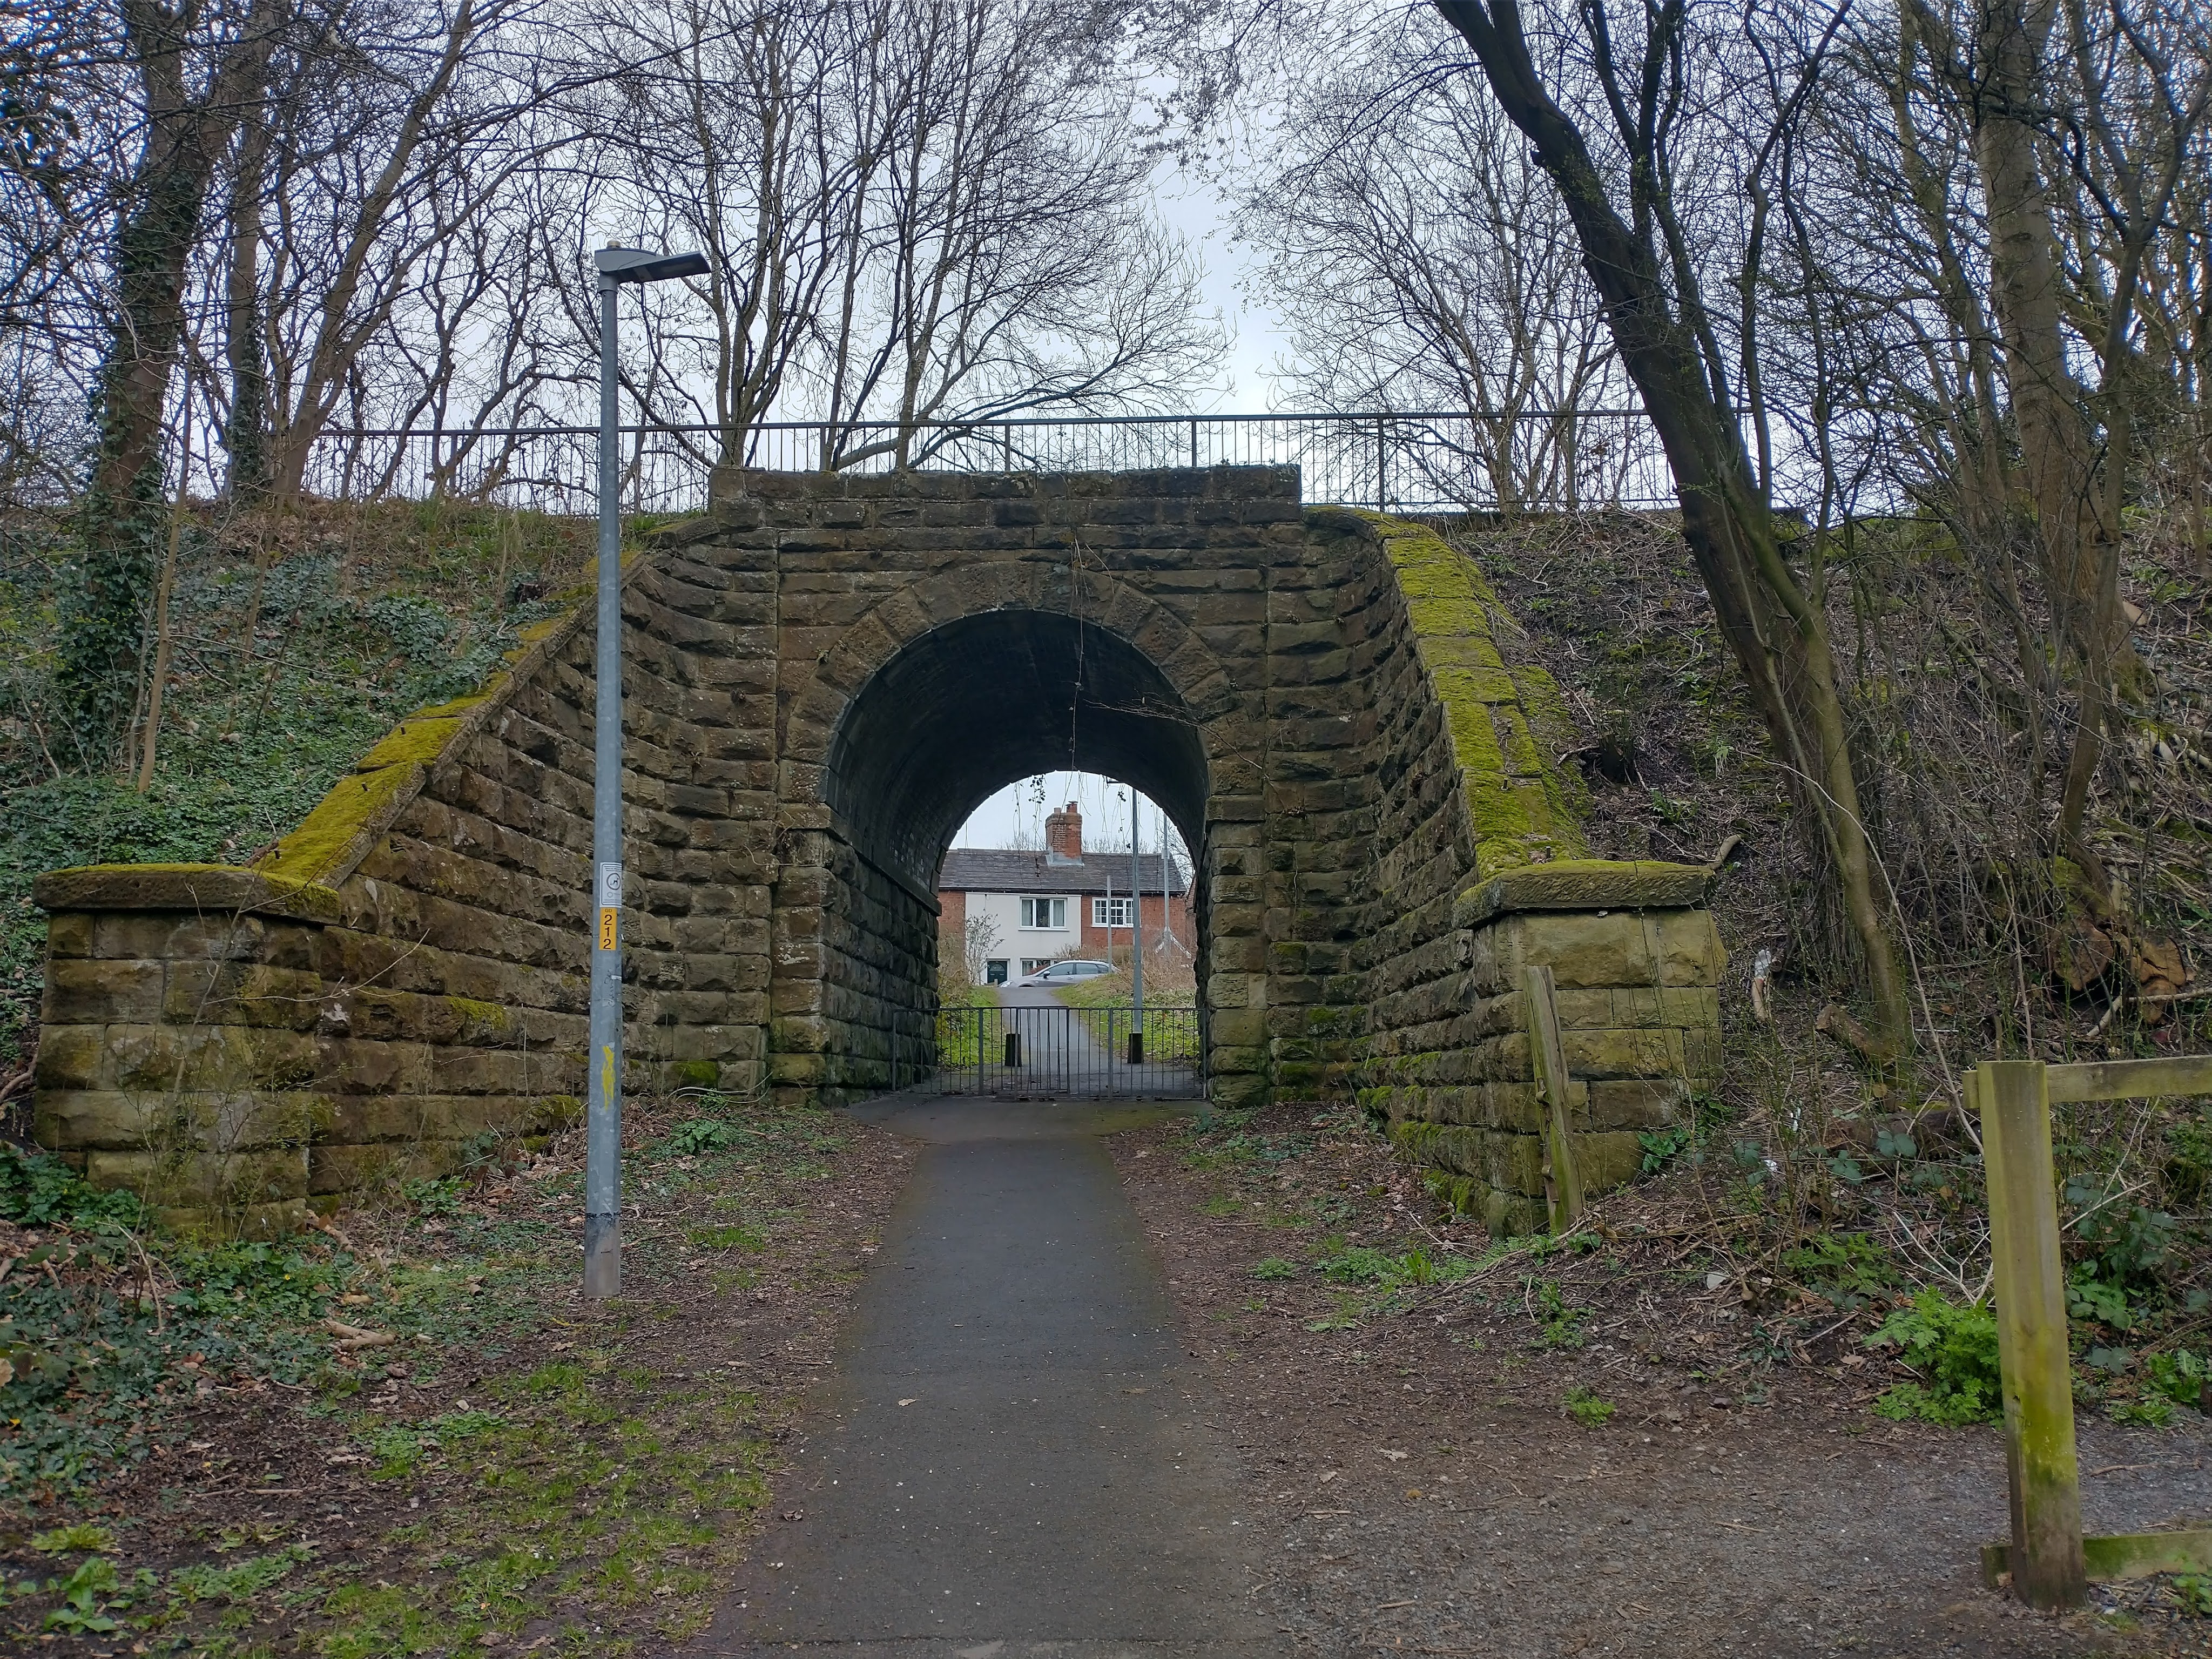
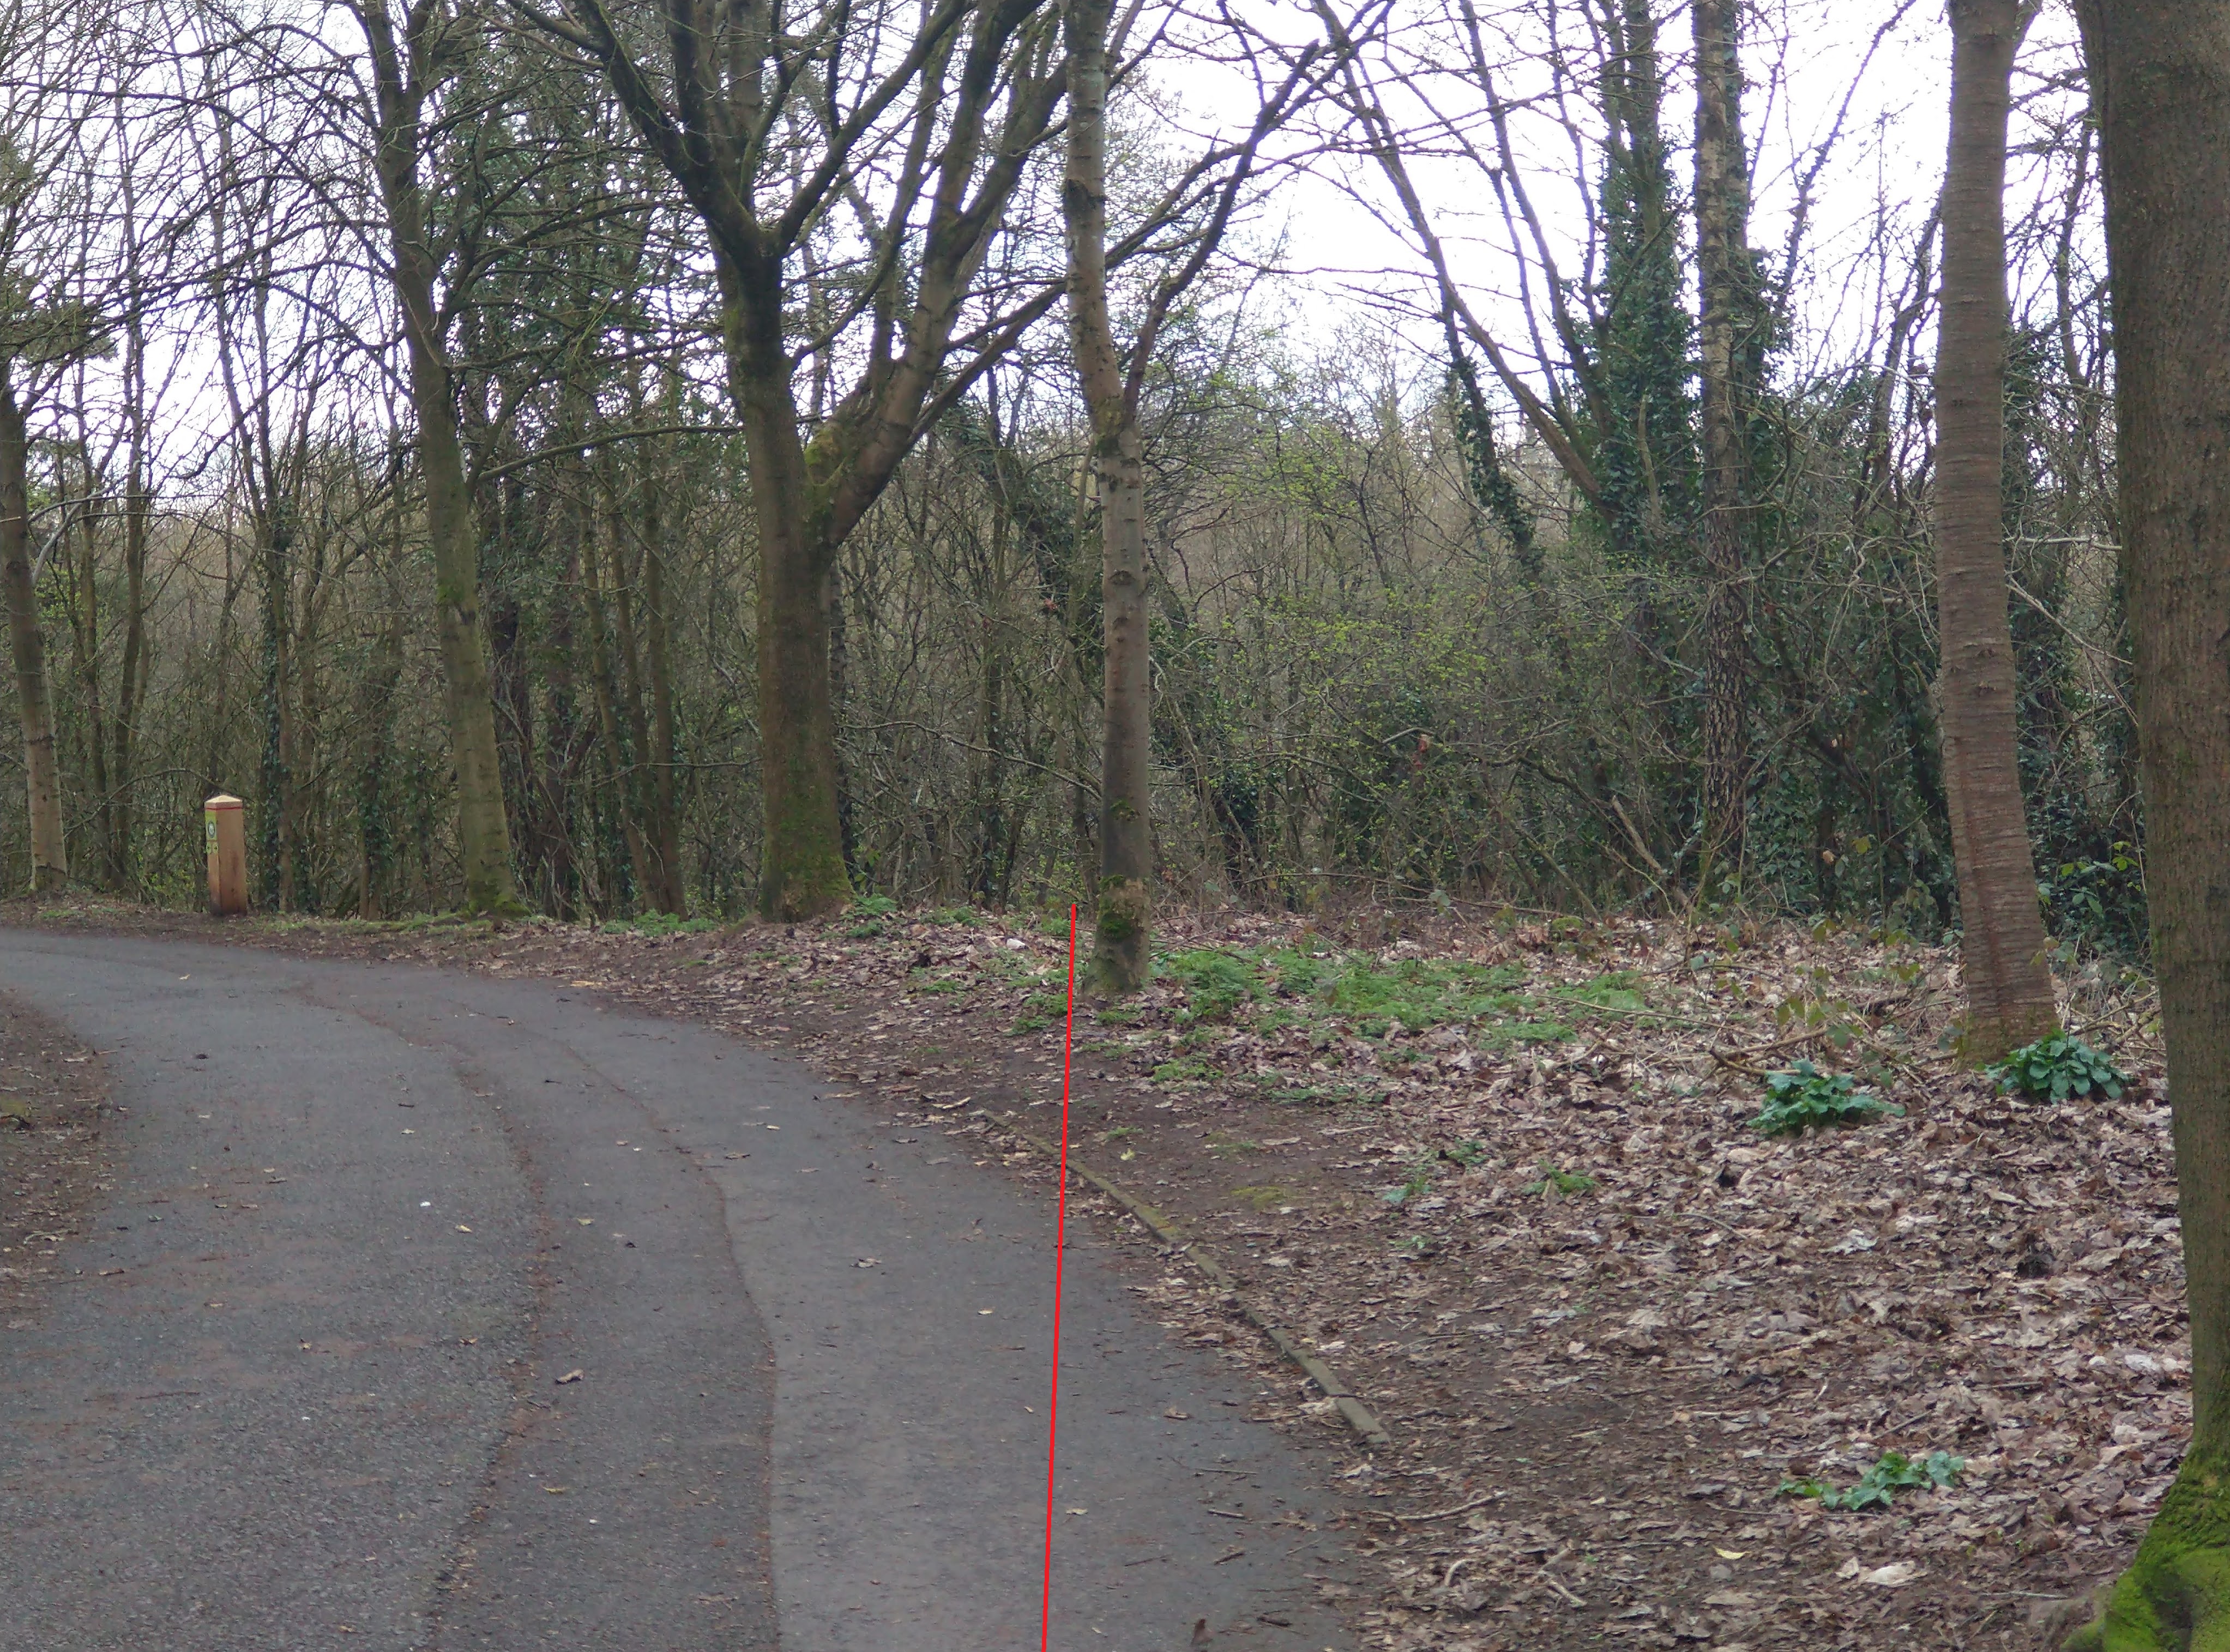
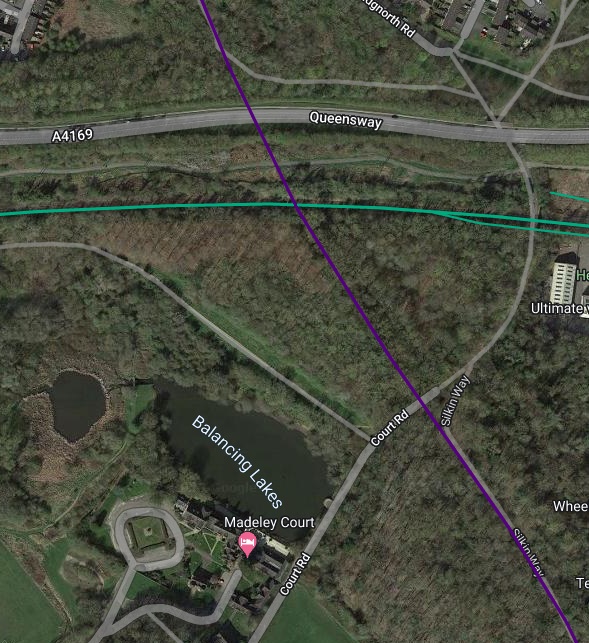
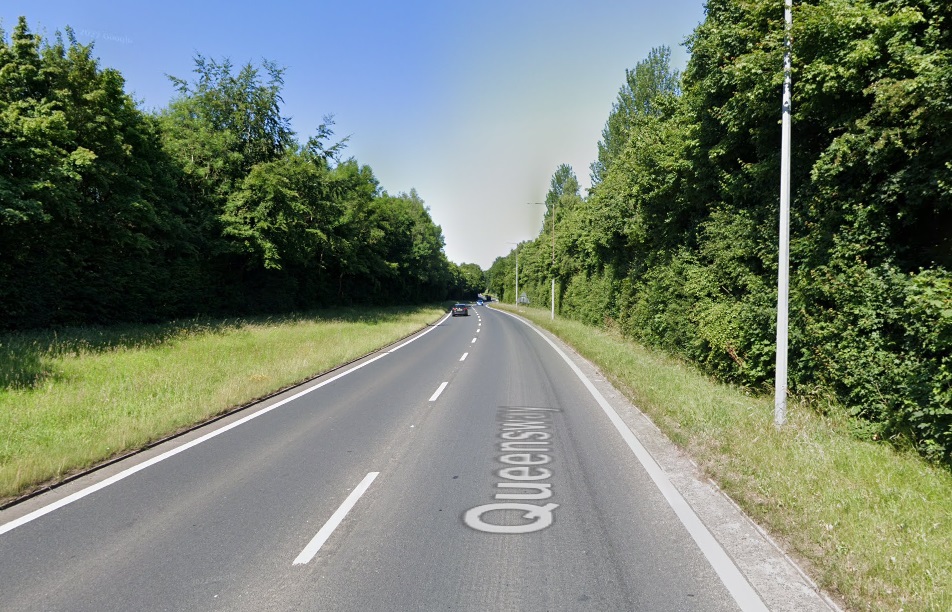
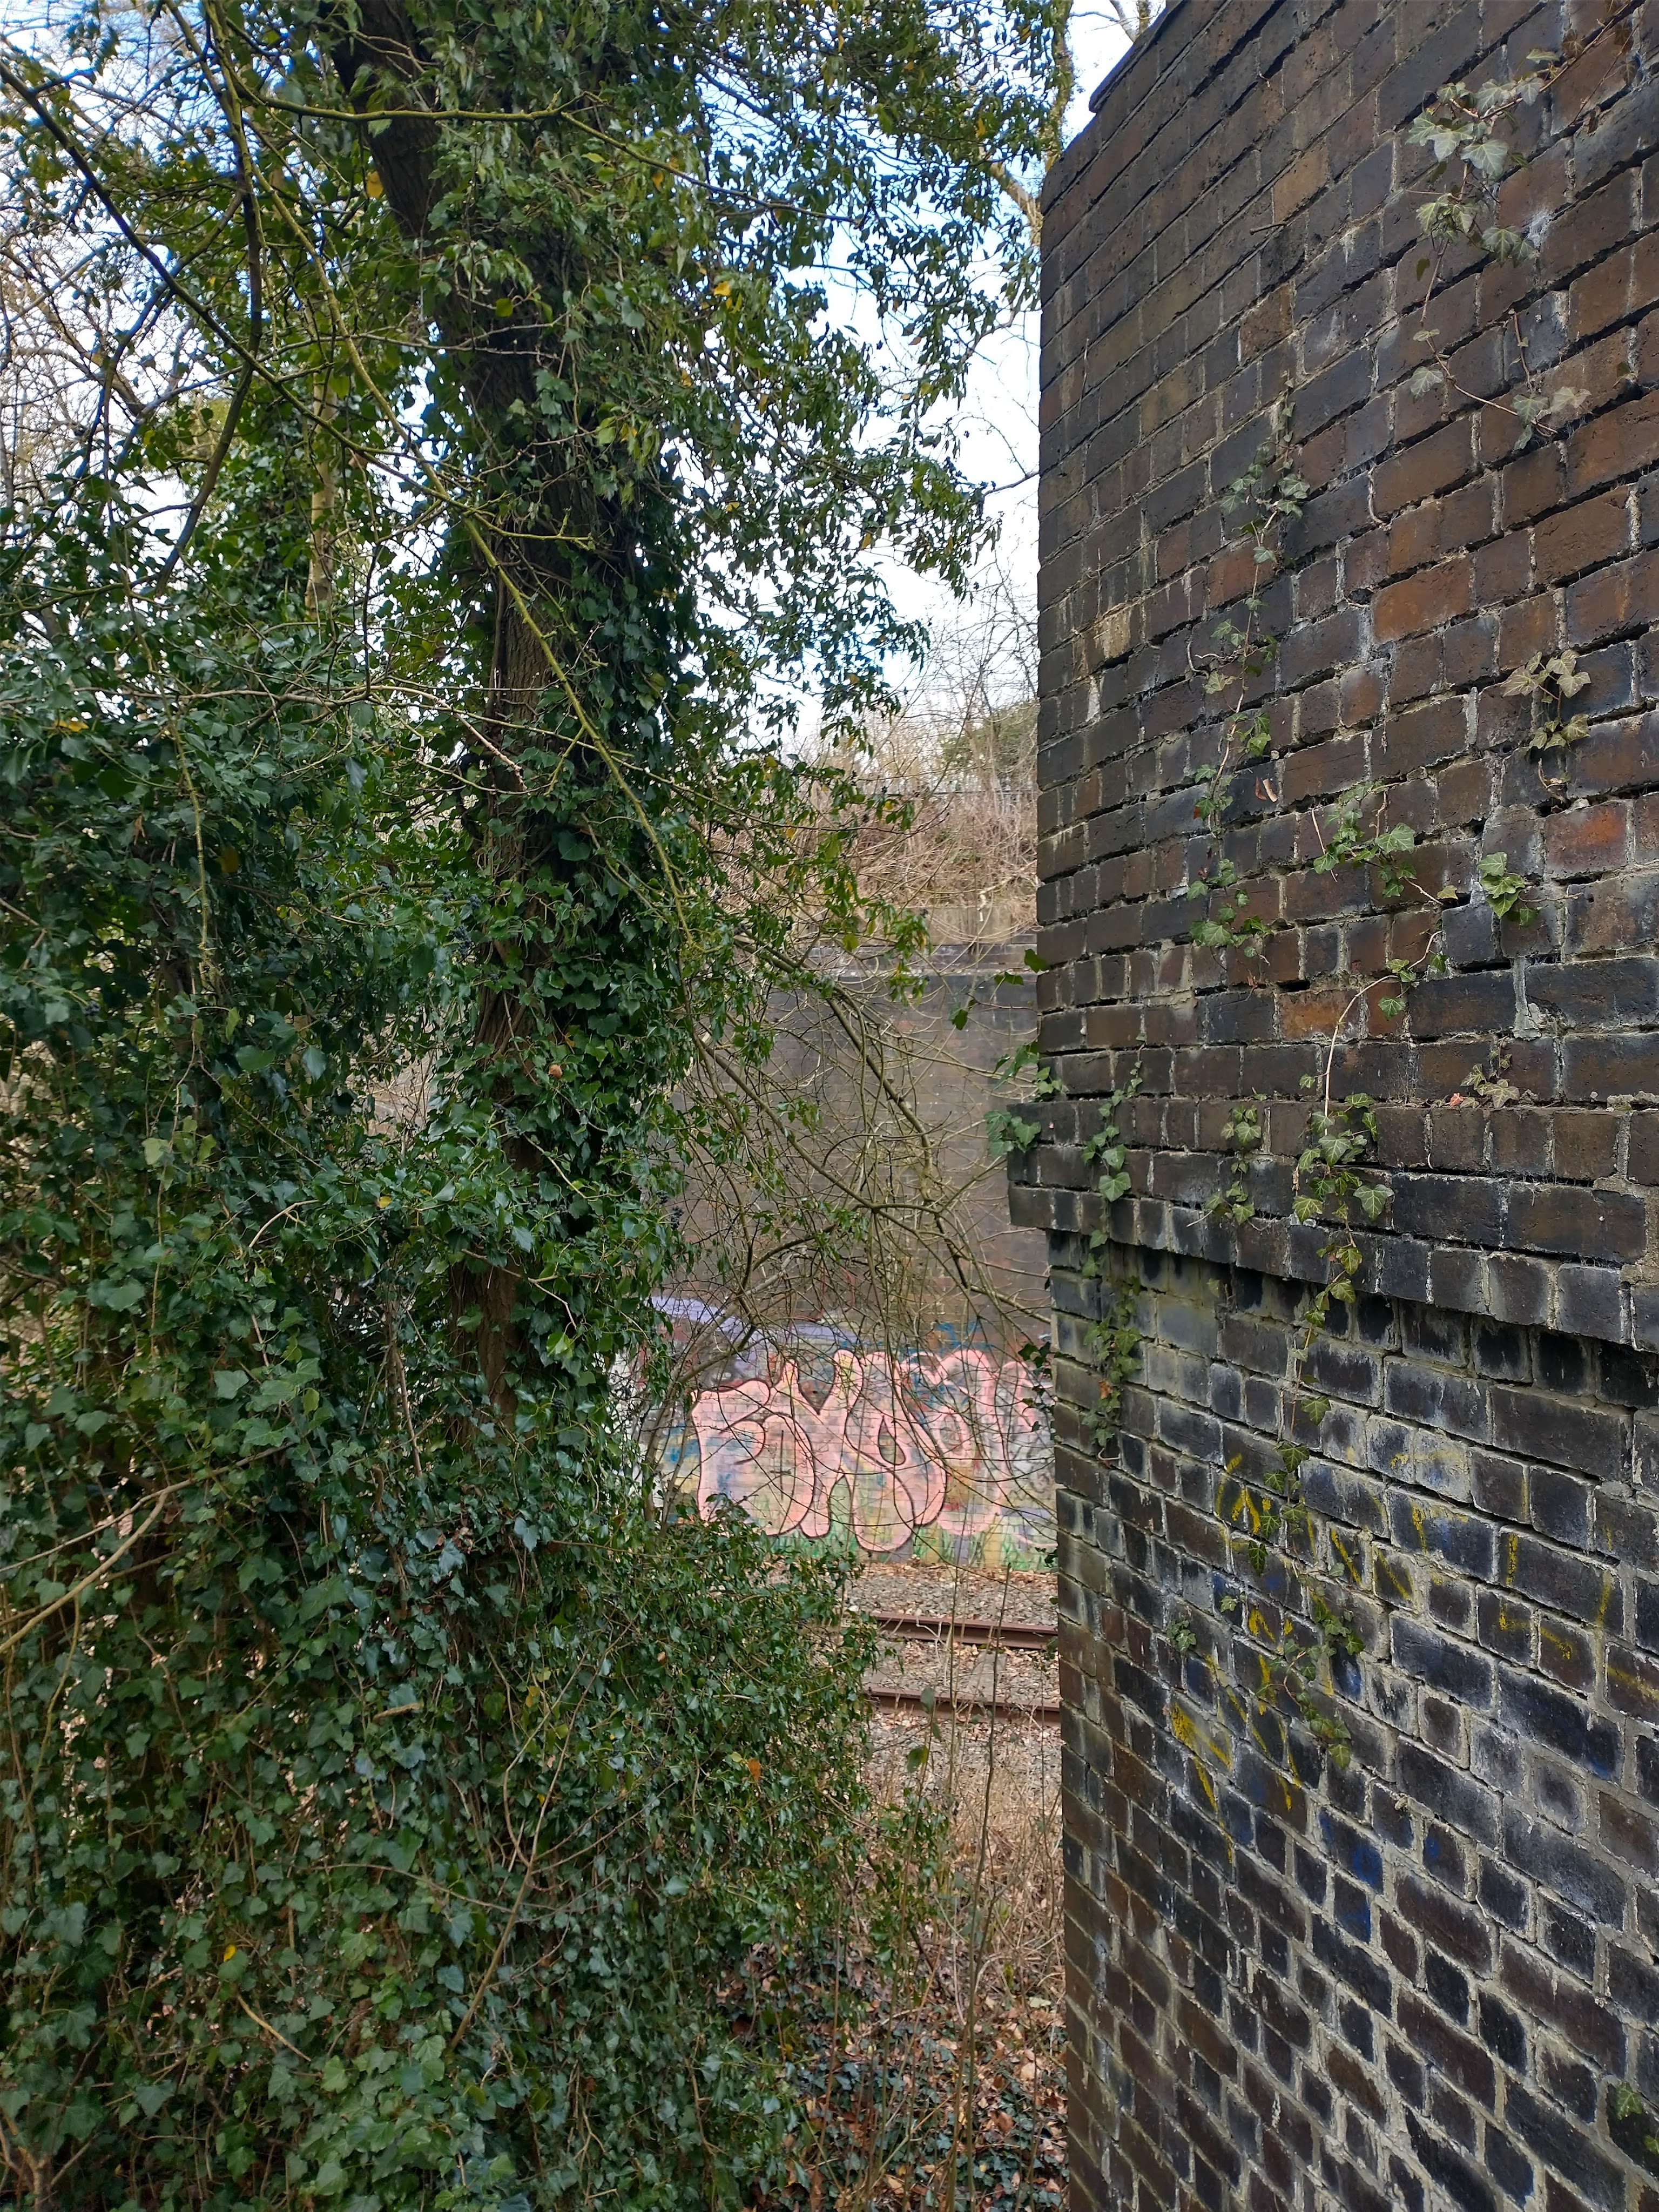
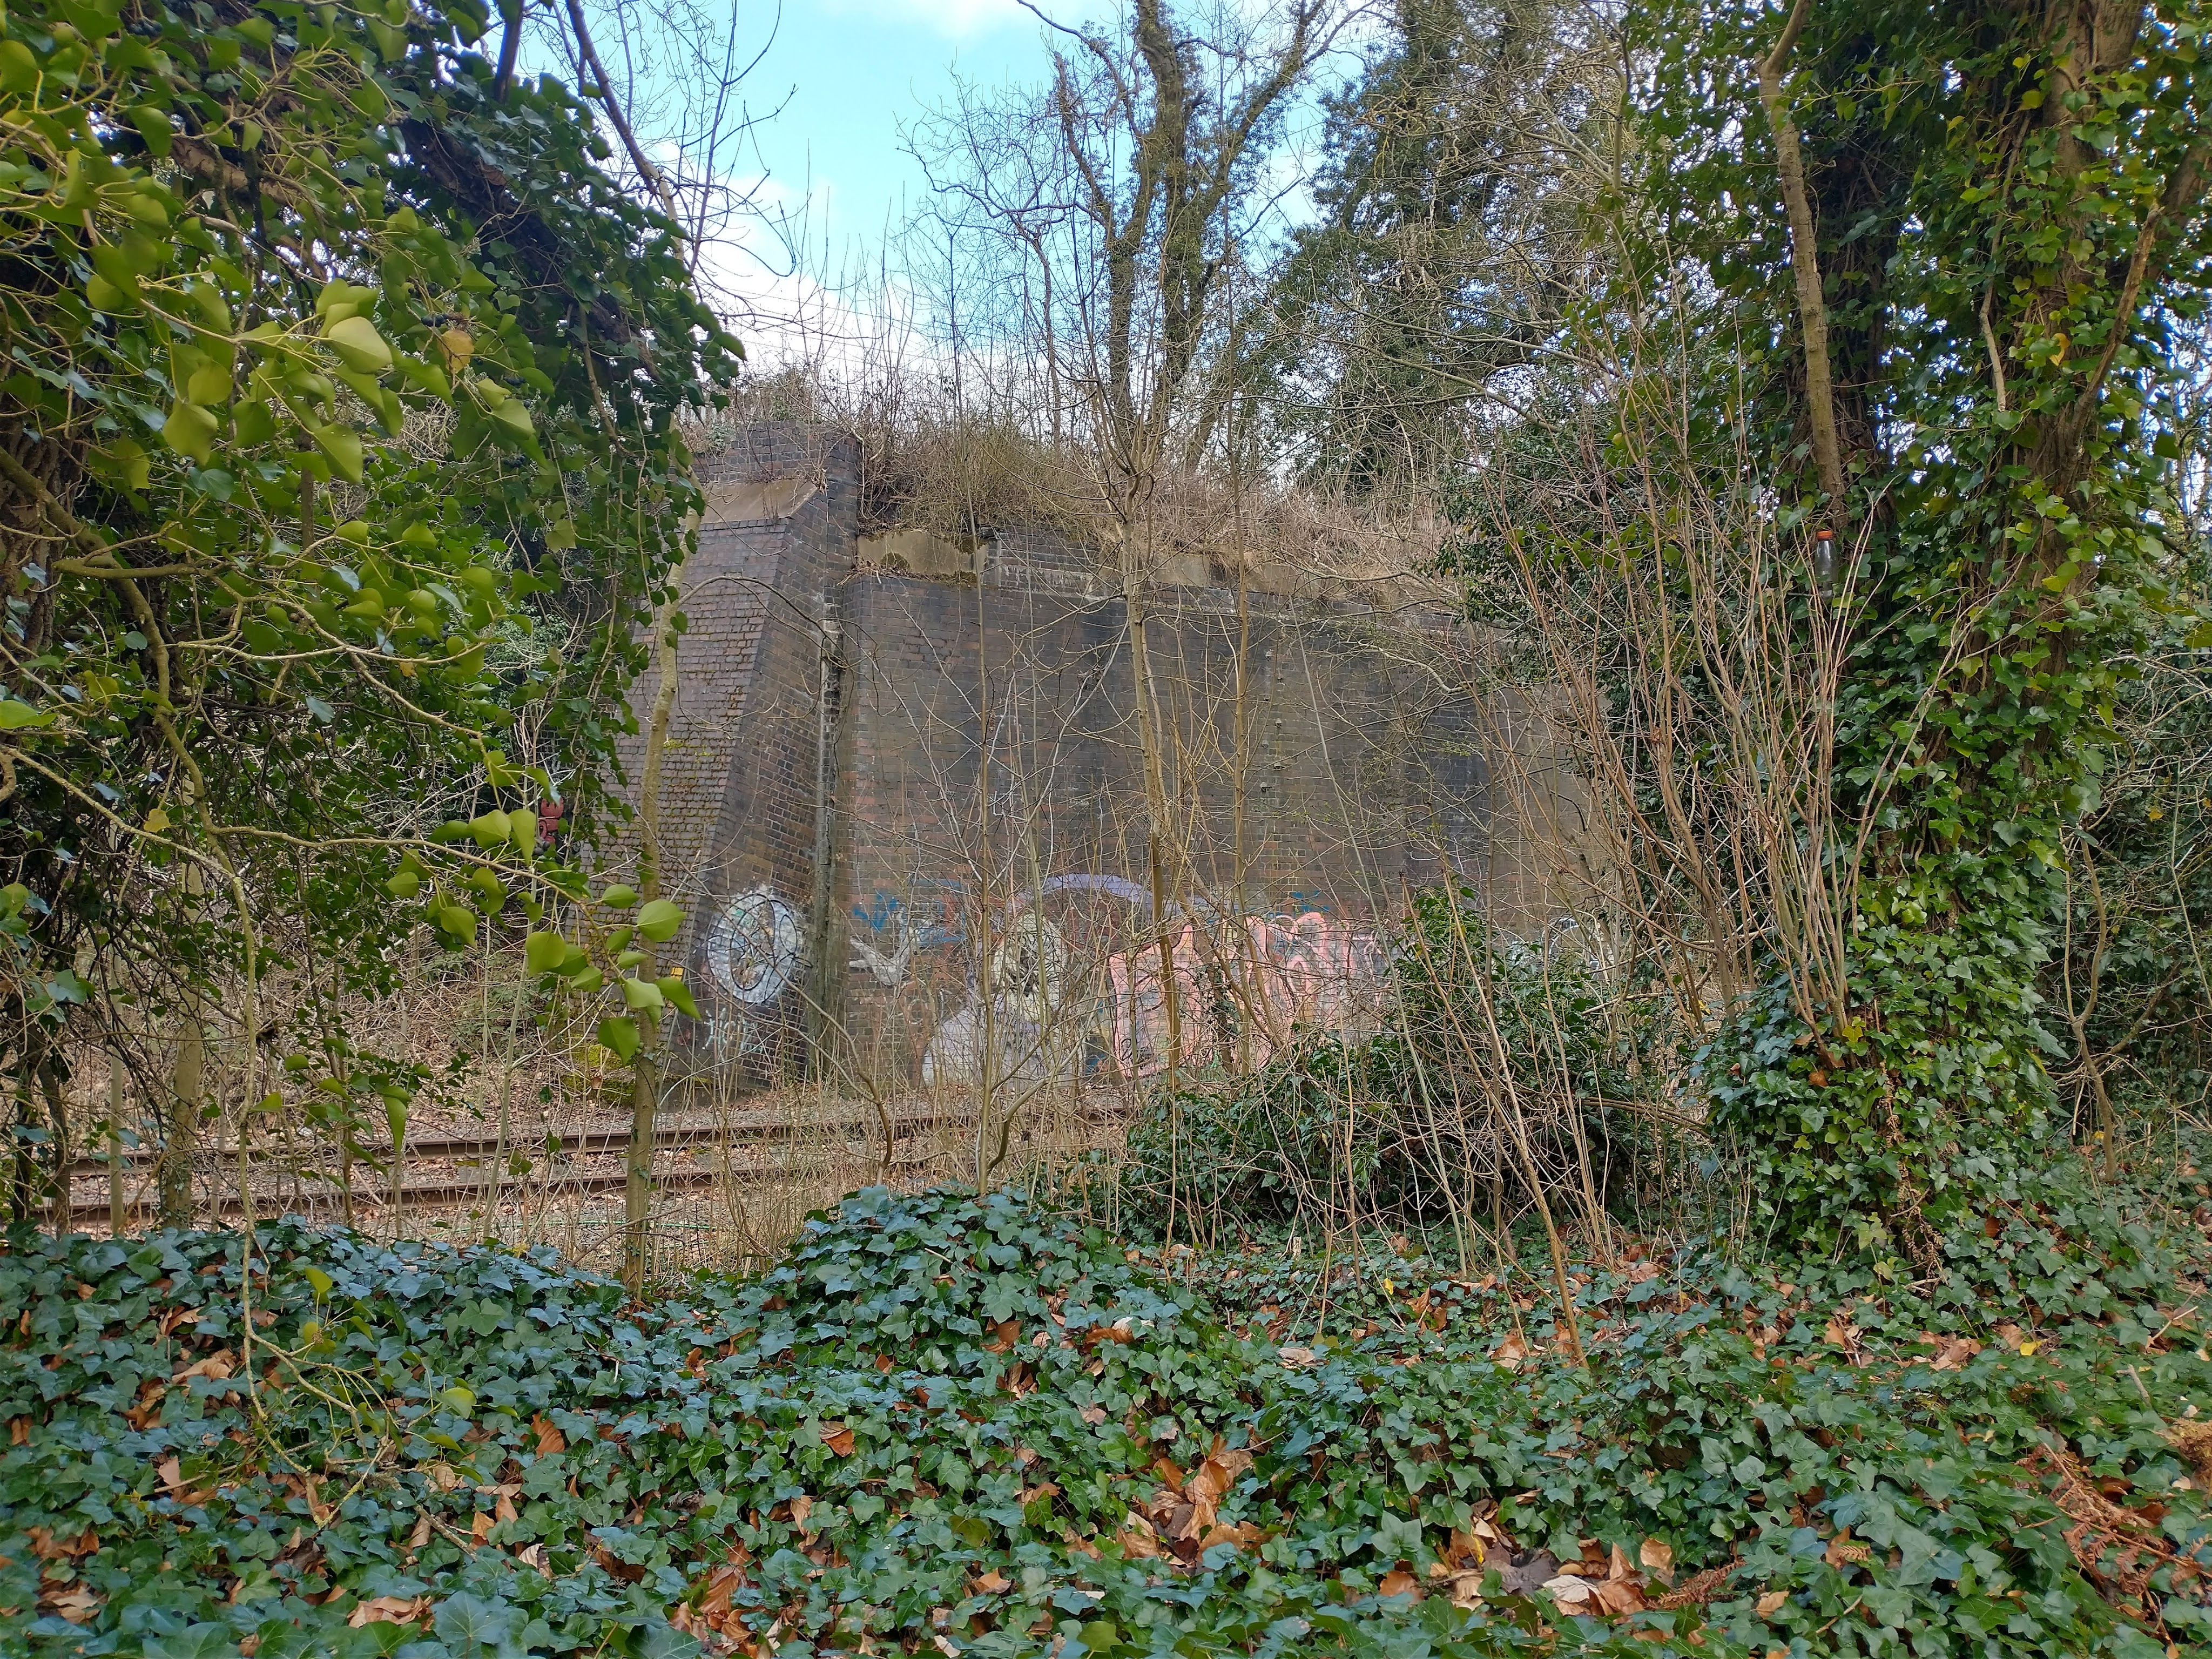
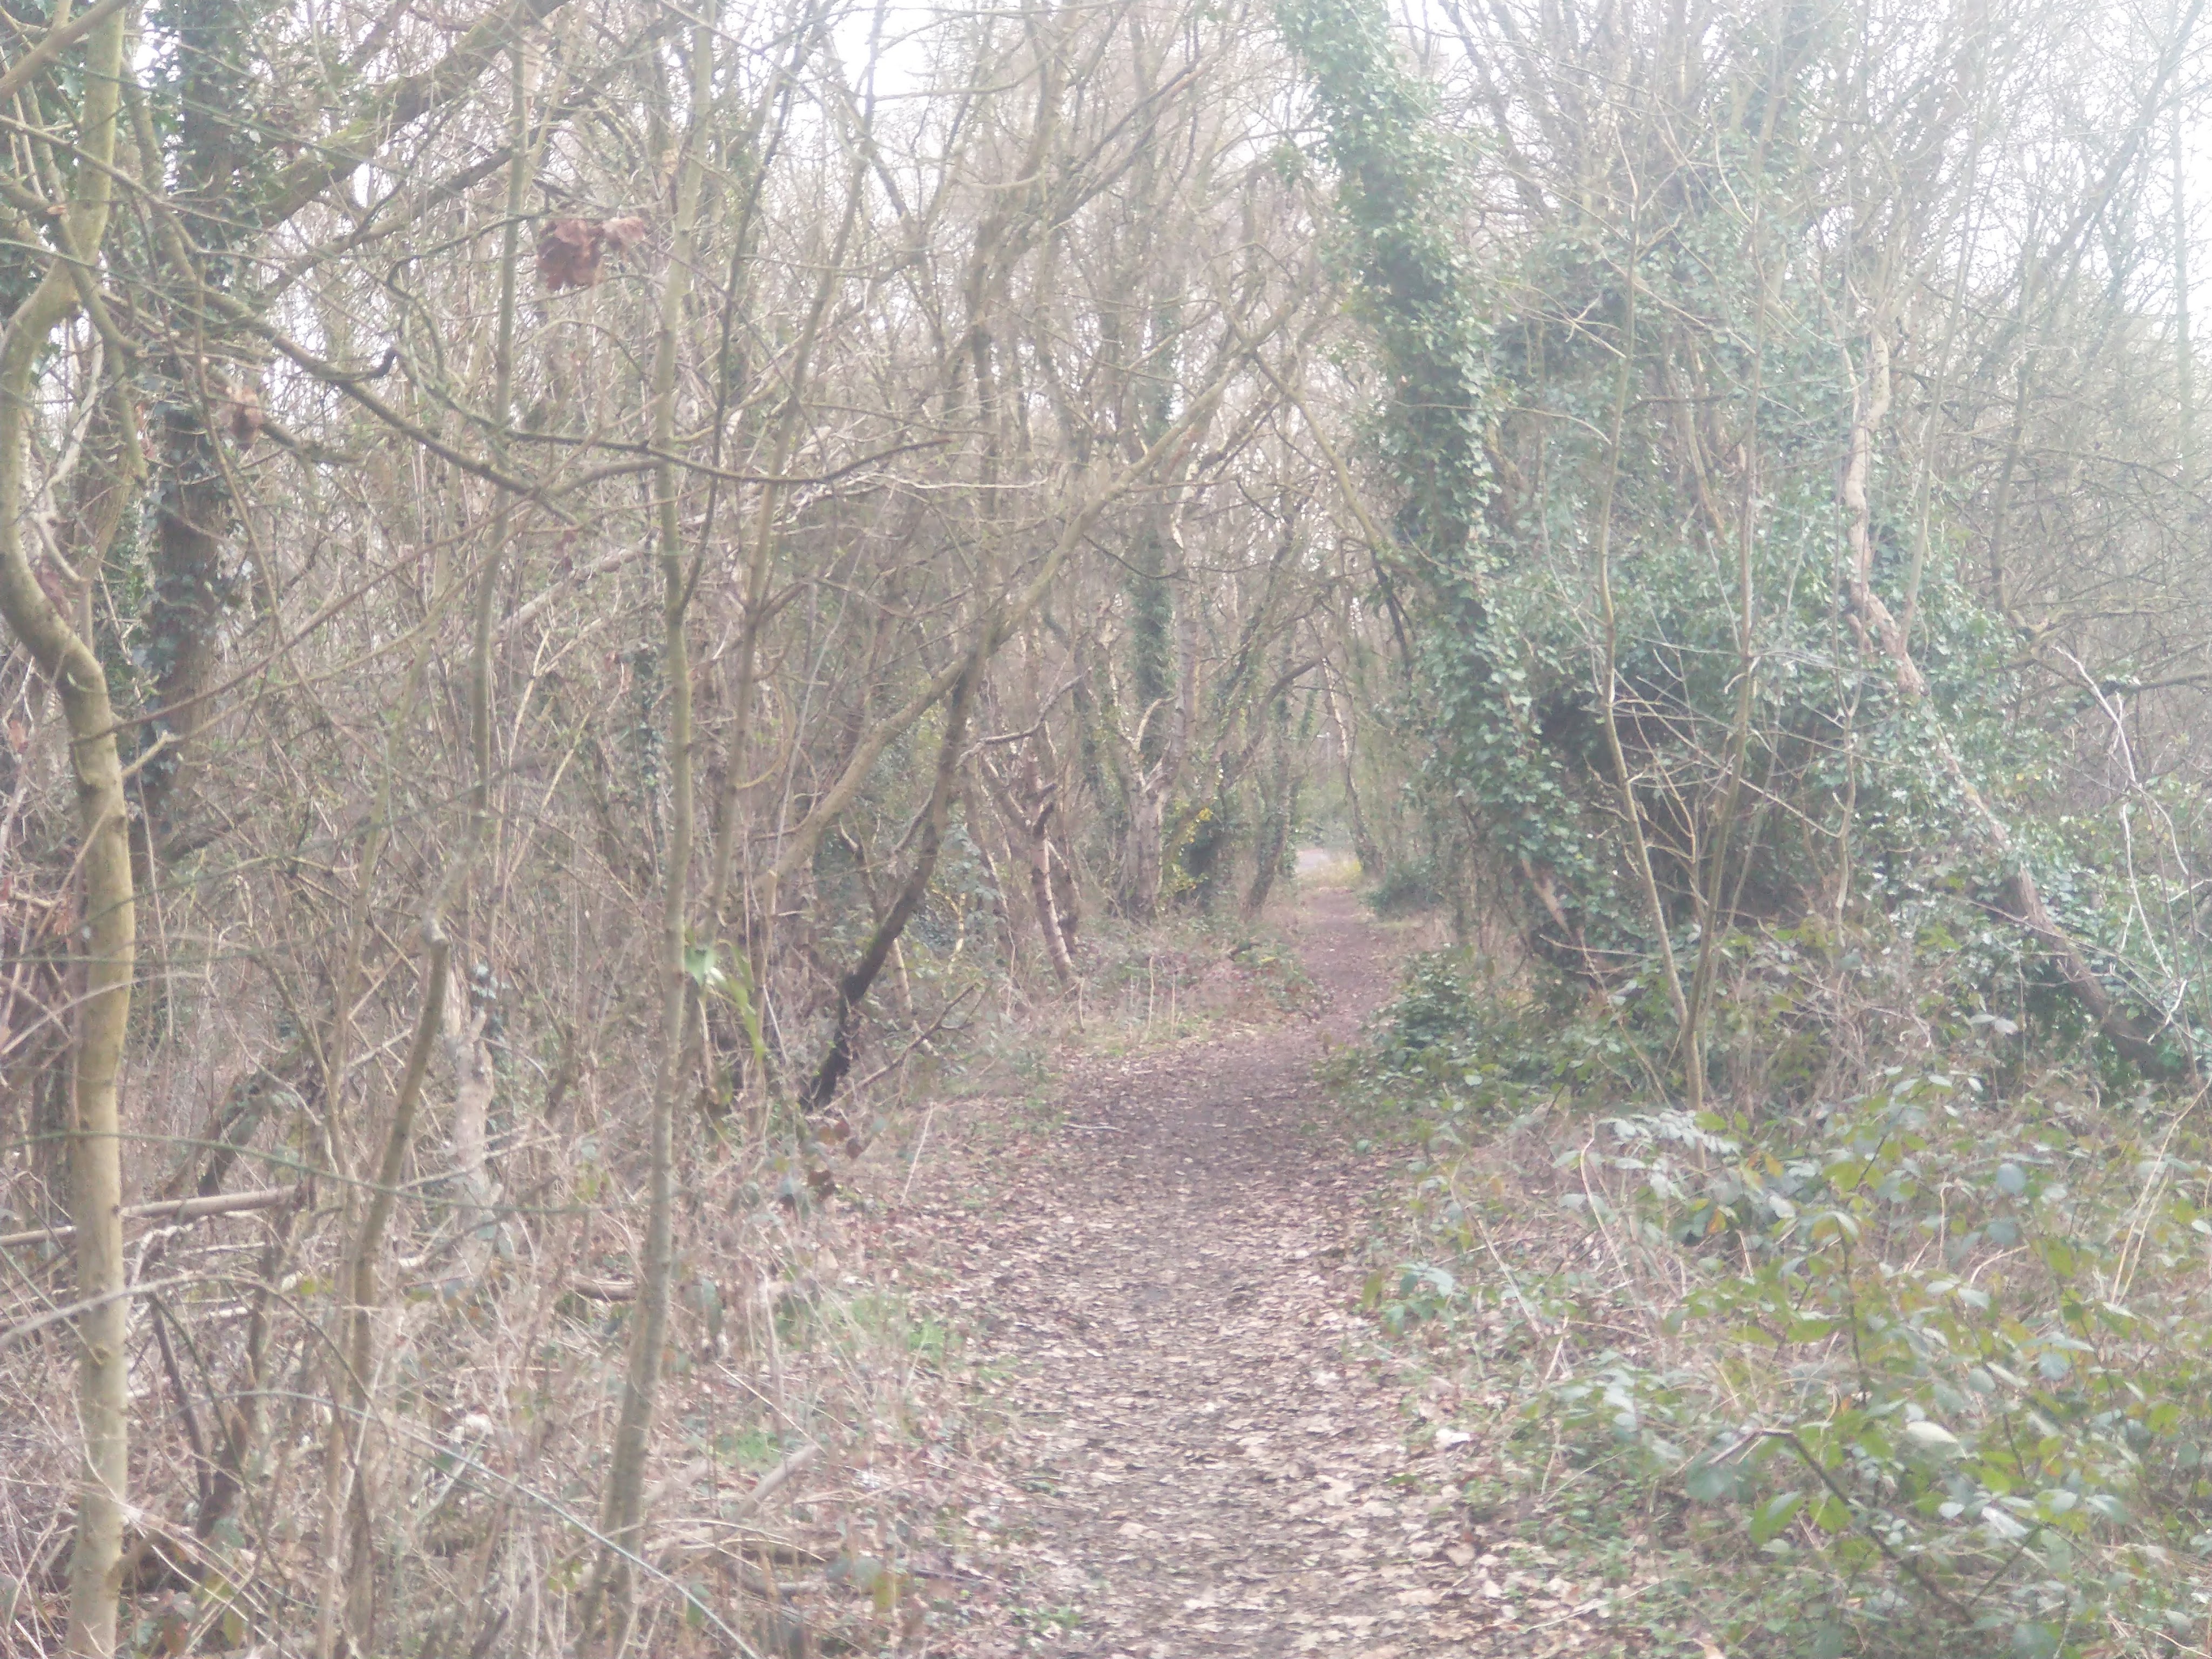
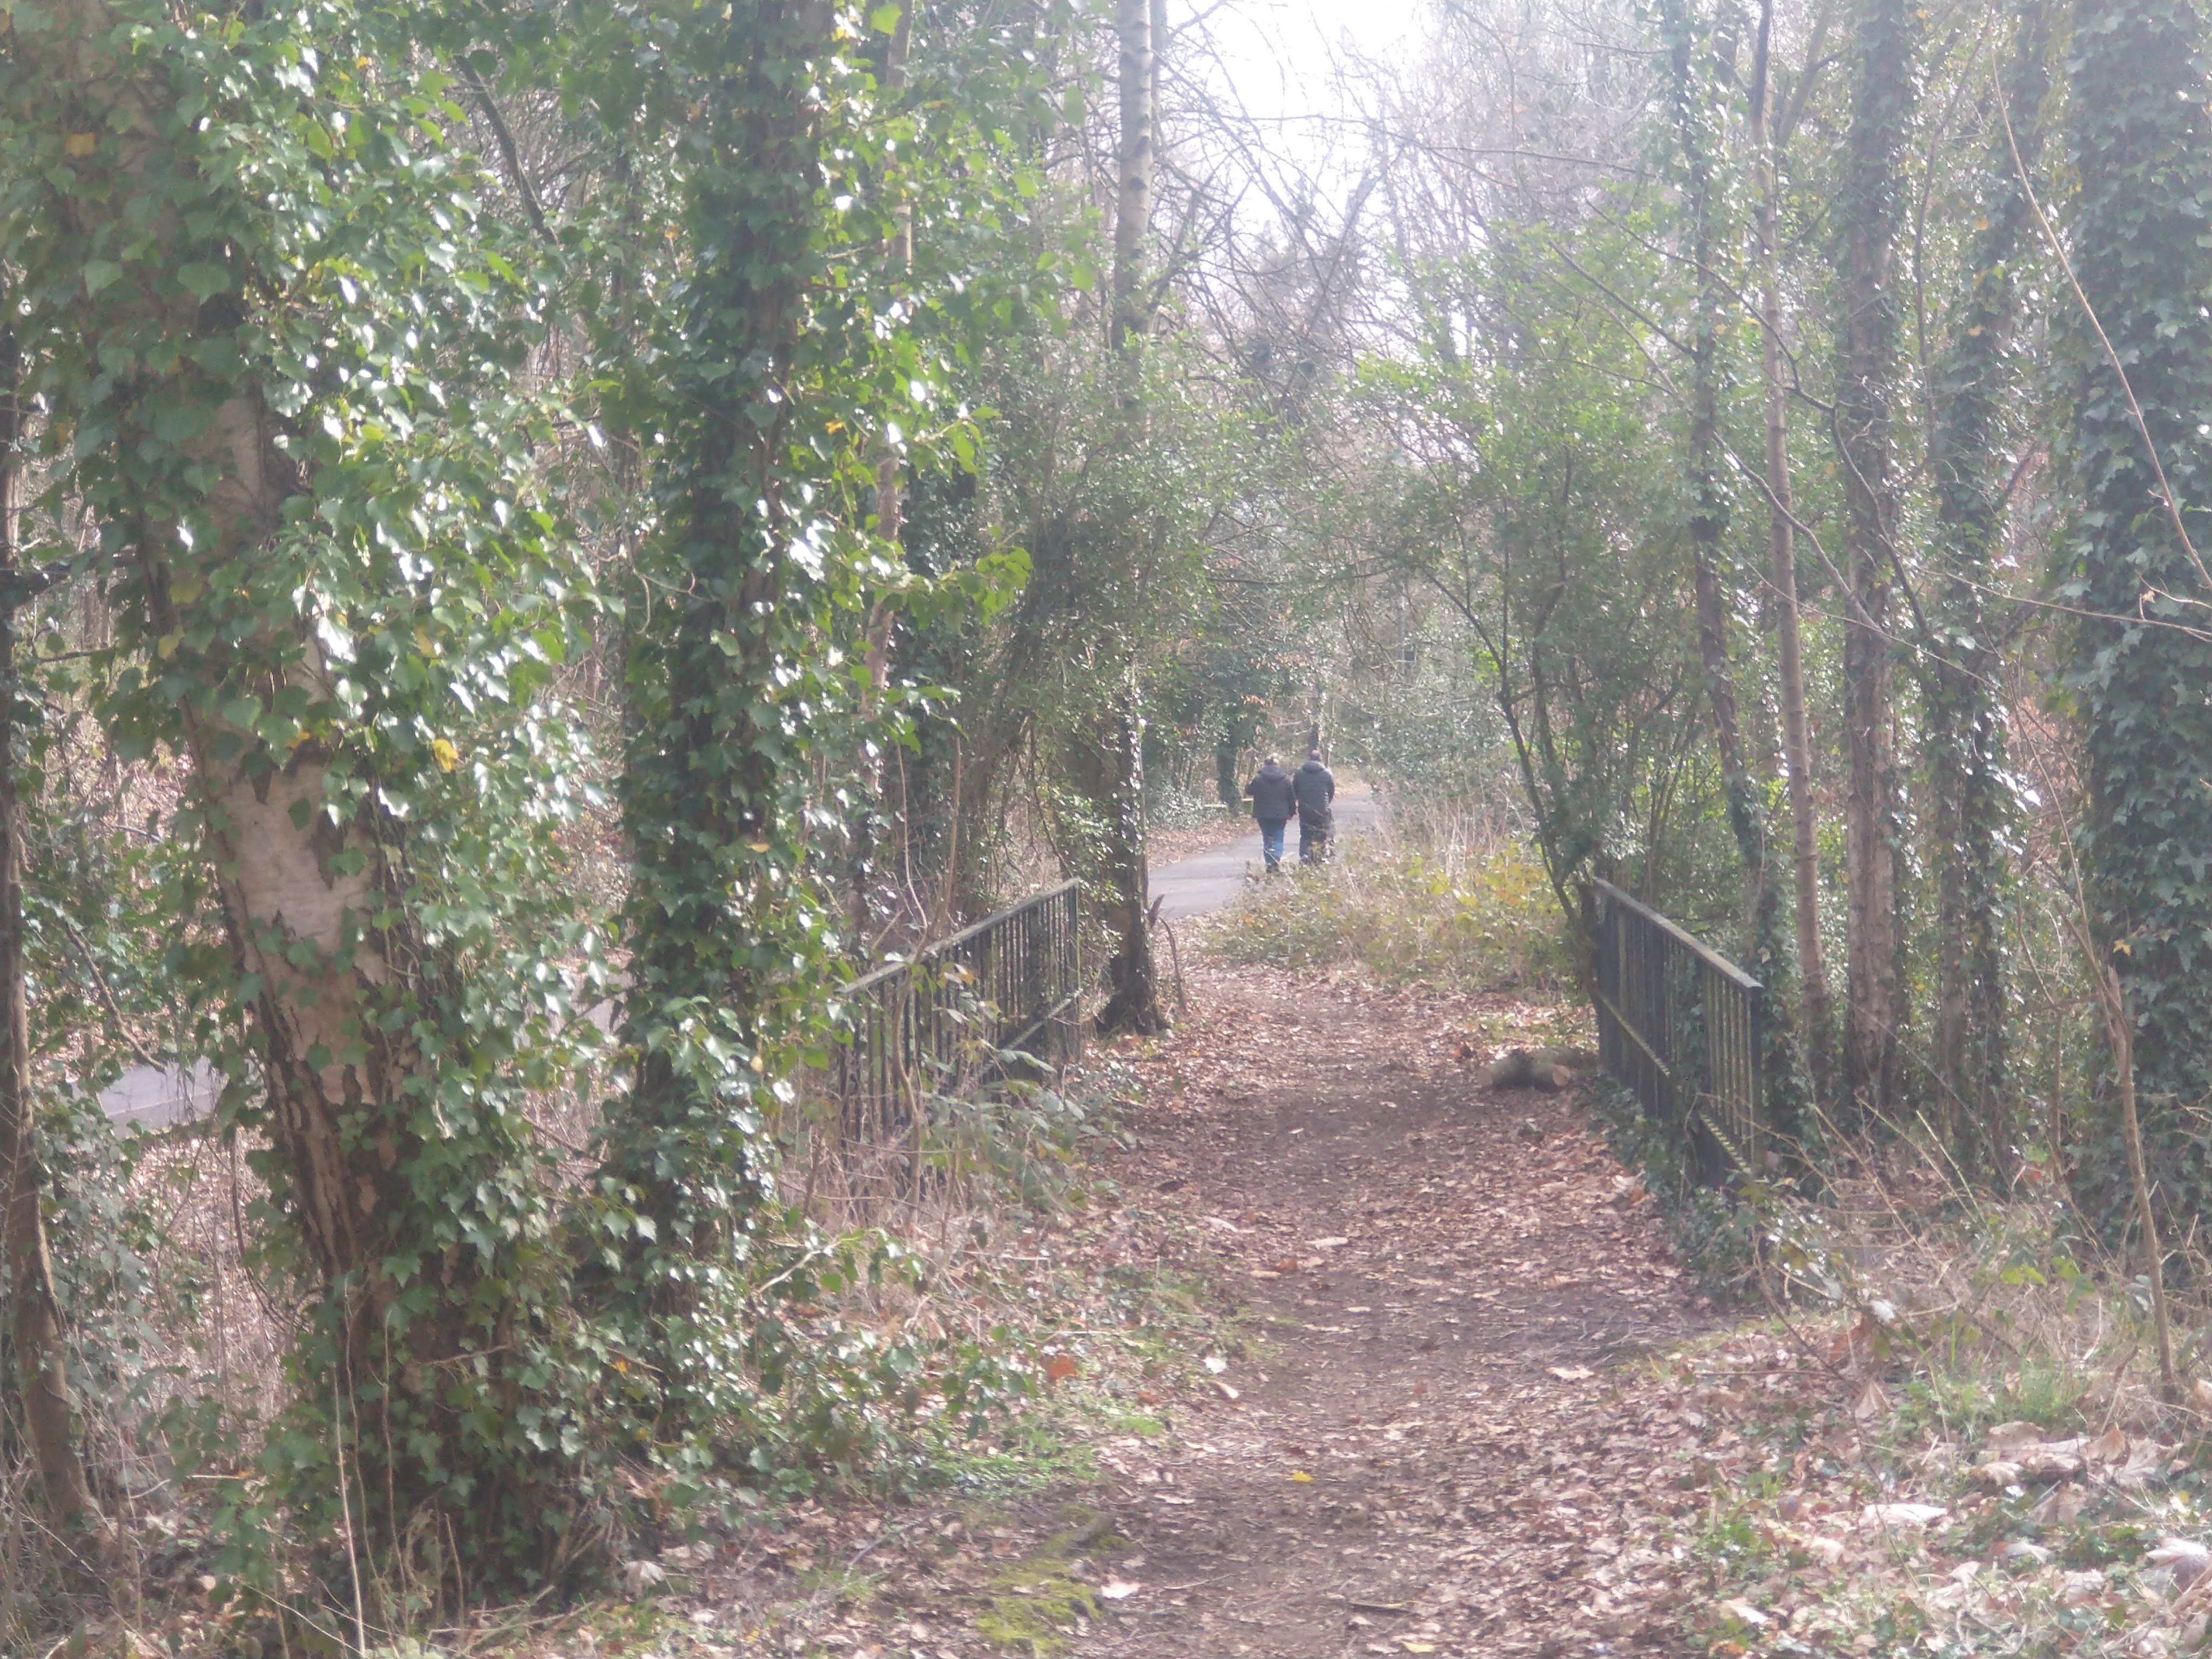
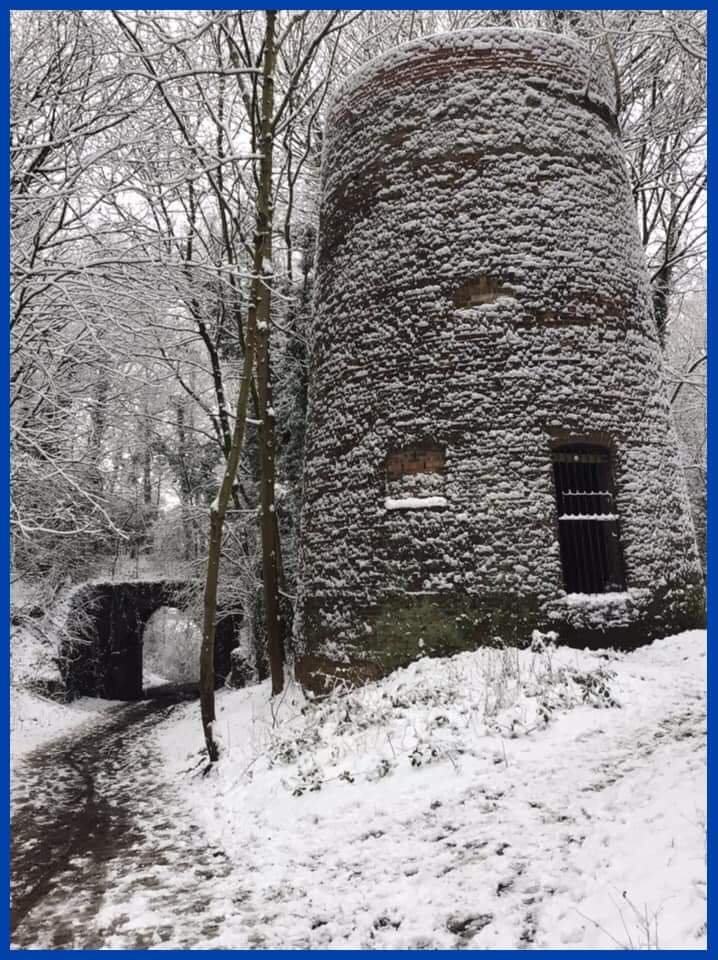
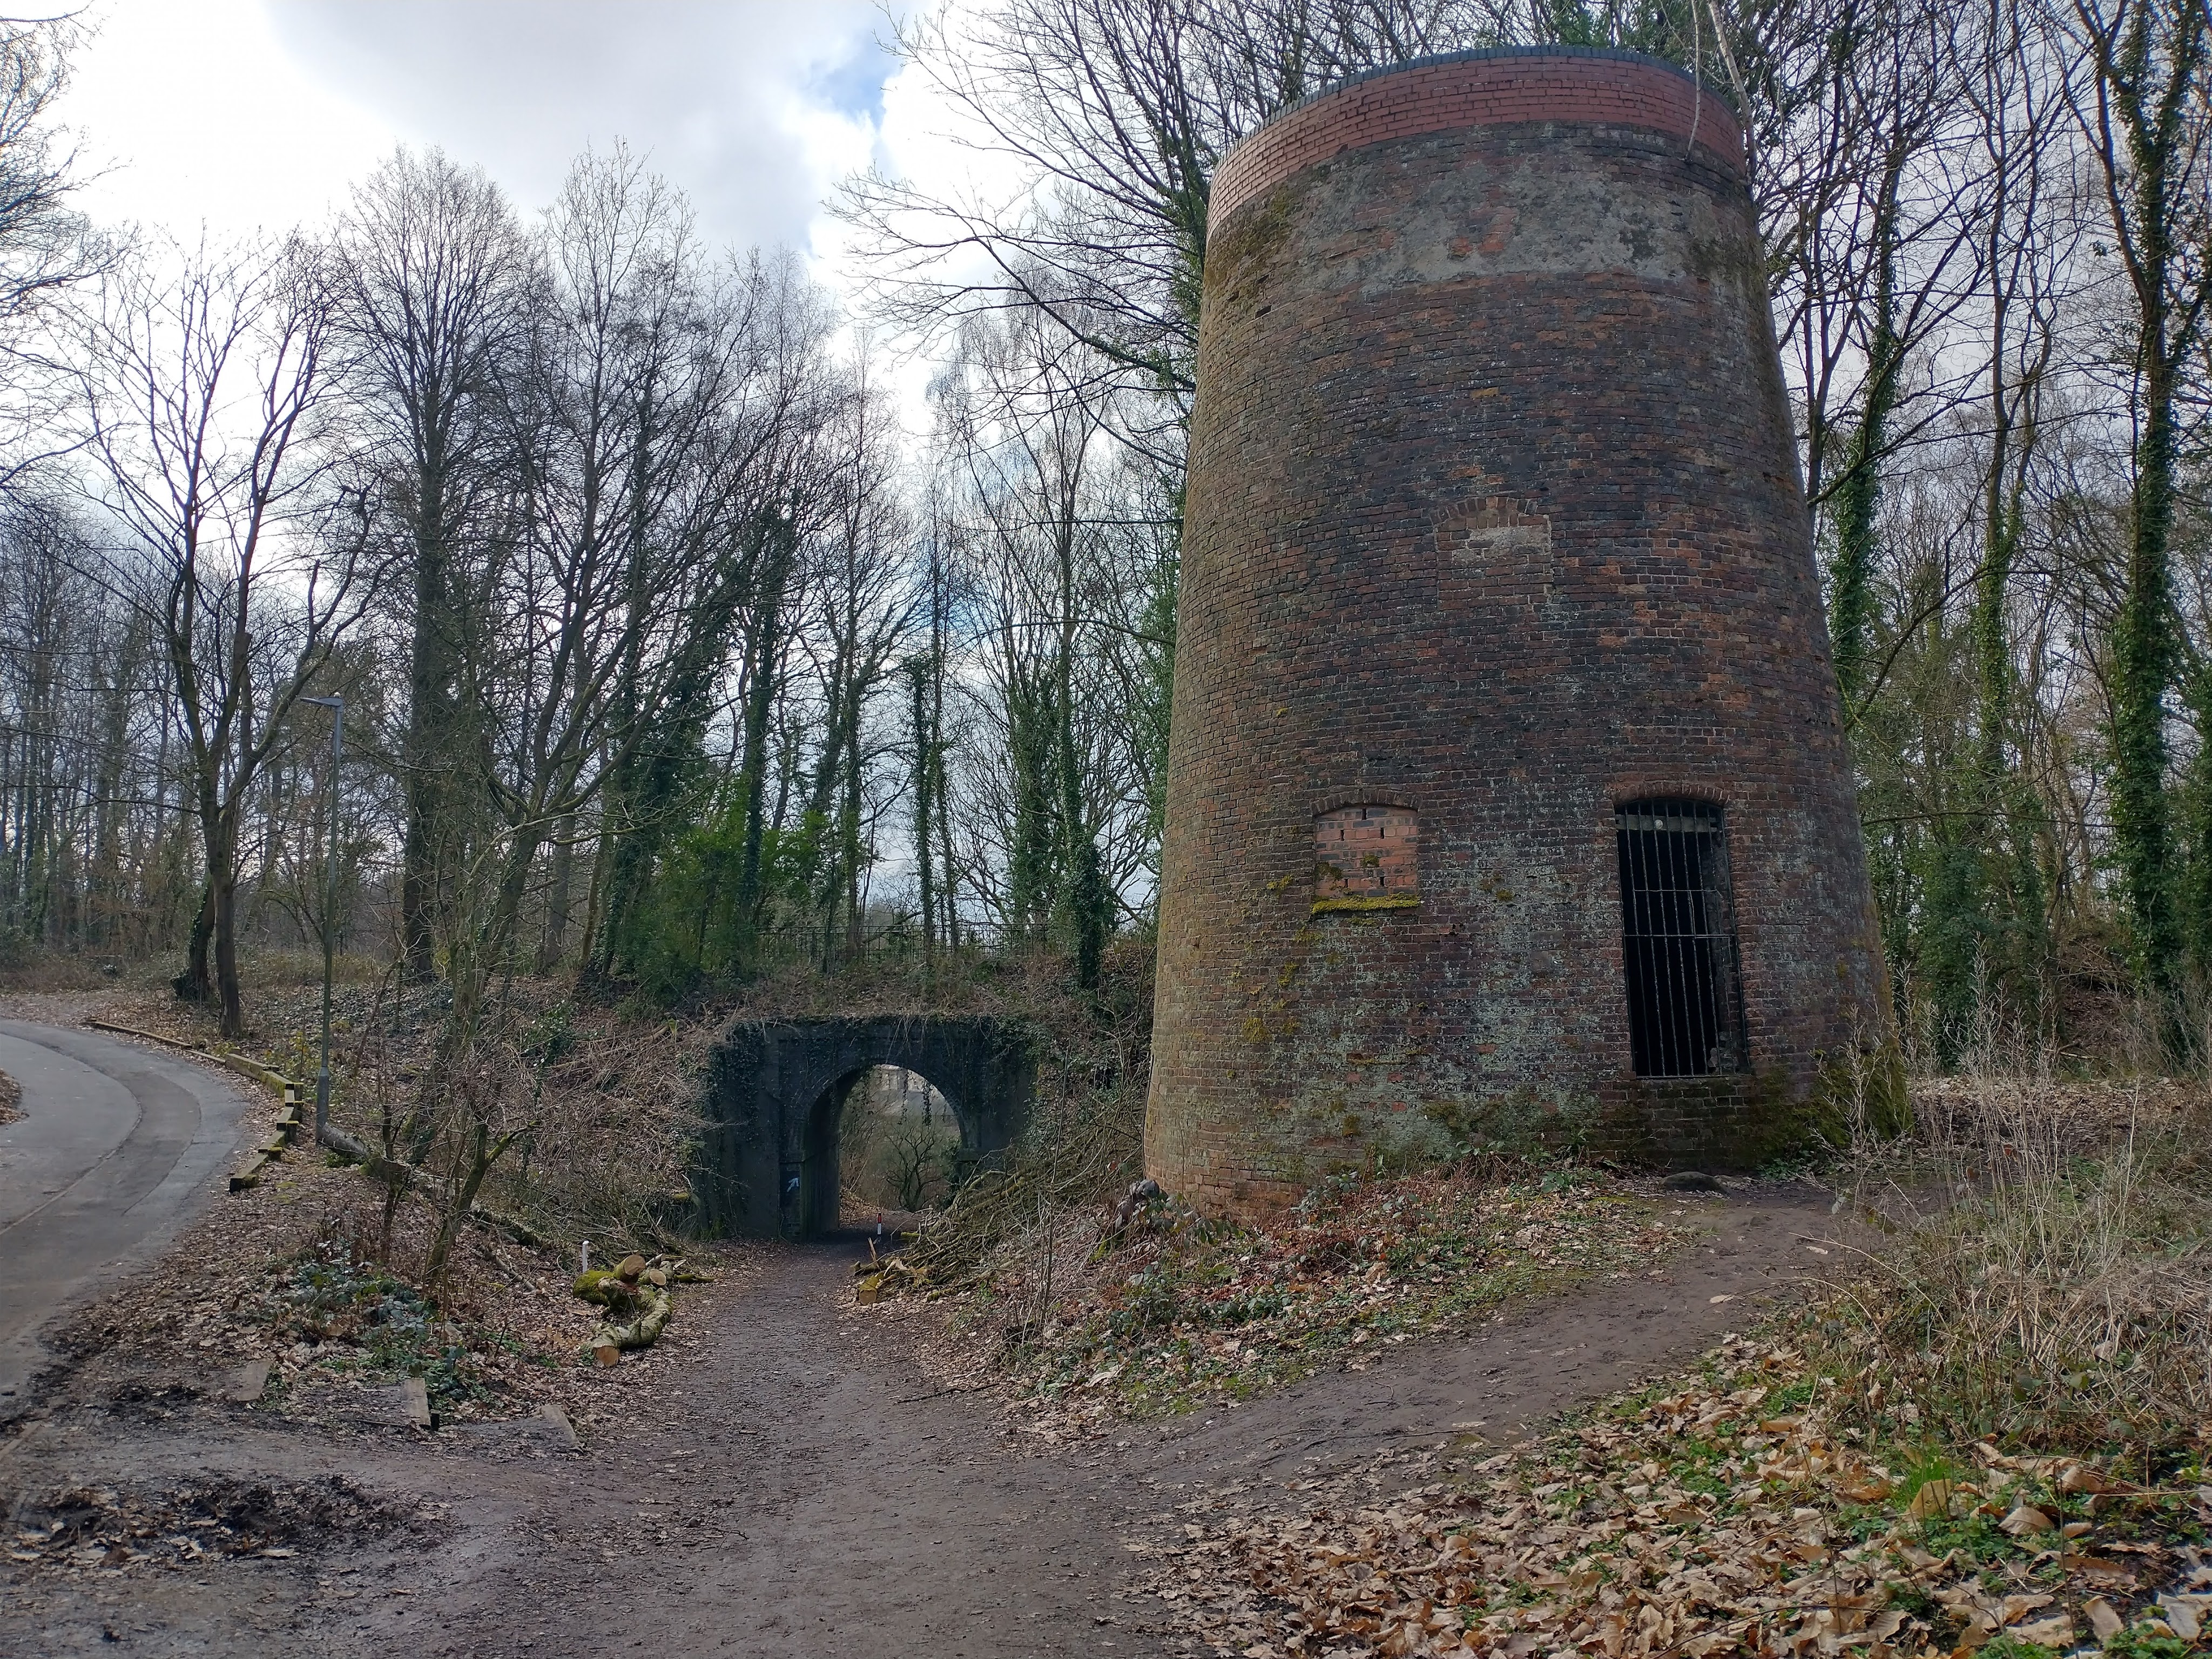


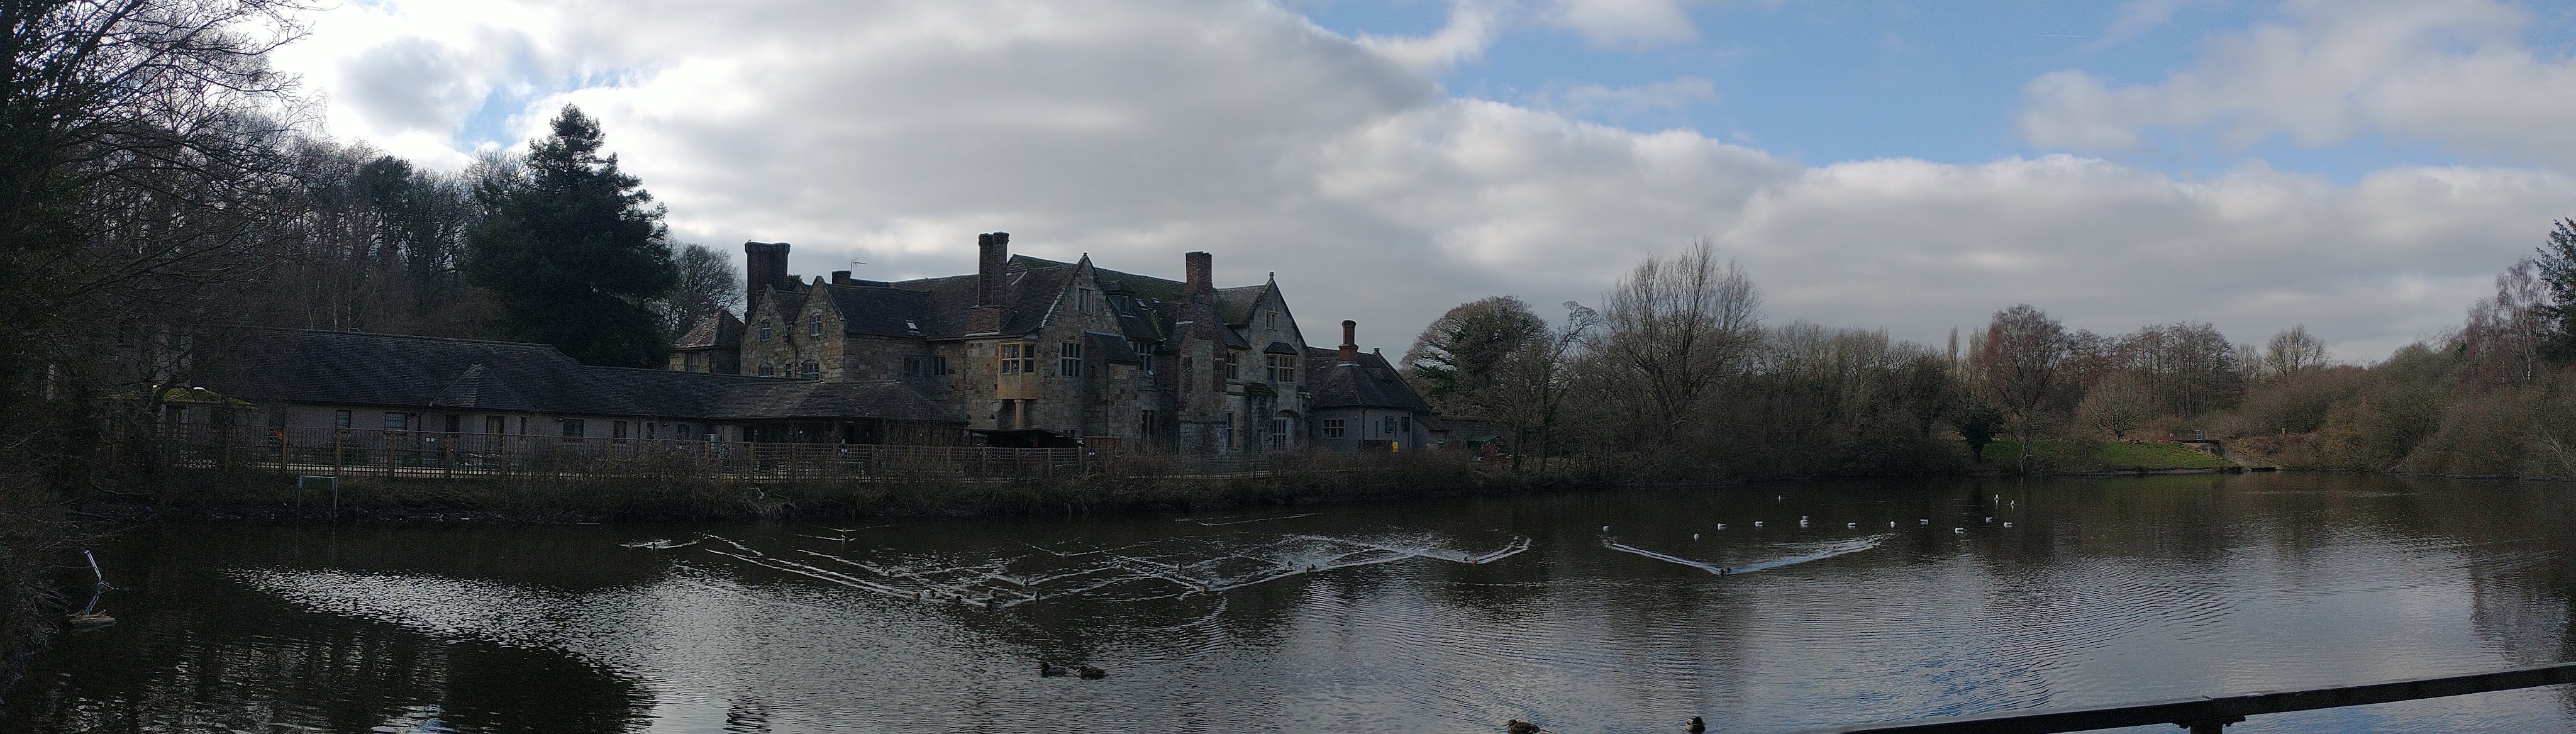
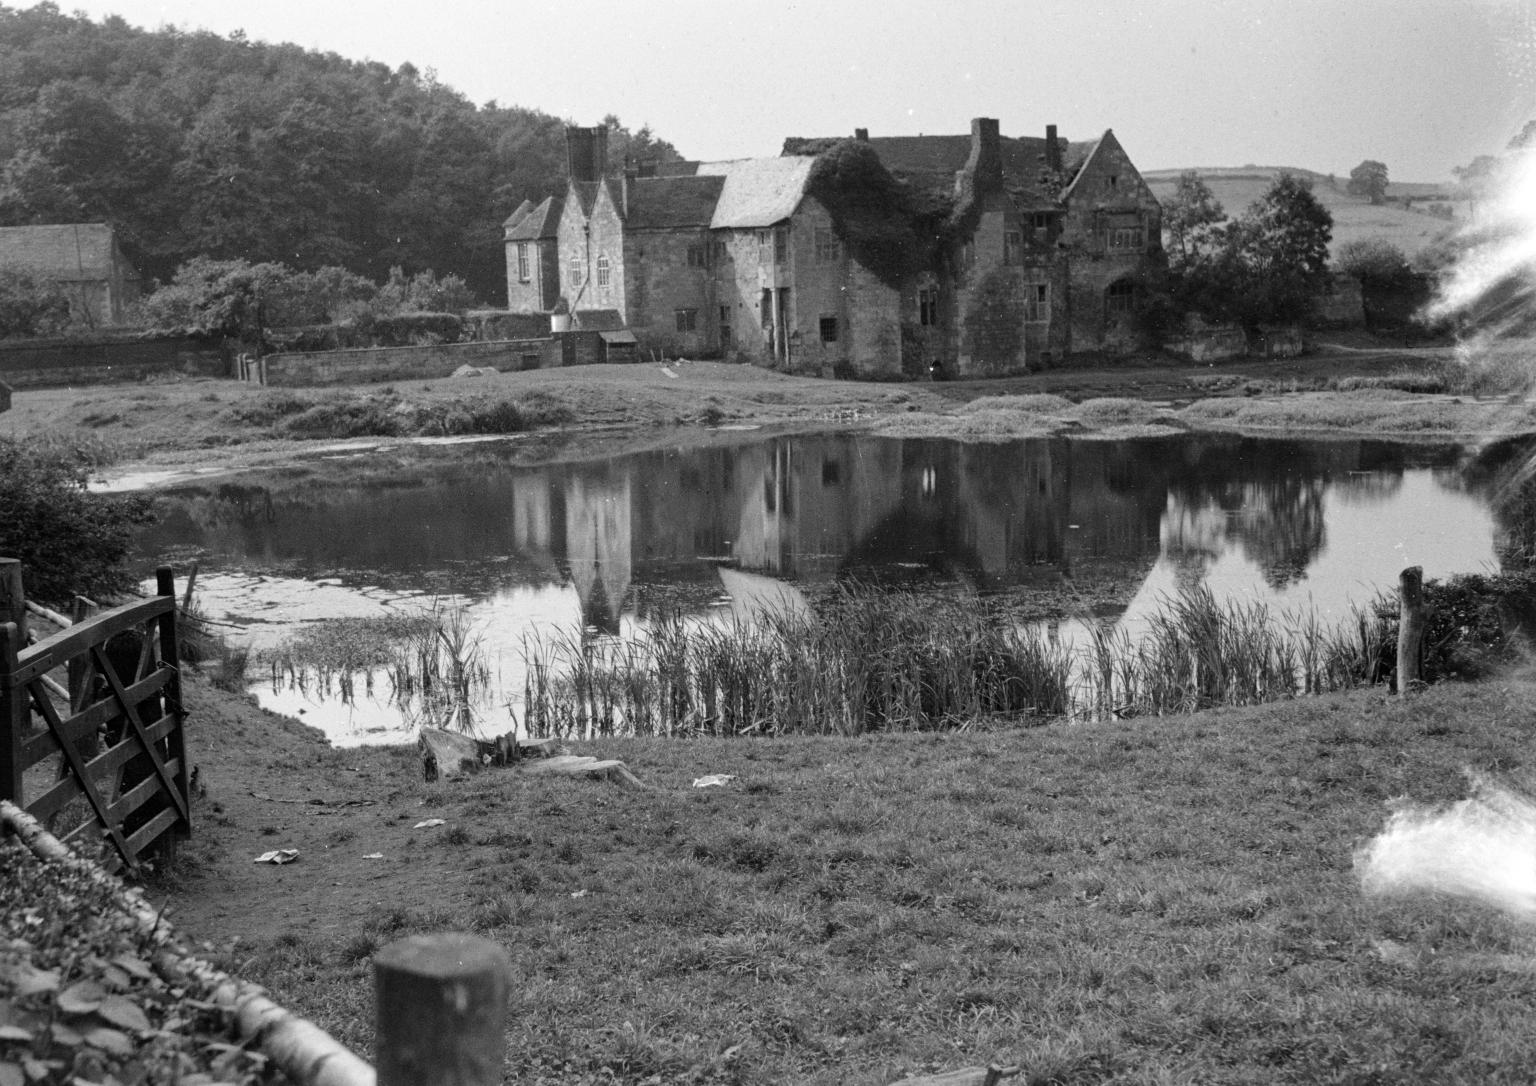

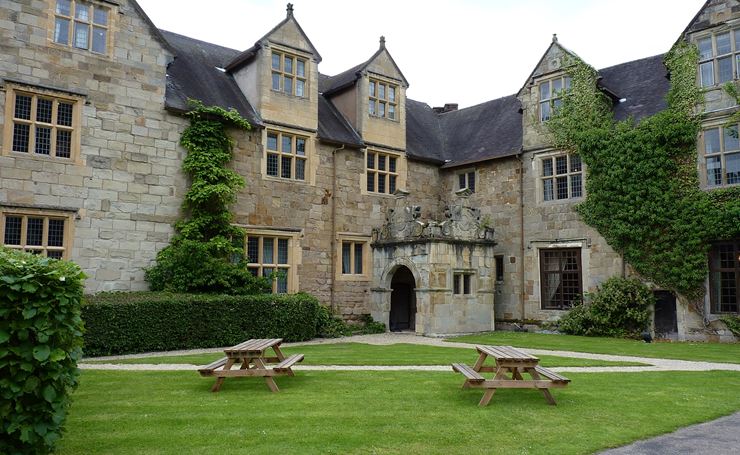
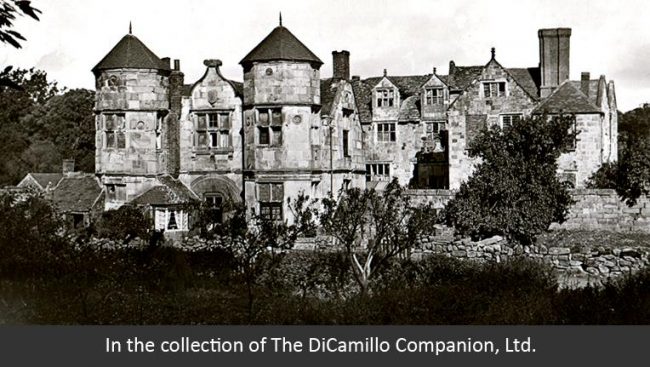
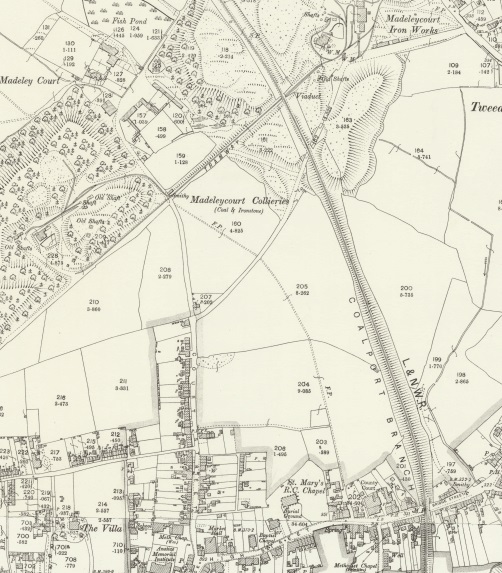
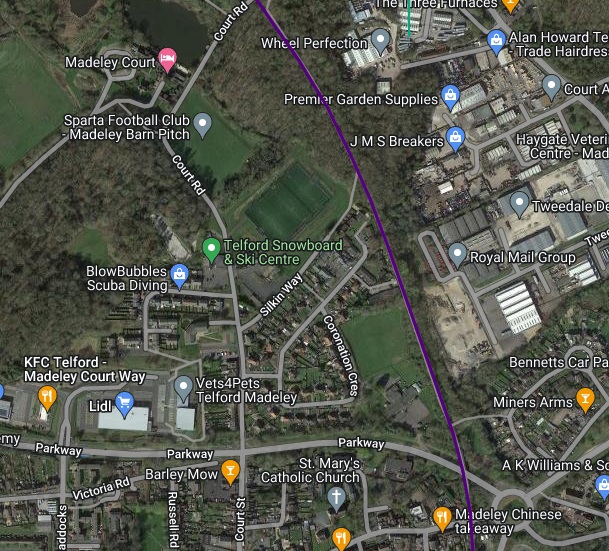
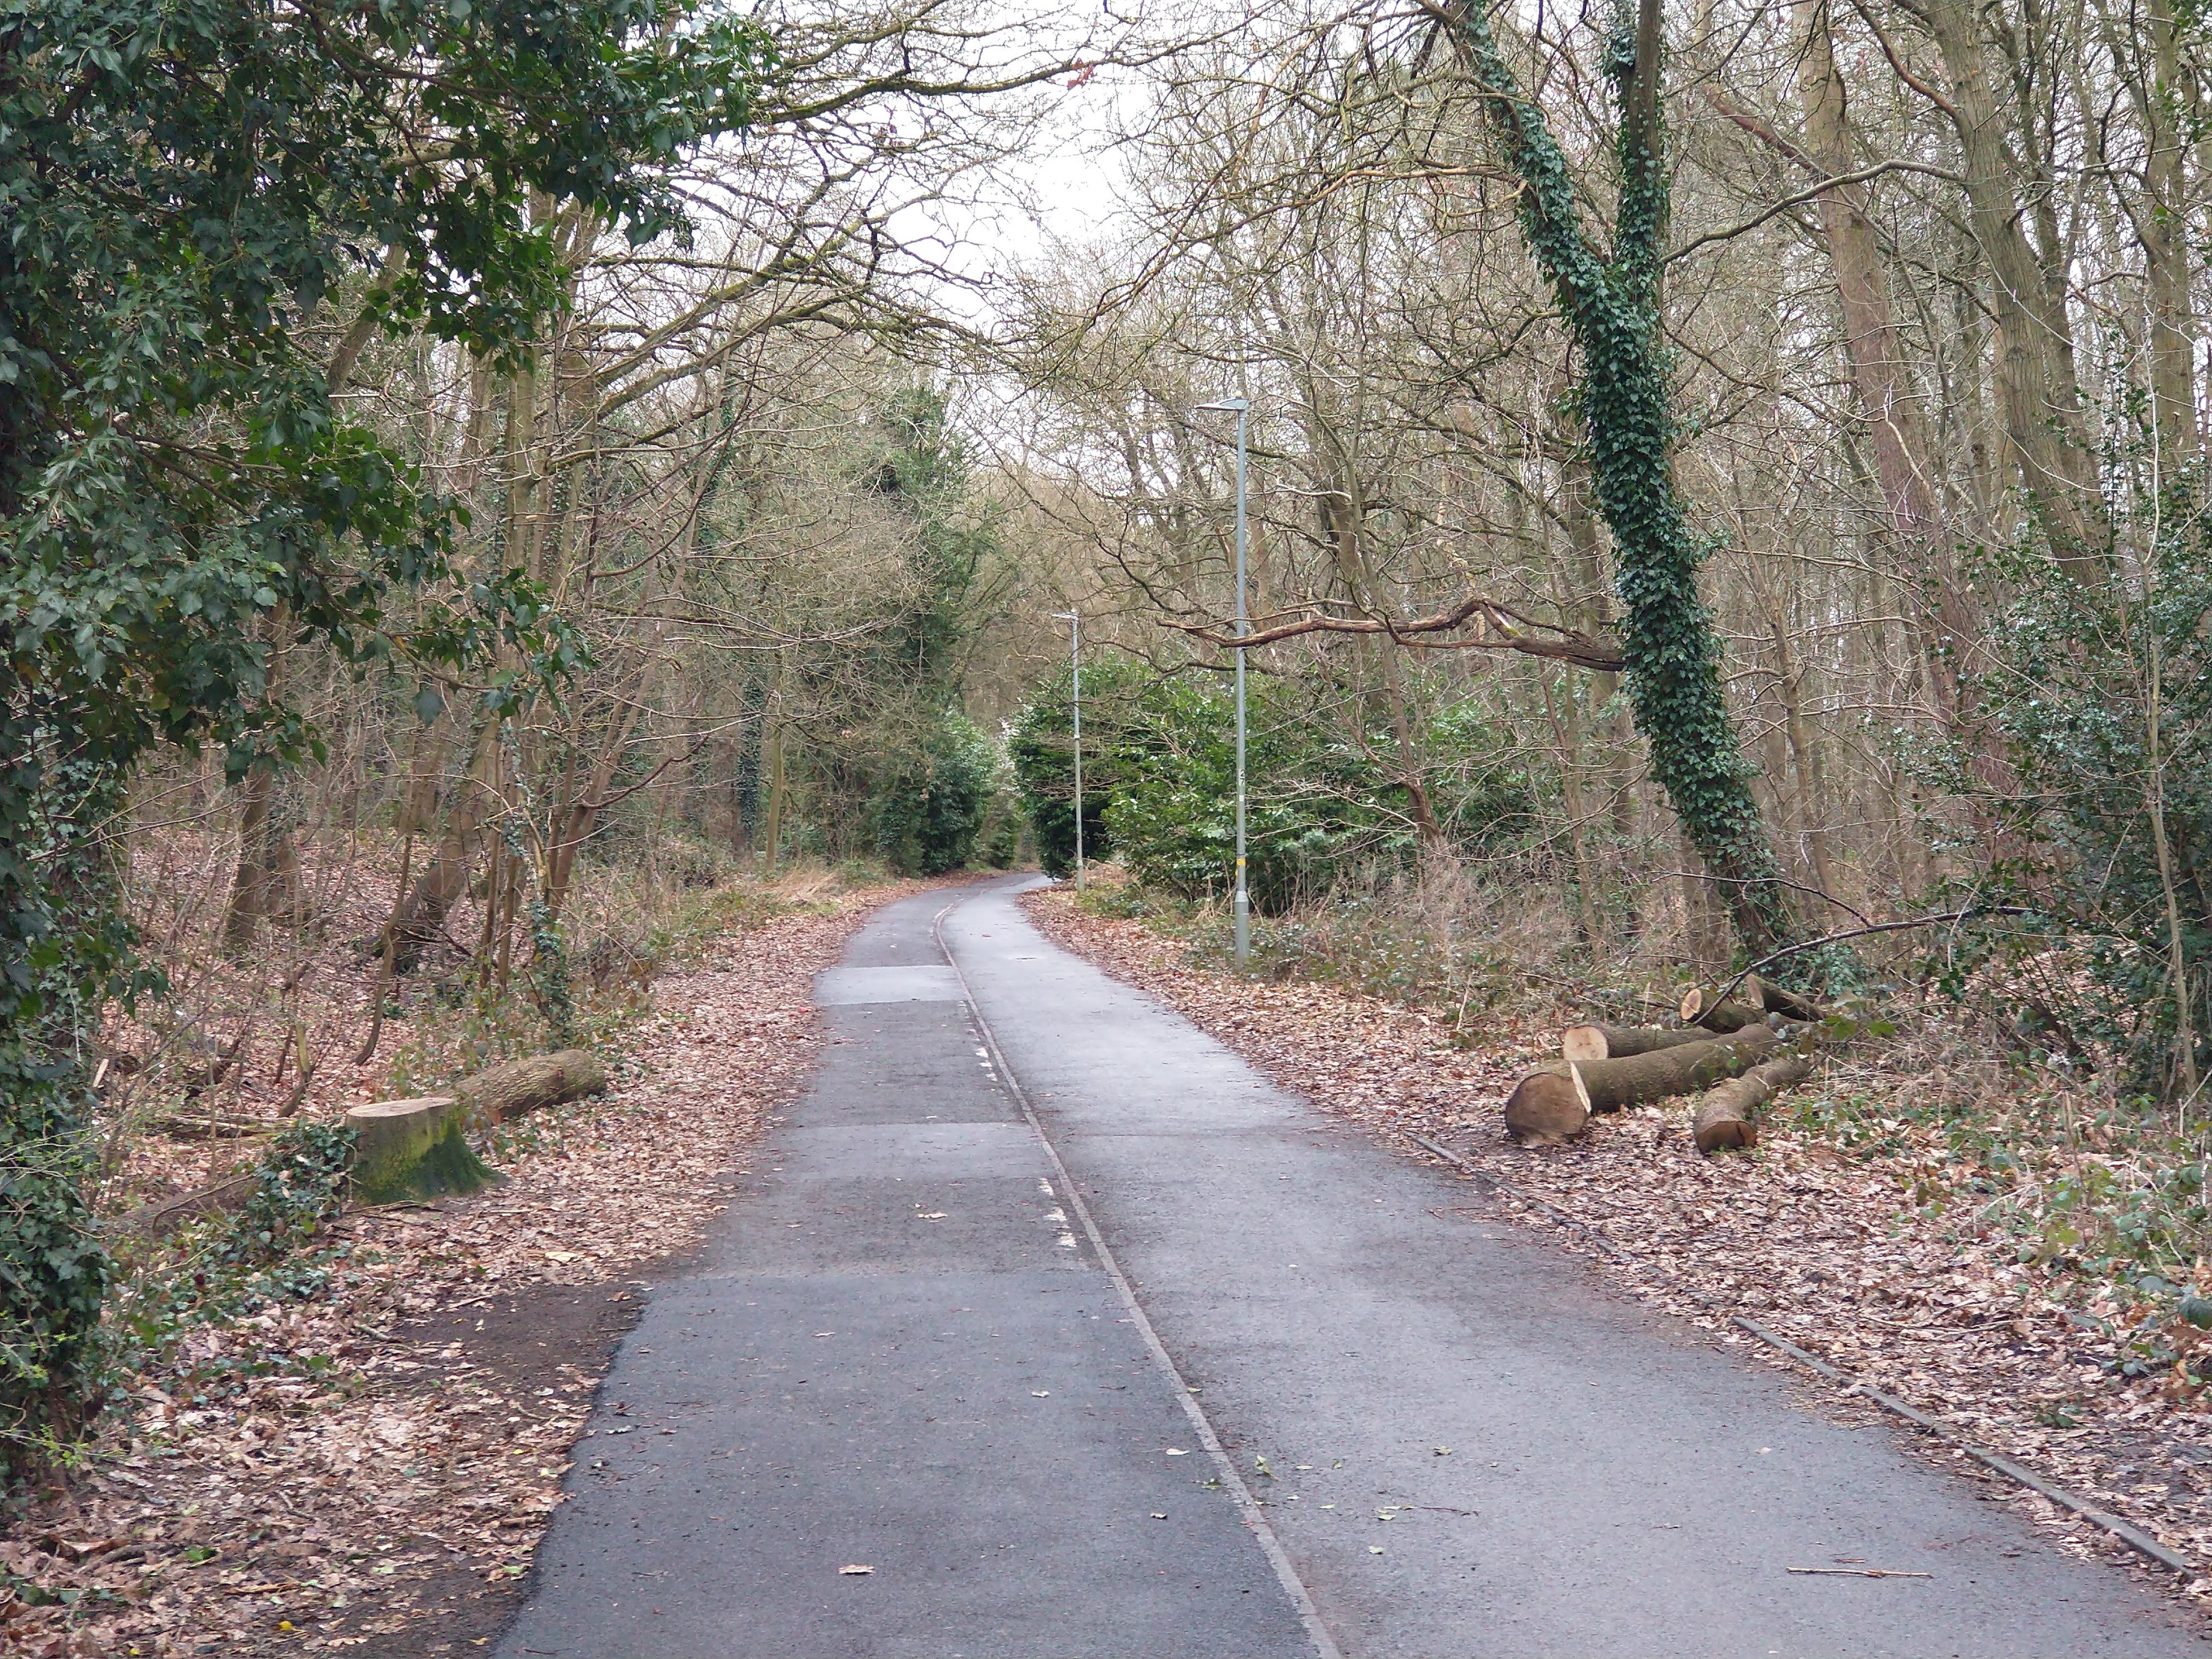
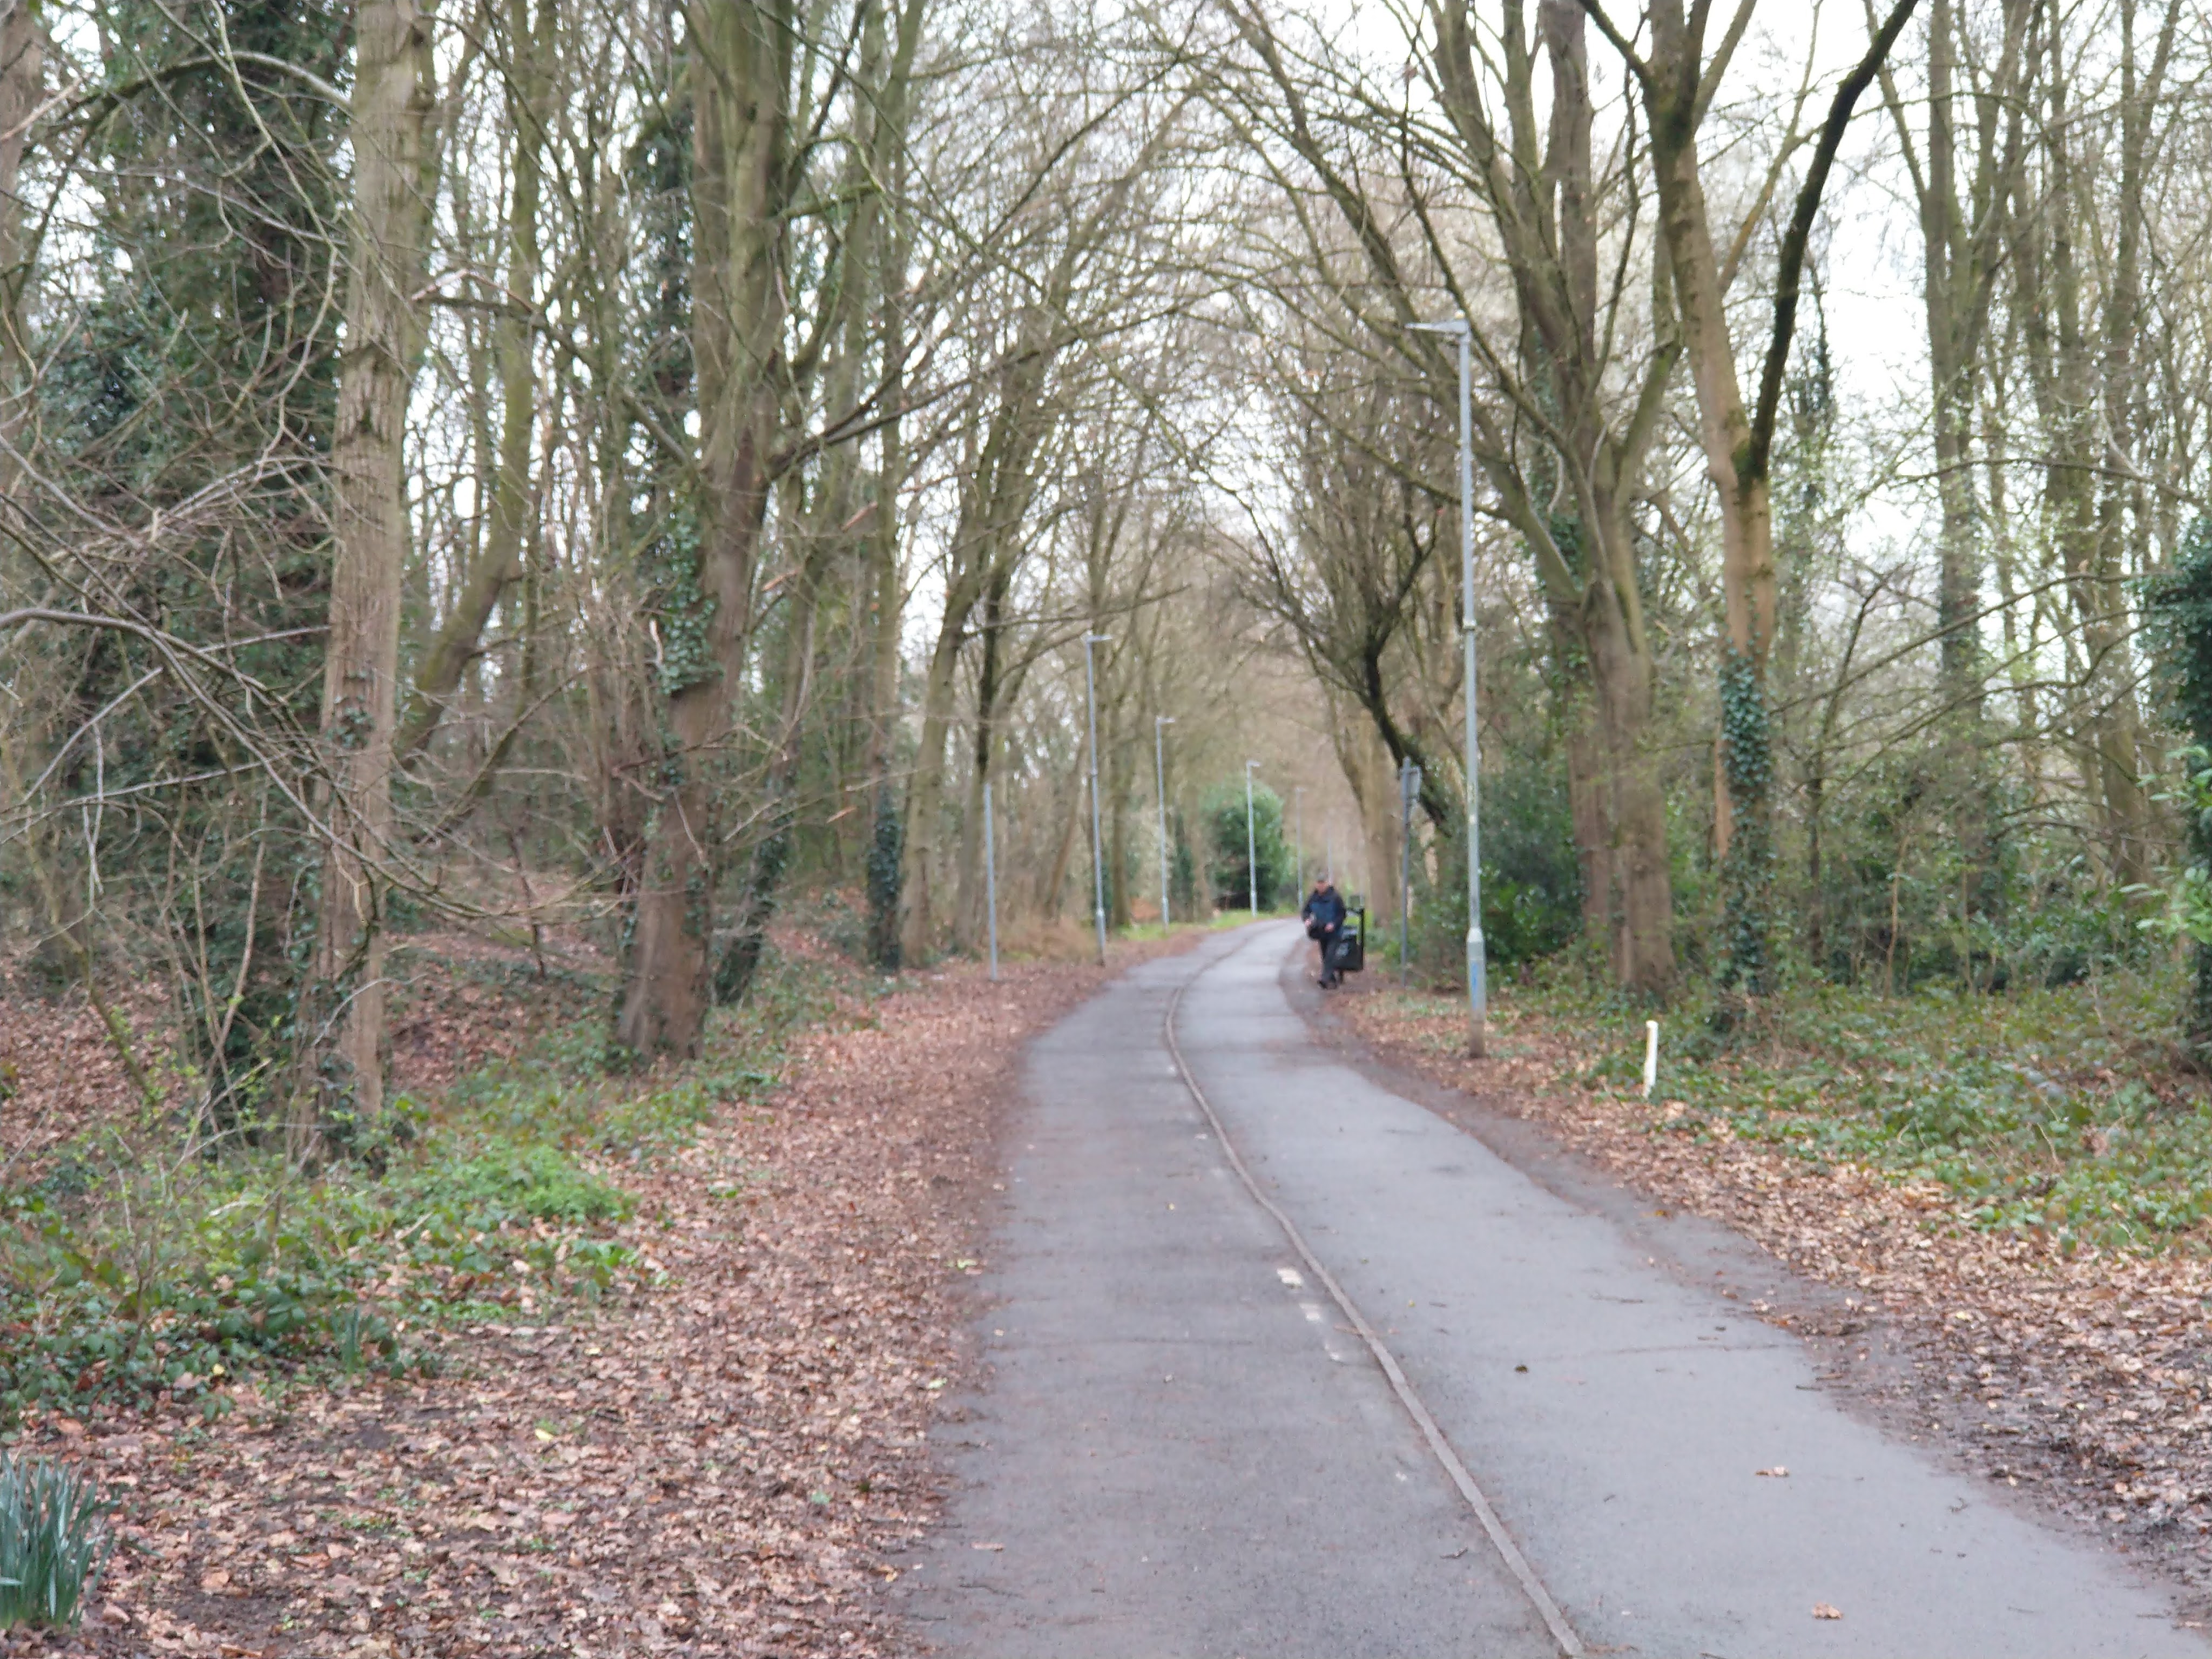
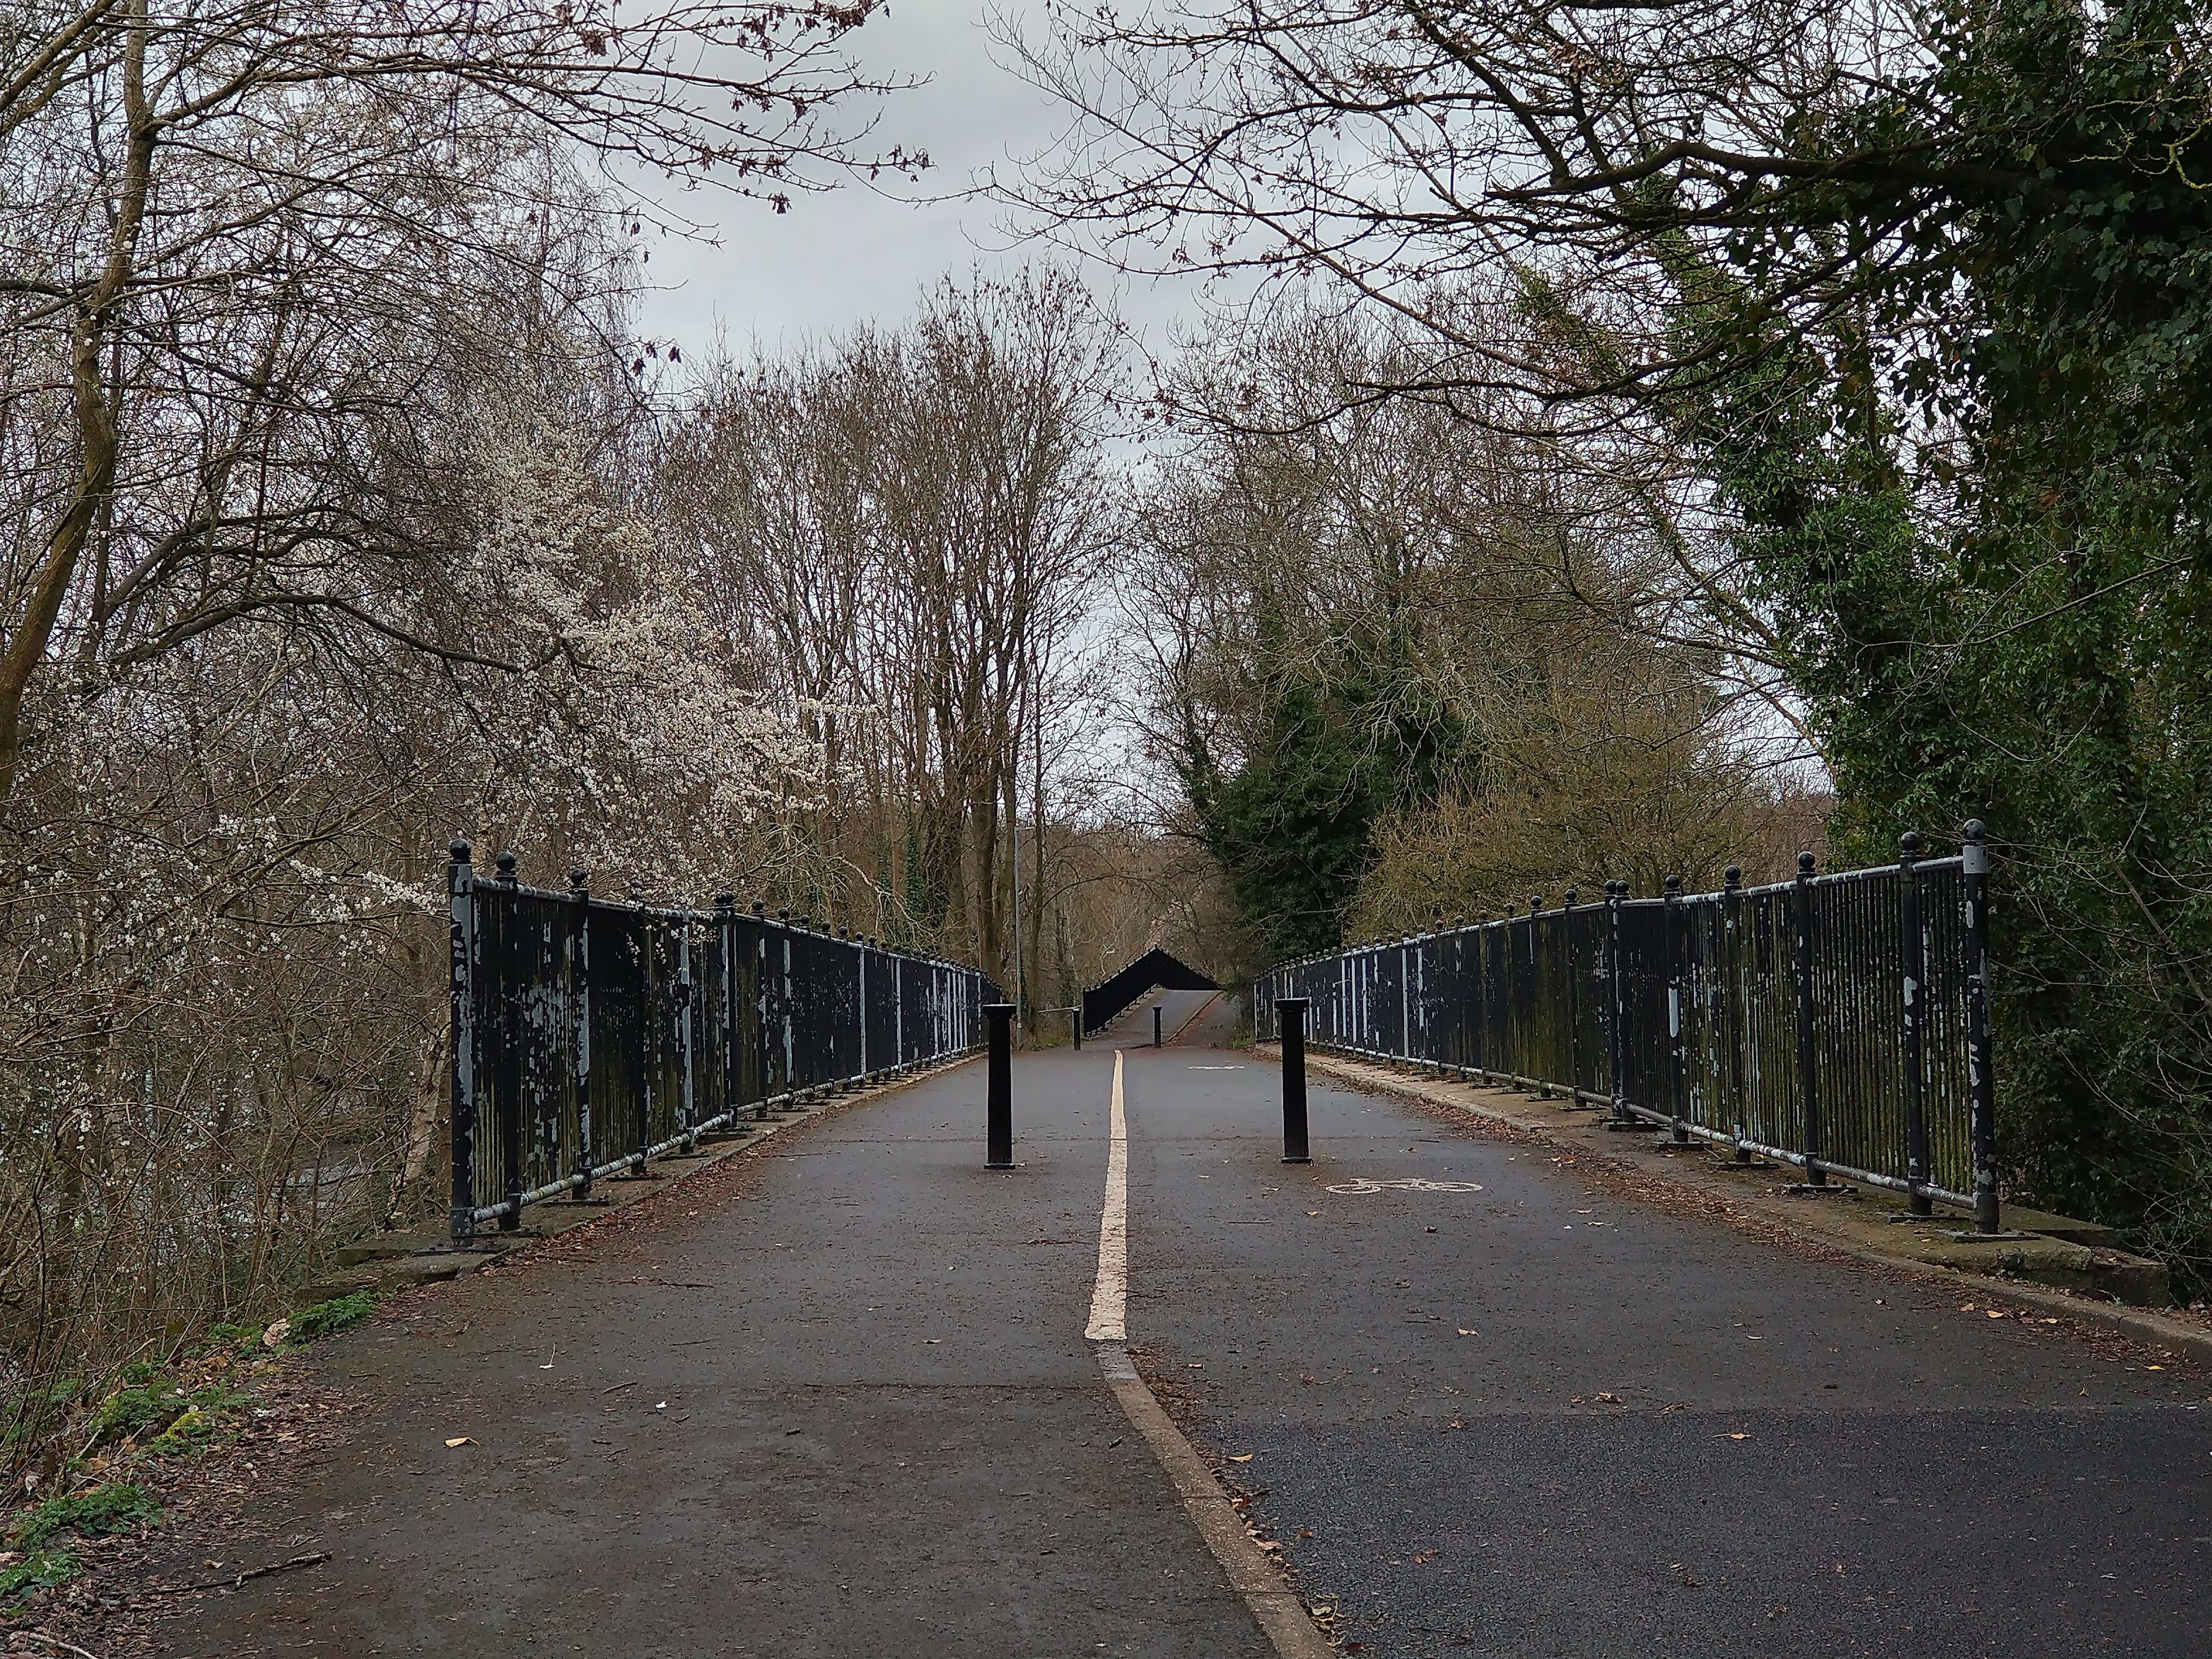
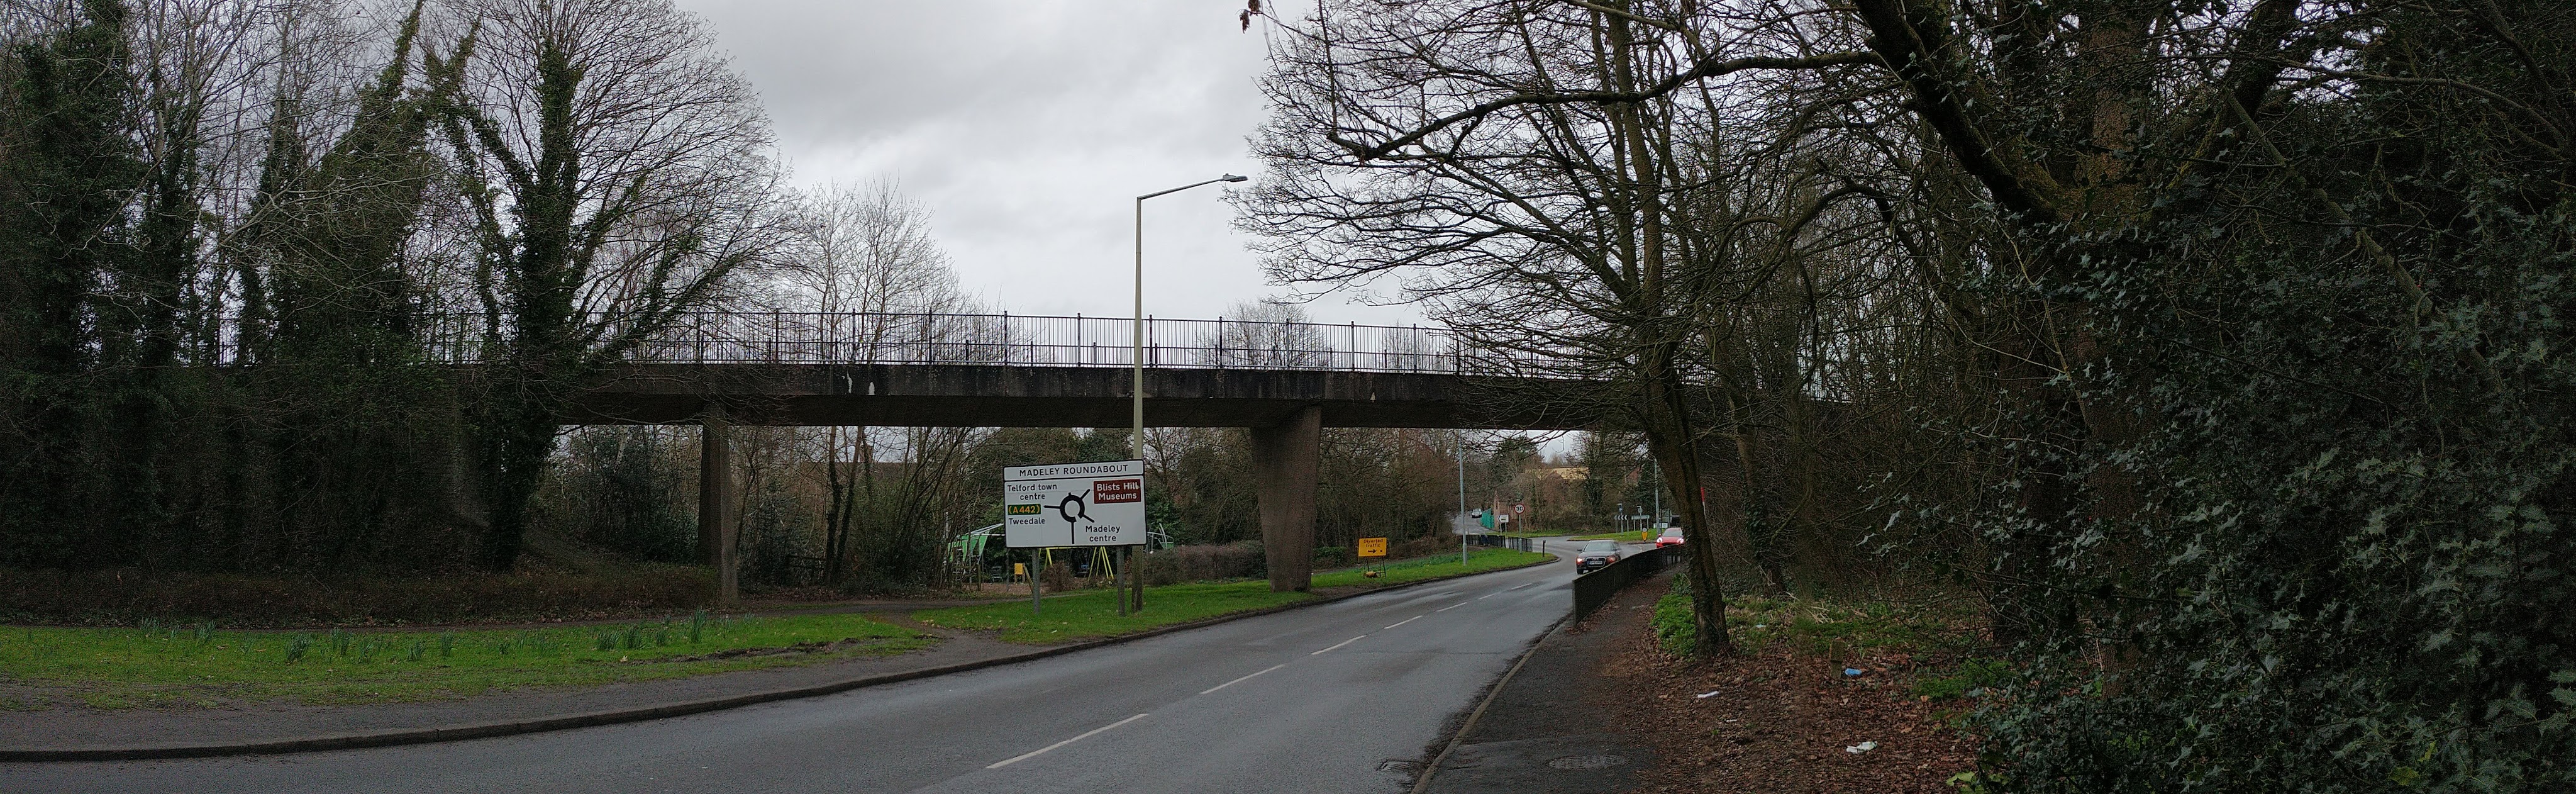
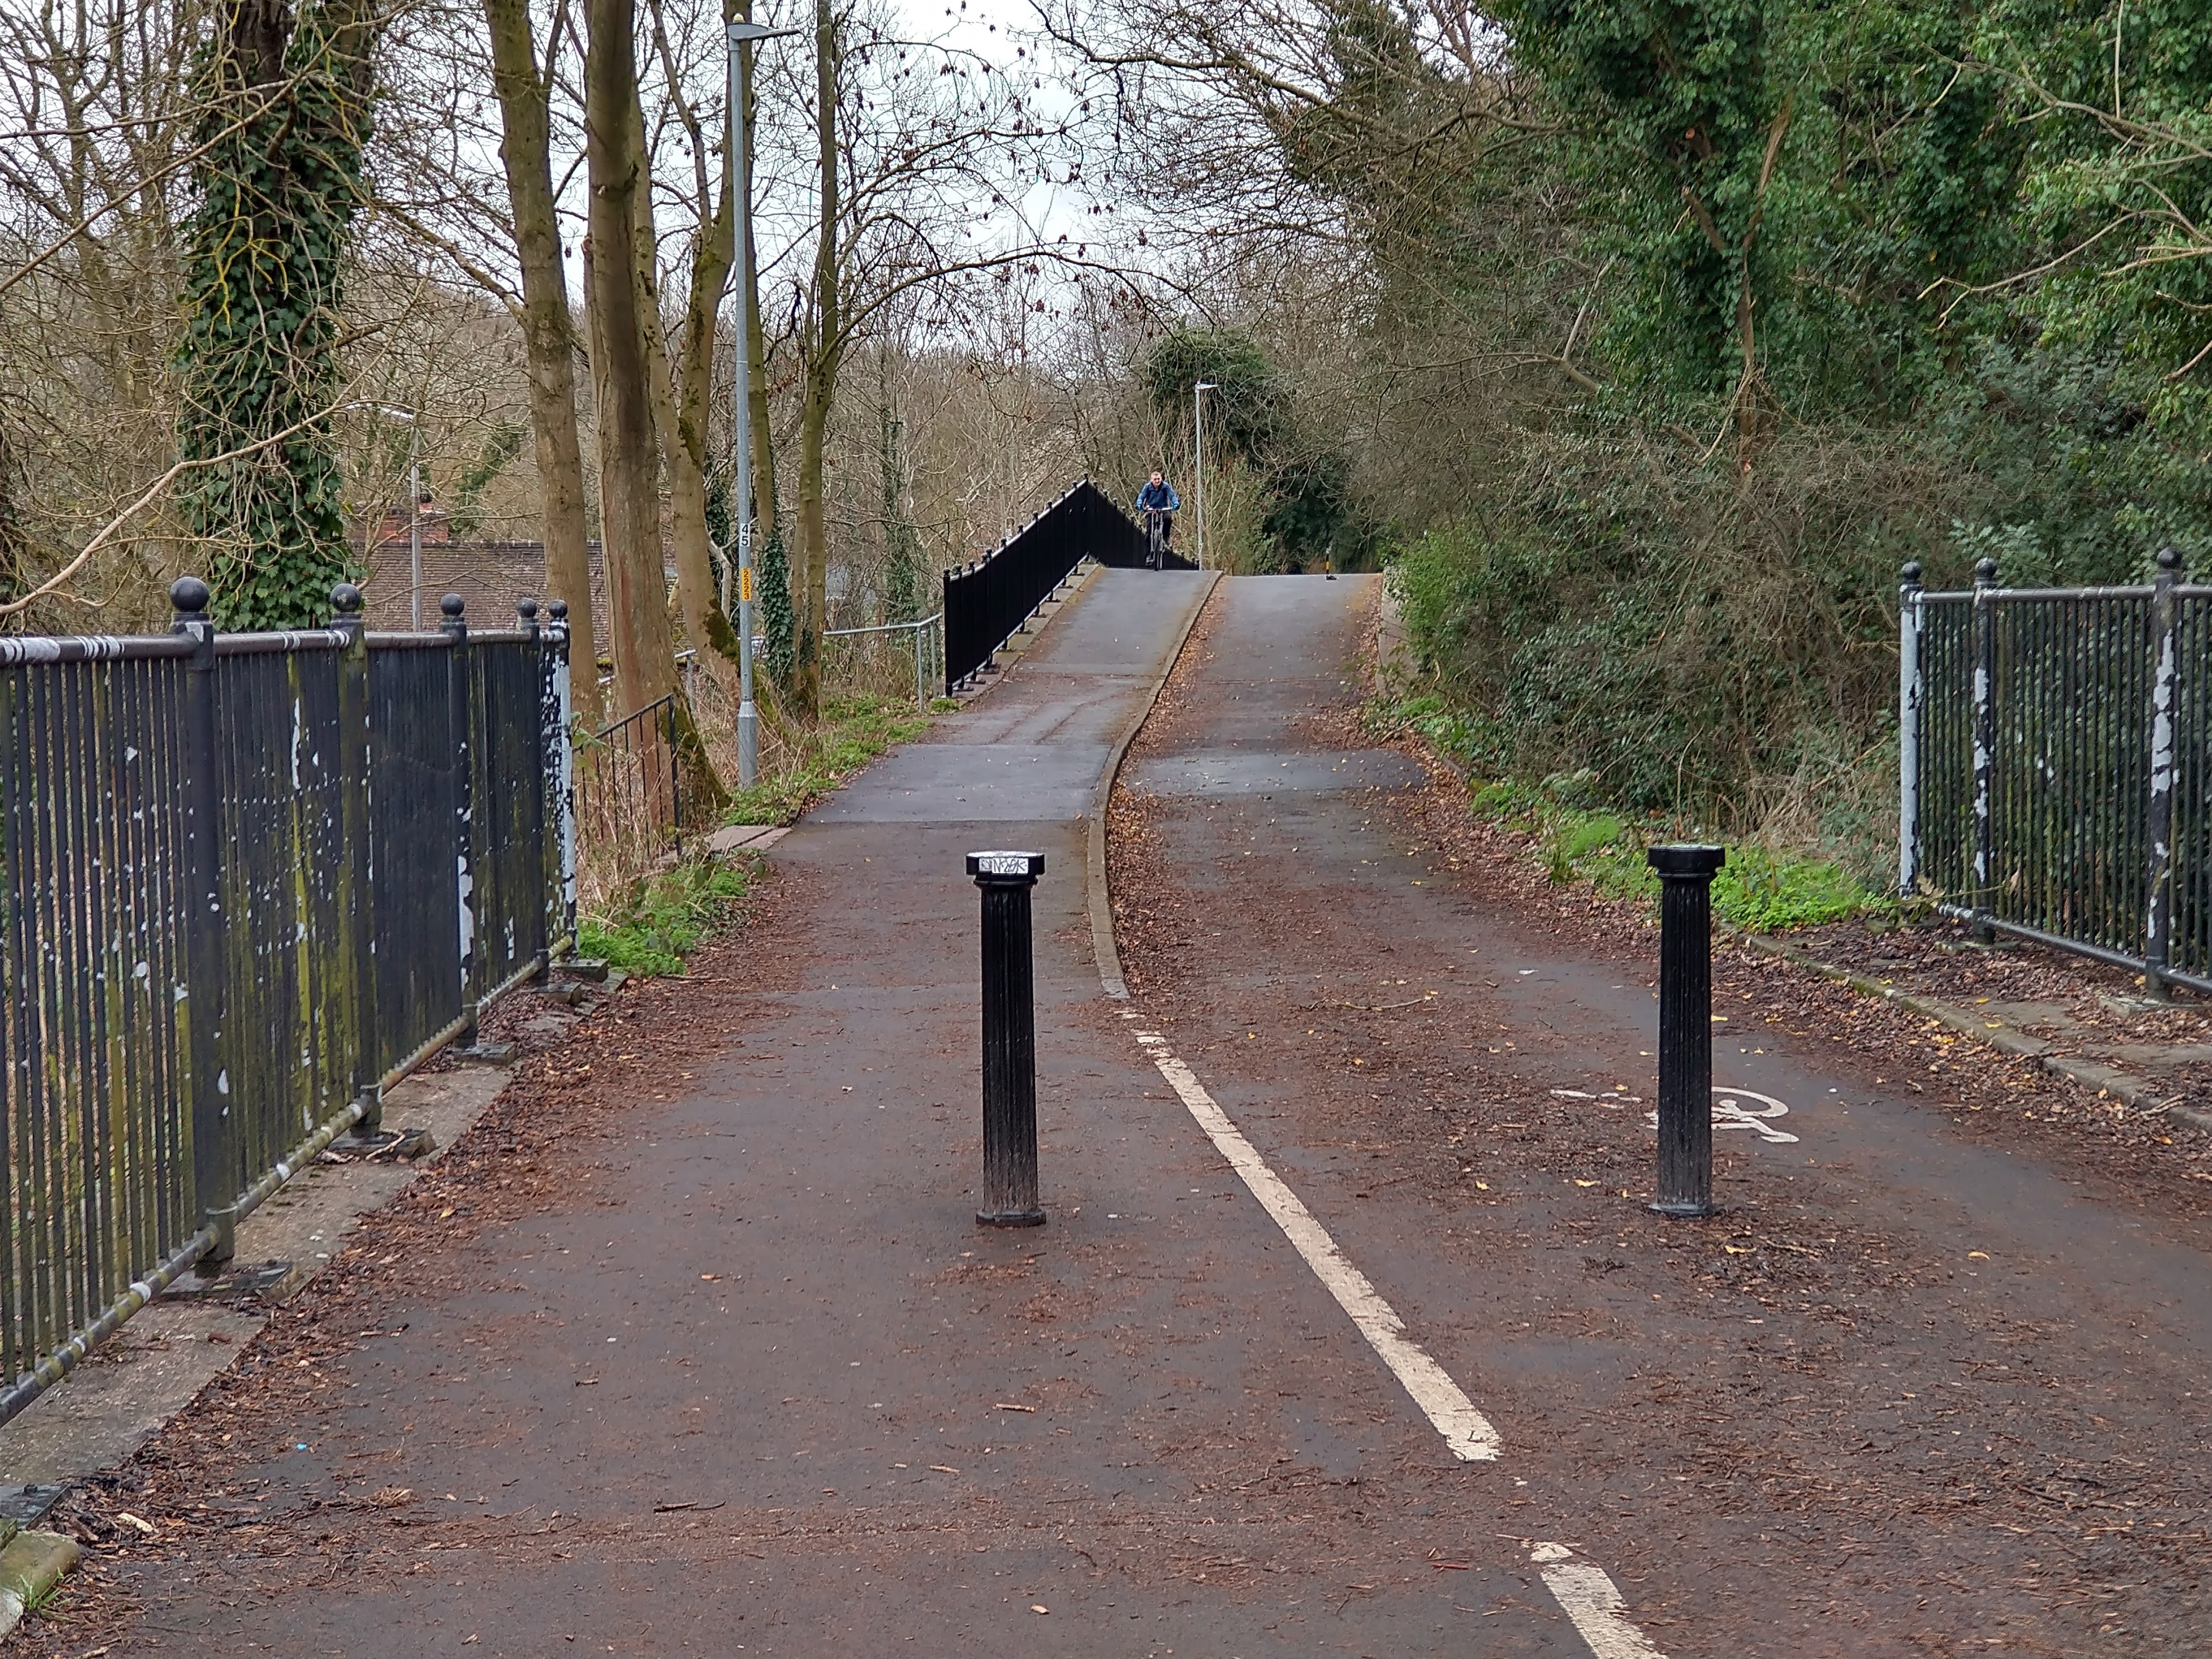
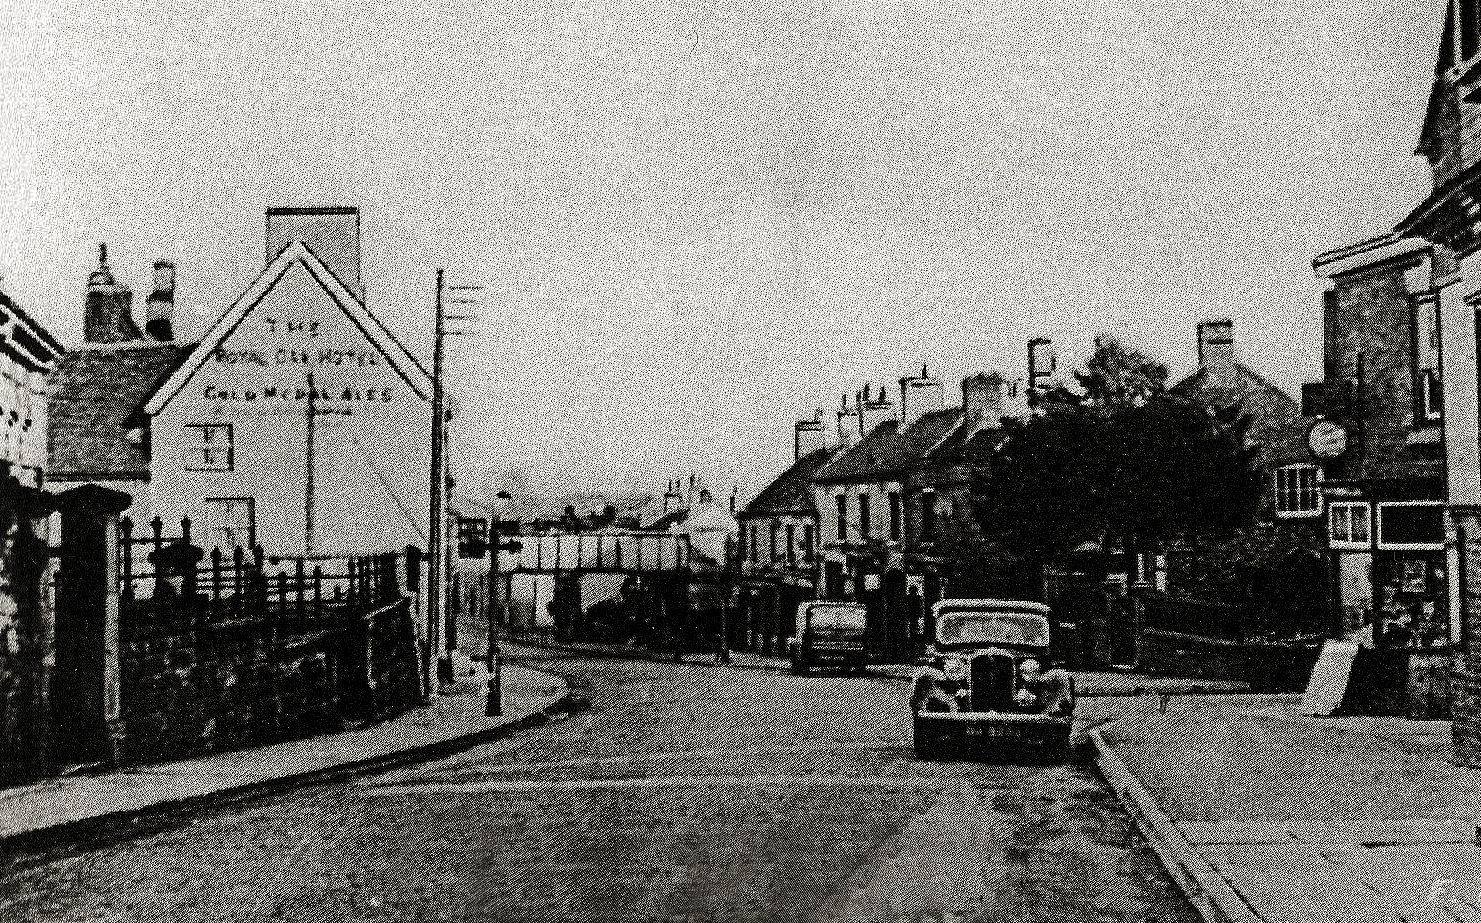
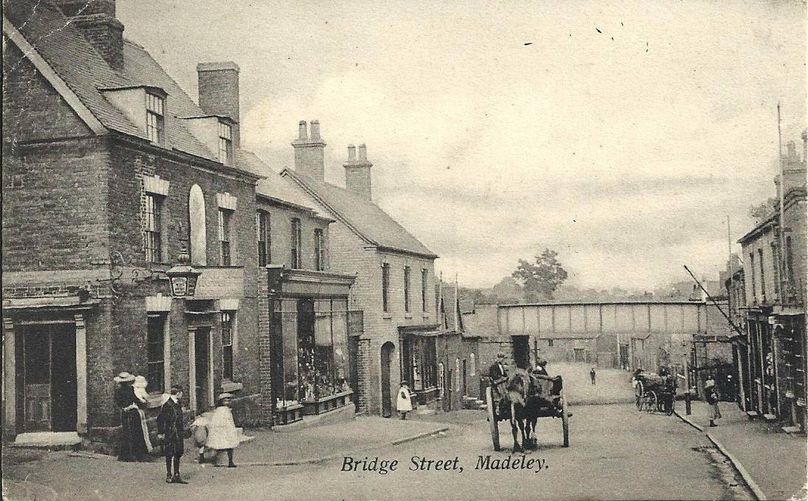
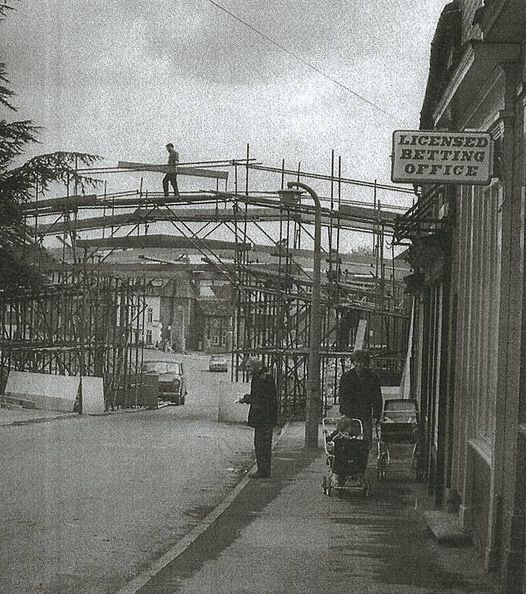

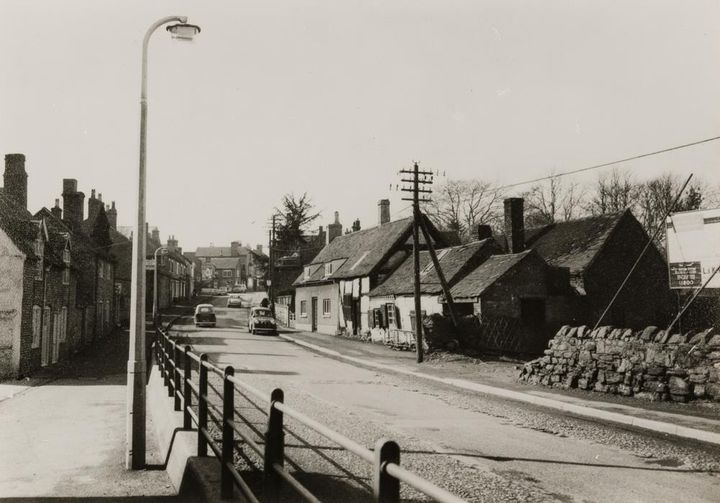
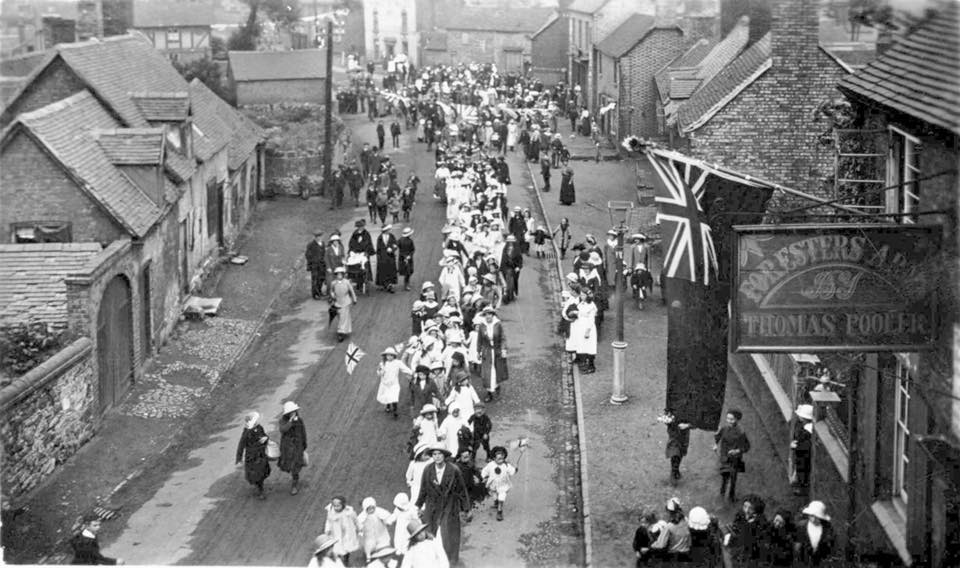
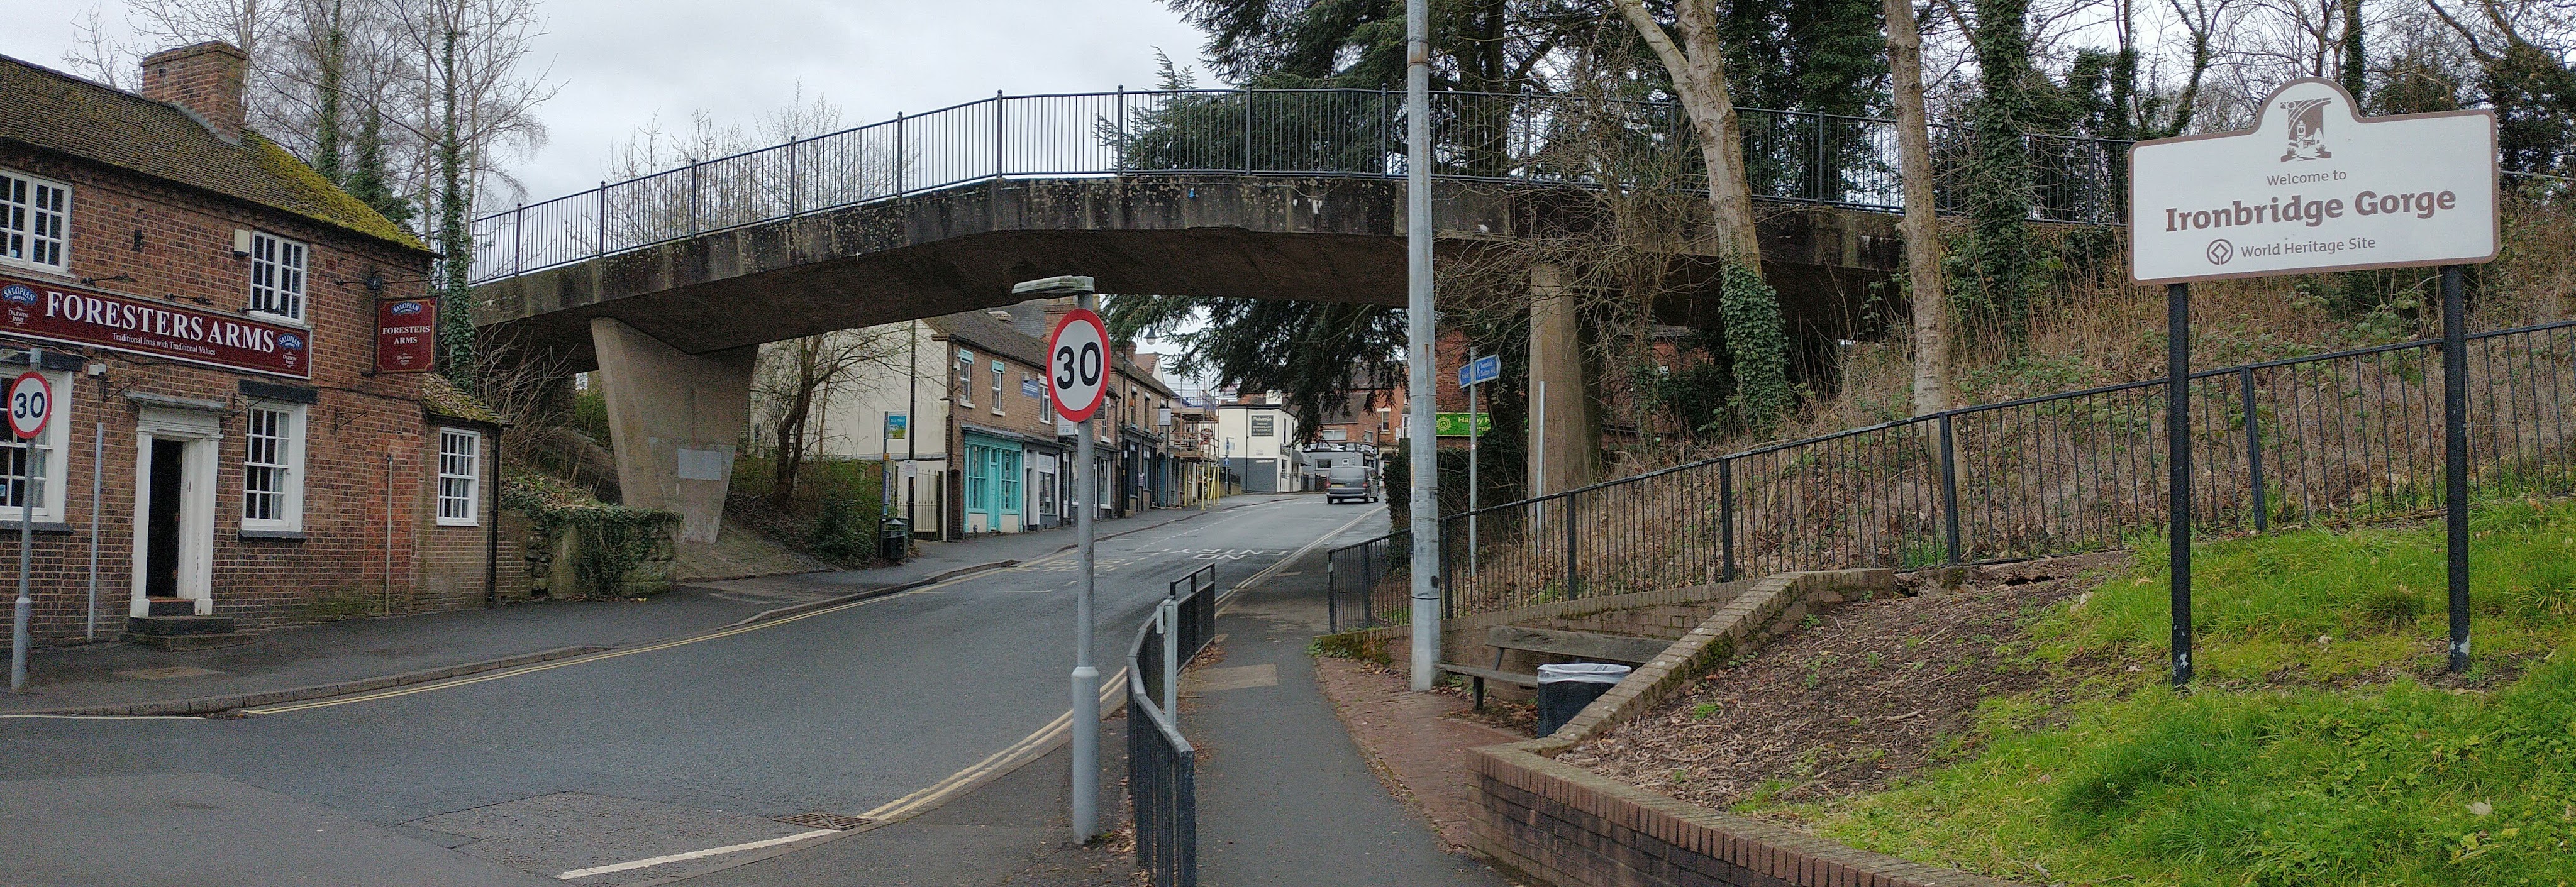
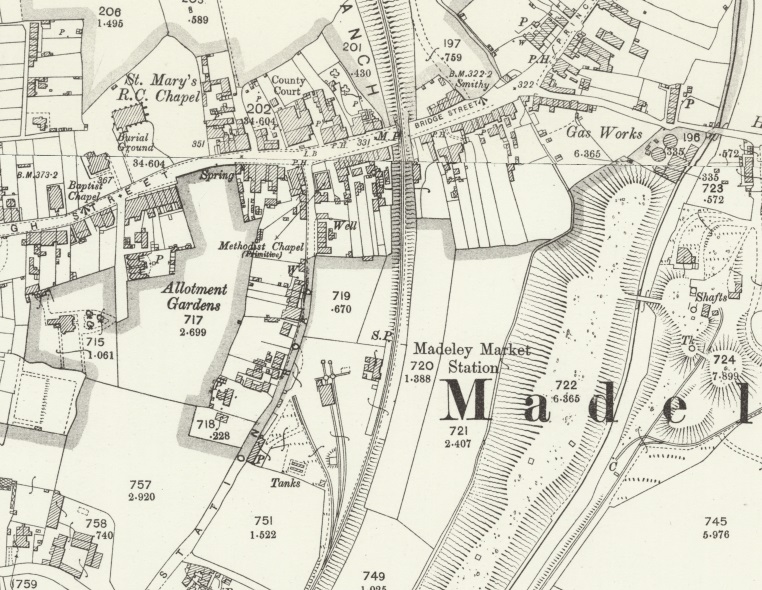
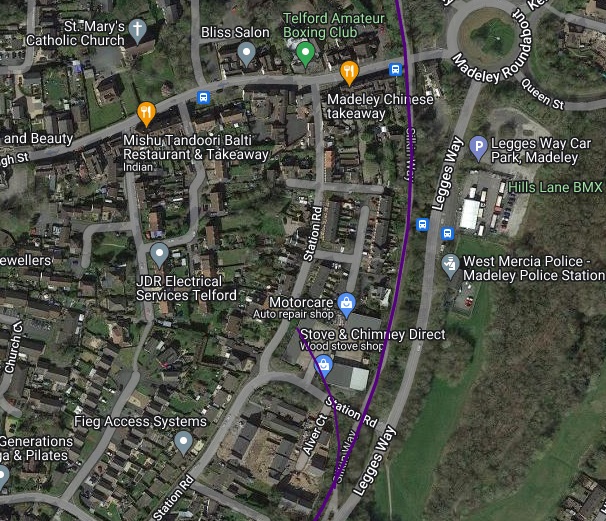
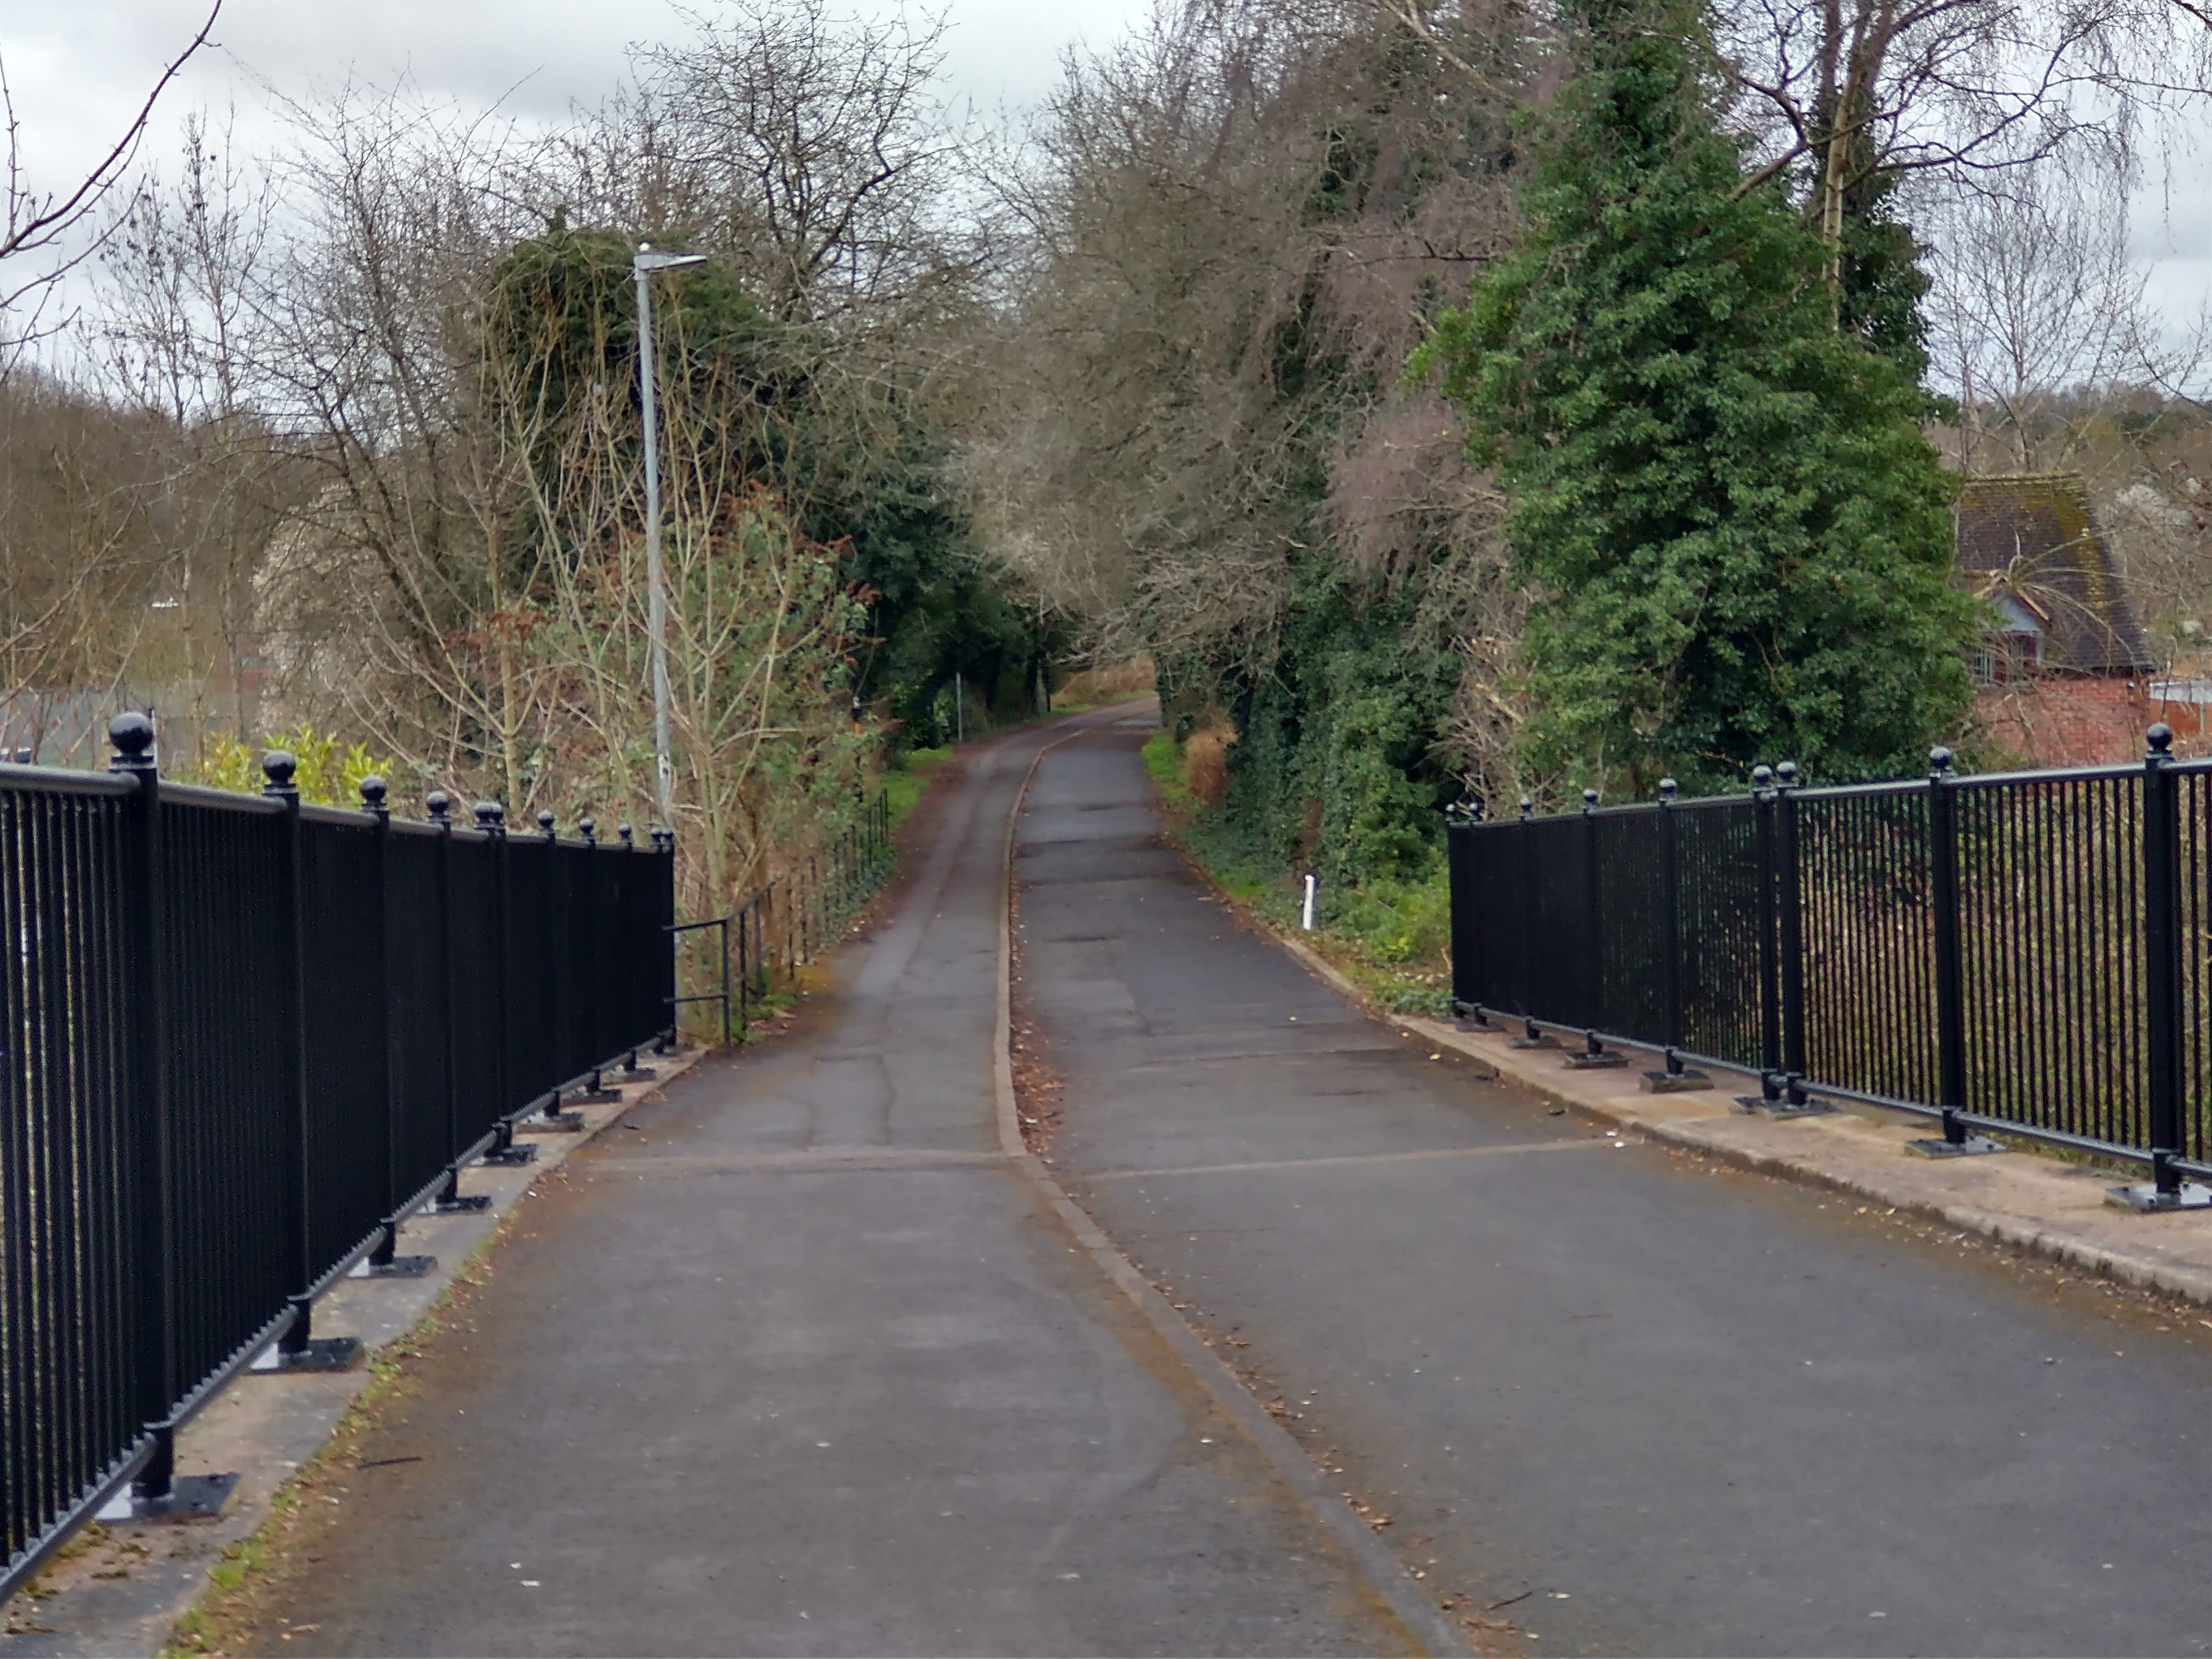
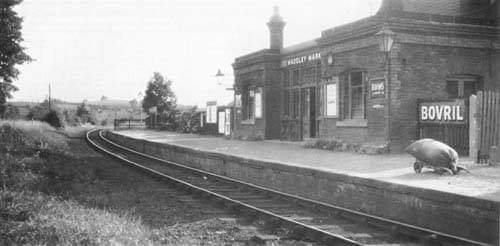

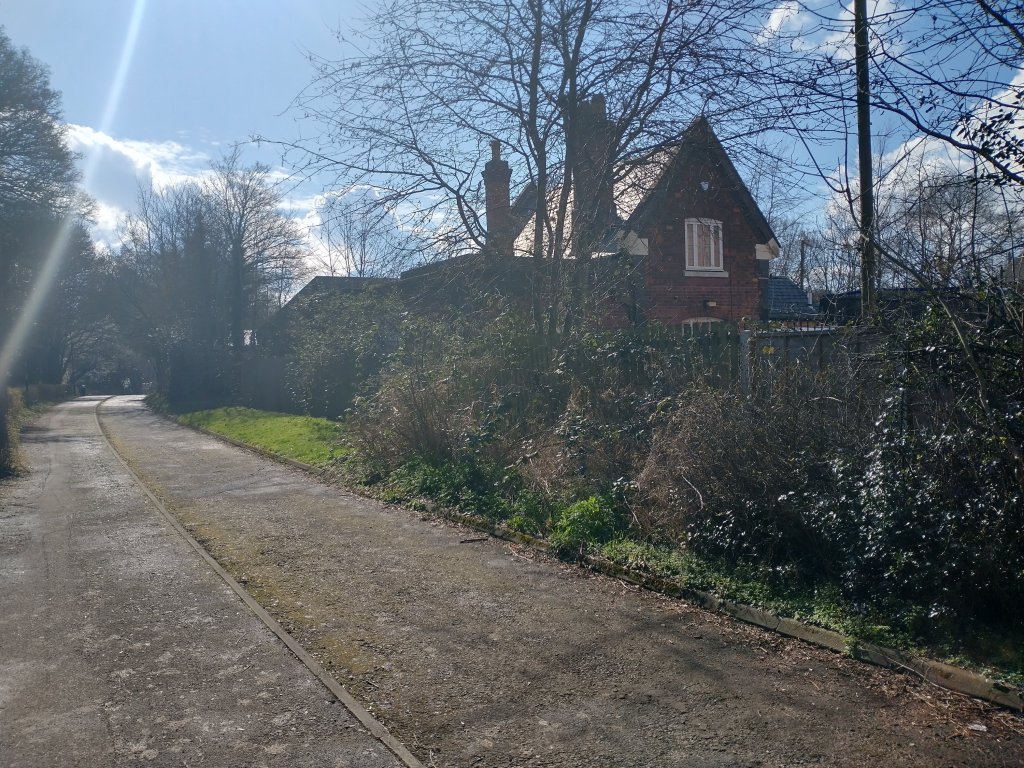
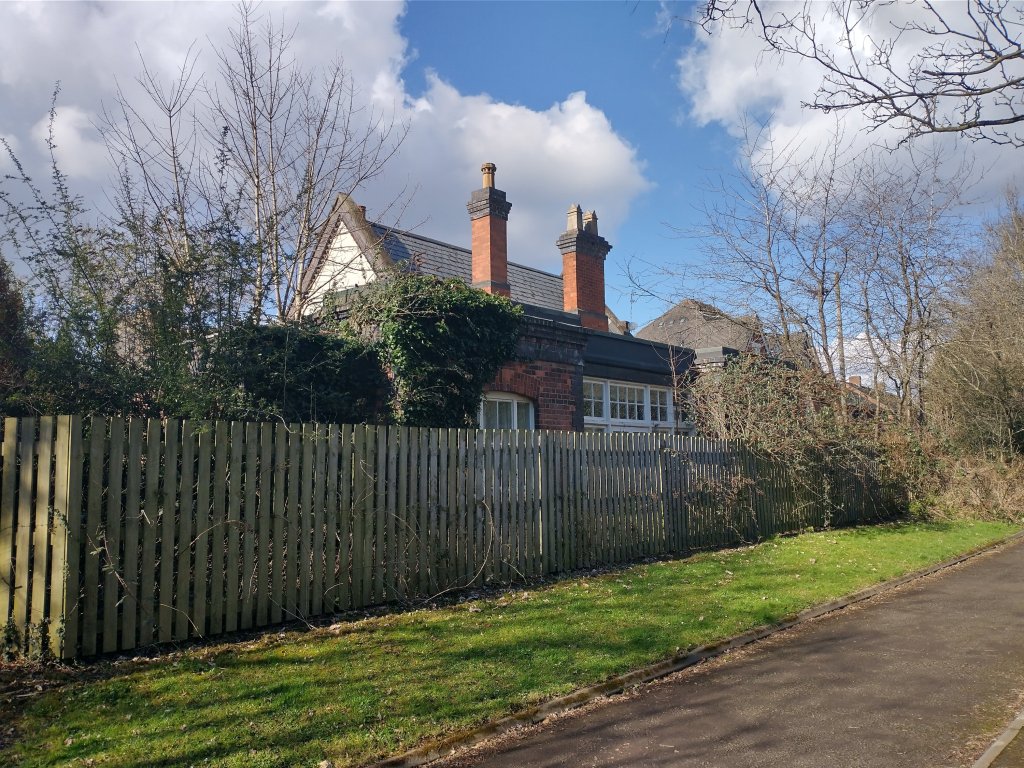
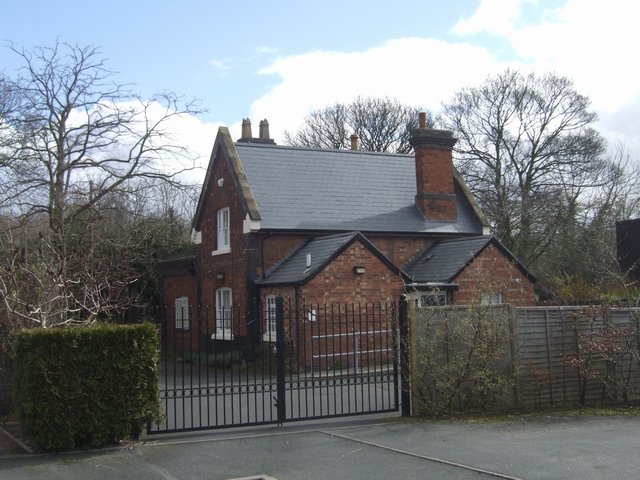
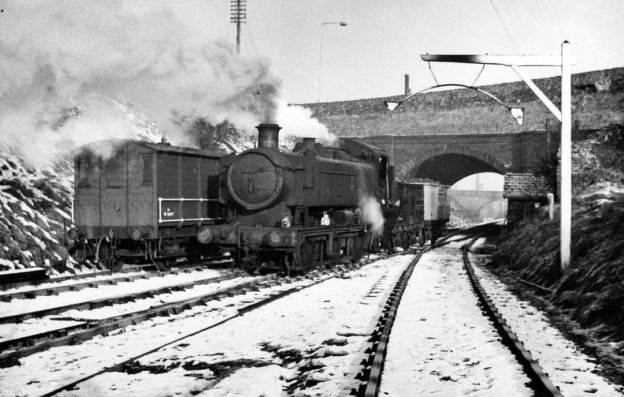
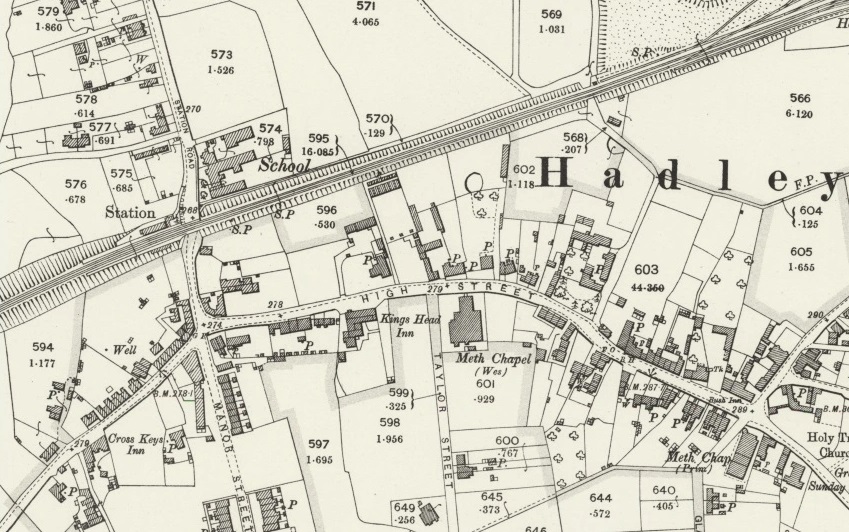
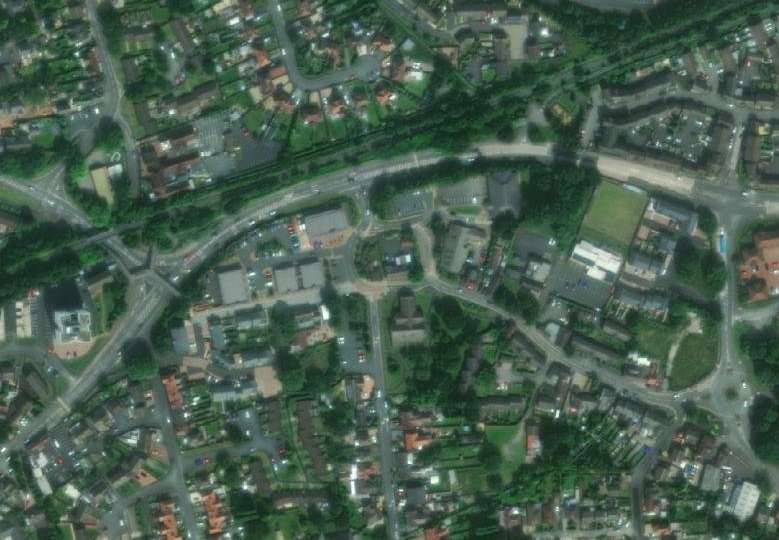
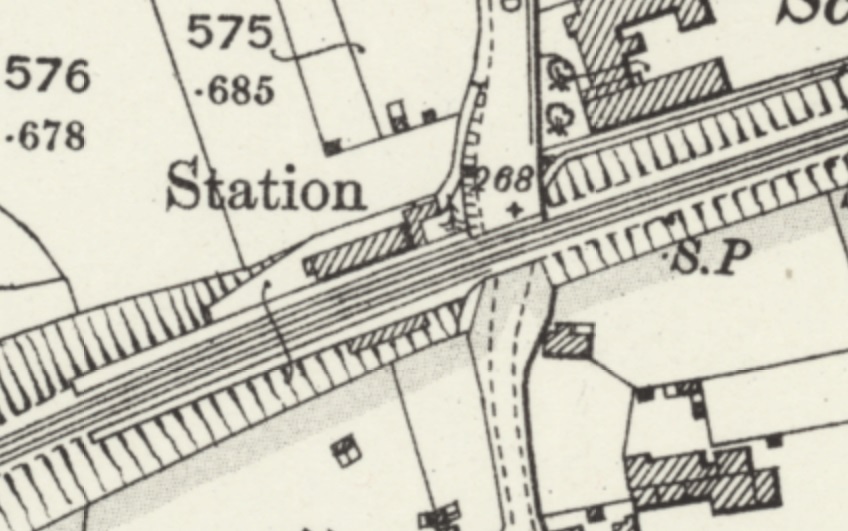
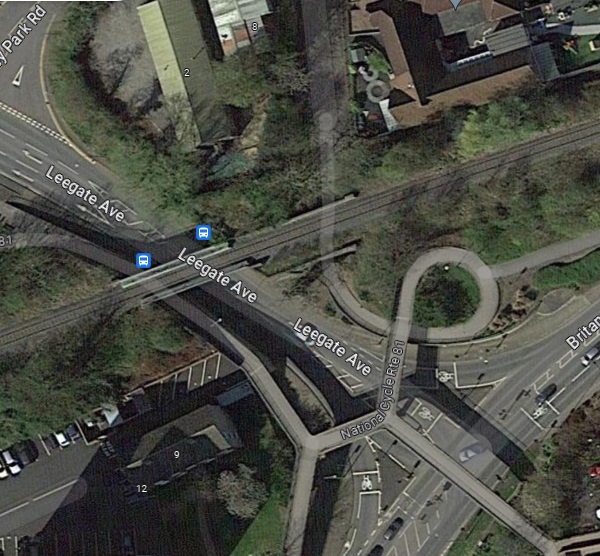
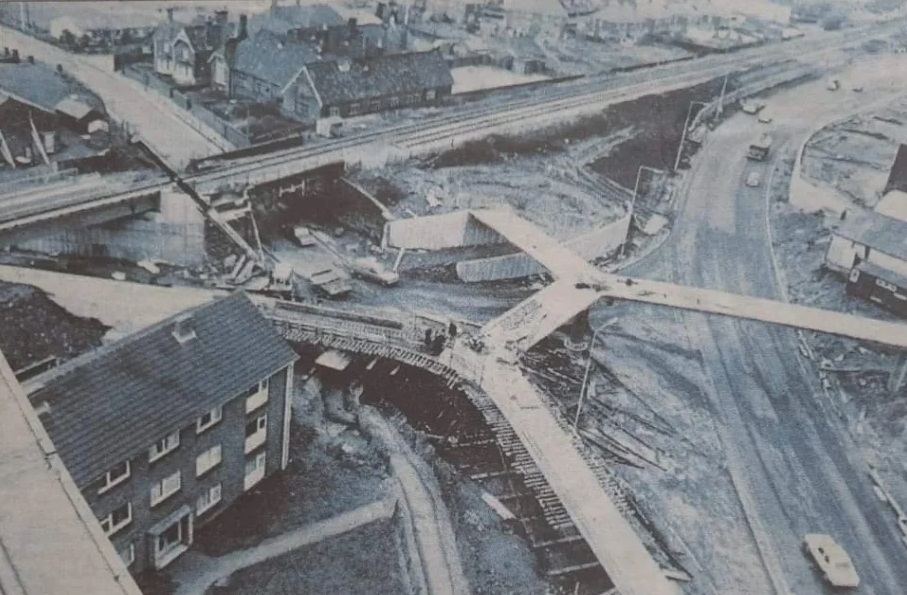
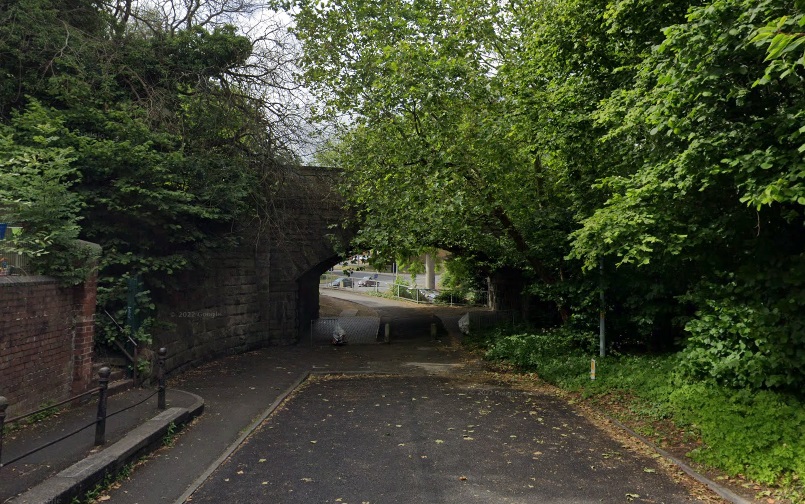
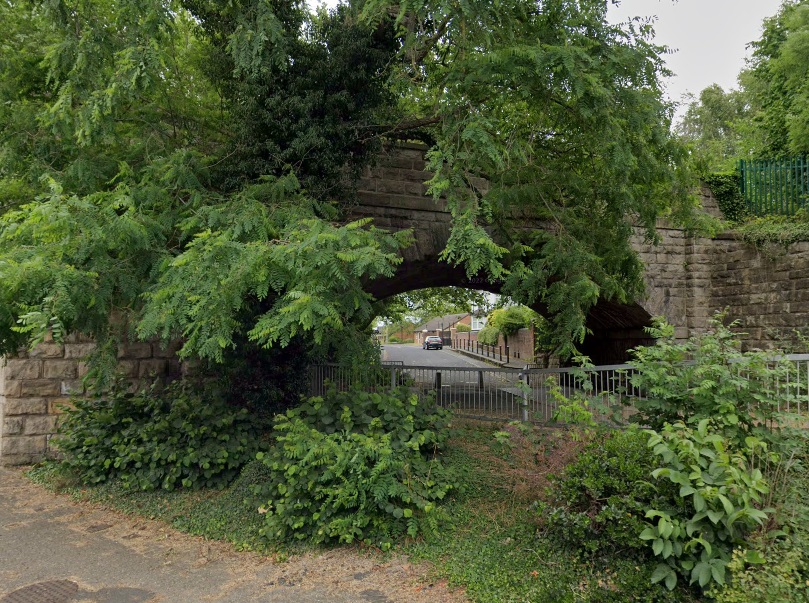
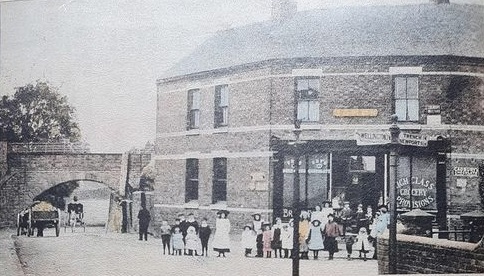
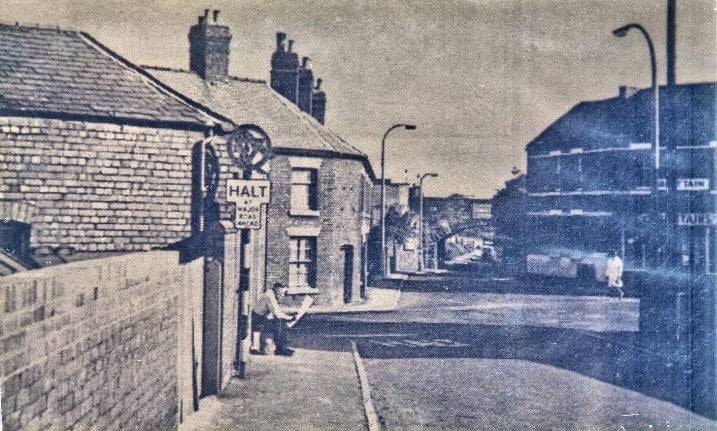

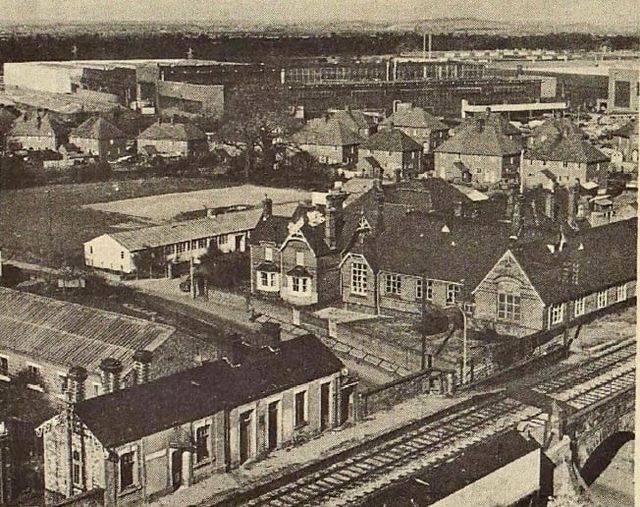

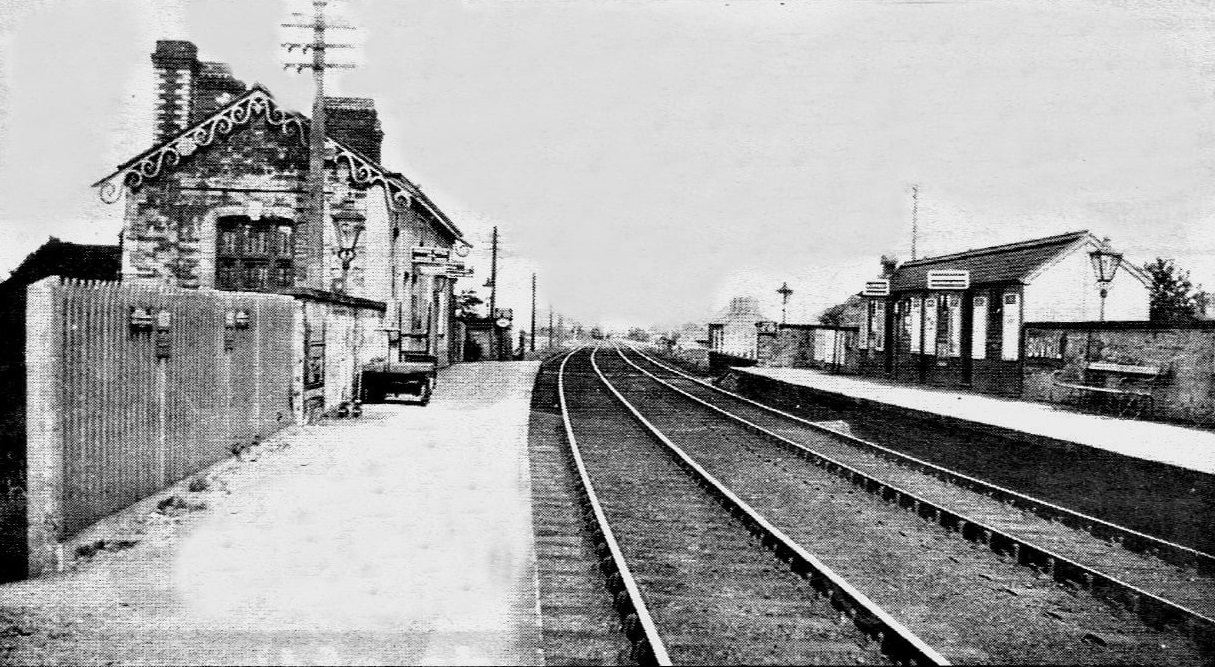
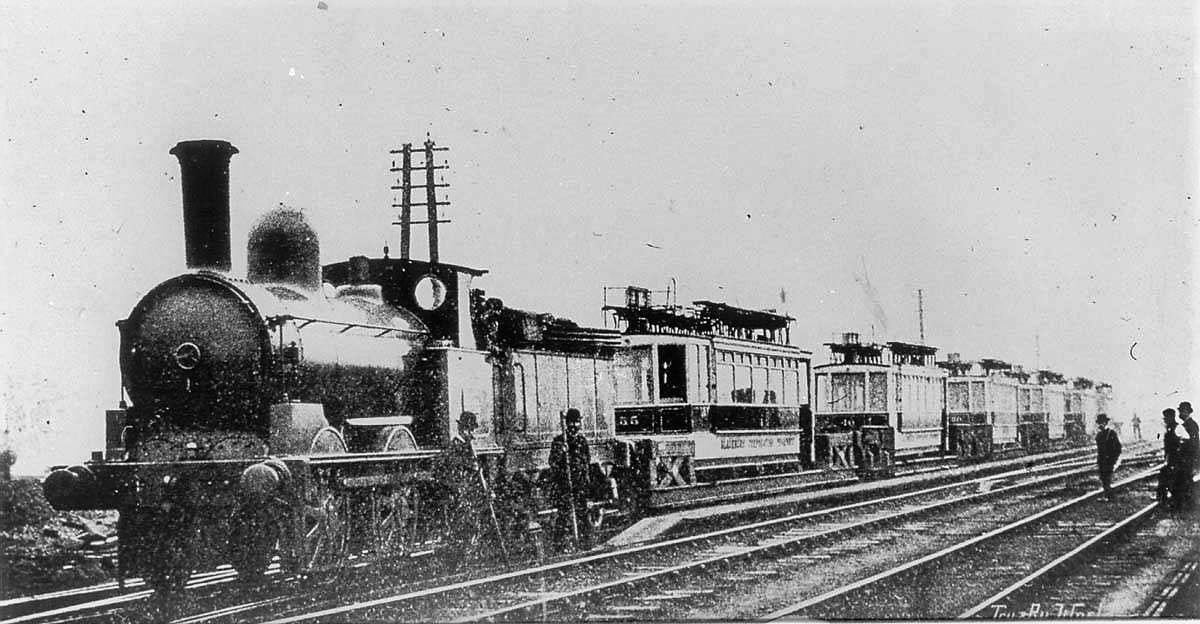


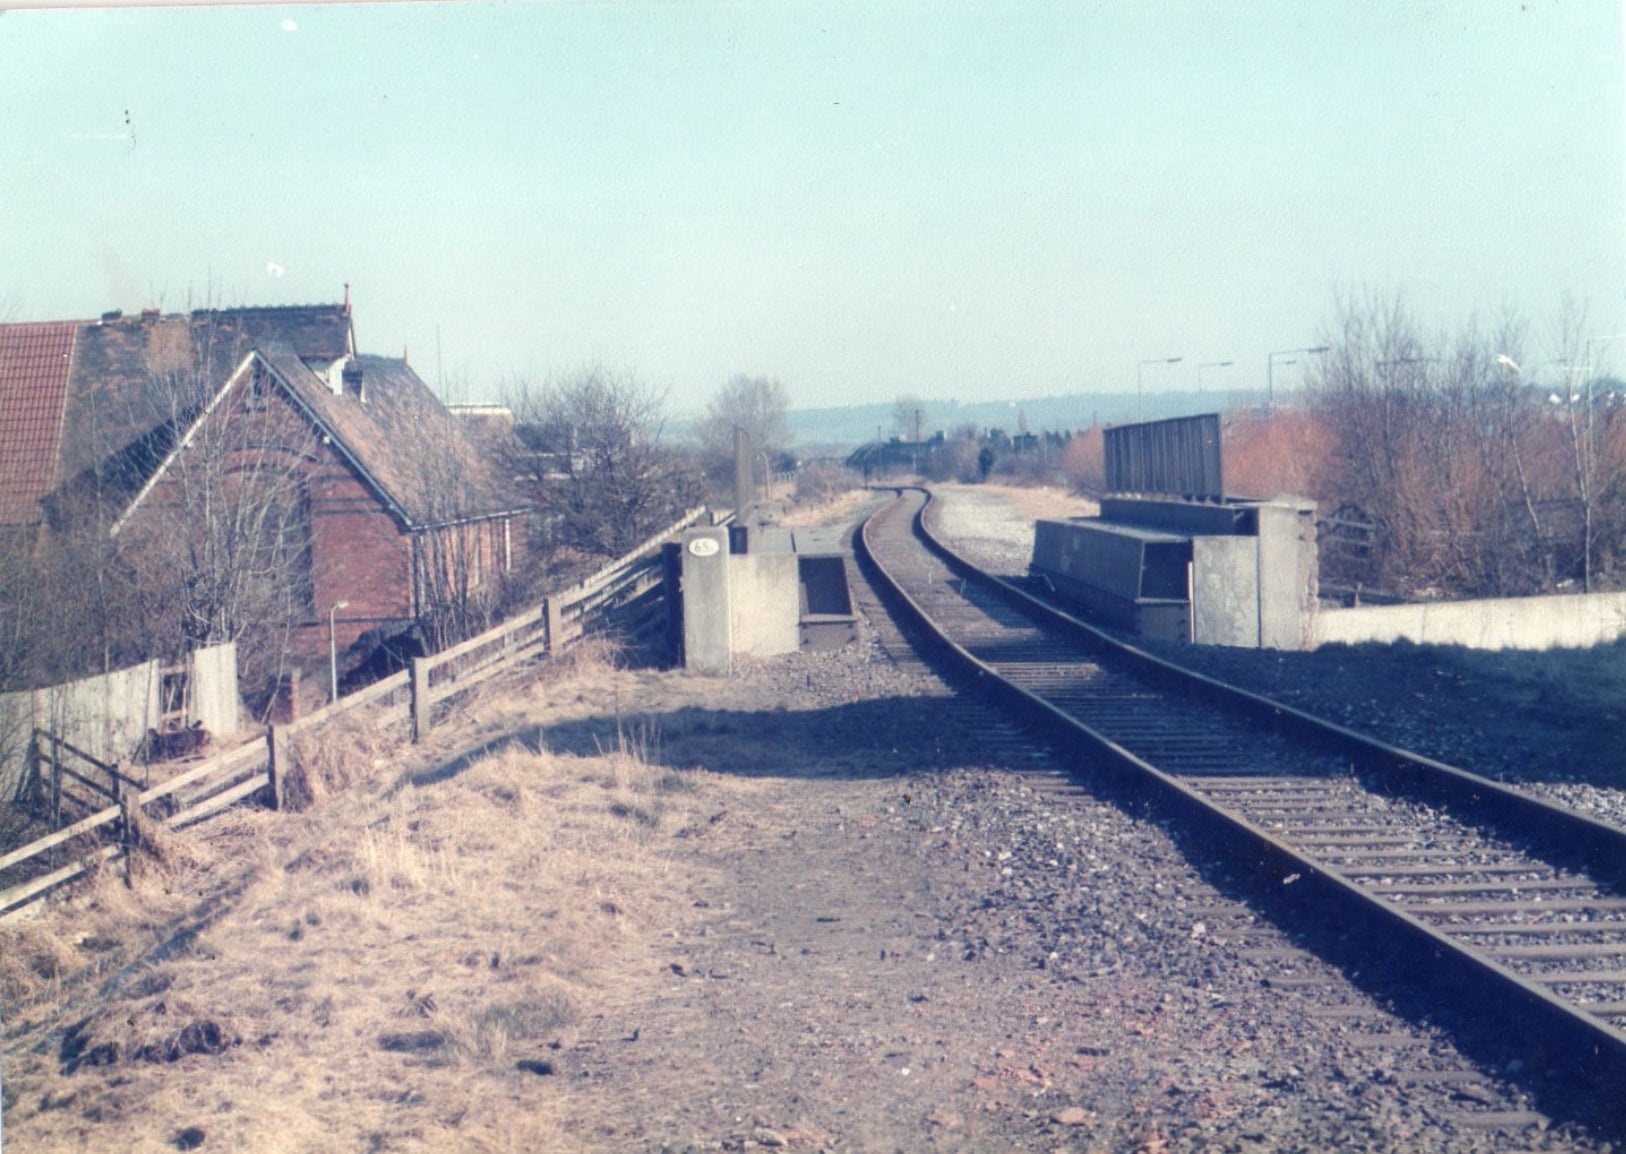

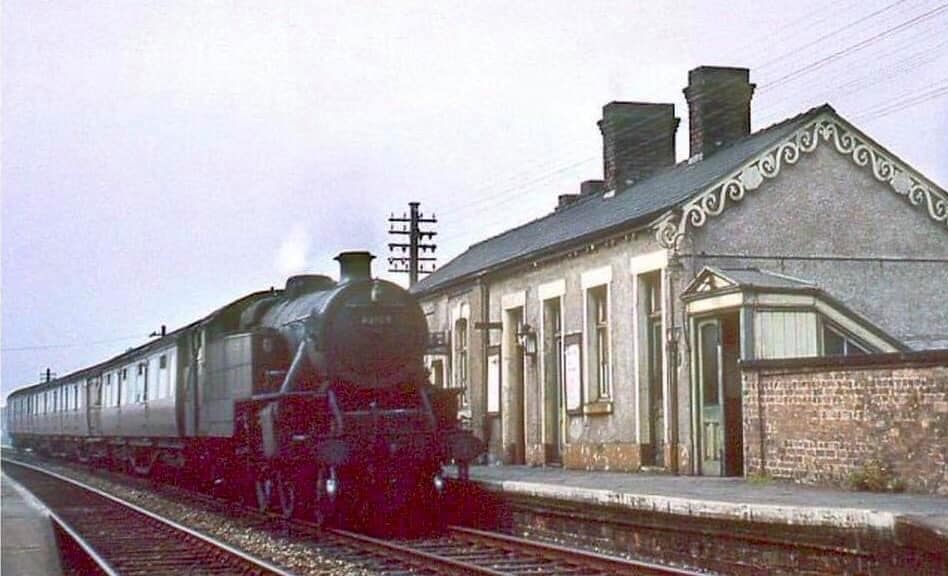
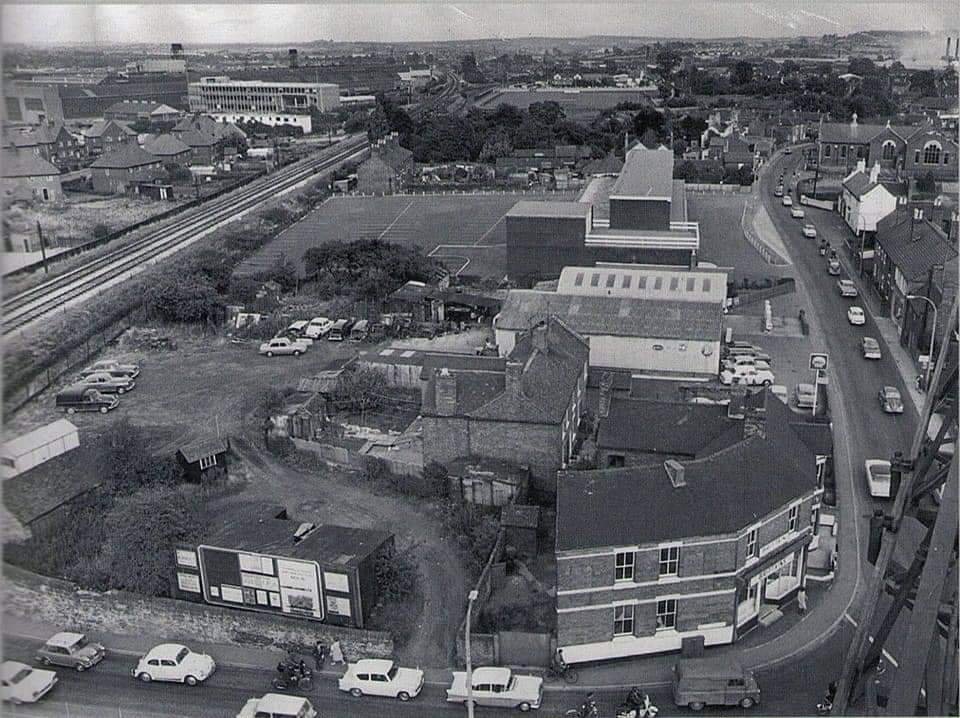

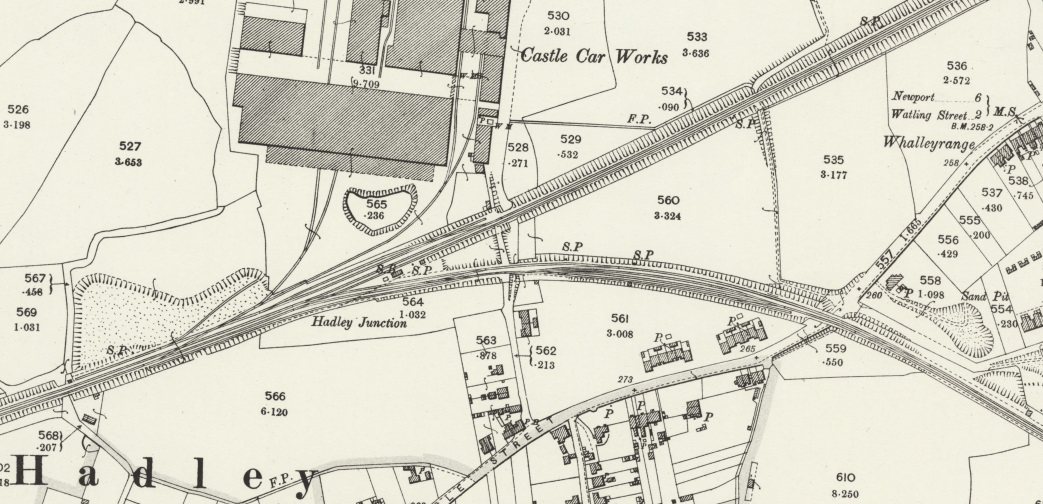

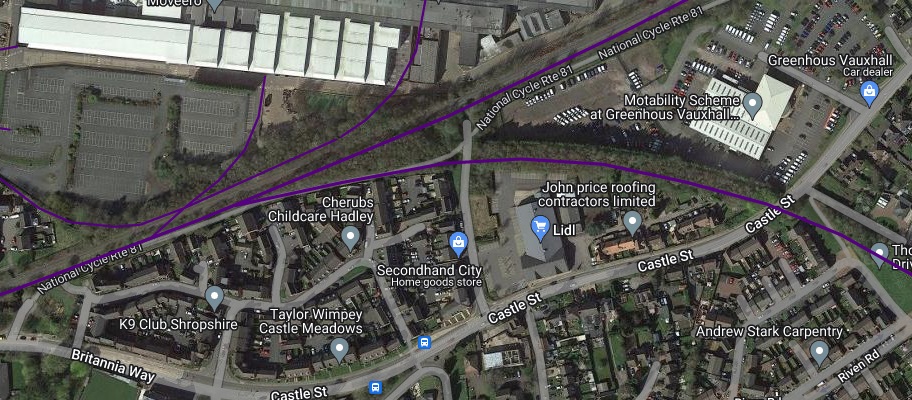
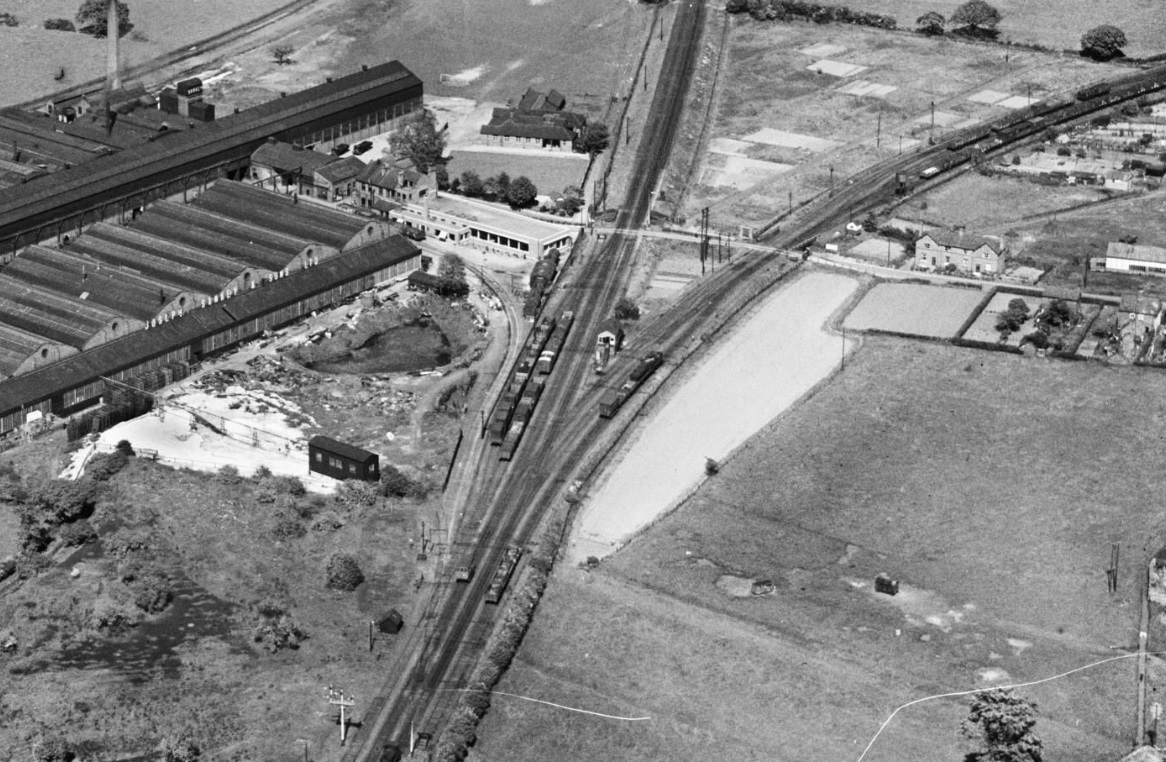
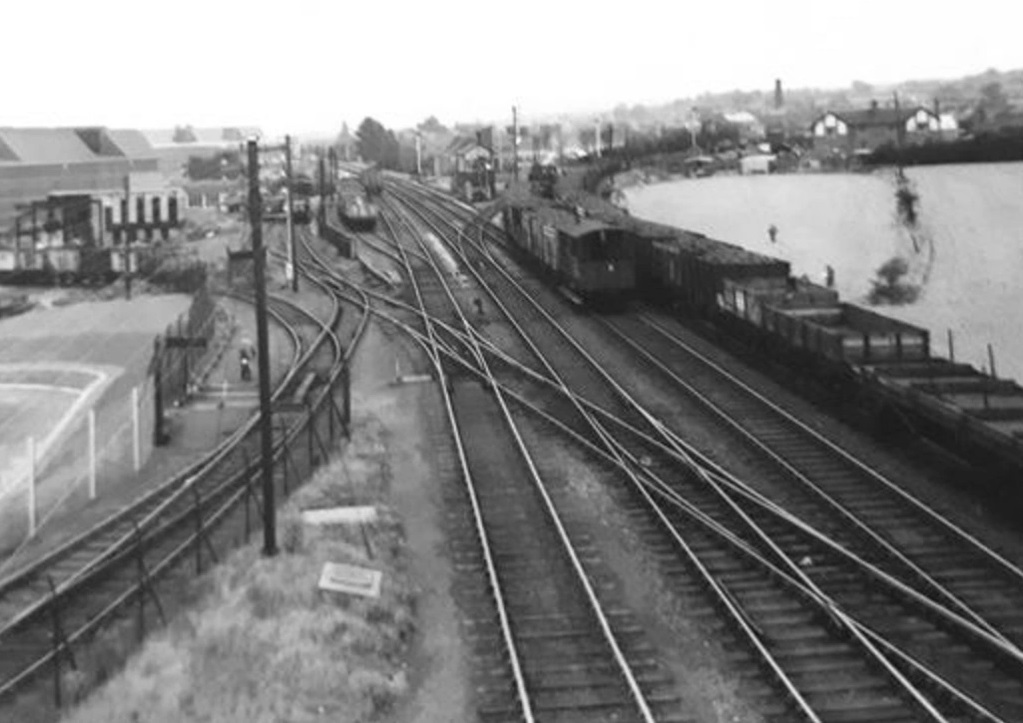
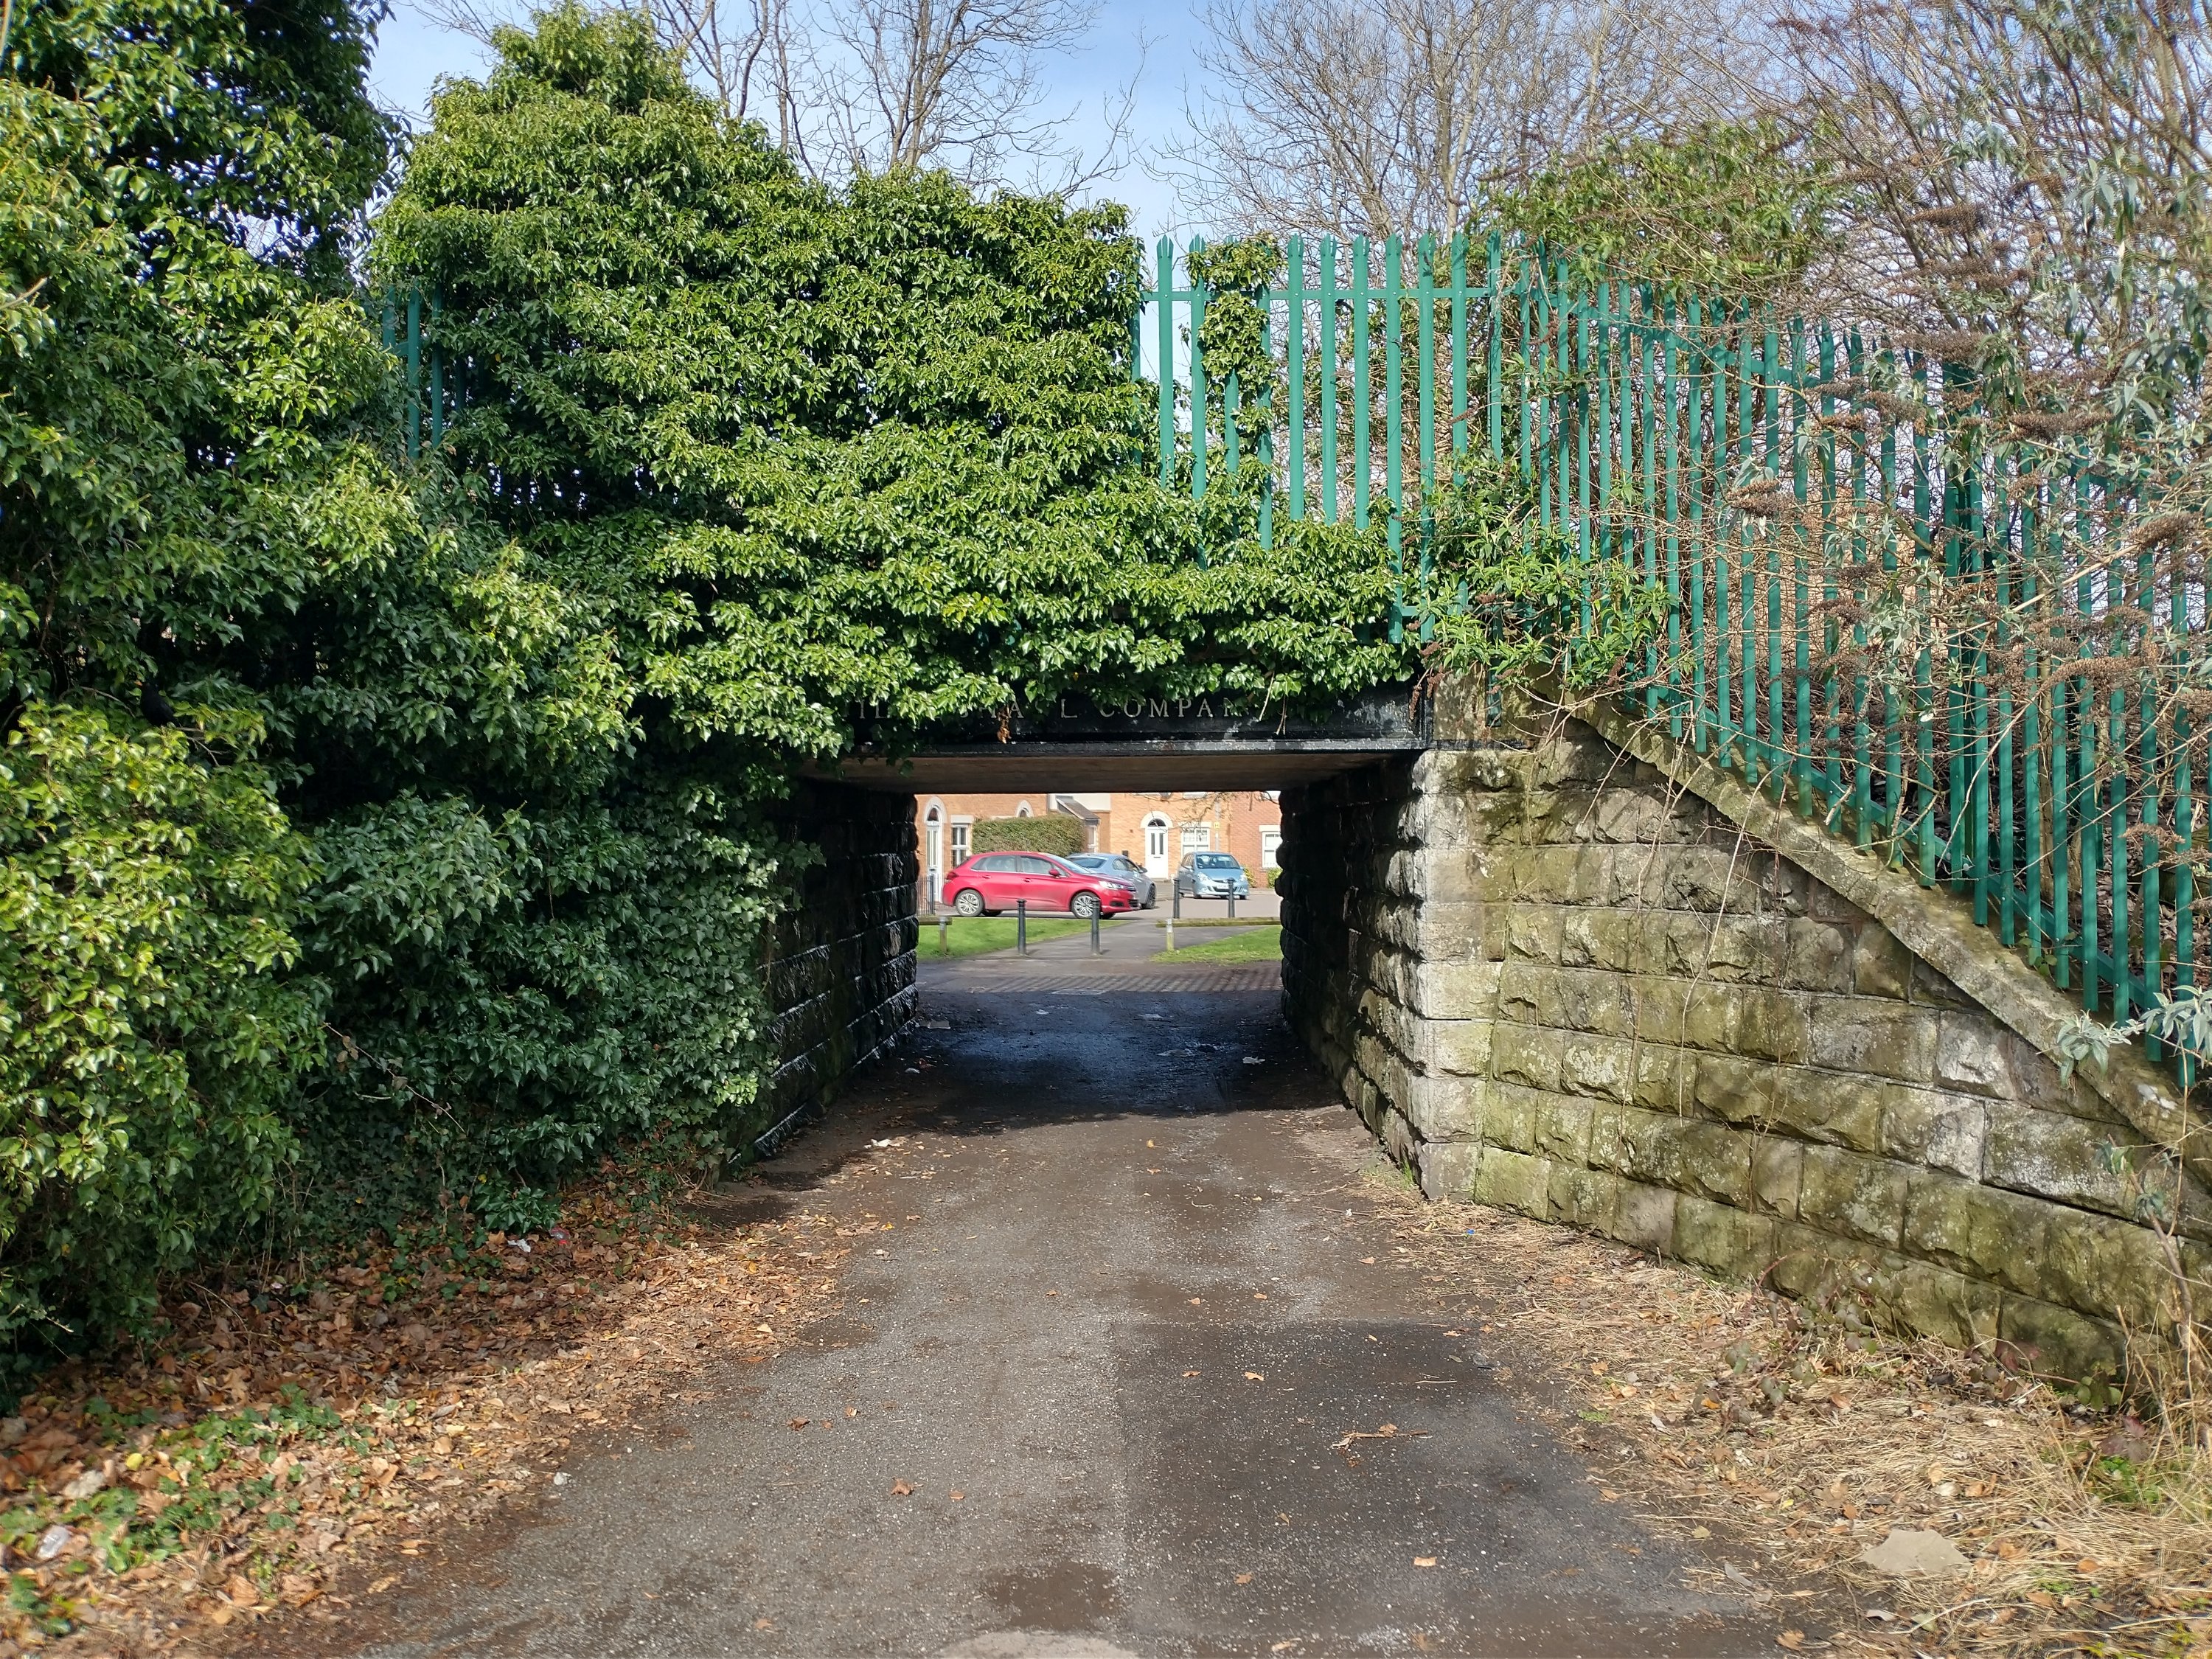
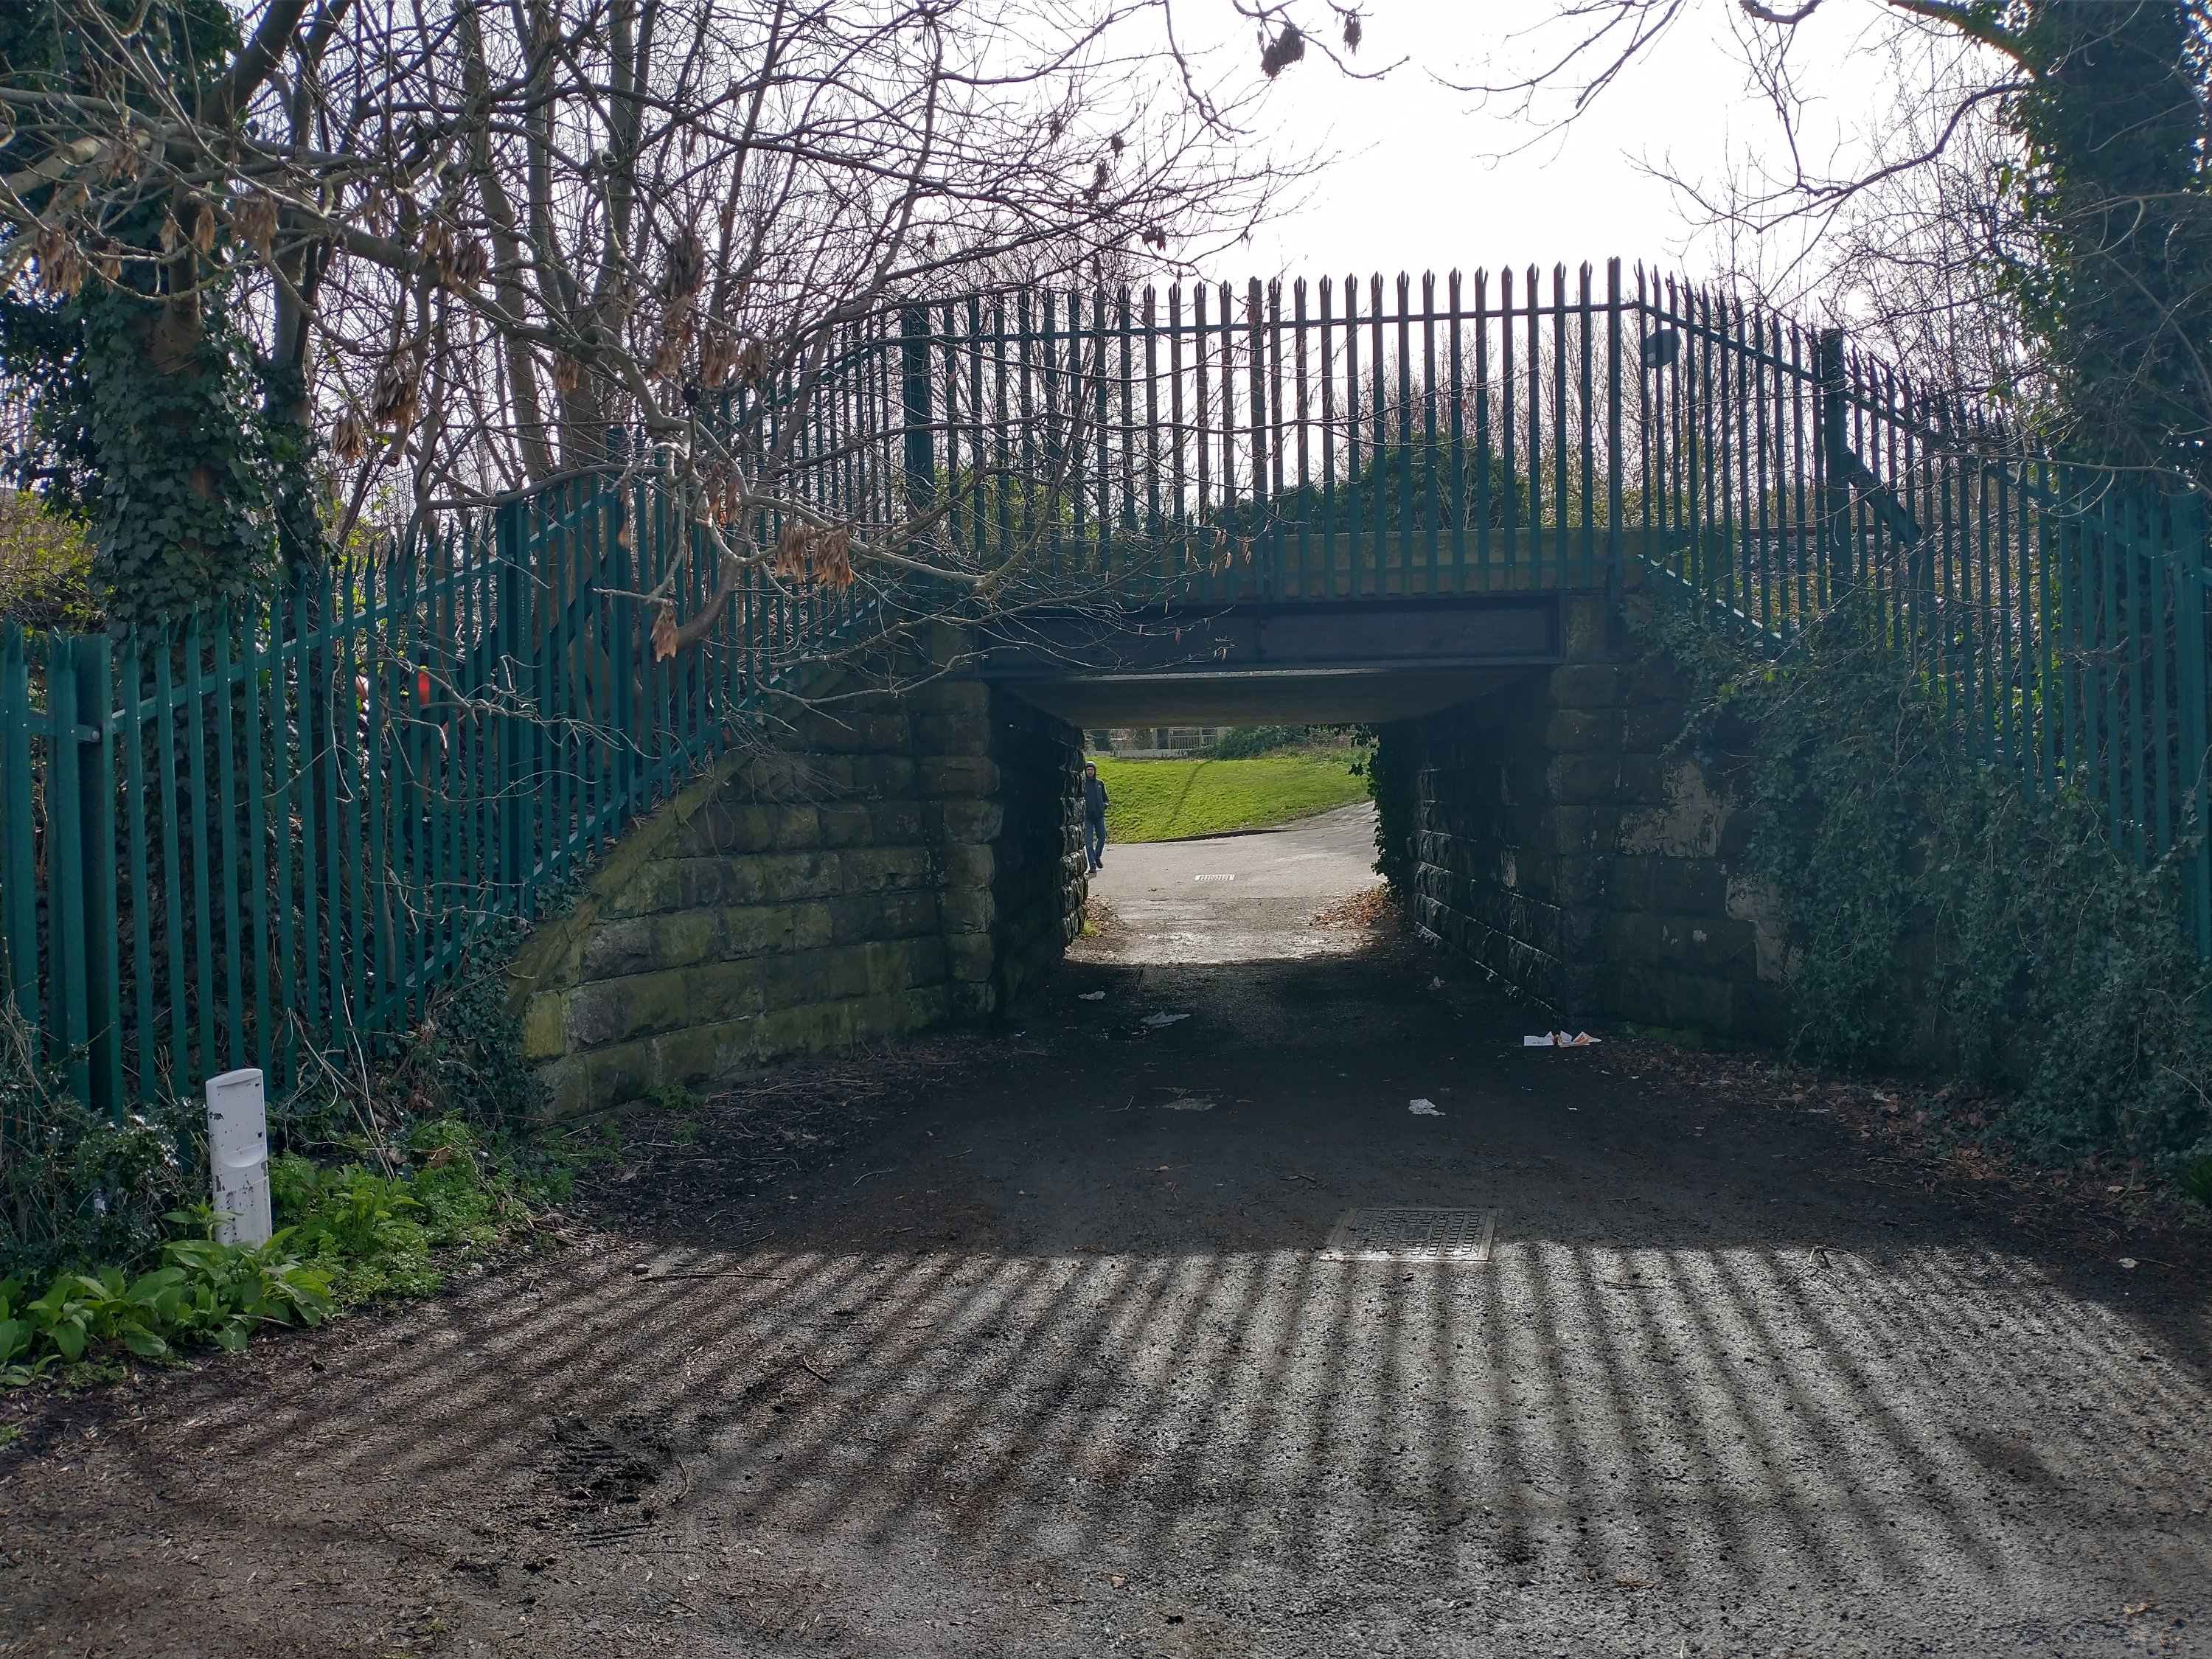
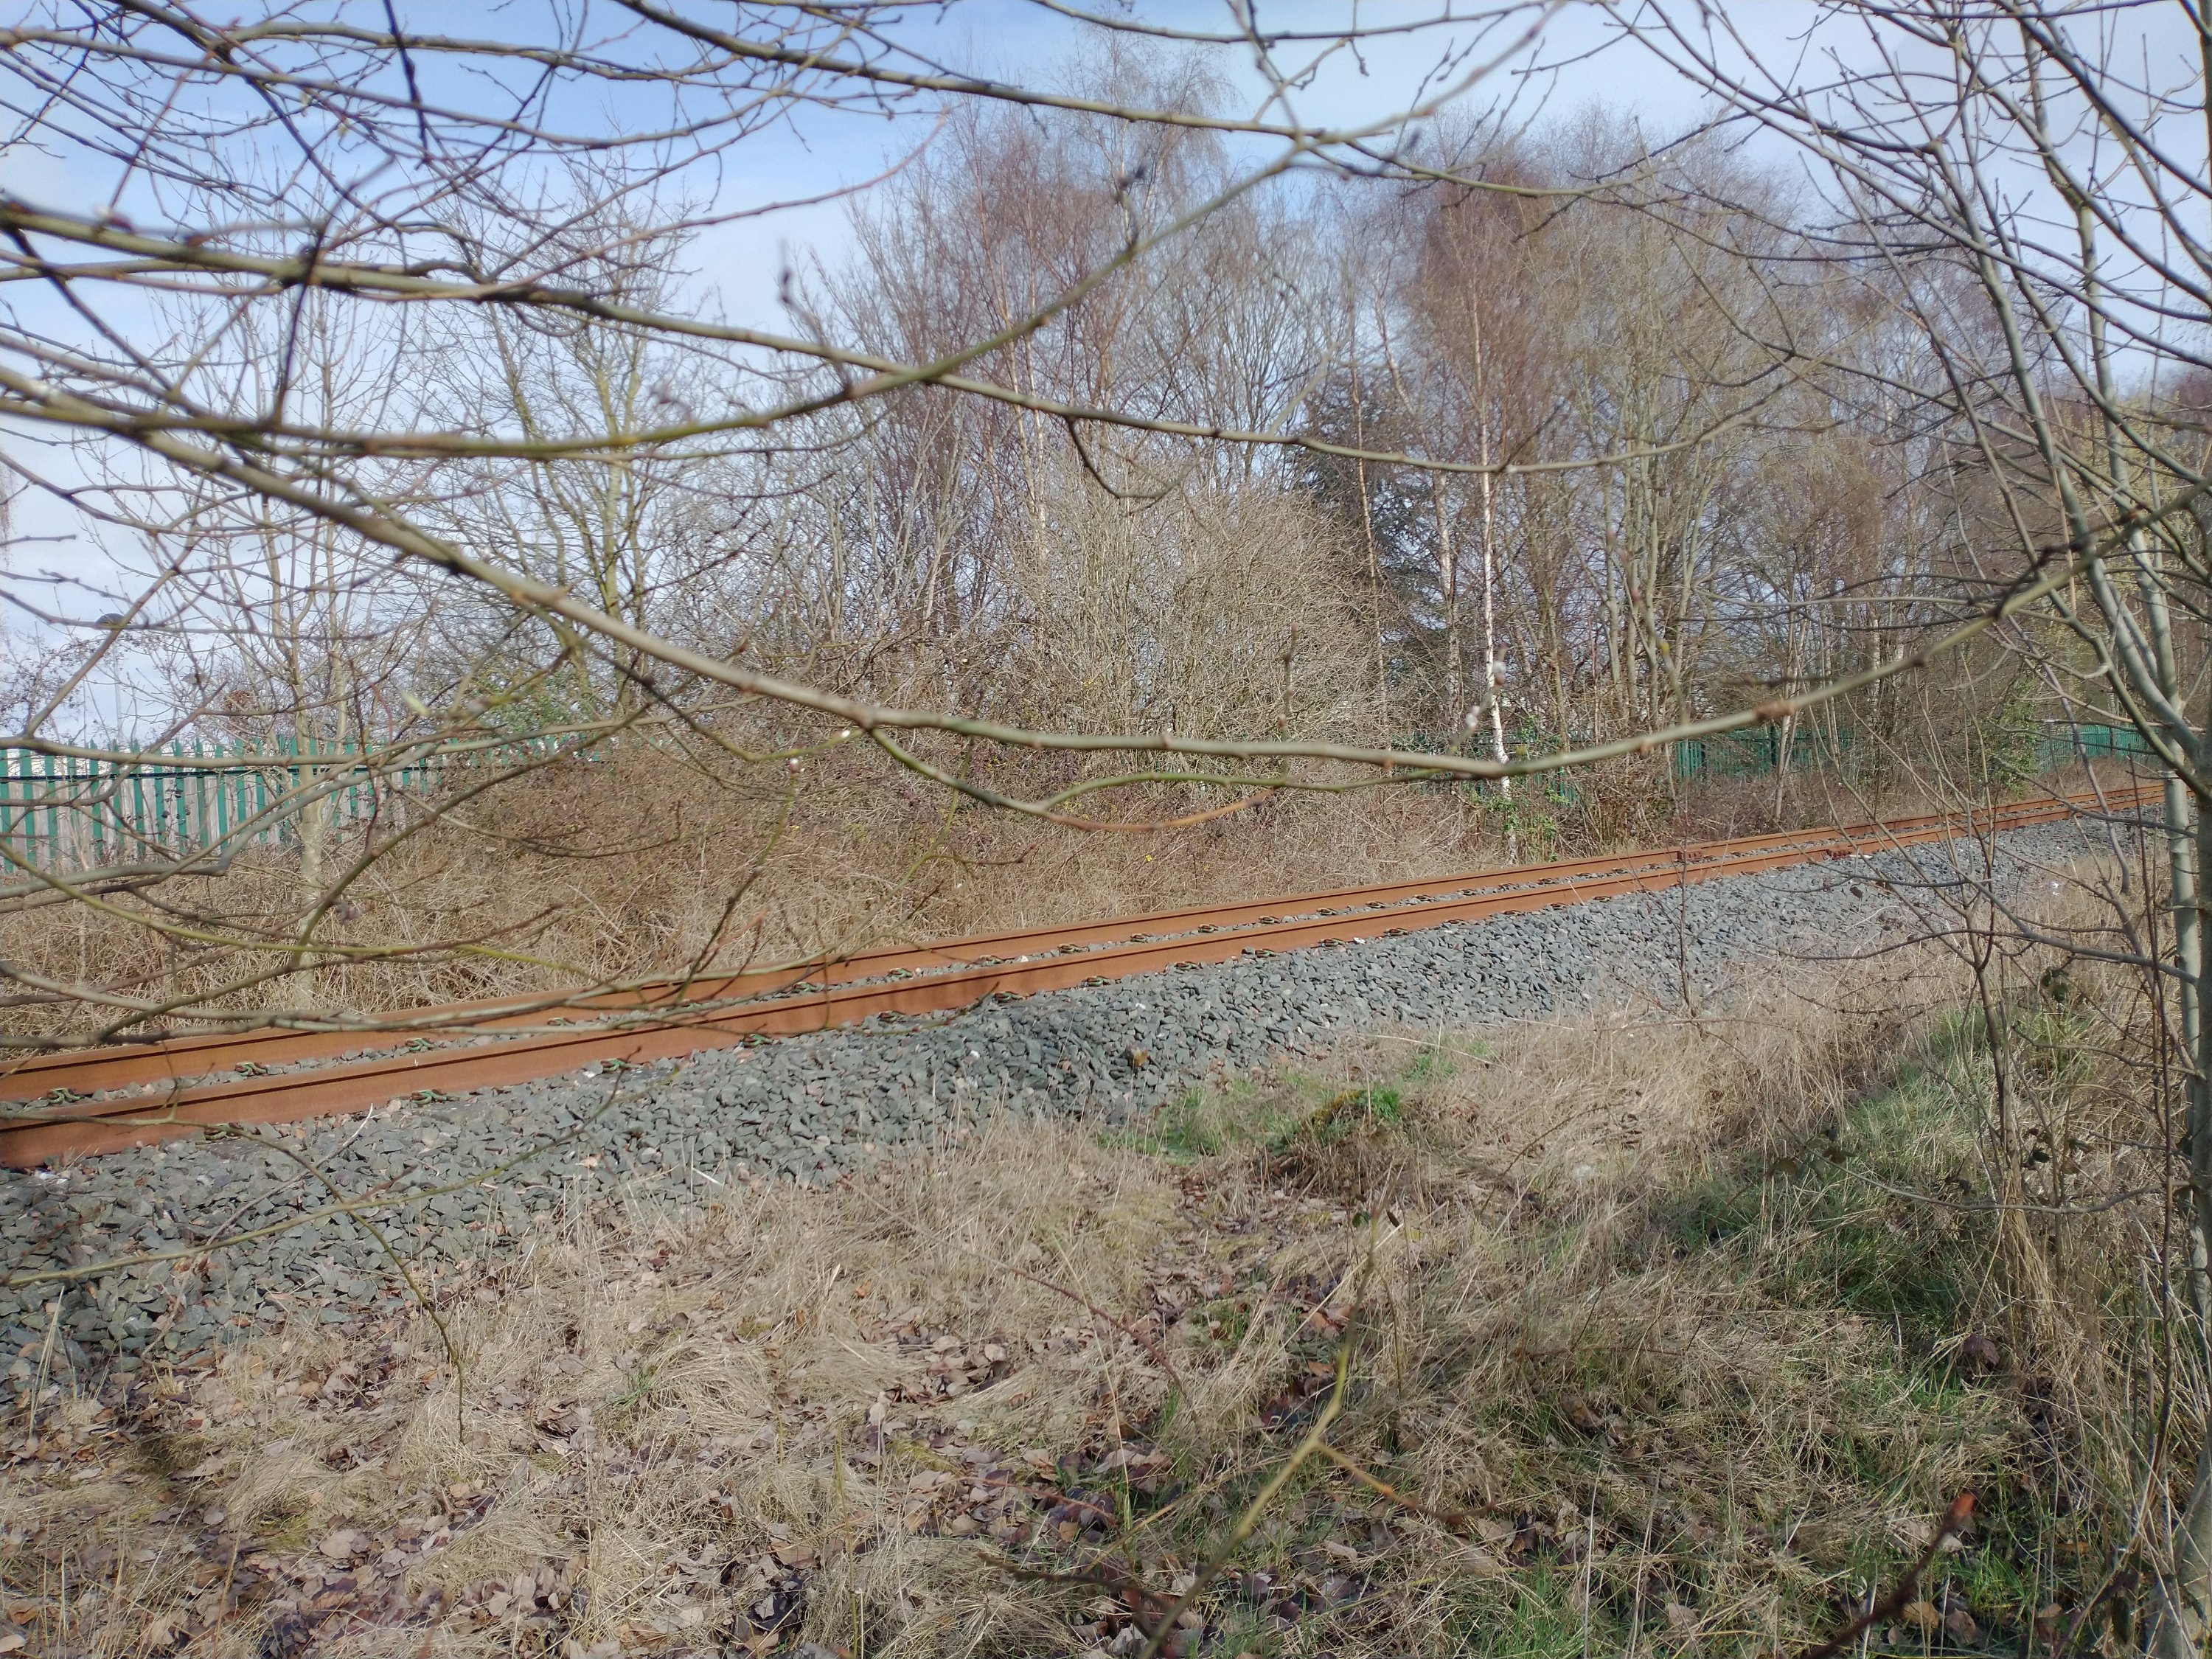
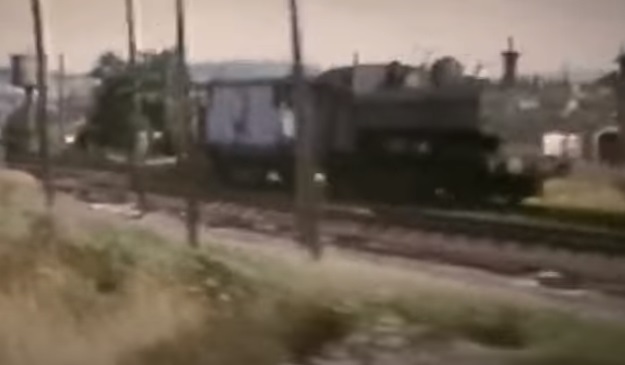
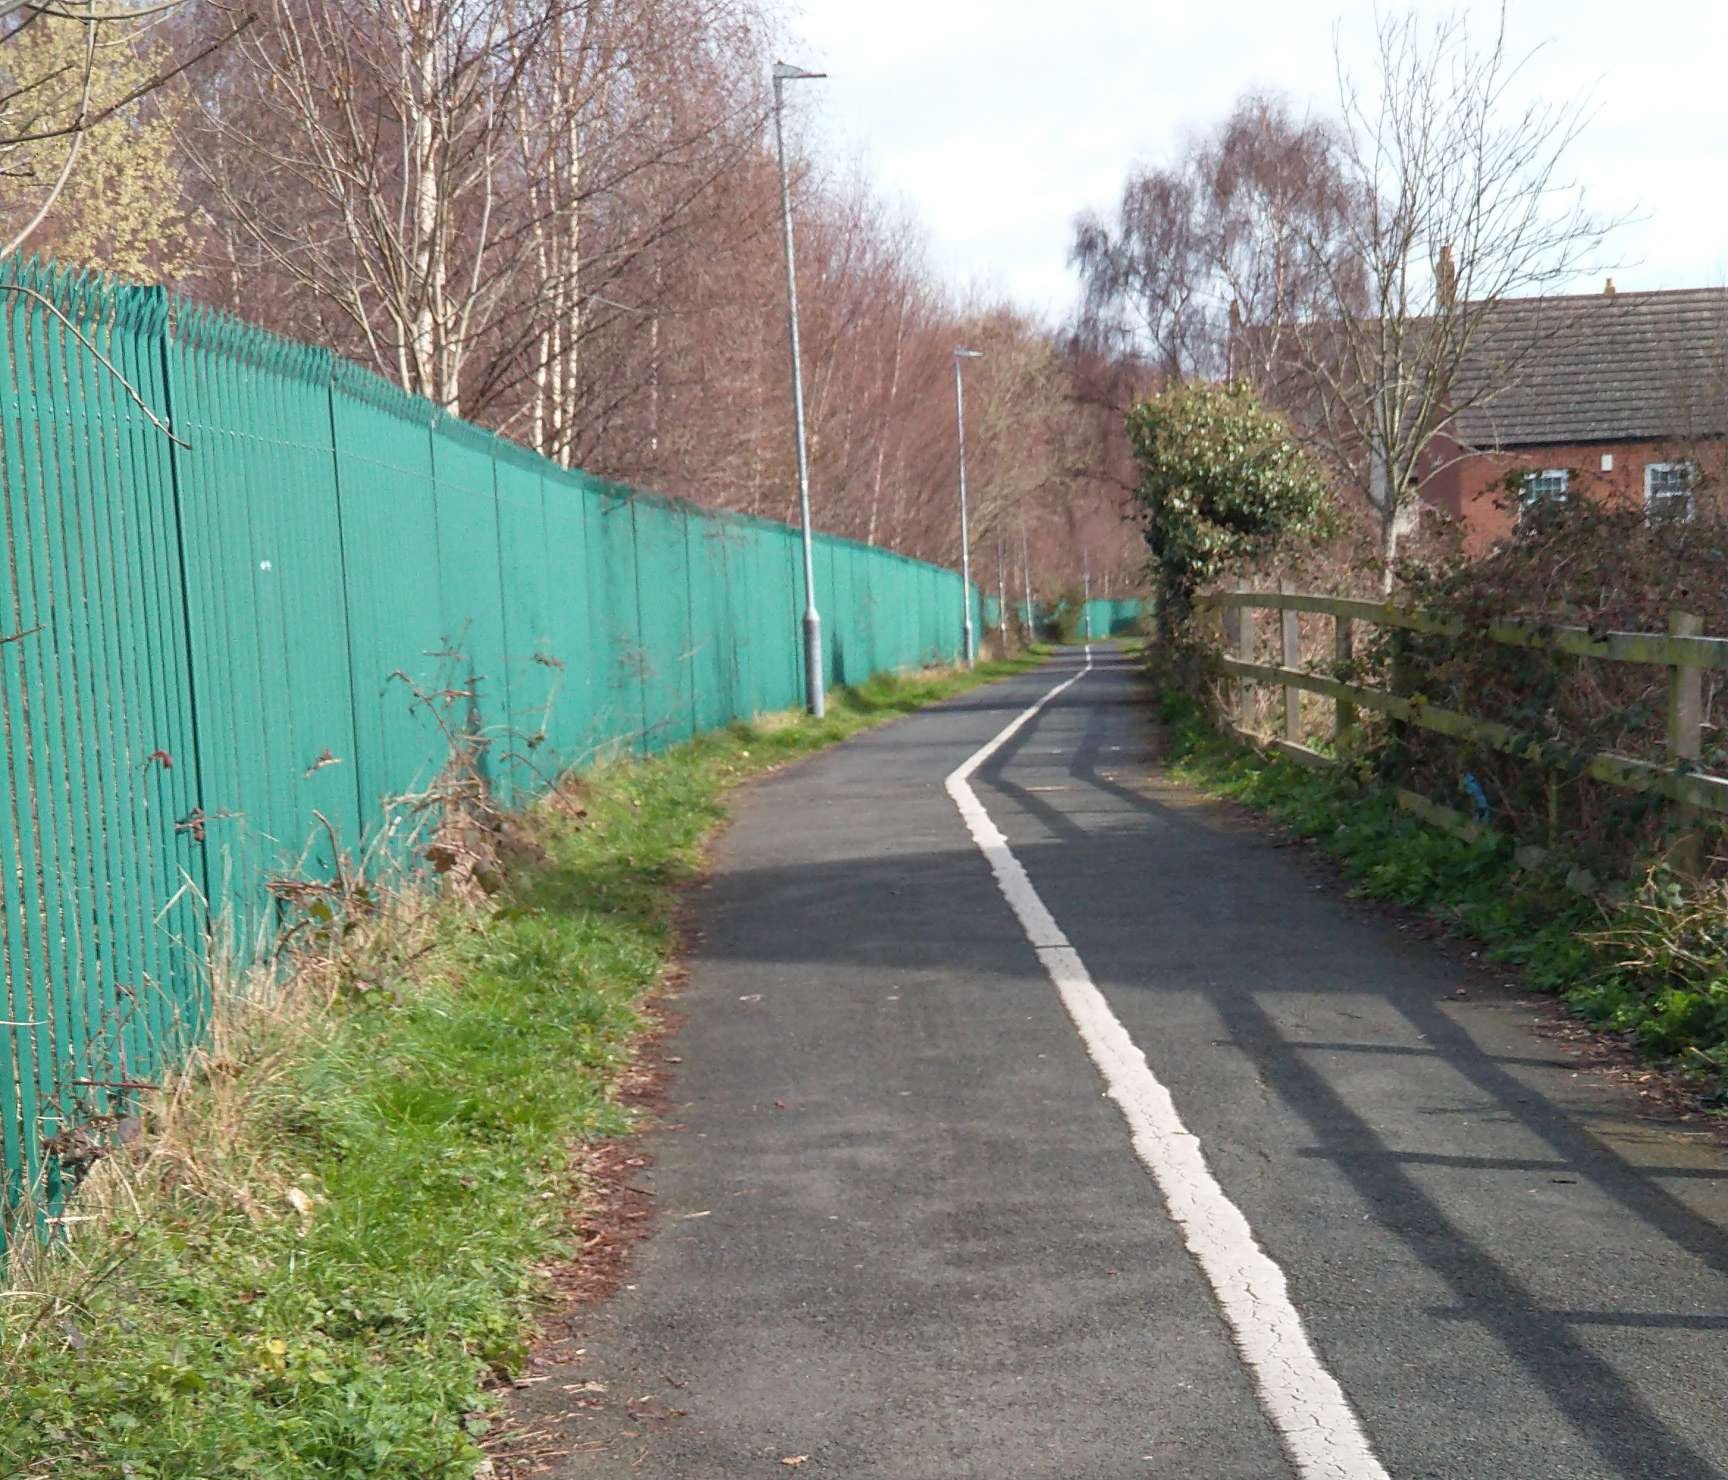
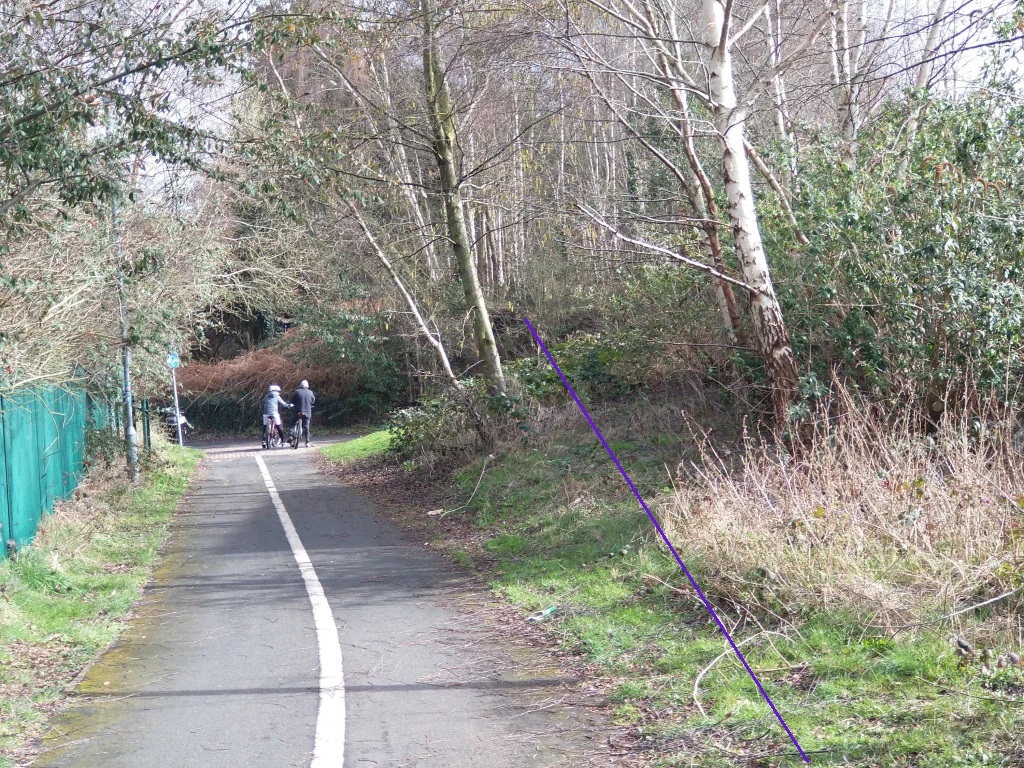
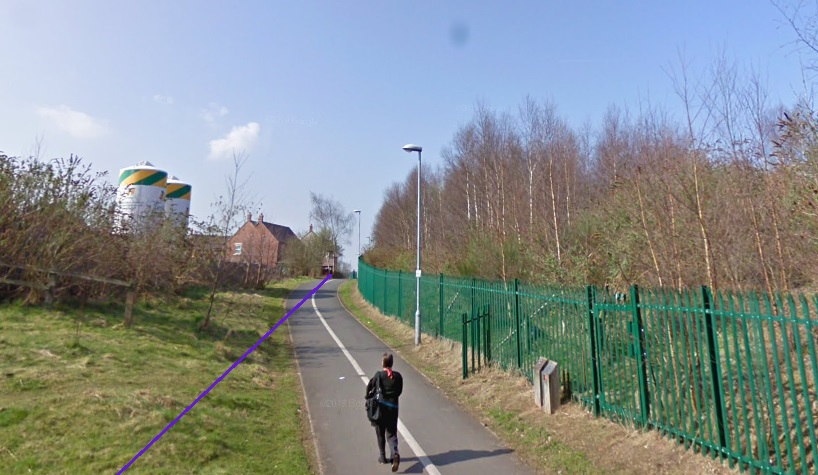
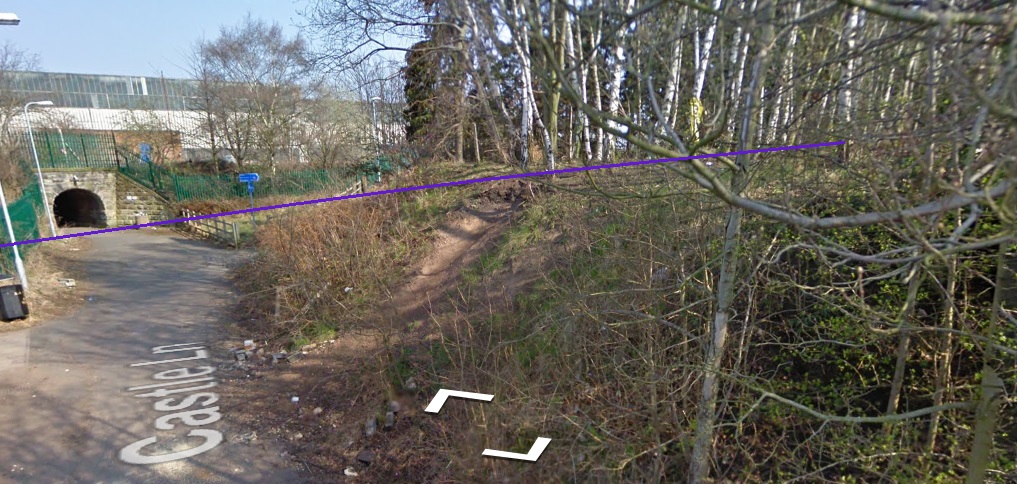
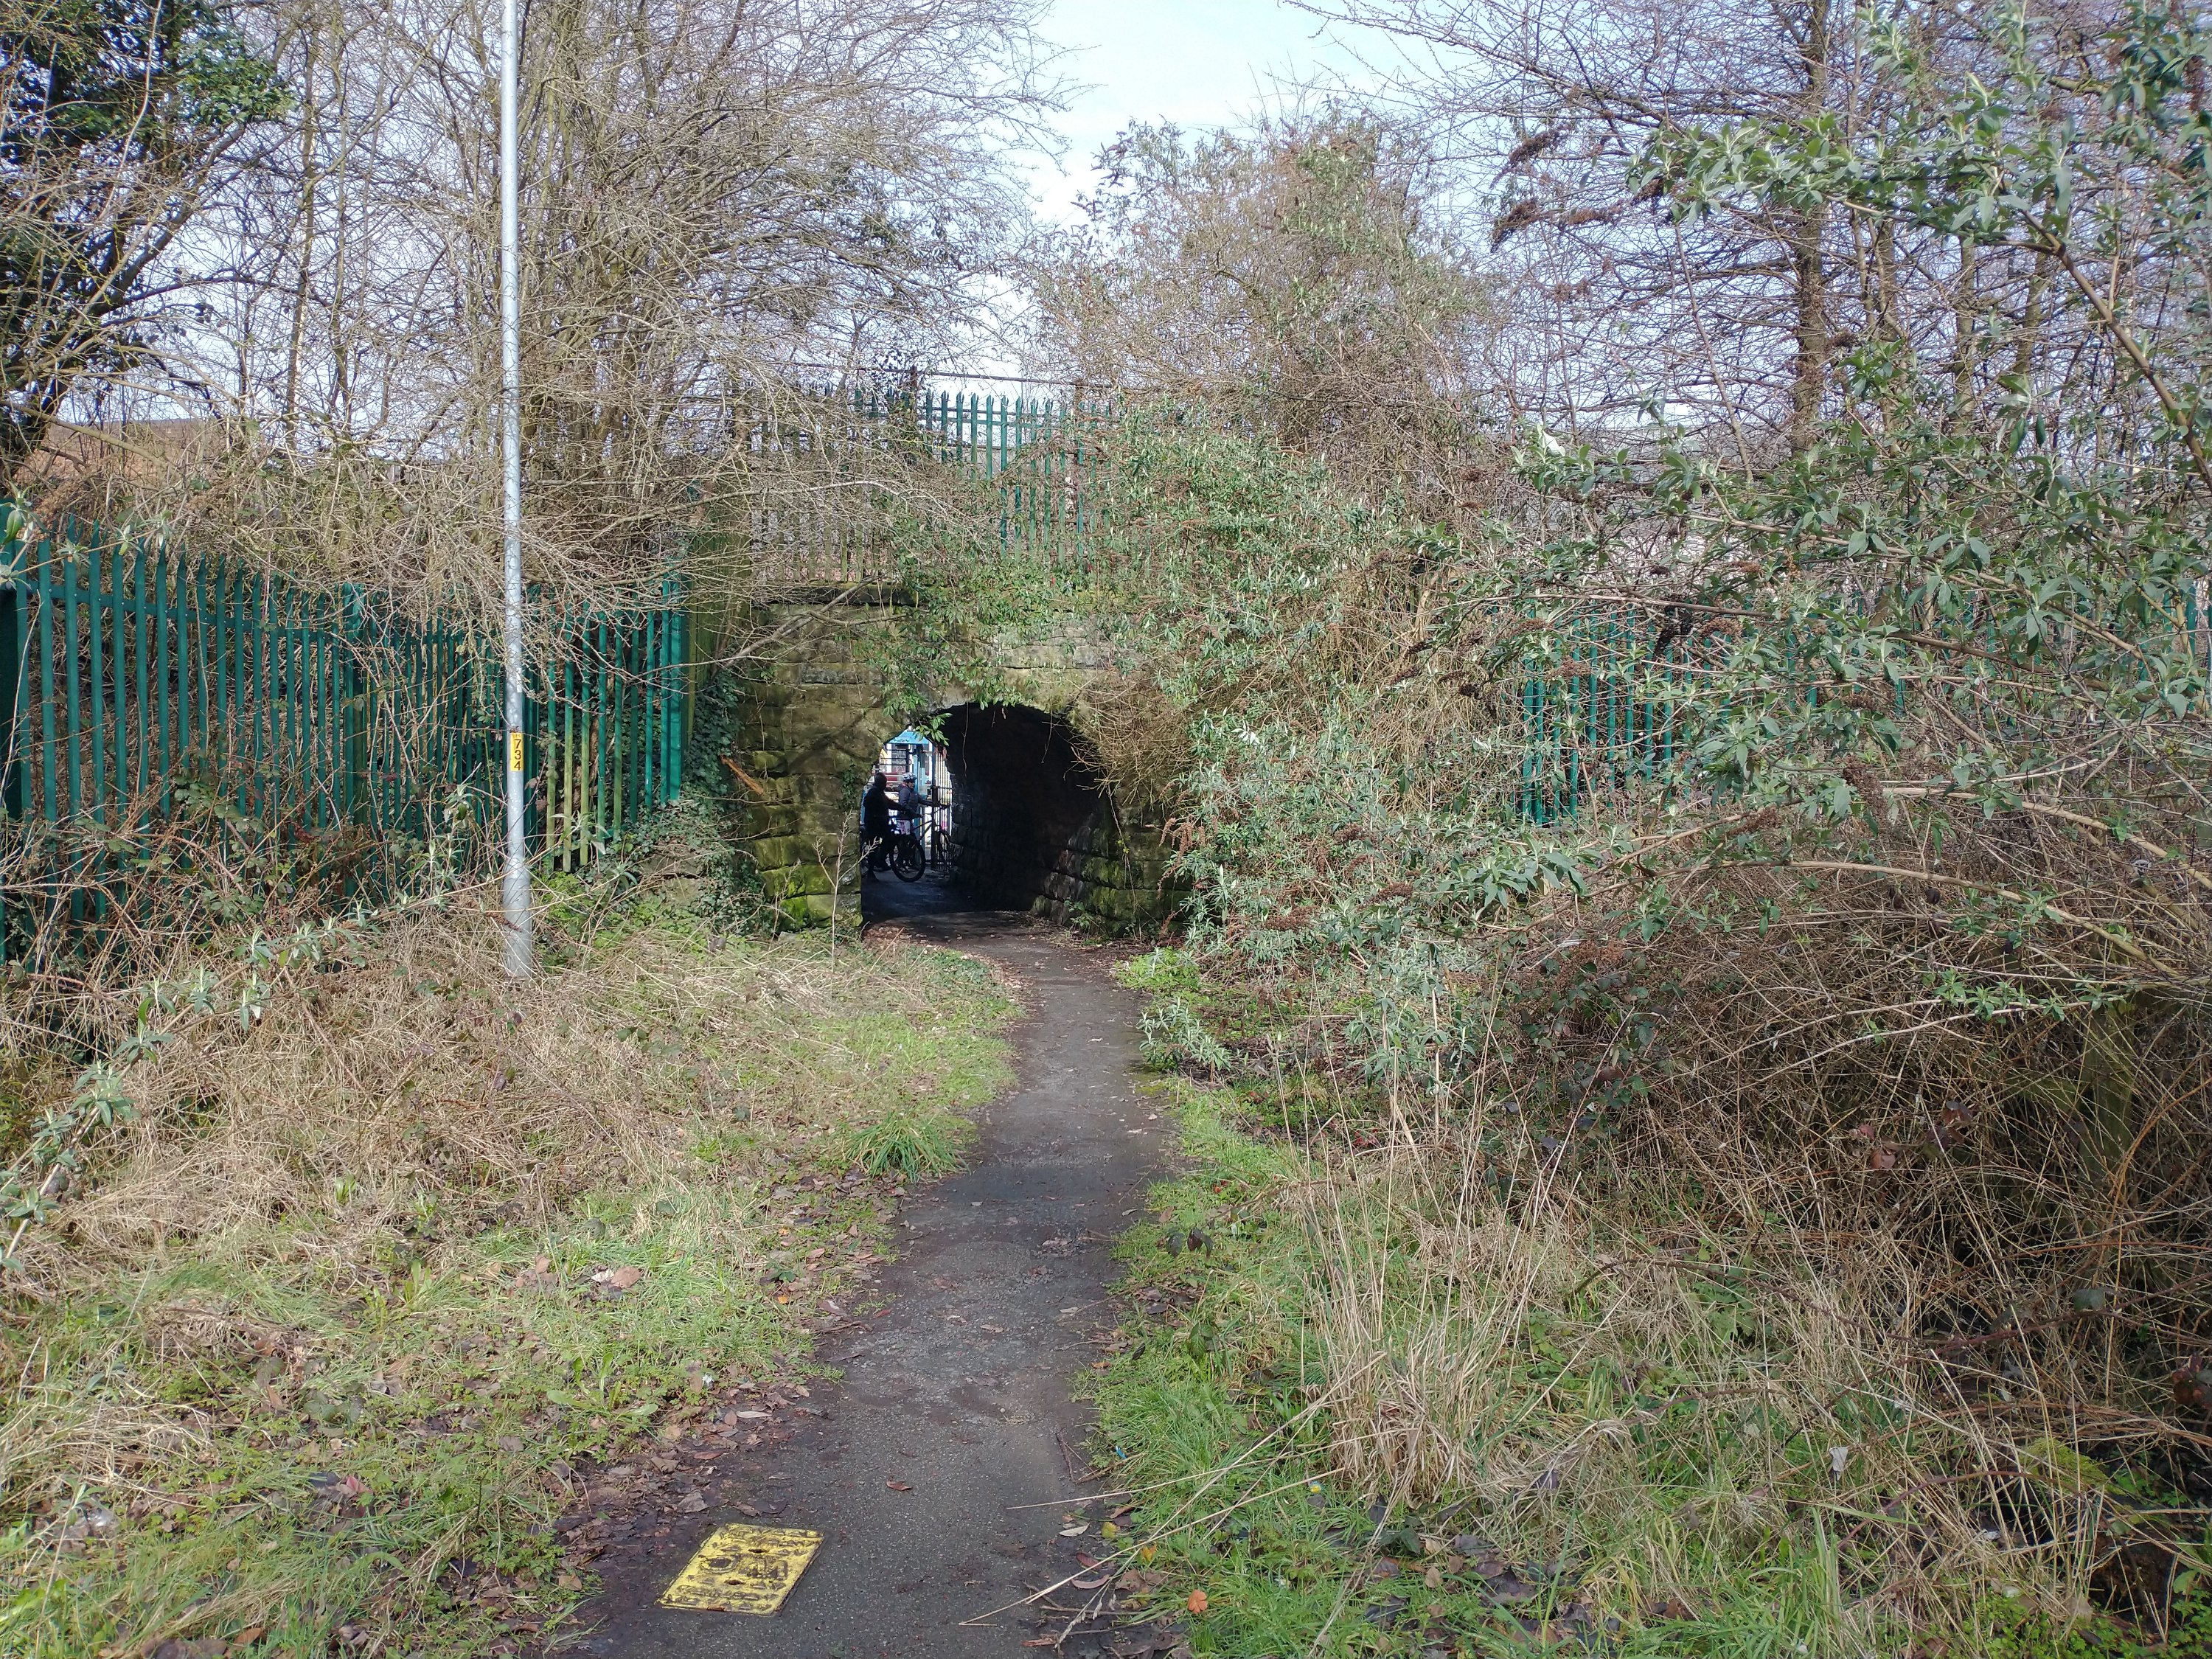
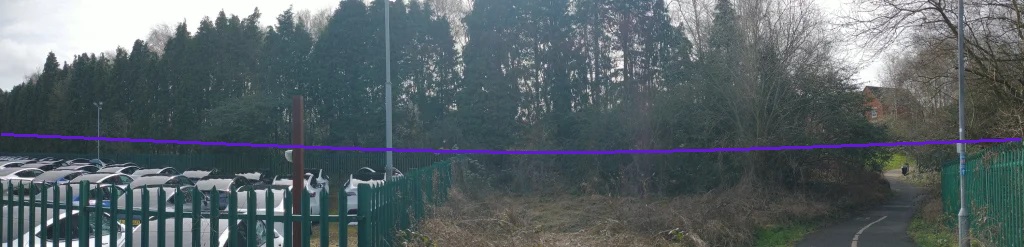
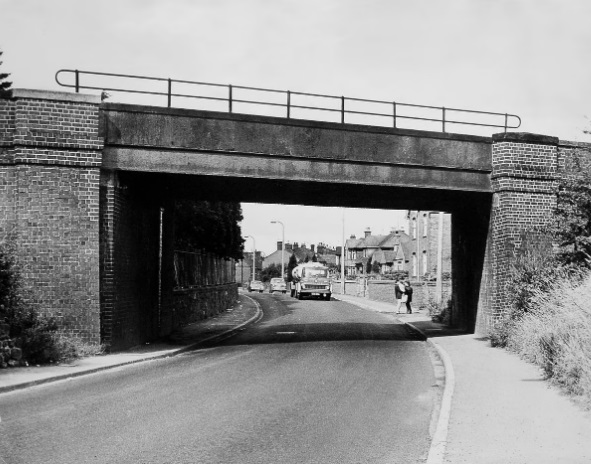
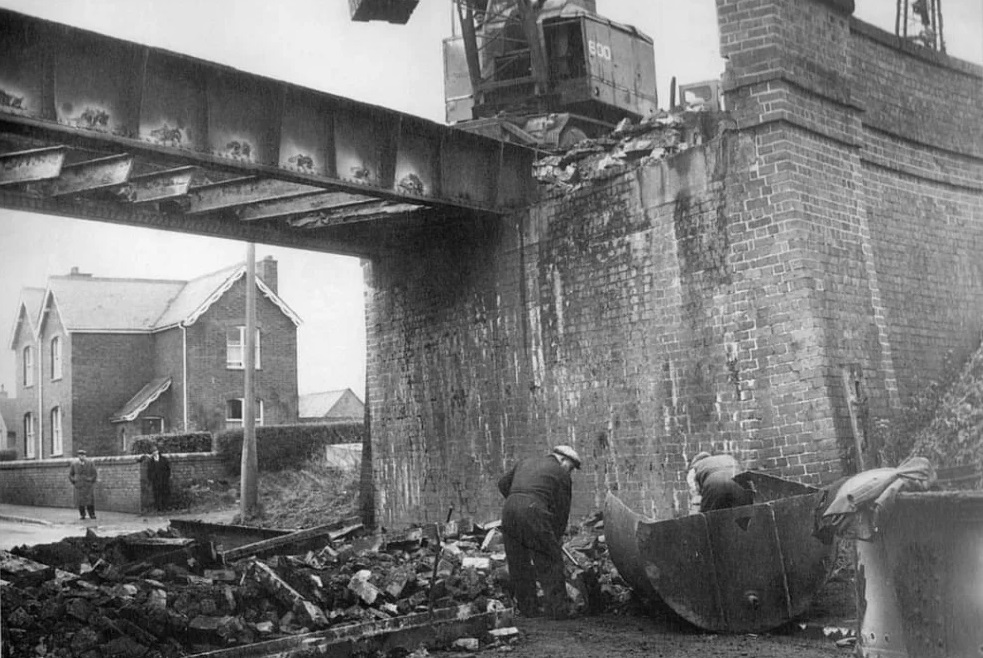
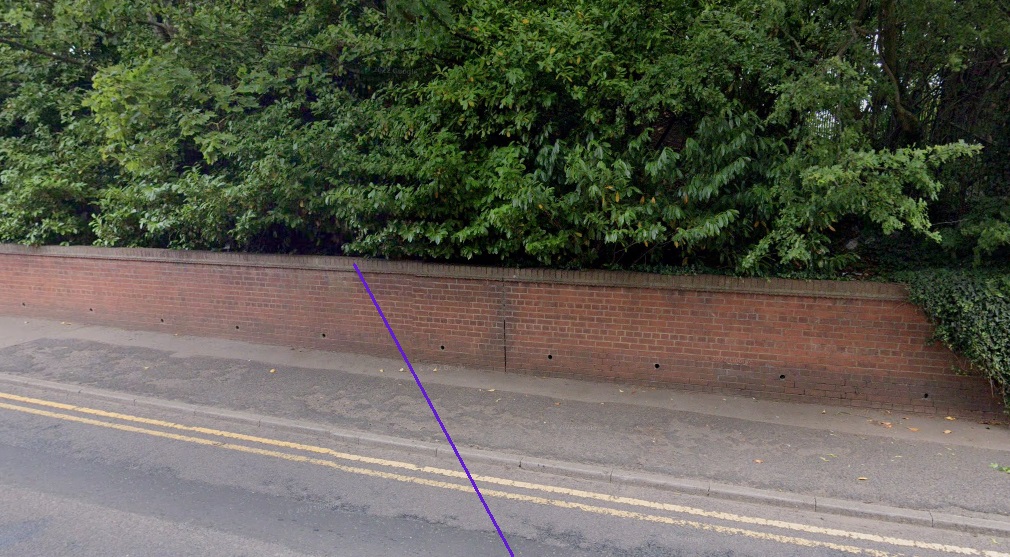
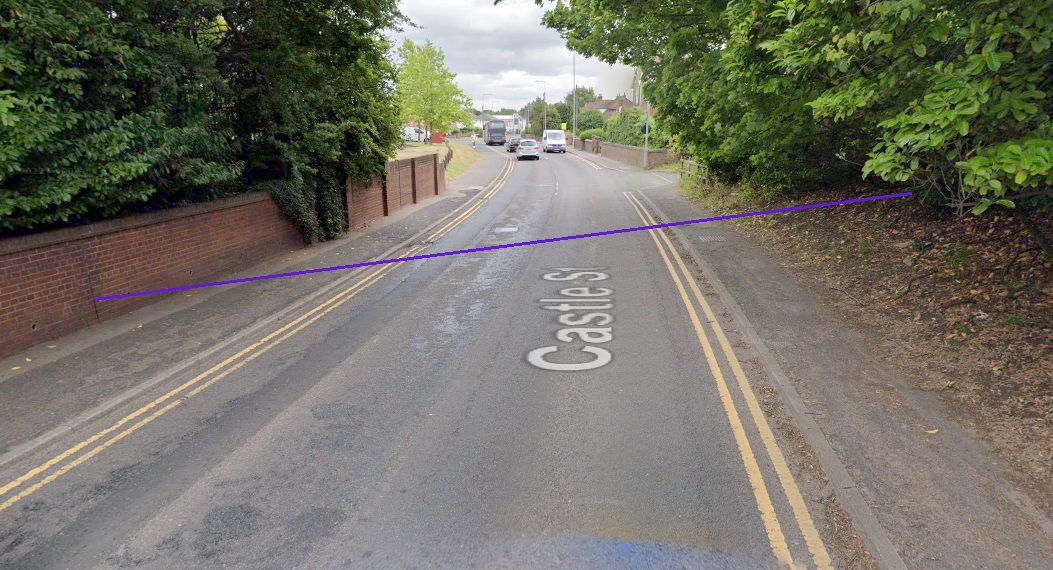
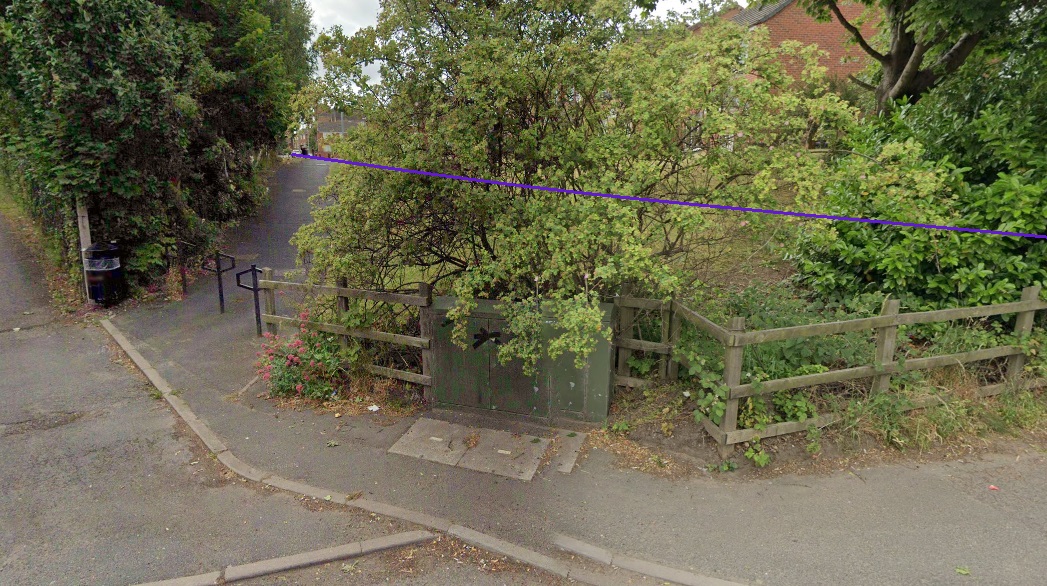
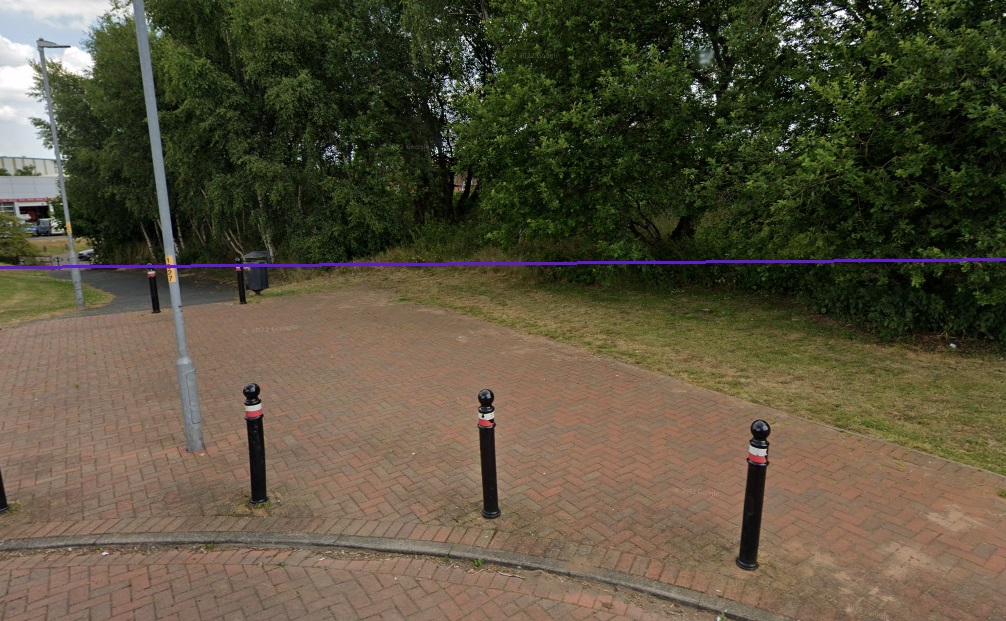
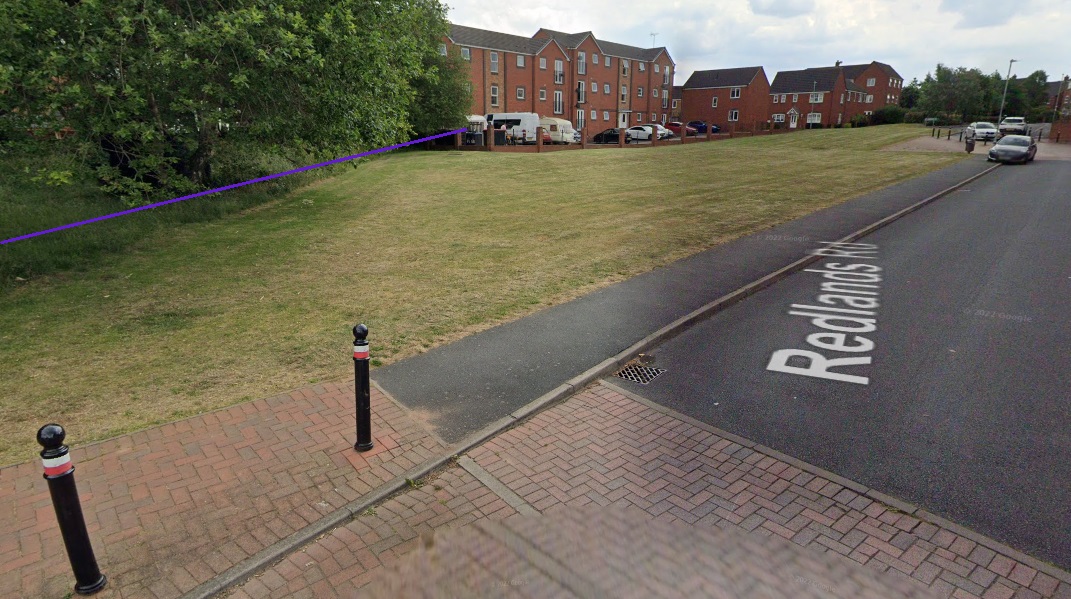
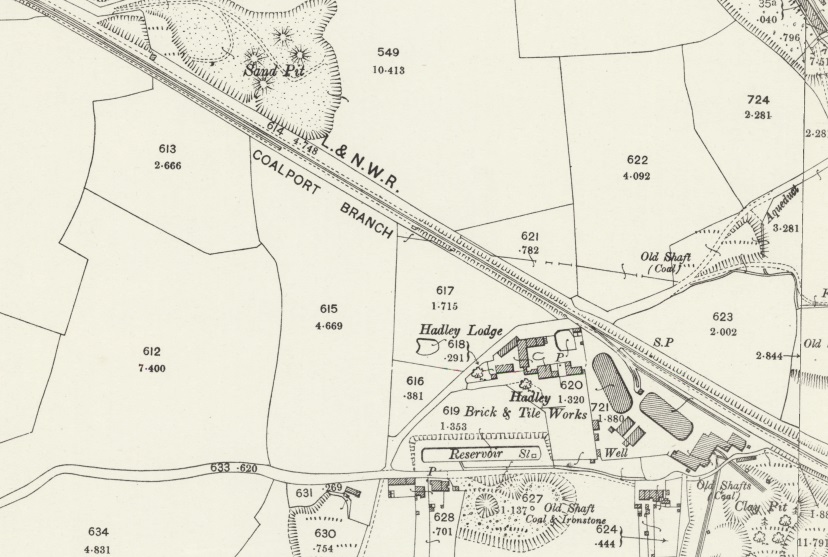
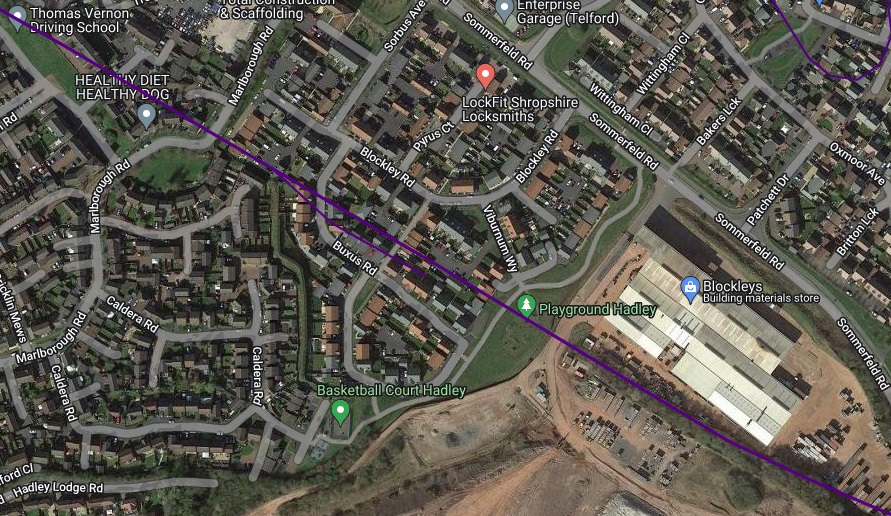
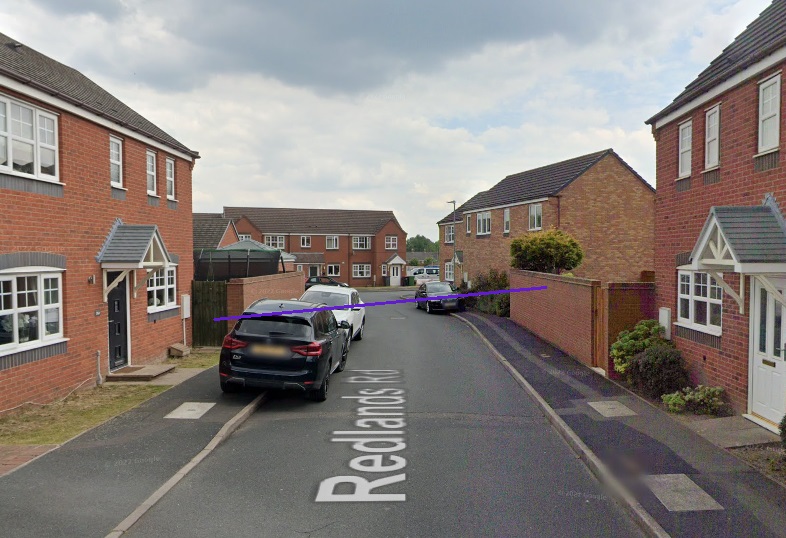
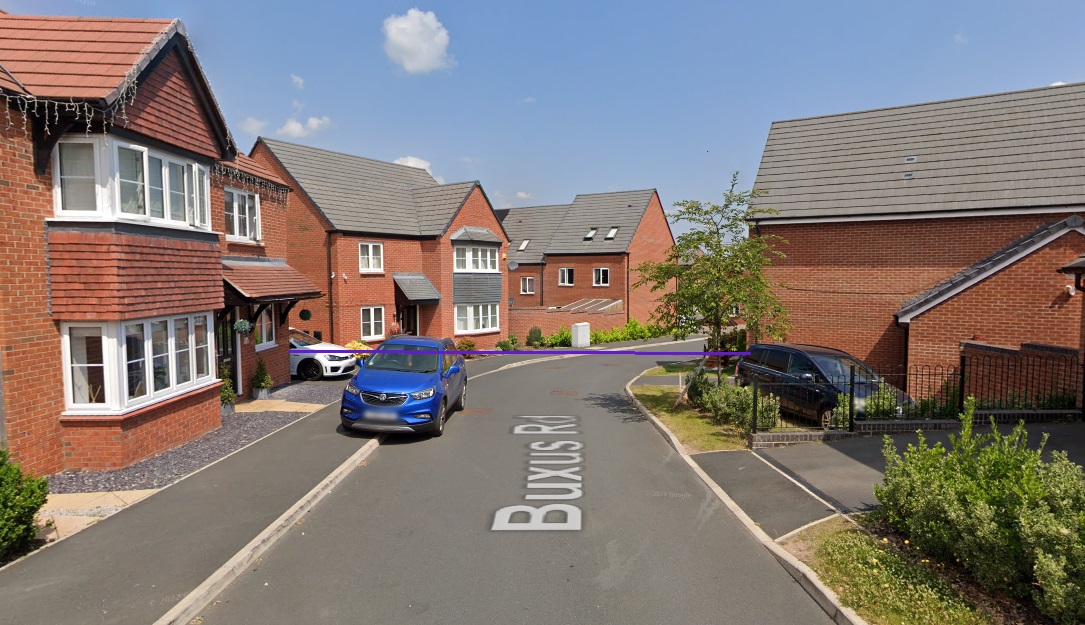


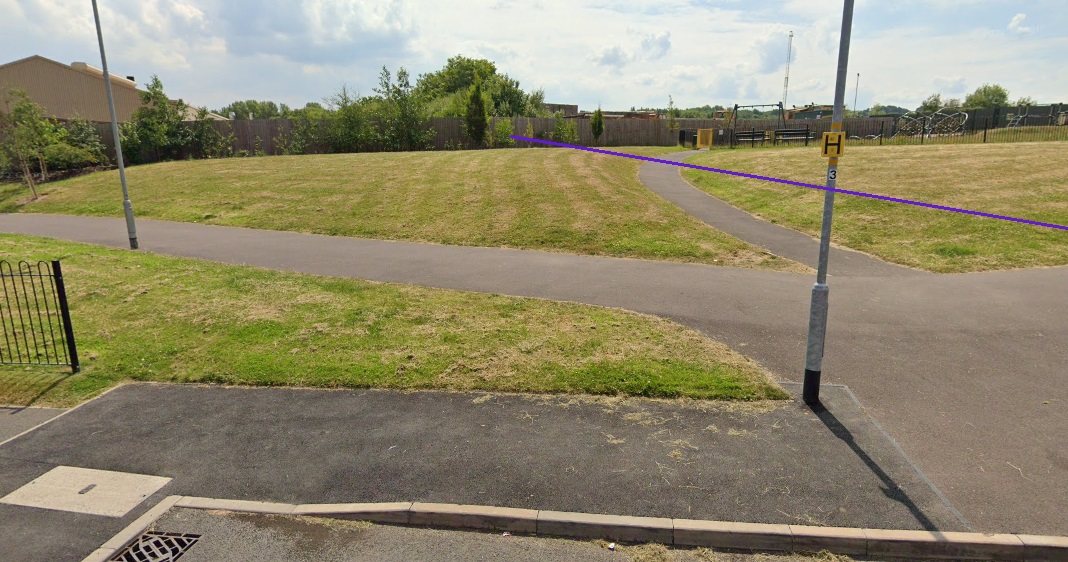
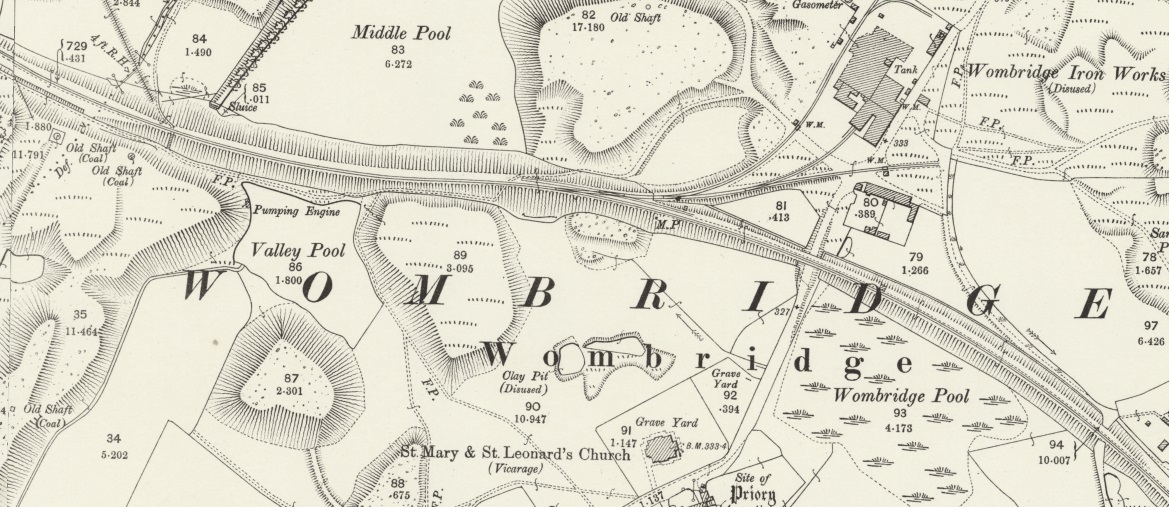
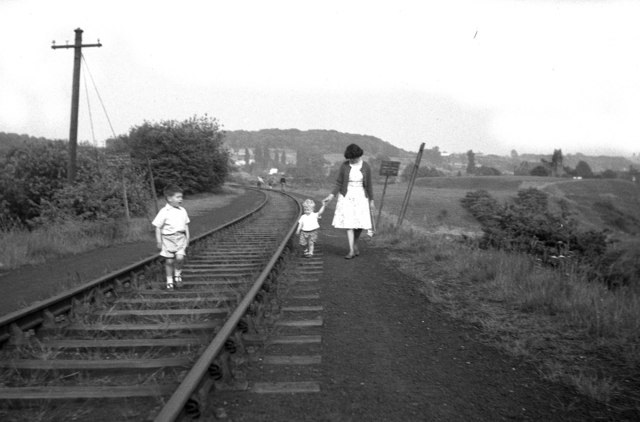
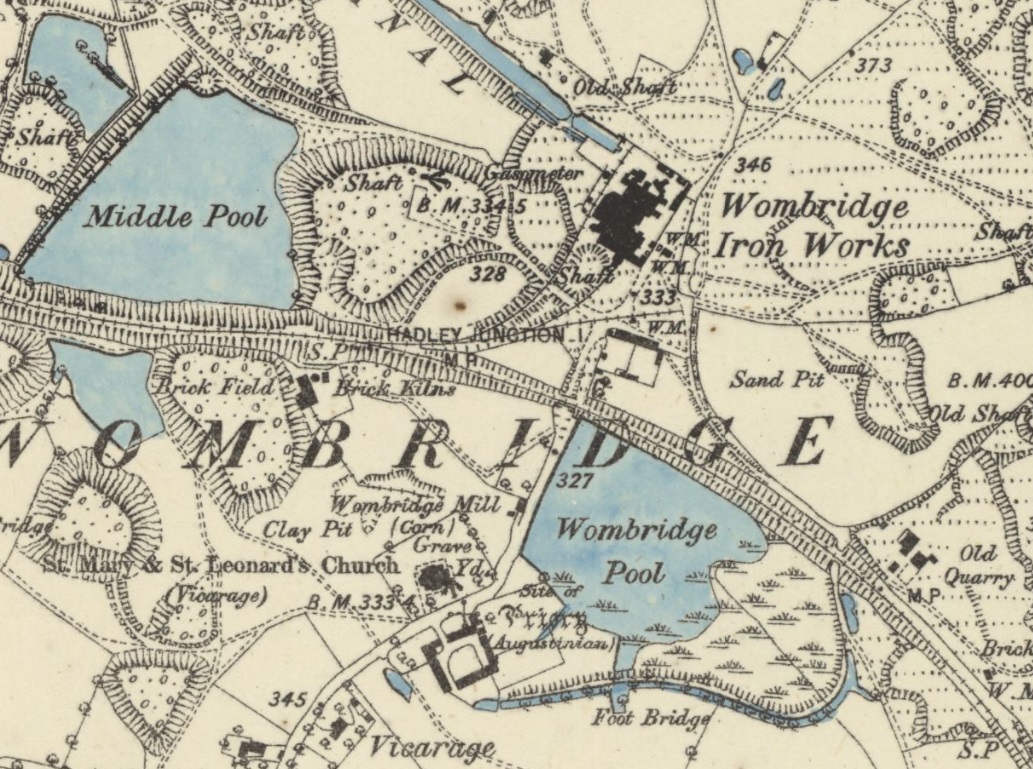
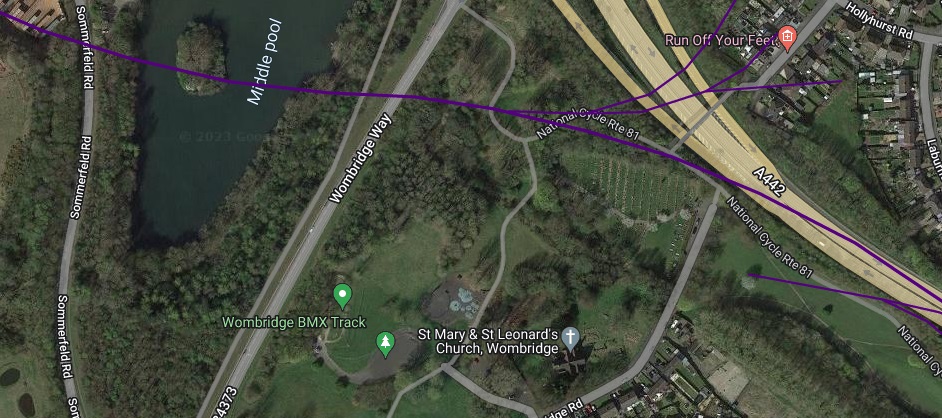
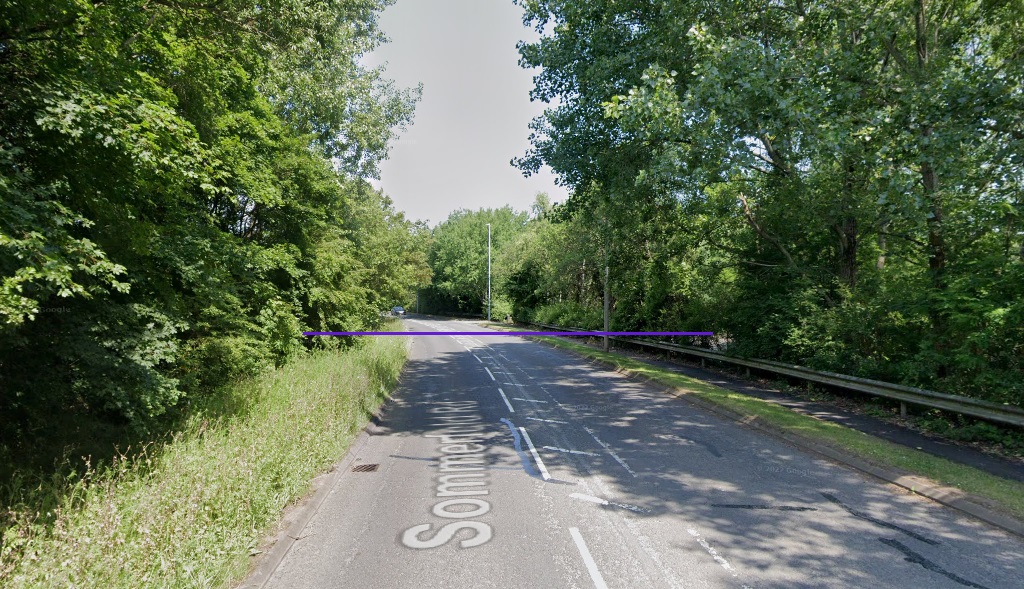
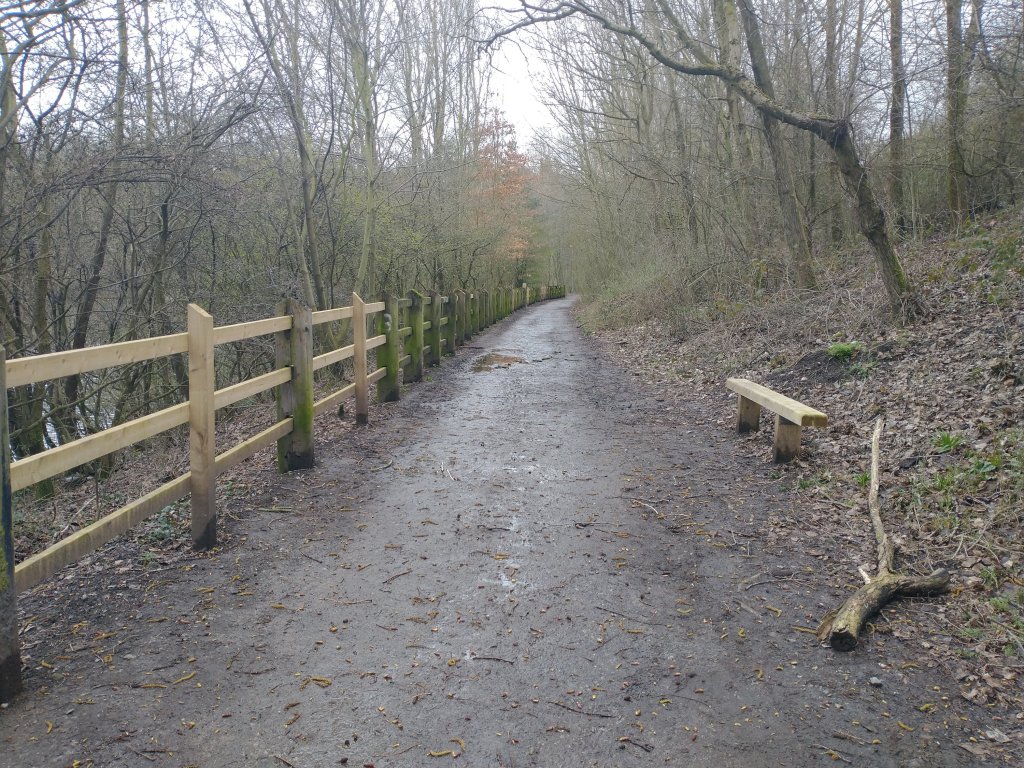
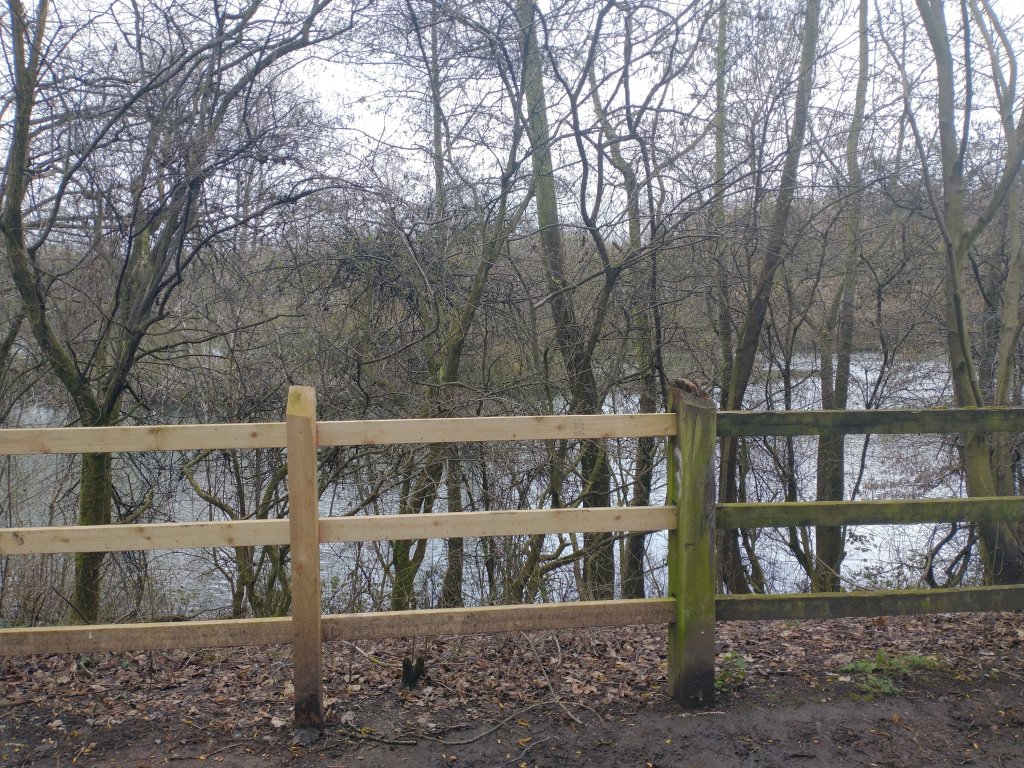
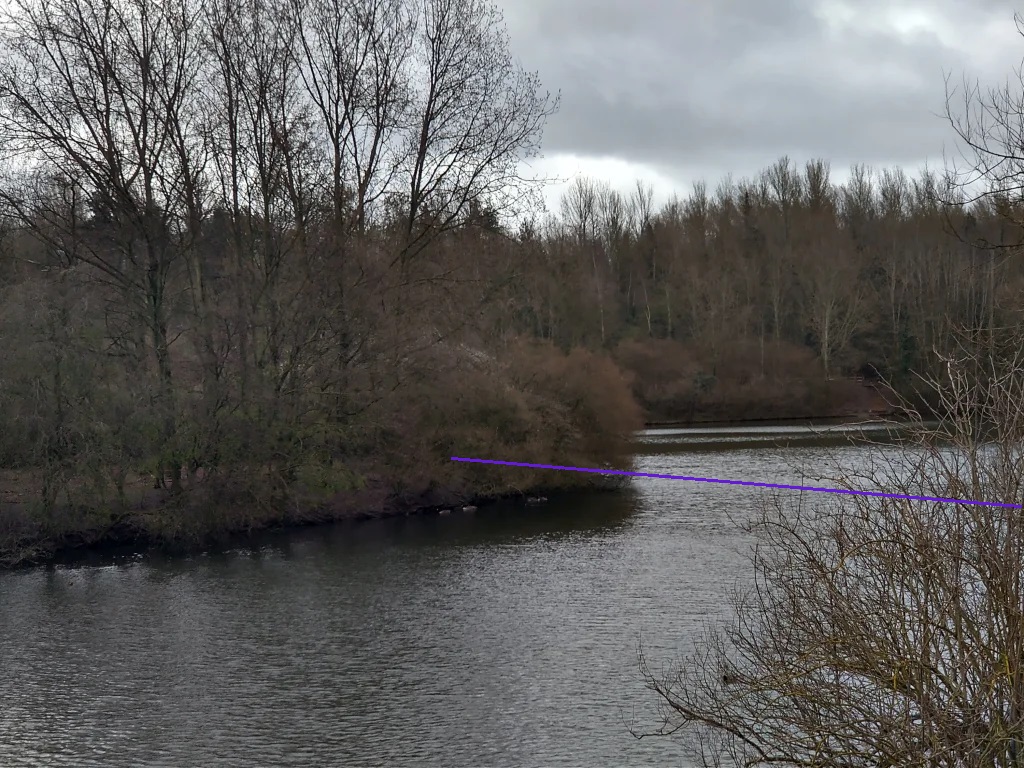
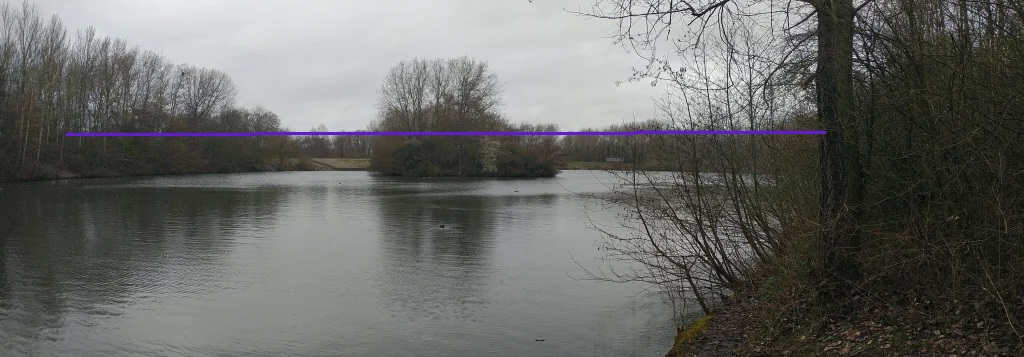
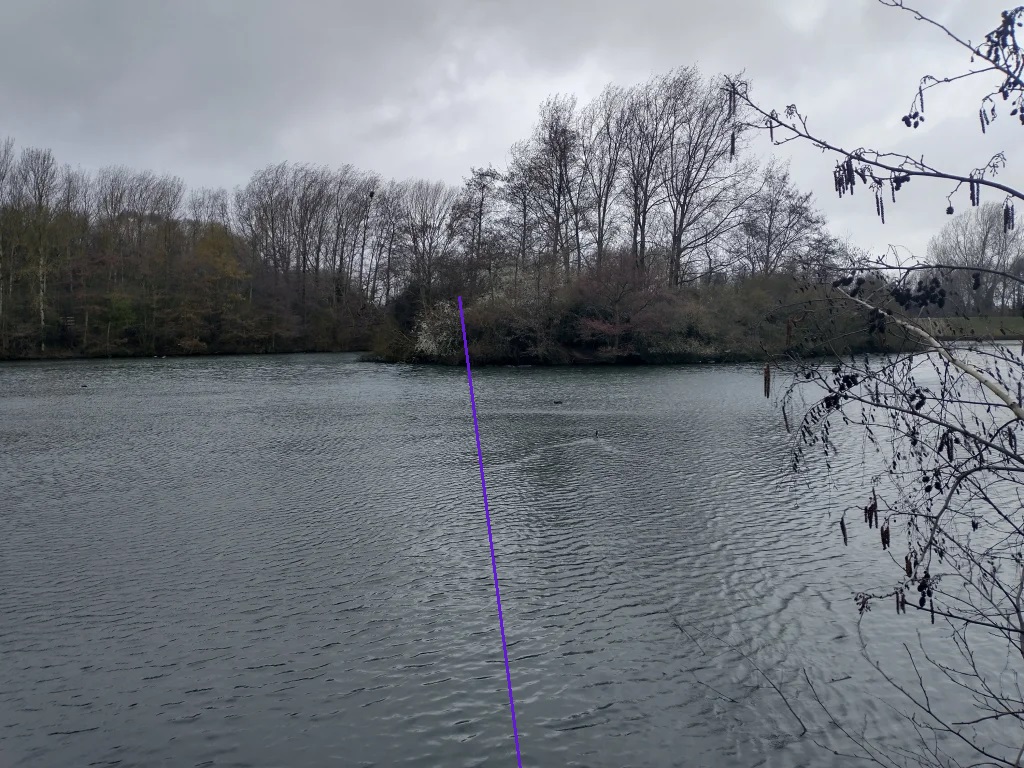
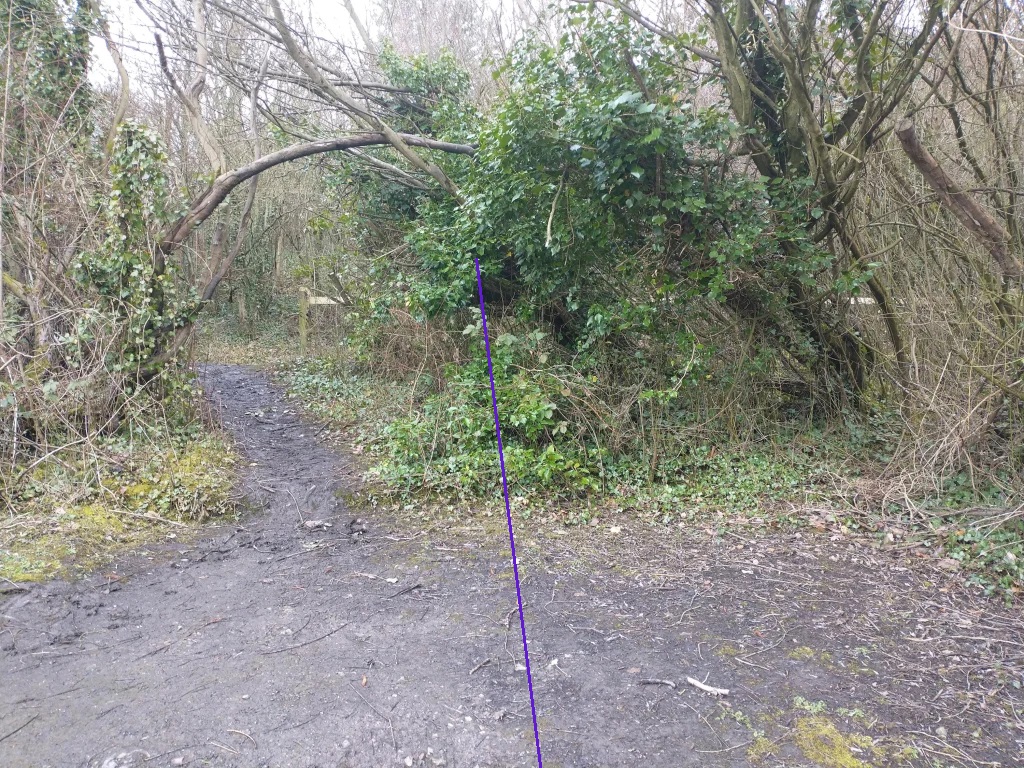
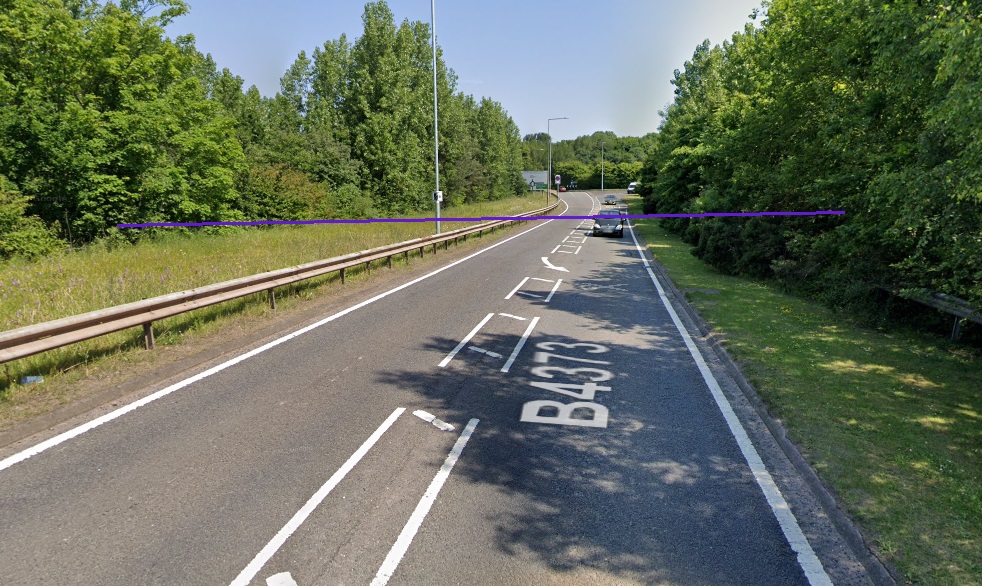
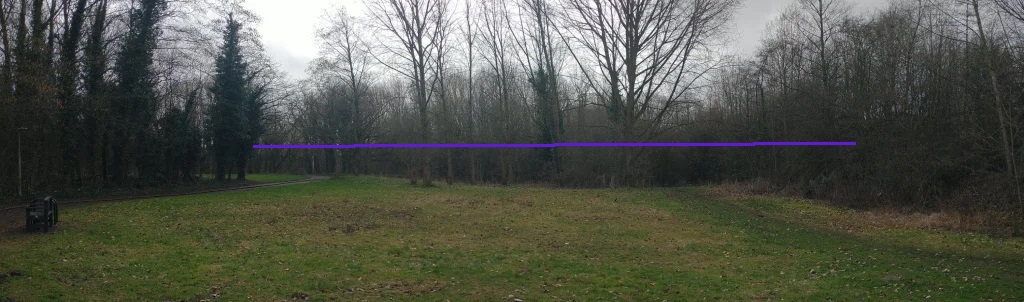
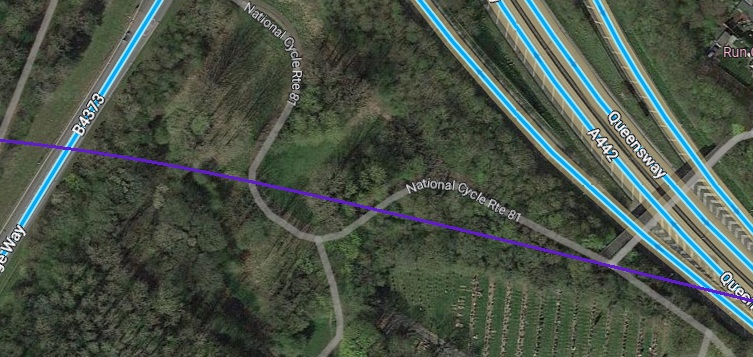
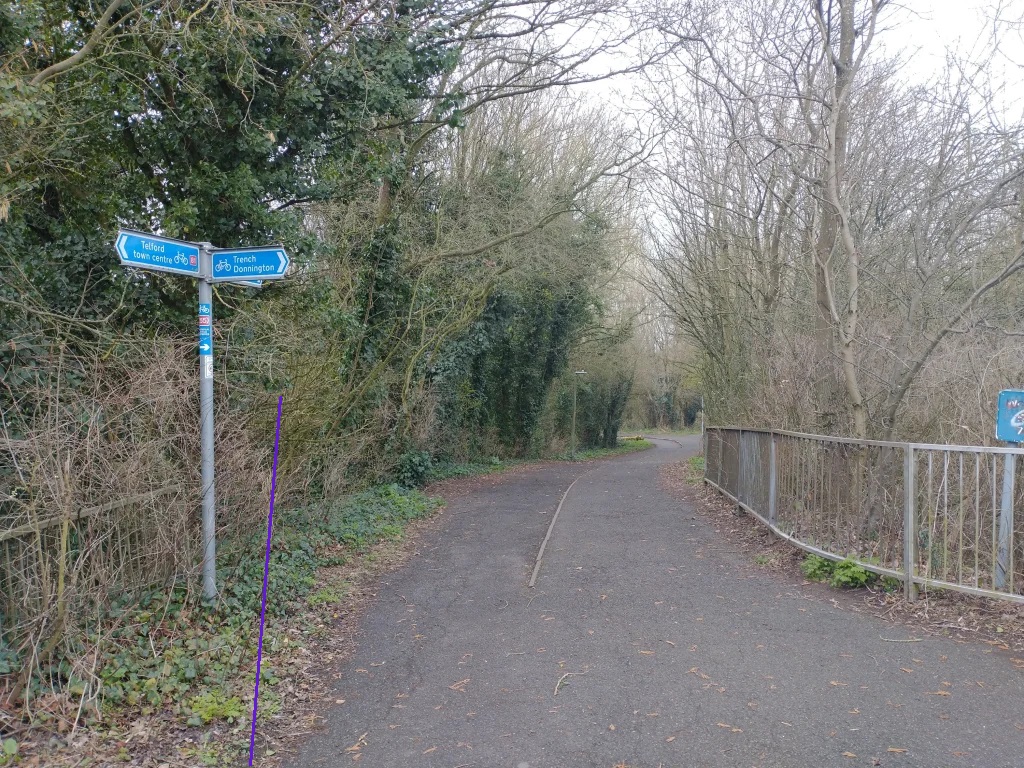
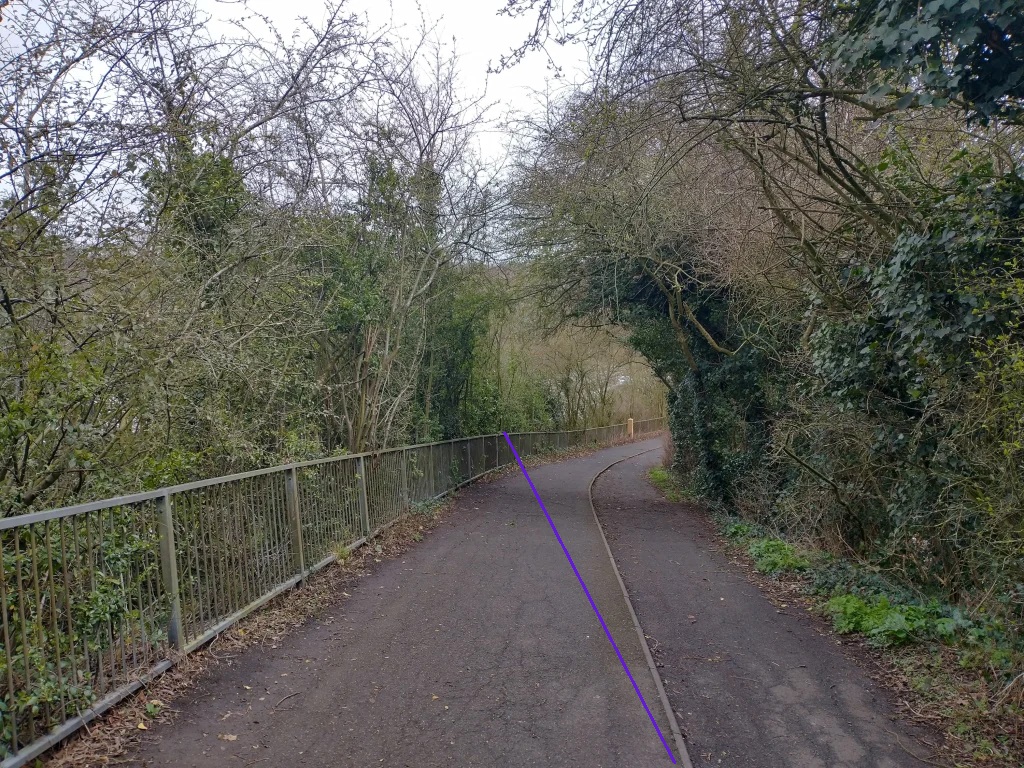
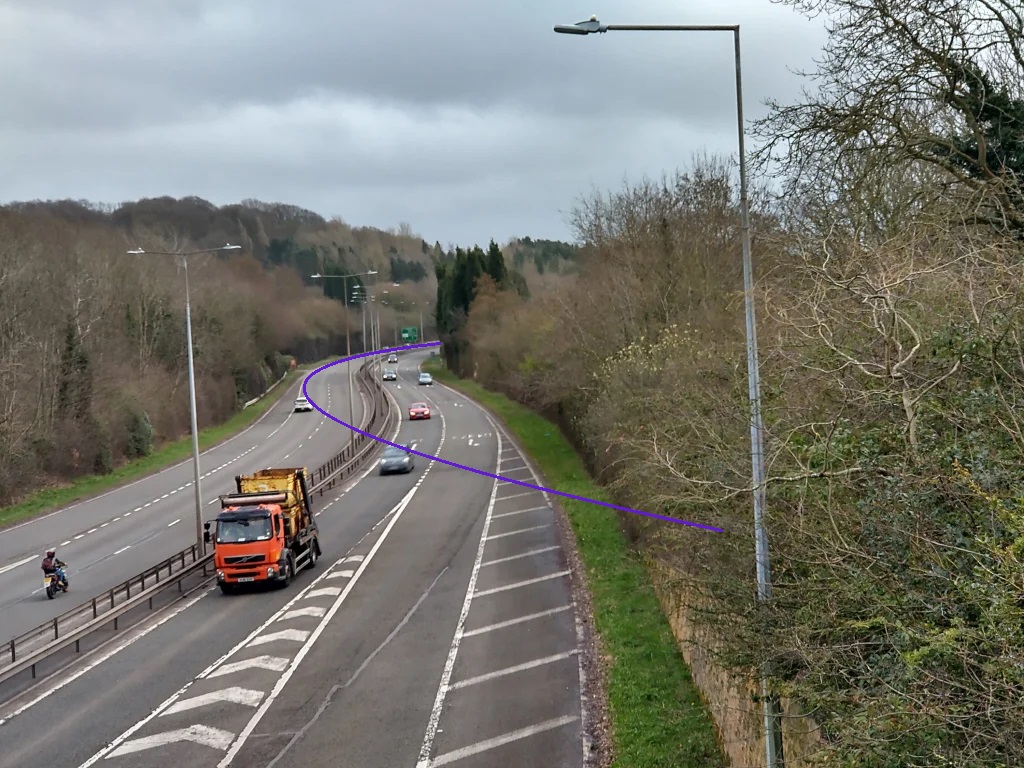
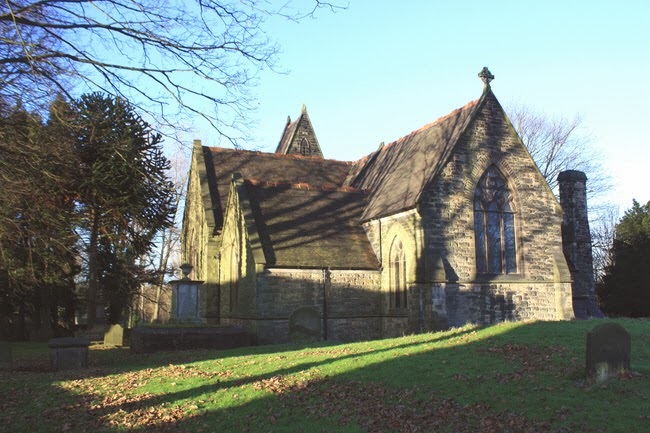
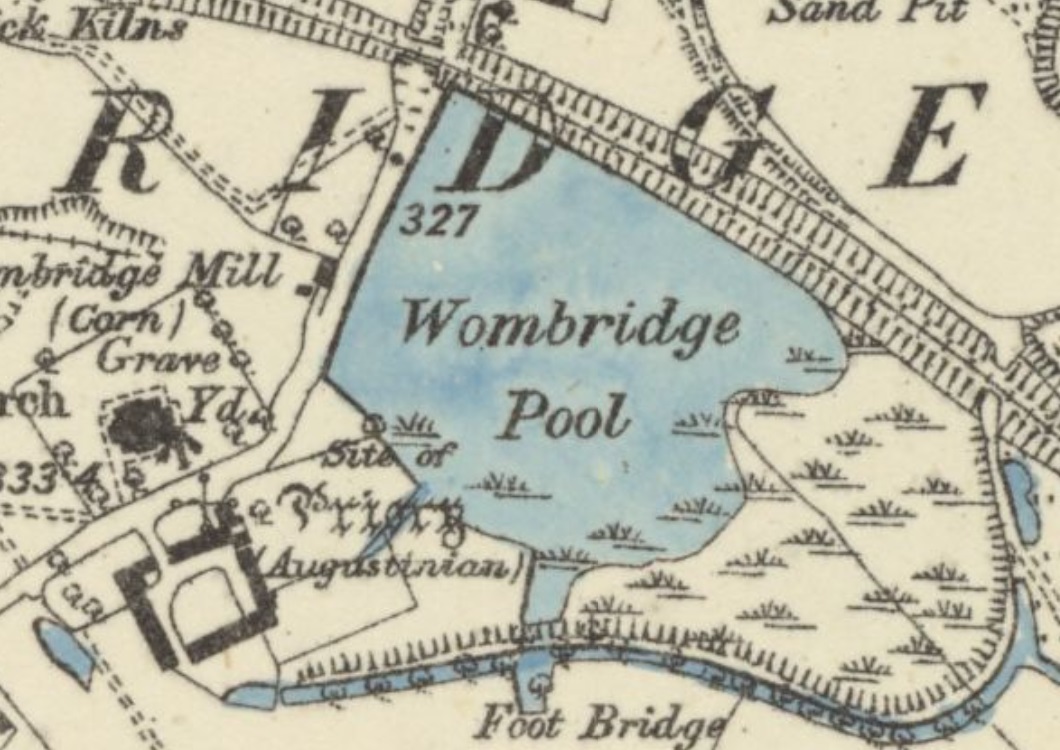
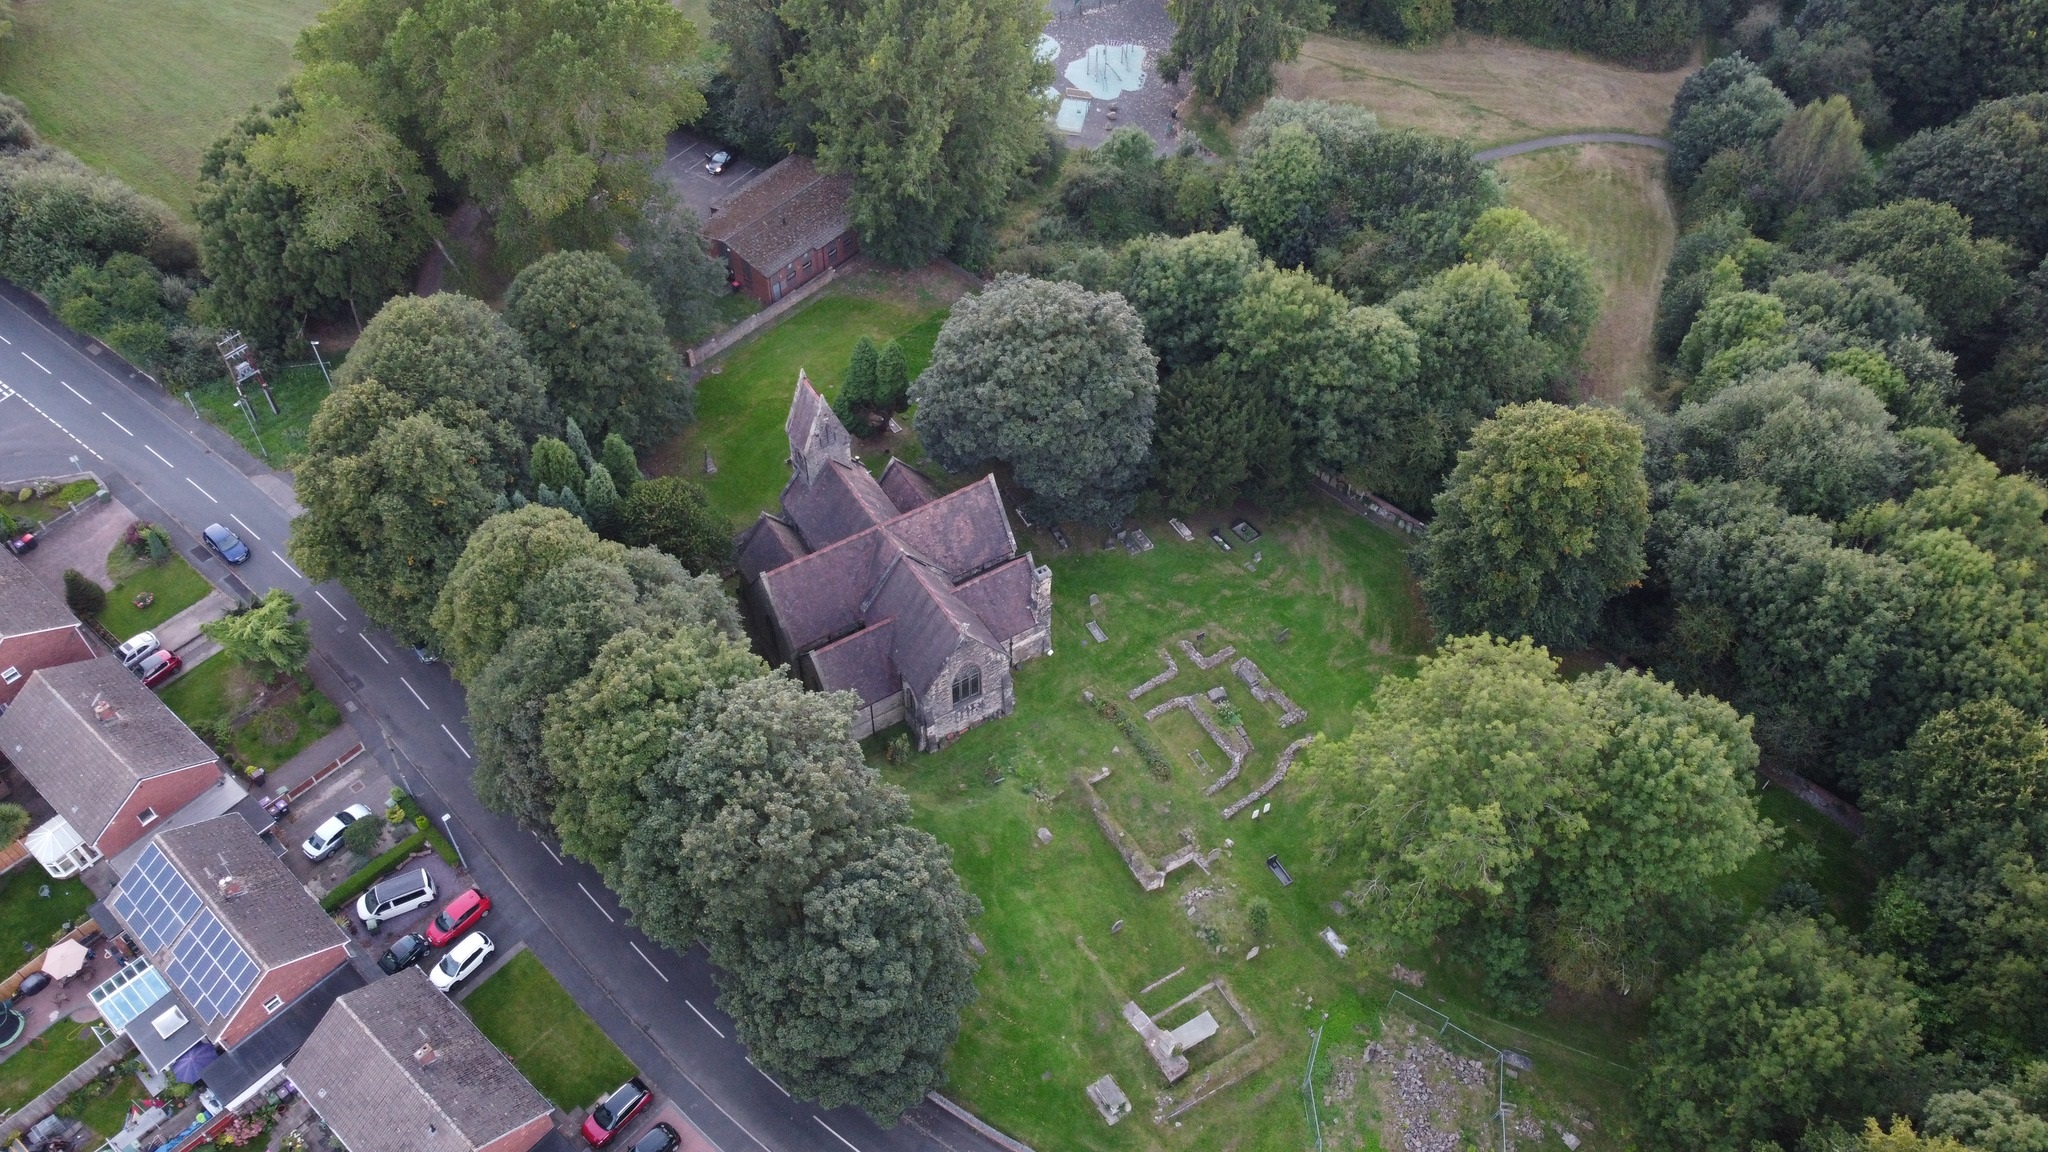
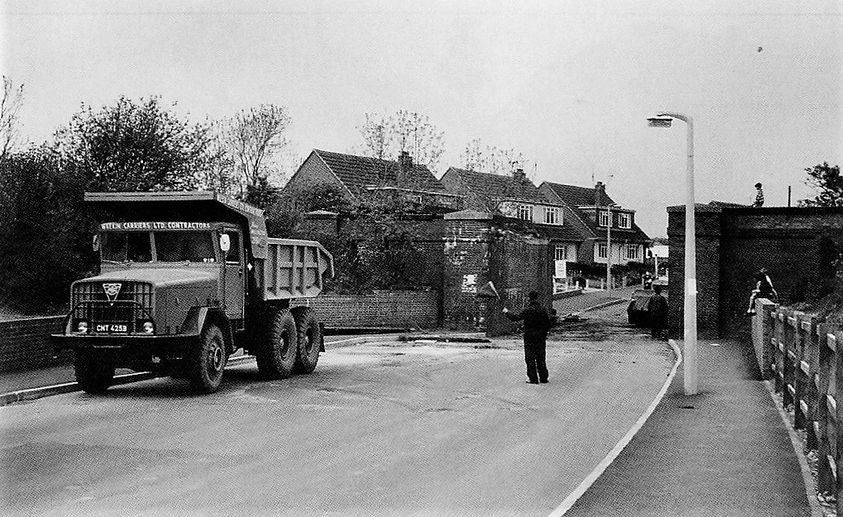
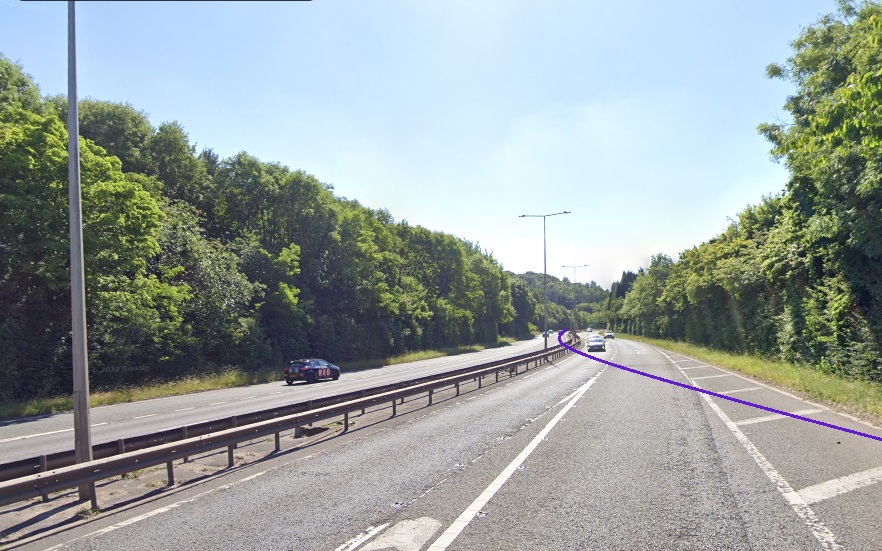
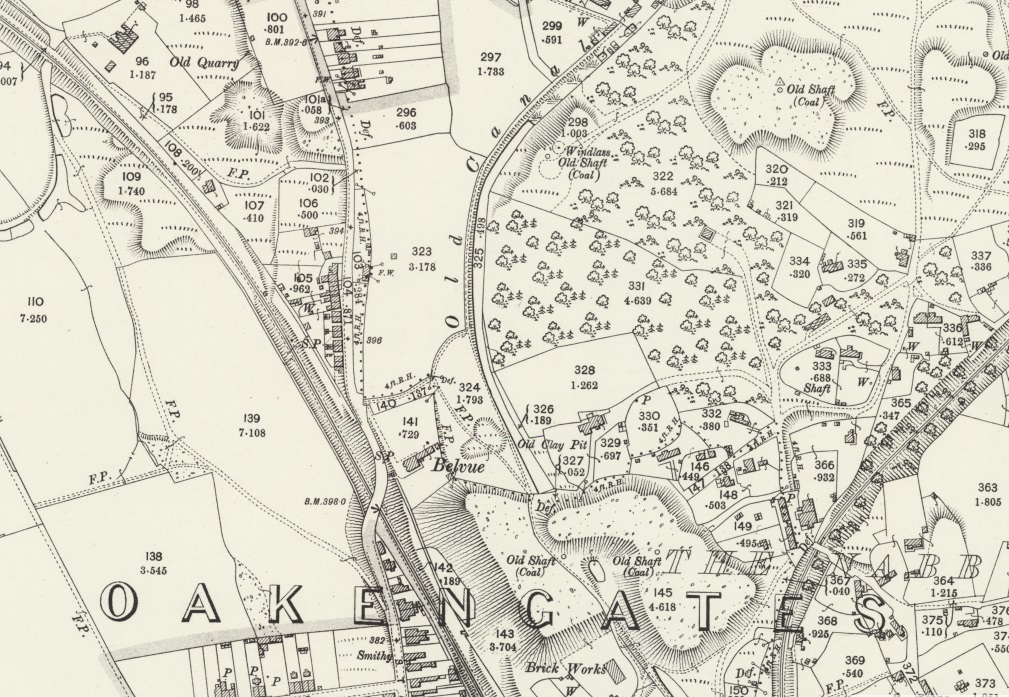
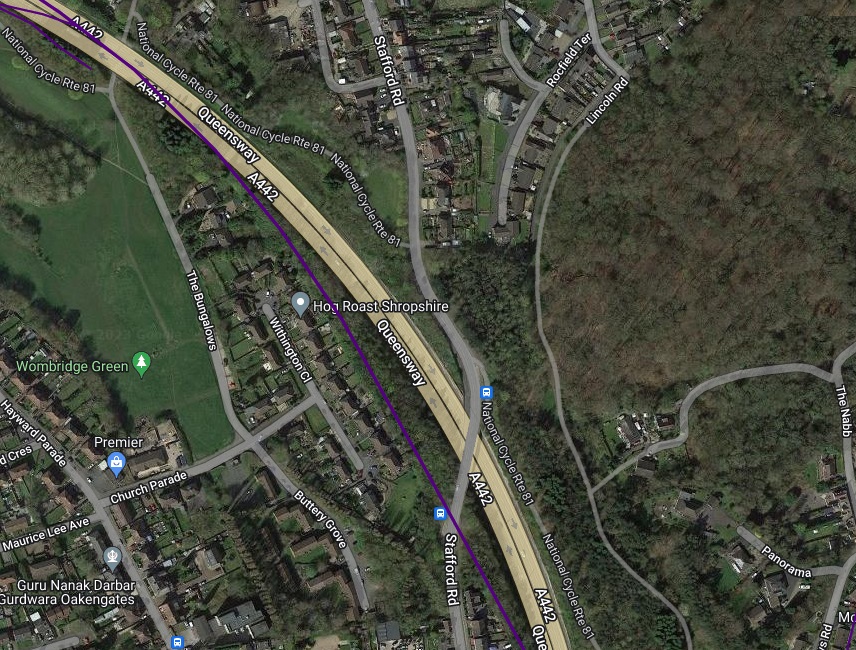
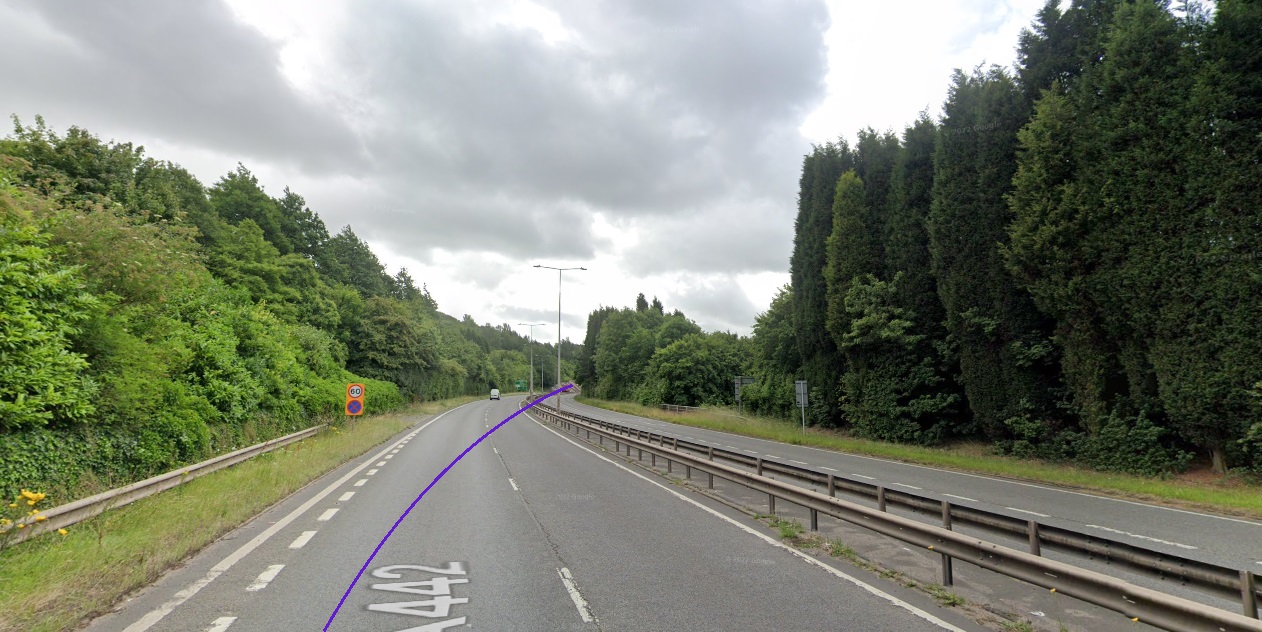
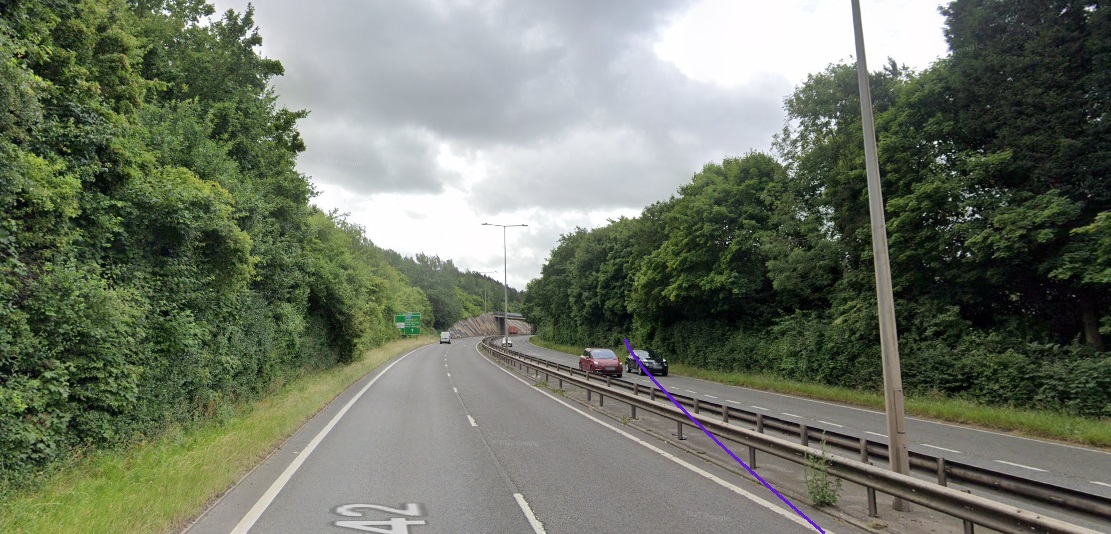
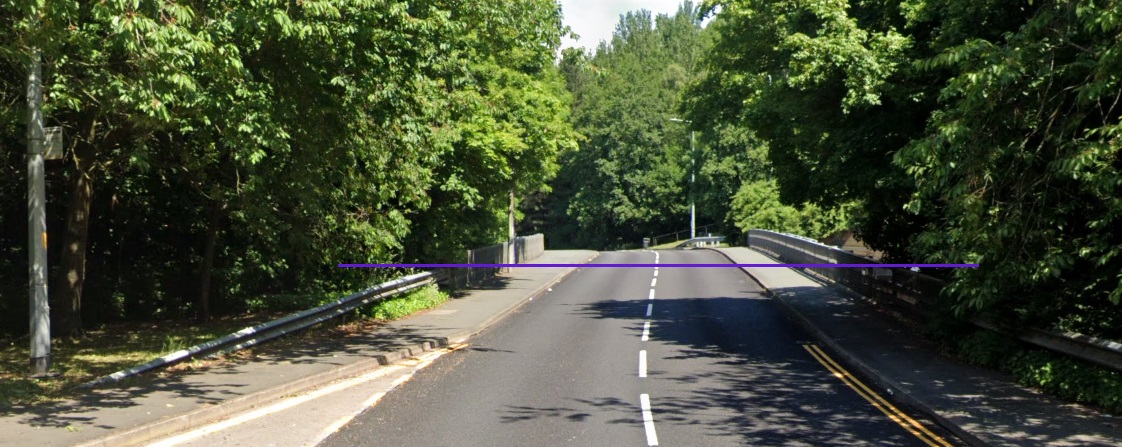
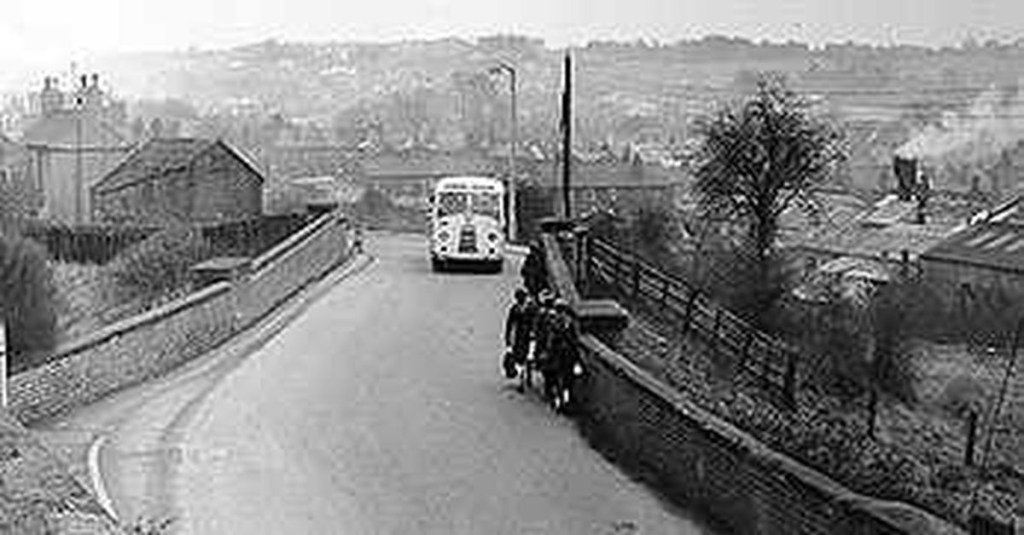
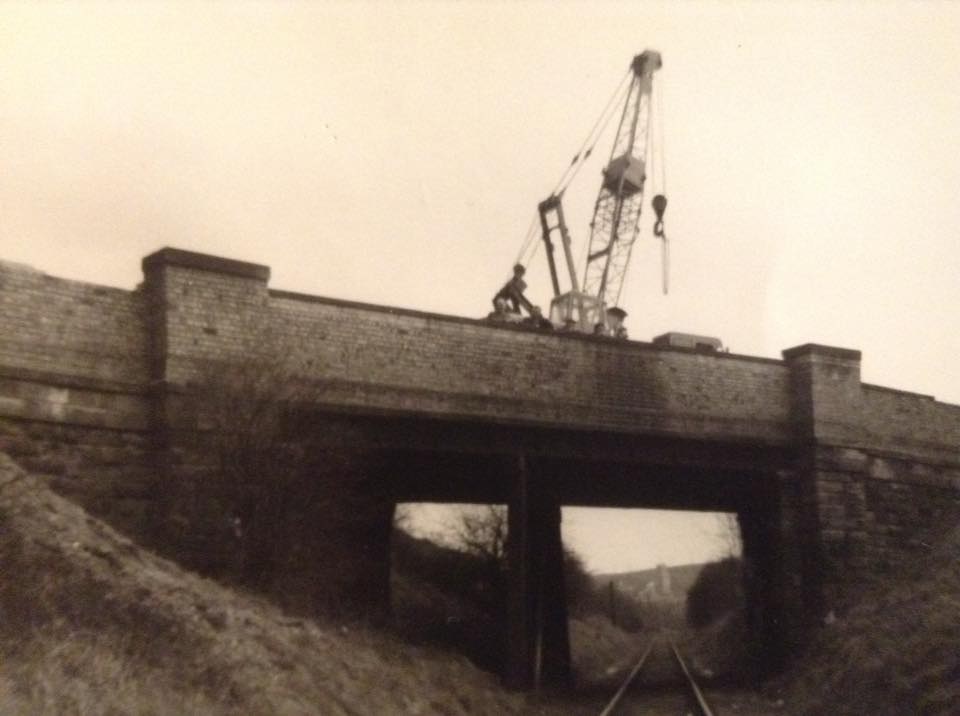
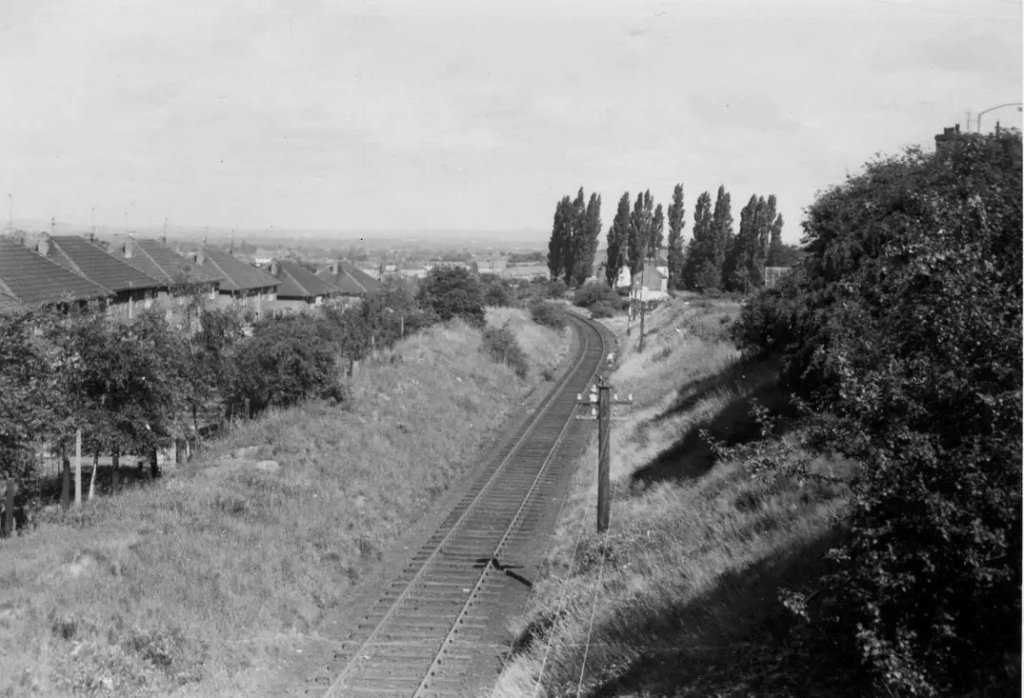
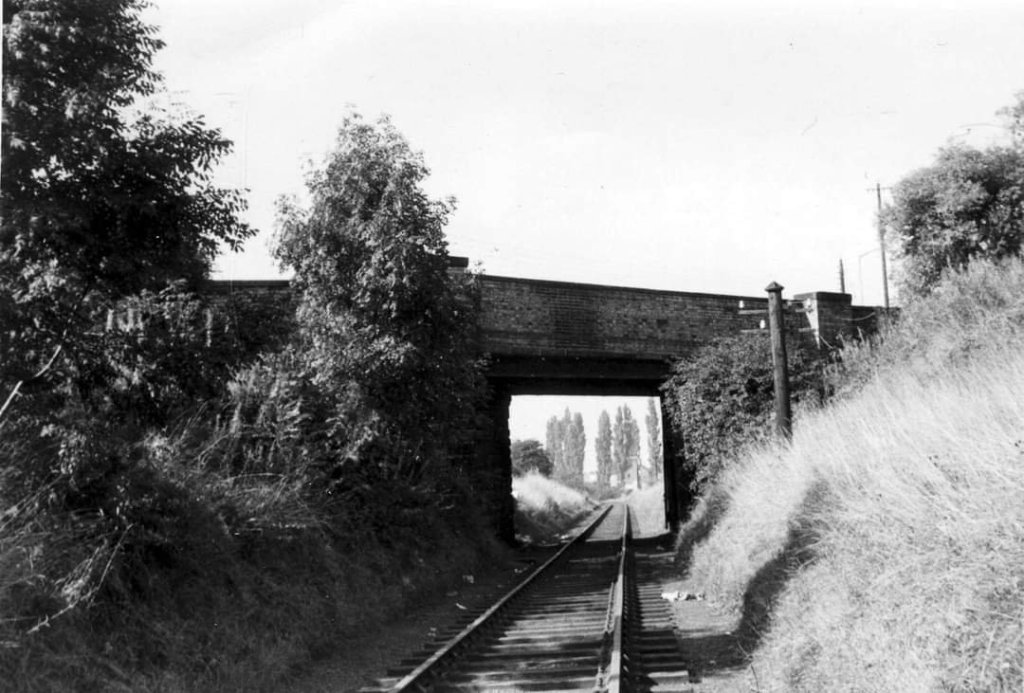
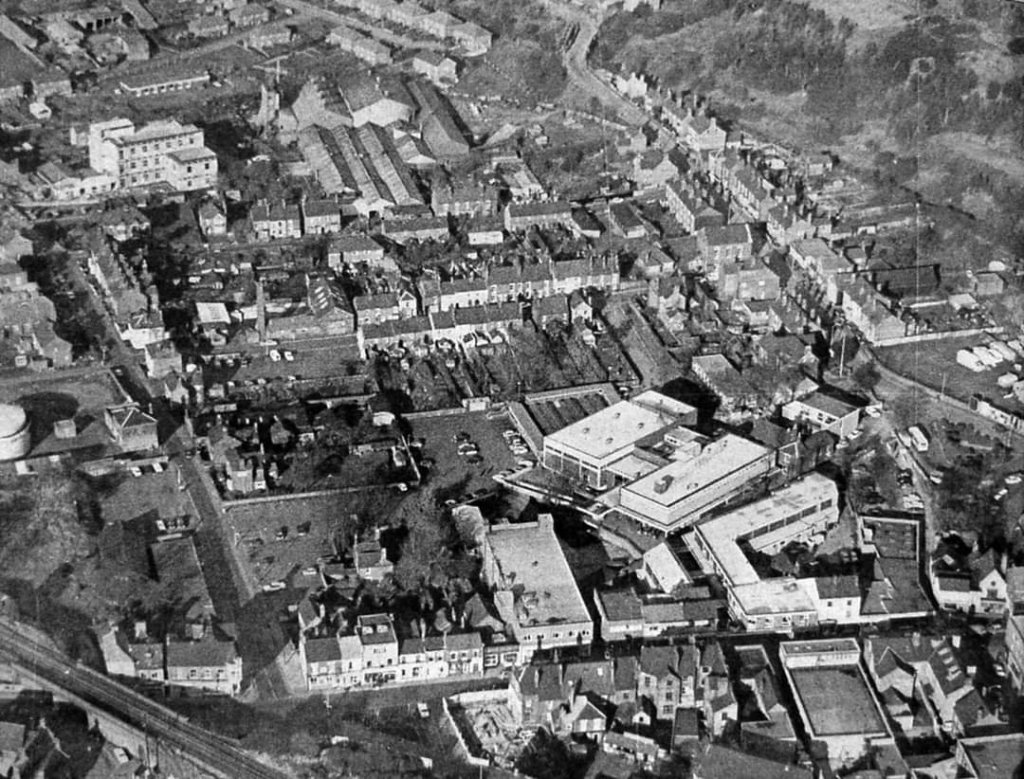
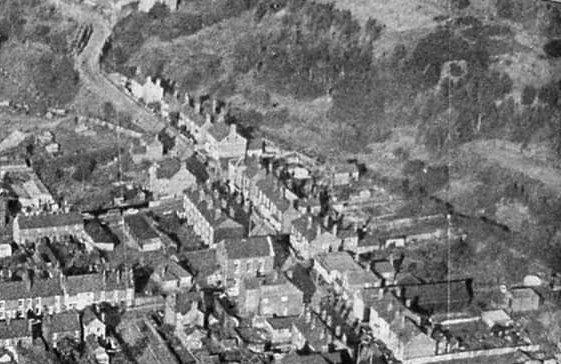

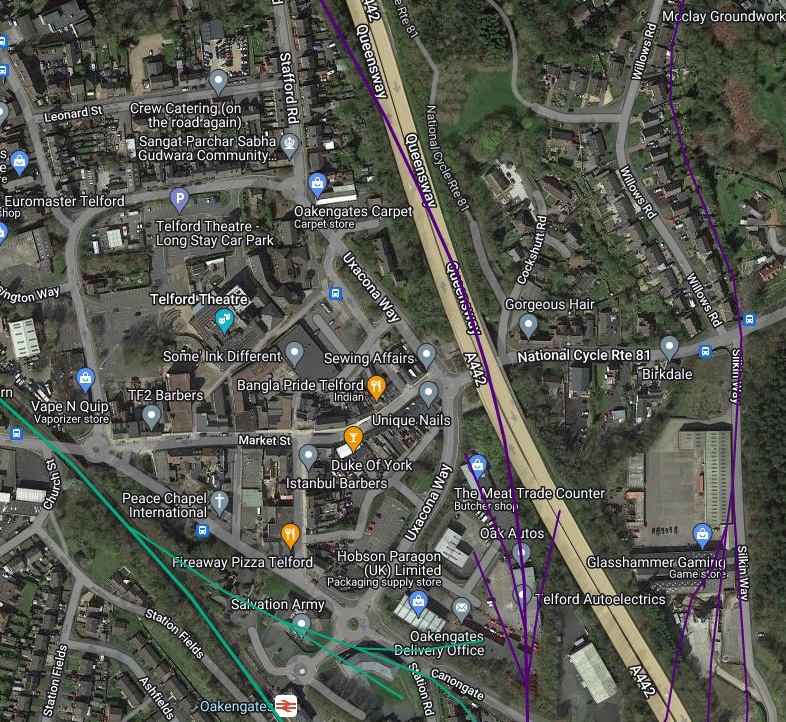
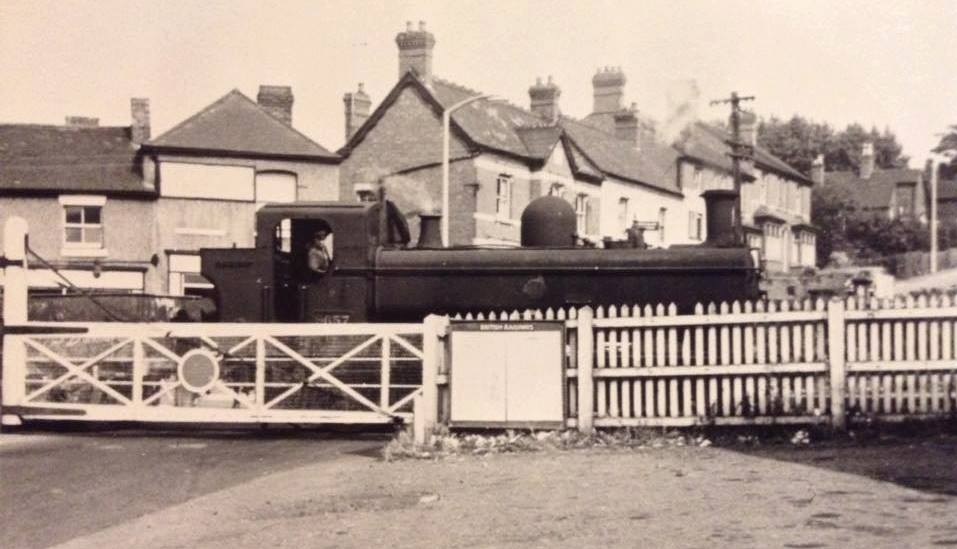
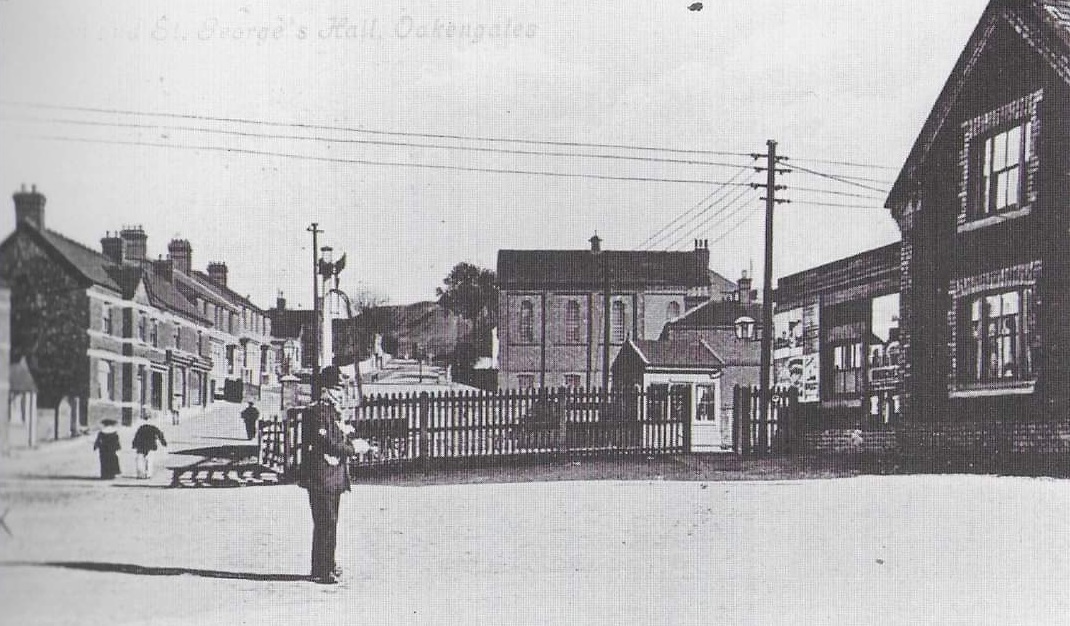
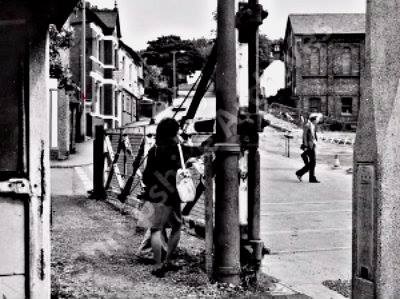
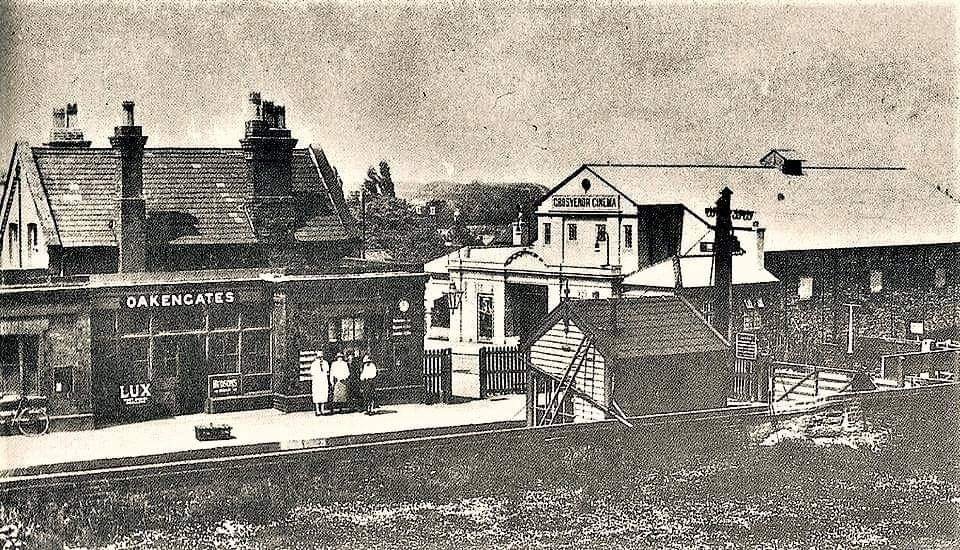
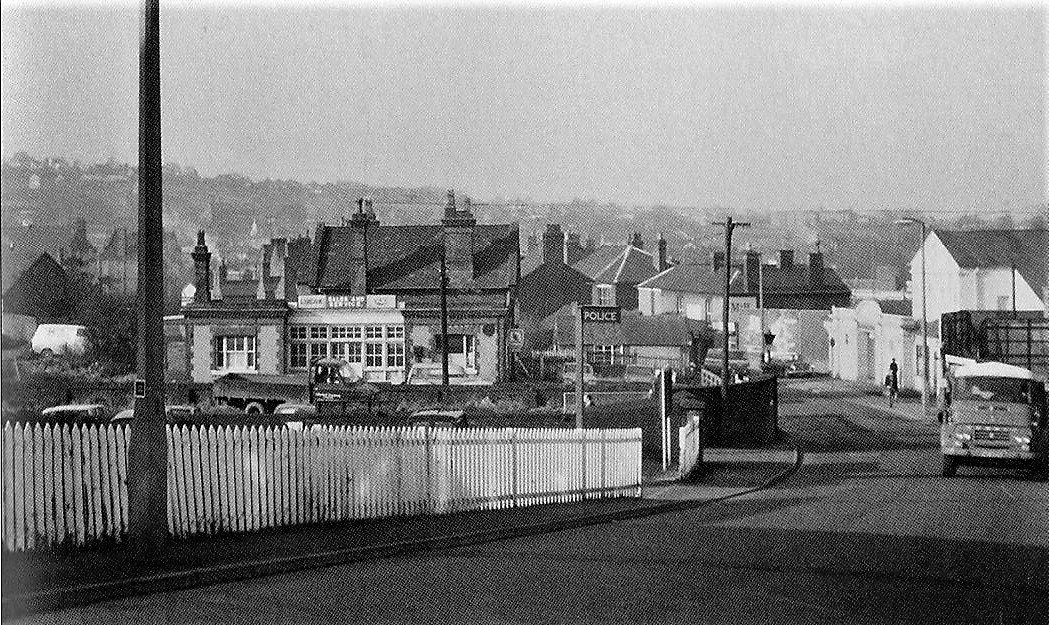
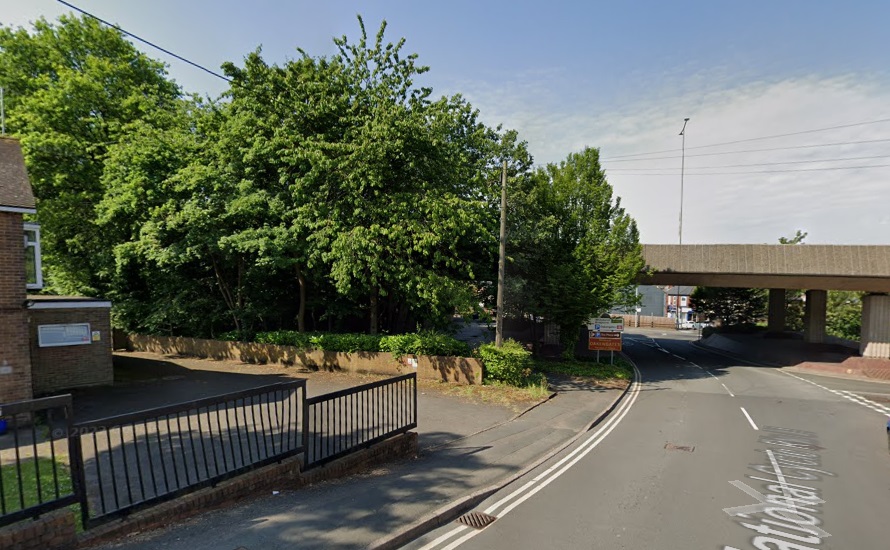
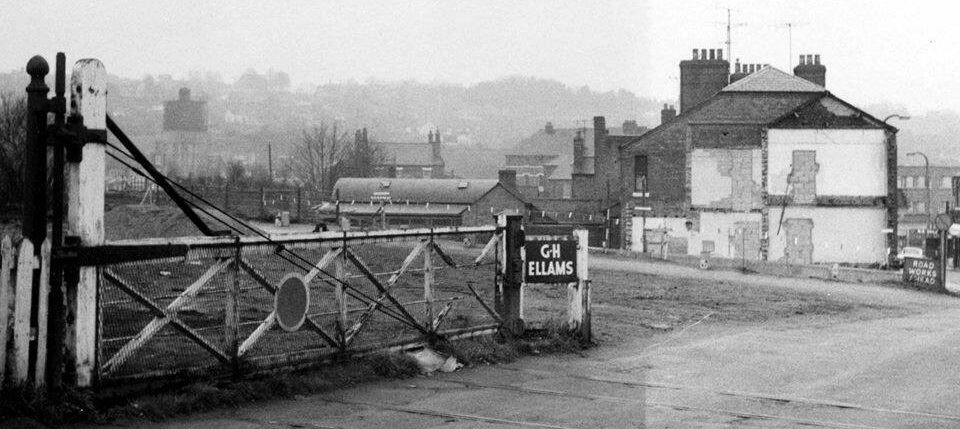
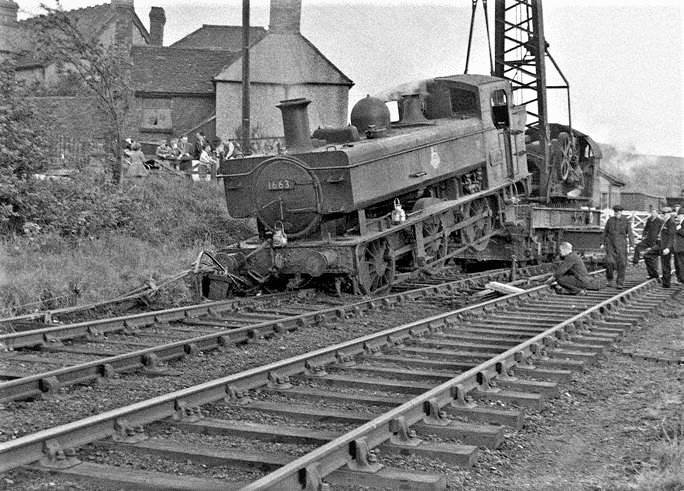
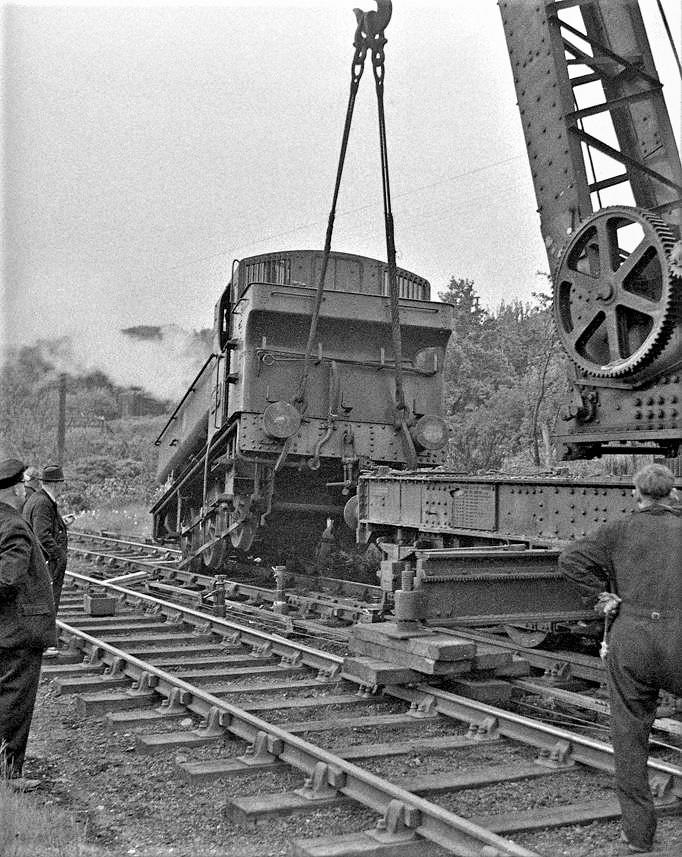
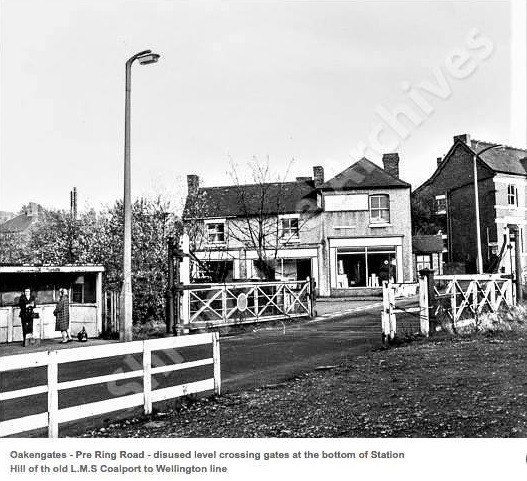
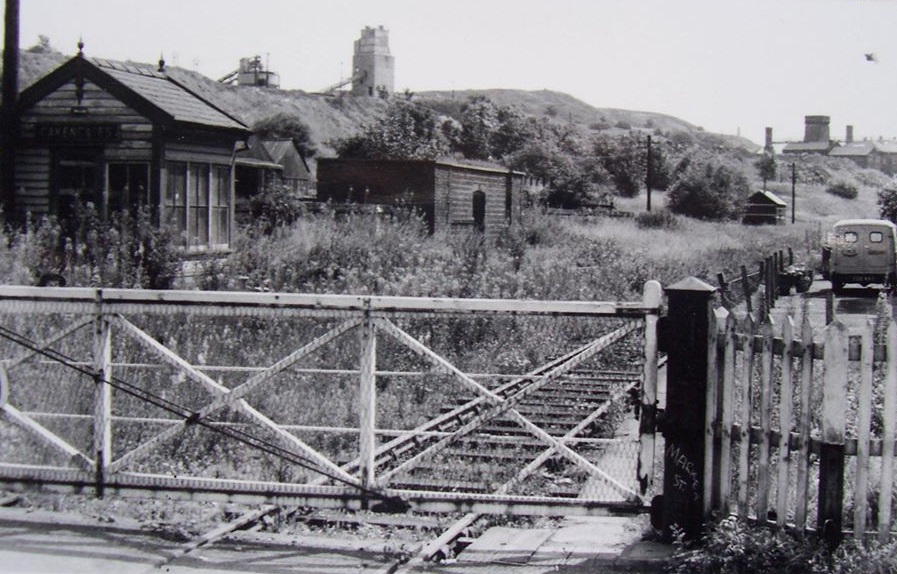

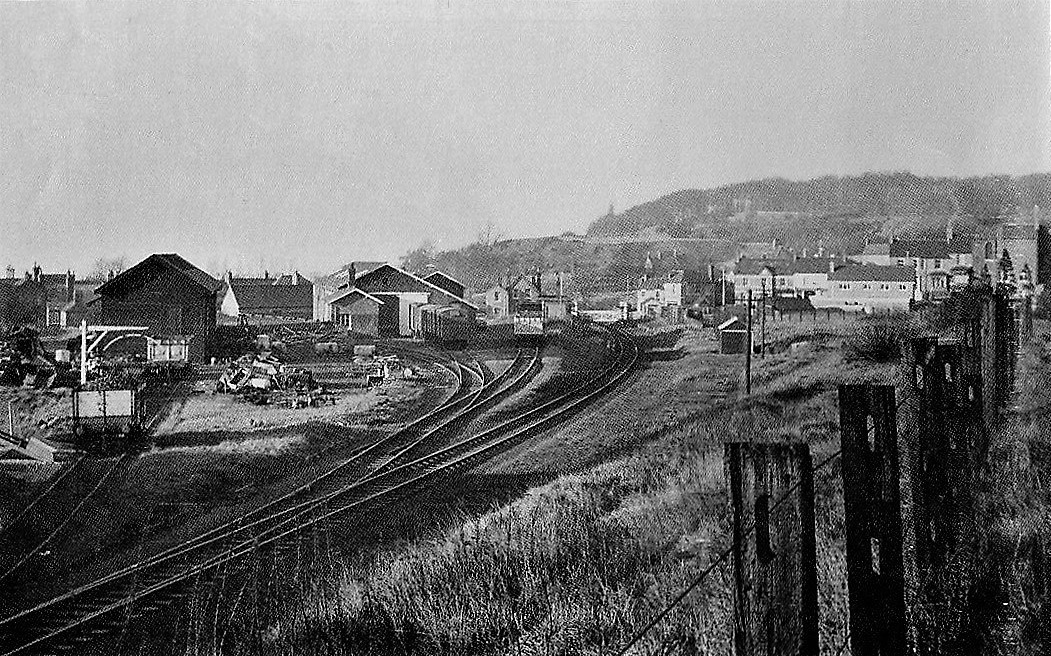
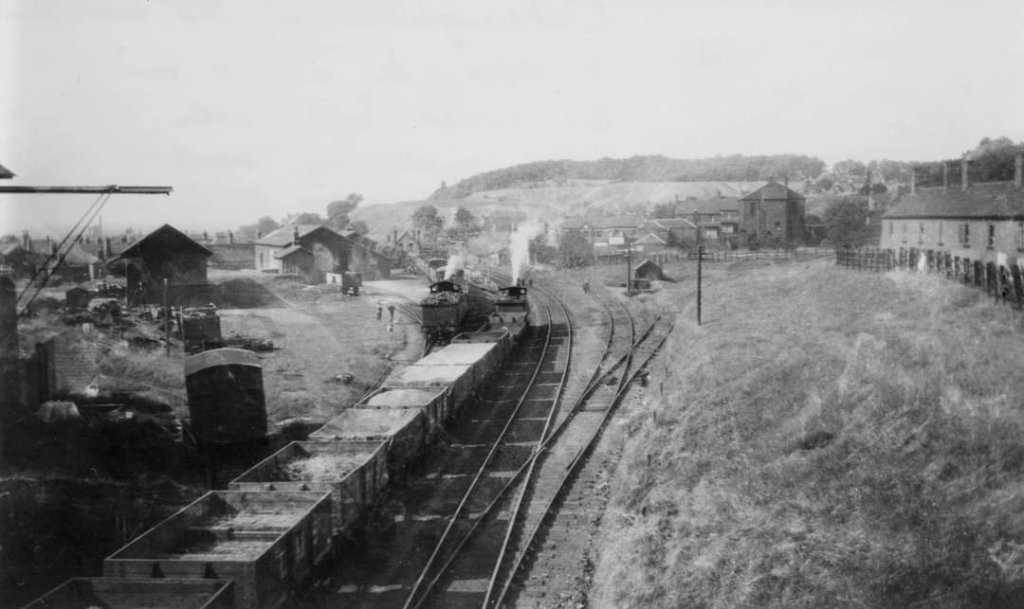
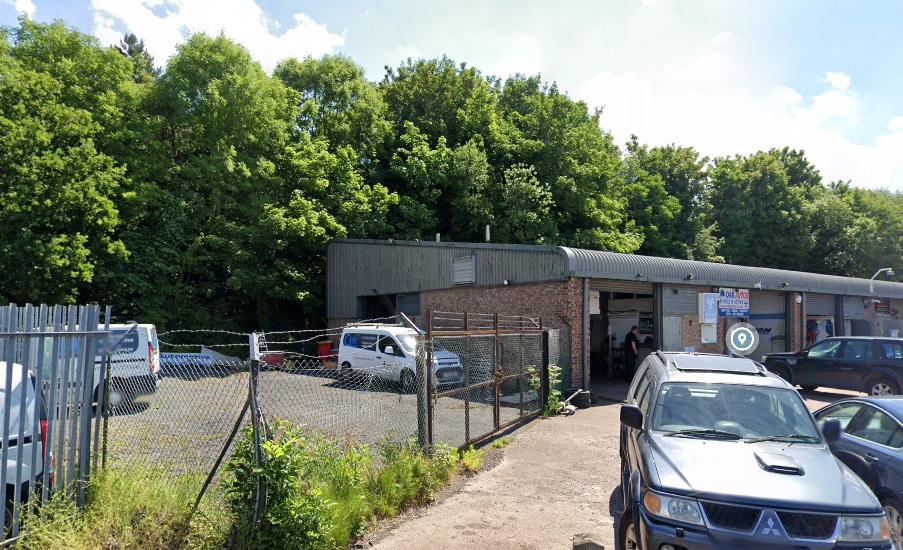
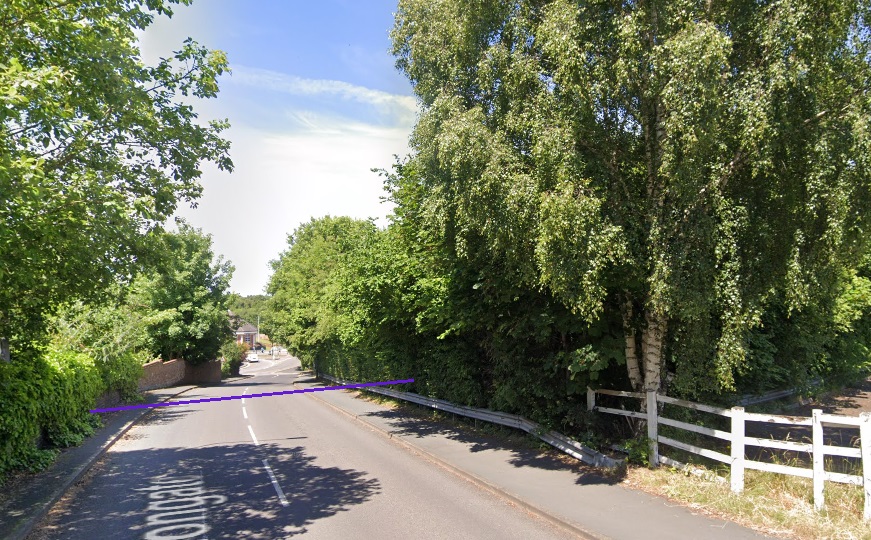

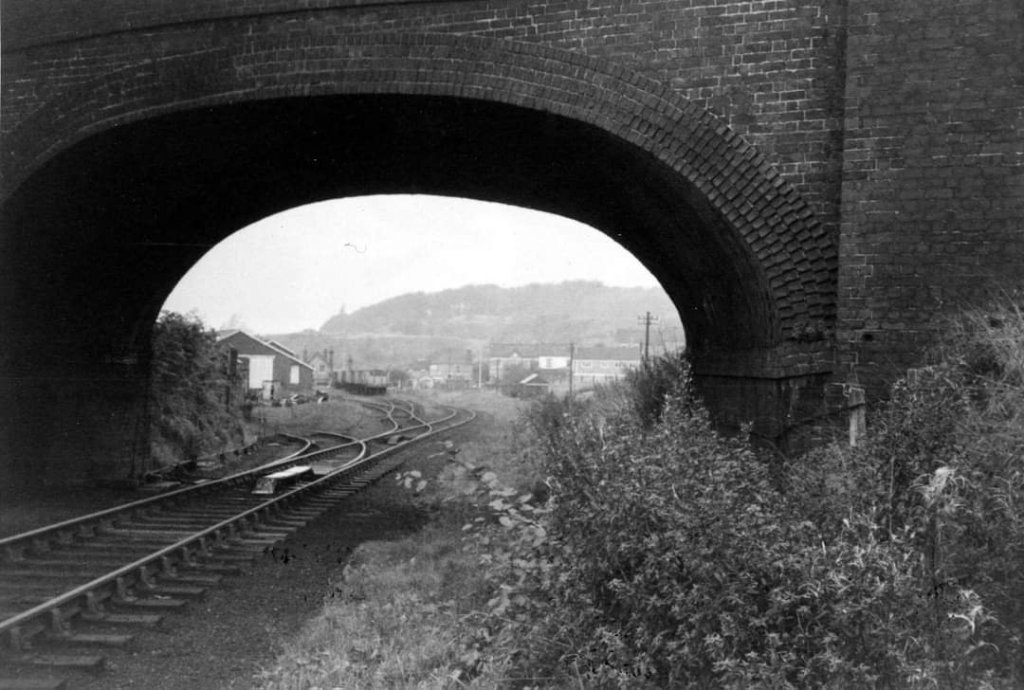
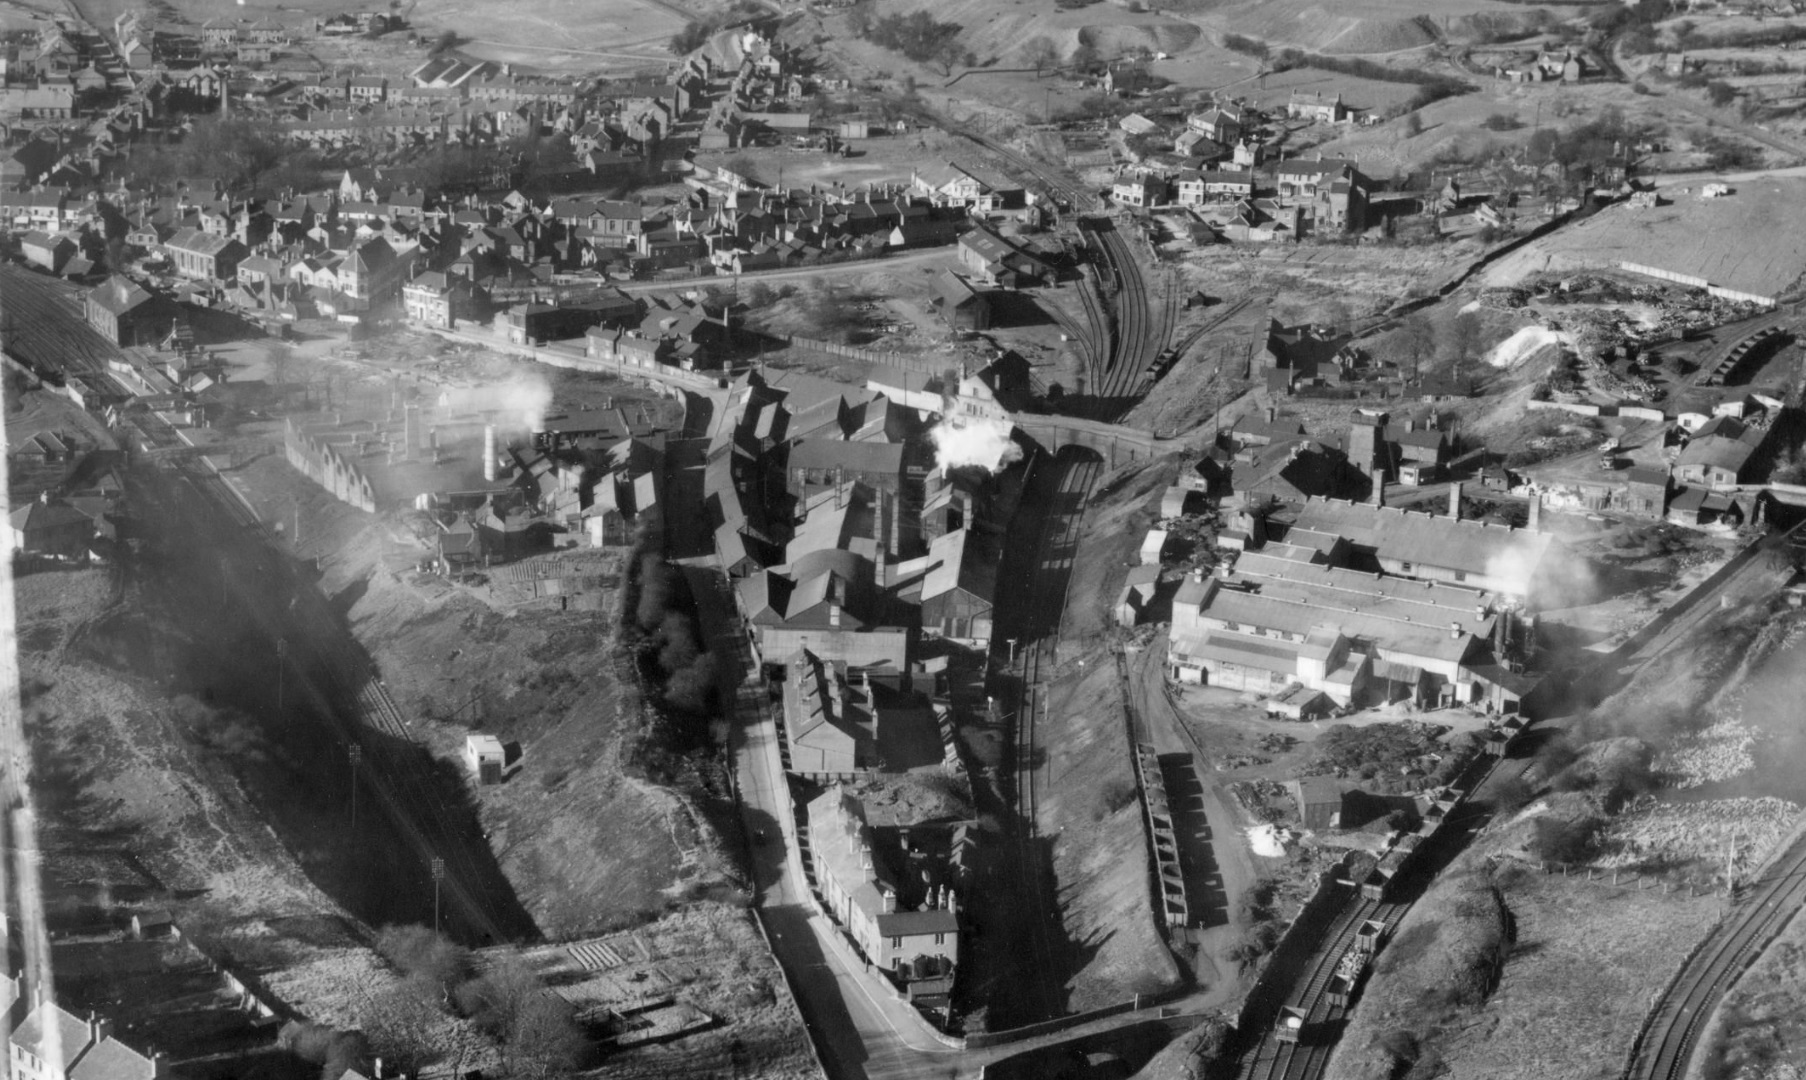
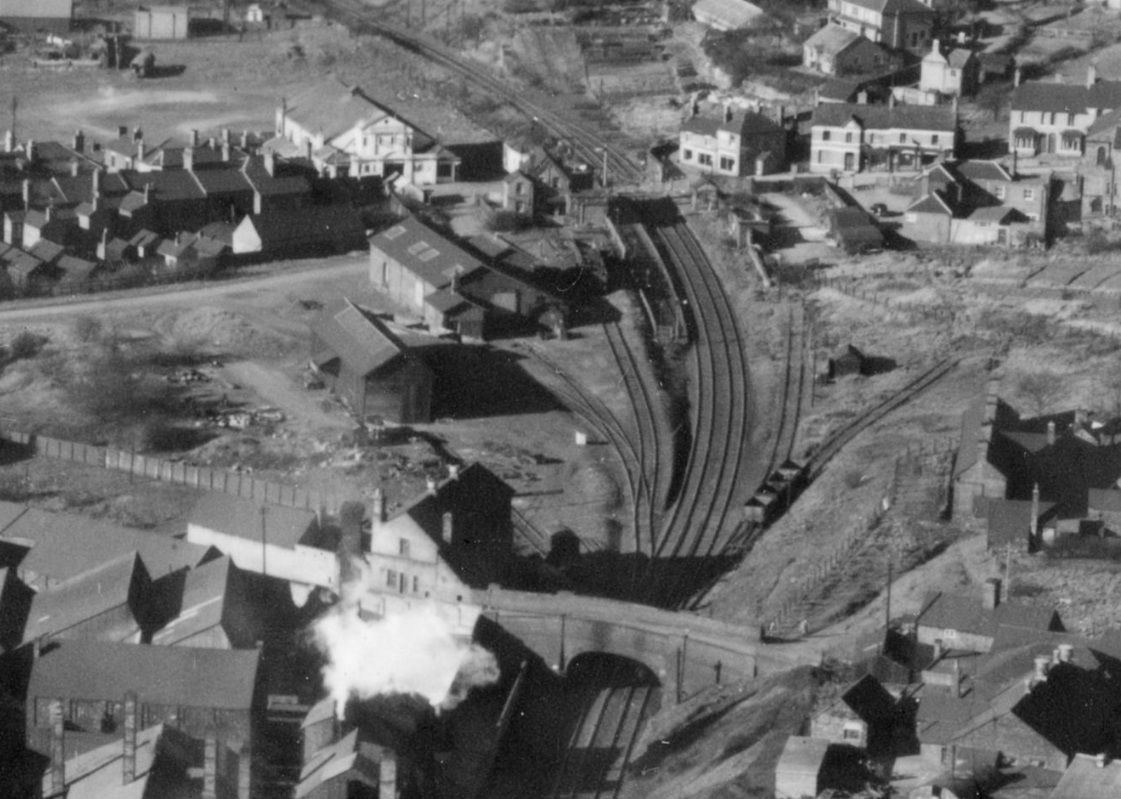
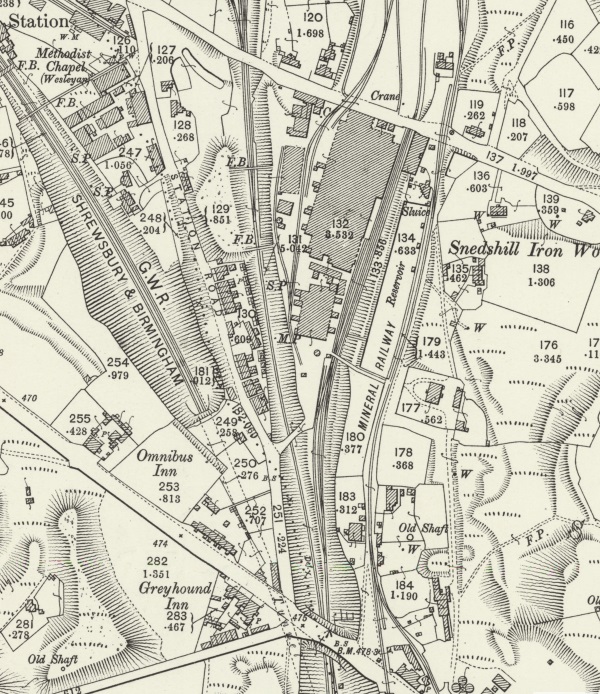

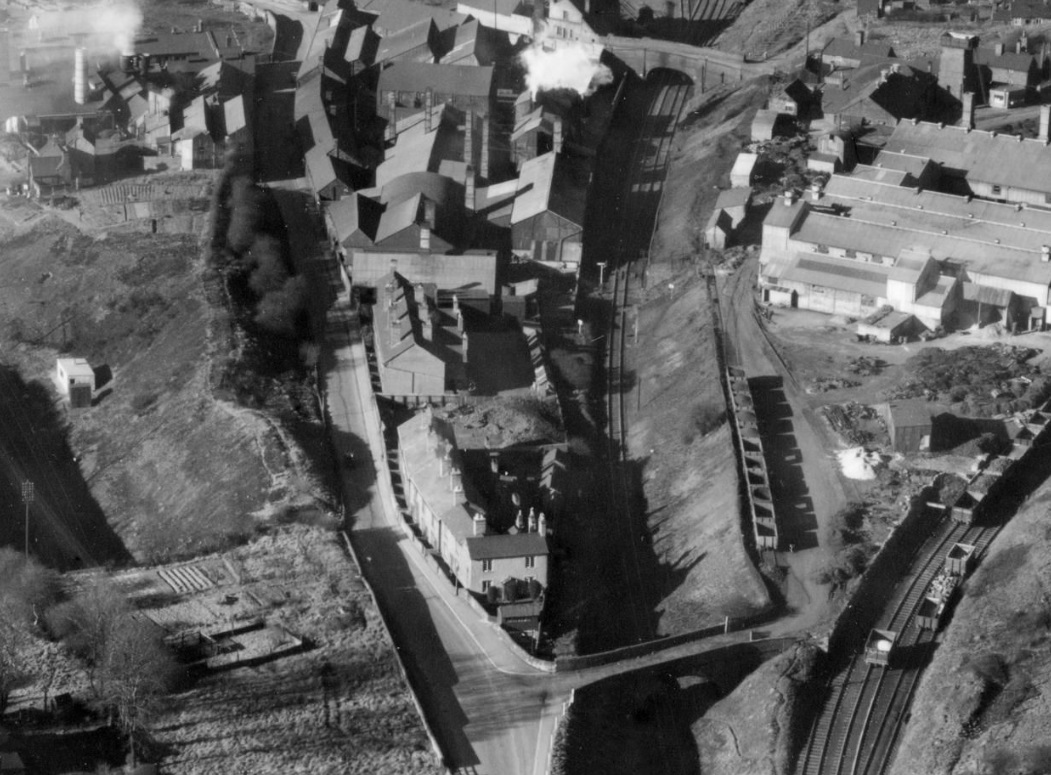
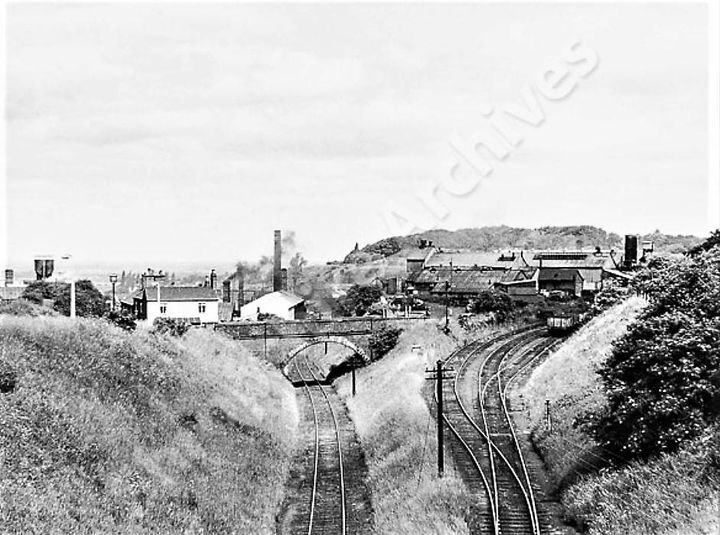
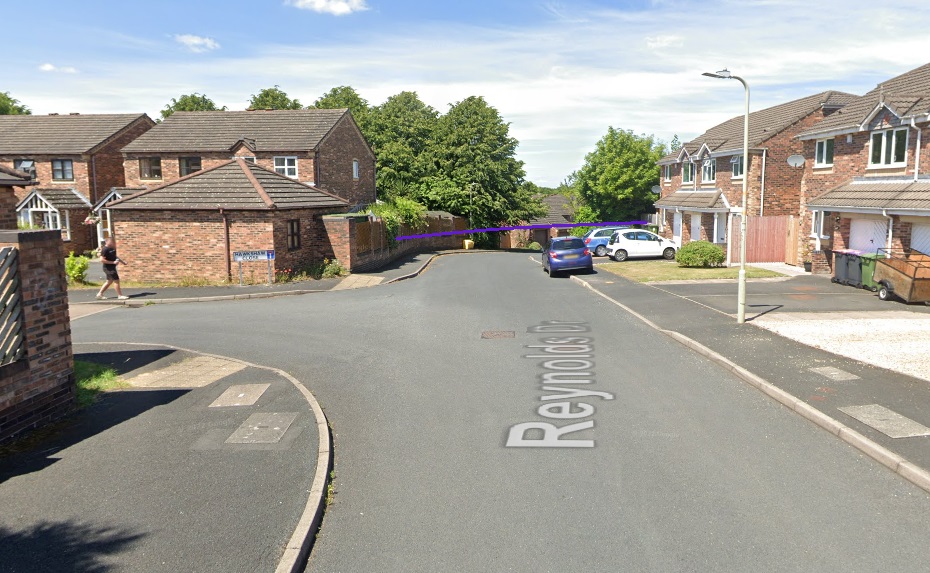
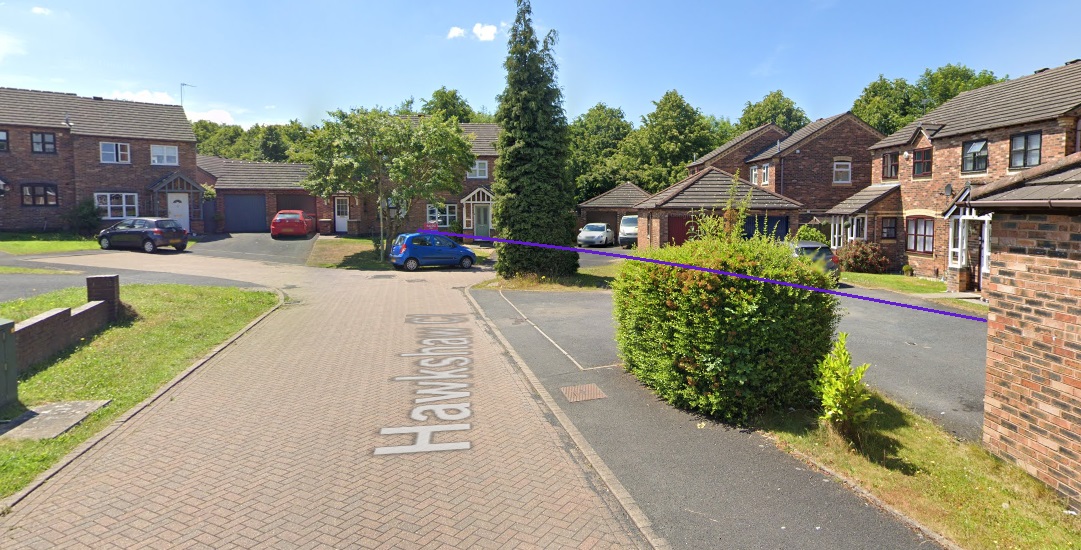
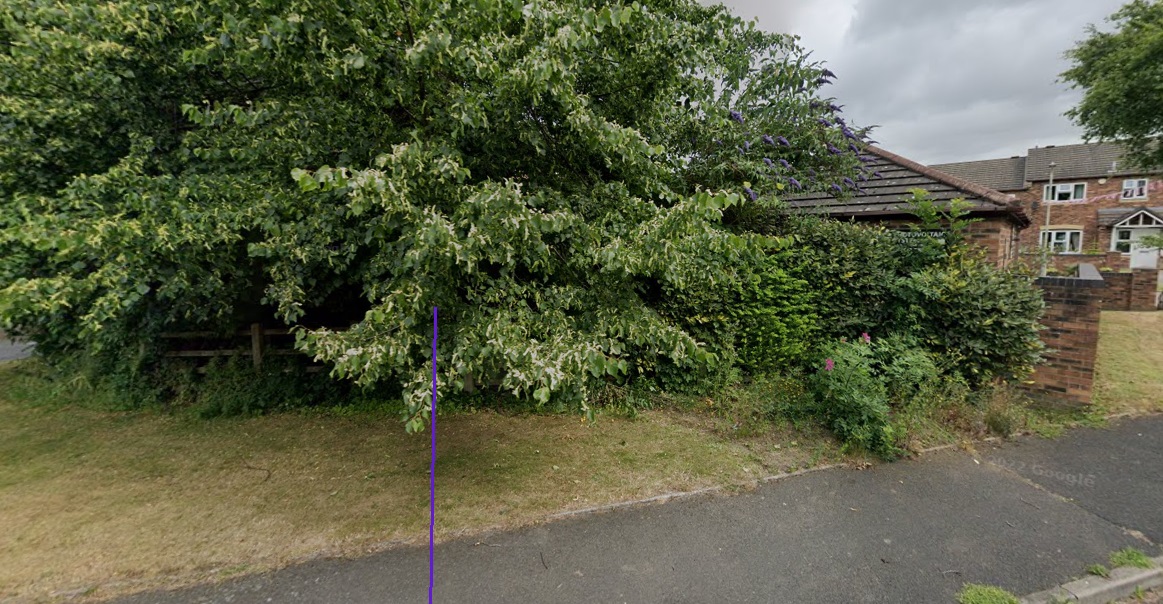
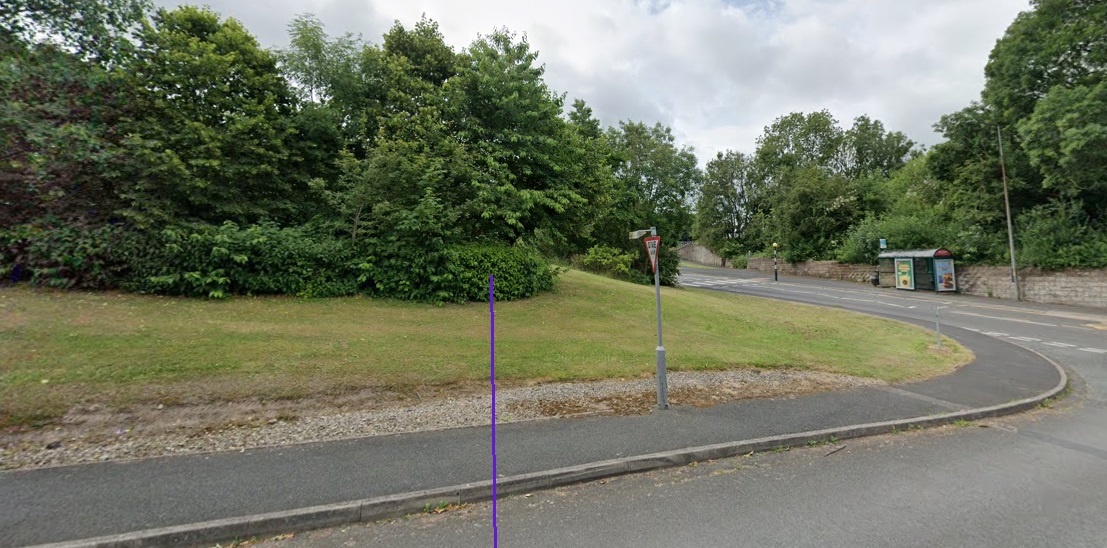
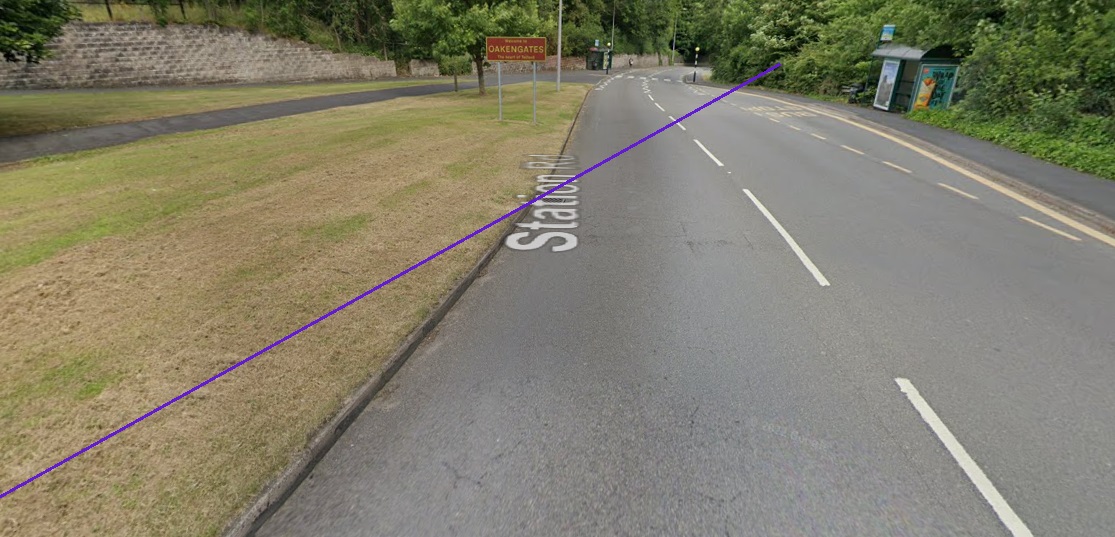

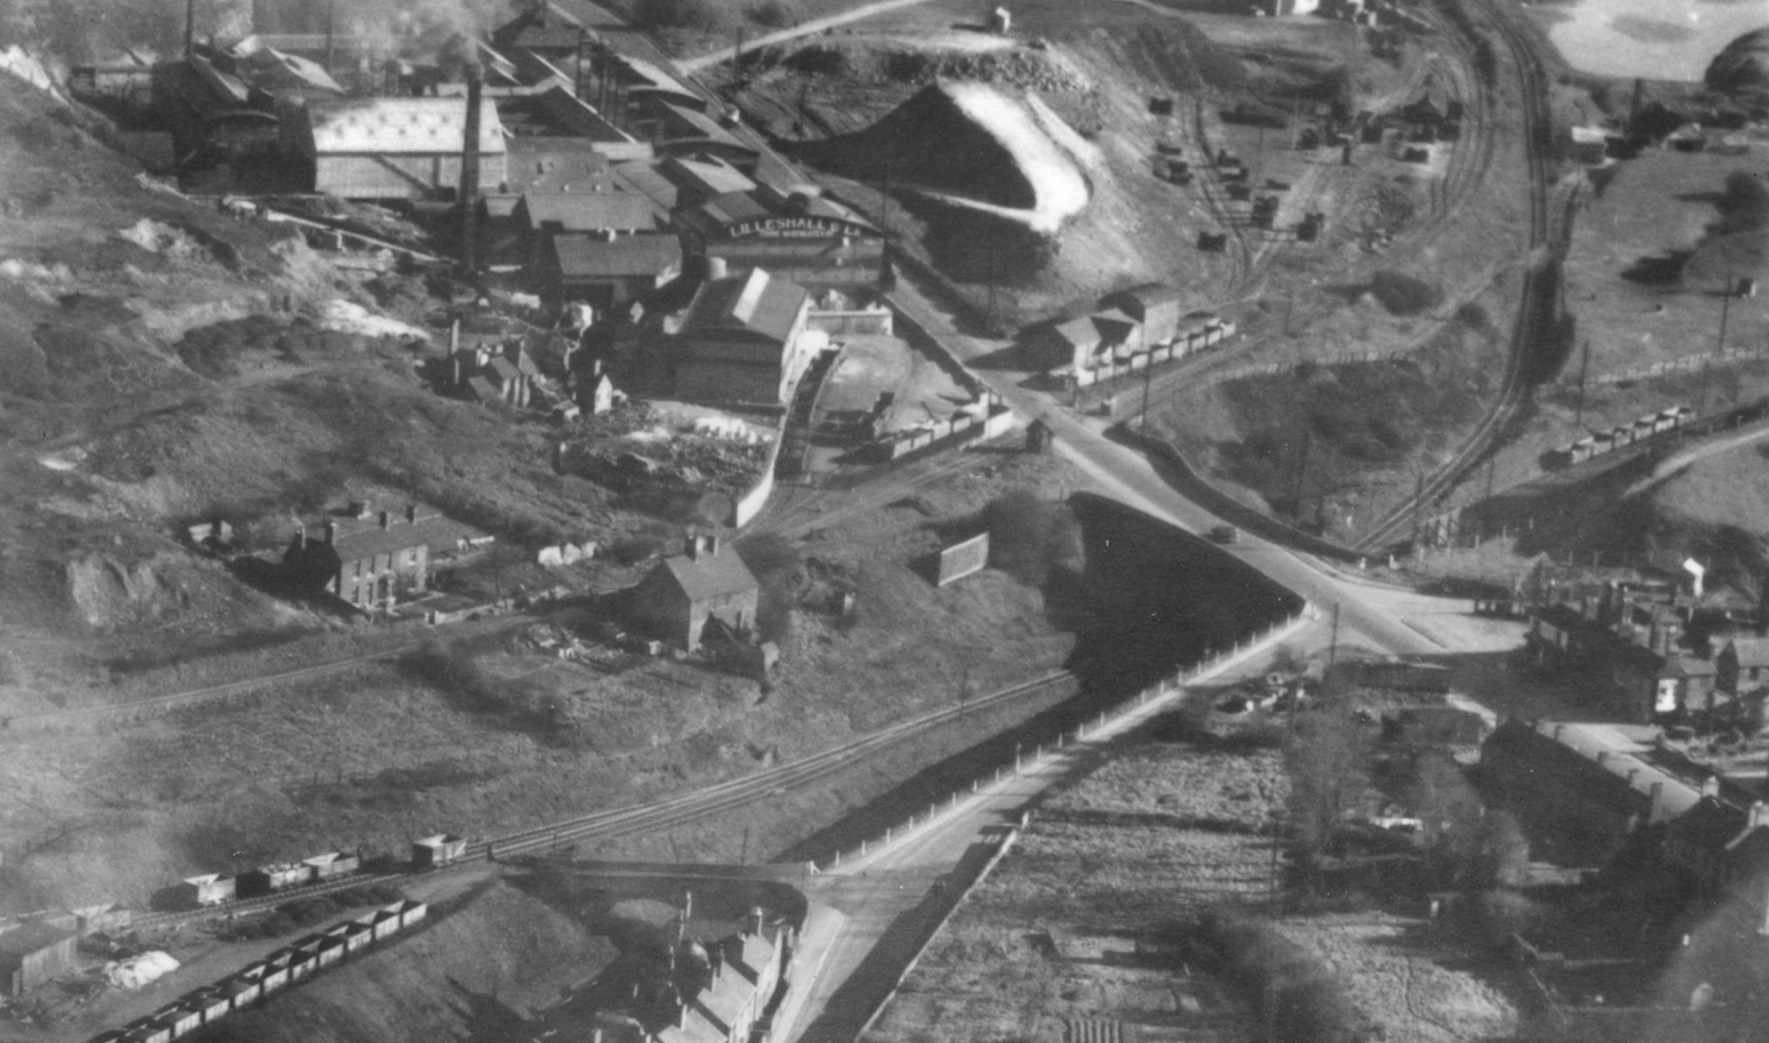
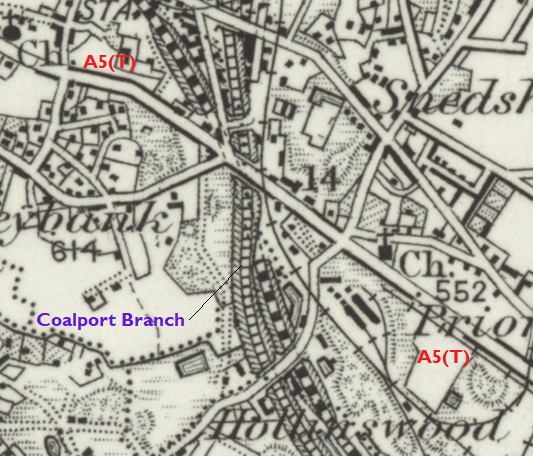
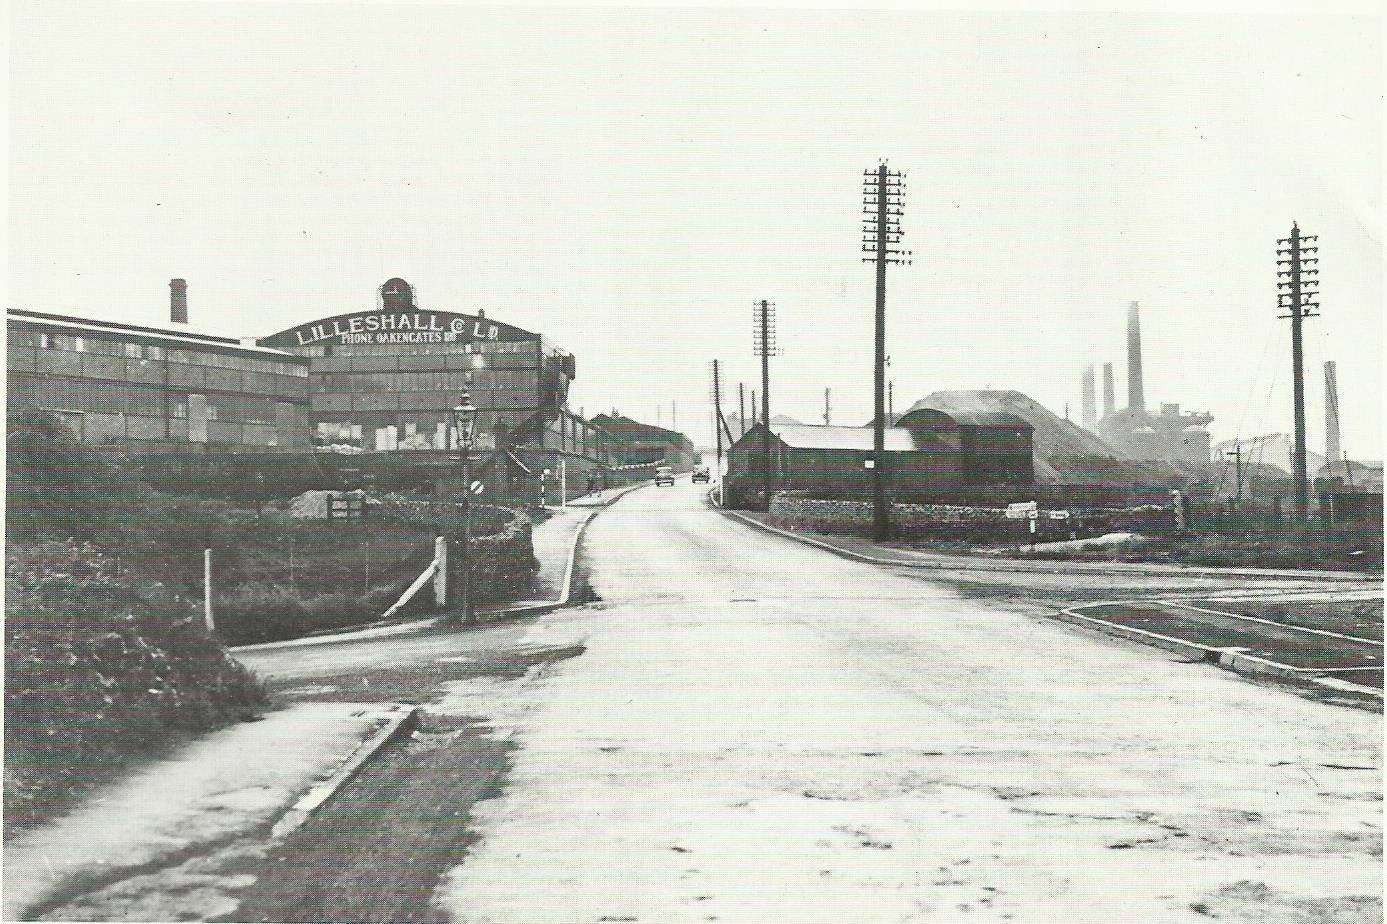
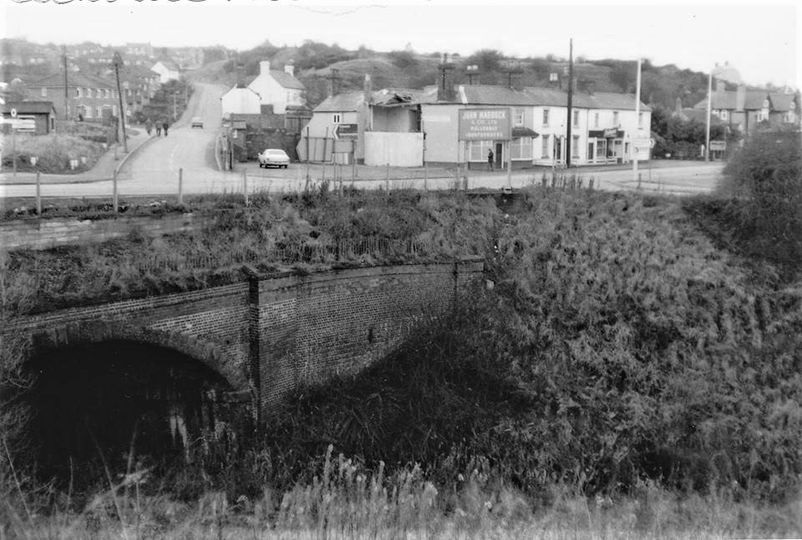
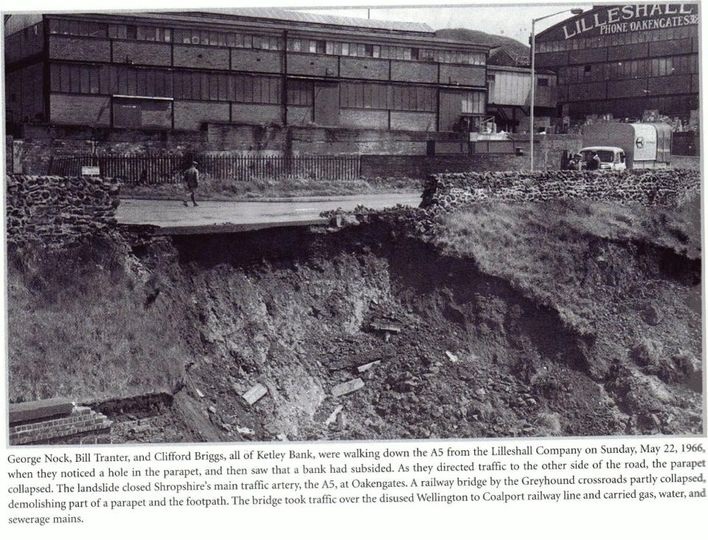
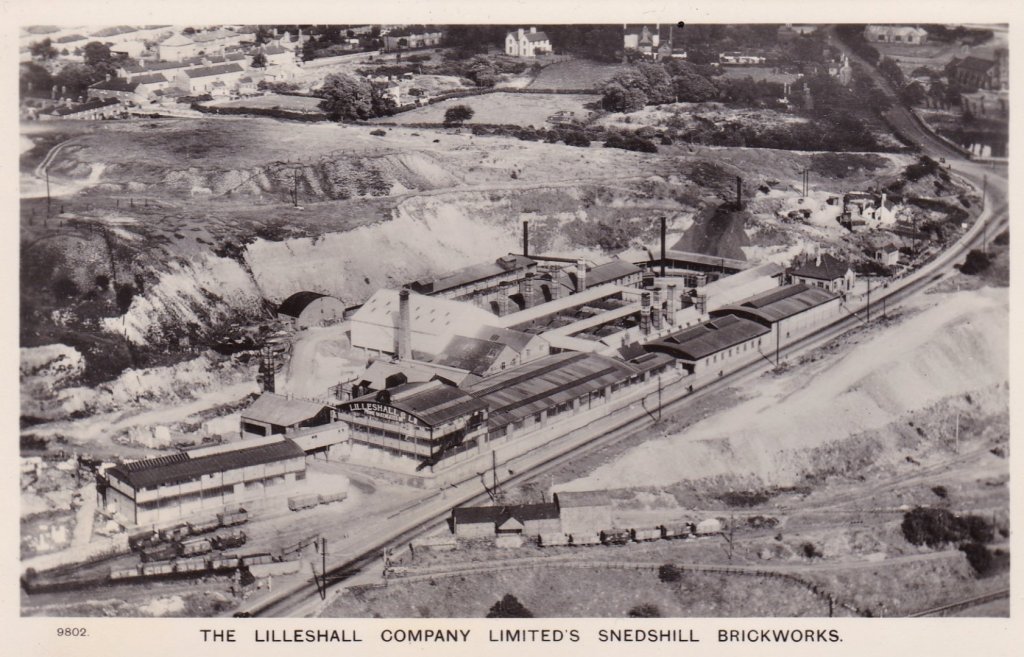
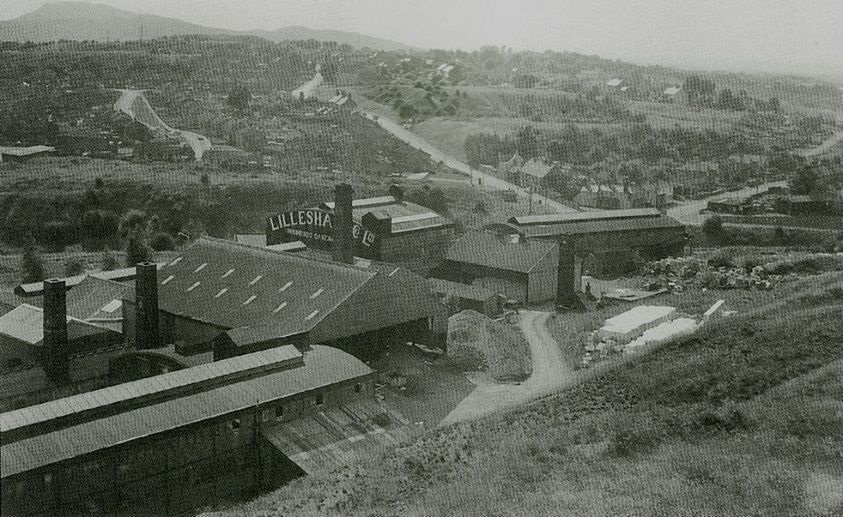
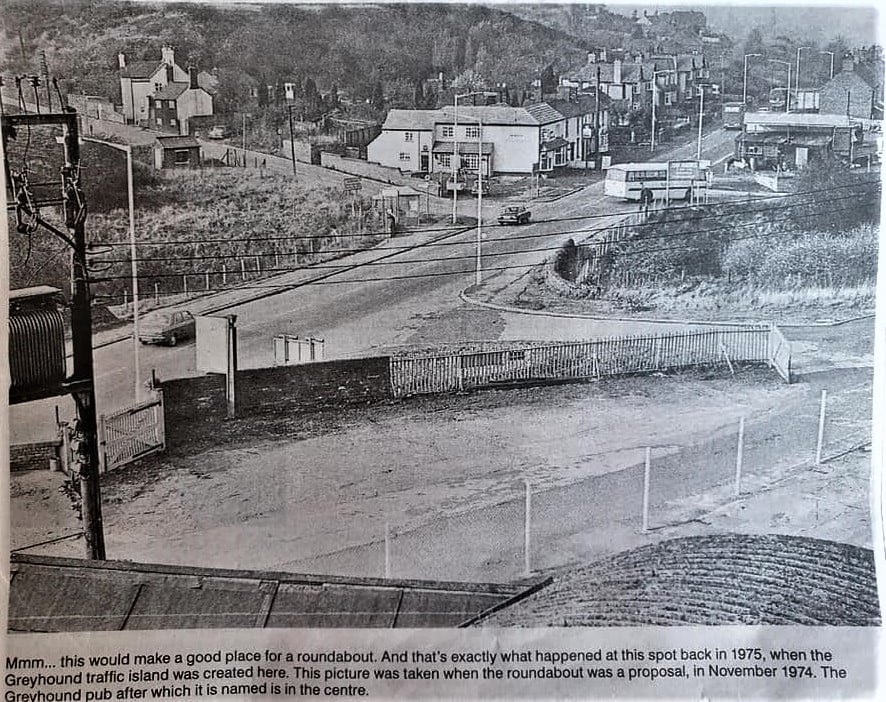
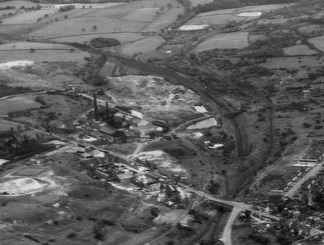
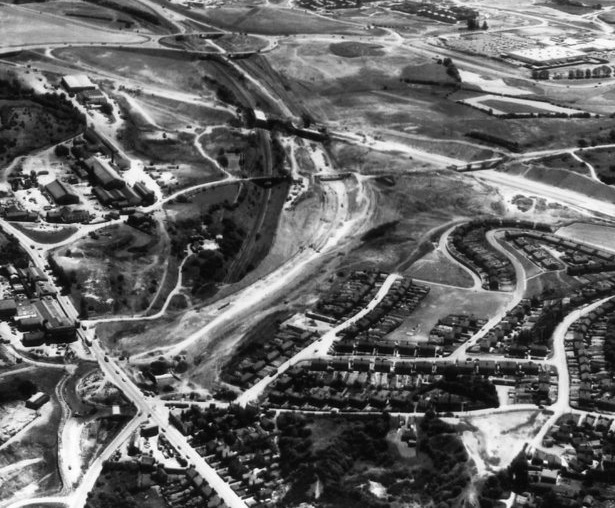
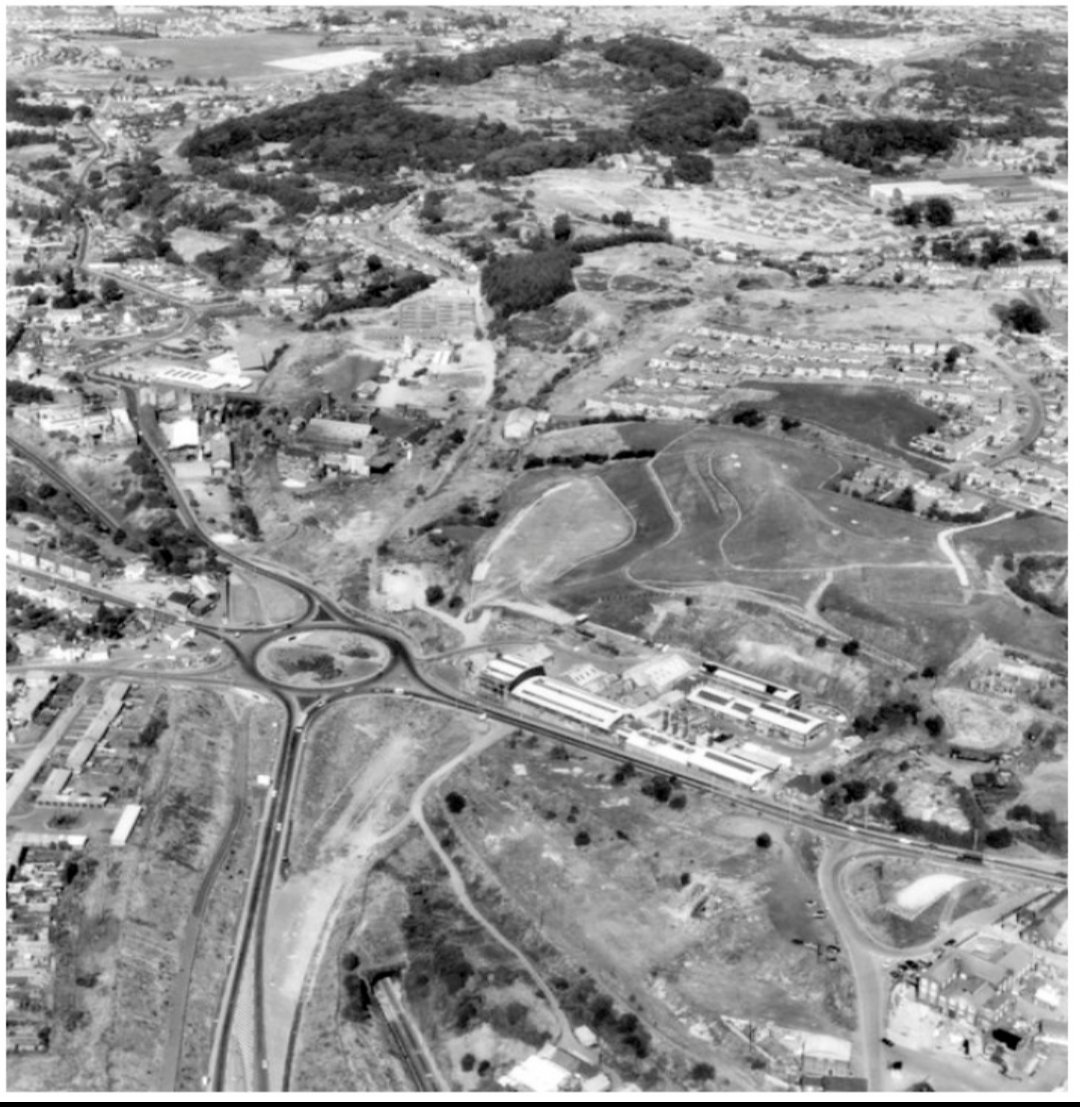

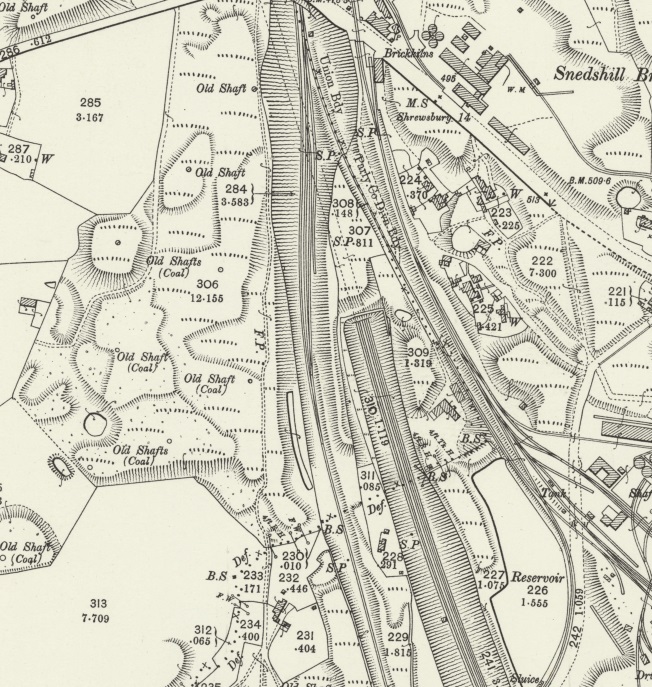
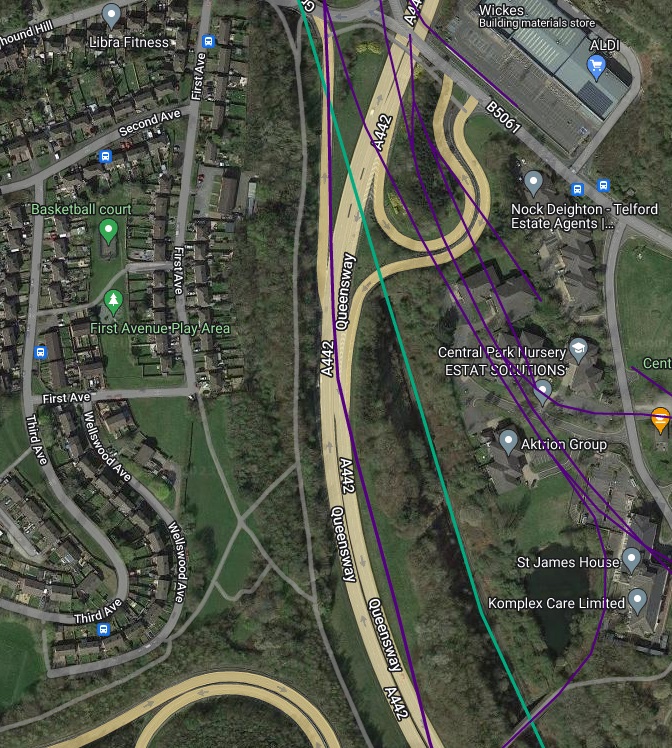
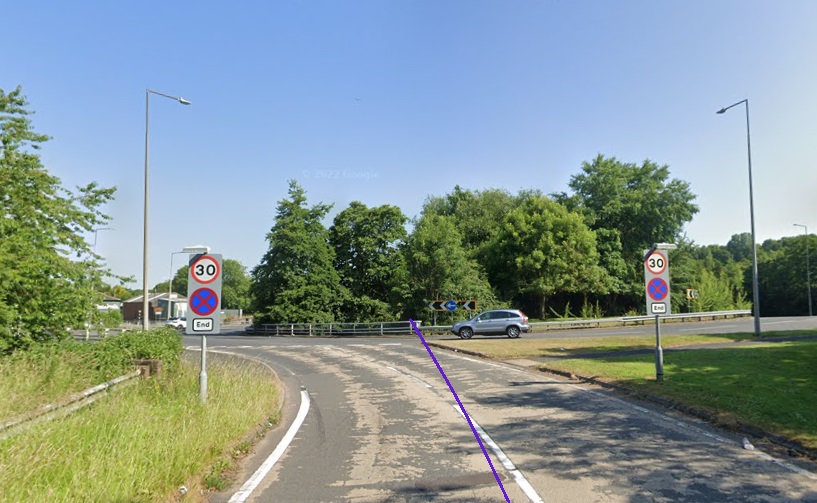
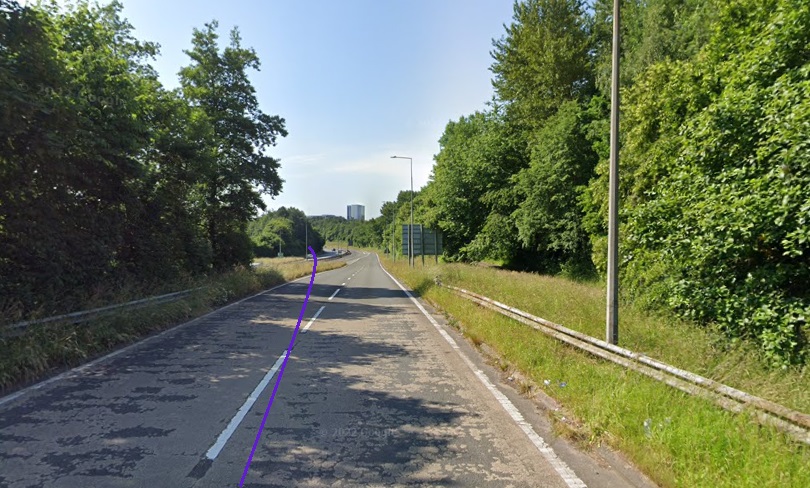
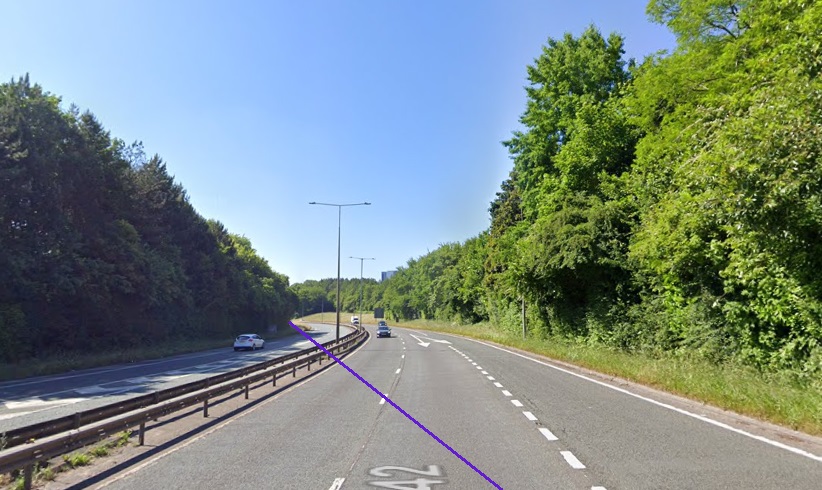
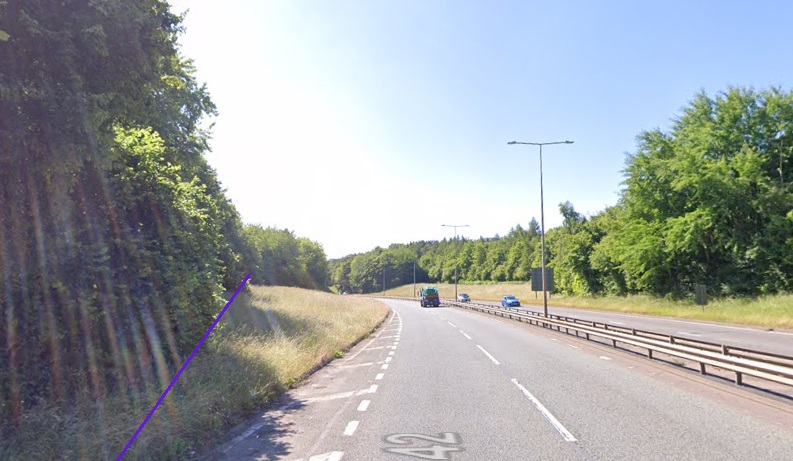
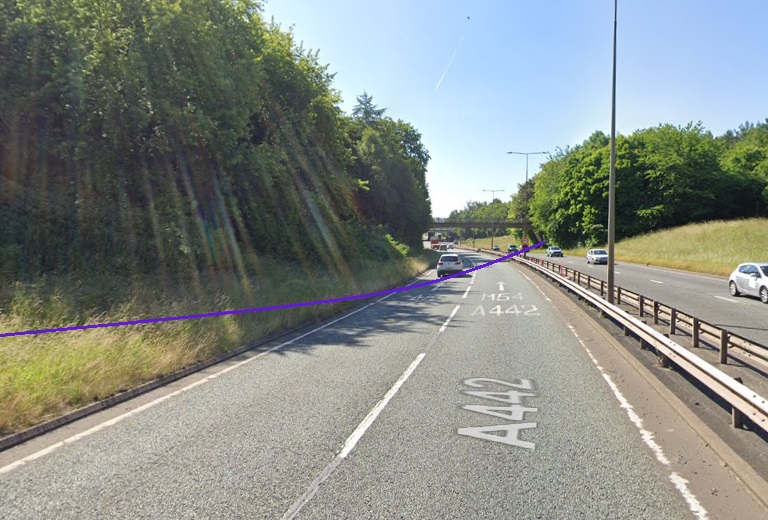
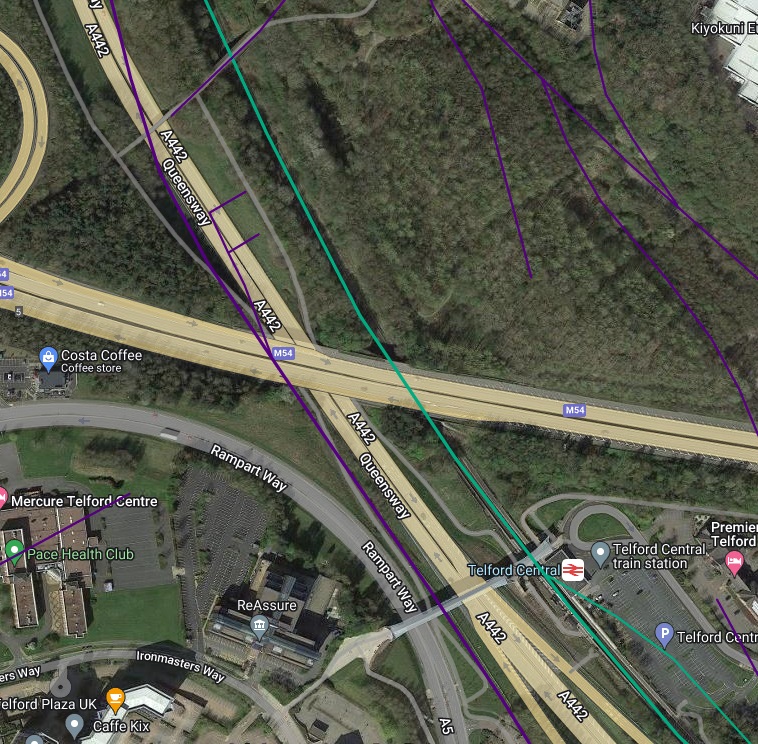
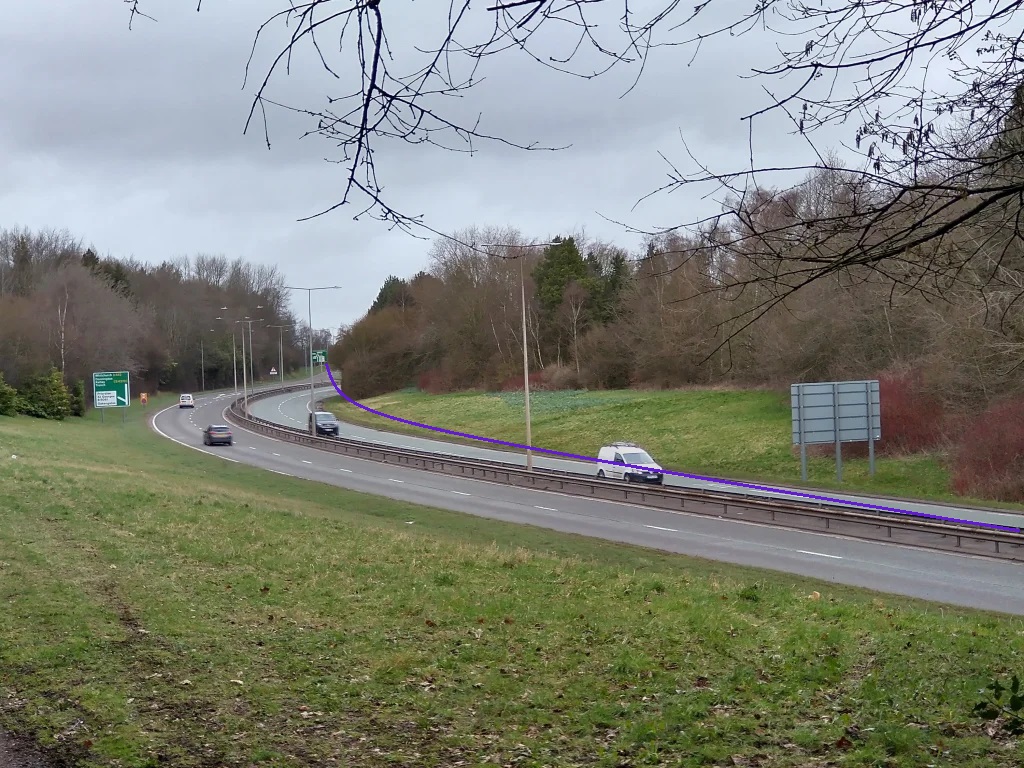
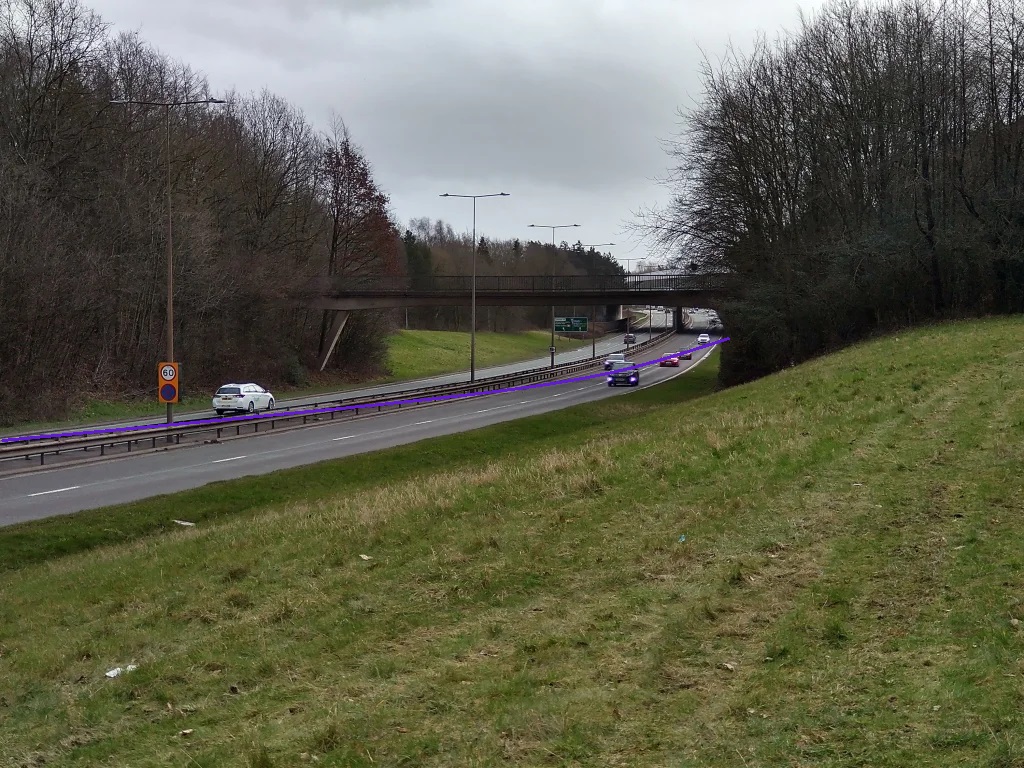
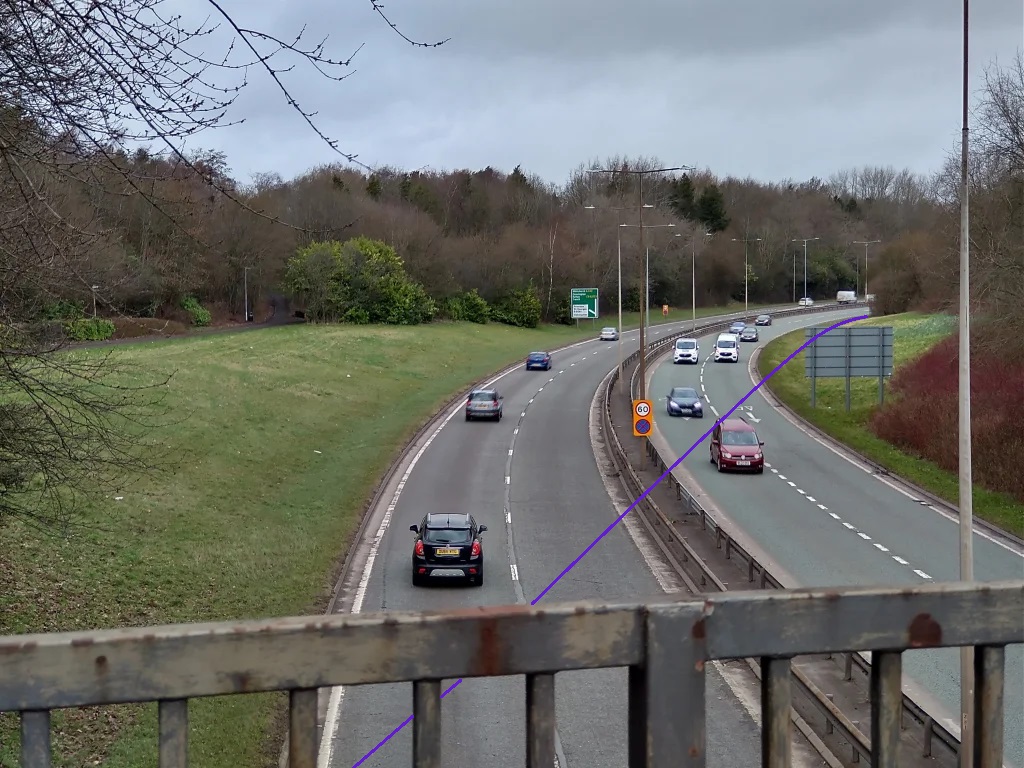
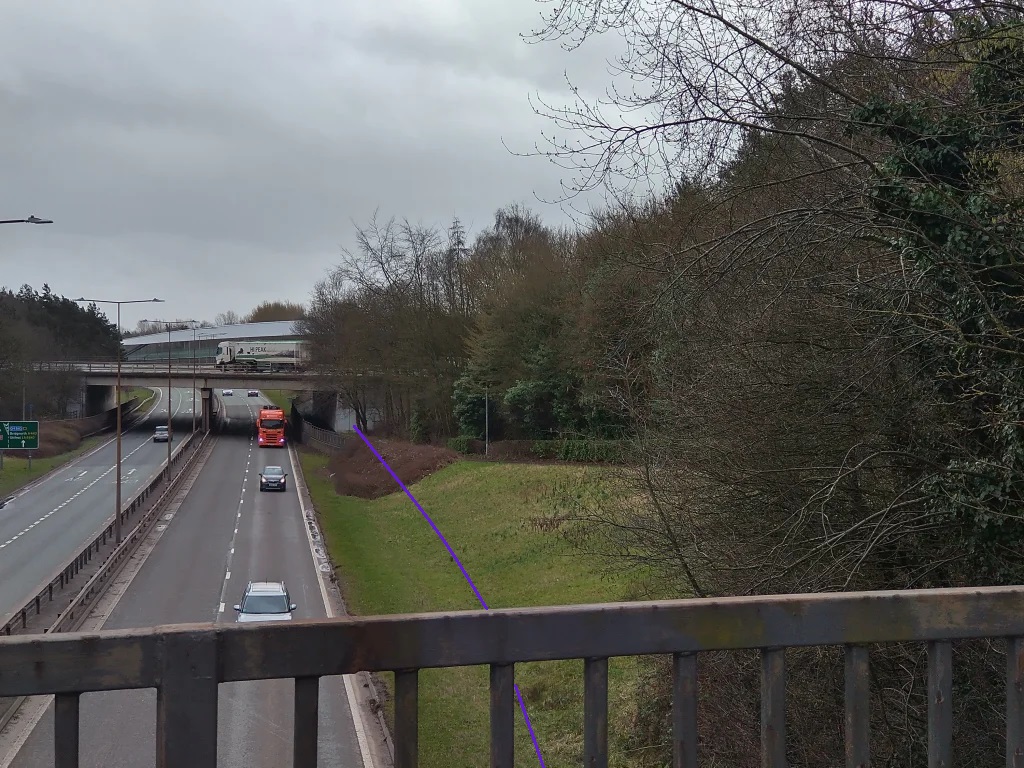
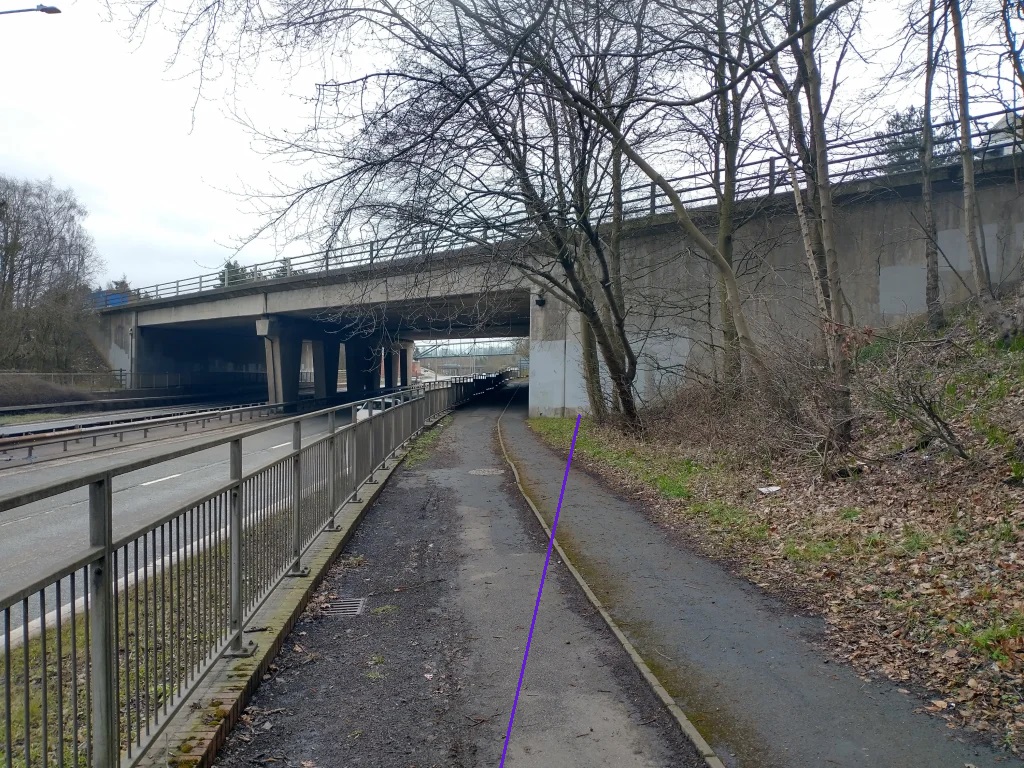

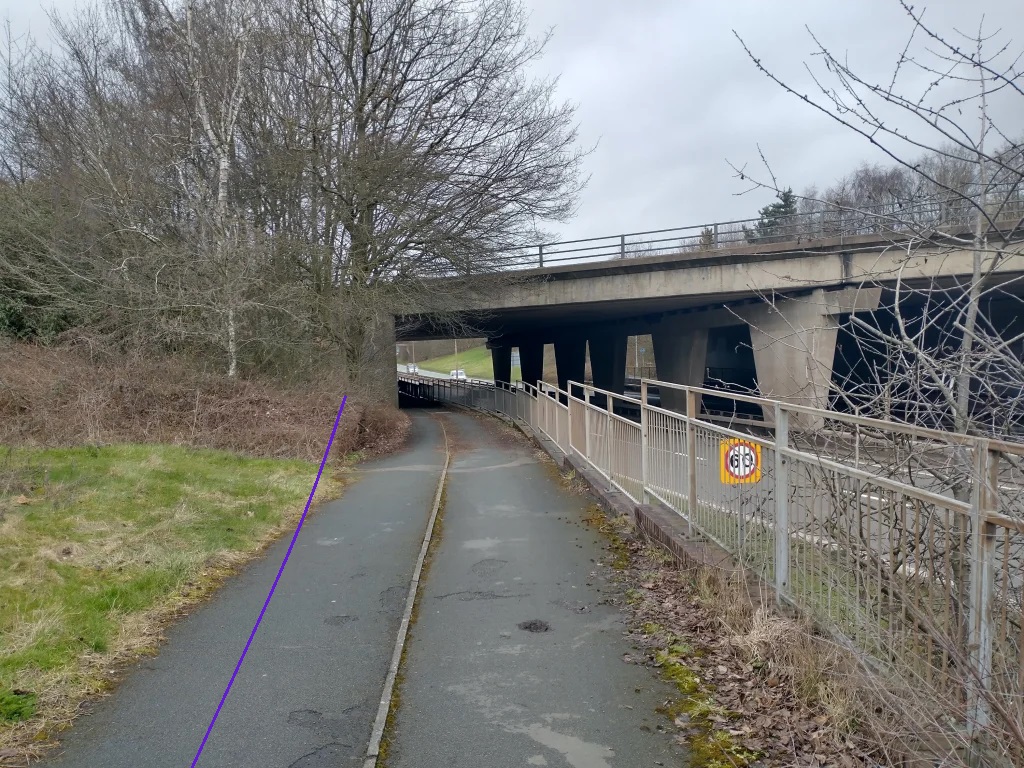
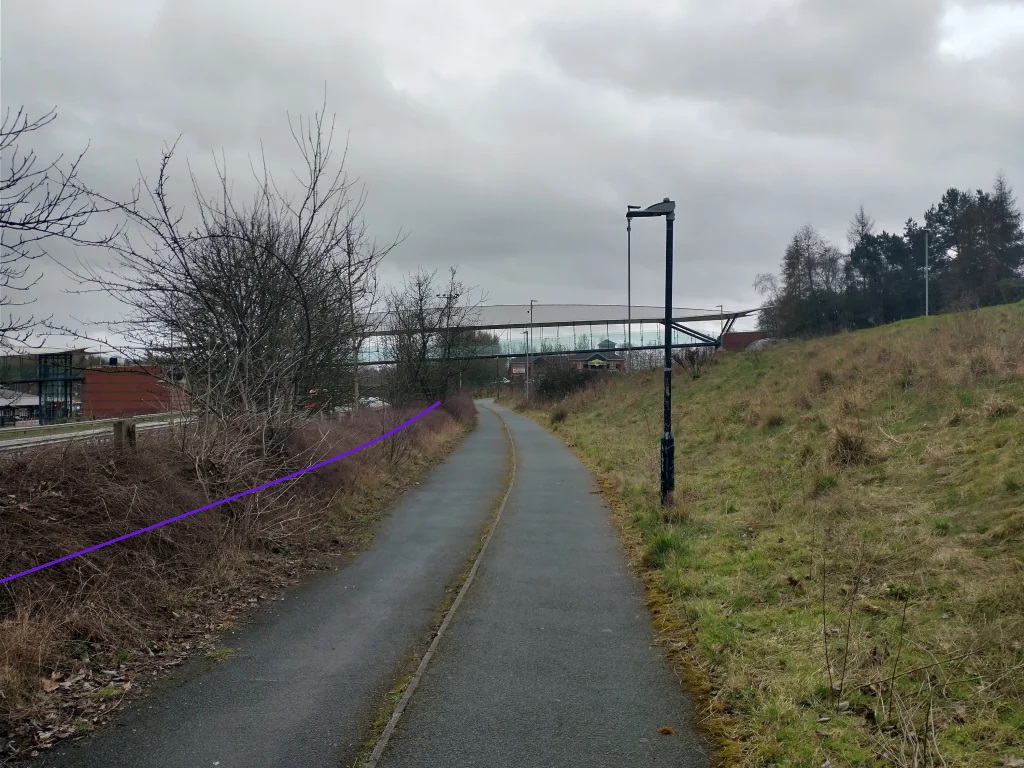
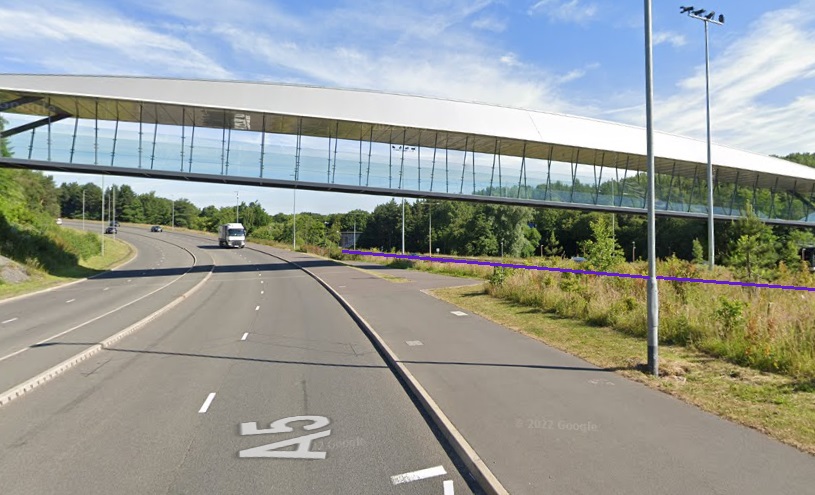
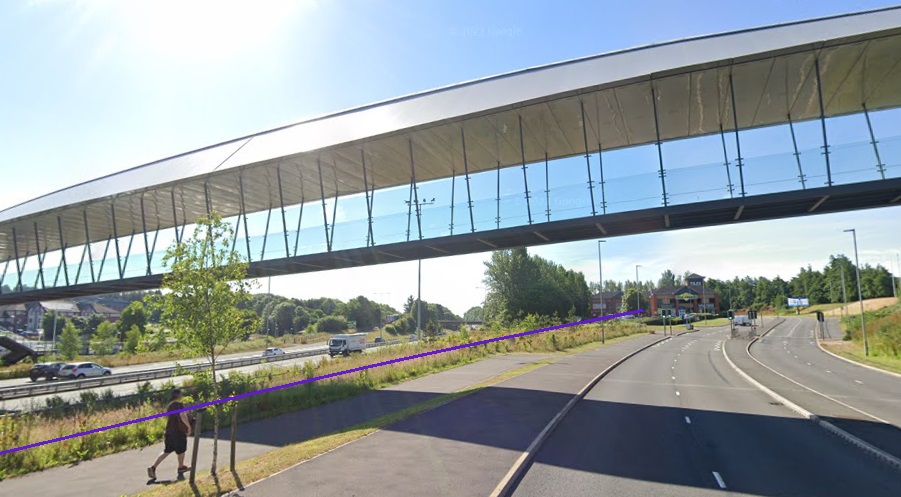
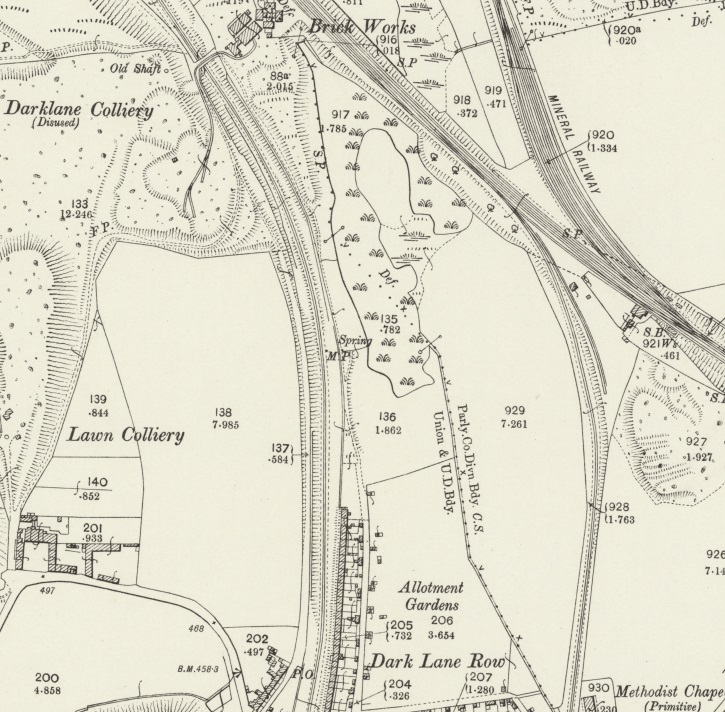
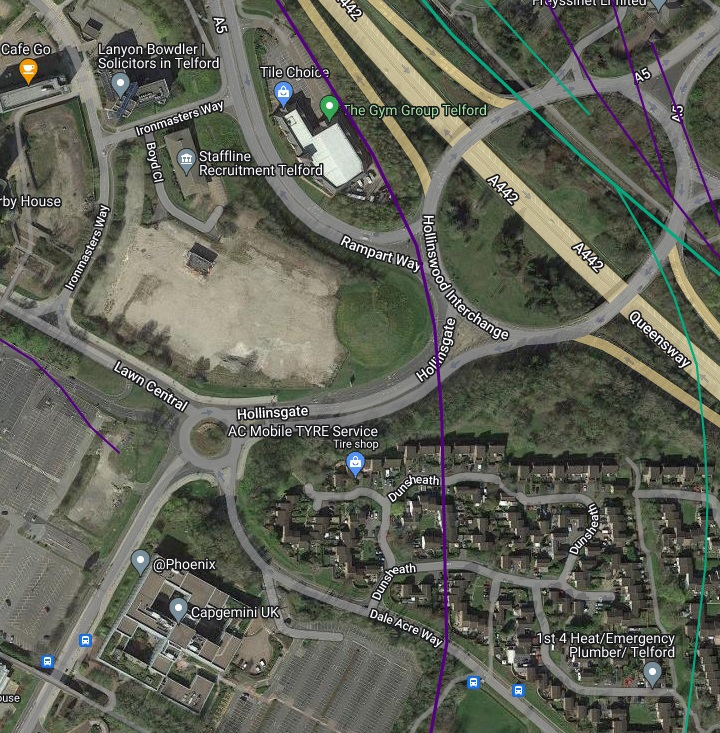
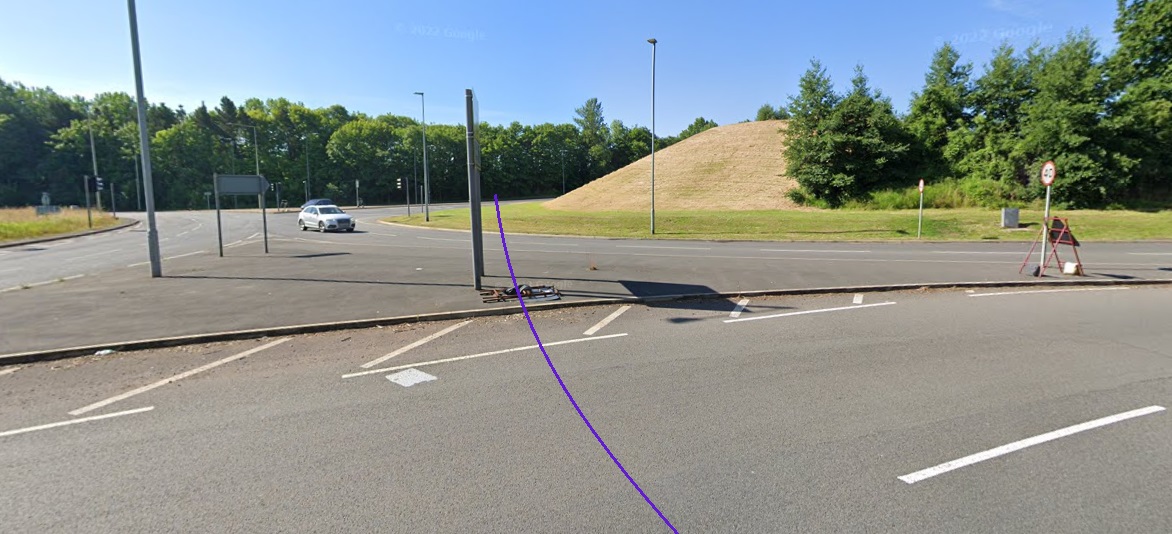


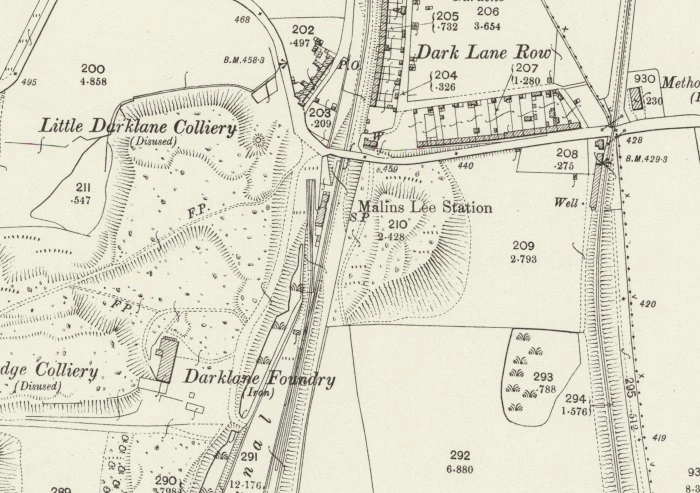

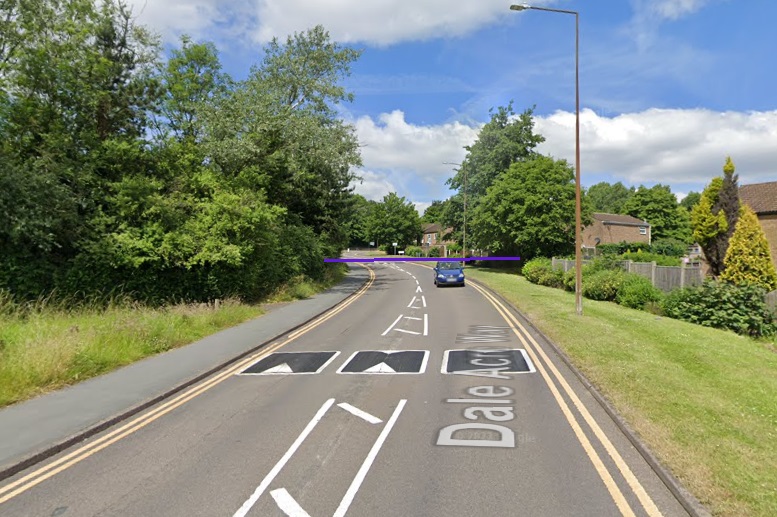
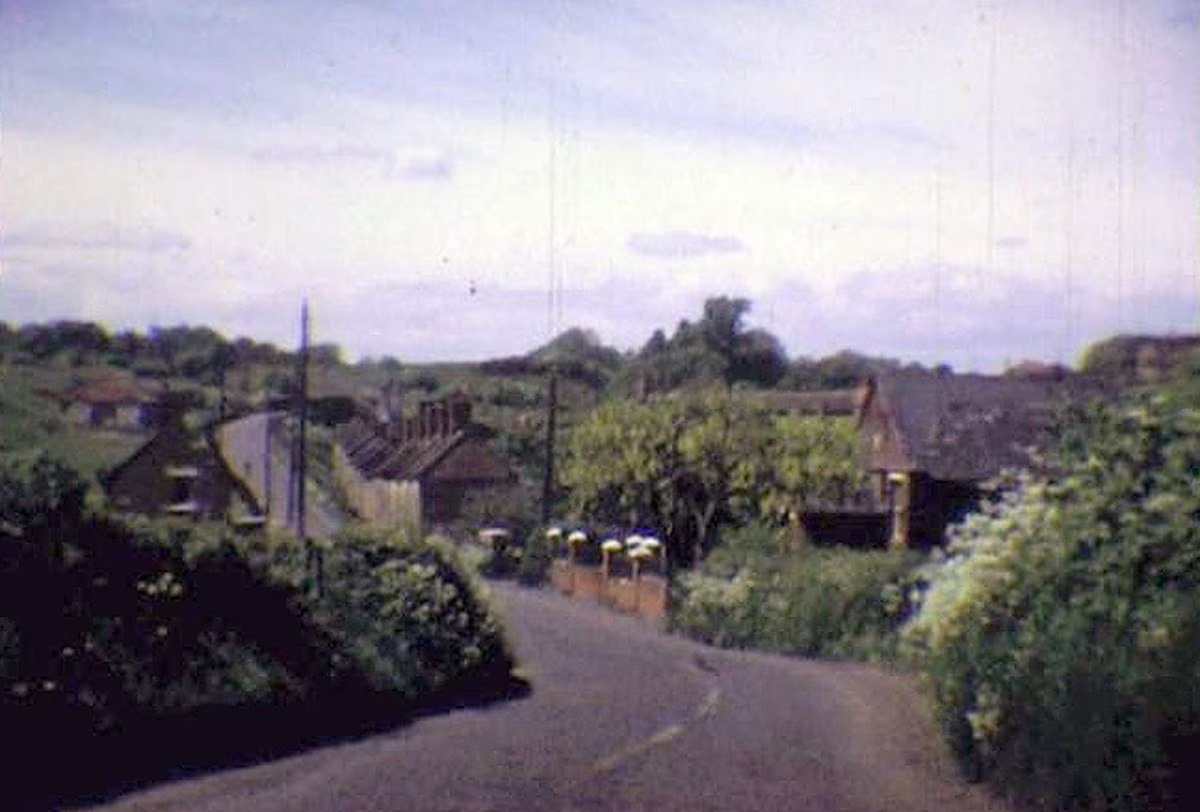

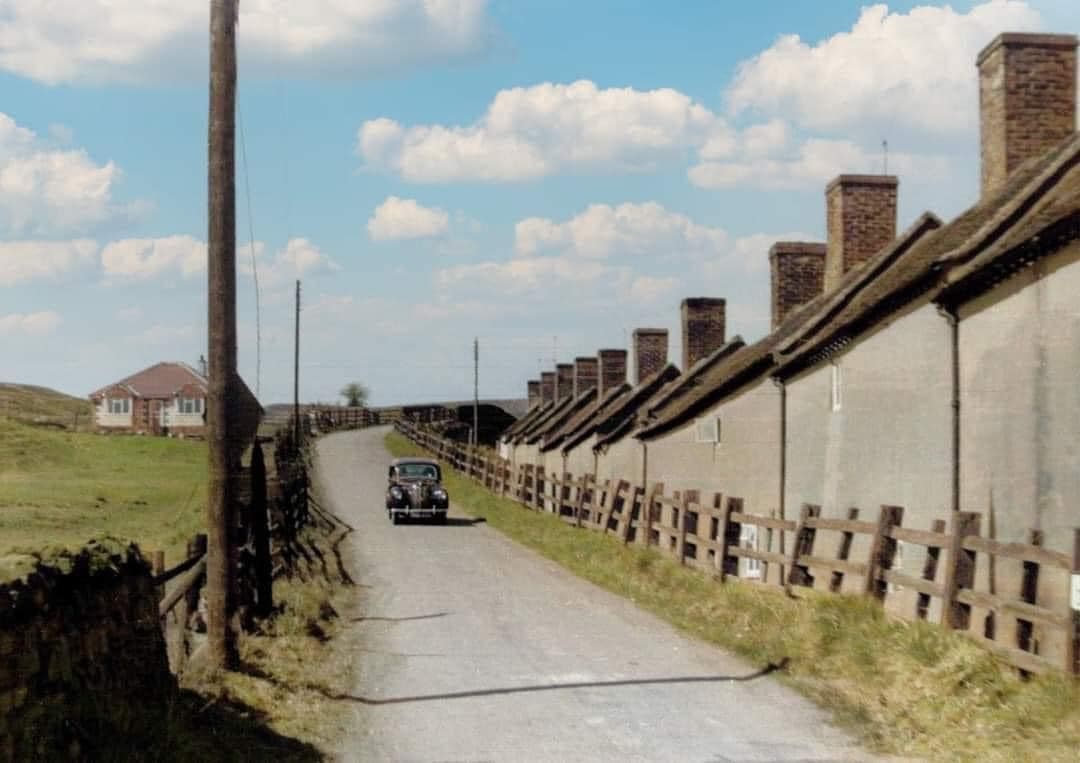
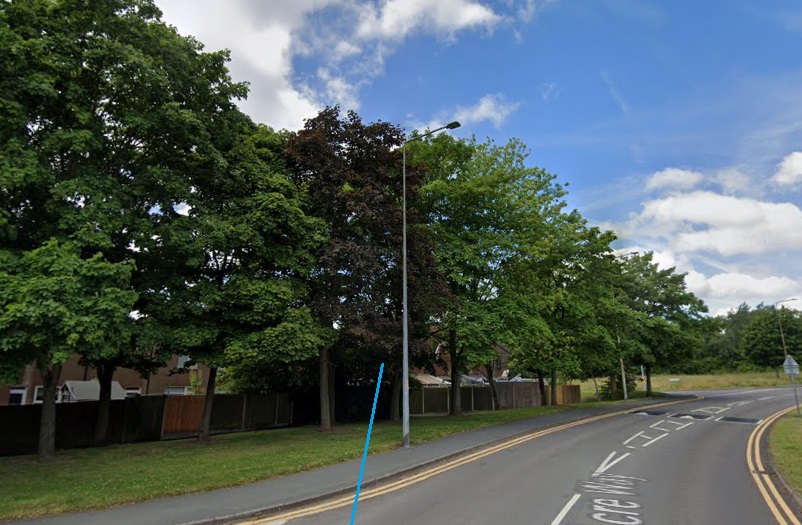
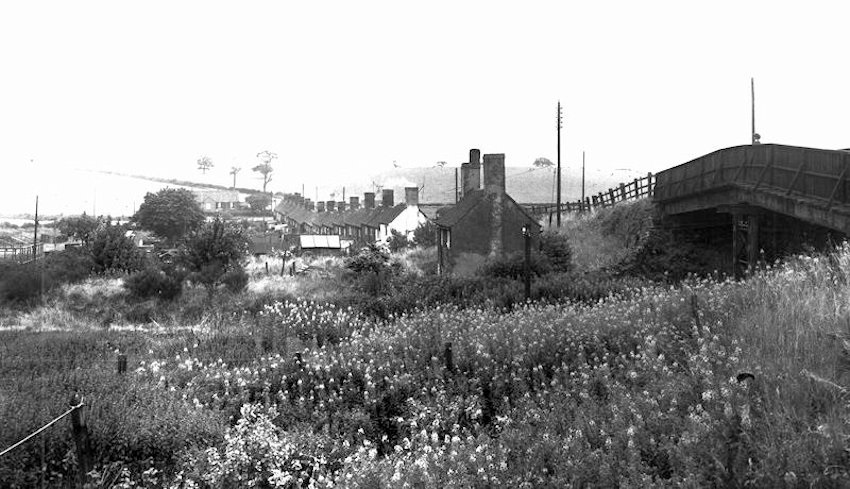

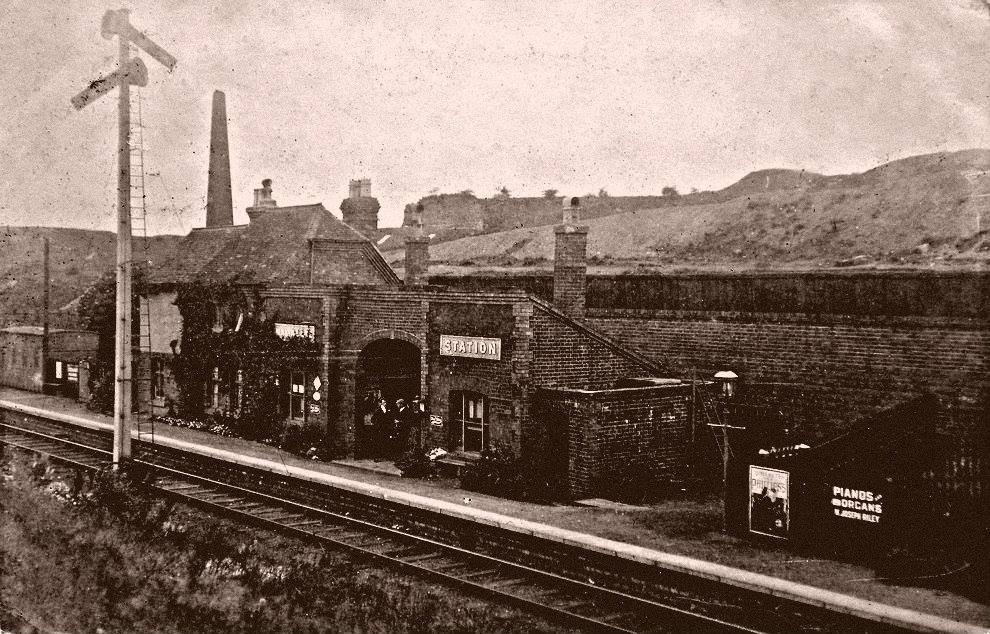
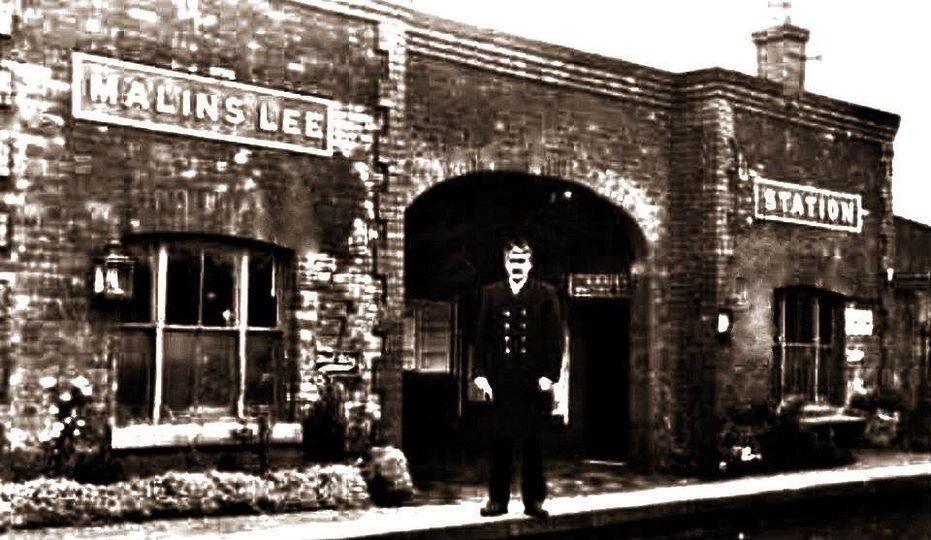
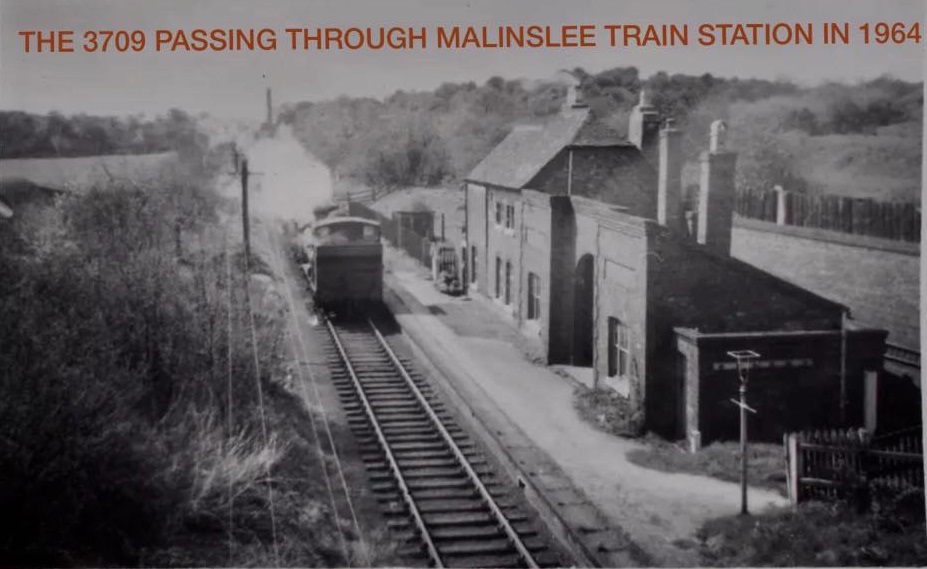
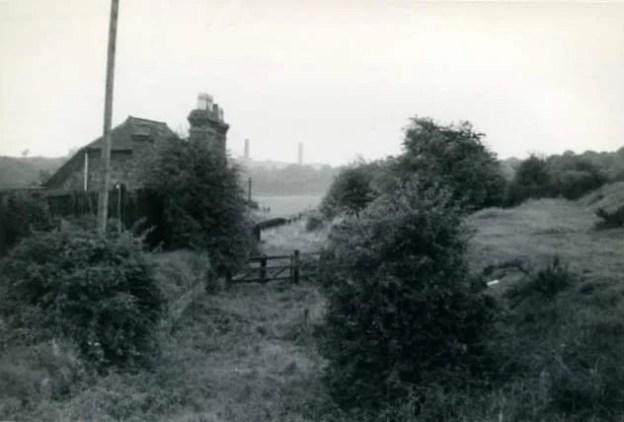
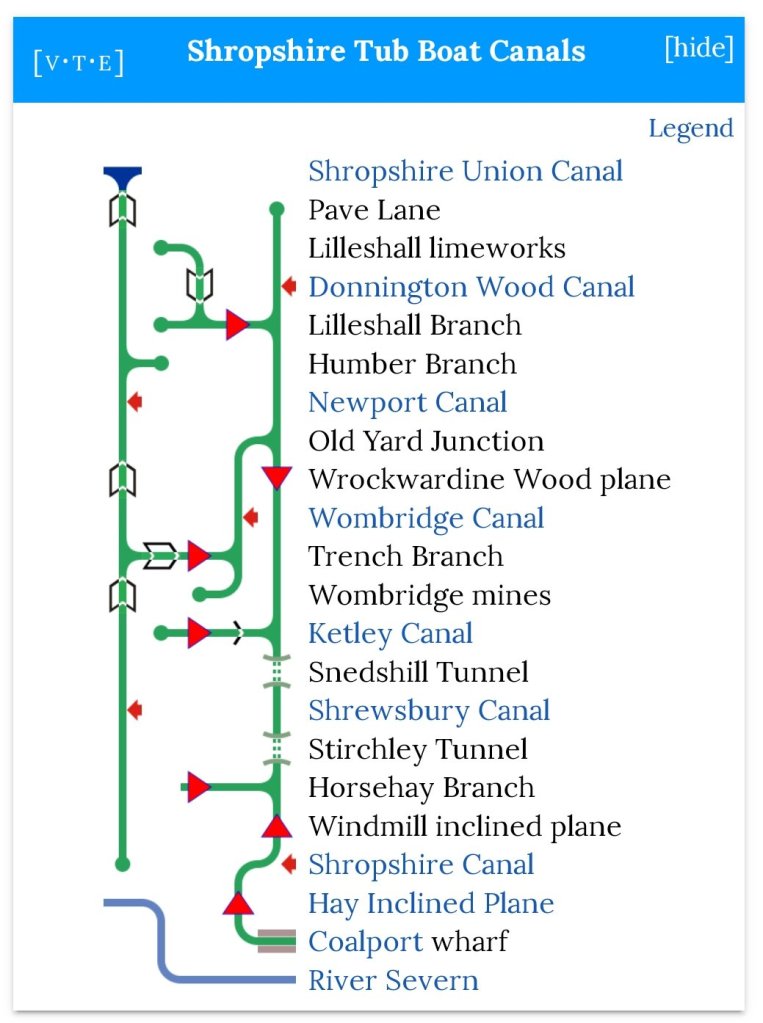

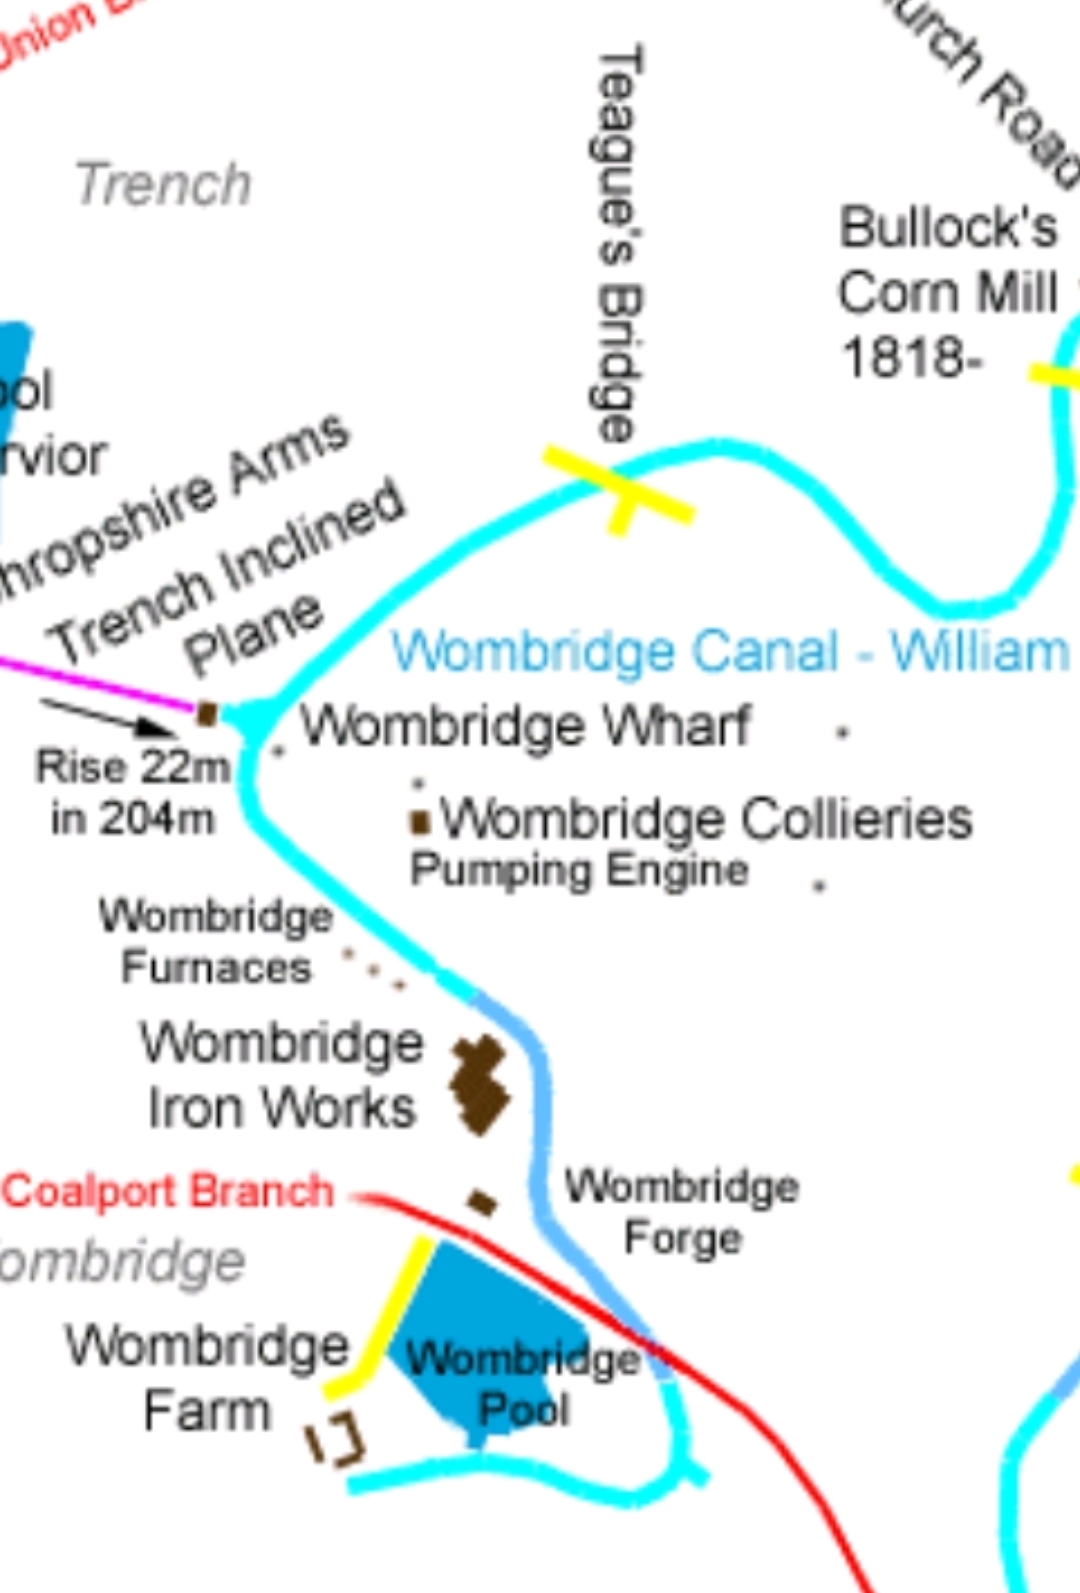

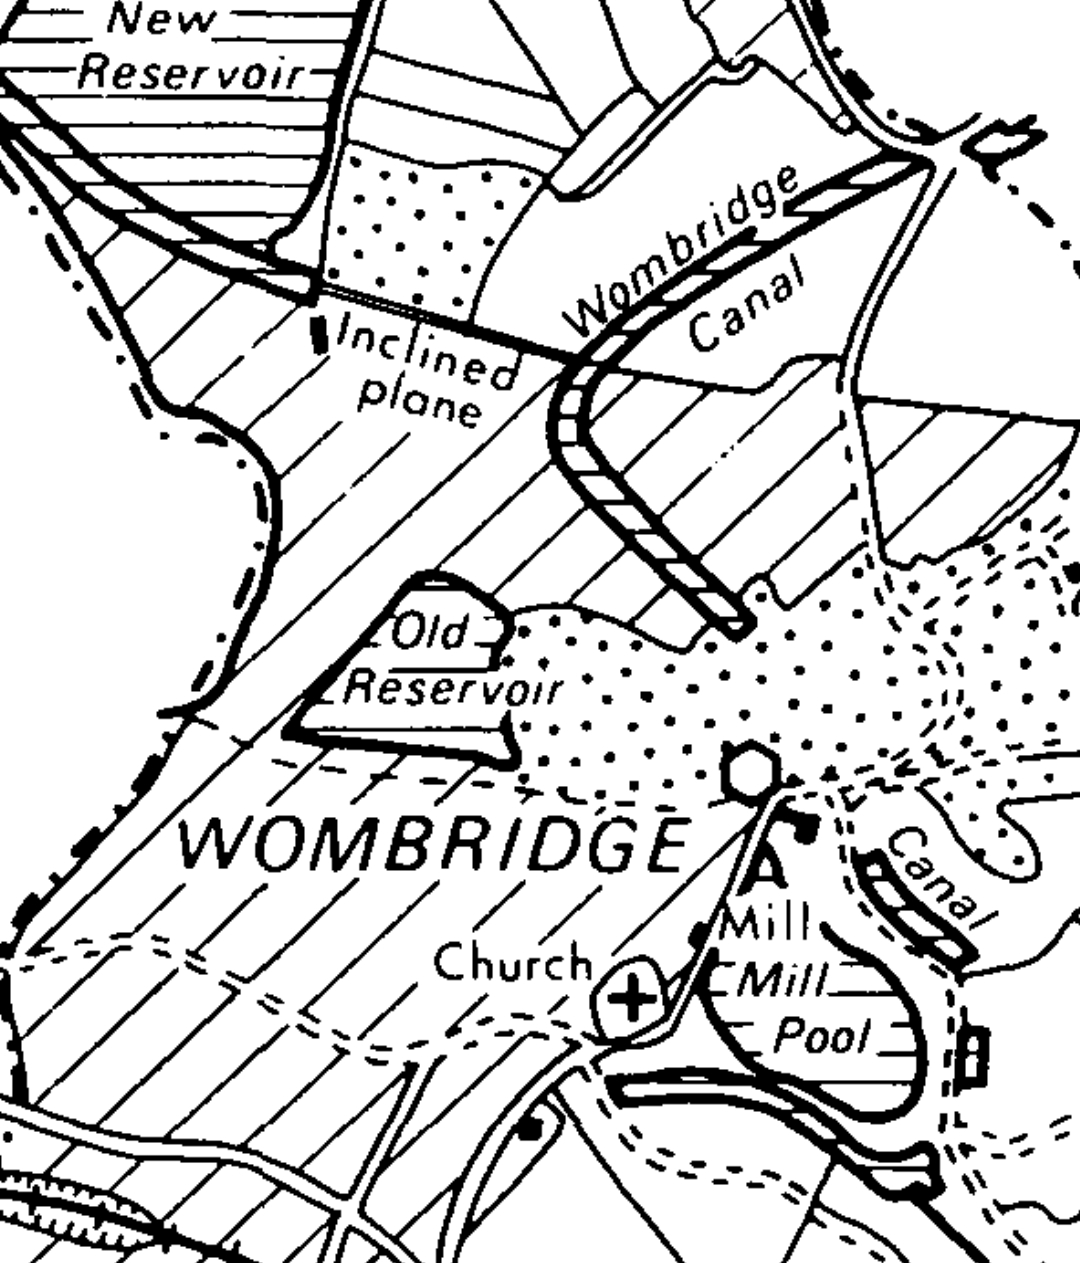
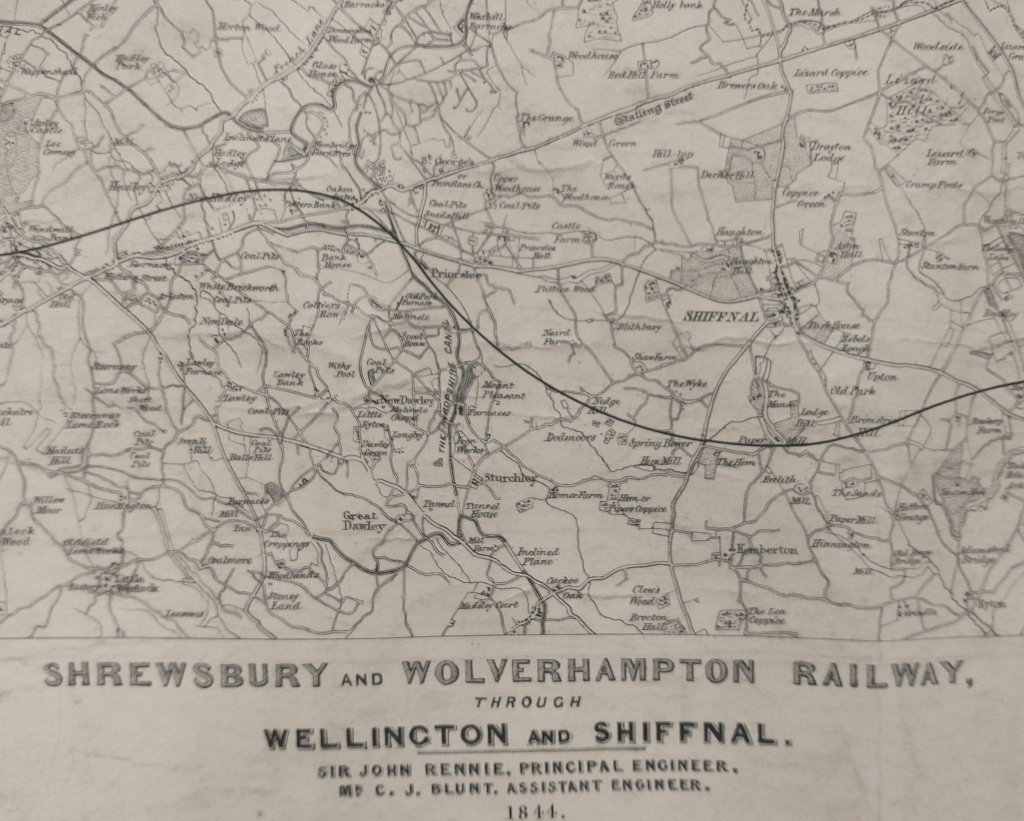
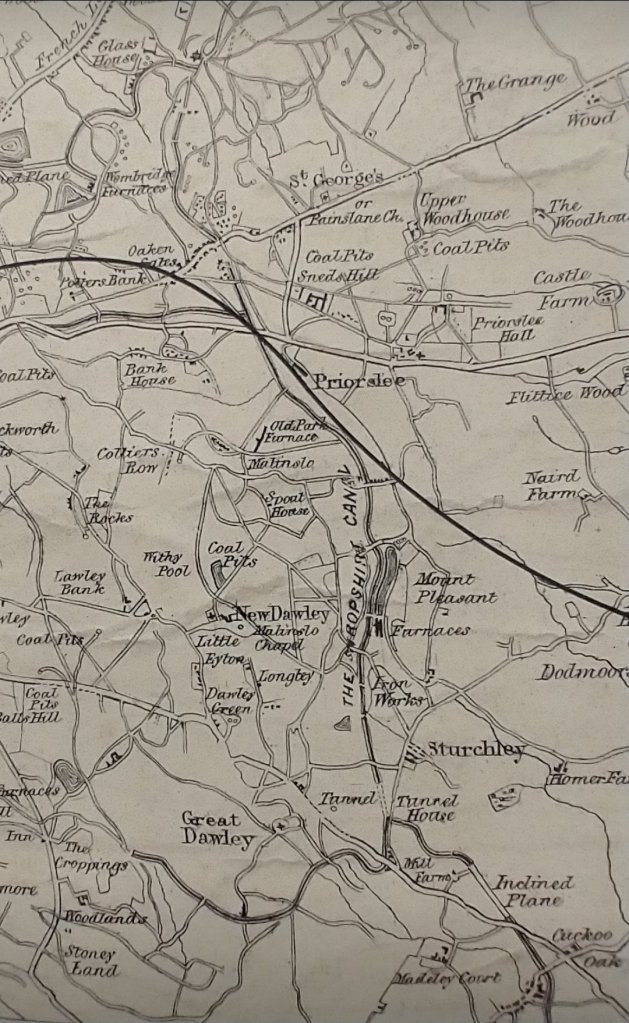
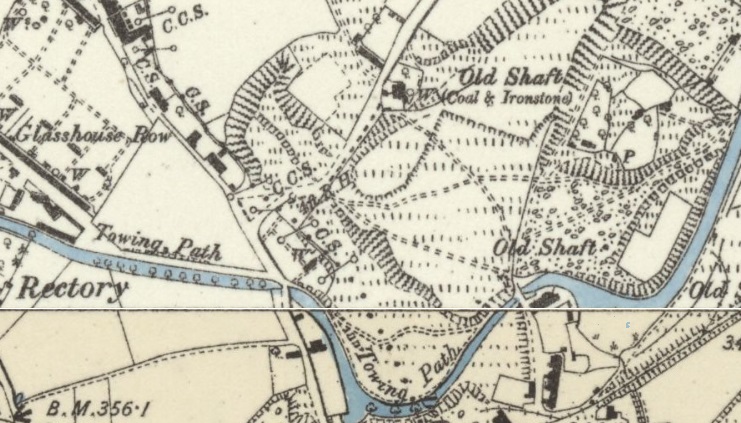
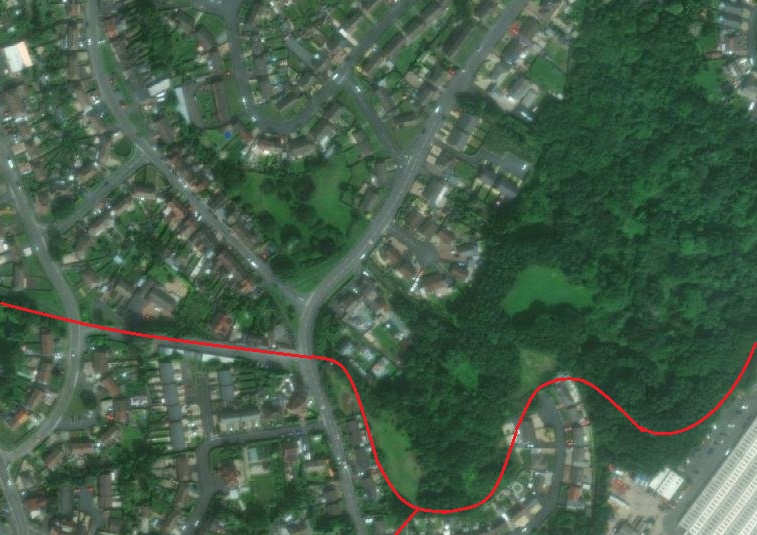
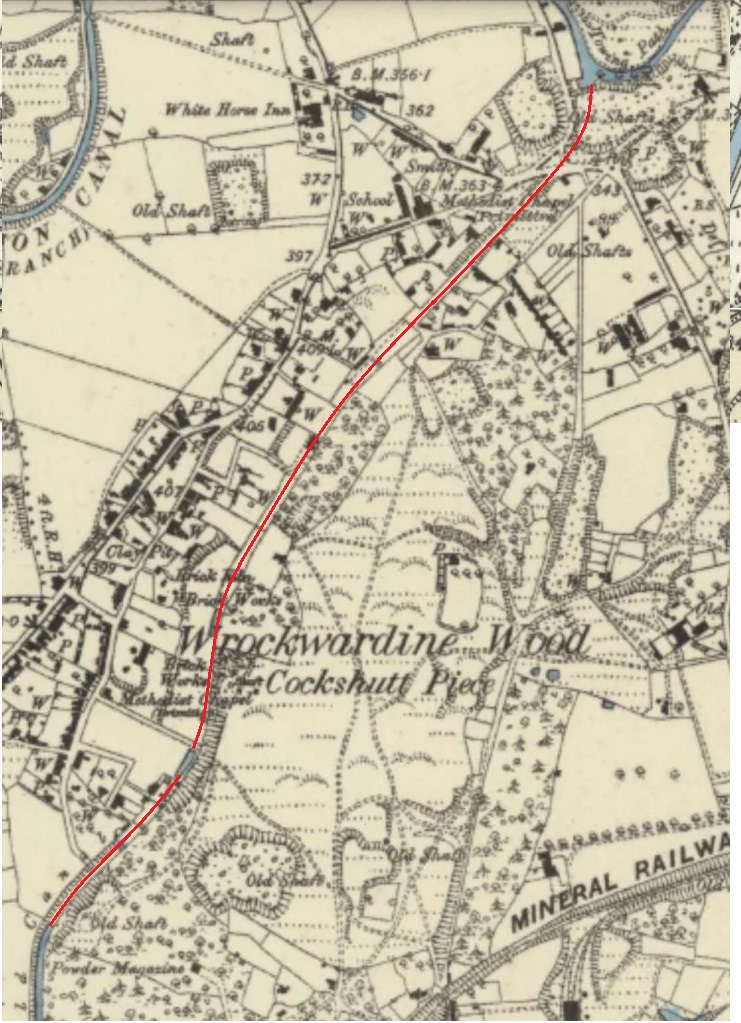
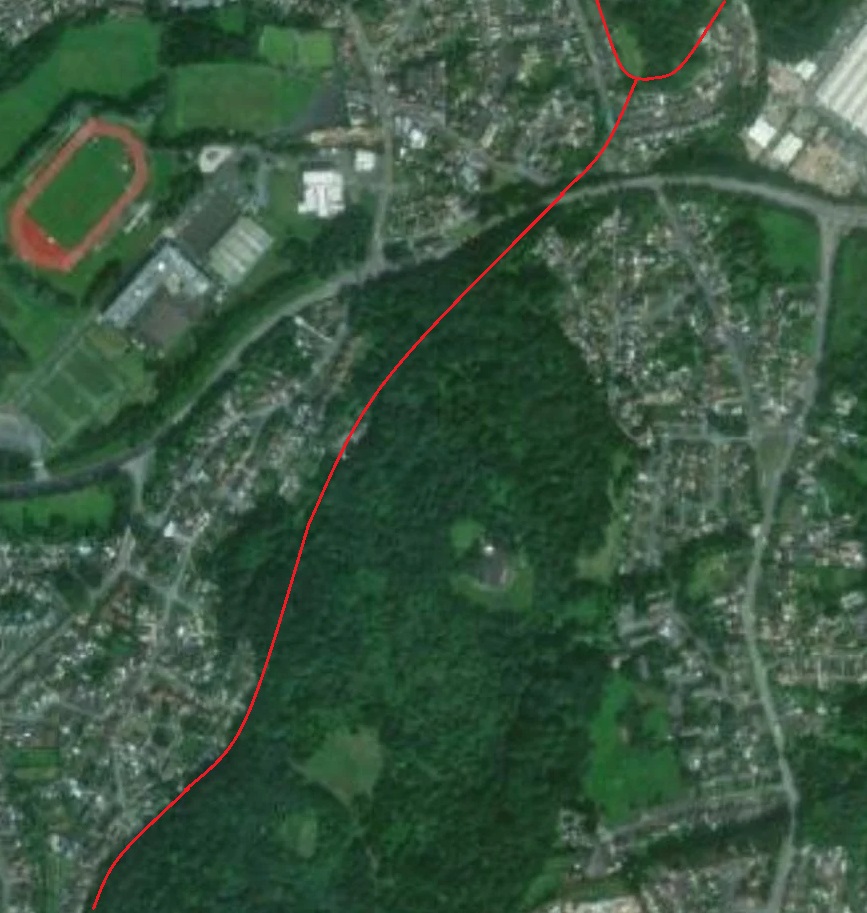
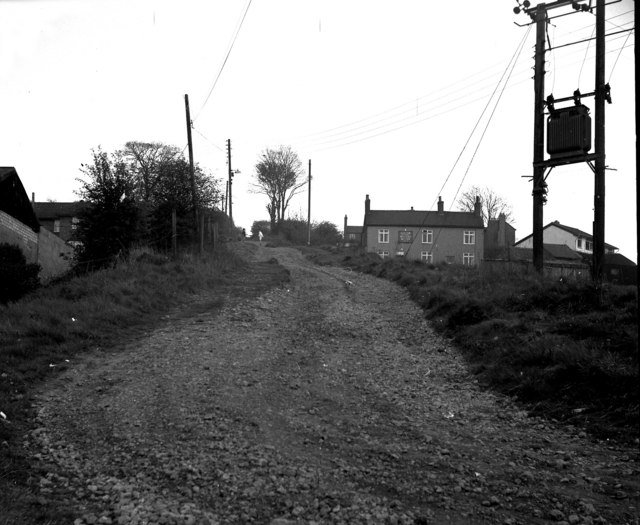
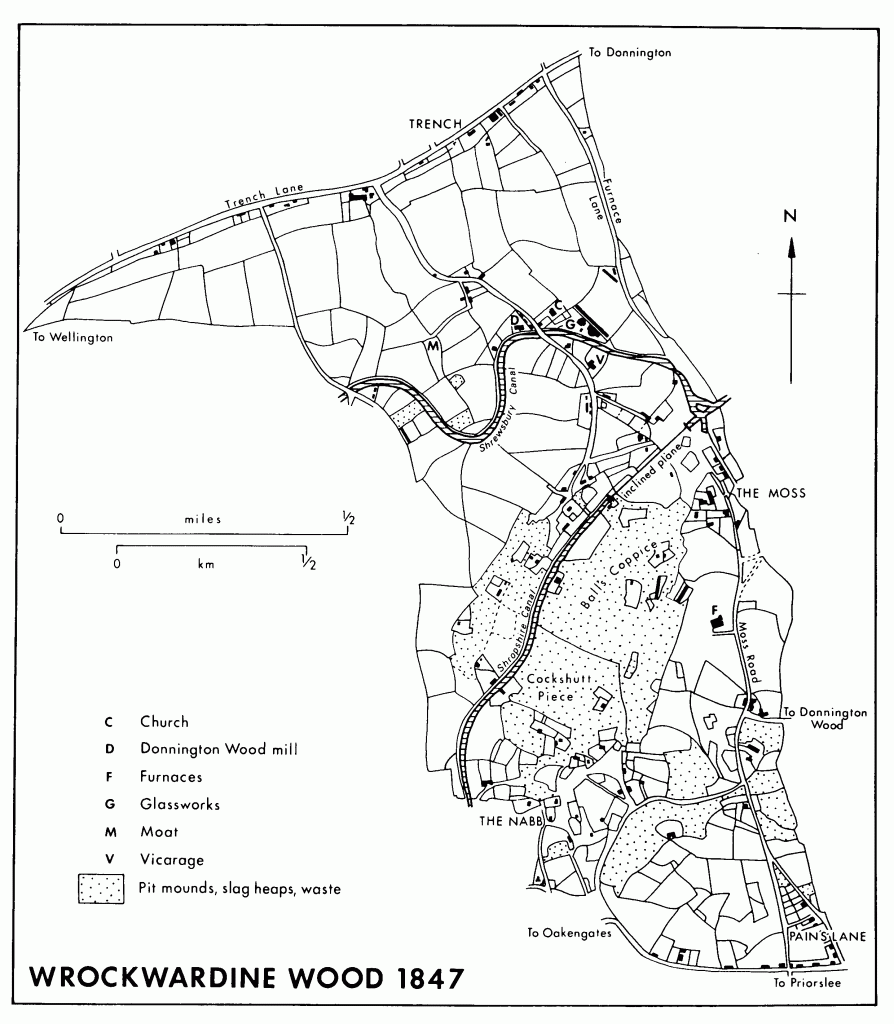
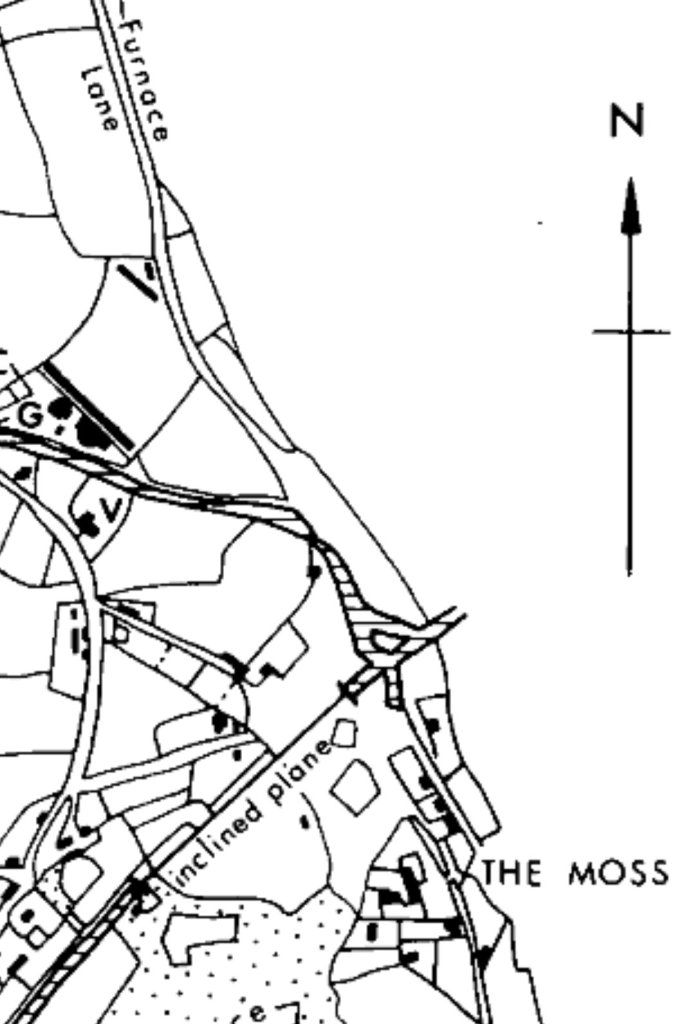
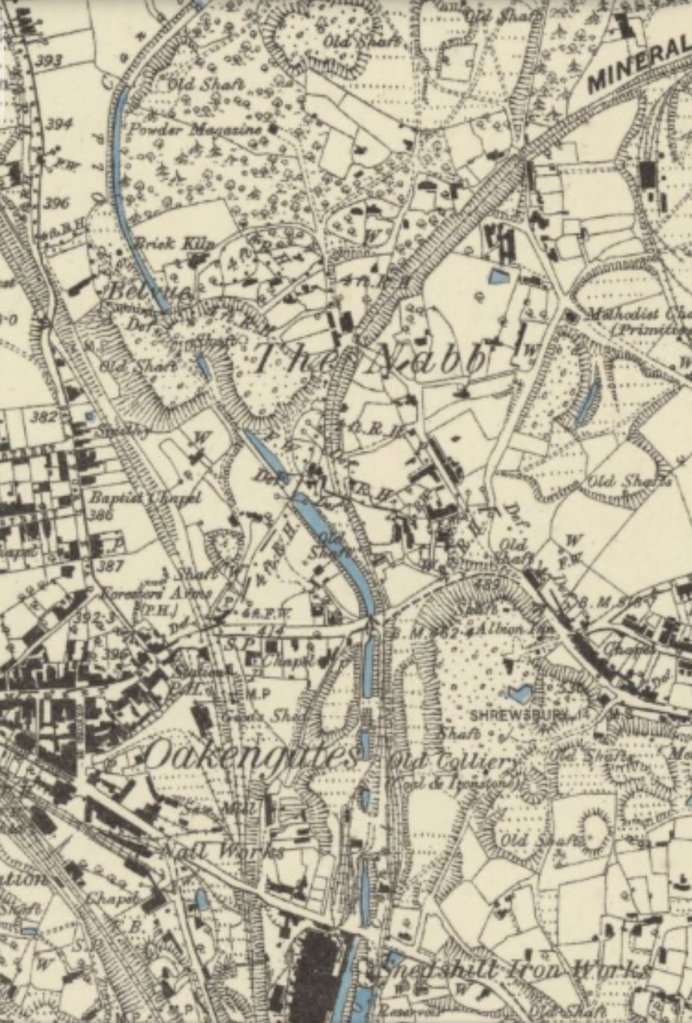
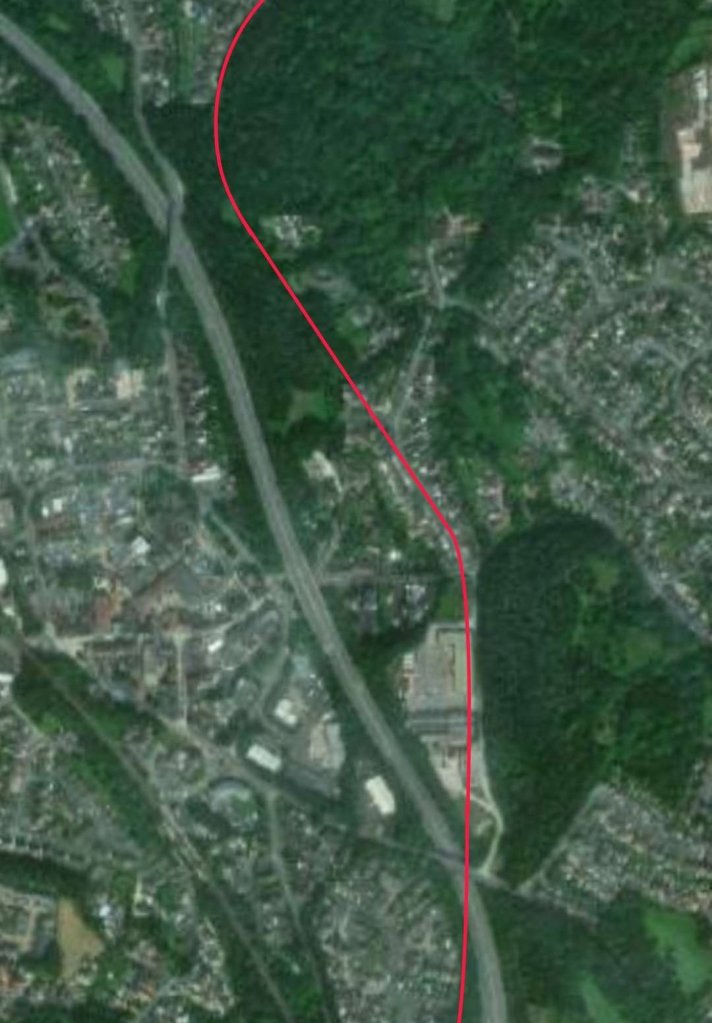
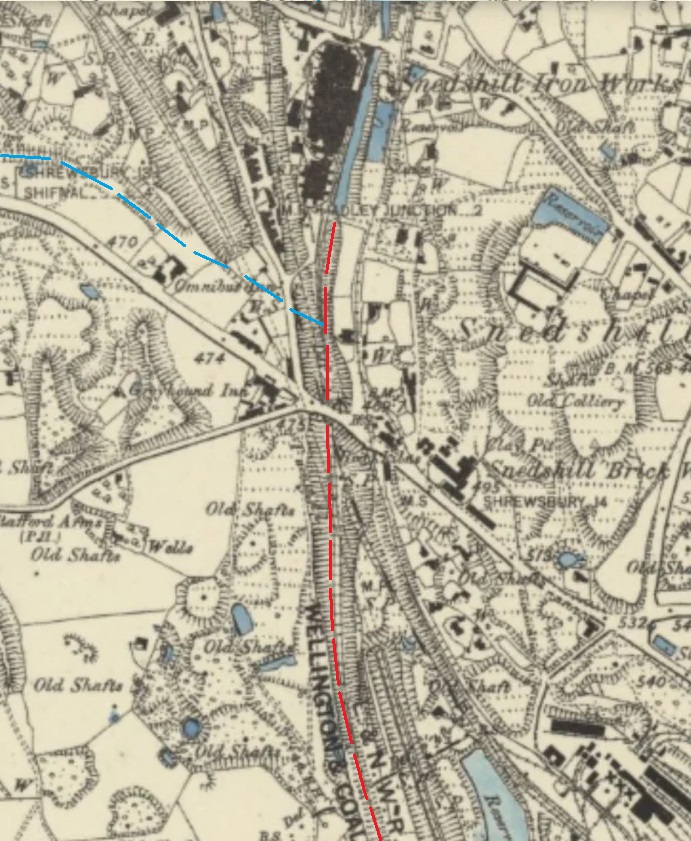
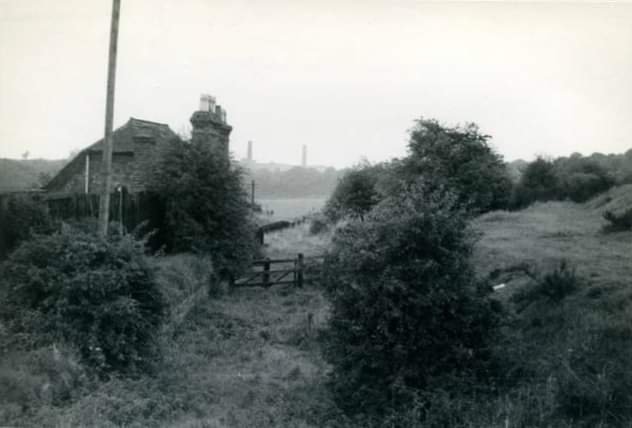
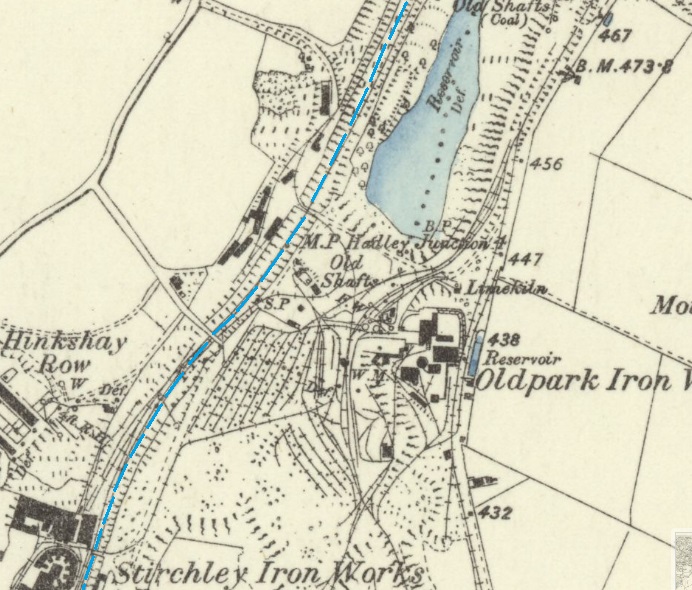
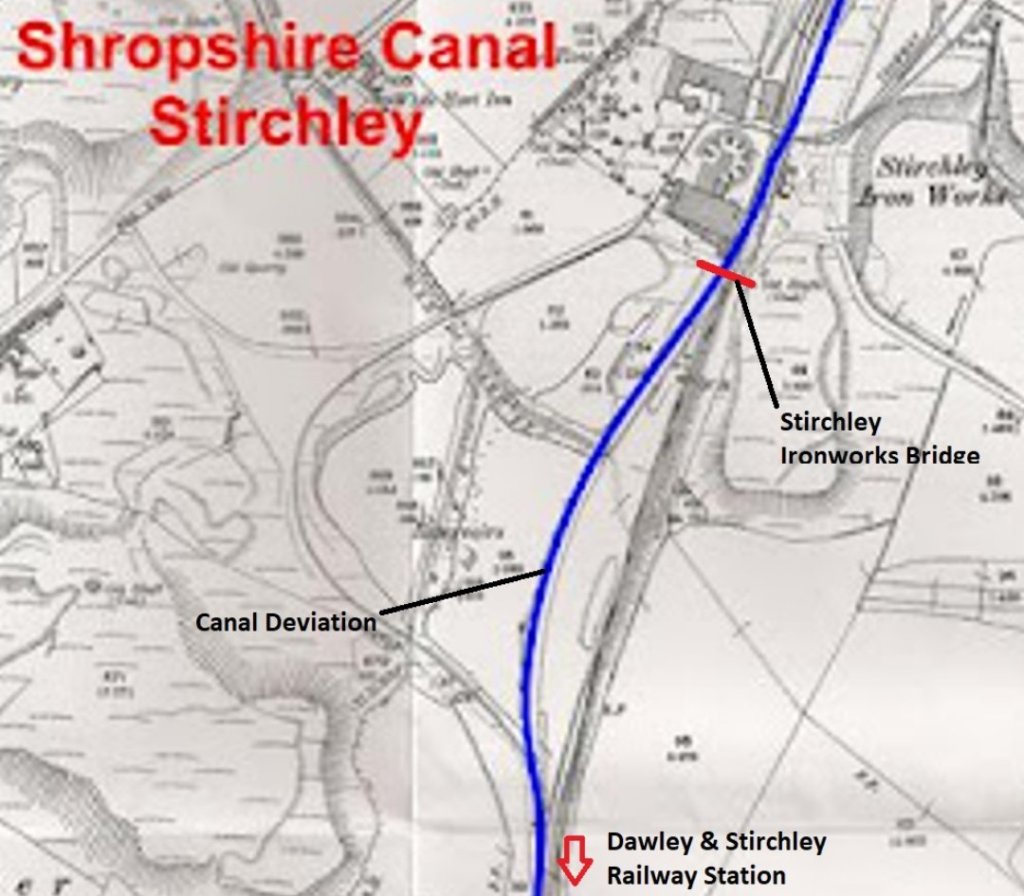


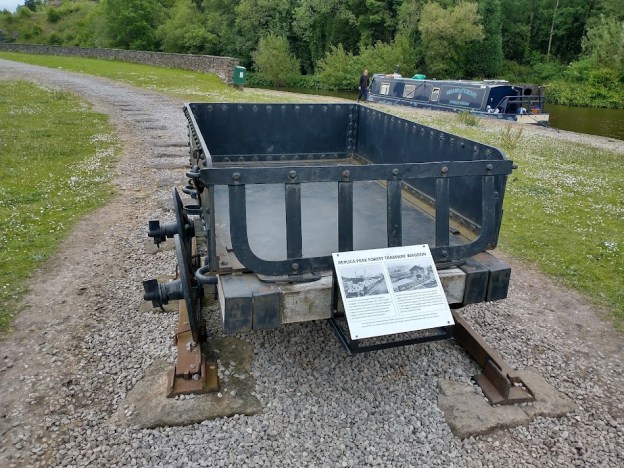


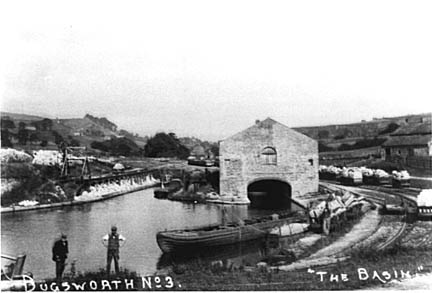
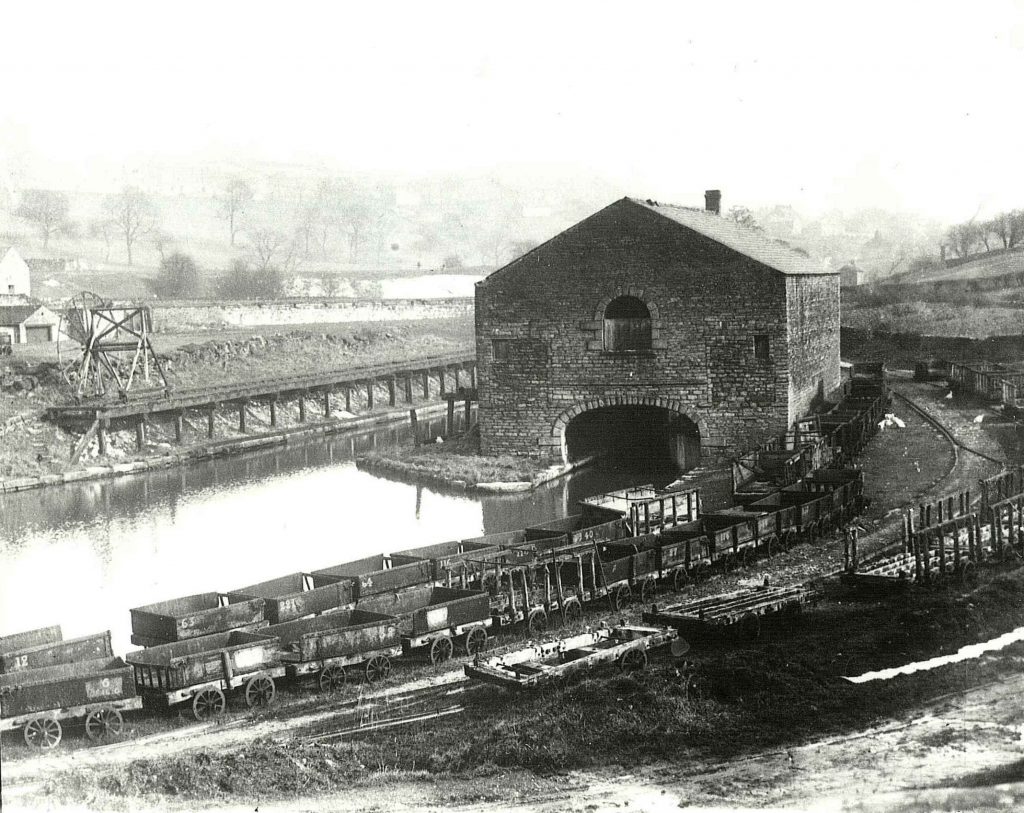
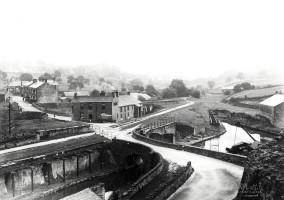
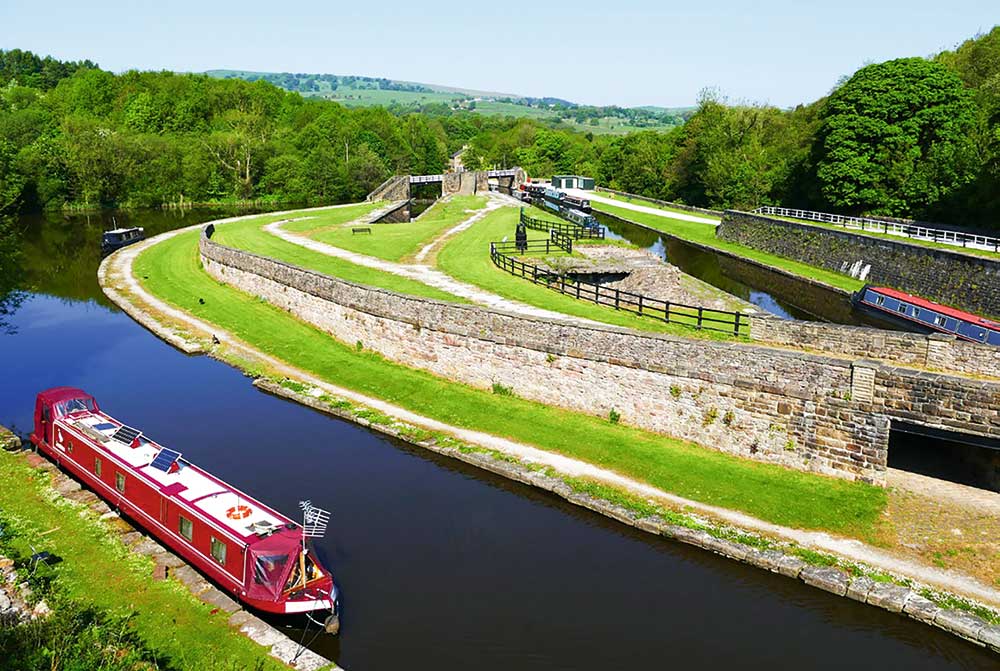
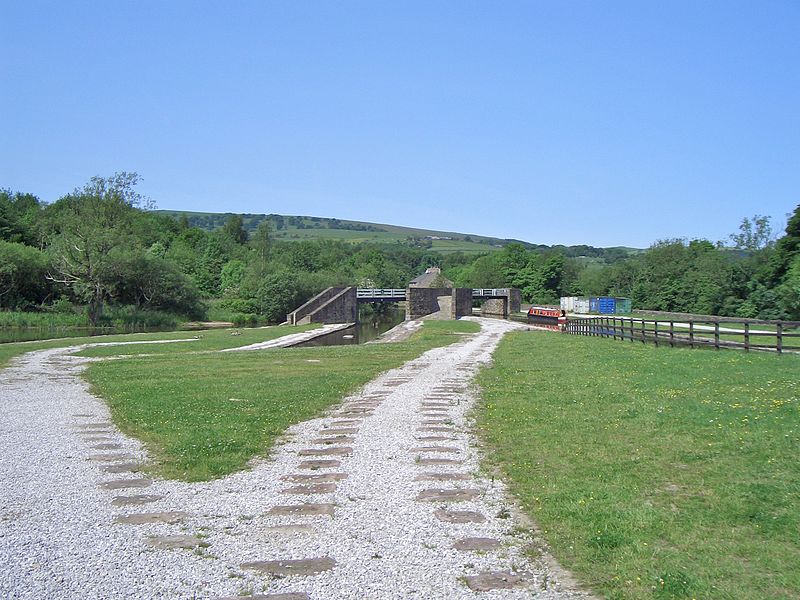
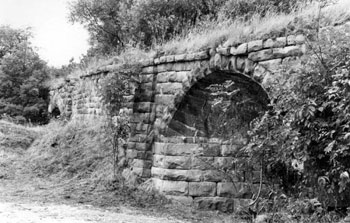
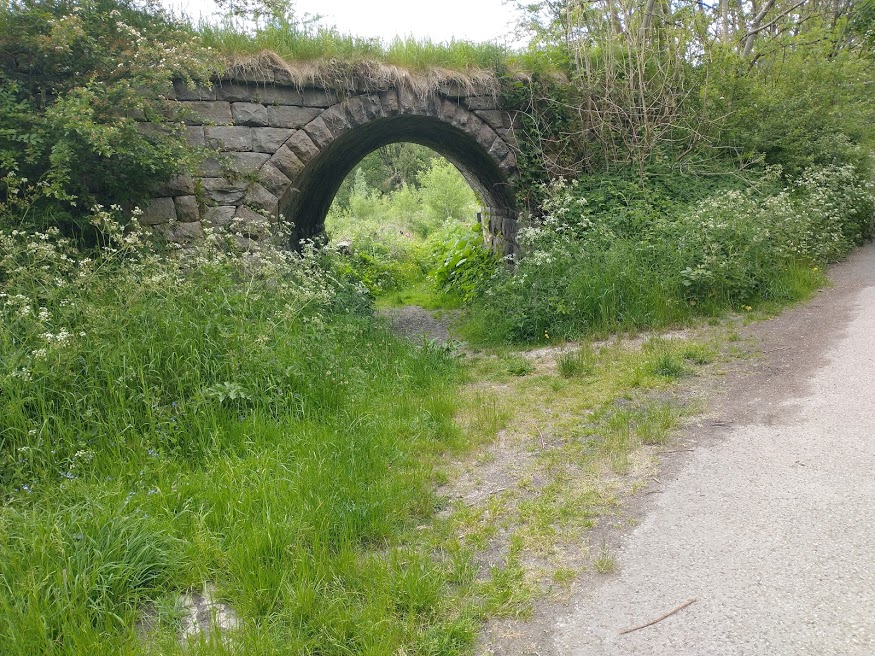
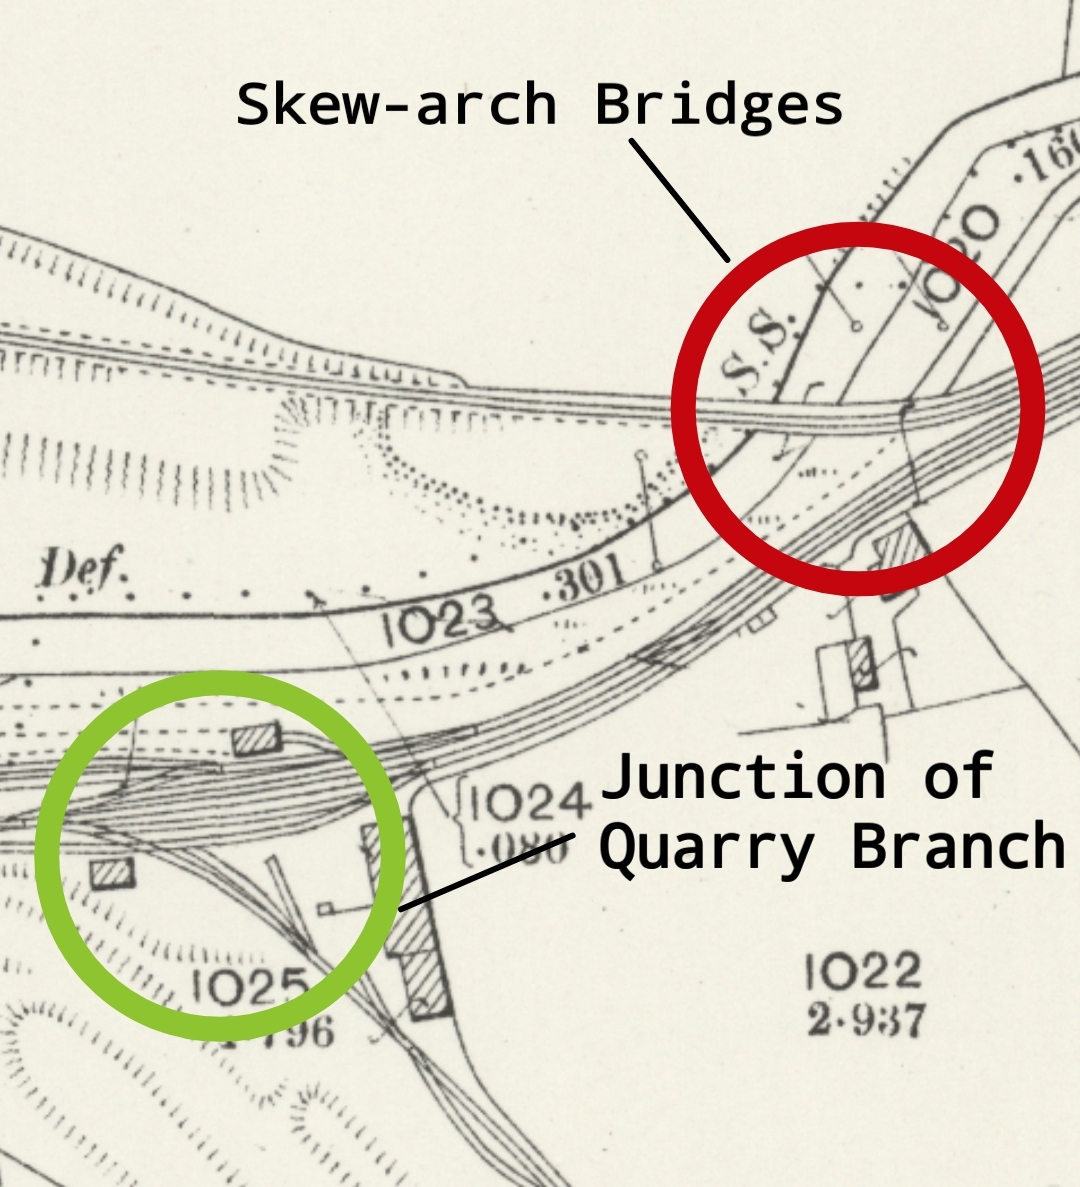
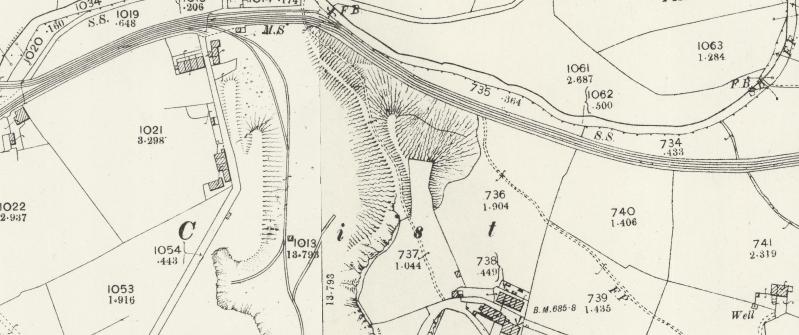


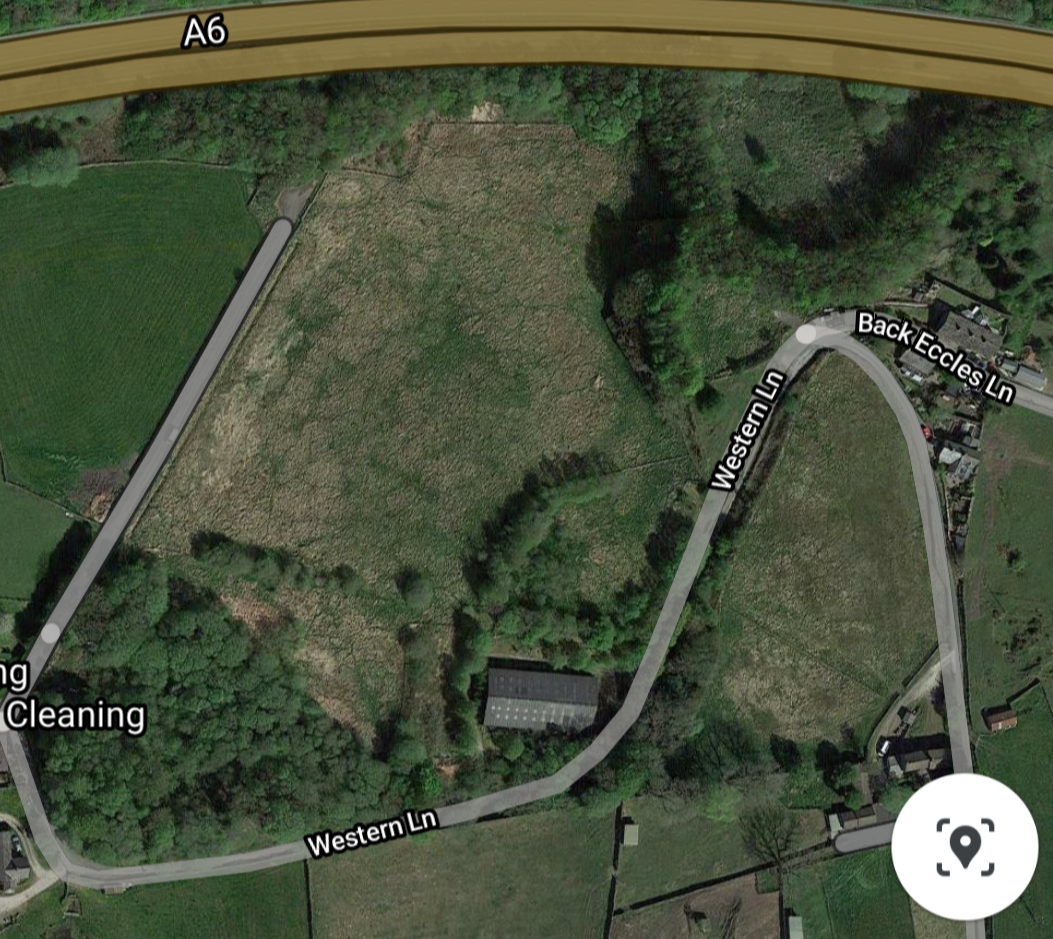

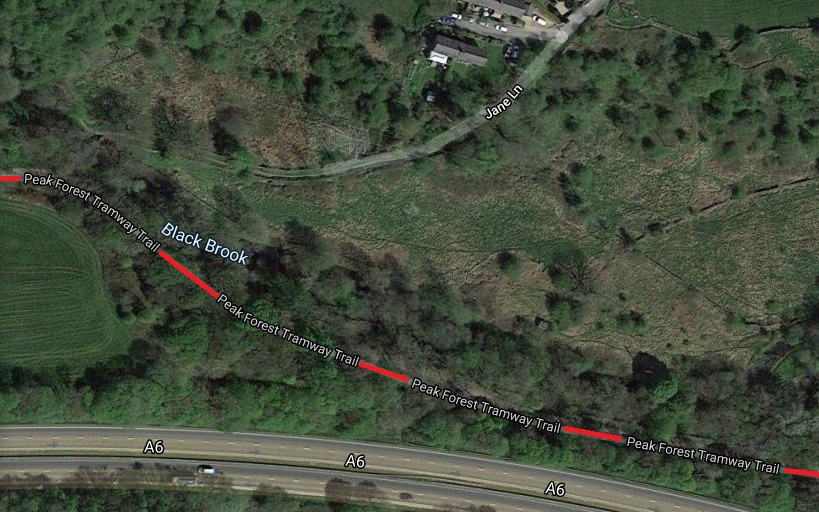
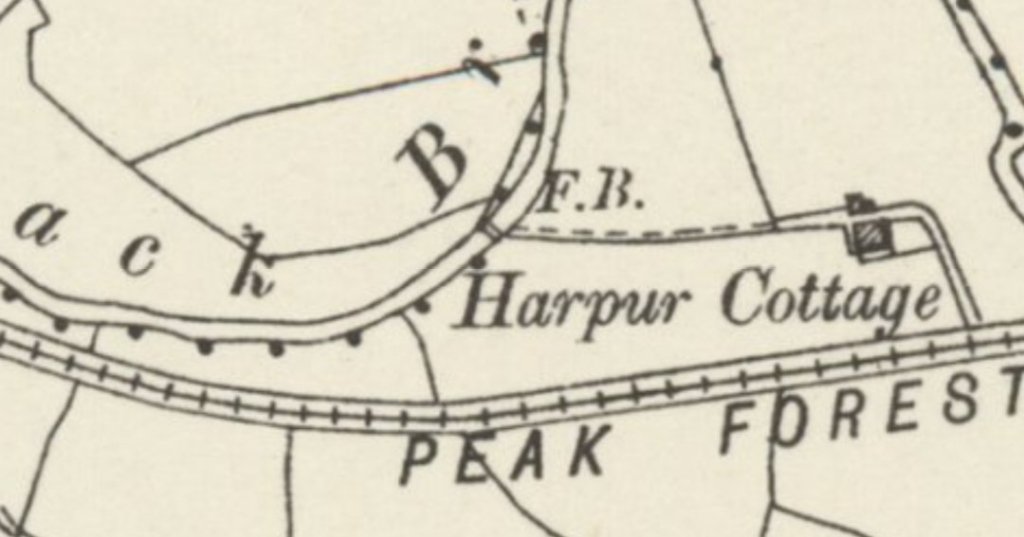
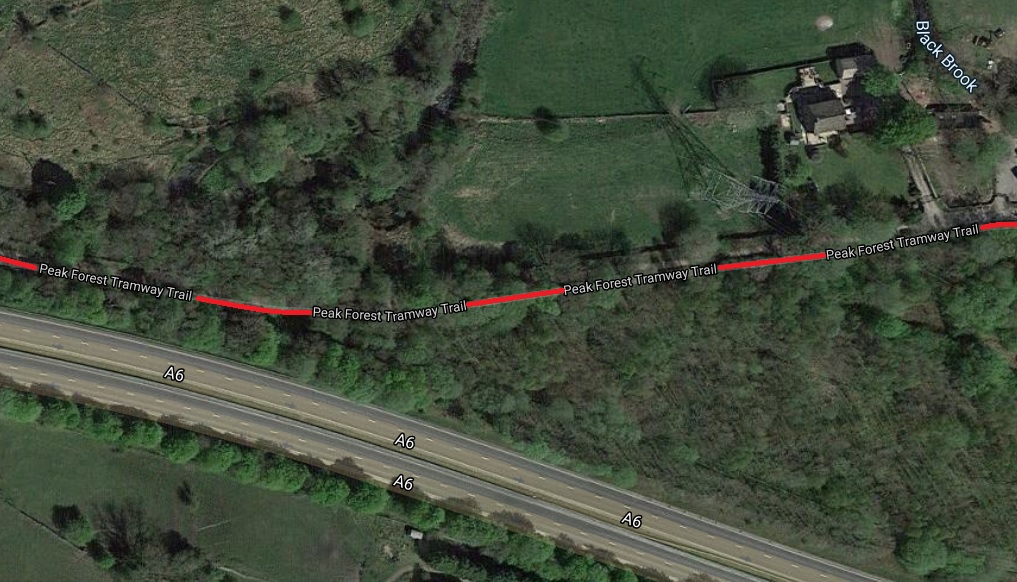
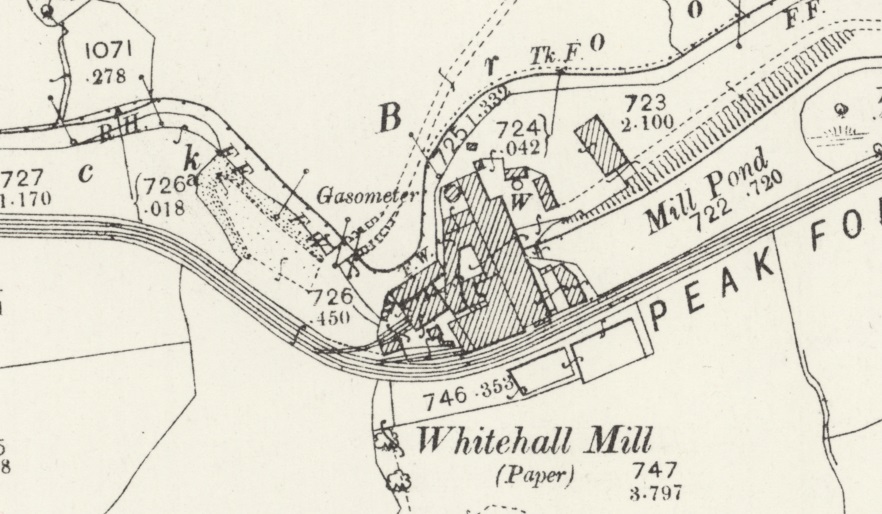


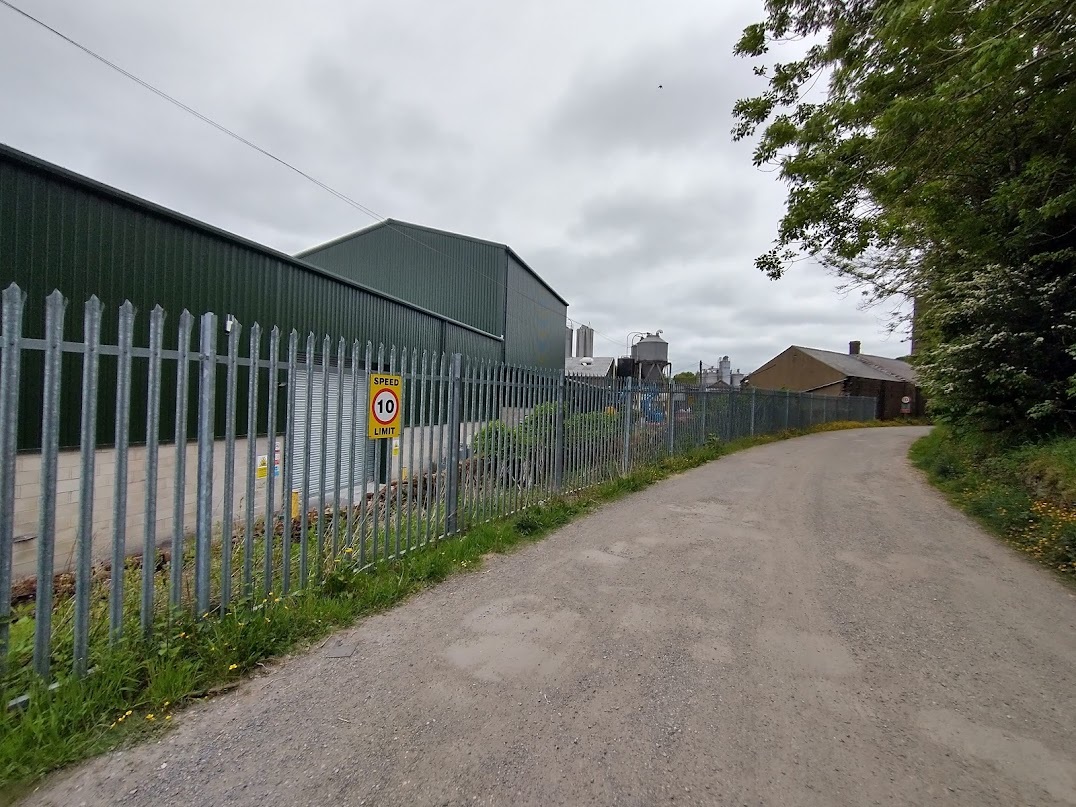
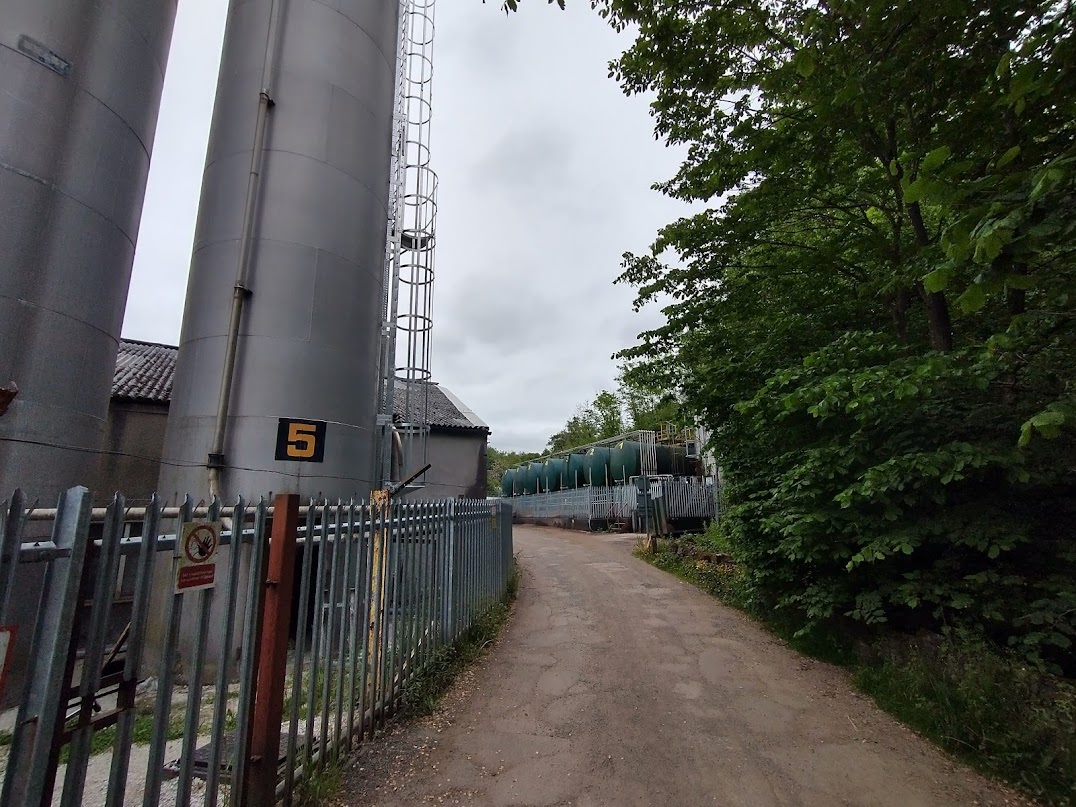

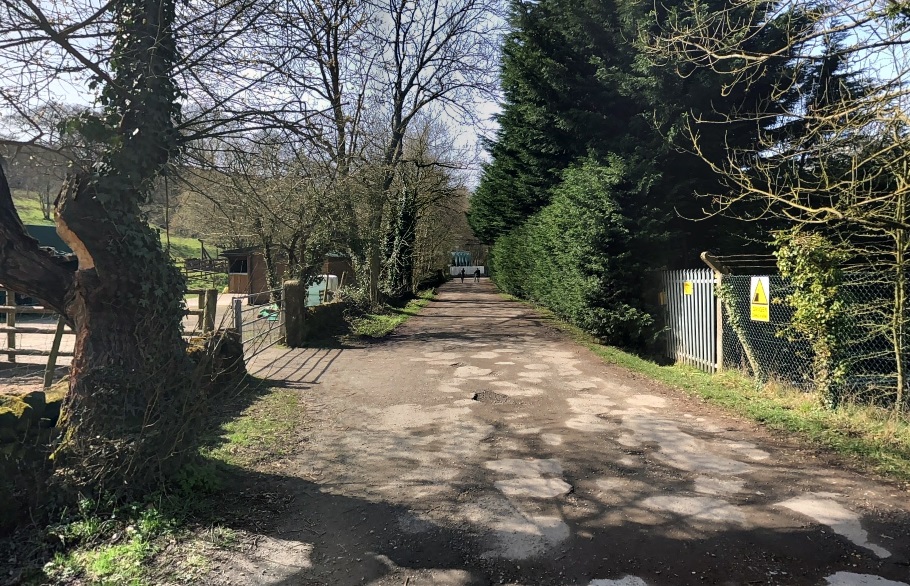
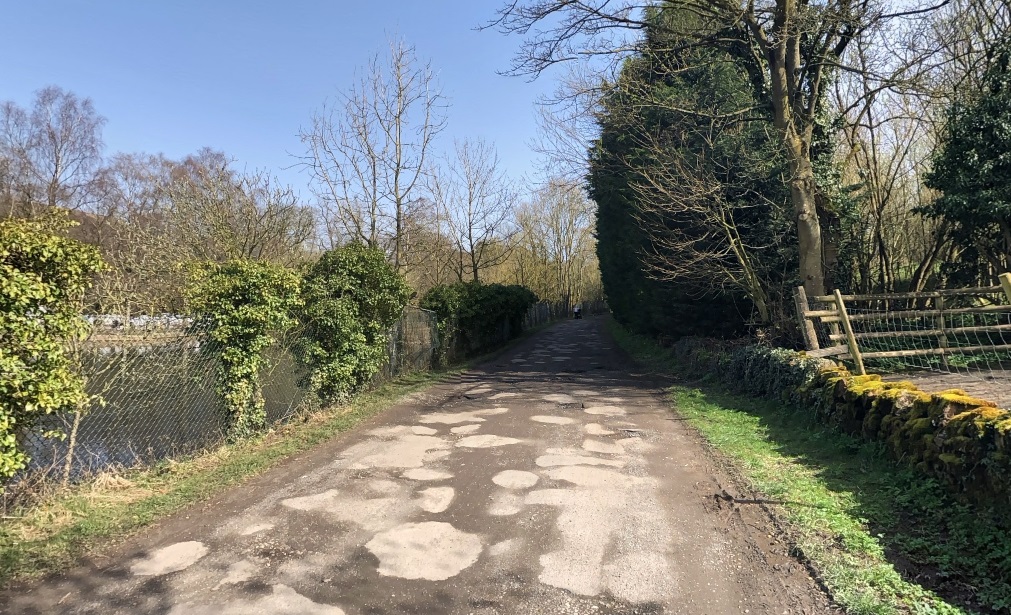
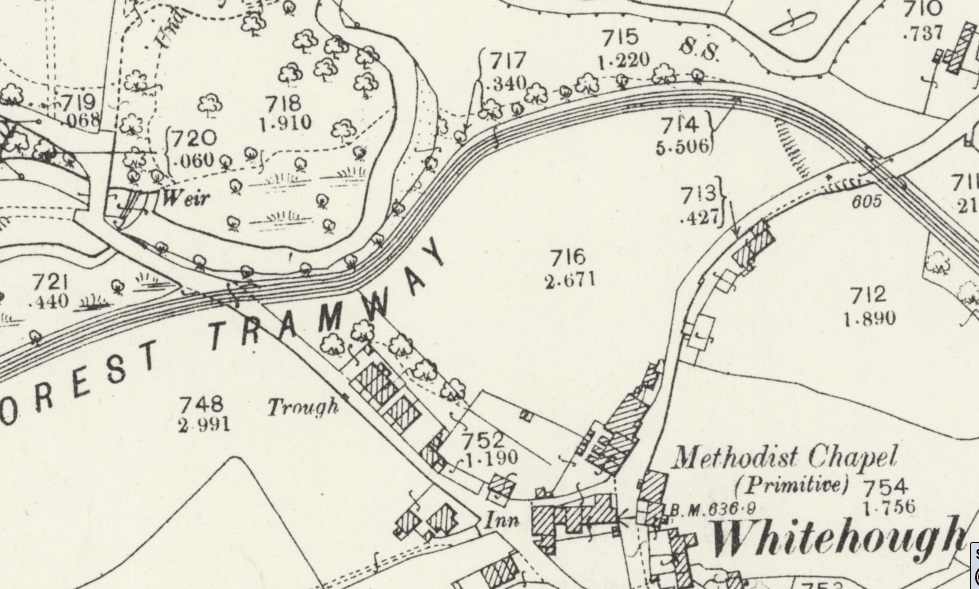

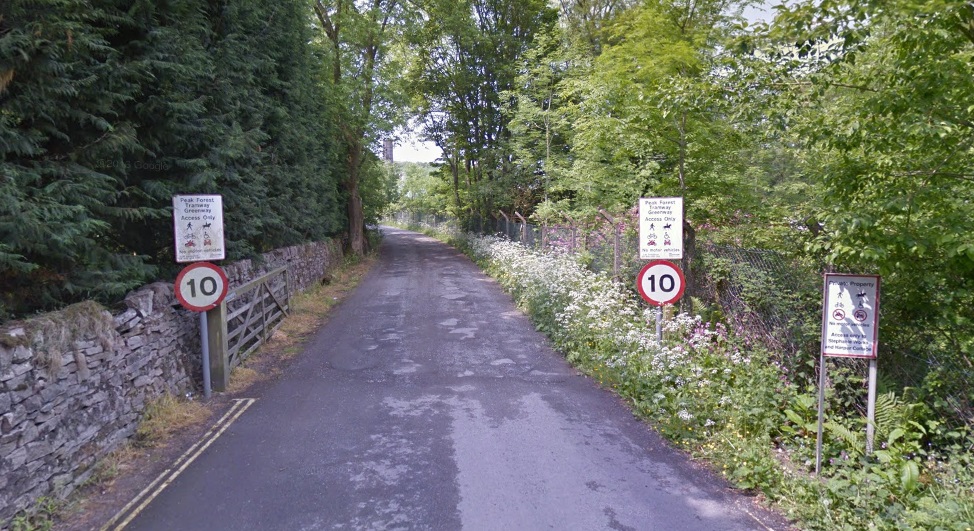


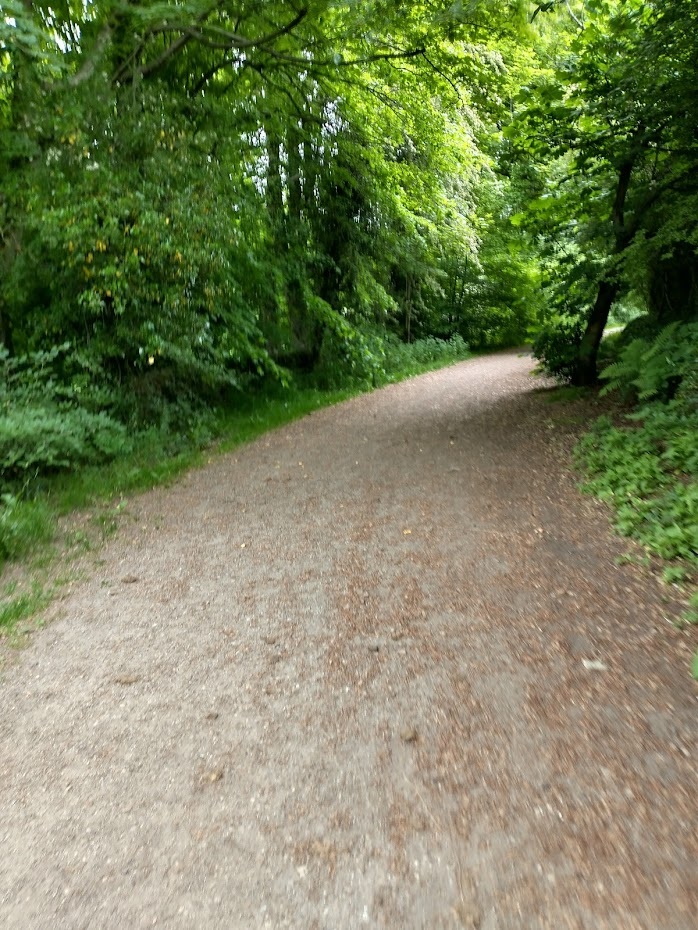


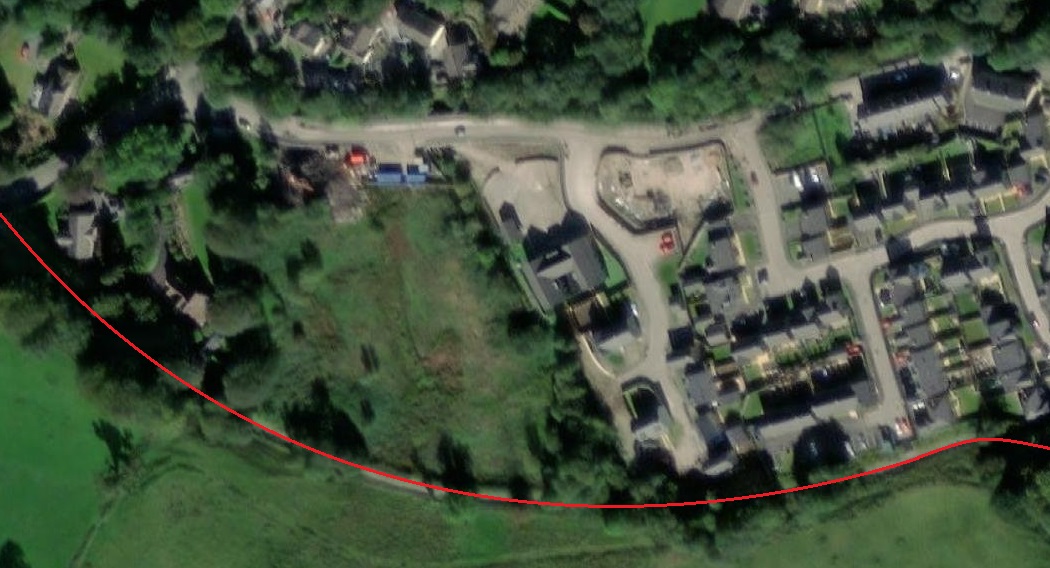


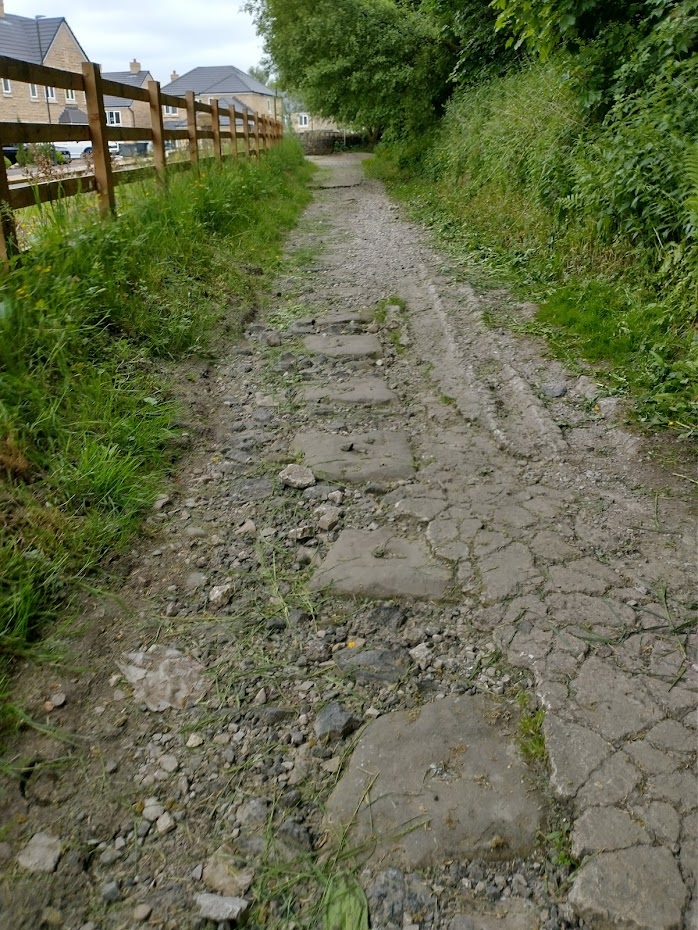


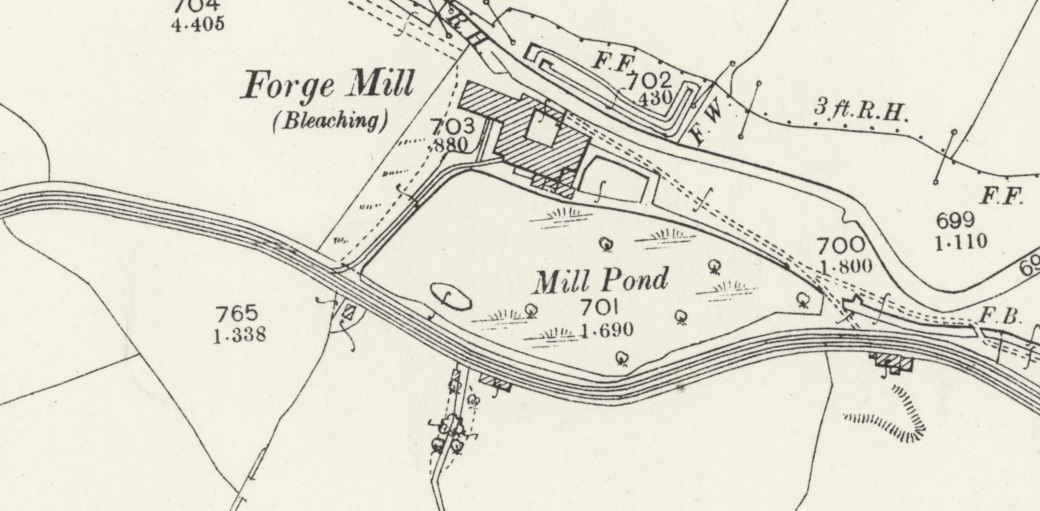

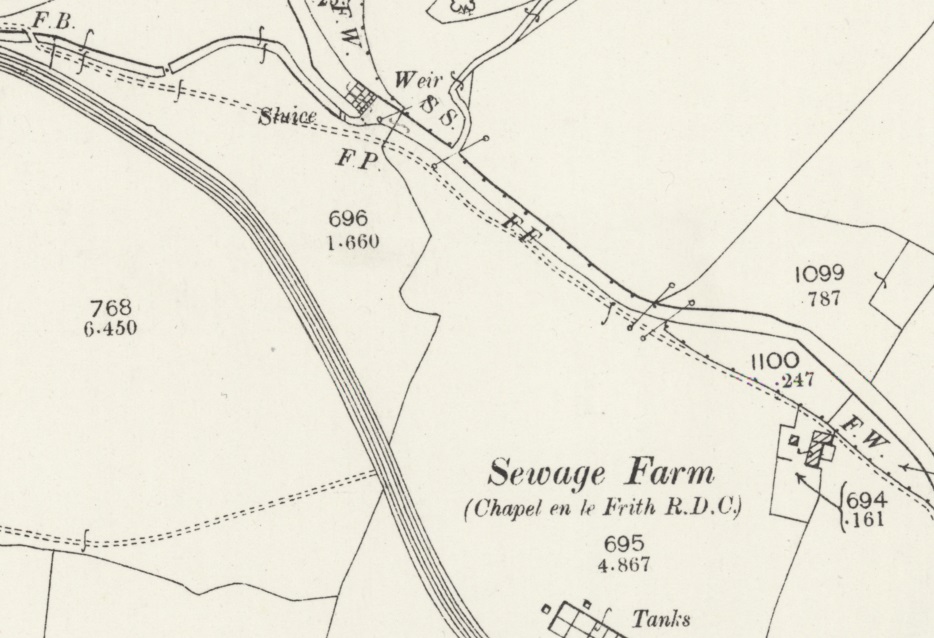

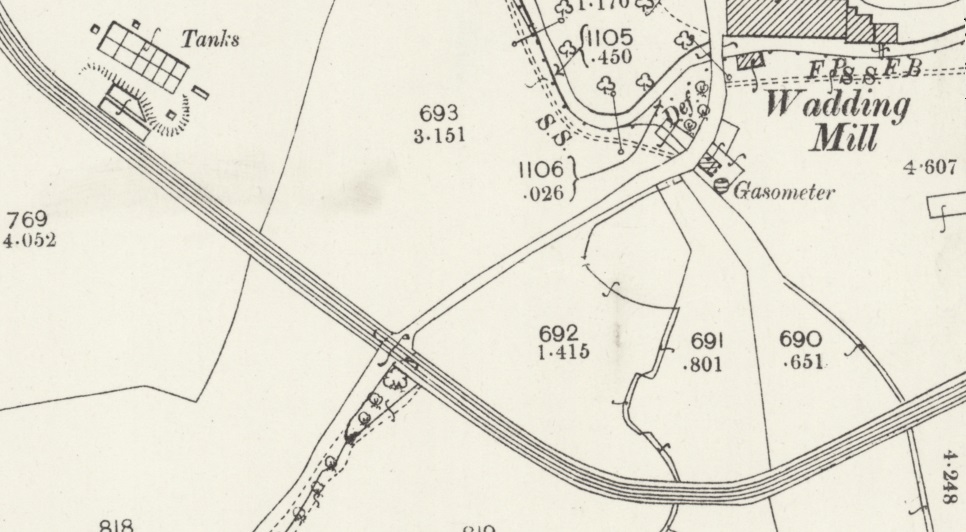
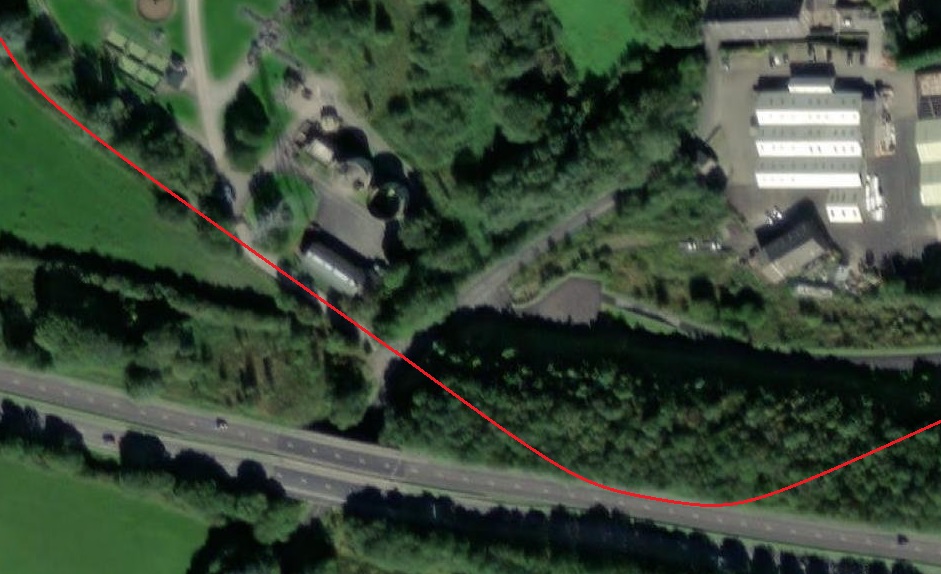
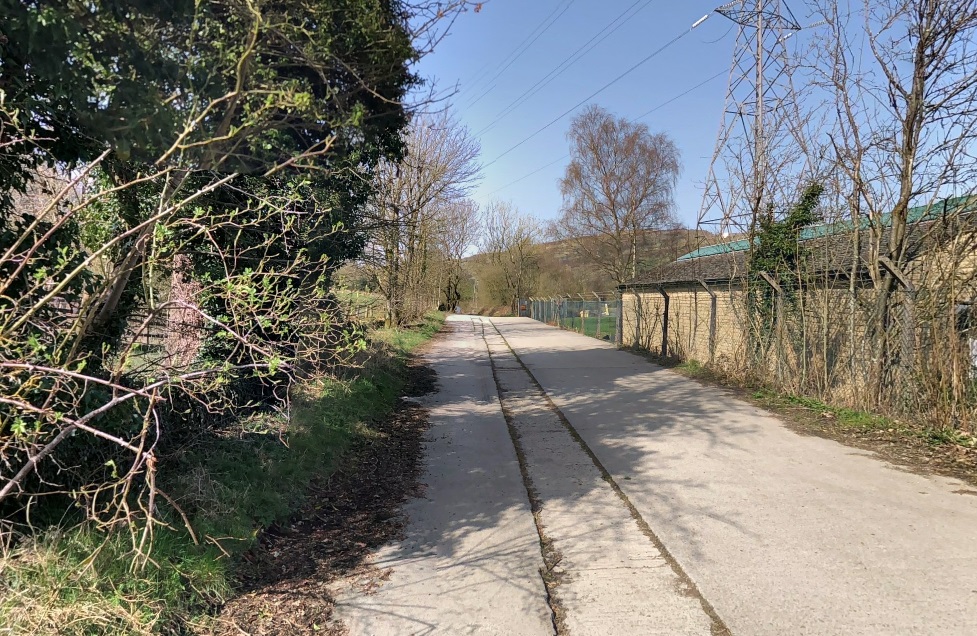
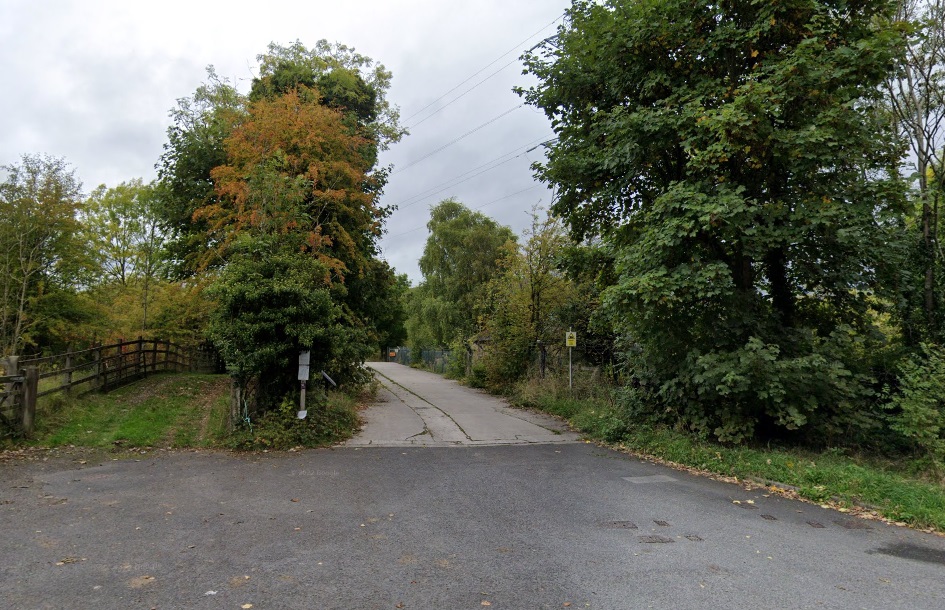
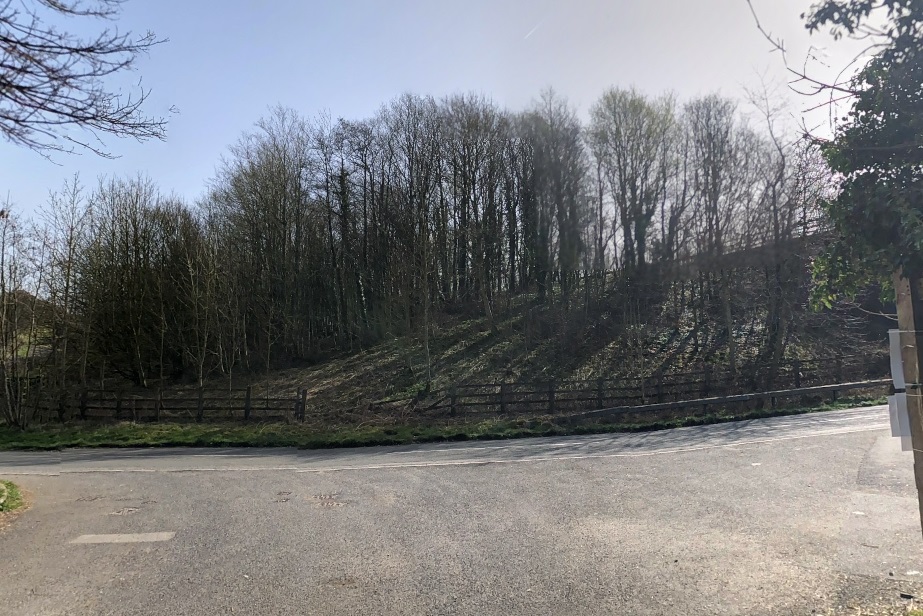
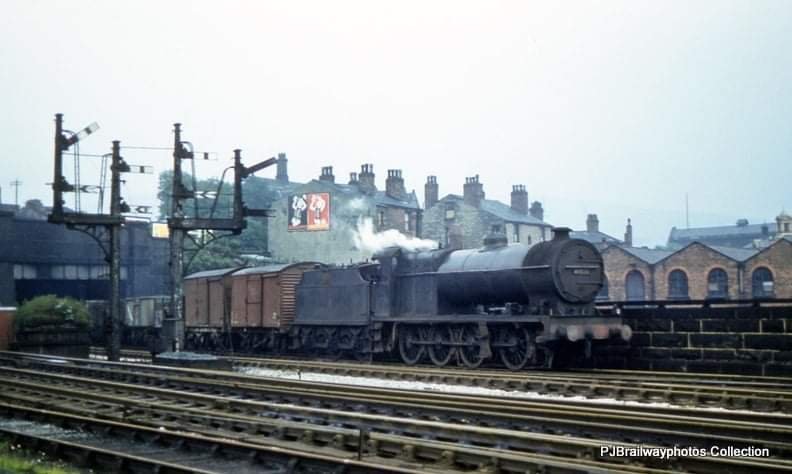


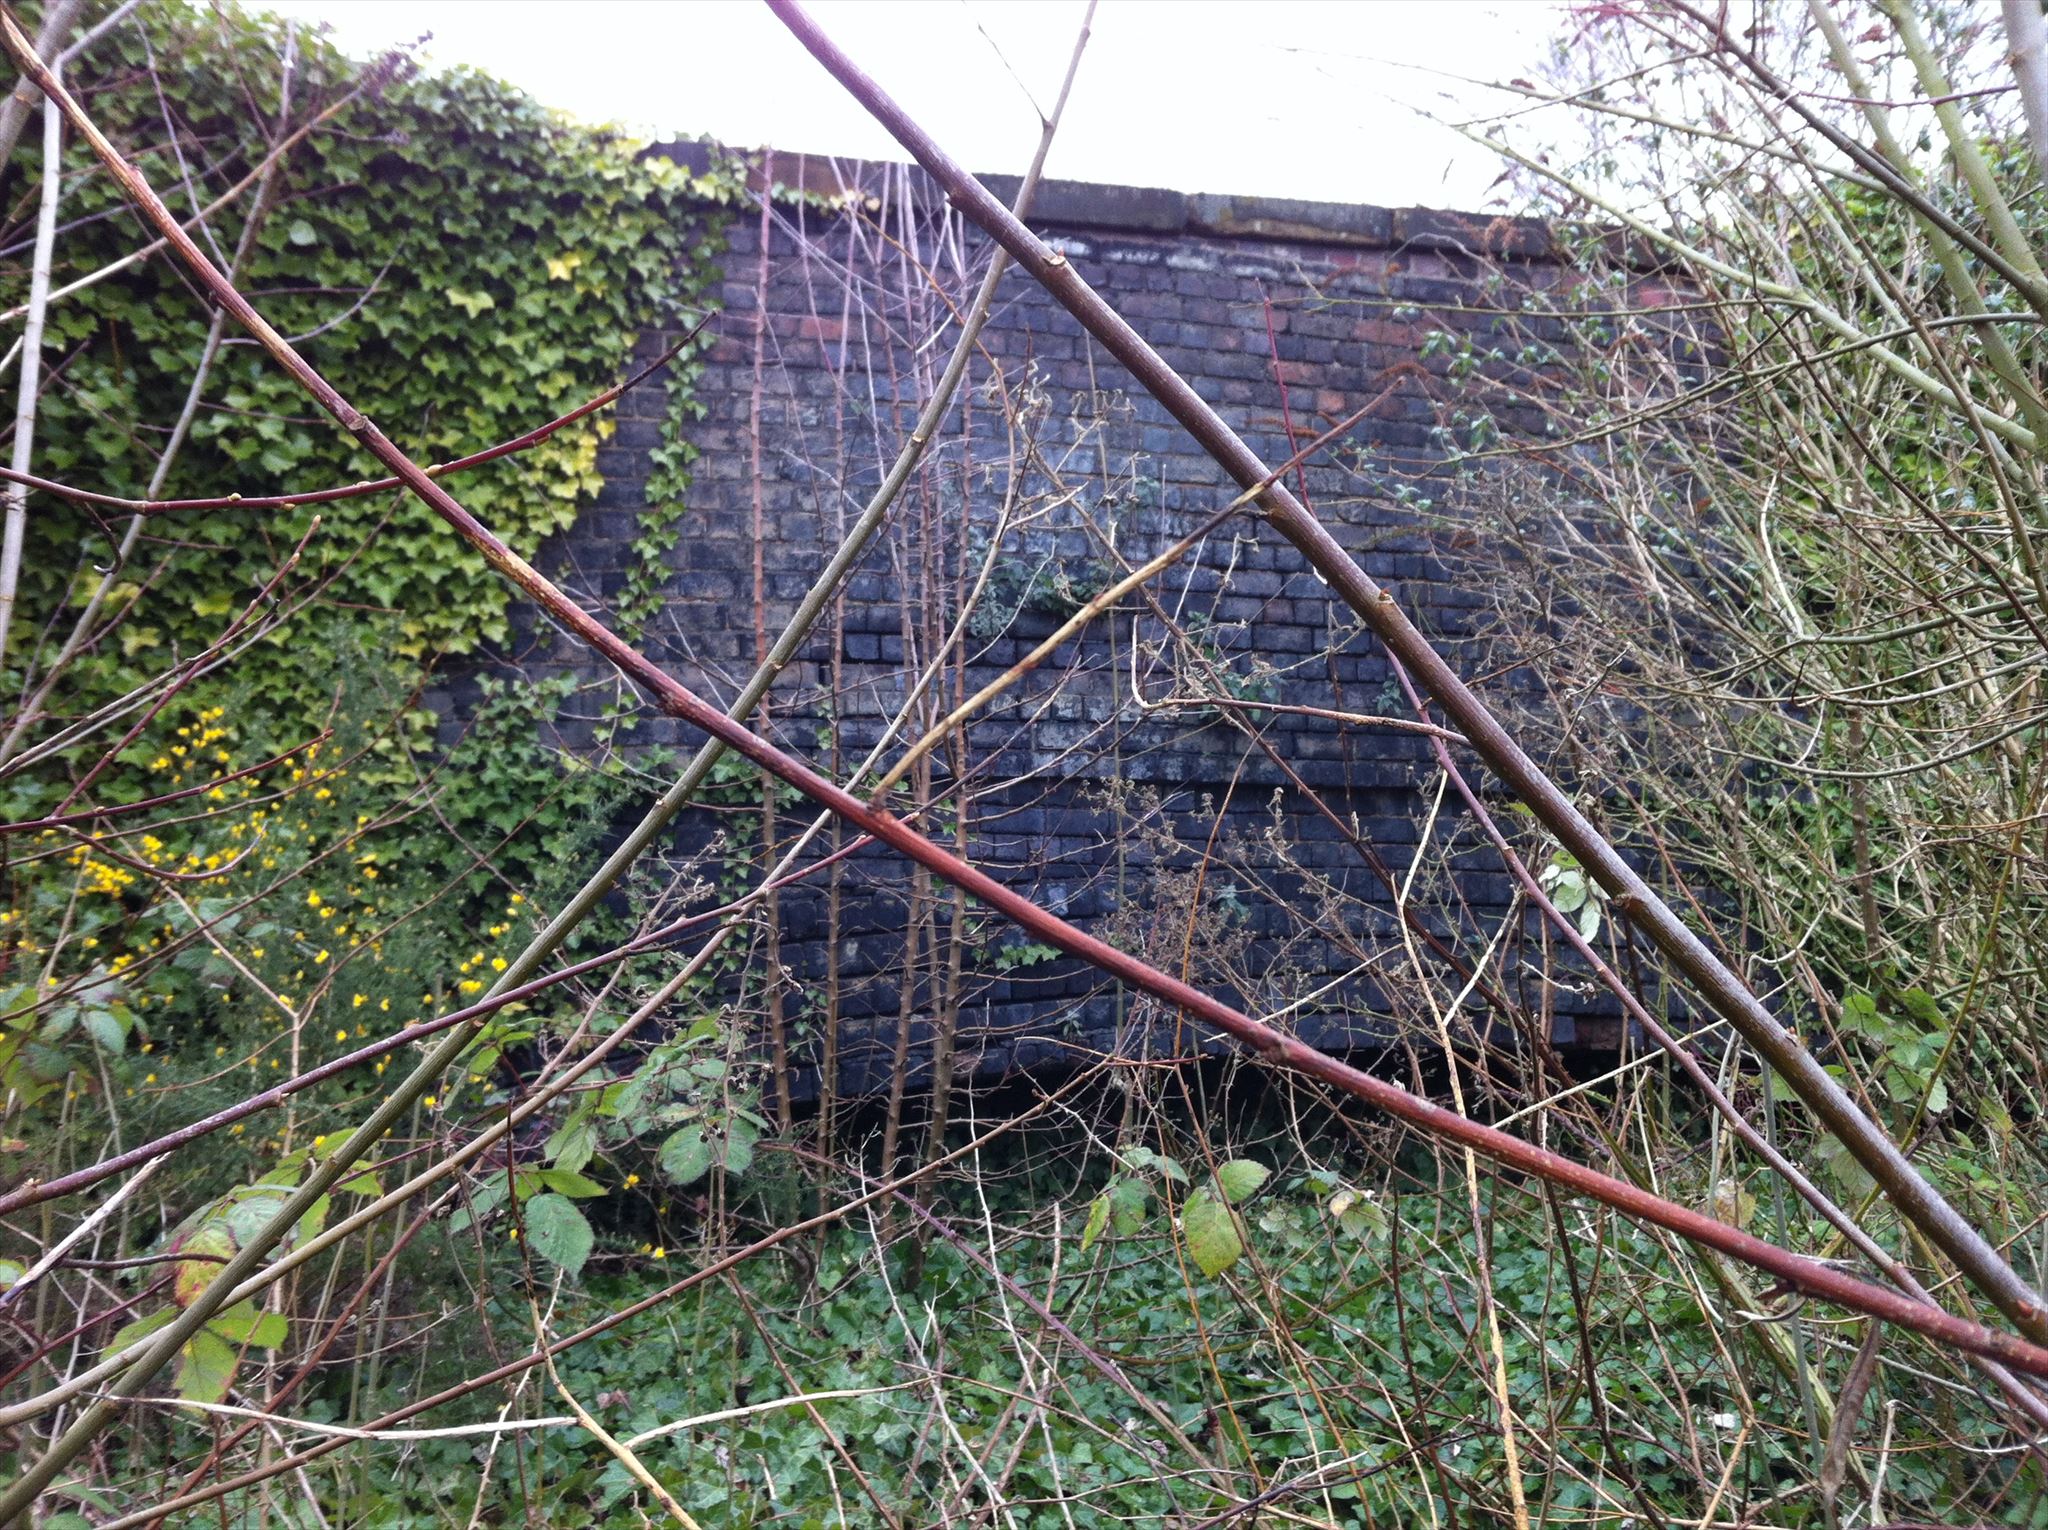