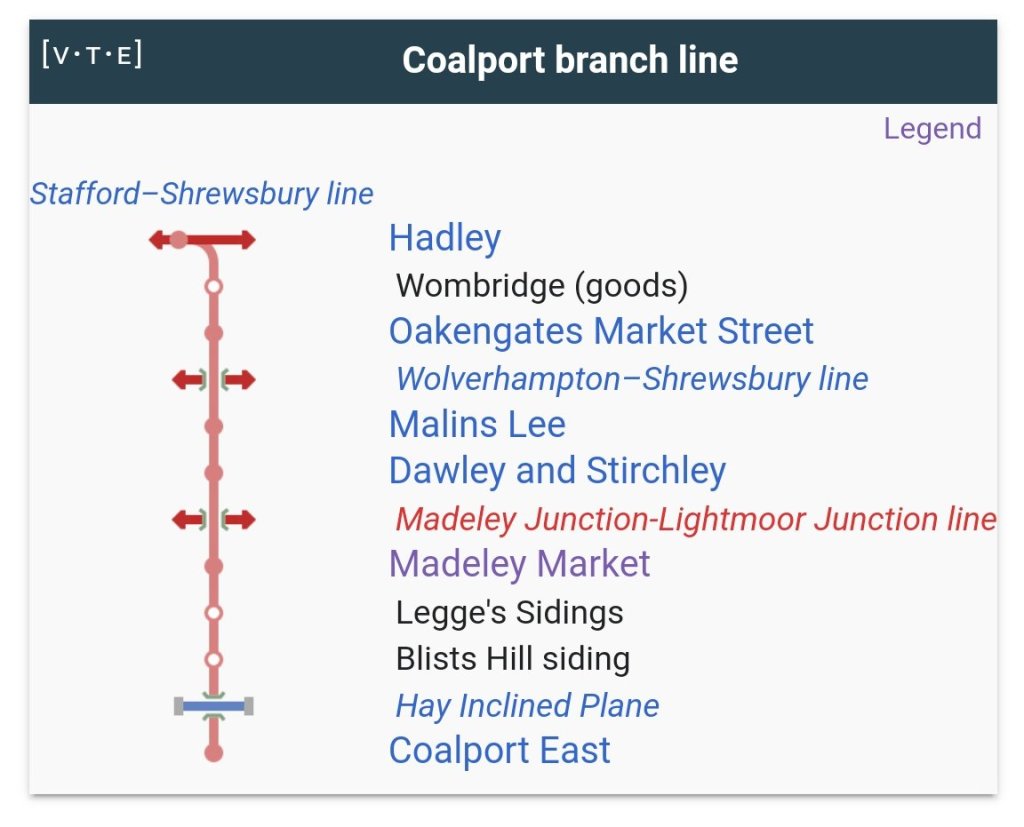
Wikipedia provides this schematic map of the Coalport Branch which highlights the key stations and sidings. [17]
History
The history of the Coalport Branch begins with competition between rival rail companies in the area during the mid 1850’s. The GWR had control of the industrial areas of East Shropshire, whereas the LNWR only had access to the area via the Shropshire Canal which ran from Trench down to Coalport. The first article in this short series about the Branch covered the history of the line as well as following the line from its junction with the LNWR main line at Hadley as far as Malins Lee Station. It can be found on this link:
The history of the LNWR branch line is built on the story of the Canal and it is with that story that any investigation should begin. Separate articles cover the route of the Canal. The first of these can be found on this link:
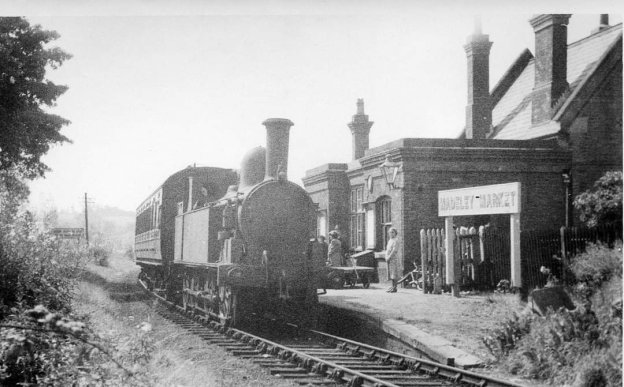
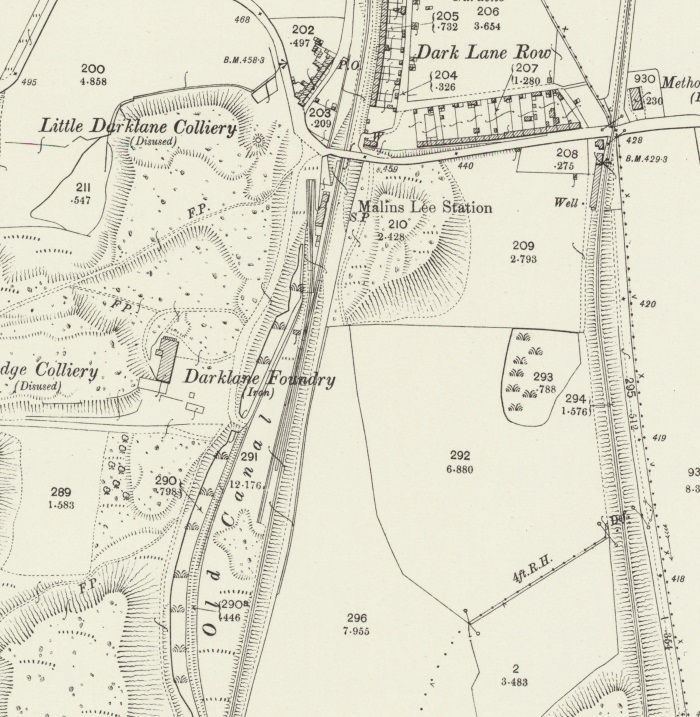
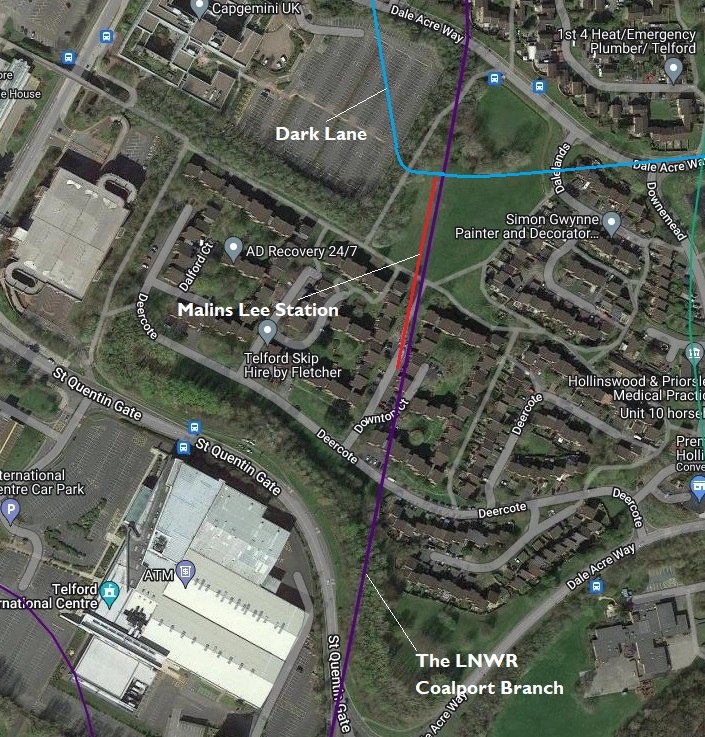
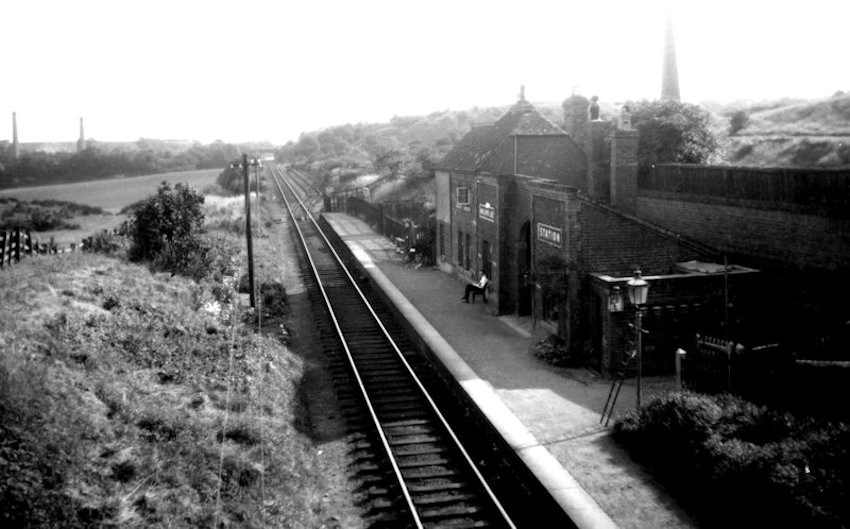
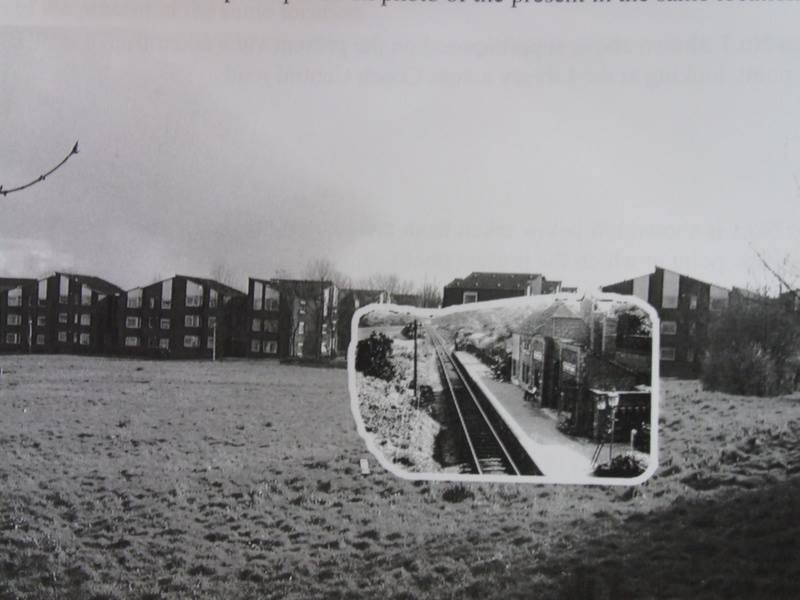
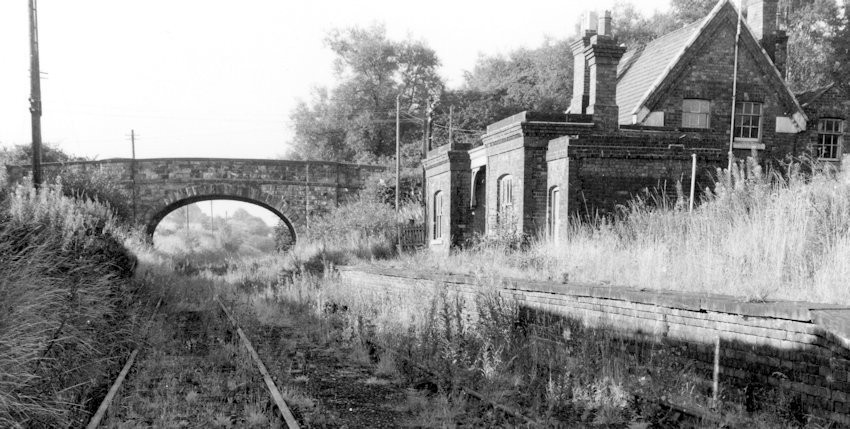
A first extract from the 1901 25″ Ordnance Survey shows Dark Lane village and Malins Lee Railway Station just to the South of Dark Lane. Also evident alongside the LNWR Coalport Branch is a length of the old Coalport Branch of the Shropshire Canal. [43]The same area on the satellite imagery provided by Railmaponline.com. After crossing Dale Acre Way, the route of the old line heads South-southwest across open ground and then over land used for housing development. [44]Malins Lee Station as in appeared in 1932.The photograph seems to have been taken facing South from the bridge which carried Dark Lane over the line. The passenger facilities at the station seem to be a little different to others on the Coalport Branch. It is possible that this might reflect an earlier original use for the two storey element of the building? The station was closed for two years during WW1 as an economy measure and finally closed in 1952 with the line remaining open for goods traffic for more than a decade. Just to the South of the station a single siding which served immediately local industries can be seen. The chimney to the right of the image beyond the station buildings is probably that of Dark Lane Foundry. This picture was shared by Lin Keska on the Telford Memories Facebook Group on 15th August 2018. [45]Marcus Keane shared this composite image on the Telford Memories Facebook Group on 20th July 2014 which shows the location of Malins Lee Station in relation to the modern blocks of flats in Hollinswood. [46]
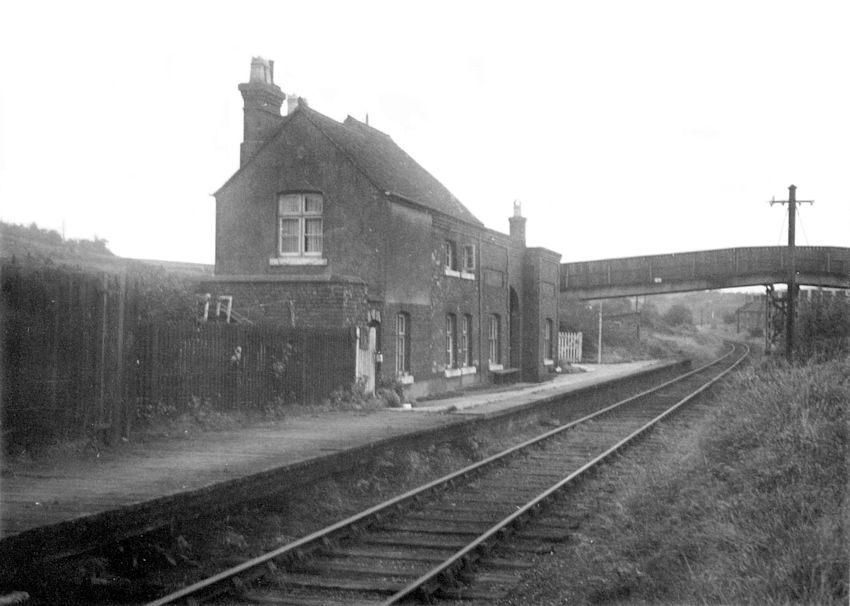
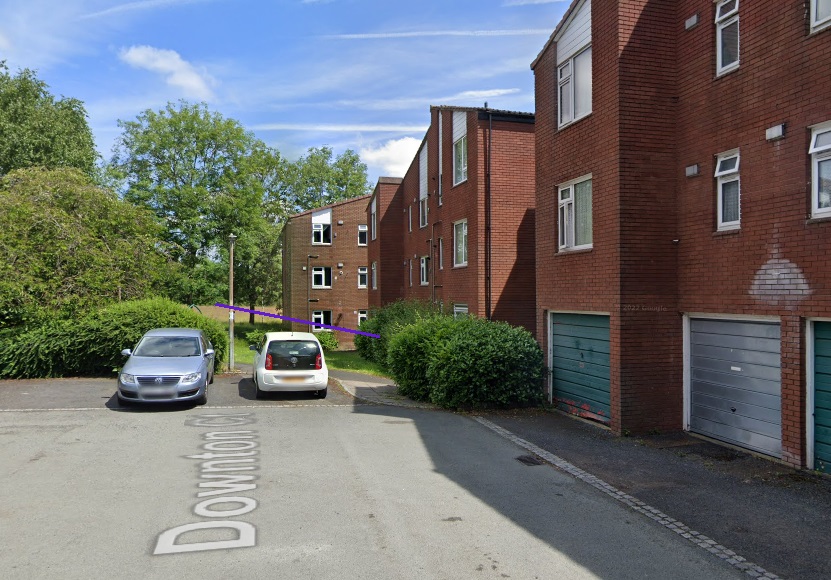
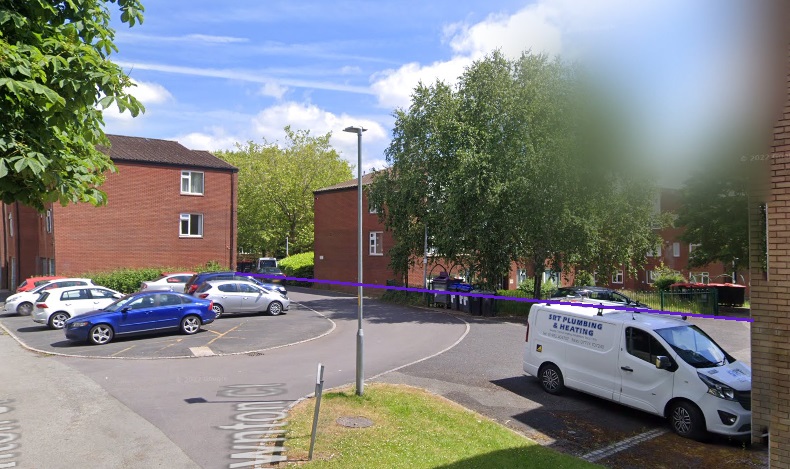
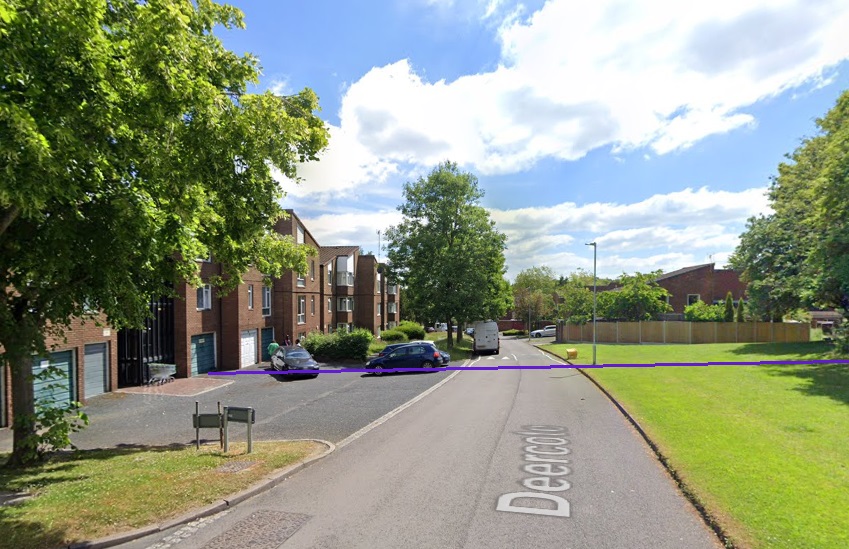
Malins Lee Railway Station, seen from the Southeast. The bridge over the line to the North of the Station carries Dark Lane. This image is embedded here from an article on the dawleyhistory.com website, (c) Collection of William H. Smith. [47]The Western arm of Downton Court looking North in the 21st century. The Coalport Branch route crosses the field ahead of the camera and then runs underneath the flats at this location. [Google Streetview, June 2022]The Eastern Arm of Downton Court looking Northeast. the purple line again approximates to the route of the old railway, passing under the buildings to the extreme right of the image which front onto Deercote. [Google Streetview, June 2022]K=Looking Southeast along Deercote with the approximate line of the Coalport Branch shown by the purple line. [Google Streetview, June 2022]Looking South on St. Quentin’s Gate with the approximate line of the Branch shown in purple. [Google Streetview, June 2022]
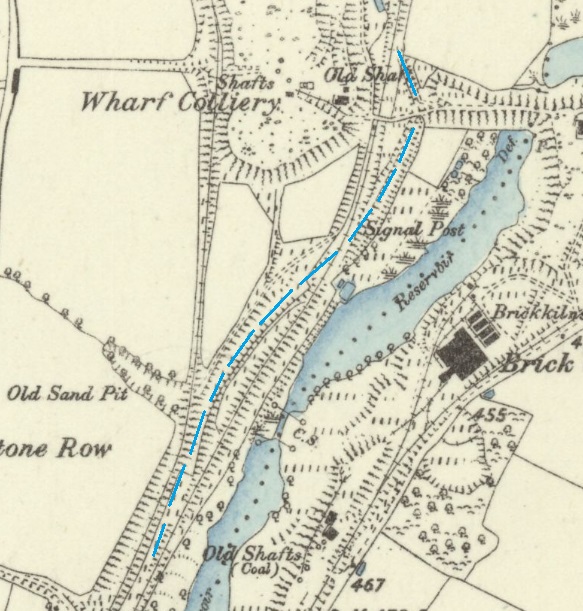
Loops of the Coalport Branch of the Shropshire Canal adjacent to, and South of, Malins Lee Railway Station
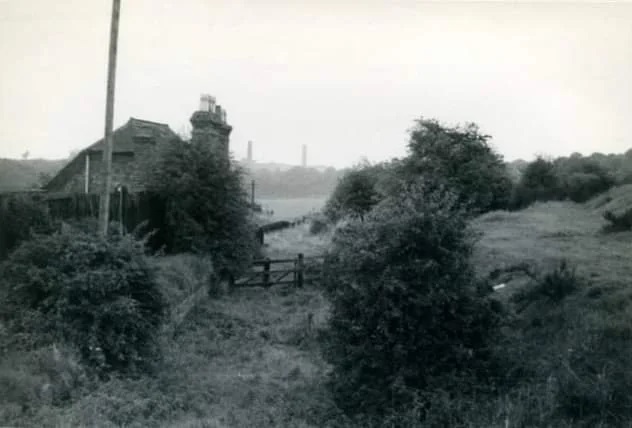
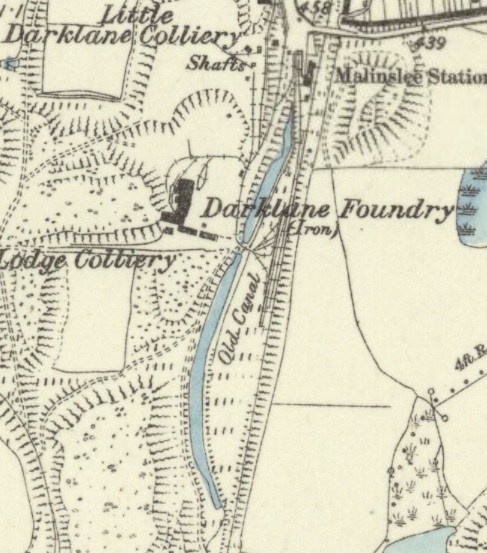
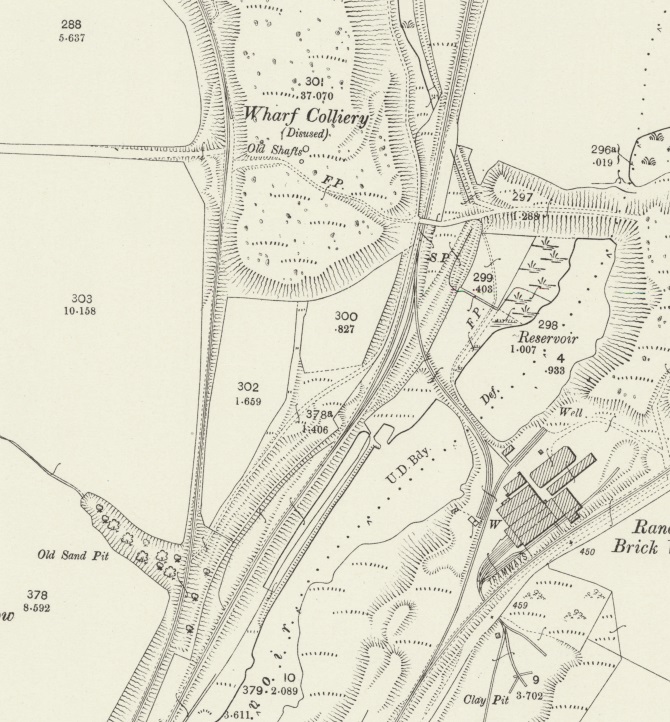
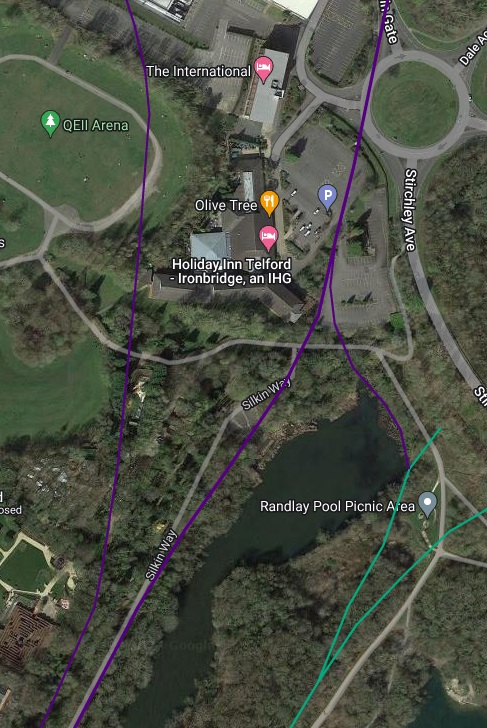
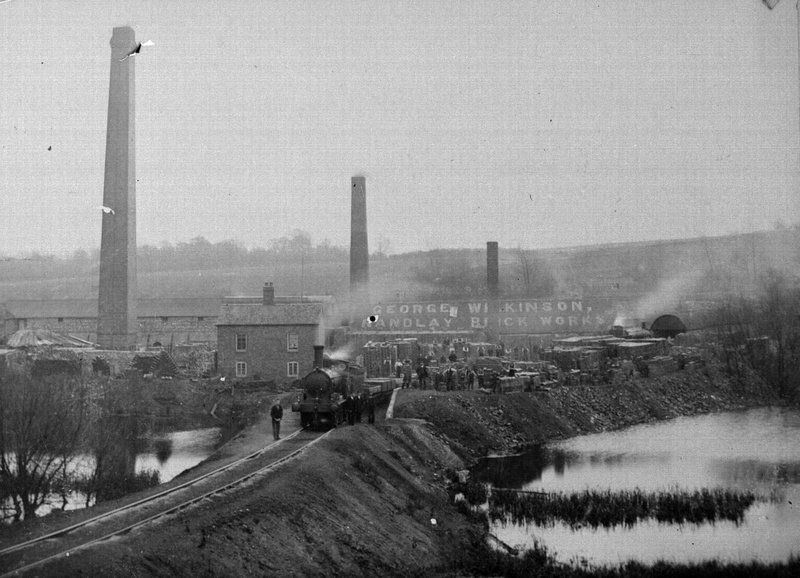
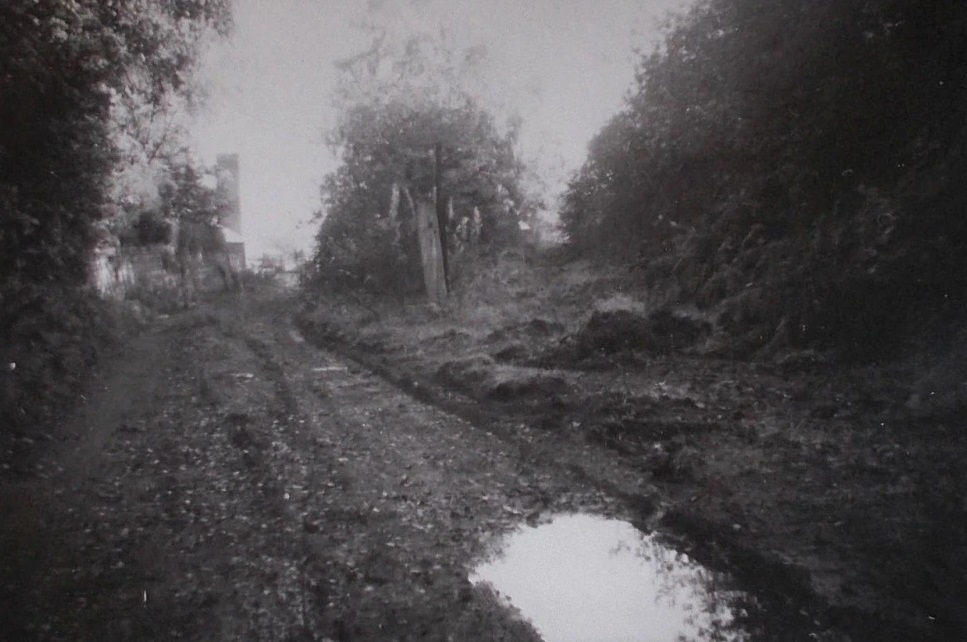
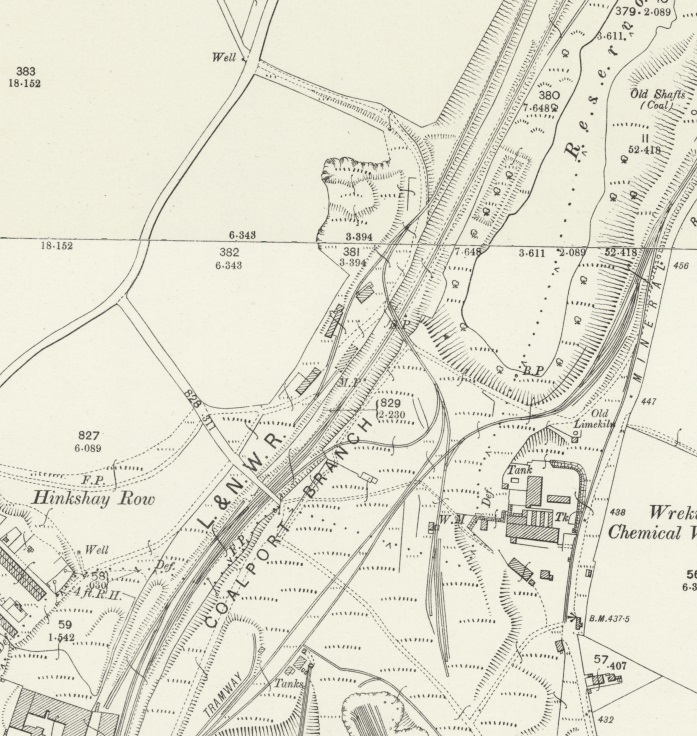
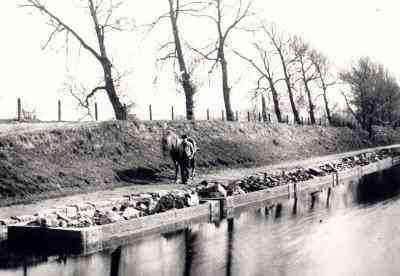
The Canal bed behind Malinslee Railway Station buildings in 1962. This image was shared on the Telford Memories Facebook Group by Marcus Keane on 27th February 2022. This view looks to the South along the back of the station buildings. The 25″ OS map extract above shows that at the time of the survey this area had a railway siding in place. The line of the canal curved away from the railway to the West before returning to the same alignment a short distance further South. [48]An extract from the 1881 Ordnance Survey, published in 1882 showing approximately the same area as that on the 25″ survey of 1901. Interestingly this earlier survey uses the name ‘Malinslee’ for the railway station rather than ‘Malins Lee’ as on the 1901 survey. Little Dark Lane Colliery, to the immediate West of the Station was still in use at the time of this survey. The standard-gauge siding to the West of the Station buildings, can be seen on this extract as serving a tramroad wharf, as can the longer siding visible in the 1932 picture above. Tramroads are not the subject of this article, but given that the tramroads shown seem to only serve the Little Dark Lane Colliery and the Dark Lane Foundry, the traffic on these lines may have either been horse-powered or even man-powered. When the Canal was active a wharf would have existed on the West side of the canal. [49]A further extract from the 1881 6″ Ordnance Survey, showing the next length of the railway. The route of the old canal is indicated approximately by the light blue dashed line. [49]A similar length of the railway is shown on this next extract from the 25″ 1901 Ordnance Survey. Of note, is Randlay Brickworks which has a connection to the Coalport Branch and the disused Wharf Colliery which was active in 1881. There is a Mineral Railway running to the West of the Wharf Colliery site and the GWR Stirchley Branch to the Southeast of Randlay Brick Works. [50]The same area on the satellite imagery provided by Railmaponline.com. [44]This image was sent to me as an email attachment by David Clarke in March 2023. It shows the rail siding leading from the LNWR Coalport line to Randlay Brick Works. David Clarke is the author of a relatively recent book, “The Railways of Telford” which I reviewed soon after we moved to Telford. It was an invaluable first step for me in exploring the railways and plateways (tramroads/tramways) of the area. My review of his book can be found here. [58]The route of the Randlay Brickworks Siding in 1962. This image was also sent to me as an email attachment by David Clarke in March 2023.This next extract from the 25″ 1901 Ordnance Survey takes us as far as the Stirchley Iron Works. The buildings can be picked out right at the bottom of the map extract on the left. Of note, is the Wrekin Chemical Works on the site of what was for a time Old Park Ironworks. This is connected both the LNWR Branch line via a tramway bridge over the line and to the GWR Stirchley branch denoted Mineral Railway on the right of the extract. [51]The same area on the satellite imagery provided by Railmaponline.com. Some of the old tramways are shown on this extract. [44]
A Loop of the Coalport Branch of the Shropshire Canal near Stirchley Ironworks
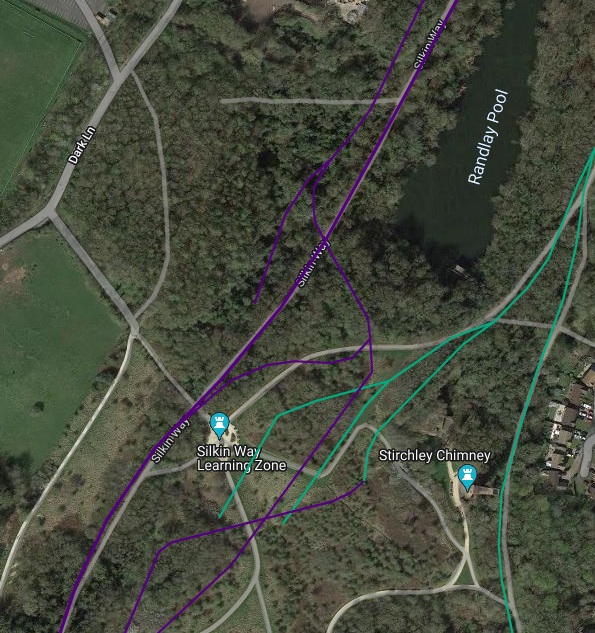
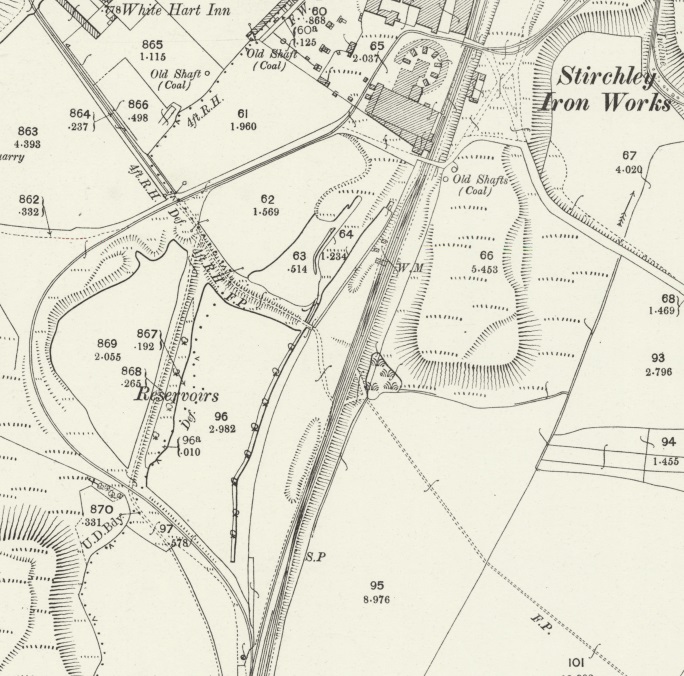
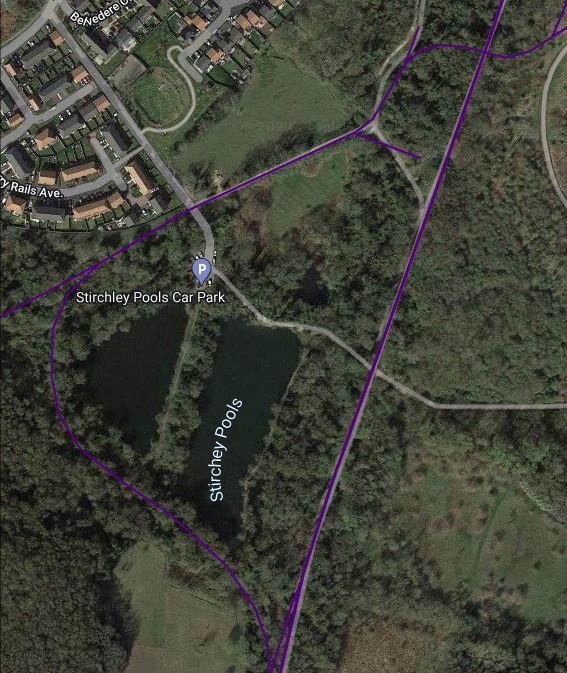
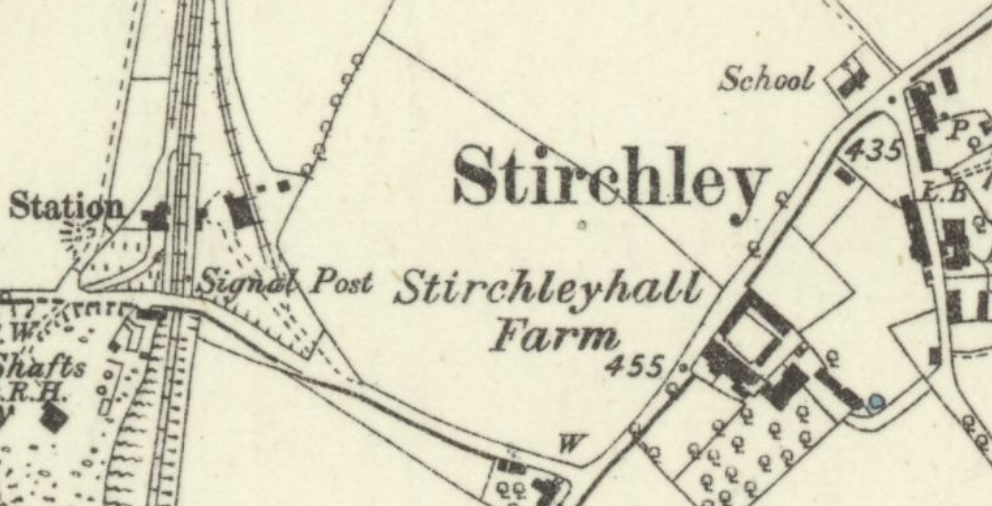
This section of the line on the 1901 25″ Ordnance Survey. [52]This is Railmaponline.com’s representation of the same area as that shown on the OS map extract above. The tramroads around Stirchley/Hinkshay Pools are shown as well as the Coalport Branch. The abandoned loop of the old canal can just about be made out through the trees. [44]
Andy Tidy surveyed the route of the Coalport Branch of the Shropshire Canal in March 2012 the majority of which lies underneath the formation of the LNWR Coalport Branch. He highlighted two areas worthy of note. The first adjacent to Hinkshay/Stirchley Pools and the second to the South of Dawley and Stirchley Railway Station where the Canal was in tunnel during its working life. [15]
Adjacent to the Hinkshay Pools, the Canal alignment deviated from the formation of the later Railway. Andy Tidy provided a plan (below) of the location which I have annotated with the key features he refers to. His pictures of the canal deviation can be seen here. [15]
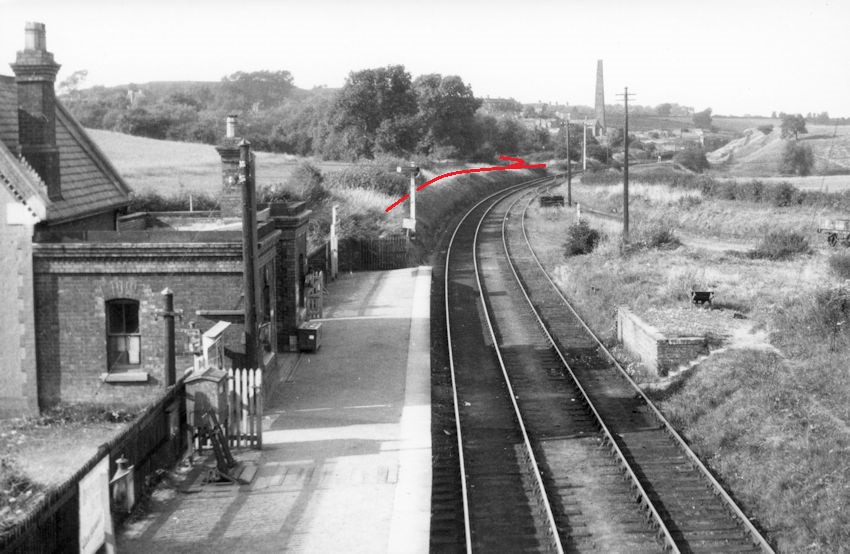
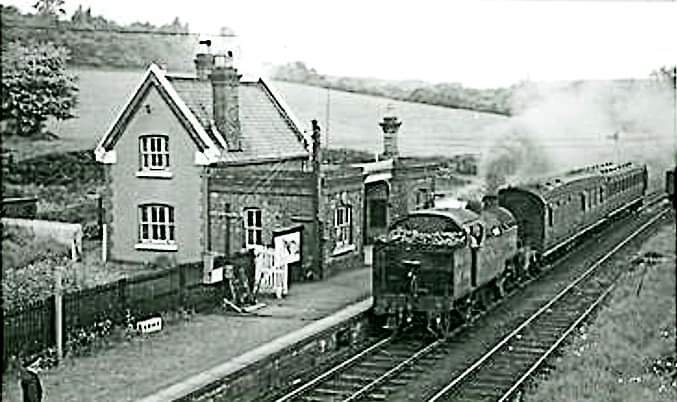
Andy Tidy says: “No sooner has the line moved off the modern Silkin Way than it is in water, first in the undergrowth but then as it passes the first reservoir the bed squeezes through the foundations of a collapsed bridge and on into open water. … The towpath sits on a narrow strand of land between the canal and the Stirchley Pools Reservoir, a pretty spot which is carefully maintained as a nature reserve. This clear stretch of canal is haunting and as you walk under the shade of the trees you almost expect to meet a horse plodding the other way towing a string of loaded tub boats. … All too soon this enduring stretch of canal slides back into the railway bed, all traces are lost at it passes through the recently rebuilt Stirchley Station.” [15]This picture shows the length of the canal on the map above. It was shared by Andy Rose on the Telford Memories Facebook Group in February 2022. [16]Andy Tidy’s photograph in 2012 of the Stirchley Ironworks Bridge which crossed the Canal and later the railway. Stirchley Ironworks were on the right-hand side of the photographer, on the near side of the bridge, (c) Andy Tidy. [15]A relatively poor photo showing a steam service on the LNWR Coalport Branch heading North. The train has passed through Dawley & Stirchley Railway Station and is heading towards Malins Lee Station with Stirchley Chimney in the background. The picture was shared on the Telford Memories Facebook Group by Marcus Keane on 9th January 2022. [22]
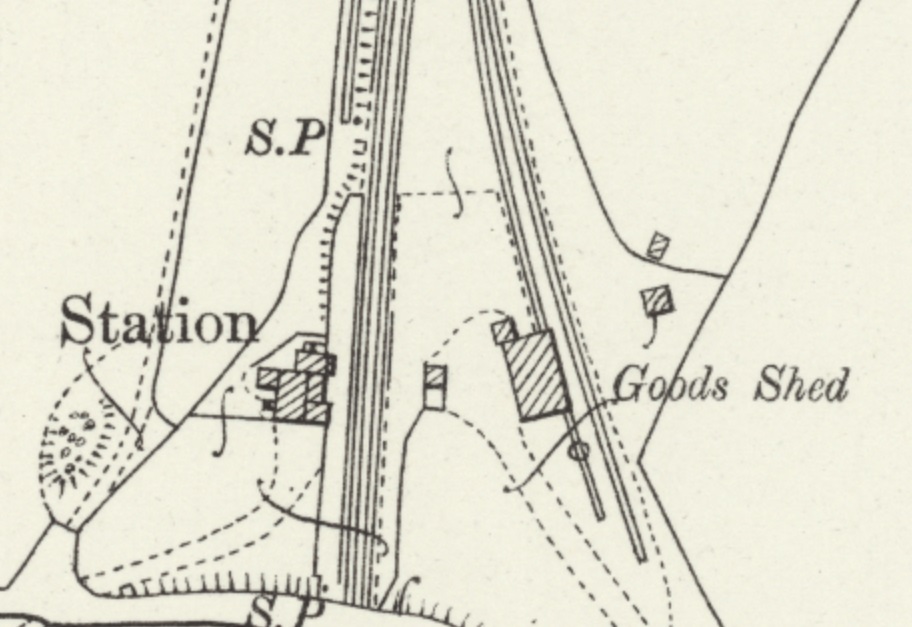
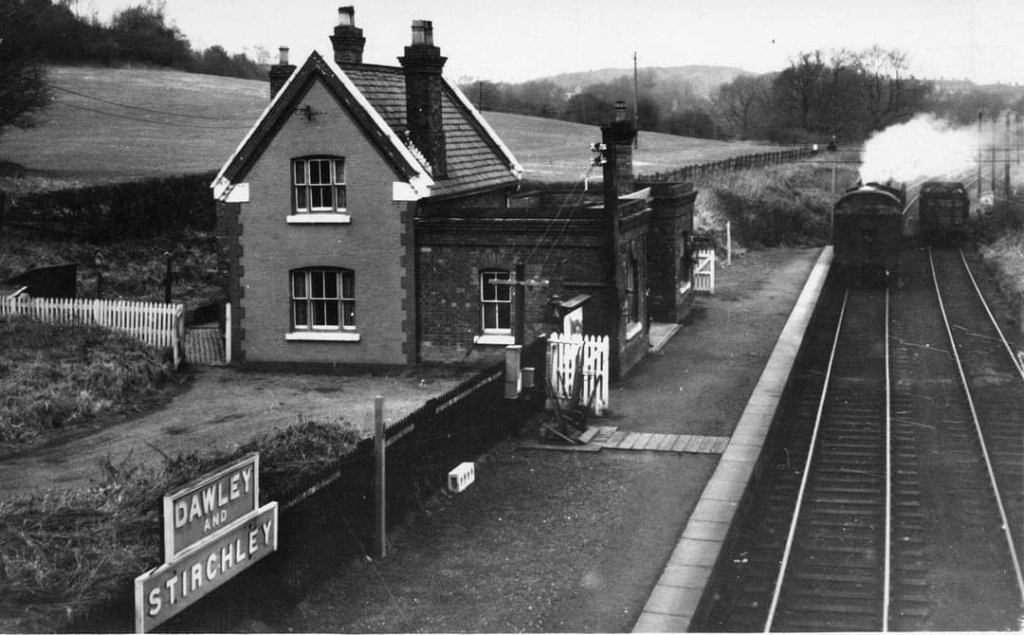
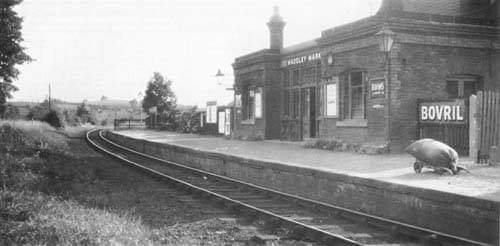
Dawley and Stirchley Railway Station
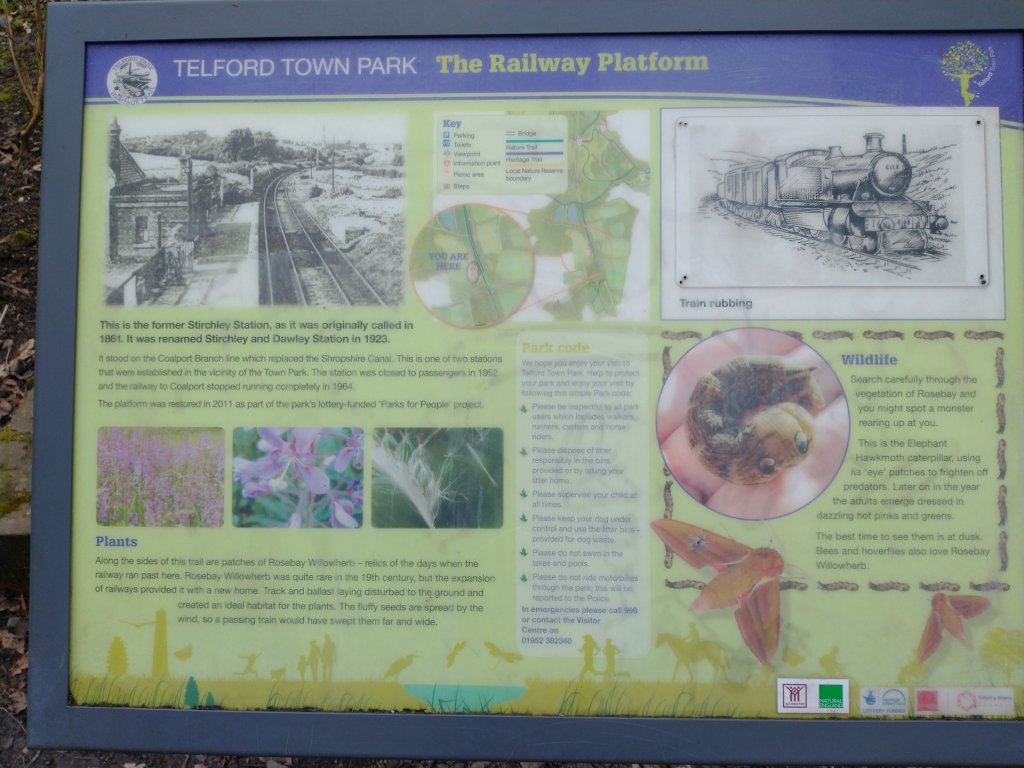
Dawley and Stirchley railway station was opened in 1861 and closed to passengers in 1952. [3] When it opened, it was given the name ‘Stirchley’. The station was renamed Dawley & Stirchley in 1923, although closed to passengers as early as 1952 the line through the station site was not finally closed to freight until 1964. Although the goods service which originally served Coalport was restricted to only travelling to Dawley and Stirchley Station in 1960.[4][5]
The London and North Western Railway Society comments on the standard-gauge Coalport Branch as follows: “The first half of the route was originally part of the Shropshire Canal which the LNWR bought in 1857 and filled in, the line opening four years later. The passenger service, referred to locally as the Dawley Dodger, consisted of four trains on weekdays, the journey taking 30 minutes. It was withdrawn in 1952 but a string of private sidings between Wellington and Stirchley helped to keep that section open a further twelve years.” [5]
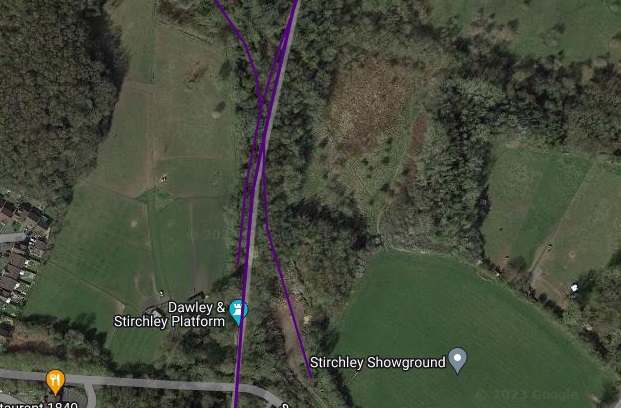
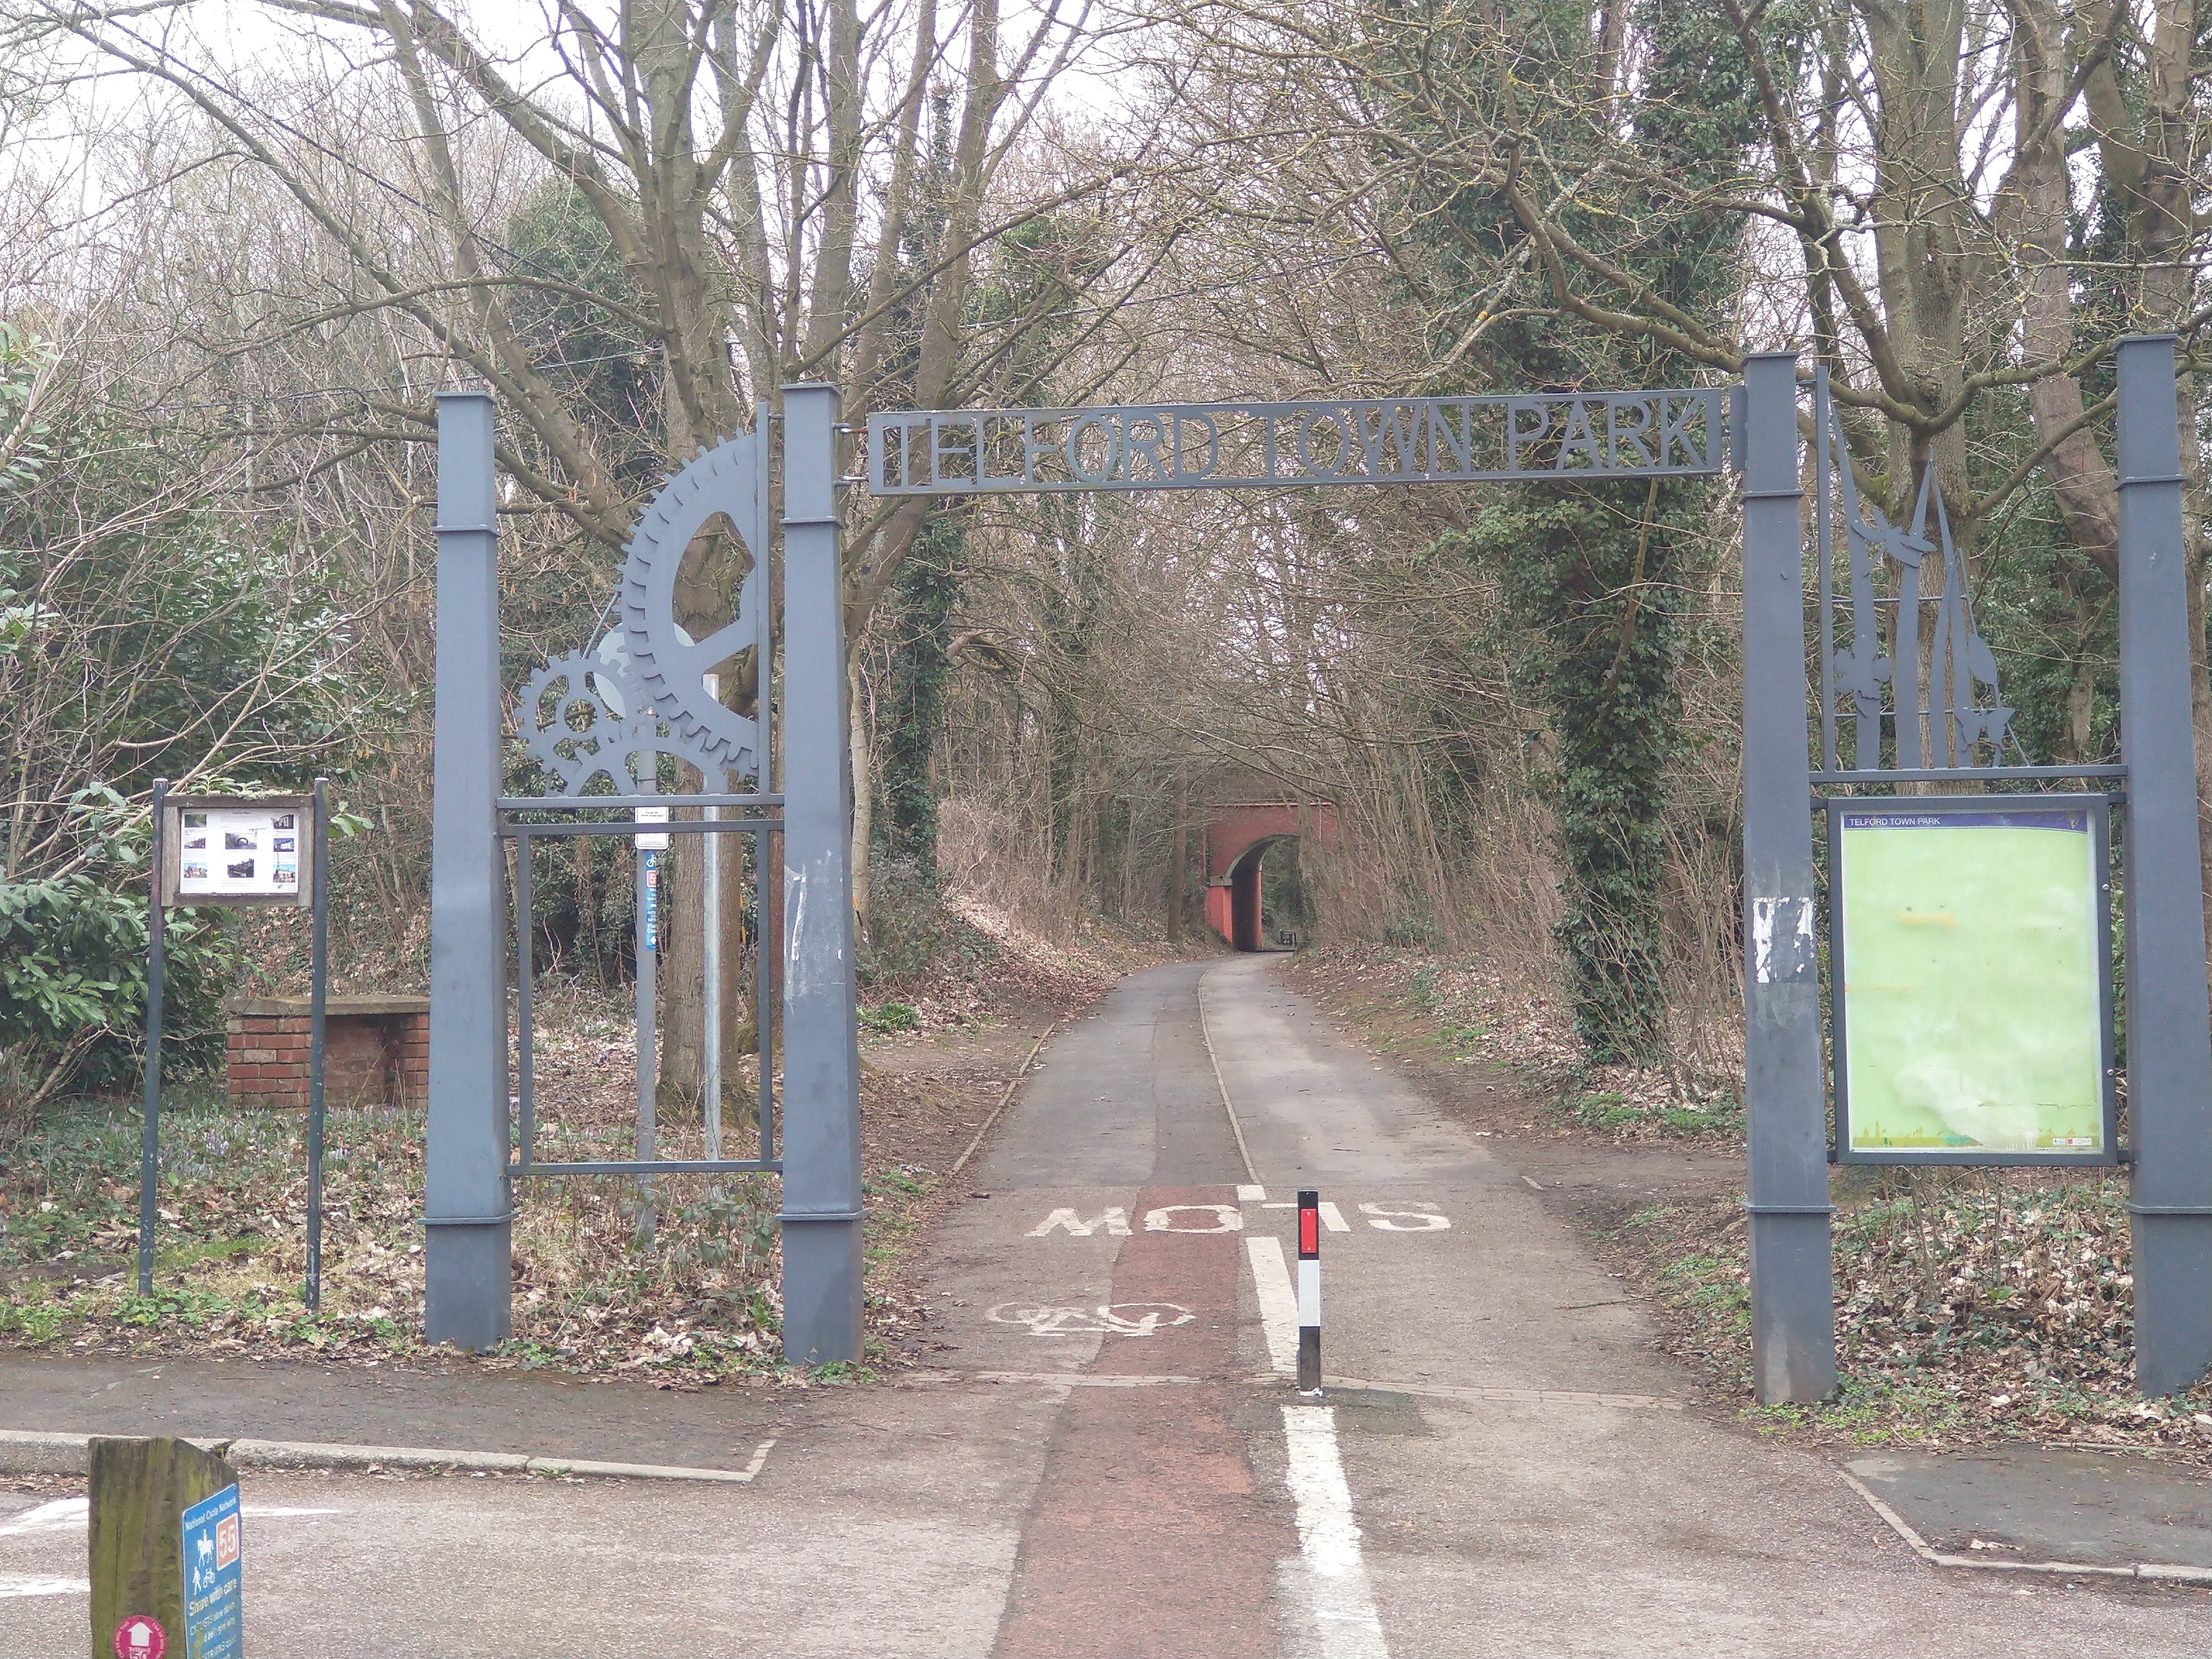
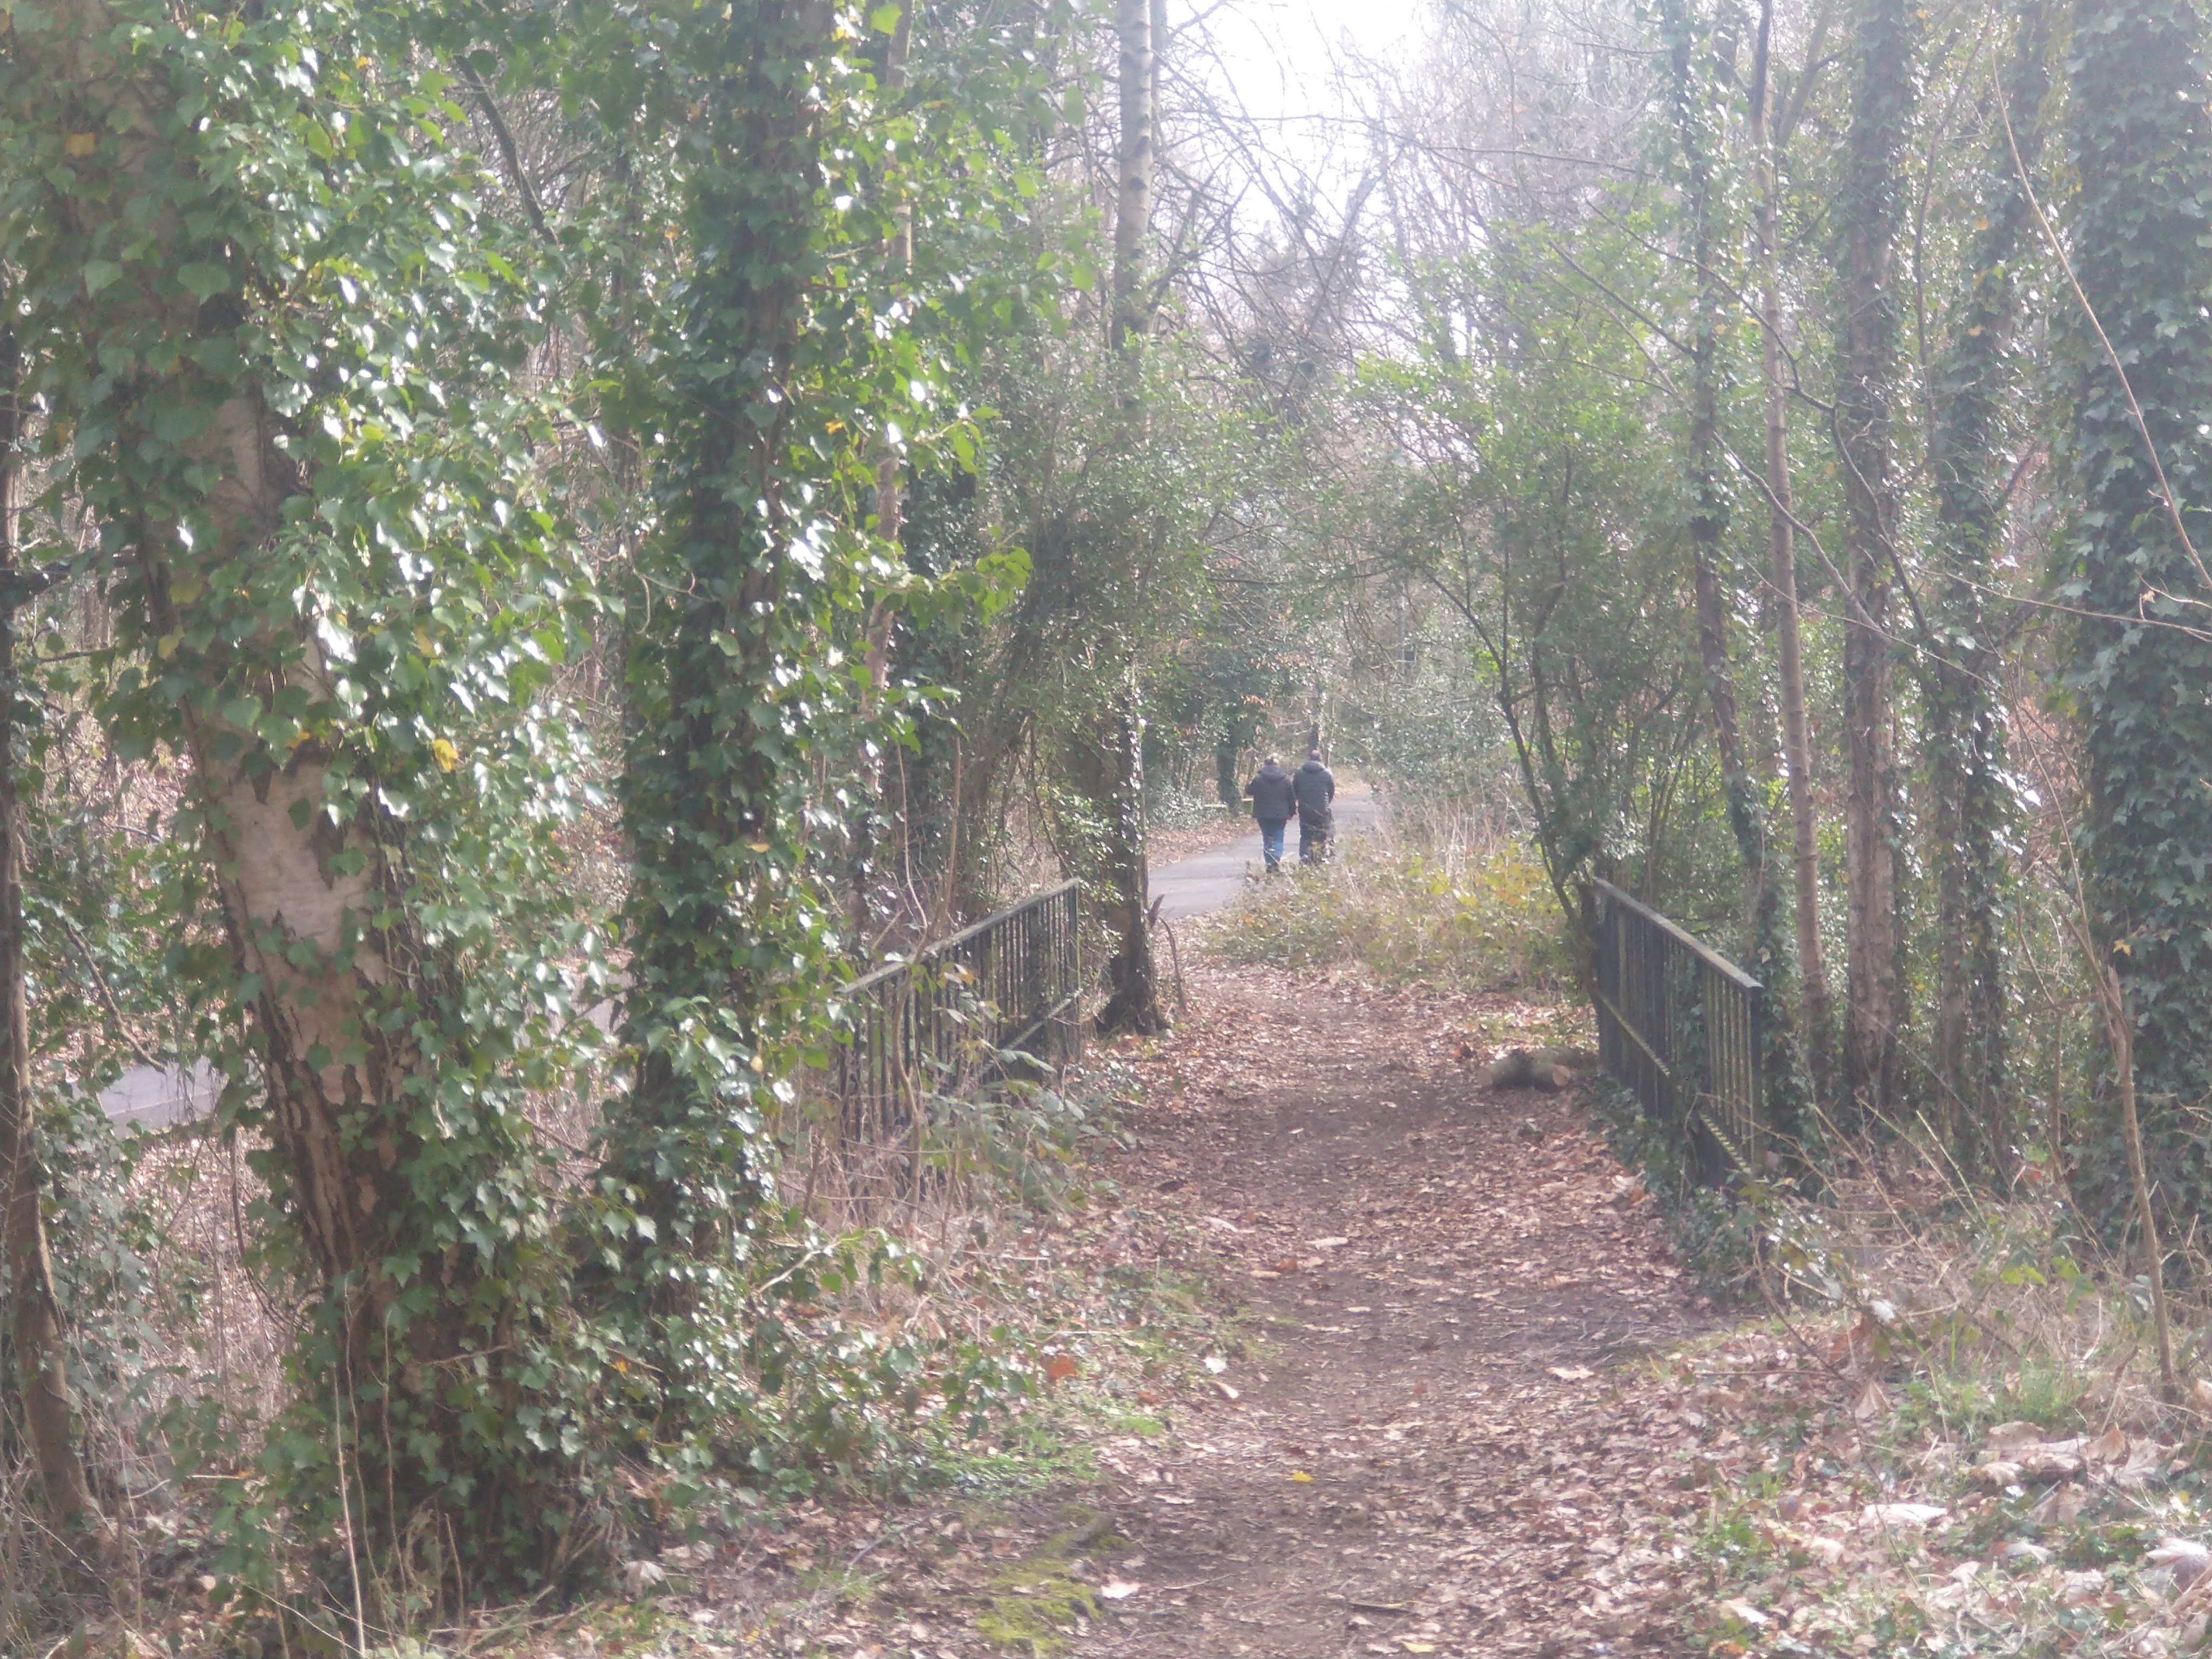
Through Telford Town Park and on through Dawley and Stirchley Station, the old railway line is now part of The Silkin Way. [6][7]
In the first half of the 19th century, before the LNWR branch line was built the tramway had a wharf on the Western bank of the Coalport Branch of the Shropshire Canal which was sited a little to the Northwest of the bottom of the map extract above. When the Coalport Branch of the LNWR was built the tramway was extended a little to run alongside the standard-gauge railway.
The Stirchley Canal Tunneland later Railway Cutting
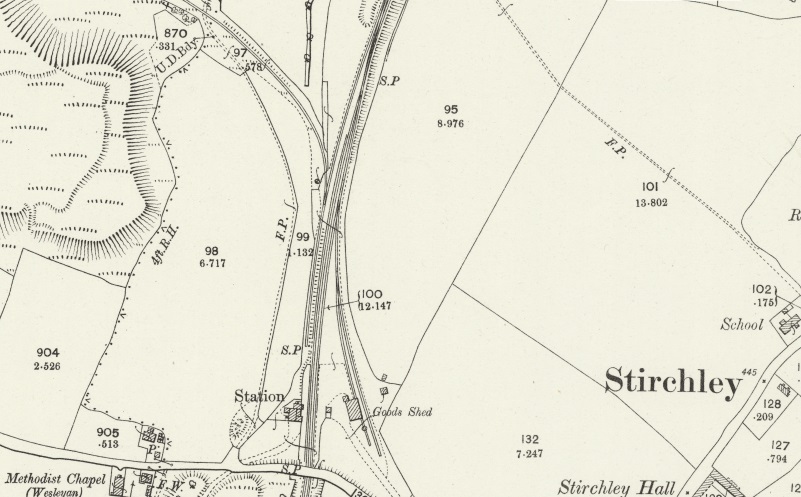
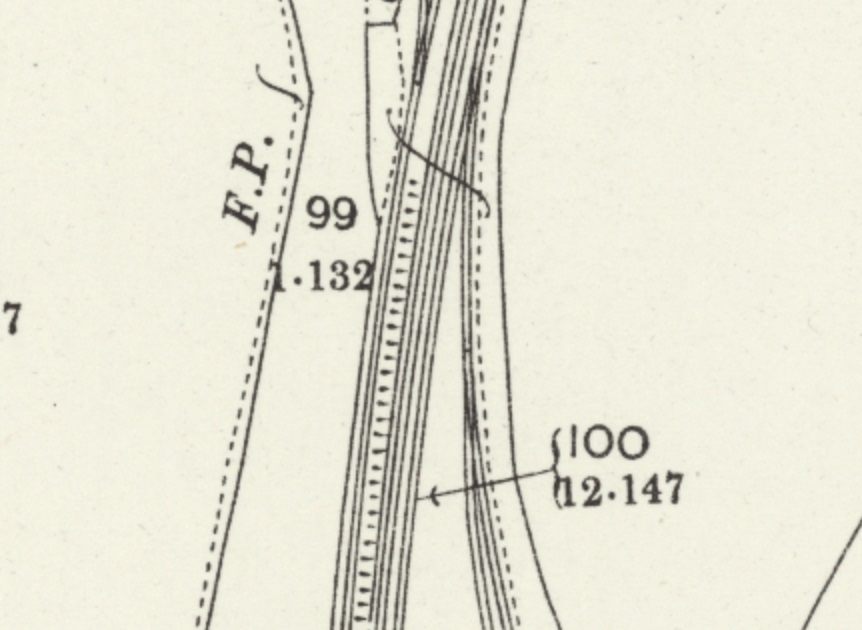
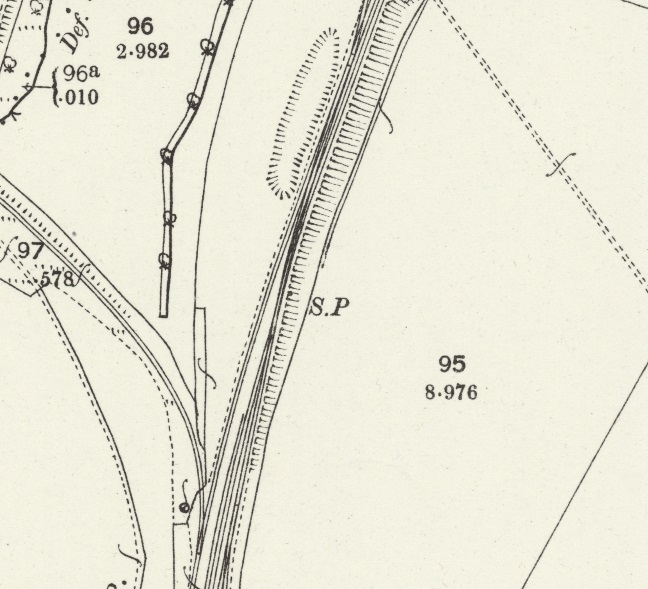
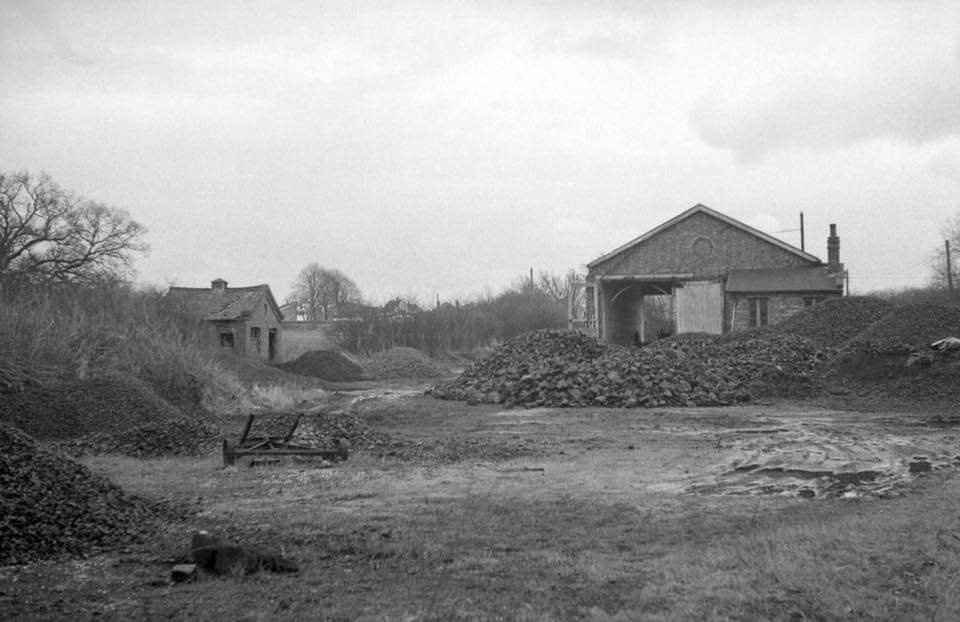
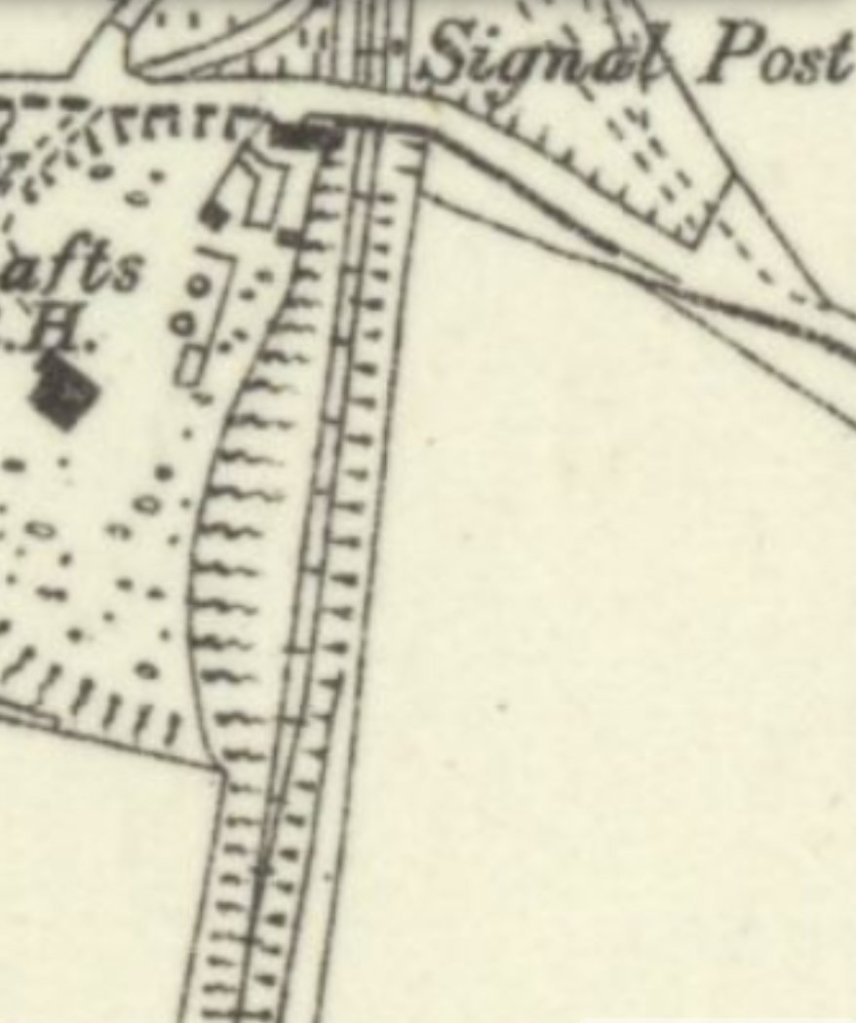
Immediately South of the overbridge the station loop continued as shown on the 6″ Ordnance Survey (1883) map extract below.
South of Stirchley Lane the station loop continued for some distance. [18]
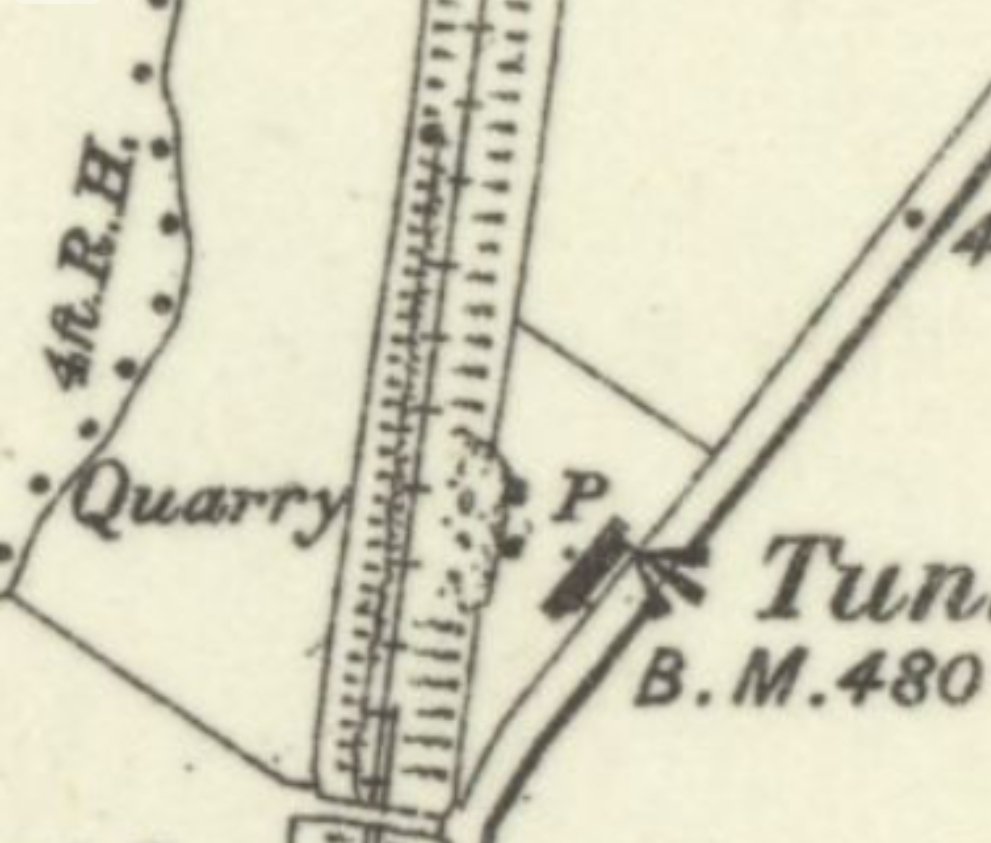
A very short distance further South, the Canal which preceded the railway entered a 281 yard long tunnel – Stirchley Tunnel. When the railway was built, the tunnel was opened out into a cutting. At this location the Ordnance Survey mapping shows a rock face to the West side of the line.
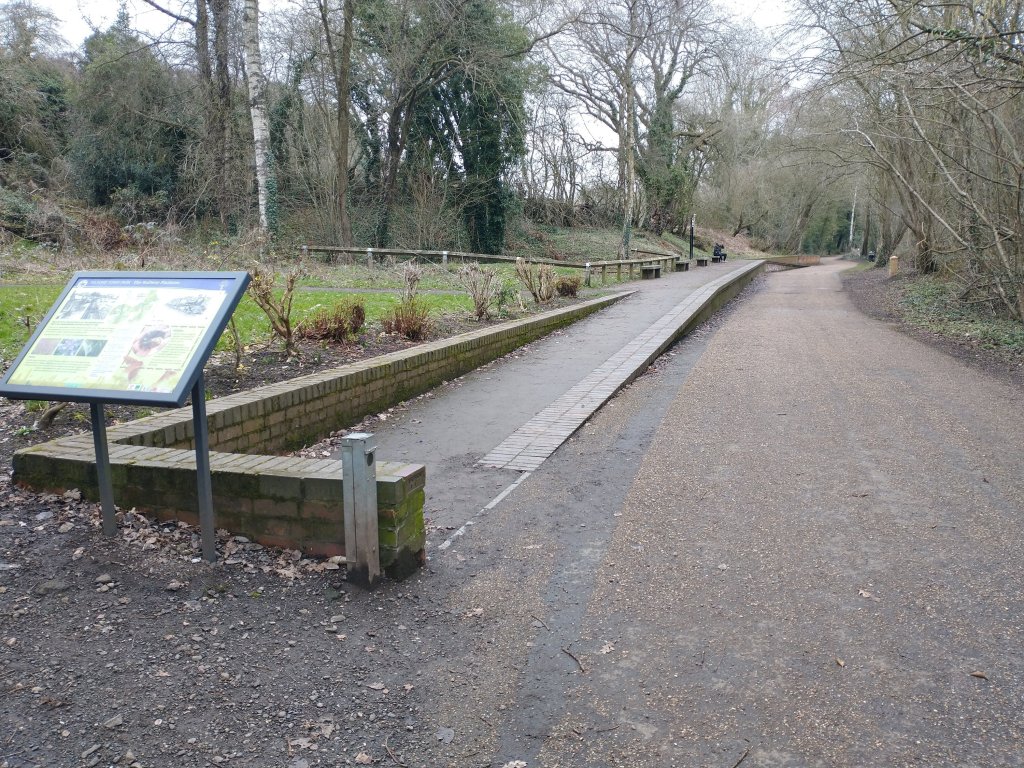
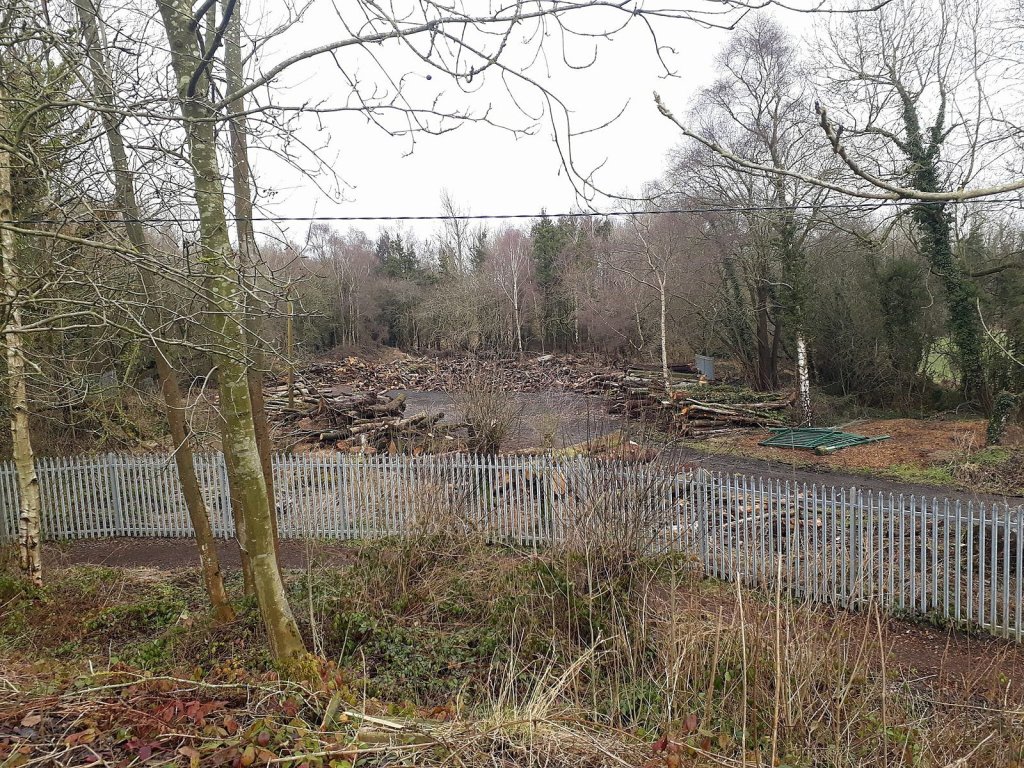
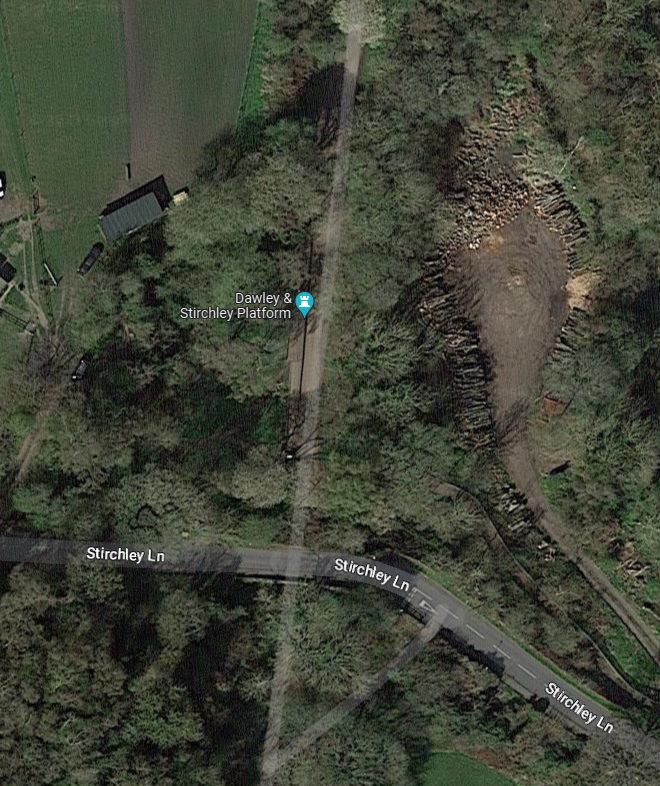
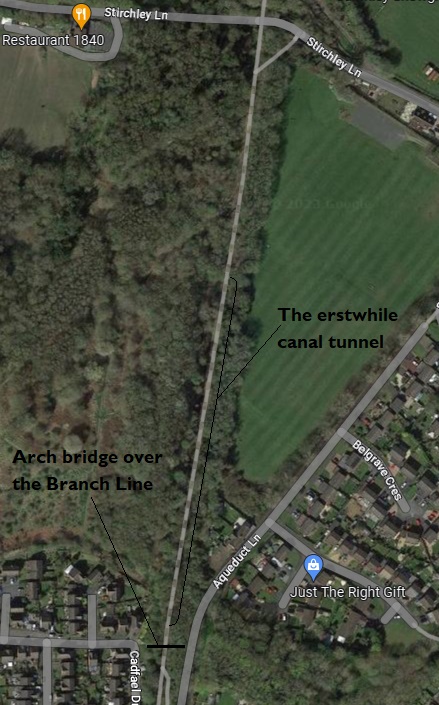
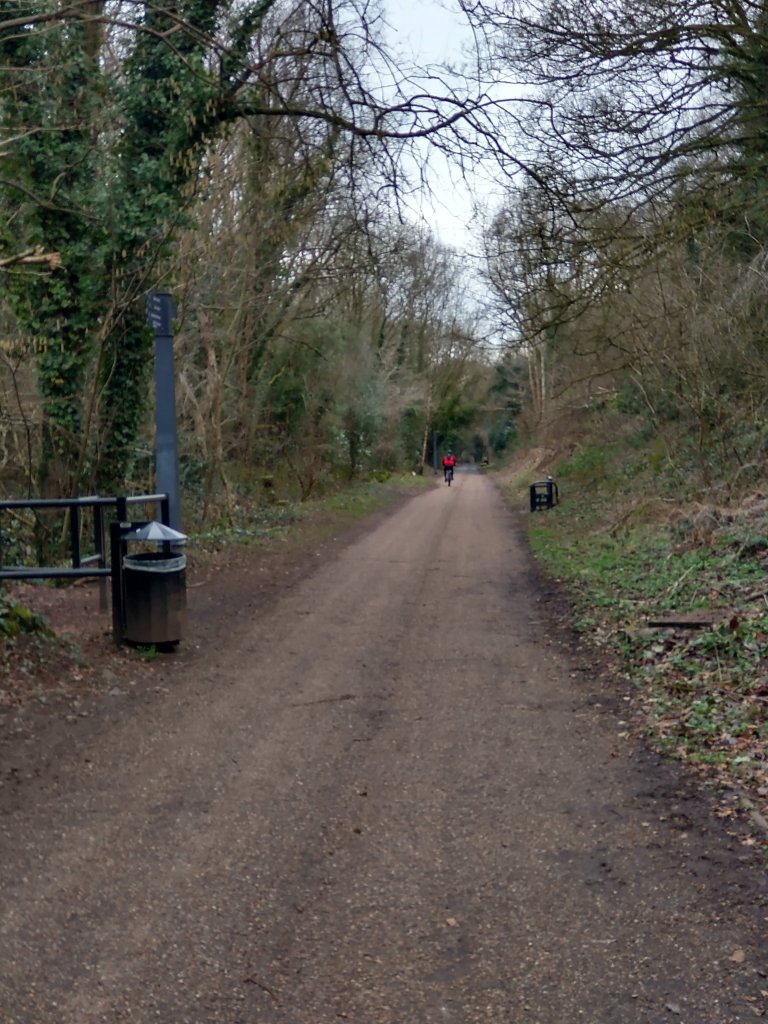
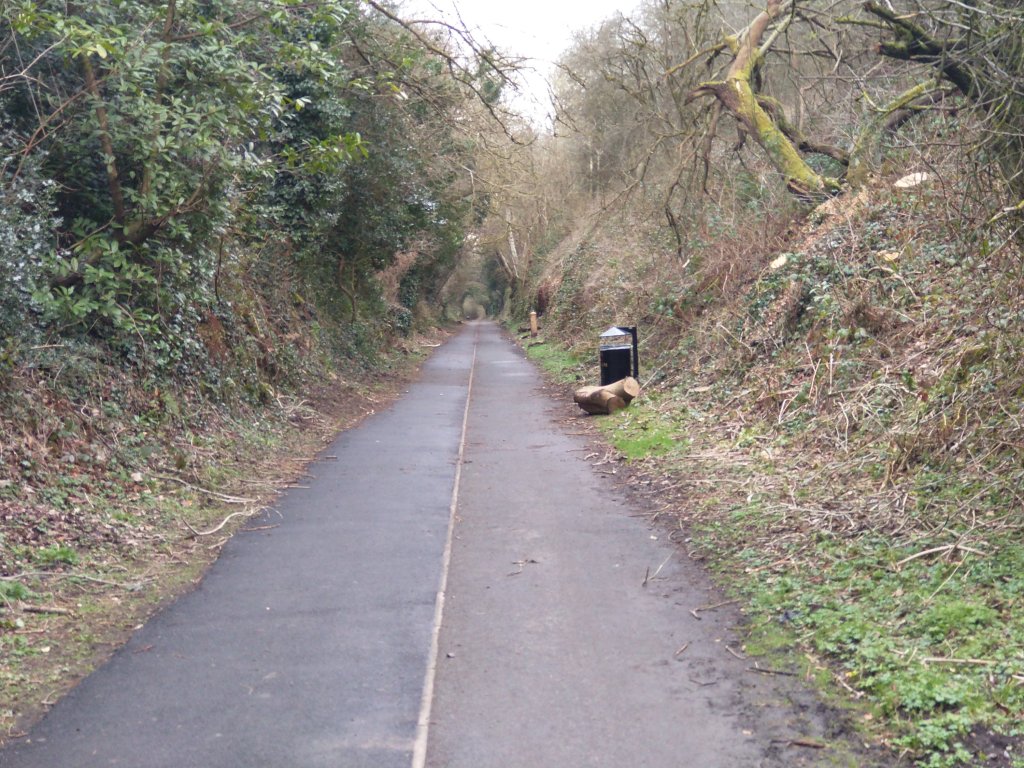
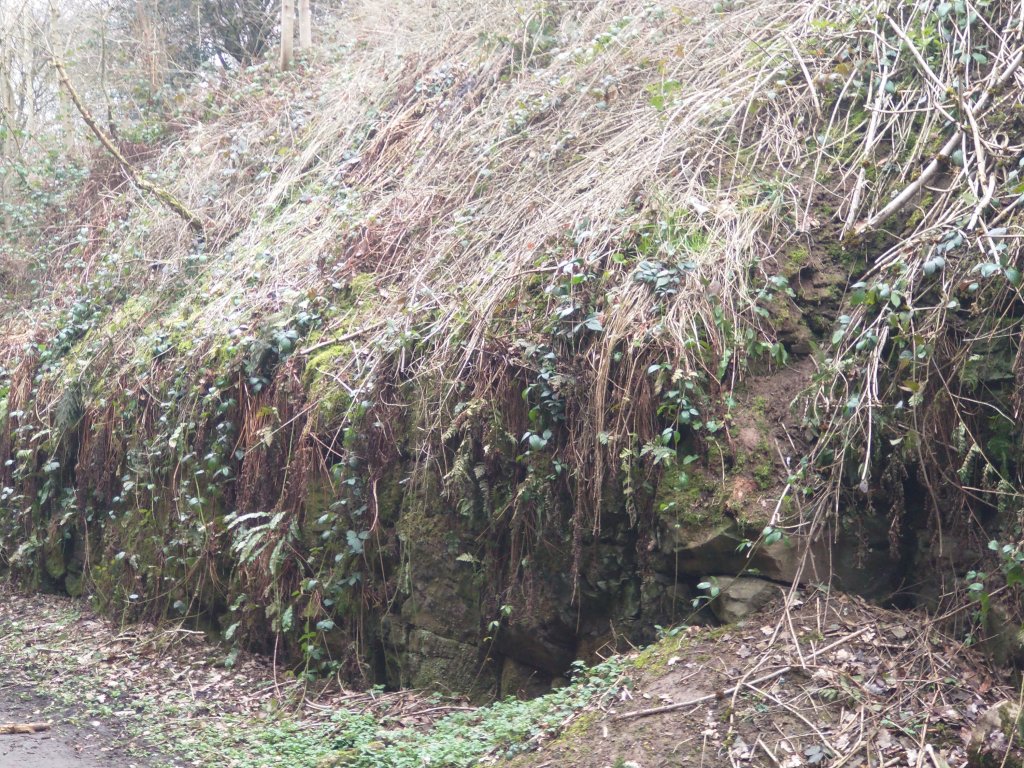
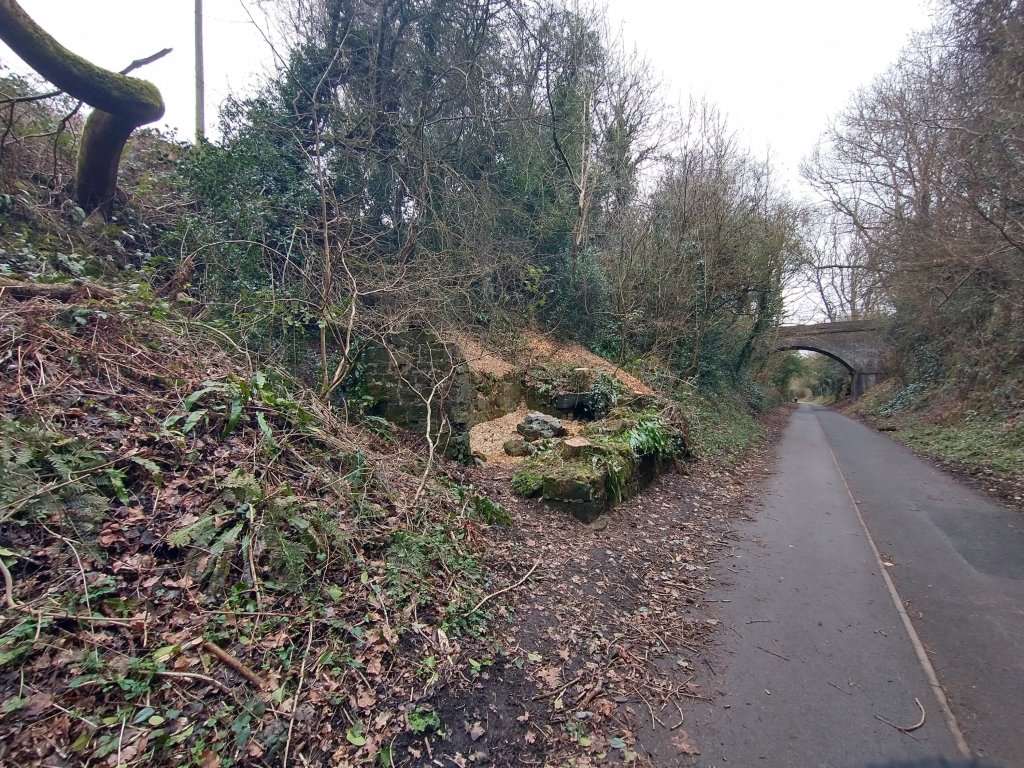
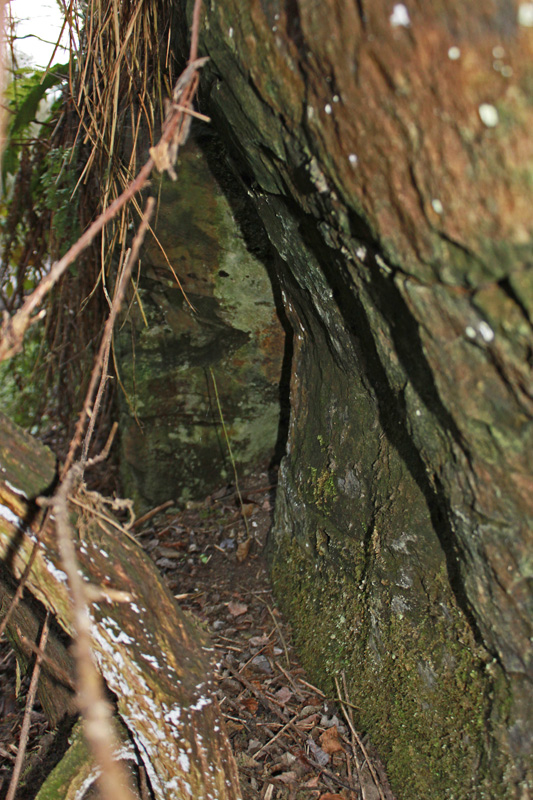
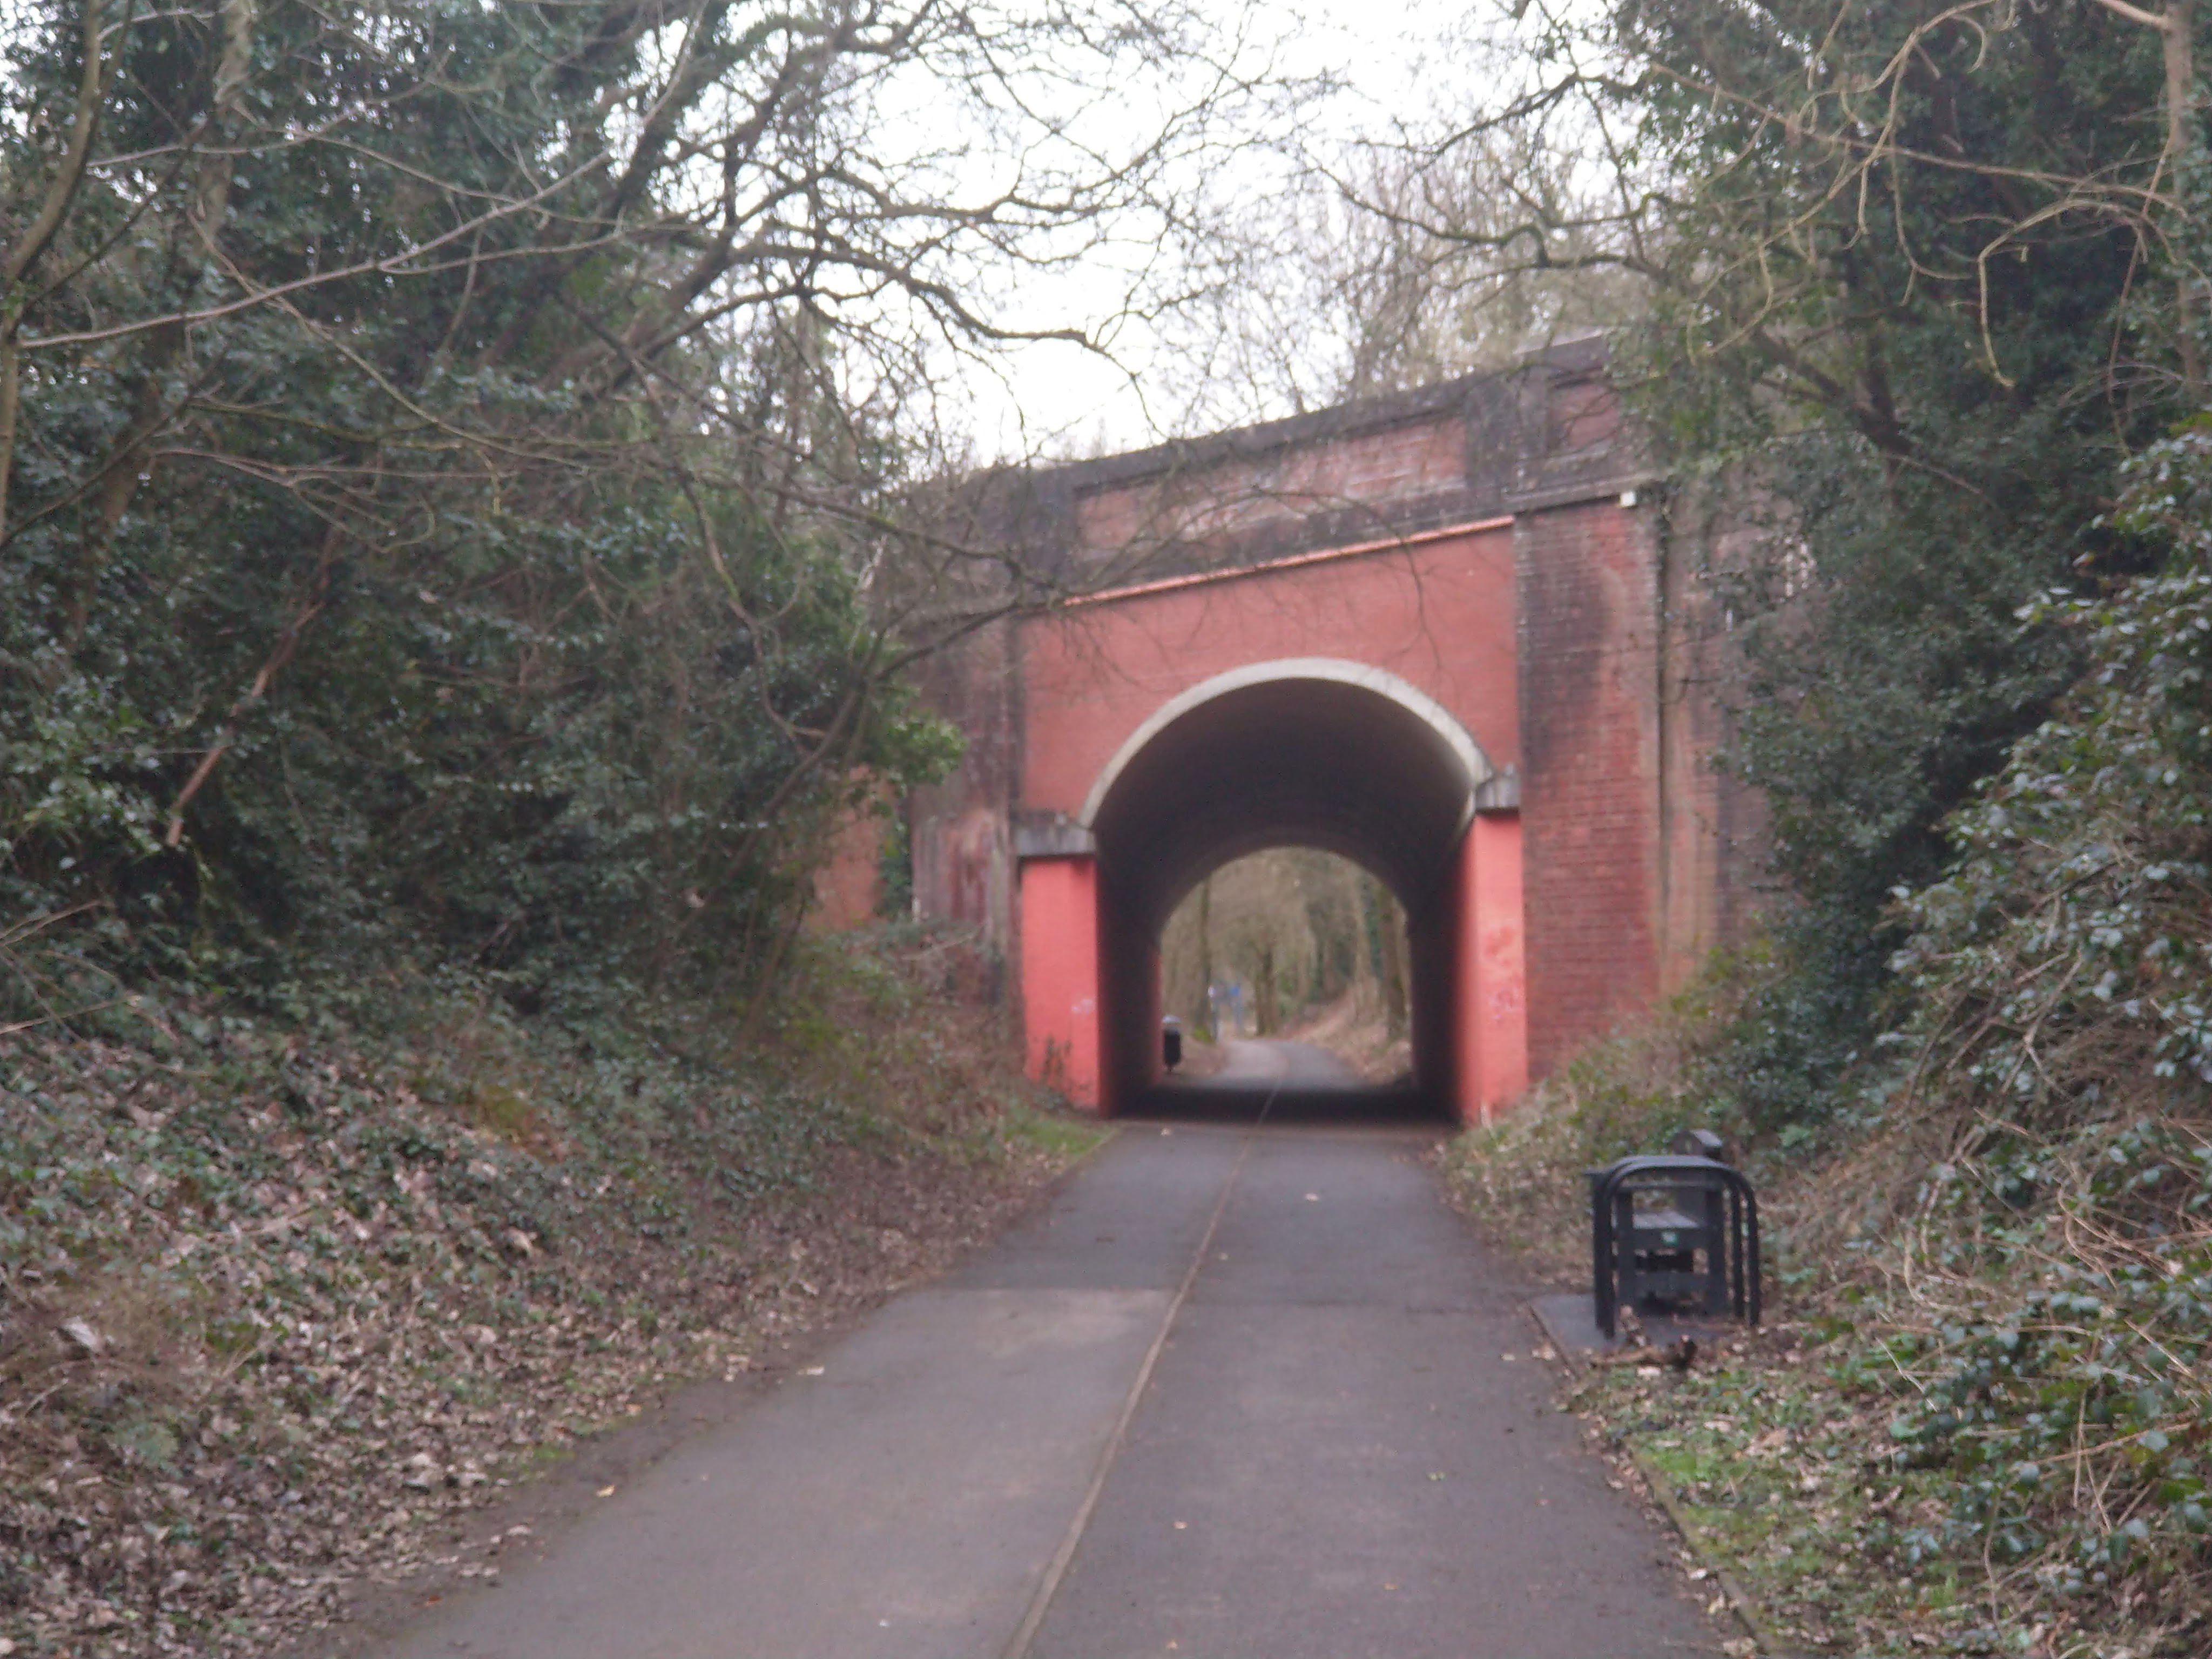
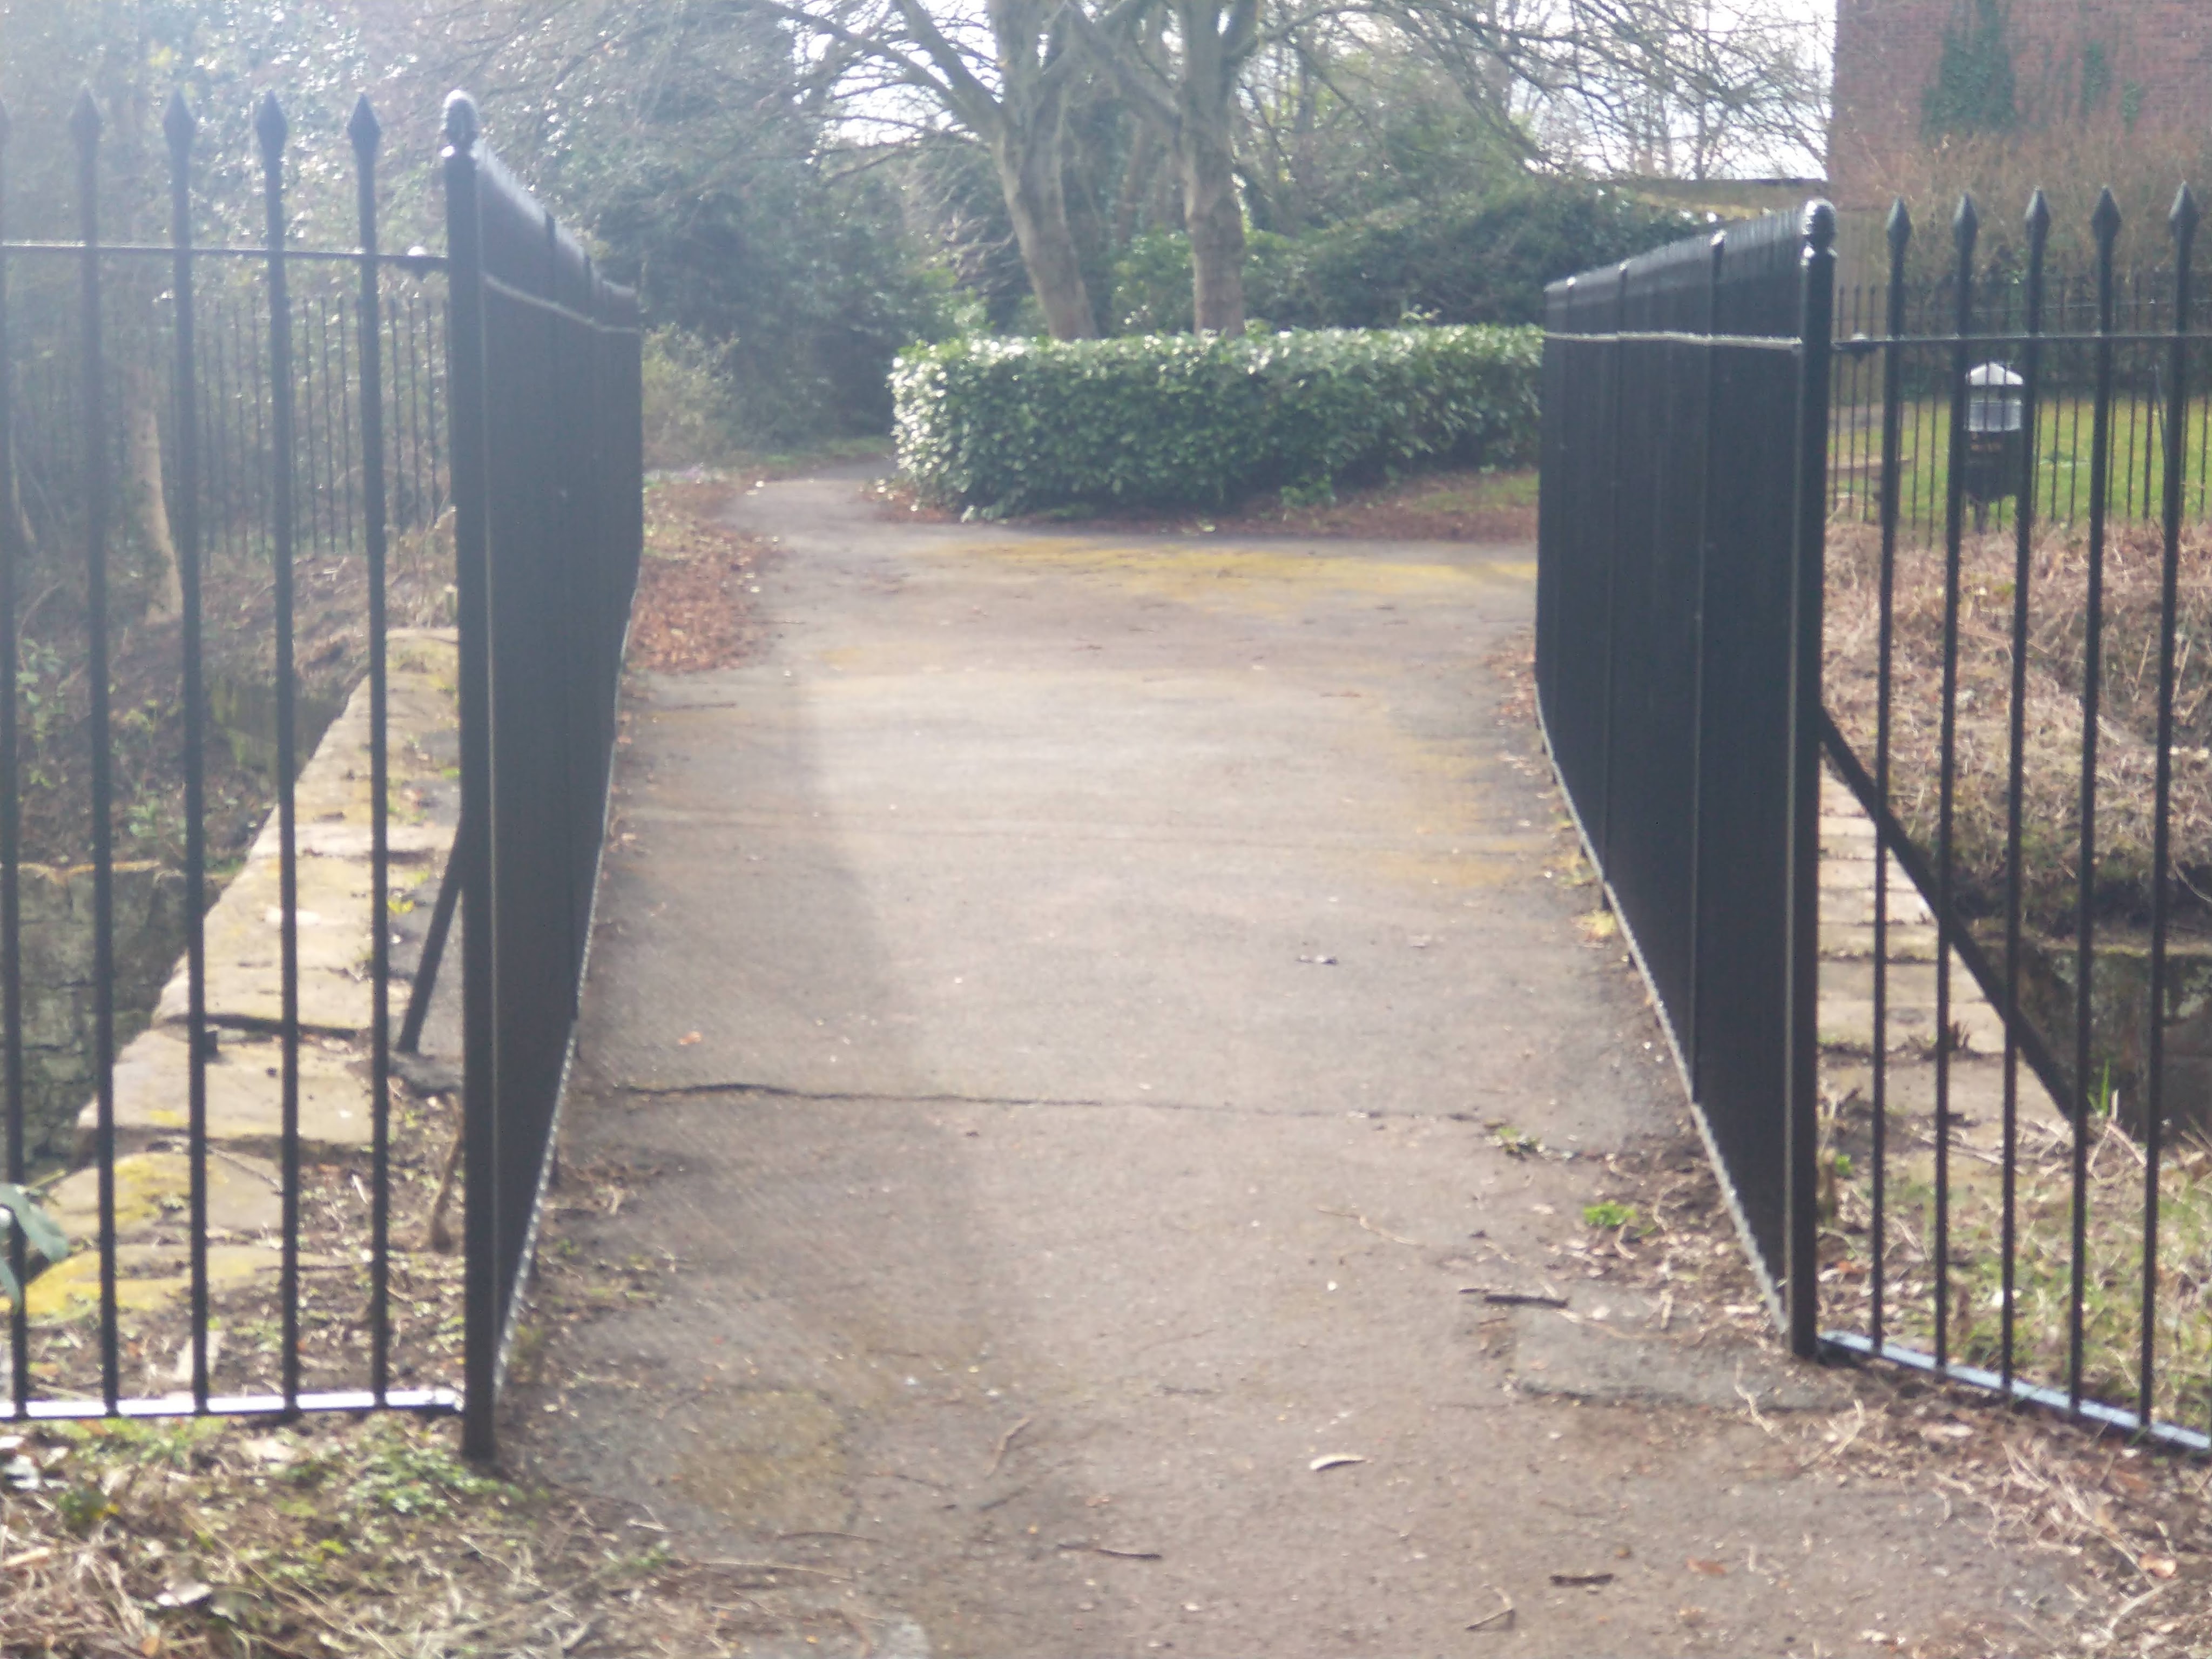
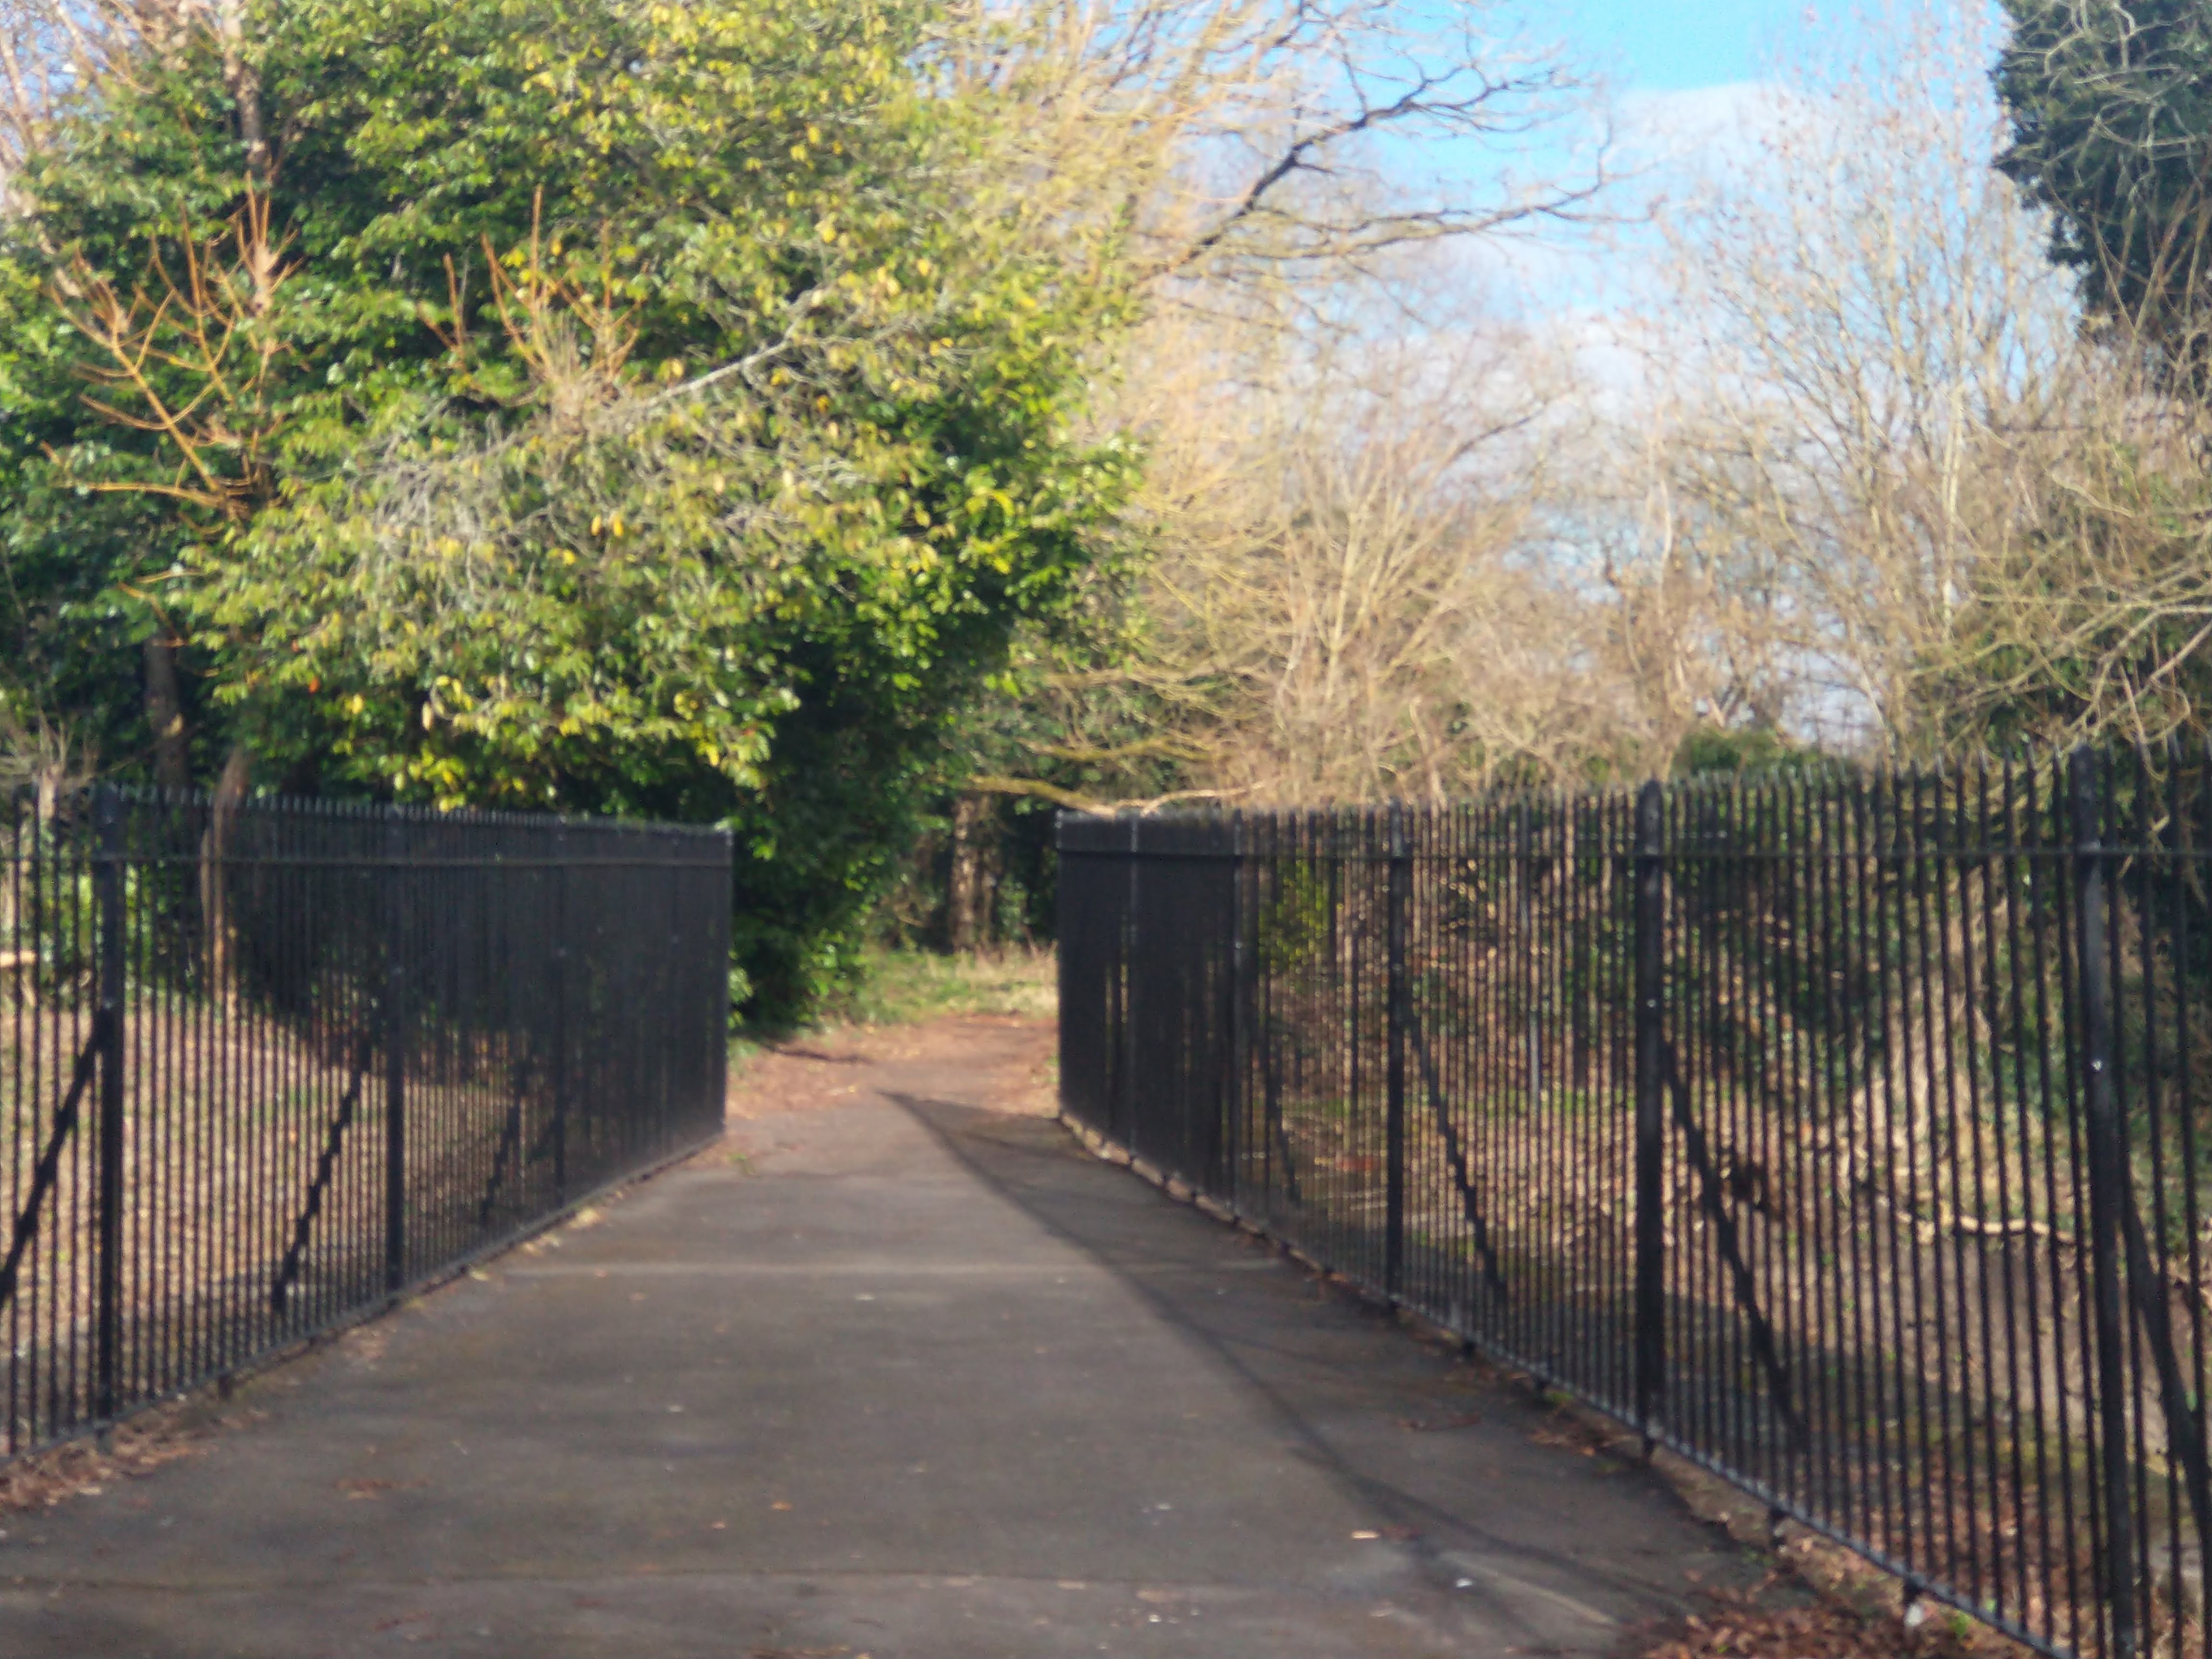
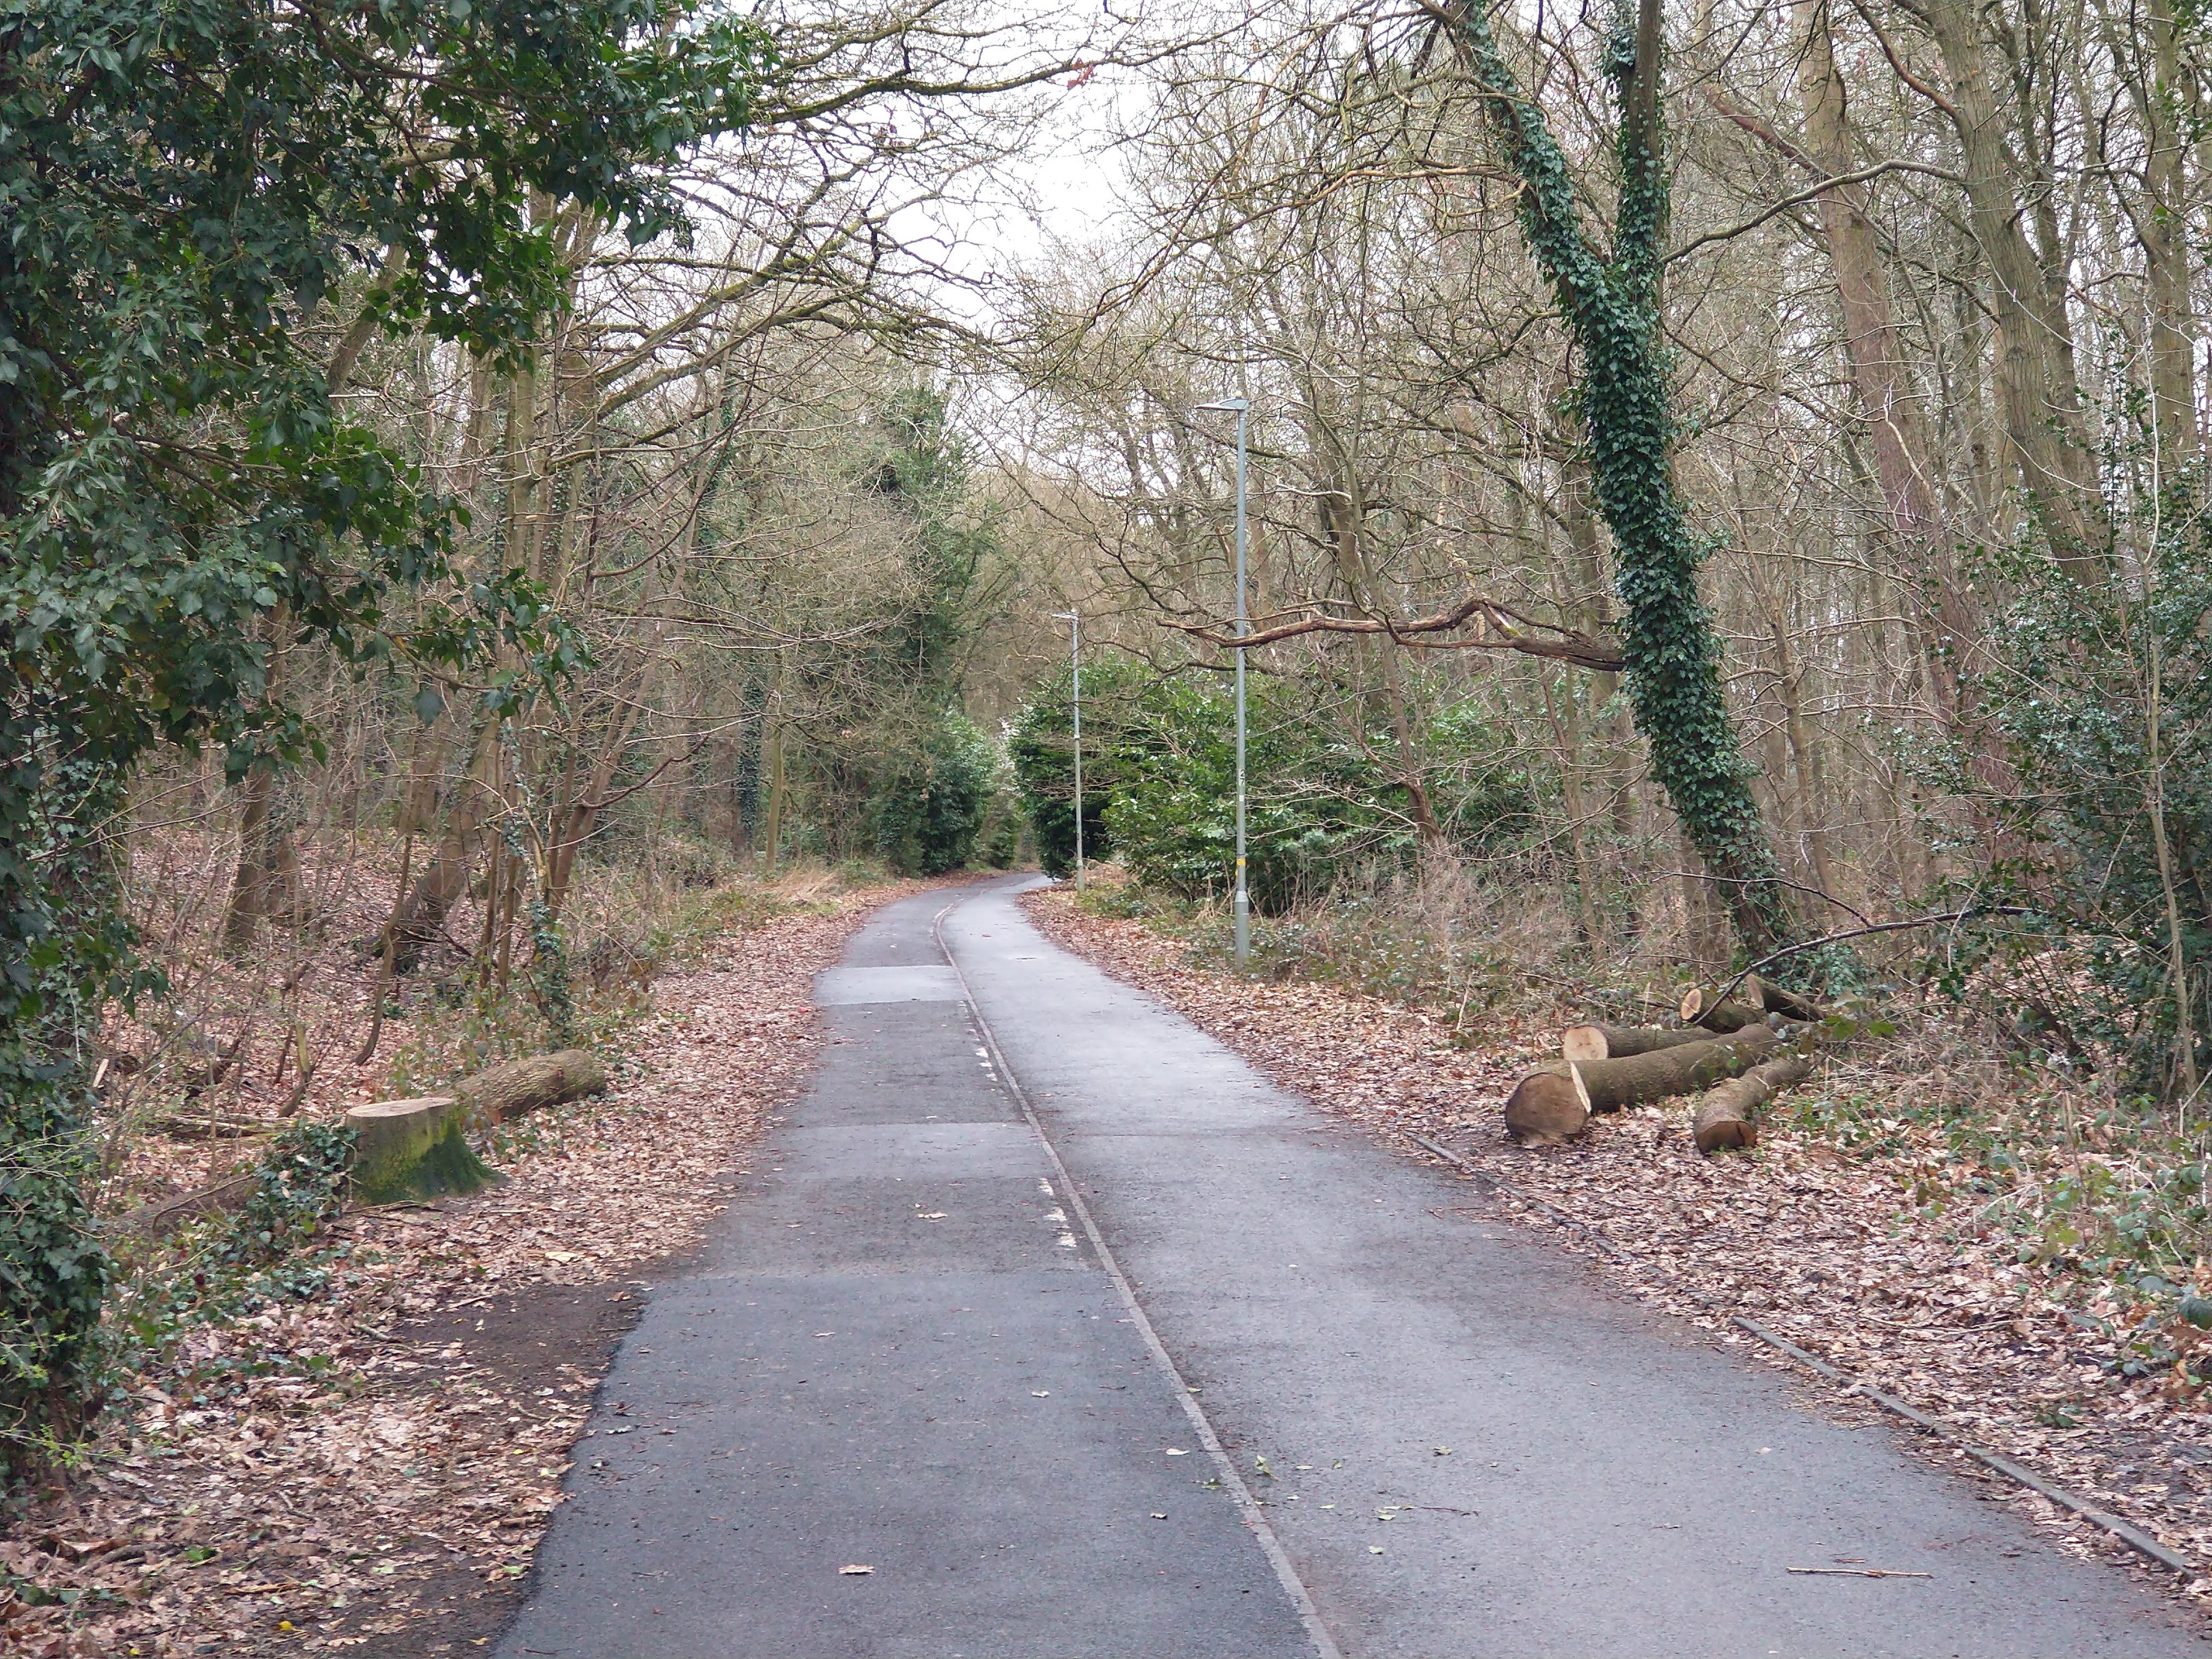
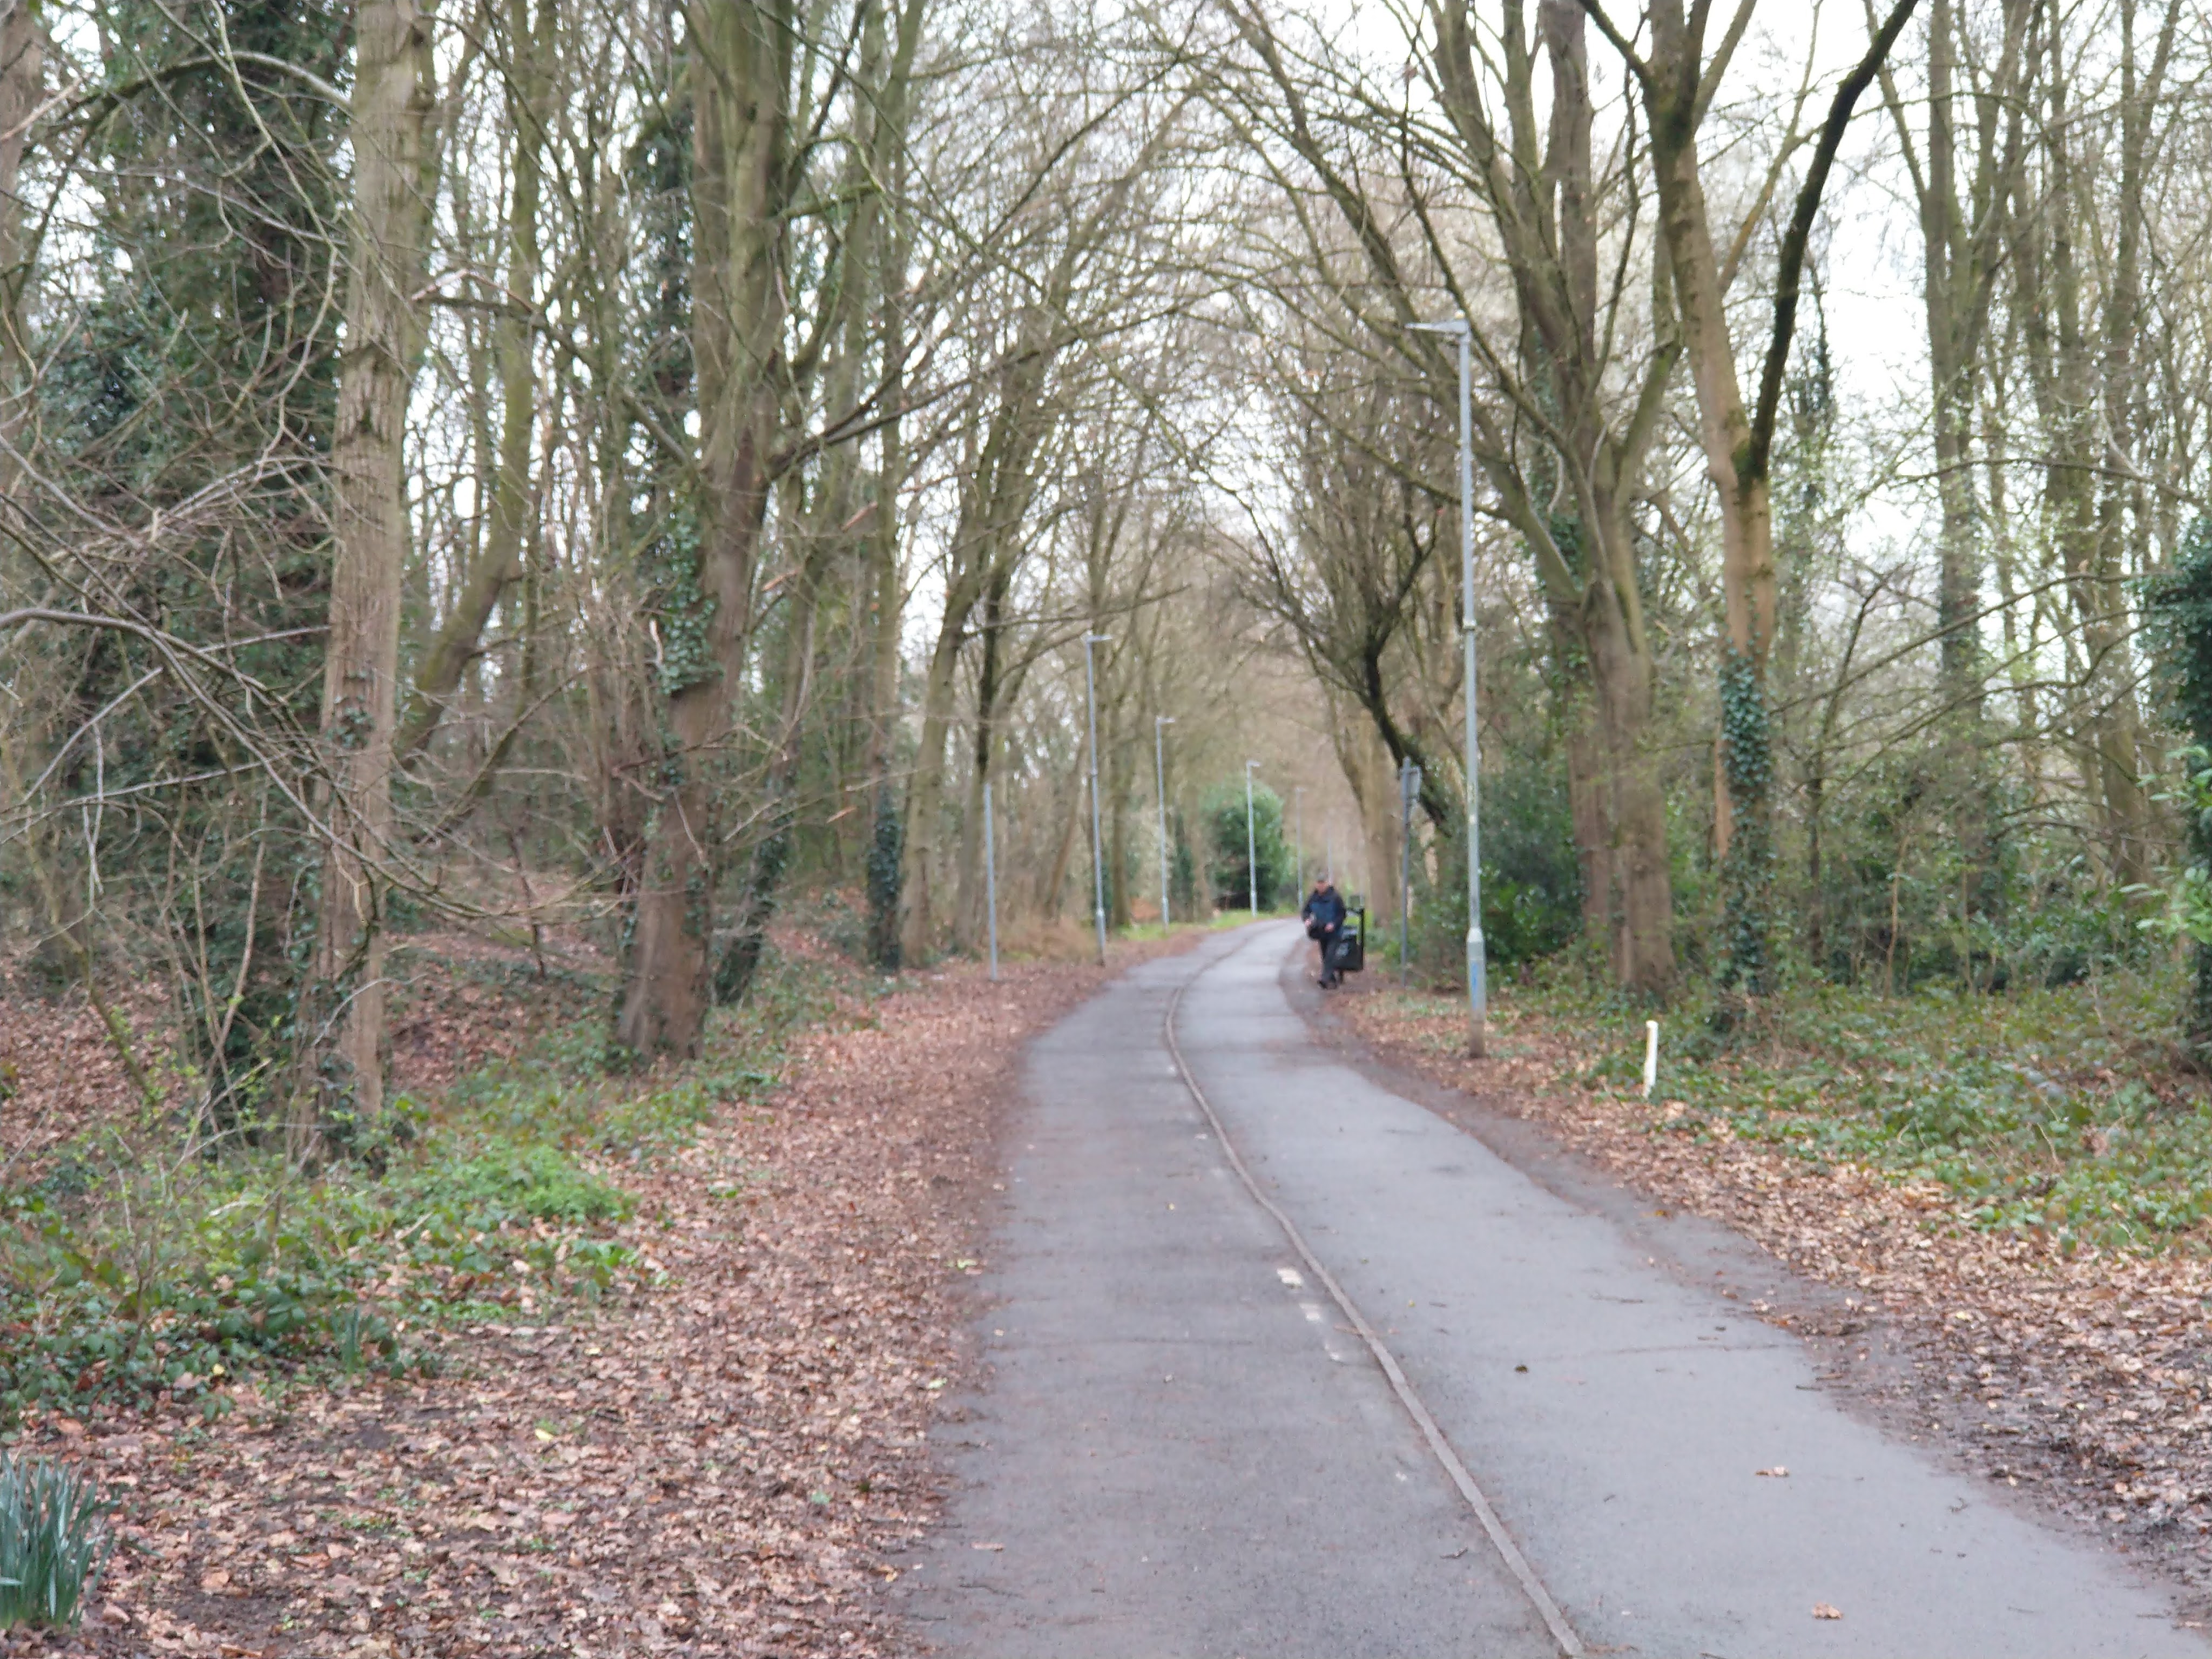
The location of what was once a canal tunnel but which remains as a disused railway cutting and, in the 21st century, a cycleway and footpath. [18]The Silkin Way to the South of Stirchley Lane as shown on Google Maps in 2023. [28]Looking South along the Silkin Way towards the cutting mentioned above. [My photograph, 2nd March 2023]Continuing to the South along the Silkin Way, we are now in the cutting and facing South. The original canal tunnel at this location was opened out when the railway was built. [My photograph, 2nd March 2023]At various points along the cutting the original canal tunnel’s walls, below arch springing level, can be seen. [My photograph, 2nd March 2023]Beyond the end of the original canal tunnel the railway cutting opens out to have more normal sloping sides. The remains of a railway workmans’ (platelayers) hut sit on the East side of the old line. [My photograph, 2nd March 2023]
There is little remaining of the canal structure at this location. However Andy Tidy points out that cottages adjacent to the site are called ‘Tunnel Cottages’ and that “a careful inspection of the west wall of the cutting reveals the unmistakable curve of the old canal tunnel as it was carved out of solid rock spanning 10ft at the waterline.” [15]
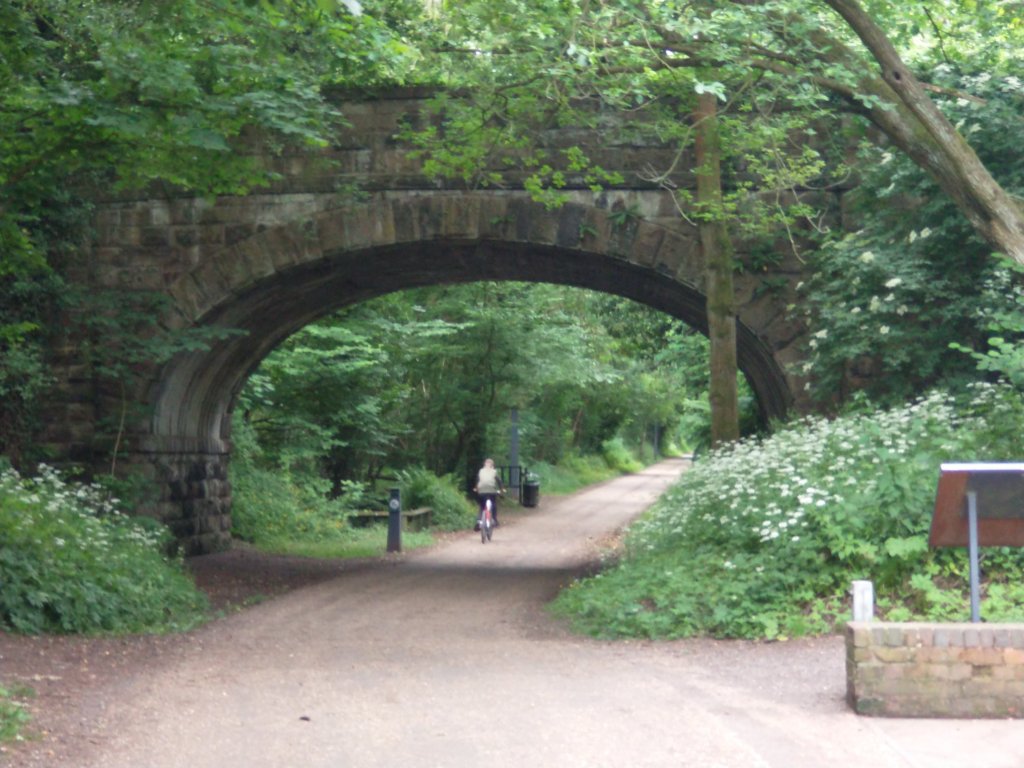
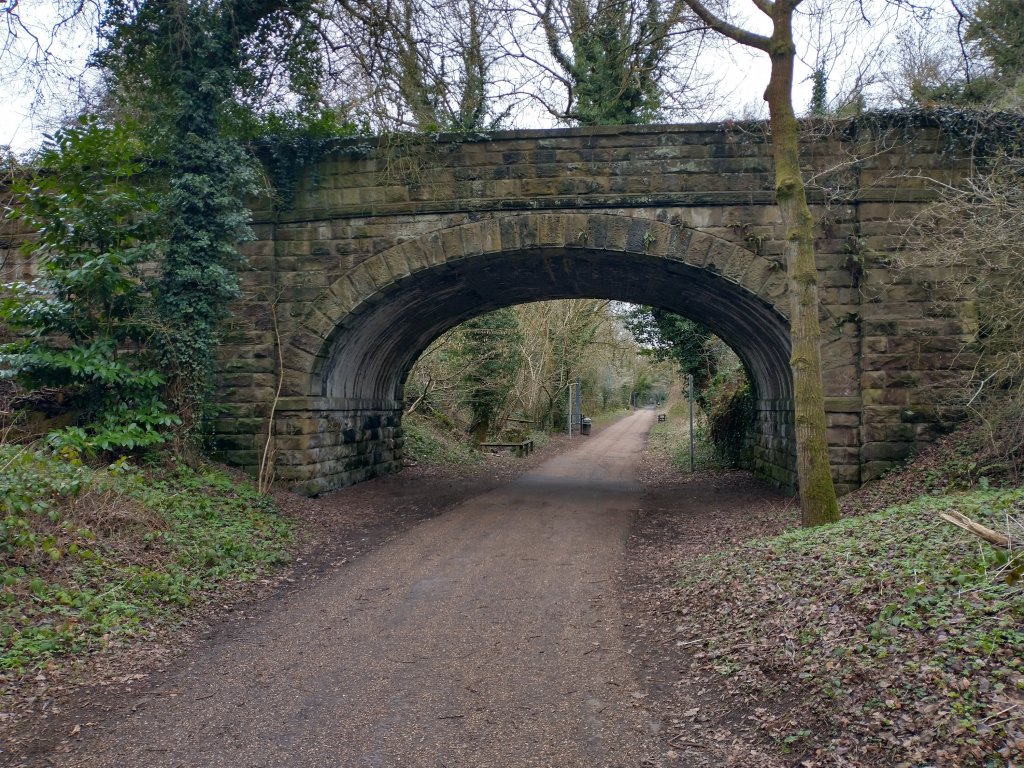
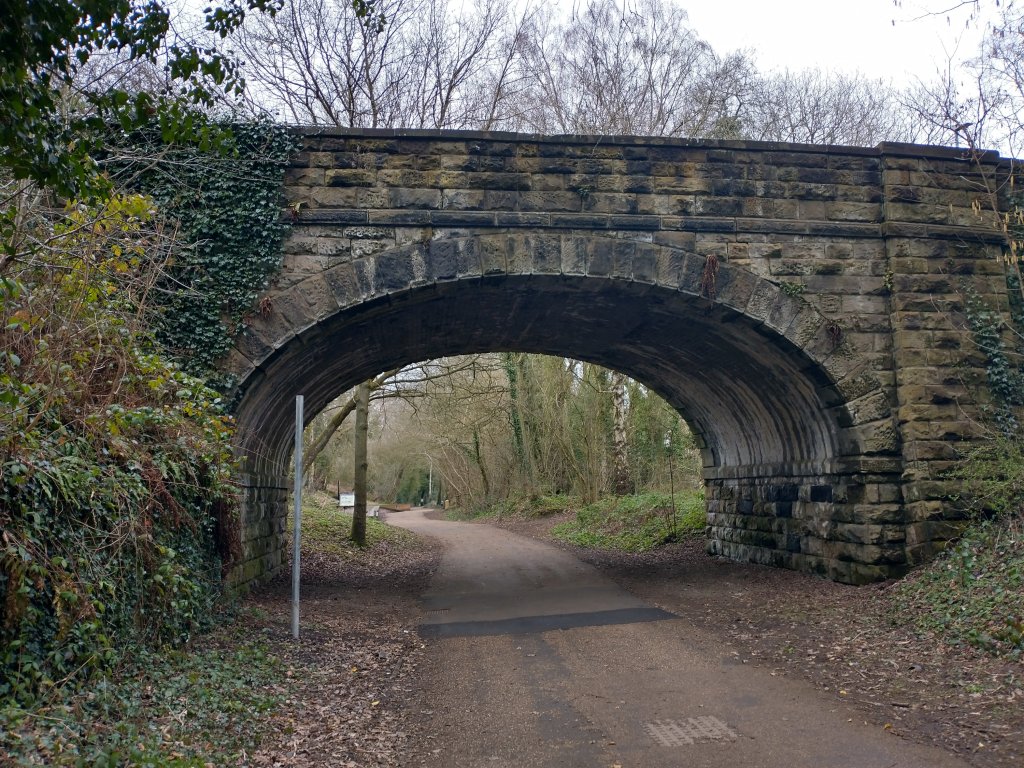
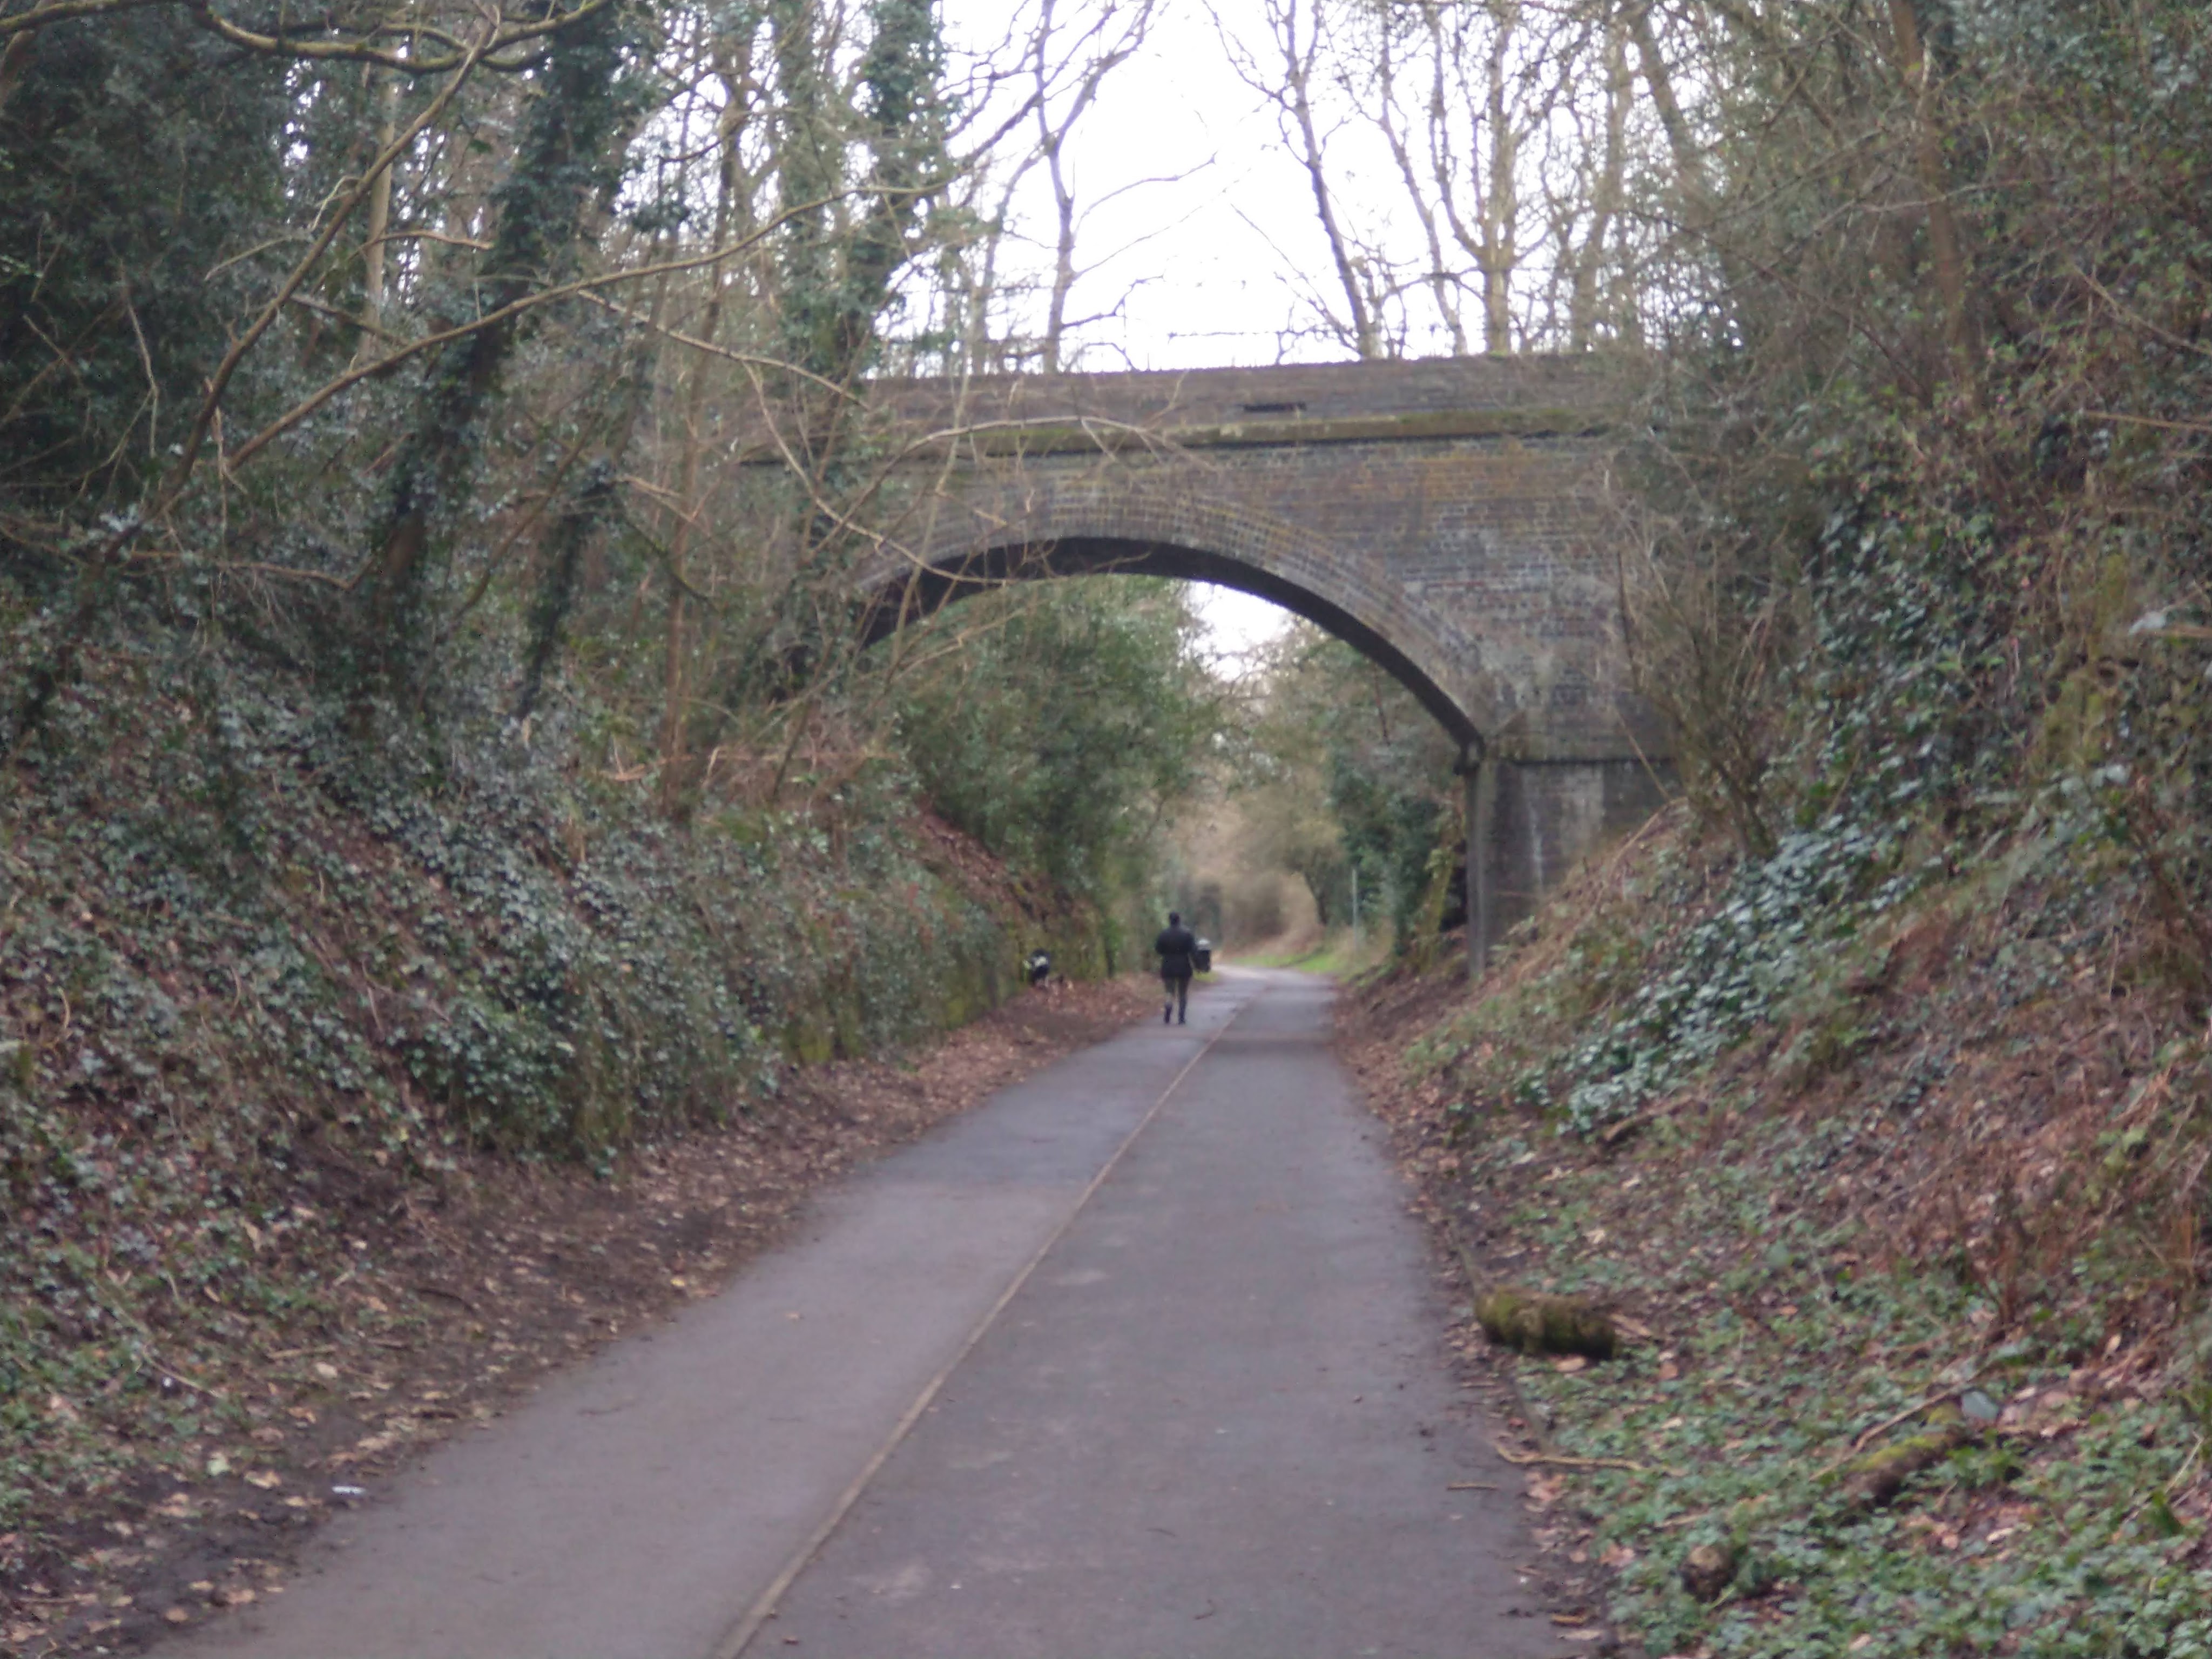
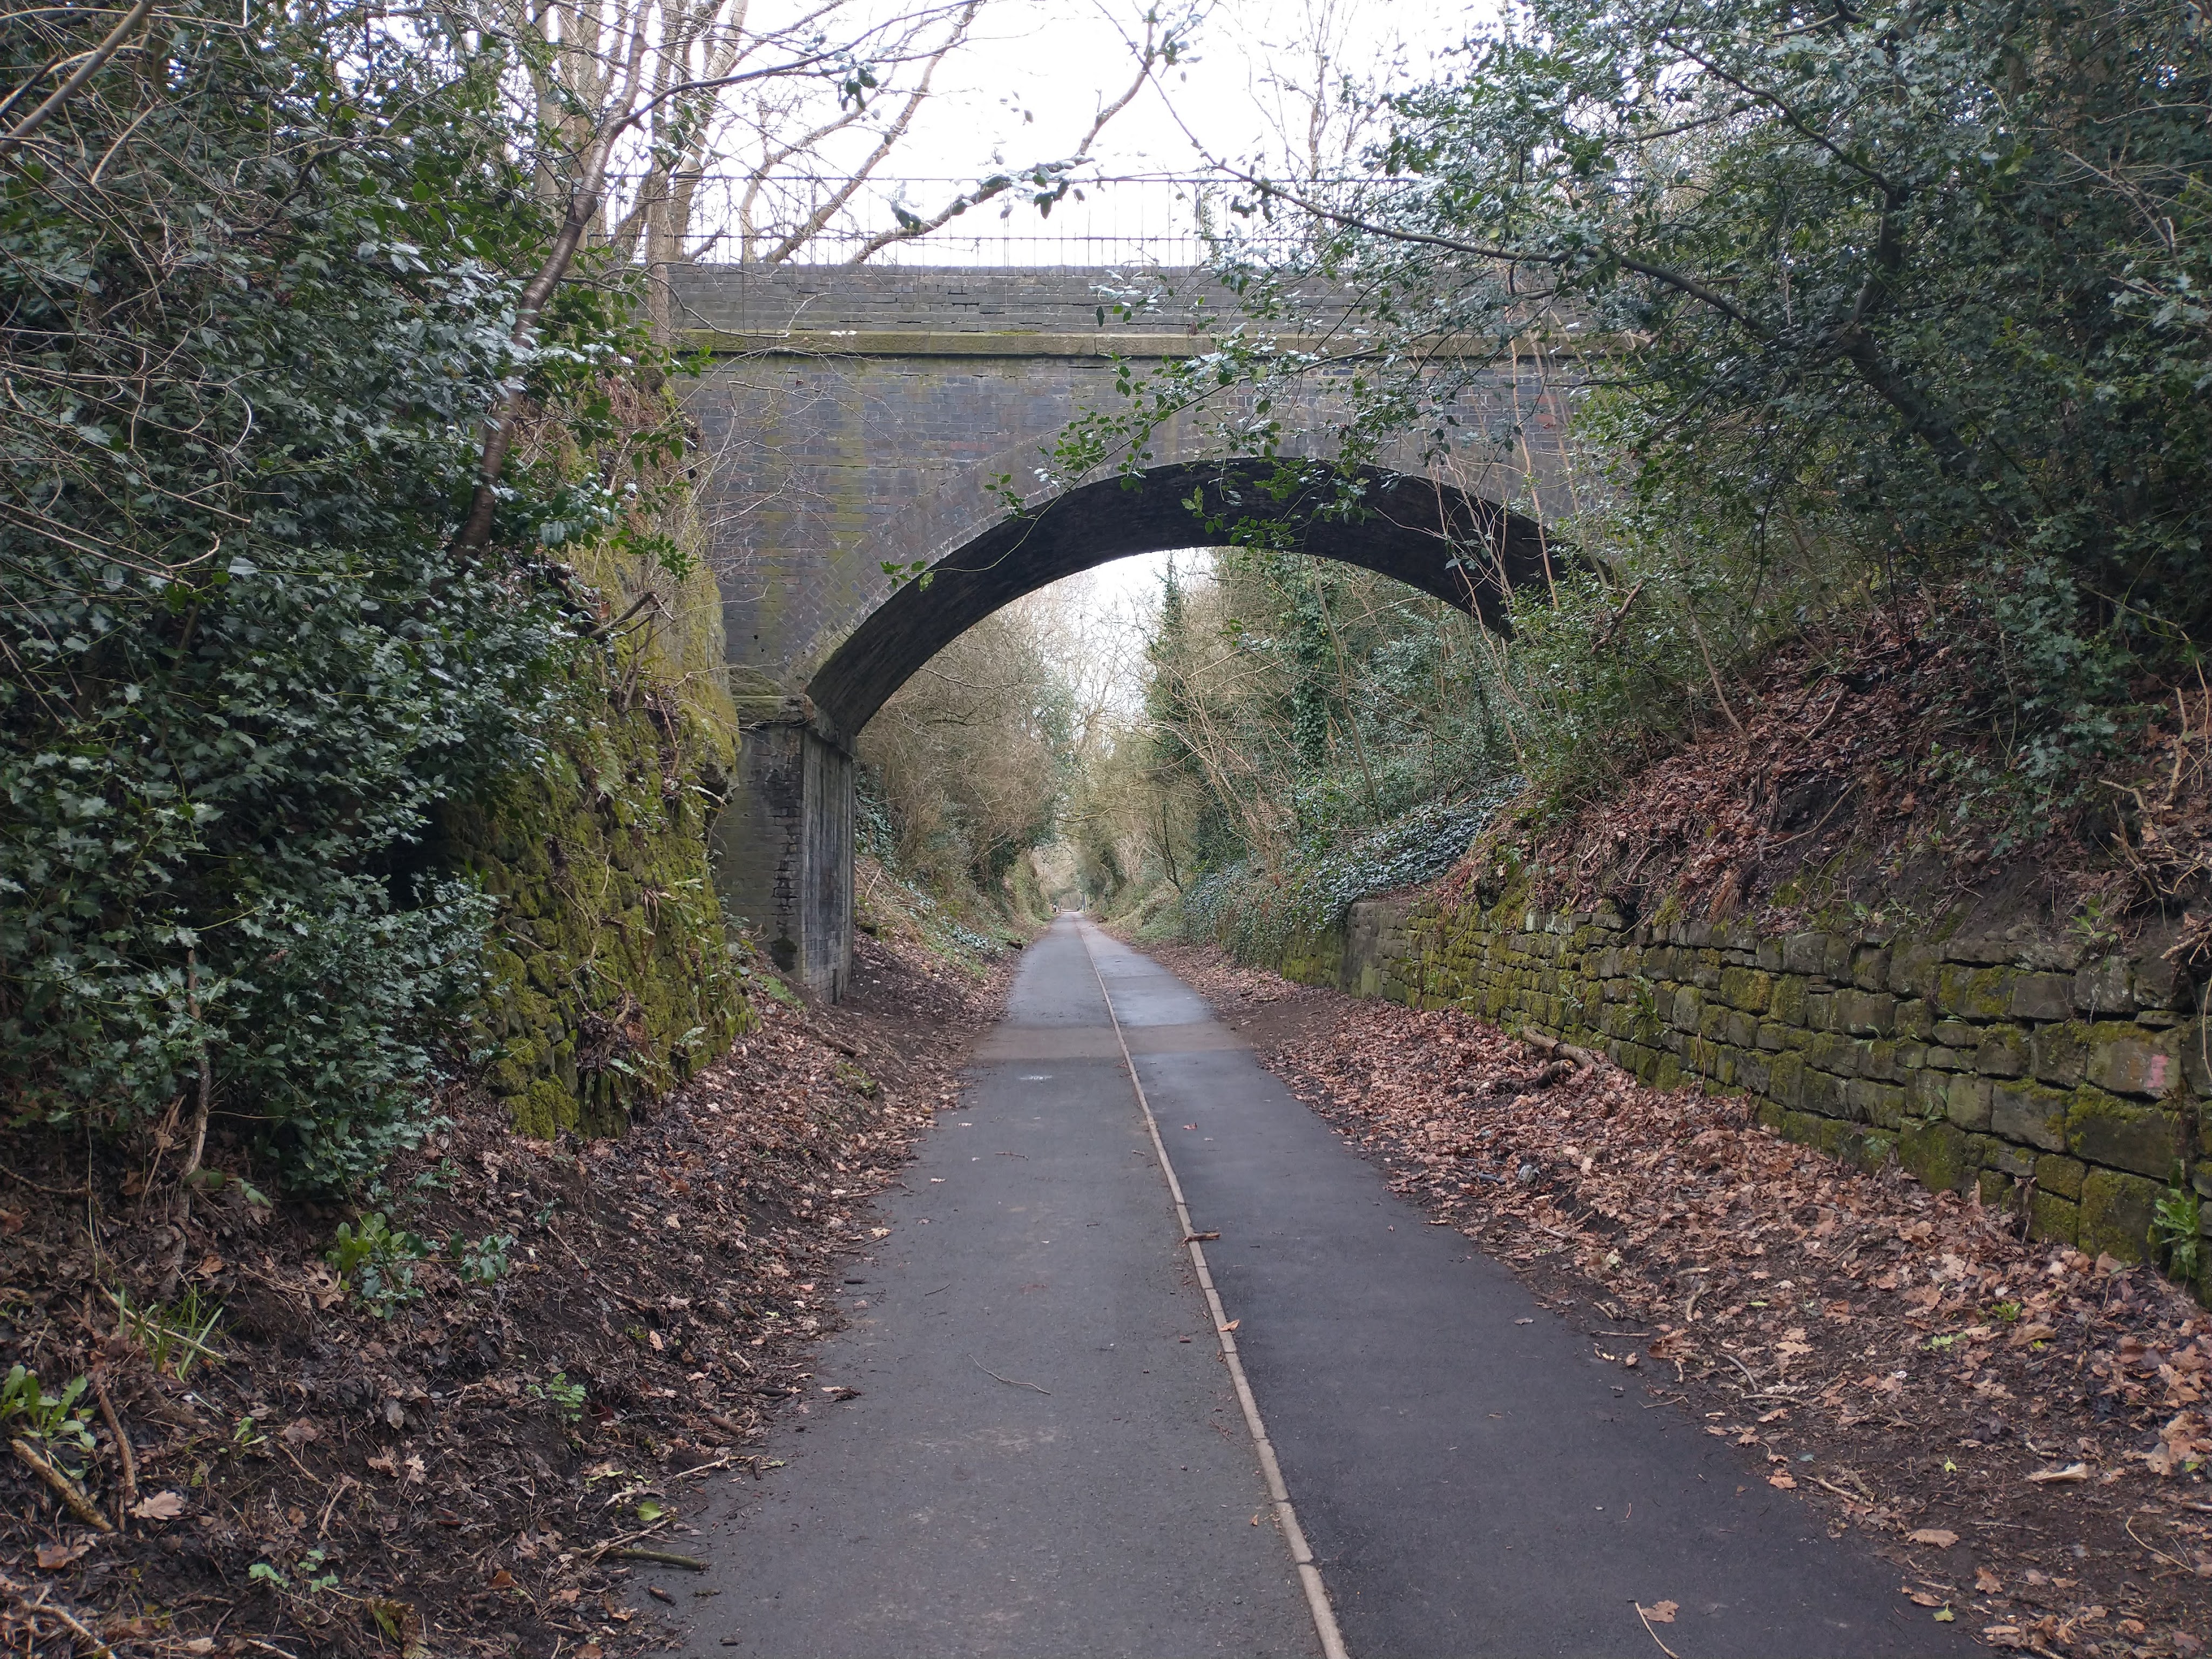
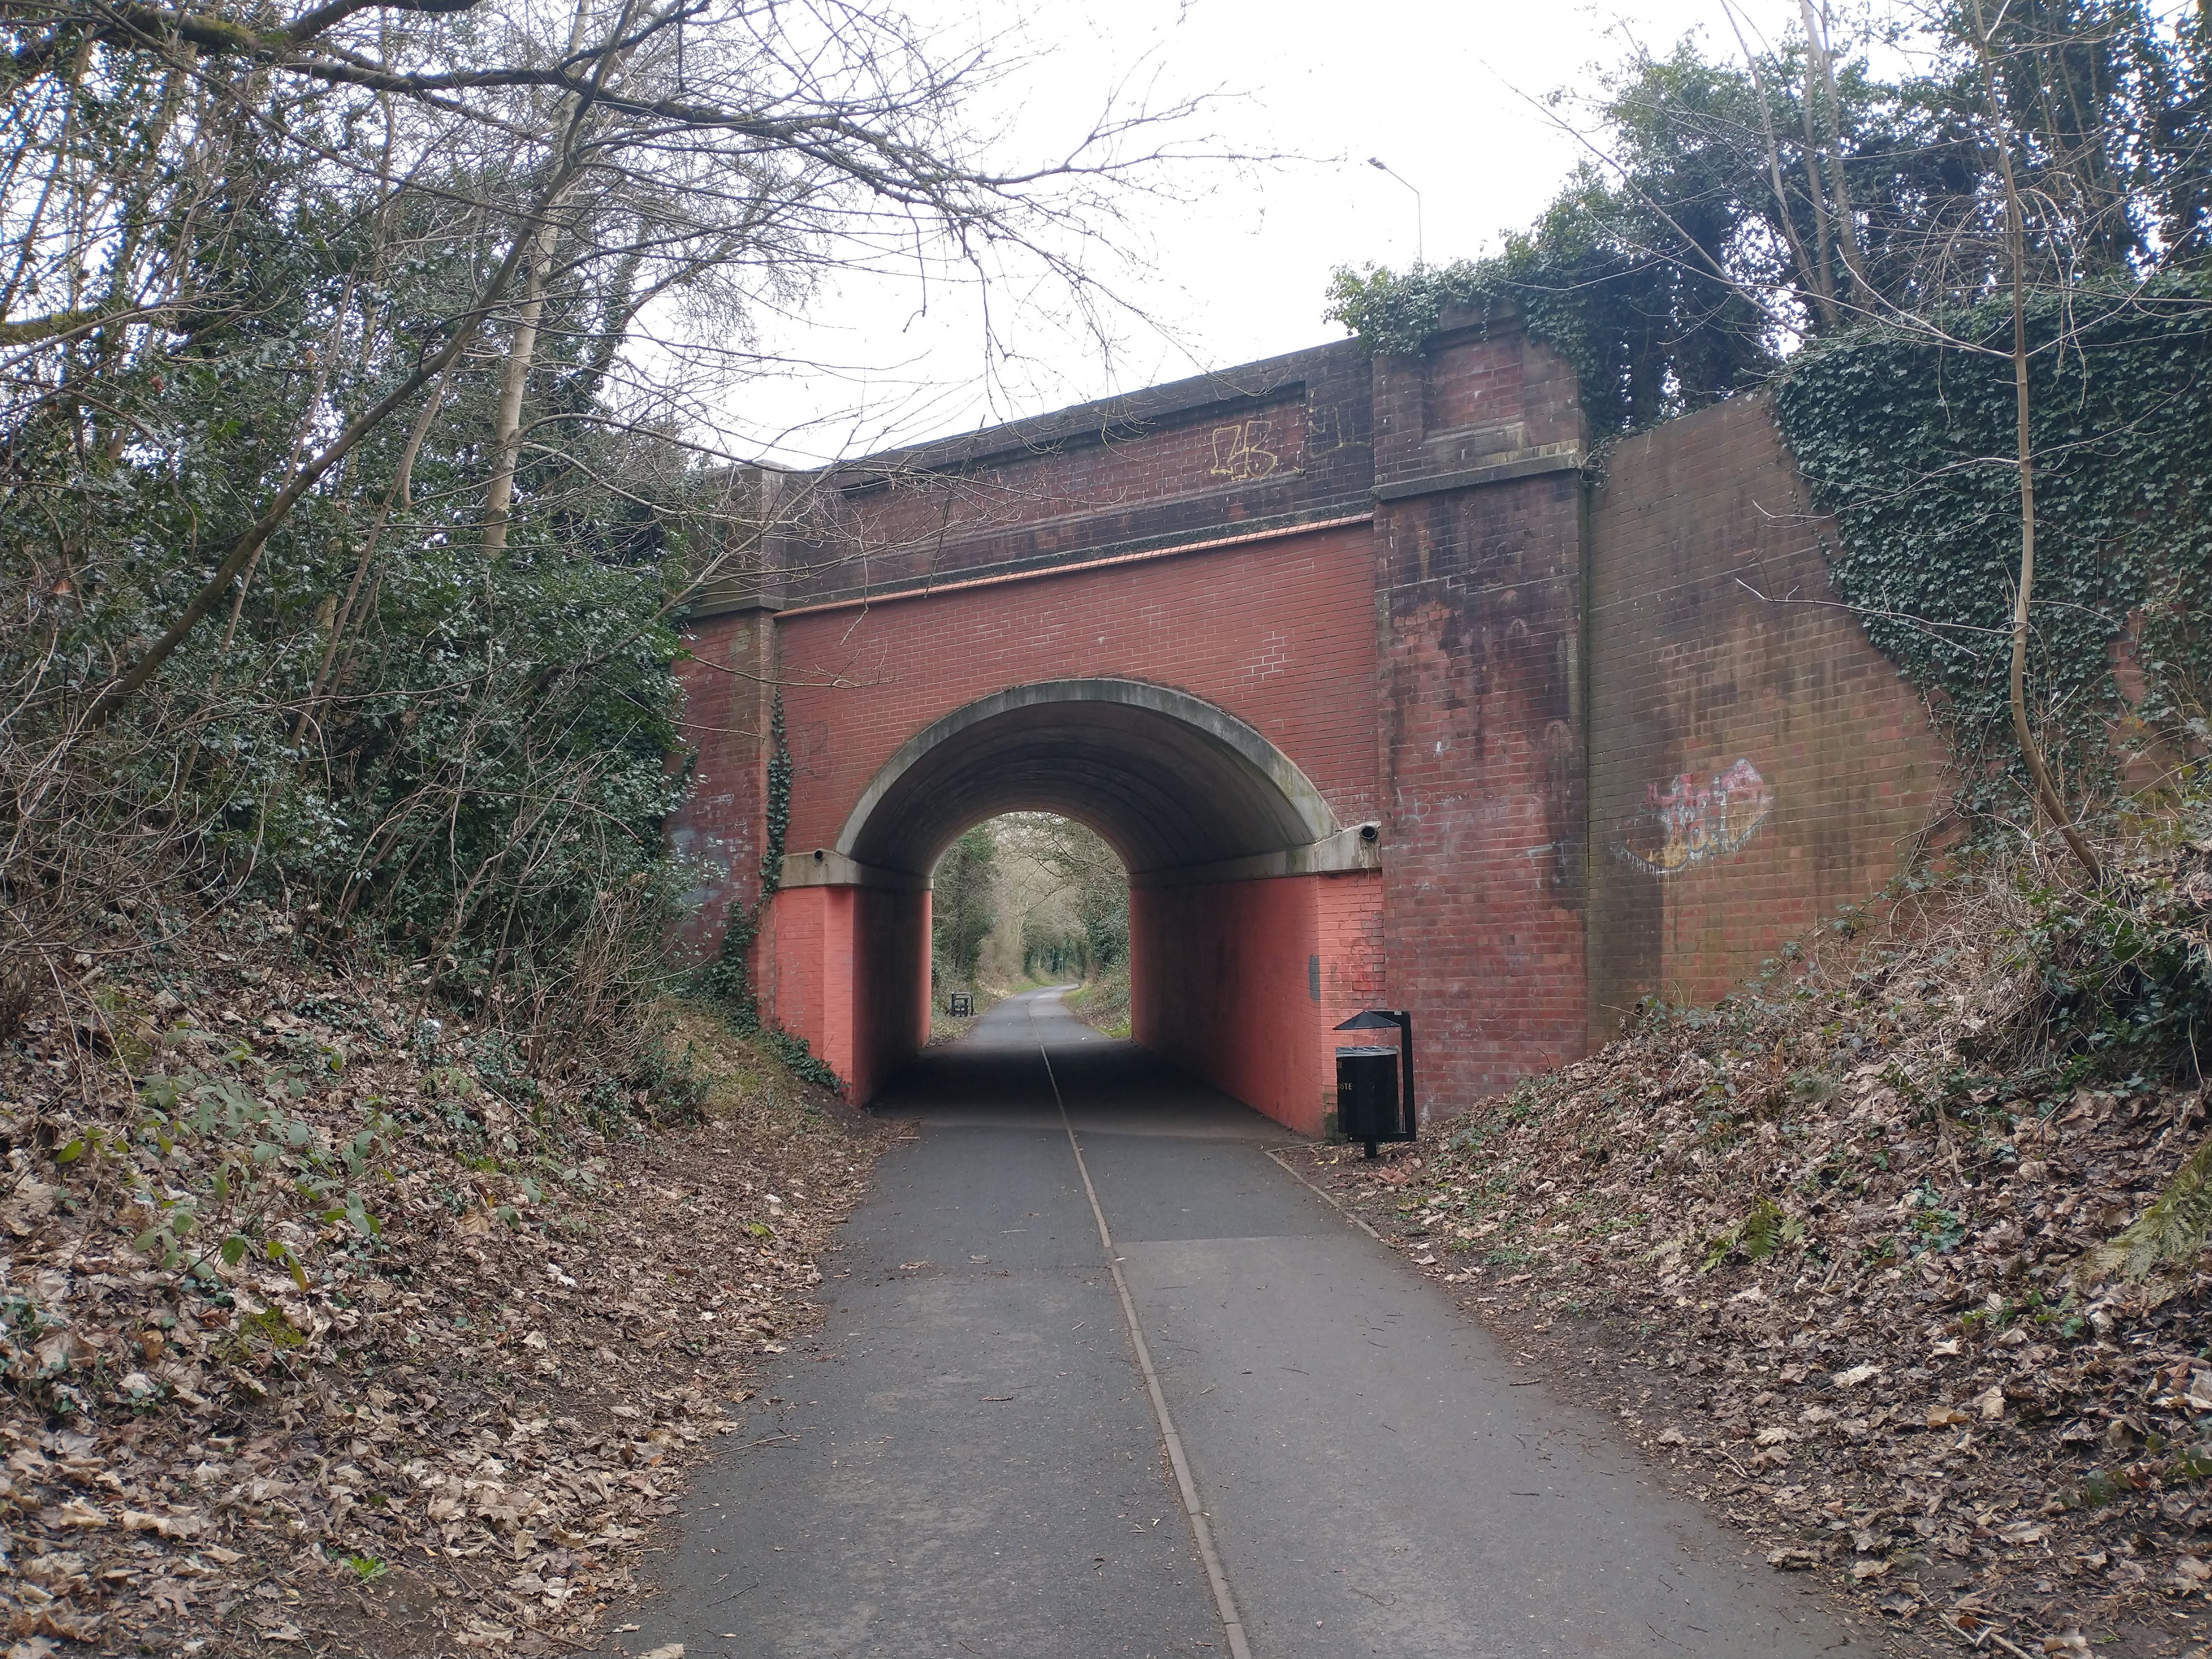
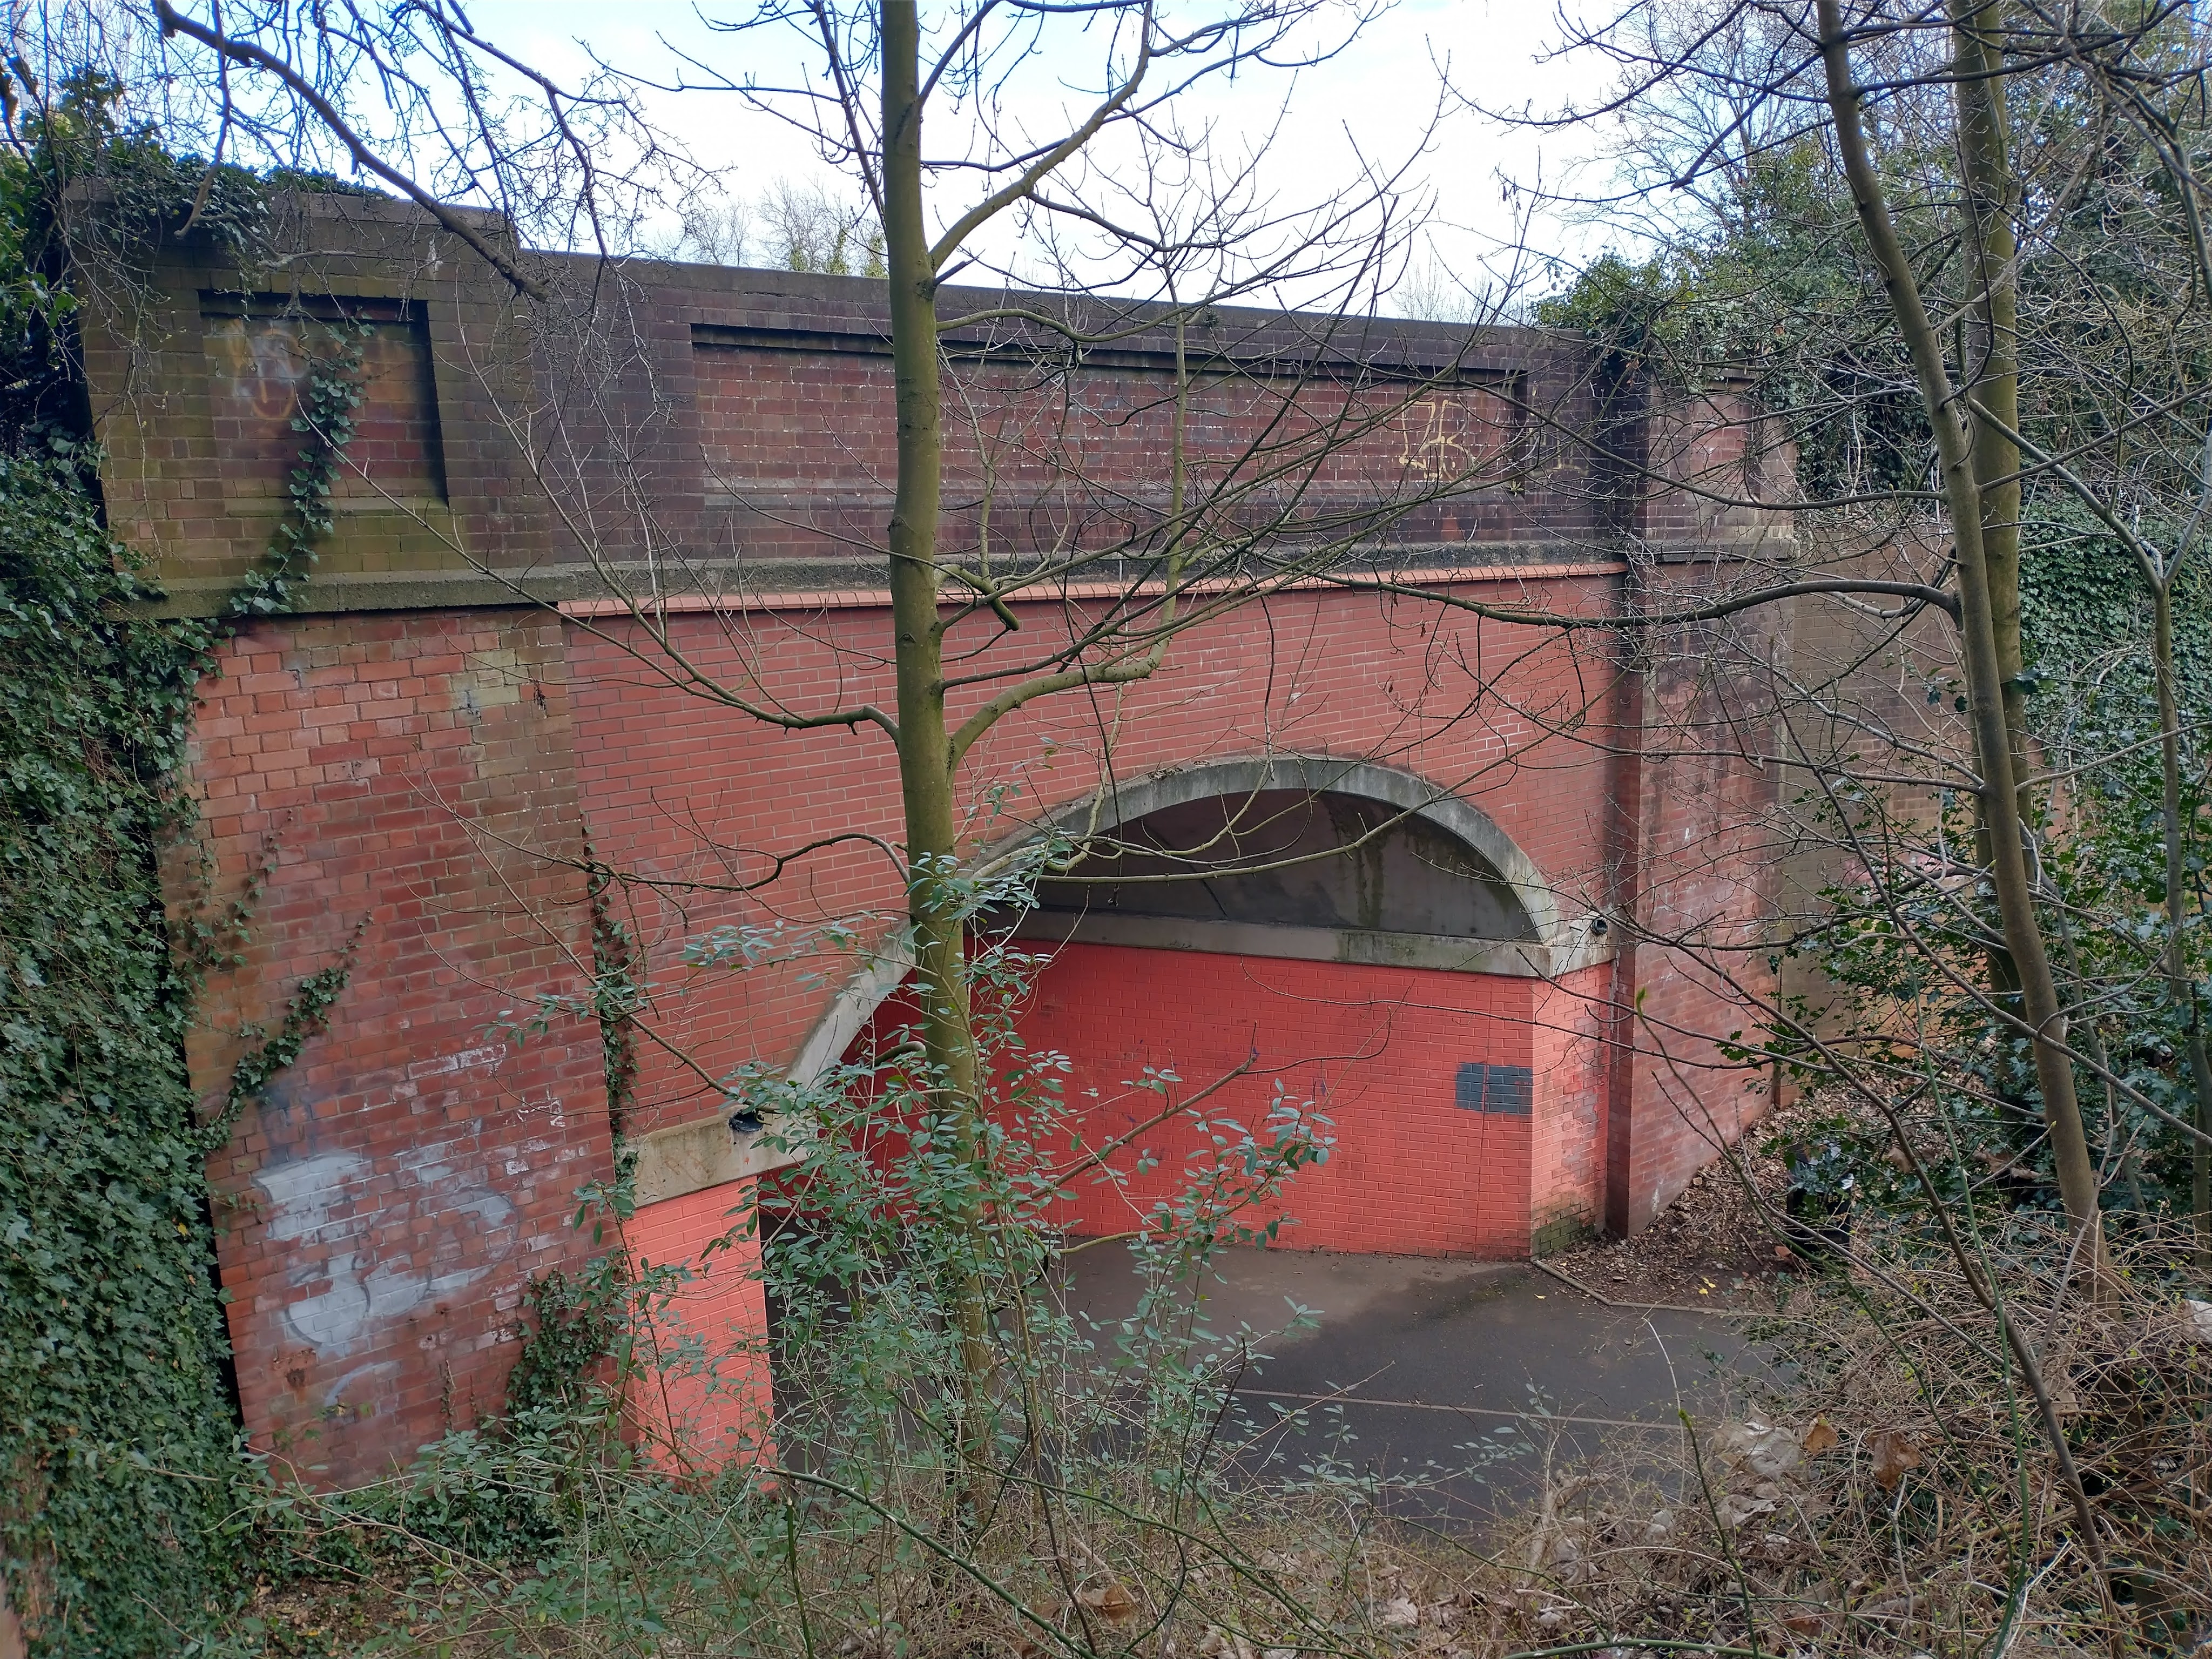
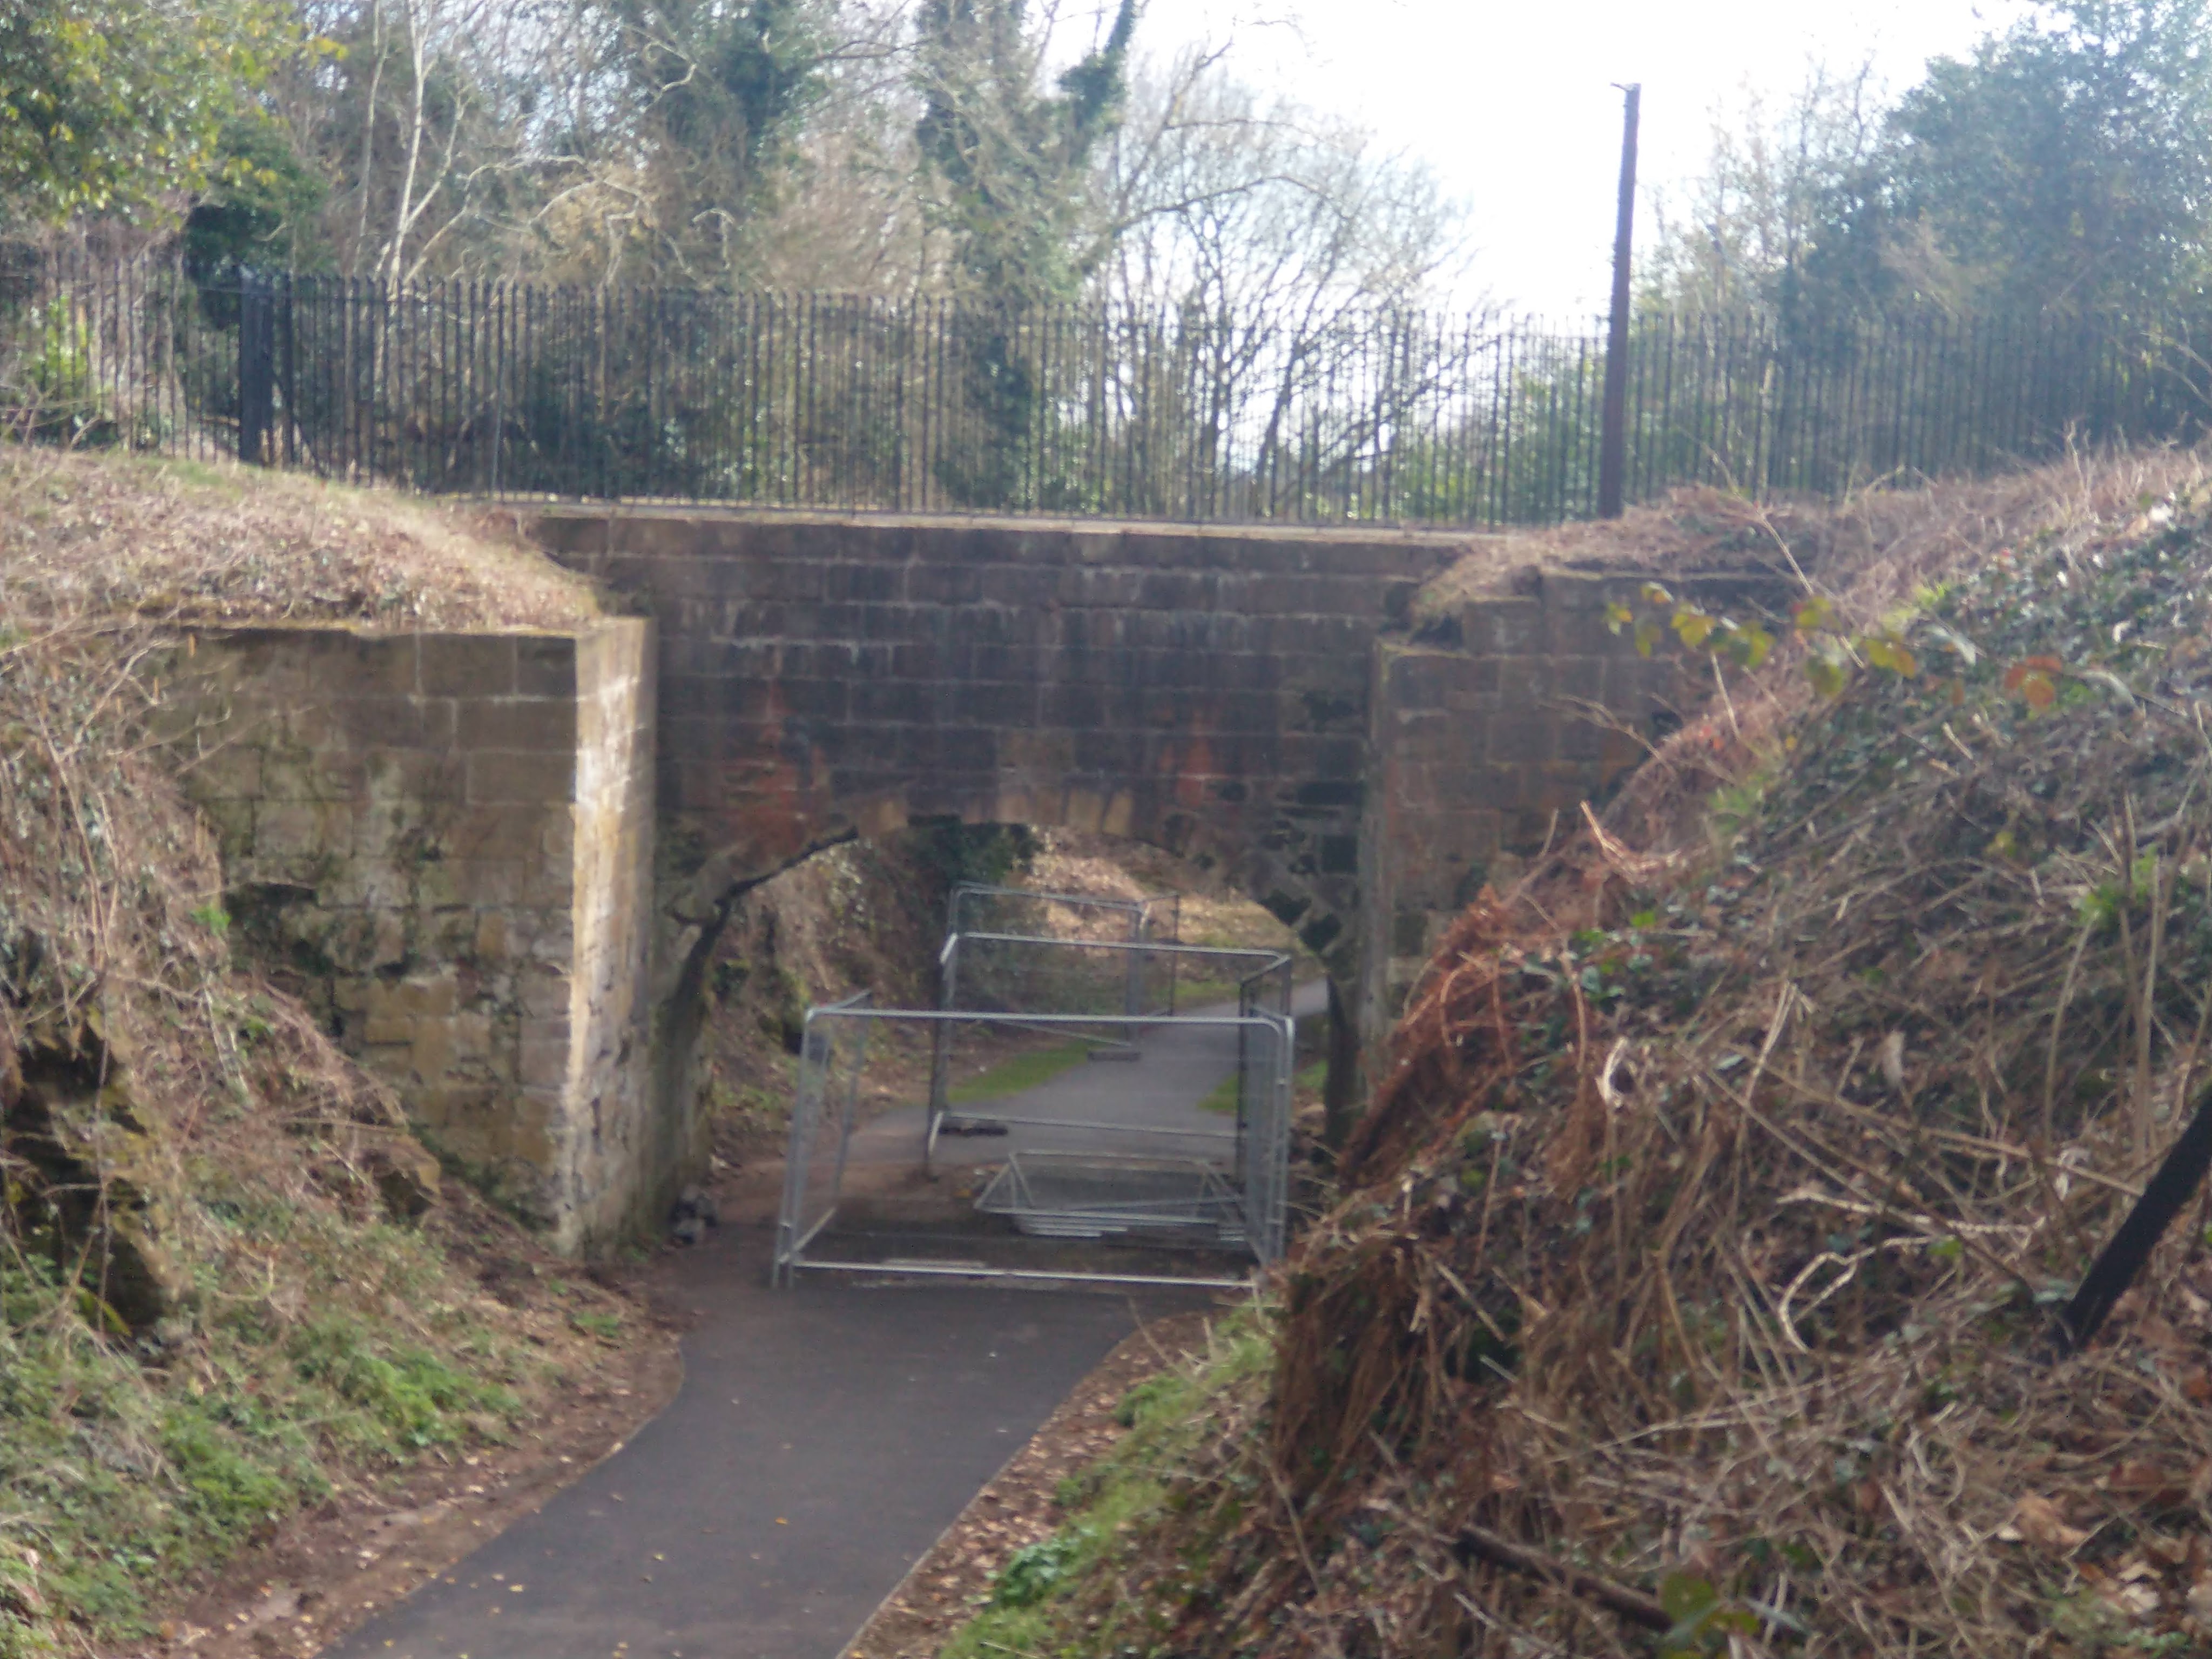
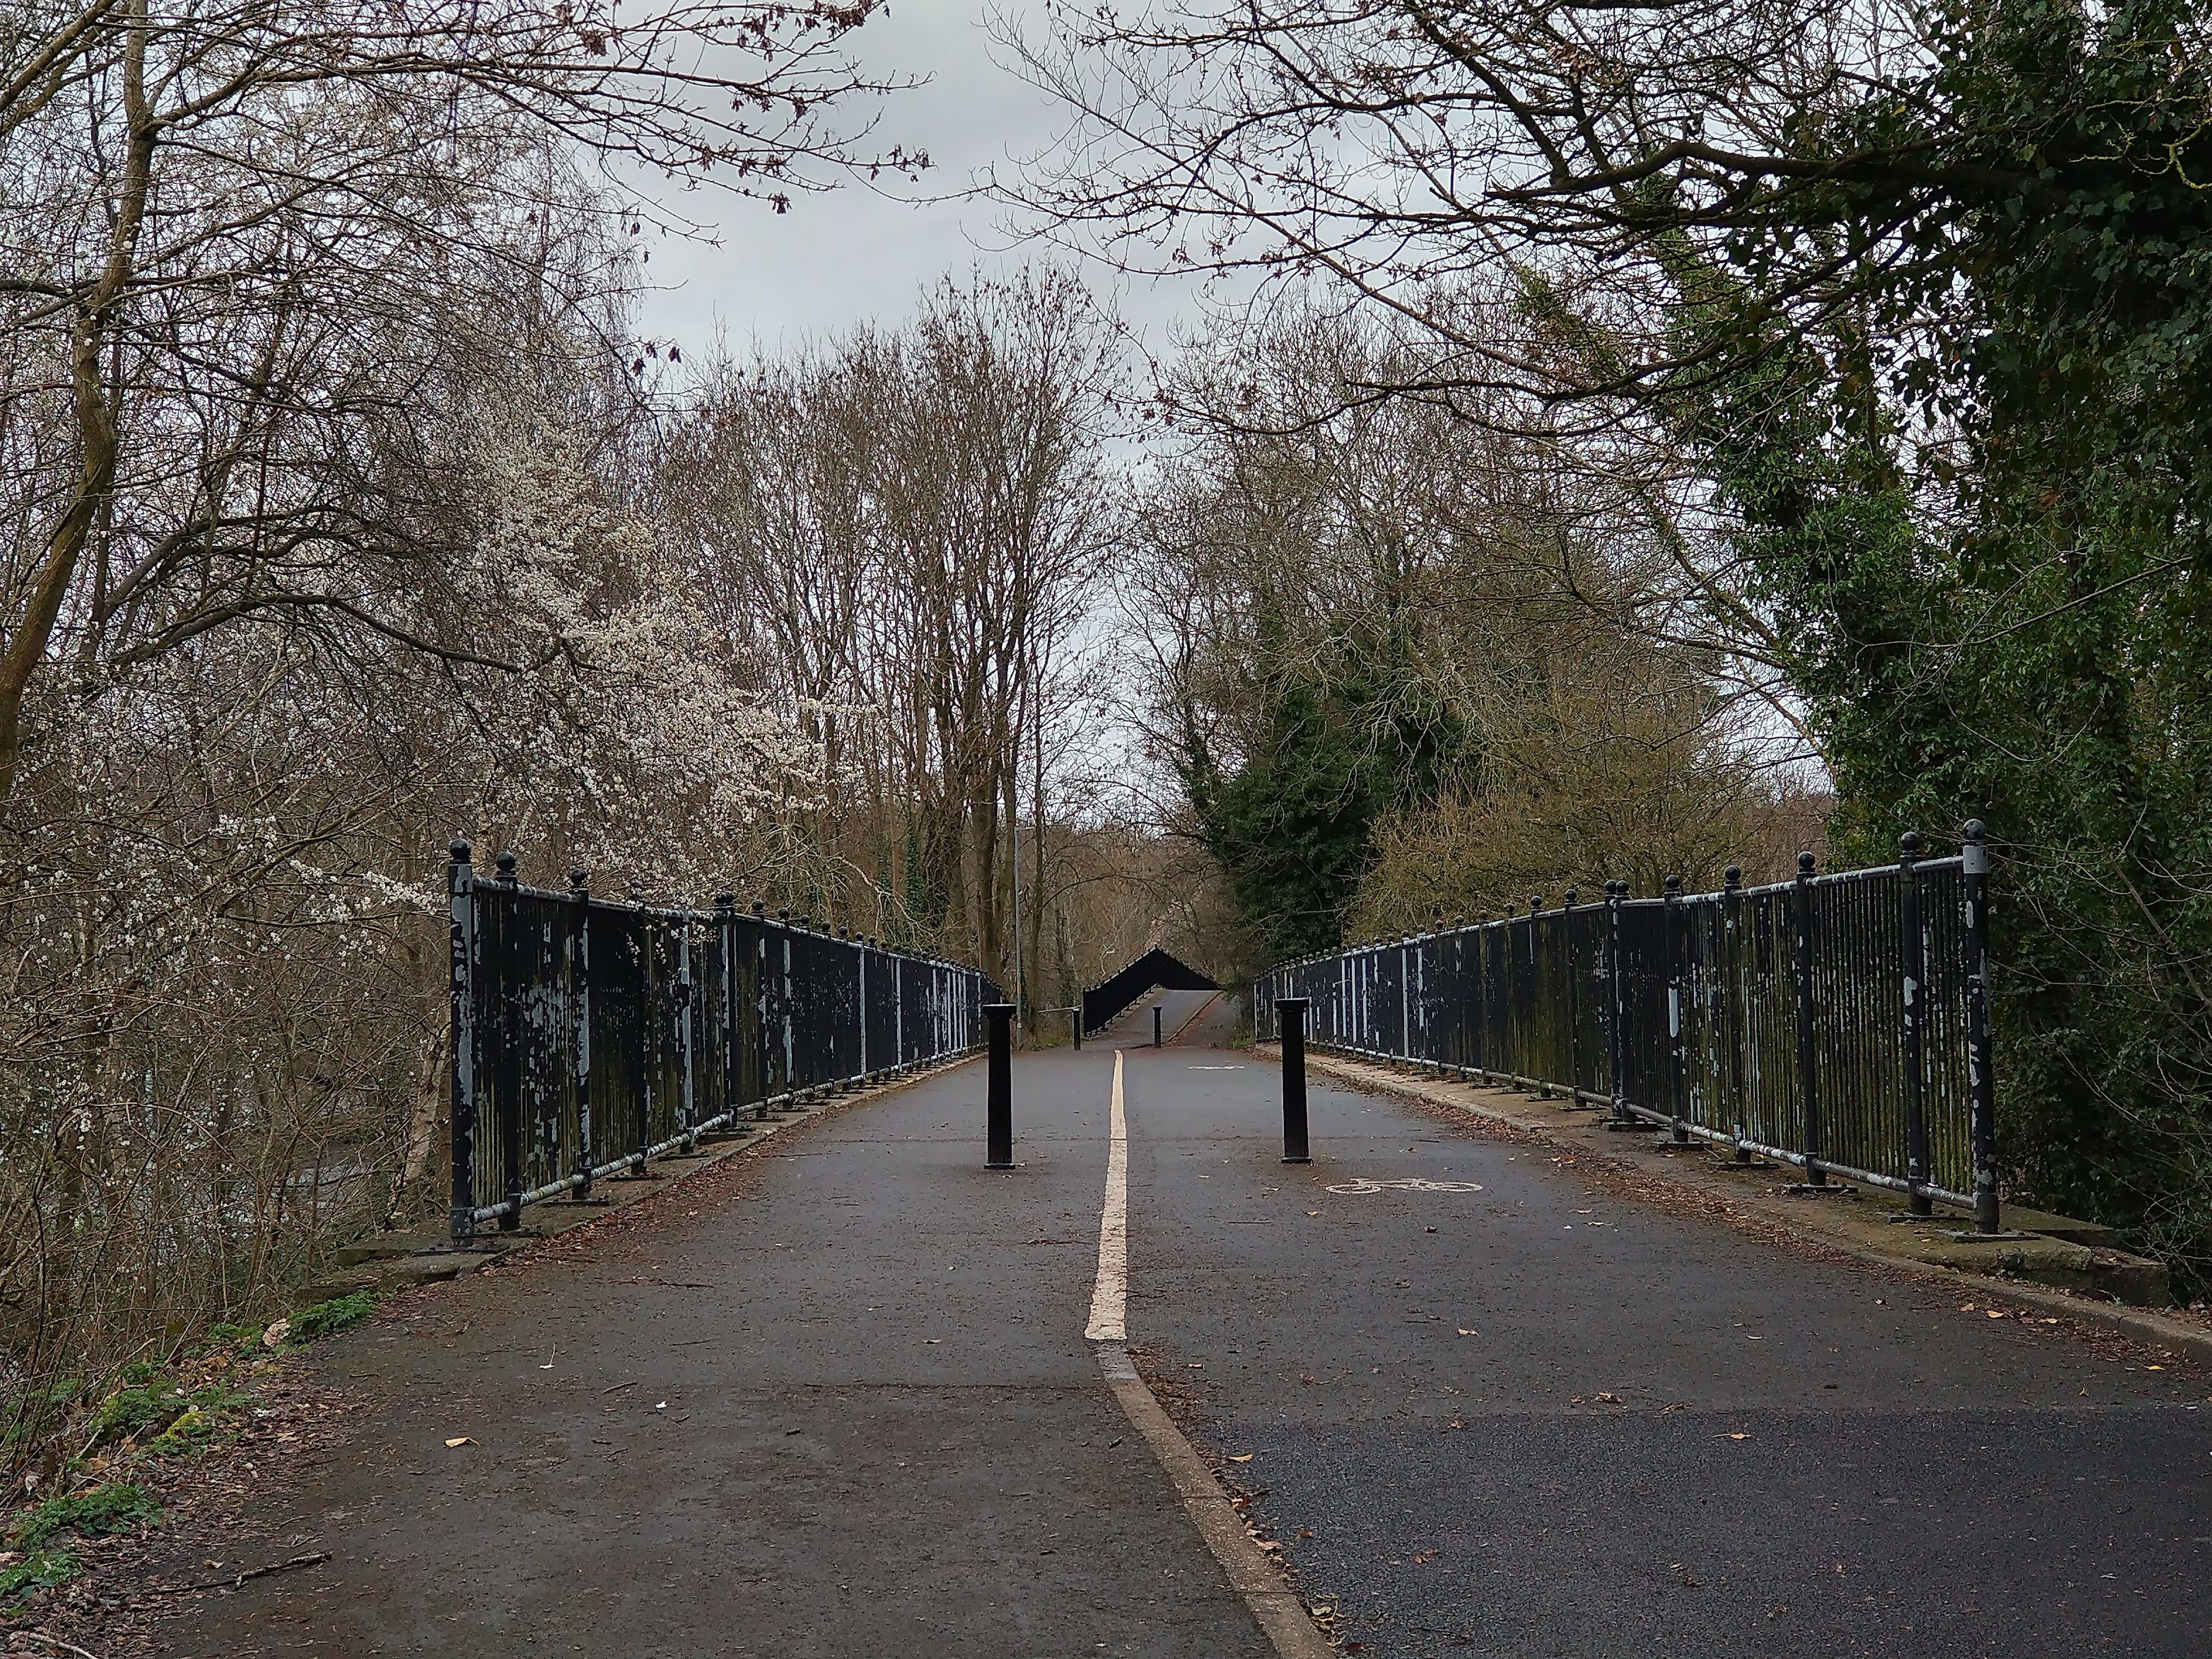
Remnants of Stirchley Canal Tunnel (c) Andy Tidy [15]Looking South along the Silkin Way under the arch bridge at the end of the rock cutting. This bridge carries a footpath in the 21st century. [My photograph, 2nd March 2023]Looking North towards Dawley and Stirchley Station along the Silkin Way under the same arch bridge at the end of the rock cutting. [My photograph, 2nd March 2023]Looking West across the same bridge. [My photograph, 2nd March 2023]
Aqueduct village and the GWR Madeley Branch
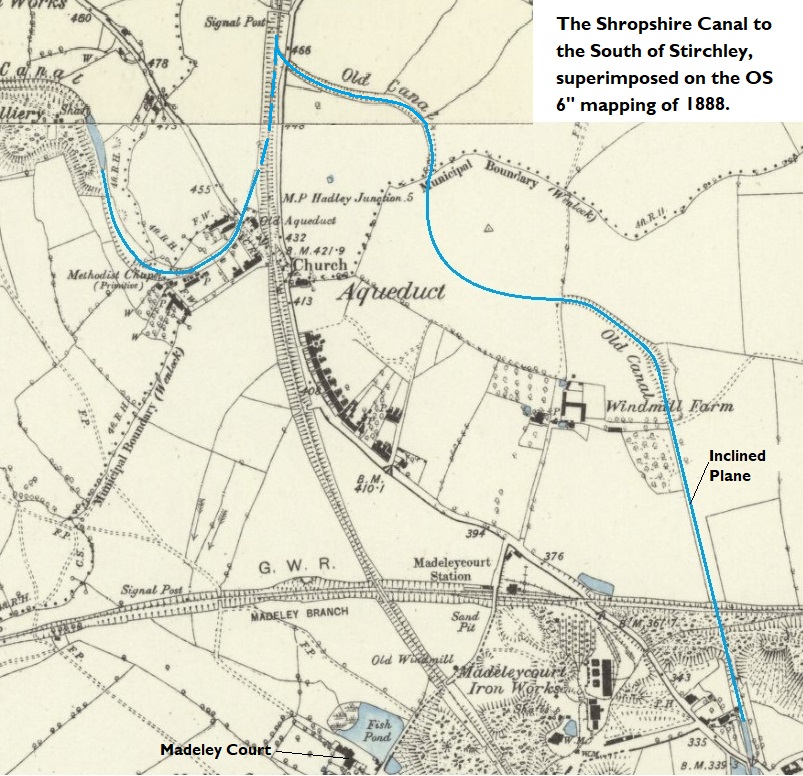
The OS Map extract below shows the next length of the branch line. To the South of what had been Stirchley Canal Tunnel there was a canal junction. One arm of the canal turned West and ran across towards Lightmoor, the other arm first turned East and then South down the incline near Windmill Farm. Neither branch survived the coming of the railway. The hamlet of Aqueduct straddled the old turnpike road to Bridgnorth which passed under the canal arm to the West. The aqueduct used to carry the canal is still standing in the 21st century although the old turnpike road is not in use as a modern highway. The railway cut through the village of Aqueduct as shown on the map extract.
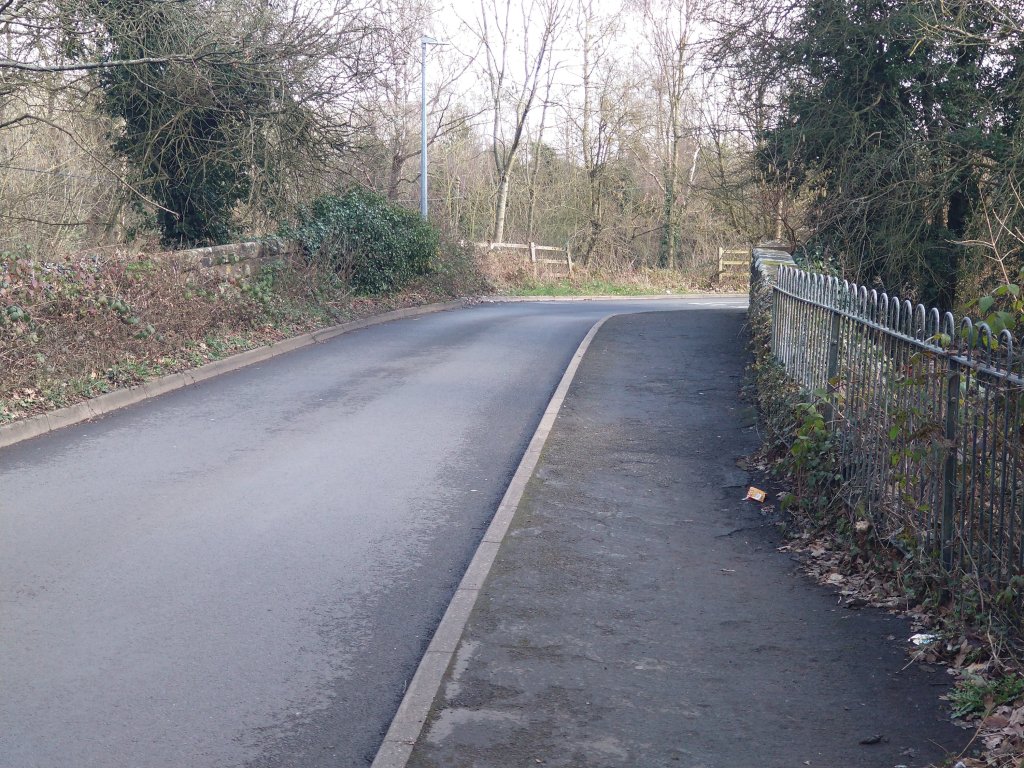
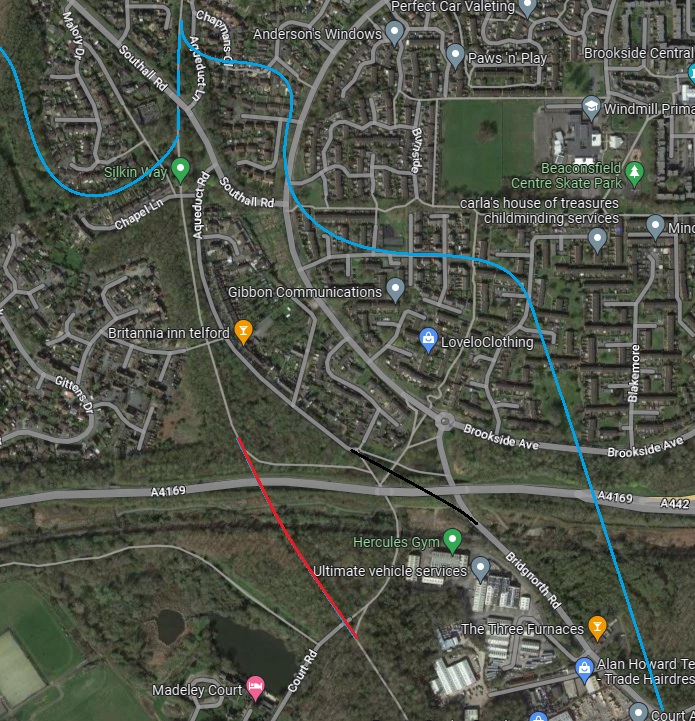
This extract from the 6″ OS mapping of 1883 shows the new railways and has the old canal routes superimposed. Note the canal incline close to Windmill Farm and the branch running to the West. The aqueduct which carried this arm over the old turnpike road can be seen on the extract. It gave a name to the hamlet immediately next to it. As will be seen from the satellite image below, Madeley Court Station is long gone. The GWR Madeley Branch remains in the early 21st century as it was used for merry-go-round coal trains serving Ironbridge Power Station until the power station closed. [25][26]A Google Maps satellite image extract showing approximately the same area as the OS map extract above. Sketched onto the satellite image are: the very approximate canal routes in blue; the length of the LNWR branch which is not used by the Silkin Way in red; and the old Bridgnorth Road alignment in black. The diversion of the Silkin Way was required with the building of the A4169 and the removal of the bridge deck where the LNWR Coalport Branch line crossed the GWR Madeley Branch. There are no features on the ground in the 21st century to define the line of the old canal as it passed through the are now called Brookside. The old road bridge next to Madeley Court Railway Station remains and carries the diverted Silkin Way across what was the GWR Madeley Branch. Towards the top of this satellite image Southall Road crosses the old railway by means of the bridge shown below. [29]Looking South along the Silkin Way under Southall Road bridge. [My photograph, 2nd March 2023]Looking North along the Silkin Way under Southall Road bridge. [My photograph, 2nd March 2023]The same bridge from the top of the embankment on the Southwest corner of the bridge. [My photograph, 2nd March 2023]Looking Southwest across Southall Road, this image shows the roadside parapet of the bridge above. [My photograph, 2nd March 2023]
South of Southall Road Chapel Lane crossed the old railway at level.
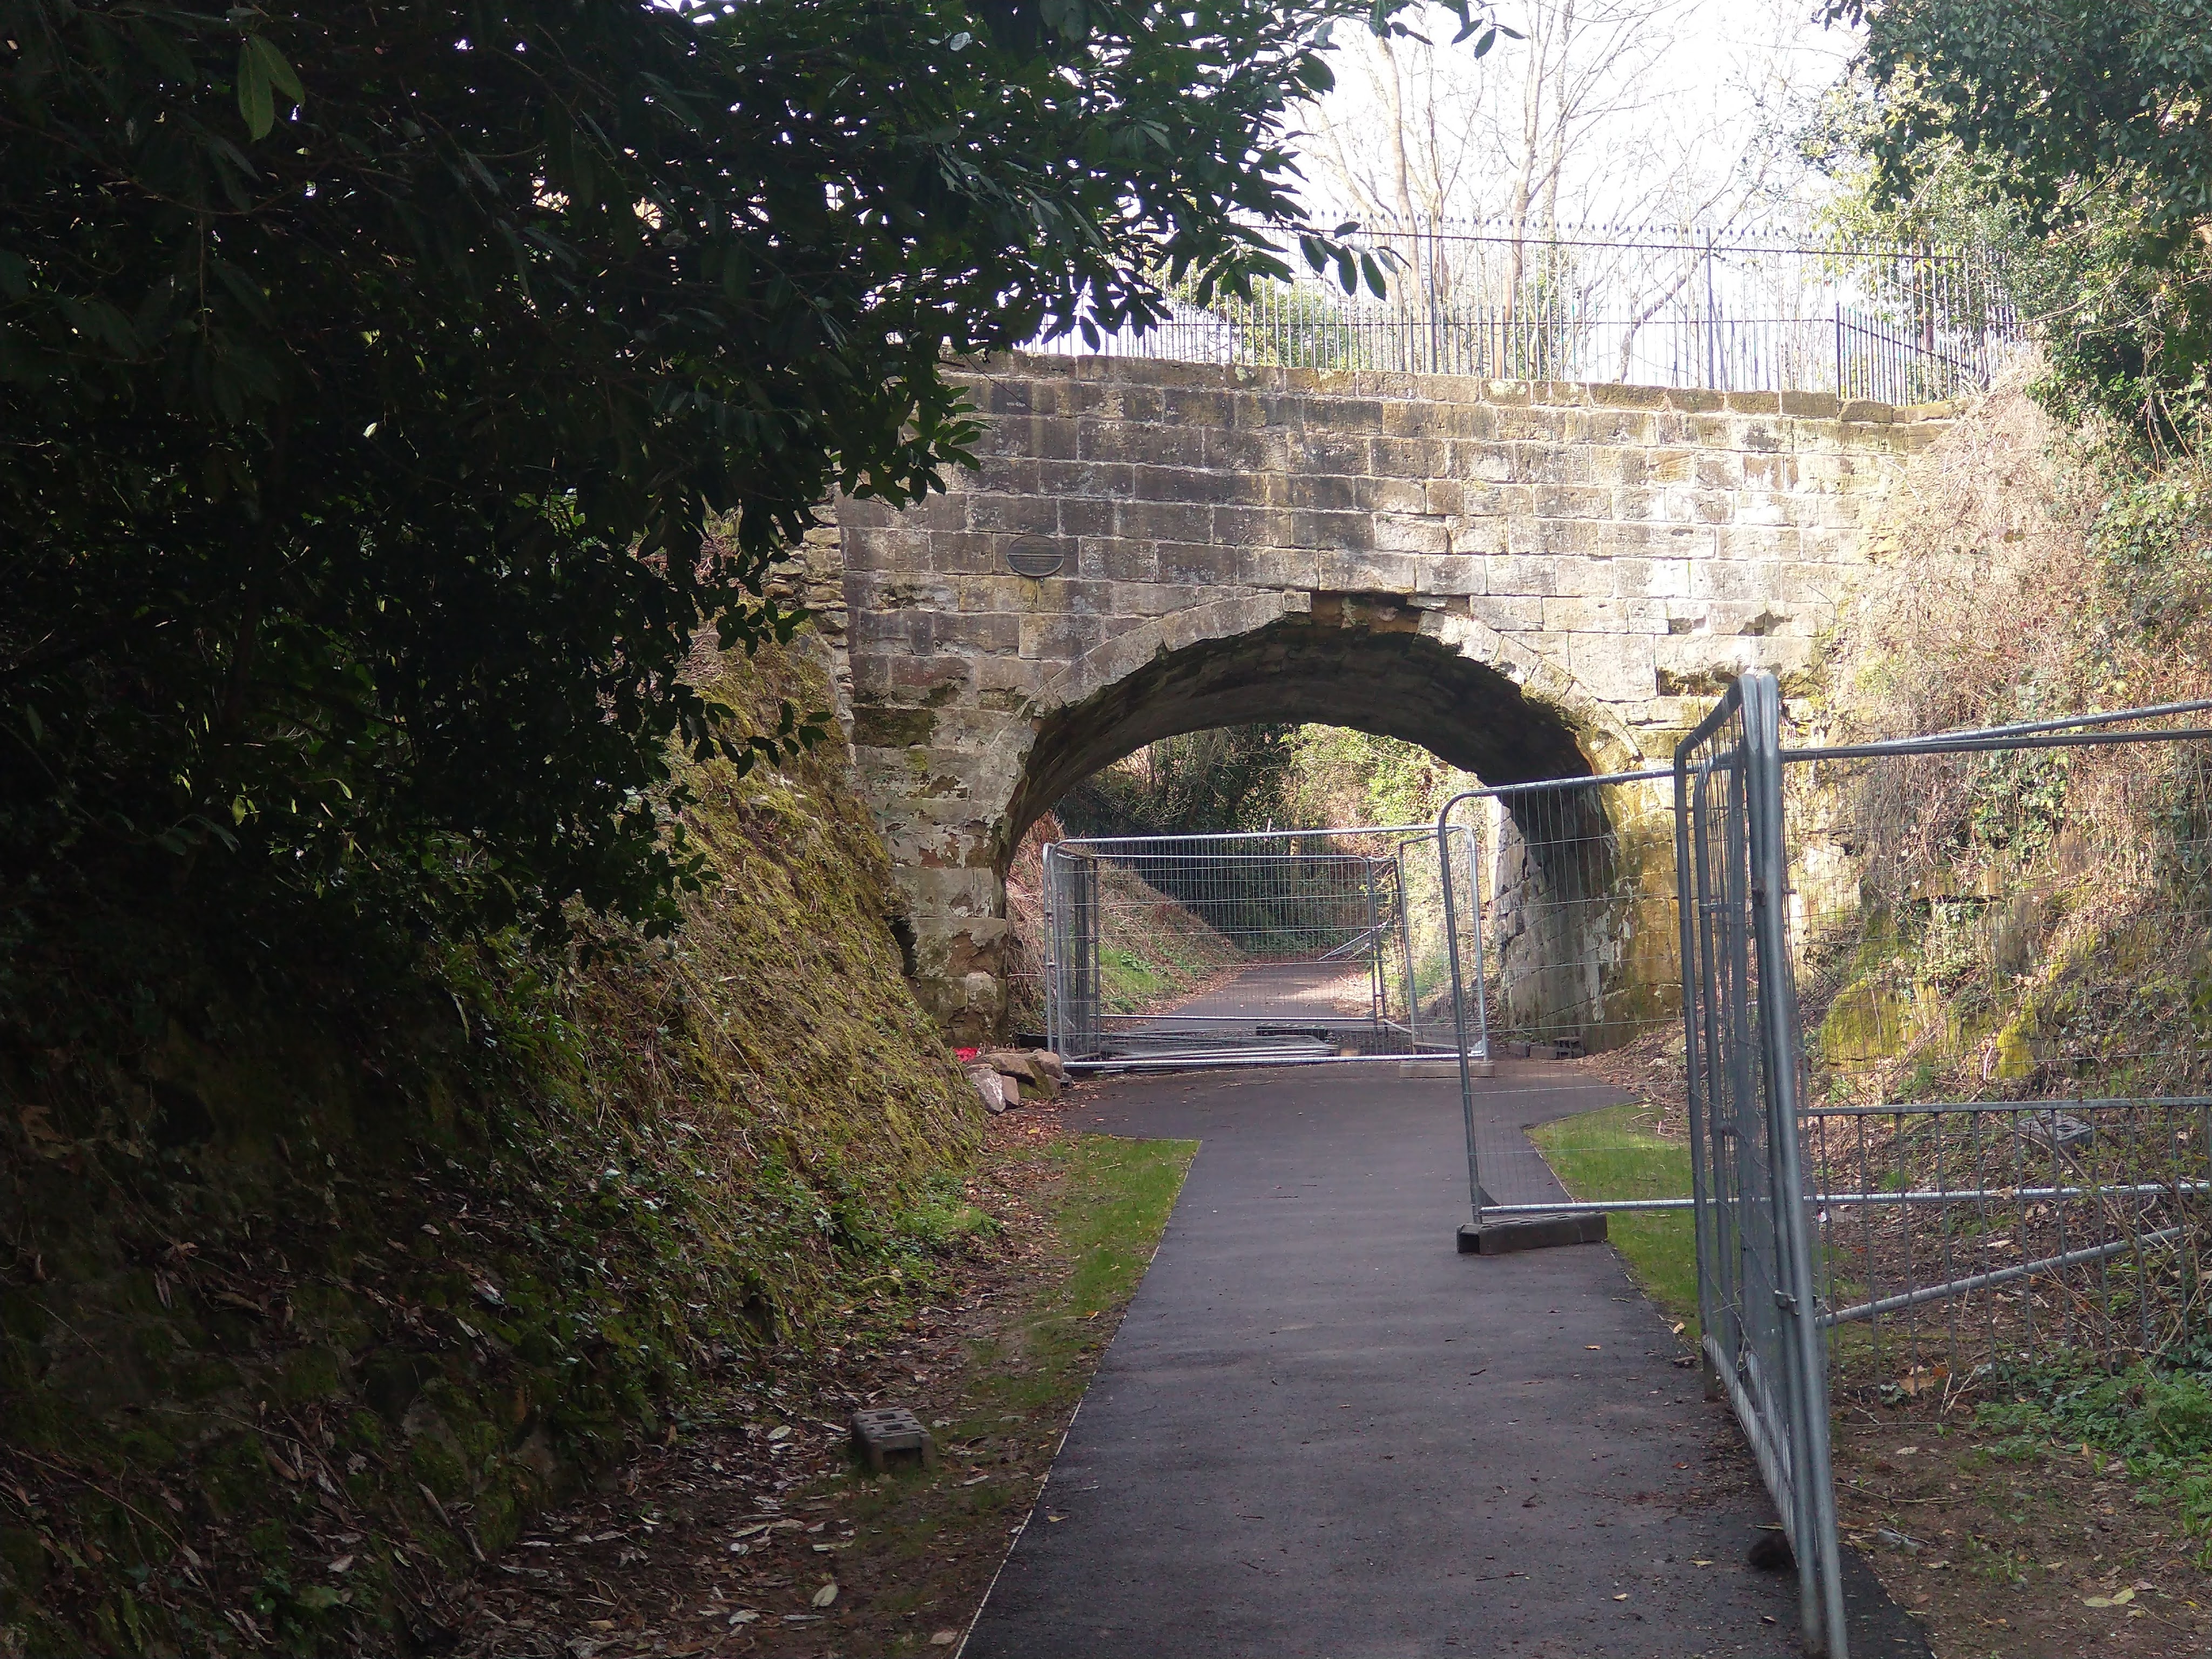
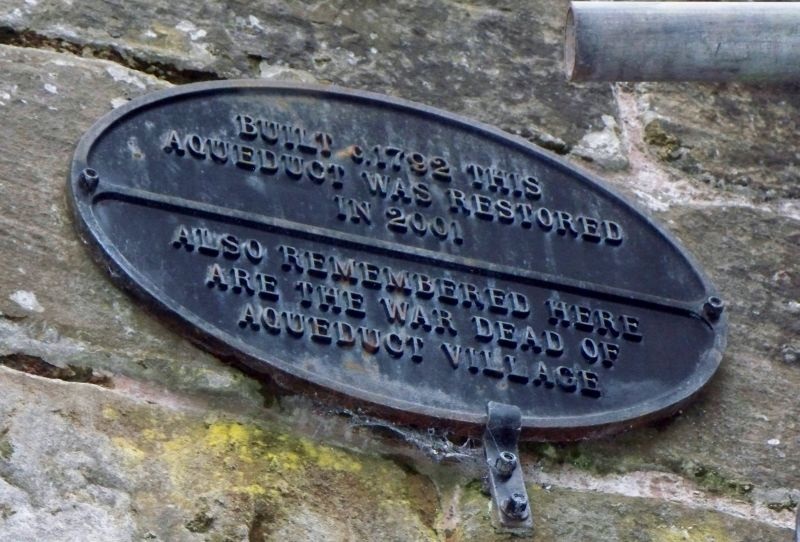
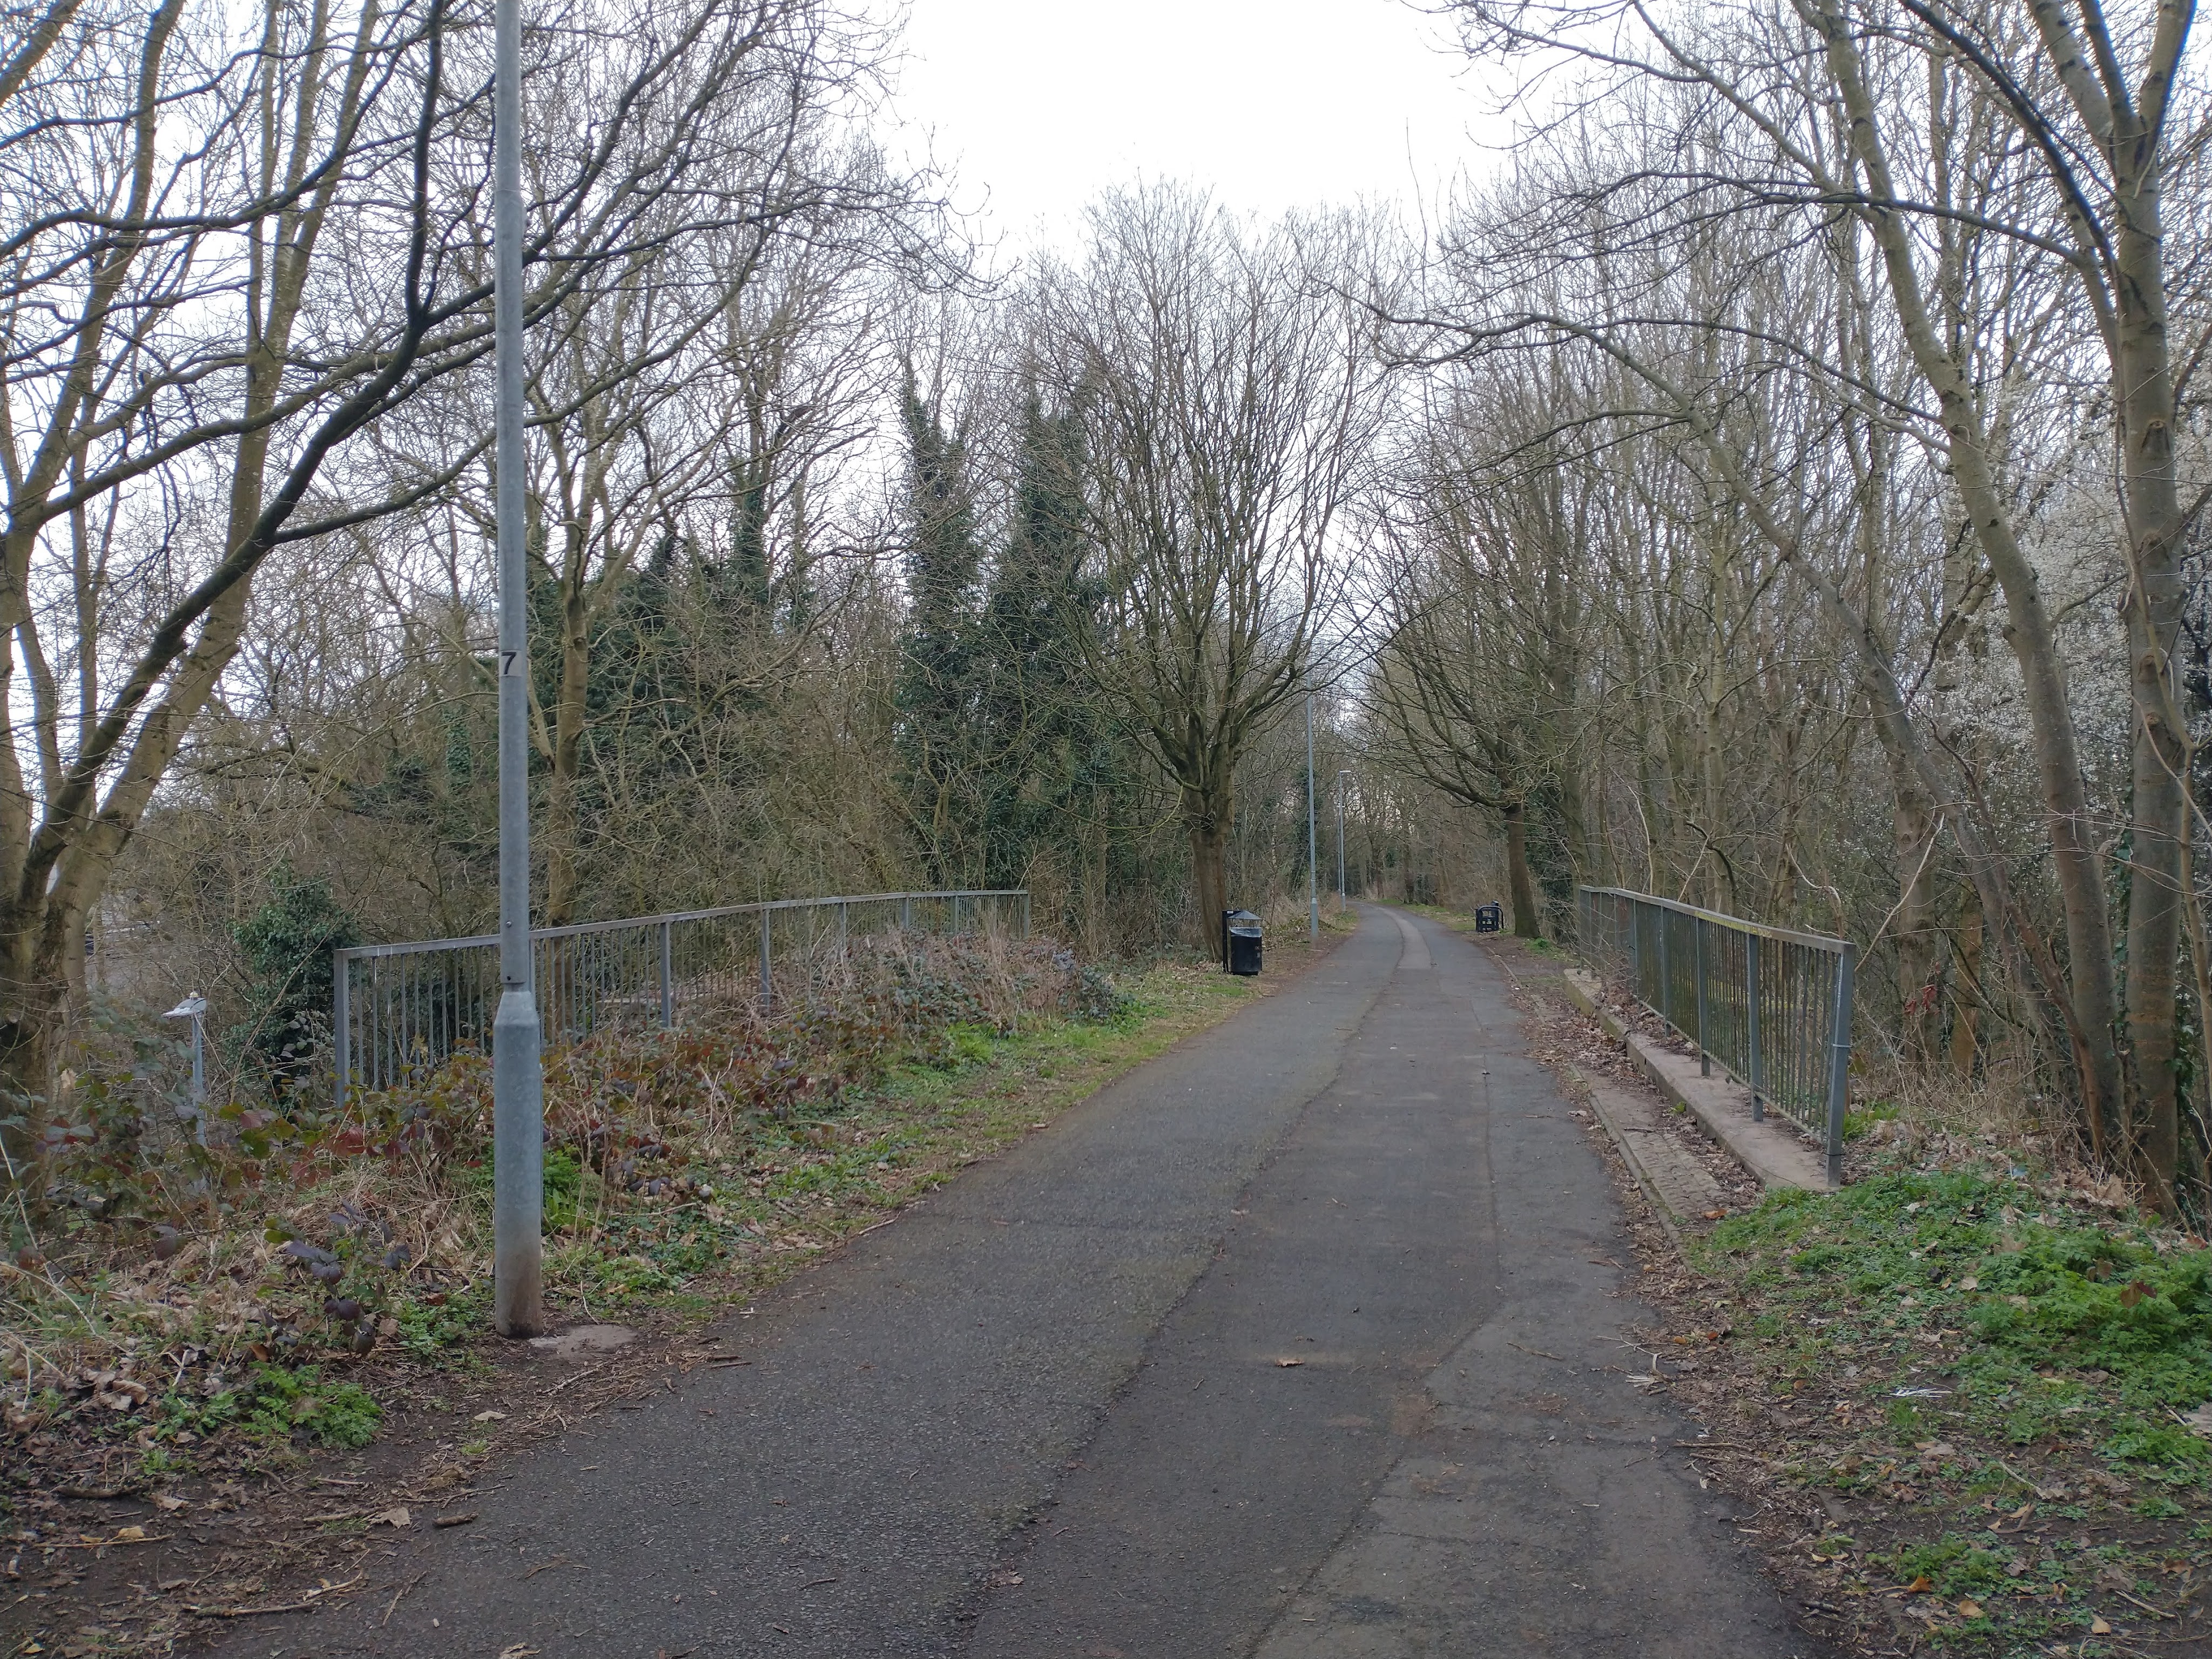
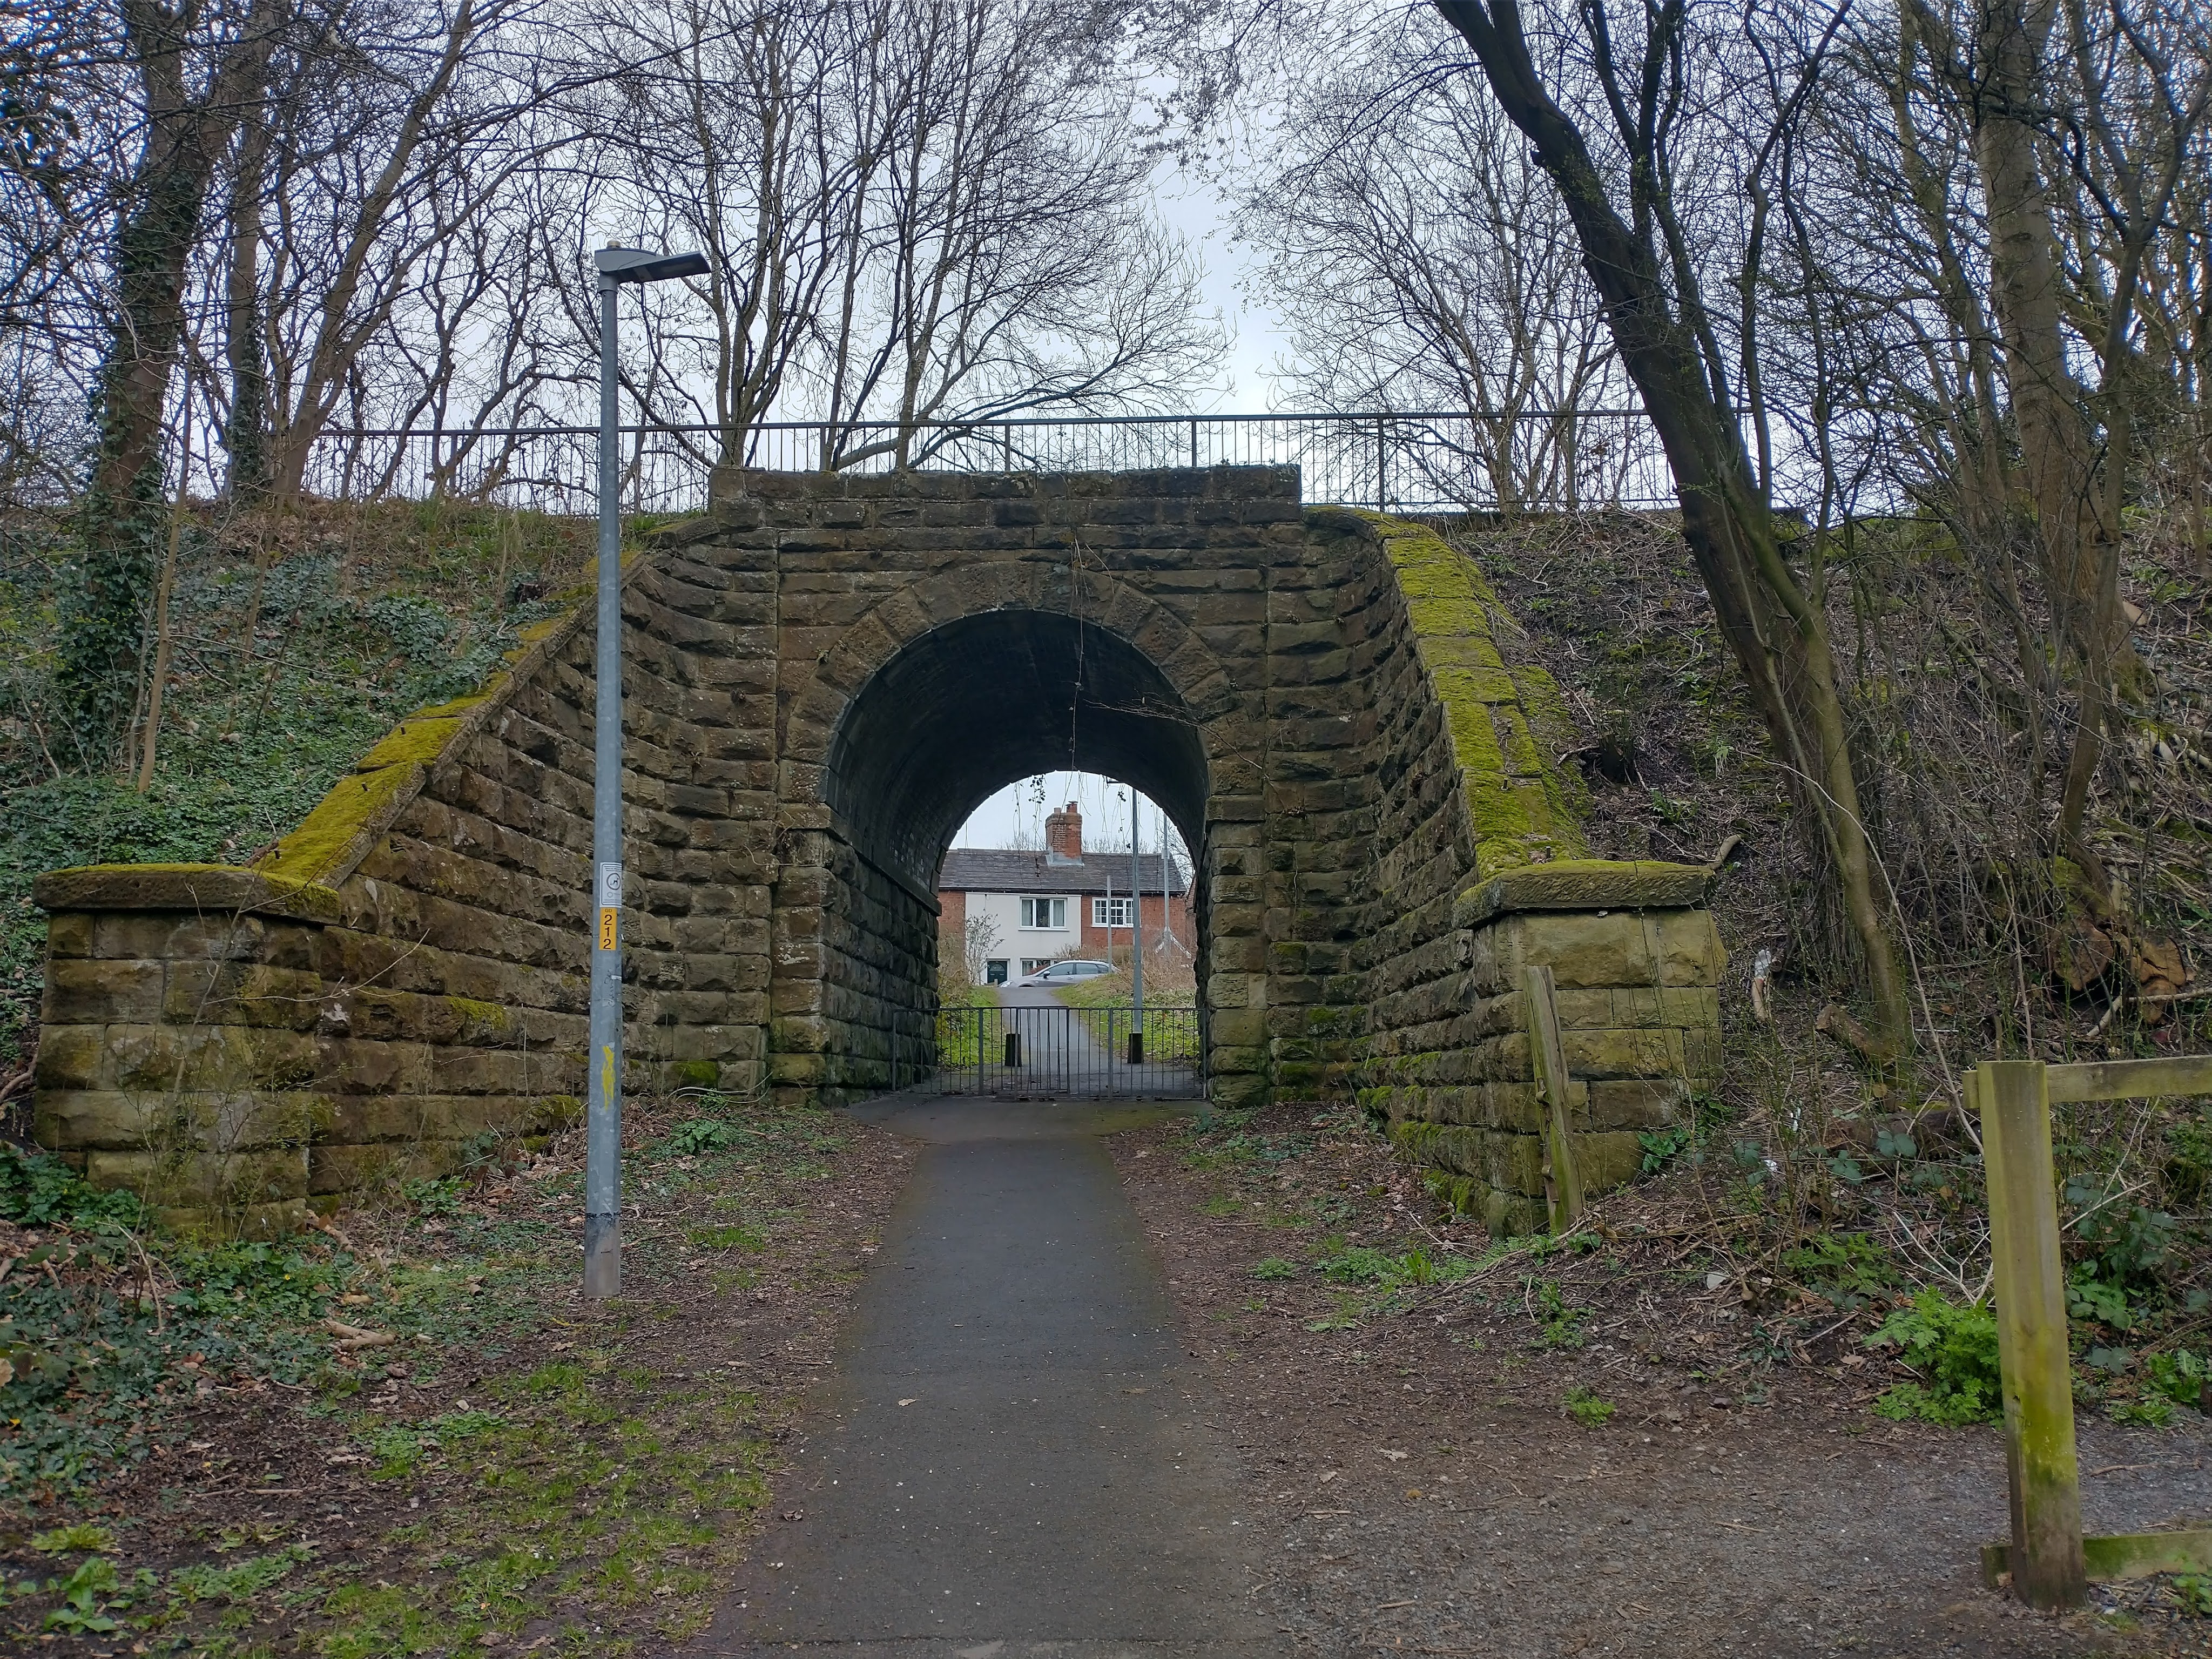
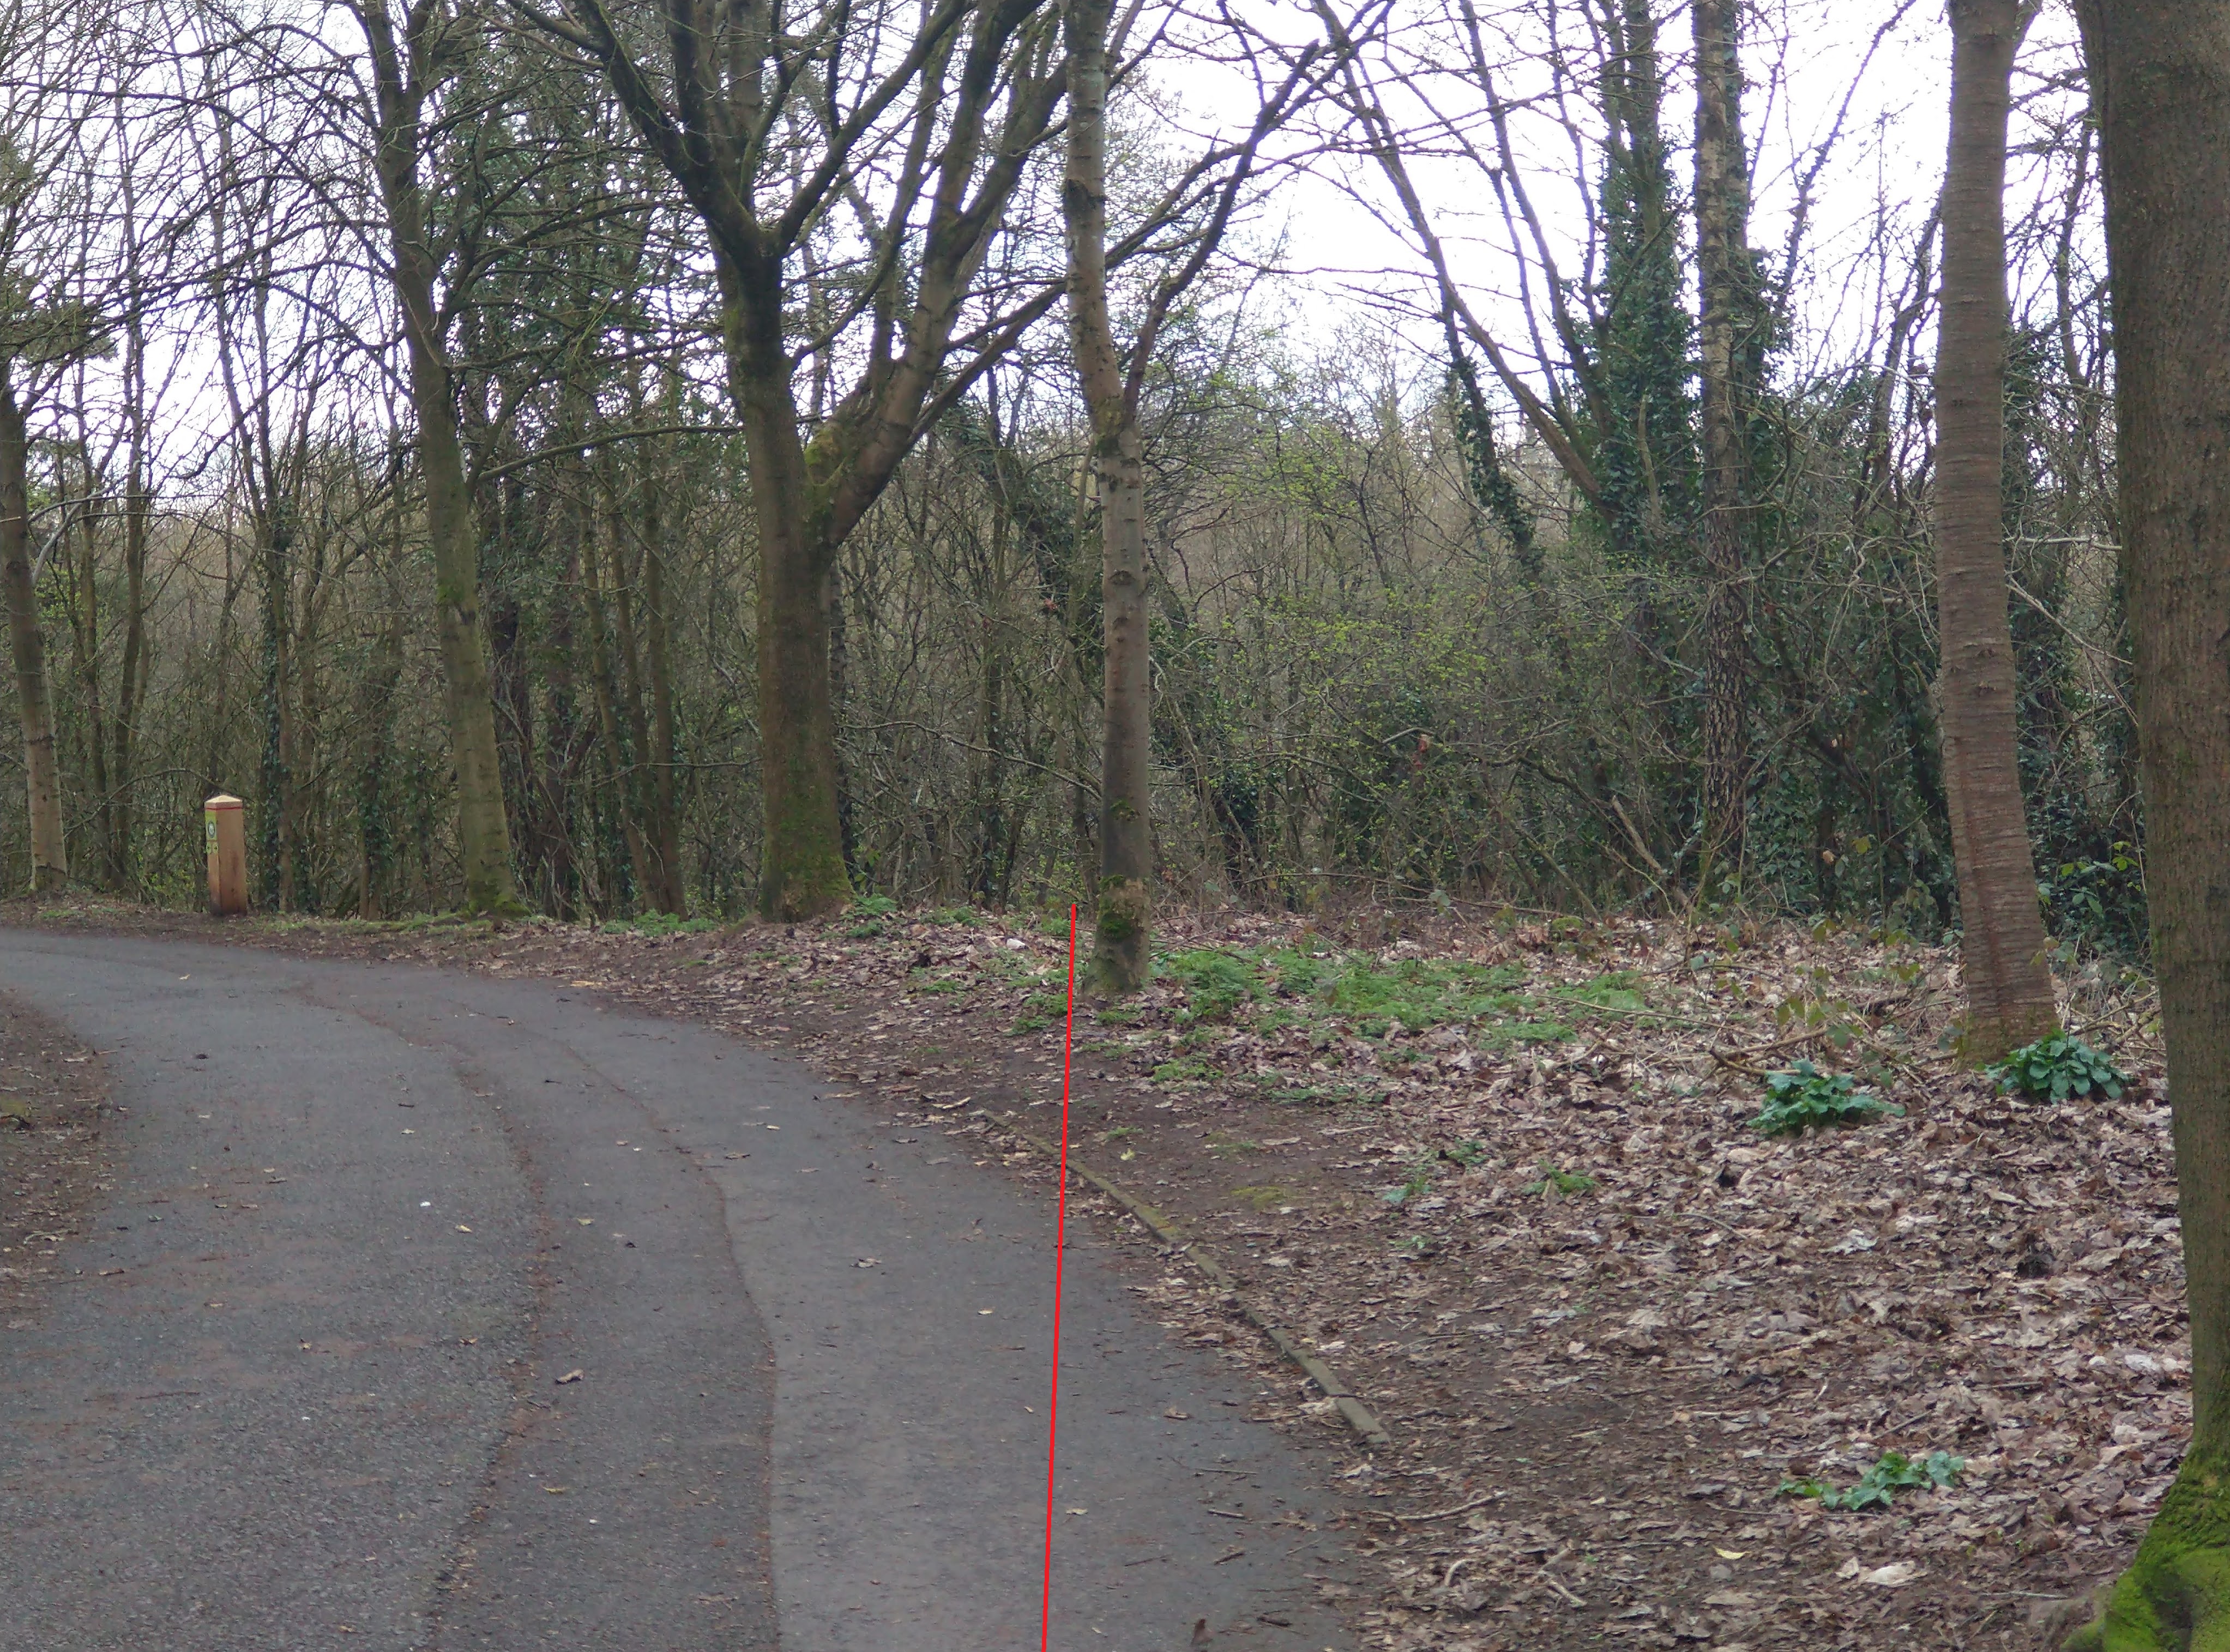
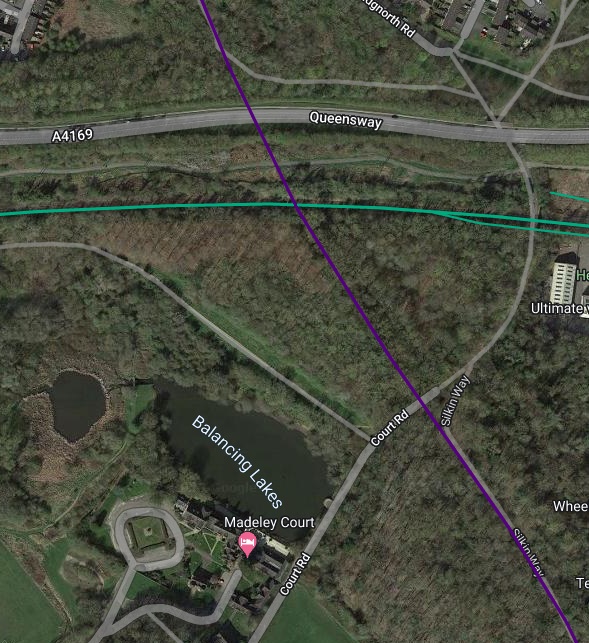
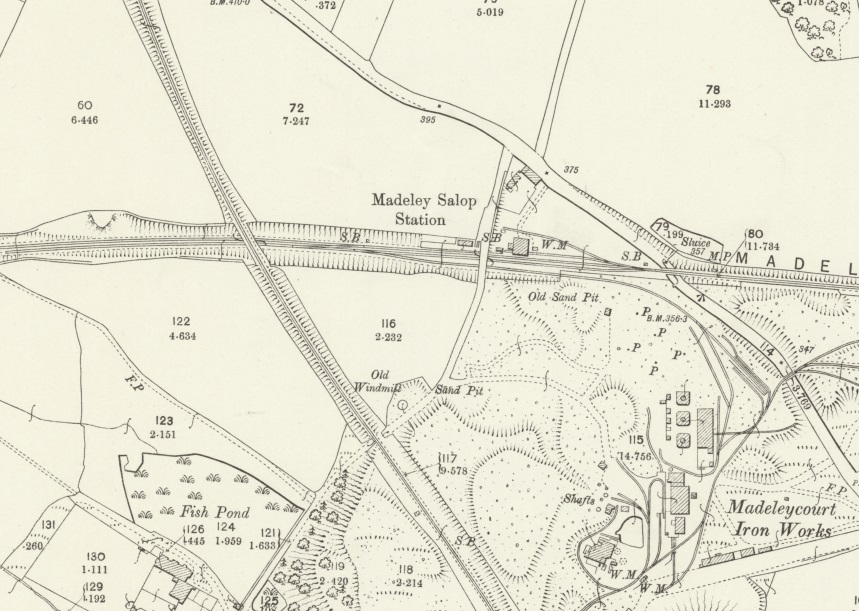
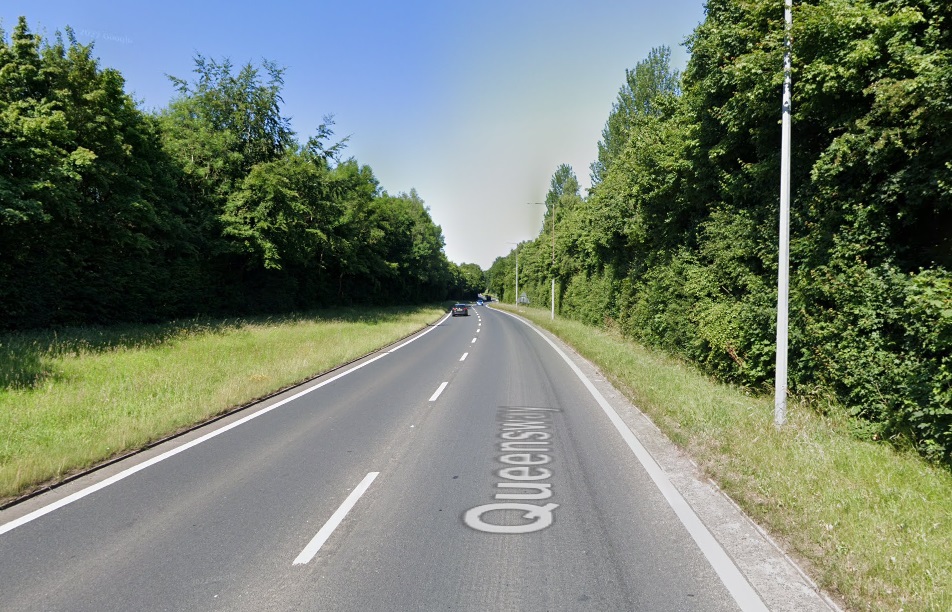
The point at which Chapel Lane crossed the old railway. This view is taken looking South along the Silkin Way. The aqueduct which carried the old canal arm is off the the right of this image. [My photograph, 2nd March 2023]Looking North from Chapel Lane with the Southall Road bridge in the distance. The aqueduct is off the the left of this photograph about half the distance to Southall Road bridge. [My photograph, 2nd March 2023]Looking Southwest across the aqueduct along what would have been the line of the branch canal. After crossing the turnpike road on this aqueduct, the branch canal turned sharply to the North before heading West towards Lightmoor. [My photograph, 2nd March 2023]Looking Northeast across the aqueduct along what would have been the line of the branch canal heading towards what is now the centre of Telford. [My photograph, 2nd March 2023]Looking Southeast along what was the turnpike road to Bridgnorth, through the arch of the aqueduct which was built in around 1792. [My photograph, 2nd March 2023]Looking Northwest towards modern-day Telford along what was once the Bridgnorth turnpike road. [My photograph, 2nd March 2023]The plaque placed on the aqueduct after its restoration in 2001, (c) Neil Brittain, 19th March 2013. [30]Continuing to the South along the Silkin Way another arched underbridge is encountered. This bridge carried the LNWR Coalport branch over an access road. This view looks South over the bridge. [My photograph, 2nd March 2023]The stone arch underbridge viewed from the West looking towards what was once the main Bridgnorth Road. It is worth noting that some observers have indicated that this is the aqueduct. This is not the case, the bridge was built for the railway and at this point the Coalport Branch is no longer following the old Shropshire Canal. [My photograph, 2nd March 2023] A couple of hundred metres beyond the underbridge, the Silkin Way diverges from the route of the Coalport Branch. At this point the formation of the old line was crossed by the new A4169 and no features remain in the immediate vicinity of the new road. The road is a few tens of meters ahead. The red line shows the route of the old railway. [My photograph, 2nd March 2023]Railmaponline.com shows the are we are looking at with the line Coalport Branch in purple and that of the GWR Madeley branch in turquoise. [44]The same immediate area as shown on the 25″ Ordnance Survey of 1901. Madeley Court just edges onto the map extract in the bottom-left.Madely Court Iron Works is shown active and with a network of tramroads which do not seem to have access to the Coalport Branch. [53]Looking West along the A4169, Queensway at the point where the old railway crossed the line of the road. The formation would have been a little under 2 metres higher than the present road. [Google Streetview, June 2022]
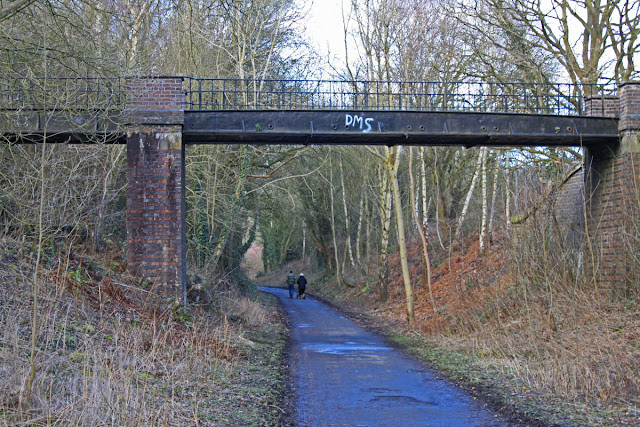
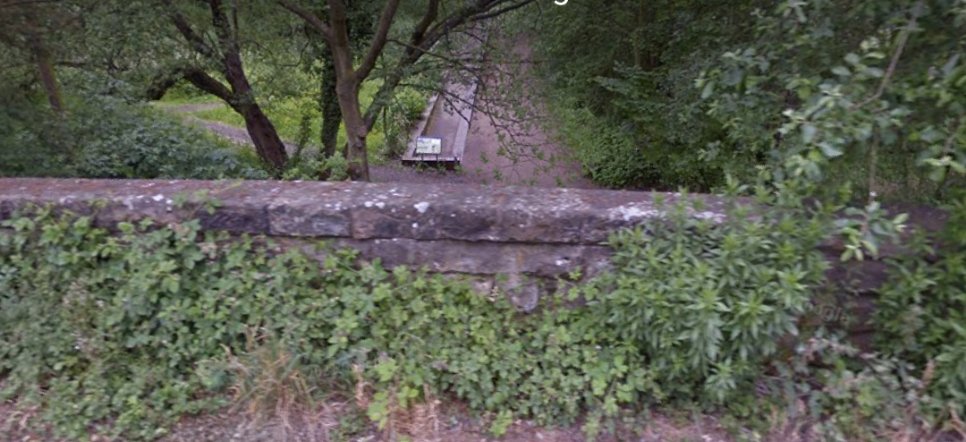
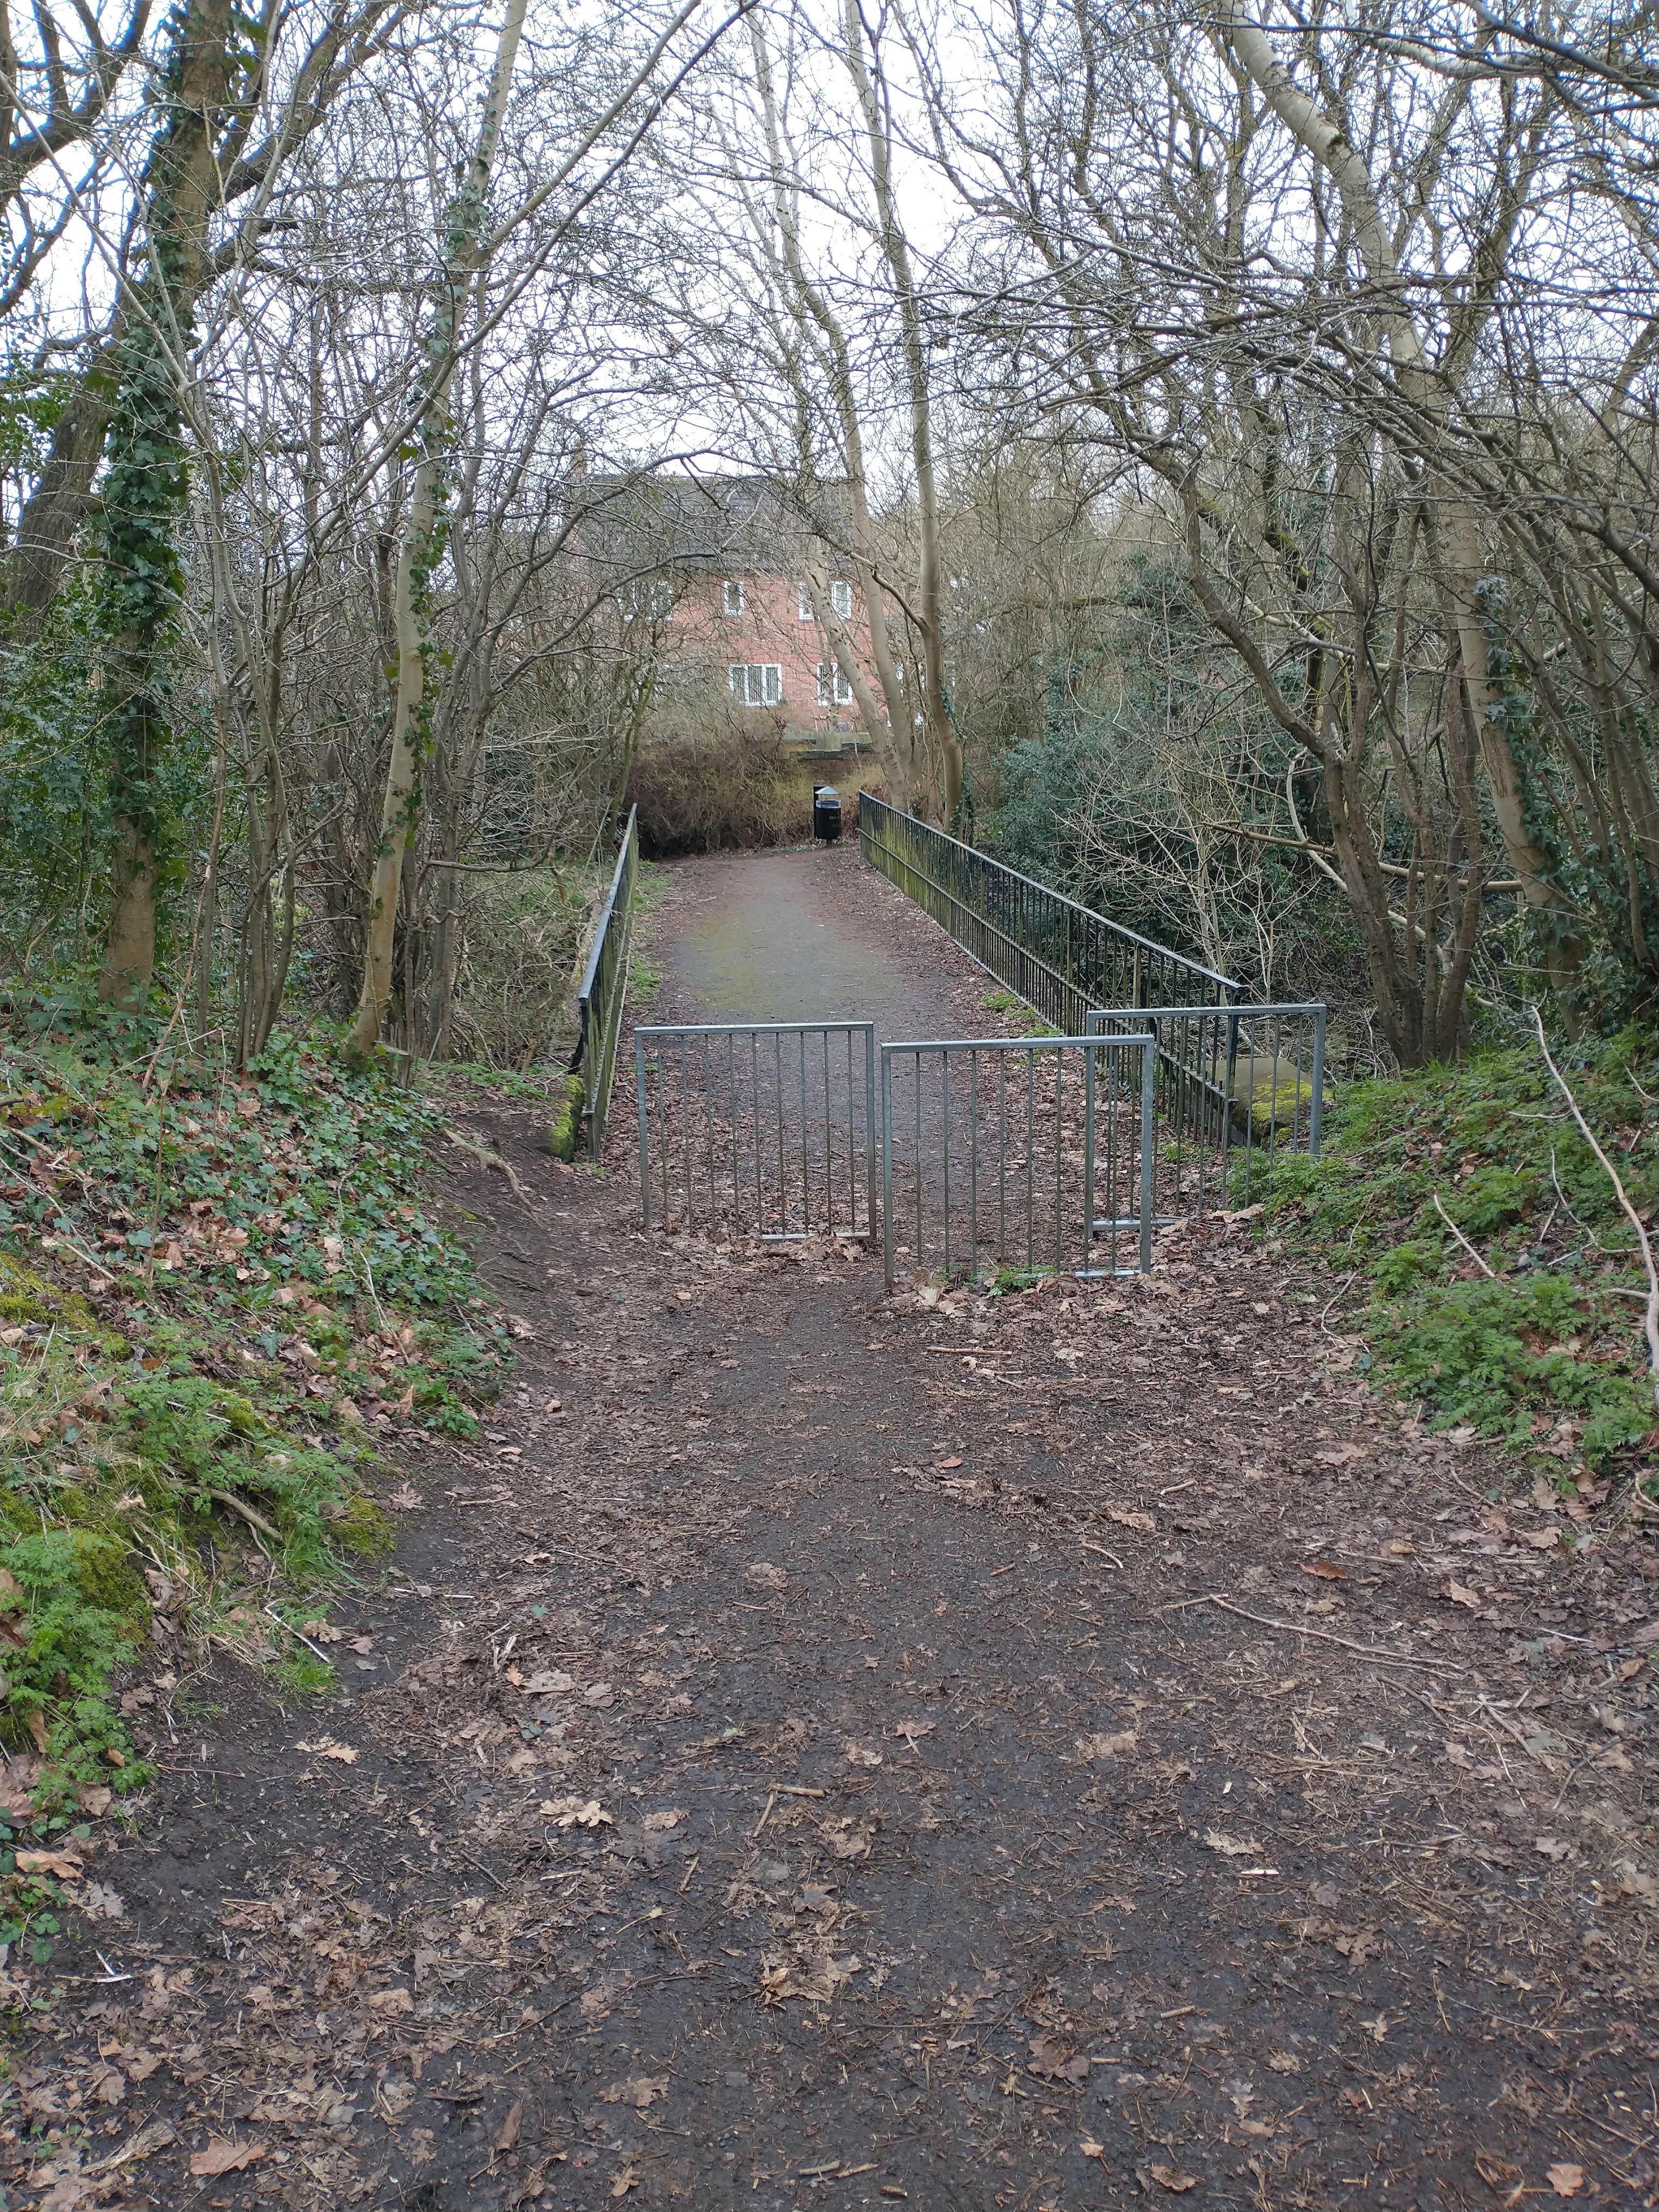
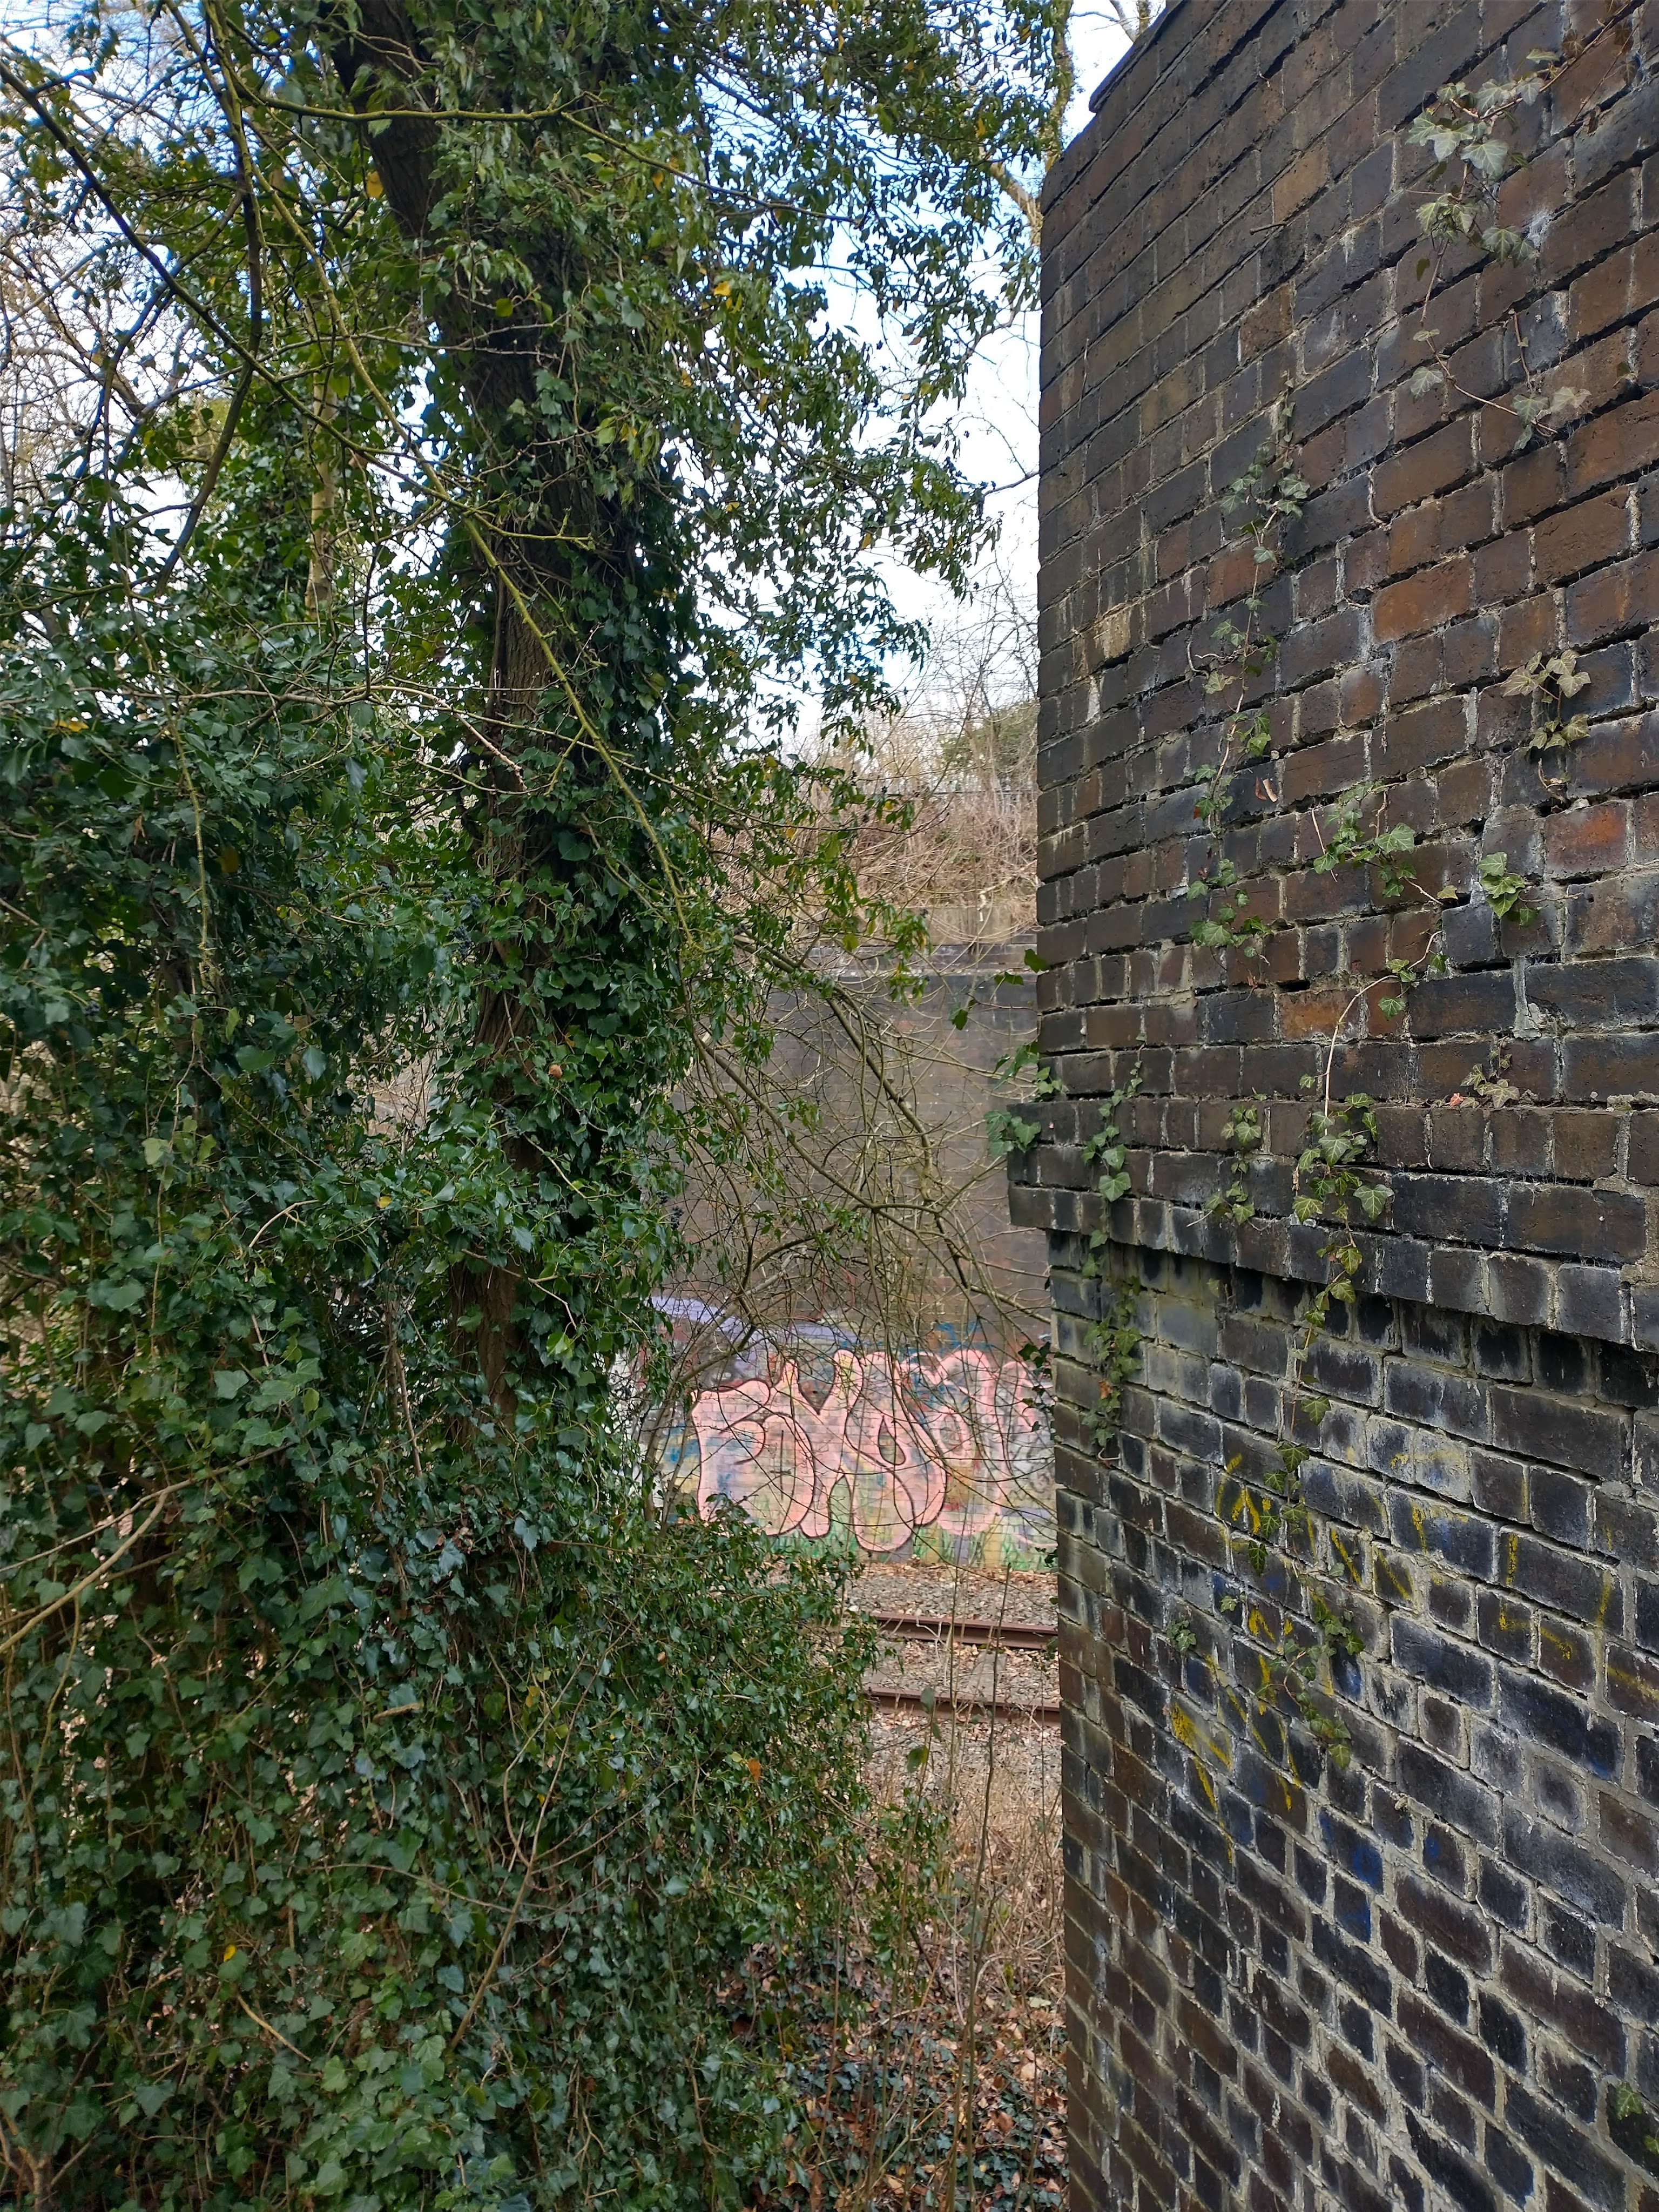
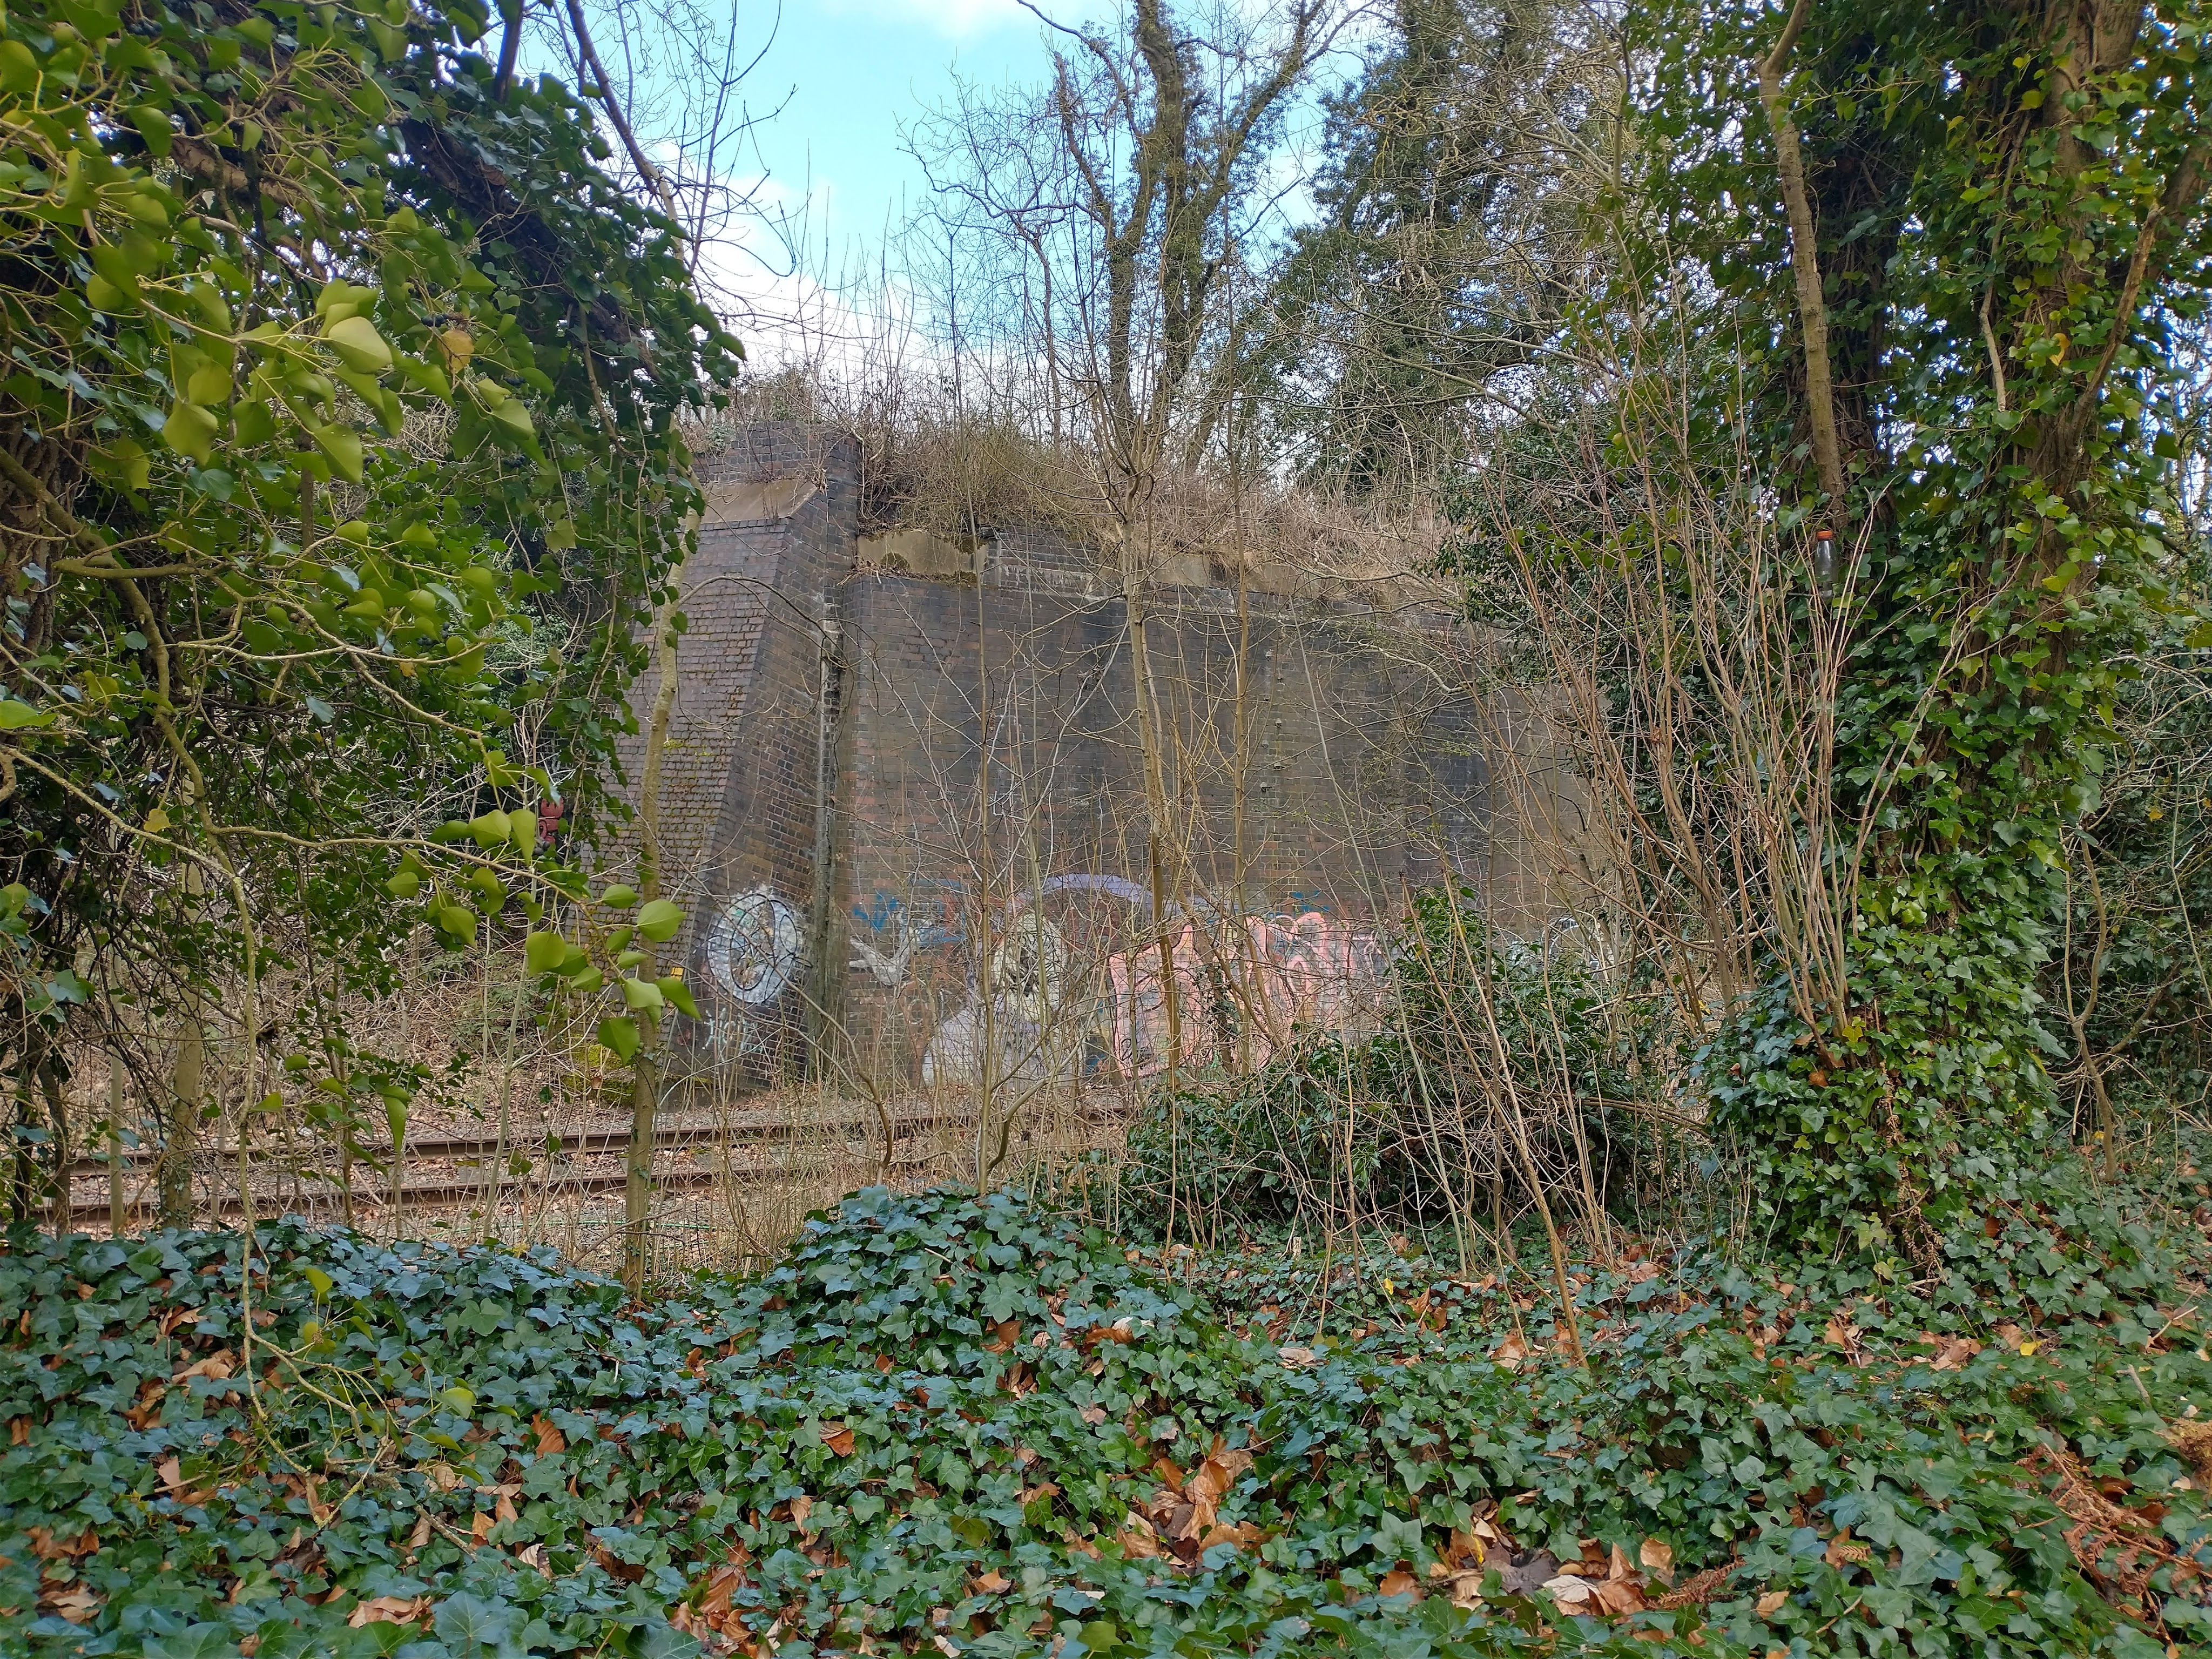
Immediately South of the modern A4169, the old Coalport Branch crossed what was the GWR Madeley Branch. The abutments of the bridge remain and can be seen by trekking from the South towards the still remaining Madeley Branch.
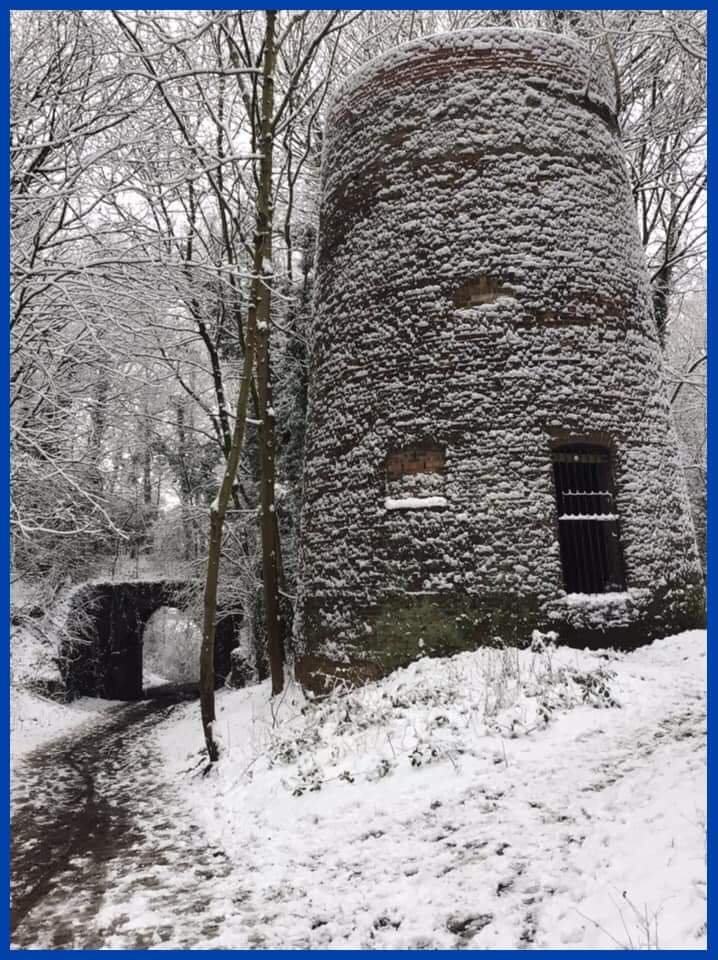
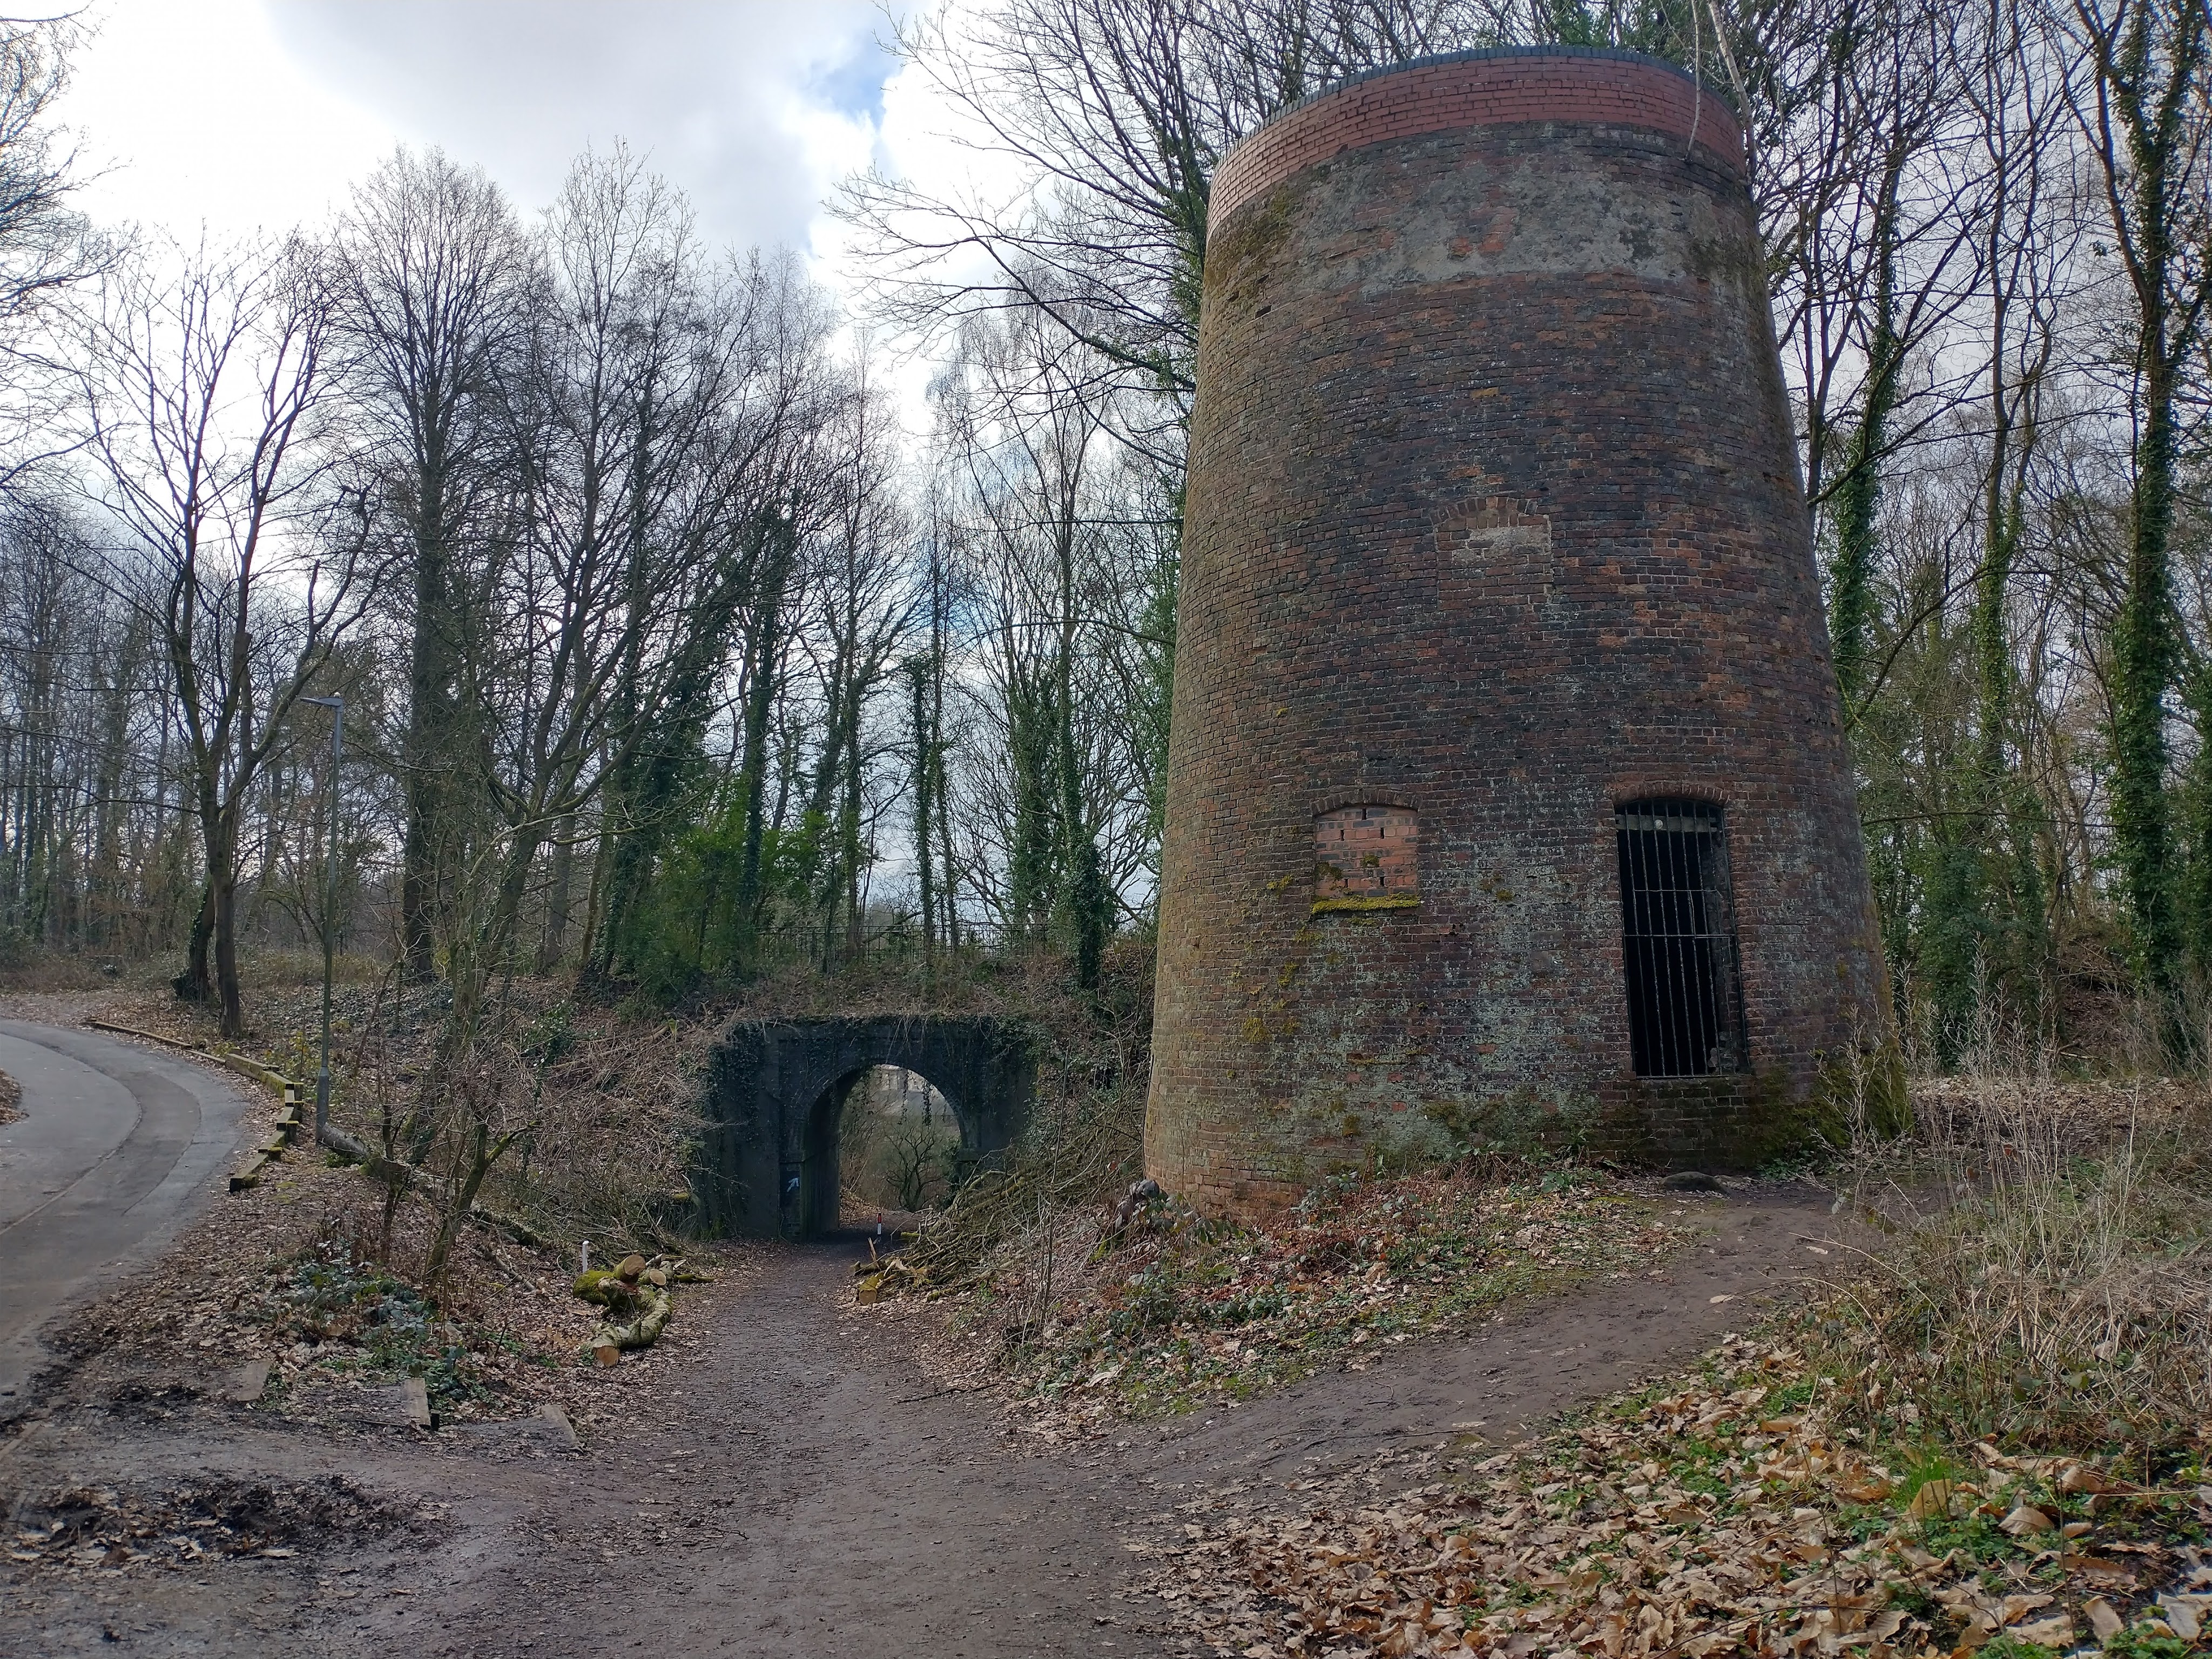
Looking from the South across the Madeley Branch from adjacent to the South abutment of the bridge which carried the Coalport Branch over the Madeley Branch. The graffitied North abutment is visible beyond the railway track. [My photograph, 2nd March 2023]A view of the North abutment from a short distance further to the West. [My photograph, 2nd March 2023]Looking South-southeast from the South abutment of the old bridge along the formation of the Coalport Branch. [My photograph, 2nd March 2023]Just before the diverted Silkin Way re-joins the line of the Coalport Branch, the old railway crossed another stone-arched accommodation Bridge which provided access between Madeley Court and its windmill. The windmill is off to the left, Madeley Court is some distance to the right (West). [My photograph, 2nd March 2023]Madeley Mill alongside the Silkin Way, one cold January in the snow. A short walk under the arch bridge in the background is Madeley Court which is now a hotel. …The arch bridge carries the LNWR Coalport Branch. Just to the East of the line, and shown here, are the remains of a windmill, Madeley Mill. There has been a mill on the site since at least 1702 and the mill was last known to operate in 1840. It was later, apparently, used as a bunkhouse for the railway navvies. No machinery survives. The picture was shared on the Telford Memories Facebook Group by Lin Keska on 19th November 2022. [23]A similar view to that taken in snowy conditions. The Silkin Way is on the left of the picture, the underbridge is directly ahead. [My photograph, 2nd March 2023]While I was wandering around near the old windmill, the sun came out. [My photograph, 2nd March 2023]The underbridge viewed from the West. [My photograph, 2nd March 2023]Madeley Court in 2023 is a Hotel, temporarily in use to house Afghan refugees who worked with the British in Afghanistan. This picture was taken from just to the West of the underbridge in the last photo. [My photograph, 2nd March 2023]
Madeley Court Iron Works
In 1845-6, James Foster built three blast furnaces near the newly opened mines on his Madeley Court estate. They replaced his Wombridge furnaces, and Foster moved workmen and plant from Wombridge to create a modern ironworks. For most of their life only two of the three furnaces were in blast together. All the Madeley Court pig iron was sent to the Fosters’ ironworks in Staffordshire and Worcestershire to be blended with other types for the manufacture of high quality bar. The ironworks ceased working in 1902 but in 1912 were taken over by Thomas Parker, an electrical engineer. He and his son C. H. Parker established Court Works Ltd., a foundry firm which, seventy years later, had long specialized in iron castings for the electrical industry. [54]
The tramroads in this are will feature in a future article in the series about Telford’s tramroads/tramways. An overview of the wider area’s tramroads/tramways/plateways can be found on this link:
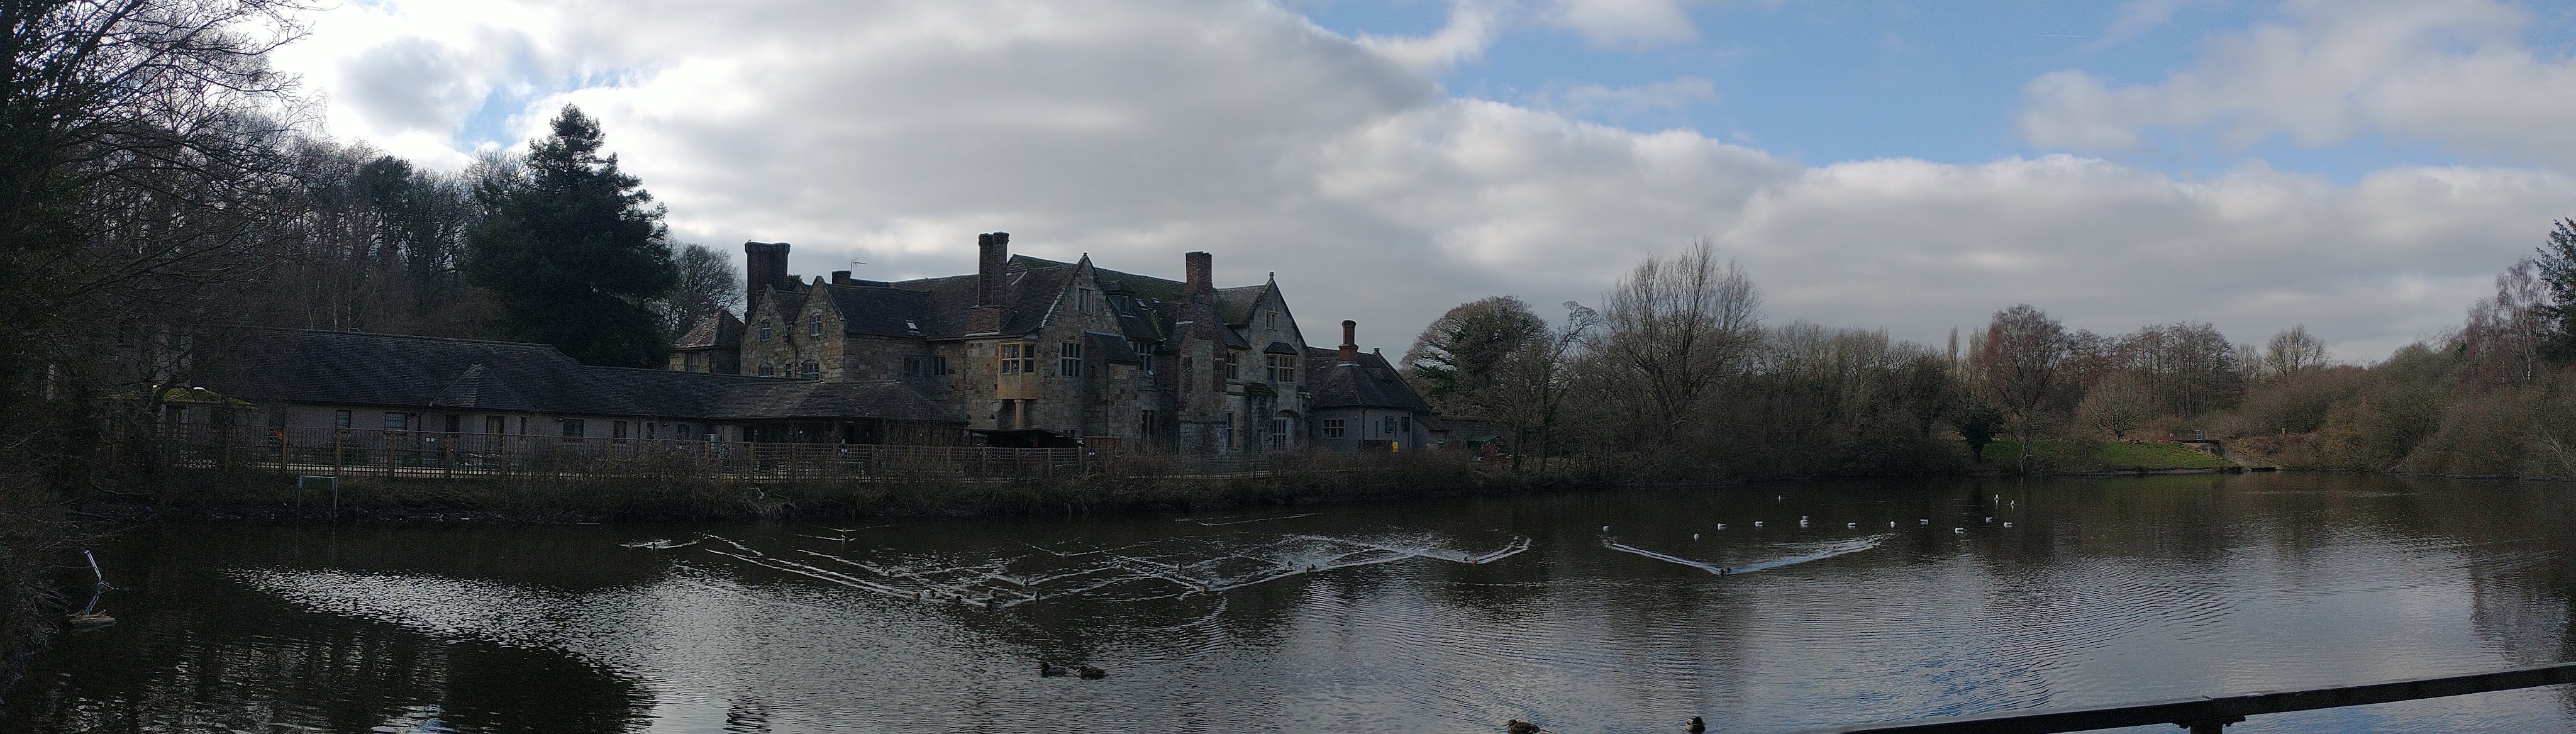
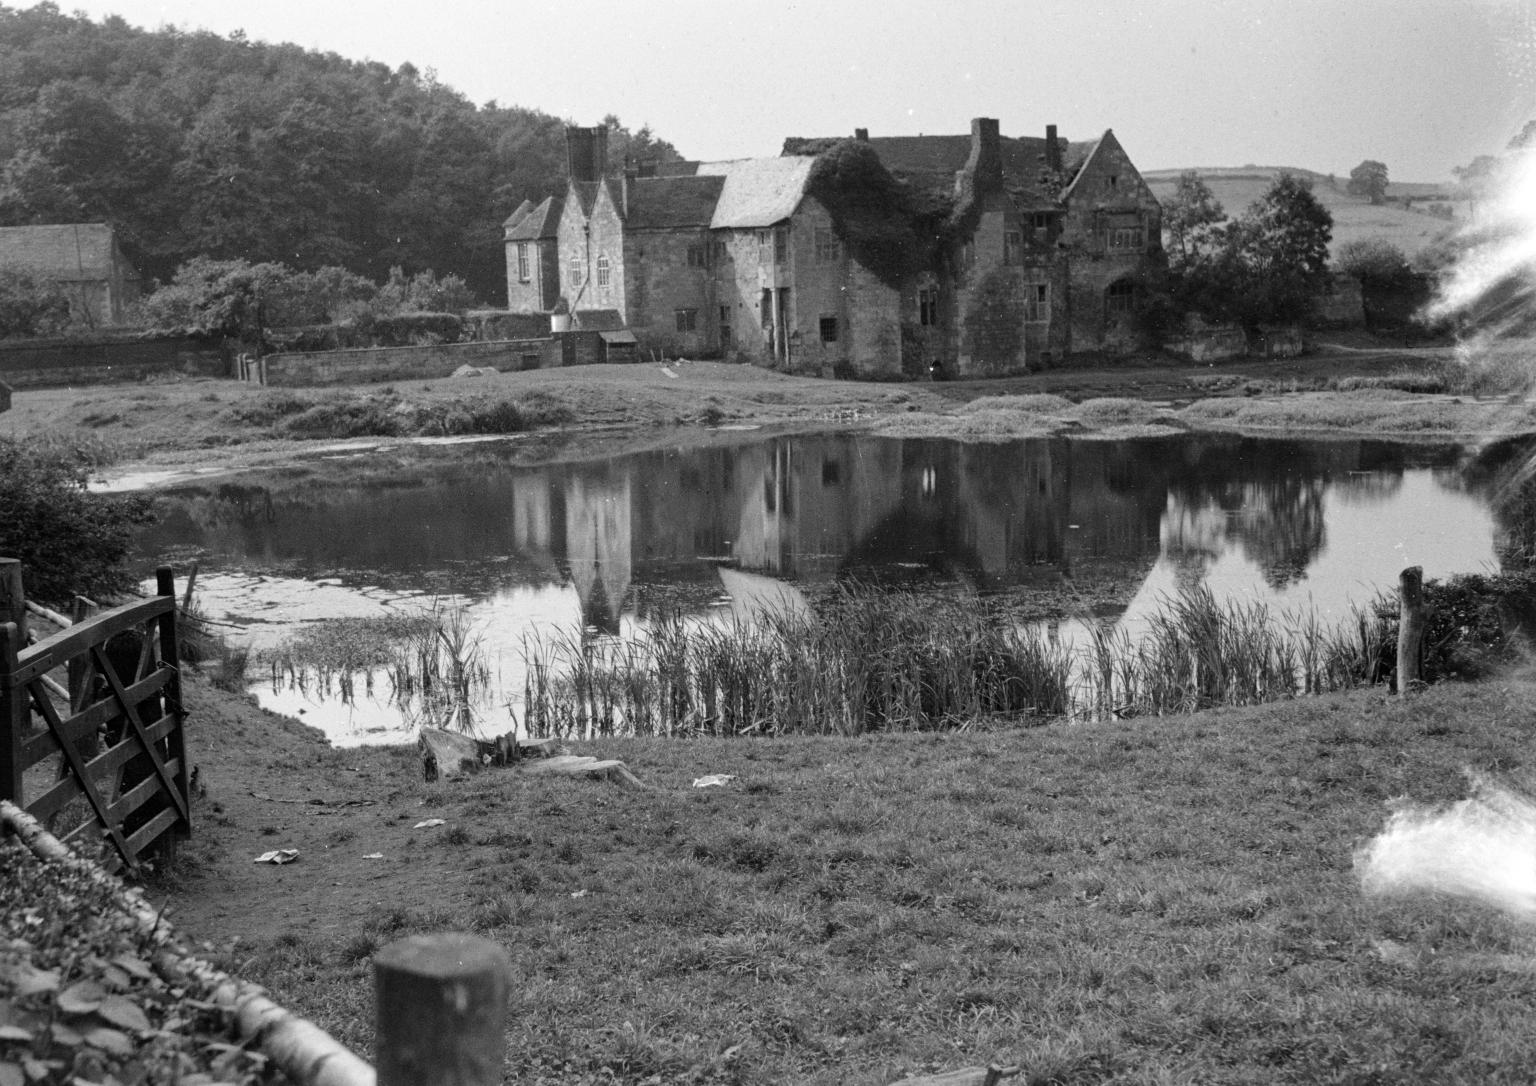
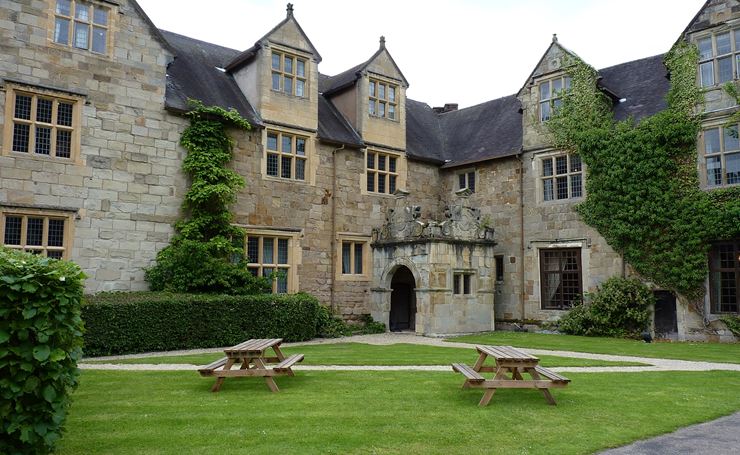
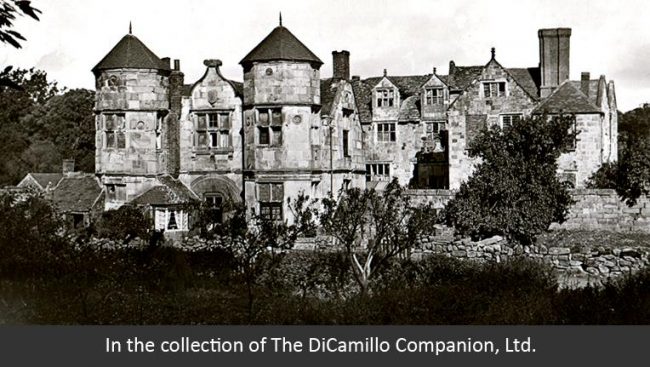
Historic England records this Grade II* listed building as being, “Mainly C16 with traces of C13 fabric. Built as a grange to Wenlock Priory. At the Dissolution bought in 1553 by Sir Robert Brooke, Speaker in the House of Commons, and stayed in the Brooke family until early C19. Tenanted by Abraham Darby I from 1709 until his death. Large ashlar house, at time of survey (1980) being restored. Tiled roofs with gables with parapet coping. Large brick shafted chimney stacks. Two-storeys and attics. L-shaped on plan, originally on west wing as well. The north-west hall range extensively rebuilt. Gabled stone attic windows with finials. Large stone mullion transom windows with dripmoulds. Early C17 stone porch to right hand of hall range with moulded round arch and ornate gables with volutes, pediments and strapwork foliage decoration. The east wing contains large C16 timber newel staircase and rooms with bolection moulded panelling and chimney piece.” [39]
Madeley Court, Shropshire as it appeared in the mid 20th century, (c) John Piper (1903-1992). [37] Madeley Court, sketch held by Historic England. [38]Madeley Court, image held by Historic England. [38]Madeley Court, an early 20th century postcard. [40]
Madeley Court to Bridge Street/High Street, Madeley
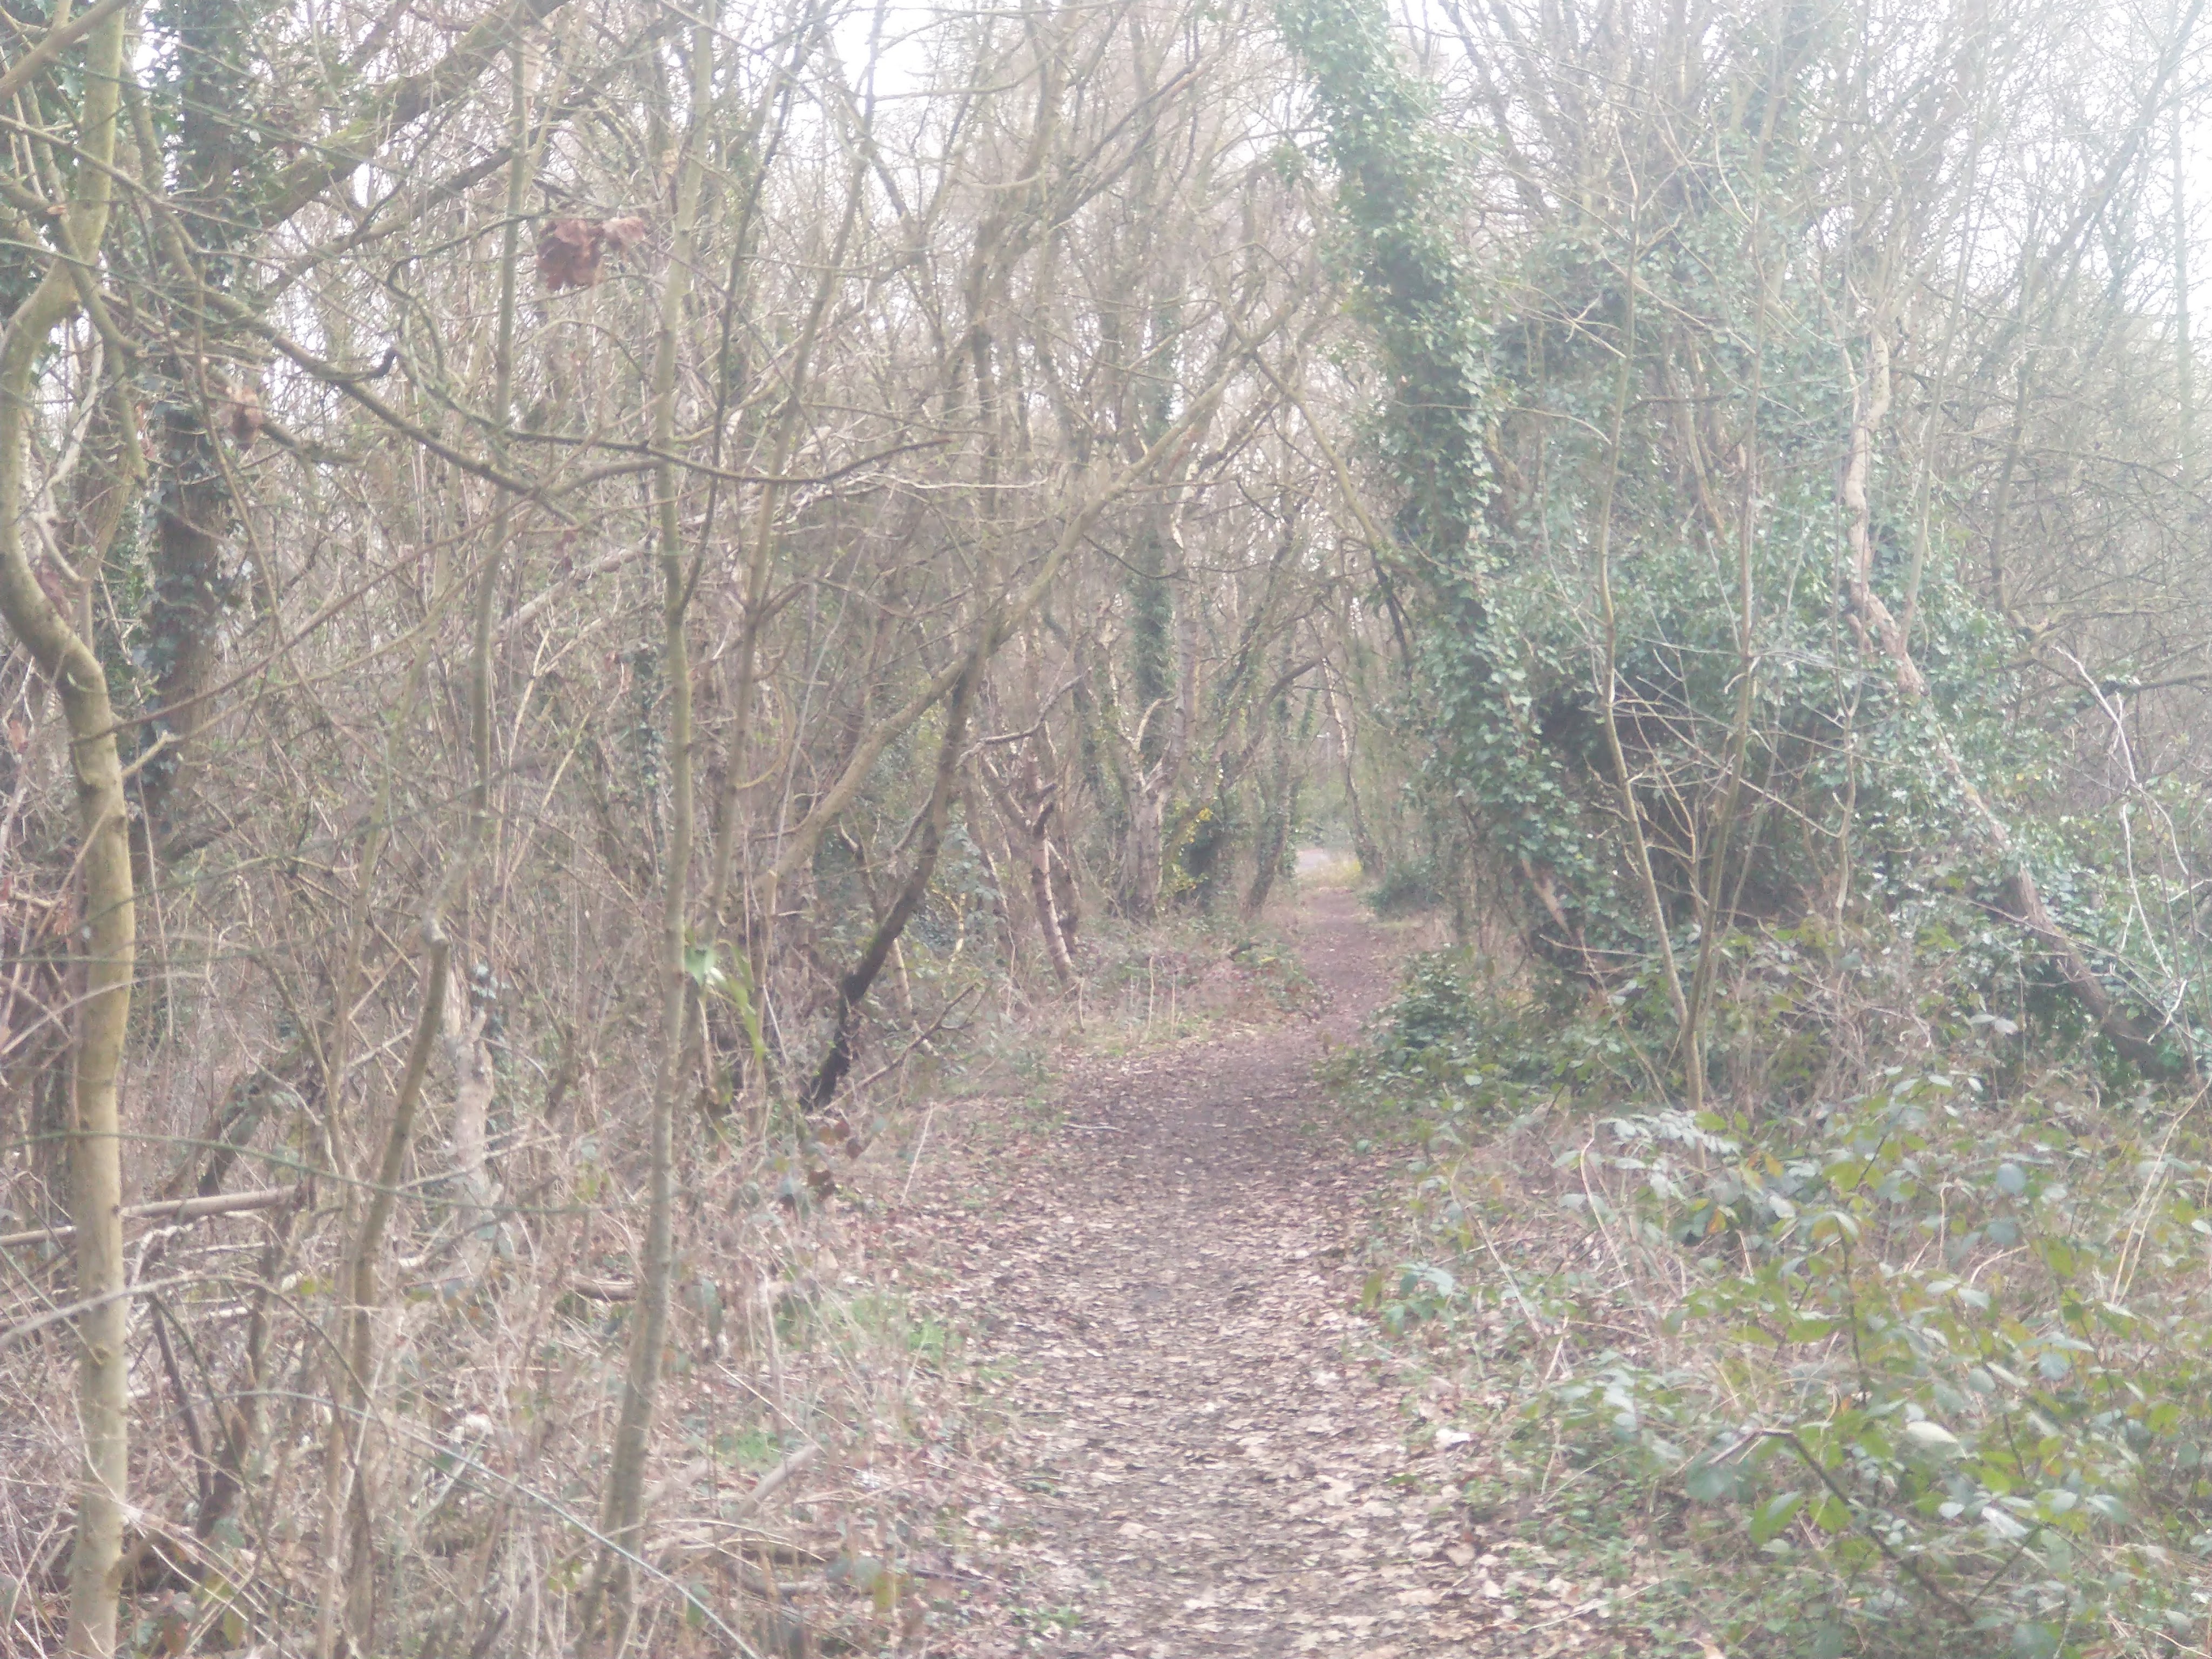
Returning to the route of the Coalport Branch, we continue to follow the old line in a South-southeasterly direction.
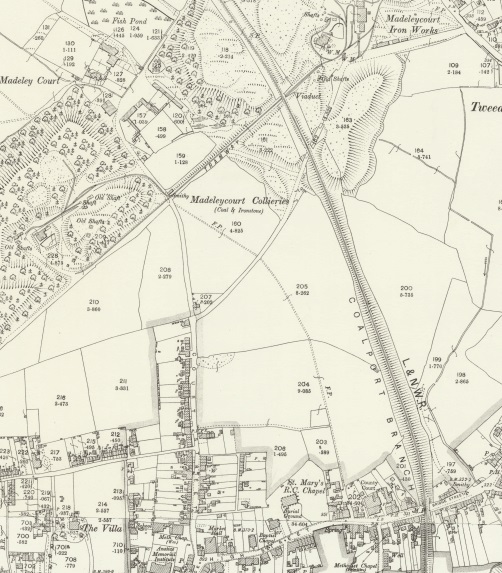
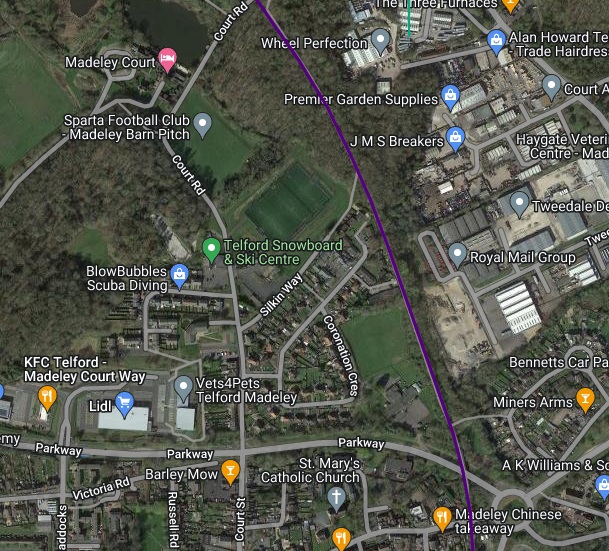
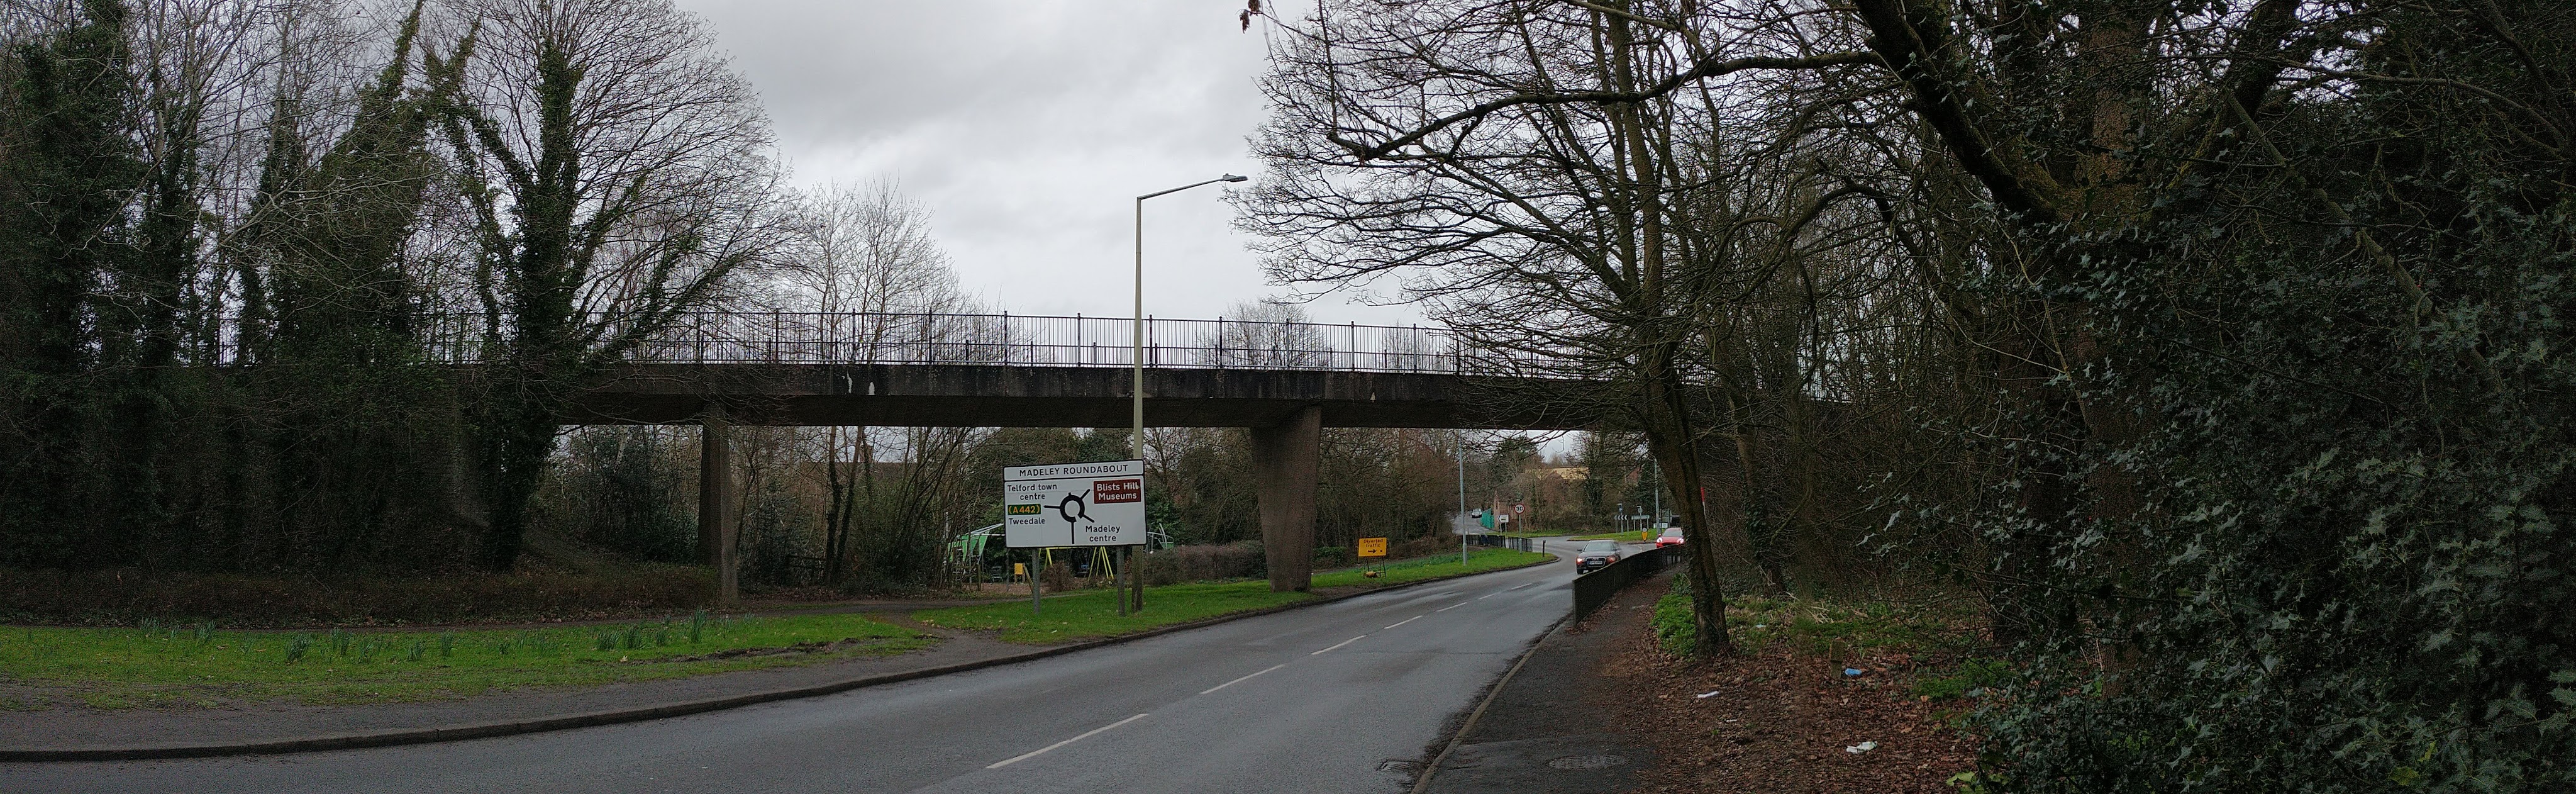
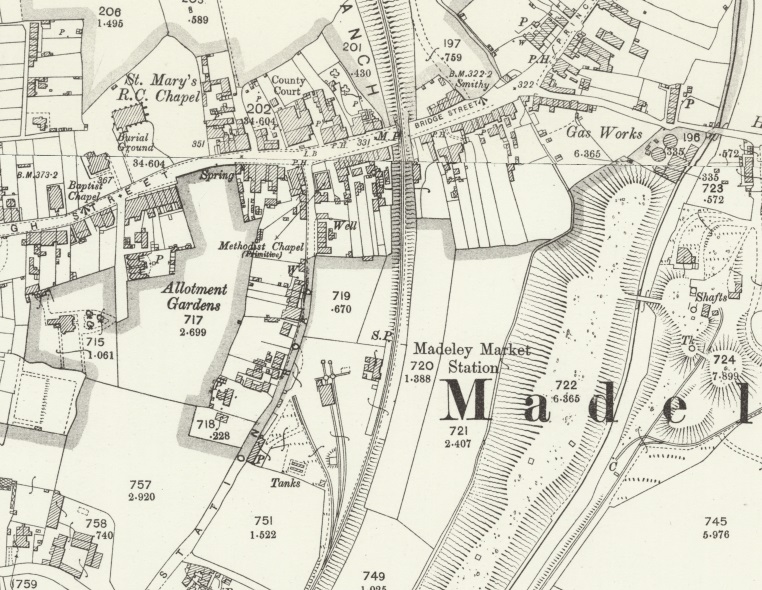
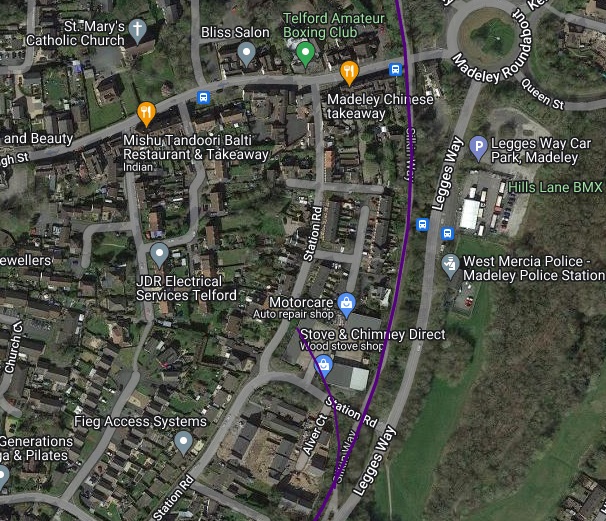
This extract from the 25″ Ordnance Survey of 1901, published in 1902, shows the length of the Coalport Branch from the Madeley Court area to the town of Madeley. Along this length the old railway was on a relatively high embankment. At the bottom-right of the extract it can be seen bridging Bridge Street, Madeley which became Madeley High Street. [55]The same area as shown by Railmaponline.com. [44]These two photographs show the line beginning to curve back from a South-southeast alignment to head South to the East end of Madeley High Street. [My photographs, 6th March 2023]The Madeley bypass is known as Parkway. The old railway was on embankment at this location and the Silkin Way required a concrete structure to span the route on the new road. [My photograph, 6th March 2023]The view East along Parkway on the approach to the roundabout at the East end of Madeley High Street. The bridge was constructed in the late 1960s. [My photograph, 6th March 2023]The Silikn Way approaching the bridge over Madeley High Street. [My photograph, 6th March 2023]
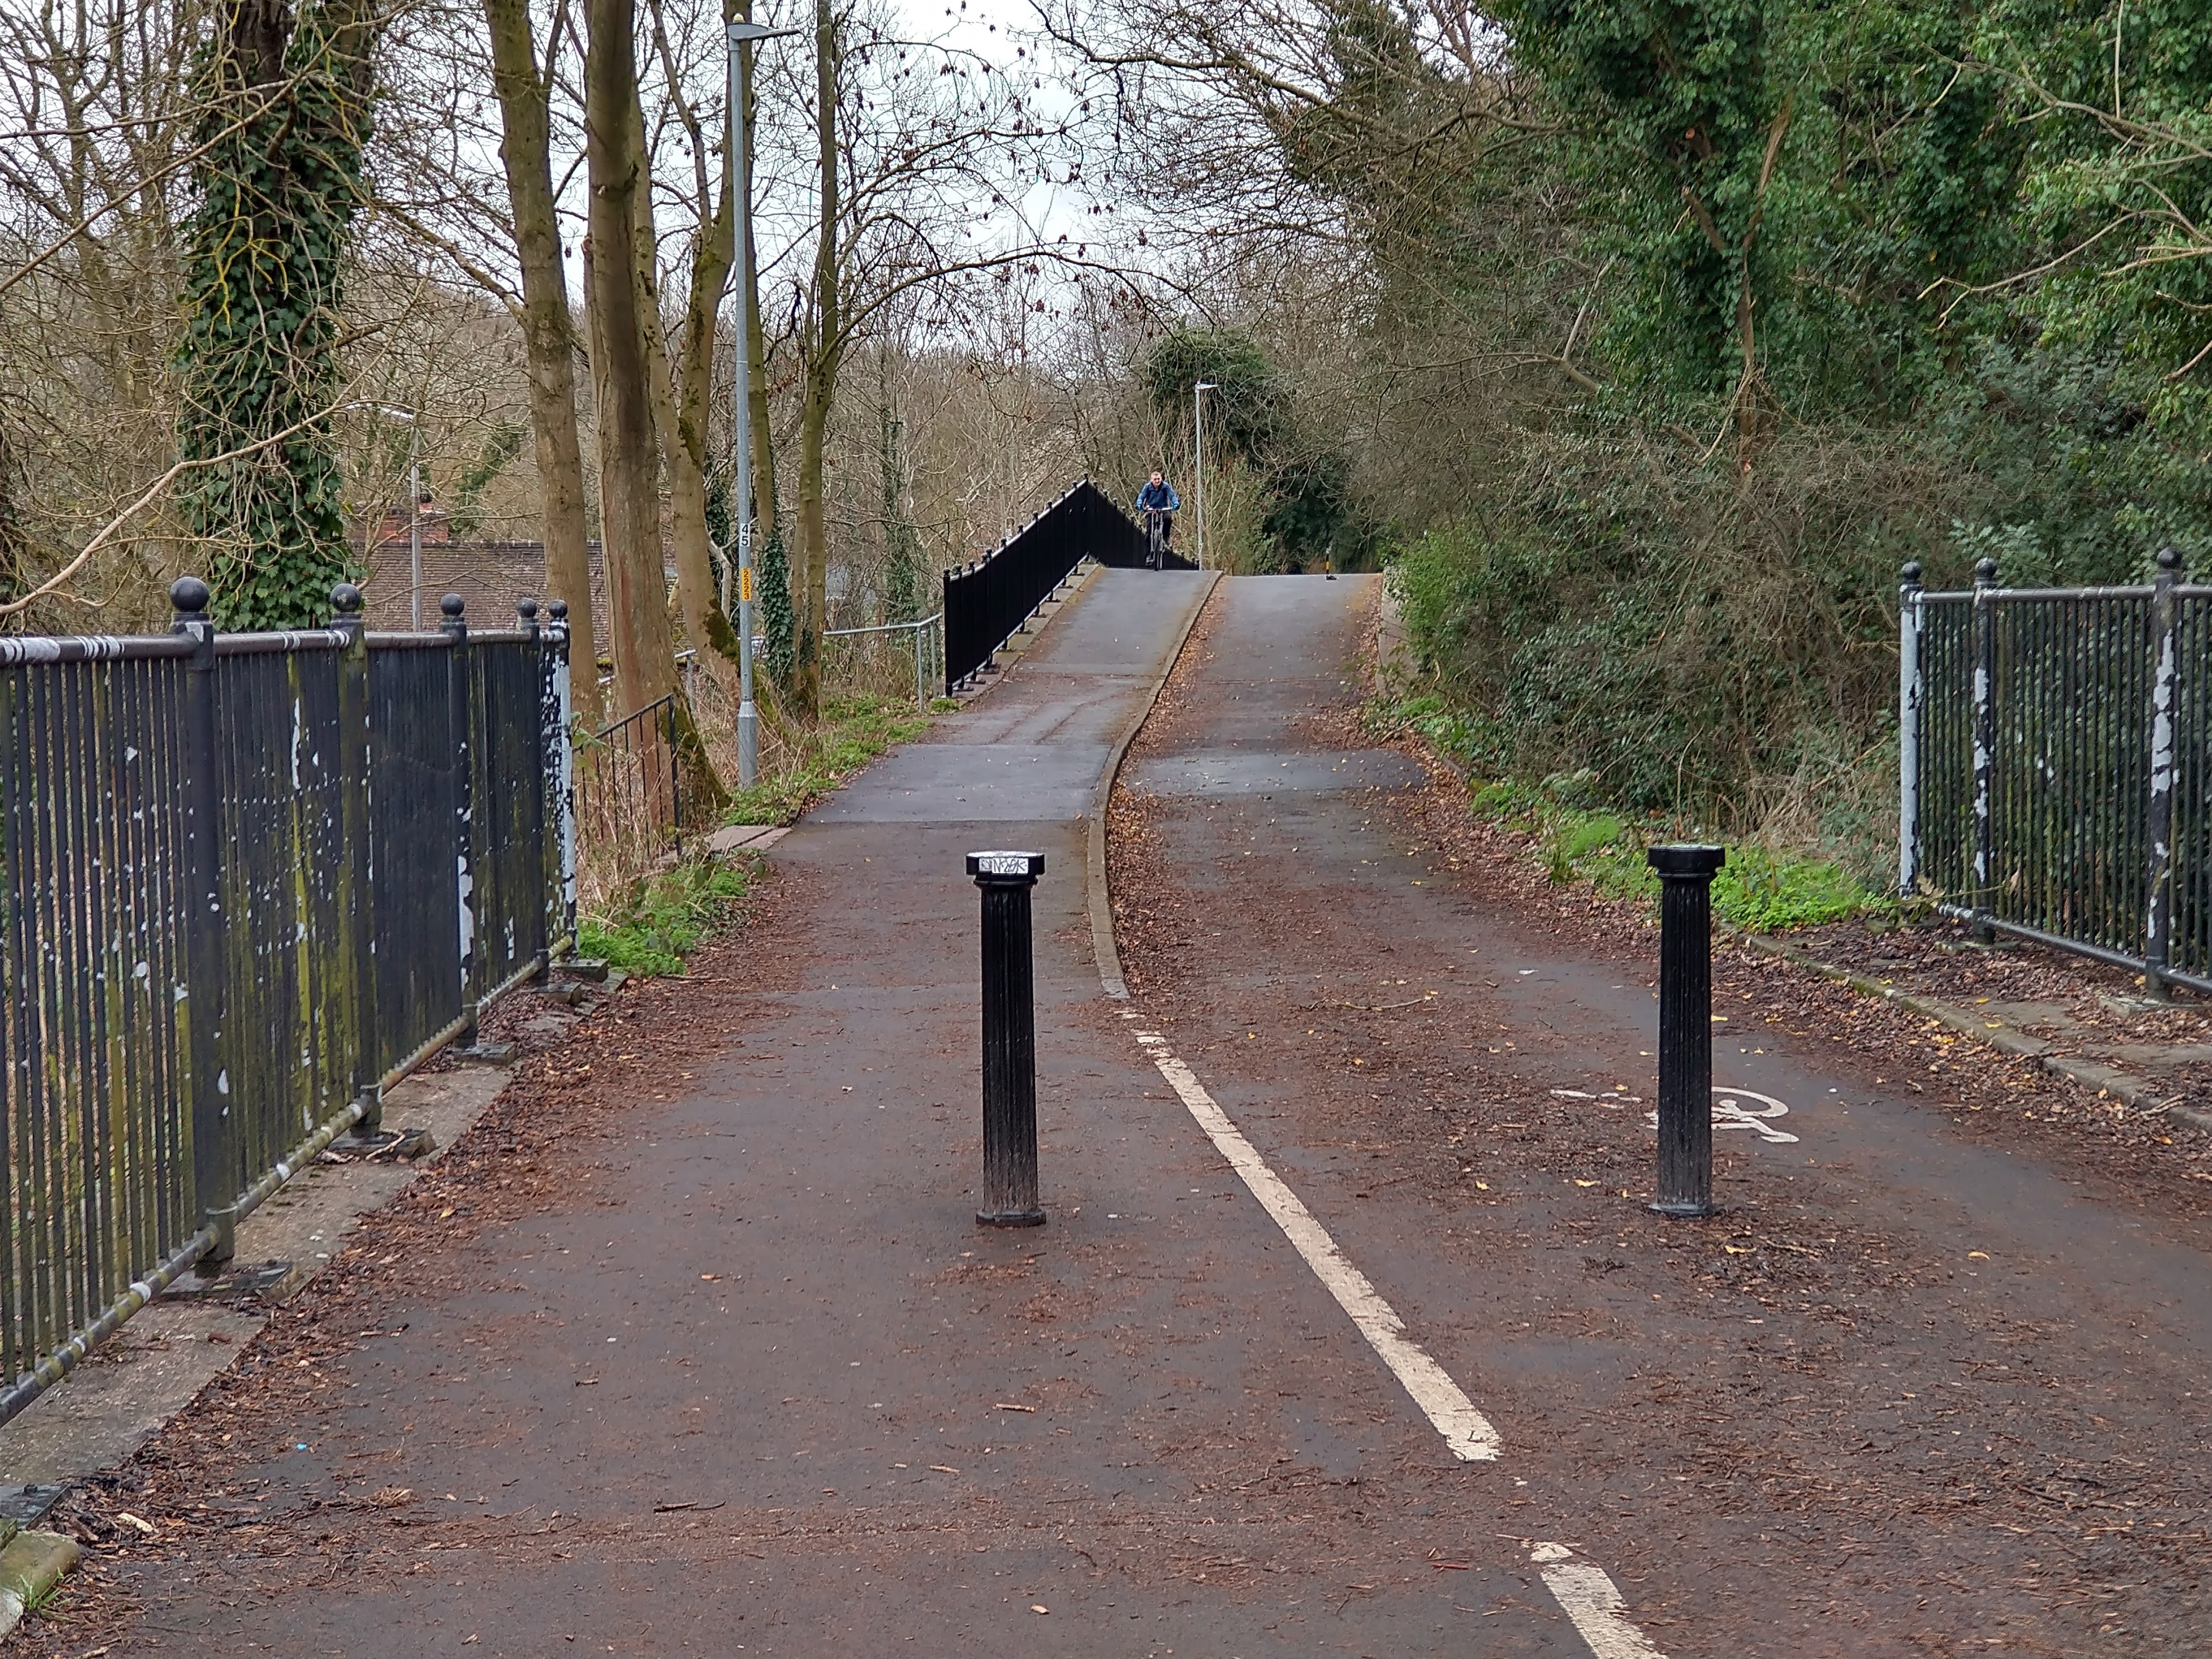
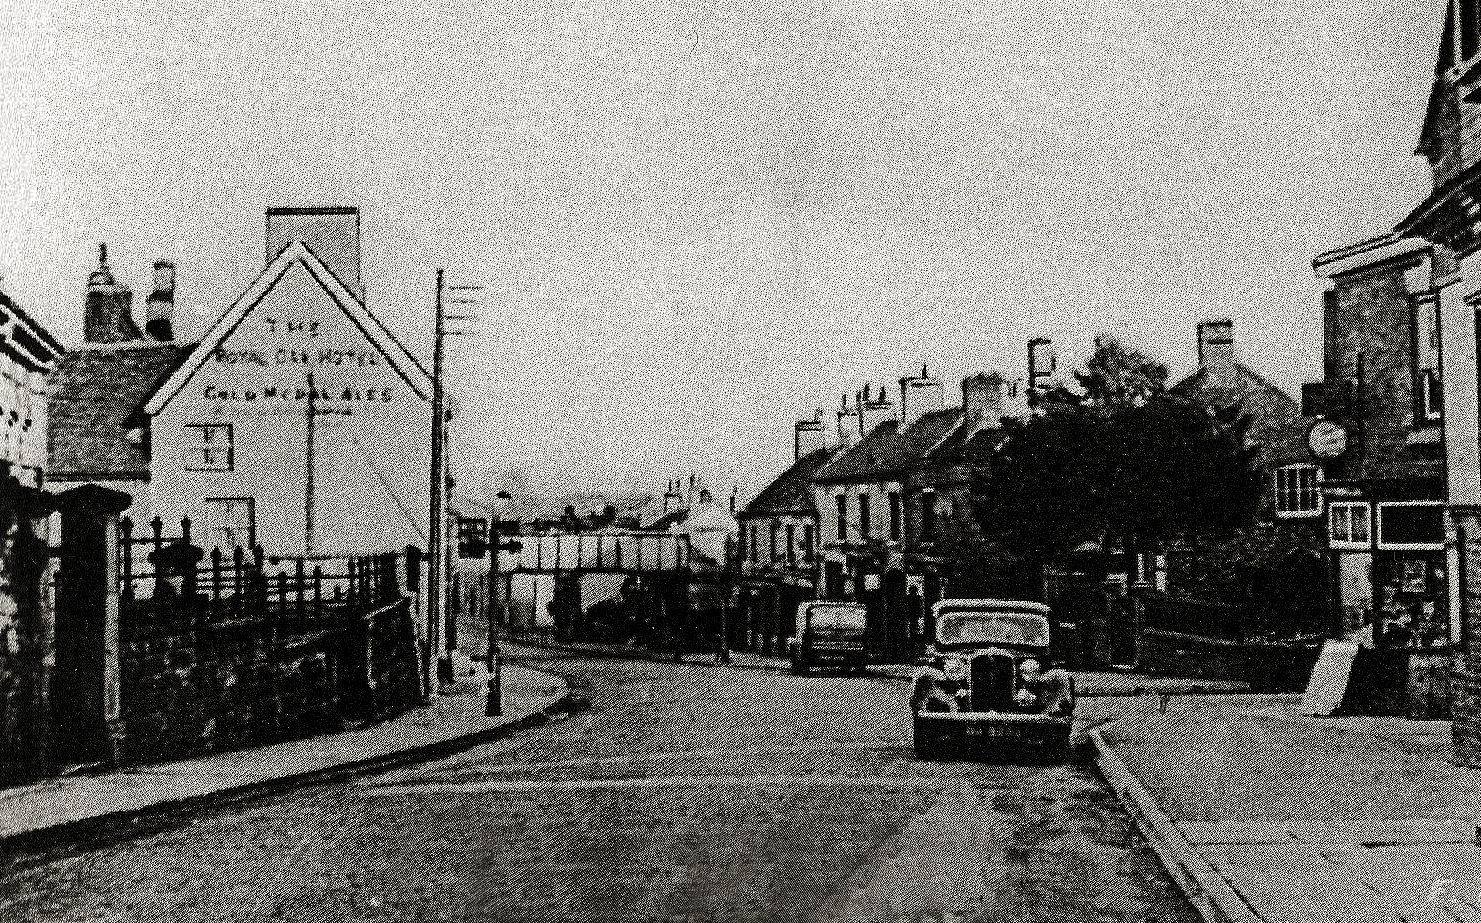
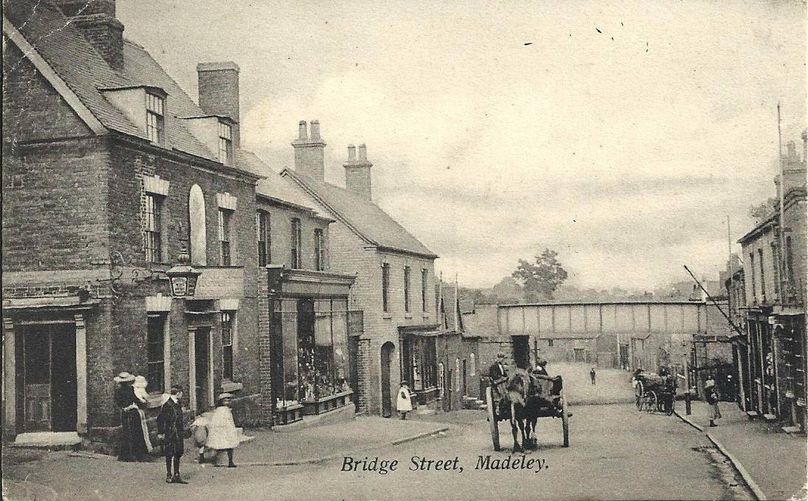
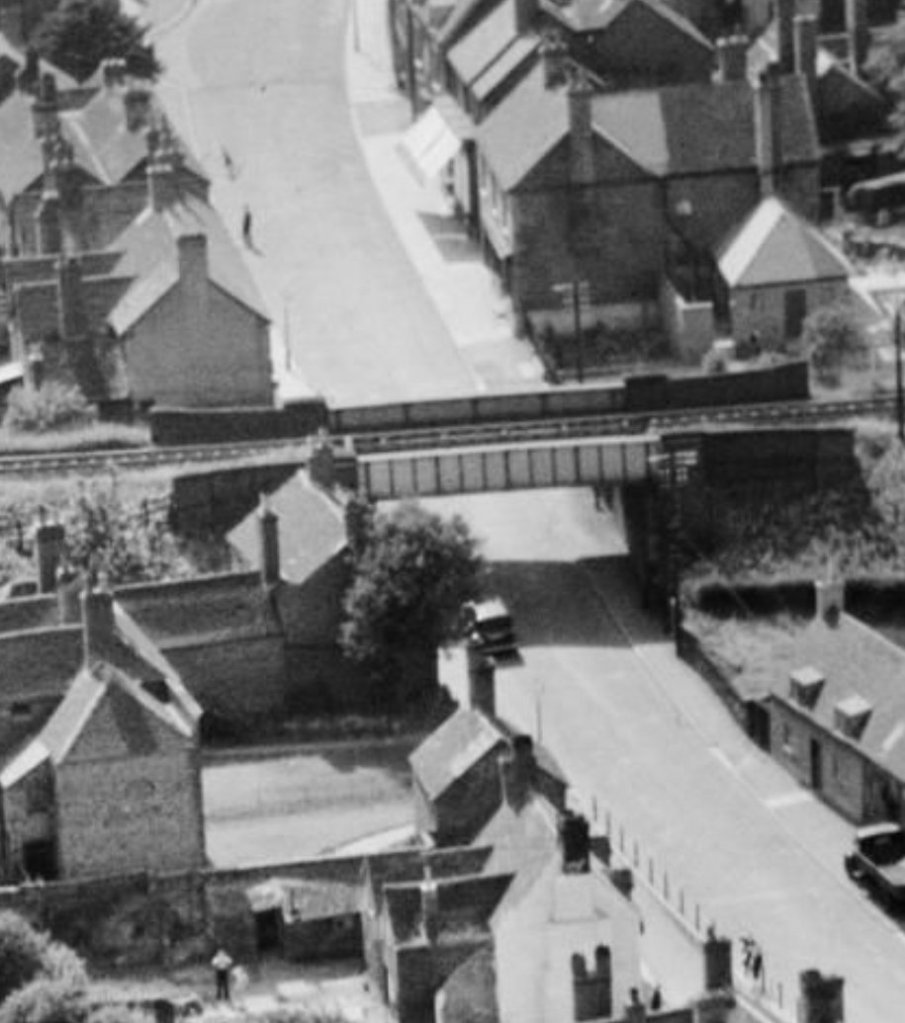
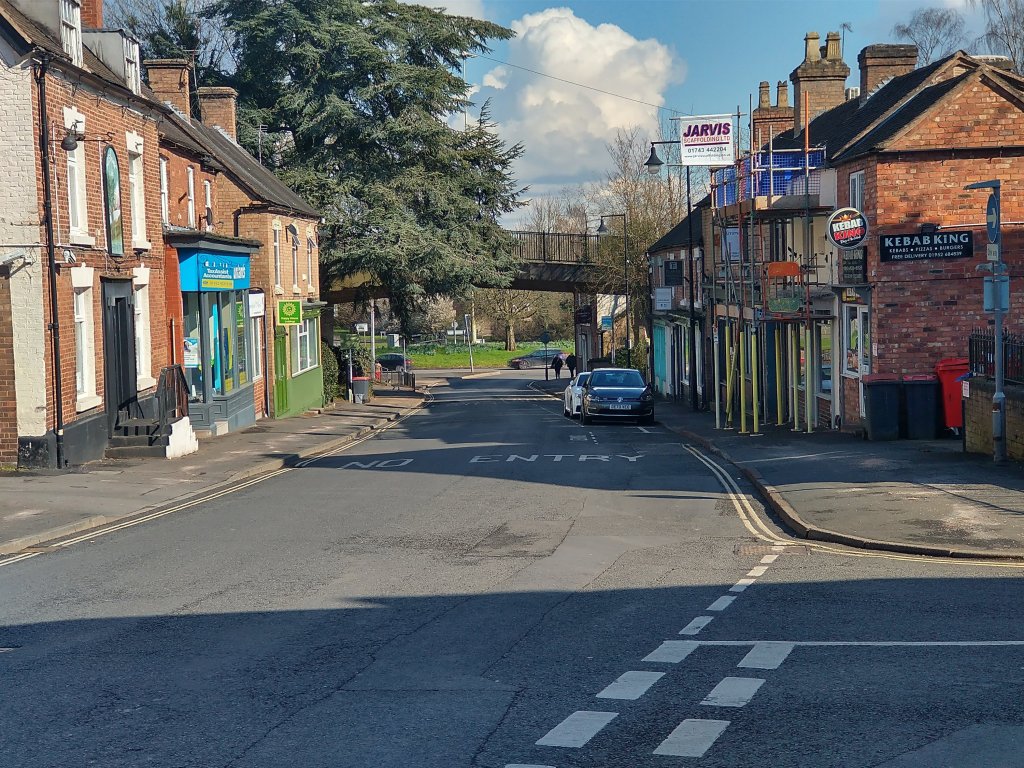
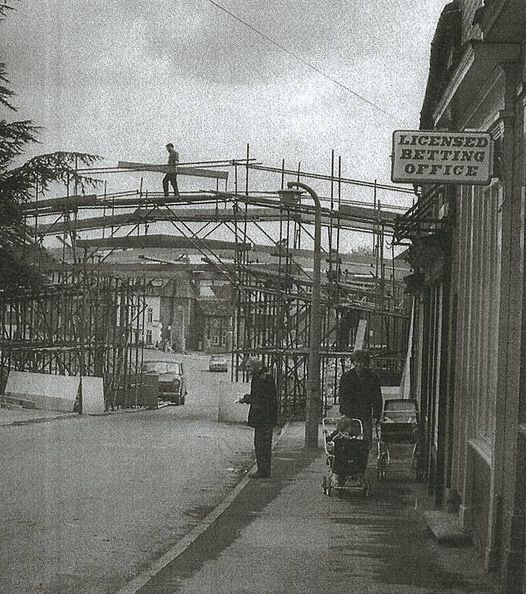
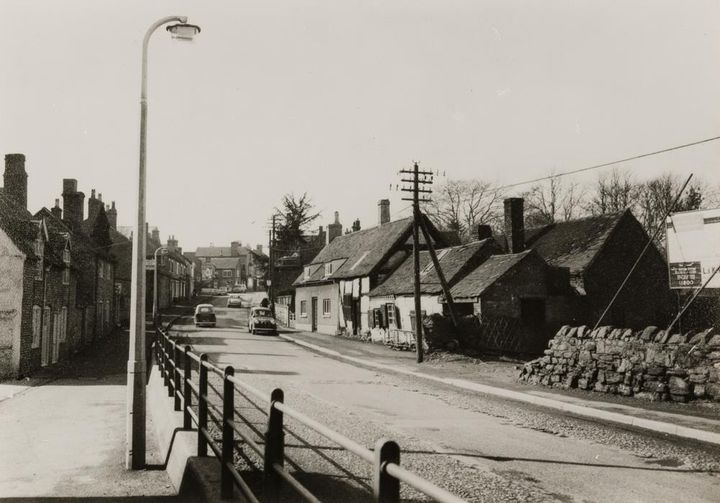
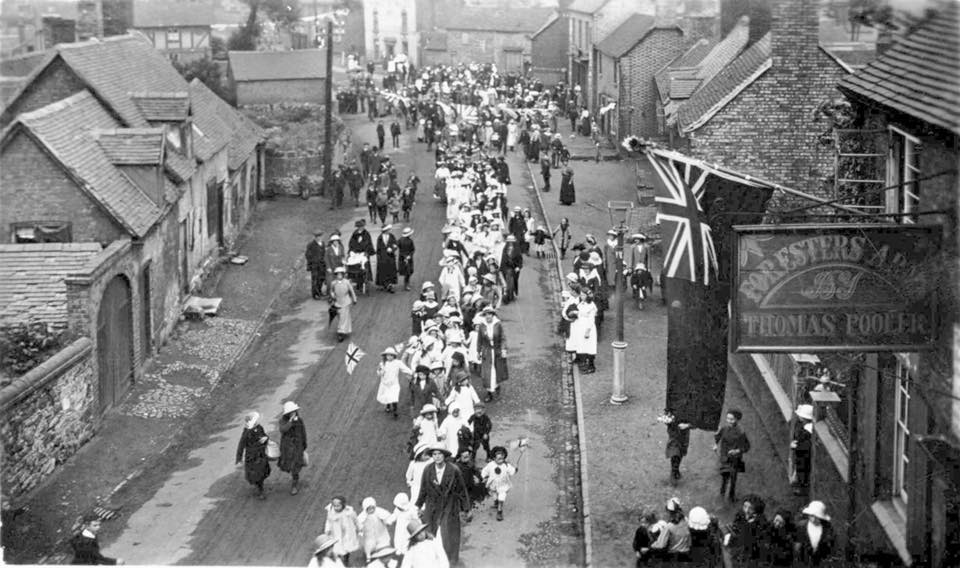
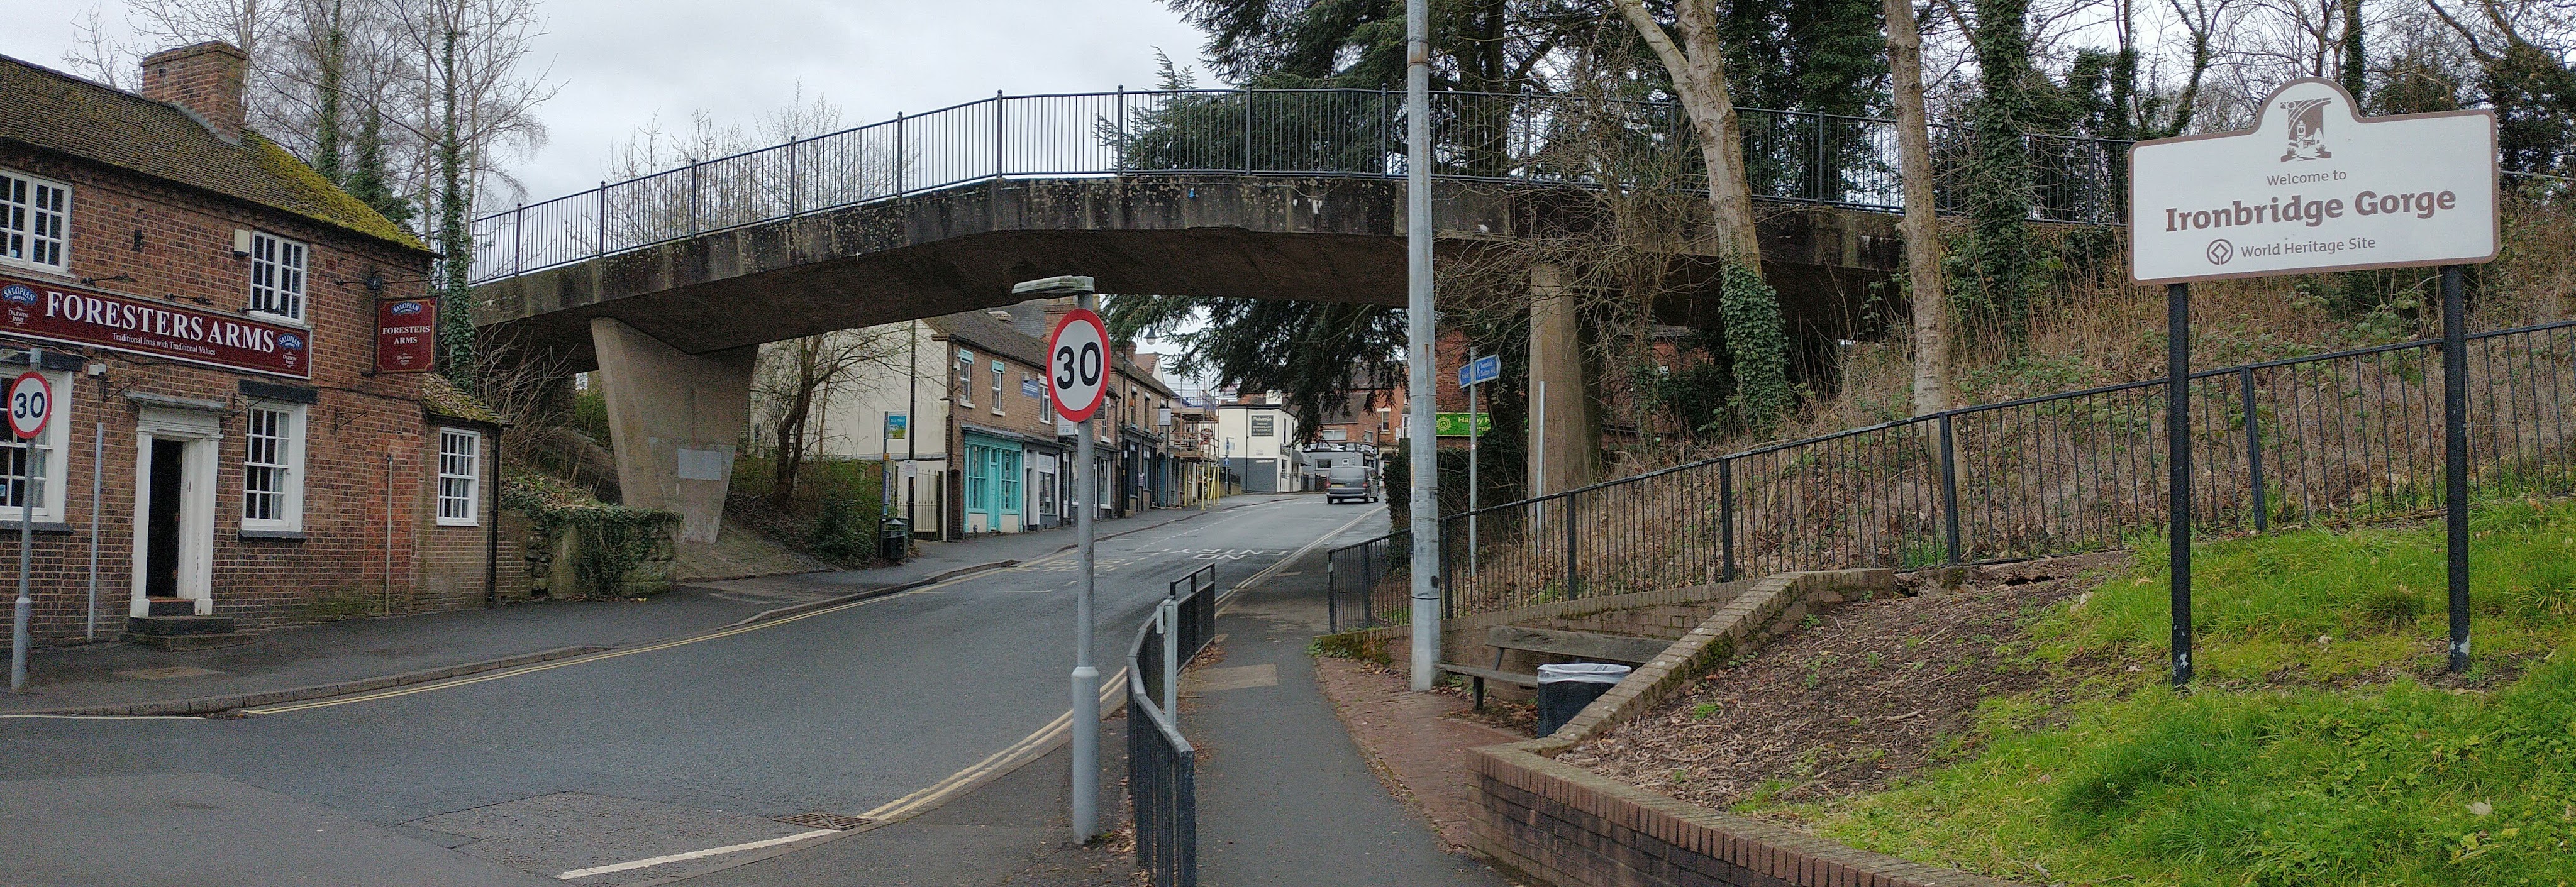
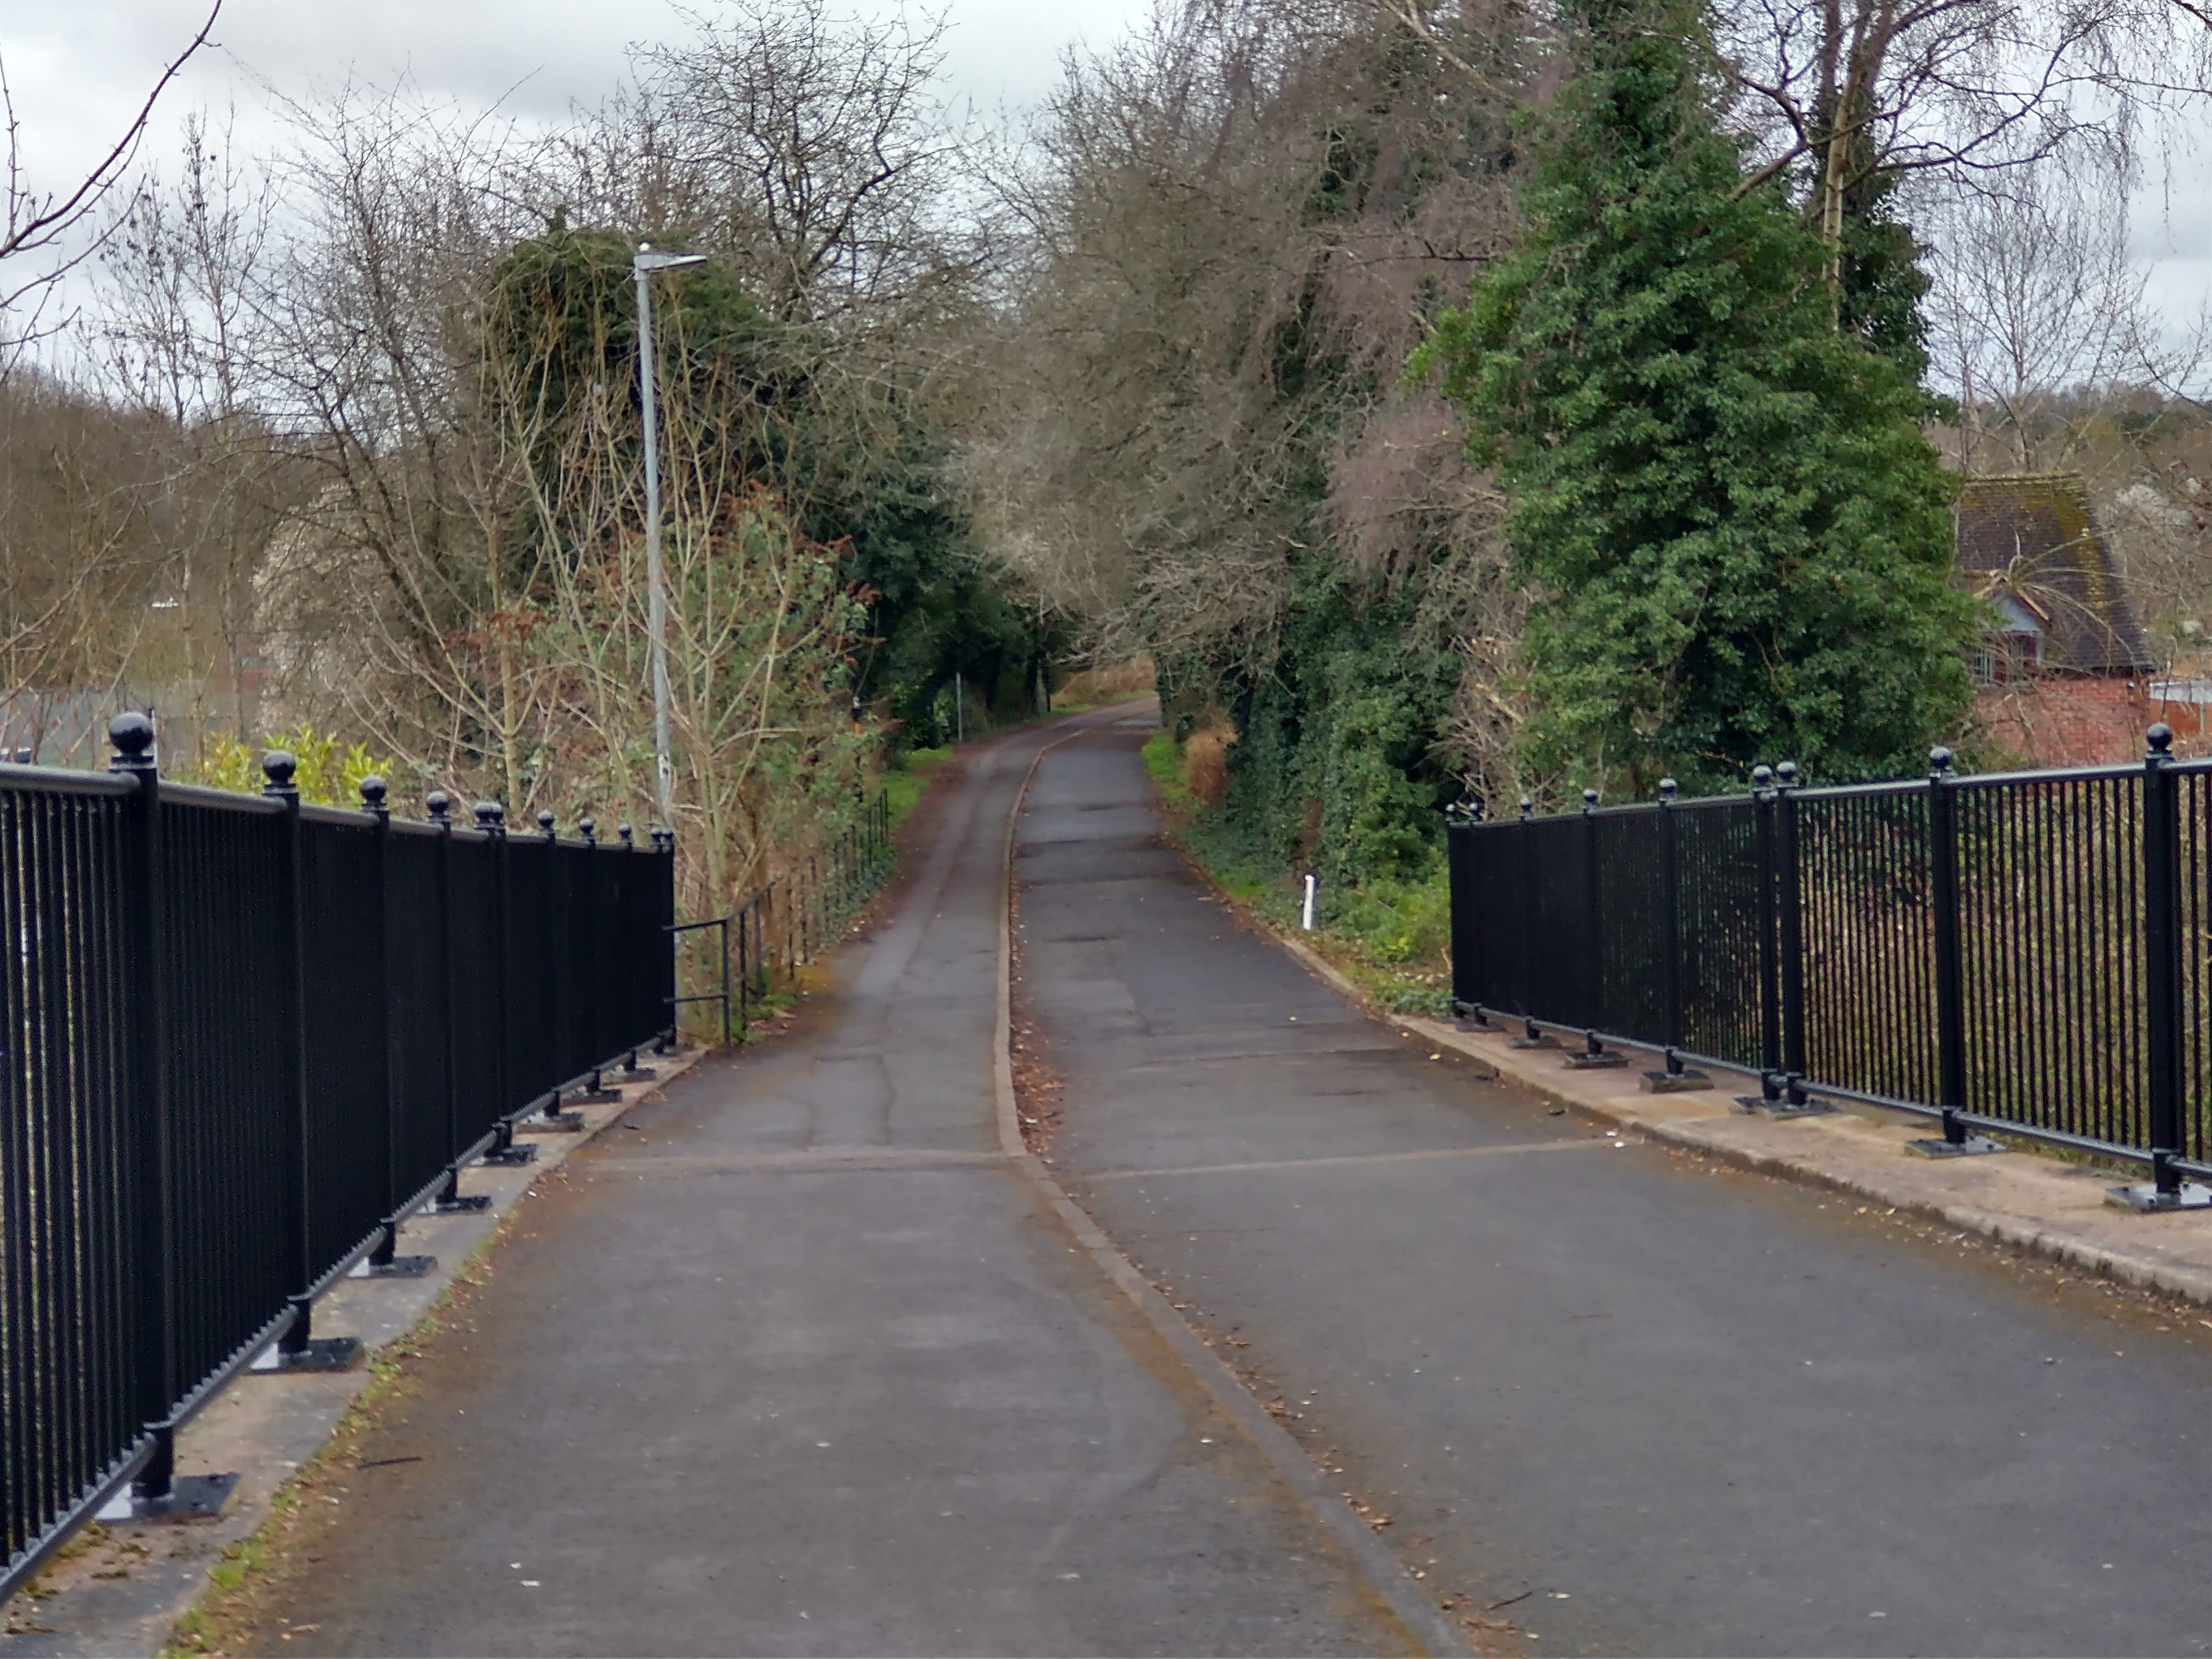
The Coalport Branch crossed Bridge Street on a single-span girder bridge. The road is now known as High Street. These next few pictures show the location through the years.
In a very short distance, the line passed through Madeley Market Station. The line was single through the station and a small goods yard was provided immediately South of the station on the West side of the line.
This photograph was shared as a comment by Andy Rose on a group post by Marcus Keane dated 27th February 2022 which showed the length of the Shropshire Canal bed directly behind Malinslee Railway Station; https://m.facebook.com/groups/674238619260811/permalink/7378452445506028, accessed on 29th August 2022.
Absolutely totally fascinating!! Read it all and enjoyed figuring what used to be where the places I know now and what they looked liked then!! Would make a lovely guided walk and most of it accessable…I am disabled and couldn’t walk far and most of it could be done from a wheelchair/ scooter!! Just a thought……???


Pingback: The Railways of Telford – the Coalport Branch of the LNWR – Part 3 – Madeley Market Station to Coalport East Station | Roger Farnworth
Absolutely totally fascinating!! Read it all and enjoyed figuring what used to be where the places I know now and what they looked liked then!! Would make a lovely guided walk and most of it accessable…I am disabled and couldn’t walk far and most of it could be done from a wheelchair/ scooter!! Just a thought……???
Thank you Alison.