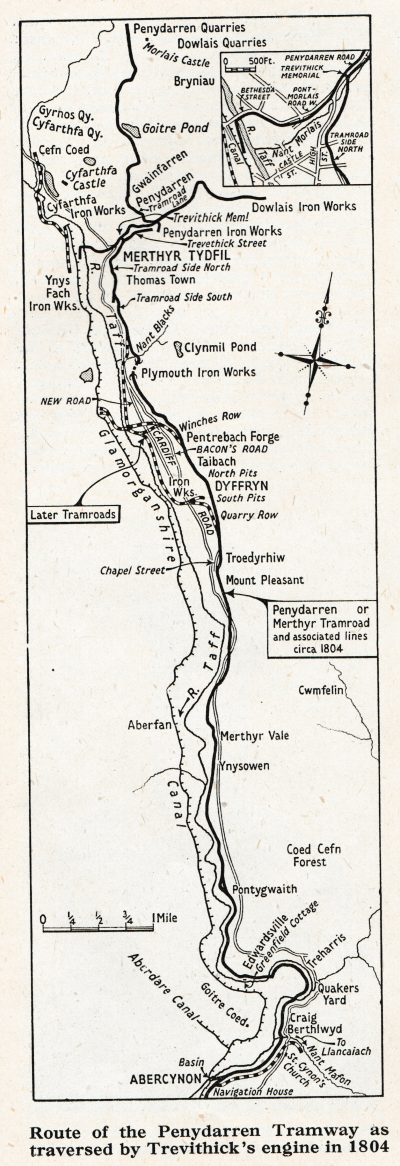
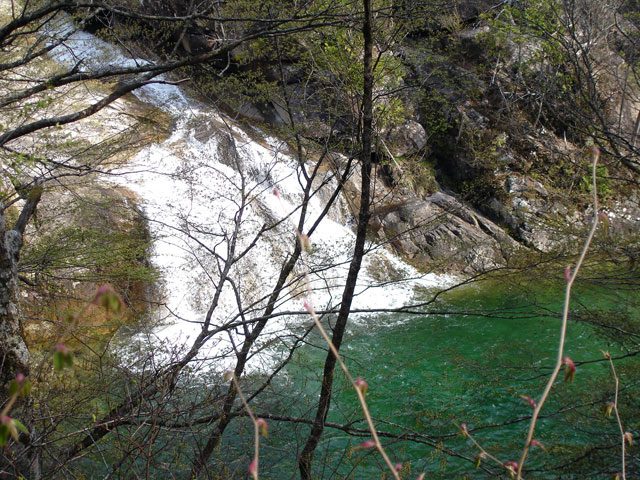
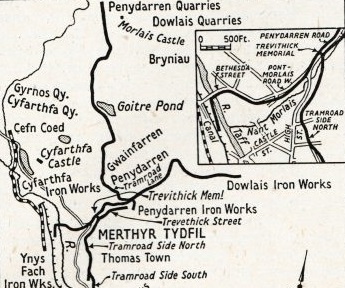
 This post follows the route of the Penydarren Tramroad from Abercynon to Merthyr Tydfil as shown on the adjacent sketch map which is taken from The Railway Magazine’ March 1951 edition. [14]
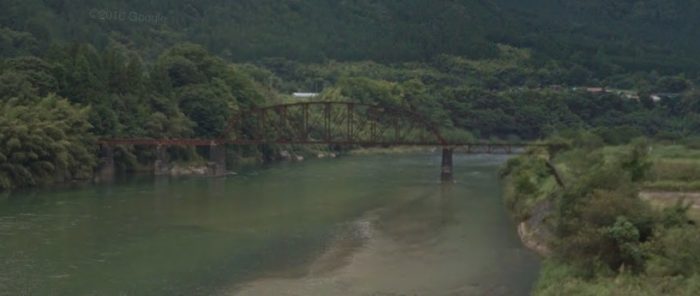
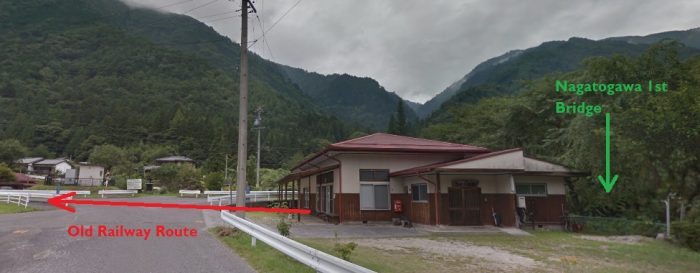
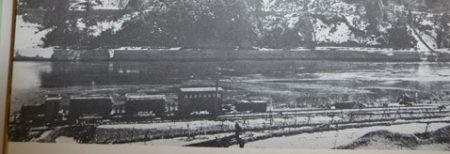
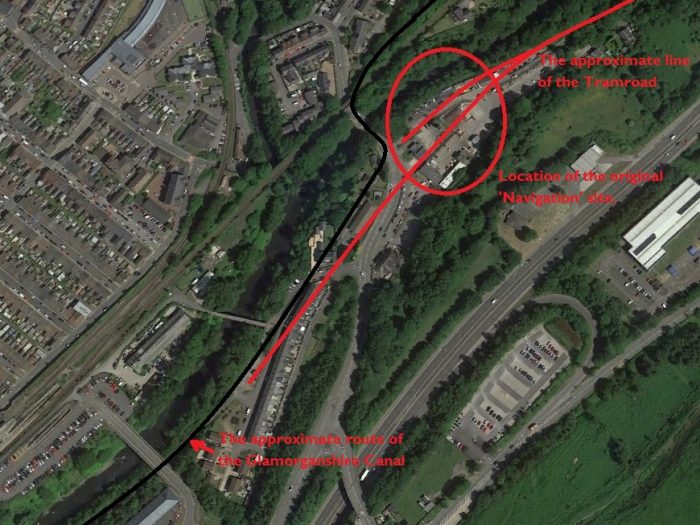
The community of Abercynon grew around the Canal Basin which bears its name. It was identified as the furthest point north on the Glamorganshire Canal where it was realistic to consider undertaking canal-boat repair. It was also just below “the infamous ‘Abercynon Sixteen’ flight of locks. In addition to their headquarters at Navigation House the Glamorganshire Canal Company also constructed warehouses, depot houses, a winding hole, saw pit, blacksmiths shop and dry dock here.” [1]
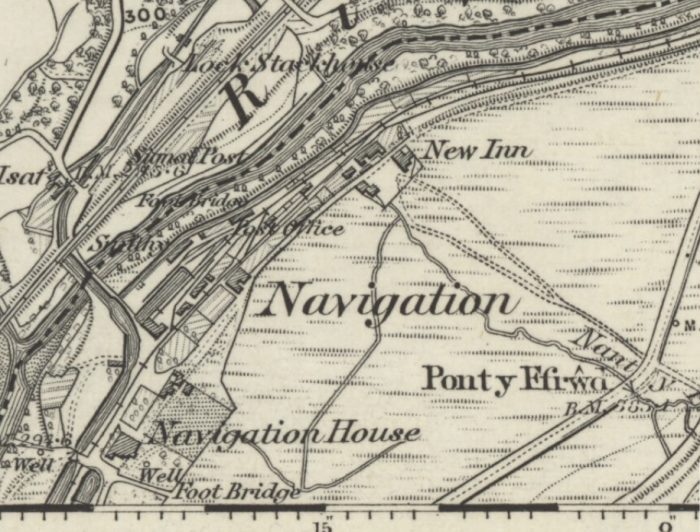
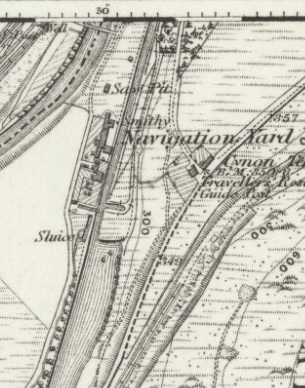
The basin was also the point where the Merthyr/Penydarren Tramroad and the Llanfabon Tramroad met the canal. There were some significant transfer facilites to allow loads to be moved between the canal and the tramroad and, as the maps below show, the tramroad terminus was of a significant size even in 1884/1885 which are the dates of publication of the maps.
Navigation, on the maps below, is Abercynon. The lower map shows the canal basin and the tramway lines which served it. They seemingly are still in place in 1884/1885.
 The Canal is seen to turn first westward and then northward again, on the first of the two maps. Some key buildings can also be seen. They include the Smithy and the Post Office as well as the Main Canal Company Offices.
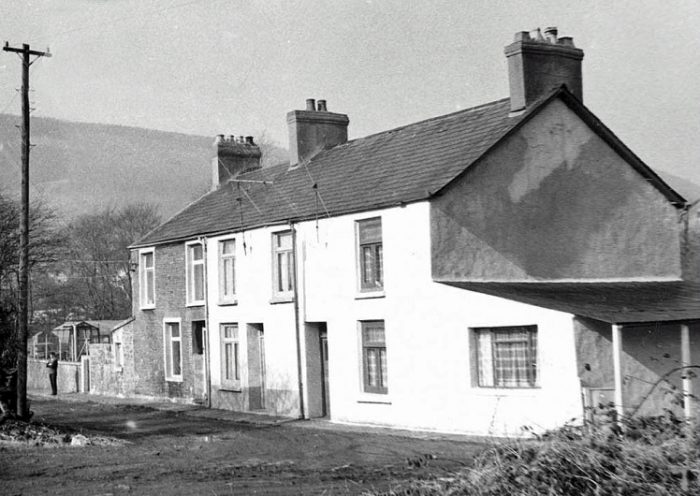
The Post Office building was still standing in 2016 and is shown in the image below.
 The building which once housed the Basin Post Office. Now used by the council as part of its depot, it is one of the few remaining signs that the Basin ever existed. [1]
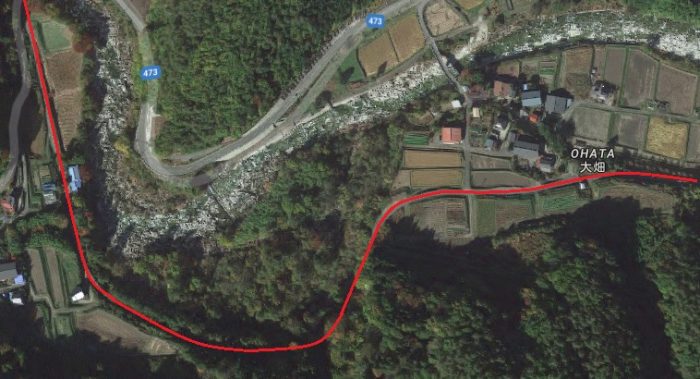
 Abercynon on Google Earth, showing the approximate locations of the Glamorganshire canal (black line) and the Merthyr/Penydarren Tramroad (red line) The oval shows the location of the main facilities at ‘Navigation’. In the 1st Century this is now the location of the Fire Station in Abercynon.
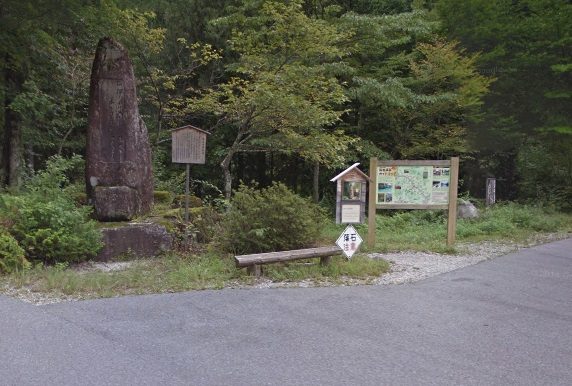
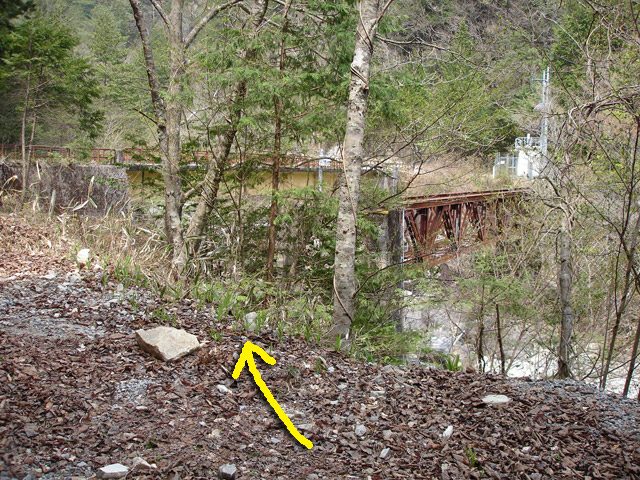
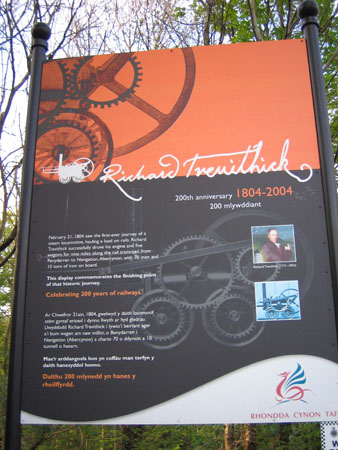
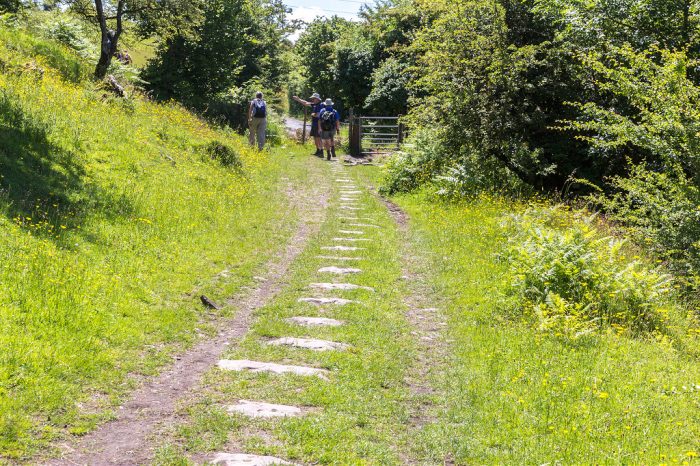
The adjacent image shows the marker board for the Richard Tevethick Trail which follows the route of the tramway. [15]
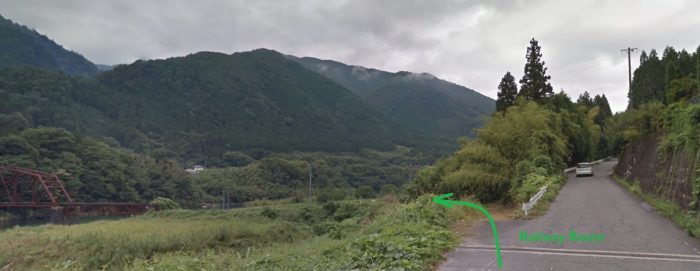
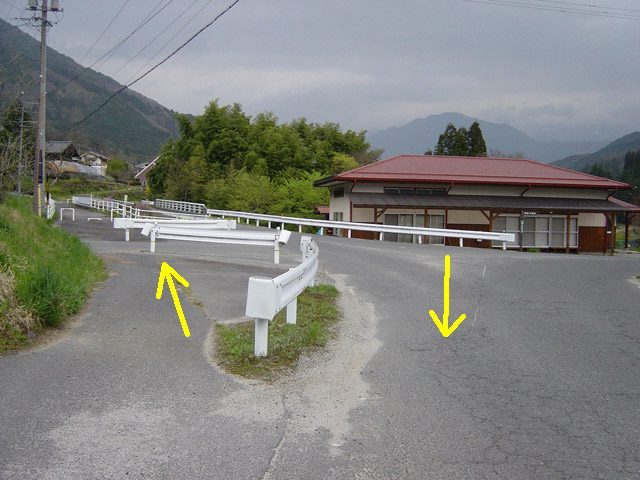
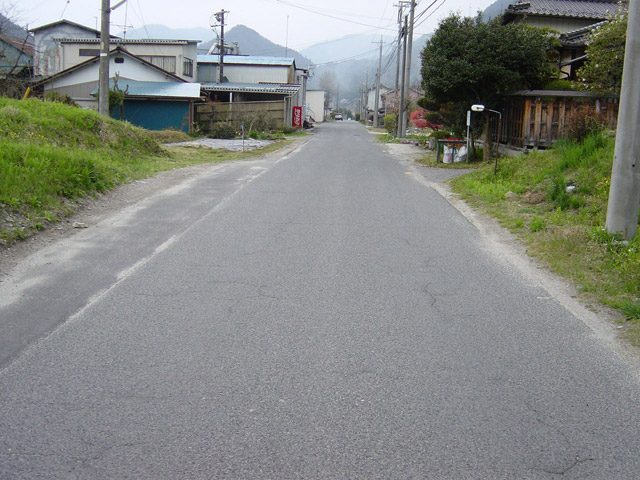
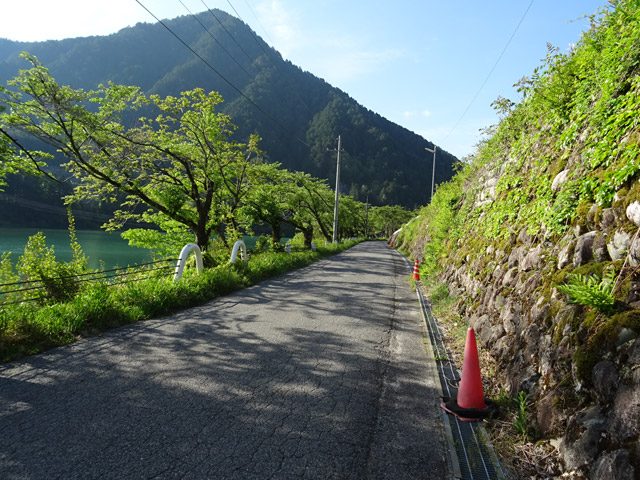
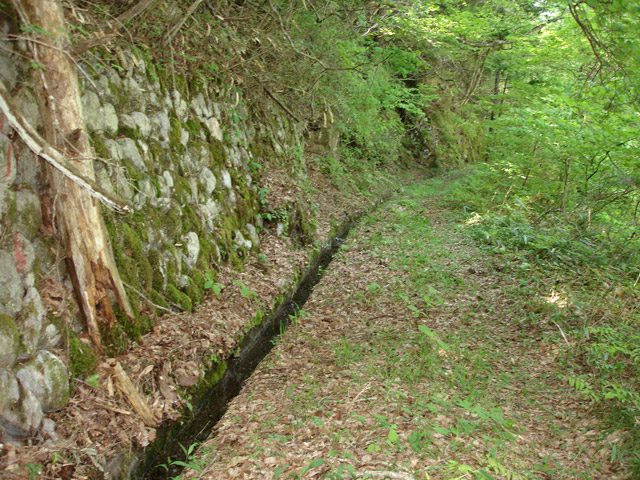
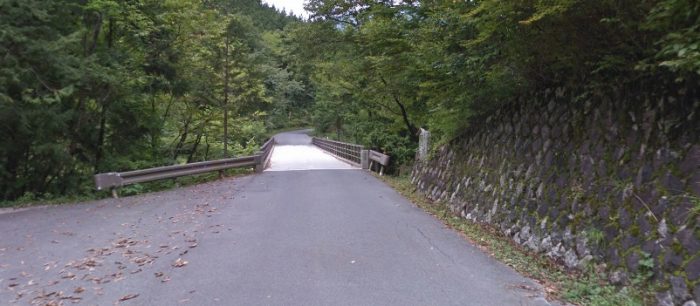
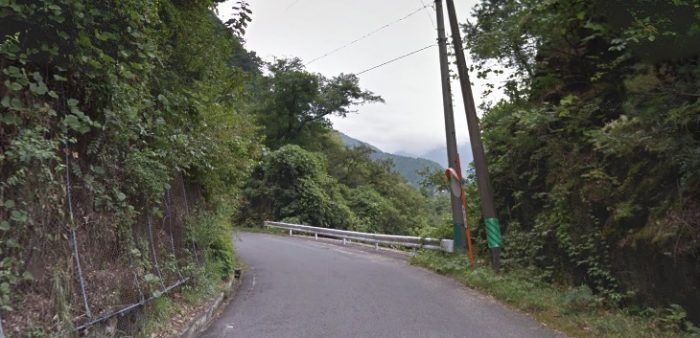
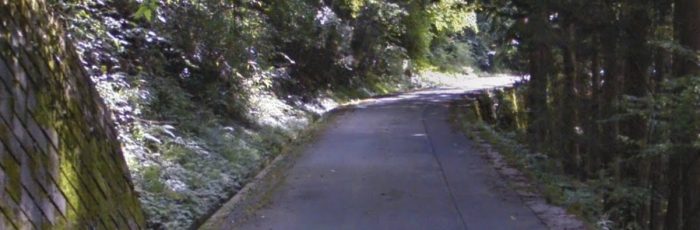
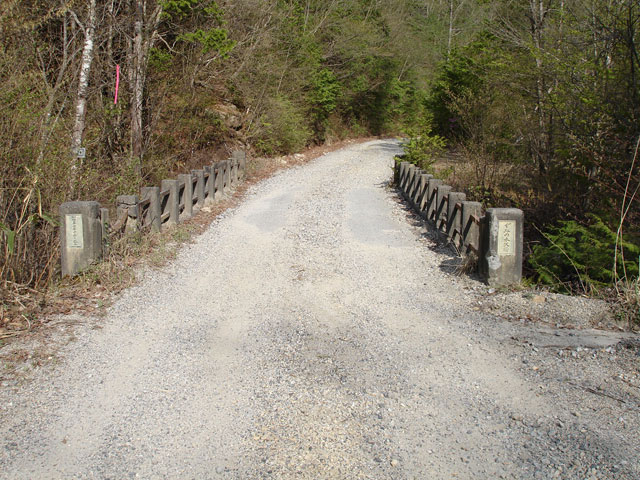
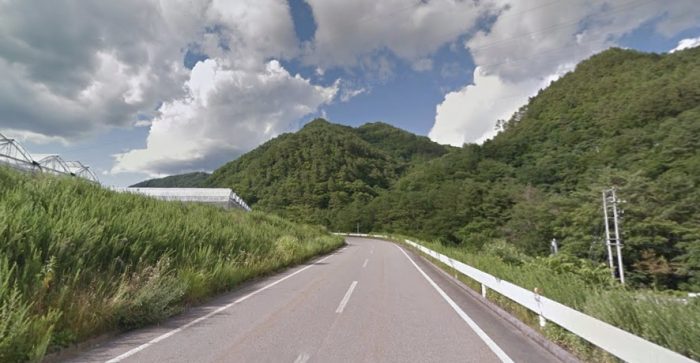
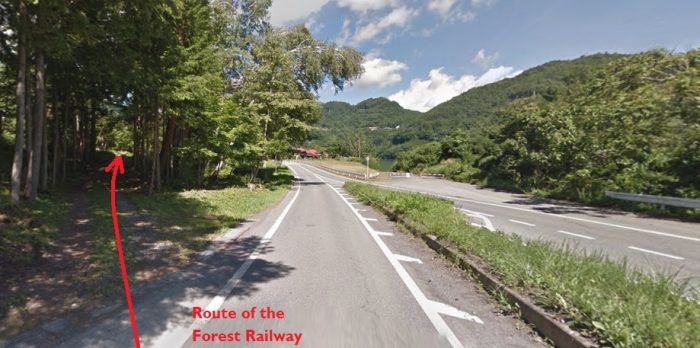
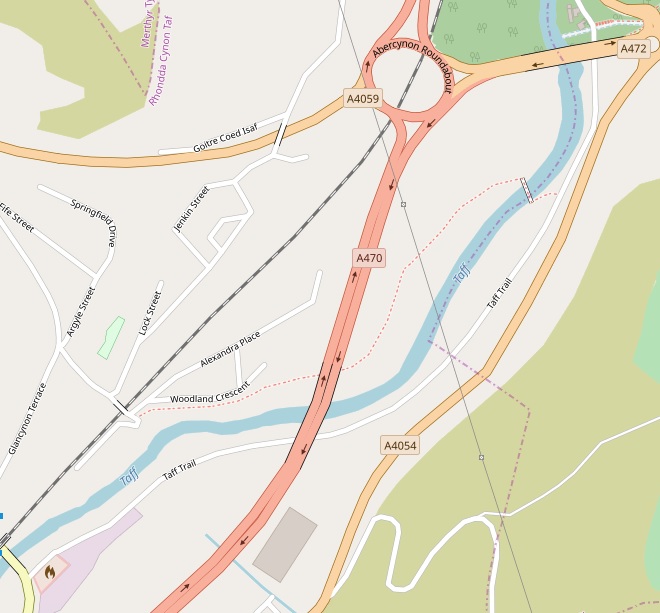
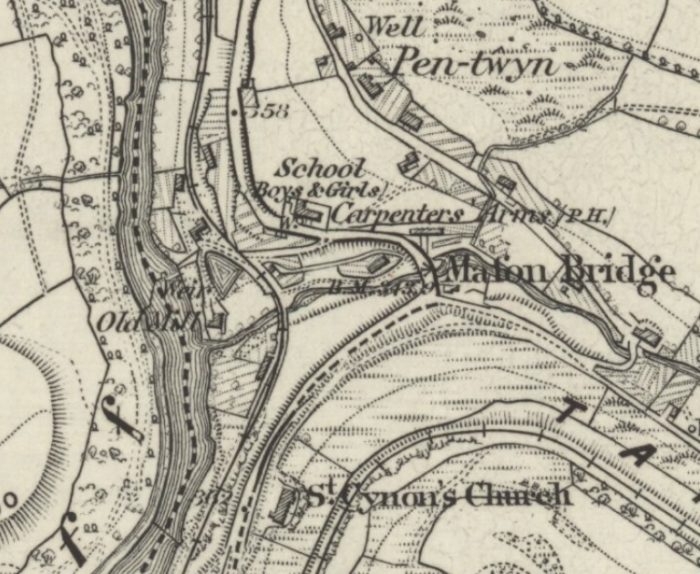
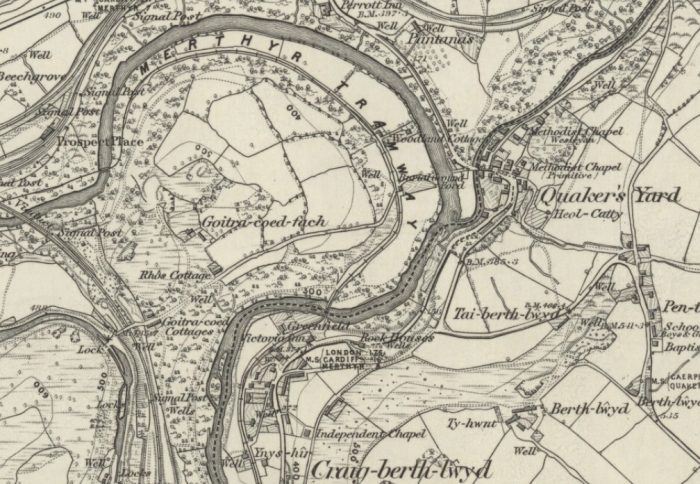
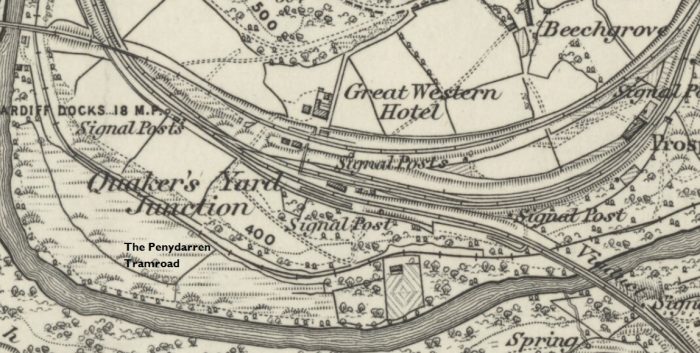
From Abercynon, the tramroad/tramway followed the East bank of the River Taff. There is a ‘road’ following the first part of the route which is marked as the Taff Trail on the OpenStreetMap below. From Navigation to Quakers Yard, the Tramroad has become a single-track road serving a few houses that lie along the route. The line of the old tramway is visible on the 1885 Ordnance Survey Map of the area. A passing loop can be seen on the excerpt below just to the south of the bridge over the Cwm Mafon. Another passing loop is just visible to the top edge of the map.
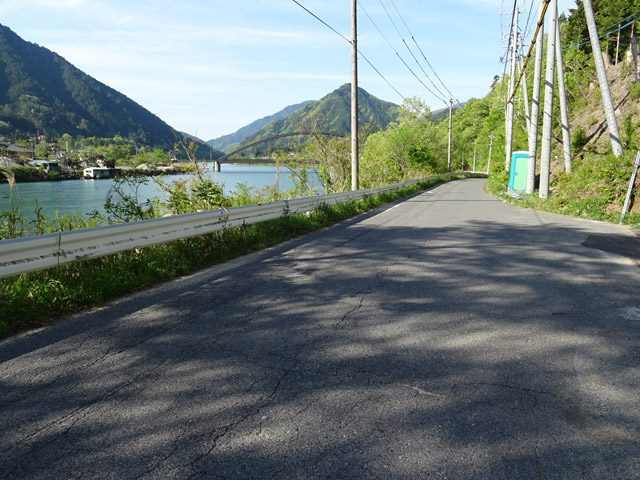
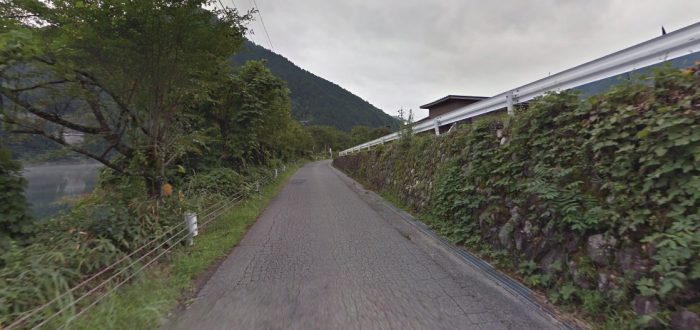
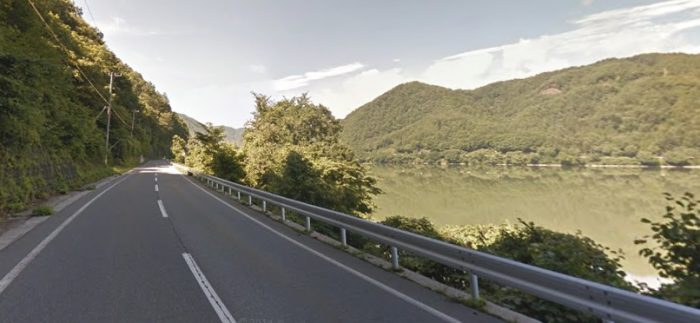
 North of the Cwm Mafon the tramway continued to follow the East bank of the River Taff through Craig-berth-lwyd, passed Ynys-hir and the Victoria Inn before crossing the Taff to the West bank just as the river swung round in a tight loop close to Quakers Yard. The Merthyr Tramway is clearly marked on the map excerpt below. A passing loop was located between Ynys-Hir and Victoria Inn. Two more were located on the West bank of the river, the first of these was close to Woddland Cottage, the second was just before the Tramway crossed the river once again.
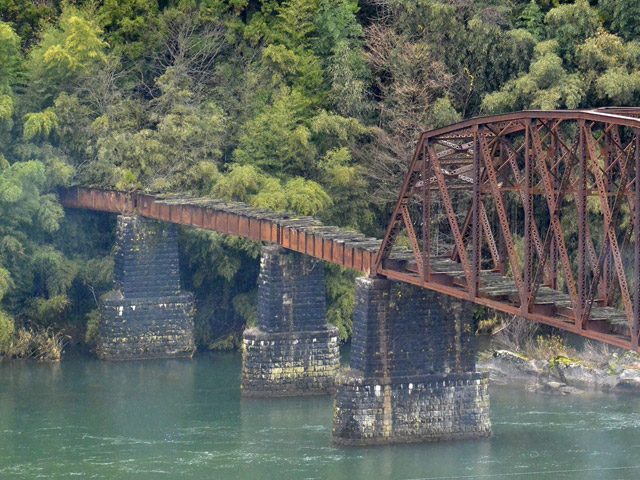
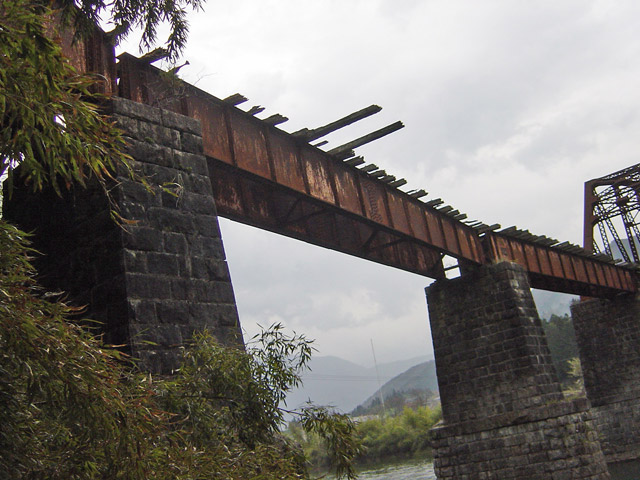
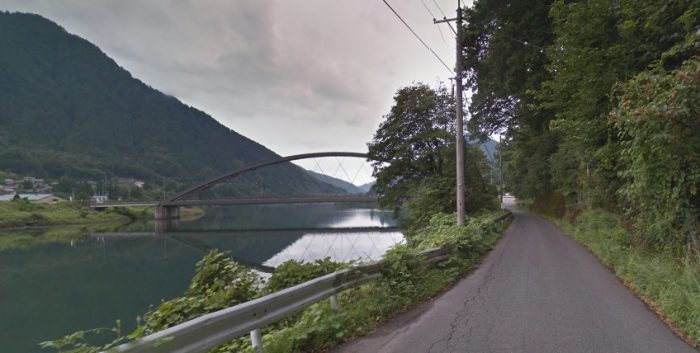
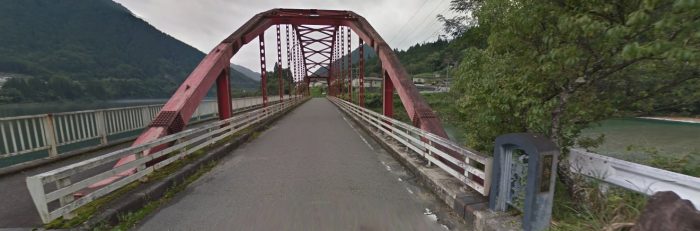
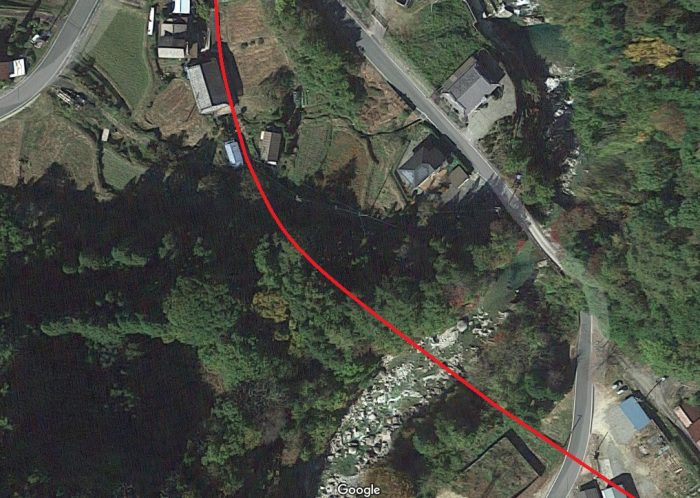
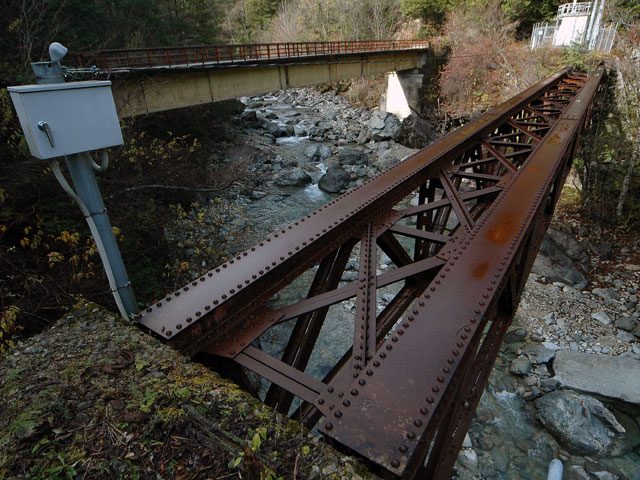
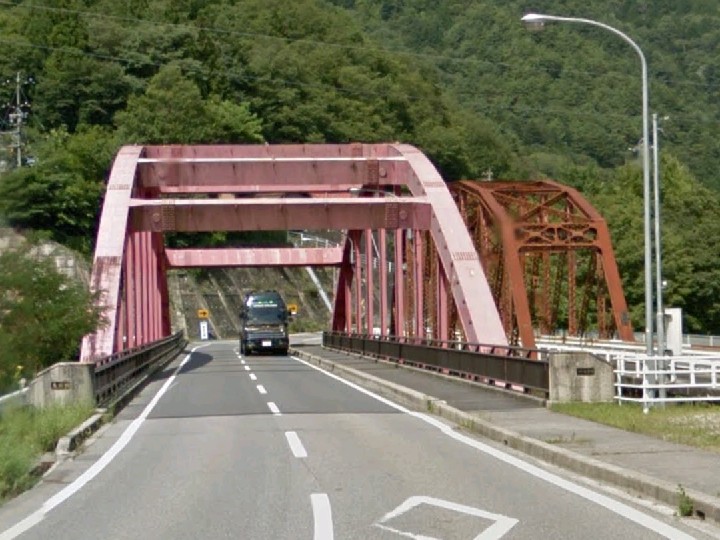
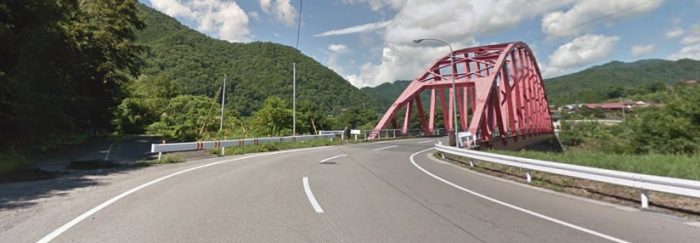
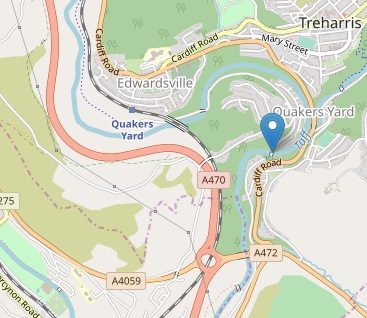
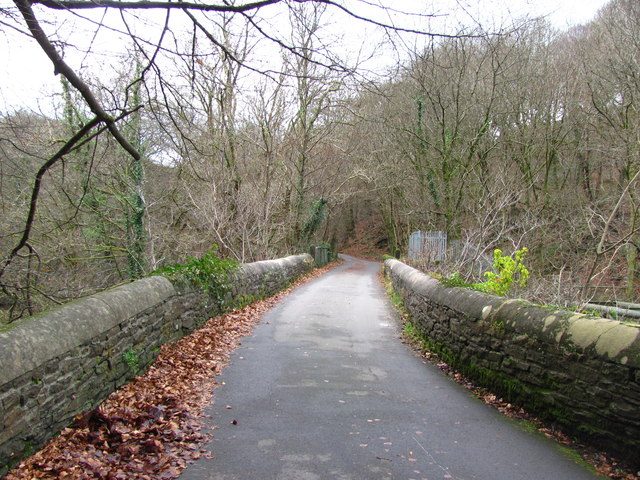
 Victoria Bridge on the Penydarren Tramroad is located just to the North of Victoria Inn. The bridge is a Grade II* Listed Building in the area now known as Treharris, Merthyr Tydfil. It is marked by the blue flag on the adjacent map. The Cadw source ID is 80910. [2]
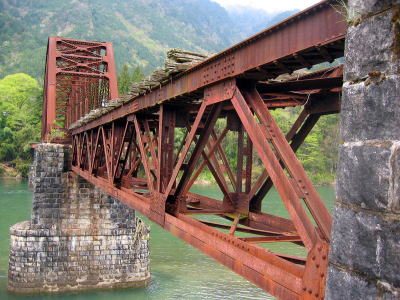
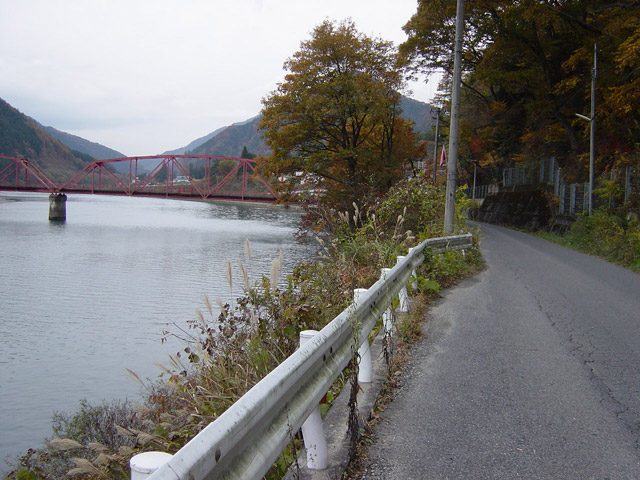
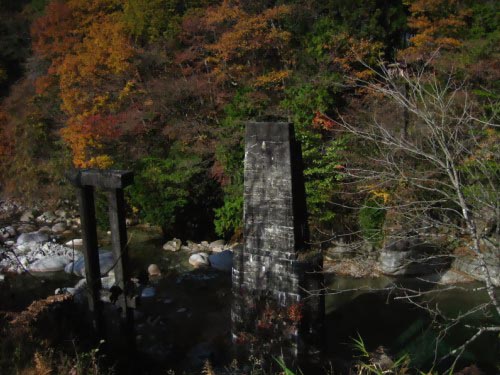
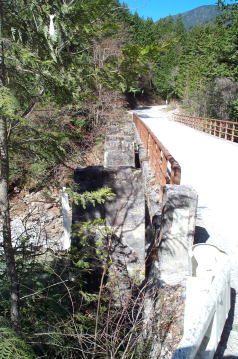
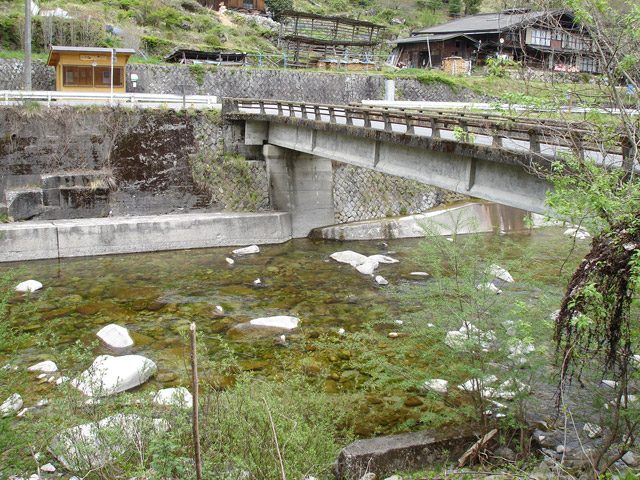
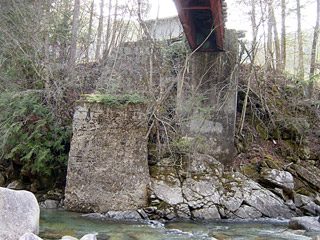
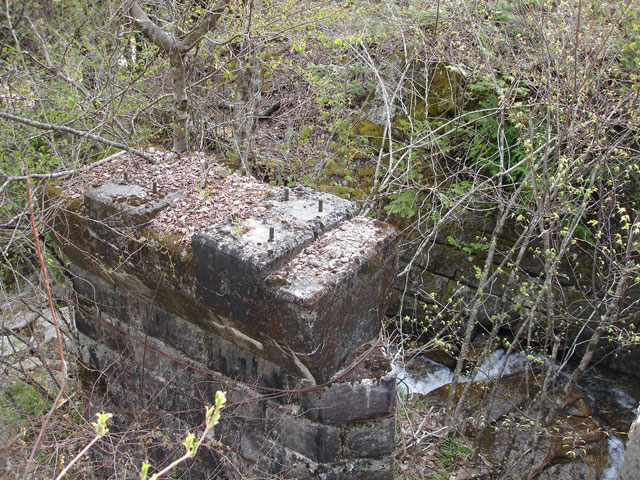
The bridge was built as a substantial stone structure, as can be seen in the picture below.  Victoria Bridge, the lower Penydarren Tramroad bridge across the Taff at Quakers Yard. The piers beyond carried a feeder to the Glamorganshire Canal. The arch has now been replaced by a footbridge. [collection T.J. Lodge] [3]
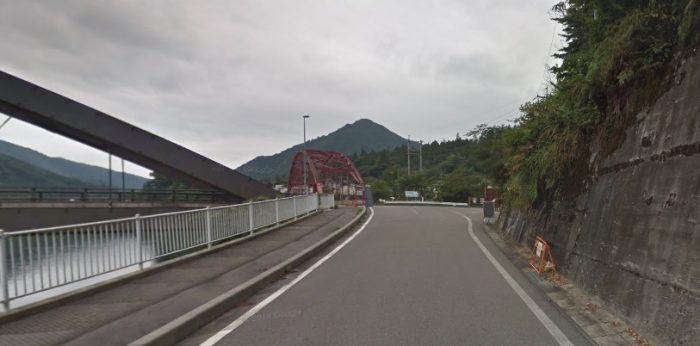
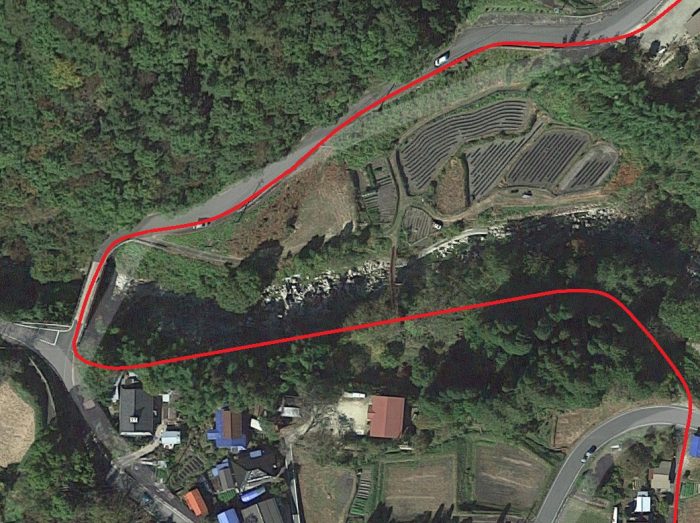
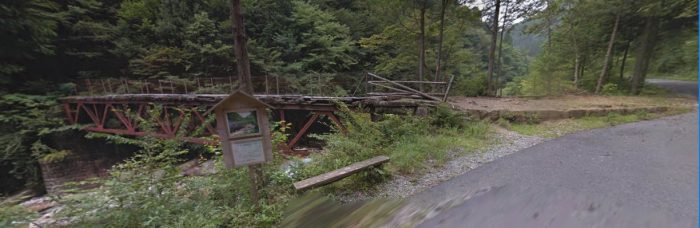
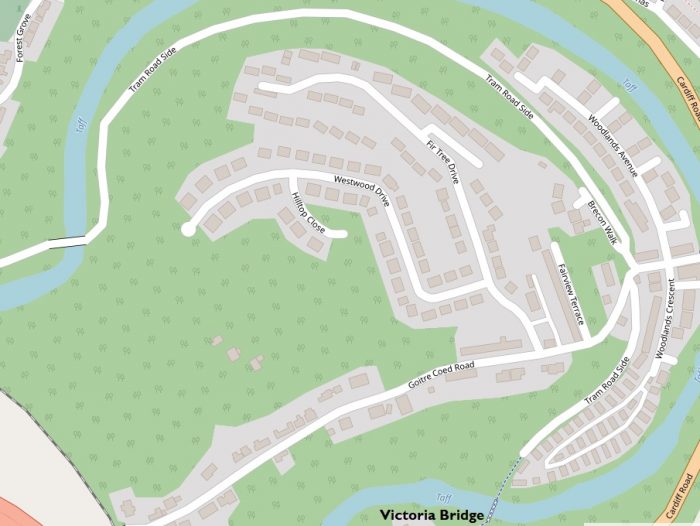
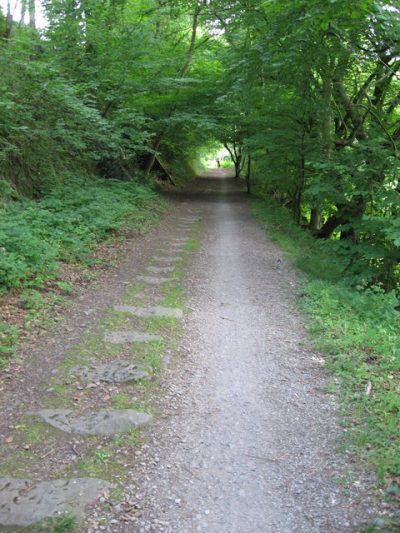
A short length of the tramway formation either side of the Victoria Bridge is now purely a footpath. Beyond the Victoria Bridge, the tramway route continues as a tarmacked road. Themap below shows the route as ‘Tram Road Side’. The bridge crossing to the East bank is visible on the left side of the map and appears in the photograph immediately beneath it.
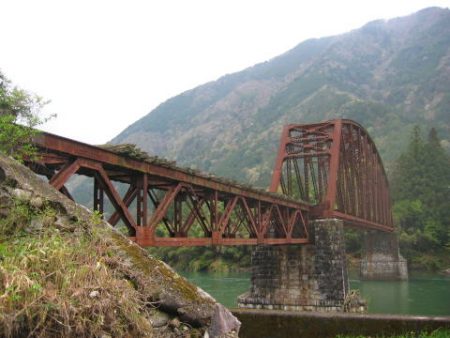
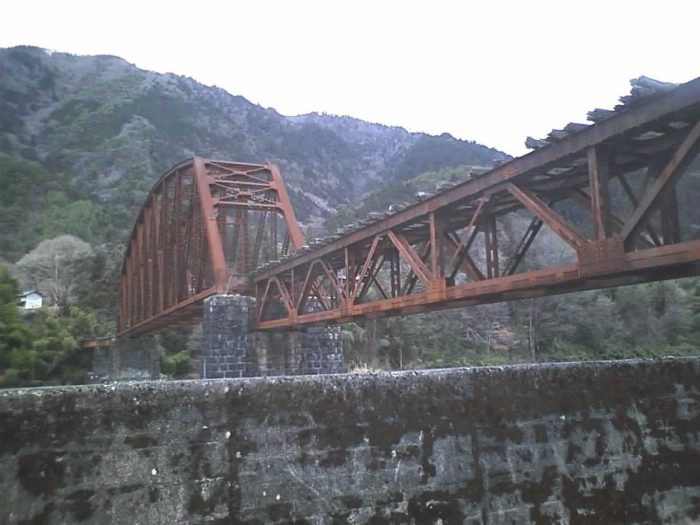
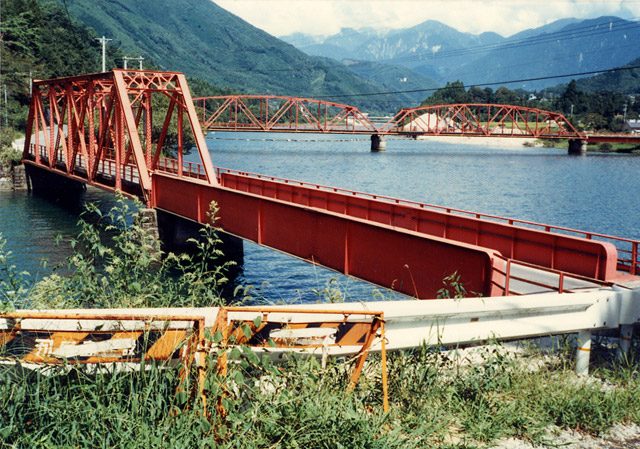
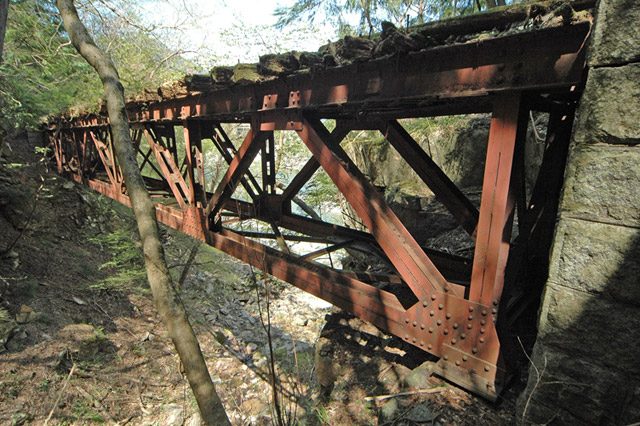
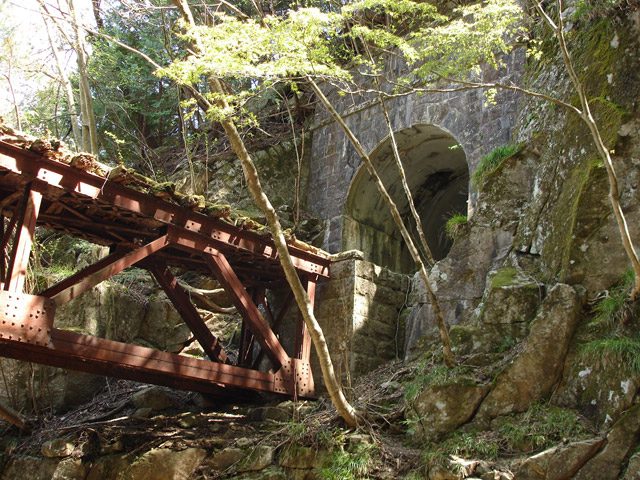
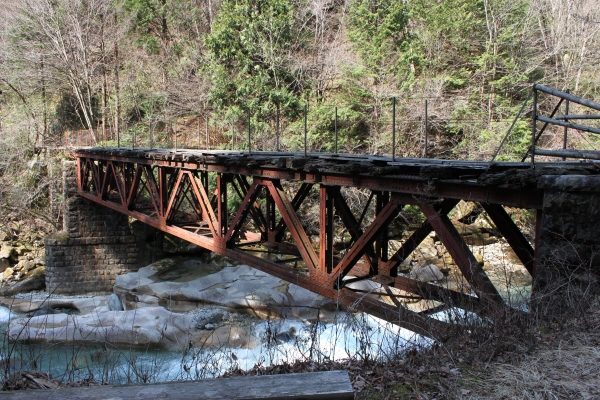
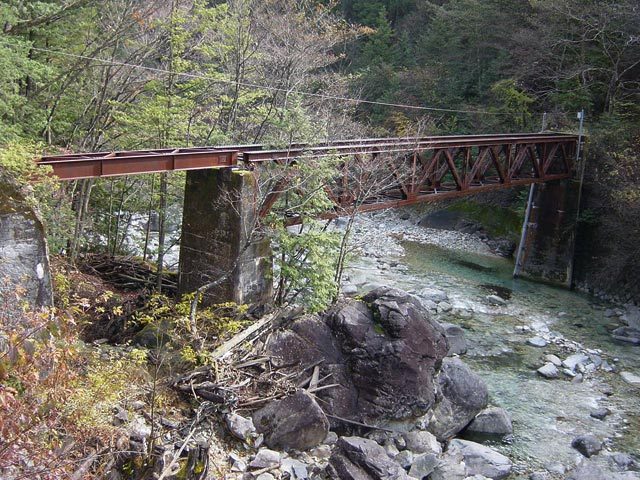
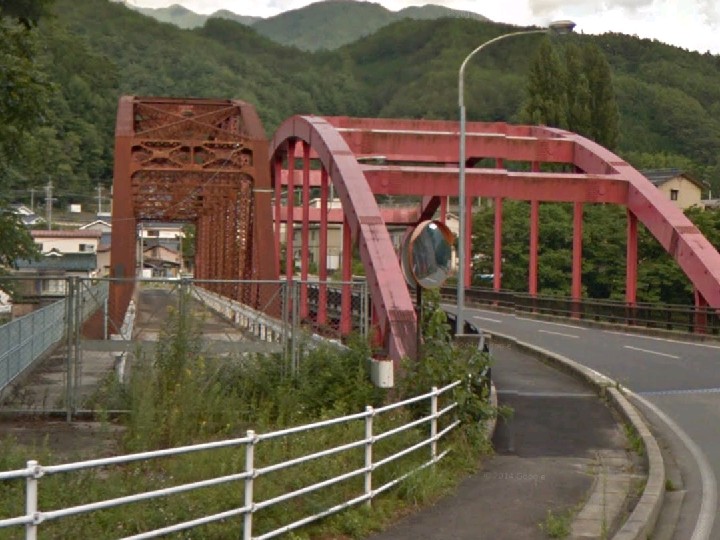
 Greenfield Bridge, Penydarren Tramroad is a Grade II* Listed Building in Treharris, Merthyr Tydfilridge over the River Taff []– this section of the tramroad is, today, quite tranquil as it passes through a small wood with the river running below (c) John Light. [5]
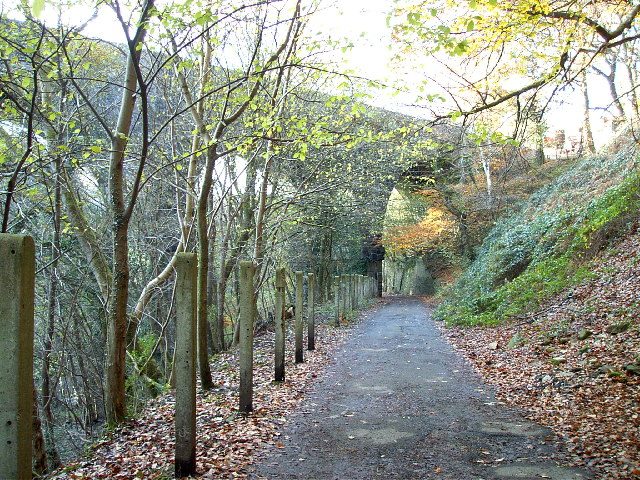
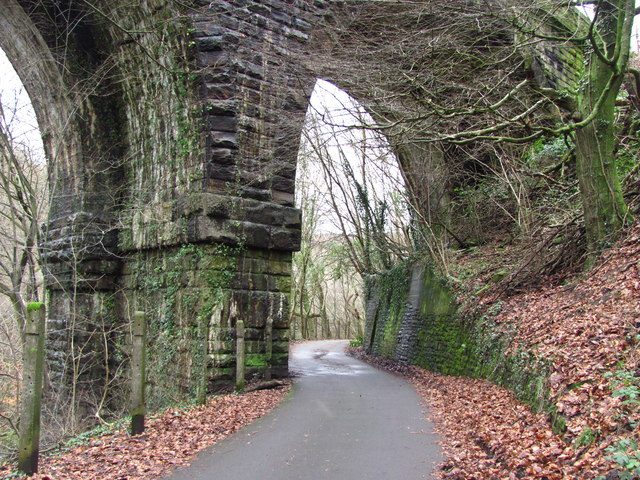
 Penydarren Tramway at Quakers Yard Viaduct – the Tramway is now a Cycleway. The viaduct carried the 1841 Taff Valley Railway © nantcoly. [4]
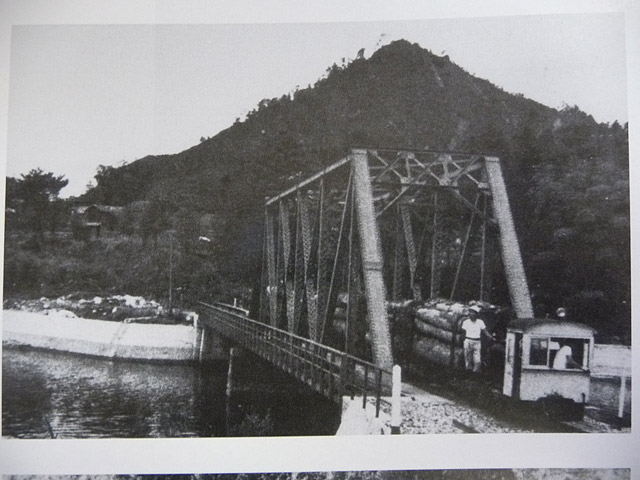
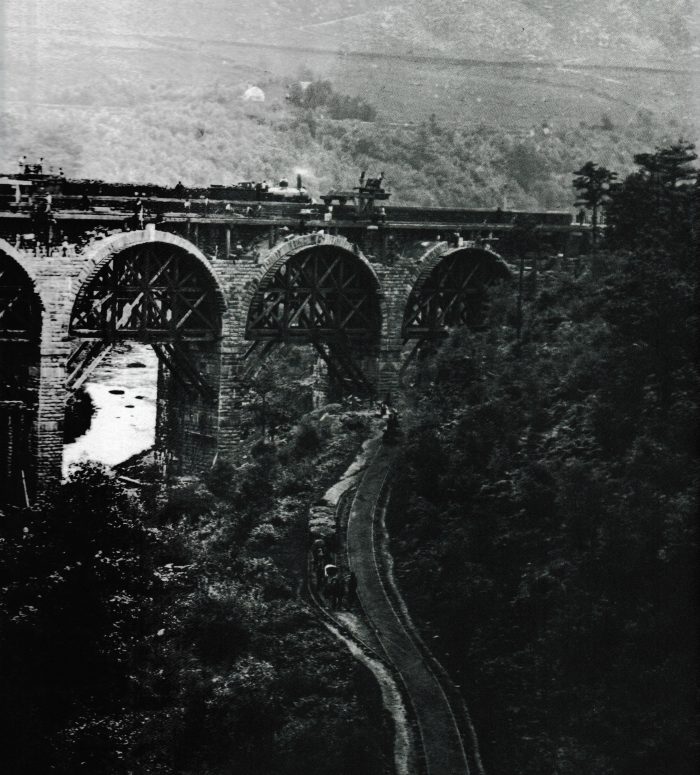
 This image may be the most significant reproduced in both these two posts about the Penydarren Tramroad. It comes from a book by John Minnis. It shows the widening of the viaduct which appears in the images above and below. The picture was taken in 1862. Brunel’s original viaduct is being widened under the supervision of John Hawkshaw. Its significance comes from the fact that it is the only know photograph of the tramroad in operation. On the tramroad, a southbound train, drawn by two horses and comprising 5 wagons, stands in the loop, whiole a northbound train of a single wagon passes. The line, with a path for horses and the clearly visible stone blocks, stands out well, as do the cast iron tram plates, (c) Jospeh Collings/John Minnis Collection. [33]
Taff Trail passing under Quaker’s Yard viaduct, the Goitre Coed Viaduct. There is access to Quaker’s Yard train station about 100 metres past the viaduct on a grassy path to the right of the trail – best suited to walkers or mountain bikes, (c) John Light. [7]
in 1667 the Quakers were given the use of a small piece of land on an estate owned by Mary Chapman. In her will of 1700 this land was subsequently given to the society and on this pasture land the Quakers decided to create a burial ground. The community of Quaker’s Yard began to take shape. Quaker’s Yard was, until the second half of the 19th century, a quiet rural spot. There was a corn mill and a small woollen mill and a small scattering of houses. With its ancient bridge across the Taff the village could even boast two inns, ideal watering holes for weary travellers on their way to and from Cardiff. [8]
The Industrial Revolution, of course, changed all that. Soon the coal trade totally revolutionized the nature of the environment, creating booming and burgeoning communities like Treharris and Trelewis, both of them just a stones throw away from Quaker’s Yard. Links to Quakerism remained strong. Treharris was named after William Harris, a Quaker businessman whose family owned a fleet of steam ships, while streets in the new towns were named after famous Quakers such as William Penn and George Fox. In 1858 the Quaker’s Yard High Level station was opened. Together with the village’s Low Level station this created a lively and bustling railway junction where passengers could embark for places like Merthyr and Aberdare and coal could be dispatched down the valley to the docks at Cardiff. [8] The advent of these standard-gauge railways in the 1840s saw the start of the decline of the Penydarren tramway/tramroad and ultimately brought about its demise.
The tramway continued round beyond the viaduct and passed to the South of the Quarker’s Yard Station on the Taff Valley Railway. That station was a relatively important junction station in its time. The OS extract below shows the tramroad. Two passing loops can be picked out to the South of the Railway Station and one further to the East beyond the viaduct.
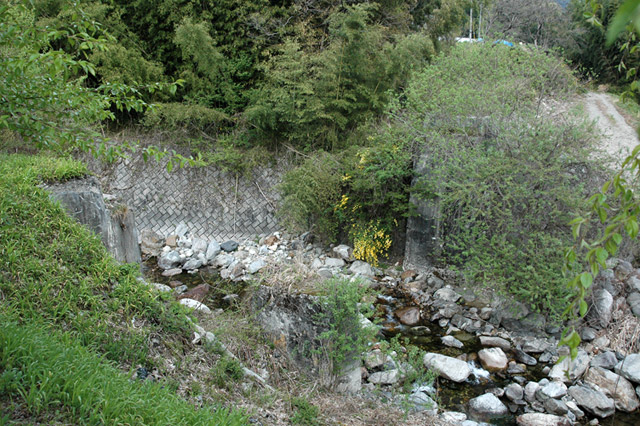
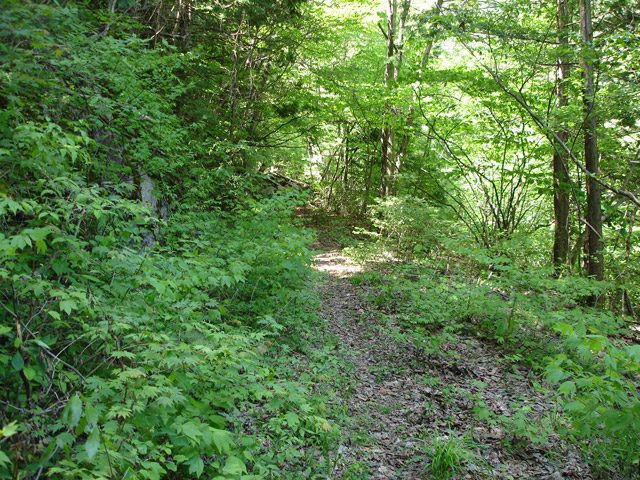
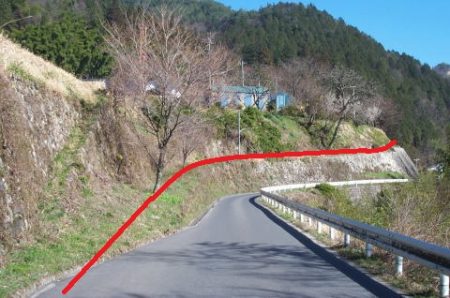
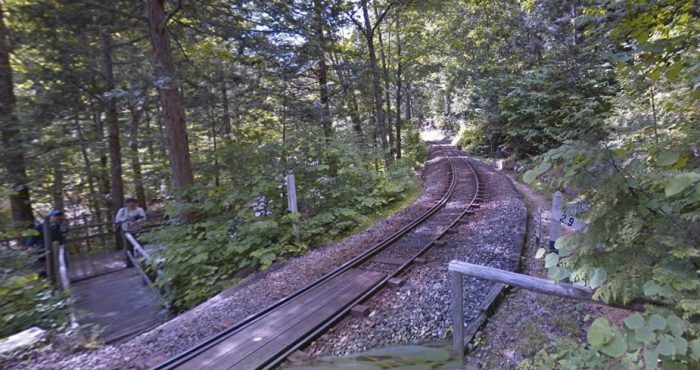
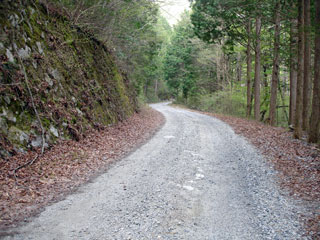
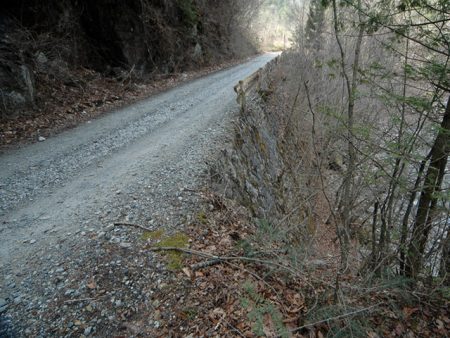
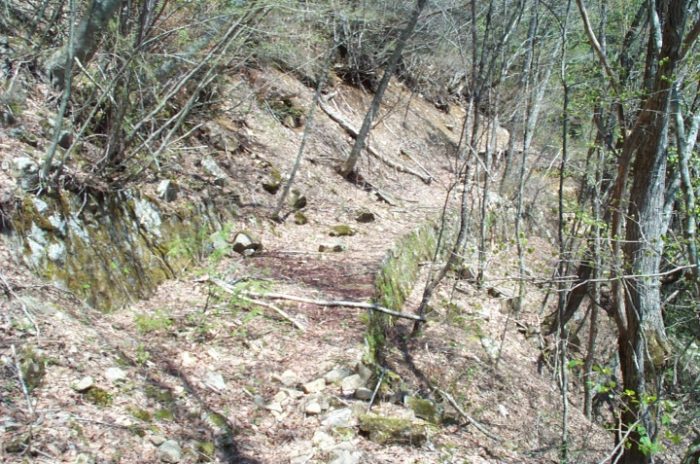
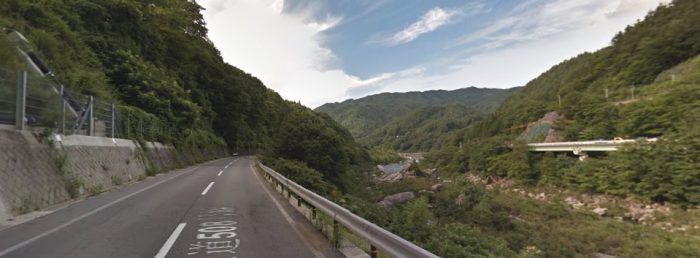
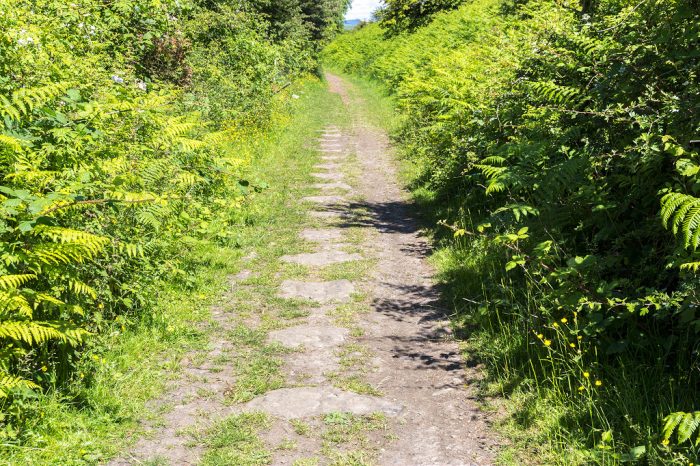
 The line turned north and passed under the later Great Western Coal Level Viaduct which can just be seen in the top-left corner of the map above. Travelling North, the tramway, the railway and the Canal followed the course of the River Taff. Passing loops were provided every few hundred metres. From Quakers Yard to Pontygwaith Bridge the tramroad formation is a tightly packed stony track. [6]
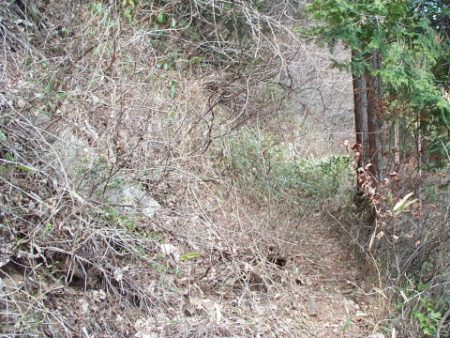
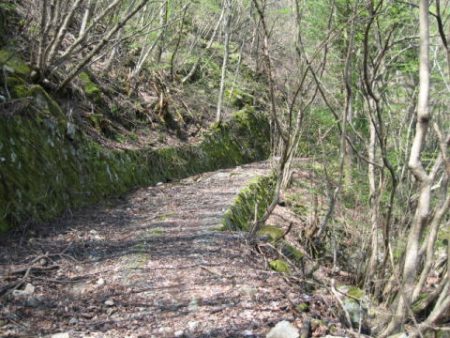
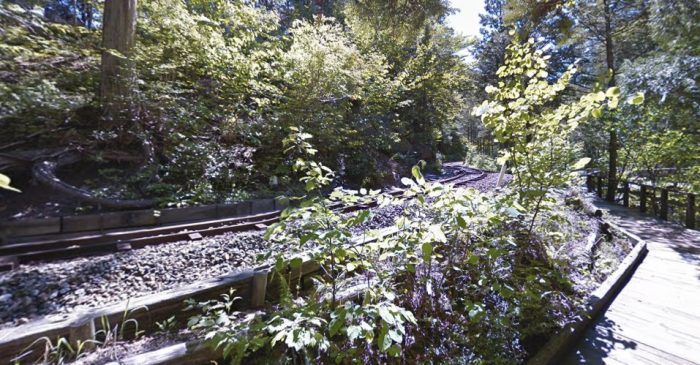
The adjacent image shows the tramroad formation looking south along this length of the tramroad. Note the stone blocks that once supported the rails of the tramroad, (c) Gareth James. [18]
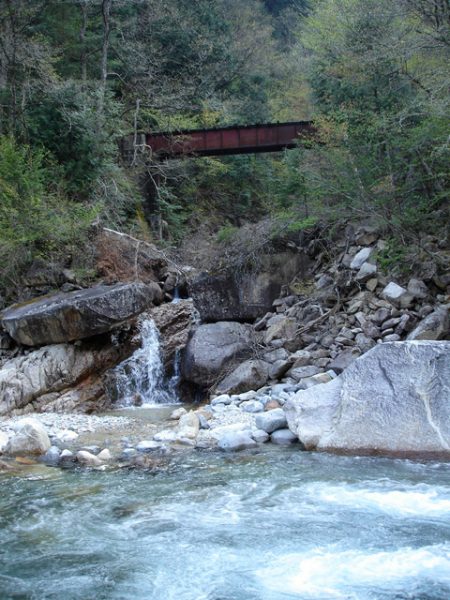
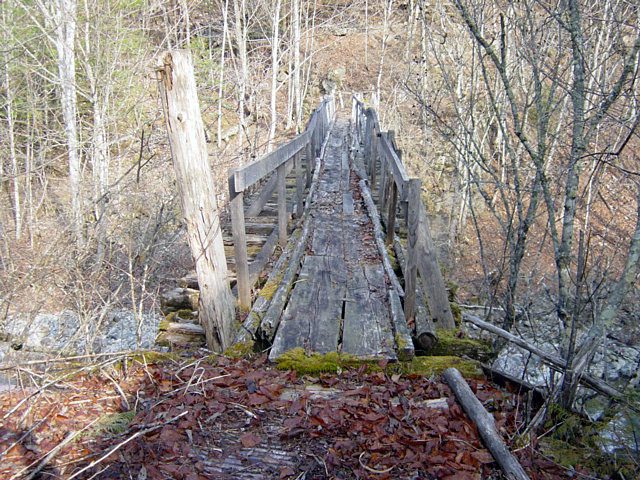
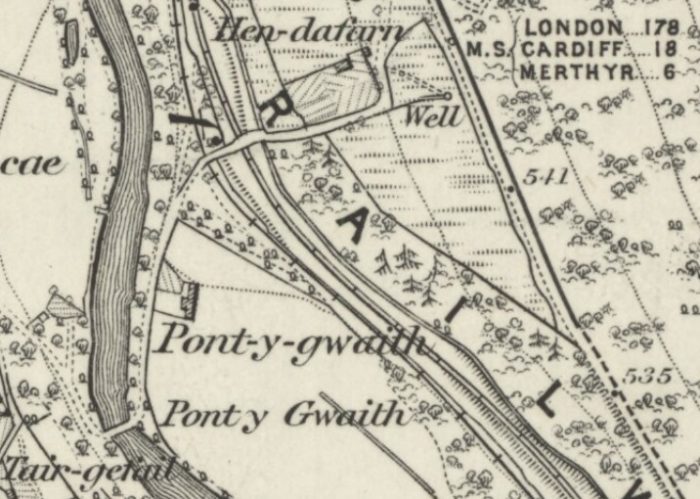
At Pont-y-gwaith there was a graceful arch bridge over the River Taff which carried a farm access road. That same road crossed the tramway and later the railway as well. The map extract below shows the location.
 This image looks back along the formation of the tramroad from close to the bridge over the line, (c) Gareth James. [13]
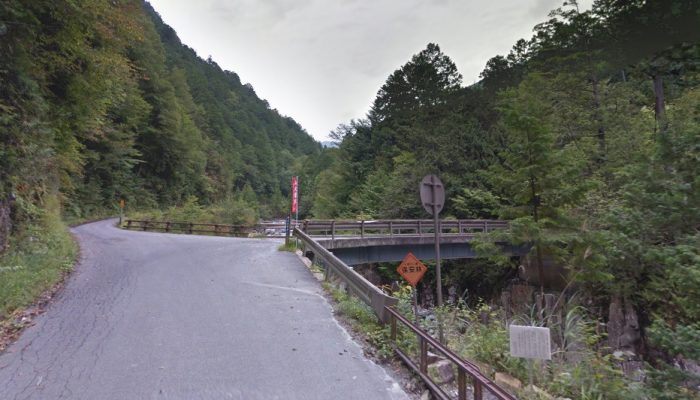
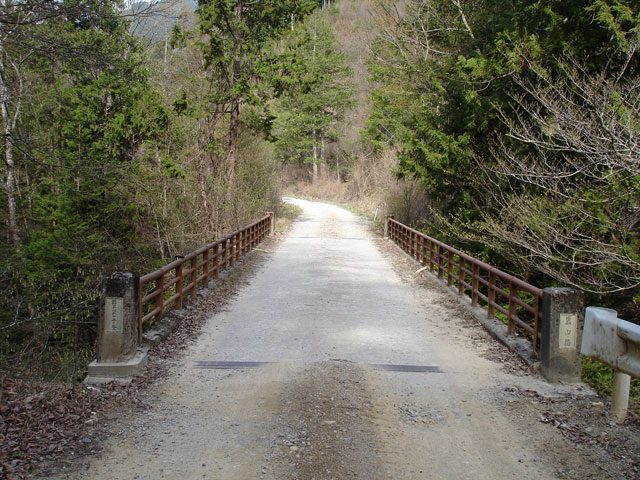
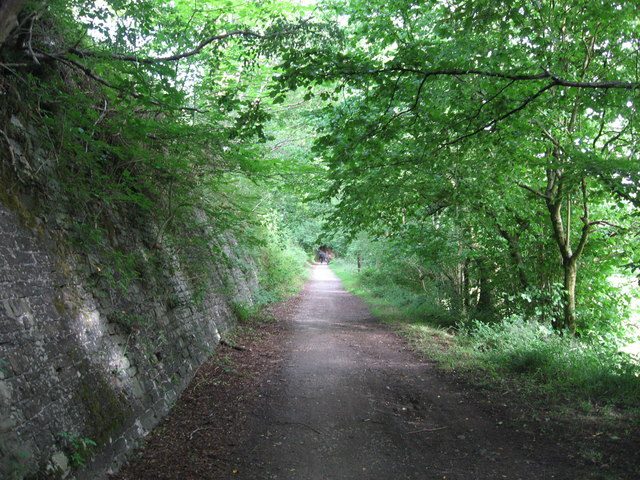
 Pontygwaith Bridge South Side – road bridge over the Trevithick Trail (Tramroad) at Pontygwaith. Taken Summer 2007. This is taken from the Abercynon side of the bridge, (c) Alan Harris. [16]
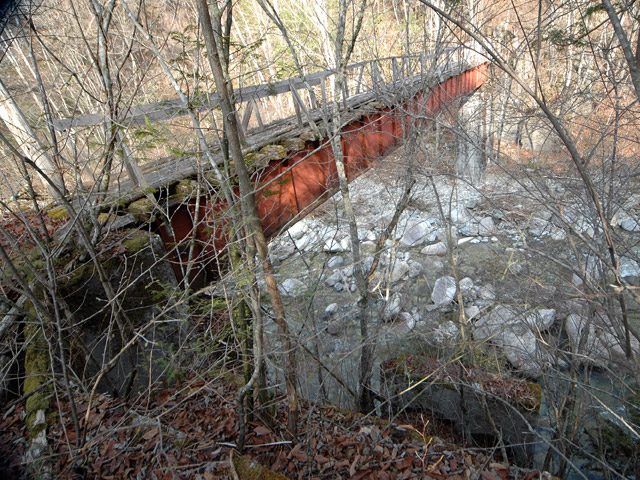
 Pontygwaith Bridge North Side – road bridge over the Trevithick Trail (Tramroad) at Pontygwaith. Taken Summer 2007. This is taken from the Merthyr Vale side of the bridge, (c) Alan Harris. [17] The bridge over the river was an altogether more graceful affair! [19]


South of Ynys-Owen Farm, the tramway and the Taff Valley railway become a little intertwined and the Tramroad is shown on the adjacent map (1885) as being on both sides of the railway. It seems that close to the bottom of the map extract the Tramroad crossed the railway line on a newly constructed bridge (close to Mount Pleasant). At this point stood Black Lion Signal Box and the colliery sidings where coal wagons filled with the best steam coal from Merthyr Vale (Taff) Colliery were marshaled into trains.
From here, the tramroad ran up the East side of the railway, passed the Farm and on beyond the Merthyr Vale (Taff) Colliery. That colliery seems to have had its own tramway (or possibly standard-Gauge sidings) running alongside the river. This colliery was not opened until 1869 and so would not have been present when the tramroad was seeing its peak traffic. [10] This area of the Valley has been known as Merthyr Vale for many years.
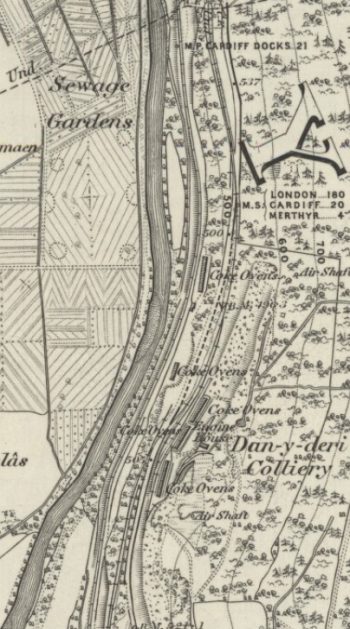
Travelling further North, the line passed Dan-y-Deri Colliery. Thomas Joseph, in partnership with Samuel Thomas opened a level here in 1842. The coal mined at Dan-y-Deri was coked and transported along the Penydarren Tramroad to be used in the Plymouth Ironworks. Long after the tramroad south of Merthyr Vale had fallen into disuse it continued to be used between Dan y-deri and Merthyr. Joseph Thomas was later to open the Duraven Collieries in the Rhondda Valleys, while Samuel Thomas was the father of D. Thomas (Lord Rhondda), founder of the Cambrian Collieries. [20]
Now-a-days, part of the old tramroad formation is in private hands and it is necessary to follow a route along modern roads. The tramway formation can be followed as far North as the Merthyr Vale Station on the Taff Valley Railway. The modern map below shows the Station and the end of the access to the lower part of the line.
The route can be picked up again opposite Aberfan which is on the far side of the valley. After a short distance the Trevithick Trail rejoins the A4054 Cardiff Road. The route of the tramway cannot be picked up again until we reach Troed-y-rhiw.
The tramway can be seen on the OS extract below, which was published in 1875, running above the road and to its East as it approaches Troed-y-rhiw from the Southeast.
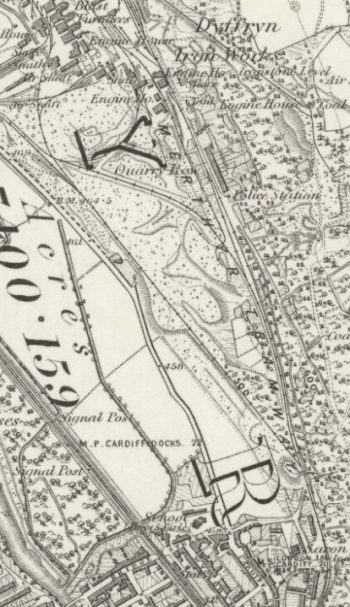
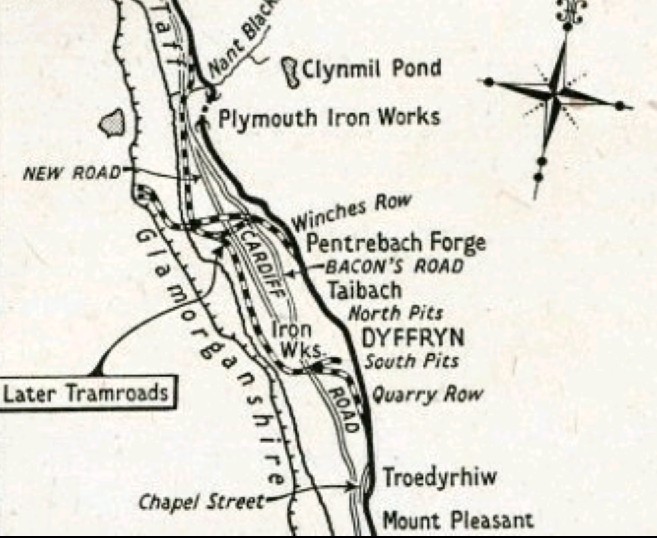
It remains above the small town on the valley side and then heads for the Dyffryn Ironworks. These Ironworks were part of the company that ran the Plymouth Ironworks.
The Plymouth Works relied on water power, long after its use had ended elsewhere. In order to re-use the water, the works expanded by adding 2 other, separate units: the Pentrebach Forge and Dyffryn Furnaces. [21] The first furnace at Dyffryn was erected in 1819.
Steam power was finally introduced leading to a dramatic increase in output following the dry summers of 1843 and 1844. During the second half of the 19th century, obsolete technology and economics combined to the disadvantage of the Plymouth Iron Works. A lack of capital to convert to steel production finally lead to closure in 1880; though the company continued to mine its vast reserves of coal, from the South Dyffryn and other pits. [22]
Dyffryn Ironworks were only a short distance South of The Pentre-bach Ironworks which were also managed by the Plymouth Ironworks. In turn, Pentre-bach Ironworks were only a short distance Southeast of the Plymouth Ironworks. The area effectively became one large industrial site with a variety of lines networking over the whole area.
The website for the Trevethick Trail provides some helpful information about the history of these three works. The route details on their site run North to South whereas our journey is travelling South to North: [23]
“Whilst the blast furnaces at Plymouth turned the raw materials of ironstone, coke and limestone into pig iron, the Pentrebach works was constructed to refine that metal. At the site, puddling furnaces and rolling mills were built to turn the useless pig iron into a more malleable material that could be cast or rolled into different shapes. The Hill’s still relied heavily on water to power machinery in the works so the water feeder that served the Plymouth site was continued south to serve Pentrebach. This works became a very important part of the Plymouth concern and in 1841 modern rolling mills were opened.
At the same time as the Pentrebach works were being built the owners decided to erect new cottages for their workers. A number of separate rows were built to the south, but immediately to the north, confined by the bend of the Plymouth water feeder, four rows were constructed, three of these making the shape of a Triangle. Toilets were located in the centre of the enclosed space. These were good quality houses for the skilled ironworkers of Pentrebach. After the death of Richard Hill in 1806 his three sons were involved in the running of the works.
It was however the youngest son, called Anthony after his uncle Anthony Bacon, who became the most notable of the family. He had studied geology, chemistry and metallurgy and became a Fellow of the Geological Society. Although the Hills tried to sell the works in 1834 no buyer came along and the concern remained in their ownership for almost another thirty years. Despite becoming a very wealthy family, the Hills continued to live at Plymouth House overlooking the site of the original works.
They seemed to shun the extravagant lifestyles of the other Merthyr ironmasters, preferring to provide for the education and spiritual welfare of their workers. It was not until 1850 that Anthony built the mansion that still stands at Pentrebach and where he lived until his death in 1862. (The second large building on the site used as a motel is a modern construction). Anthony Hill in particular was a man of great generosity, establishing schools at Plymouth and Troedyrhiw, paying the teachers and leaving money in his will for the maintenance of the buildings.
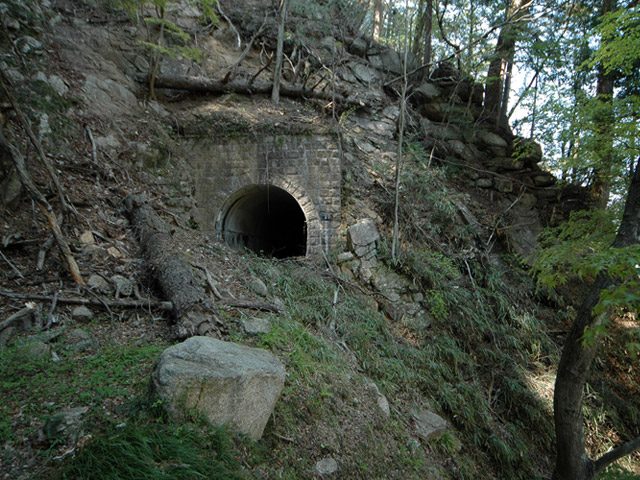
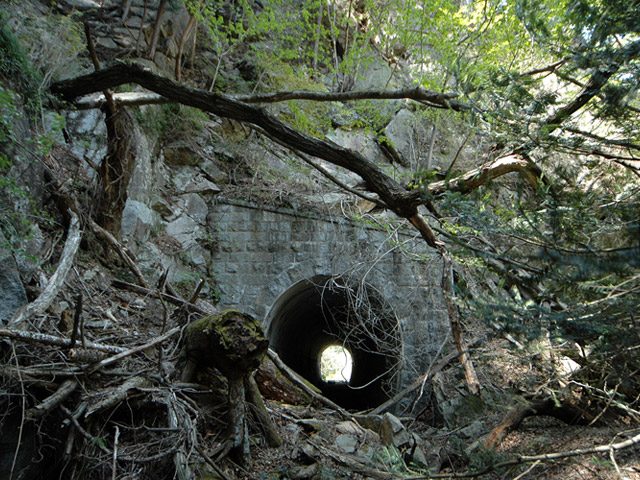
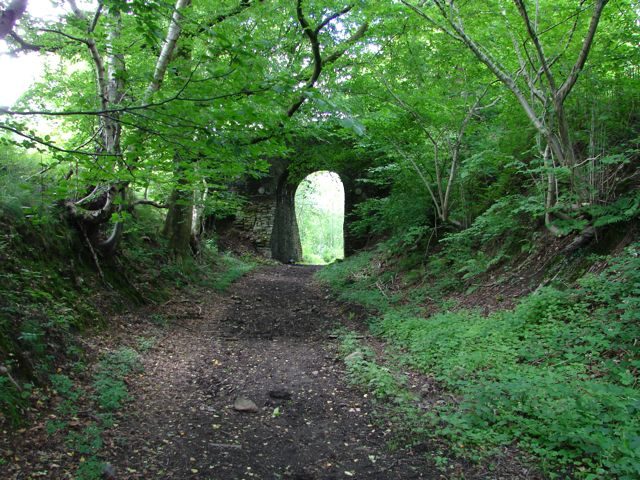
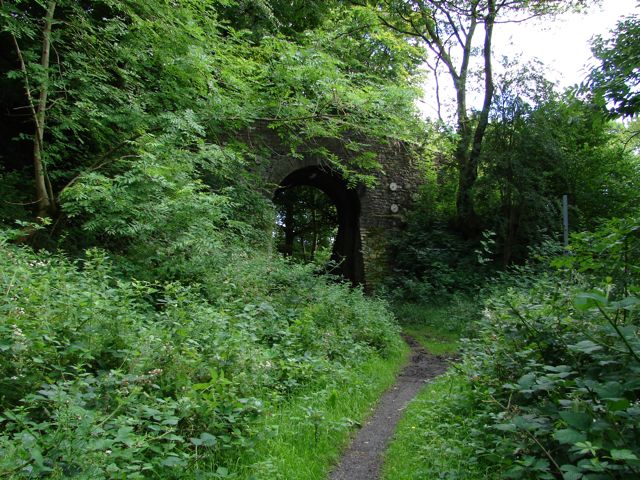
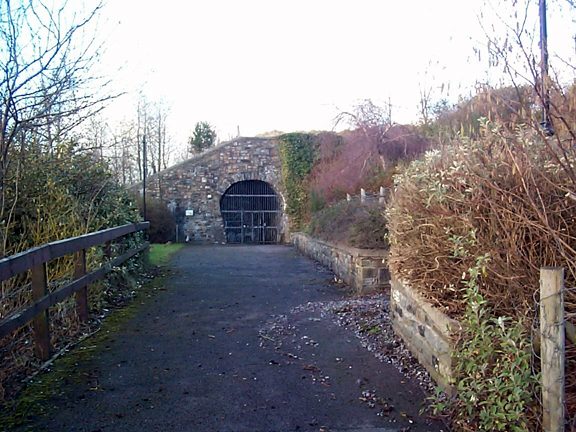
Travelling south of the Pentrebach Ironworks, a site now occupied by business offices and chain stores, the tramroad continued towards where Anthony Hill was to develop a third location for iron manufacture. At Duffryn he was to build five more blast furnaces with other associated structures, and here too deeper pits were to be sunk which would reach the richer steam coal seams of the Taff Valley. Graig and Duffryn Collieries, sunk alongside the Penydarren Tramroad would continue to produce best quality coal for world shipping for well over a half a century after Anthony Hill’s death. The tramroad ran to the East of the sites at Dyffryn and Pentrebach. As can be seen above a number of tramroads were added at later dates. At Plymouth Works it was necessary for the tramroad to run in a short tunnel some eight feet wide and eight feet high beneath the furnace charging area. This would have provided ample room for horse drawn trams but perhaps made things difficult for the passing of a steam locomotive. [14][24]
 The Tramroad Tunnel under the Works is listed by Cadw; Source ID: 4048; the Legacy ID: GM573. [25][26]
The Glamorgan-Gwent Archeological Trust (GGAT) says of this location: “The Penydarren or Merthyr Tramroad was associated with a complex network of interconnecting tramlines by 1850; this was particularly evident near the Pentrebach Iron Works. The 1878 OS map identified features associated with adjacent workings, Graig, Tai-bach and Wern-las Pits situated along the route, and features associated with the Dyffryn Furnaces, ie the Coke Ovens. While isolated Rows industrial housing with associated yards and allotments, such as Pen-Yard Row, Pencae-bach Cottage, and Winches Row were also a characteristic features of the landscape.” [11]
When Richard Hill took over the Plymouth Works it consisted only of ‘one small furnace worked by two giant bellows twenty-five feet high and one large waterwheel’. [24] It is probable that the original supply of water came from the adjacent stream later to become known as Nant Cwm Blacs. After acquiring two partners and additional capital in 1803, Hill was able to expand the enterprise with the construction of a second furnace. As the works grew the tramroad network which linked it with the various pits and levels also expanded. [24]
The coal and ironstone came first from the hillsides immediately above the works. Inclines were built to bring the raw materials down for preparation and loading into the furnace. A large weir across the River Taff at Merthyr Tydfil allowed water to be channeled through an open feeder through the Caedraw area of the rapidly developing town, to the works site. This greatly improved the power output. [24]
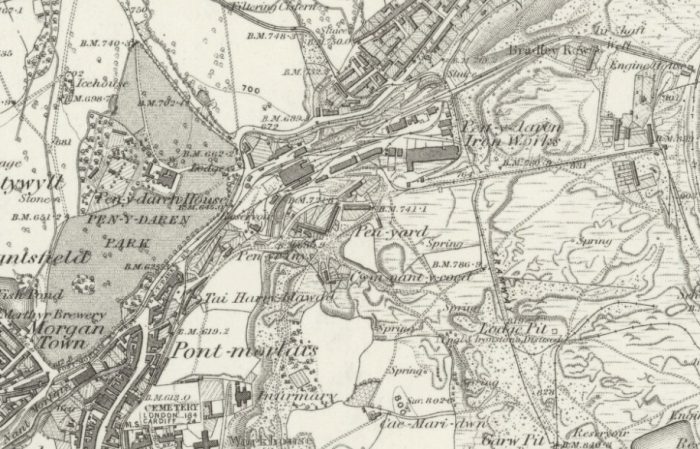
North of Plymouth Works and Nant Cwm Blacks, the tramroad continued along the East side of the River Taff towards Mertyr Tydfil. T
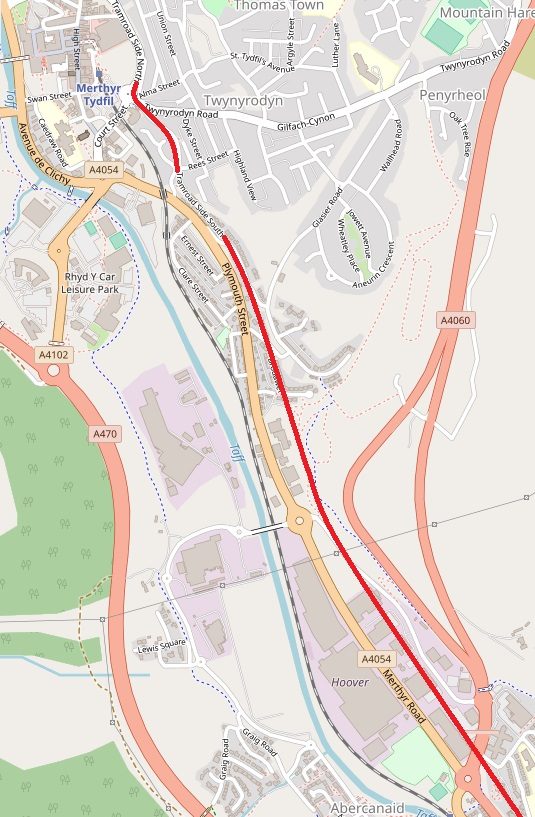
T he approximate route of the Tramroad into Mertyr Tydfil is shown here. Most of the route is hidden under modern development but the two roads named Tramroad Side South and Tramroad Side North follow the line of the old Tramroad.
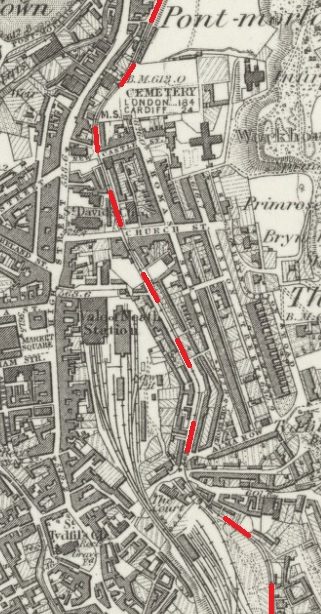
The adjacent plan gives an overview of the tramroads in and around Merthyr Tydfil. [14]
 The Penydarren Tramroad passed to the East of the modern terminus of the standard-gauge railway in Merthyr and ran on the East side of the High Street. The road that runs north to Penydarren, behind the former Glove and Shears public house and alongside the Tesco store. [27] The approximate alignment appears on the adjacent OpenStreetMap extract and is shown by a red line.
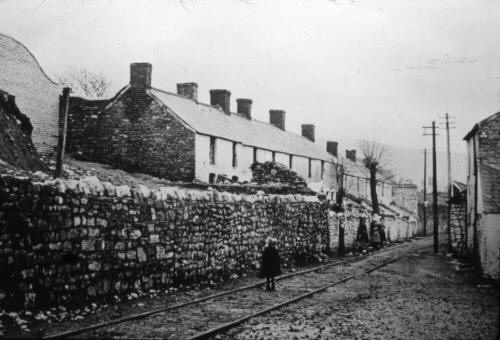
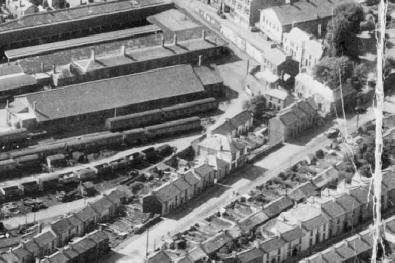
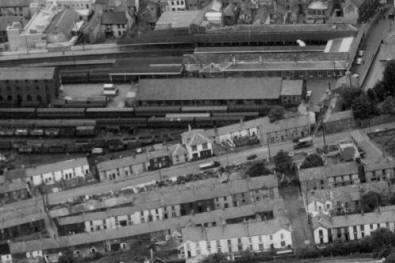
It appears from the image immediately below that the old tramway received some significant maintenance in the latter part of the 19th Century. The picture shows Tramroadside North at around 1900. It gives a good impression of the conditions of roads in Merthyr at the time and so illustrates the continued value of the tramroad to local industry. The next two images show the same road in the 1960s. Tramroadside North, early 1900s. [28]
 1960’s aerial view showing Tramroadside North. [28]
 Both these images show Tramroadside North, the Railway station and the Tydfil Arms. [28]
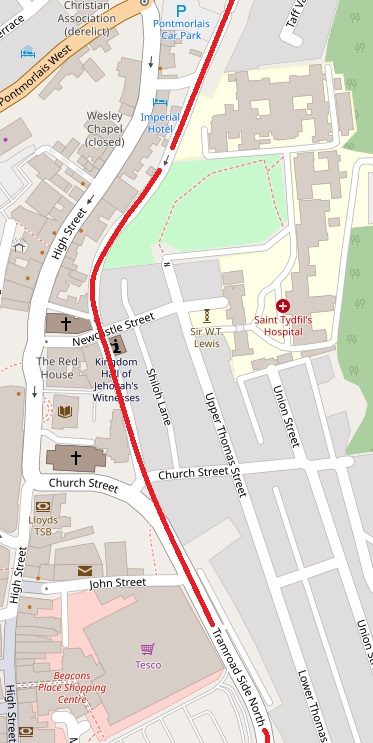
The route is picked out with red dashes on the adjacent extract from the 1875 edition of the OS Maps. It shows the extent of the standard-gauge station complex. It shows that the tramroad route was used both as a tramroad and as a highway.
North of the centre of Merthyr, the tramroad curved away to the East following the valley of the Nant Morlais and into the Penydarren Ironworks. Another extract from the early OS Map shows the works and the parkland to its West which centred around Penydarren House. In the 1930s Mertyr Tyfil erected a memorial/monument to Trevitick’s pioneering steel locomotive run on the Penydarren tramway. It sits at what is now the junction between Penydarren Road and Penyard Road. It is shown below on the first image after the OS Map of Penydarren Works.

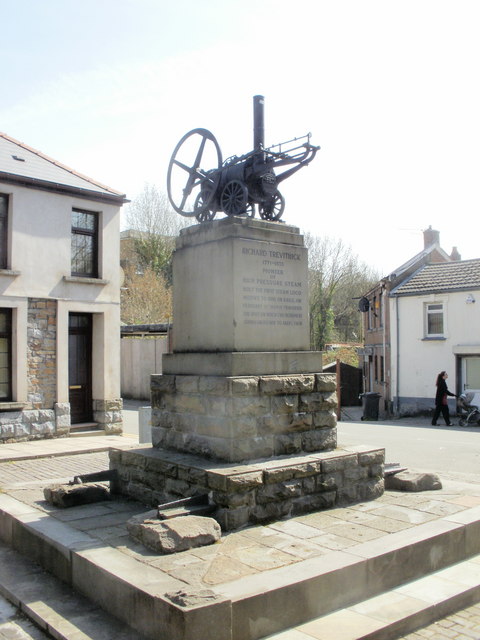
 Trevithick Monument, Merthyr Tydfil: The monument is located on the corner of Penydarren Road and Penyard Road.It is a miniature replica of the first steam locomotive to run on rails, built by Richard Trevithick. On its first run in 1804, it traversed the spot on which this monument stands, (c) Jaggery. [29]
The memorial that commemorates the journey of Richard Trevithick’s steam locomotive from Penydarren to Navigation (Abercynon) on 21st February 1804 stands at the southern extremity of the site of what was the Penydarren Ironworks. By the1840’s all of the Merthyr ironworks had outgrown their original locations. The Cyfarthfa concern had built two furnaces at Ynysfach as early as 1801 while the Plymouth Forge Company had by 1820 time expanded onto sites at Pentrebach and Dyffryn. Dowlais located a new extension to their plant at the Ifor Works.
Penydarren however, as well as lacking the extensive mineral resources of the other companies, also suffered from the fact that the site was confined within a steep sided valley and the company had no alternative site on which to develop. The buildings associated with the works therefore, were all located along Nant Morlais, stretching almost as far as Pontmorlais (close to Mertyr Town Centre), the bridge that carried the road from Dowlais, down into the town. [30] Penydarren was the It was the last of the great ironworks to be built in Merthyr. It was unfortunately the first to be closed in 1859. [31]
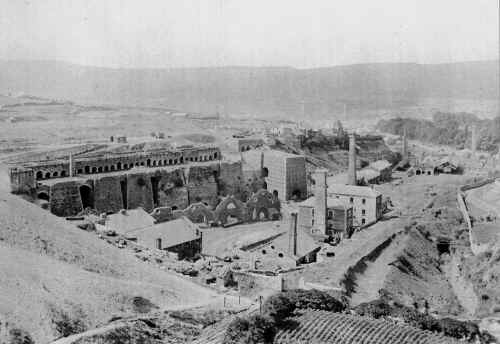
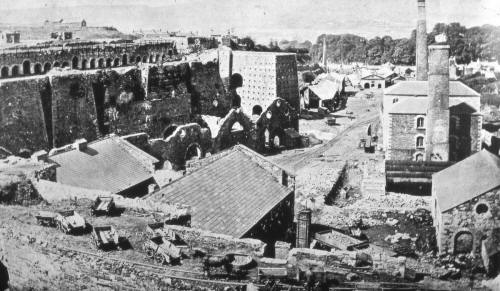
 Two pictures of Penydarren Ironworks photographed in 1875 by Robert Crawshay. [31]
Strictly, I guess, we have now reached the end of the journey along the Penydarren Tramroad. There were, however, a whole series of tramroads in the Merthyr area which warrant attention.
“The original Act of Parliament of 1790, which gave permission for the building of the Glamorgan Canal, had provided for the construction of a branch canal from Cyfarthfa to Dowlais. It very soon became apparent that the difference in elevation between the river level at Merthyr and the Dowlais works made its building completely impractical. Both Dowlais and Penydarren therefore, were forced to construct their own separate tramways to the canal wharf at Georgetown. The Dowlais tramroad, very steeply graded in places, followed the promenade on the opposite side of the road to the monument, (see sketch map below) whist that from Penydarren took a parallel line before passing through a short tunnel at the top of Bethesda Street. Wagons of red-hot furnace waste would also have followed the route for part of the way before being tipped onto the banks of Nant Morlais above the present town centre. This very large tip, extended out toward the infamous part of Merthyr Tydfil known as China, eventually taking the name of the British Tip after 1863 when the British and Foreign Bible Society built the Abermorlais Schools on top.” [30]
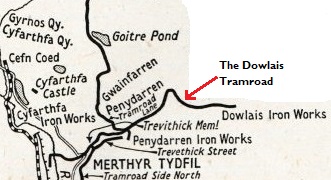 Beyond the Peydarren Works to the Northeast were the Dowlais Works. With the completion of the Penydarren Tramroad in 1802 a junction was constructed with the Dowlais Tramroad, enabling the Dowlais Works to have a direct link at this point. For almost fifty years all of the iron produced by Dowlais, and bound for the coast at Cardiff would have passed this point, either in the direction of the canal or along the Penydarren tramroad. As the middle of the nineteenth century approached the Dowlais Works far outshone the other three Merthyr Ironworks in terms of growth and output. Because of its location however, it continued to be disadvantaged as it relied on the steep and tortuous tramroad link via Penydarren to get iron to the canal and Merthyr Tramroad.
The high stonewall opposite the monument to the historic journey of Trevithick’s locomotive was originally part of the boundary of Penydarren House, the home of the Homphray family. Built on the site of a Roman fort, it was in this house that some of the soldiers called into Merthyr Tydfil to quell the riots of 1831 were quartered. Alongside, is Merthyr Tydfil’s once very popular Theatre Royal, a thriving theatre during the late nineteenth and early twentieth century. [30]
Penydarren Works was also served by a Tramroad from the North it linked the Works with the Morlais Quarries. Travelling North along this line, it passed north of the County Grammar School in the street called Tramroad, then in front of Gwaunfarren Nursing Home and Baths towards the Goitre Pond, now filled in. At this spot sleepers of mixed gauge and a passing place could be observed, before the new housing estate and school obliterated all traces. The larger gauge was 4′ 8-1/2″, the narrow one 33″. The track then proceeded under the new Head of the Valleys Road and passed the Pontsarn-Pant Road opposite a disused quarry. [12]
Penydarren quarries and Dowlais quarries were near Morlais Castle and the tramroad was used by the Dowlais works as well as Penydarren works. Plymouth works probably also obtained limestone from these quarries. [12] It appears that Dowlais later exploited the eastern portion of the quarries using its own railway.
 Morlais Castle Quarries, the tramroad from Merthyr, June 2014. [32]
 Morlais Castle Quarries Western tramroad branches from above the quarry, May 2017. [32]
A Postcript
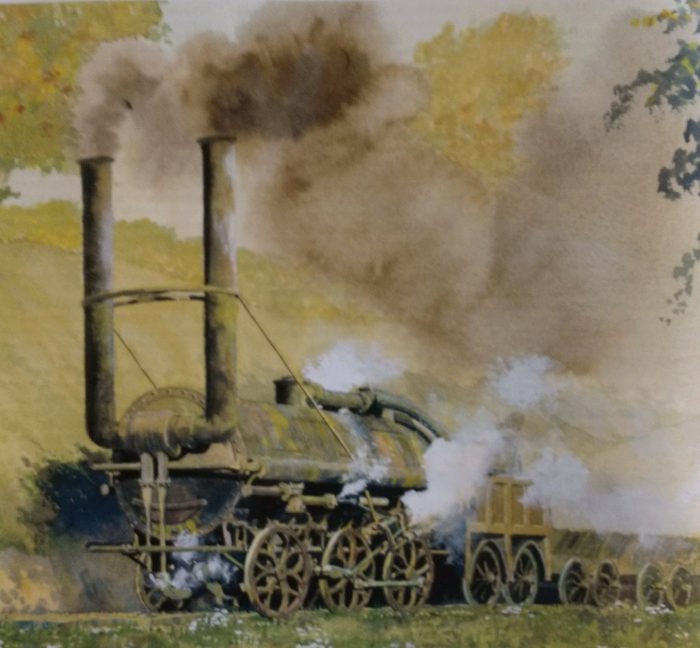
Reading an old copy of BackTrack Magazine, I recently came across this next image in an article about a visit by the King of Saxony to the UK. [34] The Dowlais Iron Company’s 4ft 4in gauge plateway rack-and-adhesion 0-6-0 Perserverance. Built at Neath Abbey in 1832, it was still on the Penydarren Tramroad at the time of the King of Saxony’s visit to the district and possibly still in use, although close to the end of its life. Its appearance would also have differed from that depicted here, which shows it as running between 1832 and 1840, in which year the twin chimneys that swung down to lie along either side of the boiler were replaced by a single exhaust which hinged forward. These awkward arrangements were necessitated by the narrow bore of the Plymouth Ironworks tunnel. Based on drawings published in Industrial Railway Record 59 (April 1975), the painting omits, because details are not known, the winch that lowered and raised the chimneys and also the overall casing originally fitted to avoid the locomotive’s frightening animals. Almost certainly this would have been discarded fairly early on as both unnecessary and a nuisance. (© Robin Barnes). [34: p412]
References
- https://abercynonhistoryblog.wordpress.com/2016/08/10/the-basin, accessed on 3rd February 2019.
- https://britishlistedbuildings.co.uk/300080910-victoria-bridge-penydarren-tramroad-treharris/maps#.XFfzhFz7SUk, accessed on 4th February 2019.
- https://www.irsociety.co.uk/Archives/59/Penydarren.htm, accessed on 1st February 2019.
- http://www.geograph.org.uk/photo/85780, accessed on 4th February 2019.
- https://www.geograph.org.uk/photo/3293539, accessed on 4th February 2019
- http://blog.stuartherbert.com/photography/2007/04/22/the-worlds-first-steam-engine-railway-journey, accessed on 2nd February 2019.
- https://www.geograph.org.uk/photo/3295097, accessed on 4th February 2019.
- http://www.bbc.co.uk/blogs/wales/entries/3bceb0c6-bc6c-3ba4-86a9-664080798702, accessed on 4th February 2019.
- https://britishlistedbuildings.co.uk/300080907-greenfield-bridge-penydarren-tramroad-treharris#.XFgwulz7SUk, accessed on 4th February 2019.
- http://www.waymarking.com/waymarks/WMVTW5_Merthyr_Vale_Colliery_formerly_Taff_Colliery_Ynysowen_Wales, accessed on 4th February 2019.
- http://www.ggat.org.uk/cadw/historic_landscape/Merthyr_Tydfil/English/Merthyr_019.htm, accessed on 2nd February 2019.
- http://www.himedo.net/TheHopkinThomasProject/TimeLine/Wales/Industrialization/WelshIndustry1800/MyrthyrTramroad.htm, accessed on 2nd February 2019.
- https://www.geograph.org.uk/photo/1999871, accessed on 4th February 2019.
- The Penydarren Tramroad; Notes and News; The Railway Magazine Volume 97 No. 599, March 1951, p206-208.
- http://www.trevithicktrail.co.uk/gallery.aspx, accessed on 3rd February 2019.
- https://www.geograph.org.uk/photo/1699268, accessed on 4th February 2019.
- https://www.geograph.org.uk/photo/1699259, accessed on 4th February 2019.
- https://www.geograph.org.uk/photo/1999882, accessed on 4th February 2019.
- https://www.treharrisdistrict.co.uk/treharris-areas/edwardsville/photography, accessed on 4th February 2019.
- http://www.trevithicktrail.co.uk/Locations/merthyr_vale.aspx, accessed on 4th February 2019.
- https://www.gracesguide.co.uk/Plymouth_Ironworks, accessed on 2nd February 2019.
- http://www.ggat.org.uk/cadw/historic_landscape/Merthyr_Tydfil/English/Merthyr_015.htm, accessed on 4th February 2019.
- http://www.trevithicktrail.co.uk/Locations/business_park.aspx, 4th February 2019.
- http://www.trevithicktrail.co.uk/locations/plymouth_iron_continued.aspx, accessed on 5th February 2019.
- https://ancientmonuments.uk/130487-merthyr-tramroad-tunnel-trevithicks-tunnel-town#.XFnWp2nLc0N, accessed on 2nd February 2019.
- http://www.ggat.org.uk/cadw/historic_landscape/Merthyr_Tydfil/Images/Merthyr019_photolrg.JPG, accessed 6th February 2019.
- http://www.trevithicktrail.co.uk/locations/tram_south.aspx, accessed on 6th February 2019.
- http://www.alangeorge.co.uk/the_tramroad.htm, accessed on 6th February 2019.
- https://www.geograph.org.uk/photo/1825912, accessed on 6th February 2019.
- http://www.trevithicktrail.co.uk/locations/monument.aspx, accessed on 6th February 2019.
- http://www.alangeorge.co.uk/penydarren_ironworks.htm, acessed on 6th February 2019.
- http://www.industrialgwent.co.uk/w-a32-merthyr/index.htm, accessed on 6th February 2019.
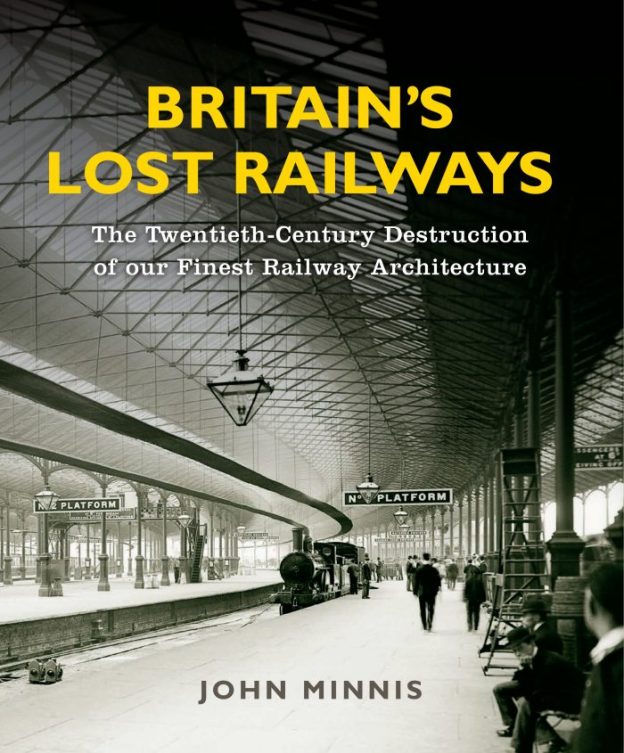
- John Minnis; Britain’s Lost Railways; Arum Press Lts, London, 2011, p32-33.
- Robin Barnes; A Royal Progress – Part 2; BackTrack Magazine Volume 16 No. 7, 2002, p406-413.

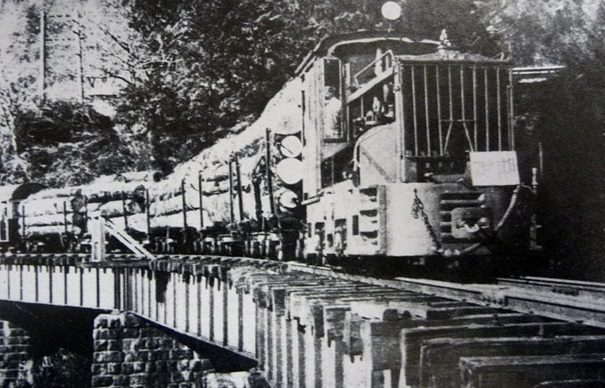
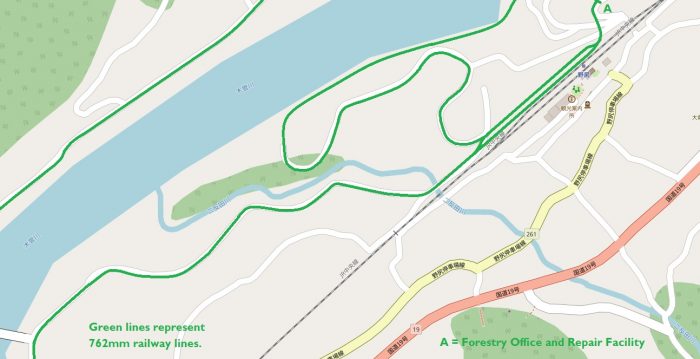

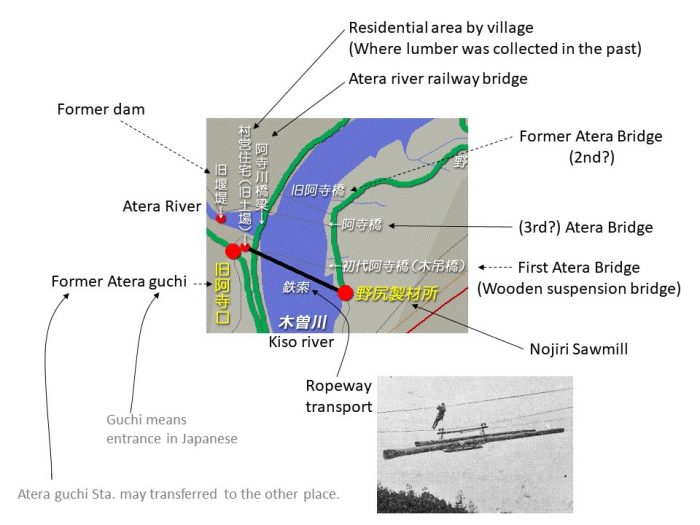


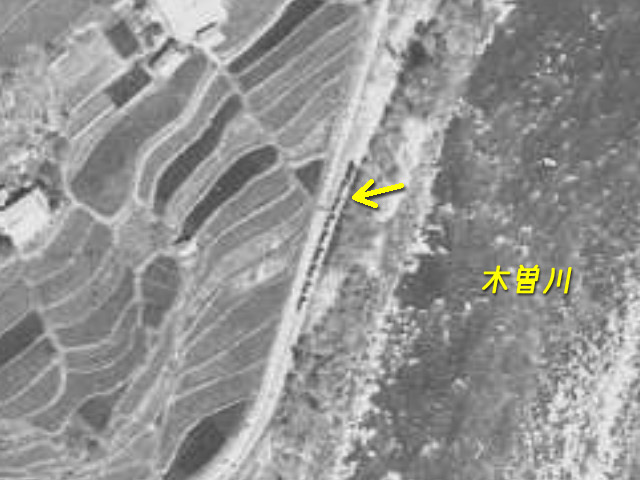


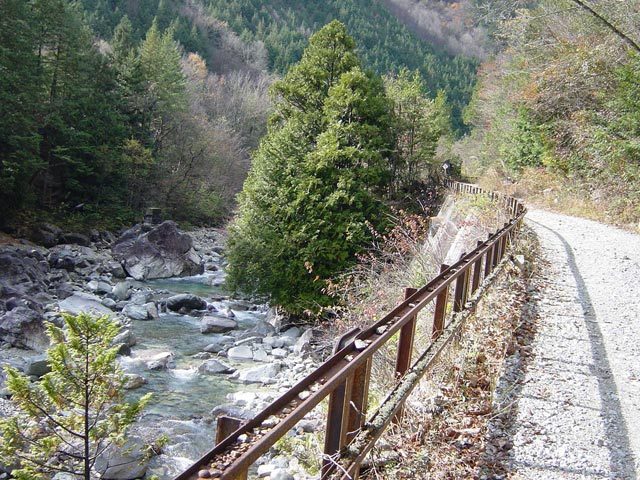
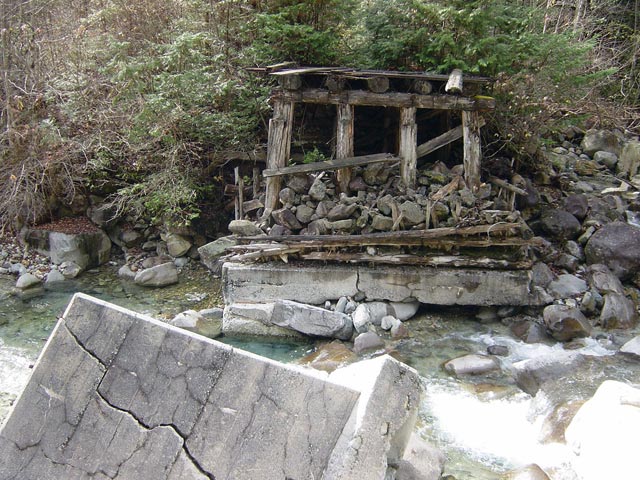
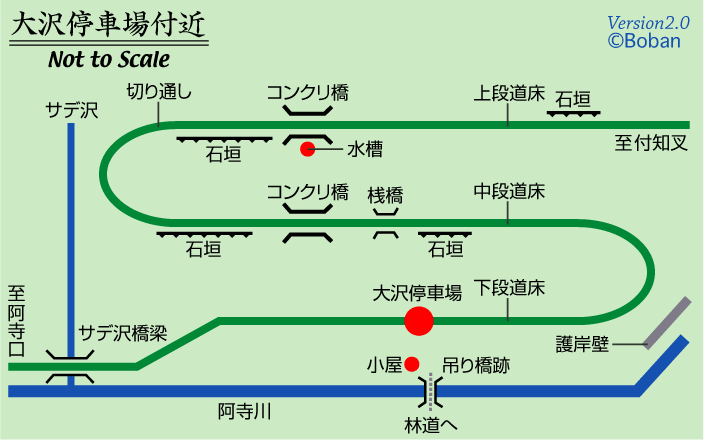
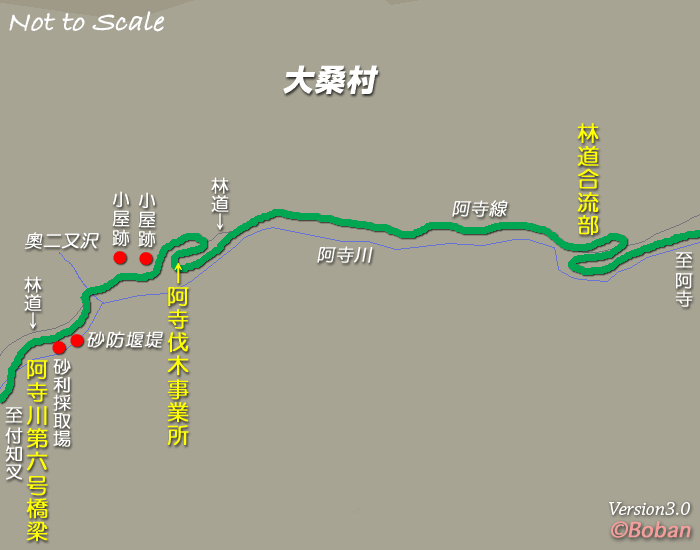


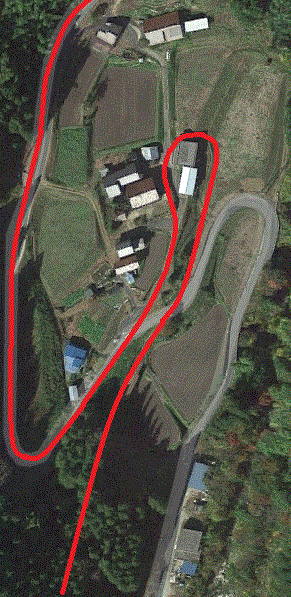
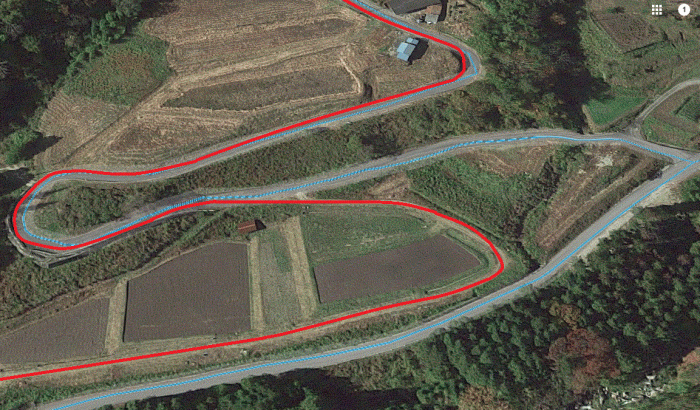
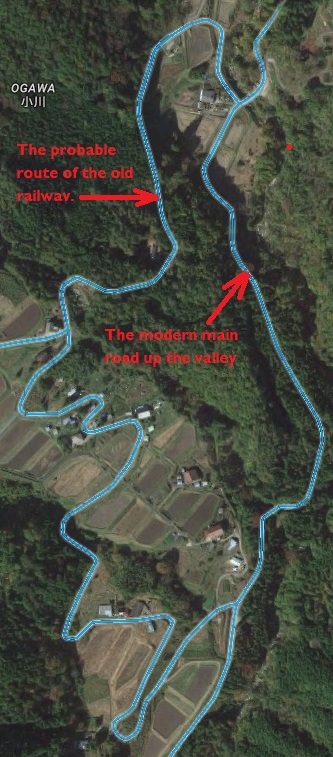
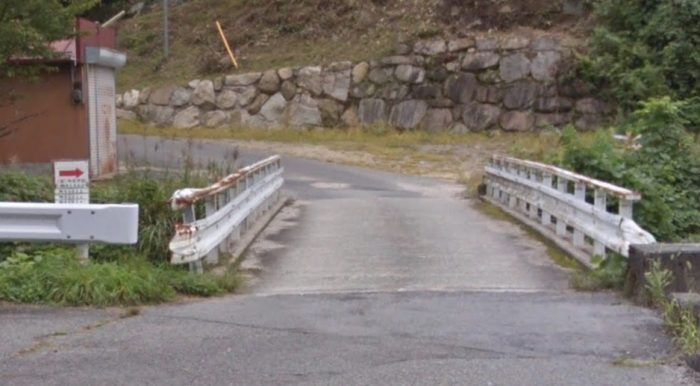
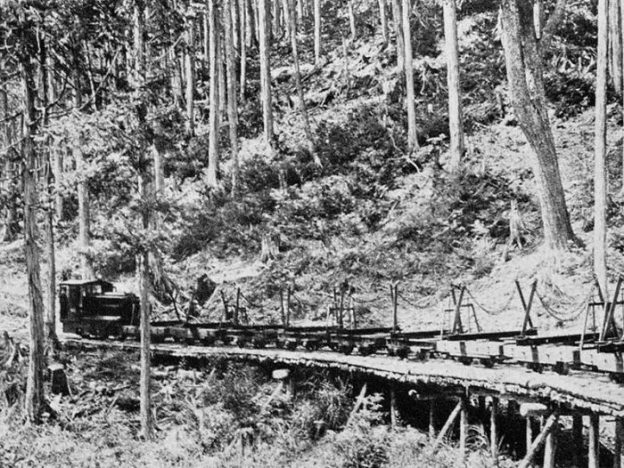
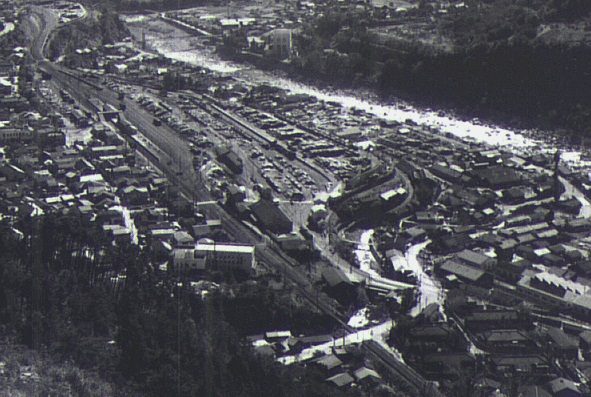
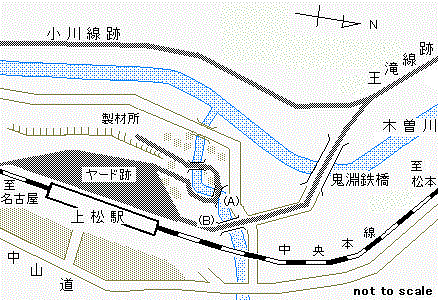
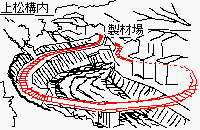
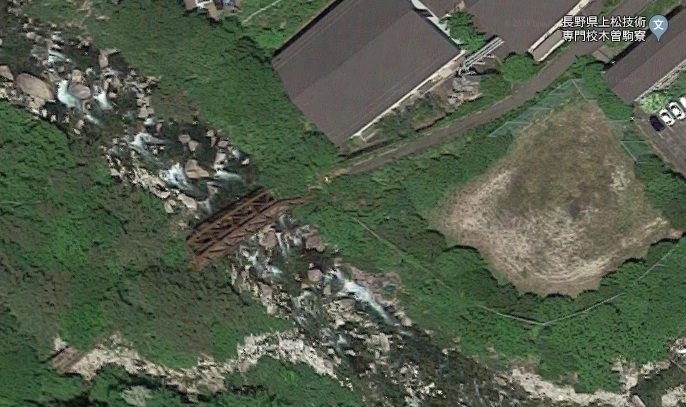
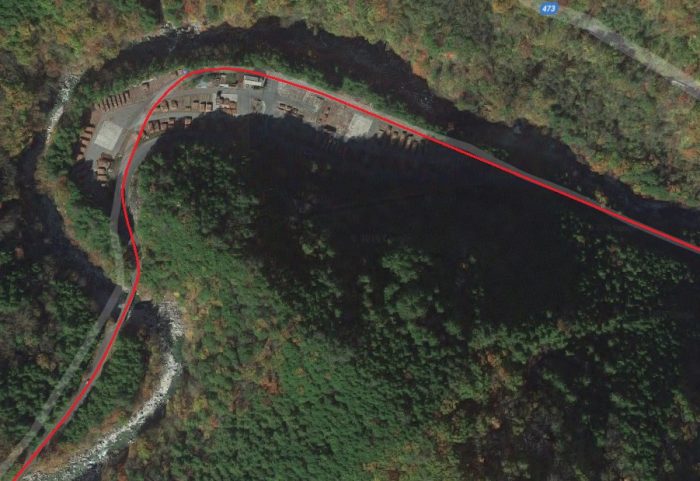
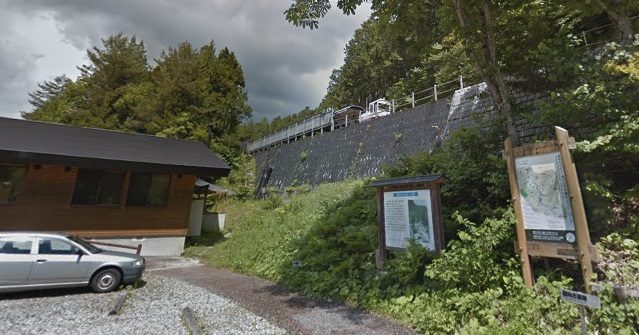
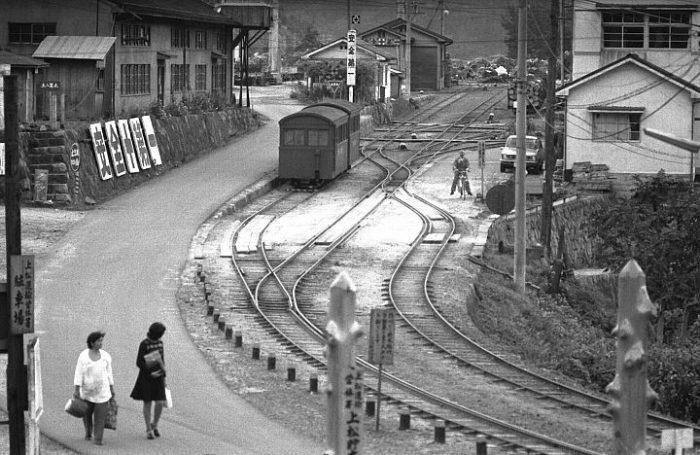
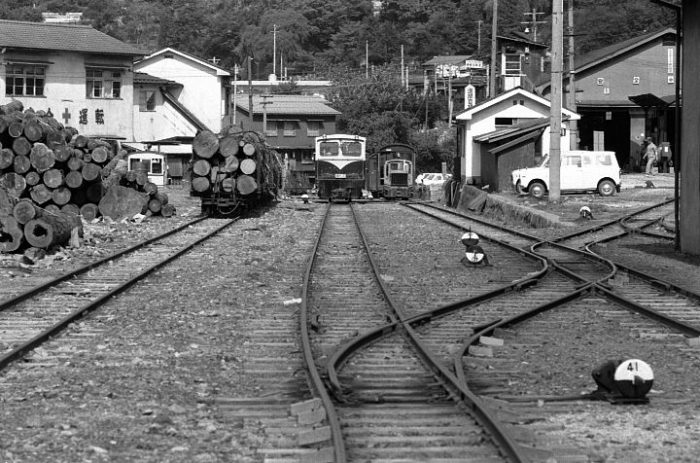
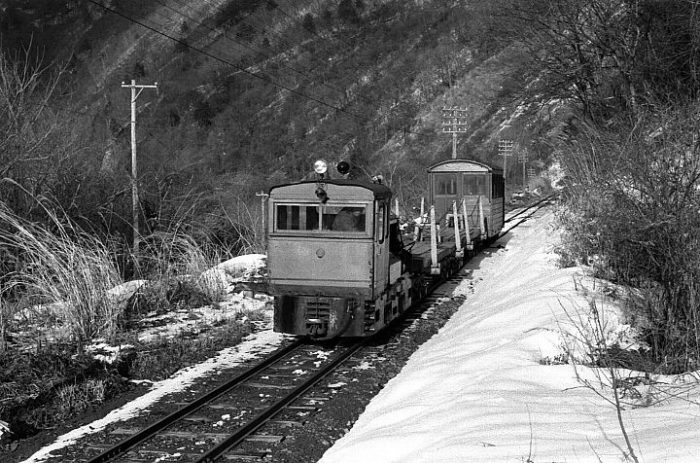
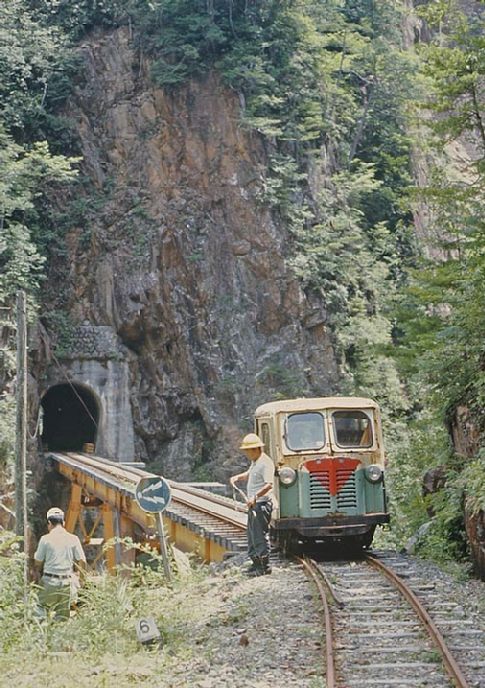
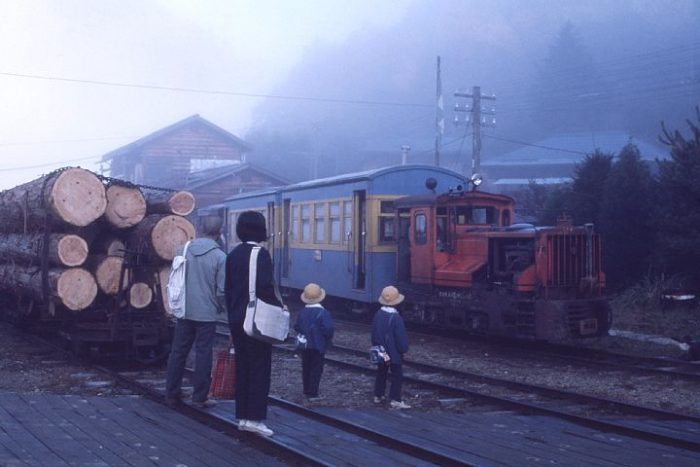
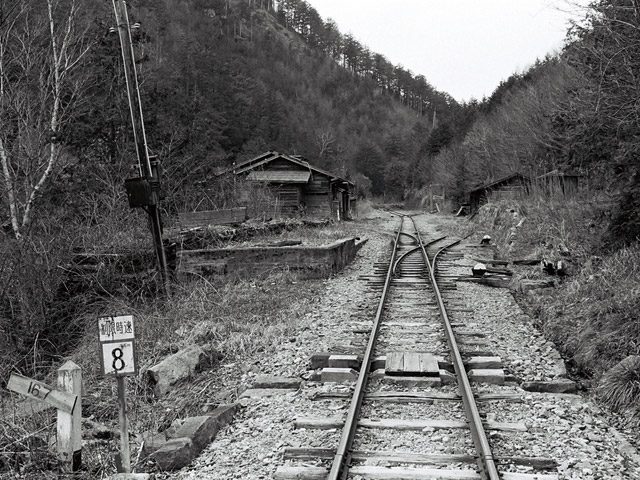
 There is an interesting feature in Agematsu which I have discovered on-line. [27] There was a short link line between the high-level railway station and yards and the sawmill in the Kiso River Valley floor. It included a sharp loop as shown in the adjacent image at position ‘A’. [27]


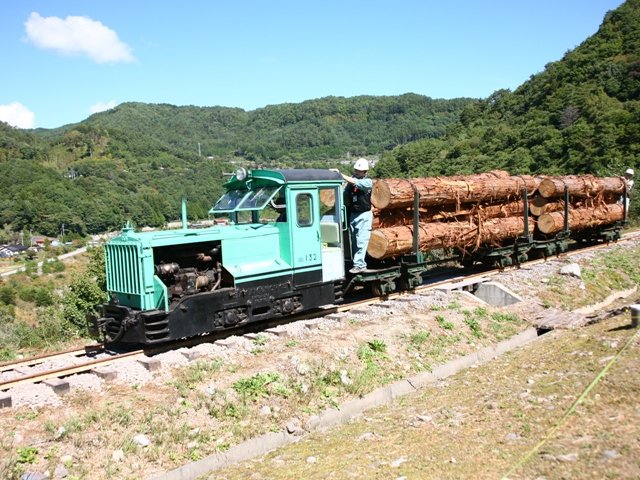


 Keeling travelled round a whole series of different Works and Tramroads which included: Fothergill’s Ironworks at Abernant (owned by The Aberdare Iron Company); and the Neath Abbey Iron Company’s works, an establishment with a history as venerable as its name suggests, having been established in 1792. [1]


