
 This short series of posts was prompted by encountering a piece about the line on a facebook group. The group:
https://www.facebook.com/groups/rtvanished
The substantial link:
http://rfbwharailway.blogspot.com/
In my first post I provided a few pictures of the station at Westward Ho! which had not appeared on the links above. This post now follows the line from Bideford to Westward Ho!
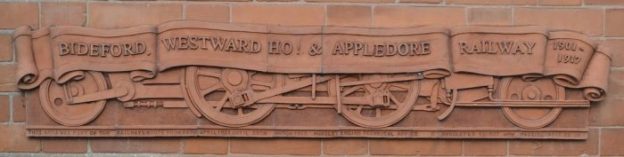
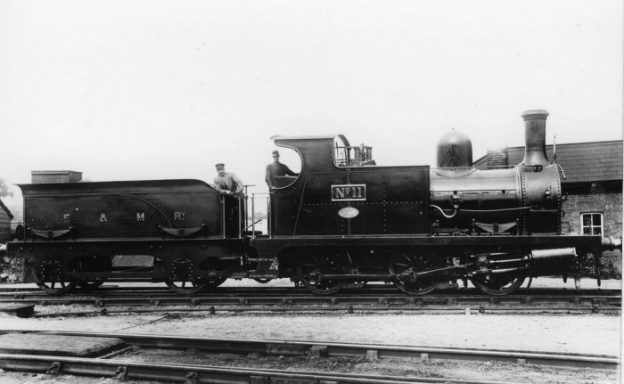
The Bideford, Westward Ho! & Appledore Railway was incorporated on 21 May 1896, with its Head Office address at the Electrical Federation Offices in Kingsway, London WC2. Soon after the line passed to the British Electric Traction Company (BET). It was not until 24 April 1901 that the single track line was opened as far as Northam, although the first trial train ran with a few friends of the directors in January 1901. The first train, pulled by Grenville was played off by Herr Groop’s German Band which had been hired for the season and it reached speeds of 36 mph on its inaugural run. The remaining extension to Appledore finally opened in 1908, on 1 May, costing £10,000. The railway was built in three sections, with the first being from Bideford for just over the third of a kilometre; the second from the termination of the first, to Westward Ho!, a length 6 t0 7 kilometres; and the third being from Westward Ho! to Appledore, a length of between 3 and 4 kilometres. [3]
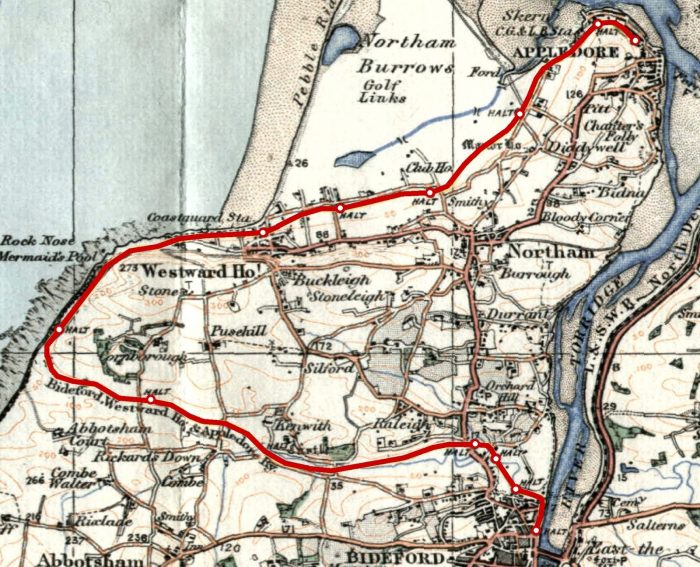
Bideford to Westward Ho!
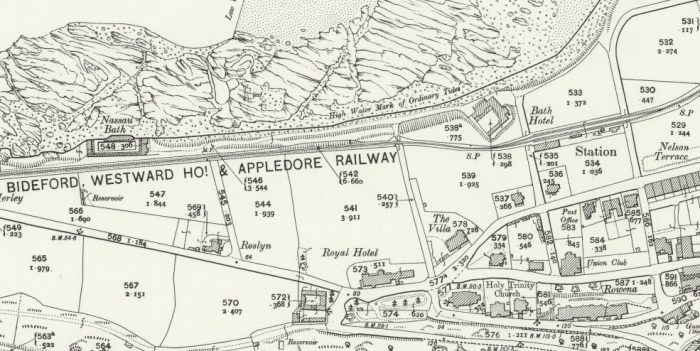
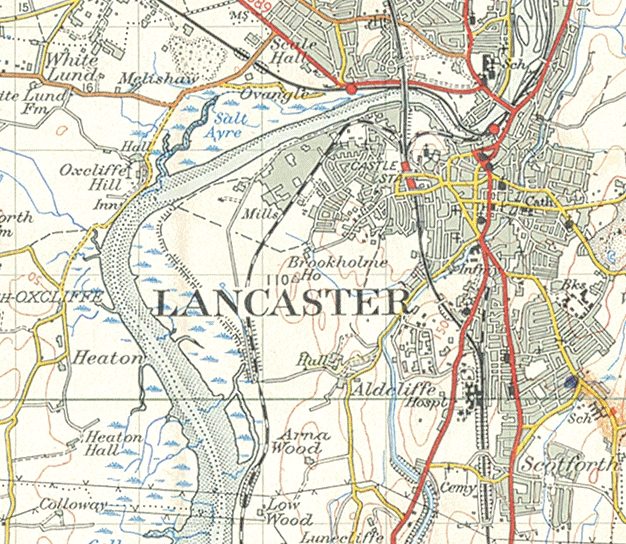
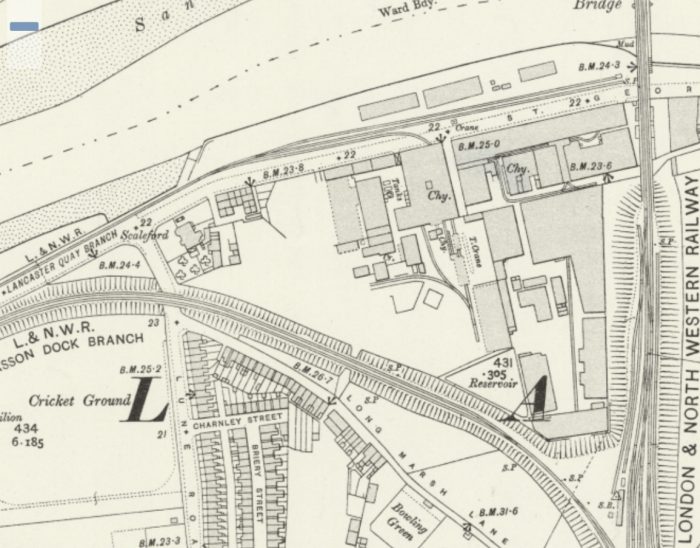
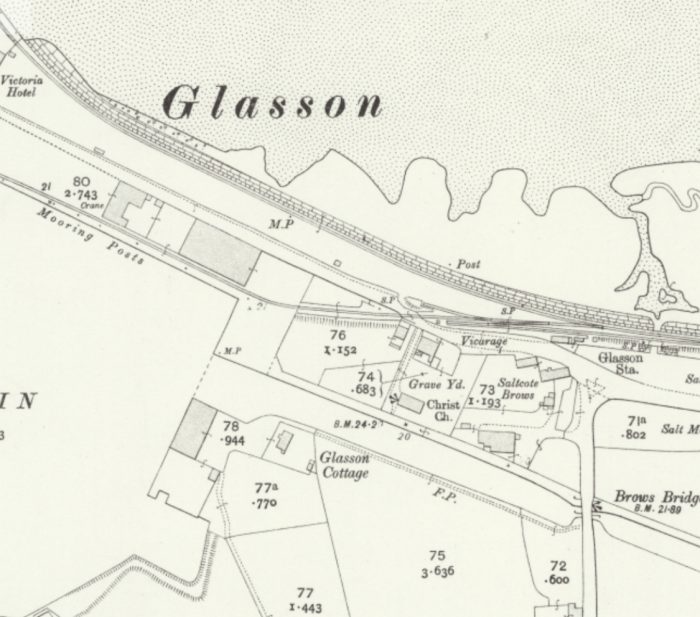
The OS Map extract below shows the relative locations of the two stations at Bideford.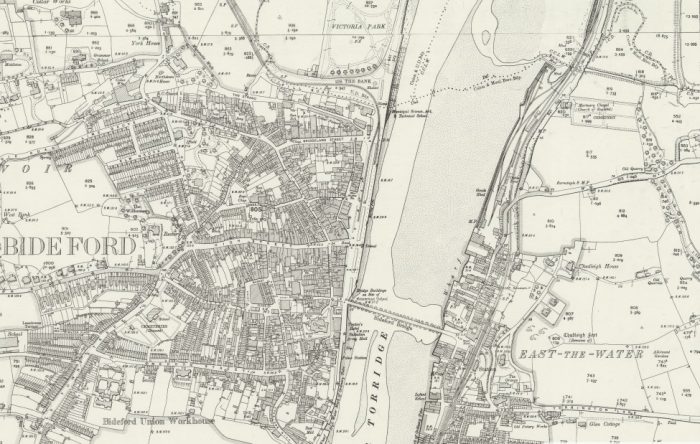
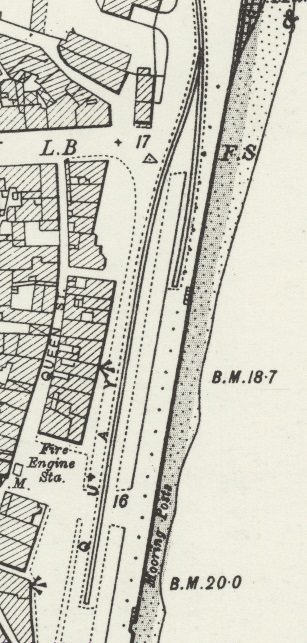 The map extract above shows the town of Bideford. It had been intended to link the two lines serving Bideford. Indeed a locomotive on rails did cross the river here – photographic evidence can be found below! [5][4]
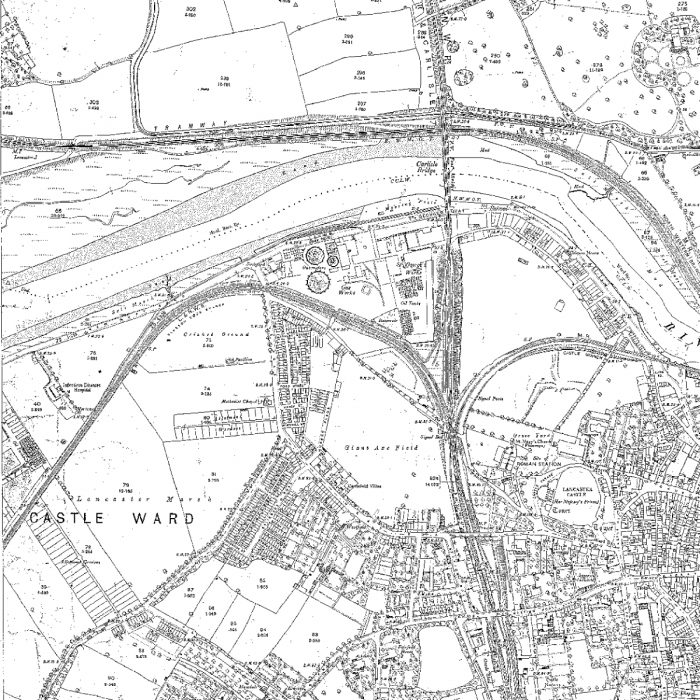
The adjacent map extract from the same OS Sheet shows clearly how spartan the facilities on ‘The Quay’ on the West side of the river were. It is a clear indication that the Bideford, Westward Ho! & Appledore Railway (BWH&A) was not particularly well resourced! [5]
One bit of trivia is highlighted by the second monchrome image below. It is taken on the day of the opening of the railway station on the West side of the River Torridge. A Hungarian Brass Band was hired to play for the occasion and are seen gathered around the official train of the day in 1901. [6]
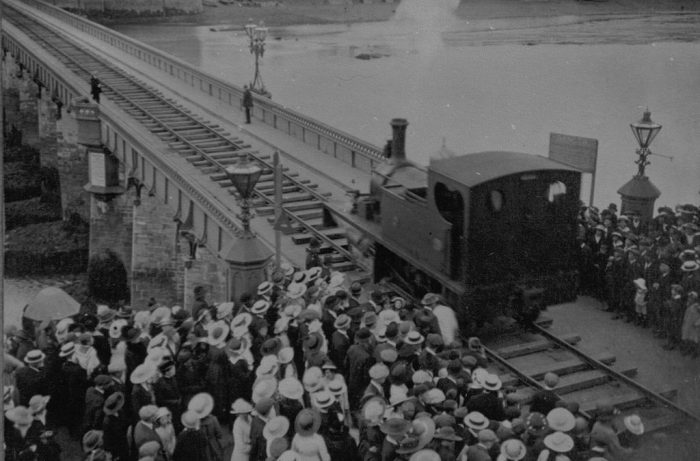 1917: a steam engine crosses Bideford Bridge on rails! [4]
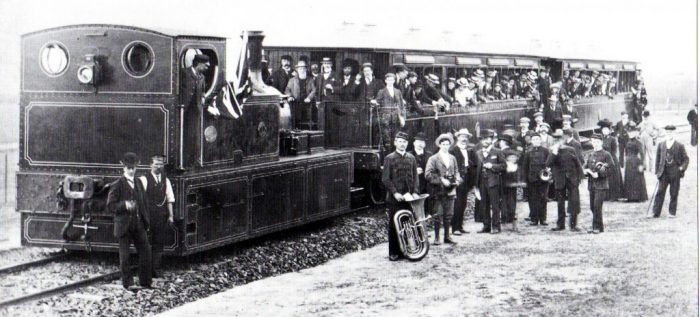 The official train at the BWH&A Station at Bideford on the opening day in 1901. [6]
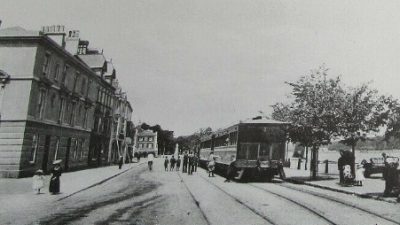
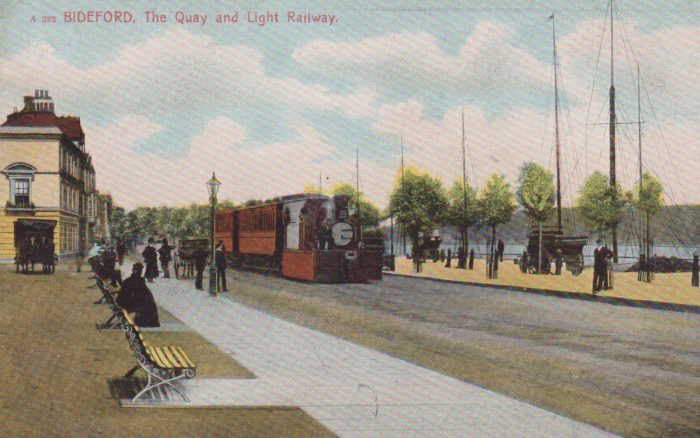 Bideford Quay and Light Railway in the early 1900s. [7]
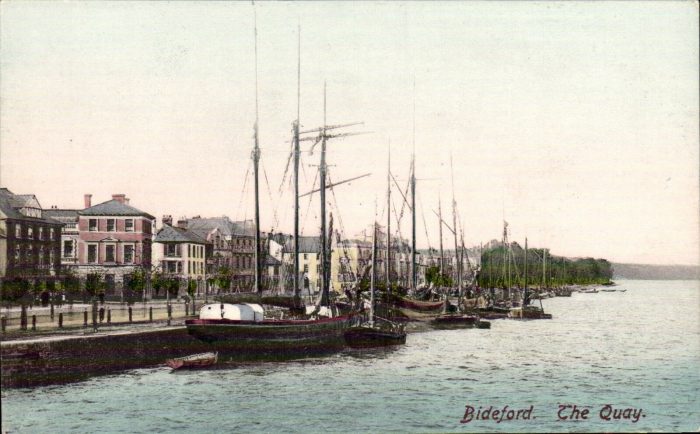
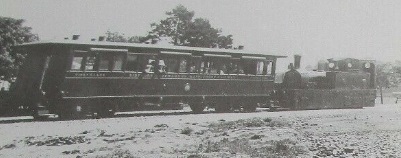
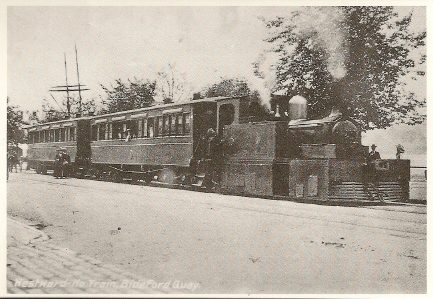
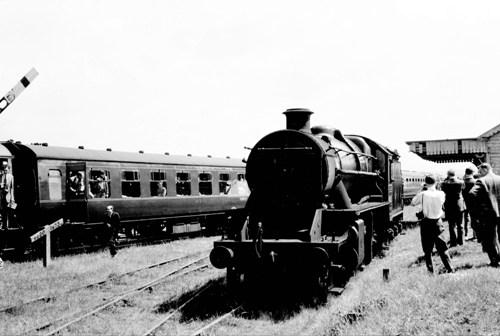
Three smaller images of BWH&A Trains in Bideford. [8]
The first full width image below shows two locomotives at Bideford Quay in around 1905. [13]
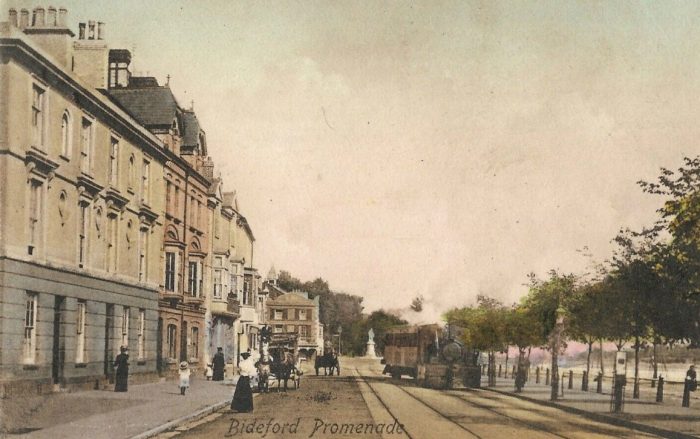
The first augmented colour print below also shows The Quay in Bideford with a BWH&A train approaching the terminus of the line. [9]
The next augmented colour image shows the Quay from Bideford Bridge in the early 1900s. There is no sign of the railway in this image. [10]
The sepia image from 1943 shows Bideford Quay again. Buses now take pride of place and the rails are long-gone. [11]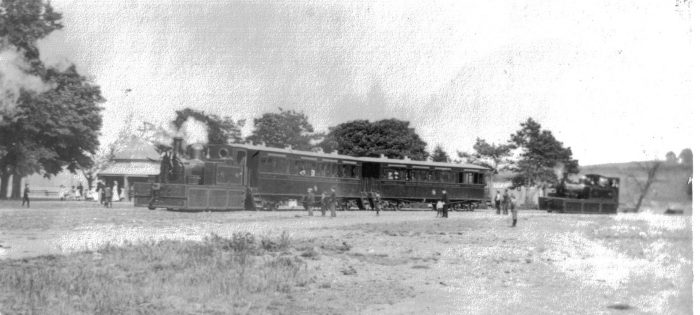
 The next few picture seek to replicate the three above, but taken in 2018.
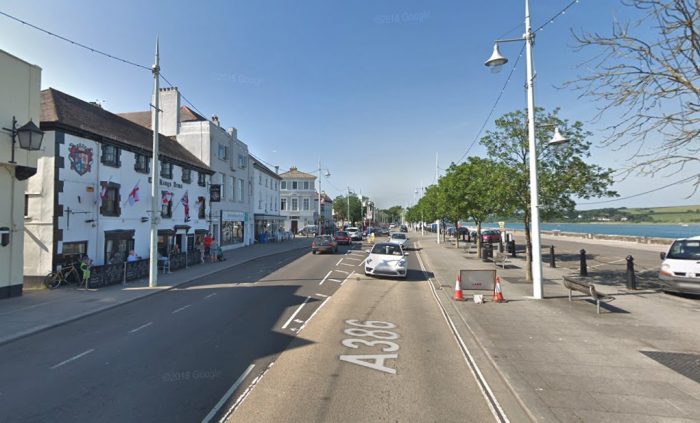 Looking North along The Quay (Google Streetview).
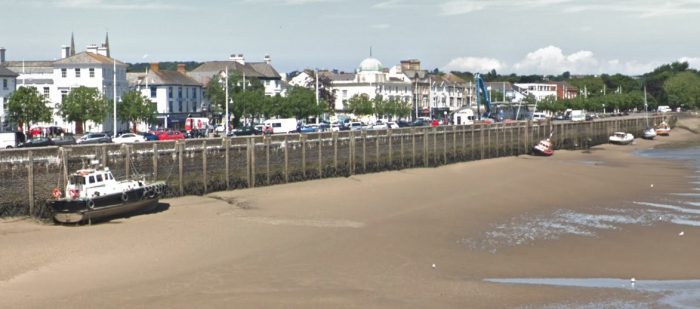 The view of The Quay from Bideford Bridge in June 2018 (Google Streetview).
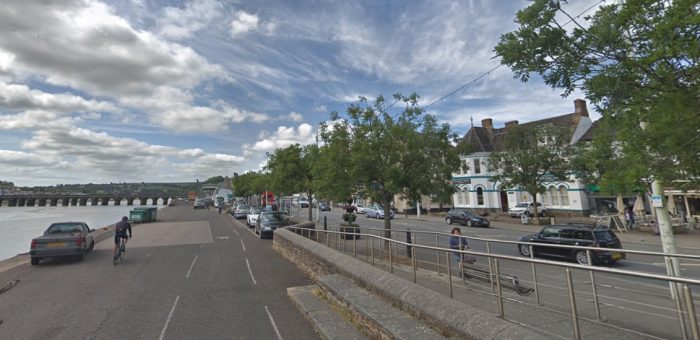 An attempt to replicate the 1943 image looking South along the Quay. The reference point is the white building seen between the trees on this image which appears inn a similar position in the picture taken in 1943.
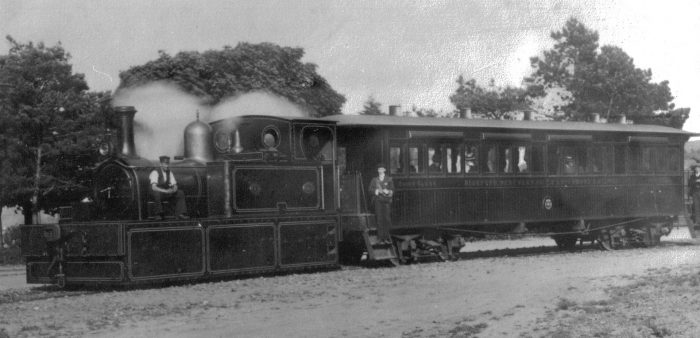 Another view taken at Bideford Quay. [12][13]
From The Quay, the line turned West and began to climb The Bank with Victoria Park on its right and Pill Road on its left. The old railway formation has become the modern A386, Kingsley Road as can be seen on the extracts from the OS Map and Google Maps below.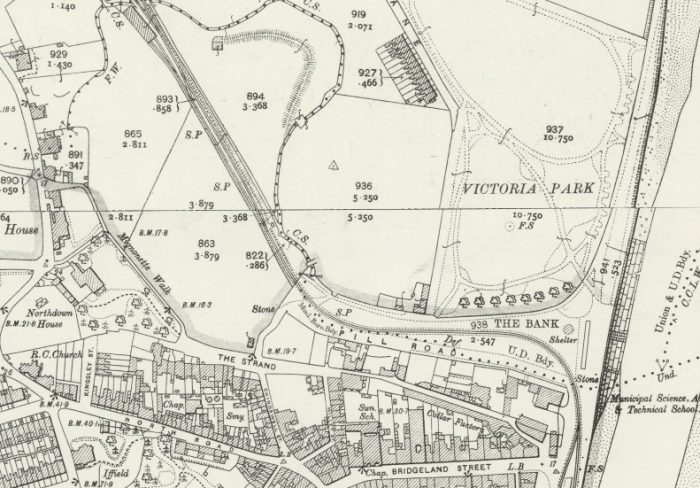
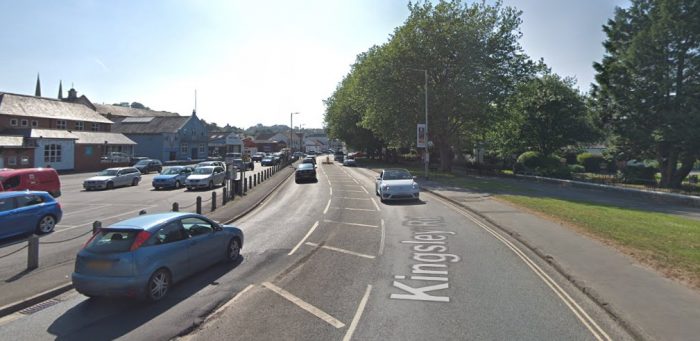 Looking West up Kingsley Road. The old railway formation/route became the A386.
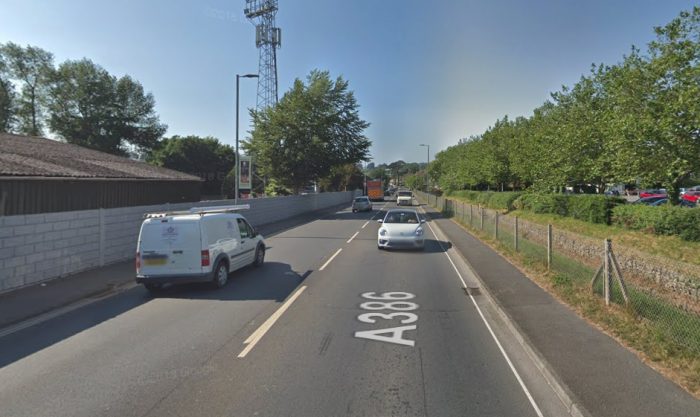 We continue to follow the route of the old railway and the A386 past the modern superstore to the right and Bideford FC to the left.
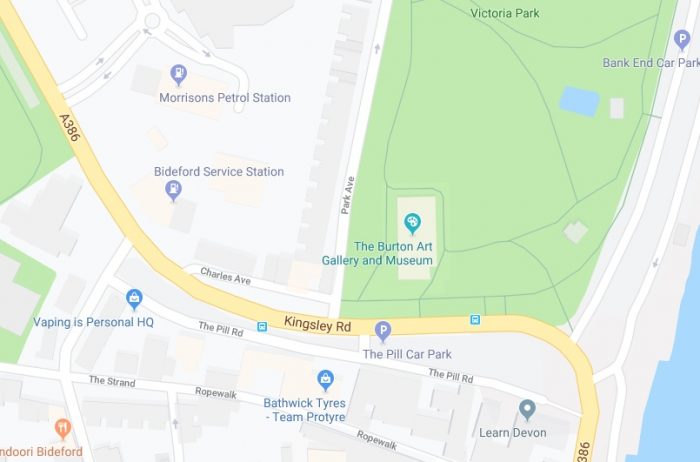
 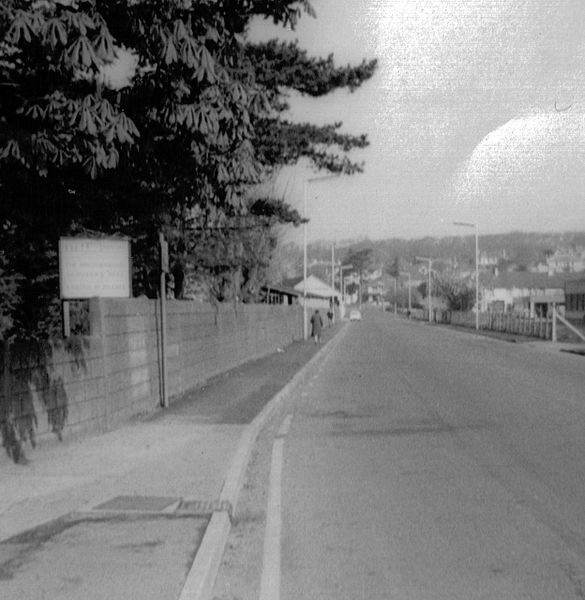 The road passed the location of the modern Morrison’s store with the Carriage Shed visible in the distance to the left of the A386. [15]
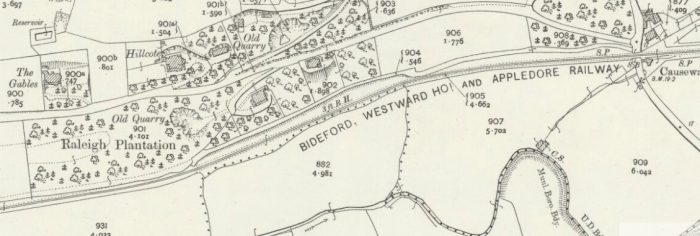
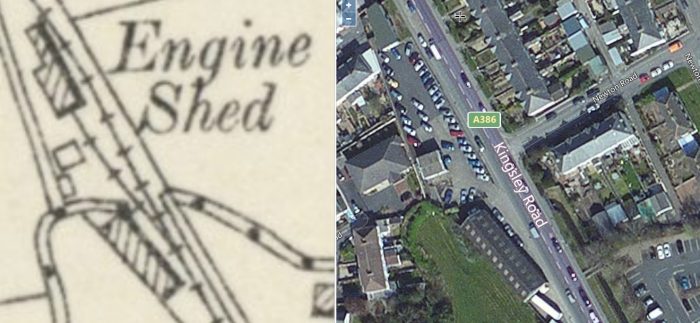 Just to the North of the football ground we find the old carriage shed at a slight angle to the A386. To its North was the Engine Shed. [5]
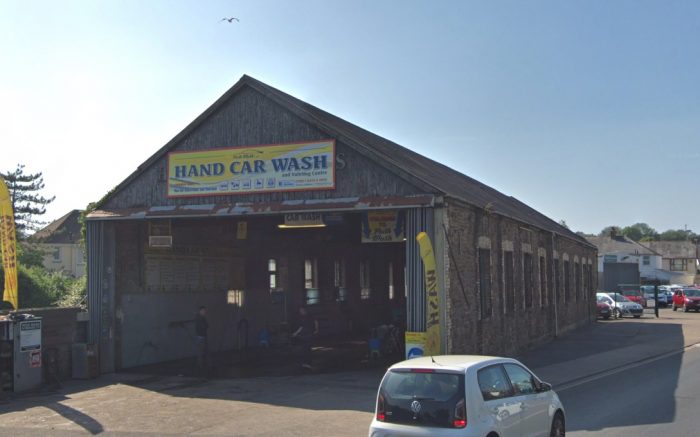 The Carriage Shed. This picture was taken in July 2018.
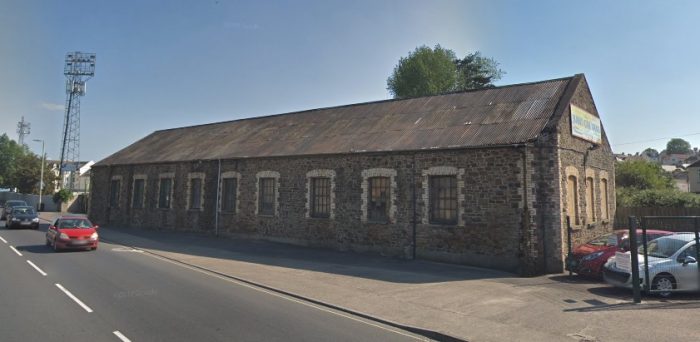
 The Carriage Shed taken in July 2018 from a little further North along the A386. It is surprising that the carriage shed has survived when the engine shed has not. The tracks for both are shown on the adjacent satellite image. [11]
I have not been able to find any pictures of the BWH&A engine shed at Bideford.
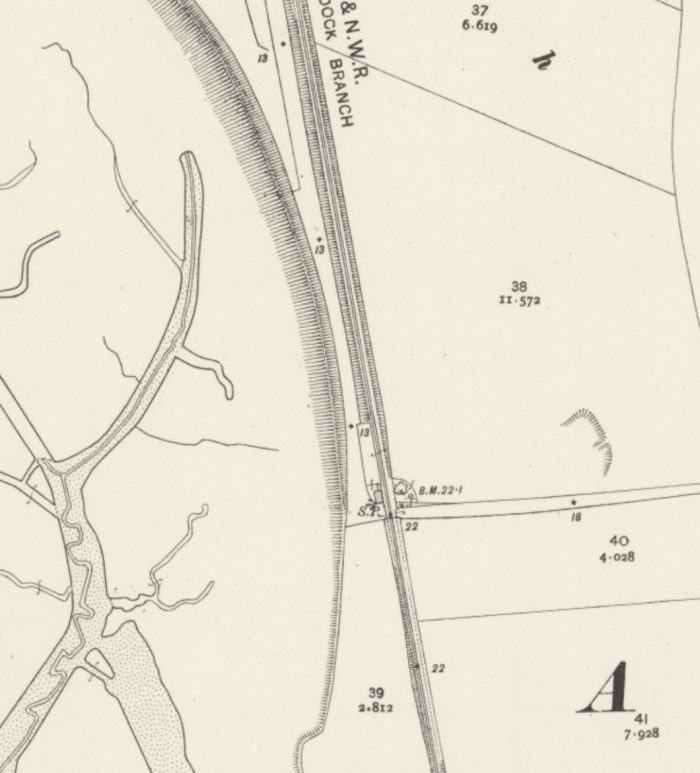
A
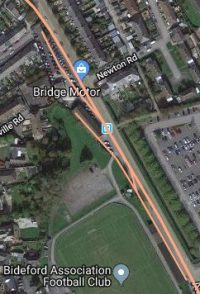
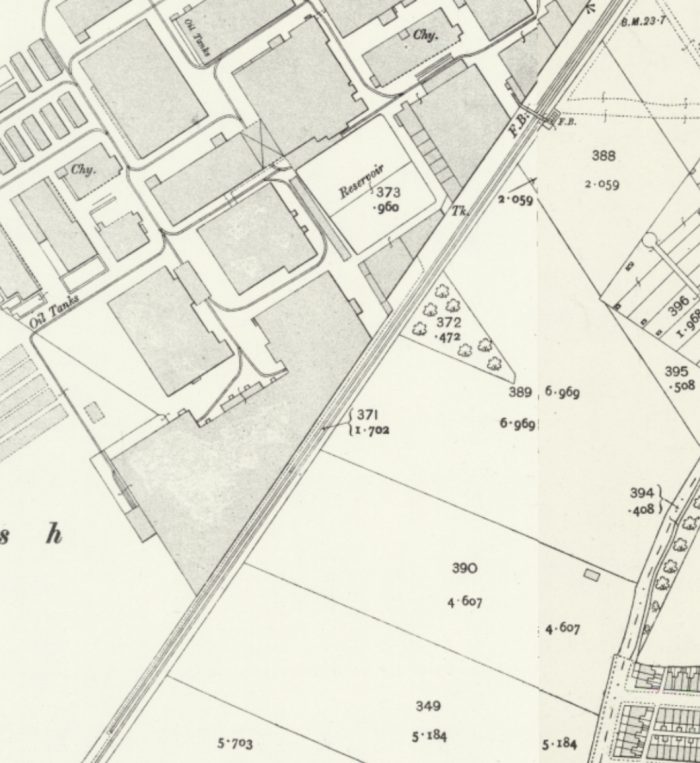
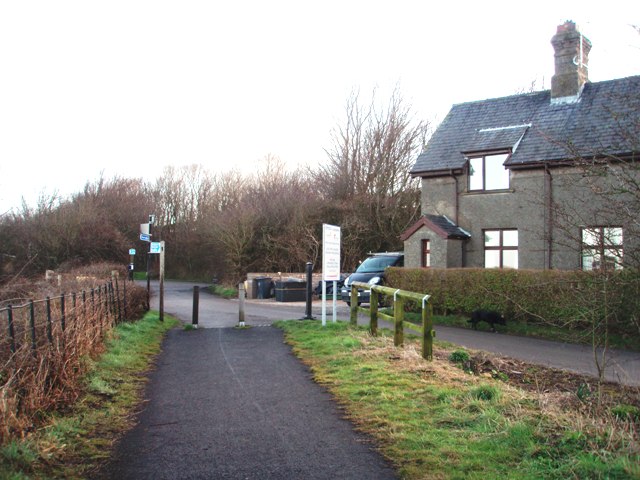
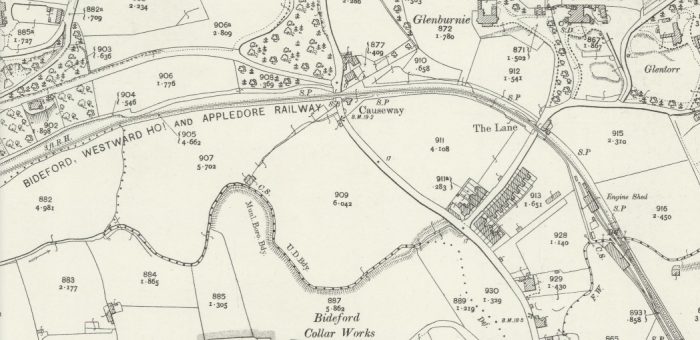 The trackbed of the old railway continues beyond the carriage and engine sheds along the line of today’s A386 for a short distance. At a point South of ‘Glenburnie’ and East of ‘Causeway’ on the above OS Map the road and trackbed separate with the modern road heading away to the North and the trackbed heading West. It crossed the old road north (Northam Road) out of Bideford to the left of ‘Causeway’ on the level adjacent to a Halt and a two and a half storey signal box. The signal box was built to this height to allow approaching road traffic to be spotted. [5][23: p16]
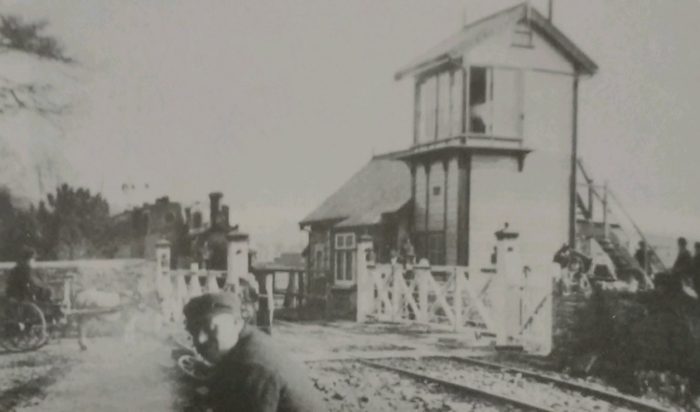
This photo shows the road crossing over Northam Road at The. Causeway, the crossing keeper’s home and the tall signal box.
 A generally westerly trajectory then took the old line beneath Raleigh Plantation (above). [5]
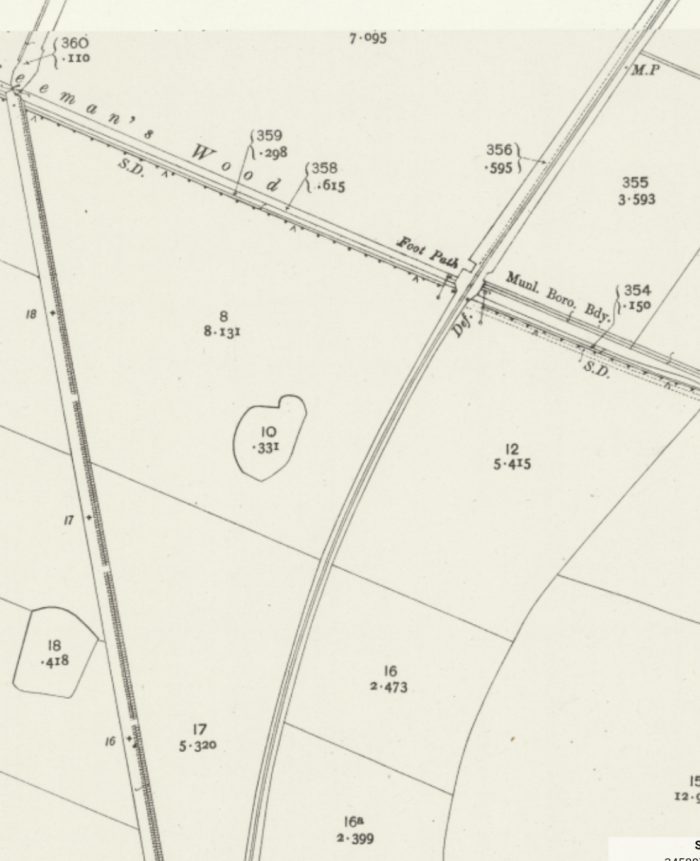
 The old line is shown on the modern satellite image above (Google Maps) its route is highlighted by a line of deciduous trees. It continued in a westerly direction travelling to the South of Turner’s Wood and Kenwith Castle as shown on the OS Map extract’s below. [5] South of Turner’s Wood the old line crossed a lane on an over-bridge. The bridge over the stream to the North of the railway line remains but there is no evidence of the railway bridge or embankment at that location. The modern A39, which is prominent on the satellite image above, does not show in any form in the older OS Map extracts.
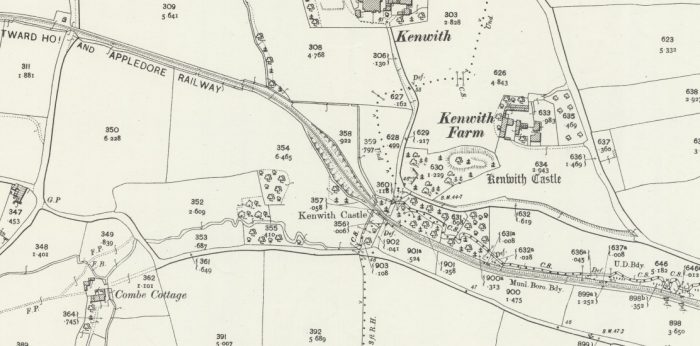 Kenwith Castle is now a Care Home. [17] The Castle was first known as Kenwith Lodge. The mid-eighteenth century building, with an earlier wing, was later used as the dower house of the Pine-Coffin family at nearby Portledge. In 1850 Dr Hevwood was the owner and by 1883 it was occupied by Major General Hickman Thomas Molesworth. The Castellated Regency Gothic front effectively disguises the older building. More recently, the building has been a hotel before being converted into use as a residential home. There is a steel line engraving entitled ‘Kenwith Lodge, North Devon, the seat of W. C. Heywood M.D.’ by H. Wallis after W. H. Bartlett, 1831 and the eighteenth-century gazebo seen in the engraving survives. [18] I believe that the image below is a copy of this engraving. [19]
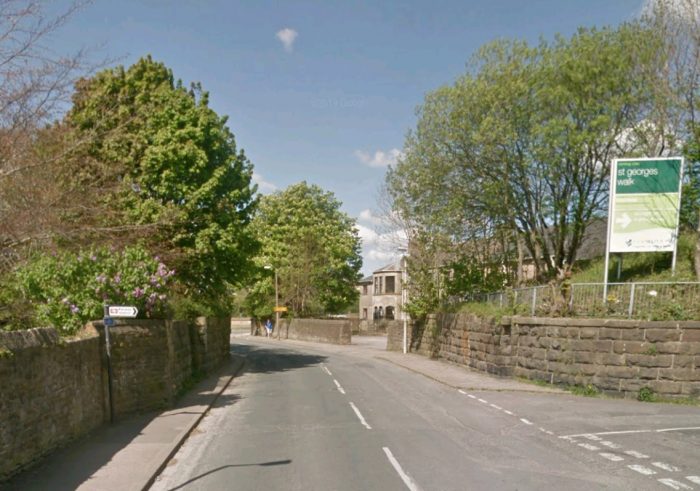
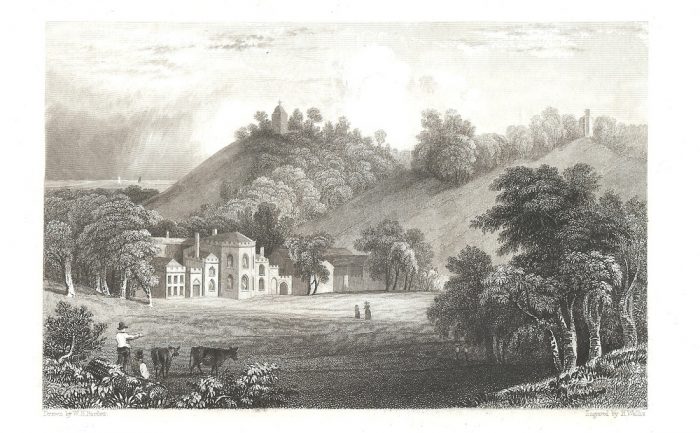 Beyond Kenwith Castle the old line travelled westwards crossing over two lanes/roads by means of over-bridges. The first is on the last OS Map extract above and the location is shown in the first image below (Google Streetview) which is taken from the South of the old line. Again, there is no evidence of the bridge or embankment which carried the old line, nor of the Halt which existed somewhere nearby.
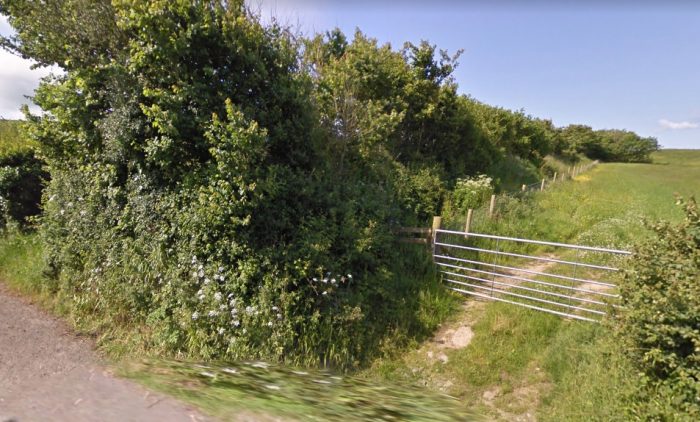
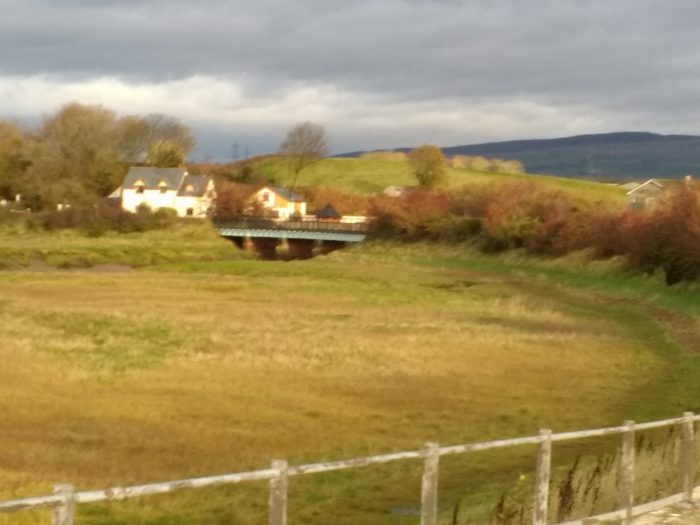
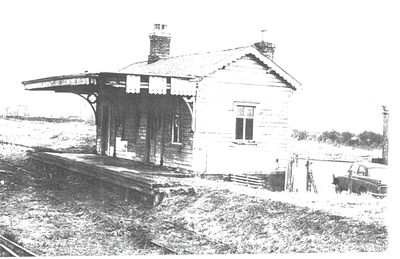
 The second, on the OS Map below, is shown as Abbotsham Road. The photograph below is taken from Abbotsham Road looking Northeast from the South of the line of the railway. The road is now a very minor lane. It was crossed on the level. The railway approached the crossing on a slight embankment as can be seen in the photograph (Google Streetview). There is no obvious sign now-a-days of the halt which existed at this location. The halt was a mile or so from Abbotsham village. A passing loop can be picked out on the OS Map.
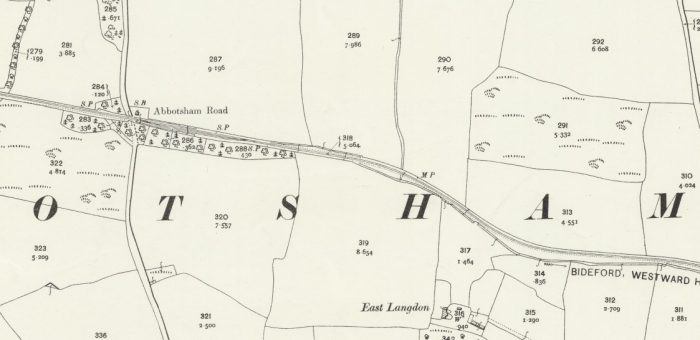
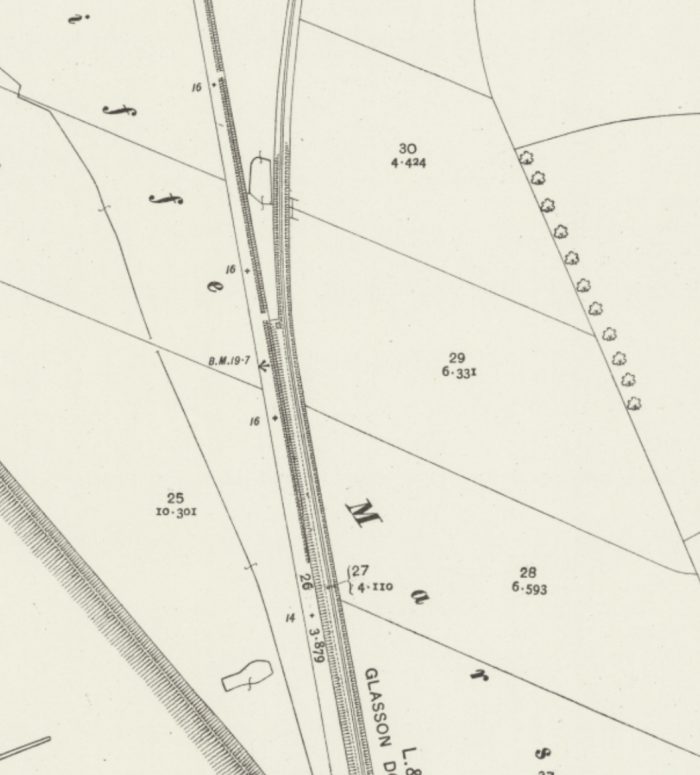
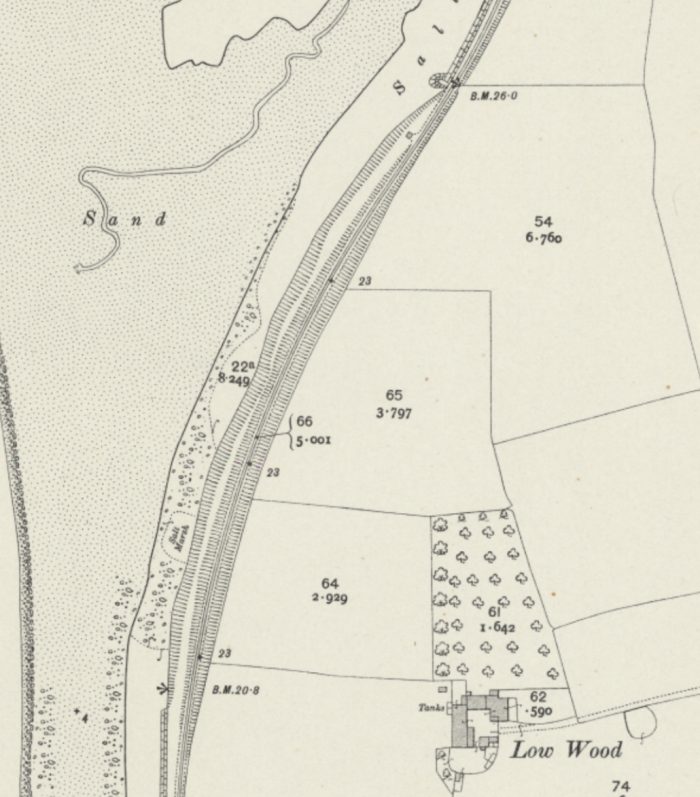
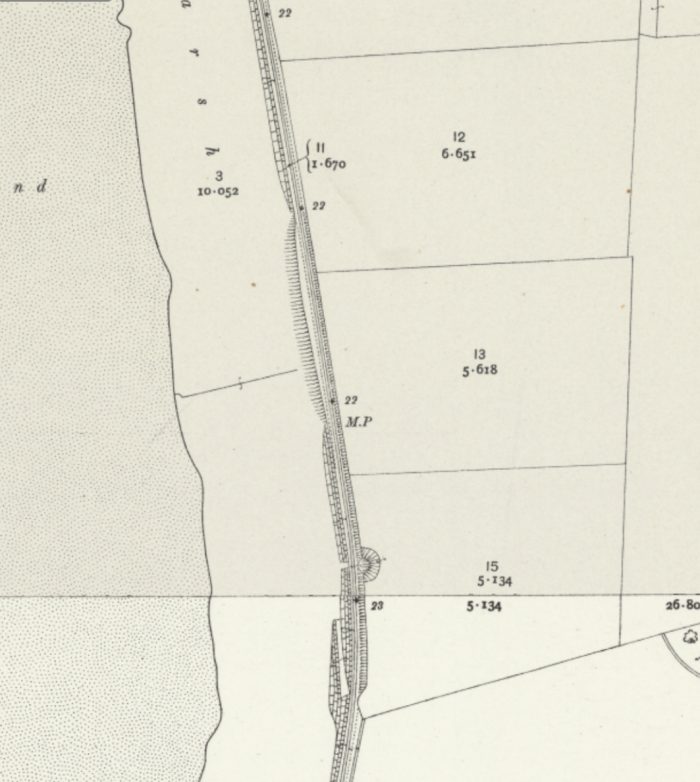
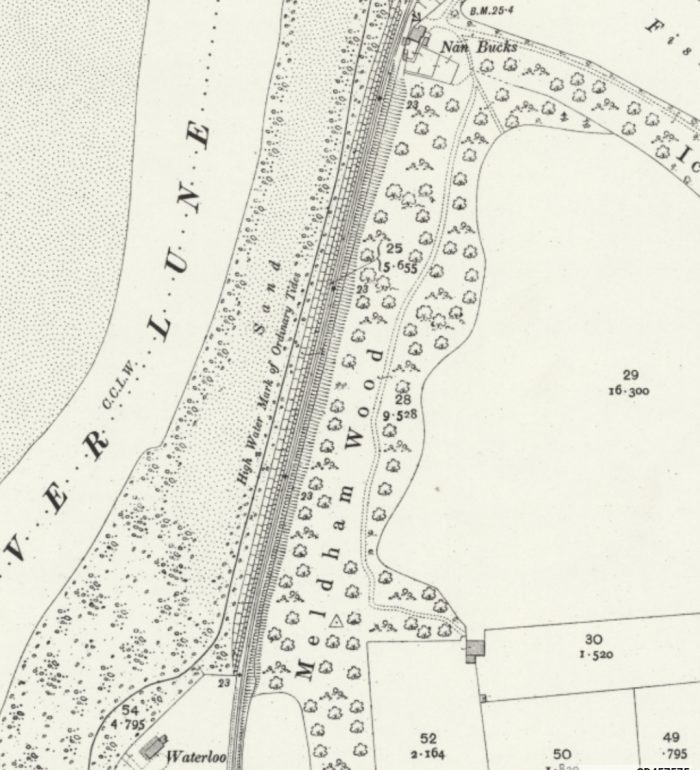
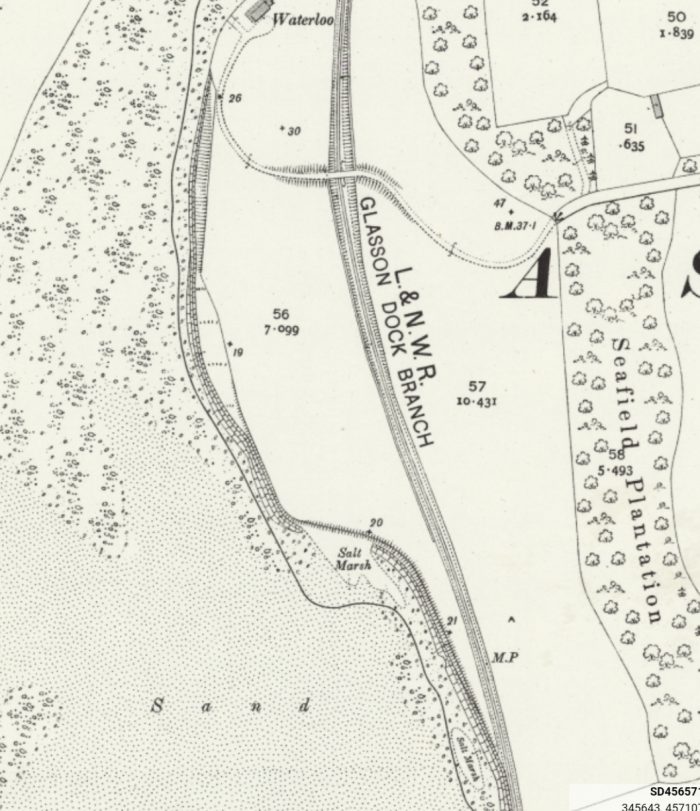
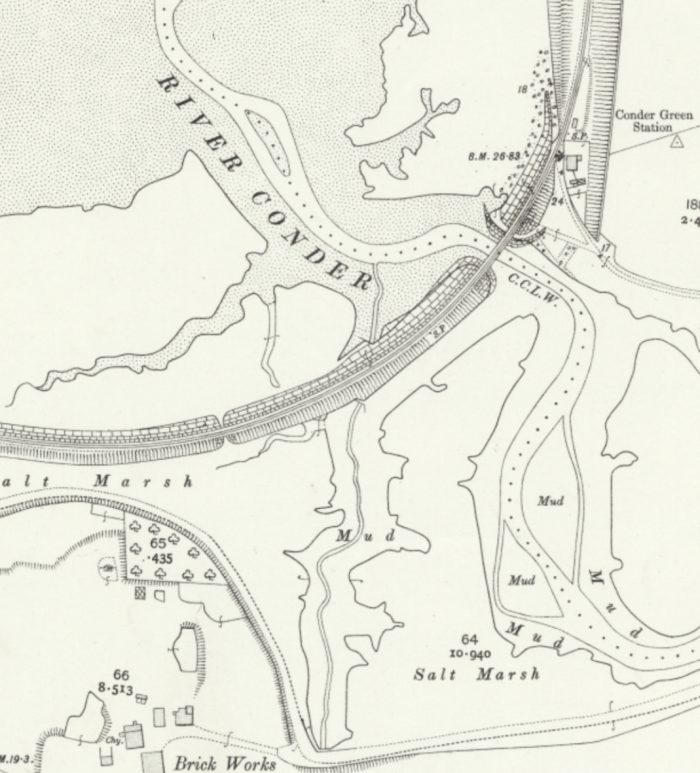
 Beyond Abbotsham Road, the old line travelled only a short distance further in a generally westerly direction before turning northwards as highlighed in the two OS Map extracts below. [5]
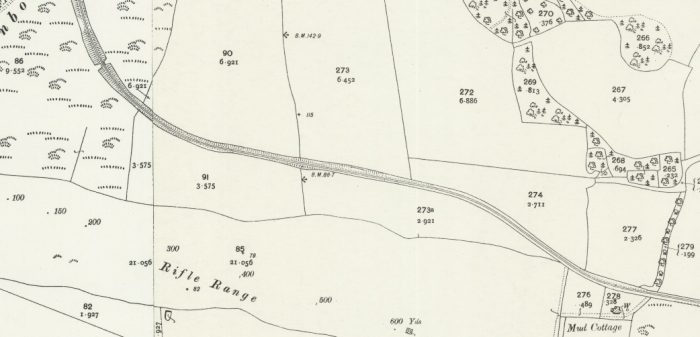
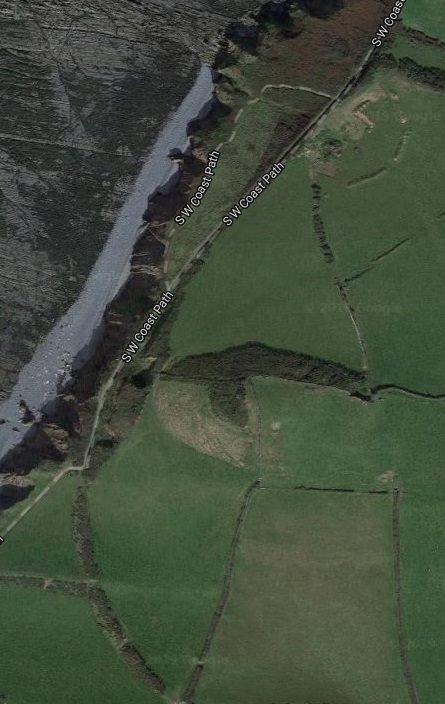
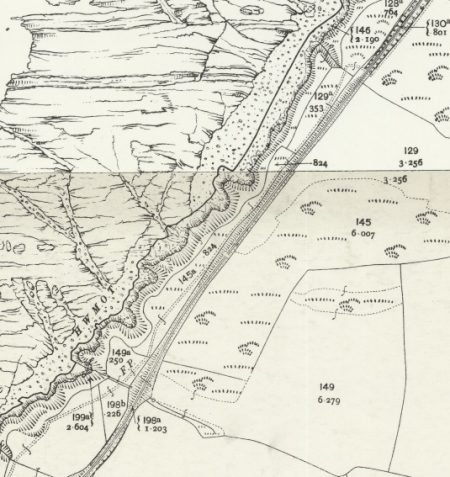
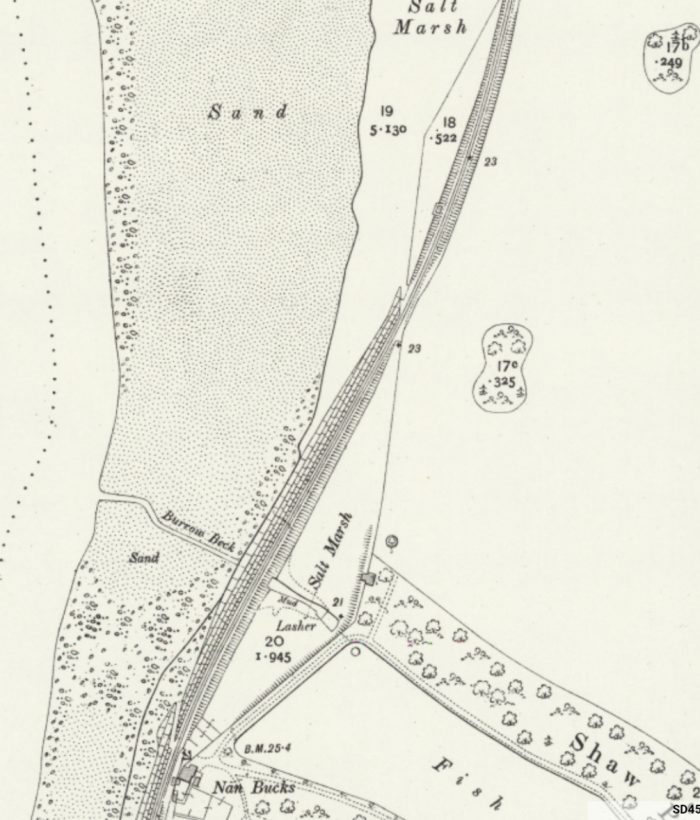
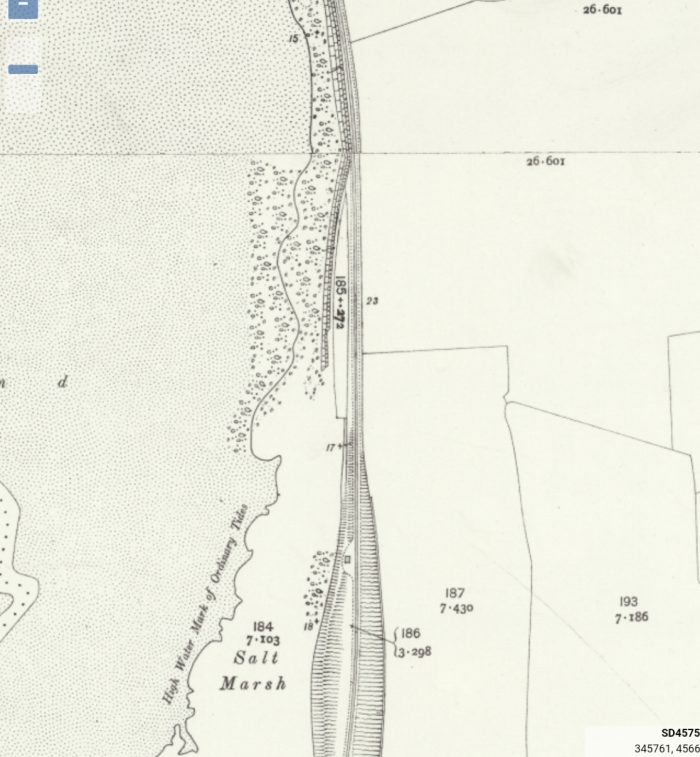
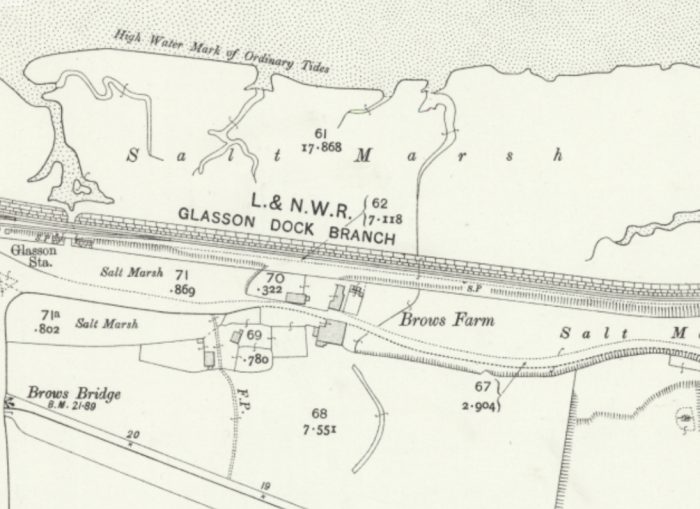
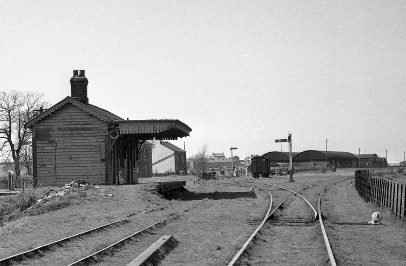
The railway formation in cutting close to the old Cornborough Halt. [22]
Cornborough Cliffs Halt had a platform, but no shelter and was sited on the up side of the line next to the footpath at the waters edge. The line ran through rock cut cuttings up to this point. [23] No sidings or freight facilities were provided. [24]
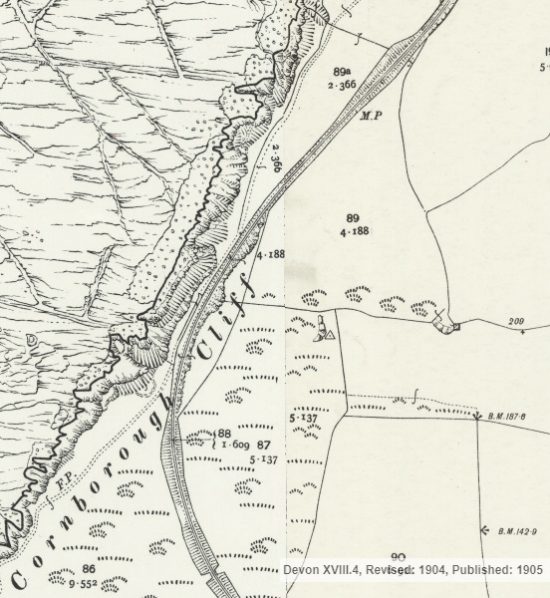
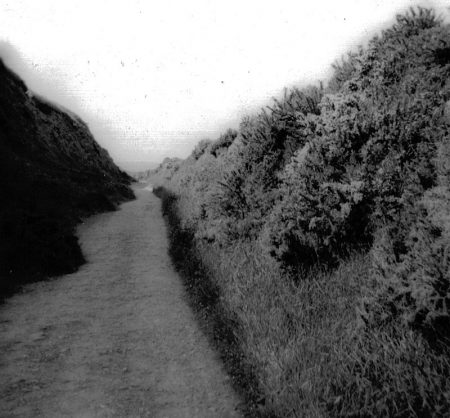
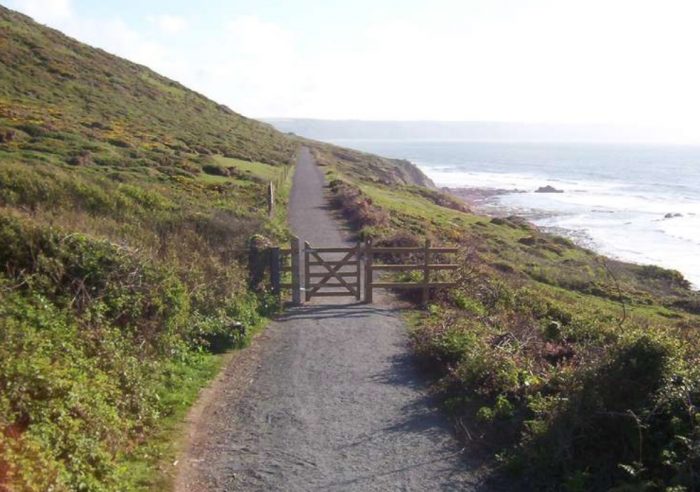
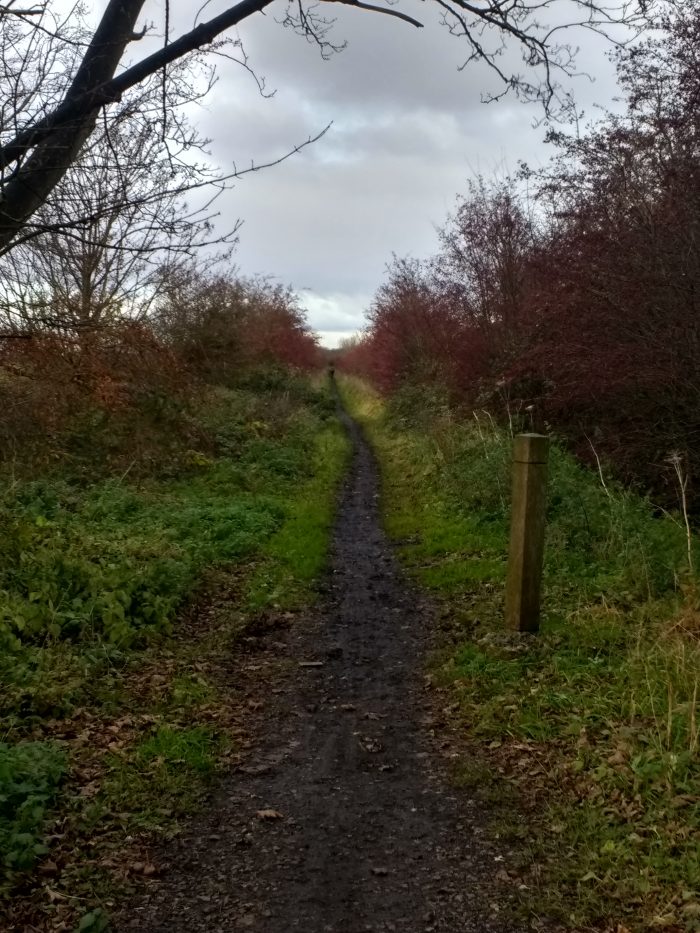
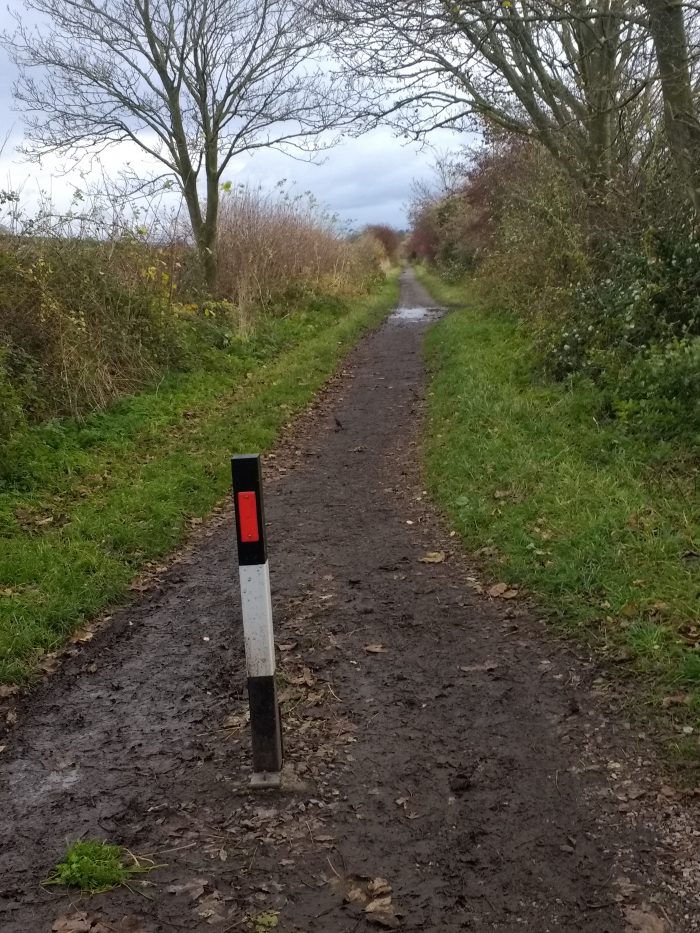
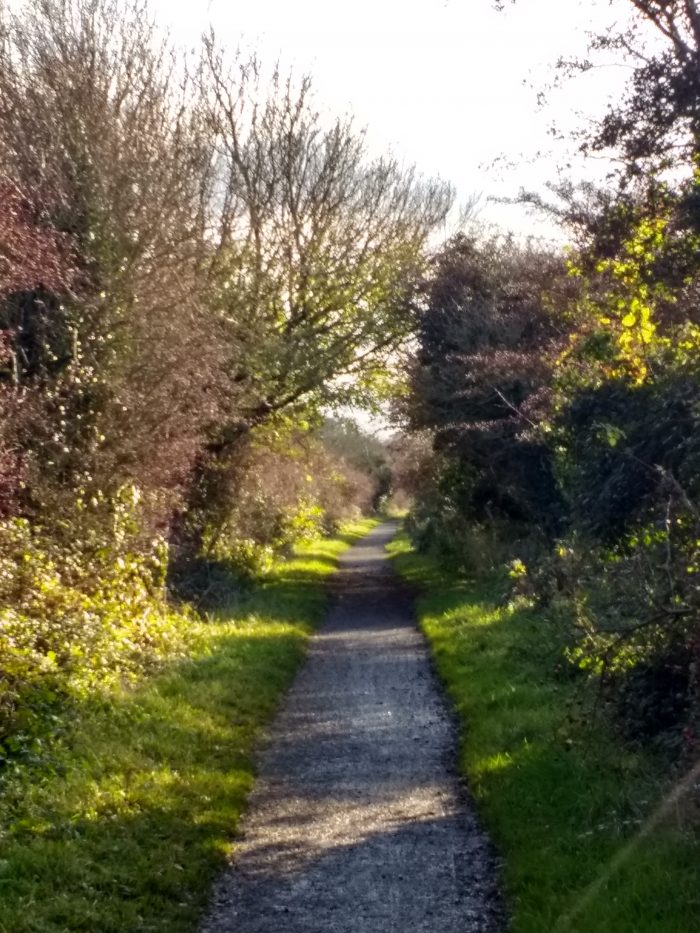
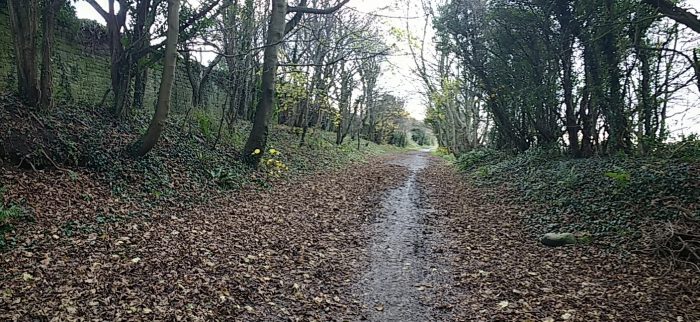
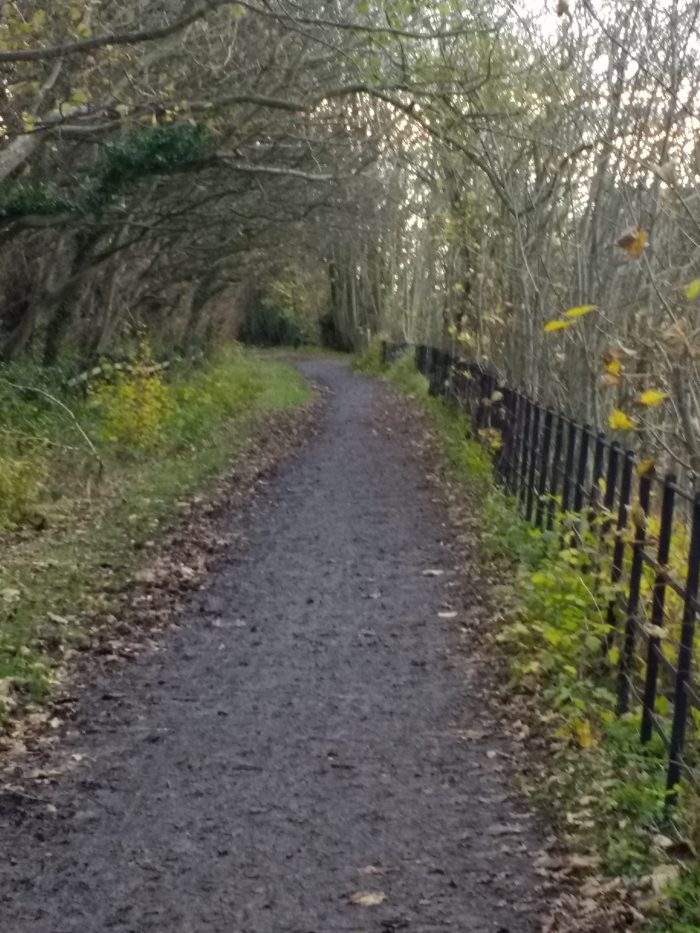
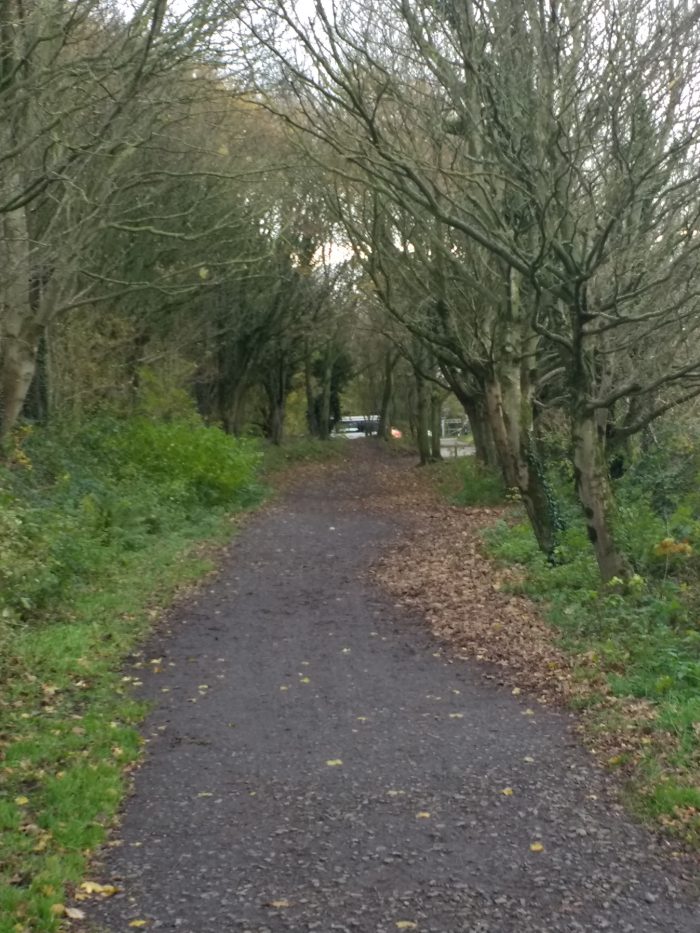
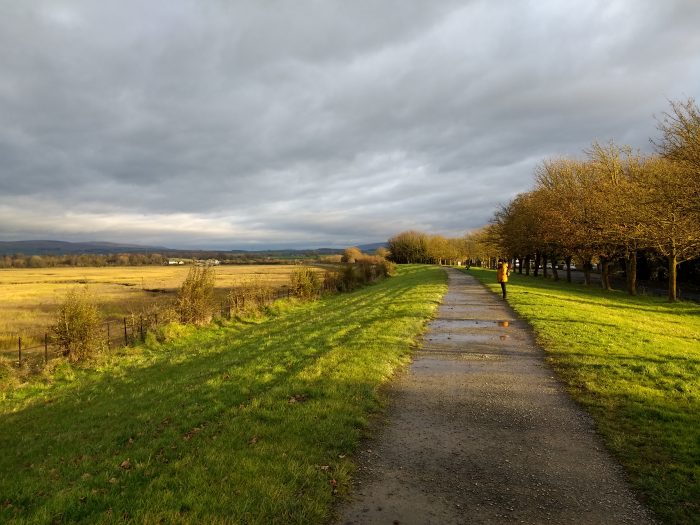
From this point, following the route of the old line is easy. Every walker on the South West Costal Path enjoys the relatively easy grades of the old railway!
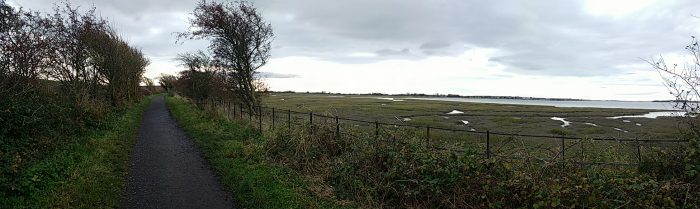
The old line turned North to follow the coast at Cornborough Cliff. The recent satellite image (Google Maps, 2019) shows the South West Coastal Path which joins the formation of the old railway just as it meets the cliffs. From this point it is about 1.5 miles into Westward Ho! The path has been designated for easy access. [20] A few pictures of the footpath/old line follow here and below.
All who chose to walk the South West Coastal path are able to enjoy the gentle grades associated with the old railway from this point into Westward Ho!
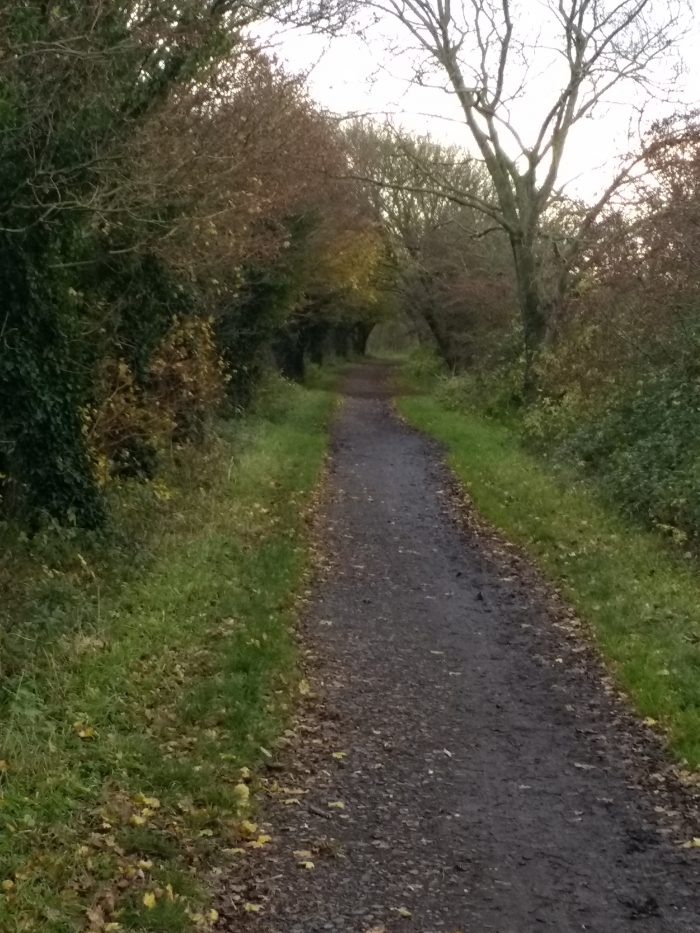
The first colour image below looks Northeast along the old railway formation in 2009, (c) Jordan Walks. [25]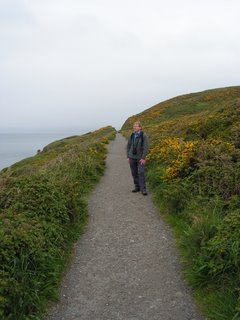
The second colour image looks Southwest along the South West Coastal Path at Cornborough Cliff (c) Grant Wilkey [21]
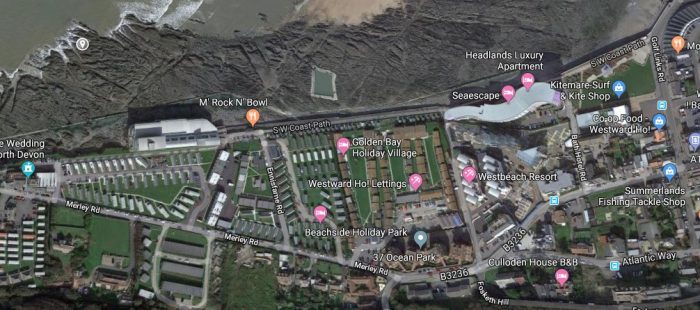
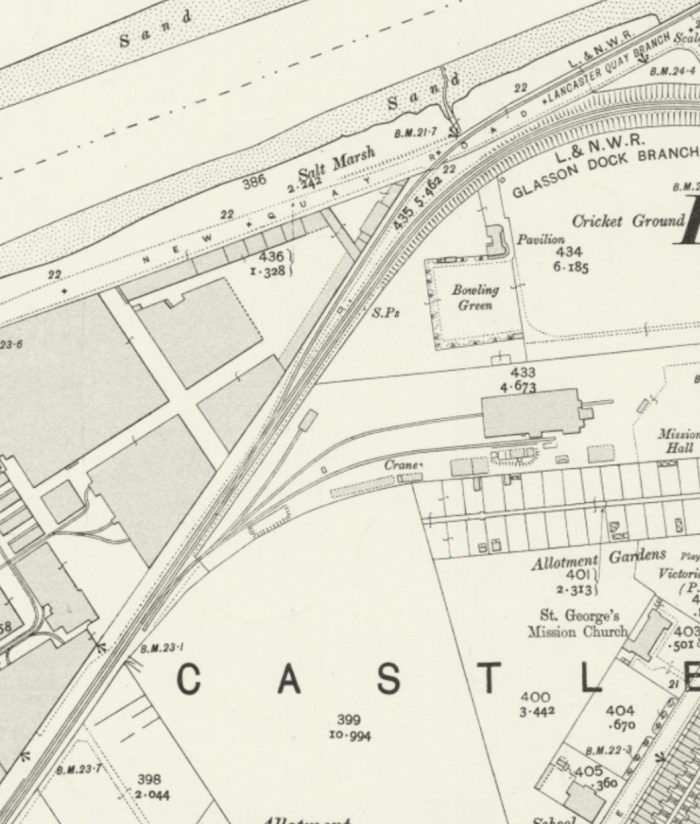
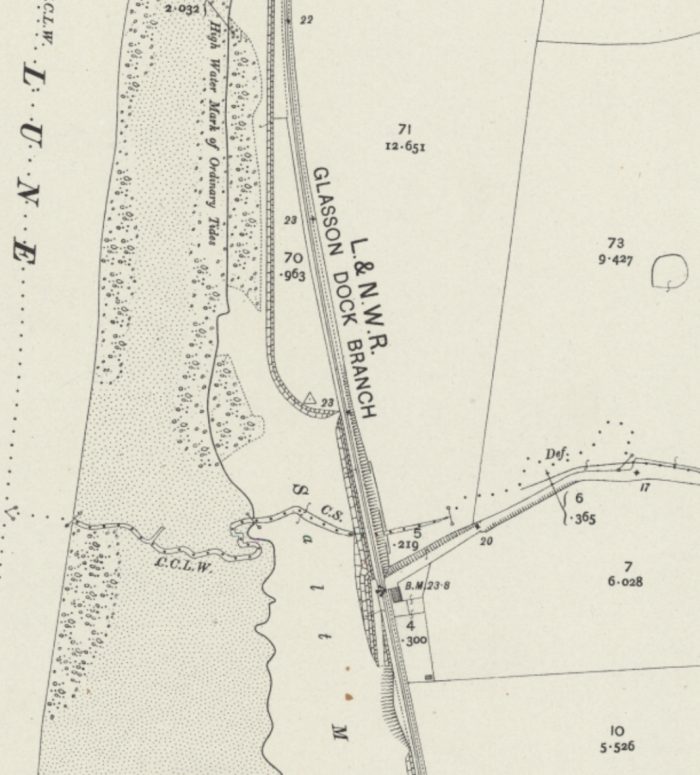
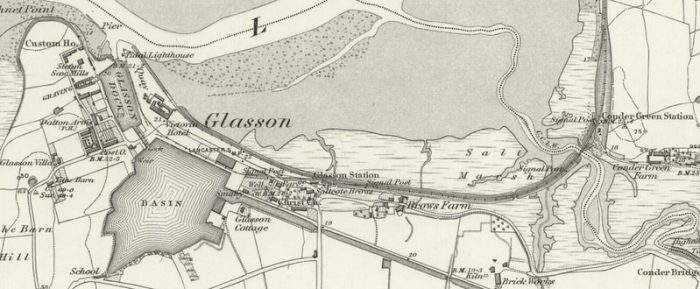
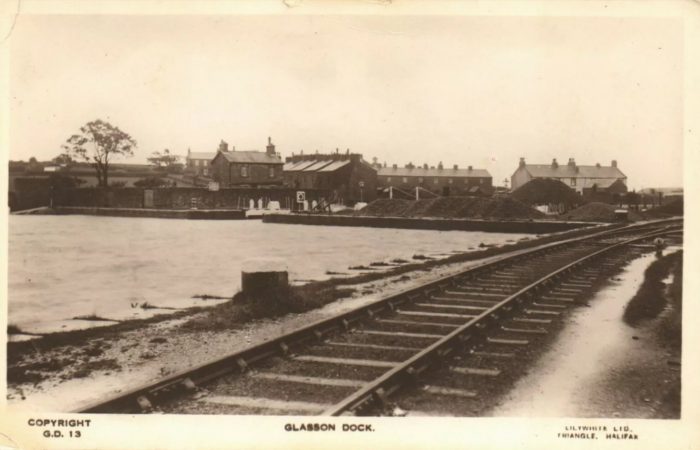
The three OS Map extracts below take us into what was Westward Ho! Railway Station. By the time trains reached the railway station they were travelling in an Easterly direction. There is plenty of room for development shown on the OS Maps and Westward Ho! developed strongly as a resort once the railway had been complete in the early years of the 20th century.
The satellite image below the map extracts shows almost exactly the same area as the last of the OS Maps and shows the develo[pment of the village/town and the significant numbers of static caravans which cover the area to the West of the centre of Westward Ho! The Station and its facilities are long gone, as is the Bath Hotel which was close by.

 “Westward Ho! History” states: [16]
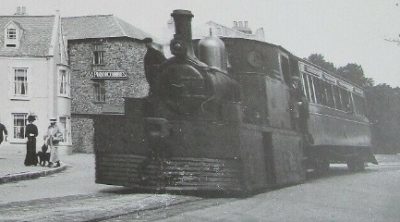
Westward Ho! was the busiest station on the line and it had its own Station Master, Mr. MacLaughlan; it had two platforms, platform lighting, a passing loop, ticket office, an 8-lever signal box and a 2-lever ground frame operated by Mr. Spry; a waiting room, refreshment room, bookstall, level crossing gates and a Concert Hall called the Station Hall. A siding ran to the Westward Ho! Gas Works. An early photograph shows Westward Ho! with only the signal box and a long unbroken fence running along the back of the platforms with no other buildings or lighting. The similarity in appearance and construction between the Westward Ho! and Appledore platform buildings suggests that they were both built at the same time, circa 1908.
In an effort to entice the public onto their trains and provide shelter during inclement weather, the company built a Concert or Reception Hall on the ‘up’ platform at Westward Ho! in 1901 / 02, it was called the Station Hall. Performers such as the ‘Jolly Dutch’ and Clog Dancers performed in Station Hall. It was an expensive undertaking, costing £17 9s 7d in 1906, under the heading of ‘Services of Minstrels’ in the traffic expenses log. The building was well built and still stood in 1980 as a ‘Beer Garden’.
The Westward Ho! History website also provides some photographs of the old railway station. including the bridge below, which was on the approach to the station – significant development has occurred in this area although it appears that the abutments remain. [26] The bridge deck is long-gone. [16]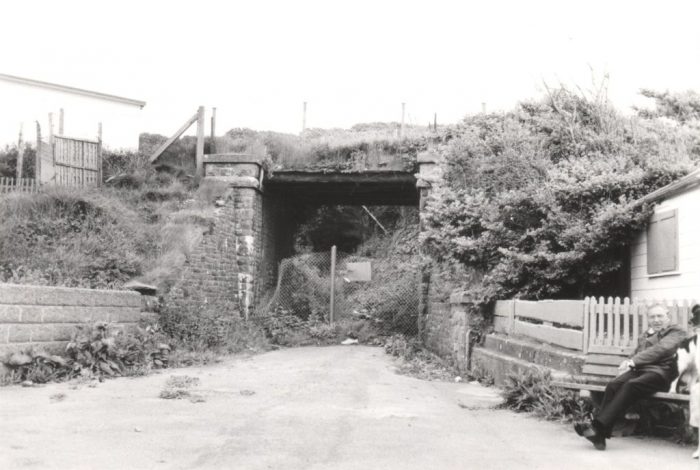 The railway station was close to the beach. Its location is shown in the picture below, marked by the red oval. [14]
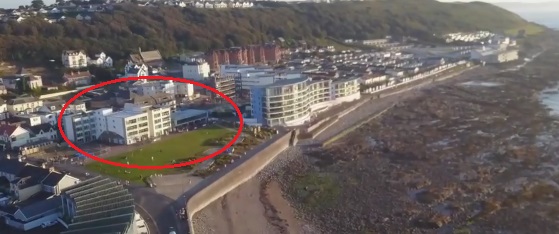 The Westward Ho! Railway Station location in 2019. [14]
References
- http://rfbwharailway.blogspot.com, accessed on 5th June 2019.
- https://en.m.wikipedia.org/wiki/Westward_Ho!_railway_station, accessed on 5th June 2019.
- http://www.westwardhohistory.co.uk/the-railway, accessed on 5th June 2019.
- https://en.m.wikipedia.org/wiki/File:BWH%26AR_Locomotive_crossing_Bideford_Bridge_1917.jpg, accessed on 5th June 2019.
- https://maps.nls.uk, accessed on 5th June 2019.
- http://bidefordbuzz.org.uk/2015/07/hungarians-not-bidefordians, accessed on 5th June 2019.
- https://www.ebay.co.uk/itm/Devon-postcard-Bideford-Quay-and-Light-Railway/401778456050?hash=item5d8bdcb5f2:g:~1cAAOSwR0Fc8tVe, accessed on 5th June 2019.
- https://www.ebay.co.uk/itm/4-VINTAGE-POSTCARDS-BIDEFORD-WESTWARD-HO-APPLEDORE-RAILWAY-POSTALLY-UNUSED/183826475123?hash=item2acce96873:g:4GUAAOSw6VVc6818, accessed on 5th June 2019.
- https://www.ebay.co.uk/itm/Bideford-The-Quay-by-Frith/350900463553?hash=item51b34c27c1:g:Ft8AAOxyIYhSXVI4, accessed on 5th June 2019.
- https://www.ebay.co.uk/itm/Devon-The-Quay-Bideford-H8915-PPC-1943-PMK-To-Mr-Ward-Beckenham/202603274299?hash=item2f2c18a03b:g:WNsAAOSw0q1cbZnA, accessed on 5th June 2019.
- http://www.railmaponline.com/UKIEMap.php, accessed on 6th June 2019.
- https://www.rmweb.co.uk, accessed on 6th June 2019.
- https://www.wikiwand.com/en/Bideford,_Westward_Ho!_and_Appledore_Railway, accessed on 6th June 2019.
- http://www.choice-cottages.com/westward-ho!-horizon-view-30-%7C-2-bedrooms-westward-ho!-26931.htm, accessed on 30th November 2019.
- https://commons.wikimedia.org/wiki/File:BWH%26AR_route,_carriage_shed_and_engine_shed.jpg, accessed on 6th June 2019.
- http://www.westwardhohistory.co.uk/the-railway, accessed on 7th June 2019.
- https://www.care-south.co.uk/homes/kenwith-castle, accessed on 30th November 2019.
- https://www.devongardenstrust.org.uk/?q=node/171, accessed on 30th November 2019.
- http://abbotshamdevon.weebly.com/people-and-property.html, accessed on 30th November 2019.
- https://www.southwestcoastpath.org.uk/print-walk/64, accessed on 30th November 2019.
- https://m.southwestcoastpath.org.uk/walksdb/64/#&ui-state=dialog, accessed on 30th November 2019.
- https://en.wikipedia.org/wiki/Cornborough_railway_station, accessed on 30th November 2019.
- Julia & Jonathan Baxter; The Bideford, Westward Ho! and Appledore railway 1901-1917; Chard (1980), p19.
- Stanley C. Jenkins; The Bideford, Westward Ho! and Appledore Railway; Oakwood Press, Oxford, 1993, p141.
- https://sites.google.com/site/jordanwalks/home/south-west-coast-path/westward-ho-to-padstow/westward-ho-to-clovelly?tmpl=%2Fsystem%2Fapp%2Ftemplates%2Fprint%2F&showPrintDialog=1, accessed on 30th November 2019.
- https://www.railforums.co.uk/attachments/20191012_145036-jpg.69341, accessed on 30th November 2019.
Resources for further investigation, [2]:
- Baxter, Julia & Jonathan (1980). The Bideford, Westward Ho! and Appledore railway 1901-1917. Pub. Chard. ISBN 0-9507330-1-6.
- Christie, Peter (1995). North Devon History. The Lazarus Press. ISBN 1-898546-08-8
- Garner, Rod (2008). The Bideford, Westward Ho! & Appledore Railway. Pub. Kestrel Railway Books. ISBN 978-1-905505-09-8.
- Griffith, Roger (1969). The Bideford, Westward Ho! and Appledore Railway. School project and personal communications. Bideford Museum.
- Jenkins, Stanley C. (1993). The Bideford, Westward Ho! and Appledore Railway. Pub. Oakwood Press. ISBN 0-85361-452-0.
- Kingsley, Charles (1923). Westward Ho! Pub. London.
- Stuckey, Douglas (1962). The Bideford, Westward Ho! and Appledore Railway 1901-1917. Pub. West Country Publications.
- Thomas, David St John (1973). A Regional History of the Railways of Britain, Vol.1: The Westcountry. Pub. David & Charles.
- https://englishrail.wordpress.com/2009/09/14/bideford-westward-ho-appledore-rwy, accessed on 5th June 2019.


