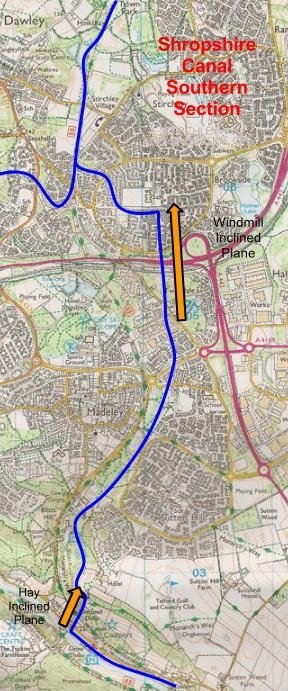
The canal length covered by this article is shown on this plan based on the Ordnance Survey Explorer map of the area. The plan is from an article by Andy Tidy on his blog, Captain Ahab’s Watery Tales. His excellent blog is worth reading. [8]
There were two inclined planes on this length of the Shropshire Canal, both are shown on this plan. Two previous articles cover the Hay Inclined Plane at Coalport which took tub boats down to the wharves alongside the River Severn. These can be found by following these links:
The Windmill Inclined Plane is buried under modern development.
There is more about both these inclined planes below.
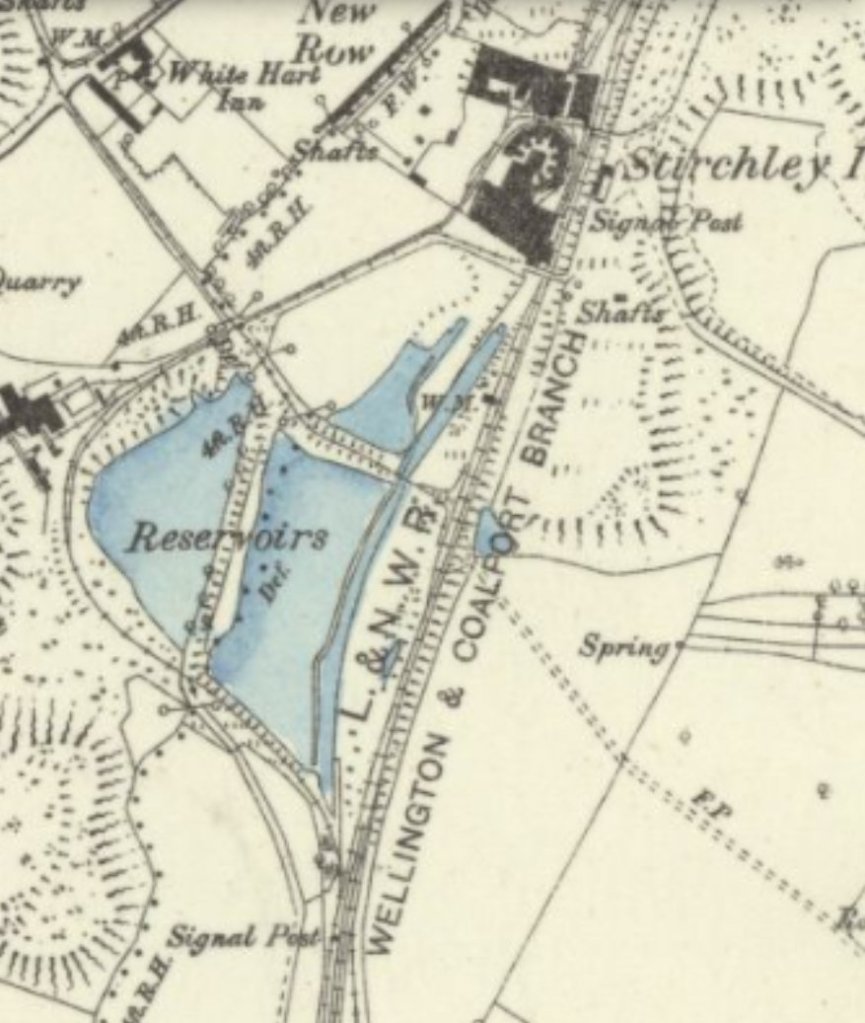
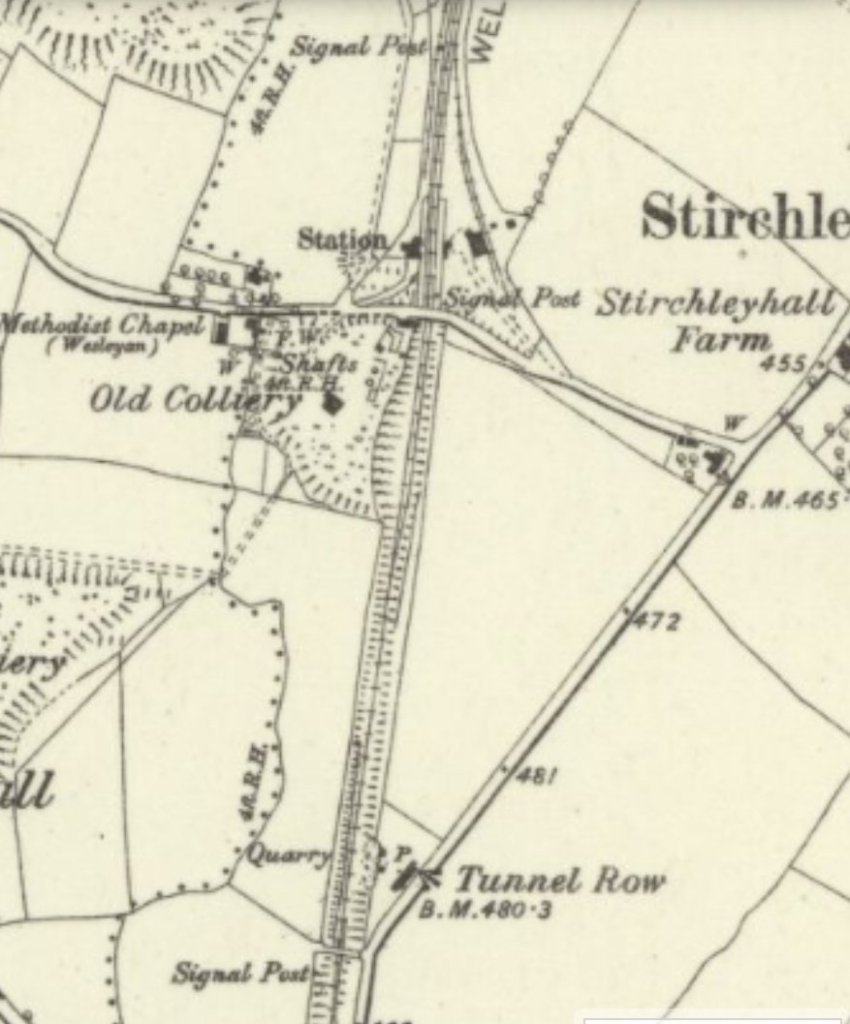
Immediately South of Stirchley Iron Works there was a loop in the line of the canal which meant that it was on a tighter curvature than the engineers for the later LNWR Coalport Branch were happy with. The 6″ Ordnance Survey of 1881 shows that length of the canal running alongside the railway.
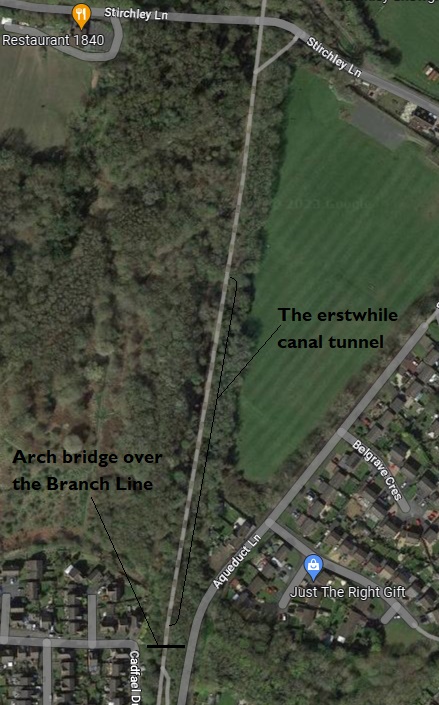
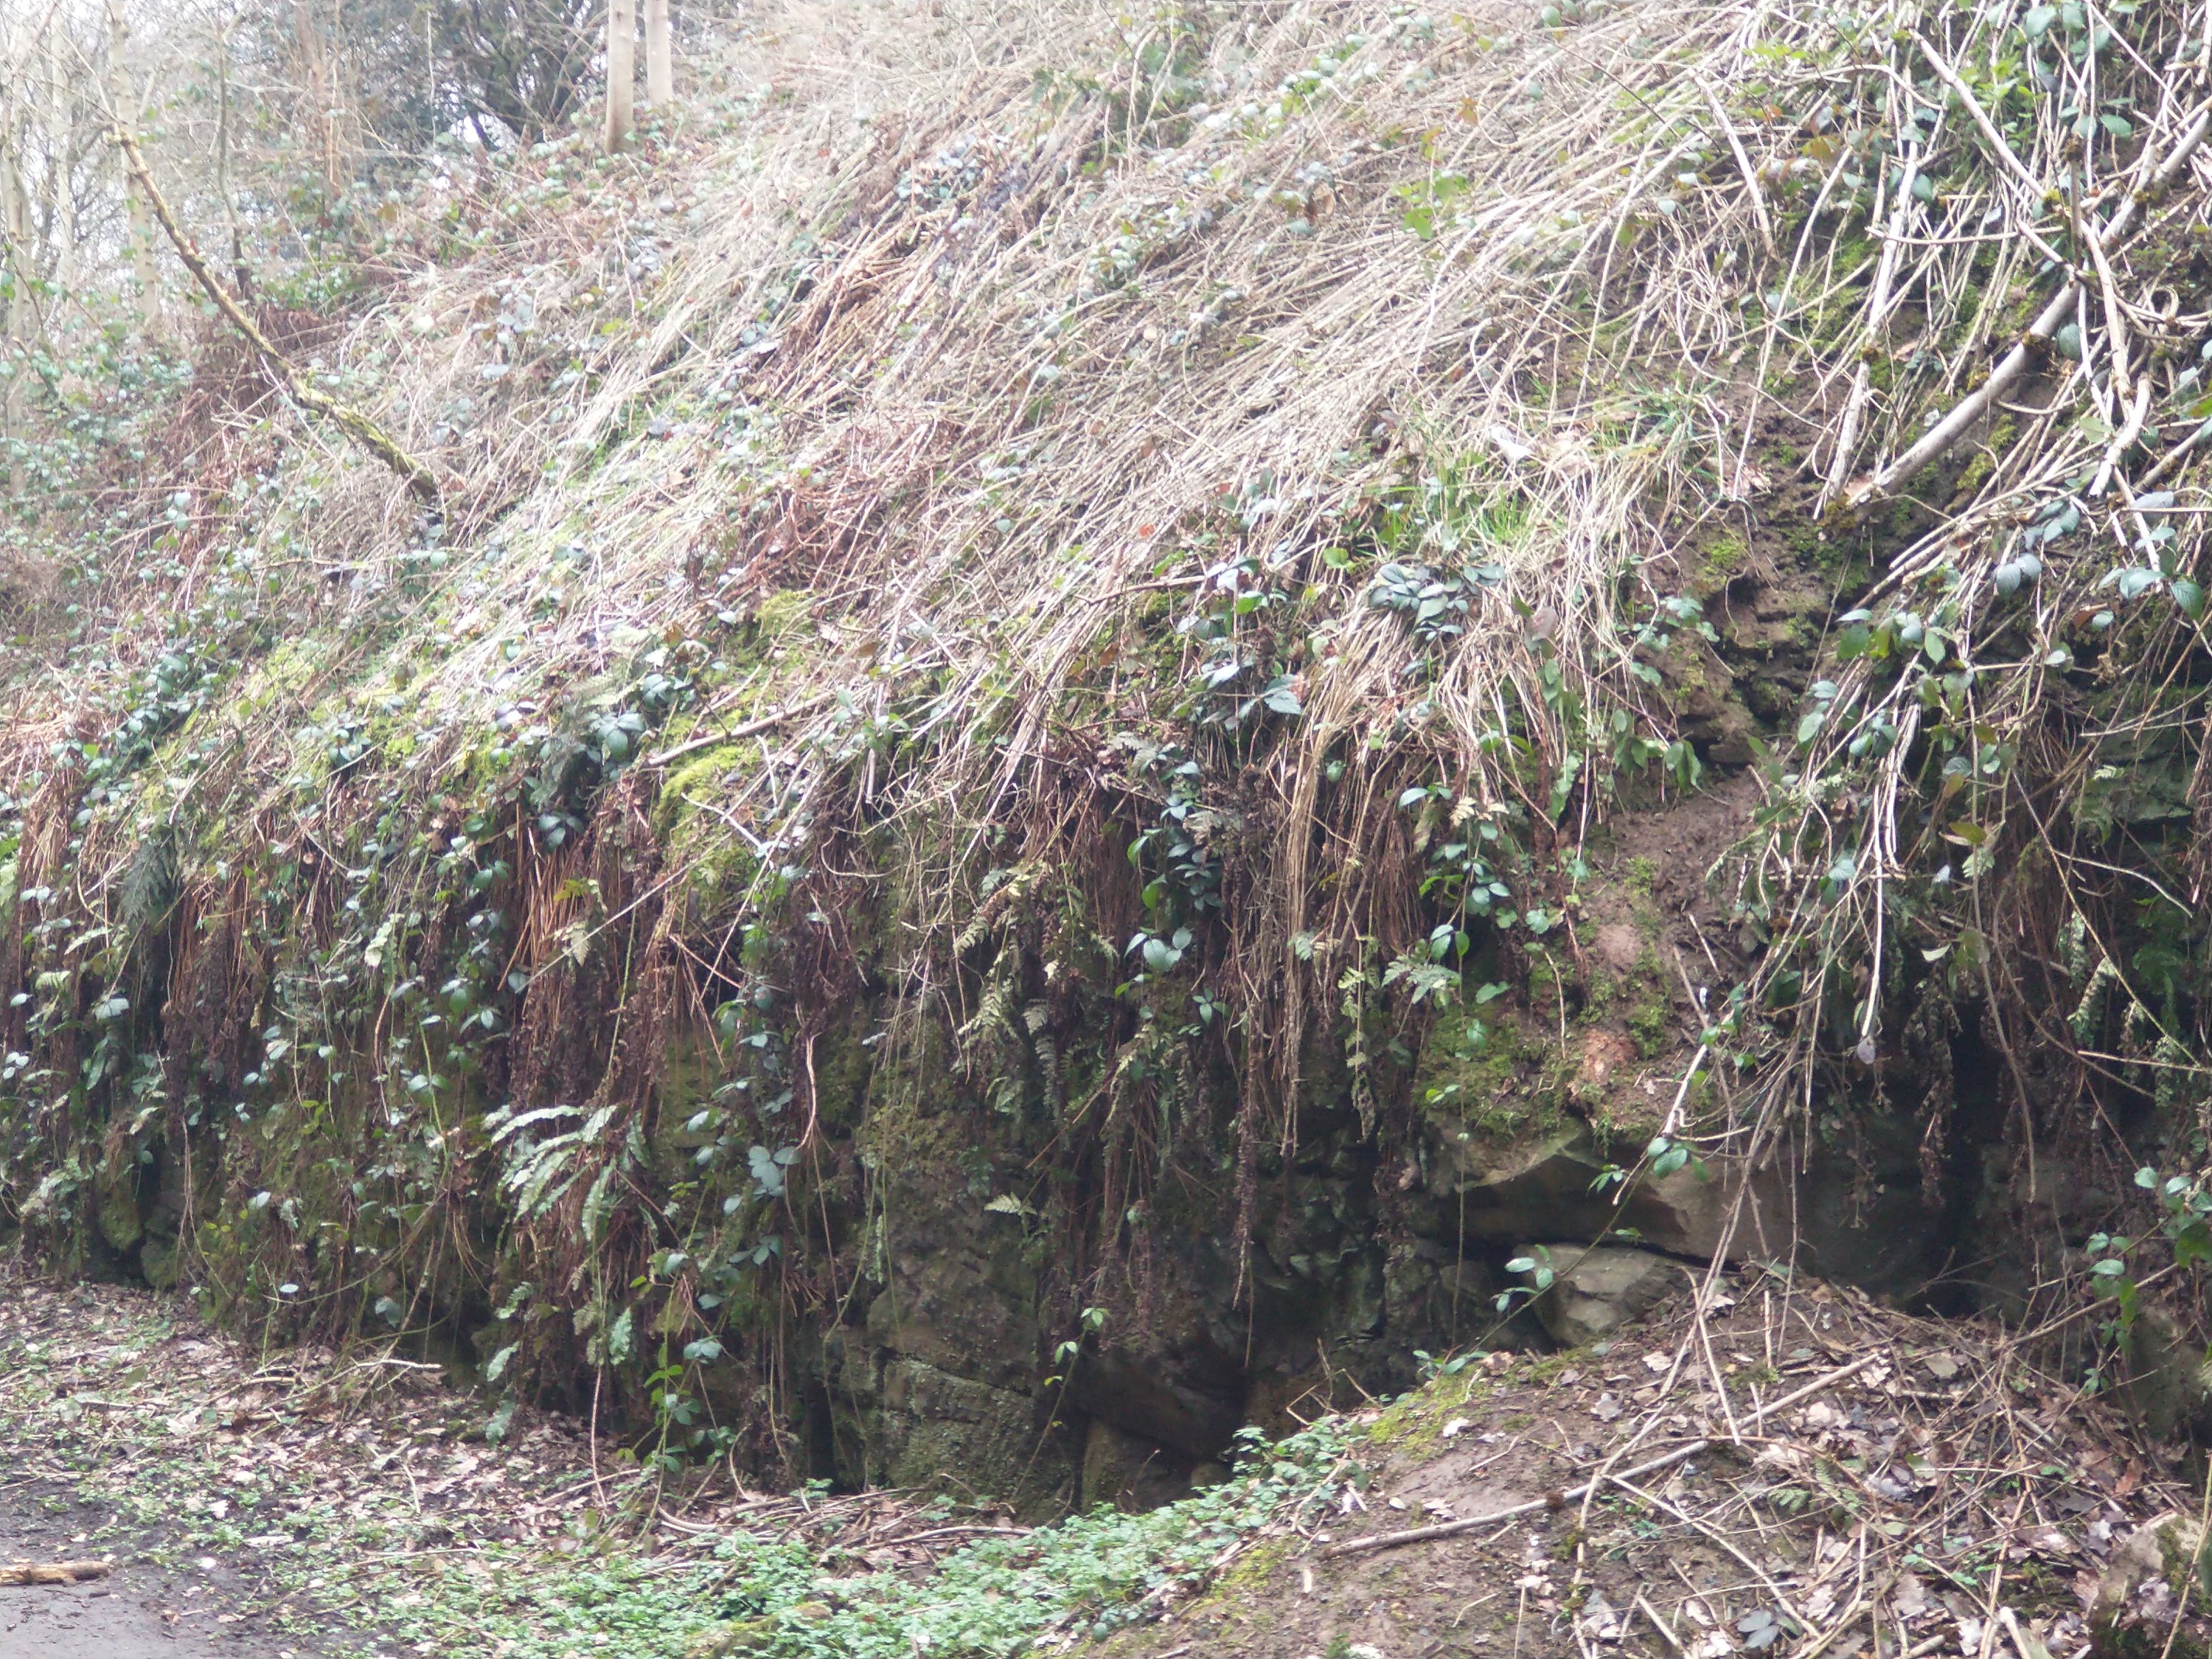
A short distance South of Stirchley Lane, the Canal entered a 281 yard long tunnel – Stirchley Tunnel. When the railway was built, the tunnel was opened out into a cutting. At this location the Ordnance Survey mapping above shows a rock face to the West side of the railway which highlights the location of the erstwhile tunnel.
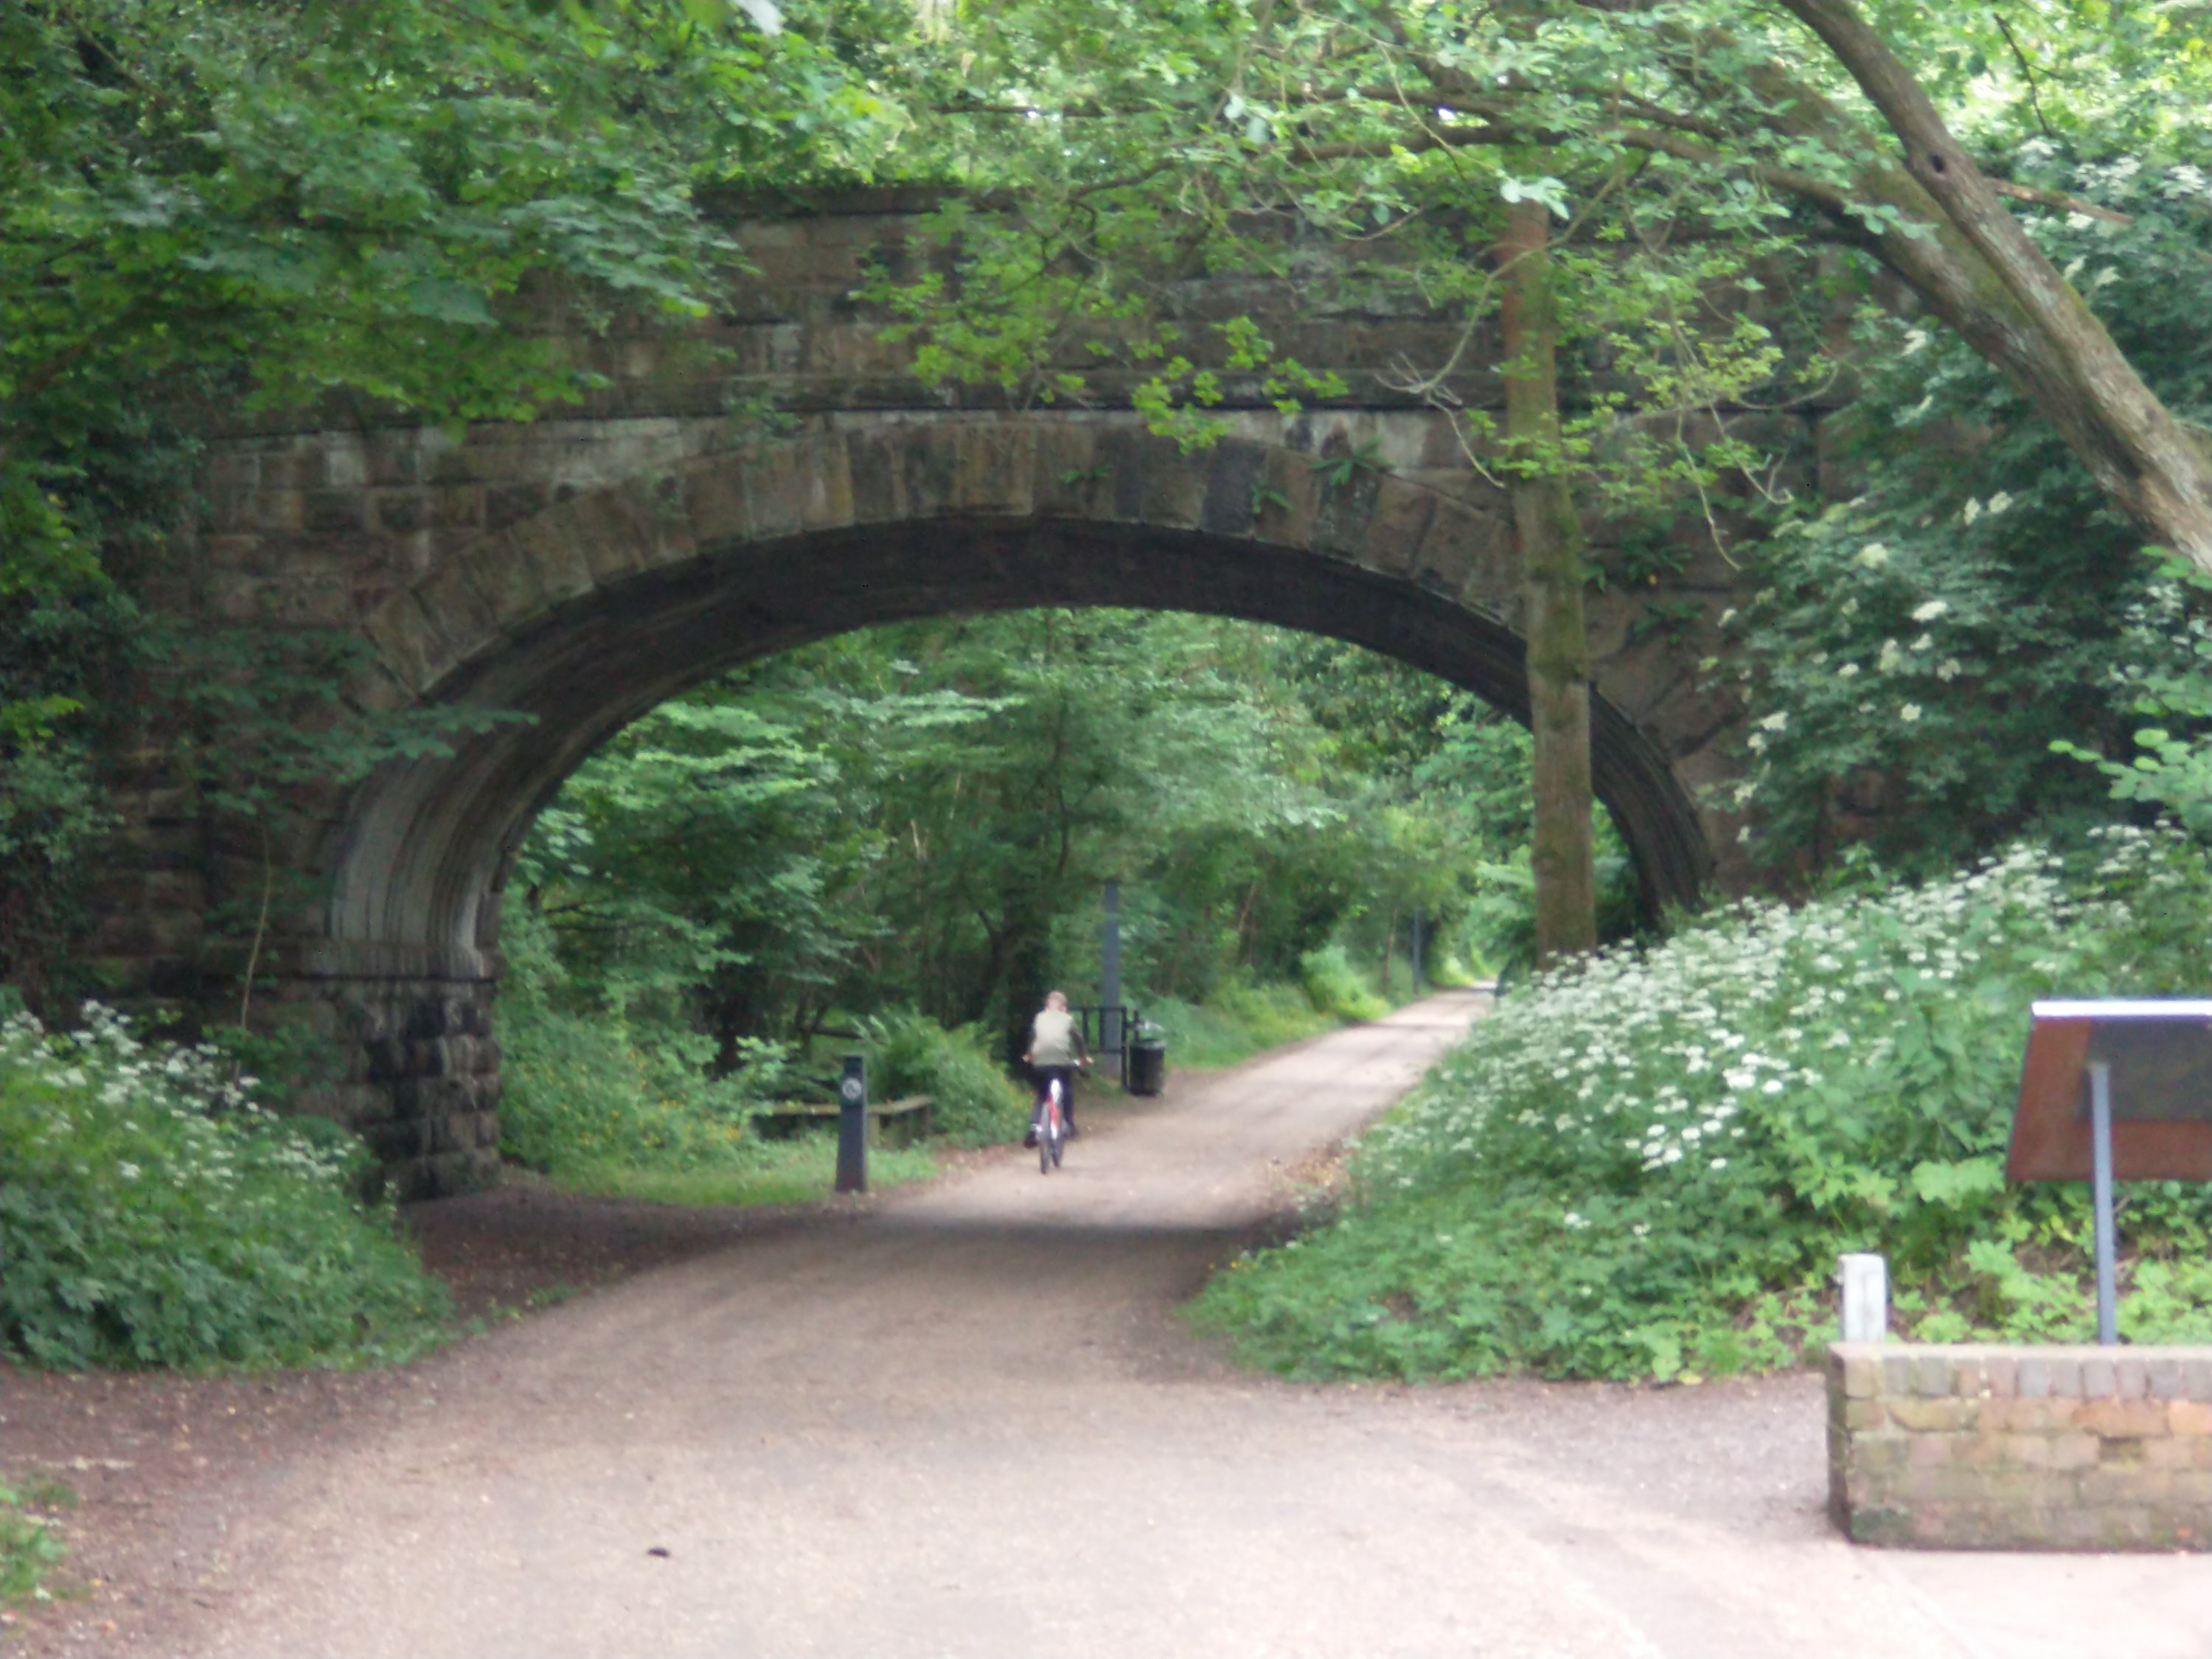
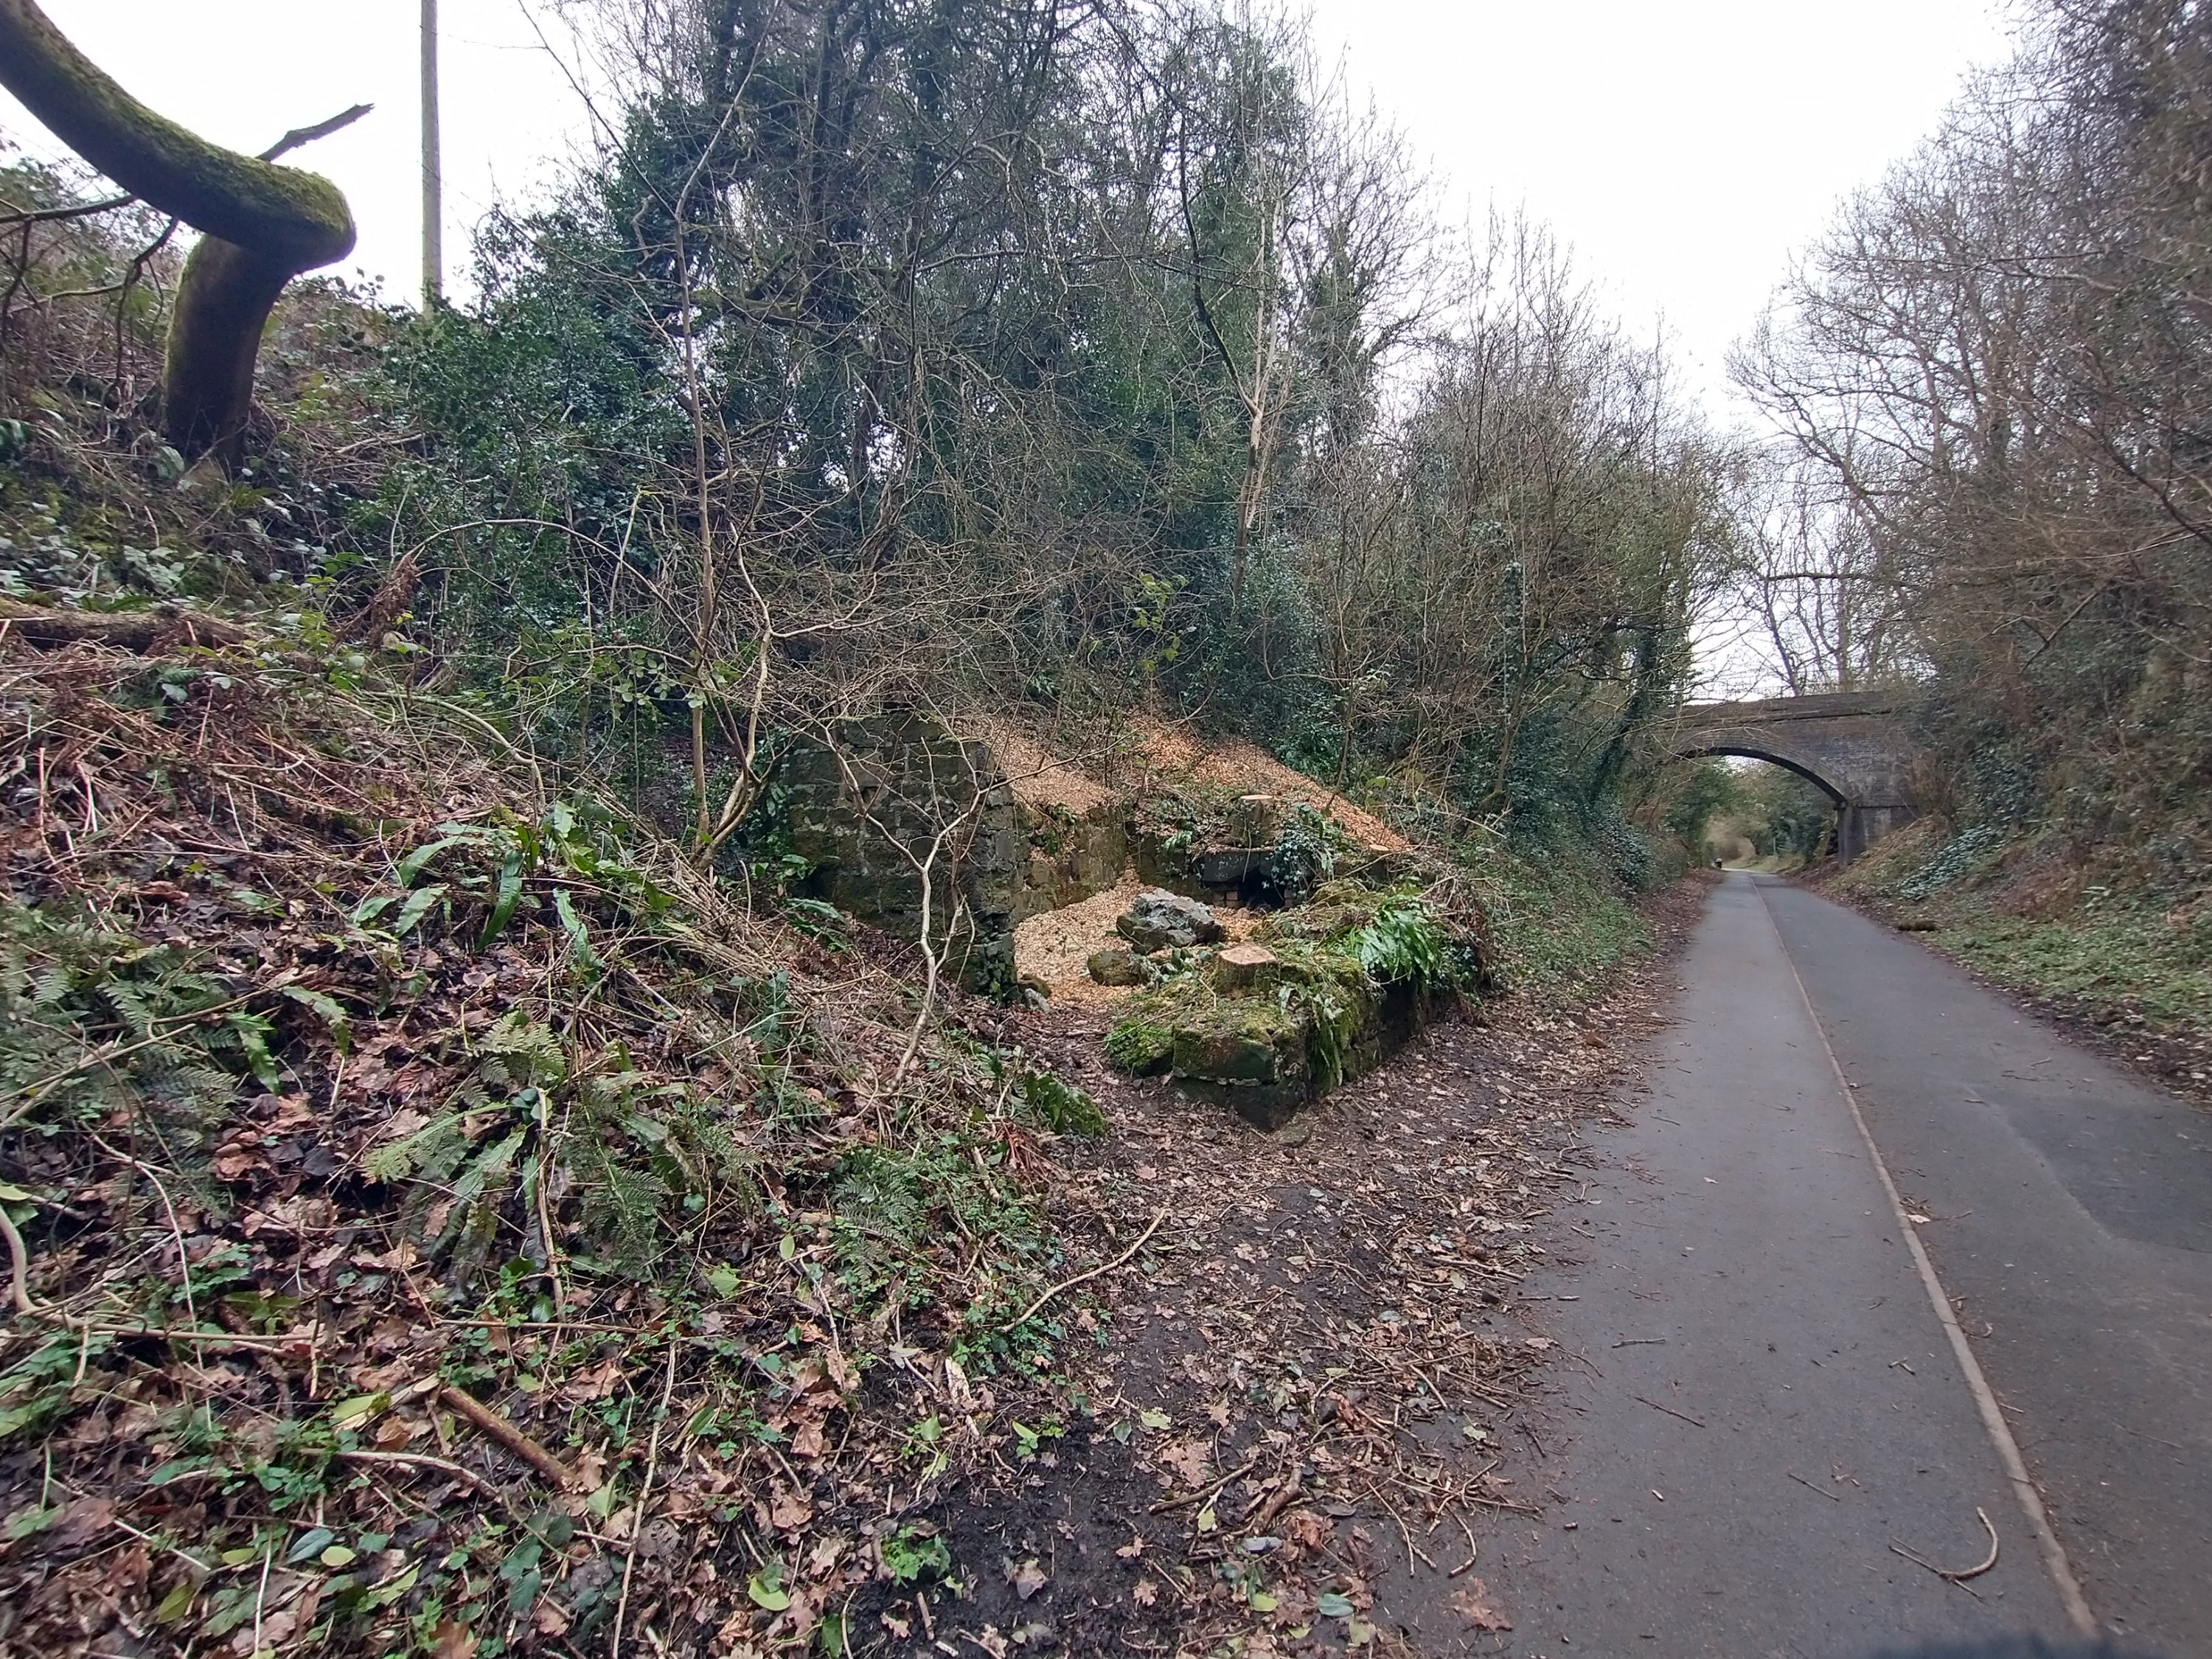
A short distance beyond the location of the bridge in the above photo the canal route to the River Severn branches away to the left (East), the arm of the canal running to the West towards Horsehay continues South for a short distance before turning West across the old Bridgnorth turnpike road. The OS Map below shows both of the two arms of the Canal.
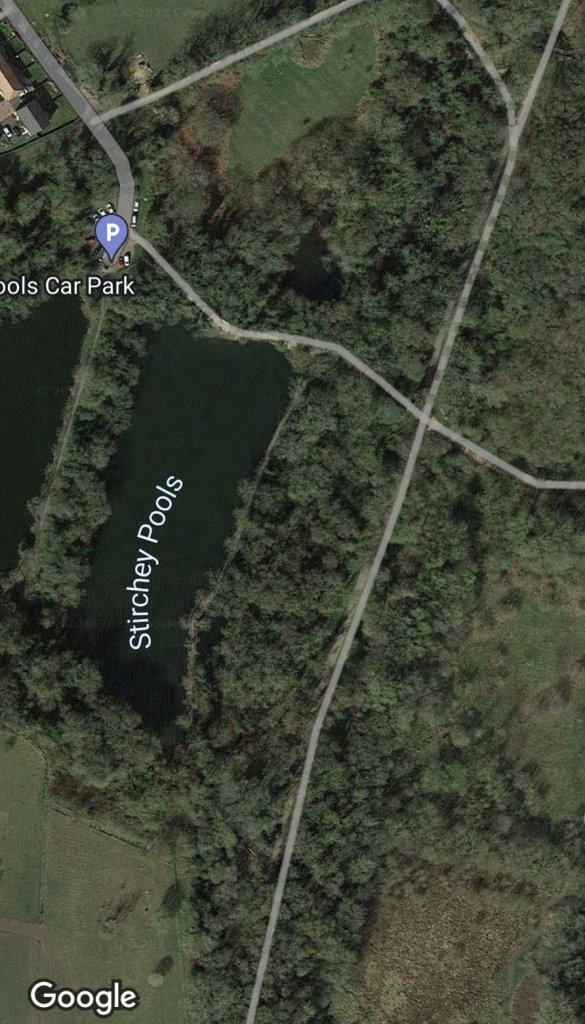
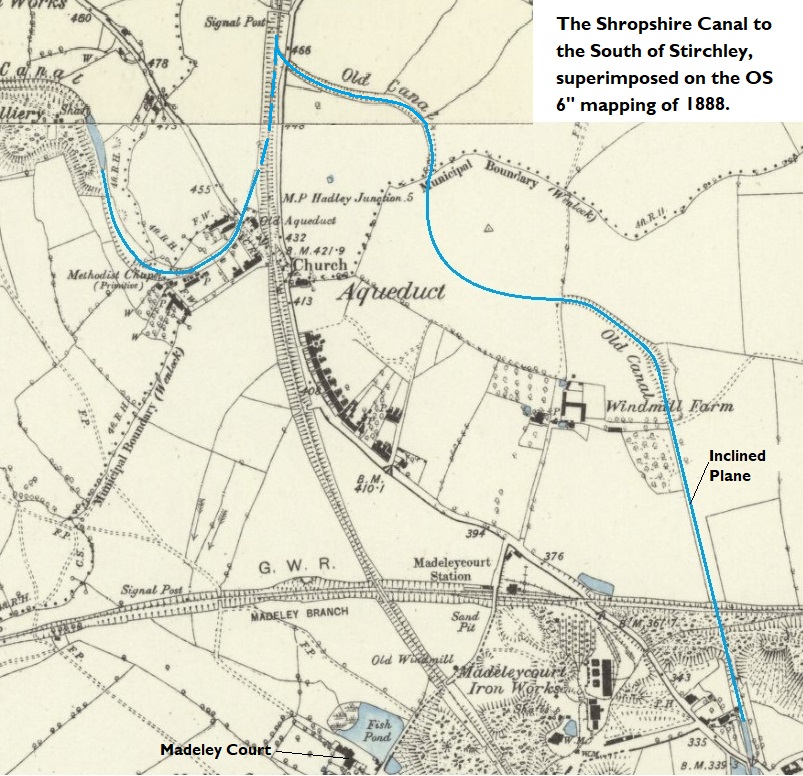
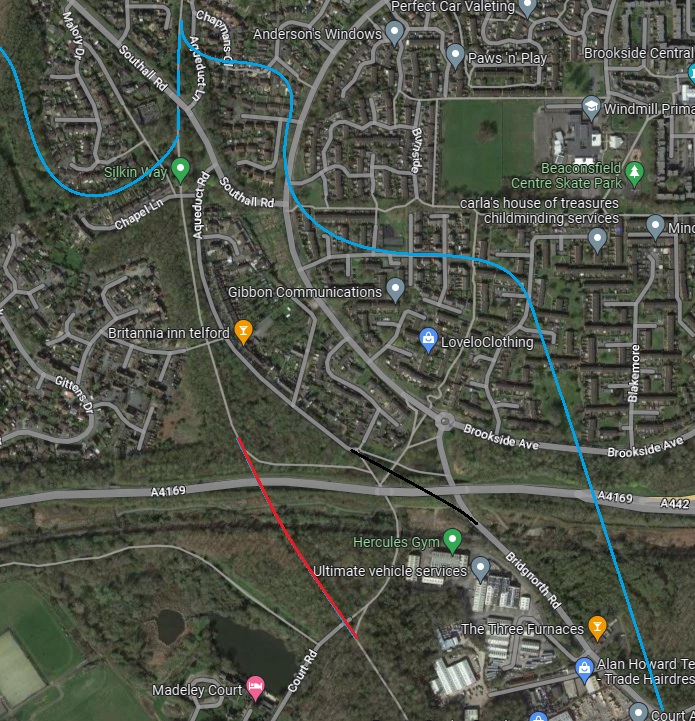
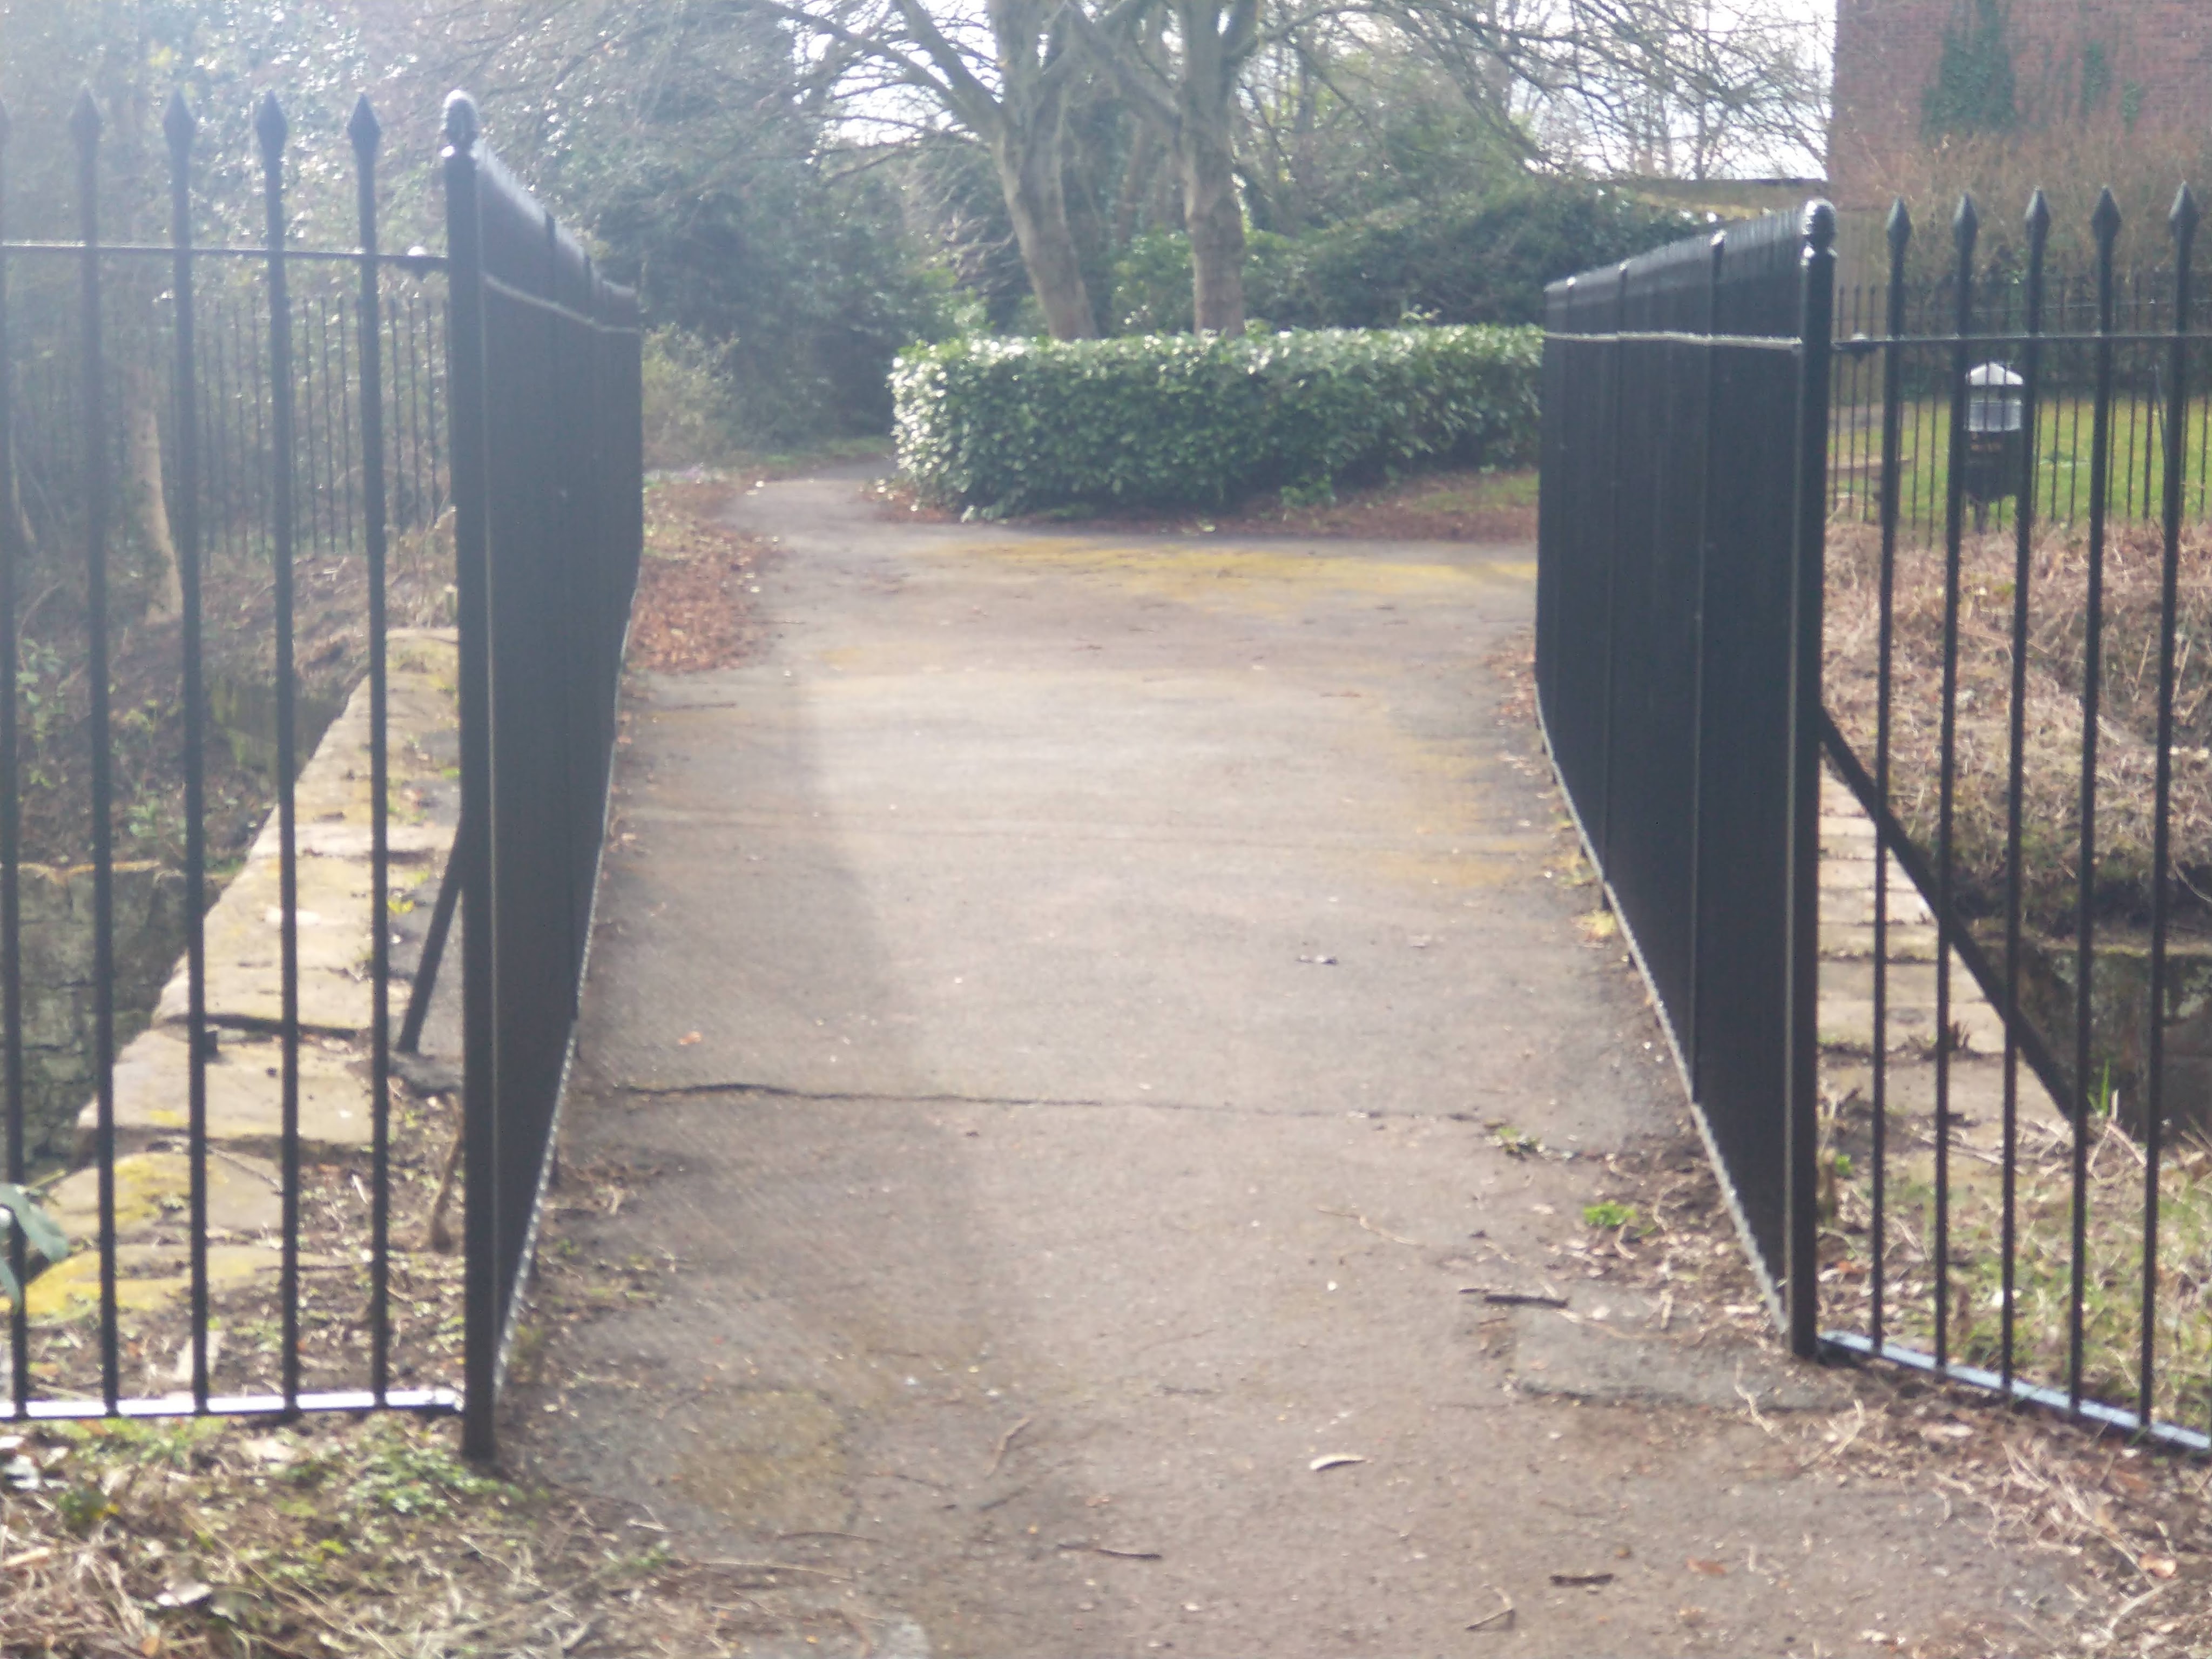
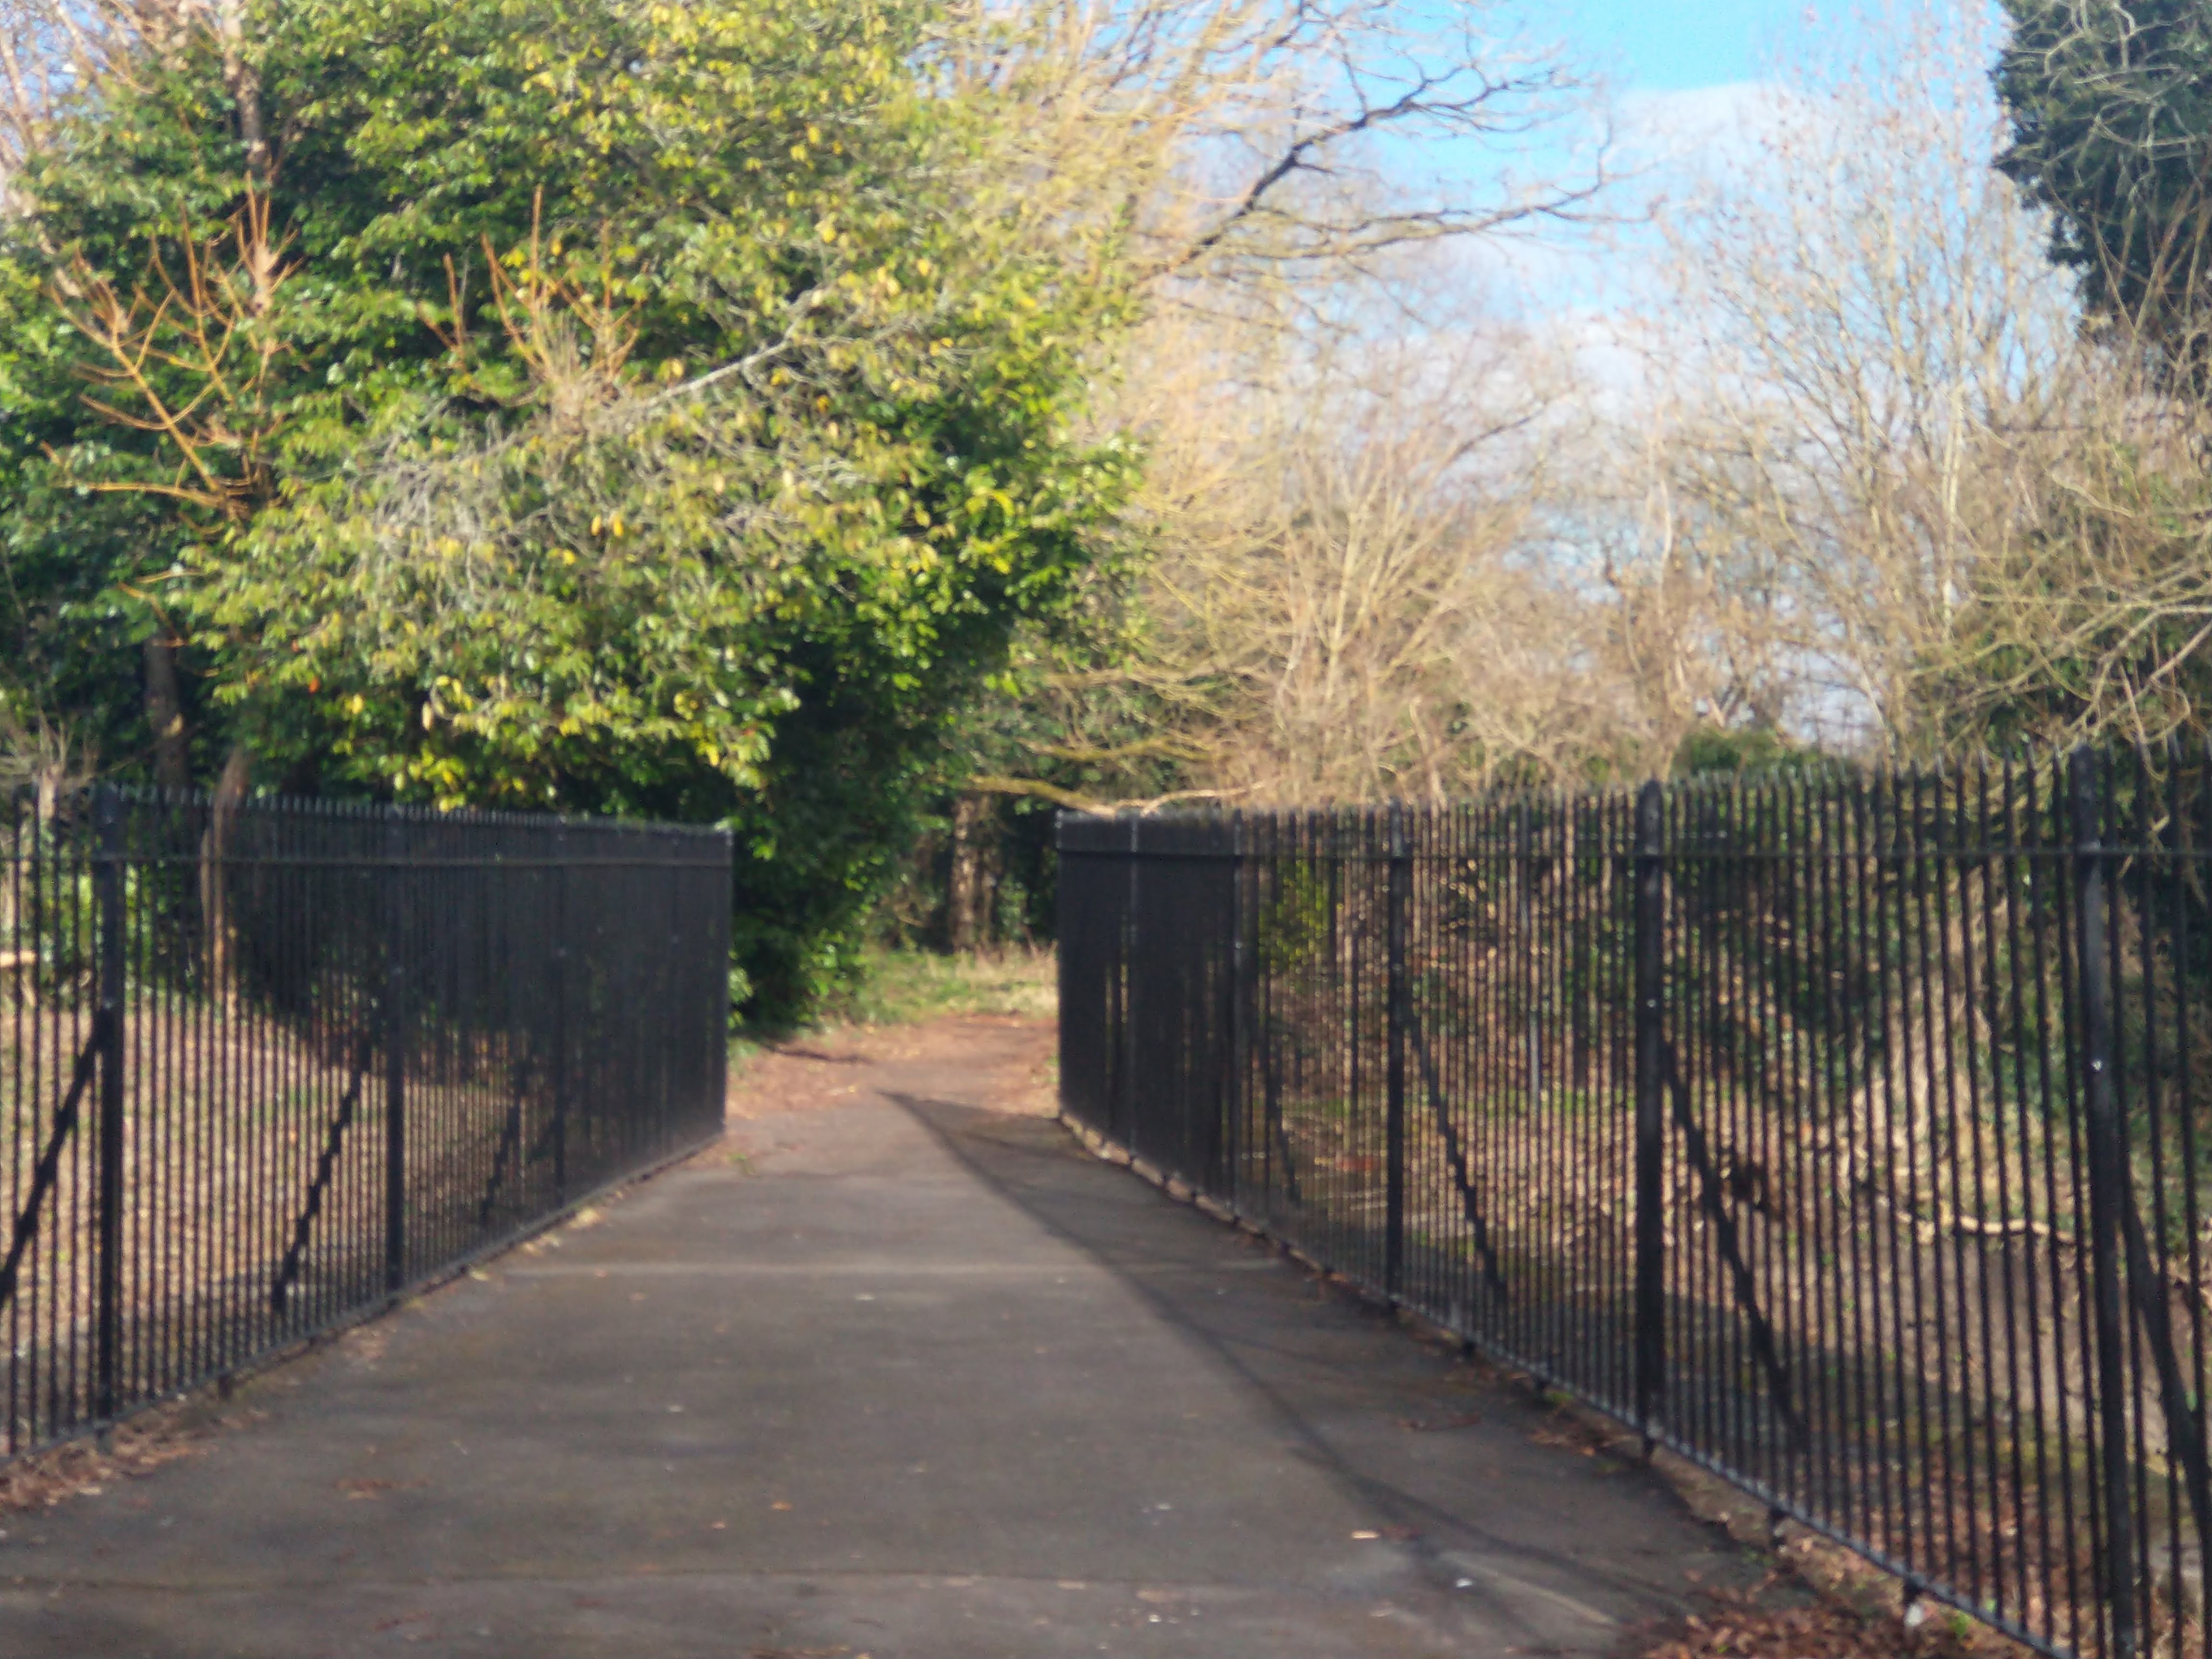
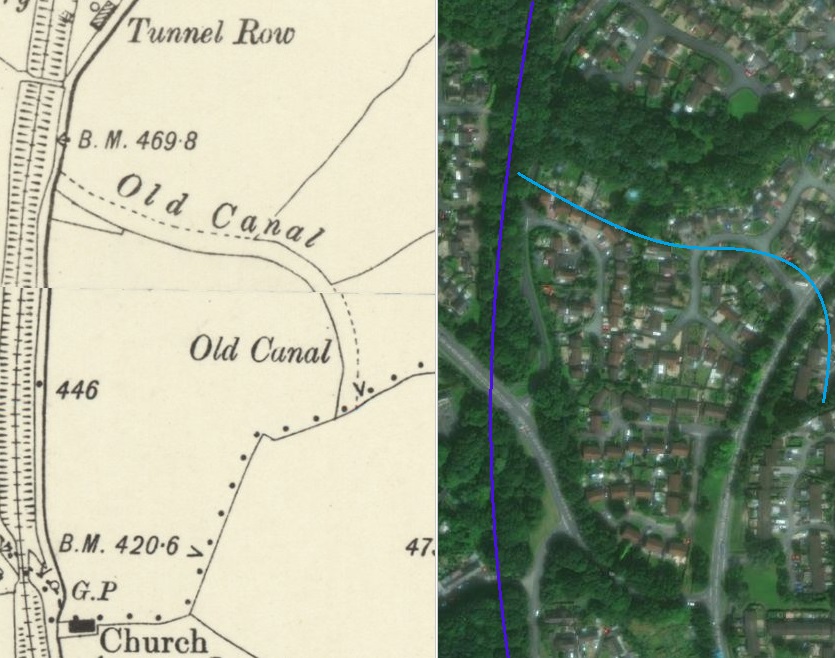
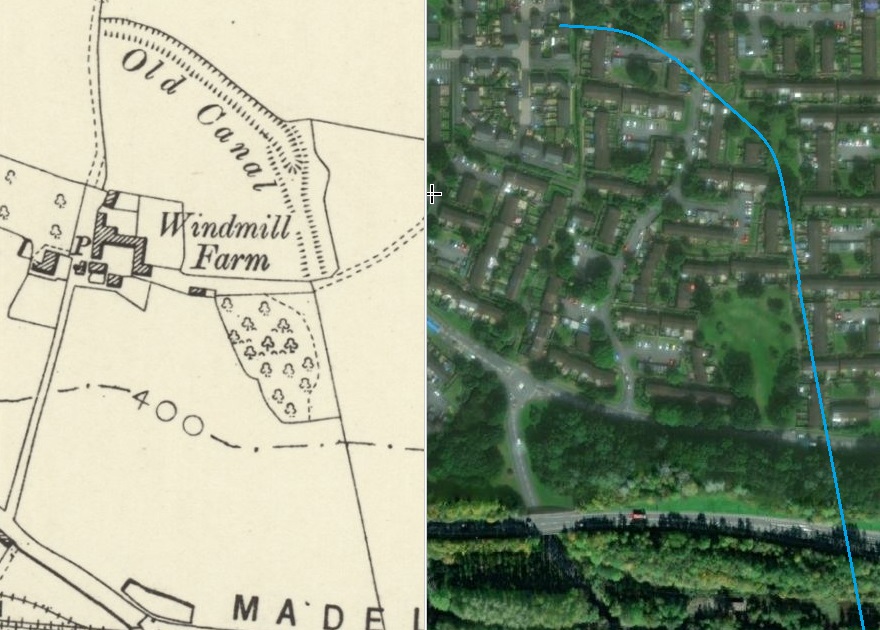
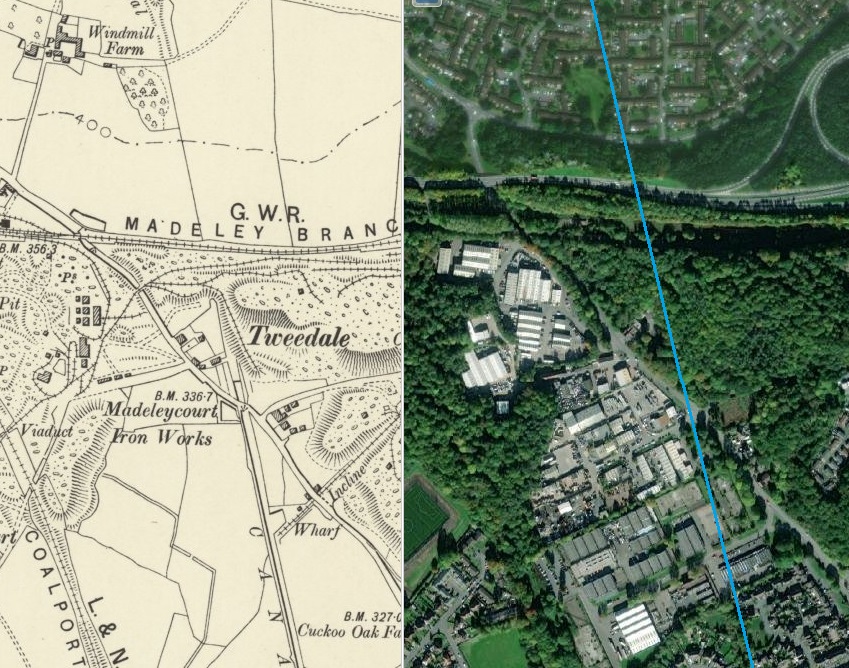
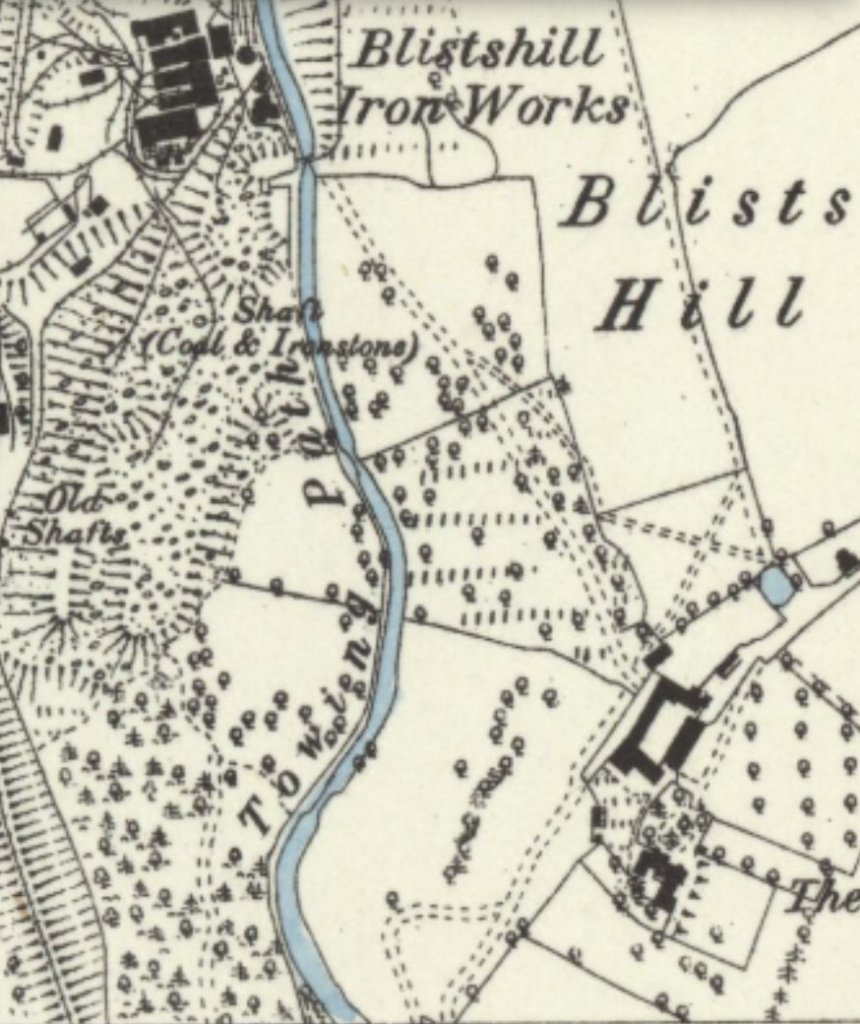
This extract from the 6″ OS mapping of 1881 shows the new railways which post-dated the Canal and has the old canal routes superimposed. Note the canal incline close to Windmill Farm and the branch running to the West from ‘Aqueduct’. The aqueduct which carried this arm over the old turnpike road can be seen on the extract. It gave a name to the hamlet immediately next to it. As will be seen from the satellite image below, Madeley Court Station is long gone. The GWR Madeley Branch remains in the early 21st century as it was used for merry-go-round coal trains serving Ironbridge Power Station until the power station closed. [1][2]A Google Maps satellite image extract showing approximately the same area as the OS map extract above. Sketched onto the satellite image are: the very approximate canal routes in blue; the length of the LNWR branch which is not used by the Silkin Way in red; and the old Bridgnorth Road alignment in black. The diversion of the Silkin Way was required with the building of the A4169 and the removal of the bridge deck where the LNWR Coalport Branch line crossed the GWR Madeley Branch. There are no features on the ground in the 21st century to define the line of the old canal as it passed through the are now called Brookside. The old road bridge next to Madeley Court Railway Station remains and carries the diverted Silkin Way across what was the GWR Madeley Branch. Towards the top of this satellite image Southall Road crosses the old railway by means of the bridge shown below. [3]
It is worth emphasising that the lines drawn above are only approximate, particularly in the case of the old Shropshire Canal. A somewhat more accurate alignment for the Canal is shown, length-by-length in the side-by-side images below
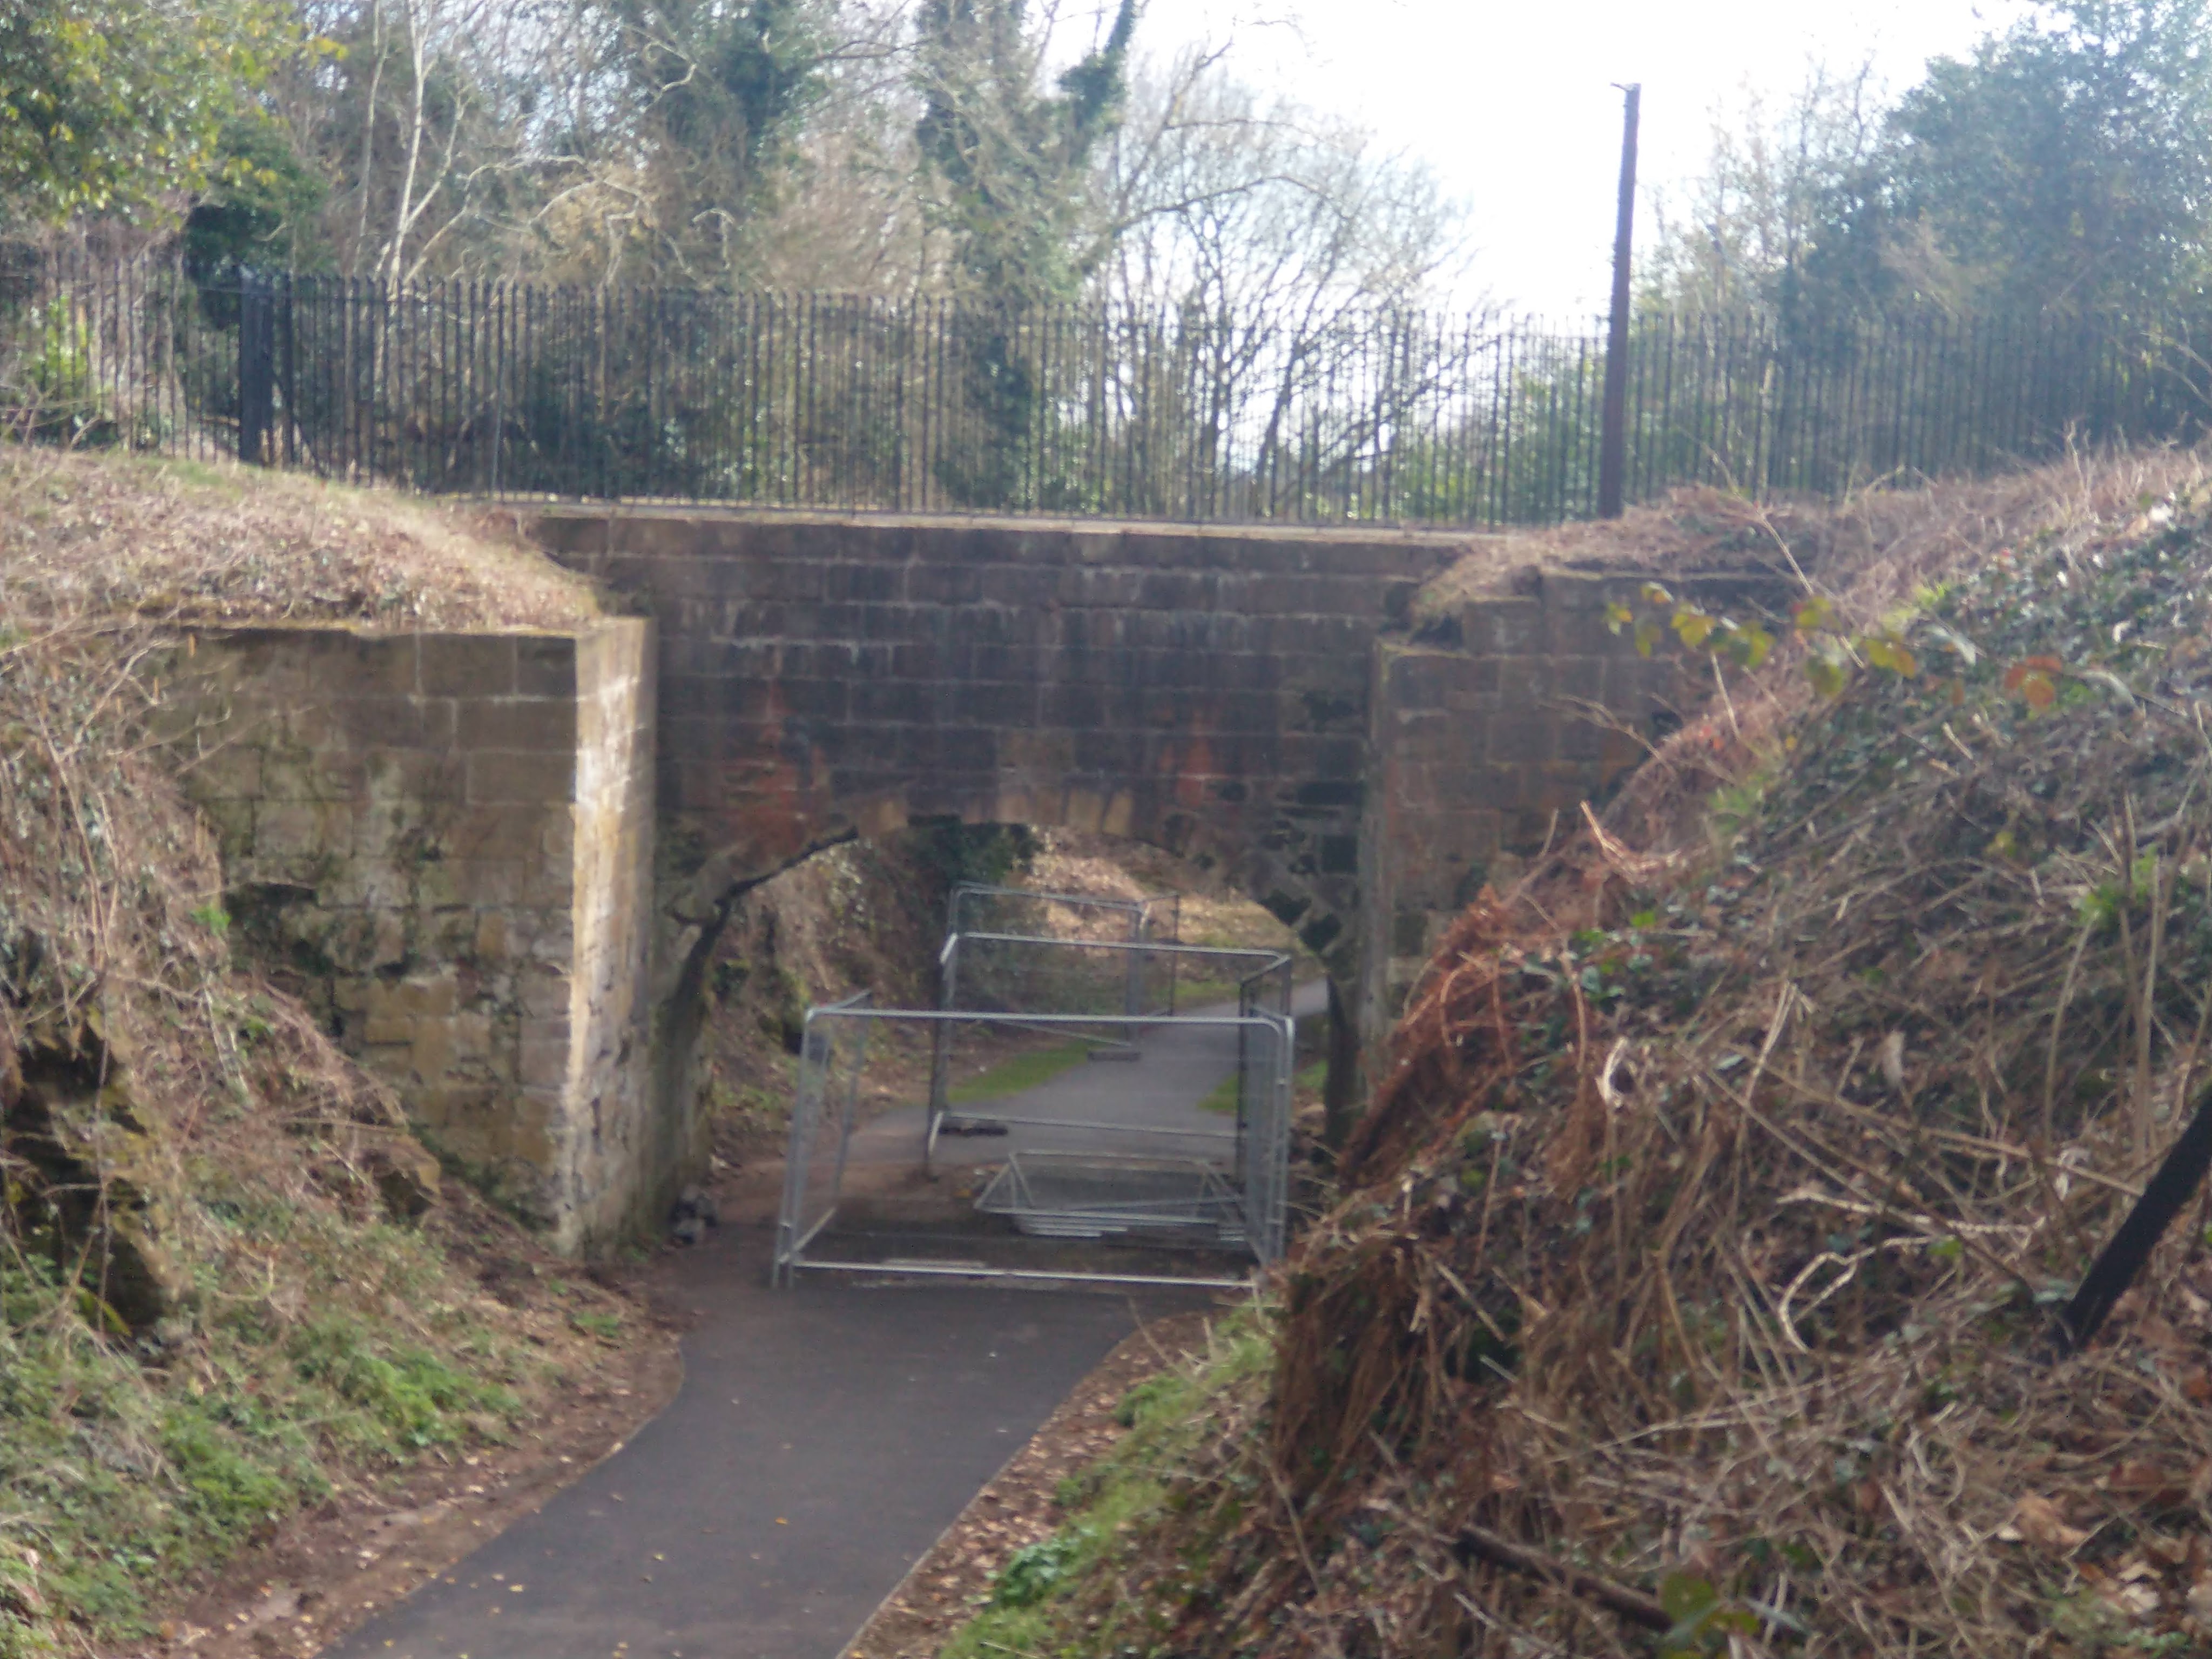
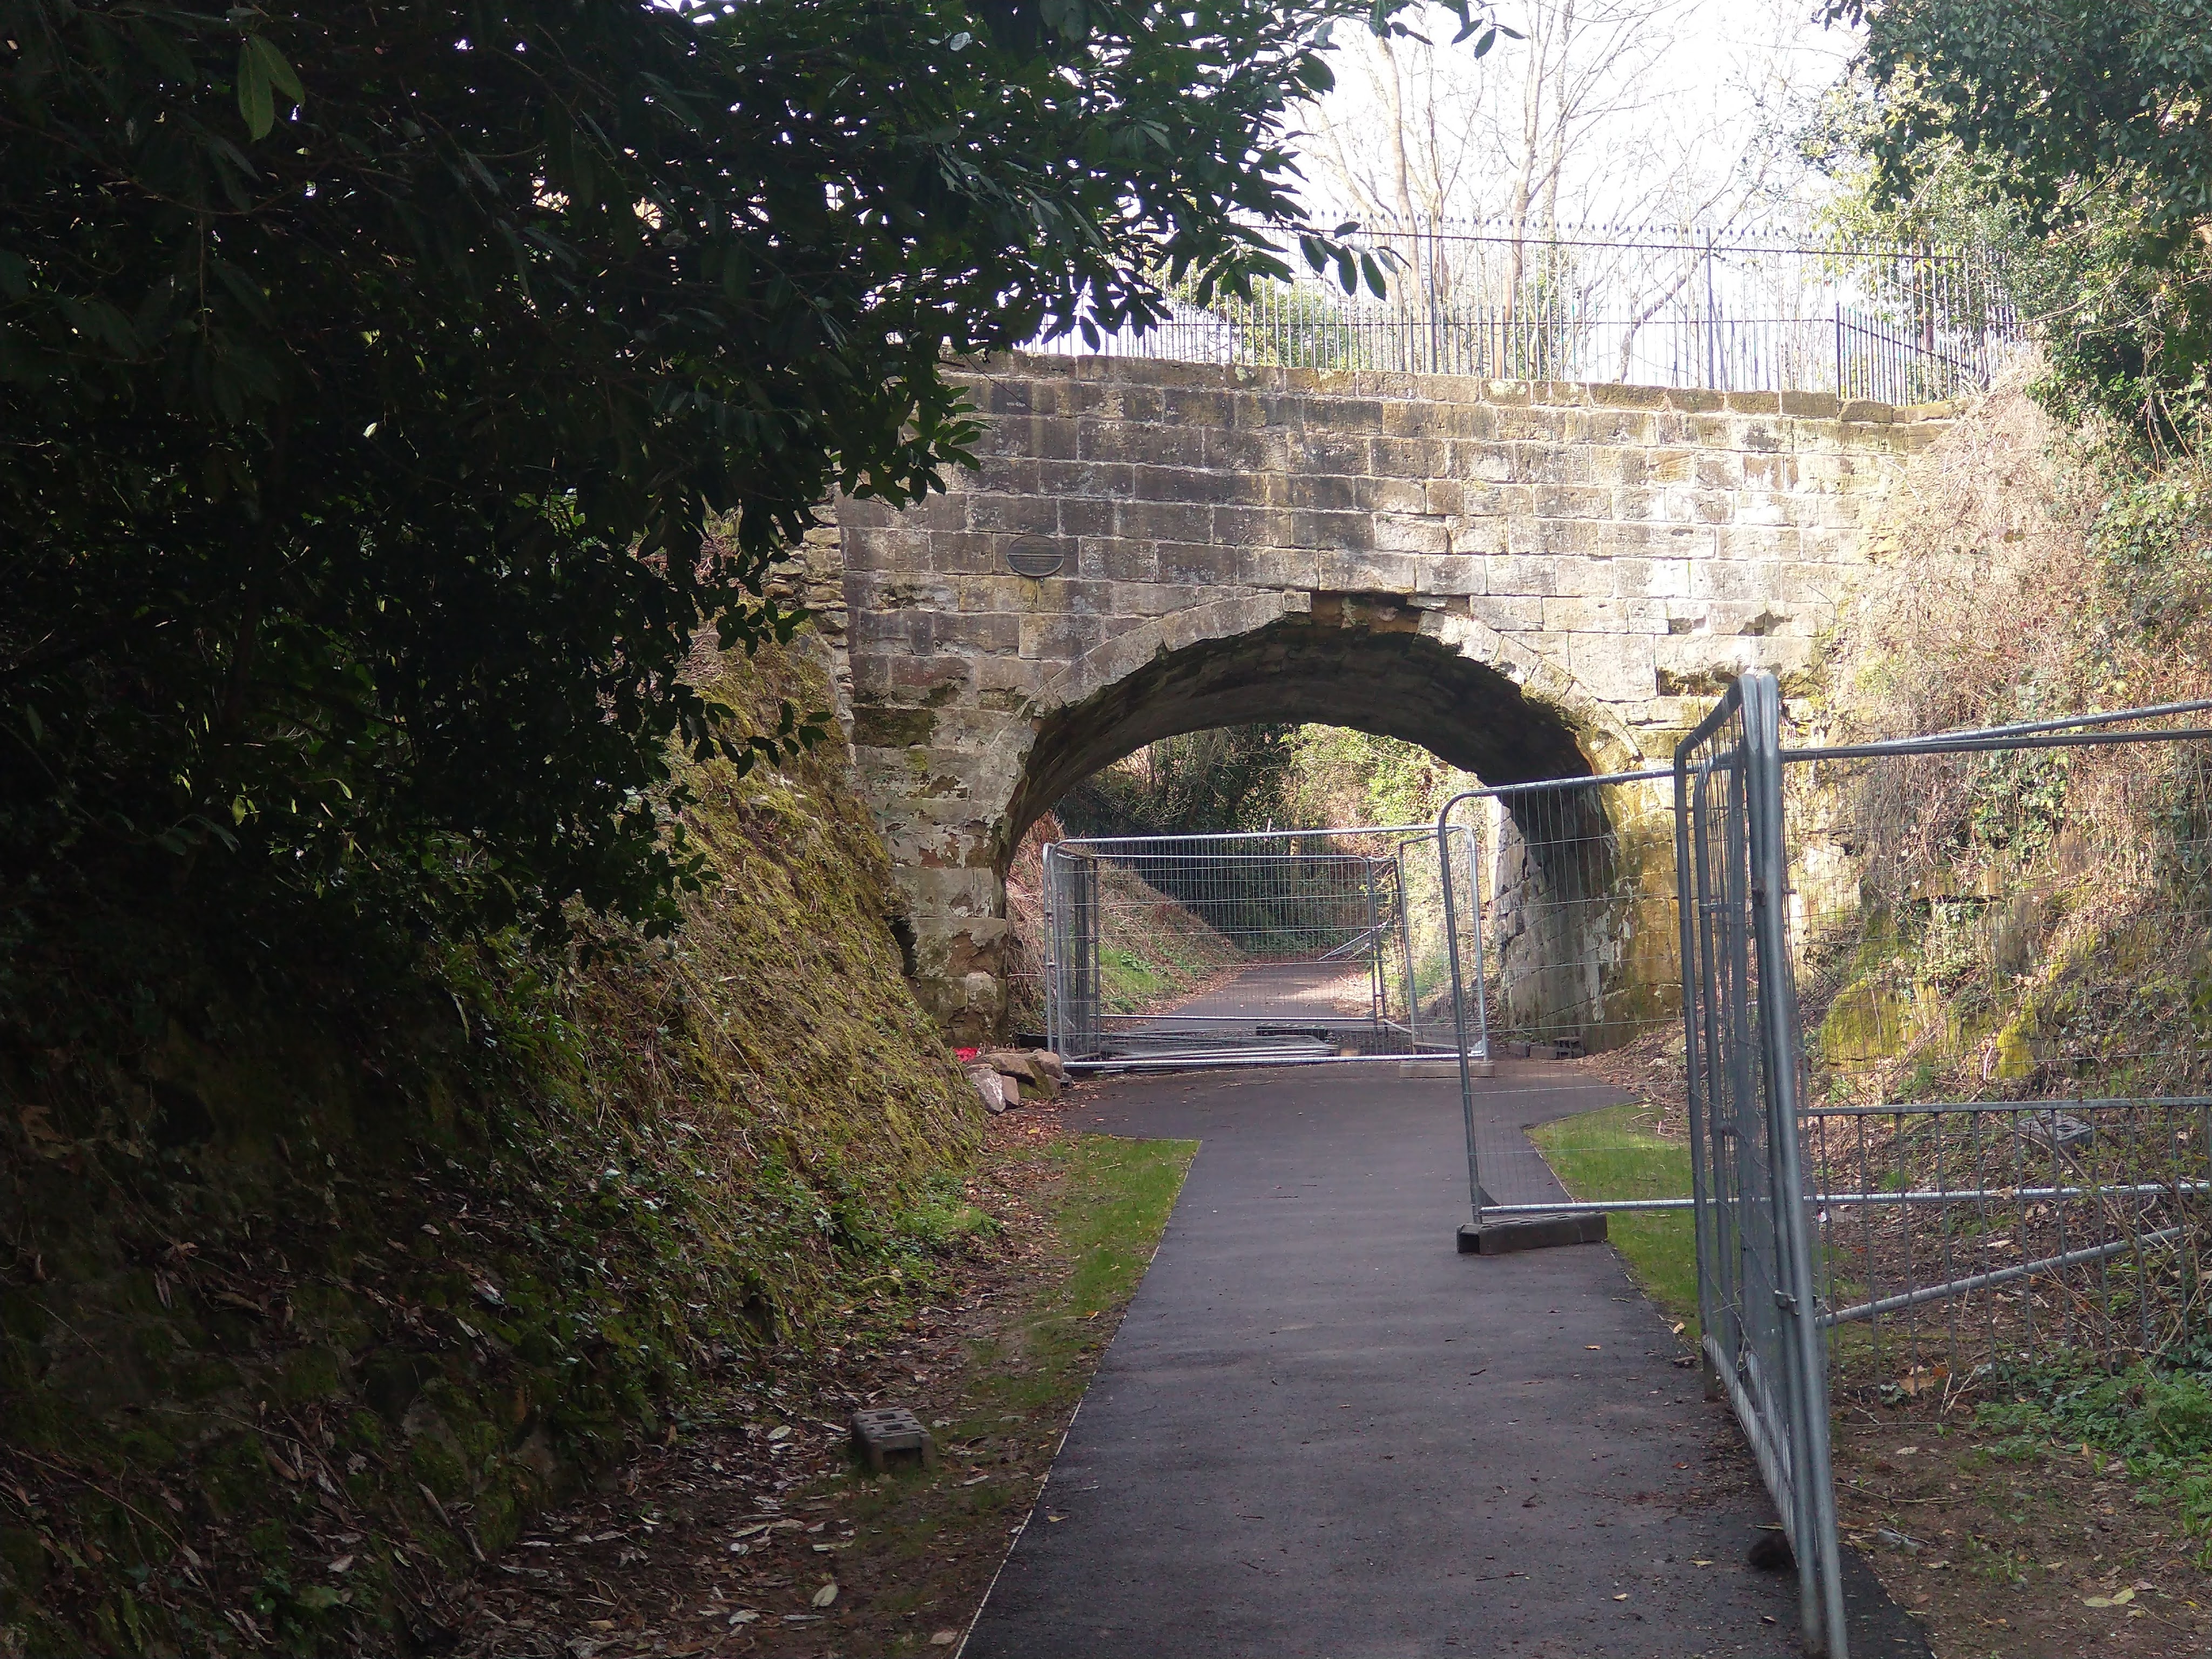
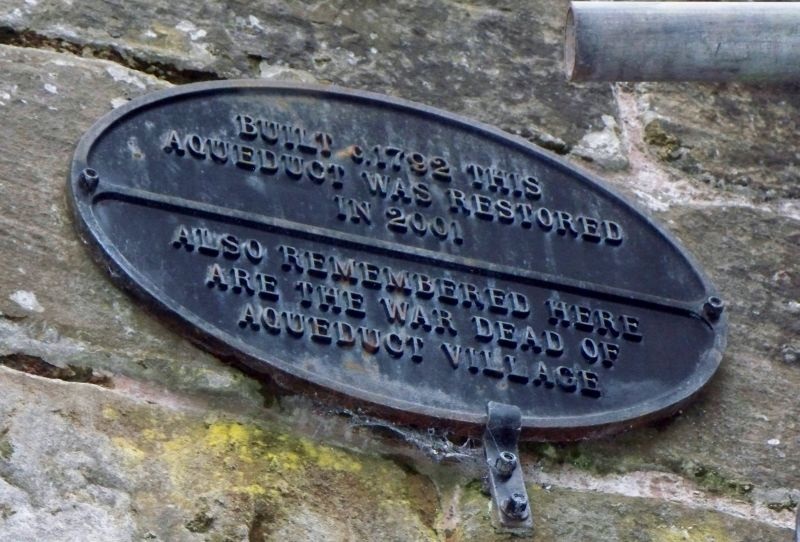
Looking Southwest across the aqueduct along what would have been the line of the branch canal. After crossing the turnpike road on this aqueduct, the branch canal turned sharply to the North before heading West towards Lightmoor. [My photograph, 2nd March 2023]Looking Northeast across the aqueduct along what would have been the line of the branch canal heading towards what is now the centre of Telford. [My photograph, 2nd March 2023]Looking Southeast along what was the turnpike road to Bridgnorth, through the arch of the aqueduct which was built in around 1792. [My photograph, 2nd March 2023]Looking Northwest towards modern-day Telford along what was once the Bridgnorth turnpike road. [My photograph, 2nd March 2023]The plaque placed on the aqueduct after its restoration in 2001, (c) Neil Brittain, 19th March 2013. [4]
The branch canal will be for another article. In this article we are following the route to the River Severn.
Aqueduct Village to the River Severn
Just South of the tunnel, the Canal to the Severn turned away to the East from the branch over the aqueduct. The 6″ Ordnance Survey of 1881 above shows the remains of the Canal, first heading East, then curving round to the South before turning East then South-southeast.
As it turned South-southeast it reached the head of the Windmill Inclined Plane which was 600yds long and had a 125 ft rise. [7]
Following the route of the Canal on the ground in the 21st century is difficult as the topography has changed significantly and the majority of the line is built over. Establishing the actual route is difficult, even with the aid of modern mapping tools available through the National Library of Scotland (NLS). The side-by-side option on the NLS website enables a line to be transferred with some accuracy. You will see that in producing the line on the ESRI image above I misjudged the alignment of the curves when transferring them from the 6″ Ordnance Survey of 1881 onto the ESRI imagery from the NLS. The side-by-side images permit the cursor to appear on both the map and the satellite image at the same time.
This first side-by-side image shows the length of the Canal which turns away from the later railway route. I have only mapped the actual length shows on the Ordnance Survey rather than try to interpret the line over the open fields of the map, or the housing in the satellite image. [10]
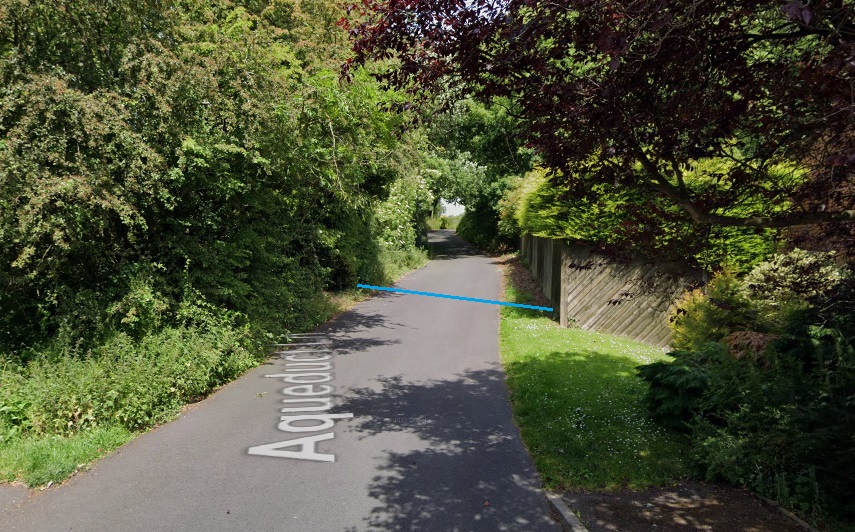
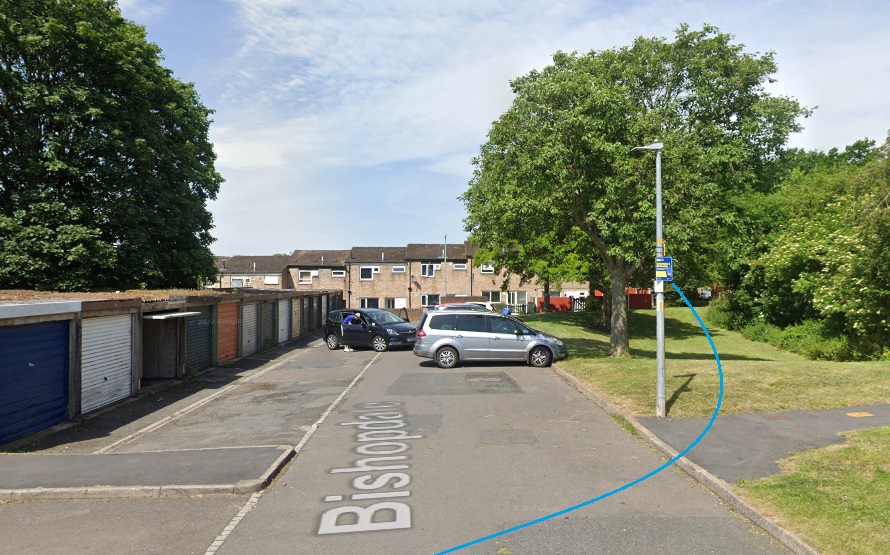
The four Streetview immediately below show the approximate points where the old canal alignment crosses modern roads. The first shows Aqueduct Lane just to the North of Chapmans Close and at the point where a modern access to the Silkin Way meets the lane.
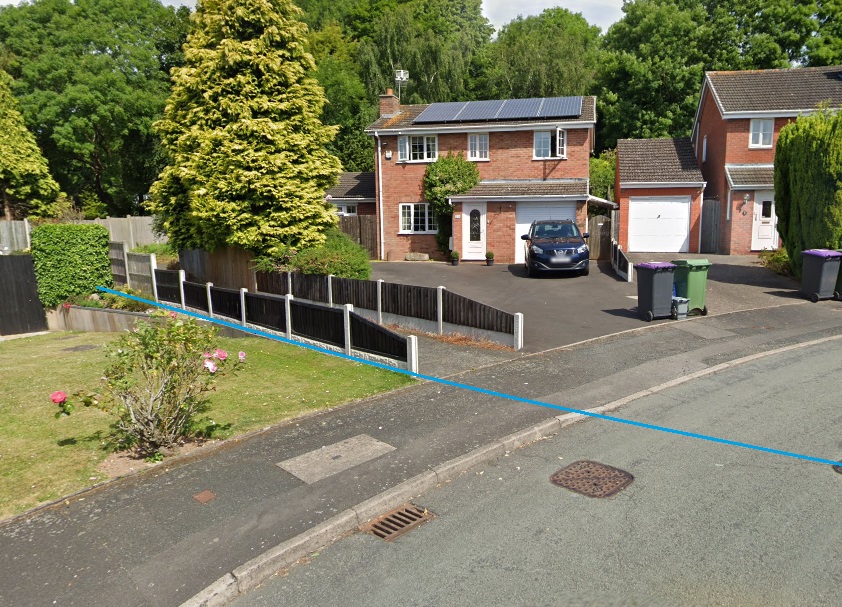
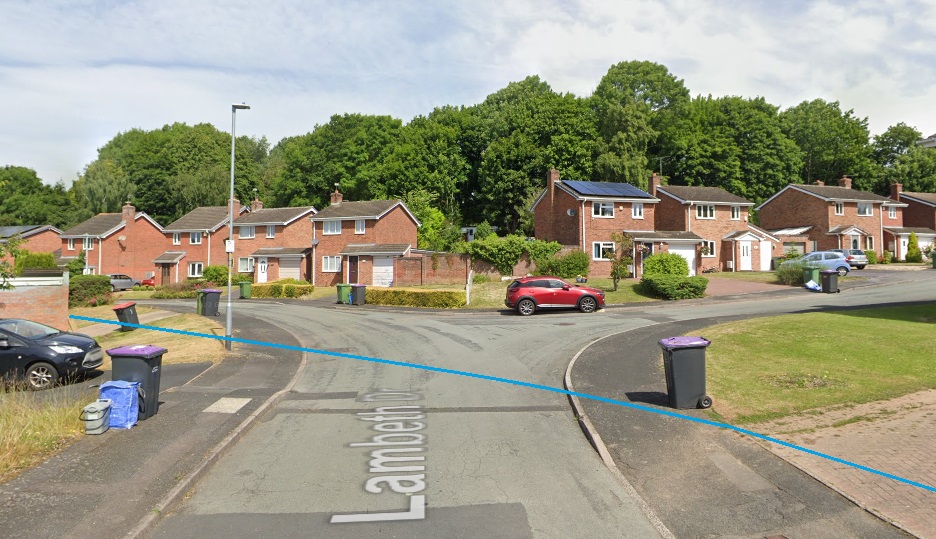
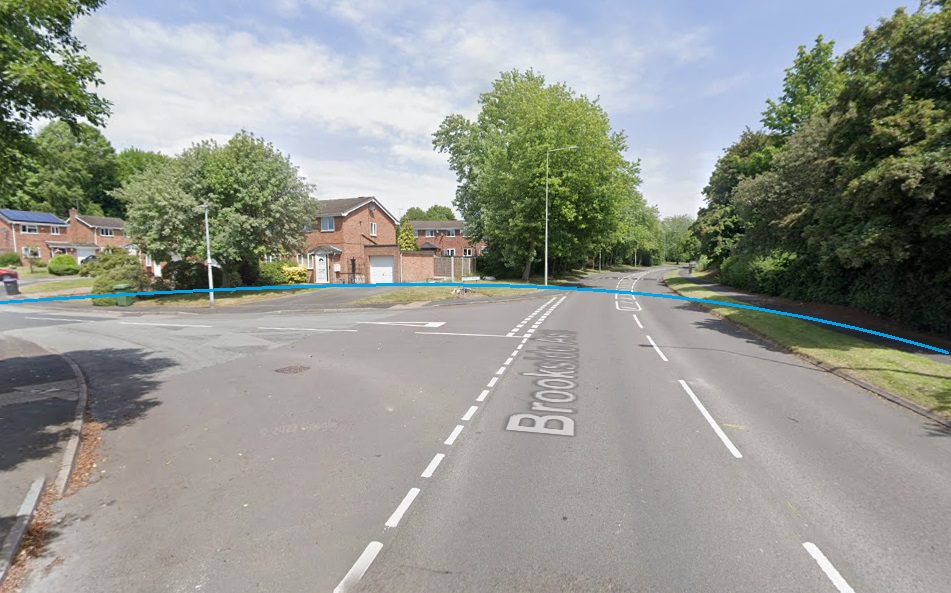
Looking North on Aqueduct Lane just to the North of Chapmans Close. Aqueduct Lane was a highway in the mid 19th century and must have bridged the old canal. Nothing is known about any structure at this location. The Silkin Way is off to the left of the image and is at a significantly lower level than Aqueduct Lane. [Google Streetview, June 2022]Looking North at the bend in Lambeth Drive. The blue line is the approximate route of the old canal transposed from the side-by-side image above. The passageway immediatly alongside the blue line is not a public right of way, it merely provides access to a property behind the conifer that is prominent in the image. [Google Streetview, June 2022]Further East on Lambeth Drive the old canal’s route curve across the junction and will soon cross Brookside Avenue which is a short distance behind the camera. [Google Streetview, June 2022]Looking Northeast along Brookside Avenue at its junction with Lambeth Drive. The old canal’s route curves sharply round to the South. [Google Streetview, June 2022]
As we noted above, I have not tried to accurately plot the line of the old canal where it does not show on th Ordnance Survey mapping. The next length shown on the mapping is covered on the next side-by-side image below and includes the top part of the Windmill Inclined plane. The route of the incline is defined by the field boundary shown on the OS map.
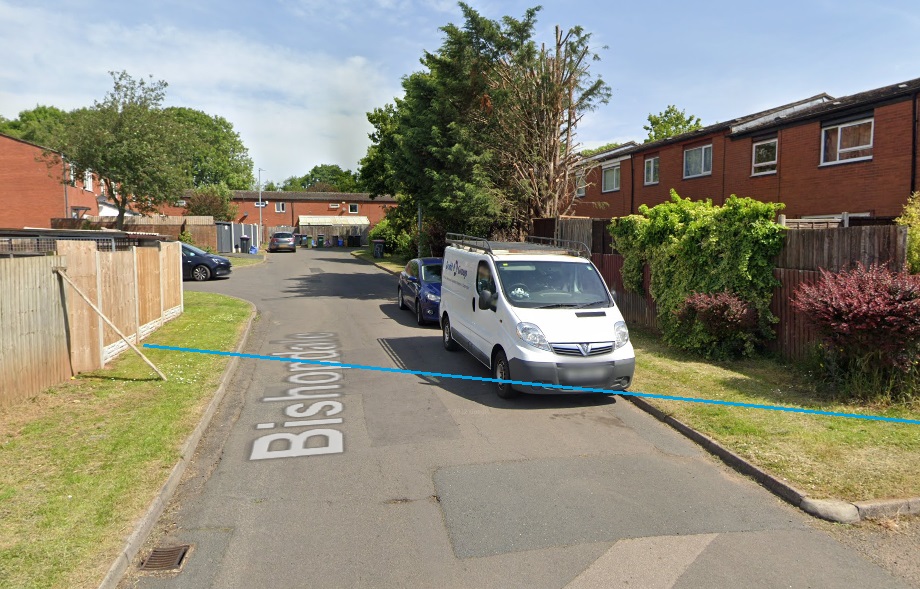
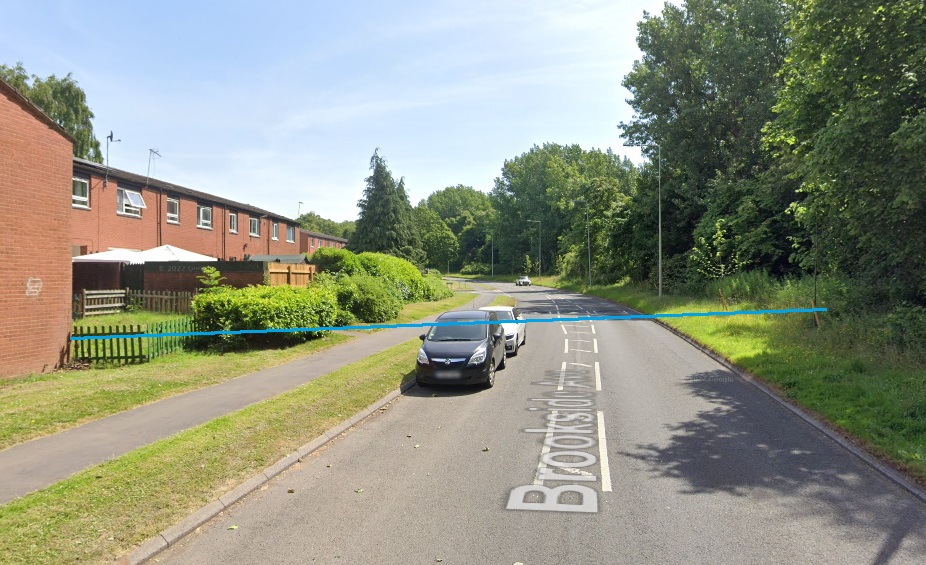
This second side-by-side image shows the next mapped length of the old canal as it reaches the head on the incline adjacent to Windmill Farm. Once again, very little of the old topography remains and the area has seen significant housing development. [11]Looking East on one of the arms of Bishopdale with the approximate line of the old canal shown in blue. [Google Streetview, June 2022]Looking North on Bishopdale with the approximate line of the old canal shown by the blue line. [Google Streetview, June 2022]Looking to the East along the most southerly part of Brookside Avenue with the old canal route marked by the blue line. As the side-by-side image above shows, we are now a good distance down the Windmill Inclined Plane and it is impossible to be sure of the relative levels of the old canal incline and the modern road.
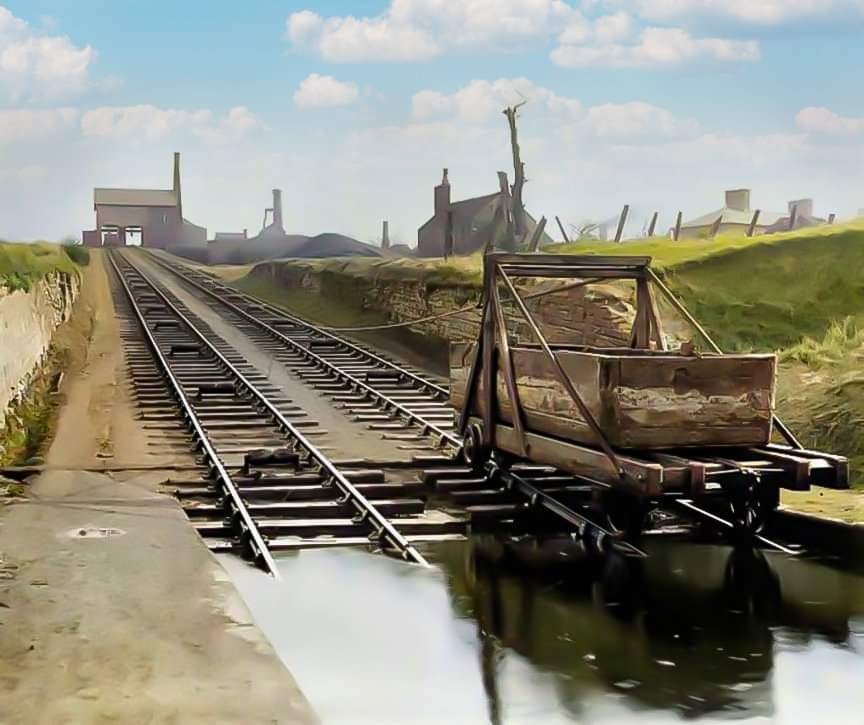
As we have already noted Windmill Inclined Plane was 6ooft long and saw a drop in levels towards the River Severn of 125ft. We have no pictures of the incline but we do have pictures of another incline on the Shropshire Canal which survived for a little longer and we have the Hay Incline to see in the 21st century. Photos have survived of Trench Incline while it was still operational.
Trench Inclined Plane was covered in another article on this site:
The original photos of Trench Incline were monochrome but modern technology now allows those images to be colourised. The images below hopefully give a good idea of what Windmill Inclined Plane might also have been like in operation. The images were colourised by Simon Alun Hark and shared by him on his Shropshire Nostalgia and Film Facebook Group. [12]
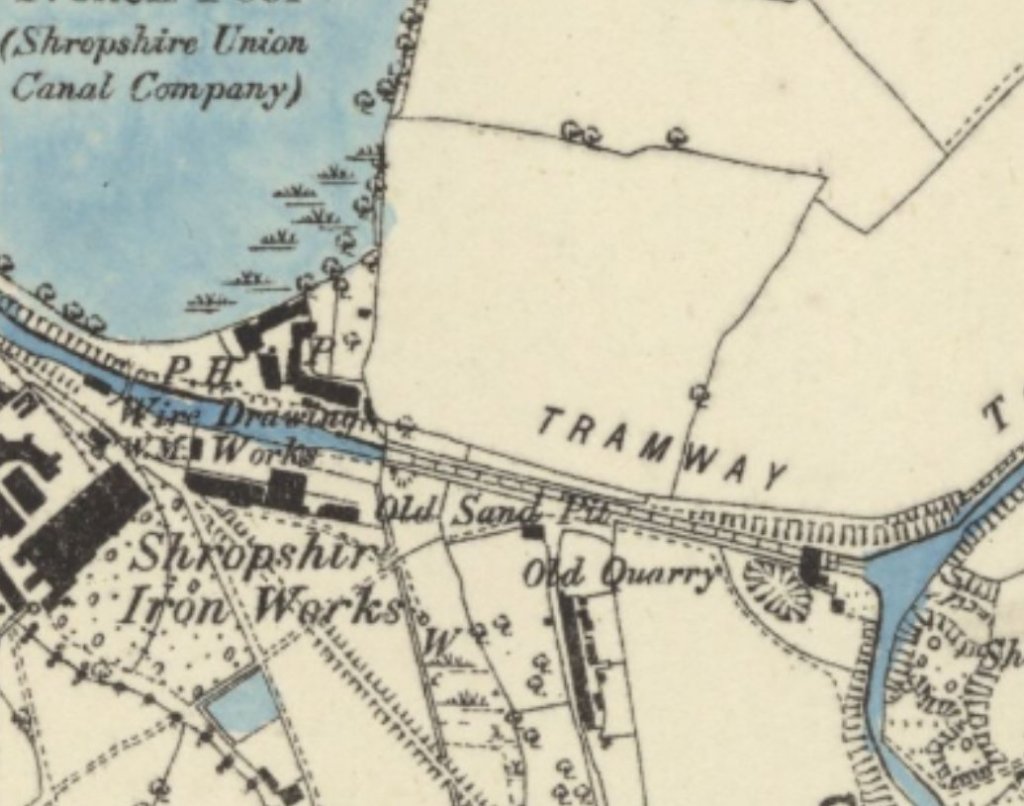
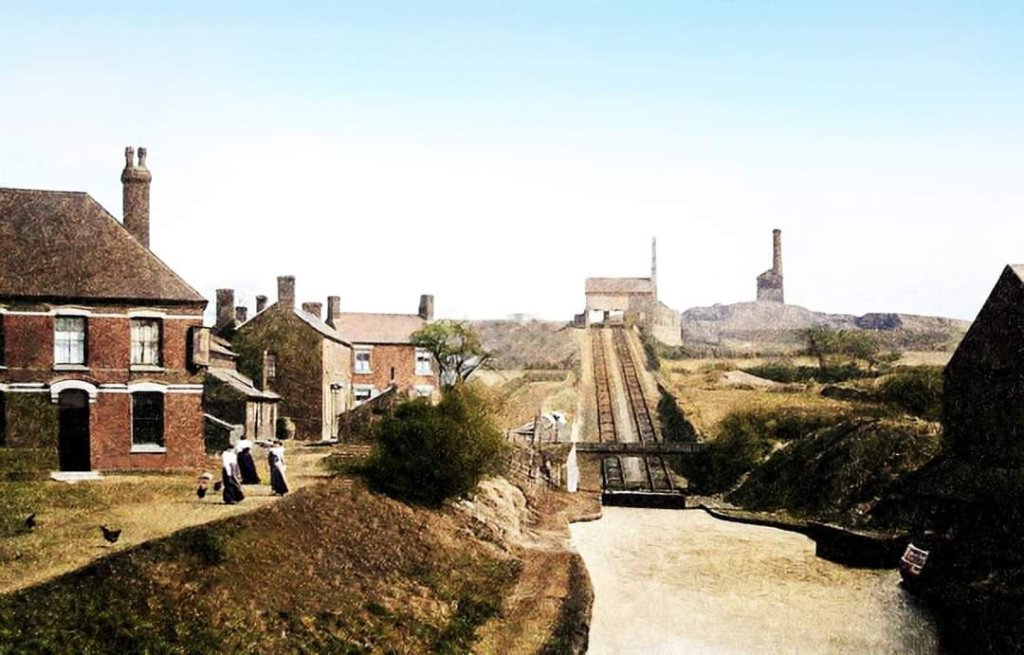
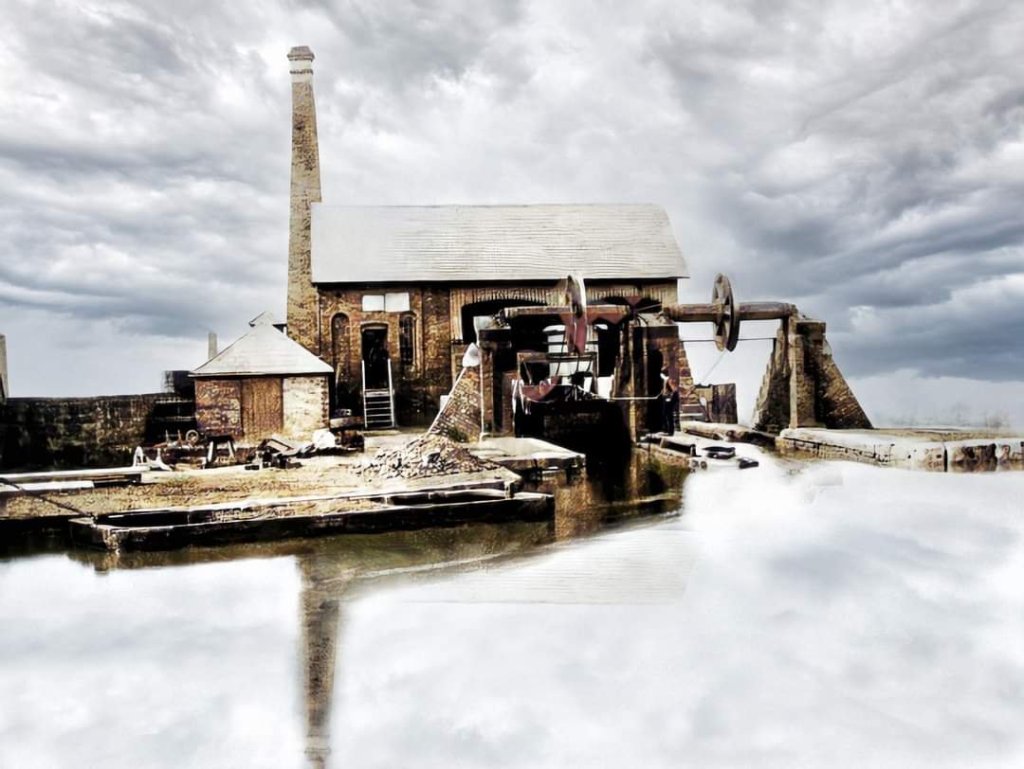
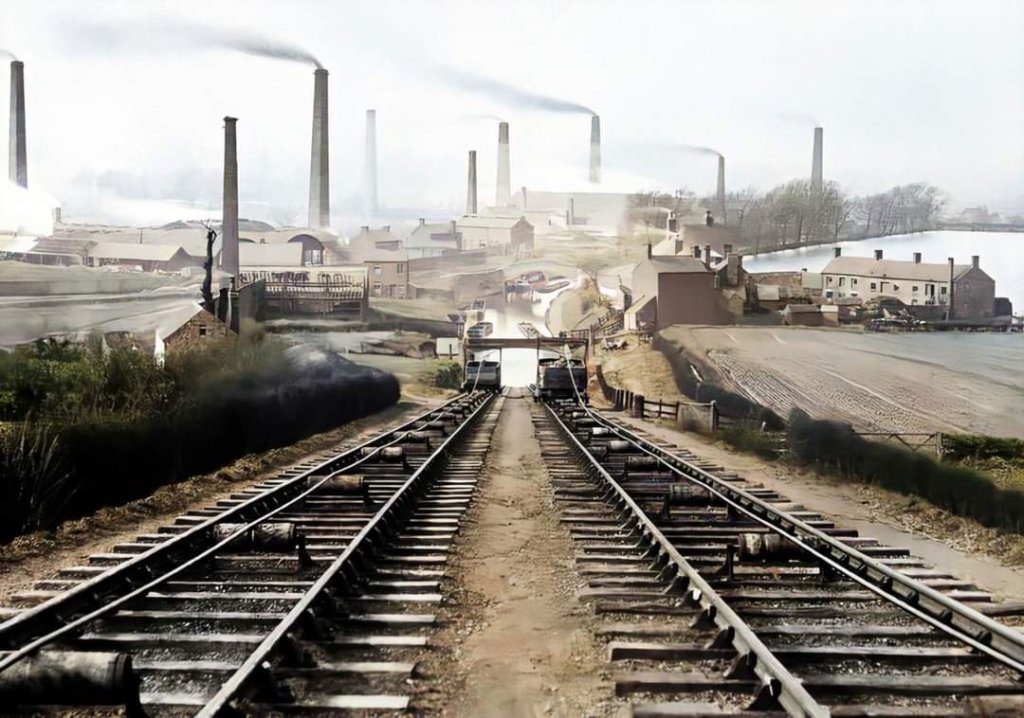
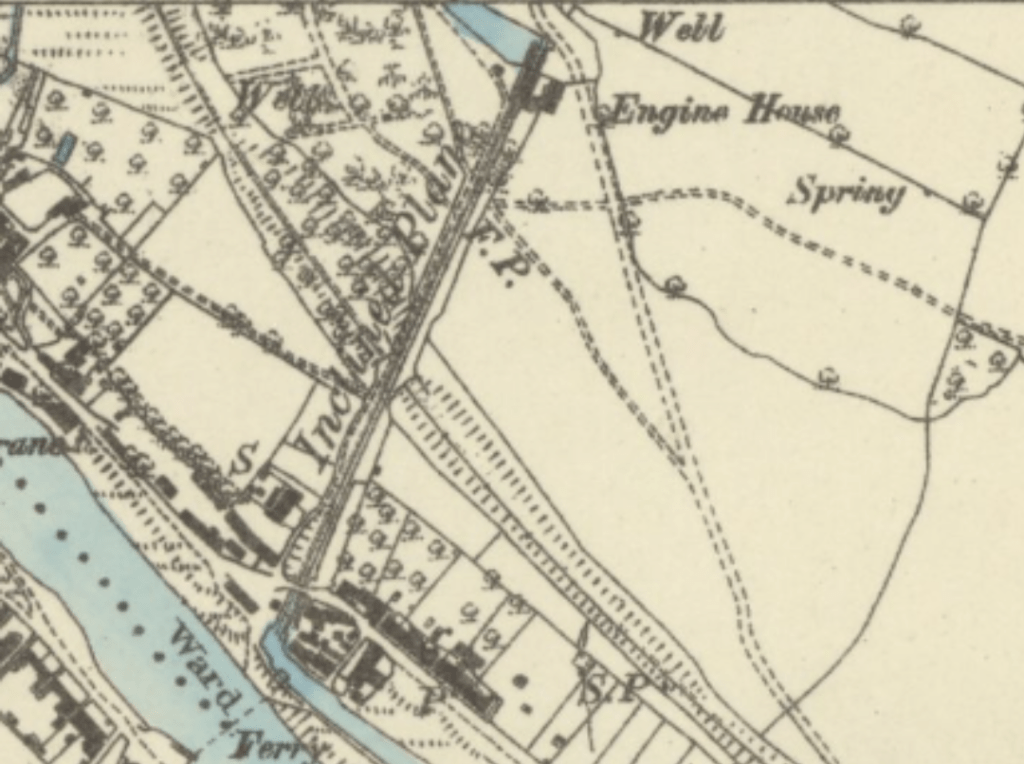
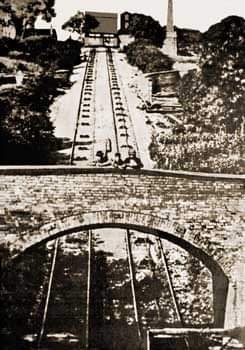
This extract from the 6″ Ordnance Survey shows Trench Inclined Plane close to the Shropshire Oron Works. Trench Pool is to the Northwest of the incline. The incline is marked as a tramway on the map extract. [13]Trench Inclined Plane viewed from the West with the Blue Pig (formerly the Shropshire Arms) Public House on the left of the image. At the top of the incline two different buildings are visible. The one at the top of the incline was the engine house for the incline. [14]The Engine House at the top of the Trench Inclined Plane. [15]Looking down the Trench Inclined Plane to the West. The Shropshire Iron Works (Trench Iron Works on later mapping) are immediately at the bottom of the incline on the left. Castle Car Works are further ahead. [16]The Trench Inclined Plane once again. This image shows how the iron tob boats were transported up and down the incline. At either end of the incline was a pool into which the cradles which carried the tub boats were submerged. Once a tub boats was positioned over the cradle it was picked up by the cradle which left the pool to climb or descend the incline. At the opposite end of the incline the process was reversed. [17]
These Canal Inclined Planes were a much more effective method of lifting the tub boats over significant height gains than would have been a series of canal locks. While these were expedient with tub boats, they would have been impractical for narrow boats which were of a much greater length.
A history of the inclined planes on the Shropshire Canal is provided by P. Whitehead in an article online which is entitled ‘Shropshire Tub Boat Canals‘. [18]
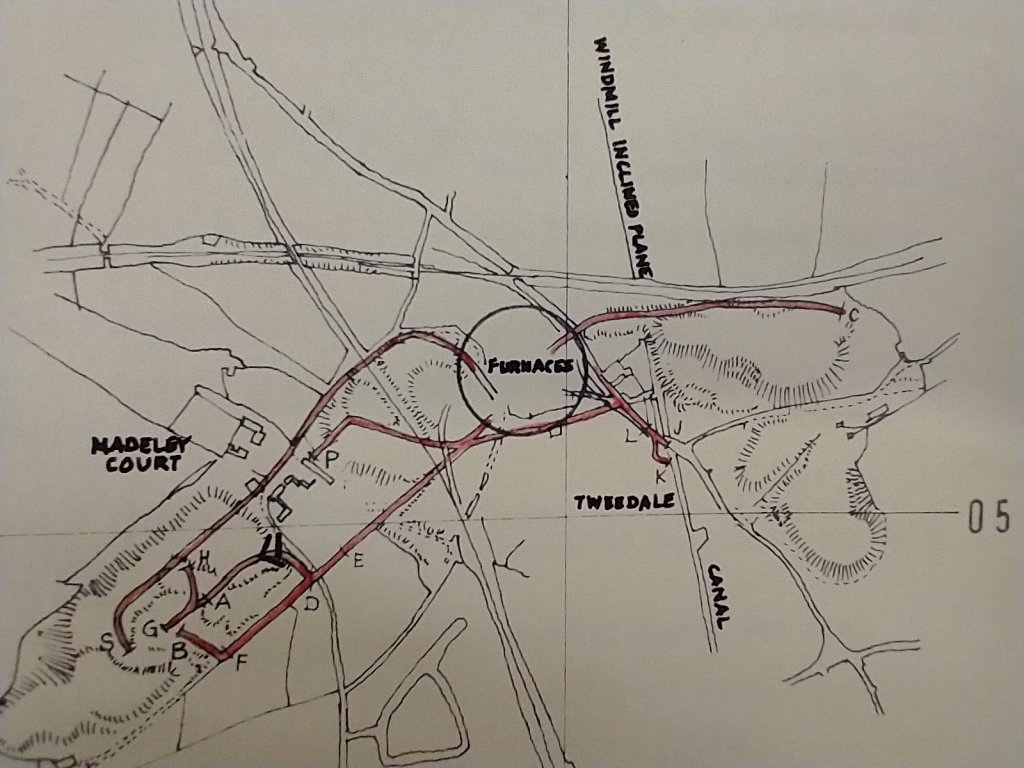
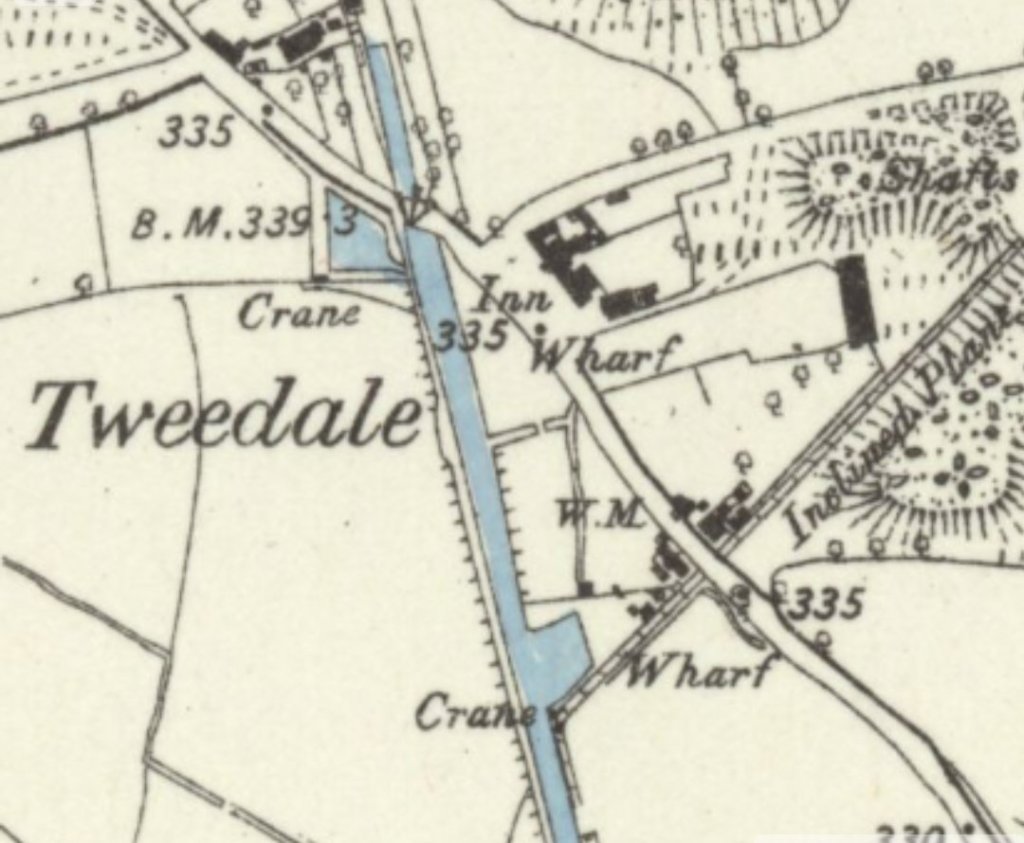
This hand-traced drawing which focusses on the tramways/tramroads serving Madeley Court Furnaces is part of a series included in research published by R.F. Savage and L.D.W. Smith entitled, The Waggon-ways and Plate-ways of East Shropshire. It shows the line of the Windmill Inclined Plane and the canal which it served continuing South towards the River Severn. [19: p179]This extract from the 6″ Ordnance Survey of 1881, published in 1888, shows the Shropshire Canal at the bottom of the Windmill Inclined Plane. The road crossing the canal is the Bridgnorth turnpike road. There are two Wharves show on the extract, one of which was accessed by means of an inclined plane from Kemberton and Halesfield collieries to the East, which is not shown on Savage & Smith’s traced drawing above. They do show a short length of tramroad running along the turnpike road on the West side of the canal. Although not coloured blue on this map extract, there was a canal basin at Tweedale. Its outline can be seen to the East of the Bridgnorth road just South of the Inn. [20]
Bradshaw and Jenkins tell us that “the canal was closed between Wrockwardine Wood and the bottom of the Windmill Hill inclined plane on 1st June 1858, although isolated sections of the waterway remained in use for many years thereafter.” [21: p169]
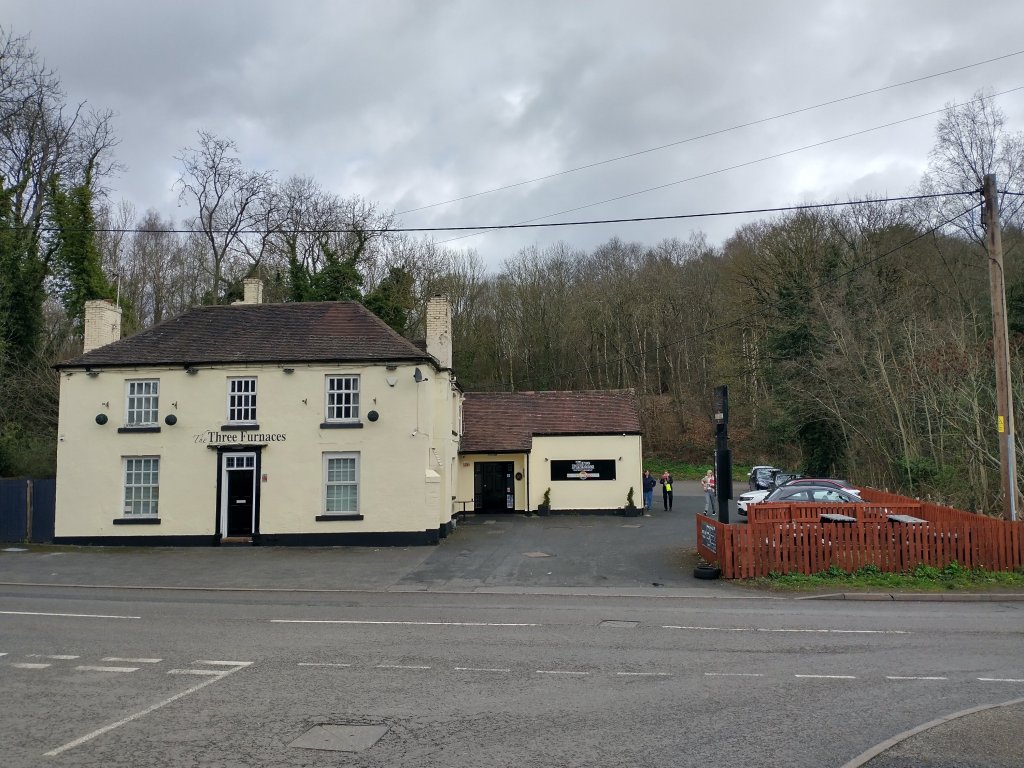
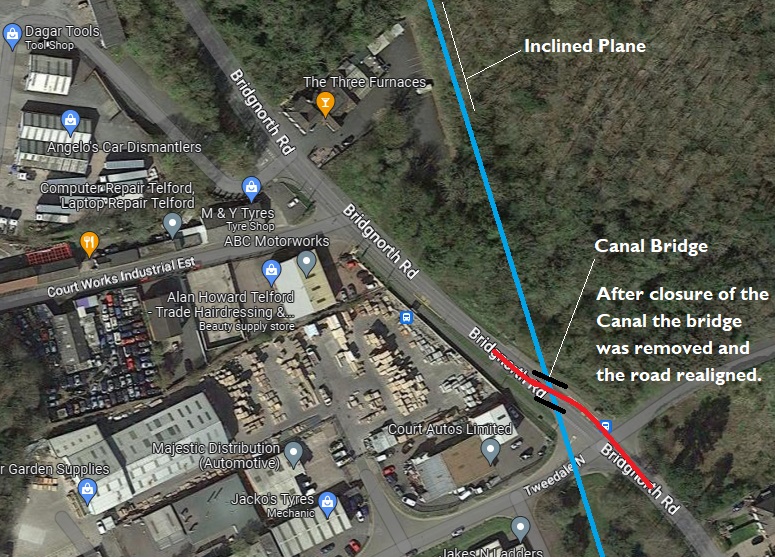
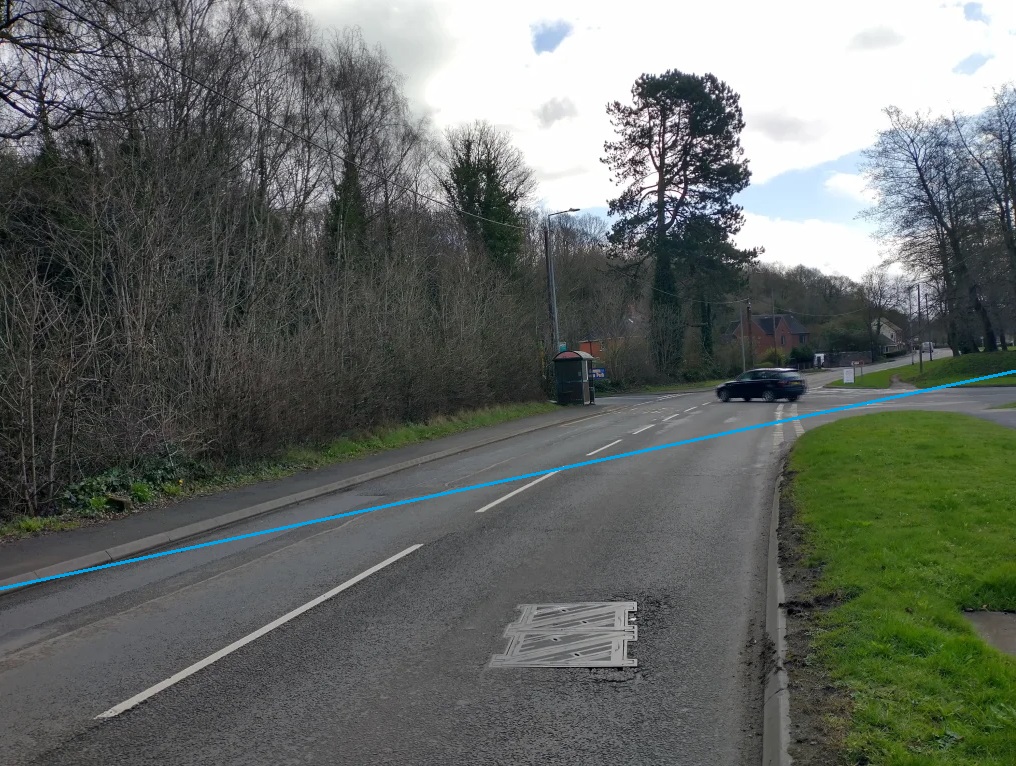
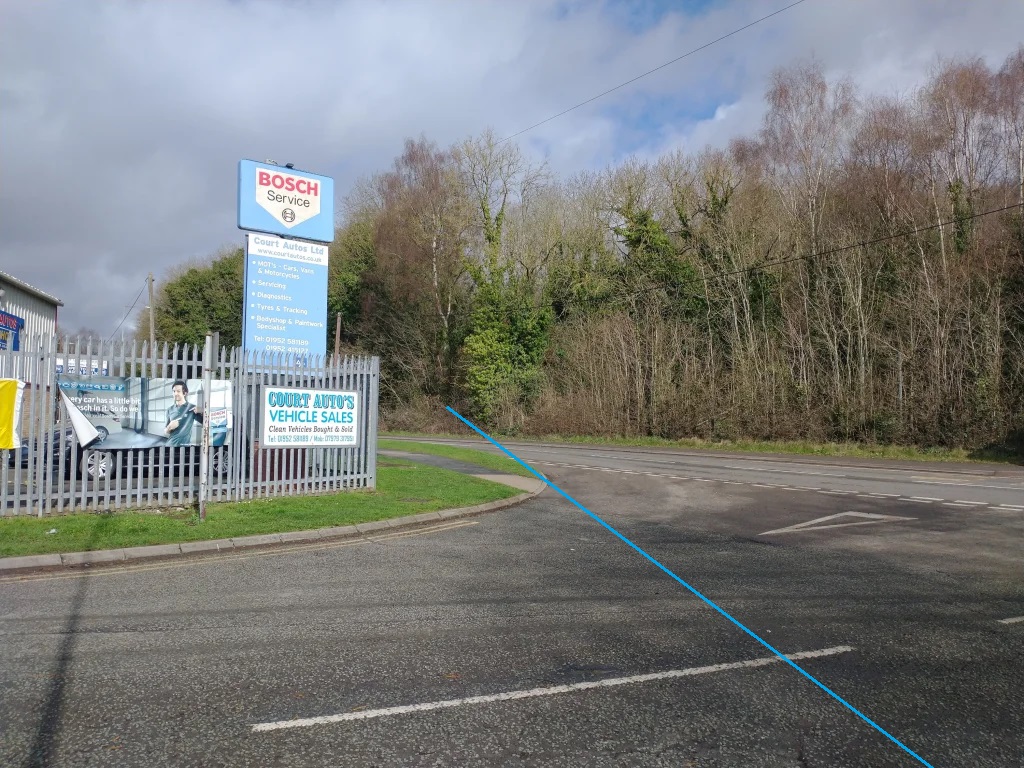
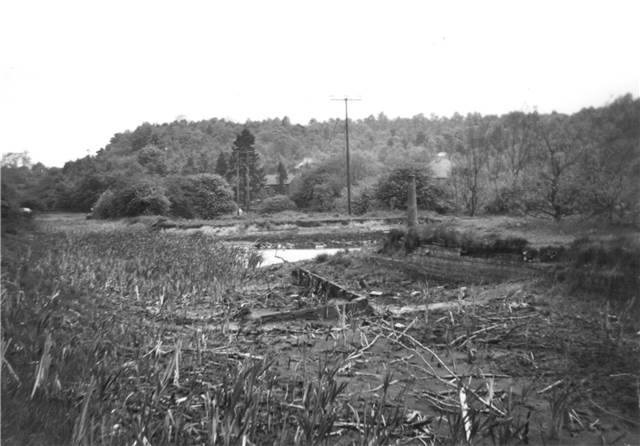
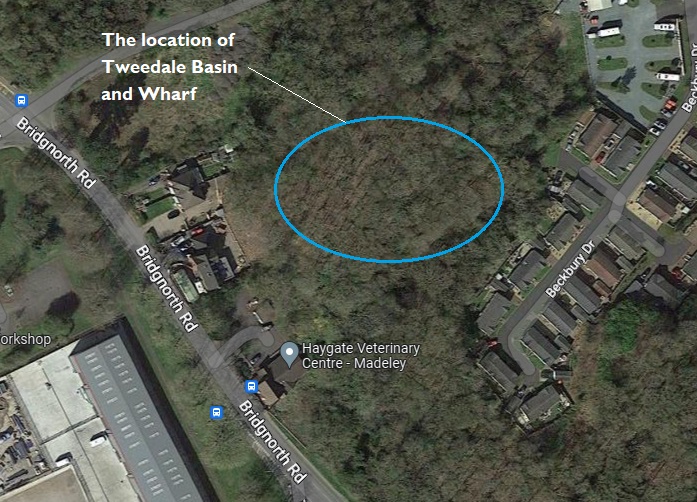
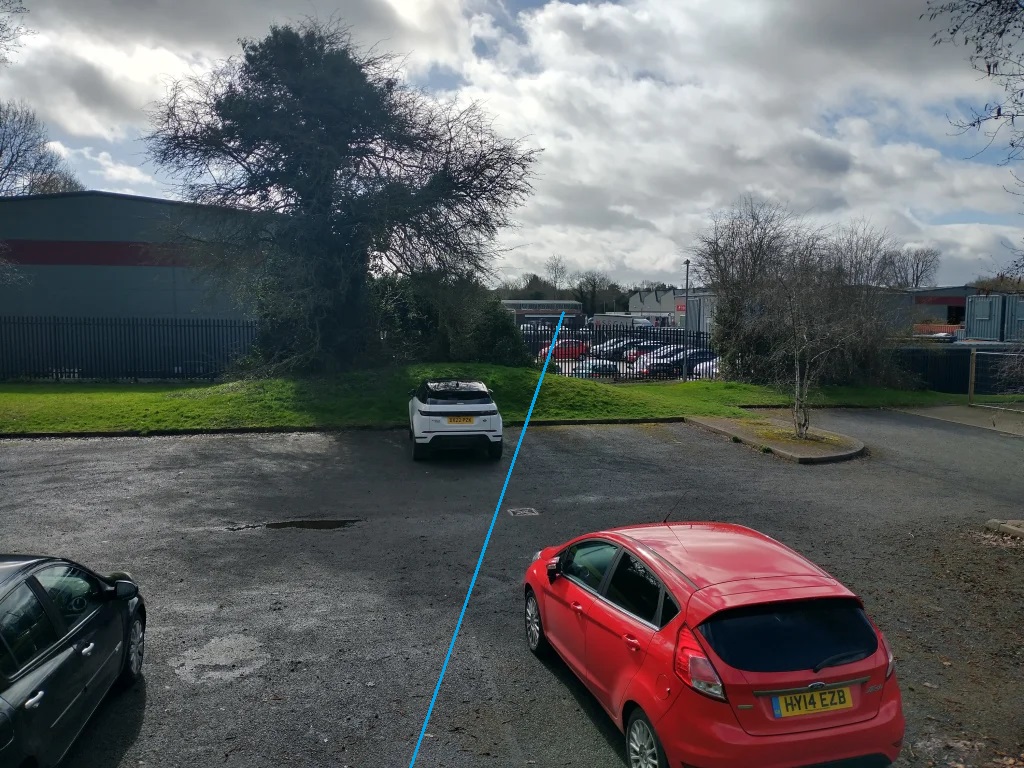
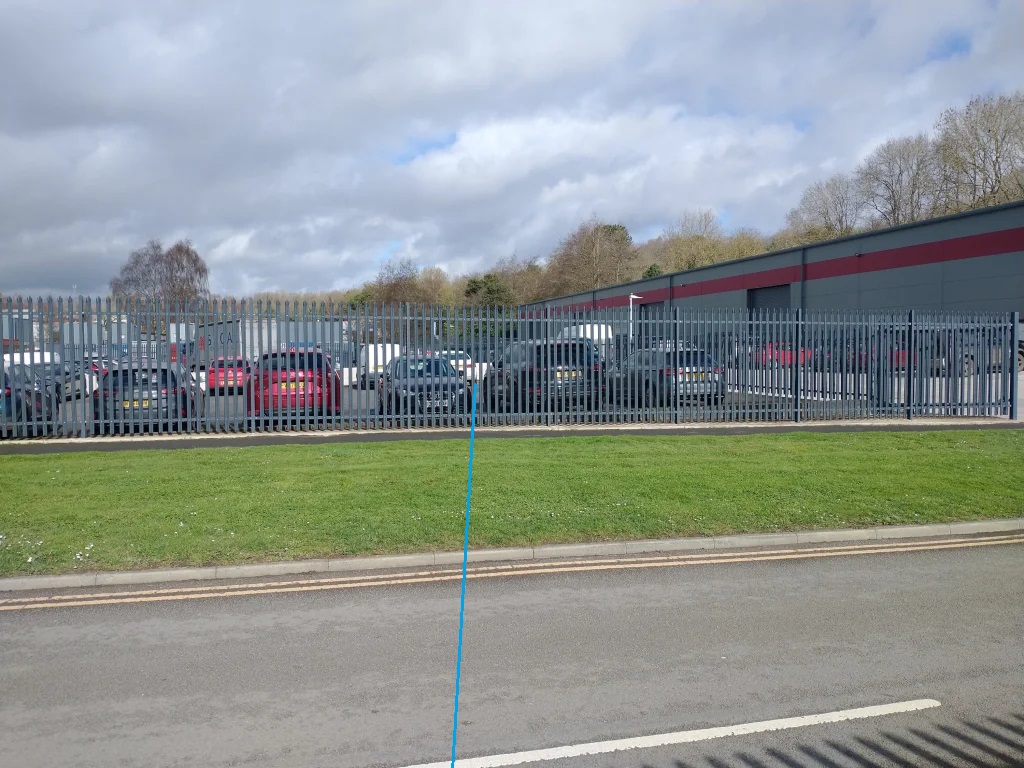
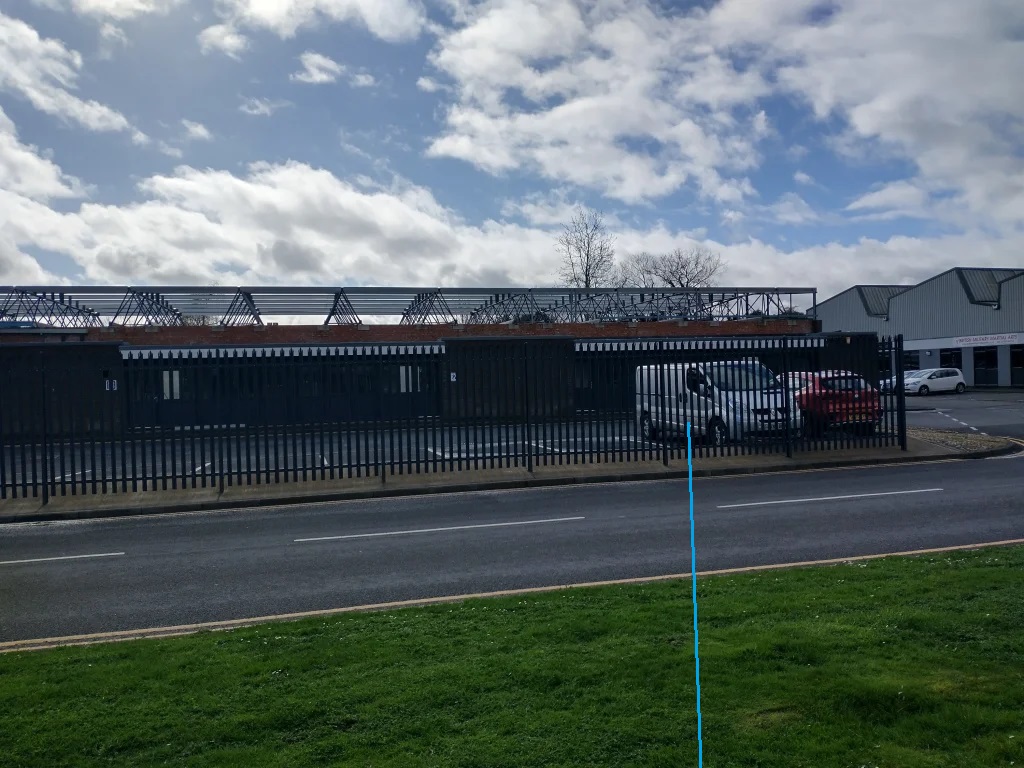
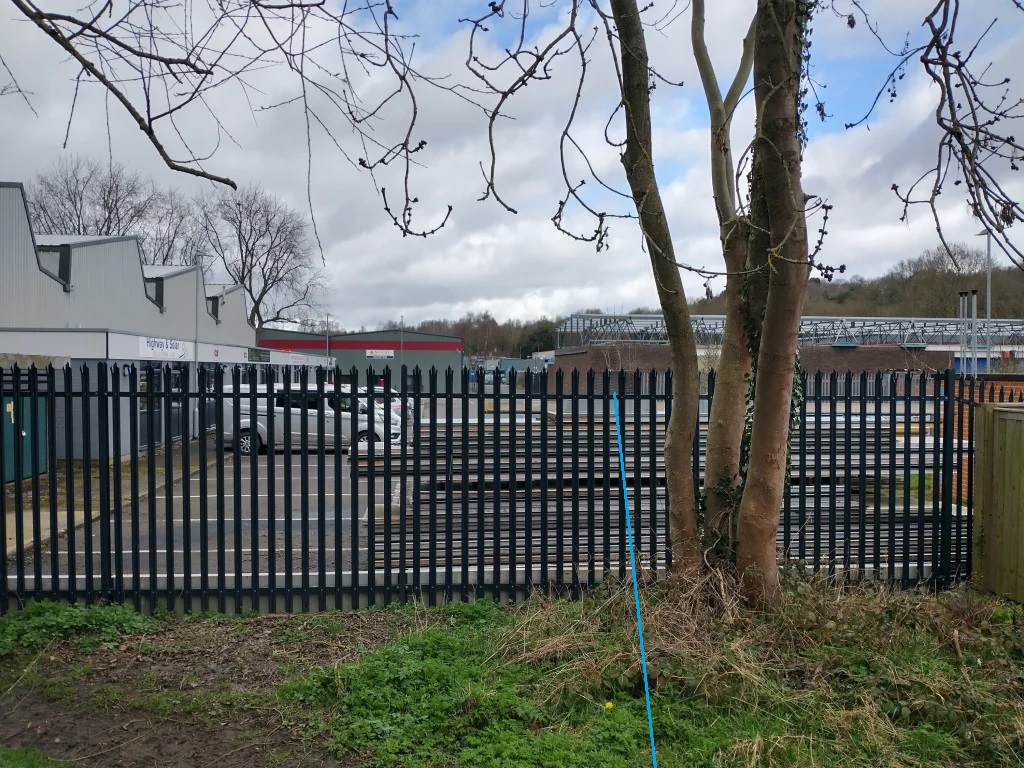
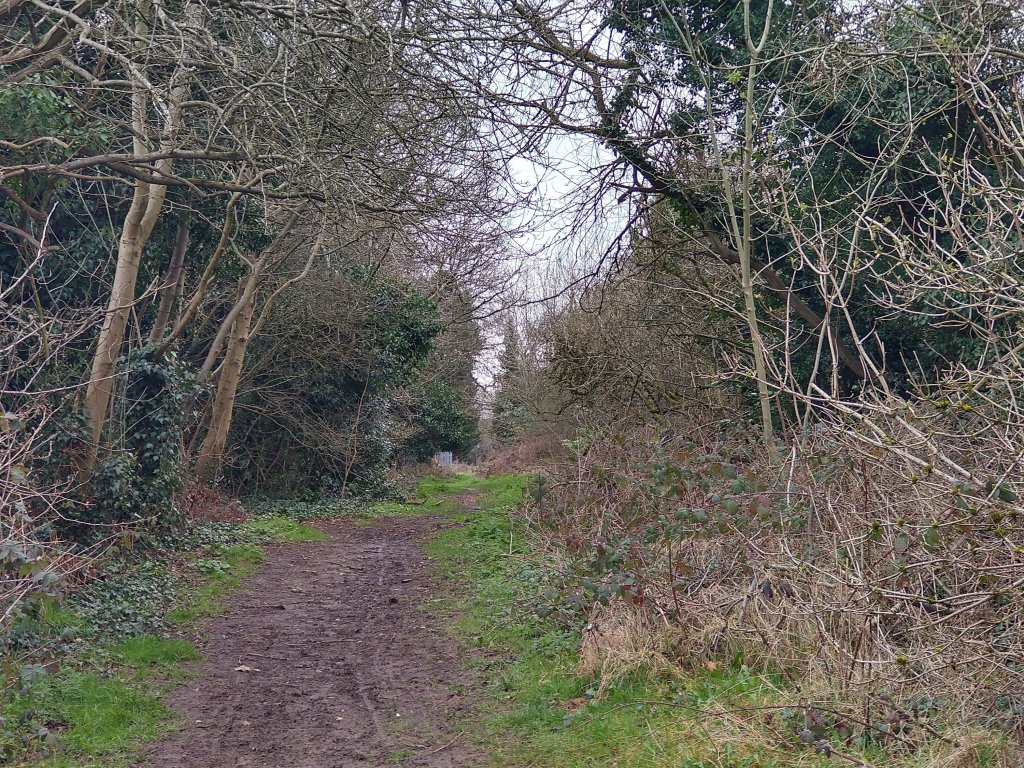
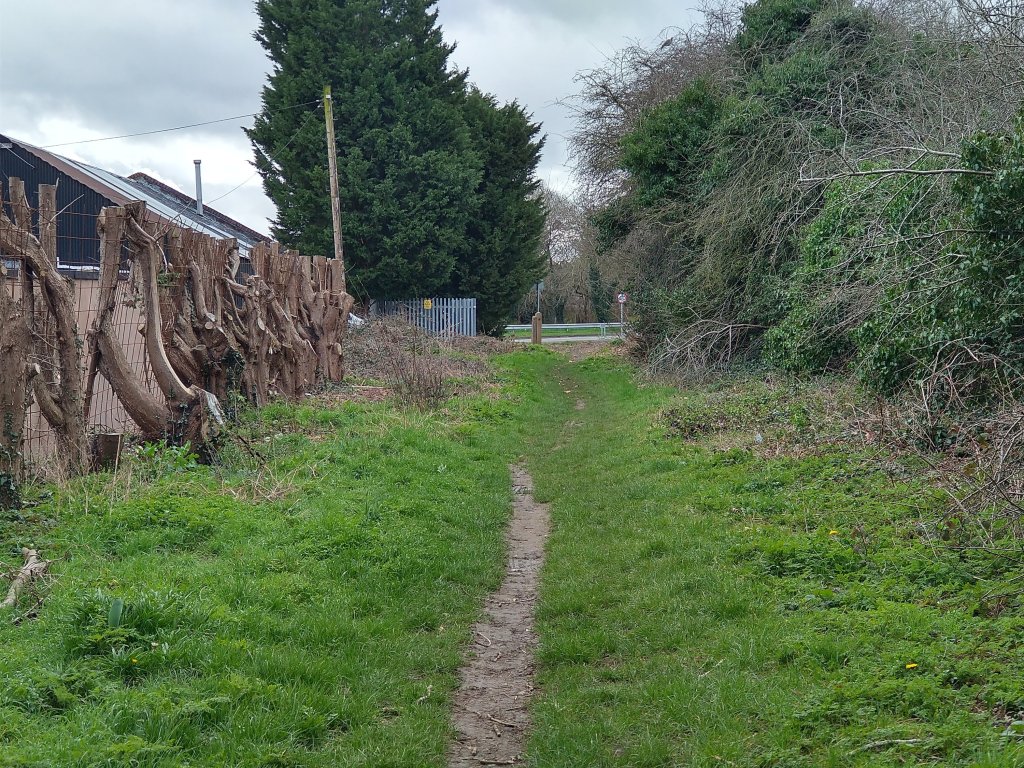
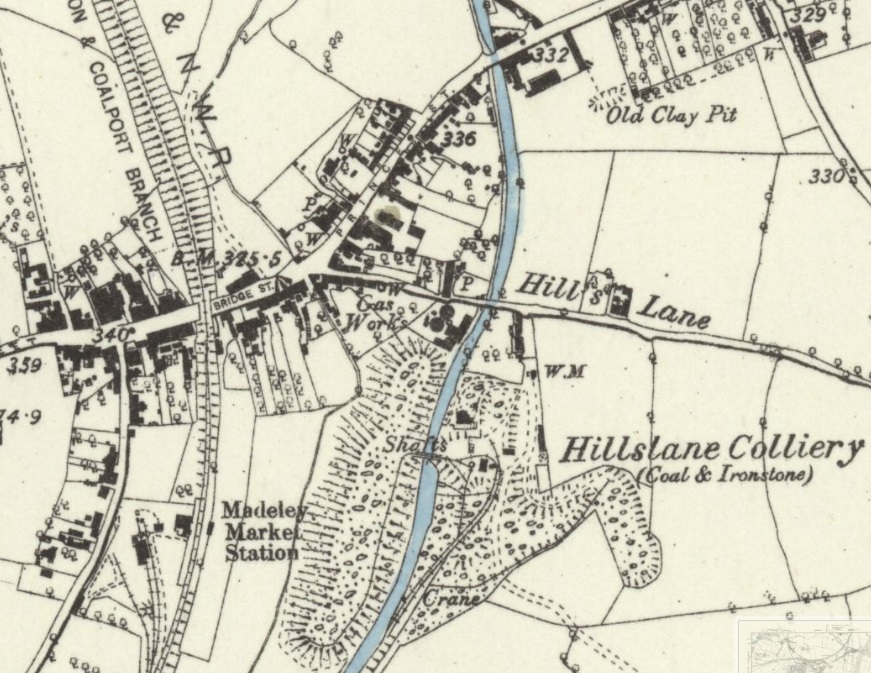
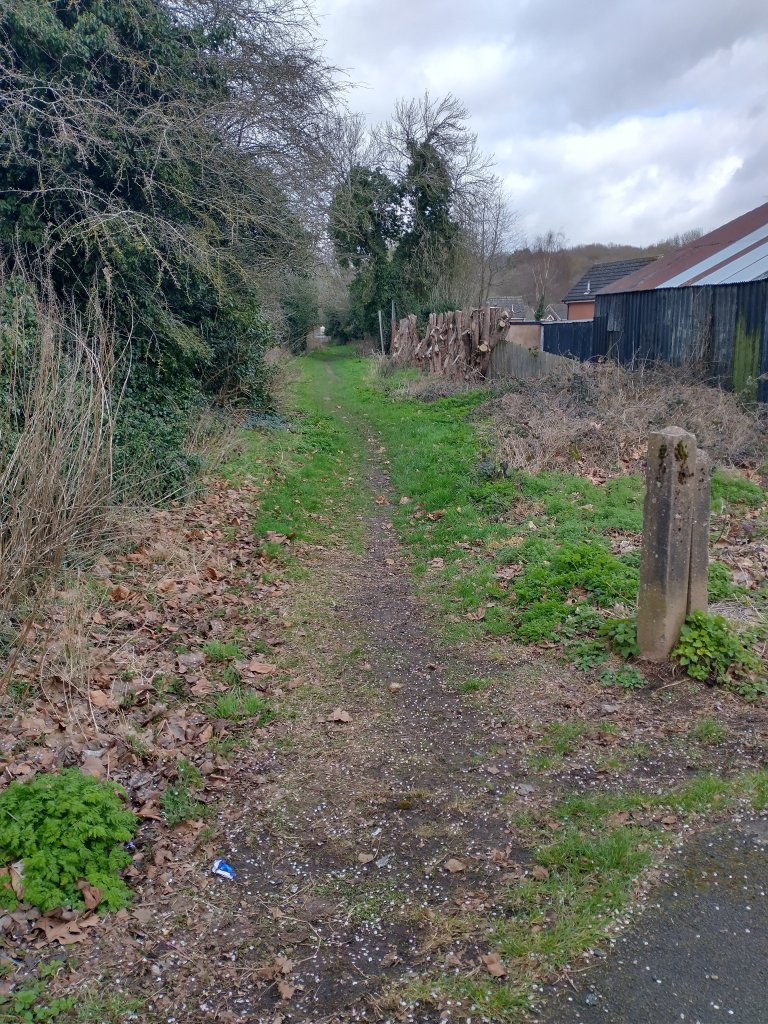
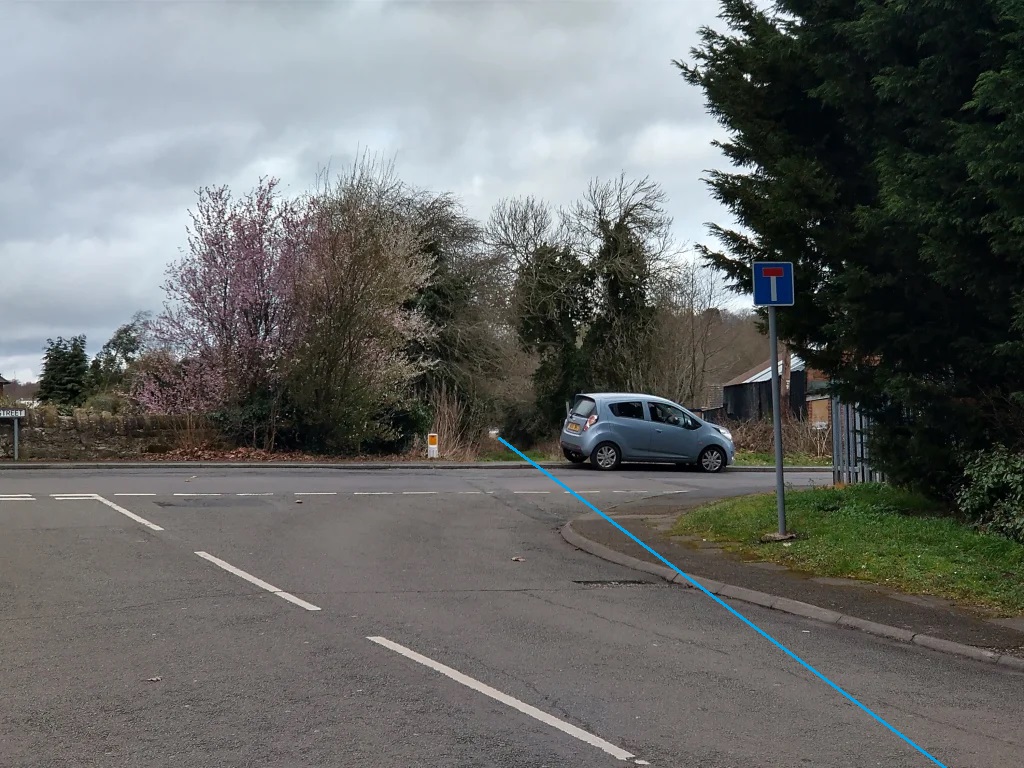
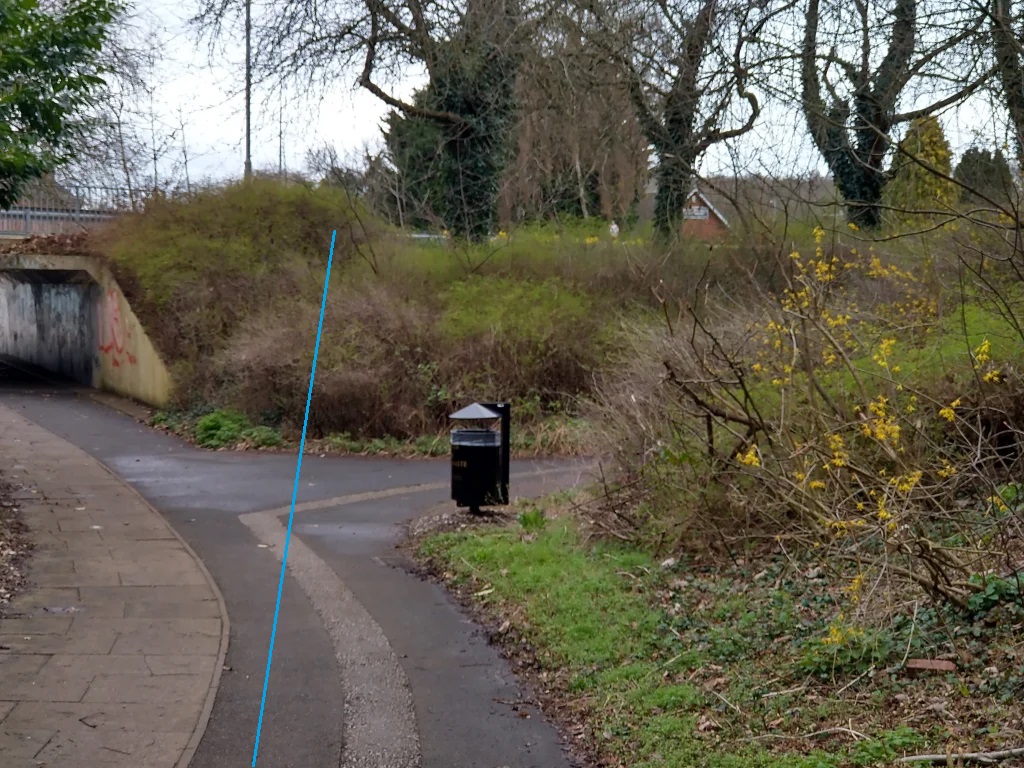
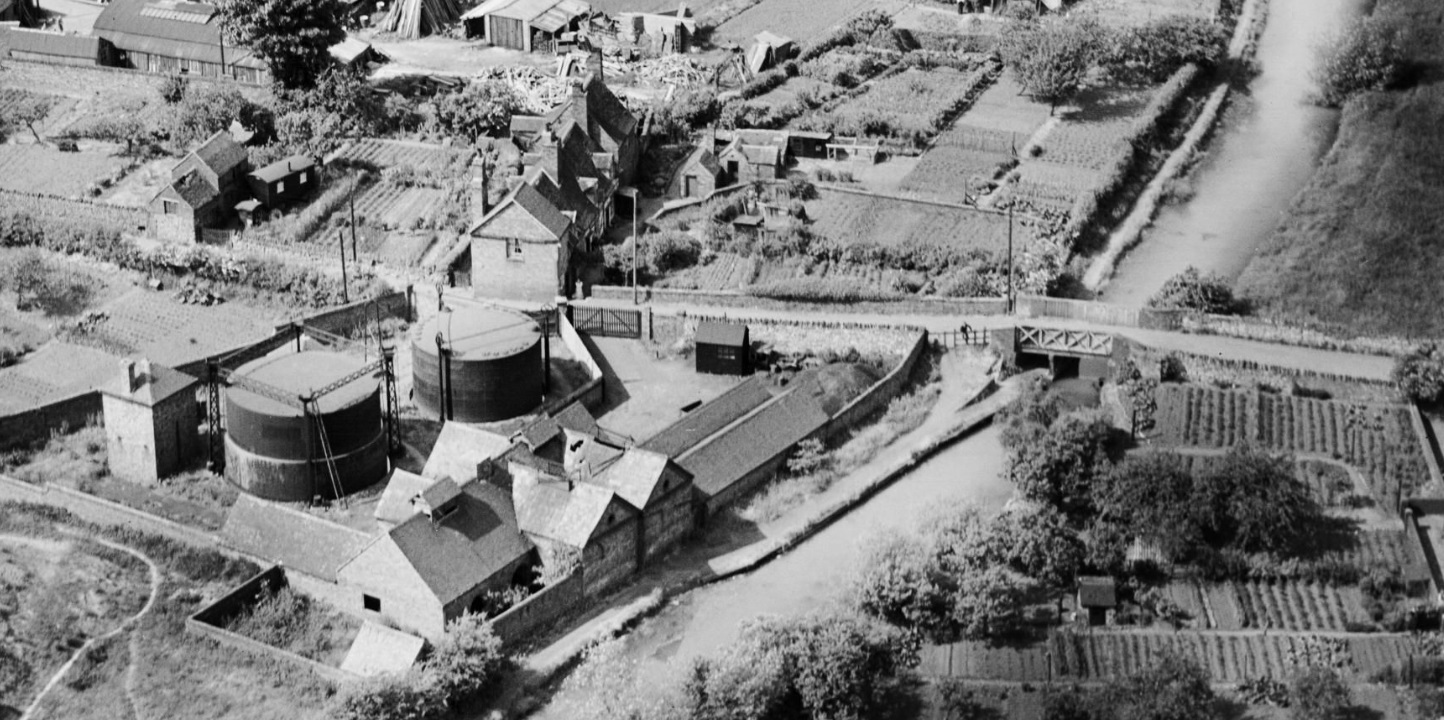
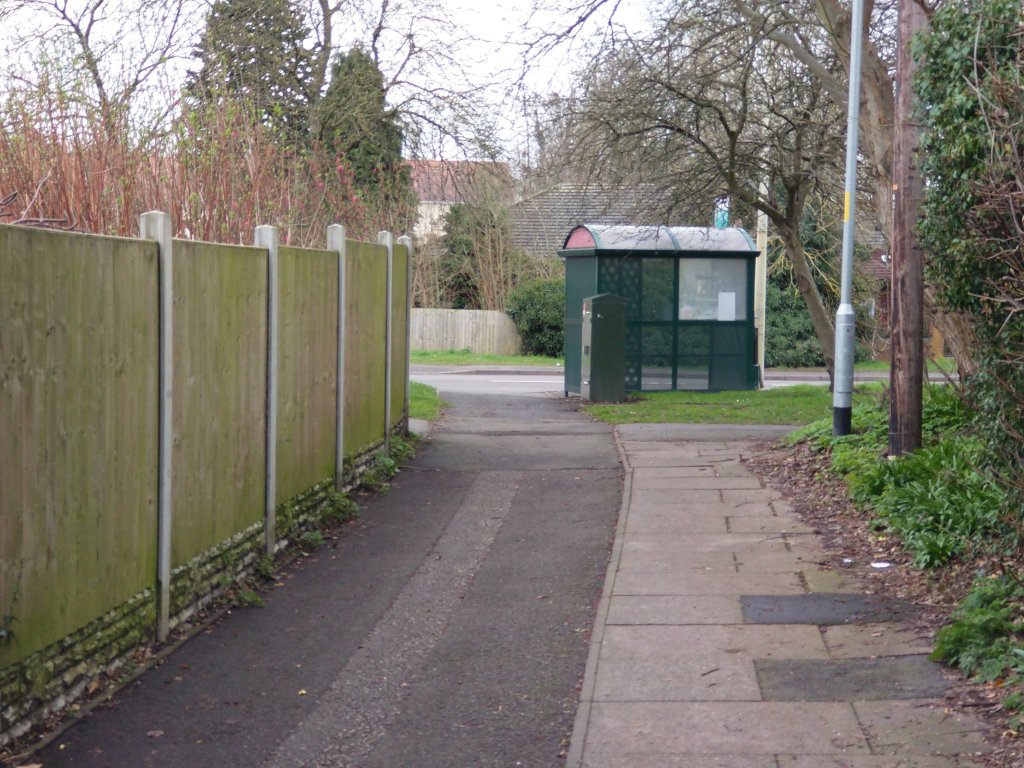
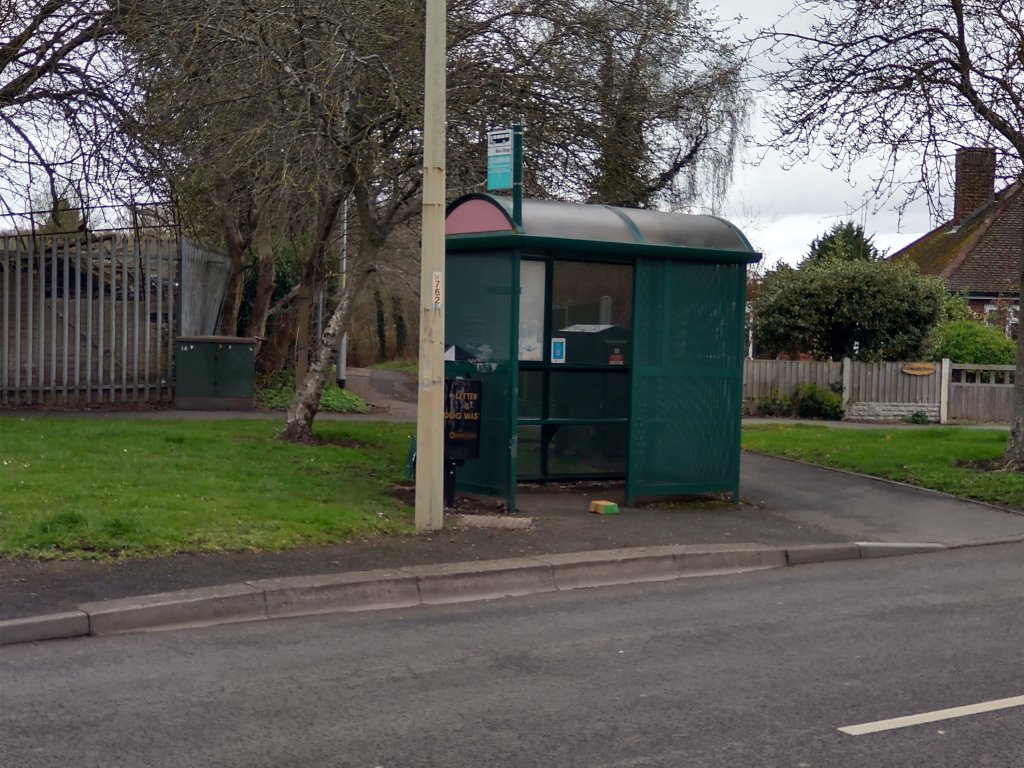
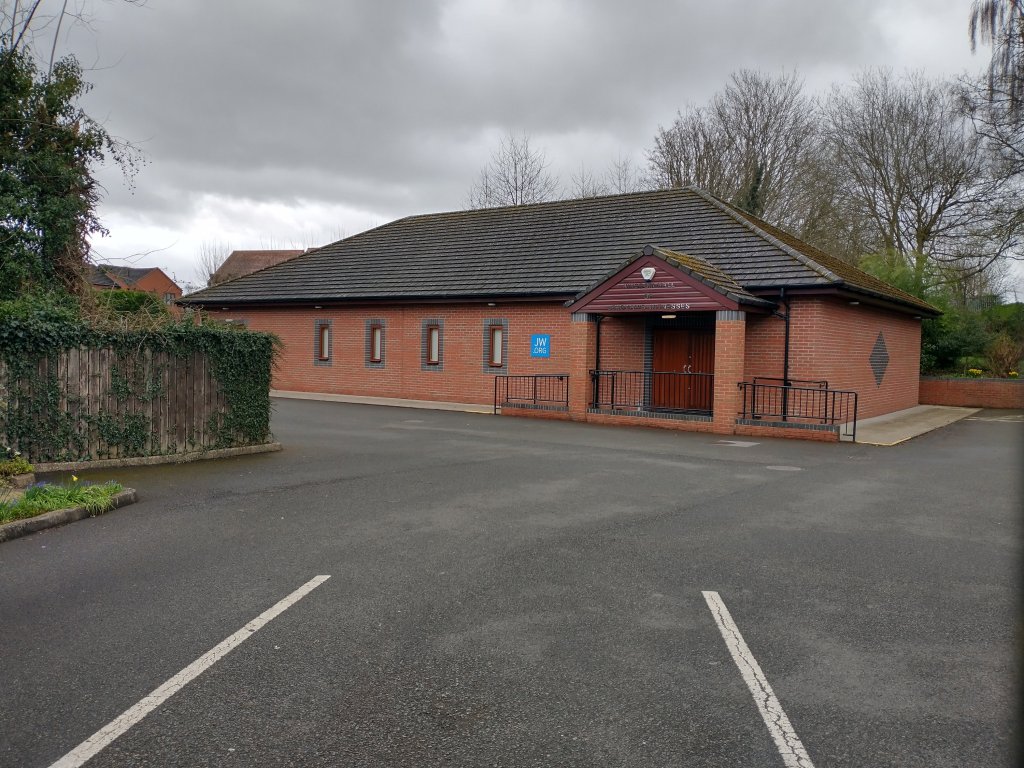
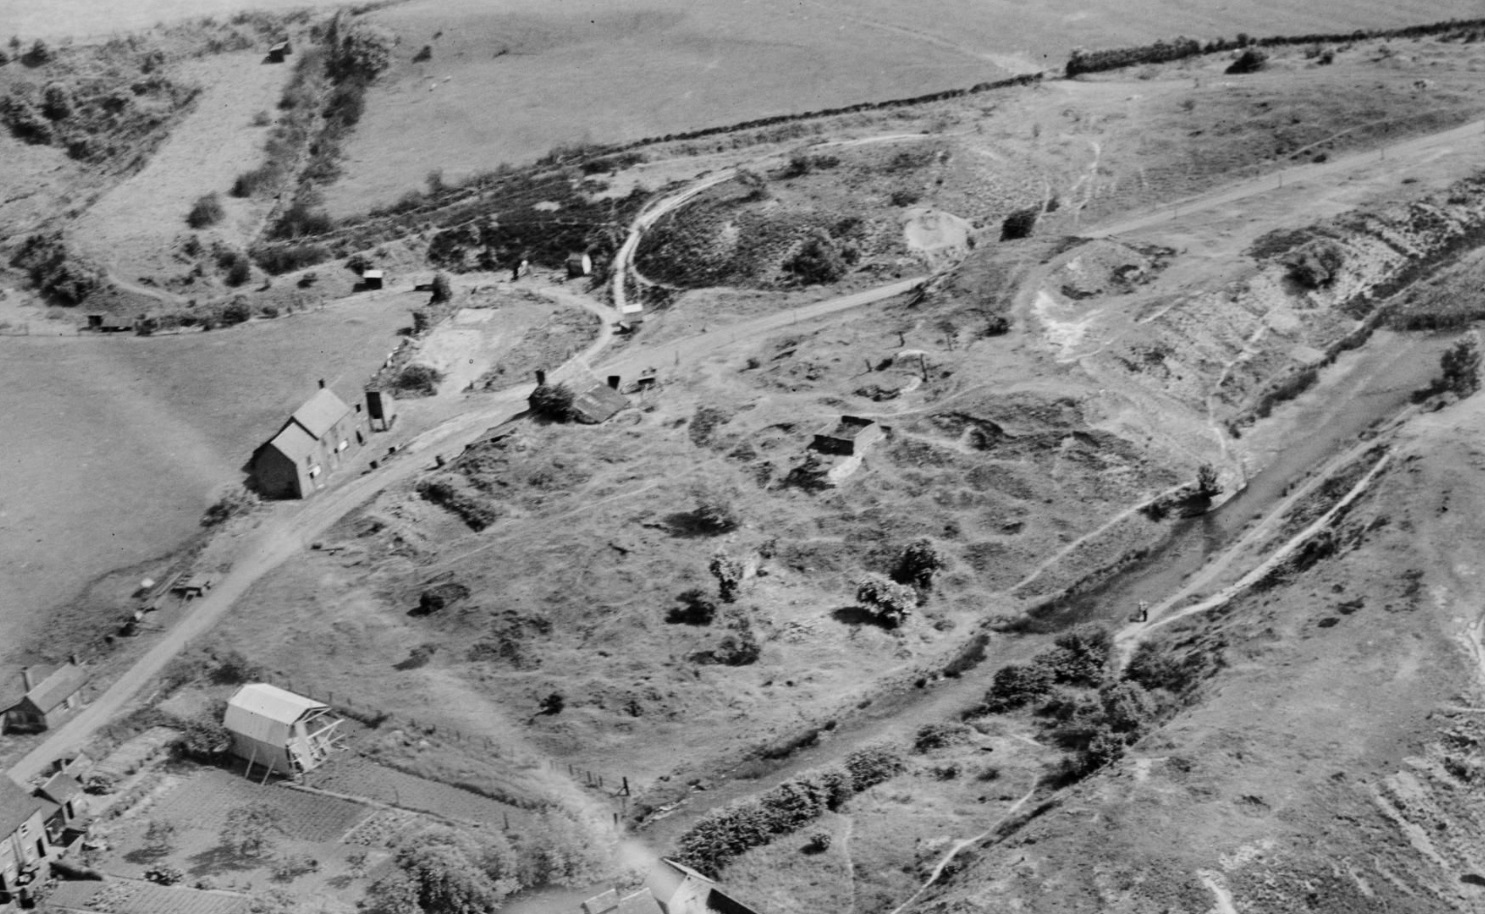
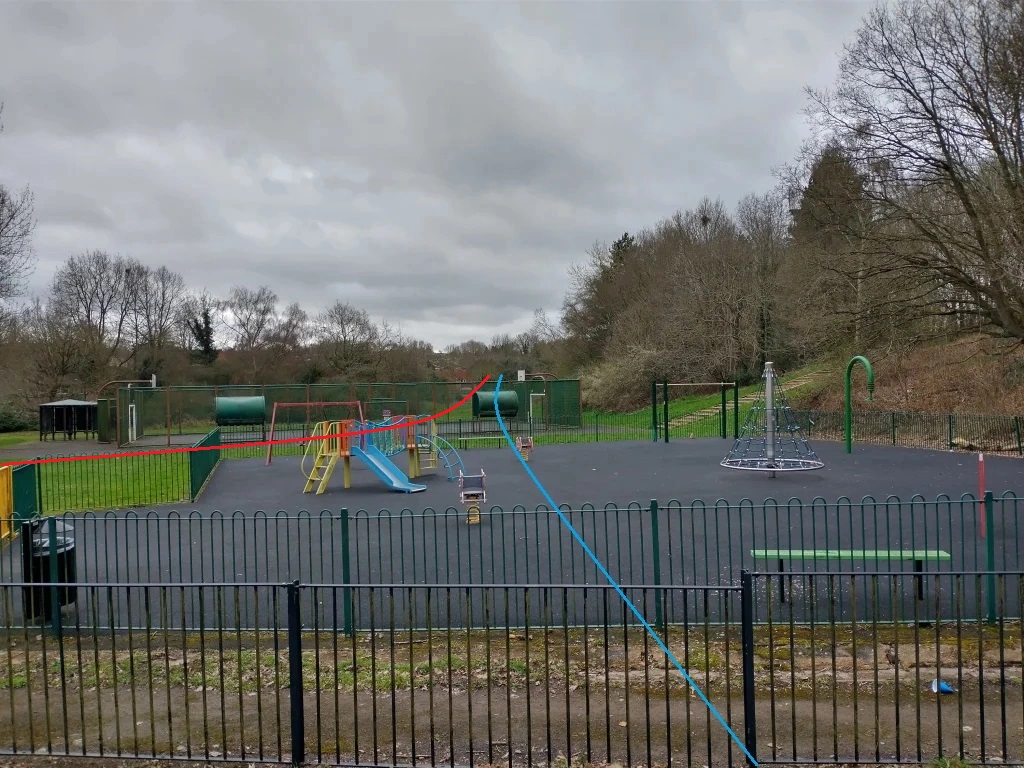
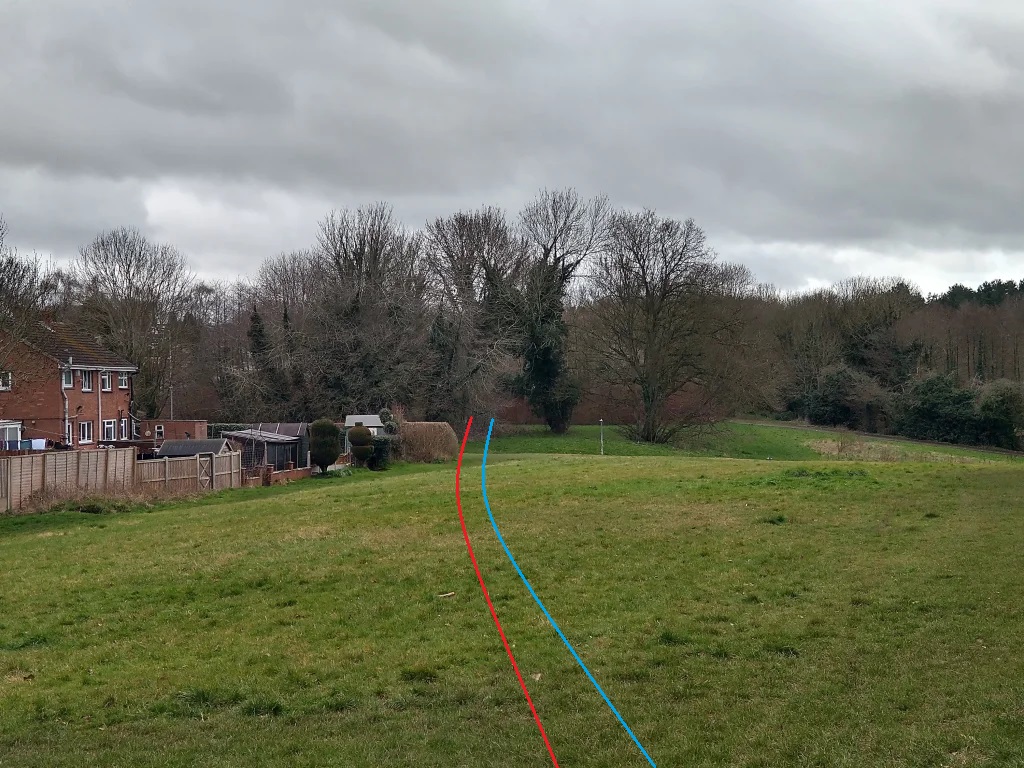
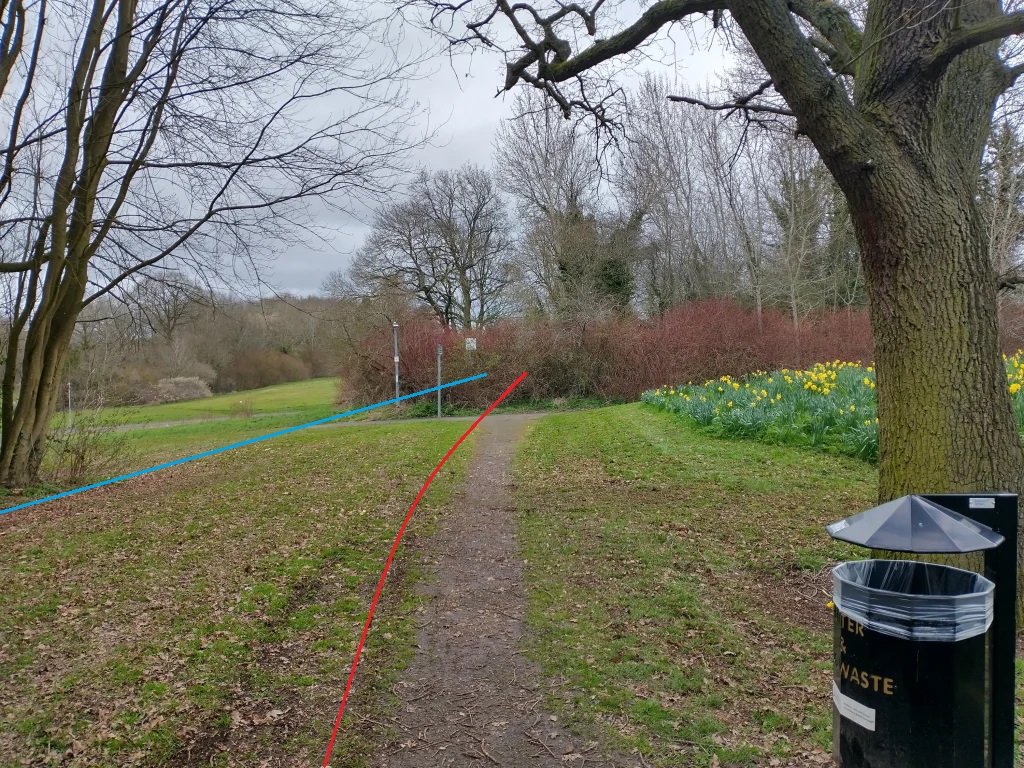
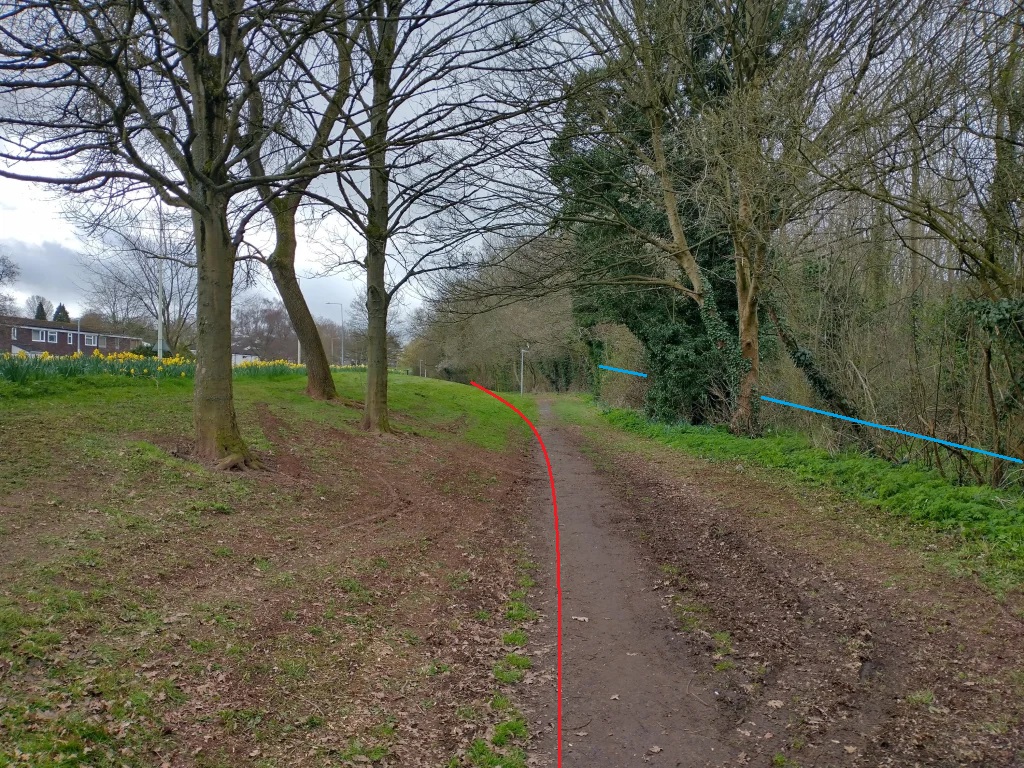
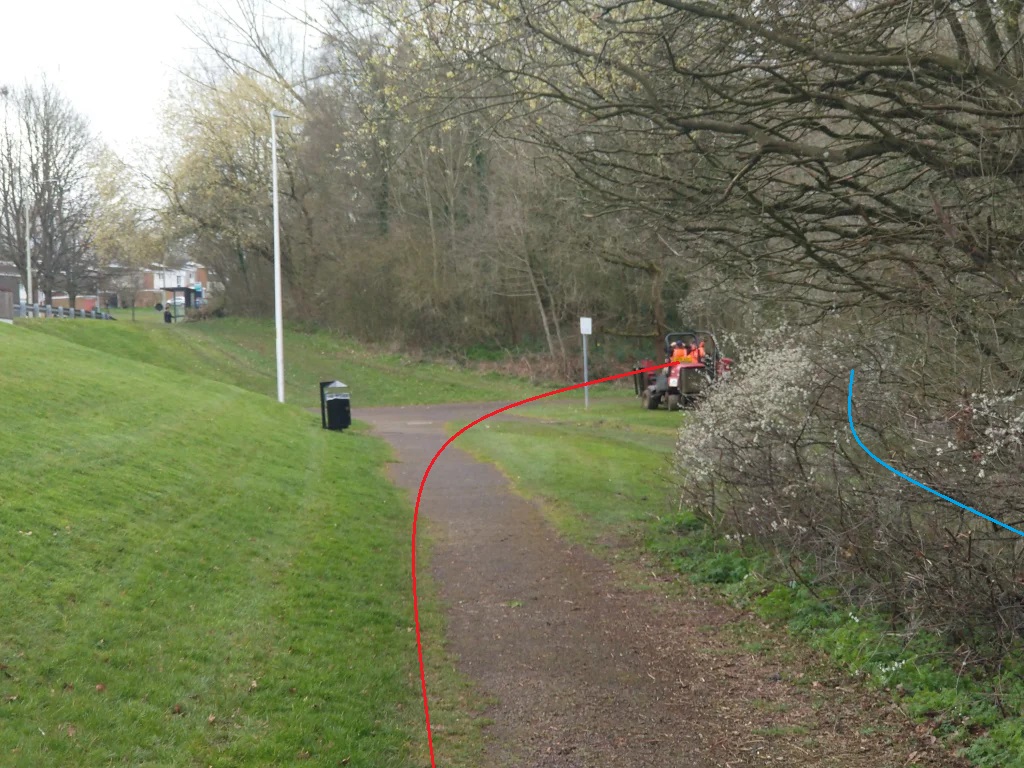
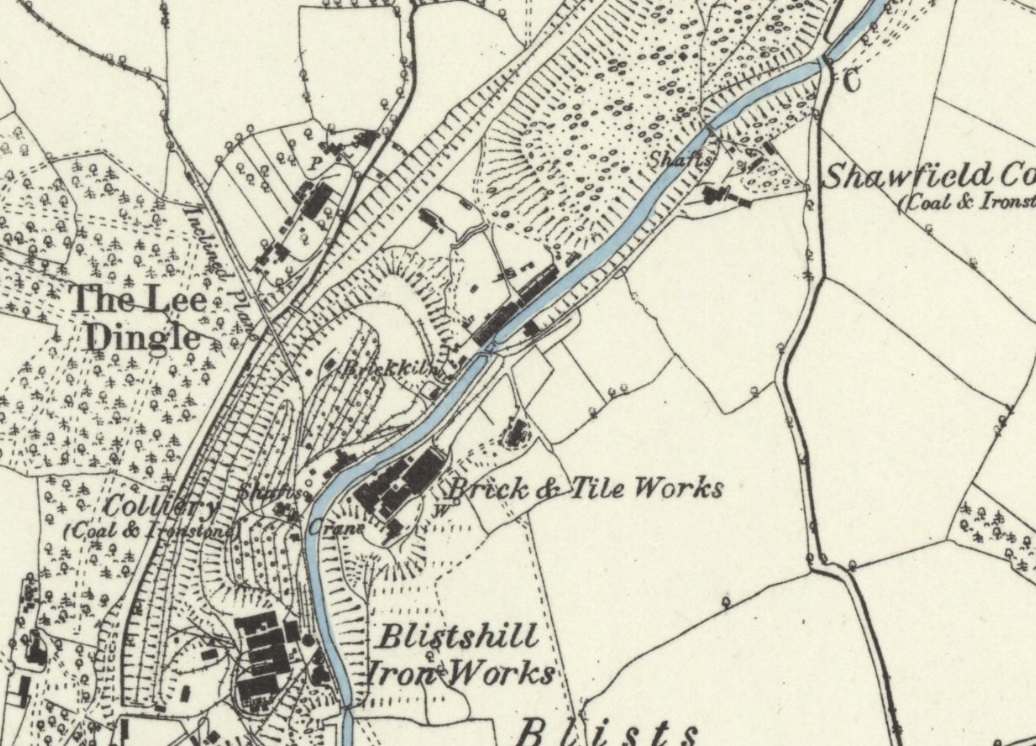
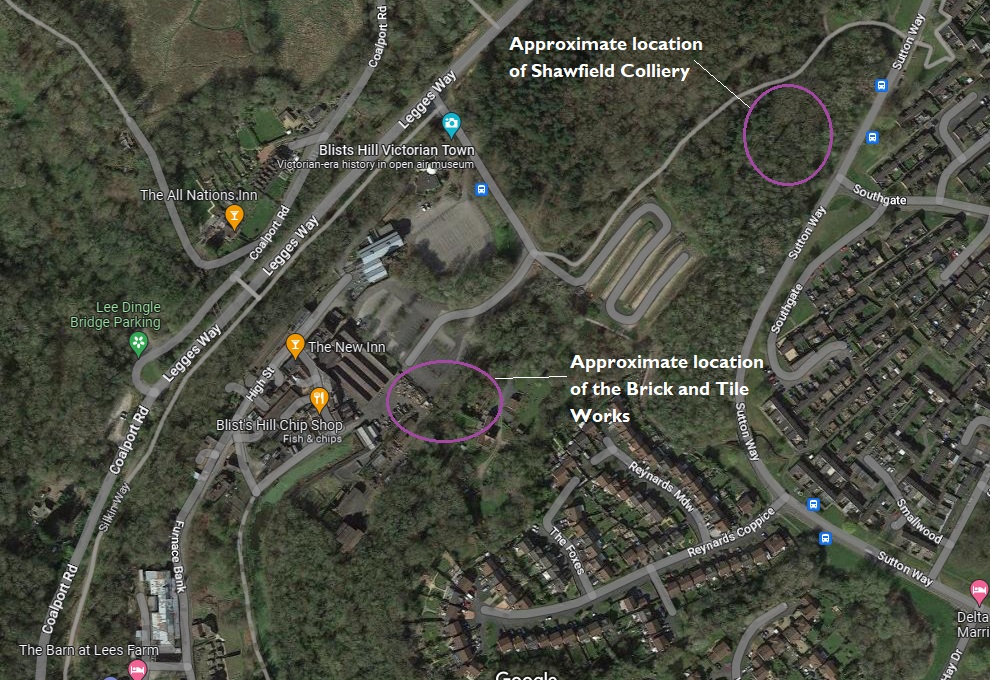
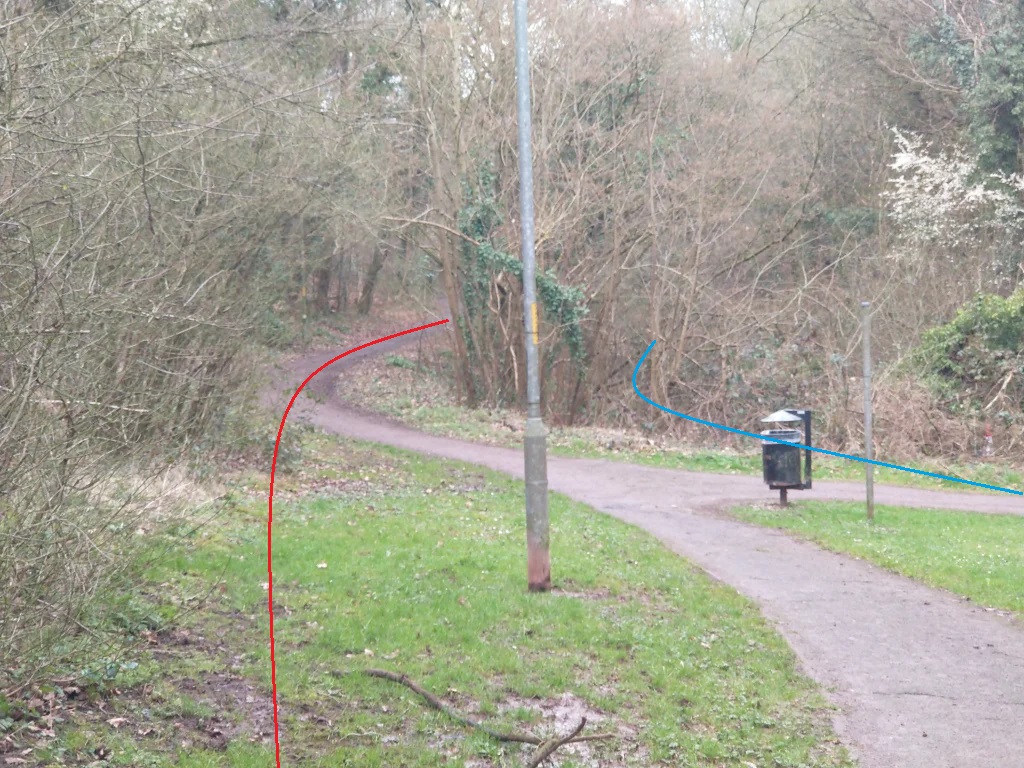
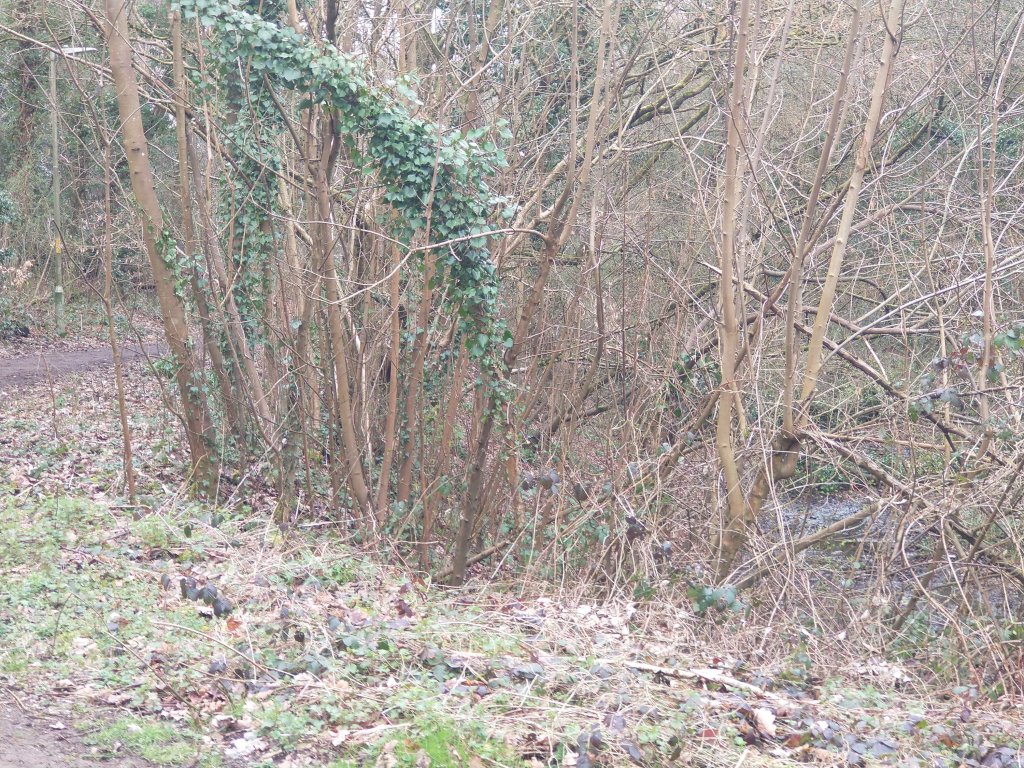
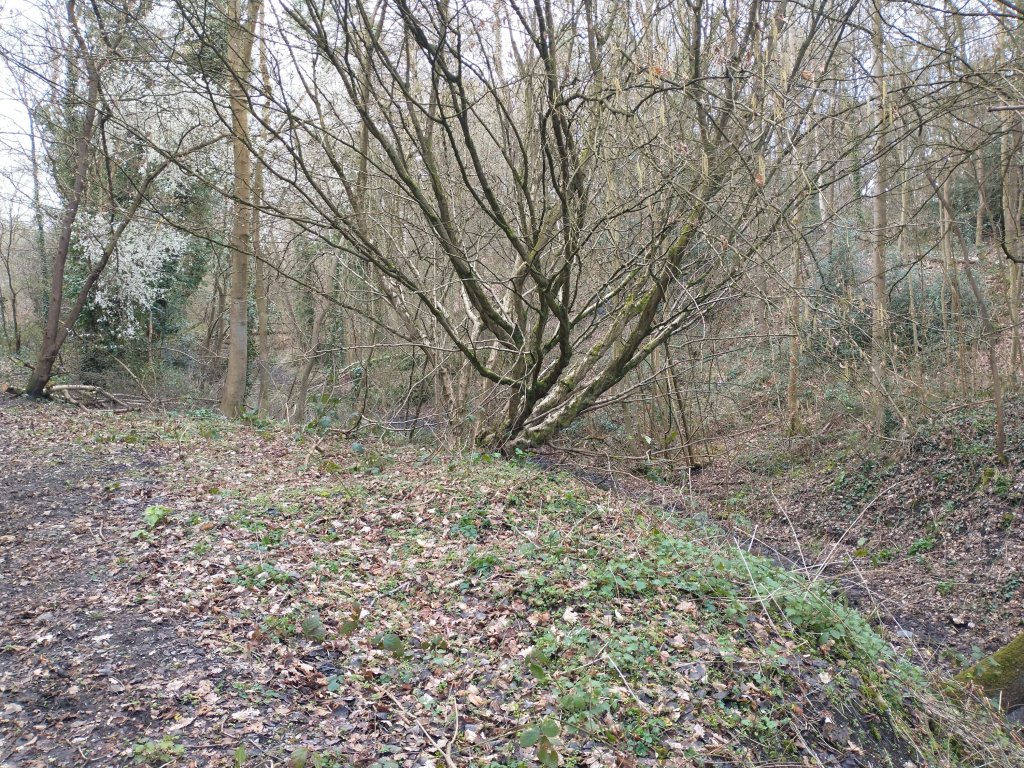
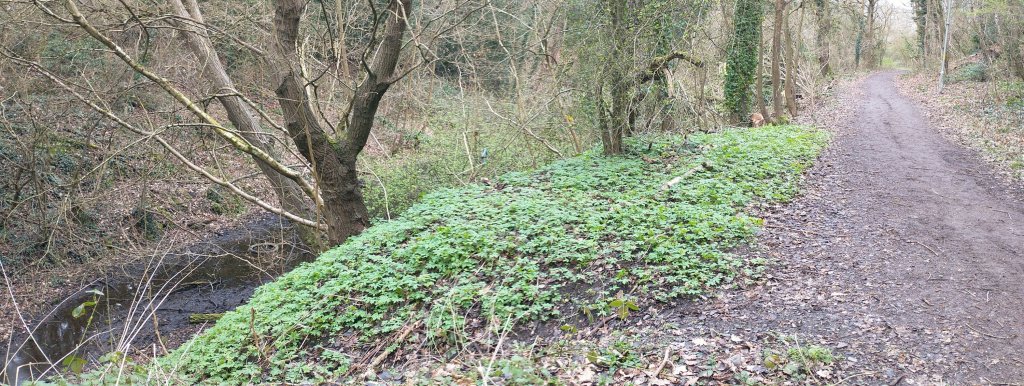
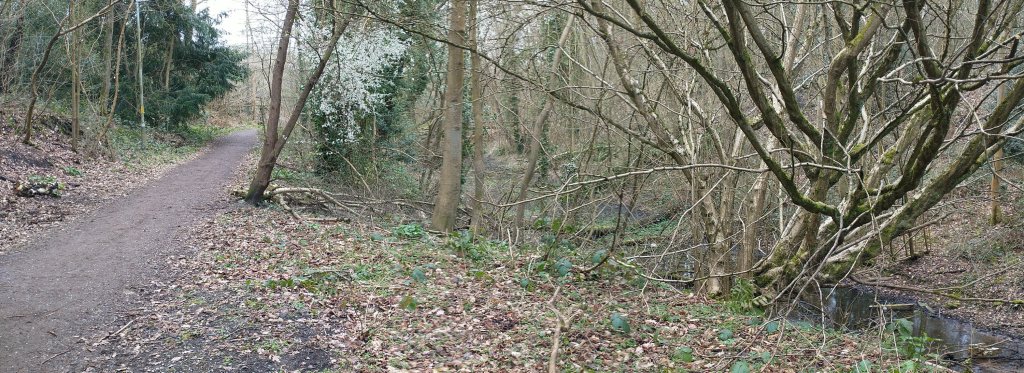
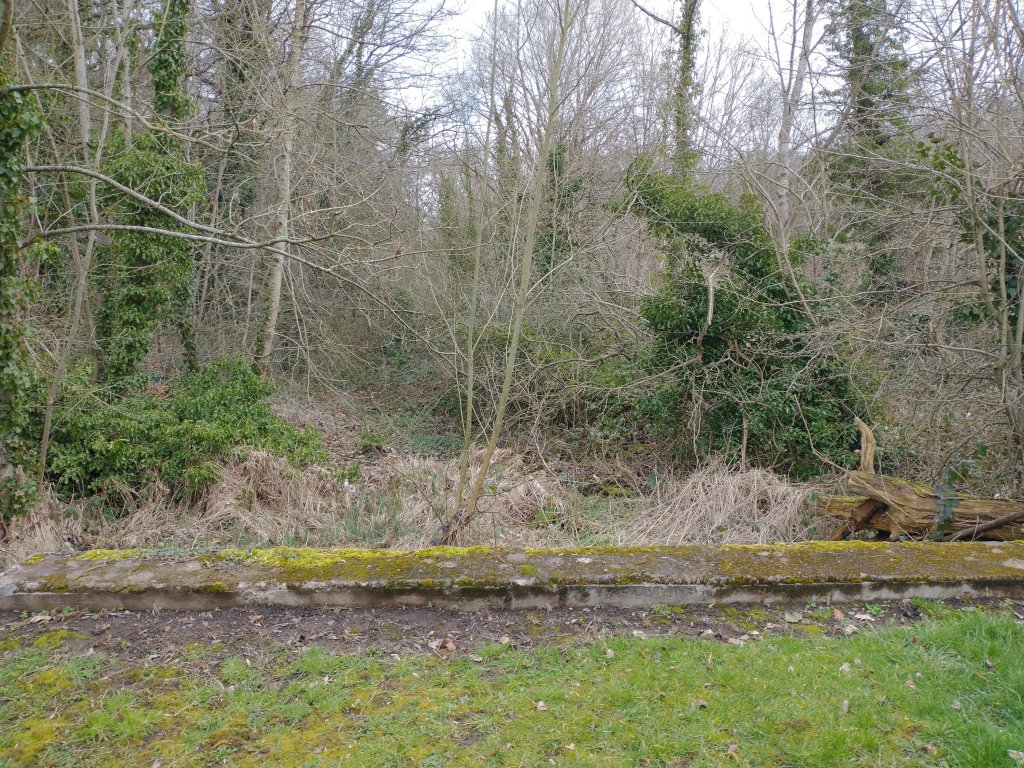
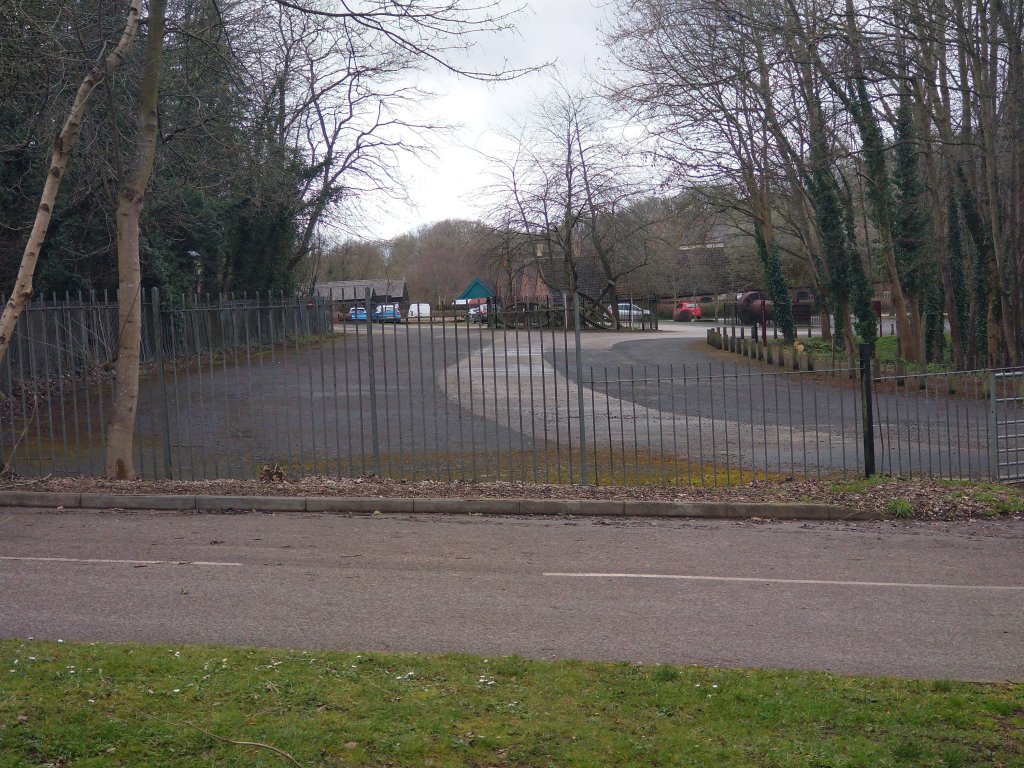
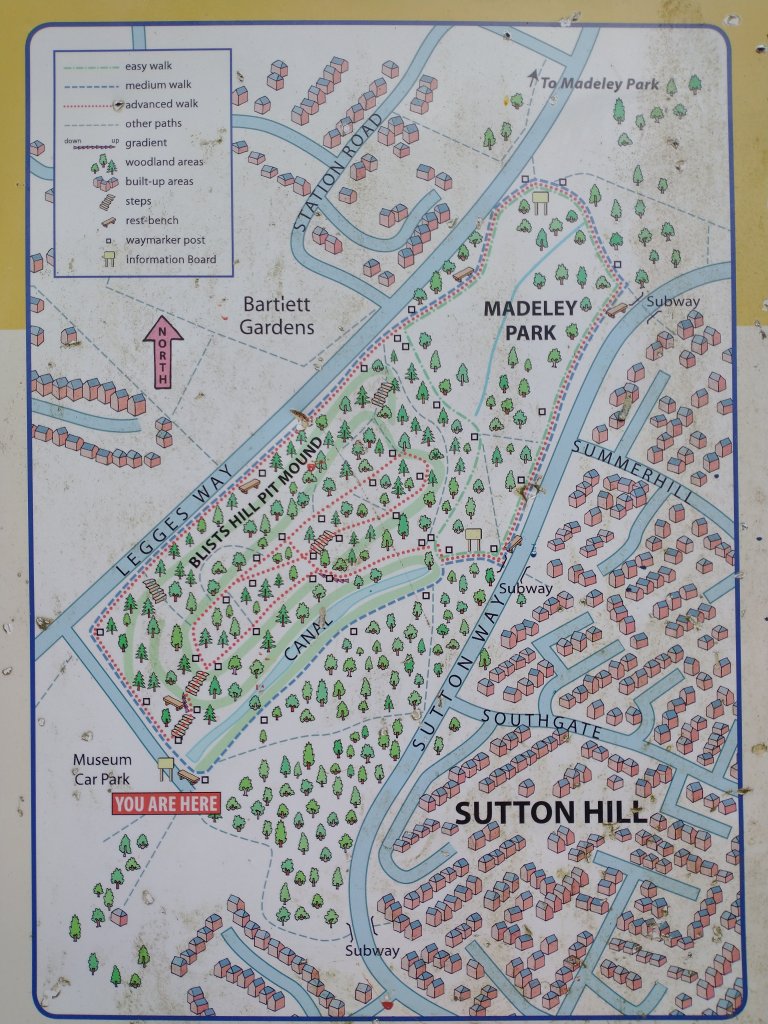
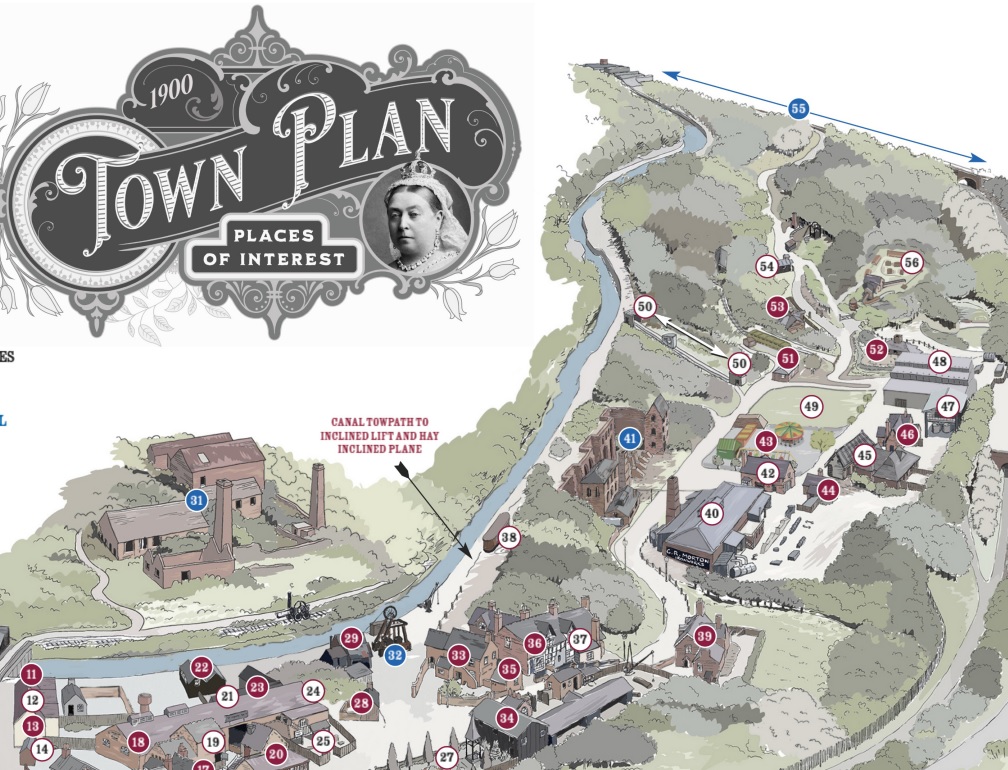
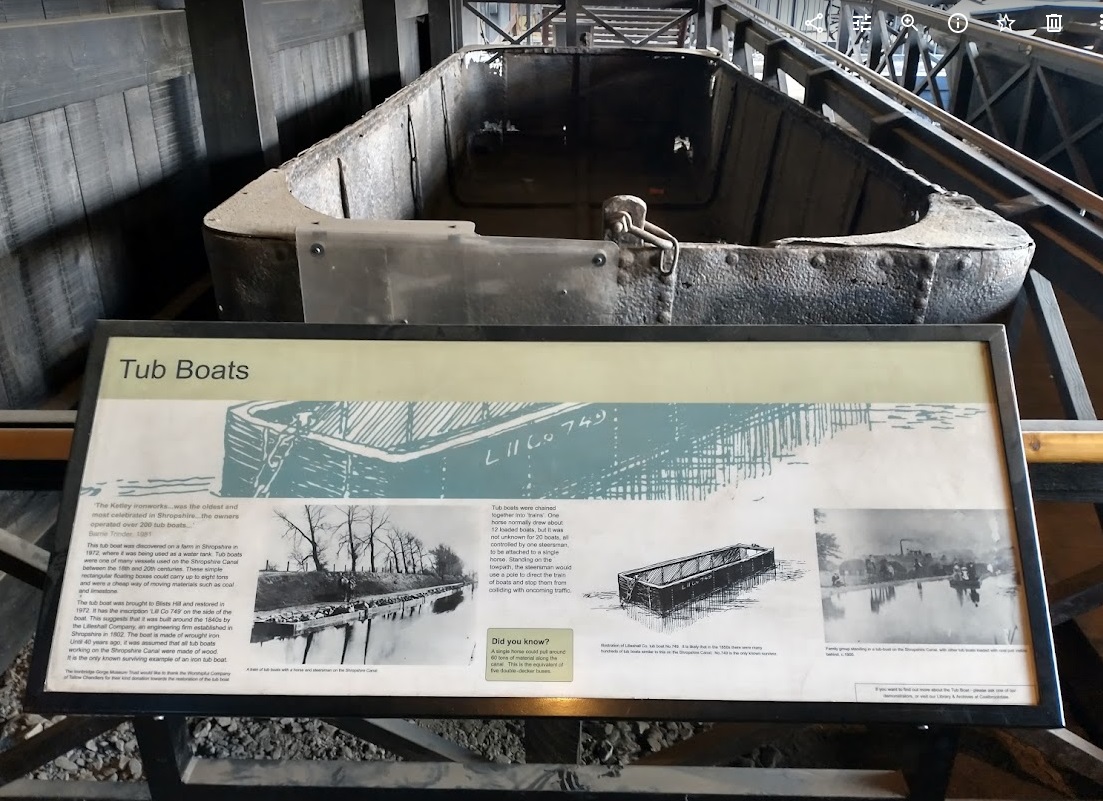
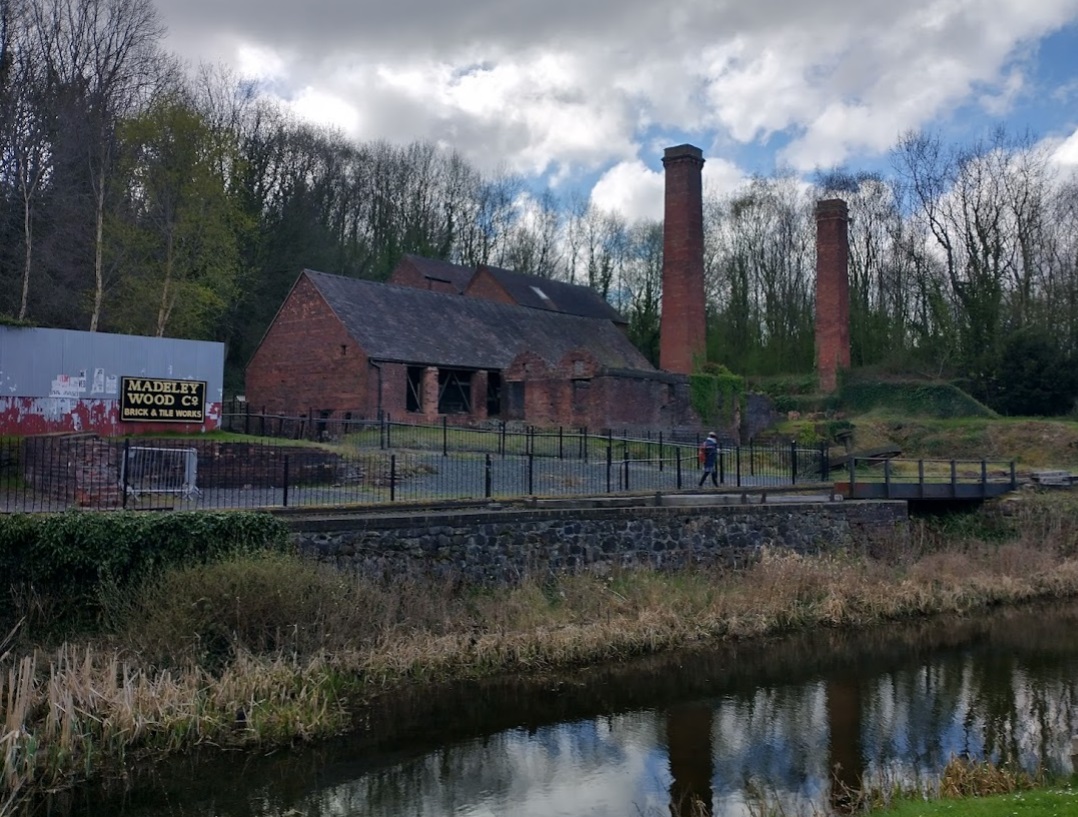
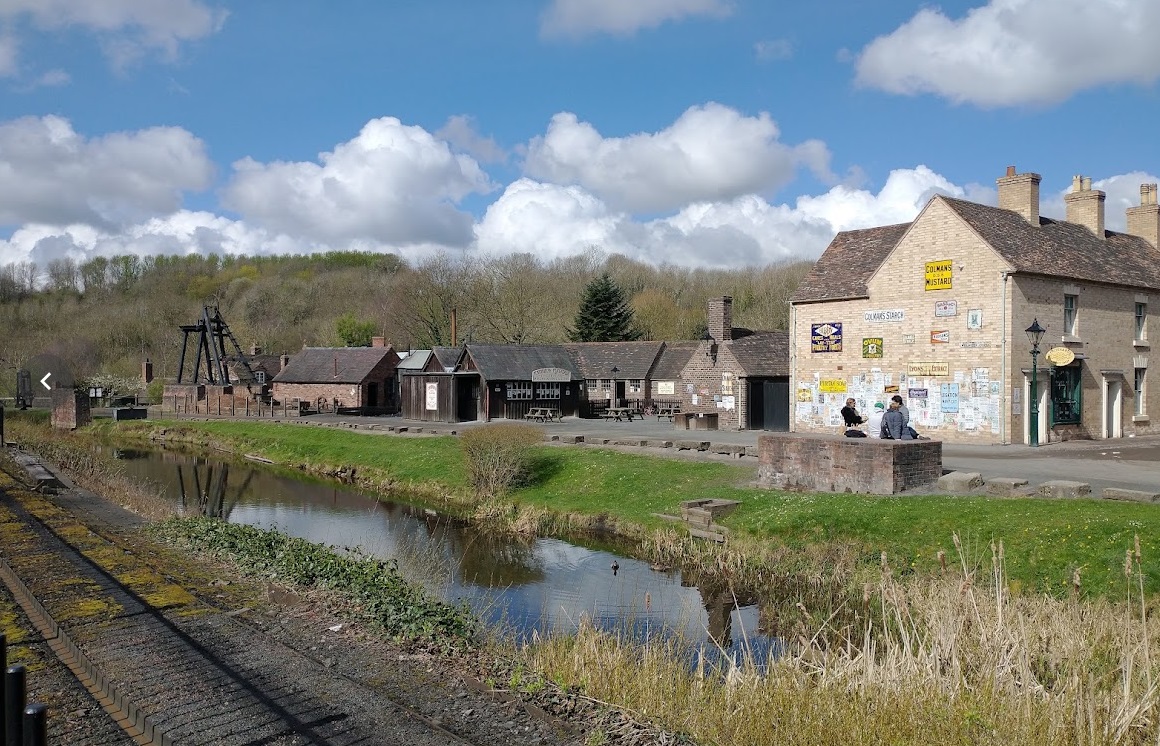
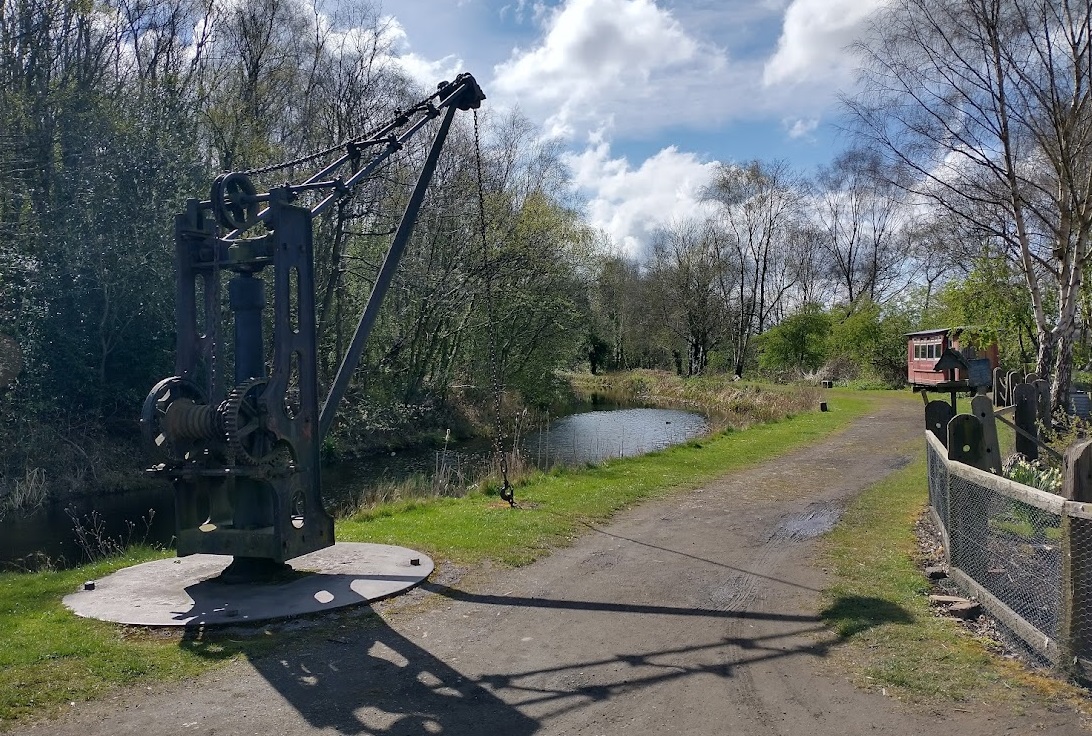
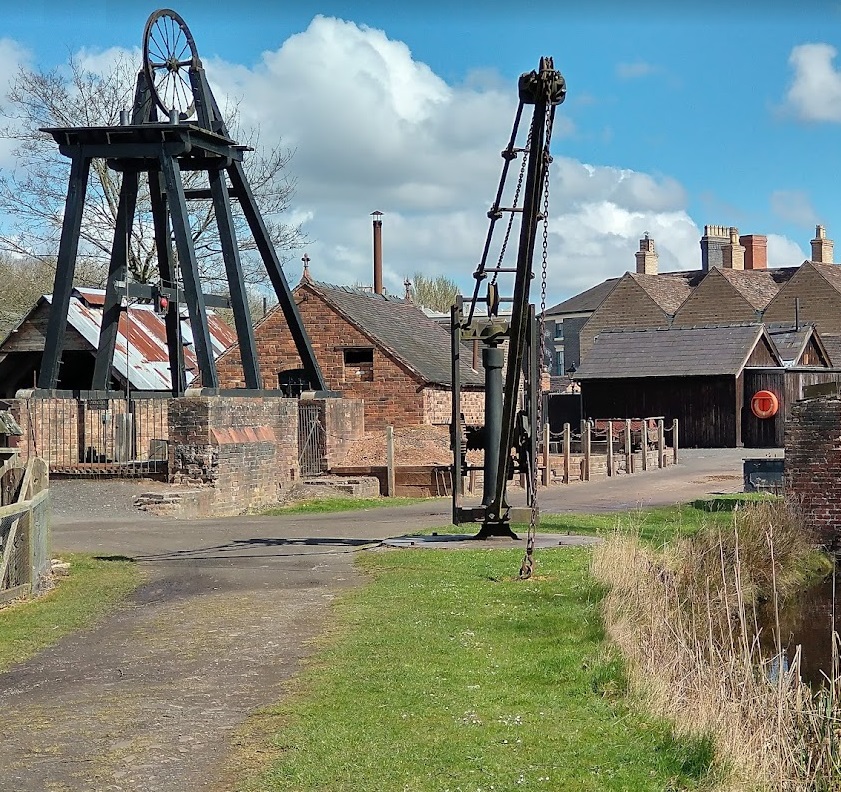
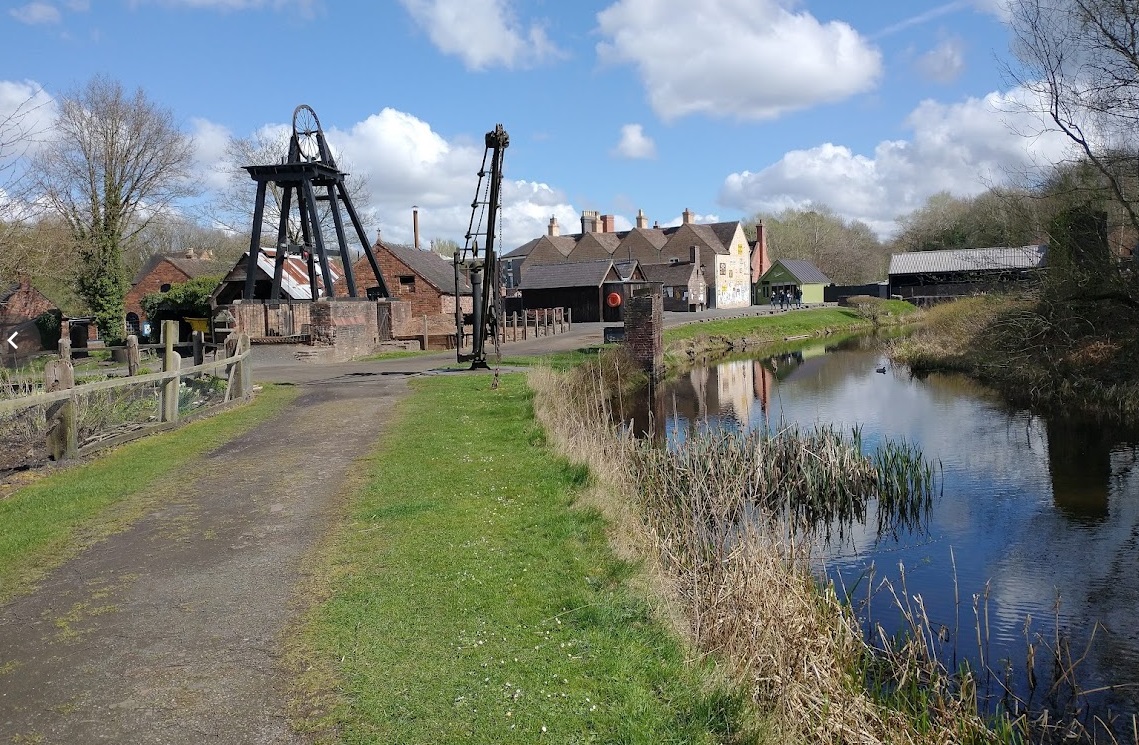
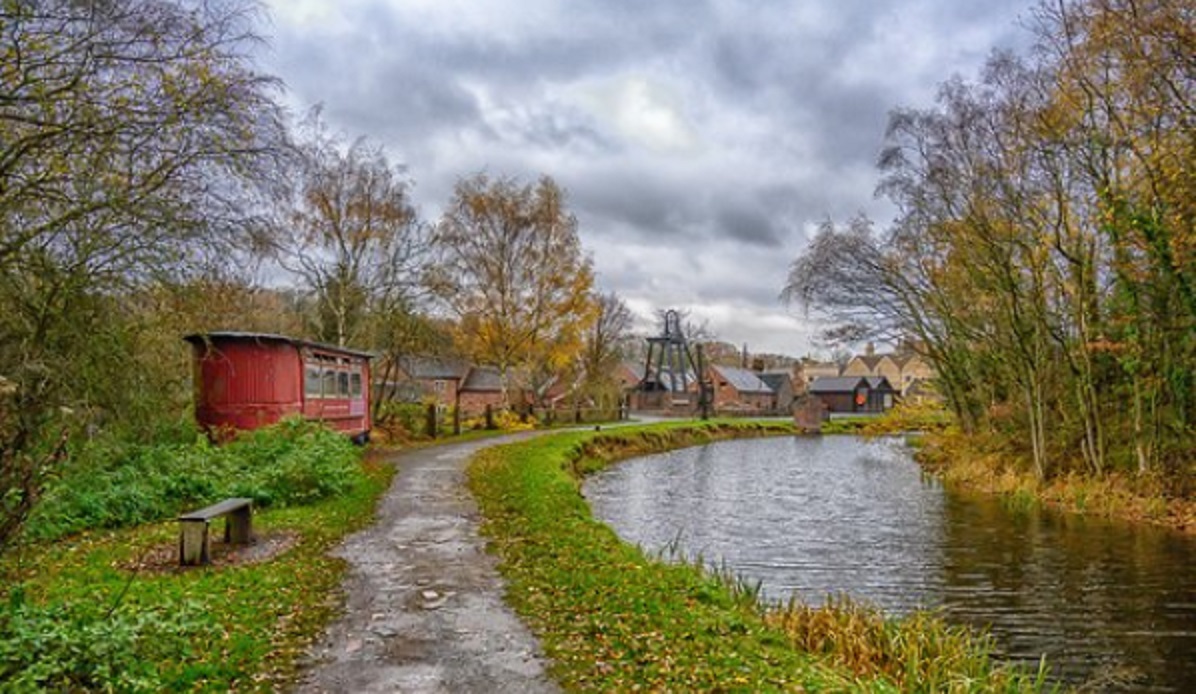
These side-by-side images show the Tweedale area with the old incline (shown in blue on the satellite image) running down from the location of Windmill Farm to a point close to the old Bridgnorth turnpike road. From this point South the canal remained open after the construction of the LNWR Coalport Branch. The OS Map used in these images is the 1901 6″ survey. The Inn, the canal basin and the warehouse at its western end no longer appear on the map. [22]The Three Furnaces Pub in Tweedale is on the East side of Bridgnorth Road. Behind it are the remains of a colliery slag-heap. That colliery waste built up over the years and swallowed the bottom end of the Windmill Inclined Plane. [My photograph, 21st March 2023]Google Maps satellite image showing the location of the canal bridge and the line of the old canal. [Google Maps, 21st March 2023]looking South down Bridgnorth Road across the ols canal alignment (shown in blue). The canal bridge was removed and the road was realigned. [My photograph, 21st March 2023]Looking North along the line of the canal across Bridgnorth Road. [My photograph, 21st March 2023]Looking South along the line of the canal from the junction of Tweedale North (Court Works Industrial Estate) and Bridgnorth Road. [My photograph, 21st March 2023]We noted when looking at the side-by-side images above that the 1901 Ordnance Survey did not show Tweedale Canal Basin. This image, from 1954, shows that the Basin was still present as late as the middle of the 20th century. The photo was shared on the Telford Memories Facebook Group by Marcus Keane on 16th January 2017. [23] A similar photograph, taken in 1957 from a point closer to tha abandoned tub boat can be found in Ivor Brown’s book “The East Shropshire Coalfields.” Ivor Brown writes: “Much still remained of the colliery canal and tramway systems in the 1950s. This view shows the basin for turning and loading boats at Halesfield Mine with a sunken tub boat and a crane stump remaining. While this tub boat was made of wood, some were of iron and one of these can still be seen at the Blists Hill Museum.” [24: p43]Further South, the canal continued in a generally southerly direction. Its route buried under the Tweedale Industrial Estate. [My photograph, 21st March 2023]Tweedale Basin and Wharf were to be found to the East of Bridgnorth Road under what, in the 21st century, is a dense canopy of trees. [Google Maps, 21st March 2023]Looking North across Tweedale along the line of the old canal. The building on the right is used by Bu Industrial Components Ltd. [My photograph, 21st March 2023]Looking South across Tweedale along the line of the canal. The building ahead is let out as a series of small units. Mmy photograph, 21st March 2023]We are now facing North at the back of the site in the last photograph on a footpath which from this point follows the line of the old canal. [My photograph, 21st March 2023]Looking to the South from the same location as the previous photo. This footpath follows the line of the old canal. [My photograph, 21st March 2023]Once again facing South along the line of the old canal The conifers ahead are adjacent to Prince Street, Madeley. There was a bridge over the canal at this location which is shown on the first monochrome image below. [My photograph, 21st March 2023]This extract from the 6″ Ordnance Survey of 1881, published in 1888, shows the Shropshire Canal as it passed under Prince Street and Hills Lane (later Queen Street). Also worthy of note on this map extract are Madeley Gas Works on the West bank of the canal and Hillslane Colliery on the East bank. The slag heaps for Hillslane Colliery were on both sides of the canal. The colliery and its slag heaps were served by an internal tramway/plateway which included a bridge over the canal. The canalat this point is beginning to close in on the line of the LNWR Coalport Branch. Madeley Market Station on that line can be seen on the bottom-left of this map extract. [20]Looking back to the North from the location of Prince Street Bridge along the line of the old canal which is followed by the footpath. The corrugated -iron- building on the right of this image is a remnant from the 1930s. It can be seen on the first monochrome aerial image below. [My photograph, 21st March 2023]Looking North across the location of Prince Street Bridge with the route of the canal shown by the blue line. [My photograph, 21st March 2023]This aerial image is an extract from a photograph on Historic England’s Britain From Above website. The reference number is EPW061719. This extract shows Prince Street Canal Bridge. The corrugated-iron building mentioned above can be seen in this image to the right of the canal. [26]Redevelopment of Madeley has resulted in the provision of a new road extending East out of the town centre, Kemberton Road. This photo is taken looking South across Kemberton Road and shows the line of the old canal. [My photograph, 21st March 2023]Looking back North towards Kemberton Road. [My photograph, 21st March 2023]This image is also an extract from the same aerial image as that showing Prince Street Bridge above. It was taken facing to the North. The photograph was part of a survey undertaken in 1939 and can be found on Historic England’s Britain from Above website. This picture features the Gas Works off Queen Street and the area around it in Madeley, and includes the Queen Street Canal Bridge, (c) Historic England, Britain From Above (EPW061719). [26]Looking South from the same location along the footpath/cycle way which follows the line of the canal at this location. [My photograph, 21st March 2023]Looking South towards Queen Street to the location of Queen Street canal bridge. The roofline straddling the route of the old canal is the JW Kingdom Hall. [My photograph, 21st March 2023]Looking North from the location of Queen Street bridge. The route of the old canal runs away from the camera behind the bus-stop. [My photograph, 21st March 2023]Just to the South of Queen Street the Jehovah’s Witnesses Kingdom Hall occupies the site of the old Gas Works and straddles the line of the canal. [My photograph, 21st March 2023]This extract from another aerial image, this time facing Southeast, shows the canal (running diagonally across the image from the bottom-centre to the right) heading away from the Gas Works to the South. The image has been affected by flare, hence the lighter shaded band running from centre-bottom towards the top-left, The trapezoidal area of scrubland which dominates the image is the site of the old Hillslane Colliery. (c) Historic England, Britain From Above (EPW061721). [27]This view looks back to the North along the line of the old canal. Hillslane Colliery would have been to the right of the canal. The higher ground to the left of the image was the spoil heap for the old colliery and was reached by a bridge carrying a tramway across the canal. The line of the tramway between Hill Lane Colliery and Shawfield Colliery would have been Just off to the right of the picture. That tramway appears on the OS map extract below. [My photograph, 21st March 2023]The 1901 6″ Ordnance Survey published in 1902 shows the canal running Southwest from adjacent to the Gas Works in Madeley. Hillslane Colliery is now named ‘Hills Lane Colliery’ but has recently become disused. The old tramway bridge across the canal remains. Further South a Cement Mill can be seen on the West bank of the canal, adjacent to the towpath. A bridge over the canal is shown at this point. Further South again, is a Corn Mill to the West of the Canal and Shawfield Colliery, also, by 1901, disused. Both collieries were linked to the Blists Hill Site which is just off the extract to the Southwest. Northeast of Shawfield Colliery there was another bridge across the canal. [25]Turning though a half-circle and looking South along the line of the canal. The blue line gives the approximate line of the canal, the red line, that of the old tramway which followed the canal from Hill Lane Colliery towards Blists Hill Furnaces. [My photograph, 21st March 2023]Further South again we can see the approximate parallel routes of the old canal and tramway. [My photograph, 21st March 2023]Further South again we can see the approximate parallel routes of the old canal and tramway. [My photograph, 21st March 2023]This photograph looks back along the line of the canal and tramway towards the erstwhile Madeley Gas Works. The trees on the line of the canal and tramway are those which appear across their line in the photograph above. [My photograph, 21st March 2023]Looking to the Southwest from the same point, along the approximate line of the tramway. The old canal ran parallel to the tramway but a little away to the right and probably at a lower level. [My photograph, 21st March 2023]Further Southwest and looking to the Southwest, the approximate line of the tramway is followed by the metalled path which begins to curve round to the right. The old canal ran parallel to the tramway but a little away to the right and at a lower level. The blue line suggests this but the actual line of the canal would have been lower down the embankment which is covered by vegetation. [My photograph, 21st March 2023]The 1881 Ordnance Survey again shows Shawfield Colliery with its local tramway network and another bridge across the canal to access spoil heaps to the Northwest of the canal. In 1881 it already also had a tramway leading down to the Brick and Tile Works and the Blists Hill furnaces.This Google Maps satellite image covers approximately the same area as the OS map extract above. Blists Hill; Furnaces are actually right on the bottom edge of this image, to the left.We are now at around the same point as the top-edge of the OS map extract above where the canal enters that extract. The route of the canal becomes a little more obvious as we walk towards the Blists Hill site a few hundred metres ahead. The area to the right of this image is holding water and very much appears to be the line of the canal. the next photo has a glimpse of the water in the marshy bottom of the canal. [My photograph, 21sy March 2023]Looking to the Southwest, in the bottom-right of this image there is a glimpse of water in the bottom of the old canal. [My photograph, 21st March 2023]Again looking Southwest, the old canal bed enters this image at the bottom-right. The old tramway is just off the left of the image. [My photograph, 21st March 2023]Looking Northeast at the same point as in the last photo. Water can be seen in the canal (on the left) and the footpath follows the old tramway. [My photograph, 21st March 2023]A panoramic image looking Southwest at the same location, shows the tramway on the left and the canal on the right. [My photograph, 21st March 2023]Here we have reached the Blists Hill Car park, this photo looks back Northeast along the line of the canal. [My photograph, 21st March 2023]Turning a half-circle again, this is the view to the Southwest from the same location. The carpark covers both the route of the old canal and much of the site of an old Brick and Tile Works. The main Blists Hill site is beyond the car park. [My photograph, 21st March 2023]The information board at the same location shows the line of the old canal. Our route above followed the westside of Sutton Way to a point close to the Subway and then the dotted line following the Southeast bank of the old canal. [My photograph, 21st March 2023]The canal features strongly in this artist-drawn aerial view of the Blists Hill Site. The car parks for the site are off the left of the image. The canal can be seen curving round the hillside following the contours until it reaches the Hay Inclined Plane which is indicated at the top-right of the image. [28]The tub boat display at Blists Hill Victorian Museum. [My photograph, 8th April 2022]Madeley Wood Brick & Tile Works buildings at Blists Hill. [My photograph, 8th April 2022]The canal at Blists Hill, viewed from the Northeast. [My photograph, 8th April 2022]The canal again, this time from the towpath with the wharf crane close to the camera. [My photograph, 8th April 2022]The view Northeast along the canal towpath giving a close view of the crane and pithead installed as part of the museum. [My photograph, 8th April 2022]A broader view Northeast along the canal towpath. [My photograph, 8th April 2022]Another 100 metres or so along the canal towpath. This is an image from TripAdvisor. [29]On the 6″ Ordnance Survey of 1881/1882, from a point close to Blists Hill furnaces the canal is shown heading South until just before reaching the Hay Inclined Plane it turned to the Southeast. [20]
The canal curved round to the top of the Hay Inclined Plane. The next map extract shows the full extent of the Hay Inclined Plane.
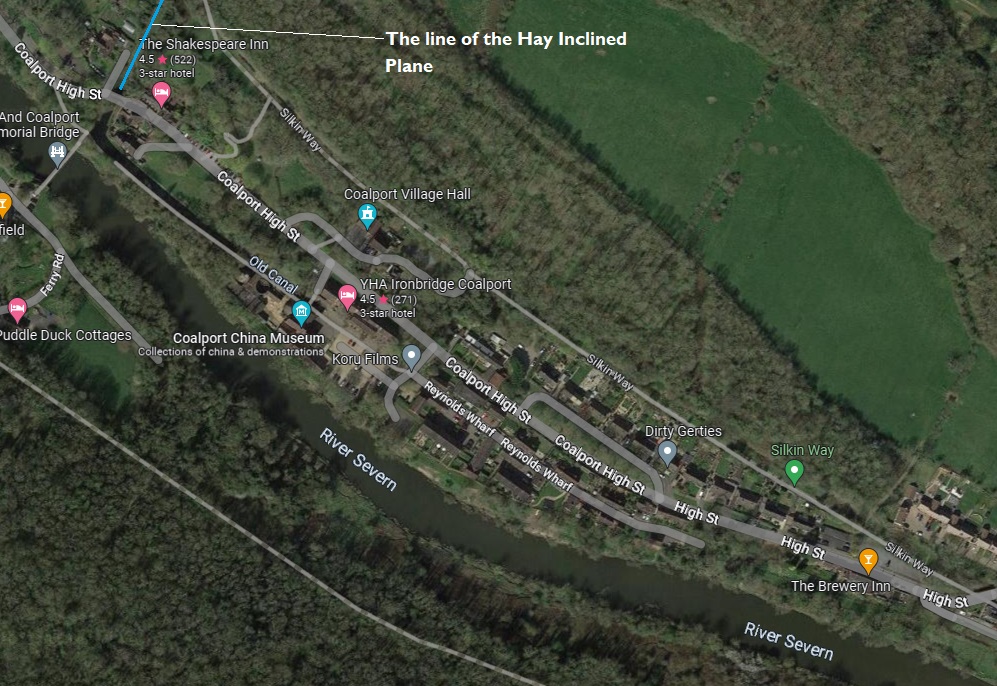
A further extract from the 6″ Ordnance Survey of 1881/1882 showing the full extent of the Hay Inclined Plane, its bridge over the LNWR Coalport Branch, and the Bridge carrying Coalport High Street over the incline. [32]An extract from Google Maps which shows the location of the Hay Incline in relation to the modern Blists Hill Victorian Town. The line of the canal above the Incline is marked clearly. [Google Maps, 30th March 2023]
The Incline is covered in two short articles which can be found here and here. A few pictures will suffice as part of this article. …
The Hay Inclined Plane in its original condition in the late 19th century when it was still in use.
The structures at the top of the incline are in good condition.
The rope on the track on the right shows that a tub boat has recently descended the inline on that track.
This picture was shared on the Memories of Shropshire Facebook Group by Stephen Williams on 25th January 2020.
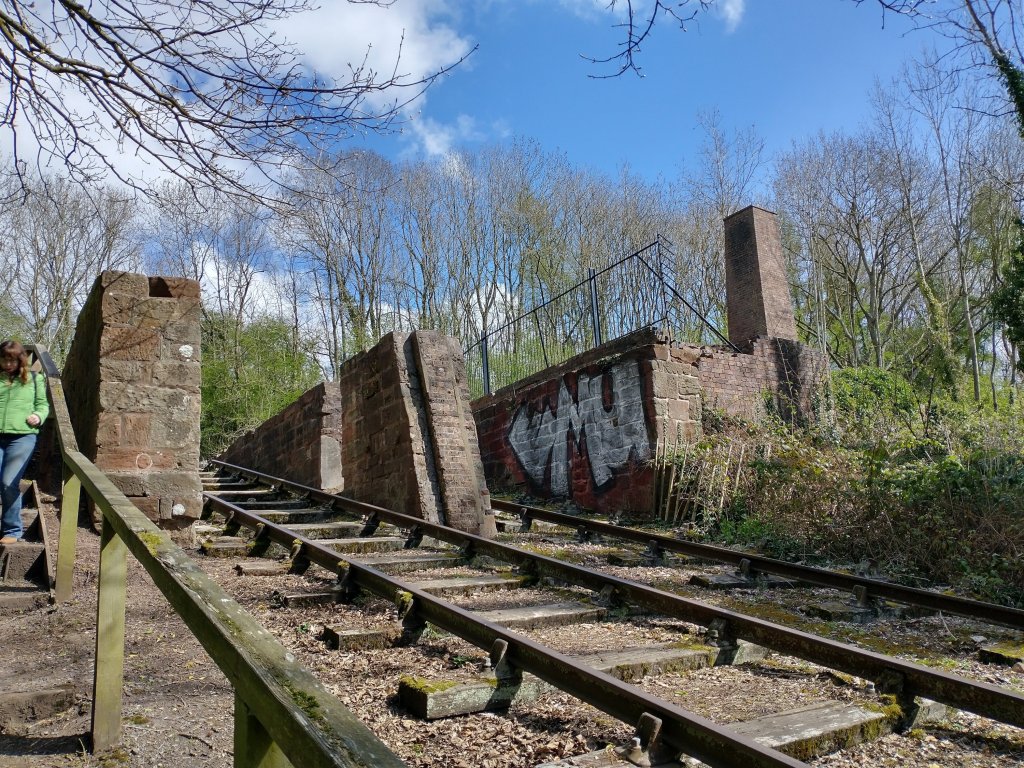
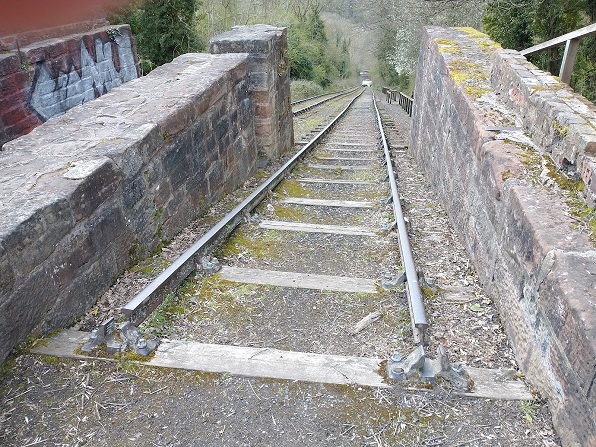
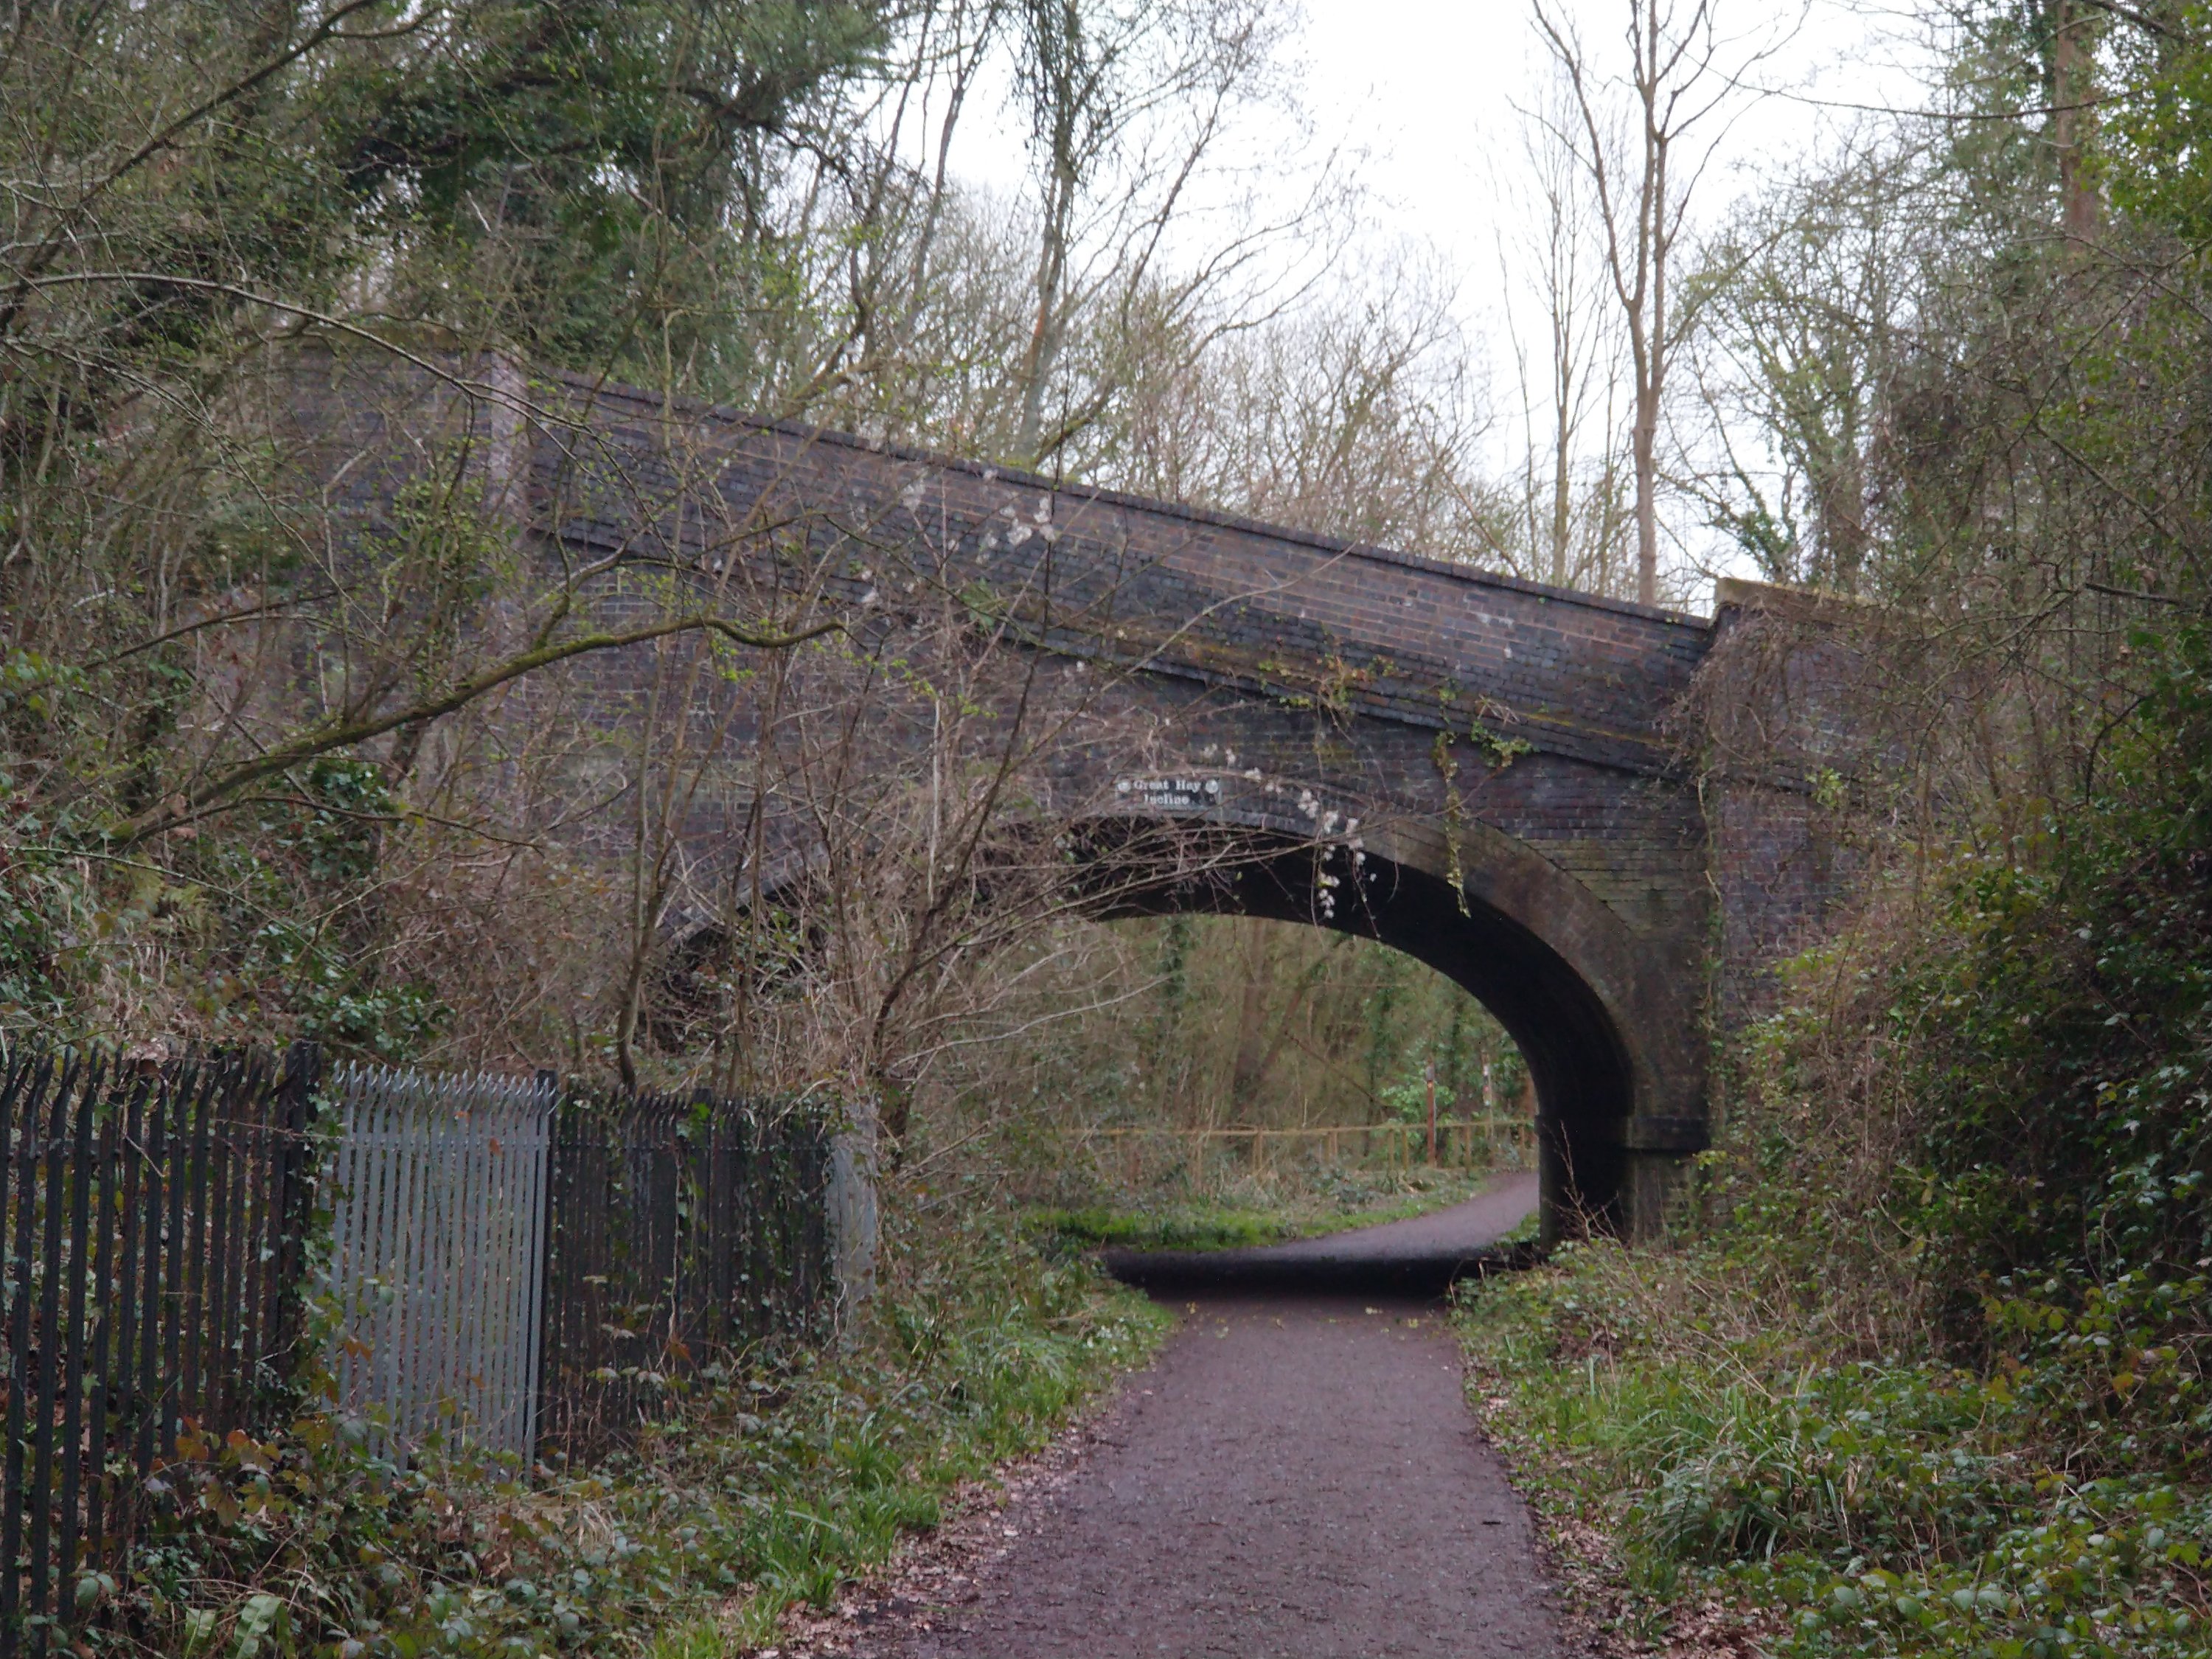
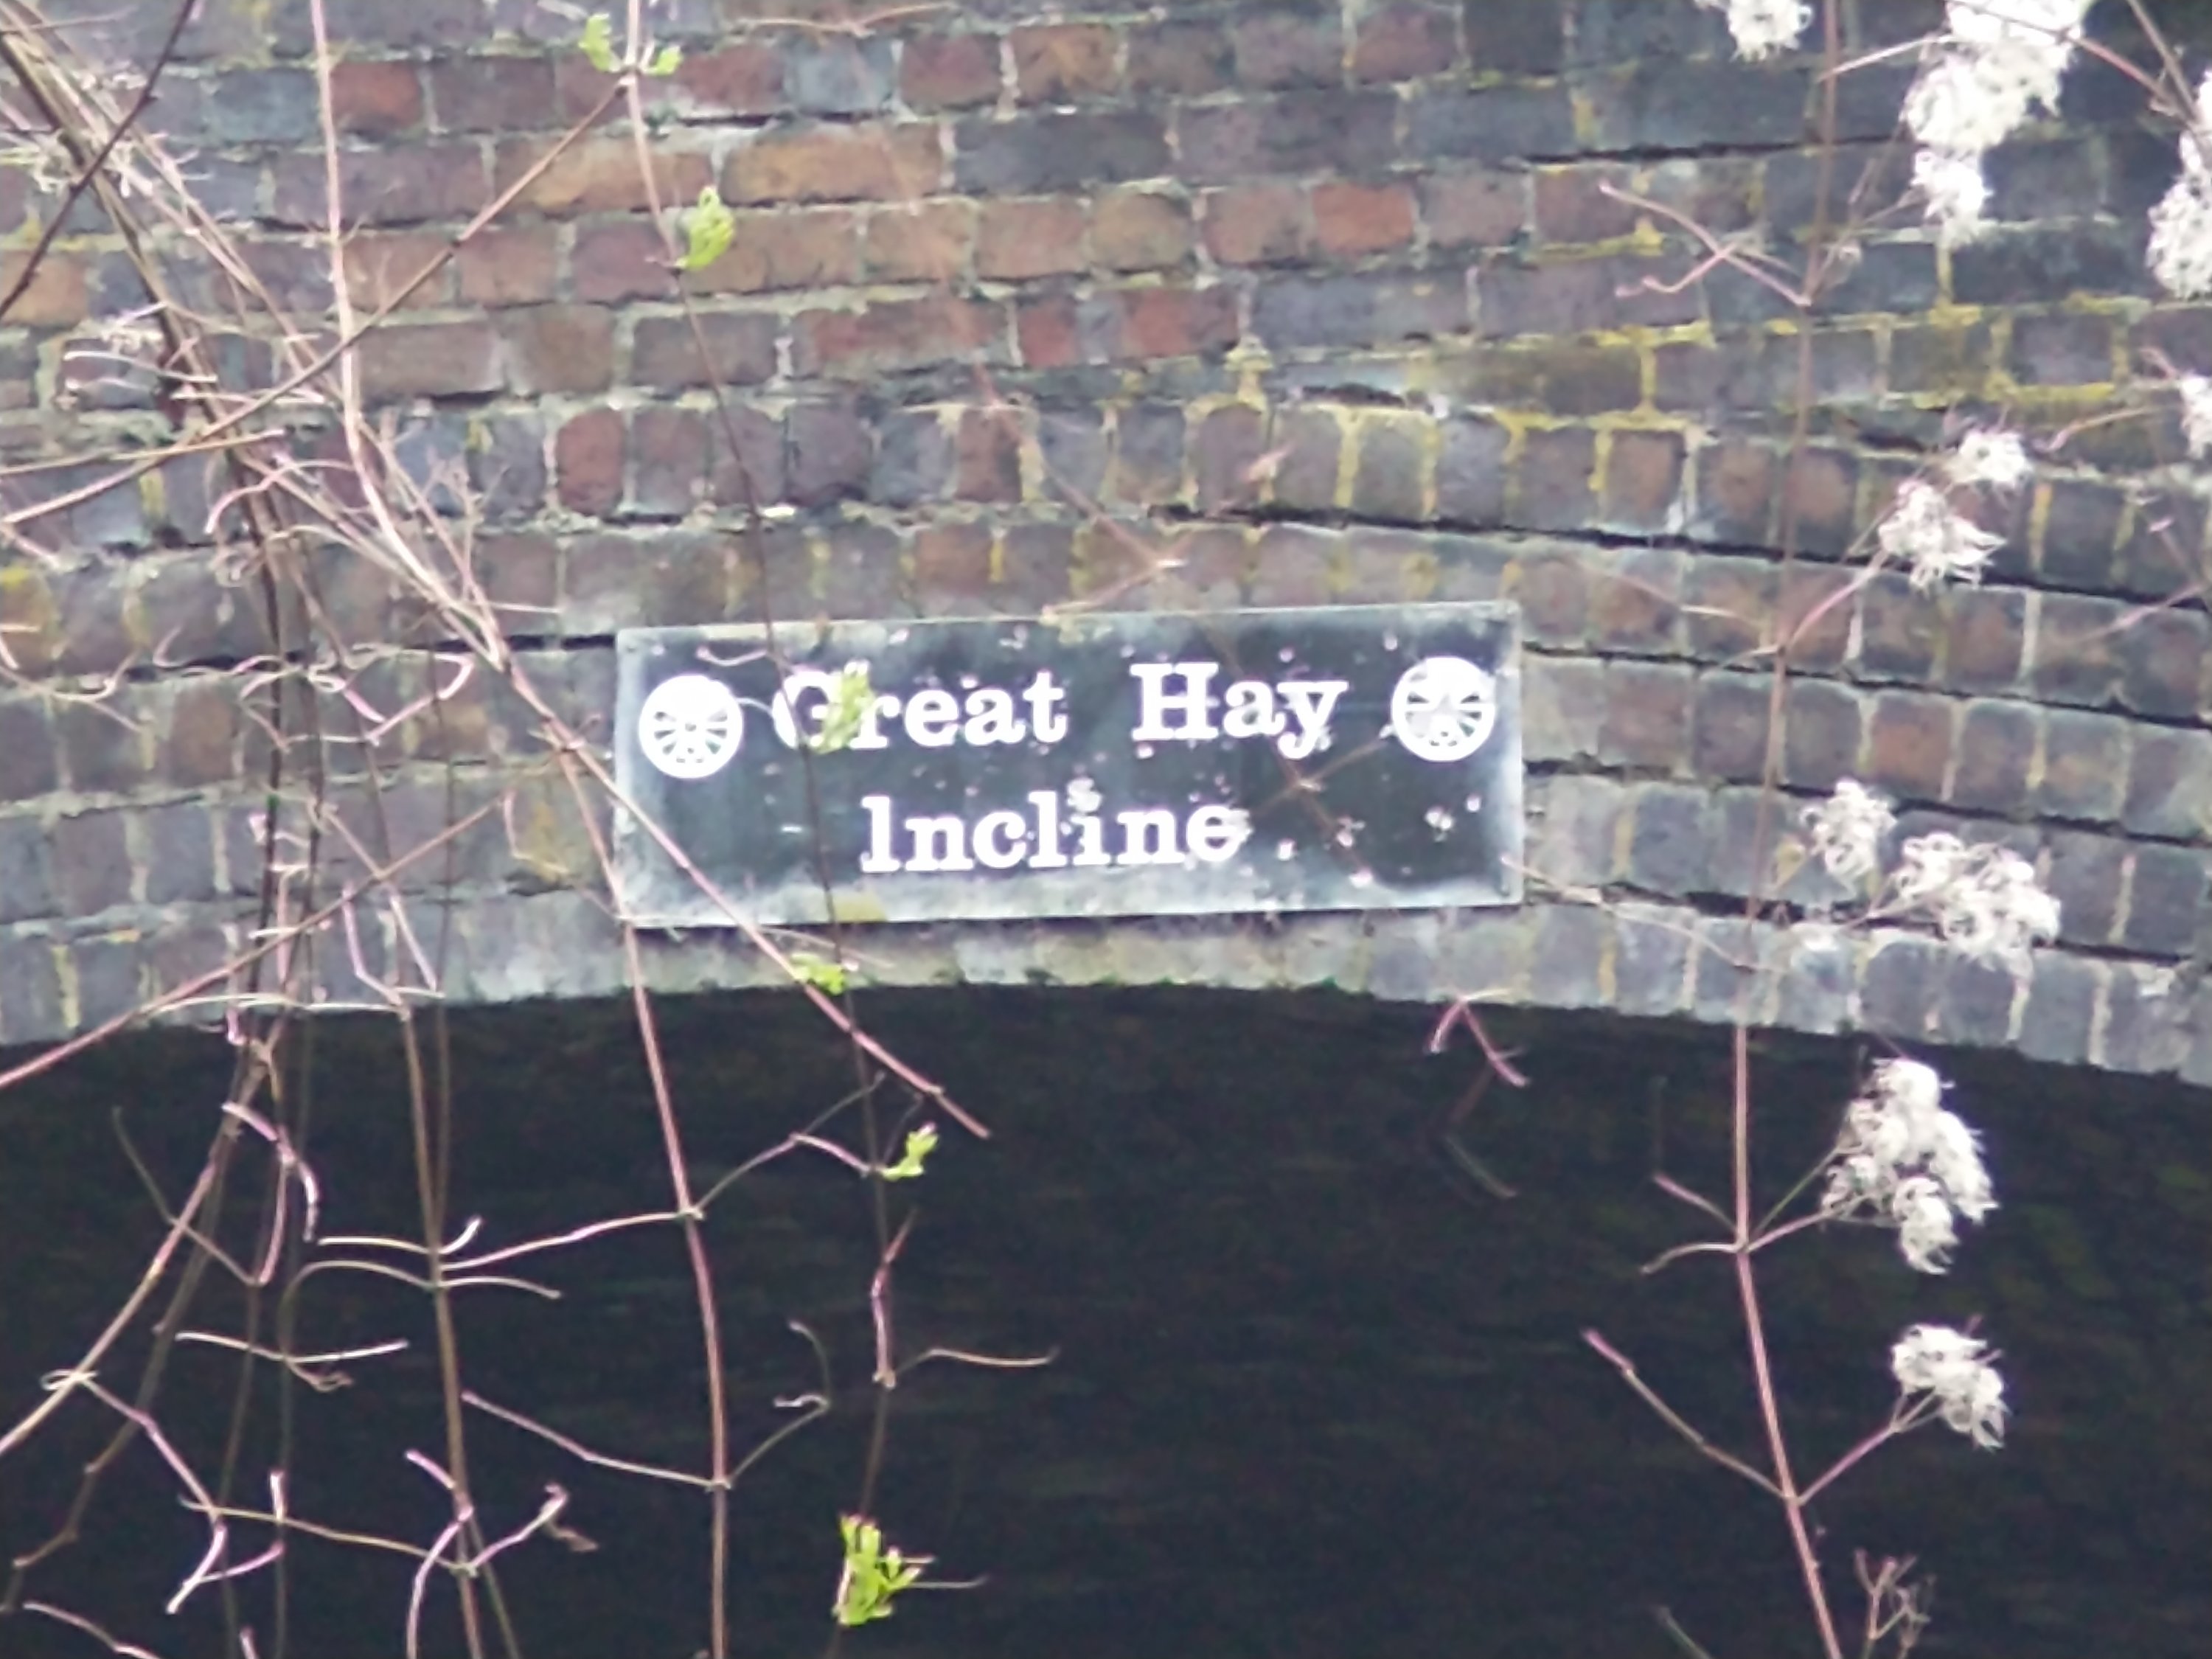
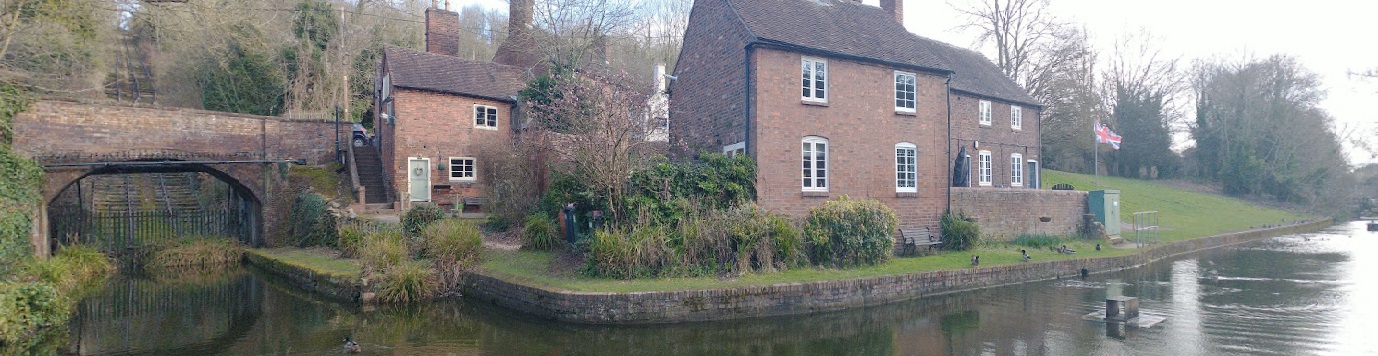
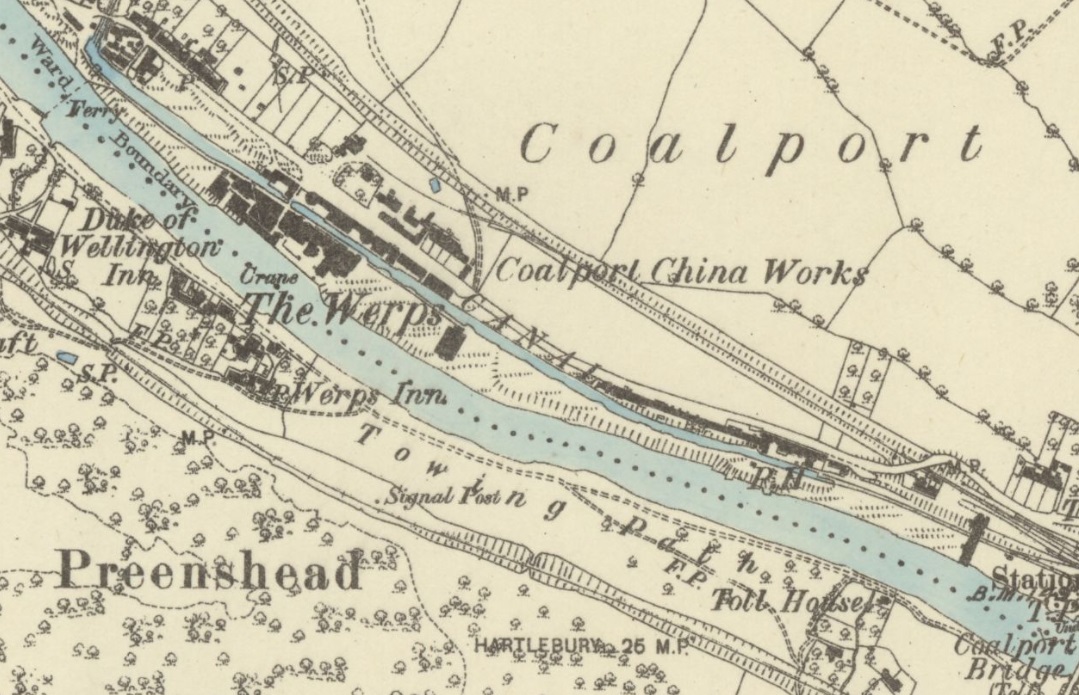
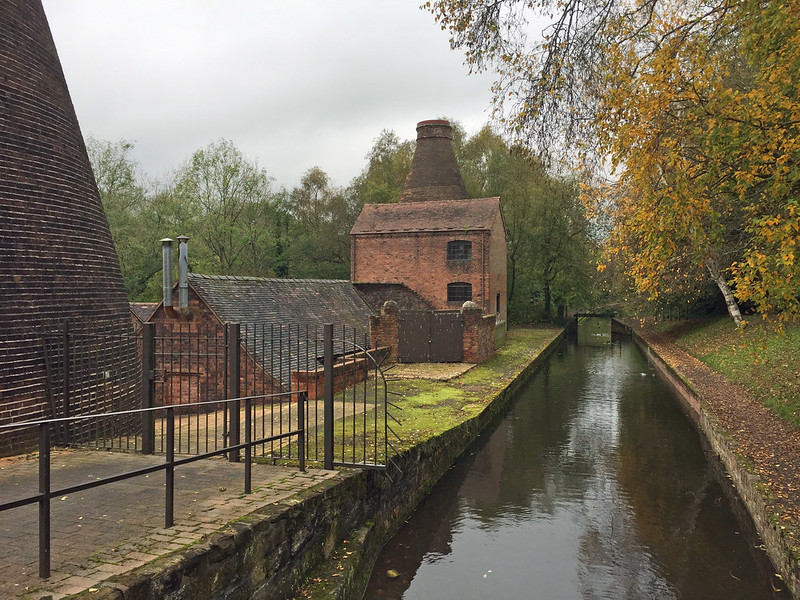
The top of the Hay Inclined Plane seen from the Southwest. The canal which saw tub boats brought to the top of the incline is immediately behind the visible brickwork on the left side of the image. The engine house was to the right. Its chimney is visible, top-right. [My photograph, 8th April 2022]A panoramic view of the engine house at the top of the Hay Inclined Plane. [My photograph, 8th April 2023]The view South down the Hay Incline towards the River Severn. The rails, chairs and sleepers are the product of a 20th century restoration and not original to the incline. [My photograph, 8th April 2022]The bridge carrying the incline over what was the LNWR Coalport Branch. This picture is taken looking East along the line of the old railway which became the footpath and cycleway named The Silkin Way after Lewis Silkin, the Minister responsible for the post-war Labour Government’s New Towns Act, 1946. Dawley New Town was designated in 1963 but expanded and renamed Telford in 1968. The Town Park to Coalport section of the route was opened by Prime Minister, Jim Callaghan, in 1977. [33][My photograph, 29th March 2023]The plaque placed on the bridge with the opening of the Silkin Way. [My photograph, 29th March 2023]The bridge carry Coalport High Street over the Hay Incline. [My photograph, 17th February 2023]A panoramic photograph which shows the sharp bend in the canal at the bottom of the incline. From this point East, the Canal ran parallel to the River Severn and wharves allowed the loading and unloading of tub boats and vessels on the River Severn. [My photograph, 17th February 2023]The reamining length of the canal is illustrated on this extract from the 6″ Ordnance Survey of 1881/1882, published in 1883. By the time of this map, as we have already noted, the LNWR Coalport Branch ha effectively superseded the canal. Of note are the factories either side of the canal which formed Coalport China Works, the end on connection between the canal and one of the sidings at Coalport Station, and the presence of the GWR Severn Valley line on the South bank of the River Servern. [32] This Google Maps extract shows the base on the Hay Inclined Plane and the truncated length of the canal alongside the River Severn. The Silkin Way marks the line of the old LNWR Coalport Branch. [Google Maps, 3rd April 2023]Coalport China Museum and Youth Hostel in 2016, looking Southeast along the last section of the canal. Both sets of buildings were once Chins Factories. The Youth Hostel is on the left, the Museum on the right, (c) Adrian Snood and used here under a Creative Commons Licence (CC BY-NC 2.0) [30]From a location further to the Southeast, looking back Northwest towards the Hay Incline, (c) Diamond Geezer and used here under a Creative Commons Licence (CC BY-NC-ND 2.0). [31]
R.F. Savage & L.D.W. Smith; The Waggon-ways and Plate-ways of East Shropshire, Birmingham School of Architecture, 1965. An original document is held by the Archive Office of the Ironbridge Gorge Museum Trust.


Pingback: The Coalport Branch of the Shropshire Canal – Part 1 – The length as far South as Stirchley Iron Works. | Roger Farnworth