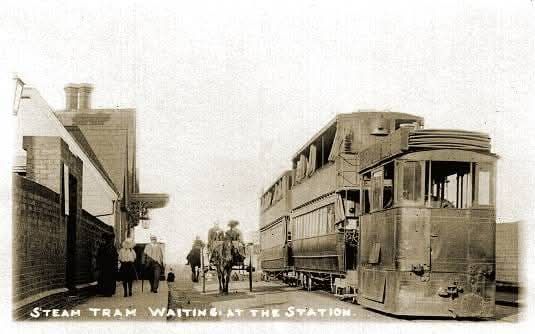
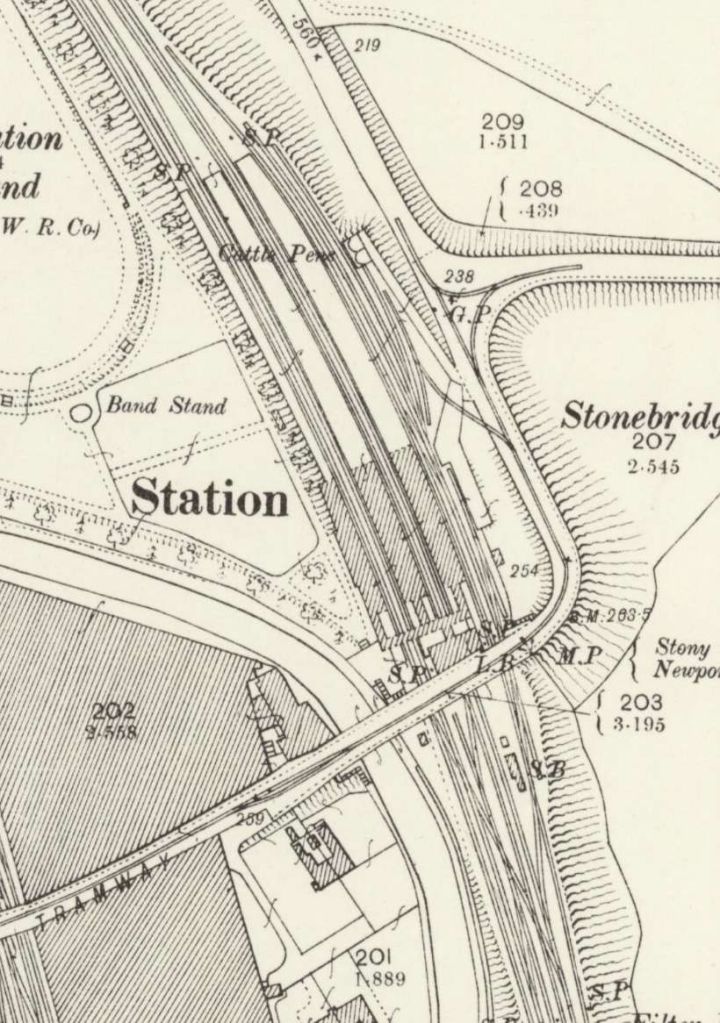
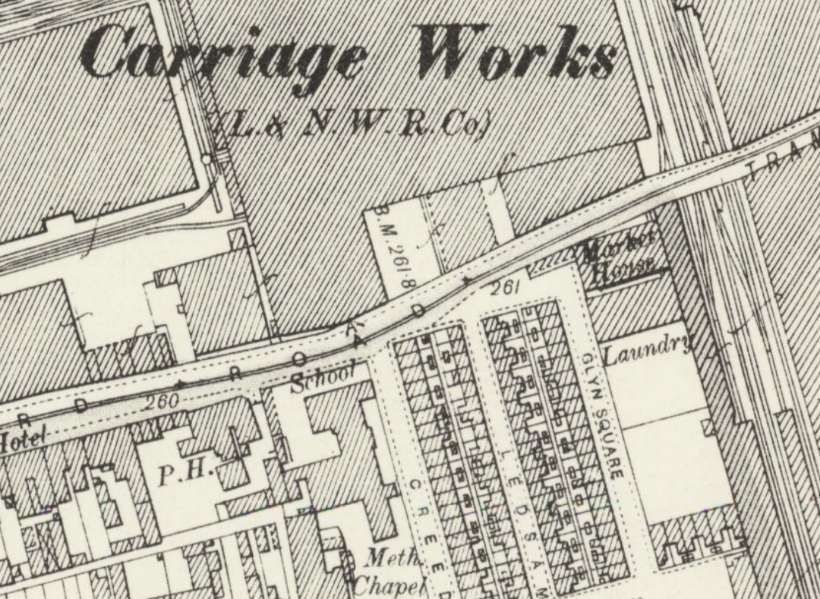
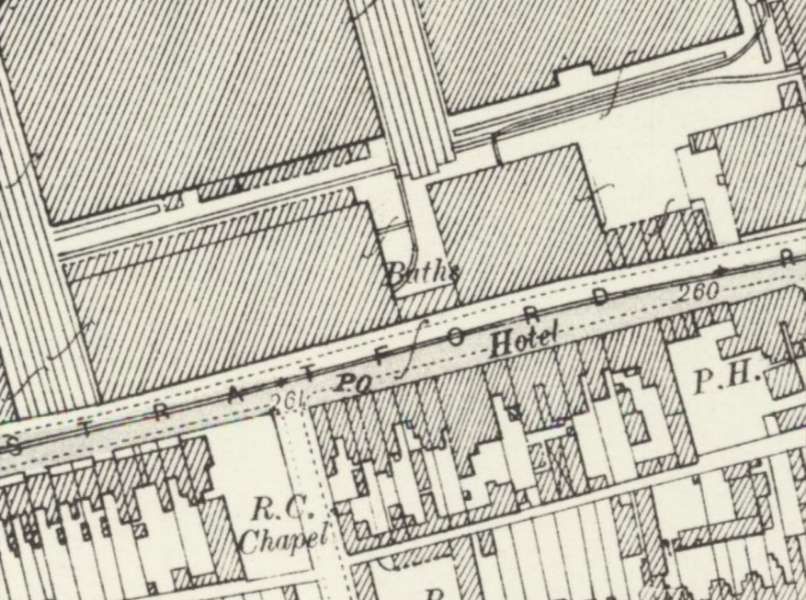
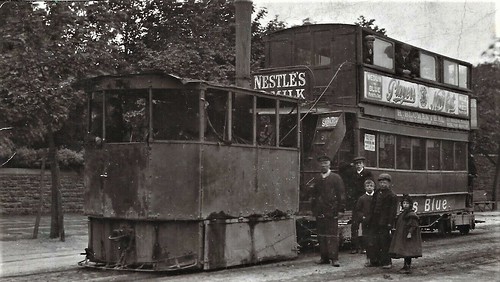
Possibly as early as 1825, an extensive horse-drawn tramway network served the works.
The tramway was laid to 3ft 5.5in. “The gauge was measured to the outside of the railheads as the wheels had flanges outside of the rails. … They were the earliest railways in the area. … It is said that outside flanges were used so that the space between the rails could be built up into a firm level path for the horses. Fallen lumps of chalk could then be easily kicked clear of the rails.” [1: p4]
“The works lay to the north of the London Road and the tramway ran due north for 1000 yards to Bell Wharf. There was a whiting works to the west of the main works with a tramway to the pits near the cricket ground. The main pits were between the London Road and the South Eastern Railway. Some time before 1898 the tramway burrowed under the South Eastern Railway in a tunnel at Craylands and pits were opened south of the railway later extending for a considerable distance. There was a transhipment siding on the South Eastern Railway at Craylands during the time of the narrow gauge.” [30: p38,42]
“Steam locomotives were introduced in 1875, built by a variety of builders. “There were engines by Lewin of Poole, HE Taylor of Chester, Kilmarnock Engineering Co. and … Aveling and Porter of Rochester. By 1927, these charming workhorses were becoming increasingly difficult to maintain and so, with the need to increase production, the railway was re-laid to standard gauge and new locomotives purchased.” [1: p4]
Initially the industry was made up of a series of independent companies. These companies joined in 1900 to form ‘The Associated Portland Cement Manufacturers’ (APCM), often referred to within the industry as ‘The Combine’. After 1900 the various works continued to be known by their original names.
The modernisation of the railways at Swanscombe Works was completed by 1929. … The Works shifted to a busy, efficient standard-gauge system connecting the chalk pits, main plant, river Thames jetty, and British Rail interchange.
“When the standard gauge line was built a single track ran down from the exchange sidings on a steep and curving route to the works. The standard gauge ‘main line’ ran through the tunnel under Craylands, then turned more westerly than the old line, and passed under a footbridge across old workings, through a tunnel under a lane, then another tunnel under Alkerden Lane, and into a very large pit running almost down to Watling Street, a distance of 14 miles from the Works.” [30: p42]
The Works were among the most important cement production facilities in the country. Extensive railway infrastructure was required to handle raw materials and finished cement, resulting in a complex network of sidings, exchange lines, and industrial locomotives. Rail traffic included limestone and chalk movements, internal works shunting, and outward cement trains connecting with the wider British Rail network. By the late 1960s and early 1970s, the site reflected wider changes across the UK rail system. [11]
A sketch of the area around Swanscombe Works. The pier on the Thames, the Works and the quarries were on a North-South axis. This sketch is an extract from a broader sketch of the various Cement Works on the South side of the River Thames. [30: p10]
The series of map extracts and photographs below illustrate the development of the Works over the years.
Map of Works in 1864
The First Edition OS 1:2500 County Series Kent X.1 map surveyed 1864 (British Library), modified to National grid format. The plant in 1864 was in course of rapid expansion, still using the wet process static kilns originated by Frost. Chalk quarrying, initially north of the road, had spread to the area between the road and the railway, connected by a 4 m wide tunnel under the road – the first of five eventually dug. [
Map of Works in 1895
This pair of Ordnance Survey Map extracts are taken from the 25″ Ordnance Survey of 1895, published in 1897. [7]
These three 6″ Ordnance Survey map extracts of 1938-1940 and published in 1950-1951 belong together. The top two overlap marginally North to South. [5] The third extract sits alongside the second – to its left. It comes from a different OS Sheet and shows the Works line extending to Chalk Pits near Knockhall and Alkerden Manor Farm. [6]
Swanscombe Cement Works began operations in 1825, when James Frost commenced making his “British Cement” using wet process bottle kilns. The plant was acquired by Francis and White in 1833 and made the same product. The partnership was dissolved in 1836 and John Bazley White and Sons commenced as a business in 1837, making both Roman and Frost’s cements at the Swanscombe site. [8]
Map of the Railway Network in 1965
Note that the Northpoint for this plan is turned through about 120 degrees. The Thames jetty is off the left of the plan. The chalk Pit Workings are off to the bottom-right. [12]
In 1965, the Works had seven 0−4−0STs to work the considerable traffic – six built by Hawthorn Leslie (four in 1928, one in 1929 and one in 1935) and the last by Robert Stephenson & Hawthorns in 1948. All seven were painted green with the running number on each side of the tank. There were no diesels. One was tried but it could not manage the poor track and was continually “sitting down”. There is no prospect of having any until money can be spared for relaying several miles of track. [12] A number of other locomotives were used at different times after 1929.
The five identical Hawthorn Leslie 0-4-0ST engines were delivered in 1928, followed by a sixth in 1935. They weighed 25 tons, featured 16in x 24in outside cylinders, and had a tractive effort of 21,425 lbf. [13]
The works can be divided into three areas. The first two are old chalkpits, dug each side of the main road, while the third contains the line to the workings. The first area is bisected by a private road with the cement works proper on one side. On the other side is the single road engine shed and works, and also an awning over one track where engines stand when not in use. A single line runs past the works, and across the marshy countryside to the jetty on the river Thames. [12]
“Another line runs across the road and winds its way around the main works until entering a tunnel under the main road. This brings it to the second old pit, where are situated two unloading tips for arriving trains. As can be seen from the map, a connection to British Railways struggles up and round the side of the pit. (Sand all over the rails shows the severity of the climb.) On the opposite side of the pit, another single line dips downwards into a tunnel under BR, a road and the connecting line, and emerges into a long, deep and wide cutting. There are two passing loops on the way to the workings, of which one has watering facilities, and another tunnel, and a high footbridge.” [12]
Chris Down, writing in 1965, continues:
“At the middle pit, an arriving train runs above one of the two tips, and backs down on to the tip. When the end wagon is on the tip, the wagons are braked, and the locomotive is uncoupled so that it can go up to the end of the line to obtain coal and water.
“The tips are similar to mechanical coaling plants on B.R. and deal with one wagon at a time. As each wagon is unloaded, it runs along the siding by gravity, until the train is reformed at the other end of the loop. The locomotive then comes back and couples onto the same end as before. The next train brings the single line tablet which is hung on a hook on a post. The first train collects the tablet and then goes down to the workings, the locomotive propelling the wagons.
“I spent some time around the footbridge, photographing the trains which passed at frequent intervals. The maximum speed was about 20m.p.h., but trains lurched terribly, due to the poor track. When the track deteriorates so much as to necessitate its replacement, diesels will doubtless be purchased. From the opinion of many of the men to whom I spoke, however, steam should retain its supremacy for some time to come.” [12]
Satellite Image the Area of the Works of 2026
“Swanscombe cement works operated for nearly 165 years, one of the longest-lived cement works in the world and, for many decades, … one of the largest. For a hundred years from about 1826 until 1929 it employed a unique narrow gauge railway using outside-flanged wheels, with over thirty steam locomotives, many also unique. When modernised in the 1927-29 period, its new standard gauge railway was one of the busiest and most efficient in the industry.” [9]
Details of locomotives employed at the Works can be found below.
Production at Swanscombe Works measured in tonnes per year. [8]
Comparing 1915/1916 to the 21st century
A few images follow which compare locations on the Swanscombe Works network with modern satellite imagery. The plans and satellite images are supplemented, where available, with photographs from close to ground level.
Bell Wharf at the North end of the company’s rail network, as it appears on the 6″ Ordnance Survey of 1915/1916 published in 1923. [33]
The Wharf as it appears on the ESRI satellite imagery provided by the national Library of Scotland (NLS) [34]
The approach to the Jetty along the line of the old railway. This view looks North towards the jetty. [Google Streetview, August 2025]
The jetty seen from the South. [Google Streetview, August 2025]
Looking South across the marshes from the jetty towards the location of Swanscombe Works. [Google Streetview, August 2025]
The Cement Works in 1915/1916. A road can bee seen leaving London Road at the bottom-left of this map extract and running towards Manor Way Farm through the centre of the site. [33]
In the 21st century, the outline of the Cement Works site is still visible. A variety of primarily transport related companies use the site. Manor Way now runs from the bottom-right across the centre of the old cement works siteand the area is known as Manor Way Business Park. [34]
Looking Northeast along Manor Way in the 21st century. The majority of buildings which were present when the Cement Works was in operation have been removed. [Google Streetview, October 2024]
Narrow Gauge Locomotives before 1929
Although records are sketchy, Stoyel and Kidner give details of nearly 30 narrow-gauge locomotives which served at Swanscombe, all of which had wheels with outside flanges. These included:
Aveling & Porter supplied a total of eight 3ft 5.5in, outside-gauge, geared tramway engines to Swanscombe Works. These were all scrapped by 1929 after the standard-gauge works lines were built.
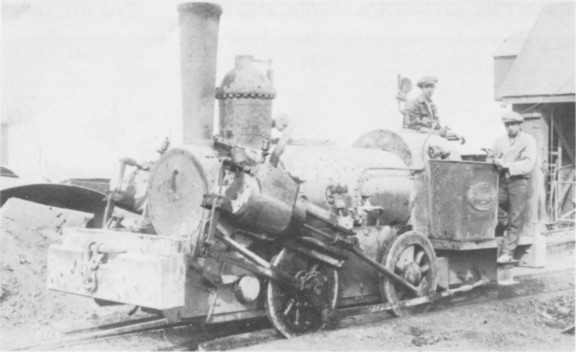
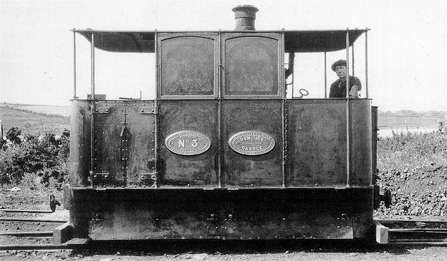
S. Lewin of Poole – Only a small number of locomotives were built by this company, including: an 0-4-0 locomotive of 1875, for the 1 ft 10 in (559 mm) gauge Cornish Hush Mine, Howden Burn; 0-4-0 Ant and Bee, for the 20 in (508 mm) gauge Great Laxey Mine Railway, Isle of Man; an 0-4-0ST for Seaham Harbour, County Durham; an 0-4-0 steam tram engine for Guernsey Railway; an 0-4-0 with rear tank, 3 ft 5 1⁄2 in (1,055 mm) gauge, outside flanged, (photographed below at) Swanscombe Cement Works; and an 0-4-0 Tiny, a 3 ft 9 in (1,143 mm) gauge loco for the Fayle’s Tramway on the Isle of Purbeck. [23][24]
S. Lewin only made a few locomotives. Erith “had the eccentrics on the front axle and the valves were on top of the steeply-inclined cylinders, the spindles being actuated by Stephenson link motion. Erith was rebuilt at Swanscombe Works in 1920 with the help of fitters from the Dorset Iron Foundry.” [30: p45]
De Winton supplied one vertical-bolier 0-4-0WT locomotive, Revolution, it had two 6″ x 10″ cylinders and 1ft 7in diameter wheels.
It is possible that Revolution “came second-hand in about 1890 and possibly from the Bute Works Supply Co. Cardiff, who were advertising a similar locomotive for sale in 1893.” [30: p45]
H. E. Taylor of Chester supplied six 0-4-0 side tank locomotives to Swanscombe Works between 1877 and 1882.
Stoyel & Kidner provide details of these locomotives:
Swanscombe, 0-4-0ST, 1879, outside cylinders other details not known.
Iron Horse, 0-4-0ST, 1882, outside cylinders (9.5″ x 18″), 2ft 6in wheels.
Dead Horse, 0-4-0ST, 1882, outside cylinders other details not known.
Millbank, 0-4-0ST, 1879, outside cylinders other details not known.
Liverpool, 0-4-0ST, 1879, outside cylinders other details not known.
Chester, 0-4-0ST, 1877, outside cylinders other details not known.
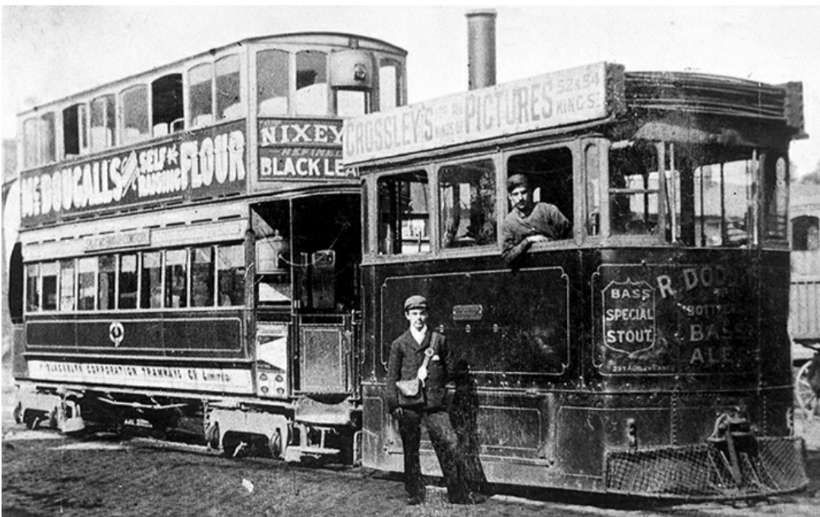
William Wilkinson & Co. built around sixty locomotives. Wilkinson’s also contracted out the manufacture of tram locomotives to Beyer, Peacock and Co, Black, Hawthorn and Co and Thomas Green and Son. Altogether 207 engines were built to Wilkinson’s patent. The Plymouth & Devonport Tramways steam locomotives were assembled at Wilkinson’s works in Wigan, the vertical boiler in each of these locomotives was made by the Steel Company of Scotland. Small bore cylinders acted upon a crankshaft that was in turn connected to the four, coupled wheels by means of cog-wheel gears. The axles, wheels and nearly all the working parts of the engine were made of Sieman-Martin’s best quality steel and all the brass workings were of phosphor bronze. The exhaust steam was superheated in the firebox before escaping to the atmosphere through the chimney. The fuel was coke and the emission of smoke was described as ‘scarcely perceptible’. The Plymouth locomotives were apparently from Wilkinson’s own works. They cost between £600 each for the non-condensing version and £1,100 for those fitted with the condensing apparatus. [26]
A number of the Wilkinson steam trams purchased by the Plymouth & Devonport Tramways for their abortive experiment with steam trams were bought by the Swanscombe Works in the late 1880s/early 1890s. [25]
A typical Wilkinson’s Steam Tram – this one was used on the Wigan network close to Wilkinson’s Works. It was built in 1886. These engines must have been an unusual sight working on an industrial railway! [27]
Wilkinson also supplied a single vertical-boiler locomotive to Swanscombe Works. It was built in 1884.
Kilmarnock Engineering Co. supplied five 0-4-0ST 3ft 5.5in outside-gauge locomotives to Swanscombe Works in 1920 and 1925. Kilmarnock Engineering Co. were not prolific engine builders. These five were some of a very few locomotives built by the Company.
These sturdy 0-4-0ST locomotives undertook most of the chalk haulage for Swanscombe Works in the 1920s. When the railway was modernised and the gauge changed the locomotives were scrapped. [1: p6]‘Hustler’ was one of this batch of locomotives from Kilmarnock Engineering Co., (c) Public Domain. (Kenn Nunn Collection/LCGB). [25: photo No. 26]
J. B. White& Bros, owners of the Swanscombe works, appear to have constructed at least one locomotive in use on their own site, Gravesend, another 0-4-0WT. It is also possible that a number of other locomotives used on the site were rebuilt there at various times. [30: p45]
Bagnall – one locomotive, Rede, an 0-4-0ST built in 1894, was built by Bagnall (Works No. 1413) and came second-hand in 1921. [30: p45]
Hudswell Clarke – one locomotive, Spry, another 0-4-0ST, was built by Hudswell Clarke and arrived at Swanscombe in 1923. [30: p45]
Stoyel & Kidner tell us that “on a visit to the works in December 1929, 12 narrow gauge locomotives were seen on a length of track awaiting scrapping. The old 3-road engine shed was rebuilt as a two-road standard gauge shed. … On the modernisation of the railway system in 1929 all the remaining narrow gauge locomotives were scrapped that year or in 1930, and it is thought that very few of them had been scrapped at an earlier date, although Plymouth and Devonport are said to have been broken up in 1922, and Swanscombe by 1920. The second-hand engines would have had their gauge altered on arrival.” [30: p45]
The narrow gauge wooden tipper wagons, “were shunted in 1929 into the passing loops half way down the tramway to the river, and remained there for many years. There were also a few left in an old pit south of Ingress Gardens.” [30: p45]
Standard Gauge Locomotives after 1929
“When preparations were made in 1928 for replacing the narrow gauge system by one laid to the 4ft 8½ in. gauge, an order was placed for a series of powerful new locomotives for the purpose. Pending their delivery three old locomotives were transferred from other works but they were usually employed two at a time in removing the overburden prior to quarrying, on track which had no physical connection with the remainder of the system.” [30: p45]
Those early standard-gauge arrivals were from two manufacturers:
Falcon – Henry Hughes and Company was based at Falcon Works. The firm experienced financial difficulties in the late 1870s/early 1880s. It was restructured as the Falcon Railway Plant Works in 1883 under the control of Norman Scott Russell. [31]
The factory remained busy with both railway and tramway locomotives and rolling stock. Among these were tank locomotives for Ireland, Spain and the Azores. Some were subcontracts from other firms, such as Kerr, Stuart and Co, at that time in Glasgow. [32]
The two Falcon locomotives came to Swanscombe second-hand, they were Works Nos 120 and 150 and were named Wolf and Delta. Delta was one of a number originally supplied to Gibbs Works, Essex. It had a dropped cab for passage through low tunnels. [30: p43, 45]
Falcon also provided a later second-hand arrival, Lion, (Works No. 205?) which was transferred from Stone Court in 1946. [30: p41, 45]
Manning Wardle – Guernsey, a 0-4-0ST, Works No. 1241 of 1892 came second-hand to Swanscombe at the end of the 1920s.
Hawthorn Leslie supplied five identical standard-gauge 0-4-0ST locomotives to Swanscombe Works in 1928. [1: p6] These locomotives were constructed with two outside cylinders of 16in x 24in, 3ft 3in diameter driving wheels and a weight of 25 tons and a tractive effort of 21.425 lbf. [13] A single further engine (No. 6) was supplied in 1935.
No. 1 was Hawthorn Leslie Works No. 3715. [13]
No. 2 was Hawthorn Leslie Works No. 3716. [16]
No. 3 was Hawthorn Leslie Works No. 3717. [15]
No. 4 was Hawthorn Leslie Works No. 3718. [14]
No. 5 was Hawthorn Leslie Works No. 3719. [17][25]
No. 6 was Hawthorn Leslie Works No. 3860. [18]
No. 5 was one of the fleet of standard-gauge Hawthorn Leslie Locomotives. It is seen here working the exchange sidings at Swanscombe, (c) Public Domain, (Andrew Neale Collection). [25: photo No. 27]
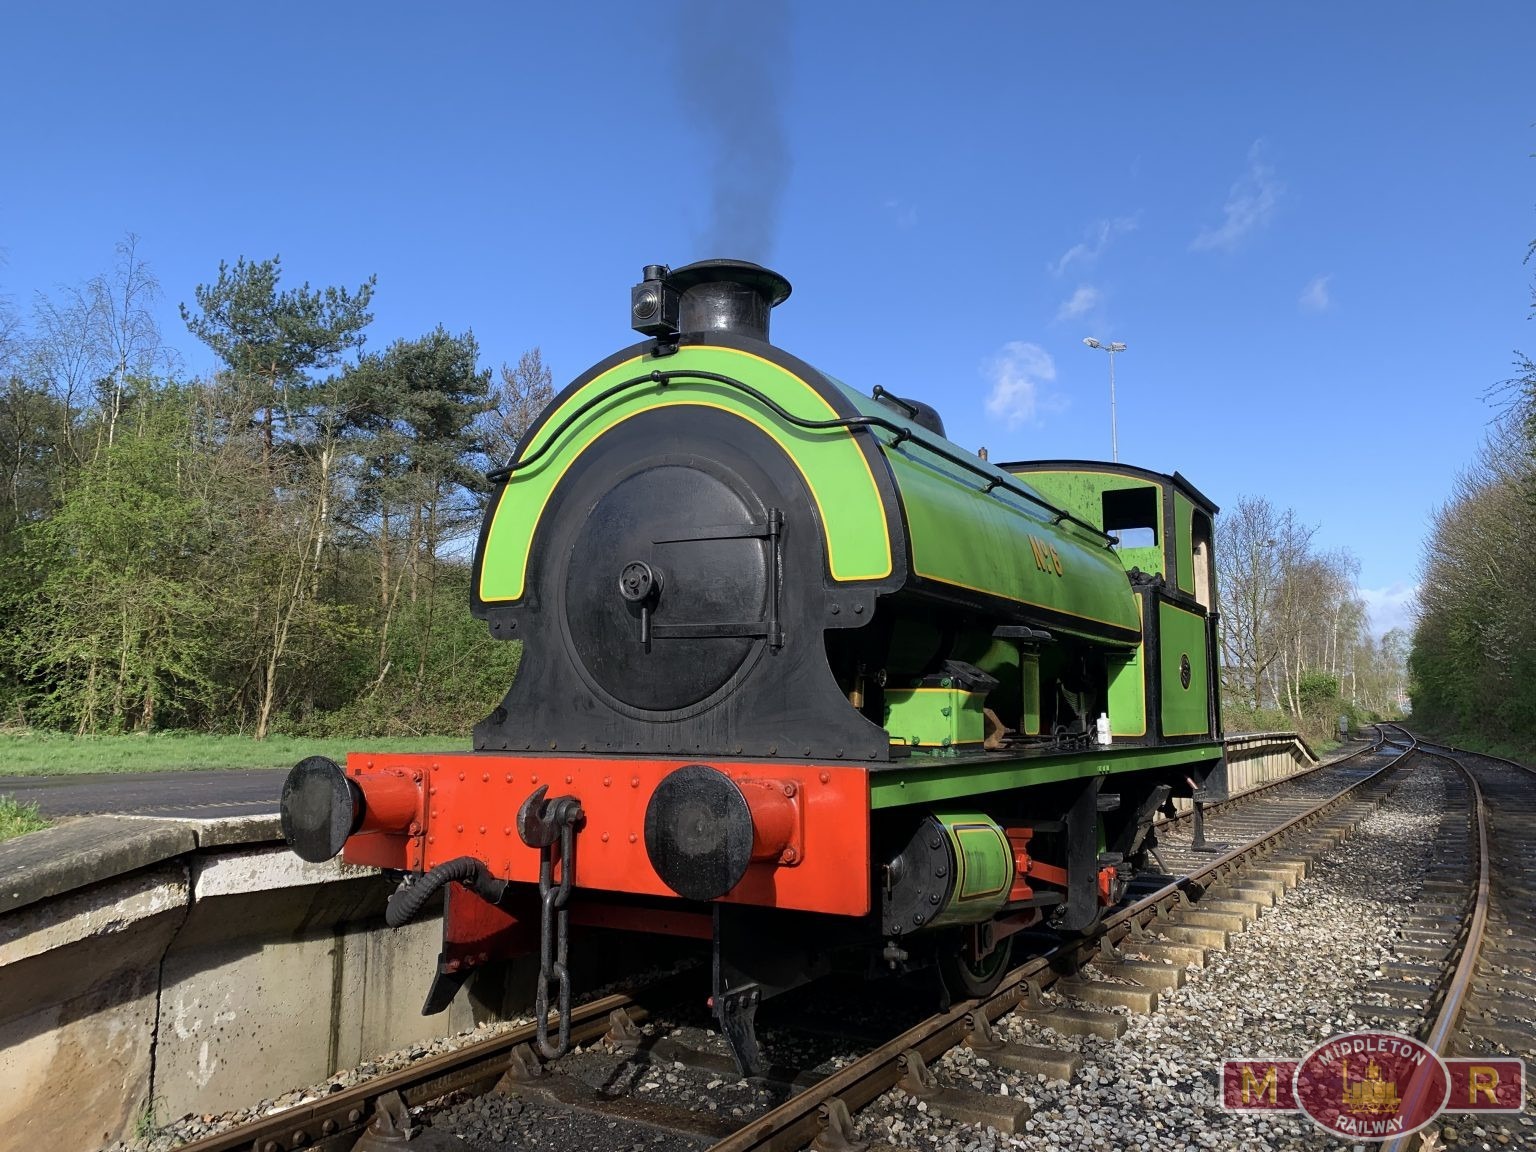
This image is embedded here directly from the Middleton Railway Website, it shows Hawthorn-Leslie No. 3860 Swanscombe ‘No.6’ which was gifted to the Middleton Railway in 1971 once the APCM turned away from steam- to diesel-power. [19]
Chapman & Furneaux – Kappa, another 0-4-0ST, built by Chapman & Furneaux (successors to Black, Hawthorn & Co) Works No. 1164 (of 1898) arrived at Swanscombe in the 1930s. [30: p45]
Robert Stephenson & Hawthorns supplied one slightly larger standard-gauge locomotive to Swanscombe Works – 0-4-0ST No. 7, RSH No. 7405 of 1948. [1: p6]
The Barrow-in-Furness Tramways Company operated a steam-powered tram service from 11th July 1885 until electrification in 1904. Using a 4 ft (1.219 m) gauge, the tramway reached Ramsden Dock by 1886 and continued expanding through the electric era to locations such as Bigger Bank. Ultimately, on 5th April 1932 the tramway network was closed in favour of buses. [1]
From 1876 to 1901 the Kitson built over 300 steam tram engines and steam railmotor units, which were developed from a design by W. R.Rowan. [6][7]
The tramway network connected the town centre with areas like Ramsden Dock (1886) and eventually extended to Biggar Bank on Walney Island in 1911. After the network was bought by British Electric Traction, the company embarked on a modernisaton programme and the network saw its first electric service in 1904. [1]
Barrow-in-Furness Corporation took over operation of the service on 1st January 1920 at a cost of £96,250 (close to £5 million in 2026). Technological advancements in the form of petrol and diesel powered buses resulted in the closure of the tramway, with the last service running on 5th April 1932. [1]
The Network in 1899/1890
The steam tram network appears on the 1889/1890 6″ Ordnance Survey which was published in 1895. Three element can be identified:
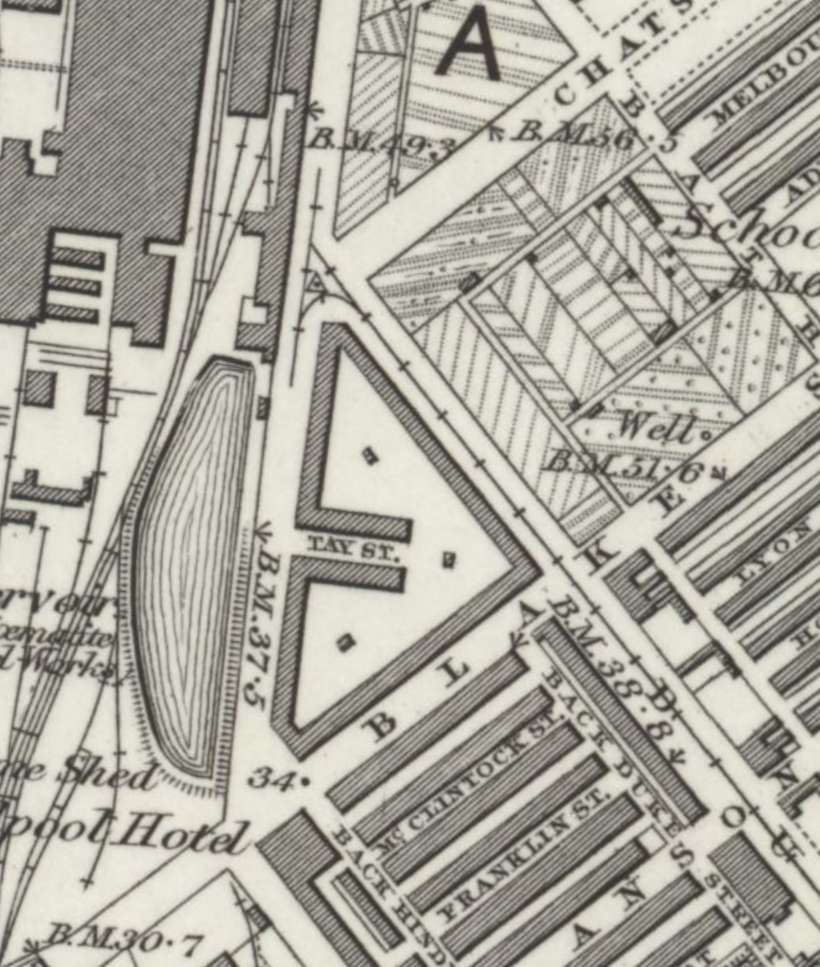
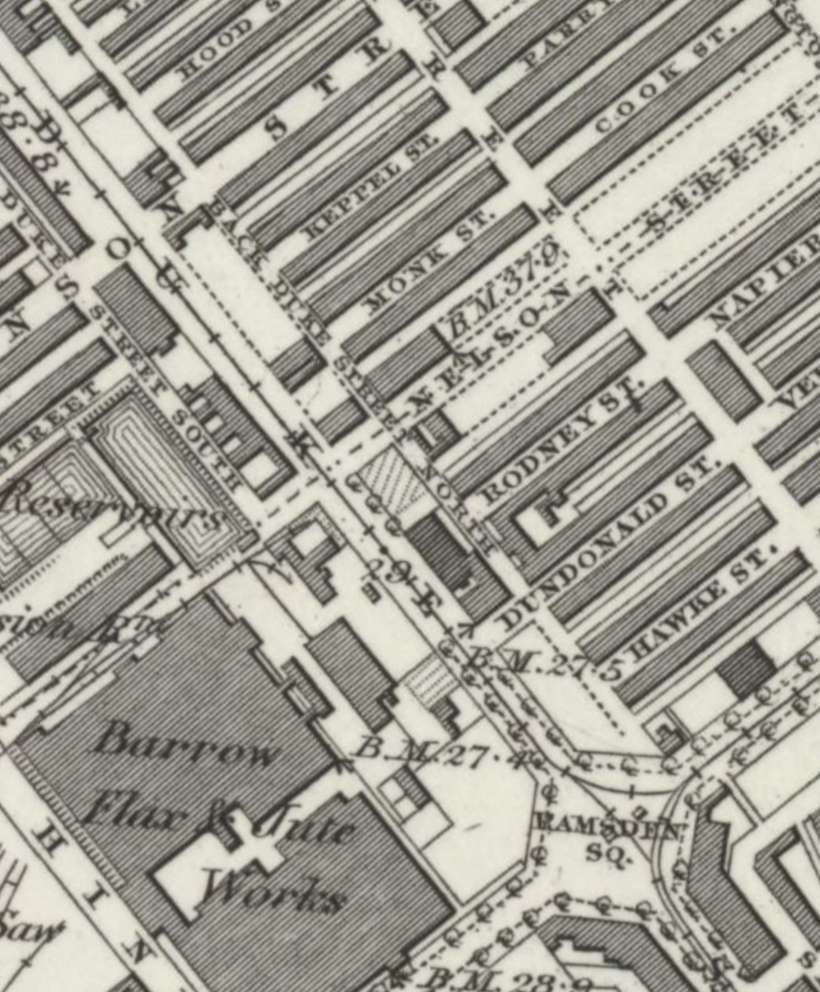
1. Priors Lea to Ramsden Dock Station
One axis of the steam tramway appears to have run from Priors Lea in the North to Ramsden Dock in the South via Ramsden Square. … The route appears on the next eight extracts from the 6″Ordnance Survey of 1889/1990 which was published in 1895.
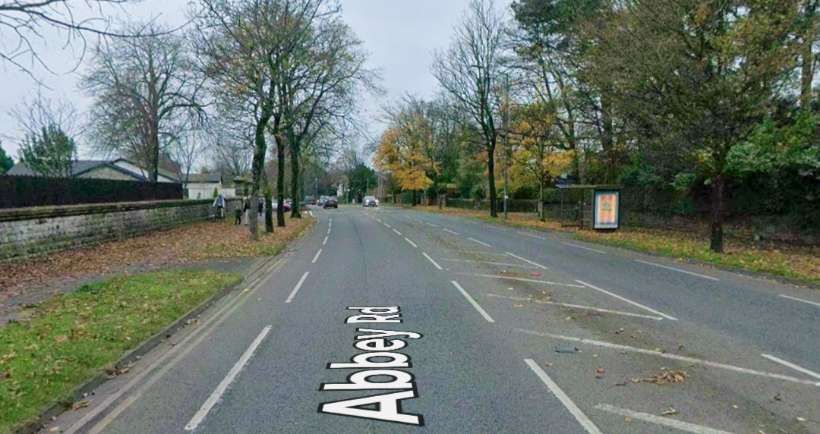
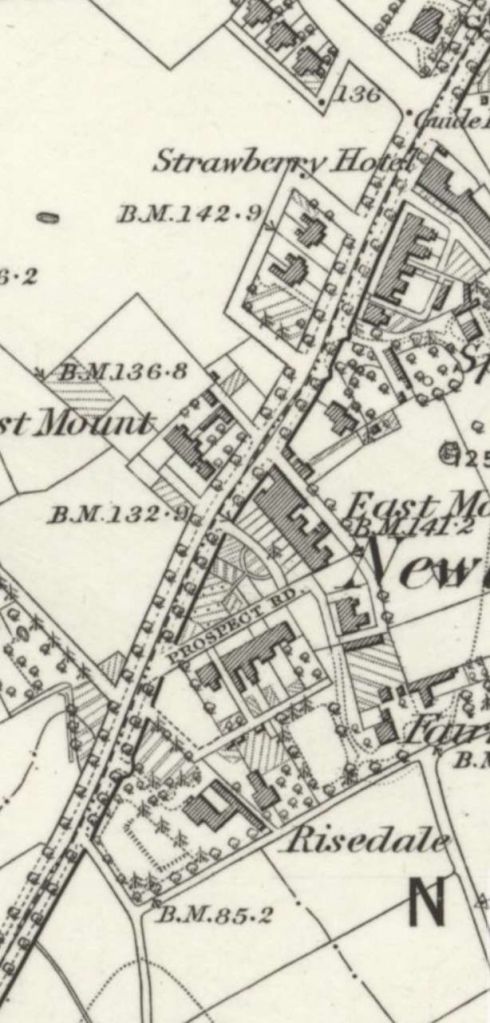
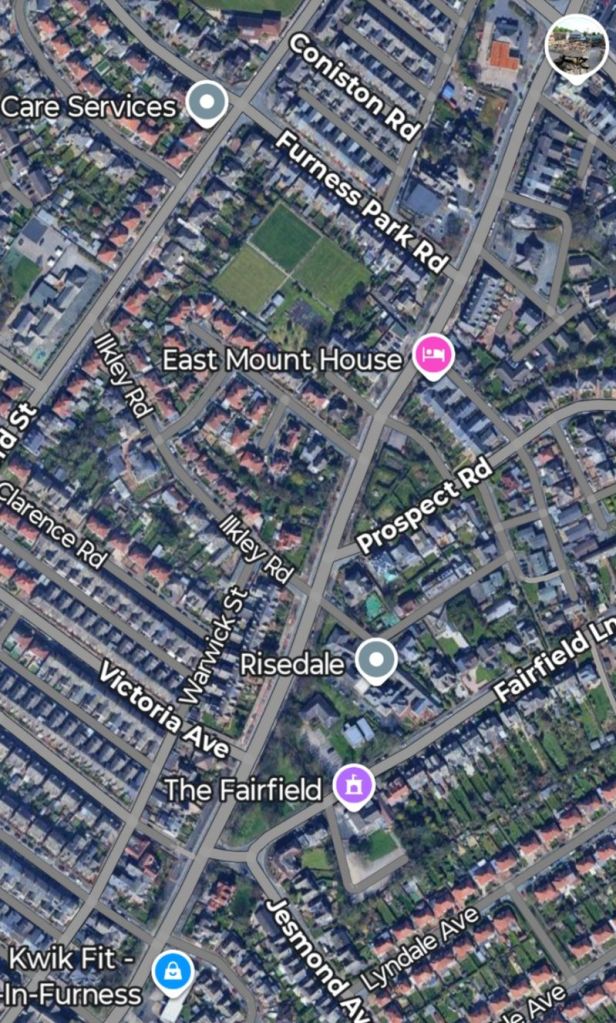
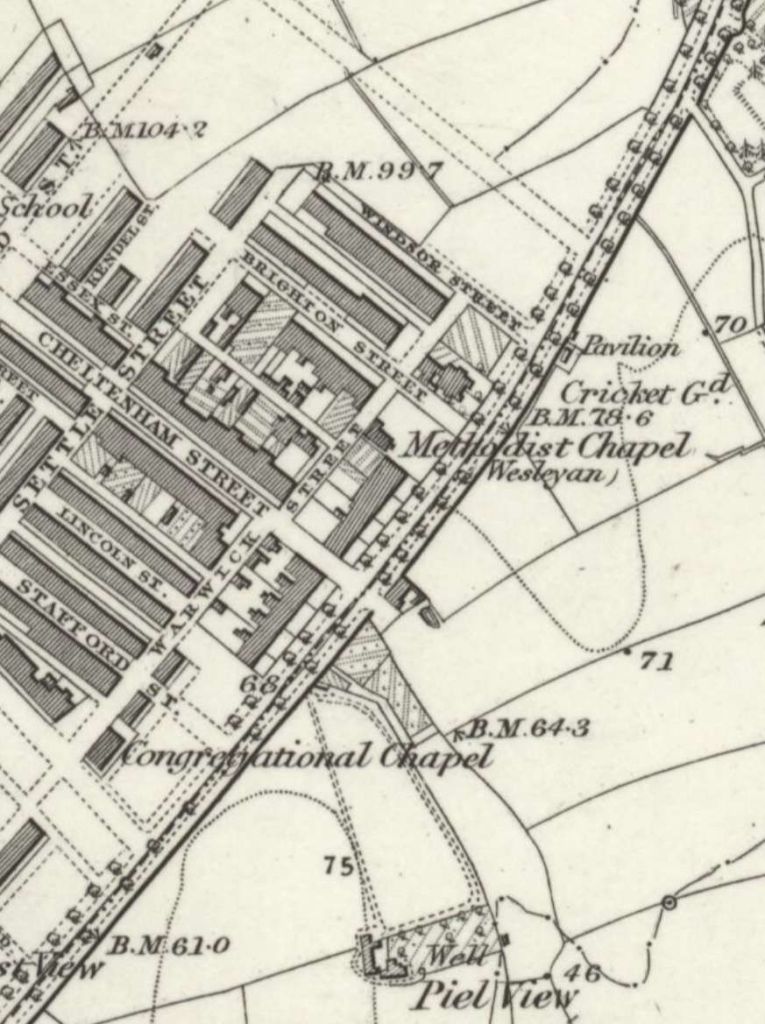
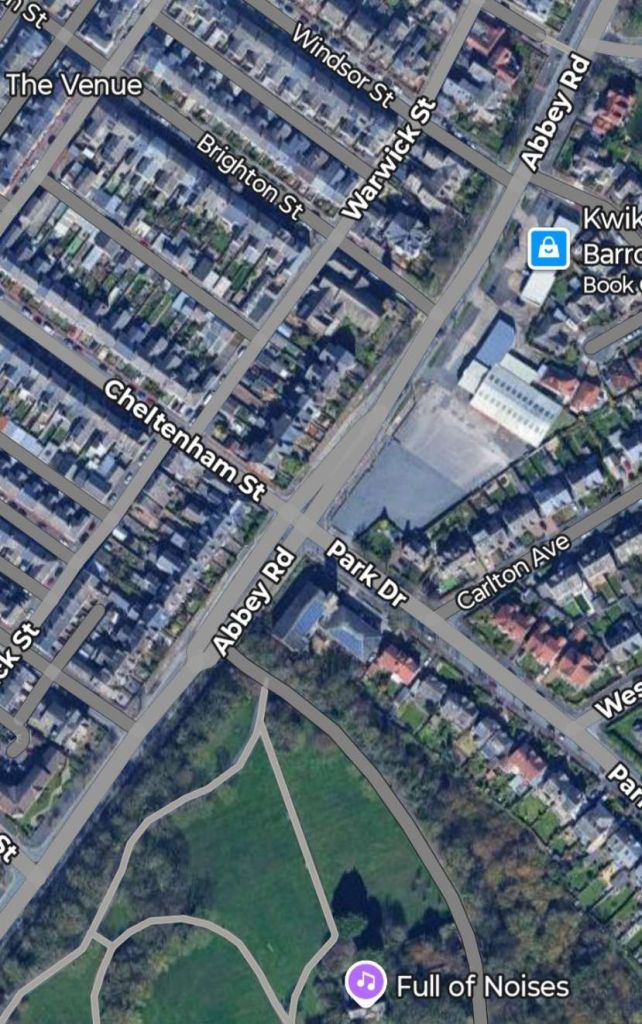
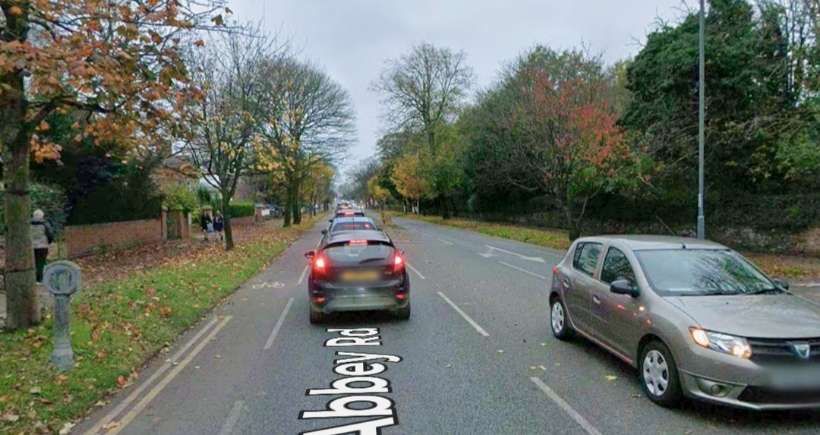
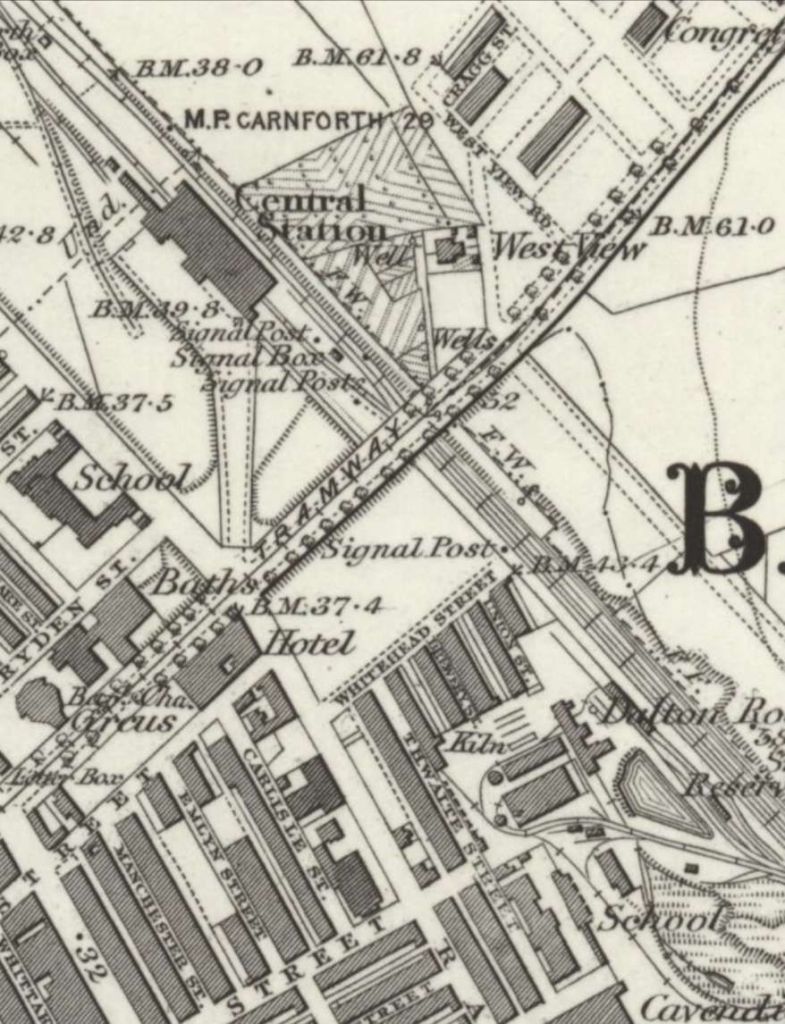
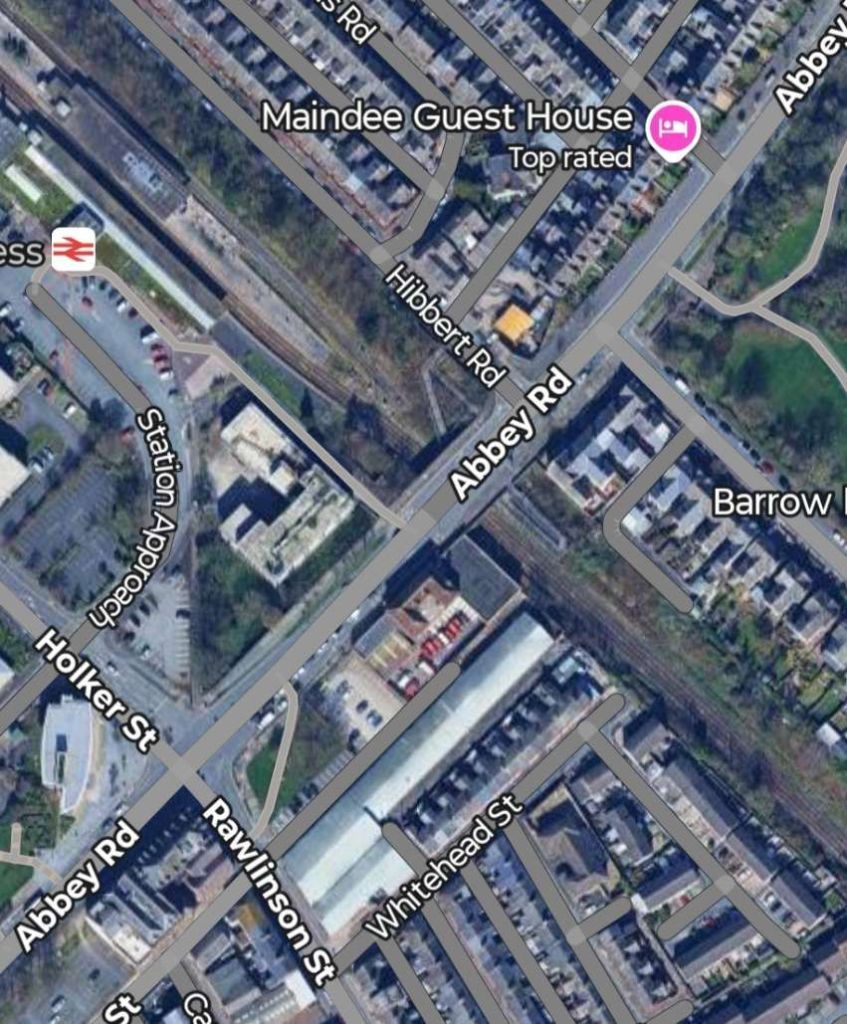
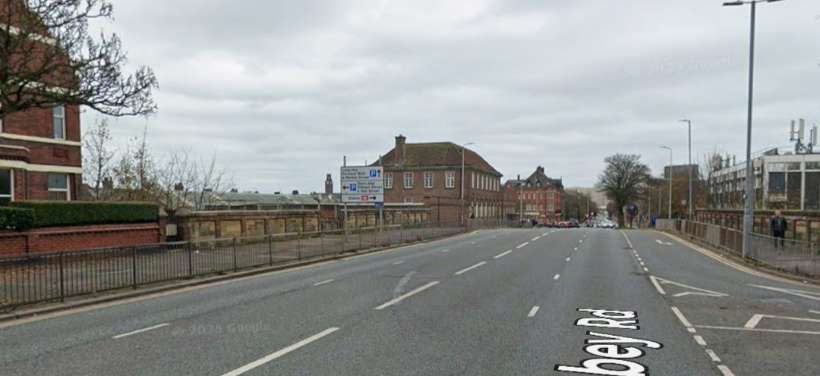
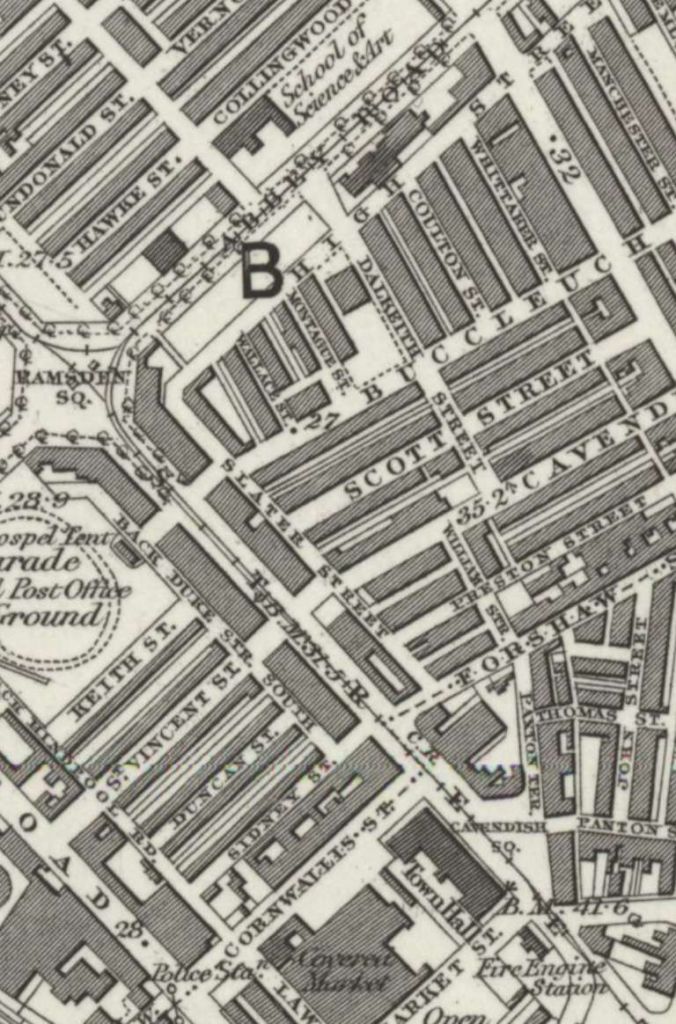
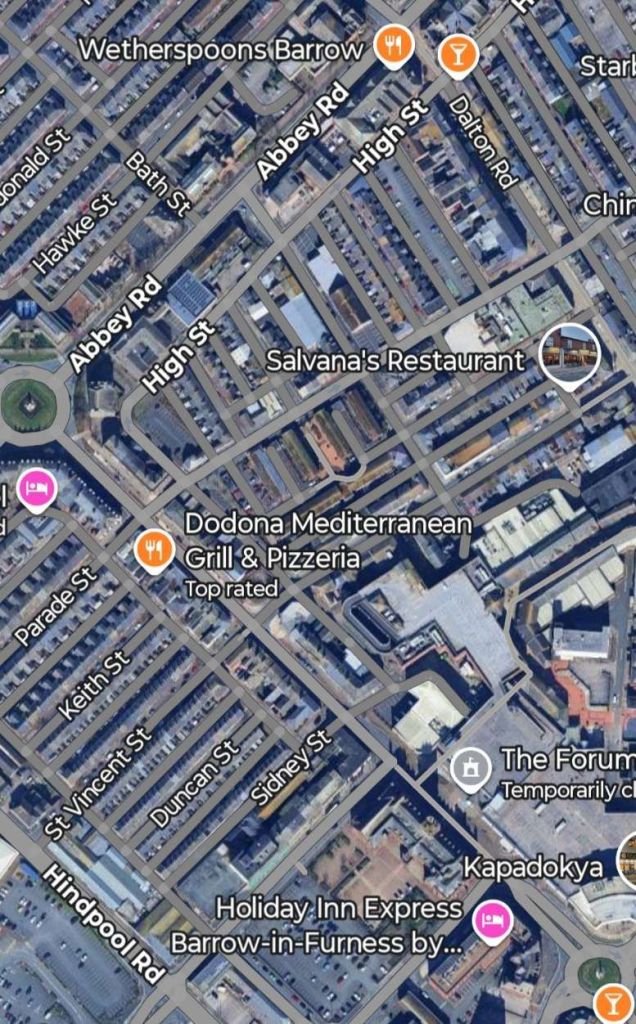
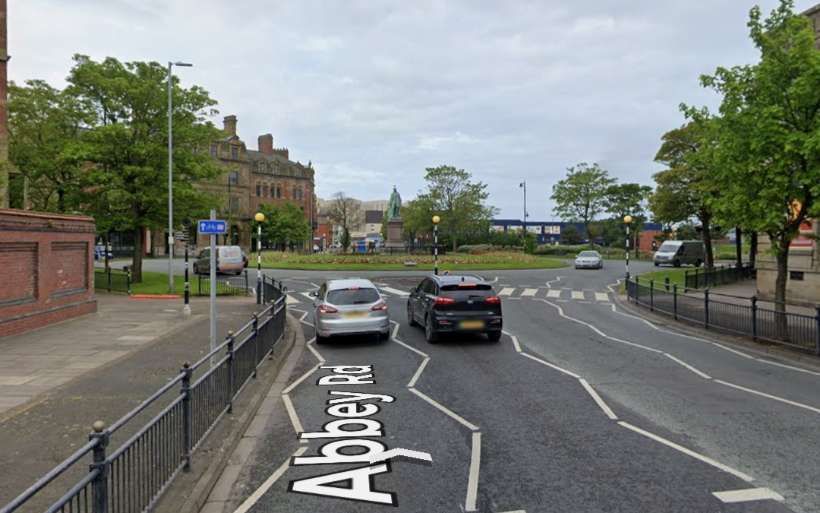
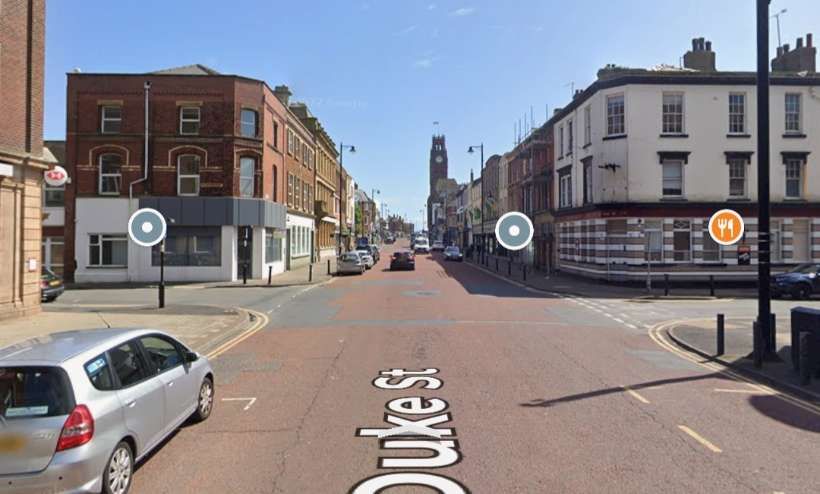
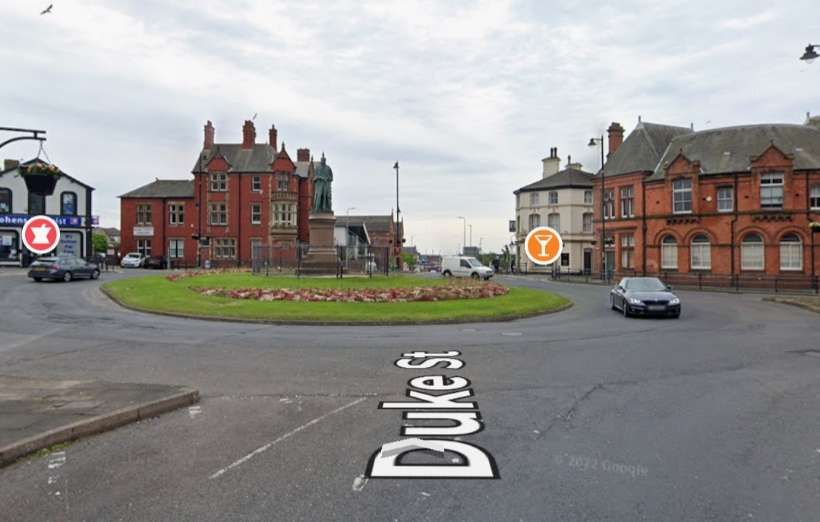
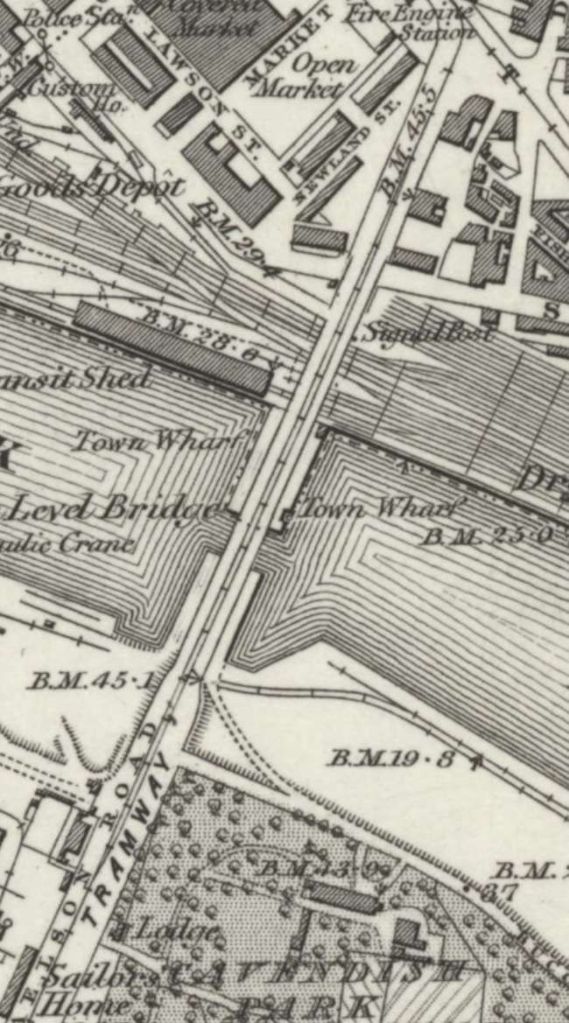
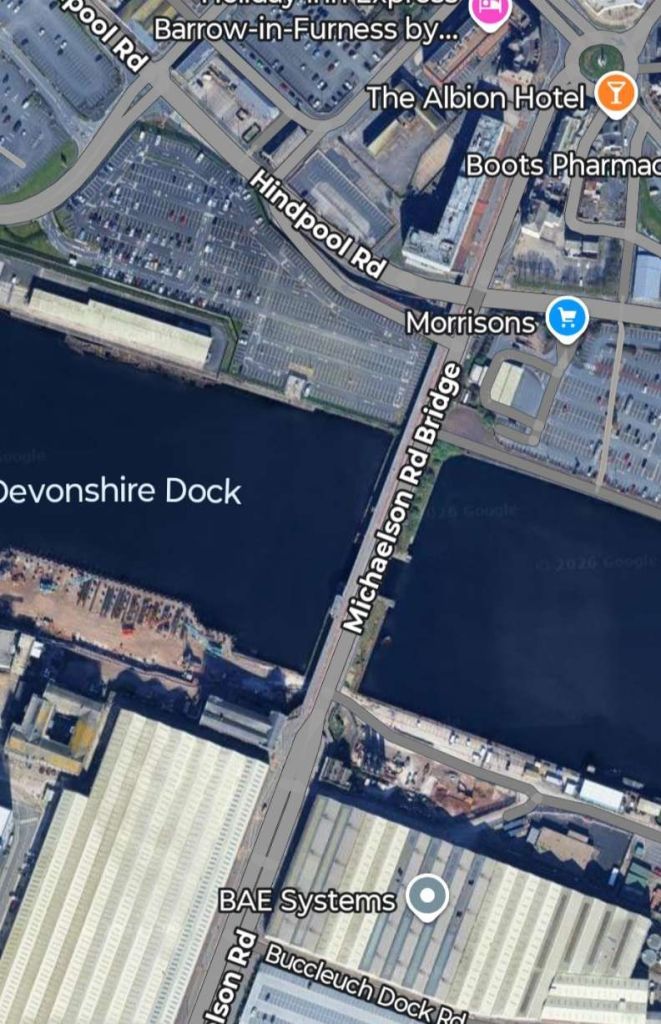
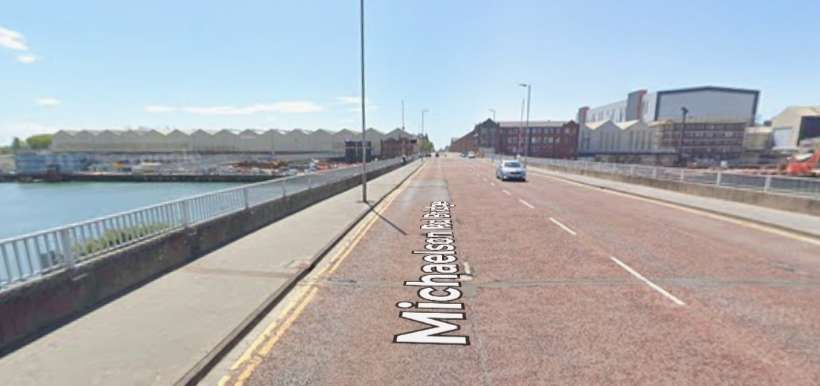
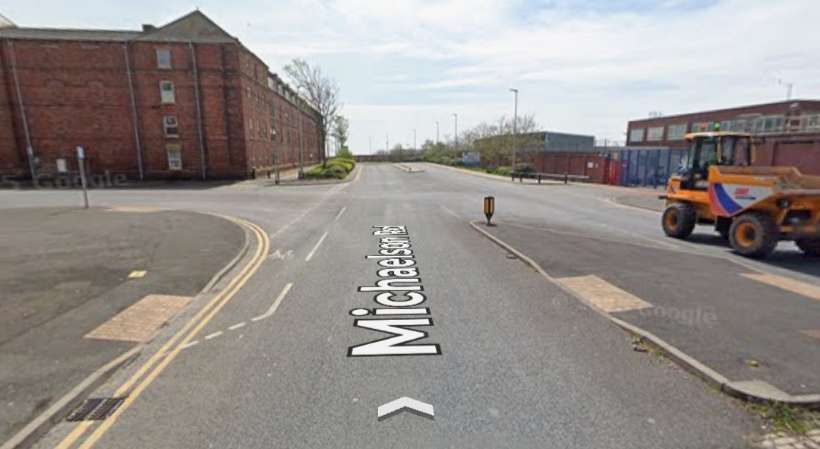
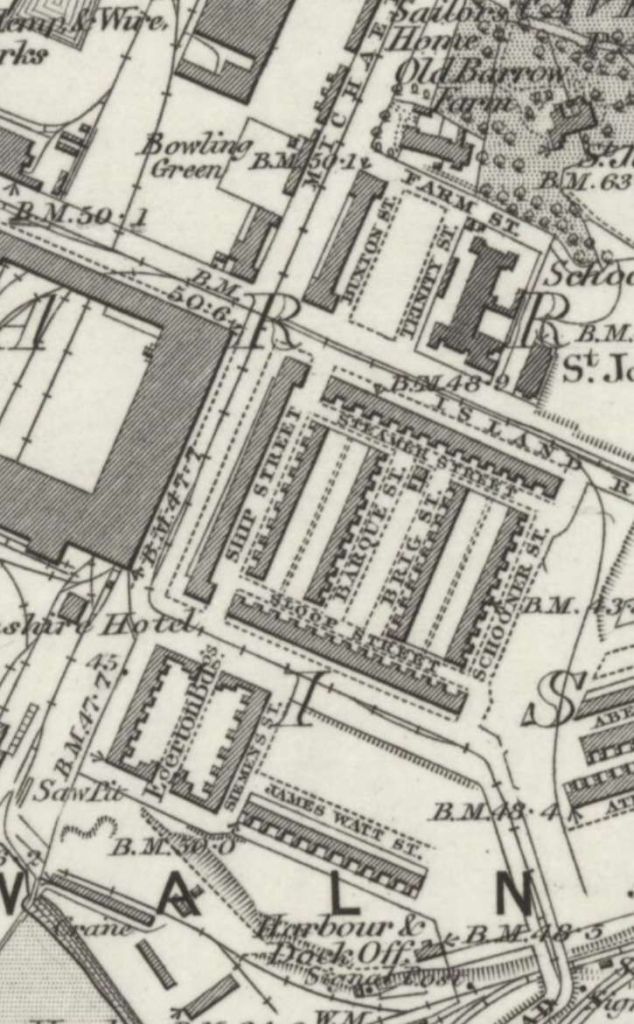
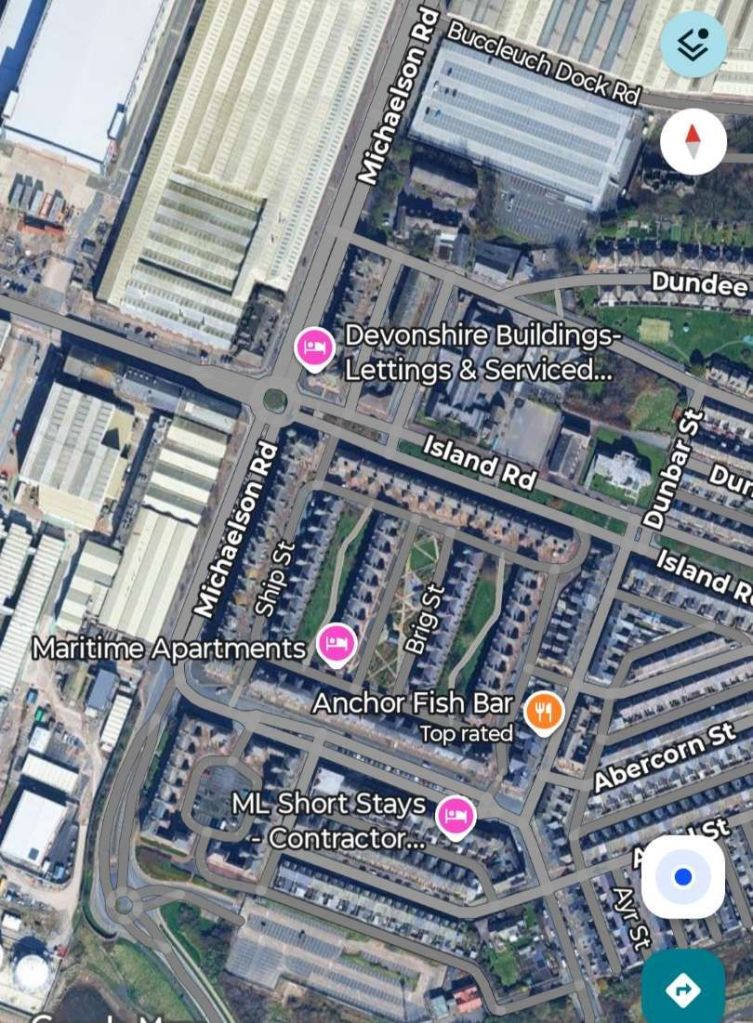
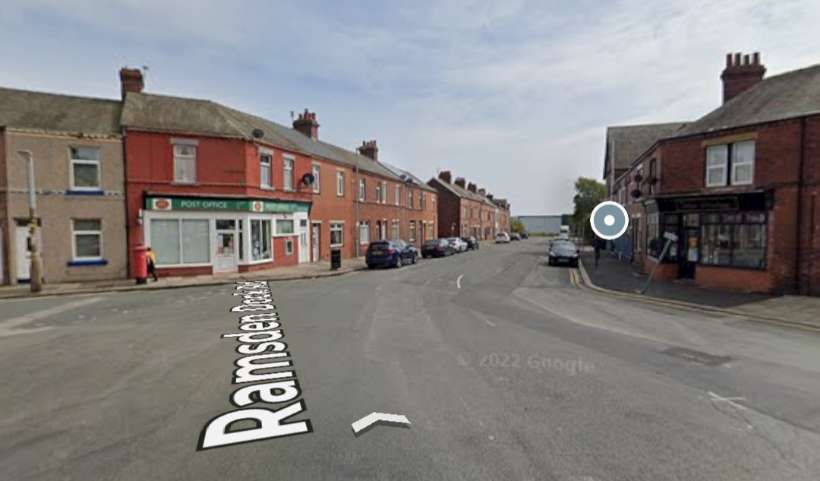
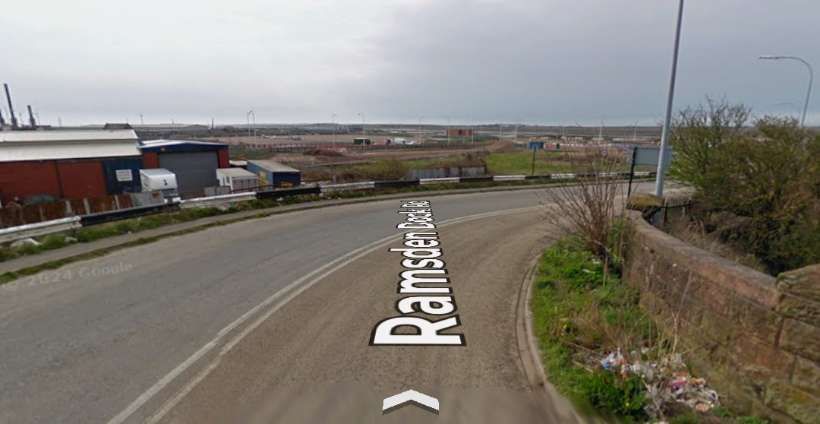
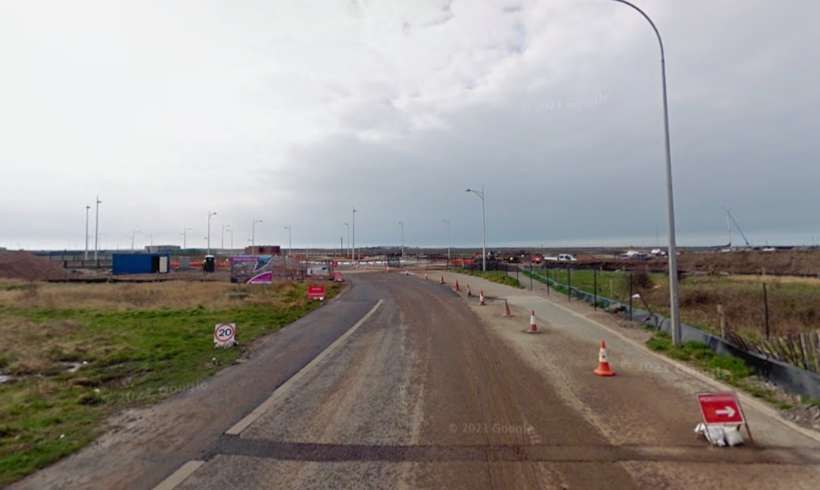
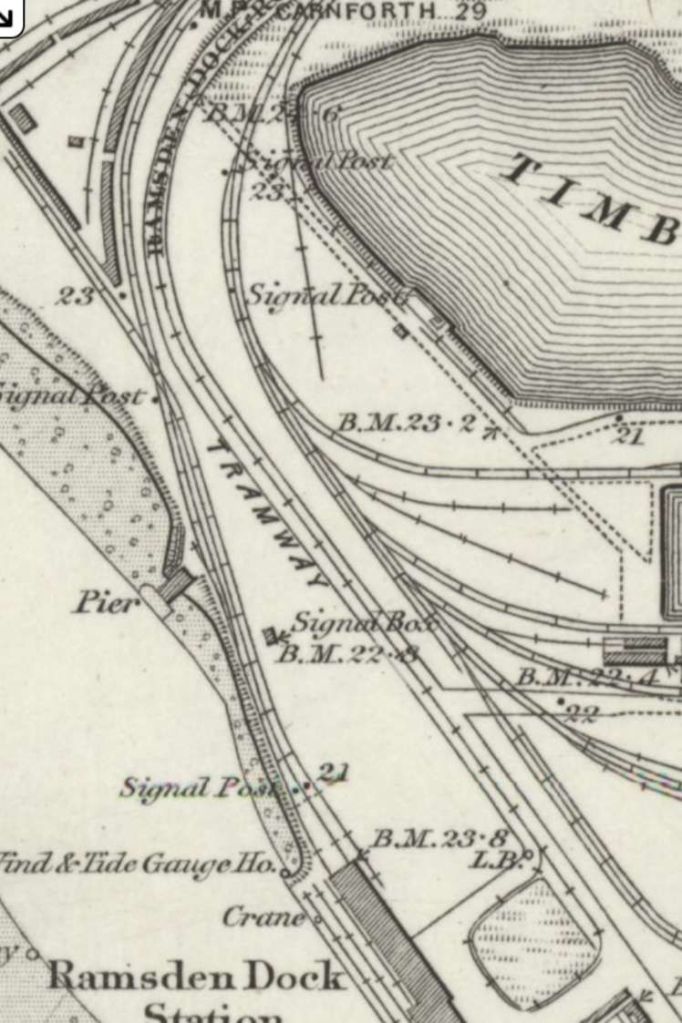
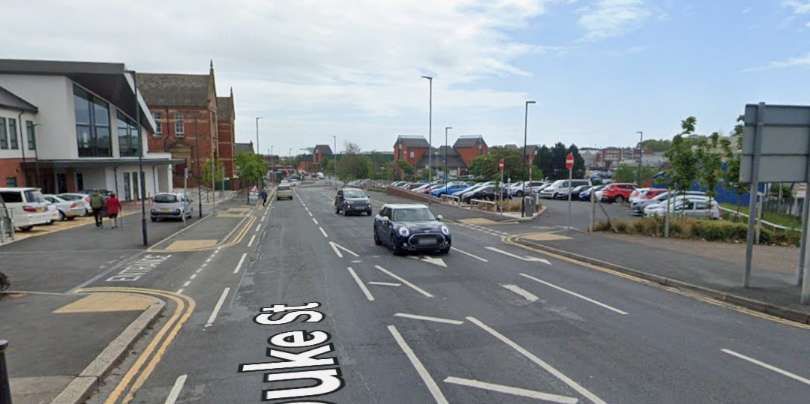
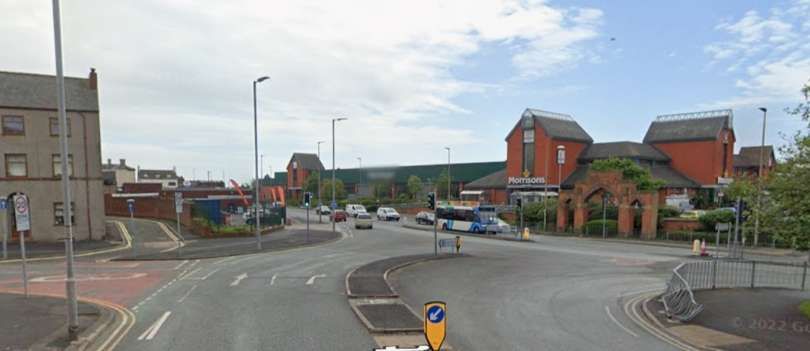
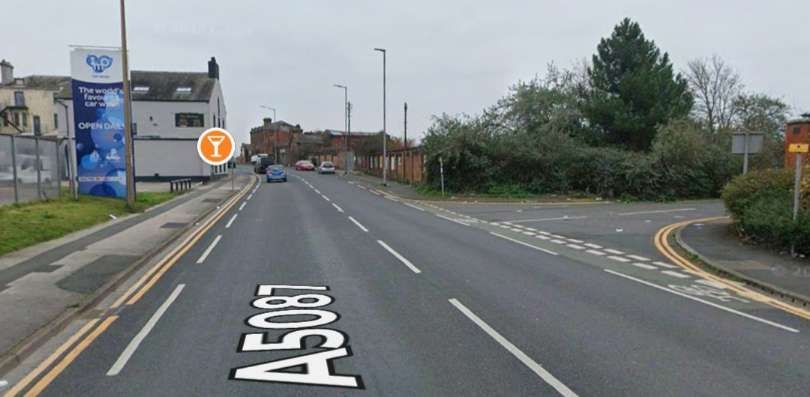
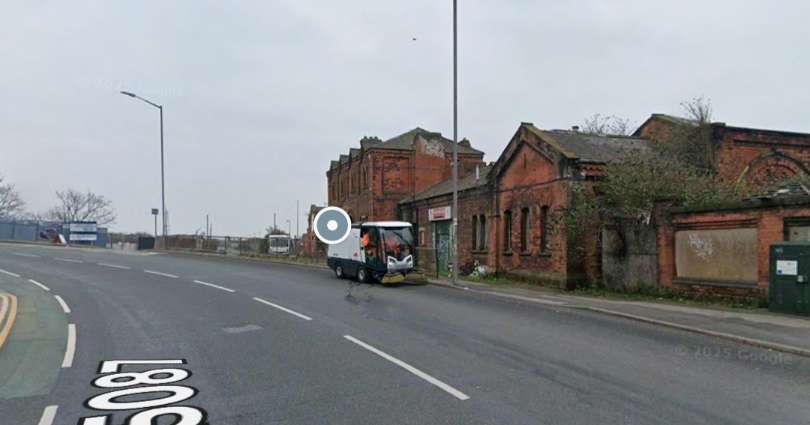
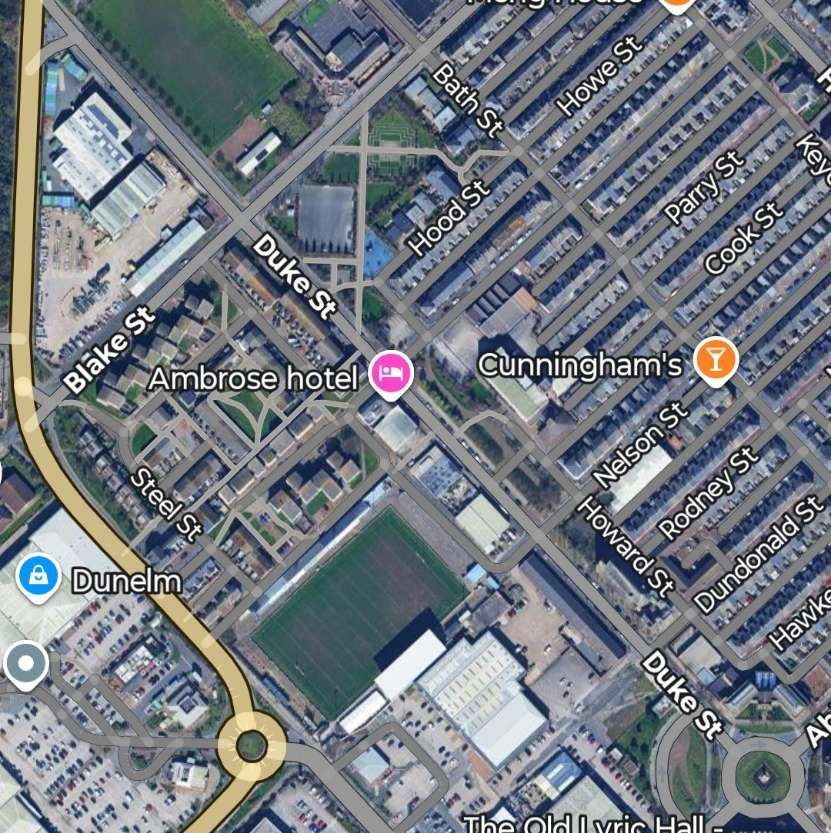
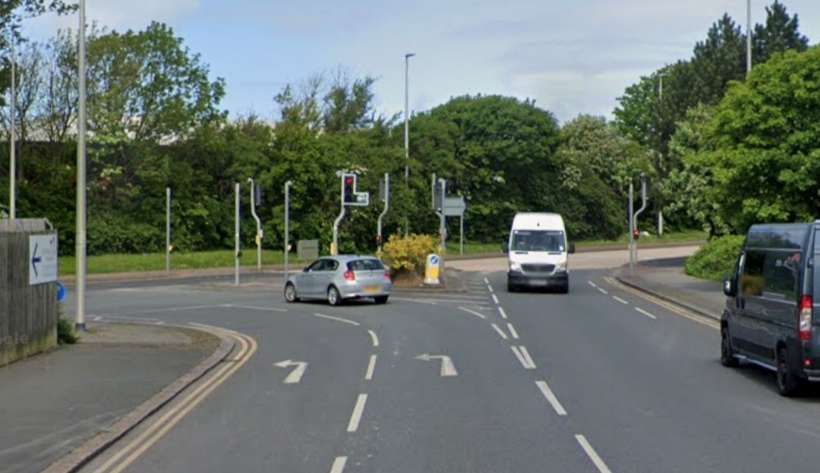
At the Priors Lee terminus, Top-right a tram engine had to run round its carriage. [5]The same length of Abbey Road in the 21st century, as shown above. [Google Maps, February 2026]Looking South on Abbey Road approximately at the location of the old tramway terminus. [Google Streetview, November 2024]Trams ran up and down Abbey Road. [5]The same length of Abbey Road in the 21st century, as shown above. [Google Maps, February 2026]A Methodist Chapel and Congregational Chapel sat to the West of the line. [5]A similar length of Abbey Road. [Google Maps, February 2026]Travelling South down Abbey Road. [Google Streetview, November 2024]The line crossed Abbey Road Bridge, with the Station a short distance away to the Northwest. [5]A similar length of Abbey Road in the 21st century. [Google Maps, February 2026]Looking Southwest along Abbey Road. Ahead is the bridge carrying the road over the railway. [Google Streetview, November 2024]At Ramsden Square the tramway turned Southeast along Duke Street. [5]Abbey Road, Ramsden Square, Duke Street and the very top of Michaelson’s Bridge Road. [Google Streetview, February 2026]The approach to Ramsden Square along Abbey Road. [Google Streetview, May 2022]Having turned left into Duke Street, trams continued in. Southeasterly direction. [Google Streetview, May 2022]A roundabout now sits at the top end of Michaelson Road. Trams would have been confined by the road layout of earlier time and swept round to the right on the near side of the modern roundabout. [Google Streetview, May 2022]It then turned Southwest along Michaelson Bridge Road [5]Michaelson Road Bridge carried the Tramway across the Devonshire & Buccleuch Docks. [Google Maps, February 2026]Looking South along the line of the old tramway across Michaelson Bridge. [Google Streetview, May 2022]Further South down Michaelson Road trams turned to the left into Ramsden Dock Road. [Google Streetview, May 2022]Trams ran along Ramsden Dock Road from its right-angle junction with Michaelson Road. [5]Approximately the same area in 21st century. [Google Maps, February 2026]Trams followed Ramsden Dock Road sweeping round to the South. [Google Streetview, May 2022]A relatively sharp curve to the right followed Ramsden Dock Road after the road had bridged the dock railways. [Google Streetview, May 2022]Ramsden Dock Road has now been closed to traffic. This photograph in 2009 appears to have been taken as the work to close the road was underway. [Google Streetview, April 2009]The steam tram served Ramsden Dock Station at its Southern terminal, where a loop was provided to obviate the need for the steam tram to run past its carriage. [5]The same length of the route of the old tramway as is shown on the above map extract. [Google Maps, February 2026]This final photograph faces South along the line of the old tramway towards the location of Ramsden Dock Station. [Google Streetview, May 2022]
2. A Line to Roose Station
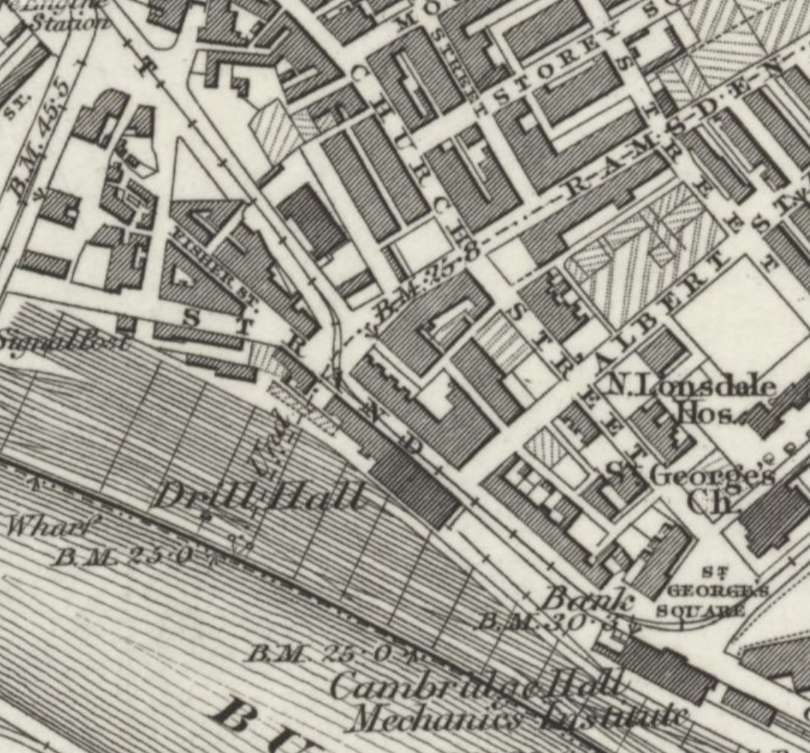
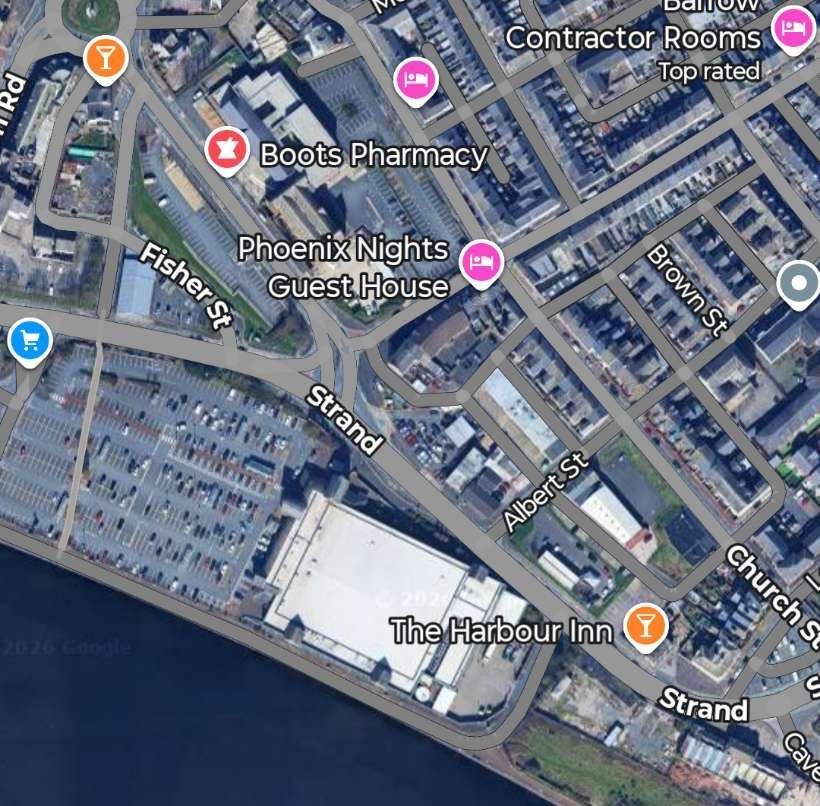
A line left the route to Ramsden Dock Station at the North end of Michaelson Road, continuing Southeast on Duke Street and then along Strand to Cambridge Hall Mechanics Institute where it turned Northeast.
This tramway route ran along Duke Street and Strand to Cambridge Hall Mechanics Institute and the old Strand Station where it turned Northeast at St. George Square. [5]The roads mentioned above still remain – Duke Street, Strand. St. George’s Square still exists but Salthouse Road now runs through it to meet Strand. [Google Maps, February 2026]Duke Street immediately beyond the roundabout. [Google Streetview, May 2022]Duke Street meets Strand, the tramway ran round to the left, almost straight on. [Google Streetview, May 2022]Further along Strand with the old railway station in the distance. [Google Streetview, May 2022]Trams turned from Strand onto Salthouse Road. [Google Streetview, May 2022]
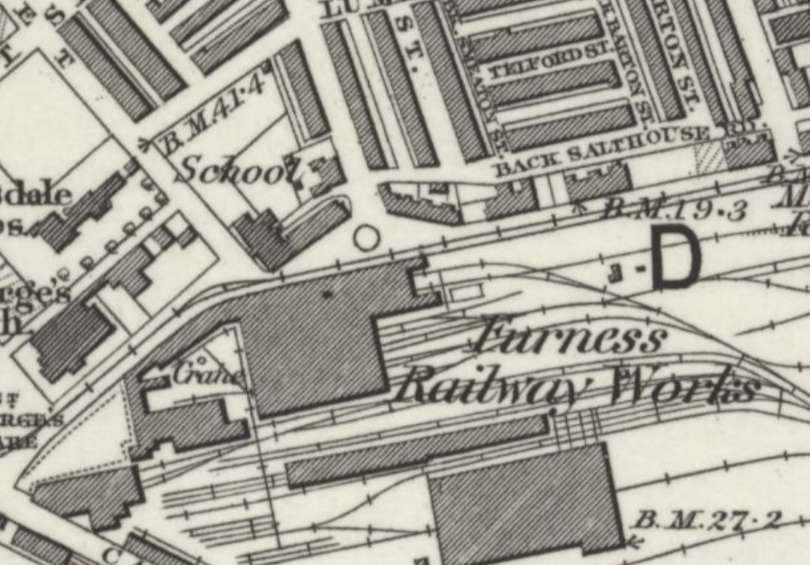
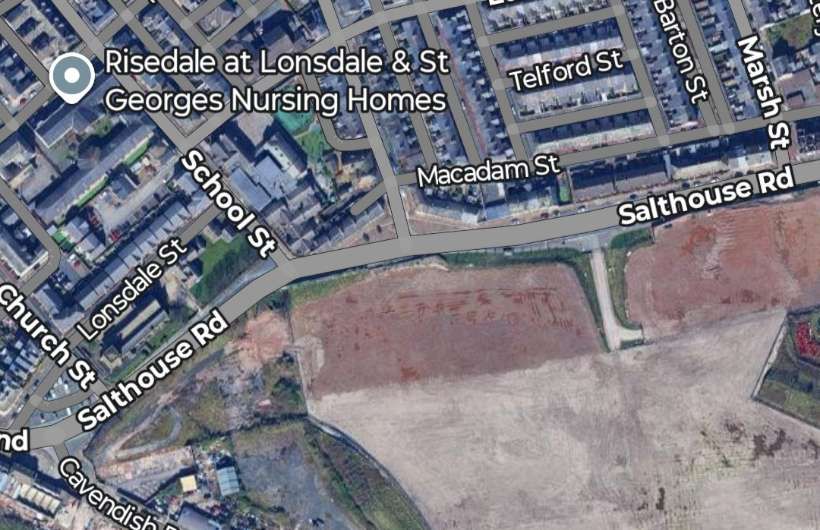
The tramway then ran along Salthouse Road on the North side of the Furness Railway Works.
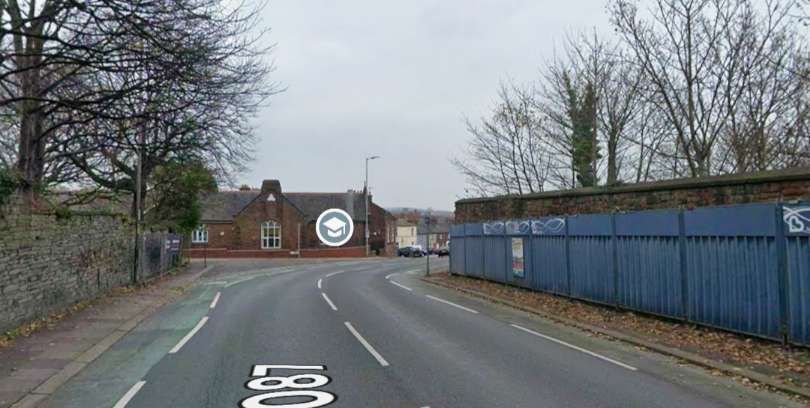
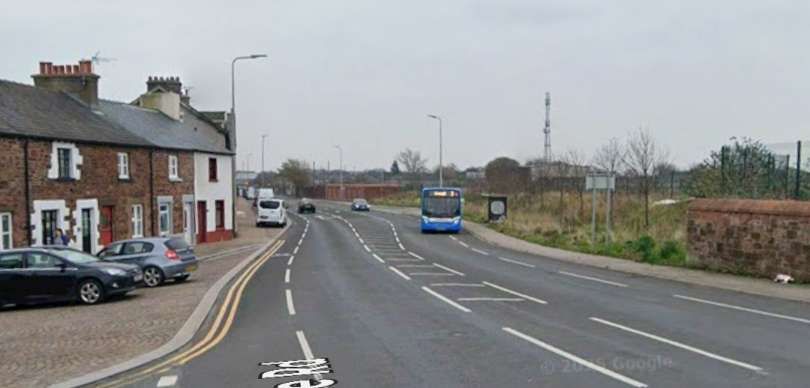
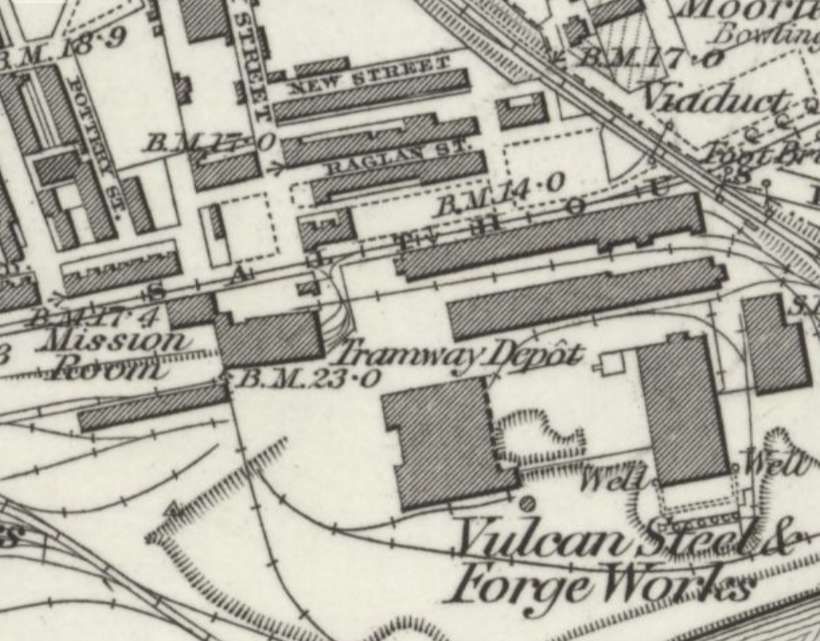
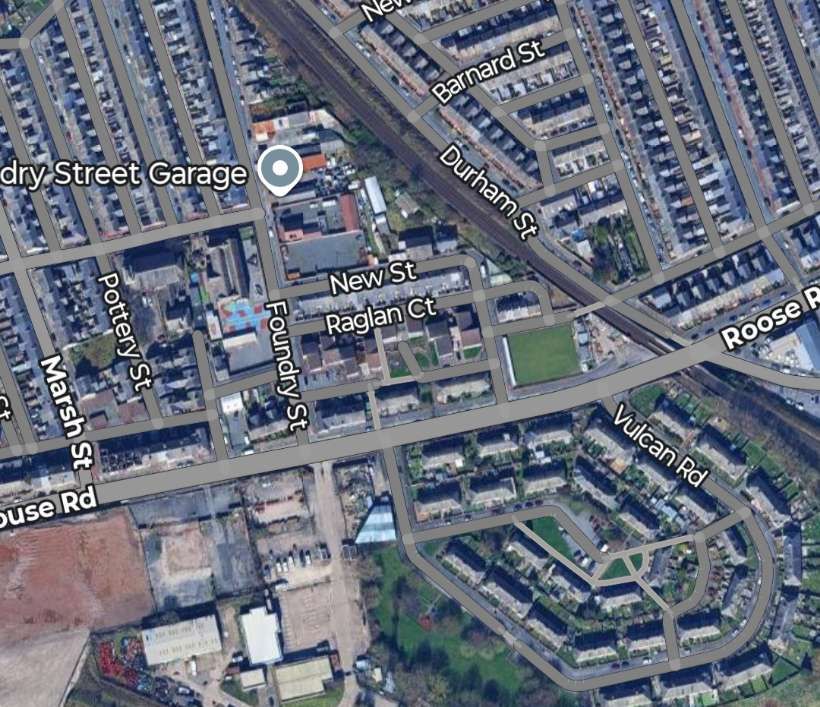
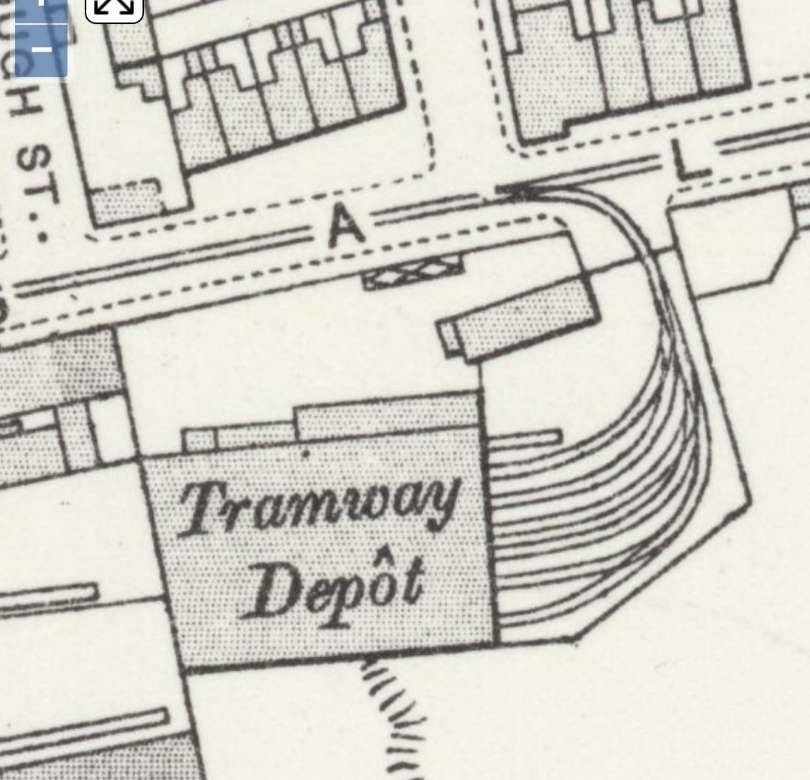
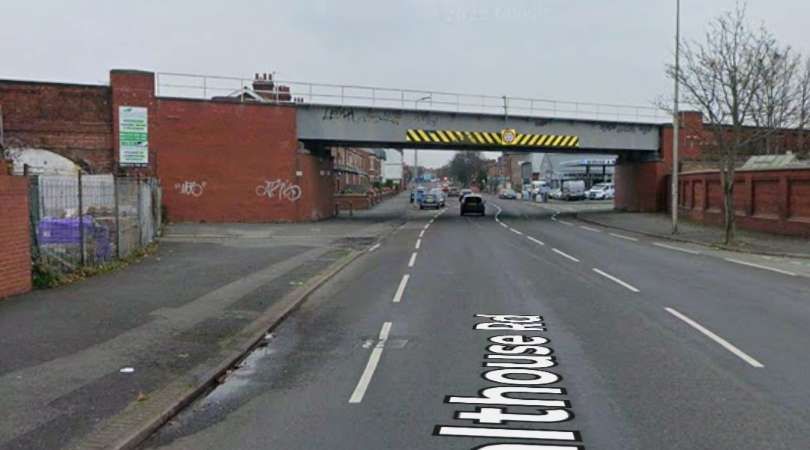
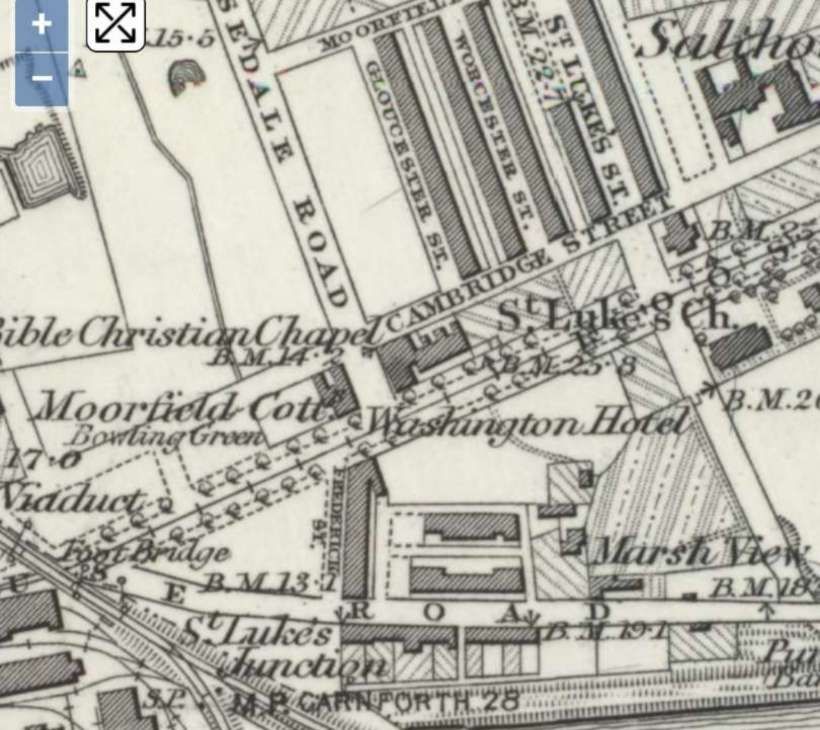
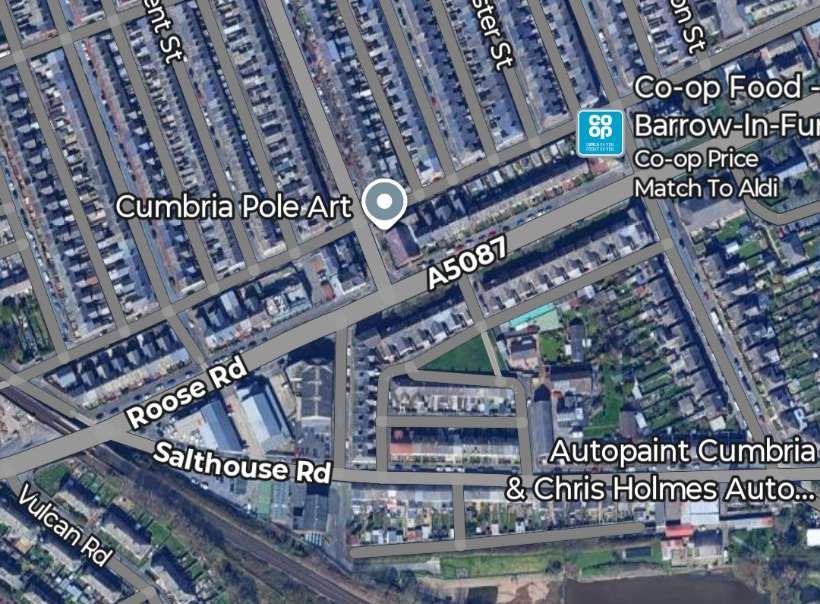
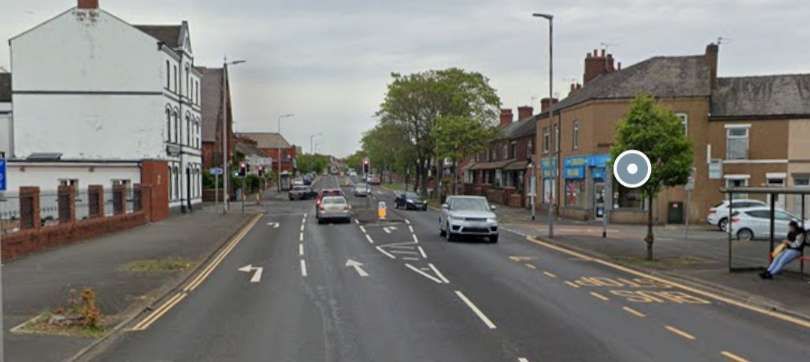
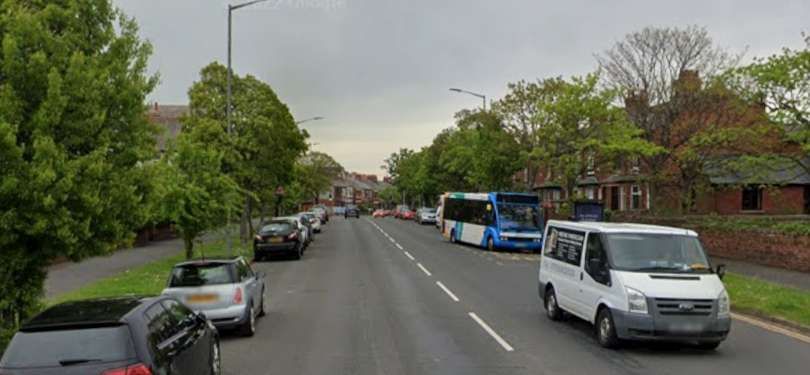
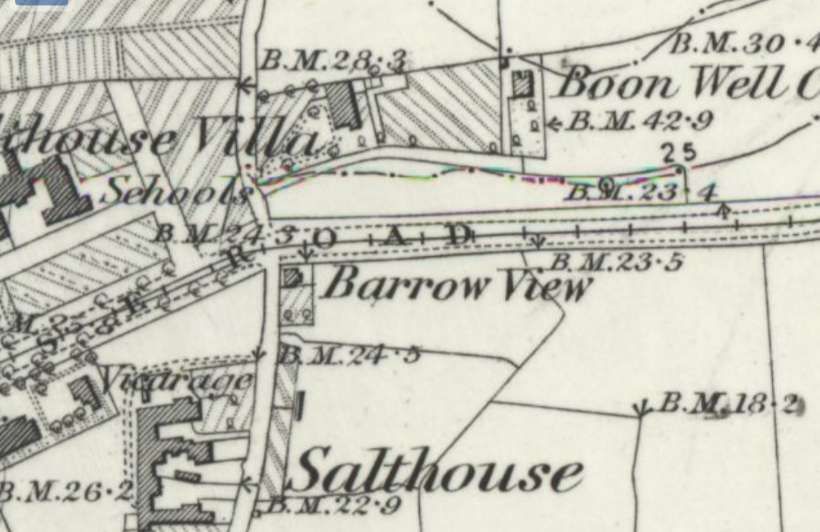
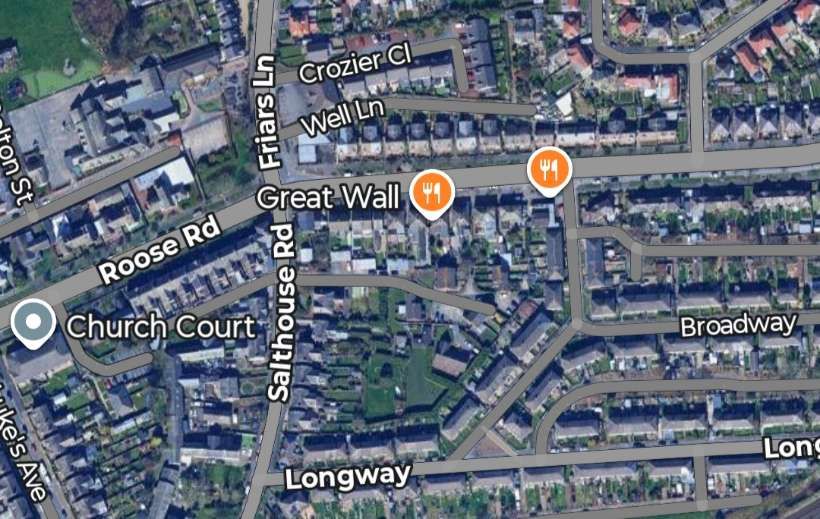
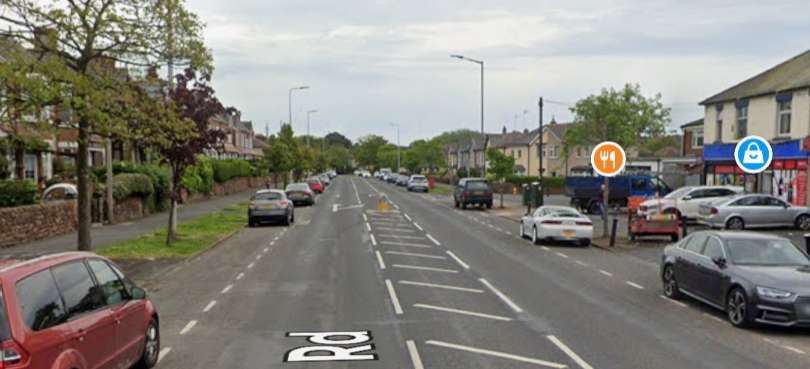
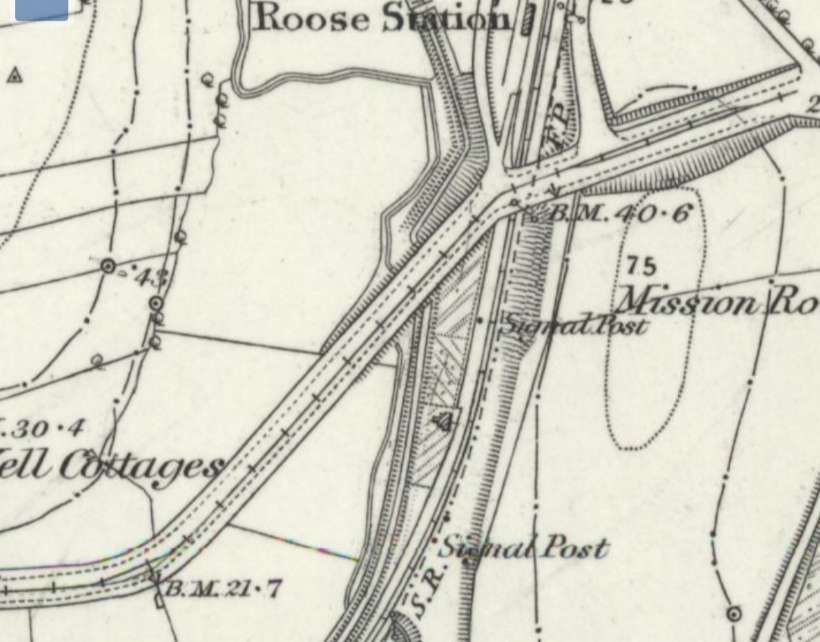
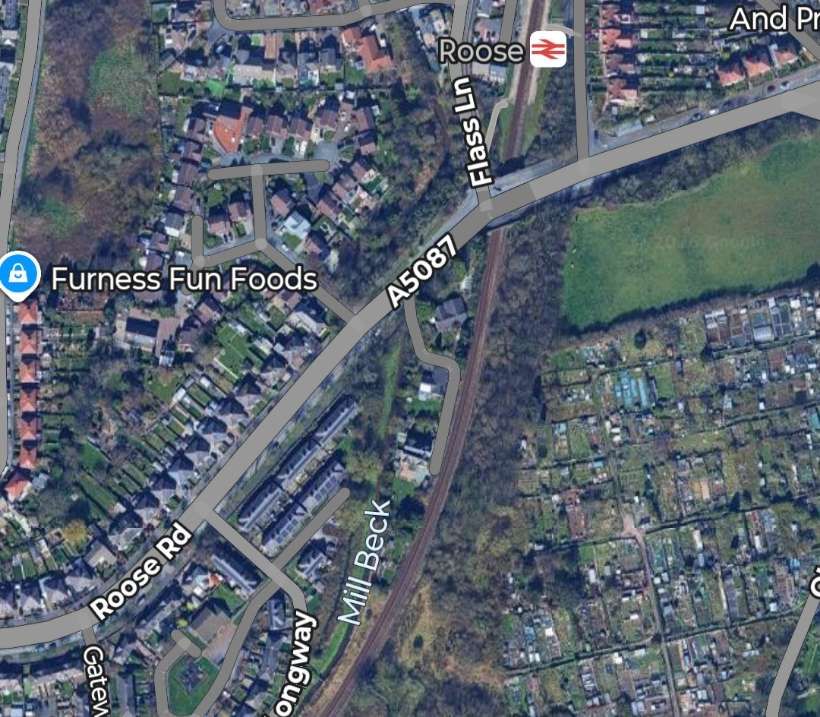
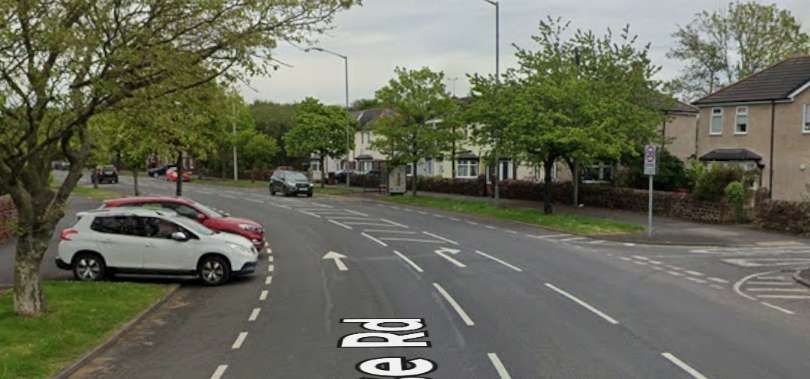
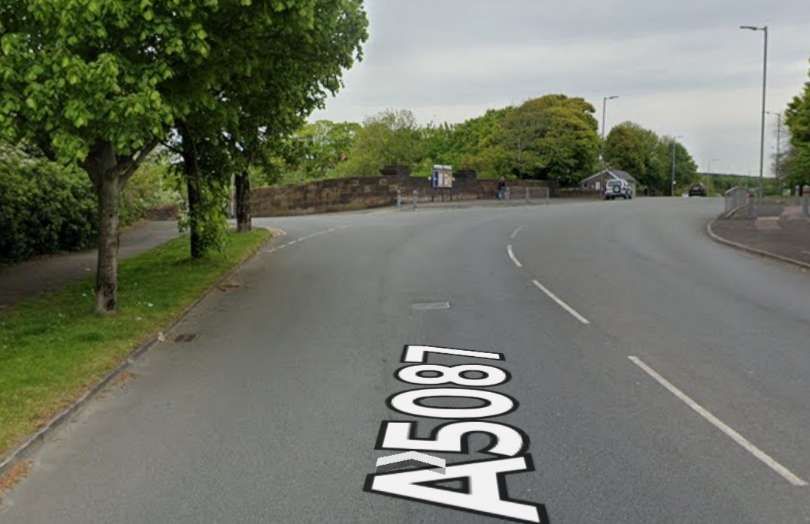
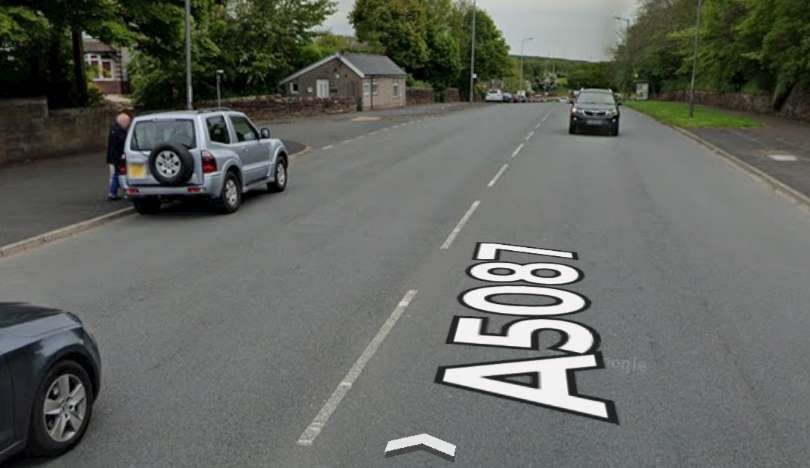
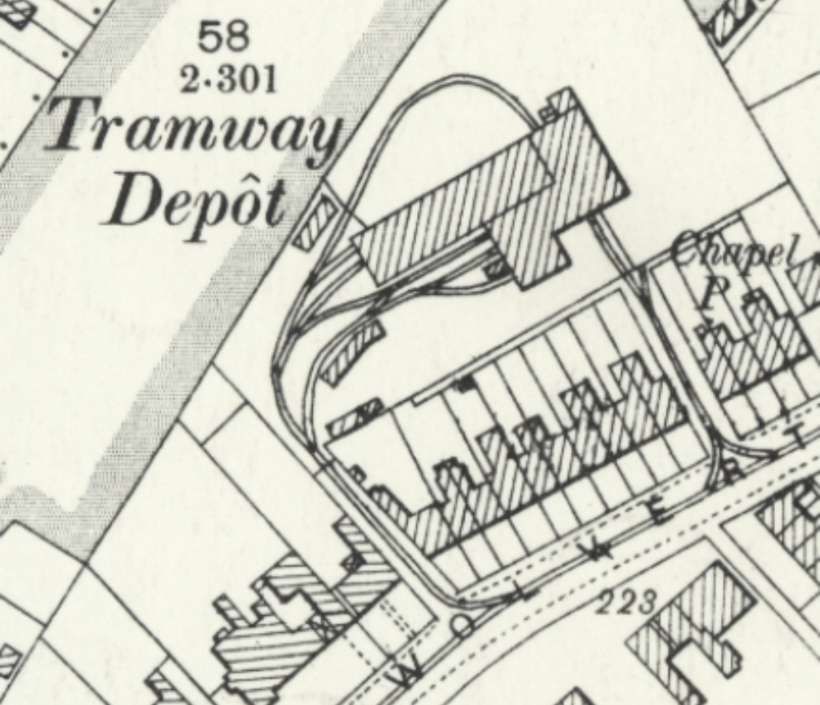
From St. George’s Square the line ran along Salthouse Road on the North side of the Railway Works. [5]The area of Furness Railway Works appears to be underdevelopment in this image. Salthouse Road runs across the top of the site. [Google Maps, February 2026]Salthouse Road with the old Furness Railway Works on the right. The rod curves round to the right. [Google Streetview, May 2022]Further East on Salthouse Road. [Google Streetview, May 2022]Close to the Vulcan Foundry was a tramway depot on the South side of Salthouse Road. The tramway then passed under the viaduct carrying the line Northwest from St. Luke’s Junction to Barrow Central Station. [5]The same area in the 21st century. A housing estate sits on the site of the Vulcan Steel & Forge Works. [Google Maps, February 2026]The tramway depot on the South side of Salthouse Road, as it appears on the 1910 25″ Ordnance Survey. [8]The Viaduct carrying the railway from what was St. Luke’s Junction, Northwest towards Barrow Central Station. Google Streetview, May 2022]St. Luke’s Junction is bottom left of this next map extract, St Luke’s Church is at the right side of the image. The tramway continues Northeast up Roose Road. [5]The same location in the 21st century. [Google Maps, February 2026]Further East, the old tramway ran ahead along Roose Road. [Google Streetview, May 2022]Further East the tramway continued along Roose Road. [Google Streetview, May 2022]The tramway continued East on Roose Road. [5]The same area in the 21st century. [Google Maps, February 2026]Continuing along Roose Road. [Google Streetview, May 2022]Approaching Roose Station and the terminus of the tramway, the road and tramway turned Northeast before bridging athe railway at the South end of Roose Railway Station. A loop was provided to allow a steam tram to run round its carriage. [5]The final length of the tramway was on Roose Road. The terminus was to the East of the railway line and Roose Station. [Google Maps, February 2026]Roose Road bends round towards the Northeast. [Google Streetview, May 2022]Approaching the location of Roose Station, the road curves back towards the East a crosses a railway bridge. Google Streetview, May 2022]The location of the tramway terminus, the photograph is taken facing away from Barrow in an East-northeast direction. Google Streetview, May 2026]
3. A Short Line Serving the Steelworks
Just two map extracts are all that is needed to cover the length of this short line which ran along Duke Street between the Steelworks and Ramsden Square.
A triangular junction was formed at the Northwest end of Duke Street. A short length of tramway with its mid-point at the junction with Duke Street, ran North-South on Walney Road outside the Steelworks. From there the line ran Southeast along Duke Street. [5]The line continued Southeast on Duke Street and met the wider tramway network at Ramsden Square. [5]
The full length of the line is shown on modern mapping below. ….
The old tramway ran from Walney Road to Ramsden Square along Duke Street. [Google Maps, February 2026]The View Northwest along Duke Street towards the junction at Walney Road. In times past this view would have been dominated by the Steelworks and no doubt shrouded in a pall of smoke. Google Streetview, May 2022]A view along Duke Street, facing Southeast towards Ramsden Square. [Google Streetview, May 2022]Looking Southeast along Duke Street close to Ramsden Square. [Google Streetview, May 2022]
Changes Immediately After Electrification
The short line along Duke Street serving the Steelworks does not feature on the 1910/1911 25″Ordnance Survey published in 1911/1913.
A new tramway line left Michaelson Road at its junction with Bridge Road. The surface of Bridge Road was littered with a whole series of different lines. The tramway sat on the North side of the road and ran on Northwest into Ferry Road, terminating opposite the Walney Bridge Approach Road.
Summary
Steam powered trams in Barrow-in-Furness, like elsewhere we’re a relatively short-lived phenomenon which last only until electrical technology had advanced sufficiently to be used on street networks.
“Kitsons entered the steam tramway locomotive field in 1876 building some combined steam cars to W.R. Rowan’s design. In 1878 they built three to their own design with vertical boilers, four coupled wheels and inclined outside cylinders. Motion was by means of a modified version of Walschaerts valve gear. All was enclosed in bodywork and the wheels and motions were surrounded by protective plates. The condensing system was placed on the roof and consisted of a series of copper tubes through which the exhaust steam passed, the surrounding air cooling the steam and the condensate returning to the feed water tank. After many trials it was decided to replace the vertical boiler by a horizontal type and this was standardised for future steam trains. Various types of condensers were tried and the final type was a series of arched transverse tubes which were a great improvement.
In Kitson’s patent valve-gear, a modification of Walschaert’s valve gear, the ends of a floating lever are linked to the crosshead, the valve-spindle, and intermediately at a point near the valve-spindle; the lever is pinned to the radius-link, which receives its rocking movement through an arm linked to the coupling rod. The motion of the valve and its spindle is a compound of two movements: one, a movement directly the inverse of that of the piston, on a reduced scale, for the lead; the other a reduced duplicate of the vertical movement of the coupling rod, to open the port for steam” (D. K. Clark Tramways, their construction and working, 2nd Ed., 1894).
More than 300 units were built and besides supplying many to the tramway systems of the British Isles, others were sent to New Zealand. Australia and the continent. The last one built was in 1901 for the Portstewart Tramway (Works No. T302). Work numbers for tram locomotives were kept separate and bore a prefix T.”, via, https://steamindex.com/manlocos/kitsons.htm, accessed on 16th February 2026.
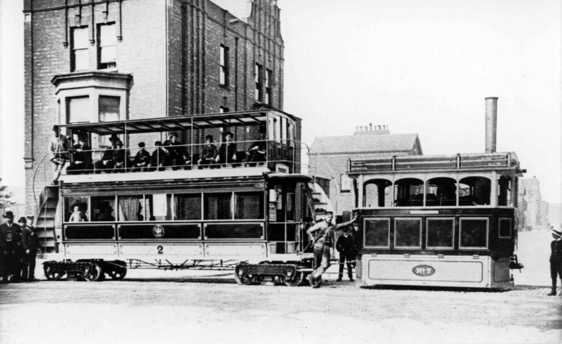
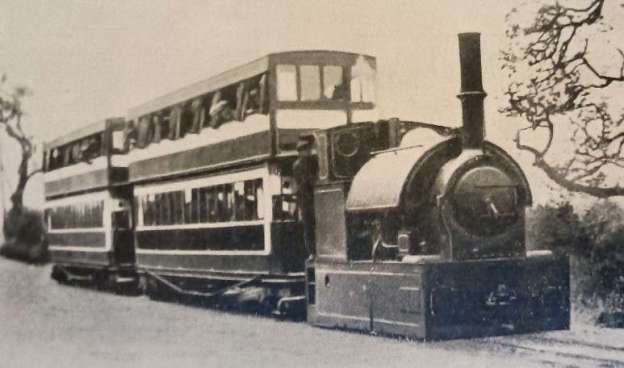
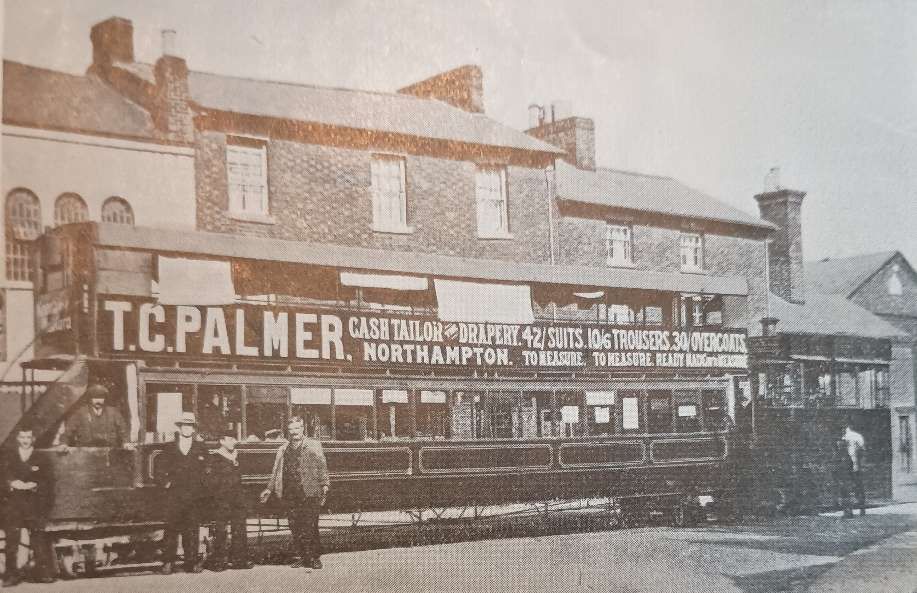
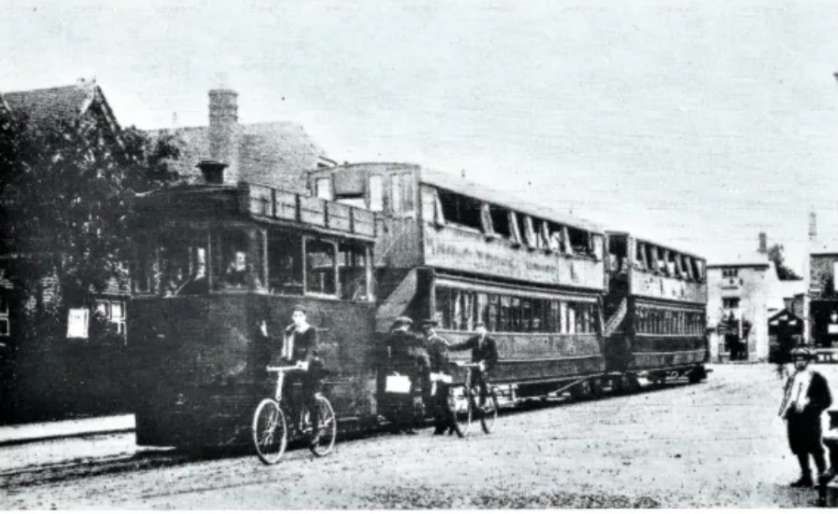
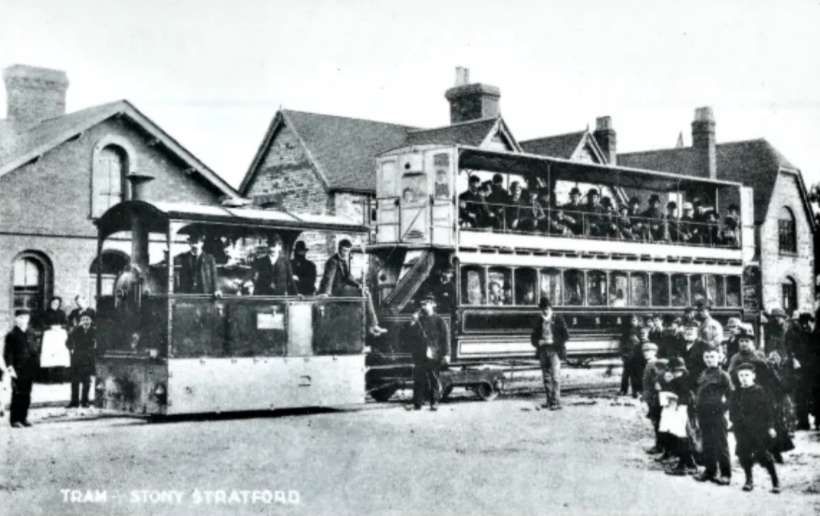
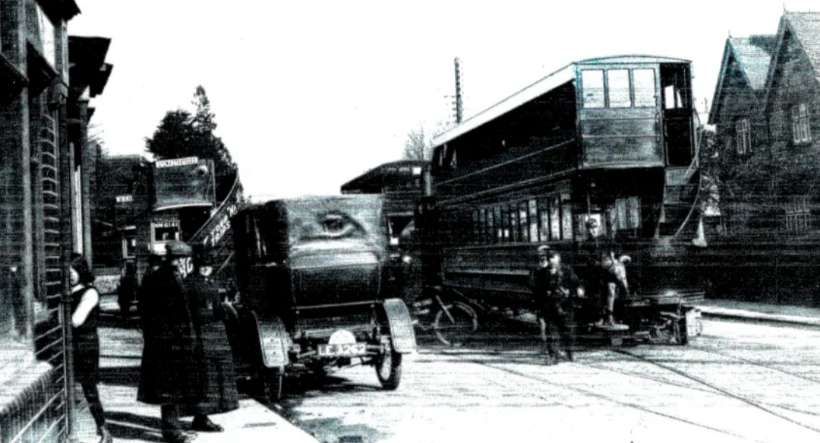
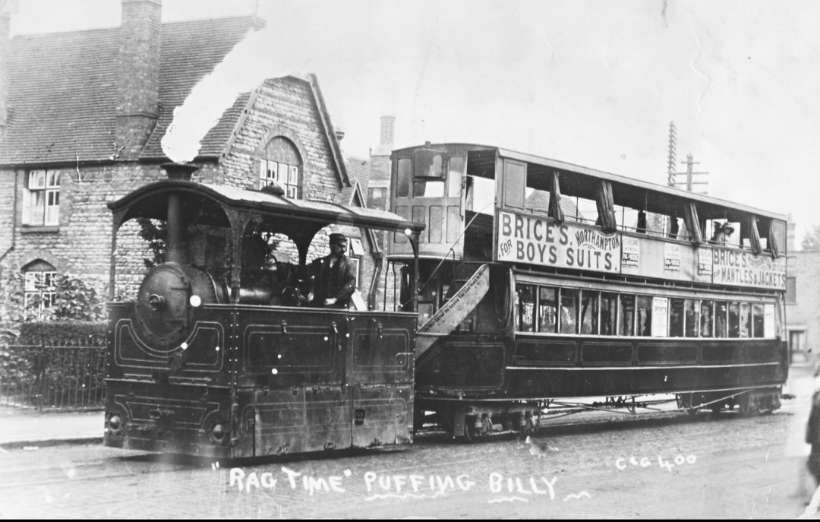
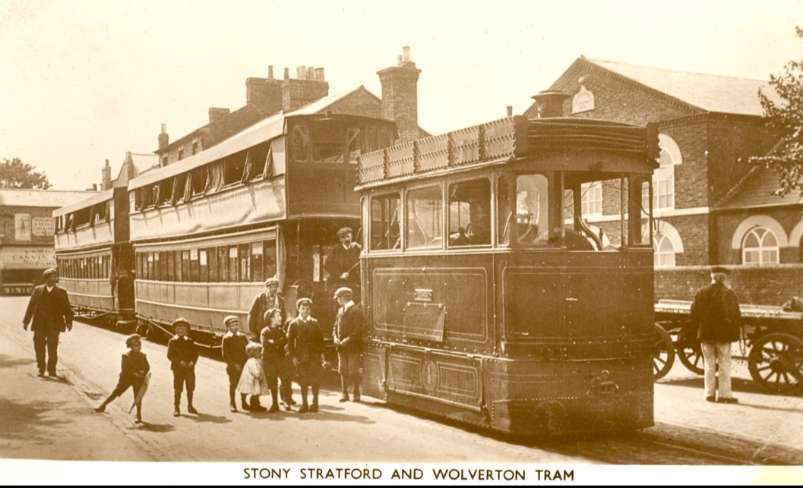
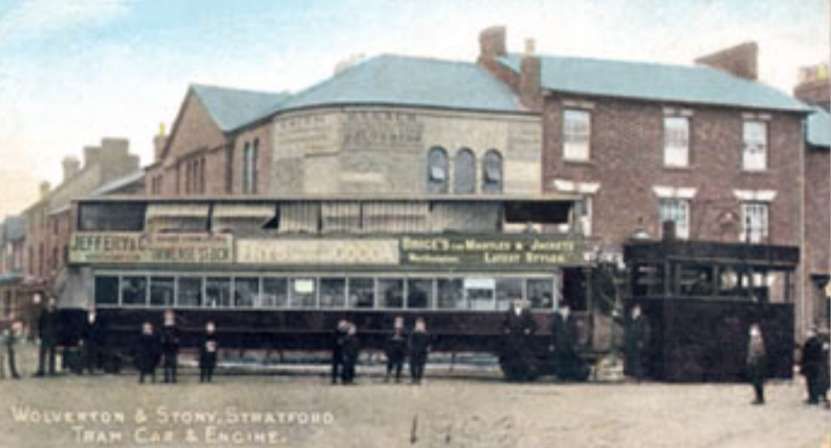
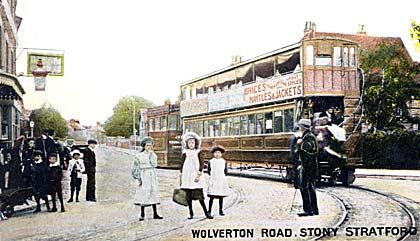
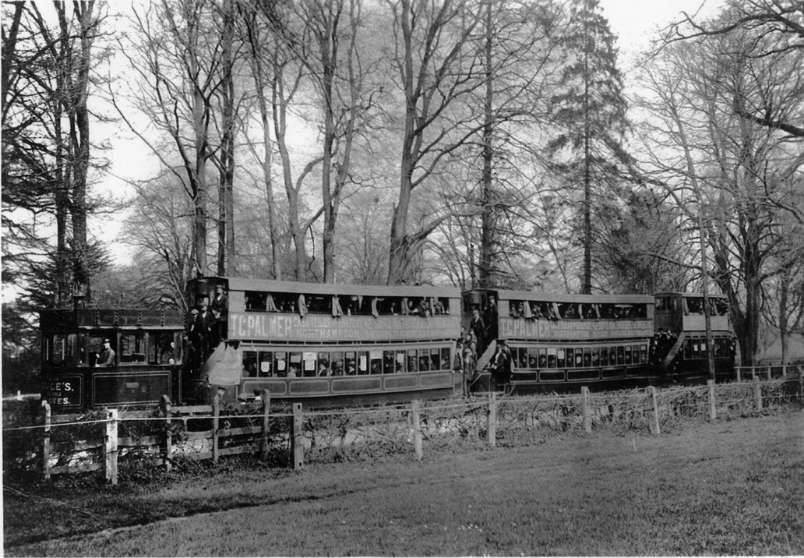
The featured image for this article shows a Bagnall saddle-tank engine and train of two 100-seat workmen’s cars in L.N.W.R. livery on the Wolverton and Stony Stratford Tramway.
Wolverton Works
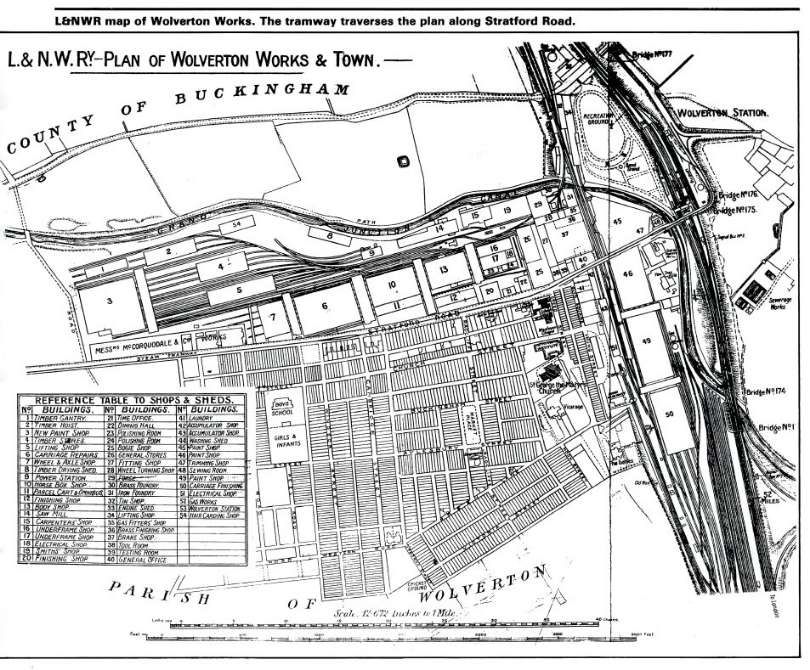
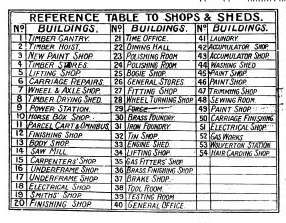
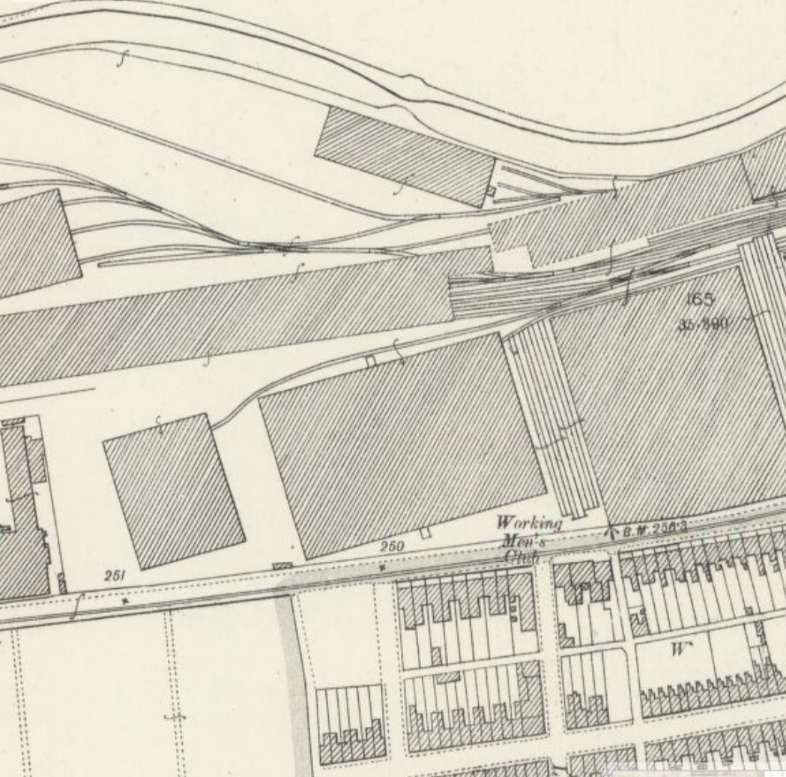
The LNWR works at Wolverton. The tramway crosses this plan on Stratford Road. [13: p19]
An enlarged key to the plan above which details the use of each building on the LNWR Site. [13: p19]
“Mainly by reason of the growth of the London North Western Railway works at Wolverton in the late 1870s, and the establishment of McCorquodale’s printing works alongside in 1878, a scheme to link the old market town of Stony Stratford, on Watling Street, with the London & North Western Western Railway station at Wolverton by means of a light railway began to take tangible form in 1882.” [1: p547]
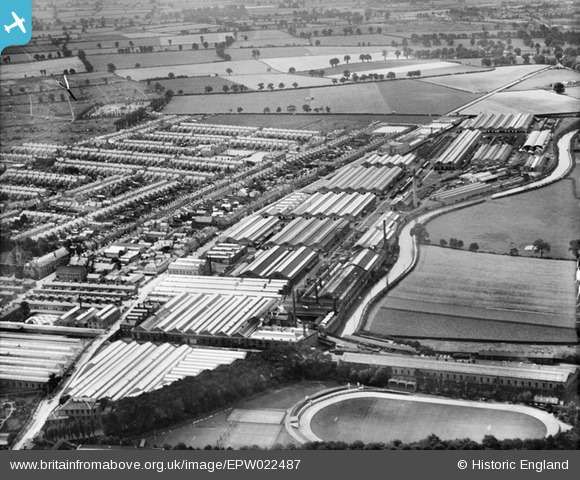
Wolverton Railway Works was established in Wolverton, Buckinghamshire, by the London and Birmingham Railway Company in 1838 at the midpoint of the 112-mile-long (180-kilometre) route from London to Birmingham. The line was developed by Robert Stephenson following the great success of the Liverpool and Manchester Railway line. [2]
“The Victorian era new towns of Wolverton and New Bradwell were built to house the workers and service the works. The older towns of Stony Stratford and Newport Pagnell grew substantially too, being joined to it by the Wolverton and Stony Stratford Tramway and the Wolverton to Newport Pagnell Line (a branch line), respectively. The trams were … hauled by steam locomotives: the tram cars were certainly the largest ever in the UK and possibly the world.” [2]
After a survey of all possible sites for the London and Birmingham Railway works, “Wolverton was chosen due to its co-location alongside the wharfing facilities of the Grand Union Canal, thereby also enabling the railway company to gain an easy agreement to build a viaduct over the canal company’s land at this point.”
“In 1837, Edward Bury of Bury Curtis & Kennedy of Liverpool was appointed Locomotive Superintendent of the London to Birmingham railway with his headquarters at Wolverton. However, as Wolverton was simply considered to be a repair shop for the engines his Liverpool firm supplied to run on the line, he left the running of the Works to his Shop Foreman.” [3]
It became necessary for expansion to take place to accommodate, service and repair the increasing amount of rolling stock owned by the Company. “A large engine shed was built, said to be cathedral sized, together with all supporting facilities which also enabled the Works” [3] to produce, locomotives in house.
J E McConnell was appointed Superintendent in 1847. He built his first locomotive in 1849. This was “the prototype of the ‘Bloomer’ class (the wheels and works being more exposed the engines became know as Bloomers after Mrs Amelia Bloomer who was trying to reform ladies dress). During his time at Wolverton he made many innovations such as train heating, failsafe braking, hollow axles, boilers, fireboxes etc. Early in 1851, the first Bloomer engines were running.” [3]
Bloomer was a name used to refer to three similar classes of 2-2-2 express passenger locomotives designed by James McConnell. “A total of seventy-four were built between 1851 and 1862. The classes were similar in design and layout but differed in dimensions.” [4]
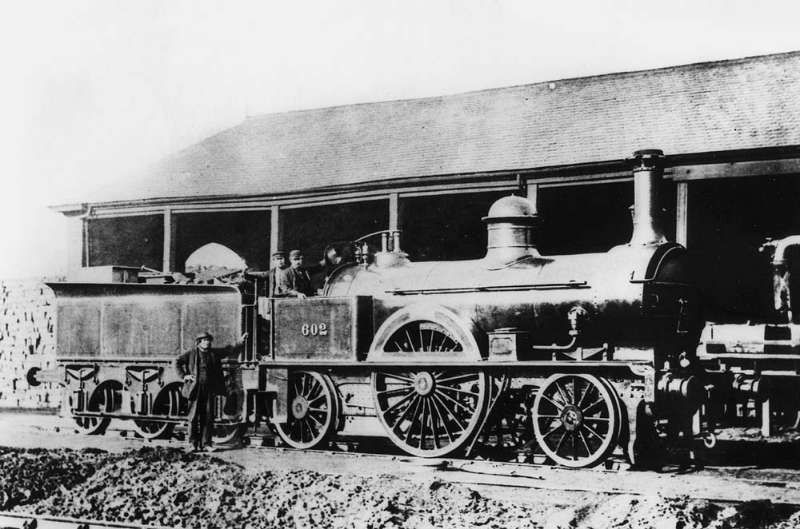
A LNWR engine No. 602, a Small Bloomer Class Locomotive. The photograph was taken circa. 1868 at Rugby’s coke sheds. The Class was introduced in 1854, they were inside-cylinder inside-frame single-wheelers with 6′-6″ driving wheels. [4]
“In 1859, thirty four engines were transferred from Crewe to Wolverton which involved further expansion of the Works. Under McConnell the Works flourished but unfortunately for him Mr Richard Moon was appointed Chairman of the Company and there was a clash of personalities resulting in McConnell retiring. A year or two after his retirement the engineering works were transferred to Crewe. Before the transfer to Crewe, 165 engines had been built at Wolverton.” [3]
“Expansion of the Works again took place during 1864 when Wolverton became the Carriage Works for the LNWR and the manufacturing shops were converted to enable carriages to be built, painted and repaired. In 1869 two Royal Saloons for Queen Victoria were built at Wolverton. Sadly in 1872 the locomotive shop finally closed and Wolverton became exclusively a carriage works until in 1877 it was the largest in Britain.” [3]
It seems that the original railway main line through Wolverton crossed land which was needed for the expansion of Wolverton Works. Two previous stations had been situated in the original route of the main line. “The first station was built for the opening of the London and Birmingham Railway on 17th September 1838, on the embankment just north of the canal above Wolverton Park. It proved to be temporary as the railway company purchased an additional 13.5 acres to the south, where they built a larger, more permanent station in 1840, at the east end of Church Street.” [8]
To avoid passing through the Wolverton Carriage Works, a railway main line deviation to the east was opened in August, 1881. The present Wolverton Station was built on the new line.
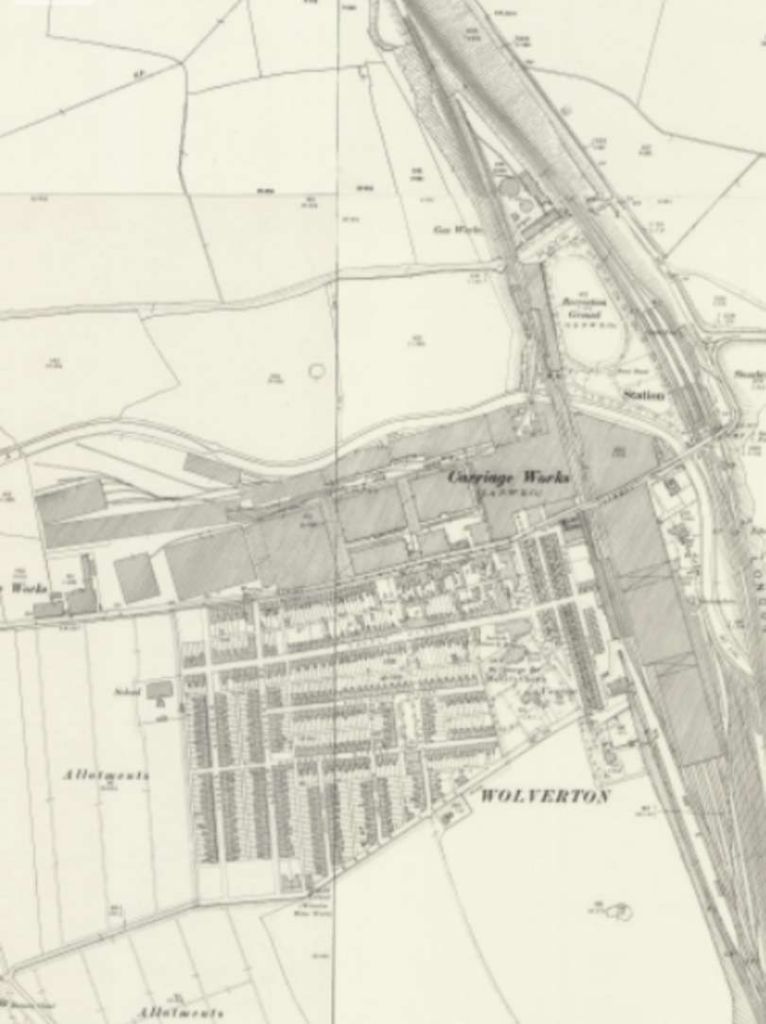
This rather fuzzy extract from the 25″ Ordnance Survey of 1898, published in 1900 shows the extent of the Railway Works at that time. To the West of the Railway Works was the site of McCorquodale’s Printing Works which can just be made out at the left edge of this map extract. The Grand Junction Canal sits between the Works and the Railway Station. [9]
McCorquodale’s Printing Works
McCorquodale’s Printing Works were one of a series of such establishments. McCorquodales built premises in Wolverton in 1878. The firm specialised in registered envelope manufacture, but undertook many other government and security printing contracts. The “history of the company commenced in 1841. George McCorquodale opened a stationers shop in Liverpool which became the Liverpool Printing and Stationery Company Ltd. The company prospered and five years later George opened the first McCorquodale printing works at Newton-le-Willows in Lancashire, specialising in providing a service to the ever expanding railway network.” [5]
Further factories were opened in Glasgow and London in the 1870s. In Wolverton, men were employed in the railway works but their daughters remained unemployed. “Sir Richard Moon, Chairman of the London & North Western Railway had an idea for solving the problem and contacted his friend George McCorquodale and suggested that he build a printing works in the town. George thought it an admirable suggestion and in 1878 he opened his registered envelope factory – success was immediate. The works rapidly increased in size and diversified into printing books, forms and commercial stationery.” [5]
“By 1886, McCorquodales of Wolverton was known as one of the finest printing factories in the country and employed 120 women and 20 men. Most of the girls started work at the age 13 or 14 and were normally employed until they married. Girls were encouraged to remain in the factory as long as possible and a £10 wedding grant was given to those who had completed 10 years service. Until 1909 staff worked a 54 hour week starting at 6am with a half day on Saturday. The company were also quick to provide the best welfare and working facilities in the area, and the staff were provided with dining, reading and recreation rooms. A Good Samaritan Society was started and pension funds paid for holidays and service bonuses.” [5]
Lee tells us that in 1882 a special meeting of Stony Stratford ratepayers considered a proposal to apply to the Board of Trade for an Order to sanction a tramway between Wolverton and Stony Stratford. “The ratepayers approved, subject to the track nowhere exceeding 6 ft. in width. A company was formed, apparently by these local interests, and was incorporated on 4th November 1882, as the Wolverton & Stony Stratford Tramways Co. Ltd. The Chairman was Abraham Culverhouse, and the Secretary John George Ventris Field Johnson. The company failed to get under way, and was placed in voluntary liquidation on 3rd September 1883. One of its few corporate acts seems to have been the granting of consent, two days after it went into liquidation, to the registration of a new company with a similar (but not the same) name.” [1: p547]
“Meanwhile, a Tramways Order had been promoted by Frederick Charles Winby, a civil engineer and contractor, and this was granted on 16th July 1883. It authorised [a tramway] 2 miles 54 chains [in length], mainly of single line, 4 ft. gauge, from the new Wolverton Station (opened in August, 1881) to the northern end of High Street, Stony Stratford.” [1: p547]
Wolverton to Stony Stratford and beyond
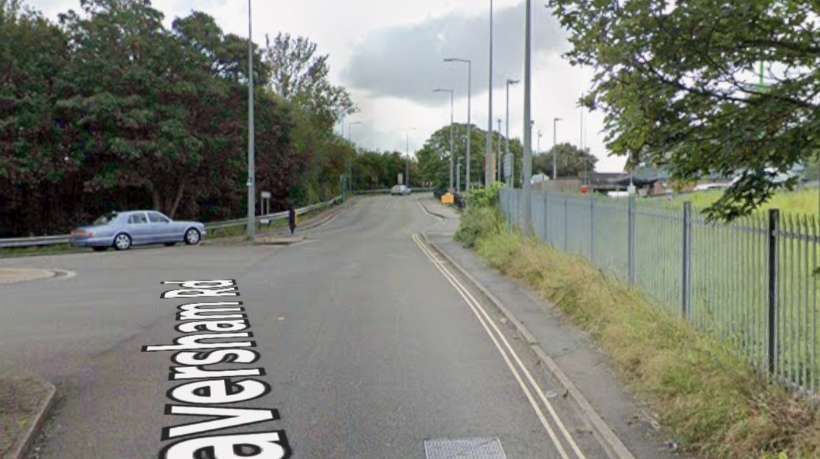
From the new station the tramway ran South along the road built to bridge the diversion line and the Canal at the South end of the site of Wolverton Railway Station. This road had once been a footpath.
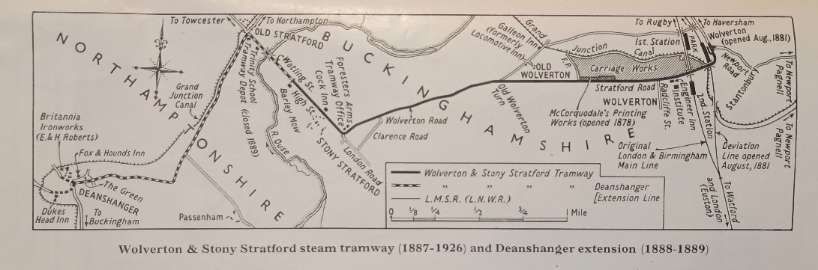
The fullest extent of the tramway. [1: p549]
The company promoted by Winby took the name, ‘The Wolverton & Stony Stratford & District Tramways Co. Ltd‘. It acquired all the rights and interests of Winby in the Tramways Order of 1883. Lee tells us that “It had an authorised capital of £20,000 in £1 shares, which was increased to £30,000 on 27th October 1883. The latter fact seems to have been forgotten, although it was duly registered and the requisite stamp duty paid. Indeed, the company had very little regard for the niceties of the Companies Acts, and actually varied its corporate name on the Memorandum and Articles of Association respectively. Thereafter, it could never remember the precise title shown on the certificate of registration, which is the one used above. Winby contracted to build the line, and to take part of the price in shares, but the whole arrangement fell through. The company was dormant until 1886, and only 34 shares were issued.” [1: p548]
C.H. Wikinson, a local contractor that promoted a number of schemes in the area (such as a link between Newport Pagnell and Olney), “entered into a contract with the company on 18th August 1886, to build the line for £13,325, and on 8th September 1886. agreed under an indenture to accept £2,000 in shares. The name of the company was changed on 5th October 1886, to the Wolverton, Stony Stratford & District Light Railways Co. Ltd., and its shares were offered for sale. They were taken up by a large number of local [people], and the work proceeded rapidly.” [1: p548]
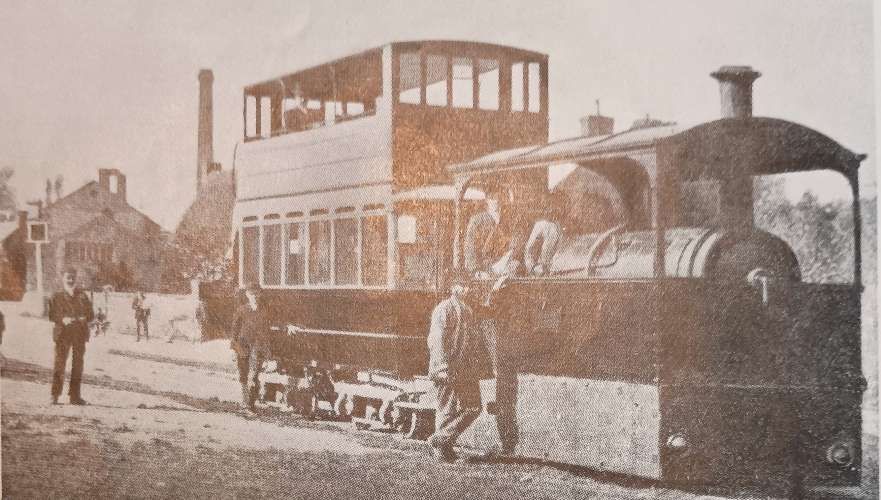
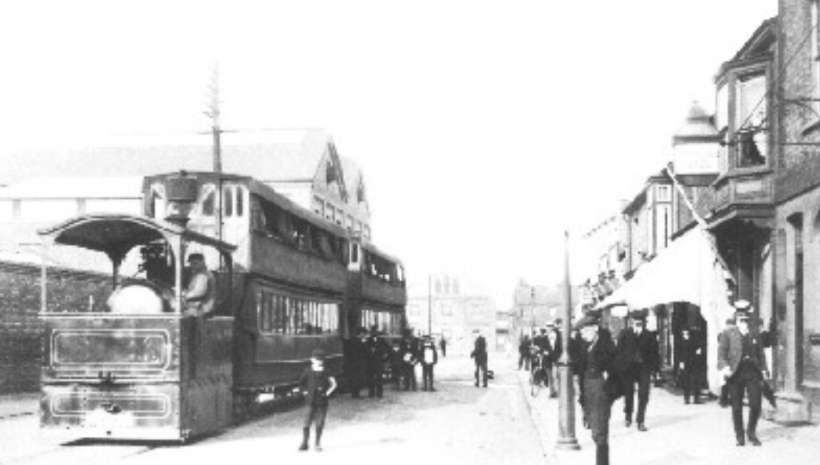
Lee continues: “The line as authorised in 1883 received Board of Trade sanction on 20th May 1887, in respect of 2 miles 15 chains single line and 40 chains double. It was built to the 3 ft. 6 in. gauge instead of the 4 ft. originally authorised. Public passenger traffic was begun on 27th May 1887, between the Barley Mow Inn, Stony Stratford, and Wolverton Station, with tramway-type steam locomotives hauling very large covered-top double-deck tramcars. The ordinary fare was 2d., with a special cheap rate for workmen, whereas the horse bus that had previously served the route charged 6d.” [1: p548]
Allan Edwards says: Wolverton “grew rapidly to an austere and symmetrical pattern, its housing owned by the railway company and leased to its employees; it seemed almost to be a northern industrial town misplaced in the agricultural heart of England. Stony Stratford meanwhile declined, becoming largely a dormitory town for its now larger neighbour. … By 1880, hundreds of workmen were walking daily to Wolverton from Stony Stratford and the surrounding villages. An alternative form of transport was a horse bus from Stony Stratford but the fare for this was 6d (22p) for a single journey, a price beyond the wage of the workmen of the now London & North Western Railway Co., or the new McCorquodale’s printing works whose average wage was only 30 shillings per week (£1.50).” [13: p15]
The old bus service did not run to a timetable, only travelling when there were sufficient passengers. “Average bus receipts were between £2 and £3 a week, but the tramway takings rapidly became £45 a week, largely by reason of the use of the line made by employees at the Wolverton carriage Works and at McCorquodale’s. Weekly tickets were issued to them at 1 shilling and entitled them to 4 journeys a day.” [1: p548]
Wolverton was a railway town built to accommodate the workers. It has since expanded significantly. Much of the old Works site and the railway ‘village’ of terraced housing form a Conservation Area in the 21st century.
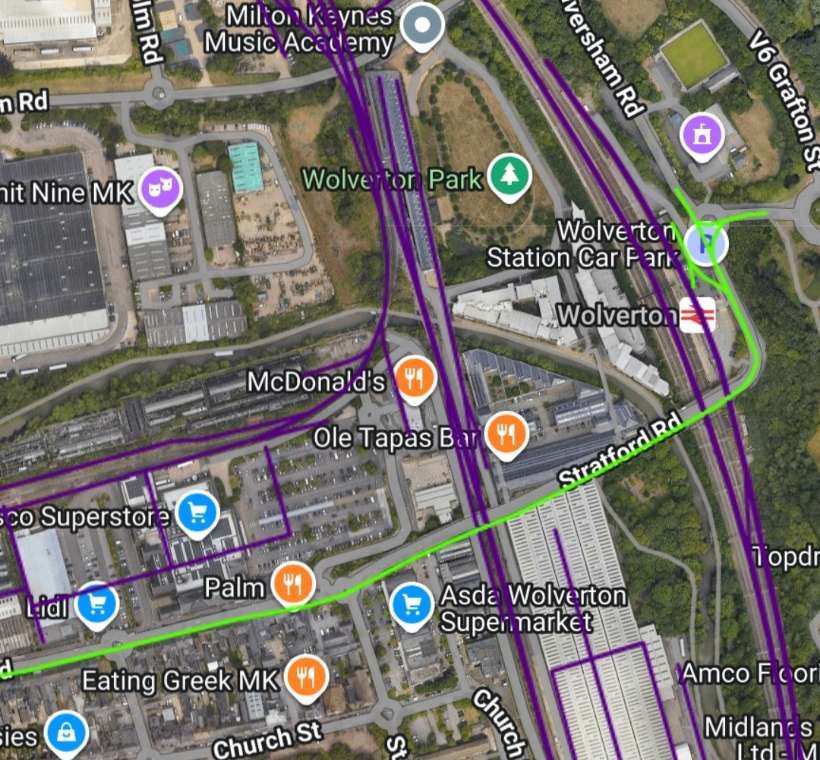
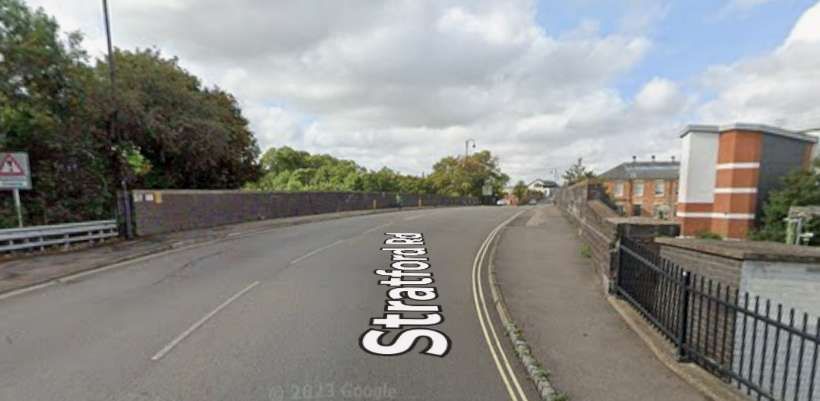
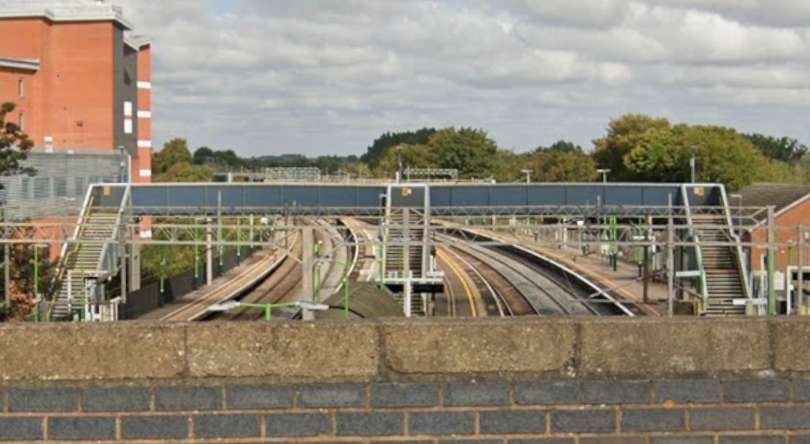
Allan Edwards describes the route of the tramway through Wolverton like this: Outside Wolverton Station goods yard there was a turning triangle on a steeply descending section of road and a link into the station goods yard. From this location, trams “climbed steeply on a right-hand curve to the road bridge over the 4-track railway line where tramway passengers could board outside the overline buildings of the LNWR station. The tramway then continued up and over the lines leading into the railway works. … With its track in the centre of the highway the tramway passed the railway workshops, the town of Wolverton being entirely on the left-hand side. Virtually continuous brick walls to the right sealed off first the LNWR works and then McCorquodale’s printing factory. It was nearly three quarters of a mile before the tramway line abruptly left the town behind, moving to the lefthand side of the road.” [13: p17]
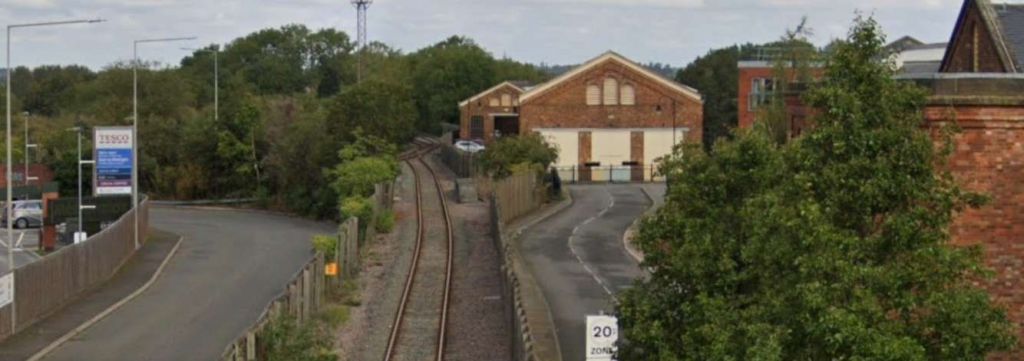
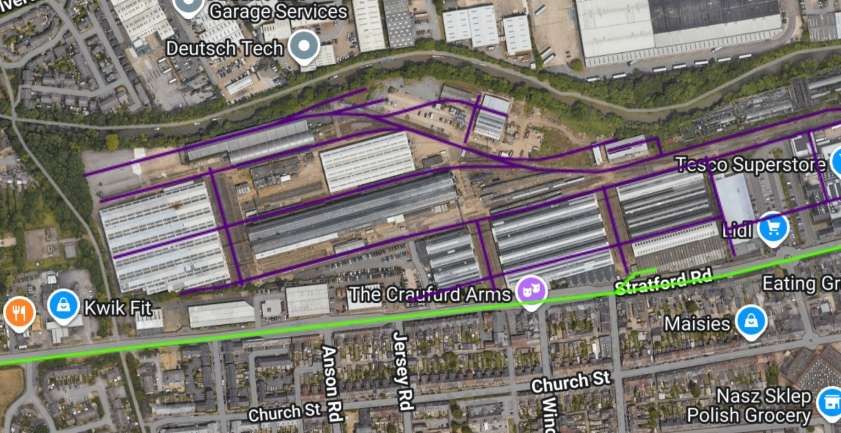
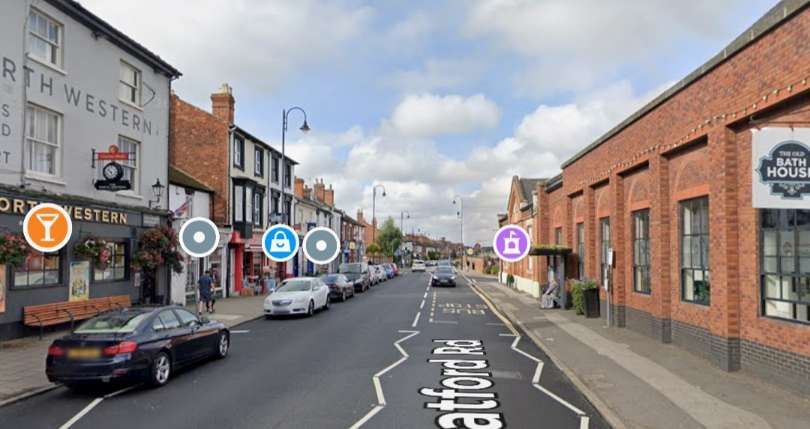
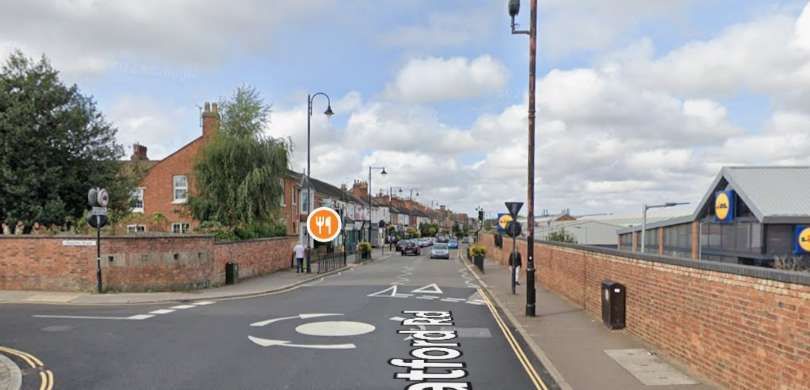
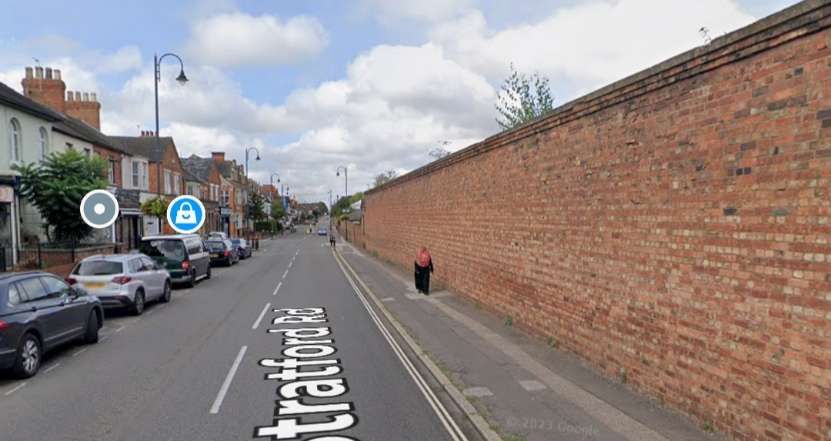
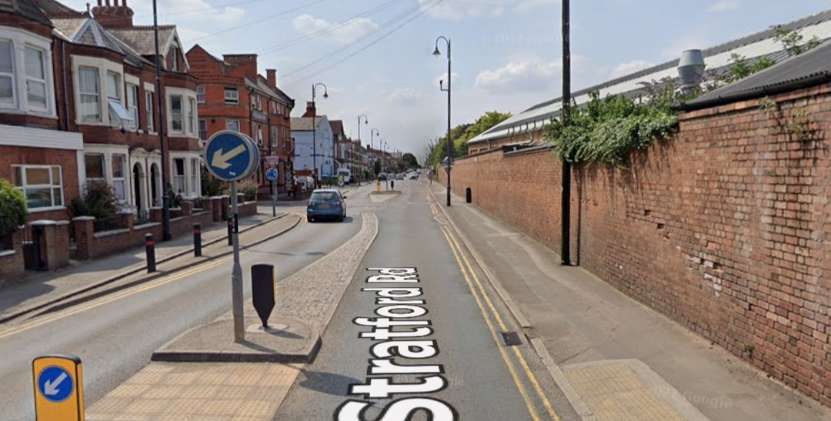
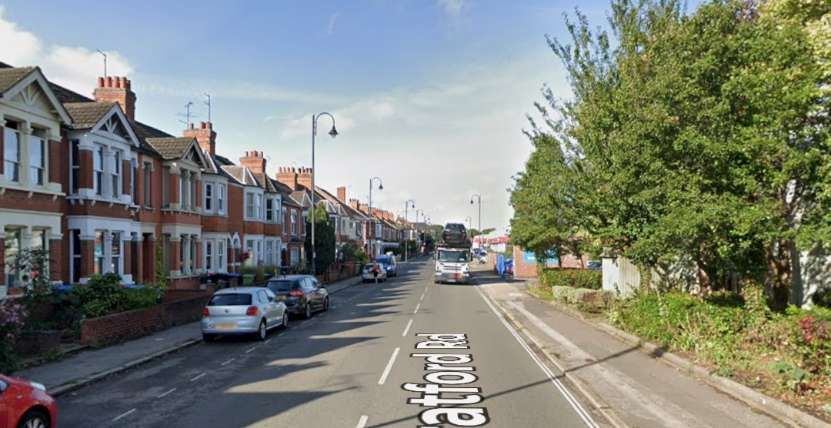
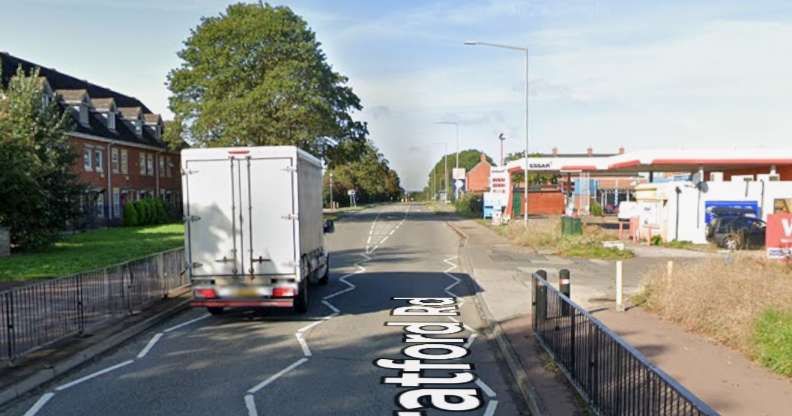
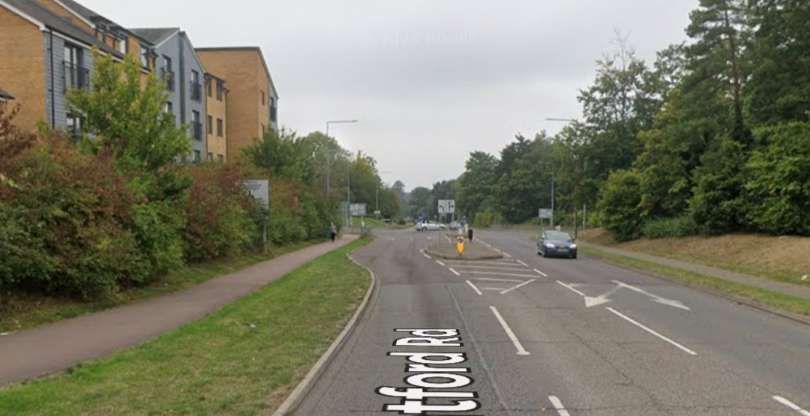
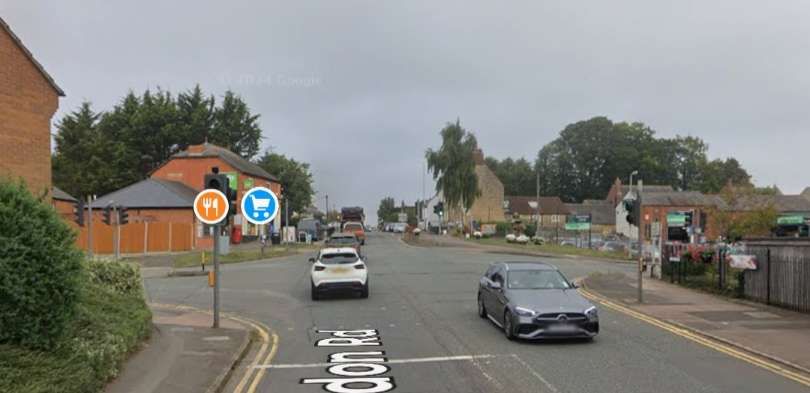
McCorquodale’s Printing Works were beyond the western extent of Wolverton’s railway town. [12]The tramway continued West along Stratford Road. [12]The area today is much more developed! [14]Continuing West along Stratford Road following the route of the old tramway. The Tesco Superstore is behind the brick built buildings on the right of this image. [Google Streetview, September 2023]The old tramway continued along Stratford Road. [Google Streetview, September 2023]And again, further West on Stratford Road. [Google Streetview, September 2023]
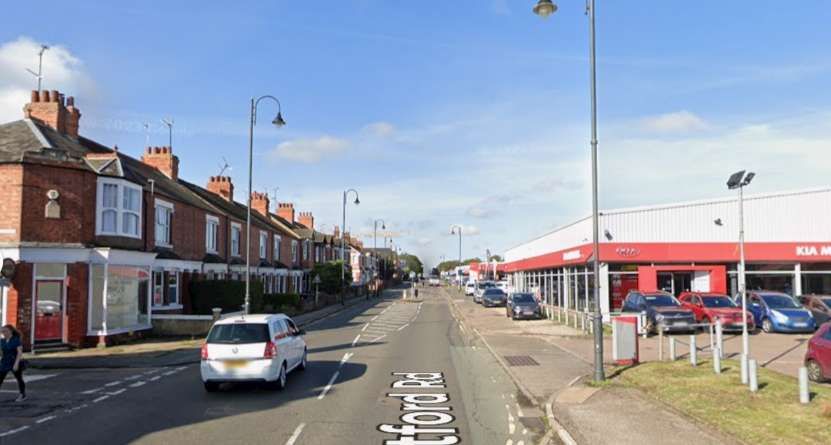
The next three images continue to show Stratford Road running along the South side of the site of Wolverton Works. …
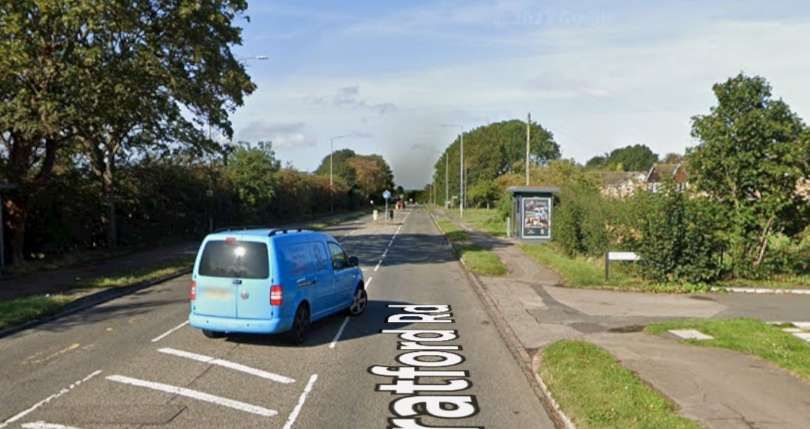
[Google Streetview, September 2023][Google Streetview, September 2023][Google Streetview, September 2023]
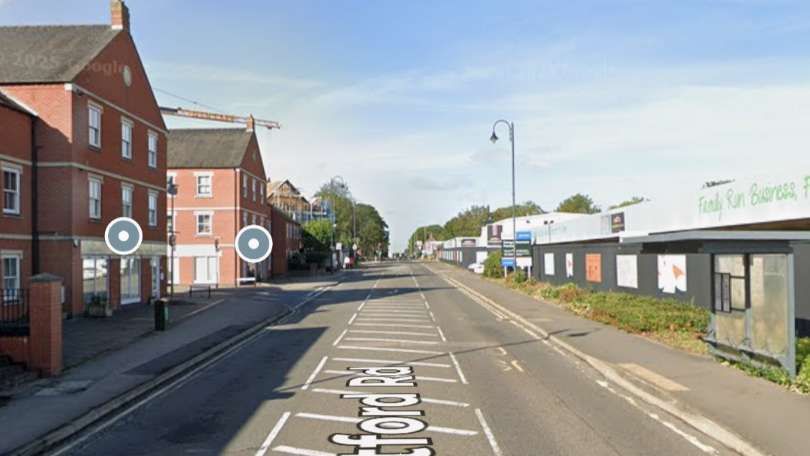
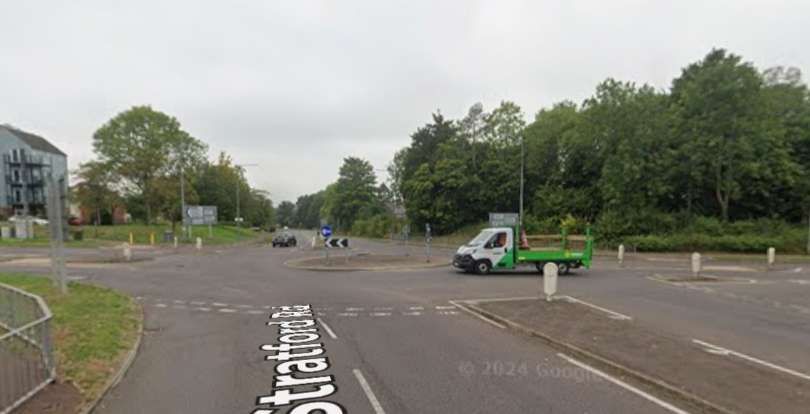
We are now beyond the West end of the Works site. The next three images show Stratford Road heading West towards a modern roundabout at Old Wolverton Road. …
[Google Streetview, September 2023][Google Streetview, September 2023][Google Streetview, September 2023]
Edwards says that, “The route was almost straight but a fierce hill faced engines travelling towards Wolverton at almost the halfway point of the route where the old road to Wolverton (the remaining buildings of the original hamlet somewhat west of the new industrial town having by this time received the suffix ‘Old’) diverged from the newer, more direct course that the tramway traversed.” [13: p17]
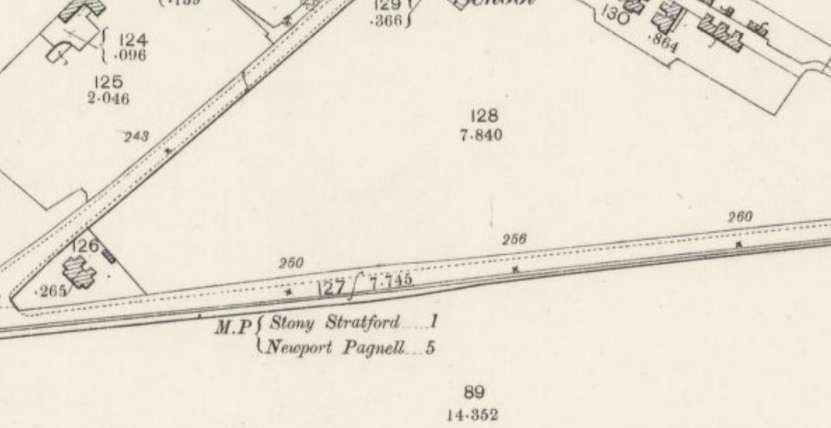
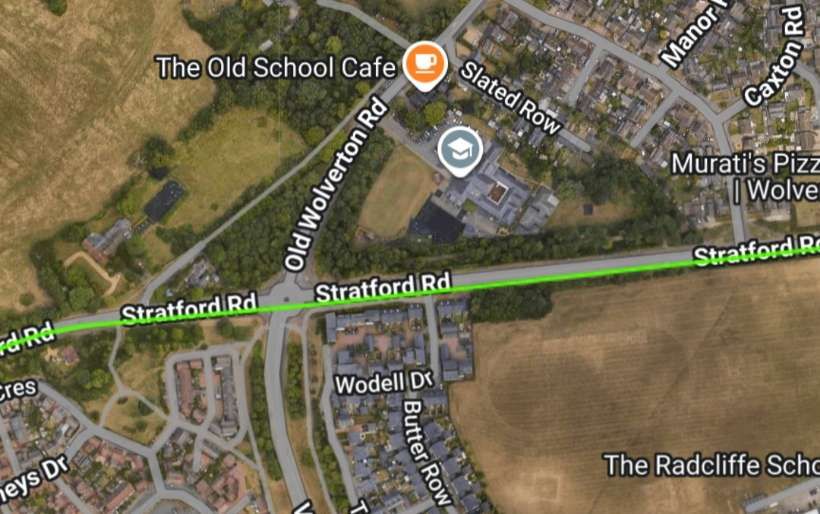
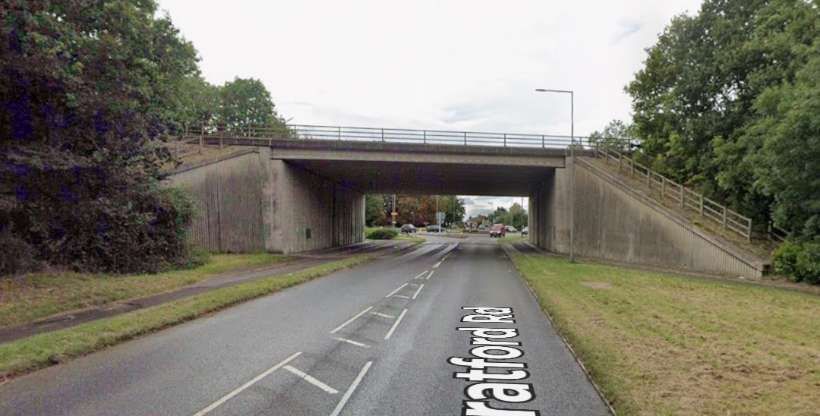
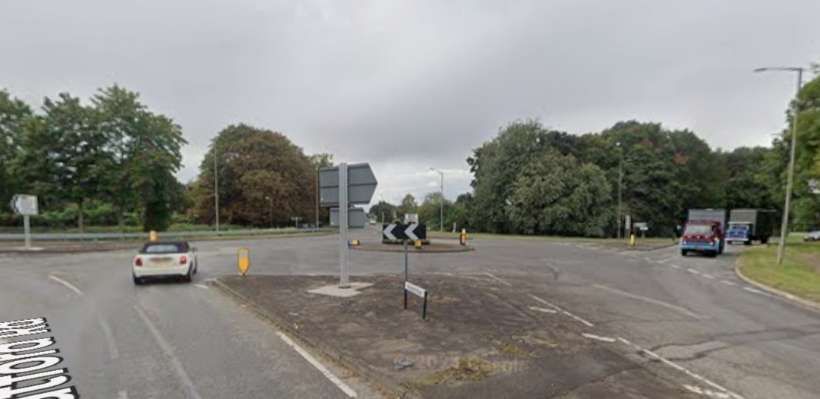
Old Wolverton Road meets Stratford Road at an acute angle. The tramway continued West along Stratford Road. [12]In the 21st century, Old Wolverton Road has been realigned to meet Stratford Road at a roundabout as part of a western bypass around Wolverton. [14]
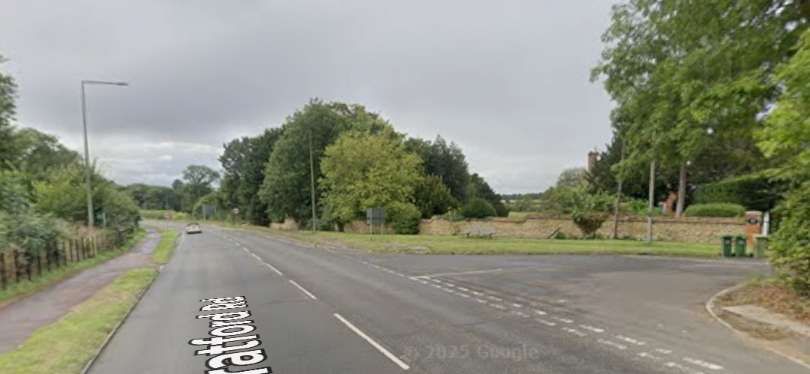
The next three Google Streetview images take the route of the tramway across the modern roundabout at the junction between Stratford Road and Old Wolverton Road to the original junction between the two roads. …
[Google Streetview, September 2024][Google Streetview, September 2024]Wolverton Park is to the North of the junction in this Streetview image. [Google Streetview, September 2024]
Lee provides just one paragraph which relates to the route travelled. He tells us that “In its maximum form, the undertaking began at the cattle sidings, Wolverton Station, and ran as a single line in the middle of the road through Wolverton. It then kept to its own track for about a mile, on the south side of the road to a point half a mile before the Wolverton Road joins the main Holyhead Road. The line there crossed over the Wolverton Road to its own track on the north side, but transferred once more to the middle of the public road through Stony Stratford. It thus traversed Wolverton Road to the junction, and turned sharply to the right (north west) along the Holyhead Road, here called High Street, and later Watling Street. At Old Stratford, the Deanshanger extension turned even more sharply to the left from Watling Street, and ran on its own track on the left-hand (south-east) side of the road.” [1: p549]
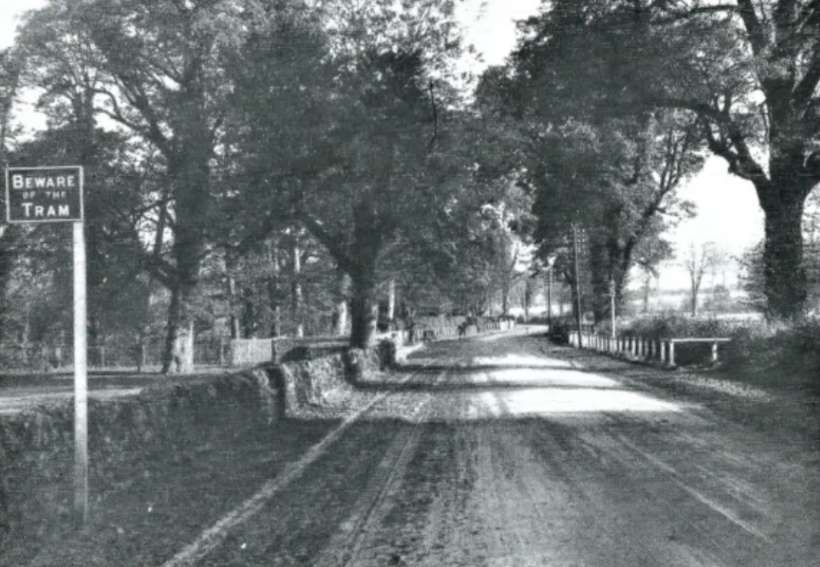
As we have already seen, Edwards description gives a little more detail: “Shortly before entering Stony Stratford the line abruptly cut across to the opposite side of the road. More than one pioneer motorist was apparently taken unawares by the sudden appearance of a steam tram engine and its trailers across his bows!” [13: p17]
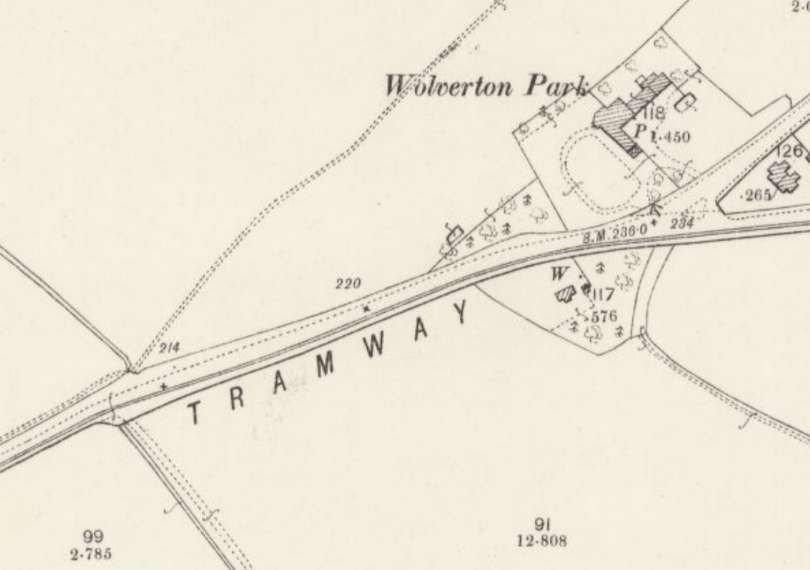
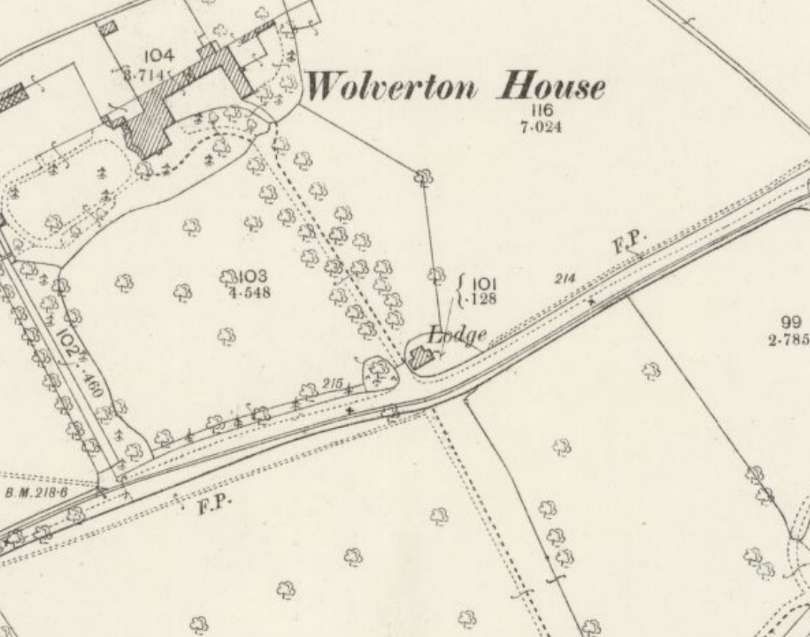
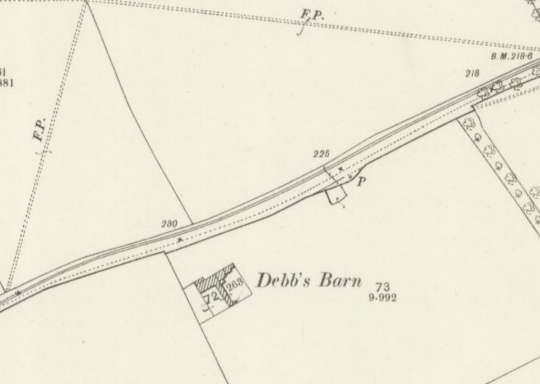
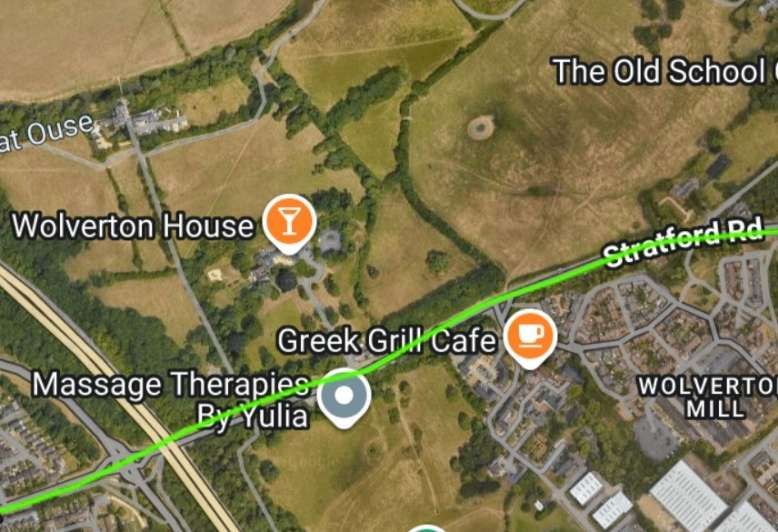
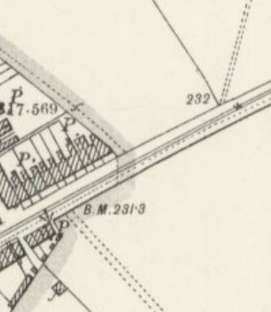
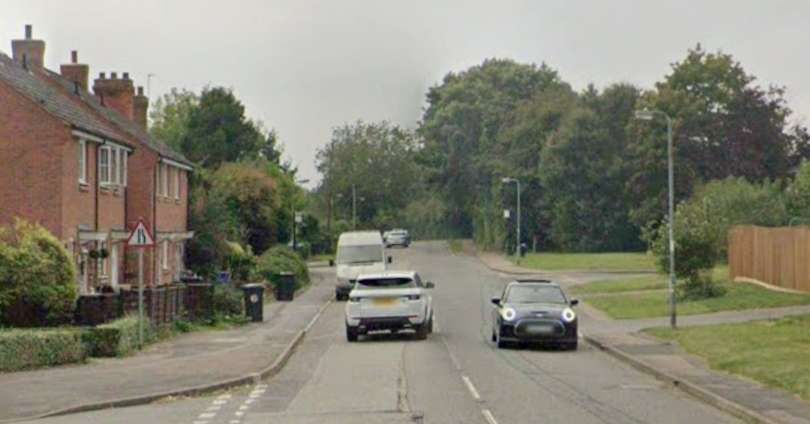
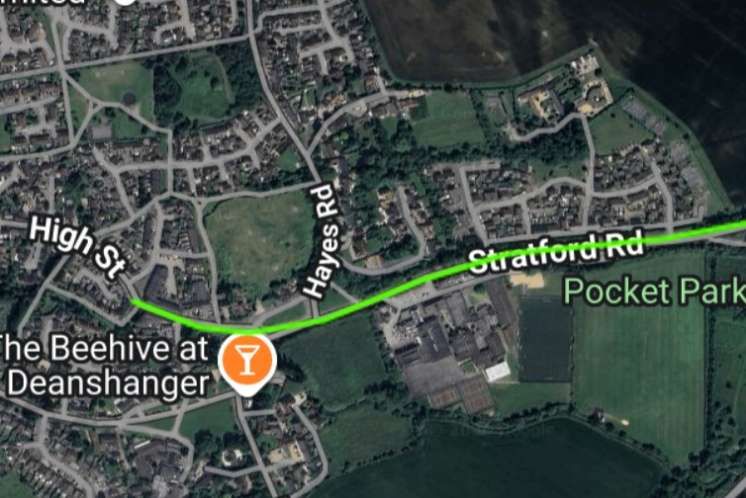
This photograph was taken a few hundred yards from Stony Stratford. Allen Edwards says that the line crossed the road just ahead of the camera. A sign was provided as a warning, but apparently the sudden movement of the tram across the road surprised many pioneer motorists. [13: p17]After the junction with Old Wolverton Road Descent to Wolverton Park, the tramway continued West-southwest on Stratford Road. [12]The road and tramway ran to the South side of Wolverton House. [12]And continued West-southwest towards Stony Stratford. [12]This extract from railmaponline.com’s satellite imagery covers much the same length of the Stratford Road as shown in the three OS map extracts immediately above. The A5 dual carriageway is clearly an addition to the landscape. As is the road immediately to its West. [14]Stratford Road facing Southwest with the modern A5 spanning the route of the old tramway. [Google Streetview, September 2024]To the West of the A5 Stratford Road crosses Queen Eleanor Street. [Google Streetview, September 2024]
This next smaller map extract brings the line to the edge of the Ordnance Survey map sheet and shows the beginning of the housing at the eastern edge of Stony Stratford. [12]
Edwards continues his description of the line: “Entering the town the line again took up position in the centre of the road. It had traversed just one mile from Wolverton. After a few hundred yards the road came to a T-junction with Watling Street outside The Forester’s Arms public house.” [13: p17]
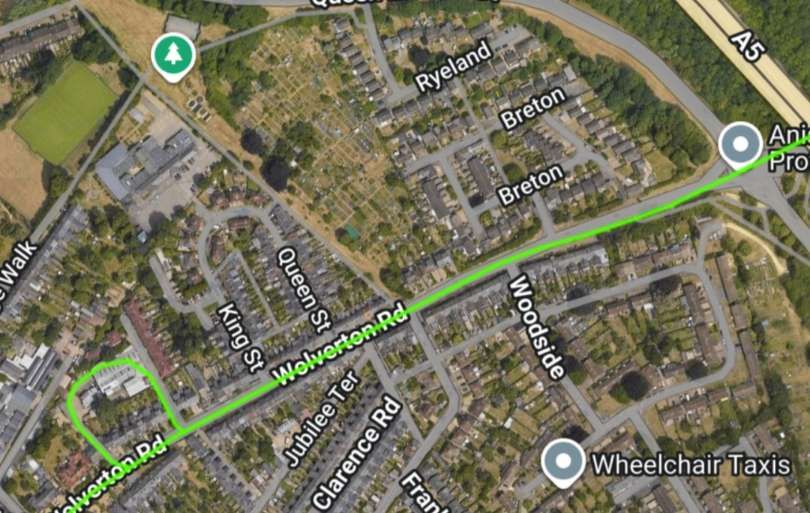
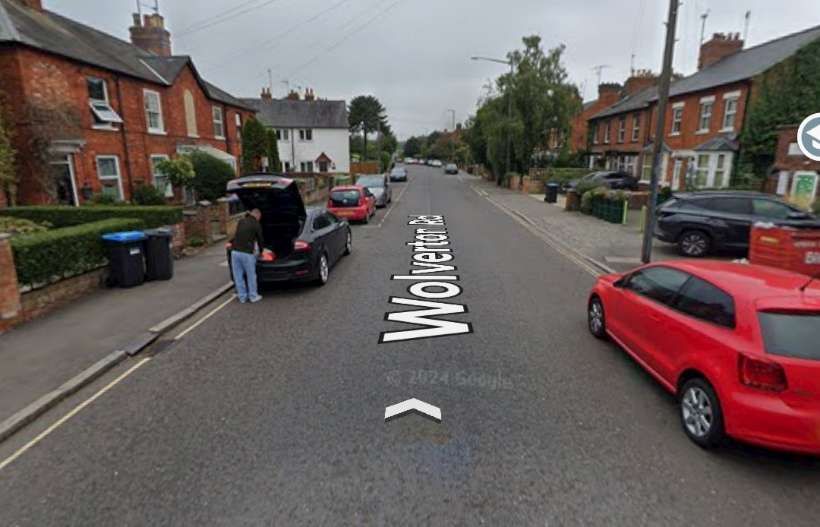
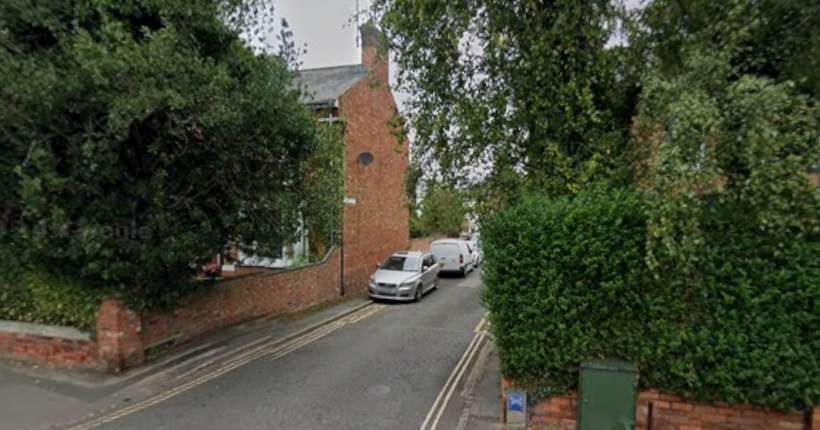
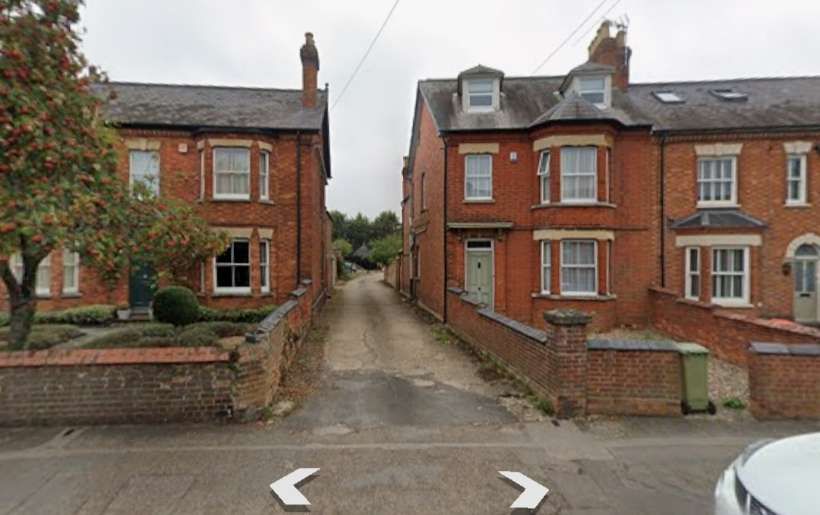
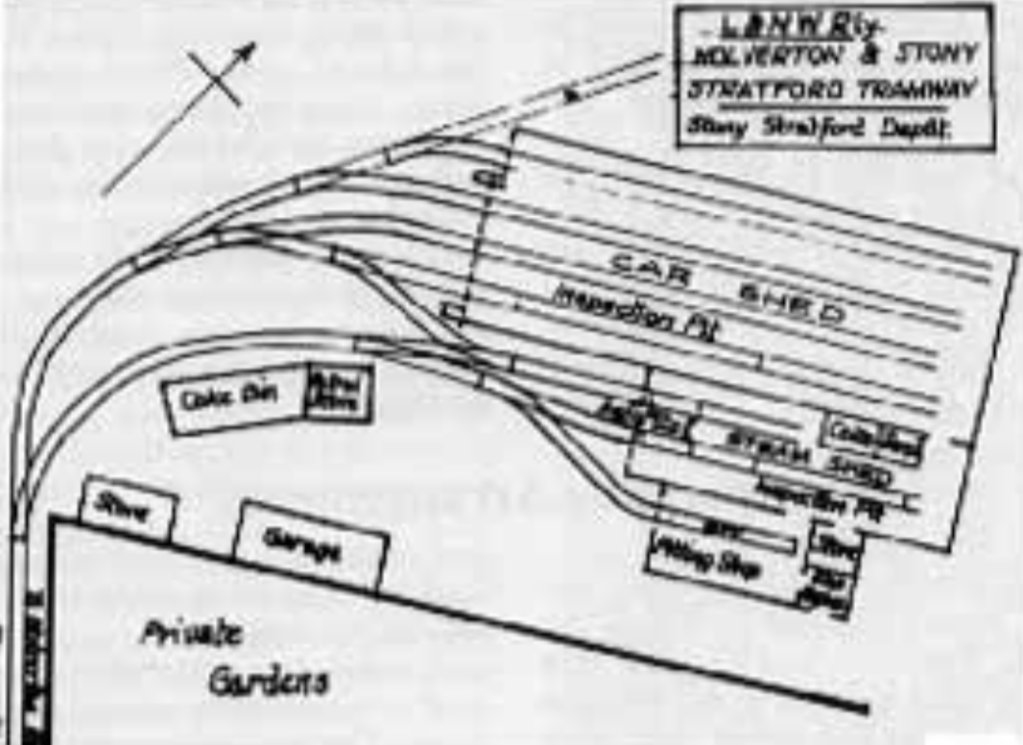
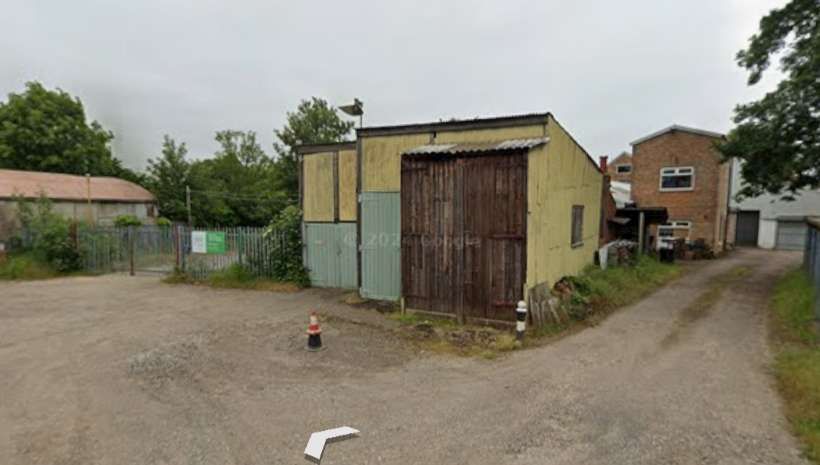
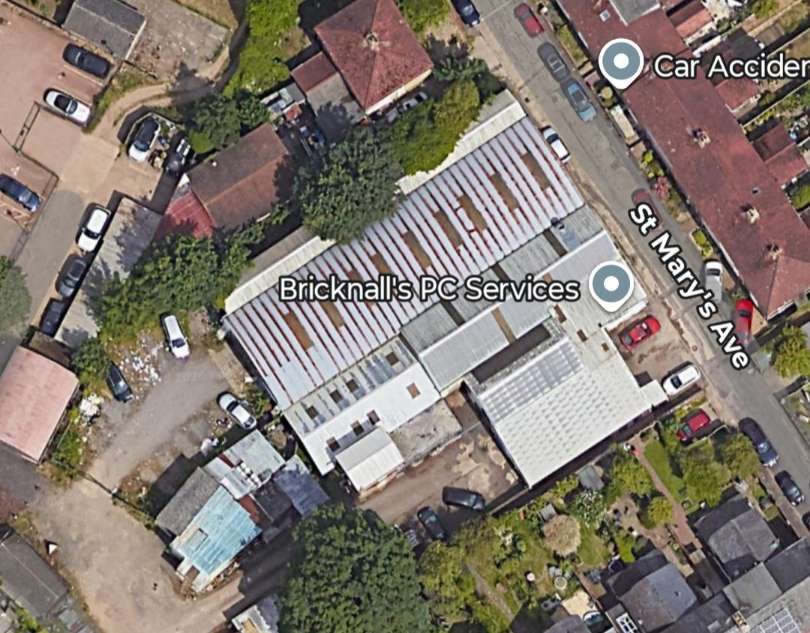
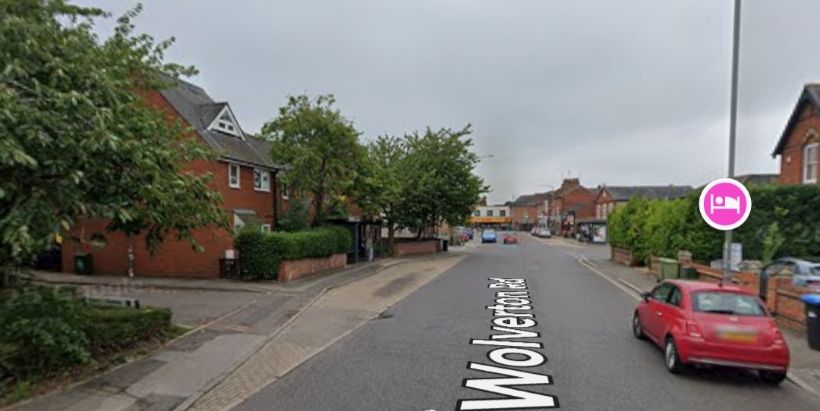
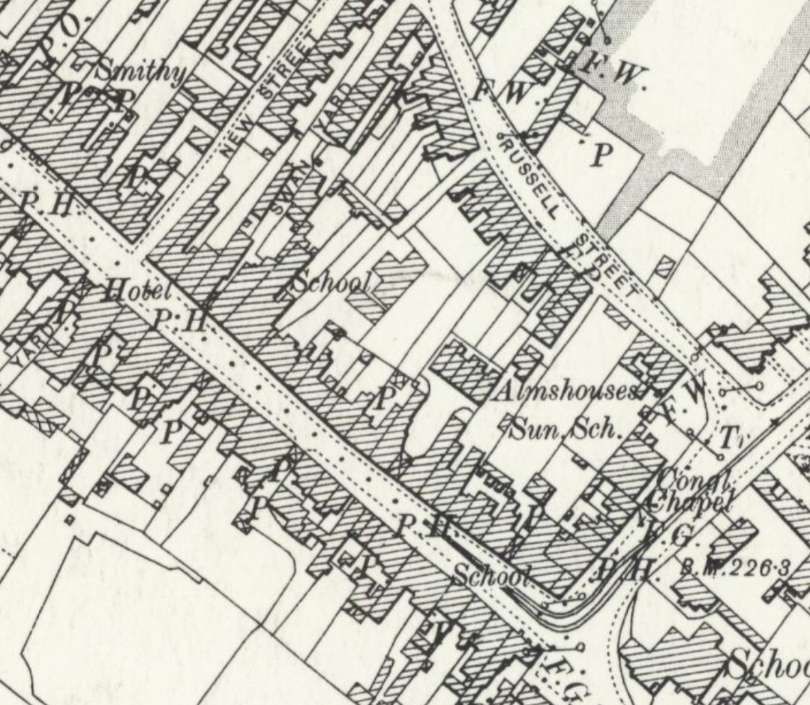
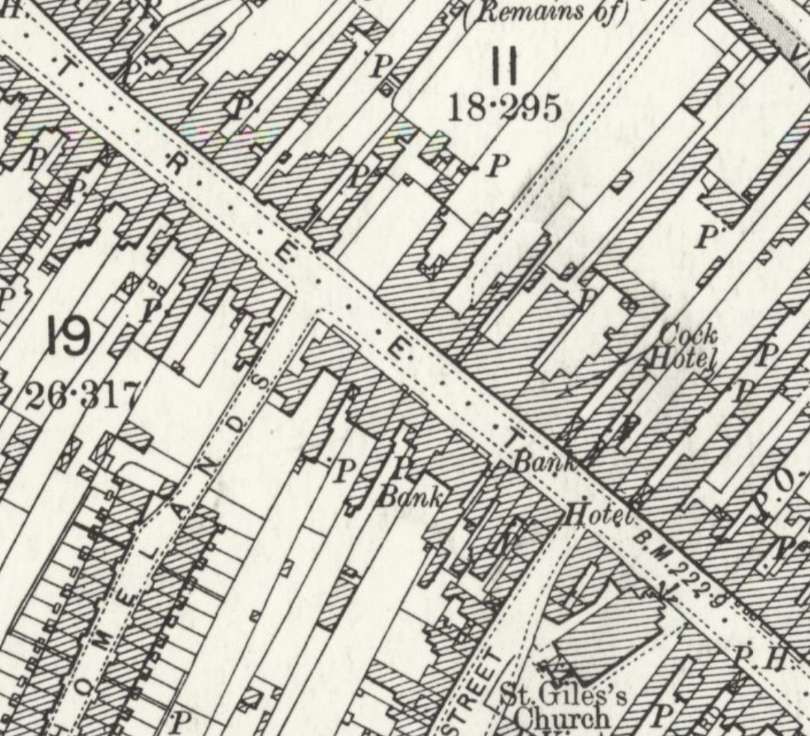
This next extract is from the 1923 Ordnance Survey, published in 1925. It shows the tramway heading towards the road junction in Stony Stratford. The tramway depot features in the top left of the extract. [15]The tramway depot as shown on the 1898 25″ ordnance survey. At this time, an additional access from the depot to Wolverton Road ran along what, in the 21st century, is known as St. Mary’s Avenue. There was a loop behind the depot which turned South-southeast running through the depot building and down to Wolverton Road along St. Mary’s Avenue. [21]The old tramway runs Southwest towards the road junction in Stony Stratford. Railmaponline.com shows a loop at the location of the tramway depot, but not the detailed track layout in the depot. [14]Facing towards Stoney Stratford just a couple of hundred yards beyond Queen Eleanor Street. [Google Streetview, September 2024]Continuing down Wolverton Road towards the centre of Stony Stratford. [Google Streetview, September 2024]St. Mary’s Avenue was one of the access points to the Tram Depot. [Google Streetview, September 2024]The main access to the Tramway Depot. [Google Streetview, September 2024]The LNWR track plan of the tram depot at Stony Stratford. It comprised a large shed for holding the tramcars, and a smaller one for the engines and the repair facilities. As far as is known all the repairs were undertaken in situ, but there were few machine tools available. Also in the depot were coaling and watering arrangements for the engines. [17]Looking into the Tramway Depot site from the access road. After the tramway closed the building (behind the garage in the foreground, so not visible) was used as a bus depot [Google Streetview, June 2023]The current building on the site of the tramway depot. [Google Maps, January 2026]Continuing Southwest down Wolverton Road. [Google Streetview, September 2024]Approaching the Junction with High Street, Stony Stratford. The Forresters Arms is on the right. [Google Streetview, September 2024]A passing loop occupied the highway with the tramway turning to the Northwest. On this 1898 survey, the tramway is shown terminating just after the 90° turn onto the High Street in Stony Stratford. [15]This extract from the railmaponline.com satellite imagery includes the length of line in the extract above and extends a little to the West. St. Mary & St.Giles Church, which is just beyond the West side of the OS map extract above can be made out towards the left of this image. [14]
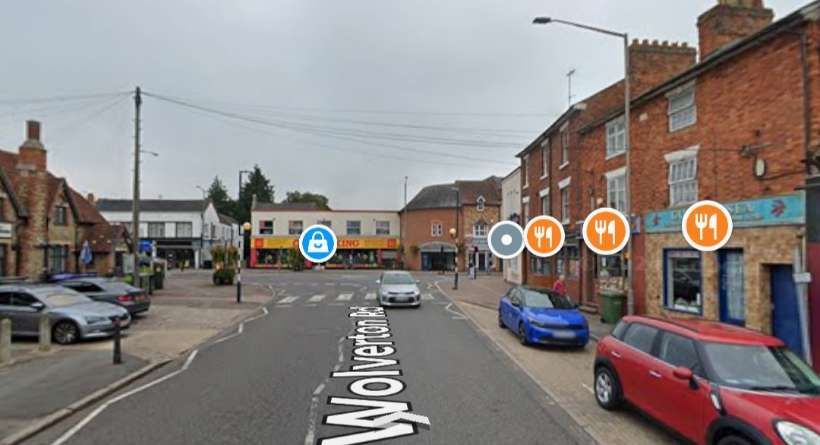
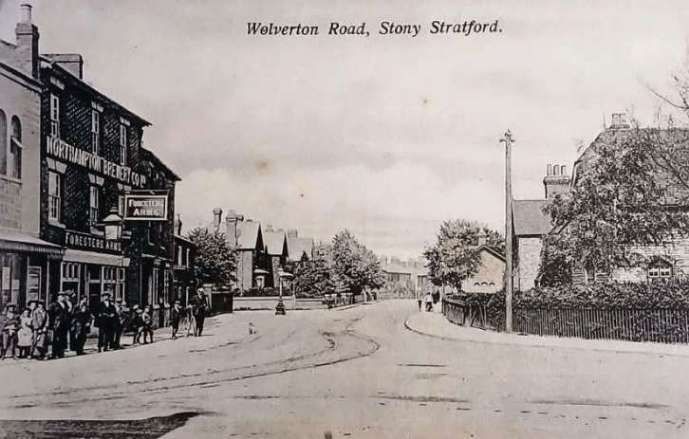
The view Northeast along Wolverton Road in Stony Stratford. The depot is behind the housing in the middle distance. To the left of the camera the tramway ran away to the Northwest. The Forresters Arms is on the left side of the photograph. This image was shared on the Stony Stratford Photos Facebook Group by Edward Corney on 20th November 2018. [22]
Edwards says that at the junction adjacent to the Forresters Arms, “The tramway turned right … to continue northwards beyond The Cock and The Bull hotels for another half mile to terminate outside The Barley Mow public house, the last building in the town.” [13: p17]
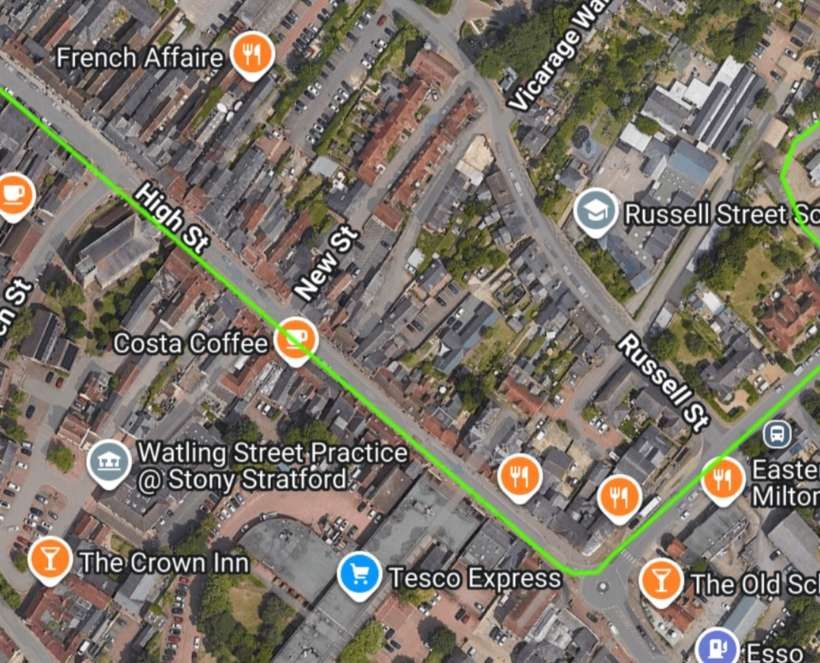
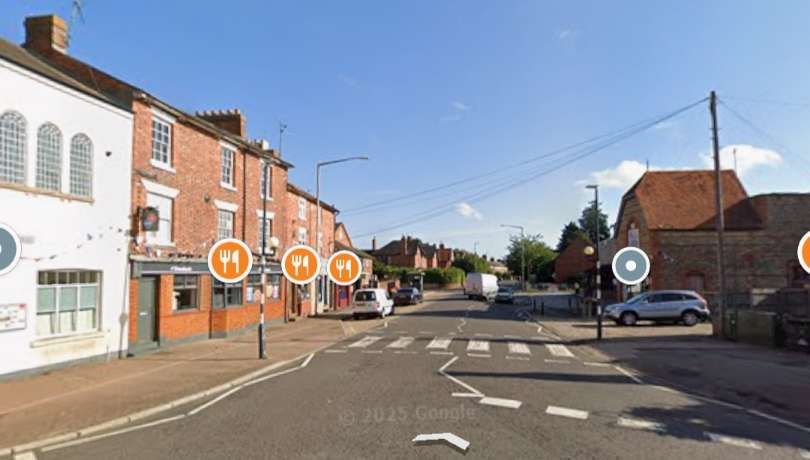
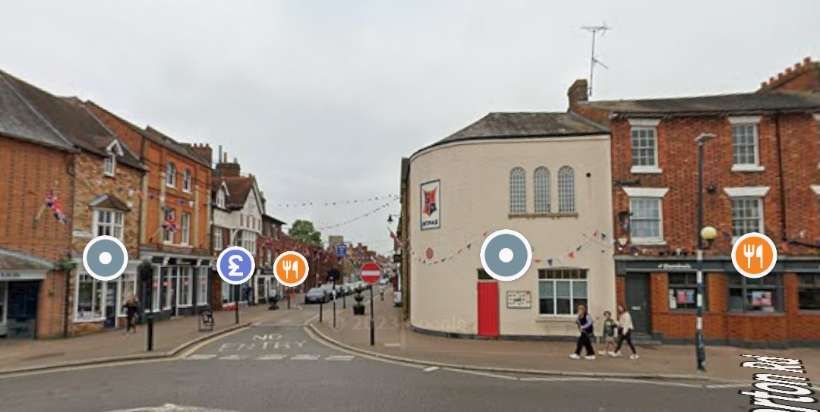
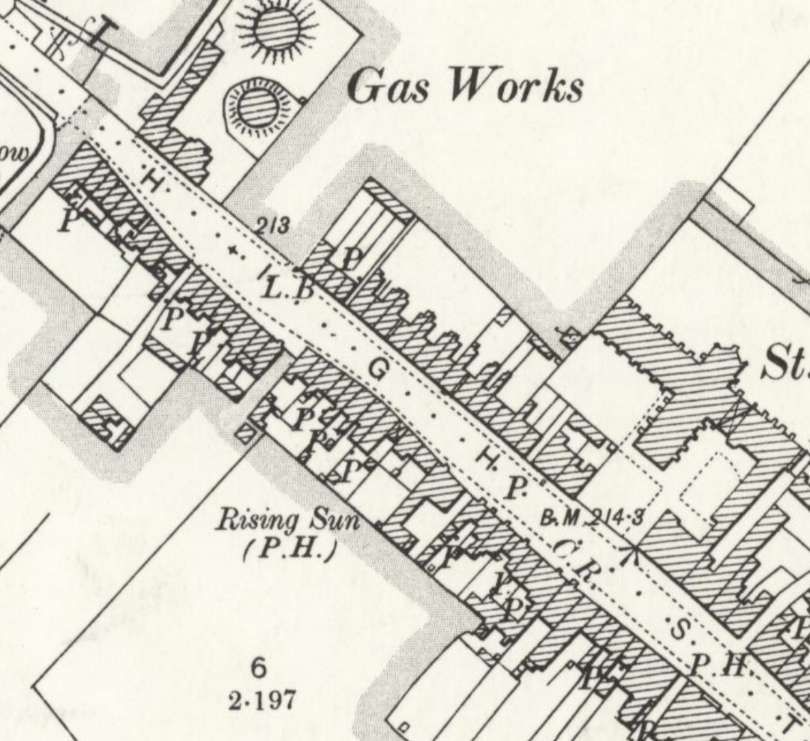
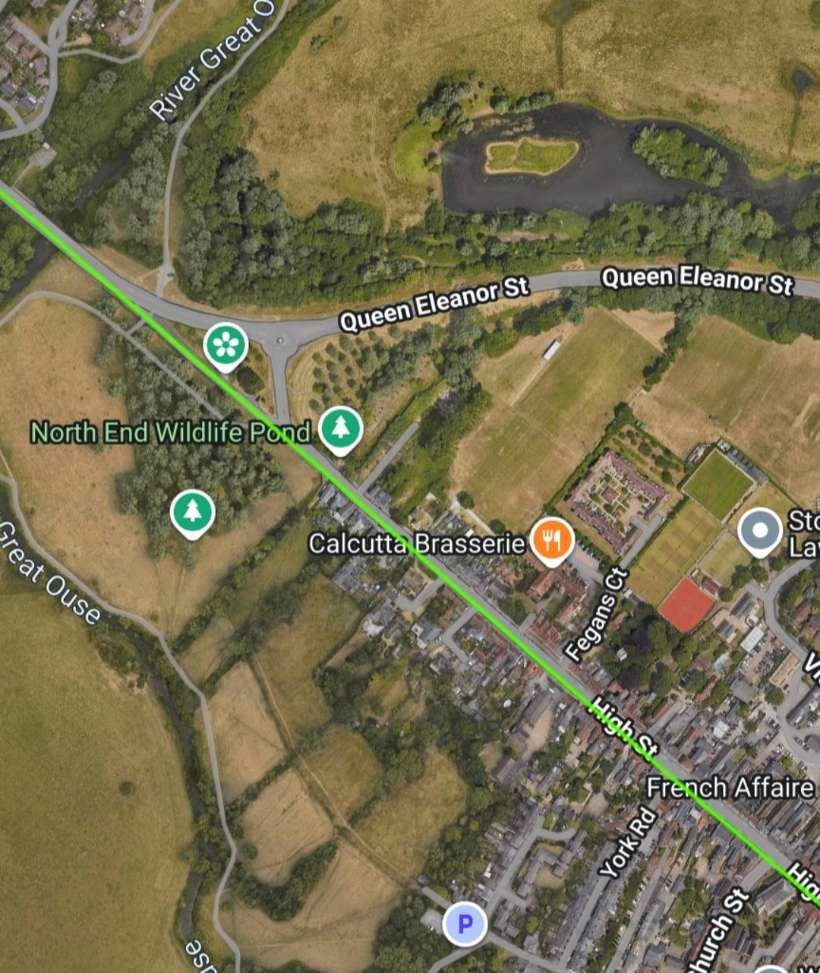
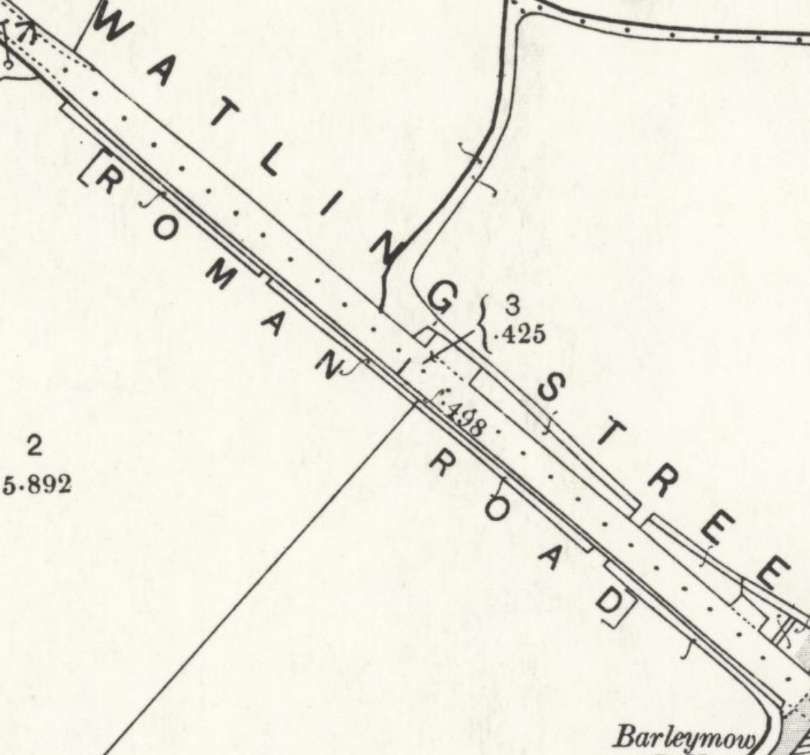
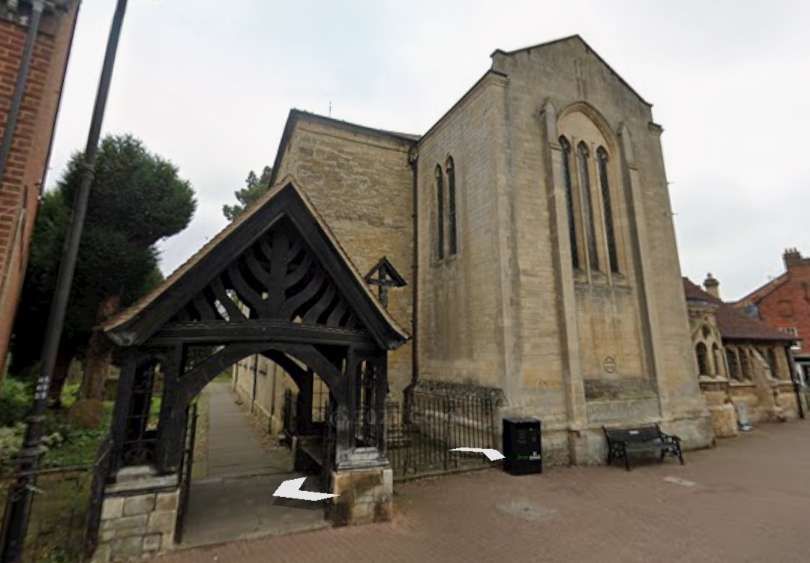
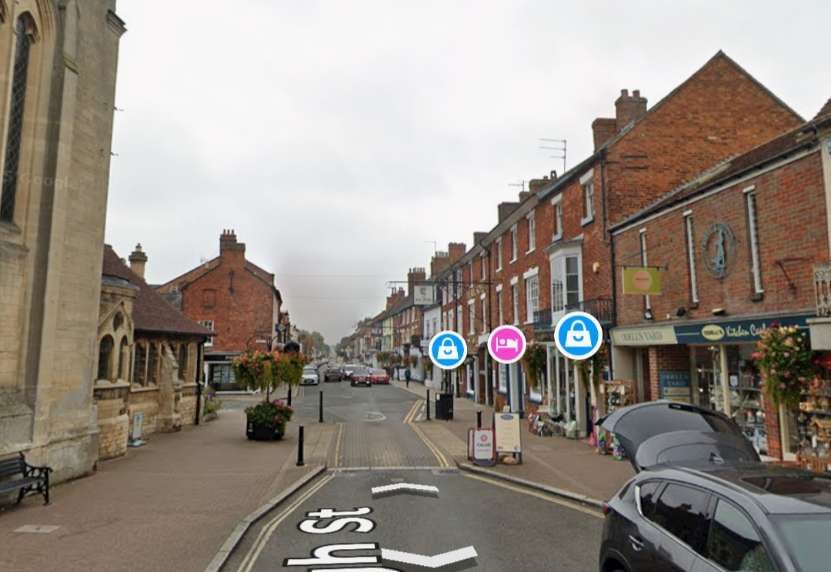
Looking Northwest along High Street, Stony Stratford. [Google Streetview, September 2024]The 25″ 1898 Ordnance Survey, published in 1900 does not show the tramway running Northwest along High Street, Stony Stratford. Which suggests that it was removed by the publication date in 1900. We know that the line was active until at least 4th September 1899. [15][1: p549]The line ran Northwest along High Street, Stony Stratford passing the Rising Sun public house and originally terminating at the Barley Mow Public House opposite the town’s Gas Works. [15]This extract from the railmaponline.com satellite imagery shows the length of the route of the old tramway from St. Mary & St. Giles Church (bottom-right) to the River Great Ouse (top-left). [14]The Barley Mow Public House was the terminus of the first length of the line and the point at which the extension to Deanshanger started. The length of Watling Street shown on this OS map extract is within the length of the line shown on the last extract from the railmaponline.com satellite imagery above. [15]St. Mary’s & St. Giles Church, High Street, Stony Stratford [Google Streetview, September 2024]Looking Northwest along High Street from just outside the church. [Google Streetview, September 2024]Further Northwest on High Street, looking towards the River Great Ouse. [Google Streetview, September 2024]Heading towards the River Great Ouse along the line of the old tramway. The Stony Stratford by-pass (Queen Eleanor Street) joins the road ahead of the camera. [Google Streetview, September 2023]
An extension, which opened fully in 1898, continued Northwest from the Barley Mow towards the River Ouse and the County border.
Lee tells us that from the outset, it had been intended to cater also for goods traffic: “this was not begun until March, 1888. A contract was made with the LNWR. to deliver its goods, which was stated to save the main-line railway £500 per annum. With an eye to goods traffic principally, Wilkinson promoted an extension from High Street, Stony Stratford, to Deanshanger, which was sanctioned by Order of 19th July 1887, authorising 2 miles 3 chains of 3 ft. 6 in. gauge. Deanshanger was the location of the Britannia Ironworks, the agricultural implement works of E. & H. Roberts, established in 1820.” [1: p548]
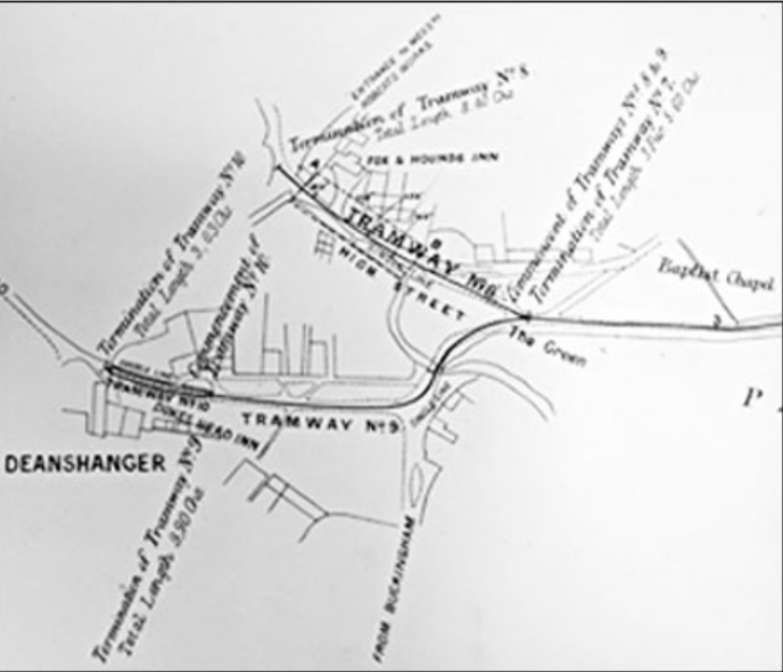
Allan Edwards tells us that, “Leaving The Barley Mow and taking its normal position in the middle of the road the extension travelled straight for almost three quarters of a mile over the embankment that carried the highway across the floodplain of the River Ouse. The river was the county border. Climbing very steeply into the Northamptonshire village of Old Stratford, the line then swung sharp left onto the Buckingham road. A separate depot and workshop for this section of line was established at this corner. … The line then ran parallel to the Buckingham arm of the Grand Junction canal to Deanshanger where it terminated on the village green outside The Fox & Hounds public house. This extension was sanctioned by the Board of Trade on 24th May 1888 and immediately came into public use.” [13: p18]
It seems that a section of 14 chains from the bottom of High Street, across the Great Ouse, to Old Stratford, was built quite quickly and opened later in 1887. “The major portion of the extension was complete at the time a visit to the undertaking was paid by the Civil & Mechanical Engineers Society on Saturday, 12th May 1888, and the party was given a run over the new line. Sanction of the Board of Trade was given on 24th May 1888, to 1 mile 56 chains single and 13 chains double of the Deanshanger extension, and this appears to have been brought into use for public passenger and goods traffic forthwith, extending from Old Stratford to The Green, Deanshanger, near the Fox & Hounds Inn. The intended extension to the Dukes Head Inn was never buiit. From Wolverton to Deanshanger, the through fare was 4d. This section seems to have remained Wilkinson’s property, and to have been leased to the company.” [1: p548]
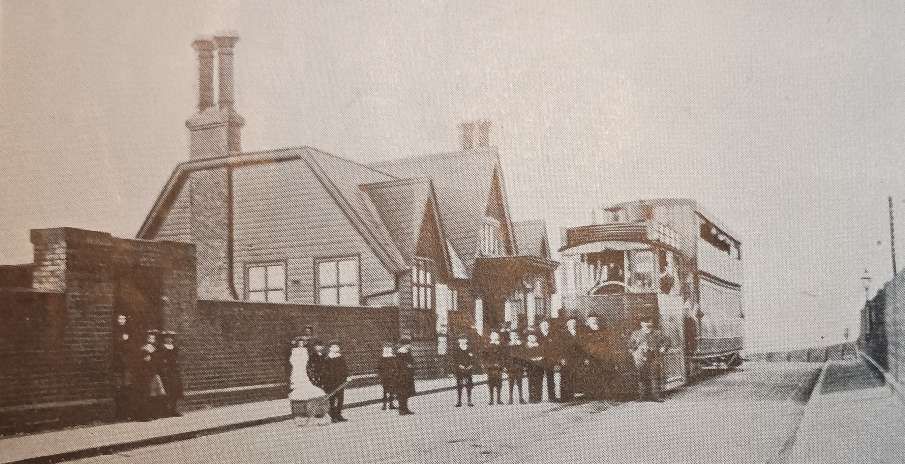
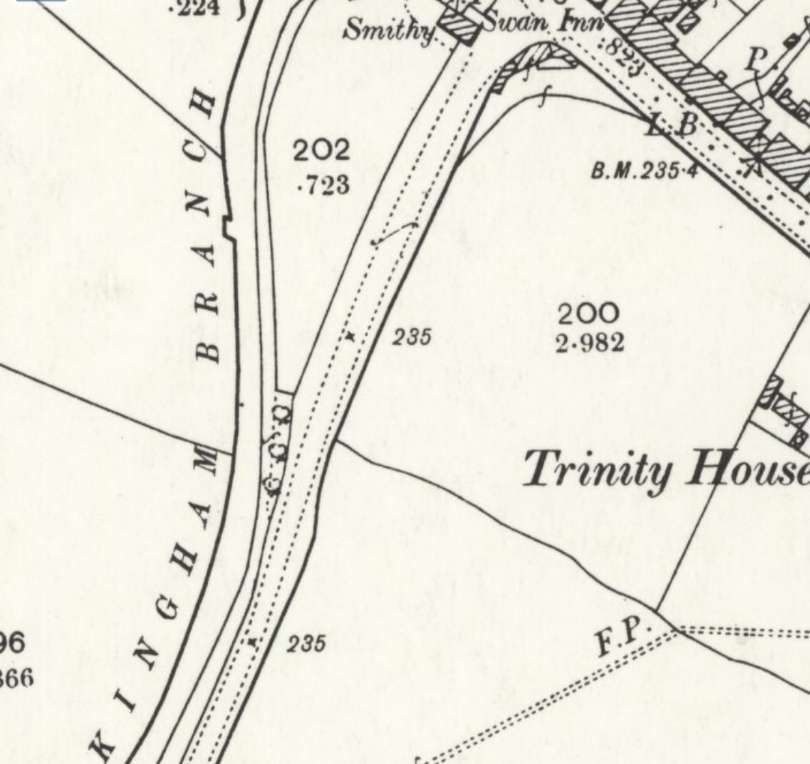
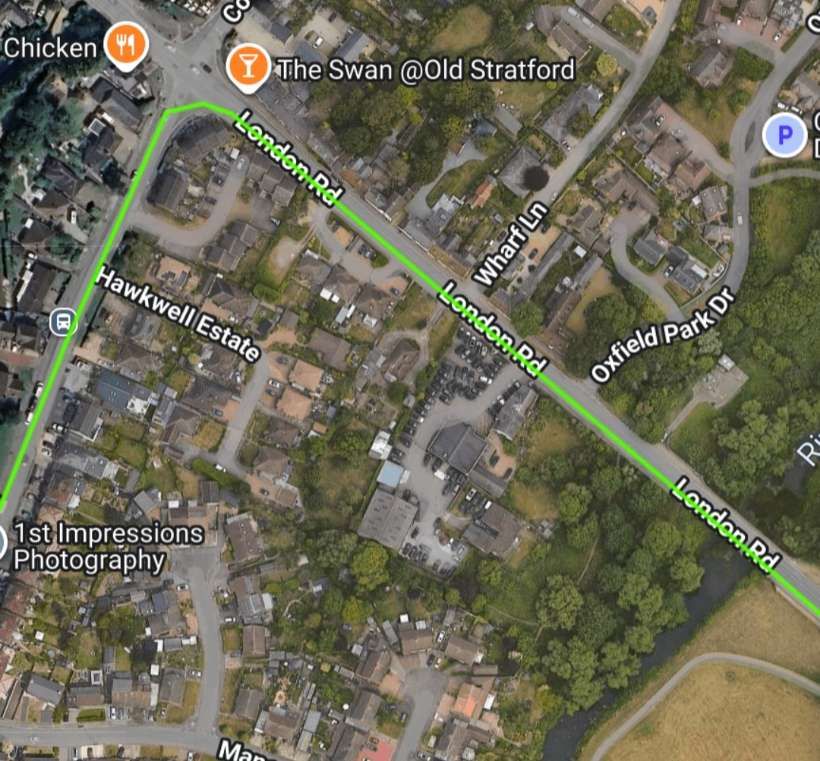
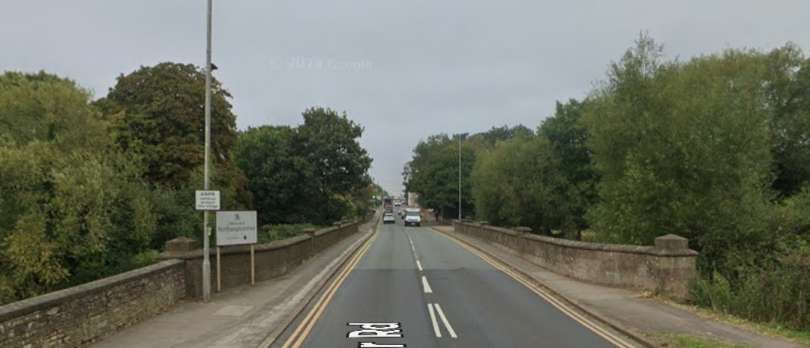
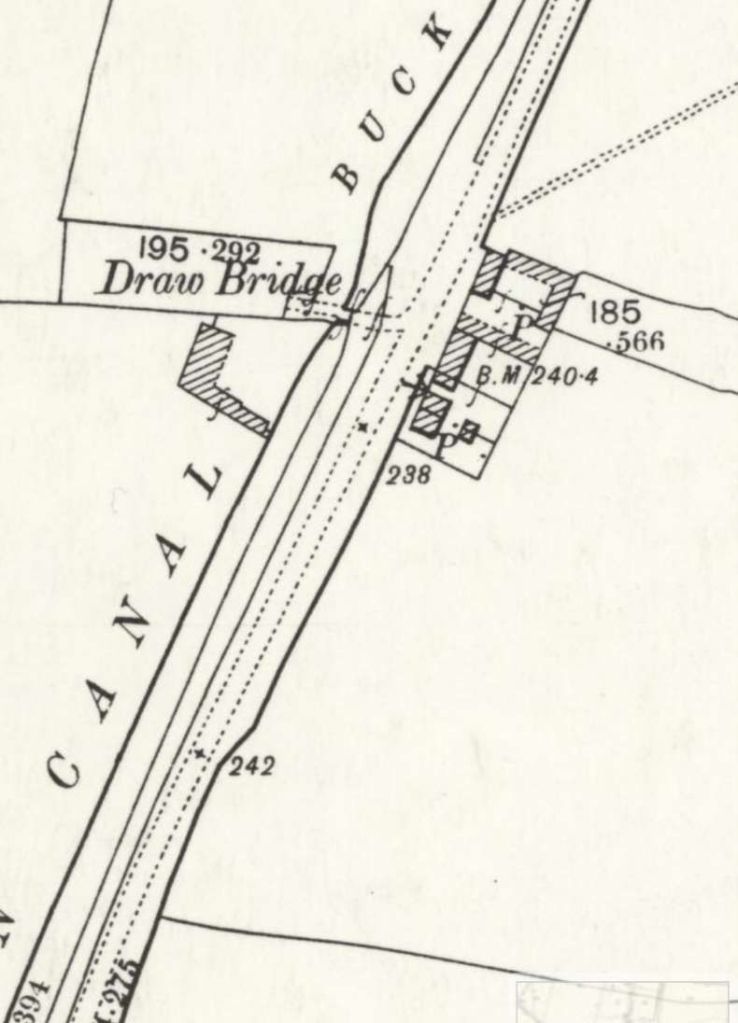
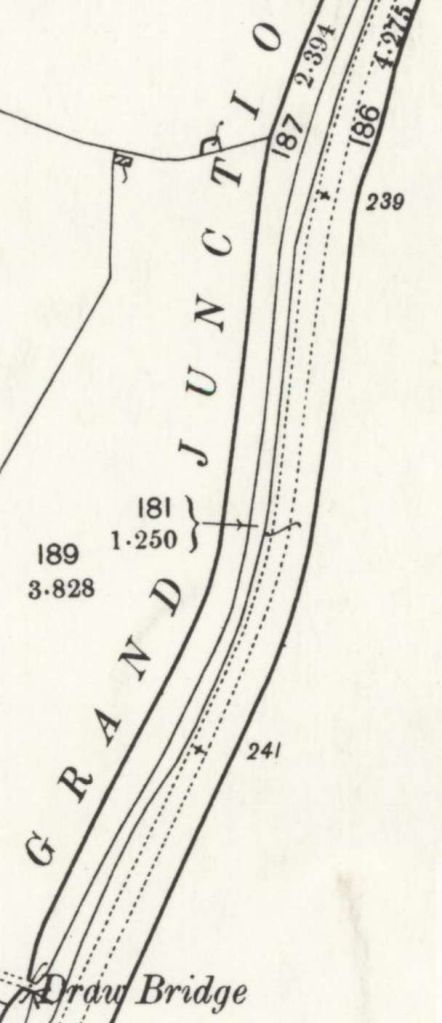
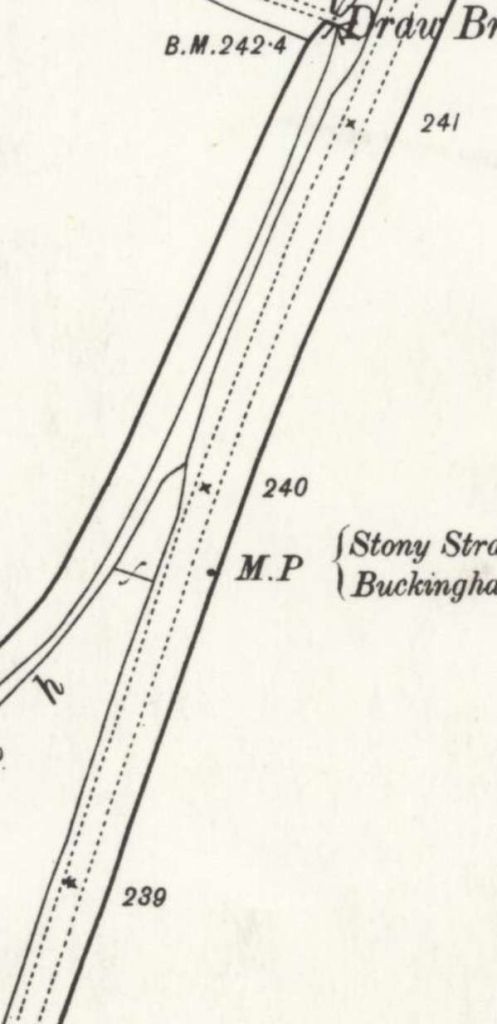
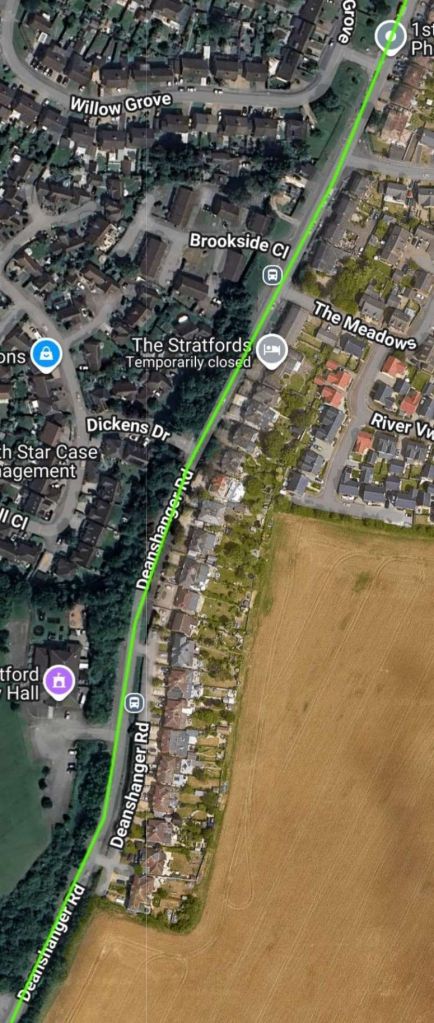
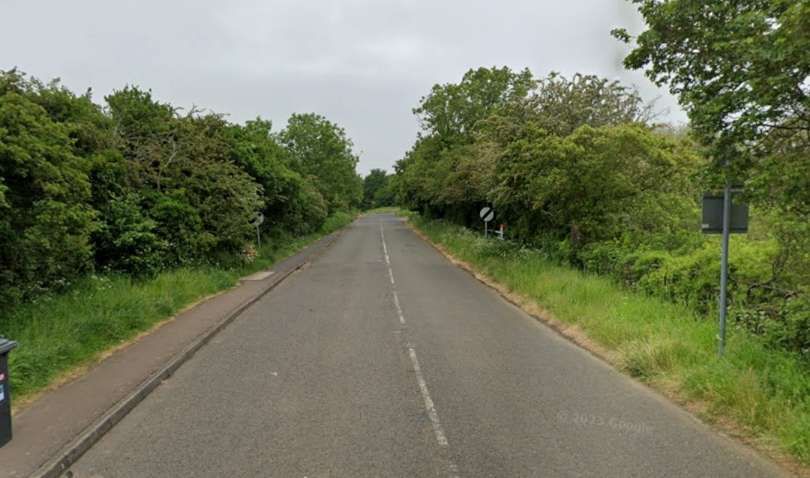
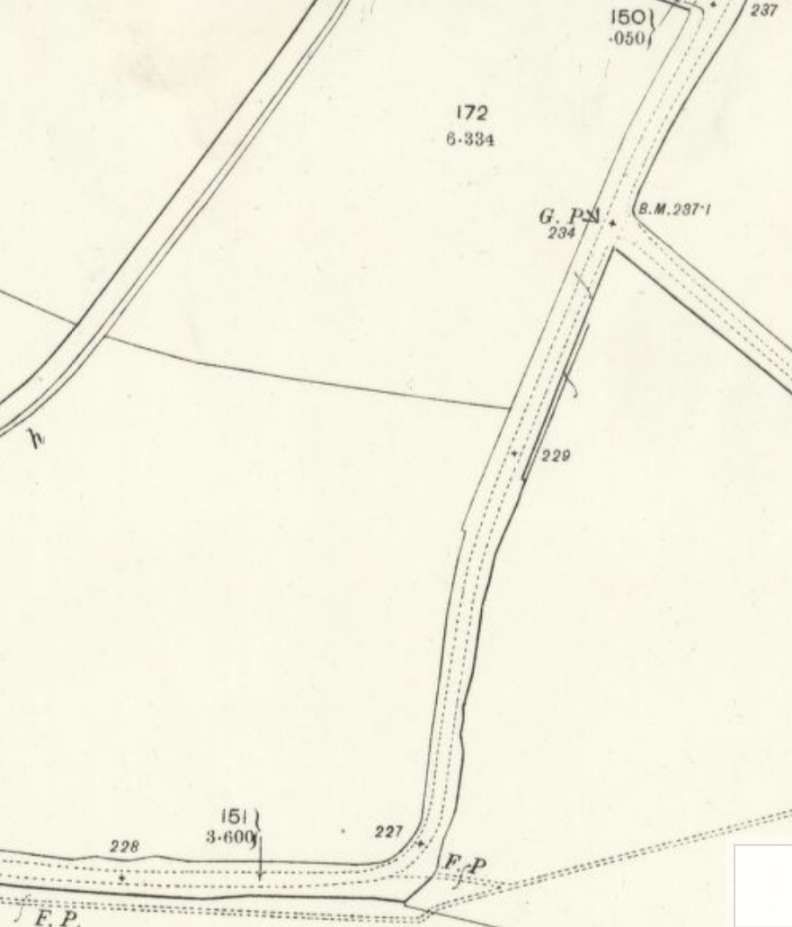
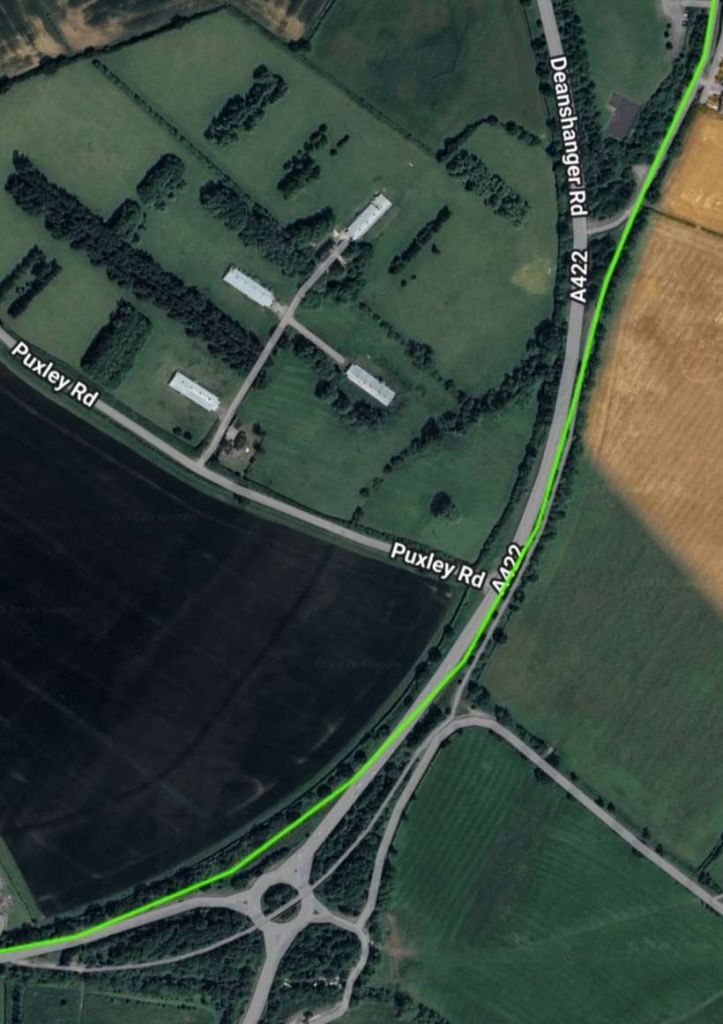
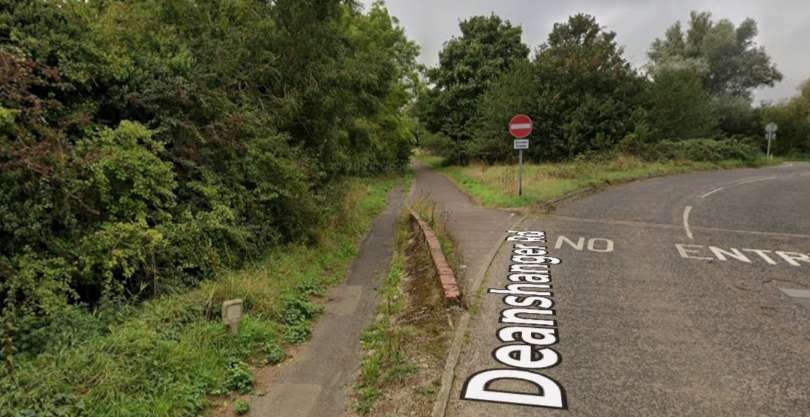
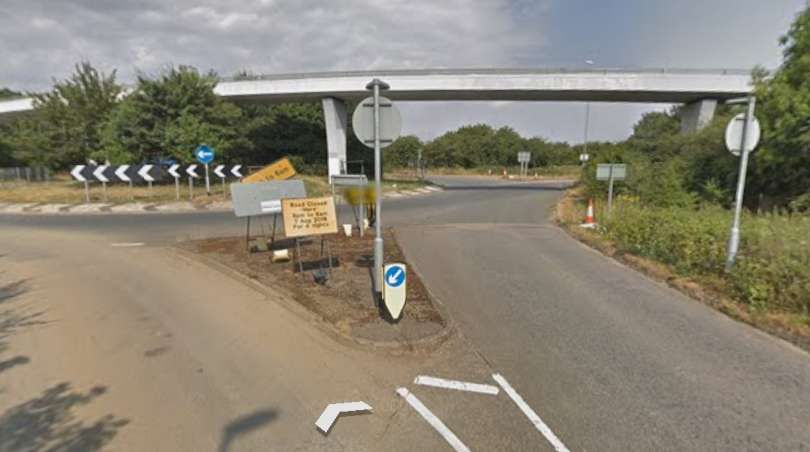
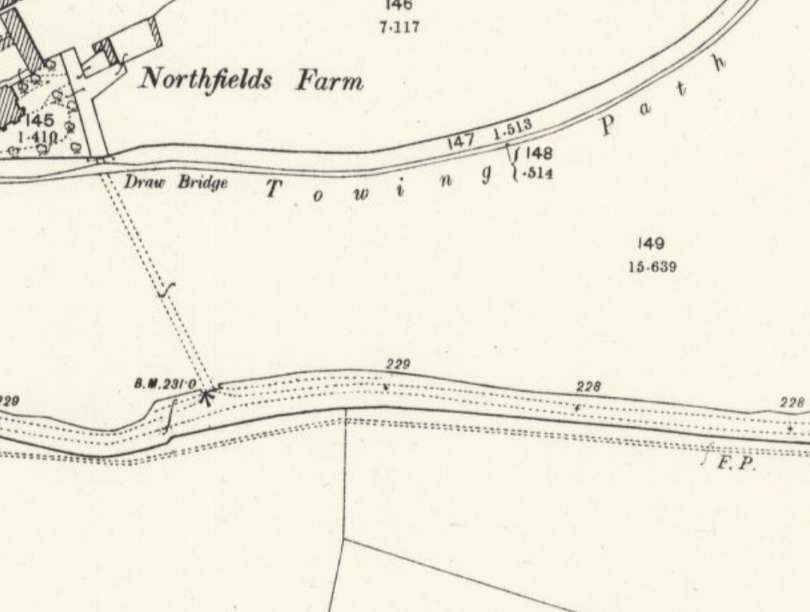
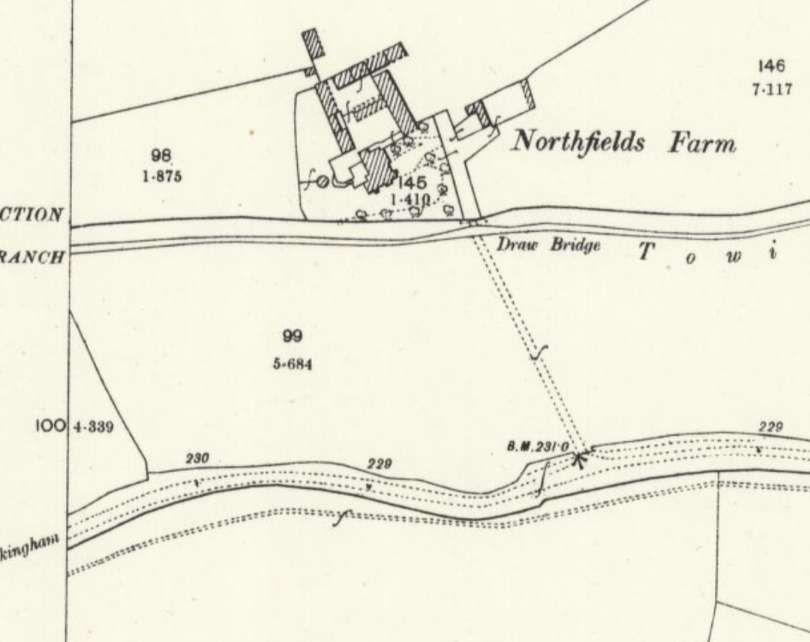
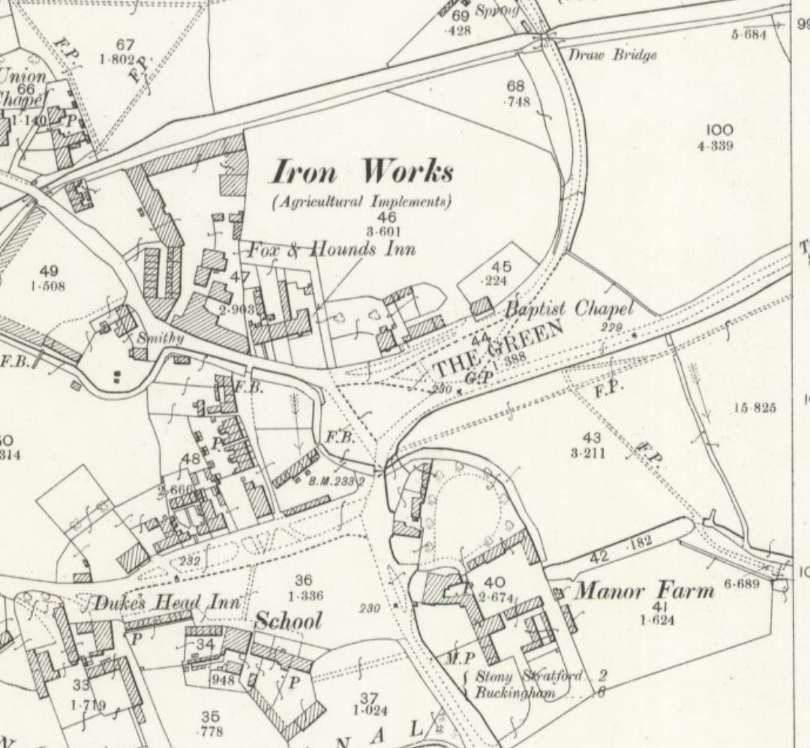
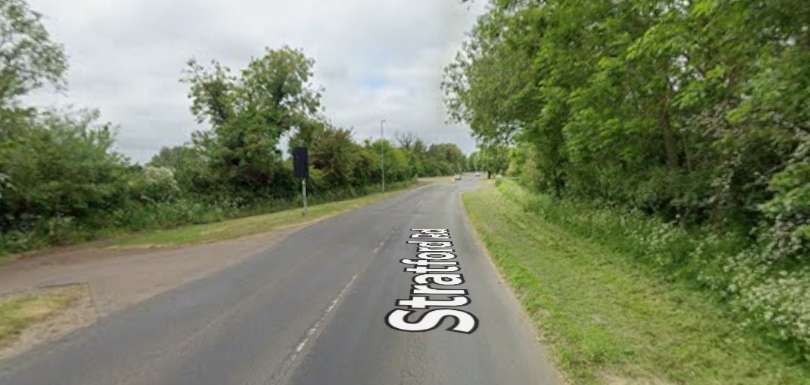
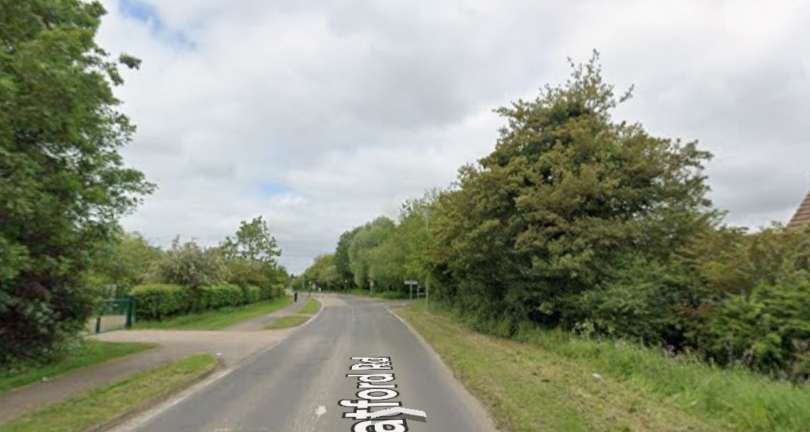
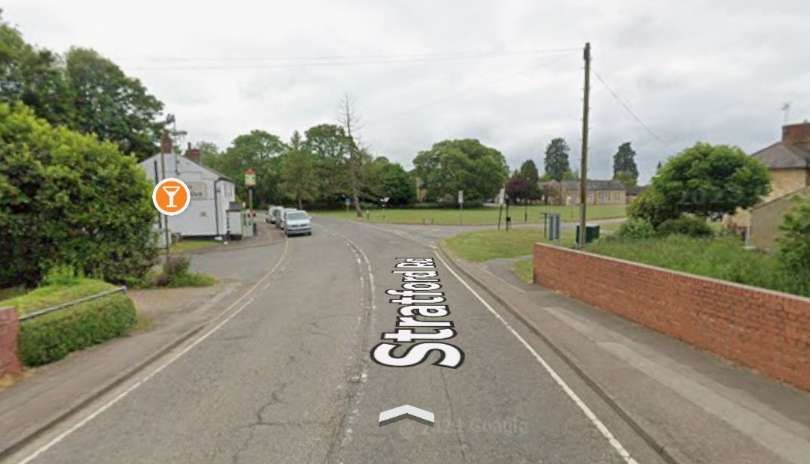
The road bridge over the River Great Ouse can be seen in the bottom right of this next extract from the 1898 25″ Ordnance Survey. [15]Only a short distance further Northwest at the junction adjacent to the Swan Inn and Smithy in Old Stratford, the tramway extension turned left and soon found itself following the Buckingham Branch of the Grand Junction Canal. [15]This extract from the railmaponline.com satellite imagery covers the same length of the old line as the two extracts from the OS mapping immediately above. [14]The Tramway route crossed the River Great Ouse on the road bridge. [Google Streetview, September 2024]The Tramway turned left at the junction in Old Stratford onto what in the 21st century is called Deanshanger Road. [Google Streetview, September 2024]Heading South-southwest along Deanshanger Road, along what was the route of the extension to the tramway to Deanshanger. [Google Streetview, September 2024]The tramway continued South-southwest alongside the canal. [15]And again the tramway route followed the Buckingham Branch of the Grand Junction Canal. [15]The tramway continued South-southwest as the canal turned away towards the West. [15]This extract from the railmaponline.com satellite imagery covers the majority of the length of the line as shown on the three OS map extracts immediately above. [14]Deanshanger Road facing South. [Google Streetview, September 2024]A relatively tight curve appears to have taken the tramway onto the road to Deanshanger. However, the research that was done to prepare the railmaponline.com representation of the line suggests that the line left the highway and ran on its own formation for a few hundred yards. [18]This extract from the railmaponline.com satellite imagery takes the line as far as the OS map extract above. The route of the old line is shown in this image following the Buckingham Branch of the Grand Junction Canal. A modern public footpath/cycleway is shown taking a tighter curve. Could the alignment of the footpath/cycleway be that of the old tramway? [14]The modern Deanshanger Road joins the A422 as it heads South. The route of the old tramway is probably followed by the tarmac footpath to the left of the no entry sign. It follows the line of the old road. [Google Streetview, September 2024]The footpath shown on the right of this image matches the line of the old tramway. [Google Streetview, September 2024]If the footpath/cycleway is on the line of the old tramway, then the bridge over roundabout is on the line of the old tramway. [Google Streetview, July 2018] Running parallel to the canal but a distance to the South, the tramway/road headed towards Deanshanger. [18] Continuing to the West on the South side of Northfield’s farm and the Buckingham Branch of the Grand Junction Canal the edge of the Ordnance Survey map sheet is reached before the road entered Deanshanger. [18]This final extract from the Ordnance Survey mapping of the turn of the 20th century shows the settlement of Deanshanger with its Iron Works. The tramway terminated adjacent to the Fox & Hounds Inn, the intended extension to the Dukes Head Inn in the bottom-left of this map extract. [19]The remaining length of the tramway as shown on the railmaponline.com satellite imagery. [14]Heading West along the line of the old tramway on Stratford Road. [Google Streetview, May 2023]Further West on Stratford Road. [Google Streetview, May 2023]Approaching The Green, Deanshanger where the tramway terminated. [Google Streetview, May 2023] The line beyond the Fox & Hounds was not built. It was also intended to link the Iron Works to the tramway as shown here. This short link was also never built. Britannia Iron Works was owned by E.H. Roberts. The Iron Works was always satisfied with using the canal for exporting its finished products and could not be persuaded to use the tramway. [20]Krauss Engine and 50-seater tramcar at the Green, Deanshanger, in 1888. [1: p550]
Operation
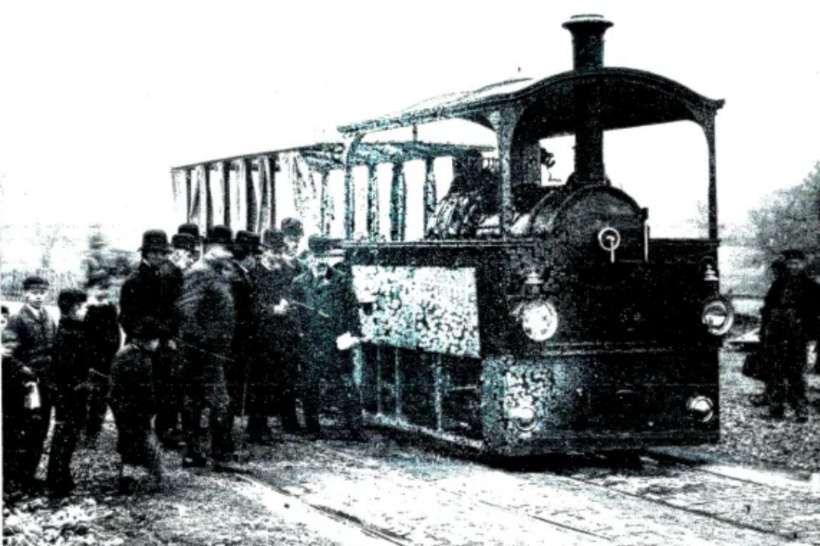
Edwards tells us that “On Friday 17th May 1887 prior to the Whitsuntide holiday horses pulled the first tram from Wolverton station goods yard to Stony Stratford tram depot. On board were Charles Aveline (the Managing Director) and other officials of the tram company. For the return journey the horses were replaced by one of the two Krauss tram engines. Local school children were given free tickets.” [13: p17]
By 1st September 1887, Lee tells us, “the issued capital was no less than £20,000, which must be regarded as a gross over-capitalisation. Nevertheless, the nominal capital was increased on 21st June 1889, by £5,000, stated to be beyond £20,000, as the nominal increase of 1883 had been forgotten, and additional stamp duty was paid. A further change of name was also made at this period, and became effective on 26th July 1889, whereby the legal title became the ‘Wolverton, Stony Stratford & District Tramroads Co. Ltd.’ Shortly afterwards, the company declared itself insolvent, and went into voluntary liquidation on 4th September 1889. This was not acceptable to the creditors, and by Court Order of 26th October the winding up was made compulsory, and subject to the Court. The undertaking was placed in the hands of the official liquidator on 17th December, and the line was closed. Much of it was never reopened.” [1: p549]
The original portion, between Wolverton and Stony Stratford, was purchased by a syndicate of Bedford businessmen who reopened the Wolverton to Stony Stratford section in November 1891 and it was known as the ‘Wolverton, Stony Stratford District New Tramway’ and this was formally incorporated on 15th September 1893 with a capital of £5000 in £100 shares. The nominal capital was increased by £3000 (30 shares) at the end of January 1907. It ran until liquidation in 1919. The Deanshanger extension never re-opened. [16][1: p551]
Lee continues: “For many years the Stony Stratford terminus was at the Cock Hotel, but by 1910 the line was curtailed to a few yards in High Street, and in 1919 the terminus was at the Foresters Arms. After the first world war, the line was rapidly approaching derelict condition, and the company’s financial difficulties compelled it to go into liquidation on 17th July 1919; George Henry Margrave (then Secretary and Manager) was appointed liquidator. The local authorities refused to take over the line, and it seemed that the service would be finally abandoned, despite the fact that it had been conveying some 700 workmen daily, principally employees of the Wolverton Carriage Works and of the printing works of McCorquodale & Co. Ltd.” [1: p551]
Grace’s Guide continues: “In the early 1920s the line was taken over by the London and North Western Railway (LNWR) who purchased a new W. G. Bagnall tram locomotive. After the LNWR was merged into the London, Midland and Scottish Railway (LMS) the line was soon closed, in 1926.” [16]
After purchase by the LNWR, the tramway was completely re-laid with concrete placed beneath the rails to strengthen them. Lee tells us that “under LNWR management the staff consisted of three drivers, three conductors, one fitter, one bricklayer and two labourers.” [1: p551]
Under LNWR management prior to the ‘grouping’, the surviving rolling stock “comprised three small four-wheel locomotives, five bogie double-deck cars, and two 10-ton coke trucks. The passengers continued to be principally Stony Stratford men employed at the Railway Works or at McCorquodale’s in Wolverton. They then numbered about 600 daily, of whom some 550 were weekly season-ticket holders. Although the number of men employed at the works increased as time went on, the working loss to the L.N.W.R. increased also, on account of the competition of motorbuses which gave a quicker service. In 1926, no fewer than 12 of these vehicles plied between Wolverton and Stony Stratford, and the trams, with their speed limit of 8 m.p.h. were almost deserted. Schemes of electrification were considered by the railway company (by now the L.M.S.R.), but they all proved too costly, and the climax came with the General Strike of that year, when on 4th May the service was suspended, never to be resumed. Latterly, the services (which, according to the railway company’s timetable, were run “subject to the condition of roads and other circumstances permitting”) had comprised about 14 trips each way, with one or two additional on Saturdays. There were three cars in each direction on Sundays. The journey time was 15 minutes. The official abandonment was announced on 19th May 1926, and it was stated that the company had been losing £2,000 a year on the service. Latterly the total takings were only about £30 a week. [1: p553]
The LMS negotiated with Buckinghamshire County Council (BCC) which took over the track in 1927 with the Ministry of Transport’s consent. BCC immediately began lifting the track and reconstructing the road surface. Work began in June 1927, by November 1927 the length between Watling Street and Clarence Road in Stony Stratford was completed. The section between Clarence Road and McCorquodale’s Printing Works was addressed between October 1933 and June 1934.
Rolling Stock– Locomotives
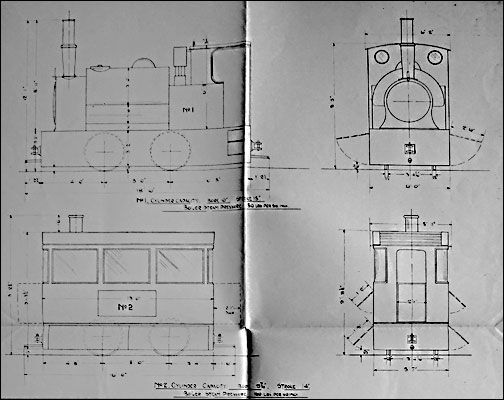
Lee tells us that, “the original locomotives consisted of two German engines supplied by Krauss & Company of Munich to a standard design then used in many continental cities for steam tramways. Some accounts of the line have stated that three, and even four, engines were provided at first, but the Board of Trade Returns to 30th June 1887, show only two, and others (if any) were presumably on loan. They had outside cylinders 8 in. in diameter by 12 in. stroke, wheels 2 ft. 6 in. in diameter, and a 5 ft. wheelbase. The working pressure was 175 lb. per sq. in. and they were non-condensing. Stephenson valve gear was used.” [1: p553]
Edwards tells us that these Krauss locomotives, “with their distinctively European canopies and massive oil lights, soon earned the tramway the nickname ‘the little German‘.” [13: p17]
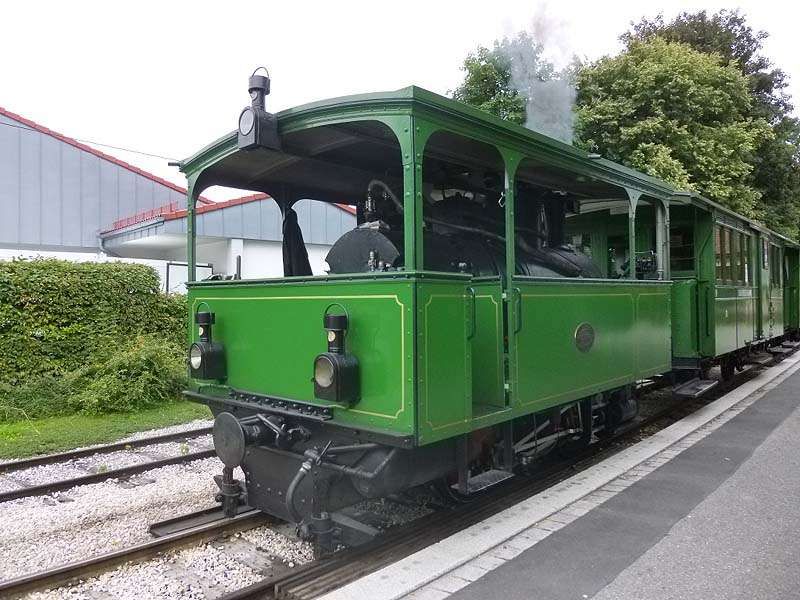
These Krauss locomotives were similar to tram locomotives sent to the Chiemseebahn in the same year, but smaller. They were rated at 40 hp and were governed to run no faster than 10 mph (16 km/h). Board of Trade regulations also required that the running gear had to be shrouded, steam exhaust had to be directed into condensers to avoid visible steam, smoke as well had to be invisible and had to be almost noiseless. [24]
This is one of the Krauss 0-4-0 metre-gauge tram locomotives built for the Chiemseebahn in the same year as those built for the Wolverton & Stony Stratford Tramway – this is Works No. 1813 of 1887. It is in excellent condition in the 21st century, operable and in frequent service. It is unique – in that this is the only example still working in regular commercial service on the line for which it was supplied. A diesel-powered replica now helps out. [25]
Sadly, unlike the locomotives sent to the Chiemseebahn, the Krauss locomotives supplied to the Wolverton & Stony Stratford Tramway “were found to be unable to handle the heavy passenger rolling stock, and two, more powerful, engines were supplied in 1887 by Thomas Green & Son of Leeds, designed to haul two large passenger cars fully loaded. These had 9 in. cylinders by 14 in. stroke, 2 ft. 6 in. wheels, and a 5 ft. wheelbase; the working pressure was 175 lb. These engines were of the tramway type with atmospheric condensers on the roof. The total loaded weight was 9-9.5 tons. A further locomotive was secured in 1900 from the Brush Electrical Engineering Co. Ltd., Falcon Works, Loughborough, which was generally similar to the Green engines, and had inside cylinders 7.5 in. in diameter by 12 in. stroke. This also worked at 175 lb. pressure and had an atmospheric condenser.” [1: p553]
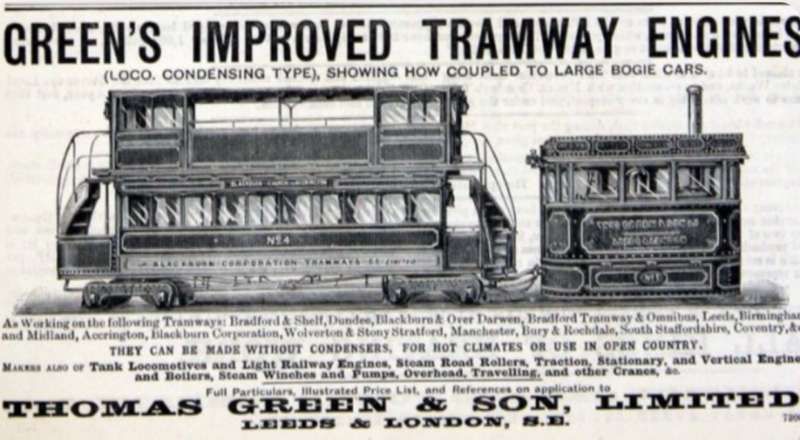
Thomas Green commenced building tramway locomotives in 1882. [27] These locomotives were initially of the Wilkinson’s patent, built under licence. This design used a vertical boiler and a vertically mounted engine which drove one set of wheels through gears. The second pair of wheels was driven through coupling rods. The exhaust passed through a chamber in the firebox to provide reheat, which in principle would make the steam invisible. The speed governor was an “Allen” paddle type which acted on the reversing gear. [26]
Thirty-nine Wilkinson type trams were delivered before Green’s developed their own design using a horizontal boiler, inclined cylinders and Joy valve gear. These tram engines first appeared in August 1885. The machine quickly evolved such that Green’s tram engines became one of the market leaders. [26][27] It was Green’s own design of tram engine that was supplied to the Wolverton & Stony Stratford Tramway.
Lee continues: “After the acquisition of the line by the LNWR., a four-coupled saddle-tank engine was secured, in 1921, from W. G. Bagnall Limited of Stafford. Excepting that the motion was boxed in, this locomotive was of conventional railway design, without the tramway type casing over the upper works. Outside cylinders were 10 in. in diameter by 15 in. stroke the coupled wheels 2 ft. 9.25 in. in diameter, and the wheelbase 5 ft. The working pressure was only 150 lb. The saddle tank carried 300 gal. of water and the side bunkers had a capacity of 18 cu. ft. The total weight in working order was 16 tons. This engine was finished in standard LNWR. livery. As the standard chimney was found to be too short for the comfort of upper deck passengers, an ugly stove-pipe extension was added.” [1: p553]
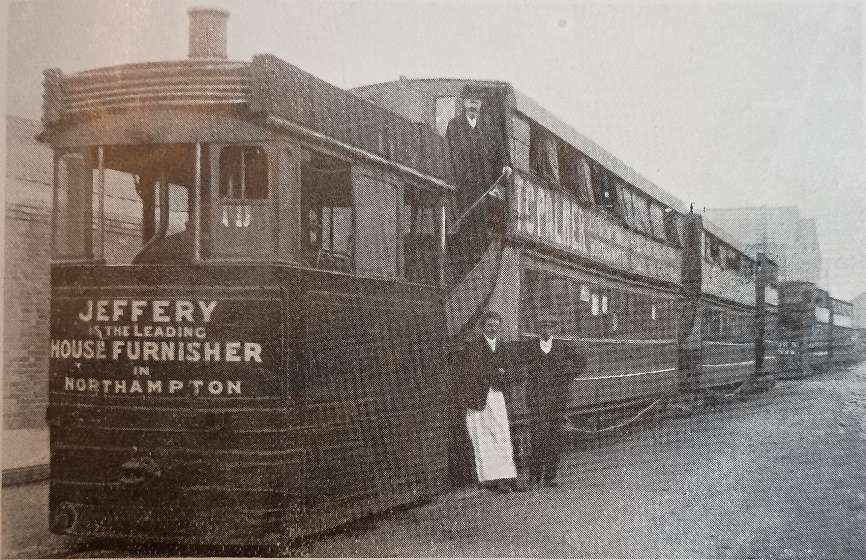
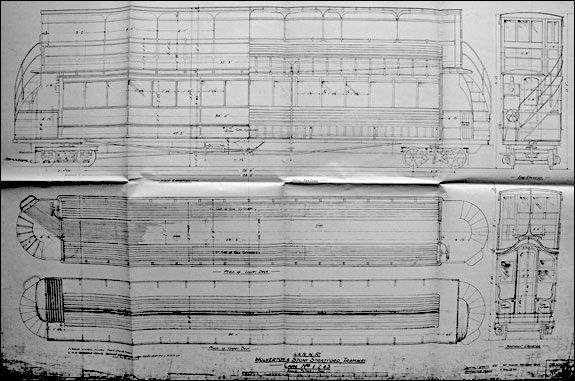
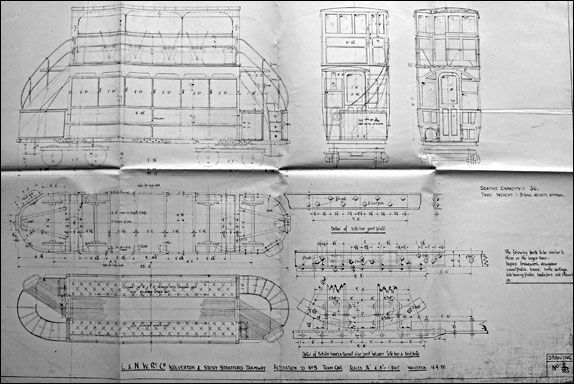
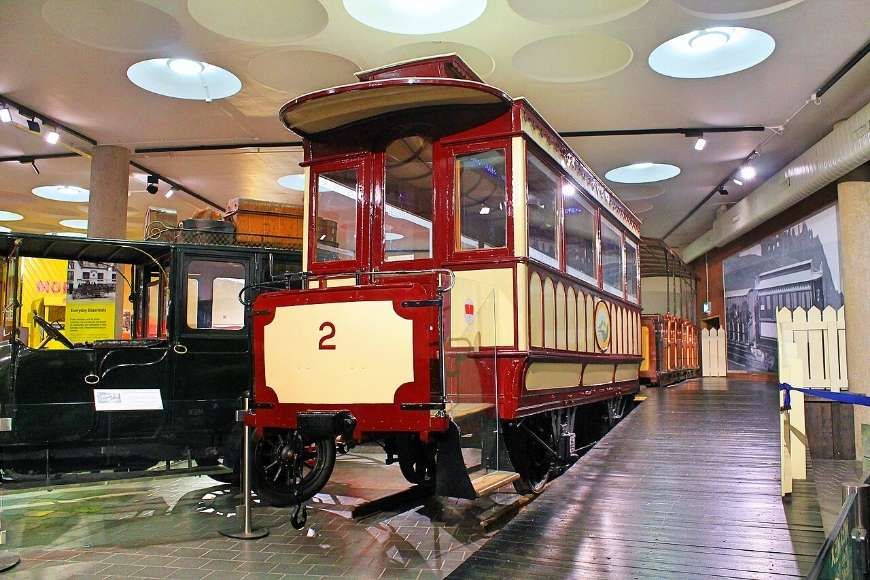
The passenger rolling stock consisted of large double-deck covered-top tramway cars which were mounted on bogies; “there were at first five in all, built by the Midland Carriage & Wagon Company, then of Shrewsbury, and these lasted throughout the life of the undertaking. The three of the largest type each seated 100 and were 44 ft. long and 5 ft. 9 in. wide; they were intended for the workmen and were said to be the largest tramway vehicles in the country. ” [1: p554]
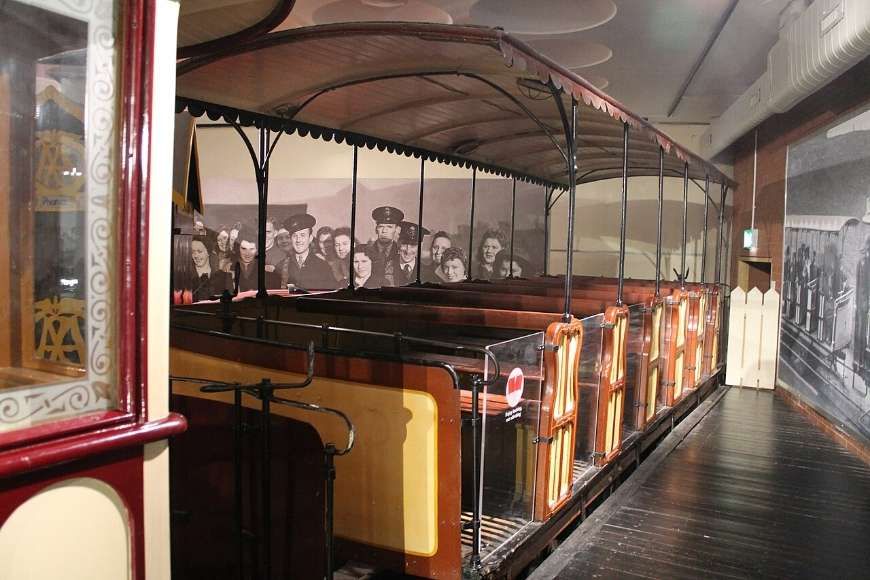
Edwards comments that the 44ft long 100-seat tramcars were the largest “to run in this country until the Swansea and Mumbles Railway built their gigantic electric cars many years later. The coaches had two inward-facing benches on the lower deck and a single continuous slatted bench on the upper deck where passengers faced outwards. The upper sides were open to the elements apart from waist-high decency boards above which were fitted canvas blinds.” [13: p18]
Edwards continues: “Capstan-operated brakes were fitted on each end platform, the locomotives also being equipped to operate the trailer braking by pull-rods and chains. The couplings of these cars were attached to the bogie centres. Originally the illumination was provided by oil lamps but acetylene lighting was later installed to be replaced again by conventional Pinsch gas lighting after the takeover of the line by the LNWR.” [13: p18]
Lees says that “Another car, upholstered, accommodated 80 passengers and was 38 ft. long and 6 ft. wide; and one [which] seated only 50 passengers, was 24 ft. 6 in. long, and 5 ft. 9 in. wide.” [1: p554]
Edwards mentions that the 80-seat tramcar had “neither decency boards or blinds on the upper deck as first built and, most unusually and inconveniently, internal landings to the staircases from the platforms. Decency boards and blinds were added later.” [13: p18]
The 50-seat tramcar “was the only one to be fitted with upholstered seating. One presumes that it was intended for use at times when the workmen would not be travelling. None of the tramcars carried external numbers and all of those mentioned were to last the lifetime of the undertaking.” [13: p18]
“A sixth car is shown in the Board of Trade Returns for the year ended 30th June 1888, and continued to feature until 1911. This was a small single-deck open-sided vehicle with curtains, seating 20 passengers, which does not appear to have been used after the closure of the line in 1889. For many years it remained in the depot at Stony Stratford.” [1: p554]
Other Rolling Stock – Goods
In its early years the undertaking had a number of parcel vans and small goods wagons, as well as 10-ton coal and coke trucks, 24 ft. long, also built by the Midland Carriage & Wagon Company. Eight goods trucks were shown in the return to the Board of Trade for 30th June 1888, at the time goods traffic was begun. It seems that goods traffic declined quite early in the history of the undertaking and all the parcel vans and most of the wagons were sold for scrap. Two of the wagons were of interest in having wheels with adjustable flanges so as to be capable of operating either on rail or road. The flanges were in sections and so arranged that they could be withdrawn inside the tread surface. When the train reached the Cock Hotel, they were, hauled off the line by horses to effect delivery at the door of the consignee. Two horses are shown in the company’s stock in 1888 and 1889. In its later years, the traffic was wholly passenger, apart from the carriage of mails.” [1: p554]
And finally
Grace’s Guide says that, “The line was unusual for a British street tramway being entirely worked by steam locomotives; indeed it was the last steam worked street tramway in the United Kingdom.” [16]
References
Charles E. Lee; The Wolverton and Stony Stratford Tramway; in The Railway Magazine, Volume 98 No. 616; Tothill Press, London, August 1952, p547-554.
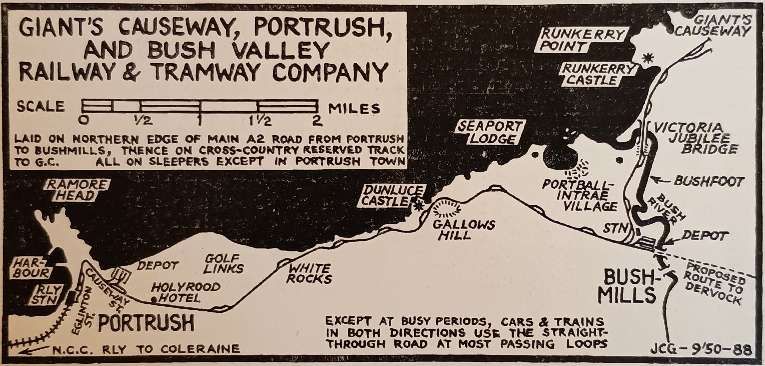
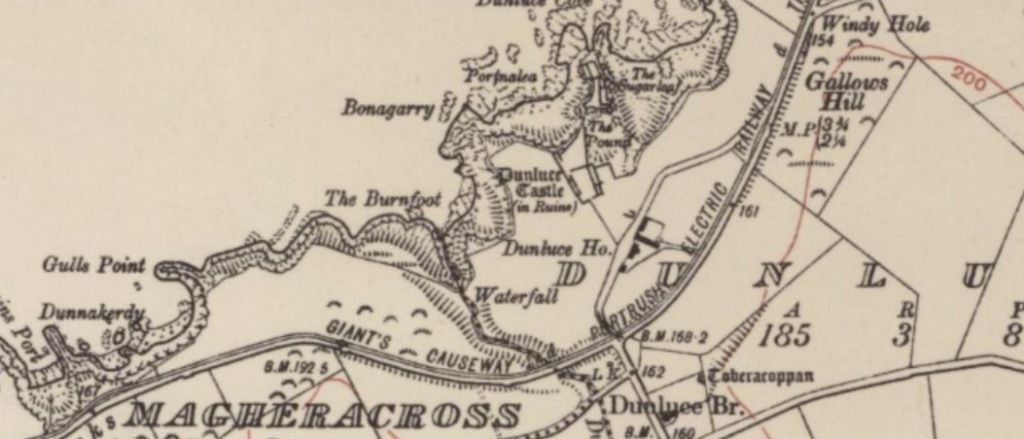
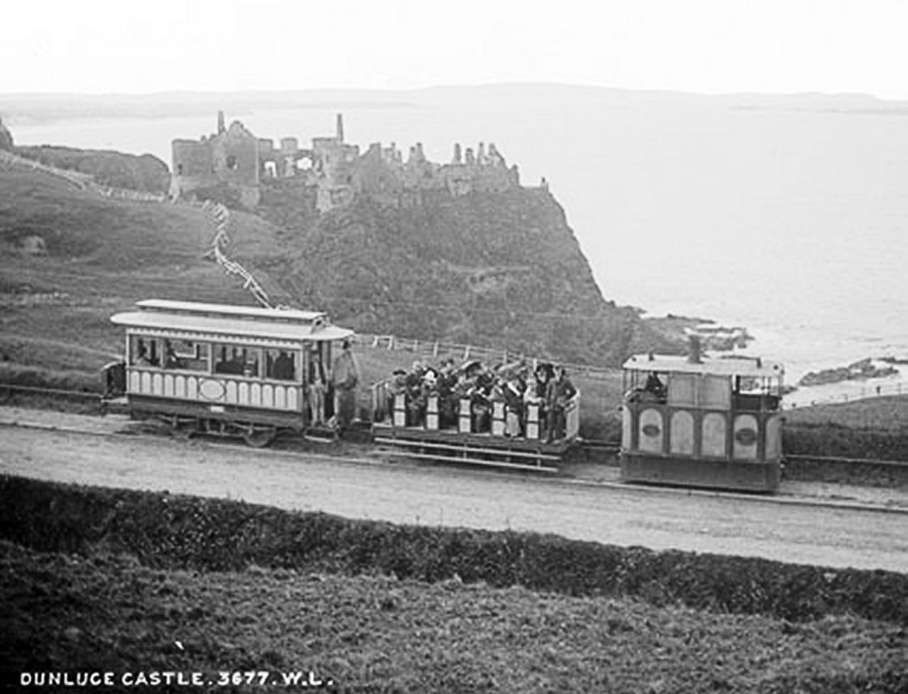
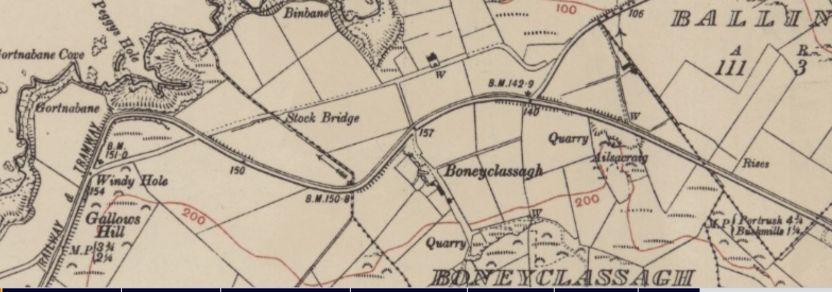
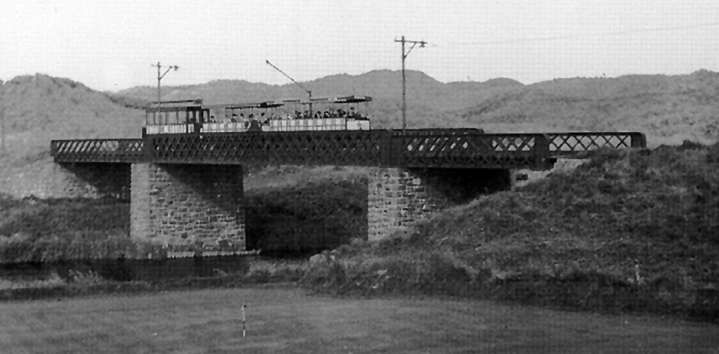
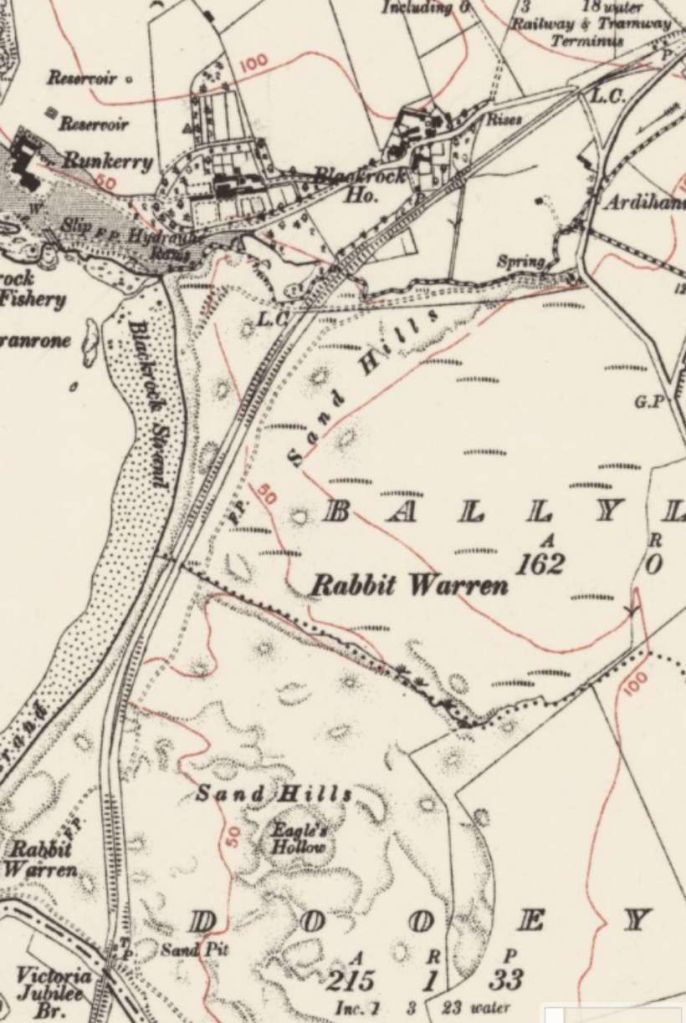
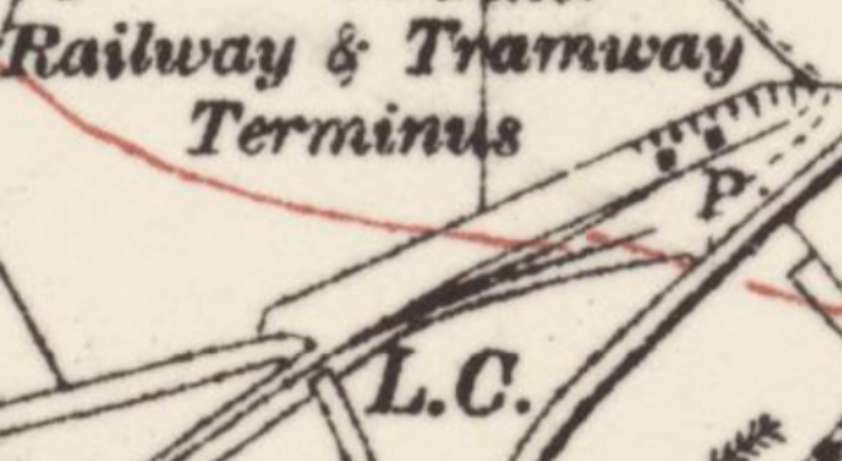
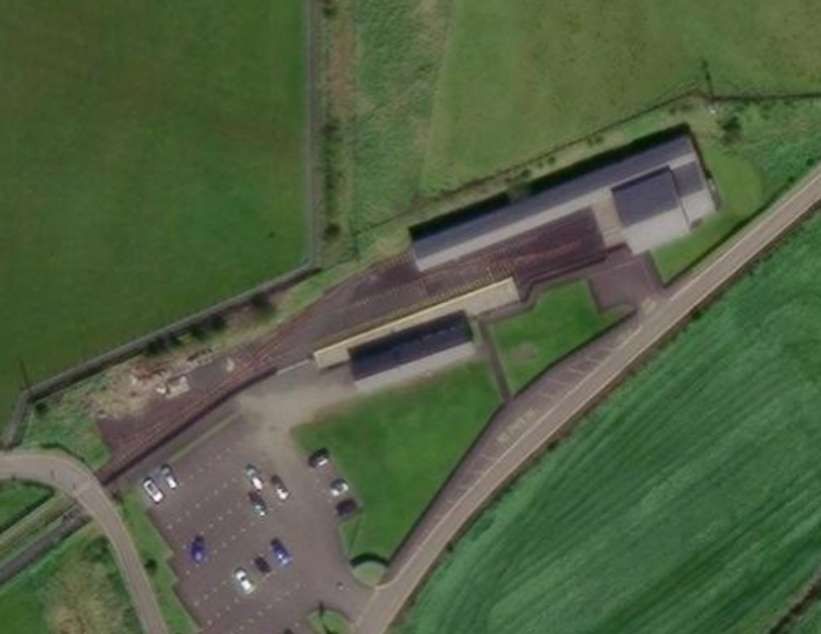
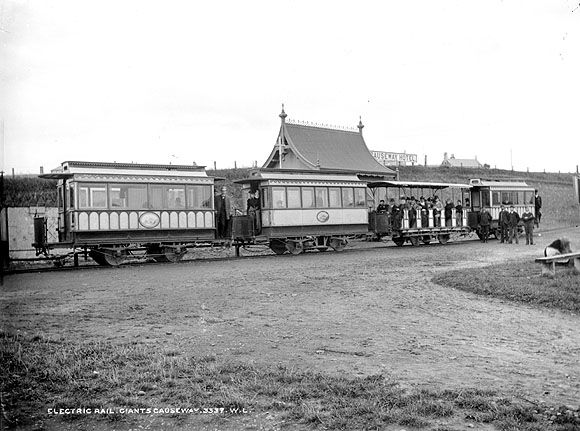
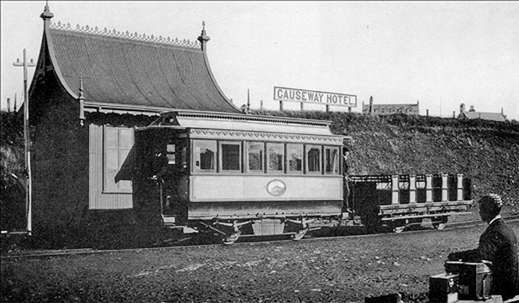
In the Summer of 2024, my wife and I visited Giants’ Causeway as part of a few days meandering along the North coast of Ireland. When reading a series of older copies of the Modern Tramway, I came across an article written in 1950. … The Modern Tramway of September 1950 featured an article by D. G. Evans about one of the very early electric tramways – The Giants’ Causeway and Portrush Tramway. His article is quoted in full in this article.
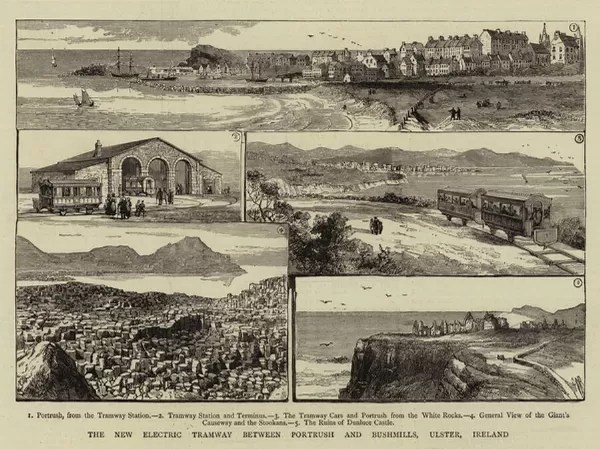
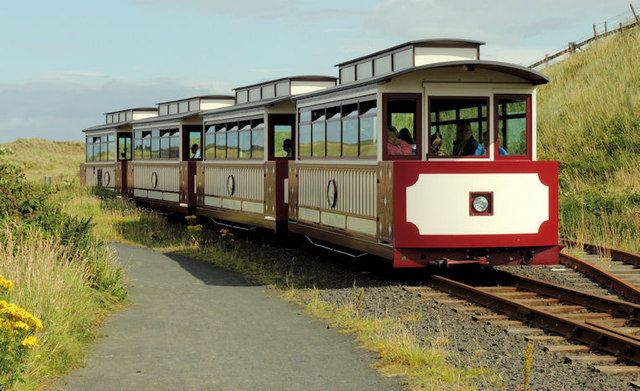
Wikipedia tells us that The Giants’ Causeway, Portrush, & Bush Valley Railway & Tramway was a “pioneering 3 ft (914 mm) narrow gauge electric railway operating between Portrush and the Giant’s Causeway on the coast of County Antrim, Northern Ireland. The line, 9 1⁄4 miles (14.9 km) long, was hailed at its opening as ‘the first long electric tramway in the world’. [2] The Giant’s Causeway and Bushmills Railway today operates diesel and steam tourist trains over part of the Tramway’s former course.” [3]
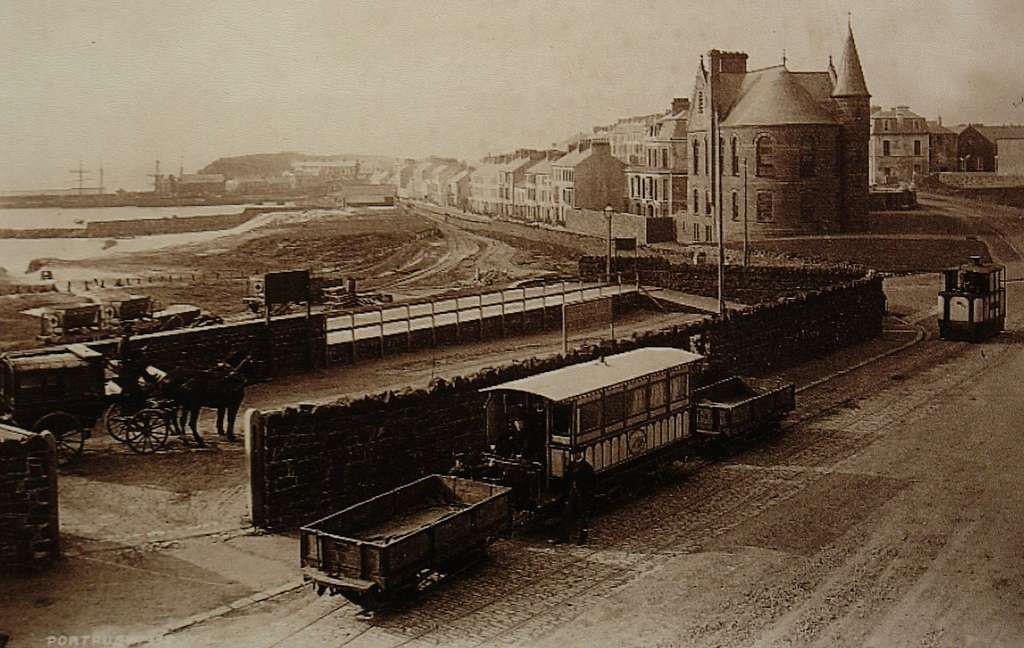
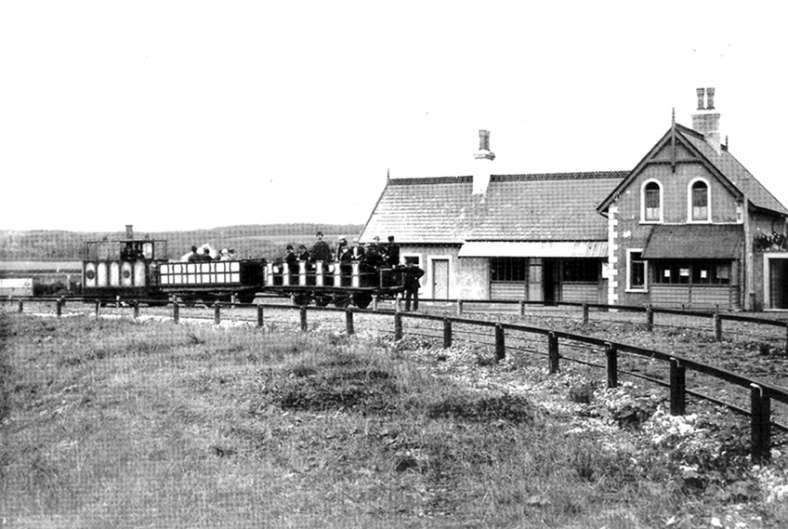
The Giants’ Causeway, Portrush, & Bush Valley Railway & Tramway. [24]
Writing in 1950, Evans says that:
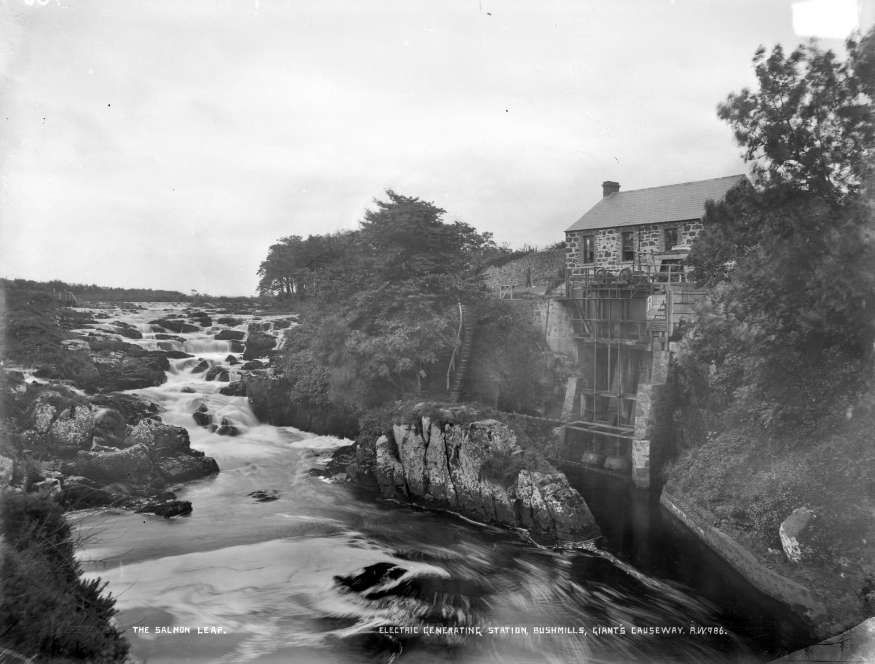
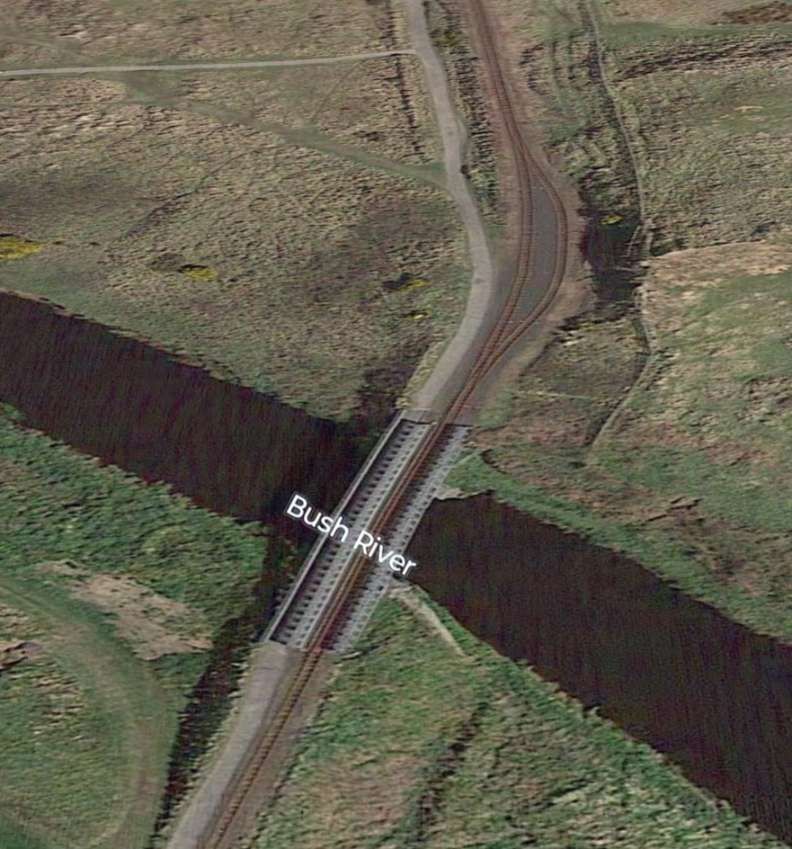
“The recent decision of the shareholders to close down the Giant’s Causeway tramway was sad news to those who knew the line and can recall the pleasure of breezy rides along the cliff tops in the qua’nt cars that had seen but little change since their first day of operation. The line was the first tramway in the United Kingdom to be operated by electricity and the current was produced by a hydro- electric power station at Walkmills, one mile from the Bushmills terminus. A waterfall on the river Bush was the source of the hydro-electric power.
Opened from Portrush station to Bushmills in January, 1883, the line was extended to the ultimate terminus at Giant’s Causeway in 1887. The original current collection was from a side conductor rail 17in. above ground and 22in. from the inside running rail. This method was of course unsuited to a street tramway and the portion of the line which ran in the centre of the street through the town of Portrush was therefore worked by steam tram engines of the usual vertical boiler pattern. This method of operation of the first half-mile of the tramway persisted until 1899, when a change over to the overhead trolley system was made. From that date until 1915 the steam tram engines were retained for use during the peak traffic periods in the summer at which time the original power station proved inadequate for the needs of the system.” [1: p185]
Wikipedia gives some of the background to the opening of the line: “The Giant’s Causeway Tramway came about through the enthusiasm of William Atcheson Traill, M.A.Ing., of Ballylough (1844–1934), together with his brother Dr Anthony Traill, who between them undertook most of the promotion and fundraising for the line. W.A. Traill was a man with not only an interest in railways but also a keen interest in technological developments in engineering. The Act of Parliament incorporating ‘The Giant’s Causeway, Portrush, and Bush Valley Railway and Tramway Company’ was passed on 26th August 1880. It authorised a tramway from Portrush to Bushmills and a railway from there to join the Ballycastle Railway (also 3 ft. gauge) at Dervock. The only section of the railway never built was a short spur at Dervock. [5] The Dervock section was abandoned by an 1885 Act, which authorised extension from Bushmills to the Causeway.” [3][6]
“At the Berlin Trade Fair of 1879 Siemens was demonstrating the first railway electrification system and it was that which led the British branch of the firm to be commissioned to incorporate this new technology into the Giant’s Causeway Tramway venture. Sir William Siemens (1823–83) was briefly a Director and Siemens Brothers of London were appointed electrical engineers to the company, their representative being Dr Edward Hopkinson, who later went on to work on the Bessbrook and Newry Tramway and the City & South London Railway. Surveying and civil engineering work was carried out by Edward Price, son of the eminent Irish civil engineer James Price.” [3]
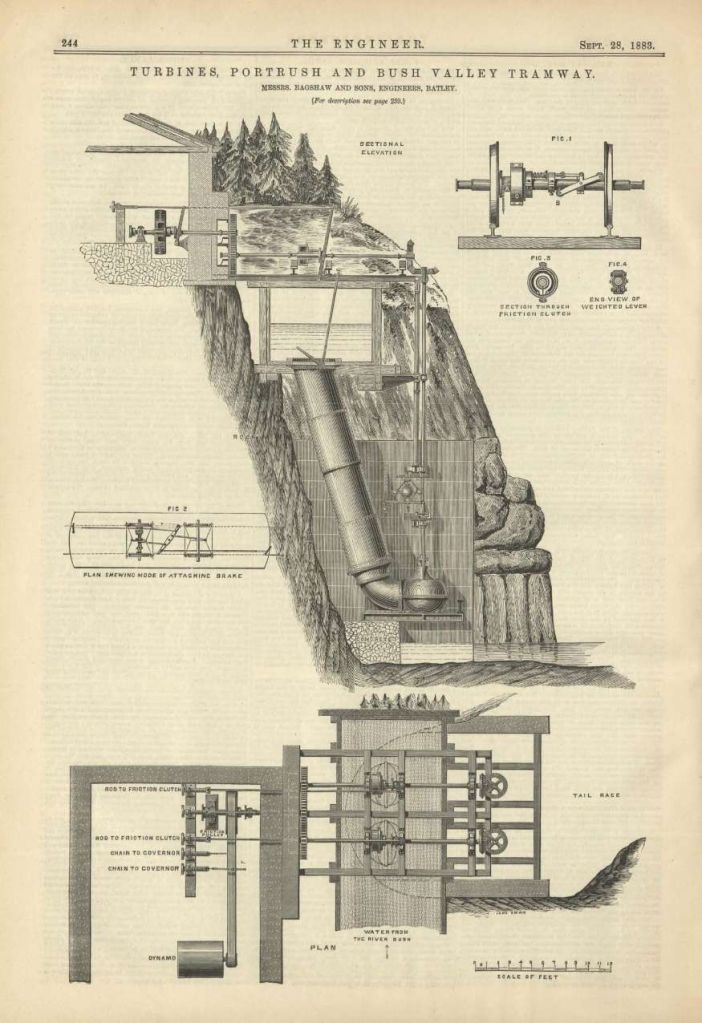
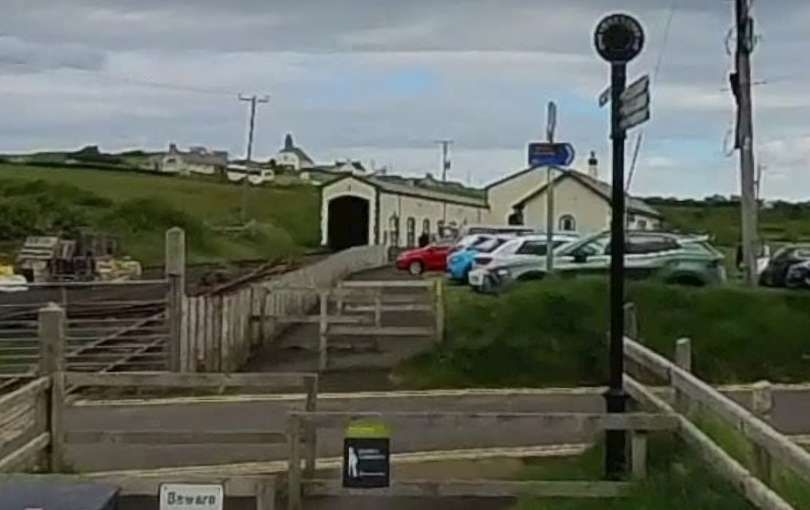
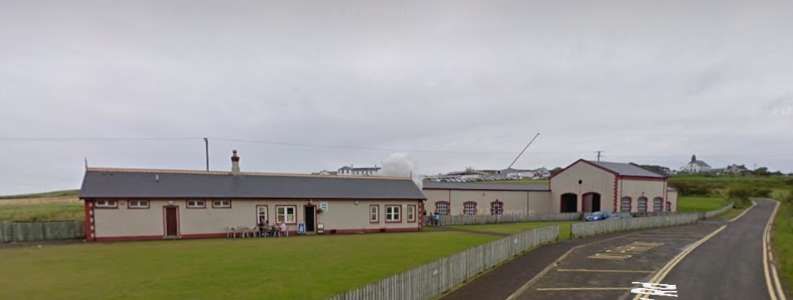
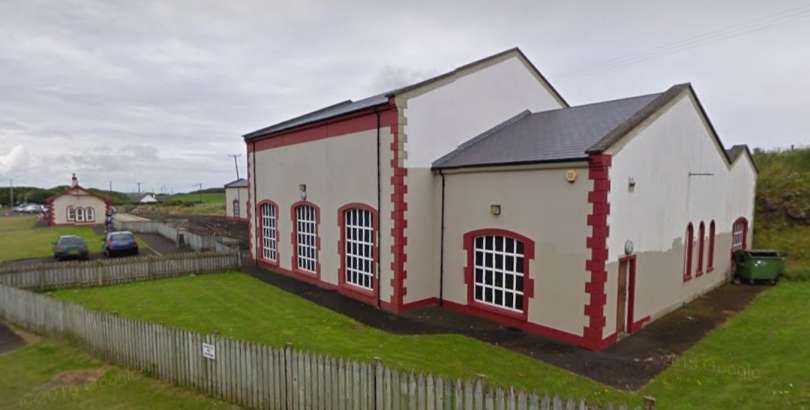
“The line was the world’s first to be powered by hydroelectricity, something that was later developed at Bessbrook and in Switzerland. Traill built a generating station at Walkmill Falls (24 feet (7.3 m)) head), near Bushmills, installing 104 horsepower (78 kW) Alcott water turbines to produce up to 250 volts at 100 amps of electrical power for his line. Later 160 horsepower (120 kW) turbines were installed. [8] This building, although without its equipment, is still in existence.” [3]
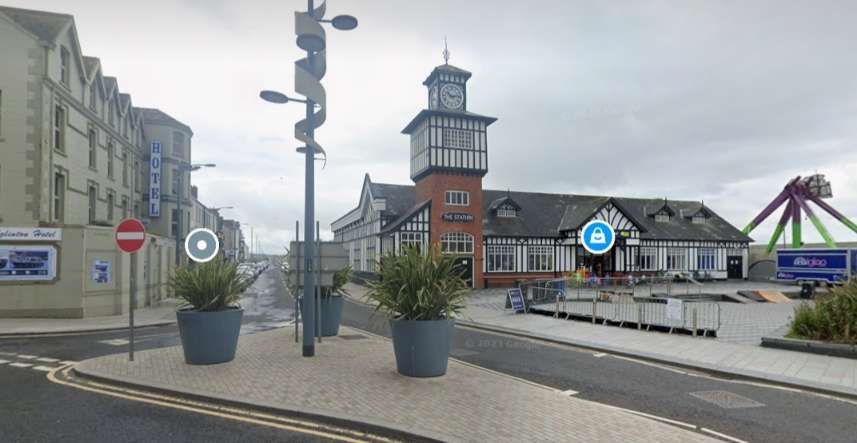
“Because of legal problems over water rights, erection of the Walkmills turbines was delayed and when the first section of the tramway, from Portrush to Bushmills, was opened on 29th January 1883 some of the timetabled passenger traffic was handled by steam tram engines which were in any case necessary on the town section in Portrush where it was impossible to provide electric power since this was originally fed to the trains via an elevated third rail which ran alongside the line. Therefore, a 25 horsepower (19 kW) steam generator was installed at the Portrush depot, [9] (by 1936 replaced by a 550 volt diesel generator for the Portrush-Dunluce section).” [3]
“The ceremonial opening, using electric traction, took place on 28th September 1883 although a full scheduled electric service did not begin until 5th November and steam locomotives remained available for use until at least 1926.” [3] In 1897, of the annual mileage travelled, “17,797 miles (28,641 km) were steam operated and 4,721 miles (7,598 km) electric. In 1901 the figures were 7,423 miles (11,946 km) and 23,550 miles (37,900 km) respectively. Very little use of steam was made after 1916.” [3]
Evans tells us that:
“In 1915, the Portrush power plant was installed and the two remaining steam engines were kept as stand-by equipment for use in the event of electricity failures. They were finally sold in 1930 to a public works contractor.
The voltage was 550 d.c., the Portrush plant supplying the Portrush-Dunluce section and the original station outside Bushmills the remainder of the line. Laid to the 3ft. gauge, the line was 7.5 miles in length, single track throughout with loops at irregular intervals.
The loops were normally run through on the landward line, the other line being used only when it was necessary to pass another car. All points (except those at the Portrush terminus which were tramway section) were of light railway type, controlled by dolly-weighted point levers which normally held the rails set for the direct (or landward) line.” [1: p185]
Wikipedia tells us that “the section from Bushmills to the Giants’ Causeway opened on 1st July 1887. In 1895, a cyclist died of electric shock after coming into contact with the conductor rail. At the subsequent inquiry it was revealed that the line voltage varied from an average of 290 V up to 360 V, and the company agreed to a temporary reduction in the voltage, which limited the number of services that could be electrically worked. The third rail was replaced by overhead electric wire using side poles from 26th July 1899, apparently initially at 250 V. Voltage drop remained a problem and the tram was the subject of a song by the Irish Rovers which comments on its slow speed. The song was written by Hugh Speers of Bushmills. [10] After upgrading of the Bushmills generating station in 1907 it was possible to produce a 550 V output.” [3]
Evans continues:
“As the wiring was double and followed the rails through the gantry type standards at loops, it followed that the trolley pole had to be changed from the wire normally used (the landward wire) to the seaward wire when a loop wasto be used pass another tram. The writer has often seen this trolley changing performed whilst the cars her were at full speed on a downward grade and has marvelled at the dexterity with which the trolley wheel was placed on the opposite wire. The operation was also seen when the cars were descending the long hill outside Portrush. It seemed usual to lower the trolley bo boom west of White Rocks loop to the Holyrood Hotel. and coast from a point just West of White Rocks loop to the Holyrood Hotel.
The Portrush terminus was outside the N.C.C. (formerly B. & N.C.R.) station and consisted of a run-round loop and lay-by siding in Eglinton Street. At one time there was a short branch which diverged just beyond the loop and ran down to the Harbour, but this was taken up about 1893.” [1: p185-186]
“For a short distance, the line ran due north before turning in a 75-degree curve into Causeway Street. The single track was of tramway section rails as far as the outskirts of the town. From a point near the depot the line was laid on flat-bottom light railway track on the seaward side of the Portrush-Bushmills road. The depot consisted of a dead end road with a permanent way yard at one side. The auxiliary power station was also here. This power station had a modern diesel plant installed in latter years.
After leaving the depot the line ran through open country on its roadside reservation. Climbing steadily, it passed the famous Royal Links and at White Rocks gained the cliff tops. Onward to Dunluce, the trams ran close to the sea and in places the cliffs fell almost sheer from the trackside. There can be no doubt that the tramway, with its open toast-rack cars, was the best means of appreciating this wild and rugged coast.” [1: p186]
“Before reaching Dunluce, the tramway climbed to its highest point at Clooney Hill. This section, nearly 200ft, above the sea, abounded in sharp curves, gradients of 1 in 40 and even a short stretch of 1 in 30.
Beyond Dunluce, the line ran inland for a short distance below Gallows Hill, reaching the coast again at its most spectacular point. Here one could gaze down 140ft. to the foam-covered rocks below. From this point the line again ran inland and after three more passing loops reached Bushmills, a village known for its whisky. Bushmills had a light railway station provided with waiting room, luggage office and lavatories.” [1: p,186-187]
“At one side of the station yard is a small tram shed with accommodation for two cars. The line to the car shed is of interest in that it was to have formed the beginning of an extension to Dervock on the 3ft. gauge Ballycastle Railway. It was with a view to through running with the latter railway that the narrow gauge was adopted for the electric line. The owners wisely decided that an extension to the Causeway would probably be more remunerative.
From Bushmills the line was completely private right-of-way and negotiated cuttings and embankments of railway proportions. After passing a loop, the Bushfoot Golf Links request halt was reached. Soon after this, the line crossed the Bush river by the impressive Victoria Jubilee Bridge, a three-span structure so named because it was erected in 1887.” [1: p187]
“On the other side of the bridge the line passed through sandhills and rabbit warrens, reaching the coast again and following it for a short distance before finally turning inland for the last time. There were two loops between the Victoria Bridge and the terminus; the layout at this latter point consisted of a run-round loop and a siding. The passenger accommodation was unpretentious, consisting merely of a shelter. The tourist had still almost a mile to walk before reaching the Causeway itself, and here, as is usual in such places, he has to pay for admission.” [1: p187]
This extract from the 6″ Ordnance Survey shows the remaining length of the line. The terminus is shown in the top-right of the image. [23]
Discover Portrush describes the last part of the journey, thus: “the tram would run behind Black Rock Strand for about half a mile before turning right and climbing towards the Causeway Terminal. On the left passengers would see Runkerry House, a fine red sandstone house constructed in a striking location. Then part of the McNaughten Estate, occupied by two unmarried McNaughten ladies – later it became a home for the elderly after being passed to the government in lieu of death duties. Later still, it became an outward bound centre and is now divided into apartments.” [21]
The next three views show the modern preservation line’s buildings in the early 21st century.
The first of these three views shows the approach to the stationary from the Southwest.vThe second is a panorama of the station site and the third looks into the Station site from the East. [Google Streetview, September 2011]
Operation
Evans describes the operation of the original line:
“The somewhat tortuous route along the cliff tops gave the line a reputation for scenery rather than speed, but high speeds were frequently attained on the long falling gradient between White Rocks and the Portrush depot.
When the full summer service was operating, the lengthy sections between passing loops rendered operation difficult, and, as some of the loops were not visible from each other, boy signallers were employed. These boys were supplied with white and red flags which they would display to the drivers from a convenient vantage point, the red flag calling on an eastbound car and the white a westbound
The small shed at Bushmills was used by the morning tram from the village which left, with a load of school children and others, to journey into Portrush before the main service started from the depot The winter service was extremely meagre and did not continue beyond Bushmills out to the Causeway unless three or more passengers booked through to that point. During the summer peaks five sets (of one motor car and two trailers) were often in operation at one time.” [1: p187-188]
Wikipedia tells us that “Traill, a former geological surveyor, expected a considerable mineral traffic between quarries along the line and Portrush harbour, and there was originally a goods branch into the main square of Bushmills. However, this traffic fell away, the narrow gauge harbour branch being taken up when the Northern Counties station was opened in 1893, [11] and for most of its life the line primarily served tourists visiting the Causeway. From 1925/26 the line was closed down during each winter.” [3]
“Increased patronage, partly from military traffic, during World War II meant a brief revival of winter services, but receipts were becoming inadequate to support maintenance of the company’s ageing assets, and the line did not reopen after the end of the 1949 season (last day of regular service 30th September 1949), [12] and was subsequently dismantled.” [3]
Nos. 20-23 (toast-rack motor-cars with canopies, originally completely open).
No. 24 (vestibuled motor-car, Peckham pendulum truck, originally double deck 3ft 6in. gauge car and purchased as such from Dunfermline and District Traction Co., August, 1937. It had longitudinal cushioned seats).” [1: p188]
Wikipedia expands somewhat on the rolling-stock record provided by Evans: “the original cars were built by the Midland Railway Carriage and Wagon Company and were later followed by 5 examples from GEC, each with 2 x 20 horsepower (15 kW) British Thomson-Houston motors, and also a Peckham car. There were a maximum of six electric power cars owned at any one time, all being single-truck, single-deck vehicles with both enclosed and “toast rack” examples; typically these would haul several 4-wheel “toast rack” trailers, of which there were 15. There were four steam tram engines, ordered from Wilkinson of Wigan. They had vertical boilers, weighed 7 tons and burnt coke. No.2 was scrapped in 1899, No.1 converted to a ballast wagon in 1910 and Nos. 3 (Dunluce Castle) and 4 (Brian Boroihme) were sold in 1930 for the River Bann Navigation works near Portstewart.” [3][11]
“In 1938 a final electric tram was added to the stock as number 24. This vehicle was formerly a double deck Dunfermline and District Tramways car which was both re-gauged and extensively modified to become a single decker with enclosed ends for the Giants Causeway route.” [3][14]
The modified Dunfermline tram which was given the number 24. It was once a double-deck tram and ran originally on a different gauge. [21]
“A power car and trailer are restored at the Ulster Folk and Transport Museum, Cultra and another power car is in the care of the National Transport Museum of Ireland at Howth.” [3]
Full details of the steam locomotives can be found here. [17]
Evans concludes:
“The disappearance of this historic tramway, which changed so little in its 66 years of operation, yet provided a useful amenity, and an attraction for tourists, will be mourned by many and the line will be greatly missed by holidaymakers who have in previous years enjoyed rides along its scenic coastal route.” [1: p188]
The editor of The Modern Tramway commented: “We understand that a conference of local authorities is being held to urge the Government to subsidise the Giants Causeway line to the amount of £2,000 a year, so that it may be carried on as a tourist attraction. This is a move that commands our support, but we submit that the modernisation of the line might after a while actually render the subsidy unnecessary.” [1: p188]
Preservation
The Giants’ Causeway and Bushmills Railway was later constructed over the final two miles (3.2 km) of the Tramway and carried its first passengers at Easter 2002. Trains were running at least until the end of 2024. [3][13]
The Giant’s Causeway and Bushmills Railway (GC&BR) is a 3 ft (914 mm) narrow gauge heritage railway operating between the Giant’s Causeway and Bushmills. It “uses equipment originally assembled by Lord O’Neill for a tourist line at Shane’s Castle, Country Antrim, which closed in 1994. The idea of using this to revive part of the Tramway was largely conceived and promoted by David Laing. The Giant’s Causeway and Bushmills Railway Company is a not-for-profit organisation with charitable status. Clearance of the trackbed commenced at the end of 1999 and the railway carried its first passengers at Easter 2002.” [27]
“On 10th July 2010 the railway took delivery of a specially customised 4 coach diesel multiple unit capable of accommodating up to 90 passengers. Manufactured by Severn Lamb UK Ltd., it was designed to enhance the visitor experience to the North Antrim Coast and to recreate, in so far as was possible, the passenger experience of the original hydro electric tram. Commissioning of the new rolling stock by the manufacturers began on Monday 12 July with the inaugural journey three days later. The DMU is powered by a Kubota V3600-E3 engine and shares the line with the previous steam rolling stock. All vehicles run on bogies. The power vehicle is on the Causeway side and is shorter (4 windows) than the three trailers (5 windows).” [27]
Rolling Stock
In addition to the 4-coach DMU, the line has three locomotives and a number of coaches.
The Locomotives owned by the preservation line. [27]
References
D. G. Evans; The Giants’ Causeway and Portrush Tramway; in The Modern Tramway Vol. 13 No. 153, London, September 1950, p185-188.
Railway Times; 22nd September 1883. (Cited by the article at Reference No. 3)
As part of a batch of magazines from the 1950s and 1960s I picked up a number of editions of ‘Modern Tramway’ from 1963 into 1964. ‘The Modern Tramway’ was the journal of the Light Railway Transport League (LRTL). By 1963 it had dropped the ‘The’ and was published jointly by Ian Allan and the LRTL. Its formal title was ‘Modern Tramway and Light Railway Review’.
The February 1963 edition of the journal was priced at 2s 6d.
Among a number of articles in the journal was a piece by G. Hyde, The Strange Tale of No. 2.
This No. 2 was Beyer Peacock steam tram engine No. 2. It is shown in the featured image above in which it is seen at Beyer Peacock’s works in Gorton, Manchester. [2]
It was originally built to a Wilkinson patent for the New South Wales Government tramways in 1885 and shipped to Australia in April of that year. It made several trial runs on the Redfern Station line of the Sydney steam tramways, but it evidently did not compare favourably with the Baldwin locomotives then in use there. Hyde says that, “It was reputed to have a heavy fuel consumption. and Beyer Peacock’s received complaints about the difficulties in maintaining a sufficient head of steam, but the engine hardly had a fair trial as only short runs were made with it, and the drivers’ inexperience may have contributed to its shortcomings. The trials were invariably carried out after midnight so no photographs were taken of the engine in service; neither was it ever incorporated into the Sydney tramway stock, consequently it never had a fleet number. Whilst in Australia it was referred to as ‘John Bull’.” [1: p48]
After its short unsuccessful trials in Sydney, John Bull was shipped to the small port of Wollongong and worked the isolated Wollongong-Clifton section of the New South Wales Government railways. It stayed there until the section was connected to the main coastal line in 1886.
Hyde commented that at this point “John Bull” disappeared. “Nothing further is known about it until it turned up again at Manchester in 1890, when it featured in Beyer Peacock’s stock list as yard engine No. 2. The mystery of this missing four years is heightened by the fact that Beyer Peacock’s records refer to the engine as having been salvaged, and returned to their works. This led to the rumour which persists in the Gorton works that No. 2 fell into the sea at one point during its travels round the world.” [1: p48]
In 1890 the loco was modified, the duplicate controls were removed, as also were the wheel curtains, then railway type buffers and drawgear were fitted.
In 1915 a steam brake was fitted, then in 1930 a new boiler was installed and in 1958 a new steam dryer was fitted. It was ultimately withdrawn from service in early 1959.
Hyde asserted that No. 2 was “certainly the biggest tramway engine ever built to Wilkinson’s patent, and was one of the most powerful steam tramway engines ever to be built in this country Its gross working weight of 16 tons compares with the 12 tons of the heavy 83-86 class Wilkinson engines of the Manchester, Bury, Rochdale & Oldham tramway, one of which is being kept by the British Transport Commission.” [1: p49]
Hyde provided detailed information about No. 2. … It had two simple cylinders, 9.5 in. diameter by 12 in. stroke. The crank axle had a pinion in the centre with 20 teeth geared to a spur wheel on the driving axle having 33 teeth, thus having a ratio of 1.65 to 1. It was fitted with a Stephenson type link motion. The four coupled driving wheels were of 30 in. diameter, with a wheelbase of 6 ft. 8 in. The water capacity was 225 gallons and there was a fuel space of 11 cubic feet. The vertical boiler was of the Field type, and had 121 tubes, each with an outside diameter of 2.13 in. The tubes, which project down into the firebox, were between 19 and 27 inches long, and had fitted concentric open-ended internal tubes known as circulating tubes. The working pressure is 150 lb. per sq. in., and the total heating area was about 184 sq. ft. with a total fire grate area of 10.8 sq. ft. The engine has an overall length of 13 ft 6 in. and an overall width of 7 ft.
“For close on 70 years, No. 2 trundled round the Gorton works of Beyer Peacock’s being affectionately known there as Old Coffeepot,” and it is hoped that it will now see many more years of active life at the Crich Tramway Museum. In the erecting shops at Beyer Peacock’s the wheels were re-tyred and the new tyres turned down to tramway standards. Then, after boiler inspection and insurance formalities had been completed, it was despatched to join the T.M.S. fleet at Crich as the only working British steam tram engine.” [1: p49]
Hyde noted that “Project Steam Tram” would involve the Tramway Museum Society in some heavy capital outlay, and that the Society was appealing to tramway enthusiasts to take an interest in the project and support it with donations. [1: p49-50]
More recent research has filled in some of the unknowns which Hyde commented on in 1963. It was Beyer Peacock Works No. 2464 and carried an operational number of 47 in Australia. In the missing years the locomotive is thought to have spent time working in Illawarra between 1887 and 1888 prior to returning to the UK in 1889. That it was at Illawarra may be a reference to its work on the Wollongong-Clifton section of the New South Wales Government railways. If so then it remained in New South Wales longer than the article in ‘Modern Tramway‘ suggested. [2][3]
As a works shunter, the tram operated in the firm’s large works complex towing huge Beyer-Garrett locomotives from one shed to another.
After arriving at Crich in 1962, No. 2 “was operated under steam for some years from 1966. A period of off-site storage between 1971 and 1978 was followed by a return to steam in the 1980s, during which it even performed on the Santa specials. However, the work involved in firing it up, supplying it with coal and clearing away the ash helped to explain why steam traction gave way to electricity on Britain’s tramways in the early years of the twentieth century.” [3]
Crich Tramway Museum’s website tells us that, “because it was destined for export and as it was expected to be pulling much heavier loads it was much larger than those built for the home market. With 30 inch driving wheels and weighing almost 16 tons it was a true giant of a tram engine, though it did boast a number of features in common with other road-going locomotives including the fully enclosed wheels and a mechanism – in this case a “Wilkinson Patent” exhaust superheater – that was designed to reduce the amount of smoke emitted.” [3]
References
G. Hyde; The Strange Tale of No. 2; in Modern Tramway Volume 26 No. 302, LRTL and Ian Allan, Hampton Court, Surrey; February 1963, p48-50.