The featured image for this article is a photograph of Canadian Pacific Railway No. 2816 ‘Empress’ leading an excursion on 10th May 2008. [5] The Canadian Pacific (CP) and the Canadian National (CN) are both North American companies that choose to call themselves ‘Railways’ rather than ‘Railroads’. (This photo is licensed under the Creative Commons Attribution-Share Alike 3.0 Unported license.)
“Rail transport terms are a form of technical terminology applied to railways. Although many terms are uniform across different nations and companies, they are by no means universal, with differences often originating from parallel development of rail transport systems in different parts of the world, and in the national origins of the engineers and managers who built the inaugural rail infrastructure. An example is the term railroad, used (but not exclusively) in North America, and railway, generally used in English-speaking countries outside North America and by the International Union of Railways. In English-speaking countries outside the United Kingdom, a mixture of US and UK terms may exist.” [1][2]
The Canadian Broadcasting Corporation (CBC), in answer to a question submitted to it in May 2002 [3] comments that the word ‘Rail’ came from the Old French term for an iron rod – ‘reille’ which was in turn based on the Latin word for’rule’ or ‘straight stick’ – ‘regula’. The CBC answer continues: ‘Way’ was carted into Old English from the German and Dutch terms for’move’ or ‘carry’ (weg). ‘Road’ is an Old English term for journey by horseback (rad), which is related to the verb ‘ride’ (ridan).
“These words have been closely tied since the 19th century, and nobody – not even journalists at CP or the CBC – can railroad you into picking one term over the other. Both news organizations prefer railway. So does the Globe and Mail’s Style Book, which boldly states that ‘Railway is the Canadian term’.”… The Oxford Guide to Canadian English Usage is a little less rigid: “Canadians say both railway and railroad, but railway is much more common, as in the company name Canadian National Railways. Railway is also preferred in Britain. Railroad is more common in the United States.” [3]
“Proper nouns can be tricky, and many news outlets warn writers to make sure they get a company’s name correct – for example, some firms use Railway, others Railroad, and still others Rail Road. So while the US-based Associated Press tells its journalists to write ‘railroad’ in all second references, it also advises them to look up the actual names of railroads first. Which manual does AP recommend? The ‘Official Railway Guide’, which has been published in the United States for more than a century!” [3]
CBC is also happy to note that similar discrepancies occur in Canada. “The Canadian Railway Museum, south of Montreal, invites people to visit what it calls the largest collection of railway equipment in the country. Who runs it? The Canadian Railroad Historical Association, of course!” [3]
Ultimately the CBC says that usage often boils down to “convention and individual preference.” [3]
The August 1905 edition of The Railway Magazine has something to say about this, a view from much earlier in the history of railways/railroads. …
“Railway or Railroad? – In England we have remained fairly true to the use of the word railway, to describe a “rail road,’ but in the United States the word railroad is mostly used to describe every railway; now, however, there is being discussed the rival claims of the two words. Sometimes the one has served to designate a company which stands in a certain legal relation to another; thus, as is well known, the ABC railroad company may be the operating organisation for the ABC railway company, or vice versa. In reorganisations and consolidations in the United States, the two words have been of great utility and convenience. During the early epochs of United States railway history the term Rail Road was used almost exclusively, while in England the term railway is quite as old as the institution itself, and for many years past, “railway” has been used almost exclusively throughout Great Britain and her colonies. An eminent philologist to whom the relative merits of the two words were submitted decided in favour of the term “railway,” partly on the ground that “railway was better adapted to the use as both noun and adjective, and that it sounded better, affording a smoother form of expression. The American railway writer, Mr. B. H. Meyer, in his first monograph on railway subjects, employed the word ‘railroad’ but in all subsequent publications he has used the word ‘railway’, as being, on the whole, a much more agreeable and facile form of expression. American railway legislation has been conspicuously wanting in the definition of terms; and had the English custom of defining the terms used been adopted by American law makers it is not improbable that either railway or railroad would have held the field to the practical exclusion of the other. However, both words abound in American laws, and neither can be said to have defeated the other, either in legislation or in company terminology. Virginia has now declared that the two terms shall be used and construed synonymously in the laws and decisions of the State.” [4: p169-170]
I guess that the use of ‘railway’, ‘rail road’ or ‘railroad’ is a matter of preference partially influenced by where we live in the world. It is worth remembering, however, that care is needed when referring to particular railway/railroad companies to ensure that their proper name is used. Just a few examples to illustrate this from the US to finish:
The Airlake Terminal Railway The Alabama and Florida Rail Road Company The Alaska Railroad The AN Railway The Arizona & California Railroad The Baltimore and Ohio Railroad The BNSF Railway The Chesapeake and Ohio Railway The Central Pacific Railroad
I guess that each of these companies would want their correct name used when referring to them.
Des McAuliffe, Des (1999). The Snowtown to Port Pirie Line. Proceedings of the 1999 Convention. Modelling the Railways of South Australia; Adelaide. 1999, p1-129.
The August 1905 edition of the Railway Magazine was the 98th issue. In preparation for its 100th edition, it carried this advert. …
A reminder to Railway Magazine Readers that the 200th edition will not have an unlimited print run. [1: p176]
The Railway Magazine had been established for over 8 years. … The above image can be read easily with the exception of the central portion which, in my copy, is damaged. As far as I can tell that portion reads:
“As a memento of this success of the RAILWAY MAGAZINE, we propose to make the 100th Number (October, 1905), a special issue, containing, in addition to the usual articles, several contributions by the leading experts in various phases of railway working, locomotive development, etc. A feature of these special articles will be the reference to improvements in train services, locomotive working and railway management that have taken place during the past 8 years. The RAILWAY MAGAZINE is entitled to the credit of suggesting many of these improvements. With the 100th Number of the RAILWAY MAGAZINE will be issued a Large Presentation Plate, specially drawn, showing the evolution of the steam locomotive from 1803 to the present time, by means of typical engines of various periods.” [1: p176]
The practice of modern railway magazine special supplements and celebratory issues clearly goes back right to the very earliest months of publication of railway magazines.
The August 1905 edition of the Railway Magazine contains a number of third party adverts which are interesting. ….
In addition to a good number of railway company adverts for particular train services and holiday destinations which are themselves worth looking at, are a number from companies which supplied the railway industry, provided services for railway passengers, or catered for the wider public. …
A. Hotel Cecil
Hotel Cecil, London. [1: pI]
The Hotel Cecil advertised itself as the only first class hotel in London with a garage on the premises. Tariffs included: a single room at 5 shillings, a double at 9 shillings, and a suite at 25 shillings. Food was equally inexpensive to modern eyes, breakfast, lunch and dinner could be purchased for a total of 11 shillings. A single person could stay full board for 16 shillings! (80 pence!)
A loaf of bread cost 5d in London in February 1905, [2] around 2p in today’s money. If we accept that supermarket prices for a 800g loaf are about £1.35 in 2024 we can make a simplistic comparison with modern day costs for full board in London. £1.35 would have bought close to 70 loaves in 1905. That factor of 70 would suggest that a comparable price for full board would be £56!
Five-star accommodation in 2024 at the Shangri-La at The Shard, London costs upwards from £602 which could include breakfast!
B. A Motoring Atlas
The British Motor Tourists ABC, published in the same premises as The Railway Magazine. [1: pIII]
The British Motor Tourists ABC, could be purchased as a paperback (limp) for 5 shillings – the same price as a single room at the Hotel Cecil! If you were using it as a chauffeur, then a special edition could be purchased far cheaper – just 1s 3d.
This ‘Indispensible’ volume included ‘Hints to Motor Tourists’, by S.F. Edge – 57 pages of clear Main Road Maps, Alphabetical List of Towns and Villages in Great Britain and Ireland. with Best Hotels, Garages, Spirit Stores, Charging Stations and Repairing Depots, Hints on Tyres. Customs Tariff and Regulations, Steamer Freights, Railway Regulations, re Petrol and Carriage of Motor Cars, Motor Car Act, Motor Signs, Racing Fixtures, Lighting-up Table, Yacht and Golfing Clubs, Automobile Clubs, Fishing and Hunting Centres.
C. Postcards
These Post Cards represented locomotives of the latest designs, they could be obtained at all railway bookstalls and through any newsagent, price 6d. per set/packet, or direct from the Railway Magazine office, post free, 7d. per packet. [1: pVI]
D. Railway Inspection Cars
Oldsmobile advertised two inspection cars. The first was a self-drive vehicle with space for 4 people. Weight: 800lbs. The second was a larger vehicle which could carry 6 to 8 people or carry tools and material. [1: pX]
Inspection Car, No. 1 was already in use by over 100 Railroads in the United States and other countries. for Bridge and Track Inspectors, Road-masters, and other officials. The Company claimed that it was economical to run and had a range of 100 miles.
Production was limited to only 127 units, the Olds Rail Road Inspection Car was built by the Olds Motor Works from 1903 to 1905 and sold exclusively by the Railway Appliance Company of New York and Chicago. [3]
Inspection Car No. 2 was a larger vehicle with a 7 hp engine. It weighed in at 1200lbs, was designed for standard-gauge track but could be reduced to a minimum of 3ft 6 in gauge. A top speed of 30 mph was possible. Its range was comparable to Inspection Car No. 1 at 100 miles. [3]
There were a number of converted road vehicles in use over time as inspection vehicles in the USA. More can be discovered here. [4]
Ford produced one which included its own turntable. A 1925 Ford Model T Railway Inspection Car was on display on a short 30m section of track outside the Collections Centre at the British Motor Museum at Gaydon on 16th July 2024.
A Ford Model T Rail Inspection Car with inbuilt turntable. [5]
E. A Mug or Two of Cocoa
Dr. Tibbles’ Vi-Cocoa was a popular energy restorative in the Victorian era. At its height it was one of the highest-selling cocoa-based drinks in Britain. [6]
Dr. Tibbles’ advert in the Railway Magazine. [1: pXI]
Adverts for Dr Tibbles Vi-Cocoa, which was a mixture of malt, hops, kola and cocoa, first appeared in 1893. He registered the company at that time and later re-registered as Dr Tibbles’ Vi- Cocoa (1898) Ltd in 1898. Tibbles retired soon afterwards.
“Land was purchased in North Watford to expand Vi-Cocoa production in 1899. A fire devastated the factory in 1903 but the site was rebuilt and became an important local employer making cocoa and chocolates.” [7]
The business was renamed the Watford Manufacturing Company in 1907.
“The Watford Manufacturing Company produced munitions during the First World War. Following the War, the company expected an increase in business and invested in the construction of a huge, new factory. However the business did not materialize. The new factory became a white elephant, was left unfinished and bankrupted the company in 1922.” [8]
In 1918, Lord Leverhulme became the largest shareholder. In 1922 the Company entered into liquidation and Lord Leverhulme purchased the Company. Virtually straight-away, Leverhulme sold up to Planters Products Ltd, a Lever Brothers subsidiary. Vi-Cocoa production continued, the factory was employing 400 people in 1929, and was one of the largest employers in the area. [6]
In 1930, the factory was sold and Unilever absorbed by Unilever, the new incarnation of Lever Brothers. Vi-Cocoa was still being advertised in 1945.
Dr. Tibble’s Vi-Cocoa “achieved remarkable success through a combination of innovative marketing techniques, including health claims, scientific endorsements, extensive print advertising, free samples, and targeted marketing. These strategies not only propelled Vi Cocoa to commercial success but also influenced broader trends in advertising and consumer culture in late Victorian Britain.” [9]
F. Thomas Firth & Sons Ltd.
Firths’ Steel of Sheffield. [1: pXII]
Wikipedia tells us that, “In 1902, Sheffield steelmakers John Brown & Company exchanged shares and came to a working agreement with neighbouring company Thomas Firth & Sons, the companies continuing under their own management until they finally merged in 1930.” [10] At the merger they formally became Firth Brown Steels.
G. W.S. Laycock Ltd.
W.S. Laycock Ltd. [1: pXIII]
W. S. Laycock of Levygreave Road and Victoria Works, Gell Street, Sheffield were Railway Carriage Fittings and Appliance Manufacturers in 1901. First established by Laycock in Victoria Street, Sheffield in 1884. In 1893, the Company “introduced a system for train heating using steam from the locomotive with storage reservoirs in each compartment.” [11]
By 1900, the Company was incorporated as a limited company. Grace’s Guide tells us that the company “supplied equipment to every railway company in the world, the main specialities being carriage blinds, buckeye automatic couplers, vestibule gangway connections, and steam-heating equipment for complete trains.” [11]
In 1902, the Company opened new works at Millhouses, adjoining the Midland Railway. The Company produced munitions during WW1 and in time became Laycock Engineering Co. and later still Laycock Engineering. The company was still exhibiting at the Motor Show in the late 1980s.
H. Giant Motor Spirit
Motor Spirit is Petrol or Gasoline. Meade-King, Robinson & Co., of Liverpool place the advert below in the Railway Magazine. For more information about early Petrol-powered rail vehicles, click here. [12]
Meade-King Robinson [13] is still in business in 2024. “It is a privately owned chemical distribution company with over 140 years experience in the supply of a wide range of oils and chemicals.” [14]
An early advert for Petrol! [1: pXIV]
I. Brown, Bayley’s Steel Works, Ltd.
Wikipedia tells that “Brown Bayley Steels was a steel-making company established in Sheffield, England in 1871, as Brown, Bayley & Dixon. They occupied a site on Leeds Road which was later occupied by the Don Valley sports stadium.” [15]
[1: pXV]
Brown, Bayley’s Steel Works had three main sites: Leeds Road, East Works, and Brighton Bar Shop.
Wikipedia tells us that “the Leeds Road site included: a spring shop, a hammer shop, a ring rolling shop with Telpher Crane, a machine shop for railway axles & tyres, an axle & railway tyre drop test plant, a heat treatment department, creep laboratories, a tyre blank press, a blacksmiths shop, a loco Shed, a drawing office, and a generator converter house creating direct current for cranes.” [15]
East Works: had “a sheet rolling mill, a sheet pickling plant, sheet polishing and guillotine shops andSteckel mills (slitting machines).” [15]
Bright Bar Shop: undertook “bar drawing, had centreless turning machines, centreless Lidkoping grinding machines, a 5 ton hammer, a 500 ton press and a railway tyre rolling mill.” [15]
NB: “A Steckel mill is also known as a reversible finishing mill, it is similar to a reversing rolling mill except two coilers are used to feed the material through the mill. One coiler is on the entrance side and the other on the exit side. The coilers pull the material through the mill, therefore the process is more similar to drawing than rolling. The material is fed back and forth through the mill until the desired thickness is reached, much like a reversing rolling mill.” [16]
NB: “The Lidkoping centerless grinder is designed and manufactured to meet practically any challenge in precision grinding. More details of the most modern form of this equipment can be found here. [17]
J. A Few Small Ads
The last page of adverts at the front of the magazine includes these four small adverts. [1: pXVI]
Goddard’s Plate Powder was developed by Joseph Goddard in the early 19th century and 180 years later Goddard’s is still a going concern. [18]
Real Devonshire Washing Serge was sold by G. Bale & Co. of Topsham, Devon. I guess they anticipated sales to railway companies subsequent to their advert. I have not been able to find out anything about the company.
Whelpton’s Purifying Pills “were supplied by G. Whelpton and Son, London. They were advertised as being able to arouse the stomach to action, promoting the flow of gastric juice, and giving tone to the whole system. Headache flies away. Biliousness, Kidney Disorders, and Skin Complaints disappear, while cheerful spirits and clear complexions follow in due course!” [19: p1325]
“The pills had an average weight of 21 grains. Chemical and microscopical examination showed the presence of aloes (apparently Socotrine), powdered colocynth, ginger, and gentian. The last-named ingredient being less positively indicated than the others. No evidence of the presence of mercury or calomel was obtained.” [19: p1326]
I could not find any convincing evidence either that they were effective, or that they caused any real harm.
The Railway Officers and Servants Association was, until 1974, a Friendly Society, it was removed from the Charity register in November 1974.
Some superb diagrams showing the operation of water troughs were included on page 4 of the January 1934 edition of The Railway Magazine.
The effective operation of water troughs. [1: p4]
The Railway Magazine commented: “Long non-stop runs necessitate either the use of large tenders, such as are used in America … or the provision of track water troughs from which the tender can be replenished while the train is travelling. As long ago as 1859, … locomotive engineer, John Ramsbottom, … designed the type then and ever since used, with but minor modifications, such as the substitution of metal for wood in their structure.” [1: p5]
Figure 1 shows a typical cross-section. The length was been 0.25 and 0.5 miles and had to be on a completely level length of track.
Figure 2 “shows diagrammatically the arrangements made for rapidly refilling a trough after a locomotive has taken water from it. The familiar ball-valve control is used to regulate the flow from a tank alongside the track to the trough. When the water in the trough reaches the correct level, the ball valve, in a small tank at rail level, rises and cuts off the supply. Steam heating has to be used to prevent freezing in frosty weather where traffic is infrequent and the troughs are in exposed positions.” [1: p5]
Figure 5: Section through a LNER eight-wheel tender which shows the arrangement of the water pick-up gear. [1: p6]
I love some of the diagrams in these early editions of The Railway Magazine. The one above is no exception, Figure 5 illustrates a typical form of water pick-up apparatus on a LNER eight-wheel tender. “The inclined delivery shoot will be seen to have a hinged foot-like scoop, curved to face the direction of travel and capable of being held clear of, or depressed into the troughs – which are centrally placed between the rails – by means of the system of rods, cranks and levers shown, these being under the control of the fireman. Warning boards are erected to enable him to be prepared to lower the scoop as the trough is approached, speed seldom being appreciably reduced over the troughs. The scoop is usually lowered before the trough is reached, a slight gradient being arranged in the track, by which the scoop drops below the water level, and is similarly raised at the far end of the trough, should the crew not have lifted it out earlier. To aid in raising the scoop when the tender gauge shows the tank in it to be full, steam or compressed air is often used.” [1: p5]
A speed through the toughs of 25 mph was sufficient to ensure the take-up of water, although higher speeds were more effective. But express speeds tended to waste water and could result in damage to the permanent way. Maintenance costs with the amount of flooding which occurred were high.
The LMS made use of a tender which had an observer’s compartment to study what happened at water troughs and, as a result, designed a simple device which significantly reduced the spilling of water. “Briefly, the passage of the scoop through the trough causes the water in it to pile up and overflow at each side, and to neutralise this a pair of slightly converging deflector vanes are fixed 1 ft. 4 in. in advance of the scoop, which force the water towards the centre of the trough and make it pile up there instead of at the sides (Figures 3 and 4). Some 400 gallons are saved every time these deflector vanes are used, and the quantity of water required is reduced by about 20 per cent.” [1: p5]
Figure 6: Water Pick-up Troughs on the East Coast Main Line (LNER) [1: p7]
Figure 6 is a map showing the distribution of water troughs along the main LNER. route to Scotland, and Figure 7, those on the LMS, both on the LNWR (West Coast) and the Midland routes.
Figure 7:The Water Troughs on the two LMS routes to Scotland. [1: p7]
The water troughs on these long distance routes obviated the need for larger tenders and the need for time-wasting water stops. 3,500 to 5,000-gallon tenders were more than adequate. It also appears to have been true that the use of water troughs generally meant that water purity was higher which minimised boiler maintenance and also reduced the need for water-softening plants. [1: p5]
The GWR Capital Programme
The Railway Magazine noted, “A special programme of extensions and improvements, involving a cost of over £8,000,000, was put in hand by the GWR under the Development (Loan Guarantees and Grants) Act, 1929, in anticipation of its future requirements, for the purpose of assisting in the relief of unemployment. … The Railway Gazette, issued on [8th December 1933] a profusely illustrated Special Supplement dealing comprehensively with these works. A notable feature of this supplement is the wealth of drawings, including a double-page map of the G.W.R. system, with inset detail plans of the new works.” [1: p74]
Earlier in the January 1934 edition, The Railway Magazine carried an advert over two pages from The Railway Gazette for the supplement to their magazine (which, when bought separately, cost the princely sum of 1s).
The first page of the advert about the GWR Capital works programme and the Railway Gazette supplement. [1: pXIV]The second page of the advert about the GWR Capital works programme and the Railway Gazette supplement. [1: pXV]
The Campbeltown & Machrihanish Light Railway
The Campbeltown and Machrihanish Light Railway was one of only four 2 ft 3 in (686 mm) narrow gauge railways in the UK. The other three were/are in Wales: the Corris Railway, the short-lived Plynlimon and Hafan Tramway and the Talyllyn Railway. [3]
In its January edition, the Railway Magazine reported that “an Order dated [7th November 1933], by the Minister of Transport, appeared in The London Gazette of 7th November, declaring that the Campbeltown & Machrihanish Light Railway Company shall be wound up.” [1: p74] The line, which was closed about eighteen months earlier was 6 miles 29 chains in length and of 2ft 3in gauge. The rolling-stock comprised three locomotives, six passenger and and two goods vehicles. “The company was incorporated on 8th May 1905, and the line opened on [17th August 1906] of the following year. This isolated railway, in the Mull of Kintyre, suffered particularly severely from road motor competition,” [1: p74] and, a few years previously, an attempt was made to meet road competition with its own bus service, but that failed.
‘Atlantic’ was the last locomotive built for the Campbeltown and Machrihanish Light Railway. It was an Andrew Barclay 0-6-2T, built in 1907. Seen here in charge of a train of four coaches leaving Campbeltown for Machrihanish. [2]
A canal was first constructed to bring coal from pits close to Machrihanish to Campbeltown. It was in use from 1794. There were no locks as the canal traversed relatively flat terrain. It was three miles in length, running from Mill Dam in the West to Campbeltown. Only two barges plied its length which carried around 40 cartloads of coal each day to Campbeltown. However, “the extent to which the canal was used or cared for seems doubtful. … It had fallen into disuse and been virtually abandoned by 1856 and when, about 1875 the colliery changed hands, the new owners … found it choked with weeds and difficult to clear. … In the Company’s prospectus of 1875 it was stated that a railway was to be built.” [4: p7-8]
The new railway was a little over 4 miles in length at first, running between the pits and a coal depot on Argyle Street, Campbeltown. In 1881 the length was extended to 4.7 miles. “There were a number of level crossings, all originally gated but subsequently left open, protected only by cross trenches to keep cattle and sheep off the line.” [4: p8]
At first, only a single loco worked the line, an Andrew Barclay 0-4-0T engine named ‘Pioneer’. After the line was extended to a new colliery business “became so brisk that in 1885 a second locomotive was bought from Barclays, an [0-4-0ST initially, later altered to an 0-4-2ST] named ‘Chevalier’.” [4: p9]
In 1901 and 1902, two high-speed turbine steamers brought “increasing numbers of day trippers to Campbeltown where … many of them were conveyed to Machrihanish … by horse-drawn carriages.” [4: p11]
The railway saw significant changes as a result. Both to carry passengers and to enhance the delivery of coal to boats at the New Quay in Campbeltown, the line was extended East to New Quay and West to the Golf links at Machrihanish. A new company, the ‘Argyll Railway Company’, was formed to manage the line.
The new railway was to be close to 6.4 miles in length and was opened to passenger traffic in 1906. By “August 1913 there were seven trains each way daily. … The war naturally led to a curtailment of services, … until the early months of 1917 saw the line’s minimum service of one daily train in each direction. … After the war … the tourist trade soon picked up again and before long the summer months saw eight regular trains a day in each direction. … Although the 20s saw increasing competition from buses, the time tables continued to show eight trains daily in each direction right up until the withdrawal of services in 1931.” [4: p23]
Commenting on the closure of the line, A.D. Farr says: “When the railway finally closed the prime reason was the loss of revenue following the closure of the colliery in 1929, but a major factor was also the bus competition. To meet this second-hand buses had been bought by the railway, but the experiment was to no avail and they were soon sold to the competing road transport concern.” [4: p23]
The line owned a total of five locomotives at different times: ‘Pioneer’, a Barclay 0-4-0T; ‘Chevalier’, a Barclay 0-4-0ST which may have been converted to an 0-4-2ST; ‘Princess’, a Kerr-Stuart 0-4-2T; ‘Argyll’, a Barclay 0-6-2T; and ‘Atlantic’, another Barclay 0-6-2T. [4: p41]
Six passenger coaches were employed on the line, all built by R.Y Pickering & Co., of Wishaw, Lanarkshire. All were bogie ‘cars’ and “were externally very attractive models of the tramways type, 43 ft 6 in long and with two 4-wheel bogies, 30 ft centre to centre carrying 1ft 11in diameter wheels. At each end was a covered platform, guarded by a wrought-iron balcony and ‘telescopic gates’, and with steps on either side to within a foot or so of the ground.” [4: p43]
The coal company owned a series of wagons which carried the ‘C.C.C’ lettering. But it seems as though the railway company owned only a heavy goods brake van and one other wagon, although little is known about that vehicle. [4: p45]
The Welsh Highland Railway
The Railway Magazine reported that the “Joint Committee representing the local authorities with investments in the Welsh Highland Railway has decided to ask the debenture-holders to close down the line. Carnarvonshire County Council has £15,000 in the venture, Portmadoc Urban District Council £5,000, and the Gwyrfai, Glaslyn and Deudraeth Rural District Councils £3,000 each. At a recent meeting of the Portmadoc Council, Mr. Oswald Thomas said it was important that if the railway were closed, the rails should not be taken up, particularly between Portmadoc and Croesor Bridge, as it was hoped before long to see quarries in the district working again. Captain Richard Jones said it might be arranged for the Portmadoc Council to take over that part of the railway.” [1: p74]
West Monkseaton Railway Station Waiting Shelter
The Railway Magazine picked a rather modest platform building at West Monkseaton for praise.
West Monkseaton Railway Station, LNER – a new waiting shelter – January 1934. [1: p75]
“Here is precise repetition used rhythmically; the units are a nine-light window and a half-glazed door; the rhythm is 2-door-2-door-2-door-2. The designer is to be congratulated in that he has been careful to keep the horizontal glazing bars of doors in line with those of the windows; the horizontal effect of the windows; therefore unbroken. The portions of the window panes are The proportion good, being about 5 to 3. The key-note of the design is the restful cornice band running round the structure; unpretentiously it ties in the whole composition; its horizontality is repeated by the edges of the weather-boarding under the windows, and is balanced by the white base upon which the building stands; this cornice band also sets off, and is set off, by Mr. Eric Gill’s standard LNER lettering. Thought has evidently been expended upon the design of this shelter, and it gives us pleasure to illustrate such a satisfactory and pleasing little piece of station architecture, especially when we consider what the perpetuation of railway custom might have produced.” [1: p75]
Check Rails and Ramps
By 1934, it was common practice “to provide safety devices at viaducts and other important bridges to reduce to a minimum the risk of vehicles, which may have become derailed, falling over the edge. Special guard rails, fixed either inside or outside the running rails and usually at a slightly higher level, are laid across the viaduct, with some splayed arrangement at both ends to direct derailed vehicles from the edge toward the rails. An ingenious elaboration of this is shown in the accompanying illustration. It consists of converging rails with a steel ramp between them rising to rail level. Any derailed wheels would run up this and should automatically become re-railed at the top.” [1: p74]
The steel-ramp approach to a short viaduct at Midfield. [1: p74]
References
The Railway Magazine; Westminster, London, January 1934
The Railway Magazine of September 1922 carried two short articles about new petrol Railmotors. …
North Eastern Railway (NER) – Petrol Rail Motor Bus
The first short article was about an experimental vehicle used by the NER.
On certain portions of the NER network, the company realised that “there was room for a service conducted on lines as nearly as possible identical with those of motor buses on the roads. With the view of ascertaining, without much initial expenditure, whether the scheme is likely to prove financially successful, they have converted one of their ‘Leyland’ road motor ‘buses, formerly running on the road services in the vicinity of Durham, so as to make it suitable for running on the railway.” [1: p234]
The war resulted in a significant increase in railway working expenses which made it impossible to provide a train unit on some of the country branches, where the number of people travelling was small, “sufficiently cheap to cover its working expenses out of the small revenue available,” [1: p234]
NER Rail Motor [1: p235]
The NER needed to devise a cheaper form of rail transport. As a first step, it decided to convert one of its own fleet of petrol-powered road buses. The company’s intention was to undertake a trial at low cost before developing a design specifically tailored to rail use.
The experimental unit entered service on 19th July 1922. If “the results of the working of this vehicle are encouraging, the company intend[ed] to build vehicles [capable of] carrying up to 40 passengers, and maintaining an average speed of approximately 30 m.p.h.” [1: p236]
The railmotor operated between Copmanthorpe, York, Strensall and Earswick, and was “manned by a motorman and a conductor exactly in the same way as if it were running on the highway. Single journey tickets [were] issued on board, so that passengers [did not have] the trouble of going to the booking office. It [had] accommodation for 26 passengers. It [ could] be driven from both ends, and run in either direction, and the motive power consist[ed] of a 35-h.p. Leyland engine of the standard type, supplied by the builders for their ordinary commercial road vehicles.” [1: p236]
The donor vehicle was one of three Leyland Motor Co. buses that the NER purchased on 21st July 1921. “With a long bonnet and a overhanging roof at the front, it was a typical design for that time. The conversion was completed at York Carriage Works. Initially No. 110 in the Road Vehicle fleet, it was renumbered as No. 130Y shortly after conversion because No. 110 was already occupied in the Coaching Stock list.” [2]
An “additional radiator and an additional driving position were located at the rear of the vehicle. Central passenger doors were fitted to both sides of the saloon. …. Folding steps were also added to allow access from rail level. These were later replaced with fixed steps, and eventually removed altogether. An electric headlamp was also fitted.” [2]
The LNER website continues: “the initial York duty involved a service to Haxby, Strensall, Earswick, and Copmanthorpe. NER Petrol Autocar No. 2105 took over this duty on 9th July 1923, and No. 130 was transferred to Selby. At Selby, No. 130 operated daily return trips to Straddlethorpe, York, Goole, Catleford, Goole, Market Weighton, Cawood, and Hemingborough. This resulted in a full timetable that started at 6:52am and finished at 7:44pm. No. 130 took part in the Stockton & Darlington Centenary celebrations, but continued these Selby duties until November 1926.” [2]
Railmotor No. 110, later No. 130. The fold-down steps can be seen clearly in this image. [2]
On 11th November 1926 the railmotor/railbus “caught fire whilst being filled up with petrol at Selby shed. The entire bus was reportedly gutted within 15 minutes. Reports also suggest that someone used a naked paraffin lamp to check the level of the petrol tank. Only the chassis remained, and it was eventually decided not to rebuild or replace the bus. No. 130 was officially withdrawn from stock on 9th April 1927.” [2]
It seems as though the initial experiment was successful enough to allow the NER to authorise the building of a further experimental petrol railmotor (No. 2105) in September 1922. A Daimler engine was purchased in October and “the remainder of the vehicle was built at York Carriage Works and was completed in July 1923. By this time, Grouping had occurred, and the autocar was given the LNER number 2105Y. It was later renumbered as No. 22105 in August 1926.” [3]
Railmotor No. 2105 (later renumbered 22105) [3]
It seated 40 in third class accommodation, seats were in pairs either side of a central gangway. “The distinctive wheel arrangement had a two axle bogie at the engine end, and a single fixed axle at the other end. The single fixed axle was powered from the motor via a clutch, three-speed gearbox, and propeller shaft with two universal joints. 40mph was reportedly possible. Radiators were fitted to both ends.” [3]
This Railmotor took over the service provided by No. 130 and continued to operate local services in and around York until 1930. By 1930, it had been renumbered 22105.Closure of a series of local stations that year led to it being reassigned to the Hull area. It is “known to have been given an extensive timetable in the Hull area from 1st May to 17th July 1932 when it worked a 14 hour timetable including Beverley, Thorne North, Brough, Willerby & Kirk Ella, and Hull. Reports suggest it was unreliable during this period and was often replaced by a Sentinel steam railcar.” [3]
Over the next two years, No. 22105 did not work any revenue-earning services. It was withdrawn from service on 19th May 1934.
What is perhaps surprising is that these two experimental vehicles were not the first ones used on the NER network. The NER had experimented with petrol railmotors just after the turn of the 20th century. Two examples are worthy of note.
A. Petrol-electric Railmotors/Autocars
The NER were reviewing their operation of suburban passenger services on Tyneside. Alongside the introduction of electric trains on an urban network of lines which would later develop into the Tyne and Wear Metro, the NER ordered two experimental railcars/railmotors to work other, non-electrified, parts of the network.
“Both railcars were built at the York Carriage Works, together with the original Tyneside electric stock, in 1902-3 and numbered 3170 and 3171. They were 53.5 feet long and weighed around 35 tons. They had clerestory roofs, bow ends, large windows and matchboard sides. There were four compartments inside, the engine room with the principal driving position, a vestibule, the passenger saloon and a driving compartment. There was no guard’s compartment. The passenger saloon had 52 seats. These were reversible and upholstered in standard NER pattern. With curtains at the windows, radiators between the seats and electric lighting, the passenger accommodation was described as ‘cosy’ and seems to have been very popular with the travelling public.” [4]
These two railmotors were referred to as ‘autocars’ after the steam push/pull autotrain services already operated by the NER.
The Embassy & Bolton Abbey Railway comments: “These NER railcars were the first in the world to use petrol-electric technology. At that time, diesel engines were less advanced and not as reliable as their petrol counterparts. The concept of using internal combustion engines to power electric traction motors would later be developed into the diesel electric technology used to power many of BR’s ‘diesel’ locos.” [4]
One of the two NER petrol-electric railmotors. [5]
Initially the railmotors/autocars saw service “between West Hartlepool and Hartlepool stations (in direct competition with electric tramcars) and Scarborough to Filey (as a replacement of a steam service). Later, the autocars were transferred to the Selby – Cawood branchline to work the passenger services there. In 1923, no.3170 was fitted with a larger engine and new generator giving it sufficient power to pull a conventional carriage, thus increasing passenger capacity. It worked in the Harrogate area for a while before rejoining its twin on the Cawood branch. No. 3171 was withdrawn in 1930 and No. 3170 in 1931.” [5]
These vehicles had a petrol engine and a generator in their engine rooms, producing electricity for two Westinghouse 55HP traction motors which were mounted on the bogie underneath. A series of different petrol engines were used during the life of these vehicles. “In 1923, no. 3170 was given a third engine, a 225HP 6 cylinder ex-WD engine rumoured to come from a First World War tank. This new engine gave 3170 more torque and enough power to haul an autocoach as a trailer, though it seems not to have affected the maximum speed.” [5]
The LNER showed an interest in these vehicles and went on to test Armstrong diesel-electric railcars in the 1930s, but by then Sentinel steam railcars had been introduced. “These were not as reliable or popular, they had more seats and fitted better into the contemporary infrastructure.” [4]
No. 3171 was dismantled when withdrawn. When No. 3170 was withdrawn on the 4th April 1931 it was transported to Kirkbymoorside near Pickering, where the body became a holiday home. “Fitted with a tin roof and veranda it was well protected from the weather and survived there until September 2003 when it was sold to carriage restorer Stephen Middleton who moved it to the Embsay and Bolton Abbey Steam Railway.” [5]
B. A Petrol Directors’ Vehicle
NER Directors’ Inspection Car [8: p358]Side elevation and Plan of NER Inspection Car [8: p460]End elevation of NER Inspection Car. [8: p460]
The Engineer reported in early 1908 that “The North-Eastern Railway Company [had] recently built at its York carriage works and introduced into service a petrol rail motor inspection car designed for the use of its executive officers. The car [was] 17 ft in length by 7 ft in width, with a wheel base of 10 ft. It [was] arranged with a driver’s compartment at each end, and with an open saloon 10 ft. long in the middle. The saloon [was] entered through either of the driver’s compartments, and there [was] a permanent seating accommodation for six passengers, whilst two extra seats [were] provided on camp stools.” [8: p358]
It seems reasonable to ask why, with the experience gleaned in the very early years of the 20th century, the NER felt the need in 1922 to commission further experimental vehicles. Was it because the technology had developed significantly? Had the early experiments been less than satisfactory?
Weston, Cleveland & Portishead Light Railway
The second short piece in The Railway Magazine of September 1922 related to a Railmotor constructed by the Drewry Car Company Limited (Works No. 1252), to the instructions of Colonel H.F. Stephens, who, along with other roles, was Engineer and General Manager of the Weston, Clevedon and Portishead Light Railway.
The railmotor was powered by a 4-cylinder Baguley 35 hp petrol engine with a 3-speed gearbox and its oil consumption, on easy gradients, [was] 16 miles to the gallon. It had a maximum speed of 25 mph. It was 19ft long and driven by a chain drive from either end. It had 2ft diameter wheels. [1: p239][6]
A Drewry Railmotor at the Weston, Cleveland & Portishead Light Railway. [1: p239]
The vehicle had full visibility all round. Glazed throughout above waist height. Side widows were openable. The panels below the windows were of steel. Acetylene lighting was provided for travel after-dark. The unit carried a maximum of “42 passengers – 30 sitting and 12 standing. The car [was] provided with rails round the roof to enable light luggage and market produce to be carried outside, thus giving the passengers more accommodation.” [1: p239]
Colonel Stephens “was a pioneer of petrol traction. The WC&PR was the first of his railways to introduce railcars. … Due to low running costs [the Drewry Railmotor] was relatively profitable. … Originally the petrol tank was fitted inside the railcar together with spare cans of petrol. As smoking was then common, it was later realised that this was a hazard and a cylindrical horizontal petrol tank was fitted at one end above the buffer beam.” [6]
“A light four-wheel wagon built by Cranes was bought in 1925 for the railcar to carry extra luggage or milk churns.” [6]
This article features advertising from the November 1929 edition of The Railway Magazine. It will probably be of interest to compare the various adverts here with those in The Railway Magazine of November 1938. An article about the 1938 magazine can be found here. [2]
The Southern Railway
The Southern Railway had a single page advertisement in the magazine which featured the Golden Arrow Pullman Service between London and Paris.
London to Paris in 6 hrs 30 mins! [1: pIII]
Wikipedia tells us that, “The Flèche d’Or was introduced in 1926 as an all-first-class Pullman service between Paris and Calais. On 15th May 1929, the Southern Railway introduced the equivalent between London Victoria and Dover while simultaneously launching a new first class only ship, the ‘Canterbury’, for the ferry crossing. The train usually consisted of 10 British Pullman cars, hauled by one of the Southern Railway’s Lord Nelson class locomotives, and took 98 minutes to travel between London and Dover. Because of the impact of air travel and ‘market forces’ on the underlying economy of the service, ordinary first- and third-class carriages were added in 1931. Similarly the first-class-only ferry, ‘Canterbury’, was modified to allow other classes of passenger.” [3]
It is not surprising that the train service ceased at the outbreak of the Second World War in September 1939. “It resumed after the war on 15th April 1946, initially running with the pre-war Pullmans and the Trianon Bar car, a converted twelve-wheeled Pullman. The Southern Railway flagship, the ‘Invicta’ replaced the ‘Canterbury’ from 10th October 1946. As of 1949, the all-Pullman train was scheduled to depart from London Victoria at 10:30, with the connecting train from Calais reaching Paris (Gare du Nord) at 17:30, and from Paris at 12:15, with the connecting train from Dover arriving in London at 19:30. This worked out to a scheduled journey time of 6 hours eastbound and 6 hours, 15 minutes, westbound.” [3]
Four Full-page Adverts from the LMS
The LMS had four full-page adverts in the November 1929 magazine:
The first advert was for a series of ‘Carriage Window’ books. …
The first page pointed to a series of ‘carriage window’ books which helped travellers to comprehend what they were seeing beyond the windows on their journeys. [1: p IV]
These ‘Carriage Window’ books were usually entitled ‘The Track of the …’. They covered a number of different main line routes.
The frontispiece from the edition of ‘Track of the Irish Mail’ issued in 1947. [4]
In the article about The Railway Magazine of November 1938 we noted that the LNER was supplying scripts and slides for talks about their network. In 1929, the LMS was offering a similar range of lectures. …
Lecture notes and slides, illustrating holiday places and places of general interest on the LMS, supplied free! There is also a suggestion that a lecturer may be available too! [1: p V]
The LMS also advertised the dining experience on their express services. …
The dining experience on LMS is celebrated in this advert. I wonder whether their customers saw the advertised service or had similar disappointments as people in later generations? The food on offer probably simplified preparation work. [1: p VI]The use of containers on the LMS was clearly established by 1929. Mobile cranes in goods depots at railheads facilitated transfer from railway wagons to trucks and lorries. [1: p VII]
Four LNER Full-page Adverts
The first advert is for two books, a picture and a model celebrating ‘The Flying Scotsman’ and other LNER locomotives.
Two books, a ‘panel’ and a paperweight, all available direct from the LNER! [1: pVIII]Pullman services provided by the LNER. The ‘Queen of Scots’, the ‘West Riding Pullman’, the ‘ Harrogate Sunday Pullman’. [1: pIX]Ferry routes to Flushing (every day), to Hook of Holland (every night) to Antwerp and to Esbjerg (both nightly except Sundays). [1: pX]LNER slides and lectures, available free of charge! It seems from this advert, and that from 1938, that this practice was normal during the interwar period. Some interesting subjects! [1: pXI]
Two GWR Adverts
The first GWR adverts seems to be endeavouring to extend the summer season in the West Country. …
The GWR encourages out-of-season travel to the West Country, and the purchase of travel books direct from the GWR. [1: pXII]
Their second advert focussed on their container service. …
Advertising the GWR container services, the photograph used shows a contemporary mobile crane and a GWR road-lorry. [1: pXIII]
Other Adverts
A regular feature is a full-page advert from the Railway Publishing Co. Ltd. [1: pXIV]Adverts from ‘The Railway Club’ and Bassett-Lowke sit alongside an offering from the Press Bureau of London’s Underground of two new lectures, the first about London’s landmarks, the second about the building of the underground railways. [1: pXV]The advert from St. Martin’s Engraving Co. Ltd. appears also in the November 1938 magazine. Fouled for Books is still a going concern in 2024. Edward Exley & Co. was founded in Bradford in about 1920 and the company is still in existence in 1924, undertaking repairs of Exley products from the past. [5] F. Moore was not the name of a real artist, but rather the name adopted by the Locomotive Publishing Company, which employed the services of the rather reclusive Edwin Thomas Rudd to do the actual painting. [6][1: pXVI]The Central Argentine Railway [1: pXVII]
The Central Argentine Railway was one of four broad gauge (5ft 6in/1676mm) British companies that built and operated railway networks in Argentina. Established in the 19th century, to serve the provinces of Santa Fe and Córdoba, in the east-central region of the country, it eventually also served Buenos Aires, Tucumán, and Santiago del Estero. It effectively ceased to exist after nationalisation.
“British railway companies operating in Argentina, including the CA, were nationalized in 1948 by the Juan Perón administration. The CA took over the northern section of the Ferrocarril Rosario y Puerto Belgrano and then became part of the state-owned Ferrocarril General Bartolomé Mitre.” [7]
This final advert from the front pages of the November 1929 magazine promoted a publication by The Railway Engineer, the revised 6th edition of “Locomotive Management – from Cleaning to Driving” by Jas T. Hodgson and John Williams. [1: pXVIII]
‘Locomotive Management – from Cleaning to Driving’ was a standard text which went through regular revisions to keep it up-to-date.
Some LMS “Business” Posters
The LMS. sent specimen copies of an “admirable set of new posters recently issued by them depicting the various goods traffic facilities offered on their system. There [were] four posters altogether, all drawn by Mr. Norman Wilkinson, and these differ from the usual run of such things inasmuch as they are in black and white, with good bold red and black lettering beneath each picture.” [1: p412] Two were reproduced in the magazine.
Two of the LMS posters were reproduced in monochrome in The Railway Magazine. [1: p410]
One poster dealt with “‘Modern Equipment for Modern Loads’, and illustrate[d] the fact that the LMS. have modern cranes and specially constructed rolling-stock for dealing with loads of exceptional size and weight; another is mainly concerned with ‘Mobility’, and stresses the fact that containers reduce[d] packing costs and eliminate[d] risks of damage – besides expediting transportation of merchandise between truck and lorry. A third poster – a specially fine bit of work, this illustrate[d] the LMS. method of ‘rapid transport of goods from ship to dock’ – that is, by means of electric trucks – the contention being that modern LMS. steamers and handling appliances ensure[d] safe and expeditious transportation of goods between Great Britain and the Irish Free State and Northern Ireland. The last of the series also deals with ‘Speedy Handling’ by means of mechanically-propelled trucks, which ‘transfer goods expeditiously and safely in LMS. goods depots’.” [1: p412]
New GWR posters
“Two posters which have been issued by Mr. E. Ford, Chief Goods Manager, GWR. … They may be regarded as good examples of the modern tendency to recognise that there is almost as much scope for advertising goods traffic facilities as for those provided by the passenger department. The first emphasise[d] the fact that express freight trains provide[d] for rapid transit, usually on the basis of collection one evening and delivery early next morning, while it is quite appropriate that a first-class express engine should be shown at the head of the train, in that the latest express engines [were] quite frequently employed for running these trains, especially those on ‘registered’ service, with which the poster [was] particularly concerned. The poster itself [was] in colour, with lettering in black, white and amber on a blue ground. Pictorial portions [were] in full colour, while the arrow [was] in green, with amber shading, to emphasise ‘The Sign of the Green Arrow’.” [1: p 413]
The two GWR posters were reproduced in monochrome in the Railway Magazine. [1: p411]
“The second poster also use[d] the symbol of an arrow to indicate, in this case, speed and sureness. The train itself [was] utilised as the arrow, while the target [was] an outline map of the British Isles in green, the name of the principal centres served by the GWR. was indicated as arrow destinations. The poster in other respects [was] on a green ground, utilising also blue, red and amber to an effective degree.” [1: p413]
These two posters go some way towards addressing the veracity of different views about the commencement of the ‘Green Arrow’ service referred to in my article about the November 1938 edition of the magazine. These posters demonstrate that the GWR, at least, was offering a Green Arrow service by November 1929 and suggest that the service reached into Scotland and so into the territories of the LMS and LNER.
The Railway Magazine in November 1929 reported the breakdown of staffing across Britain’s railways in the week ending 9th March 1929. [1: p400]
The census of railway employees in 1929. [1: p400]
It is interesting, first, to note the relative sizes of the staff numbers of the Big Four railway companies. Significantly the largest employer was the LMS. The LNER had around 55,000 less staff than the LMS. Strikingly, the GWR had significantly less staff again, with the SR the smallest, with less than one third of the staff numbers of the LMS. I wonder whether these figures might have resulted in some careful thinking, particularly by the LMS about the efficiency of their organisation? It would have been helpful to see the relative levels of income to compare against these figures. …
Secondly, I was struck by the relative numbers of male and female staff: 619,000 men to 17,000 women. 10 years after the first world war, very few of the women employed on the railways at that time would still have been employed by the railway companies. … What might have been the figures in a census during WW1?
Hidden within those figures are other striking comparisons. …
There were 6,800 male carriage cleaners and only 675 female carriage cleaners.
It seems that male officers and clerical staff totaled just over 72,000, supplemented by over 2,700 technical staff. Women employed in these areas amounted to around 9,800. It is unlikely that many supervisory positions in these areas would have been open to women, perhaps head offices of the railway companies may have had female managers in typing pools?
The role of crossing-keeper seems to have been far more equitably staffed between men (1,400) and women (1,500). Often a station master’s wife (or the wife of another male employee) would be a crossing-keeper at a nearby crossing. One wonders whether there was a pay differential between men and women in this occupation?
Cleaning roles for carriages and engines were given to men (13,600). Office cleaners were set alongside charwomen (3,100) and it appears that all lavatory attendants and waiting room staff were women (660).
Shop and artisan staff are recorded separately. Men seem to have filled all supervisory roles (2,900) with 104,500 men in other grades (excluding watchmen and labourers). There were just over 1,000 women in similar roles.
There were 7,600 male hotel, refreshment room, dining car and laundry staff and 5,700 women.
I am sure that as you look at the figures other matters will come to light.
I wonder what heading wheeltappers would be recorded under? Probably ‘carriage and wagon examiners’.
It also seems that in 1929 there was a ‘profession’ that trainspotters could aspire to. Across the railways of Britain there were 2,408 ‘number-takers’!
And finally … There are two pictures below showing railway employees at work on the railways. I came across the second while searching for a wartime image of women at work on the railways. The first is the cover page from the booklet which included the second picture. The “booklet, [was] published for six old pence in the BR era, by J W Stafford, the President of the NUR with the evocative title ‘We See Ourselves’. J W Stafford was a lengthman on the Great Western Railway, and later British Railways, for 33 years before he was elected president of the NUR in 1954. He asserted that it was management’s view in the 1930s that the heavier the tool, the greater would be the output of work, and that this belief had not entirely died out in the 1950s.” [2]
Men at work on the railways. [2]
The foreword by Frank Mosley notes that “Credit for building a cathedral is seldom given to the men who carefully and skilfully laid the stones. It is the same with a railway – in building it and keeping it in good order.”
Didcot Railway Centre comments: “This booklet itself is a comprehensive and very honest reflection of all aspects of Permanent Way staff employment, its challenges and its future prospects. Extending to no less than 21 sections on 23 pages, it includes ‘As Others see us’; ‘We were the Pioneers’; ‘Our Girls’; ‘A Dangerous Occupation’; ‘The Whitewash Train’ to ‘Airing our Grievances’.” [2]
The section entitled ‘Our Girls’ is a frank reflection that wartime shortages of men caused females to be employed on this work. Stafford, writing in the BR era, considered that given the arduous and dangerous nature of normal activities, it simply wasn’t a suitable environment for women!
I suspect that today that thinking would be seen as sexist, even if it wasn’t in the mid-20th century. Women clearly proved themselves effective railway employees in both world wars.
This article follows on from six other articles which covered the Wellington to Severn Junction Railway and this line from Buildwas to Longville-in-the-Dale. The first three articles can be found on these links:
As we noted in the last two articles, from the commencement of the building of the line between Buildwas and Much Wenlock, the directors hoped that the line could be extended to Craven Arms via Presthope on Wenlock Edge (linking with the limestone quarries/works at that location).
The directors of the Wellington & Severn Junction Railway were, however, fully occupied with the line from Wellington to Buildwas. Another company was set up to build the ‘Wenlock & Craven Arms and Coalbrookdale Extension Railway‘. The bill went through the parliamentary process unopposed and authorised the ‘Wenlock Railway Company‘ to construct the line. Work started on 23rd October 1861.
By 5th December 1864, the line was open from Much Wenlock to Presthope. (That length is covered in the last but one online article listed above.) At this time, because it was a freight-only line, the Board of Trade saw no need for an inspection of the line. It had already been agreed at a meeting held on 4th December 1863 not to proceed with the line from Presthope to Craven Arms for the time being. It was to be three years after the line reached Presthope before the connection to the Shrewsbury & Hereford Railway close to Craven Arms was completed. It was finally opened on 16th December 1867.
Longville in the Dale to Harton Road Station
We begin this article at Longville Railway Station and travel towards Craven Arms, we complete this part of the journey at Harton Road Station.
Longville Station had a single platform with a red and yellow brick booking office and waiting room. Ken Jones tells us that it “served a few cottages, a farm, an Inn, and the nearby Lutwyche Hall, the home of the Benson family, who did so much to promote the building of the line between Much Wenlock and Craven Arms. The station also served the villages of Cardington, Holdgate, Shipton and Stanton Long. The platform was on the up side, and the station buildings consisted of a general waiting room, ladies’ waiting room of brick and goods warehouse lock-up. There were two sidings, and a horse landing for two horse boxes, and a cattle landing for two wagons. There was no signal box, Longville being an intermediate station on the Presthope to Rushbury staff section. There were east and west ground frames, access to both being obtained by a key on the Presthope-Rushbury staff.” [1: p105]
After passing under the minor road the line ran Southwest towards Coates Crossing.
I was able to access the line from Northeast of Coates Crossing (via a footpath from Wenlock Edge Farm) to Rushbury Station with permission from local landowners. From here to Rushbury Station the original railway boundaries are predominantly fenced and gated with significant hedgerows and trees.
Looking Northeast along the line of the Wenlock Branch toward the minor road bridge above. [My photograph, 3rd July 2024]Looking Southwest along the line of the old railway towards Rushbury Station, for a distance of around 100 metres the route of the line is not protected by hedging. [My photograph, 3rd July 2024]A couple of hundred metres to the Southwest, another view looking Southwest along the line of the old railway. [My photograph, 3rd July 2024]This extract from the 25″ Ordinance Survey, together with the extract immediately below, cover the length of the line to Rushbury Station. [7]Rushbury Station appears in the bottom-left of this extract from the 25″Ordnance Survey. [8]This next railmaponline.com satellite image covers the same length of the line as the two map extracts above. Wenlock Edge Farm appears in the top-right, Rushbury Station in the bottom-left. [3]Approaching, and looking towards, the location of Coates Crossing which is about 200 metres ahead. [My photograph, 3rd July 2024]
Coates Crossing’s keeper’s cottage was from its construction “occupied by the Rushbury station master, and it was the duty of the station master’s wife to operate the crossing gates as and when a farm cart from the nearby Coates Farm required to go into the fields under Coates Wood. Later, after the abolition of the Rushbury SM’s post, it became the duty of the Longville station master’s wife.” [1: p105]
An enlarged extract from the 25″ Ordnance Survey shows Coates Crossing. [7]The location of Coates Crossing. The building shown is larger than the original crossing-keepers cottage which for a good while doubled up as the Rushbury Stationmaster’s house. [Google Maps, July 2024]250 metres or so to the Southwest of the location of Coates Crossing, looking Southwest. [My photograph, 3rd July 2024]Just under halfway from Coates Crossing to Rushbury Station the old formation becomes overgrown and is being used by the landowner for muck storage. [My photograph, 3rd July 2024]Beyond the piles of muck a gate is closed across the line of the old railway. Access along the line required turning to the last and walking through the field immediately alongside the line until it was possible to get back onto the line 100metres or so ahead. [My photograph, 3rd July 2024]Having regained the line of the old railway it is noticeable that the route is not as heavily used in the 21st century as the length already covered. [My photograph, 3rd July 2024]The ‘green lane’ continues. [My photograph, 3rd July 2024]Much closer now to the site of Rushbury Station a gate marks a change in ownership. [My photograph, 3rd July 2024]The modern complex of buildings on the Rushbury station site appears on the horizon, flanked by various fir trees. [My photograph, 3rd July 2024]The occasional railway sleeper can be seen. This photo was taken towards the Eastern end of the Rushbury Station site. [My photograph, 3rd July 2024]The modern track diverts away from the line of the old railway once within the boundaries of the station site. The trees to the left run alongside the route taken by the line through the station. The roof of the old station building can just be made out at the centre-top of this image. The concrete post and railings are what remains of the cattle loading pens. [My photograph, 3rd July 2024]Rushbury Station: the remains of the cattle loading pens. [My photograph, 3rd July 2024]The site of the old station, viewed from the North. [My photograph, 3rd July 2024]The road approach to Rushbury Station, seen from the Northeast. [My photograph, 3rd July 2024]
About the length just walked and about Rushbury and its station, Ken Jones writes: “The line has now levelled out into Ape Dale, and soon enters Rushbury station with its avenue of fir trees on either side, the station in every respect being similar to that of Longville. … The station served the villages of Rushbury and Munslow. The signal box was at the north end of the platform, the box containing the locking frame only, the electric train staff instruments being situated in the booking office. The station was not a crossing place. The station buildings consisted of a booking office, general and ladies’ waiting room, and a lamp room. The staff were just the station master and a signalman, the latter being required to assist with station duties.” [1: p105]
A further ground frame was situated at the Northeast end of the station, “and gave access to two sidings, a horse landing and cattle pens. In the station yard there was a cart weighbridge. At the Craven Arms end of the platform there was a water column.” [1: p105]
At this point on the Wenlock Branch it was necessary to leave the line of the old railway. A short detour along a field boundary and then along Darby Lane led to another access point to the old railway line.
To the West of this location the line of the old railway is now in private hands. Access to the line is limited to that possible on public footpaths/roads which cross the line. A diversion to the South of the line was necessary to reach the first point of access.
The next length of line from close to Eaton Cottage to Hartonroad Station. An extract from the 25″ Ordnance Survey mapping of 1882/1883. [21]The same area as that shown on the OS map extract above. [21]The route of the old railway is again shown in green, the necessary diversion by a red-dashed line. At the East edge of this image there are a series of private properties built over the line of the old railway. These are shown immediately below.
At the West edge of this image the footpath marked by the red-dashed line crossed the line of the old railway. In both directions from the footpath the old line is now in private ownership. [20]A series of four photographs look North from the public highway into the properties built over the line of the old railway. [My photographs, 17th July 2024]A further 200 metres to the Southwest on the road to the hamlet of Harton, this photo shows an open field between the road and the treeline which marks the line of the Wenlock Branch. [My photograph, 17th July 2023]Looking East at the point where the footpath crossed the old railway. [17th July 2024]Looking West at the same location. [My photograph, 17th July 2024]Using a telephoto lens, this is the line of the old railway heading West. [My photograph, 17th July 2024]A view from the South through the location of the bridge carrying the Wenlock Branch over the road adjacent to Hartonroad Railway Station. [My photograph, 17th July 2024]A view from the North through the location of the bridge carrying the Wenlock Branch over the road adjacent to Hartonroad Railway Station. [My photograph, 17th July 2024]
Writing of the length of the line between Rushbury and Harton Road stations, Ken Jones says: “On leaving [Rushbury] station the train passes under the roadway which formed part of the Roman road, with a steep rise from the station leading on to Roman Bank and over Wenlock Edge into the Corve Dale. Still passing under the densely wooded Edge Wood, to the left, and nestling under the wood, can be seen the small hamlet of Eaton-under-Heywood, and the embattled tower of the 12th century church of St Edith; the hamlet consists of one farm, the rectory and one cottage. Soon the train enters Harton Road station, the last on the branch. The station is as isolated as the hamlet of Eaton, all that can be seen from the train is a farm, and the station master’s house. Harton Road served the hamlets of Ticklerton, Halton, Soudley, Eaton, Westhope and Burwood, most of these (in 1922) each having a population of 50 people, Eaton and Burwood having only 40. The station consisted of the usual buildings: booking office, general and ladies’ waiting room and a lamp room. The staff consisted of the station master and one gate woman, she being employed at Wolverton Crossing, which was situated between Harton Road and Marsh Farm [Junction]. There was one double-ended siding which held 10 wagons, access to which was from either the east or west ground frames. The ground frames were controlled by the key on the Rushbury to Marsh Farm [Junction] staff. Also in the sidings was a cattle pen, which held one wagon and a horse landing for three horse boxes. One scene of activity that could be witnessed at the station was when the local estate farmers conveyed coal from the yard to the home of the local Lord of the Manor, as part of their statutory estate duty.” [1: p105 & 109]
Ken Jones; The Wenlock Branch; The Oakwood Press, Usk, Monmouthshire, 1998.
The photographs of the pre-contract drawings for the line were taken by myself and show extracts from the construction plans held in the Shropshire Archive. There is a standard charge of £10 per visit for taking photographs of their records.
The photographs of the pre-contract drawings for the line were taken by myself and show extracts from the construction plans held in the Shropshire Archive. There is a standard charge of £10 per visit for taking photographs of their records.
The Whitland & Cardigan Railway was a 27.5 miles (44.3 km) long branch line, “built in two stages, at first as the Whitland and Taf Vale Railway from the South Wales Main Line at Whitland to the quarries at Glogue. It opened in 1873, at first only for goods and minerals and later for passengers. The line to Cardigan opened in 1886; reflected in the company name change.” [2]
“The Company was always short of cash. Huge borrowings made it unable to pay its way; it was taken over by the Great Western Railway in 1886. Still considerably loss-making, it closed to passengers in 1962 and completely in 1963.” [2]
This is the second in a short series of articles about the line. The first of the articles can be found here. [4]
My interest in this branch line stems from reading an article by M.R. Connop Price; Before the Railways: The Early Steamers of Cardiganshire; in the Railway & Canal Historical Society Journal in July 2022. [1] And from staying North of Cardigan in 2023 and walking part of the route of the old line.
We restart our journey from Cardigan to Whitland at Boncath Railway Station.
Boncath Railway Station as it appears on the 6″ Ordnance Survey of 1887 (published in 1888). [5]
“The station had a passing loop served by two passenger platforms and a goods loop on the down side where there was a small goods yard and shed. A siding from the yard served a saw mill nearby to the north of the station. The single-storey stone-built main station building was on the up platform and, along with the goods shed, still survives, as does the nearby Station House.” [6] The line serving the saw mill can be seen in its entirety in the map extract above.
M.R. Connop Price says that Boncath “was a crossing place and a tablet exchange station. The goods yard was quite sizeable, comprising three sidings on the down side, one forming a loop behind the down platform. Traffic consisted mostly of timber from the adjacent saw mills, rabbits and agricultural goods. Apparently the level crossing gates were demolished so often by accident that there was talk of doing away with them. In his two articles on the Cardigan line J.F. Burrell has pointed out that from the platform at Boncath it was possible to see the smoke of a freight train coming up from Cardigan for as long as a quarter of an hour before arrival. The many curves caused it to disappear and reappear at frequent intervals on the way. This was one of the most remarkable sights on a remarkable railway, because the line fell away from Boncath towards Cardigan on a gradient of 1 in 40 for nearly three miles. Climbing up this incline was hardly less exciting than the ever steepening climb up the Taf vale to Crymmych! Had the original route north of Boncath been built it would have kept to some higher ground and been more gently graded. It might also have been less attractive because the line as built ran for a mile and a half above a beautiful and heavily wooded valley towards Kilgerran” (Cilgerran). [15: p82 & 90]
These two extracts from the railmaponline.com satellite imagery cover the full extent of the Boncath Railway Station site. The old railway is shown by the green lines on the images from railmaponline.com. And these green lines include the siding serving the saw mill. [3]
The Southwest end of the Boncath Station site was framed by the highway bridge which carried what was to become the B4332. [5]An enlarged segment of one of the two images shared on the coflein.gov.uk website. This is the best image that I have been able to find of the bridge at the Southwest end of the station site. [6]The view along the B4332 from the East through what was the location of the bridge carrying the road over the old railway. [Google Streetview, March 2022]
Shaun Butler’s TT gauge model of Boncath can be seen in photographs here. [27] Other views of the station can be seen here [28] and here [29]. The station has a page of its own on the Disused Stations website, here. [30]
M.R. Connop Price covers the route of the line from Whitland to Cardigan travelling towards Cardigan – the ‘down’ direction on the line. His description is quite evocative of the line’s rural and meandering nature. He describes the length of the line between Boncath and Crymmych Arms stations but in the ‘down’ direction: “North of Crymmych the [line] … climbed through a deep rock cutting to the summit before descending briefly on a gradient of 1 in 80 and rising again at 1 in 200 to a secondary summit about a mile and 30 chains beyond the station. By now the track was winding round a ledge on the hillside and giving magnificent views westwards to the Prescelly mountains. … On a clear day the view extended across the valley of the Afon Nyfer to the sea near Newport. … Meanwhile, [the line] negotiated a horseshoe bend and a remarkable series of sharp curves across the desolate countryside as it began its steady descent. Just over two miles from Crymmych the railway passed Rhyd-du, where once it was proposed to build a station. … Just beyond Rhyd-du the [railway] passed near Blaenffos and under the main Cardigan-Tenby road for the second time. A short distance further on a tributary of the River Teifi could be seen running through woods far below on the east side of the line, giving confirmation to the traveller that he was now across the watershed” and close to Boncath. [15: p82]
The railway first headed South as it left Boncath and then turned to the West above a wooded valley. [7]This extract from the ESRI satellite imagery from the NLS covers approximately the same area as the 6″ OS map extract above. Once again, the route of the old railway can be followed by tracing the field boundaries, hedgerows and trees. [7]The line then turned West. [8]The route of the old railway was a little difficult to see on the Google mapping, so it is good to have the green line on this railmaponline.com satellite image. [3]
On both of the two images above the Whitland & Cardigan Railway crosses the A478. The next couple of images show enlarged views of the location, on the 6″ OS Map and the railmaponline.com satellite imagery. …
The story of an N Gauge project to model Crymmych Arms Railway Station can be found here. [14] The station is covered in some detail in text and photographs on the Disused Stations website. [16]
The station was, for a time the terminus of a branch line from Whitland which was extended by the GWR to Cardigan.
M.R. Connop Price says that Crymmych Arms station was “situated near the source of the [Afon] Taf and in the shadow of the 1,297 ft high Freni Fawr, on the edge of the Prescelly mountains. The buildings were substantial, and right up to the 1960s a pillar box was provided on the wall of the large station house on the up platform. Another facility on the up platform was a well that always gave ice cold water; a GWR cup was available for drinking purposes. After the tablet instruments were removed from Llanfyrnach [further South down the line], Crymmych Arms became [a] … tablet station on the line. Latterly it was the only intermediate station to be in the charge of a station master.” [15: p82]
C.J. Gammell notes that Crymmych Arms, “as well as being a crossing point and block post was closed to the summit of the line, reached by steep gradients from both sides. Up goods and mineral trains had to stop to pin down brakes on the 1 in 35 decent from Crymmych Arms as well as the 1 in 60 rise from the North to the station.” [18: p233]
M.R. Connop Price notes that South of Crymmych Arms “there was a 500 yd stretch at 1 in 35. Train crews [on down trains] undoubtedly entered Crymmych Arms with a great sense of relief!” [15: p77]
The station has a page on the Disused Stations website. [31] The Coflein record for the station notes that when “the station closed in 1962, the wooden station buildings and water tower were demolished although Station House nearby still survives.” [33]
Glogue Quarries were served by a short branch from the Whitland & Cardigan Railway which terminated in two sidings. The quarries had an internal tramway system which included a number of inclines and tunnels. A better map of the quarries can be found in M.R. Connop Price’s book about the old railway. [15: p73][20]
The Coflein record, written by David Leighton, RCAHMW in February 2015, talks of a single quarry formed by “the merging of two early, perhaps seventeenth-century, workings. Material was lowered by two inclines, the upper one abandoned when work deepened and a tunnel was cut to bring material out to the head of the lower incline. The workings were handicapped by a lack of transport. Originally slate was was carted to Blackpool on the Eastern Cleddau, and after 1853 to Narberth Road on the South Wales Railway. Expansion only became possible when in 1873 a siding on the Whitland & Cardigan Railway was laid.” [21] There was a mill, powered by steam and later electricity, at the Western edge of the site. “Roofing slates of good colour were produced but as they were heavy the main output was slab. During the 1920s attempts were made to make bricks from slate dust. But these became uncompetitive when, in 1927, the GWR demanded a transport premium due to their weight; forcing closure. Bulk working has left little to be seen aside from vestiges of buildings in the mill area and the stone-built lower incline. Notably, a terrace of family dwellings was built by the company and is still occupied (in 1991).” [21]
Wikipedia says: “Glogue quarry was a slate quarry … worked from the late 1700s, by the mid-1800s it was owned by John Owen, who wanted to make higher profits by improving his distribution. This led to the construction of the Whitland and Cardigan Railway. The advent of the railway led to Owen expanding his workforce to over 80 men. … After sale to a local consortium, the quarry was worked until 1926.” [32]
The 6″ Ordnance Survey of 1887 shows the old railway continuing East alongside the Glogue Corn Mill before turning South. All the while, it ran alongside the Afon Taf, although as it turned South it bridged the river, as shown here in the central part of the image and in the enlargement which is a few images below. [22]The same area on the railmaponline.com satellite images. [3]A combined image which shows both the view across the line of the old railway to the buildings of Glogue Corn Mill, in the upper part of the image, and the location of the camera on the lane to the East of Glogue, in the lower portion of the image. [Google Maps/Streetview, November 2021]An enlarged extract from the 6″ OS map above which shows the location where the railway bridged the Afon Taf. [22]As the railway continued heading South it curved round the Llanfyrnach Sliver Lead Mine on the approach to the railway station at Llanfyrnach. [23]A very similar length of the Whitland & Cardigan Railway shown on the railmaponline.com satellite imagery. Both these images show that the old railway ran alongside Wellstone Lane as it travelled South. [3]Looking Northwest from Wellstone Lane, the railway ran on the shoulder next to the lane. The land dropped away into the adjacent field, the other side of the line. The sheds visible in this picture are at the lower level beyond the line of the old railway. [Google Streetview, November 2021]
As its name suggests, Llanfyrnach Silver Lead Mine was a 19th century silver/lead producer; on site in the 21st century there are ruins of Cornish engine house and other mine buildings. [34] It was, “an important lead mine with a number of shafts, extensive tips and tailings heaps, buddle pits, together with a number of mine buildings including the remains of a Cornish engine house and boiler remaining on the site. … [It was] by far the largest of the Pembrokeshire mines, and of the south Wales mines, second only to Carmarthenshire’s Nantymwyn Mine in terms of the recorded output. A reference in the Mining Journal (1879) notes a well-defined east-west lode made up of sugary quartz and containing a good deal of lead, and about 150 tons of lead ore being delivered monthly from this and the old lode. Very little sphalerite was sold until the final few years of its working. Silver was extracted from the galena.” [35]
Llanfyrnach Railway Station has its own page which includes text and photographs on the Disused Stations website. It can be viewed here. [36] The Disused Stations page for the railway station suggests that the building in in a considerably worse condition in 2024. Two images showing its condition can be viewed here [38] and here. [39]
This final image taken looking Southwest along the platform at Llanfyrnach Station shows the siding which provided a small goods facility at the station. This image was shared on the Login Railway Station Facebook Page on 8th November 2019. [43]
Southwest of the station the old railway is now followed by a modern single track access road.
The Llanfyrnach entrance to the modern track following the route of the old railway. [Google Streetview, March 2022]Google Maps shows the track running along the formation of the Whitland & Cardigan Railway Southwest from Llanfyrnach. [51, Google Maps, July 2024]
A short distance along the access road/old railway route, the line crossed the Afon Taf again. An enlarged extract from the 6″ Ordnance Survey is shown below.
This enlarged extract from the 6″ Ordnance Survey of 1887 shows the location of the bridge across the Afon Taf which was to the Southwest of Llanfyrnach Station. [24]Continuing to the Southwest, the Whitland & Cardigan Railway followed the North bank of the Afon Taf. [44]This extract from Google Maps shows the track running along the formation of the old railway. It covers a slightly larger area than the extract form OS mapping above. In the bottom-right of this image the modern track can be seen terminating at a T-junction with another track. [52, Google Maps, July 2024]Again, continuing to the Southwest, the Whitland & Cardigan Railway followed the contours on the North bank of the Afon Taf, crossing a farm access road. The length of the line Northeast of the access track at the centre of this image is shown on the modern Google satellite image above. That to the Southwest is shown below. [45]The access track which followed the line of the old railway terminated in a T-junction with the farm access road at the top right of this extract from the railmaponline.com satellite imagery. The line continues in a southwesterly direction from that point. [3]Continuing to the Southwest, the Whitland & Cardigan Railway continued to follow the North bank of the Afon Taf as far as Aber-Elwyn. An enlarged extract from the 6″ Ordnance Survey of 1887 below shows the location more clearly [46]A similar length of the old railway is covered on this next extract from the railmaponline.com satellite imagery. [3]An enlarged extract from the 6″ Ordnance Survey of 1887 shows the old railway bridging the Afon Taf to the Northwest of Aber-Elwyn and then a tributary of the Taf to the Southwest of the hamlet, close to Waun-Bwll. The next station on the line sits just off the bottom-left of this extract – Rhyd-Owen Station. [47]This next extract from the 6″ 1887 Ordnance Survey shows Rhyd-Owen Station, top-right and the Pen-celli Quarries, bottom-left. [48]A similar length of the old railway is covered on this next extract from the railmaponline.com satellite imagery. [3]An enlarged extract from the 6″ Ordnance Survey of 1887 focussing on the Rhyd-Owen Railway Station. [49]
The Coflein record for Rhyd-Owen Station, written in 2010, notes that there was a through line with a passing loop; the passenger platform was on the up side. The station closed in 1962; although the wooden station buildings have been demolished, the nearby station house survives. [53]
Rhydowen Station in 1961, seen from the road at the North end of the station site, from the Rokeby Collection III ref 25c. It is authorised for use here by Coflein. [53]Rhydowen Station in 1961, seen from the South end of the platform, from the Rokeby Collection III ref 25b. It is authorised for use here by Coflein. [53]Another view of Rhyd-Owen Station. The train is on a down service to Cardigan and consists of a single Hawkesworth Corridor Brake 3rd coach pulled by an unidentified 16xx 0-6-0PT.The station house just appears at the extreme left of this image. This image was shared on the Login Railway Station Facebook Page on 11th February 2022. [54]A view through the station from the North shows the loop siding at Rhyd-Owen. This image was shared on the Login Railway Station Facebook page on 16th September 2015. [55]The site of Rhyd-Owen Railway Station, seen from the road at its northern end. The station itself was on the left side of this image with the station house on the right side. It appears as though the station house has been significantly extended and modernised. [Google Streetview, November 2021]
Rhyd-Owen Railway Station has its own page on the Disused Stations website. Click here. [60]
Another enlarged extract from the 6″ Ordnance Survey which shows the site of the Pen-celli Quarries. A single siding was provided for the quarries on the down side of the line. [50]Another length of the old railway which was still heading in a southwesterly direction. [56]This extract from the railmaponline.com satellite imagery covers a similar length of the line to that shown on the map extract above. [3]This next extract from the 6″ Ordnance Survey of 1887 covers the length of the line as far as Llanglydwen Station. [57]This extract from the railmaponline.com satellite imagery covers a similar length of the line to that shown on the map extract above. Llanglydwen Railway Station was sited towards the bottom of this image to the south side of the road through the village. [3]An enlarged extract from the 6″ Ordnance Survey of 1887 which focusses on Llanglydwen Railway Station. [58]The Llanglydwen station site as it appears in the 21st century. [Google Maps, July 2024. [59]Llanglydwen Railway Station in the 1950s. This photo was shared on the Login Railway Station Facebook Page on 9th October 2014. [63]View of Llanglydwen Station in 1962 from the Rokeby Collection III ref 3b. [64]View of Llanglydwen Station in 1962 from the Rokeby Collection III ref 4b. [64]The station building in 1982 when the crossing gates were still in place. This photo was taken by John Gale and was more recently shared on the Login Railway Station Facebook Page on 23rd June 2015. [61]The erstwhile station site at Llanglydwen. The station building remains in place. The white gated driveway is on the line of the station platform and the white fence marks the approximate location of the main running line through the station. The station yard is, in the 21st century, occupied by Dickman’s Sawmill. [Google Streetview, July 2021]A better view of what was the platform elevation of the station building as it appears in 21st century. [Google Streetview, July 2021]
Llanglydwen Railway Station has its own page on the Disused Stations website. Please click here to access that site. [62]
References
M.R. Connop Price; Before the Railways: The Early Steamers of Cardiganshire; in the RCHS Journal, Vol. 40 Part 8 No. 244 July 2022, p471-477.
Following on from the short article about The Railway and Travel Monthly of July 1918 which can be found here, [1] this is a short reflection on the advertising which appeared in the November 1938 edition of The Railway Magazine, [2] twenty years after the magazine looked at from 1918 and only a few months before the outbreak of the Second World War.
Advertising included a series of adverts for:
New publications such as: A History of the Southern Railway (17s/6d); Gradients if the British Main Line Railways (5s); British Locomotive Types – 3rd Edition (5s); History of the Great Western Railway, Volume 1 (1833-1863)(£1/1s) and Volume 2 (1863-1921)(10s/6d);The Railway Handbook 1938-1939, 5th Annual Edition (2s/6d); a reprint of The Locomotive Stock Book (2s/6d), and its Appendix (1s/6d), bought together – 3s/9d.
Damaged books at low prices from The Locomotive Publishing Co. Ltd.
St. Martin’s Engraving Co. Ltd.
The Railway Correspondence & Travel Society membership and visits.
The Railway Club membership.
The LNER’s practice of loaning out slides free of charge accompanied by a set of lecture notes, enabling individuals, clubs and societies to put on talks about railway related subjects themselves.
Lantern Slide talks at minimal cost. A goodwill gesture from the LNER or perhaps a good publicity exercise! [2: pIV]
Sending Containered Loads & Liquids in Bulk by Rail
There were three full page adverts placed jointly by the Big Four railway companies. The first two pages related to the movement of prepacked loads – containers and tankers.
A joint advert in The Railway Magazine of November 1938 by the Big Four railway companies. [2: pV]
Containerisation on Britain’s railways can be traced back to very early days. “In the 1830s the Liverpool & Manchester Railway used simple rectangular boxes, four to a waggon, to convey coal from the Lancashire collieries to Liverpool, where they were transferred to horse-drawn carts by crane.” [3] This had some advantages, particularly the reduced handling of the cargo.
After the turn of the 20th century, “the London & North Western, Lancashire & Yorkshire, and Midland Railway companies were carrying ‘box coal’ on flat wagons, the coal being destined for use by steamboats.” [3]
The Great Central Railway “also played a part in the story of containerisation, being one of only three companies which provided special wagons for the conveyance of ‘fish tanks’.” [3] The wagons were classified as passenger stock.
The Midland and the Great Northern also followed this practice; in the case of the Great Northern Railway the containers were referred to as ‘cod boxes’ some of which lasted into the 1930s.
As early as the late 19th Century railways were using closed containers which resembled the bodies of wooden box vans, “these were initially known as ‘lift vans’ and were privately owned by several furniture removal firms. They were carried both on railway wagons and on flat road trailers drawn by horses or steam tractors.” [3]
The Advent of more effective road transport after WWI brought a challenge to railway companies. The biggest concern was that lorries could offer a door-to-door service which significantly reduced handling costs.
“The LMS launched its first container in 1926, and over the next few years all four of the pre-Nationalisation railway companies developed significant container traffic. Containers were soon to be found carrying all manner of goods, including bicycles, confectionery, castings, cookers, baths, machinery, boots, cloth, carpet, pianos, gramophones, sugar, shrubs, and of course furniture. Special insulated containers were soon developed for the conveyance of meat, dry ice bunkers being provided to maintain the temperature.” [3]
Containerisation worked best for high value items many of which required careful packing to avoid breakages. “This meant that a premium could be charged for a fast ‘door to door’ service, which justified the use of containers.” [3]
In the first instance a variety of different wagons were used to carry thesevstandardised containers. But “by the 1930s specialised container flat wagons or ‘conflats’ were built. In many cases these were converted from other wagons, for example the LNER converted a number of cattle trucks following a downturn in livestock traffic.” [3]
Early Road-Rail Tank Containers and Demountable Tanks. This full page advert in The Railway Magazine is on the following page to the ‘Containerisation’ advert above. [2: pVI]
This advert highlights a further, more recent, development in the movement of goods – sending liquids in bulk by rail. Road-Rail tank containers dispensed with the use of casks and drums, so reducing conveyance and handling costs. The rail companies sweetened the deal by only charging for transport of the contents of these tanks provided they were carried on privately owned railway vehicles – so no return charge for the empty tank/wagon!
A similar image from a leaflet produced at the time, entitled “Conveyance of Liquids in Bulk by Rail” jointly produced by the GWR, LNER, LMS and the SR in the 1930s. [4]
The Green Arrow Freight Service
The third full page advert placed jointly by the railway companies was for ‘The Green Arrow’.
“The sign of the Green Arrow was a double precaution for traders – a system of Registered Transit for merchandise or livestock by goods train, ensuring that goods were monitored effectively throughout their journey. A Green Arrow label was fixed to the consignment facilitating identification and advance notification of its arrival. A fee of 2s/6d per consignment secured this service.” [2: pVIII]A BR western region poster advertising the Green Arrow service, framed and protected by glass. This image was shared on the LNER Forum by ‘1H was 2E’ on 3rd March 2015. It is made available for use by the Science Museum under a Creative Commons Licence (CC BY-NC-SA 4.0). [6][7]
“In 1928 the LNER set up their officially named full wagon load ‘Green Arrow’ service, offering registered overnight transits.” [8] There is a confusion between sources – Atkins, Beard, Hyde and Tourret say that “the GWR ran an experiment with registered transit loads between 1927 and March 1929. This was a great success and became the ‘Green Arrow’ service. The other railway companies would not accept the principle until March 1933 when they at last followed suit.” [9]
However, by 1938, all four companies were clearly participating in the Green Arrow scheme.
Railhead Distribution – the GWR
The GWR advertised its road services in a full page advert in the November 1938 Railway Magazine as shown in the image below.
Although it is early morning the railhead fleet is ready for the road! [2: pVII]
Goods received in bulk at railheads in Birmingham, Bristol, Cardiff, Exeter and Swansea were, by early morning, sorted ready for distribution and had been placed in road vehicles ready for distribution. The GWR distributed goods to destinations within a radius of 30 miles from their railheads.
The scheme ensured that goods reached even the most isolated destinations by the day following their original despatch. This meant that customer’s orders could be fulfilled in a timely manner direct from the warehouse rather than needing to be pre-stocked in a company’s outlying branches.
A contemporary postcard image showing a Thornycroft van supplied to the GWR. This vehicle is dated as being in service in 1939. [10]
Famous Trains of the LMS
The LMS placed adverts across 3 full pages for three express restaurant car services: The ‘Lancastrian’; the ‘Mancunion’; and the ‘Centenary’. …………
The ‘Lancastrian’. [2: pVIII]The ‘Mancunion’. [2: pIX]The ‘Centenary’. [2: pX]
In the midst of a small batch of older railway magazines, was a partial copy of the July 1918 copy of “The Railway and Travel Monthly.”
The price for the magazine: 1 shilling
Edited by: G.A. Sekon.
I find these old magazines quite interesting particularly for the contemporary view they provide on what, for us, is railway history.
Articles and Advertising. …
The articles listed on the contents page of the magazine were:
Coloured Presentation Plate of Great Central Railway 4-6-0 Express Locomotive “Lord Farringdon,” No. 1169.
The 4-6-0 Locomotives of the London and South Western Railway.
Concrete Boilers for Locomotives.
The short article on p10 of the magazine on concrete boilers for locomotives. [1: p10]
The Naming of British Locomotives, (its advertising influence: the methods adopted).
The King in Scotland(an illustration).
The Royal Train on the North British Railway, hauled by two ‘Scott’ class 4-4-0 express locomotives. [1: p22]
Side Door Coaches for American Suburban Trains
British Express Trains and Locomotives.
Three Position Light-Signal on the Metropolitan Railway.
The Century of the ” Railway and Travel Monthly.”
A short note on p39 of the magazine which tried to describe plans for celebrating the 100th anniversary of a magazine in war-time conditions. [1: p39]
Correspondence.
Nautical News and Notes.
Dock, Harbour, and Shipbuilding Comments.
The Why and the Wherefore.
Apposite Aphorisms
What is Happening on our Railways.
What our Railways were doing Seventy-Seven Years Ago.
Looking back 77 years from July 1918 to July 1841. I am not sure what the significance of 77 years was in the context of this magazine’s 99th edition. However, this retrospective takes us back to the very early railway years! [1: p66]
The Stephenson Locomotive Society.
Much of the advertising space at the front of this magazine was given over to different railway companies seeking to attract manufacturers to their area of operation. These included adverts from: the Great Northern Railway; the Furness Railway; the Midland Railway; the Metropolitan Railway; the North Staffordshire Railway; the South Eastern and Chatham Railway; the Midland and South Western Junction Railway; the Lancashire and Yorkshire Railway; the London Brighton and South Coast Railway; and the London and South Western Railway. There was also a half page advert from the Birmingham Railway Carriage and Wagon Co., Ltd. These are all shown below.
Two other adverts, shown first and second below, were interesting. …
First, a poignant and generous advert from the publisher who had worked with the Post Office to provide an opportunity for readers of the magazine to hand in their read copies of the magazine at any post office to be ‘sent to the Troops at the Front free of charge’.
Second, an advert for a colour print of the Great Central Railway Immingham Deep-water Dock, unfolded for framing, in a tube, post free for the princely sum of 4d. And if you wanted to check how good it was you could call in at the journal’s offices on Cursitor Street, London.
Two adverts by the publishers of the Railway & Travel Monthly.The Great Northern Railway.The Furness Railway.The Midland Railway and the Metropolitan Railway.The North Staffordshire Railway, the South Eastern _ Chatham Railway, and the. Midland & South Western Junction Railway.The Lancashire and Yorkshire Railway, and the London Brighton and South Coast Railway.The London and South Western Railway.The Birmingham Railway Carriage and Wagon Co. Ltd.
References
G.A. Sekon (ed.); The Railway and Travel Monthly, July 1918.

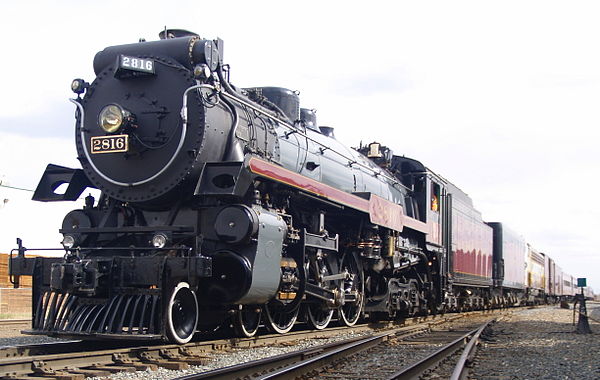

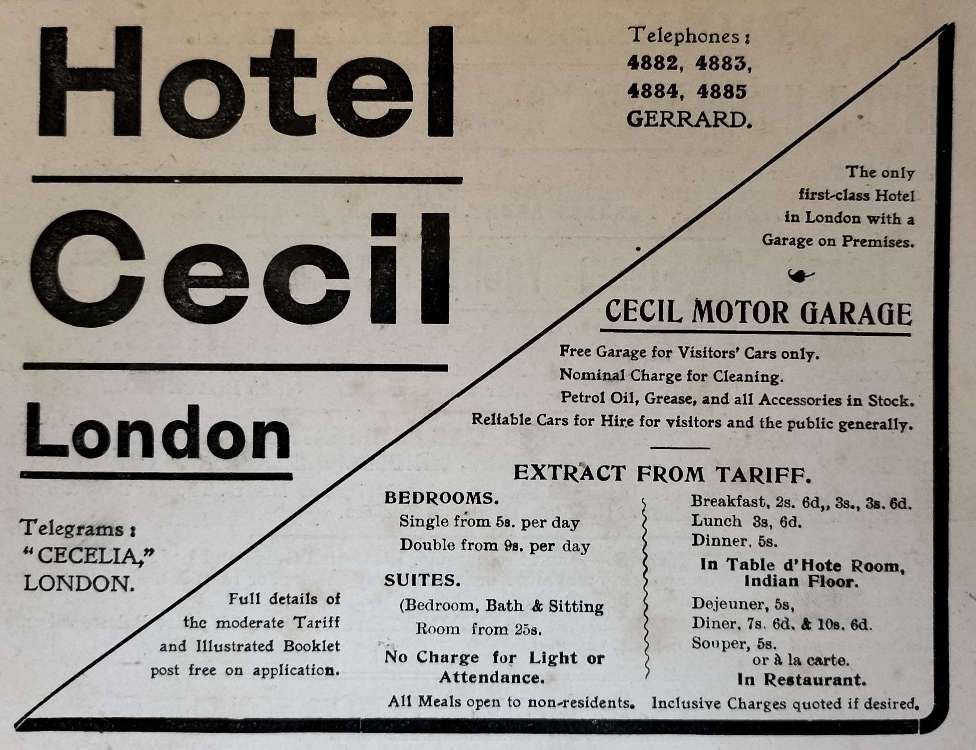

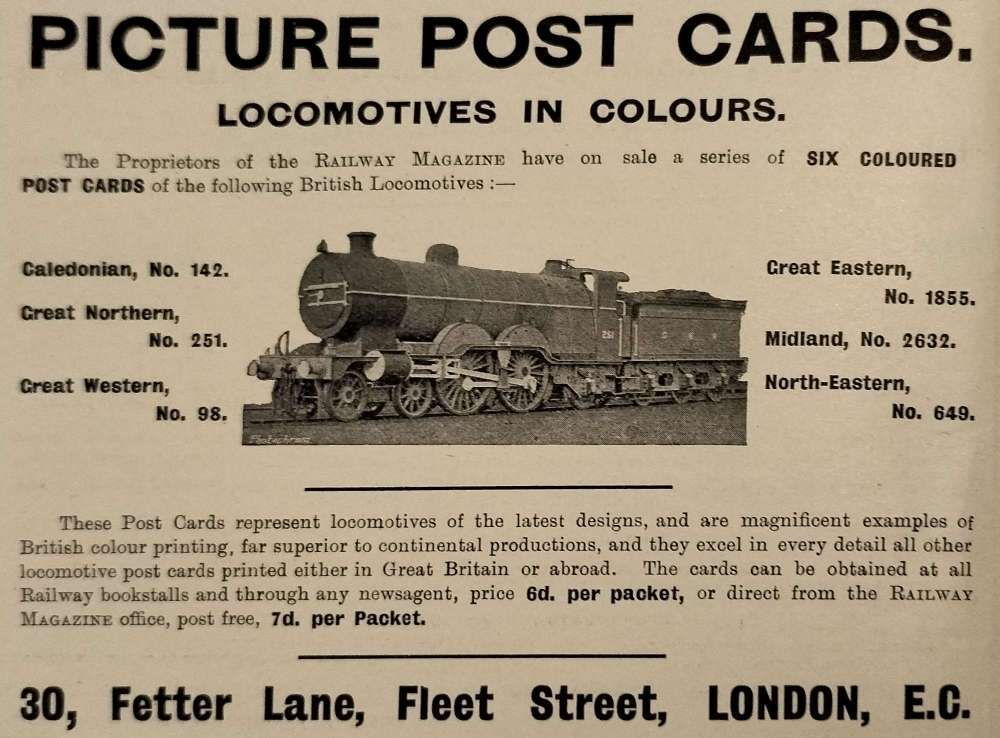
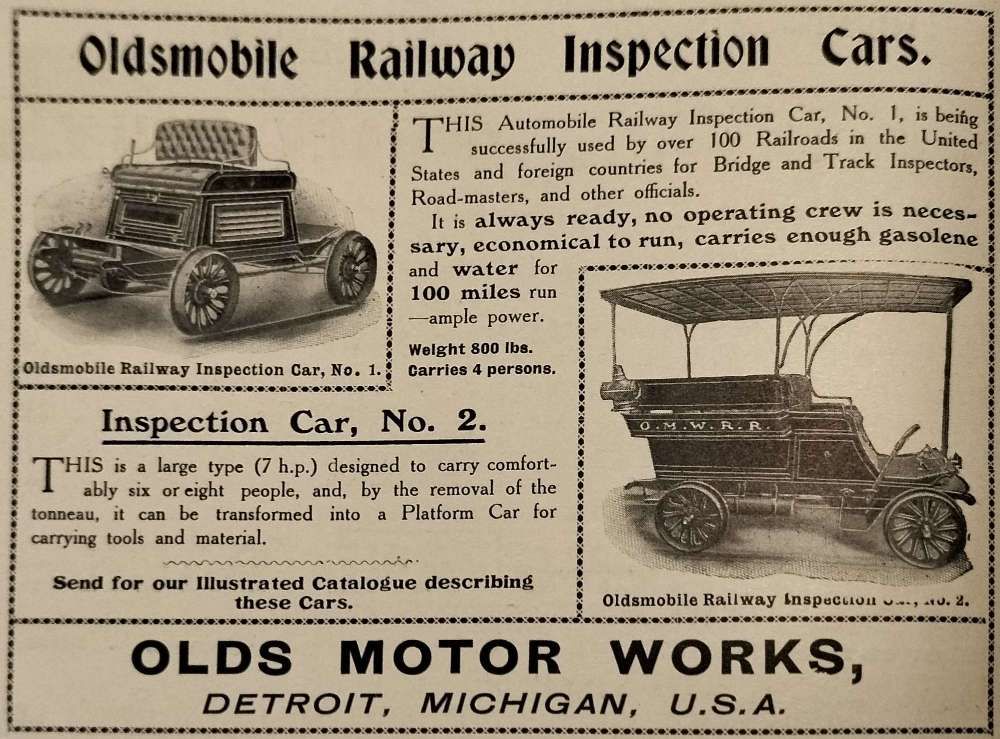

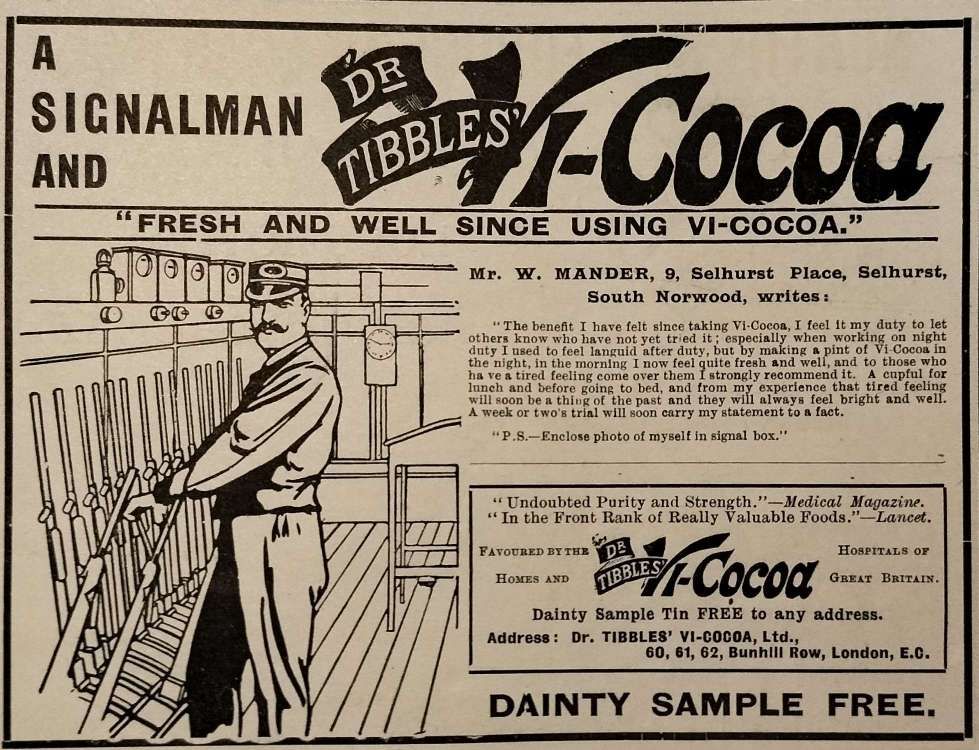
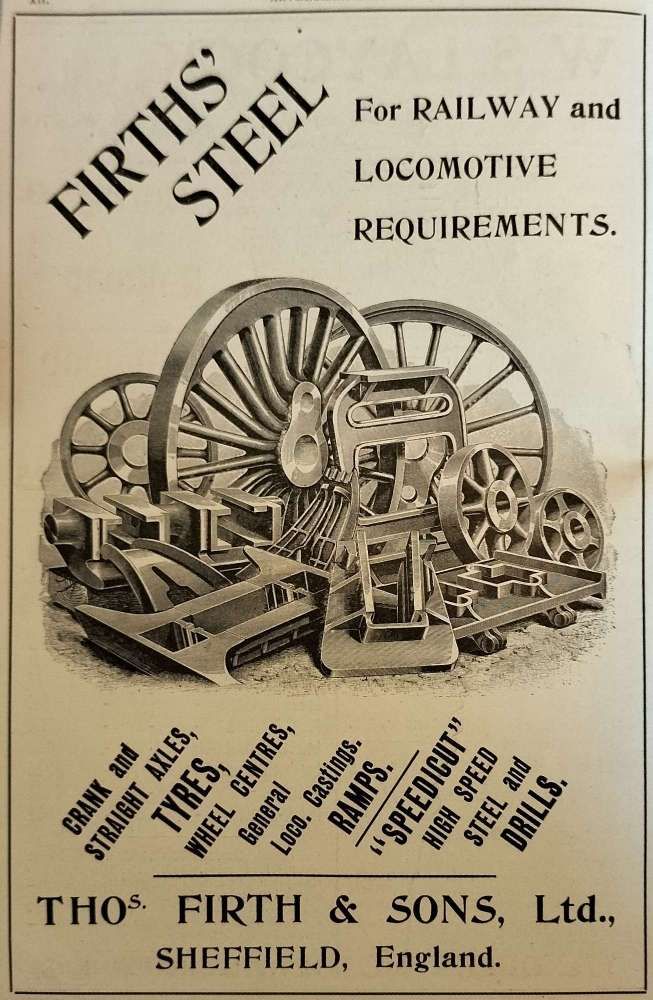
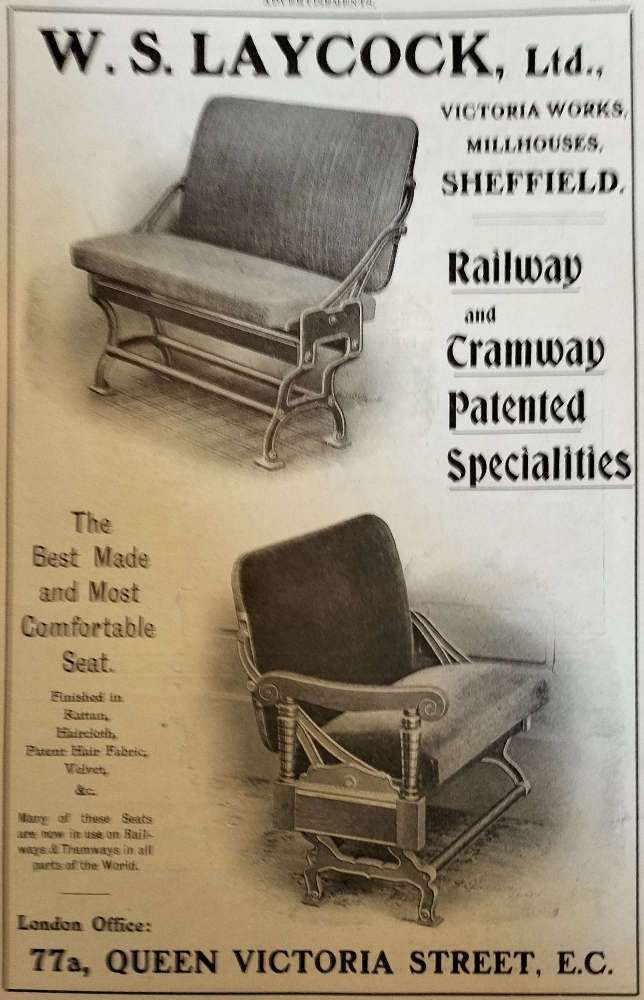
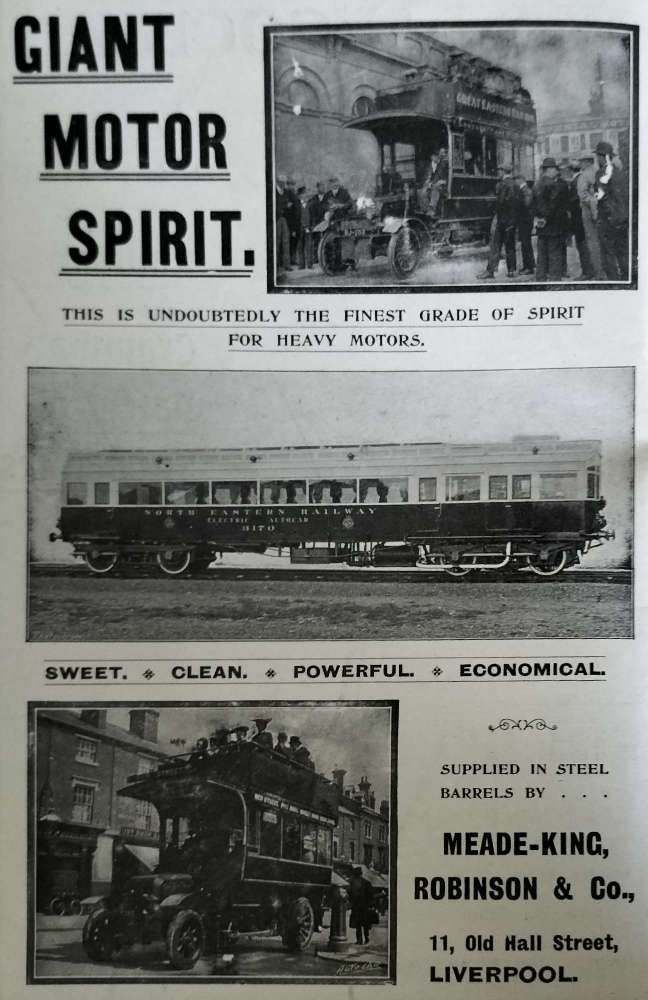


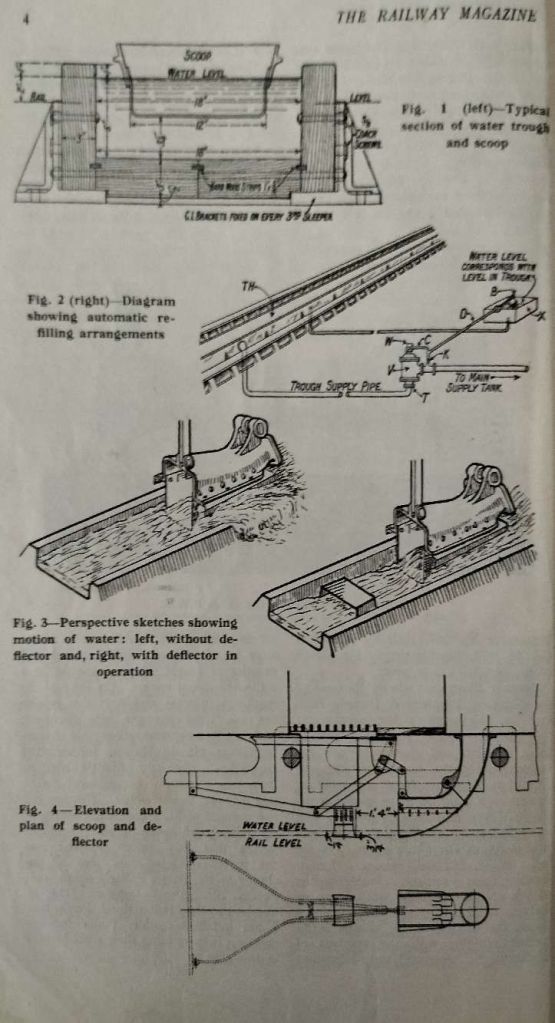
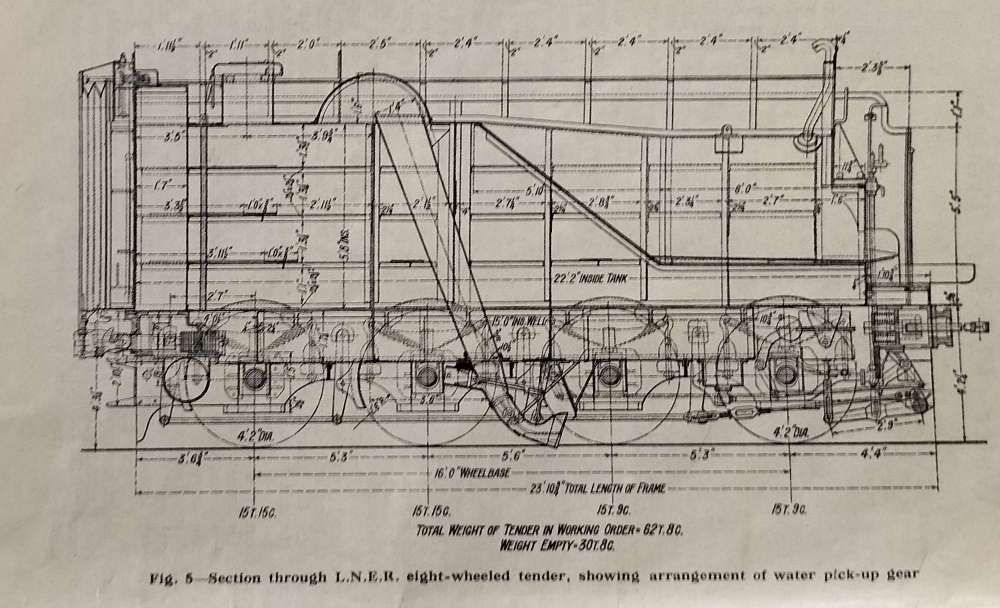
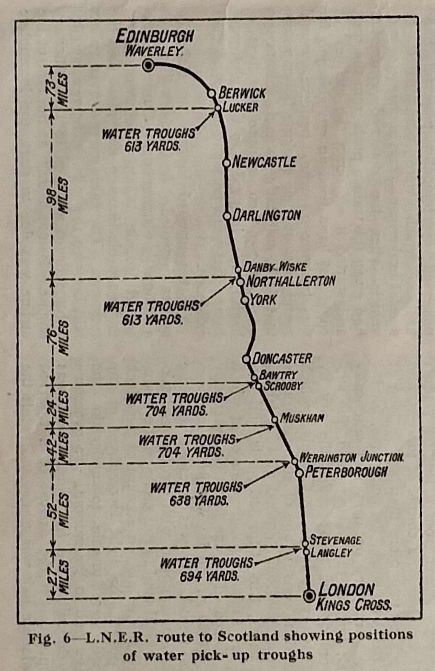
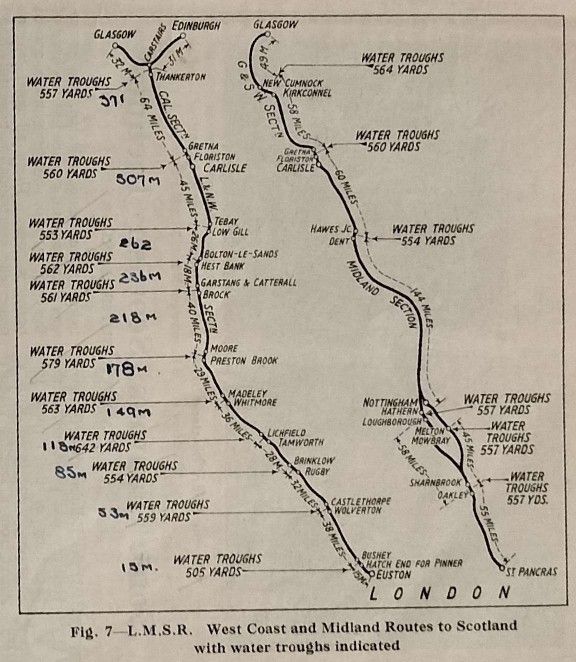
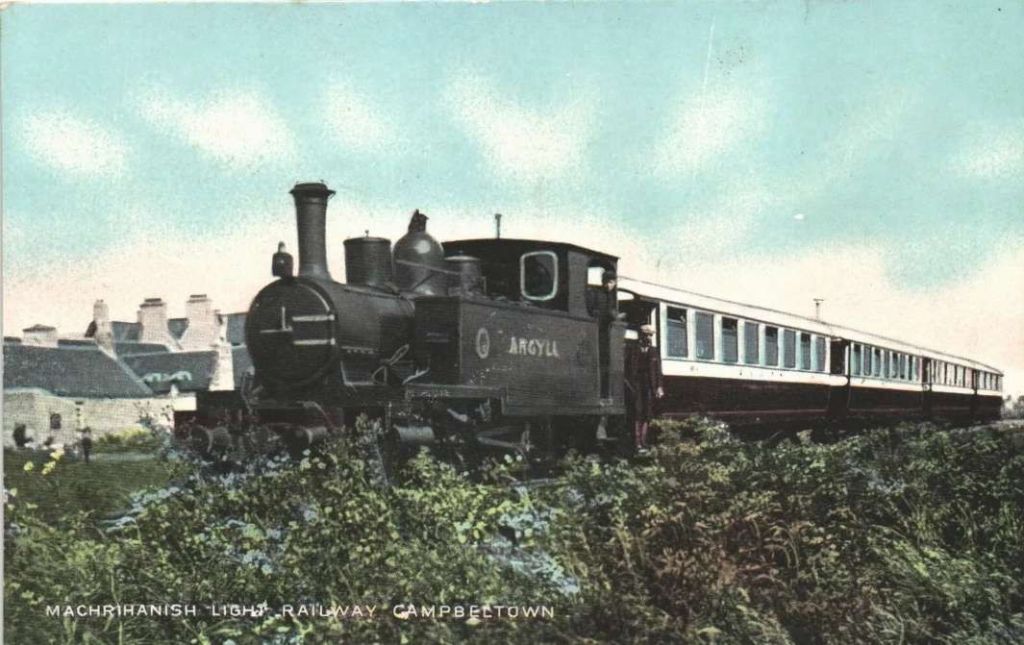
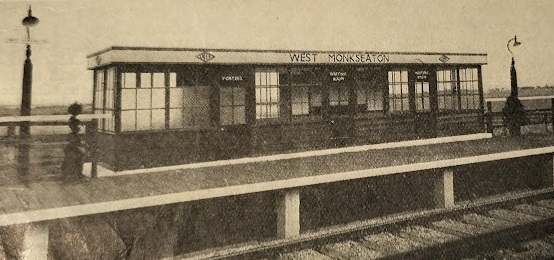
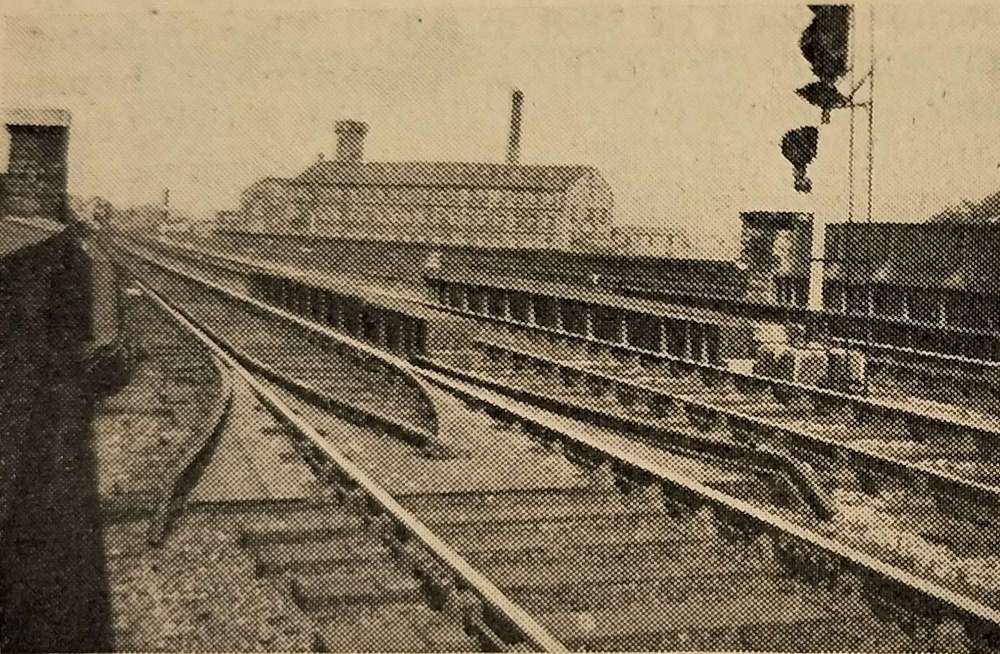
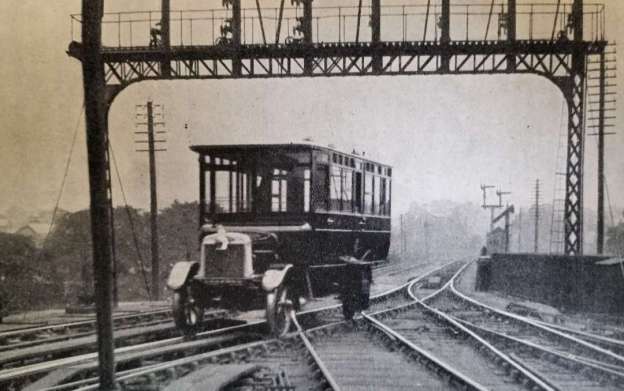

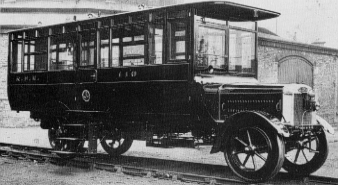
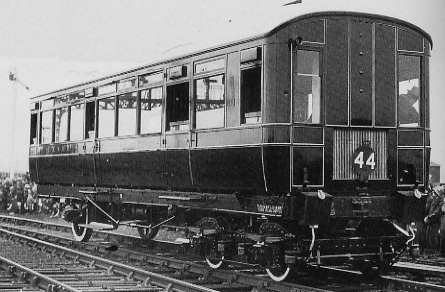
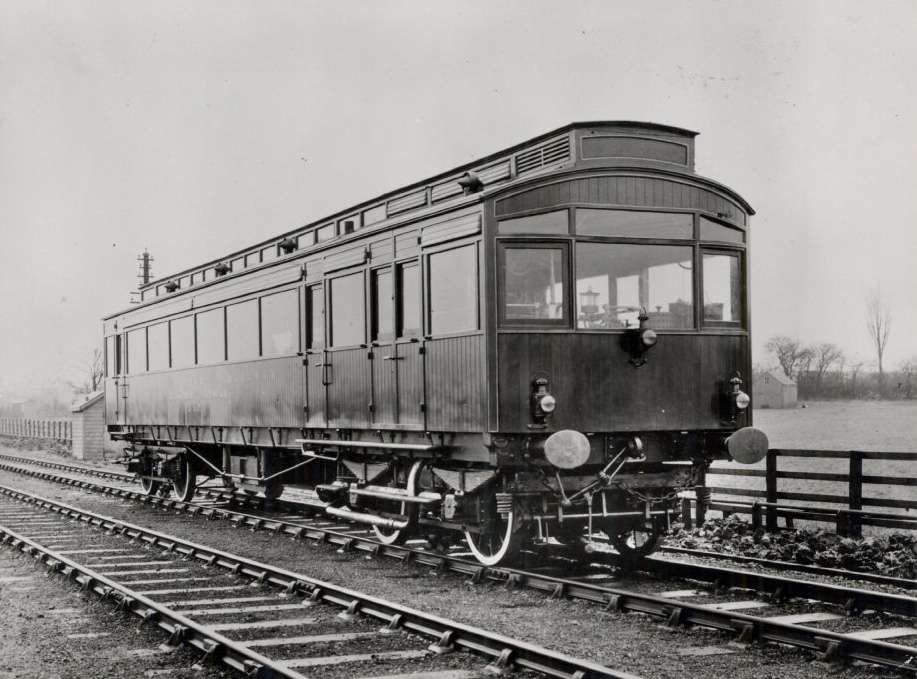
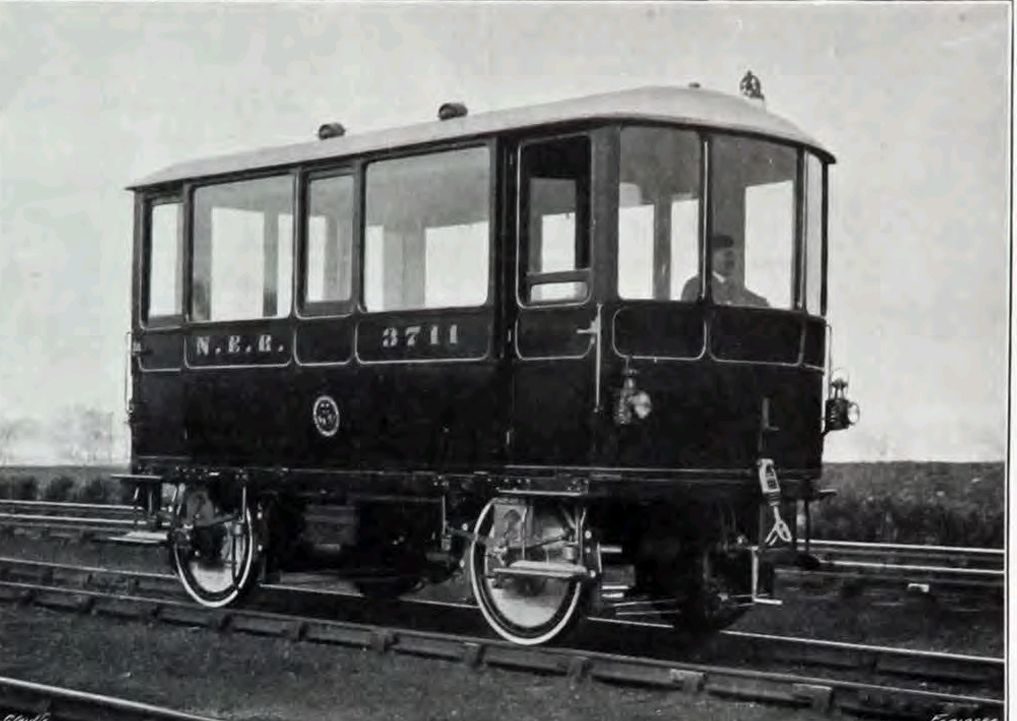
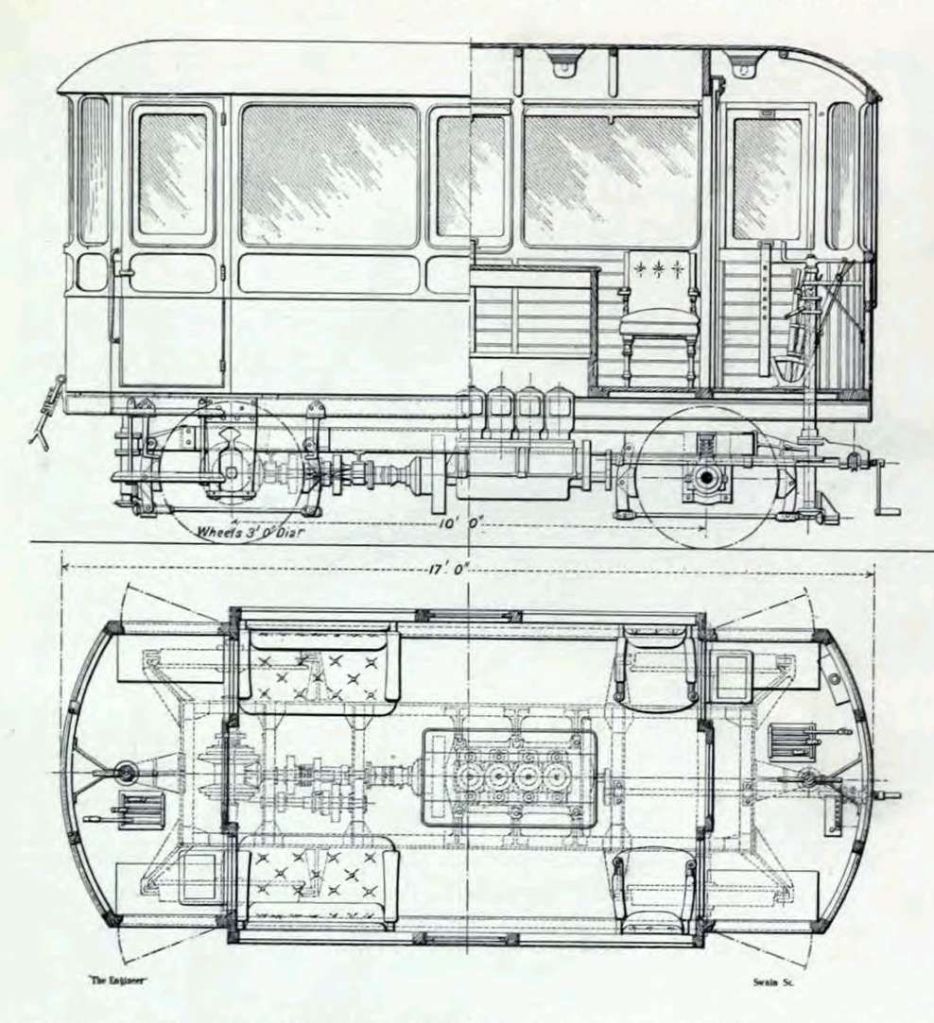
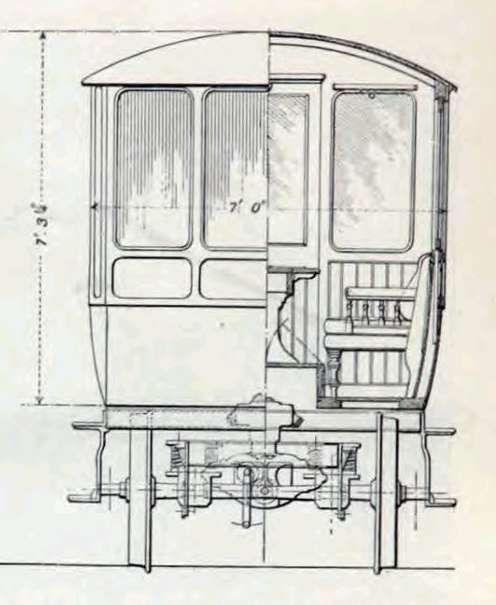
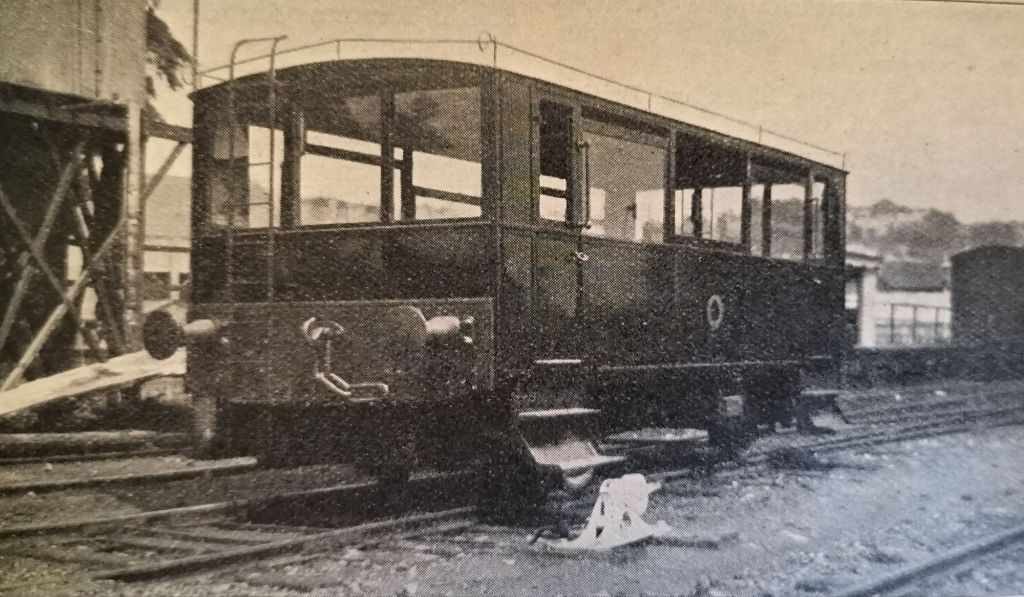
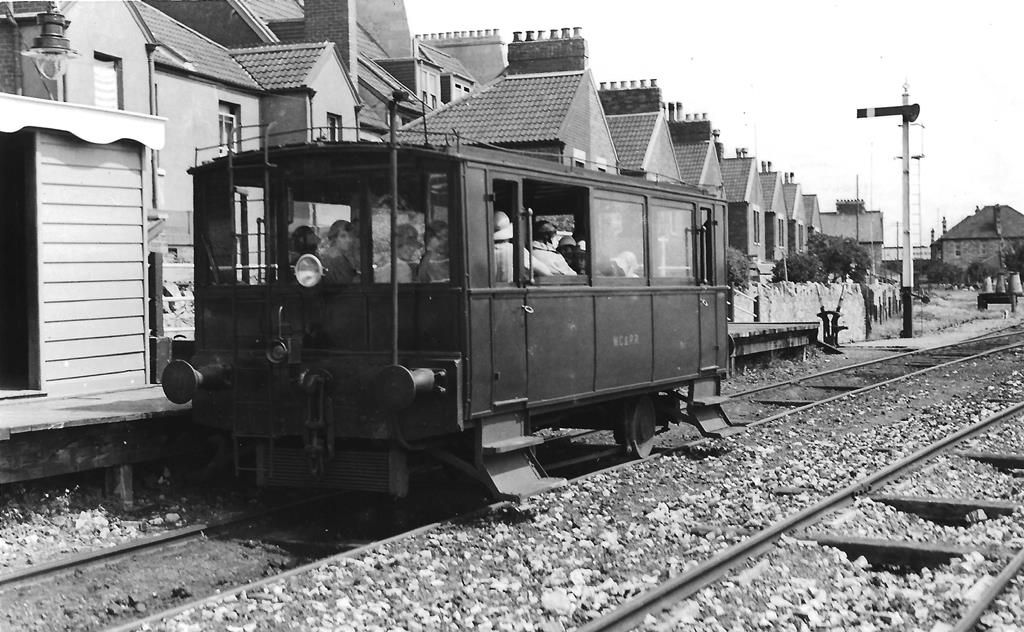
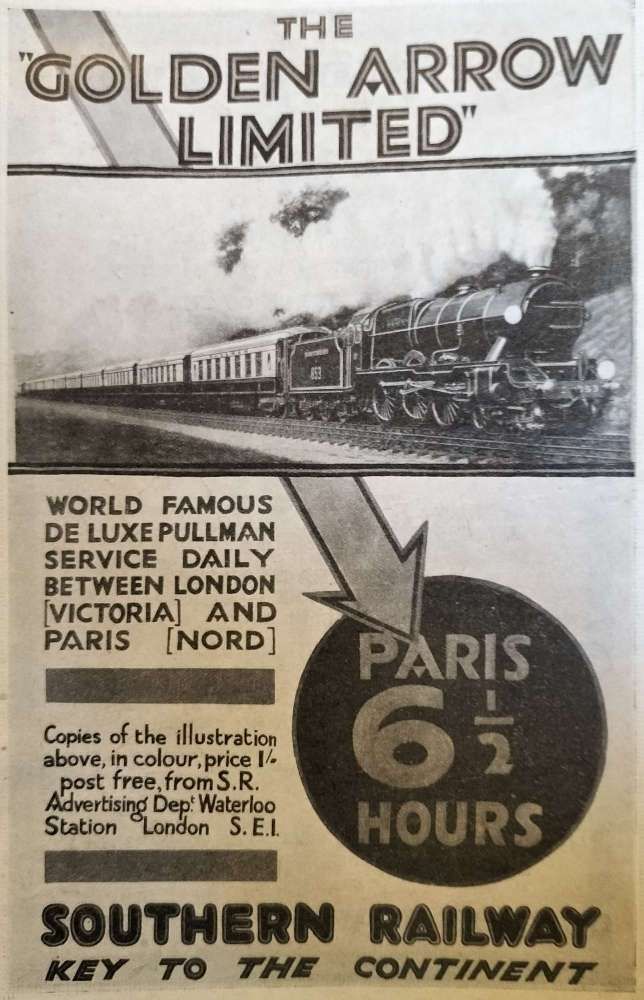
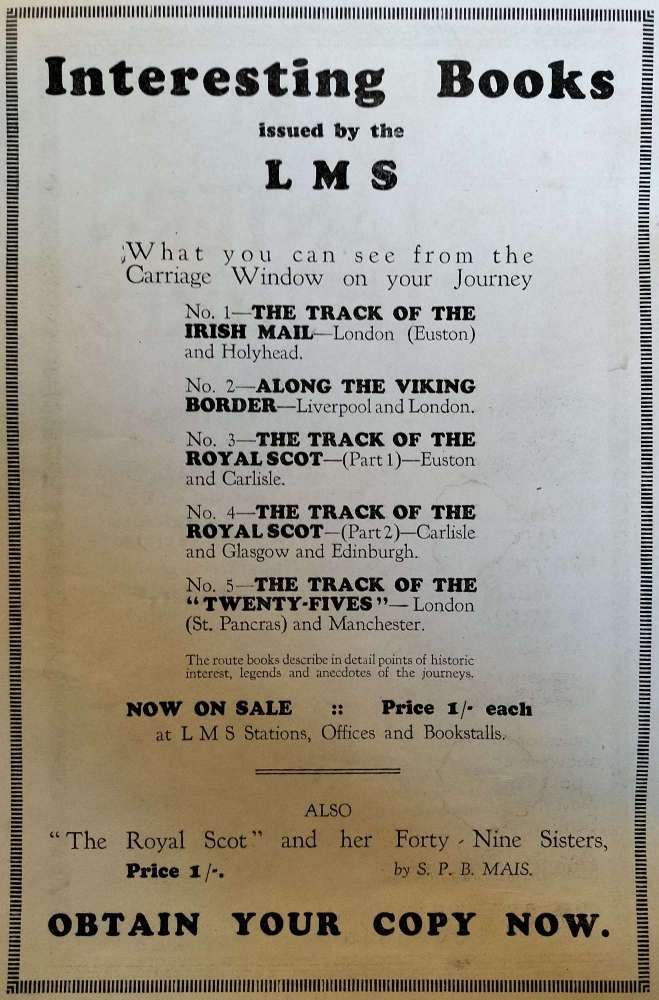
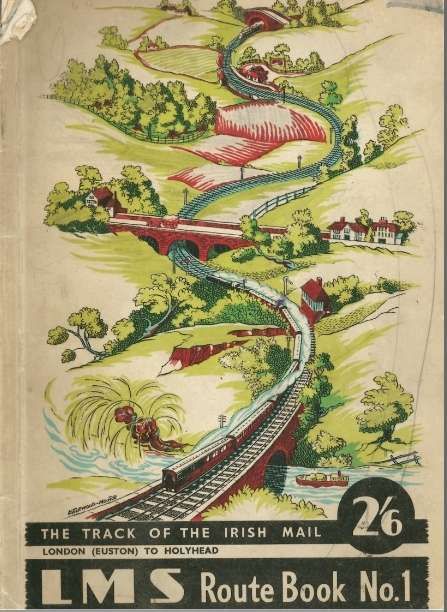

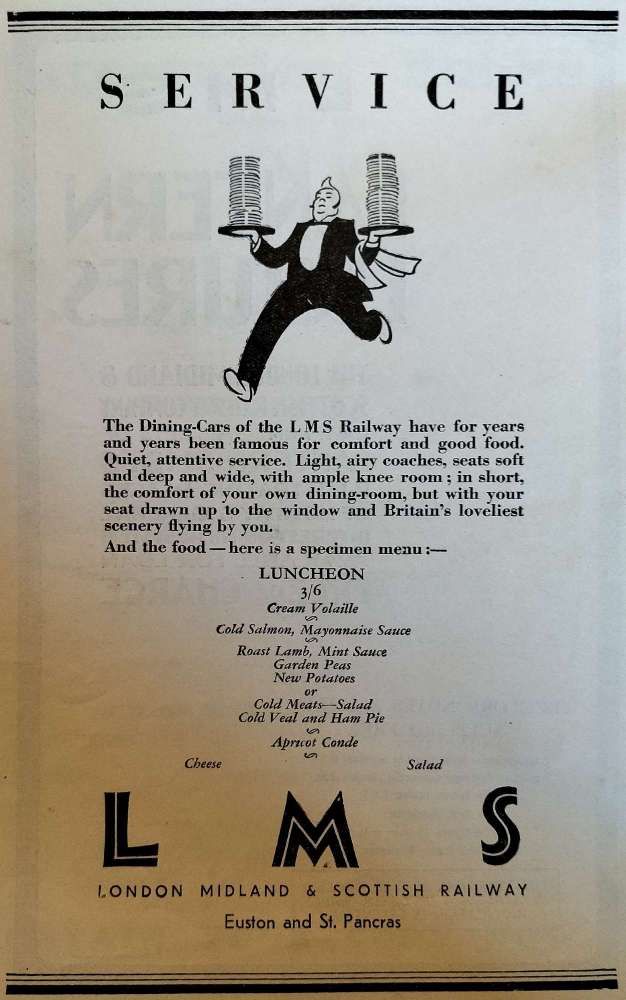

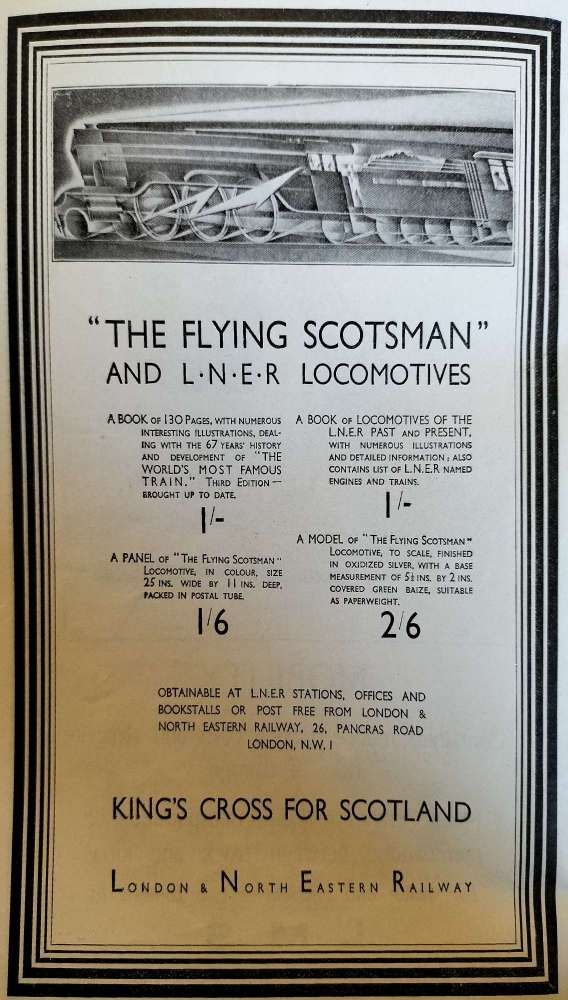
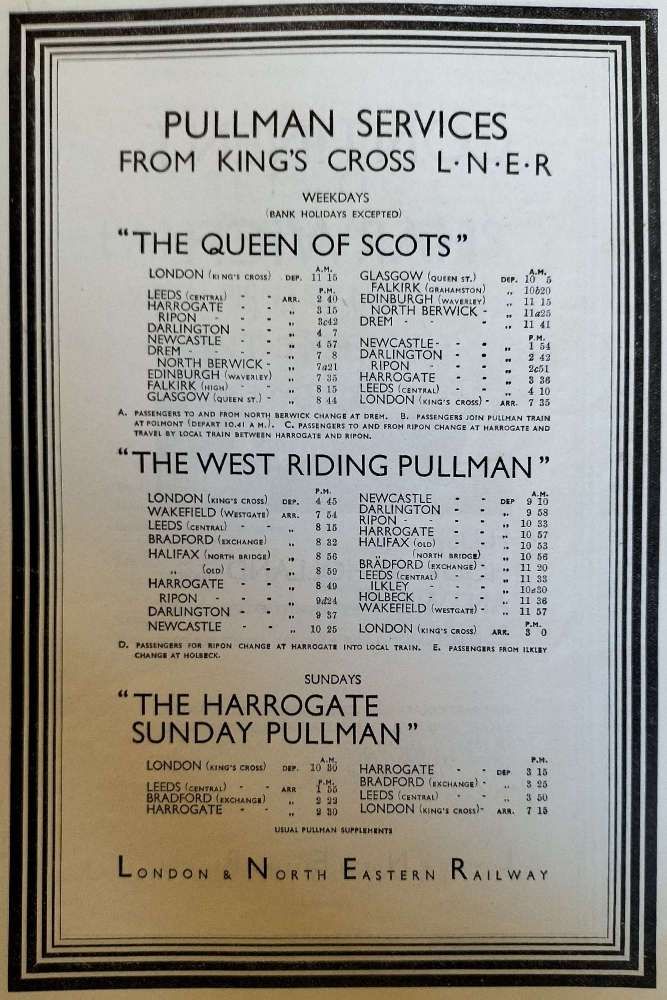
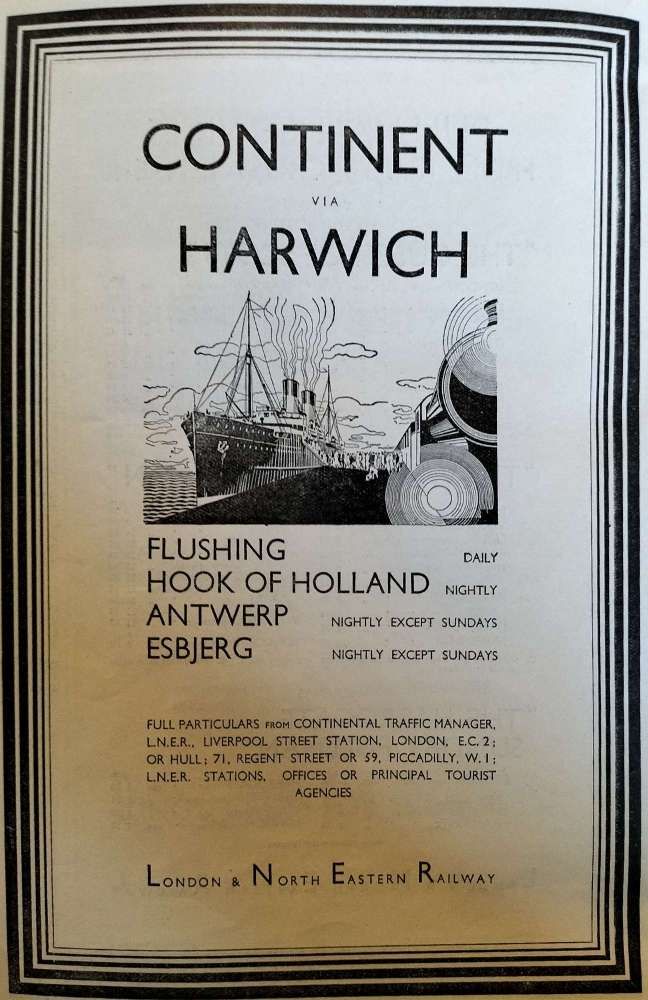
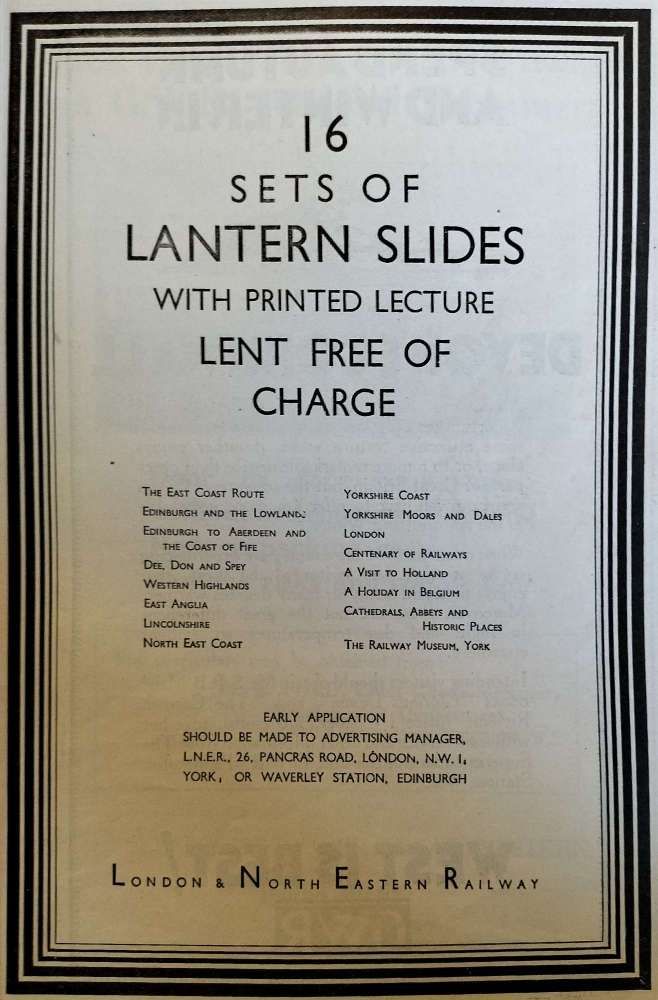
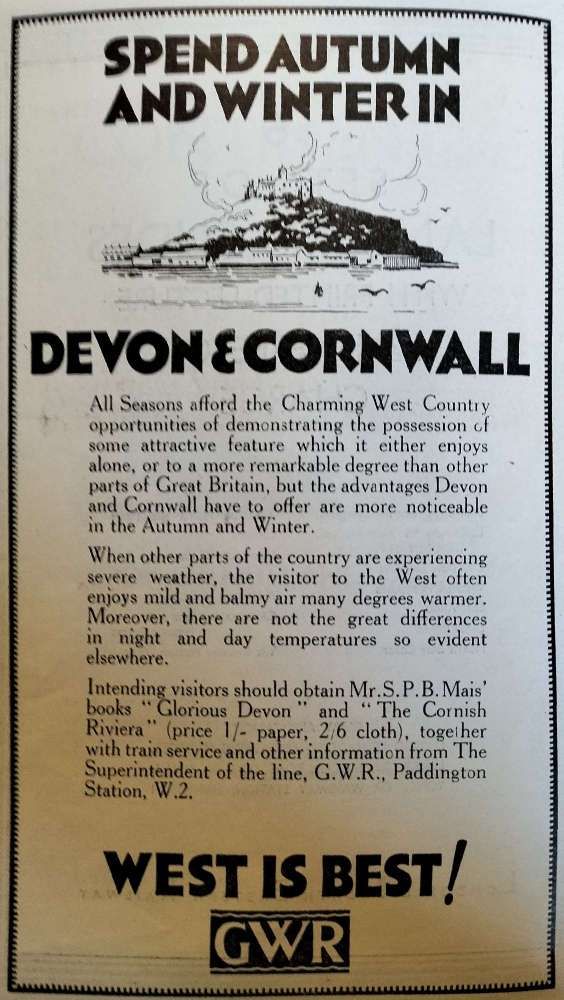
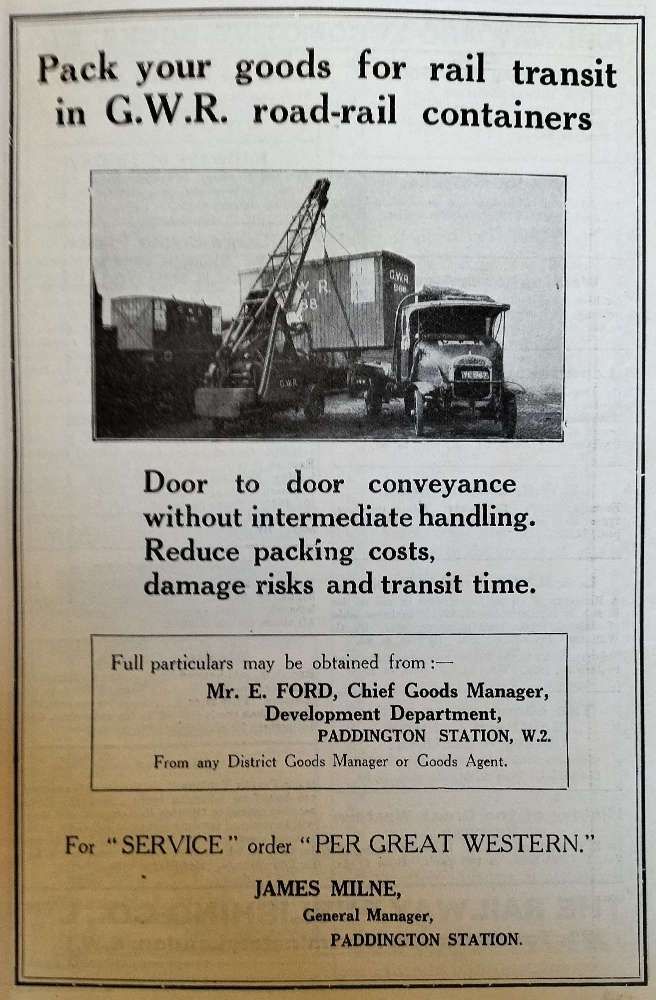
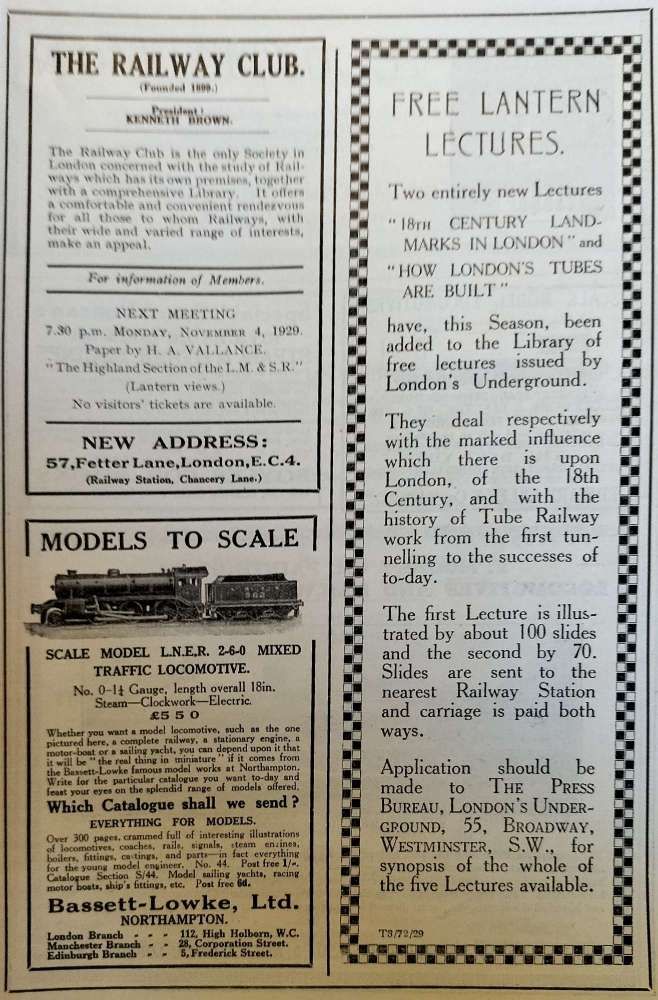
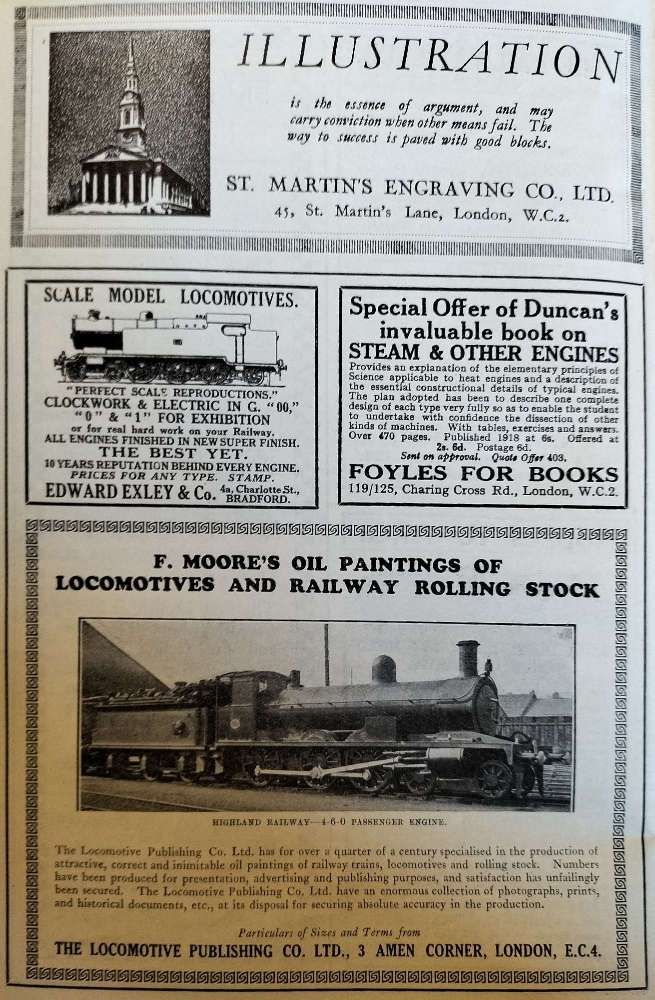
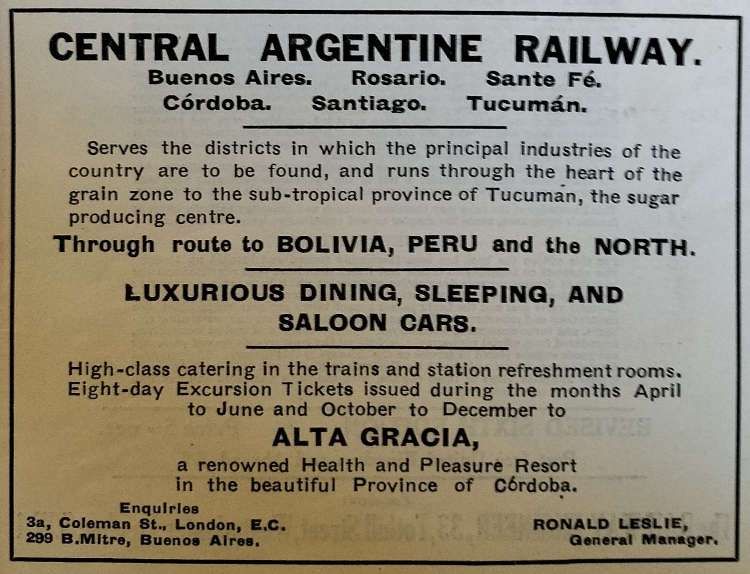
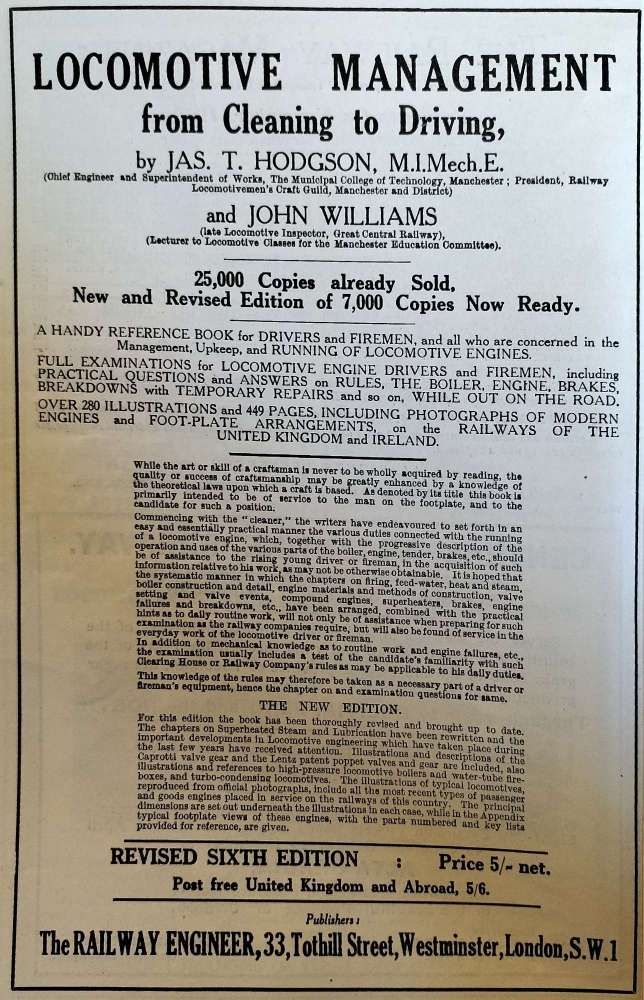
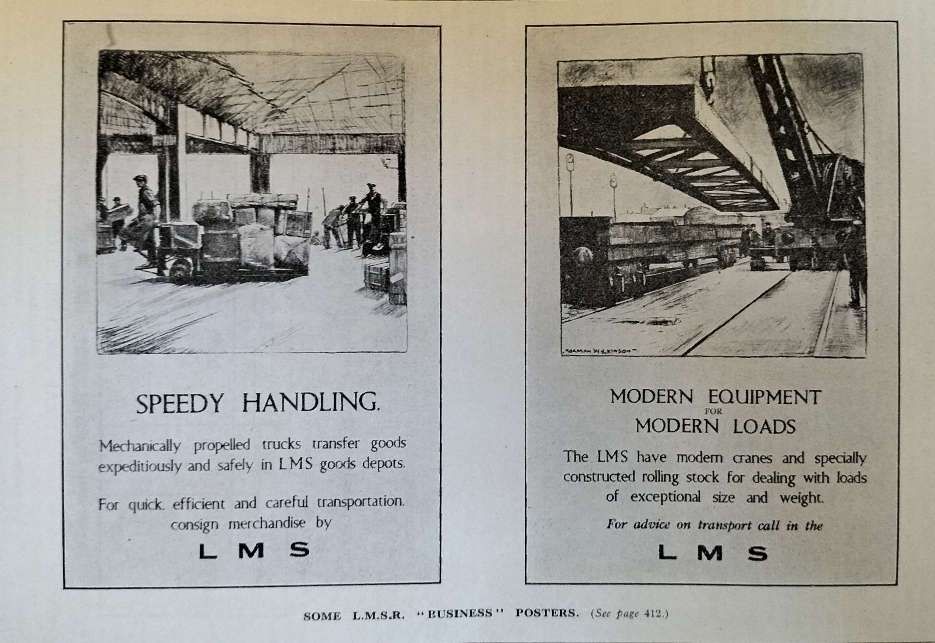
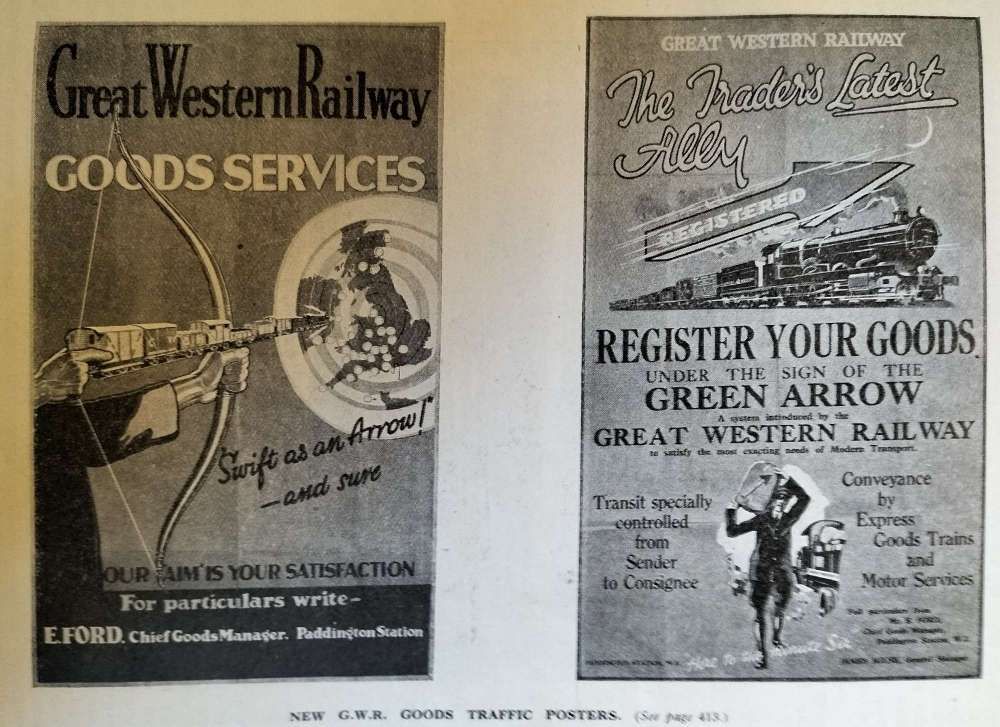
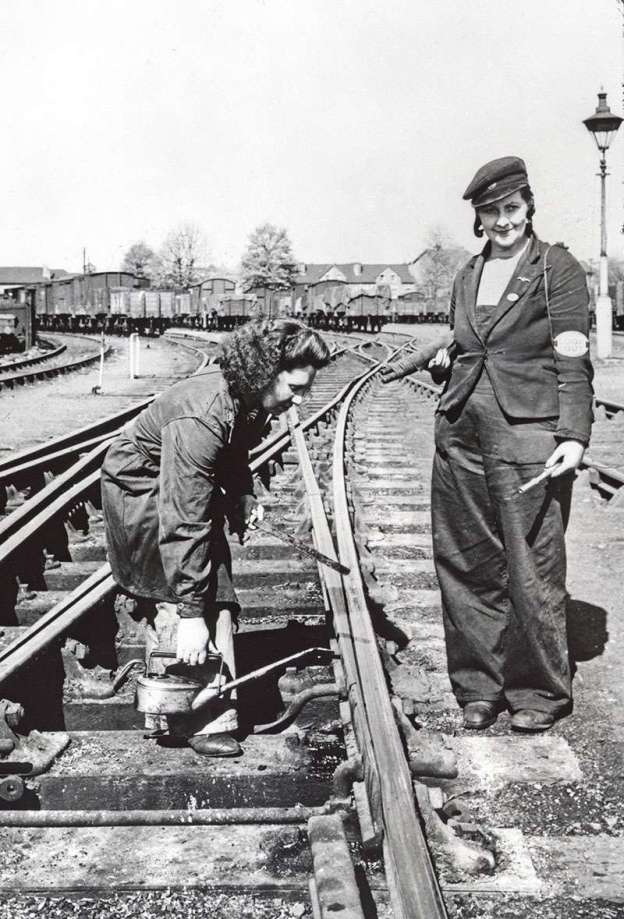
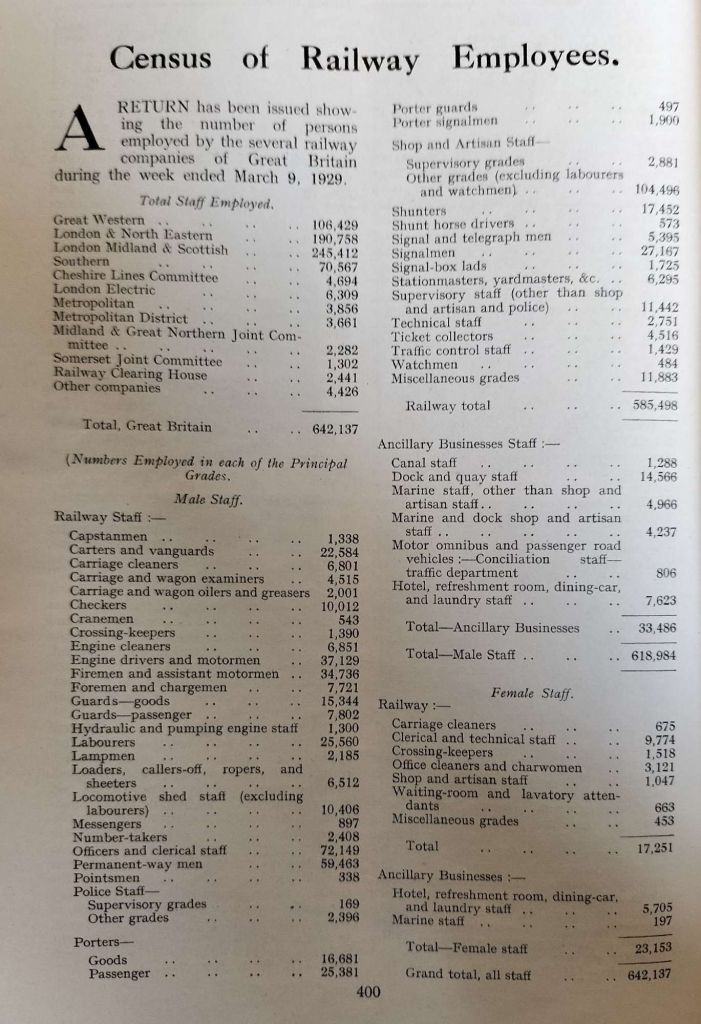
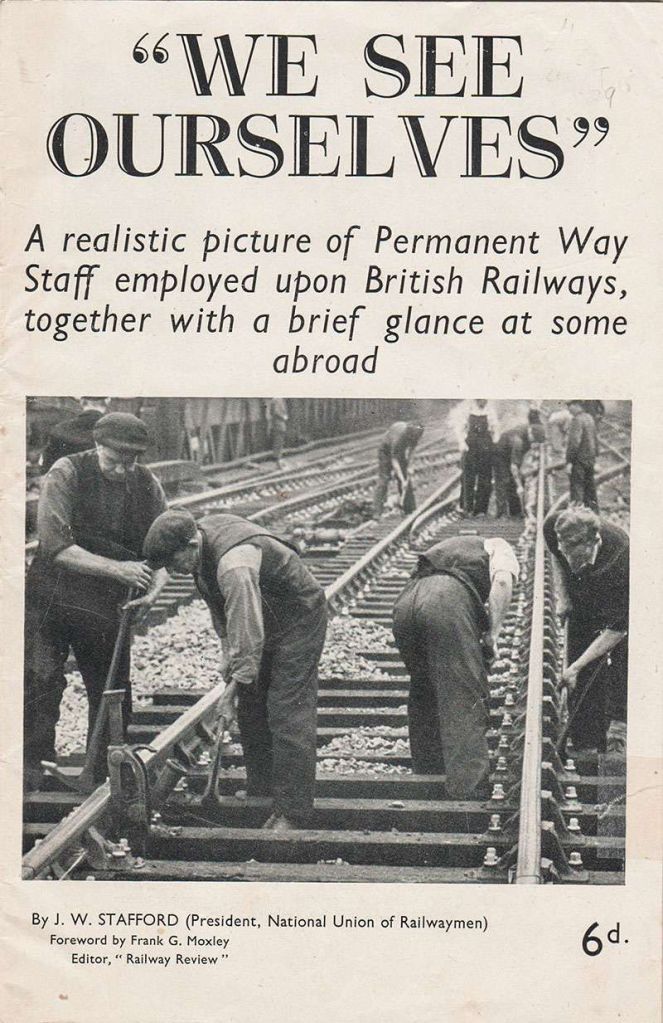


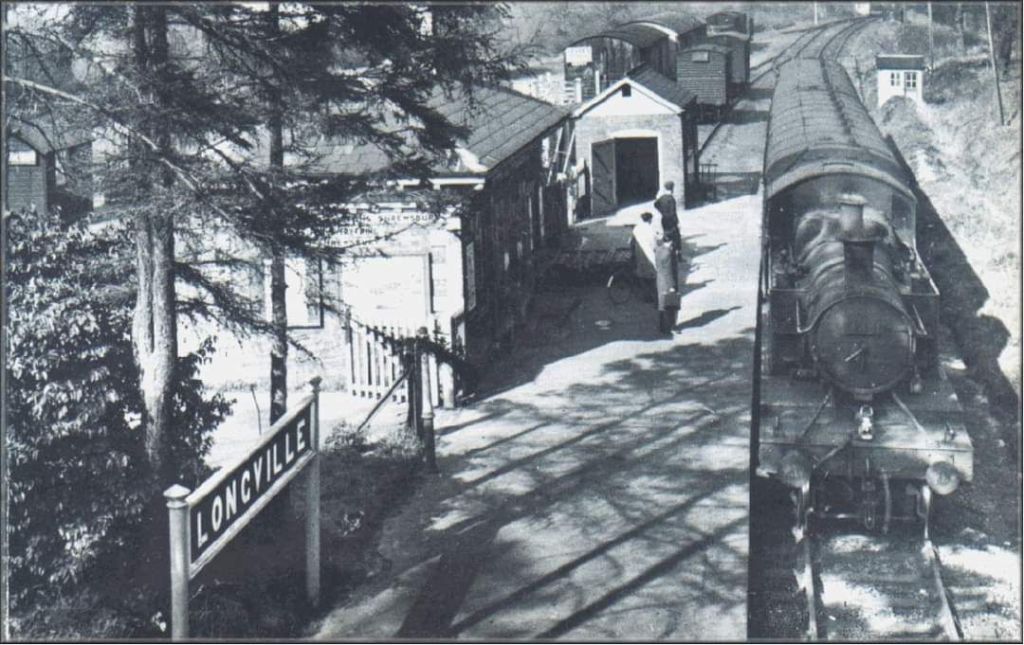
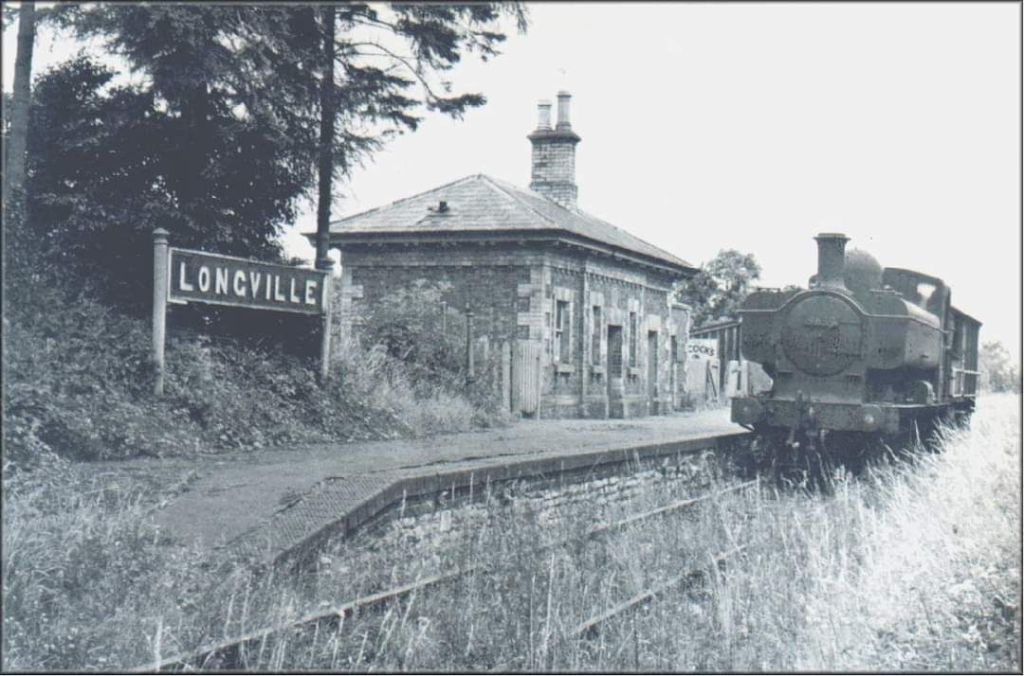
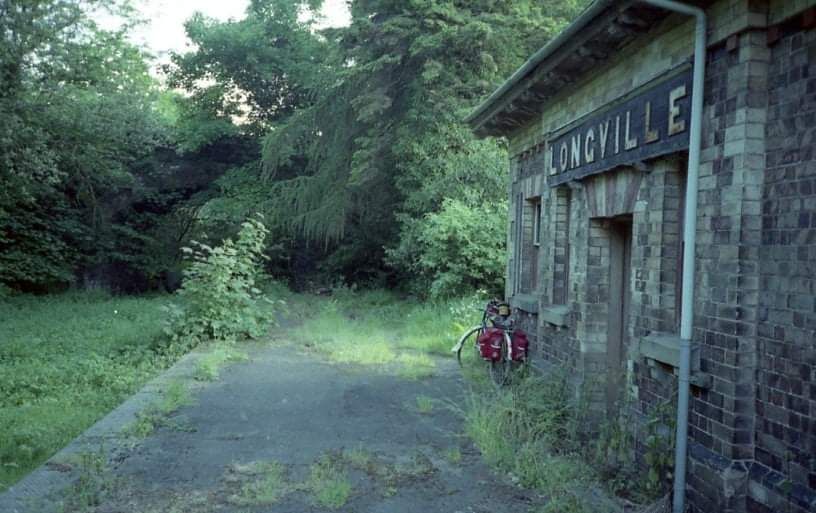
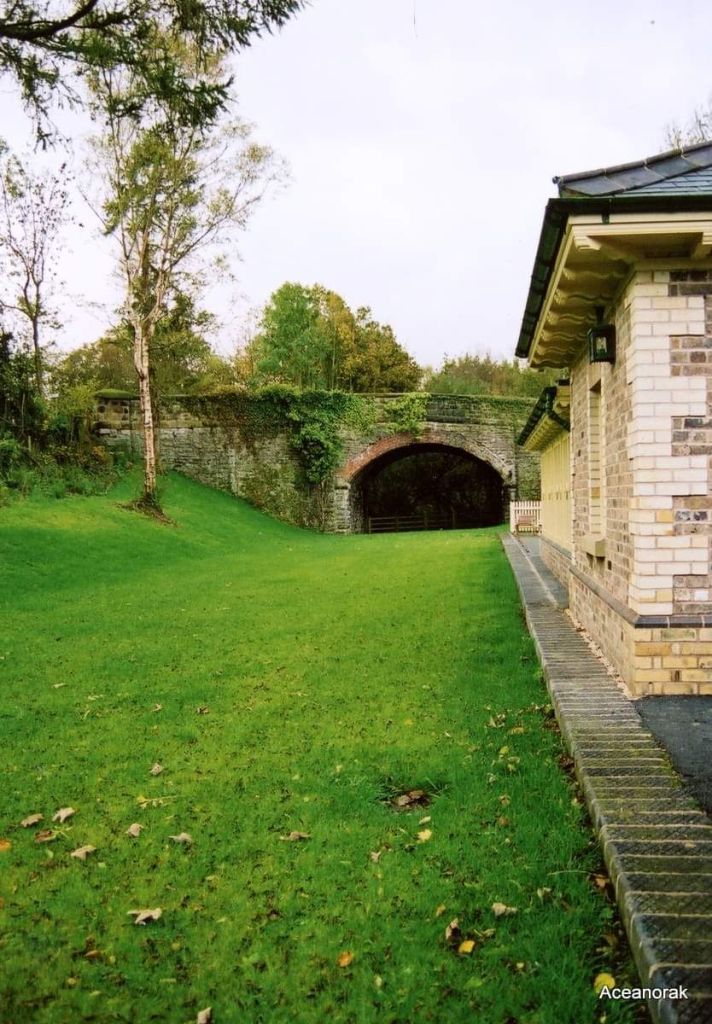
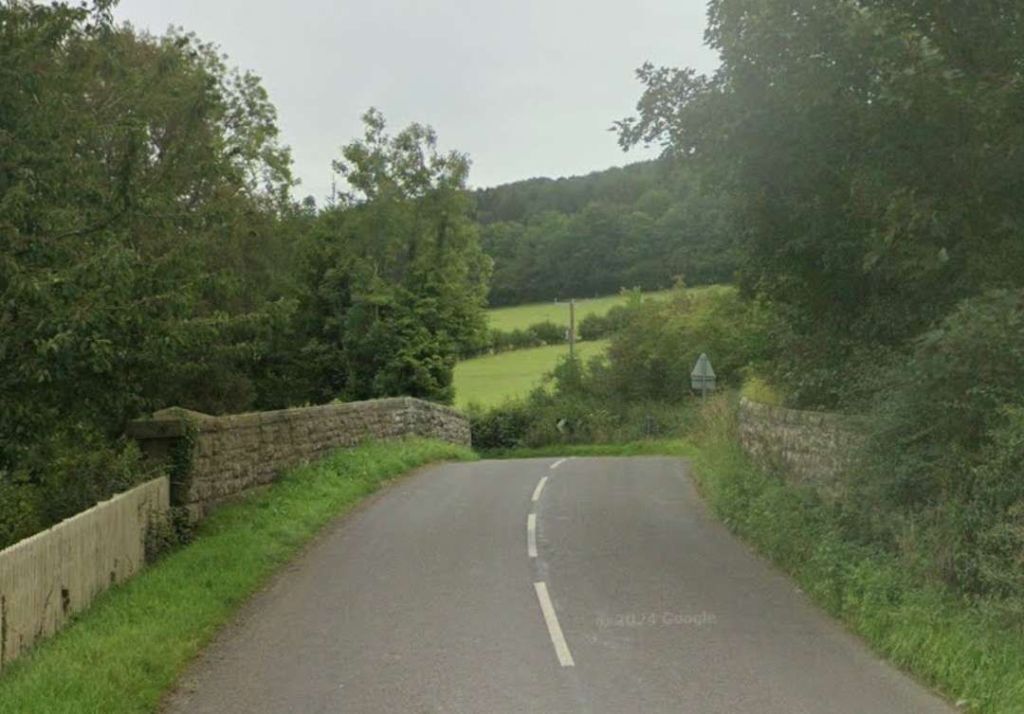

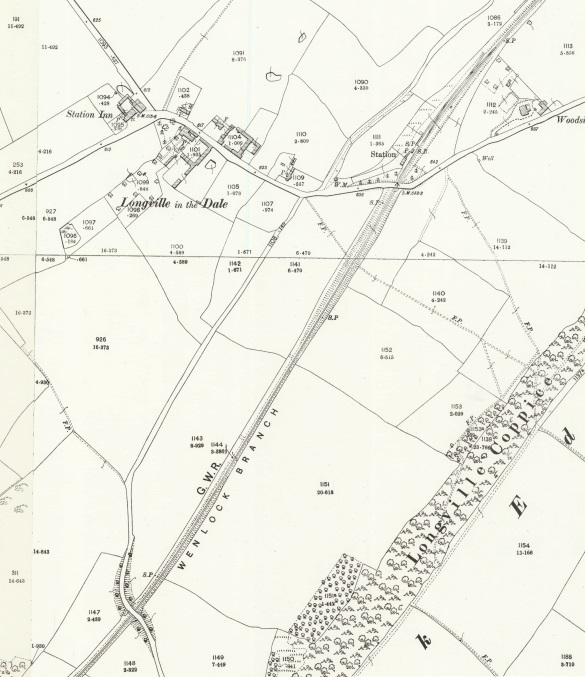
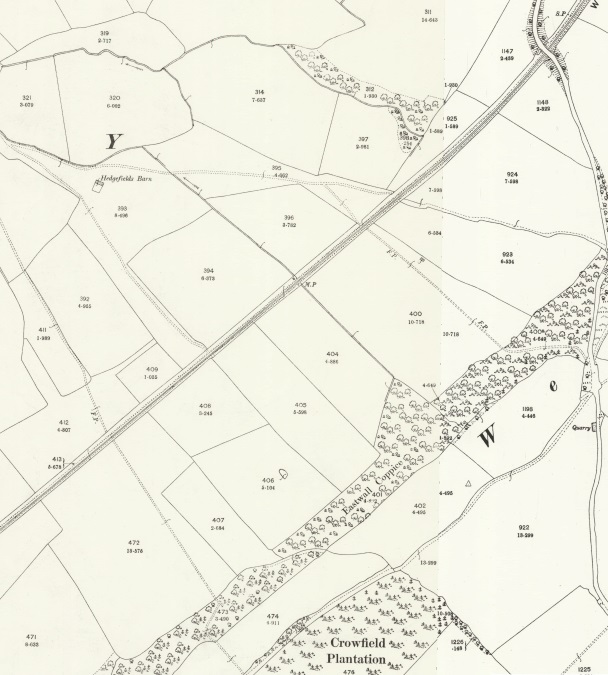


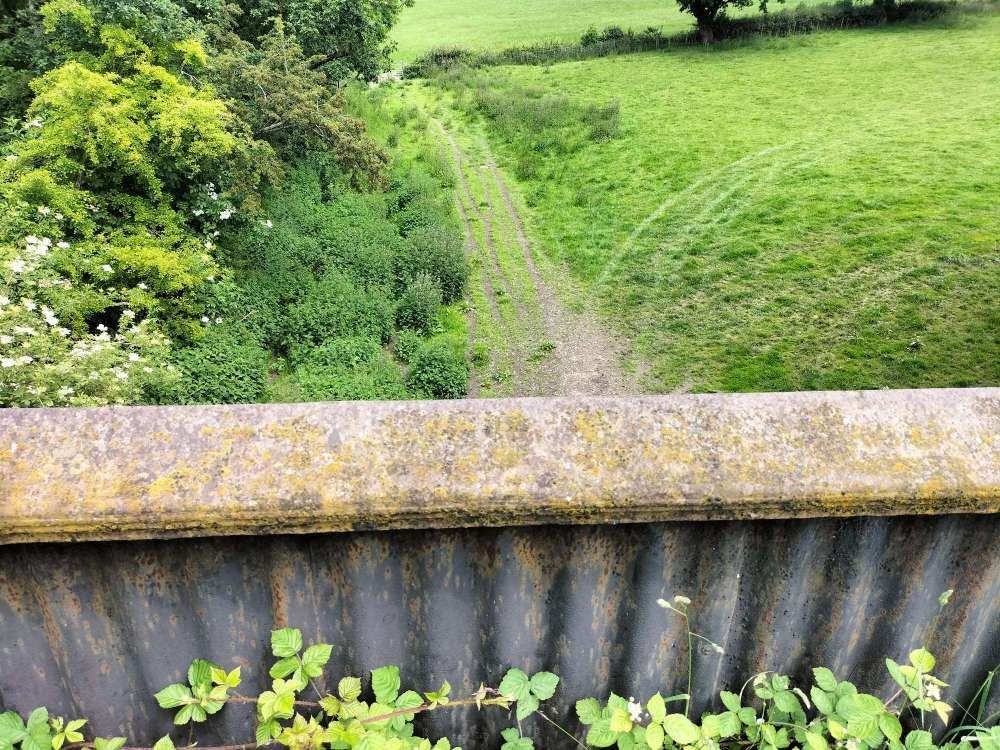
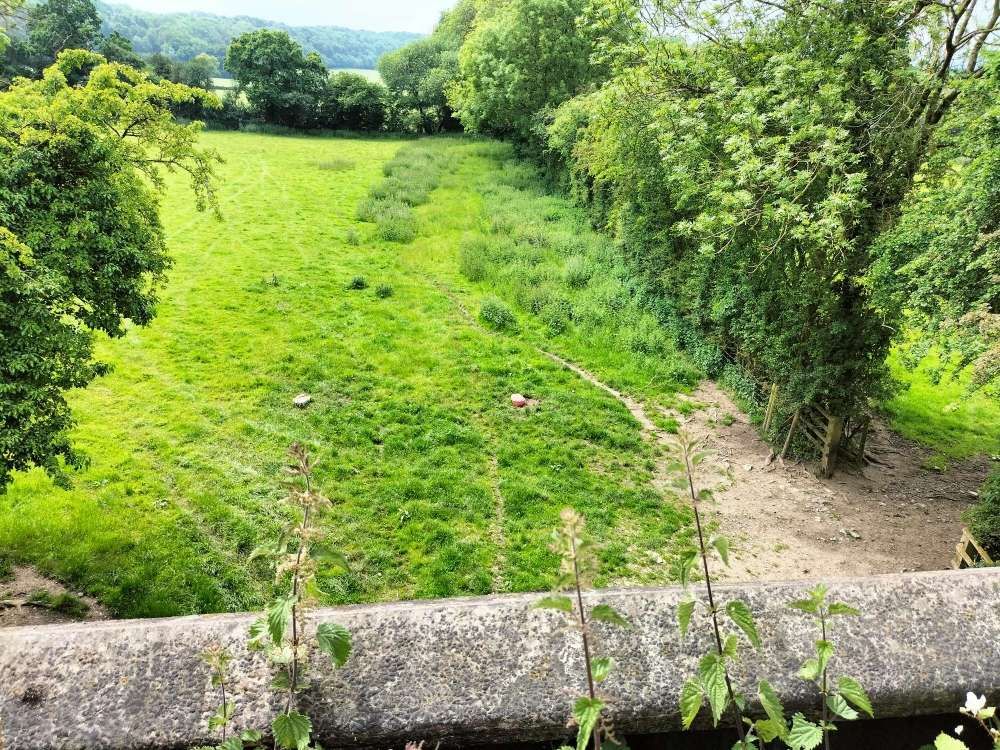
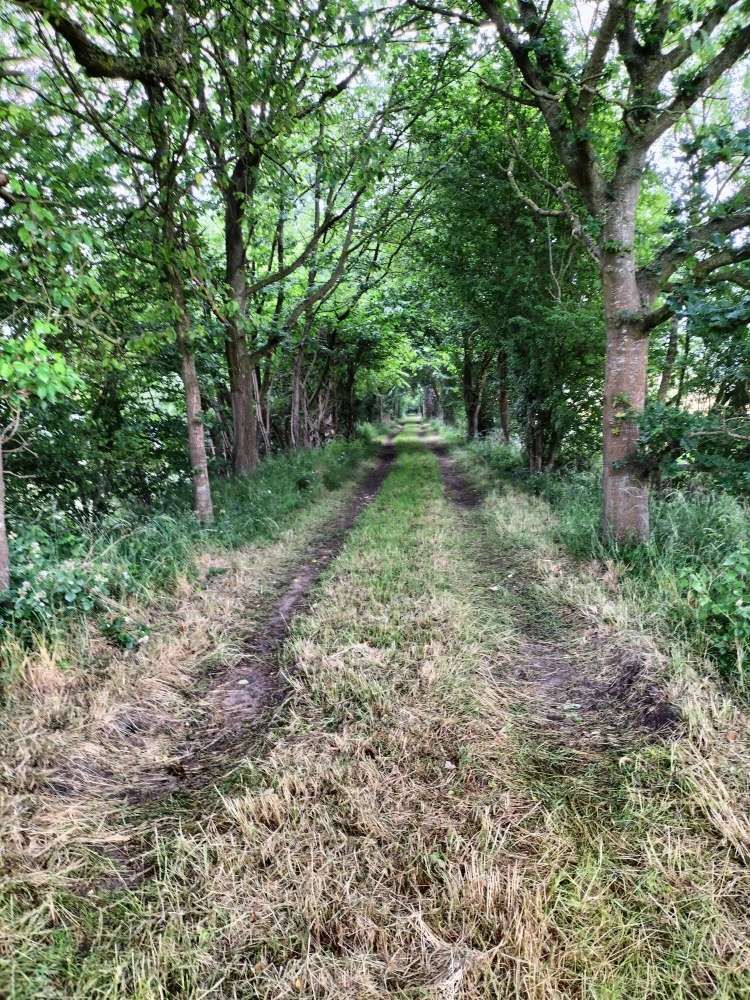
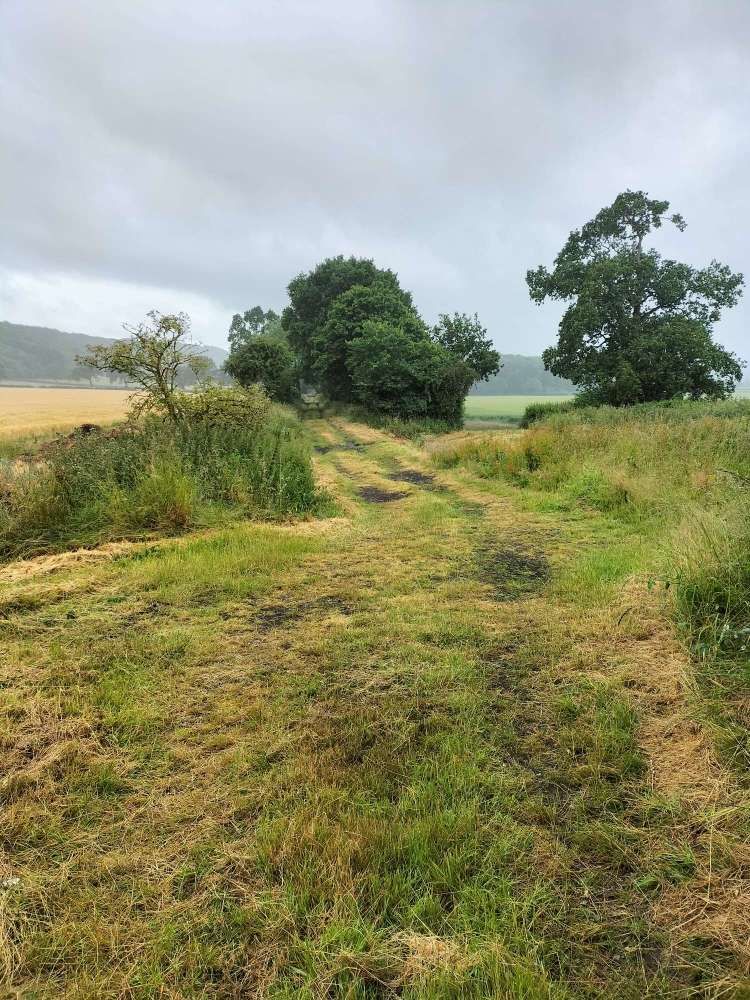
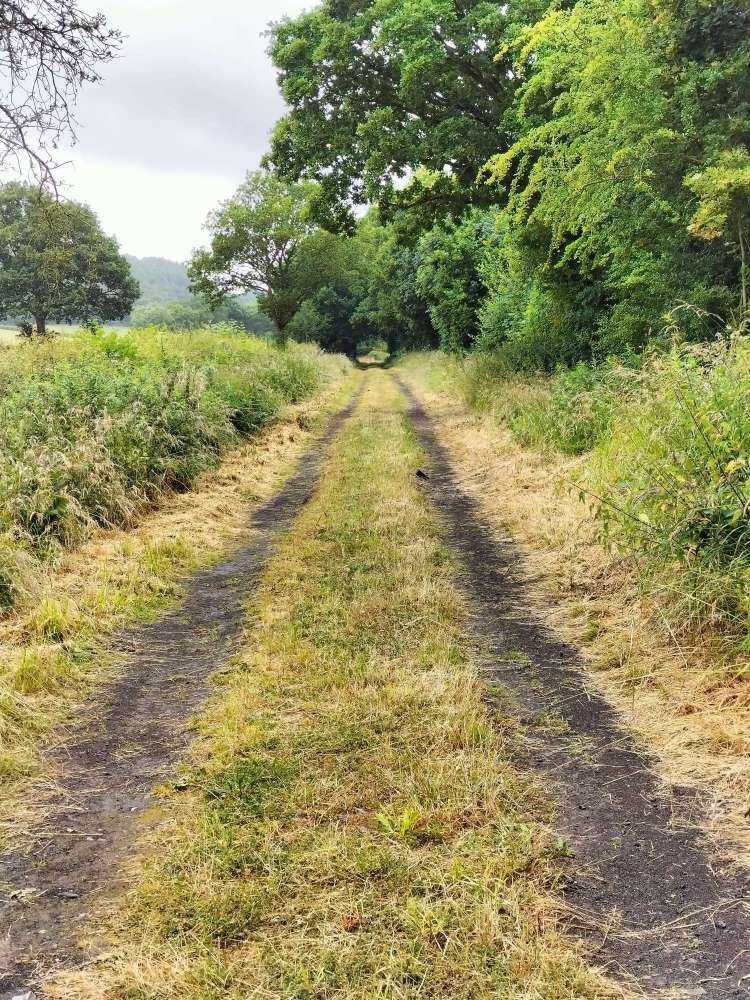
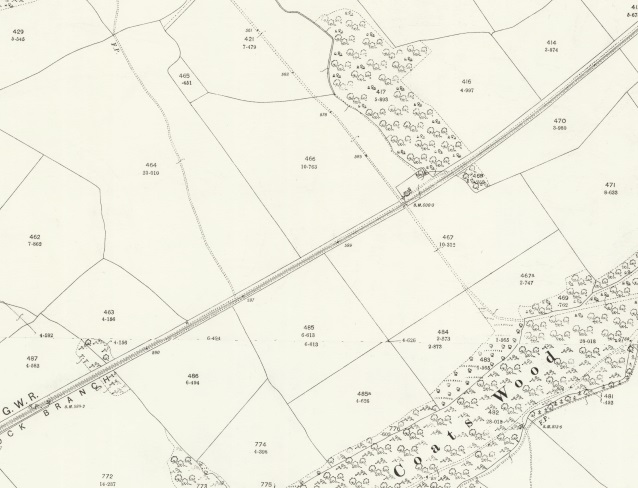

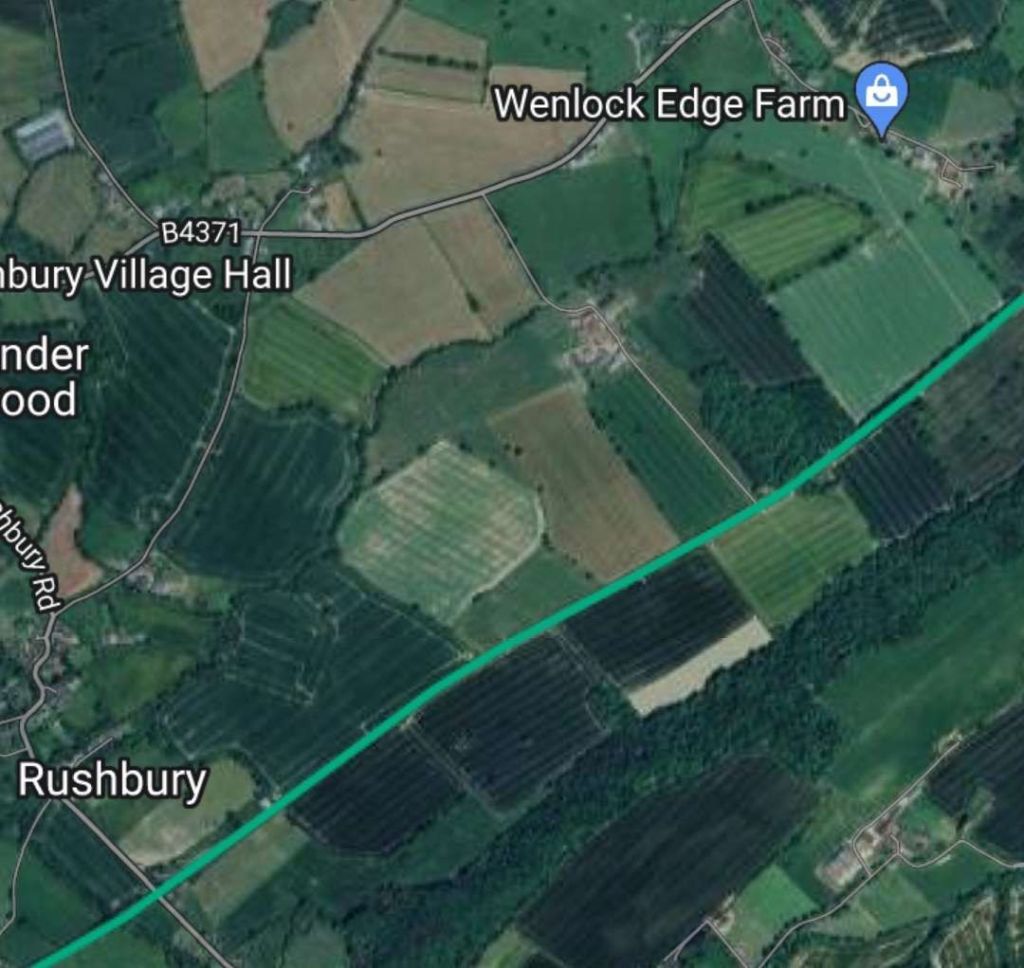
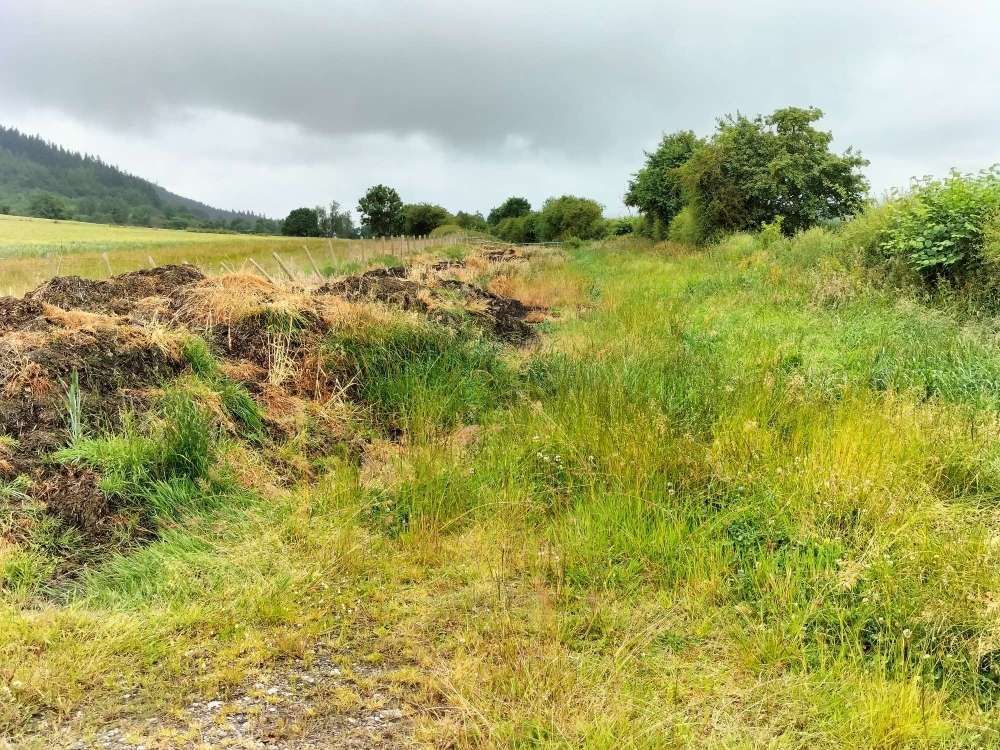

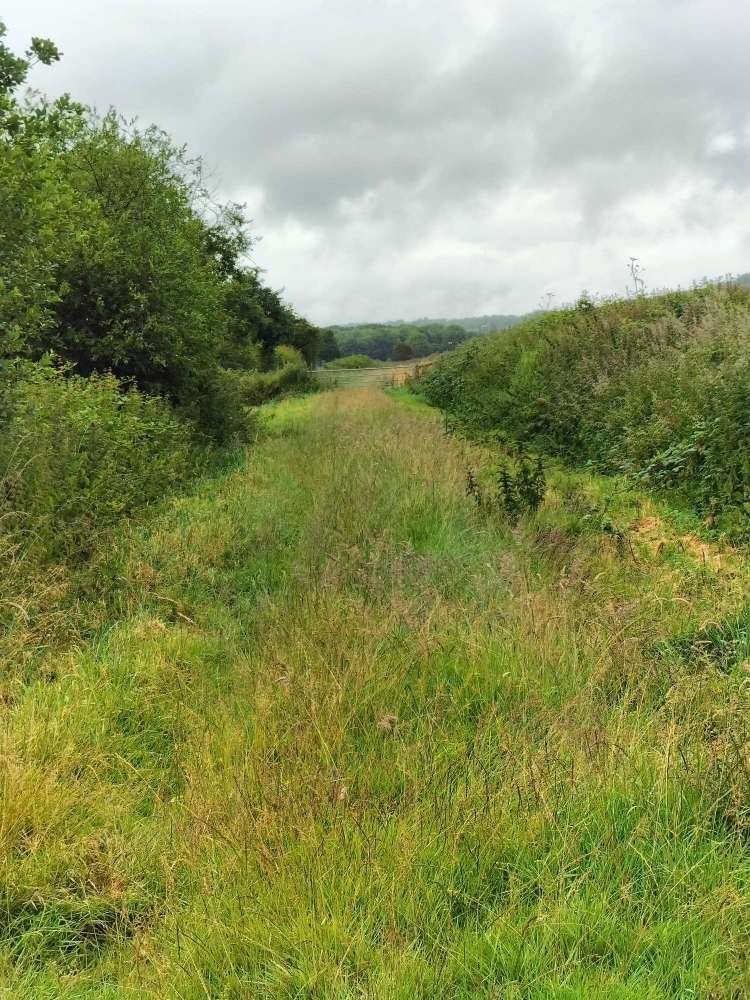
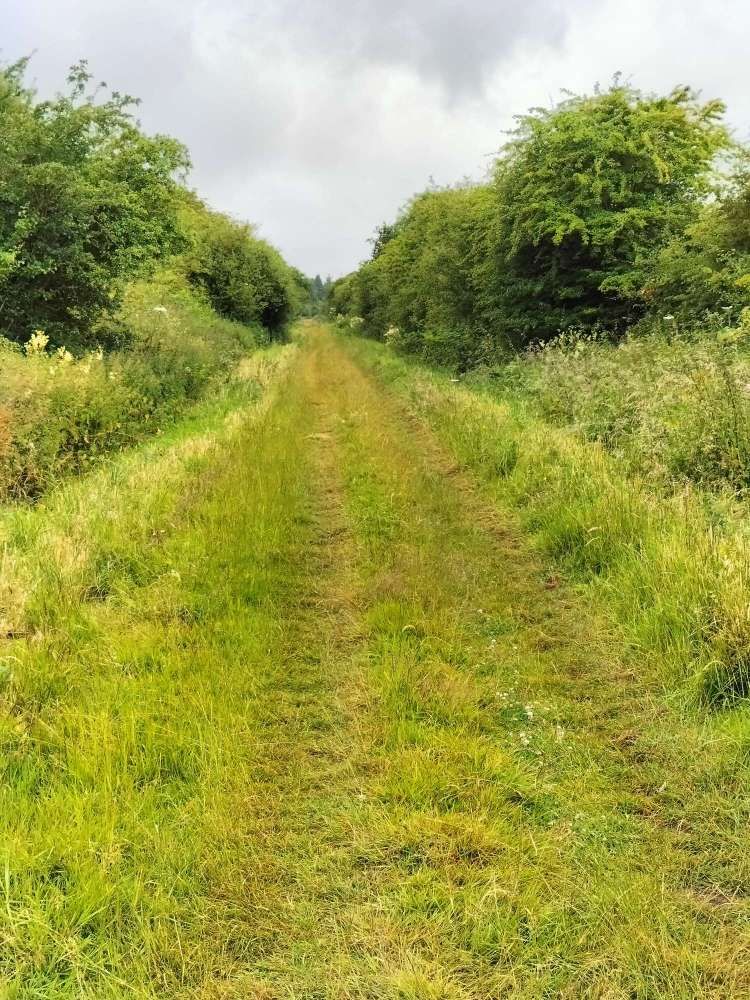
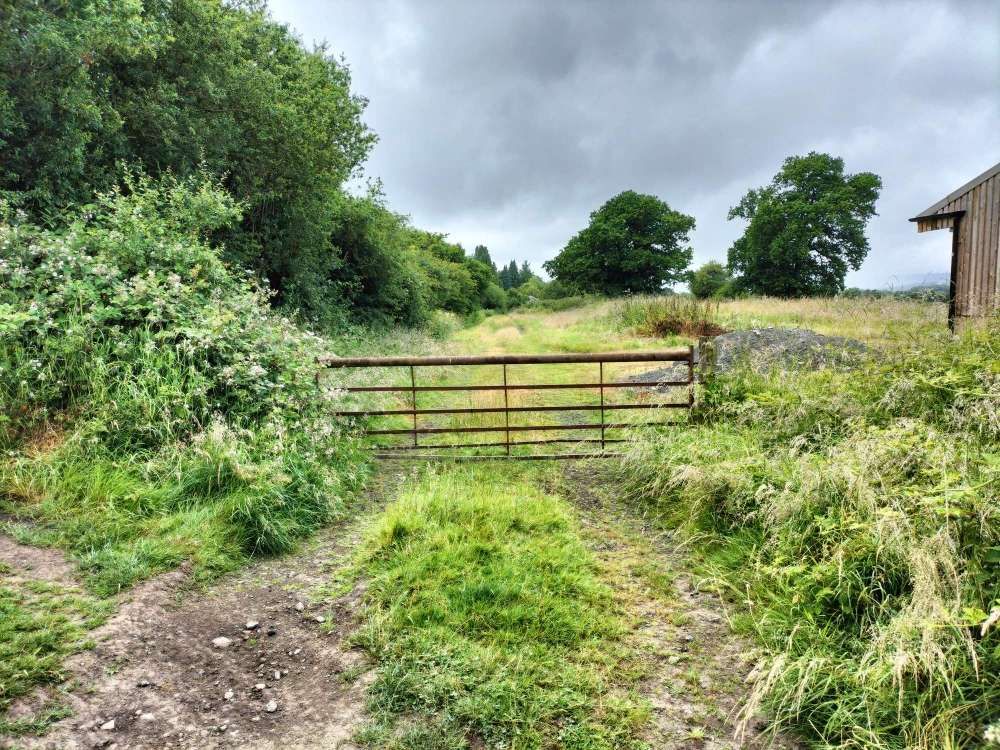

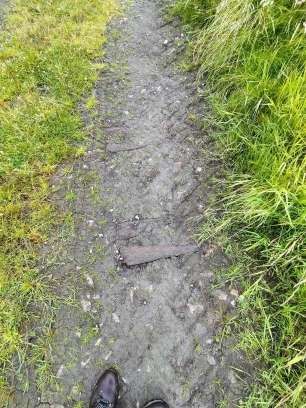

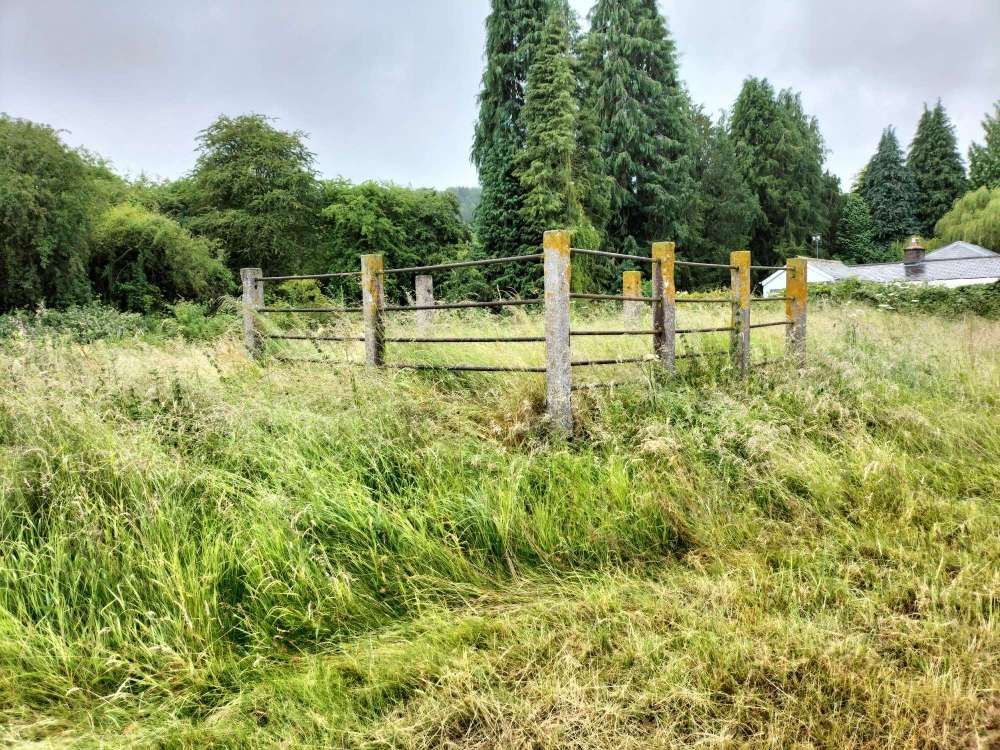
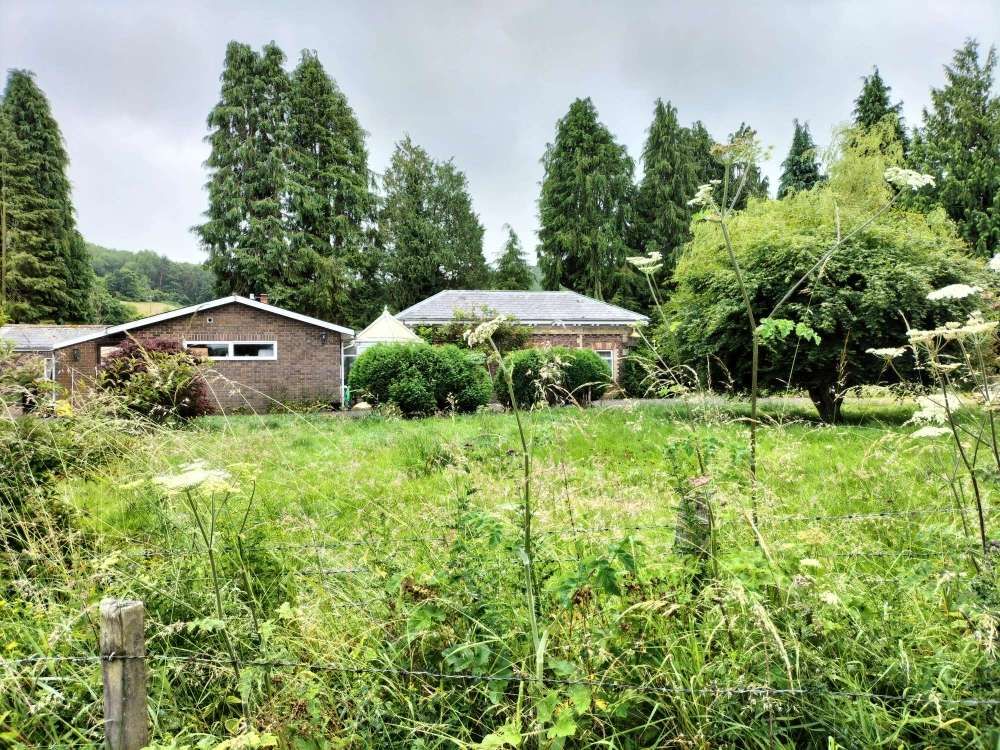
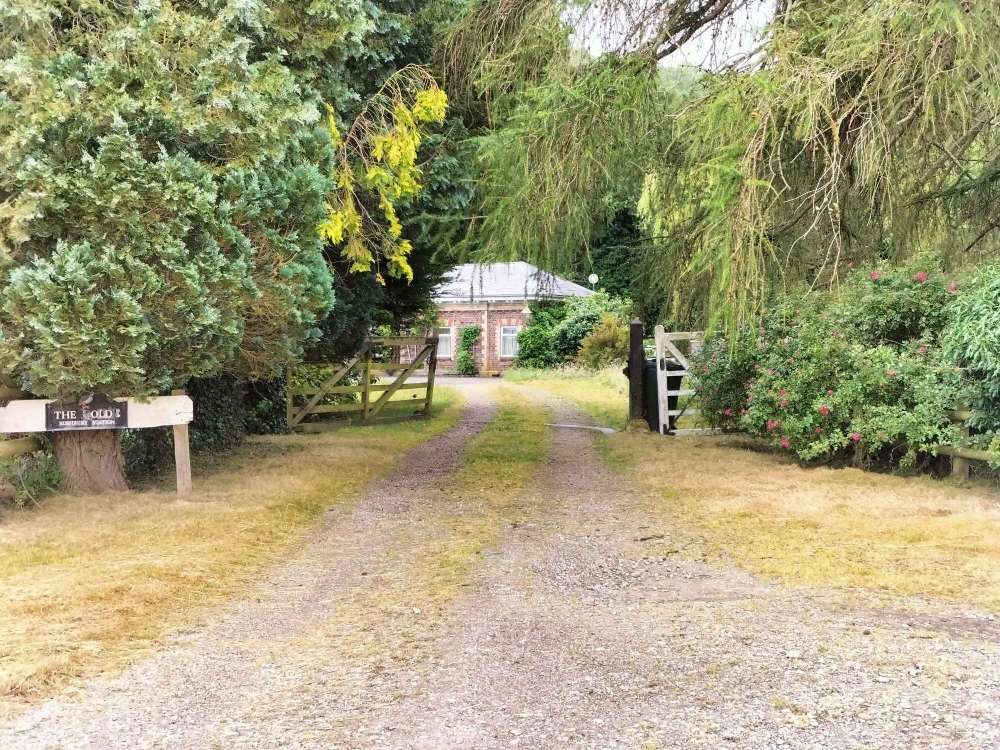
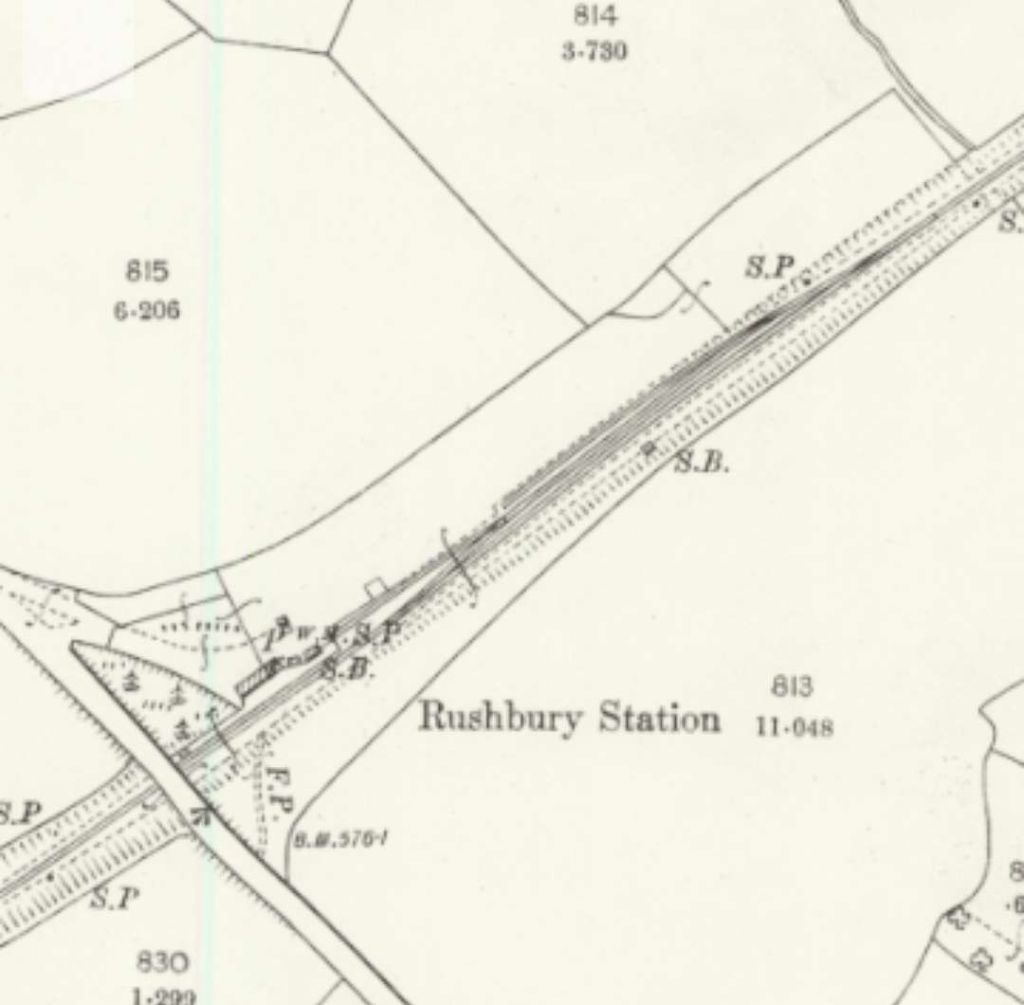
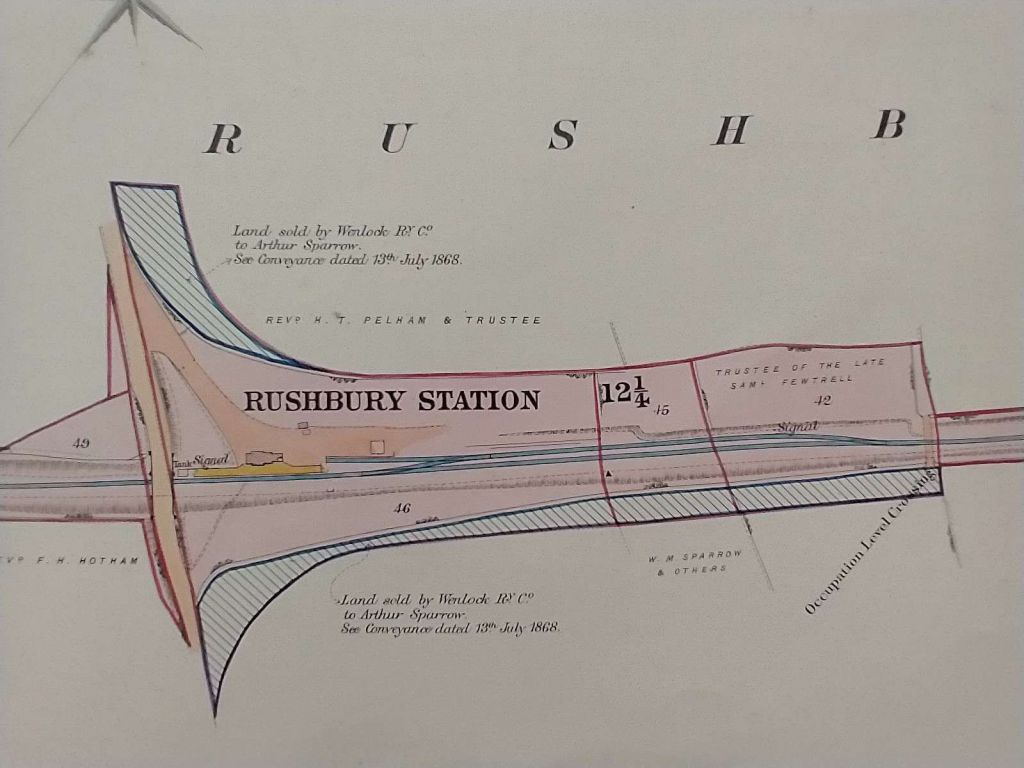

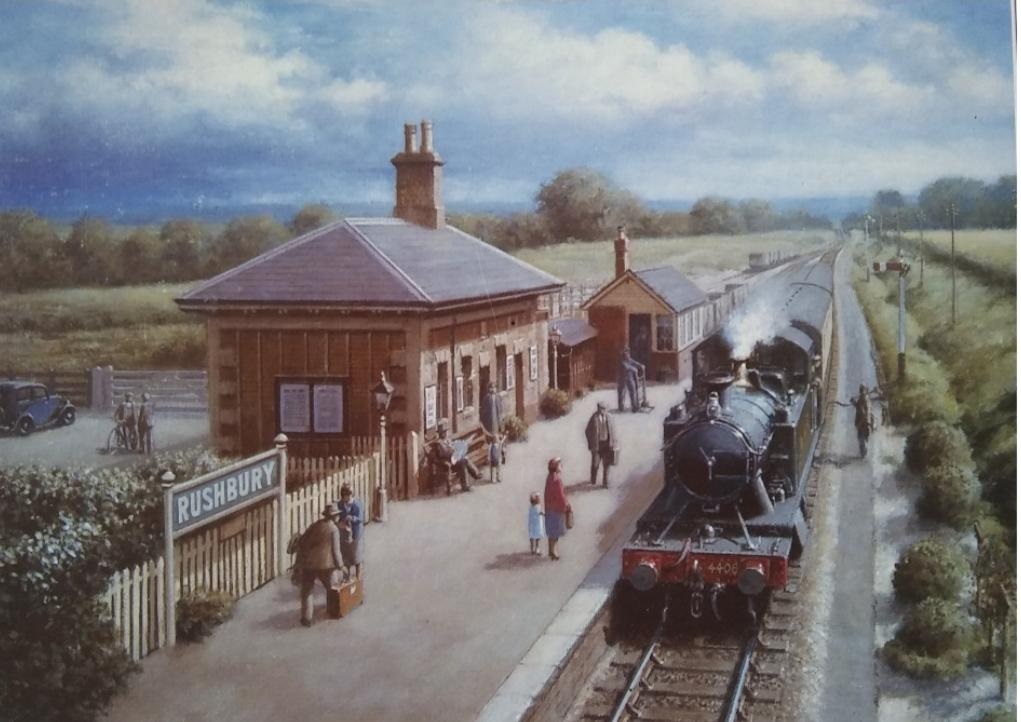
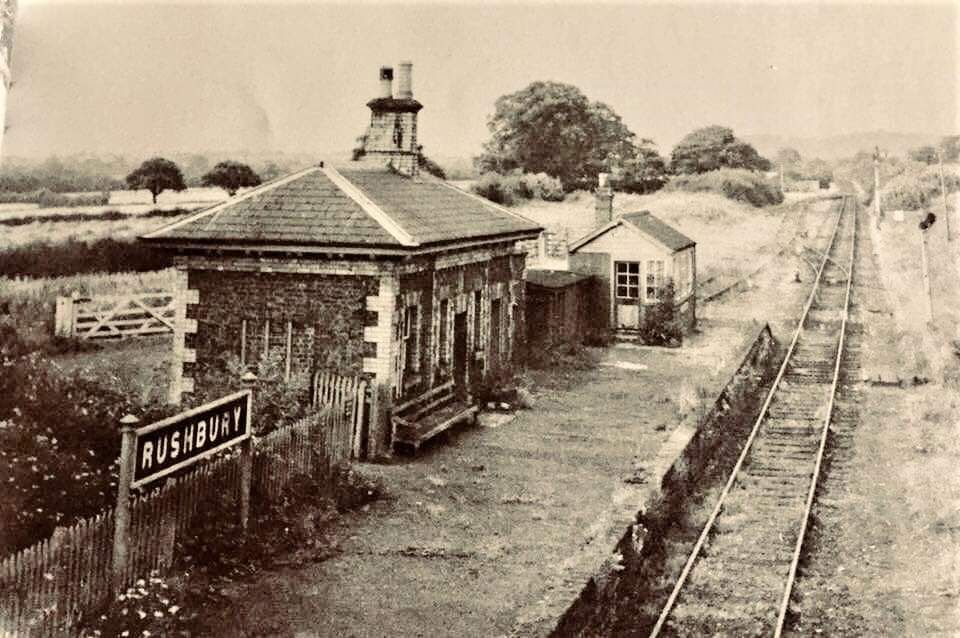
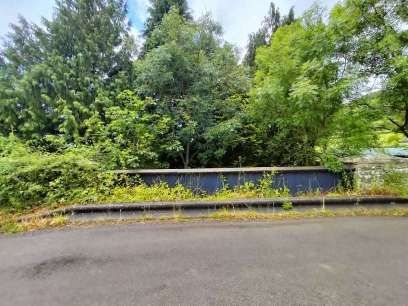

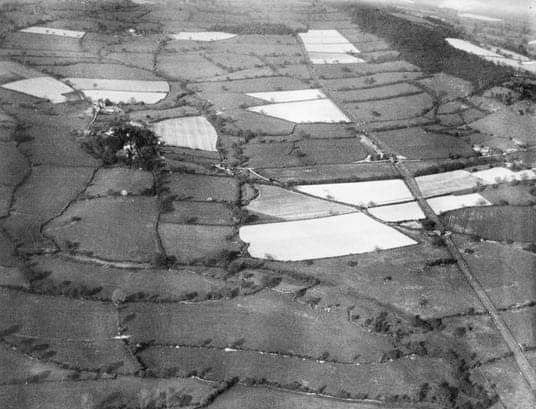
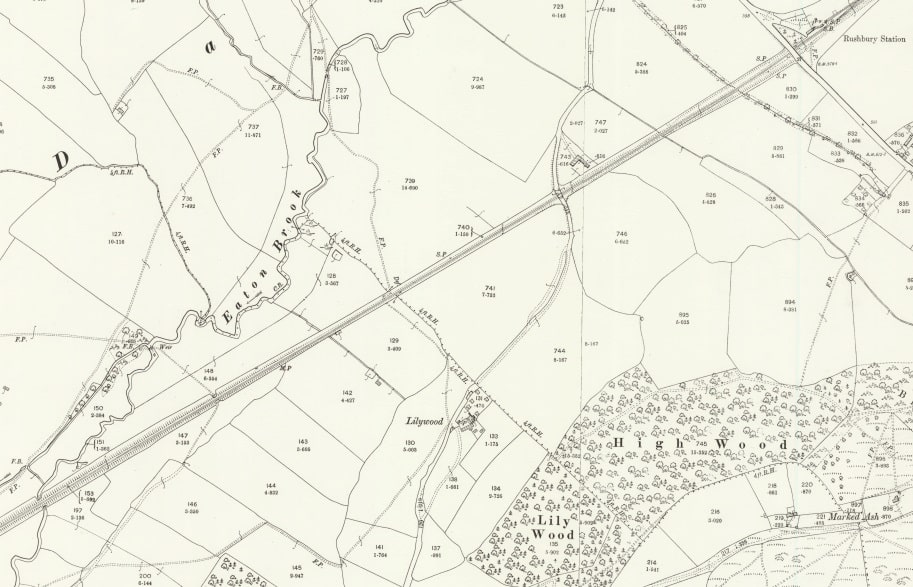

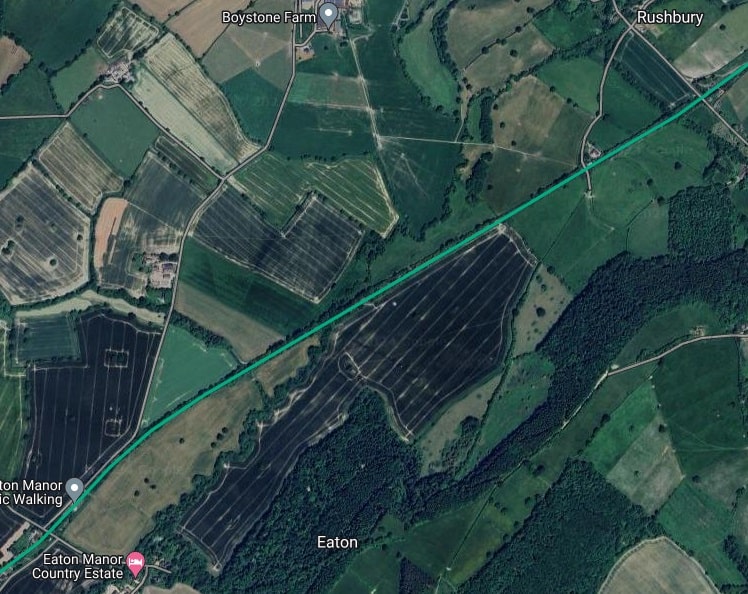
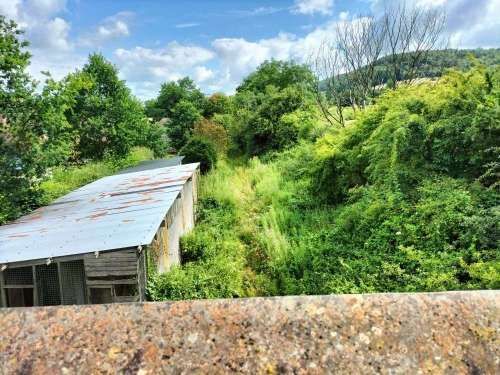
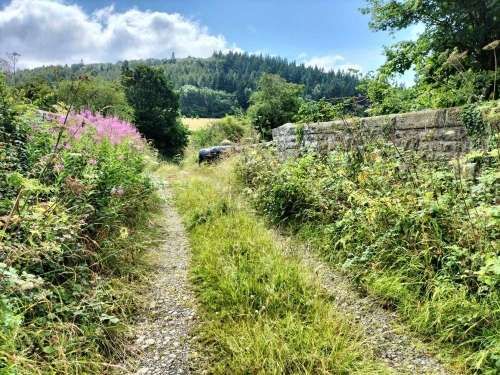
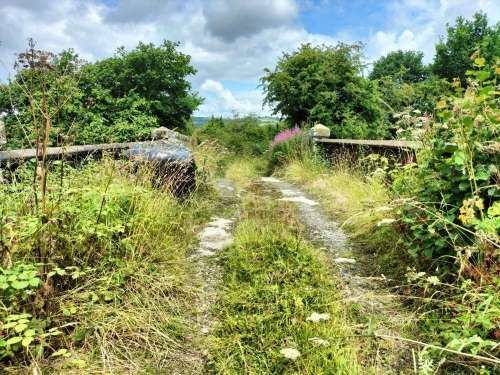
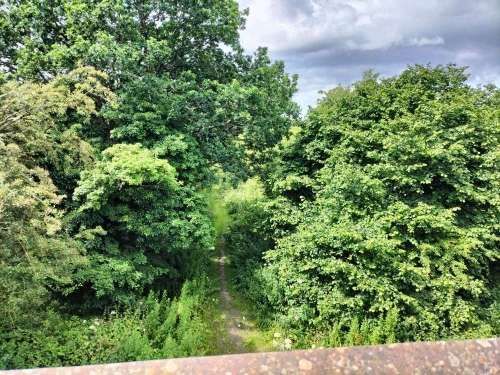
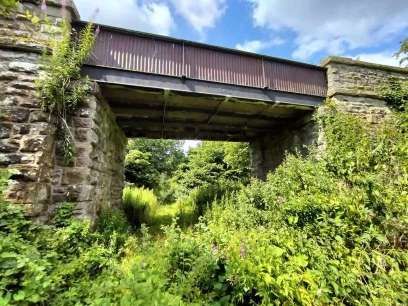

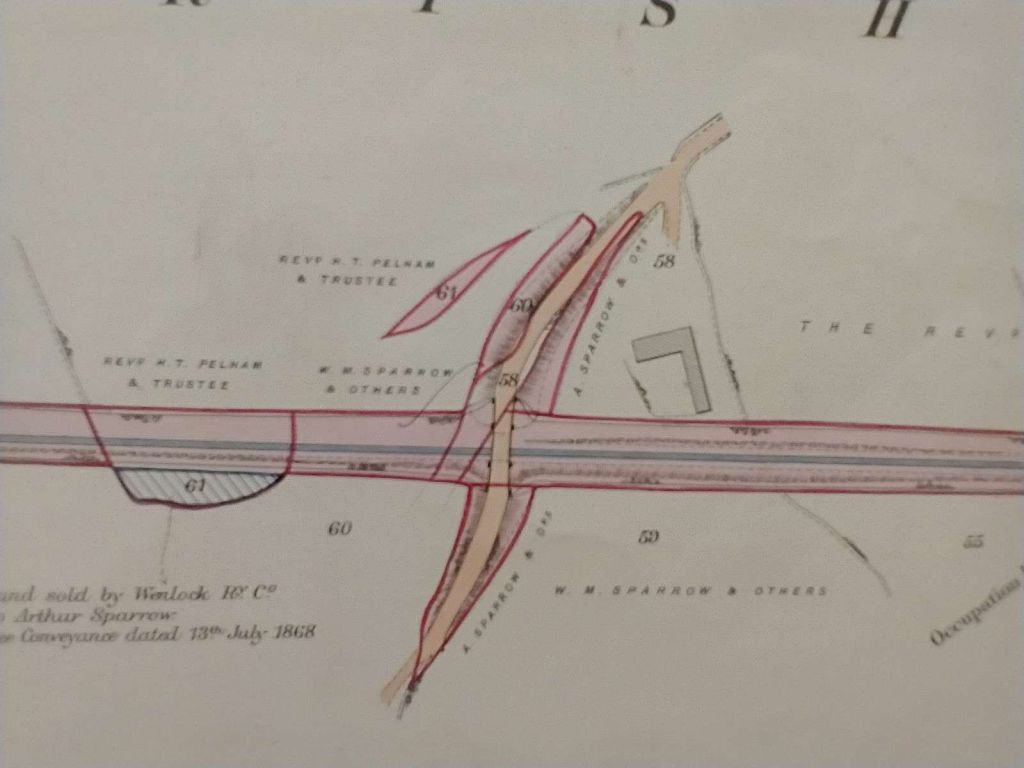
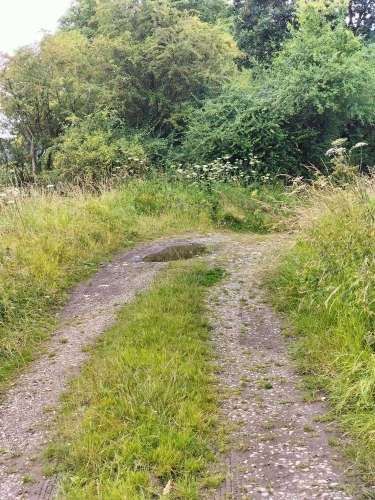
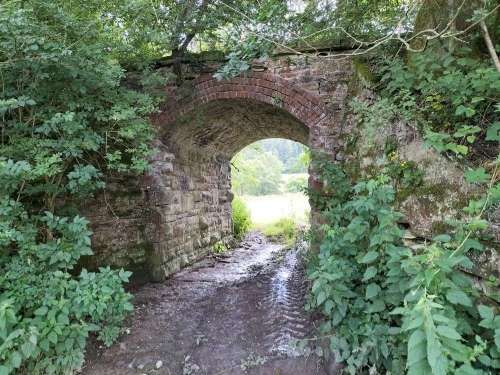
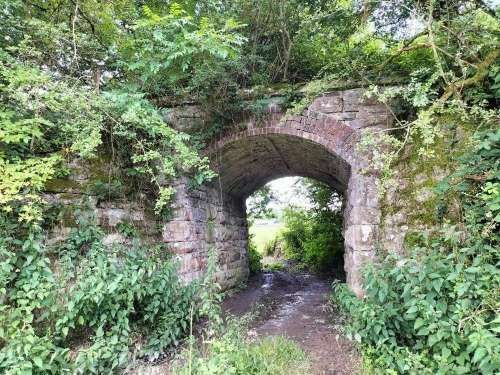
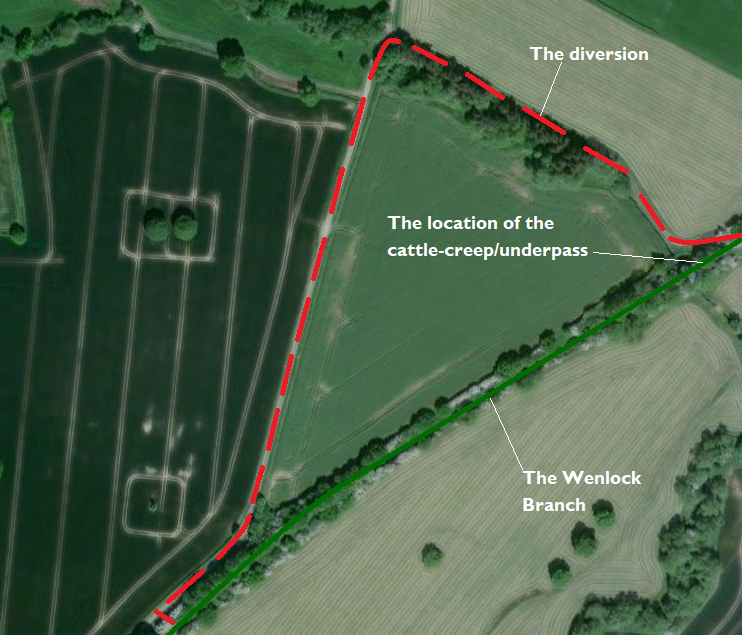
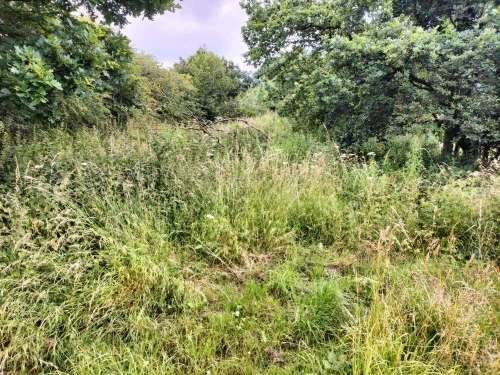
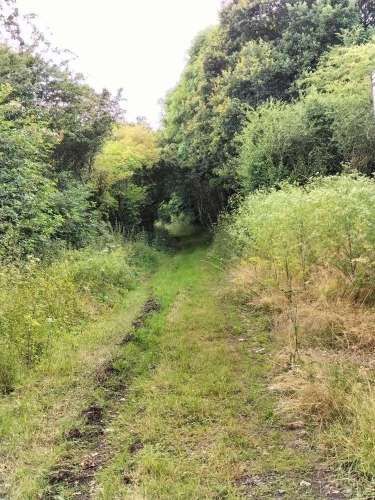
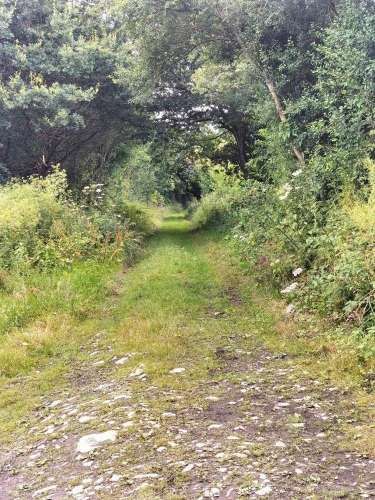
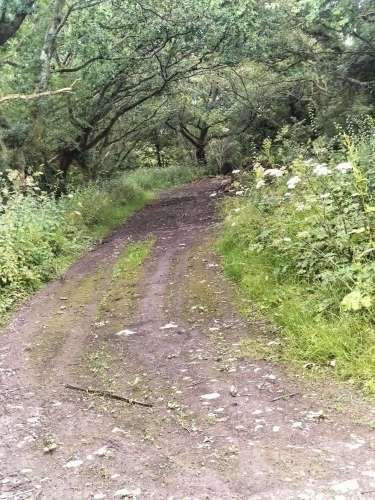
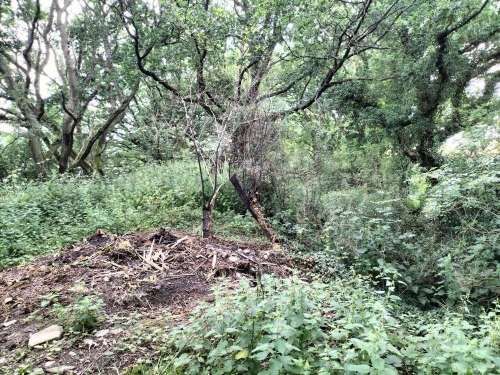
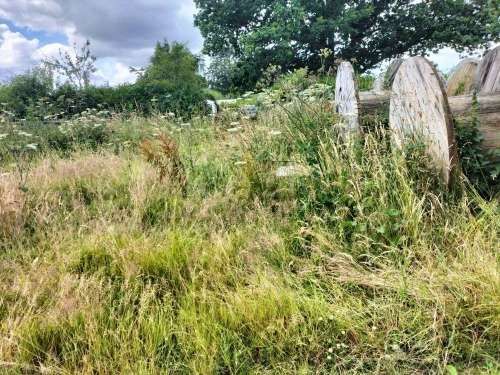
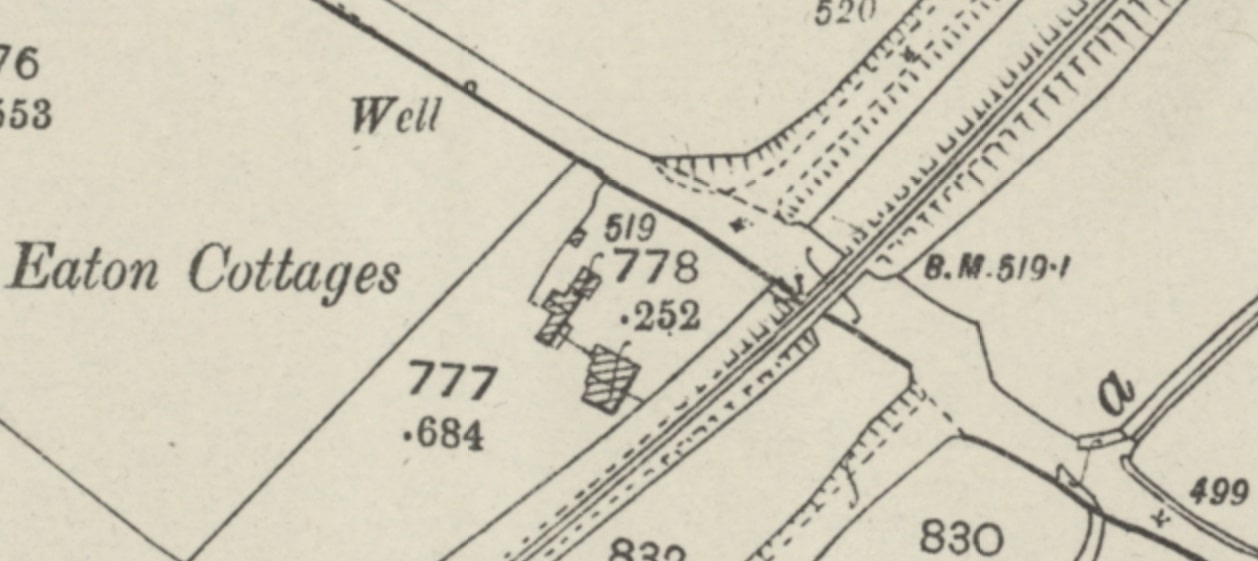
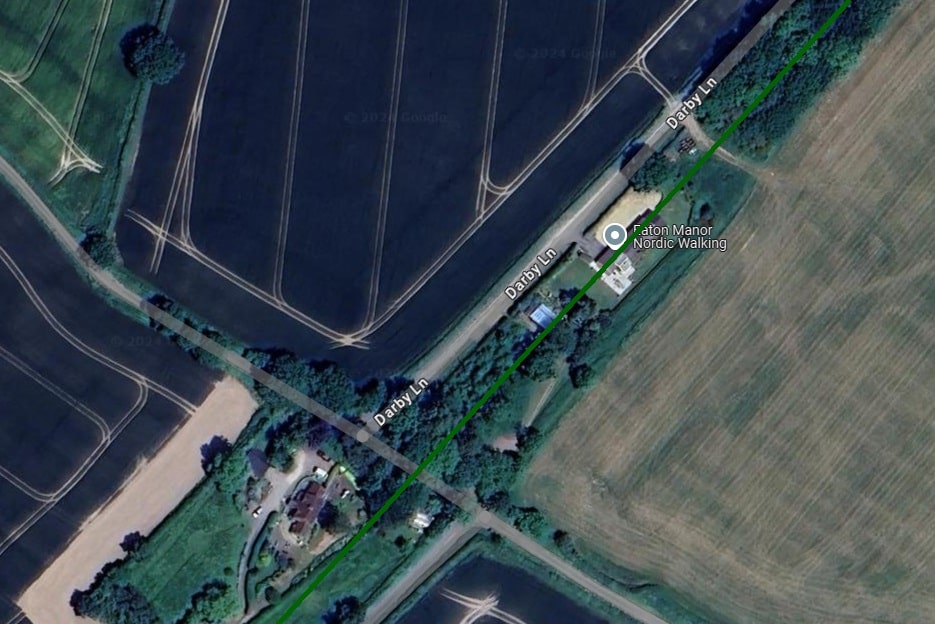
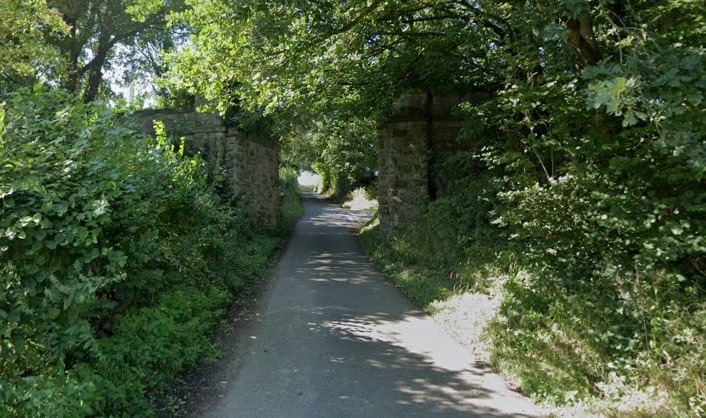
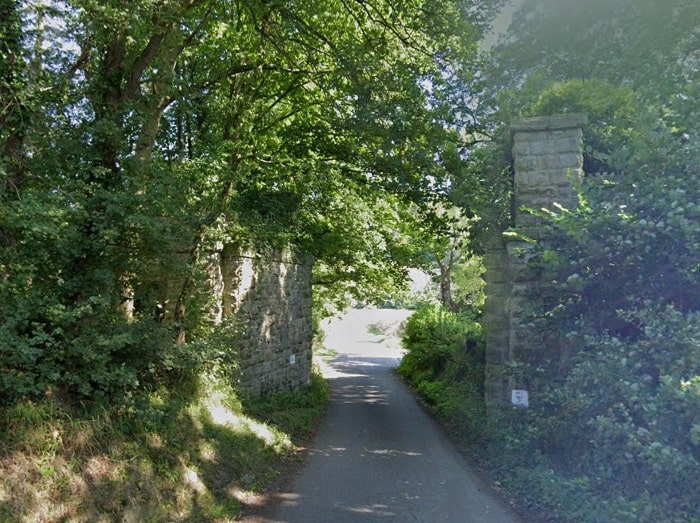
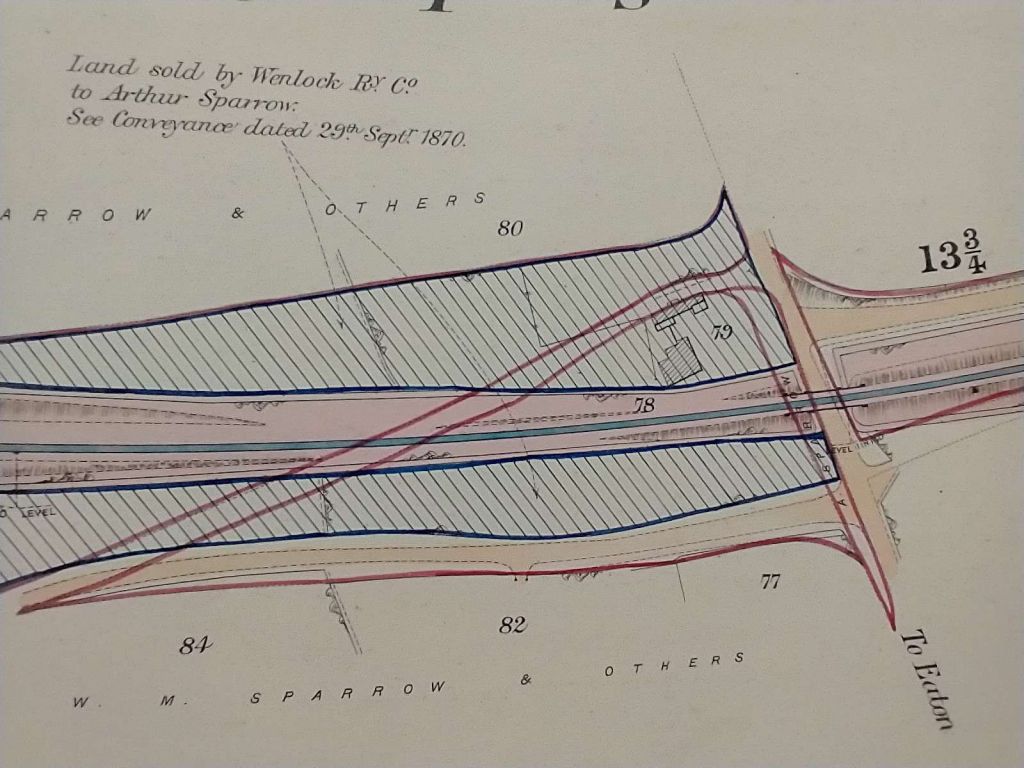
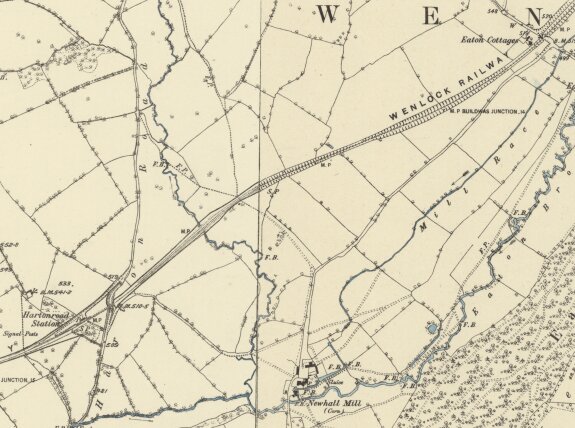
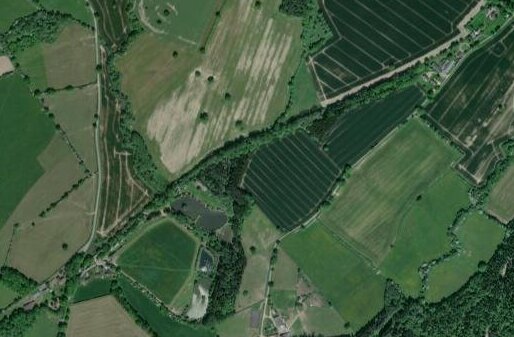
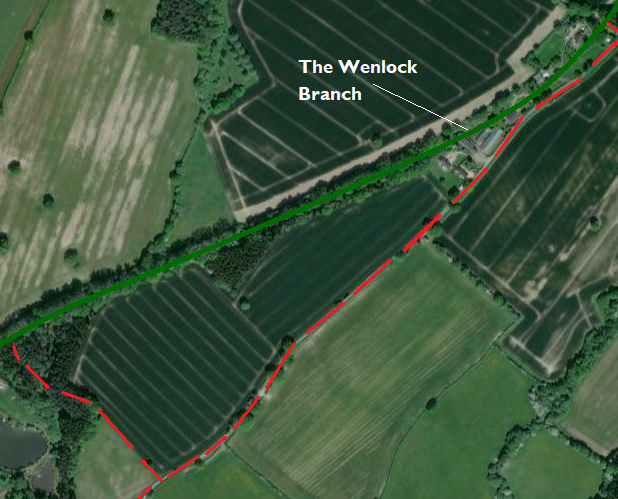
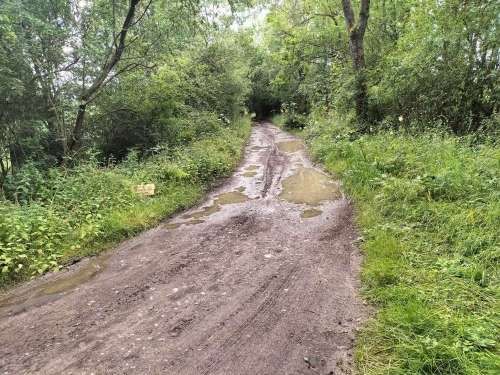
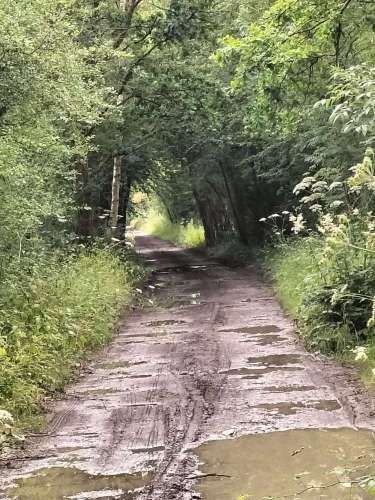
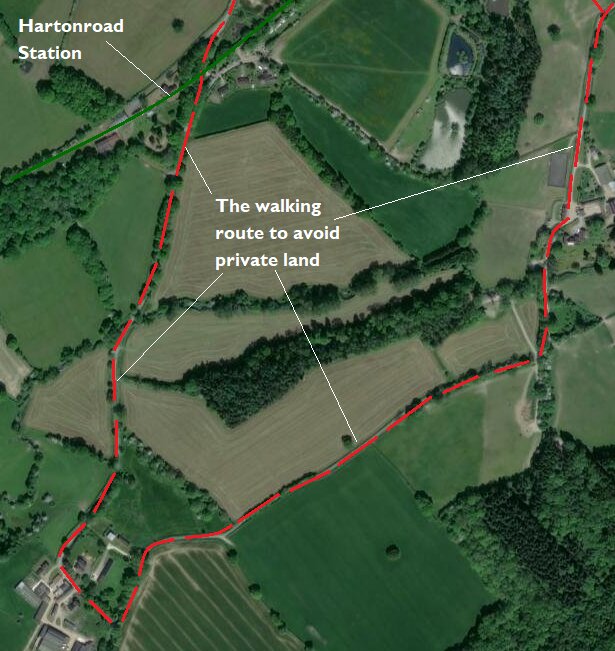

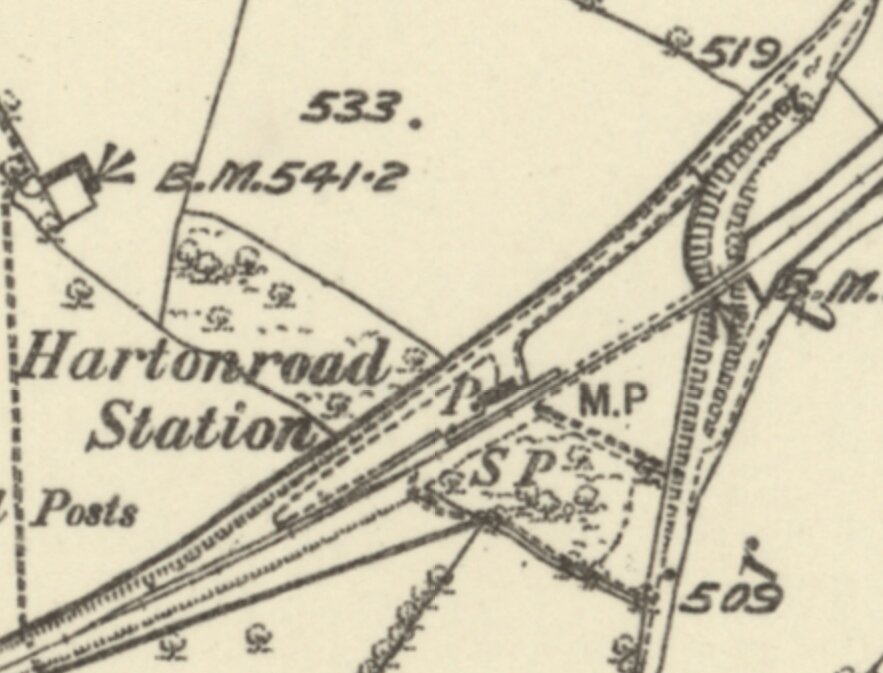

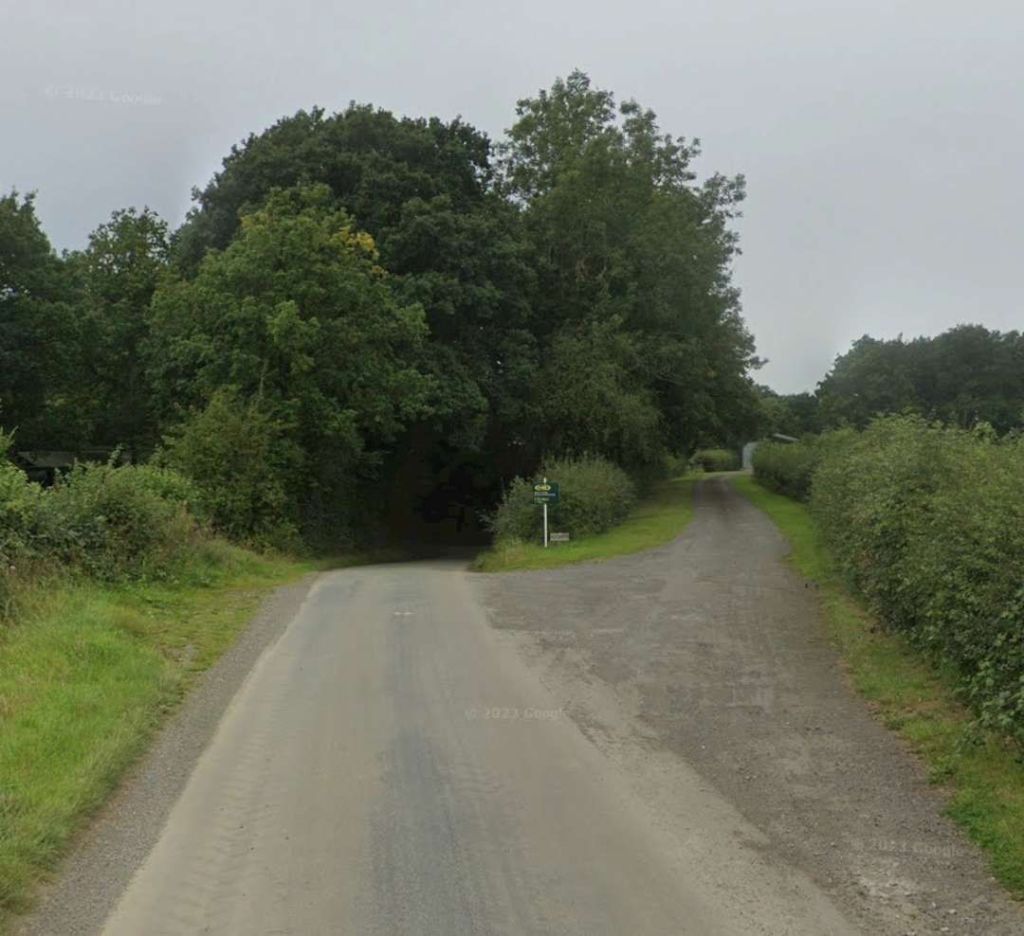
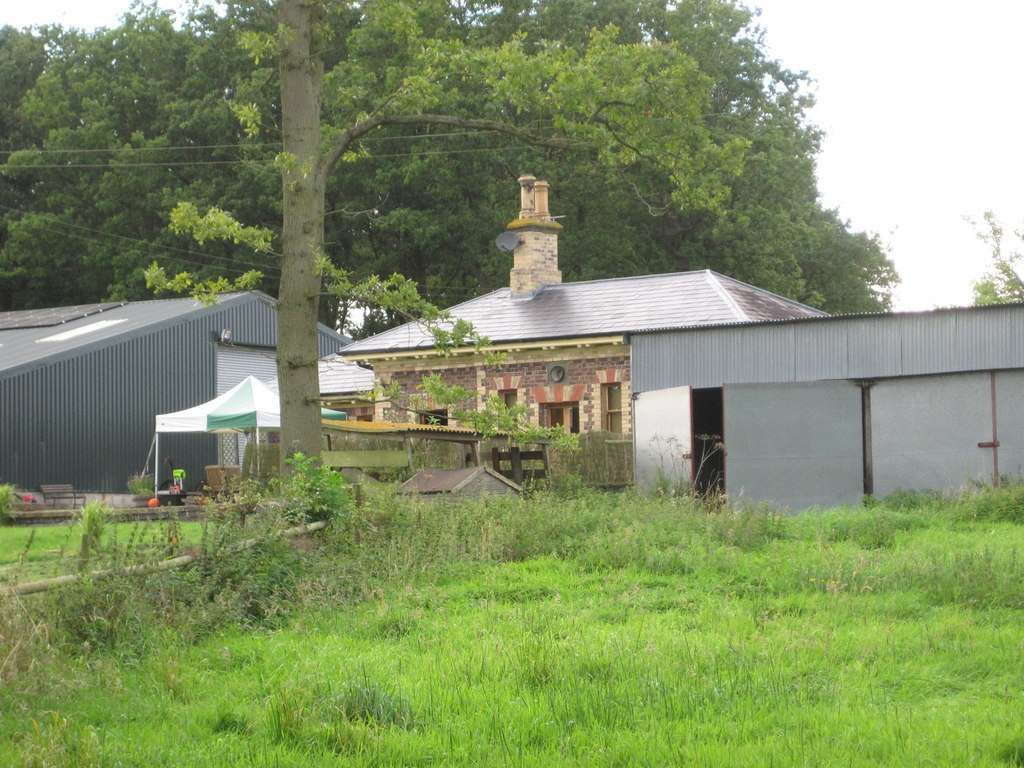
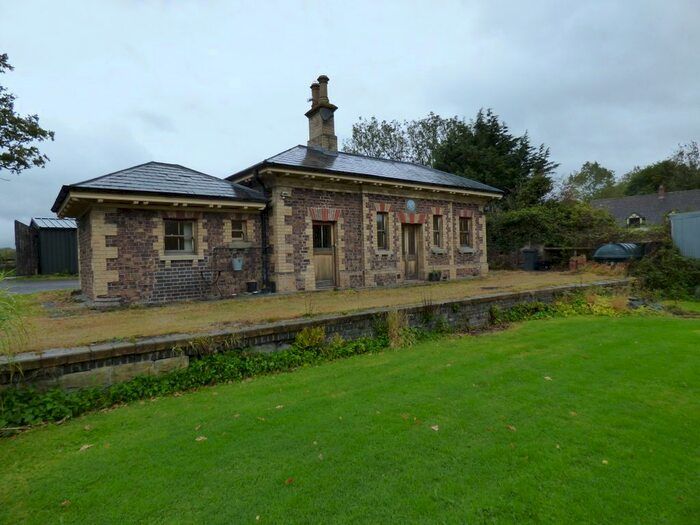
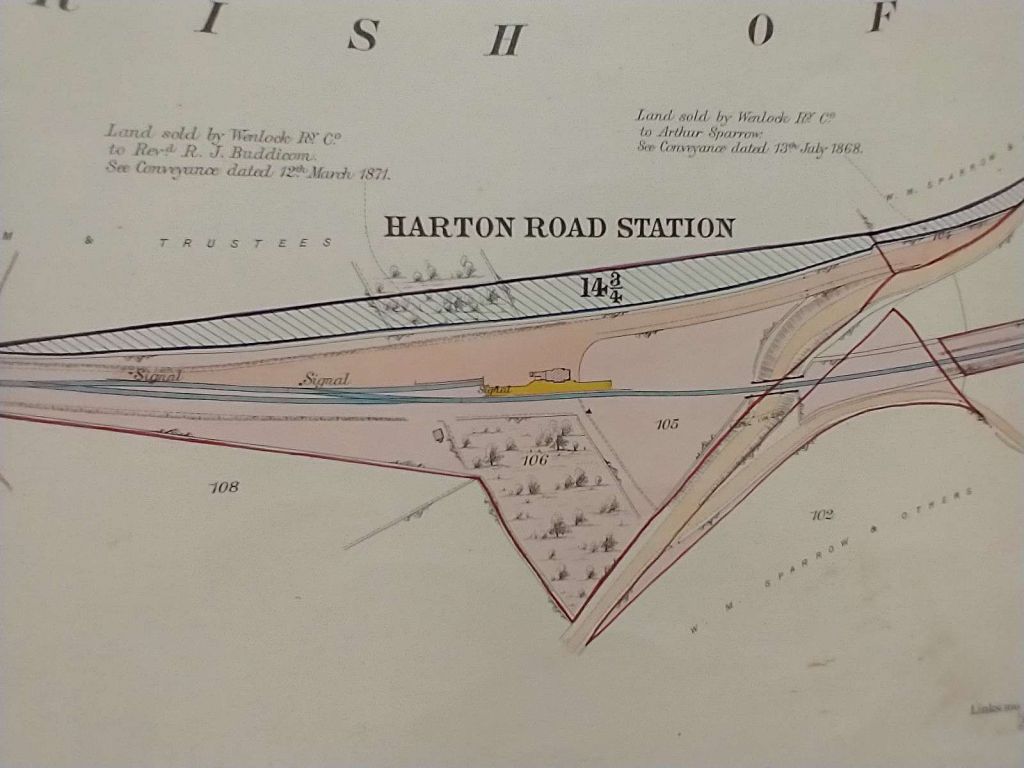
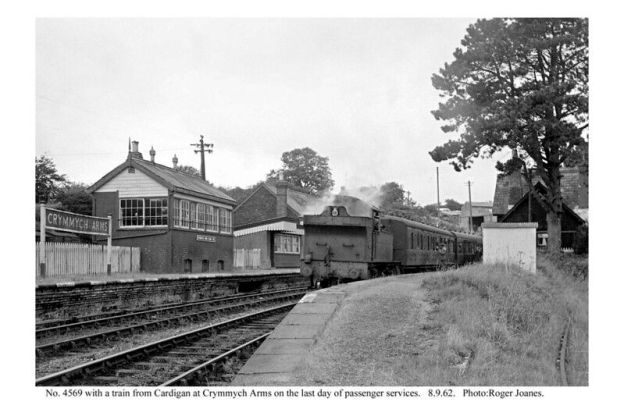
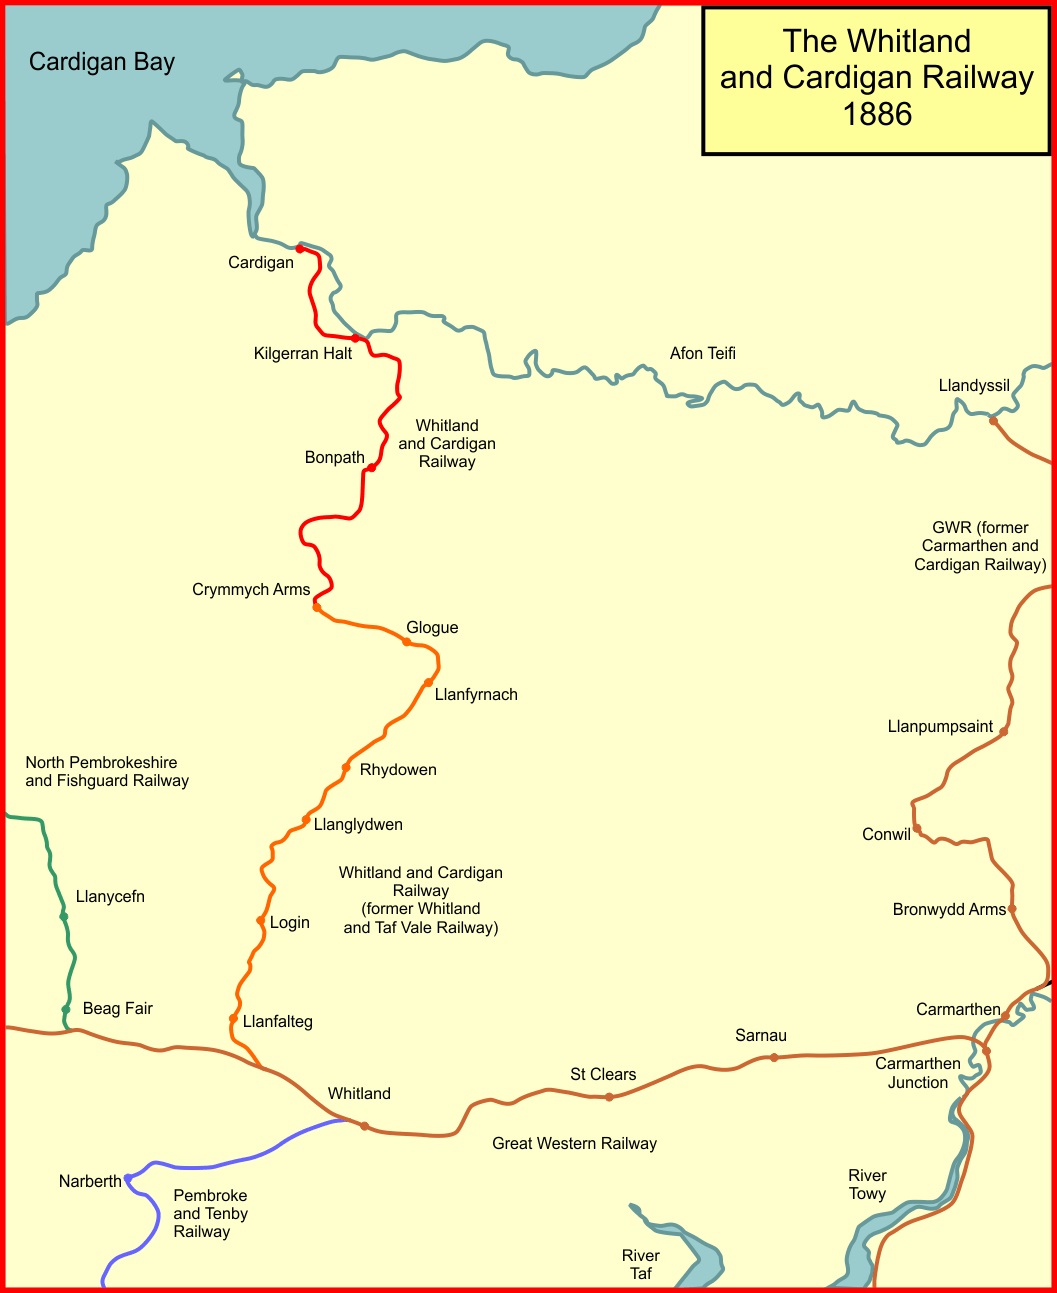
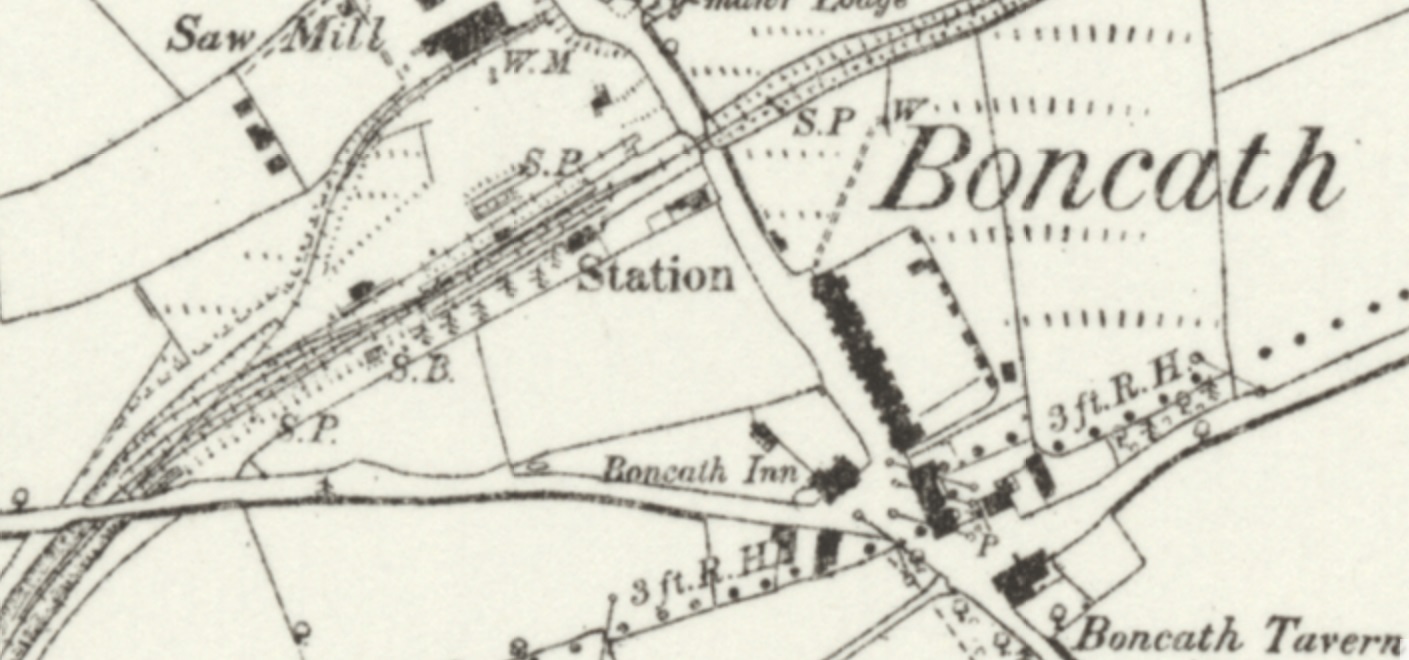
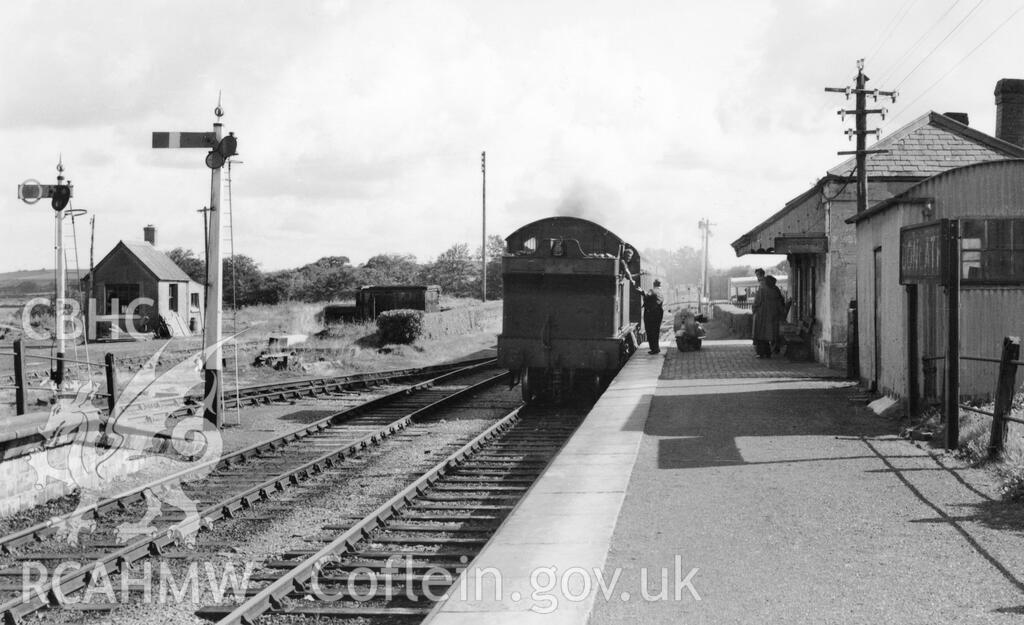

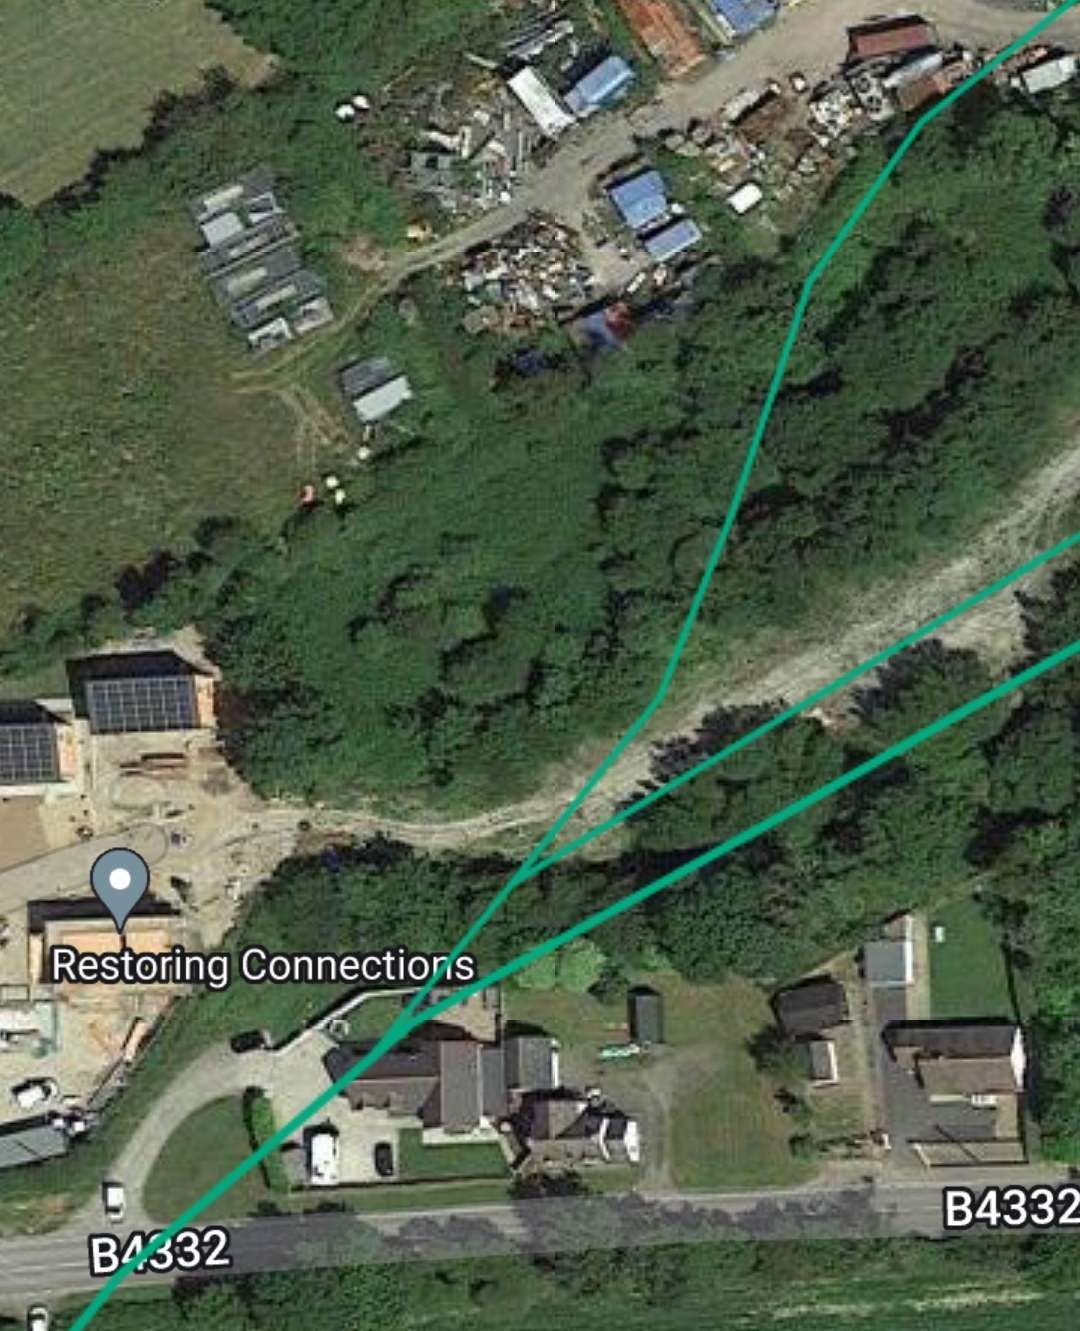
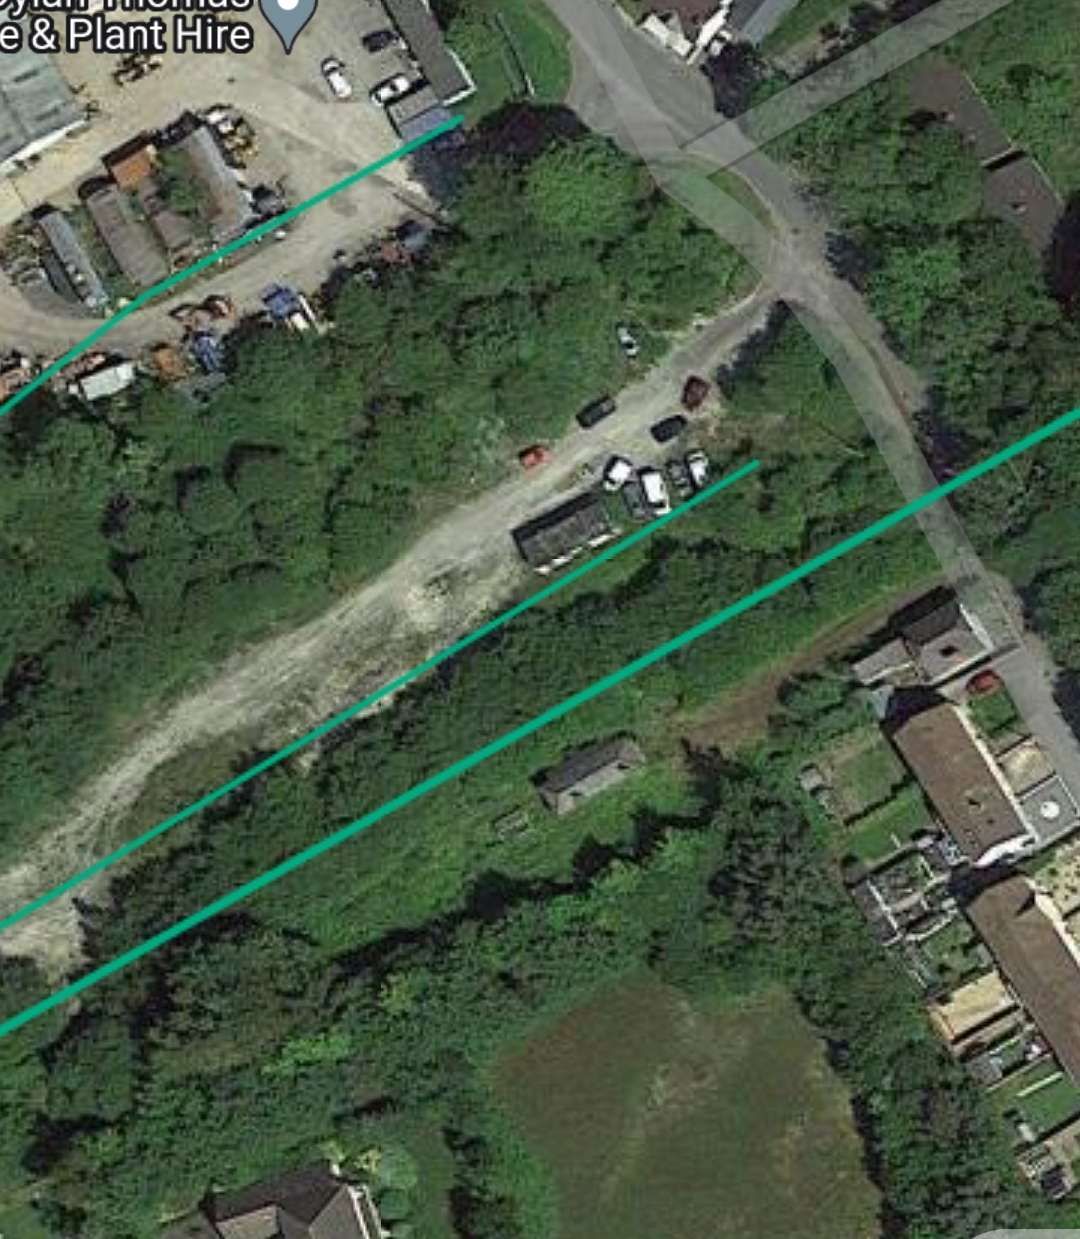
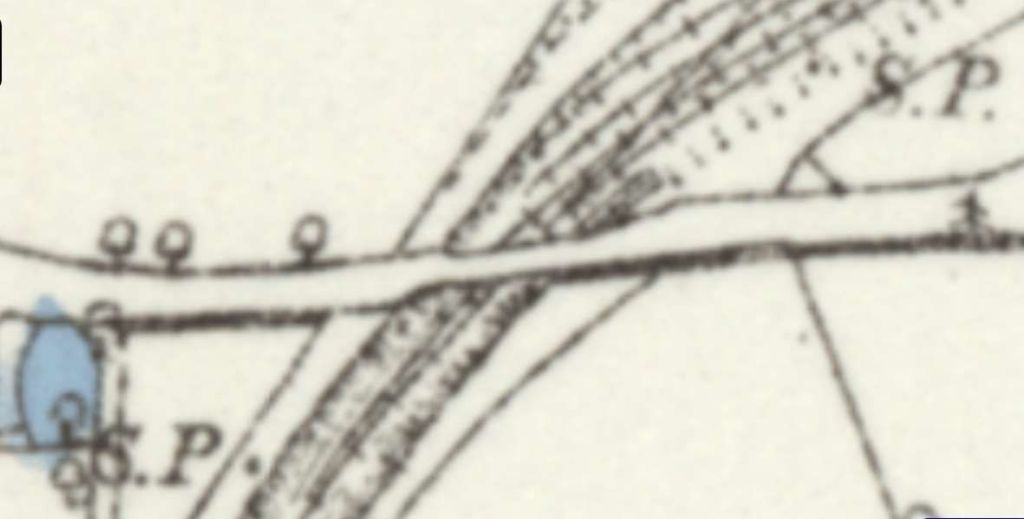
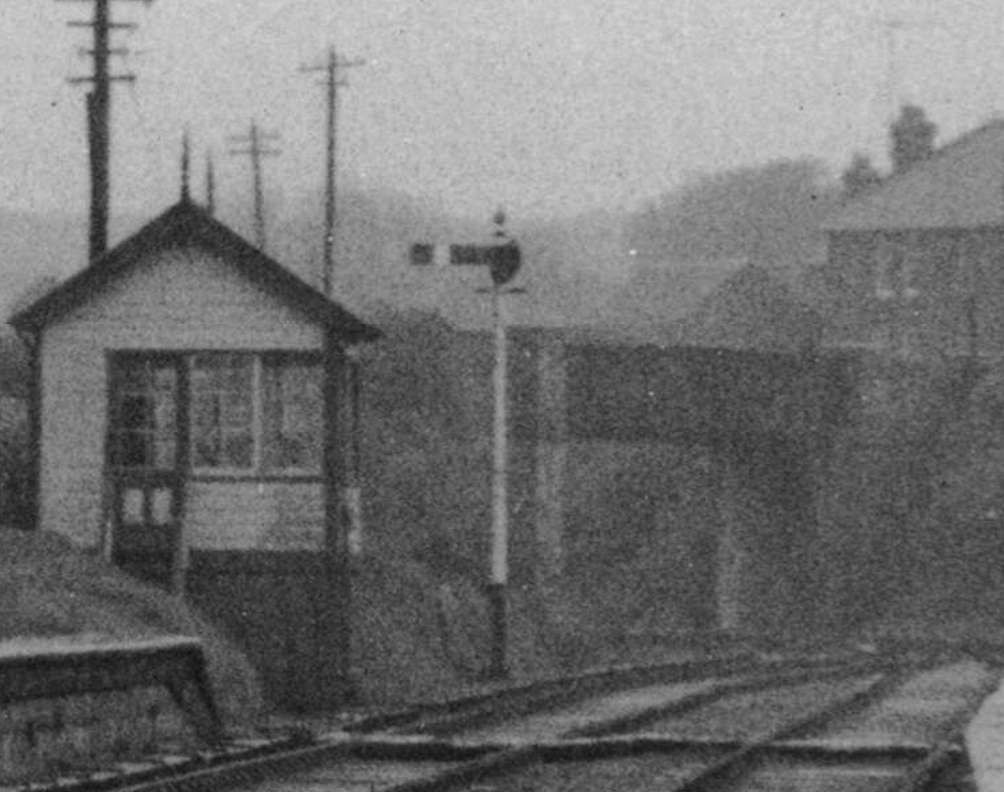

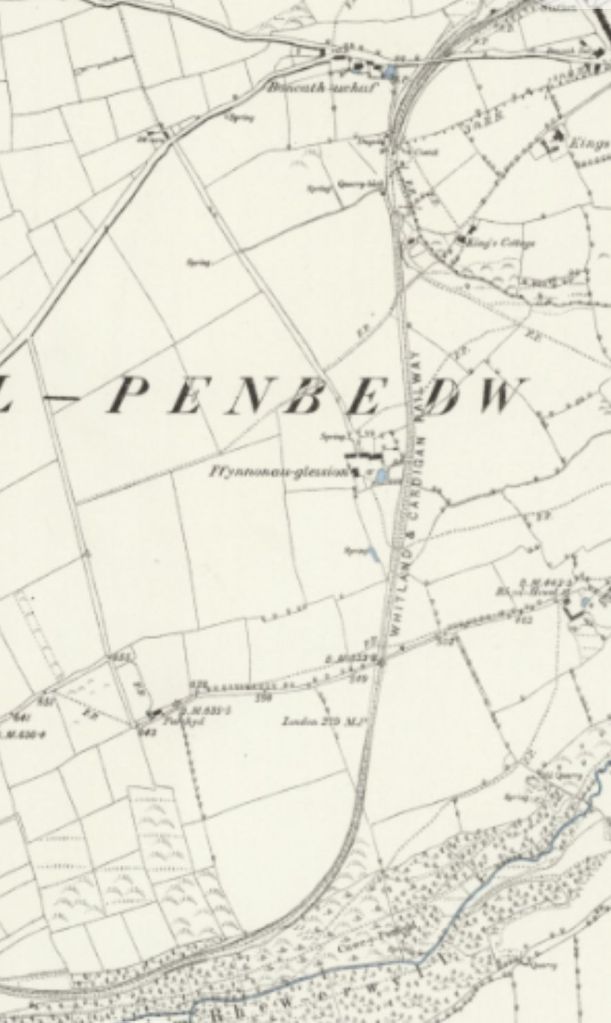
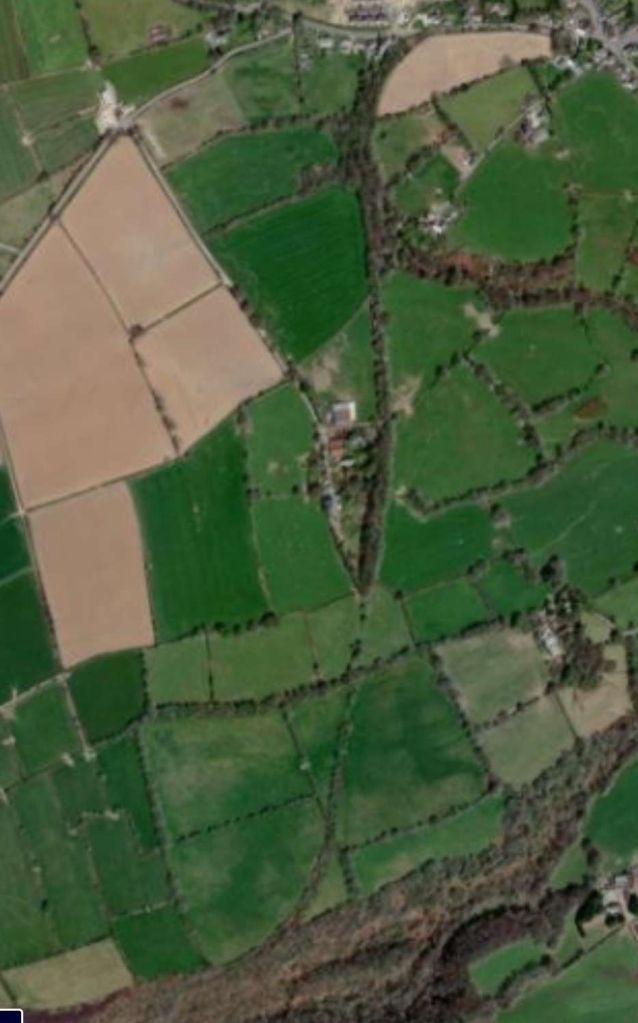
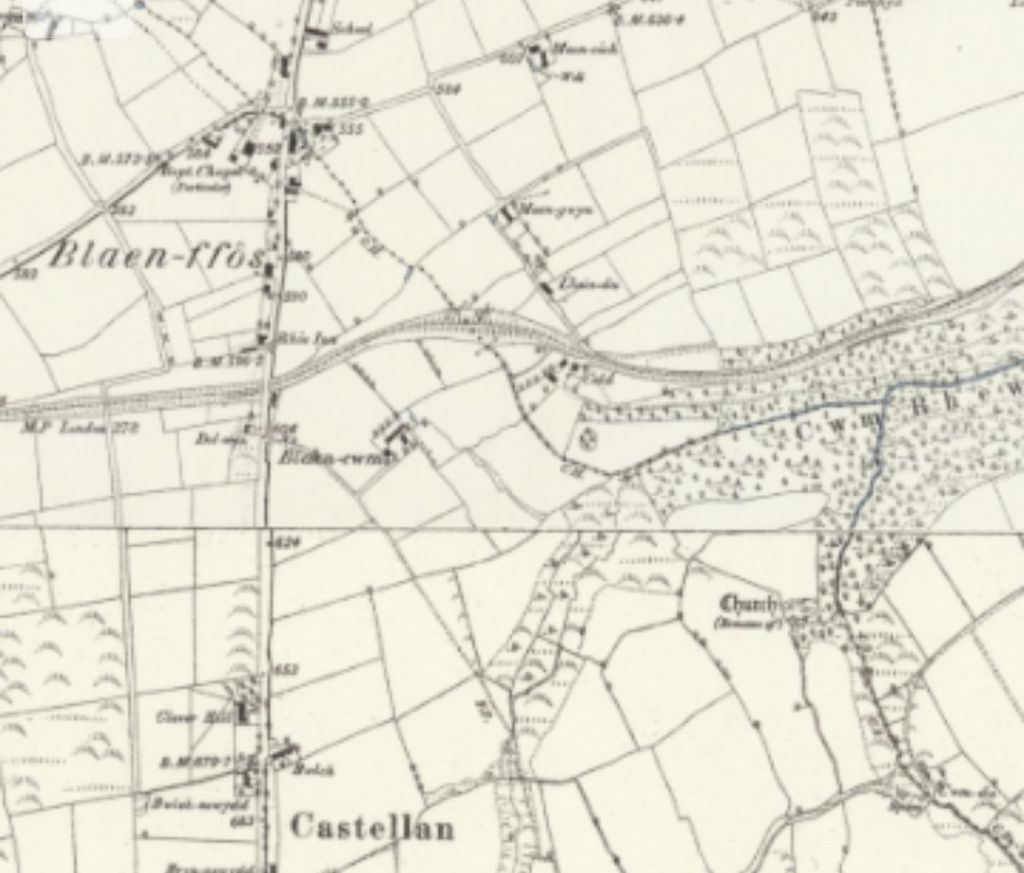
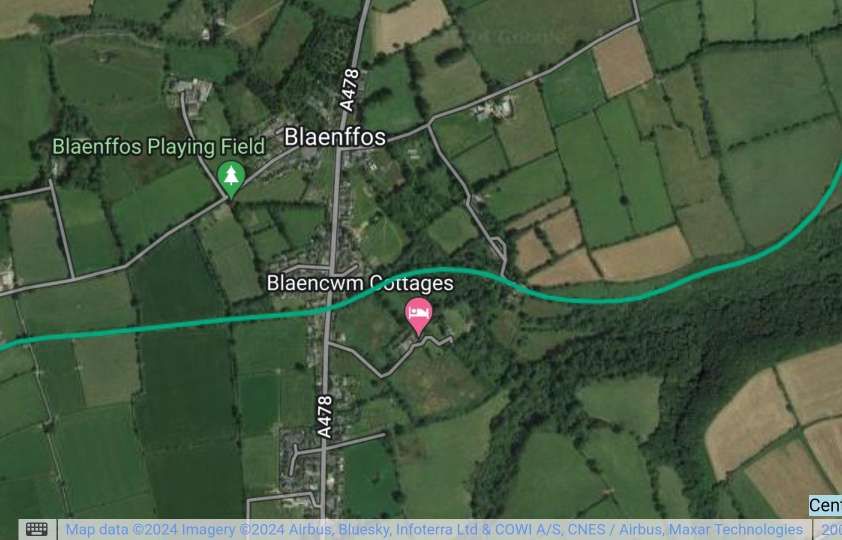

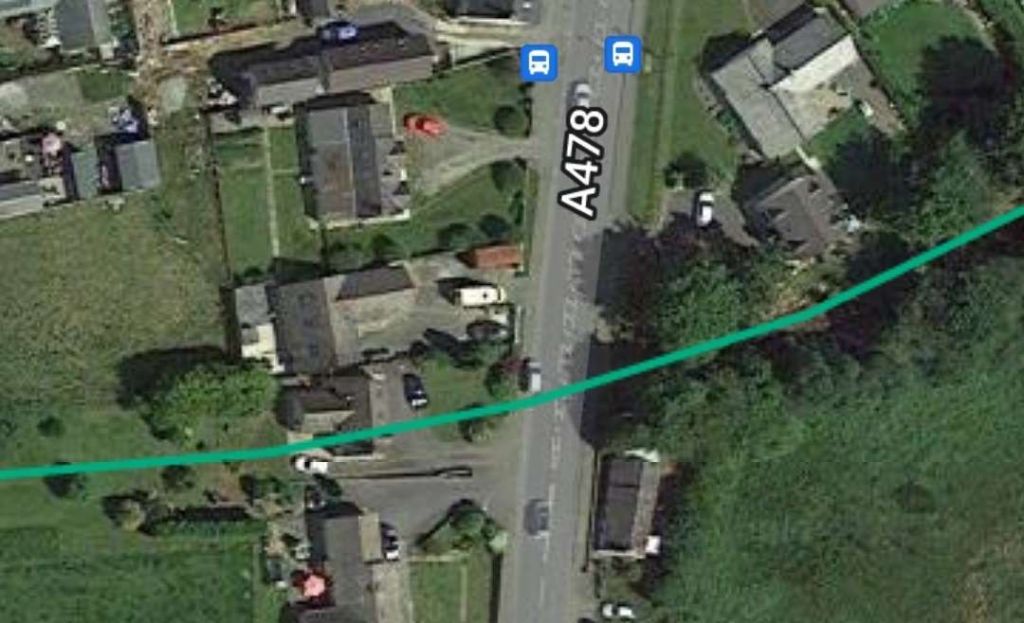
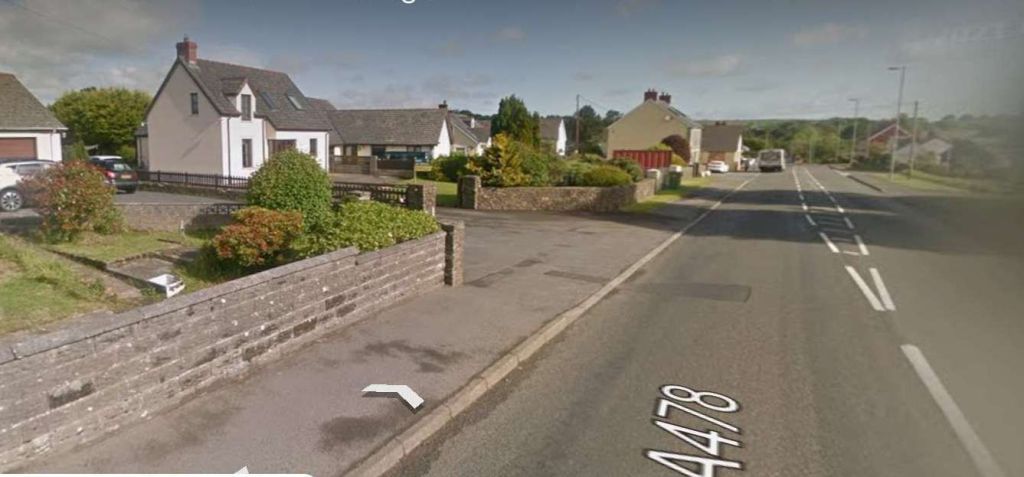
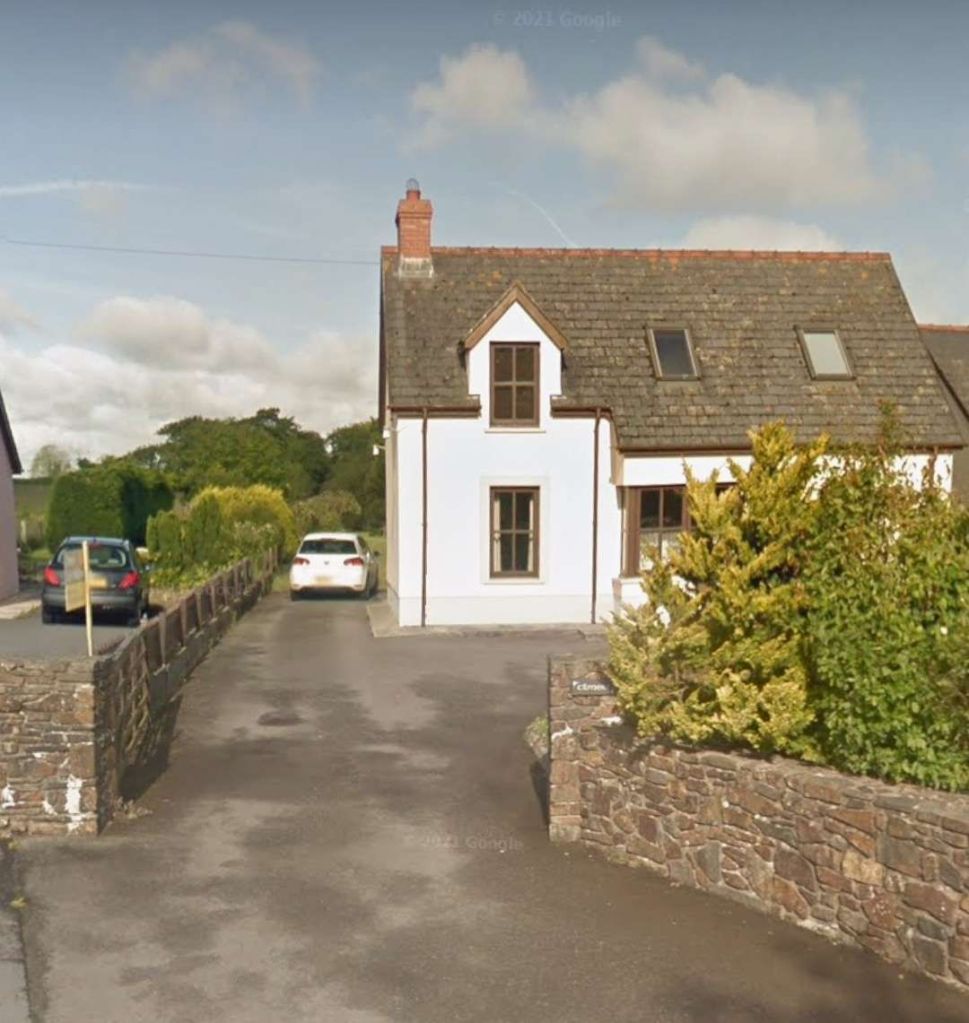

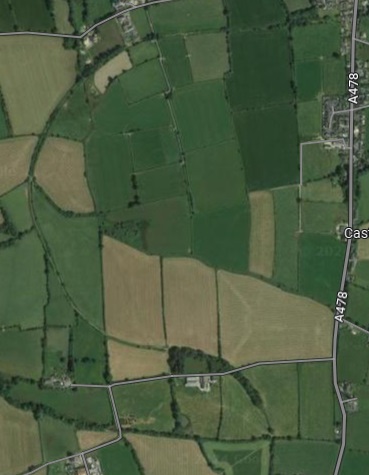
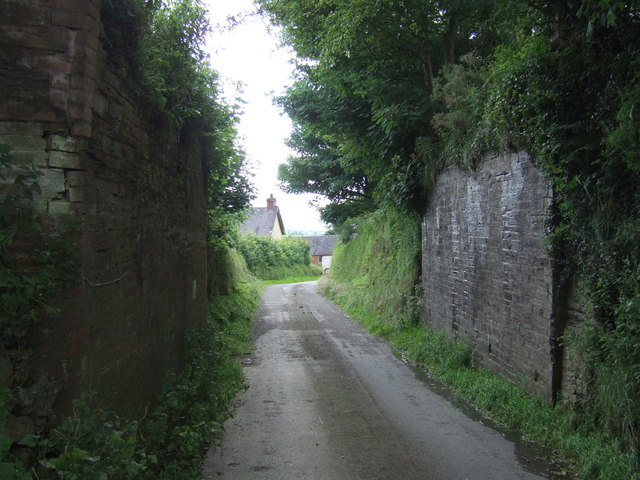
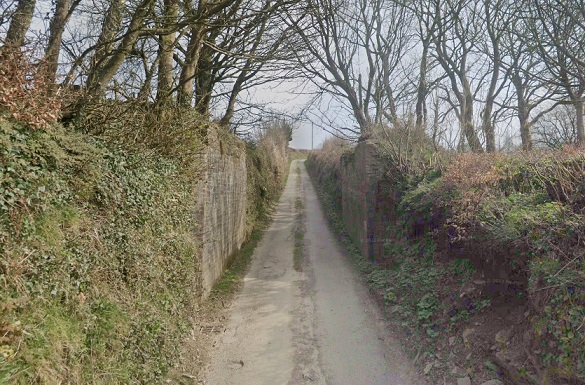
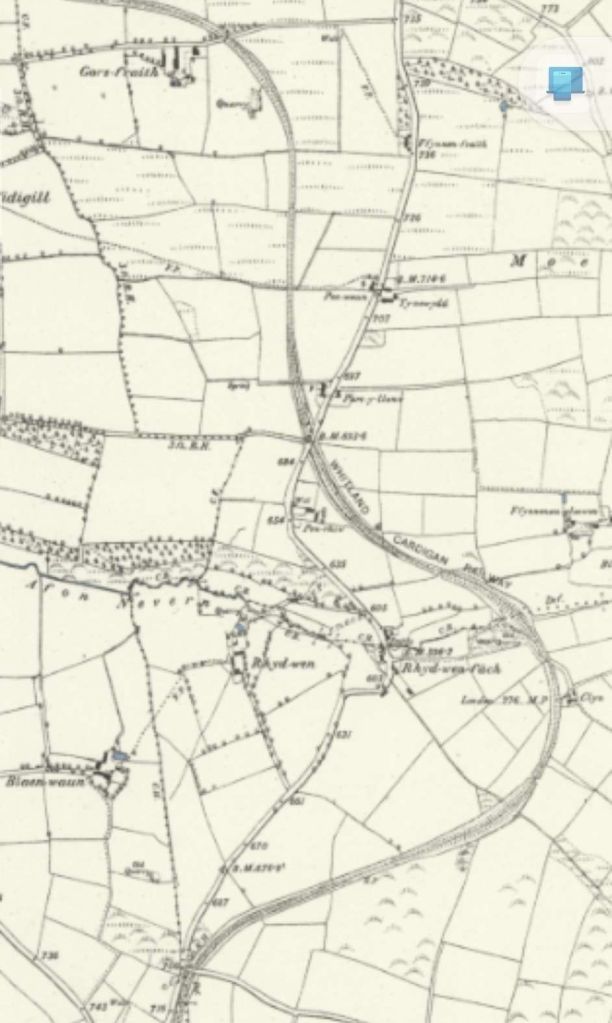
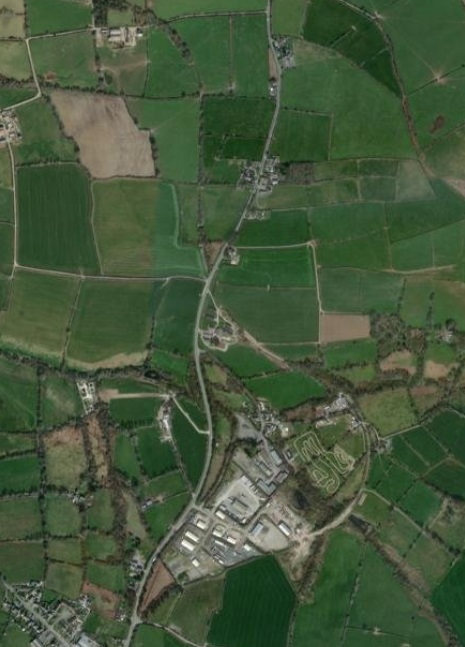
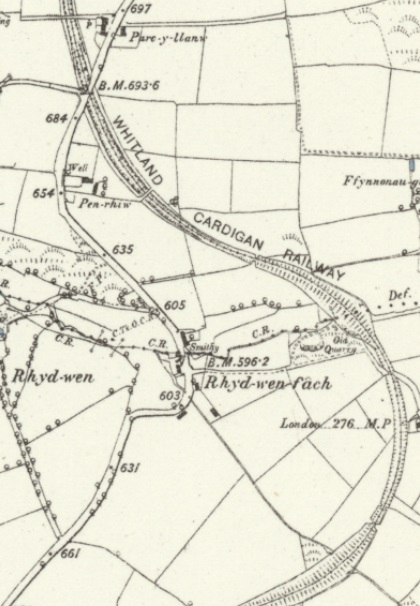
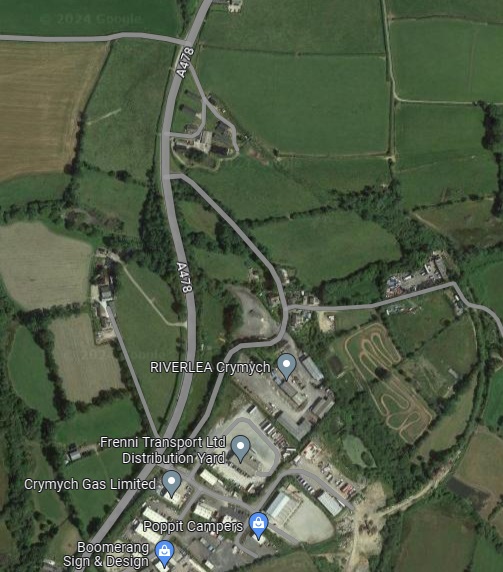
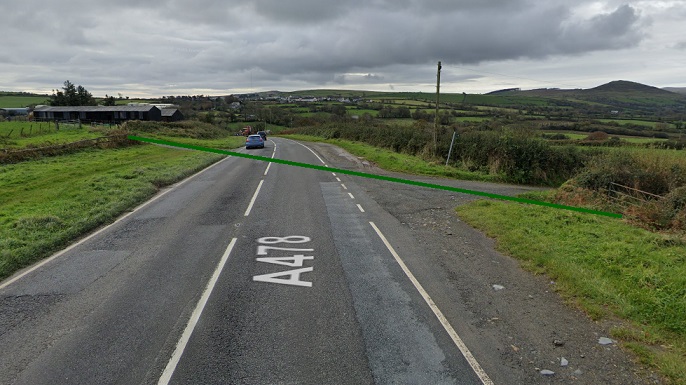
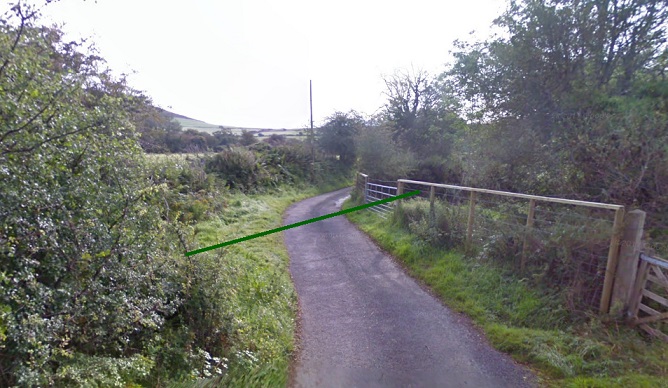
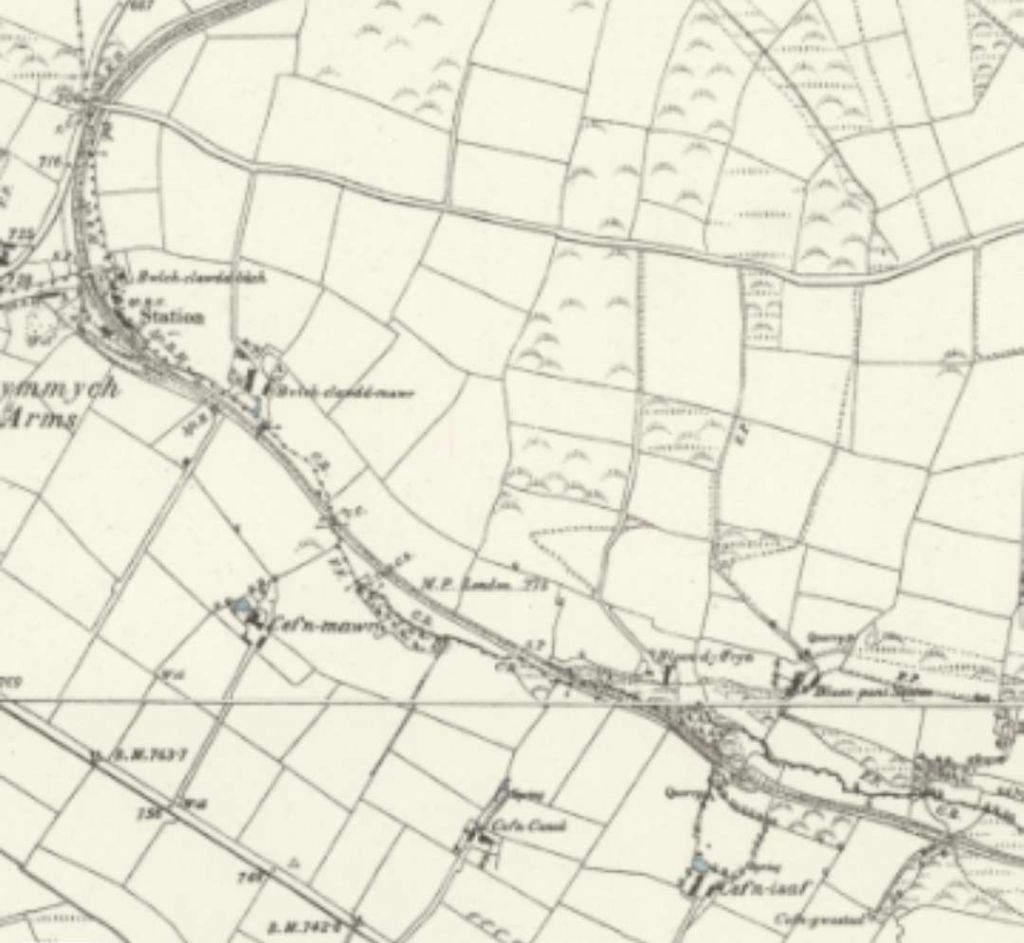
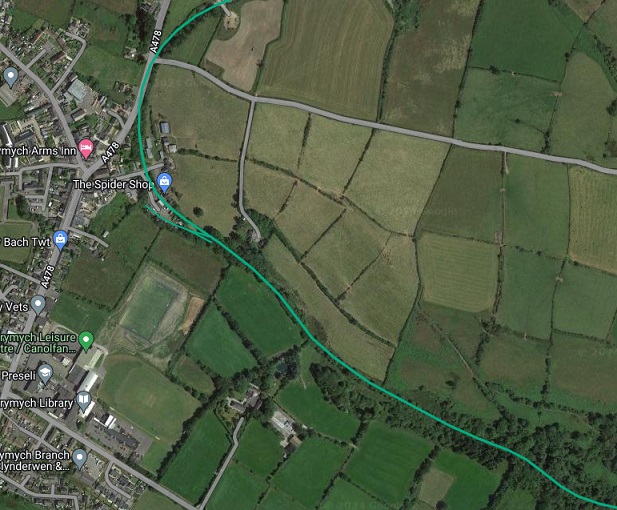
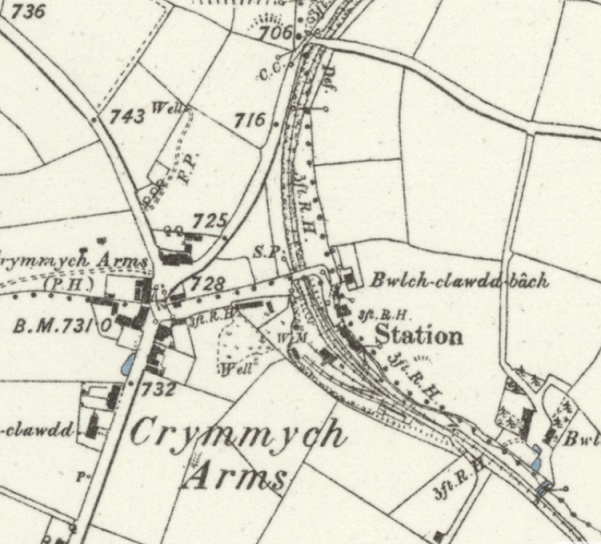
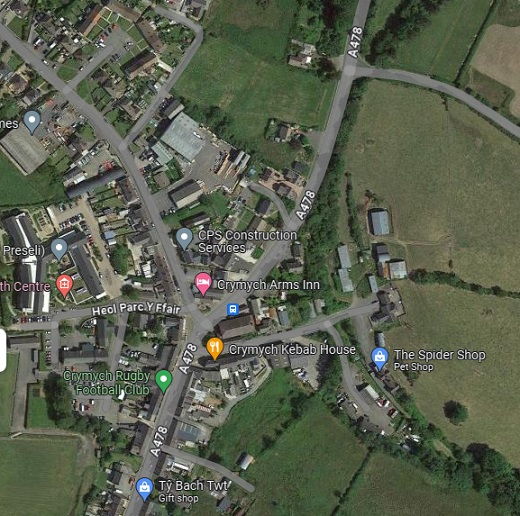
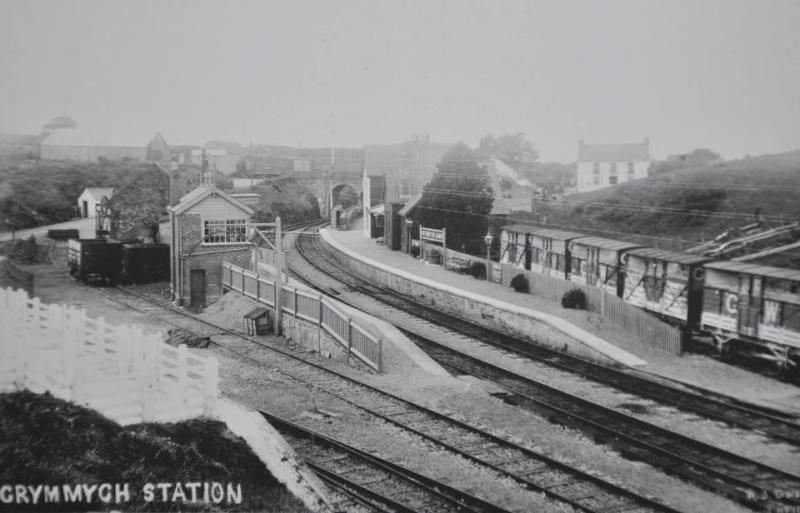
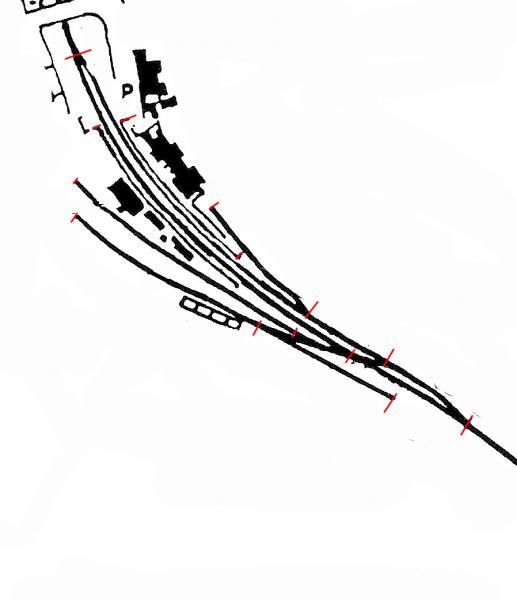
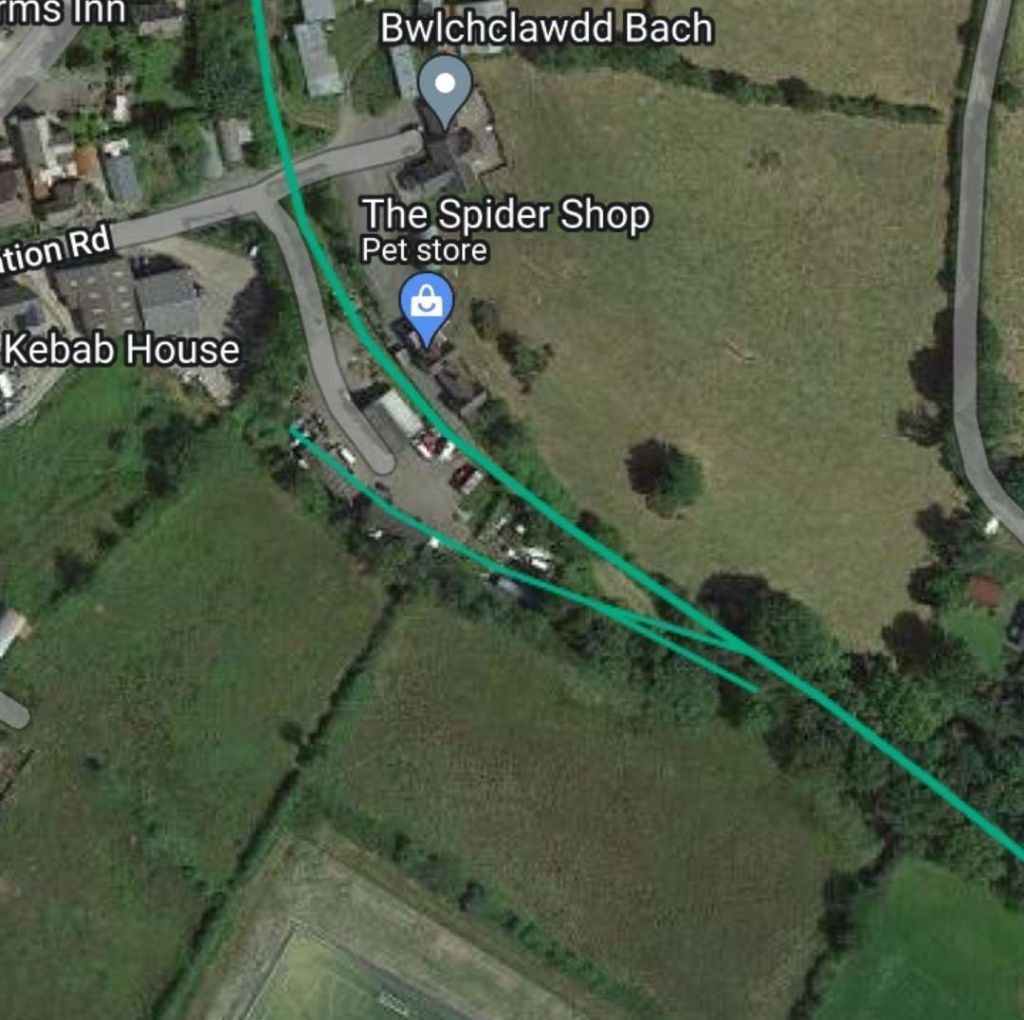
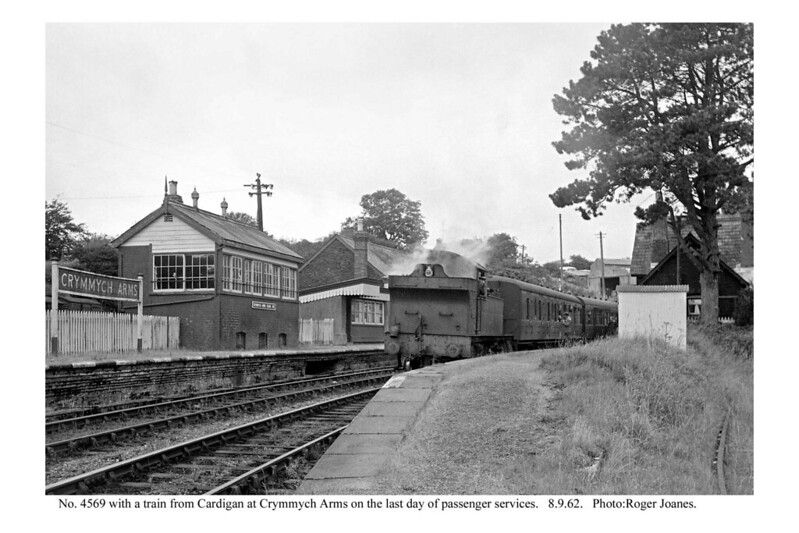
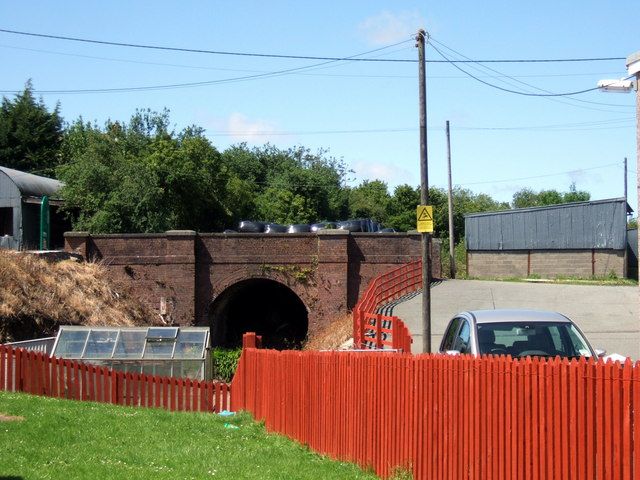
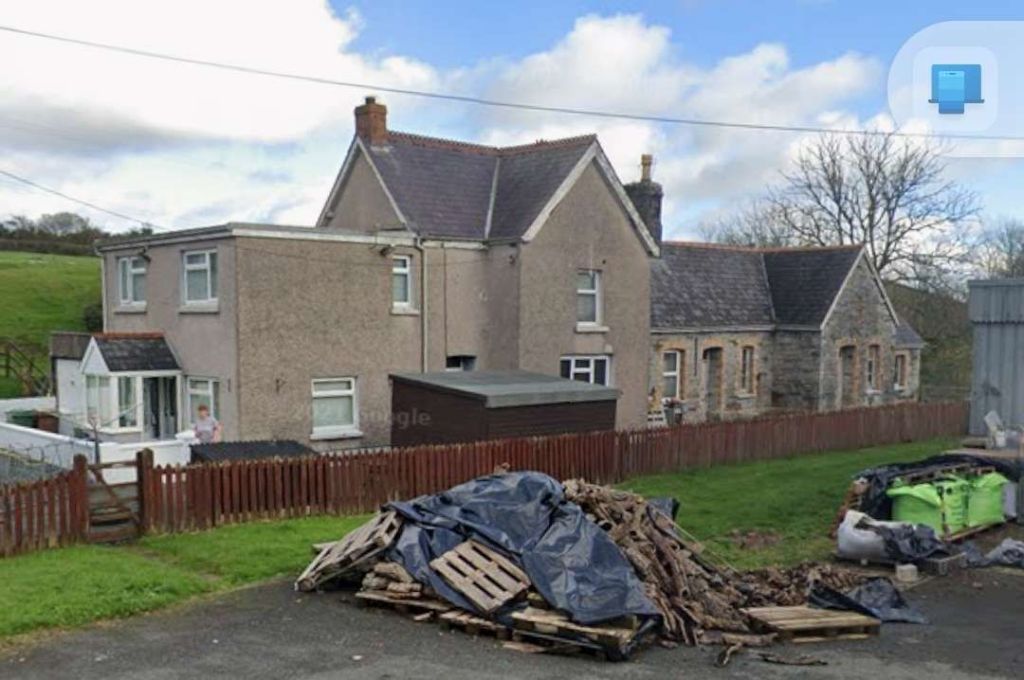
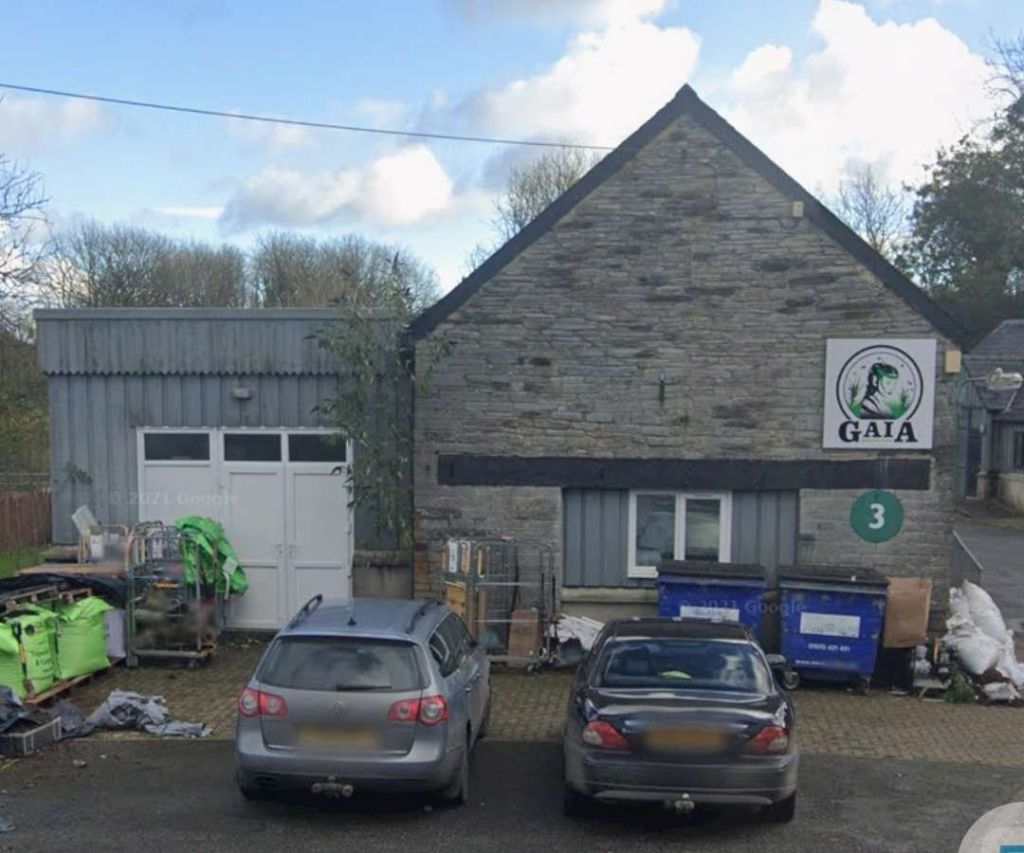

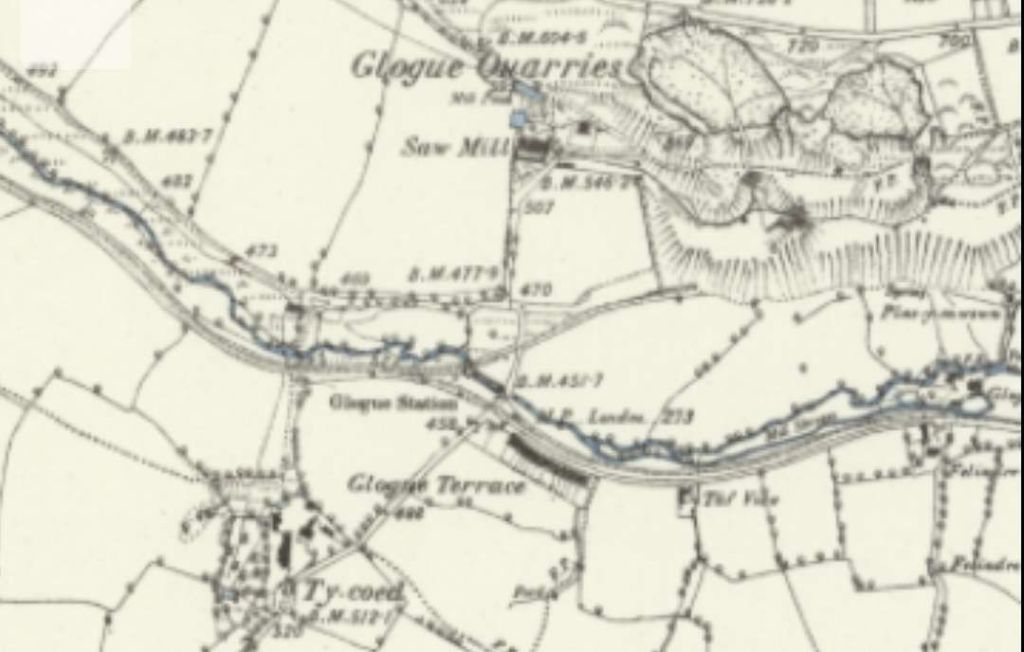
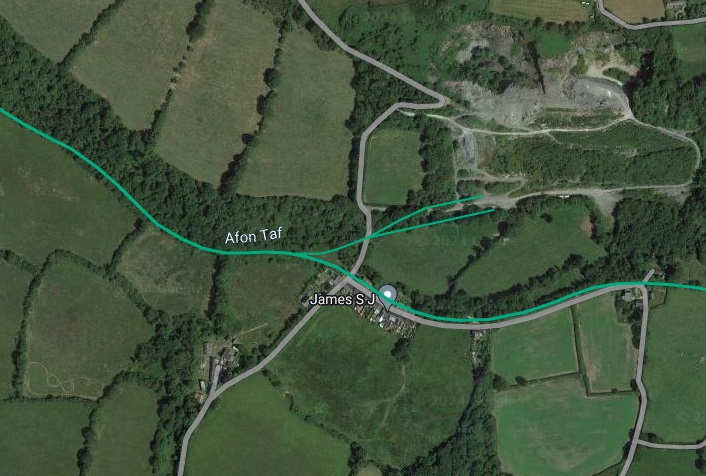
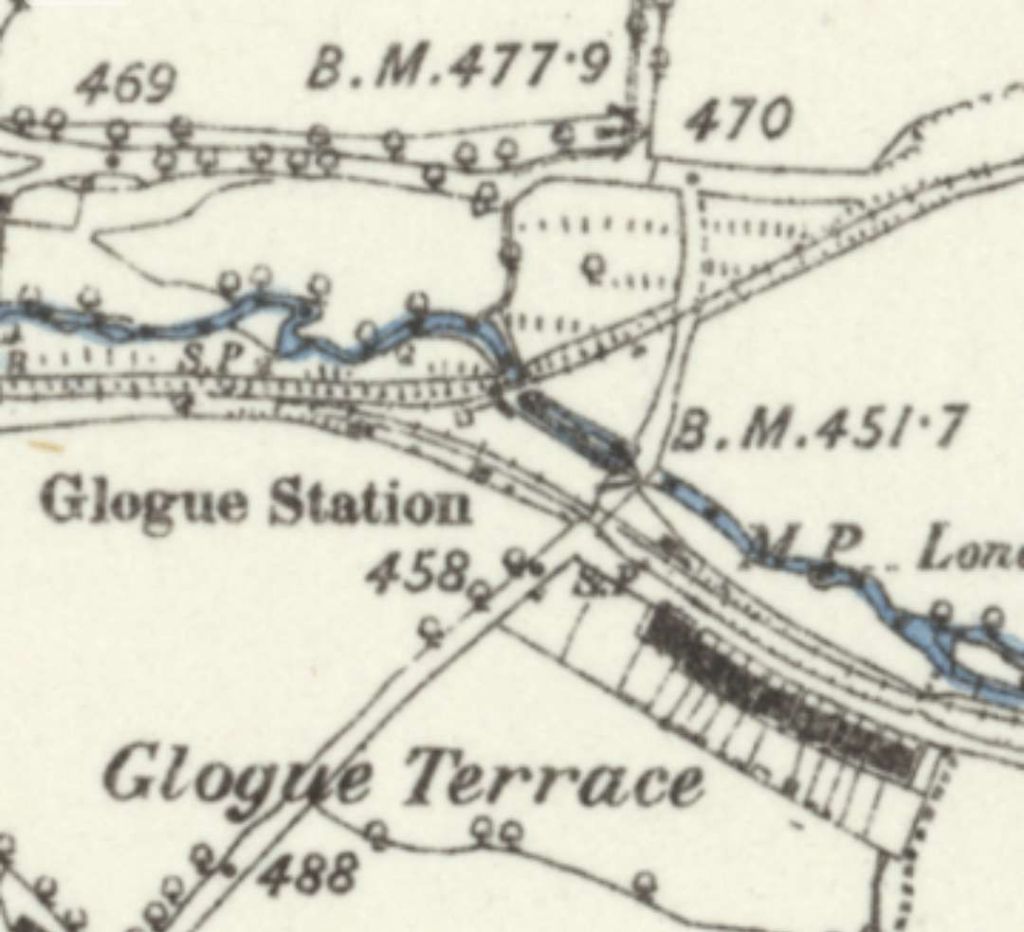

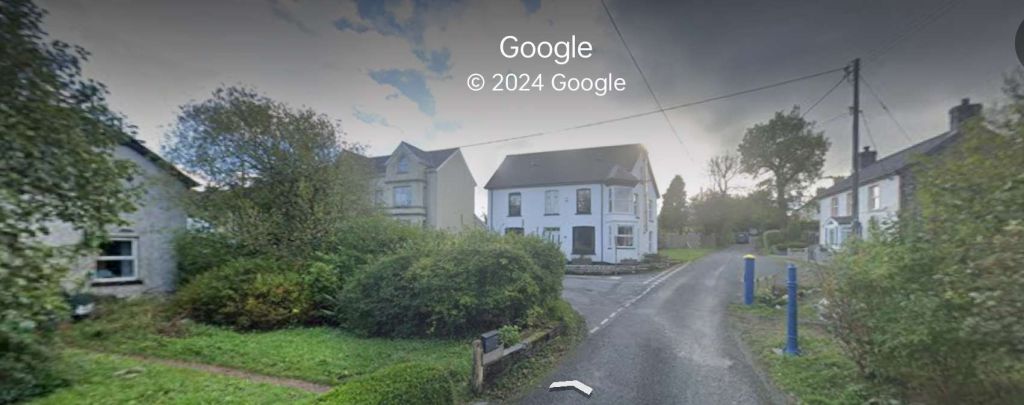
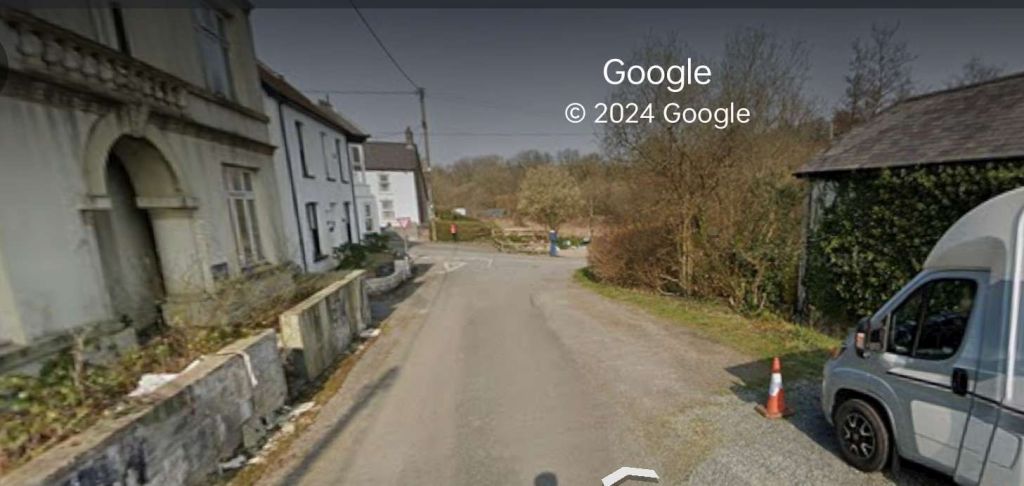

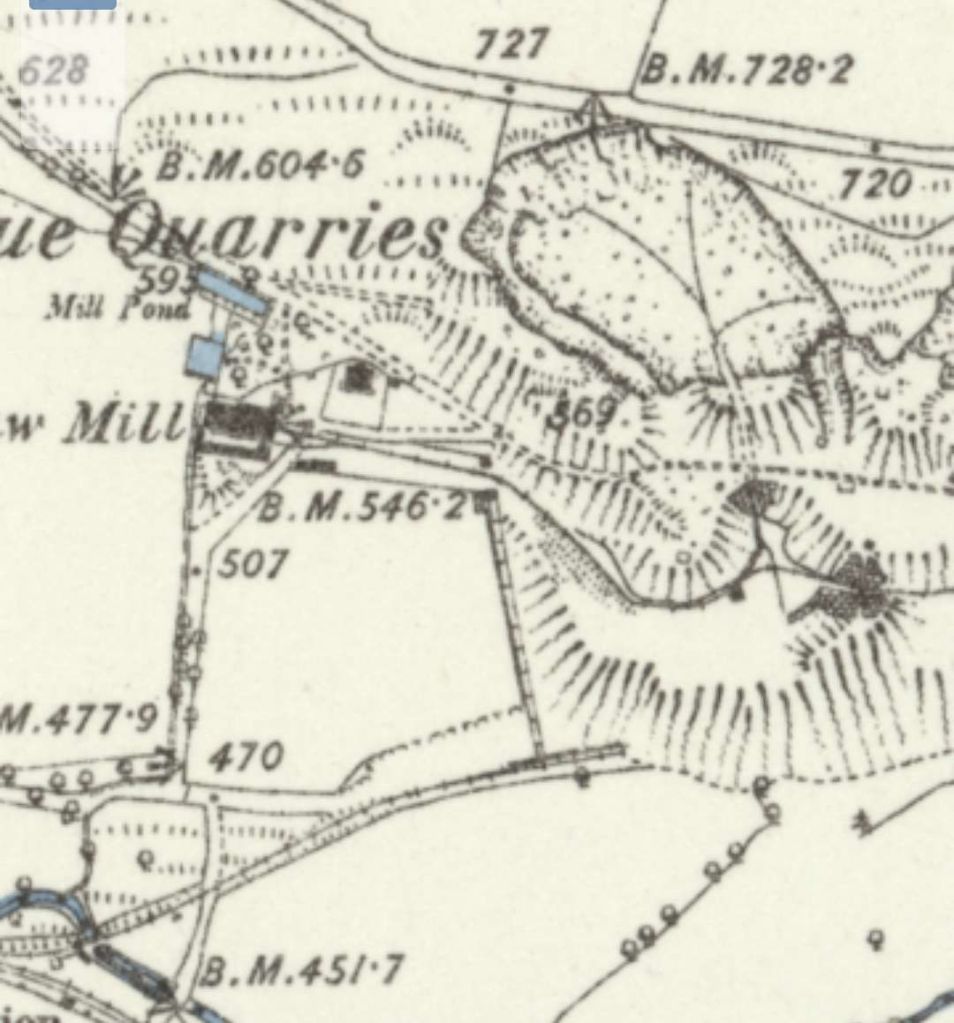
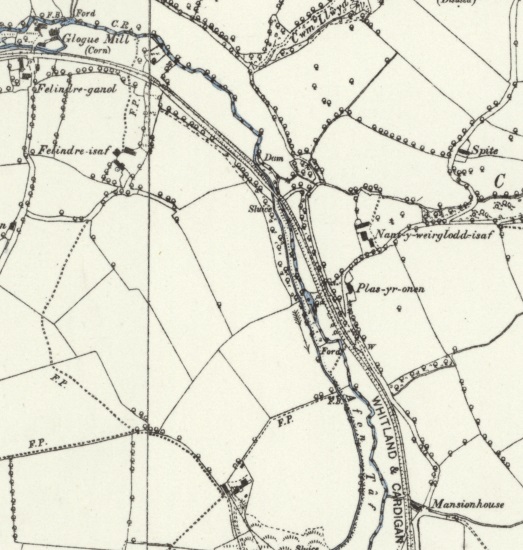
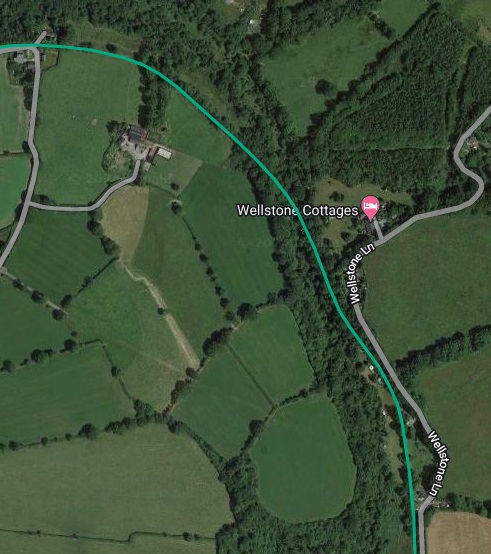

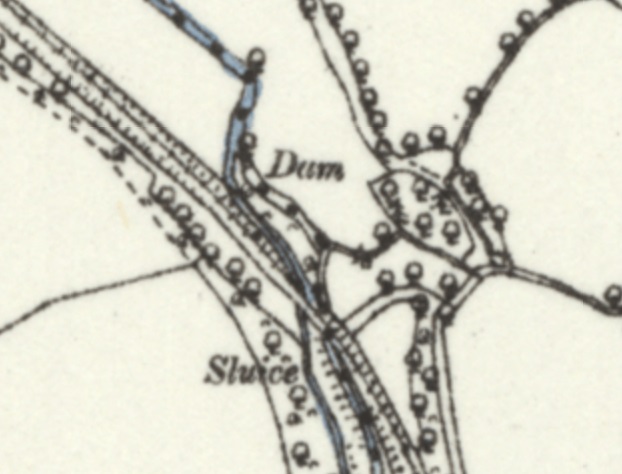
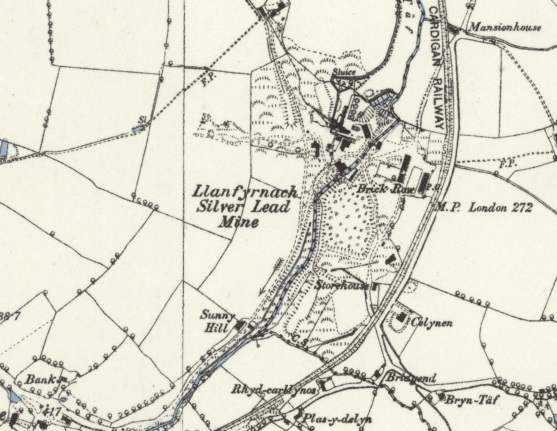

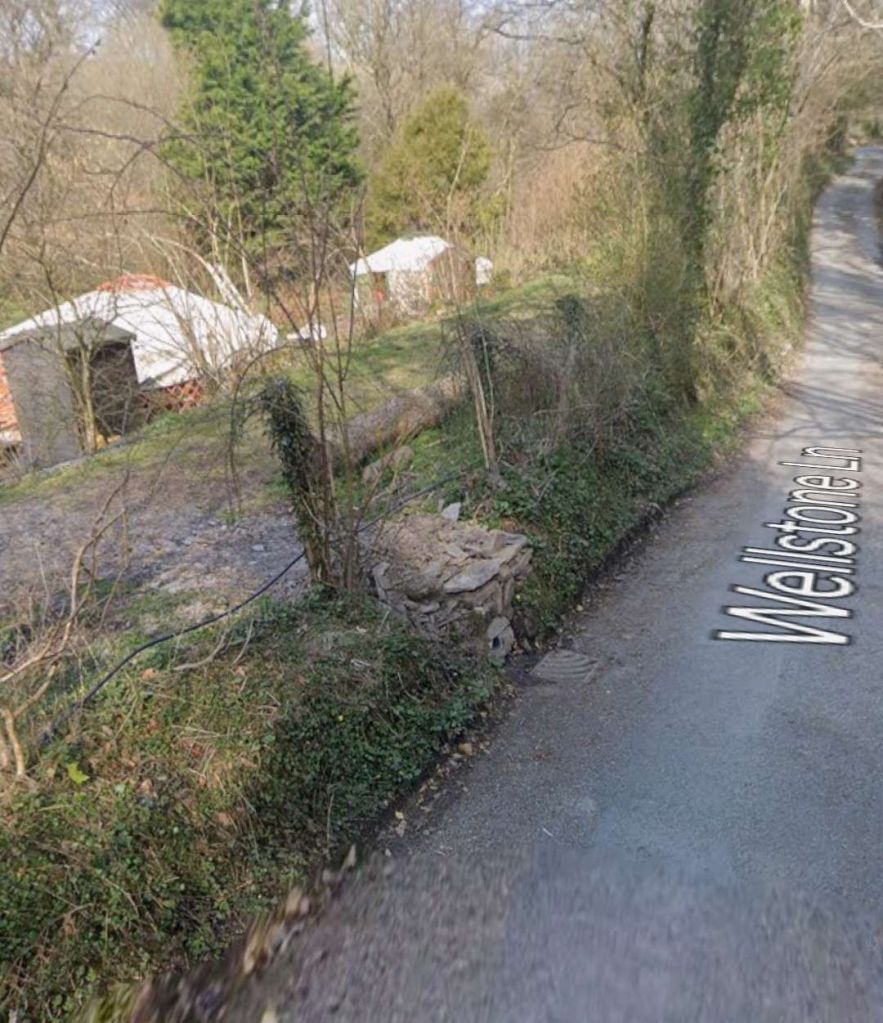
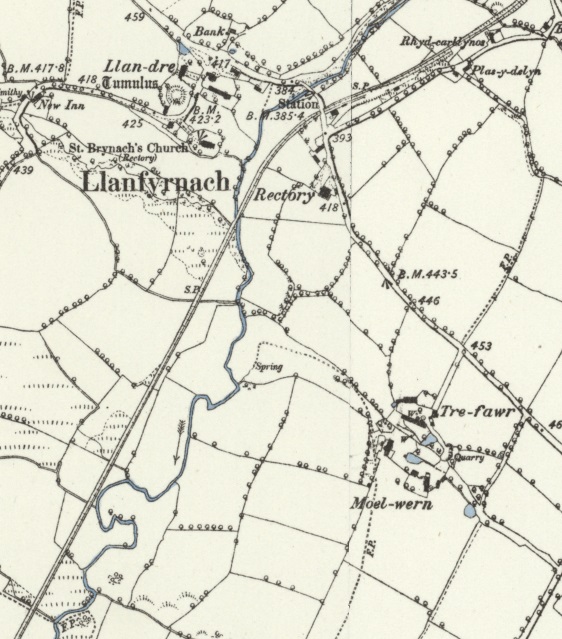
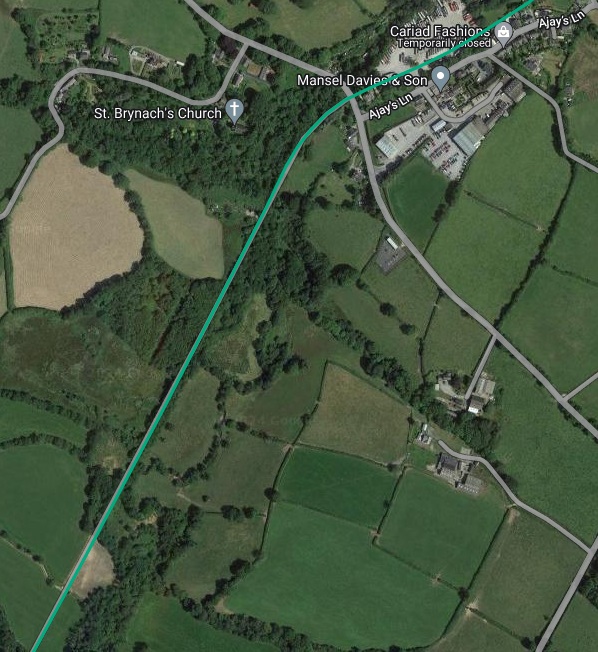
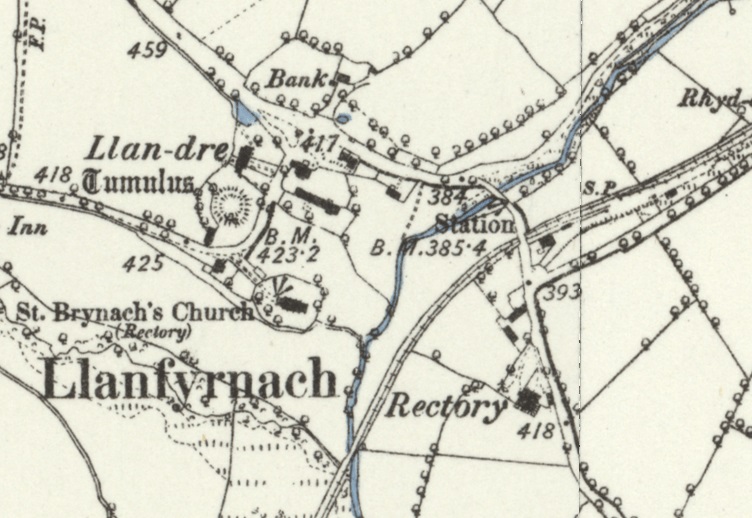
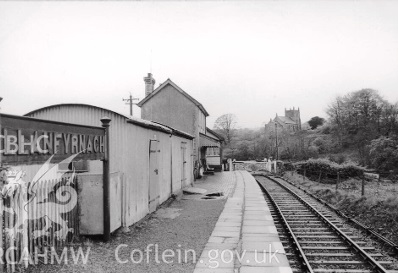
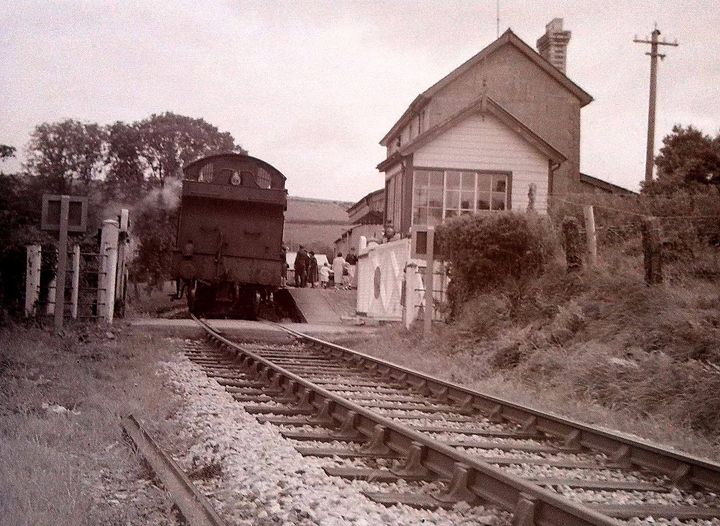
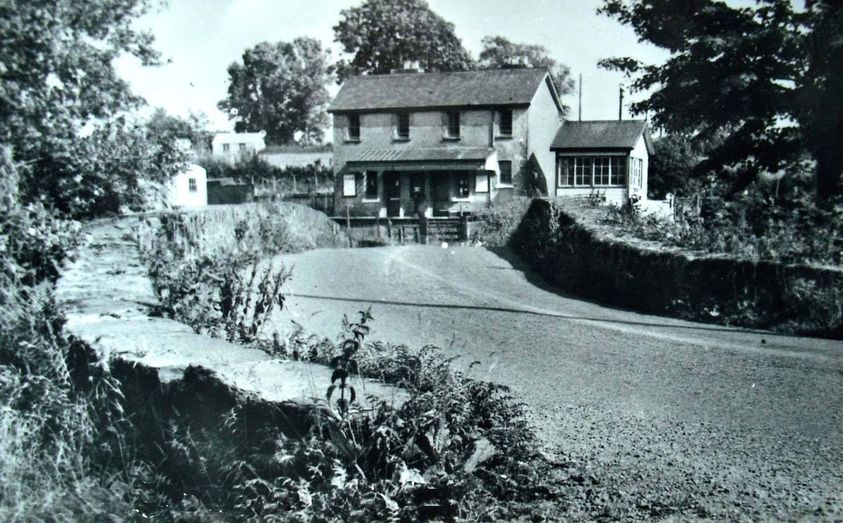
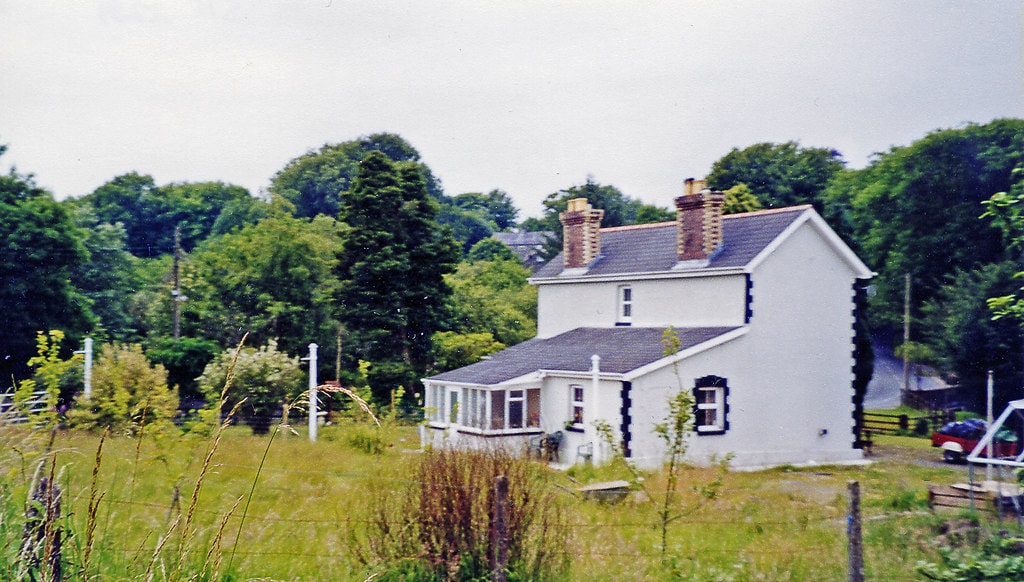
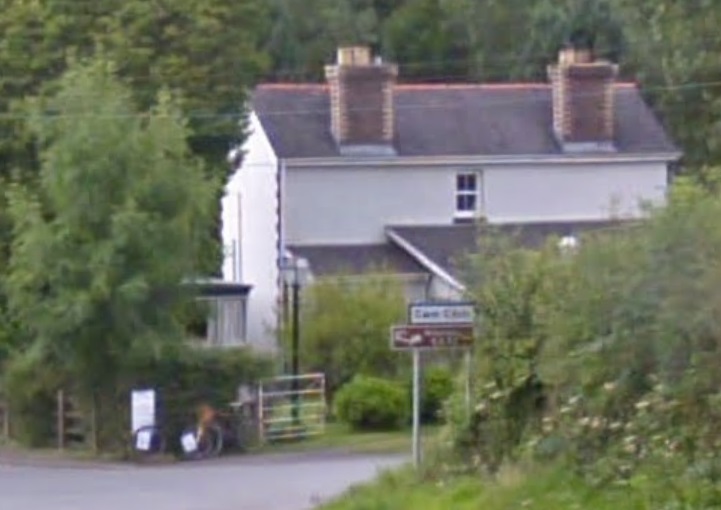
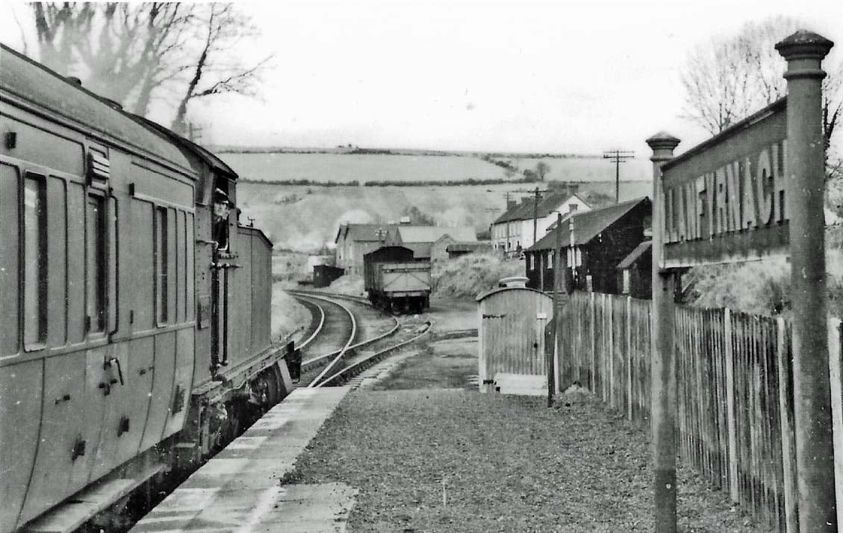

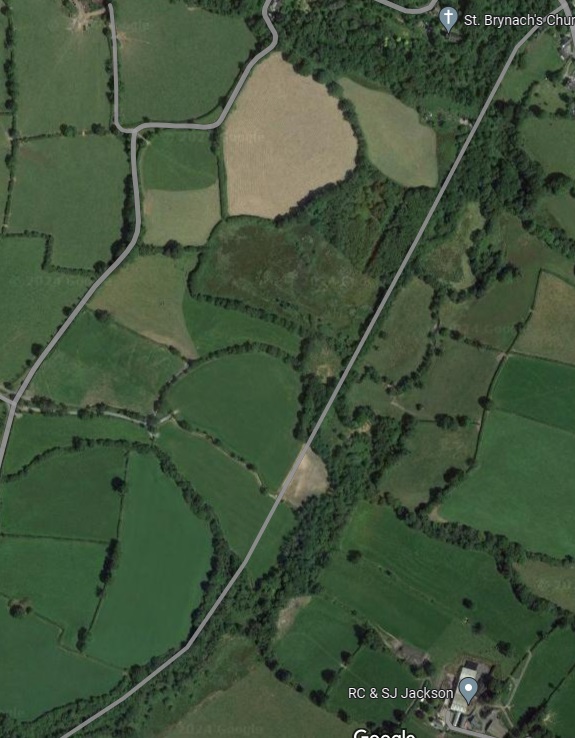
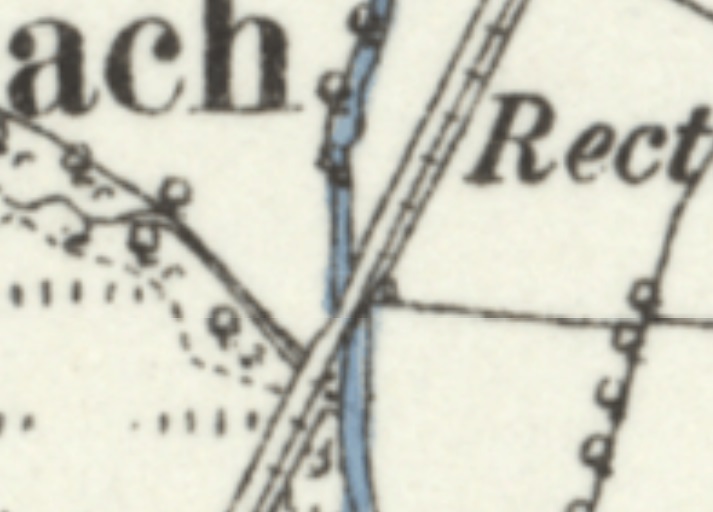

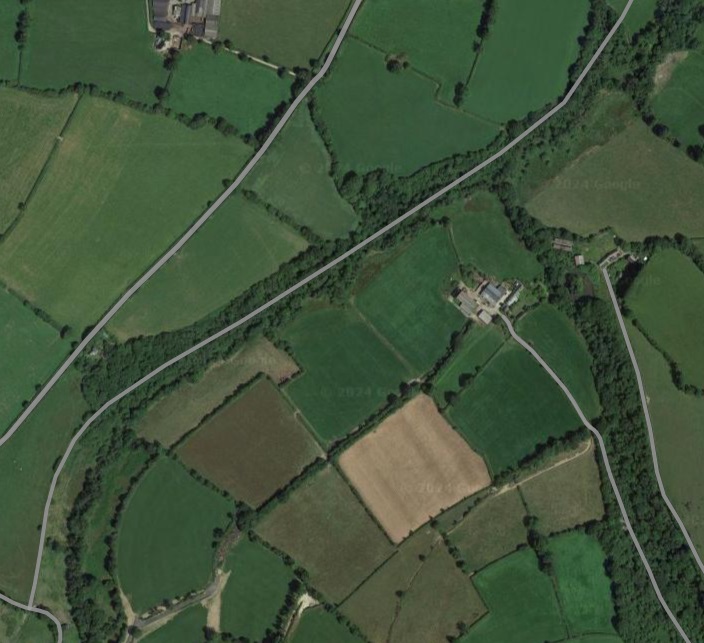
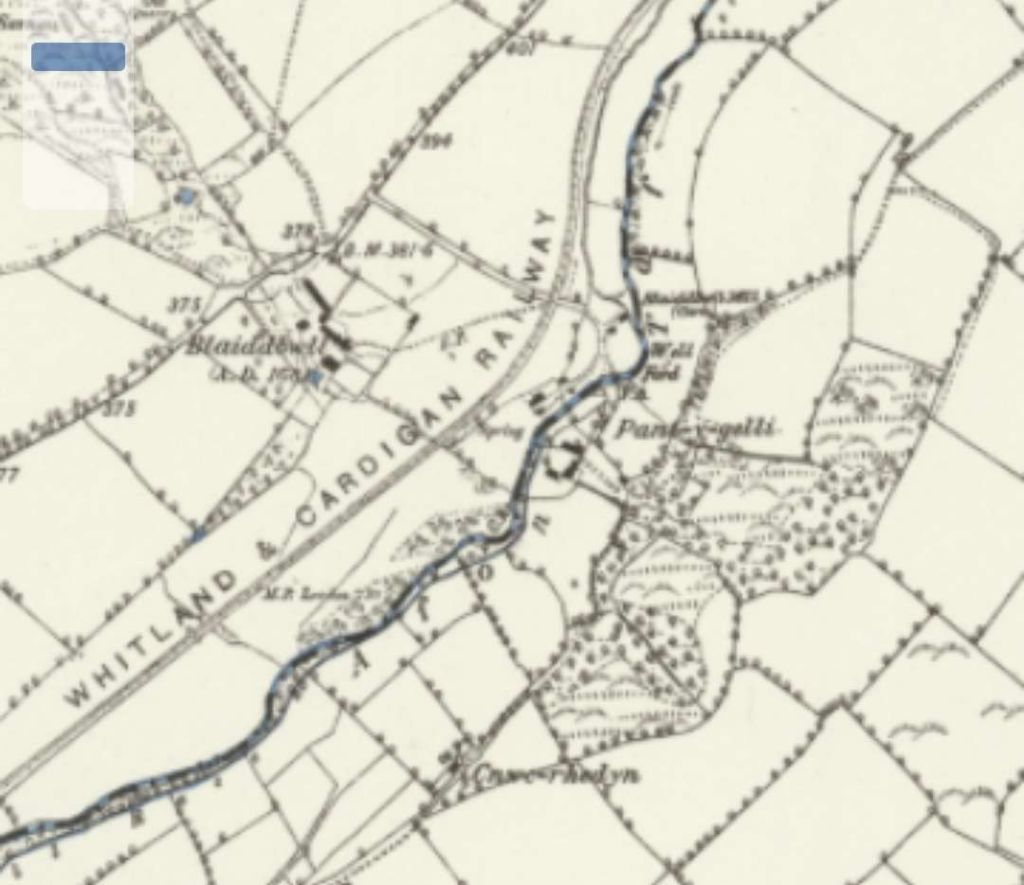
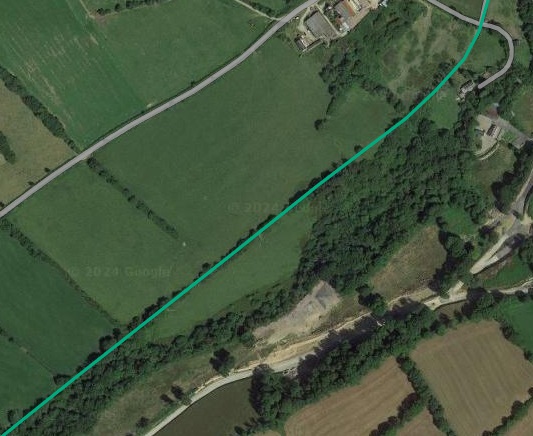
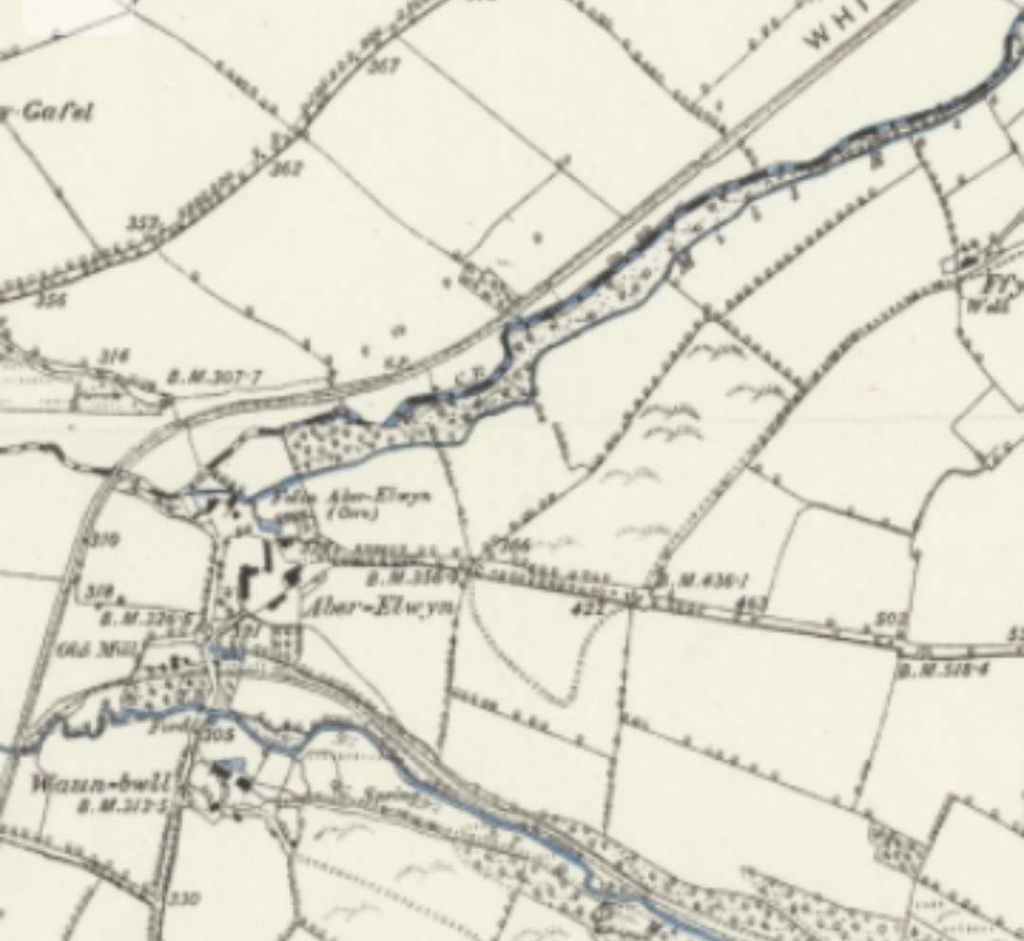
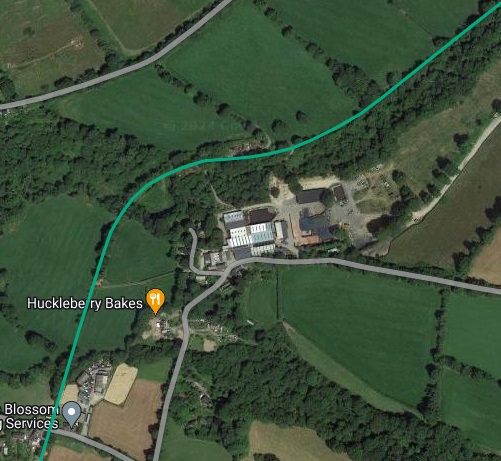
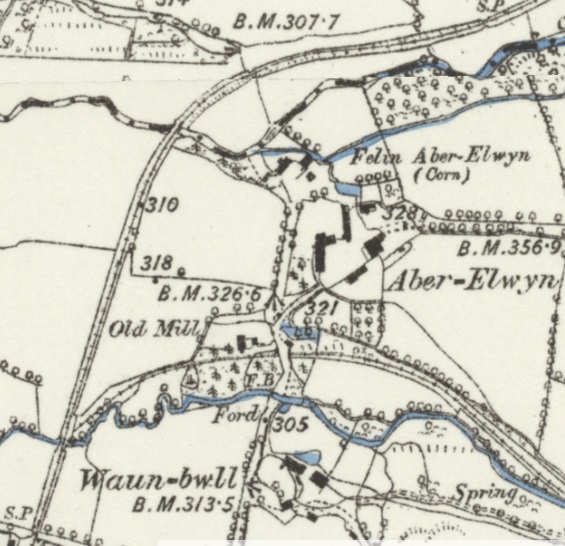
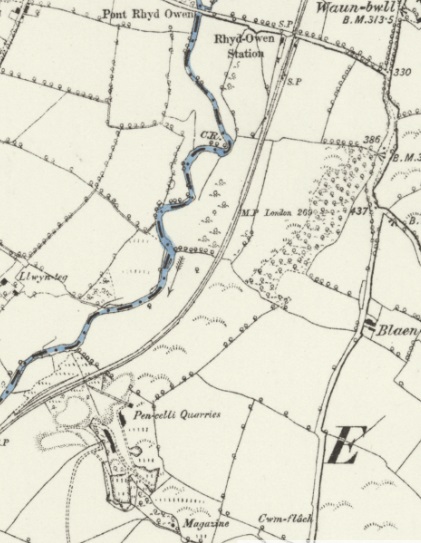
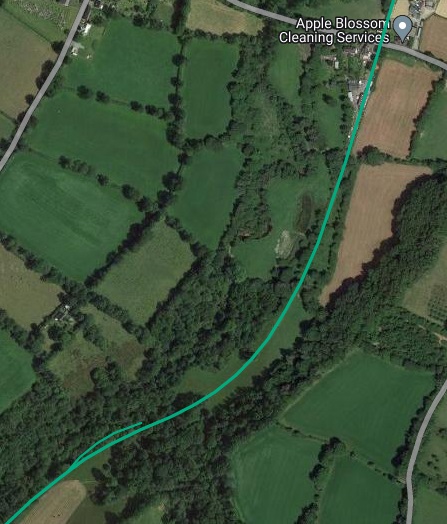
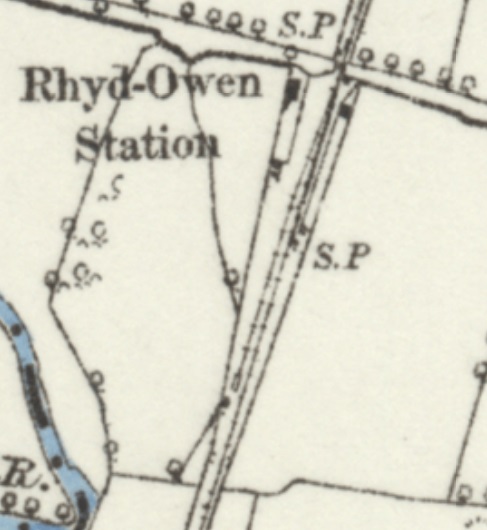
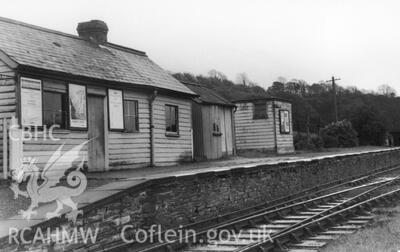

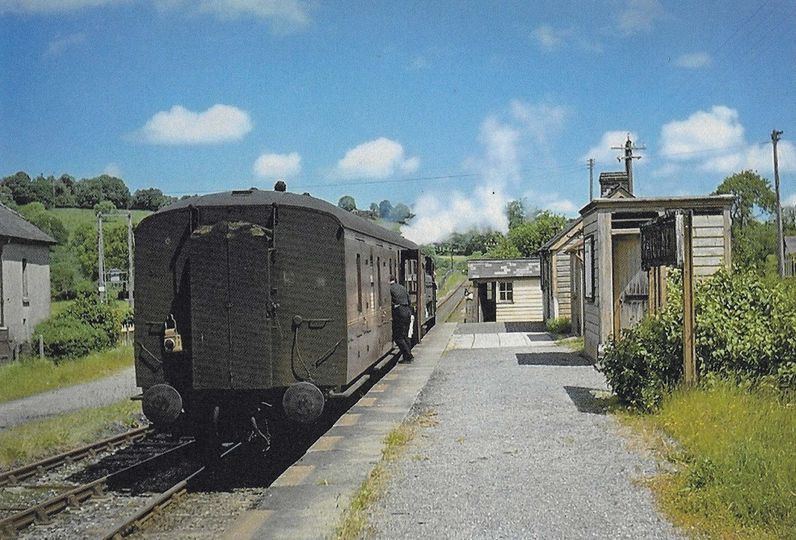
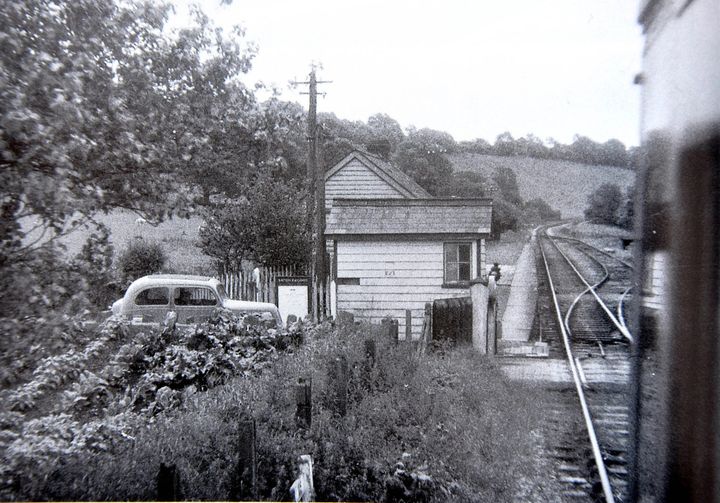
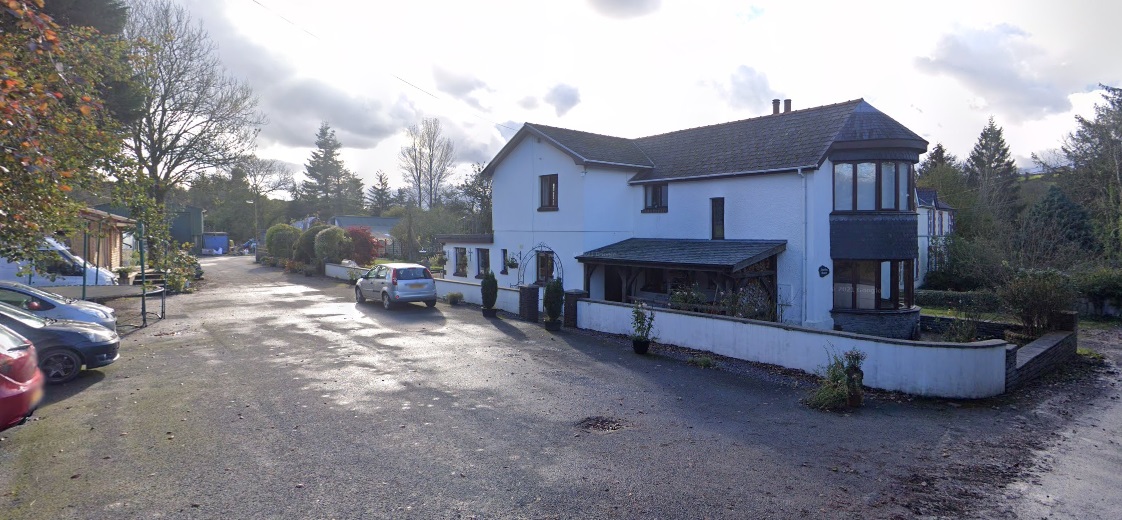
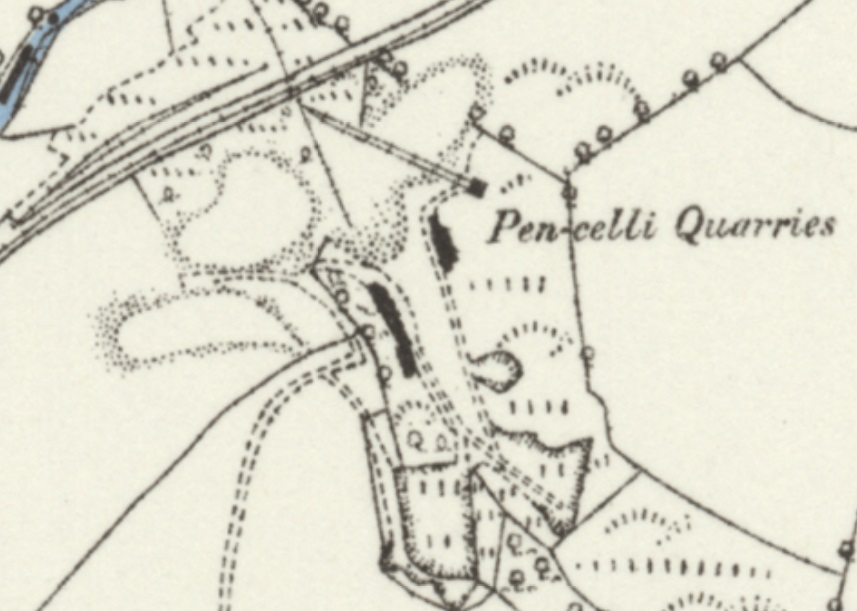
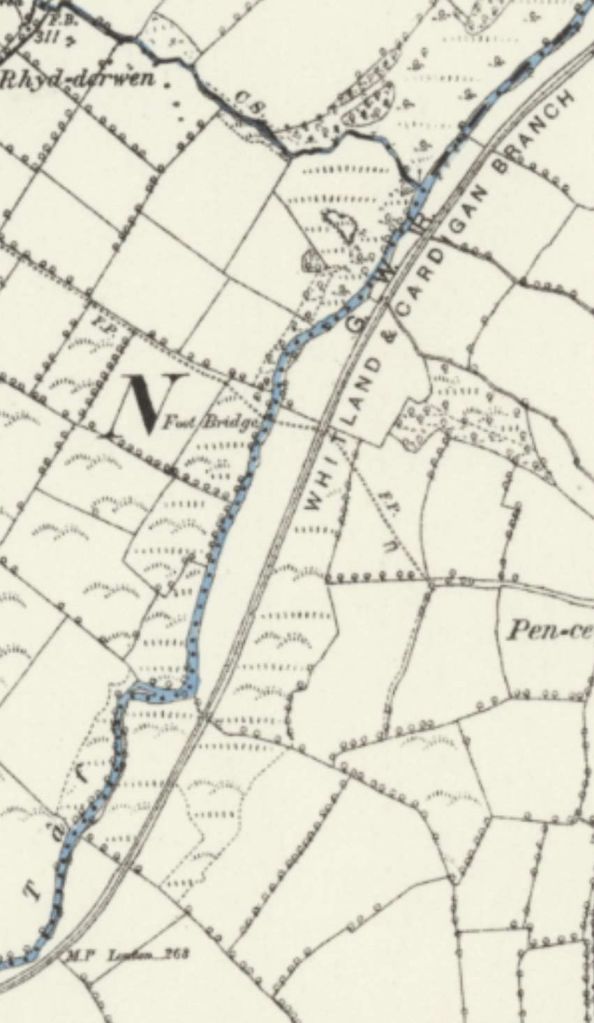
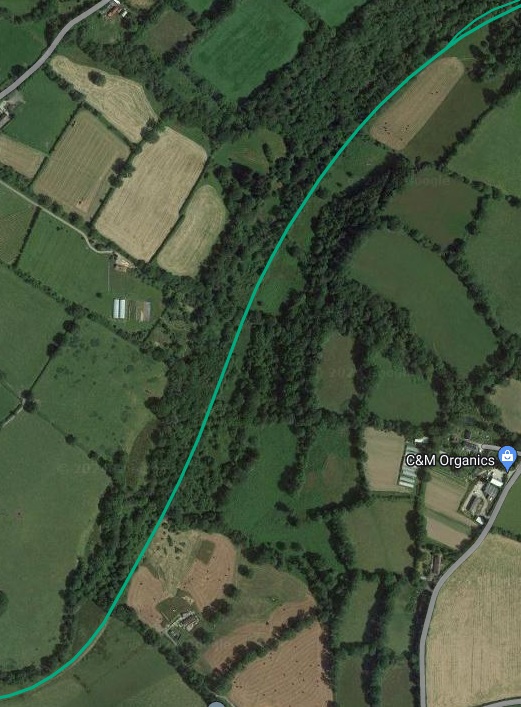
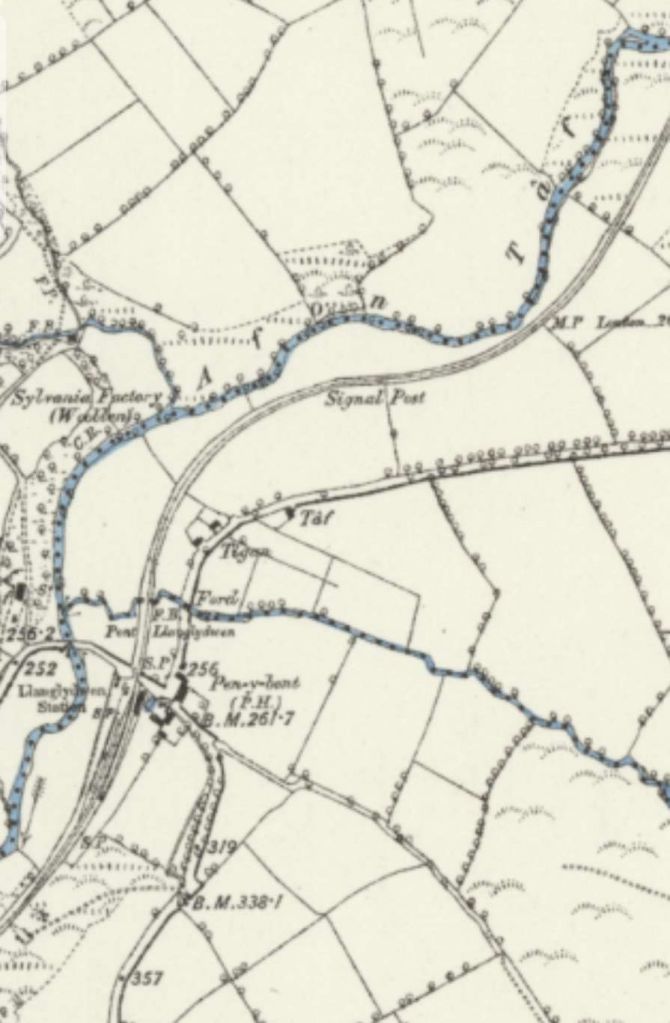
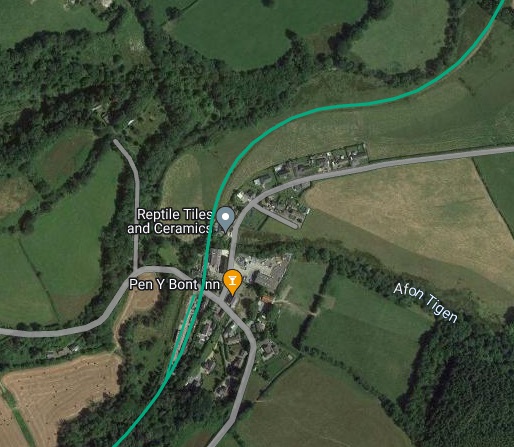
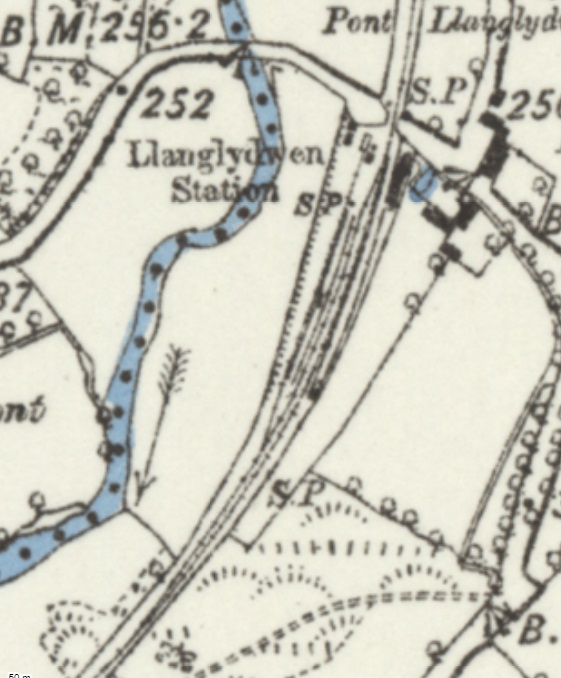
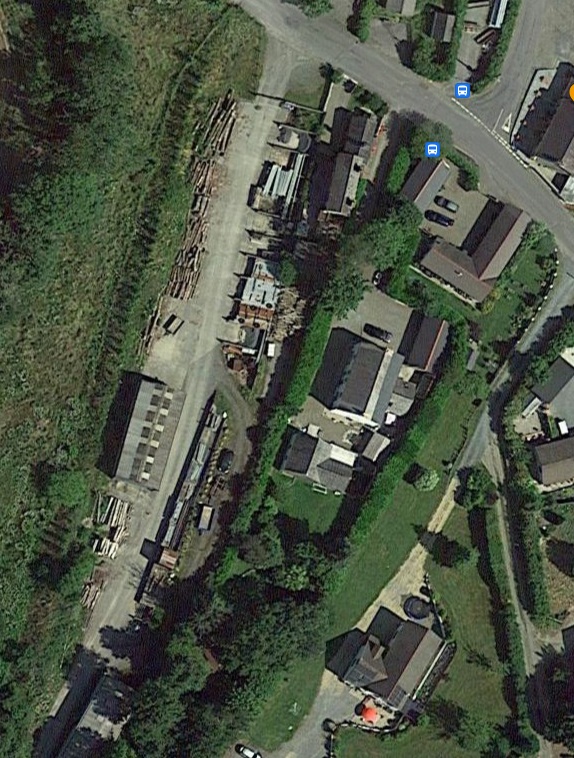
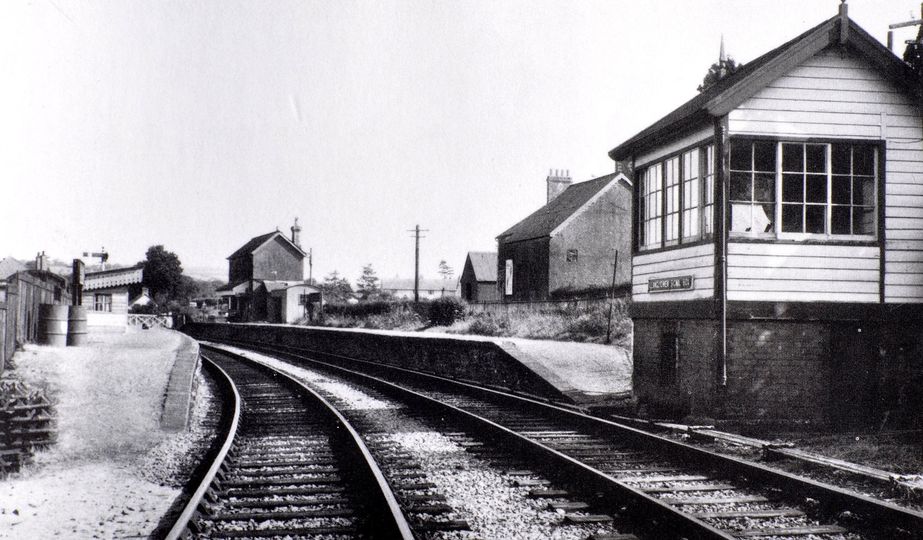
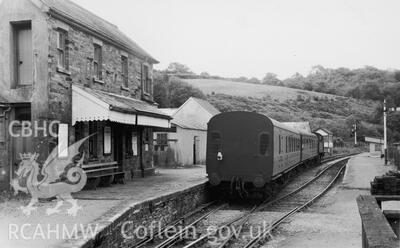
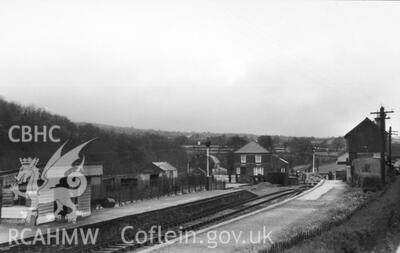
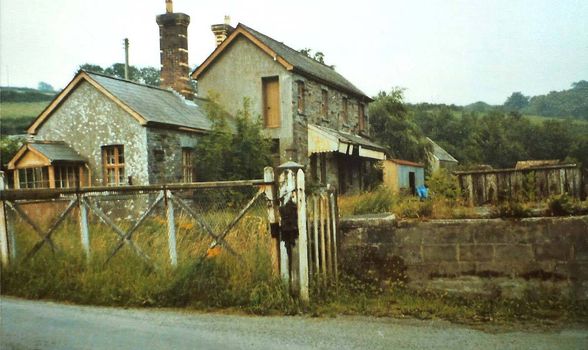

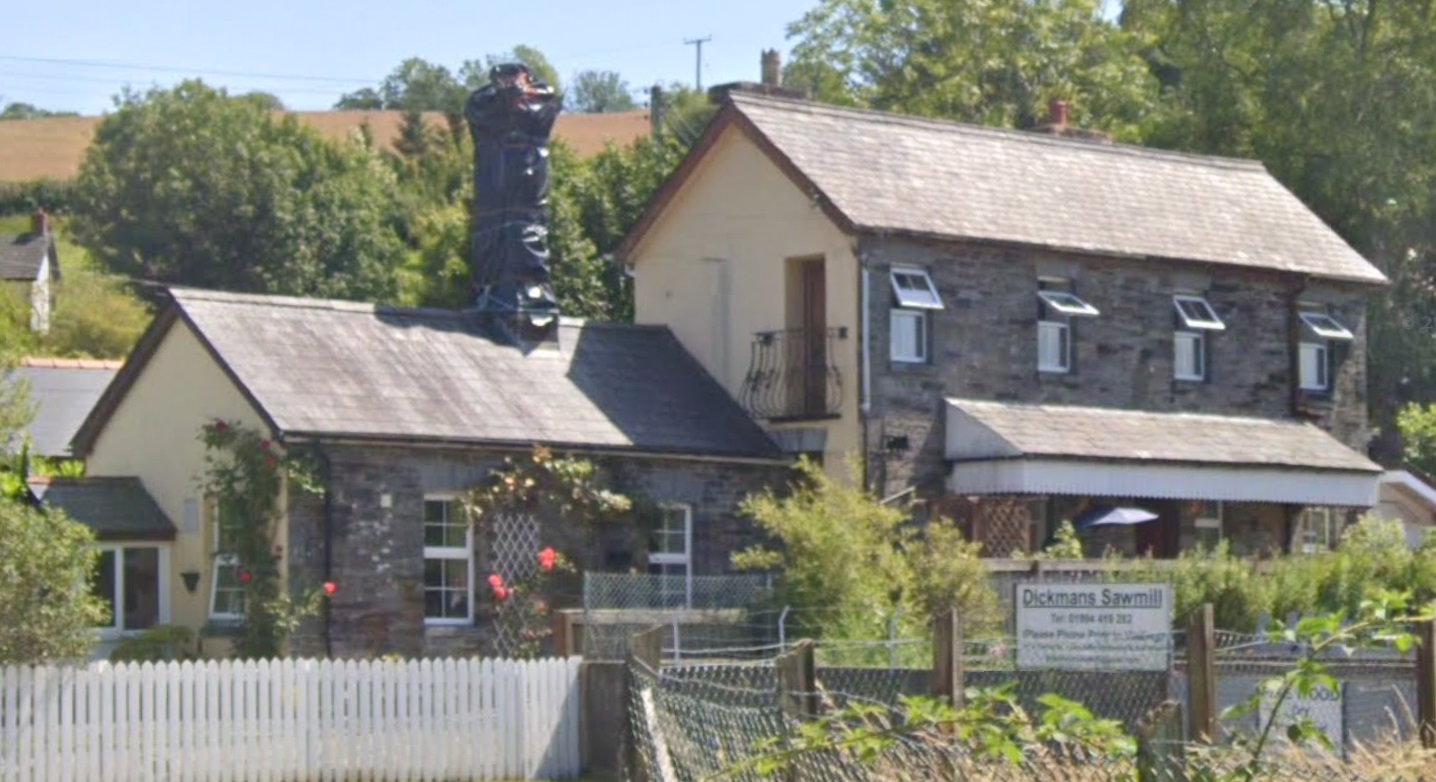
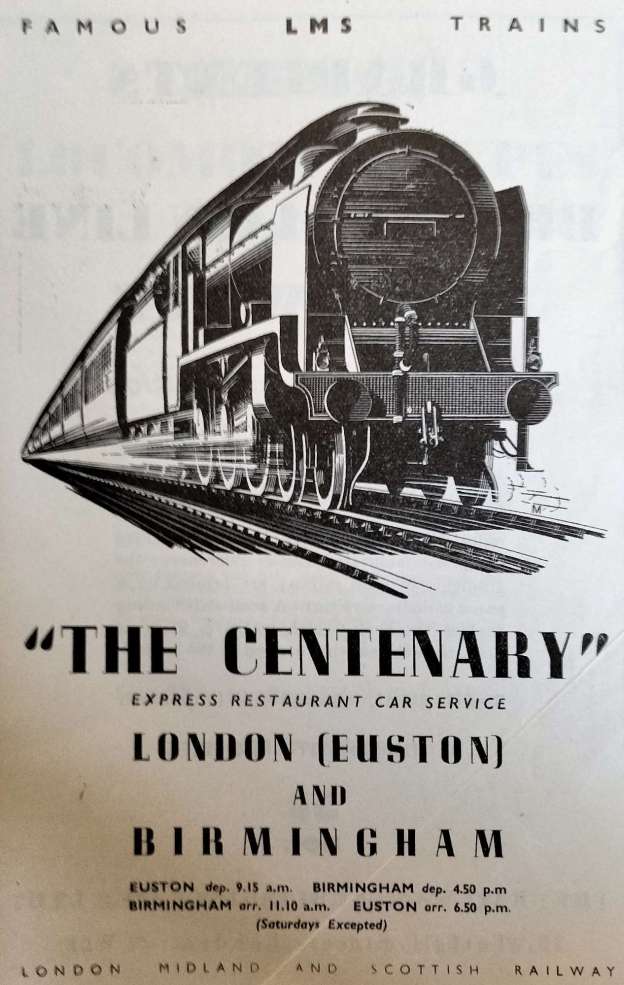
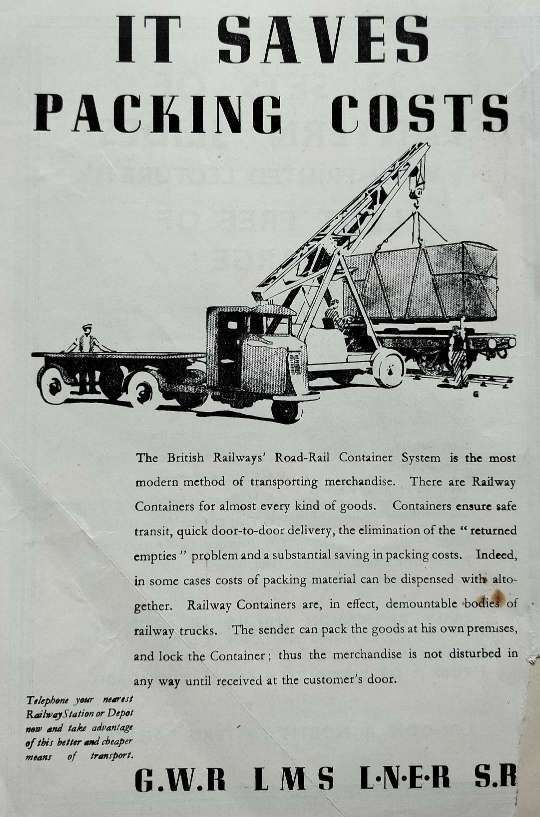
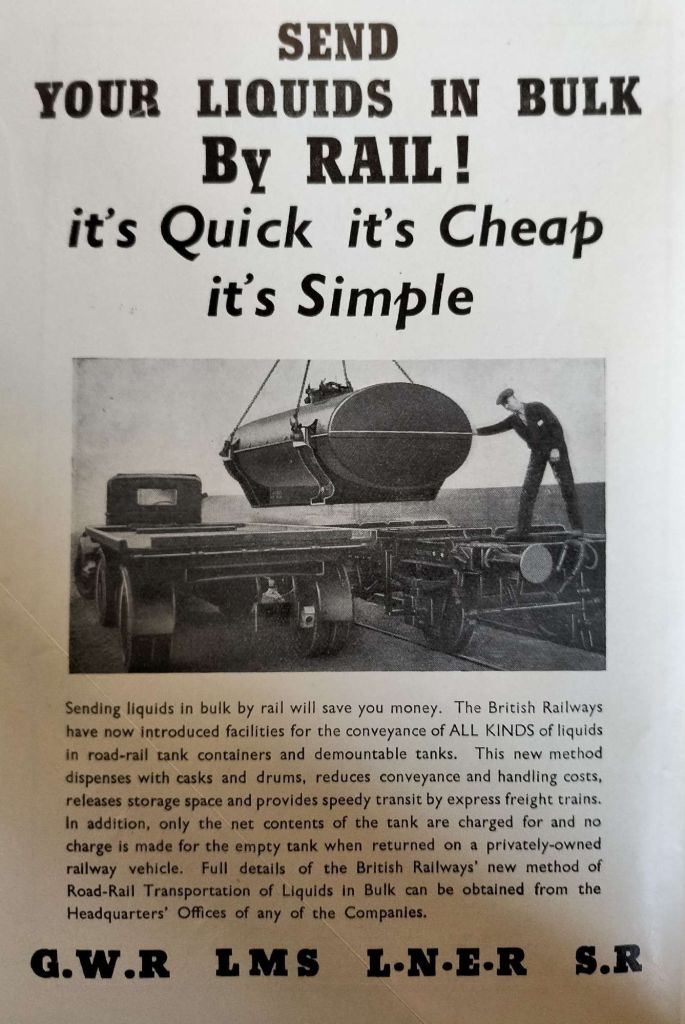
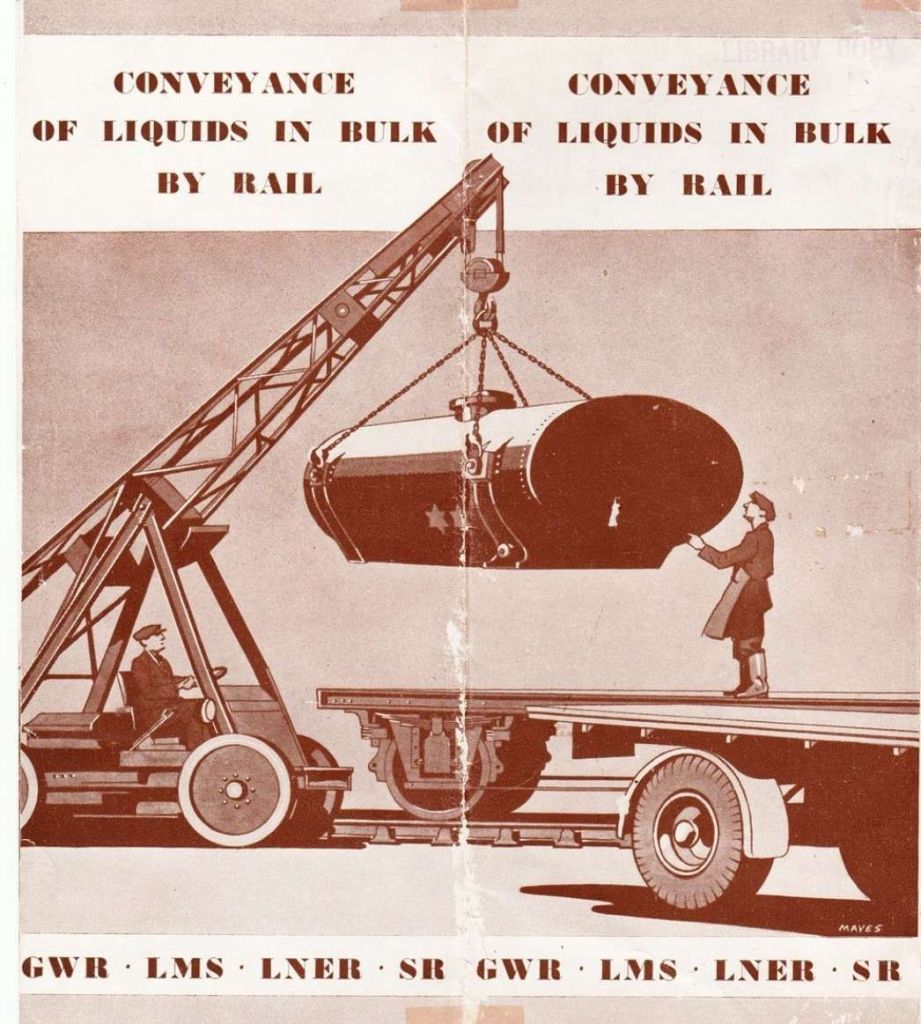

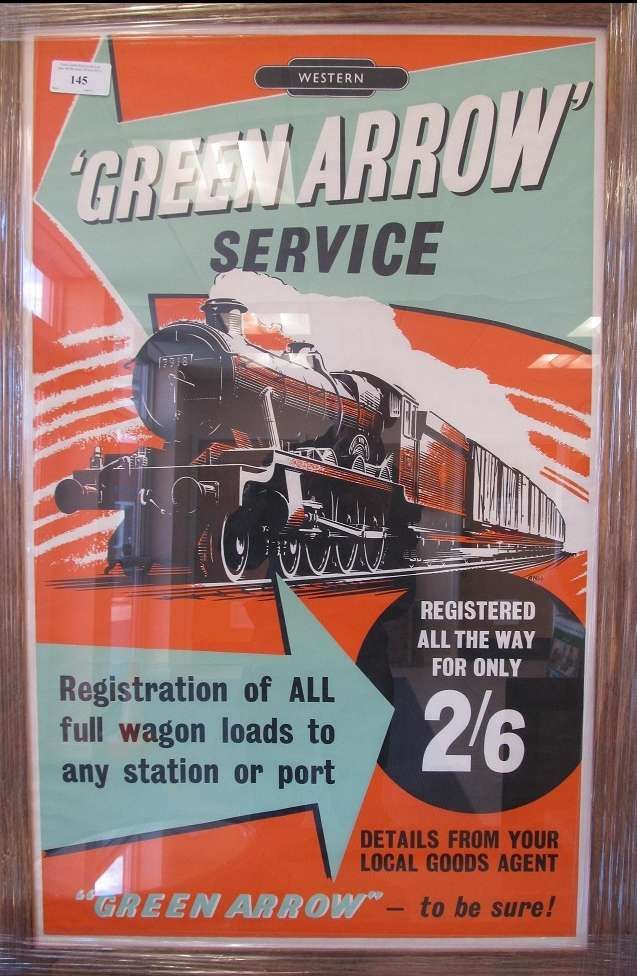
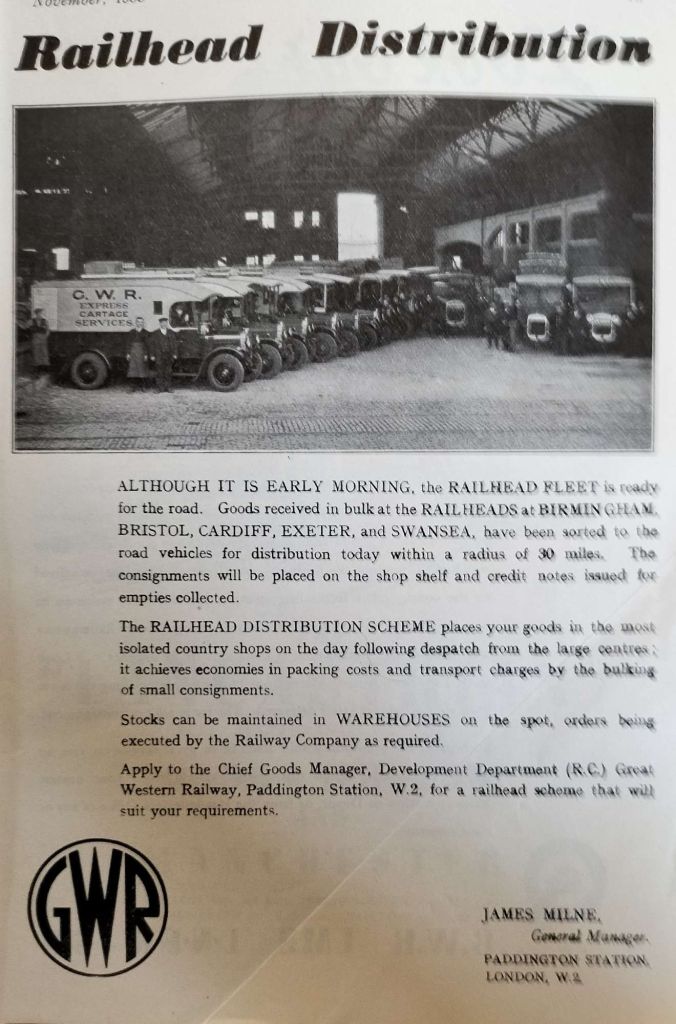

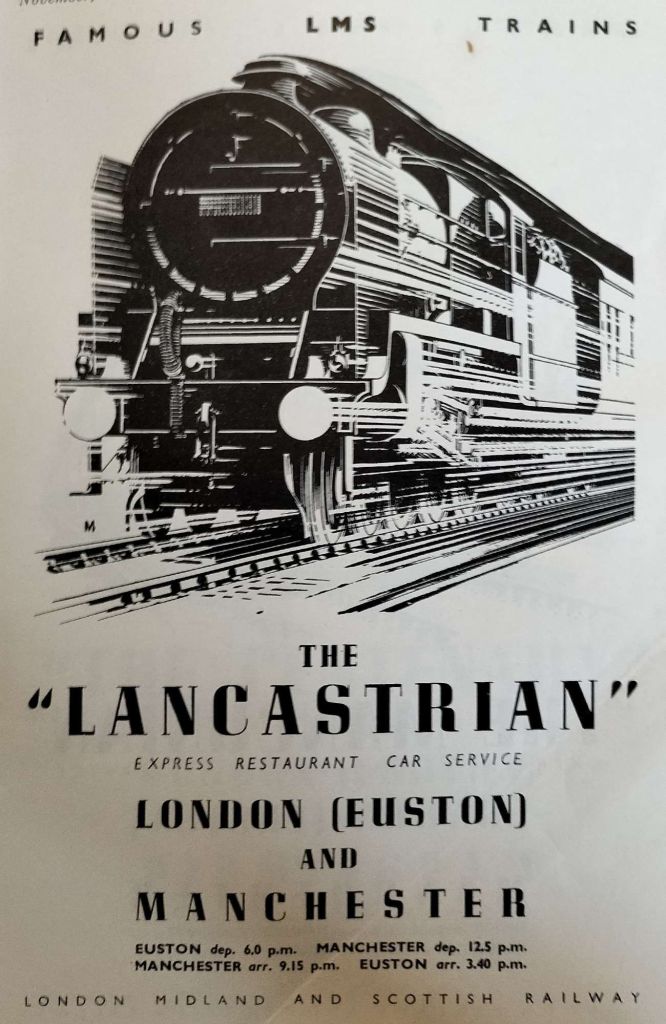
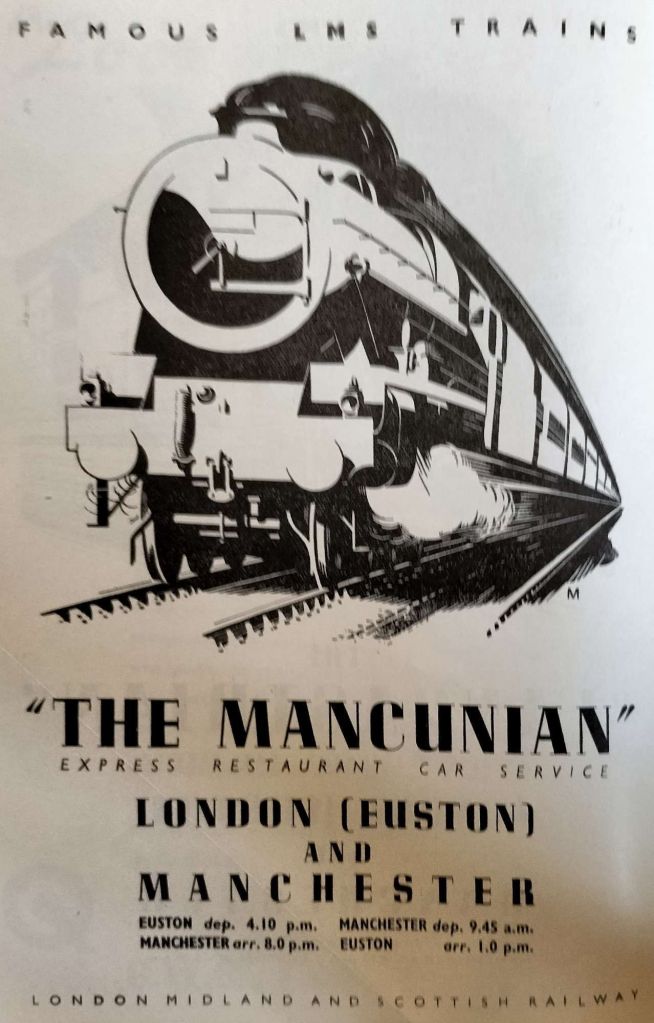

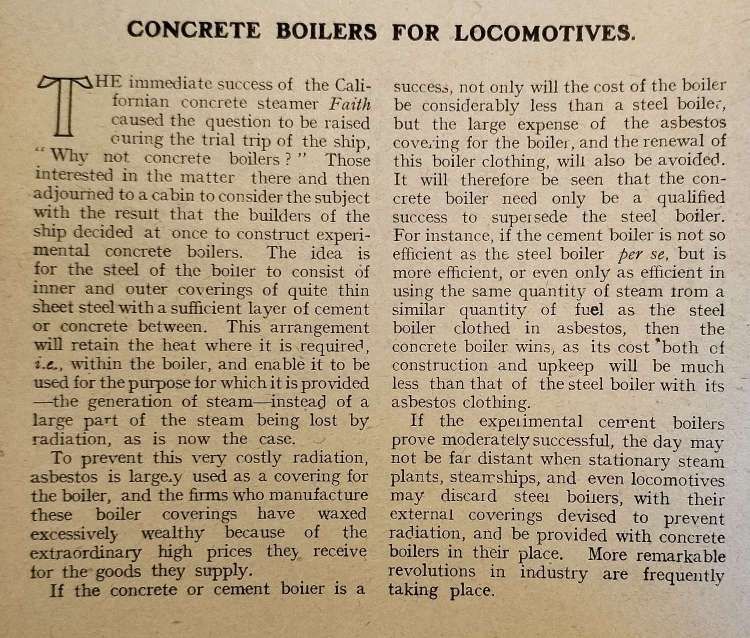
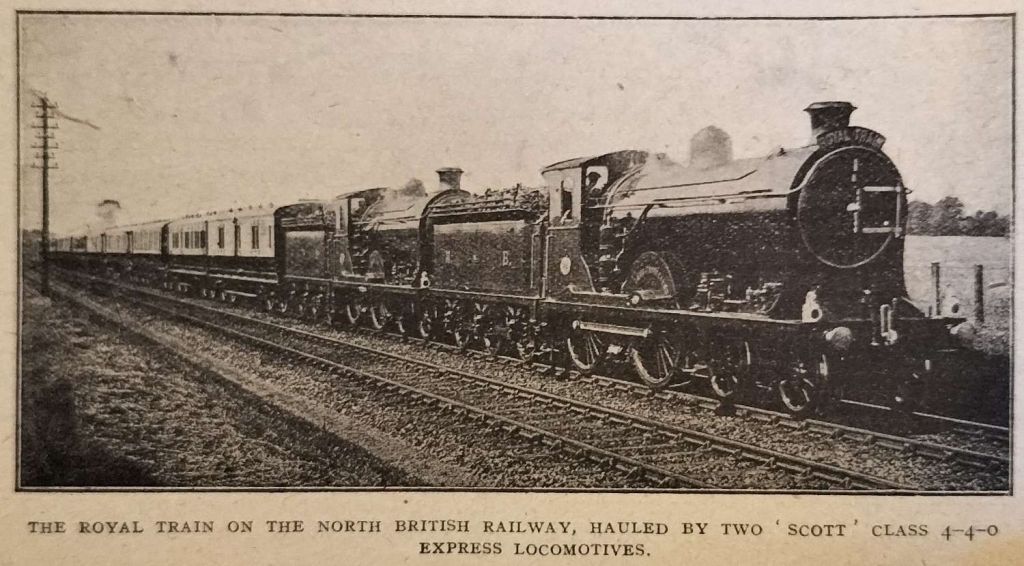
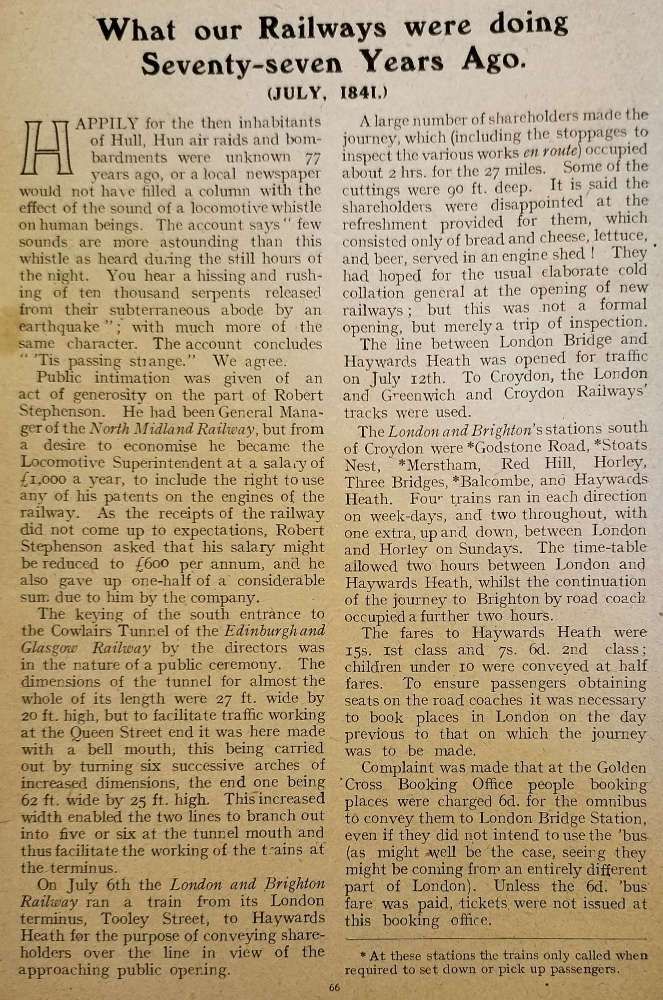
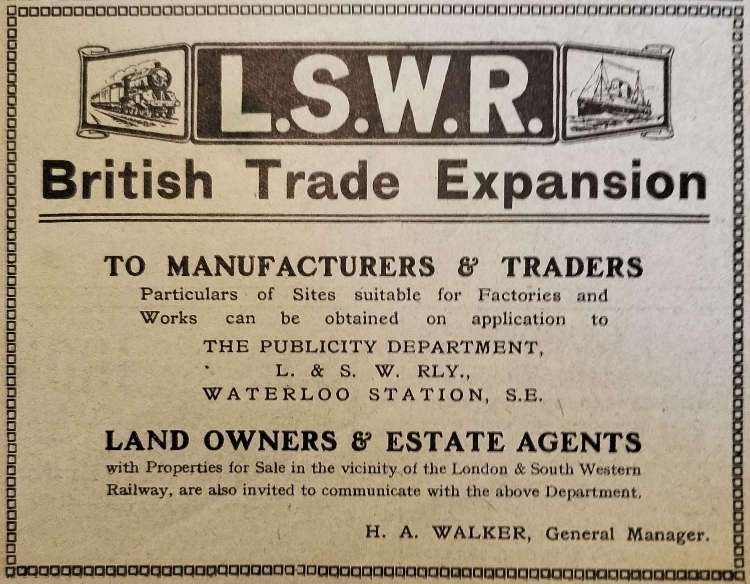
