Following on from a couple of articles about the Tanat Valley Light Railway written some years back, I was reading some older rather tatty magazines and found an article entitled “Rails up the Tanat Valley” in an issue of the Ian Allan publication ‘Railway World‘ – the June 1990 edition. [1]
The Tanat Valley Railway and associated lines. [1: p365]
In his article, Colin Ganley recounted the rise and decline of the minor lines running west from Oswestry, the last remnant of which by 1990 had been ‘mothballed’.
Colin Ganley wrote: “In October 1988, the last train ran between Gobowen and Biodwell Quarry in Shropshire. For some years the line had carried only stone trains, bringing out ballast to the requirements of the Area Engineer. The trains, normally Class 31-hauled, traversed the remains of five different branch lines, which in their heyday provided Oswestry and the eastern end of the Tanat Valley with a fascinating and complicated array of lines to serve local industry. With the decision to cease using ballast from Blodwell, traffic on the line came to an end, marking the final cessation of all rail services connected with the delightful one-time Tanat Valley Light Railway.” [1: p364]
He continued: “For the present, this surviving section is in suspended animation. As there is a possibility that the stone traffic may restart in the future, the railway is being left in place. Traffic will resume if BR returns to this source of ballast. If not, eventually a decision will be made to lift the track and dispose of the land: unless the Cambrian Railways Society, based at Oswestry, is in a position to take an active interest in its future.” [1: p364]
Parts of the derelict line at Nant Mawr which were once the western end of the Old Potts Railway are now owned by ‘The Tanat Valley Light Railway’ which is a modern charity that aims to preserve and restore this line.
“The original Tanat Valley Light Railway was the first cross border light railway crossing from England into Wales, meandering up the fantastic Tanat Valley from Llynclys Junction to Llangynog and providing links to Llanymynech and Llanfyllin via its other branches.” [2] It was opened in 1904, mainly as a direct result of the 1896 Light Railways Act, but, says Ganley, “before taking up its story it would be useful to look at its associated lines and also earlier schemes to provide the picturesque village of Llangynog with railway transport. At the height of railway mania in 1845, the Shrewsbury, Oswestry and Chester Junction Railway obtained powers to build a line from Shrewsbury to Chester with a branch from Gobowen to Llanymynech. All that was built of the branch was the 2.25 miles from Gobowen to Oswestry, which opened on 23rd December 1848. In 1854 this line became part of the Great Western Railway.” [1: p364]
He continues: “The second portion of line to be constructed was the Oswestry & Newtown Railway, which was incorporated in 1855. to link these two towns. The section between Oswestry and Pool Quay opened on 1st May 1860 with the remainder to Newtown opening on 14th August. … The company, which was to be the foundation of the later Cambrian Railways, opened a 1.25-mile freight-only branch from Llynclys Junction, some 3.5 miles south of Oswestry, to Porthywaen. This branch served important quarries, some of which are still operating today, and became the railhead for the industries of the Upper Tanat Valley, Shortly after the Porthywaen branch was opened, a mineral line was built from it to serve some collieries at Trefonen. These collieries however were not very successful and this line was abandoned as early as 1881.” [1: p364]
“In the meantime there had been several proposals to build a line up the Tanat Valley. One such proposal envisaged a great trunk line from Worcester to Porth Dinllaen, near Nefyn on the Caenarvonshire coast, with the object of providing an alternative route for Irish Mail traffic. In 1860, a similar proposal was put forward as the West Midlands, Shrewsbury & Coast of Wales Railway which planned a railway from Shrewsbury to Portmadoc via Llanymynech, Llangynog and Bala. This route would have included a 1.5-mile tunnel under the Berwyn Mountains between Llangynog and Bala.” [1: p364]
“However, the project had trouble raising support and money. … Proposals for a similar route were resurrected in 1862 as the Shrewsbury & North Wales Railway. Powers were obtained by 1865 to build a line from Abbey Foregate, Shrewsbury, to Llanymynech but before this section was completed the company had merged with another scheme to provide a railway from Stoke-on-Trent to Shrewsbury. The combined efforts brought forth the grand title of the Potteries, Shrewsbury & North Wales Railway (or POTTS for short) and extended the original plans to include an extension from Llanymynech to Nantmawr over which passenger trains were to run as far as Llanyblodwell (later renamed Blodwell Junction). The financial troubles of the POTTS and its rebirth as the renowned Shropshire & Montgomeryshire Light Railway [3] are outside the scope of this article, but the result was the working of the Llanymynech to Nant Mawr section by the Cambrian Railways from 1881. At this time goods traffic only was operated, the passenger service between and Llanymynech and Lianyblodwell having ceased in 1880.” [1: p364-365]
“The Light Railways Act of 1896 made possible the construction of railways to remote agricultural areas that hitherto had had difficulties in raising capital and several places along the Welsh border benefited from such schemes, one being the Tanat Valley. The Act saw the birth of two schemes to provide, at last, rail transport to the Upper Tanat Valley and the industries of Llangynog. The unsuccessful proposal was for a 2ft 6in gauge railway from the Llanfyllin terminus of the Cambrian branch from Llanymynech.” [1: p365]
“This plan, the Llanfyllin & Llangynog Light Railway, was to cross sparsely populated country between Llanfyllin and Penybontfawr and would not have benefited the lower part of the Tanat Valley. It nevertheless could have been a fascinating line had it been constructed, though the change of gauge at Llanfyllin would have proved a disadvantage.” [1: p365]
“The scheme that was selected by the Light Railway Commissioners was for a standard gauge line from the Cambrian’s Porthywaen mineral branch straight up the valley Liangynog. The plan also envisaged using a short section of the Nantmawr branch. The Tanat Valley Light Railway received its Light Railway Order in 1898 and was constructed by J. Strachan of Cardiff who employed about 125 men on the work. The total cost of the line proved to be about £92,000 which was around £20,000 more than the company had hoped for. This shortfall, not helped by a delay in construction, meant that the Tanat Valley Co was impoverished from the outset and had to approach the Treasury for more grant aid. During construction in 1903 some directors found that the contractor was giving a ‘free’ train service over the partially finished railway but as the contractor was allowed to finish the job it can be assumed that any quarrel was rectified.” [1: p365] For the earlier articles about this line, please follow these two links:
Colin Ganley continues: the Tanat Valley Light Railway “opened on 5th January 1904 to both passengers and freight and was worked by the Cambrian from the start. It became wholly part of the Cambrian in 1921, passing to the Great Western Railway and then to the Western Region of British Rail. The length of the linc from Llynclys Junction to Llangynog was some 15 miles 71 chains and included 11 stations or halts, one of which was former POTTS station of Llanyblodwell which was renamed Blodwell Junction. The stations were of typical light railway pattern with rather mean corrugated iron clad buildings and, except for Liangedwyn and Llanrhaiadr Mochnant, had only one platform. Original plans for some stations did consider refreshment rooms in effort to build up tourism but the company’s lack of capital put an end to such plans.” [1: p365-366]
“With the opening of the Tanat Valley line, passenger services were restored between Llanymynech and Blodwel Junction as this had been a condition of securing support from potential opponents during the planning stages. The opening of the Tanat Valley line also restimulated the slate quarries at Llangynog which had all but closed by 1900. Slate quarrying continued intermittently until 1939 but lead mining, which had effectively ceased in 1877, was never to resume on any commercial scale. The railway also assured the development of granite quarrying at Llangynog, the Berwyn Granite Co. providing much traffic until World War 2. The quarry survived into the mid 1950s but at the end offered virtually no traffic to the railway.” [1: p366] Berwyn Granite Quarries Ltd. remains an active company with headquarters in Wellington, Shropshire. [4]
Colin Ganley continues: “Initially the passenger service consisted of four trains each weekday with an extra trip on Wednesdays. Many trains were mixed and the journey to Oswestry took no less than 75min on some trains. Two trains a day carried a through coach to Llanymynech, detached at Blodwell Junction, but this practice ceased in 1915 and was replaced by a connecting service. The Blodwell Junction to Llanymynech service ceased completely as from 1st January 1917, having been hardly ever used and only operated to fulfil an agreement. Freight traffic over this section ceased in 1925, the Nantmawr traffic then being worked via Porthywaen, and most of it was lifted between 1936 and 1938.” [1: p366]
By 1923, “the number of passengers being carried was half the level of 1913 and continued to decline during the GWR years. By 1925 services, which normally consisted of two four-wheeled carriages, were reduced to three trains each way, though certain extras ran on Wednesdays and Saturdays. In 1929, the GWR introduced a rival bus service which was taken over by Crosville in 1933. The bus served the centres of villages far better than the train as certain stations. Llanrhajadr Mochnant in particular, were badly situated. This, coupled with the elongated journey times caused by the adherence to light railway practices, reduced traffic even further.” [1: p366-367]
“During World War 2 the passenger service was reduced to two trains each way, by now composed of a single Cambrian brake third. After the war, despite petrol rationing, few people were making the delightful trip up the Tanat Valley by rail. Goods traffic was also on the wane and on 15th January 1951 passenger services ceased because of a grave coal shortage, never to return. Official closure took place on 1st July 1952 and at the same time freight traffic was also withdrawn between Llanrhaiadr Mochnant and Llangynog. The track on this section remained in situ for several years, not being lifted until 1958. Freight traffic to Llanrhaiadr Mochnant ceased abruptly on 5th December 1960 after the river bridge near Pentrefelin was badly damaged by flooding,” [1: p367]
“Services on neighbouring lines were savaged in the mid-1960s. All passenger traffic between Welshpool and Whitchurch and also over the Llanfyllin branch were withdrawn on 18th January 1965, leaving Oswestry with the Gobowen diesel shuttle service, which ceased in November the following year. By 1967, just the single track South of Oswestry to Porthywaen and Nantmawr was left, along with the line from Gobowen. Reduction in traffic over the ensuing years left just the Blodwell Quarry service. All the sidings at Oswestry and Porthywaen disappeared. The section west of Blodwell Junction had been lifted by 1965 and though the Nantmawr branch has not seen a train for 20 years the track is still in-situ, although with sturdy trees growing between the sleepers.” [1: p367]
“No account of the Tanat Valley would be complete without a brief mention of its quaint motive power. From the outset, the Cambrian normally provided three Sharp Stewart 2-4-0Ts, Nos 57, 58 & 59 of 1866 vintage. They became GWR Nos. 1192, 1196 and 1197 respectively, and although No 1192 was withdrawn in 1929 after being sent to Devon, Nos 1196 & 1197, both in a rebuilt state, survived at Oswestry until 1948.” [1: p367]
Sharp, Stewart and Co. “was a steam locomotive manufacturer, originally based in Manchester, England. The company was established in 1843 following the dissolution of Sharp, Roberts & Co.. In 1888, it relocated to Glasgow, Scotland, where it later amalgamated with two other Glasgow-based locomotive manufacturers to form the North British Locomotive Company.” [5]
Ganley tells us that the two surviving Sharp Stewart locomotives were “assisted by No. 1308 Lady Margaret, an Andrew Barclay 2-4-0T built in 1902 for the Liskeard and Looe Railway and taken over by the GWR in 1909. This locomotive also did yeoman service in the Tanat Valley until it too was withdrawn in 1948.” [1: p367]
“Other locomotives were seen up the Tanat Valley at various times, including old Cambrian Sharp Stewart 0-6-0s dating from 1875 and the odd Dean Goods. In the latter years passenger traffic was the preserve of ‘5800’ class 0-4-2 tanks, numbers 5808 & 5812 being particular regulars. Goods traffic that remained was normally entrusted by the early 1950s to the Ivatt Class 2 2-6-0s.” [1: p367]
“Various types of diesels handled the surviving quarry services, including Classes 25, 31 and 37. A Class 31 had the privilege to be the last railway locomotive to operate a commercial train (so far) in this region of complex and fascinating railway history. It remains to be seen whether the Cambrian Railways Society will be able to continue the railway traditions of the area if they can successfully launch a private steam service from their Oswestry base.” [1: p367]
Ganley was writing in 1990, things have moved on over the past 36 years. Cambrian Heritage Railways, in the 2020s, operate a service on selected days from their Oswestry Station to Weston Wharf, featuring steam, vintage diesel and diesel multiple units. The 1.75-mile scenic route leads to Weston Wharf with its period station with a café, picnic area, and railway artifact displays. Cambrian Heritage Railways also operate the ‘Llynclys Railway Centre’ which is open on select dates – at Llynlcys South Station. [6][7]
References
Colin Ganley; Rails up the Tanat Valley; in Railway World; Ian Allan, June 1990, p364-367.
In the first article [4] in this short series, we finished the first part of our journey from Oswestry along the Llanfyllin Branch just after passing through Carreghofa Halt with its adjacent combined canal aqueduct and road bridge. Just beyond the bridge we noted the Nantmawr Branch heading away to the North while trains for Llanfyllin ran round a short chord to meet what was the original alignment of the Llanfyllin Branch.
This photograph was taken from the road/canal bridge to the Northwest of Carreghofa Halt. Trains for Llanfyllin took the chord to the left. The Nantmawr Branch heads away to the North. [4]This extract from the 6″ Ordnance Survey of 1900, published in 1902, shows the relationship of the old and new routes taken by branch trains for and from Llanfyllin. The earlier alignment is shown as dismantled and runs to the North of the later alignment. The chord linking the two is on the left of this extract with the line to Llanfyllin leaving the left side of the extract. [5]This satellite image picks out the routes of the lines discussed as they appear in the 21st century. Just to the North of Llanymynech, the original line of the Llanfyllin Branch can be made out. A line of trees gives way travelling westwards to field boundaries that follow the route of the old line. To the South of Llanymynech, the more recent alignment is highlighted by field boundaries becoming tree lined as it approaches the location of Carreghofa Halt and then passes under the modern B4398 and the line of the canal. Immediately to the North of the Canal/Road Bridge the chord connecting the newer line to the older alignment of the Llanfyllin Branch is still described by a line of trees and then by field boundaries. [Google Earth, 28th February 2025]
After leaving the 26-chain chord trains headed due West for Llansantffraid across “a tract of pleasant agricultural countryside.” [3: p635] Within a short distance the Grove Viaduct was reached. It was a 90-yard long viaduct which sat about 7.7 miles from Oswestry.
This extract from the 6″ Ordnance Survey of 1900, published in 1903, shows the Llanfyllin Branch heading West over Grove Viaduct which is close to the centre of the image. The Afon Vyrnwy can be seen on the left side of the extract. [6]This satellite image covers approximately the same length of the Llanfyllin Branch as does the 6″ OS map extract above. [Google Earth, March 2025]
A minor road bridged the line to the East of Grove Viaduct. The railway cutting has been infilled but the bridge parapets and the deck under the road remain.
Looking North along the minor road in April 2024. [Google Streetview, April 2024]Looking East along the old railway from the bridge towards Llanymynech. [Google Streetview, April 2024]Looking West along the line of the old railway towards Grove Viaduct and Llansantffraid. [Google Streetview, April 2024]This is how the Grove Viaduct is shown on the 6″ OS map published in 1885 and surveyed during the years before that date. [9]The location of the Grove Viaduct over the Afon Tanat as it appears on modern satellite imagery. [Google Earth, March 2025]The line continues towards Llansantffraid. [6]A similar length of the line as it appears in Google Maps in March 2025. [Google Maps, March 2025]An aerial image looking Southeast showing Bryn Vyrnwy Holiday Park in the 21st Century. The access road running diagonally across the image follows the line of the old railway. [13]Looking West across Bryn Vyrnwy Holiday Park – the line of the old railway is paved, running between the two hedges. [13]Looking Southwest towards the hills the two hedge lines define the extent of the old railway land. [13]Llansantffraid-ym-Mechain Railway Station was the only passing place on the Branch. It is a large village about 7 miles (11 km) south-west of Oswestry (9.2 miles along the line) and 8 miles (13 km) north of Welshpool. It is at the confluence of the River Vyrnwy and the River Cain. The station can be seen just below the centre of this map extract. [6]
Llansantffraid-ym-Mechain
Jenkins tells us that Llansantffraid Railway Station was “the principal intermediate station on the branch. Its facilities included a single platform for passenger traffic on the up side of the line with a crossing loop immediately to the west, and a gated level-crossing to the east. The well-equipped goods yard included accommodation for coal, minerals, livestock, vehicles, and general merchandise traffic.” [4: p635]
The village of Llansantffraid-ym-Mechain as it appears in Powys Council’s local development plan. [12]A closer view of the railway on the OS map of 1885 where it crossed what is now the B4393 to the North of the river bridge. [6]The same location as it appears on the NLS ESRI satellite imagery in the 21st century. [14]Looking North from the river bridge towards the A495. The old railway crossed the road at the near side of the white walled property on the left of this image. [Google Streetview, April 2024]Looking East, the line of the old railway is marked by the driveway protected by the green gates. [Google Streetview, April 2024]Looking West, the old railway ran to the left of the buildings. [Google Streetview, April 2024]
Llansanffraid (Llansantffraid) means “Church of Saint Bride” in the Welsh language; ym-Mechain refers to its location in the medieval cantref of Mechain and distinguishes it from other places with the same or similar names. [7]
“The name is based on the story of St Bhrid, who is said to have floated across the Irish Sea on a sod of turf, or to have been carried to Scotland by two oystercatchers. The followers of St Bhrid possibly set up new settlements known by the Welsh as Llan Santes Ffraid, Church of (Lady) Saint Bhrid. In recent years the spelling of the village name, with or without a ‘t’, has been a contentious issue (as it has been at Llansantffraid Glyn Ceiriog).” [7]
Approaching the railway station, the old line crossed Lletty Lane on the level.
Looking East from Lletty Lane away from the site of the station. The level crossing location is off to the left of this image. [Google Streetview June 2021]
Jenkins continues: “Llansantffraid was the only crossing place between Llanymynech and Llanfyllin, although it was not [ideal] for passing two passenger trains because the loop was sited beyond the platform. It was nevertheless possible for one passenger train and one freight train to pass here, although the timetable in force in later GWR days ensured that this was not normally necessary. In the 1930s this only took place on Wednesdays when the 9.05 am (WO) passenger service from Llanfyllin to Oswestry passed the 9.12am (WO) light engine from Oswestry to Llanfyllin at 9.27 am.” [3: p635]
“The station building at Llansantffraid was a brick-built structure incorporating a two-storey residential portion for the stationmaster and his family. Although, like many Welsh stations, it was of comparatively plain appearance, the facade was enlivened by the provision of a bay window in the house portion, together with elaborate barge-boards and tall ‘ball & spear’ finials at the end of each gable. The stationmaster’s house was to the left (when viewed from the platform), while the booking office was to the right; the house was an L-plan structure with its gabled cross-wing facing the platform and a subsidiary wing that was parallel to the track.” [3: p636]
To the immediate West of the station building, a SPAR convenience store and a small industrial estate are built over the line of the old railway. A little further to the West, what is now the A495 turned South and bridged the line of the railway.
A closer view of the bridge at the West end of the village of Llansantffraid-ym-Mechain as shown on the 1885 6″ OS Map. [15]The same location in the early 21st century, as it appears on the NLS ESRI satellite imagery. The road (A495) has been widened, the bridge carrying the highway is long-gone. [15]This more recent satellite image shows a small new estate being built over the line of the old railway to the West of the A495. The route of the railway on the East side of the road is better defined in this image and the road Maes Y Cledrau sits on the line of the railway on the West side of the road. [Google Maps, March 2025]Looking East from the A495 along the line of the old railway. It passed to the left of the house visible on the right of the image. [Google Streetview, July 2024]Looking West from the A495 along Maes Y Cledrau. The old railway ran on the left side of the trees on the right of the image. In the distance, the newly built houses sit over the line of the railway. Closer to the camera it centre-line approximated to the kerb line of the road. [Google Streetview, July 2024]
The B4393 ran parallel to the line to the North. The line climbed towards Llanfechain on a gradient of 1 in 75.
The old railway closely followed what became the B4393. The road ran on the North side of the railway. [16]The same area as it appears on Google Earth satellite imagery in the 21st century. [Google Maps, March 2025]Looking West along the B4393 the line of the old railway can be identified, delineated by the two hedge lines on the left of this photograph. [Google Streetview, April 2024]The road and railway continued West immediately adjacent to each other. [17]The same area on 21st century satellite imagery. [Google Maps, March 2025]Again the old railway formation continues West alongside the B4393. [Google Streetview, April 2024]On this next extract from the 6″ Ordnance Survey a side road to the B4393 crosses the line of the railway. [18]The same area in the 21st century. [Google Maps, March 2025]Looking North across the bridge noted above. [Google Streetview, April 2024]Looking East along the old railway alignment from the road bridge. [Google Streetview, April 2024]Looking West along the old railway formation from the road bridge. [Google Streetview, April 2024]This next map extract shows Llanfechain Railway Station. [19]The same area in the 21st century. Note the way that the old railway turns away to the Southwest after passing through the station. [Google Maps, March 2025]The station at Llanfechain was a good walk from the centre of the village and not at the closest road crossing to the village. [21] The facilities at the station were limited, although the main station house was as substantial as that at Llansantffraid-ym-Mechain. The station site was framed by a road bridge. [21]
Llanfechain
Llanfechain was near to 11 miles from Oswestry. Jenkins tells us that “The layout at Llanfechain echoed that at neighbouring Llansantffraid in that there was just one platform on the up side. A small goods yard was able to deal with coal, livestock, and other forms of traffic. … The station building was of ‘Victorian house’ design incorporating residential quarters for the local stationmaster. The presence of a two-storey house portion made these stations appear much bigger than they actually were, the booking office and waiting-rooms being only one portion of the main structure.” [3: p636]
Leaving Llanfechain Railway Station “heading south-westwards, the single line climbed steadily through pastoral countryside towards the penultimate stopping place at Bryngwyn” [3: p636] which was a little over 12.5 miles from Oswestry.
Looking West-southwest along the line of the old railway in 2024. [Google Streetview, April 2024]The line headed Southwest as it left Llanfechain. Note the footbridge in the top-right of this map extract, the road bridge just below and to the left of the centre of the image and the accommodation bridge in the bottom-left. [20]The same area in the 21st century. At the top-right of this image what was once a footbridge over the old railway has been converted into an access road. On both this image and the map extract above another minor road can be seen bridging the line of the old railway just below the centre of the image. The line was in a cutting at this point. [Google Maps, March 2025]The road bridge seen from the Northwest. [Google Streetview, April 2024]Looking Northeast along the line of the old railway towards Llanfechain Railway Station. [Google Streetview, April 2024]Looking Southwest along the line of the old railway. [Google Streetview, April 2024]In this next 6″ map extract the accommodation bridge noted before, appears top-right and a further bridge bottom-left. The line remained in cutting along this length. [25]This extract from Google’s satellite imagery covers a similar area to the map extract above..It also shows the bridge noted above which carried another local access road over the old railway. [Google Maps, March 2025]On this next extract from the 6″ Ordnance Survey of 1880s the line begins to turn towards the West, from a southwesterly heading. What becomes the B4393 crosses the line at Bryngwyn Flag Station (a halt at which passengers had to signal the train to stop to collect them). The road curving round the bottom-left corner of the extract was to become the A490. [26]Much the same length of the line appears on this 21st century satellite image. The A490 can be seen on the bottom-left of this image. [Google Maps, March 2025]A closer view of the location of Bryngwyn Halt. The old railway can be seen bridging the old road which had to dog-leg to pass under the line. [26]Looking Northeast along the line of the old railway from the B4393. The bridge at this location was removed and the road was realigned after the closure of the railway. The level difference between the two is still evident. [Google Streetview, April 2024]Turning through 180°, looking Southwest along the line of the old railway. The realignment of the road required the removal of the bridge abutment and a short length of embankment which once also supported the Bryngwyn Halt. [Google Streetview, April 2024]
Bryngwyn Halt
Bryngwyn did not open with the line. Jenkins tells us that “having been opened by the Cambrian Railways as an unstaffed halt in the mid-1860s. The single platform was sited on the down side of the line with access from a nearby road. Interestingly, Bryngwyn was an early example of a ‘request stop’, a semaphore stop-signal being worked by intending travellers. The platform was originally of timber trestle construction with a small open-fronted waiting shelter, although a concrete platform and corrugated-iron shelter were later provided.” [3: p636]
“From Bryngwyn the route continued westwards for the final two miles to Llanfyllin. With the A490 road running parallel to the left, the line passed beneath a minor road bridge and, slowing for the final approach to their terminus, branch trains passed an array of parallel sidings before finally coming to rest beside a single-platform station some 8 miles 41 chains from Llanymynech, and 14 miles 48 chains from the start of the through journey from Oswestry.” [3: p636-637]
Over this next stretch of the old railway, the line continues to curve round towards the Northwest. The road that became the A490 runs parallel to the line but to its South. An access track Plas-ywen crossed the line at an un-manned crossing. A little further West the line was bridged by a lane running North from the main road. [27]Much the same area on modern satellite imagery. [Google Maps, March 2025]Looking North along the lane which crossed the old line. The railway was in cutting at this location so there are no significant gradients on the approaches to the bridge. The brick parapets of the bridge remain in place. [Google Streetview, Summer 2022]Looking East, the line of the old railway is camouflaged by tree growth. [Google Streetview, Summer 2022]Looking West, it is possible to see the old formation with the hedge following the old railway boundary. [Google Streetview, Summer 2022]The road and railway continued in parallel across this next extract from the 6″ Ordnance Survey. The River Cain runs just to the North. [28]The same area on modern satellite imagery. At the left of both these images a farm access track crosses the line of the old railway. [Google Maps, March 2025]The old line continued to curve towards the Northwest. [29]A very similar length of the old railway in the 21st century. The route of the railway can still be seen easily curving to the Northwest on the South side of the River Cain. [Google Maps, March 2025]The final length of the line which terminated to the Southeast of the centre of Llanfyllin. [30]The same area of Llanfyllin as it appears on satellite imagery in the 21st century. [Google Maps, March 2025]The centre of Llanfyllin in the 21st century. [Google Maps, March 2025]
Llanfyllin
Jenkins says that “Llanfyllin was a surprisingly spacious station, and although its track-plan was relatively simple, the goods yard and other facilities were laid out on a generous scale, the distance from the turnout at the eastern end of the run-round loop to the terminal buffer stops being around 34 chains, or slightly less than half a mile. The passenger platform was situated on the down side, and it had a length of around 385ft. The platform was flanked by two long parallel lines, one of which functioned as an engine release road while the other formed a lengthy goods reception line. These two lines were linked by intermediate cross-overs which allowed greater flexibility during shunting operations.” [3: p637]
The goods yard contained two goods sheds, one of these being situated on a loop siding that was laid on a parallel alignment to the passenger station. A long siding for “coal and other forms of wagon-load traffic extended along the rear edge of the goods yard; this siding branched into two shorter sidings at its western end, the second goods shed being served by one of these short spurs. The main goods sidings ended at loading docks at the western extremity of the station, while a further siding to the east of the platform on the down side served a cattle-loading dock. The latter siding was entered by means of headshunt from the engine shed siding, a reverse shunt being necessary before vehicles could be propelled into the cattle dock.” [3: p638]
Nearby the “engine shed was single-road structure with a length of about 50ft, … this normally accommodated just one locomotive. Water was supplied from a stilted metal tank beside the engine shed, this structure being fitted with flexible hoses through which the water could be delivered.” [3: p638]
The station throat at Llanfyllin Railway Station is framed by the road bridge carrying Derwlwyn Lane. This map extract comes from the 25″ Ordnance Survey of 1900, published in 1901. [33]
The image above is embedded from the Flickr site of Katerfelto, who comments: “Trains arriving at Llanfyllin passed a ground frame and then passed under a single-span iron bridge which carried Derwlwyn Lane over the line. From the south side could be seen the engine shed and water tower followed by some cattle pens and Llanfyllin signal box, before the single platform and its substantial station building announced the journey’s end.” [34]
Opposite the platform were the goods shed, a warehouse, several buildings and the run-round loop.
The terminal buffers were in a shallow cutting and short approach road led from the station building to the public road.
Jenkins continues: “Llanfyllin station building was similar to the other station buildings on the branch, being a typical ‘Victorian house’ design with a two-storey stationmaster’s house and attached single-storey booking-office wing. The window and door apertures were simple square-headed openings with large-paned window frames, but this otherwise plain brick building was enlivened by the provision of decorative barge-boards and elaborate pointed finials. The front of the booking office was slightly recessed to form a covered waiting area, and this feature contributed further visual interest to this former Oswestry & Newton Railway building.” [3: p638]
Llanfyllin had a population of around 2,000. Wikipedia tells us that “the community … population in 2021 was 1,586 and the town’s name means church or parish (Llan) of St Myllin (‘m’ frequently mutates to ‘f’ in Welsh).” [30]
The Llanfyllin Branch was featured in an article by Stanley Jenkins in the October 2003 issue of Steam Days magazine. [3]
The immediately adjacent Tanat Valley Light Railway is covered elsewhere on this blog. The articles about that line can be found here [4] and here. [5]
The two lines ran into the hills to the Southwest of Oswestry. The local Cambrian network is shown diagrammatically in the image below.
Trains on the branch ran from the Welsh border town of Oswestry to Llanfyllin in the Berwyn Mountains. The branch left the Oswestry & Newtown Railway at Llanymynech, where the station nameboard called on passengers for Llanfyllin and Lake Vyrnwy to disembark and change trains. The lake is a nearby beauty spot where there is a reservoir supplying water to Liverpool.
In July 1864, the Oswestry & Newtown Railway joined with other local concerns to form the Cambrian Railways Company with its headquarters at Oswestry.
Llanfyllin’s townfolk formed a company to secure a rail link to the Cambrian network. The Cambrian began to show some interest when ideas of an East-West mainline came to the fore.
A 10-mile branch was agreed from Llanfyllin to Llanymynech which, in the view of the companies which would soon form the Cambrian, would hinder any rival’s attempt to construct a mainline between the Midlands and the Welsh coast.
The modest scheme received Royal Assent on 17th May 1861 and the Act empowered the Oswestry & Newton Railway to build branch lines to Llanfyllin and Kerry. The Llanfyllin Branch was soon pegged out in advance of construction. It presented few engineering challenges as “for much of its length the proposed branch line would follow a comparatively easy course along convenient river valleys, and with few physical obstacles to impede [the] work.” [3: p627]
“The line was substantially complete by the early months of 1863, a significant event being the arrival of the locomotive Nant Clwyd at Llanfyllin in March of that year. The railway was opened on 10th April 1863 and branch trains began running through to Oswestry on 17th July 1863.” [3: p627]
The railway “was single track throughout, with intermediate stations at Llansantffraid and also Llanfechain. At Llanymynech the junction was situated to the North of the station, and this necessitated an awkward reversal when trains entered or left the branch. There were no tunnels on the branch, although several overbridges or underbridges were required including a 90-yard viaduct between Llanymynech and Llansantffraid. An additional stopping place was opened at Bryngwyn in the first few months of operation, although this new station was merely a request stop with no provision for goods traffic. The trains travelling eastwards to Oswestry were regarded as up workings, while westbound trains were down services.” [3: p627-628]
The new railway was soon functioning as a typical country branch line with a modest service of around five trains each way. “Minor changes took place at Llanymynech in 1866 in connection with the opening of the Potteries, Shrewsbury & North Wales Railway, but in the event this undertaking was more or less a total failure. Much later, in 1896, the Llanfyllin branch junction was re-aligned using part of the PS&NW route.” [3: p628]
“The Llanfyllin branch found a welcome, unexpected source of heavy freight traffic in the 1880s when Liverpool Corporation obtained powers for the construction of a massive dam at Llanwddyn, about seven miles to the west of Llanfyllin. By this means the surrounding valley was turned into a reservoir known as Lake Vrynwy from which water was supplied to Liverpool via a 75mile-long aqueduct. Materials needed in connection with this gigantic feat of Victorian engineering were delivered by rail to Llanfyllin, which became an important railhead while the reservoir scheme was under construction.” [3: p628]
In 1922, the Cambrian became an integral part of an enlarged GWR as part of the grouping required by the Railways Act of 1921.
Road competition led the GWR to become “a large-scale user of motorised road transport, with railway-owned lorries being employed for local cartage work in urban areas and as ‘country lorries’ for collection and delivery work in rural areas. Certain stations were selected as ‘country lorry centres’, while others were down-graded in various ways so that, by the later 1930s, many smaller stations were handling very little carted freight traffic. Oswestry and Llansantffraid, for example, both became ‘country lorry centres’, and a large rural area was then served by road transport, with GWR vehicles running on regular routes. In this way the railway could fight back against the road-transport operators.” [3: p628]
The GWR was also a pioneer in the use of motorised road passenger services. “By the post-Grouping period the GWR had introduced road feeder services on a very large scale, rural Wales being regarded as an ideal area for the employment of such vehicles. Oswestry emerged as an important centre in the company’s motor-bus network, with services radiating to towns such as Llangollen, Welshpool, and to Llanfair Caereinion. These extensive road services needed a relatively-large allocation of motor vehicles, among the buses working from Oswestry during the 1920s being Burford 30cwt buses Nos. 801, 807, and 861, and Thornycroft 30cwt vehicles Nos. 911 and 936. The GWR buses … worked in close conjunction with the trains as useful feeders for the railway system.” [3: p628] This was an early example of an integrated transport network!
To regularise its practice, the GWR obtained new legal powers “under the provisions of the Great Western (Road Transport) Act of 1928. This new legislation enabled the GWR to own, work, and use motor vehicles in its own right, and to enter into arrangements with other parties for the operation of road transport services. By virtue of these powers the railway company at once entered into detailed negotiations with certain road transport companies, and by 1933 all of the GWR motor-bus services had been handed over to ‘associated’ bus companies such as Crosville Motor Services Ltd.” [3: p629]
“This arrangement was supposed to lead to greater co-ordination between road and rail transport, but there is no doubt that in many areas the buses began to compete with the railways for what little transport was available in rural areas. The situation in respect of the Oswestry area seems to have been particularly disadvantageous as far as the GWR was concerned in that many buses ran on a Llanymynech-Oswestry-Gobowen axis in open competition with the rail service.” [3: p629]
“In some instances Crosville (or the other railway-associated bus companies) assisted the GWR by collecting and delivering parcels traffic, while goods traffic was handled by GWR motor lorries, some of which had been converted from former railway buses. Oswestry-based road motors Nos. 891, 897 and 861 … were adapted for use as lorries between 1926 and 1929. …They retained their old GWR fleet numbers. … Buses were more flexible than the railways, … to mitigate this the GWR opened numerous unstaffed halts. … One of these … was established in 1938 at Carreghofa in the Llanfyllin Branch, near Llanymynech.” [3: p629]
Jenkins tells us that the train services on the branch were similar throughout the years of its operation with five up passenger services to Llanymynech from Llanfyllin each weekday and five down trains. Occasionally these services worked through to Oswestry but, with the exception of the 1.43pm service, such movements were not always timetabled. The reverse workings, often unadvertised, ran from Gobowen through Oswestry and Llanymynech to Llanfyllin. Wednesdays and Saturdays, market days in Oswestry, were different, with two morning trains running through to Oswestry and two early afternoon trains back to Llanfyllin. There was no Sunday service. A daily branch goods train “generally departed from Llanymynech at 12.25pm and arrived at the terminus at 1.35pm, having called intermediately at Llansantffraid where half an hour was allowed for shunting operations. The return working left Llanfyllin at 2.30pm and, after spending another half an hour at Llansantffraid, … arrived at Llanymynech at 3.42pm.” [3: p629]
Jenkins comments that “the line was worked by short-wheelbase coaching stock for many years, although in GWR days 2-coach ‘B-sets’ and other formations were employed.” [3: p629]
The Cambrian Railway had very few small tank engines which meant that tender engines worked many of their small branch lines. Usually these would be ‘Queen’ class 0-6-0 locomotives. Following the grouping, GWR locos began to appear on the branch lines around Oswestry, particularly Armstrong and Collett 0-4-2Ts. Jenkins tells us that “these newcomers included ‘517’ 0-4-2T No 848 which worked on the branch at various times until its withdrawal in 1945, being out-stationed in the branch sub-shed at various times. The familiar Collett 0-4-2Ts were introduced by the GWR in 1932 as replacements for the veteran ‘517’ class 0-4-2Ts on local passenger services.” [3: p630]
The first examples of the non-auto ’58XX’ locomotives appeared on the branch in the 1930s. Jenkins notes that No. 5816 was sent to Llanfyllin shed as early as August 1933, while by 1947, the resident branch engine was No. 5806. The auto-fitted ’48XX’ class also arrived at Oswestry in the mid-1930s. These locos could also be seen on the Llanfyllin Branch. [3: p630] Dean goods 0-6-0 locos were also seen at times on the branch. Jenkins notes appearances of Nos. 2482 and 2535. No doubt the branch was served by a number of pannier tank (0-6-0PT) locomotives of different classes that were stabled at Oswestry. After nationalisation, by the mid-1950s, a group of Ivatt ‘2MT’ 2-6-0s were allocated to Oswestry and were employed on the branch. “As there was no turntable at the terminus the Ivatt Moguls generally ran tender-first towards Llanfyllin and then returned to Oswestry facing in the right direction. Several Llanfyllin branch services were at this time through trips to Gobowen which continued northwards over the Great Western branch to connect with the Shrewsbury & Chester main line. … At Gobowen it was found that the clearance between the stop block at the end of the down bay platform was insufficient for an Ivatt 2-6-0 running tender-first, and drivers were therefore instructed to enter the bay running chimney-first; this instruction probably explains why the engines normally faced northwards when they were running on the Llanfyllin route!” [3: p631]
The Route
We commence our journey at Oswestry Railway Station. We noted first that from 1860 onwards there were two separate stations in Oswestry – a GWR station and a Cambrian station.
The first 25″ OS map extract below shows the general arrangement of railway facilities in the centre of Oswestry at the turn of the 20th century. The second focusses on the two railway stations.
A series of photographs of the railway station can be found on the Disused Stations website. [32]
Oswestry Railway Station (at the top of this image) and the Cambrian’s Works (nearer the camera) seen in an aerial view looking from the Northeast across Oswestry (EAW056424, 1954). Historic England. [30]
After the grouping in 1922 the GWR set about rationalising their inheritance. The old Cambrian station became the town’s passenger facilities and the GWR station was converted into the hub of an enlarged goods yard. “The Cambrian platforms were extended by 300ft, and a new branch bay was created on the west side of the station on a site that had previously been occupied by a large goods shed. At the same time the main up and down platforms were equipped with new canopies, and electric lighting was installed in place of gas in the goods yard and engine sheds. … Goods facilities were provided on a lavish scale, with sidings at both the north and south ends of the station. The main goods yard, which incorporated the original Great Western terminus, was situated to the north of the passenger station; the former terminus remained largely intact after its conversion to a goods depot, although part of the platform canopy was boxed-in to form a goods loading area.” [3: p632]
Goods facilities extended both to the North and South of the enlarged passenger station. Oswestry engine shed contained six terminal roads and sat to the North of the station complex, between the lines to Whitchurch and Gobowen. Jenkins tells us that a “standard GWR raised coaling plant was erected as part of the post-Grouping improvements, and this replaced an earlier Cambrian coaling stage. The Great Western coal stage was surmounted by a 45,000gallon water tank, while the old 45ft-diameter locomotive turntable was taken up and a new 65ft-diameter GWR one erected.” [3: p632]
South of Oswestry, trains for Llanfyllin travelled along the GWR Whitchurch to Aberystwyth main line as far as Llanymynech, passing Llynclys junction where the Tanat Valley Light Railway diverged westwards on its way to Blodwell Junction and Llangynog. Llynclys Railway Station was situated a short distance beyond the junction. It “was a wayside station with a small but substantial station building on the up side and a waiting shelter on the down platform. In architectural terms the station building, with its two-storey stationmaster’s house and single-storey booking-office wing, was very typical of Oswestry & Newton practice. The nearby goods yard contained facilities for coal, livestock, and general merchandise traffic.” [3: p633]
The length of the line from Oswestry to Llanymynech is covered by the next sixteen extracts from the 25″ Ordnance Survey of 1900 and accompanying satellite images and photohgraphs.
A short distance to the South of Oswestry town centre the line passed under Salop Road adjacent to the gates of the town cemetery. [9]The same location in the 21st century. [Google Earth, February 2025] The line South from Oswestry is single track, it is part of the Cambrian Heritage Railways based at both Llynclys and Oswestry in the restored Oswestry Railway Station. It was formed after the 2009 merger of the Cambrian Railways Society and the Cambrian Railways Trust, it aims to reinstate the infrastructure required to operate trains from Gobowen to Llynclys Junction (for Pant) and to Blodwel. Cambrian Heritage Railways also operates the Cambrian Railways Museum in the Oswestry railway station’s former goods depot. [17]This schematic map shows the lengths of the line between Gobowen and Welshpool that have been restored as of the end of 2024. [17]
The Cambrian Heritage Railway is extending and repairing track from Llynclys South northwards towards Oswestry to enable trains to run into the former Cambrian Railway headquarters at Oswestry. [17]
Looking North from Salop Road bridge in the first quarter of the 21st century. [Google Streetview, April 2024]Looking South from Salop Road bridge in the first quarter of the 21st century. [Google Streetview, April 2024]The line continued South from the Salop Road bridge. [9]Further South, the line continued to track South-southeast. [9]The line passed to the East of the small village of Weston. [10]The same location in the 21st century. This is Weston Wharf Station on the Cambrian Heritage Railway. [Google Earth, February 2025]Looking North from Weston Road in the 21st century. [Google Streetview, April 2024]
Weston Wharf Railway Station on the Cambrian Heritage Railways’ line to the South of Oswestry. “Plans to extend the line from Oswestry were reported in January 2016. The work was scheduled to proceed in three stages: phase one from Oswestry to Gasworks Bridge which carries the B4579 Shrewsbury Road over the line, phase two to make Gasworks Bridge passable and phase three to reach Weston Wharf. [24] At Gasworks Bridge, the track had to be lowered to allow trains to pass under the steel girder frame installed to strengthen the bridge. Funding was received from Shropshire Council and Oswestry Town Council.” [25][26][28]
“By April 2022 the 2 miles (3.2 km) of track from Oswestry to Western Wharf, which lay abandoned for more than 50 years, had been reinstated. The station was officially opened on 2 April 2022 by Helen Morgan MP and Vince Hunt, Chairman of Shropshire Council. It consists of a single platform, a run-around loop and a siding. Previously, there was no station here, only a goods depot.” [27][28]
Weston Wharf Railway Station development proposals as shown in the Cambrian Heritage Railway’s newsletter in 2019. [27]
Looking South from Weston Road in the 21st century. [Google Streetview, April 2024]The line continues South-southwest [10]The modern day A483 crosses the line of the railway a little to the South of Weston Wharf. [Google Earth, February 2025]Looking North from the A483 in the first quarter of the 21st century. [Google Streetview, July 2024]Looking South from the A483 in the 21st century. [Google Streetview, July 2024]The line continued South-southwest. [10]And passed under one minor road and then over another (just at the bottom edge of this extract. [11]The first of the two bridges in the 21st century. [Google Earth, February 2025]Looking North from the minor road bridge in the 21st century. [Google Streetview, April 2024]Looking South from the same minor road bridge in the 21st century. [Google Streetview, April 2024]The second of the two bridges in the 21st century. [Google Earth, February 2025]Looking South through the bridge spanning Albridge Lane. [Google Streetview, April 2024]Looking North through the bridge spanning Albridge Lane. [Google Streetview, April 2024]Beyond Albridge Lane Bridge, the line continued Southwest passing under another minor road bridge which carried Church Lane and which can just be seen at the bottom of this extract from the 25″ Ordnance Survey of 1900. [11]Church Lane Bridge as it appears on satellite imagery in the 21st century. [Google Earth, February 2025]Looking North-northeast from Church Lane Bridge. [Google Streetview, April 2024]Looking South-southwest from Church Lane Bridge. [Google Streetview, April 2024]On this next extract, the minor bridge appears at the very top. South of that bridge the village of Llynclys was passed after the Tanat Valley branch left the main line heading West. [12]The same location as it appears on the ESRI [satellite imagery provided by the National Library of Scotland (NLS). [20]
The Tanat Valley Light Railway is covered by two articles which can be found here [18] and here. [19] The route of the main line and that of the Tanat Valley Light Railway are defined by the lines of trees in the 21st century. The village has extended across the railway line.
Looking North from the B4396 at Llynclys. The building is Llynclys Railway Stationmaster’s House and booking office which are now in private hands. Jenkins describes the station as a “wayside station with a small but substantial station building on the up side and a waiting shelter on the down platform. In architectural terms the station building, with its two-storey stationmaster’s house and single-storey booking-office wing, was very typical of Oswestry & Newton practice. The nearby goods yard contained facilities for coal, livestock, and general merchandise traffic.” [Google Streetview, April 2024]Looking South from the B4396 at Llynclys along the preservation line. … Llynclys South Railway Station was built by the preservation railway to replace the original Llynclys Railway Station. [Google Streetview, April 2024]
Llynclys South Railway Stationis located just South of the original located Llynclys station, “on the other side of the B4396 road bridge. During the original commercial operation of the line, the site was used for goods handling. … The station was built as an alternative to the original Llynclys station, which has become a private house. Work on the South station began in 2004 and opened to the public in 2005. CHR currently keeps the bulk of its rolling stock here, on a number of sidings, and a new carriage shed is set to be built after having gained planning permission in 2007.” [23]
More photographs and maps of Llynclys Railway Station can be found on the Disused Stations website. [33]
South of Llynclys trains ran on through Pant to Llanymynech which was nearly 6 miles South of Oswestry.
The old line continues South-southwest from Llynclys Railway Station. [12]And then ran parallel to and on the West side of the Shropshire Union Canal. Close to the mid-point on the West side of this image the line is bridged by Penygarreg Lane. [13]The same area in the 21st century as it appears in the NLS ESRI satellite imagery both highlighted by the lines of trees. Penygarreg Lane and bridge can be seen quite easily on this image. The length of the Montgomery Canal (Shropshire Union Canal) in the vicinity of the village of Pant is known as the Shropshire Gap. The Shropshire Union Canal Society is working to renovate the derelict length of the Canal. [21][22]The view North-northeast from Penygarreg Lane. The bridge forms the end of the heritage line. The view South from the lane is completely blocked by a high Leylandii hedge. This is the Southern limit (in 2025) of the preservation line. [Google Streetview, April 2025]A little to the South of Penygarreg Lane, Pant Railway Station is at the centre of this next extract from the 25″ Ordnance Survey of 1900. [14]A closer view of the immediate area around the station at Pant is worthwhile. It shows the wharf at the canal side and transshipment facilities for the standard-gauge line. The tramway served Crickheath Quarry. By the 21st century, much of this area has changed significantly. [14]The same location in the 21st century. A comparison of this satellite image with the map extract immediately above is illuminating. Access to the canal wharf from the West was a shared underbridge. Both the tramway and the road passed under the bridge. The road then turned sharply to the South running parallel to the canal before turning East to cross the bridge over the canal which is still in place in the 31st century. Removal of the railway had meant that a new alignment of the road on the West side of the canal has been possible. [Google Earth, February 2025]Looking North along the line of the railway towards Llynclys and Oswestry. [Google Streetview, April 2024]Looking South along the line of the railway towards Llanymynech. [Google Streetview, April 2024]The line continued South towards Llanymynech bridging the Montgomery Canal on a skew bridge. [14]The location of the bridge over the Montgomery Canal. Well house Lane runs on the South side of the old canal.The remains of the railway bridge over Wellhouse Lane seen from the Northeast. The northern abutment is hidden by vegetation. The Montgomery Canal, in its overgrown state, is off the right side of this image. [Google Streetview, April 2024]The remains of the railway bridge over Wellhouse Lane seen from the Southwest. The northern abutment is hidden by vegetation (on the left of the road). The Montgomery Canal, in its overgrown state, is further to the left. [Google Streetview, April 2024]After crossing the Canal and Wellhouse Lane, the line passed through a shallow reverse curve and bridged another lane. [14]
The location of the bridge in the map extract above is shrouded by the tree canopy. A modern satellite image would show very little as does the Streetview image below.
Looking Northwest through the location of the bridge at the centre of the map extract above. The bridge, including its abutments, is no longer present. The road leaving the lane to the left climbs onto the old railway embankment and follows the route of the line for a few hundred metres, giving access to a private dwelling and a sewerage farm. [Google Streetview, April 2024]The 25″ Ordnance Survey of 1900 shows the original junction between the Cambrian’s Whitchurch to Aberystwyth line and the Llanfyllin Branch to the North of Llanymynech Railway Station. With this junction facing North, trains from and to Llanfyllin were required to undertake and awkward reversal along the main line into Llanymynech Station. The replacement alignment can be seen towards the bottom of this extract. It followed the line of the old extension to the Potteries, Shrewsbury and North Wales Railway (PS&NWR) By the time of this survey the length of the original branch just to the West of this map extract had been abandoned. A short chord (also off the left of this extract) linked the branch to the PSNWR. [15]This extract from the 6″ Ordnance Survey from before the turn of the 29th century shows the alterations necessary close to the main line. The PS&NWR crossed the line to Newton from Oswestry on the level at a diamond crossing. A new chord was necessary to allow trains access to and from the main line. That chord was placed to the South of the original line (the earthworks of the original line can be seen to the North of the new chord). [35]The same area shown on Google Maps’ satellite imagery. Station Road crosses the site of the old station at the top-right of this image. The mainline runs South down the right side of the image. The route of the Llanfyllin Branch is marked by the track marked in grey running West from the location of the junction to the A483. [Google Maps, February 2025]Looking from the West along Station Road (B4398) on its approach to the bridge over the old railway. The railway station was under this bridge. [Google Streetview, April 2024]Looking West along Station Road from the location of the East abutment of the bridge over Llanymynech Railway Station. [Google Streetview, April 2024]This extract from the 6″ Ordnance Survey of 1900, published in 1902, shows the relationship of the old and new routes taken by branch trains for and from Llanfyllin. The earlier alignment is shown as dismantled and runs to the North of the later alignment. The chord linking the two is on the left of this extract. The bridge which carried the main road South from Llanymynech over the branch can be seen at the right of this map extract. [16]
Llanymynech Railway Station was the point of departure for Llanfyllin Branch trains from the main line. In early year this required trains serving Llanymynech from Oswestry to undertake a reversal in order to travel along the branch. The same applied to trains from Llanfyllin needing to call at or terminate at Llanymynech.
This was addressed by providing a short chord line from the Llanfyllin Branch to what was once part of the Potteries, Shrewsbury and North Wales Railway (PS&NWR). “This remodelled layout enabled branch trains to serve Llanymynech station without reversing, although the new junction arrangements necessitated the abandonment of a small portion of the original Oswestry & Newton branch. … Further changes ensued in 1911 when a connection was established between the former PS&NW line and the Tanat Valley route at Blodwell Junction. This new line created a useful loop line between the Llanfyllin and Tanat Valley branches, although in the event the two-mile connecting line between Llanymynech and Blodwell Junction had a comparatively short life, and it was closed in the mid-1920s.” [3: p635]
Llanymynech grew as a Victorian village after the opening of the Montgomeryshire Canal in 1797. This length of Canal became part of the Shropshire Union Railways and Canal Company and then part of the LNWR. The Canal was only abandoned after the LNWR became part of the LMS. The Canal was not abandoned until towards the end of the Second World War (1944). Although Llanymynech has a Welsh name it sits on the English side of the border with Offa’s Dyke running through the parish. [3: p635]
The Oswestry & Newton Railway “constructed a simple two-platform station southeast of Llanymynech, plus an adjacent goods yard, to enable shipping of locally quarried limestone, and created products of quick lime and lead. However, under its Act of Parliament, it had agreed not to disturb the operations of the existing local tramways or canals, and hence access across each would either be over (bridge) or under (aqueduct). … The Hoffmann kilns were located on the opposite side of the canal to the chosen station site, and if accessed on the level would have required an aqueduct to be built under the canal. Not having the money to achieve this, the O&NR agreed to junction with the local tramways north of its station at “Rock Siding”. It hence built a bay platform on the northwest side of the station, from which line extended to the “Rock Siding”. To access the Hoffmann kilns, trains would firstly enter the bay, then reverse up the slope to the “Rock Siding”, where they would then change direction again by pulling forward over a bridge to the Hoffmann kilns.” [34]
Details and more photographs of Llanymynech Railway Station can be found on the Disused Stations website. [36]
Once the chord linking the old Llanfyllin Branch and the PS&NWR had been built and the chord between the main line and the PS&NWR was complete, trains from Oswestry and Llanymynech diverged West off the main line just South of Llanymynech Railway Station.
The Llanfyllin Branch
After running off the main line, trains for Llanfyllin passed under what would become the A483. The bridge appears on both of the last OS Map extracts above.
Looking South along the A483. There is nothing to see, at road level, of the bridge over the old railway. The line ran on the near side of the terrace visible on the right. [Google Streetview, July 2024]
Carreghofa Halt was the first stop on the Branch, it was just a short distance from the mainline close to the chord which served to link the old branch and the PS&NWR line. It was an unstaffed stopping place, opened by the GWR on 11th April 1938, “its facilities comprised a short platform on the down side of the running line. The platform was of earth & cinder construction with revetting of old sleepers. A small wooden shelter was provided for the comfort of waiting travellers, while the simple platform was fenced with tubular metal railings. … Other features of minor interest at Carreghofa included a sleeper-built permanent-way hut to the east of the platform and an unusual overbridge immediately to the west of the halt. The bridge, which crossed the railway on a skewed alignment, was a single-span structure carrying the B4398 road and the Montgomeryshire Canal.” [3: p635]
Having passed beneath the road/canal bridge, “trains reached the junction between the Potteries, Shrewsbury & North Wales branch to Nantmawr and the short connection which gave access to the original Llanfyllin route. This 26-chain curve was opened on 27th January 1896 as a means of linking the PS&NW route to the original 1863 branch.” [3: p365][4][5]
A relatively low quality view from the road bridge/canal aqueduct looking Northwest. The stored wagons on the right sit on the Nantmawr Branch. The chord to Llanfyllin heads off to the left. [40]
Now heading pretty much due West the branch sets off for Llansantffraid. We will pick up this next length of the route in the second article in this short series.
Before resuming our journey along the Whitland & Cardigan Railway, just a few comments about Locomotives and Rolling Stock. …
Locomotives
In early days the line operated with three locomotives. These were all constructed by the same company, Fox, Walker & Co. of Bristol.
“The company was founded by Francis William Fox and Edwin Walker who opened an engineering works at Atlas Locomotive Works in Bristol in 1864.
They built four and six-coupled saddle tank engines for industrial use. They also built stationary engines and pioneered steam tramcars, the first being tested in Bristol in 1877.
Much of their output was exported.
By 1878 the company had made over 400 small tank engines.
In 1878 they produced six narrow gauge 2-4-2 trench engines for the Royal Engineers at Chatham using Henry Handyside’s steep gradient apparatus. They also produced nine 0-6-0 saddle tank engines for the Somerset and Dorset Railway.
They were taken over by Thomas Peckett in 1880, becoming Peckett and Sons, Atlas Engine Works, Bristol.” [1]
These locomotives were:
No. 1, John Owen, (Works No. 170 of 1872).
No. 2, (Works No. 271 of 1875) – sold by GWR to Bute Works Supply Co., and East Kent Light Railway in 1911. Working until the early 1930s, last known in steam on 22 September 1934, scrapped by September 1935. [10][11][6: p91]
No. 3, (Works No. 340 of 1877) – rebuilt by GWR in 1896; rebuilt again and renumbered 1331 in 1926. Withdrawn in 1950. [11] A story about the building of a model of this locomotive in 00 Gauge can be found here. [12]
Two images of the rebuilt GWR No. 1331 which appeared on ‘X’. [13]
Nos. 1 and 2 were 0-6-0ST locos of a similar design. No. 3 was a larger 0-6-0ST locomotive. All three were rebuilt by the GWR. No.1 was rebuilt in 1894. [6: p91]
“Soon after the GWR began operating the railway in 1886, a valuation of W&CR stock was made.No.1 was valued at £450, No. 2 at £600 and No. 3 at £850.” [6: p97]
M.R. Connop Price tells us that:
“Small Great Western tank locomotive types soon put in an appearance and the Whitland and Cardigan engines were moved away. Amongst the designs in evidence at the turn of the century were ’19XX’ 0-6-0 saddle tanks and Armstrong 0-4-2 tanks of ‘517’ class. Pannier tanks were frequently seen as well, but during World War I one of the 0-6-0 saddle tanks, either No. 1939 or No. 1999, was stationed at Cardigan. On the freight side a ‘Dean Goods’ 0-6-0 regularly arrived at Crymmych with the monthly cattle train. This was probably the only working to bring a tender engine onto the branch with any frequency, but tender engines were never common. About 1950 a ‘Dean Goods’ was seen standing on the Cardigan line at Cardigan Junction, in the company of a composite coach and a Siphon ‘G’ van: this is the last known instance of the class on the W&C route. Larger tender locomotives were prohibited by virtue of the line having a yellow colour weight restriction.
For many years ‘2021’ class pannier tanks were active on the line, and between the wars the more powerful ’45XX’ 2-6-2 tank locomotives appeared. These held sway on the Cardigan branch until the complete closure in 1963, although latterly they were supported by more modern pannier tanks in the ’16XX’ series. Amongst the engines seen on the railway in the post-war period were 0-6-0PTs Nos. 2011, 1637, 1648, 1666 and 2-6-2Ts Nos. 4550, 4557, 4569, 5550, 5571. In the final weeks of operation Nos. 4557 and 4569 were the most common performers on the railway.” [6: p99]
Carriages
Connop Price tells us that, “The Whitland & Taf Vale Railway owned six four-wheeled carriages, all constructed by the Gloucester Wagon Co. The first four were completed in June 1875, and comprised two composite coaches each having a first and two second class compartments, and a luggage compartment. The other two were brake thirds – that is to say comprising three third class compartments and a compartment for the guard. … Two more coaches were supplied by the Gloucester Wagon Co. in September 1875, and these vehicles comprised three third class compartments and a luggage compartment.” [6: p99]
After the GWR takeover of the line, standard GWR coach types began to appear.
Wagons
The Company’s wagons were all constructed by the Bristol Wagon Co. In October 1872, “in anticipation of the opening of the line, the W&TVR ordered a 4-wheel goods brake van and six 4-wheel open goods wagons. … In May 1874, as traffic developed, it was decided to order four more 4-wheel open wagons. … A 4-wheel covered van [was] … Ordered by the company in October 1974, for use on the Crymmych freight service.” [6: p101]
Records of the Gloucester Railway Carriage and Wagon Co. Ltd show that a number of private owner wagons were in use on the line. Connop Price mentions: a five-plank wagon obtained by William Thomas, Coal, Lime & Manure merchant in March 1903; a seven-plank wagon delivered to the Cardigan Mercantile Co. Ltd. in March 1904. A near identical seven-plank wagon was supplied to G.D. Owen, Coal and Lime Merchant of Cardigan in April 1904. Another seven-plank wagon was supplied to S.J. Phillips of Crymmych Arms, Coal and Lime Merchant in September 1908. [6: p101-103]
Connop Price continues: “One other vehicle had a claim to be an item of Cardigan line rolling stock, although at a later date. This was the water tank wagon provided by the GWR in the 1920s or early 1930s to convey water to Cardigan where the supply was sometimes too low to fill the tank. … It was a standard 4-wheel tank wagon, painted white with the initials GW painted in black on the side. The underframe was also black.” [6: p103]
This unusual short goods at Cardigan contains a tank wagon between two coal wagons. There are stories of water supply problems at Cardigan. Although the station sits on the bank of the River Teifi, being tidal water was only available at low tide as salt water damaged the locomotives. A tank wagon was used to bring water down to Cardigan presumably from Glogue. This image was shared on the Login Railway Station Facebook Page on 12th March 2018. [9]An enlarged extract from the image above. The tank wagon referred to in the text above is between the two mineral wagons. Connop Price indicated [6: p103] that no photograph of this tank wagon had been identified by the date of the 2nd Edition of his book (August 1990). This image may therefore be the only one of the tank wagon! [9]
Llanglydwen to Whitland
We restart our journey to Whitland at Llanglydwen Railway Station. …
Wikipedia tells that “the original station only had a wooden shed as a station building. A new station was built in 1886. This had a two-storey station building, incorporating the station master’s house, the booking office and a waiting room. The down platform had a timber waiting shelter. Behind this platform was the goods yard, which had one siding. Access to this was enabled by the signal box, which also controlled the level crossing and was at the south end of the up platform. There was also a busy coal yard near the station. The station closed to passengers on 10th September 1962 but remained open for goods until 27th May 1963. The coal depot closed on 2nd February 1963.” [17]
This extract from the 6″ Ordnance Survey of 1887 shows the old railway left Llanglydwen following the Southeast bank of the Afon Taf. [23]The same area on railmaponline.com. [3]Continuing on the Southeast bank of the Afon Taf. [24]And the same length again on railmaponline.com’s satellite imagery. [3]Continuing alongside the Afon Taf, the old railway ran past the Dol-Wilym bridge which appears close to the top of this extract from the 6″ Ordnance Survey of 1887. [25]The same area as shown on the railmaponline.com satellite imagery. An area of forest close to the Dol-Wilym Bridge. [3]
The first significant location South of Llanglydwen is the Dol-Wilym bridge over the Afon Taf. This appears at the top of the OS Map extract above and is shown below.
Connop Price says that between Llanglydwen and Login “the gradients continued to change often as the track followed the lie of the land; the steepest grade on this section was 1 in 40. About half a mile north of Login was the tightest curve on the railway: it was short but built to a mere 8 chains radius.” [4: p68]
Further to the South the old railway curves around to the West before beginning to switch back to the South. The 6″ Ordnance Survey of 1887. The Dol-Wilym woods sit on the far side of the Taf. [26]Heavily camouflaged by the forest this railmaponlone.com extract does the same area. [3]Further South still and the OS map shows the mileage from London – 266 miles. [27]The same area as shown on the railmaponline.com. Rather than being in the middle of the woodland, it now proves the eastern border of the area of trees. [3]Still on the East side of the Afon Taf, the old railway continues to head for Login. [28]Again, the same length of line as shown on railmaponlone.com’s satellite imagery. [3]Now on the run down to Login Railway Station the old railway heads due South. [29]The same length of line on the railmaponline.com satellite imagery. [3]Login Railway Station appears at the bottom of this next extract from the 1887 6″ Ordnance Survey. [30]The open area at the bottom of this extract from the railmaponline.com satellite imagery is the station site. [3]Login Railway Station as it appeared on the First Edition of the 6″ Ordnance Survey. [19]The same area on the ESRI satellite imagery from the NLS. [19]
At Login, “a short platform was dignified by the large station building serving the tiny hamlet perched on the hillside just across the river. The goods loop was protected by a ground frame at each end, that at the south end being just a single lever unlocked by the Cardigan Junction – Llanglydwen electric tablet. The ground frame at the north end, however, also controlled the level crossing, and it was housed in a wooden hut of typical Great Western design.” [4: p68]
South of Login the valley of the Taf begins to widen out and the hillsides become less steep. However, gradients continued to change. On the East of the Taf, the railway ran through Penclippen level crossing and past its wooden crossing keeper’s hut.
The Whitland & Cardigan Railway continued South to Llanfalteg (3 miles 48 chains from Whitland). “In the early years of the line … this place had some importance. Until the reconstruction of the mid-1880s the layout consisted of a loop, with a siding parallel to it to serve the goods shed, and a further siding for the locomotive shed and for coal traffic. In its heyday, the locomotive shed had a forge for day-to-day repairs, but it was not big enough to be able to undertake major overhauls. After the Great Western took over the W&CR the shed at Whitland assumed most of the responsibilities of Llanfallteg shed, and gradually the latter fell into disuse. For a while it was occupied by Mr J. Williams’ carpenter’s shop, but this ceased and decay set in until eventually the shed fell down in about 1939.” [4: p68]
Llanfallteg Railway Station as it appeared on the First Edition of the 6″ Ordnance Survey. [37]The same location on the ESRI satellite imagery provided by the National Library of Scotland (NLS). [37]
“At closure in 1962, the station building and the wooden ground frame box were intact, and a dilapidated iron goods shed still stood by the level crossing. The layout, however, was reduced: the loop had been replaced by a siding, and although the siding to the goods shed remained the rest of the trackwork had long gone. A length of rusting cable in the undergrowth provided the only evidence of the practice at Llanfallteg of cable-shunting. The site was cramped and inconvenient, and for many years the most effective way of moving wagons in and out of the sidings was by a cable linking them to a locomotive on a parallel track.”
0-6-0PT at Lanfallteg Railway Station in May 1959, (c) Unknown. [38]A similar view of Llanfallteg Railway Station in 1961, from the Rokeby Album IV ref 5a. [47]Looking North from the location of the level-crossing in Llanfallteg. {Google Streetview, November 2021]Looking South from the location of the level-crossing. Residential properties have been built over the line of the old railway and the station site. [Google Streetview, November 2021]
South of Llanfallteg a run of just over a mile brought the single track line to its junction with the main line known latterly as Cardigan Junction. There were no significant features on this length of the line. It remained on the Northeast bank of the Afon Taf.
Taf Vale Junction as shown on the 6″ Ordnance Survey. The name of this junction was changed to ‘Cardigan Junction’ later in the life of the old branch line. [39]The same location on the NLS ESRI satellite imagery. [39]
“At Cardigan Junction the signal box, opening in 1873 and closed in 1964, was whitewashed, pebble-dashed and austerely domestic in appearance, being built entirely in stone or brick. The window overlooking the tracks was a modest rectangle with two uprights in the window frame. The name-board ‘Cardigan Junction’ was located directly under it. The door was on the east side of the box, with another window, and the pitched roof was surmounted by a single chimney. A gaslight was situated outside.” [4: p68]
Cardigan Junction (formerly Taf Vale Junction) where the Cardigan Branch left the main line. This photograph was taken on Saturday 25th May 1963, significant because the goods only rail service on the branch was withdrawn on the following Monday (27th May 1963). This picture was shared on the Login Railway Station Facebook Page on 20th June 2024. It looks Southeast. [8]
The last 2 miles 21 chains of the route was along the main line from Cardigan Junction (originally Taf Vale Junction) to Whitland.
Close to Taf Vale Junction (Cardigan Junction) the main line crossed rivers twice. This is the location of the first of the bridges (Sarn-las Bridge) which crossed the Afon Daulan, a tributary of the Afon Taf. [40]The same location on the ESRI satellite imagery. [40]The second bridge crossed the Afon Taf (Tre-wern Bridge). [41]The same location in the 21st century. [41]The line then crossed what was a minor road. [42]The crossing and it’s keeper’s cottage remain in the 2st century. [42]The crossing seen from the South in the 21st century. [Google Streetview, November 2021]What is now the A40 then bridged the mainline. [43]The same location on the NLS ESRI satellite imagery. [43]Looking East from the A40 roadbridge towards Whitland Railway Station. [Google Streetview, March 2022]
There were no further significant features on the line before it entered Whitland Station.
Whitland Railway Station as it appeared on the 6″ Ordnance Survey from the turn of the 20th century. [44]A similar area as shown on the map extract above as it appears in 2024. [Google Maps, September 2024]
“After the opening of the Pembroke and Tenby and Whitland and Taf Vale Railways the station at Whitland had four platform faces. Two of these served the main line, one served a loop round the down island platform and the other a bay behind the up platform, access to which was from the west. The main station buildings were on the up side and nearby, close to the bay platform, there was a goods shed and a few sidings. All these changed little until British Railways’ days when the station was extensively modernised. In addition, in the 1960s the down loop was disconnected and became a bay for Pembroke Dock trains. On the down side, too, there was a small goods vard originally constructed for the use of the Pembroke and Tenby Railway, and for the exchange of traffic between that company and the GWR before the Great Western took over the working of the P&T in 1896. A short distance west of Whitland station the locomotive shed stood until the mid-1960s. Passenger trains from Cardigan ran into either the bay or the up main platform at Whitland, but trains departing for Cardigan customarily shared the outer face of the down island platform with P&T line trains.” [4: p61]
Whitland Railway Station in 1971 (c) Roger Griffith (Public Domain). [45]Whitland Railway Station in 1979, (c) John Mann Collection and used with the kind permission of Nick Catford. [46]Whitlad Station seen from Station Road, the B4328 in 2021. This view looks West along the modern railway line. [Google Streetview, November 2021]
The Whitland & Cardigan Railway was a 27.5 miles (44.3 km) long branch line, “built in two stages, at first as the Whitland and Taf Vale Railway from the South Wales Main Line at Whitland to the quarries at Glogue. It opened in 1873, at first only for goods and minerals and later for passengers. The line to Cardigan opened in 1886; reflected in the company name change.” [2]
“The Company was always short of cash. Huge borrowings made it unable to pay its way; it was taken over by the Great Western Railway in 1886. Still considerably loss-making, it closed to passengers in 1962 and completely in 1963.” [2]
This is the second in a short series of articles about the line. The first of the articles can be found here. [4]
My interest in this branch line stems from reading an article by M.R. Connop Price; Before the Railways: The Early Steamers of Cardiganshire; in the Railway & Canal Historical Society Journal in July 2022. [1] And from staying North of Cardigan in 2023 and walking part of the route of the old line.
We restart our journey from Cardigan to Whitland at Boncath Railway Station.
Boncath Railway Station as it appears on the 6″ Ordnance Survey of 1887 (published in 1888). [5]
“The station had a passing loop served by two passenger platforms and a goods loop on the down side where there was a small goods yard and shed. A siding from the yard served a saw mill nearby to the north of the station. The single-storey stone-built main station building was on the up platform and, along with the goods shed, still survives, as does the nearby Station House.” [6] The line serving the saw mill can be seen in its entirety in the map extract above.
M.R. Connop Price says that Boncath “was a crossing place and a tablet exchange station. The goods yard was quite sizeable, comprising three sidings on the down side, one forming a loop behind the down platform. Traffic consisted mostly of timber from the adjacent saw mills, rabbits and agricultural goods. Apparently the level crossing gates were demolished so often by accident that there was talk of doing away with them. In his two articles on the Cardigan line J.F. Burrell has pointed out that from the platform at Boncath it was possible to see the smoke of a freight train coming up from Cardigan for as long as a quarter of an hour before arrival. The many curves caused it to disappear and reappear at frequent intervals on the way. This was one of the most remarkable sights on a remarkable railway, because the line fell away from Boncath towards Cardigan on a gradient of 1 in 40 for nearly three miles. Climbing up this incline was hardly less exciting than the ever steepening climb up the Taf vale to Crymmych! Had the original route north of Boncath been built it would have kept to some higher ground and been more gently graded. It might also have been less attractive because the line as built ran for a mile and a half above a beautiful and heavily wooded valley towards Kilgerran” (Cilgerran). [15: p82 & 90]
These two extracts from the railmaponline.com satellite imagery cover the full extent of the Boncath Railway Station site. The old railway is shown by the green lines on the images from railmaponline.com. And these green lines include the siding serving the saw mill. [3]
The Southwest end of the Boncath Station site was framed by the highway bridge which carried what was to become the B4332. [5]An enlarged segment of one of the two images shared on the coflein.gov.uk website. This is the best image that I have been able to find of the bridge at the Southwest end of the station site. [6]The view along the B4332 from the East through what was the location of the bridge carrying the road over the old railway. [Google Streetview, March 2022]
Shaun Butler’s TT gauge model of Boncath can be seen in photographs here. [27] Other views of the station can be seen here [28] and here [29]. The station has a page of its own on the Disused Stations website, here. [30]
M.R. Connop Price covers the route of the line from Whitland to Cardigan travelling towards Cardigan – the ‘down’ direction on the line. His description is quite evocative of the line’s rural and meandering nature. He describes the length of the line between Boncath and Crymmych Arms stations but in the ‘down’ direction: “North of Crymmych the [line] … climbed through a deep rock cutting to the summit before descending briefly on a gradient of 1 in 80 and rising again at 1 in 200 to a secondary summit about a mile and 30 chains beyond the station. By now the track was winding round a ledge on the hillside and giving magnificent views westwards to the Prescelly mountains. … On a clear day the view extended across the valley of the Afon Nyfer to the sea near Newport. … Meanwhile, [the line] negotiated a horseshoe bend and a remarkable series of sharp curves across the desolate countryside as it began its steady descent. Just over two miles from Crymmych the railway passed Rhyd-du, where once it was proposed to build a station. … Just beyond Rhyd-du the [railway] passed near Blaenffos and under the main Cardigan-Tenby road for the second time. A short distance further on a tributary of the River Teifi could be seen running through woods far below on the east side of the line, giving confirmation to the traveller that he was now across the watershed” and close to Boncath. [15: p82]
The railway first headed South as it left Boncath and then turned to the West above a wooded valley. [7]This extract from the ESRI satellite imagery from the NLS covers approximately the same area as the 6″ OS map extract above. Once again, the route of the old railway can be followed by tracing the field boundaries, hedgerows and trees. [7]The line then turned West. [8]The route of the old railway was a little difficult to see on the Google mapping, so it is good to have the green line on this railmaponline.com satellite image. [3]
On both of the two images above the Whitland & Cardigan Railway crosses the A478. The next couple of images show enlarged views of the location, on the 6″ OS Map and the railmaponline.com satellite imagery. …
The story of an N Gauge project to model Crymmych Arms Railway Station can be found here. [14] The station is covered in some detail in text and photographs on the Disused Stations website. [16]
The station was, for a time the terminus of a branch line from Whitland which was extended by the GWR to Cardigan.
M.R. Connop Price says that Crymmych Arms station was “situated near the source of the [Afon] Taf and in the shadow of the 1,297 ft high Freni Fawr, on the edge of the Prescelly mountains. The buildings were substantial, and right up to the 1960s a pillar box was provided on the wall of the large station house on the up platform. Another facility on the up platform was a well that always gave ice cold water; a GWR cup was available for drinking purposes. After the tablet instruments were removed from Llanfyrnach [further South down the line], Crymmych Arms became [a] … tablet station on the line. Latterly it was the only intermediate station to be in the charge of a station master.” [15: p82]
C.J. Gammell notes that Crymmych Arms, “as well as being a crossing point and block post was closed to the summit of the line, reached by steep gradients from both sides. Up goods and mineral trains had to stop to pin down brakes on the 1 in 35 decent from Crymmych Arms as well as the 1 in 60 rise from the North to the station.” [18: p233]
M.R. Connop Price notes that South of Crymmych Arms “there was a 500 yd stretch at 1 in 35. Train crews [on down trains] undoubtedly entered Crymmych Arms with a great sense of relief!” [15: p77]
The station has a page on the Disused Stations website. [31] The Coflein record for the station notes that when “the station closed in 1962, the wooden station buildings and water tower were demolished although Station House nearby still survives.” [33]
Glogue Quarries were served by a short branch from the Whitland & Cardigan Railway which terminated in two sidings. The quarries had an internal tramway system which included a number of inclines and tunnels. A better map of the quarries can be found in M.R. Connop Price’s book about the old railway. [15: p73][20]
The Coflein record, written by David Leighton, RCAHMW in February 2015, talks of a single quarry formed by “the merging of two early, perhaps seventeenth-century, workings. Material was lowered by two inclines, the upper one abandoned when work deepened and a tunnel was cut to bring material out to the head of the lower incline. The workings were handicapped by a lack of transport. Originally slate was was carted to Blackpool on the Eastern Cleddau, and after 1853 to Narberth Road on the South Wales Railway. Expansion only became possible when in 1873 a siding on the Whitland & Cardigan Railway was laid.” [21] There was a mill, powered by steam and later electricity, at the Western edge of the site. “Roofing slates of good colour were produced but as they were heavy the main output was slab. During the 1920s attempts were made to make bricks from slate dust. But these became uncompetitive when, in 1927, the GWR demanded a transport premium due to their weight; forcing closure. Bulk working has left little to be seen aside from vestiges of buildings in the mill area and the stone-built lower incline. Notably, a terrace of family dwellings was built by the company and is still occupied (in 1991).” [21]
Wikipedia says: “Glogue quarry was a slate quarry … worked from the late 1700s, by the mid-1800s it was owned by John Owen, who wanted to make higher profits by improving his distribution. This led to the construction of the Whitland and Cardigan Railway. The advent of the railway led to Owen expanding his workforce to over 80 men. … After sale to a local consortium, the quarry was worked until 1926.” [32]
The 6″ Ordnance Survey of 1887 shows the old railway continuing East alongside the Glogue Corn Mill before turning South. All the while, it ran alongside the Afon Taf, although as it turned South it bridged the river, as shown here in the central part of the image and in the enlargement which is a few images below. [22]The same area on the railmaponline.com satellite images. [3]A combined image which shows both the view across the line of the old railway to the buildings of Glogue Corn Mill, in the upper part of the image, and the location of the camera on the lane to the East of Glogue, in the lower portion of the image. [Google Maps/Streetview, November 2021]An enlarged extract from the 6″ OS map above which shows the location where the railway bridged the Afon Taf. [22]As the railway continued heading South it curved round the Llanfyrnach Sliver Lead Mine on the approach to the railway station at Llanfyrnach. [23]A very similar length of the Whitland & Cardigan Railway shown on the railmaponline.com satellite imagery. Both these images show that the old railway ran alongside Wellstone Lane as it travelled South. [3]Looking Northwest from Wellstone Lane, the railway ran on the shoulder next to the lane. The land dropped away into the adjacent field, the other side of the line. The sheds visible in this picture are at the lower level beyond the line of the old railway. [Google Streetview, November 2021]
As its name suggests, Llanfyrnach Silver Lead Mine was a 19th century silver/lead producer; on site in the 21st century there are ruins of Cornish engine house and other mine buildings. [34] It was, “an important lead mine with a number of shafts, extensive tips and tailings heaps, buddle pits, together with a number of mine buildings including the remains of a Cornish engine house and boiler remaining on the site. … [It was] by far the largest of the Pembrokeshire mines, and of the south Wales mines, second only to Carmarthenshire’s Nantymwyn Mine in terms of the recorded output. A reference in the Mining Journal (1879) notes a well-defined east-west lode made up of sugary quartz and containing a good deal of lead, and about 150 tons of lead ore being delivered monthly from this and the old lode. Very little sphalerite was sold until the final few years of its working. Silver was extracted from the galena.” [35]
Llanfyrnach Railway Station has its own page which includes text and photographs on the Disused Stations website. It can be viewed here. [36] The Disused Stations page for the railway station suggests that the building in in a considerably worse condition in 2024. Two images showing its condition can be viewed here [38] and here. [39]
This final image taken looking Southwest along the platform at Llanfyrnach Station shows the siding which provided a small goods facility at the station. This image was shared on the Login Railway Station Facebook Page on 8th November 2019. [43]
Southwest of the station the old railway is now followed by a modern single track access road.
The Llanfyrnach entrance to the modern track following the route of the old railway. [Google Streetview, March 2022]Google Maps shows the track running along the formation of the Whitland & Cardigan Railway Southwest from Llanfyrnach. [51, Google Maps, July 2024]
A short distance along the access road/old railway route, the line crossed the Afon Taf again. An enlarged extract from the 6″ Ordnance Survey is shown below.
This enlarged extract from the 6″ Ordnance Survey of 1887 shows the location of the bridge across the Afon Taf which was to the Southwest of Llanfyrnach Station. [24]Continuing to the Southwest, the Whitland & Cardigan Railway followed the North bank of the Afon Taf. [44]This extract from Google Maps shows the track running along the formation of the old railway. It covers a slightly larger area than the extract form OS mapping above. In the bottom-right of this image the modern track can be seen terminating at a T-junction with another track. [52, Google Maps, July 2024]Again, continuing to the Southwest, the Whitland & Cardigan Railway followed the contours on the North bank of the Afon Taf, crossing a farm access road. The length of the line Northeast of the access track at the centre of this image is shown on the modern Google satellite image above. That to the Southwest is shown below. [45]The access track which followed the line of the old railway terminated in a T-junction with the farm access road at the top right of this extract from the railmaponline.com satellite imagery. The line continues in a southwesterly direction from that point. [3]Continuing to the Southwest, the Whitland & Cardigan Railway continued to follow the North bank of the Afon Taf as far as Aber-Elwyn. An enlarged extract from the 6″ Ordnance Survey of 1887 below shows the location more clearly [46]A similar length of the old railway is covered on this next extract from the railmaponline.com satellite imagery. [3]An enlarged extract from the 6″ Ordnance Survey of 1887 shows the old railway bridging the Afon Taf to the Northwest of Aber-Elwyn and then a tributary of the Taf to the Southwest of the hamlet, close to Waun-Bwll. The next station on the line sits just off the bottom-left of this extract – Rhyd-Owen Station. [47]This next extract from the 6″ 1887 Ordnance Survey shows Rhyd-Owen Station, top-right and the Pen-celli Quarries, bottom-left. [48]A similar length of the old railway is covered on this next extract from the railmaponline.com satellite imagery. [3]An enlarged extract from the 6″ Ordnance Survey of 1887 focussing on the Rhyd-Owen Railway Station. [49]
The Coflein record for Rhyd-Owen Station, written in 2010, notes that there was a through line with a passing loop; the passenger platform was on the up side. The station closed in 1962; although the wooden station buildings have been demolished, the nearby station house survives. [53]
Rhydowen Station in 1961, seen from the road at the North end of the station site, from the Rokeby Collection III ref 25c. It is authorised for use here by Coflein. [53]Rhydowen Station in 1961, seen from the South end of the platform, from the Rokeby Collection III ref 25b. It is authorised for use here by Coflein. [53]Another view of Rhyd-Owen Station. The train is on a down service to Cardigan and consists of a single Hawkesworth Corridor Brake 3rd coach pulled by an unidentified 16xx 0-6-0PT.The station house just appears at the extreme left of this image. This image was shared on the Login Railway Station Facebook Page on 11th February 2022. [54]A view through the station from the North shows the loop siding at Rhyd-Owen. This image was shared on the Login Railway Station Facebook page on 16th September 2015. [55]The site of Rhyd-Owen Railway Station, seen from the road at its northern end. The station itself was on the left side of this image with the station house on the right side. It appears as though the station house has been significantly extended and modernised. [Google Streetview, November 2021]
Rhyd-Owen Railway Station has its own page on the Disused Stations website. Click here. [60]
Another enlarged extract from the 6″ Ordnance Survey which shows the site of the Pen-celli Quarries. A single siding was provided for the quarries on the down side of the line. [50]Another length of the old railway which was still heading in a southwesterly direction. [56]This extract from the railmaponline.com satellite imagery covers a similar length of the line to that shown on the map extract above. [3]This next extract from the 6″ Ordnance Survey of 1887 covers the length of the line as far as Llanglydwen Station. [57]This extract from the railmaponline.com satellite imagery covers a similar length of the line to that shown on the map extract above. Llanglydwen Railway Station was sited towards the bottom of this image to the south side of the road through the village. [3]An enlarged extract from the 6″ Ordnance Survey of 1887 which focusses on Llanglydwen Railway Station. [58]The Llanglydwen station site as it appears in the 21st century. [Google Maps, July 2024. [59]Llanglydwen Railway Station in the 1950s. This photo was shared on the Login Railway Station Facebook Page on 9th October 2014. [63]View of Llanglydwen Station in 1962 from the Rokeby Collection III ref 3b. [64]View of Llanglydwen Station in 1962 from the Rokeby Collection III ref 4b. [64]The station building in 1982 when the crossing gates were still in place. This photo was taken by John Gale and was more recently shared on the Login Railway Station Facebook Page on 23rd June 2015. [61]The erstwhile station site at Llanglydwen. The station building remains in place. The white gated driveway is on the line of the station platform and the white fence marks the approximate location of the main running line through the station. The station yard is, in the 21st century, occupied by Dickman’s Sawmill. [Google Streetview, July 2021]A better view of what was the platform elevation of the station building as it appears in 21st century. [Google Streetview, July 2021]
Llanglydwen Railway Station has its own page on the Disused Stations website. Please click here to access that site. [62]
References
M.R. Connop Price; Before the Railways: The Early Steamers of Cardiganshire; in the RCHS Journal, Vol. 40 Part 8 No. 244 July 2022, p471-477.
The Whitland & Cardigan Railway was a 27.5 miles (44.3 km) long branch line, “built in two stages, at first as the Whitland and Taf Vale Railway from the South Wales Main Line at Whitland to the quarries at Glogue. It opened in 1873, at first only for goods and minerals and later for passengers. The line to Cardigan opened in 1886; reflected in the company name change.” [2]
“The Company was always short of cash. Huge borrowings made it unable to pay its way; it was taken over by the Great Western Railway in 1886. Still considerably loss-making, it closed to passengers in 1962 and completely in 1963.” [2]
As we have noted, the Whitland & Cardigan Railway (W&CR) opened for public traffic on 1st September 1886 after over ten years in planning and construction. “Thomas Davies, ‘Master Tom’, as managing director of [a] shipping company at Cardigan, was well aware that times were changing, and besides his shipping interests, chose to hedge his bets by investing in railways. Even though the Teifi valley had been the obvious route for a line west to Cardigan, the C&CR (Carmarthen & Cardigan Railway) never advanced beyond Llandyssil, and after the Great Western Railway abandoned the broad gauge in south Wales in 1872 it was only a matter of time before the GWR decided to extend the line as far as Newcastle Emlyn. By then, though, there was little point in taking it further on to Cardigan, because the W&CR had already reached the town by a somewhat sinuous route over the Preseli hills.” [1: p469]
After reaching Crymmych Arms in 1874 “the W&CR obtained powers for an extension to Cardigan in 1877. Construction was slow. … Thomas Davies had become a director of the railway as early as 1880, and although he was plainly interested in his own income, it seems he also aimed to do his best for his home town, too.” [1: p469]
“The formal opening of the Whitland & Cardigan Railway took place on 31st August 1886, the day before the GWR was due to open the public passenger service. The arrival of the opening ‘special’ was accorded due ceremony and the occasion was presided over in part by ‘Master Tom’, Cardigan otherwise known as Thomas Davies, Bank House, the Mayor of Cardigan.” [1: p469]
After speeches, dignitaries dined in the in “the new goods shed at Cardigan station, just to the east of Cardigan bridge, south of the river.” [1: p470]
“The opening of this line was a critical moment for the commercial life of Cardigan, because thereafter influence began to move away from shipping interests towards those ready to use the railway.” [1: p470]
The terminus of the line in Cardigan was on the South side of the Afon Teifi, to the East of the town’s bridge across the river. The 6″ Ordnance Survey of 1887 shows the layout of the station in the later years of the 19th century.
The coflein.gove.uk website carries this description of the station site: “the station had a single passenger platform on the down side and a run-round loop. There was a goods yard, with two sidings and a stone-built goods shed, on the up side and a siding served a small locomotive shed and turntable adjacent to the River Teifi. A further siding on the down side completed the track layout. … The main station building had stuccoed walls of local brick under a low-pitch hipped slated roof with brick chimneys. There were square-headed openings with chamfered stucco surrounds. The canopy projected straight out from the building on moulded cast-iron brackets with a fretted fascia. The goods shed was set on a platform and had walls of slate blocks with dressed quoins and shallow arched heads to the openings. (Source: RCAHMW Cardiganshire Industrial file, SN14NE; notes by A.J. Parkinson).” [24]
Further phots of the station site can be found here, [6] here, [25] here [26] and here. [27] A search on Facebook also found a number of images of the station, the links are provided in references [6]- [13] below.
A model of the railway station was originally held by Y Cardi Bach Museum in Login. In April 2021 it was placed on display in Cardigan Castle. The Tivyside Advertiser reported on 8th April 2021 that the layout was moved to the Castle. [29]
The model of Cardigan Railway Station which was on display in Castle Green House at Cardigan Castle in 2021. [29]Turning to face East, the modern road bridge spans what was the line of the old railway. The trackbed close to Cardigan has been preserved as a footway and cycle path through Teifi Marshes and Wildlife Park, a Site of Special Scientific Interest. The River Teifi is on the left in this photo. [My photograph, 7th September 2022]
C.J. Gammell says that the Cardigan terminus was 27 miles and 38 chains from Whitland. It “is now an industrial estate and a few of the old buildings remain. The spacious layout of the former GWR station included only one platform but there was a goods shed, an engine shed, and warehousing. A good walk from the town and on the other side of the River Teifi, it was very much the traditional railhead.” [4: p233]
Gammell goes on to note that the service from and to Whitland “was extremely leisurely and strictly for the enthusiast, for the railway twisted and turned its way [through] the Prescelly mountains on tight curves and steep gradients. Br provided four trains per weekday which was more or less the same service provided in the line’s earlier years.” [4: p233-234]
Today, the trackbed close to Cardigan has been preserved as a footway and cycle path through Teifi Marshes and Wildlife Park, a Site of Special Scientific Interest.
About 9 months after my first article about Govilon, Richard Purkiss contacted me to offer a wander around the area immediately to the West of my last walk.
The location plan which appears on the information board at Govilon Railway Station. Note the red dotted line which shows the route of Bailey’s Tramroad; the location of Bailey’s Wharf and Govilon Wharf at the right side of the image; the route of the canal shown in blue; and the route of the railway in cream on the right half of the map and in green as part of one of the village trails.
In this second article we explore the route of Bailey’s Tramroad and the adjacent Railway as they are shown on the left side of the sketch map above.
The short section of the Heads of the Valley Line which is part of Govilon’s Forge and Railway Trail is a very easy stroll. Following the route of Bailey’s Tramroad is a much more difficult exercise which requires scrambling around on private land which can only be done with permission. I was very grateful to have Richard Perkiss as my guide while doing so!
The dotted line representing Bailey’s Tramroad on the plans above should be taken as a schematic representation rather than an accurate alignment. It is clear, when walking the route, that the section of the Tramroad close to Forge Car Park actually passed under the location of the viaduct and was for a very short distance on the North side of the later standard gauge line. I will try to show this in the images below which were taken on site.
We start this article back at Govilon Railway Station and looking West along the old standard gauge railway line. ….
Govilon Railway Station opened on 1 October 1862, [7: p191][8: p107] a couple of days after the ceremonial opening of the first section of the railway. It was the first station beyond Abergavenny Brecon Road. [9] The 1st October was also the first day of the LNWR’s lease of the line. [10: p112] There is a possibility that Govilon was the first station opened on the line because of its proximity to Llanfoist House, the residence of Crawshay Bailey who by this time was a director of the MTAR. [11: p20]
Wikipedia notes that “Decline in local industry and the costs of working the line between Abergavenny and Merthyr led to the cessation of passenger services on 4th January 1958. [13: p139][14: p68] The last public service over the line was a Stephenson Locomotive Society railtour on 5th January 1958 hauled by LNWR 0-8-0 No. 49121 and LNWR Coal Tank No. 58926. [13: p139][15: fig. 65] Official closure came on 6 January.” [12][7: p184][16: p55][8: p107][17: p191]
Govilon Railway Station was “situated on a steep 9-mile (14 km) climb from Abergavenny at gradients as severe as 1 in 34. [14: p68][17: p164] A gradient post showing 1 in 80 /1 in 34 was installed on one of the station platforms.” [12][13: p116]
This gradient marker is present on the wall of the old station building. It does not match the gradient marker which was originally present. The original gradient marker highlighted a change in gradient from 1 in 80 to 1 in 34. [My photograph, 25th April 2022]Govilon Railway Station looking East along the platform for Abergavenny trains, this image was shared by Malcolm Lewis on the Abergavenny Railways History Facebook Group on 16th April 2023. [18]Govilon looking East along the second platform, for trains for Merthyr Tydfil. Malcolm Lewis shared this photograph on the Abergavenny Railways History Facebook Group on 2nd April 2023. [19]The view West from Govilon station along the route of the old railway. It is just about possible to make out the road overbridge in among the trees which surround the route of the old line in the 21st century. [Google Streetview, July 2011]Looking back towards Govilon Station along the route of the old railway. [My photograph, 5th July 2023]Turning through 180° we see the first overbridge on this length of the old railway. [My photograph, 5th July 2023]Looking back to the East through that first overbridge. [My photograph, 5th July 2023]Looking back East from 100 metres further West along the old line. [My photograph, 5th July 2023]Looking West along the footpath/cycleway which follows the Merthyr, Tredegar & Abergavenny Railway (The Heads of the Valleys Line) This winter view takes advantage of the vegetation die-back to show the bridge across the line much more clearly. The photograph was taken on 27th November 2010 and the image was shared by Gareth James on the Geograph website on the same day. It is shared here under a Creative Commons Licence (CC BY-SA 2.0). [21]The view West over the stone parapets of bridge carrying the road over the old line. The footpath/cycleway can just be made out between the trees. [Google Streetview, October 2009]
The plan below shows this length of the Merthyr, Tredegar & Abergavenny Railway leaving the Govilon Station (on the right of the extract), and passing under the road bridge before curving towards the Southwest and then back towards the West. On the North side of the double-track mainline are the sidings at Govilon Railway Station and then further West at the left edge of the extract, the sidings used by Wildon Iron Works.
The railway Station at Govilon and the area to the West of the Station. The base map is the 6″ Ordnance Survey of 1879-1881 which was published on 1888. The steep batter on the South side of the Railway indicates that the land is rising at that point and on the next map extract it will be noted that the level difference between the Railway and the land immediately to its South is significant. The Tramway ran at a lower level than the railway and, in order to follow the postulated route from the sketch map at the Railway Station, would have required a significant grade just off to the left of the map extract had the dotted mauve line been correct. The more likely line follows the contours and so ran across what became the line of the Railway curving to the South as it leaves the extract. Outward bound from the railway station our route follows the old railway as highlighted by the bold red line. Our route of return follows the narrower mauve line where possible. [24]The same area as included in the map extract above as shown on Google Earth. The route of the Merthyr, Tredegar & Abergavenny Railway is flanked by large trees. The route of Bailey’s Tramroad follows School Lane before running East-West to cross the line of the standard gauge railway. [Google Earth, 20th April 2023]The standard gauge railway, again shown by the red line, crosses the valley in which Wildon Iron Works was sited. This is another extract from the 6″ Ordnance Survey of 1879-1881 which was published in 1888. Bailey’s Tramroad route is highlighted by the thin mauve line. To the immediate East of the viaduct, the Tramroad’s route was significantly disturbed by the work to construct the Heads of the Valleys Railway. It is difficult to precisely fix the line of the Tramroad over that length but it would have kept to a falling grade towards Govilon and followed the contours as closely as possible. The solid mauve line on the extract does this. The dotted line, which is an approximation to the line drawn on the information board at Govilon Railway Station, does not do so. As the earthworks for the standard gauge line indicate, there was a significant rise in ground levels to the South of the standard gauge line. [24]The same area as included in the map extract above as shown on Google Earth. The route of the Merthyr, Tredegar & Abergavenny Railway is flanked by large trees apart from the length which ran over the viaduct close to the centre of the satellite image. Its route enters the image in the top-right, curves down through the centre of the image before running Northwest towards the top-left. The route of Bailey’s Tramroad enter from the right edge of this image, crossing the field above the mid-point of that edge of the photo. It crosses the line of the standard gauge railway, running on its North side for a short distance before following the contours of the side valley (lined by trees) and crossing a stone arch bridge before turning sharply to the North, again following the contours, crossing the standard gauge line once again and running alongside it to the North at a higher level. [Google Earth, 22nd April 2023]
The map extract above shows Bailey’s Tramroad deviating away to the South from the line of the more modern standard-gauge railway and following the contours of the valley as it sought a suitable crossing point over the stream which sustained a suitable gradient on the Tramroad. The more modern standard-gauge line crossed the stream valley on a stone viaduct.
The standard-gauge line’s viaduct was flanked by two significant local structures, one of which remains in place, the other of which has been substantially removed.
The Tramroad Bridge is a scheduled ancient monument. It has had some work done to secure it’s future, but is again in need of remedial work if it is not soon to collapse into the stream it crosses. We will see pictures of this bridge later in this article.
Wildon Iron Works closed in the 1870’s. The remains can be viewed from the railway viaduct or, with permission, by walking over privately owned land.
“The origins of the works are not documented but pre-date a 1790 entry in Bradney’s History of Monmouthshire. An 1846 map shows a number of workshops and outbuildings. Later this was expanded into a single complex. The site had a small furnace from which wire rod and nails were made from bar iron. It had its own water wheel fed from a large rectangular reservoir, and the site also housed a lime kiln. It expanded in the latter half of the nineteenth century, resulting in the stream being culverted and the addition of a number of buildings including a brick kiln. At this time it was known as Wilden Wireworks and therefore, may have been related to the wireworks of the same name in the Stour Valley, Worcestershire.” [26]
“Over the road to the North of the works were 4 small cottages in front of a managers house (whose deeds date from 1675 when the owners were the Prosser family). A cottage and the managers house still remain today. Near the cottages was the works weighing machine, stables and a blacksmiths shop – now 2 private houses. An incline ran down the valley, passing Upper Mill and stopping at the canal ”dry dock”. A branch of Bailey’s tramroad was run into the works, and later this was replaced by a railway siding running from the location of the current Forge car park.” [26]
This map extract from the 1879-1881 Ordnance Survey is a repeat of one shown some distance above. It shows the tramroad arrangement in the Wildon Iron Works referred to in the text below. [24]
The 1879-1881 Ordnance Survey map some distance above is repeated immediately above. It shows the railway siding running into Wildon Iron Works. The track layout immediately adjacent to the buildings suggests that it predated the railway. The curve at the Northwest corner of the buildings it probably too tight a radius for locomotive movements. Shunting on the private siding may well have been undertaken by horses.
To the West of the standard-gauge railway’s Viaduct, the line of the Tramroad, shown on the map extract above, now considerably higher than the later railway, followed a line on the North side of the railway cutting before switching back to the South side of the railway as shown on the next map extract below.
At its peak, up to 14 blacksmiths were employed at Siop-newydd for repairs and maintenance. This included shoeing horses used to pull the trams. The tramway sidings are clearly recognisable in the field between the lane and the railway track. [28]
The next few photographs focus on this area. …
Looking East along the old standard-gauge line from a point close to the West edge of the map extract above. [My photograph, 5th July 2023]Crossing between the old standard-gauge line and the route of the old Tramroad, this is the view East into the land between the standard-gauge line and what was probably a Tramroad yard and possibly exchange sidings once the length of the Tramroad East was closed. [My photograph, 5th July 2023]Looking North towards the old standard-gauge line from the line of Bailey’s Tramroad which is now a minor road. [My photograph, 5th July 2023]The view from the gates into the land which was once the Tramroad yard. [My photograph, 5th July 2023]Looking East along the line of Bailey’s Tramroad which ran across the front of the cottage on the left and down the minor road ahead. The Tramroad yard entrance is the greenway between the cottage and the minor road ahead. The gate(s) in the last two images are just beyond the cottage. [Google Streetview, July 2011]Looking West along the line of Bailey’s Tramroad. The cottage on the left of the image above is now seen on the right. The access to the Tramroad yard is on the right closer to the camera. [My photograph, 5th July 2023]Looking East from the same location as the photograph immediately above. [My photograph, 5th July 2023]Looking West along Bailey’s Tramroad from a point 100, or so, metres to the East of the picture above. [My photograph, 5th July 2023]Siop-newydd seen from the same location on the minor road which follows the route of Bailey’s Tramroad. [My photograph, 5th July 2023]The Tramroad yard seen from the minor road. [My photograph, 5th July 2023]Looking West along the line of the Tramroad. [My photograph, 5th July 2023]Turning through 180° to look East along the line of the Tramroad. [My photograph, 5th July 2023]Continuing East for a further 100 metres, this photograph looks along the line of the Tramroad. [My photograph, 5th July 2023]Still looking to the East along the line of Bailey’s Tramroad. As the minor road now turns to the left to cross a bridge over the footpath/cycleway which follows the old standard-gauge railway, Bailey’s Tramroad continued directly ahead. Its line ahead is cut by the cutting made for the Merthyr, Tredegar and Abergavenny Railway. [My photograph, 5th July 2023]The mauve line follows the route of Bailey’s Tramroad which was cut by the cutting of the Merthyr, Tredegar and Abergavenny Railway. [24]For a short distance the formation of the old tramroad was on the North side of the standard-gauge line. It turned South looking for a suitable place to cross the stream valley. [24]Hopefully this map will not confuse matters. It was very kindly shared with me by Richard Purkiss. On this map North is to the bottom side of the image. The map shows land ownerships after the construction of the standard-gauge railway.The view Southwest across the road bridge over the Merthyr, Tredegar and Abergavenny Railway. The original route of Bailey’s Tramroad crossed this road on the near side of the bridge. [Google Streetview, July 2011]Looking South along the line of the old Tramroad as it followed the contours round the stream valley. [My photograph, 18th April 2023]The line continued, curving round towards a stone-arched bridge. [My photograph, 18th April 2023]Hidden in the top soil are a series of stone blocks which were the ‘sleepers’ for the Tramroad. [My photographs, 18th April 2023]The South side of the historic masonry arch which carried Bailey’s Tramroad. [My photograph, 18th April 2023]The North side of the same arched structure. [My photograph, 18th April 2023]Looking East along the Tramroad formation over the historic arched bridge. [My photograph, 18th April 2023]
Ancient Monuments UK, is an online database of historic monuments that are listed as being of particular archeological importance. It lists this Tramroad bridge on Bailey’s Tramroad as being scheduled on 3rd January 1980 by Cadw (Source ID: 302, Legacy ID: MM204).
The website records the structure as being to carry Bailey’s Tramroad as it “crossed the steep valley of Cwm Llanwenarth by a loop following the contour of the valley. … The tramroad bridge is a simple single arched structure of excellent quality ashlar masonry. The springings of the arch are set back from the jambs leaving a step, a feature not uncommon on early 19th century industrial structures. … The monument is of national importance for its potential to enhance our knowledge of medieval or post-medieval construction techniques and transportation systems. It retains significant archaeological potential, with a strong probability of the presence of associated archaeological features and deposits. The structure itself may be expected to contain archaeological information concerning chronology and building techniques.” [27]
To the East of the old bridge, the Tramroad turned North following the contours of the valley.
This extract from the 6″ OS mapping of 1879-1881 shows the route of the old Tramroad crossing the later railway and curving to the East. Just to the South of the Merthyr, Tredegar and Abergavenny Railway the dashed-mauve line shows the line if the Tramroad presumed by the noticeboard at Govilon station. That route is shown on the second image below which makes it clear that the gradient involved was too steep. [24]The Tramroad formation heads North towards what became the line of the Merthyr , Tredegar and Abergavenny Railway. [My photograph, 18th April 2023]The field-track confused with the line of Bailey’s Tramroad. The Tramroad remained at the level of the land at the left of this image. [My photograph, 18th April 2023]
We have covered much of what is possible relating to railways just to the West of Govilon, with one exception. There is a reference on the Govilon History website to “An incline ran down the valley, passing Upper Mill and stopping at the canal ”dry dock”.” [26] The route of that incline may well be the straight track shown to the North if the stream and Mill Race on the map extract below.
Another extract from the 6″ IS maps of 1879-1881. Upper Mill is close to the centre of the image. The canal can be seen top-left. It is possible that the incline followed the long straight track to the North of the Mill Race. [24]
Bailey’s Tramroad and the Merthyr, Tredegar and Abergavenny Railway West of Siop-newydd
The footpath/cycleway continues to follow the Merthyr, Tredegar and Abergavenny Railway route to the West of Siop-newydd with Bailey’s Tramroad running parallel to it to the South. The route of railway and Tramroad to the West will be the subject of future articles in this short series, as a taster, here is one photo taken further to the West.
Further ahead of this location, the line curves round once again to the West and passes through Gilwern Station some distance ahead.
John Bartlett’s father, Cyril, was Station Master in the period before the closure of Govilon Railway Station. This picture was shared by John Bartlett on the Facebook group ‘Govilon and Gilwern Past’, accessed on 26th April 2022.
Michael Quick; Railway passenger stations in Great Britain: a chronology (4th ed.); Railway & Canal Historical Society, Oxford, 2009.
R.V.J. Butt; The Directory of Railway Stations: details every public and private passenger station, halt, platform and stopping place, past and present (1st ed.); Patrick Stephens Ltd., Sparkford, 1995.
W.W. Tasker; The Merthyr, Tredegar & Abergavenny Railway and branches; Oxford Publishing Co., Poole, 1986.
Mike Hall; Lost Railways of South Wales; Countryside Books, Newbury, 2009.
David Edge; Abergavenny to Merthyr including the Ebbw Vale Branch; Country Railway Routes; Middleton Press., Midhurst, 2002.
C.R. Clinker; Clinker’s Register of Closed Passenger Stations and Goods Depots in England, Scotland and Wales 1830–1980 (2nd ed.); Avon-Anglia Publications & Services, Bristol, 1988.
James Page; Rails in the Valleys. London: Guild Publishing, London, 1989.
I have lost the full details of the source of this image. If you know anymore about this photograph, please let me know. If you hold copyright for this image please also make contact. As far as I know it is out of copyright but I may be wrong. It can be taken down if necessary.
This is the second article about the tramroad and railways which served Penrhyn Quarries. The first provided a short history of the line and then followed the tramroad which was first used to replaced pack horses carrying slate and other goods between the quarries and Porth Penrhyn. That article can be found at:
The featured image at the top of this second article about the Penrhyn Quarry railways comes from the camera of K.H. Cribb and is included here with the kind permission of his son Russ Cribb.
The first picture is an embedded link to a photograph on Ernie’s Railway Archive on Flickr and is general view of Porth Penrhyn looking South towards the port headquarters.
The second image shows the port headquarters in 1961, a few years before final closure of the line. The photograph appears to have been taken from the bridge over the line and looks North into the port area.
The headquarters building at Port Penrhyn, Bangor, and part of the quay photographed in August 1961. The last narrow gauge train to carry slates ran on 28th June 1964. The Penrhyn quarry route is now a public path. [41]
The Penrhyn Quarry Railway (PQR) left Porth Penrhyn running alongside a standard-gauge LNWR branch which also served the port and linked it with the national rail network.
The older tramroad occupied the same formation area as the two later lines of the PQR. The standard-gauge line was built while the horse-drawn tramroad was operating.
The PQR and the standard-gauge line ran in close proximity for some distance after leaving the port. Both used the same bridges over the Afon Cegin.
The two railways ran on different gradients after a second crossing of the Cegin. The next photograph shows the two lines passing under the old A5. As illustrated, the Shrewsbury to Holyhead road (A5) crossed the PQR and the standard-gauge line. Each line had its own bore in a tall stone embankment. “The Penrhyn bore being 36ft long and of its basic loading gauge Viz. 15ft wide and 11ft 10in. height from rail to top of arch with 7ft horizontal clearance at the foot of the walls.” [29: p60]
The old structure shown above was later replaced by a more modern structure spanning only the PQR, as shown below. The structure now carries the A5 over the Lon Las Ogwen cycle-route.
After passing under the A5, the LNWR line rose to join the main Chester to Holyhead line west of Llandygai tunnel. The PQR ran on its own course as it travelled on from the A5 at Maesgierchen.
The Penrhyn Quarry Railway opened in 1879. Its route is shown as a red line, this map is rendered with Maperitive, text and integration: Pechristener Wales in United Kingdom.svg: TUBS United Kingdom location map.svg: NordNordWest • CC BY 3.0. [4]The routes of three railways can be seen on this extract from the 6″ OS Maps from around the turn of the 20th century. It shows the area South of the A5 road bridge referred to above. On the right of the image, running South from the Incline Cottage at the top of the extract, field boundaries define the alignment of the old Tramroad. To the West of the A5, which runs down the centre of the extract, are two lines which were in use when the survey was undertaken. Running closest to the A5 is the be LNWR standard-gauge branch. The narrow-gauge Penrhyn Quarry Railway is to the West of the standard-gauge line and follows the East bank of the Afon Cegin. [5]The same area as shown on the OS 6″ Map above. The alignment of the old tramroad is illustrated by the red line. The newer narrow-gauge railway is shown light-blue. Parallel and immediately adjacent to the East of the Penrhyn Quarry Railway was the standard-gauge LNWR line. The two lines began to separate to the Southwest of the A5 road. The approximate alignment of the standard-gauge line is shown in purple. The A5 runs down the centre of the image. [5]
The old tramroad is covered in the first article in this short series:
This article follows the Penrhyn Quarry Railway which was operational from the 1870s. Motive power was given some consideration in the earlier article.
In this extract from the 6″ Ordnance Survey from the turn of the 20th century we see the two routes diverging on their way South. [6]Approximately the same area as appears in the 6″ Ordnance Survey above but focussing on the PQR. Shown, this time, on the RailMapOnline satellite imagery. The route of the Penrhyn Quarry Railway is shown in pink. [7]
At a gradient of 1 in 209 the PQR left the Nant Maes-y-Geirchen gorge crossed the occupation crossing to Felin-Esgob and approached the fine spectacle of the Chester & Holyhead Railway’s Cegin Viaduct.
The Cegin Viaduct “has seven semi-circular arches each of 35ft span – it has masonry piers but the stone arches are faced in brick (Ref: Public Record Office, M.T. 27/49.).” [29: p60]
As an aside, The Bethesda Branch which runs along a similar route to the PQR was a 4.25mile (6.8 km) line between Bangor and Bethesda in Gwynedd, North Wales. Its primary purpose was to bring quarried slate down to the main line for onward transport. It existed in competition with the private PQR. It opened in July 1884, and a local passenger service was run as well as trains for the mineral traffic.
Competition with the PQR was healthy and the two lines managed to co-exist until increasing road competition led to the cessation of ordinary passenger services on the branch in 1951; goods traffic and occasional passenger excursion journeys kept the line going until its complete closure in October 1963. [19]
Wikipedia tells us that the line climbed all the way from the main line, rising for much of the way at 1 in 40. Major features on the branch included the Ogwen Viaduct and the Tregarth Tunnel which was 279yards (255metres) long. Apart from the terminus at Bethesda, there were two intermediate stations on the route – at Felin Hen and at Tregarth. [19]
The Bethesda Branch formation now provides a cycle and walking route to Bethesda from Porth Penrhyn – known as the Ogwen Trail, part of the Sustrans 82 cycle-route.
Continuing to look at the Penrhyn Quarry Railway …. we head South from the Cegin Viaduct.
At about 70ft above sea-level, there was a halt for the Workmen’s Train adjacent to Lon Cefn Ty. The bridge here (once just a footbridge) carried the road over the PQR. To the West of the bridge, the Lon Cefn Ty crossed the Afon Cegin by means of a ford (with a footbridge for pedestrians) and then passed under the Bethesda Branch which was on a steep falling grade from its junction with the mainline just to the East of Bangor Tunnel.
The PQR left the East side of the Afon Cegin and crossed the Glas-yn-Fryn embankment, passing Coed-Hywel-Uchaf Farm on its left then passed 15ft below the LNWR Bethesda Branch by means of an acutely-skewed bridge. Boyd tells us that the LNWR retrieved this bridge from another site and cut it down “to a 31ft span for re-use here; it formed a ‘tunnel’ almost 43 ft long for the narrow gauge and gave generous vertical clearance of 14 ft and 14 ft horizontal!” [29: p59]
As the satellite image above shows, to the South of the A55, the alignments of the PQR and the LNWR Bethesda branch converged and ran parallel to each other at different levels. Immediately South of the A55, the PQR formation ran across what is now an open field. before passing under the Bethesda branch. On the adjacent map extract, to the East of Glasinfryn. The Bethesda Branch is highlighted in purple and the PQR in pink.
The Bethesda branch Felin-hen station was Immediately to the South of this point. It appears at the top of the 6″ Ordnance Survey map extract below. The PQR can be seen drifting away to the Southwest alongside the A4244 (Felin Hen Road).
The PQR runs in a large arc round to the East passed a Gravel Pit which had its own connection to the line. [13]This satellite image covers the same area as the map extract above. [7]
The line curved to the right and then to the left left and crossed the Felin-Hen Road on a 17ft lattice ironwork span and the Felin-Hen stopping point before passing through a heavily wooded area in cutting.
The view along Felin Hen Road from the Northeast. The Bethesda Branch was carried over the Felin Hen Road on a girder bridge. The PQR ran alongside the road in a Southwesterly direction for a short distance before crossing the road at its junction with the B4409. [Google Streetview]The route of the PQR crosses the Felin Hen Road at its junction with the B4409. [Google Streetview]
Continuing to curve to the left, trains passed a short siding alongside on the left which did not have a permanent connection to the PQR. This siding served “a small gravel pit and connection was made as required – and probably since 1881 – by a set of portable Spoon Points which were lifted off after use. On Mondays a wagon was manhandled down to here from Coed-y-Parc, pushed through the narrow curved cutting into the working and loaded up as required; output was small being only about 150 tons a year, with 1912-14 being the best period. An embarrassing accident occurred to the Up Workmen’s Train here one Monday morning, when, the Spoon Points having been inadvertently left in position, the train engine tried to enter the gravel pit and was derailed. The Engineer’s diary records the date, 3rd February, 1941, that the engine was CEGIN – an unusual choice – and that the train ‘Arrived Mill 10.30 a.m’.” [29: p59]
The PQR then continued to sweep round in a wide arc towards the East, gaining height as it travelled. Completing the curve to the left the PQR was then running West-northwest and to the North of Moel-y-ci Farm which is now, in the 21st century, the site of a Farm Shop (Blas Lon Las). The route of the PQR crosses the access road to the Farm Shop and gradually converges with the line of the Bethesda branch. There was an overbridge carrying the Moel-y-ci Farm lane.
James Boyd says that along this section of the PQR there was a long (250 yard) loop together with a long siding on the North side. “trains passed each other on the right. Unusually, iron railings fenced the route here, whereas elsewhere the ubiquitous estate fence made of slabs stuck into the ground on edge and wired together near the top, was (and is) a feature of the district.“[42][36: p58]
Clicking here will take you to an image of ‘Linda’ on a PQR main line up train a few years before closure in 1961 which includes the slate slab and wire fencing mentioned by Boyd. [40]
“Until the reduction in trade made the running of but one train (from 4th May, 1928) sufficient to move stocks, trains passed here regularly. There was a water tank used by Up trains which stopped if required. … There was no signalling. The loop, Pandy (or sometimes Tyn-y-Lon) was an original stopping point for the Workmen’s Train and boasted one of the four Waiting Huts, but a stone throwing incident during the Great strike so displeased His Lordship that the stop was removed.” [36: p58-59]
The two railways may be running very close together on the map or satellite image but the vertical separation was significant with the LNWR line in deep cutting.
Boyd comments that the Workmen’s Train Halt in Tregarth was behind Shiloh Chapel, it was “linked with the nearby road by footpath and wicket gate. No trains ever seemed actually to stand there, for it was sufficient for the Workmen’s rake to run slowly past as the men jumped on or off!” [36: p58]
It appears from the annotated map extract sent to me by Robin Willis, that the Workmen’s Halt was on the East side of the main road rather than behind Shiloh Chapel. Nonetheless the quote from Boyd remains apposite.
Looking from the South along the B4409 in Tregarth: the approximate line of the PQR is shown by the pink line. It passed under the road at this point. There is a footpath/cycleway at the right side of this image running away to the East which appears to be on the line of the old PQR. This is the Lon Las Ogwen and is shown on the next Streetview image below. [Google Streetview]The Lon Las Ogwen again at the point where the PQR crossed under the main street in Tregarth. At the rear of the gardens of the adjoining properties, the Lon Las Ogwen bears left, heading back to the old Bethesda Branch, while the line of the PQR continues in an East-northeast direction. The land level dropped down to the level of the PQR and then the line was on embankment for a short distance as the map extract below shows. [Google Streetview]Tregarth Station on the Bethesda Branch of the LNWR is shown on this extract from the 6″Ordnance Survey. The PQR can be seen crossing the map extract to the South of the LNWR line. [16]The next length of the PQR crosses open ground in a East-northeast direction. the satellite image is once again provided by RailMapOnline. [7]
The PQR passed under the main road in Tregarth through what James Boyd describes as “the ‘standard’ form of road overbridge, stone with brick facings.” [36: p58]
After crossing over the Bethesda Branch the route of the PQR is shown on the 6″ Ordnance Survey looping tightly round following the contours to run due South. It is high enough to cross the metalled lane to the East of Tregarth. The Bethesda line is shown in tunnel on this map extract with the PQR crossing it’s line once again above the southeastern end of the tunnel. [17]This small extract from satellite imagery shows an area one-third down the left side of the extract above from the 6″ Ordnance Survey. The lane to the East of Tregarth was crossed by the PQR after the PQR ( pink line) crossed the LNWR branch at high-level. [Google Maps]
The bridge was a skew single arch structure in brick and was funded by the LNWR.. the Bethesda Branch was 31ft below the PQR at this point. [36: p58] Details of the bridge over the lane can be found below. Immediately below are two pictures taken from road level of the 21st century remains of the bridge over the lane.
Facing Southeast along the lane referred to above. The abutments of the girder bridge which used to carry the PQR are clearly visible. [Google Streetview, November 2022]Facing Northwest along the same lane. [Google Streetview, November 2022]The satellite imagery provided by RailMapOnline covering the same area as the 6″Ordnance Survey above shows the significant loop in the line of the PQR and its relation to both the older tramroad route (red line) and the LNWR branch (purple line). The Tramroad alignment meets the newer PQR at the top of the Ddinas Incline and then follows the same route South. [7]
After crossing the LNWR, which was in deep cutting, the PQR ran along a very short embankment before bridging the Tal-y-Cae to Hen-Durnpike road which climbed steeply beneath it. The bridge was originally a 25ft timber span (which was replaced in steel) on stone abutments. Just beyond the bridge was the Corrig-Llwydion Workmen’s Train halt, then a shallow cutting followed by an equally shallow causeway. The line was now climbing at 1 in 93 and at approximately 400ft above sea level.
As both the 6″ OS map extract and the satellite image above show, the line turned very sharply to the right round the flanks of Pen-Dinas. Apparently, the tightest radius on the line was at this location (85ft) and the Baldwin locomotives purchased by the PQR were known to derail here on occasions. The line here was supported on low walls. Boyd tells us that the right of way of the PQR widens out at the head of the old Incline. There used to be stabling loops for the Incline at this point. [36: p58]
Between the old tramroad incline and Hen-Durnpike in Bron-Ogwen the newer PQR followed the line of the old Tramroad. Boyd describes this section: “the line was carried on a stone shelf. … Parallel and below, the old road to the Quarry kept company.” [36: p57]
Boyd describes this road crossing as: “a close-walled road and rail intersection with protective tall semaphore signal (its signal hut perched on the walling, the enceinte of successive Mrs. Parry – gatekeepers) and twin road gates, made all the more risky as several roads met hereabouts. The hut, wooden walled and slate roofed, survived the closure. Here the line was 420 ft above sea level, and there were ‘Whistle’ boards on each side of the gates; this was a most dangerous and narrow place, more especially for the road-user! The position of the approaching train could be determined quite exactly by long forewarning of its steam hooter, each main line engine having an individual tone.” [36: p57]
Behind the road crossing and running along the backs of the properties in Bron-Ogwen on the B4409, initially on a shallow grade, then climbing at a gradient of 1 in 36 the PQR reached open land. Here, at first, it ran on a causeway spanning a footpath, and then it passed through a series of rock cuttings, one being only 8ft wide at formation level. [36: p57]
As we noted above the route of the PQR and the earlier Tramroad diverge close to the top of this extract from the 6″ Ordnance Survey. The PQR was still in use at the turn of the 20th century and it appears as an active line. The route of the old tramroad passed through the bottom of the garden of the properties to the East of the PQR and then followed the route first delineated by the dotted lines. The route is shown on the following satellite image. [28]The same area shown on satellite imagery which includes the two routes as plotted on RailMapOnline. [7]
Over open land to the West of the modern B4409 the PQR ran on a high embankment/causeway, 18ft high and 10ft wide. The outer walls of which were formed of stone slabs which were then back filled with earth/arisings from the Quarry.
The two separate routes continue onto this next map extract and cross to the bottom right of the image. The later PQR was carried through this area on a slate-slab embankment crossing the footpath at high level by means of a 5ft span bridge. [36: p56] [29]The same area as above as it appears on the satellite imagery from RailMapOnline with the two routes plotted. [7]For a short distance the old tramway route runs to the West of the PQR, as the lines drawn on the satellite image below demonstrate. [30]This satellite image brings the PQR to the industrial complex at the North end of the Quarry site. [7]The view West from the B4409 along St. Ann’s Hl. The pink line shows tha approximate alignment of the PQR which crossed St Ann’s Hl on a bridge. The red line marks the route of the old tramway. Both the lines were at high level over the road which was in a deep cutting, as over the years the spoil heaps either side of the road had built gradually built up to levels that required high retaining walls. Once the rails had gone the bridges could be removed and road levels raised on St. Ann’s Hl and the main road. Boyd tell us that the bridge carrying the PQR “was formed in the ‘standard’ method used elsewhere viz. a square-section timber beam supported on slab piers, 4-hole chairs being used thereon to carry each rail. And this was not all, as an adjacent tip line also had its own bridge over the road until the site was full and the tip abandoned. Here too a junction in the tipping system had once thrown off a spur line which passed off the top of the ‘fortress walling’ and crossed the old turnpike road by a wooden span; it led on to further spoil banks on the east side of this road, which at a later date were linked by an incline which dropped a tramway into the Ogwen Tile Works.” [36: p56] On the North and South sides of St. Ann’s Hl the PQR was carried on a slate-slab embankment which held it above the growing spoil heaps. [Google Streetview]Looking North, back along the line of the old tramroad towards Porth Penrhyn. [Google Streetview]Looking South along the line of the old tramroad towards Penrhyn Quarry. [Google Streetview]
After crossing St. Ann’s Hl the old Tramroad continued on to the South towards the Felin-Fawr Slate Works and the Quarry. The later PQR route and the Tramroad route meet once again just before a footbridge. Felin-Fawr House was just beyond the footbridge to the left and Mill Cottage was on the right. James Boyd notes that the footbridge was constructed by John Foulkes in 1823 and framed wooden gates to close off access along the line to the Slate Works.[36: p55]
A short distance beyond the footbridge the trains reach the summit of the line. At that point they had climbed 550ft from Porth Penrhyn. [36: p56]
The summit was close to a point where a standpipe was on the retaining wall which ran down the West side of the Slate Works site, to the right of the line. It was along this length of the line that loaded slate trains were prepared for their journey down to the port.
The mainline stayed close to the wall which can still be seen on site in 21st century. The photograph below shows a port-bound slate train being prepared to for the journey North with ‘Linda’ in charge.
To the East of the mainline there were three sidings between it and the original slate-slab mill. One of these sidings was increasingly used for locomotives which had been taken out of service. The mainline continued South beyond the slab mill and then, once it has been built in 1900, under an overbridge which, like the footbridge’ was gated to control access to the site of the Quarry. Beyond the overbridge were the main sidings where slate wagons were marshalled either for their journey to the coast (if they were full).
We finish this portion of our journey with a look at some of the locomotives which were stored at Felin-Fawr and some of the rolling stock in the immediate area.
Terry Dorrity writes of the photograph above: “This was the bitter-sweet sight that met visitors to the Coed y Parc Penrhyn Works at Bethesda in Snowdonia. The sad line of withdrawn locomotives resting and rusting, apparently beyond saving, in a sort of mini Barry scrapyard must have encouraged many a daydream but fortunately every one of them, except SKINNER, has been preserved.” [47]
The Locomotives are: “EIGIAU; STANHOPE; the de Winton, KATHLEEN; JUBILEE 1847; frames wheels and part of the cab of SKINNER; LILLA, and SGT MURPHY await their fate with LILLIAN, which was next in line but out of sight.” [47]
Terry Dorrity continues: “EIGIAU is an Orenstein and Koppel 0-4-0 well tank built in 1912 (works number 5668) which was originally supplied to C L Warren contractors in Cheshire and named SUNLIGHT. In 1916 it was sold to the Aluminium Corporation of Dolgarrog for use in building Cowlyd reservoir and renamed EIGIAU after a lake in Snowdonia. It became a Penrhyn locomotive in 1928. It was taken out of service in 1949 and was bought for preservation by Mr G J Mullis and removed in pieces to Droitwich in January and February 1963 and restored to working order. It ran at Bressingham Gardens for some time but it is now part of the Bredgar and Wormshill Light Railway collection.” [47]
A number of photos taken by Barry Fitzpatrick, Ron Fisher and Ken Cribb, included here follow, all of locos on the line at Felin-Fawr. All pictures used by permission of the photographers or, in Ken’s case, with permission from his son Russ.
A short history of the line is followed by some information about the locomotives used on the line. This first article then focusses primarily on the horse-powered tramroad which preceded the later Penrhyn Quarry Railway.
Penrhyn is the Welsh word for ‘promontory’.
“The history of Port Penrhyn can be traced back as early as 1713 when it was recorded that 14 shipments totalling 415,000 slates had been sent to Dublin. In 1720, another 8 shipments totalling 155,000 slates were sent to Dublin, two to Drogheda (20,000) and one to Belfast (35,000). Two years later, a shipment of 80,000 slates were sent to Dunkirk. After these few shipments only coastal traffic left from Aber-Cegin (Port Penrhyn) until Richard Pennant took over the ownership of Penrhyn Estates and appointed Benjamin Wyatt in 1786 as agent.” [23]
Porth Penrhyn in the mid- to late- 19th century. [23]
The Penrhyn Railway opened as a tramroad in 1801 which ran from quarries a few miles inland from Bangor in North Wales to the coast at Port Penrhyn. The gauge of the tramroad was 2ft 0.5in. It was constructed by Lord Penrhyn at a cost of around £175,000. [1][2] The alignment was as shown on the map immediately below.
The Penrhyn Railway 1801 to 1878: rendered with Maperitive, text and integration: Pechristener Wales in United Kingdom.svg: TUBS United Kingdom location map.svg: NordNordWest • CC BY 3.0. [1]
It was thought that there was an earlier line which ran between Port Penrhyn and Llandegai. That tramway, if it existed, was constructed in 1798. Its route paralleled that of the northern end of Lord Penrhyn’s tramroad. One theory is that this earlier tramway was operational until 1831. [1] There appear to have been two inclines on the Llandegai Tramway, one close to the port and the other directly adjacent to Llandegai Penlan Mill at Llandegai at the Southern end of that line. Both are shown on the image below.
The Llandegai Tramway: rendered with Maperitive, text and integration: Pechristener Wales in United Kingdom.svg: TUBS United Kingdom location map.svg: NordNordWest • CC BY 3.0. [1]
Research in 2021 suggests that the earlier tramway did not exist. [2]. If it did, it is likely that it was subsumed into the tramroad built by Lord Penrhyn. There is also research, undertaken in 2019, which suggests that a tramway was probably constructed in 1798 in connection with the Penrhyn Mills on the lower Ogwen. [35] My thanks to David Elis-Williams for providing a link to this research by Barrie Lill.
Lill comments that the Penrhyn Mills at Llandegai had a part in the development of the tramway/tramroad which eventually served the Penhryn Quarry: “The mill had what David Gwyn believes to be part of the first iron-railed overland edge railway of any length in the world, and the first iron edge railway built for the mass movement of stone. However, whereas James Boyd conjectures that originally the Penlan railway only extended from Port Penrhyn to the mill at Llandegai, pre-dated the Penrhyn Quarry Railway by three years, and was only later extended to the Quarry, [36] Gwyn does not agree. Instead he believes that the Penlan line merely was an off-shoot from the Quarry Railway. [37] At present there is no available evidence to confirm either theory, although there is a belief that prior to publishing his book on the Penrhyn Quarry Railways, Boyd had obtained supporting documents which no longer are publicly available. Irrespective of the above it seems unlikely that the mill would have opened without an adequate transportation system such as some simple form of tramway being in place, and in this scenario it is likely that the problems encountered with the working of this system are what prompted Wyatt to adapt the system and introduce the iron-railed edge railway to which David Gwyn refers.” [35]
Lord Penrhyn was persuaded by William Jessop to build the tramroad. “Jessop and his partner Benjamin Outram were then constructing the Little Eaton Gangway in Derbyshire. Samuel Wyatt was also involved in the construction of the gangway, and his brother Benjamin was the Penrhyn estate manager.” [1][2]
“Benjamin Wyatt was put in charge of building the tramway. Construction started on 2 September 1800, with the first slate train travelling on 25 June 1801. … The track used oval rails designed by Benjamin Wyatt, and their quoted gauge of 2 ft 1⁄2 in (622 mm) was measured between the centres of the rails. The railroad was operated by horse power along with gravity and three balanced inclines – “Port” (sometimes called “Marchogion”), “Dinas” north east of Tregarth and “Cilgeraint” a short distance north of Coed-y-Parc workshops in Bethesda. The longest was 220 yards (200 m).” [1]
Before the tramroad was constructed, slate was transported to the port by horses along mountain paths. After the tramroad was brought into service the local costs of transport fell from 4 shillings/ton to 1 shilling/ton. [1][4: p42-43]
In 1832, “Wyatt’s oval rails were replaced with more conventional … rails. The gauge of this new track was 1ft 10.3⁄4in (578 mm), measured between the inner edges of the rails – the conventional way of measuring track gauge.” [1][3]
In 1876 the tramroad was “rebuilt on a new course with steel rails laid on wooden sleepers. Steam locomotives were introduced, supplied by De Winton & Co. Engineers of Caernarvon.” [5]
Thomas Middlemass tells us that De Winton supplied ten locomotives to the line. “Seven were to be used at the quarries, three were to work the ‘main line’ to the coast, and all* were vertical-boilered 0-4-0 tanks.” [6: p16] They had two cylinders secured below the running plate with direct drive to one axle. The total weight varied between 4 and 5 tons. [7]
* … It appears that Middlemass has overlooked the fact that 3 of the 10 locomotives were fitted with horizontal boilers and were 0-4-0ST locos. They were named ‘Edward Sholto’, ‘Hilda’ and ‘Violet’, and were supplied in 1876, 1878 and 1879 respectively. [34]
Between 1882 and 1909 the Hunslet Engine Company of Leeds supplied sixteen four-wheeled locomotives for use in the quarry and on the line to Port Penrhyn.” [5]
One surviving Penrhyn locomotive is 0-4-0 vertical-boiler tank engine “George Henry,” which was built in 1877 and still looks good 140 years later at the Narrow Gauge Railway Museum in Tywyn, Wales.
The new route to suit steam-power obviated the need for the inclined planes, maintaining the easiest possible gradients. “Between coast and quarry it rose 550 feet, and, allowing for a stretch of 1/4 mile at 1 in 37 and 3 miles at 1 in 40, the average gradient emerged as 1 in 91. Flat bottomed rails were laid at first, but these were replaced in 1894 by the 50 lb bullhead variety.” [6: p15-16]
The new route of the Penrhyn Railway which opened in 1879: rendered with Maperitive, text and integration: Pechristener Wales in United Kingdom.svg: TUBS United Kingdom location map.svg: NordNordWest • CC BY 3.0. [1]
“The first locomotives used on the new railway were three De Winton’s. … Although successful, these locomotives were not powerful enough for the substantial traffic that passed down the line.” [1]
In 1882 the railway ordered ‘Charles’, a large 0-4-0ST from Hunslet. Charles proved very successful and was followed by ‘Blanche’ and ‘Linda’ in 1893 to the same basic design. These locomotives were the mainstay of the railway for the rest of its life.
In 1882 Penrhyn switched to more conventional locomotion, ordering “‘Charles’, a large 0-4-0ST from Hunslet. Charles proved very successful and was followed by ‘Blanche’ and ‘Linda’ in 1893 to the same basic design. These locomotives were the mainstay of the railway for the rest of its life.” [1]
“Between then and 1909 a positive spate of tank locos flowed, new, from Hunslet Engine Co. All were 0-4-0 saddle tanks, with weight and power variations introduced to meet specific Penrhyn requirements. Three were designed to work the ‘main line’, three were employed shunting at Port Penrhyn. Four of the smallest were confined to quarry work, and these were supplemented a few years later when six larger tanks arrived. As it happened, the latter were the last new purchases by Penrhyn.” [6: p16]
Among the Hunslet locomotives were the Penrhyn Port Class of three locomotives “built for the Penrhyn Quarry Railway (PQR). These locomotives were built by the Hunslet Engine Company between 1883 and 1885 and supplied specifically to work at Port Penrhyn near Bangor, North Wales. They were a variant of the standard Dinorwic Alice Class design.” [8]
“The Penrhyn Main Line class was a class of three narrow gauge steam locomotives built for the Penrhyn Quarry Railway (PQR). These locomotives were built by the Hunslet Engine Company between 1882 and 1893 and supplied specifically to work the railway that connected the Penrhyn Quarry near Bethesda in north Wales to Port Penrhyn on the Menai Strait.” [9]
“All three locomotives were preserved after the closure of the PQR. Charles was donated to the Penrhyn Castle Railway Museum. Linda was loaned to the nearby Ffestiniog Railway in July 1962. For the 1963 season the locomotive was re-gauged to the Ffestiniog’s 1 ft 11.5 in (597 mm) and purchased, along with Blanche at the end of the year. Both have since received extensive modifications including tenders, pony trucks and superheating.” [9]
The post-First World War years brought such economic instability that second-hand locos were not hard to find. Penrhyn bought 15 such from 1922 onwards. [5]
In 1923, three ex-US Army Baldwin 2-6-2Ts were also imported for ‘main line’ use, but, as happened elsewhere in Britain, they were never popular, and their working life was short.
The railway was private, providing no public service for either goods or passengers. Quarrymen’s trains were run, paid for by the quarrymen themselves.” [5]
“Today Porth Penrhyn in Bangor still serves the Penrhyn Quarry at Bethesda. Although today slate production and exports are not at 19th century levels it continues to be a key part of the business of slate. Exports of crushed slate (aggregate) by Penrhyn Quarry, through Porth Penrhyn currently to Rotterdam, or ports along the south coast of England, have grown to become a significant proportion of Welsh Slate sales in addition to several containers of roofing slates being shipped every month to Australia alone (taking approximately 45 days).” [23]
“Welsh slate is now covering the roofs of buildings as prestigious as the New South Wales Supreme Court and historic as Unwin’s Stores, both in Sydney Australia, as well as the Arts Centre in earthquake-hit Christchurch, New Zealand 2012. Europe also is a prime destination for Welsh slate with shipments of slate and decorative aggregate within Europe continuing to grow and evolve in particular.” [23]
All rail connections to the quarry disappeared in the mid-20th century under competition from road transport
The Post-1879 Route of the Railway
We start at the North end of the old railway at Porth Penrhyn. Porth Penrhyn) is a harbour located just east of Bangor in north Wales at the confluence of the River Cegin with the Menai Strait.
We follow the route on the Ordnance Survey 6″ Maps from around the turn of the 20th century as supplied by the National Library of Scotland (NLS). [10]
Before the future A5 was developed as a turnpike in 1820, the tramroad ran within the width of the old highway from this point for a few hundred yards. When the turnpike was created, the road level was lifted and the tramroad crossed beneath the renewed highway and ran along the Southwestern side. The sketch below shows this.
The old tramroad which was operational until 1879 was diverted to accommodate the construction of the turnpike. We start following the route of that old Tramroad. This sketch is based on a drawing in James Boyd’s book. [36: p11] He refers to the diversion in the text of the book as well.[36:p22]In this extract from the 6″ Ordnance Survey from around the turn of the 20th century, the short standard-gauge branch meets the mainline. The route of the old tramroad has now crossed the A5. The Penrhyn Quarry Railway only appears fleetingly in the top left corner if the map extract. [24]The same area as shown in the 6″ OS map above, as recorded on the ESRI satellite imagery provided by the NLS. The colour coding remains the same as in previous satellite images. [24]
A. The old tramroad
Beyond this point, we first follow the line of the old Tramroad to Penrhyn Quarries. …..
This next extract from the 6″ Ordnance Survey shows the route of the old tramway flanked by walls and passing in front of the Grand Lodge of Penrhyn Castle at Llandegai. [25]The same area now shown on the ESRI satellite imagery provided by the NLS. The lodge can be made out just to the Northeast of the red line which shows the approximate route of the old tramway crossing the roundabout on the A5 at Llandegai. [25]The approximate route of the old tramway is marked on this picture, as before, with a red line. The photograph is taken from the roundabout on the A5 at the entrance to Llandegai Industrial Estate which is in the top left of the satellite image above. The line ran just a few metres to the Southwest of what is now the A5. [Google Streetview]The approximate line of the old tramway runs across the next roundabout on the A5 before curving round to the South. [Google Streetview]Looking along the line of the old Tramroad from the modern roundabout, with the A5 heading South on the right. [Google Streetview]This is a repeat of the sketch shown earlier which is based on a drawing from James Boyd’s book. [36: p11] After being diverted from its original route, the tramroad ran on the Southern side of the highway before turning away to the South. The Smithy shown in the sketch appears on the 6″ map extract below. Just to the North of the Smithy there was a branch from the old tramroad which served the bottom of the Llandegai Incline which connected the Upper Penrhyn Mill to the tramroad. There were two level crossings at this location, one of which became an over ridge when the turnpike was built in 1820.The route of the old tramway continues on this next extract from the 6″ Ordnance Survey. At the top of the extract it is just to the left (West) of the Smithy. It crosses the standard-gauge line which is in tunnel at this point the Llandegai Tunnel). Further the south the formation, at the time of the survey was being used as an accommodation road to access ‘Bryn’ and then even further South, it was being used as a footpath. [26]This is an extract from ‘RailMapOnline’ which shows the route of the old railway plotted on modern satellite imagery. The purple line close to the top of the image is the line of the Llandegai Tunnel on the standard-gauge mainline. [27]Just to the South of the underground route of the standard-gauge mainline (Llandegai Tunnel), the old tramroad alignment crosses the access road to the A5 and runs South along the accommodation road visible to the left of the road in this image. [Google Streetview]The old tramroad route followed this lane South. [Google Streetview]At the end of the lane, a footpath can be seen running South. The hedge ahead in this image partially blocks the route but allows pedestrian access. [Google Streetview]The route of the old tramroad and the later footpath remain on the same alignment as far as the top corner of the woods shown in this map extract. From that point southwards the Tramroad route crossed the fields in a Southeasterly direction. [28]The same area as shown on the 6″ Ordnance Survey extract above. The North Wales Expressway is the notable modern addition to the image [27]The obvious features on this next extract from the 6″ Ordnance Survey which mark the line of the tramroad are the walls to the rear (West) of the cottages at Tyddyn-Iolyn. South of these properties the tramroad ran alongside the road for a very short distance. After which it curved away to the Southwest before curving back towards the Southeast to a point to the South of Llan-isaf Cottage. [29]The route described in the notes to the 6″ map extract immediately above are illustrated on this satellite image. [27]Facing South along the lane to the South of Tyddyn-Iolyn, showing the approximate line of the old tramroad in red. [Google Streetview]Looking back to the North along the lane to Tyddyn-Iolyn showing the point at which the old tramroad crossed the line of the lane. To the East of this point the Tramroad turned to the South and then to the West. [Google Streetview]The walled route of the Tramroad can still easily be picked out on the 6″ Ordnance Survey. After a short distance travelling in an West to East direction and before reaching the banks of the Afon Ogwen at a point to the North of Tyddyn-Dicwn it turned once again towards the South. [30]On the modern satellite imagery from RailMapOnline, the tramroad route appears to be within the width of the modern A5. There are signs that the actual formation of the old tramroad runs through the woodland to the South of the A5. Boyd shows this diversion on his map of the route. [36: p11] Its route can be picked out some metres to the South of the A5 but then rather than following a curving hedge line to the North and the East of Tyddyn-Dicwn at the bottom right of this satellite image. It continued towards the road junction, crossing the Southbound road just to the South of the junction. [27]The probable route of the old tramroad at the point where it crossed the road South towards Tregarth. From this point it travelled South between the road and the Afon Ogwen for a few hundred yards. [Google Streetview]The route of the old tramroad can again be picked out easily on the West Bank of the Ogwen passing an old quarry and then running immediately adjacent to Pen-isa’r-allt and on to meet Lon Ddinas. [31]RailMapOnline shows the tramroad crossing fields to the South of Lon Ddinas to join the route of the later Penrhyn Quarry Railway. This extract shows that route. Looking at the gradients involved and the 6″Ordnance Survey, it seems possible that this was the case only if an incline was used. There is no evidence of this on the ground. It seems more likely that Lon Ddinas runs along the line of the old Tramroad and may well, in times past have shared the same formation. The gradient along Lon Ddinas would have been much more suitable. However, records indicate that there was an incline at this location – known as the Ddinas Incline. [27]The lane which can easily be confused with the route of the old tramway is clearer on the 6″ Ordnance Survey. However, the Ddinas Incline followed the present field boundaries from close to Ddinas Farm up the relatively steep escarpment to meet the later Penrhyn Quarry Railway route. [32]
“The Ddinas Incline was one of three gravity-worked inclines on the original line of the Penrhyn Railway, built 1800-1801 to transport slate from the Penrhyn quarries to Port Penrhyn. … About half-way up the incline was an overbridge carrying a minor road, now widened and straightened at this point. To the north a cutting can still be seen, but the lower part of the incline has been destroyed by construction of a sewage works. To the south the line is visible as a terrace in the field. A ruined wall constructed of large roughly squared stone blocks near the top of the incline may be a surviving fragment of the winding house.” [33] W J Crompton, RCAHMW, 5 November 2009.
From this point on, the old Tramroad and Penrhyn Quarry Railway followed approximately the same route. The second article about these lines will follow the Penrhyn Quarry Railway to this point at Tregarth.
Dan Quine; The development of Port Penrhyn, Part One: 1760-1879; Archive. No. 110. Lightmoor Press, June 2021.
James I.C. Boyd; Narrow Gauge Railways in North Caernarvonshire, Volume 2 The Penrhyn Quarry Railways; The Oakwood Press, Usk, 1985. (The British Narrow Gauge Railway No. 5.)
Susan Turner; The Padarn and Penrhyn Railways; David & Charles; Newton Abbot, 1975.
This post is a short addendum to my post about the pre-railway age and the tramways of Pembrokeshire. In that post there was a section about the Porthgain to Abereiddi Tramway. In writing about that tramway, I failed to include details of the 3ft-gauge clifftop tramway which linked the slate quarry at Pen Clegyr Point with Porthgain.
I also failed to note the detail of the tramway tunnel between St. Bride’s Quarry and Porthgain Harbour. The original post can be found here:
Much of this current post about the Clifftop Tramway is summarised from a book by R.C. Jermy – “The Railways of Porthgain and Abereiddi,” which is an excellent study of the location. [2]
The 1906 6″ OS Map shows the clifftop tramway. [1]By the time the 1906 survey was undertaken the tramway tunnel and St. Bride’s Quarry were abandoned and the tramway rails through the tunnel had been lifted. The two short branches of the clifftop tramway can be seen to good effect on this map extract. [1]
By 1906, lines which linked St. Bride’s Quarry with the harbour via two inclines had been removed. The later tramway tunnel was also redundant and the tramway rails had been lifted. “Traces of the earthworks and inclines, including the lines to the spoil tips, are the only remains on the 1906 map. There remained on the clifftop just the lines of the horse-drawn tramway fetching stone from the quarries at Pen Clegyr Point. From loading sidings in the quarry the line entered a shallow cutting passing a small smithy on the right, after which maps indicate a short passing loop. The line then climbed upwards towards the summit close to Pentop Gate at which point it curved right, passing the weighing machine which measured the wagon weights. The line then forked into two, one track leading to each of the stone crushers located above the storage hoppers. Small passing loops were located on each of these tracks.” [2: p17]
There is, for me, an interesting connection between this area and the Forest of Dean. In 1900, the Forest of Dean Stone Firms were registered in Bristol.”This concern took over the harbour and mining interest at Porthgain but after November 1909, and until it was finally wound up in 1922, its interests were managed by United Stone Firms, another Bristol-registered Company. This firm raised a mortgage of £200,000 on the Dean Forest and Porthgain interests in 1910 and indeed this was the time when the crushed stone demand was reaching its peak. Sailing ships and powered vessels called regularly, the quarry and harbour railway systems were well developed and the Company ran its own fleet of steam coasters, each of about 350 tons.” [2: p10]
However, by 1913, despite the success of its Porthgain operations the parent company passed into the hands of the receiver. It remained so until 1926 “when it was reorganised and taken out of receivership by Walter Bryant of Coleford, Gloucestershire, who formed United Stone Forms (1926) Limited.” [2: p10]
However,by July 1931, that company became insolvent and was closed by 31st August 1931.
The 1948 revision of the 6″ Ordnance Survey was published in 1953. As far as the map extract is concerned all remnants of the clifftop railway have disappeared. This seems to be an over simplification of the situation as a number of remnants were still present even if not recorded. [5] The line of the track can still be traced as a levelled strip on the clifftop, adjacent to the path to Porthgain harbour. [4] R. C. Jermy includes a number of photographs, taken in 1951 by H. Townley, which show the engine shed (with ‘Newport’ gently rotting away on one of the roads) and the remains of two traction engines, ‘Daisy’ and ‘Dinah’. Dinah was sited at Pen Clegyr and was used as a winding engine. Daisy sat on the clifftop. [2: centre-pages]
Jermy notes that “by 1908 the demand for roadstone had increased and the Forest of Dean Stone Firms made the decision to invest in a steam locomotive for operating the clifftop system. … It was realised that with the arrival of a heavy locomotive complete relaying with heavier track would become a necessity. Accordingly 200 sleepers were ordered … and … between 20th and 22nd January, 1909 the tramway was [re-laid] with heavy rails and sleepers from Pentop Gate by the water tank to the winding engine house at the top of the incline leading from the lowest quarry levels. A new engine shed was constructed, the roof over the single road being completed just six days after the arrival of the first locomotive! An inspection pit was located between the rails in the shed. Later, in November 1909 a ten ton weighbridge was installed in a brick building close to the water tower.” [2: p18]
Later, two further locomotives arrived at Porthgain necessitating the addition of a second road to the engine shed.
Records appear to show that one of these locomotives, Singapore, was too heavy for the tramway rails in place when they arrived and as a result in some expenditure was necessary to upgrade the tramway. In fact, the prevailing weather conditions and the weight of the locomotives seem to have resulted in a significant regular maintenance programme being implemented.
Jermy shows two plans of the railway – the first shows it much as on the 1906 6″ Ordnance Survey. He dates his sketch plan to 1905. [2: p20]. The second is the result of a survey of the line by Jermy in the 1980s which seems to show the small network at its fullest extent in around 1925. [2: p21] This sketch plan shows the engine shed in its position on the Northeast side of the St. Bride’s Quarry, three roads serving the crushers and hoppers, a small Yard on the North side of St. Bride’s Quarry, a weighbridge and water tank to the Northwest of the Yard, a long straight length of line with two tracks, one known as ‘The Cutting’, the other as ‘Jerusalem Road’. These two line led to the Upper Level of Pen Clegyr Quarry and, via a cable-worked incline to the lower level of the quarry. [2: p21]
Locomotives
The first locomotive was named ‘Portgain‘. It was built in 1909 by Andrew Barclay in Kilmarnock. It was Works No. 1185. … No. 1185 was an 0-6-0T with 7″ x 13″ outside cylinders, 2ft 2½in wheels 3ft gauge. … Despatch Date: 26th July 1909. [2: p23][3] This locomotive was out of use by 1929 and was scrapped on site shortly after 1931. [4]
The second, ‘Charger‘ was built in 1891 by W.J. Bagnall in Stafford and had the Works No. 1381. It had a copper firebox, brass tubes and two 5½in x 10in outside cylinders. It passed through a number of ownerships before, in September 1912, it was moved to Porthgain. [2: p29-30] This locomotive was scrapped shortly after 1931. [4]
The third, ‘Singapore‘, was a 0-4-2 saddle tank built at the Kerr-Stuart works in Stoke-on-Trent and had Works No. 659. It had 9½in x 15in outside cylinders. It was built in 1899. It was first bought by the contractor G. Pauling and Co. It was shipped to Ireland and was used on the Burtonport Extension contract which Pauling’s were undertaking for the Londonderry and Lough Swilly Railway. Sold in 1903, it went to Scotland and remained there until 1912 when it was transferred to Porthgain. [2: p31-33] This locomotive was out of use by 1929 and was scrapped on site shortly after 1931. [4]
The fourth locomotive was ‘Newport‘, a 0-4-0T loco. It was built by Hudswell, Clarke and Company of Leeds. It was originally built as a 2ft 10in gauge loco with Works No. 311 in 1889. In 1900 it was owned by Kellett & Sons who worked on the Hagley to Frankley section of the Elan Valley Aqueduct. It went through a number of ownerships after this before entering service at Porthgain in May 1929 after an overhaul. [2: p33-36] This locomotive remained in the Porthgain Railway Locomotive Shed after closure until scrapped in 1953. [4]

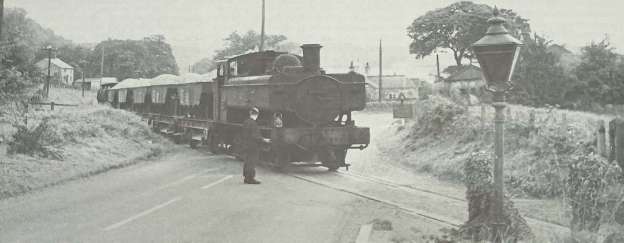
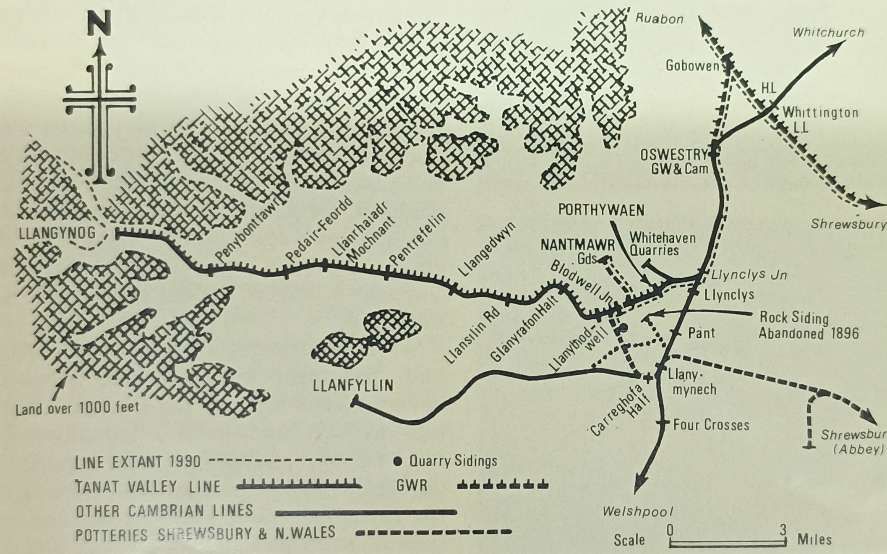
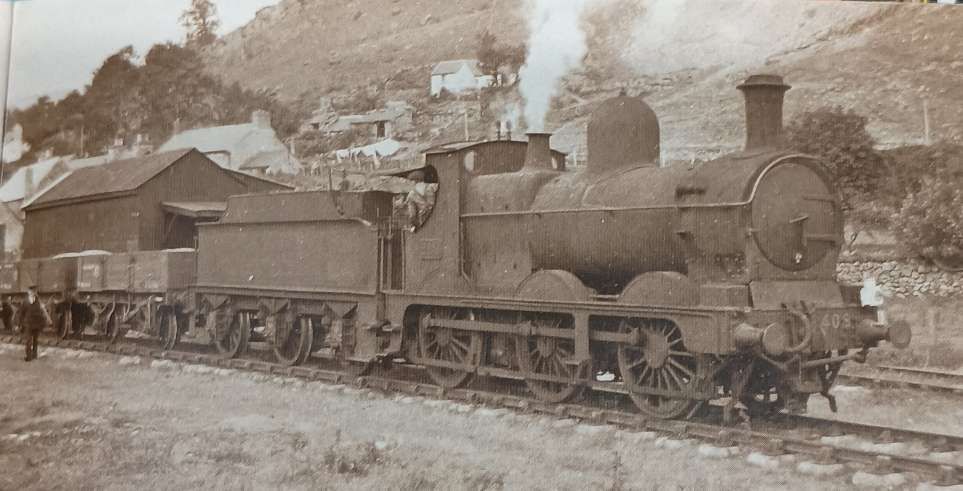
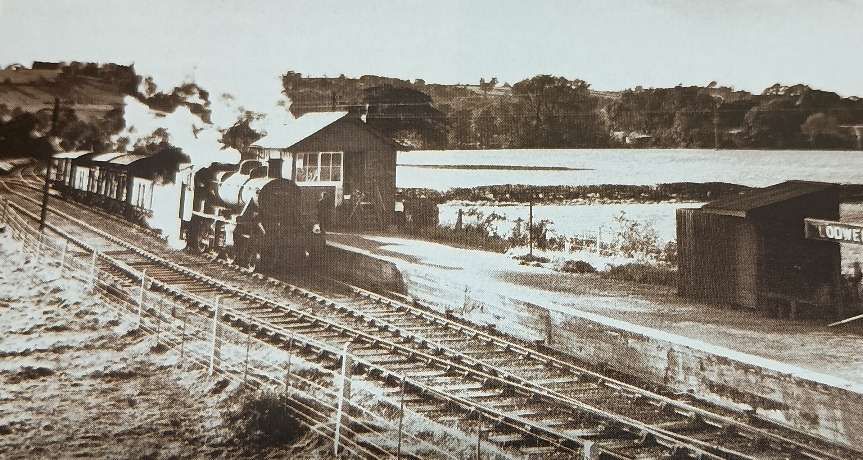
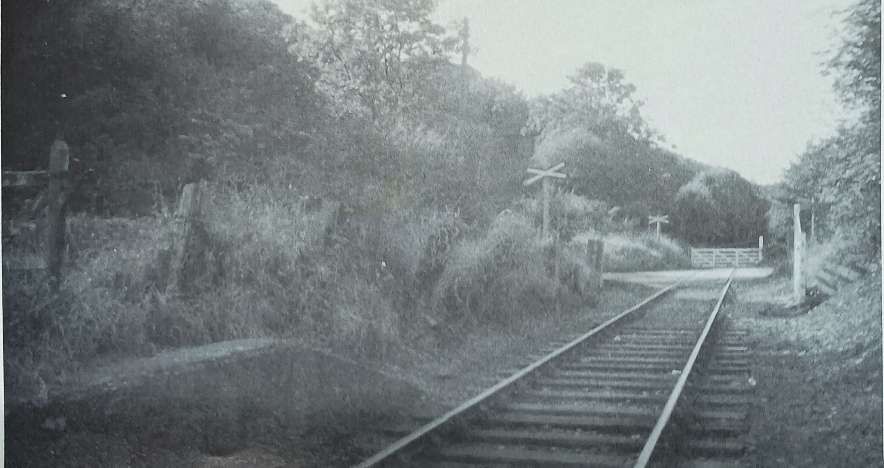
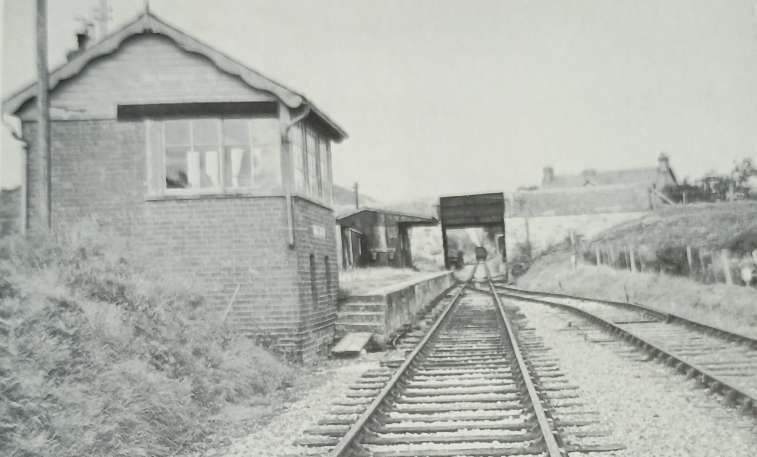
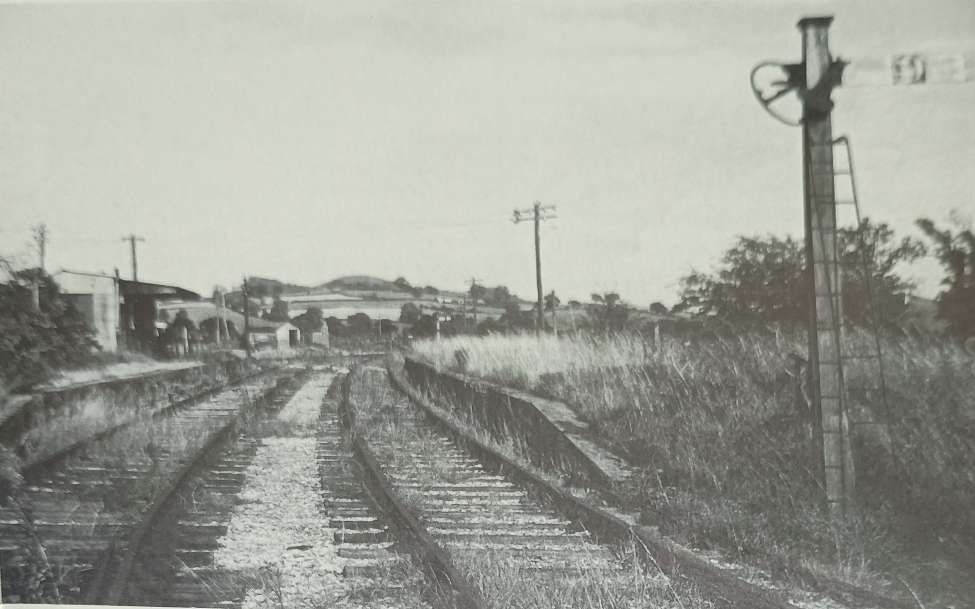
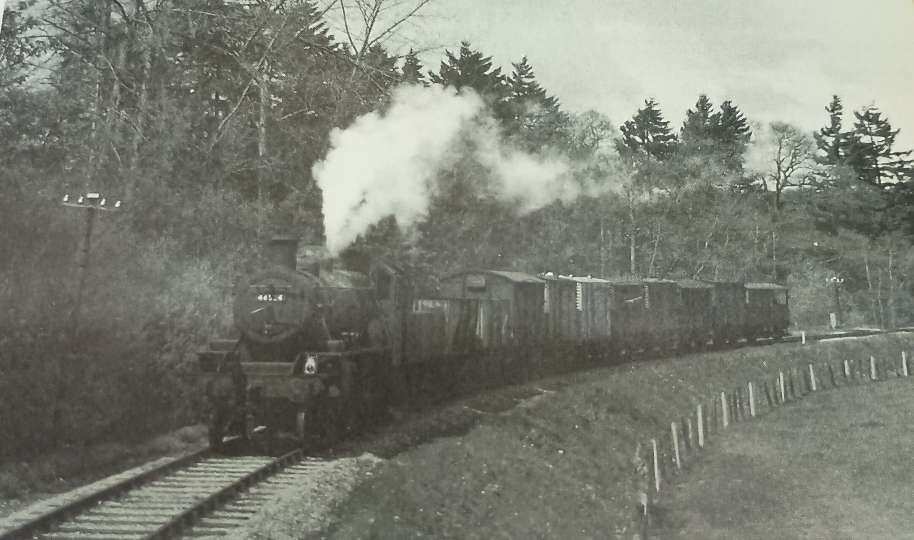
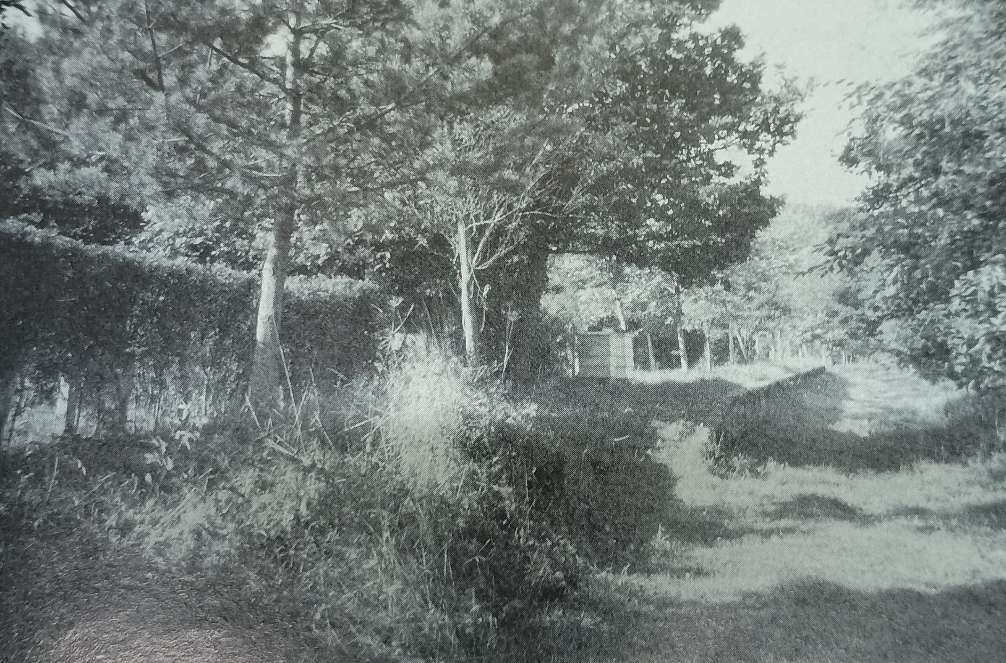
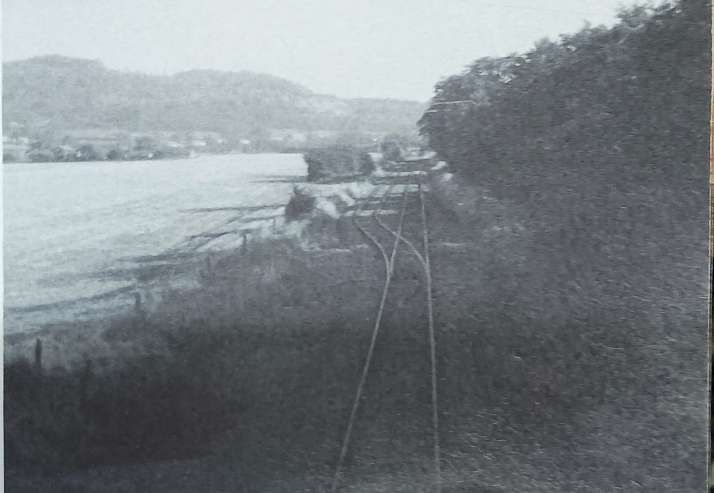
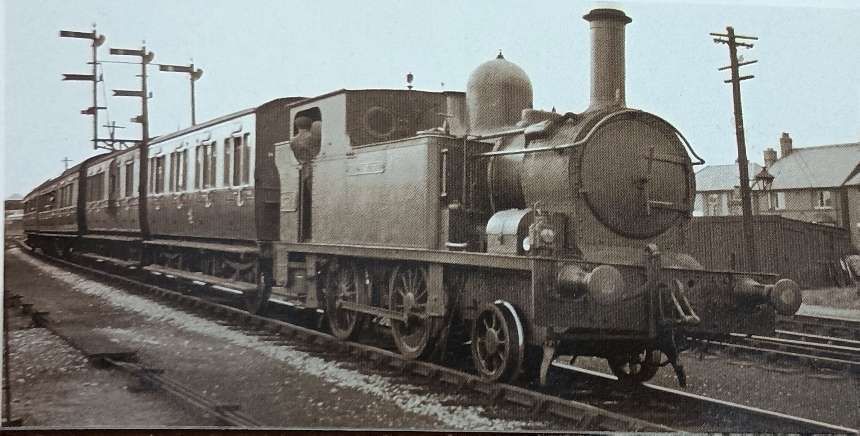
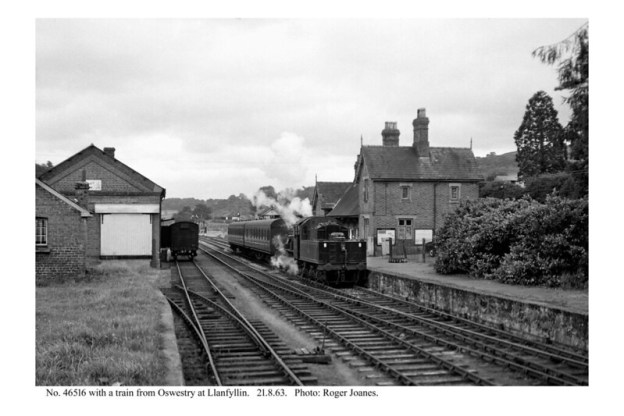
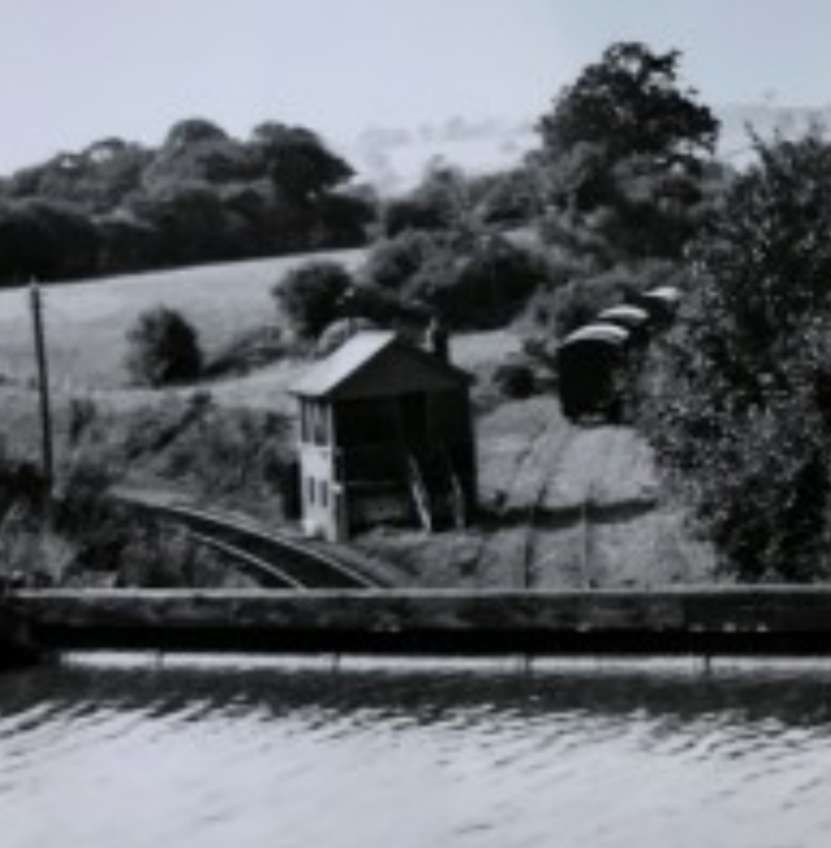
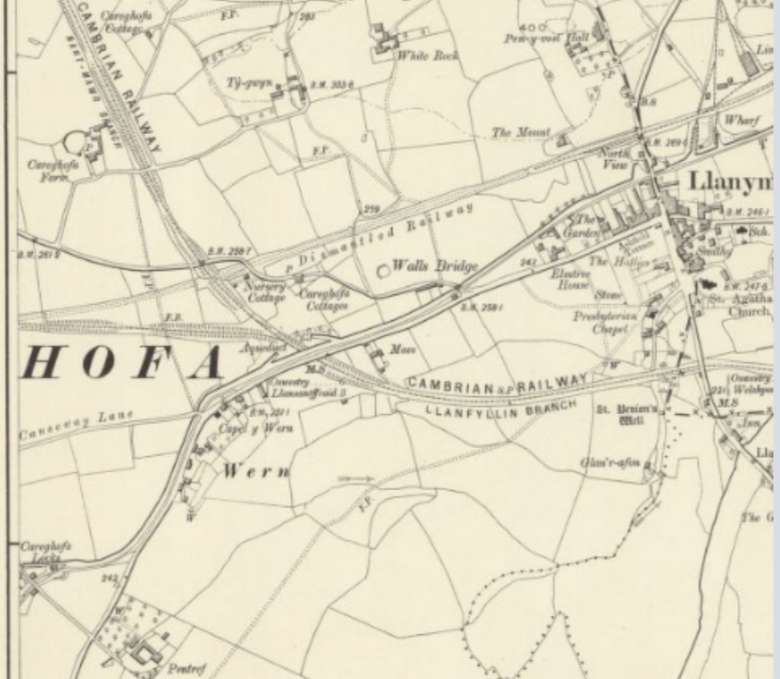
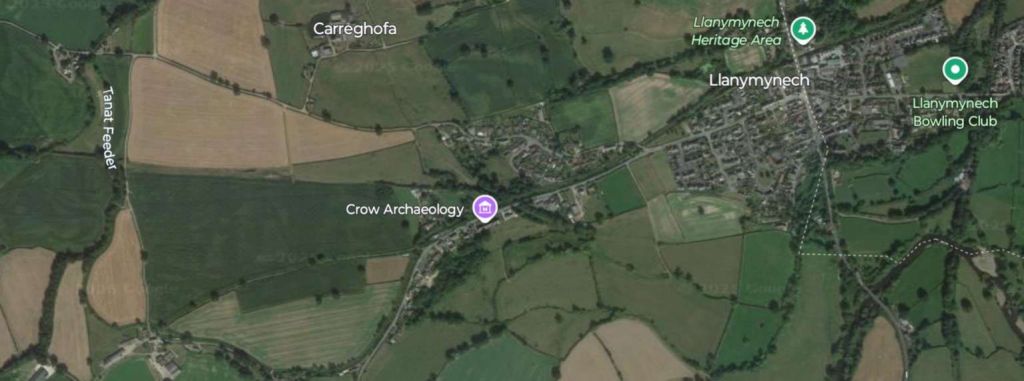

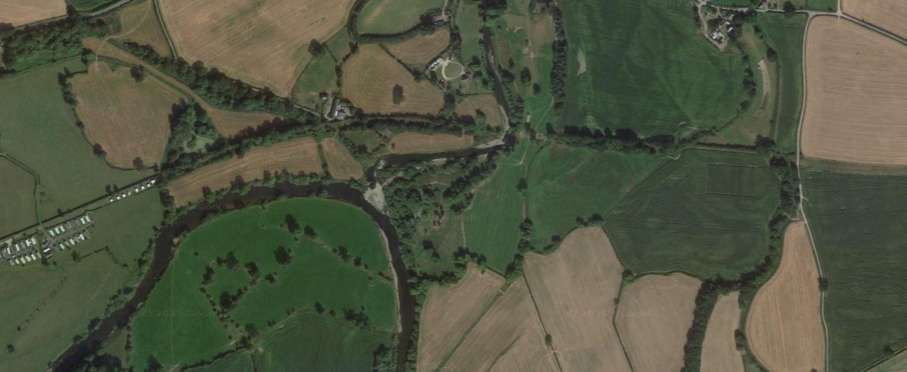
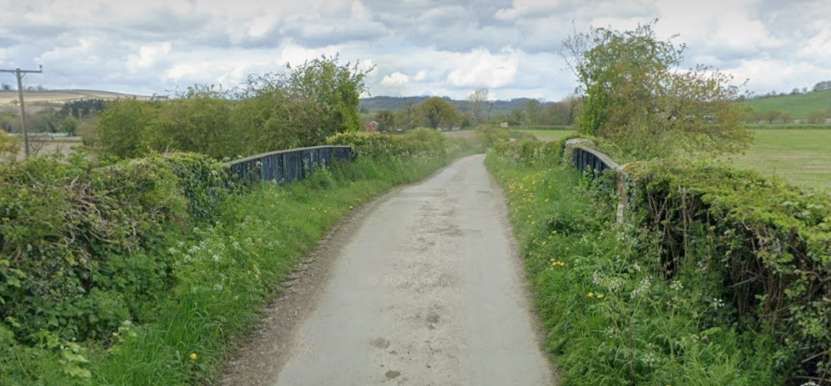
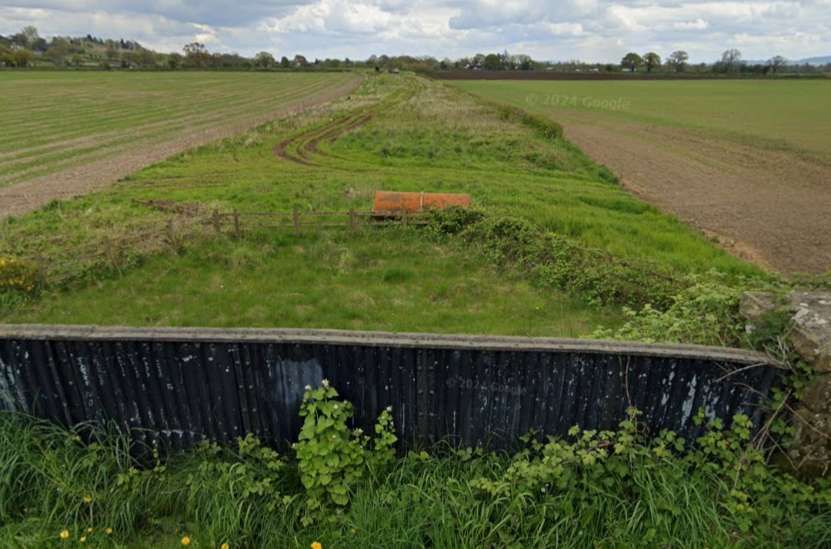
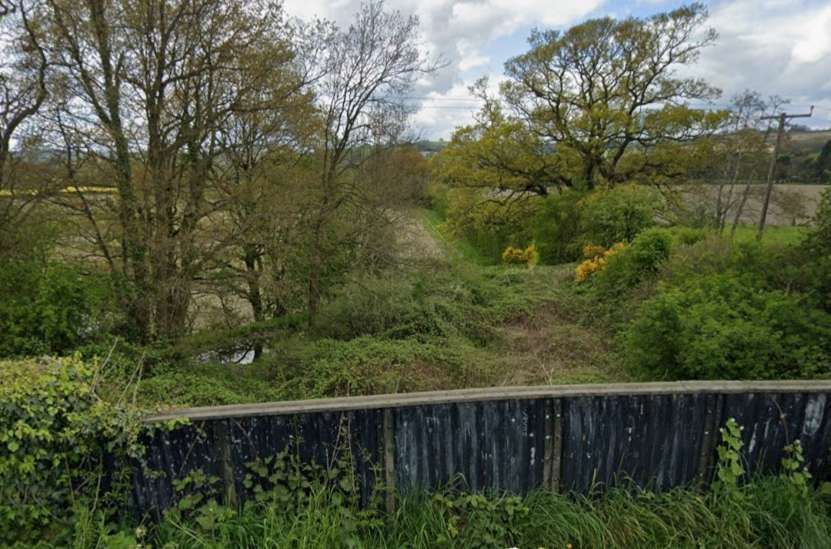
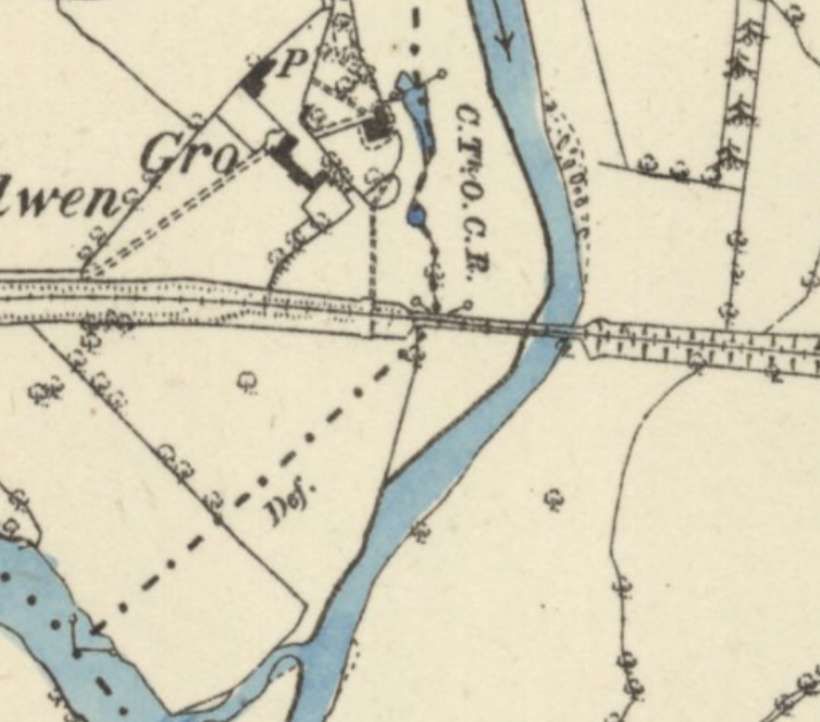
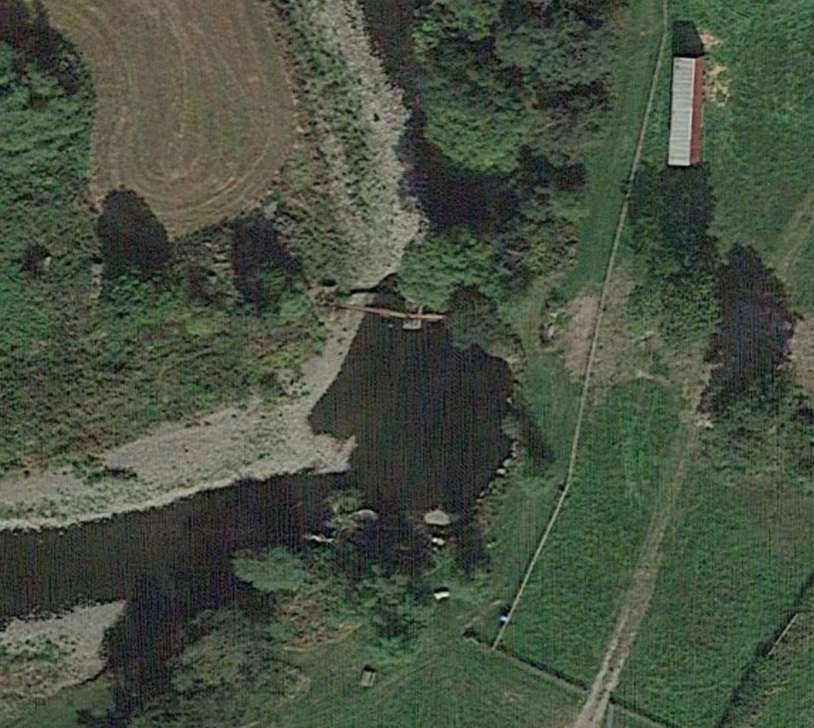
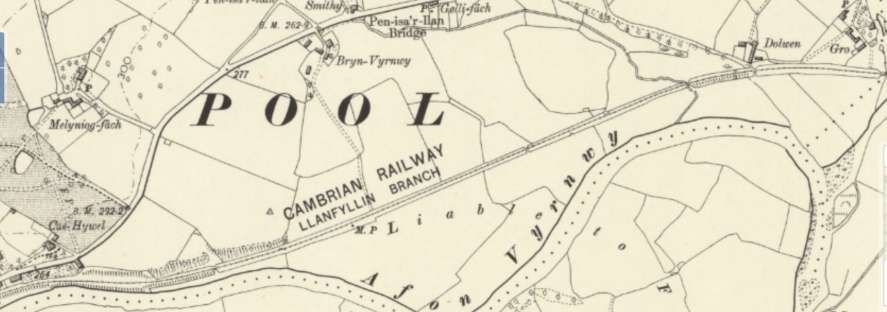
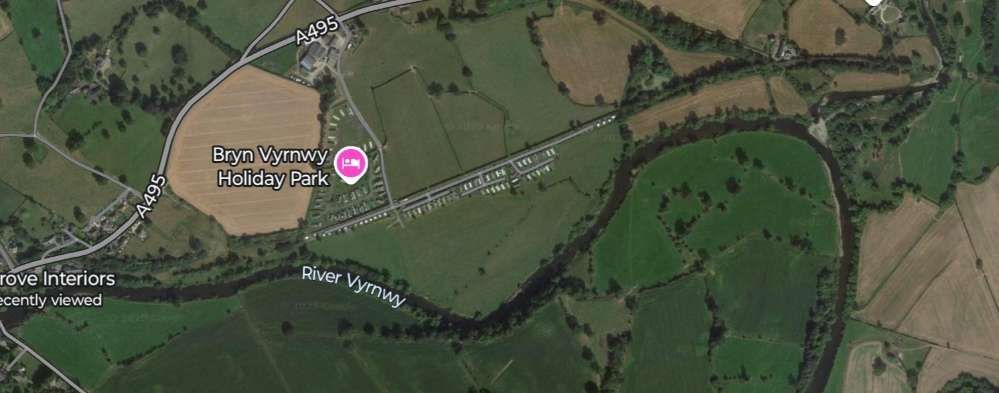
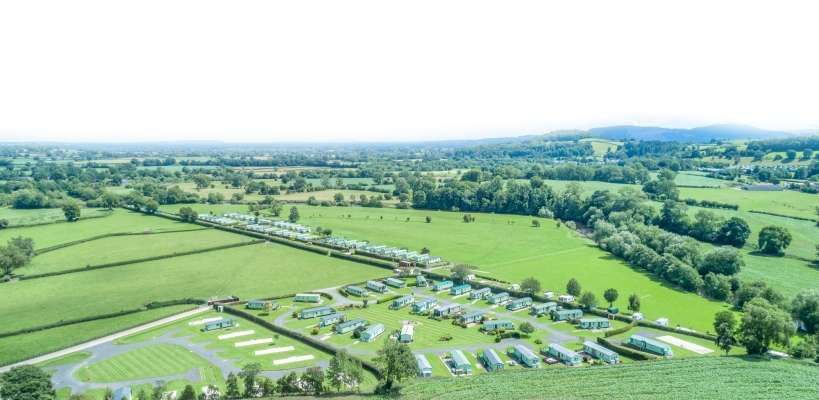

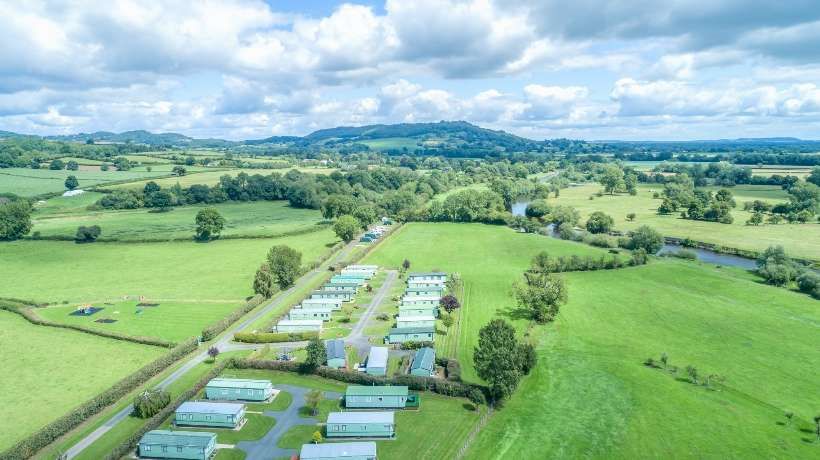

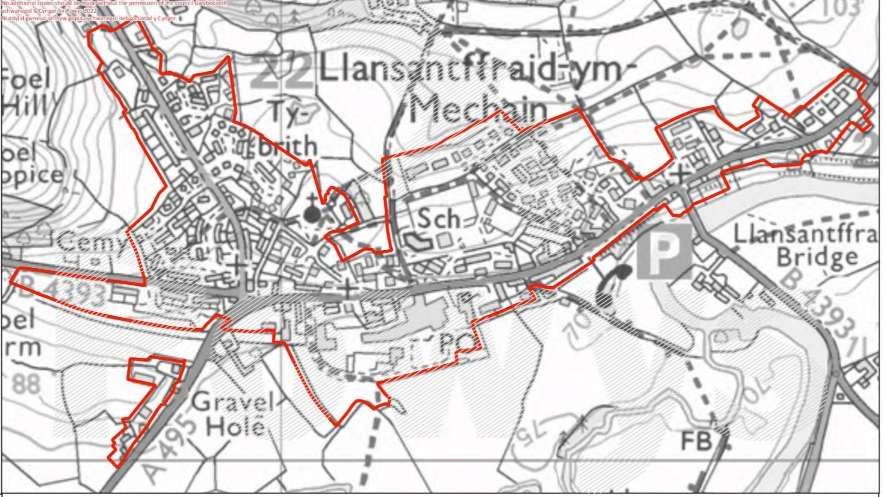
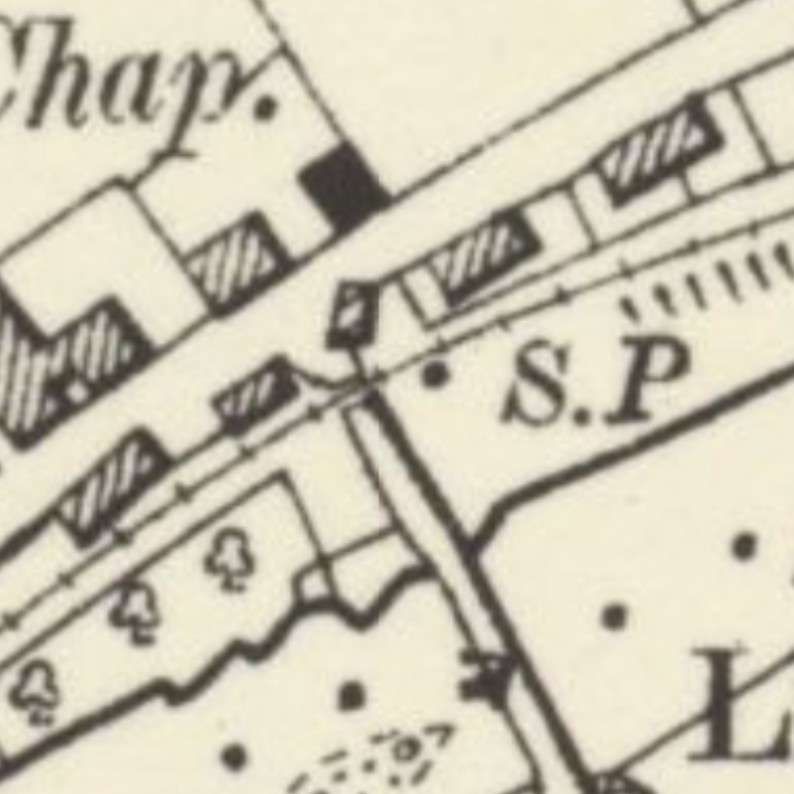
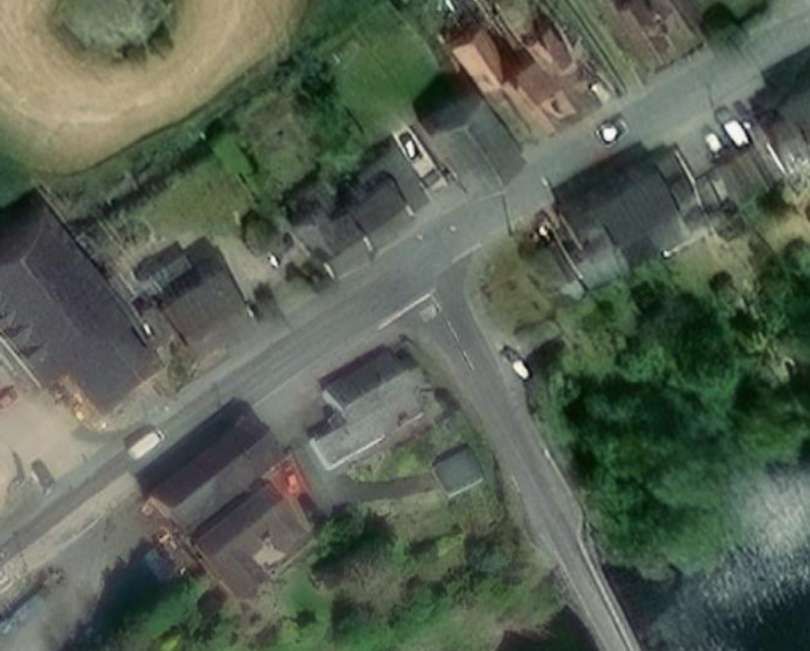
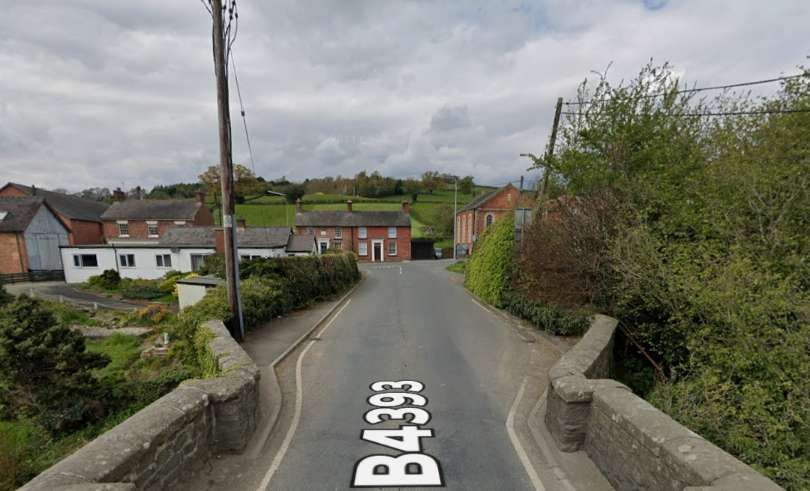
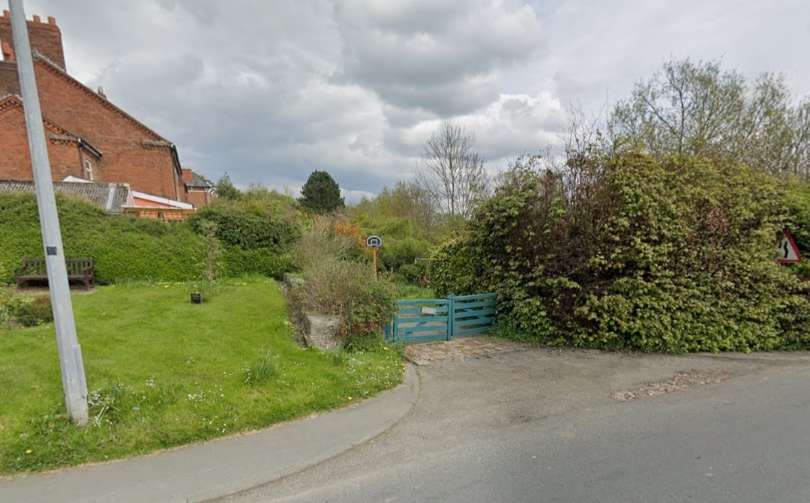
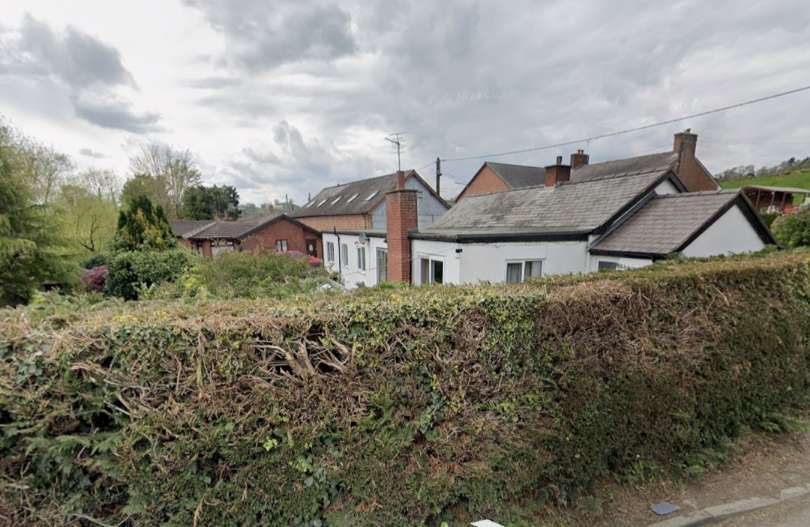
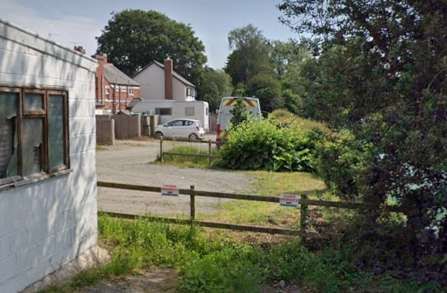
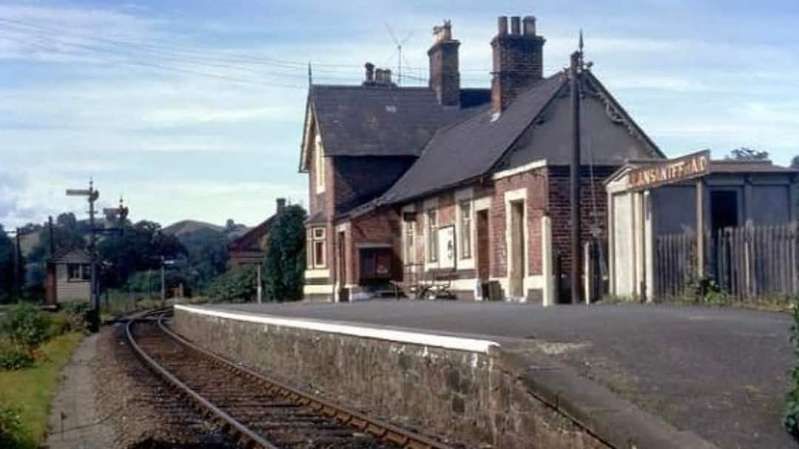
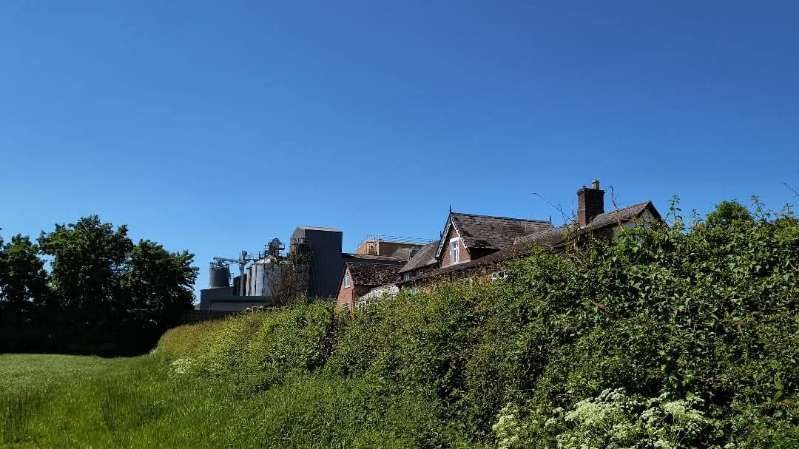
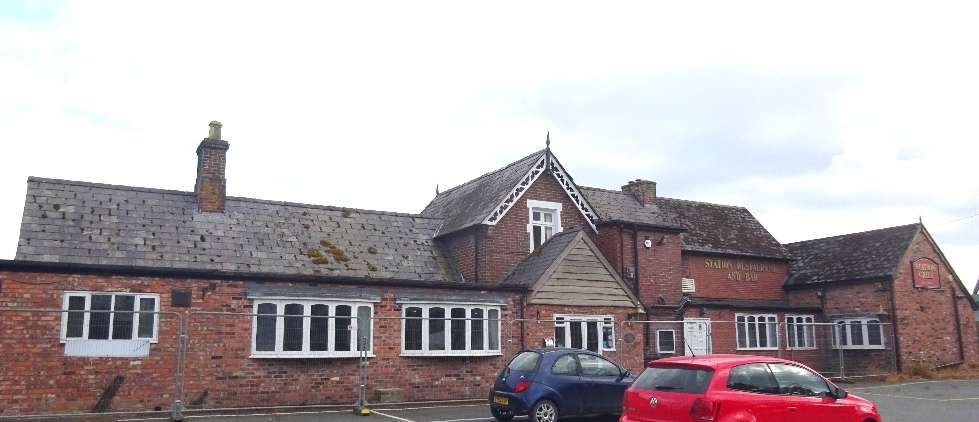
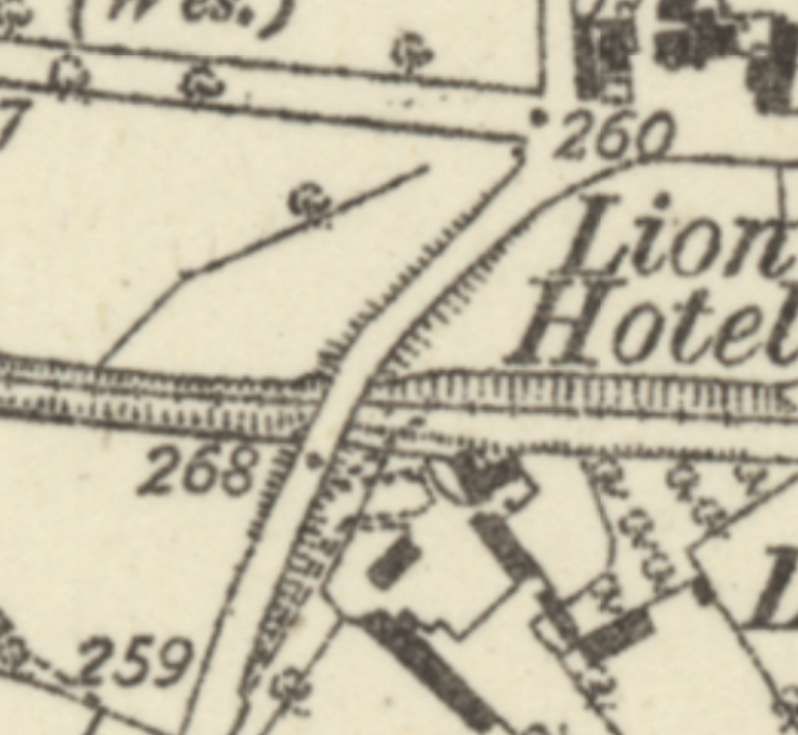

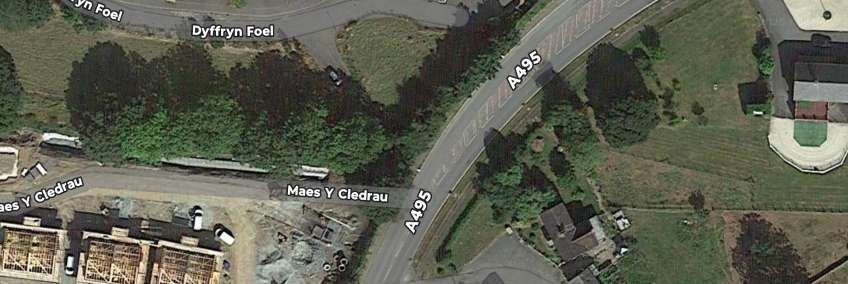
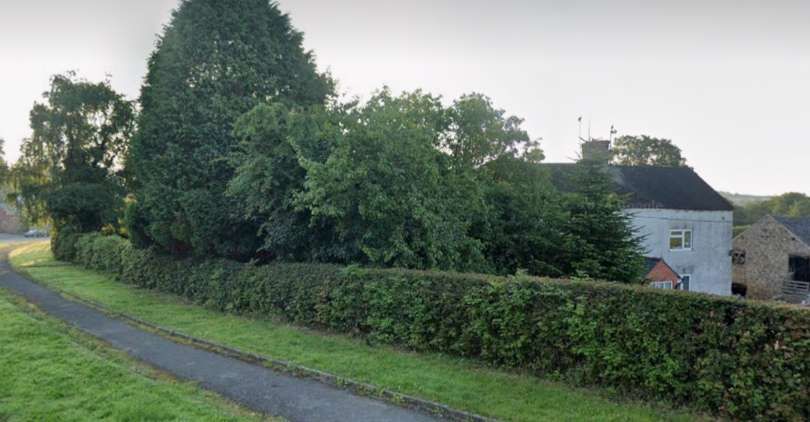
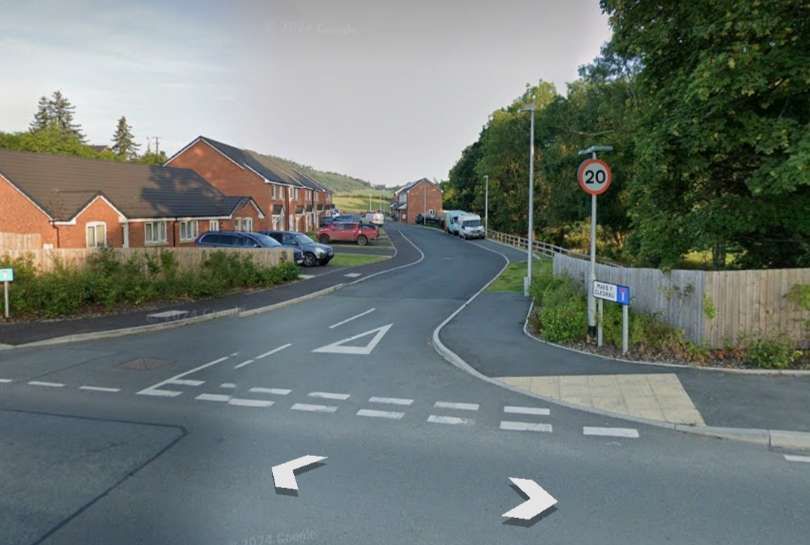
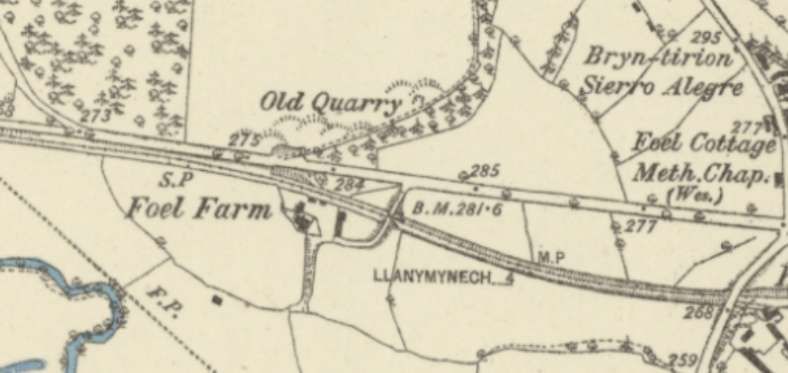

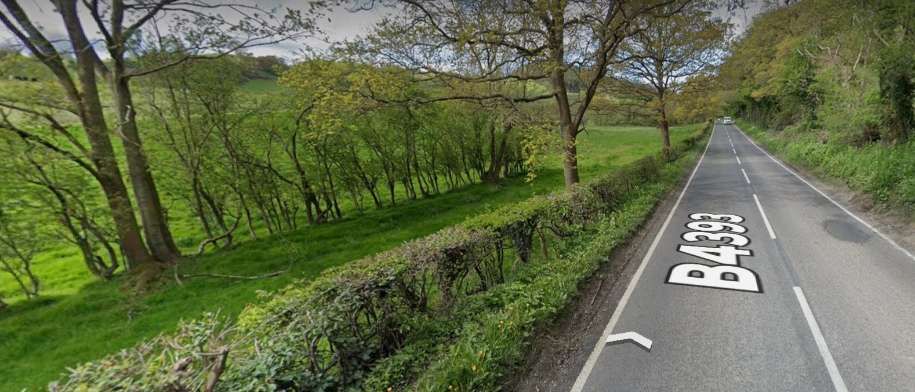
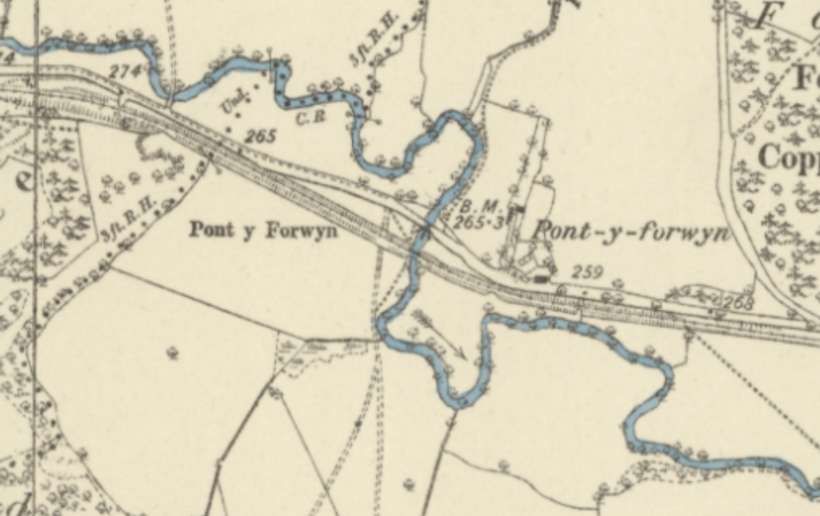

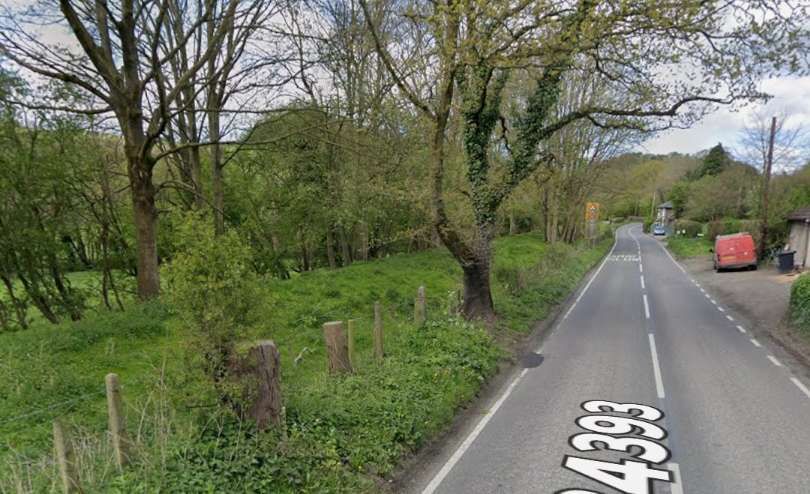
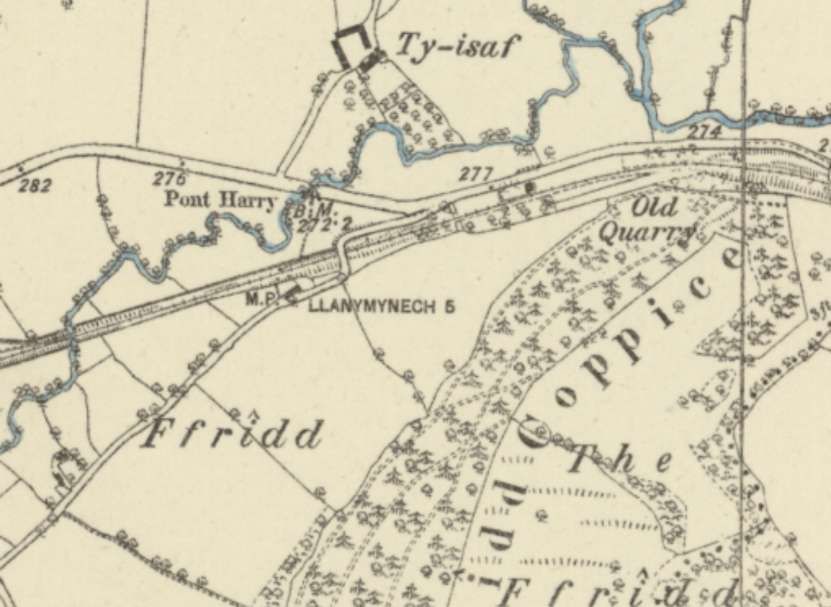
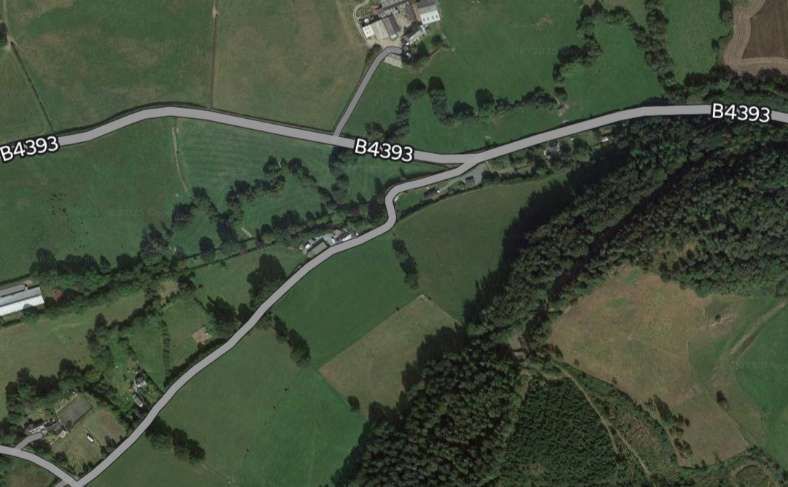
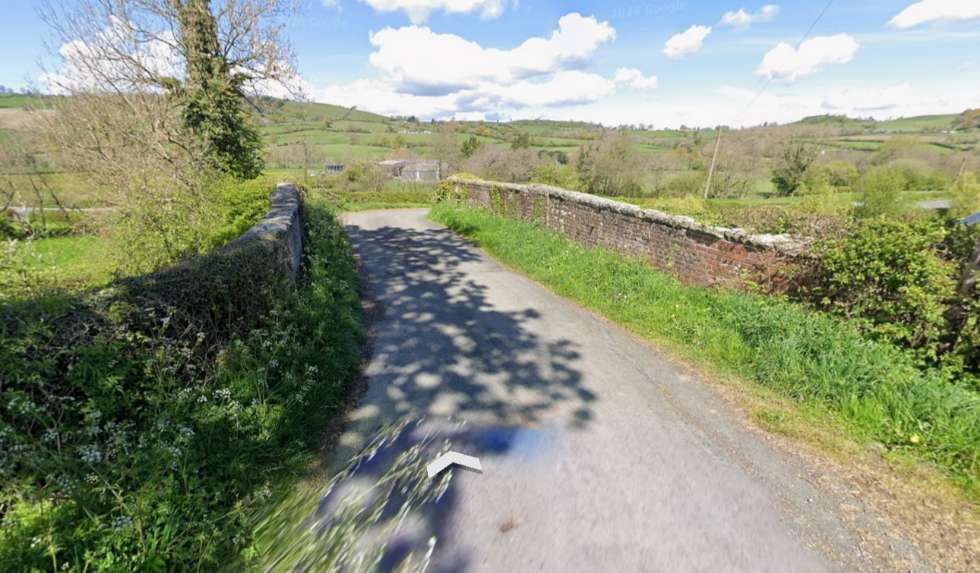
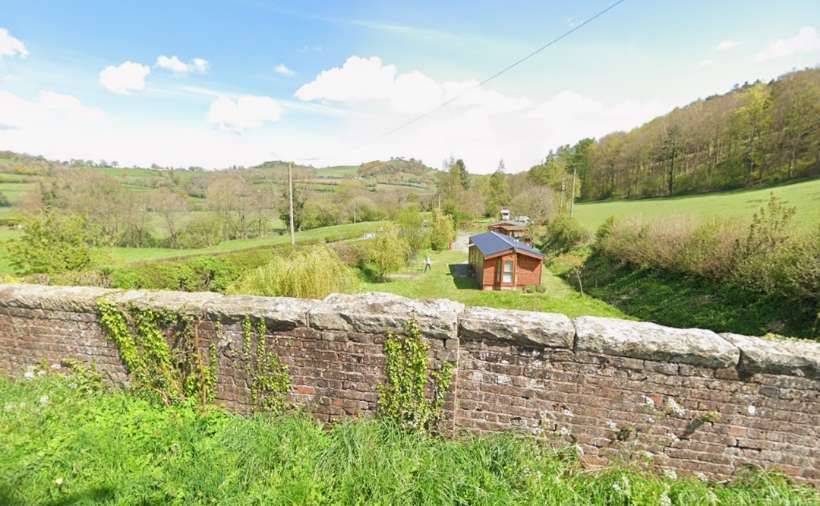
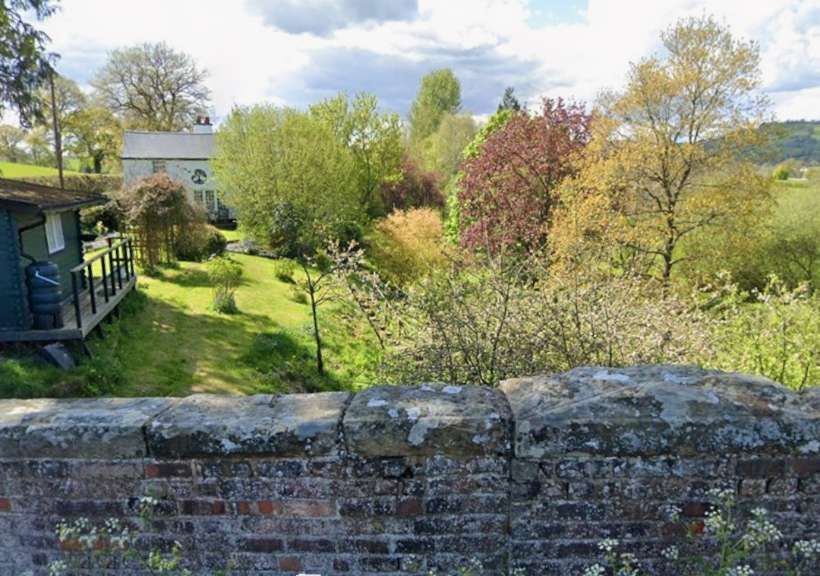
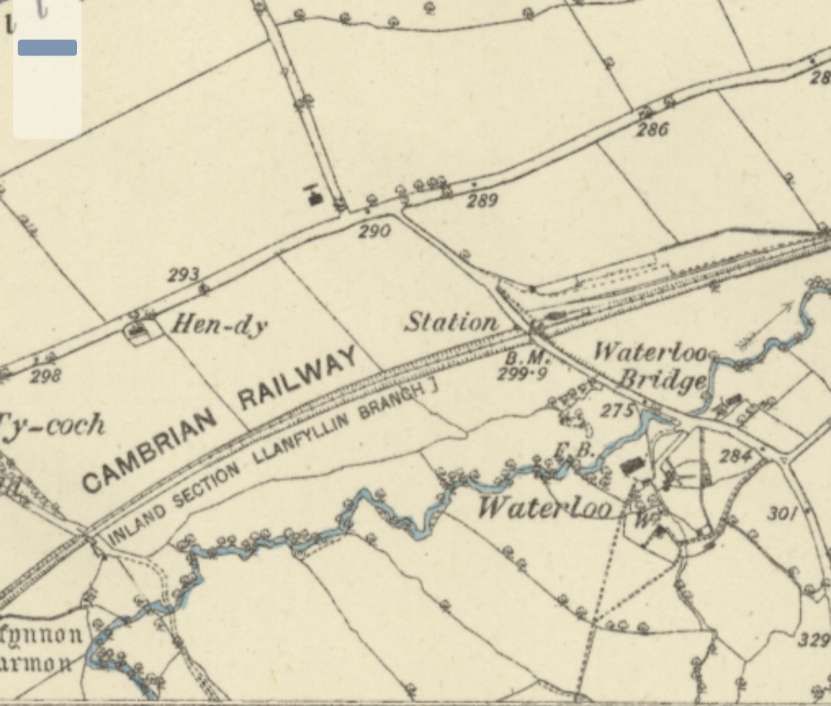
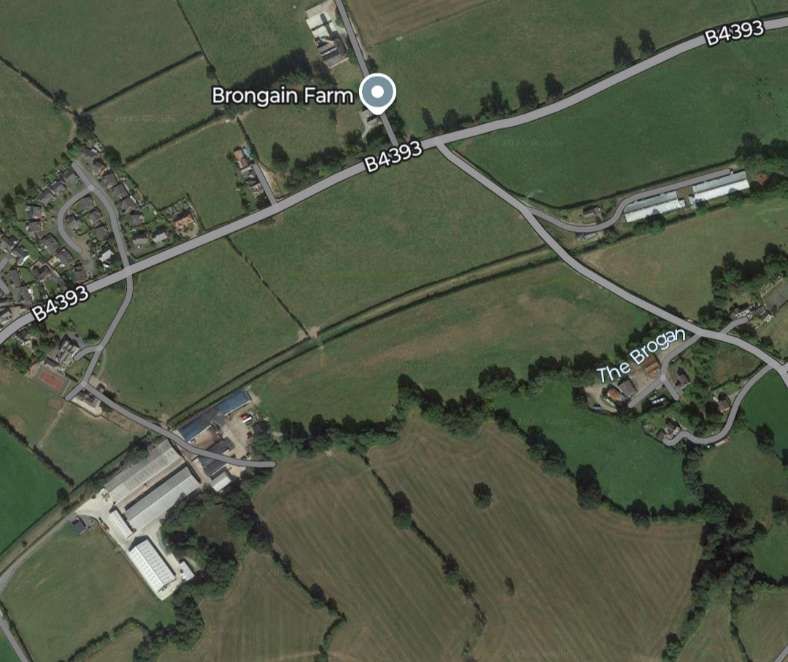
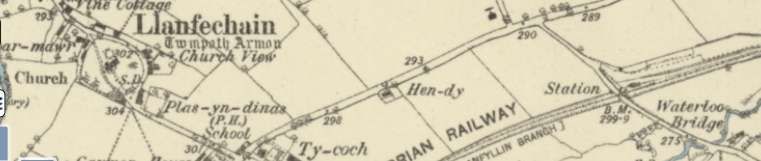
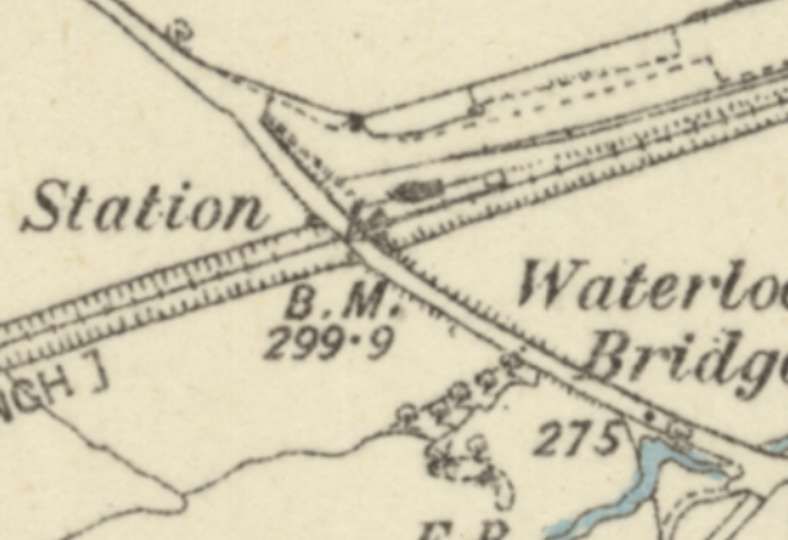
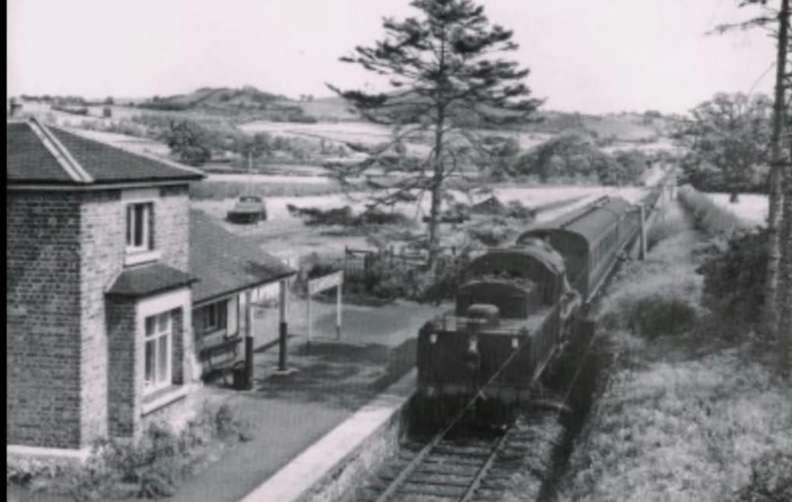
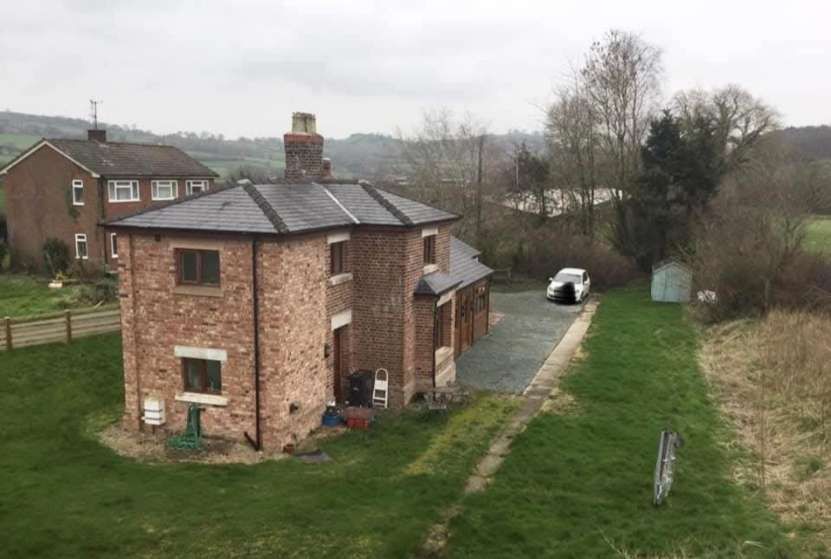
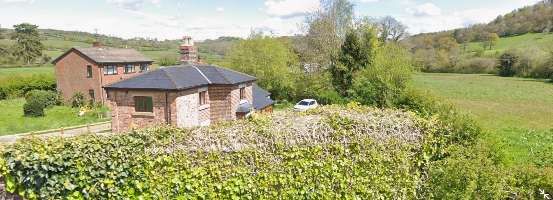
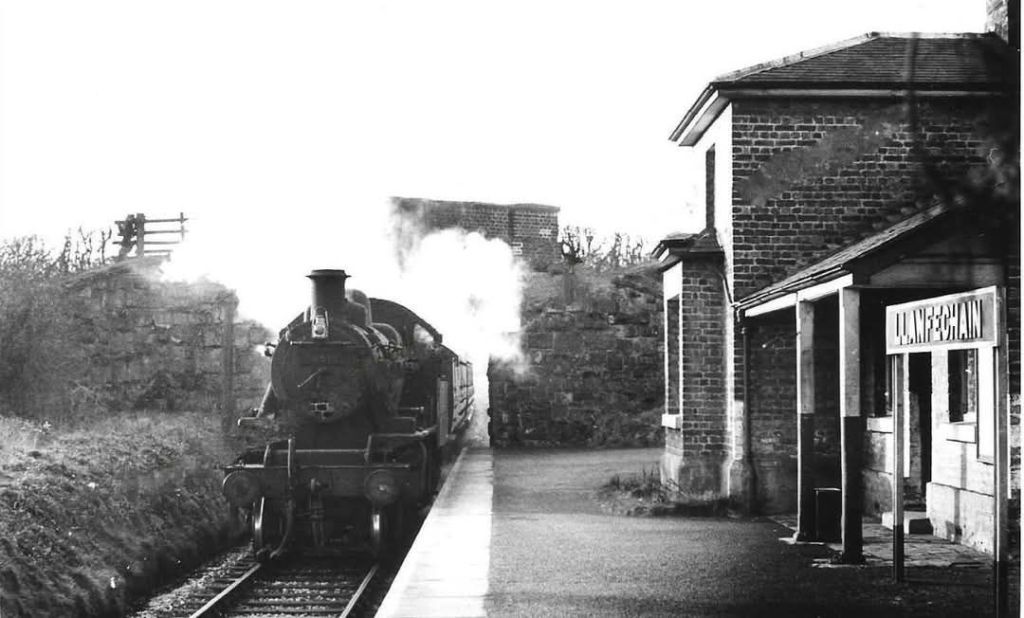

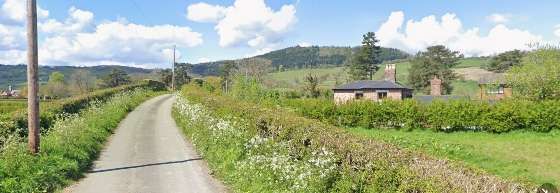
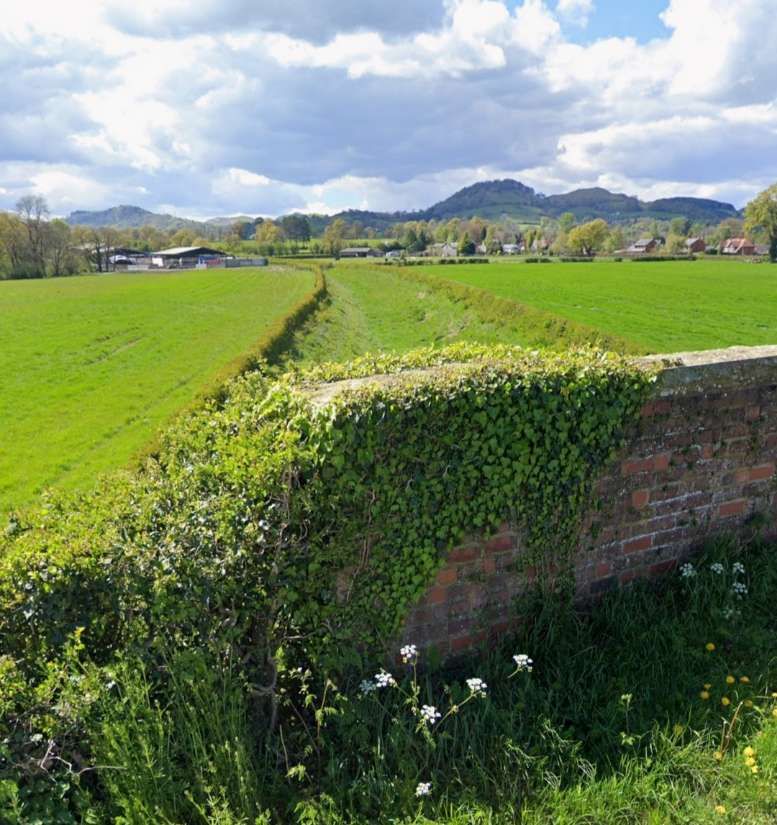
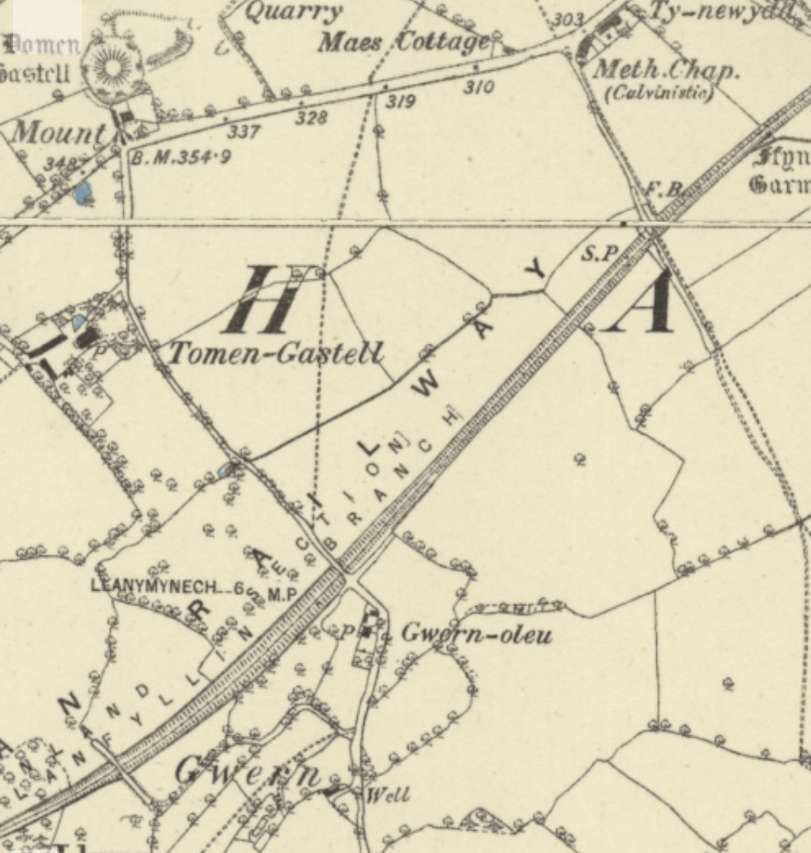
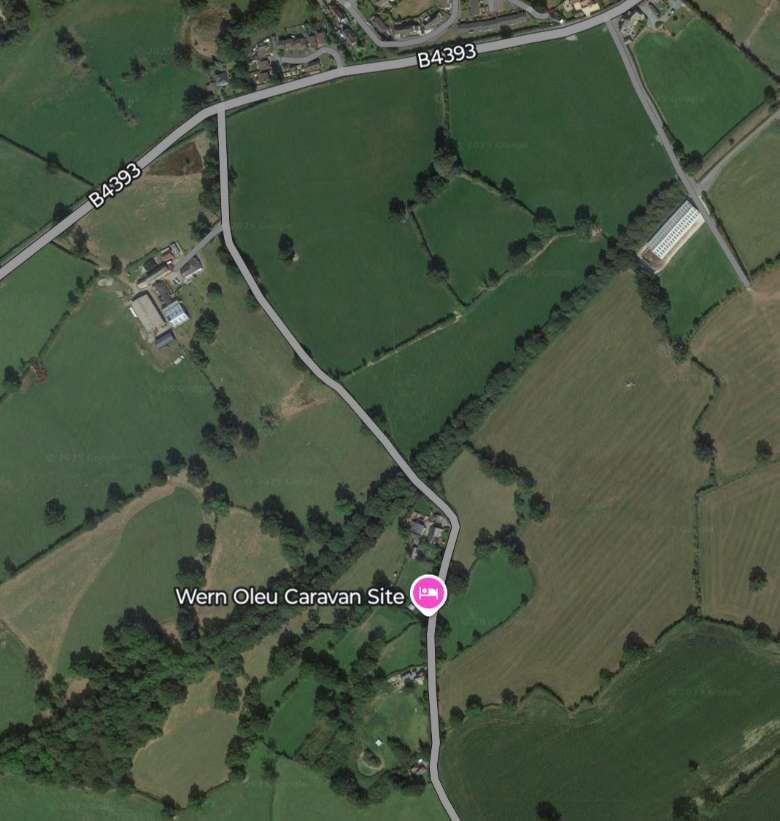
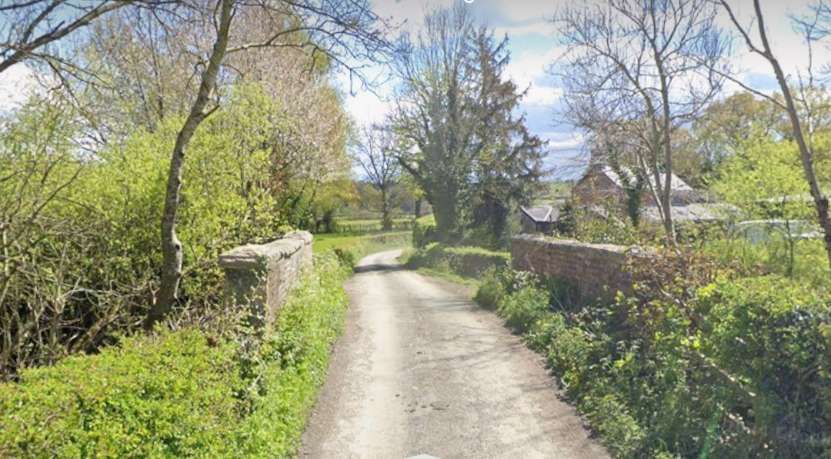
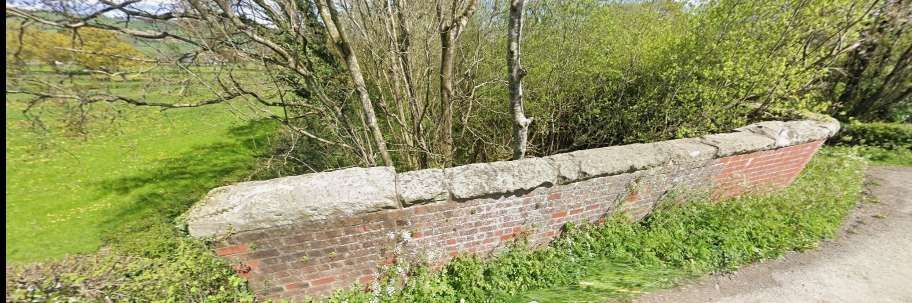
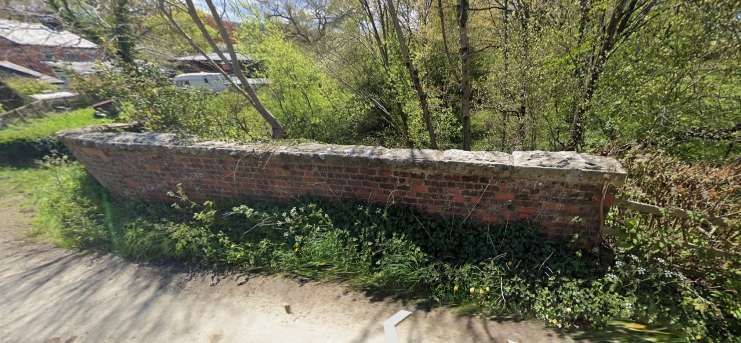
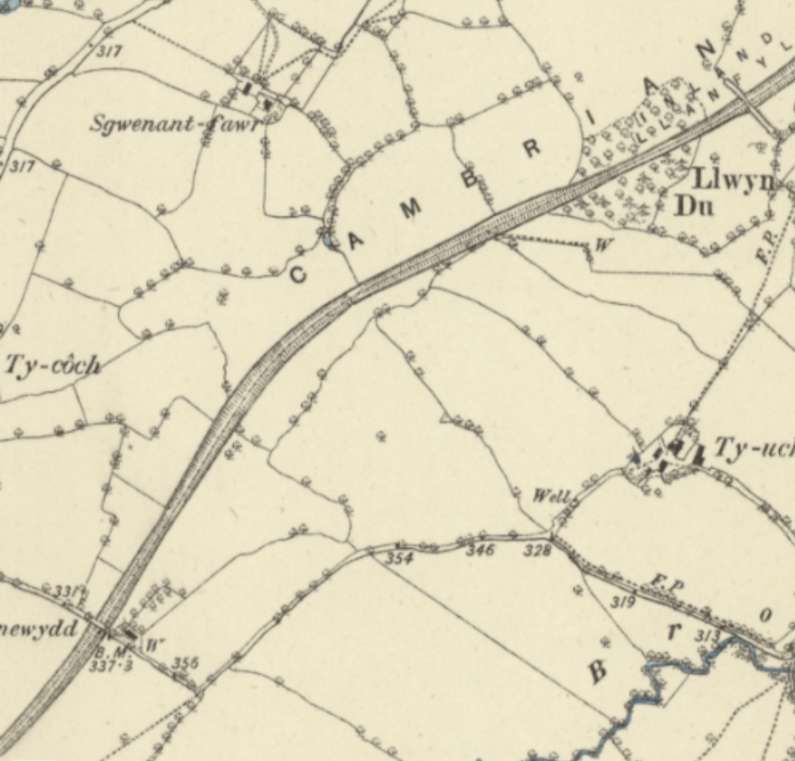
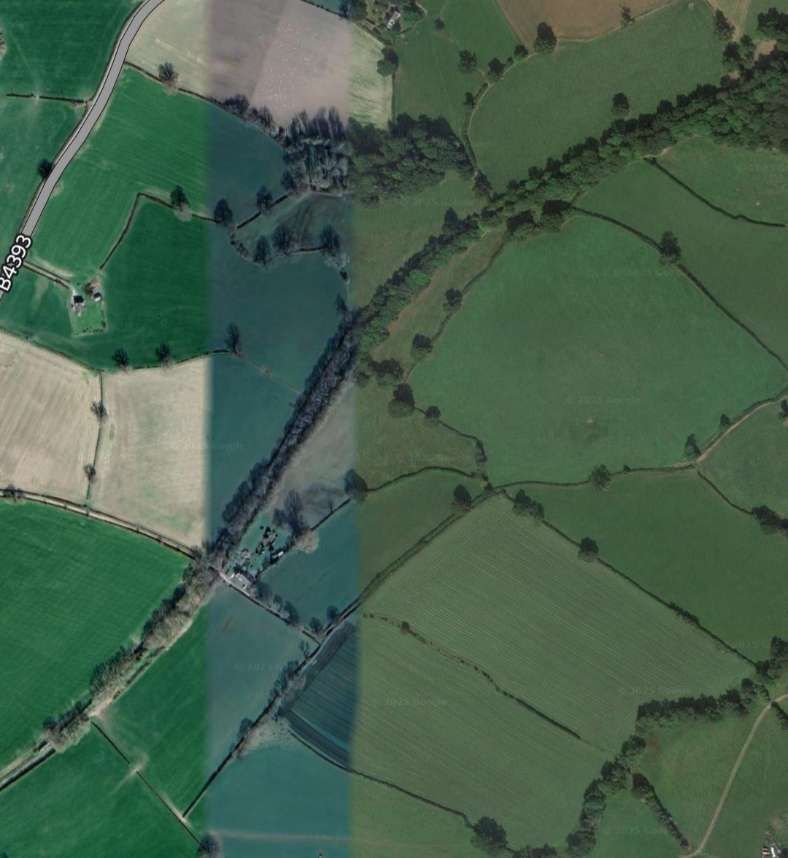
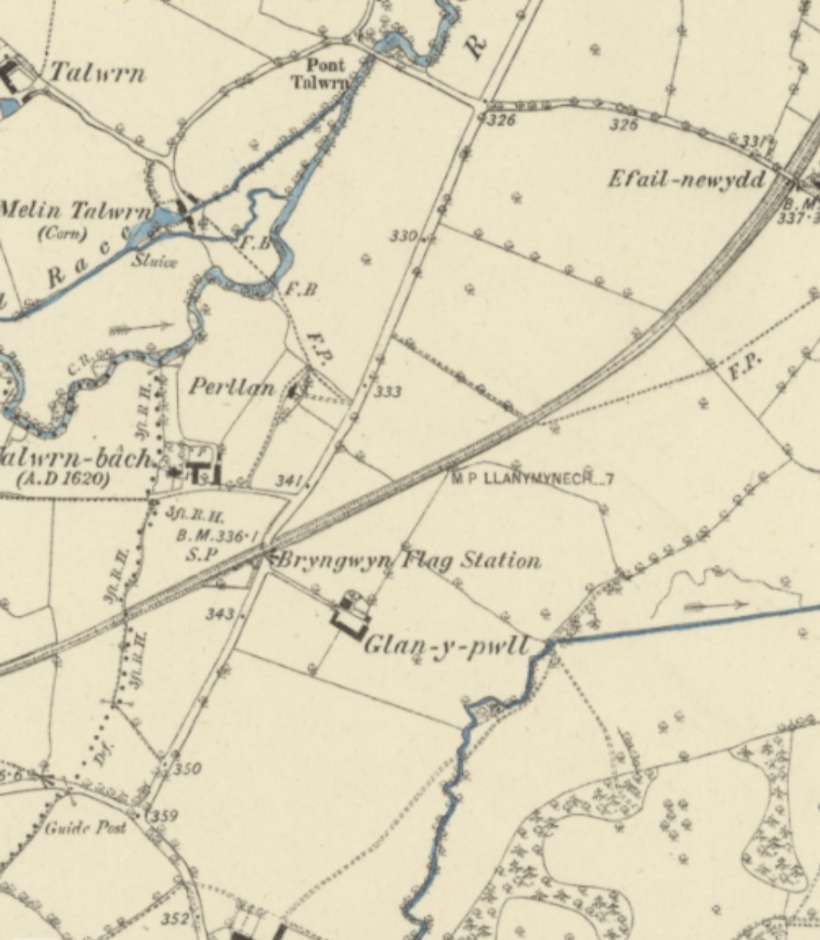
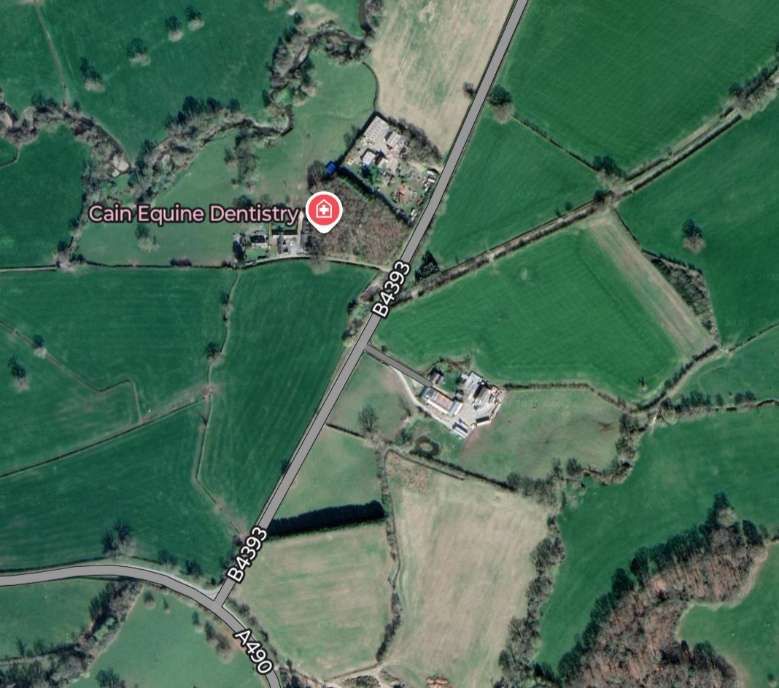
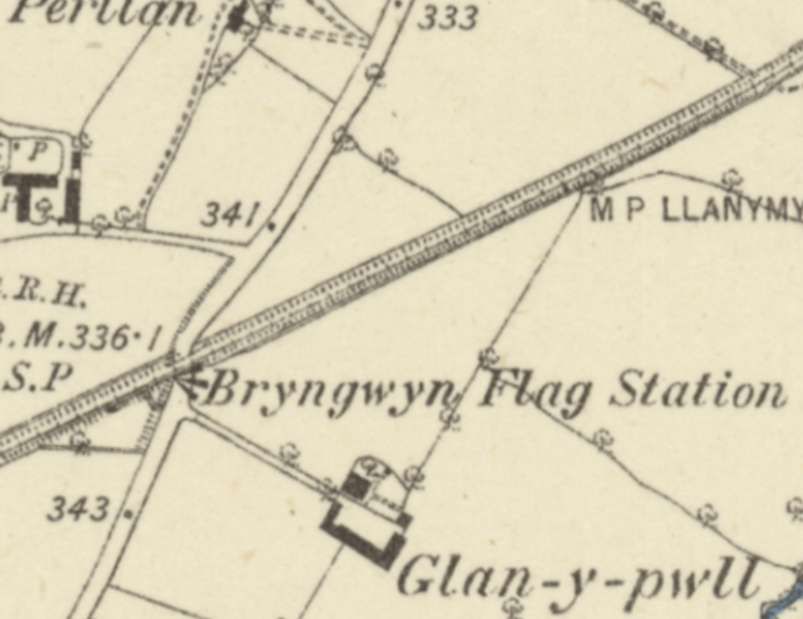
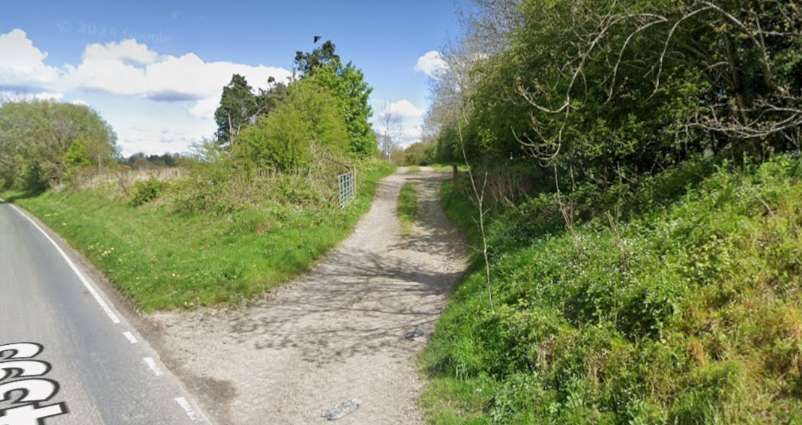
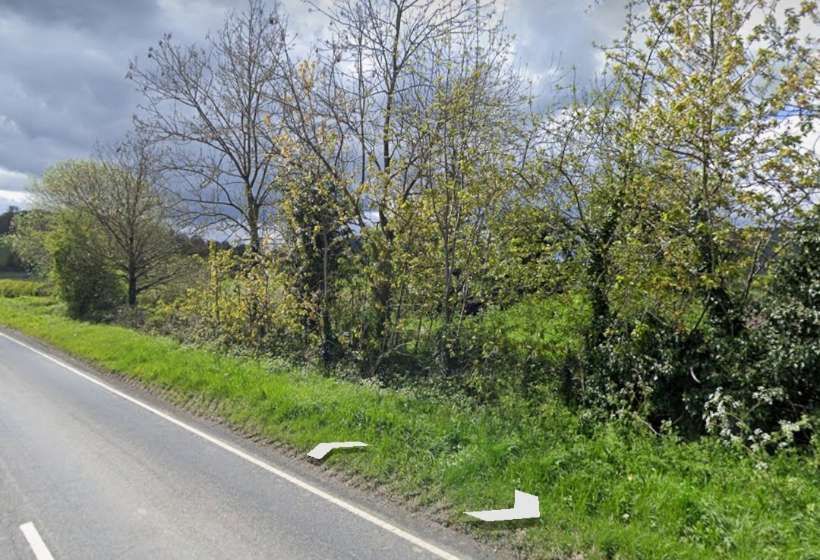
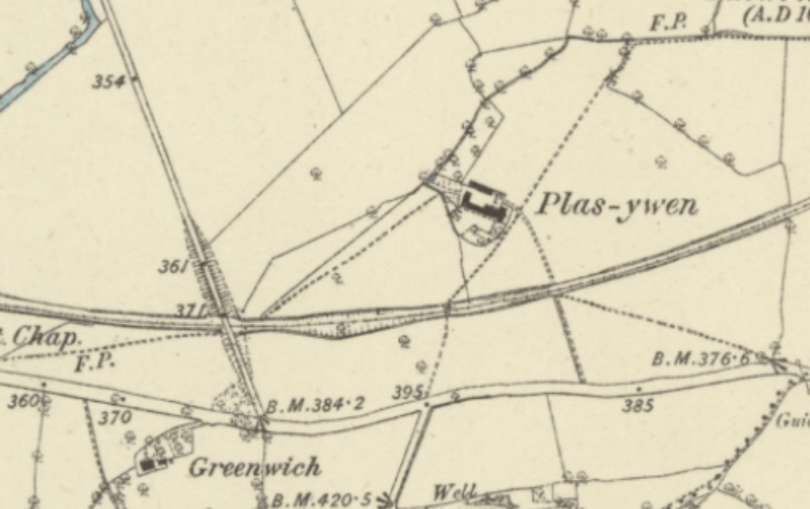
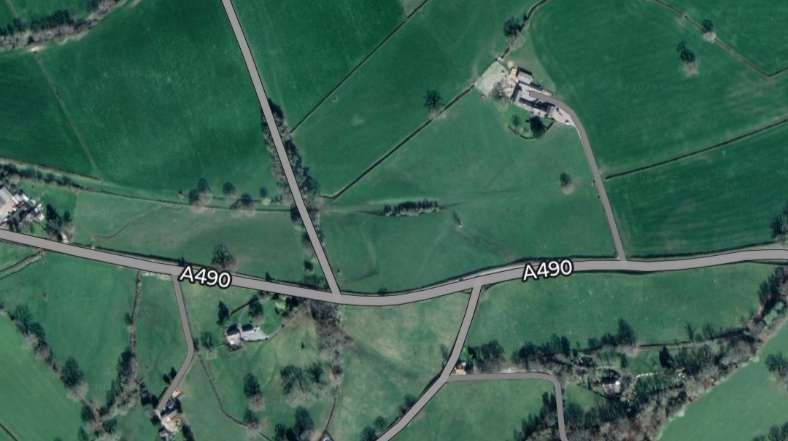


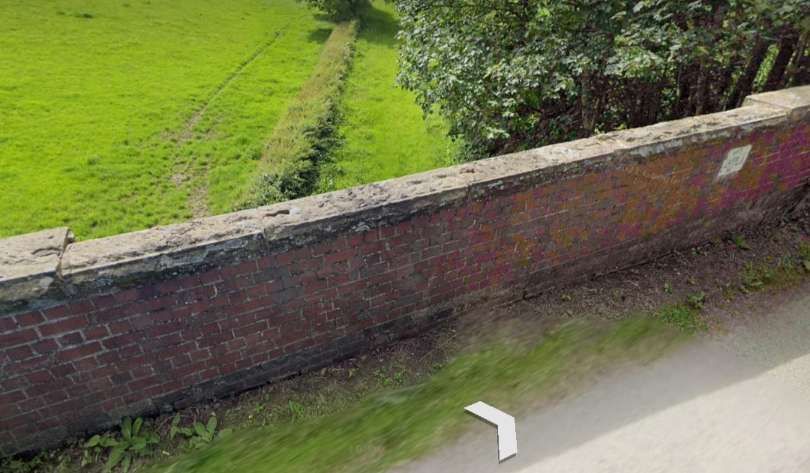
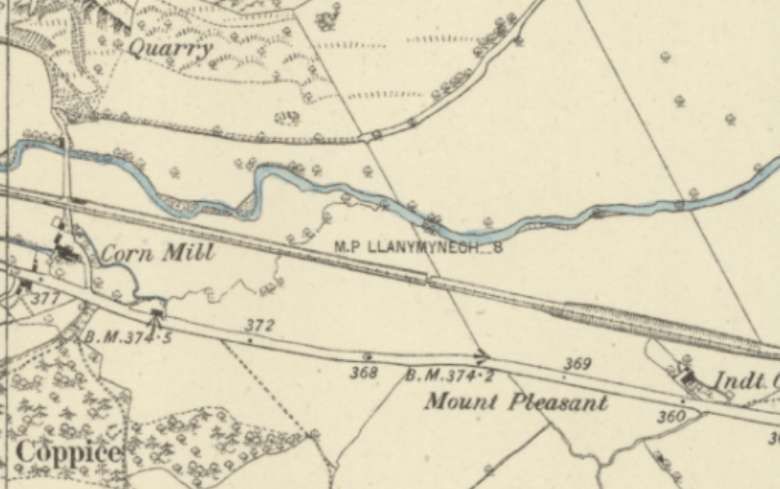
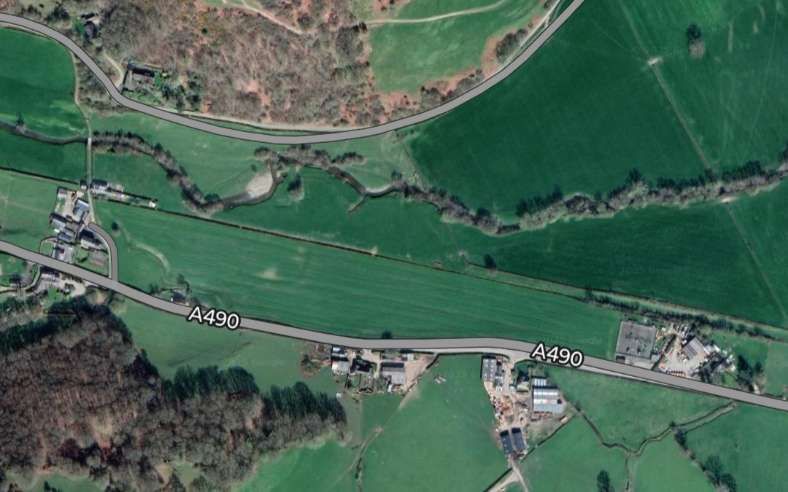
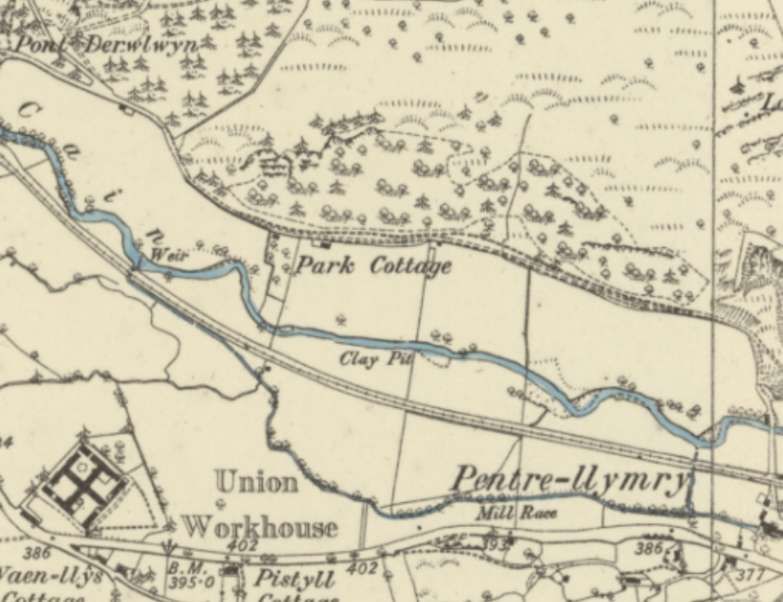
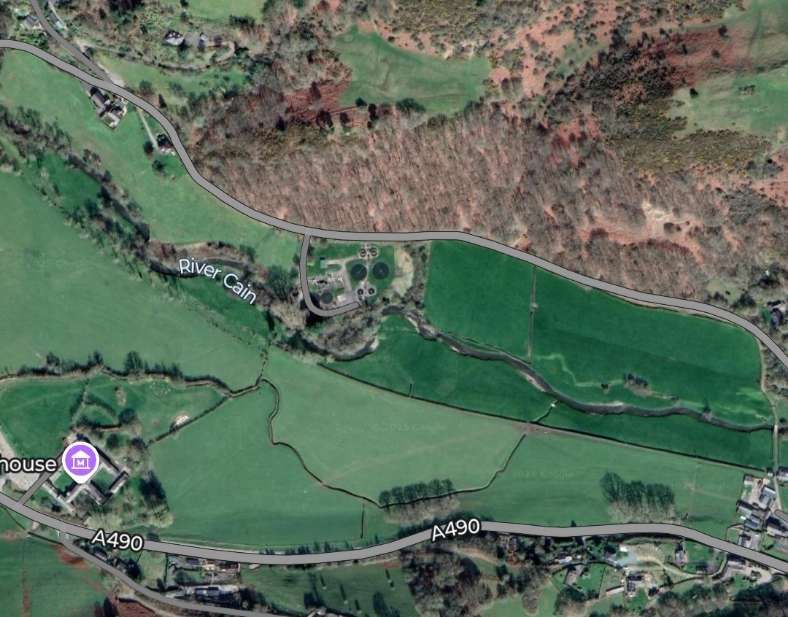
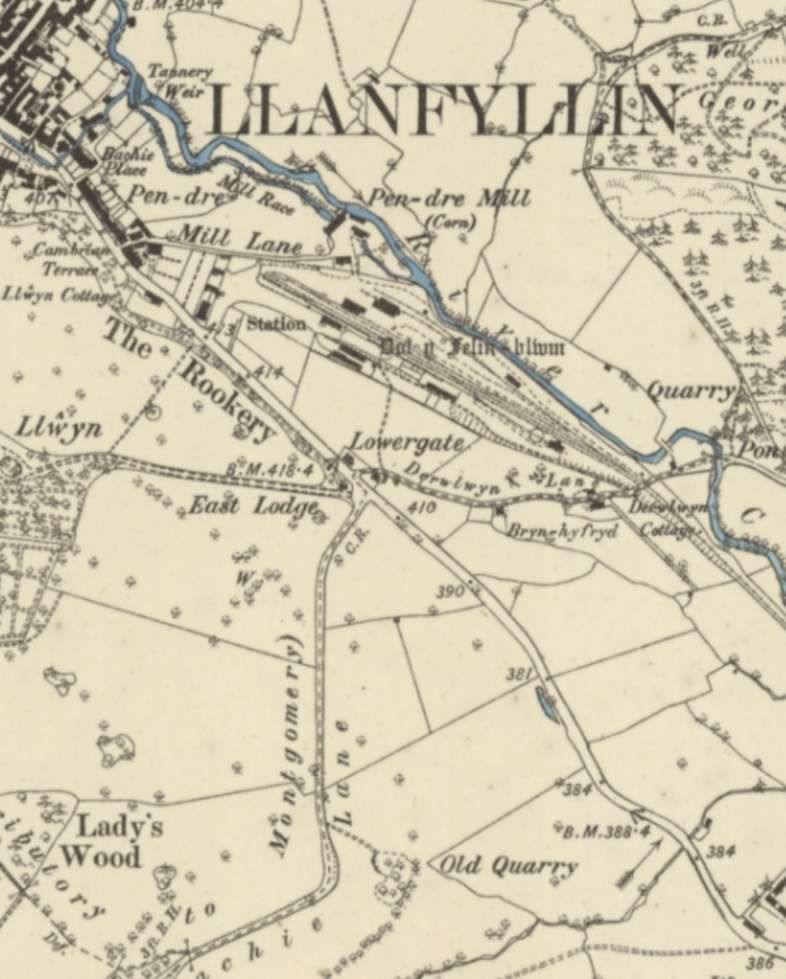
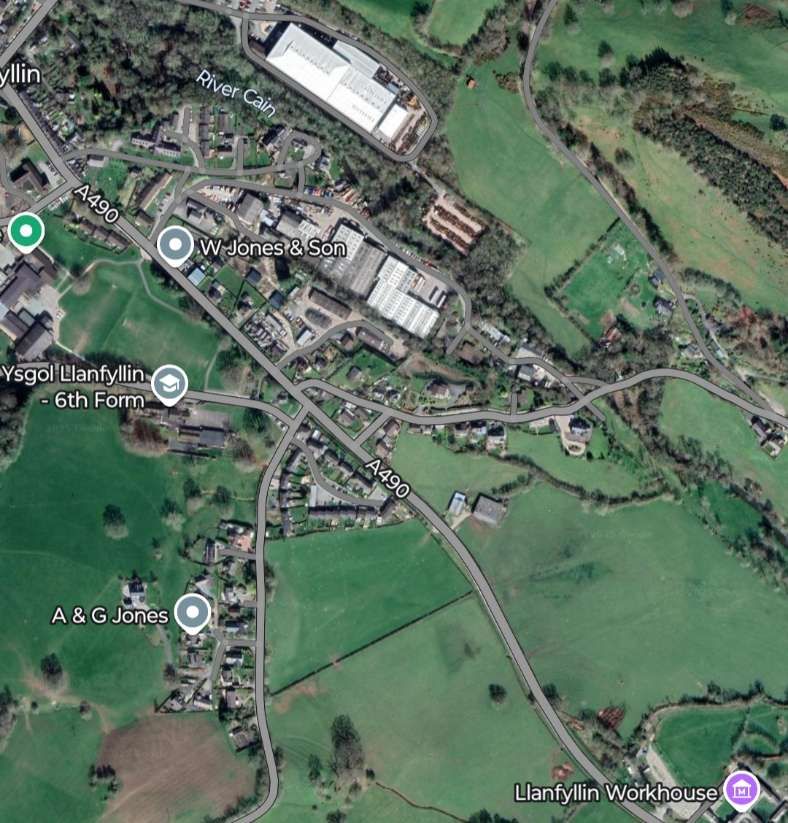
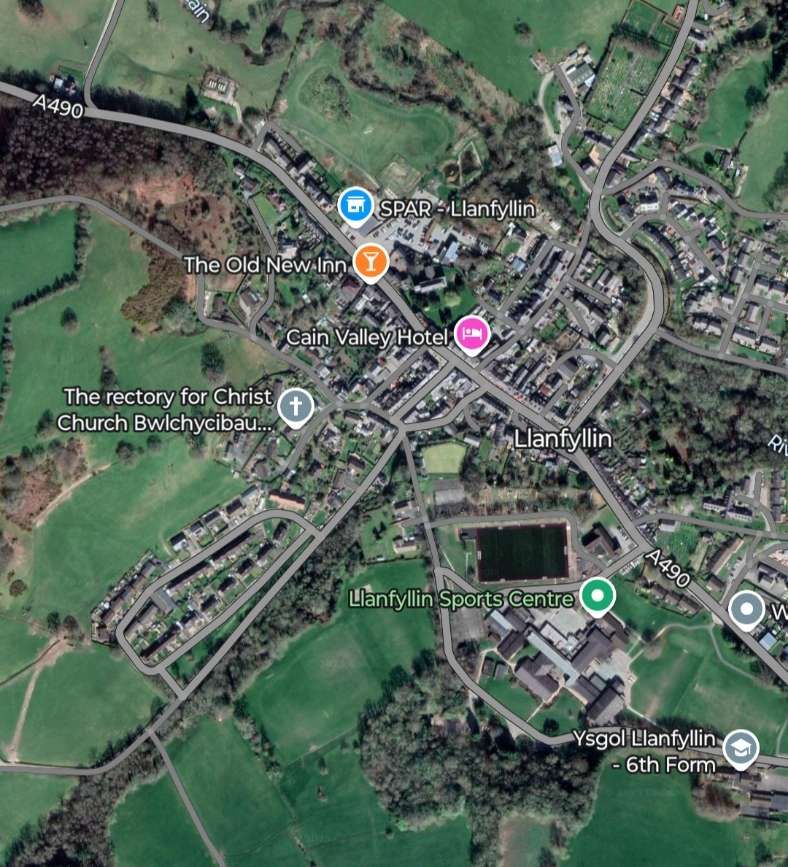
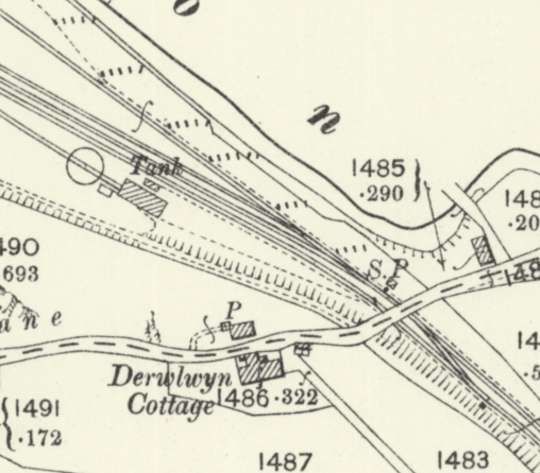

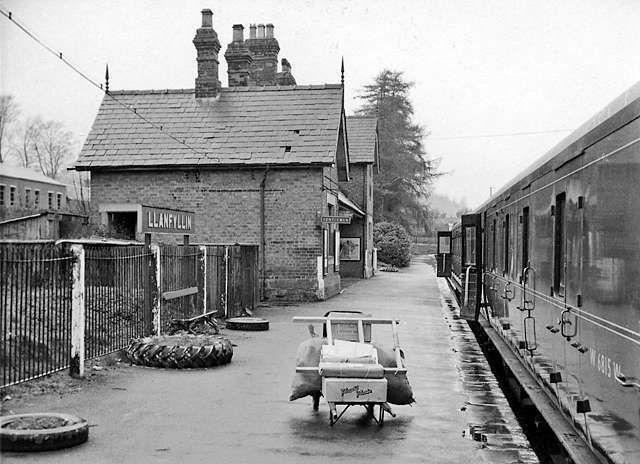
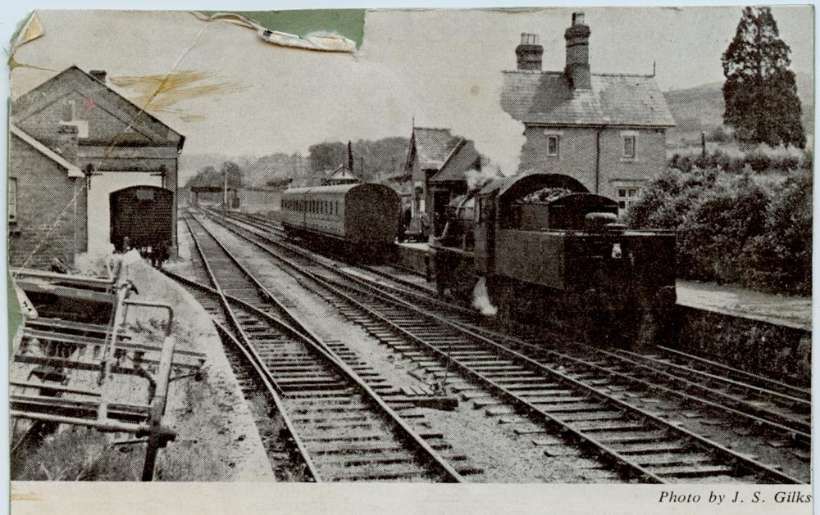
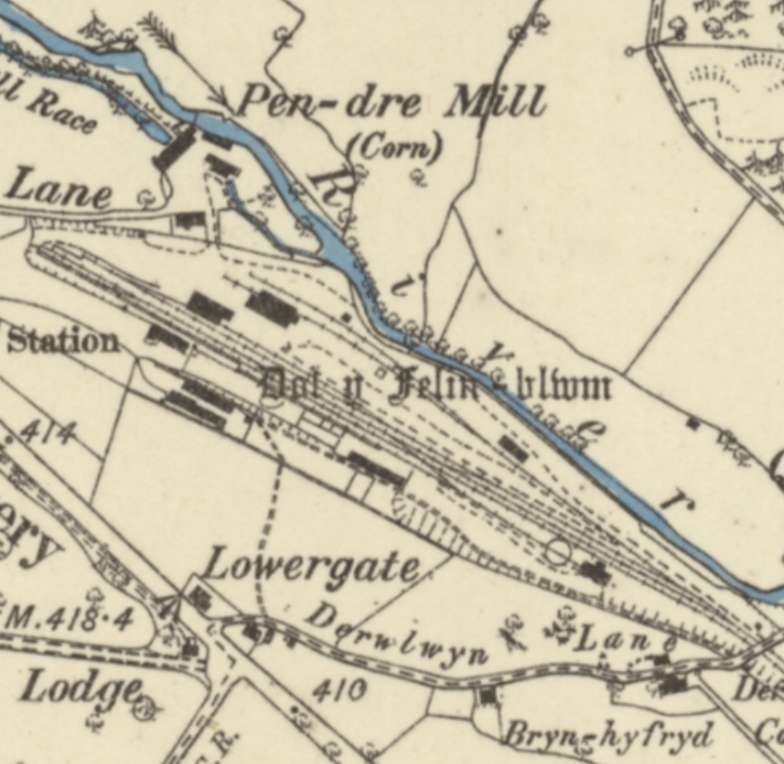
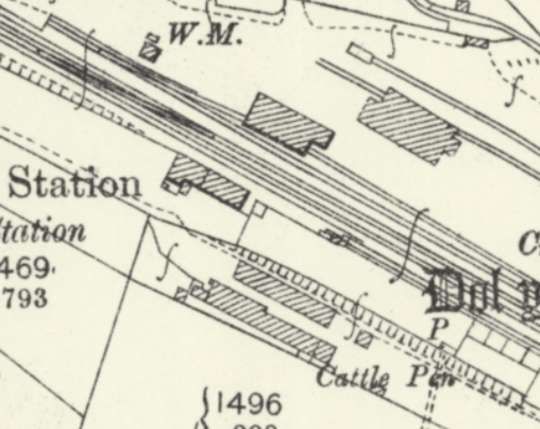

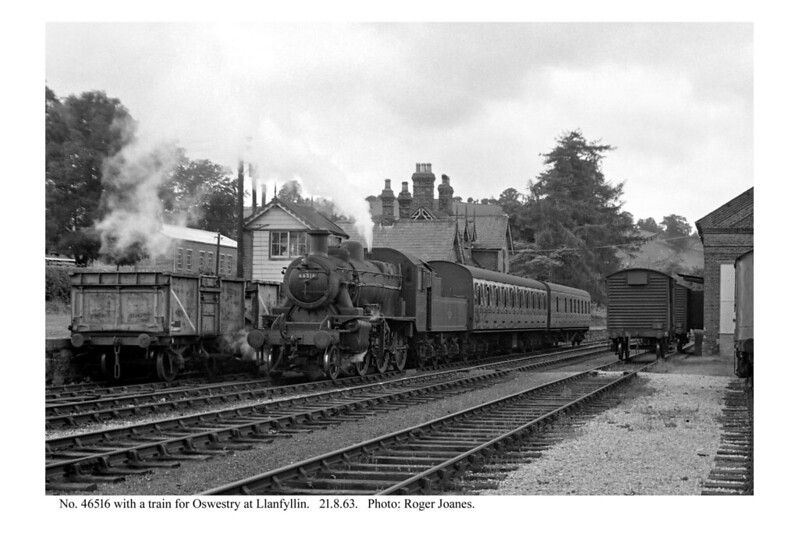

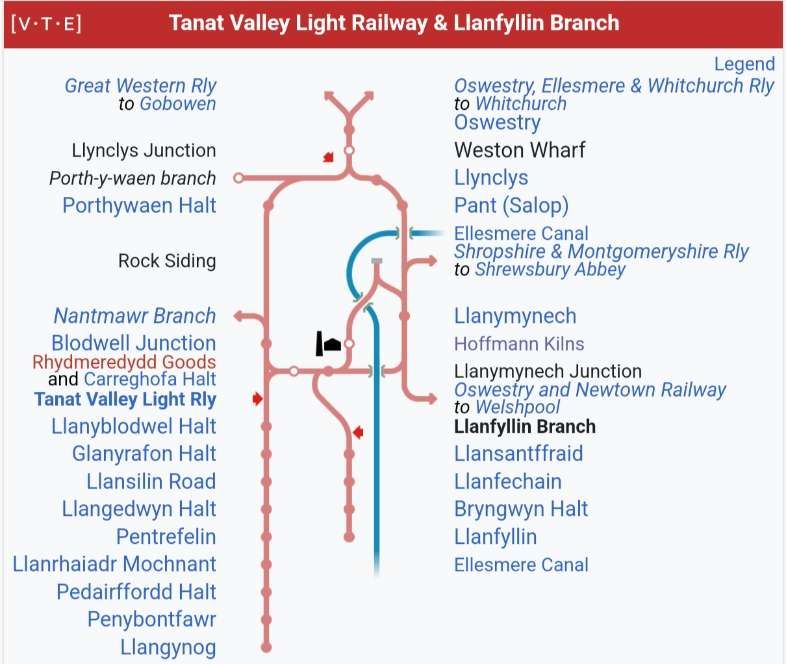
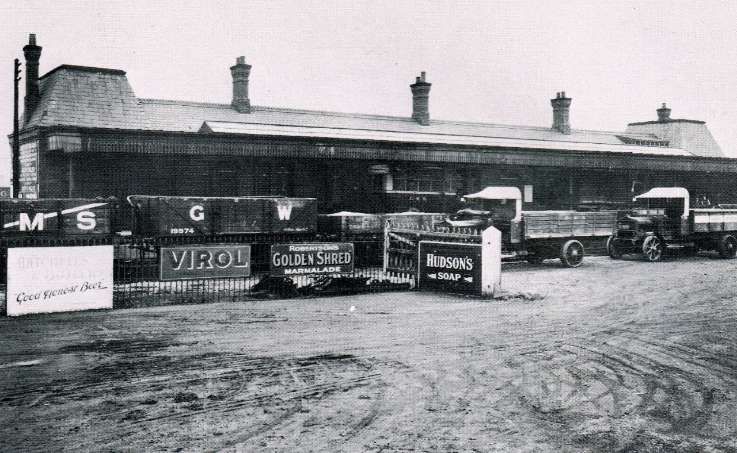
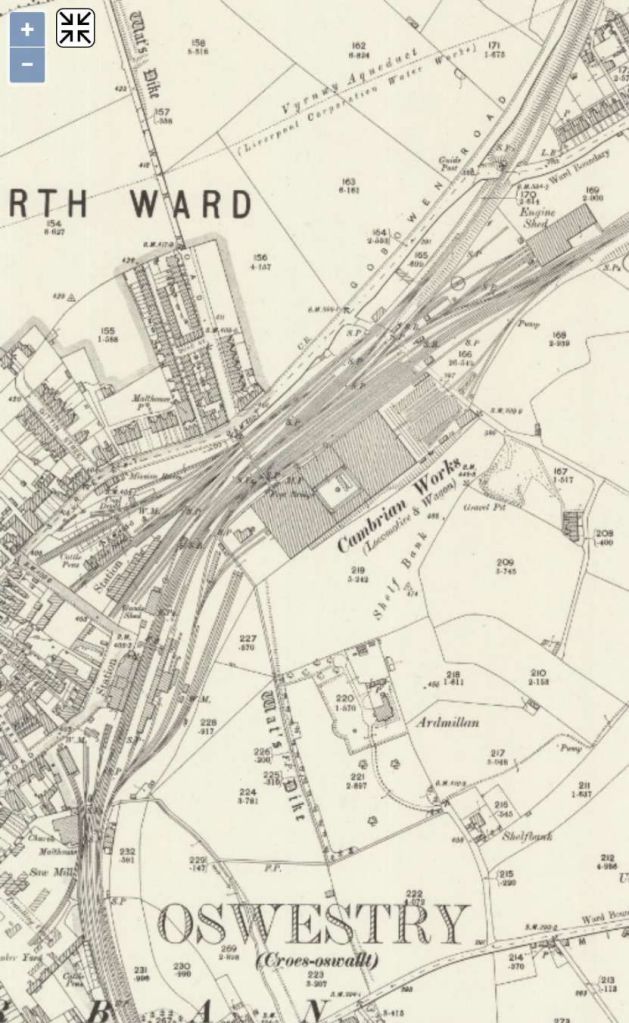
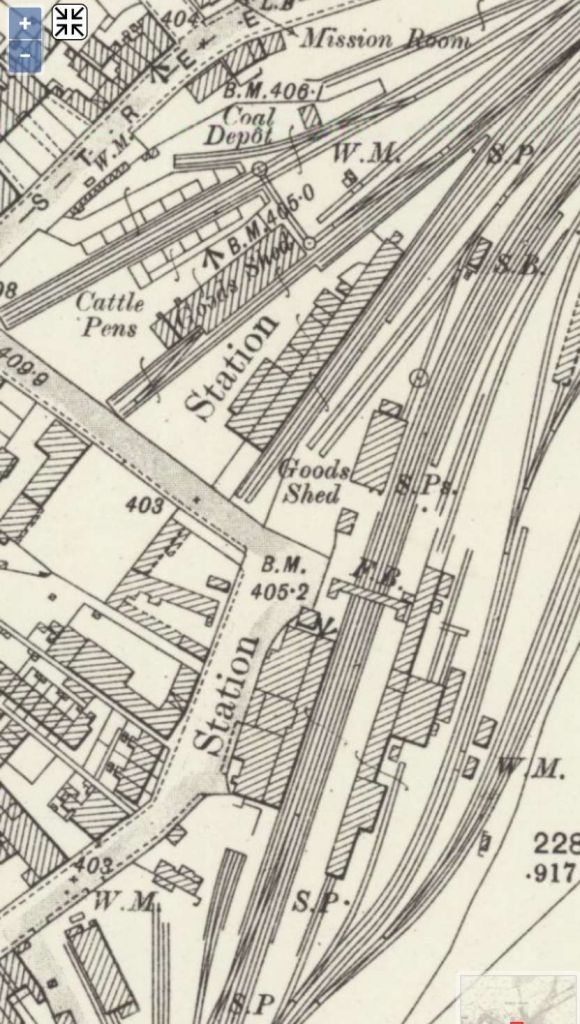
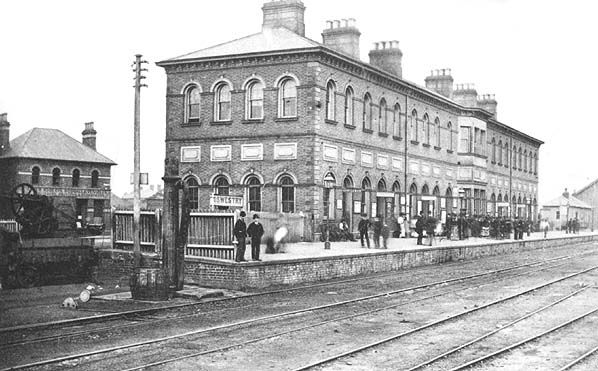
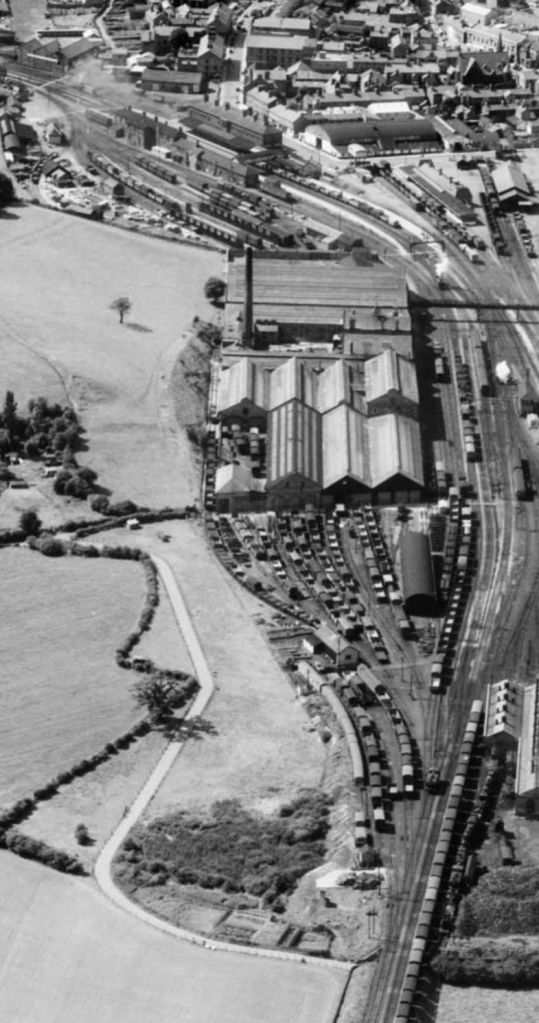
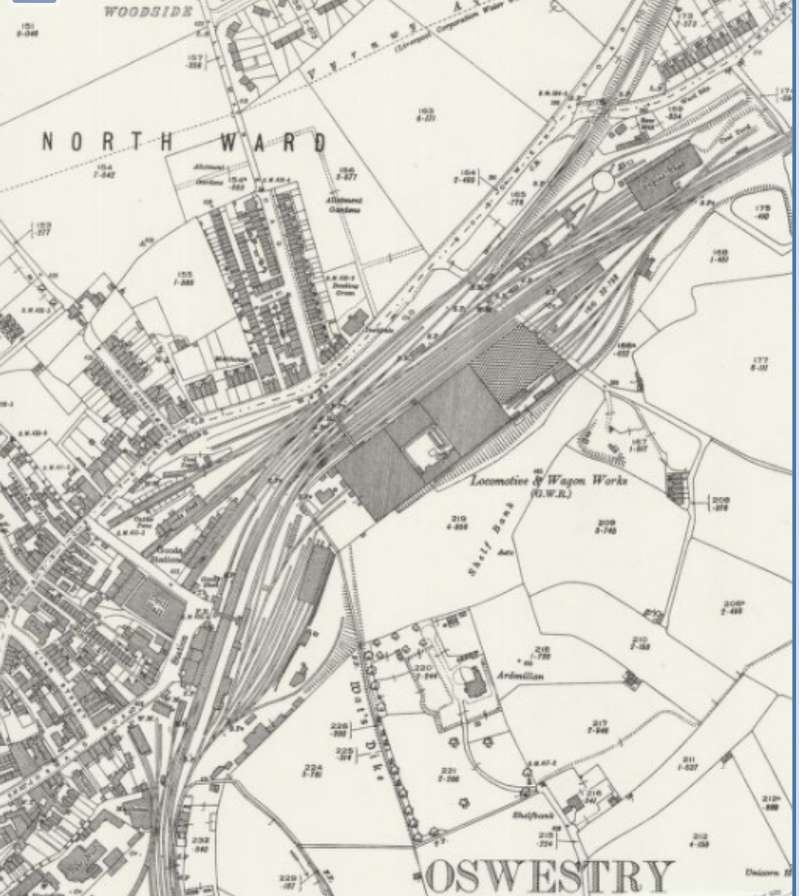
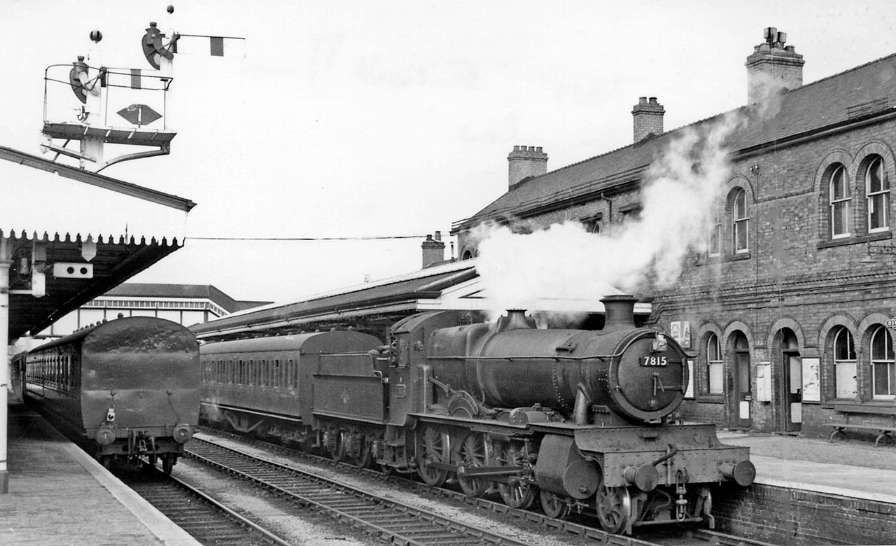
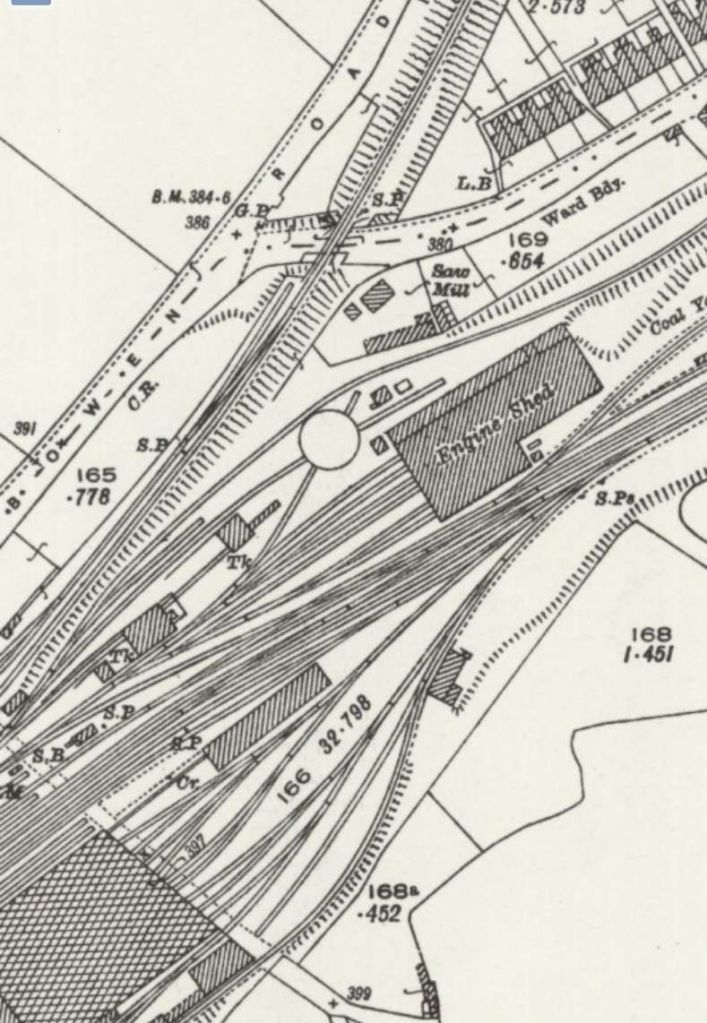
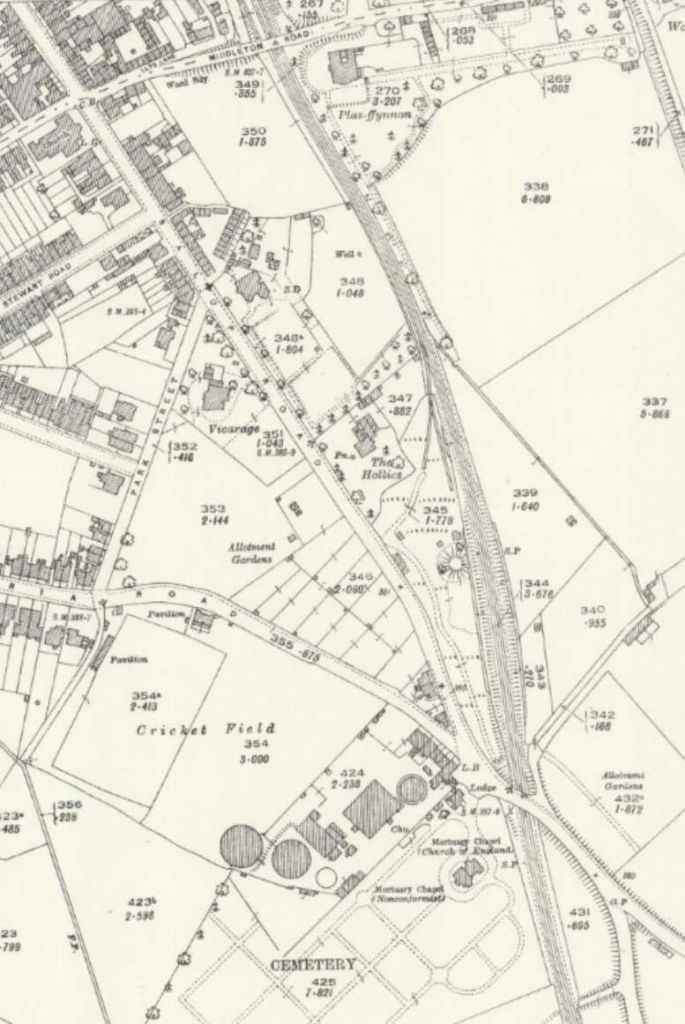
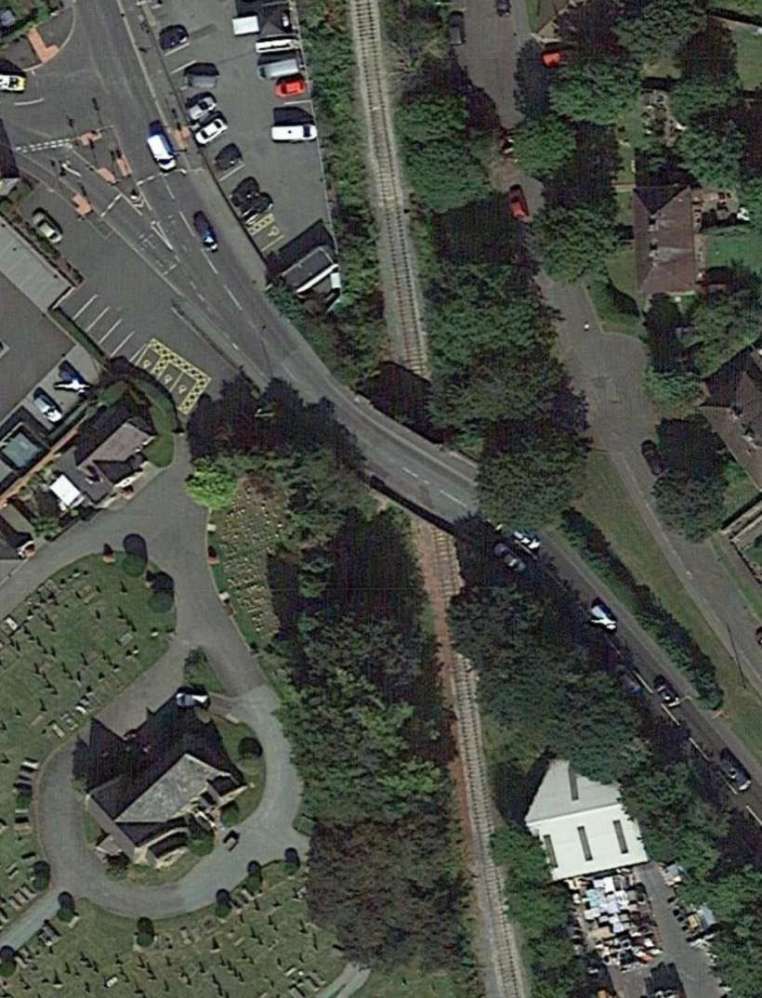
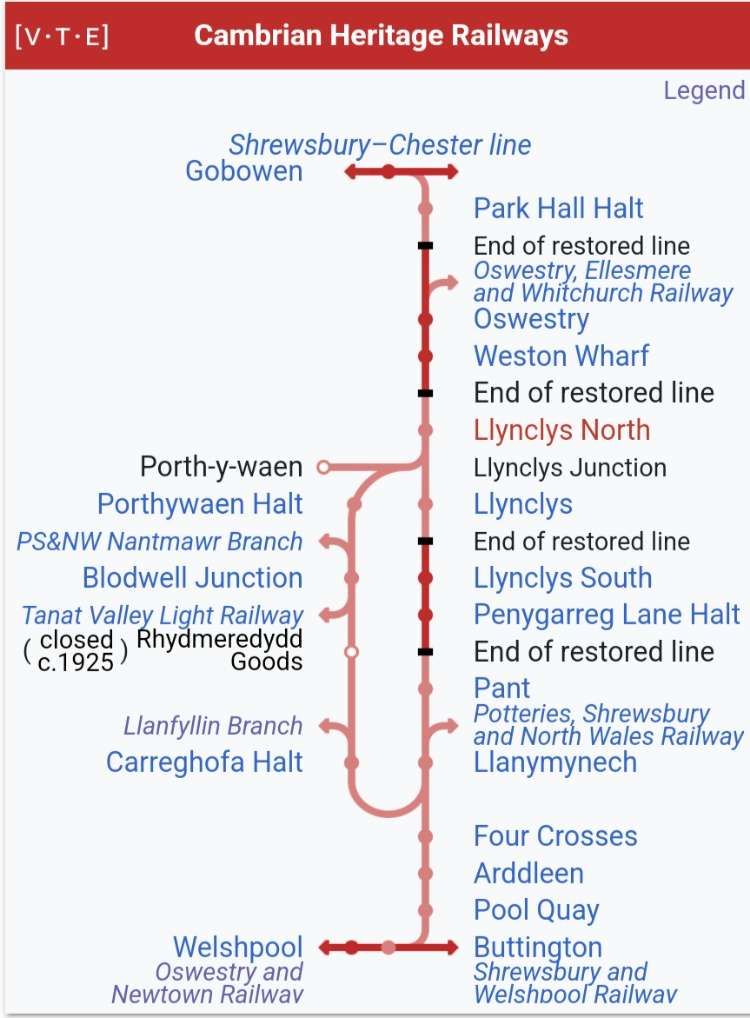
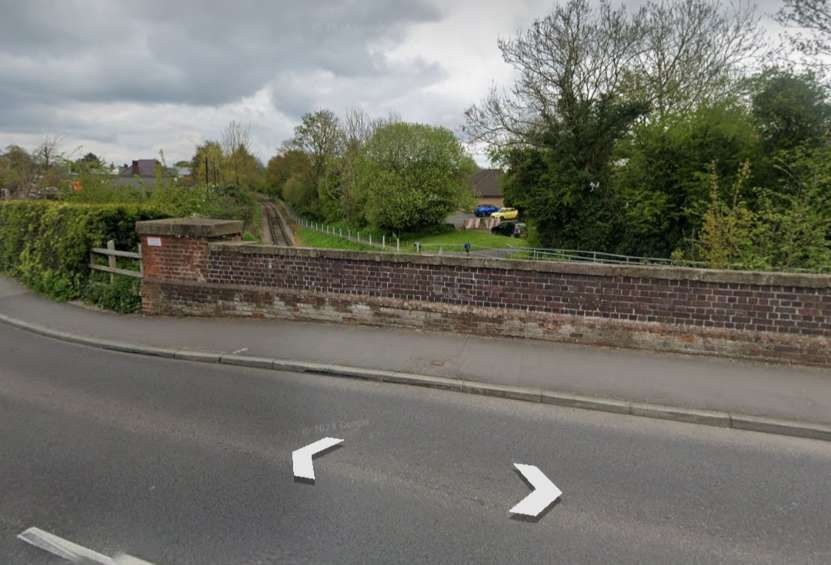
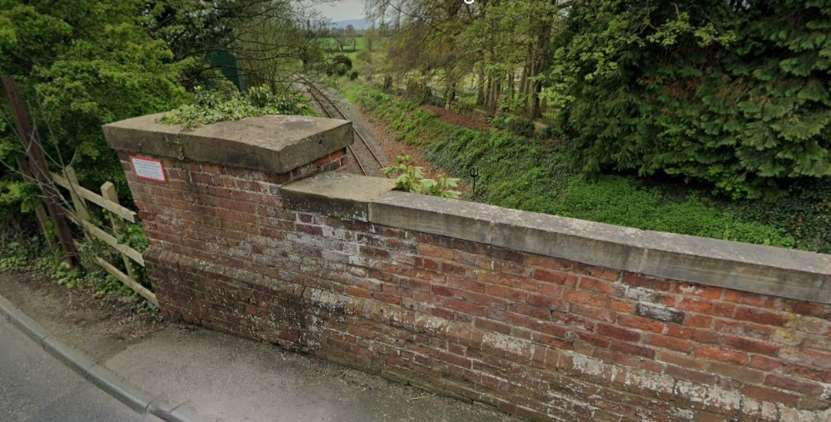
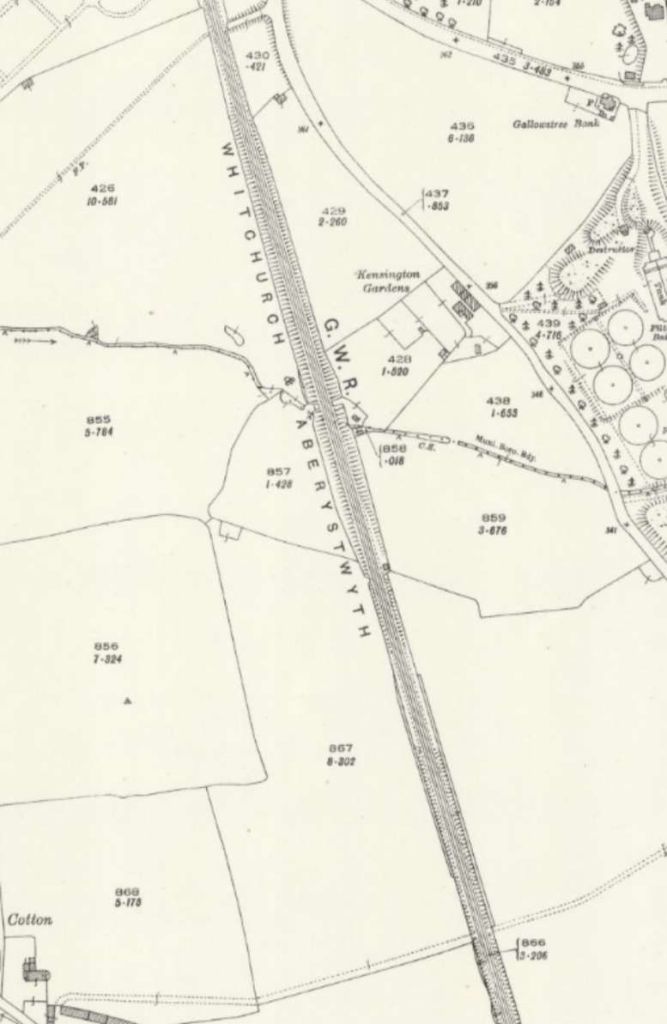
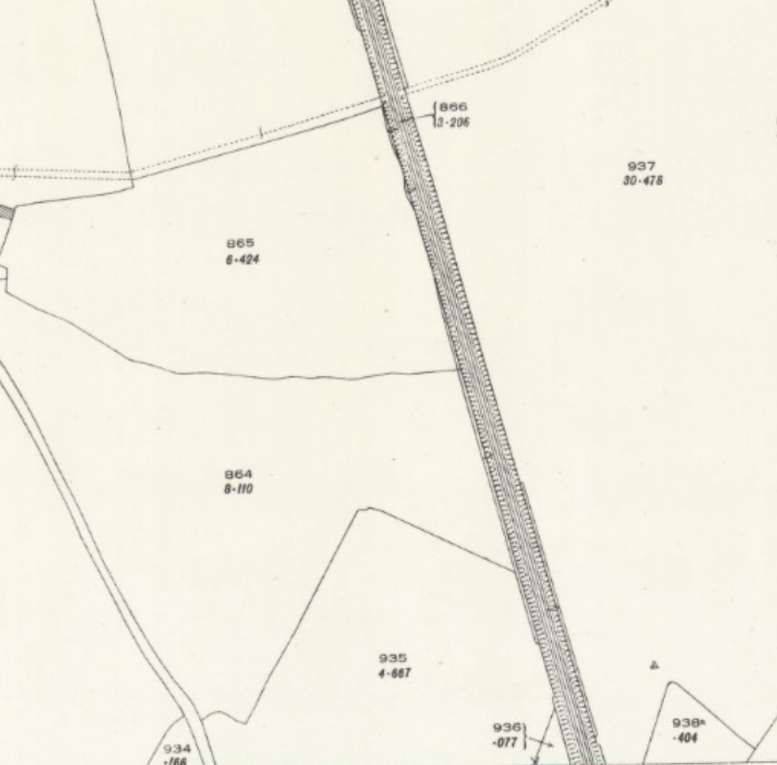
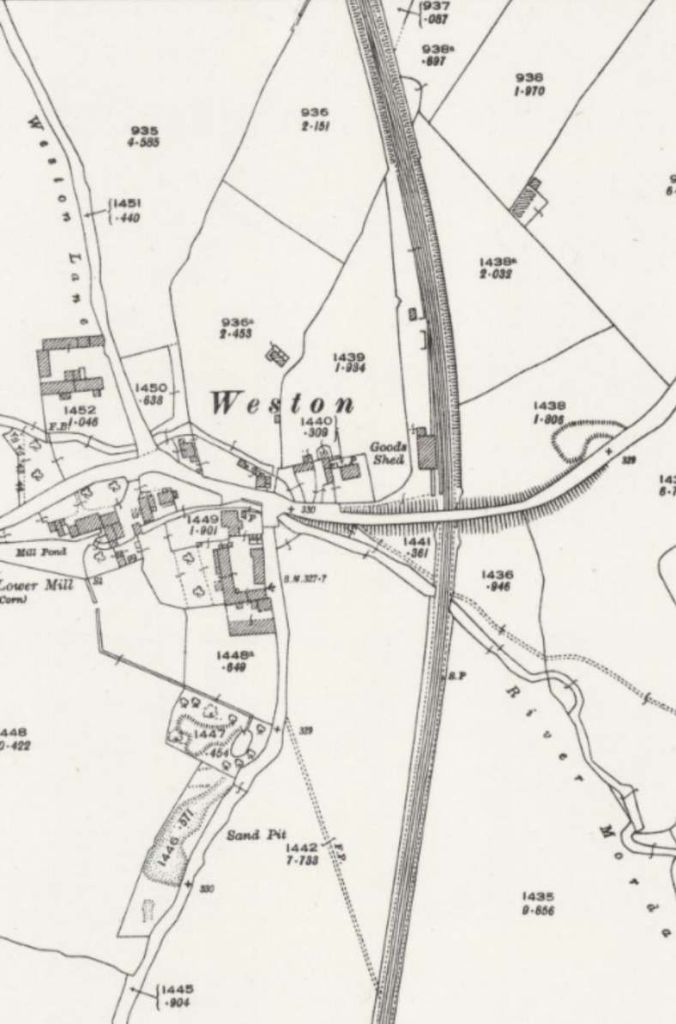

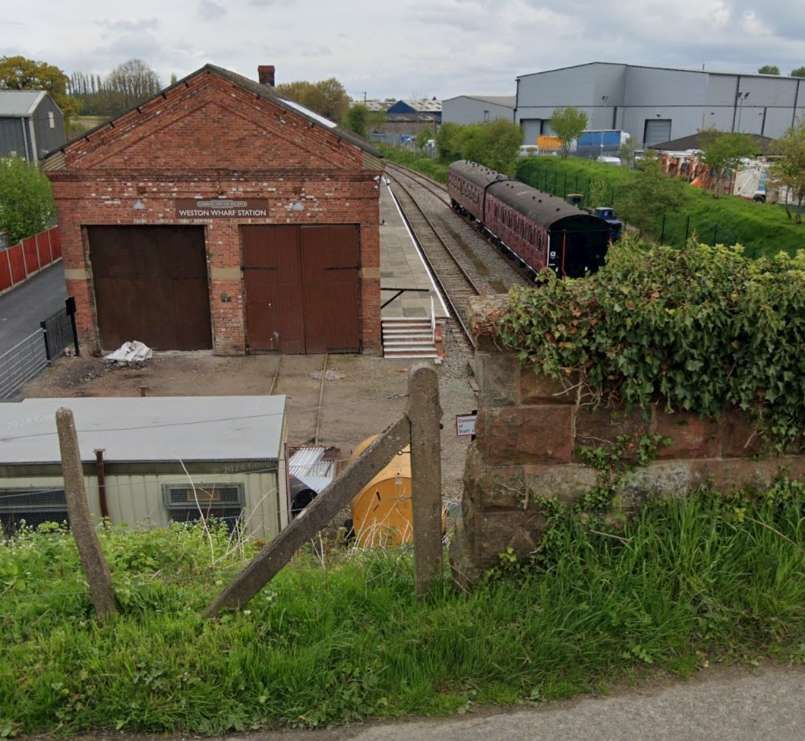
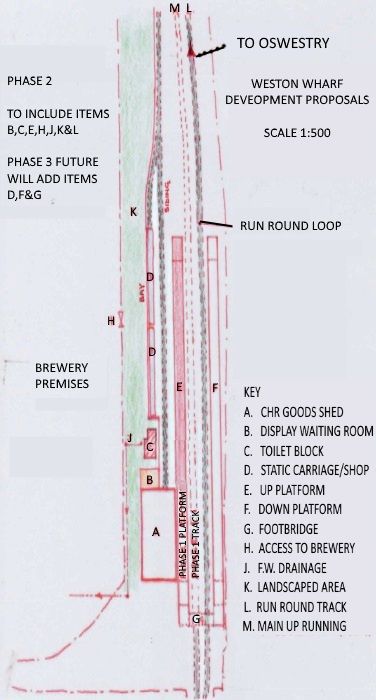
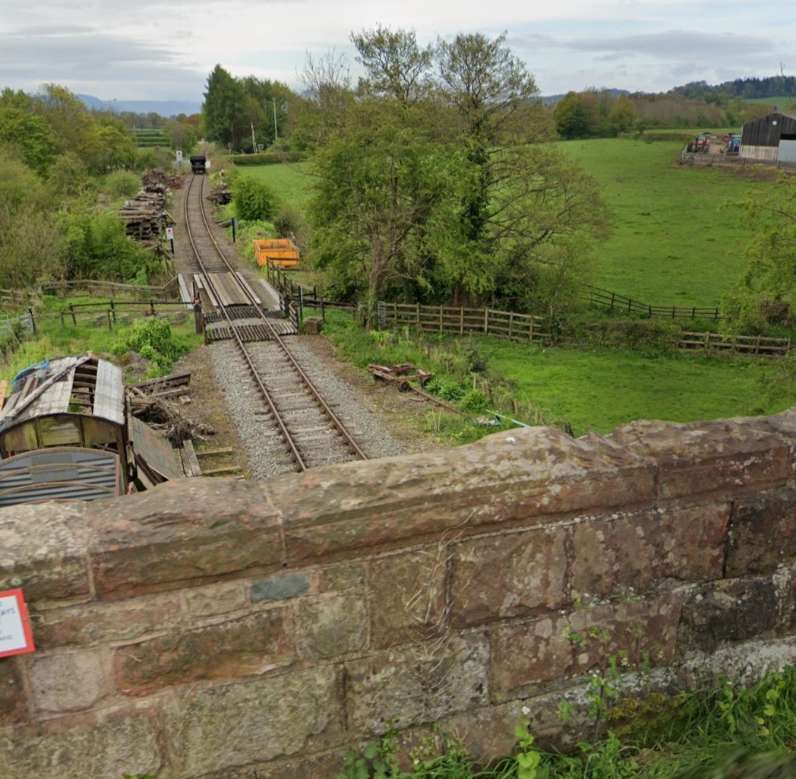
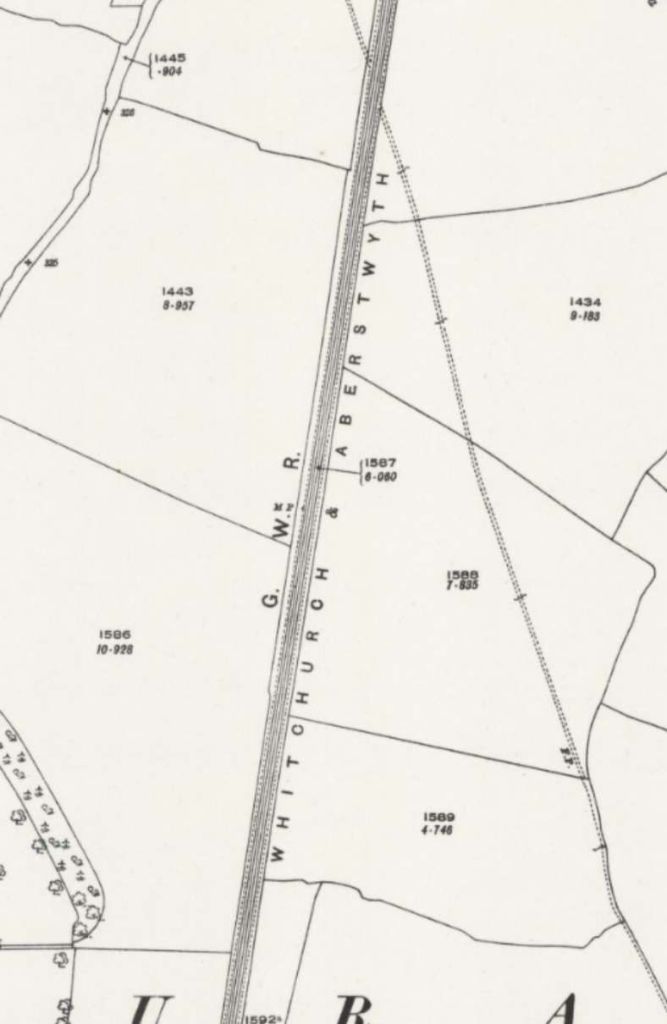
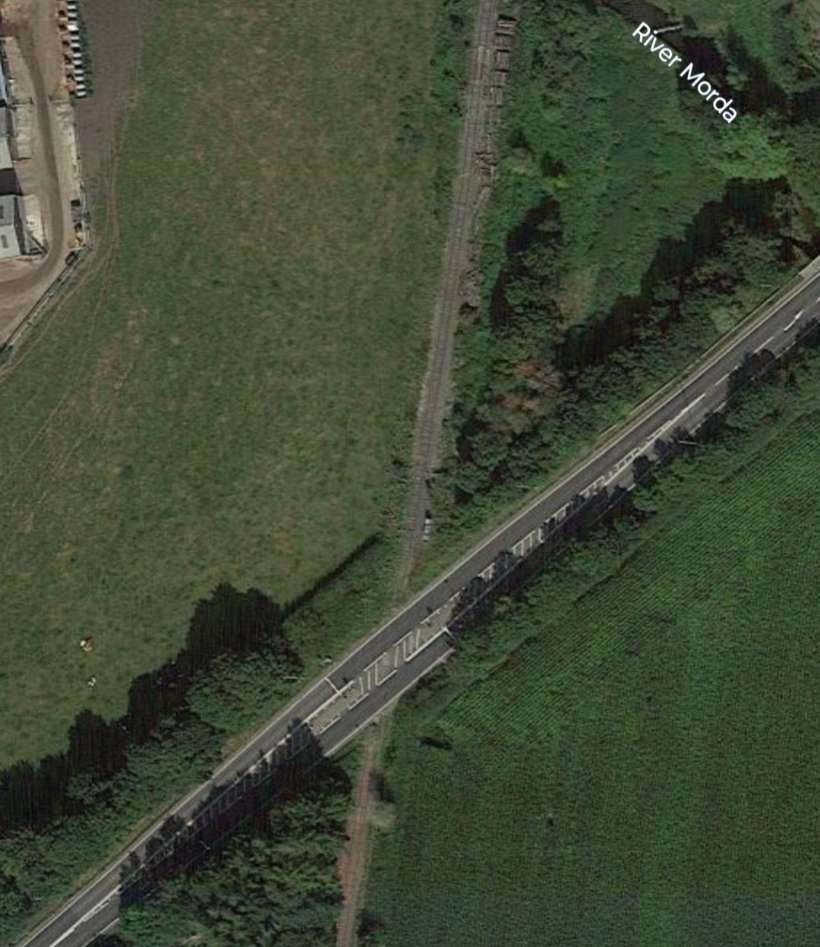
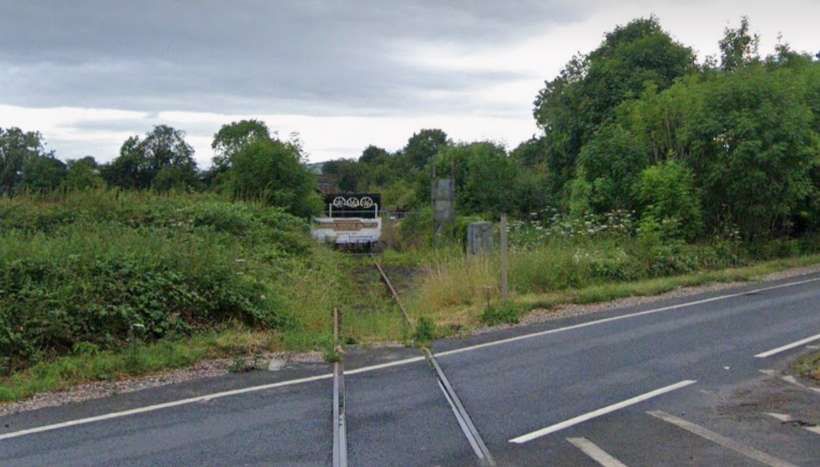
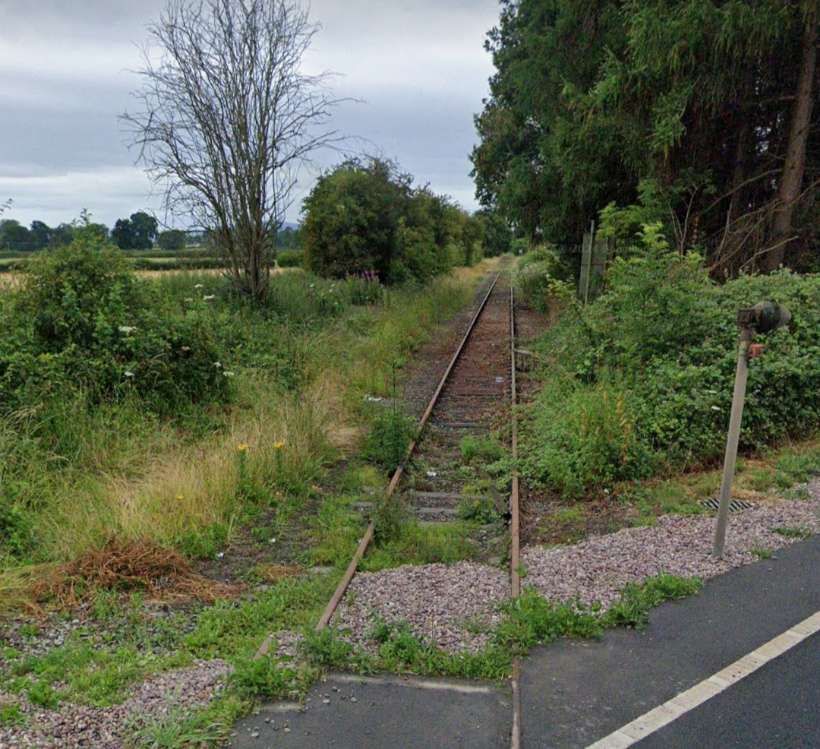

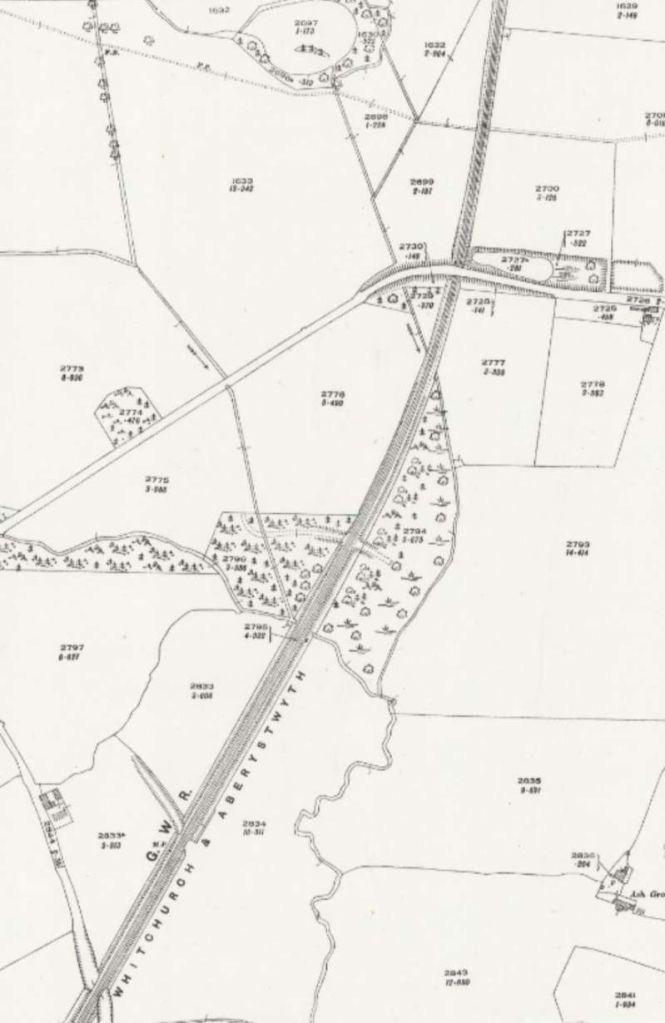
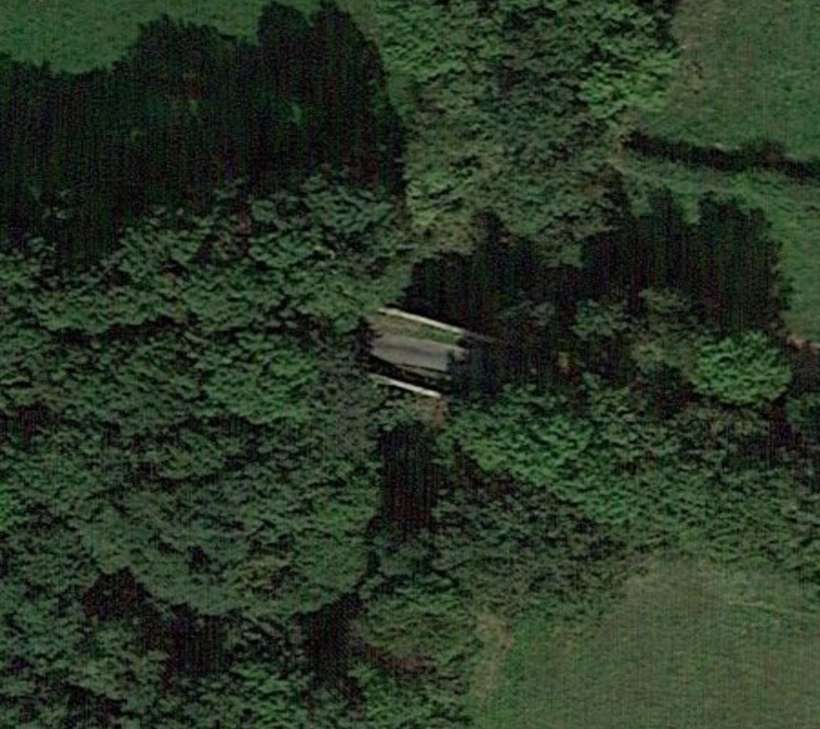
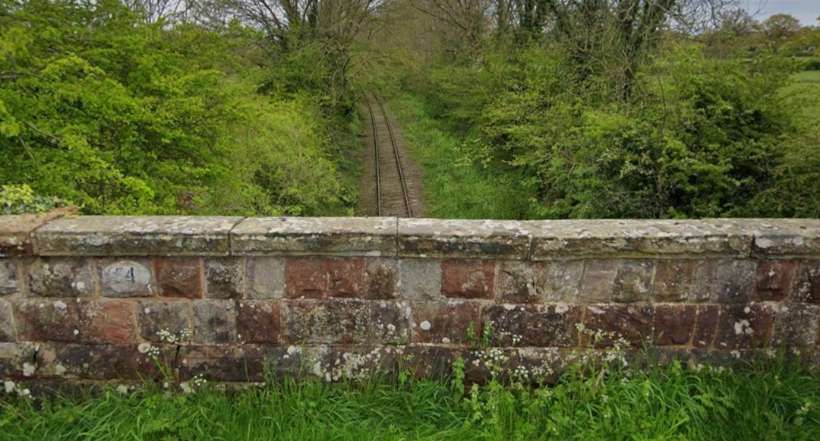
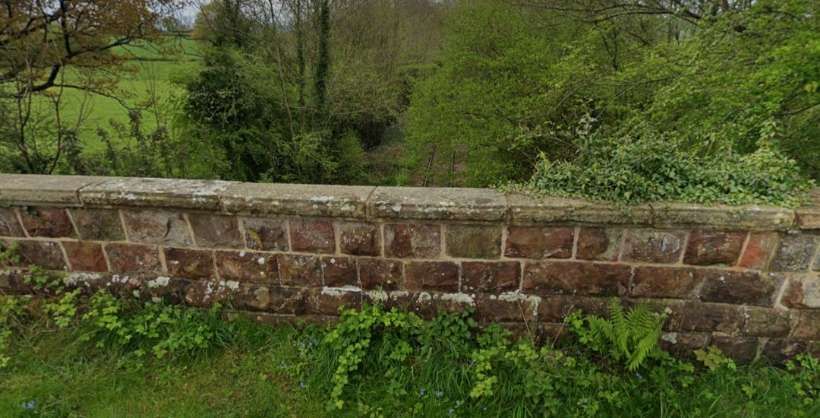
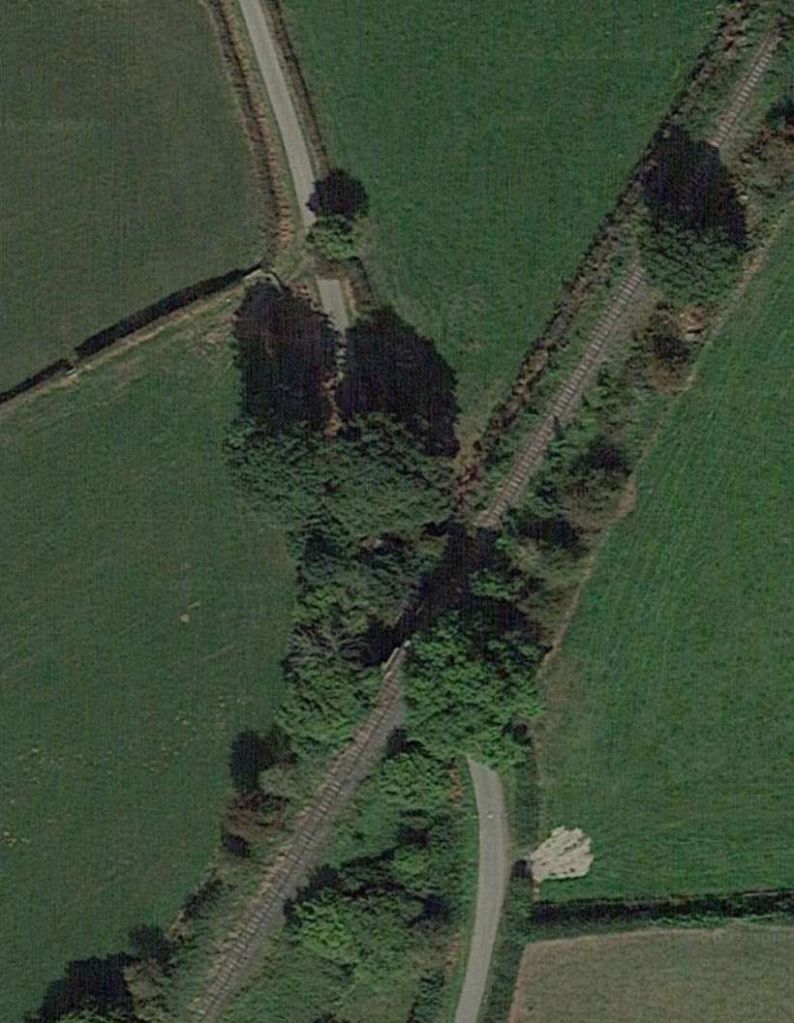
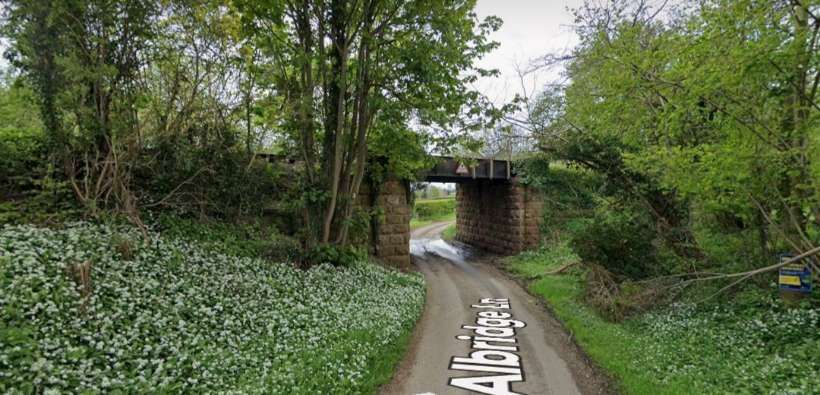
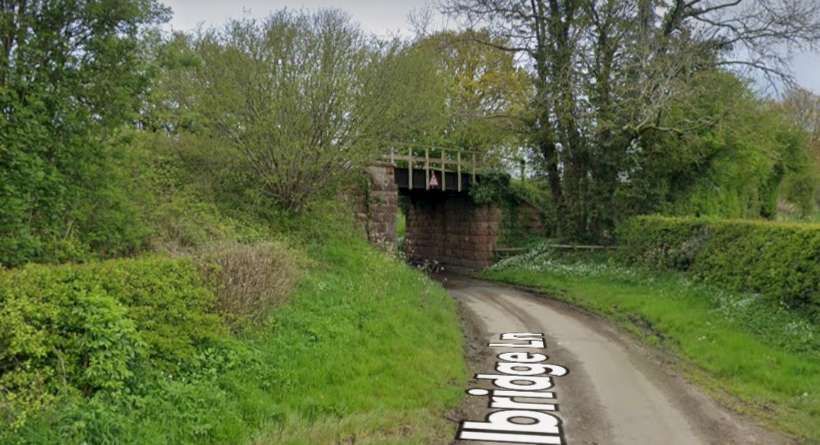
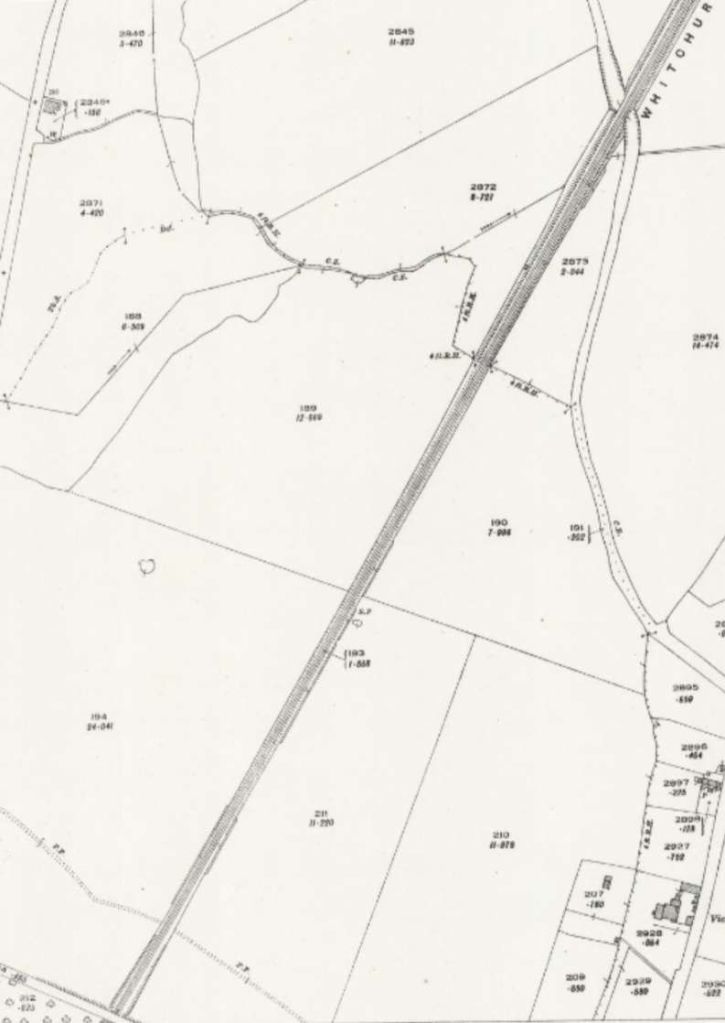
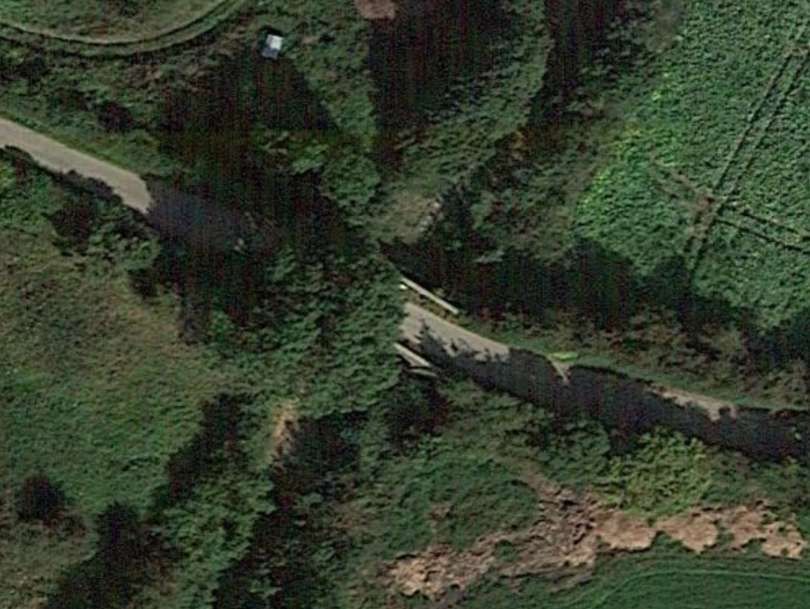
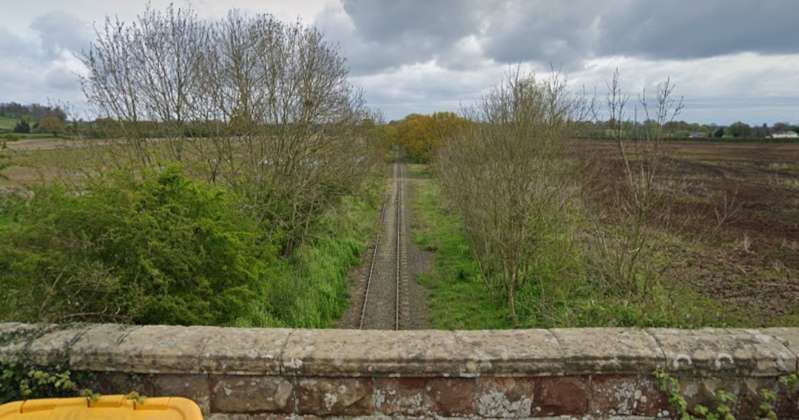
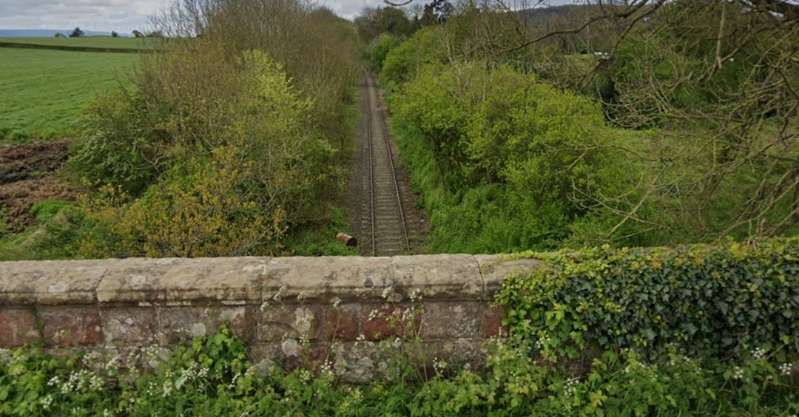
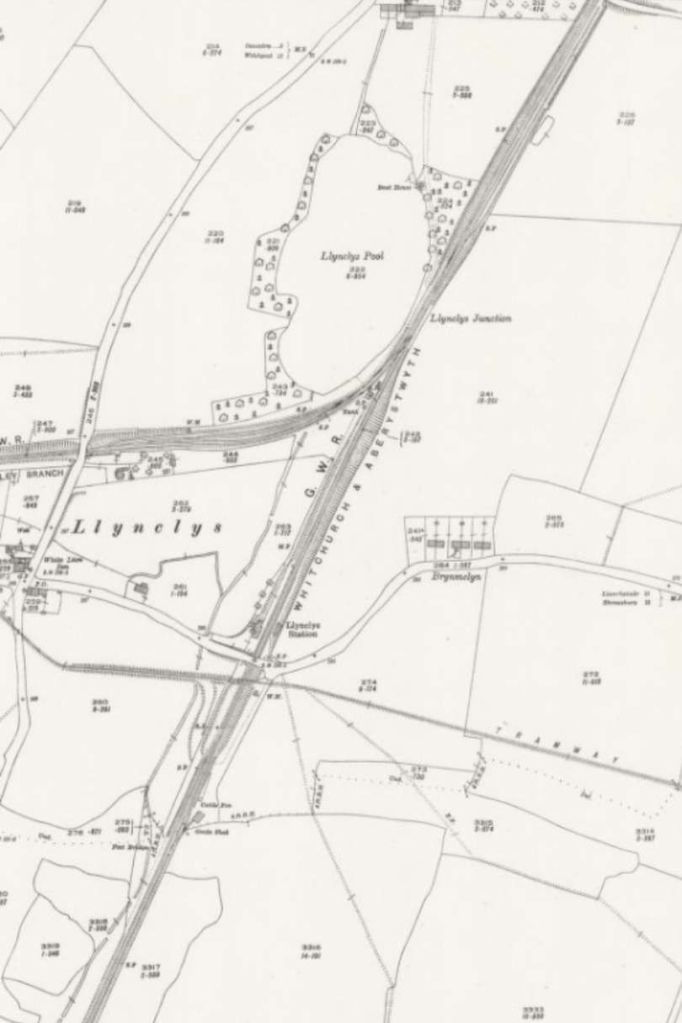
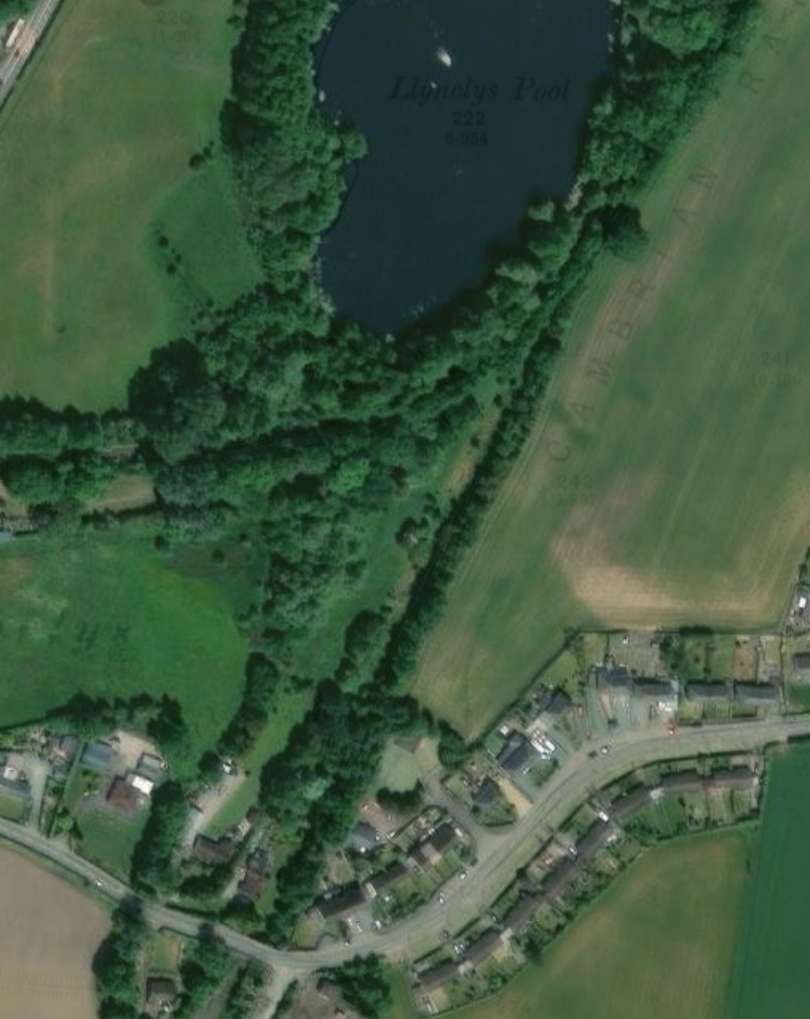
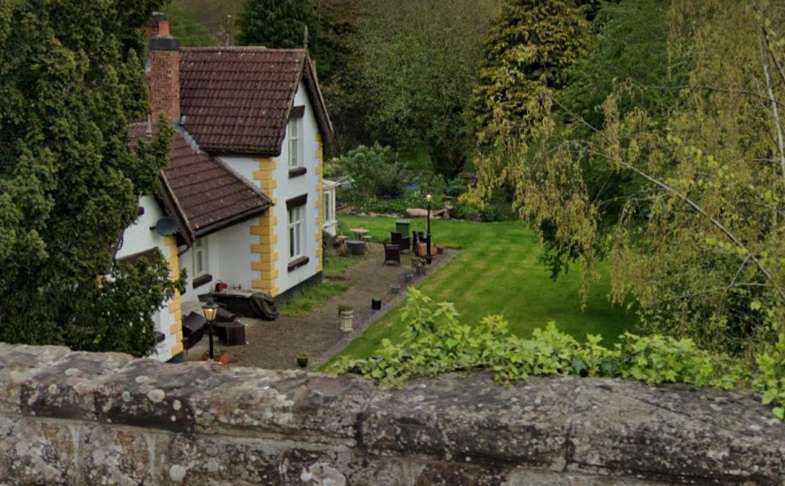
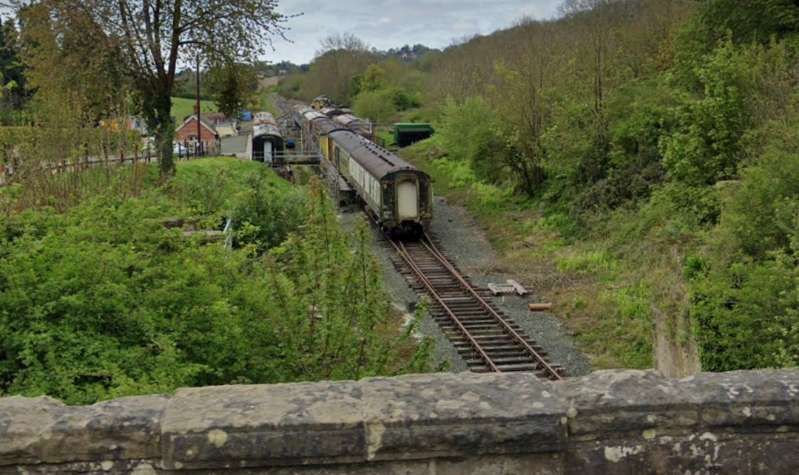
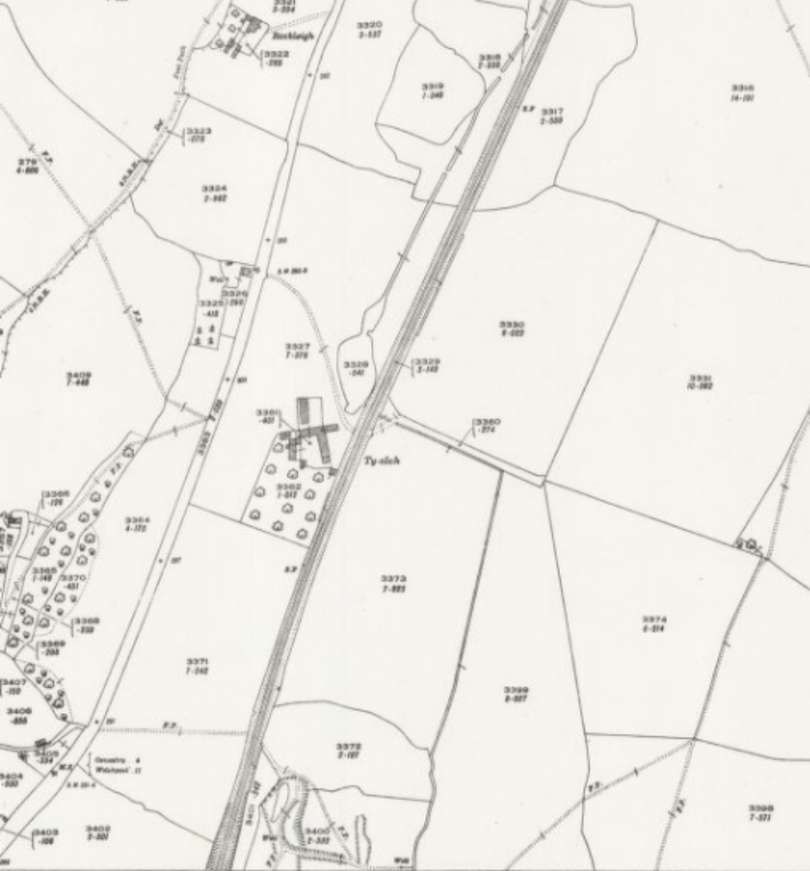


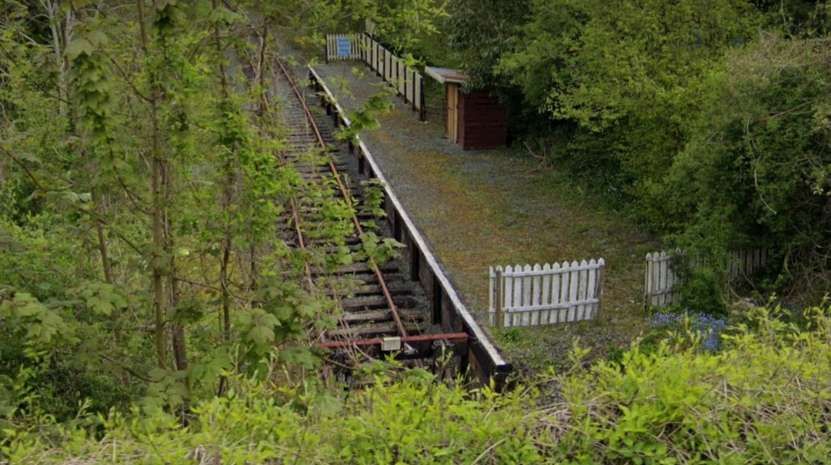
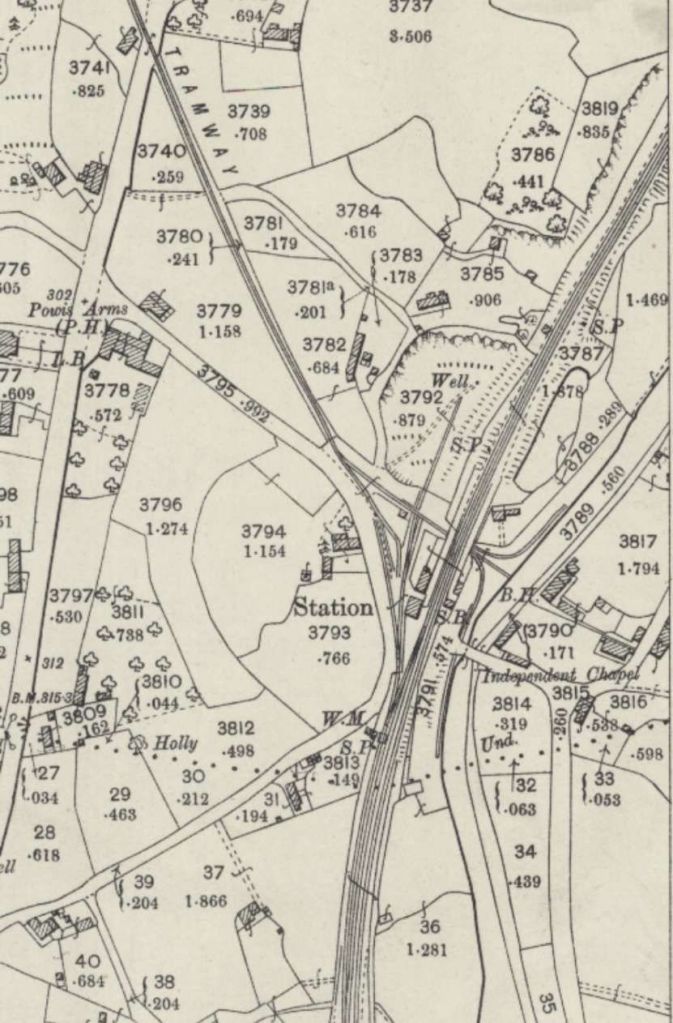
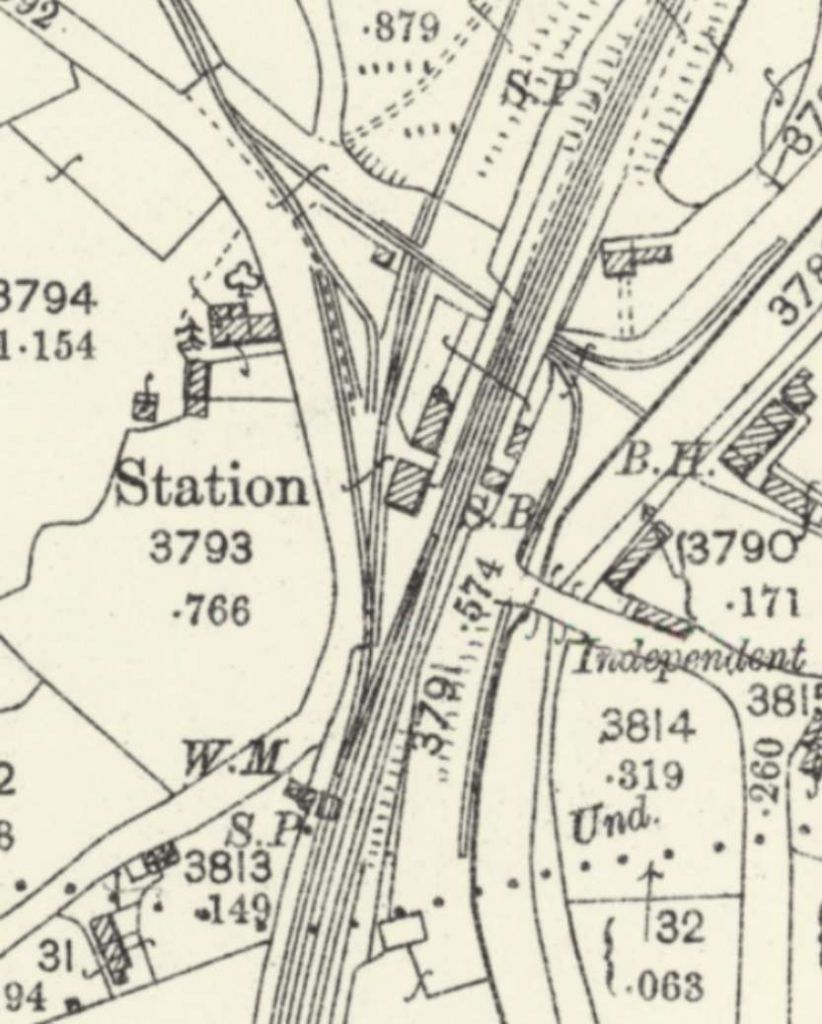
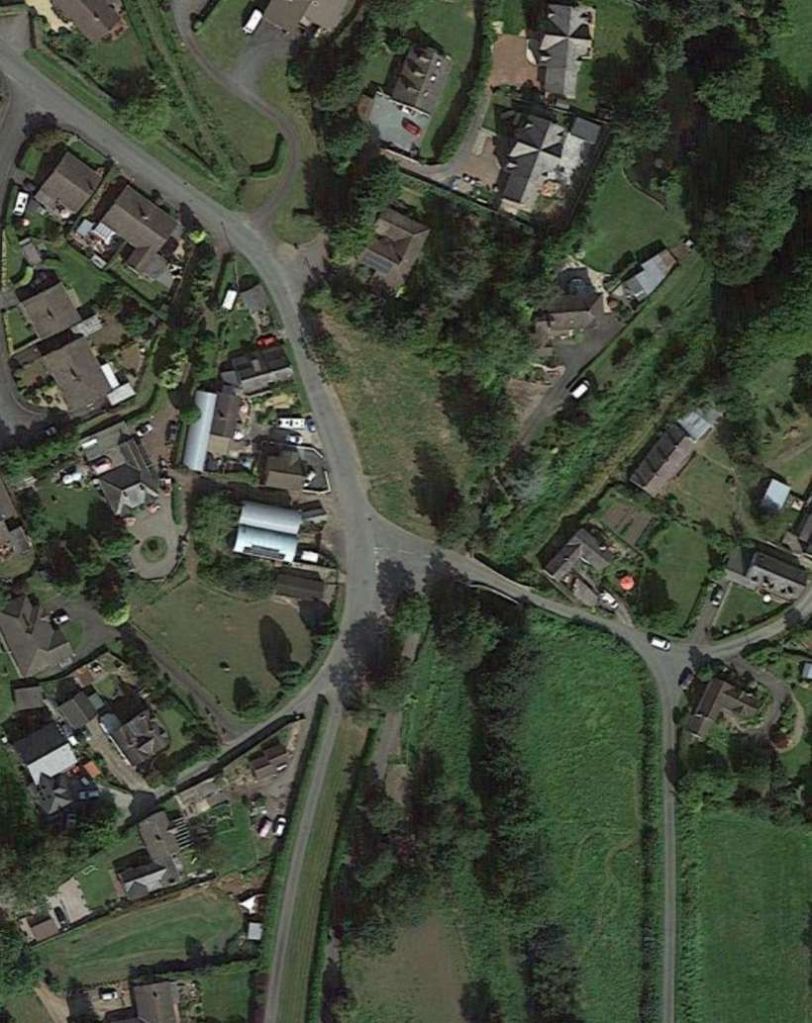
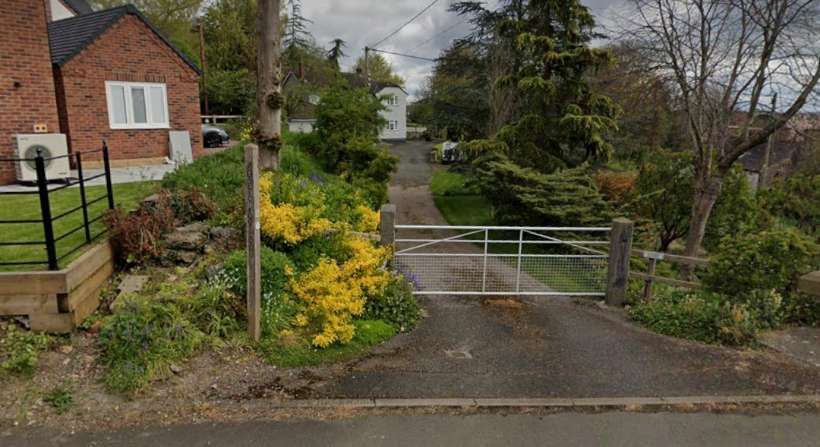
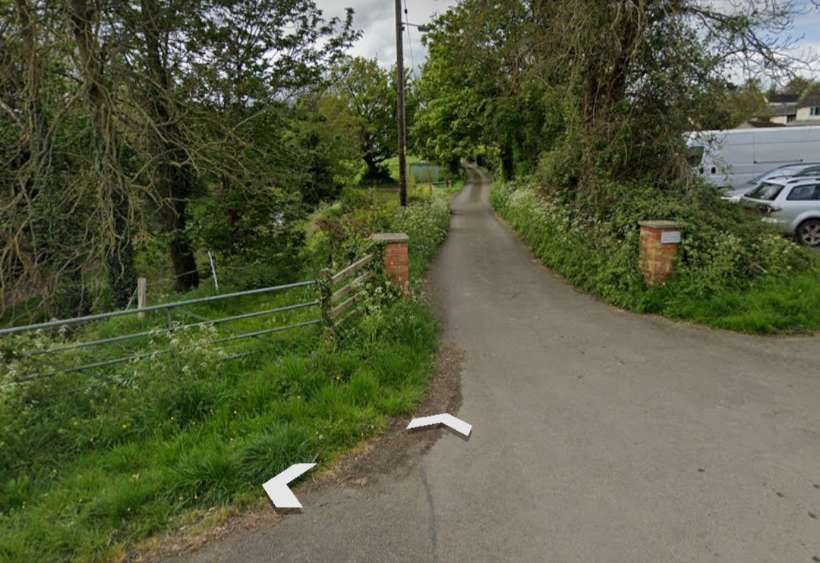
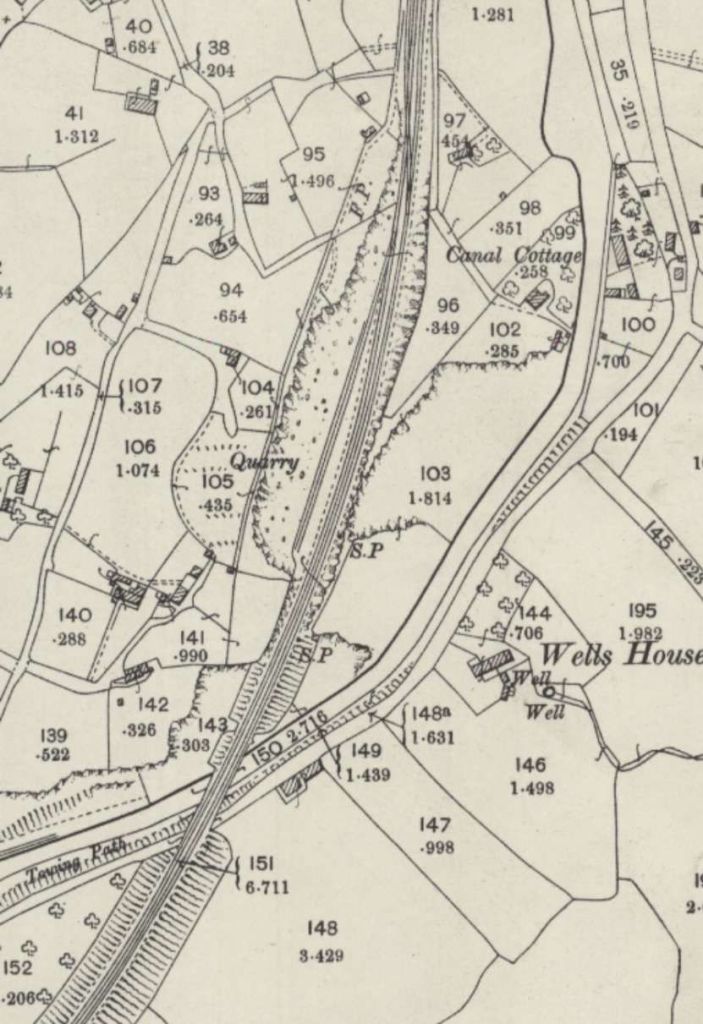
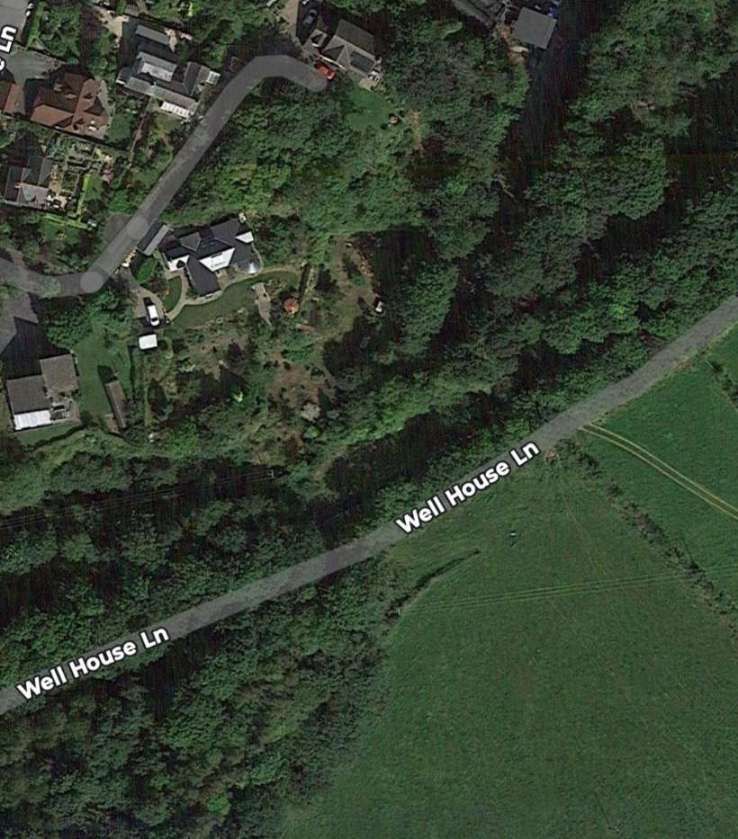
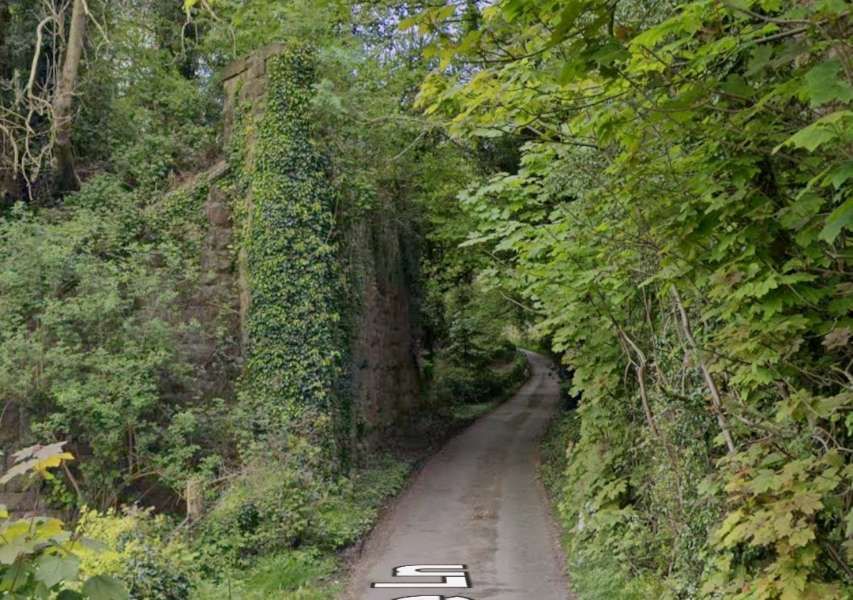
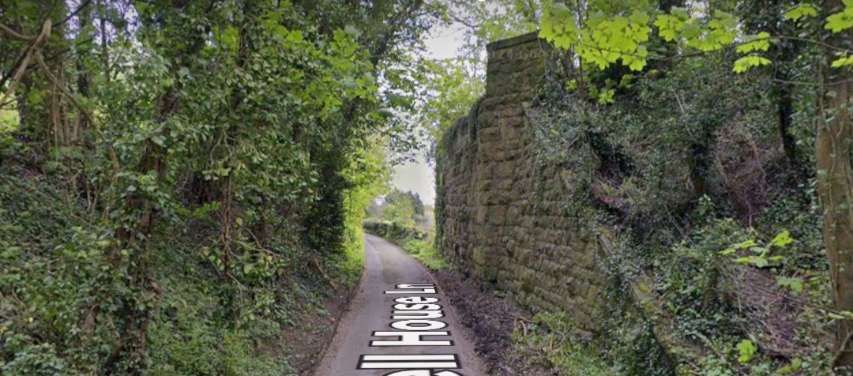
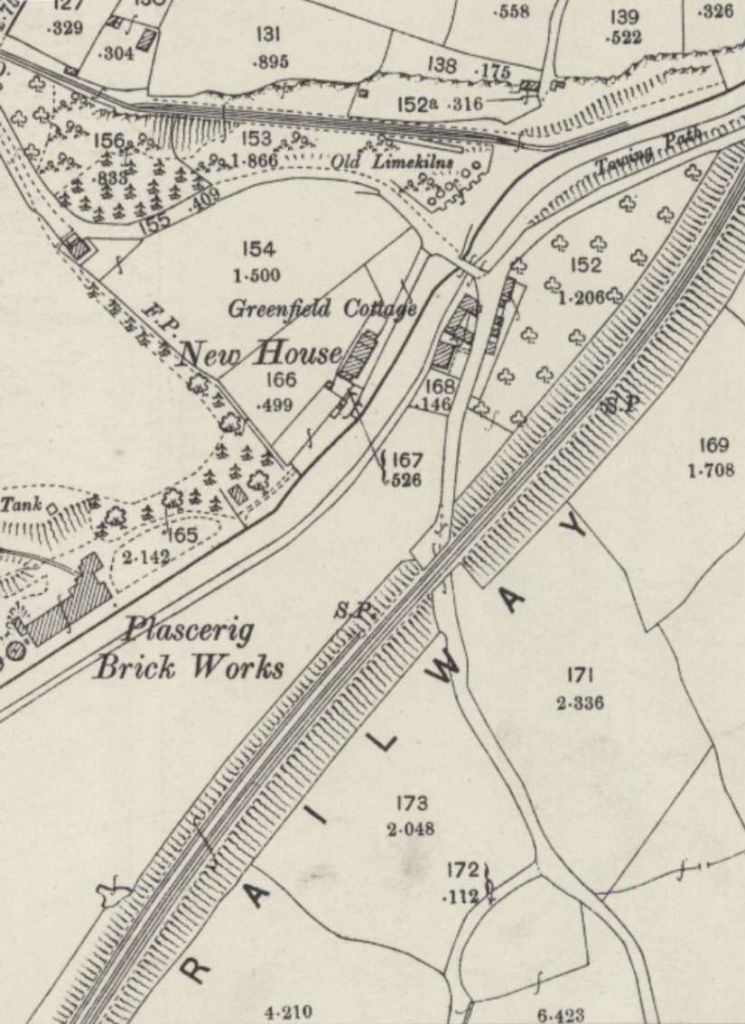
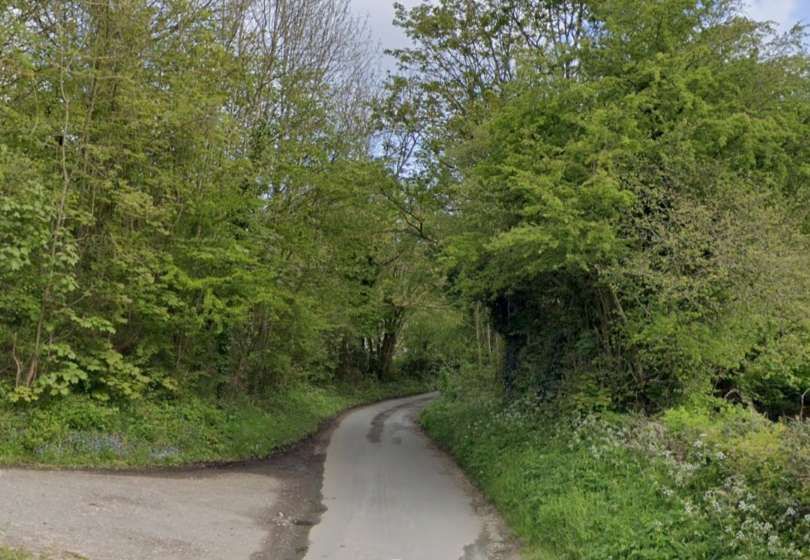
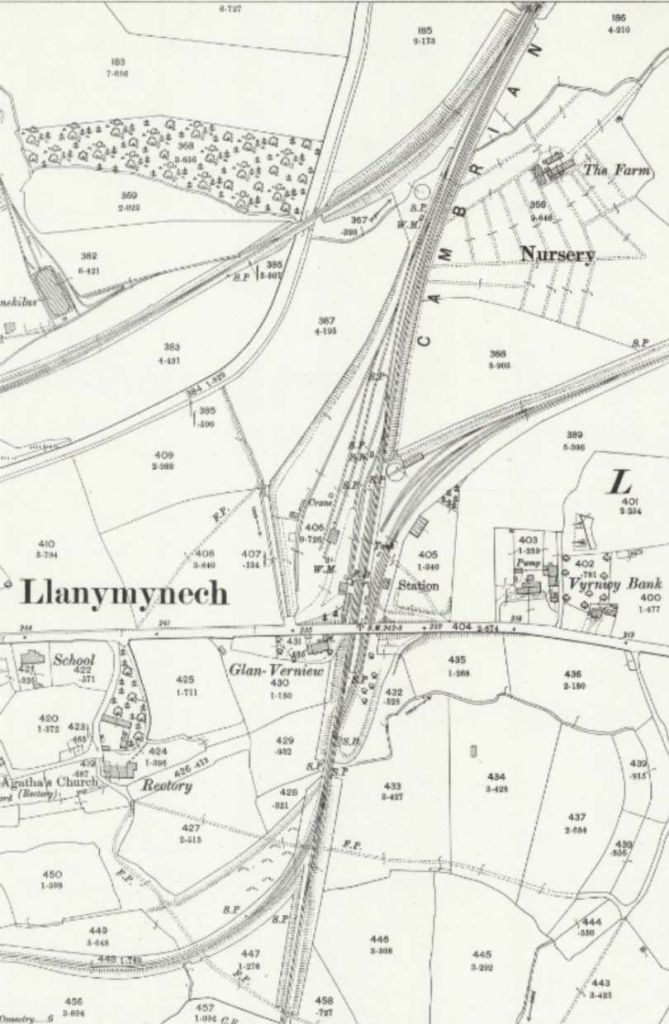


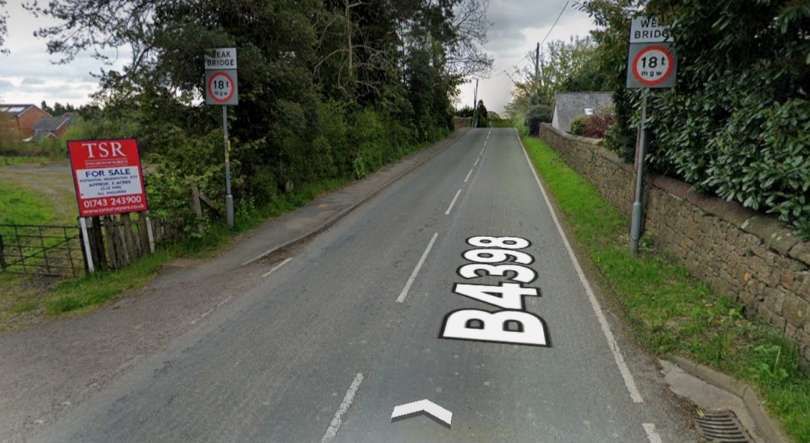
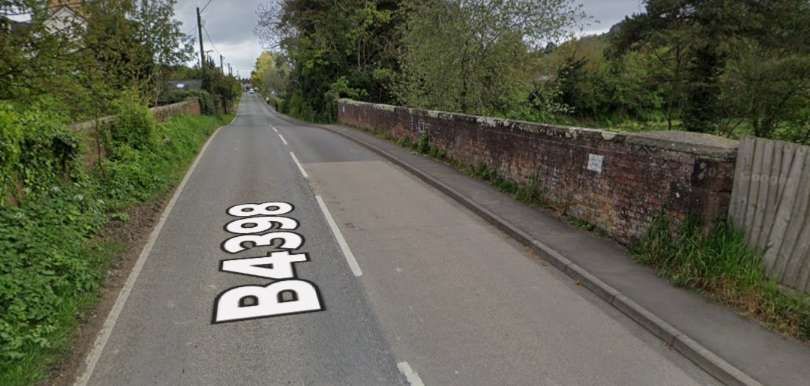
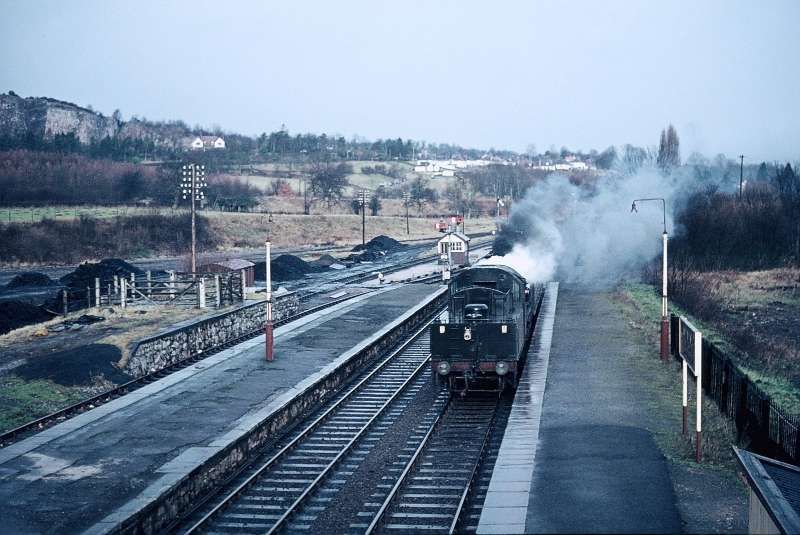
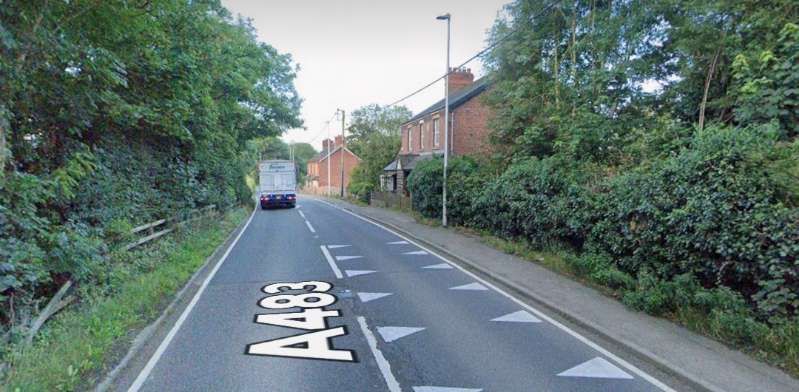
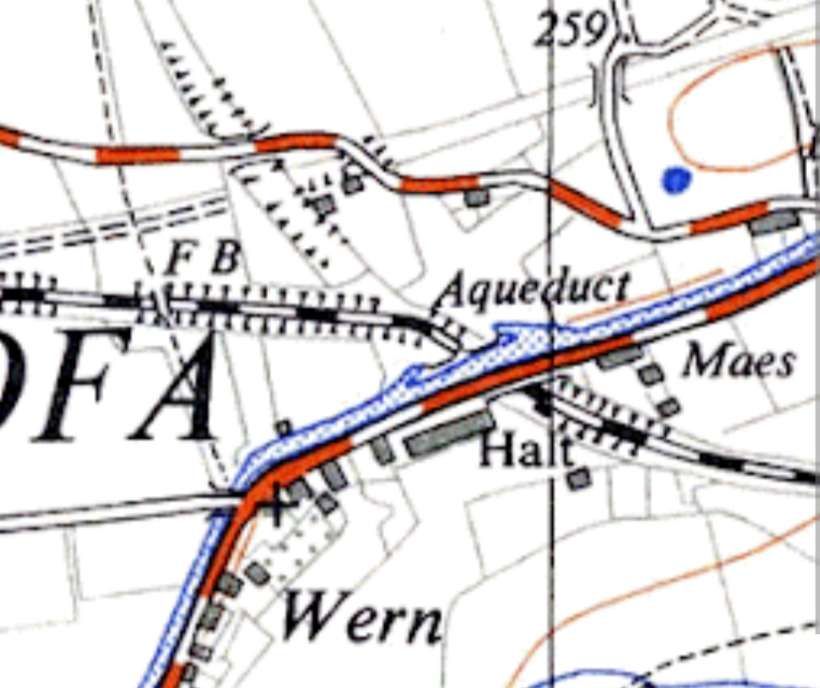
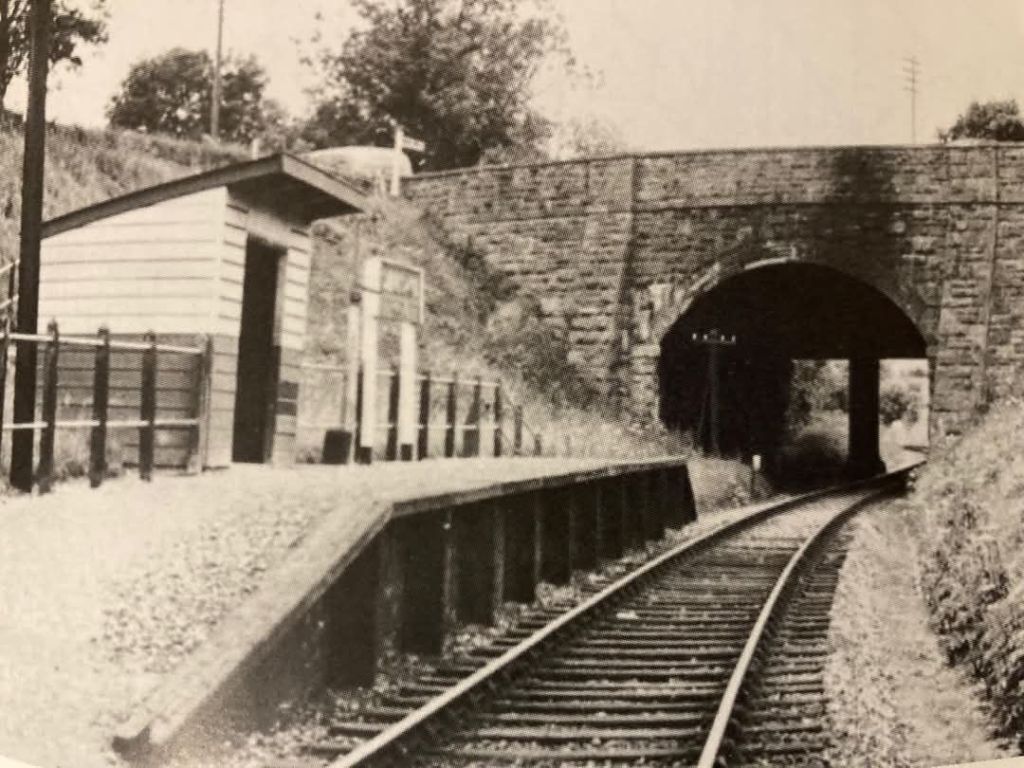
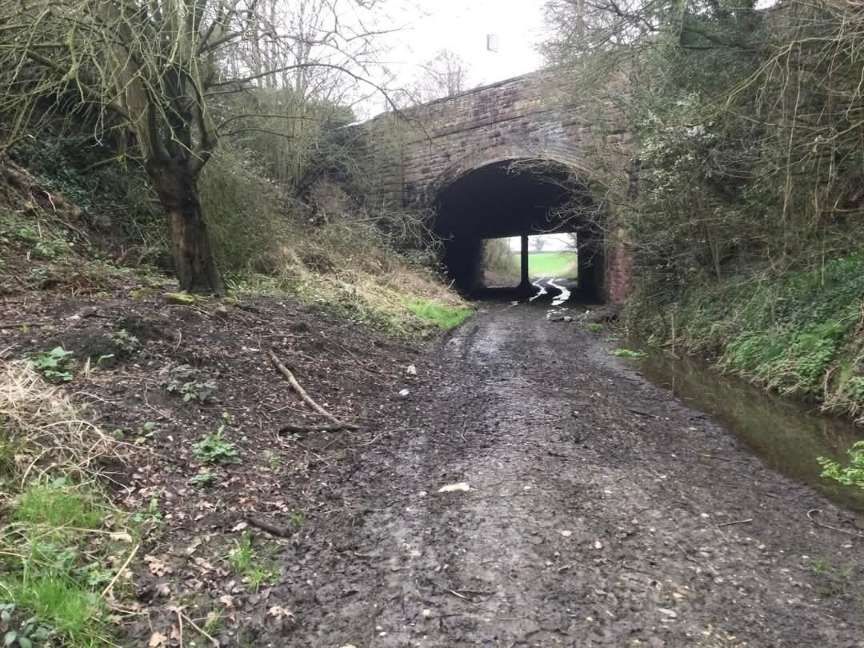
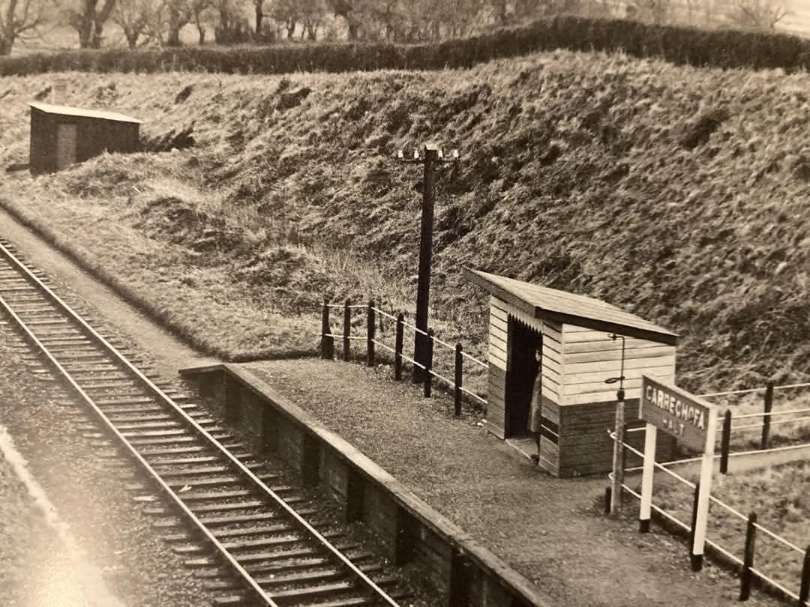
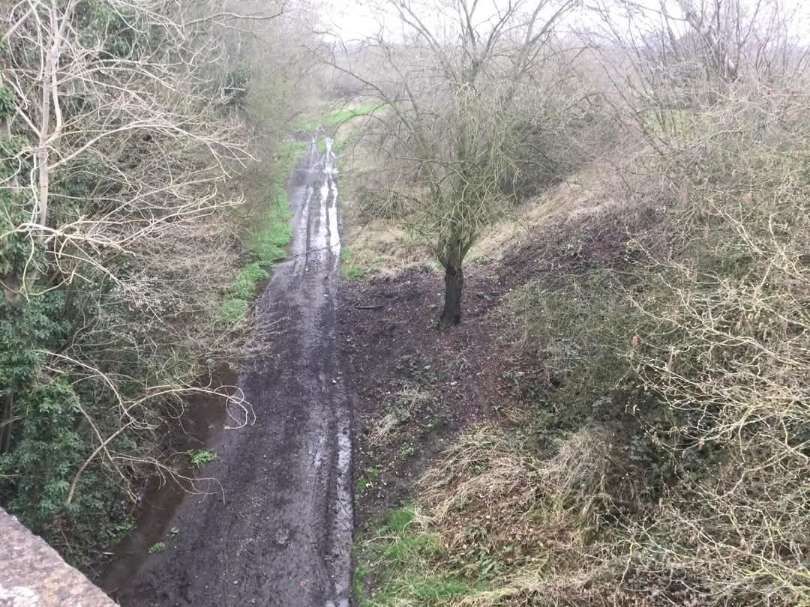
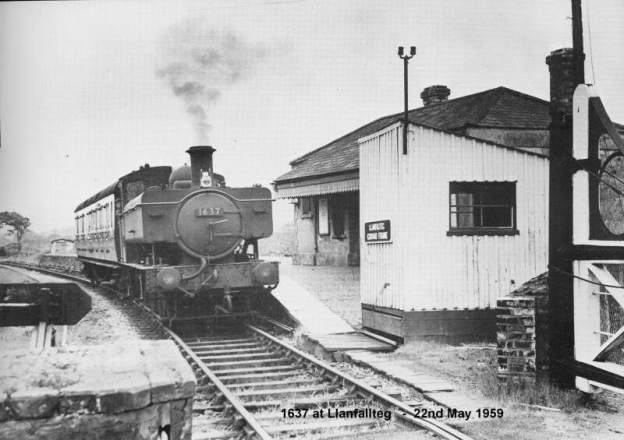
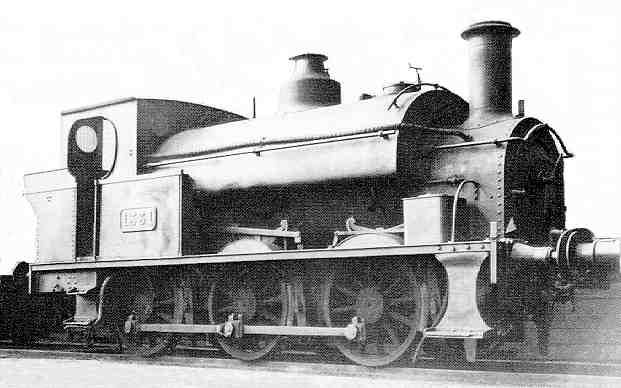
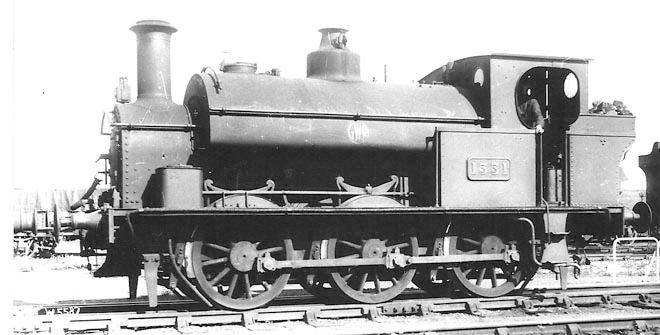
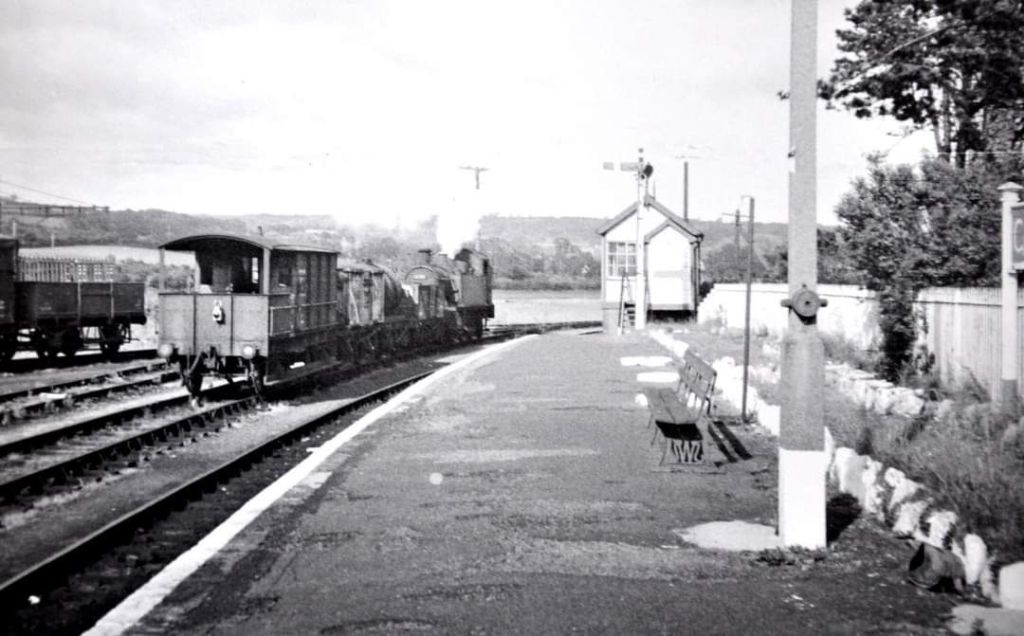
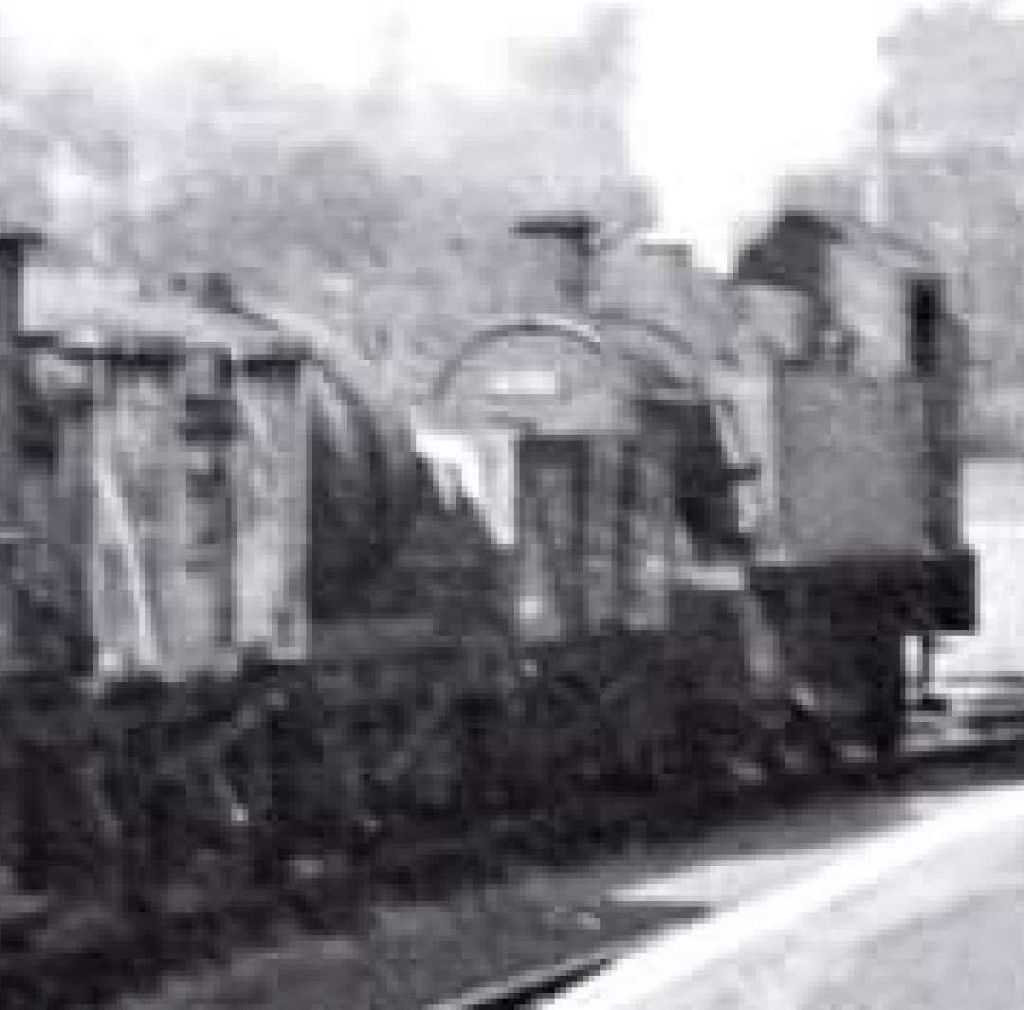
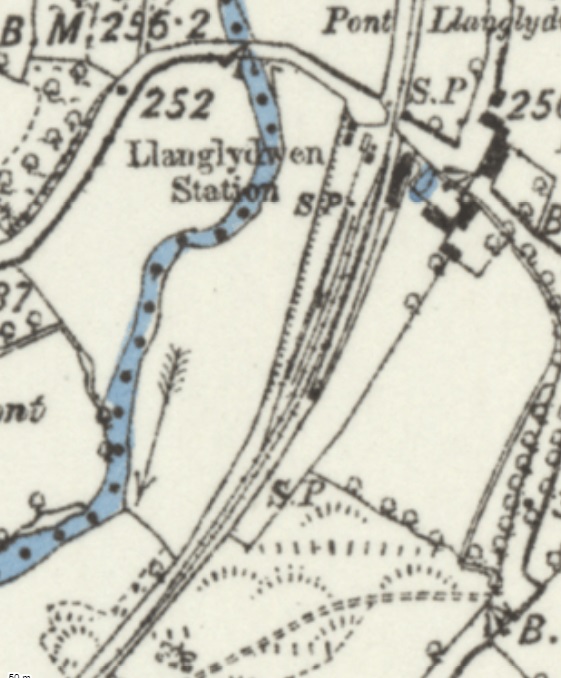
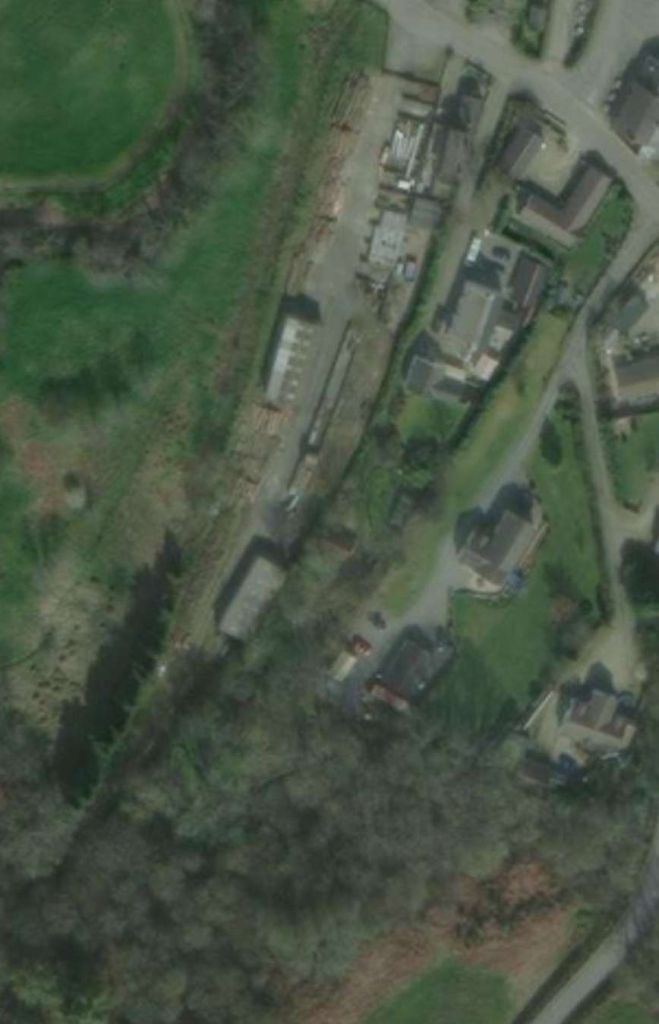

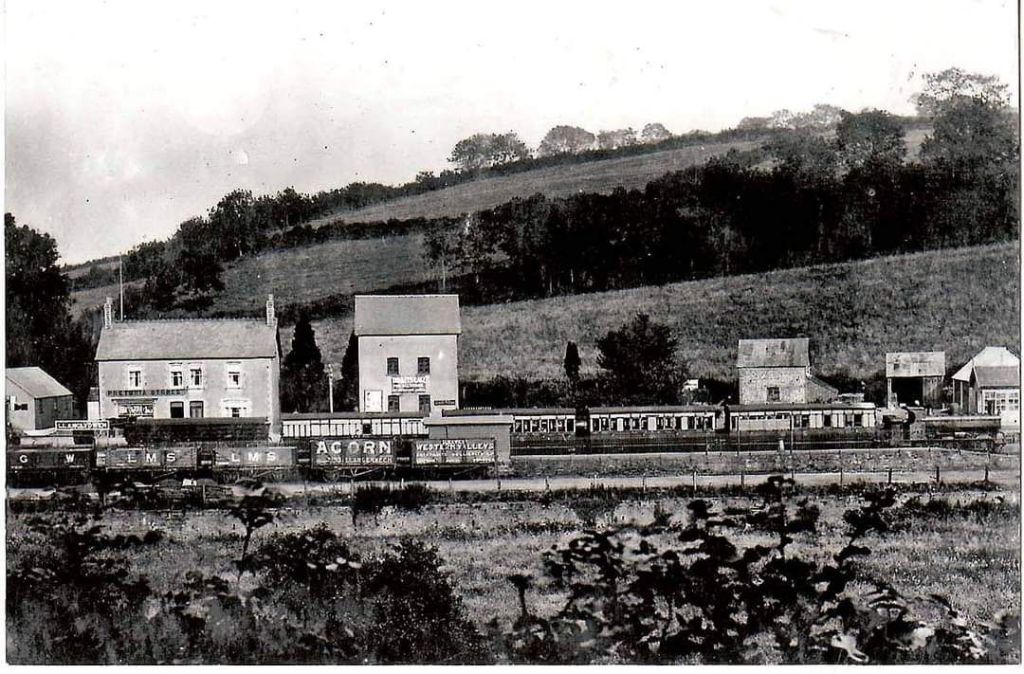
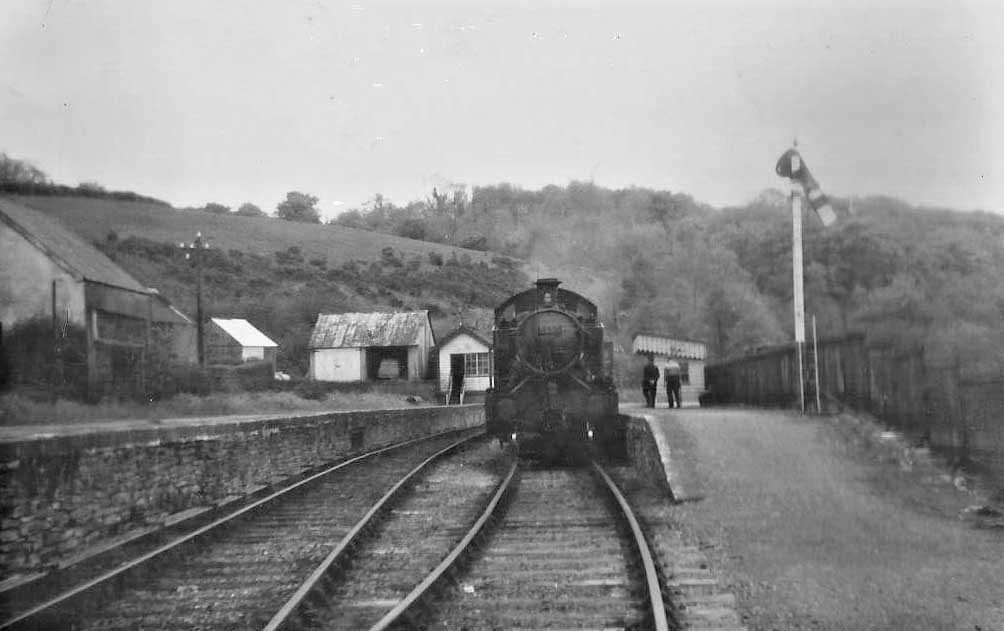
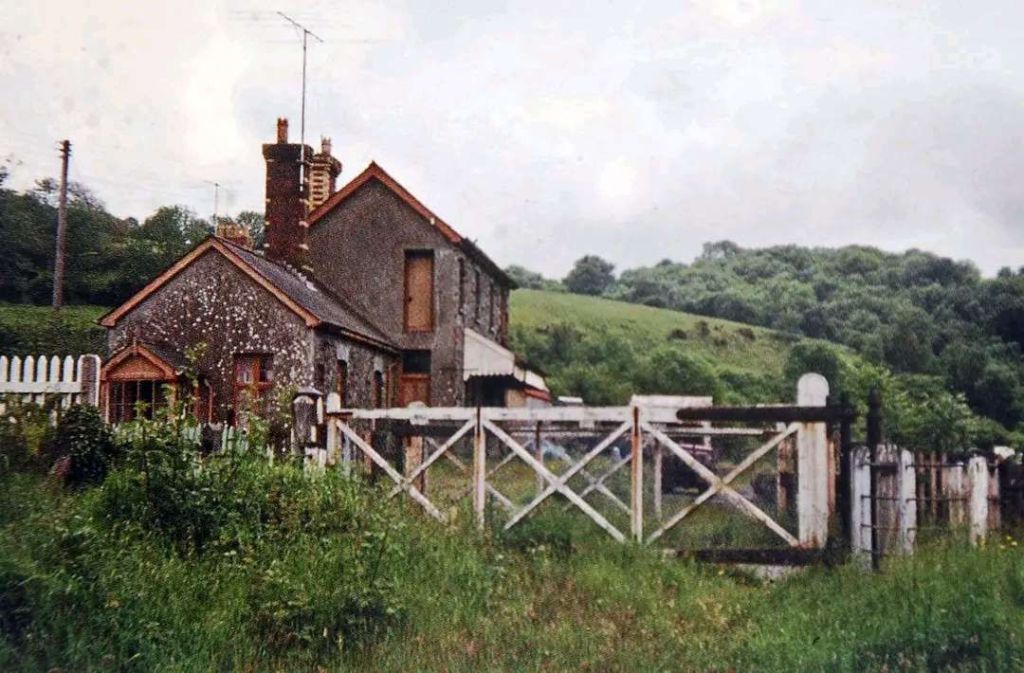
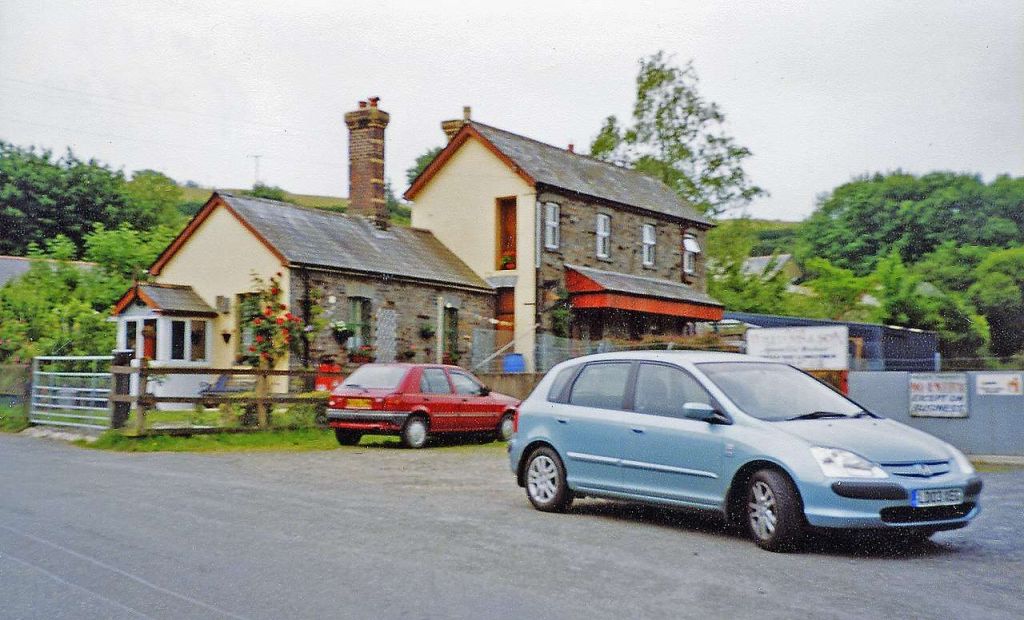
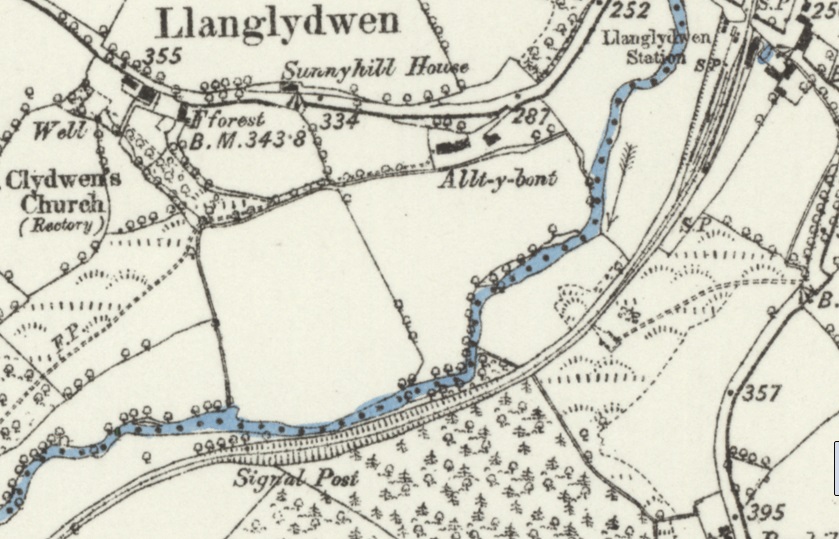
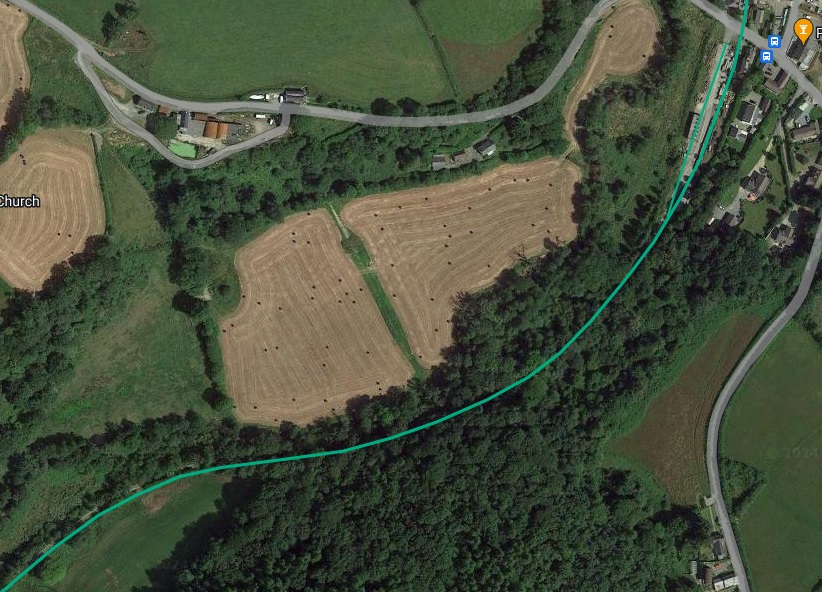
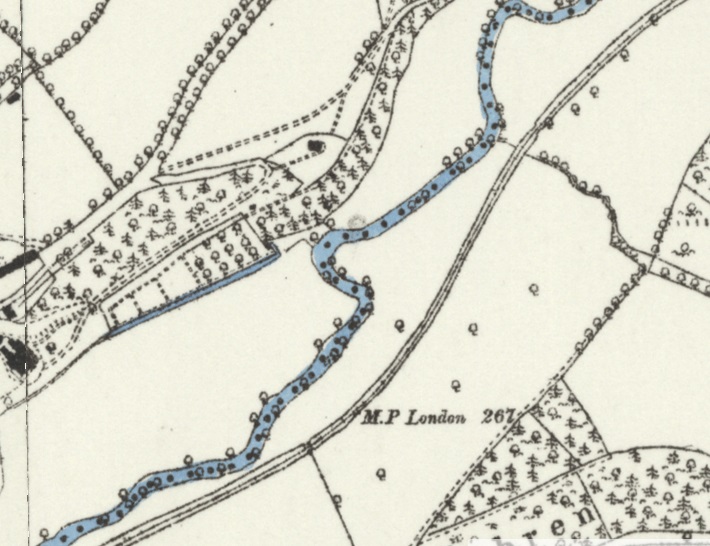
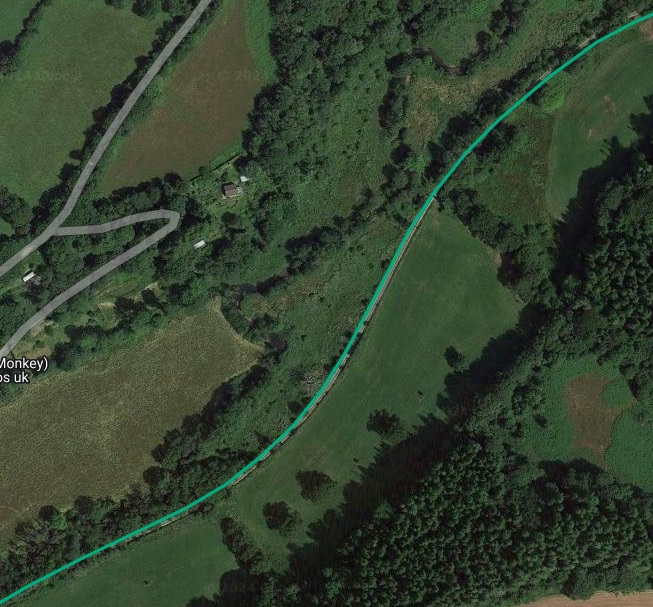
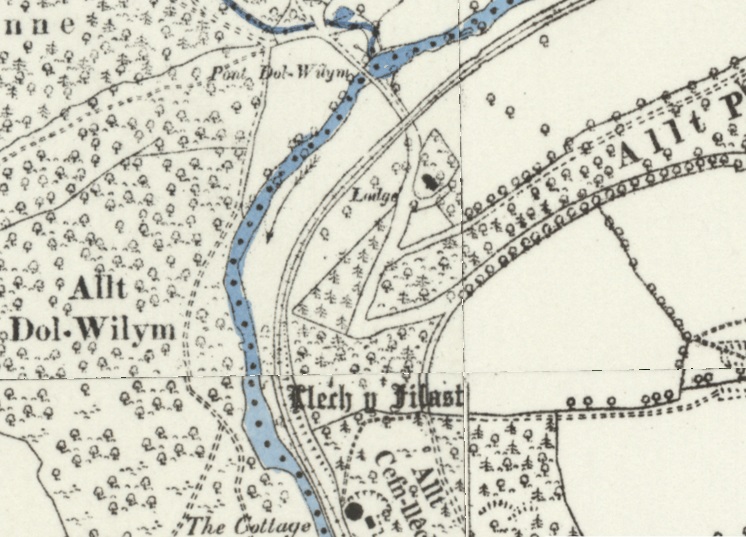
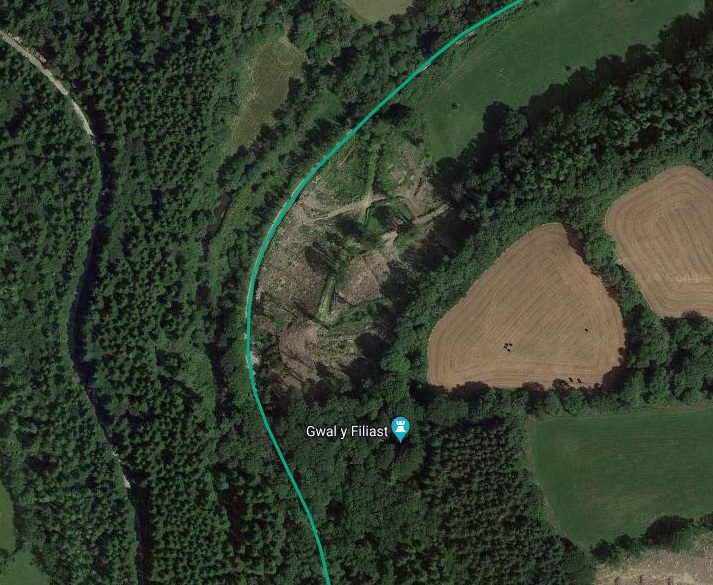
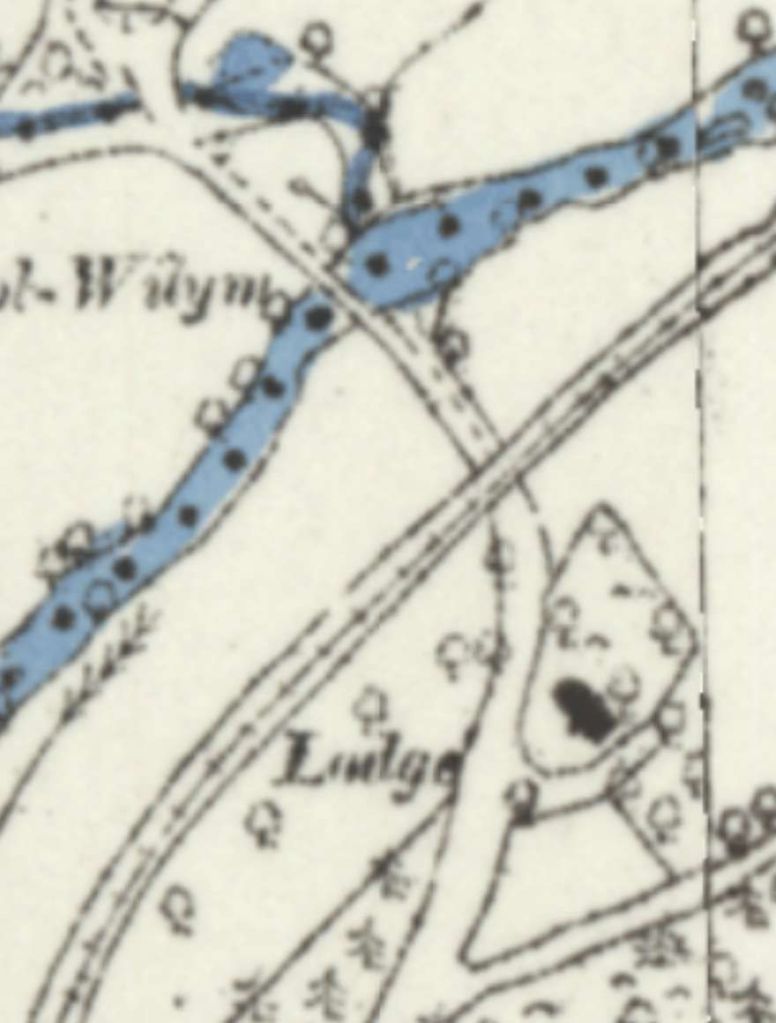
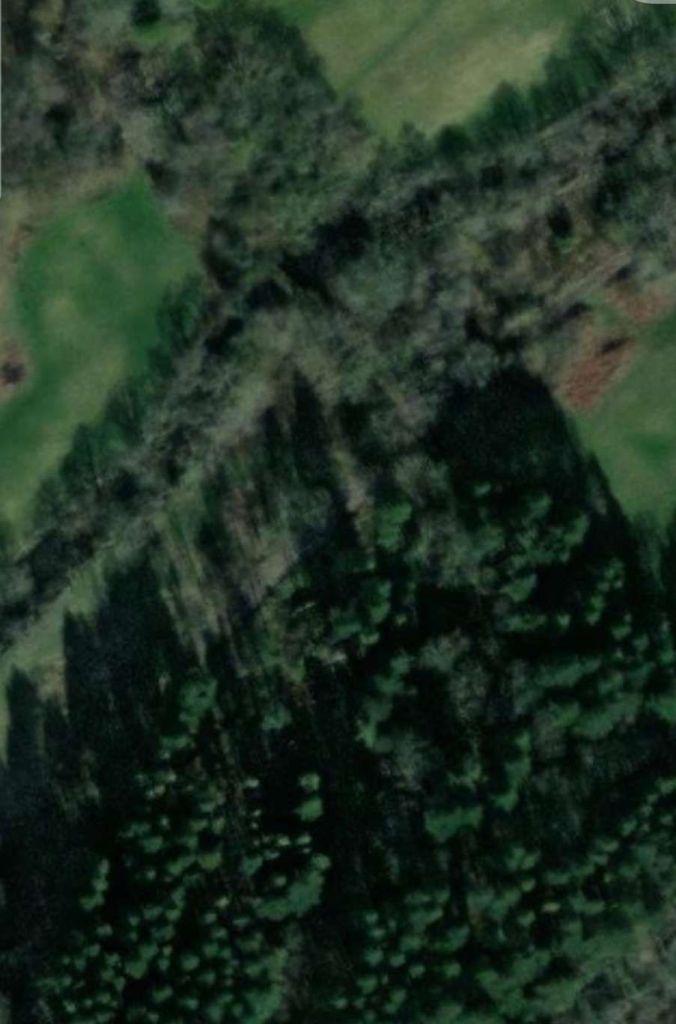
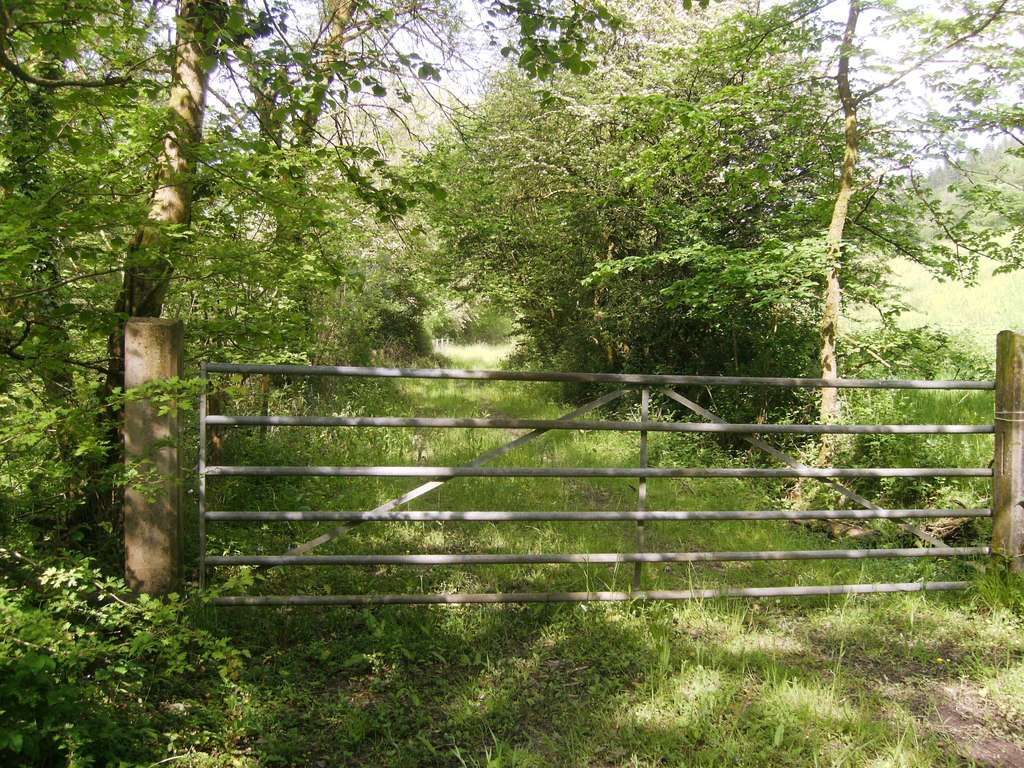

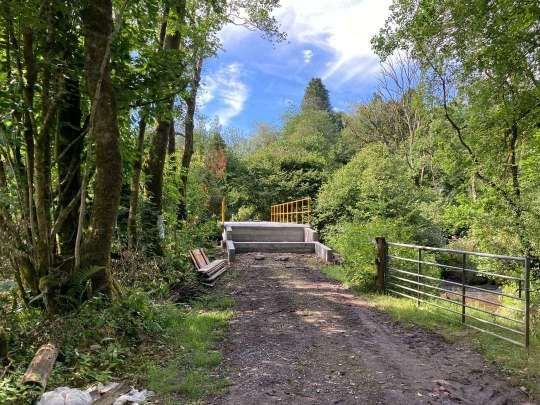
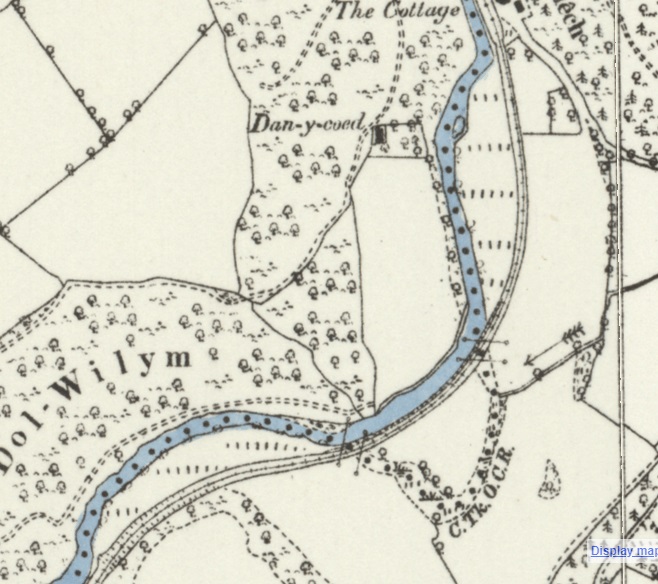
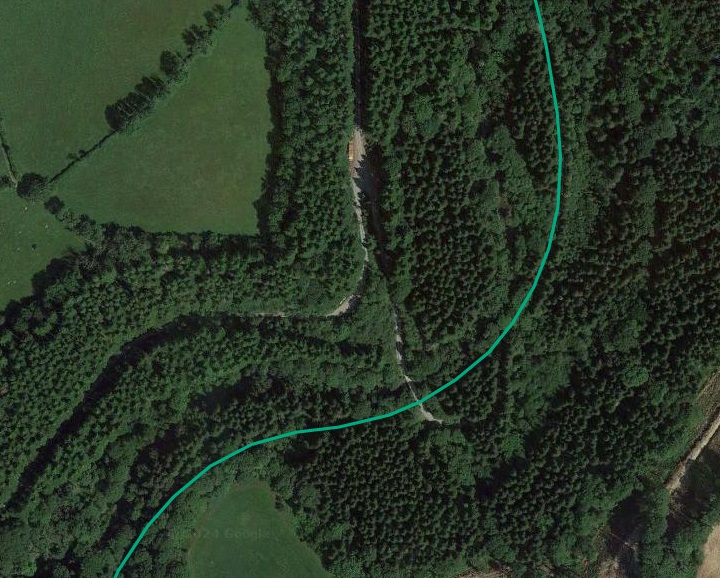
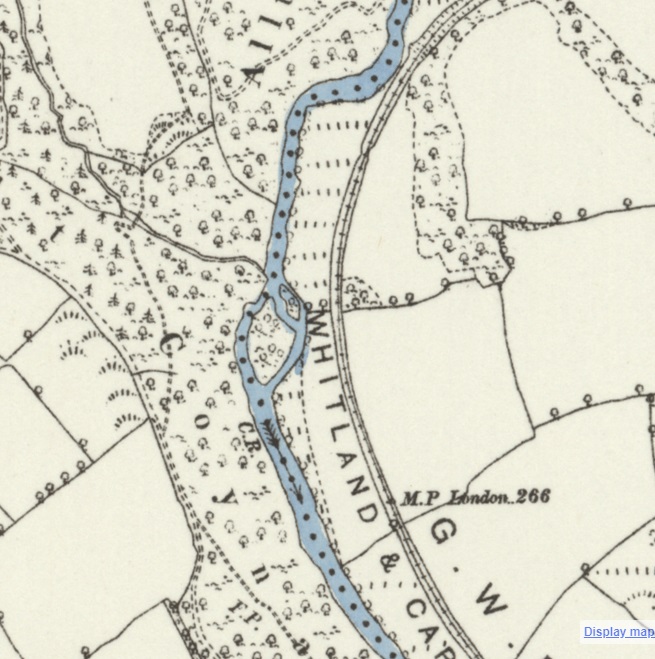
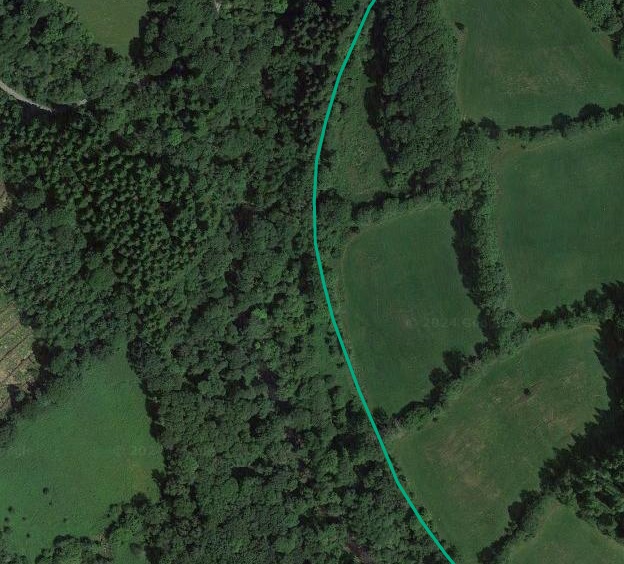
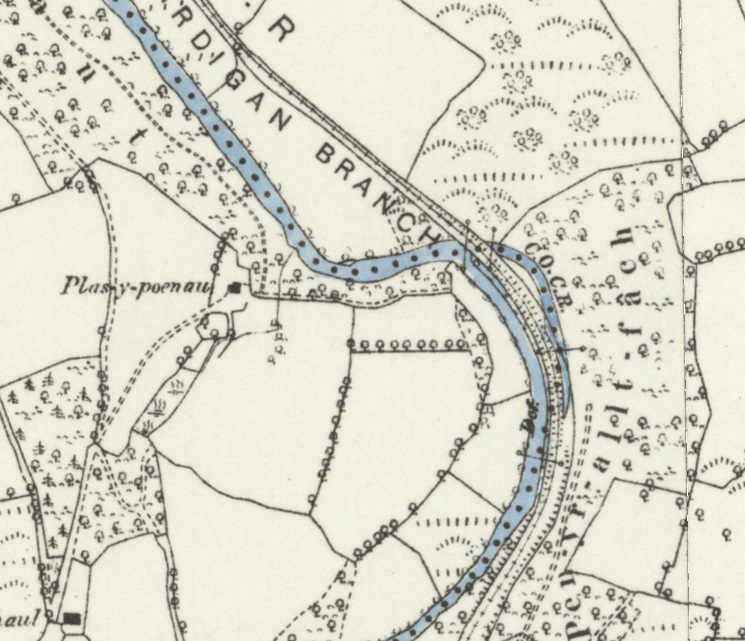
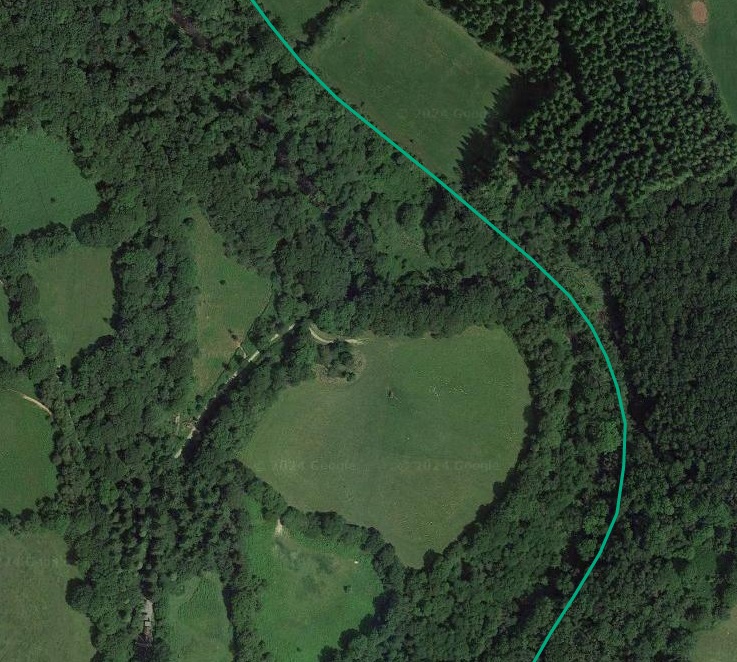
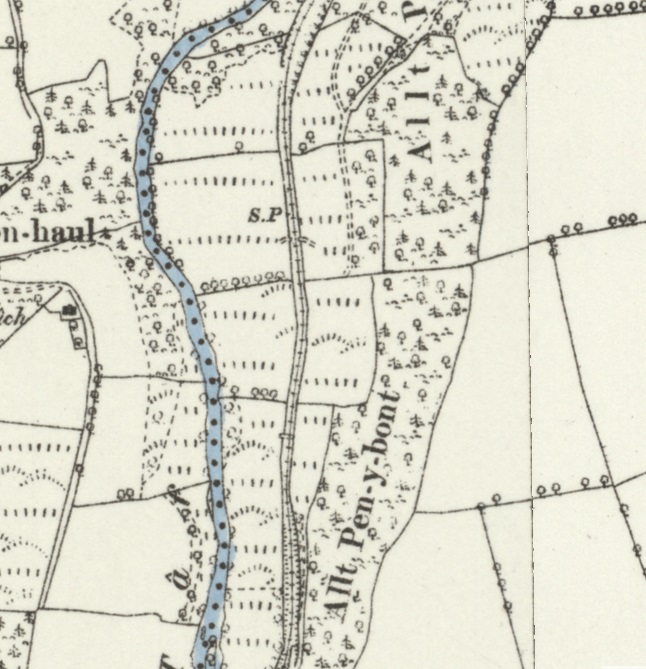
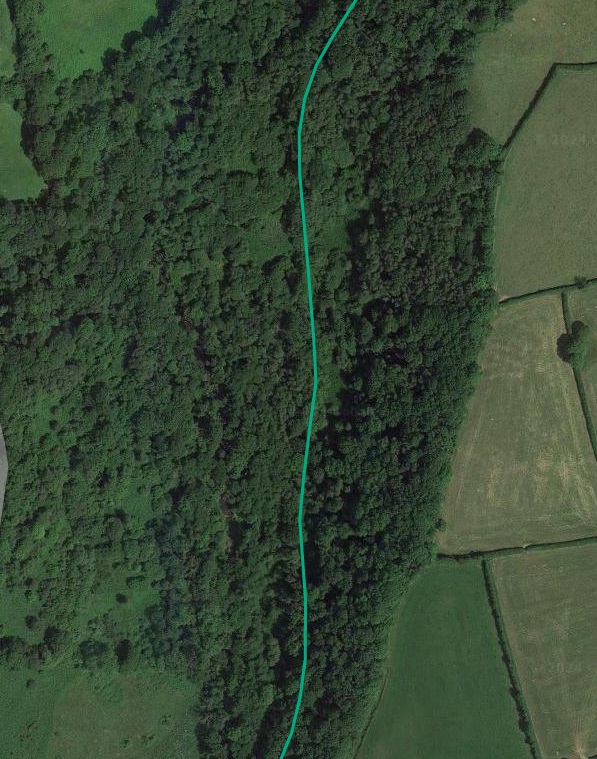
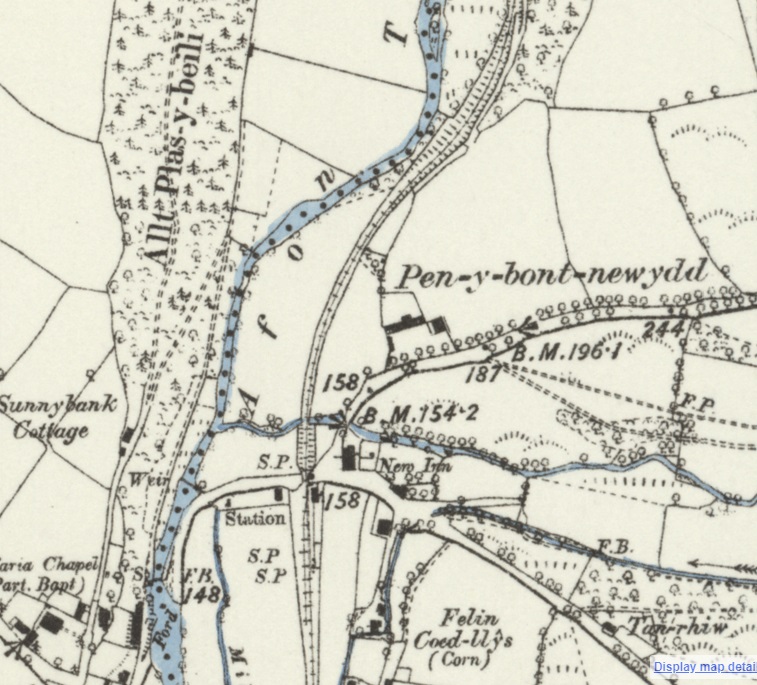
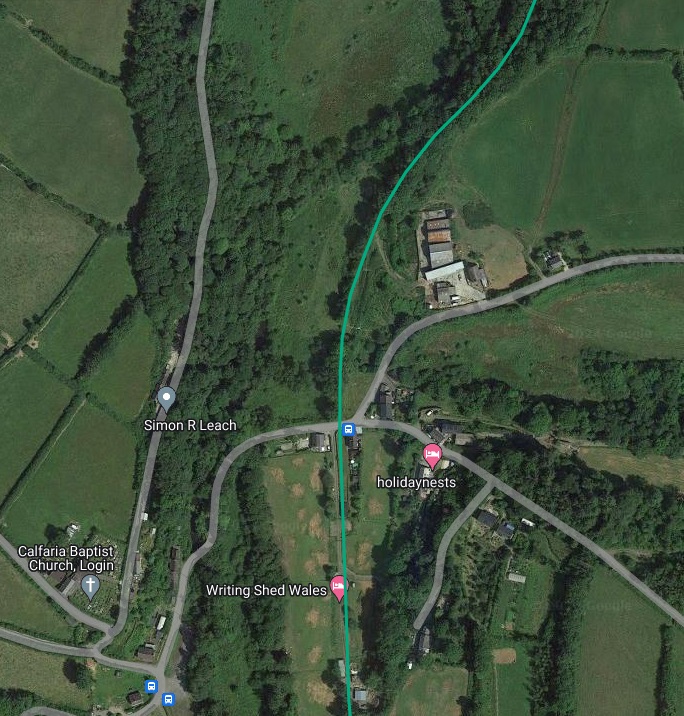
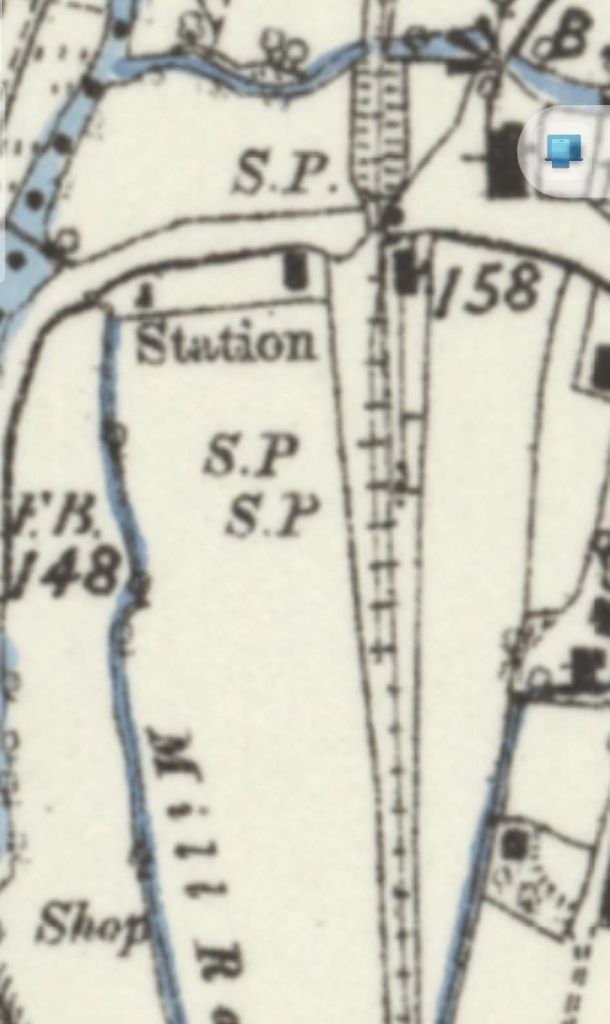
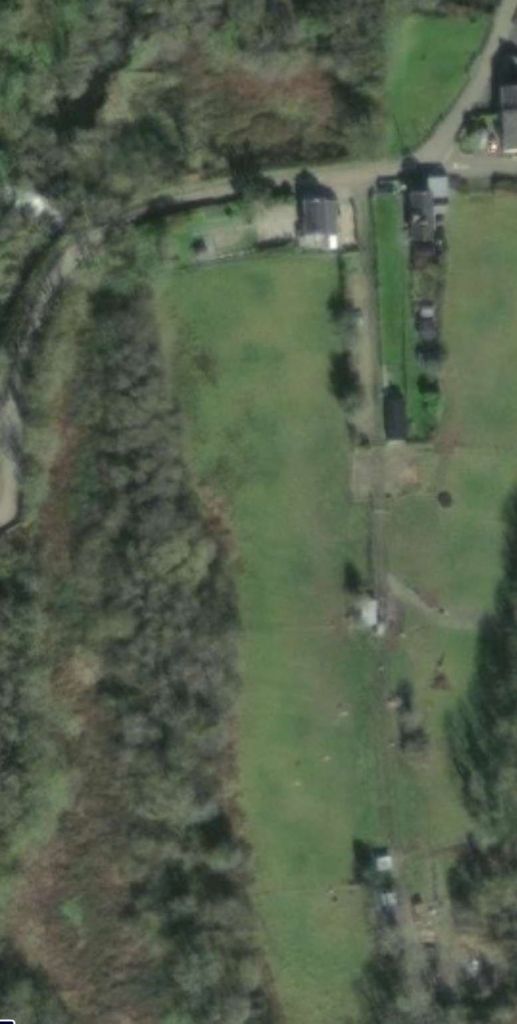
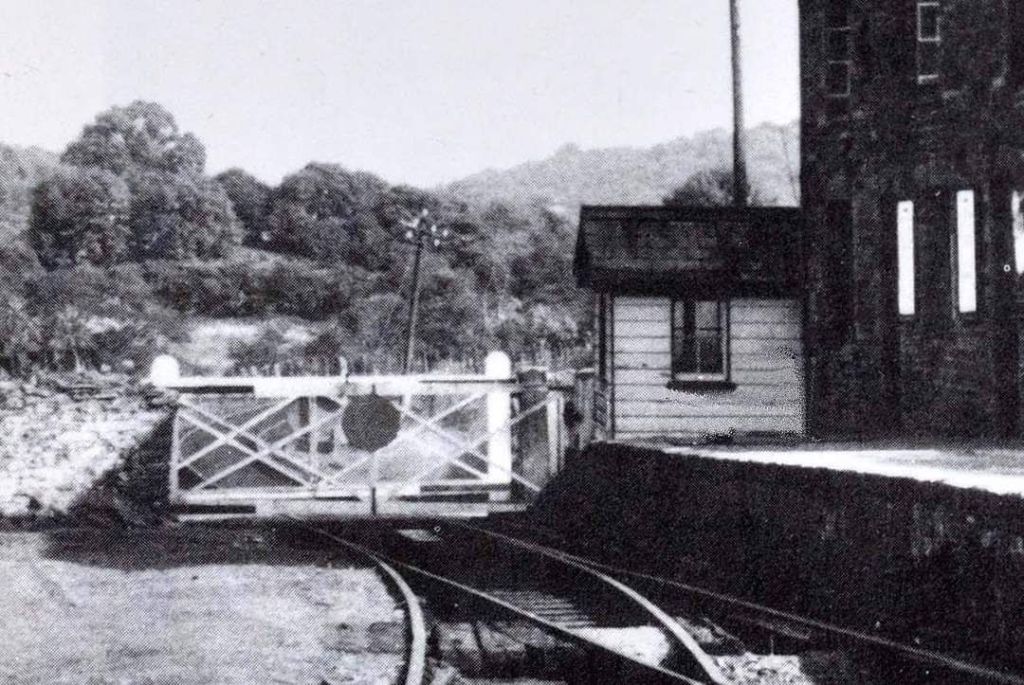
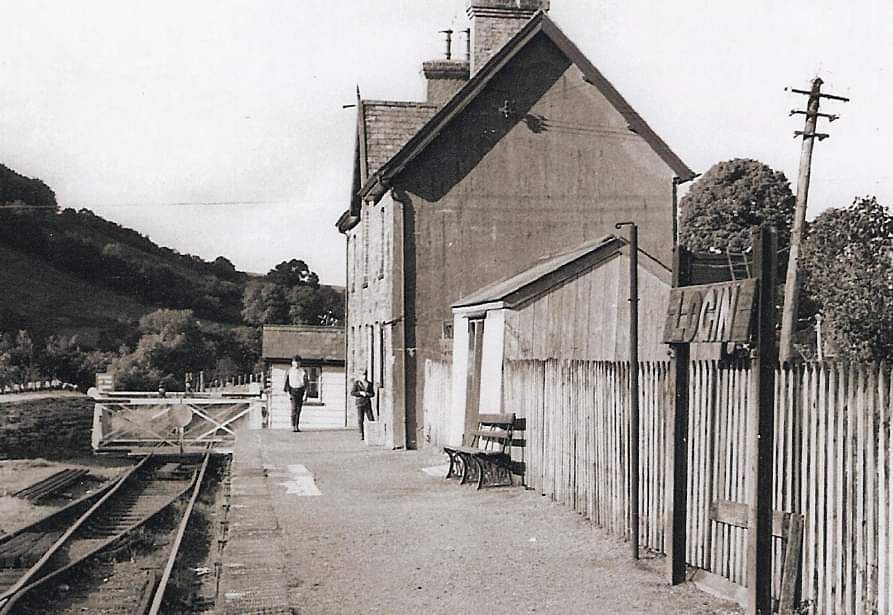
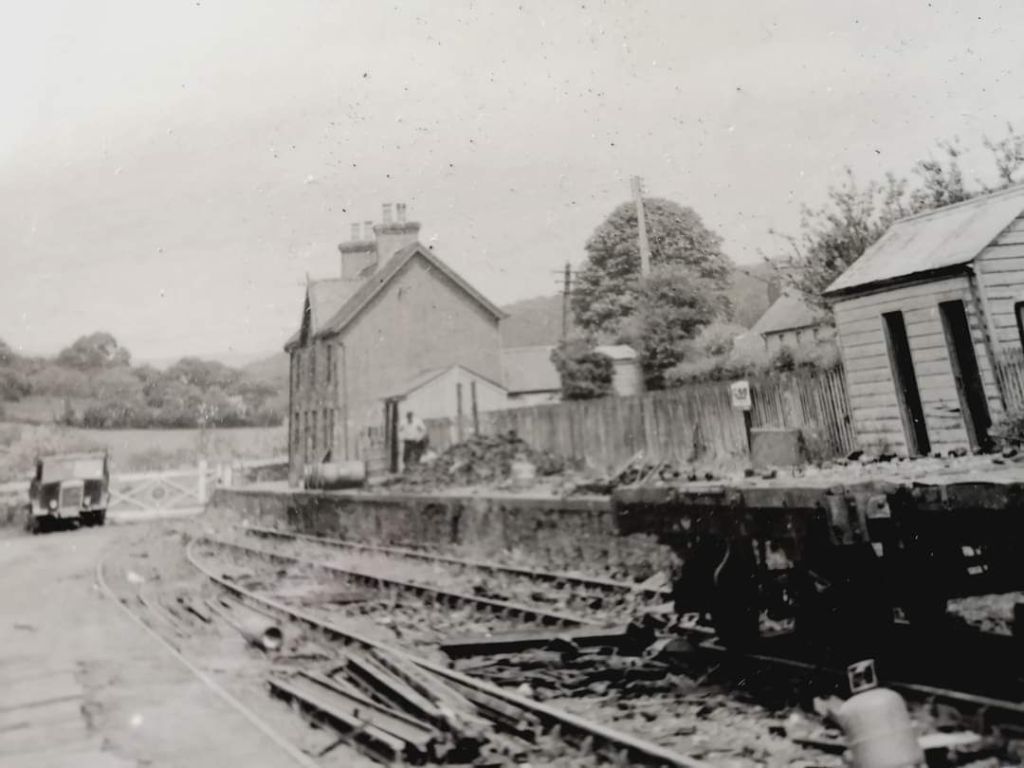
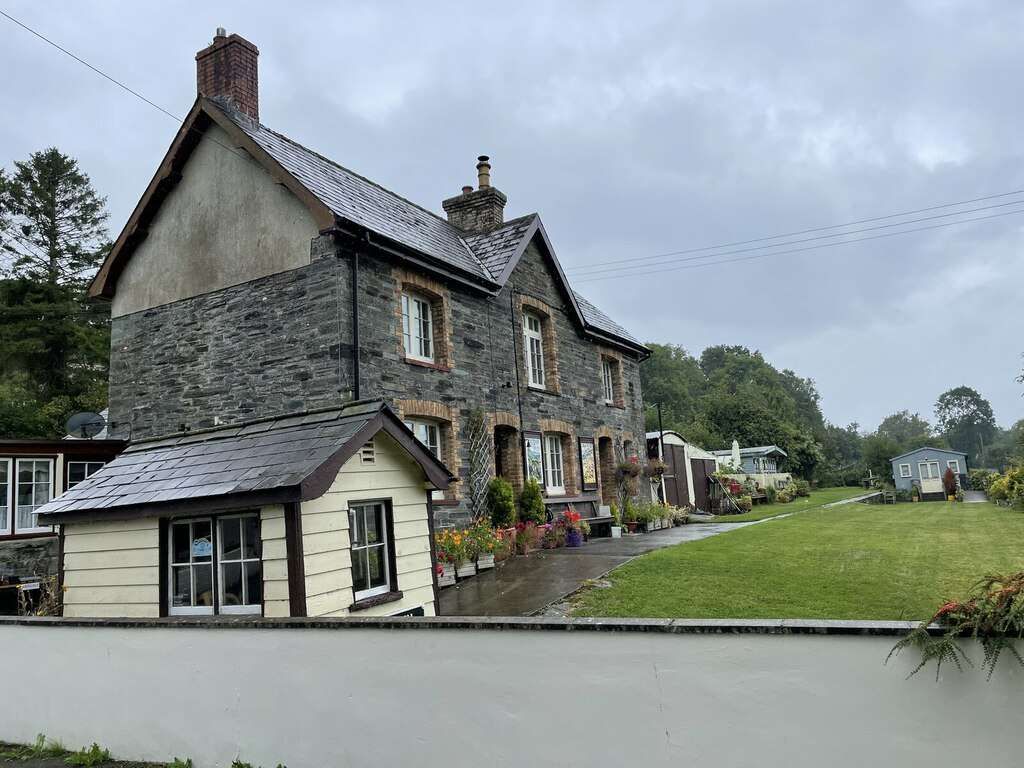
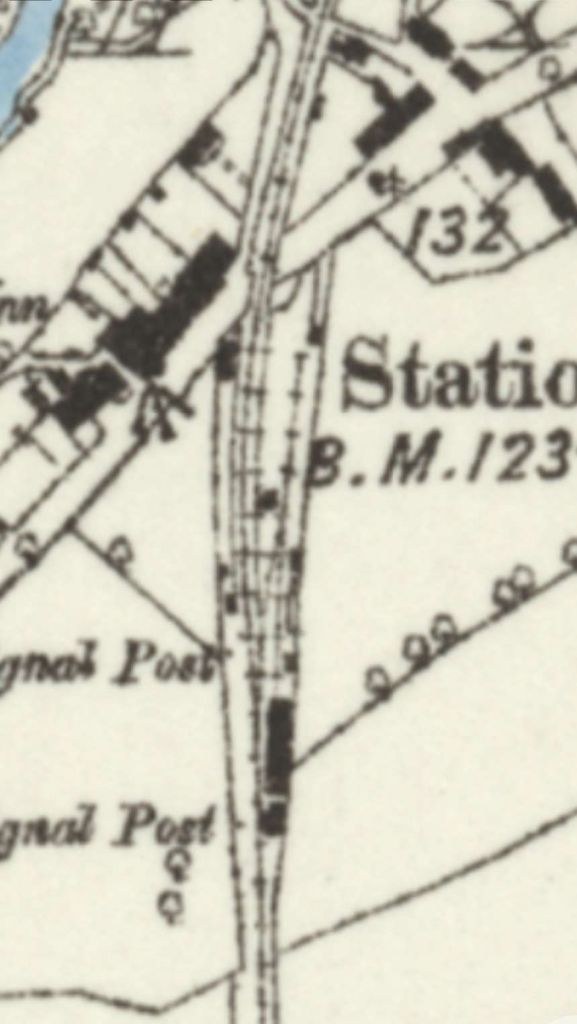
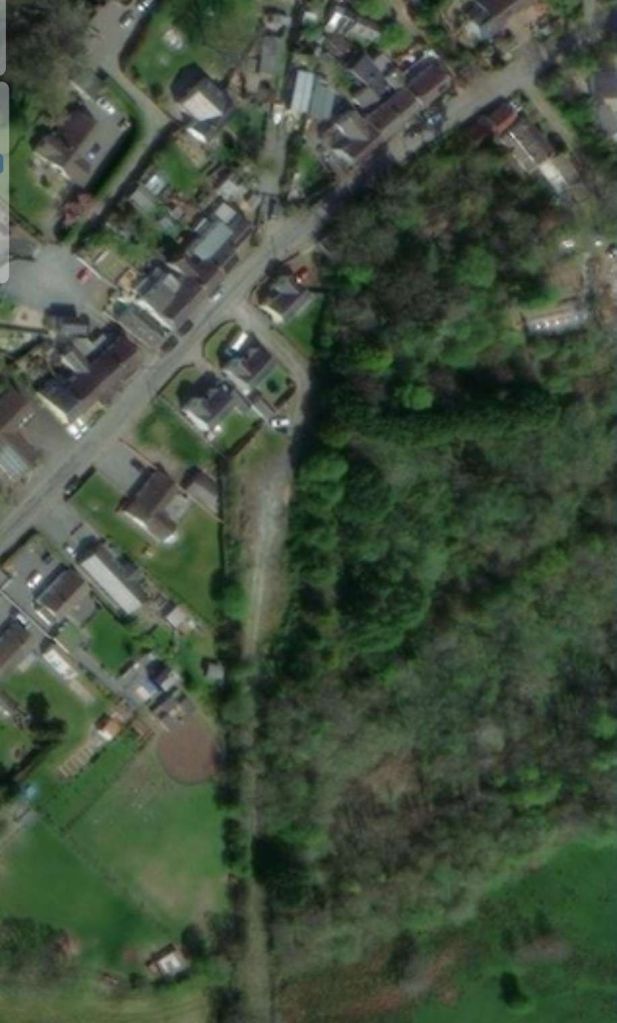

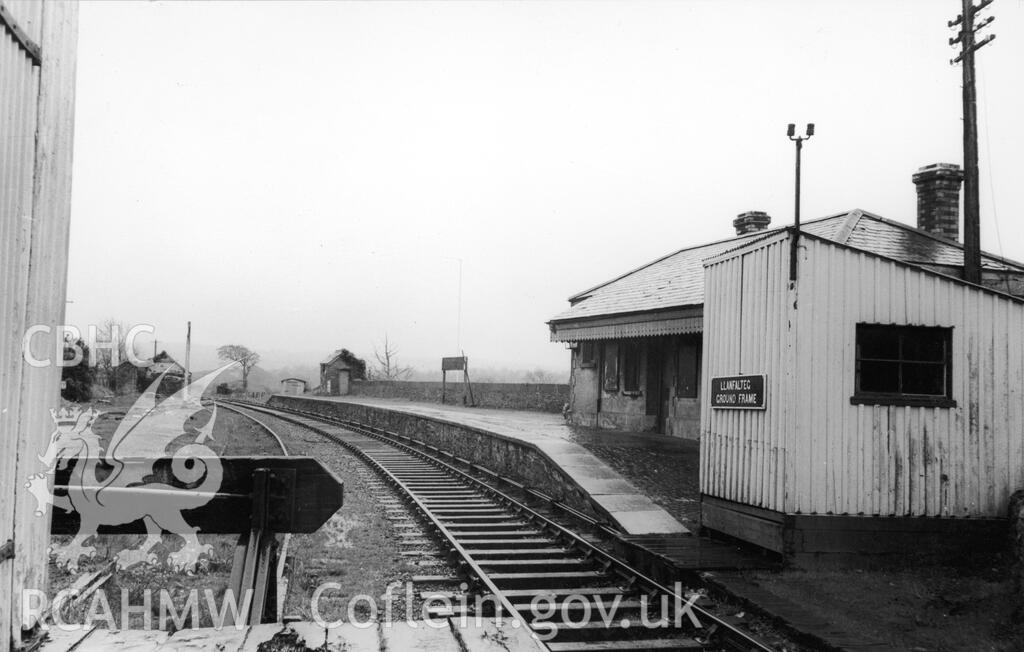
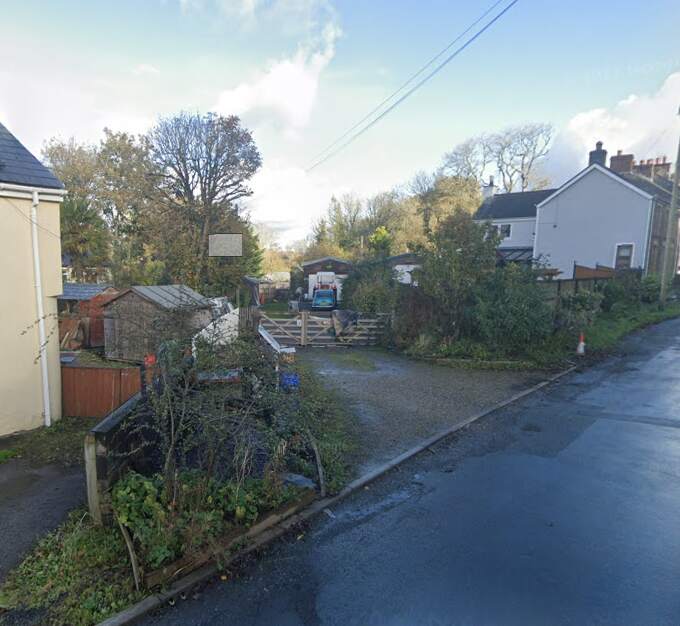
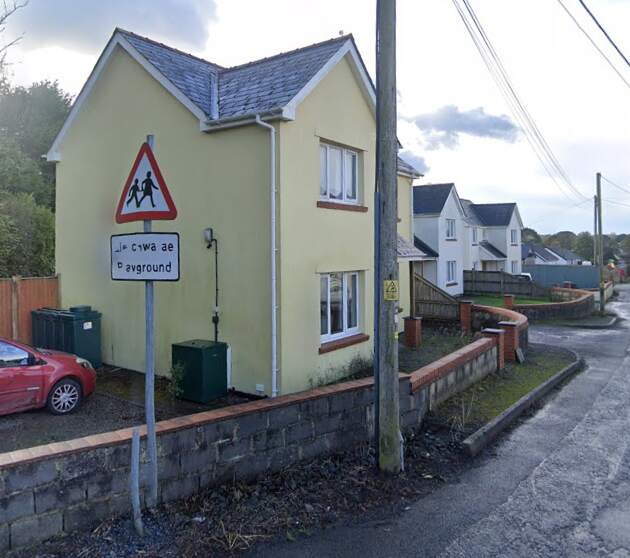
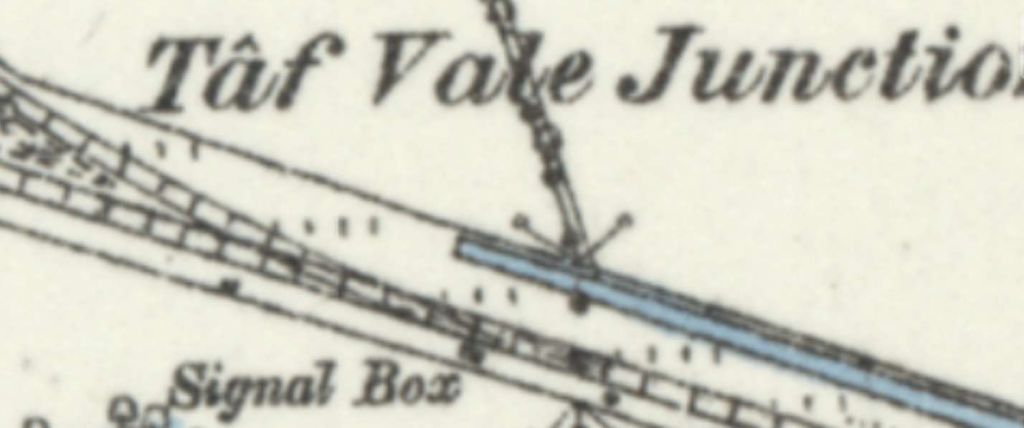
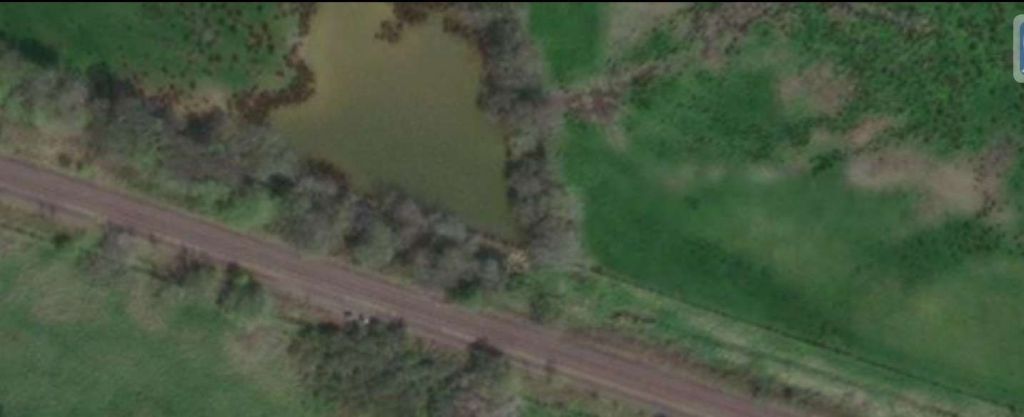
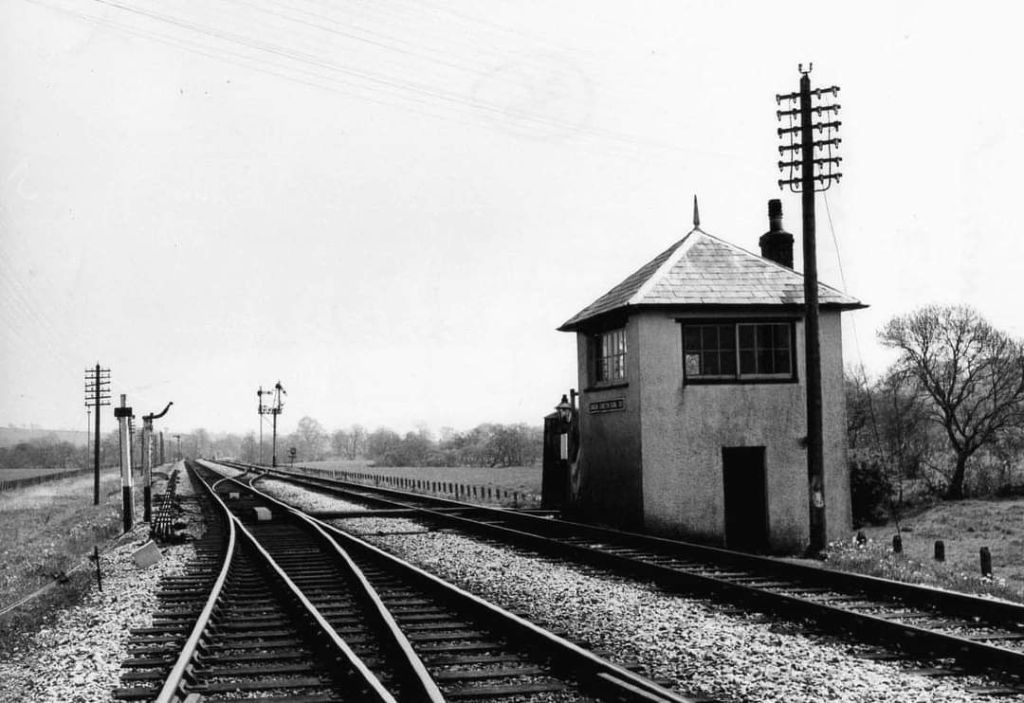
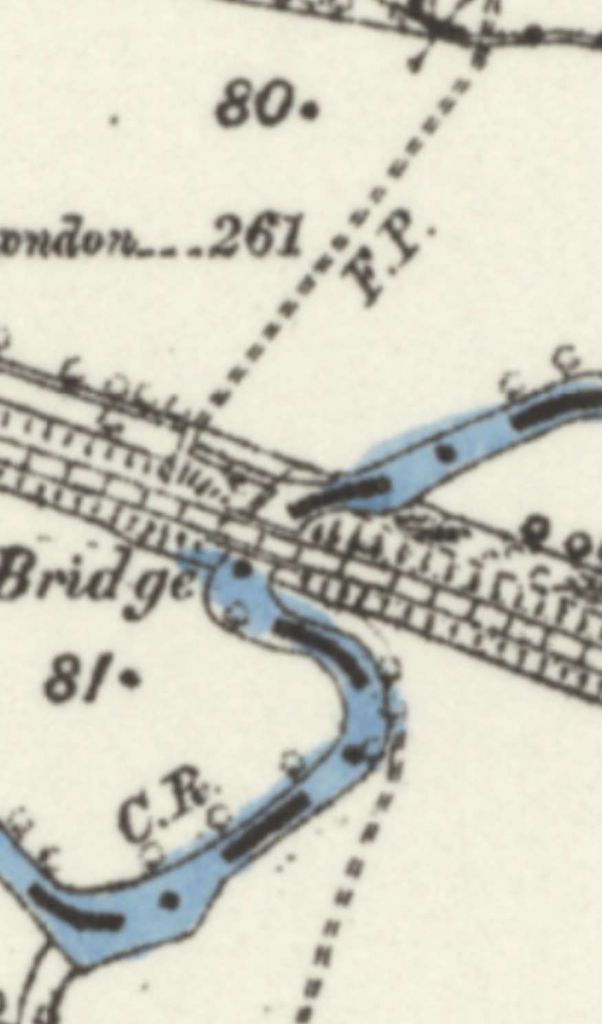
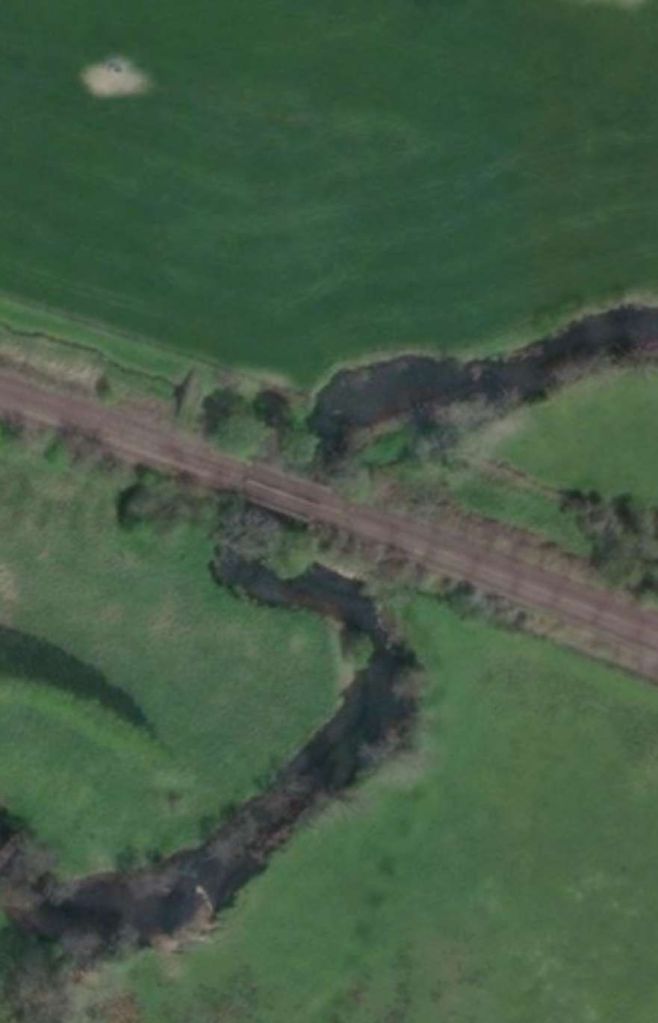
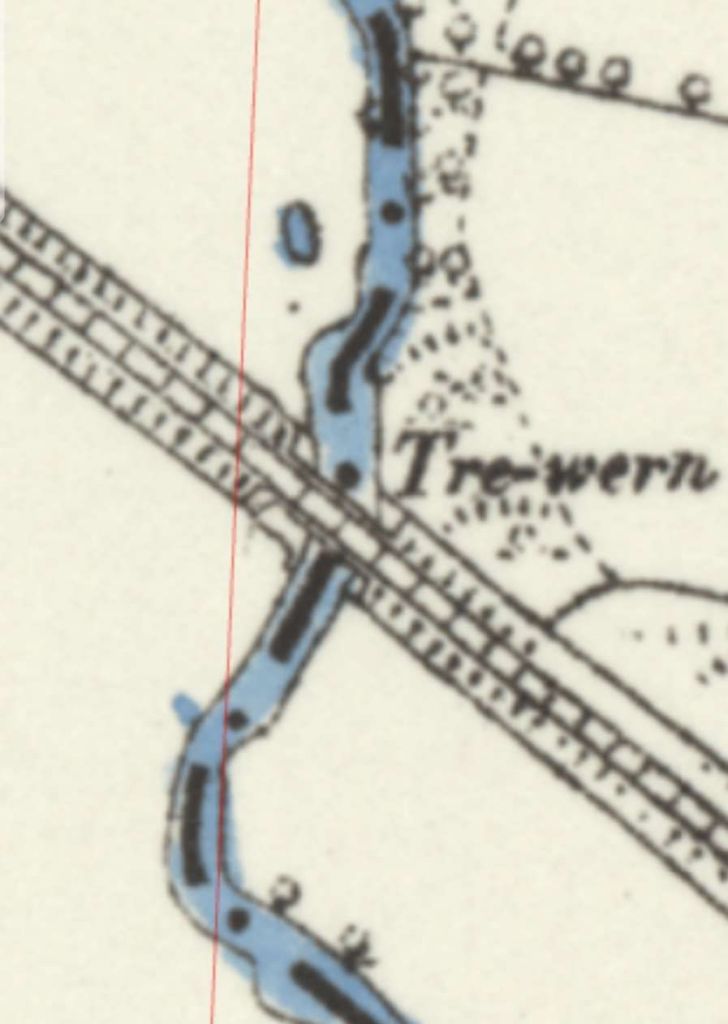
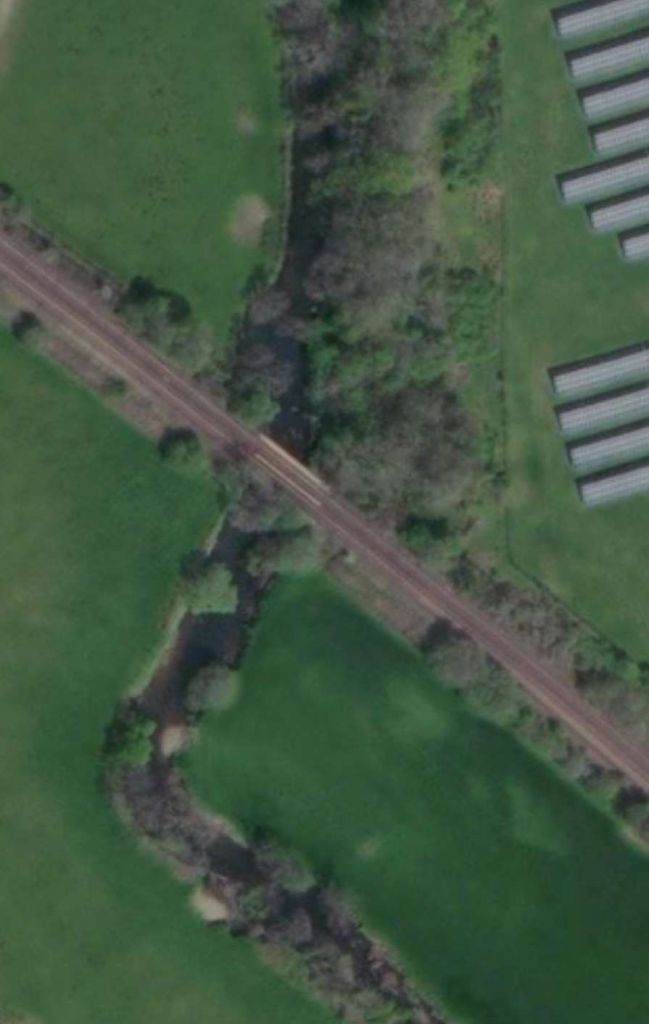
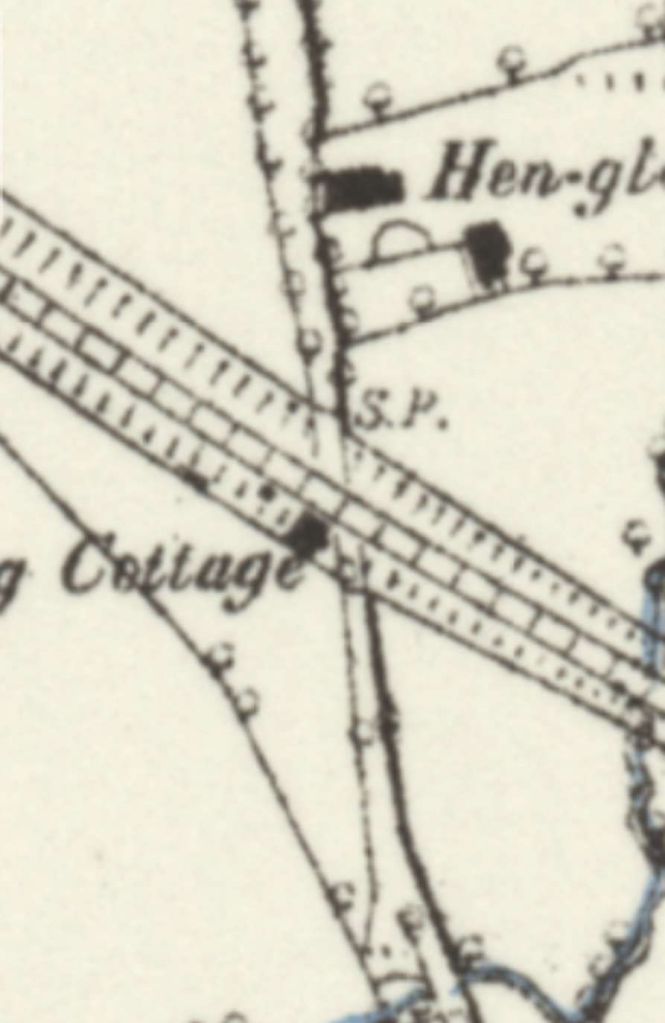
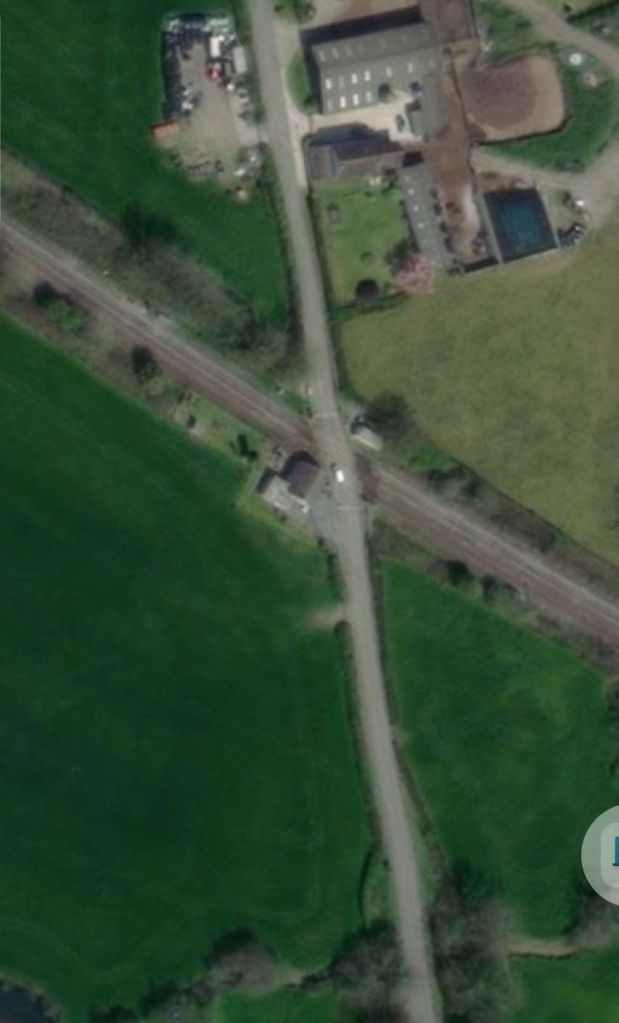
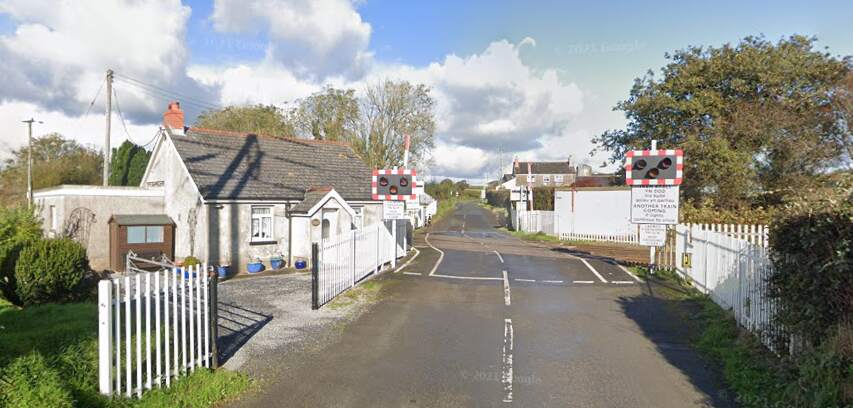
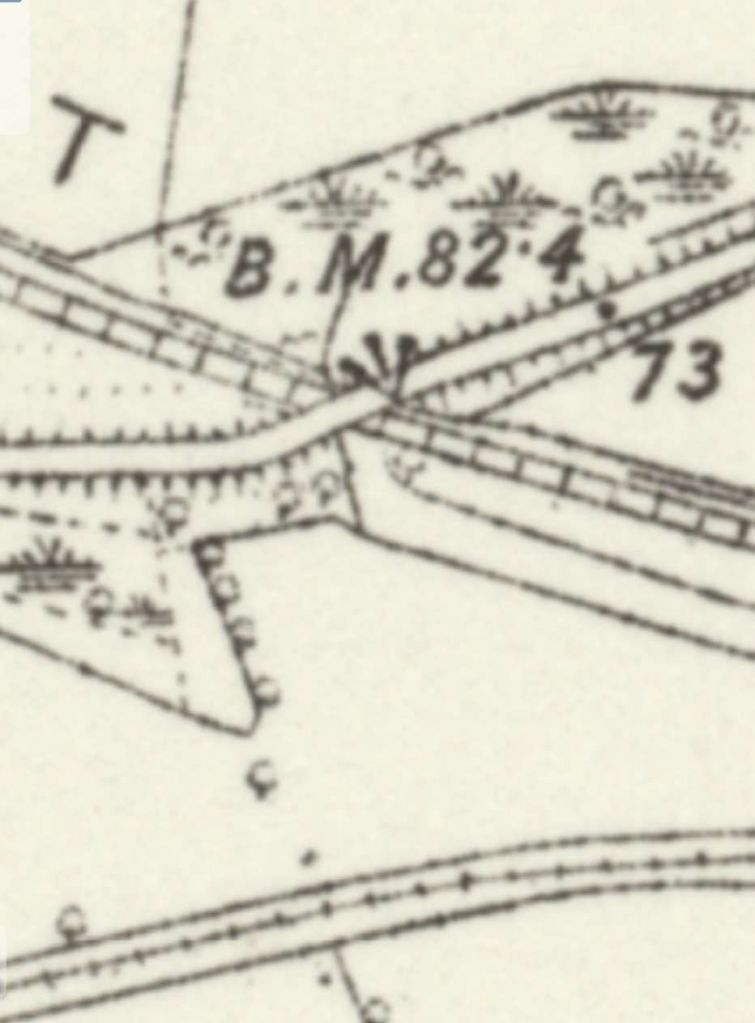
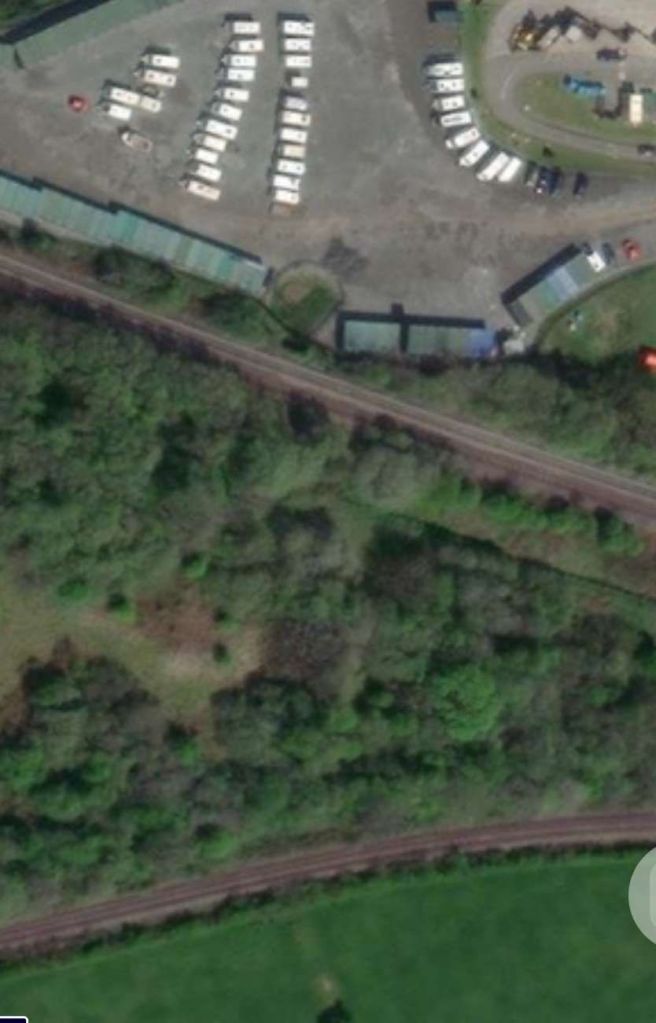
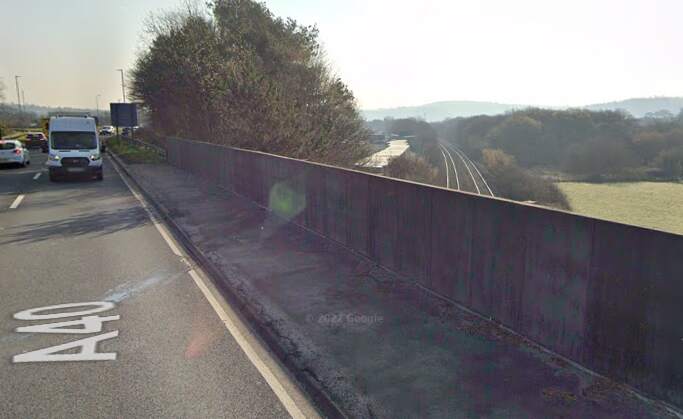
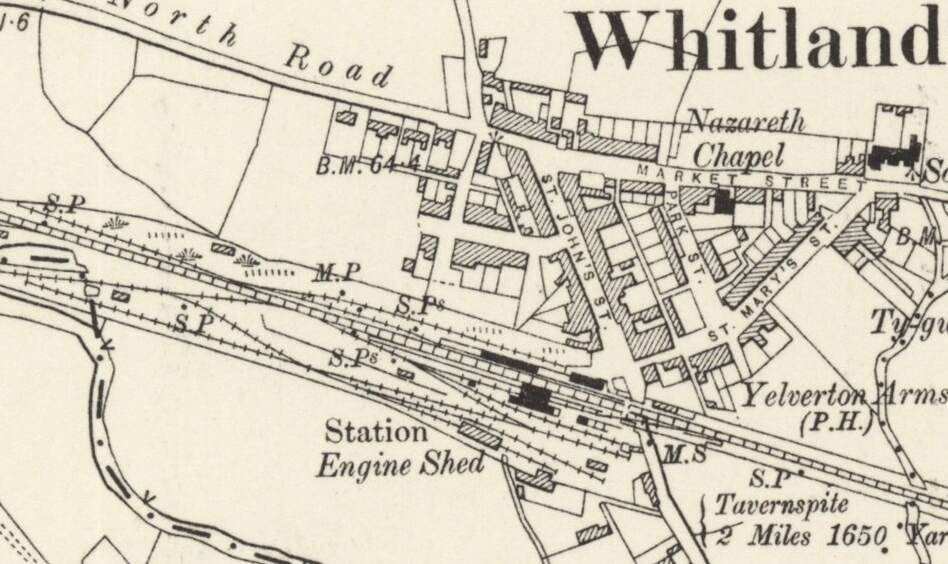
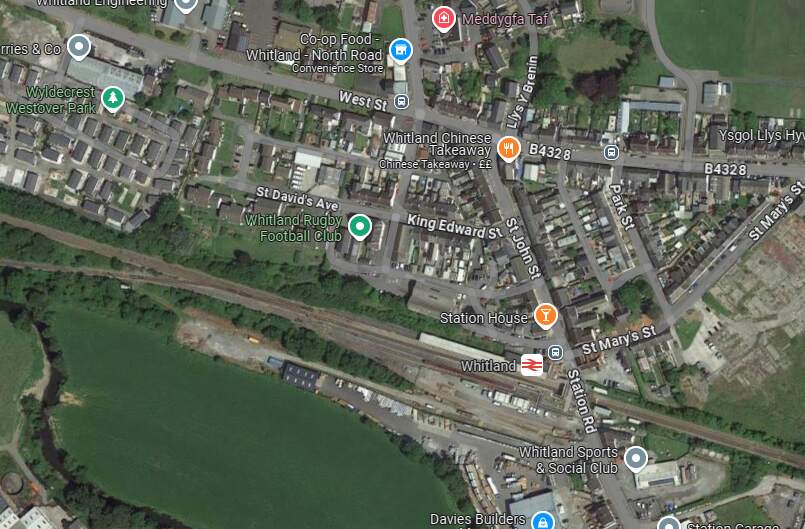
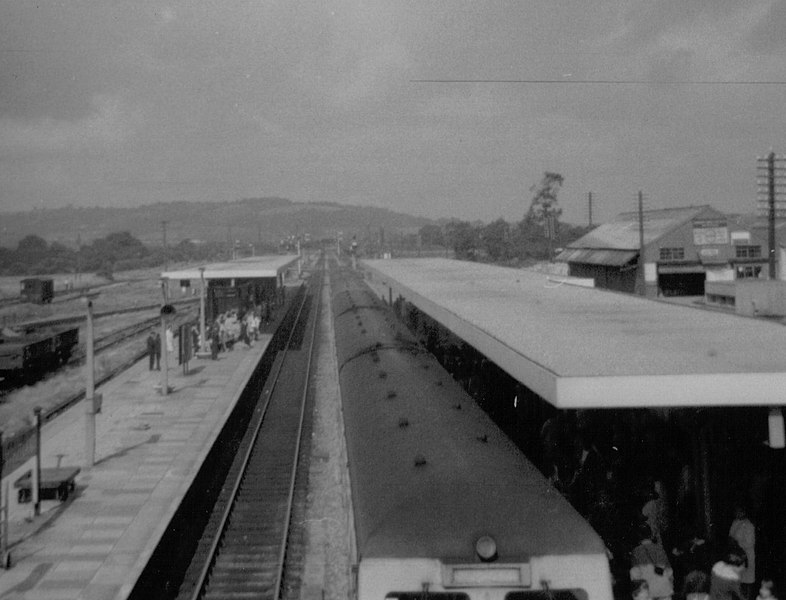
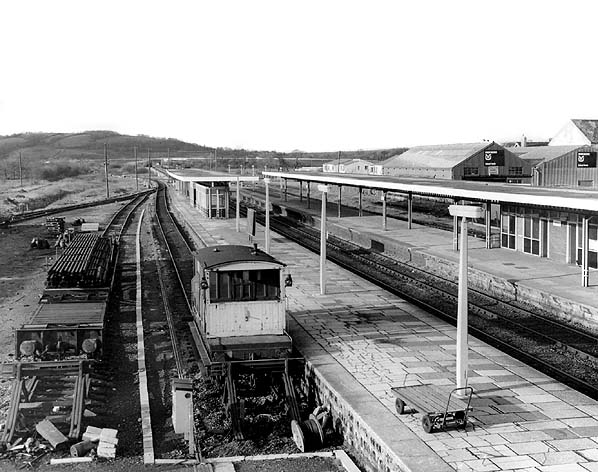
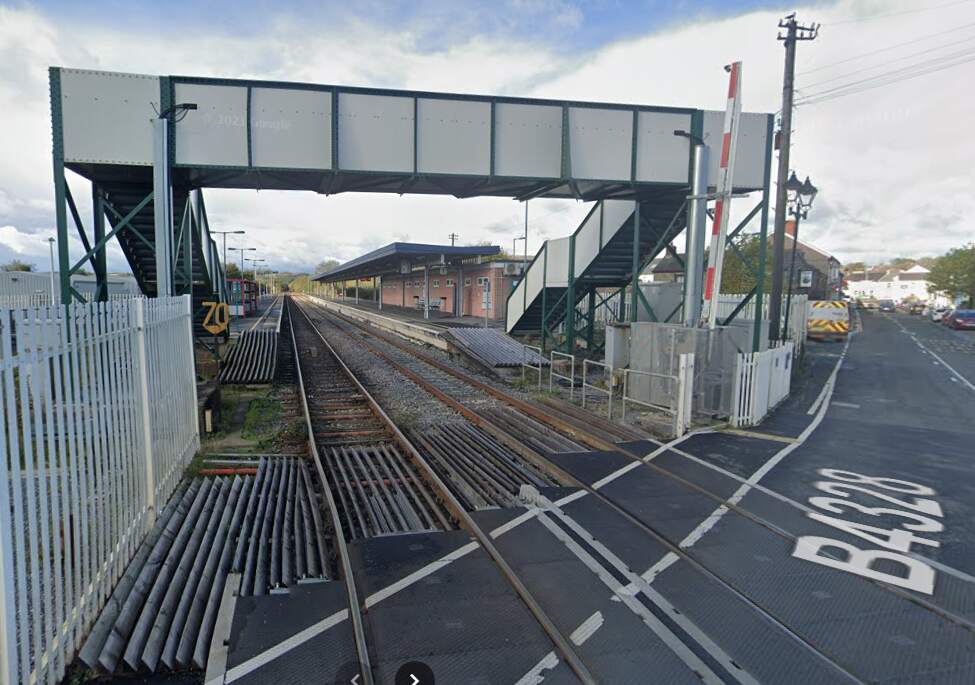
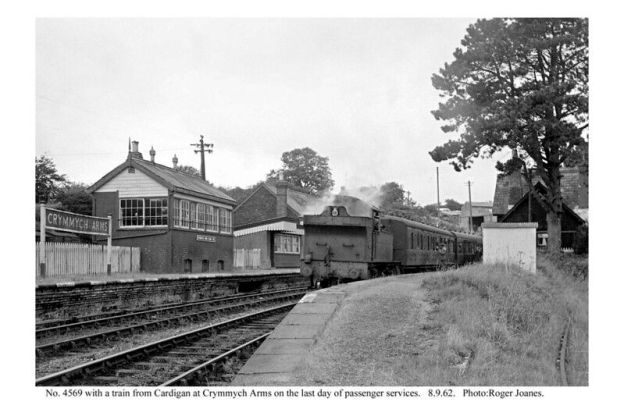
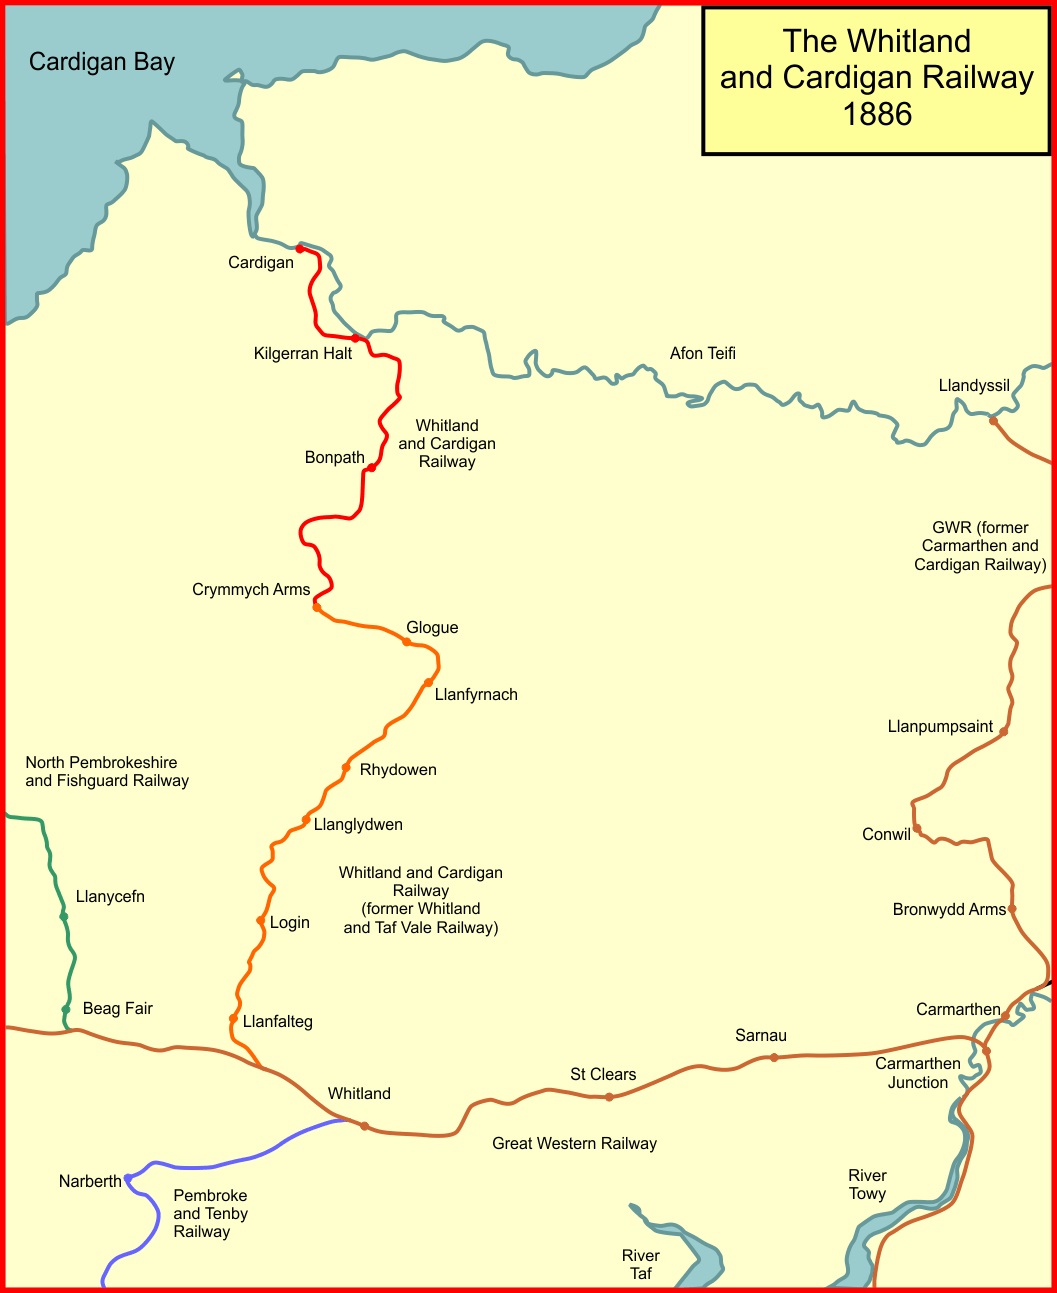
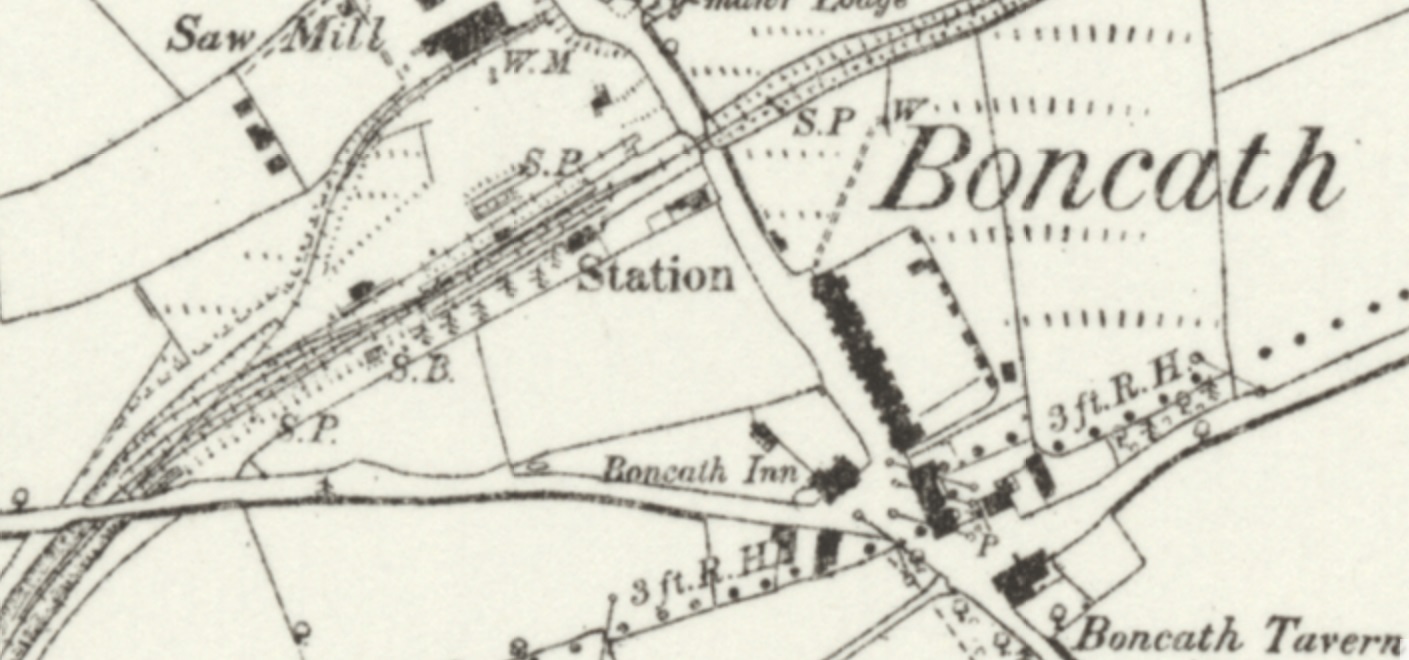
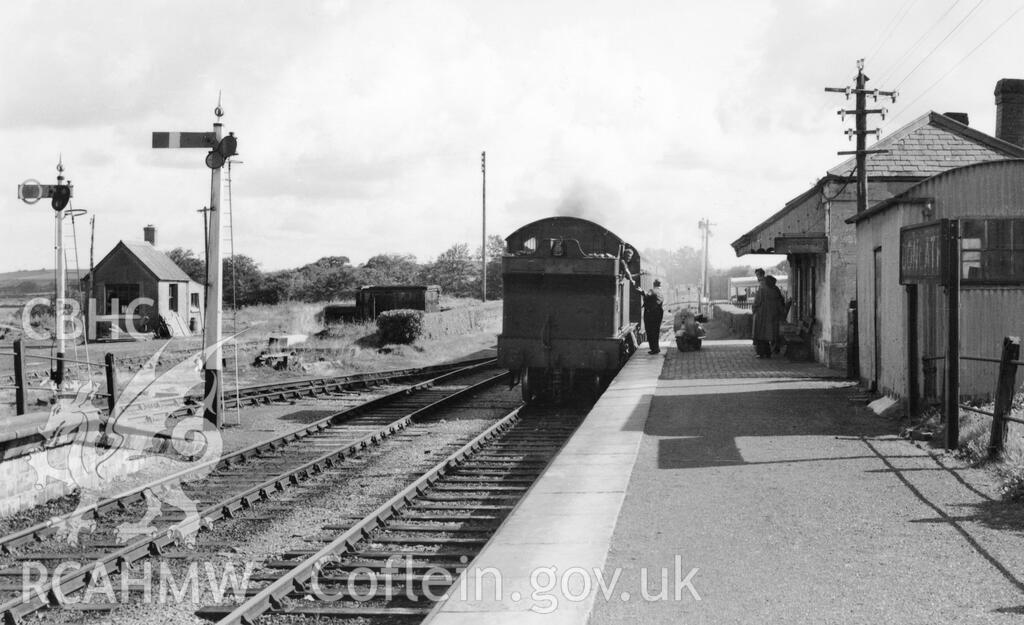


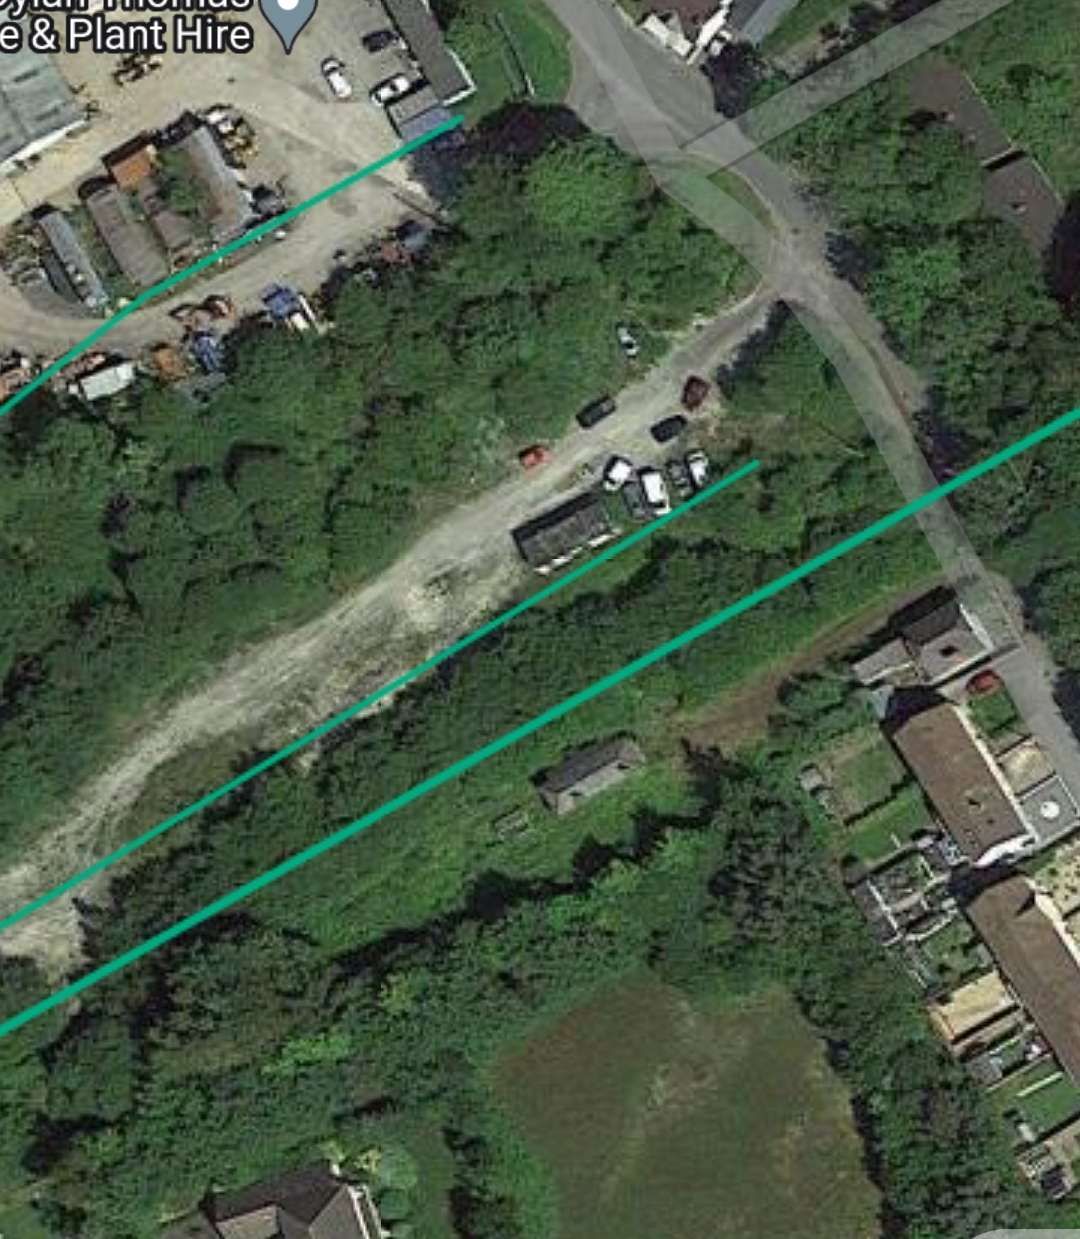
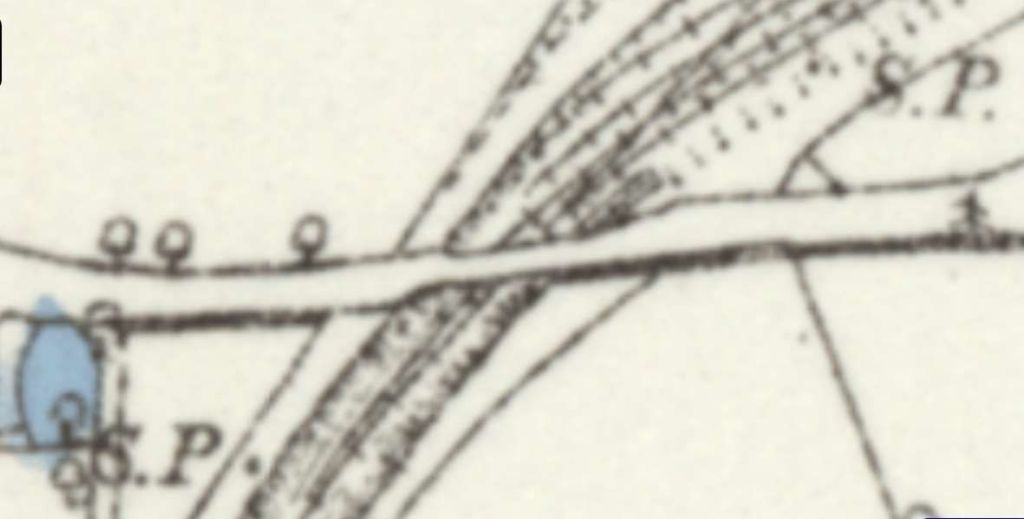
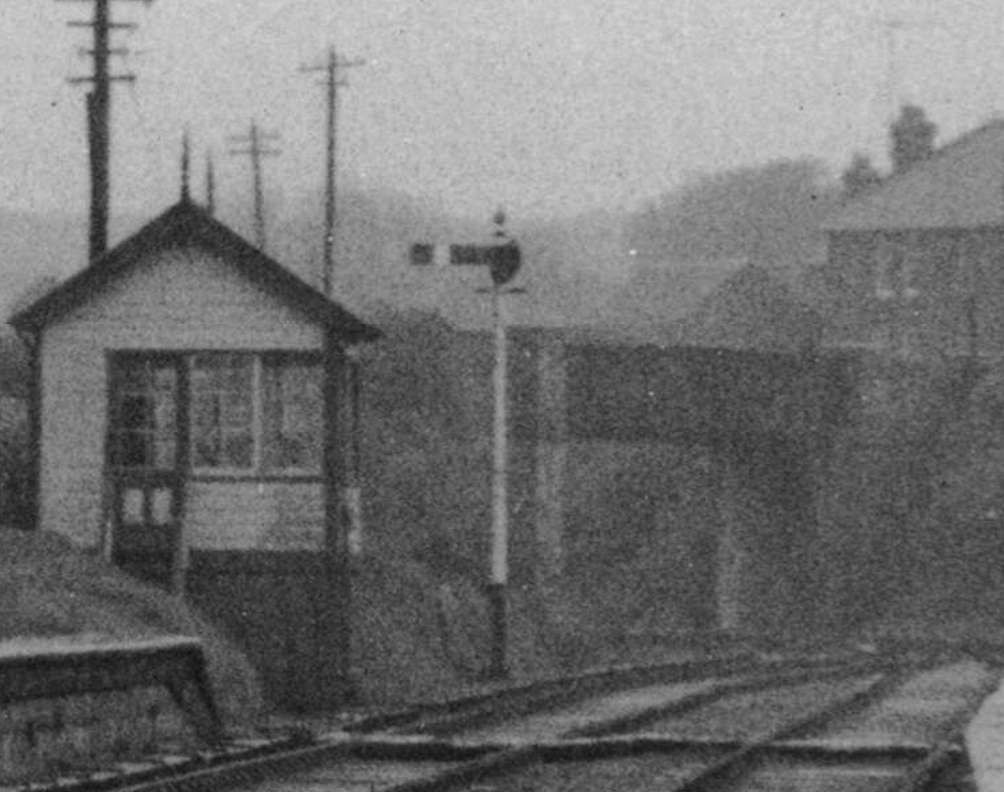

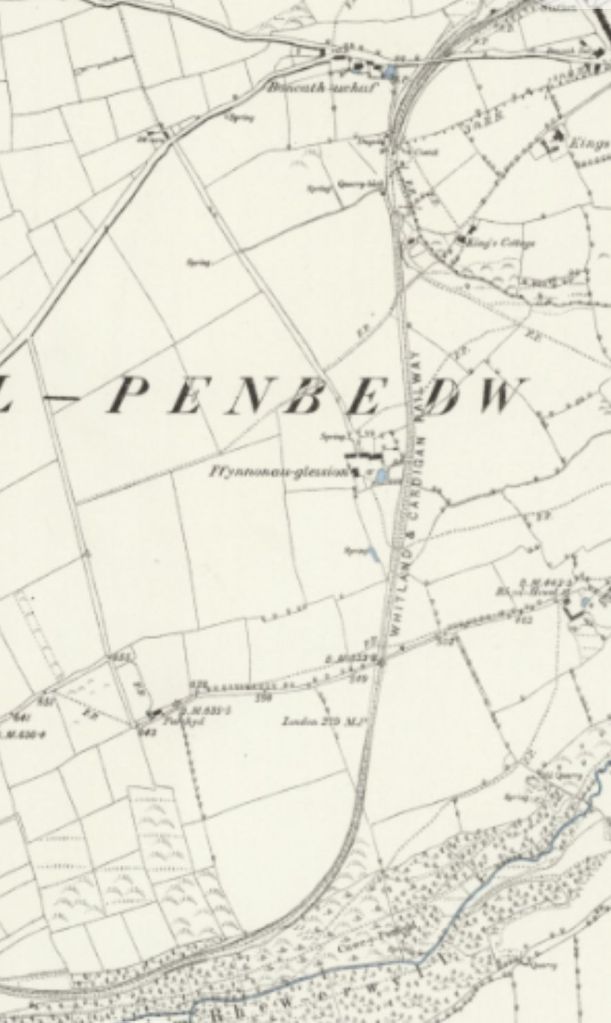
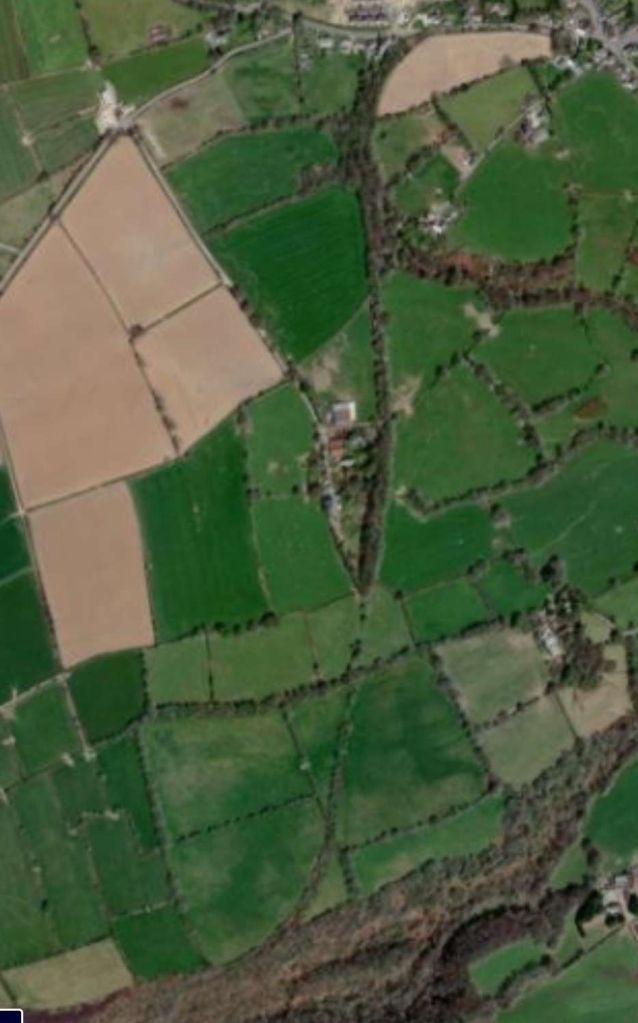
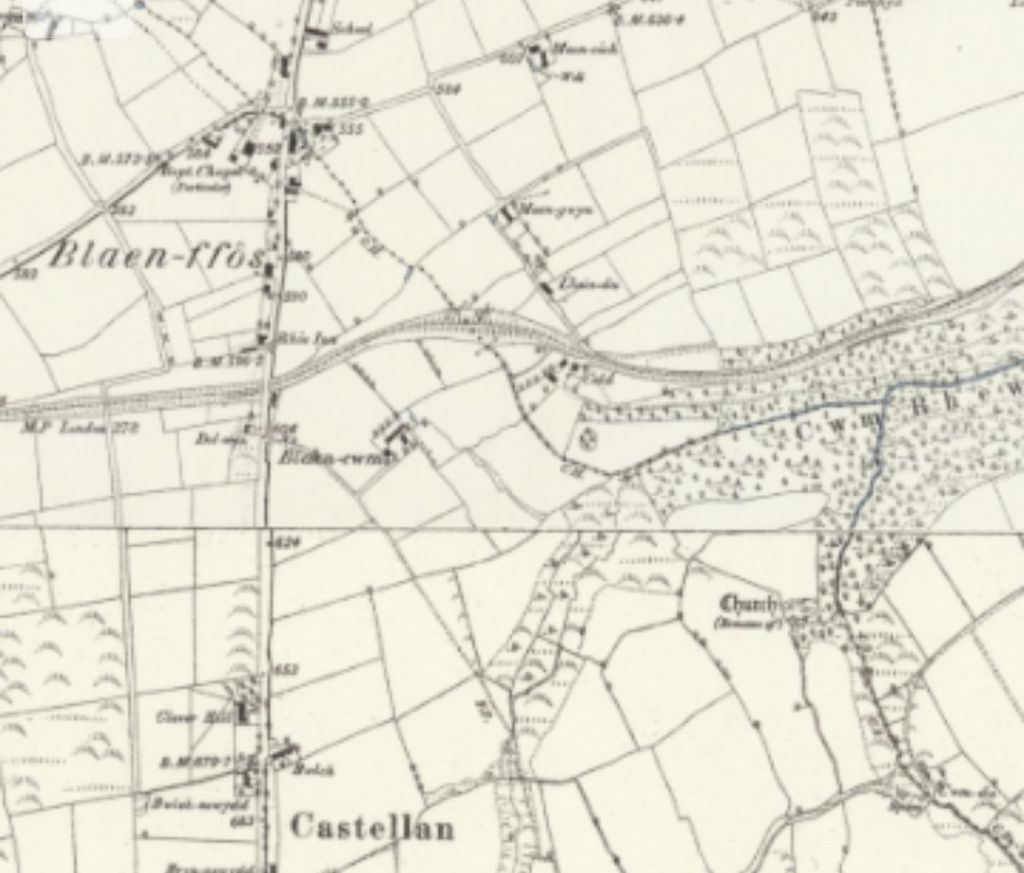
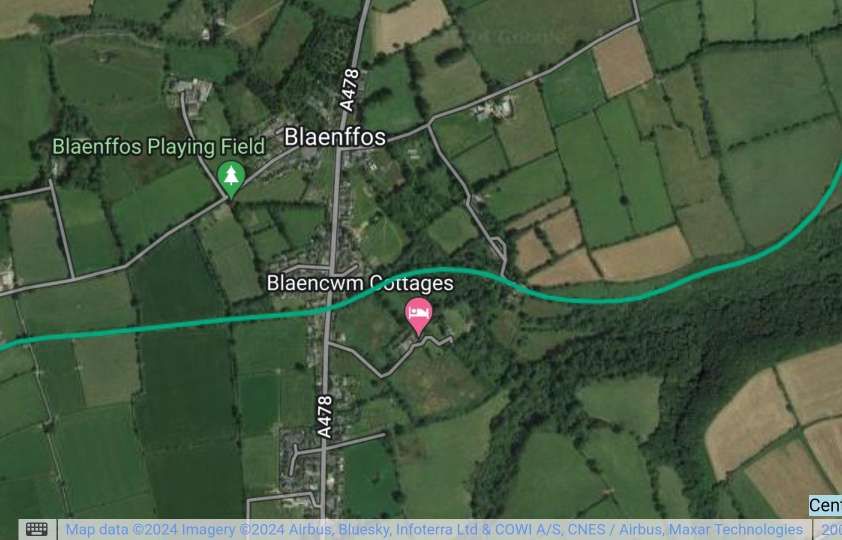

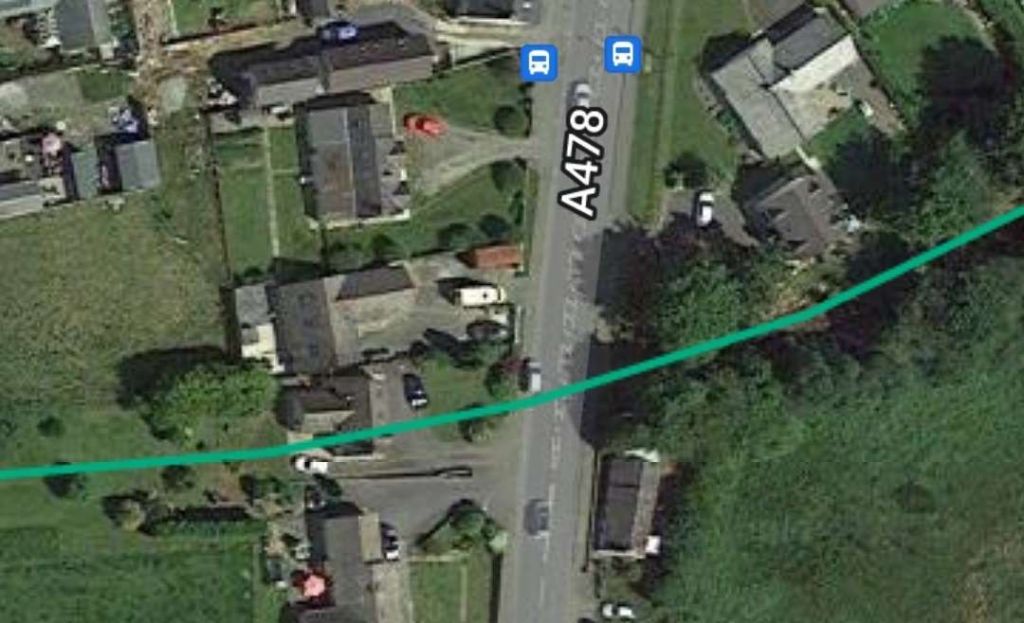
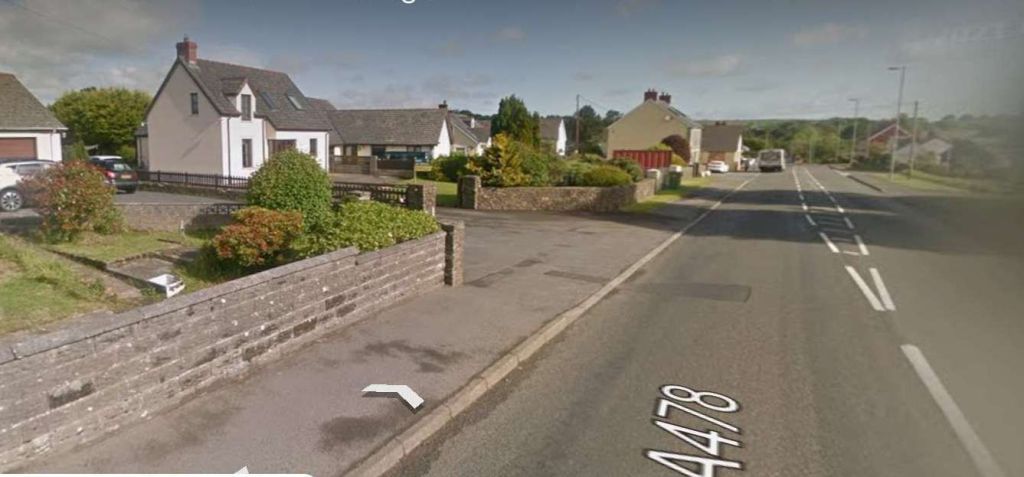
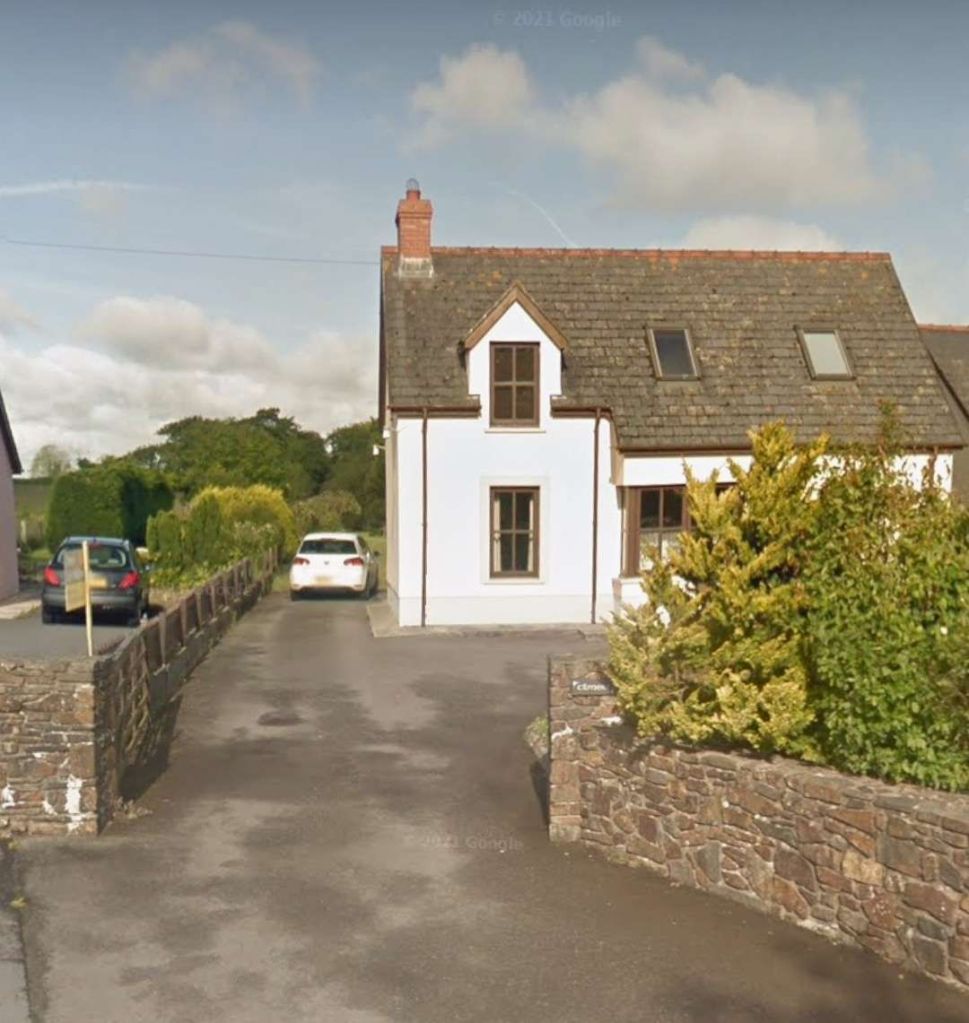
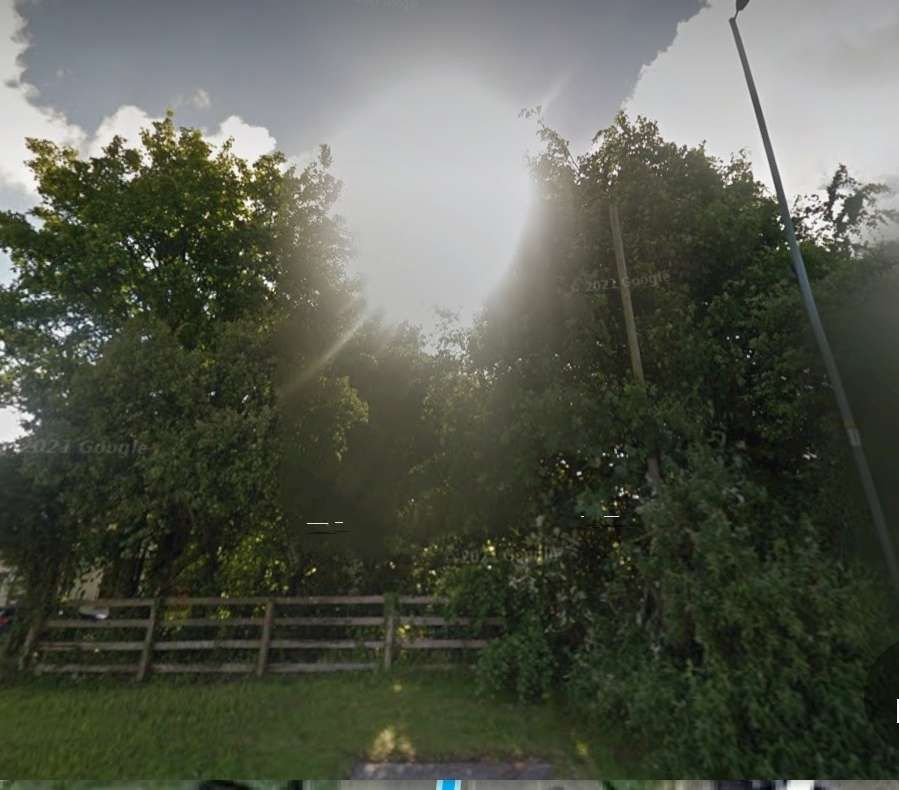

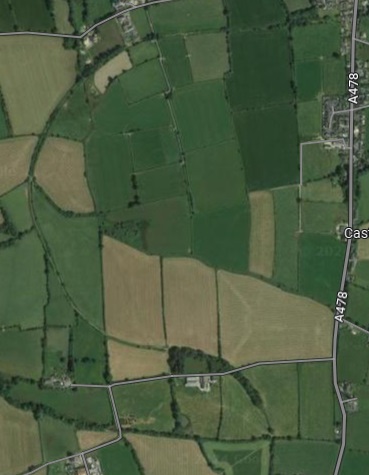
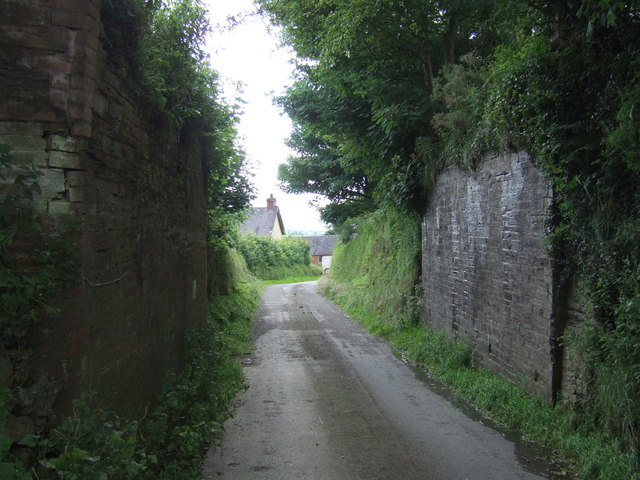
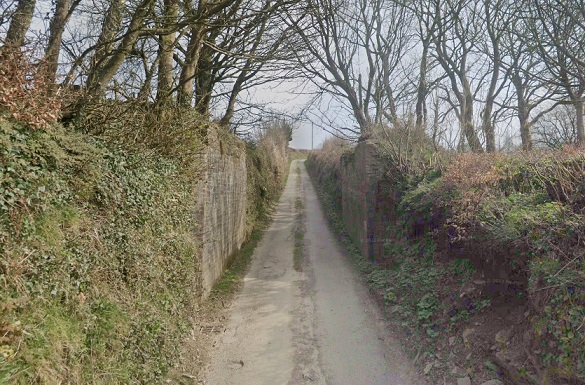
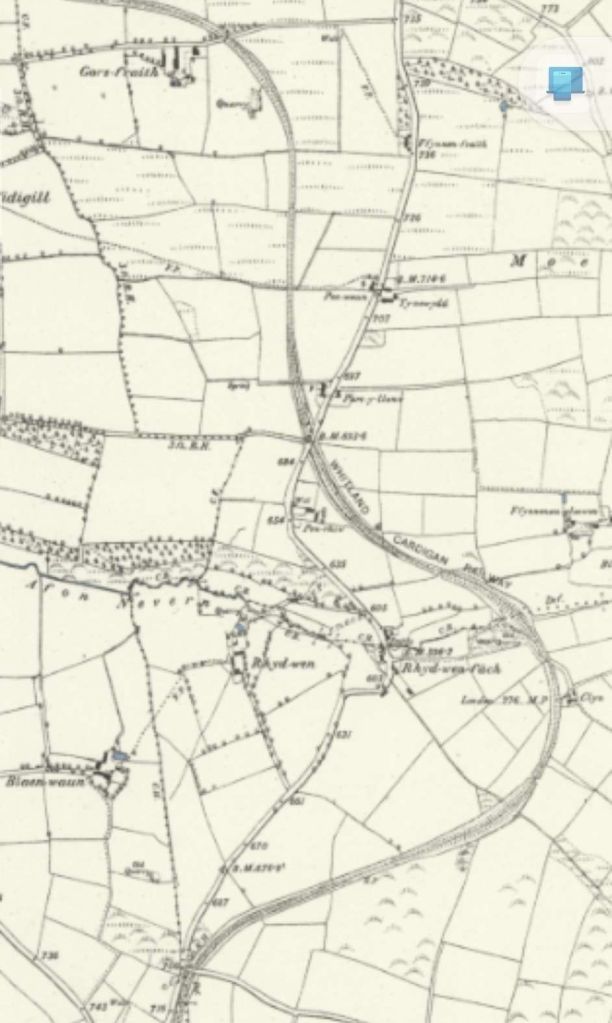
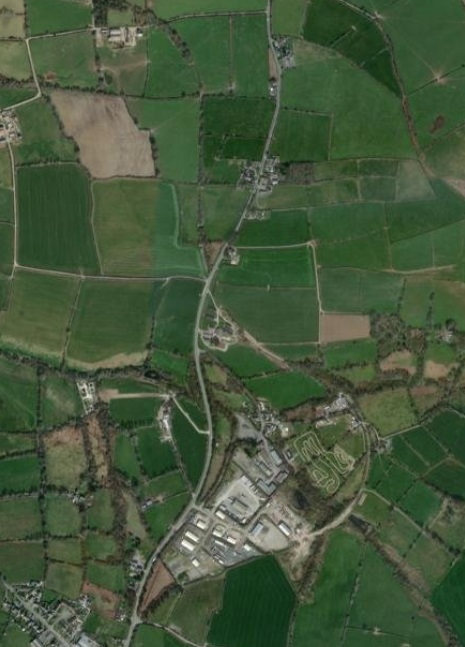
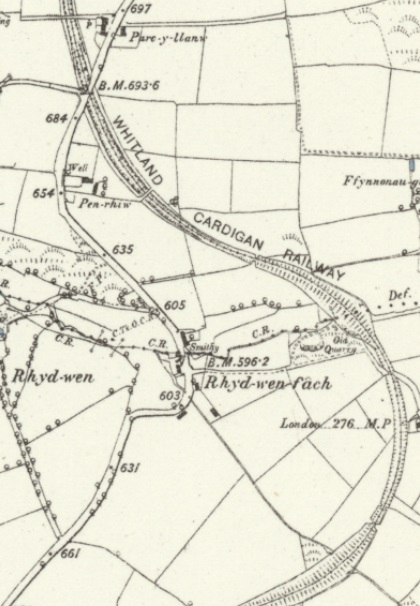
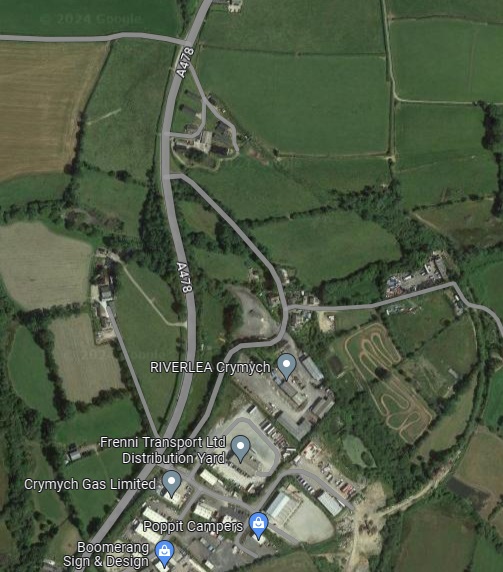
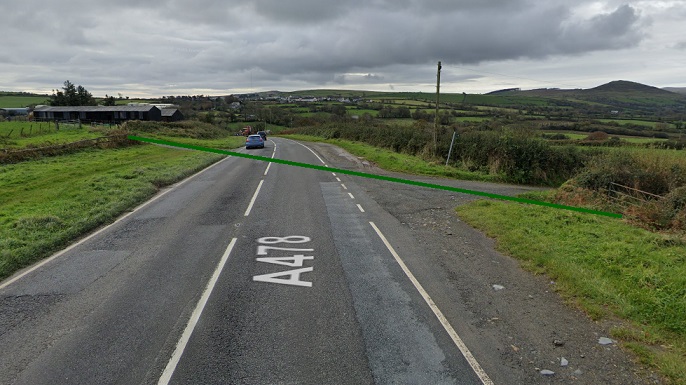
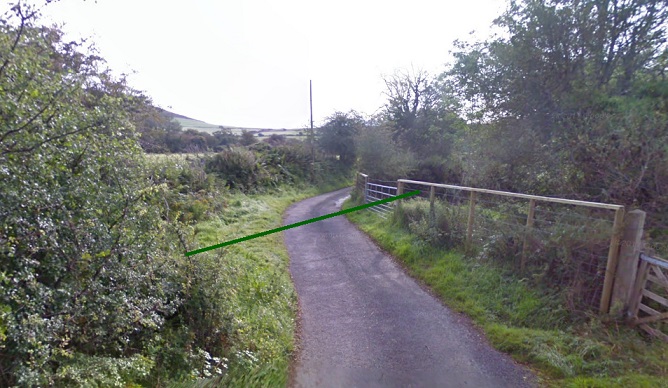
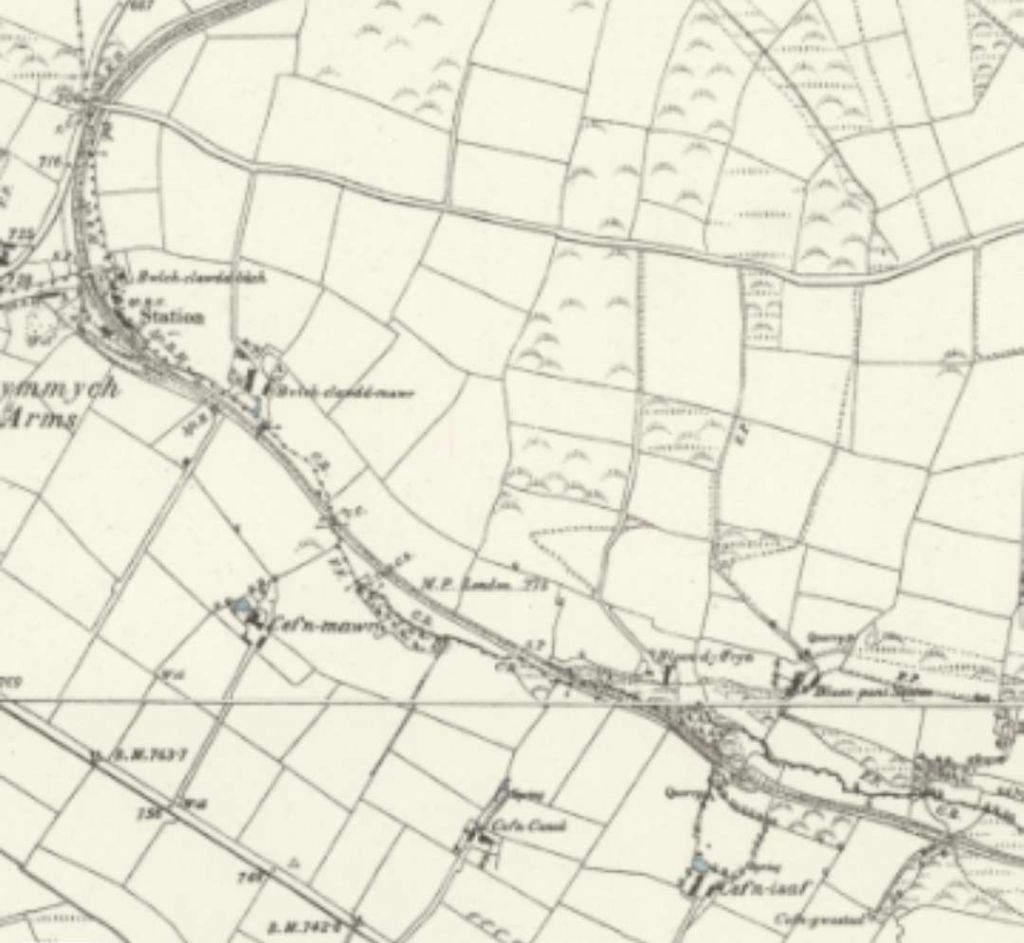
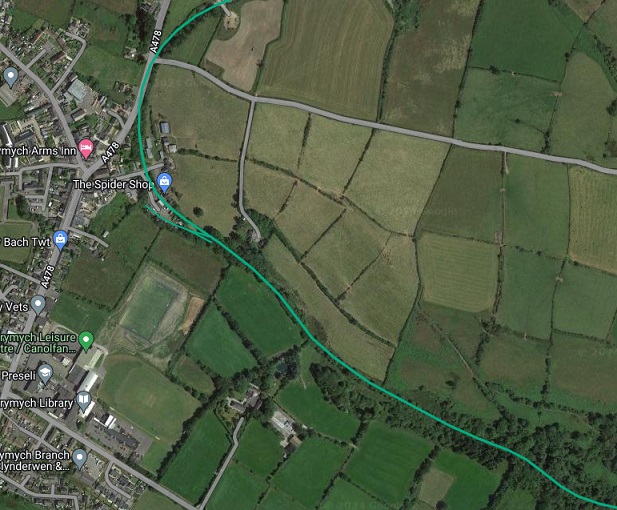
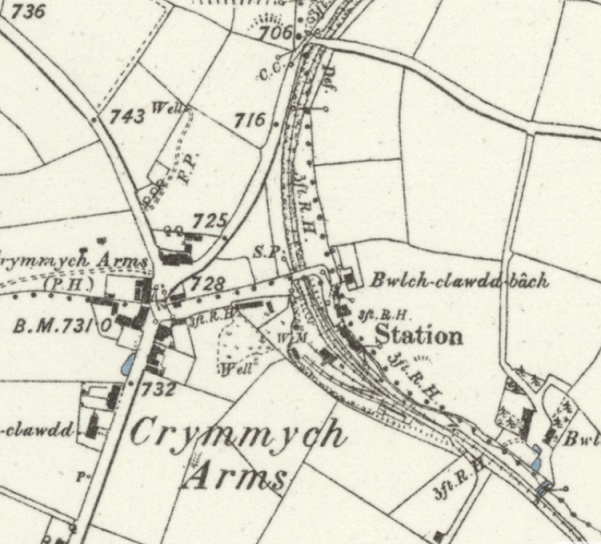
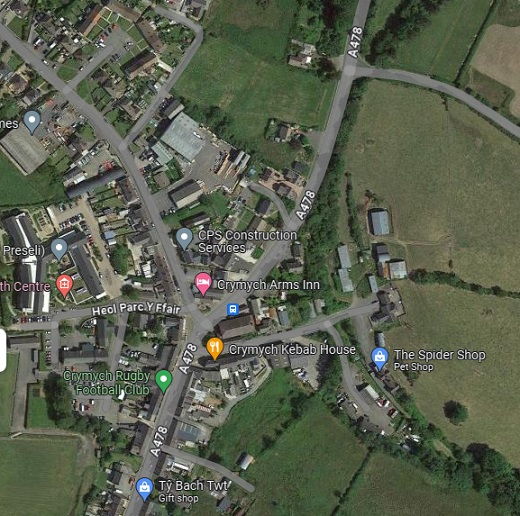
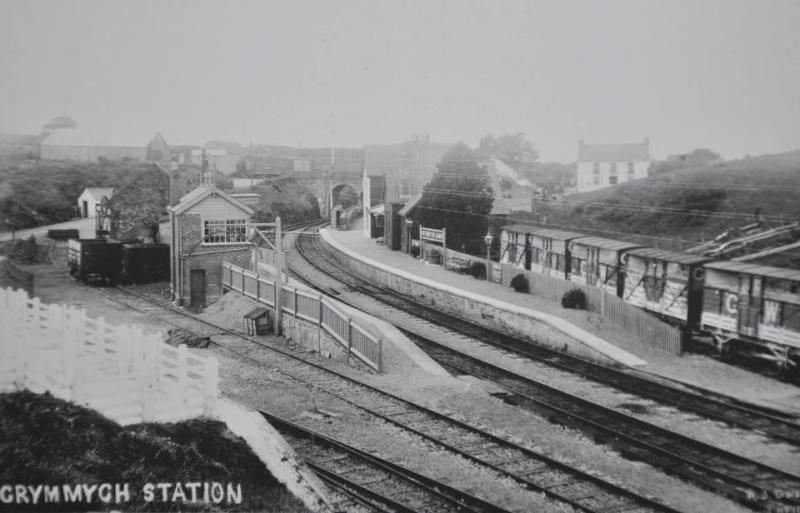
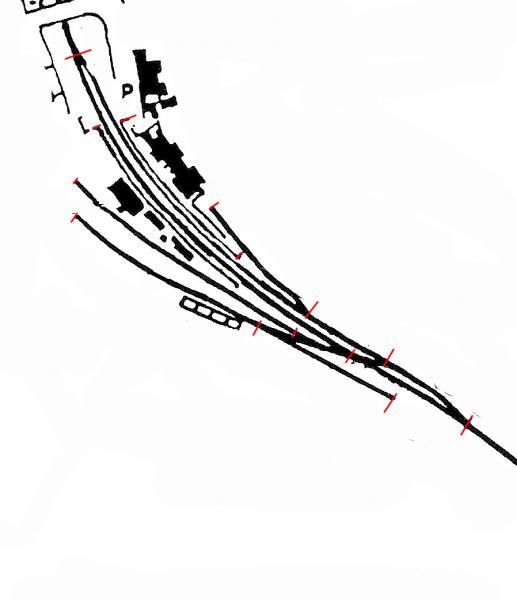
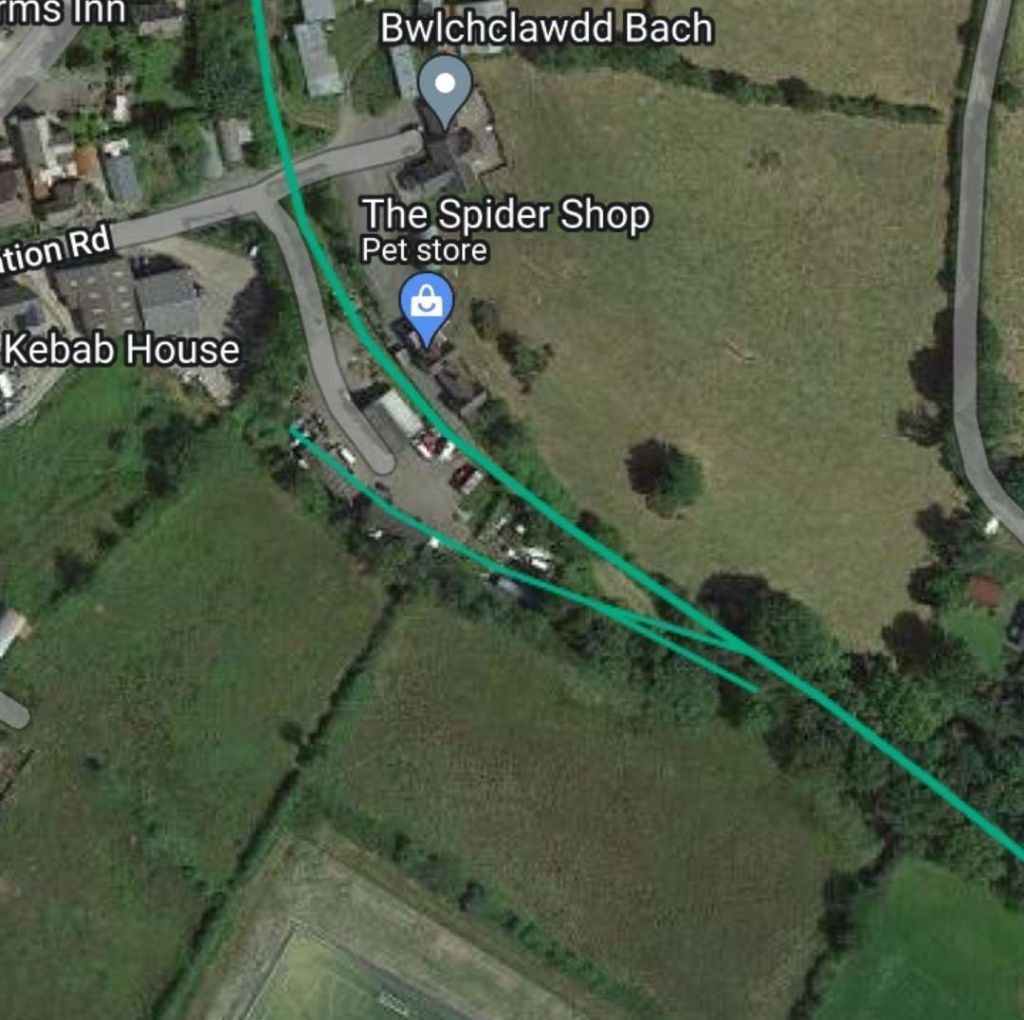
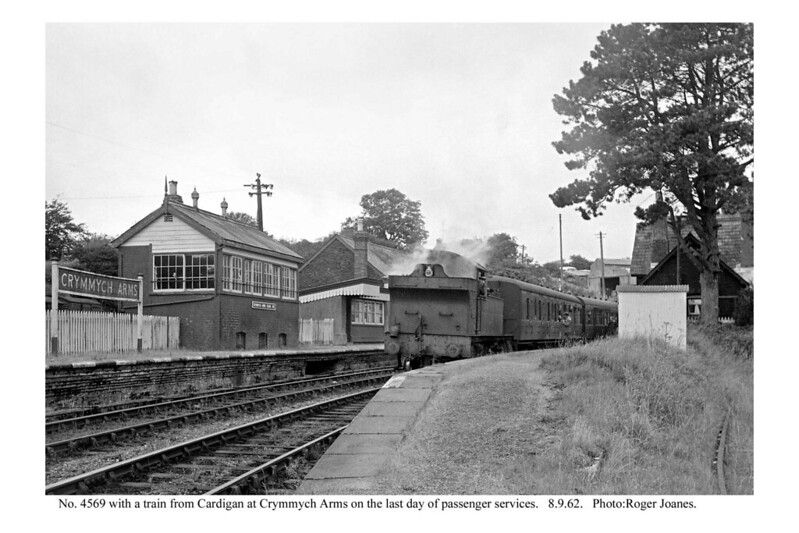
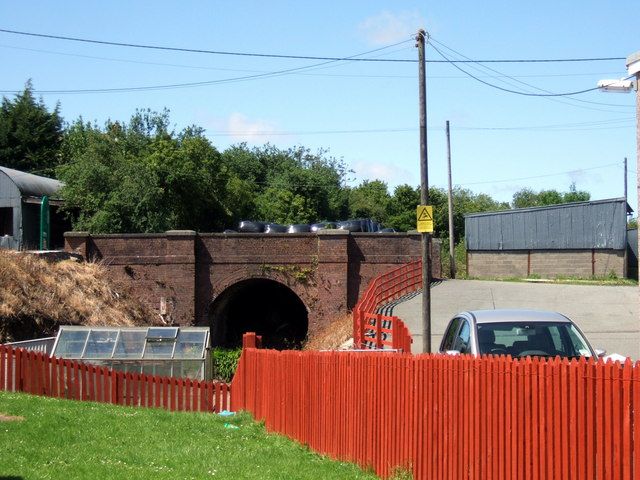
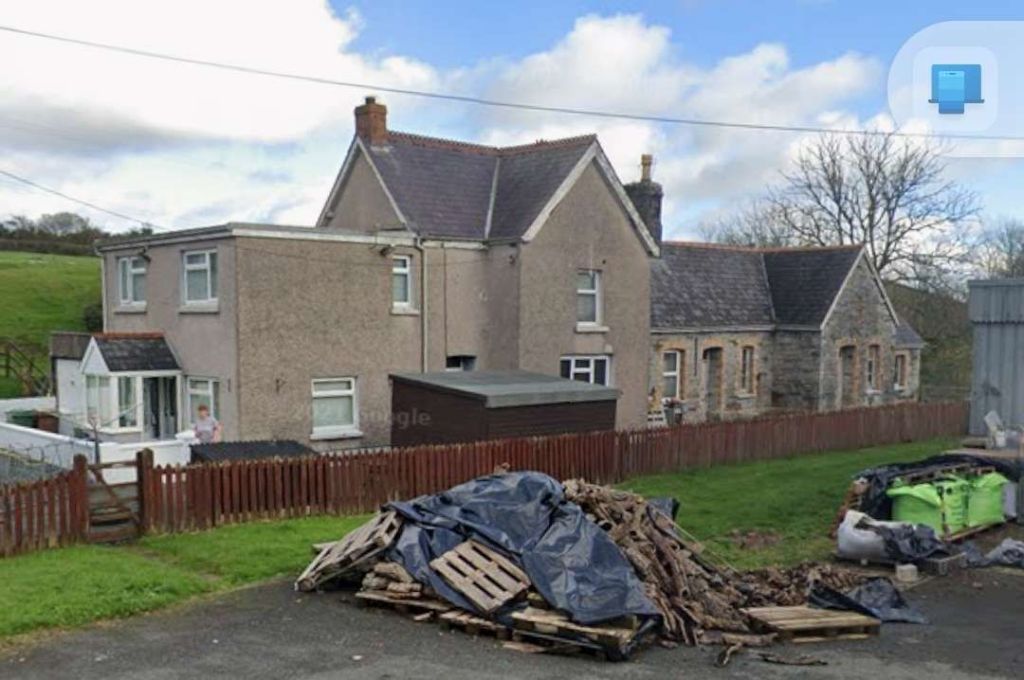
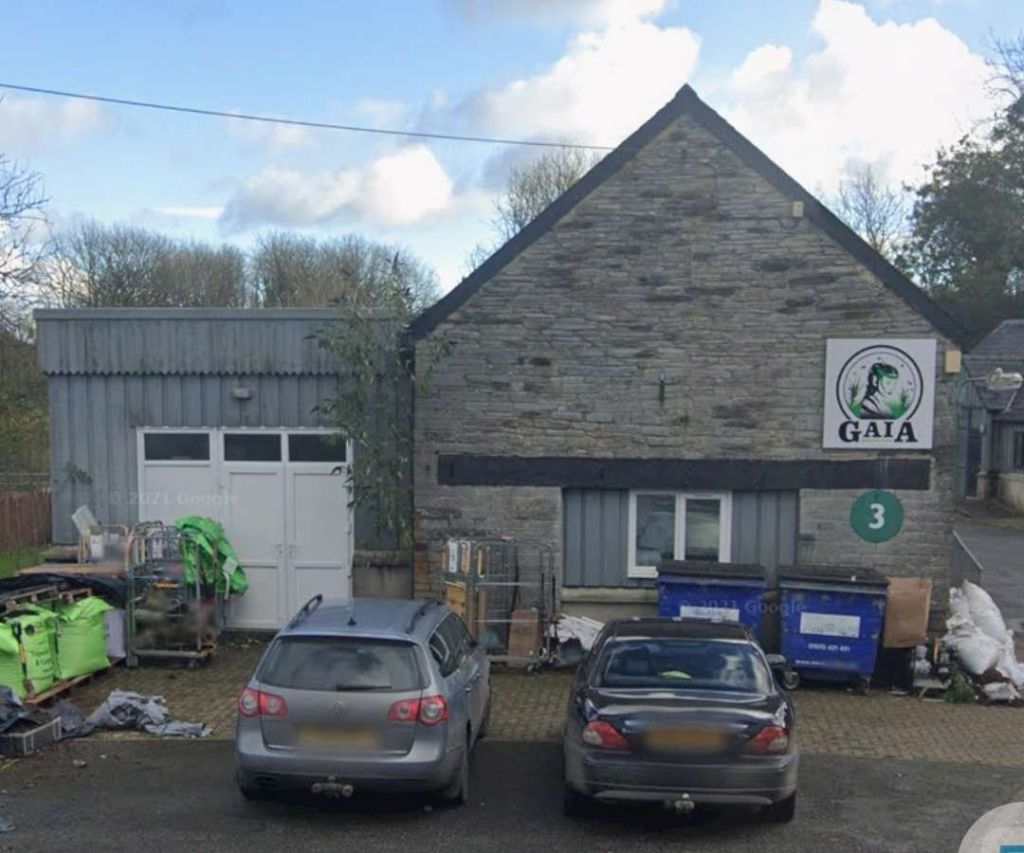

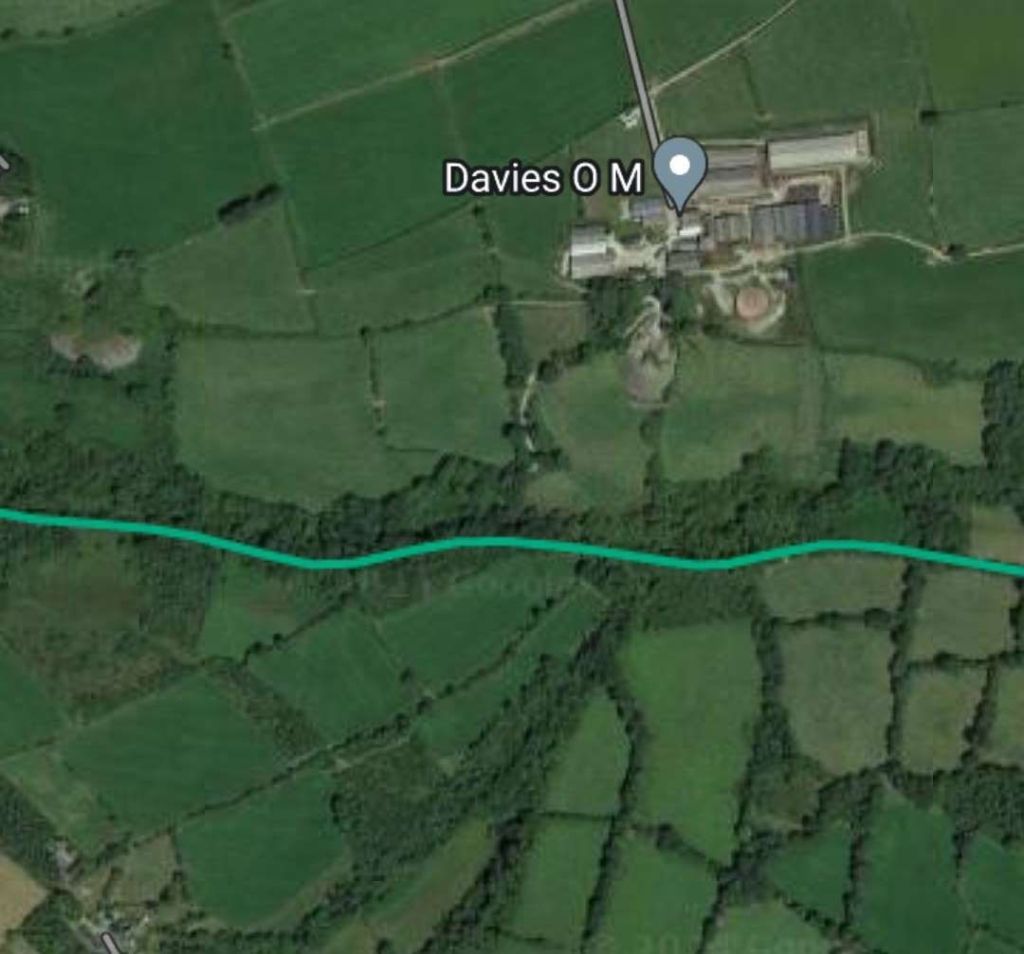
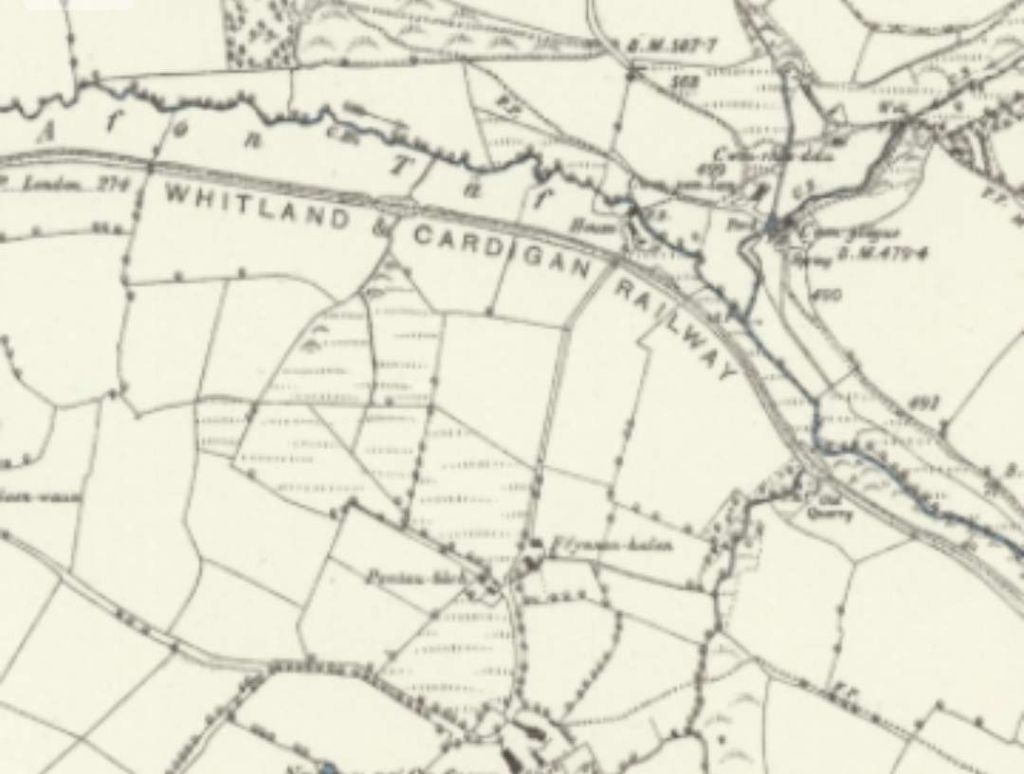
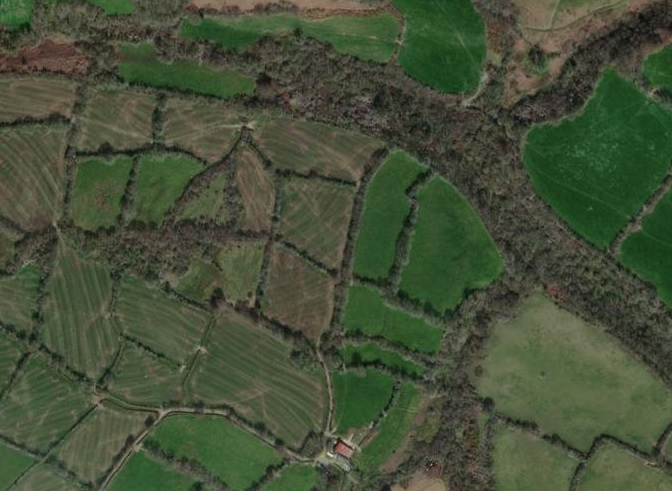
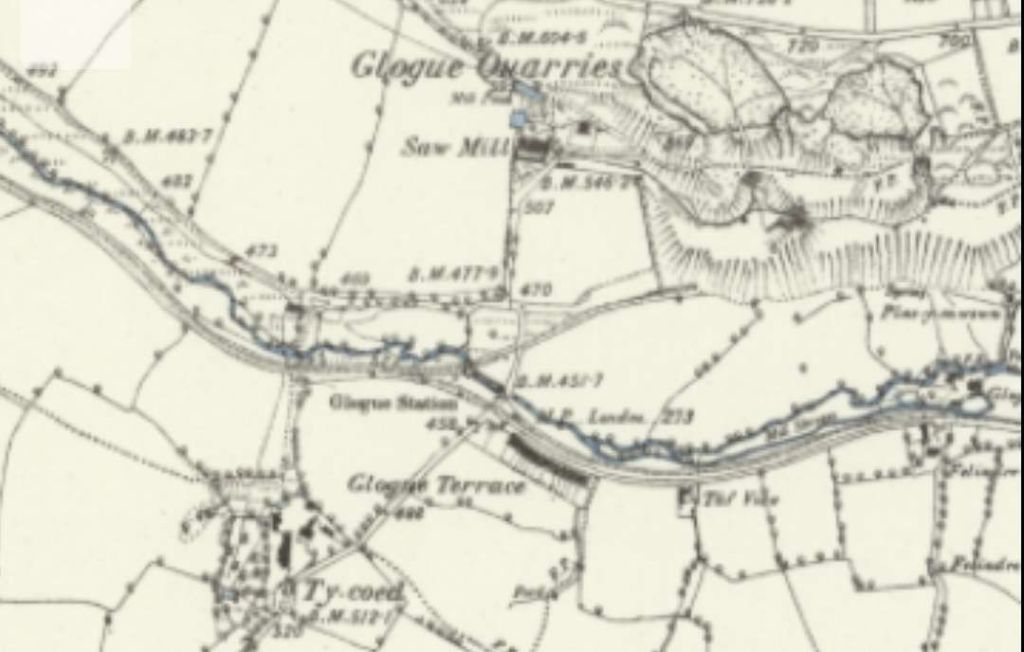
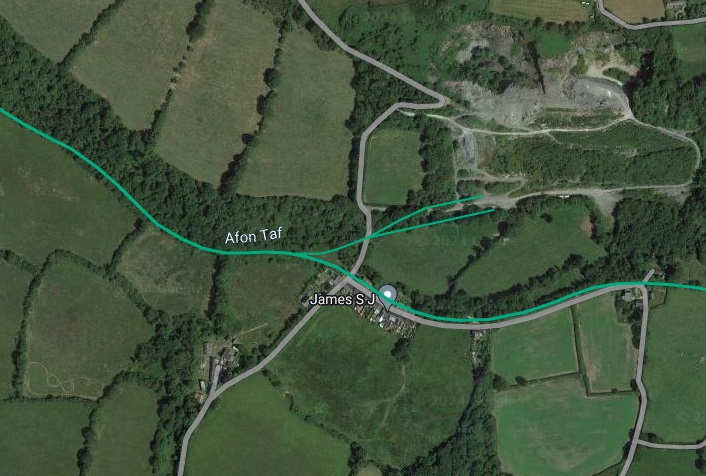
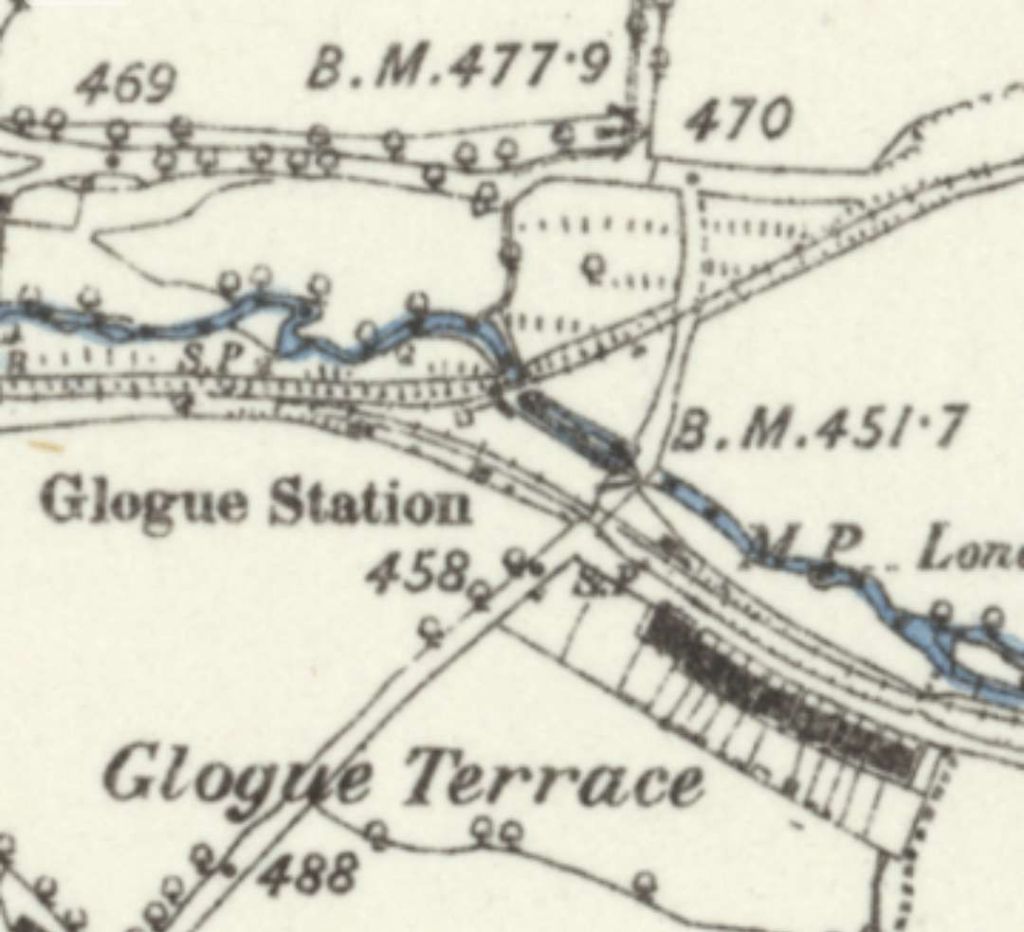

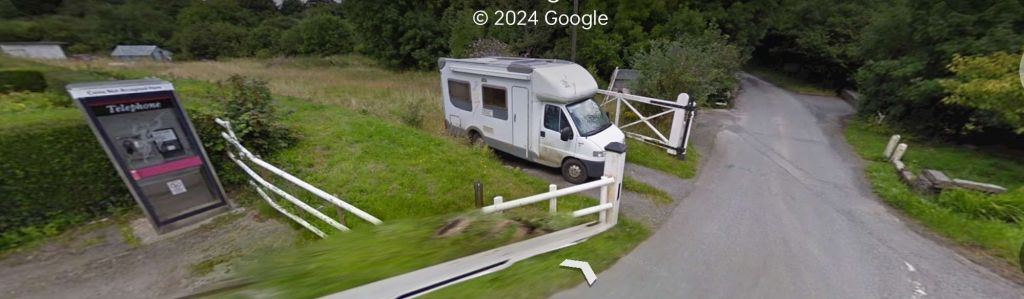
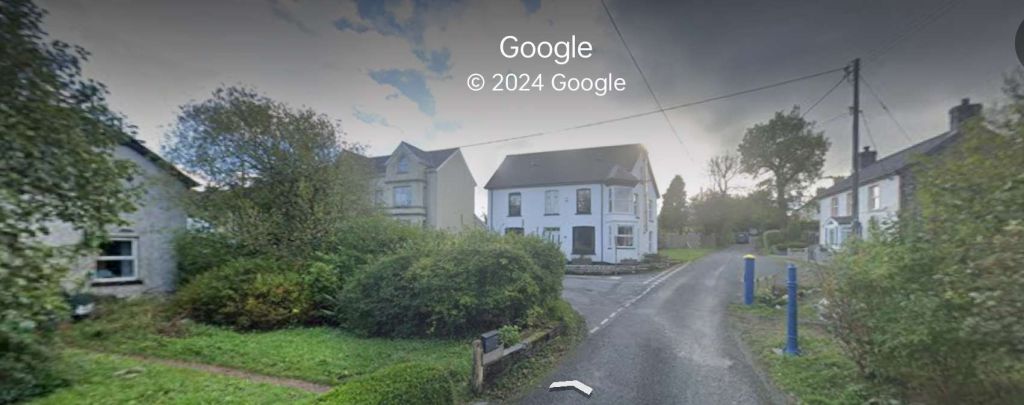
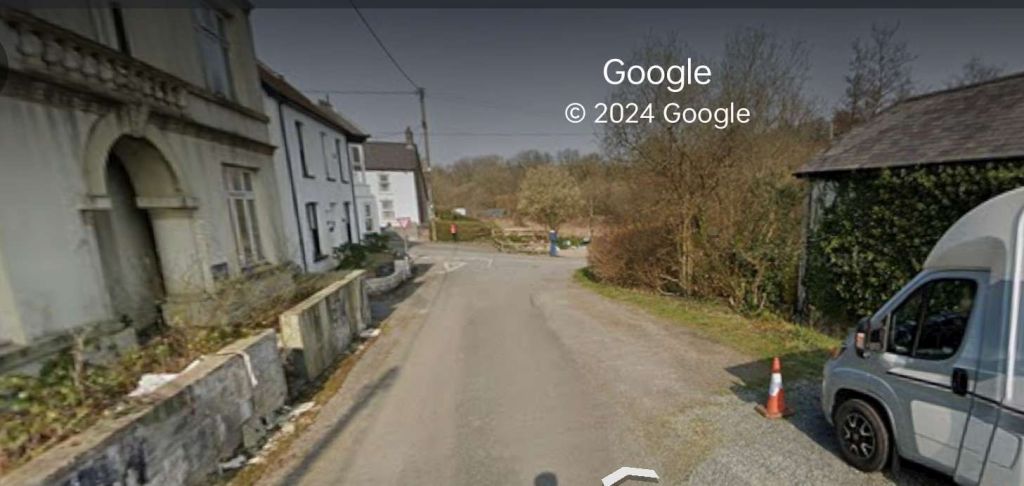

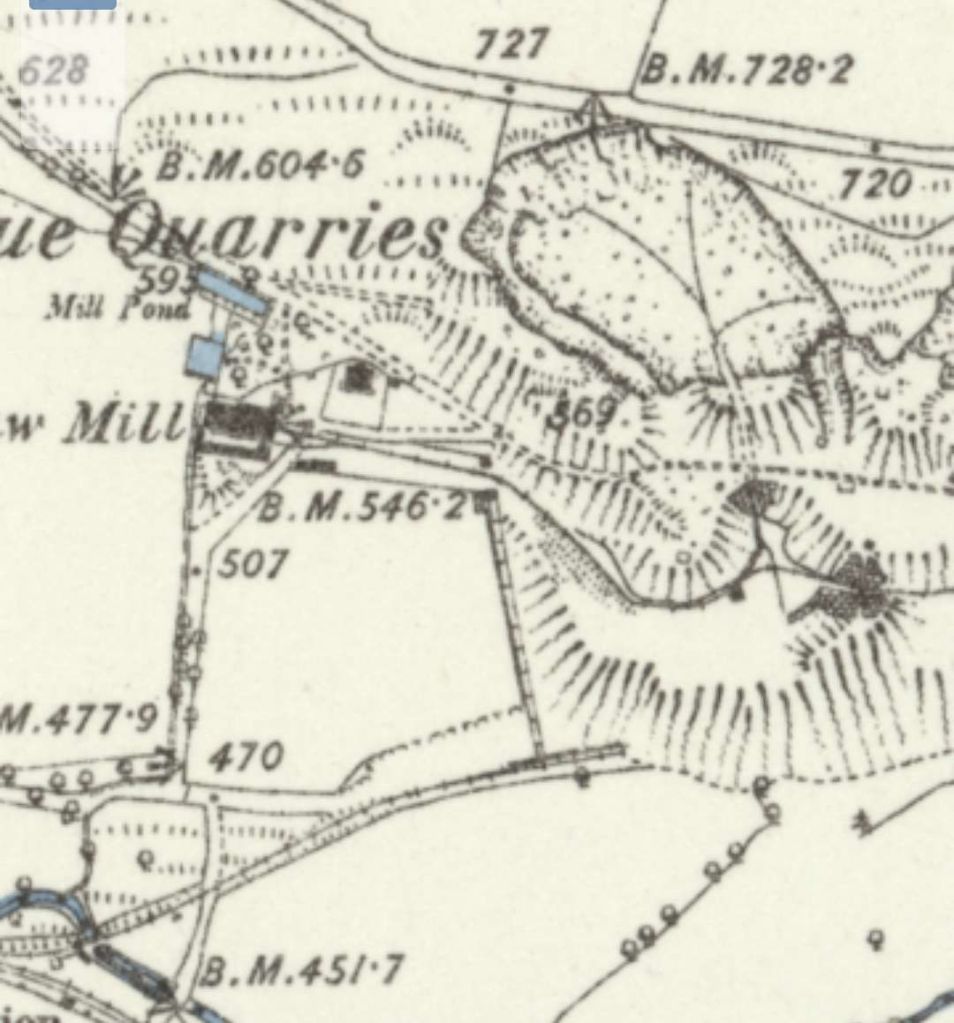
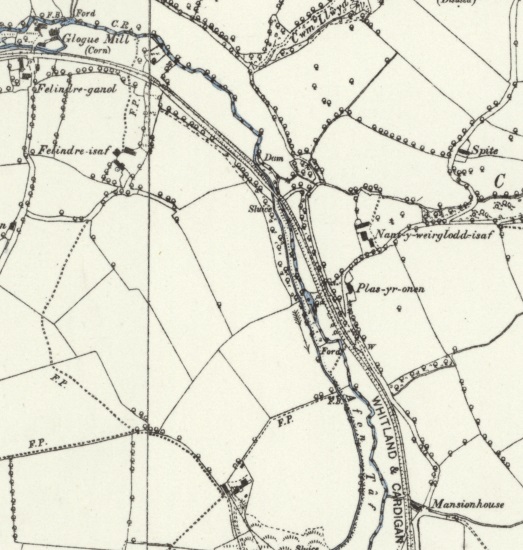
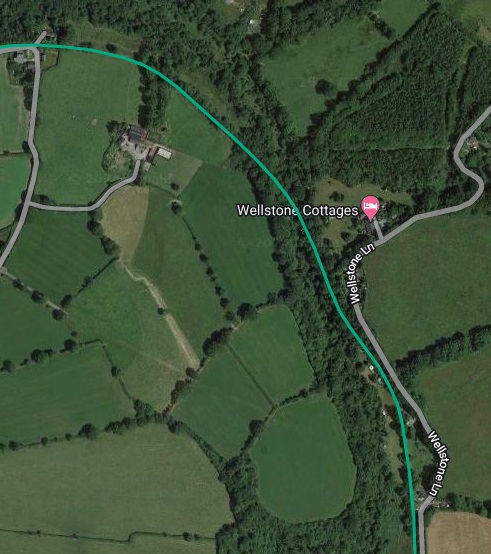

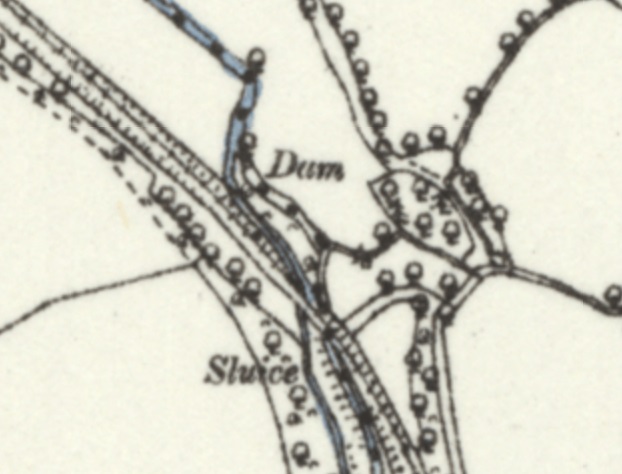
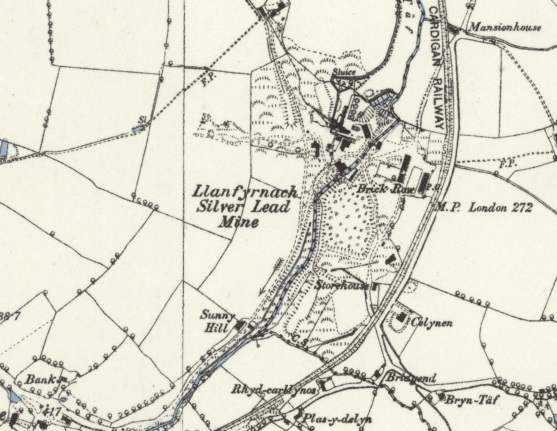

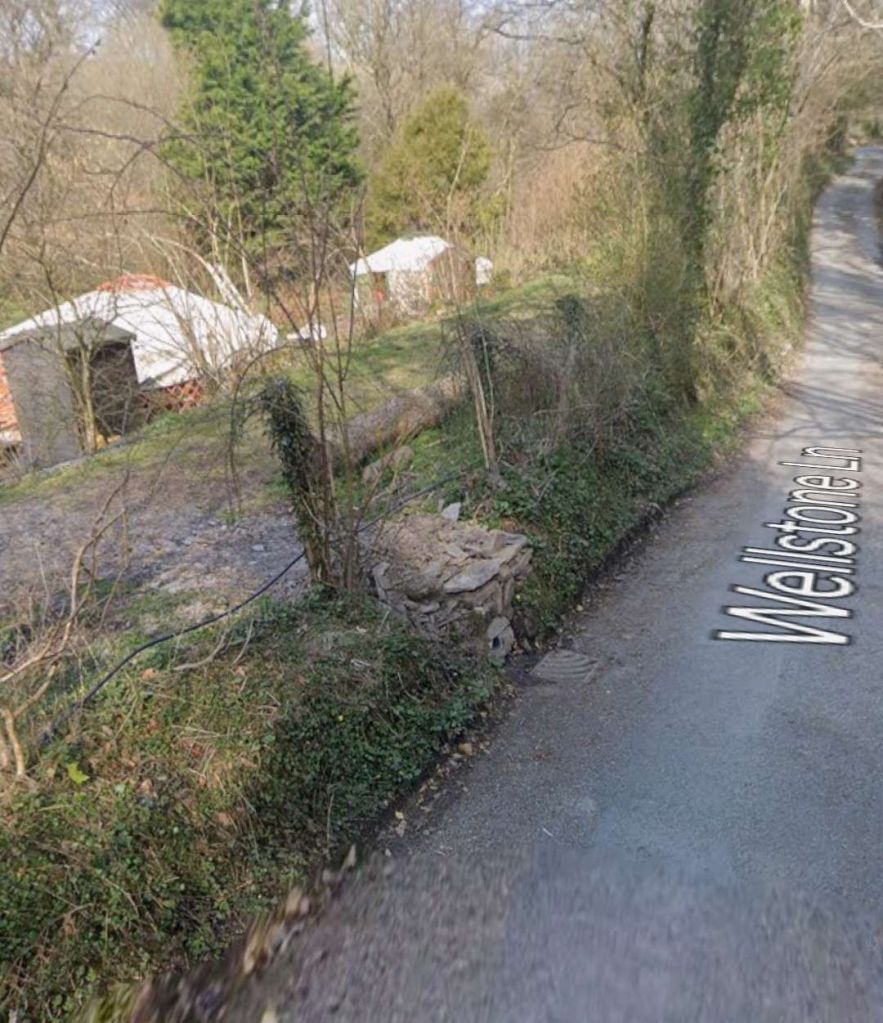
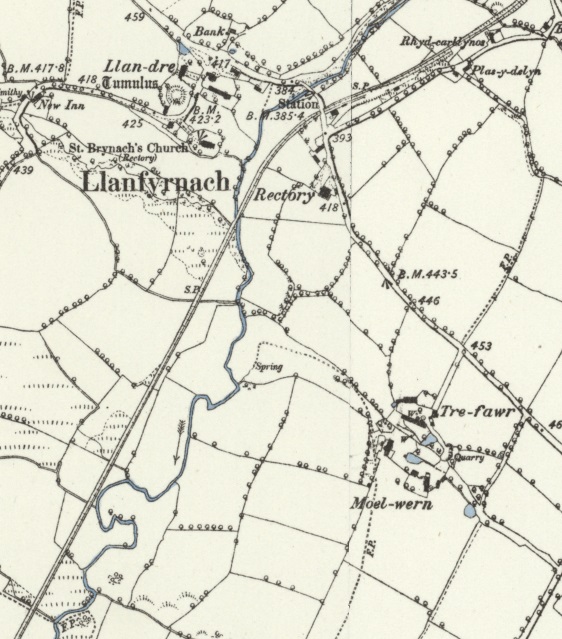
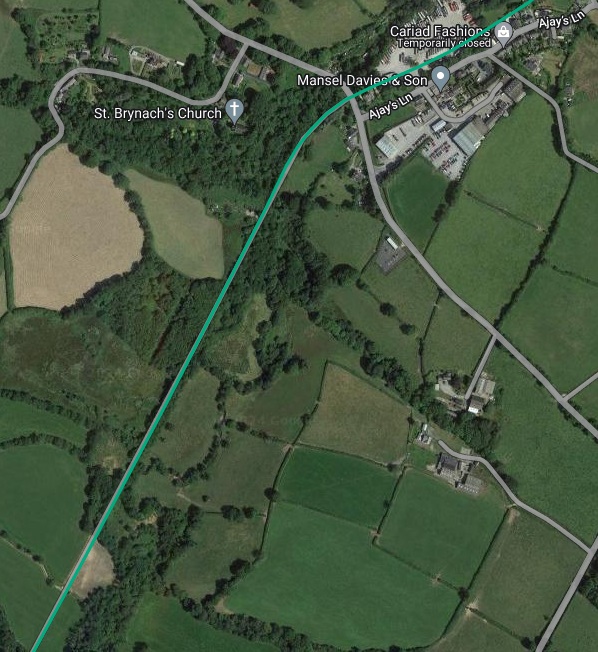
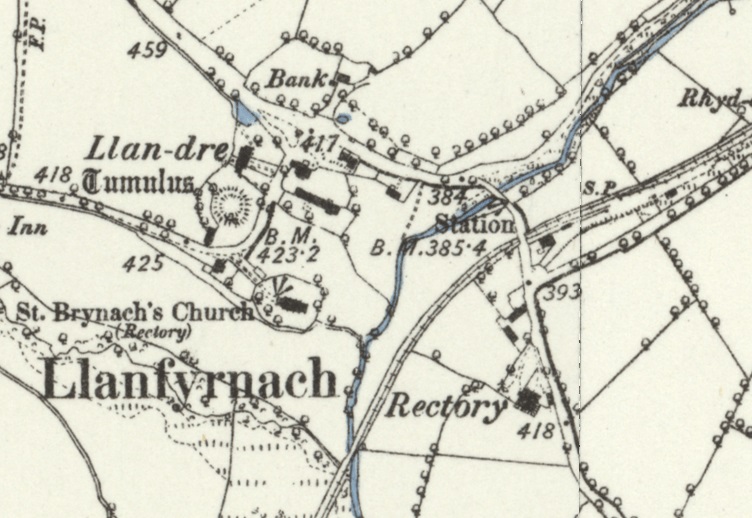
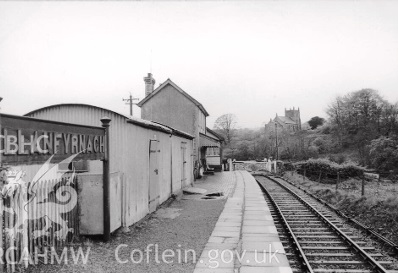
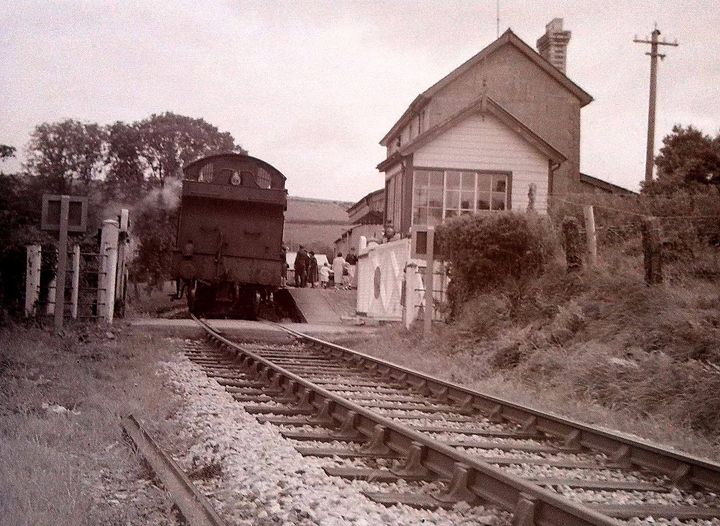
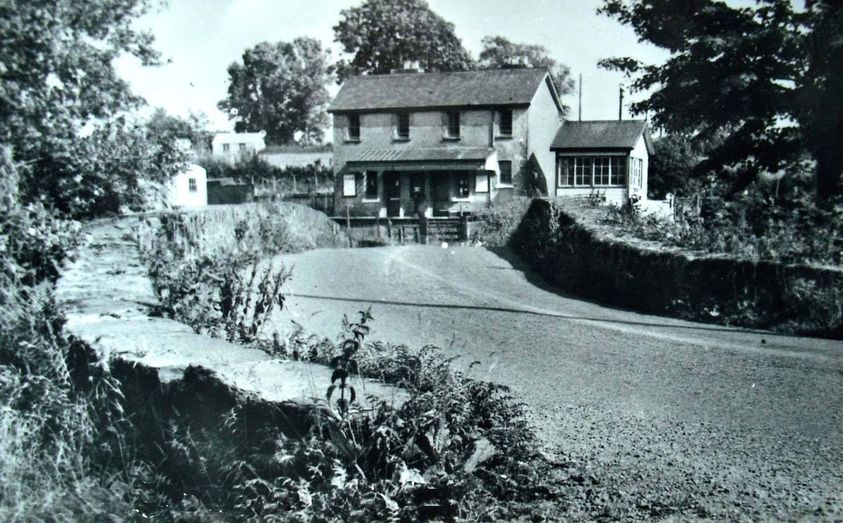
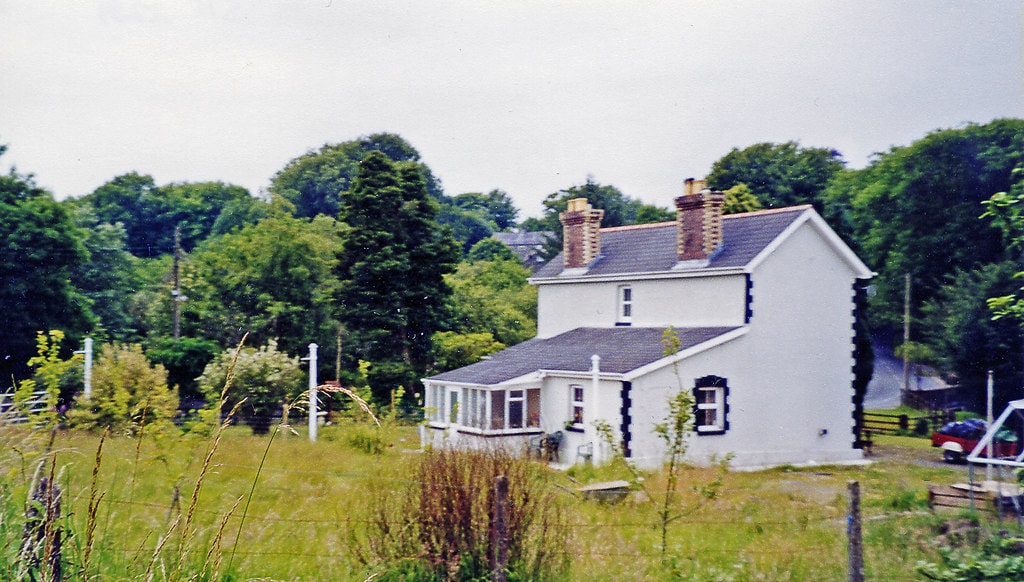
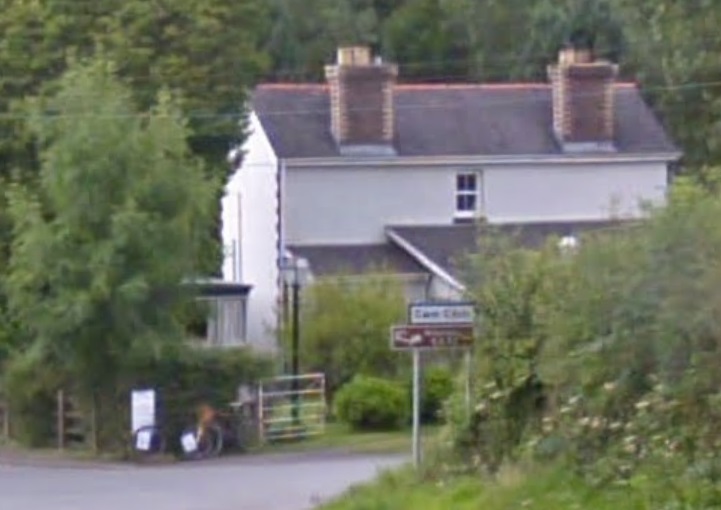
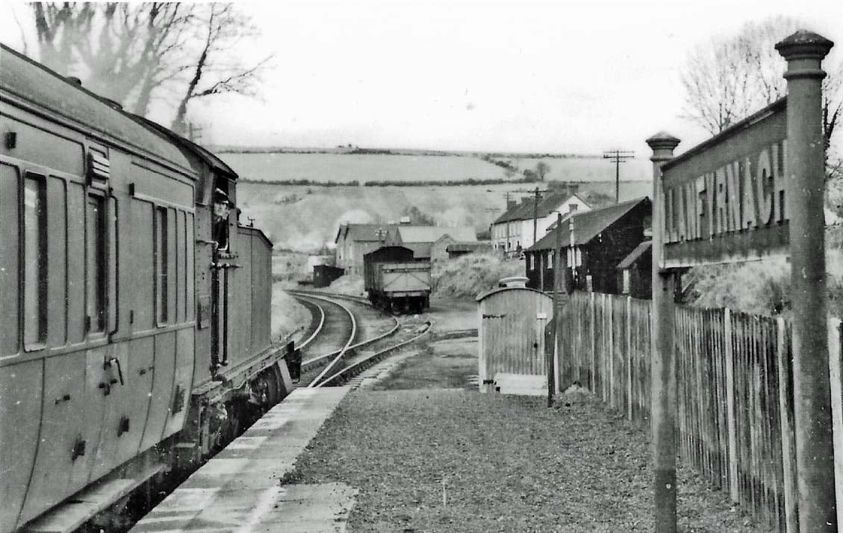

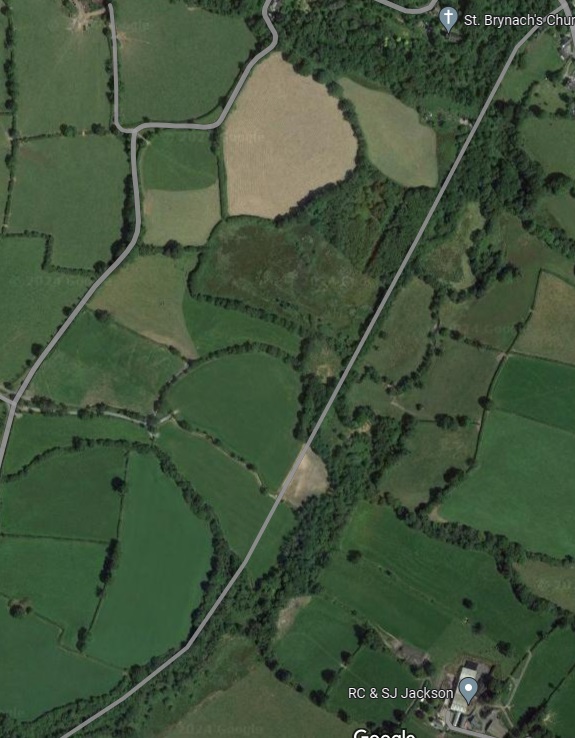
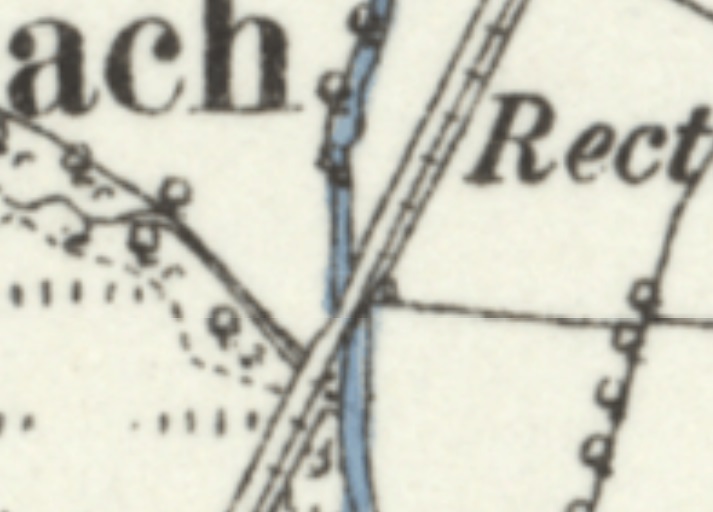

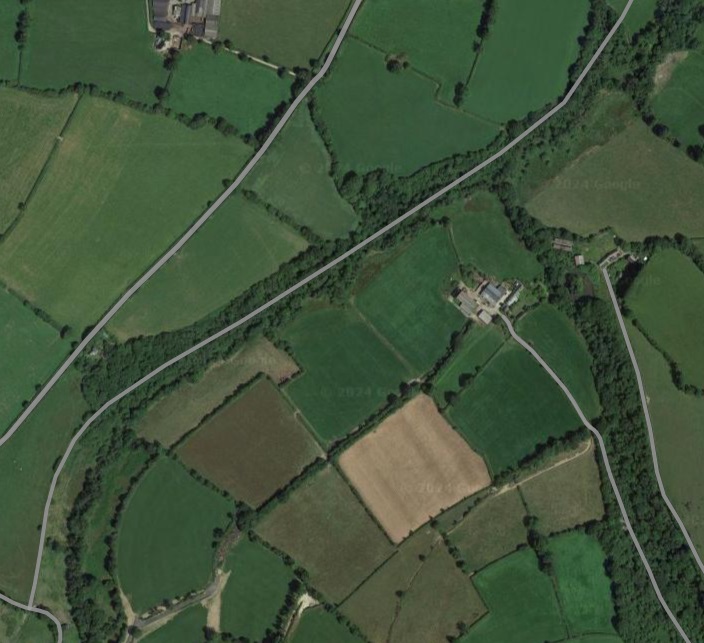
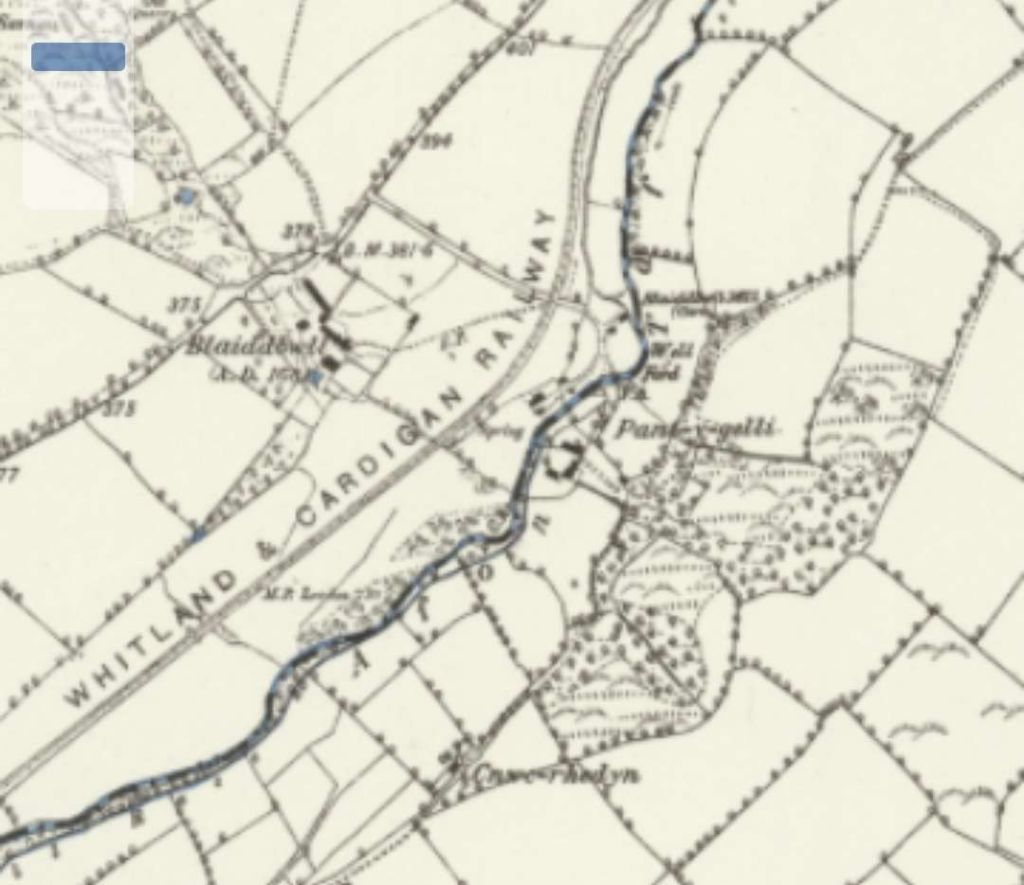
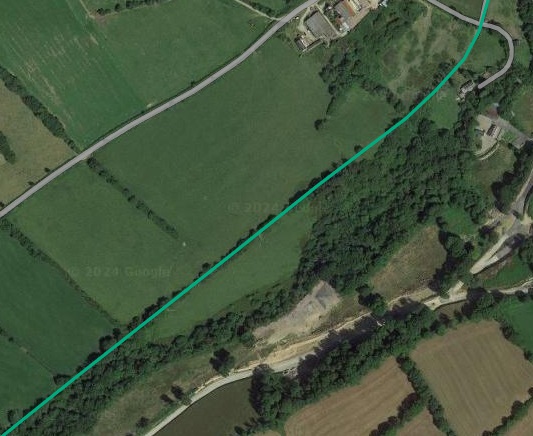
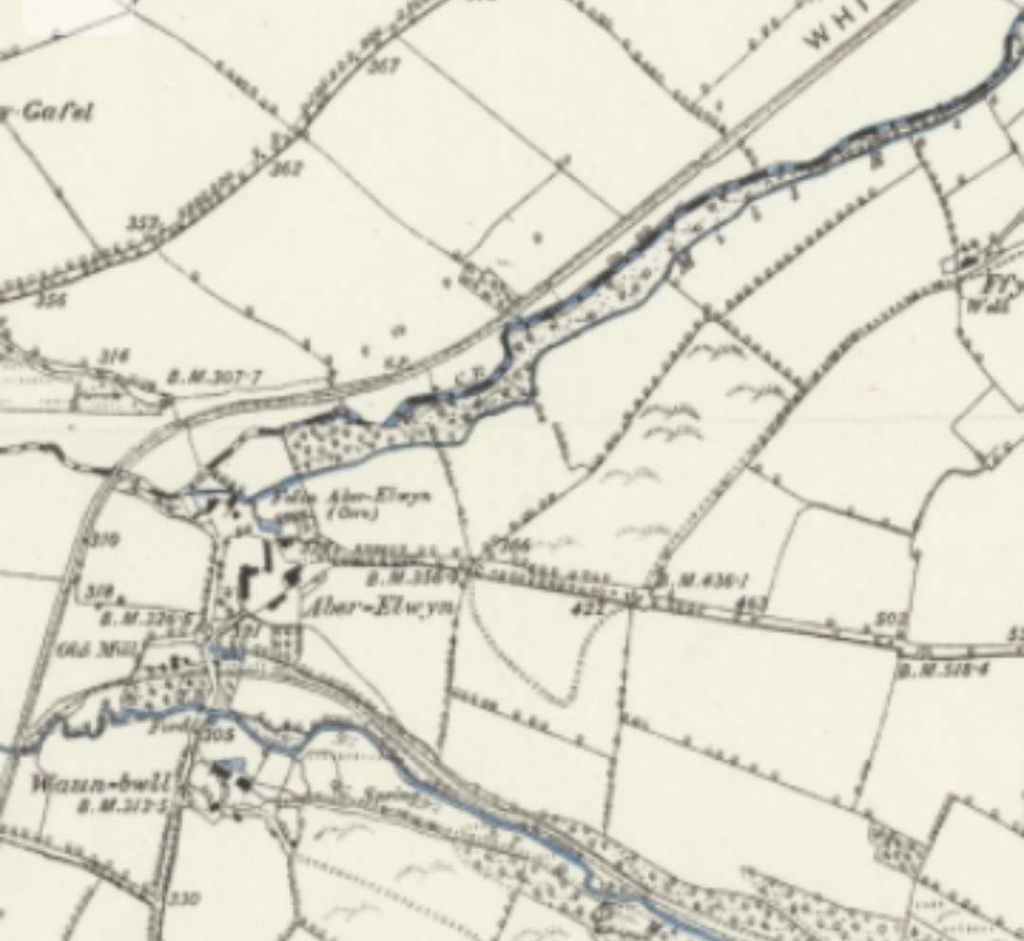
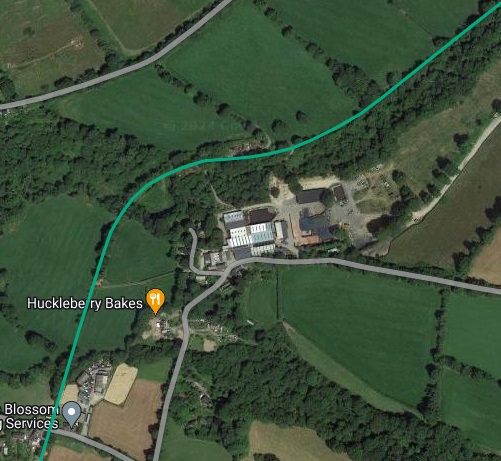
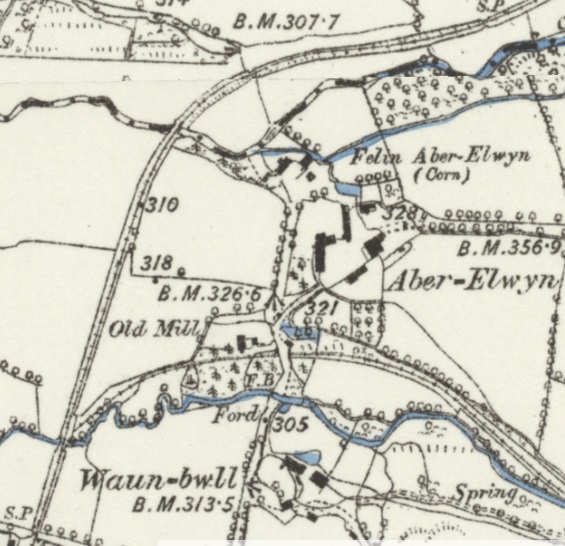
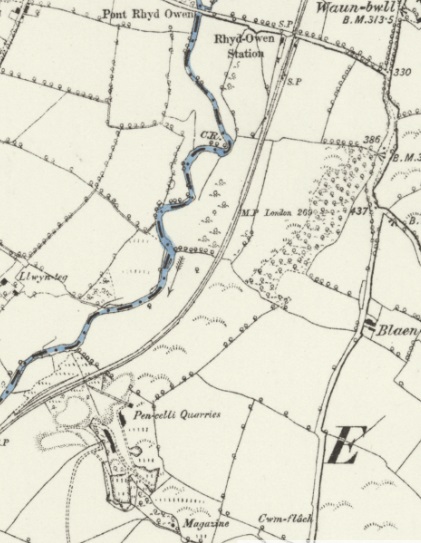
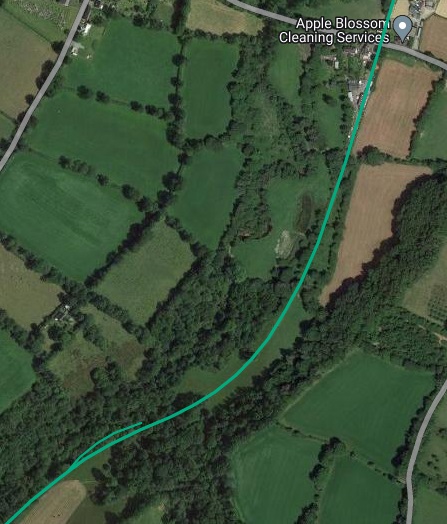
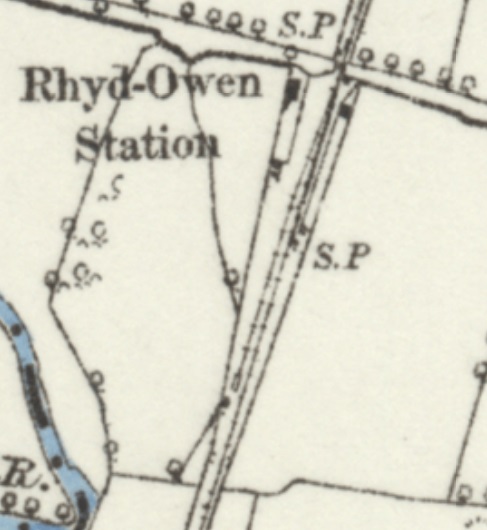
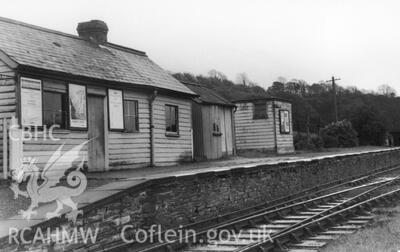

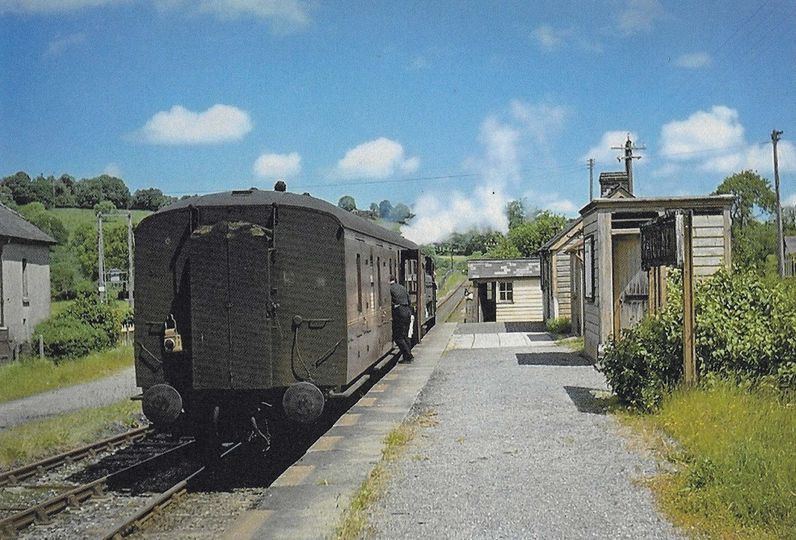
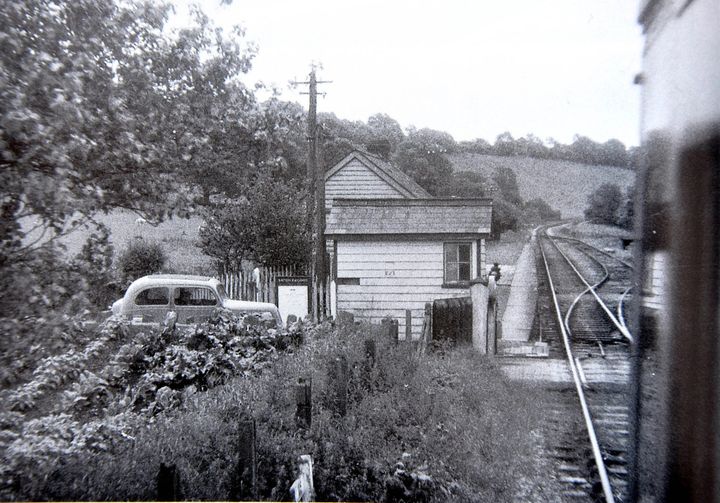
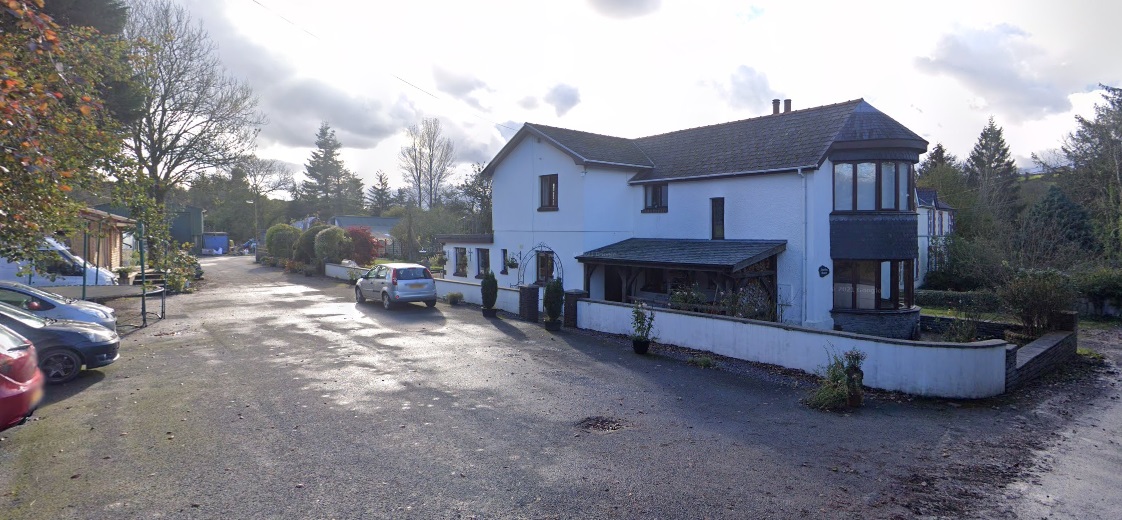
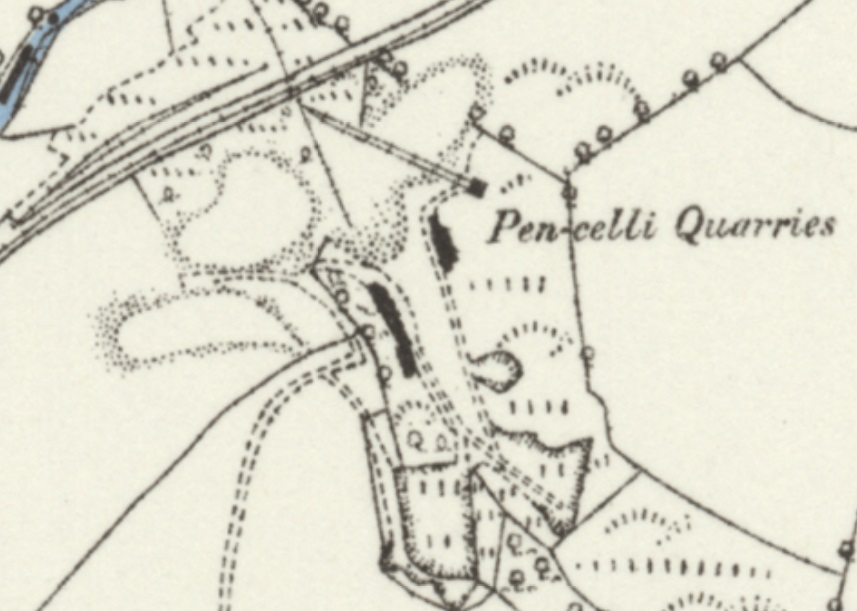
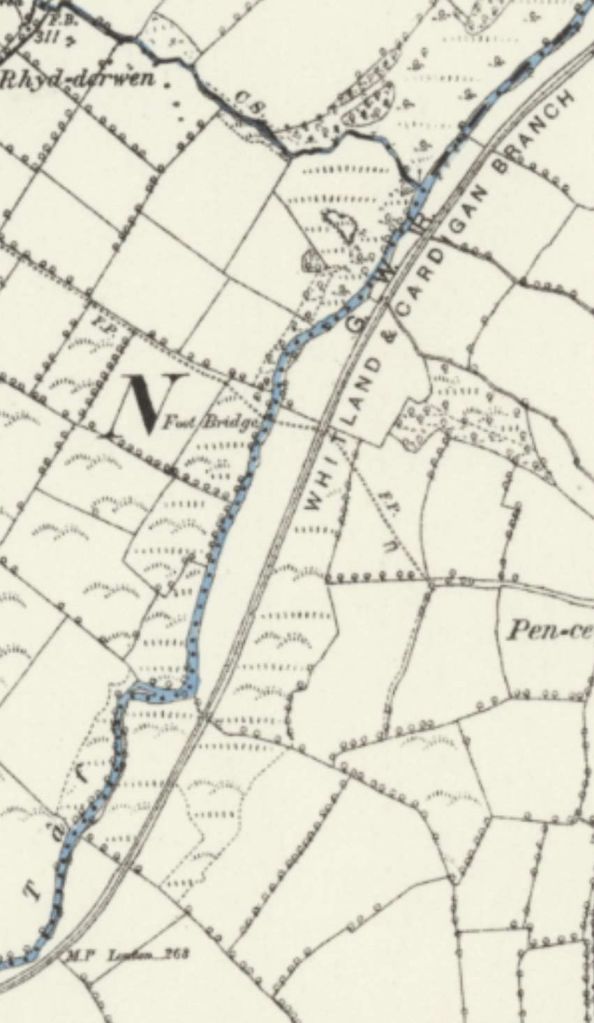
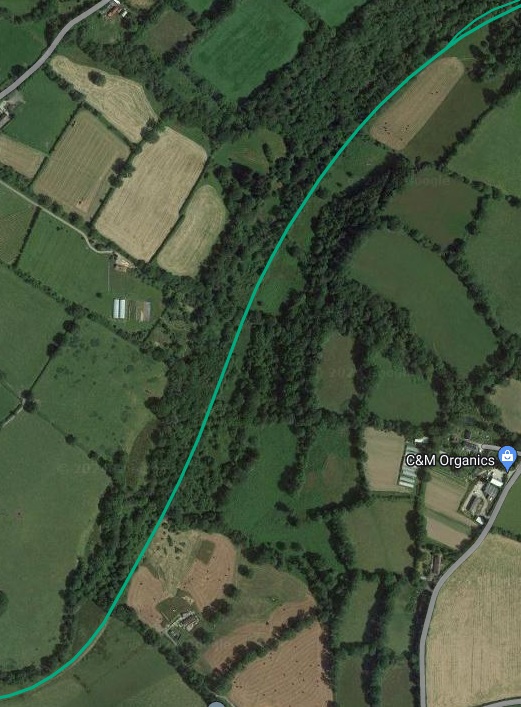
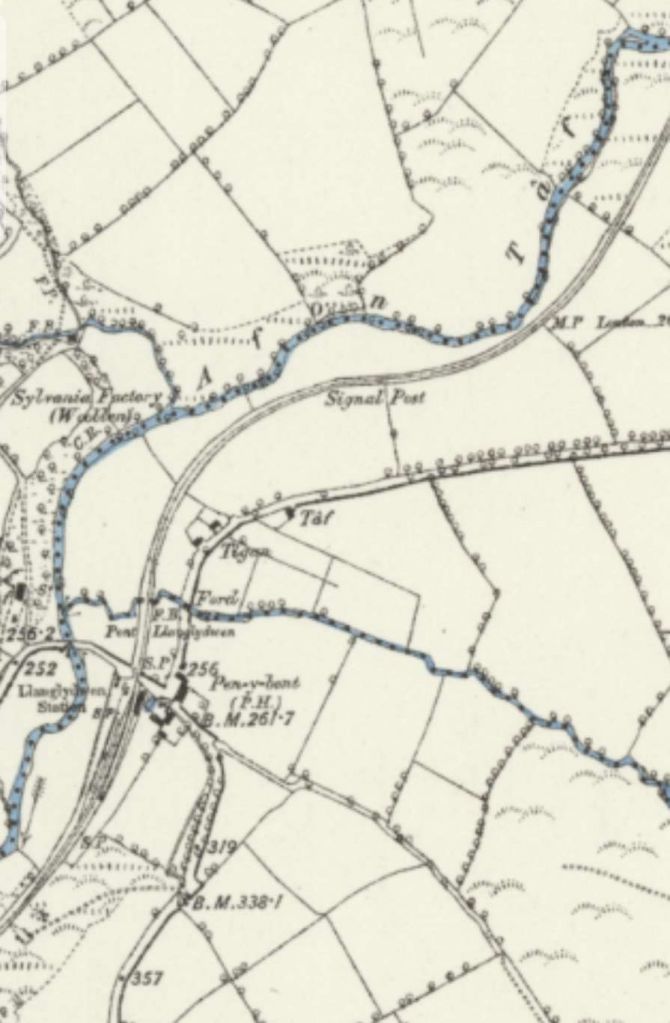
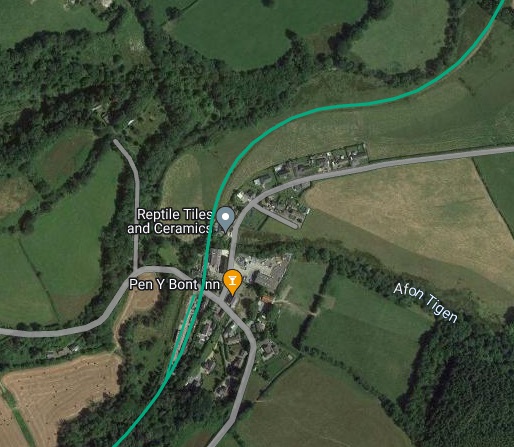

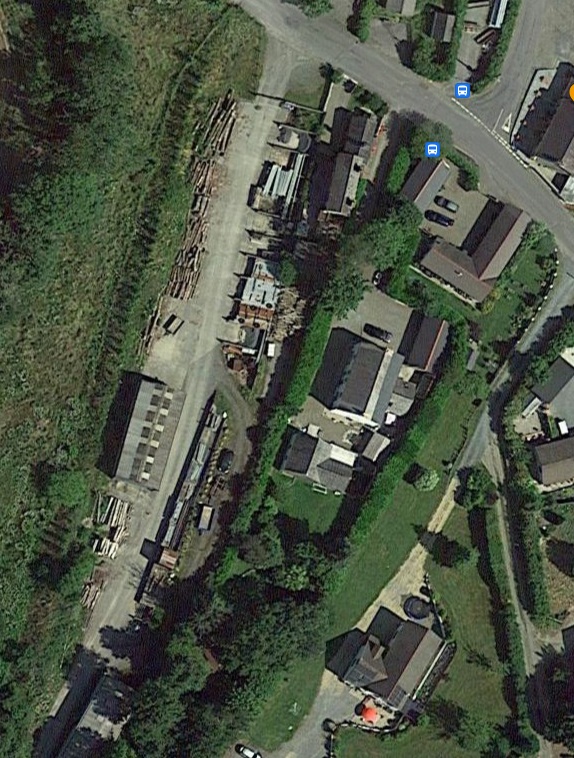
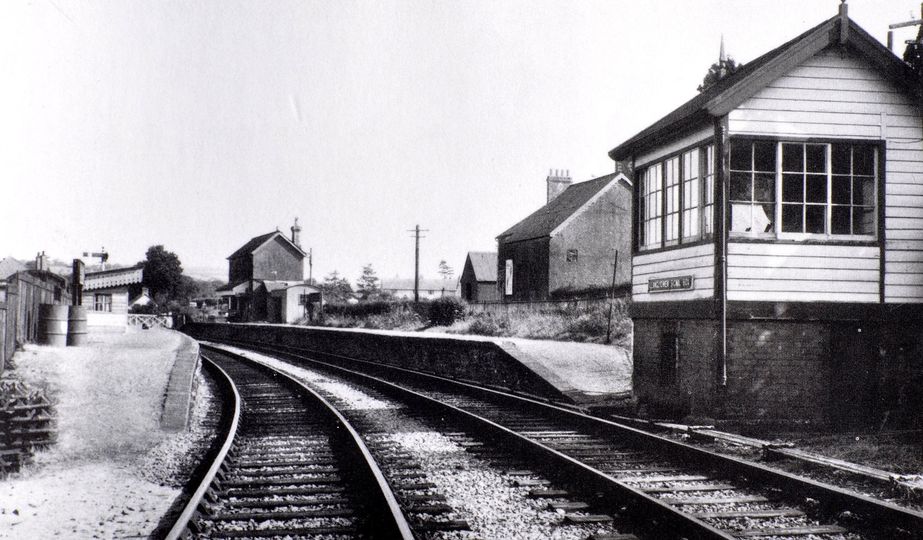
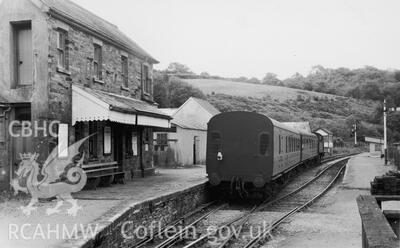
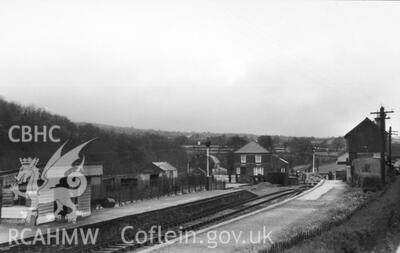
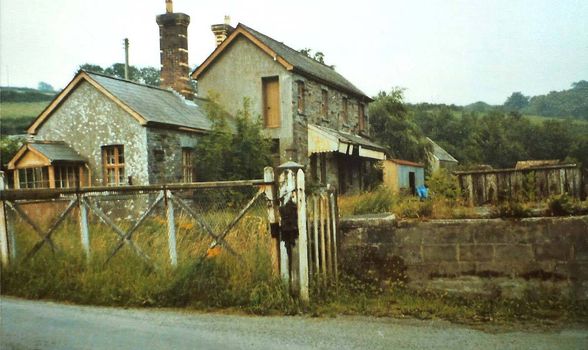

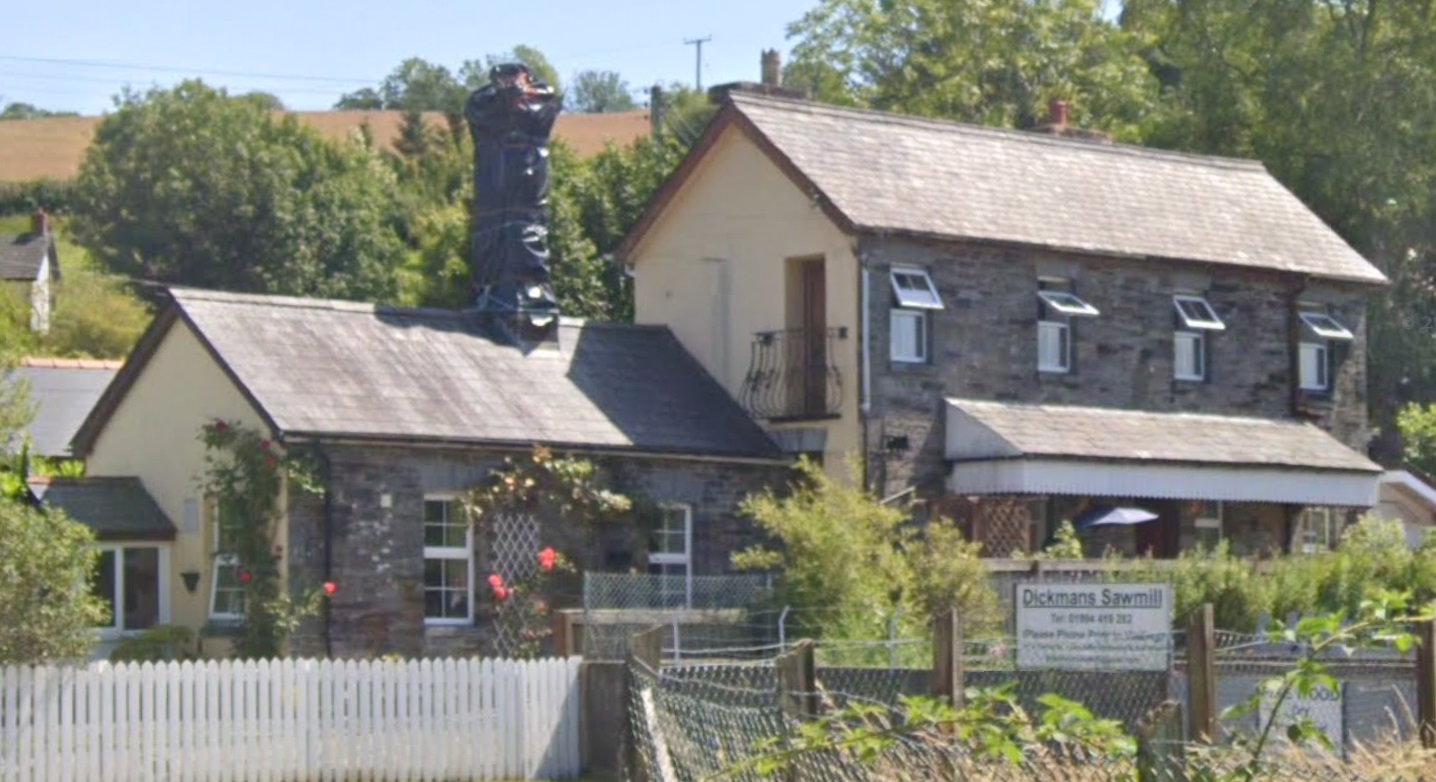

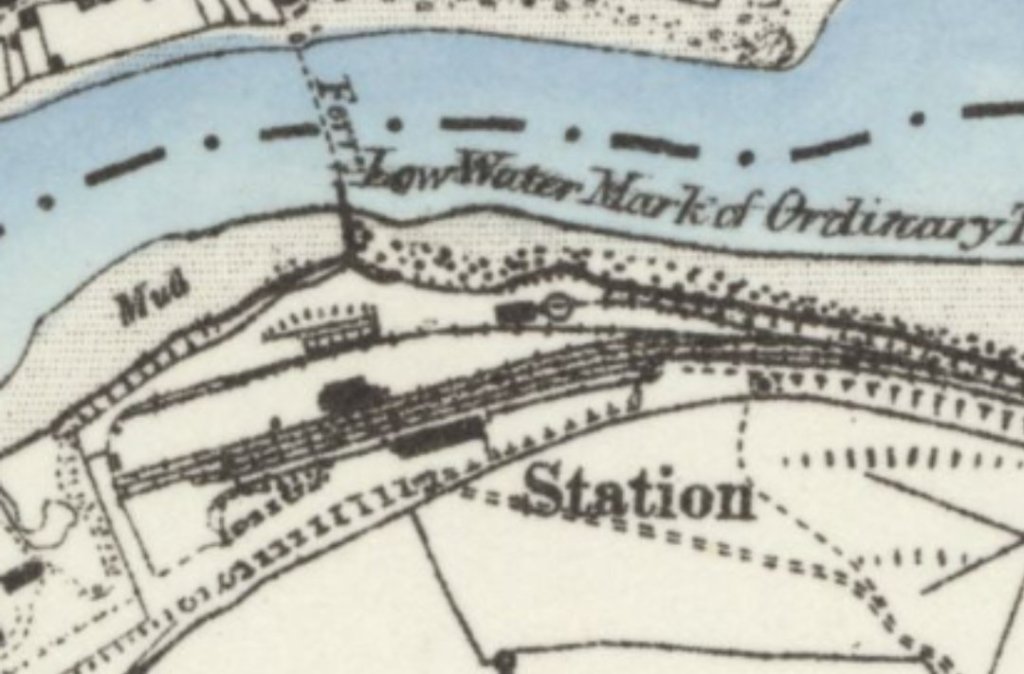
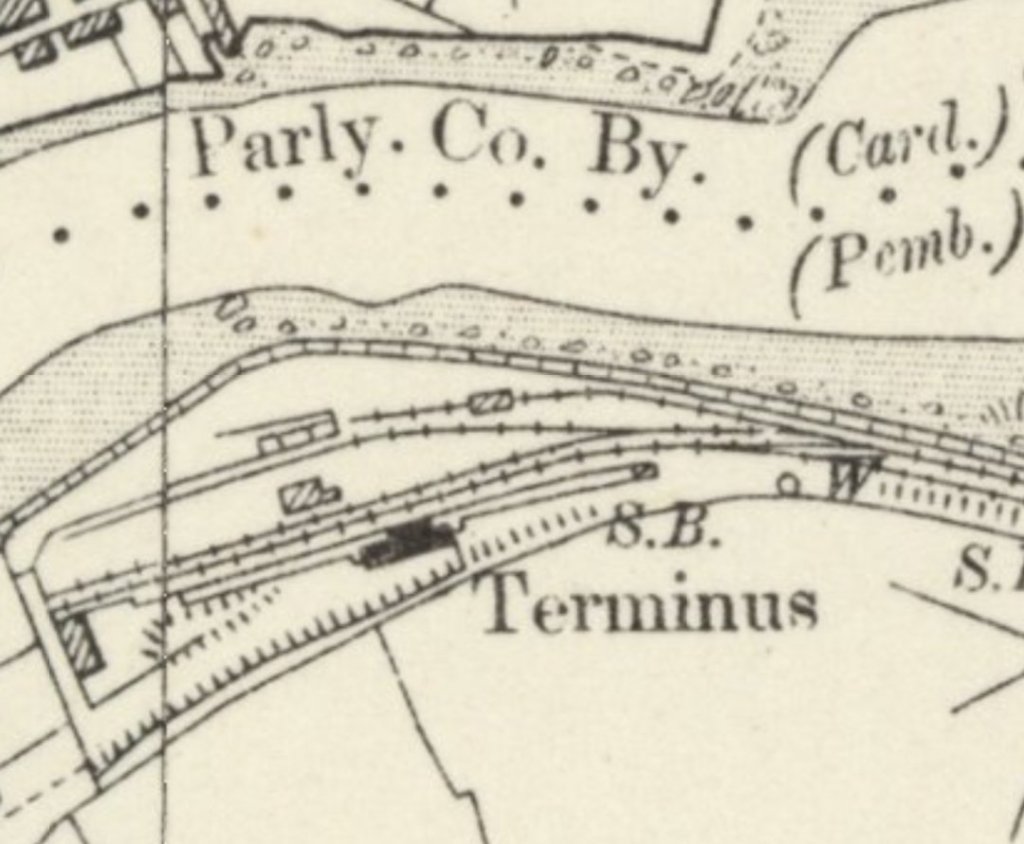
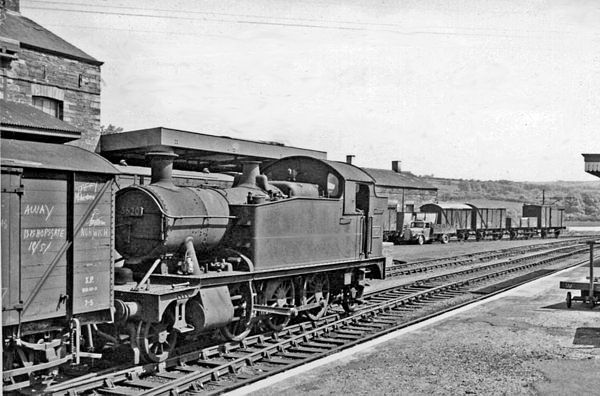
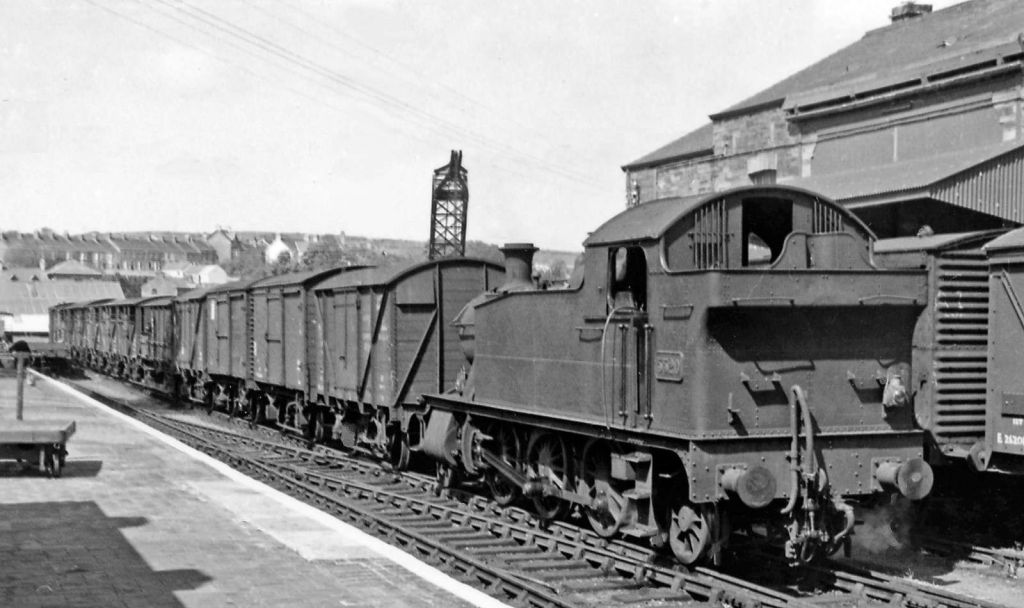
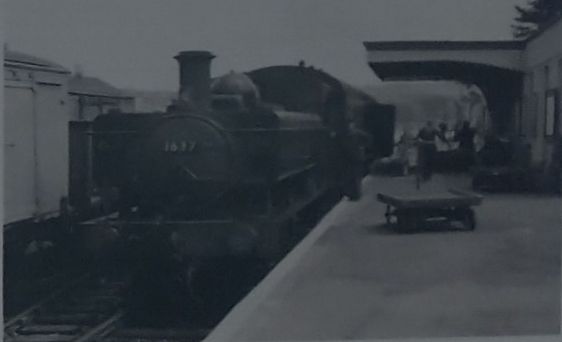
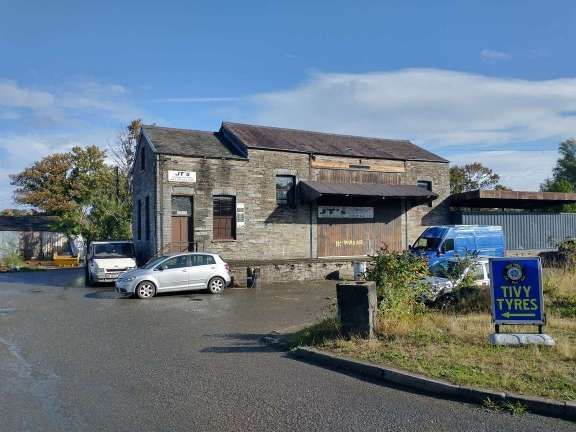
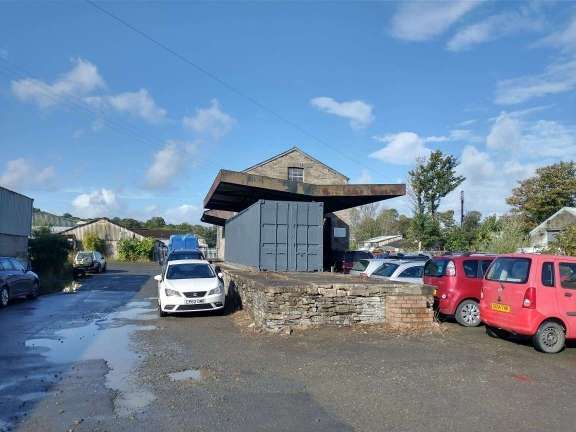
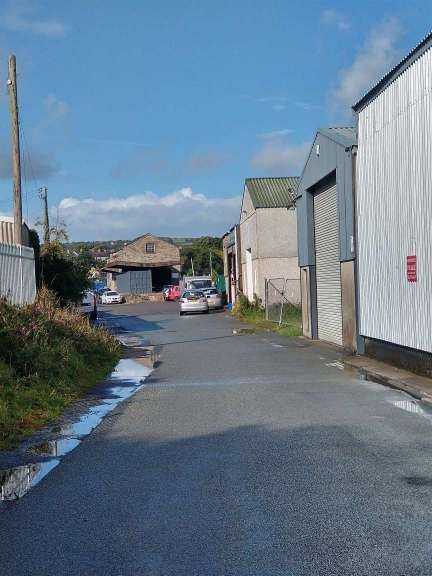

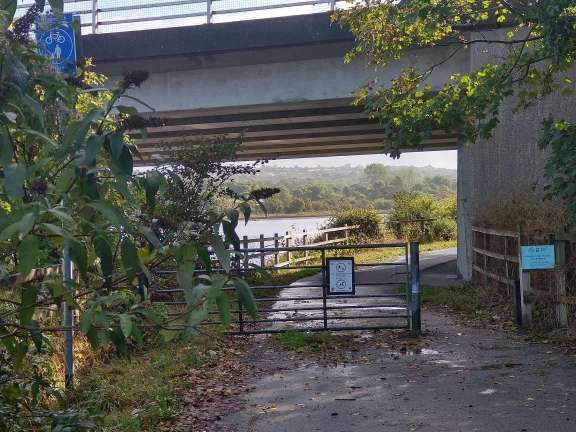
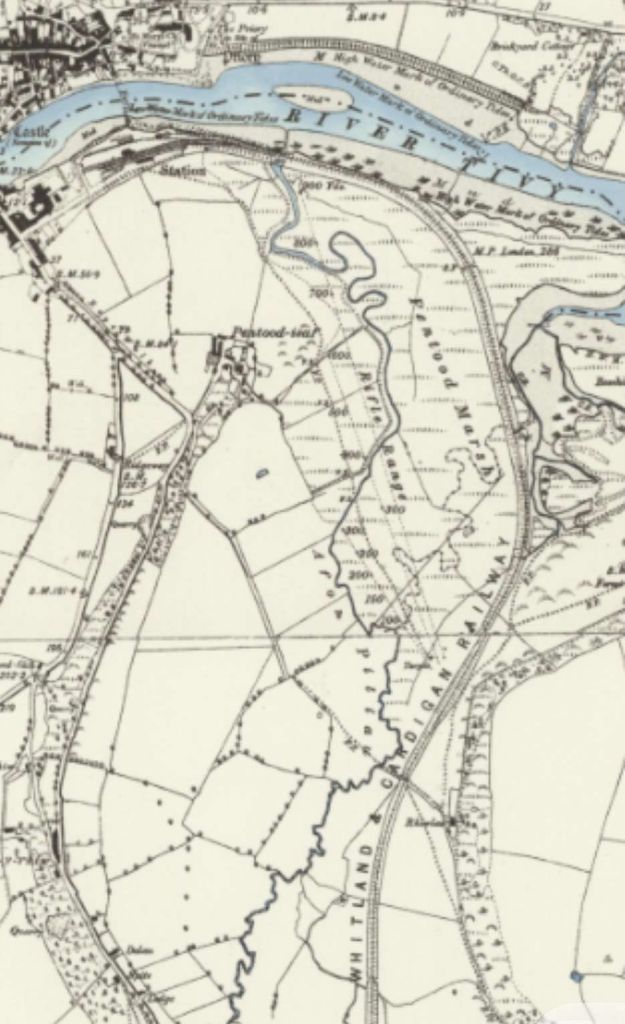
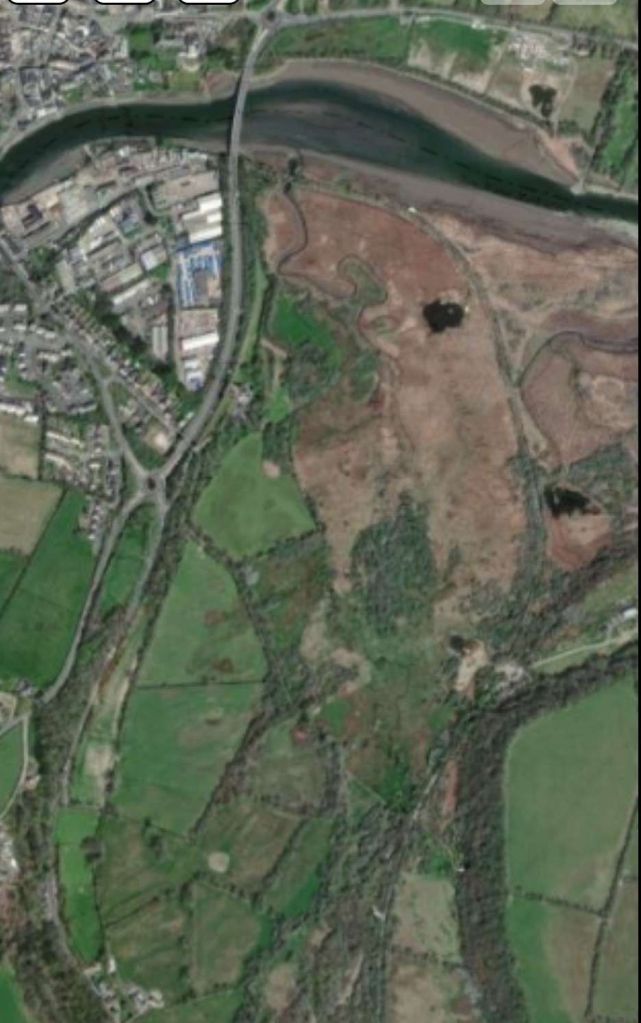
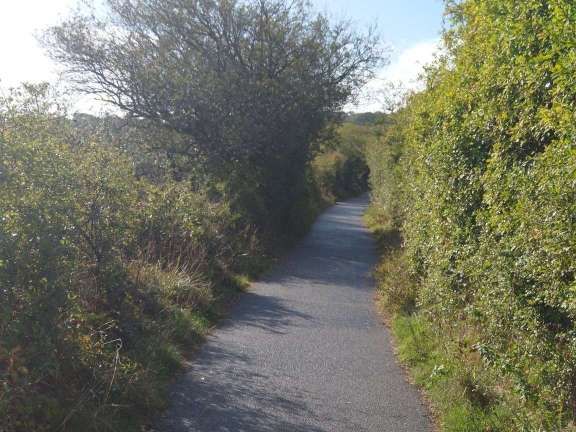
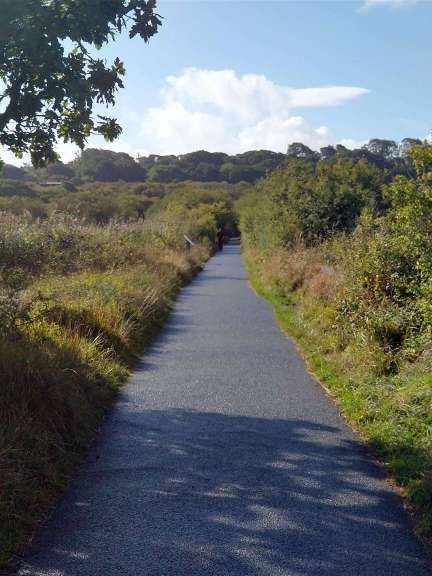
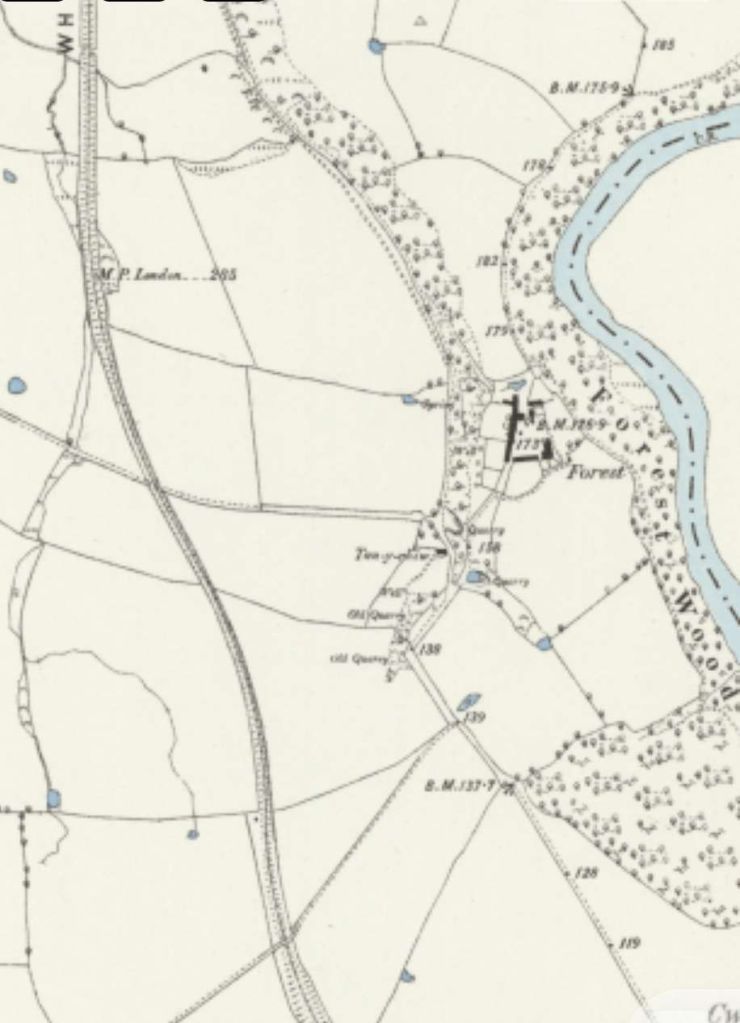
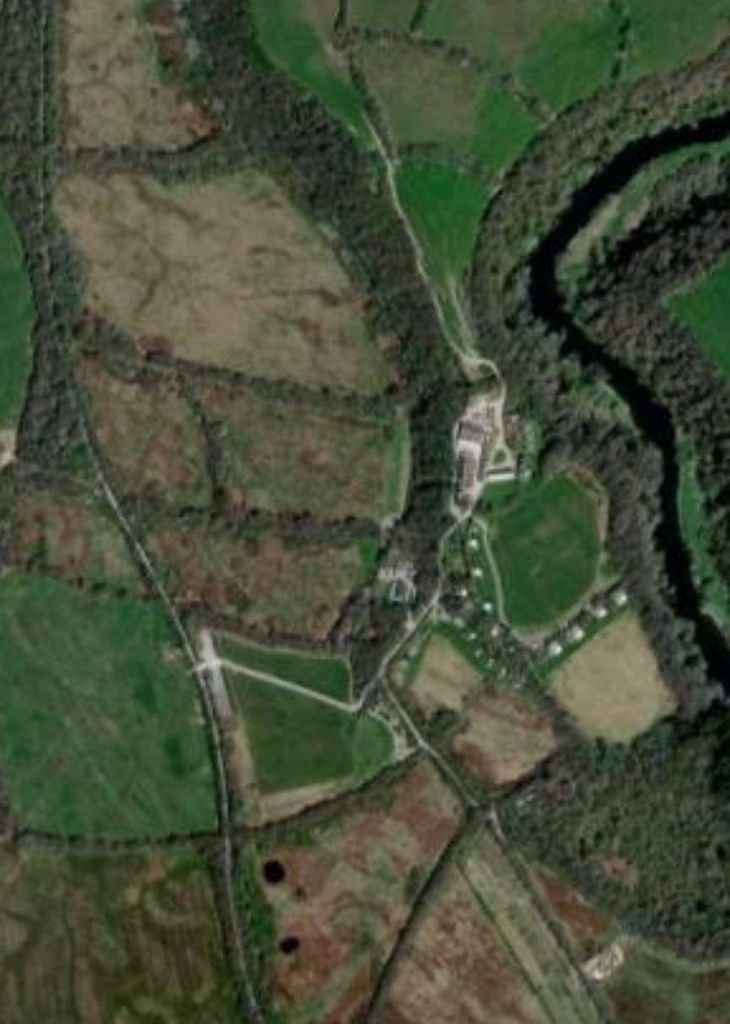
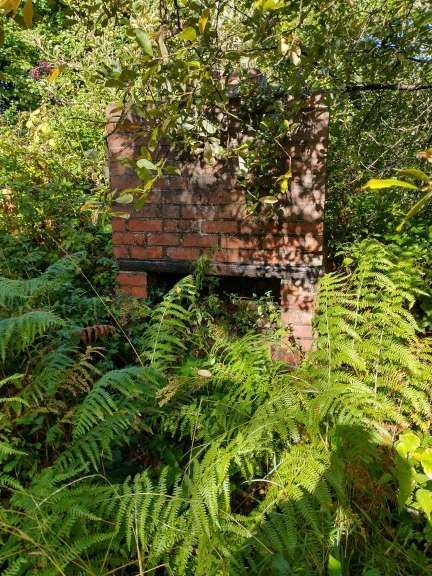
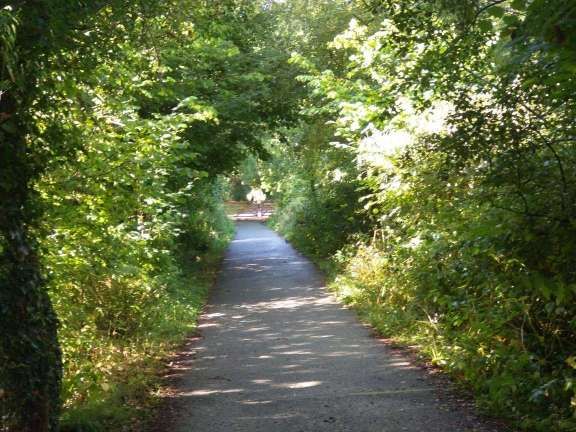
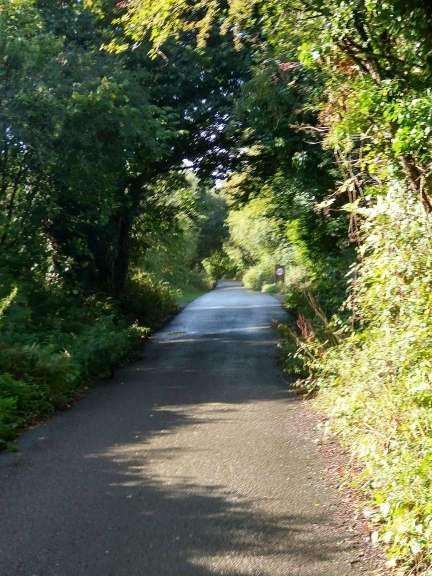
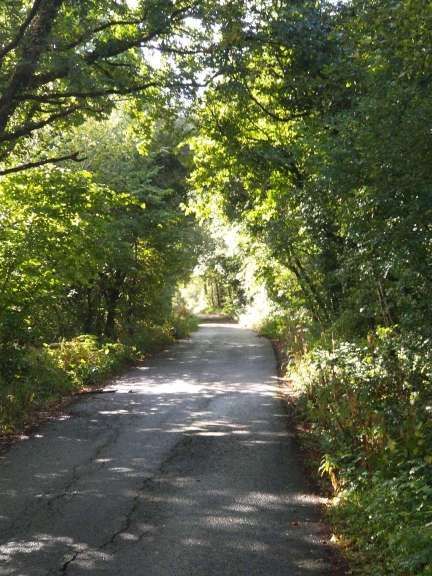
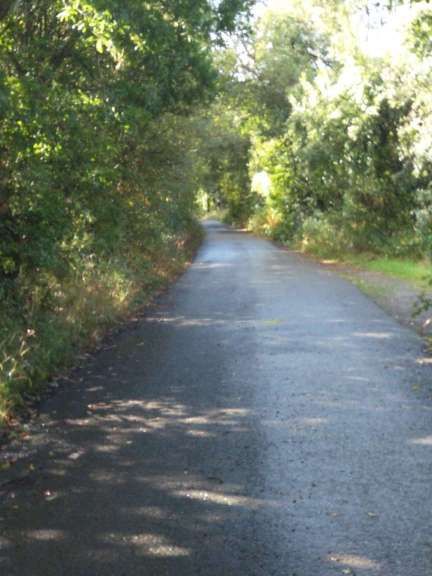
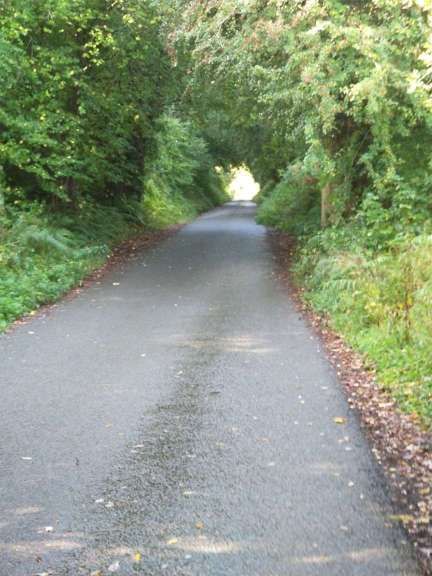
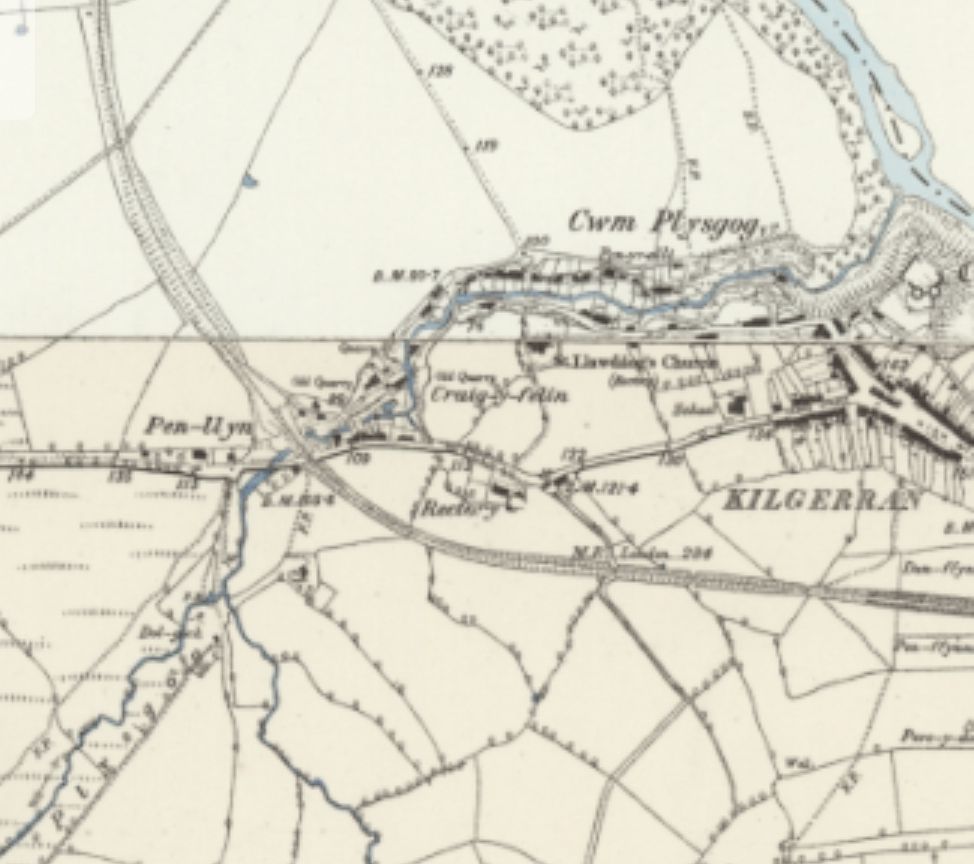
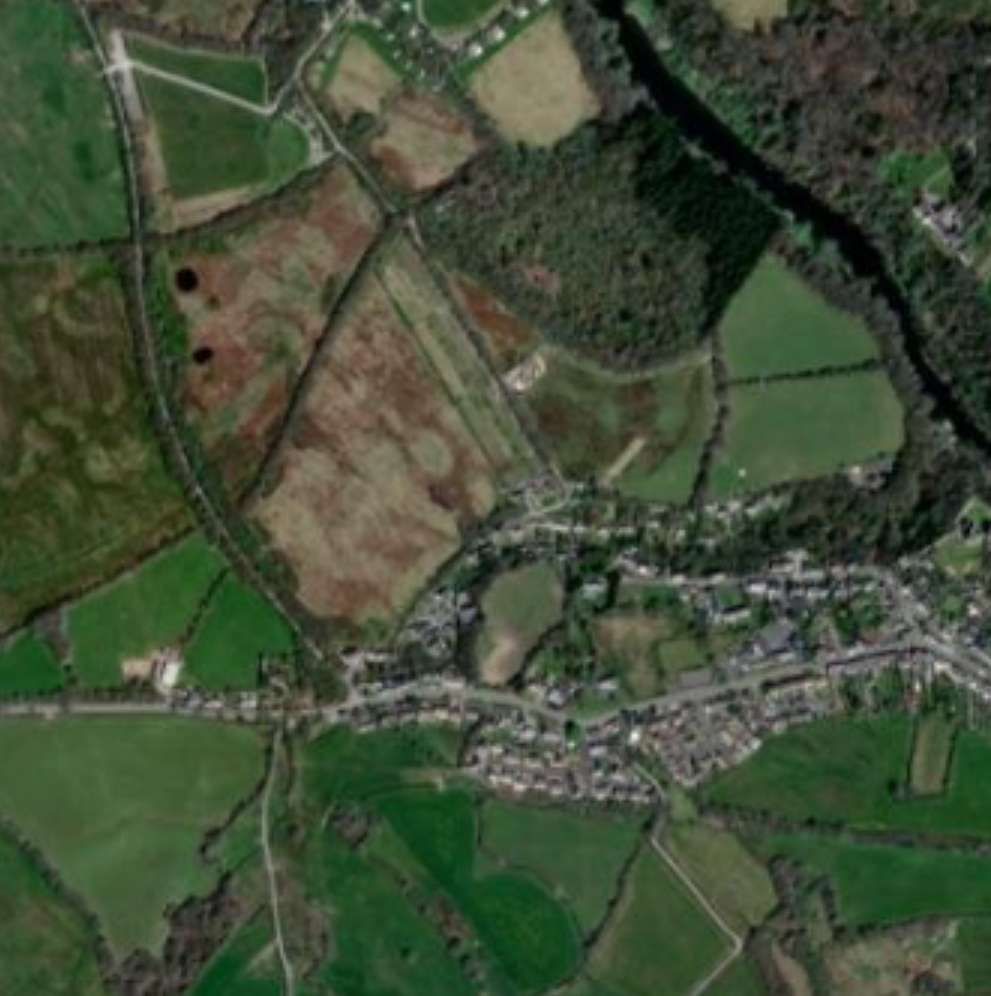
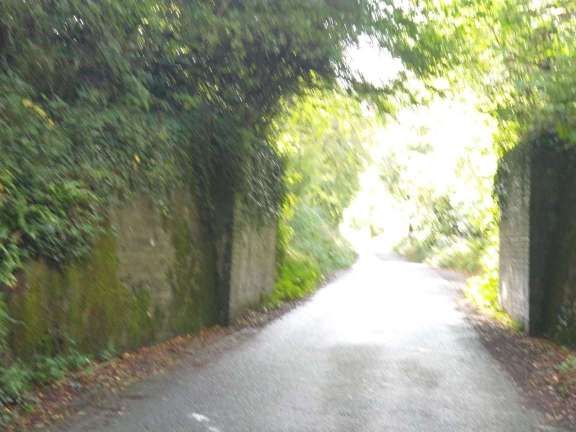
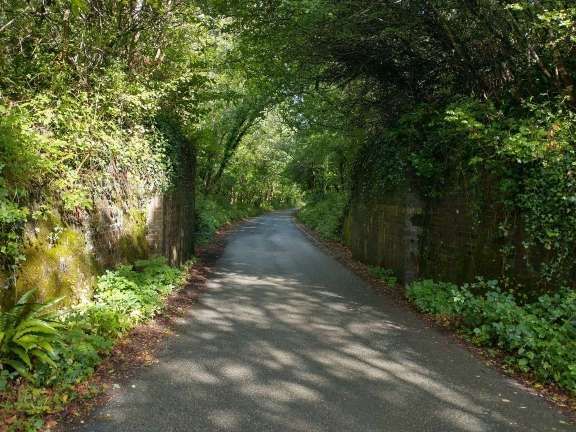
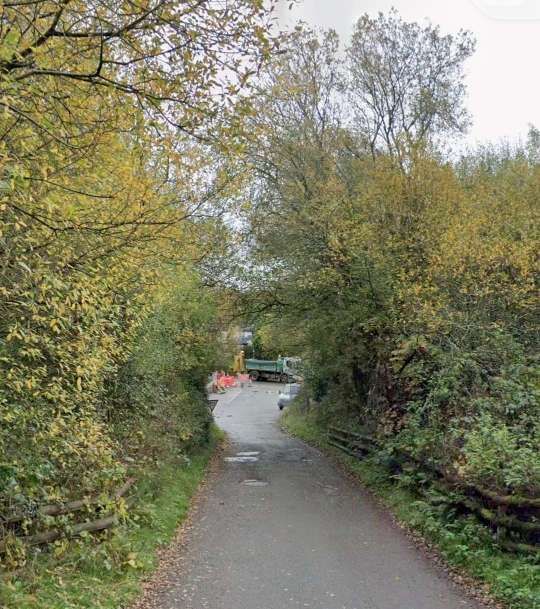
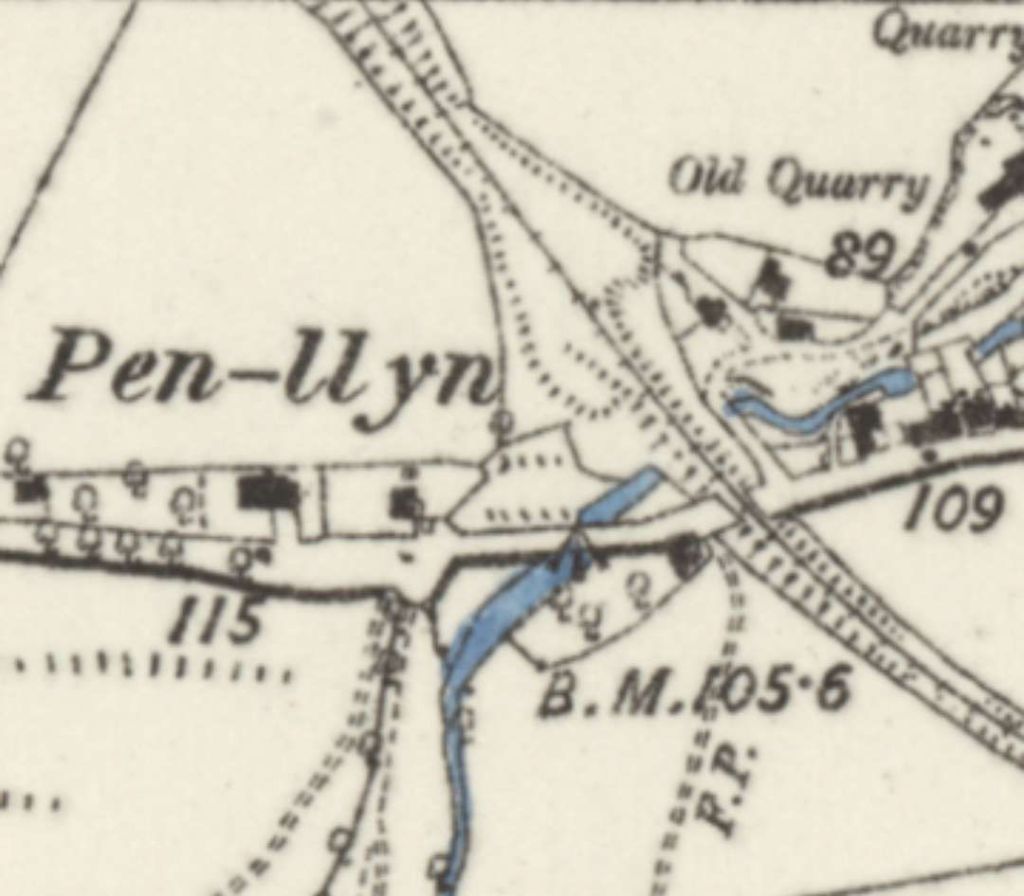
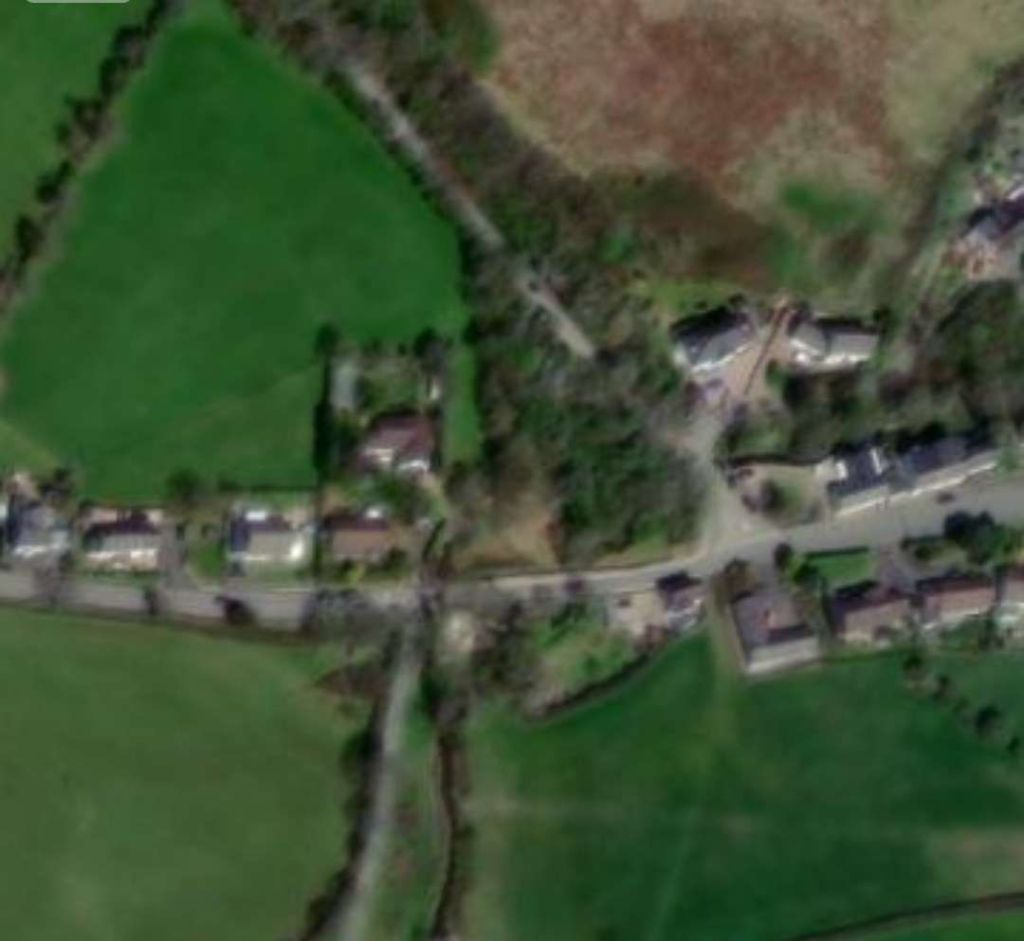
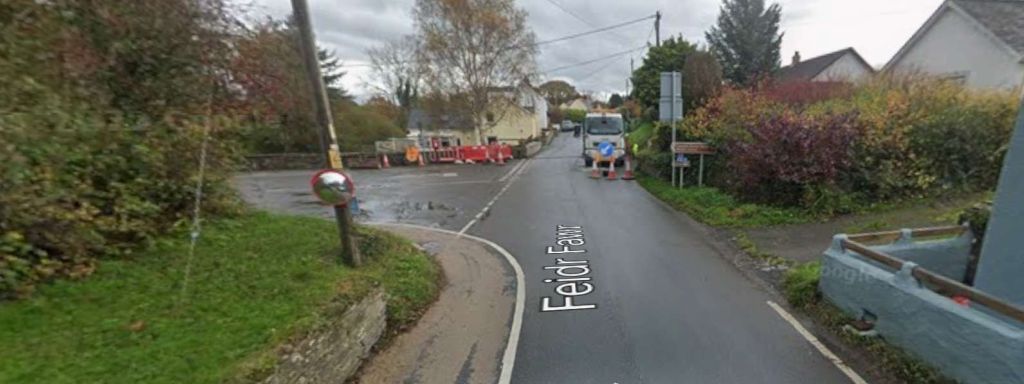
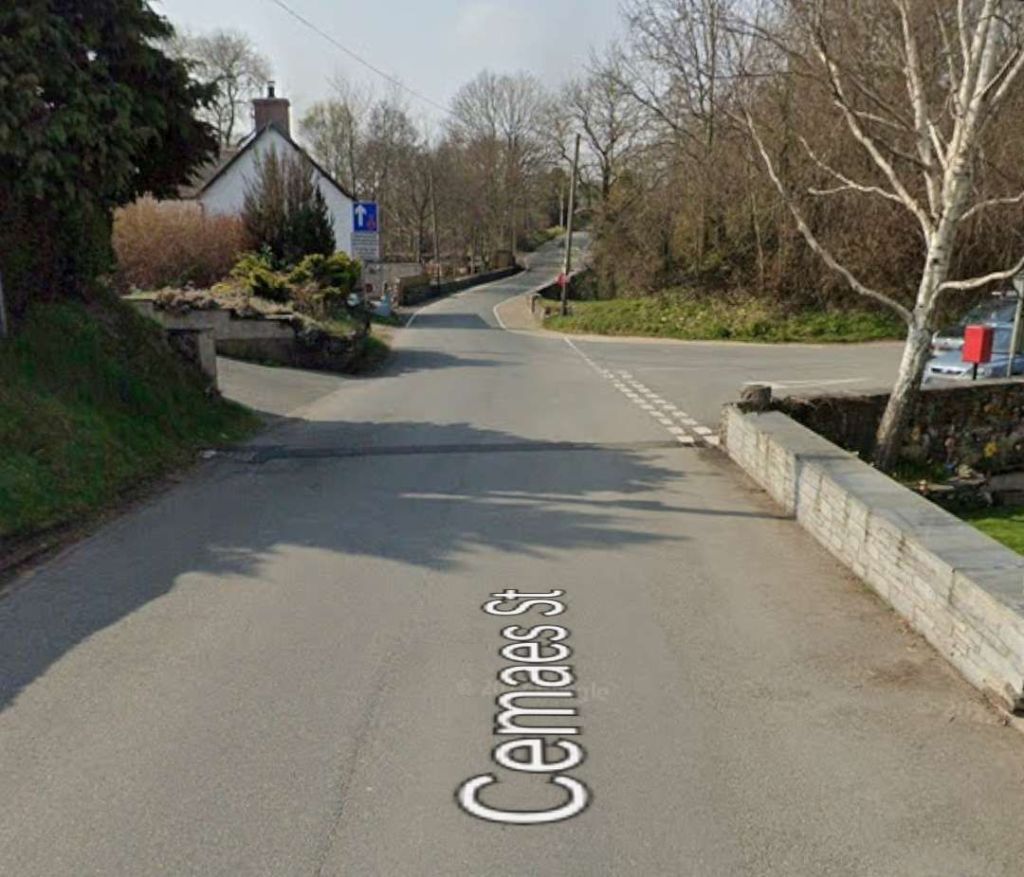
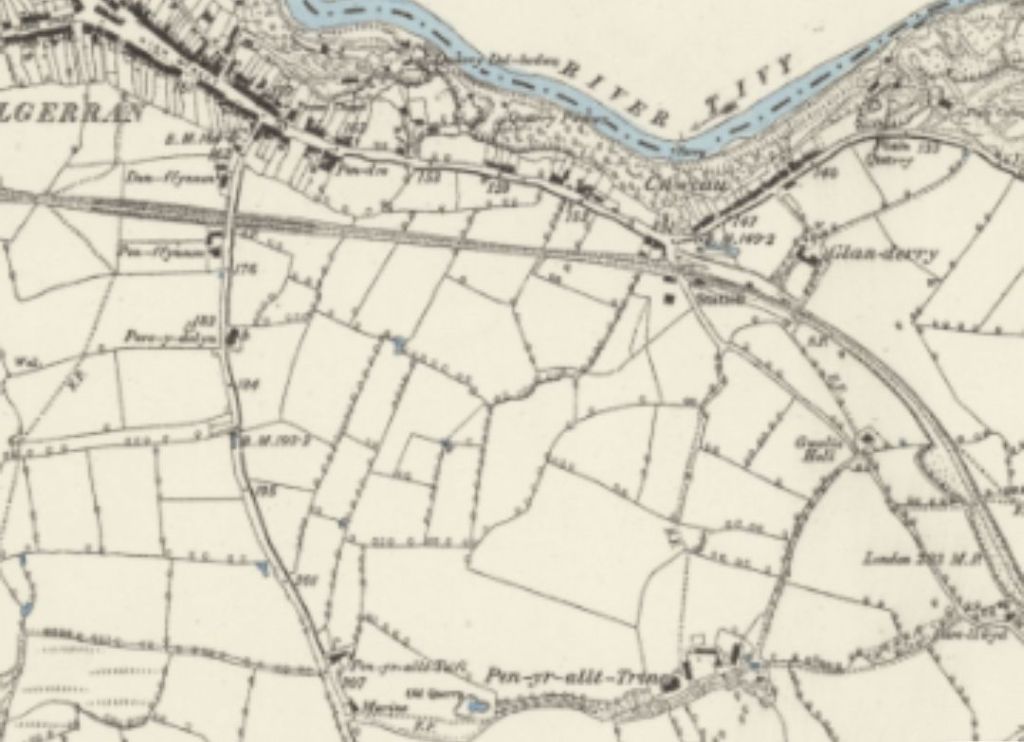
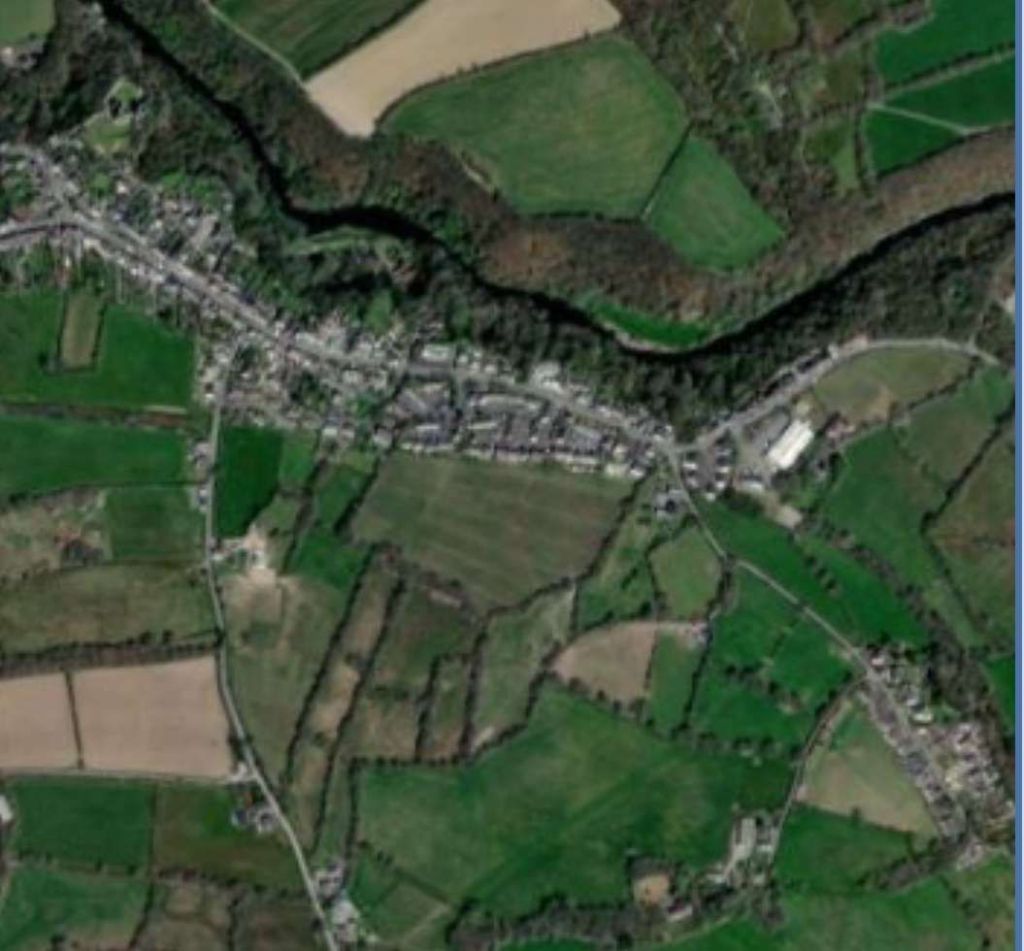
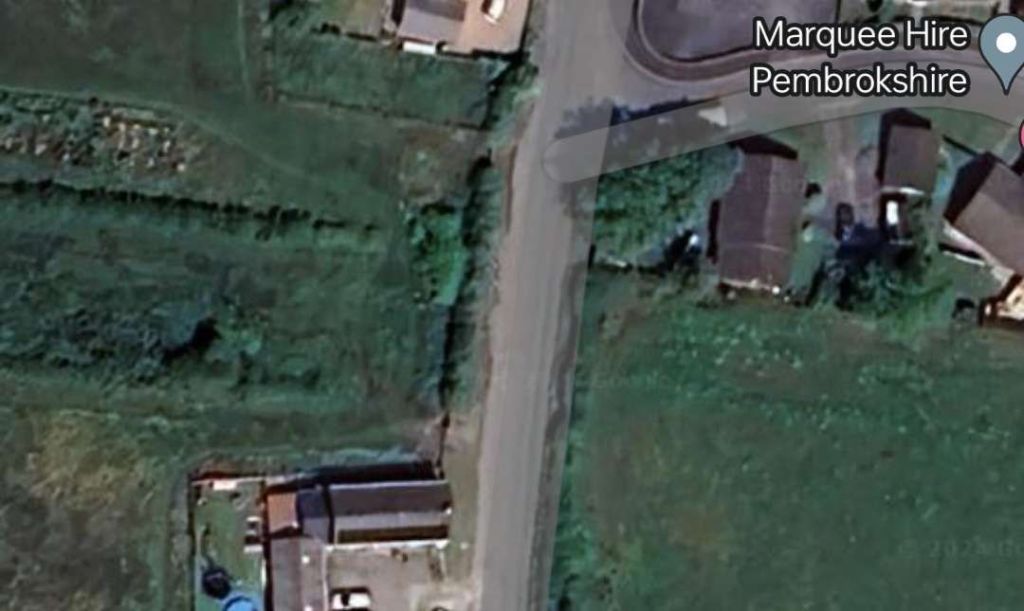
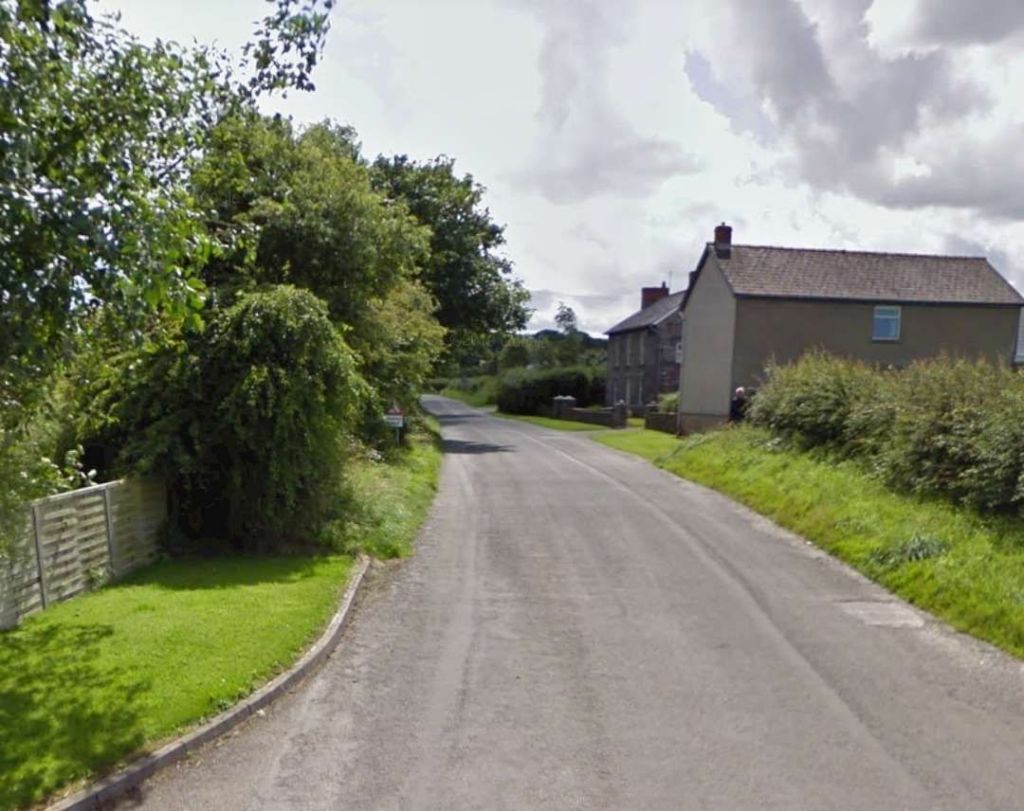
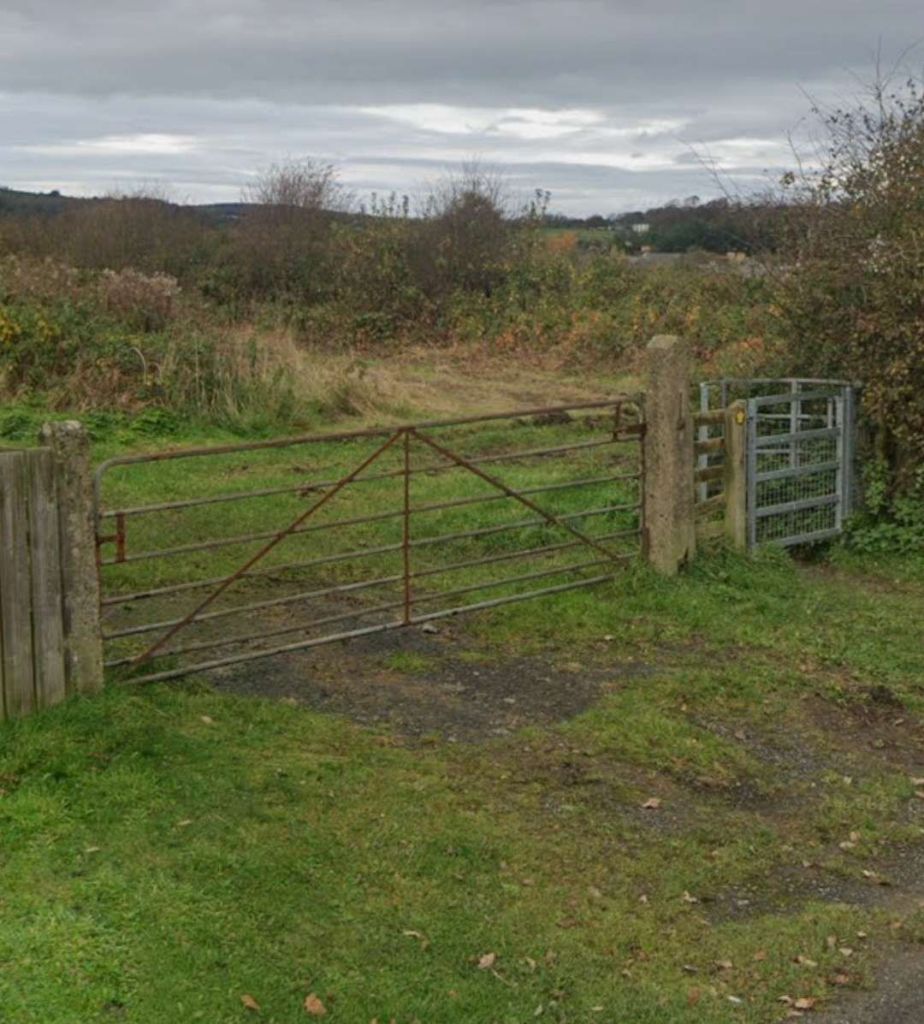
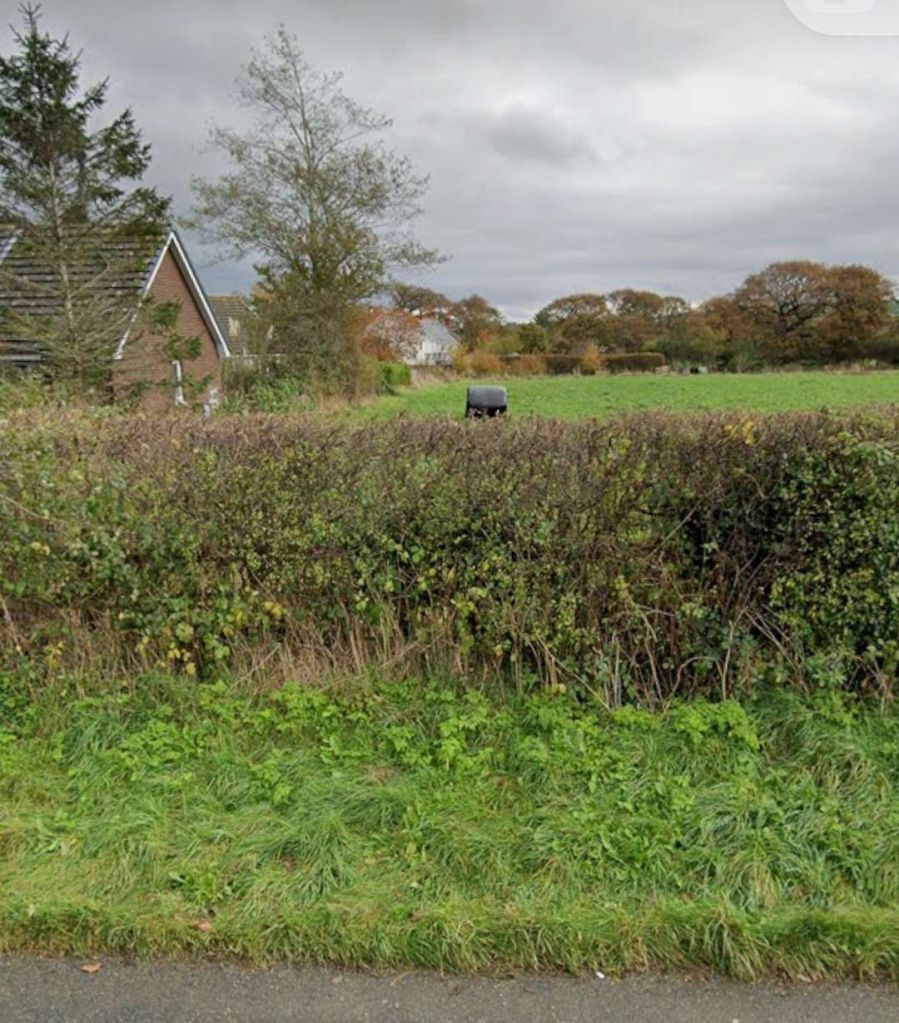
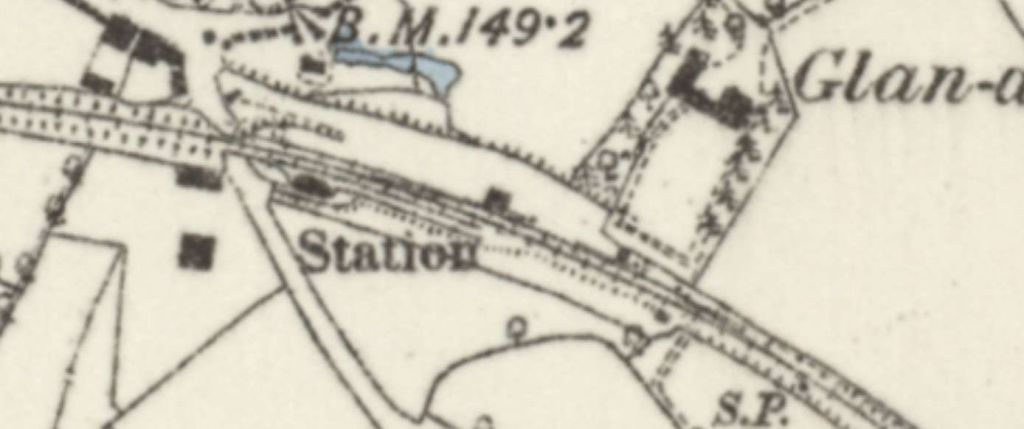
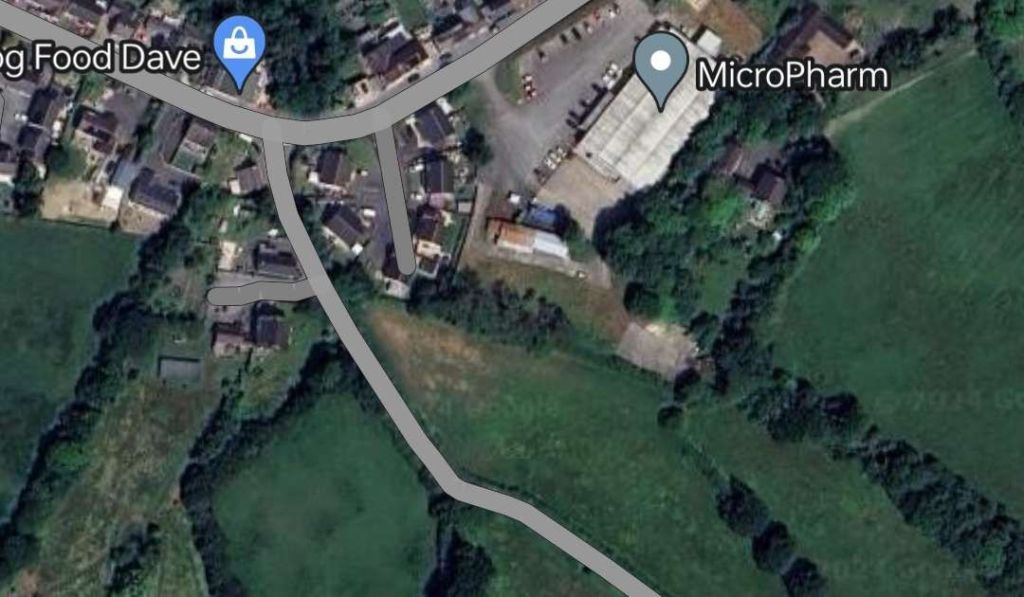
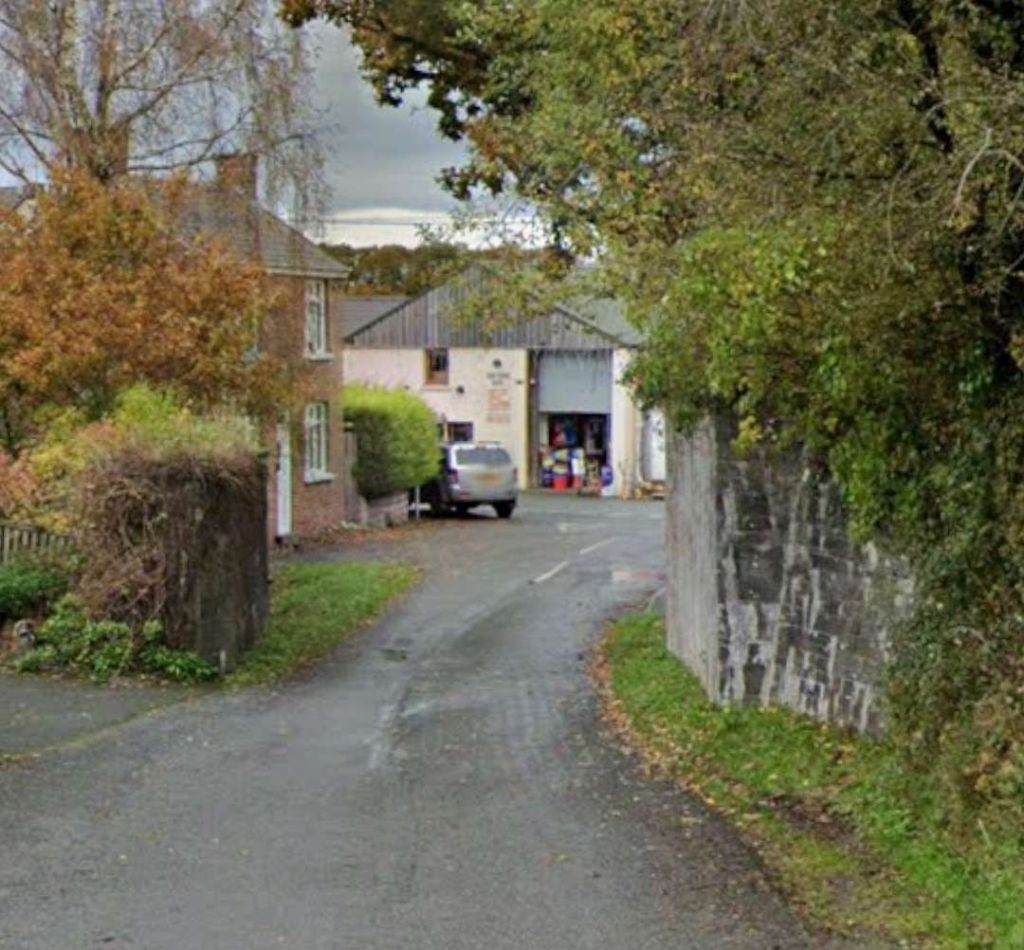
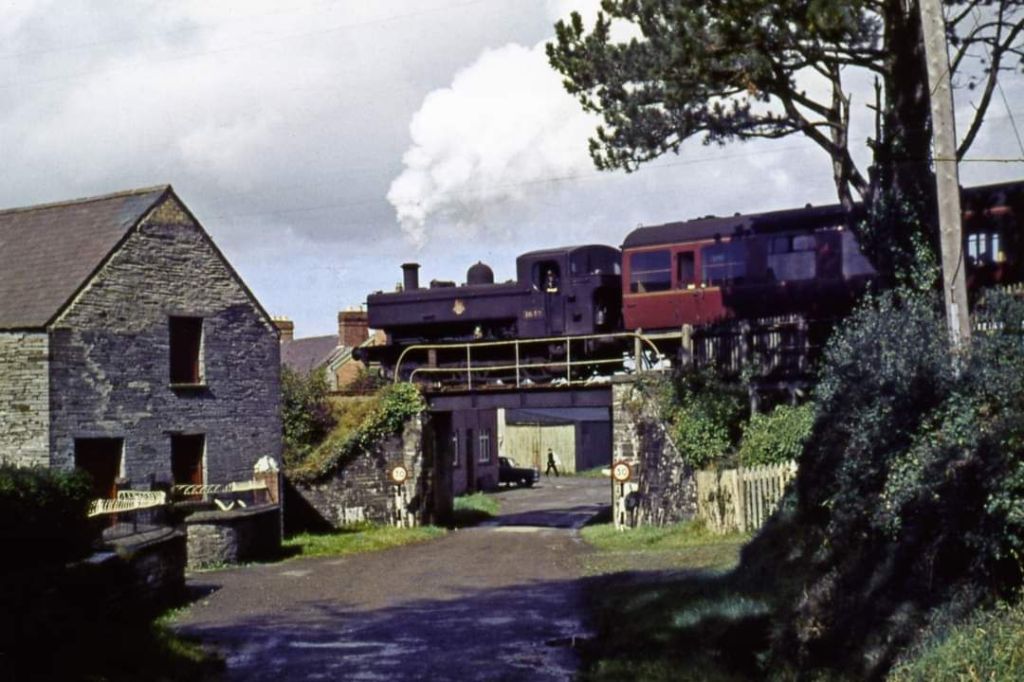
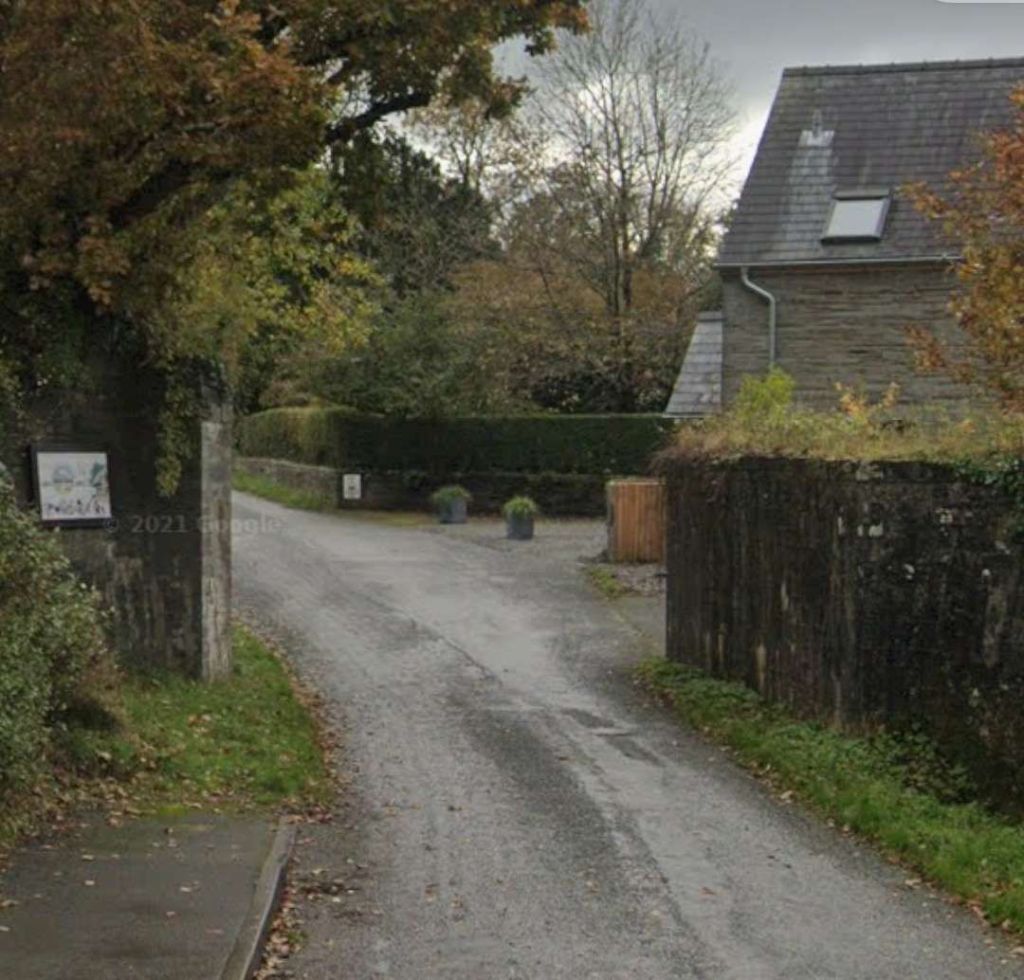
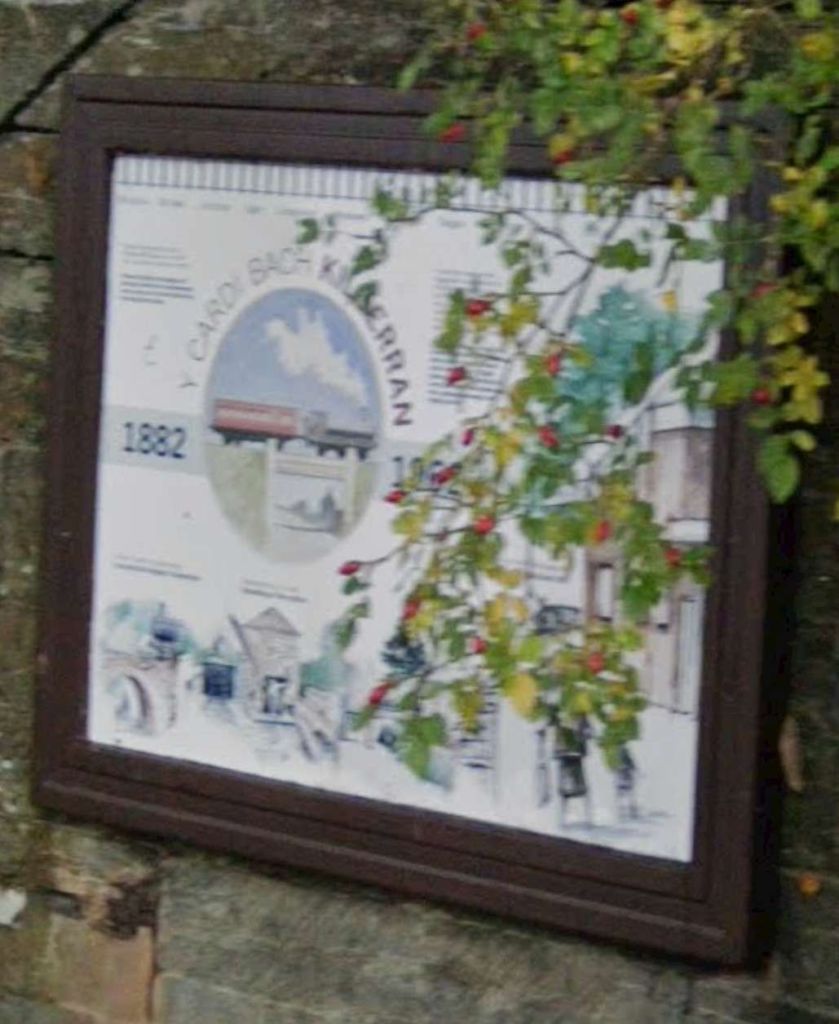
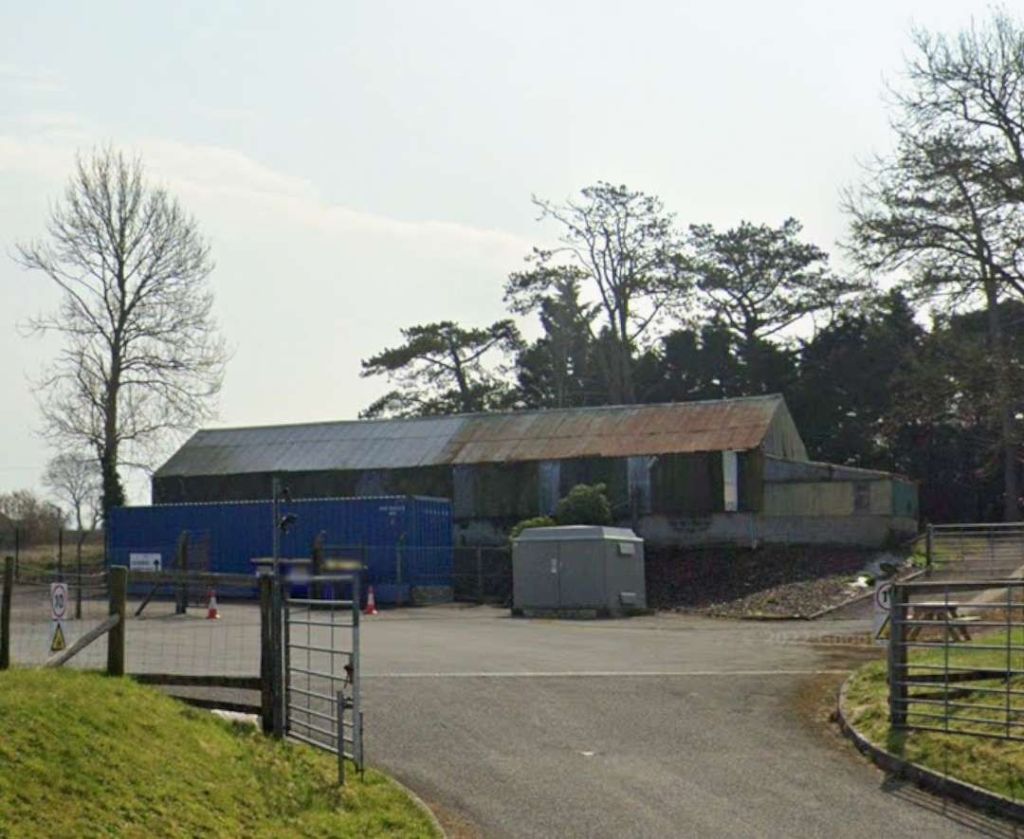
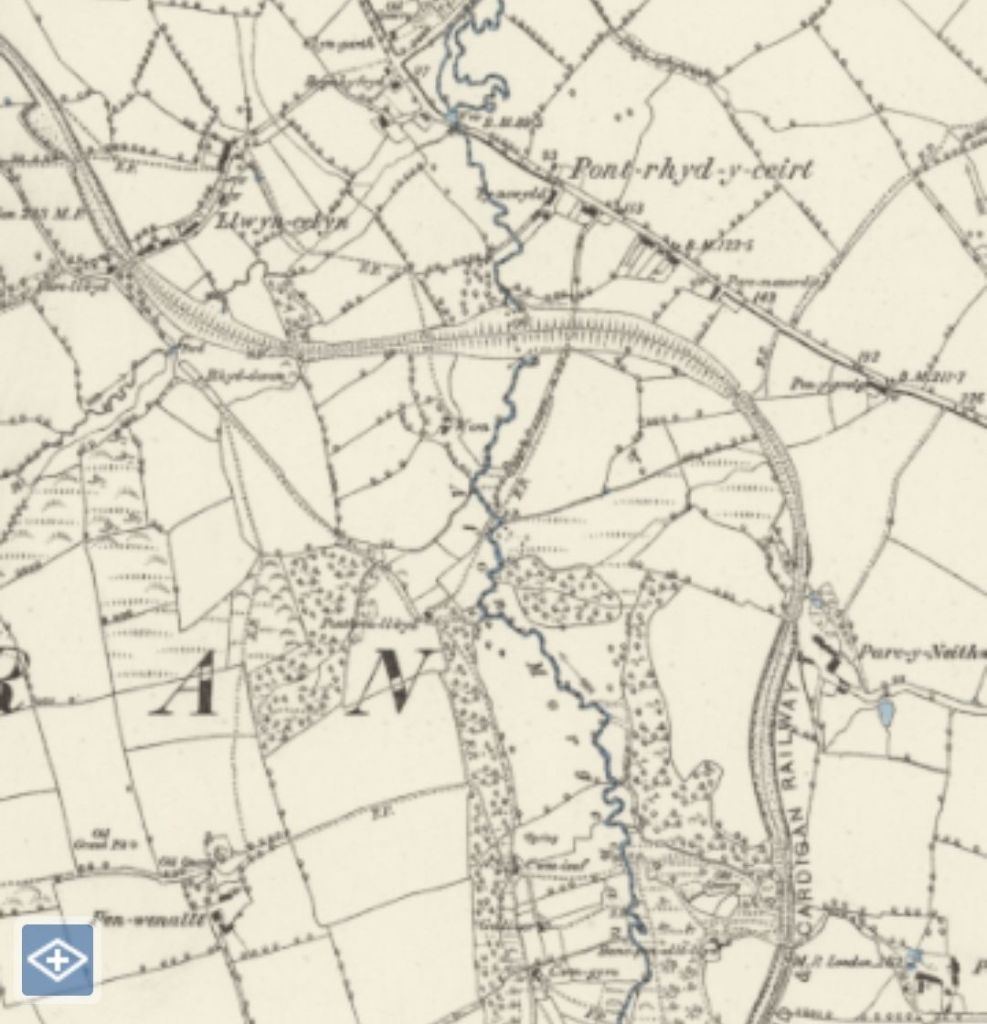
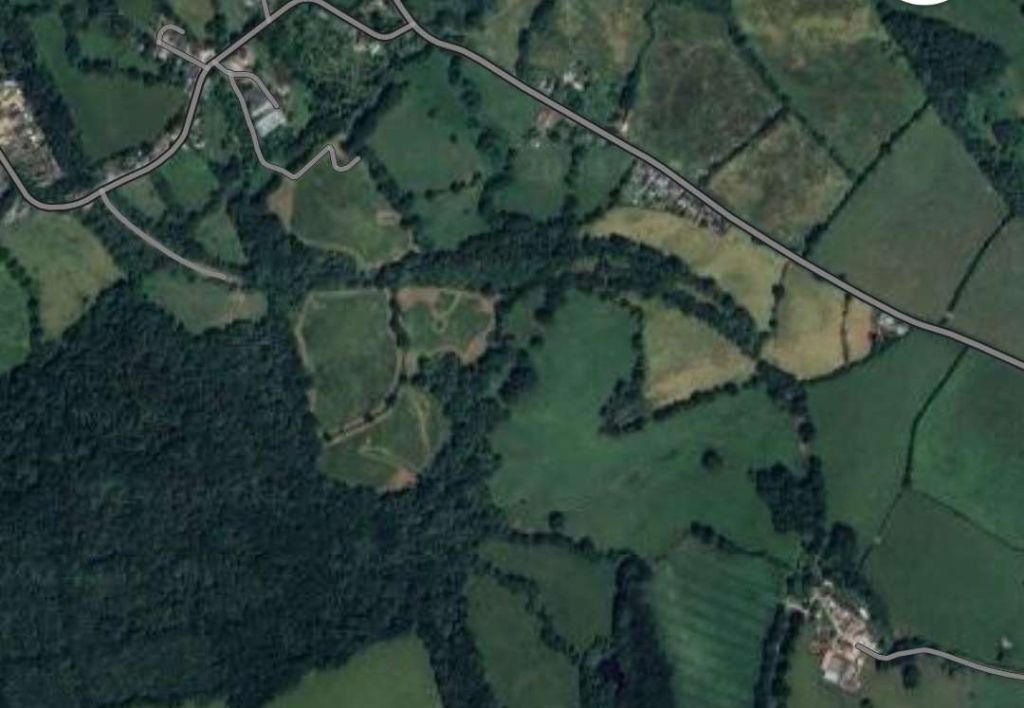
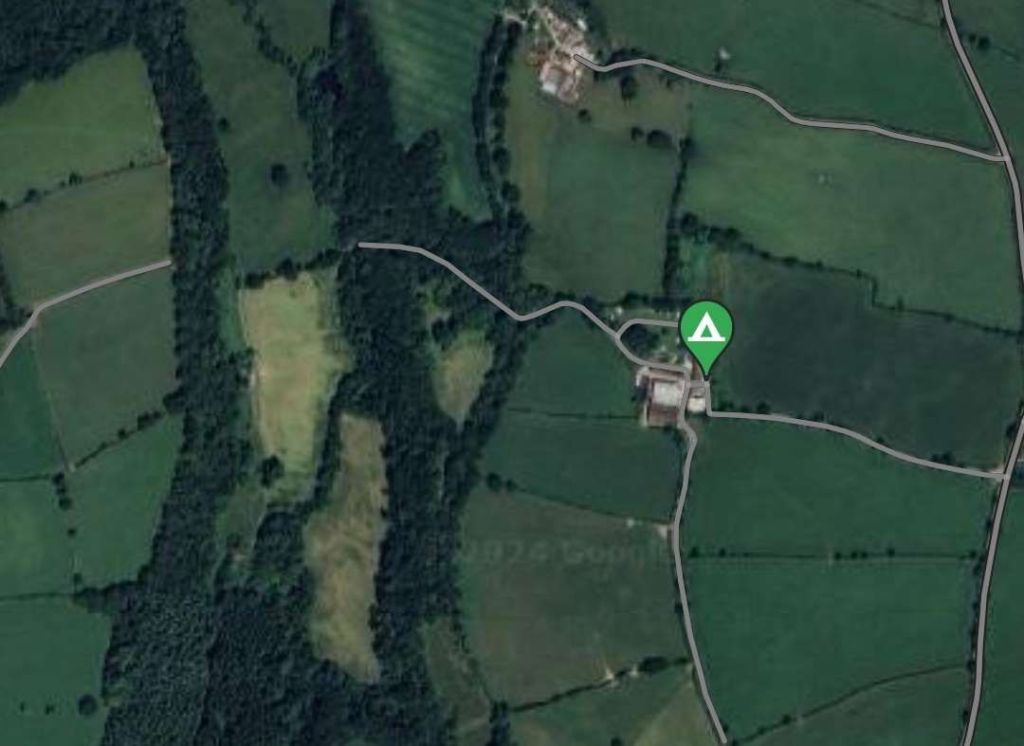
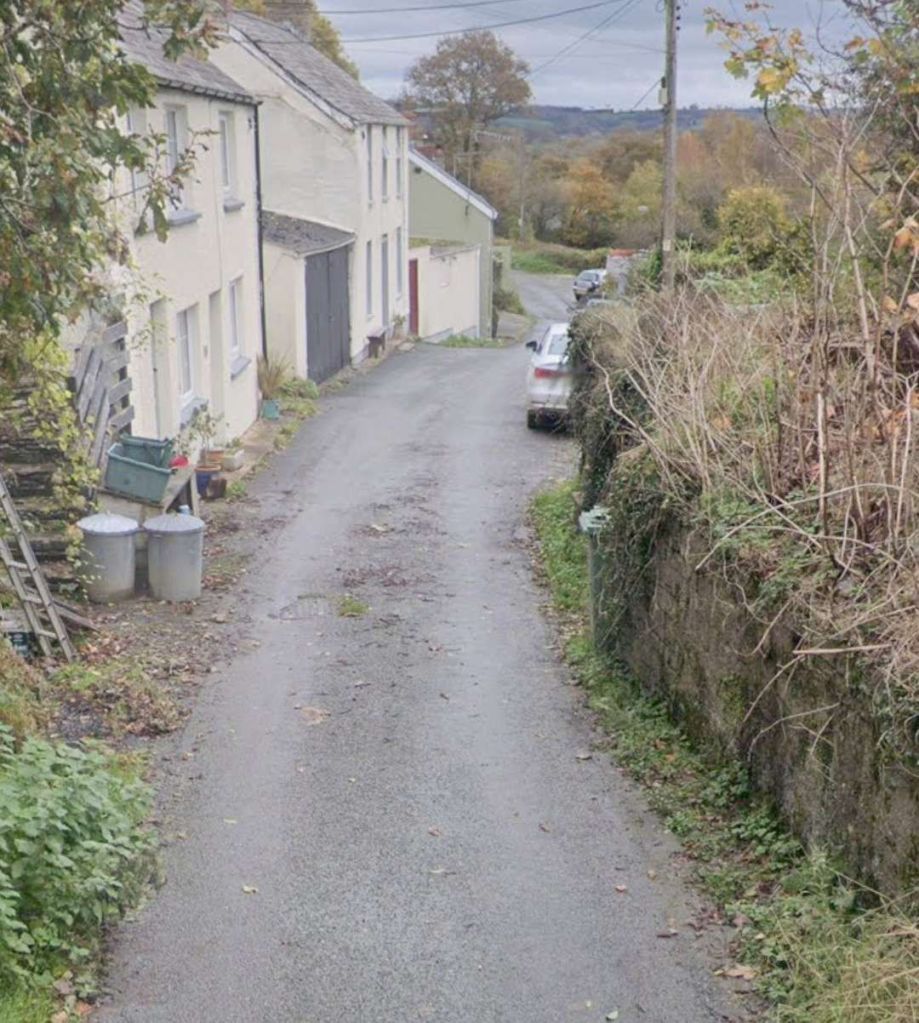
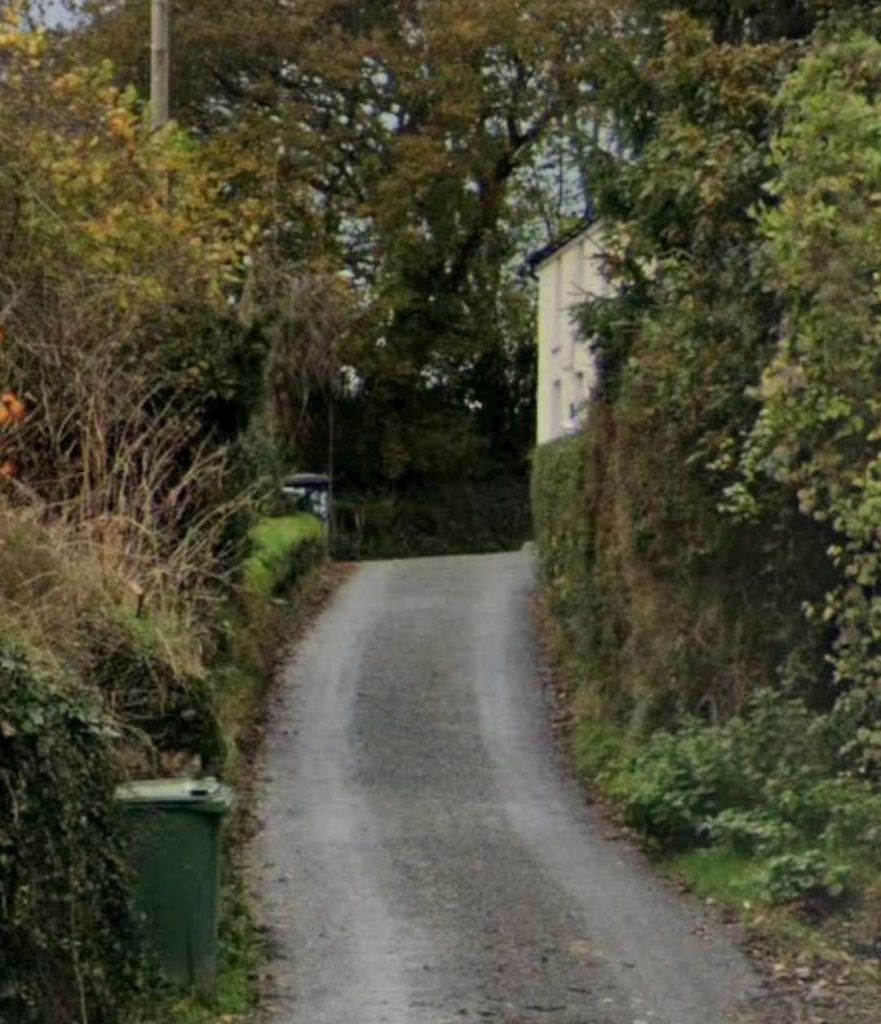
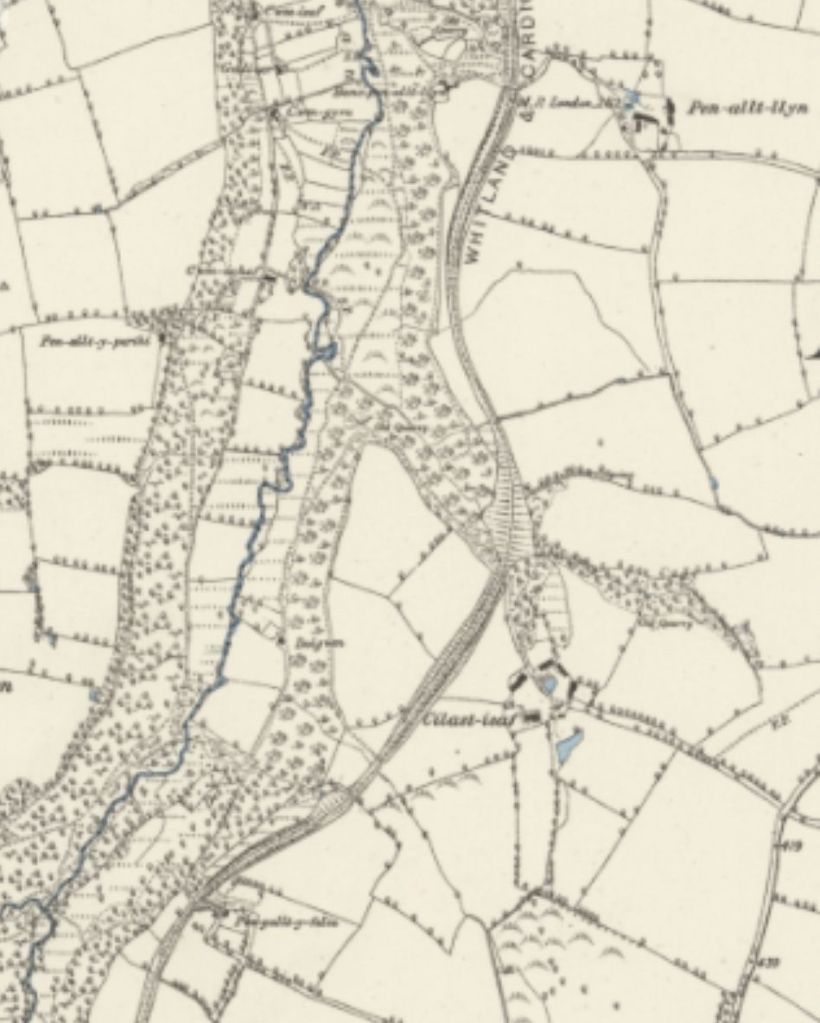

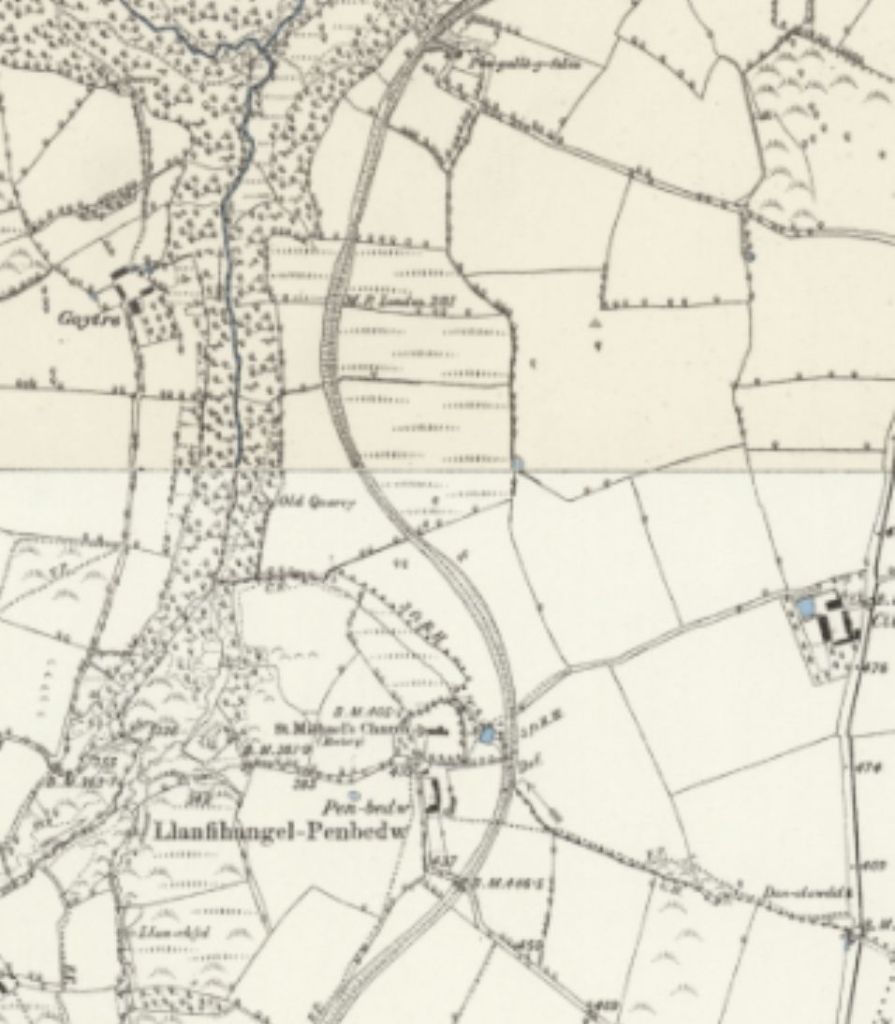
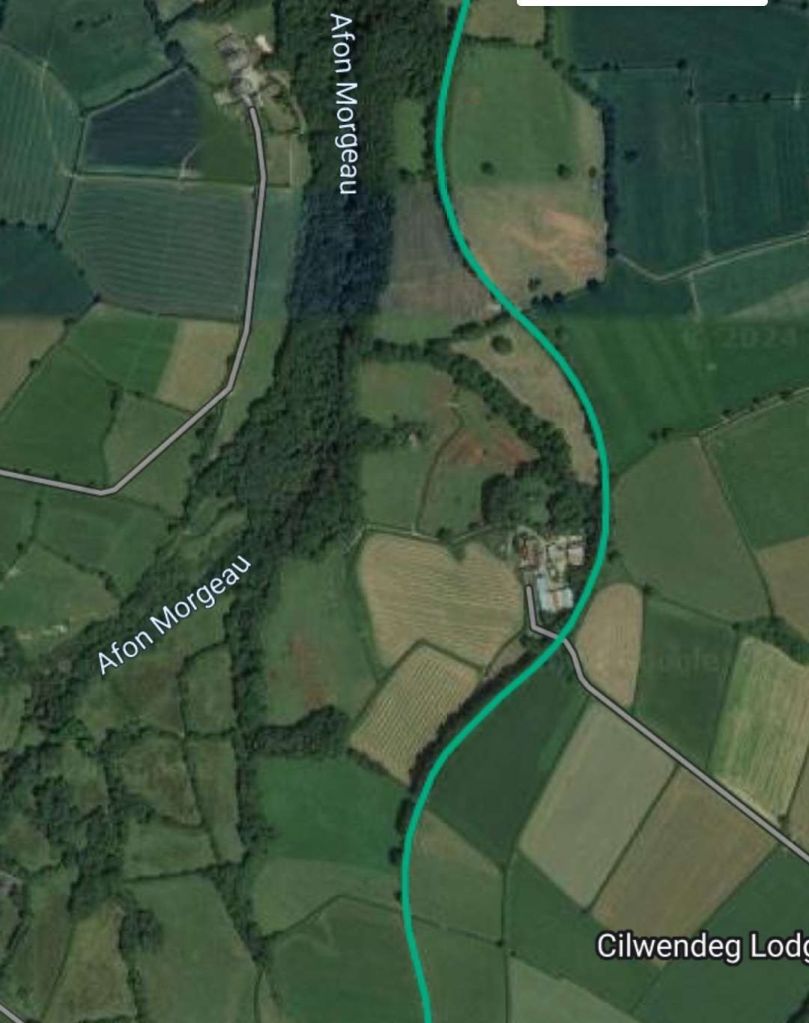
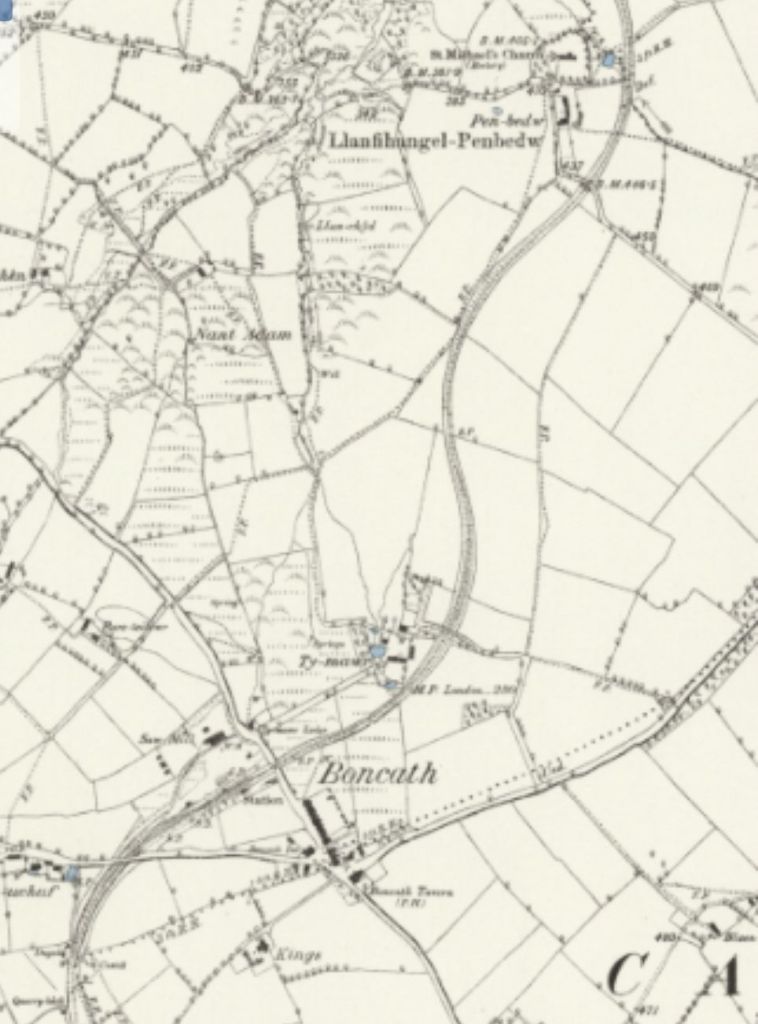
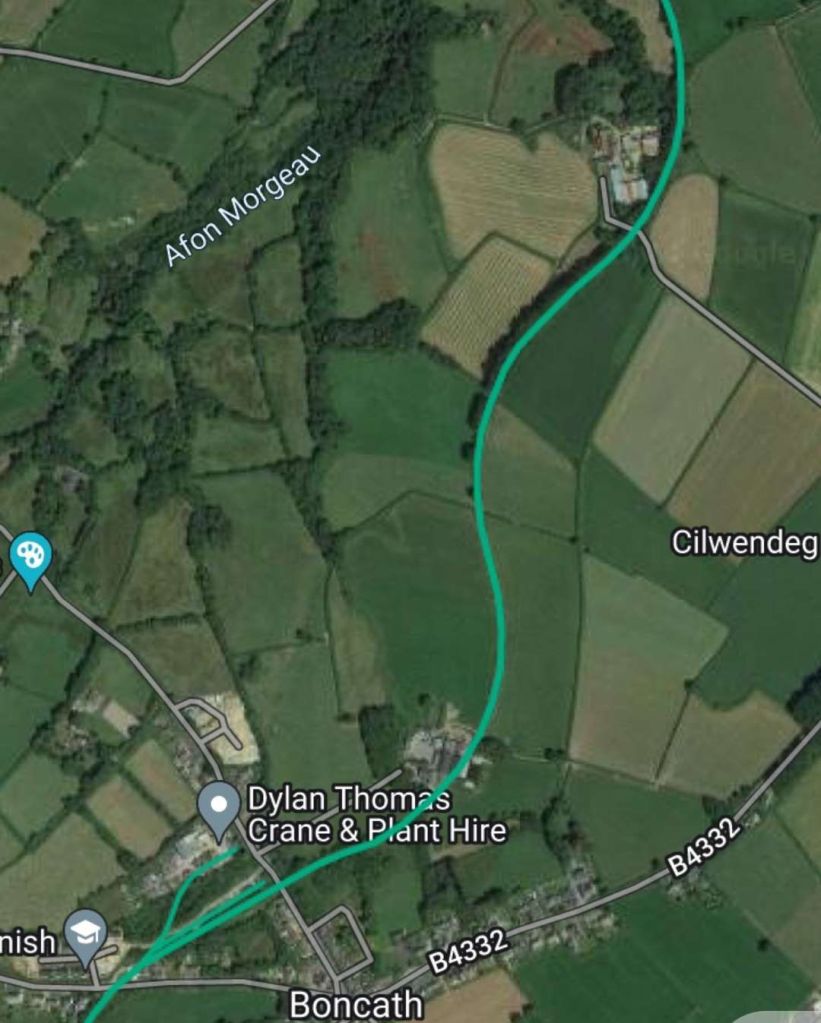
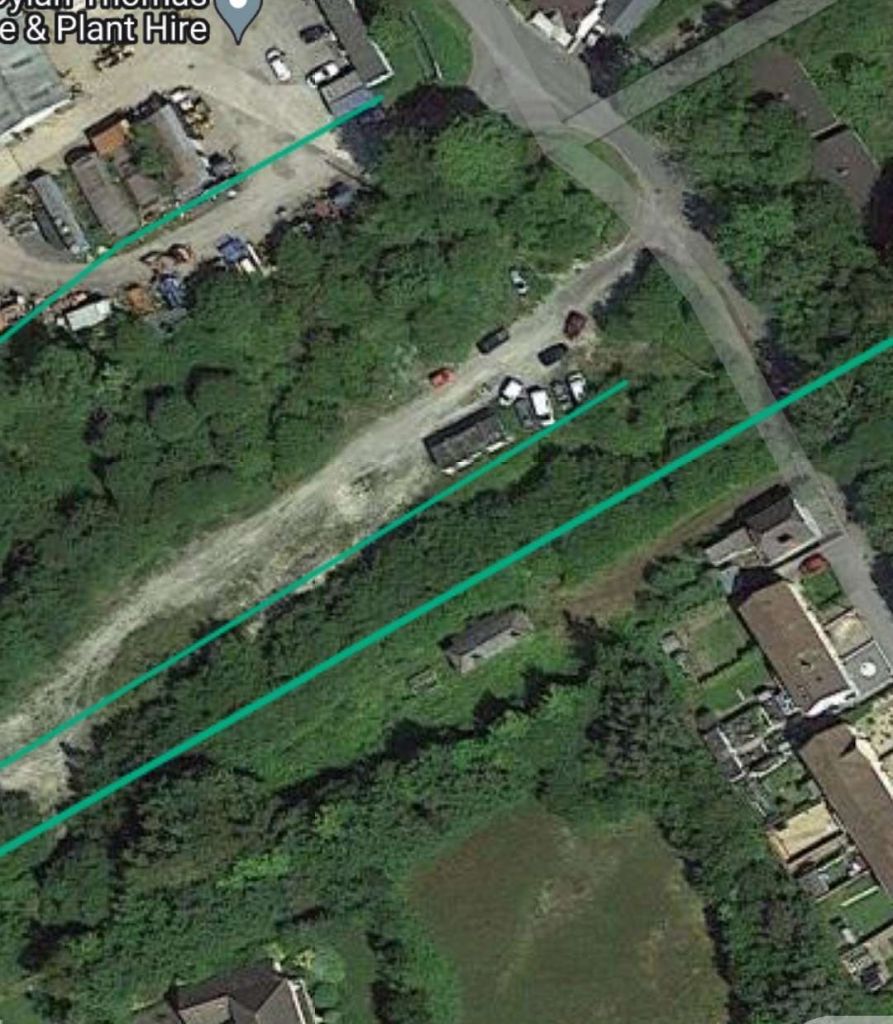
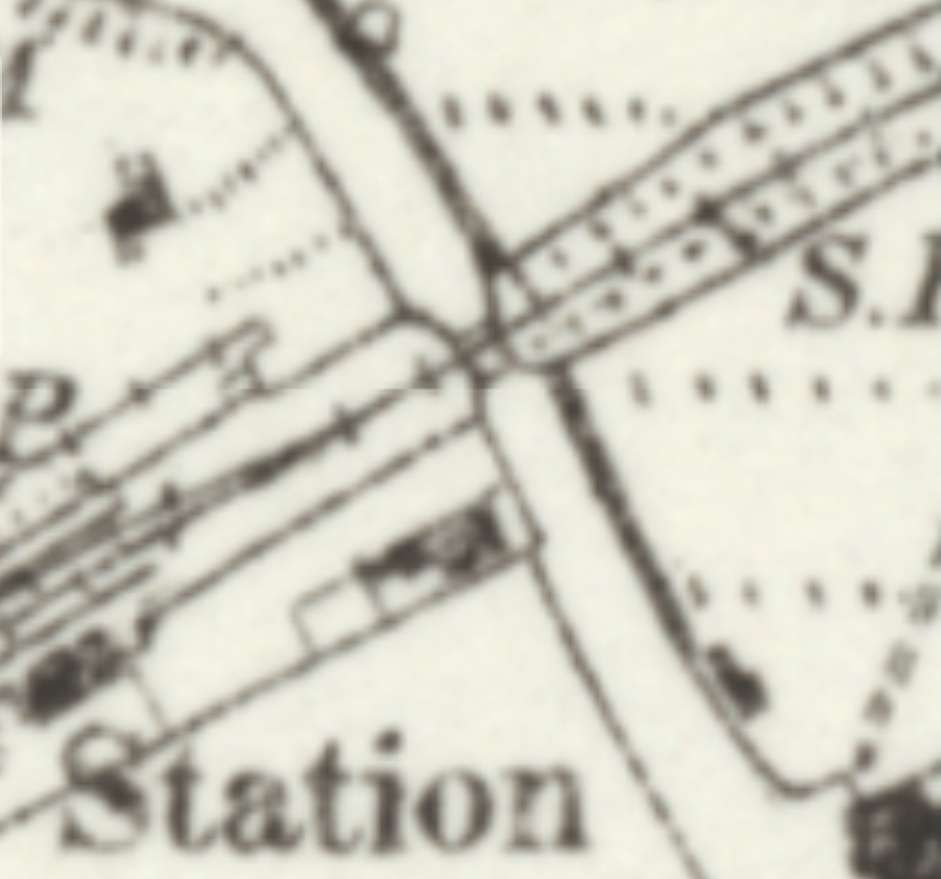
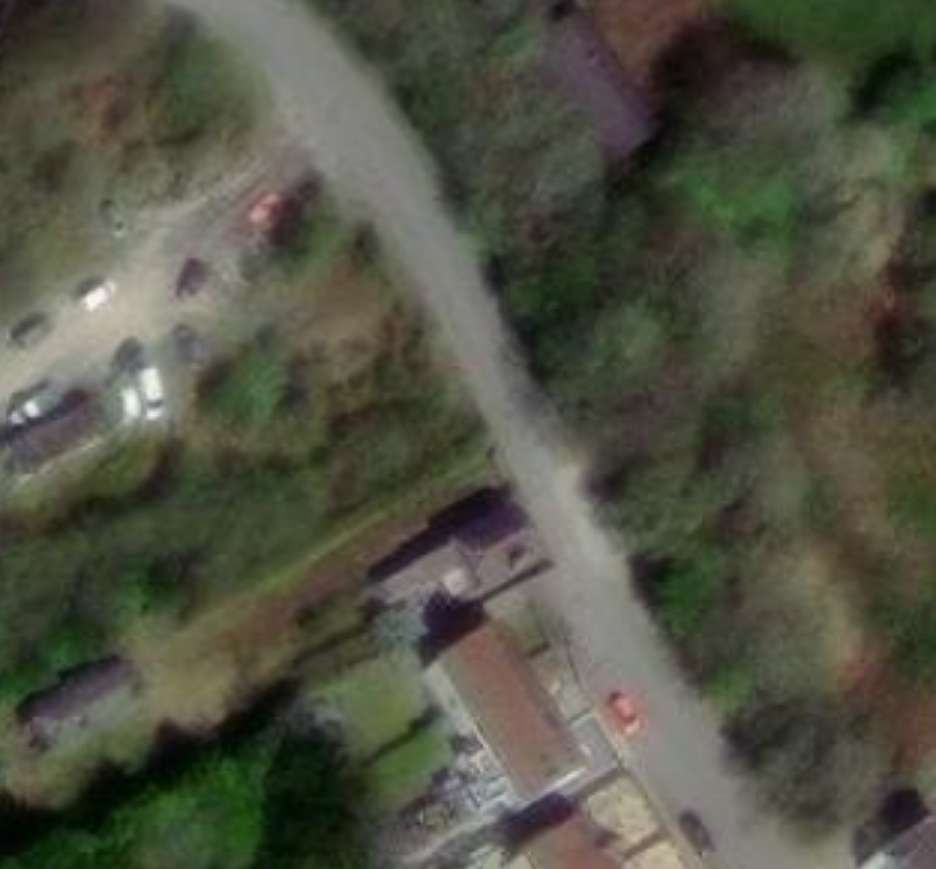
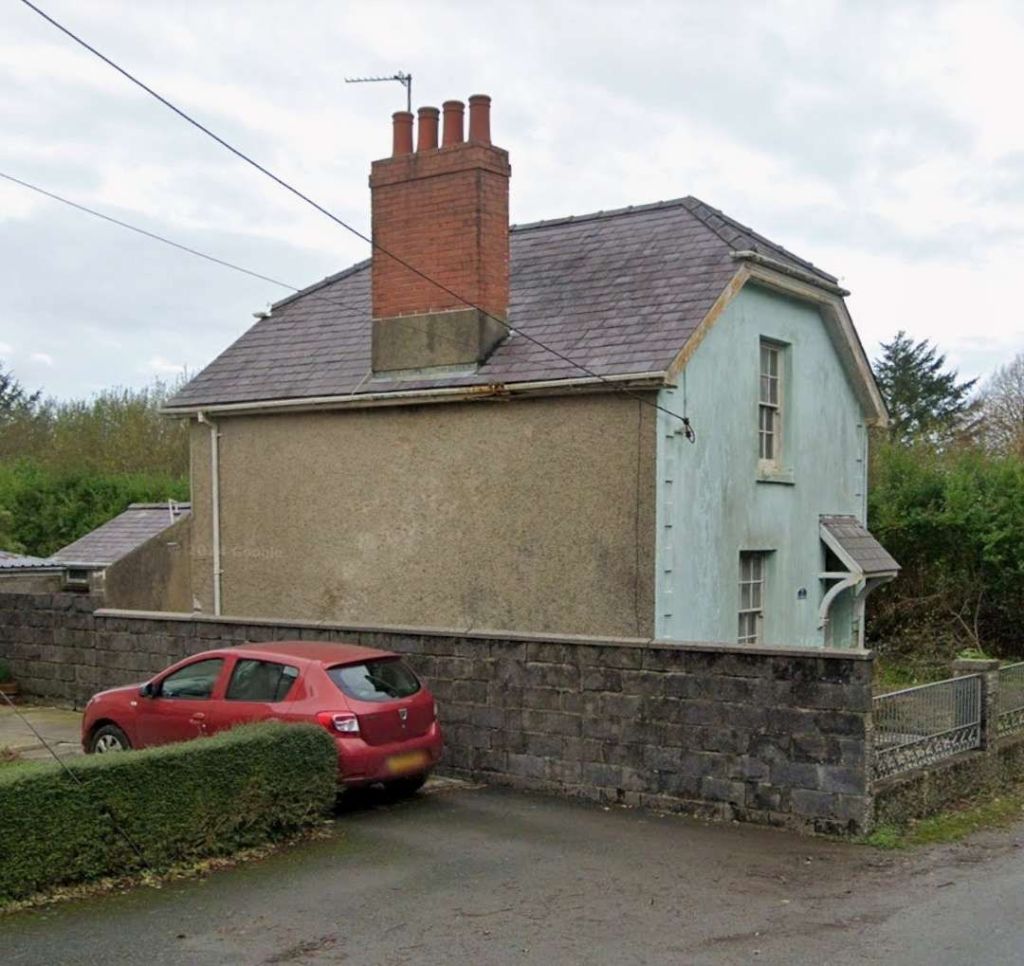
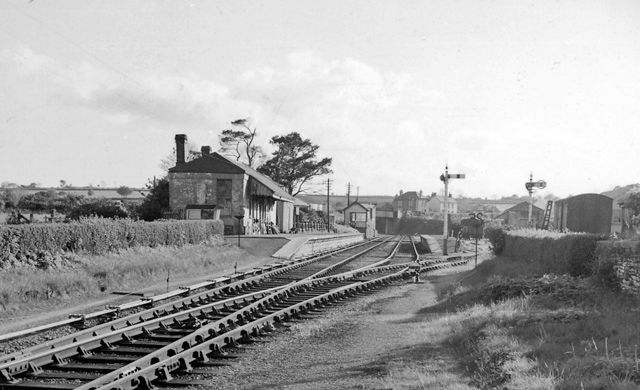
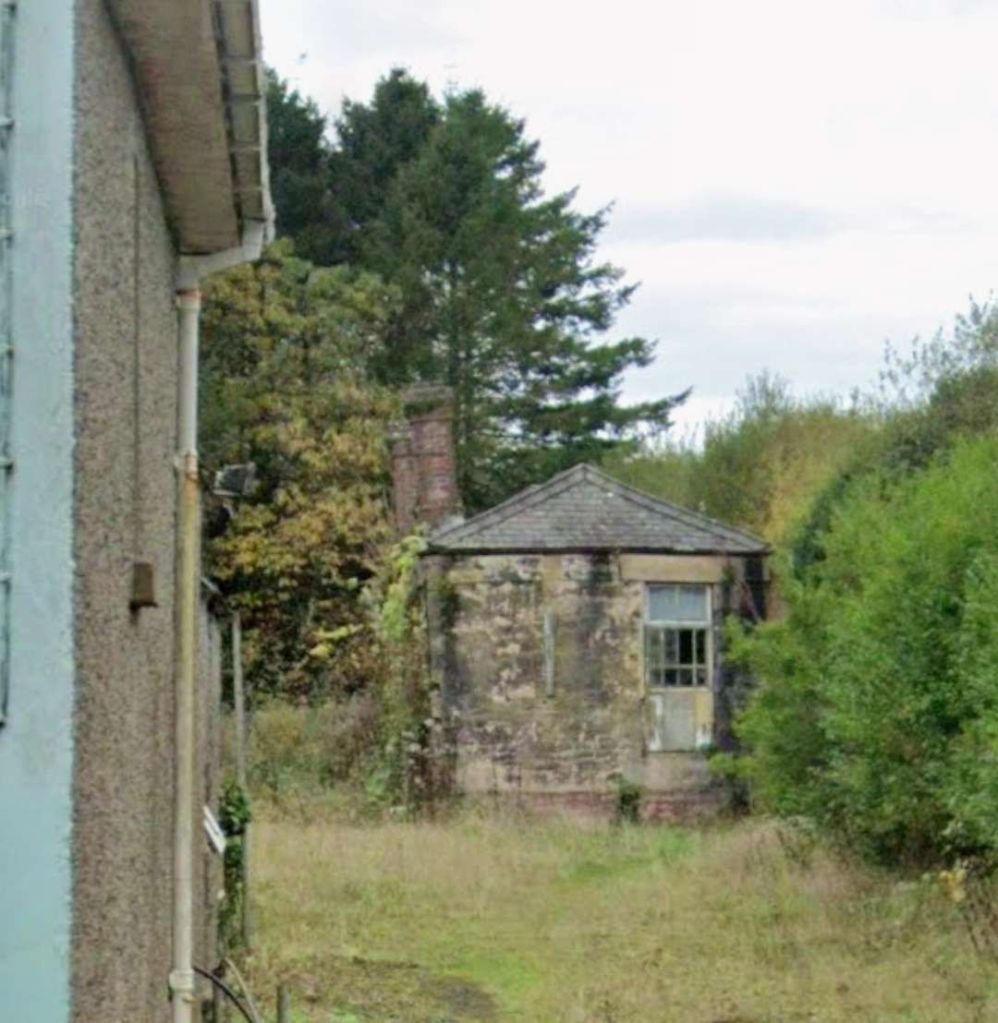
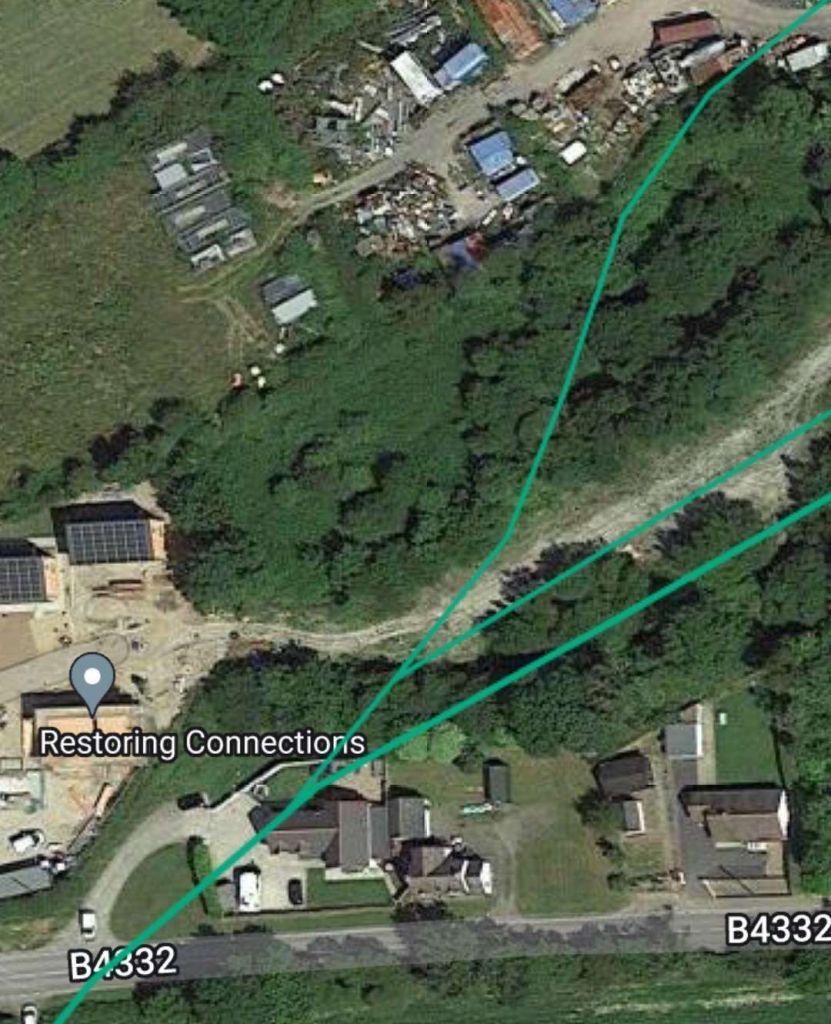


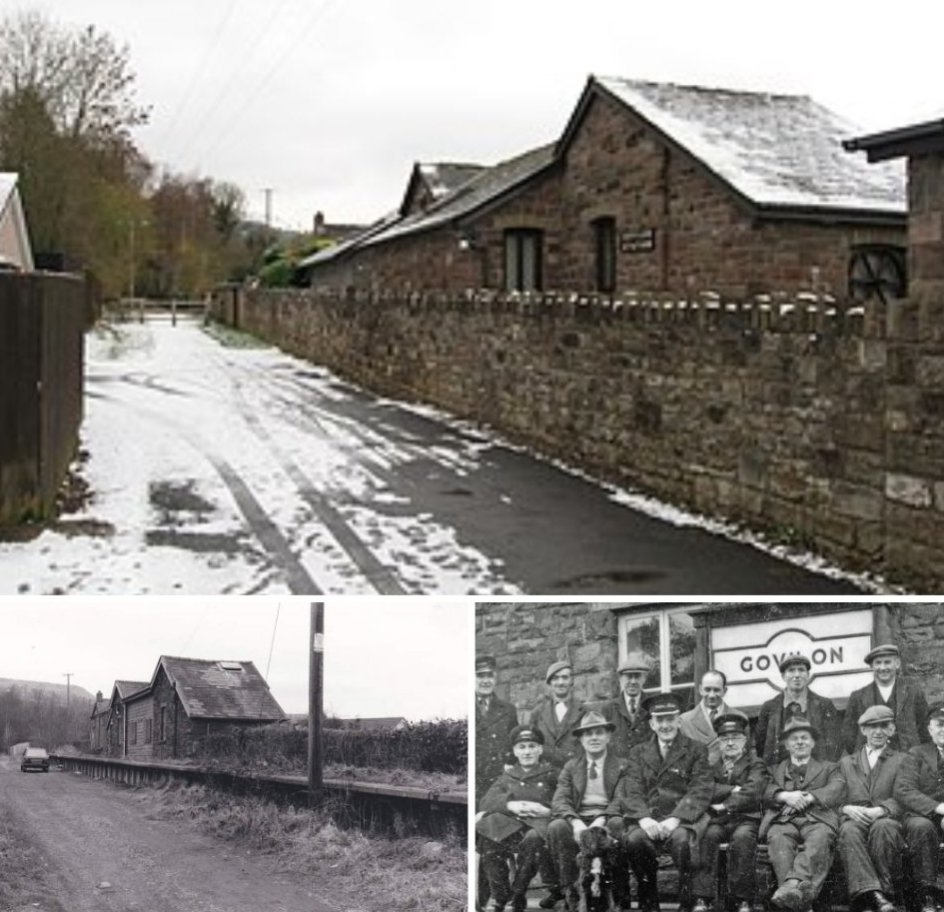
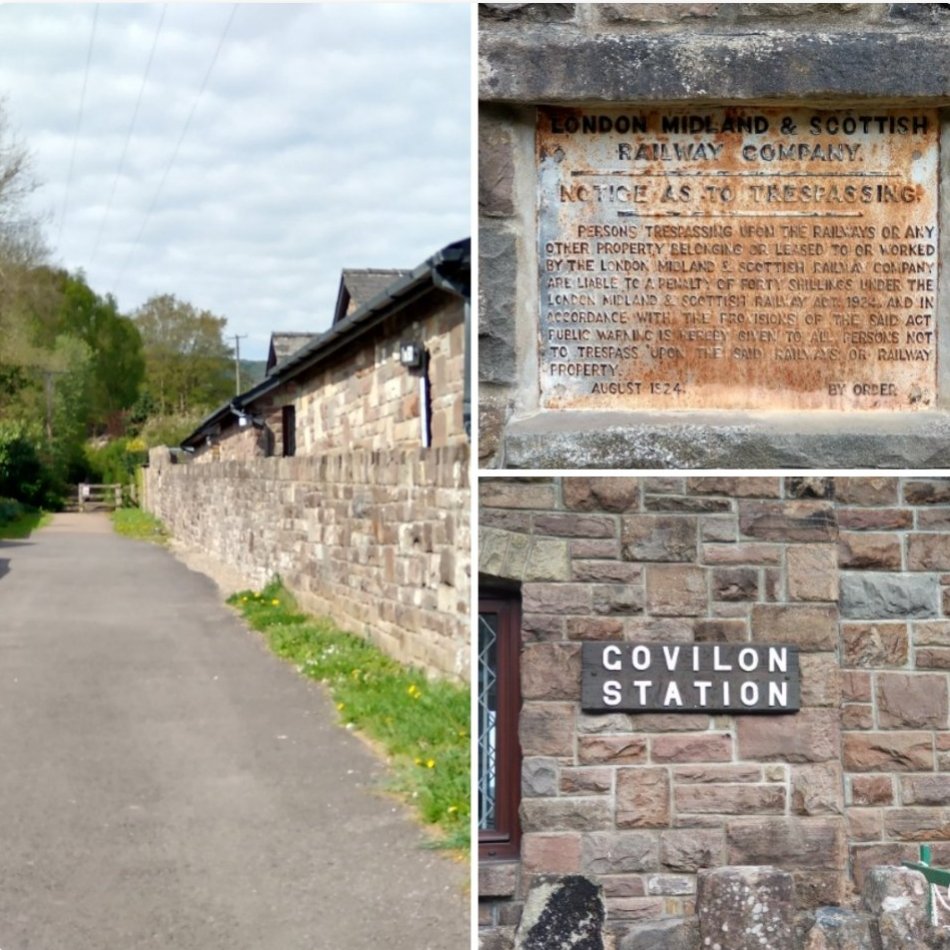
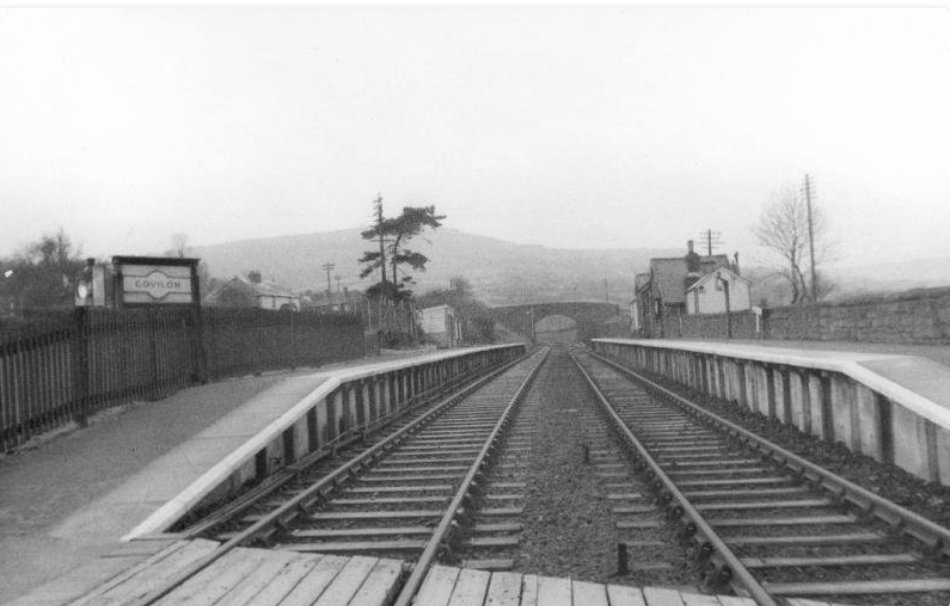
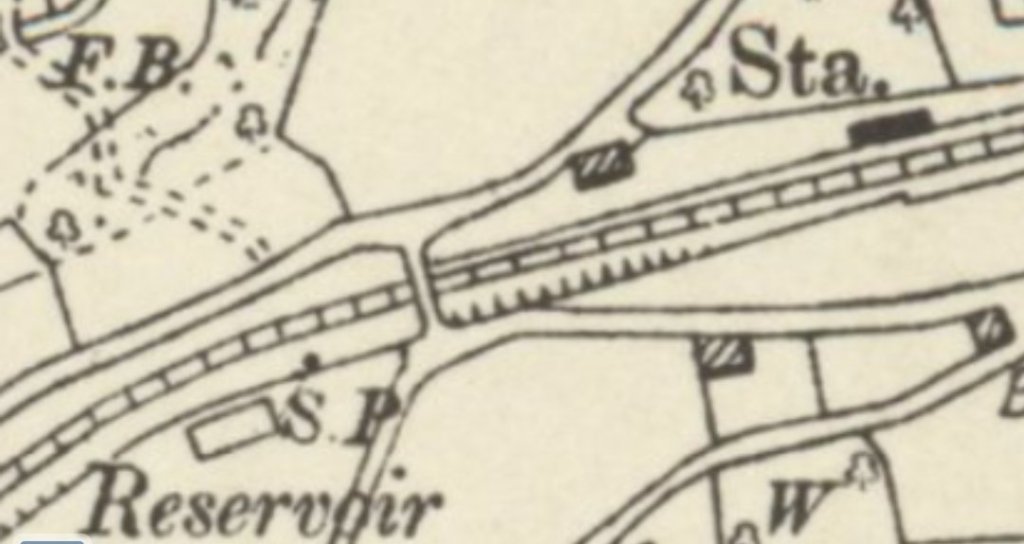
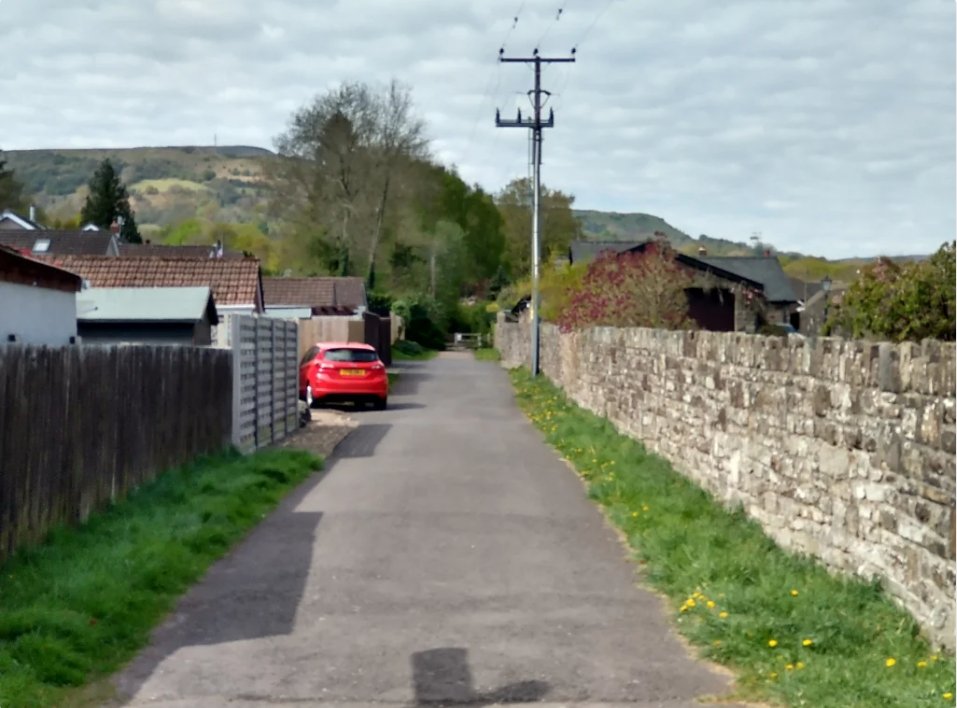
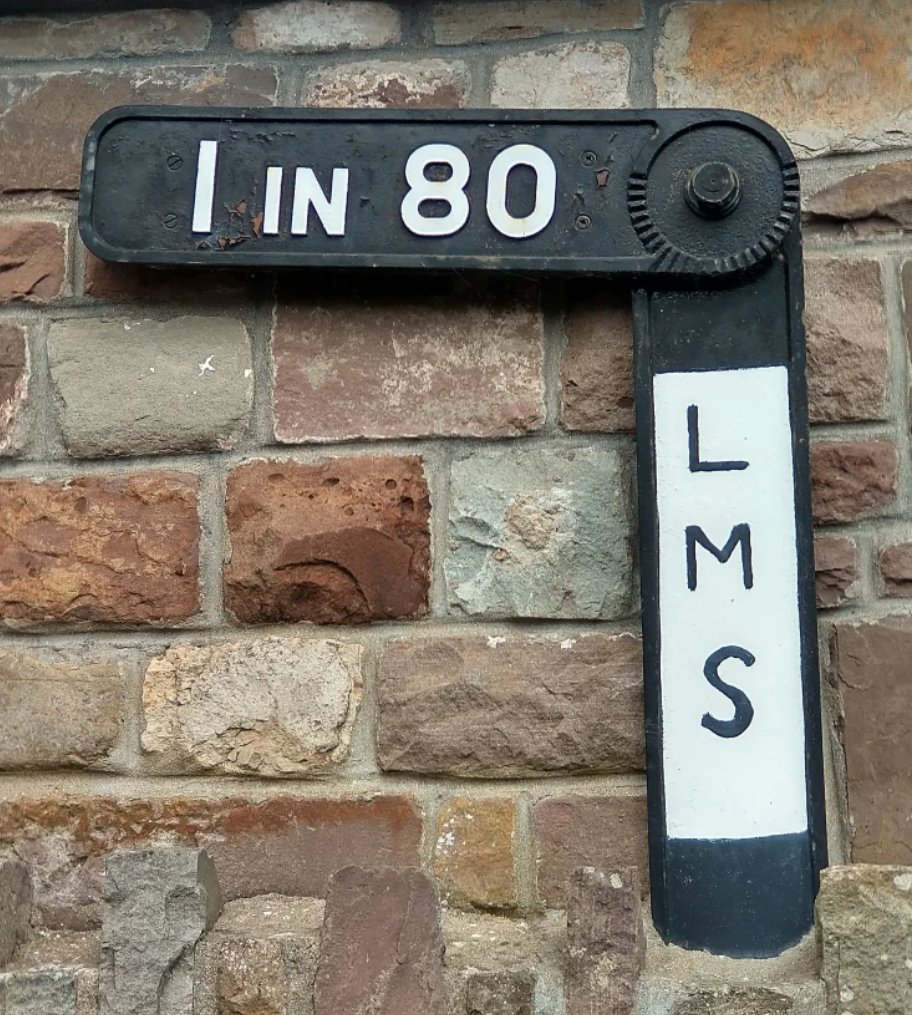
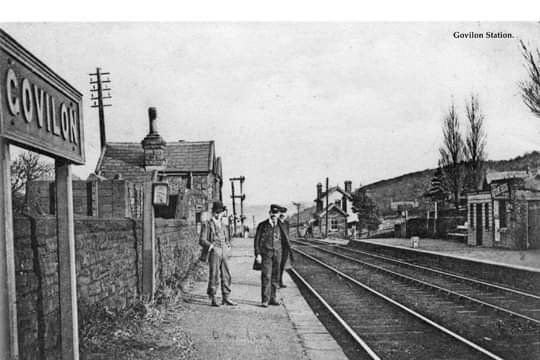
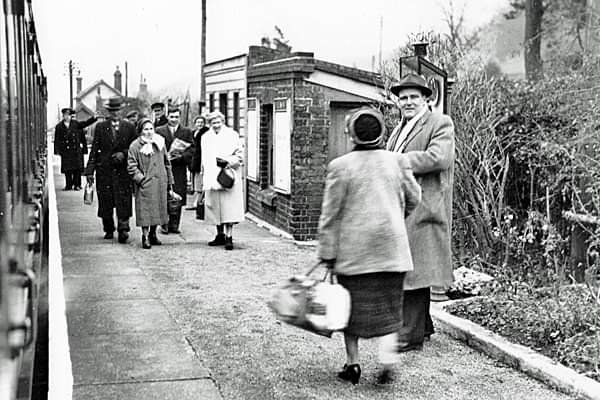
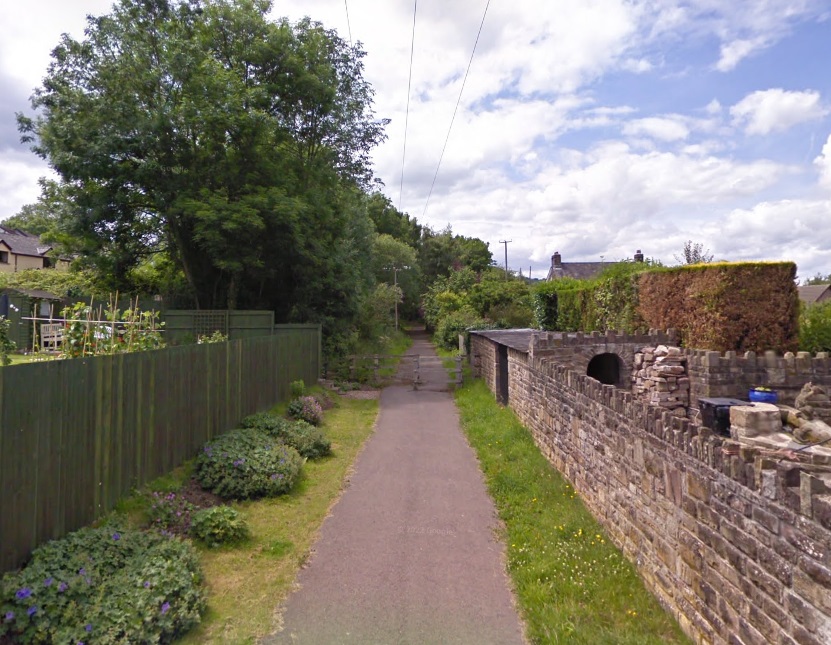

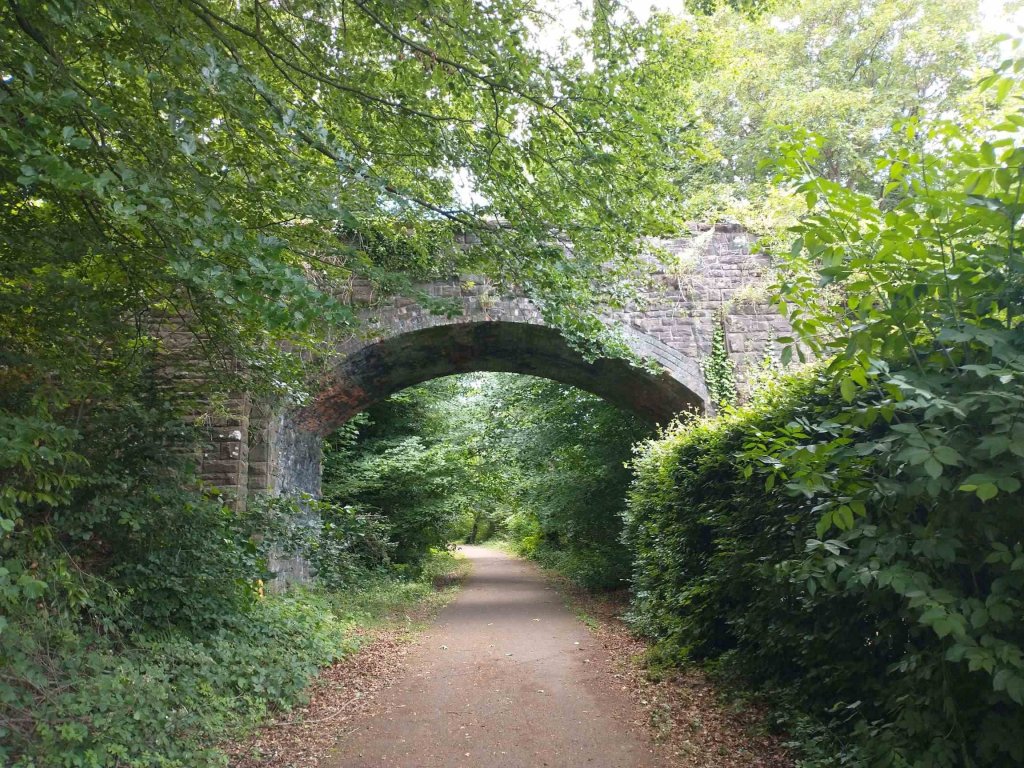

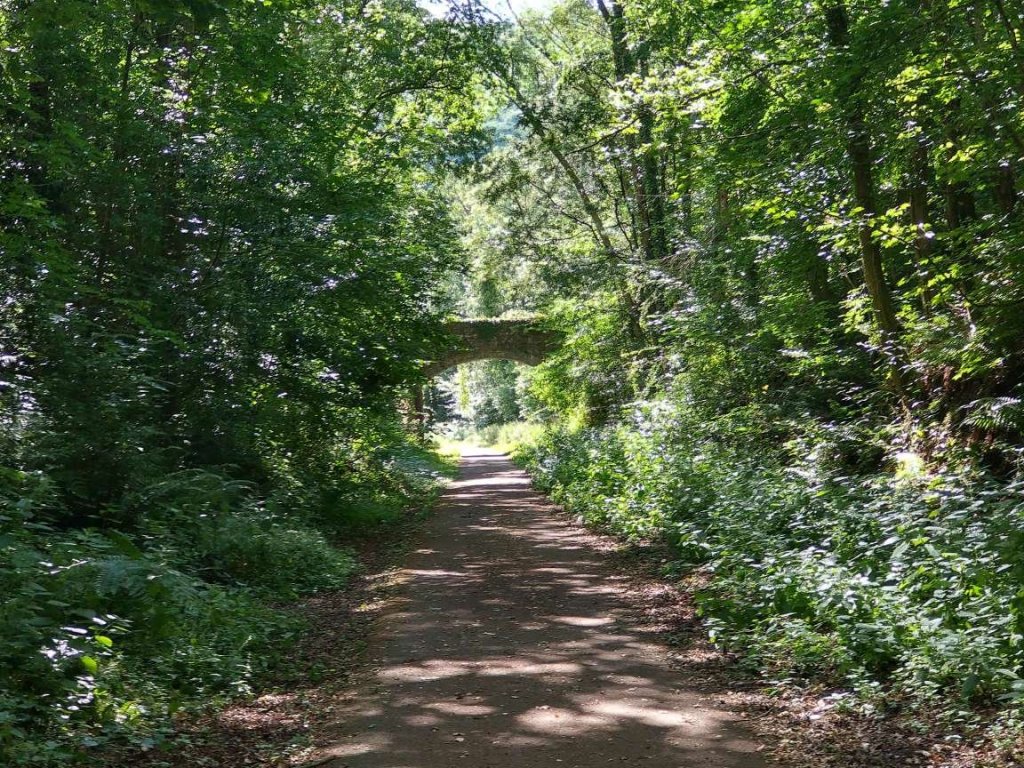

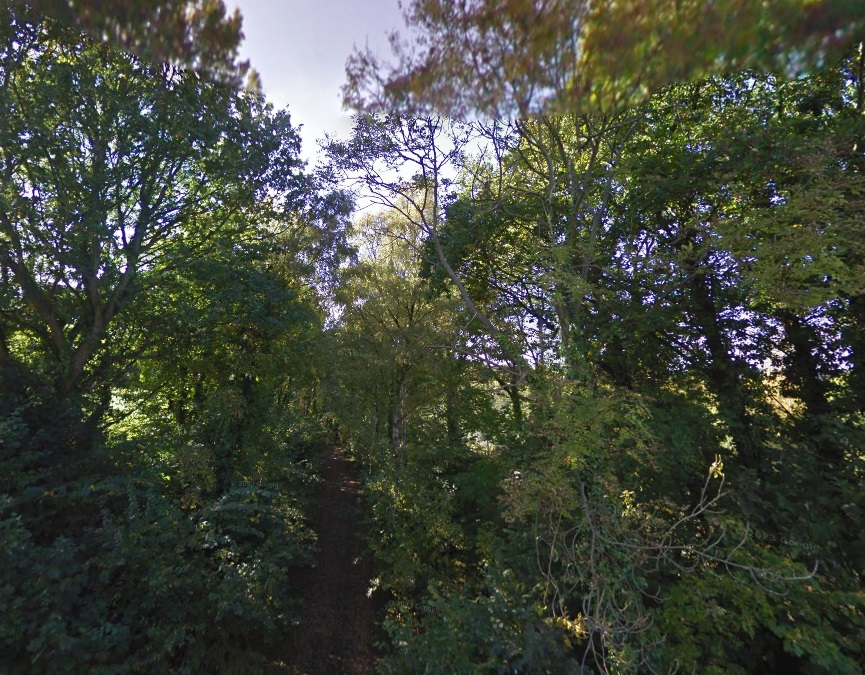
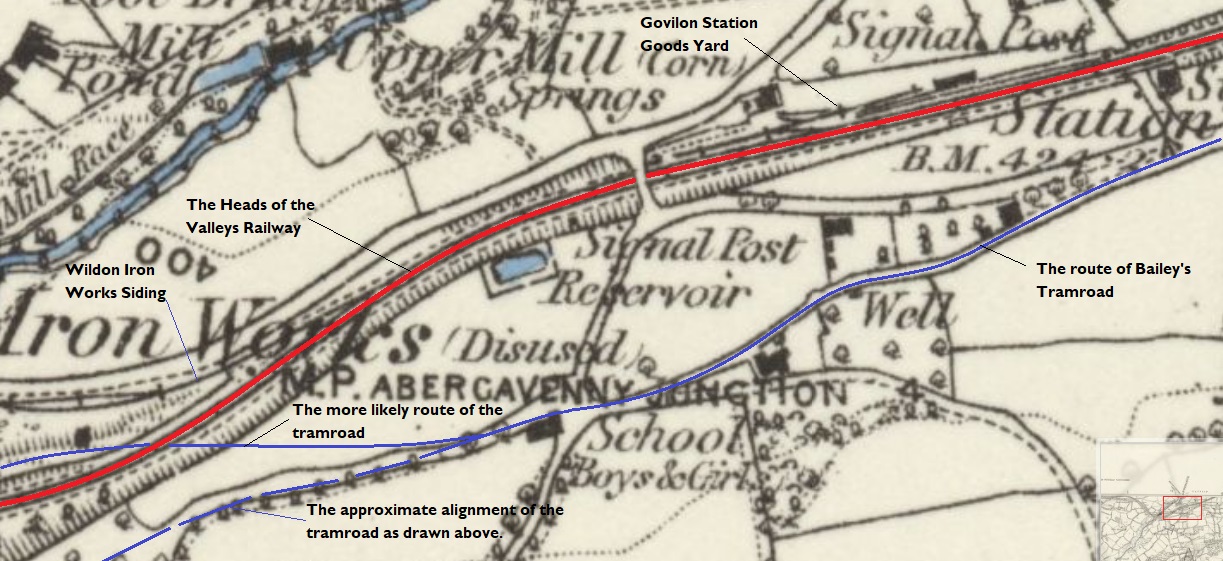
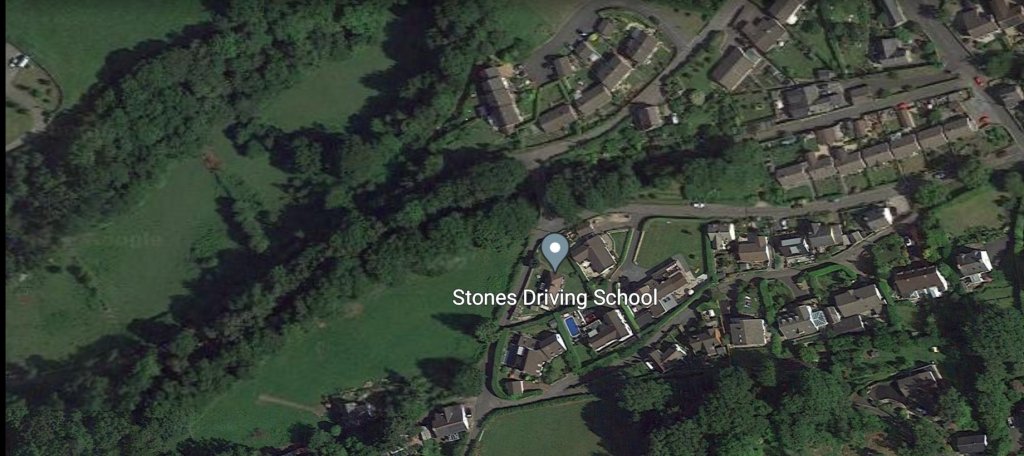


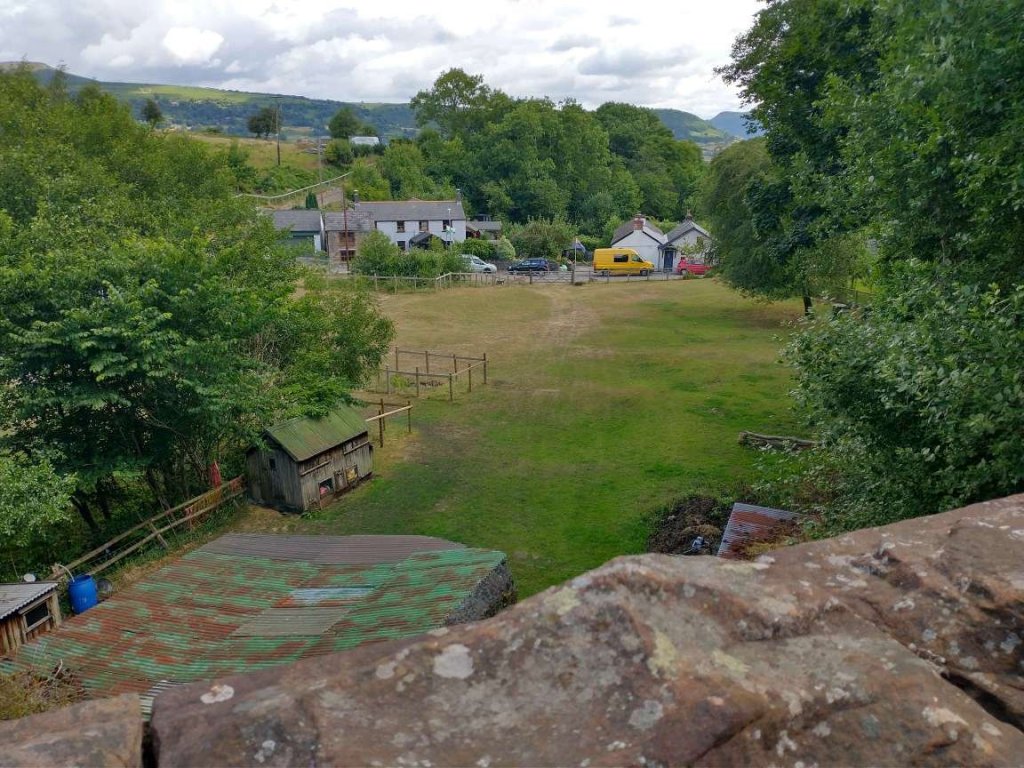


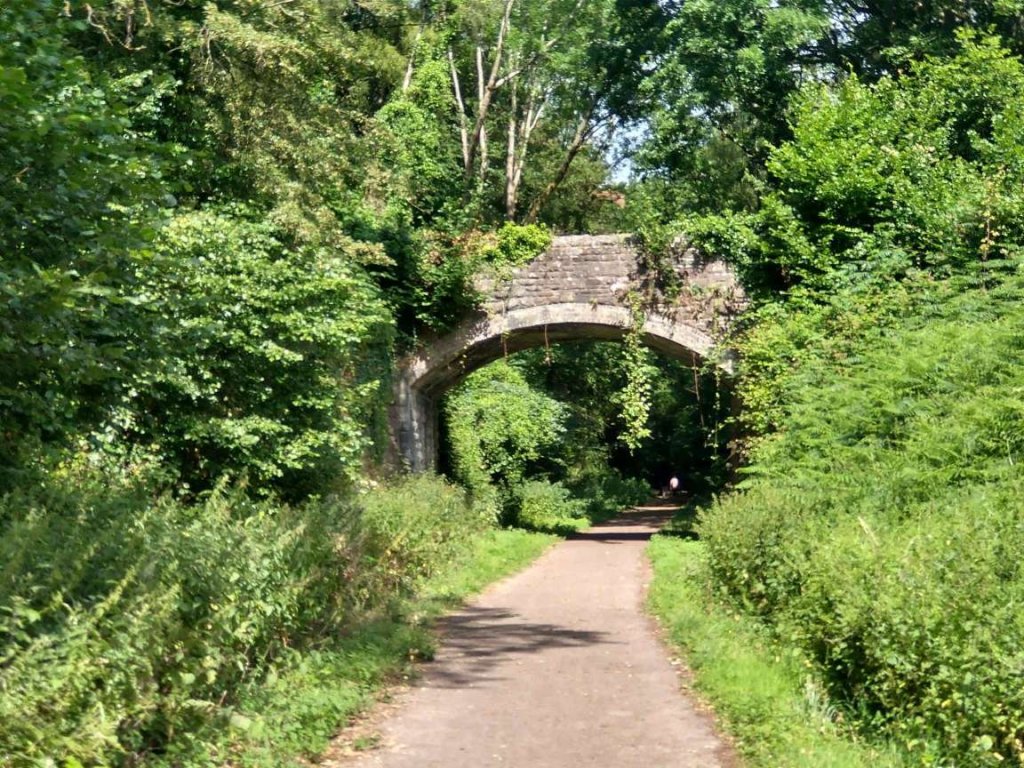
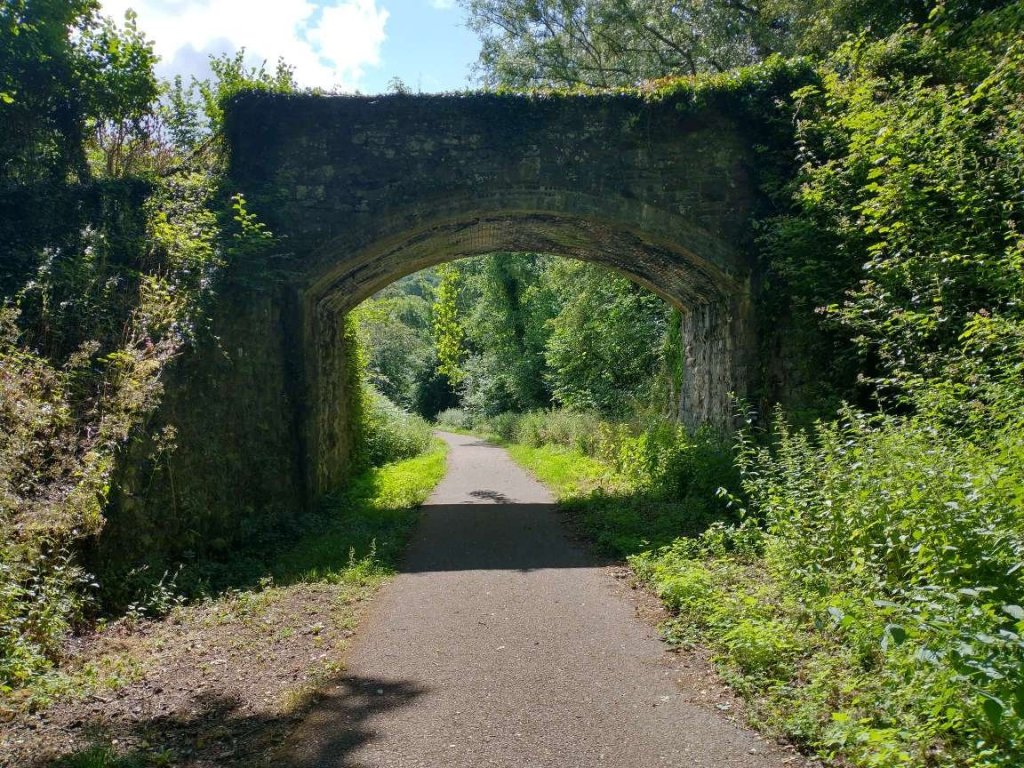
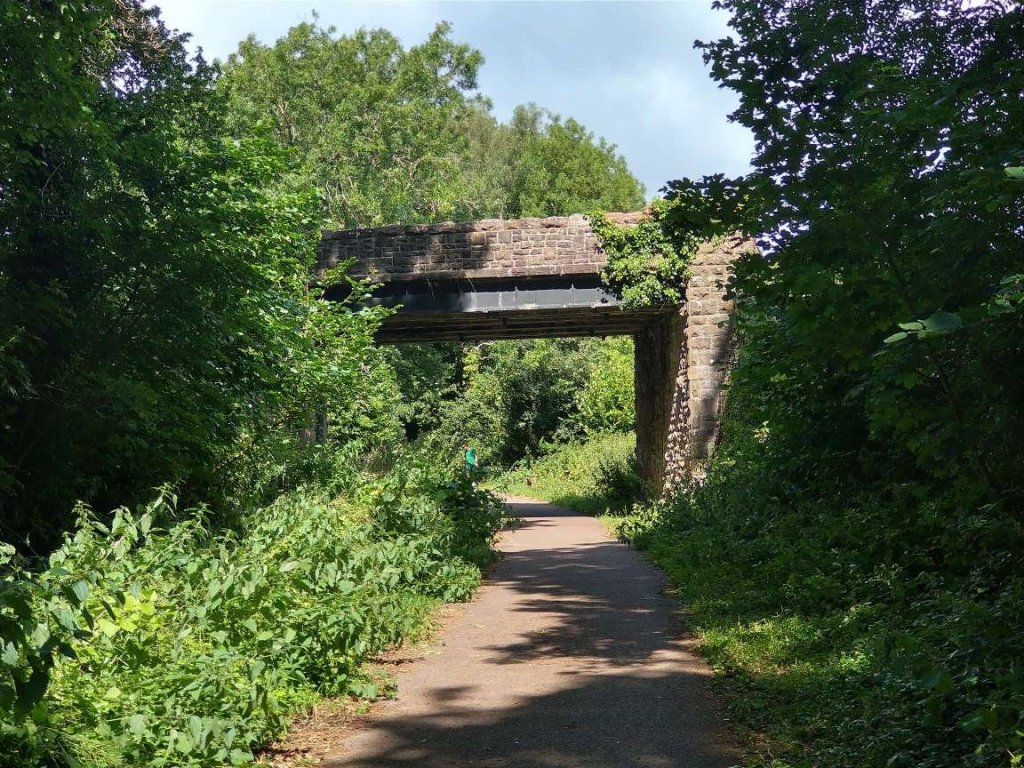
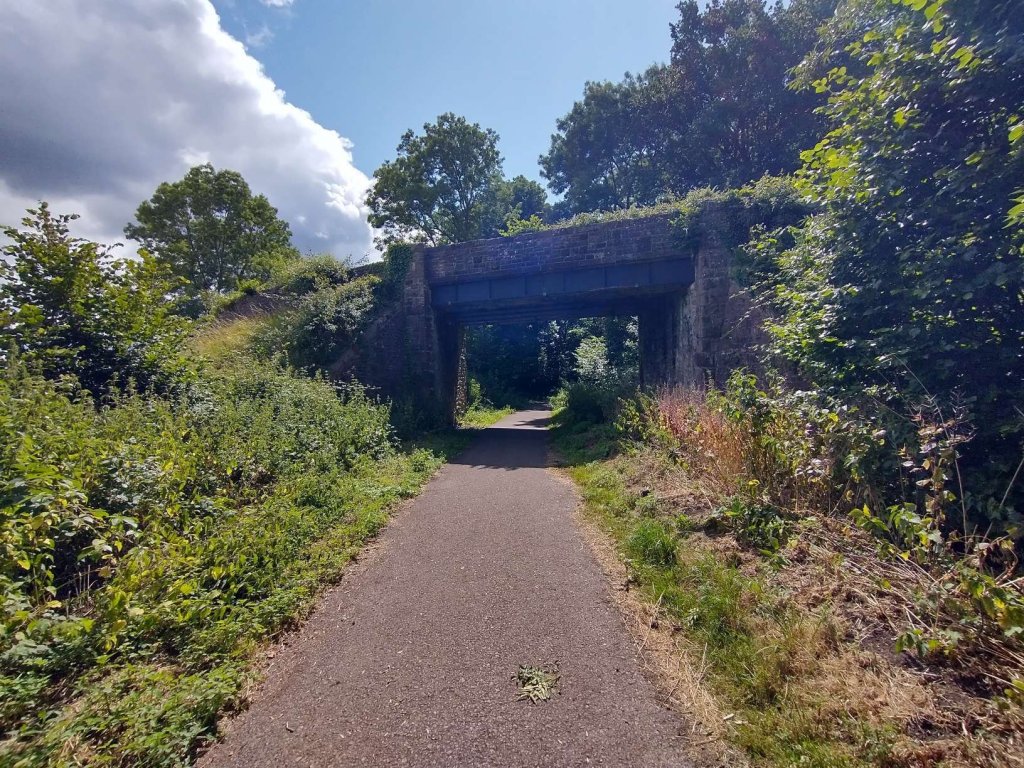
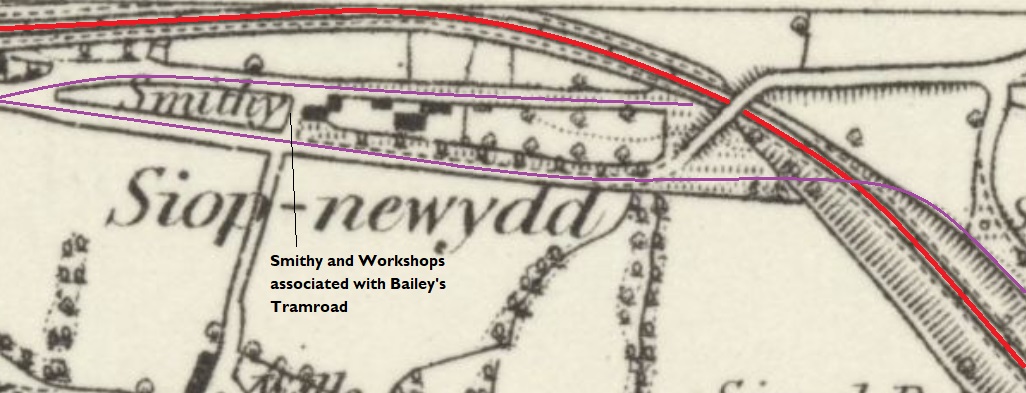
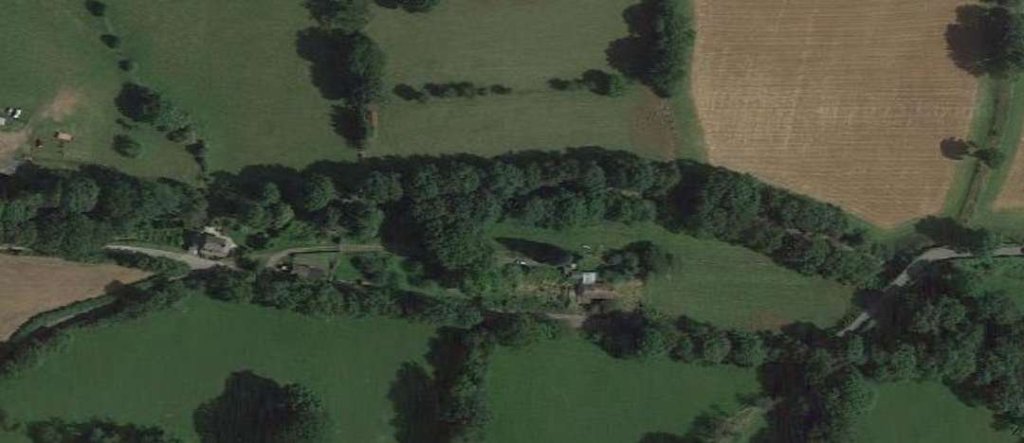


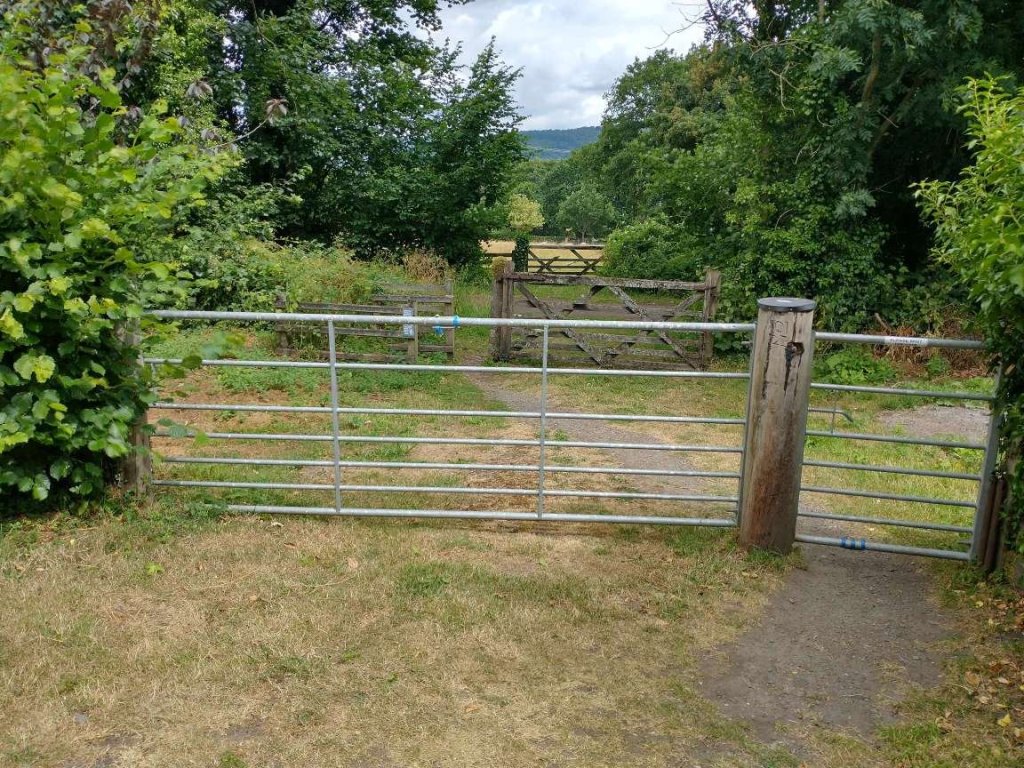

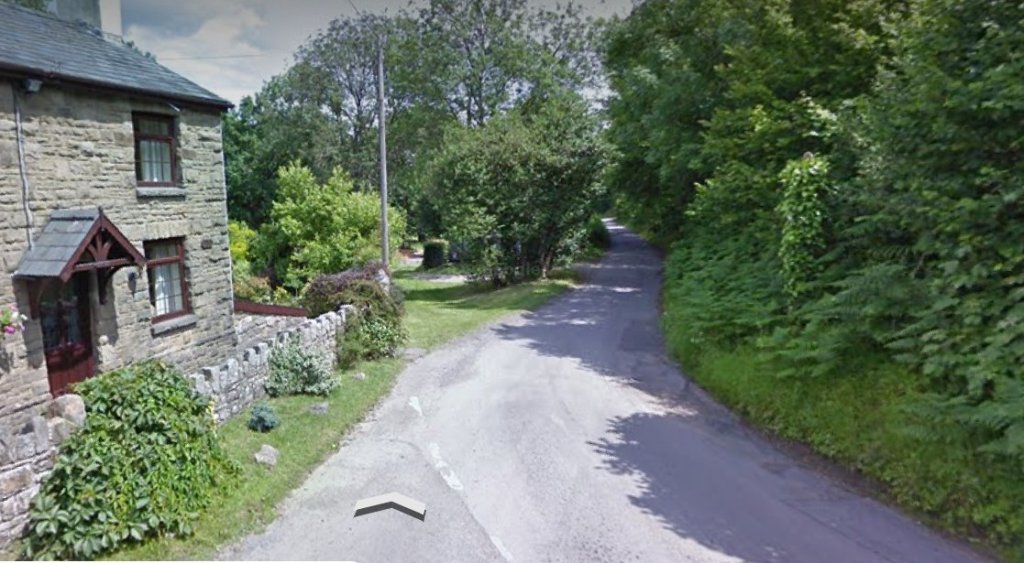


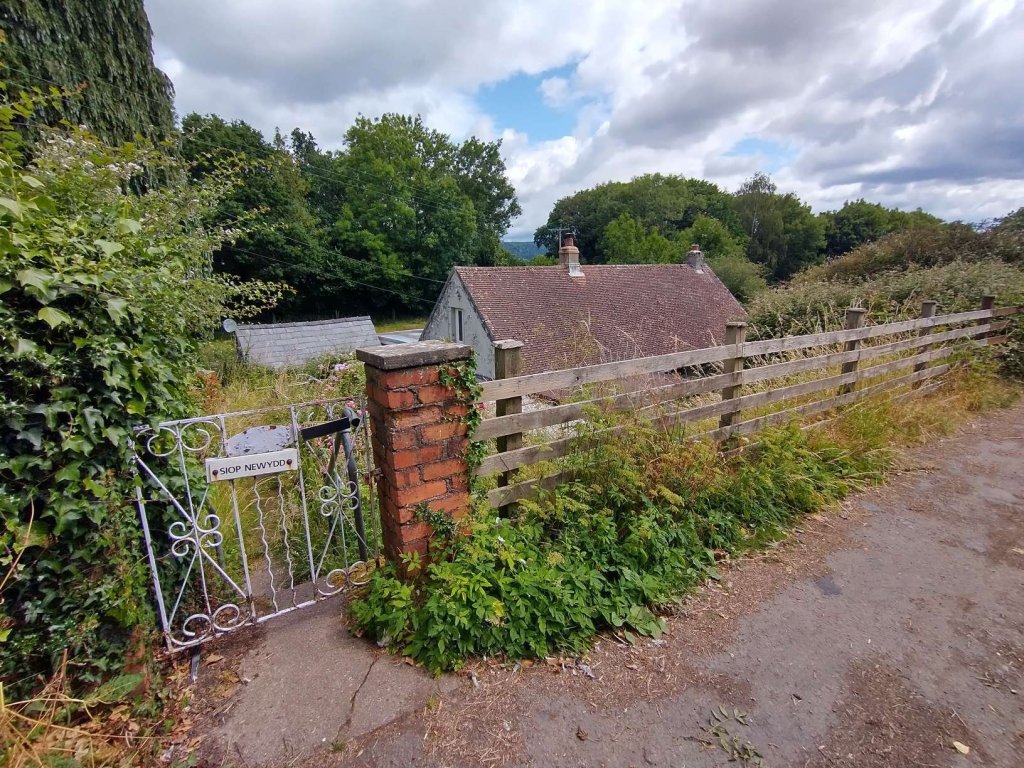
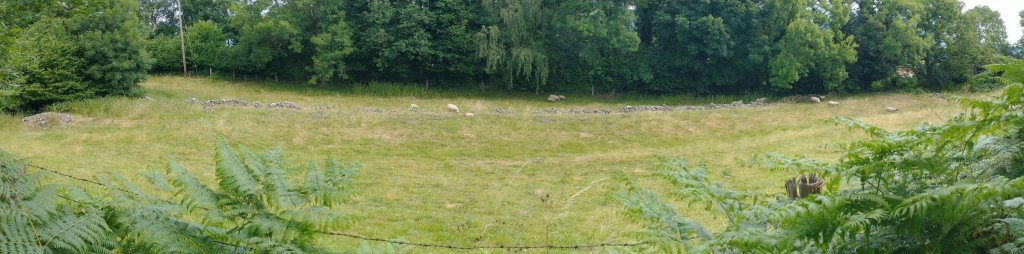


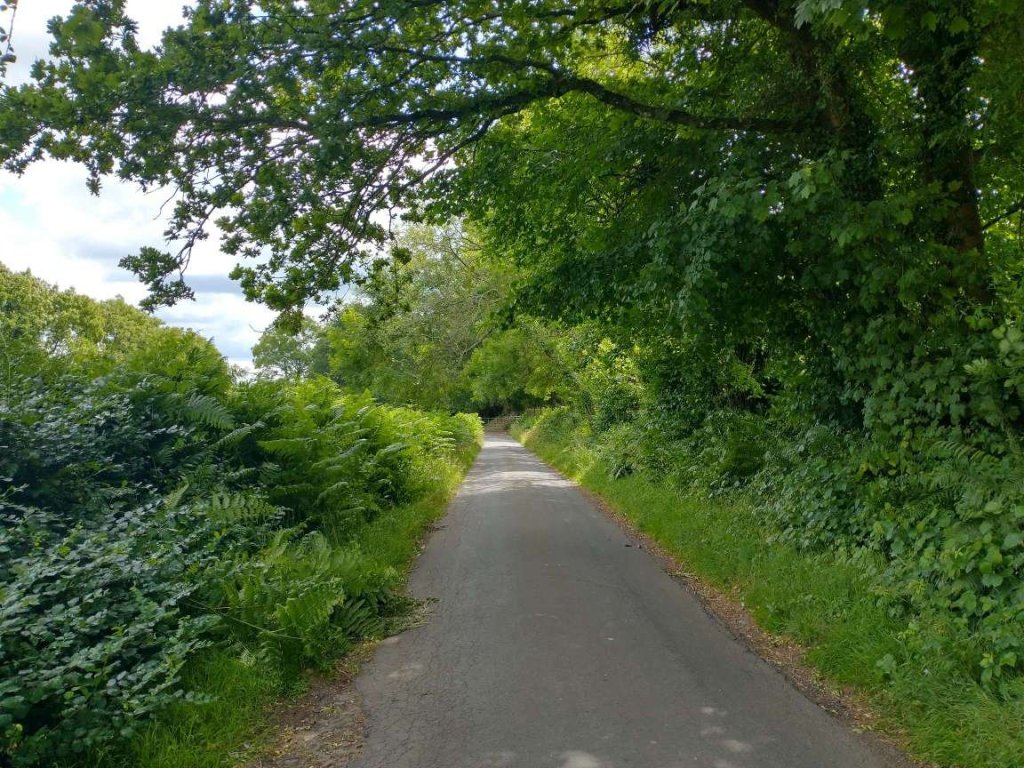
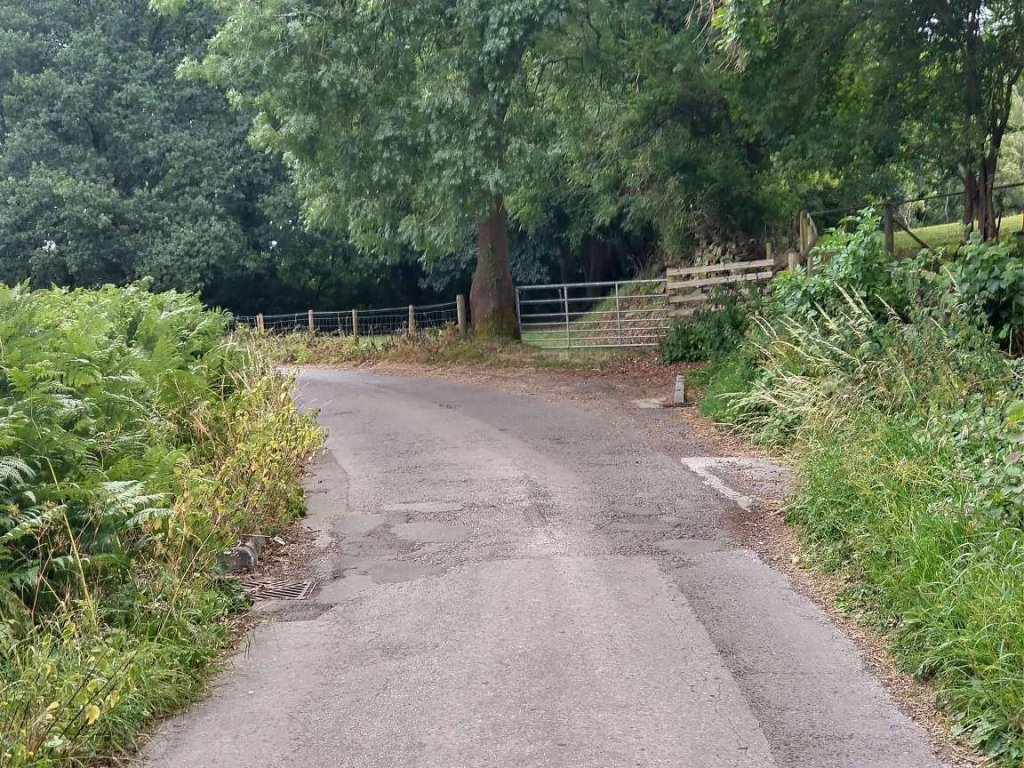
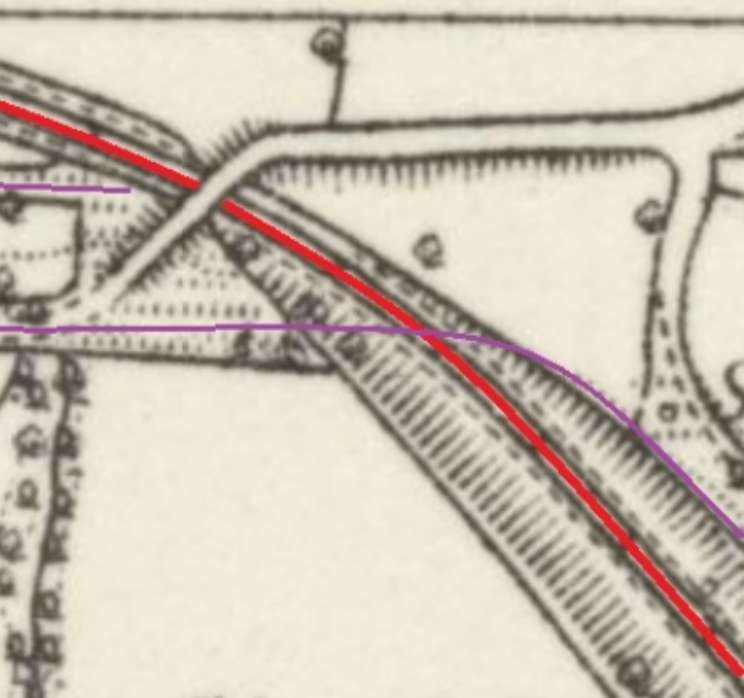
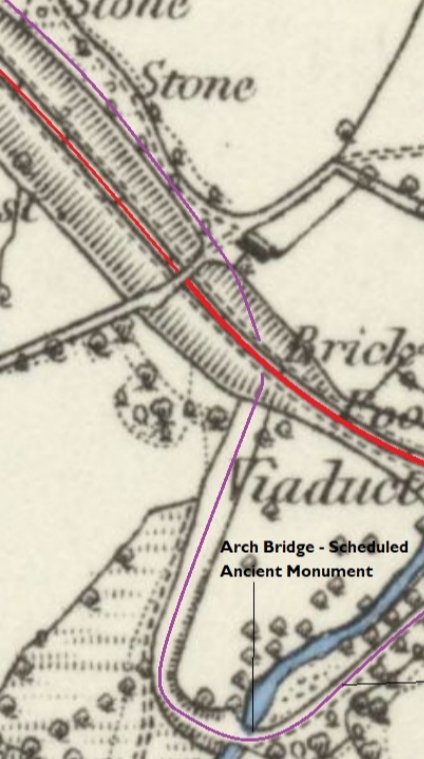

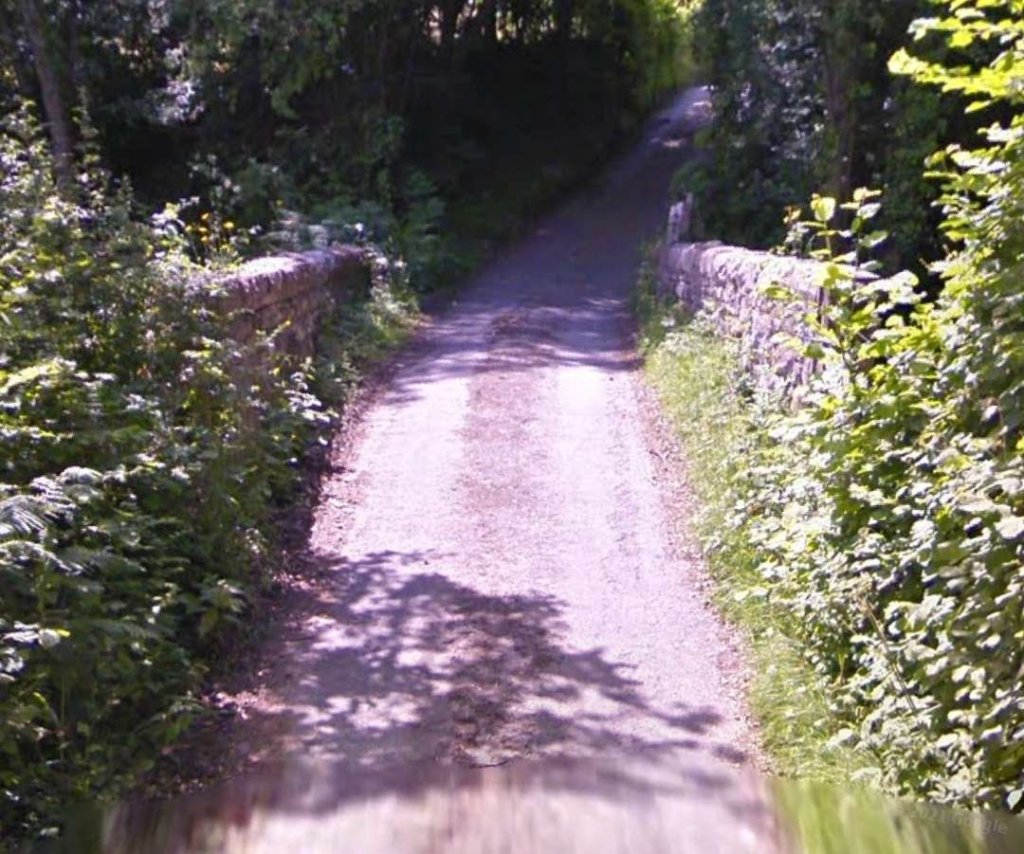


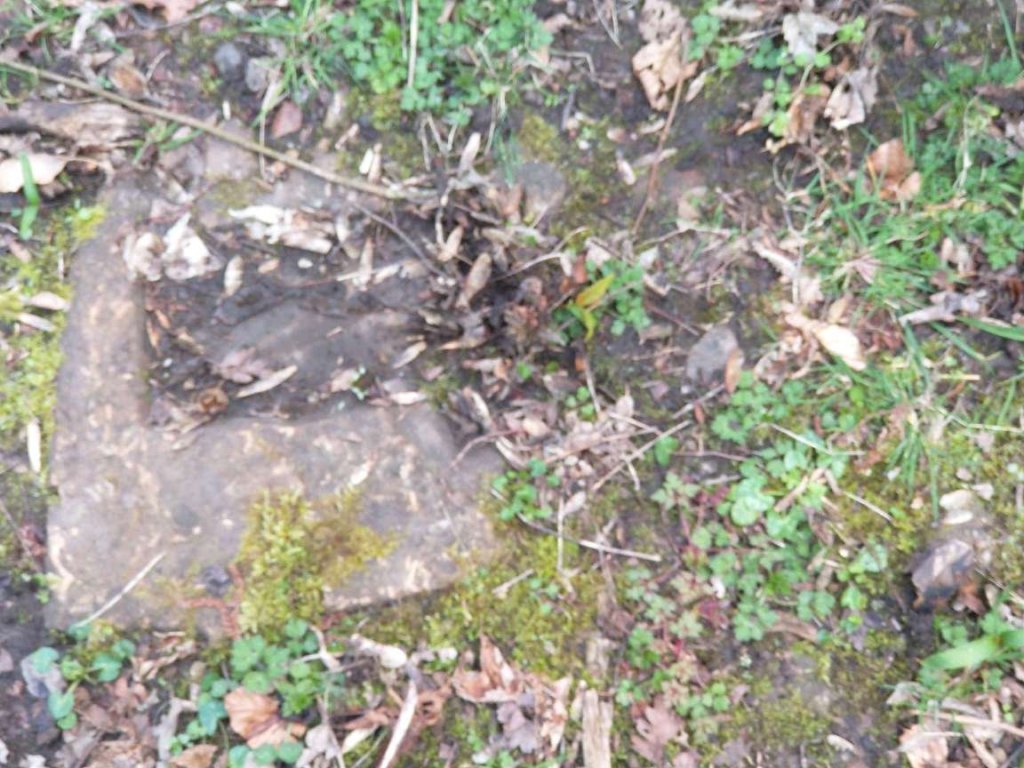
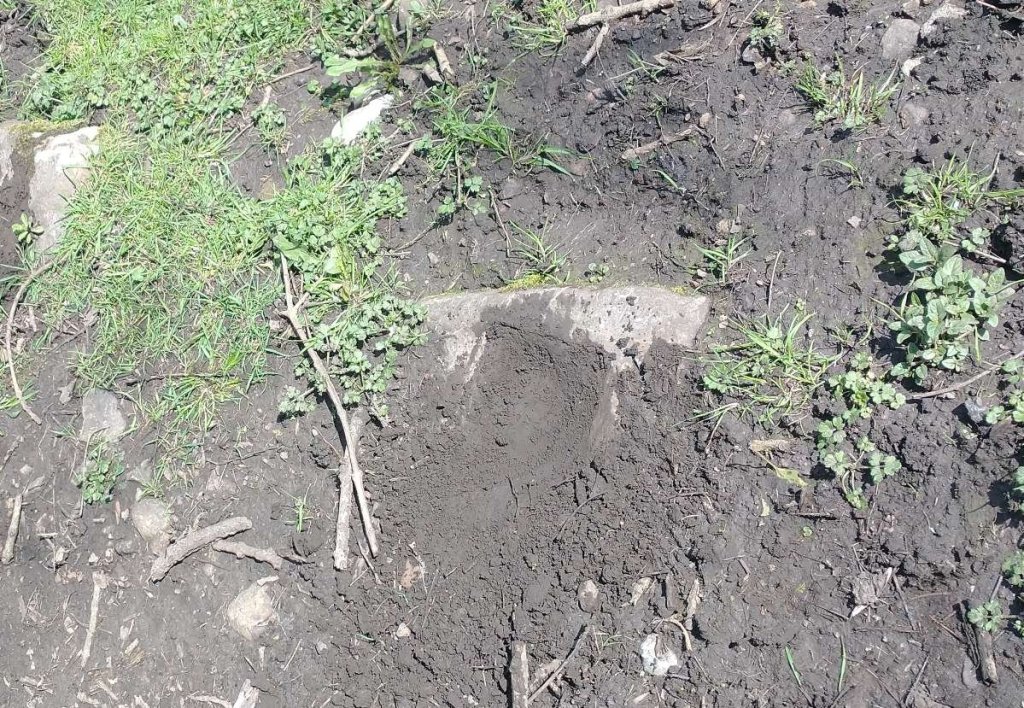
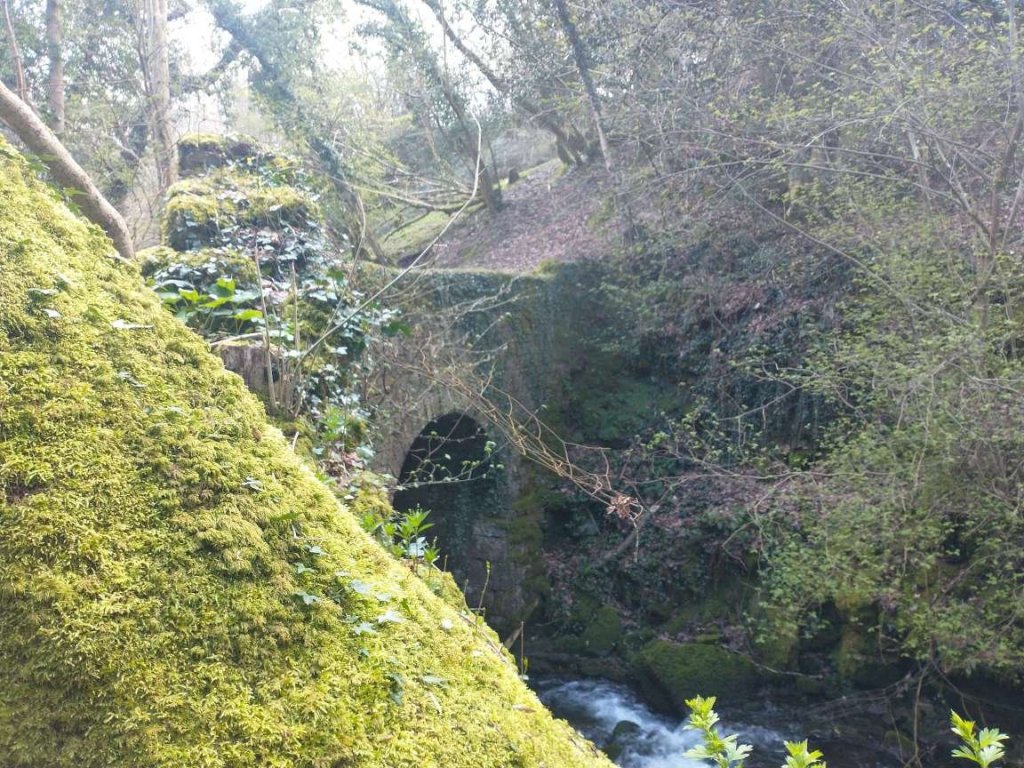
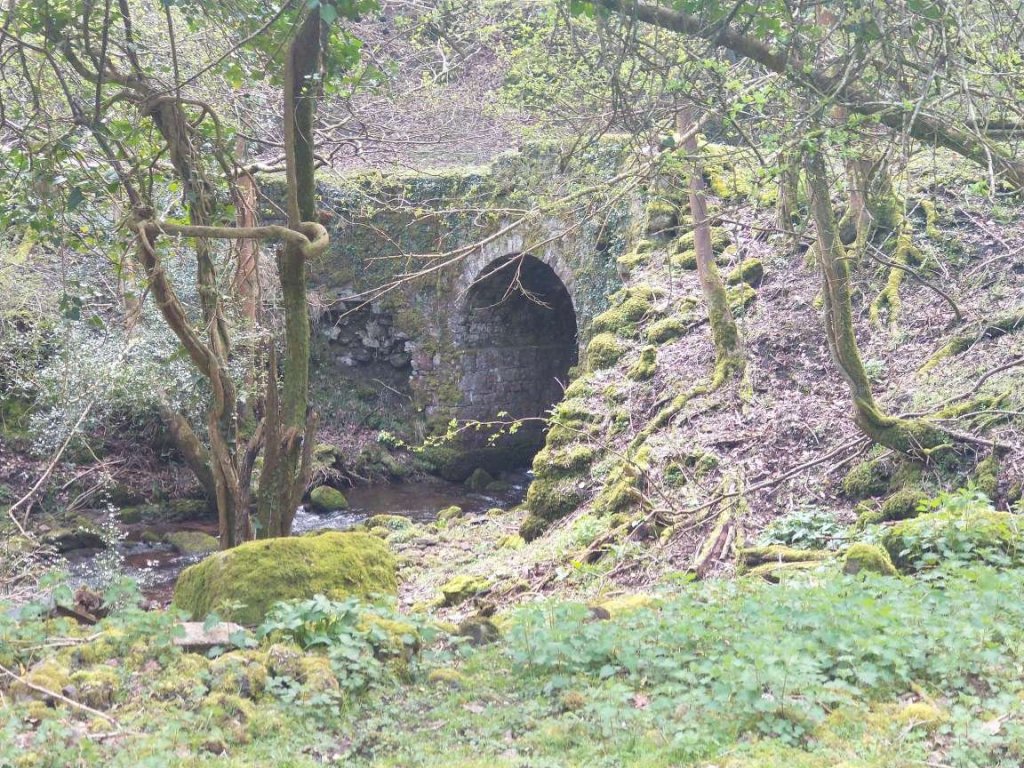
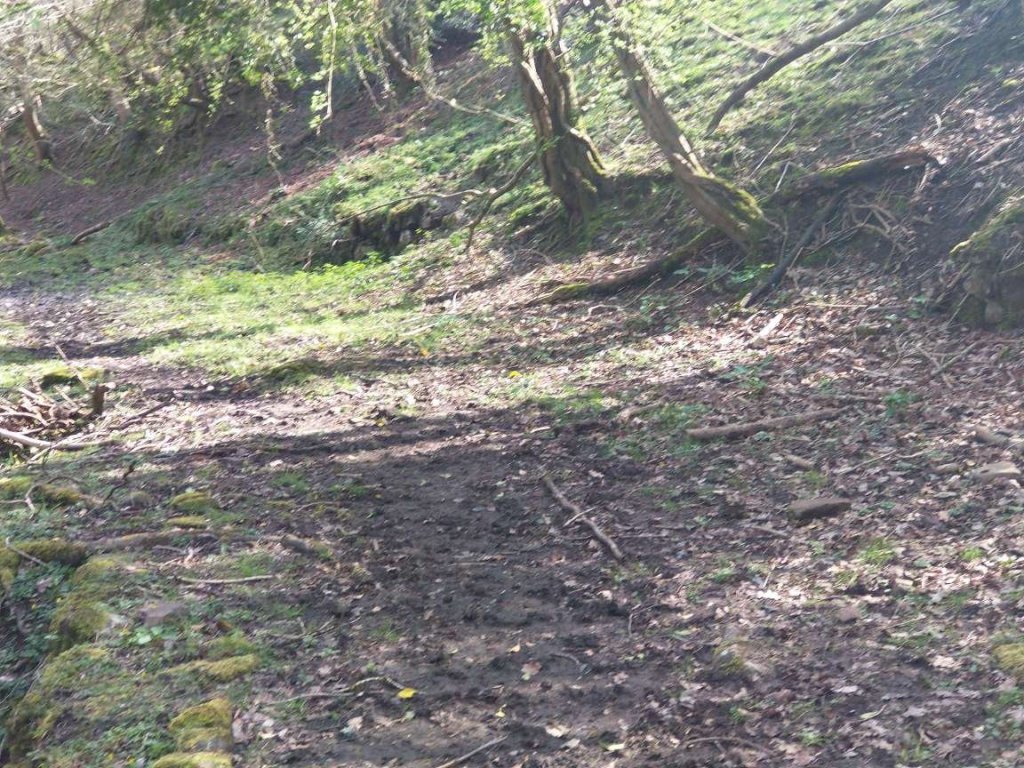
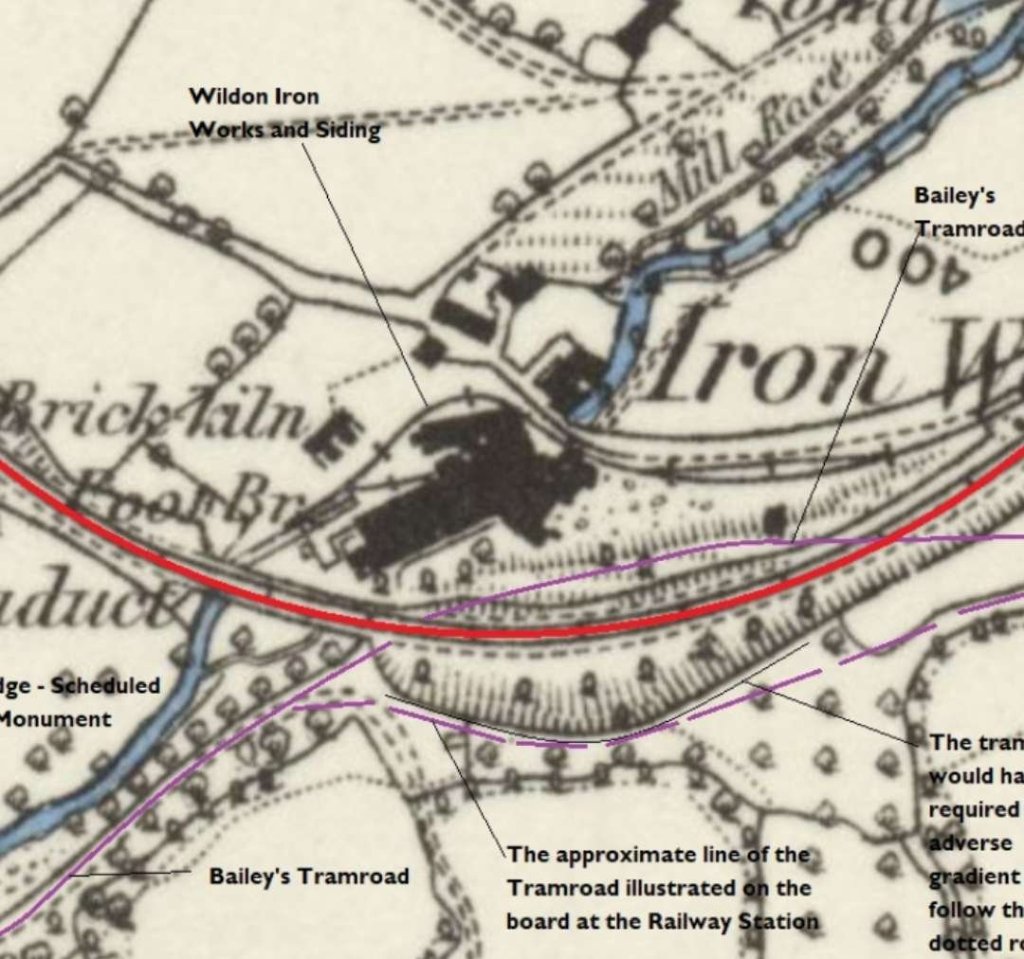


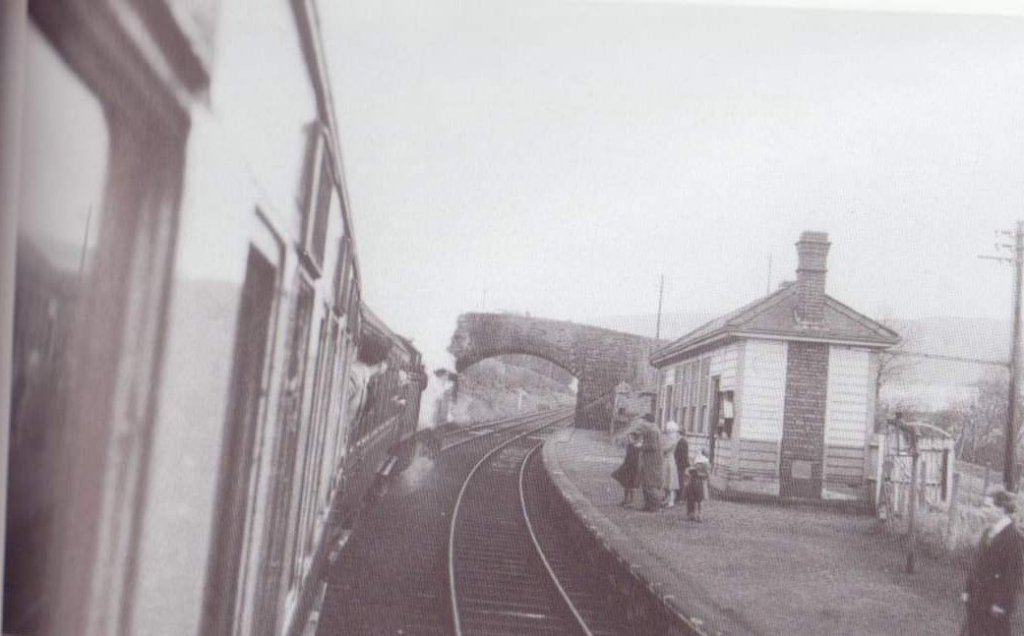


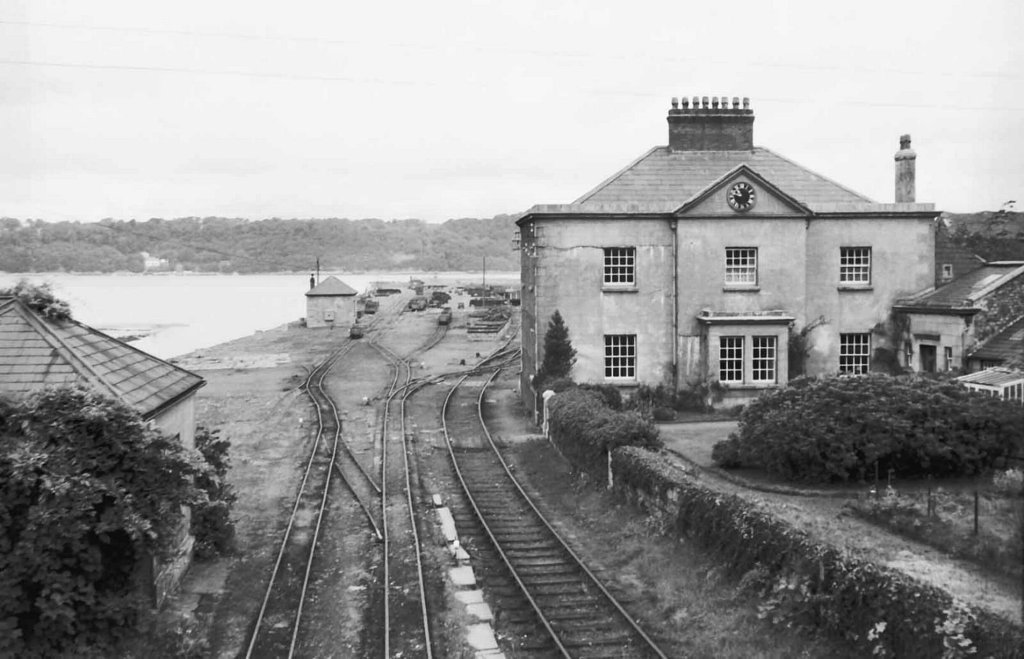

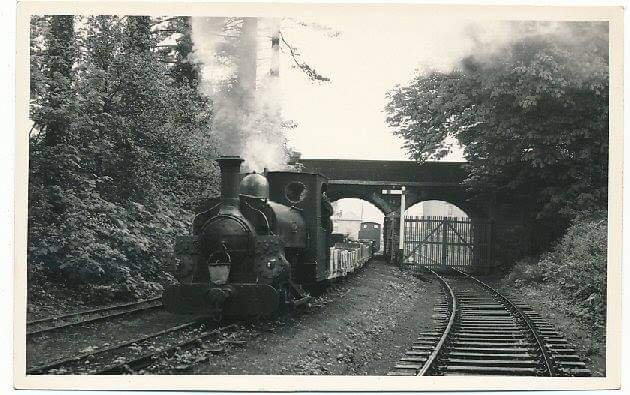
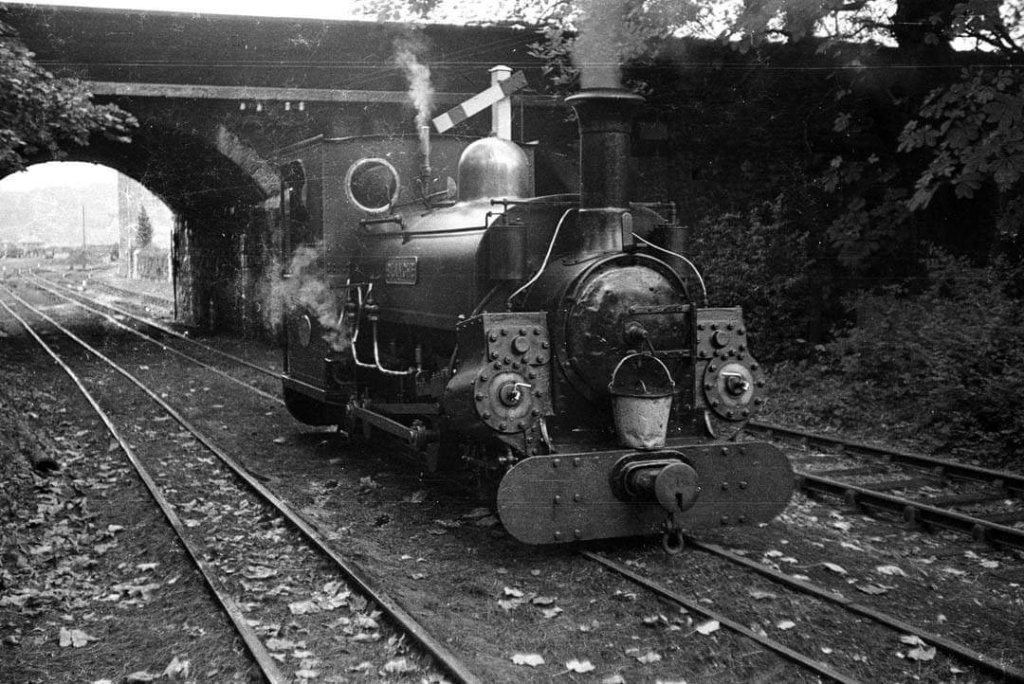
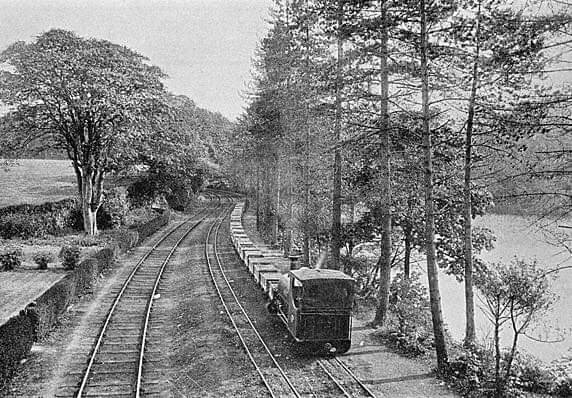
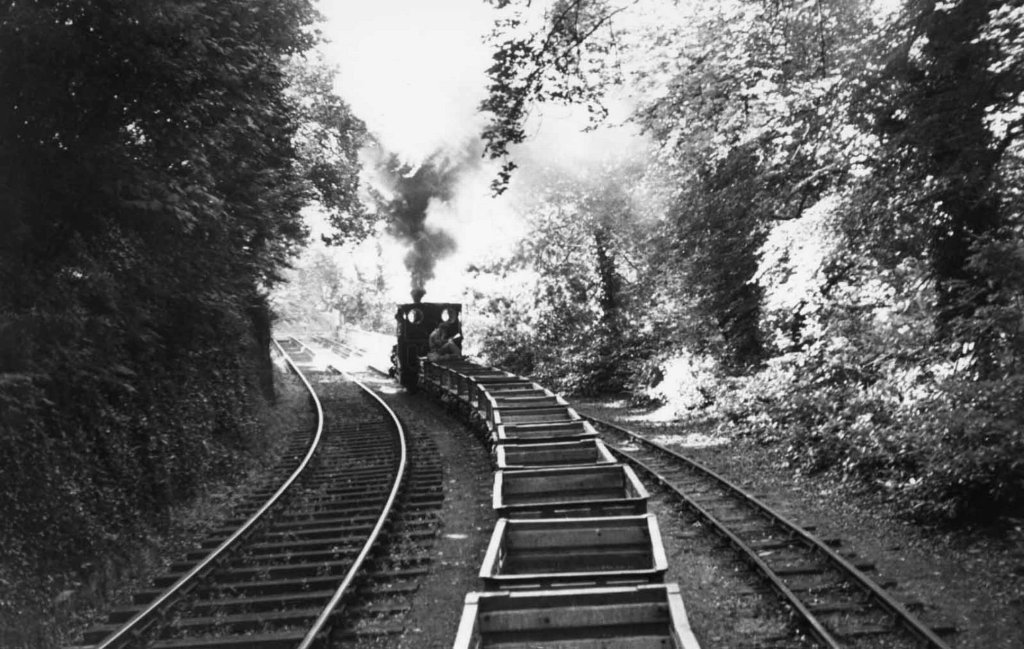
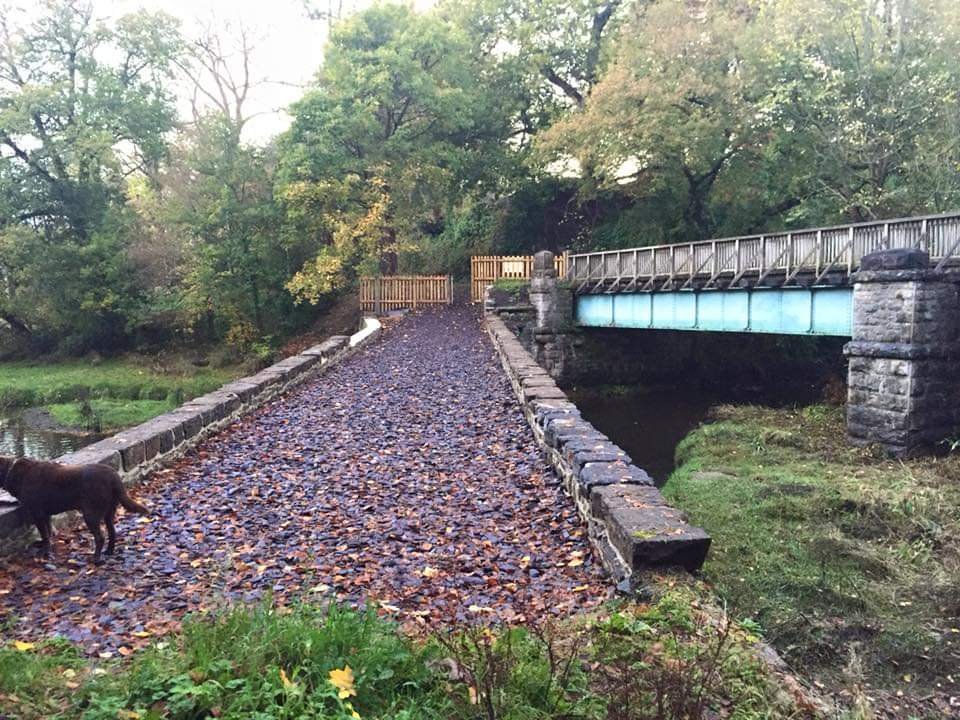
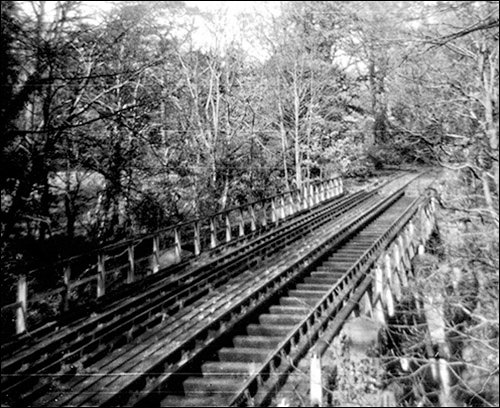

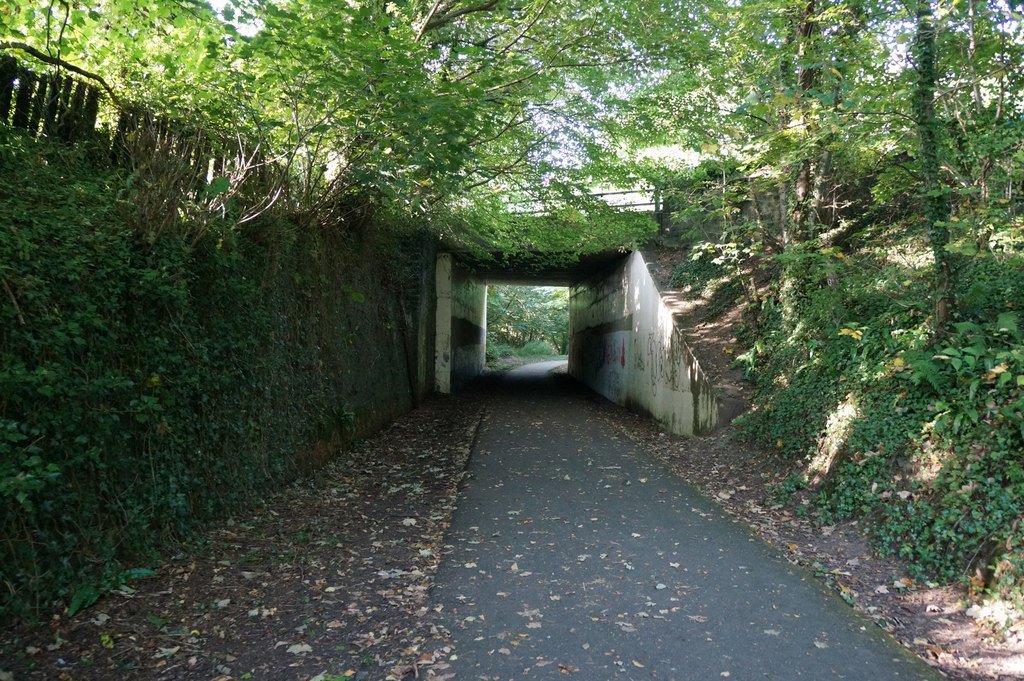
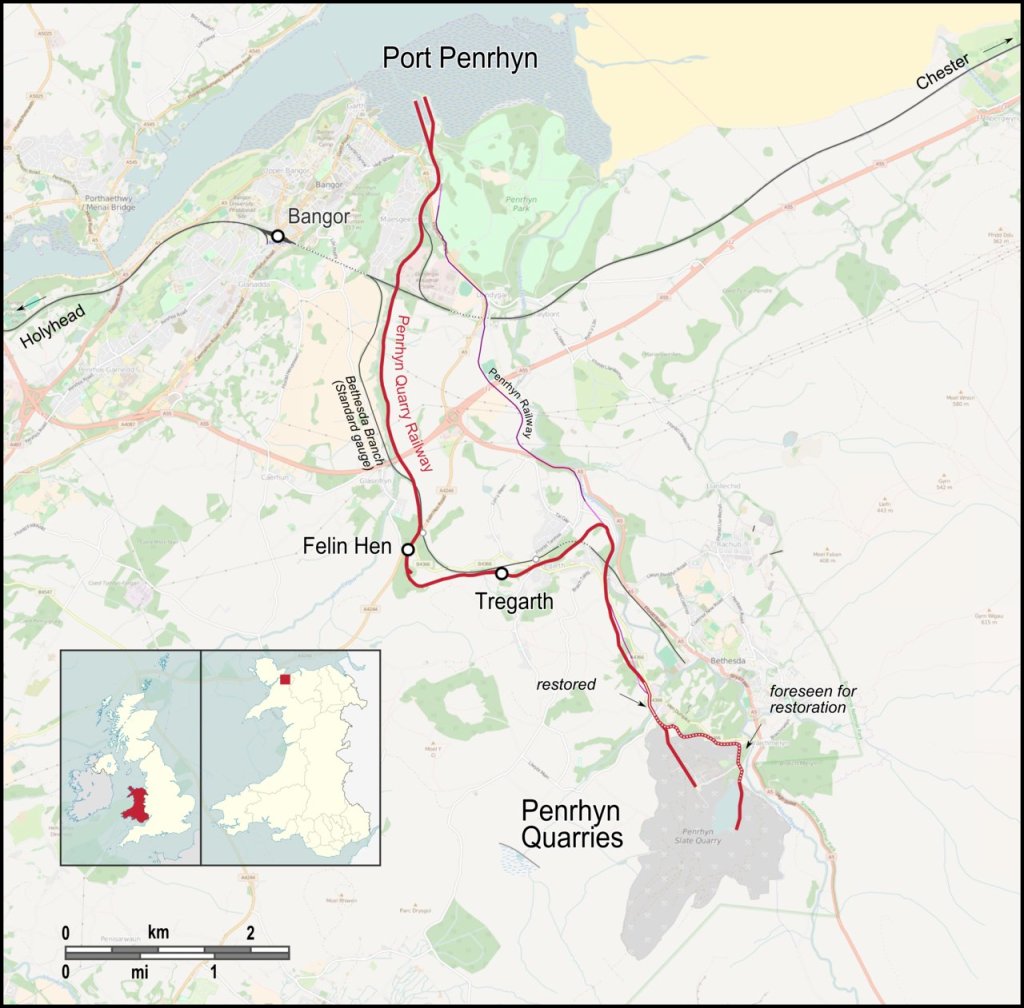
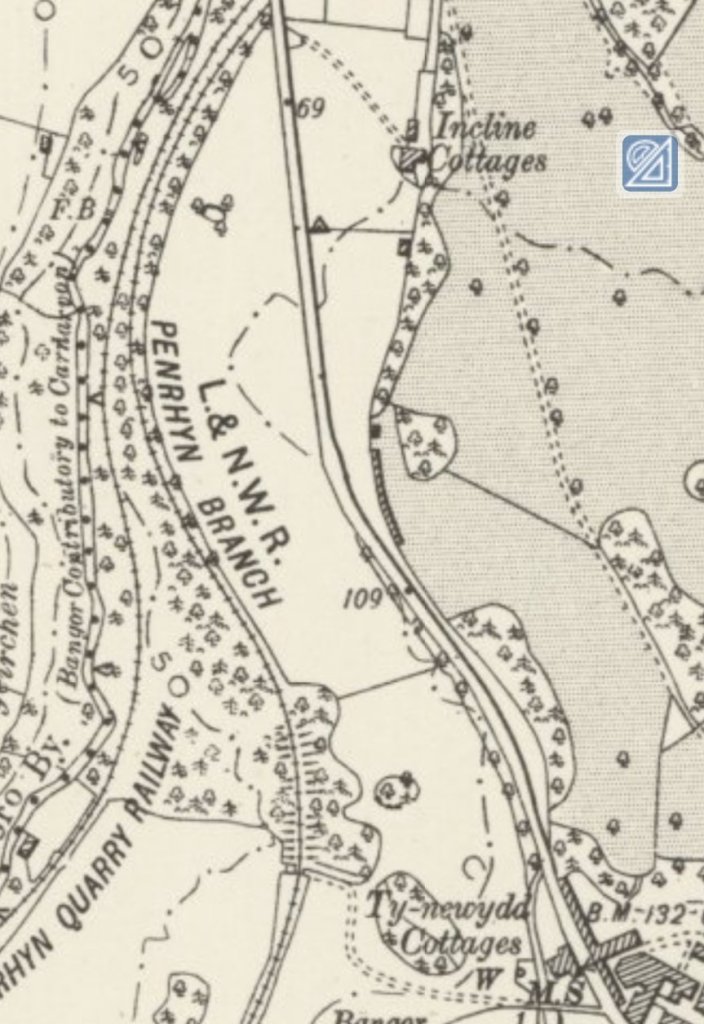

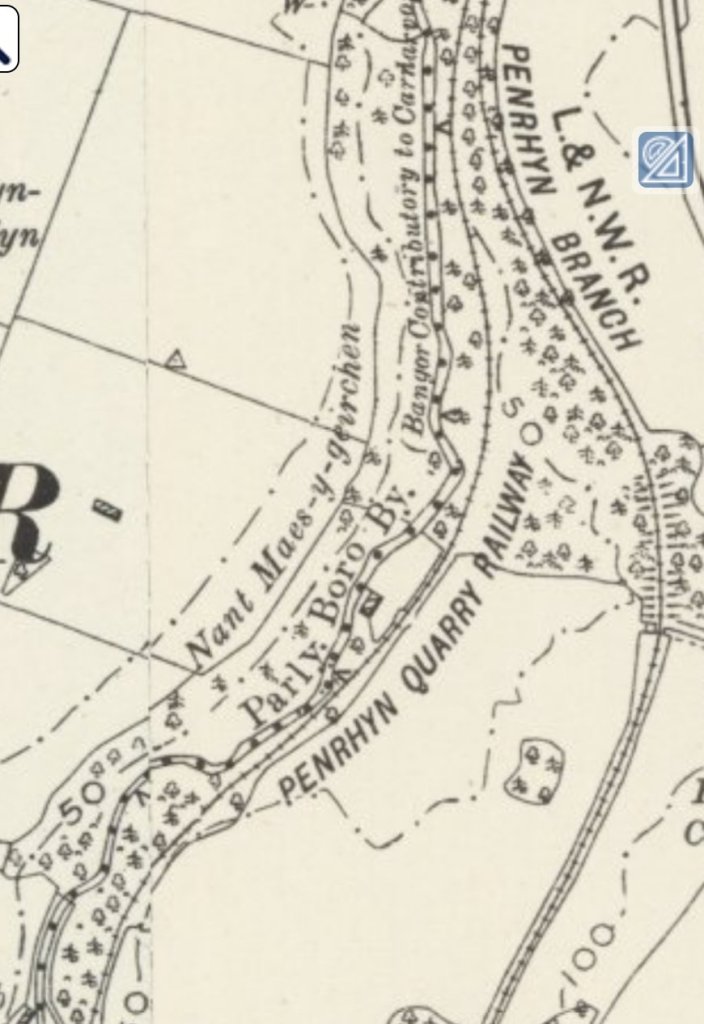
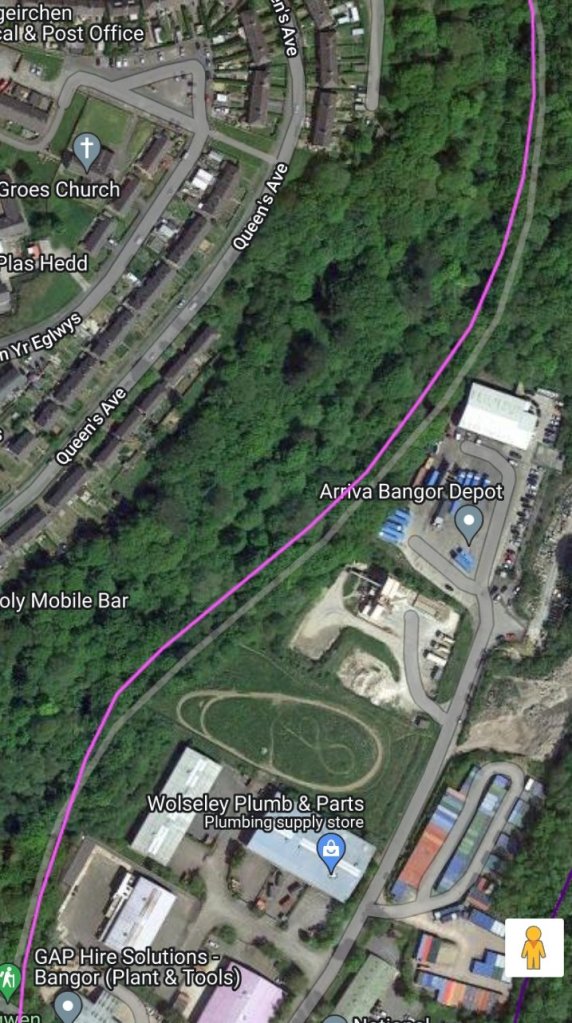
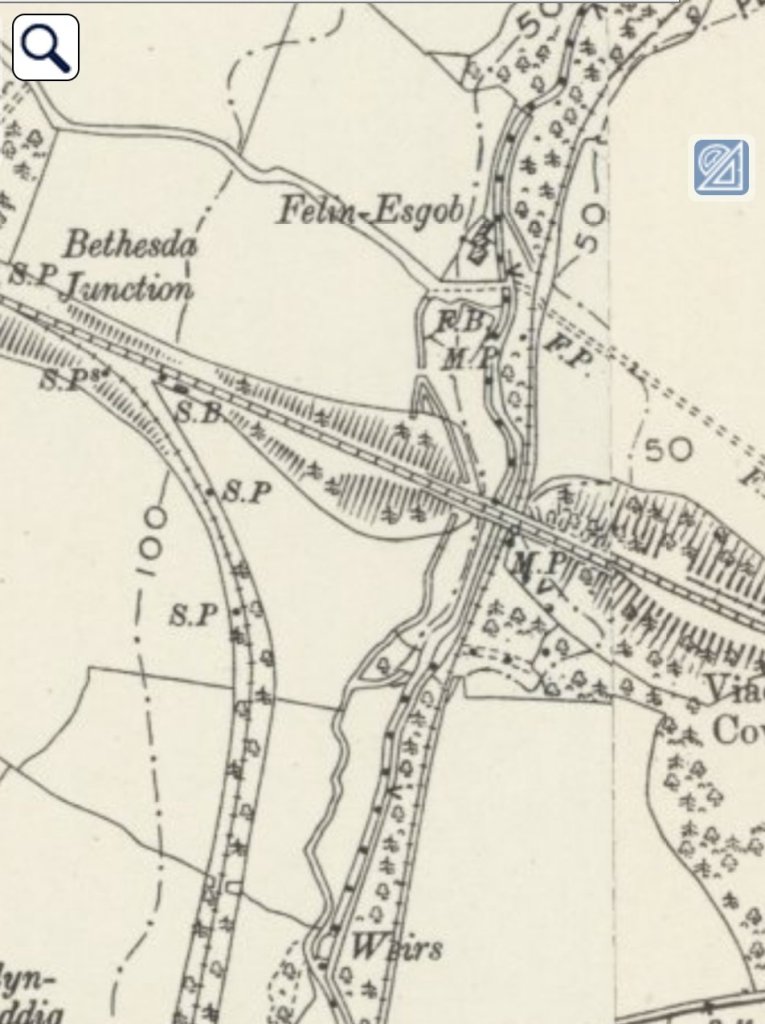

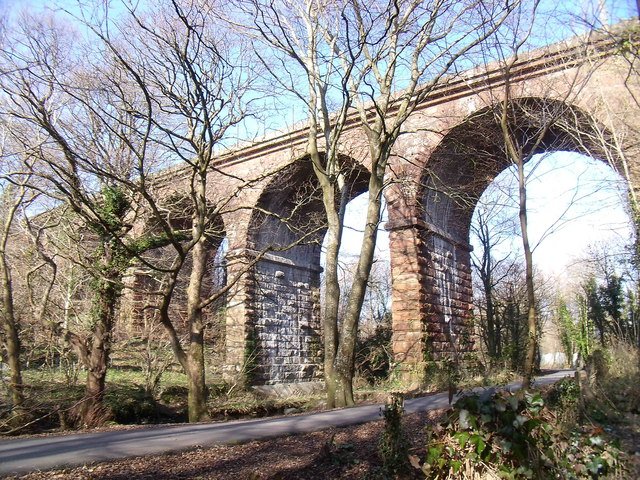
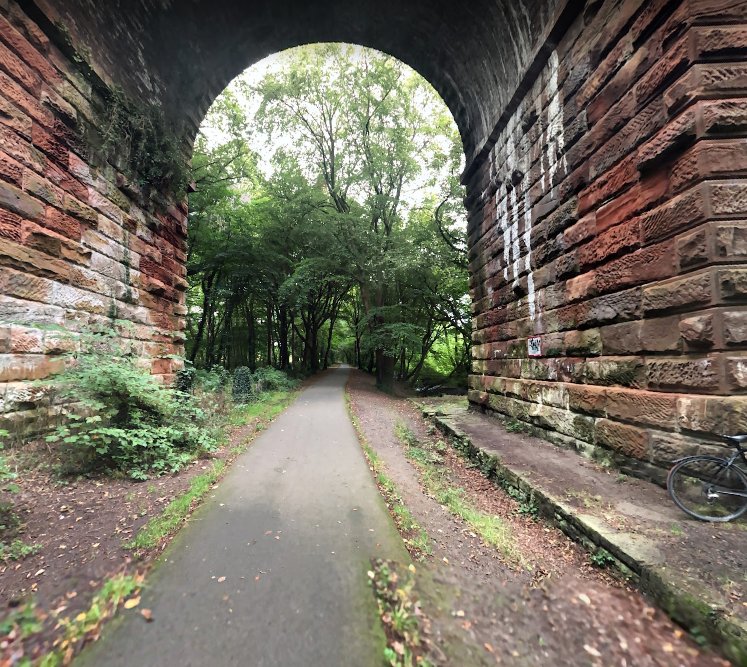
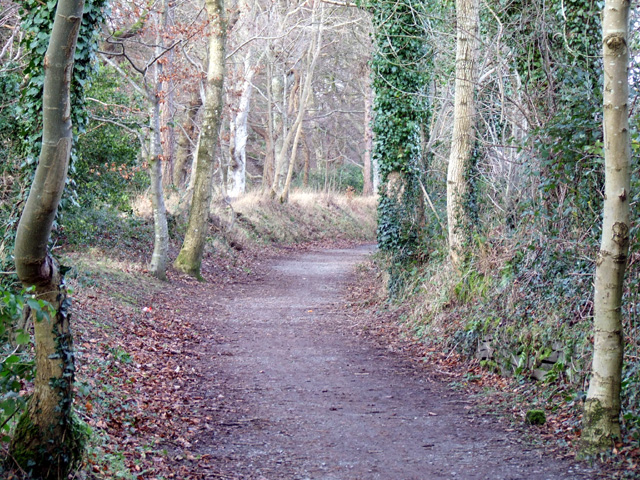
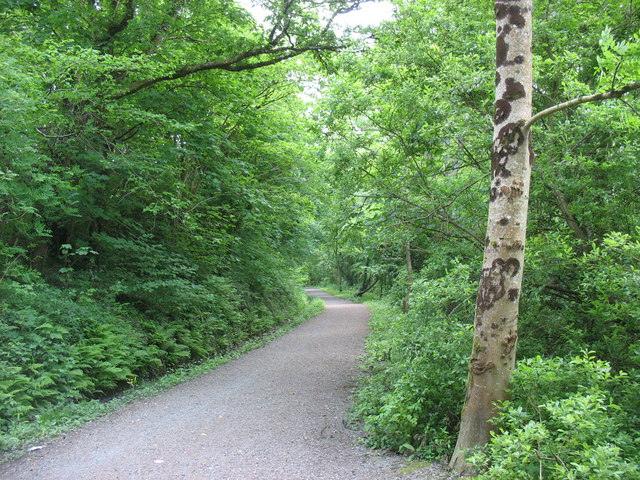
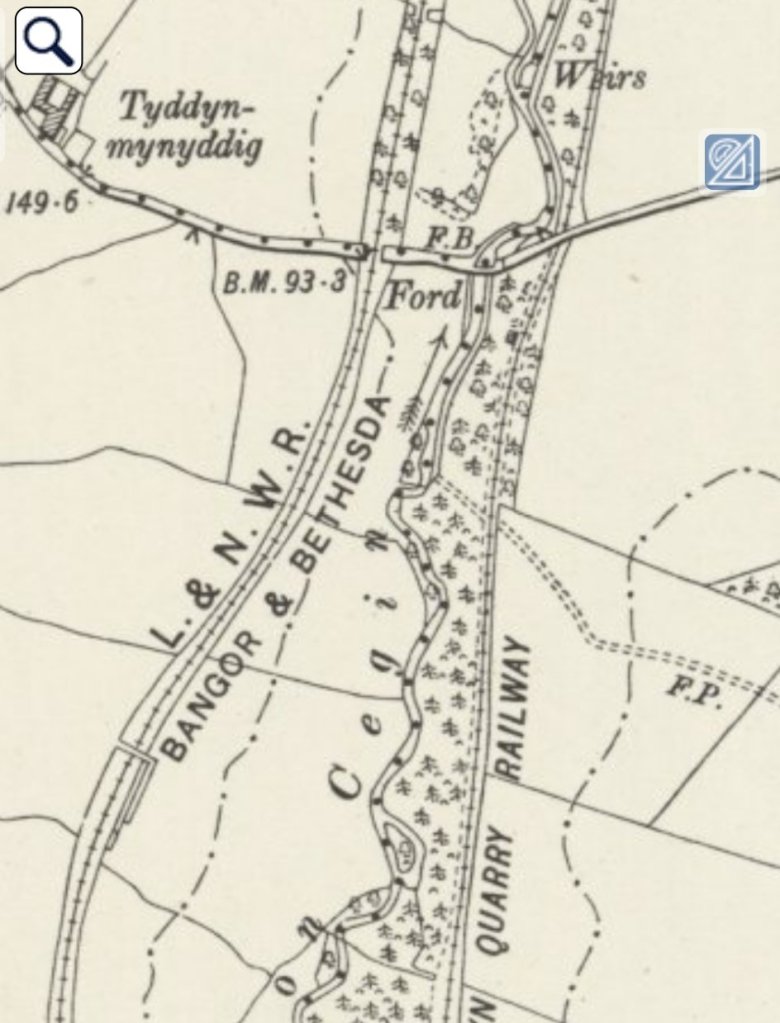
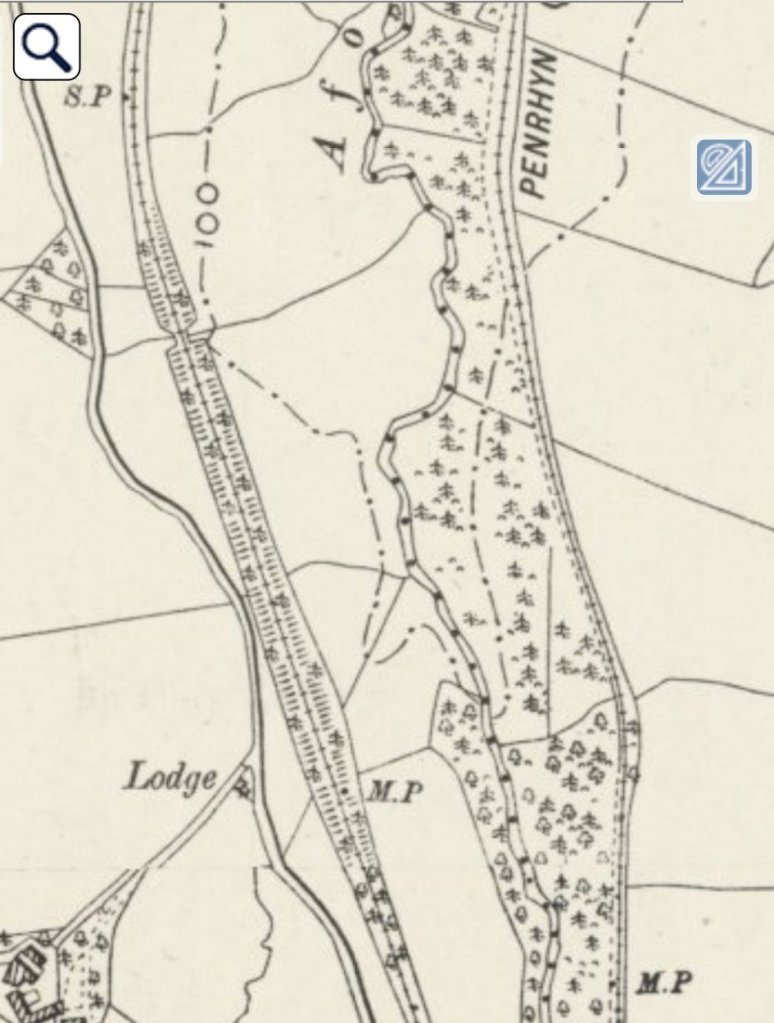
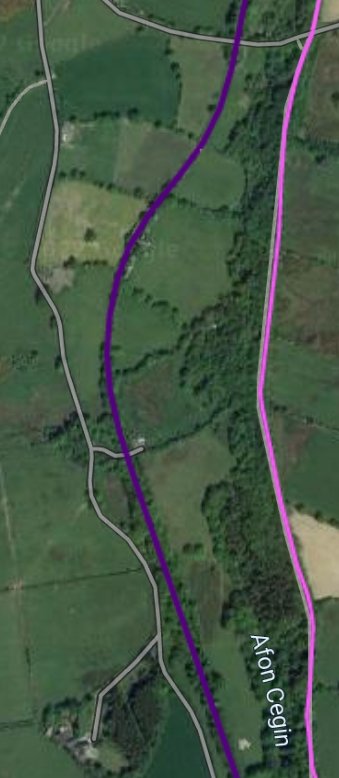
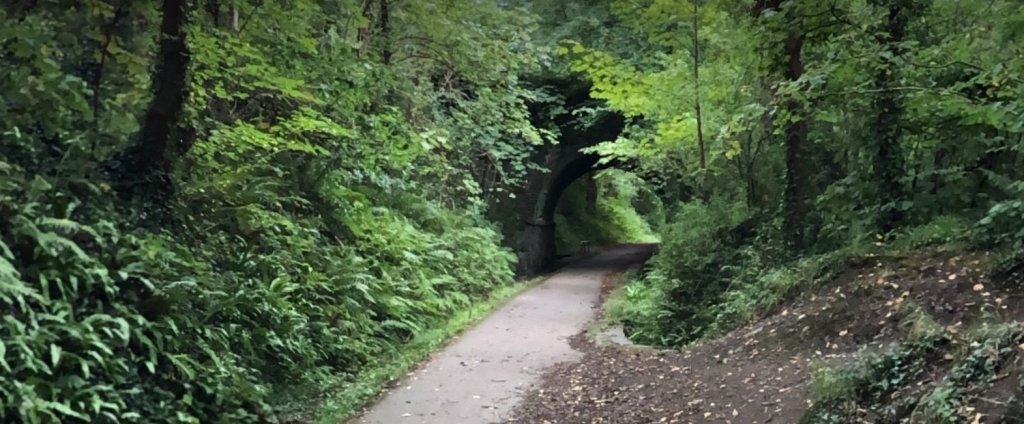
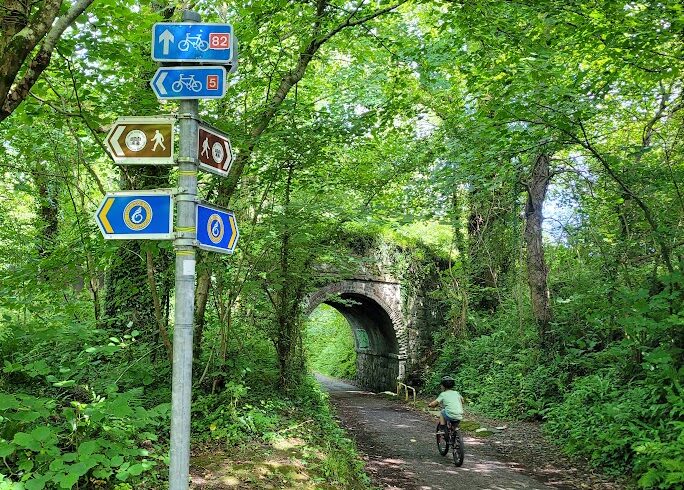
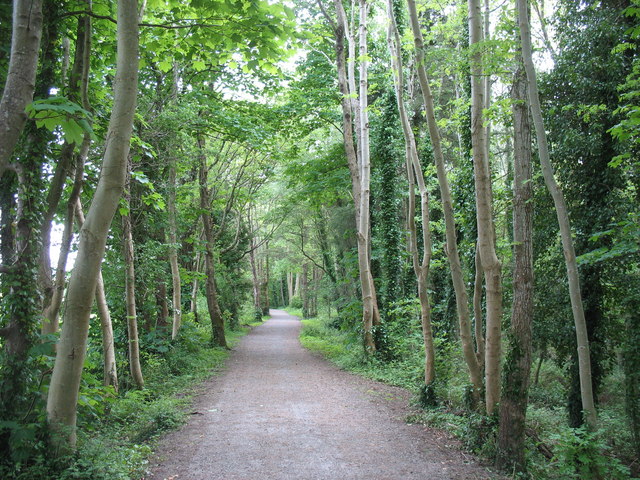
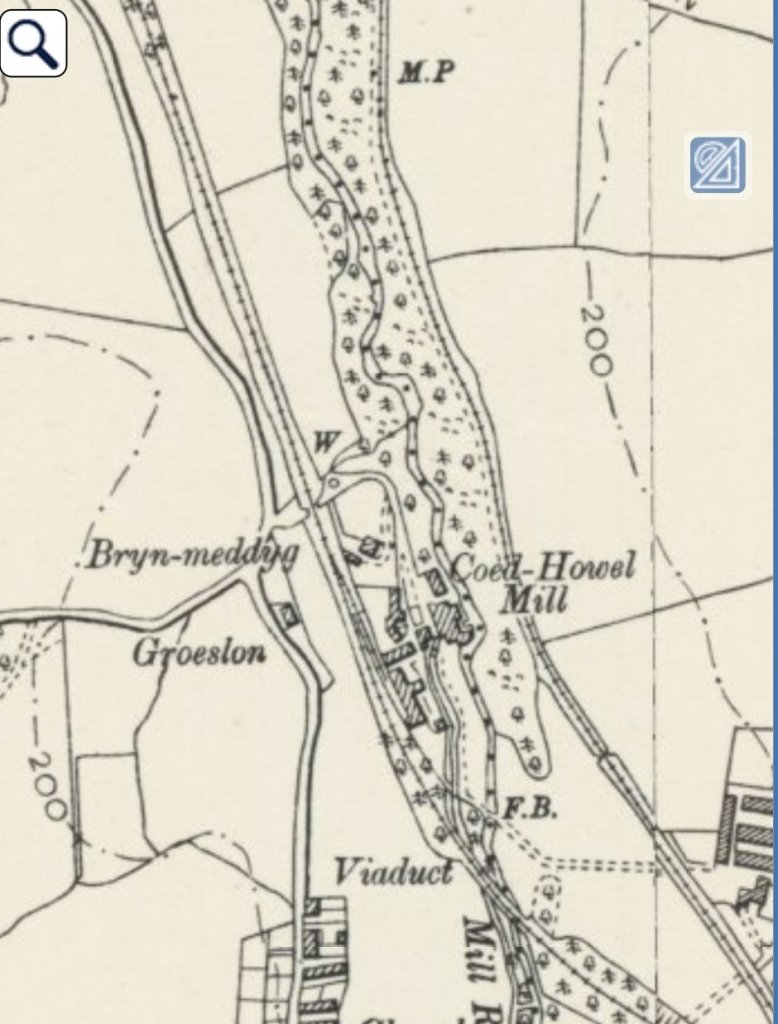
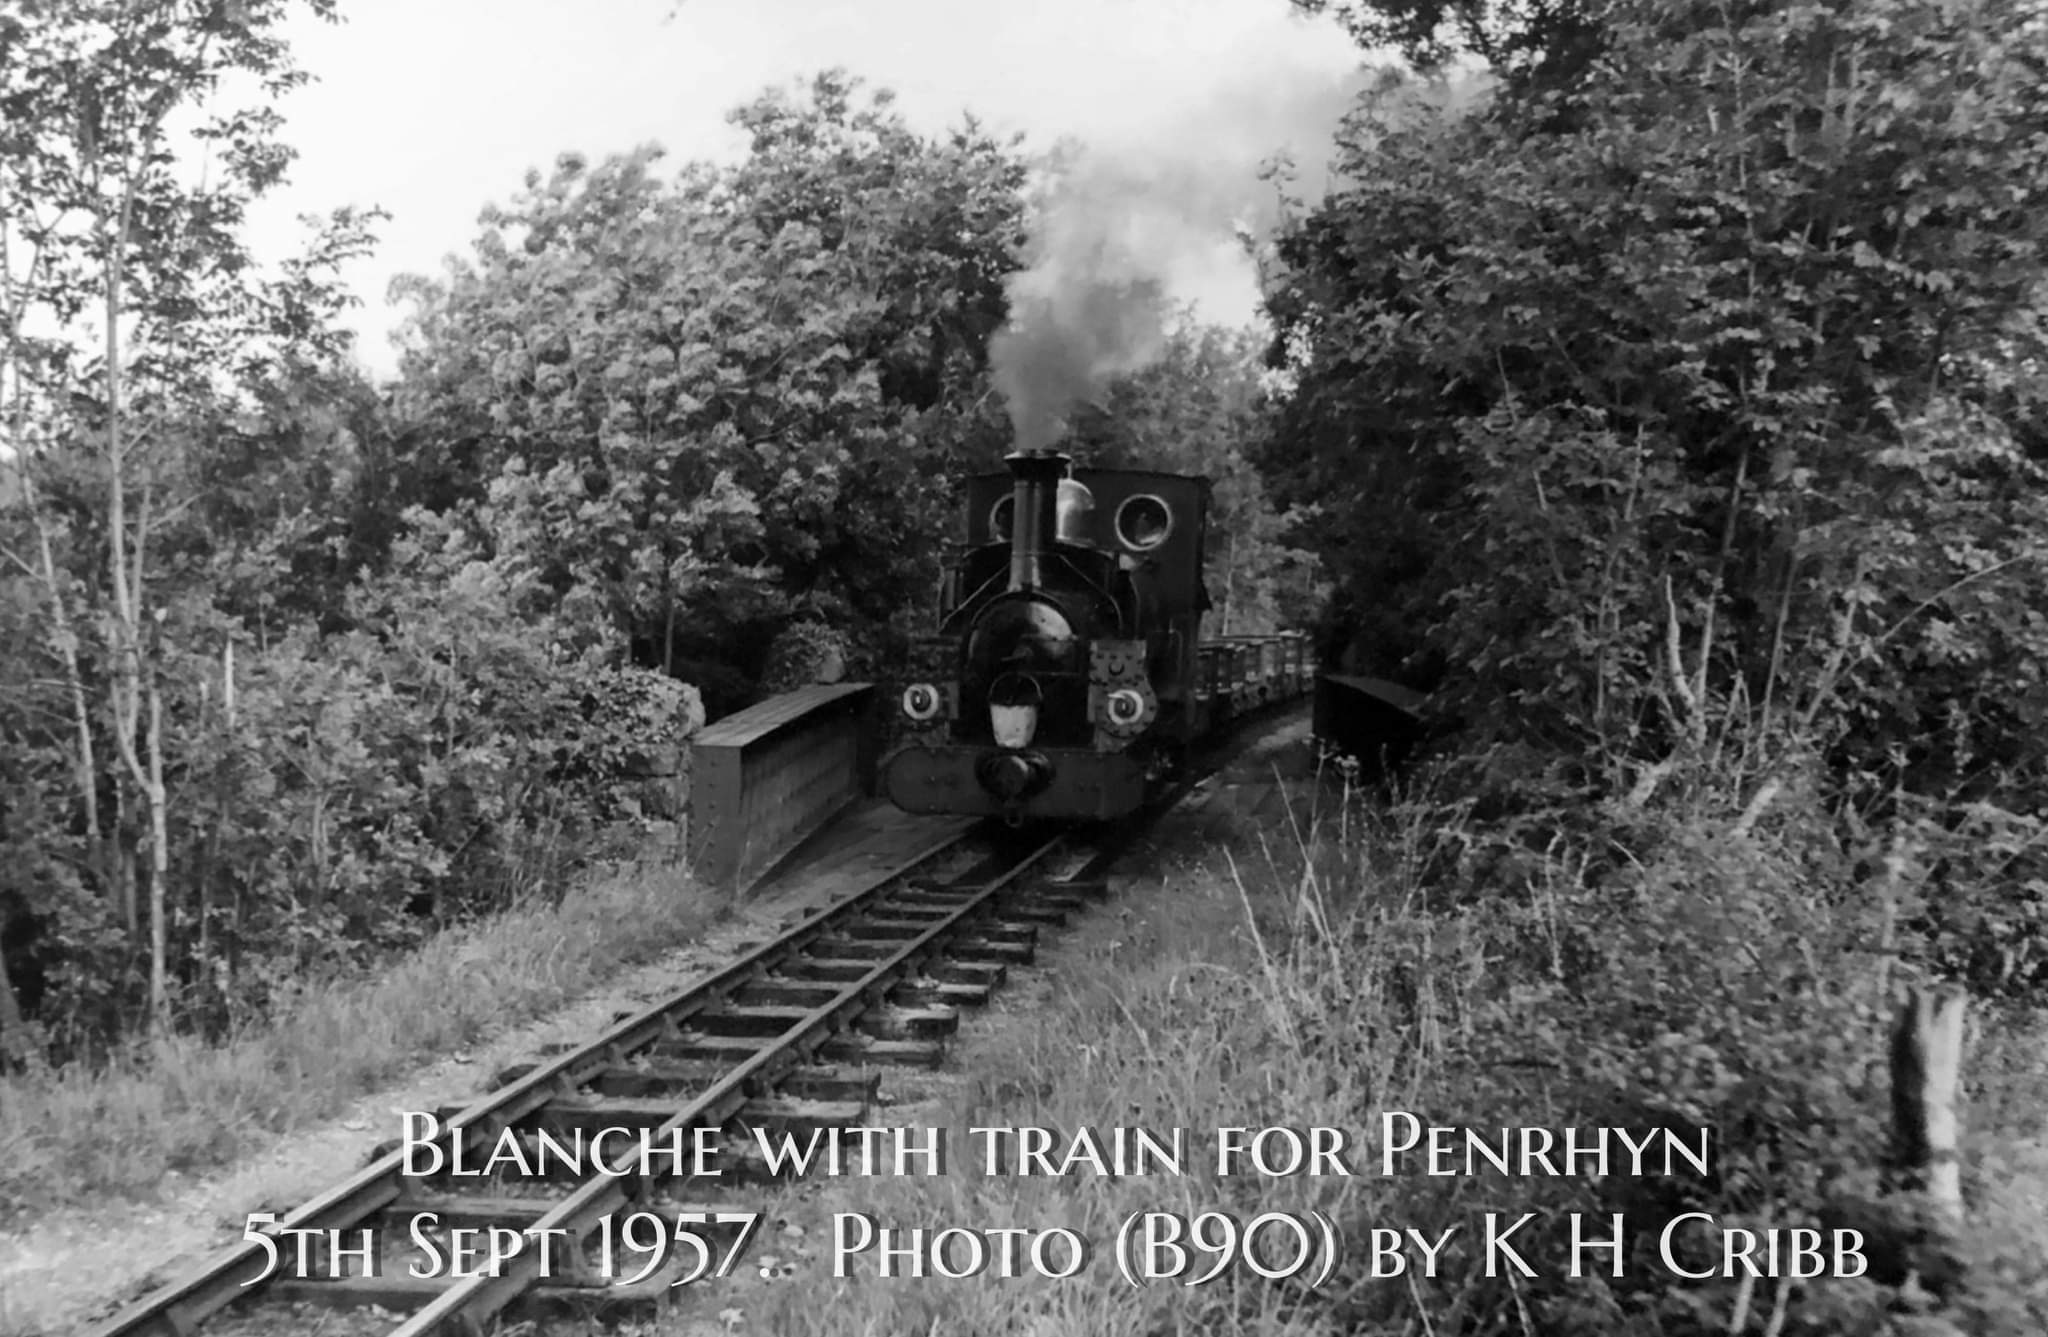
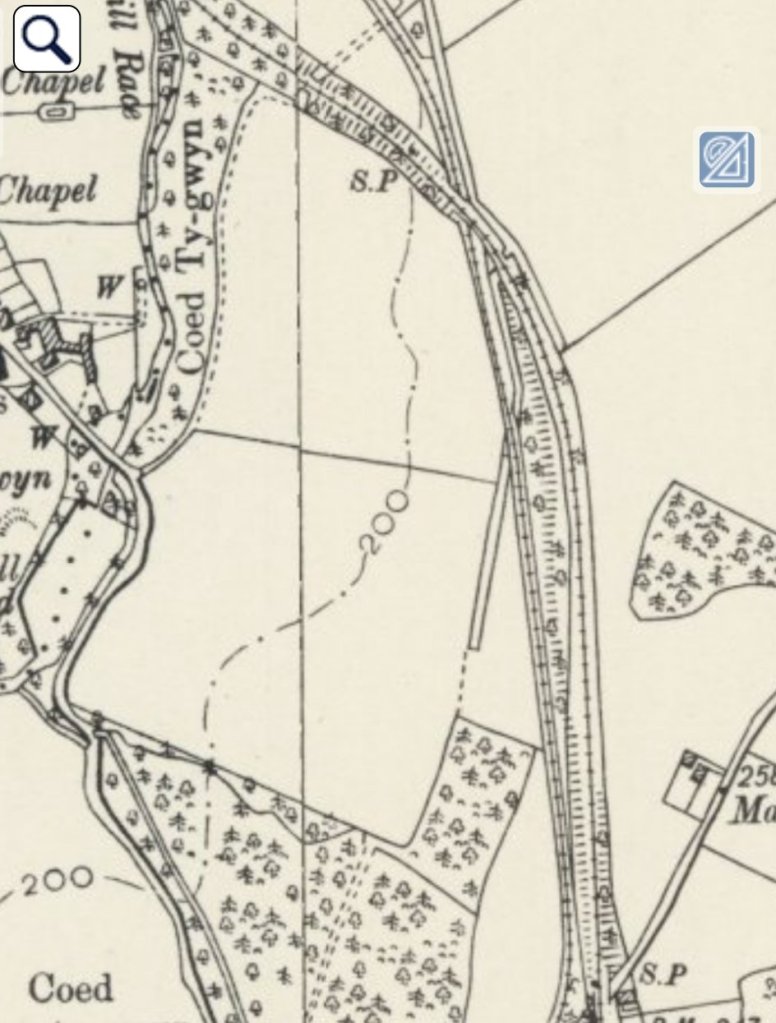
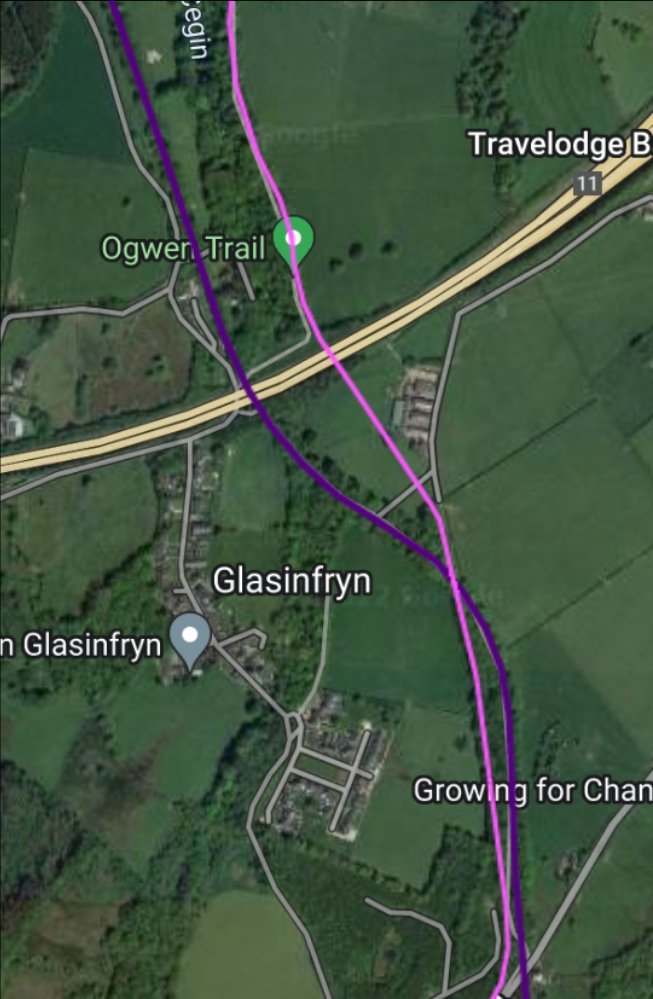
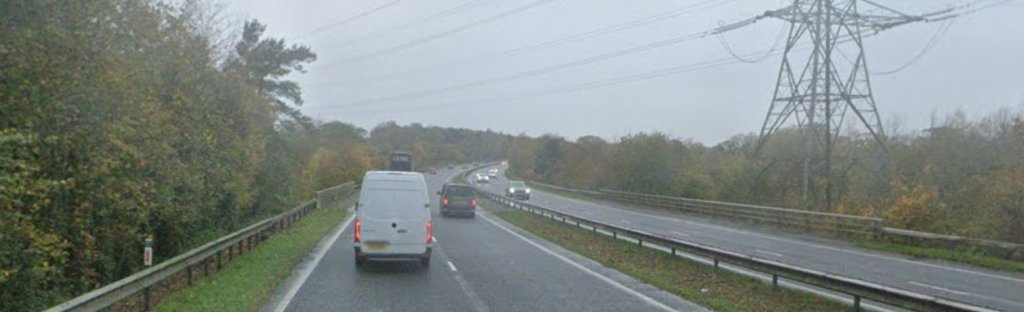

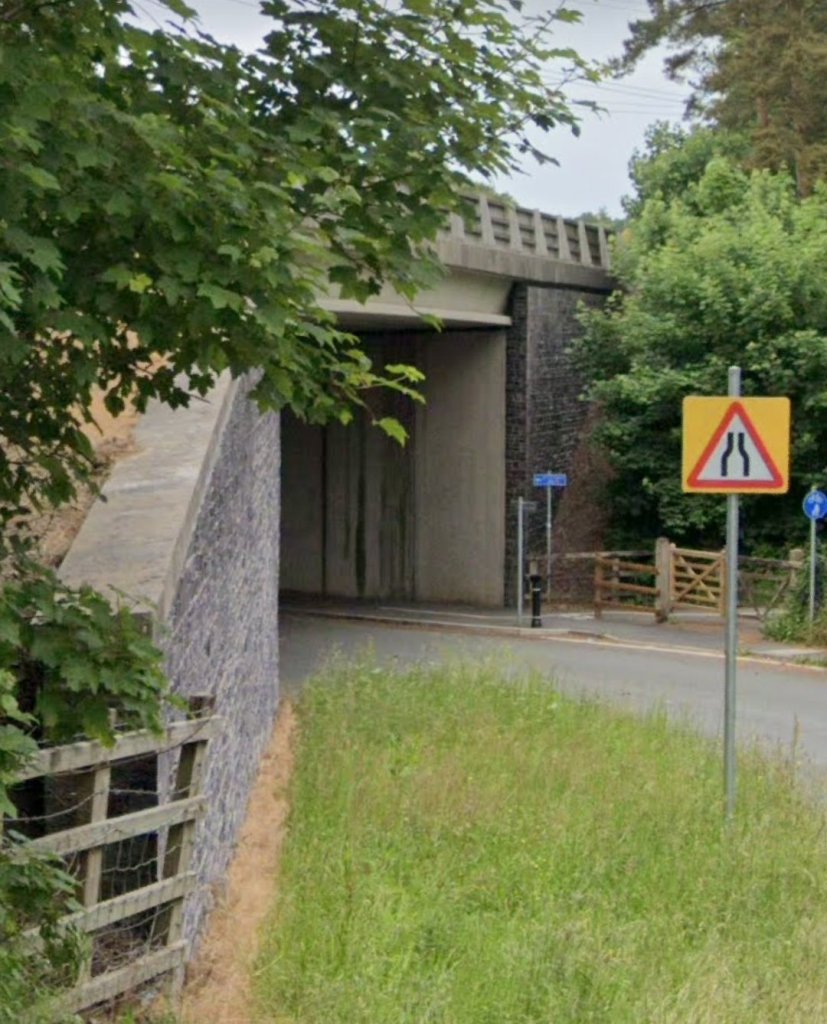
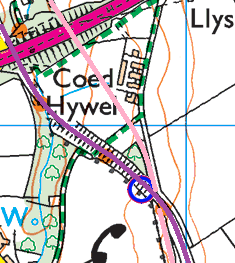
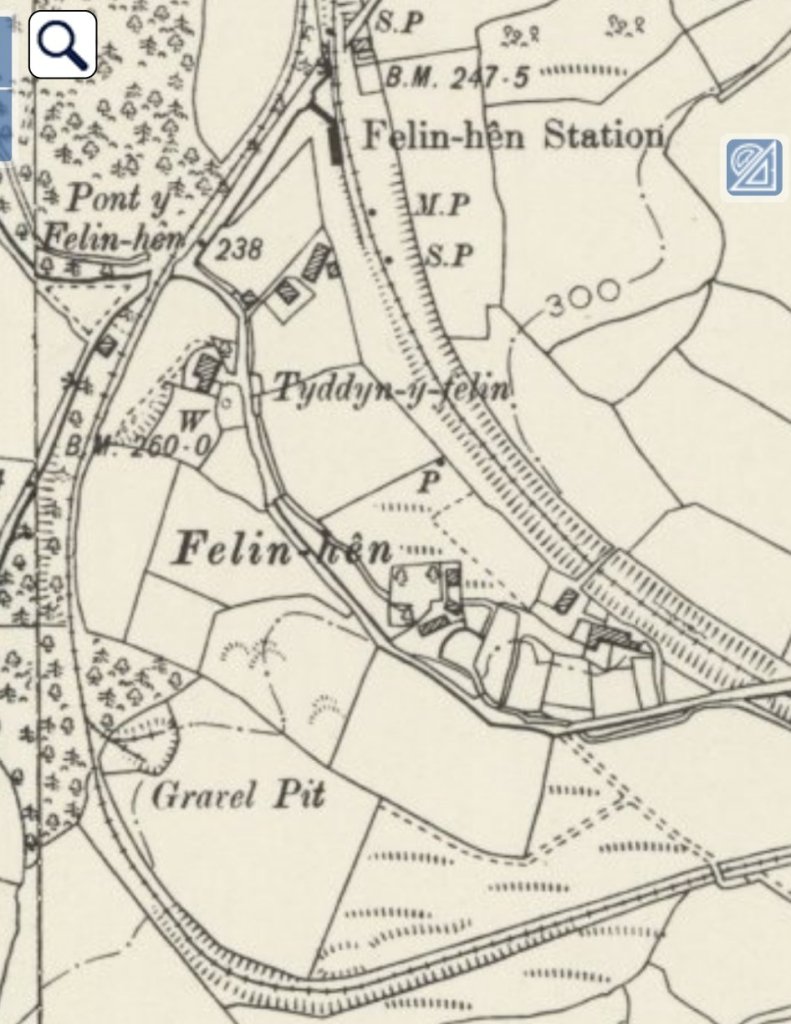
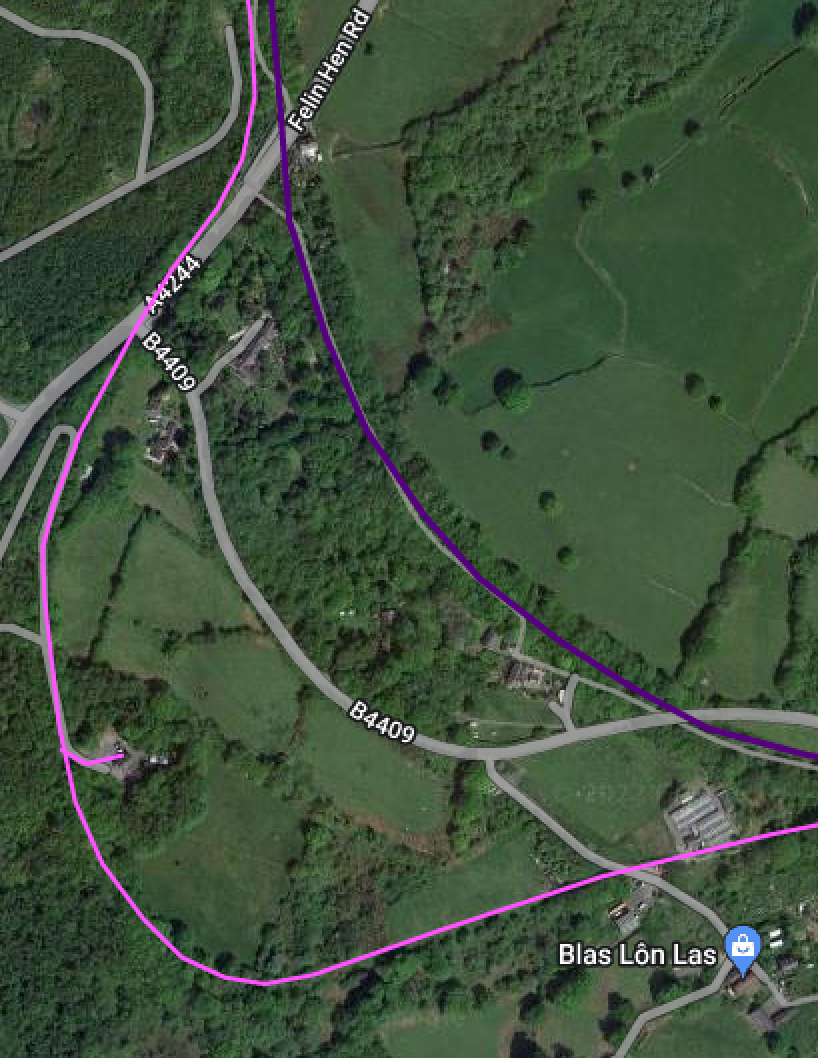
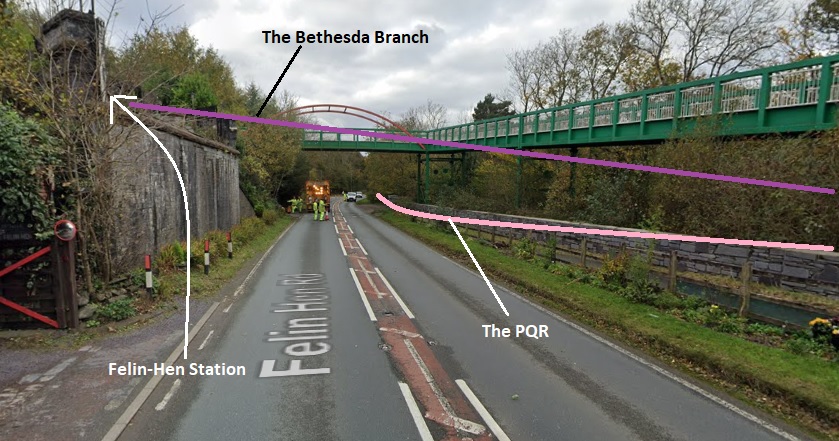
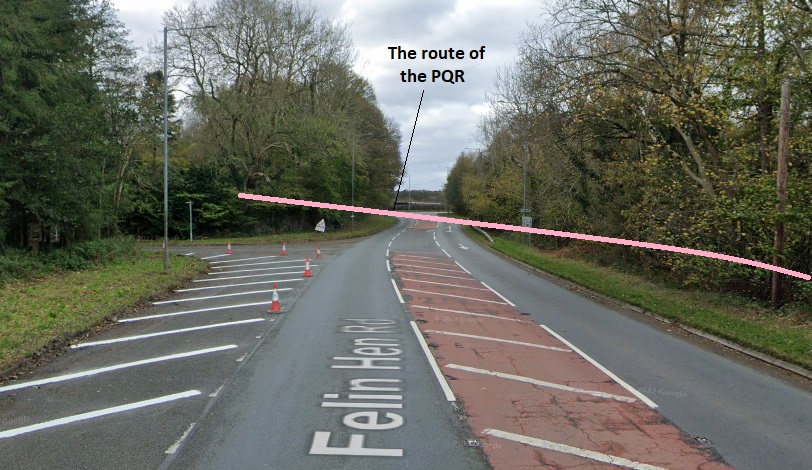
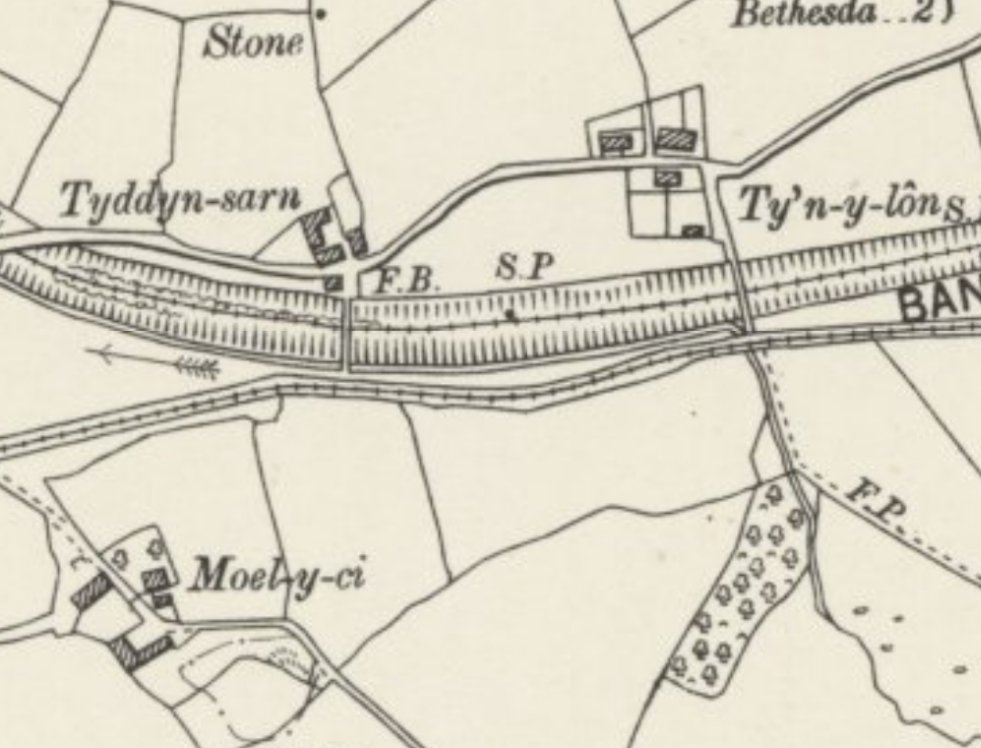
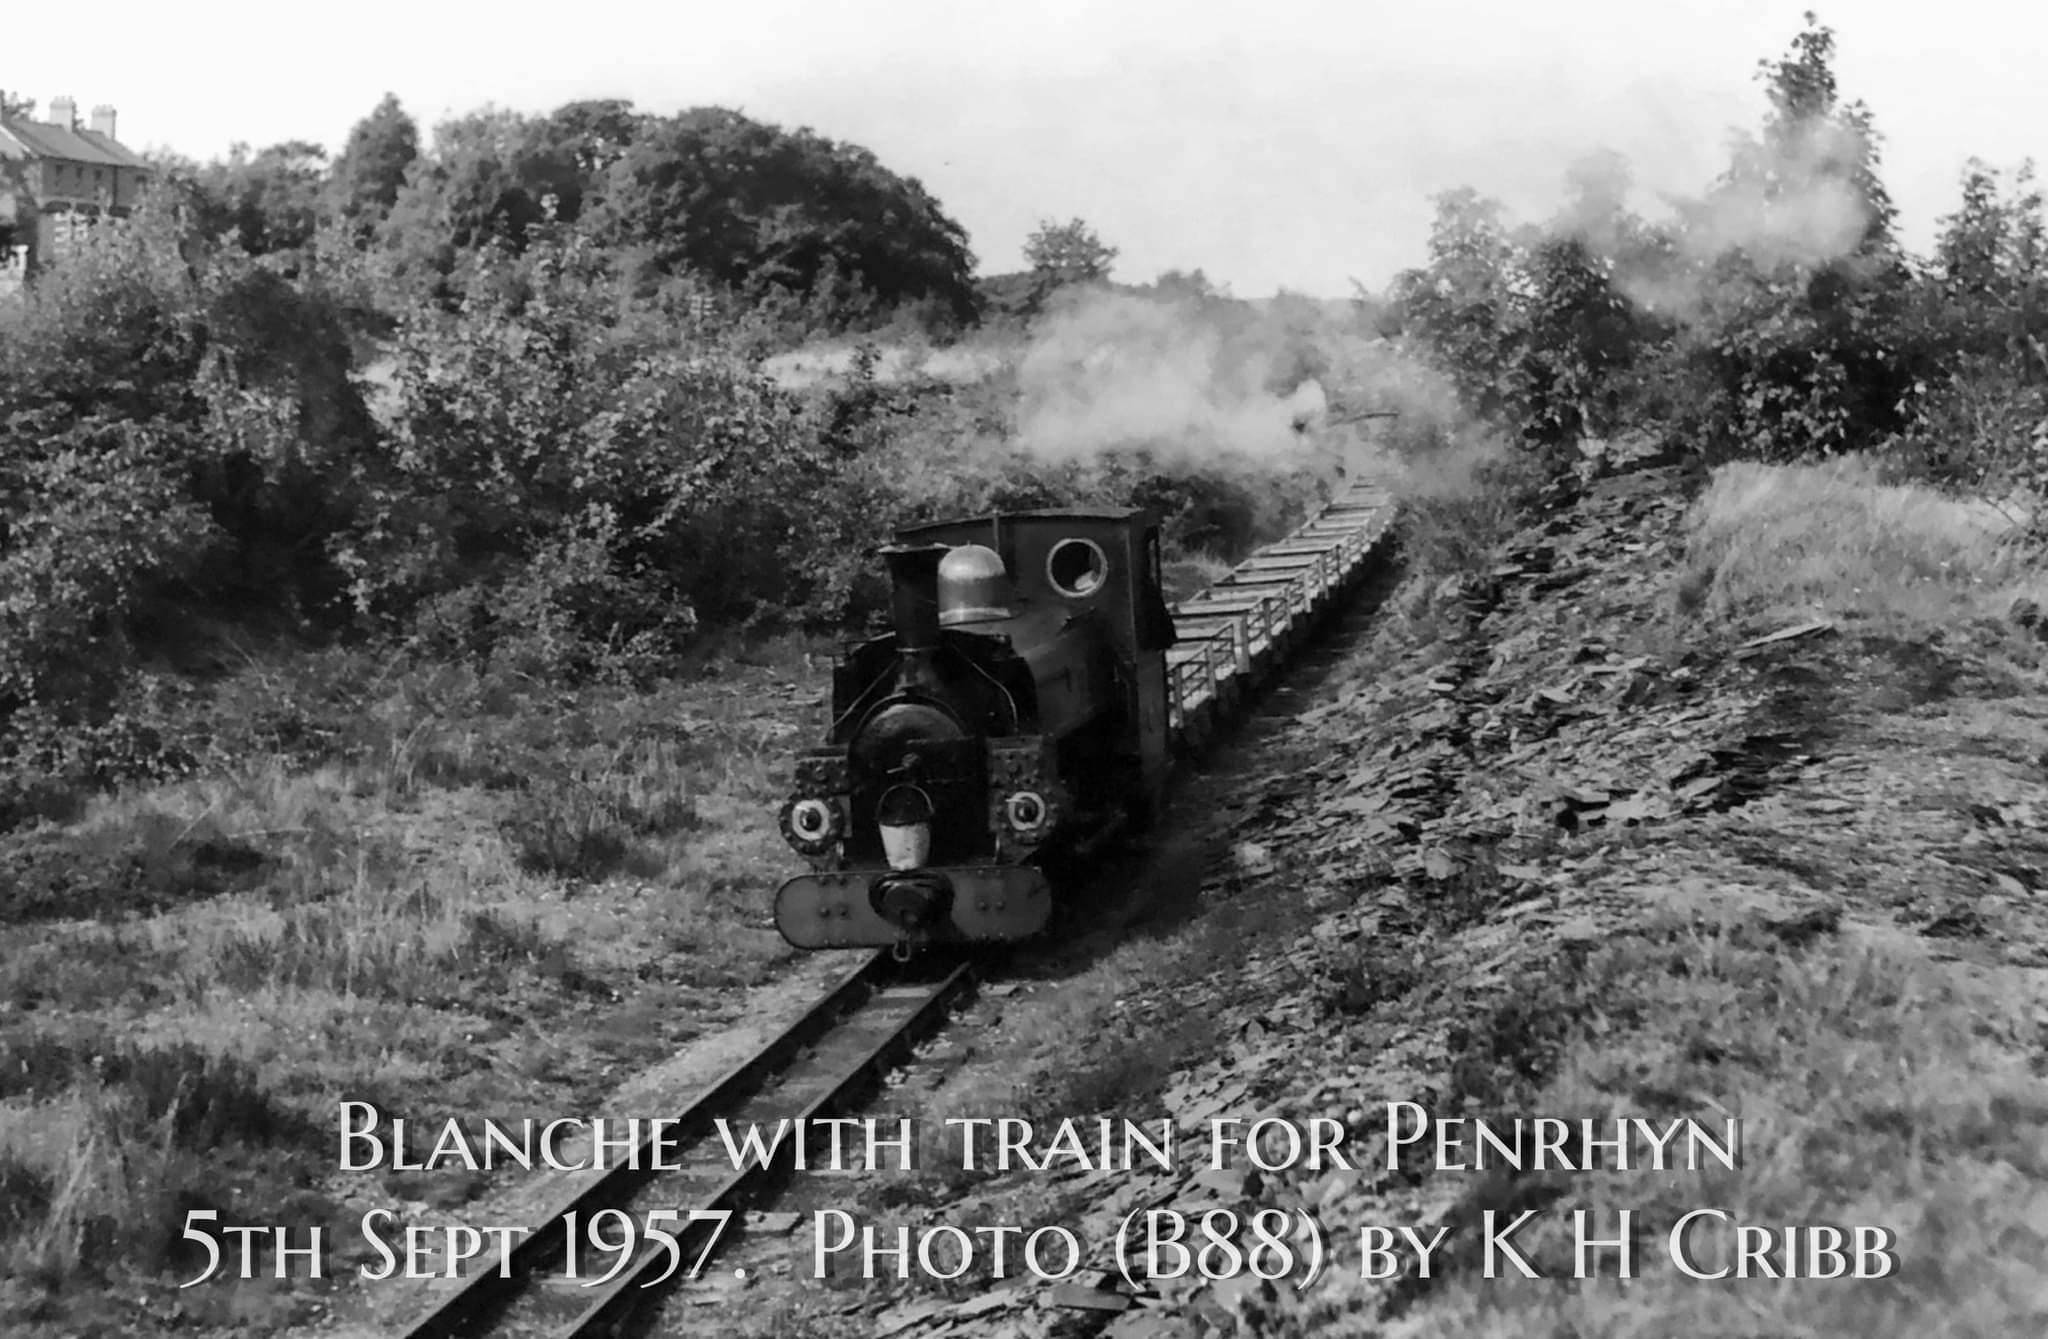
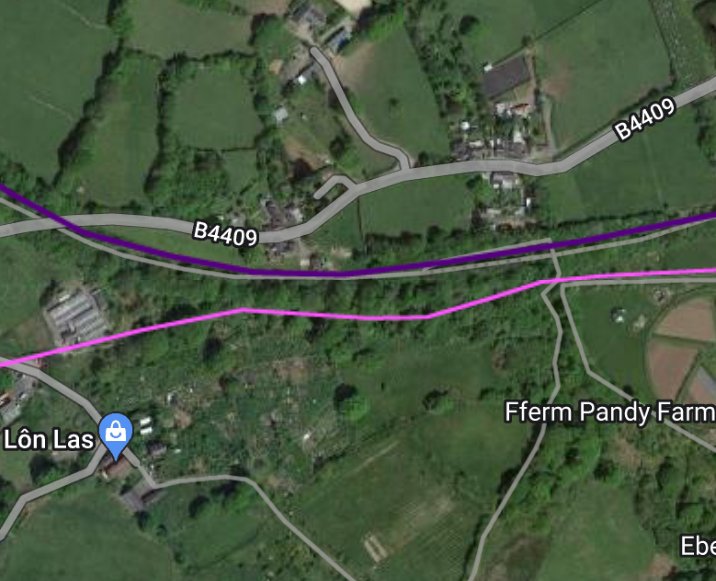
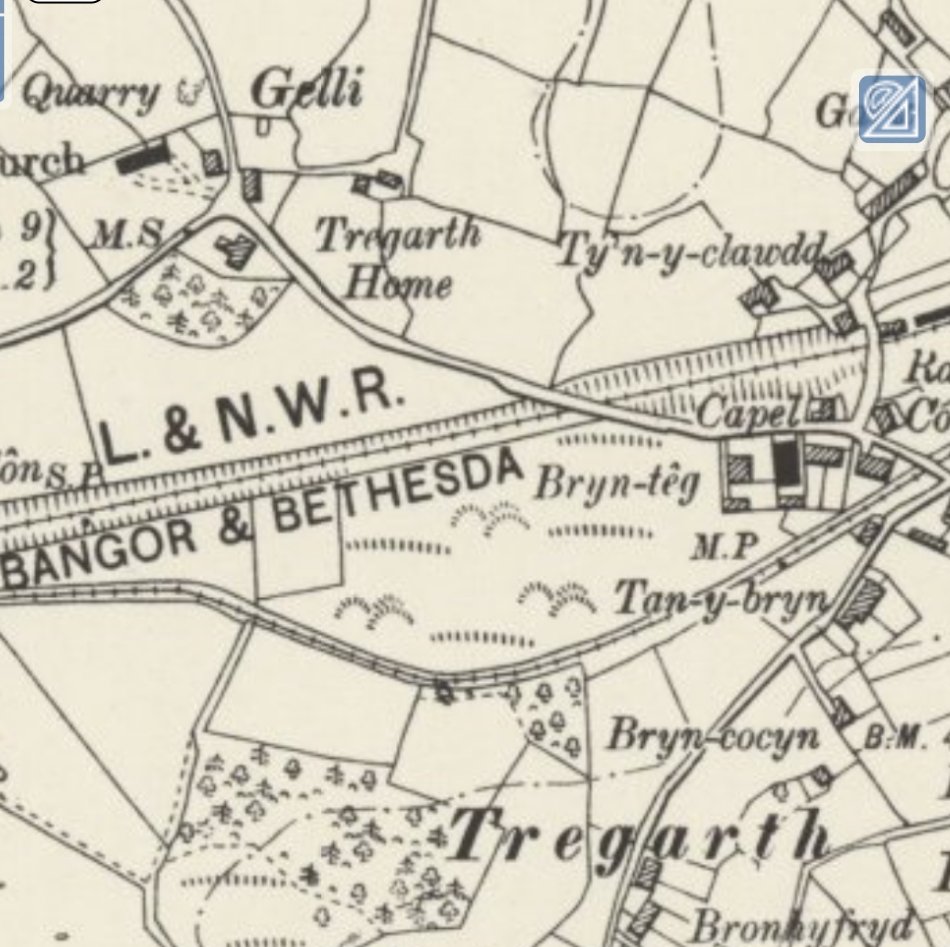
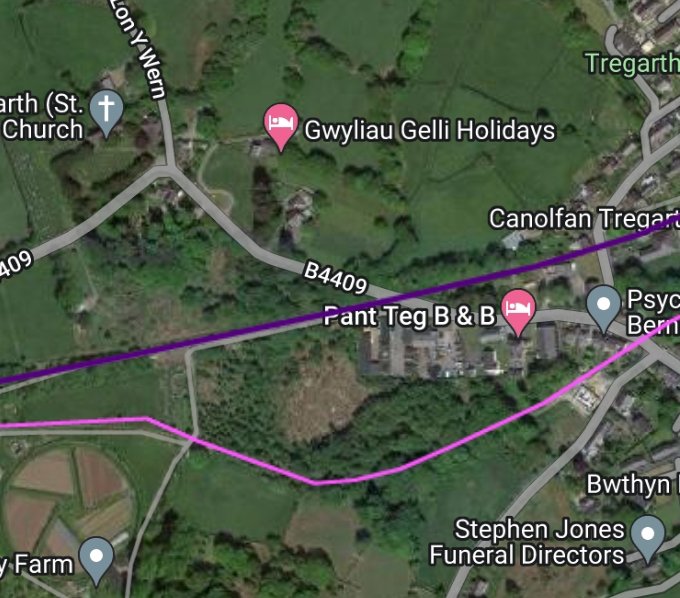
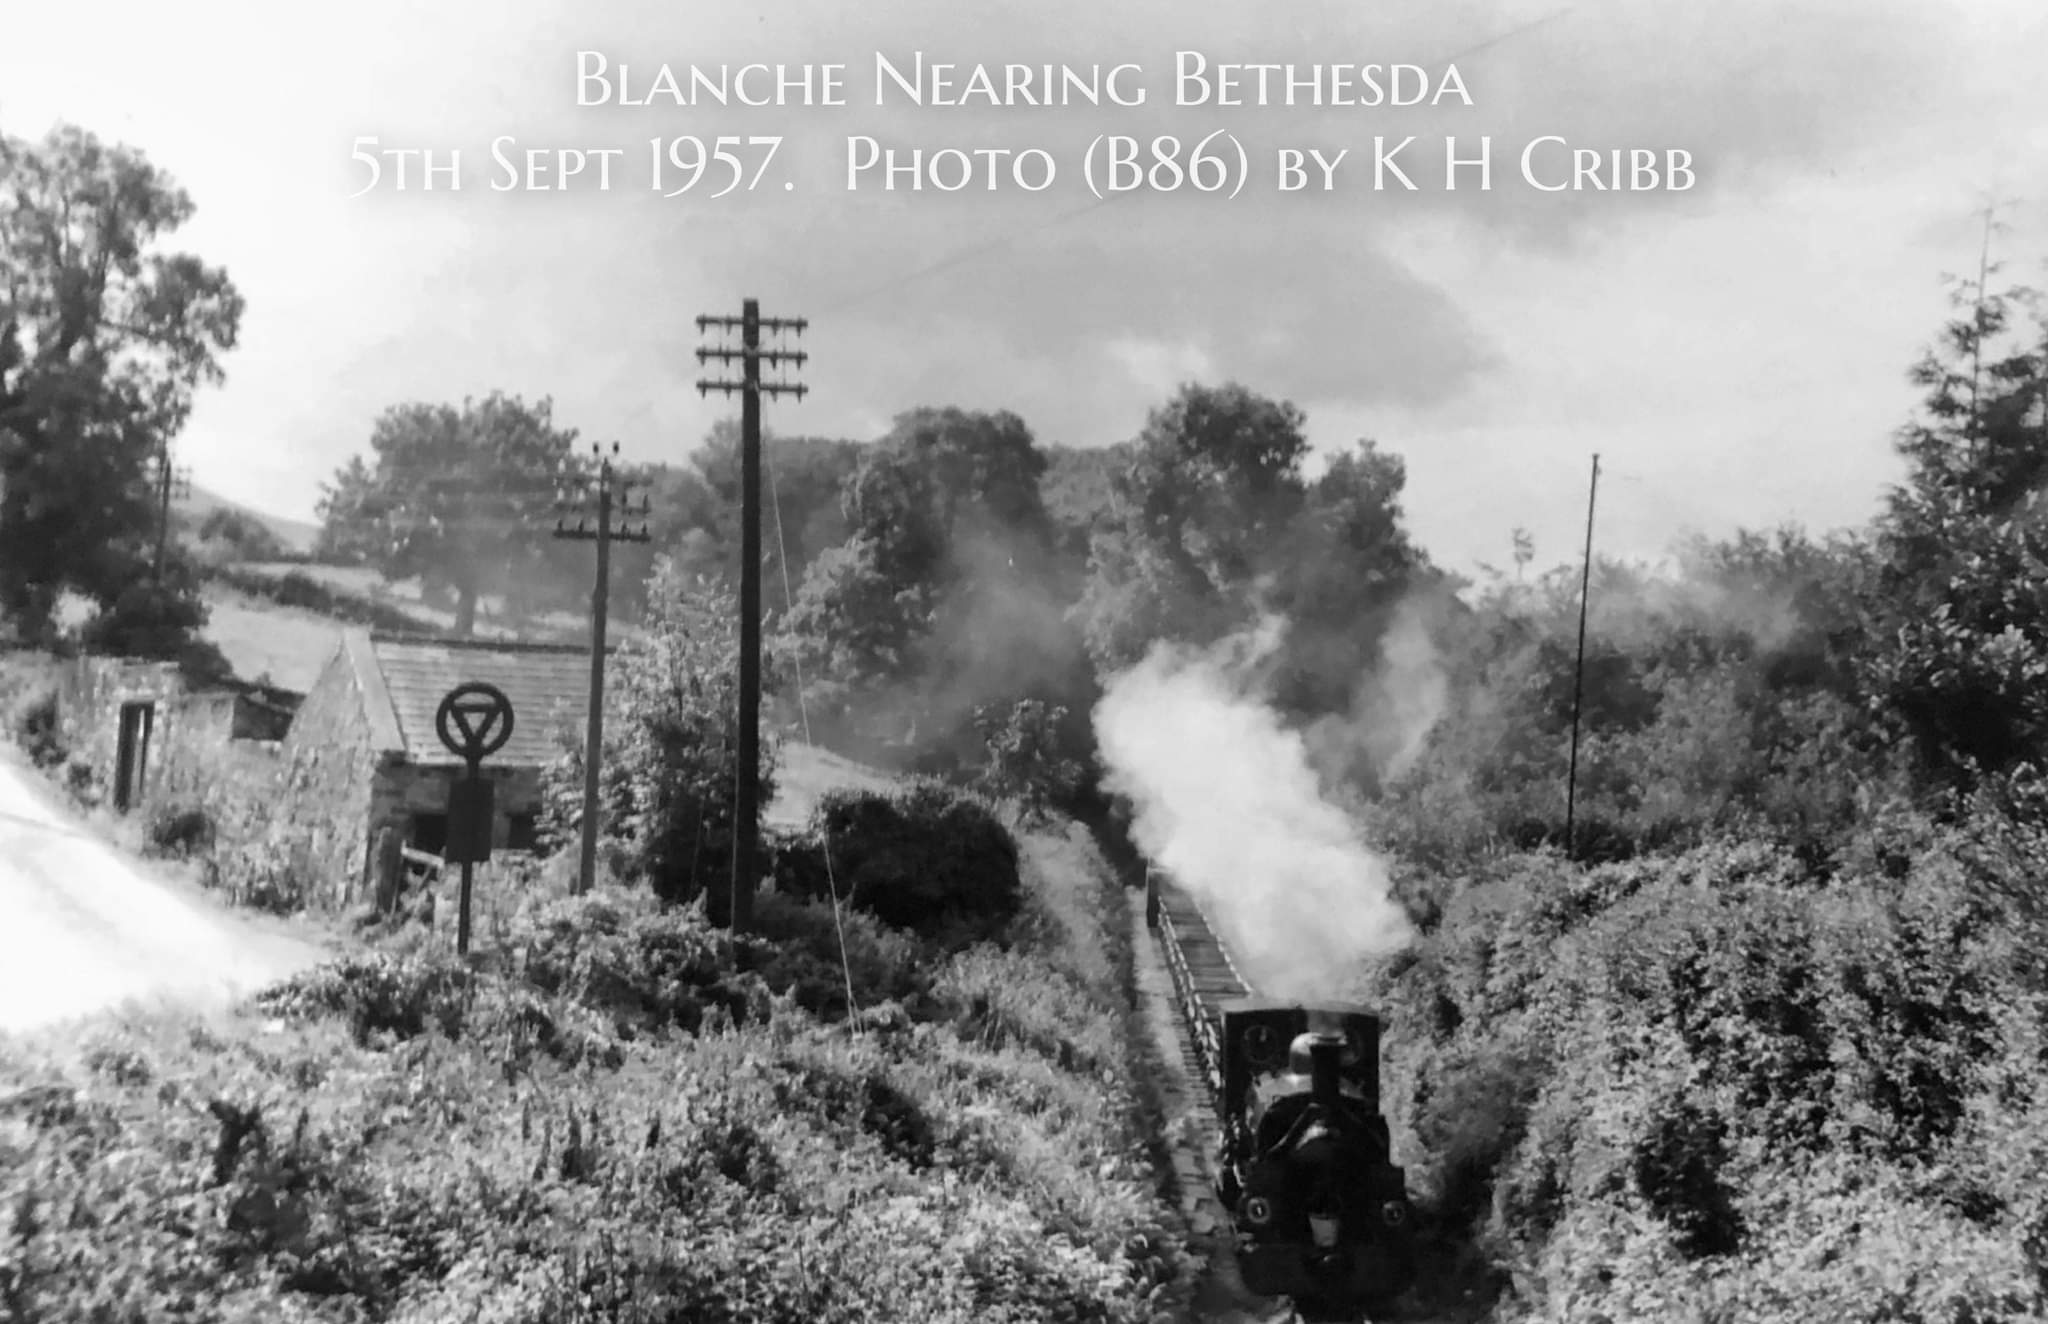
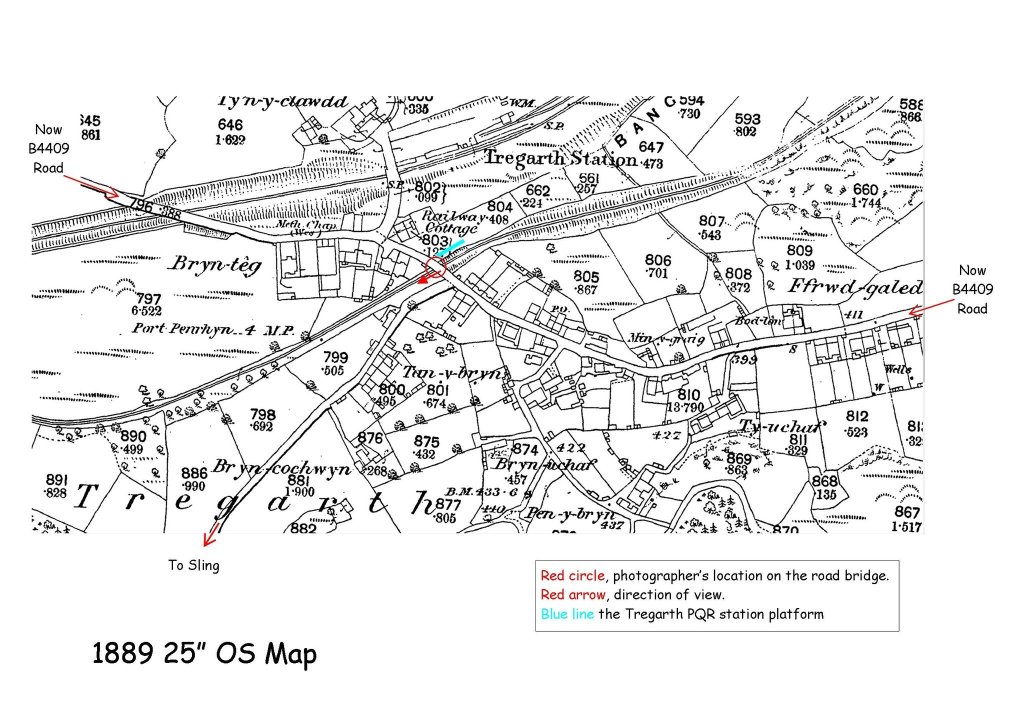
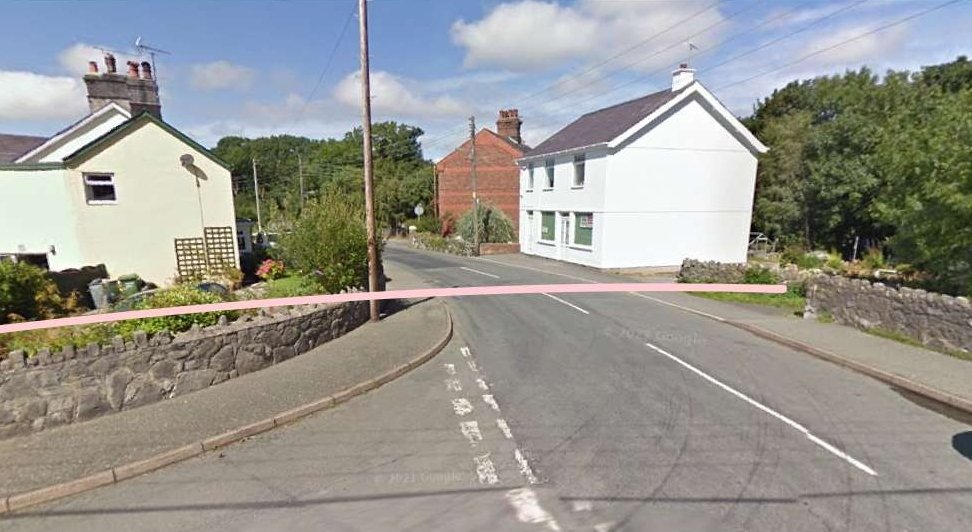
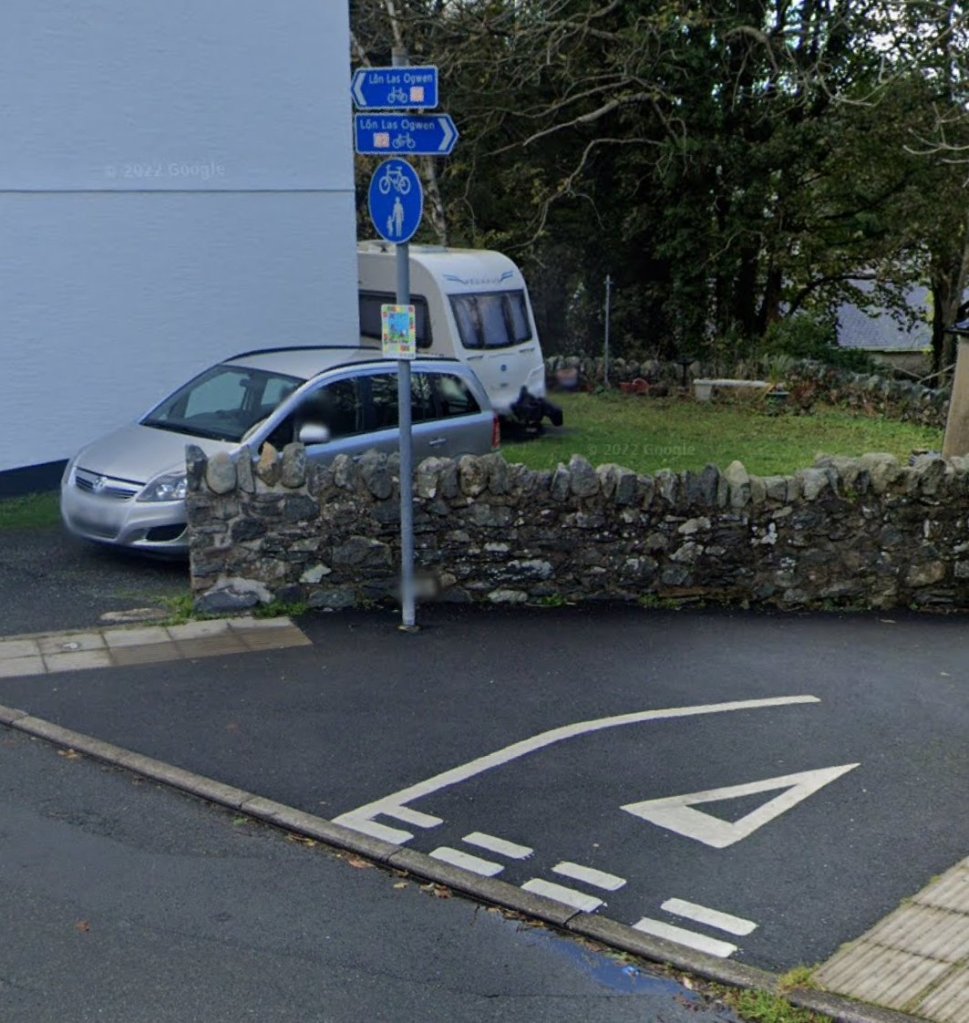
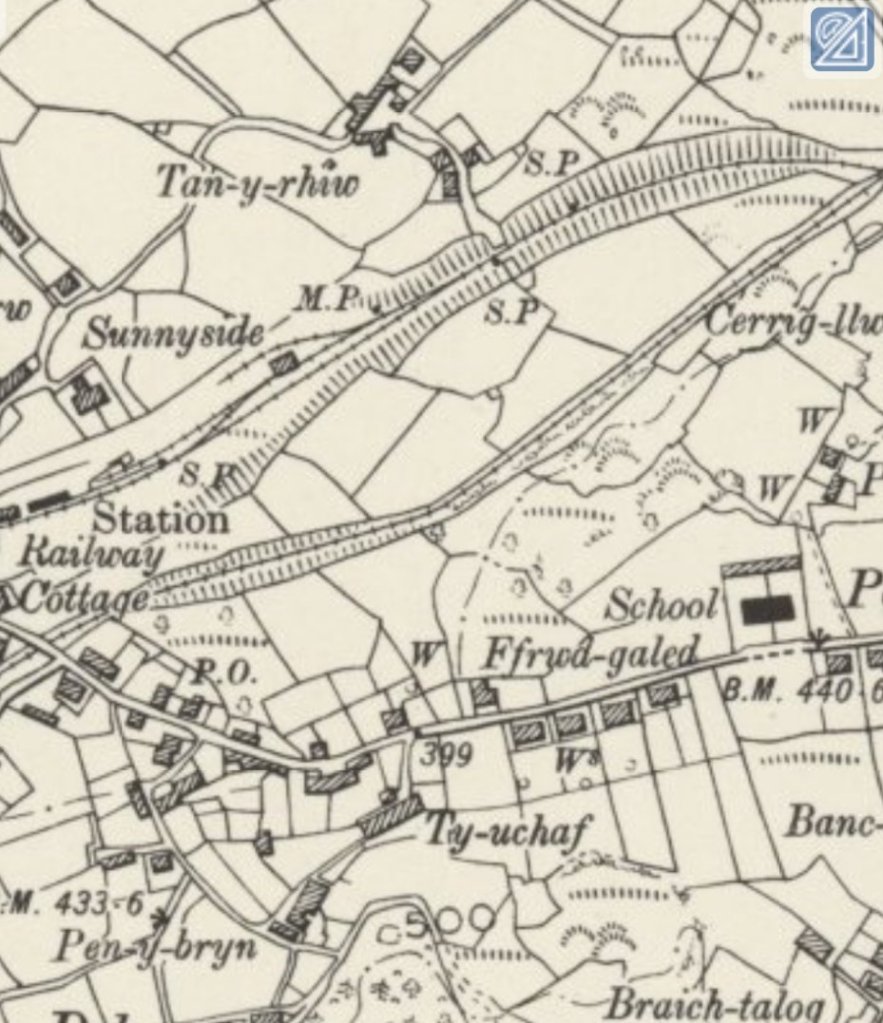
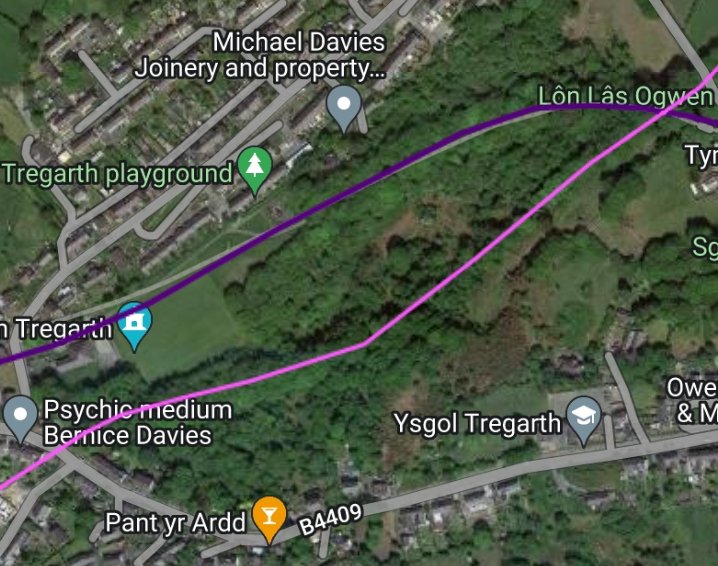
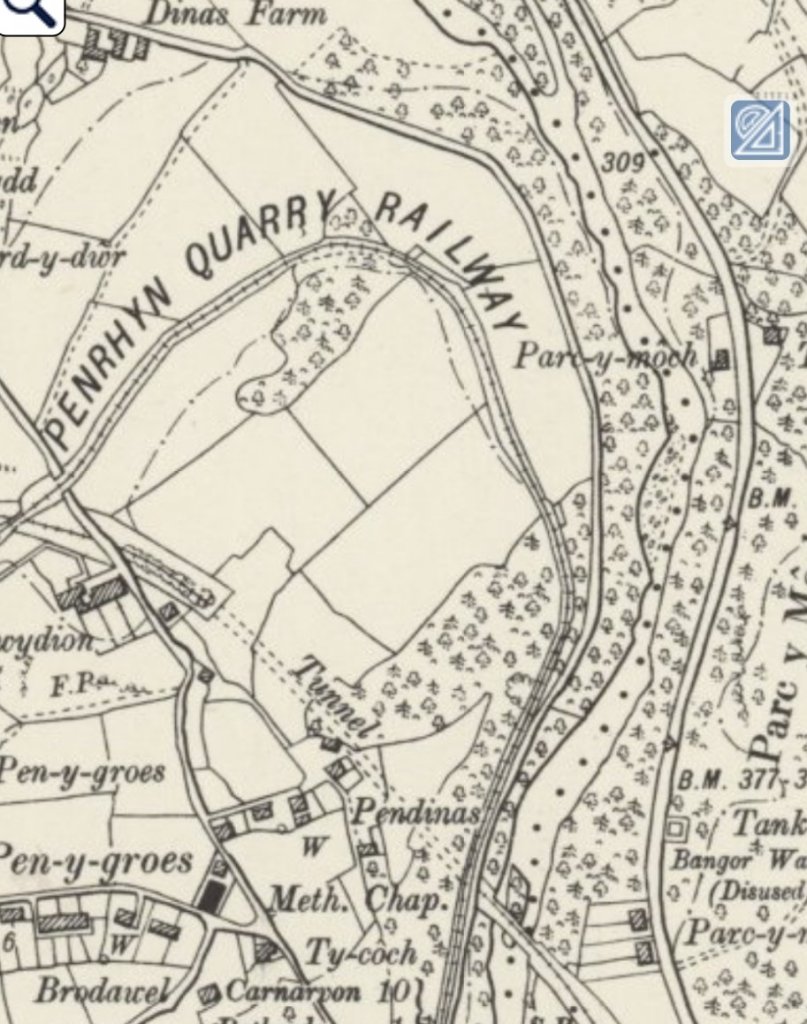
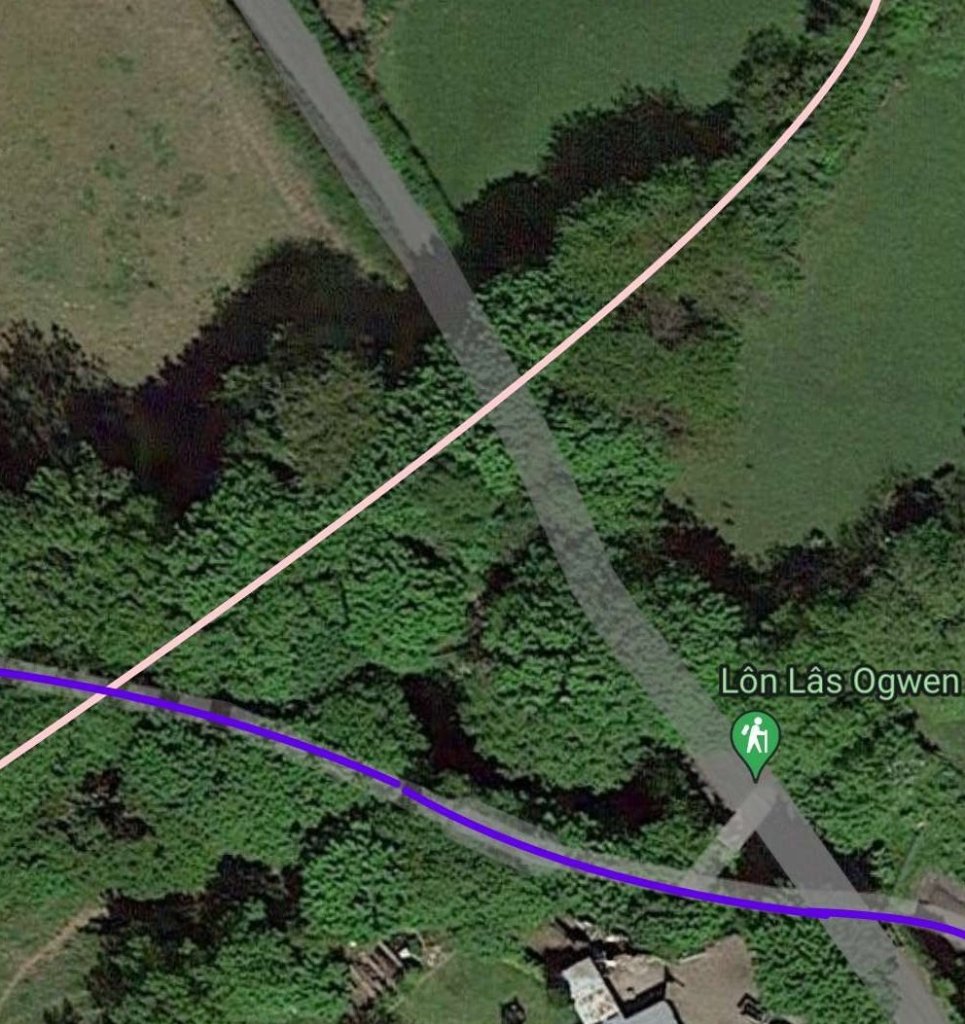
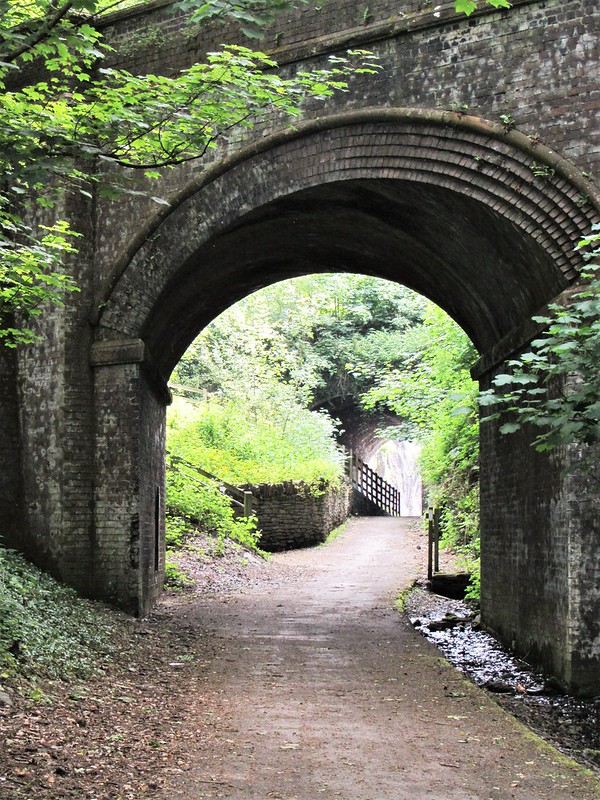
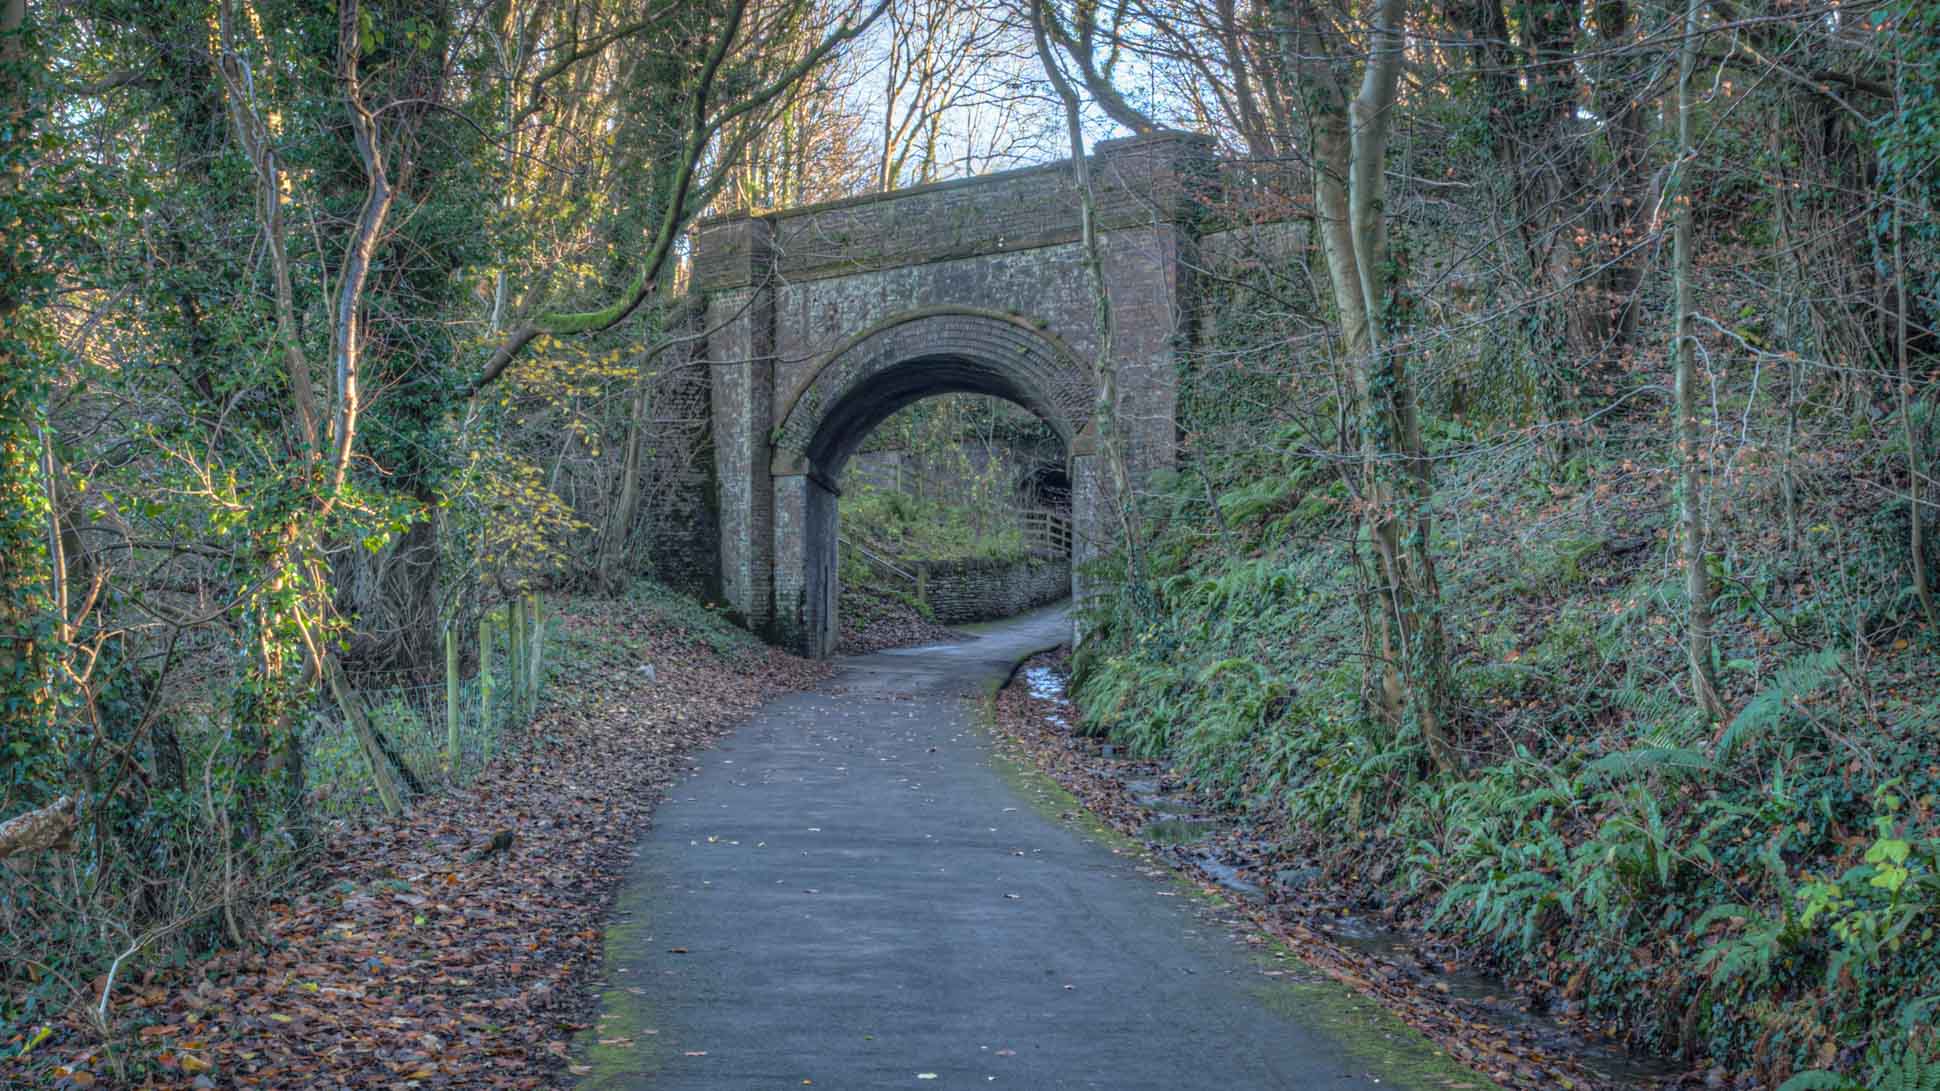
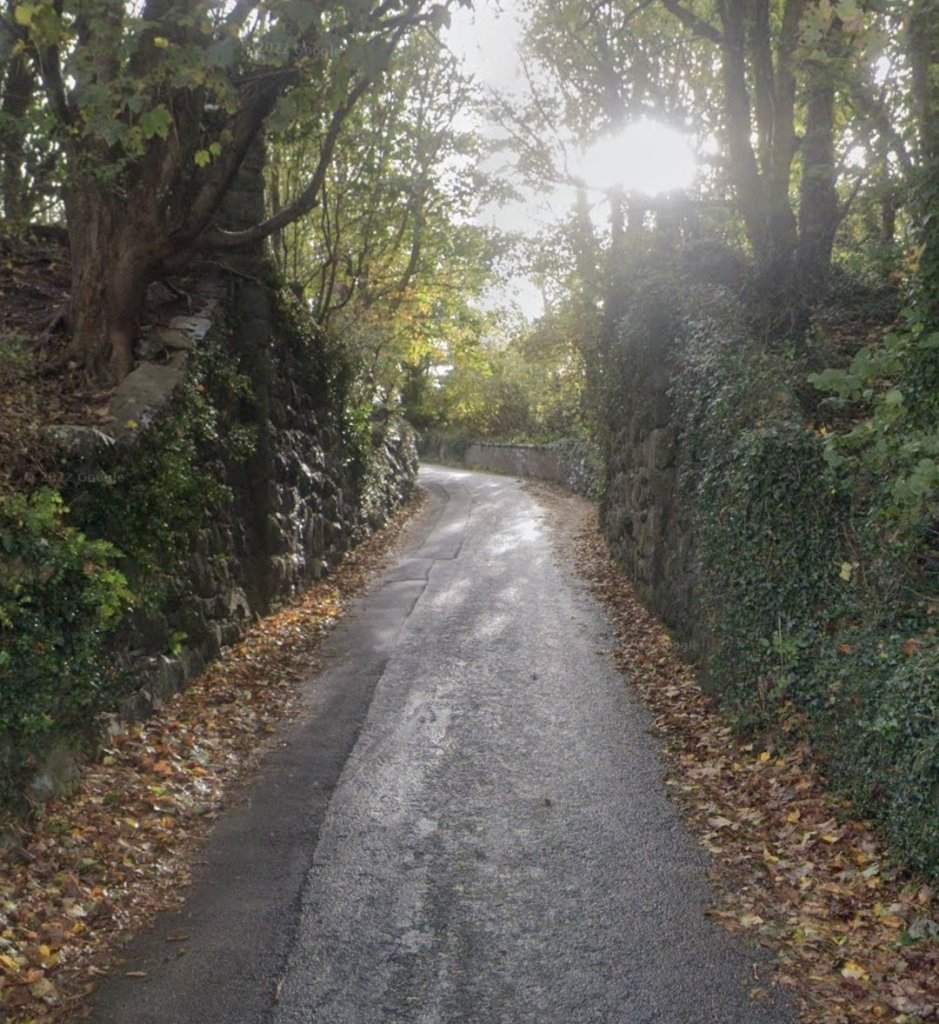
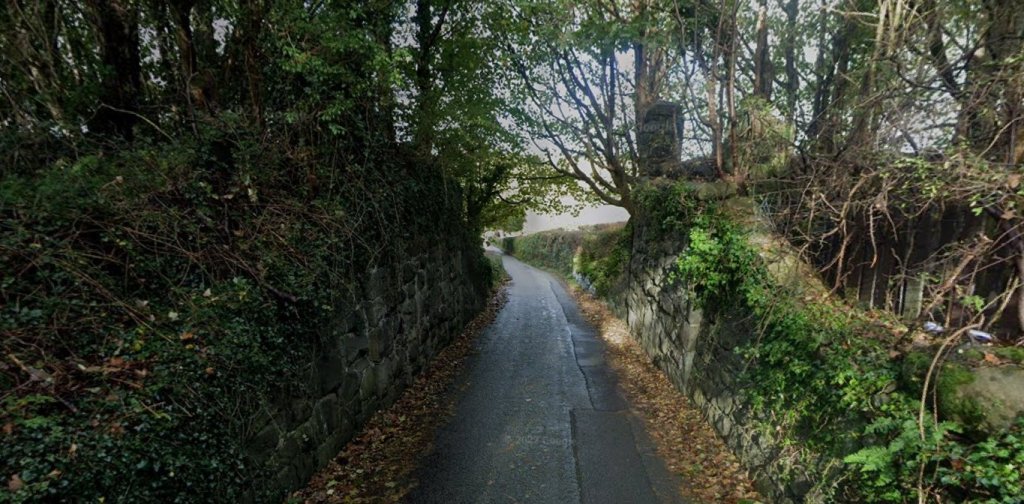

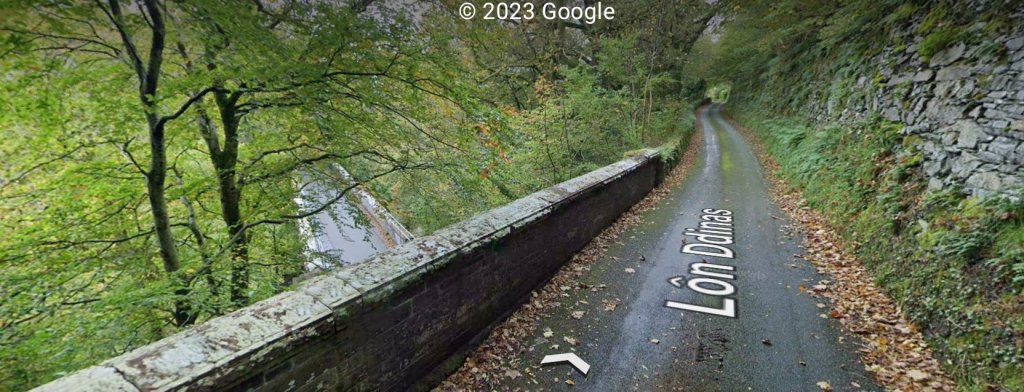
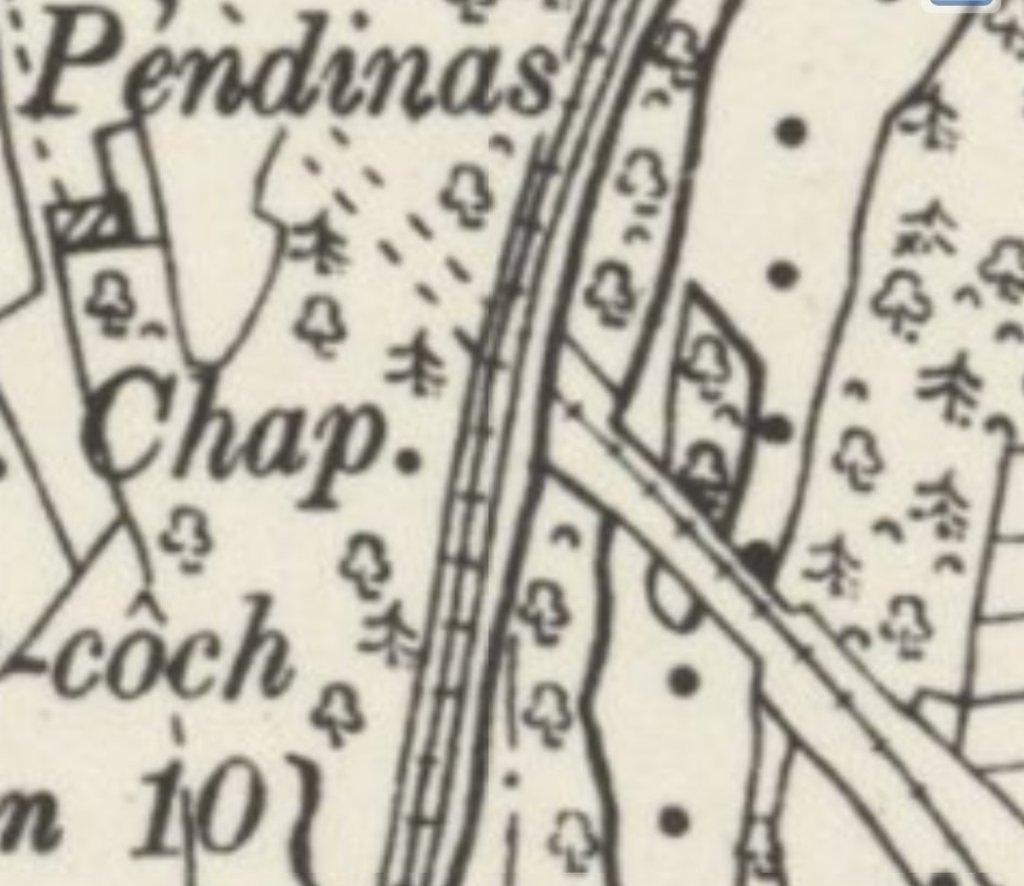
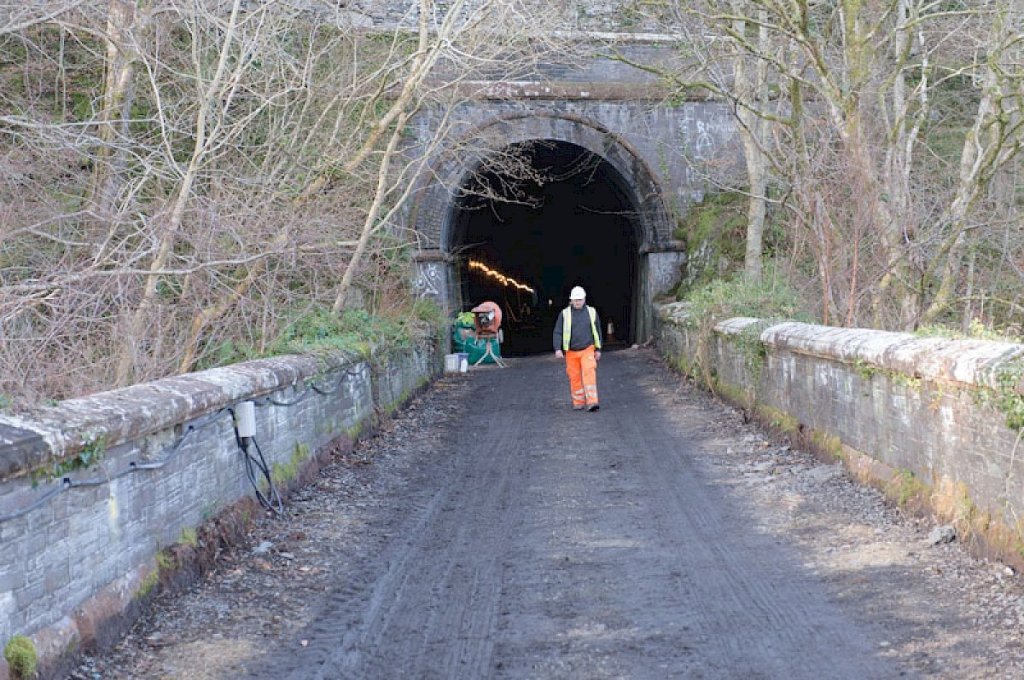
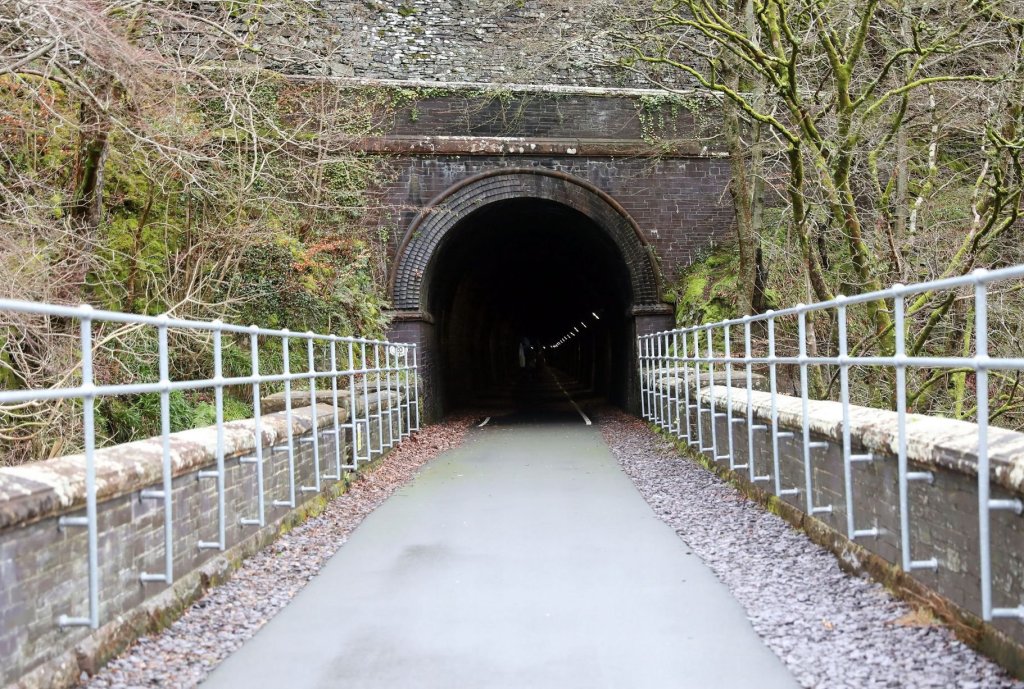

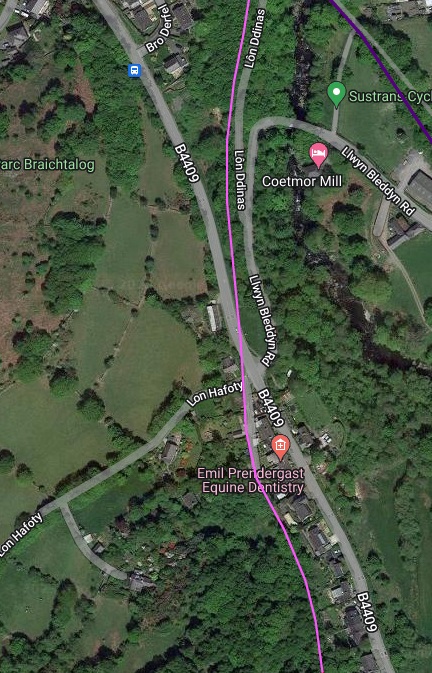
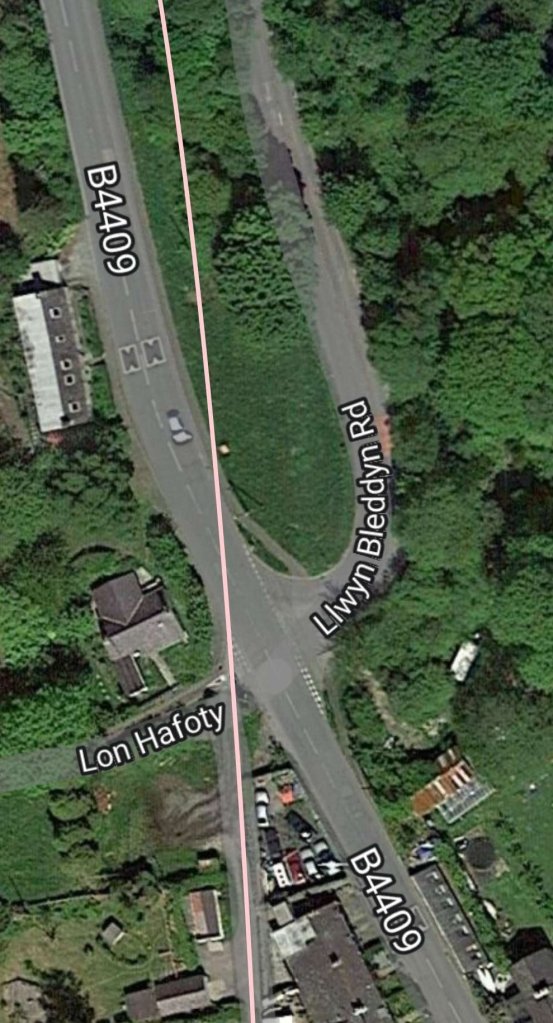

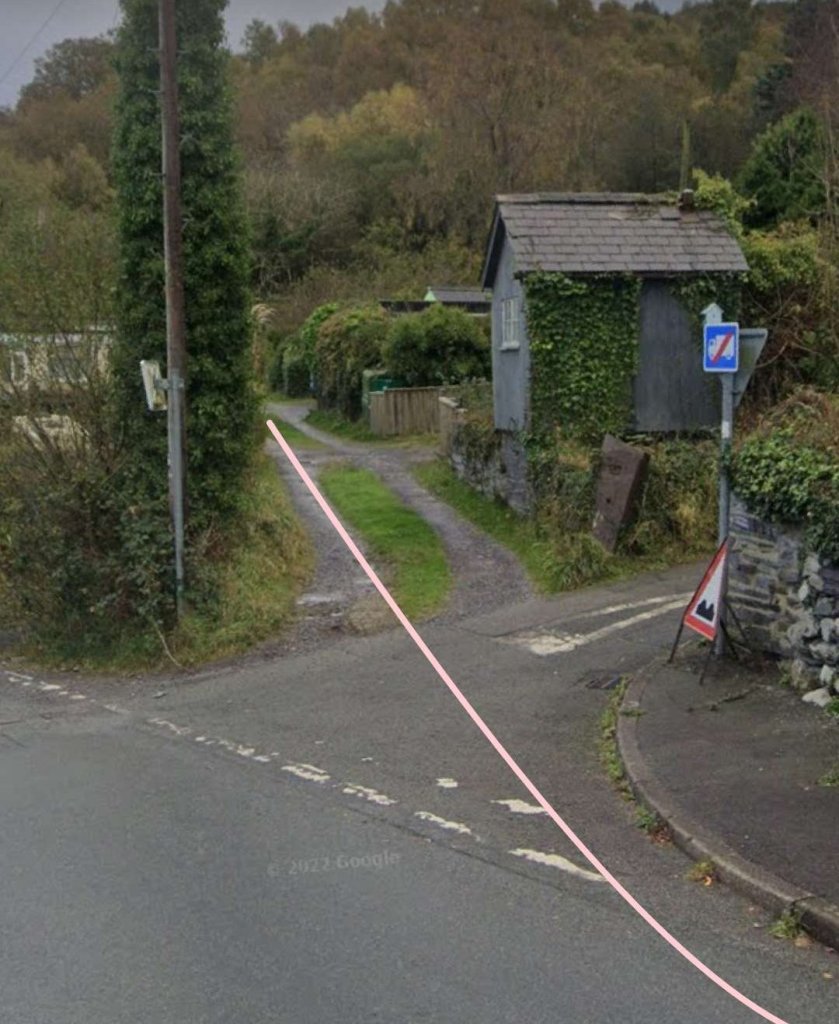
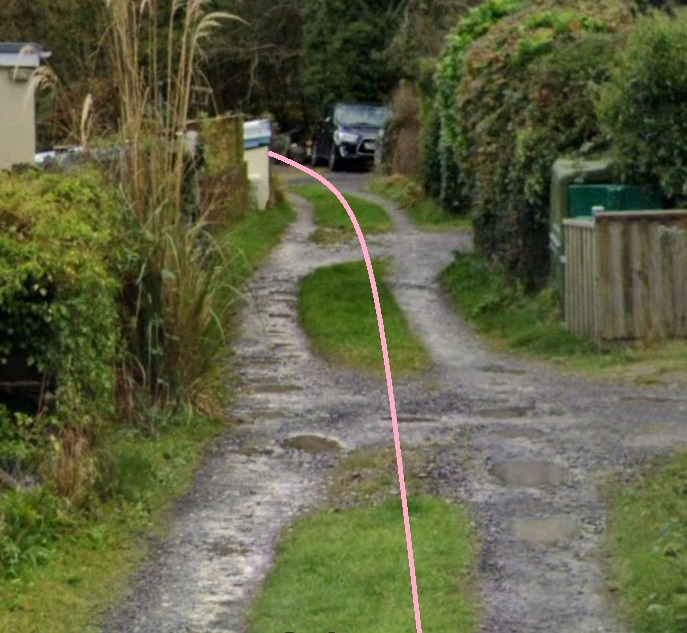
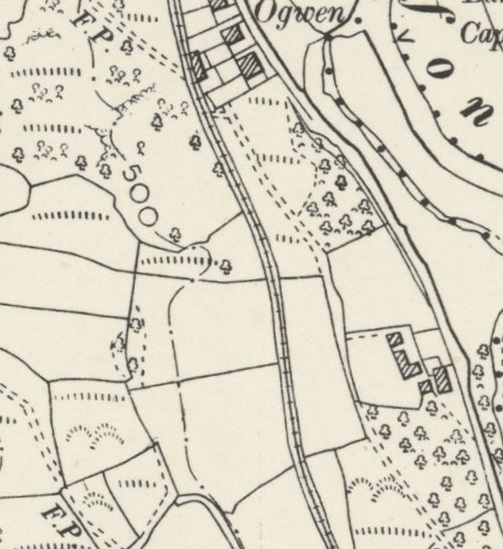
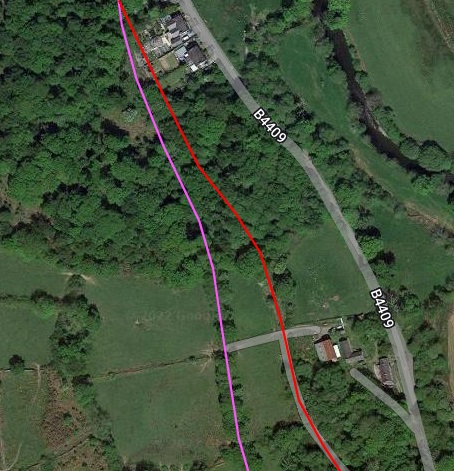
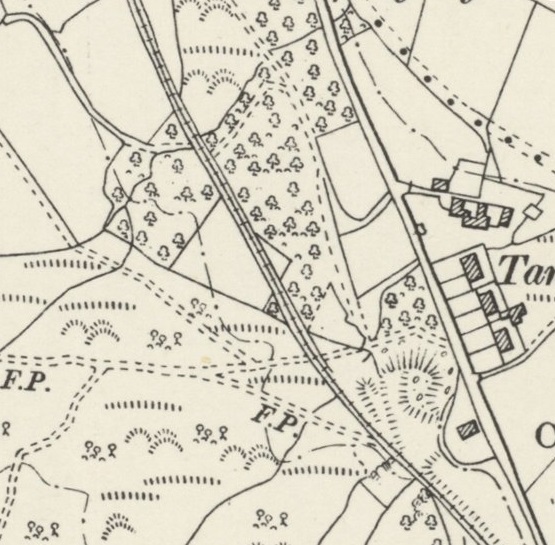

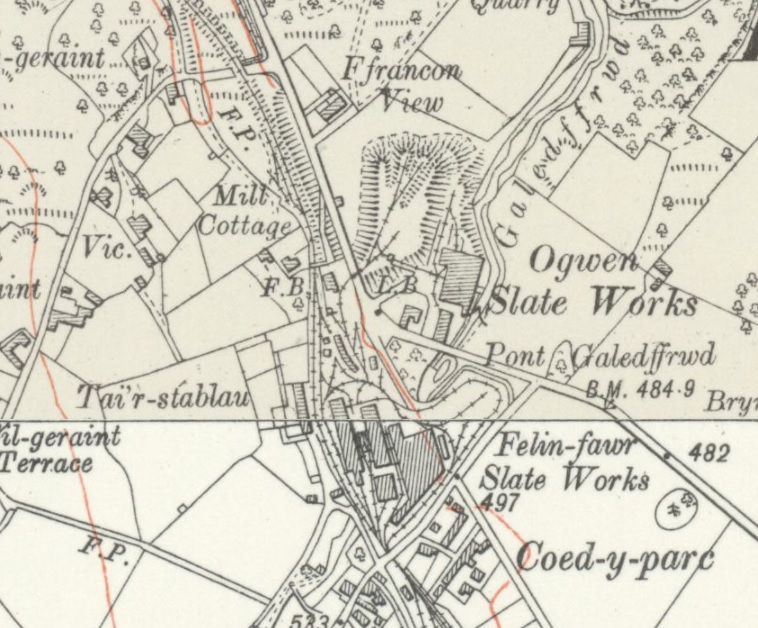
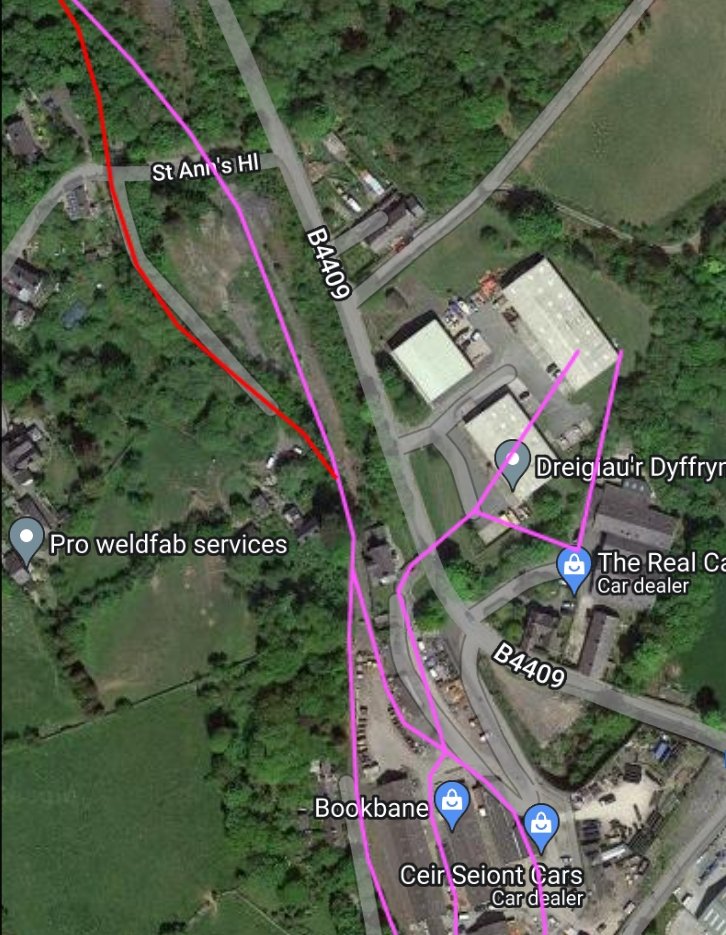
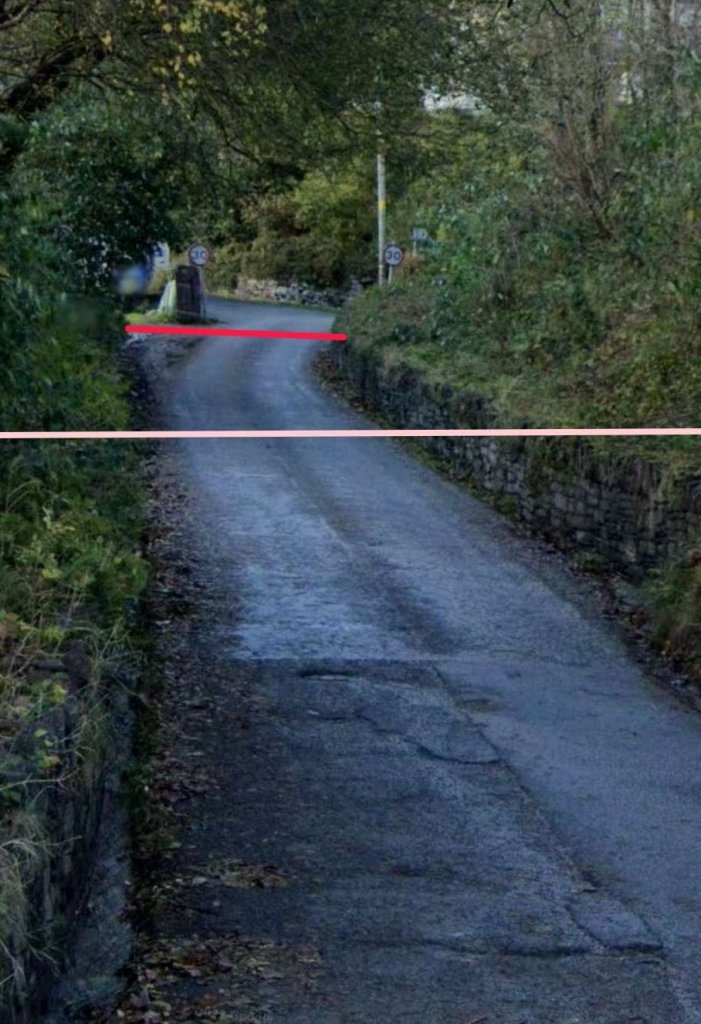
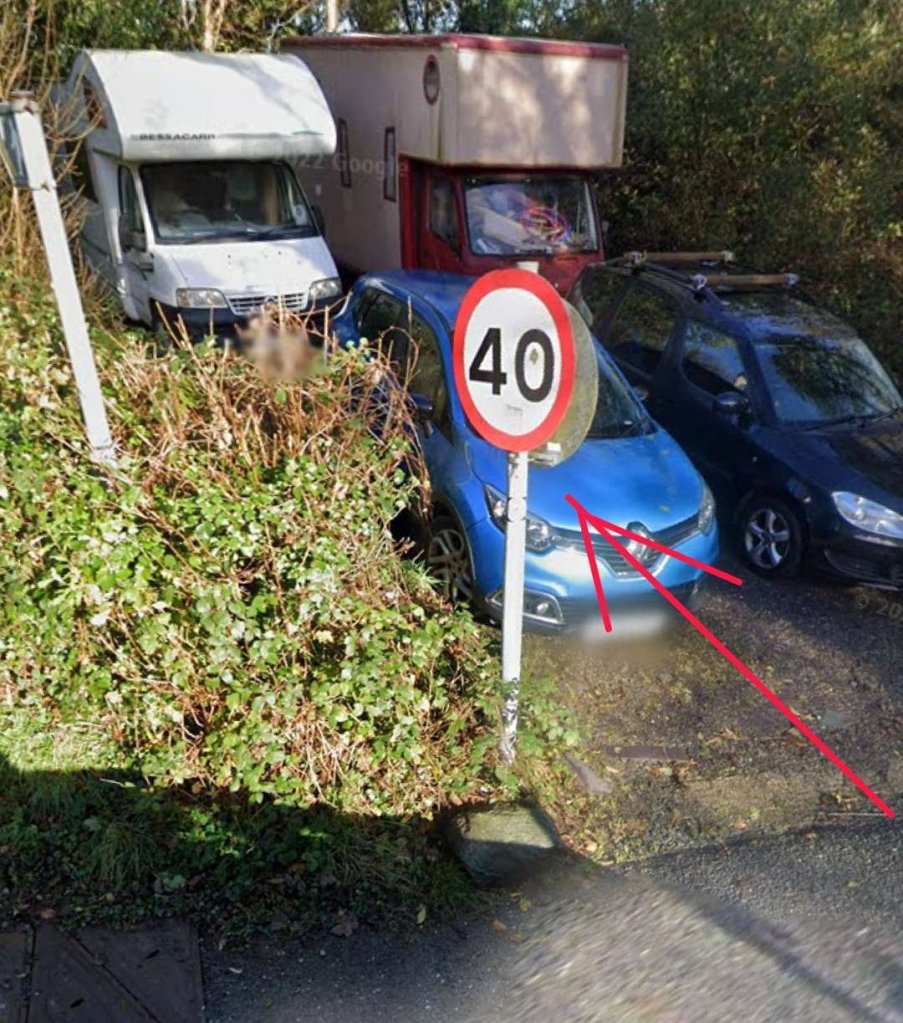
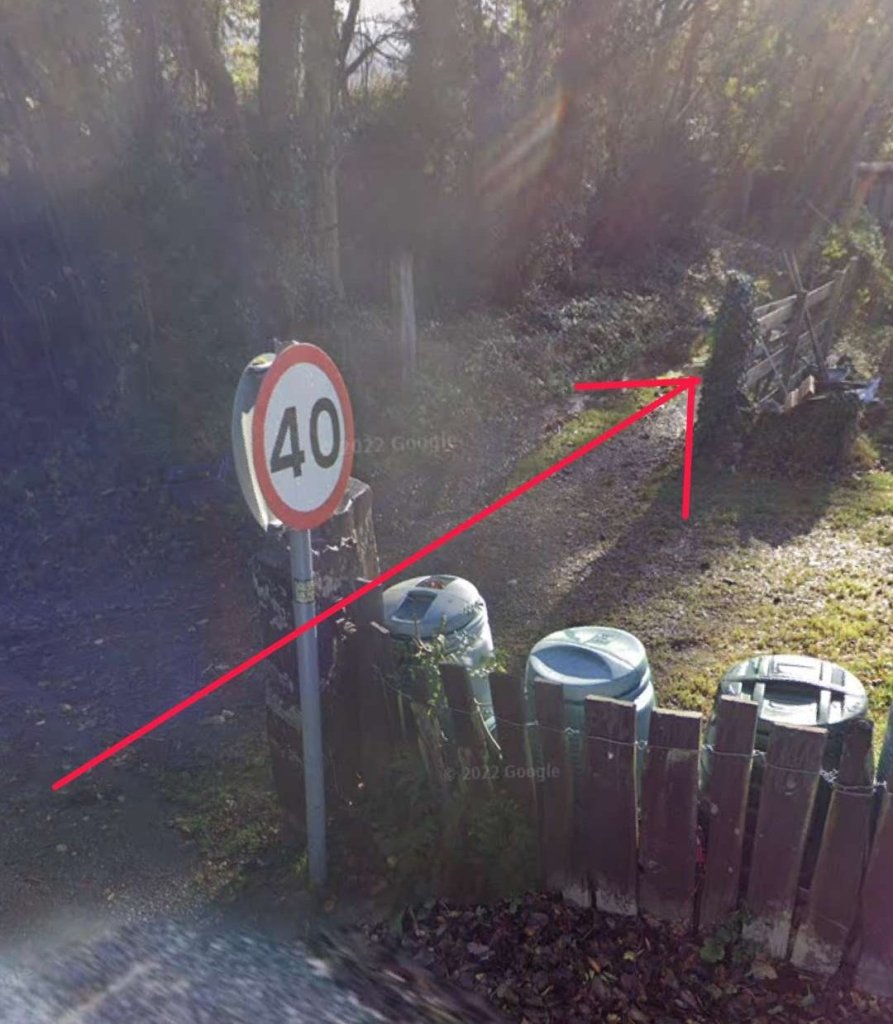
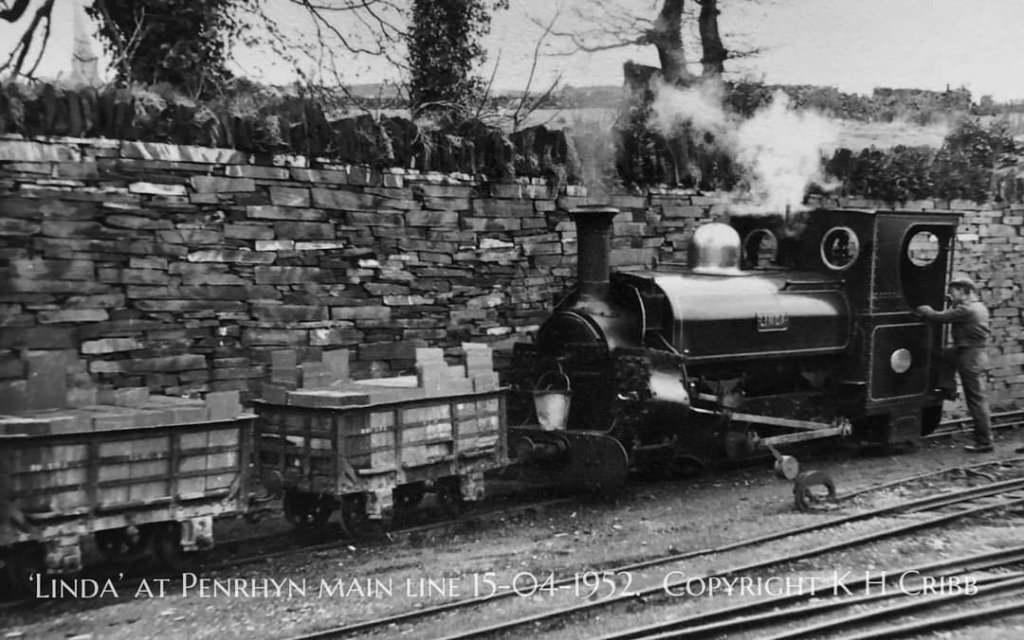
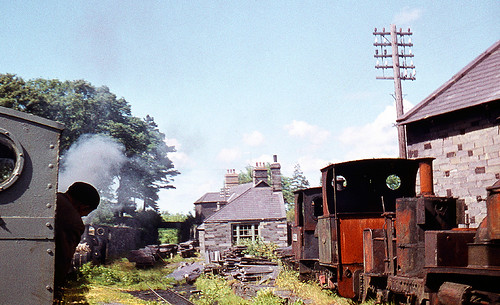
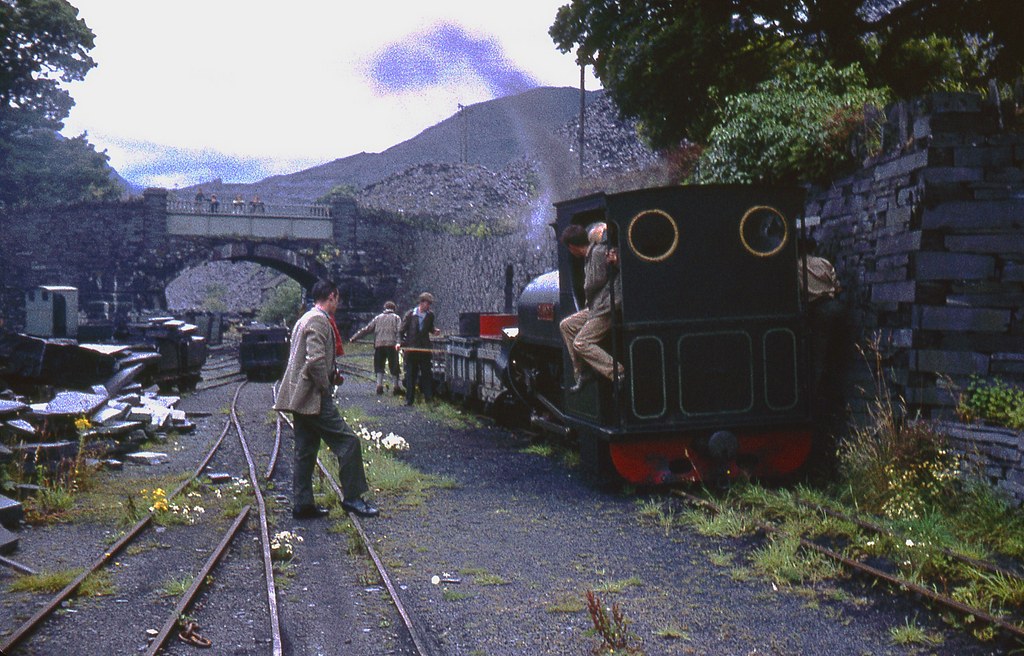
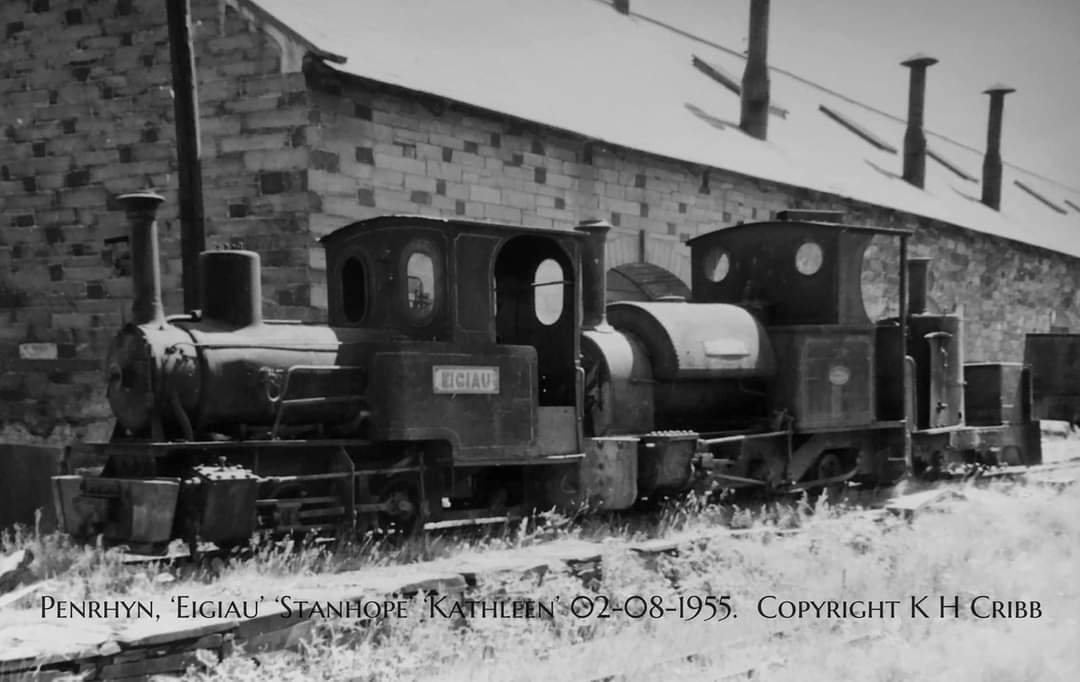
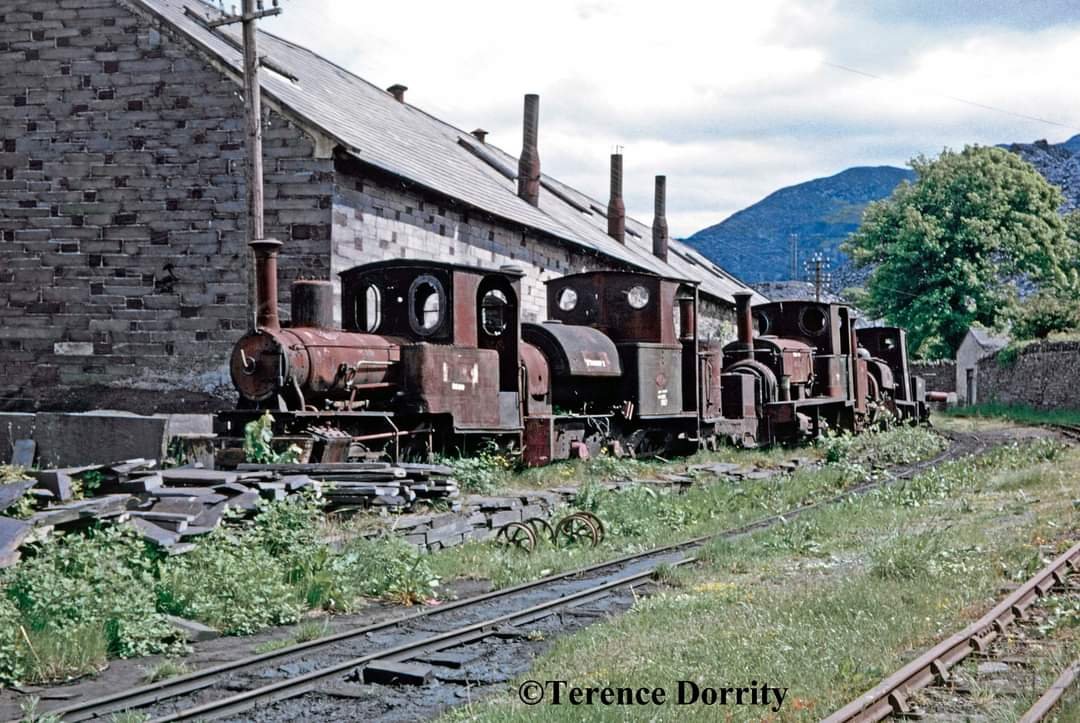
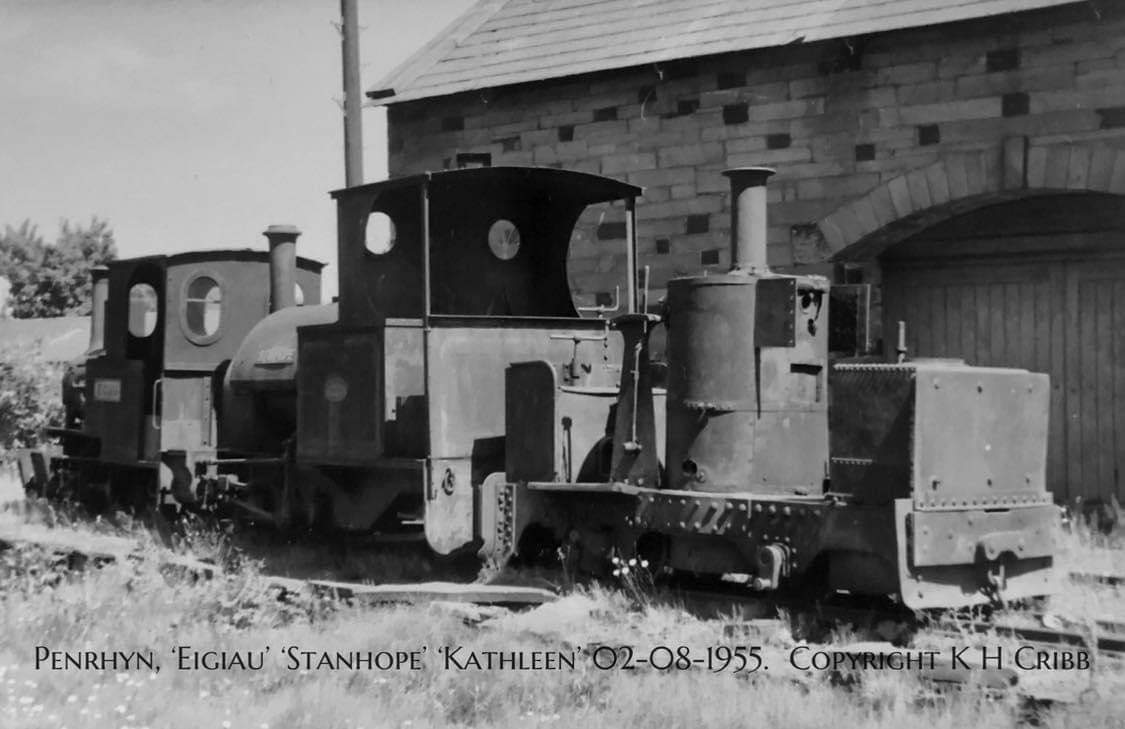
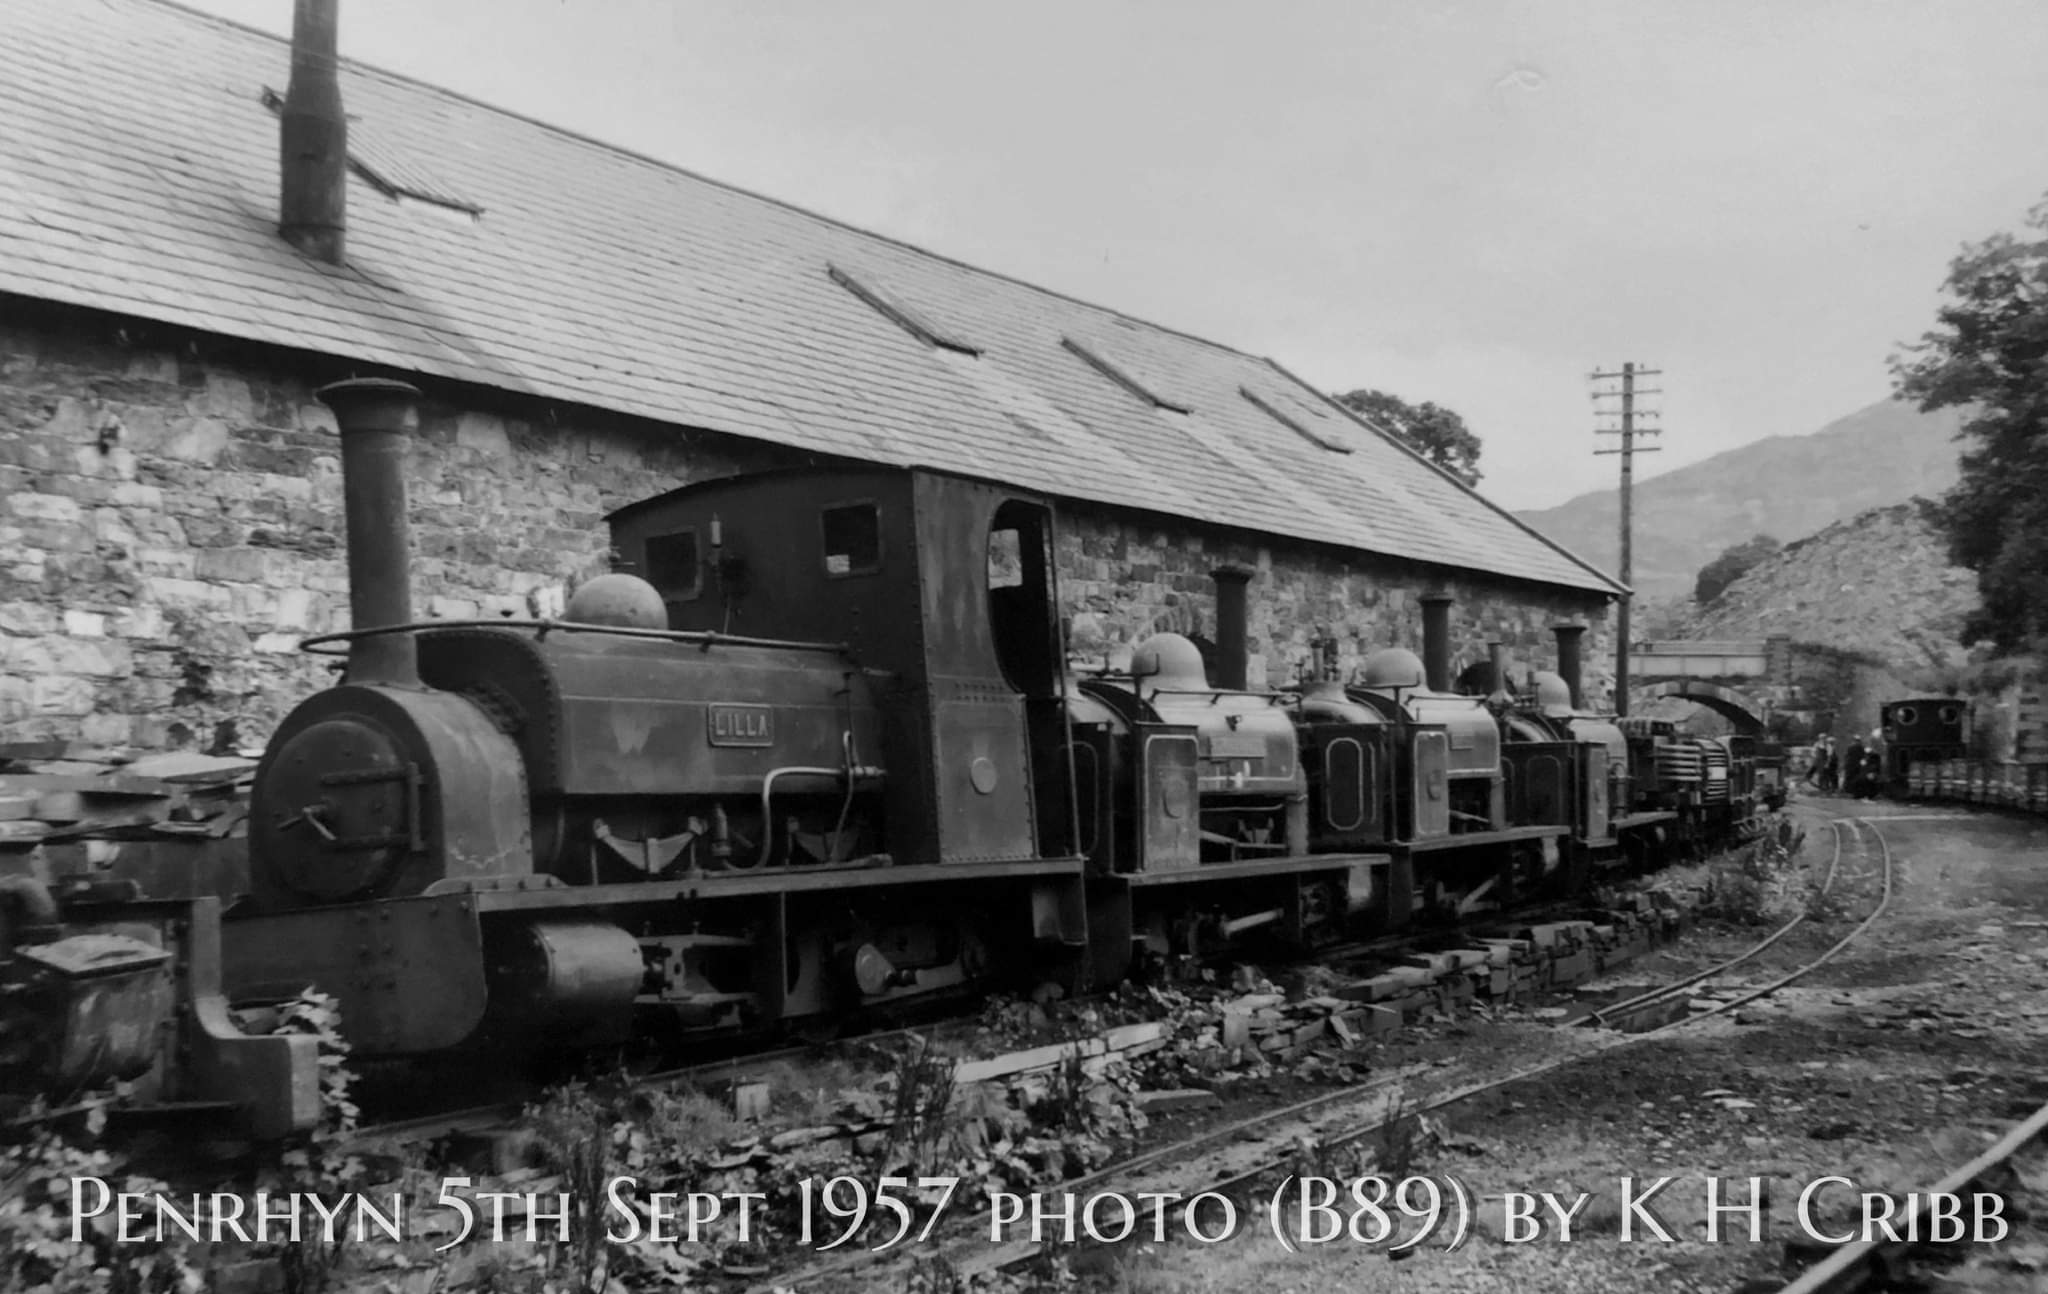
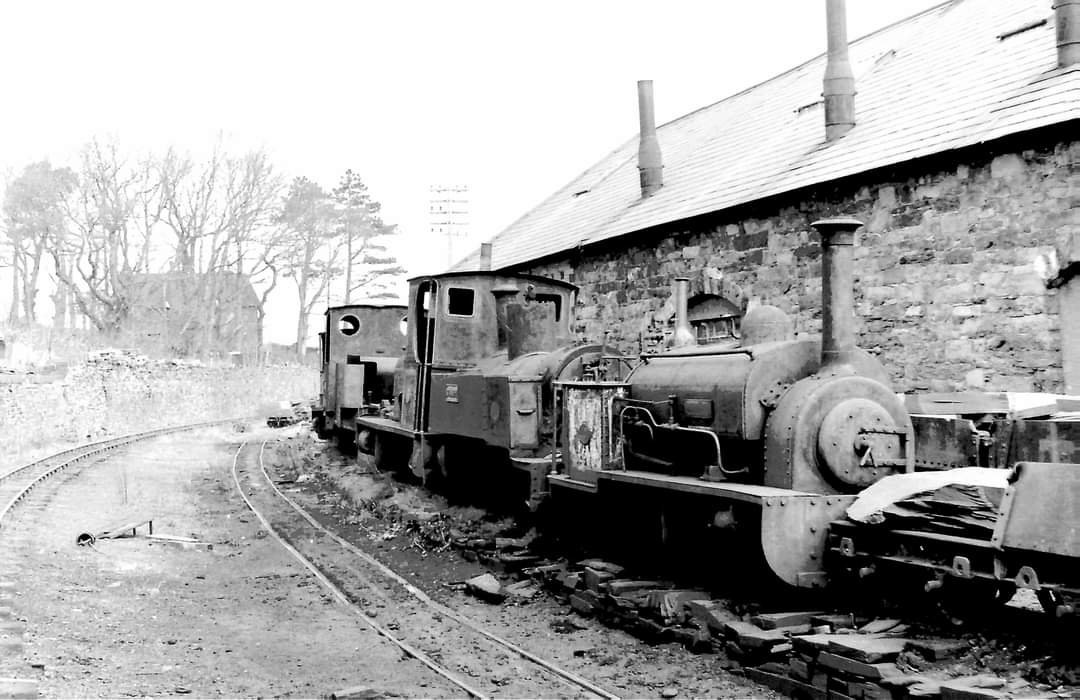
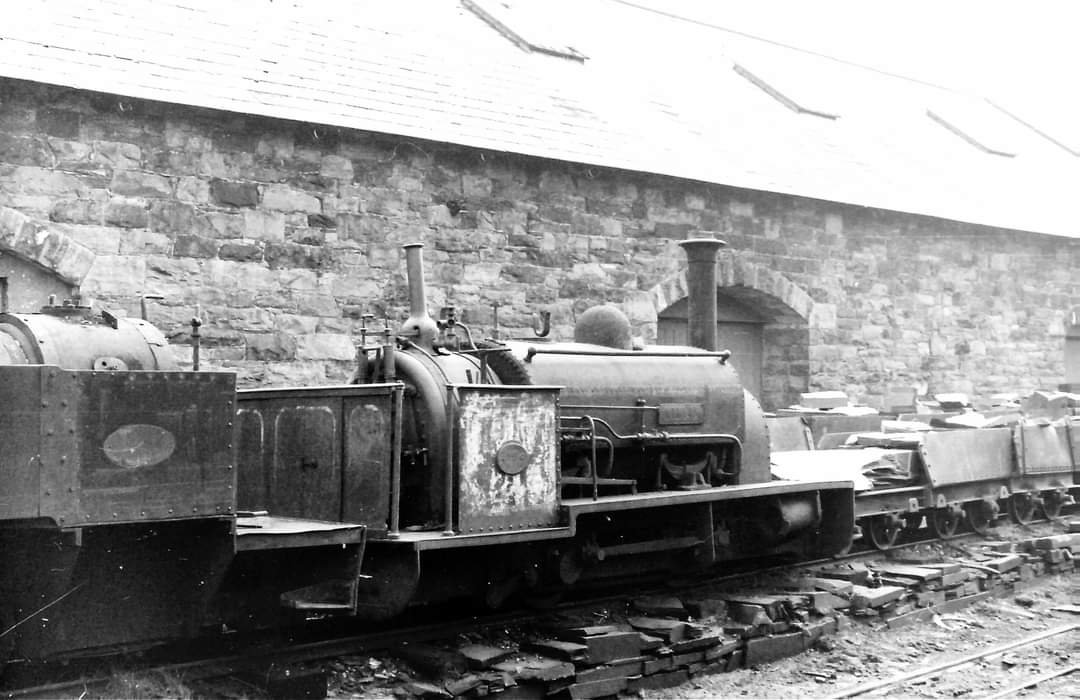
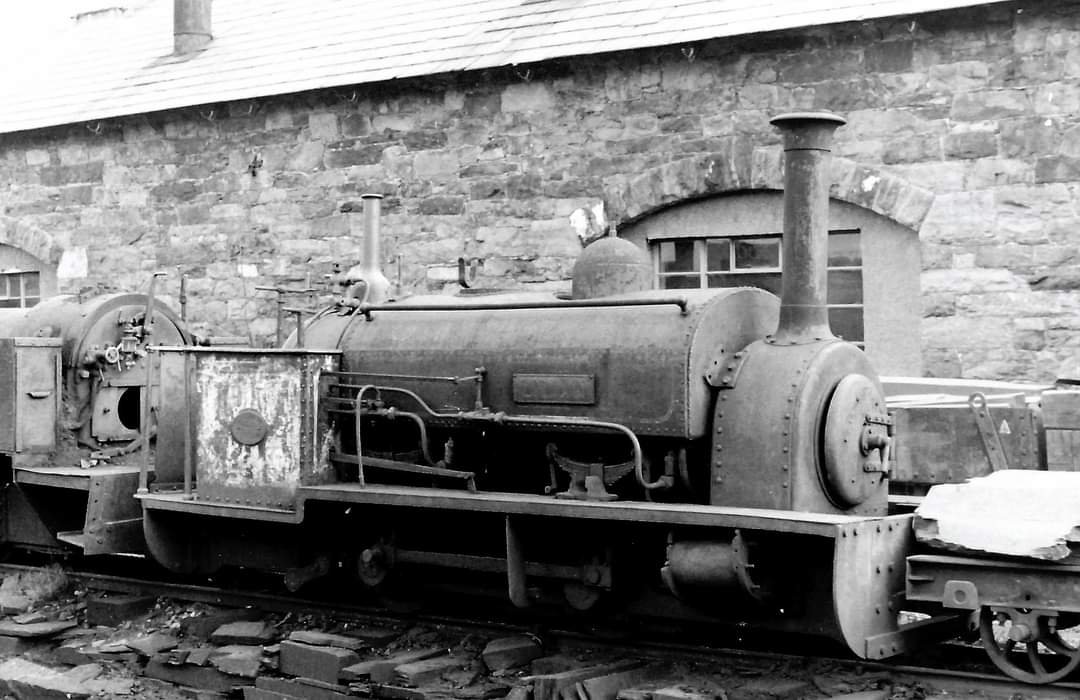
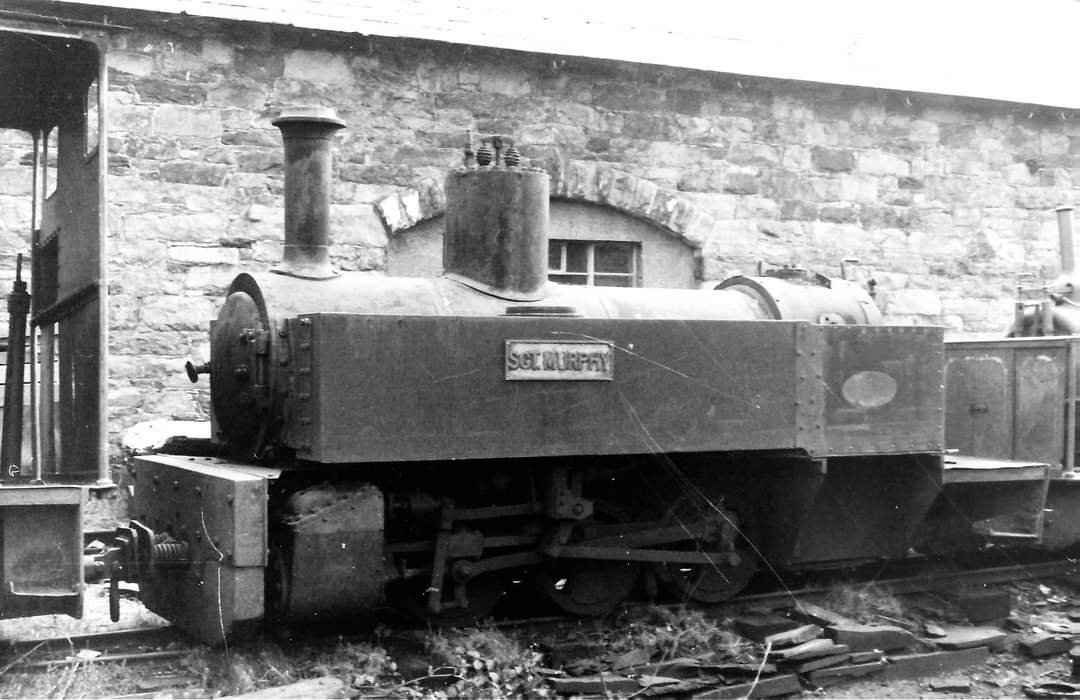


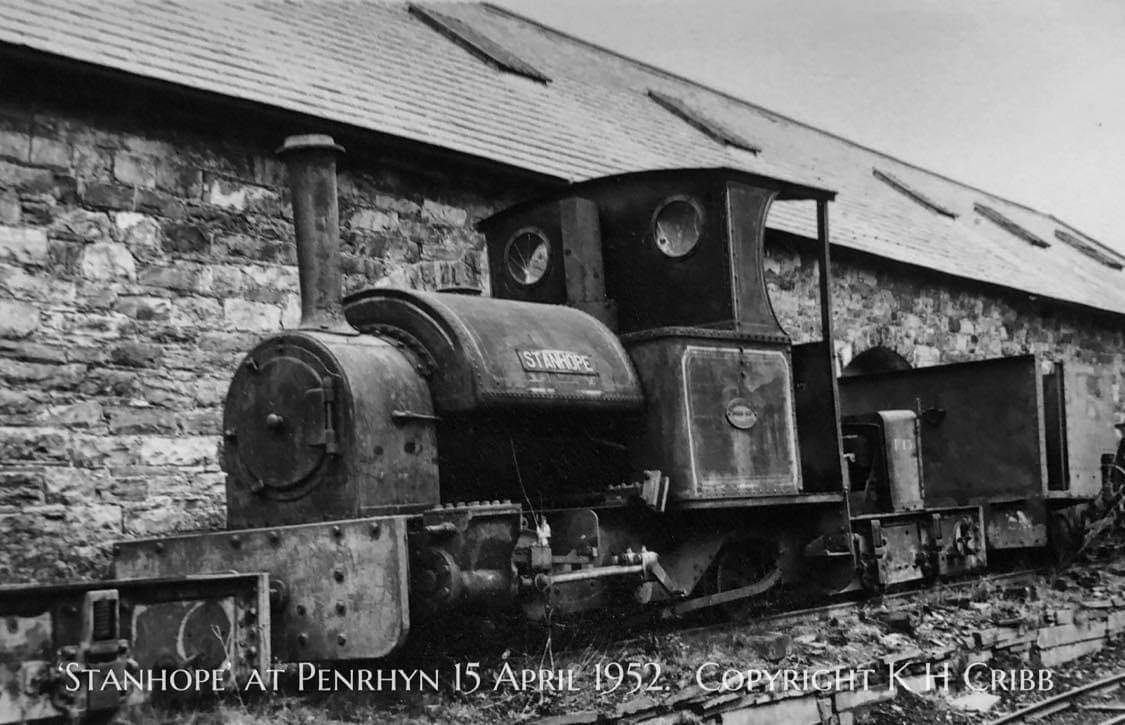
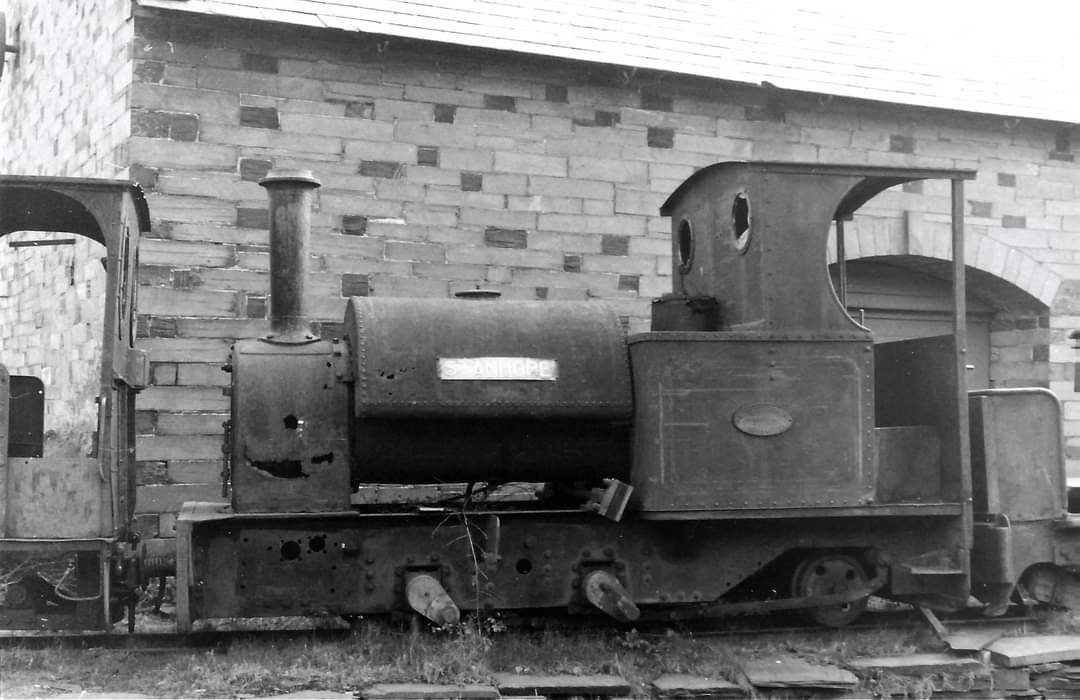
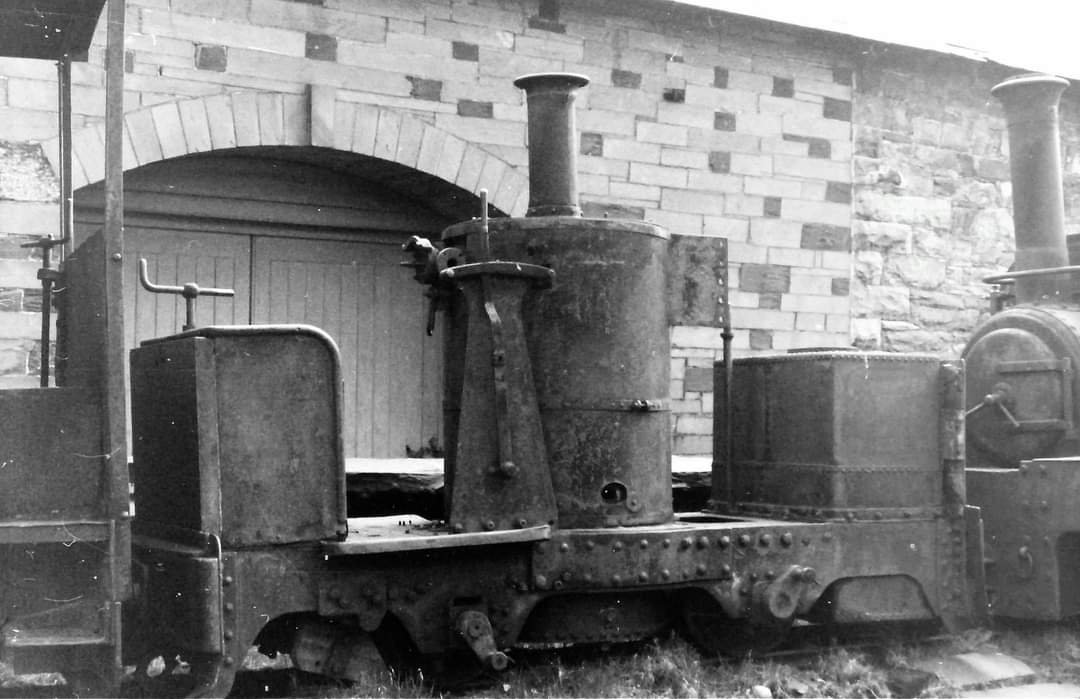
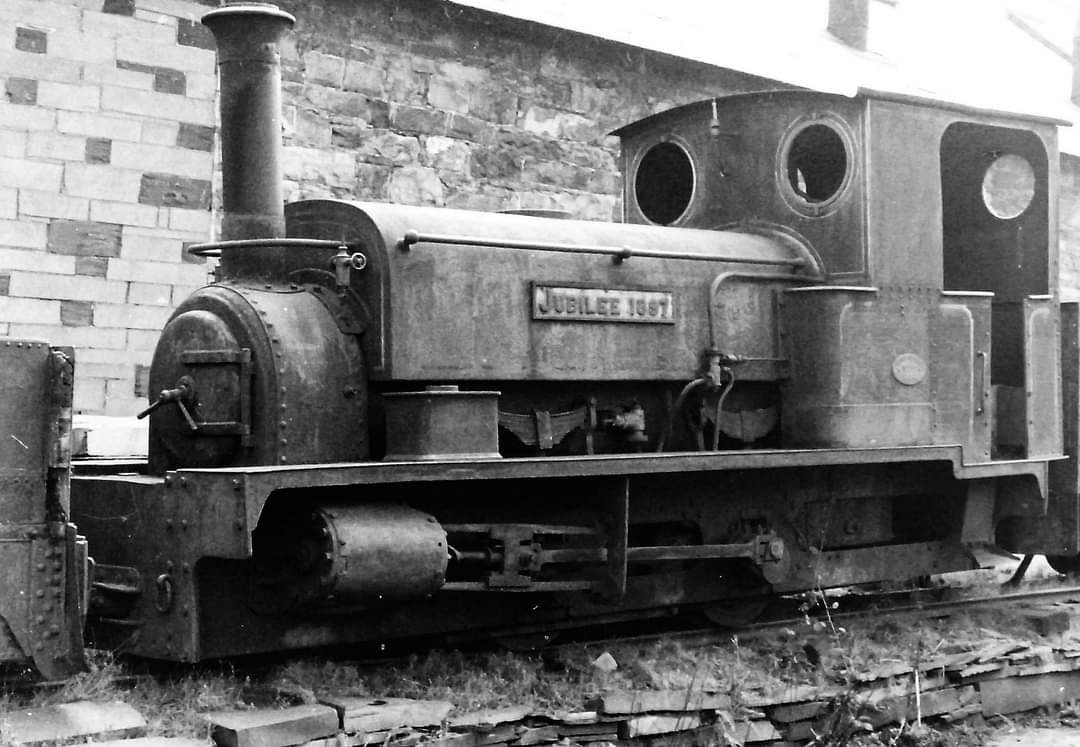
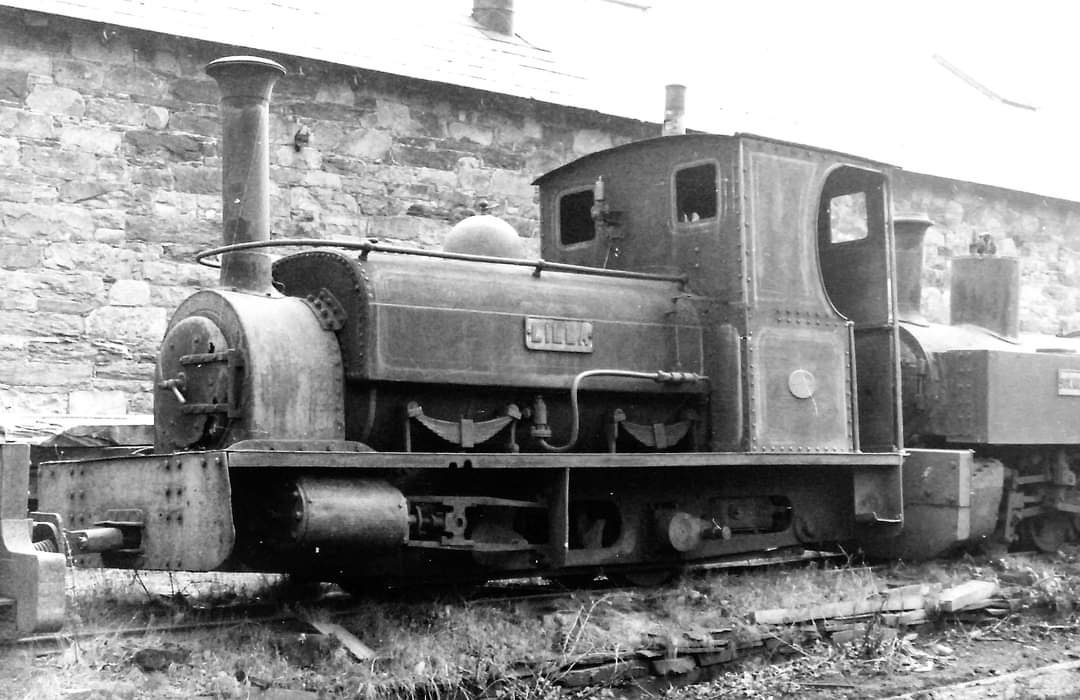
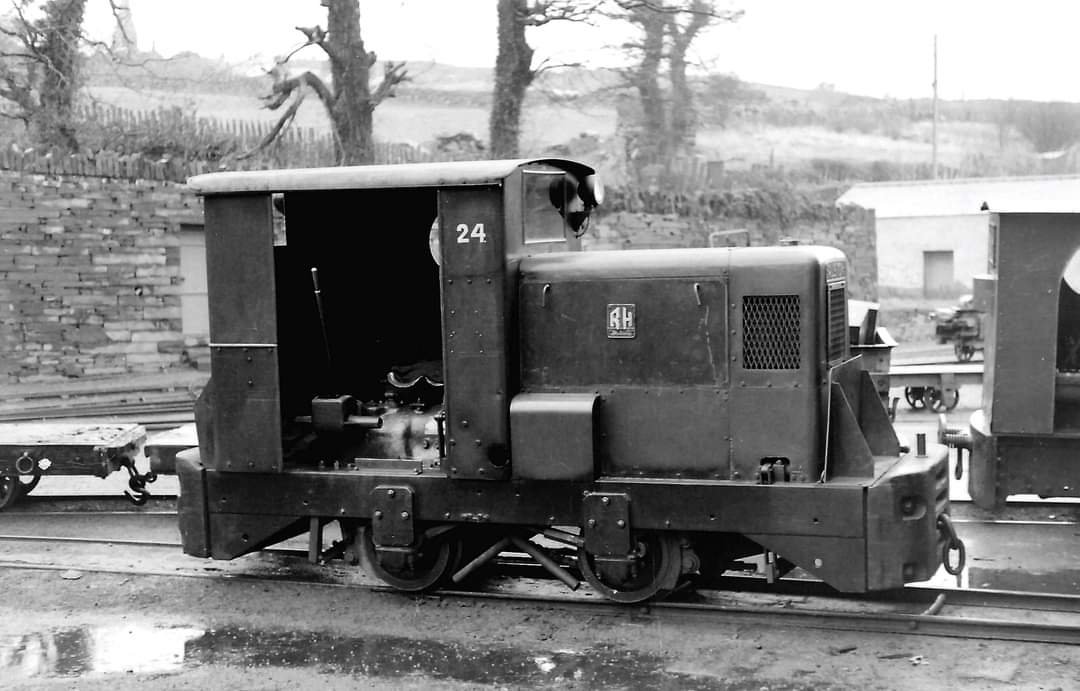
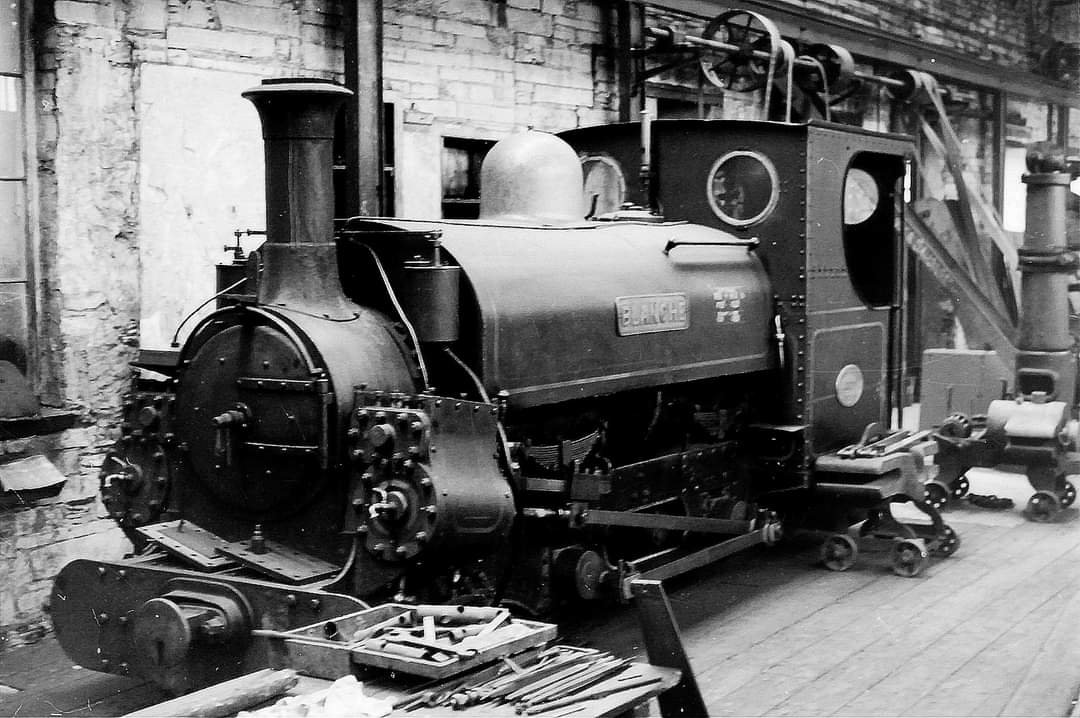
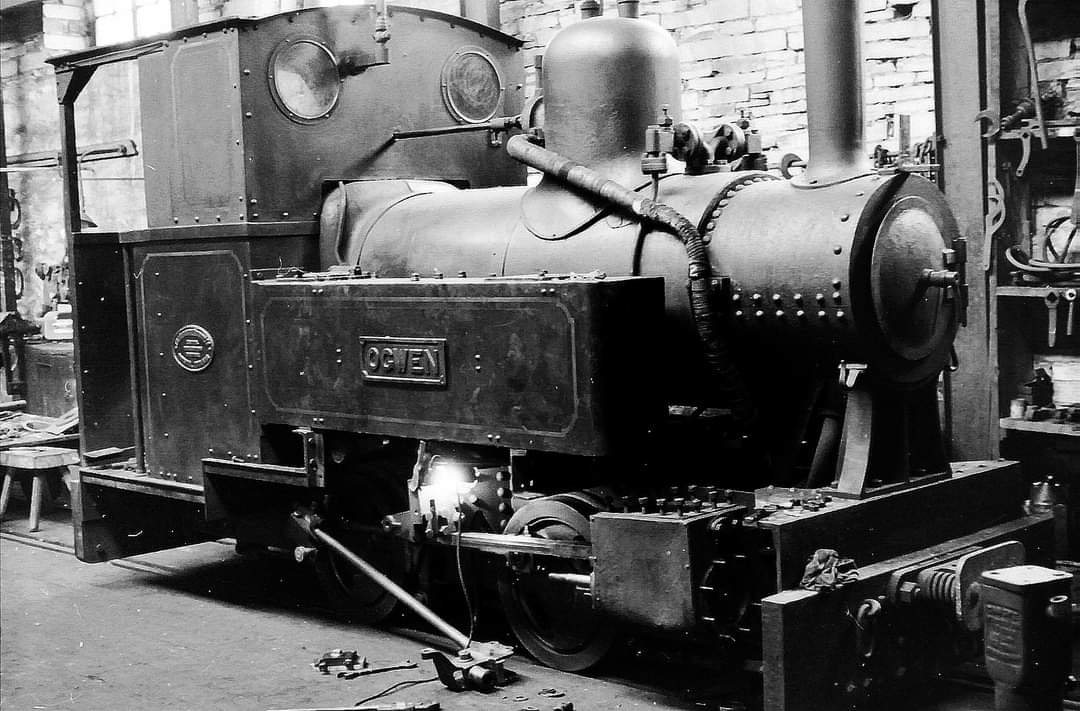
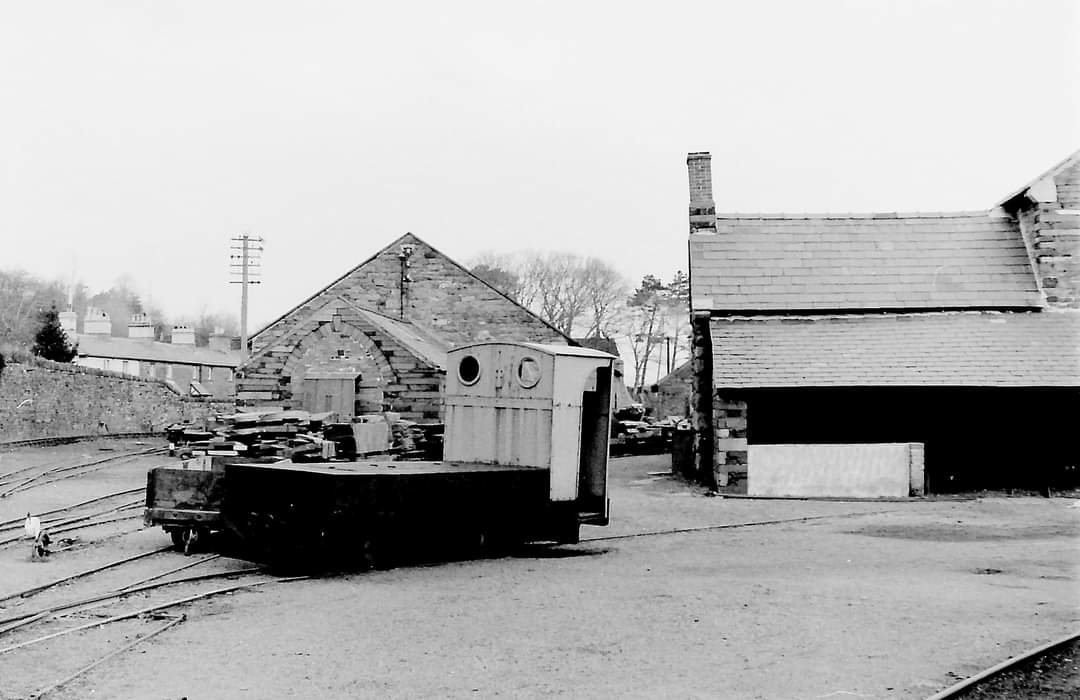

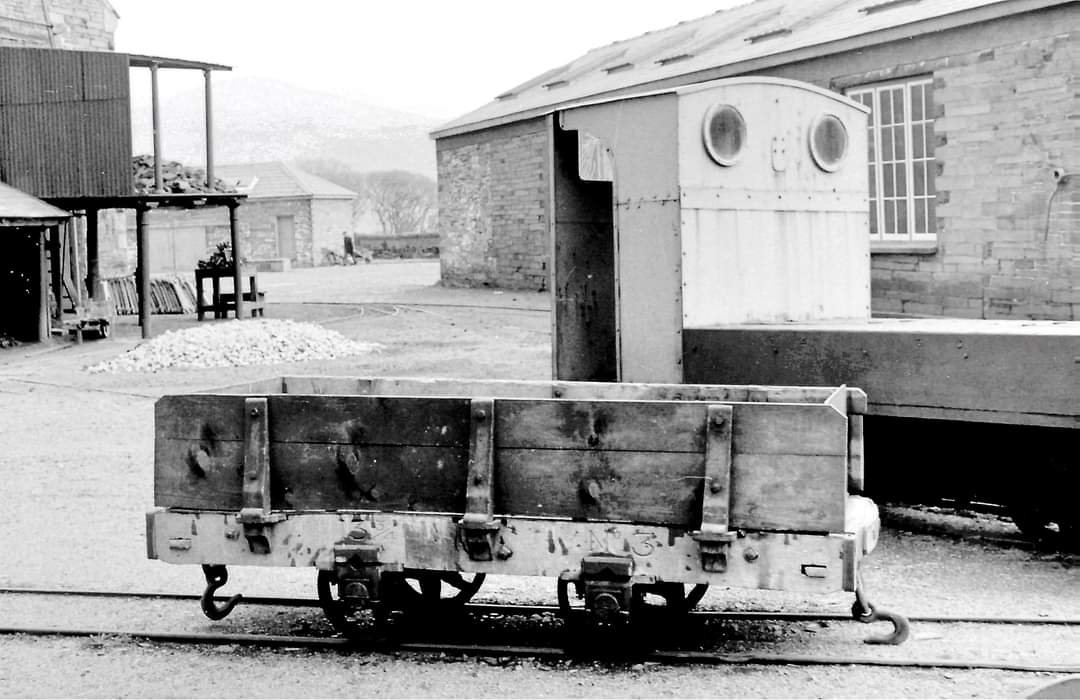

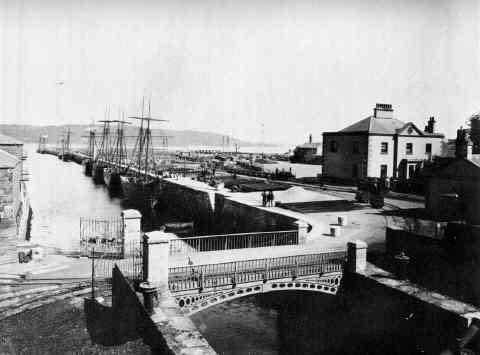


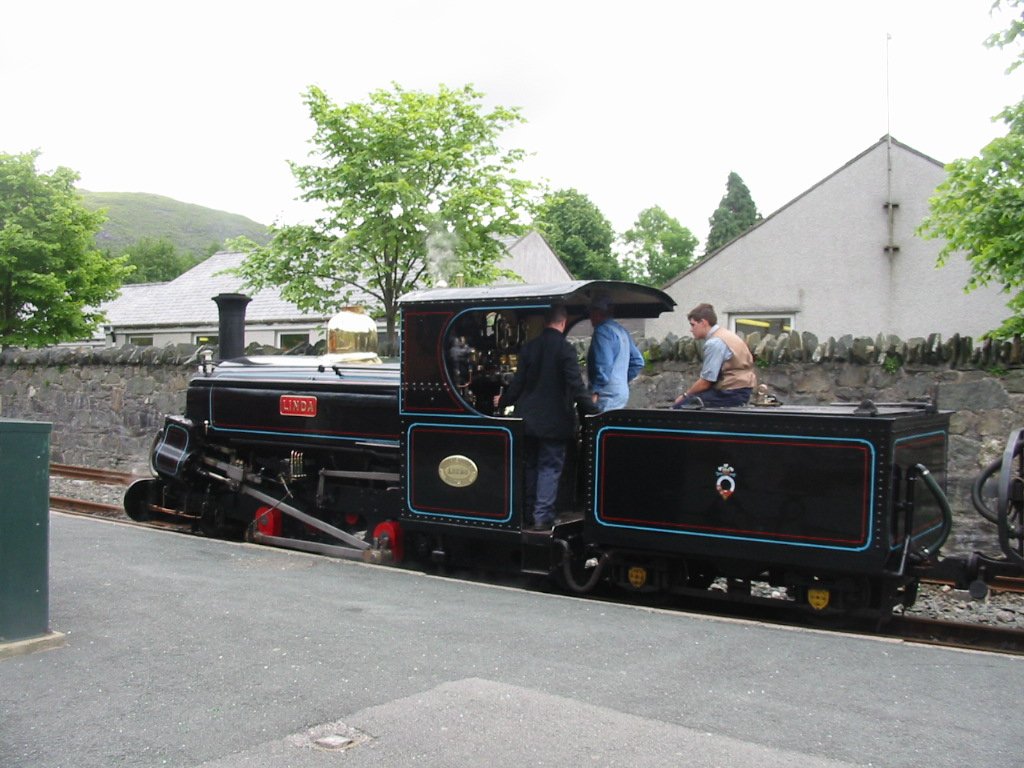

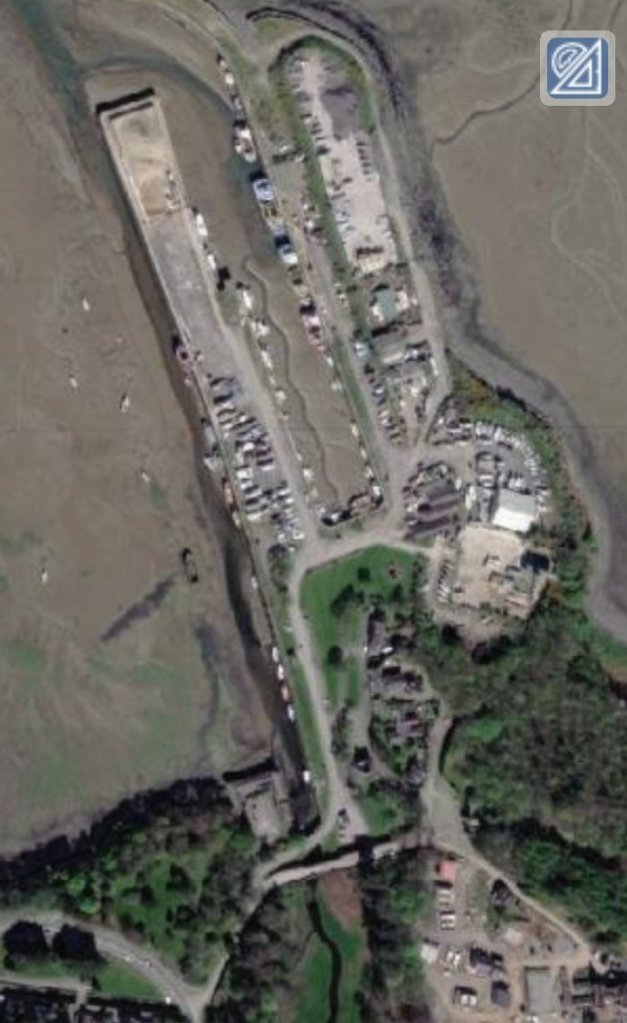


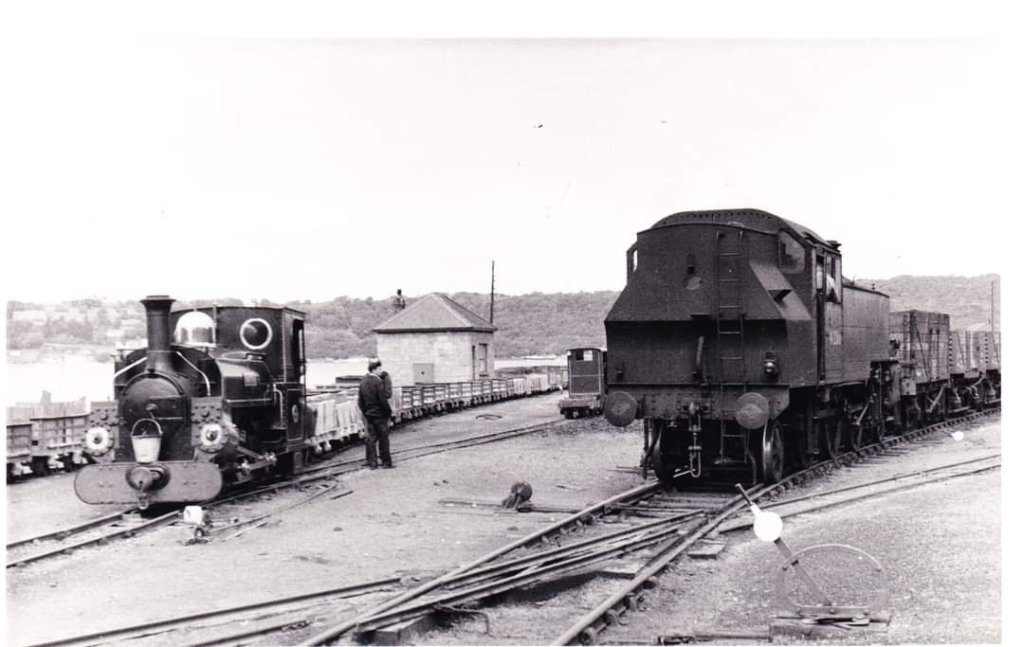
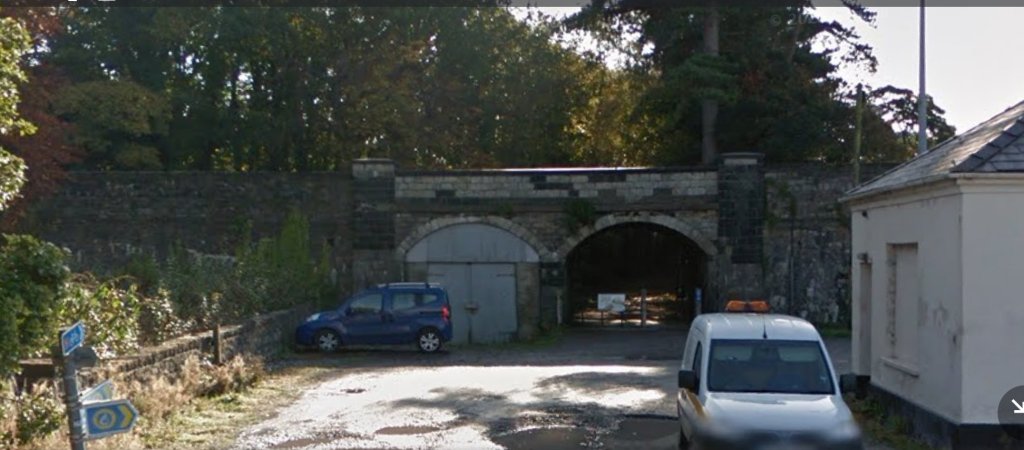
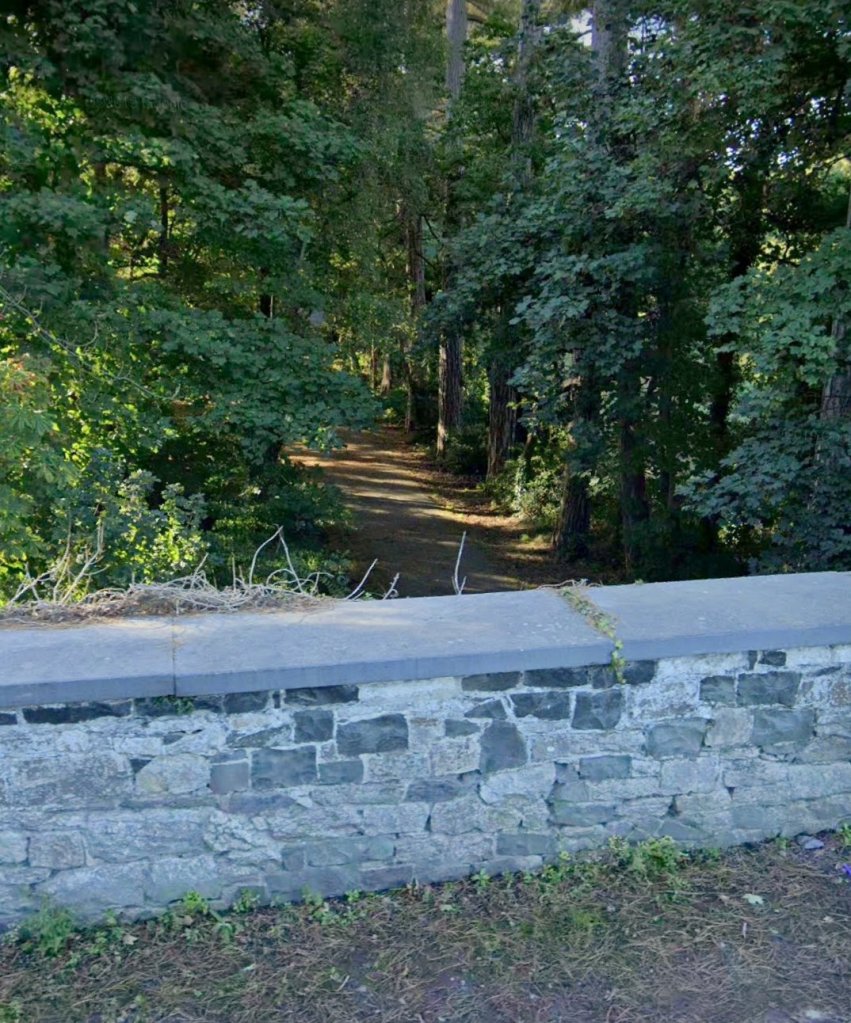

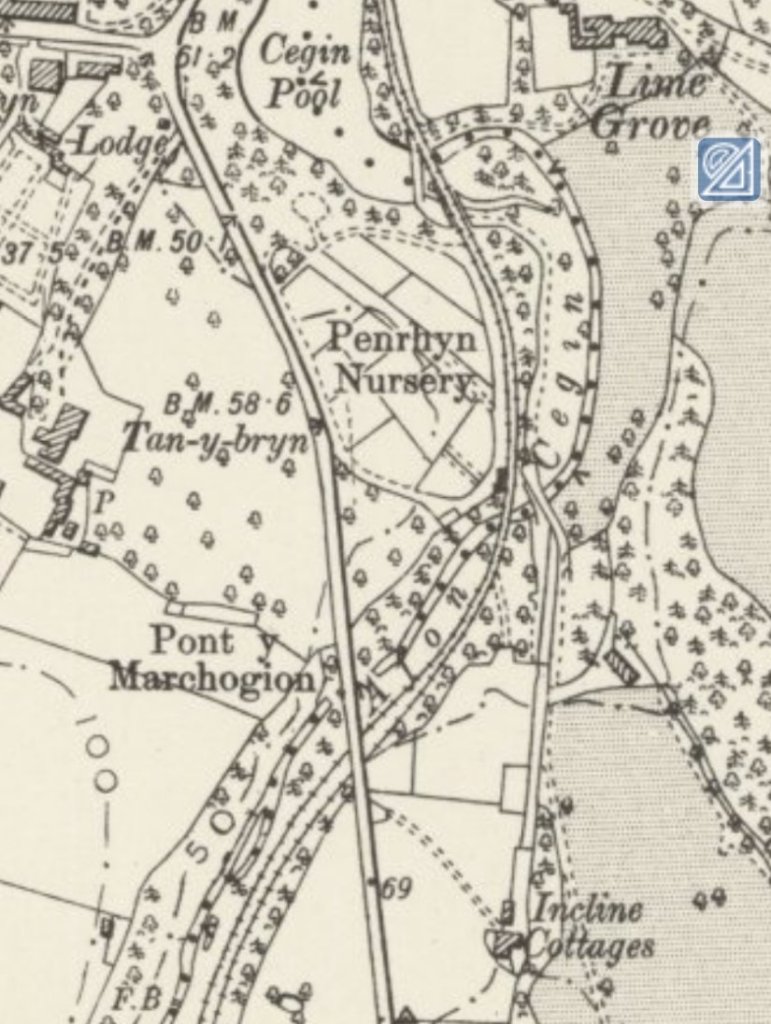


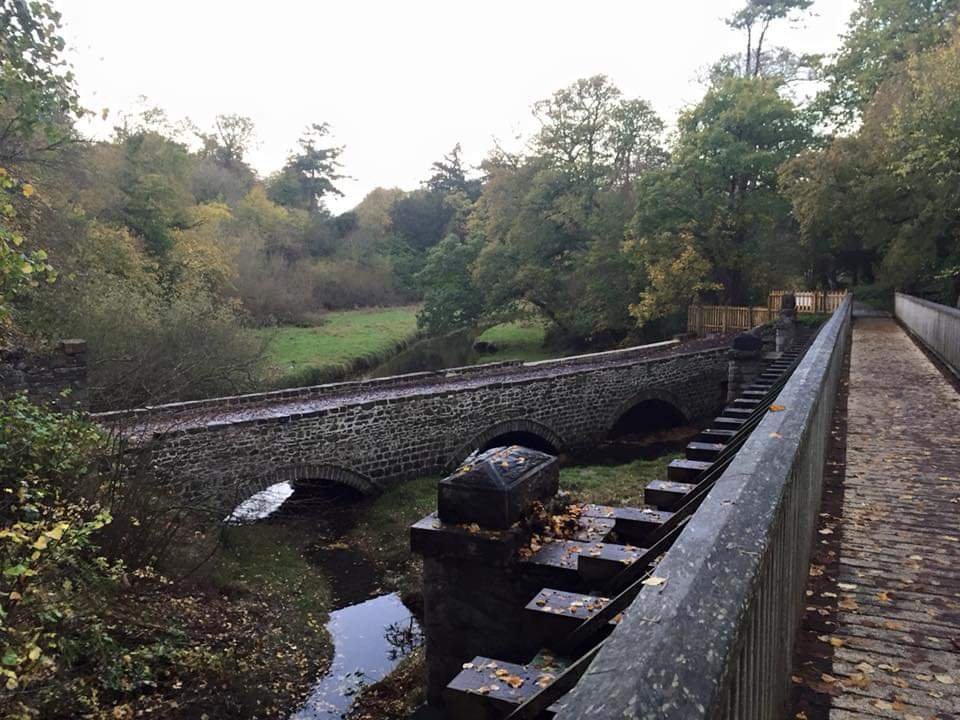
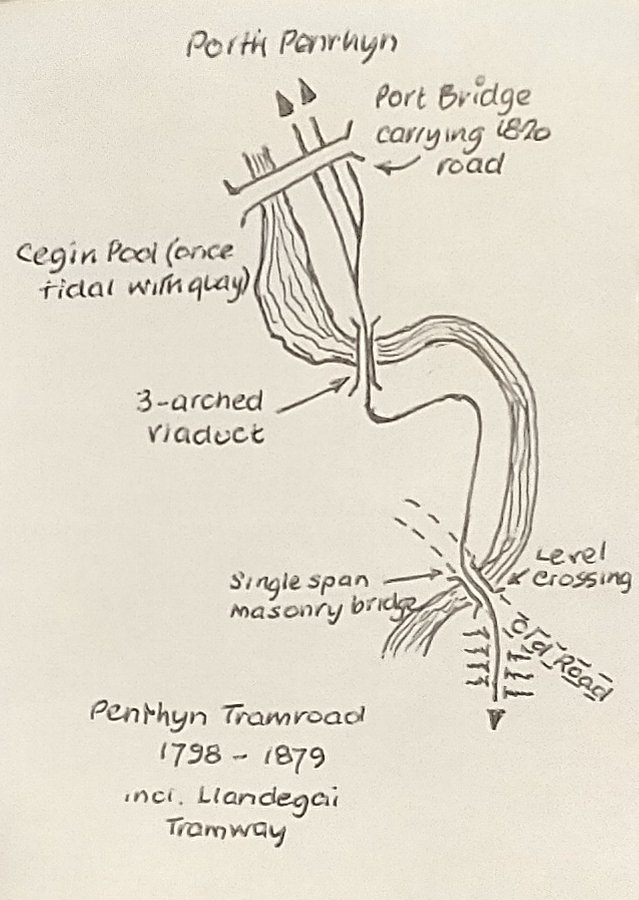
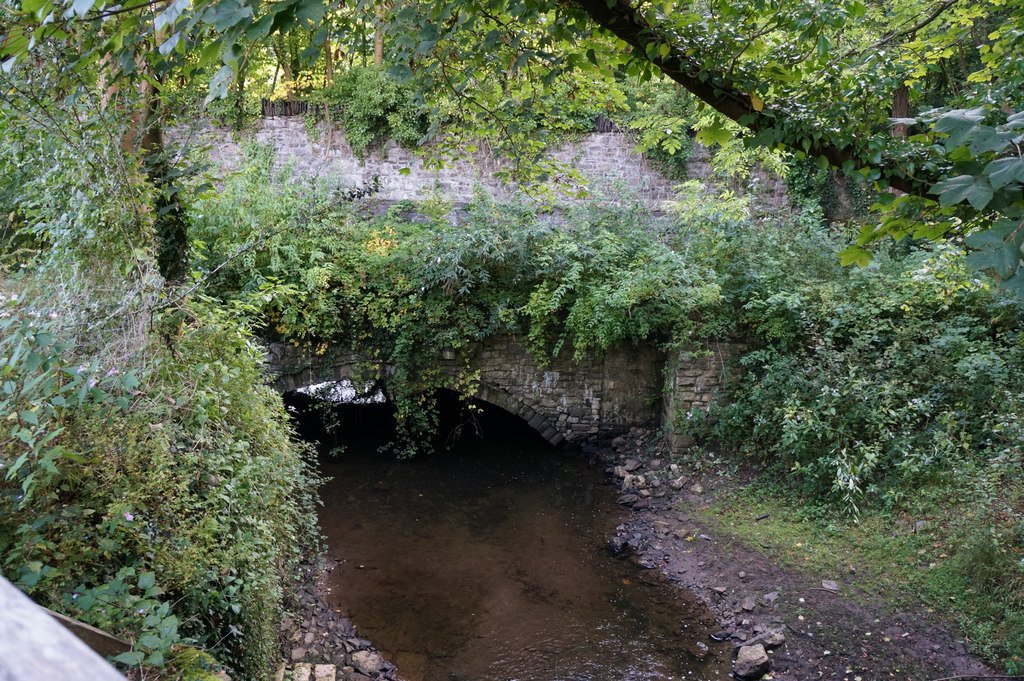

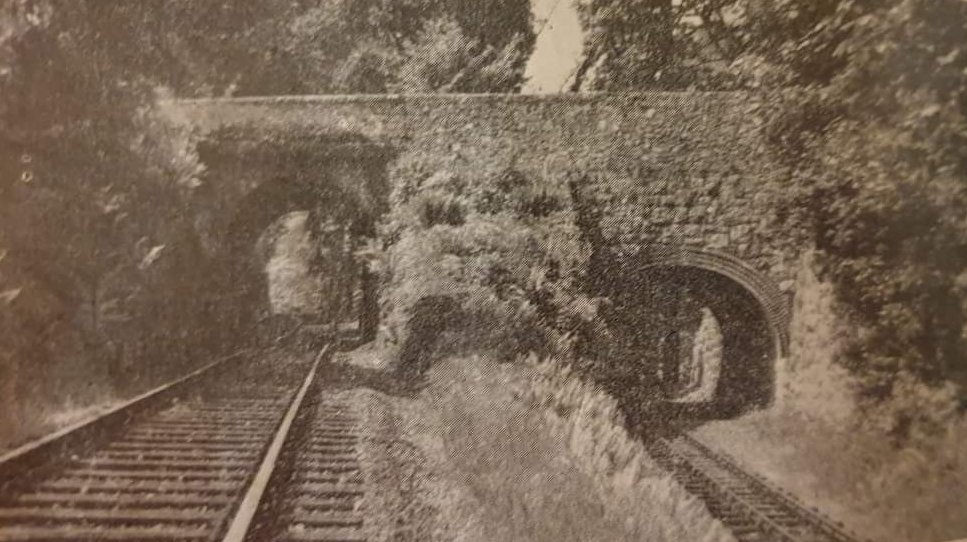
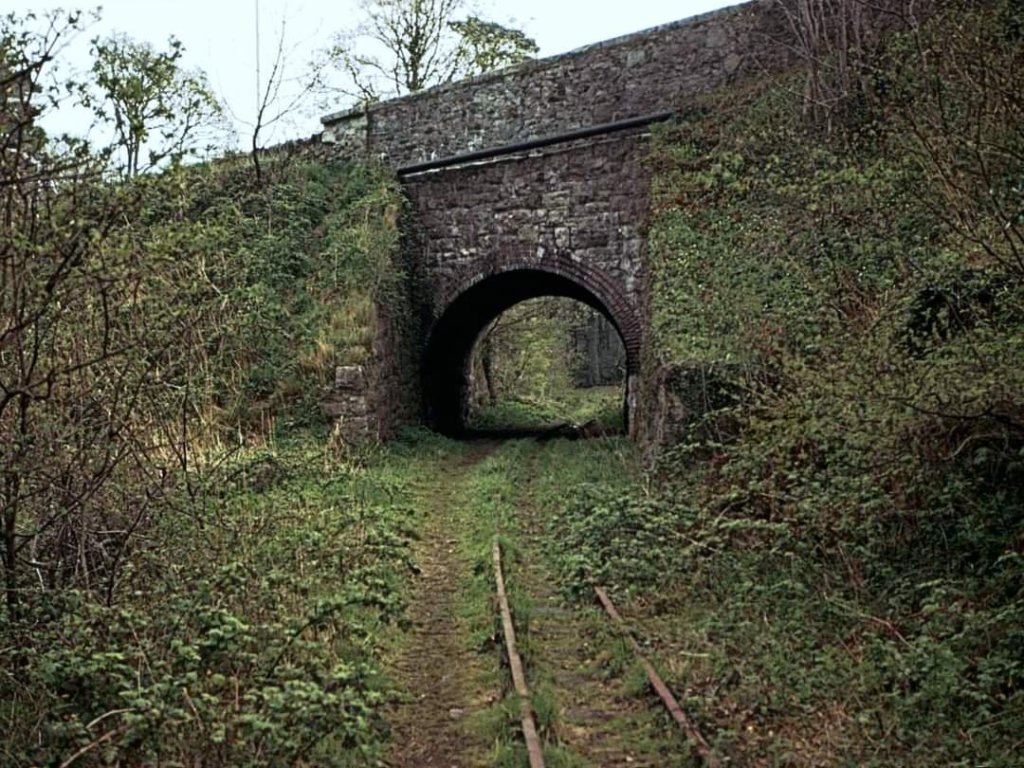


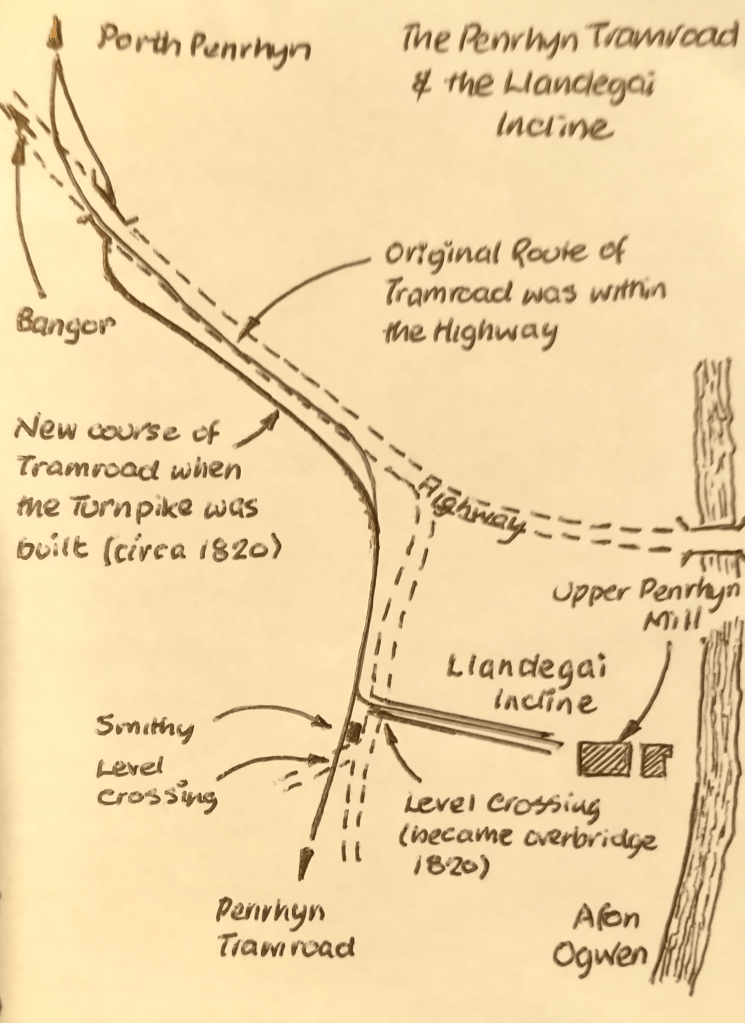
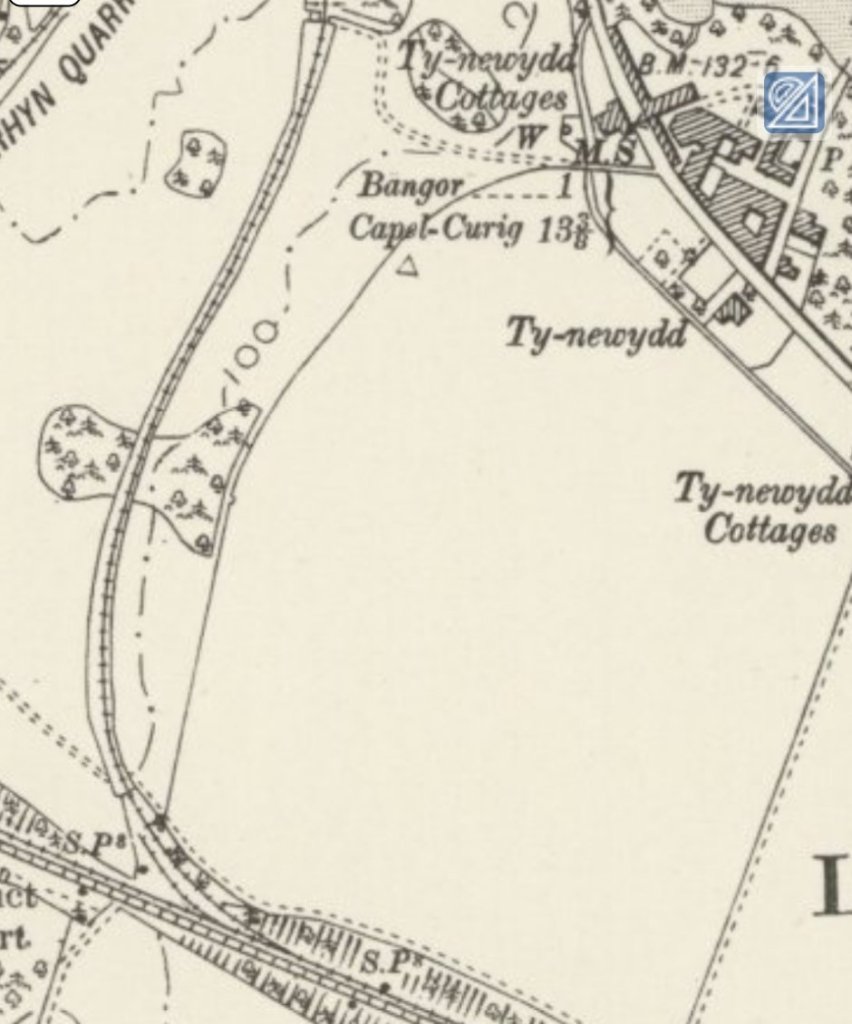
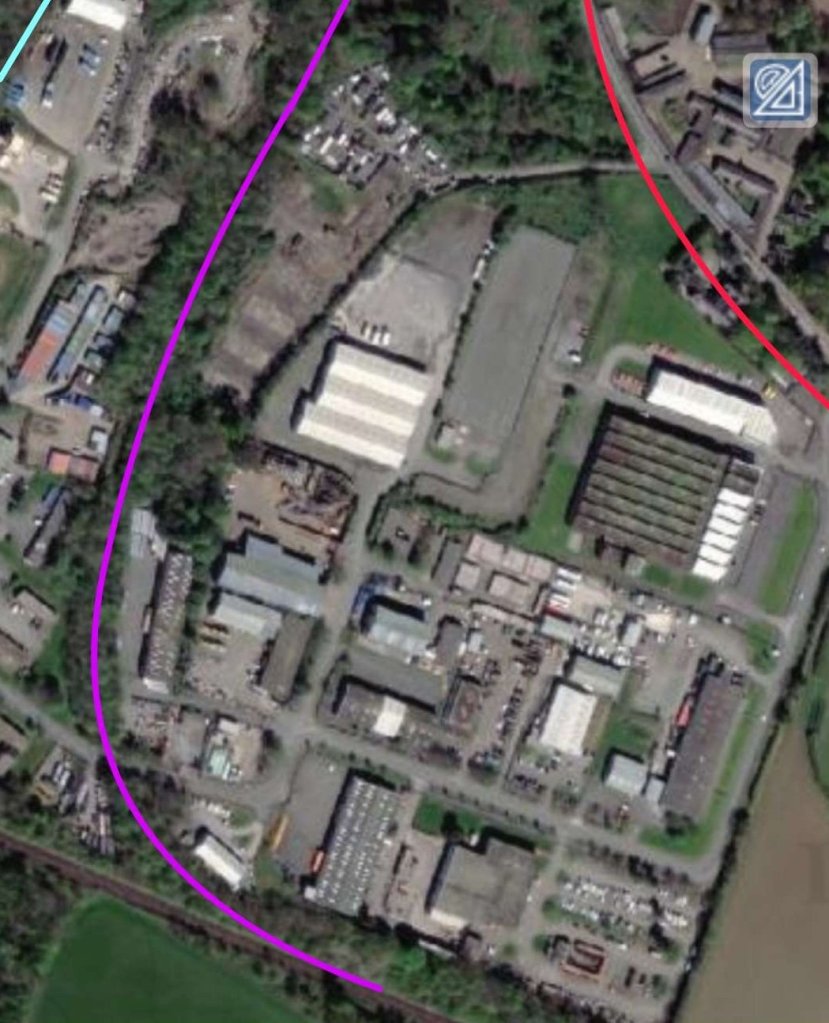
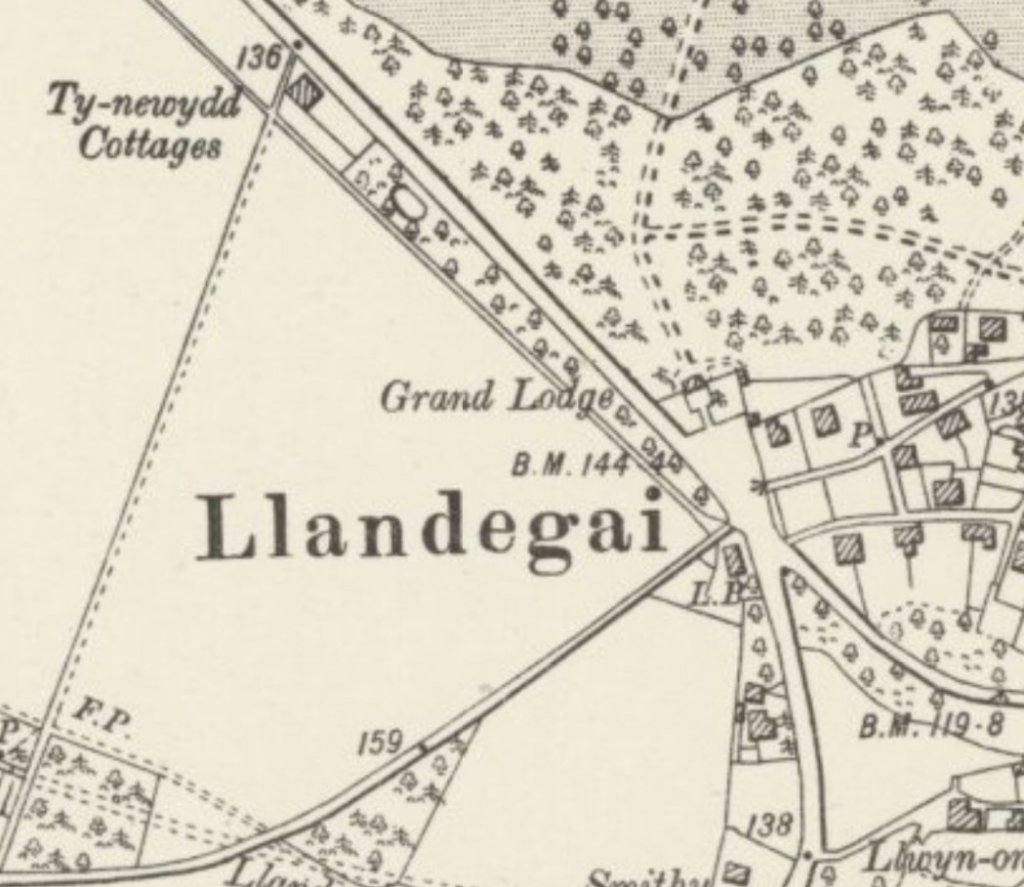

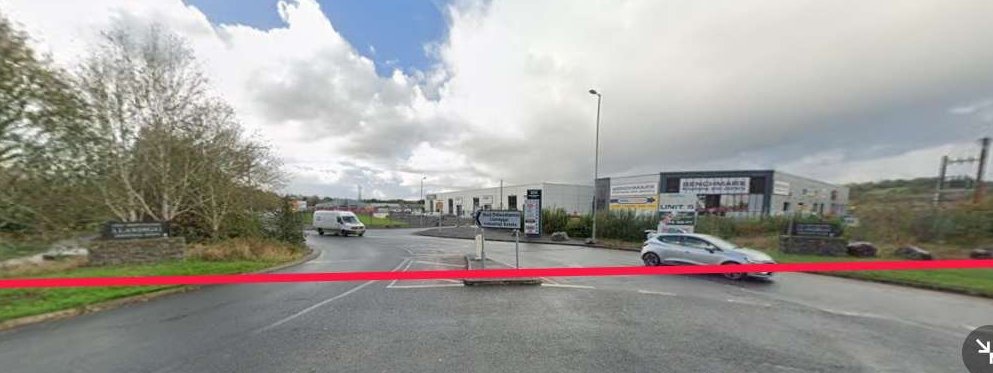

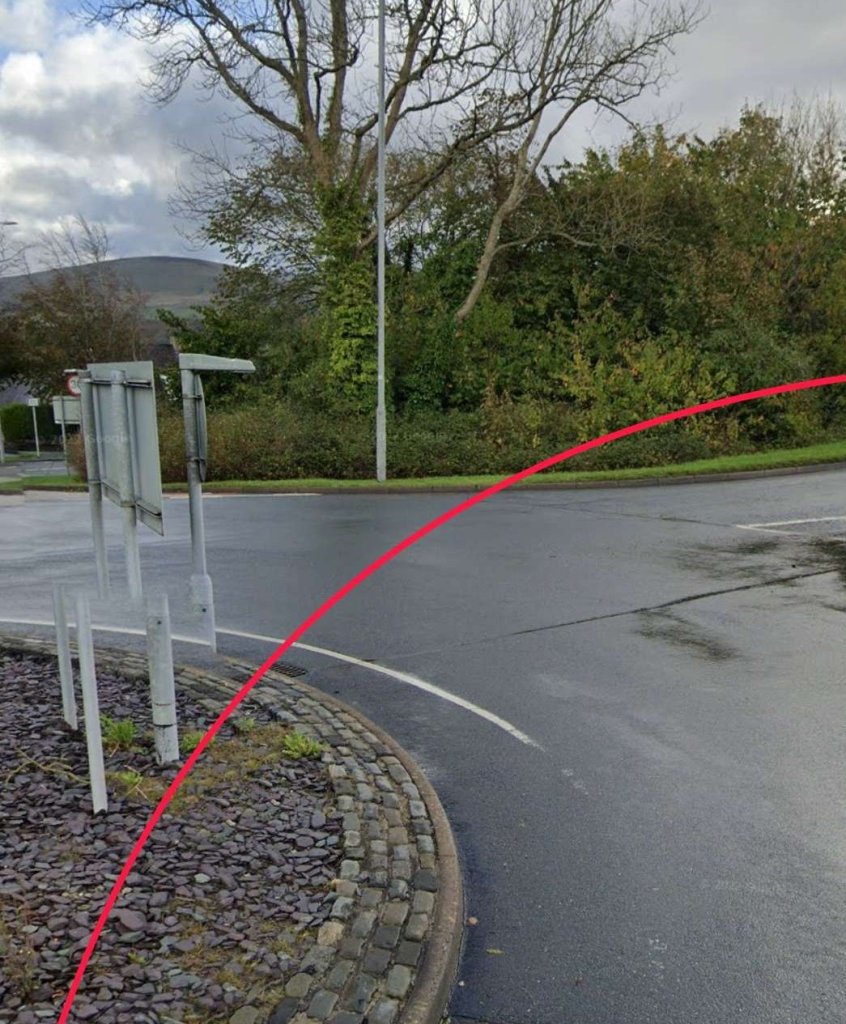

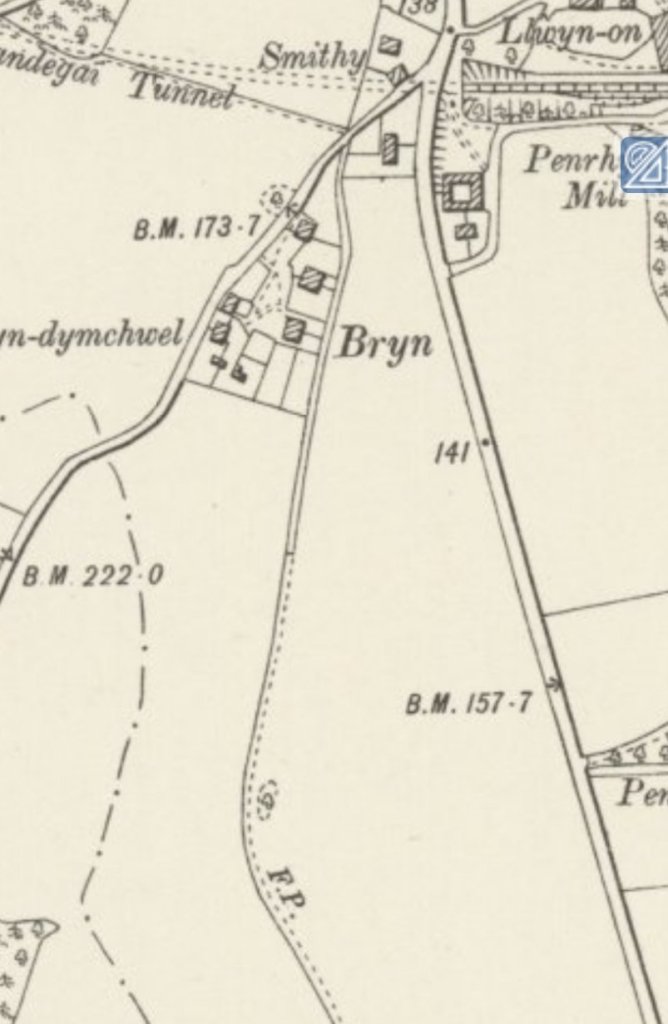
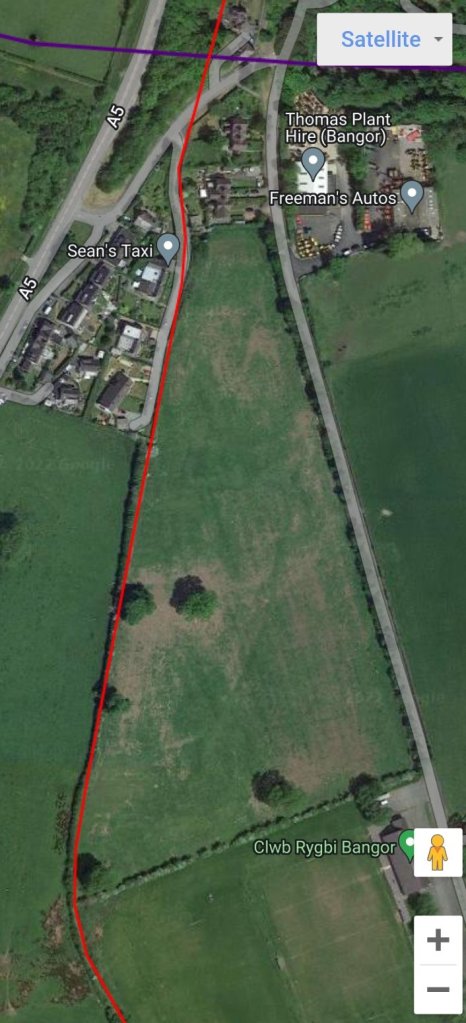

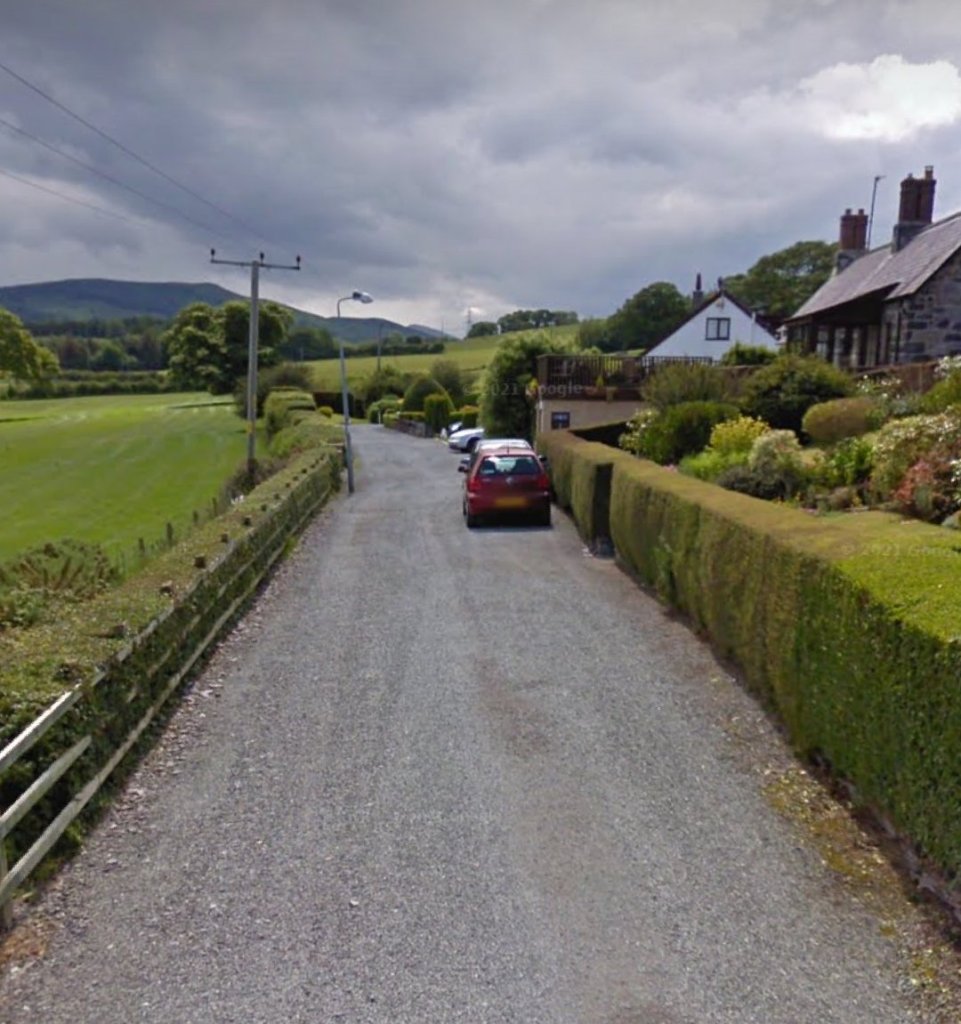

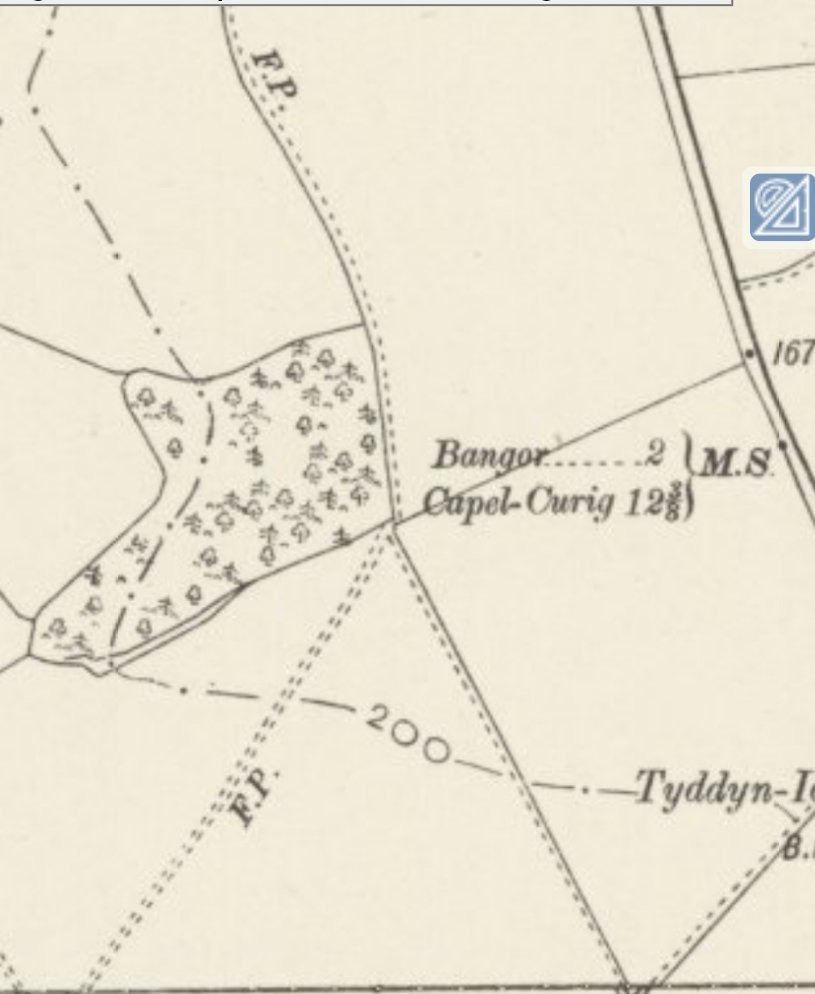
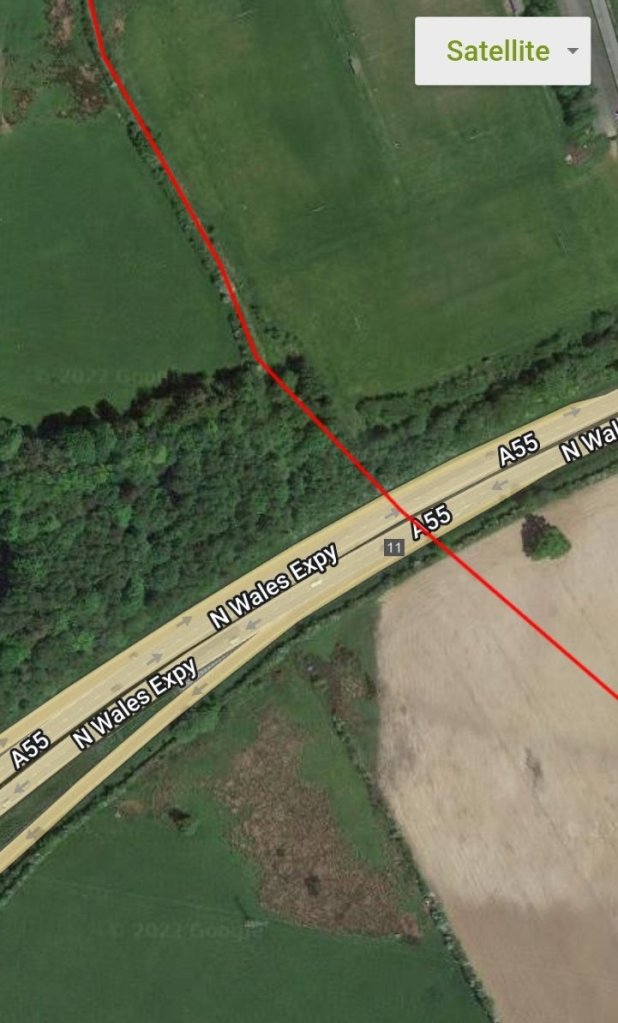
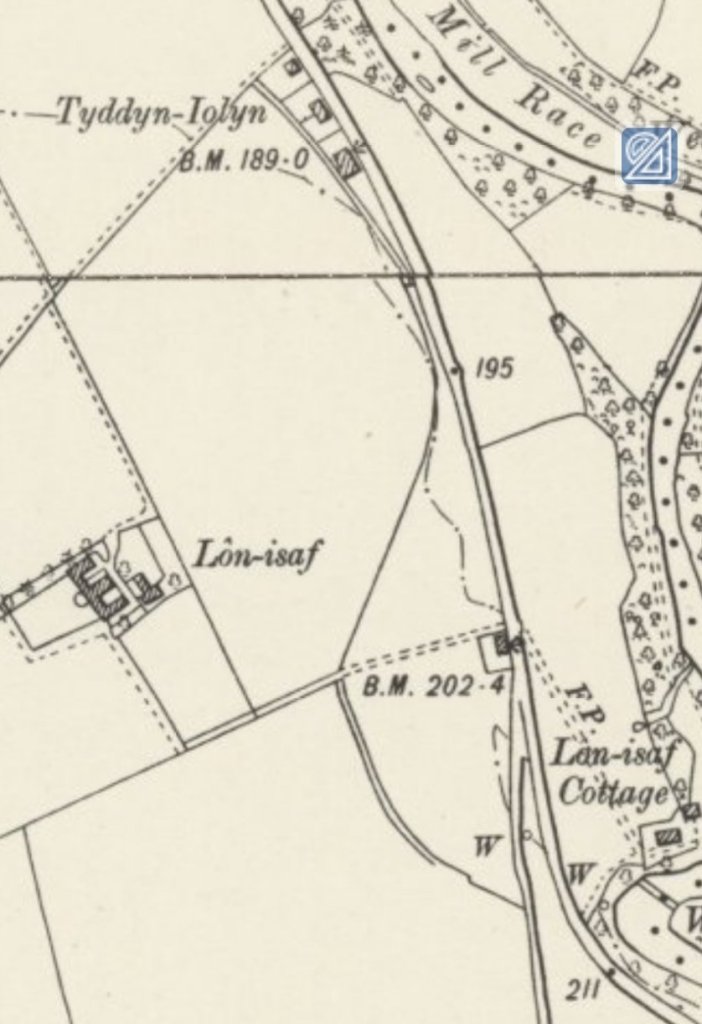


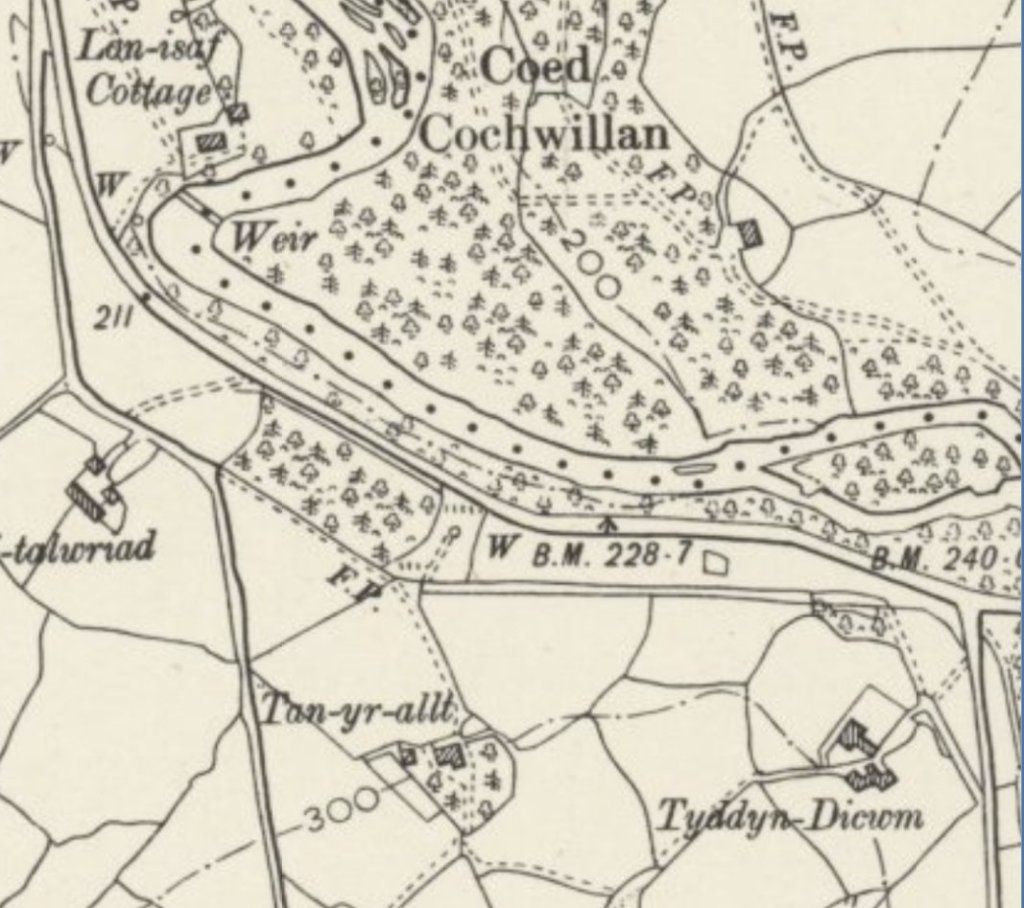
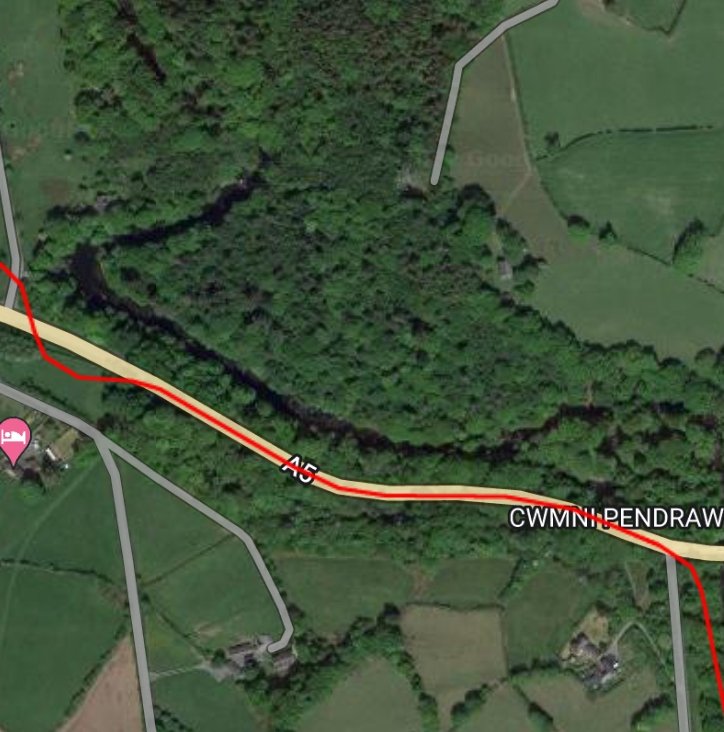
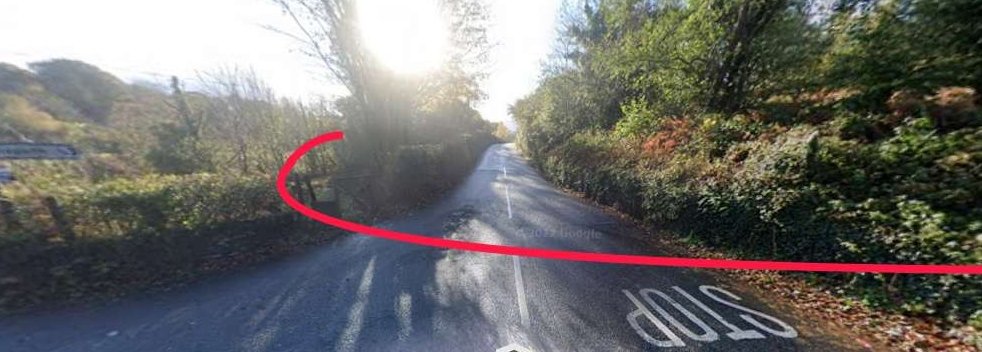
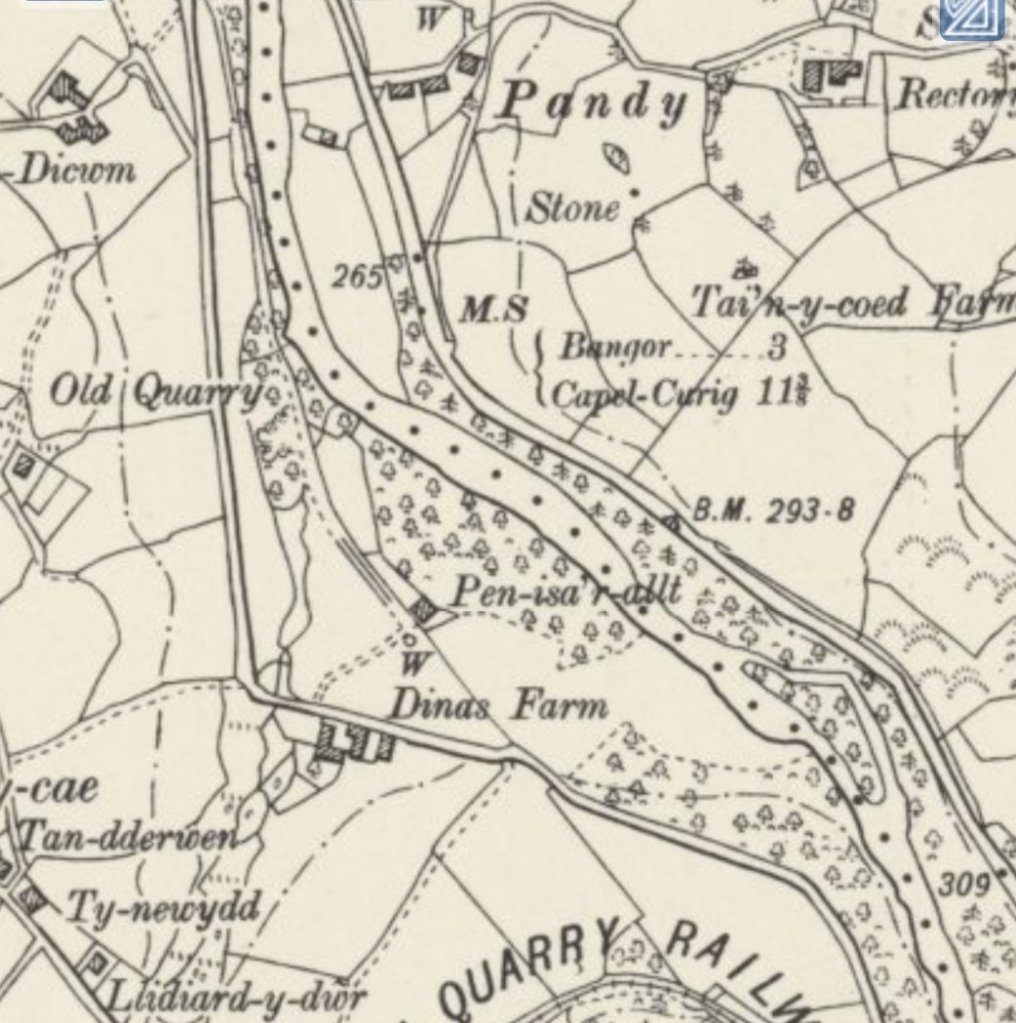
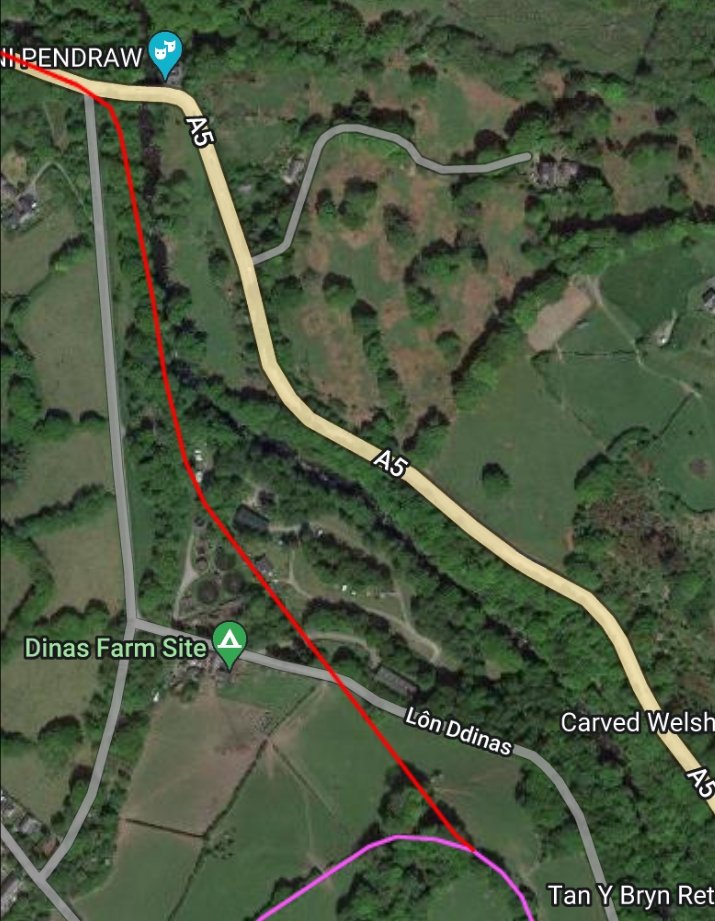

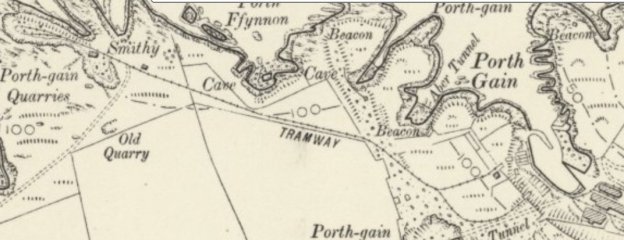
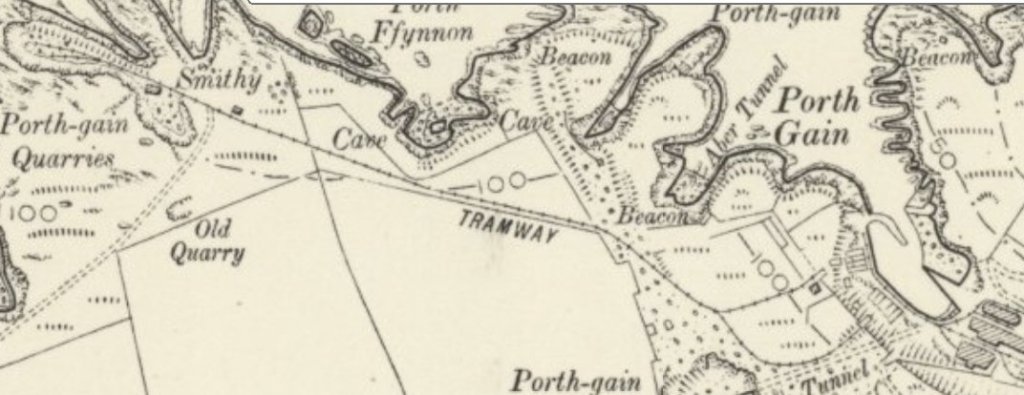

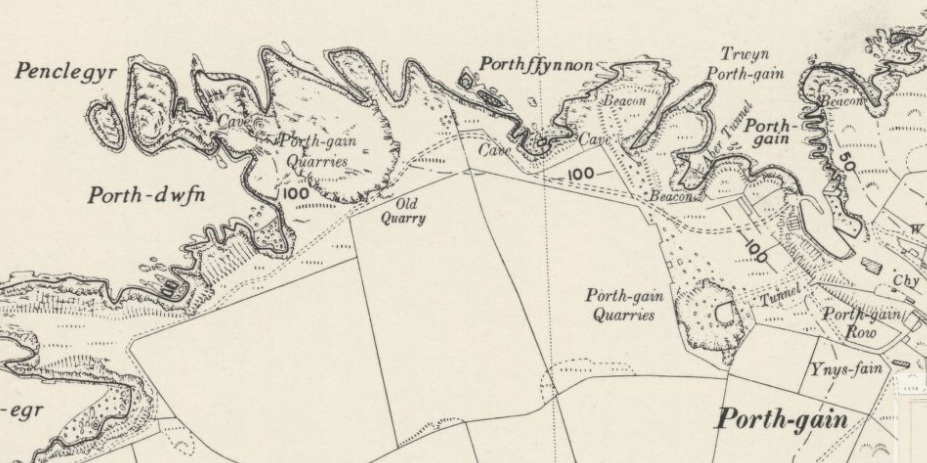

.JPG)