Tag Archives: Trains

1825-1925: The Railway Centenary Celebrations at Darlington, 1st to 3rd July 1925 – The Railway Magazine, August 1925

A significant proportion of the August 1925 edition of The Railway Magazine [1] was dedicated to coverage of the Centenary celebrations at Darlington. Given the short timescale between the event and the publication date of the August issue of the magazine (?late July?), and given that modern digital techniques were in no way available, the achievement of publication in such a short time is to be admired.

Writing at the end of 2024, in just a few months the 200th anniversary will occur, it will be interesting to see what celebrations will be taking place in the Summer of 2025. See, for example, the National Railway Museum‘s plans for 2025. [42]
G.A. Sekon offered The Railway Magazine’s congratulations to the organisers of the 1925 exhibition on their organisational achievements and on the “comprehensiveness and interest of the exhibits brought together.” [1: p101] He also notes that the opportunity was taken by the King to appoint many different leading railway officers to the Order of the British Empire these included: four CBEs (Mr. R. C. Irwin, Secretary, L.M.S.R., Mr. E. A. Bolter, Secretary, G.W.R., Mr. G. Davidson, Divisional General Manager, North Eastern Area, L.N.E.R., and Mr. G. S. Szlumper, Assistant General Manager, Southern Railway), eight OBEs and fourteen MBEs.

The ‘main event’ was the procession which was “witnessed at ease and in comfort by many hundreds of thousands in view of the accessibility of the route practically from end to end and the arrangements whereby landowners generously allowed access to fields adjoining the line.” [1: p103]

The event was opened by HRH. the Duke of York, accompanied by the Duchess of York.  (The Duke of York being the future George VI who became King unexpectedly following the abdication of his brother, King Edward VIII, in December 1936.)

In his opening address Mr. W. Whitelaw made it clear that, “The Exhibition was the result of the co-operation of five great railway companies, assisted by many friends from all parts of the country, who possessed interesting relics of the first passenger railway in the kingdom. It seemed very fitting that the commencement of the celebration of what took place on 27th September 1825, should be in that great railway town of Darlington. If Darlington did not own all the credit for the science of railways, at any rate no one could deny or challenge the statement that Darlington was the home of the first great railway statesman, Edward Pease.”

The Procession

A short (20 minute) film of the procession/cavalcade can be viewed here. [35]

The centenary celebrations were held in July to allow guests from foreign countries visiting the International Railway Congress to take part. An exhibition of rolling stock at the new Faverdale Wagon Works in Darlington was opened by the Duke and Duchess of York (later King George VI and the Queen Mother). The following day the royal couple watched as procession of locomotives passed between Stockton and Oak Tree Junction, starting with a Hetton Colliery locomotive that had been built in 1822 and finishing with a replica train of ten chaldron waggons and ‘the company’s coach’ hauled by Locomotive No.1 propelled by a petrol engine in a specially built tender.” [45] A copy of the original programme for the procession can be found here. [46]

The procession was due to have 54 items, one of which had to be withdrawn (the North British Locomotive Company’s geared turbine condensing locomotive). [1: p123] The final list was: [8]

  • 1. Hetton Colliery locomotive – 1822.
  • 2. S. & D.R. “Derwent” – 1845.
  • 3. NBR 0-6-0 No. 381 (LNER J31 10114) – 1867.
  • 4. NER 0-6-0 No. 1275 – 1874.
  • 5. LNER J26 0-6-0 No. 517 (ex NER) – 1905.
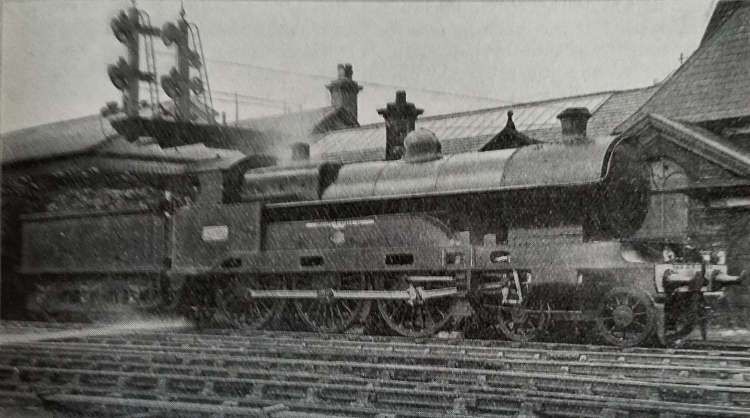
  • 6. LNER B16 4-6-0 No. 934 (ex NER) – 1921.
  • 7. LNER K3 2-6-0 No. 203 – 1925.
  • 8. LNWR 0-8-0 No. 1881 (LMS 8900) – 1901.
  • 9. LMS 0-8-0 No. 9446 (ex LNWR) – 1922.
  • 10. LNER 02 2-8-0 No. 3501 – 1924.
  • 11. GWR 2-8-0 No. 4700 – 1919
  • 12. LNER P1 2-8-2 No. 2393 – 1925.
  • 13. LNER electric loco No. 9 (hauled by J71 0-6-0T 317) (ex NER) – 1914.
  • 14. GWR 2-2-2 “North Star”(replica), (on wagon, hauled by J71 0-6-0T No. 181) – 1837.
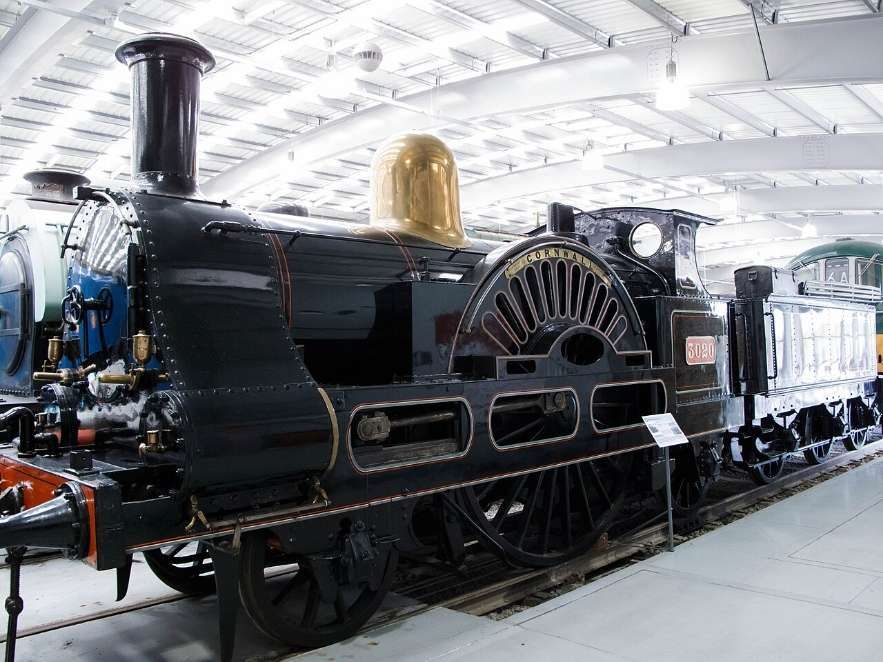
  • 15. LNWR 2-2-2 No. 3020 “Cornwall” – 1847.
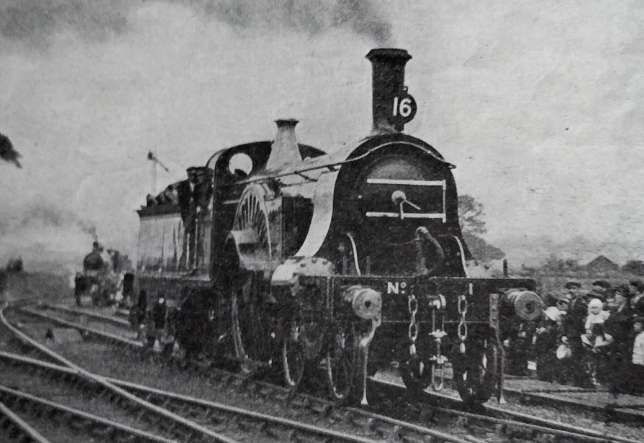
  • 16. GNR 4-2-2 No. 1 – 1870.
  • 17. MR 4-2-2 No. 679 – 1899.
  • 18. LNER X4 4-2-2 No. 5972 (exGCR) – 1900.
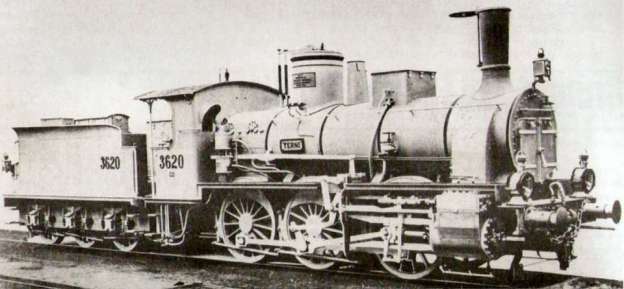
  • 19. NER Class 901 2-4-0 No. 910 – 1875.
  • 20. LNER E5 2-4-0 No. 1463 (ex NER) – 1885.
  • 21. LNER D17/1 4-4-0 No. 1620 (ex NER) – 1892.
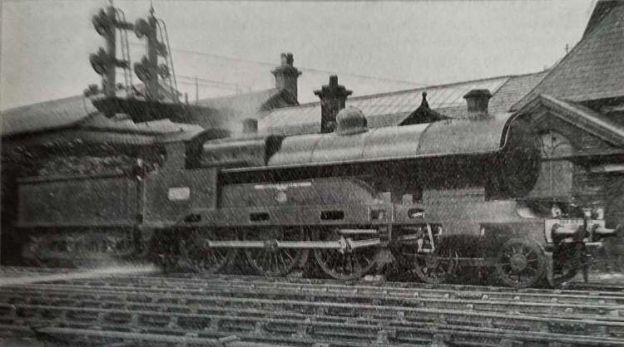
  • 22. LNER D15 4-4-0 No. 8900 “Claud Hamilton” (ex GER) – 1900.
  • 23. LNER C2 4-4-2 No. 3990 “Henry Oakley” (ex GNR) – 1898.
  • 24. LNER C1 4-4-2 No. 3251 (ex GNR) – 1902.
  • 25. LNER C11 4-4-2 No. 9902 “Highland Chief” (ex NBR) – 1911.
  • 26. LNER C7 4-4-2 No. 2207 (ex NER) – 1917.
  • 27. LNER B13 4-6-0 No. 2006 (ex NER) – 1900.
  • 28. LNER B3 4-6-0 No. 6169 “Lord Faringdon” (ex GCR) – 1917.
  • 29. LMS 4-6-0 No. 5900 “Sir Gilbert Claughton” (ex LNWR) – 1913.
  • 30. LNER A1 4-6-2 No. 2563 “William Whitelaw” – 1924
  • 31. Withdrawn
  • 32. LNER electric loco No. 13 (hauled by J71 0-6-0T No. 1163) – 1922.
  • 33. LNER X1 2-2-4T No. 66 “Aerolite” (ex NER) – 1851.
  • 34. LNER J61 0-6-0ST No. 6469 (ex GCR) – 1873.
  • 35. LNER Y6 0-4-0T No. 7133 (ex GER) – 1897.
  • 36. LNER G6 0-4-4T No. 949 (ex NER) – 1874.
  • 37. LNER G5 0-4-4T No. 1334 (ex NER) – 1901.
  • 38. LNER H1 4-4-4T No. 2152 (ex NER) – 1913.
  • 39. LNER A5 4-6-2T No. 5088 (ex GCR) – 1923.
  • 40. LMS 4-6-4T No. 11112 – 1924.
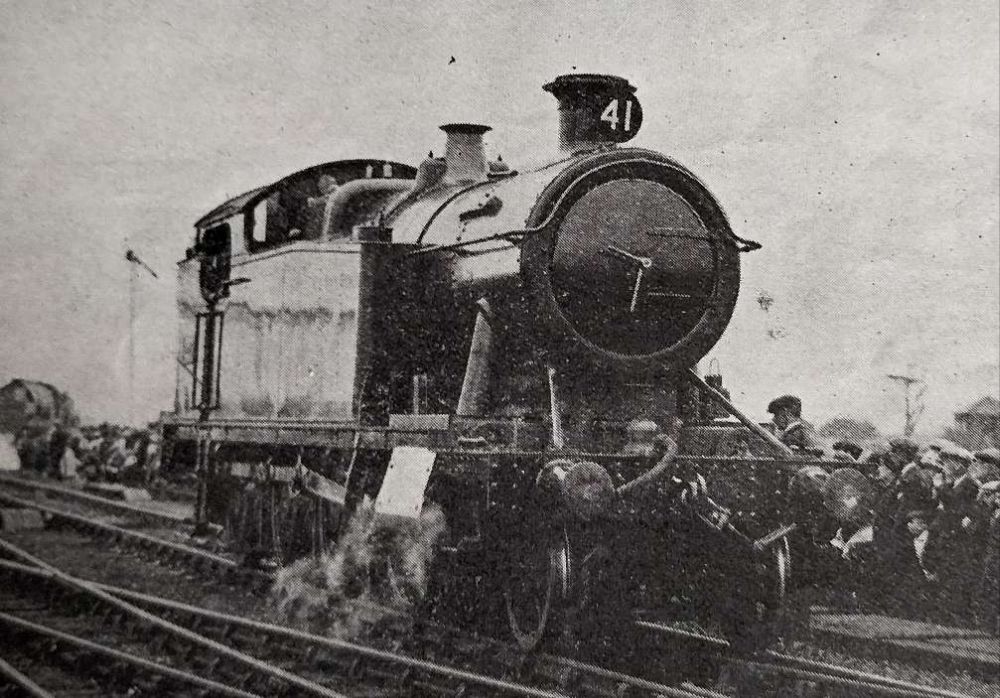
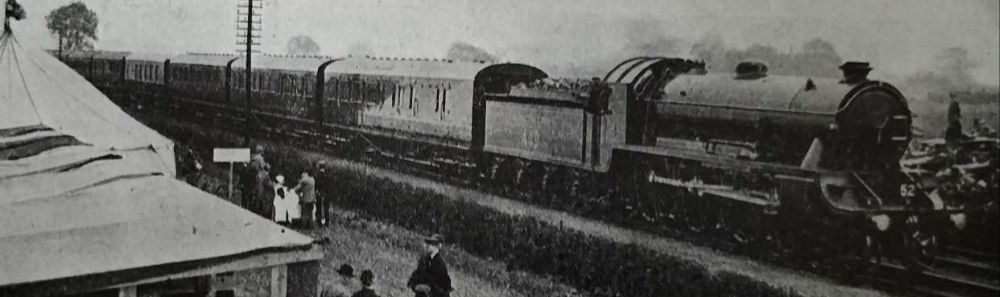
  • 41. GWR 2-8-0T No. 5225 – 1924.
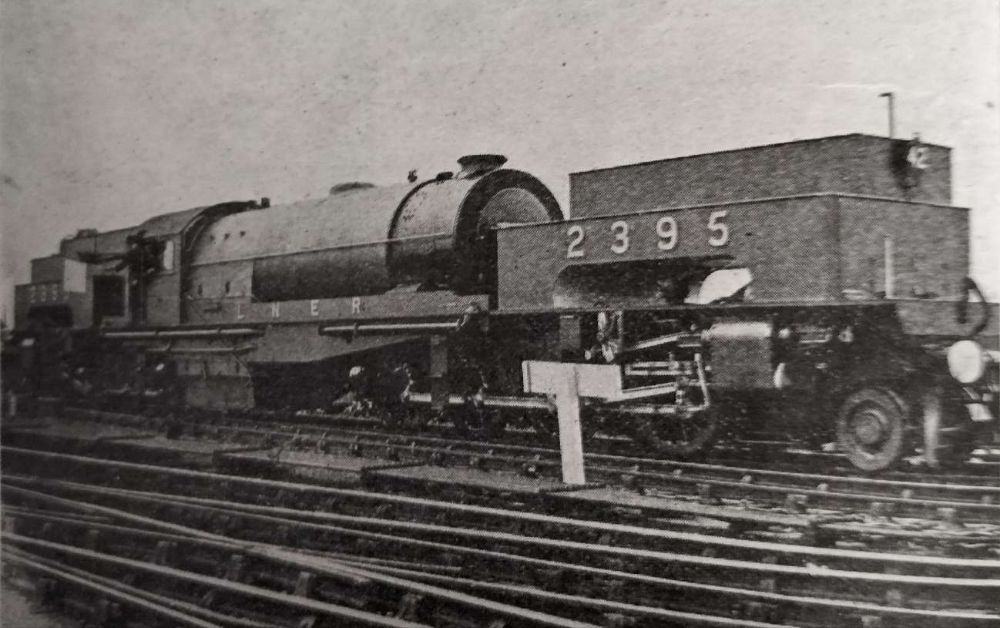
  • 42. LNER U1 2-8-8-2 No. 2395 – 1925.
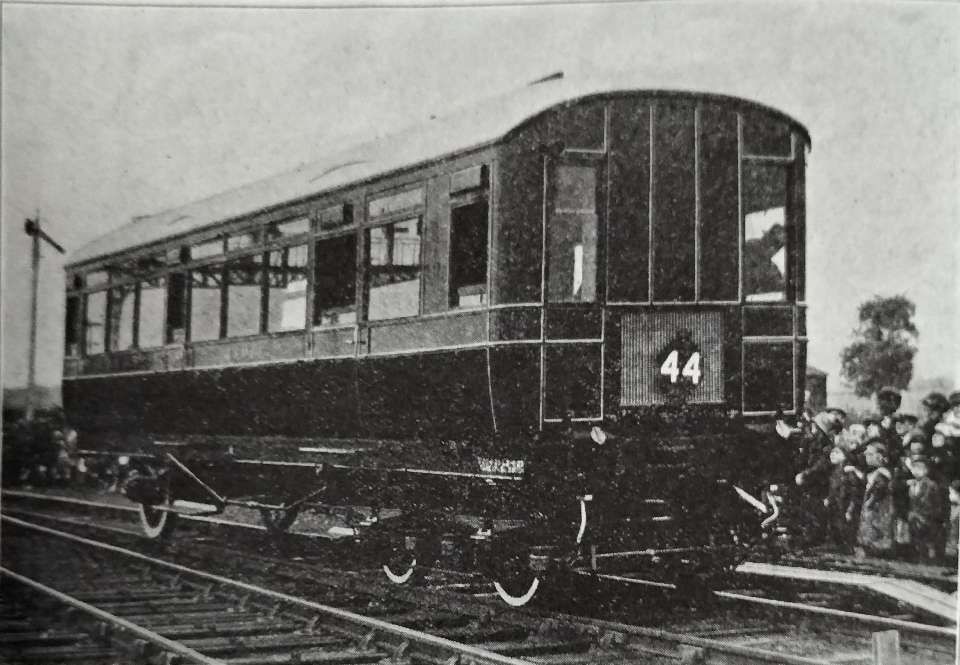
  • 43. LNER Railbus 130Y (ex NER) – 1922.
  • 44. LNER petrol autocar No. 2105Y – 1923.
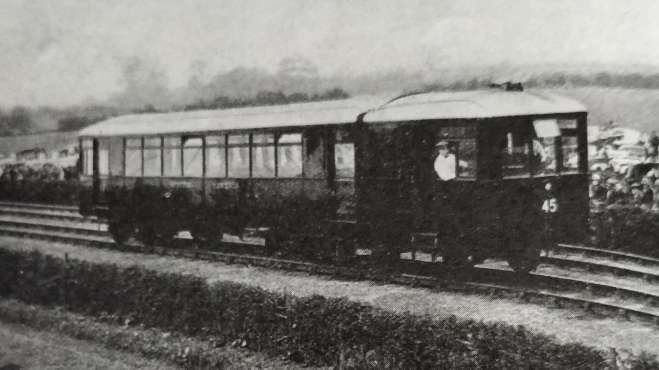
  • 45. Sentinel steam railcar – 1925.
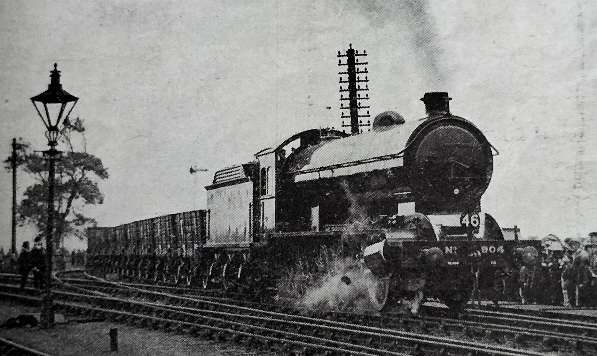
  • 46. LNER Q7 0-8-0 No. 904 (ex NER) on mineral train. – 1919.
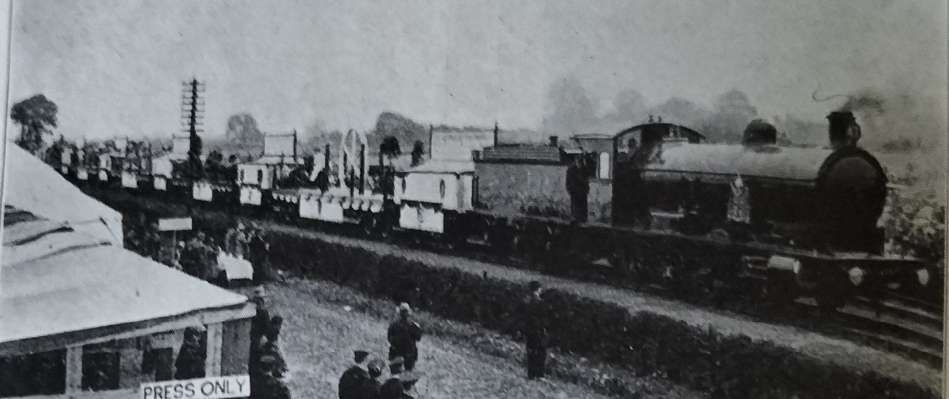
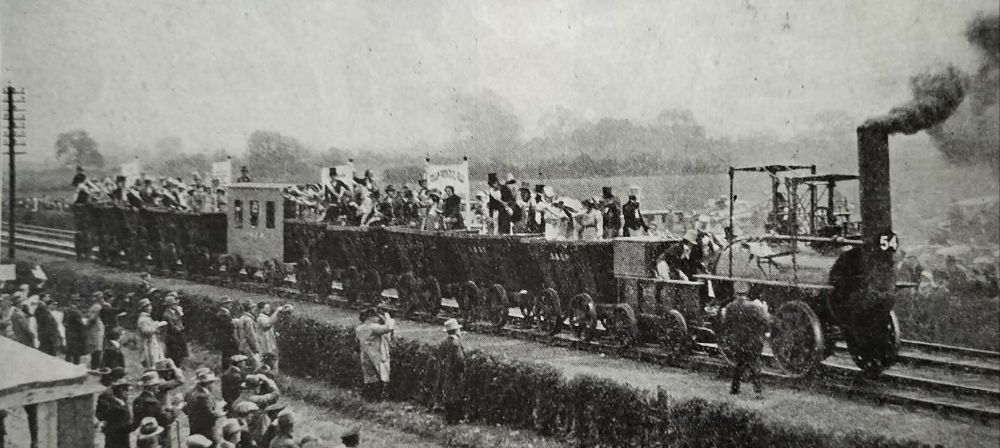
  • 47. LNER Q5 0-8-0 No. 130 (ex NER) hauling tableaux train.
  • 48. GNSR 4-4-0 No. 45A and train of old 4-wheel coaches – 1865.
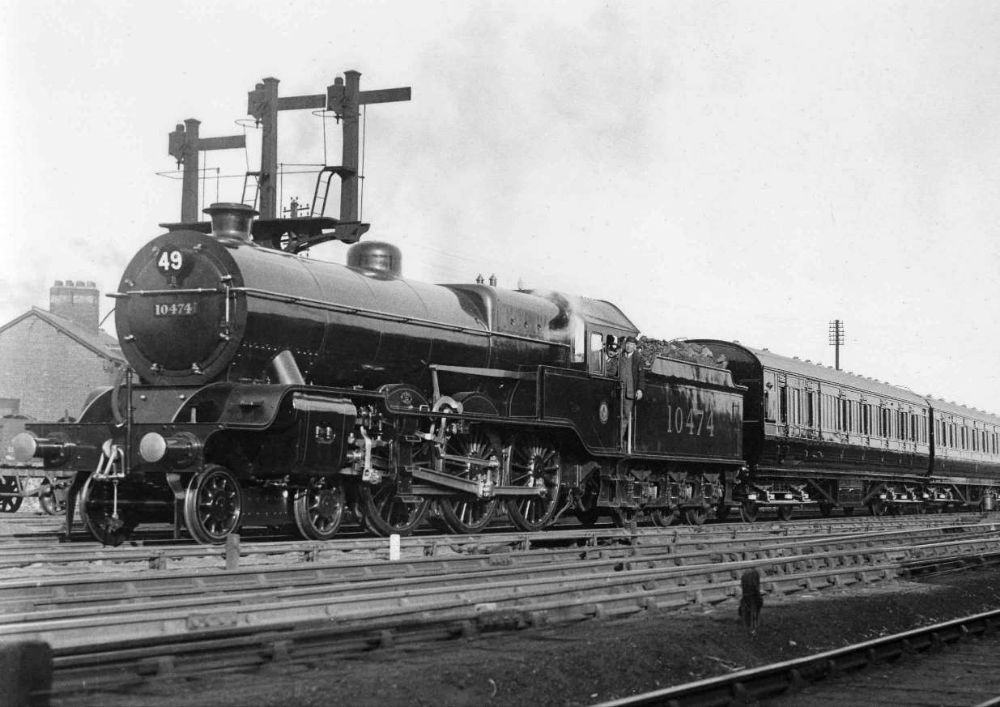
  • 49. LMS 4-6-0 No. 10474 with vestibule coaches. – 1925.
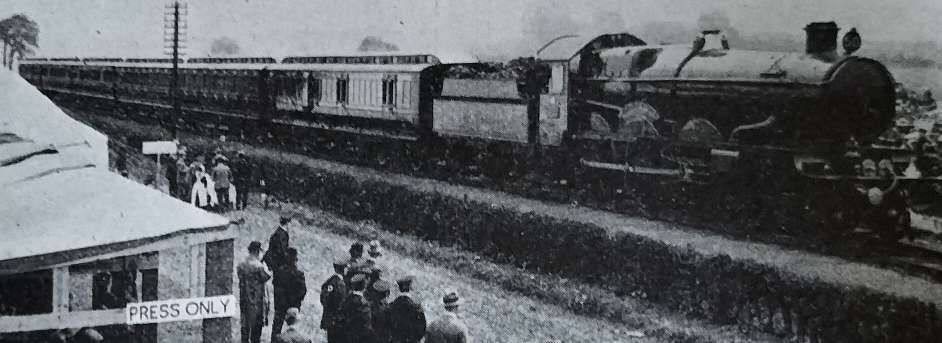
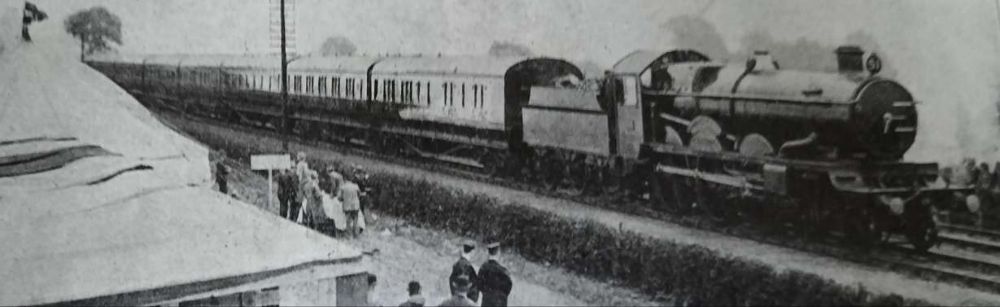
  • 50. GWR 4-6-0 No. 4082 “Windsor Castle” with GWR royal train – 1924.
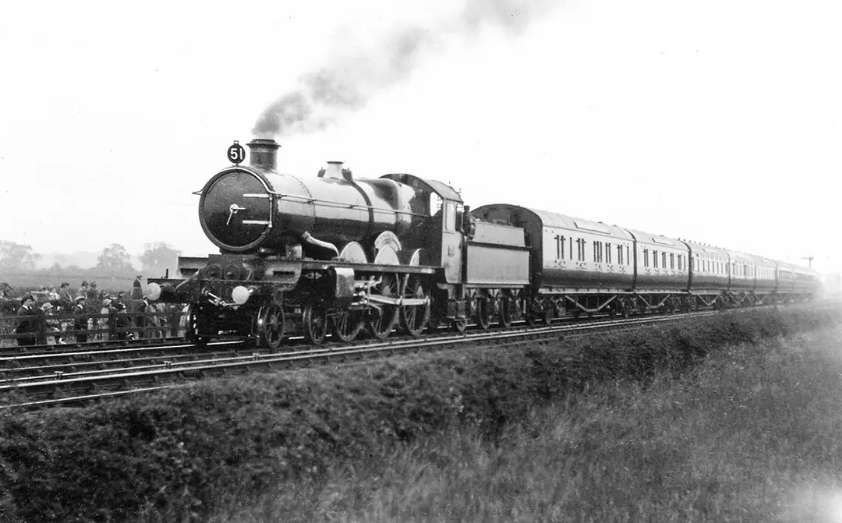
  • 51. GWR 4-6-0 No. 111 “Viscount Churchill” with coaches.
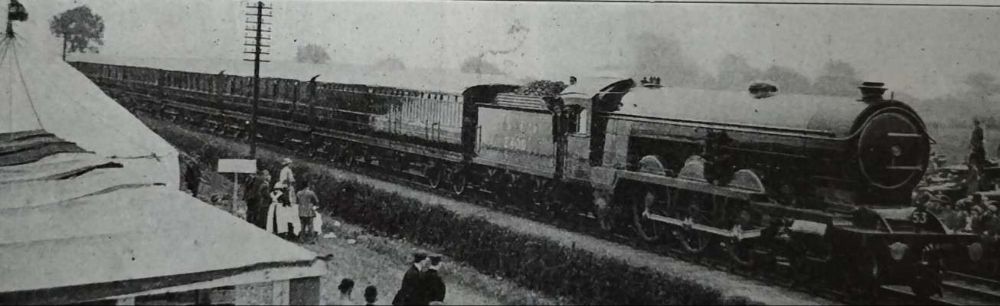
  • 52. SR 4-6-0 No. 449 “Sir Torre” with coaches. – 1925.
  • 53. LNER A2 4-6-2 No. 2400 “City of Newcastle” with coaches. – 1922.
  • 54. “Locomotion” – 1825

This list can be found on the Stockton & Darlington Rail Centre website. [8]

Of these items, The Railway Magazine chose to highlight a number of these including:

  • 1. The Hetton Colliery Locomotive

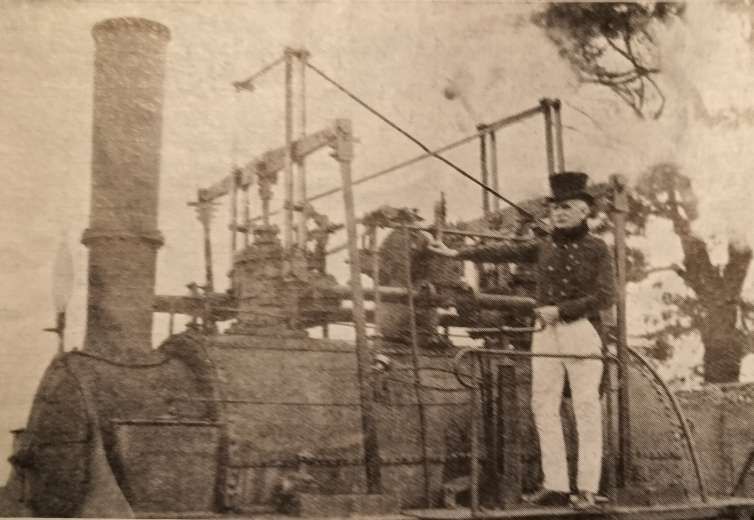
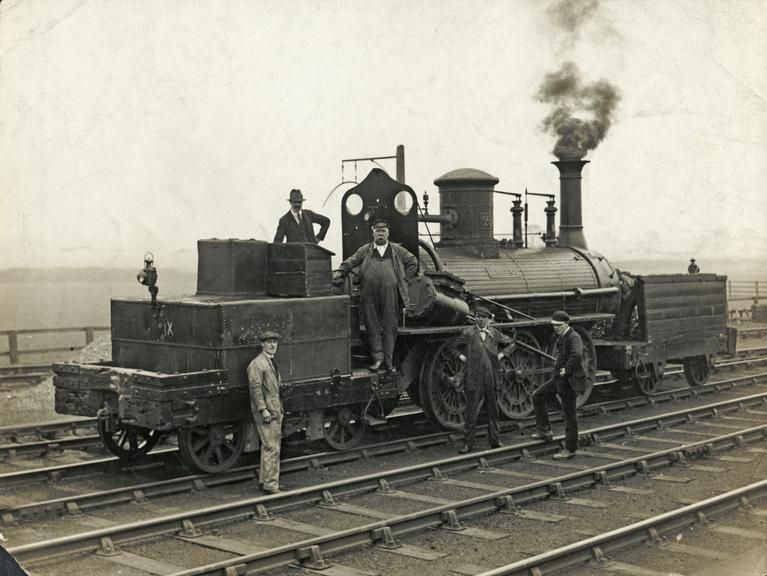
The procession was headed by the old Hetton Colliery engine, built in 1822 by George Stephenson and Nicholas Wood, previous to the establishment of Stephenson’s works at Newcastle-on-Tyne. The engine, by the way, was rebuilt in 1857, and again in 1882, when the link motion, at present fitted, was added.” [1: p109]

The Hetton Colliery Locomotive (‘Lyon’ or ‘Lyons’), © Public Domain. [1: p110]
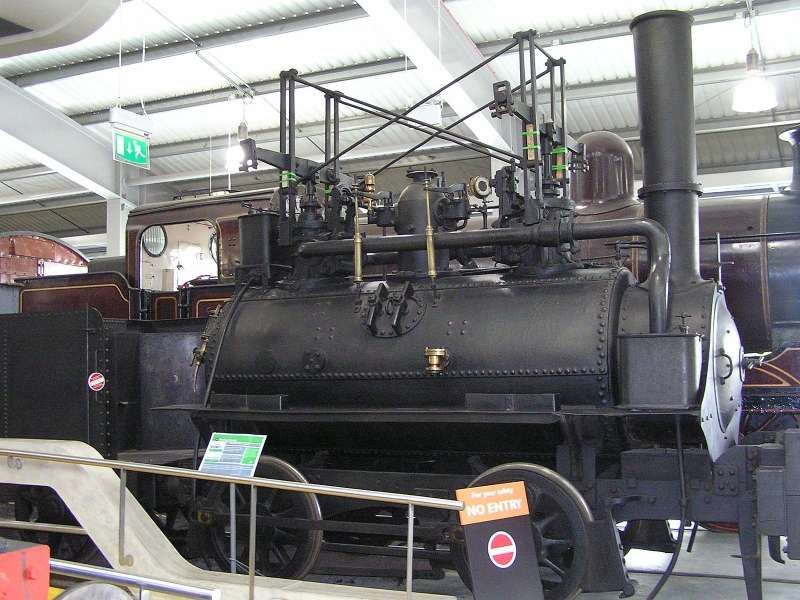
The same locomotive, ‘Lyon’ or ‘Lyons’ on display at Shildon Museum in 2009. It is an 0-4-0 loco dating back as far as 1821 but significantly refurbished/rebuilt in 1852 (or 1857) and again in 1882, © Gillett’s Crossing and licenced for reuse under a Creative Commons Licence (CC BY-SA 2.0). [2]
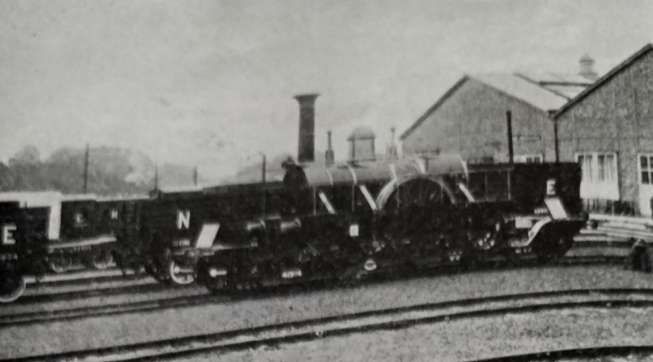
  • 2. The ‘Derwent’

Next in order came the old ‘Derwent’, a mineral engine of Timothy Hackworth’s design, which was built in 1845 by William and Alf Kitching, of the Hopetown Foundry, Darlington, for the Stockton and Darlington Railway. The ‘Derwent’ also ran under its own steam.” [1: p109]

The ‘Derwent’, © Public Domain. [1: p110]
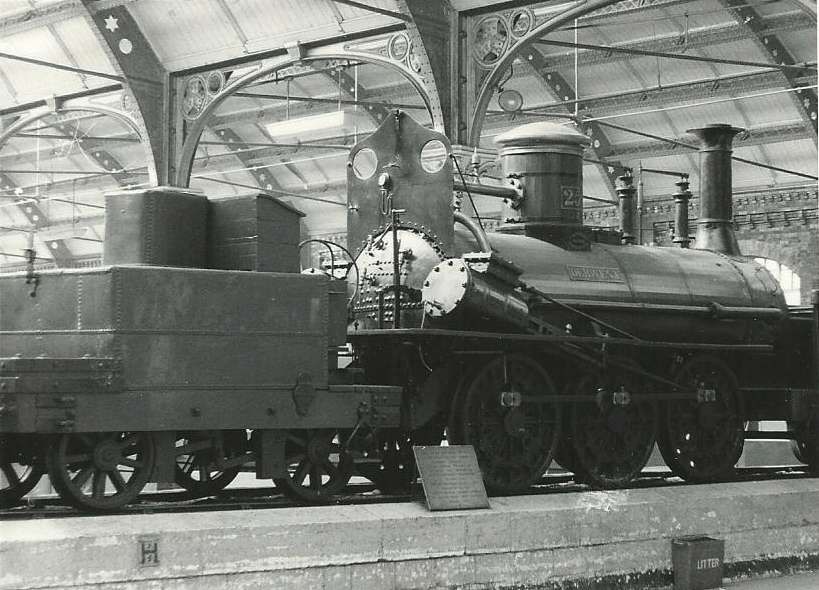
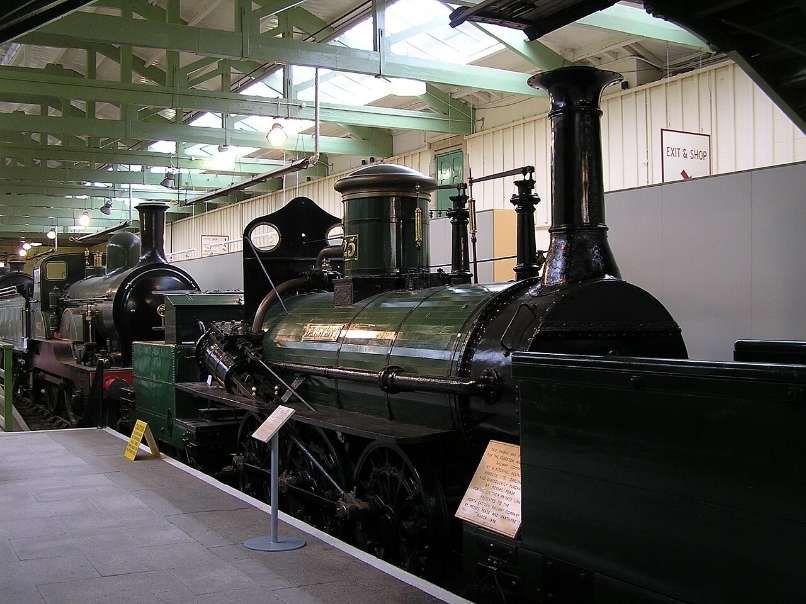
‘Derwent’ on a plinth at Darlington. Hackworth 0-6-0 No.25 “Derwent” (with a tender each end) built in 1845 by W & A. Kitching for the Stockton & Darlington Railway. It passed to the North Eastern Railway in 1863 and then withdrawn in 1869 and was sold to Pease & Partners for construction of the Waskerley Resevoir. The NER bought it for preservation in 1898 and it was eventually put on display in Darlington Station, where this photograph was taken in July 1972, © Hugh Llewellyn and licenced for reuse under a Creative Commons Licence (CC BY-SA 2.0). [3]
The same locomotive, ‘Derwent’ on display in Darlington (Head of Steam) in 2009, © Gillett’s Crossing and licenced for reuse under a Creative Commons Licence (CC BY-SA 2.0). NB. ‘Head of Steam’ is now, in 2024, part of Hometown Darlington. [4]
‘Derwent’ again: this image is held in the Science Museum Collection – Science Museum Group. Steam locomotive No. 25 “Derwent”, Stockton & Darlington Railway. 1978-7012 Science Museum Group Collection Online, and authorised for reuse under a Creative Commons Licence (CC Zero). [5]

Then followed a number of engines more or less familiar to the present generation [1925], although two of them were built over 50 years ago. A 1925 modern goods express 2-6-0, with special valve gear, and a mineral engine 2-8-0 with three cylinders, were a great contrast to the veterans that had passed earlier. Then followed a “Mikado” type of locomotive built at the Doncaster works of the L.N.E.R., for fast mineral work, but even greater interest was shown in a model of the old North Star, built in 1837 by Robert Stephenson and Co., which was mounted on a Great Western ‘crocodile’, drawn by a locomotive. Several specimens of the single-driver expresses popular in the latter half of the [19th century]  were in the procession, including the Cornwall, which has a driving wheel of 8 ft. 6 in. in diameter the largest locomotive driving wheel still in service in the world.” [1: p109]

  • 4. 0-6-0 Stockton & Darlington Goods

Fourth in the procession was a typical 0-6-0 locomotive from the Stockton and Darlington (S&D) Railway. This was probably NER No. 1275 which was the only NER 1001 Class locomotive to survive into LNER ownership. It was built by Dübs & Co., Glasgow, and was delivered to the S&D in May 1874. 1275 entered into LNER ownership with an official mileage of 908,984 miles. Still in its NER livery, it was quickly withdrawn on 16th February 1923. [6]

More details can be found on the Preserved British Steam Locomotives website. [6]

0-6-0 Stockton & Darlington Goods, © Public Domain. [1: p111]

This locomotive is preserved as part of the National Collection and is on static display at the National Railway Museum at York. [6]

NER No. 1275 is preserved in the National Railway Museum in York: Science Museum Group. NER 0-6-0 ‘1001’ class steam locomotive and tender, No 1275, 1874. 1975-7009 Science Museum Group Collection Online. [7]
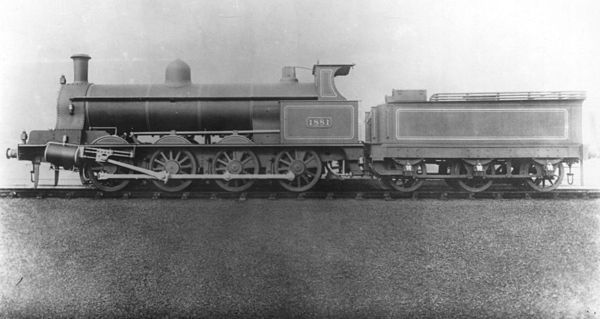
  • 8. LNWR No. 1881, 0-8-0 Webb Compound Locomotive (LMS No. 8900 of 1901)
LNWR No. 1881, © Public Domain. [1: p111]

The LNWR Class B was a class of 0-8-0 steam locomotives introduced in 1901. These locomotives were a development of the three-cylinder compound Class A (though this letter classification was not introduced until 1911), they had a 4-cylinder compound arrangement. 170 were built between 1901 and 1904. [9]

Another photograph of LNWR No. 1881 at Crewe in grey livery for its ex-works photograph. It was designated as a Class B locomotive by the LNWR from 1911 onwards. This was given the LMS No. 8900, © Public Domain. [9]
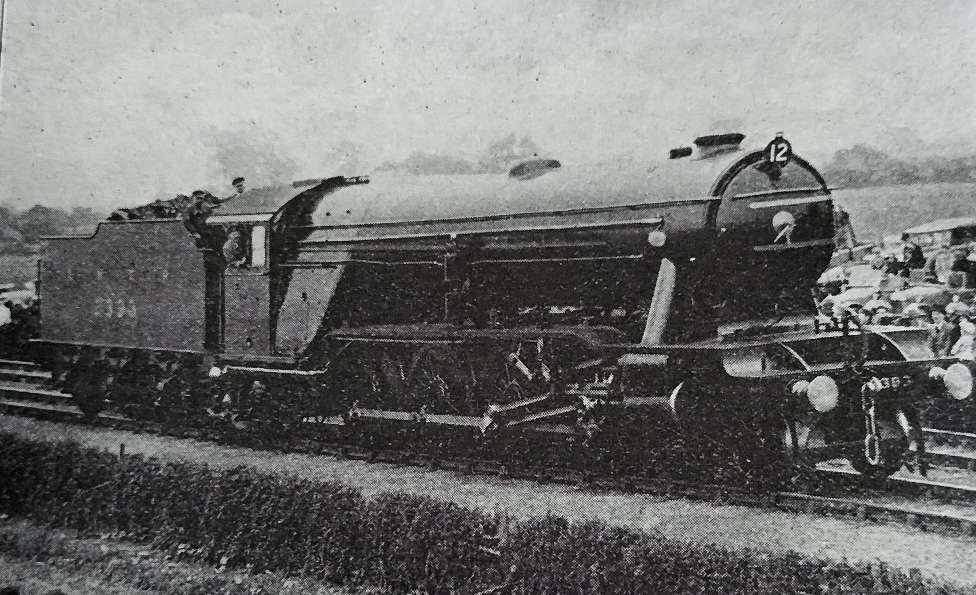
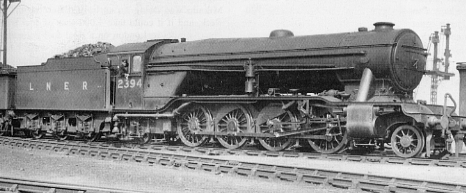
  • 12. LNER P1 2-8-2 No. 2393 ‘Mikado’

The London and North Eastern Railway Class P1 Mineral 2-8-2 Mikado was a class of two steam locomotives designed by Nigel Gresley. They were two of the most powerful freight locomotives ever designed for a British railway. It was initially intended they be a more powerful 2-10-0 version of the earlier Class O2 2-8-0s. The design was submitted in August 1923, for use between Peterborough and London, and also between Immingham and Wath marshalling yard. The power was quoted as being 25% more than the O2.” [21]

LNER P1 2-8-2 ‘Mikado’ No. 2393, © Public Domain. [1: p114]
Gresley P1 Mikado, No. 2394, © Public Domain. [22]

No. 2393 was completed in June 1925, just in time for the Stockton & Darlington Centenary celebrations in July. It was fitted with a Robinson superheater, whilst No. 2394 (completed in November) had the “E Double” superheater recommended by The Superheater Co.” [22]

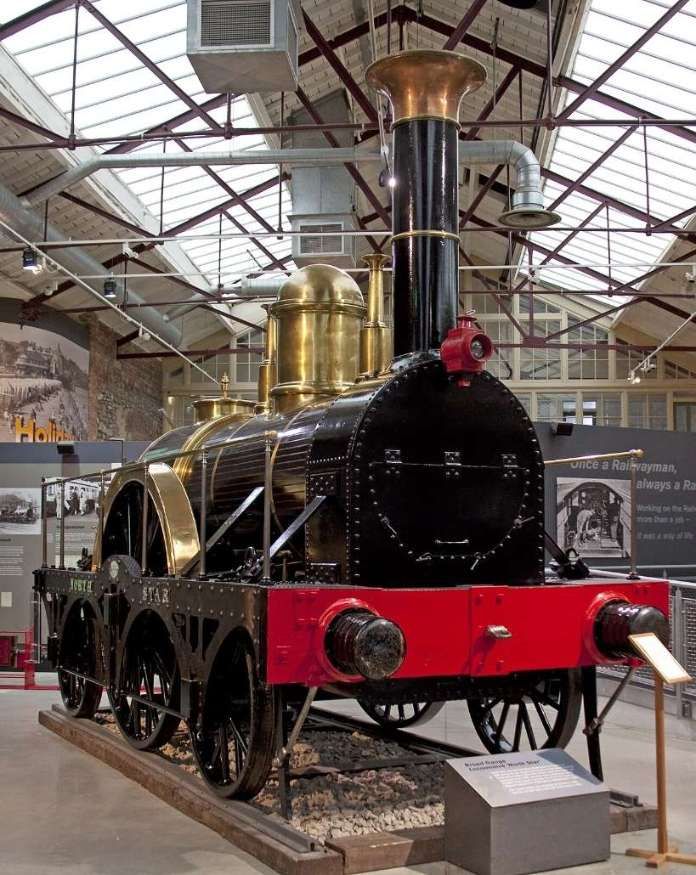
  • 14. GWR 2-2-2 ‘North Star’ (replica)

North Star was the first GWR locomotive, it on 31st May 1838 it worked the inaugural train for the company’s directors. More details can be found on the Preserved British Steam Locomotives website. [10]

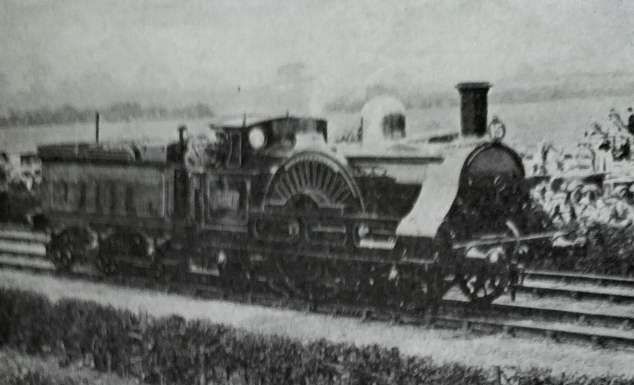
A replica of the 1837 built GWR 2-2-2 ‘North Star’ (on a wagon which was hauled by J71 0-6-0T No. 181 when in the procession) © Public Domain. [1: p112]
‘North Star’ on display in Swindon in 2011. It is a replica built in 1923 including a number of parts from the original locomotive, © Tony Hisgett and licenced for reuse under a Creative Commons Licence (CC BY 2.0). [11]
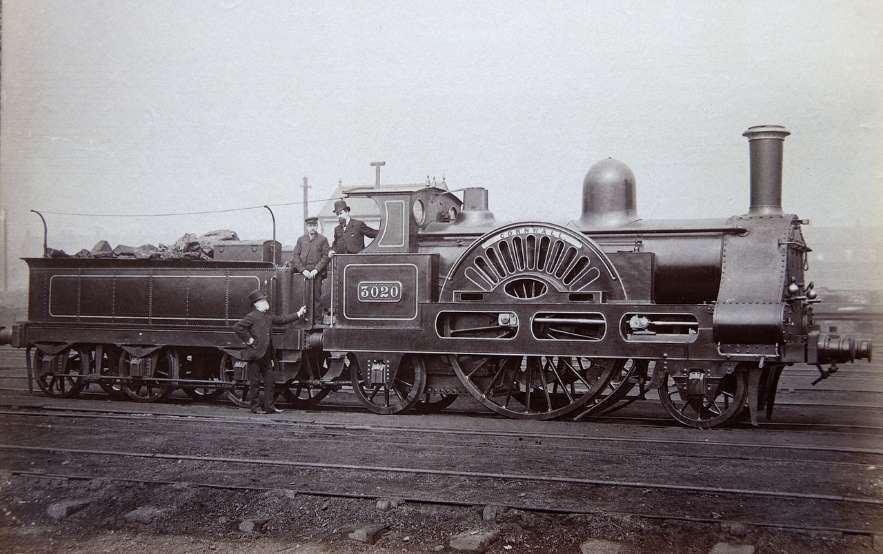
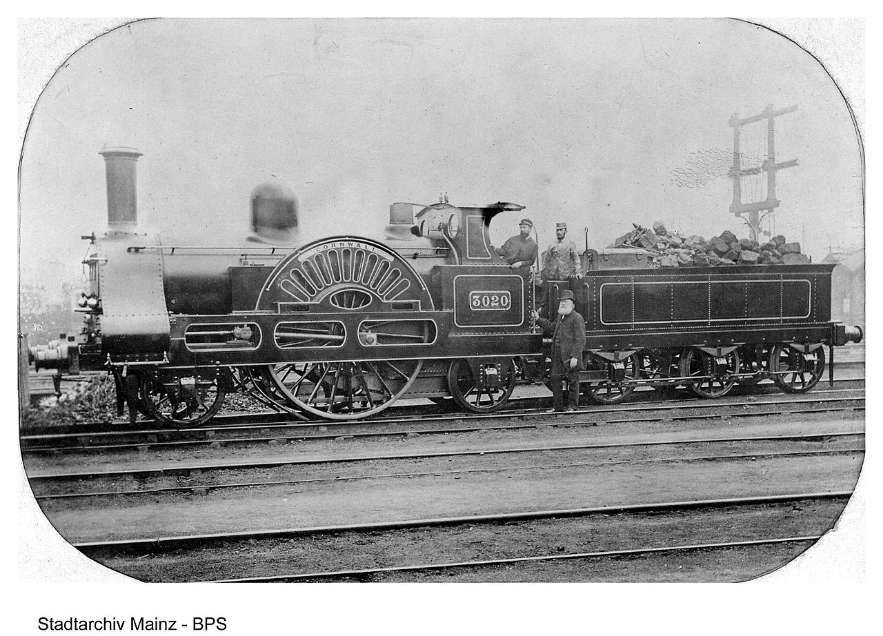
  • 15. LNWR 2-2-2 No. 3020 ‘Cornwall – 1847

Built in 1847, ‘Cornwall’ is a preserved steam locomotive. She was built as a 4-2-2 at Crewe Works in 1847, but was extensively rebuilt and converted into her current form in 1858. [12]

The ‘ Cornwall’, © Public Domain. [1: p113]

Wikipedia tells us that, “In 1858, Ramsbottom redesigned Cornwall almost completely. Little survived unchanged, other than the outside frames and the centres of the drivers. The boiler was … moved entirely above the driving axle, without any notches, channels or tubes. … New cylinders and valve gear were provided. … The wheel arrangement was [changed to] 2-2-2. … Ramsbottom also included his newly designed tamper-proof safety valves.” [12]

There was another minor rebuild in the 1870s providing a typical LNWR style of cab, with a short roof and semi-open sides. It was renumbered 3020 in June 1886. [12]

‘Cornwall’ after the 1858 rebuild, at Ordsall Lane shed, Manchester, circa. 1890, © Tony Hisgett and licenced for reuse under a Creative Commons Licence (CC BY 2.0). [12]
‘Cornwall’ after the 1858 rebuild, viewed from the other side at an unknown location and uncertain date, © Public Domain. [12]
‘Cornwall’ on display at Shildon in 2011, © James E. Pets and licensed for reuse under a Creative Commons Licence (CC BY-SA 3.0). [13]
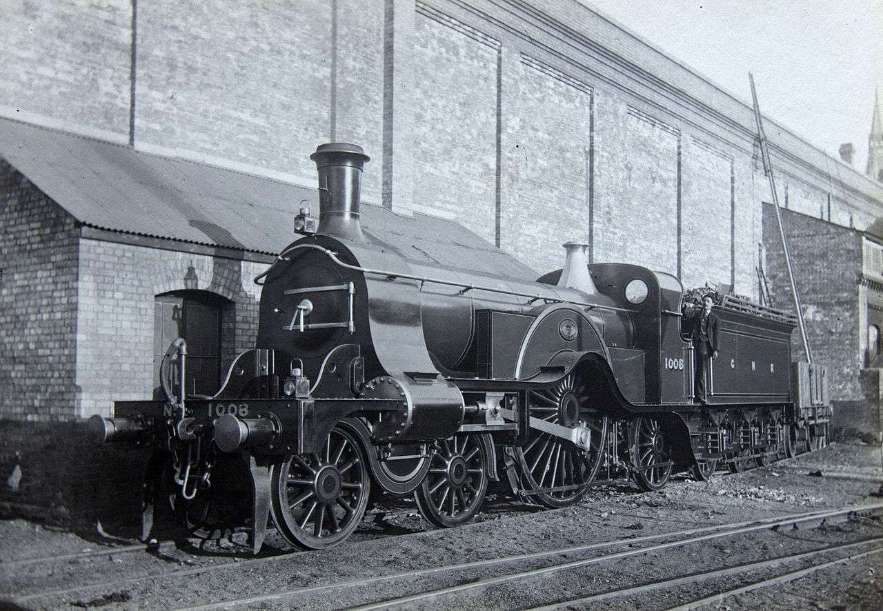
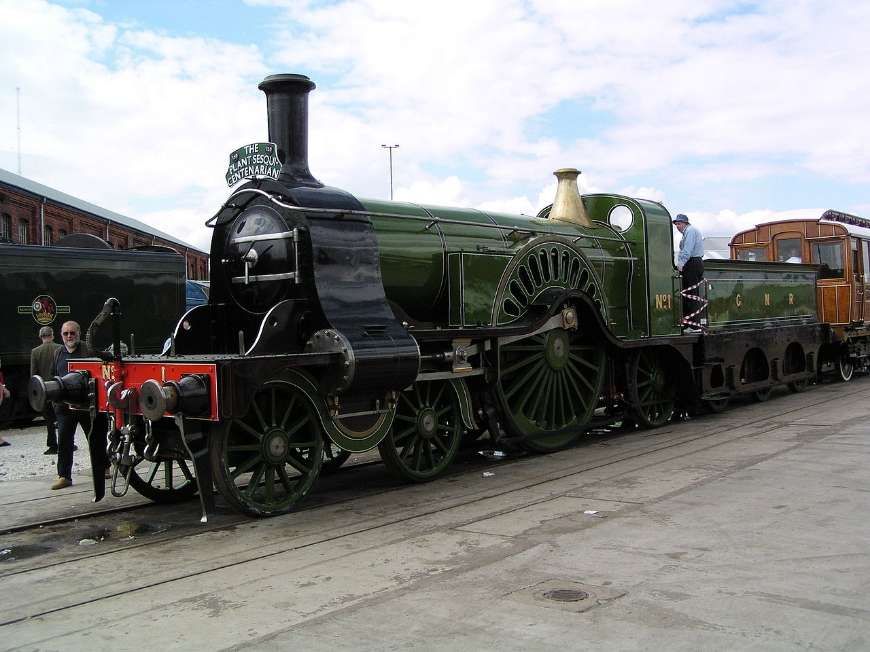
  • 16. GNR 8ft Single No. 1

The Great Northern Railway (GNR) No. 1 Class Stirling Single was a class of steam locomotive designed for express passenger work. Designed by Patrick Stirling, they were characterised by a single pair of large (8 ft 1 in) driving wheels which led to the nickname ‘eight-footer’. Originally the locomotive was designed to haul up to 26 passenger carriages at an average speed of 47 miles per hour (76 km/h). It could reach speeds of up to 85 mph (137 km/h). [14]

GNR 8ft Single No. 1, © Public Domain. [1: p113]
A three-quarter view of a GNR 8ft Single (No. 1008), © Tony Hisgett and licensed for reuse under a Creative Commons Licence (CC BY 2.0). [15]

The first of the class, No. 1 is the only engine to be preserved. It is exhibited at the National Railway Museum, York. It was restored to running order during the 1930s for the fiftieth anniversary of the Race to the North and steamed again during the 1980s.” [14]

Stirling Single No. 1 at Doncaster Works in 2003, © Our Phellap and authorised for reuse under a Creative Commons Licence (CC BY-SA 3.0). [16]
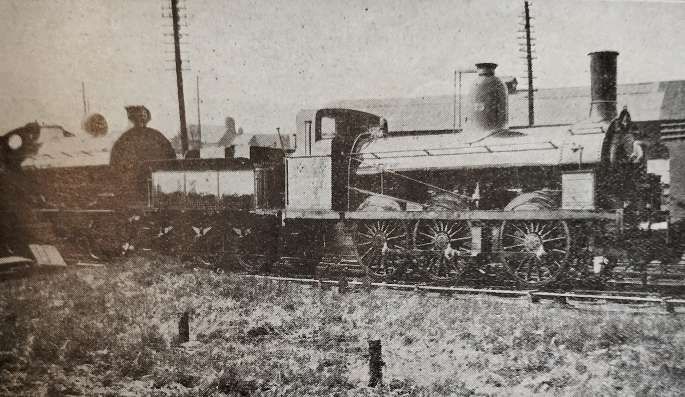
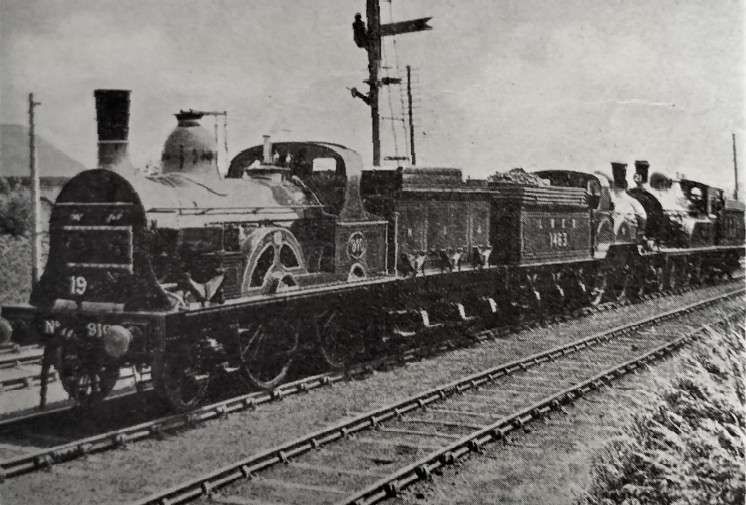
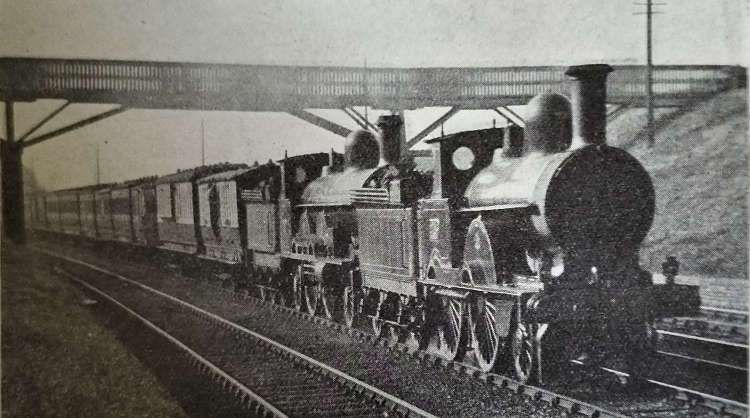
This series of three locomotives were No. 19, 1875 built NER Class 901 2-4-0 No. 910; No. 20, 1885 built LNER E5 2-4-0 No. 1463 (ex NER); and No. 21, 1892 built LNER D17/1 4-4-0 No. 1620 (ex NER) © Public Domain. [1: p112]

The three locomotives shown in the image above are:

  • 19. 1875 built NER Class 901 2-4-0 No. 910;
  • 20. 1885 built LNER E5 2-4-0 No. 1463 (ex NER);
  • 21. 1892 built LNER D17/1 4-4-0 No. 1620 (ex NER)

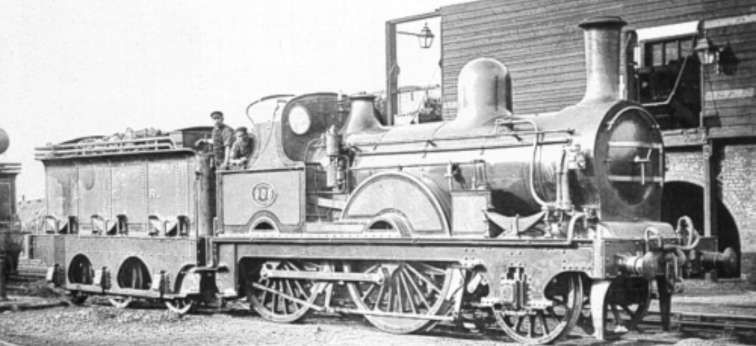
The LNER Encyclopedia says that “Fletcher’s ‘901’ class was his final express passenger design for the … NER. The ‘901’ Class was created in 1872 to provide new more powerful express locomotives to replace the 16in cylinder locomotives still being used by the NER for express work. The first two locomotives, Nos. 901/2, were built at Gateshead in 1872. Whilst these were being built, two batches of ten each were ordered from Beyer, Peacock & Co and Neilson & Co. These twenty engines were built and delivered in 1873. A further 33 were built at Gateshead between 1873 and 1882 in four batches.” [17]

A Fletcher NER ‘901’ 2-4-0 Locomotive, © Public Domain. [17]
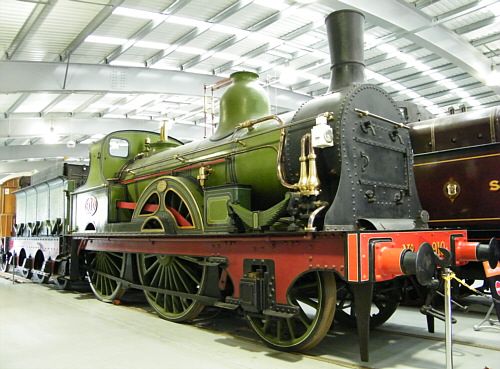
In preservation No. 910 is now a part of the National Collection and is currently located at the Shildon Locomotion. [17]

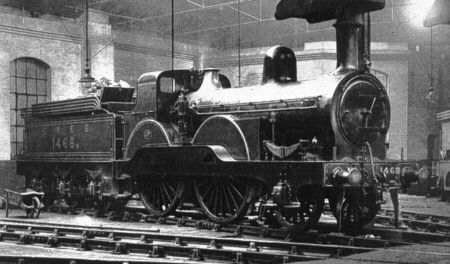
The LNER Encyclopedia says that the  “new E5 locomotives were direct descendents of Fletcher’s ‘901’s. The cab design was changed, and a completely new tender design was used. A total of twenty E5s were built in 1885, with Darlington and Gateshead building ten each.” [18]

E5 No. 1463 is owned by the National Collection, but is on loan to the Darlington ‘Head of Steam’ Museum, now known as ‘Hopetown Darlington’s. [18]

The LNER Encyclopedia also notes that the NER Class M1 (later Class M) locomotives were Wilson Worsdell’s first express passenger locomotives for the North Eastern Railway (NER). … Twenty Class M1 locomotives were built at Gateshead between 1892 and 1894. More information can be found on the LNER Encyclopedia website. [19] These NER M1 locomotives became the LNER D17/1 Class at the grouping. [20]

Preserved NER M1 locomotive No. 1621 at the National Railway Museum at Shildon in 2010, © Hugh Llewellyn and licenced for reuse under a Creative Commons Licence (CC BY-SA 2.0). [20]
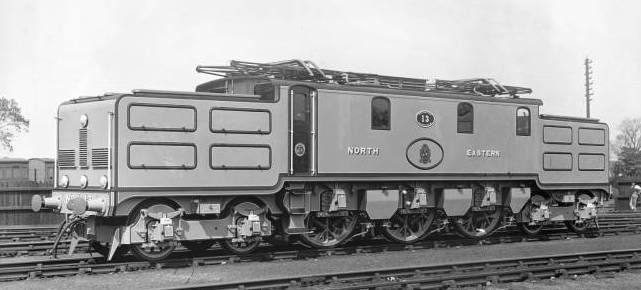
  • 32. LNER electric loco No. 13 (hauled by J71 0-6-0T No. 1163) – 1922
LNER electric loco No. 13 (built in 1922 and hauled by J71 0-6-0T No. 1163). No. 13 seems quite dull alongside a sparkling No. 1163, © Public Domain. [1: p117]

The LNER operated a surprising variety of electric locomotives and multiple units. Although its electric operations were eclipsed by the Southern, the LNER had the largest electric locomotive stud of the Big Four companies. More about the various electric locks and multiple units can be found on the LNER Encyclopedia website. [27]

Sir Vincent Raven was a great believer in the electrification of main lines. After the success of the Shildon-Newport electrification, he planned to electrify the North Eastern Railway’s (NER) stretch of the East Coast main line from York to Newcastle. As a part of this plan, authorisation was granted in March 1920 to build the prototype electric passenger locomotive No. 13. This had a 2-Co-2 (4-6-4) wheel arrangement, and was built at Darlington with electrical equipment provided by Metropolitan-Vickers.” [28] The loco was completed in 1922 just before the NER became part of the LNER in 1923.

Electric Locomotive No. 13 in a bright grey livery. In 1919 the North Eastern Railway made plans to electrify its York-Newcastle stretch of the East Coast Main Line and this locomotive was a prototype built for hauling passenger trains. It had an electrically heated boiler to generate steam for train heating. It transferred into LNER ownership in 1923. The LNER did not give class numbers to its electric locomotives. It survived into BR days and was in 1946 designated Class EE1, © Public Domain. [29]
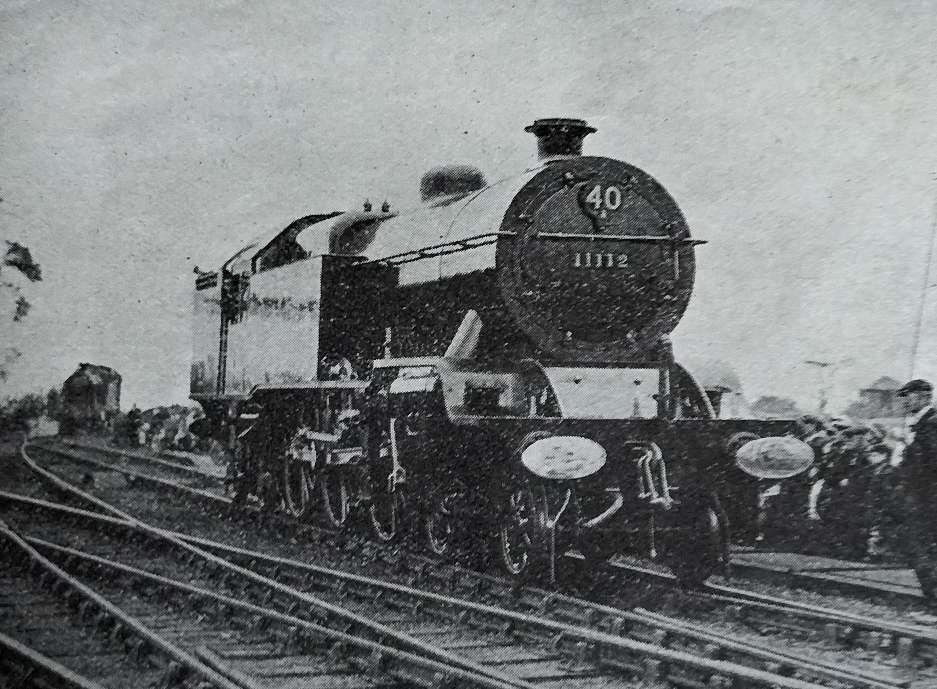
  • 40. LMS 4-6-4T No. 11112 – 1924.
LMS (ex-L&YR) Four-cylinder 4-6-4T Locomotive No. 11112, © Public Domain. [1: p 115]

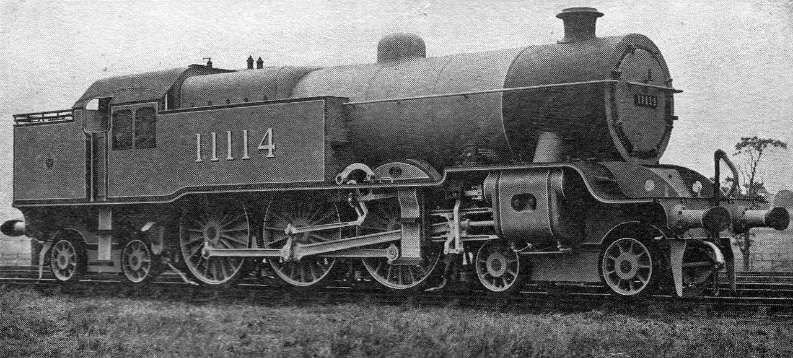
The Lancashire and Yorkshire Railway (L&YR) Hughes 4-6-4T class of steam locomotives were a 4-6-4T version of the L&YR Class 8 (‘Dreadnought’ Class 4-6-0), hence they were known as ‘Dreadnought tanks’. All were actually built by the LMS in 1924 after the grouping, albeit at the L&YR’s Horwich Works. Withdrawals started in 1938, with three engines (11112, 11115, 11116), one each in 1939 and 1940 (11113 and 11111 respectively), four in 1941 (11114, 11117–11119) and the last (11110) in January 1942. No examples were preserved. [23]

Another example of the same class, No. 11114. [23]
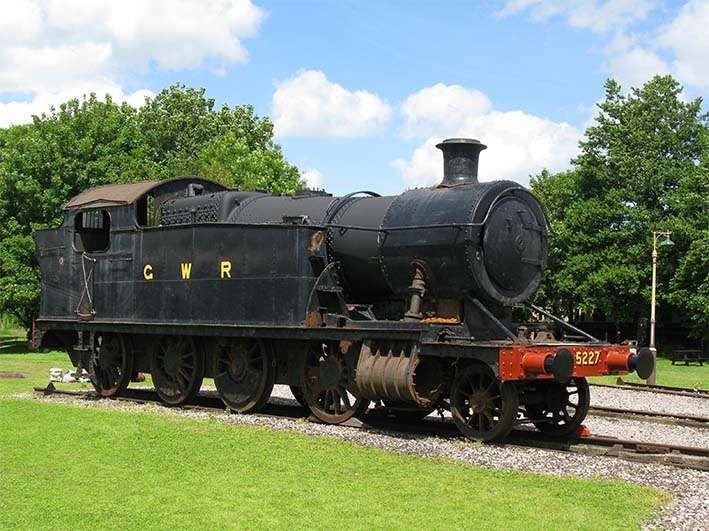
  • 41. GWR 2-8-0T Locomotive No. 5225

The 4200 class of 2-8-0T engines was designed to work the heavy short-haul coal and mineral trains in South Wales. They were designed using standard GWR parts as used in the 2800 class. A total of 205 locomotives were built (including the 5205 class) between 1910 and 1940. They were the only 2-8-0T to run in Britain. [24]

GWR 2-8-0T Locomotive No. 5225, one of the later versions of this class with outside steam pipes and raised framing over the cylinders, © Public Domain. [1: p115]

The first engine to be built was 4201 in 1910 (4200 was a later engine built in 1923). Between 1910 and 1930 195 were built numbered 4200-4299 and 5200-5294. 5205 onwards had larger cylinders and other minor alterations and were known as the 5205 class.” [24]

GWR 2-8-0T No. 5227 at Didcot, © Didcot Railway Centre. [25]

Five examples of the 4200 class and three members of the 5205 class have been preserved (4247, 4248, 4253, 4270, 4277, 5224, 5229 and 5239). There are also three locomotives preserved from the 7200 class which were rebuilds of the 5205 series 5264 rebuilt as 7229, 5275 rebuilt as 7202 and 5277 rebuilt as 7200).” [24]

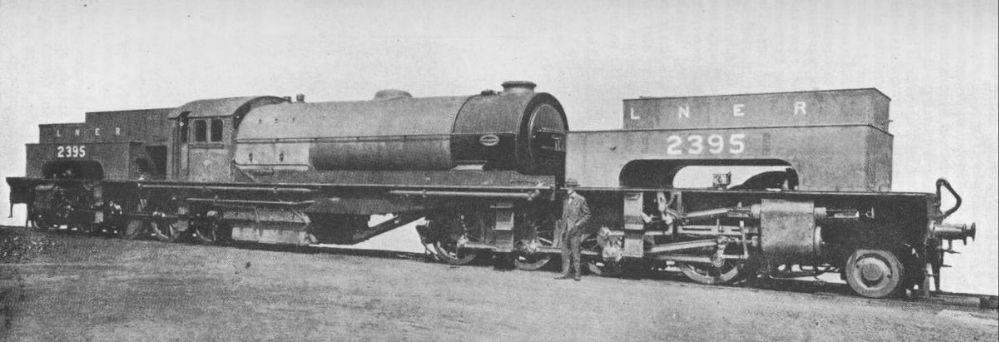
  • 42. LNER ‘Garratt’ Locomotive No. 2395

The London and North Eastern Railway Class U1 was a solitary 2-8-0+0-8-2 Garratt locomotive designed for banking coal trains over the Worsborough Bank,[i] a steeply graded line in South Yorkshire and part of the Woodhead Route. It was both the longest and the most powerful steam locomotive ever to run in Britain. It was built in 1925 with the motion at each end being based on an existing 2-8-0 design. The original number was 2395, and it was renumbered 9999 in March 1946, and then 69999 after nationalisation in 1948, although it retained its cab-side plate bearing its original number throughout its life. The locomotive ran for some time as an oil burner, and was tried out on the Lickey Incline in 1949–1950 and again, after the electrification of its home line, in 1955. These trials were unsuccessful, and so the locomotive was withdrawn in 1955 and scrapped.” [26]

LNER Class U1 heavy duty freight locomotive No. 2395 © Public Domain. [1: p114]

The locomotive was constructed in just 3 weeks in 1925, perhaps with the Stockton & Darlington centenary celebrations in mind. It was ready just in time and sent in the standard outshopped grey livery before being painted black. [26]

Ex-works photograph of LNWR Class U1 Garrett Locomotive, © Public Domain. [26]
  • 43. LNER Petrol Railcar/Railmotor No. 130Y, later 2105Y

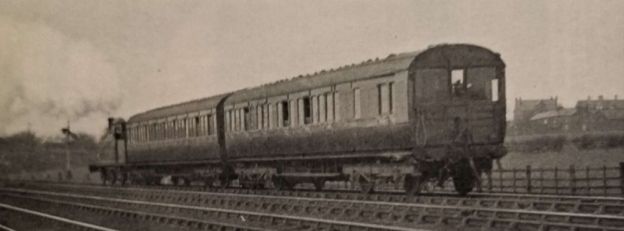
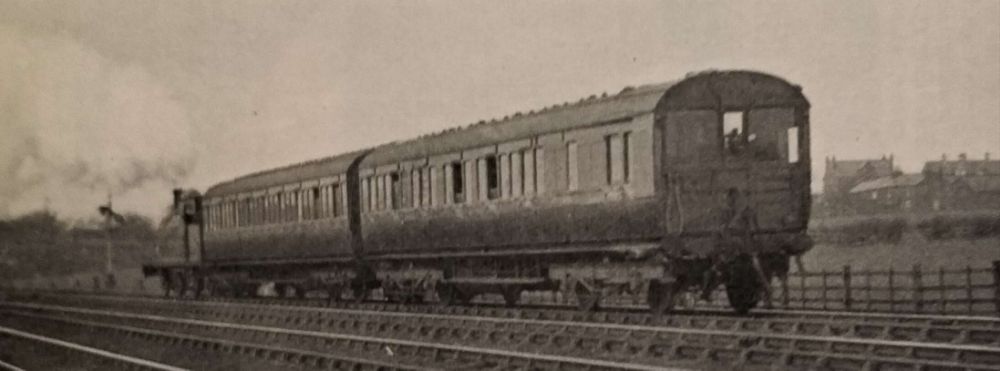
The 1920s were quite an era for experimentation on the railways of the UK. This Railcar/Railmotor is included in a number looked at elsewhere on this blog. The relevant article can be found here. [30]

The North Eastern Railway (NER) “authorised the construction of the experimental Petrol Autocar No. 2105 on 21st September 1922. On 19th October, Raven reported the purchase of a 6-cylinder 105hp Daimler engine from the Slough Trading Estate Co. Ltd. The remainder of the vehicle was built at York Carriage Works and was completed in July 1923. By this time, Grouping had occurred, and the autocar was given the LNER number 2105Y. It was later renumbered as No. 22105 in August 1926.” [31]

LNER Railcar No. 2105Y, © Public Domain. [1: p116]
  • 45. Sentinel-Cammel Steam Railmotor of 1925
Sentinel Steam Railmotor, © Public Domain. [1: p116]

Sentinel produced a significant number of steam railcars/railmotors. They are covered elsewhere on this blog. Please click here. [33]

The LNER arranged for trials of two Sentinel railmotors in 1924. After those trials, adaptations were made including providing larger boilers. The result was ideal for LNER uses and a series of 80 units were purchased. The first two large boiler railcars were ordered on 11th December 1924. These railcars used the bodies from the trial railcars and the cost was discounted accordingly. Numbered Nos. 12E & 13E, the railcars entered service with the LNER in May 1925 and were classified as Diagram 14600-614E. [34] They were ‘state of art’ units available just in time for the Stockton & Darlington celebrations.

  • 46. LNER 0-8-0 Q7 (formerly NER T3) with mineral wagons.
A rake of mineral wagons behind LNER 0-8-0 Q7 No. 904, © Public Domain. [1: p117]

The North Eastern Railway Class T3, classified as Class Q7 by the LNER, was a class of 0-8-0 steam locomotive designed for heavy freight. Five were built by the NER in 1919 and a further 10 by the LNER in 1924. No. 904 was put in charge of a rake of mineral wagons for the procession. [32]

No. 901 is preserved at Darlington. …

LNER Class Q7 No. 901 (BR 63460) has survived and is preserved at Darlington. It is the only one of the Class to have survived, © Gillett’s Crossing and licenced for reuse under a Creative Commons Licence (CC BY 2.0). [32]
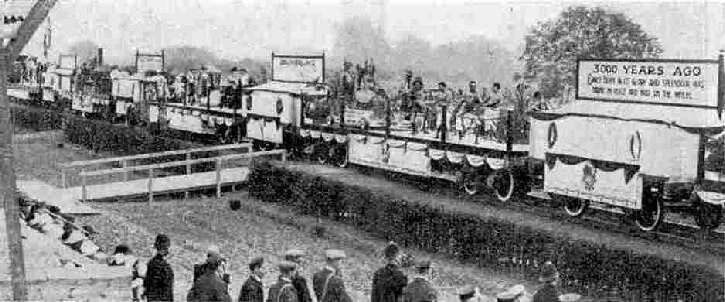
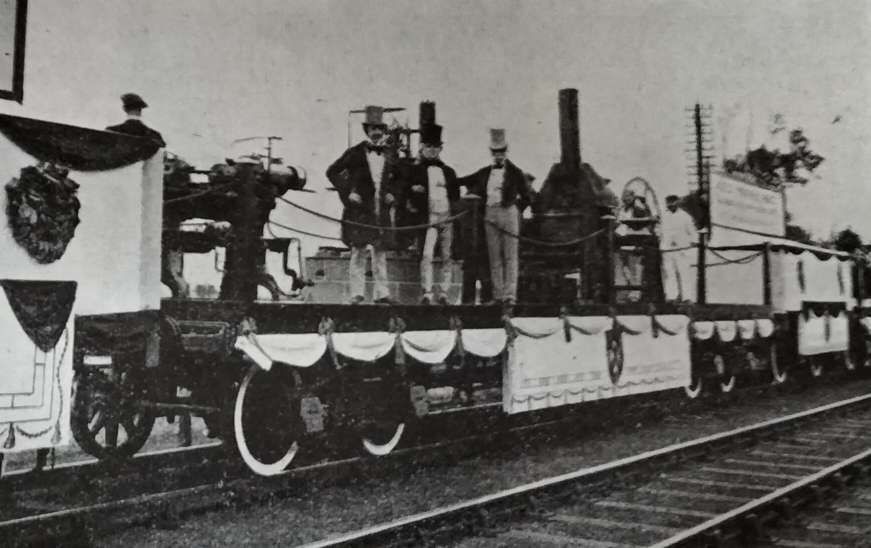
  • 47. LNER Q5 0-8-0 No. 130 (ex NER) hauling tableaux train
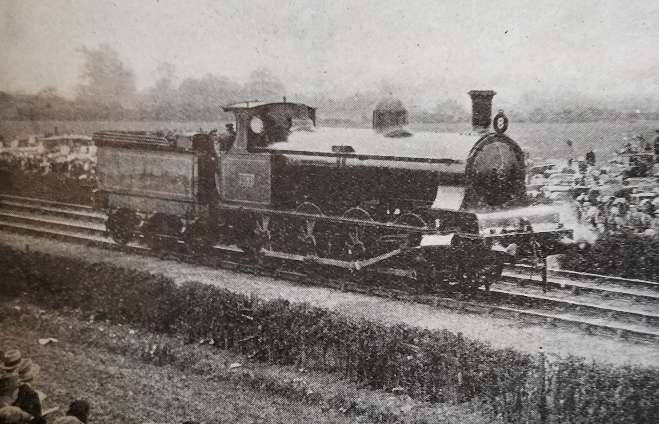
LNER Q5 0-8-0 No. 130 (ex NER) hauling tableaux train, © Public Domain. [1: p120]
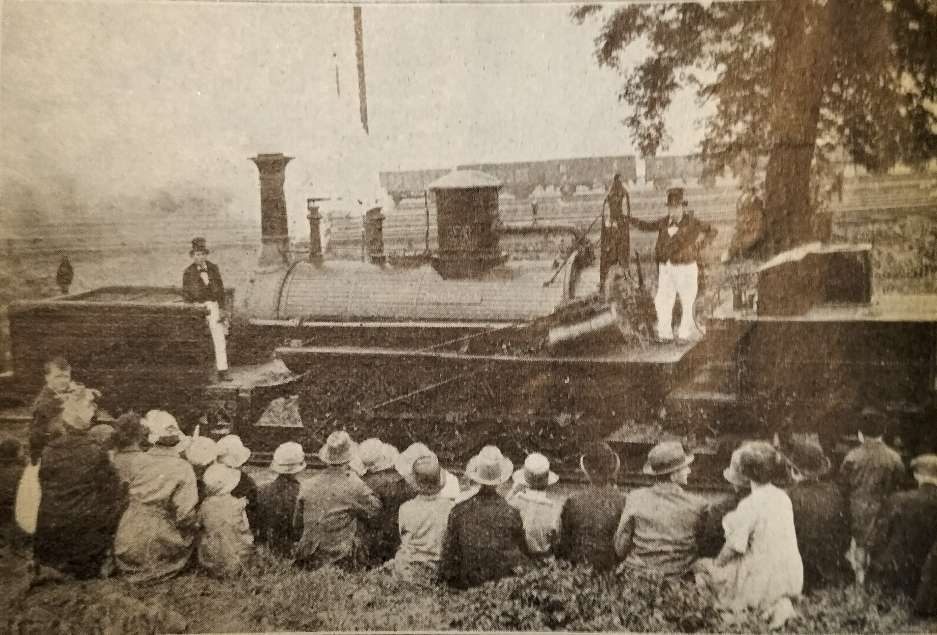
The tableaux train passing the grandstand, © Public Domain. [37]
A tableau from the train above, © Public Domain. [1: p121]

This train consisted of a series of tableaux depicting the history of the wheel. It was described in the publication ‘Railway Wonders of the World’ like this: “The tableaux consisted of six wagons each carrying a separate ‘picture’. The first was allegorical and depicted a number of astrologers grouped at one side of a symbolic wheel, with a scene showing modern engineering practice on the other. The two scenes were joined through the spokes of the wheel by a huge chain, representing the links of time. The second tableau showed a tribe of prehistoric men, who, having felled a tree with their flint axes, were shown transporting the trunk on logs used as rollers – the earliest form of the wheel. Then came an Egyptian scene in which one of the royal Pharaohs was being drawn on a wheeled platform by slaves, showing how the Egyptians started the wheel in its manifold forms so that, through the ages that followed, progress successively moved on the wheels of chariot, wain, and coach. This was followed by the fourth tableaux showing how the wheel was discarded for a time when Sedan chairs were used, and the fifth depicting the story of the wheel in transport opening its most famous chapter when Stephenson mounted an engine on wheels and steam locomotion began. On one side of this wagon Stephenson was explaining the working of a model of “Locomotion No. 1” to a group of friends and workmen, whilst on the other side modem mechanics were working with present-day materials and tools. The final tableau showed how the railways of the world have grown from the few miles of permanent way uniting Stockton and Darlington.” [37]

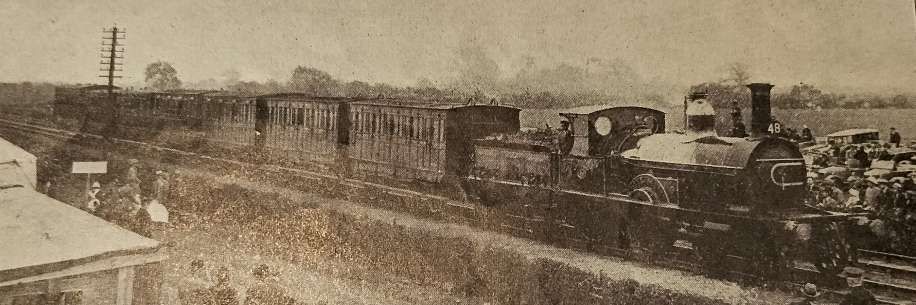
  • 48. GNSR 4-4-0 No. 45A and train of old 4-wheel coaches
Great North of Scotland Railway 4-4-0 No. 45A and train of old 4-wheel coaches – 1865, © Public Domain. [1: p126]

The locomotive was one of a Class which transferred to the LNER. More details can be found here. [38]

No. 45A was repainted in GNSR green to take part in the Stockton & Darlington Centenary celebrations. It was withdrawn on 31st July 1925 shortly after its return. There was some talk of preservation, and it was temporarily employed as a shunter at the Inverurie Works. However, preservation was not to be, and No. 45A was scrapped soon afterwards. [38]

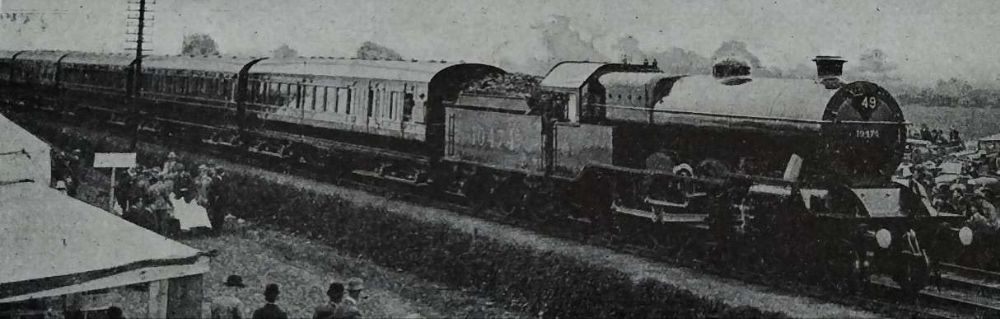
  • 49. LMS Train of Vestibule Stock behind LMS 4-6-0 No. 10474
LMS Train of 9 No. Vestibule Carriages, © Public Domain. [1: p118]

LMS 4-6-0 No. 10474 was a Class 8 4-6-0 steam locomotive to a Lancashire & Yorkshire Railway design that was built for the LMS by Horwich Works in 1925. 10474 and its siblings were used on express passenger trains for the LMS. [36]

Its train is made up of nine vestibule carriages built at Derby and used on the West Coast route to Scotland. [1: p124]

The same train in the procession/cavalcade at the Stockton & Darlington centenary celebrations, © Public Domain. [36]
  • 50. GWR Royal Train behind GWR 4-6-0 No. 4082 ‘Windsor Castle’
GWR Royal Train, © Public Domain. [1: p120]

No. 4082 ‘Windsor Castle’, “was chosen as the Royal engine from the time that it was driven from Swindon works to Swindon station by King George V accompanied by Queen Mary on 28th April 1924. Plaques were mounted on the side of the cab to commemorate the occasion.” [39]

  • 51. GWR Train of Articulated Vehicles behind GWR 4-6-0 No. 111 ‘Viscount Churchill’
GWR Train of Articulated Vehicles, © Public Domain. [1: p118]

No 111 ‘Viscount Churchill’ (converted into a Castle class 4-6-0 from ‘The Great Bear’) took charge of a train of express passenger articulated coaches. Didcot Railway Centre says that the new GWR articulated coaches “came as a surprise to many as the railway press was unaware they had been developed. The train had one two-coach unit and two three-coach units. The formation was one brake first, one first, one first restaurant car, one kitchen car, one third restaurant car, two third-class coaches and a brake third. The first-class coach interiors were finished in walnut and the third-class in mahogany.” [40]

A direct view of GWR No. 111 and its train, © Public Domain. [40]
  • 52. SR Train of New Stock behind SR 4-6-0 No. 449 ‘Sir Torre’
SR Train of New Stock, © Public Domain. [1: p119]

The LSWR N15 class was a British 2–cylinder 4-6-0 express passenger steam locomotive designed by Robert Urie. The class had “a complex build history spanning three sub-classes and ten years of construction from 1918 to 1927. The first batch of the class was constructed for the London and South Western Railway (LSWR), where they hauled heavy express passenger trains to the south coast ports and further west to Exeter. After the Lord Nelsons, they were the second biggest 4-6-0 passenger locomotives on the Southern Railway. They could reach speeds of up to 90 mph (145 km/h).” [41] The Southern Railway (SR) publicity department gave the N15 locomotives names associated with Arthurian legend; the class hence becoming known as King Arthurs.

  • 53. LNER Train of Articulated Stock behind LNER A2 4-6-2 No. 2400 ‘City of Newcastle’
LNER Train of Articulated Stock, © Public Domain. [1: p119]

The LNER Class A2 4-6-2 steam locomotive was designed by Vincent Raven for the North Eastern Railway (as NER class 4.6.2). Two were built by the NER in 1922 before the grouping and another three by the LNER in 1924. Their LNER numbers were 2400–2404. All five locomotives were named by the LNER. ‘City of Newcastle’ was the first of the class. [43]

  • 54. Locomotion No. 1 and a replica train
Locomotion No. 1 and a replica train, © Public Domain. [1: p122]

The replica train pulled by a modern incarnation of ‘Locomotion No.1’ was the last element of the procession/cavalcade. It was somewhat shorter than the original train of September 1825. ..

On 27th September 1825, Locomotion No. 1 hauled the first train on the Stockton and Darlington Railway, driven by George Stephenson. The train consisted of Locomotion No.1, eleven wagons of coal, the carriage ‘Experiment’, and a further 20 wagons of passengers, guests, and workmen. Around 300 tickets had been sold, but about twice as many people were believed to have been aboard. The train, which had an estimated weight of 80 metric tons and was 400 feet long, reached a maximum speed of 12 mph, and took two hours to complete the first 8.7 miles of the journey to Darlington, slowed by a derailed wagon and a blocked feed pump valve for an average speed of 8 mph. [44]

Locomotion No. 1 (originally named Active) … was built in 1825 by … George and Robert Stephenson at their manufacturing firm, Robert Stephenson and Company. It became the first steam locomotive to haul a passenger-carrying train on a public railway … [It] was ordered by the Stockton and Darlington Railway Company in September 1824; its design benefitted from George Stephenson’s experience building his series of Killingworth locomotives. It is believed that Locomotion No. 1 was the first locomotive to make use of coupling rods to link together its driving wheels, reducing the chance of the wheels slipping on the iron rails. However, the centre-flue boiler proved to be a weakness, providing a poorer heating surface than later multi-flue boilers. … Locomotion hauled the first train on the Stockton and Darlington Railway, the first locomotive to run on a public railway. On 1st July 1828, it was heavily damaged when its boiler exploded at Aycliffe Lane station, killing its driver, John Cree. It was rebuilt, but as a consequence of the rapid advances in locomotive design, [it] became obsolete within a decade. It was used on the railway until 1850, after which it was converted into a stationary engine. In 1857, as a consequence of its historical importance, Locomotion was preserved and put on display. Between 1892 and 1975, it was on static display at one of the platforms at Darlington Bank Top railway station, and was then on display at the Head of Steam museum based at Darlington North Road railway station between 1975 and 2021. It was then moved to the Locomotion museum in Shildon. A working replica of Locomotion was built, and following years of operation at Beamish Museum was put on display at the Head of Steam museum.” [44]

The Exhibition

At the Railway Centenary Exhibition held in the LΝΕR’s Faverdale Wagon Works and Sidings at Darlington “was gathered together the biggest and most interesting collection of railway appliances, locomotives, rolling stock and other material ever exhibited in this country. The locomotives and rolling stock on rails at the exhibition sidings numbered 99, whilst in the building were three locomotives and about 650 other items. … The railways were naturally the chief exhibitors, but many extremely interesting items were loaned from private collections.” [1: p127]

The Railway Magazine went on to list all the major exhibits, some of which were in the cavalcade/procession covered above.

The details given in The Railway Magazine are reproduced in the Appendix below.

The exhibition was comprehensive, giving an outstanding insight into the world of railways in Great Britain.

Appendix – Exhibition Items

The Railway Magazine … [1: p127-130]

In the outdoor catalogue were: the model of North Star, constructed for the exhibition, utilising the original driving wheels. Nearby was the Invicta, Canterbury and Whitstable Railway, built by R. Stephenson & Co., in 1830, and a 2-2-2 engine constructed by Bury, Curtis & Kennedy in 1846 for the Great Southern Railway. Two locomotives came from Belgium, one a 2-2-2 saddle tank, with tender built for the 3-ft. 7-in. gauge Anvers-Gand Railway in 1844, the other a full-size model of a 2-2-2 engine built in 1835 for the Belgian State Railways. Other old locomotives included the Derwent, Cornwall and the Hetton Colliery locomotive, which led the van in the Centenary procession. There was also the historic Locomotion, and a full size model of the Rocket. The remaining locomotives are tabulated according to groups, subdivided on the basis of original ownership.

Of these, the sections of the LNER were responsible for 33 locomotives.

The NER‘s total was 14:

No. 949 0-4-4 5-ft. passenger tank built by Neilson & Co. in 1874, designed by E. Fletcher;

No. 1334, 0-4-4 5-ft. 11-in. passenger tank built at Darlington in 1901, designed by Wilson Worsdell;

No. 2151, 4-4-4 5-ft. 9-in. passenger tank, 3 cylinders, built at Darlington in 1913, designed by Sir Vincent Raven;

No. 1275, 0-6-0 5-ft. mineral engine, built in 1874 by Dubs & Co., designed by W. Bouch;

No. 517, 0-6-0 4-ft. 74-in. mineral engine built at Gateshead in 1905, designed by W. Worsdell;

No. 934, 4-6-0 5-ft. 8-in. express goods engine, 3 cylinders, built at Gateshead in 1921, designed by Sir Vincent Raven;

No. 902, 0-8-0, 4-ft. 71-in. 3-cylinder mineral engine, built at Darlington in 1919, designed by Sir Vincent Raven;

No. 910, 2-4-0, 7-ft. express passenger engine, built at Gateshead in 1875, designed by E. Fletcher;

No. 1463, 2-4-0 7-ft. express passenger engine, built at Darlington in 1885, “Tennant” type;

No. 1620 4-4-0 7-ft. 1.25-in. express passenger engine, built at Gateshead, 1892, by W. Worsdell;

No. 2207, 4-4-2, 6-ft. 10-in. express passenger engine, 3 cylinders, built at Darlington, 1911, designed by Sir Vincent Raven;

No. 2006, 4-6-0 6-ft. 11-in. express passenger engine, built at Gateshead, 1900, designed by W. Worsdell, Gold Medal, Paris, 1900;

No. 9, 0-4-4-0 4-ft. electric freight engine, built at Darlington, 1914, designed by Sir Vincent Raven;

No. 13, 4-6-4, 6-ft. 8-in. electric express engine, built at Darlington, 1922, designed by Sir Vincent Raven.

The Great Central section was represented by four engines:

No. 6499, 0-6-0, 3-ft. 9-in, saddle tank shunting engine, built by Manning Wardle & Co., 1876, for the Manchester, Sheffield and Lincolnshire Railway;

No. 5088, 4-6-2 5-ft. 7-in. passenger side tank engine, built at Gorton, 1923, designed by J. G. Robinson;

No. 5972, 4-2-2 7-ft. 9-in. inside cylinder express passenger engine, built at Gorton, 1900, designed by H. Pollitt;

No. 6169, Lord Faringdon, 4-6-0 6-ft. 9-in. 4-cylinder express passenger engine, built at Gorton, designed by J. G. Robinson.

Two locomotives represented the GE section

No. 7133 was a 0-4-0 3-ft. 1-in. enclosed tramway engine built at Stratford in 1897;

No. 8900 (1900), Claud Hamilton, 4-4-0 7-ft. express passenger engine, built at Stratford, 1900, designed by J. Holden. Gold Medal Paris Exhibi- tion, 1900.

The GN section showed three engines:

The celebrated No. 1, 4-2-2 8-ft. 2-in. express engine, with outside cylinders, built at Doncaster, 1872, designed by P. Stirling:

No. 3990 (No. 990), 4-4-2 6-ft. 8-in. express engine, built at Doncaster, 1898, designed by H. A. Ivatt, the first “Atlantic” engine constructed in Great Britain;

No. 3251 (No. 251), 4-4-2 6-ft. 8-in. express engine, built at Doncaster, 1902, designed by H. A. Ivatt, the first engine on a British railway with a wide firebox.

The NBR section was represented by two engines:

No. 10114, 0-6-0 5-ft. 13-in. goods engine, built by Neilson & Co. in 1868, designed by T. Wheatley;

No. 9902, Highland Chief, 4-4-2 6-ft. 9-in, express engine, built by R. Stephenson & Co., 1911, designed by W. P. Reid.

The GNSR section was represented by No. 45A, 4-4-0 5-ft. 61-in. mixed traffic engine, built in 1866 by Neilson & Co., designed by W. Cowan.

The remaining seven locomotives exhibited by the LNER. were built since the grouping of the railways:

“Garratt” type 2-8-0+0-8-2, built by Beyer Peacock & Co., 1825, fitted with H. N. Gresley’s valve gear, driving wheels, 4-ft. 8-in. diameter, 6 cylinders (three to each truck), the first 6-cylinder “Garratt” locomotive, weight in working order, 176tons;

No. 203, 2-6-0 3-cylinder 5-ft. 8-in. express goods engine, built an Darlington, 1925, designed by H. N. Gresley (No. 202, a similar engine, was shown in the Exhibition building);

No 3499, 2-8-0 3-cylinder 4-ft. 8-in. mineral engine, built at Doncaster, 1924, designed by H. N. Gresley;

No. 2393, “Mikado” type (2-8-2) 3-cylinder 5-ft. 2-in. mineral engine, fitted with “booster” to drive trailing wheels, built at Doncaster, 1925, designed by H. N. Gresley;

No. 2563, William Whitelaw, 4-6-2 3-cylinder 6-ft. 8-in. express engine, designed by H. N. Gresley;

No. 2400, City of Newcastle, 4-6-2 3-cylinder 6-ft. 8-in. express engine, built at Darlington, 1922, designed by Sir Vincent Raven.

The LMS exhibit of modern locomotives comprised six engines: …

Three LNWR engines: …

No. 1881, 4-cylinder compound 4-ft. 3-in. mineral engine, built at Crewe, 1901, designed by F. W. Webb;

No. 9446, 0-8-0 4-ft. 2-in. goods engine, built at Crewe, 1922, designed by C. J. B. Cooke;

No. 5900, Sir Gilbert Claughton, 4-cylinder, 6-ft. 3-in. express engine, built at Crewe, 1913, designed by C. J. B. Cooke.

The Midland section exhibit was No. 679, 4-2-2 7-ft. 91-in. express engine, built at Derby, 1899, designed by S. W. Johnson.

The L&YR section showed No. 10474, 4-6-0 4-cylinder 6-ft. 3-in. express, built at Horwich, designed by G. Hughes.

The LMS specimen was No. 11112, 4-cylinder 6-ft. 3-in. passenger tank, built at Horwich, 1924, designed by G. Hughes.

The Somerset & Dorset Joint Railway No. 86 2-8-0 4-ft. 71-in. mineral engine, built by R. Stephenson & Co., 1825, designed by Sir H. Fowler (LMS)

The GWR was represented by three modern locomotives:

No. 5225, 2-8-0 4-ft. 7-in. mineral tank engine, built at Swindon, designed by G. J. Churchward;

No. 4700, 2-8-0 5-ft. 8-in. express goods engine, built at Swindon in 1919, designed by G. J. Churchward;

No. 4082, Windsor Castle, 4-6-0 4-cylinder 6-ft. 8-in. express, built at Swindon, designed by C. B. Collett. This is the locomotive the King and Queen drove at Swindon.

The SR was represented by No 449, Sir Torre, at the head of the train of modern coaches.

In addition there were: the City and South London Railway‘s old electric engine supplied for the opening of the railway in 1890. The LNER showed a petrol bus for rail service, a petrol autocar, and a Sentinel-Cammell steam coach.

Modern rolling-stock-passenger and freight was represented in profusion: …

A complete train by each of the four groups: …

GWR – showed an articulated rake of coaches and a 10-compartment third-class corridor coach, 70ft long;

LNER – showed a similar articulated rake and an electric coach, a Post Office van, a sleeper with first-class berths and third-class compartments, a twin (articulated) sleeper, a ‘triplet’ dining set, corridor third etc.;

SR – sent Pullman Car ‘Lydia’, whilst the Pullman Car Company exhibited ‘Niobe’;

LMS – showed a first-class corridor coach, Queen Victoria’s saloon (and indoors – Queen Adelaide’s carriage);

London Electric Railways by one of the latest tube coaches.

Also in view were:

The “Dandy” coach from the Port Carlisle Railway;

A Stockton & Darlington carriage built circa 1850;

A GNSR coach from circa 1865.

The wide range of modern freight vehicles was well shown by the 18 wagons, etc, of different types exhibited by the LNER, varying from a four-wheeled horse-box to a set of three 60-ton flat wagons tight coupled for conveying 160-ton guns. The GWR showed a 20-ton mineral wagon, a 35-ton well trolley, a 30-ton articulated gun wagon, and a 70-ft. rail or timber truck. There were a few items of old goods rolling-stock, including a ‘Chaldron’ coal wagon built in 1826.

Within the building the fine display of signalling appliances from the earliest days, through the crude interlocking of some sixty years ago to the present perfect locking apparatus, electrical and mechanical, attracted much attention. So did the many specimens representing all periods during the past 100 years of the rails, chairs, and sleepers that go to make up the permanent way. Chief interest was taken in the numerous models, many on a large scale, and as regards locomotives chiefly working models, actuated by compressed air. Of the 46 locomotive models there were two of the Locomotion, while several GWR. broad-gauge engines made a fine display. The Metropolitan Railway was a big exhibitor in this section, showing seven or eight models of locomotives of various railways. A quarter-size model of the GNR’s 8-ft. 1-in. single (Stirling’s famous 4-2-2 type) was prominent, as, too, was the Dandy Cart, with horse aboard, as attached to the rear of horse-hauled mineral trains. Here also were models in plenty of railway bridges and viaducts, railway coaches, steamers, &c. Early railway tickets, bills, time-tables, passes, medals, &c., were to be seen in profusion, with specimens of Edmondson’s ticket-dating presses and ticket-printing machines invented in 1840, and taken from actual work to be shown at Faverdale. Railway-station bells, besides early signal and hand lamps of various types, were represented, whilst the many loan collections of literature and maps relative to early railways provided information of rare value to those interested in the development of the railway system.

References

  1. G.A. Sekon, ed.; 1825-1925: The Railway Centenary Celebrations at Darlington, 1st to 3rd July 1925; in The Railway Magazine, London, No. 338, August 1925, p101-142.
  2. https://commons.m.wikimedia.org/wiki/File:Hetton_Colliery_0-4-0_(1822_or_1851)_Locomotion_Shildon_29.06.2009_P6290048_(9989613283).jpg, accessed on 27th December 2024.
  3. https://commons.m.wikimedia.org/wiki/File:S%26DR_Derwent_(Hugh_Llewelyn).jpg, accessed on 27th December 2024.
  4. https://commons.m.wikimedia.org/wiki/File:Stockton_%26_Darlington_0-6-0_25_%27Derwent%27_Head_of_Steam,_Darlington_30.06.2009_P6300113_(10192716434).jpg, accessed on 27th December 2024.
  5. https://collection.sciencemuseumgroup.org.uk/objects/co205769/steam-locomotive-no-25-derwent-stockton-darlington-railway, accessed on 27th December 2024.
  6. https://preservedbritishsteamlocomotives.com/sd-class-1001-0-6-0-stockton-darlington-railway-1275, accessed on 28th December 2024.
  7. https://collection.sciencemuseumgroup.org.uk/objects/co205734/ner-0-6-0-1001-class-steam-locomotive-and-tender-no-1275-1874, accessed on 28th December 2024.
  8. http://www.railcentre.co.uk/RailHistory/Stockton/Pages/StocktonPage6.html, accessed on 28th December 2024.
  9. https://en.m.wikipedia.org/wiki/LNWR_Class_B, accessed on 28th December 2024.
  10. https://preservedbritishsteamlocomotives.com/north-star-2-2-2-gwr-broad-gauge, accessed on 28th December 2024.
  11. https://commons.m.wikimedia.org/wiki/File:North_Star_Steam_museum_Swindon.jpg, accessed on 28th December 2024.
  12. https://en.m.wikipedia.org/wiki/LNWR_2-2-2_3020_Cornwall, accessed on 28th December 2024.
  13. https://commons.m.wikimedia.org/wiki/File:LNWR_locomotive,_%22Cornwall%22.jpg, accessed on 28th December 2024.
  14. https://en.m.wikipedia.org/wiki/GNR_Stirling_4-2-2, accessed on 29th December 2024.
  15. https://en.m.wikipedia.org/wiki/GNR_Stirling_4-2-2#/media/File%3A4-2-2_GNR_1008.jpg, accessed on 28th December 2024.
  16. https://en.m.wikipedia.org/wiki/GNR_Stirling_4-2-2#/media/File%3AGNR_Stirling_1_at_Doncaster_Works.jpg, accessed on 29th December 2024.
  17. https://www.lner.info/locos/E/ner_901.php, accessed on 29th December 2024.
  18. https://www.lner.info/locos/E/e5.php, accessed on 29th December 2024.
  19. https://www.lner.info/locos/D/d17.php, accessed on 29th December 2024.
  20. https://en.m.wikipedia.org/wiki/NER_Class_M1, accessed on 29th December 2024.
  21. https://en.m.wikipedia.org/wiki/LNER_Class_P1, accessed on 30th December 2024.
  22. https://www.lner.info/locos/P/p1.php, accessed on 30th December 2024.
  23. https://en.m.wikipedia.org/wiki/L%26YR_Hughes_4-6-4T, accessed on 30th December 2024.
  24. https://preservedbritishsteamlocomotives.com/4200-2-8-2t-gwr-churchward-4200-4299-5200-5204https://preservedbritishsteamlocomotives.com/4200-2-8-2t-gwr-churchward-4200-429, accessed on 30th December 2024.
  25. https://didcotrailwaycentre.org.uk/article.php/71/5227-5205-class, accessed on 30th December 2024.
  26. https://en.m.wikipedia.org/wiki/LNER_Class_U1, accessed on 30th December 2024.
  27. https://www.lner.info/locos/Electric/electric.php, accessed on 30th December 2024.
  28. https://www.lner.info/locos/Electric/ee1.php, accessed on 30th December 2024.
  29. https://en.m.wikipedia.org/wiki/LNER_Class_EE1#/media/File%3ANorth_Eastern_Railway_electric_locomotive_No_13.jpg, accessed on 30th December 2024.
  30. https://rogerfarnworth.com/2024/08/08/petrol-railmotors-the-railway-magazine-september-1922
  31. https://www.lner.info/locos/IC/ner_petrol_autocar.php, accessed on 30th December 2024.
  32. https://en.m.wikipedia.org/wiki/NER_Class_T3, accessed on 30th December 2024.
  33. https://rogerfarnworth.com/2024/06/26/steam-railmotors-part-6-after-the-grouping
  34. https://www.lner.info/locos/Railcar/sentinel.php, accessed on 30th December 2024.
  35. https://player.bfi.org.uk/free/film/watch-the-official-film-of-the-railway-centenary-1925-online, accessed on 31st December 2024.
  36. https://locomotive.fandom.com/wiki/L%26YR_Class_8_No._10474, accessed on 31st December 2024.
  37. https://www.railwaywondersoftheworld.com/railway_centenary.html, accessed on 31st December 2024.
  38. https://www.lner.info/locos/D/d47.php, accessed on 31st December 2024.
  39. http://www.greatwestern.org.uk/m_in_cas_40827013.htm, accessed on 31st December 2024.
  40. https://www.facebook.com/161421647218065/posts/pfbid0otP6Sxuamk1BURpmy2cZ6opNaZmjVDnwY8AcomKmaoE3YioDGEtK8jZmsRQ2yAZAl/?app=fbl, accessed on 31st December 2024.
  41. https://en.m.wikipedia.org/wiki/LSWR_N15_class, accessed on 31st December 2024.
  42. https://blog.railwaymuseum.org.uk/2025-celebrating-200-years-of-the-stockton-darlington-railway, accessed on 31st December 2024.
  43. https://en.m.wikipedia.org/wiki/LNER_Class_A2, accessed on 31st December 2024.
  44. https://en.m.wikipedia.org/wiki/Locomotion_No._1, accessed on 31st December 2024.
  45. https://en.m.wikipedia.org/wiki/Stockton_and_Darlington_Railway, accessed on 31st December 2024.
  46. https://wp.me/p9H29O-Ao, accessed on 31st December 2024.

The Callander and Oban Railway

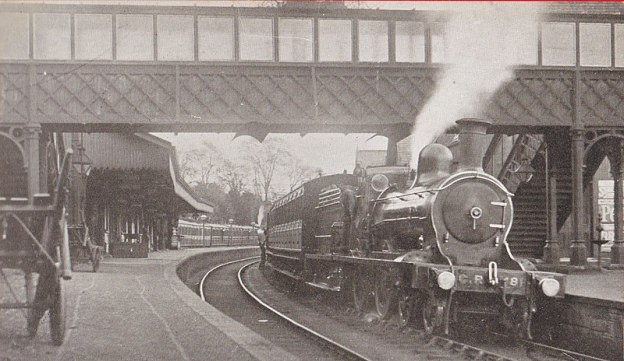
In July 1923, The Railway Magazine carried an article about the Callander & Oban Railway (C&O) written by G.F. Gairns. [1]

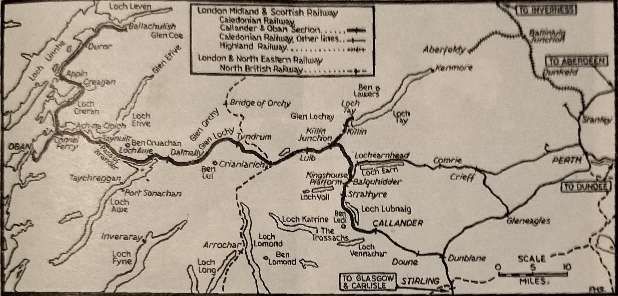
Gairns commented that the C&O constituted the third of the three great mountain lines: the Perth-Inverness line of the Highland Railway; the West Highland Line of the North British Railway; and the Callander & Oban Railway (including the Ballachulish Extension).

The Callander & Oban Railway. [1: p11]

A short series of four articles about the Ballachulish line can be found here, [2] here, [3] here, [4] and here. [5]

The C&O had previously been written about in the Railway Magazine, specifically in the issues of September 1903, August 1904, and August and September 1912. Gairns leaves the detailed history to those previous articles, apart from a brief introduction, and focusses in 1923 on a journey along the line from Stirling to Oban and to Ballachulish.

An excellent presentation of the various scenes which preceded the Callander & Oban Railway can be found in the early pages of John Thomas’, ‘The Callander & Oban Railway‘. [62: p1-26]

Ultimately, an agreement was signed between the Scottish Central Railway (SCR) and the Callander & Oban (C&O) was signed on 17th December 1864 which affirmed that the SCR would subscribe £200,000 to the scheme. “The C&O was to have nine directors, five appointed by the Scottish Central and four by the promoters. The line was to be ‘made, constructed and completed in a good, substantial sufficient and workmanlike manner, and without the adoption of timber bridges and culverts’. … The rails were to weigh 75 lb per yard and were to be laid in 24 ft lengths on larch sleepers placed at an average distance of 3 ft.” [62: p26-27]

As part of the agreement, once at least 20 miles of line directly connected to the Dunblane, Doune & Callander Railway had been constructed and passed by the Board of Trade, the Scottish Central Railway undertook work it in perpetuity, on the basis that it would receive half of the gross revenue.

The Callander & Oban Railway bill was drawn up and presented in Parliament in January 1865. … The bill sought:

First, a Railway commencing about Five Furlongs South-westwards from the Schoolhouse in the Town of Oban called the Oban Industrial School, and terminating by a Junction with the Dunblane, Doune and Callander Railway, about One and a Half Furlongs Eastward from the Booking Office of the Callander Station of the Railway.

Secondly, a Tramway commencing by a Junction with the Railway above described about One Furlong South-westwards from the said Schoolhouse, and terminating on the Pier on the East Side of the Harbour of Oban about Two Chains Eastward from the South-western end of the said Pier.” [62: p27]

148 railway bills were passed in a two-day session of Parliament on January 1865. These included the C&O and the Dingwall & Skye Railway.  Both these schemes had a similar primary purpose – to reach ports on the West Coast of Scotland to give the fishing trade access to markets in the rest of Scotland and further South.

Thomas comments: “The Callander & Oban Railway Act was passed on 8th July 1865. The  first sod was not cut for over fourteen months. Five years were to pass before a revenue-earning wheel was to turn on the line (and on only 17½ miles at that), and it would be fifteen years before a train entered Oban. … But even before the Act was passed sweeping changes had transformed the railway political scene. Ten days earlier, on 29th June, the Scottish Central had won permission to take over the Dunblane, Doune & Callander as from 31st July 1865; and the Central had enjoyed its new-found gains for one day. On 1st August 1865 the Central itself had been absorbed by the Caledonian, which acquired all its assets and liabilities including the obligation to finance and operate the Callander & Oban. At the outset the C & O directors found themselves with formidable new masters.” [62: p28]

As much as the Callander & Oban had looked attractive to the Scottish Central. “It was not at all attractive to the Caledonian, whose shareholders, had no stomach for squandering cash among the Perthshire hills. … The 1861 census had shown that Oban and Callander between them possessed fewer than 3,000 inhabitants, and the scattered hamlets between the two could produce barely a thousand more. The certain dividends lying in the coal and iron traffic of the Clyde Valley were infinitely preferable to the nebulous rewards from the fish and sheep of the West Highlands.” [62: p29]

From the beginning there was a faction on that Caledonian board which wished to drop expansion towards Oban at the earliest opportunity, “but the terms of the SCR-Caledonian amalgamation agreement forbade such a course. And there was another reason, if a negative one, why the Caledonian should use caution. The amalgamations of 1865 had given the Edinburgh & Glasgow to the North British, which as the result had now penetrated deep into traditional Caledonian territory – Glasgow and the Clyde coast; and the North British already possessed and exercised running powers into Callander. If the Caledonian abandoned its awkward foster-child on the Callander doorstep, it was reasonable to suppose that the North British would attempt to pick it up.” [62: p29]

The Callander & Oban directors had undertaken to find £400,000 along the route of the railway. This proved to be a monumental task. Their first attempts brought in 201 individual shareholders who subscribed for a total of £56,360 worth of shares! The C&O may well have been stillborn had it not been for the appointment of John Anderson as the Secretary to the C&O.

Given palpable hostility between the directors, Anderson “was left to conduct the line’s affairs single-handed.” [62: p32] Thomas goes on to describe in some detail the different methods he used to achieve progress. The machinations involved need not, however, detain us here

Gairns writes:

The Callander and Oban Railway Company was constituted in 1865. The Dunblane, Doune and Callander Railway was already in existence, having been opened in 1858. The Callander and Oban line was opened: Callander to Killin Junction, 1870; Killin Junction to Tyndrum, August, 1873; thence to Dalmally, May, 1877; and to Oban, July, 1880. At Balquhidder, at first known as Lochearnhead, the line from Crieff makes connection. This route, with connecting lines, was opened, Perth to Methven, 1838; Methven Junction to Crieff, 1866; Gleneagles (previously Crieff Junction, 1856; Crieff to Comrie, 1893; Comrie to St. Fillans, 1901; St. Fillans to Balquhidder (Lochearnhead), 1905. The Callander and Oban line has always been worked by the Caledonian Company, and is now [1923] included in the London Midland and Scottish Railway.

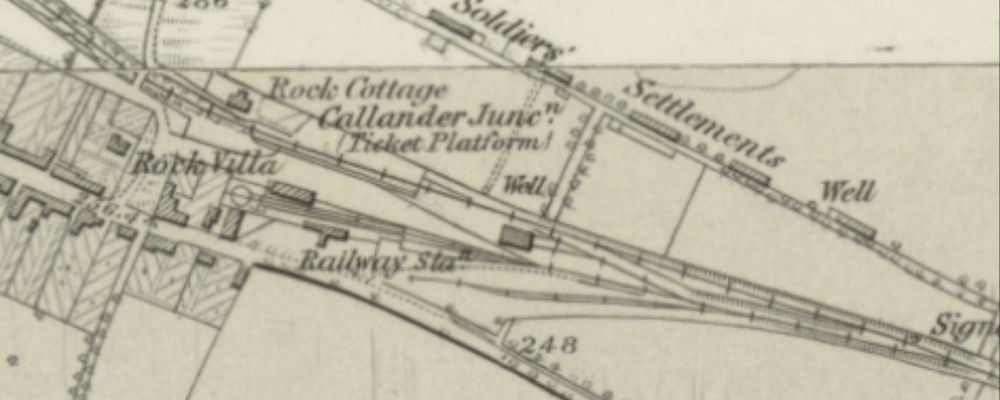
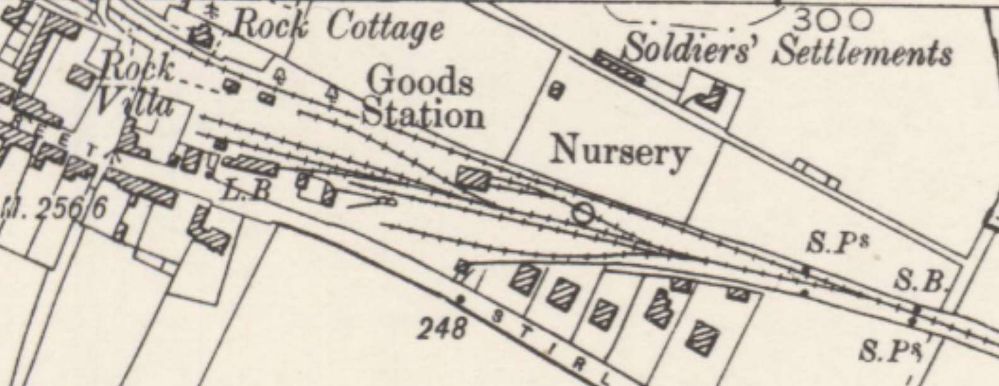
Dunblane is the ordinary junction for the Callander and Oban line, but trains which are not through to or from Glasgow use Stirling as their southern terminus. In some instances, ordinary Caledonian main line engines work the trains to and from Callander, the special C. and O, engines being attached or detached there, though this is mainly a traffic arrangement, convenient in the case of certain trains. At Dunblane there is an island platform on the down side, thus enabling branch trains to wait on the outer side to make connections. To Doune is double track, and the country mainly pastoral. Thence to Callander is single line, controlled by electric train tablet, as is the whole of the Callander and Oban line. The scenery continues to be of lowland character, though picturesque, but signs of the mountain country beyond show themselves. Between Doune and Callander is an intermediate crossing place – Drumvaich Crossing – to break up the long section of nearly 7 miles between stations. The original line diverged into what is now the goods station at Callander, the present station having been built when the Oban line was made. Callander station is distinctly picturesque, an ornamental clock tower surmounting the footbridge, and the station buildings being neat and attractive, while the platforms are decorated florally. It also has refreshment rooms on the platforms. On the up and down sides there are short bay lines from which locals can start as required. For down trains there is also a ticket platform, half a mile or so short of the station, but this is now used only by a few trains.” [1: p10]

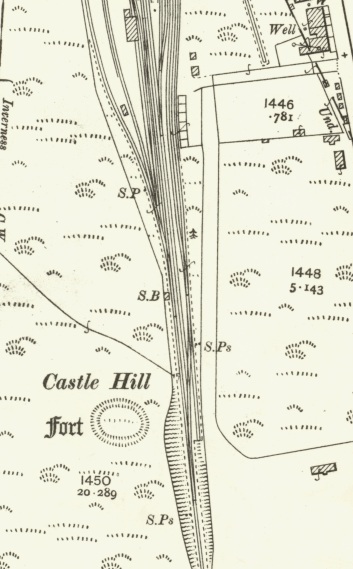
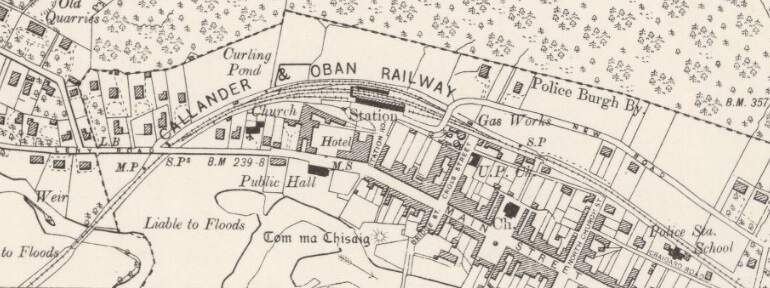
The original location of Callander Railway Station as shown on the 6″ Ordnance Survey of 1862, published in 1866.  [6]
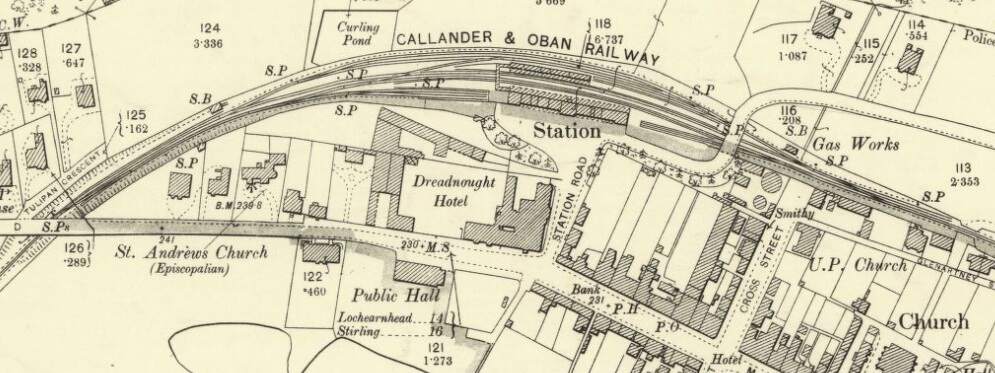
The original location of Callander Railway Station as shown on the 6″ Ordnance Survey of 1899, published in 1901. By this time the site had become Callander’s Goods Station. [7]
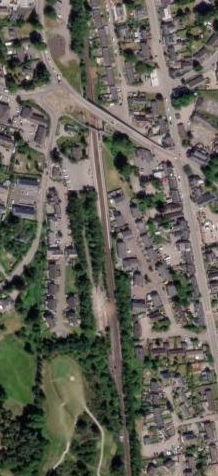
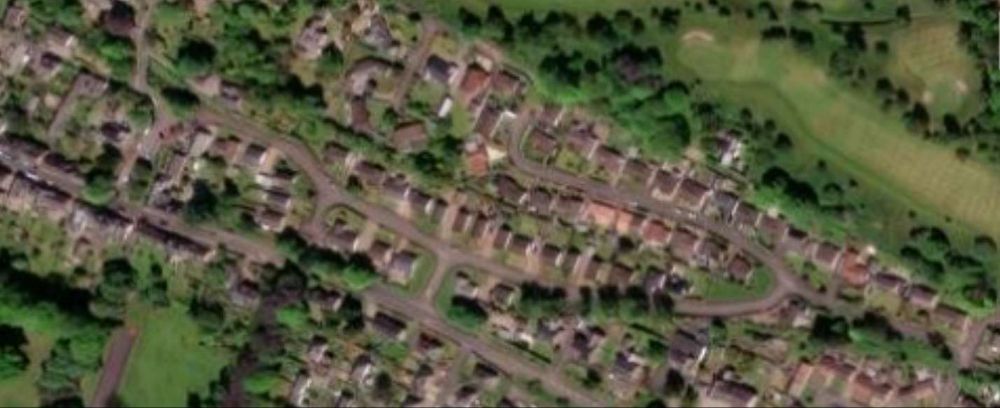
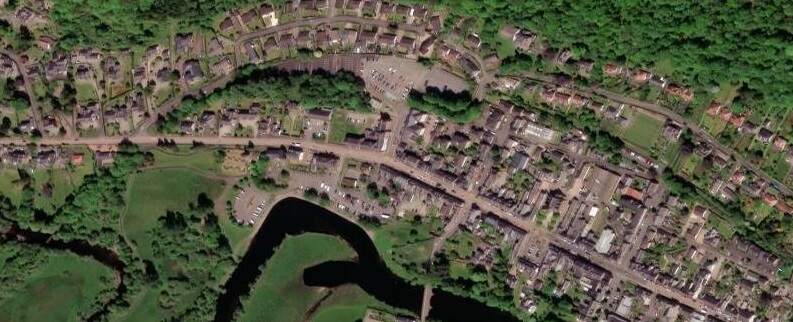
The location of Callander’s first Railway Station in the 21st century, as it appears on the ESRI satellite imagery provided by the National Library of Scotland (NLS). [6]
Callander Railway Station as shown on the 6″ Ordnance Survey of 1899, published in 1901. [9]
Callander Railway Station as shown on the 25″ Ordnance Survey of 1899, published in 1901. [13]
The location of Callander Railway Station in the 21st century as shown on the ESRI satellite imagery provided by the NLS. [9]
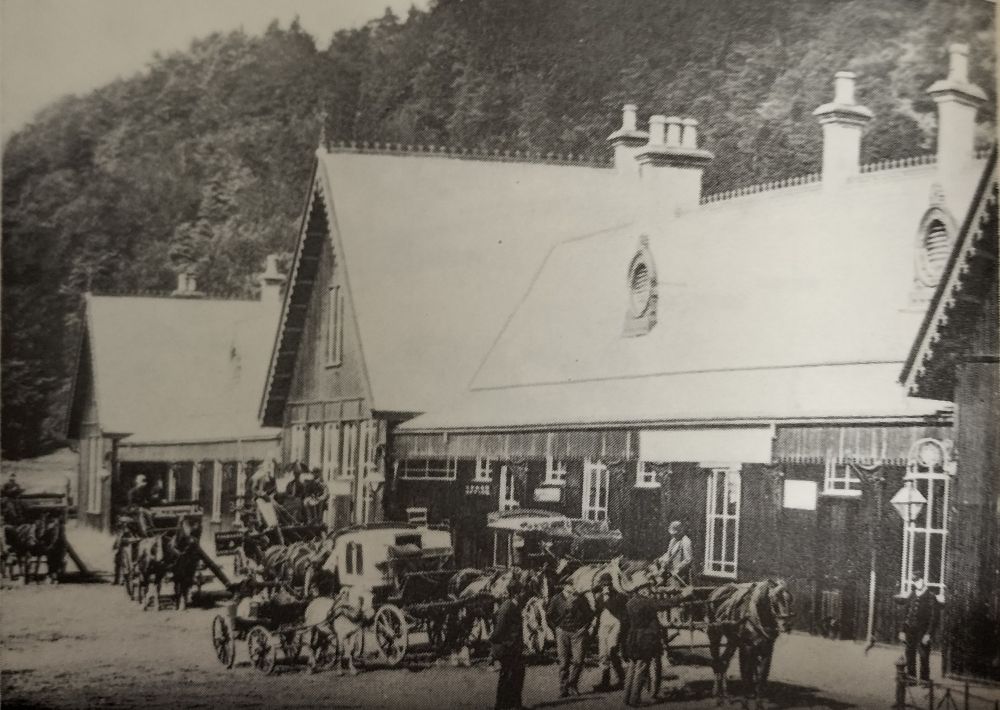
Coaches awaiting the arrival of the train, about 1895, © Public Domain. [62: p48]
A busy morning in 1959. A diesel excursion, No. 45153 on 9.18 am Oban -Glasgow, and No. 45213 on an up freight, © Public Domain. [62: p48]

Wikipedia tells us that “closure [for Callander Station] came on 1st November 1965, when the service between Callander and Dunblane ended as part of the Beeching Axe. The section between Callander and Crianlarich (lower) was closed on 27th September that year following a landslide at Glen Ogle.” [8]

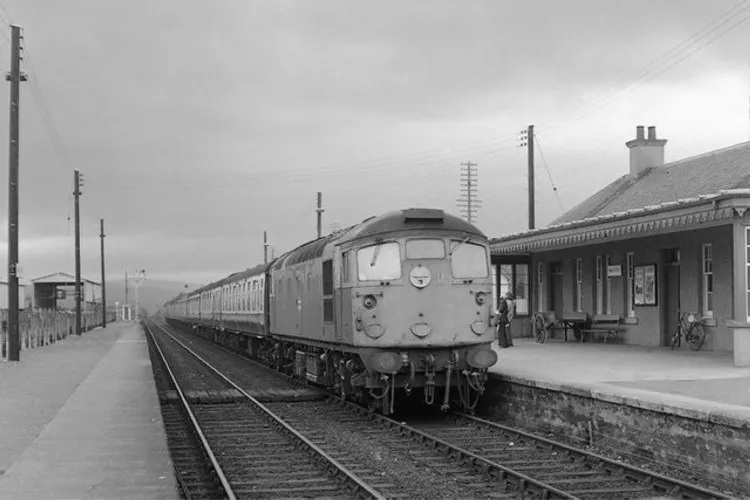
Callander Station from the roadbridge Mar'73.
This is an embedded link to a Flickr image of Callander Railway Station (seen from the road bridge at the East end of the Station) in 1973, (c) David Christie. [10]
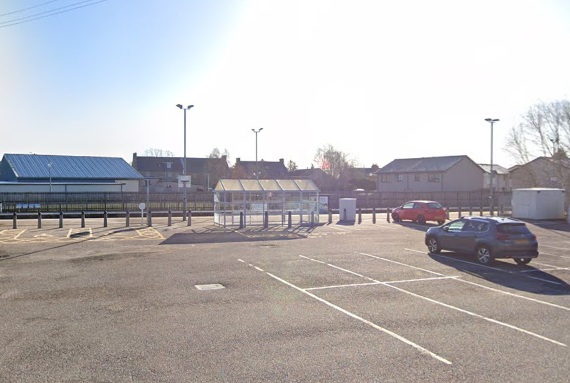
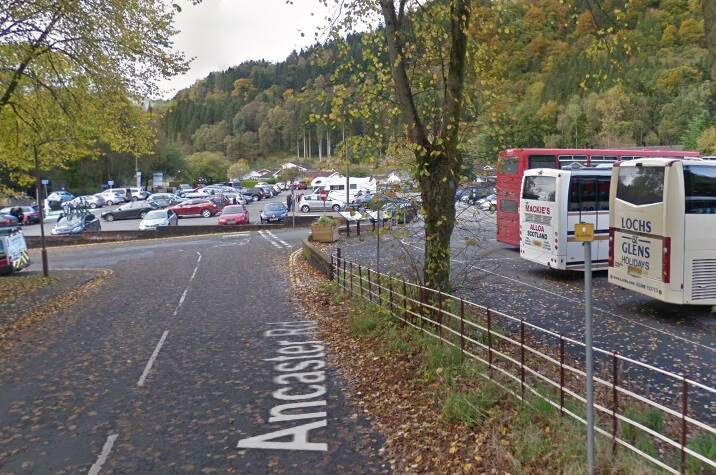
A very similar view in the 21st century. [Google Streetview, October 2016]
The road bridge at the East end of Callander Raiway Station in 1967 (Ancaster Road Bridge). (c) J.R. Hume, Public Domain [11]
Callander Railway Station forecourt in the 1940s, seen from the East. This image was shared on the Callander Heritage Society Facebook Page on 18th December 2023, (c) Public Domain. [12]
A similar view in the 21st century. [Google Streetview, October 2016]
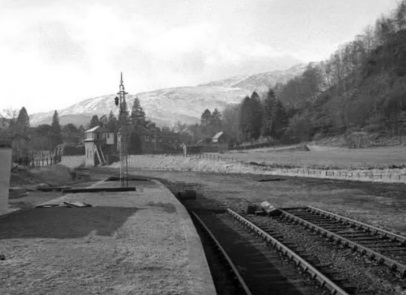
Lookin West from Callendar Railway Station after the lifting of the rails. The tall signal box allowed for visibility beyond Leny Road Bridge which is just off the scene to the left. This image was shared on the Callendar Heritage Facebook Page on 27th September 2023. [14]

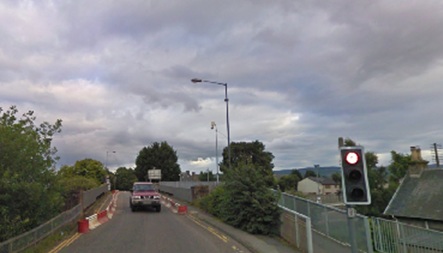
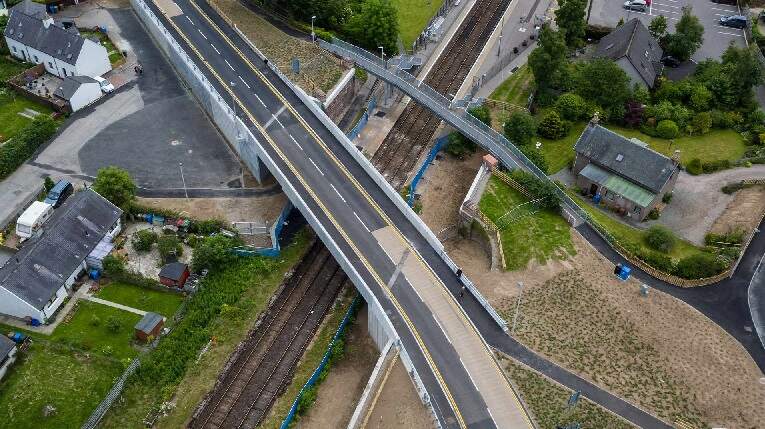
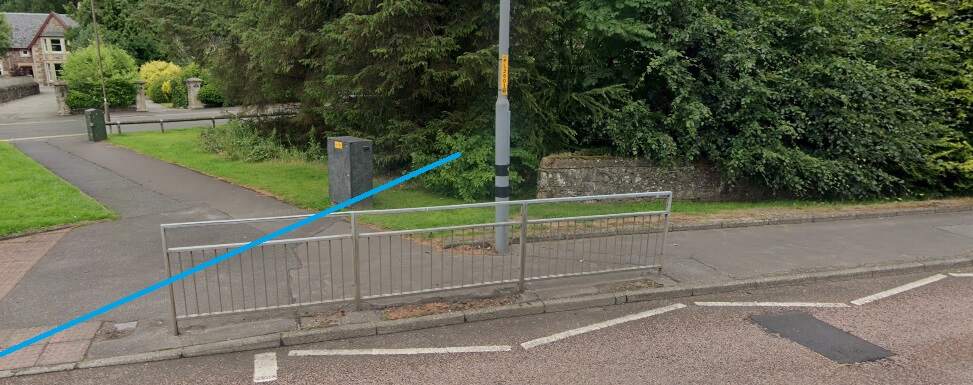
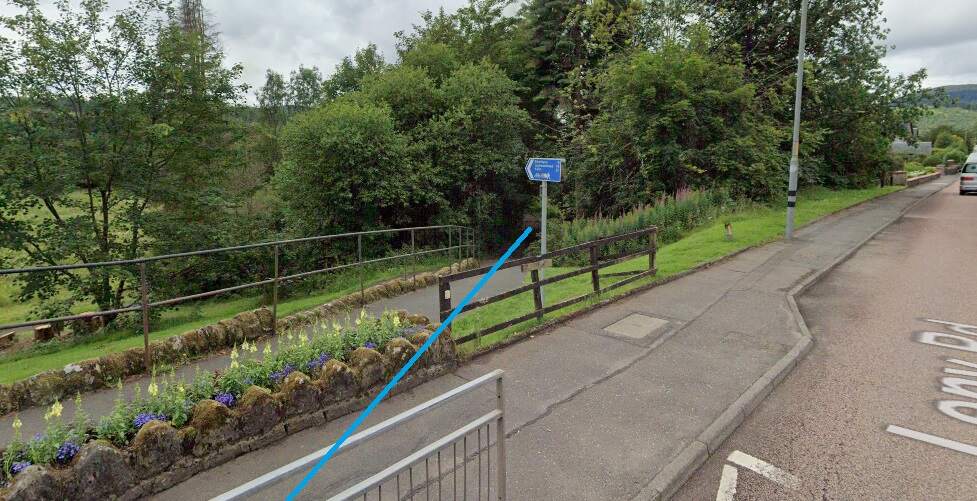
The old railway passed under Leny Road, Callander at the western end of the station site. The first image below shows the alignment of the railway looking Northeast from Leny Road. The pelican crossing marks the location of the old bridge. The second image shows the public footpath which follows the old railway to the South side of Leny Road.

The first length of the railway to the West of Callander is shown on the RailMapOnline.com image below.

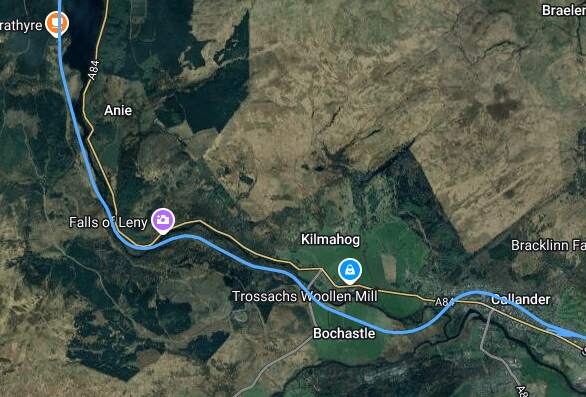
The route of the Callander & Oban Railway to the West of Callander as shown on the satellite imagery provided by RailMapOnline.com. Loch Lubnaig is at the top-left of this image. [15]
This embedded image from the Canmore National Record of the Historic Environment looks Northeast along the Callander & Oban railway towards Callander Railway station. The Bowstring Girder Bridge in the foreground is mentioned by Gairns below. The stone-arch bridge in the distance is the bridge that carried Leny Road over the old railway, (c) J.R. Hume. [16]

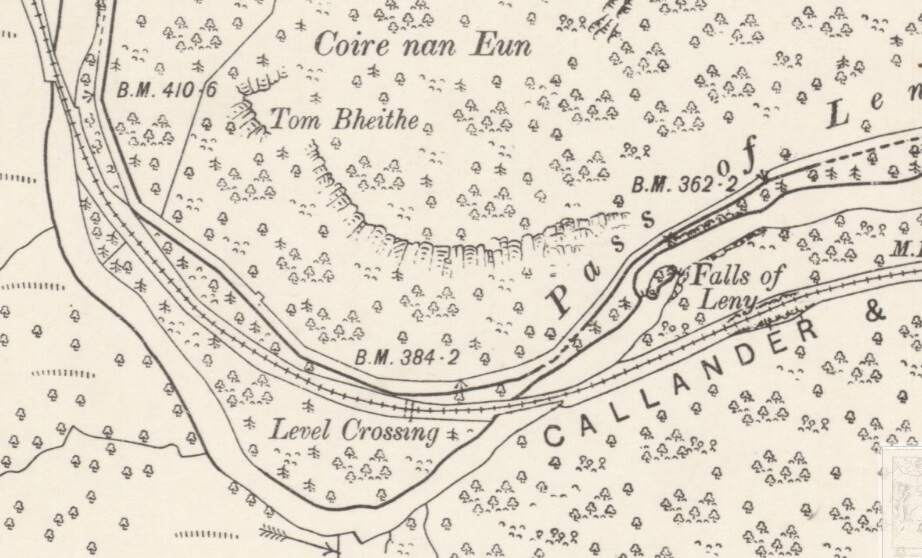
Gairns mentions the Pass of Leny and the Falls of Leny, below. The falls are shown on the map extract immediately below. The Falls can be seen in the right half of the extract.

The Falls of Leny and the Callander & Oban Railway. Note that the river – Garbh Uisge – is crossed twice by the railway. These bridges were bowstring Girder bridges like that seen above. [17]
Pair of BRCW Type 2's.River Leny bridge. 7th August 1965.
This image is embedded from Flickr and shows one of the two girder bridges shown on the map extract above. The photograph was taken shortly before the closure of the line. (c) locoman1966. [18]

Gairns continues:

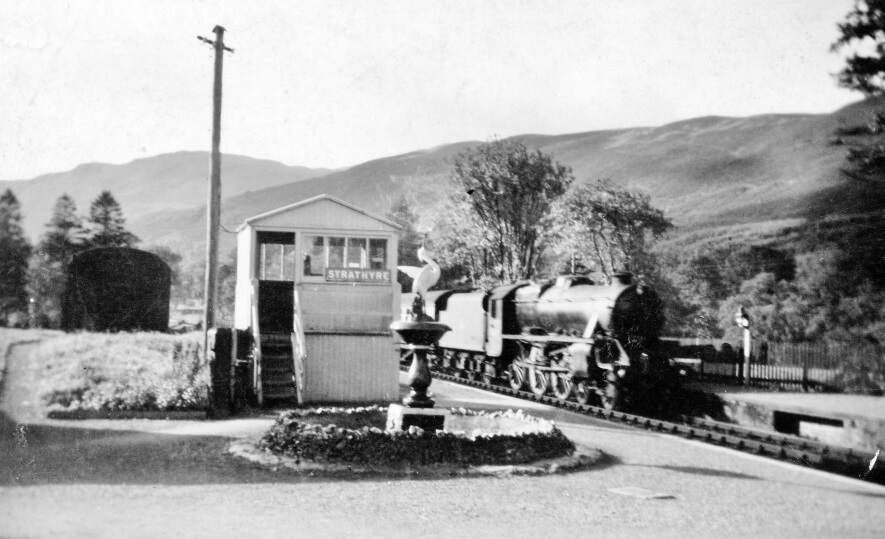
“Crossing the River Leny [Garbh Uisge] by a bowstring girder bridge, mountain country is entered in the Pass of Leny, and Ben Ledi and Ben Vane on the one side (the former skirted by the line), Ben Each, and, in the distance, Ben Vorlich, on the other, give evidence of the nature of the country traversed. The Falls of Leny can be seen on the right providing the intervening foliage is not too full. St. Bride’s Crossing, at the head of the Pass of Leny, is now only used as a crossing place at periods of special pressure. For nearly two miles the line then proceeds along the western shore, and almost at the water’s edge  of Loch Lubnaig ‘the crooked lake’. A short distance beyond St. Bride’s Crossing is Craignacailleach Platform, used by children of railway servants going to school in Callander the 5.40 a.m. from Oban and the 6.45 pm from Callander, daily except Saturdays. At the picturesque little station of Strathyre, both platforms are adorned by ornamental shrubs, and on the up side there is a fountain, rockeries, rustic gate ways, etc.. lending further interest to this pretty station among its beautiful natural surroundings.

Before reaching Strathyre station the River Balvag is crossed. It keeps close company with the railway until near Kingshouse Platform, where a glimpse is had of the hills encircling Loch Val.  Kingshouse Platform is used as a halt, trains calling as required, for the convenience of visitors to the Braes o’ Balquhidder.” [1: p10-11]

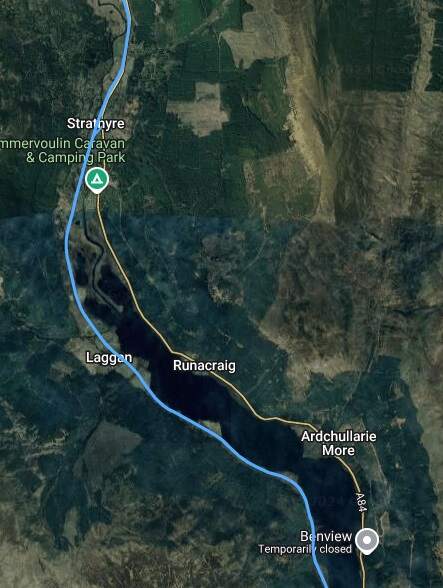
The adjacent RailMapOnline.com satellite image shows the railway running up the West side of Loch Lubnaig. Strathyre, mentioned by Gairns above, can be seen to the North of the Loch.

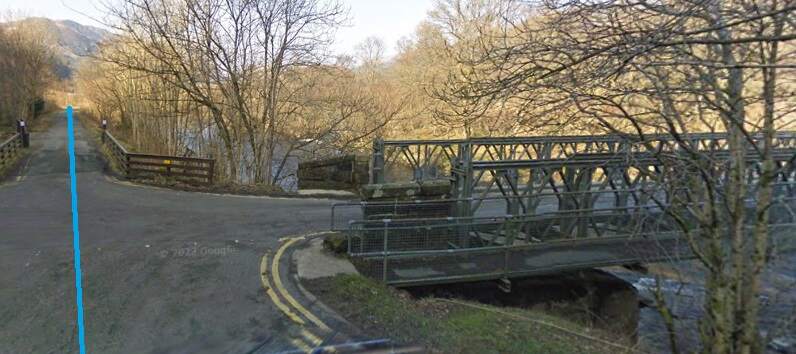
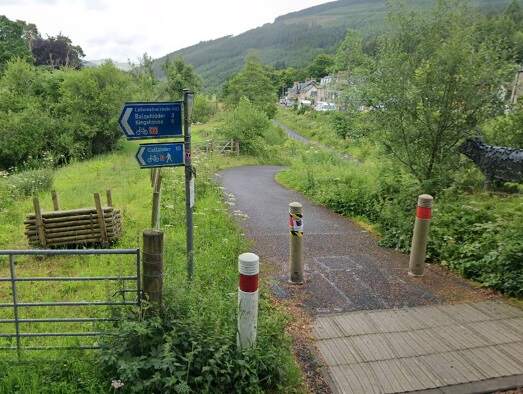
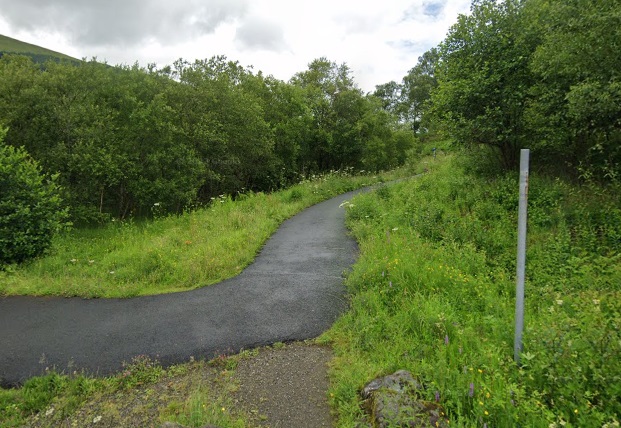
This portion of the old railway has been metalled to support its use as National Cycleway No. 7. South of the Loch, there is now a car park close to the upstream of the two bridges noted above.

The old railway formation is now the National Cycle Route No. 7. The blue line marks the route of the railway. The River Garbh Uisge is to the right of this North facing photograph. [Google Streetview, March 2009]
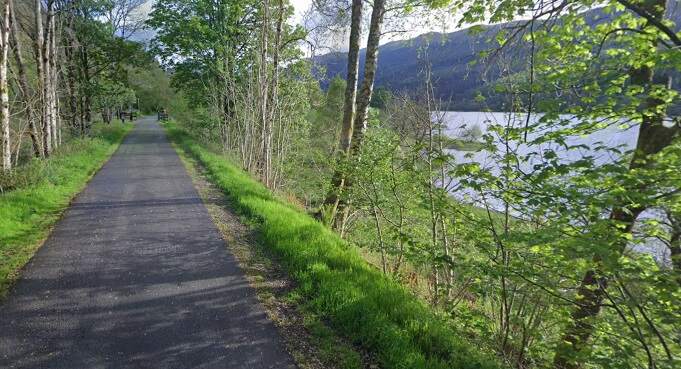
Another North facing view, this time alongside Loch Lubnaig. The tarmacked cycle route follows the line of the old railway. [Google Streetview, May 2022]

North of Loch Lubnaig, the old railway ran North through Strathyre, first crossing the river to the East bank and few hundred metres short of the Railway Station.

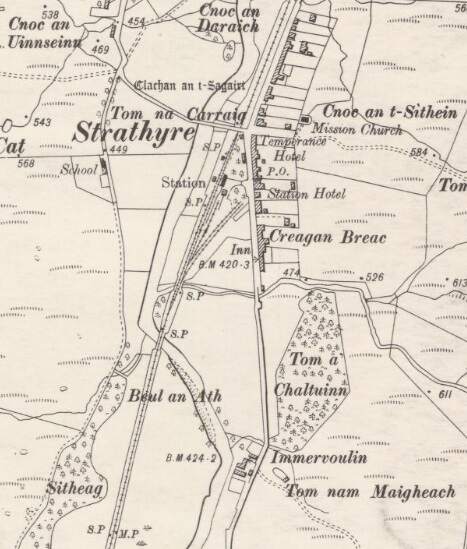
This extract from the 6″ Ordnance Survey of 1898, published in 1901 [19] shows the small village of Strathyre, its railway station and the bridge over the River Leny [Garbh Uisge].

Looking South from the main platform at Strathyre Railway Station towards Callander in September 1956, (c) T. Morgan and made available for use here under a Creative Commons Licence (CC BY-SA 2.0). [20]

North of Strathyre the line continued North-northeast towards Balquhidder.

RailMapOnline.com again – the satelitel image shows the route of the line North from Strathyre through Balquidder. [15]

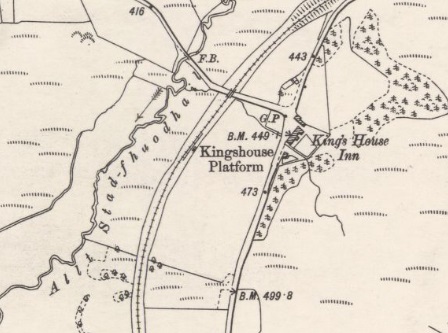
King’s House Inn on the modern A84 had its own Halt – Kingshouse Platform. This was a request halt serving both King’s House Inn (just to the east of the line) and the road to Balquhidder Glen (to the west). The halt was built at the expense of the King’s House Inn. It was a single platform, on the east side of the line, with a waiting shelter. Both platform and building were built in timber. Traffic handled included passengers, children using the school train and milk churns. As can be seen below, the halt was located south of the road to the glen.

Kingshouse Platform (Halt) as shown on the 6″ Ordnance Survey of 1898, published in 1901. [21]

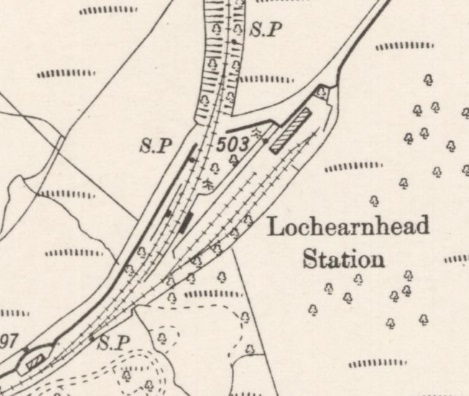
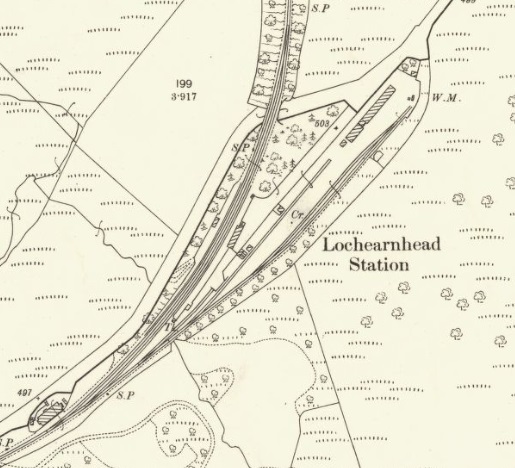
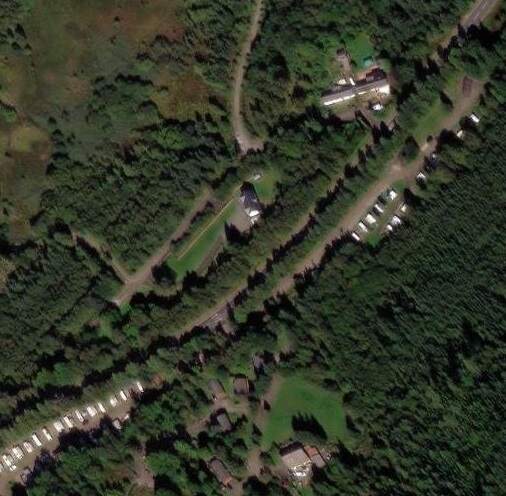
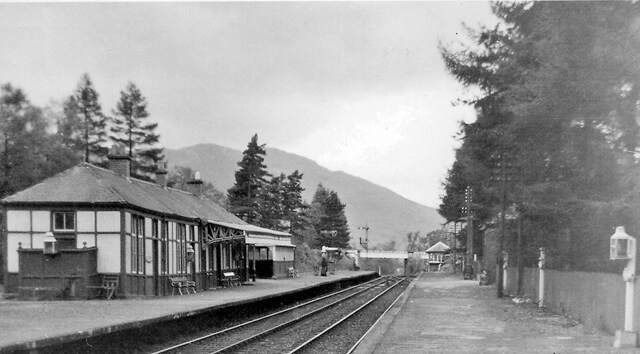
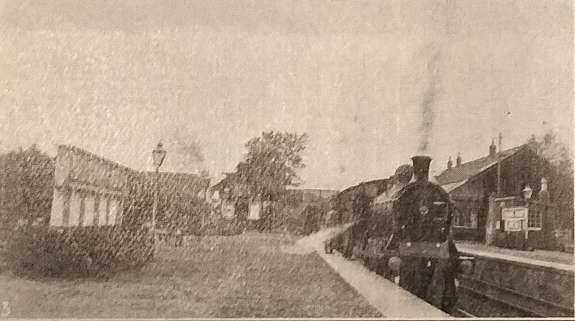
A short distance Northeast of Kingshouse Platform was Lochearnhead Railway Station sited some distance South of the community of the same name.

Lochearnhead Railway Station. [22]
Lochearnhead Railway Station as it appears on the 25″ Ordnance Survey of 1898, published 1901. [23]
The same location in the 21st century, as it appears on the ESRI satellite imagery provided by the NLS. The old railway ran from bottom-left to top-middle of this extract. [24]

The station was renamed Balquhidder Station on 1st July 1904, when the line to Crieff, Gleneagles and Perth was completed. The station then became the junction station. The branch came in from the North, paralleled by the Oban line for some distance, from the head of Loch Earn. Balquhidder station had an island platform on the up side to provide for connecting trains. A new station was built on the branch to serve Lochearnhead village. [25]

Balquhidder Railway Station looking Southwest towards Callander on 27th September 1961. The branch line was off to the left of this image, (c) Ben Brooksbank and authorised for reuse under a Creative Commons Licence (CC BY-SA 2.0). [26]

Gairns continues:

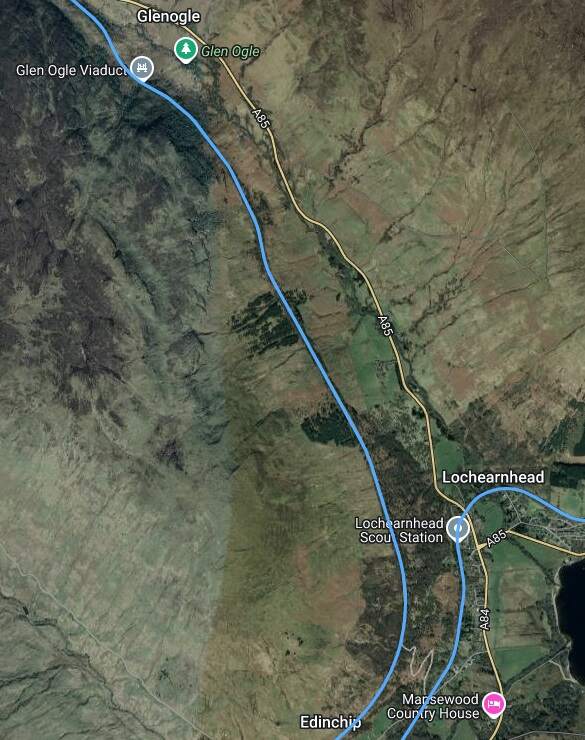
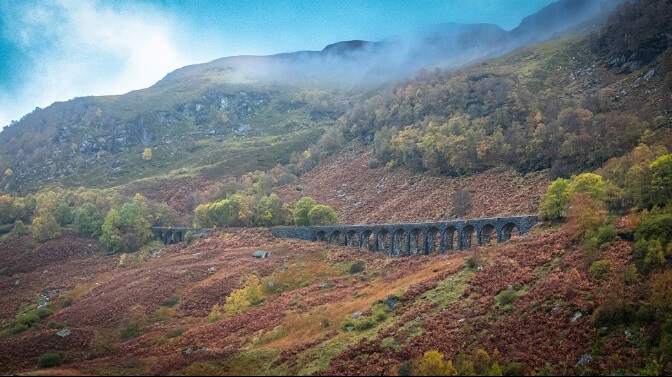
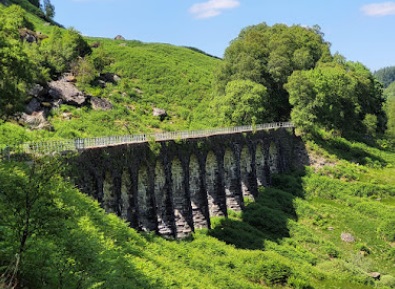
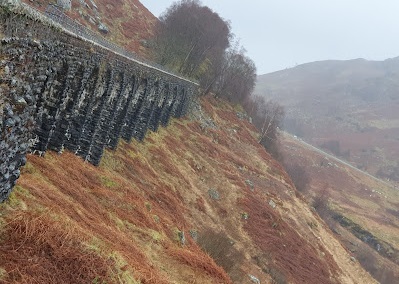
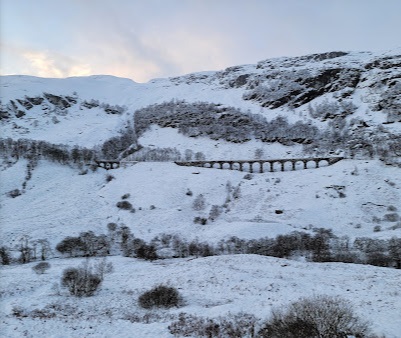
Leaving Balquhidder the Oban line climbs steeply along the hillside as it finds its way up Glen Ogle, overlooking, in the ascent, the Crieff line as it follows the shores of Loch Earn eastward, and giving views over the waters of the Loch, amidst their mountain setting, which are said to be the finest in the British Isles. … Nearly 8 miles separate Balquhidder and Killin Junction stations, though there is an intermediate crossing – Glenoglehead. This was the site of the original Killin station, before the opening of the Killin Branch Railway. The whole length of ‘gloomy’ Glen Ogle – a wild rocky valley, four miles in length, described as the Khyber Pass of Scotland – is traversed, with its rocky boulder-strewn slopes, the railway being carried in places on brick or masonry viaducts around the face of the rock where the cutting of a ledge was well-nigh impossible. For most of the ascent the view from the train is down almost precipitous slopes, continued upwards on the other side.” [1: p11]

The Oban line runs South to North on this extract from the RailMapOnline.com satellite imagery. The branch turns away to run East along the North side of Loch Earn which just peeps into this satellite image at the bottom-right. [15]
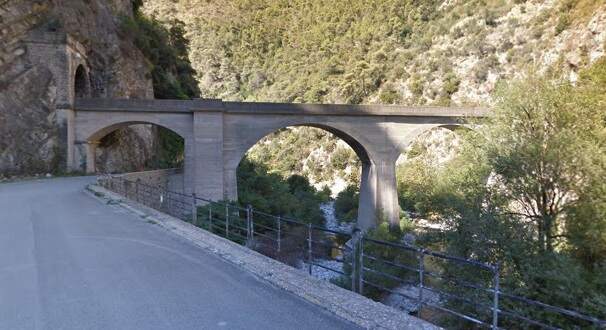
Four pictures of Glen Ogle Viaduct. The first was taken from the opposite side of the valley, (c) Euan Reid, Octobr 2024. [Google Maps, November 2024]
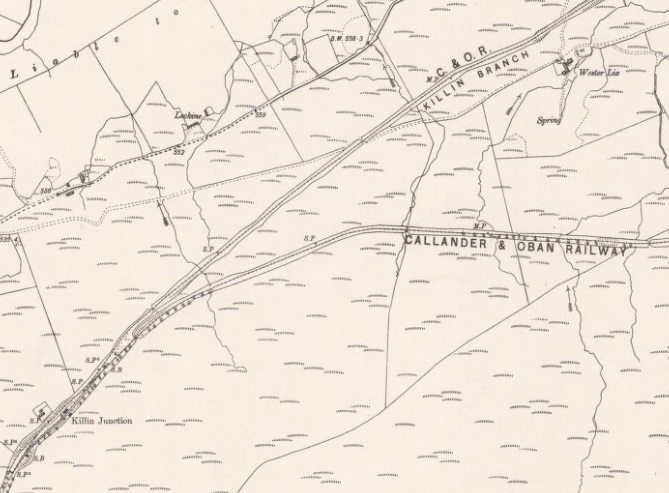
This next extract from RailMapOnline.com’s satellite imagery shows that to the North of Glen Ogle the old railway turned to the West. The line entering the extract from the top and meeting with the Callander & Oban Railway is the Killin Branch. [15]

Gairns continues:

“At the northern end of the Pass the line curves westward, overlooking the Loch Tay branch which runs from Killin Junction to the little town of Killin, with an extension of about a mile to a pier on Loch Tay to connect with the railway steamers which serve the whole length of the Loch, glimpses of which are had from the Oban train. The branch is on a lower level and its track can be seen for a long distance from the main line. The branch railway is one of very heavy gradients. At Killin Junction it makes connection with the main line which has descended from Glenoglehead to meet it. The station here has the usual island platform on the up side, to accommodate the branch trains clear of the main line.” [1: p11-12]

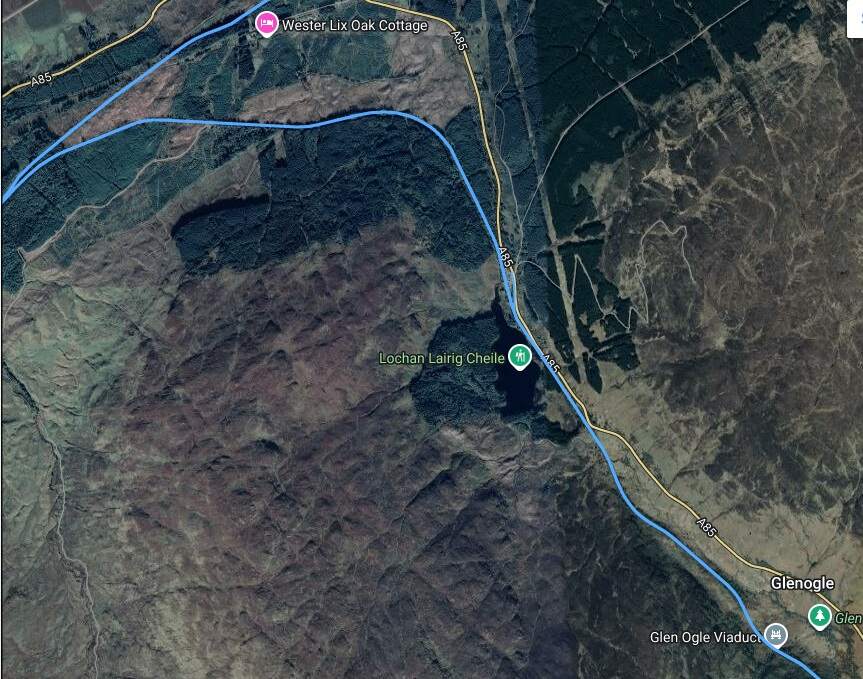
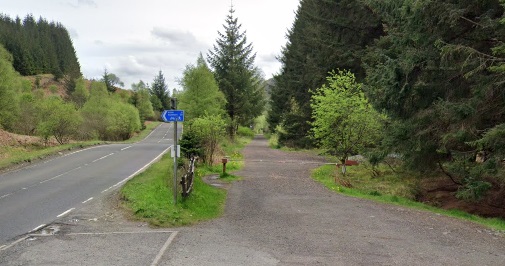
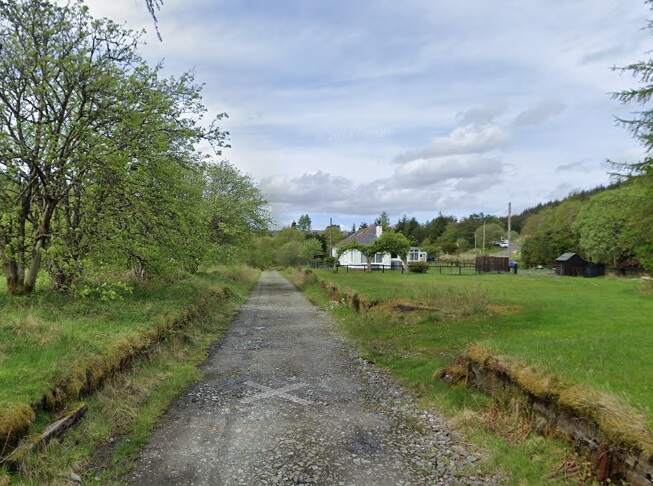
Looking South towards Lochearnhead, the A85 and the route of the old railway run immediately adjacent to each other alongside Locham Lairig Cheile which is just off the right side of this photograph. [Google Streetview, May 2022]
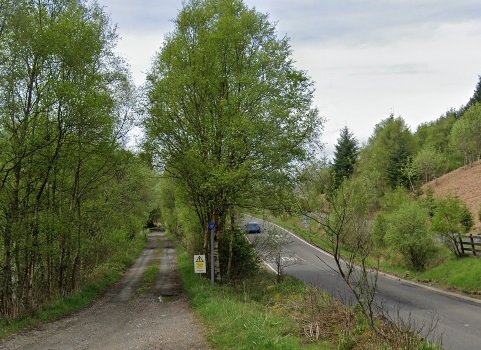
Looking North towards Glenoglehead Crossing at the smae location as the image above. Lochan Lairig Cheile ican be picked out on the left of the image. [Google Streetview, May 2022]

Glenoglehead Crossing permitted two trains on the line to pass each other.

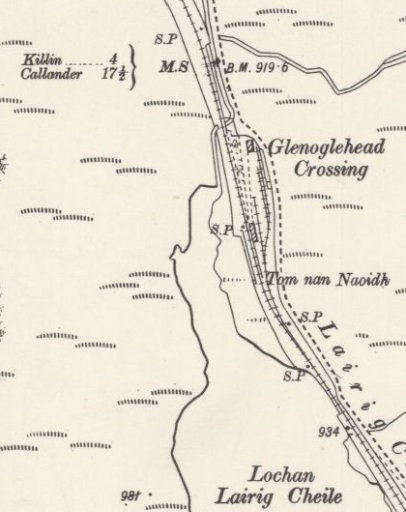
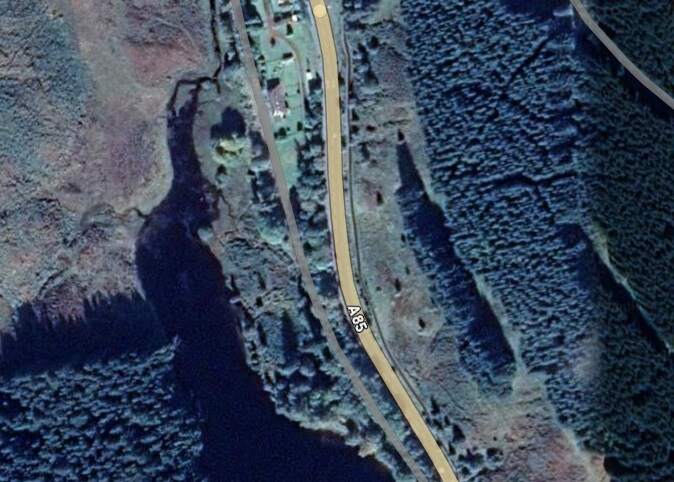
A Google Maps satellite image extract showing the location of Glenoglehead Crossing in the 21st century. It was once known as Killian Railway Station (even though over 3 miles from Killin) and was at that time the northern terminus of the Callander & Oban Railway. [Google Maps, November 2024]

From Glenoglehead the line dropped down to Killin Junction. The two map extracts above come from the same 6″ Ordnance Survey sheet surveyed in 1899 and printed in 1901. [27]

The location of Glenoglehead Railway Station with the original station building in private hands. [Google Streetview, May 2022]
The route of the old railway descending from Glenoglehead. [Google Streetview, May 2022]
The line ran West on the Southern slopes of Glen Dochart. {Google Streetview, May 2022]
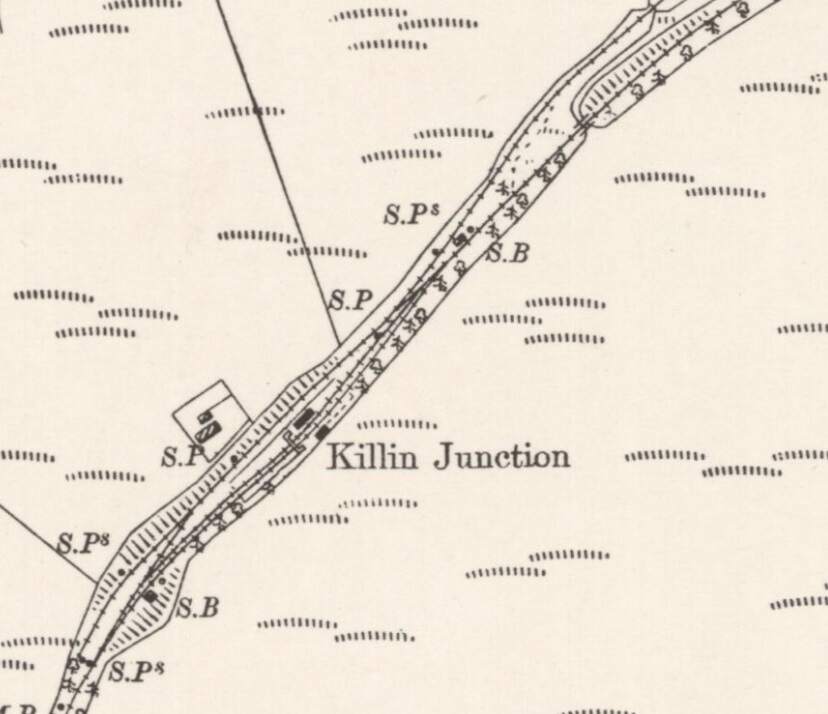
An enlarged extract from the 6″ Ordnance Survey of 1899 showing the location of Killin Junction. [27]
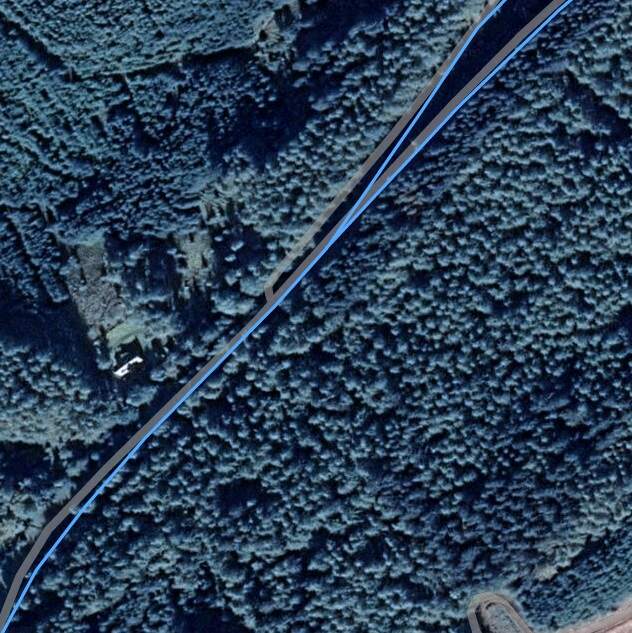
A similar length of the line on the RailMapOnline.com satellite imagery. [15]
Killin Junction Railway Station and Signal Box. This view looks Southwest through the station towards the Signal Box. This image is one of a number which scroll across the screen on [28]
Killin Junction Railway Station. This view looks Northeast. The image is one of a number which scroll across the screen on https://railwaycottagekillin.co.uk/history [28]

Just to the Southwest of Killin Junction the line was carried over the Ardchyle Burn on a stone viaduct – Glendhu Viaduct.

Glendu Viaduct carried the old railway over the Ardchyle Burn, (c) Richard Webb and made available for resue under a Creative Commons Licence (CC BY-SA 2.0), [29]

A short distance to the West of the viaduct, a farm acess track was carried over the railway on a stone arched bridge.

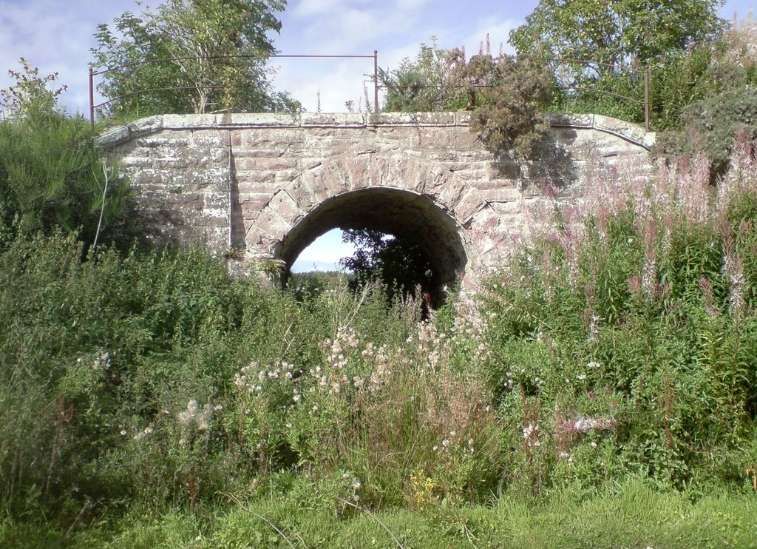
Farm access bridge over the old railway. This image was shared on the Re-Appreciate the Callander & Oban Line Facebook Group by John Gray on 6th October 2018. [32]

Along the length of the old railway between Killin Junction and Luib Railway Sation two more structures are worthy of note. First, Ledcharrie Viaduct at around the half-way point between Killin Junction and Luib spans the Ledcharrie Burn. [33] The second is Edravinoch Bridge which was a girder bridge which once spanned the Luib Burn. The aboutments remain but the girders were removed for scrap on closure of the line. [34] Bothe the pictures below were taken by John Gray and shared by him on the Re-Appreciate the Callander & Oban Line Facebook Group on 4th October 2018. John Gray’s photographs are reproduced here with his kind permission.

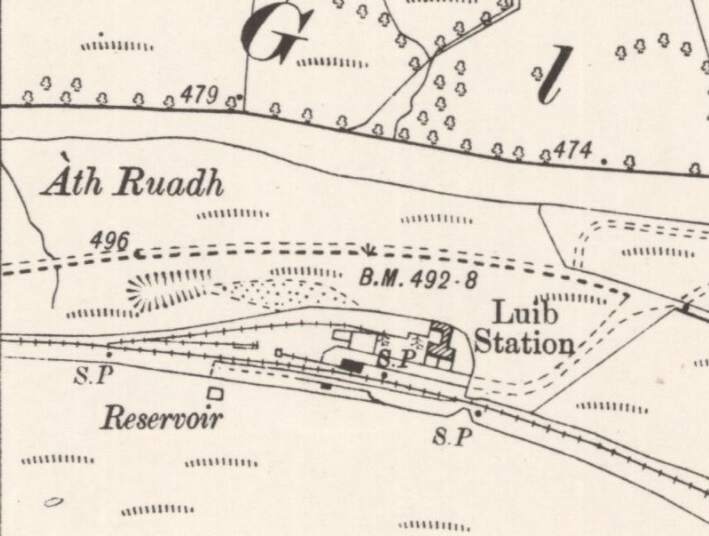
The next station on the old railway was Luib Railway Station in Glen Dochart.

River, road and railway in close proximity at Luib Railway Station. The 6″ Ordnance Survey of 1898, published in 1901. [30]
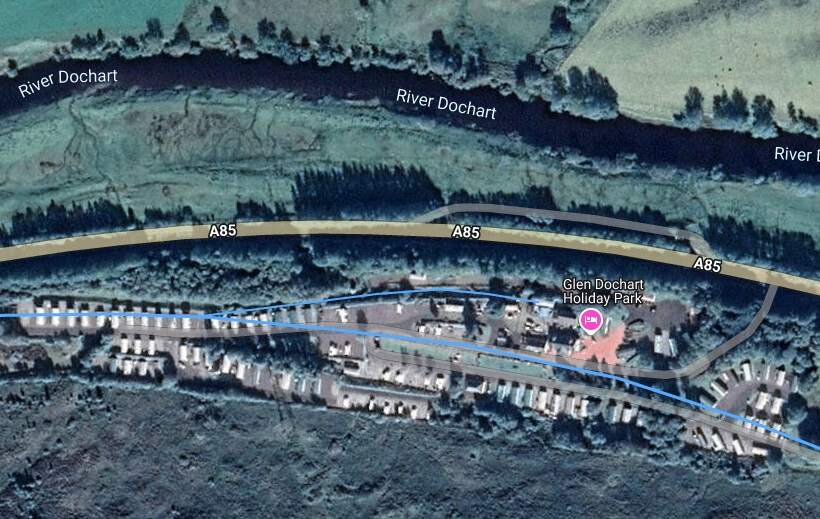
The site of Luib Railway station is, in the 21st century, Glen Dochart Holiday Park. [15]
This view looking West from Luib Railway Station is embedded from Ernie’s Railway Archive on Flickr, (c) J.M. Boyce. Note the signal box and the stone water tower base. [31]
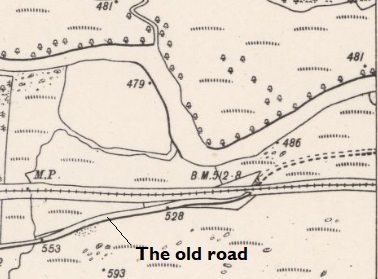
The old road alignment and under bridge to the West of the Luib Railway Station site. [35]
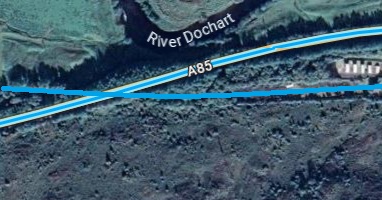
Just to the West of Luib Railway Station the line crossed what became the A85. There is no clear indication on the groud of the location of the bridge as road improvements have swept away the vestiges of the old railway in the immediate vicinity. [Google Maps, November 2024]

Gairns continues:

“Westward past Luib to Crianlarich, Glen Dochart is traversed, with the River Dochart, until it merges into Loch Iubhair, succeeded in turn by Loch Dochart, and the public road, for company close alongside. Here splendid views are hard on both sides, bare mountain slopes being relieved by wooded areas, while rushing burns and streamlets add further interest. On both sides are peaks of considerable height, notably Ben Dheiceach (3,074 ft.) to the North, Ben More (3,843 ft.) immediately ahead, and Stobinian (3,821 ft.) to the South, with many others in the distance.

Crianlarich is important as it provides for interchange traffic with the West Highland line to Fort William and Mallaig, which here crosses. The stations are within a short distance, and there is siding connection for interchange goods traffic. The Callander and Oban station is a neat double-platformed station with rather attractive buildings on the down side, Just beyond the station the North British Railway crosses by an overbridge, and Crianlarich Junction is then reached, this controlling the connection with the West Highland line.” [1: p12-13]

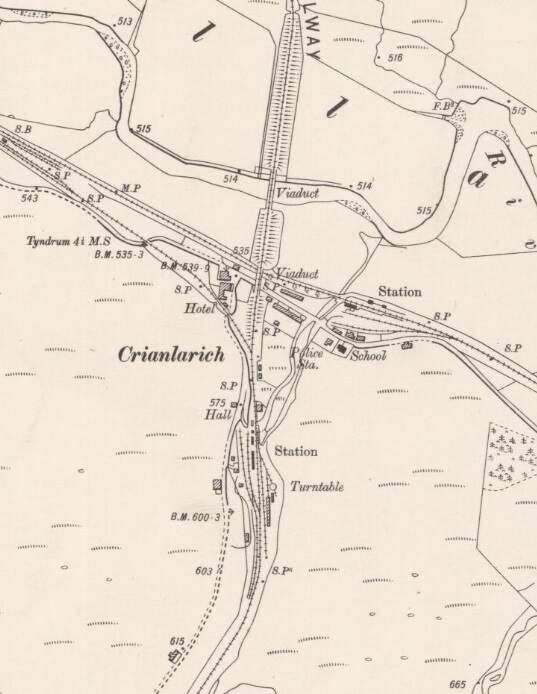
Two different railways crossed at Crianlarich. The Callander & Oban Railway ran East-West. The West Highland Line ran North-South. The East-West line and station were opened on 1st August 1873 by the Callander and Oban Railway. This was the first railway station in Crianlarich. The station was originally laid out with two platforms, one on either side of a crossing loop. There were sidings on the south side of the station. After the West Highland Railway opened in 1894, Crianlarich could boast two railway stations. The West Highland Railway crossed over the Callander and Oban Railway by means of a viaduct located a short distance west of the Lower station. The West Highland Railway’s Crianlarich station was (and still is) located a short distance south of this viaduct. [36]
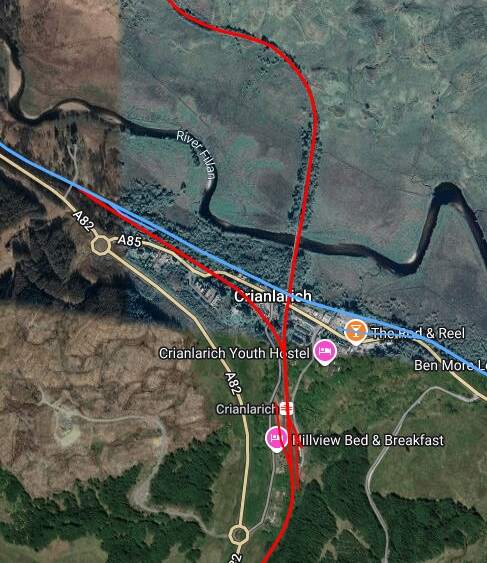
The two lines plotted on the modern satellite imagery provided by RailMapOnline.com. The blue line being the Callander and Oban Railway, the red line being the West Highland Line. The link line between the two stations/railways was put in by the West Highland Line and is shown in red. [15]

Crianlarich Junction was situated half a mile west of Crianlarich Lower station. Opened on 20th December 1897, the junction was located at one end of a short link line that ran to Crianlarich station on the West Highland Railway. There were two signal boxes: “Crianlarich Junction East” (32 levers) and “Crianlarich Junction West” (18 levers). Following closure of the line east from Crianlarich Lower, the line between there and Crianlarich Junction was retained as a siding, with the link line becoming the main line for trains to and from Oban. [37]

Crianlarich Lower Railway Station on the Callander and Oban Railway. The picture appears to have been taken in circa. the 1920s. Note that by this time the second platform and the loop had been removed. It is also [possible to see the high level viaduct which carried the West Highland line over the road (A85), the Callander and Oben Railway and the River Fillan. This image was shared by Brian Previtt on the Disused Stations Facebook Group on 25th October 2024, (c) photographer not known, Public Domain. [38]

The line to the West of Crianlarich Junction remains in use in the 21st century.

Gairns continues his description of the line:

Onwards through Strath Fillan magnificent views are had, and for some miles the West Highland line runs parallel, but on the opposite side of the valley, climbing up the hillside, after crossing the viaduct over the River Fillan until both lines are almost on the same level, with the valley between. Both lines have stations at Tyndrum (a favourite mountain resort), though these are some half-a-mile apart. The Callander and Oban station is a neat tree-shaded [location], with the goods yard at a lower level.” [1: p13]

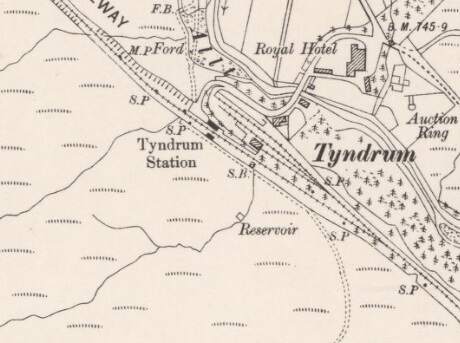
The Callander & Oban Railway’s Tyndrum Railway Station sat to the South of the Hotel which the West Highland Line’s station to the North. [39]

Wikipedia tells us that Tyndrum Lower Station “opened on 1st August 1873 as a terminal station. This was the first railway station in the village of Tyndrum. Until 1877, it was the western extremity of the Callander and Oban Railway. In 1877, the Callander and Oban Railway was extended from Tyndrum to Dalmally. Concurrently, the station was relocated 301 yards (275 m) west, onto the new through alignment. The new station was on a higher level, as the line had to climb steeply to reach the summit about 0.6 miles (1 km) to the west. The old terminus then became the goods yard. The through station was originally laid out with two platforms, one on each side of a passing loop.” [40]

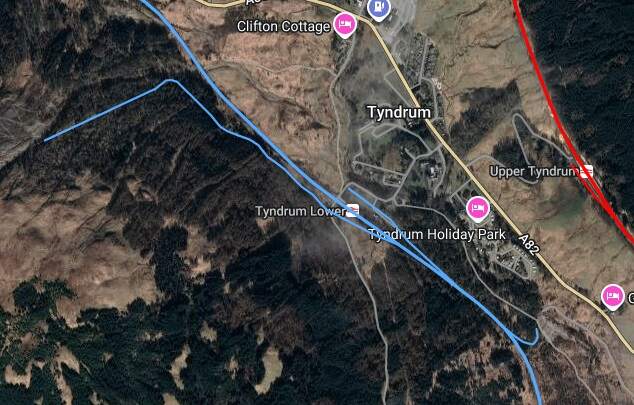
Tyndrum Lower and Upper Tyndrum Railway Stations can be seen on this extract from RailMapOnline.com’s satellite imagery. The image shows the route(also in blue) of a tramroad which served Tyndrum Lead Mines and Glengarry Lead Smelter (a little to the East of Tyndrum). After the closure of the smelter transfer to wagons of the Callander & Oban Railway took place at Tyndrum Lower Railway Station. [15]
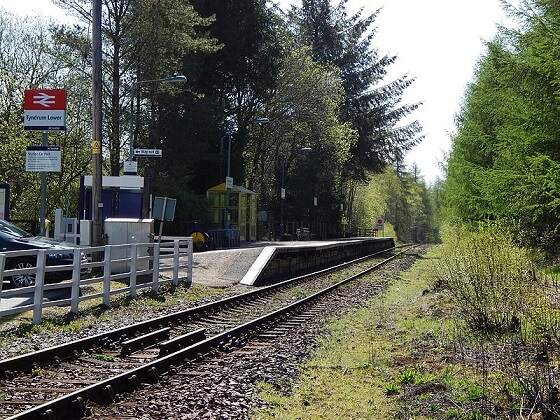
Tyndrum Lower Railway Station in 2015 – a single platform Halt. The platform is on the North side of the line. This view looks East toward Crianlarich, (c) Alex17595 and made available under a Creative Commons Licence (CC BY-SA 4.0). [41]
Looking West along the line from the access road/carpark at Tyndrum Lower Railway Station. [Google Streetview, April 2011]

Gairns’ description of the line continues:

“Passing Tyndrum station a final view is had of the West Highland line [before] it turns its course northwards, while the Callander and Oban line makes a long sweep southwesterly through Glen Lochy, wild and bare. An intermediate crossing, Glenlochy breaks the 12-mile run from Tyndrum to Dalmally. Approaching the rather pretty station at the latter place, Glen Orchy is joined, fine views being had along it. Dalmally, at the foot of Glen Orchy, has been described as ‘the loveliest spot in all that lovely glen’. A short run of less than 3 miles crossing the Orchy and rounding a bay on Loch Awe, and incidentally giving beautiful views up the Loch, and Loch Awe station is reached, right on the water side, and with a pier alongside for the steamers which ply along the Loch. For four miles or so the line runs high on the base at Ben Cruachan and follows the shores of the Loch through the gloomy Pass of Brander in which the waters of the loch merge into the brawling River Awe most turbulent of Highland salmon streams, Three miles beyond Loch Awe station the Falls of Cruachan Platform is a convenience for visitors to the celebrated Falls, a glimpse of which is had from the train in passing. The crossing place is, however, Awe Crossing, a mile or so beyond. A further run of 41 miles and Taynuilt is reached, beyond which the shores of Loch Etive are followed to Connel Ferry, a run of 64 miles, with one intermediate station – Ach-na-Cloich – and providing lovely views over the loch and the hills and mountains. beyond.” [1: p13]

Glenlochy Crossing, which Gairns describes as “An intermediate crossing, Glenlochy breaks the 12-mile run from Tyndrum to Dalmally.” This image shows what is recorded on the 6″ Ordnance Survey of 1898, published in 1900. [41]
The same location as it appears in the 21st century on the ESRI satellite imagery provided by the NLS. The site of Glenlochy Crossing is in the trees close to the centre of this image. which runs diagonally down the centre portion of the imageof this image. The A85 runs to the West of the old railway’s route which runs diagonally down the centre portion of the image. The River Lochy passes immediately to the West of Glenlochy Crossing (left of centre). [41]

Glenlochy Crossing was a passing loop opened in 1882 to increase the capacity of the line. It broke the singl-track section between Tyndrum Lower and Dalmally. The building shown just to the East of the line was similar to that found at other crossings (such as Drumvaich Crossing and Awe Crossing0. It combined a railway cottage with a signal cabin. When first built the loop had two trailing sidings one at each end of the loop. We know that the loop was lifted in 1966 when the building was also demolished. There is still a footbridge across the River Lochy which gave access to the Crossing but that is now locked against public access. [42]

The Callander & Oban Railway closely followed the South bank Of the River Lochy, only turning away to the South to cross Eas a Ghaill (a tributary which approached the River Lochy from the South) by means of Succoth Viaduct.

Succoth Viaduct. This is an embedded link to an image on the GetLostMountaineering.co.uk webpage. The viaduct carries what was the Callander & Oban Railway over Eas a Ghaill. [43]

The line runs almost due West from Succoth Viaduct at a distance from the River Lochy until it reaches Dalmally Railway Station.

Dalmally Railway Station as it appears on the 6″ Ordnance Survey of 1897, published in 1900. [44]
Dalmally Railway Station as it appears on the satellite imagery provided by RailMapOnline.com. [15]
Looking West through Dalmally Railway Station, this mage was shared by Donald Taggart on Google Maps, (c) Donald Taggart (March 2020)
A similar view of the station buildings at Dalmally from Platform No. 2, (c) Anna-Mária Palinčárová. (June 2017), shared by her on Google Maps.

This photograph was taken from the Road overbridge at the West end of Dalmally Railway Station site, (c) inett (November 2017) and shared on Google Maps.

the road overbridge at the West end of Dalmally Station site seen from the ned of Platform No. 1, (c) Marian Kalina (November 2017) and shared on Google Maps.

West of Dalmally the line ran on towards a viaduct which crossed the River Lochy at Drishaig. However, we need to note that the road layout in this immediate area is considerably different to what was present at the turn of the 20th century.

The Southeast approach to the viaduct over the River Orchy as it appears on the 1897 Ordnance Survey, published in 1900. [46]
The smae area as it appears on the 21st century RailMapOnline.om satellite imagery with two roads appearing where non were evident at the turn of the 20th century. [15]

Just a short distance to the West, the line crossed the River Orchy at the East end of Loch Awe.

Further West of Dalmally, the line bridged the River Orchy at Drishaig. The mineral Railway which branched off the Callander & Oban Railway at Drishaig served the Ben Chruachan Quarry which was high on the East flank of Ben Chruachan. [45]
The same location as it appears in satellite imagery in the 21st century. [15]
An aerial image of Lochawe Railway Bridge with the A85 bridge behind. This aerial image was shared on Google Maps in September 2022, (c) Kevin Newton. [Google Maps, November 2024]
Lochawe Railway Bridge seen from ground level. This image was shared on Google Mpas in April 2021, (c) Wojciech Suszko. [Google Maps, November 2024]

The Ben Cruachan Quarry Branch was standard-gauge and ran North from Drishaig. It is shown here as it appears on the 6″ Ordnance Survey of 1897, published in 1900. The line North from Drishaig appears on the map extract on the left. [47]

Ben Cruachan Quarry itself, shown on the next 6″ OS Map Sheet. The quarry was on the eastern slopes of Ben Cruachan. The full extent of the quarry’s internal railways is not shown. [48].

Ben Cruachan Quarry was multi-levelled and was accessed by the railway which zig-zagged to gain height. The RailScot website rells us that”The ground frame for this short Ben Cruachan Quarries Branch (Callander and Oban Railway) was released by a tablet from Loch Awe station for the section to Dalmally. The quarry had its own pair of 0-4-0ST locomotives.” [49]

Just a short distance Southwest of Drishaig was the Lochawe Hotel which had its own railway station alongside the Loch.

Lochawe Railway Station and Hotel in 1897 as shown on the 6″ Ordnance Survey sheet of that year. [50]
The same location as shown on the satellite imagery of RailMapOnline.com. [15]
A postcard view of Lochawe Railway Station and Hotel, (c) Public Do9main. [52]
Lochawe Railway Station in 2015. The removed second platform can be seen easily, (c) Tom Parnell and licenced for reuse under a Creative Commons Licence (CC BY-SA 2.0). [51]

The line ran across the North shore of Loch Awe to a Halt named for the Falls of Cruachan – Falls of Churachan Platform.

The Falls of Cruachan Platform as shown on the 6″ Ordnance Survey of 1897. [50]
The same location in the 21st century. There is a significant hydro electric scheme at this location which has a visitor centre and its own Railway Station – Falls of Cruachan Railway Station. [15]

The line continues West/Northwest along the Northside of the River Awe. It crosses the river just North of The Bridge of Awe. Just prior to reaching the Viaduct the line bridged the minor road which served properties on the North side of the River Awe.

A matter of not much more than a couple of hundred metres to the West of the minor road, the line bridges the River Awe.

The Bridge of Awe with the Railway Viaduct just to the North, as they appear on the 6″ Ordnance Survey of 1897, published in 1900. [53]

The same location on RailMapOnline.com’s satellite imagery. [15]
An aerial image of the railway viaduct. [54]
The railway viaduct over the River Awe. Network Rail Undertook a £3.5m project to refurbish Awe viaduct in 2024/25. The viaduct is a three-span wrought iron viaduct, completed in 1879. During the 7-month project, engineers replaced the timber deck (which supports the track). They removed the old paint, carry out repairs to the metallic parts of the structure and repainted those parts of the structure to protect against rusting. [54]

Over the river, the line heads for Taynuilt.

The A85 runs directly alongside the line on the approach to Taynuilt. This photograph looks Northwest along the road/railway. [Google Streetview, May 2022]
Taynuilt village and Railway Station as they appear on the 6″ Ordnance Survey of 1897. [53]
The same length of the line as it is shown on the RailMapOnline.com satellite imagery. [15]

On the way into Taynuilt the line crosses a minor road which serves the East end of the village. That road can be seen at the righthand side of the satellite image and the map extract above.

The next bridge spans the railway adjacent to Taynuilt Railway Station it carries the B845.

The view East from Taynuilt Railway Station to the bridge carrying the B845 over the line, (c) Robert Hamilton (October 2017). [Google maps, November 2024]
Taynuilt Railwaty Station forecourt. [Google Streetview, November 2021]

A little further to the West the railway passes under the A85 again.

Looking West along the A85 showing the parapets of the bridge over the Callander & Oban Railway. {Google Streetview, November 2021]

The line now drops down to the shores of Loch Etive and in due course arrives at Auch-na-Cloich.

In 1897, the station at Auch-na-Cloich bore the name ‘Ach-na-Cloich, as the 6″ OS map extract shows. It bore that name right through to closure on 1st November 1965. [55][56]
The remaining buildings at Ach-na-Cloich, seen from the public road adjacent to Loch Etive. [Google Streetview, April 2011]

The line continues to hug the shore of Loch Etive passing over the A85 a couple of local roads on its way to Connel Ferry Railway Station.

The next bridge over the A85,seen from the Northwest. [Google Streetview, November 2021]

The next image comes form Gairns’ article in The Railway Magazine and shows a train approaching Connel Ferry from the East.

This photograph shows the Pullman viewing car in use on the line alongside Loch Etive with the iconic Connel Ferry Bridge as a backdrop. [1: p16]
Connel Ferry Village and Railway Station in 1897. [57]
The same location as shown by RailMapOnline.com on their modern satellite imagery. The single blue line heading Southeast from the West end of the station site represents extensive wartime sidings – Achaleven Sidings which were installed in 1940 and lifted in 1948. This group of railway sidings were identified from vertical air photographs taken in 1947 (CPE/Scot/UK 247, frames 4028-4029, flown 31 July 1947), running for about 484m SE from the S boundary of the station. Only two sidings with rails in situ are visible on the air photographs. [15][59][60]
An aerial view of Connel Ferry Railway Station and signal box looking Southeast from above Connel Ferry Bridge. This is an extract from No. SAW039391, (c) Historic Scotland. [61]
The substantial stone-arched bridge visible on the extract from the Aerial image above carried the railway over Lusragan Burn. [Google Streetview, November 2021]
Connel Ferry Railway Station, looking West towards Oban, © G.F. Gairns, Public Domain. [1: p14]
Connel Ferry Railway Station looking East in the 1950s. [58]

In its heyday when it served a branch to Ballachulish, Connel Ferry Railway Station had three platforms, a goods yard and a turntable. Later this was reduced to just the single platform, after the branch closed in 1966, [64] as it remains today. [63][65]

As we have already noted, the journey along the branch can be followed by reading articles elsewhere on this blog. We will continue our journey with Gairns along the main line to Oban. ….

Gairns continues

At Connel Ferry, junction for the Ballachulish line, there is a wide island platform serving the up and down main lines, and a single platform on the up side designed for branch trains, though generally these use the main platform to facilitate passenger and luggage transfer. The station has sidings and [a] goods yard. Its height above the village entails high viaducts both on the Oban line and on the approach to the famous Connel Ferry bridge, crossed by Ballachulish trains. Fine views are had of the bridge from the Oban line as it pursues its course high up on the hillside until it cuts inland to attain the summit of Glencruitten. This is at the top of the 3-mile incline at 1 in 50 by which the line zig-zags down to reach the shore at Oban, giving views now over Oban and the landward hills above it, and then, with final sweep round, over the Kerrera Sound and Kerrera Island, to the mountains of Mull and the Firth of Lorne.

Before reaching the terminus a stop is usually made at Oban ticket platform, adjacent to the goods yard and engine shed. Oban station has picturesque build ings surmounted by a clock tower, and the circulating area is adorned with hanging flower baskets. Refreshment and dining rooms are provided. The three main platforms are partly covered by a glazed all-over roof, though their outer curved portions are open. Alongside are two open arrival platforms permitting cabs, &c., to come directly alongside the trains, The station is immediately alongside the steamer pier and harbour premises, the location being peculiarly convenient to the principal hotels, the sea front, and the Corran Esplanade.

Oban – ‘a little bay’ – so widely favoured as a holiday resort, as a boating and yachting centre, and as headquarters for touring the Highlands and the Hebrides in all directions, has been described as the ‘Charing Cross of the Highlands’. Whether readers will agree with this as a happy choice or not, it certainly justifies it as a great steamer traffic and touring centre. Messrs. David MacBrayne, Ltd., operate steamers between Oban, the Sound of Mull and Tobermory to Castlebay and Lochboisdale (‘Inner Island Service’), Ardrishaig via the Crinan Canal, to Staffa and Iona, to Ballachulish, Kentallen and Fort William, and thence via the Caledonian Canal to Inverness, besides many local trips and excursions.” [1: p13-15]

Connel Ferry is the last station before Oban. The railway line runs behind (South of) Connel and then turns away from the coast and the A85.

The line Southwest of Connel Ferry Railway Station, as shown on railmaponline.com’s satellite imagery. [15]
This extract from the 6″ Ordnance Survey of 1897, published in 1900 shows the next bridge on the line where a local road passes under the railway. [66]
A similar area in the 21st century. [Google Maps, December 2024]
The bridge shown on the Ordnance Survey extract and on the modern satellite image from Googlee Maps.  This view looks Northwest along the lane under the bridge from the Southeast. [Google Streetview, November 2021]
Looking Southeast along the lane this time. Google Streetview, November 2021]
The next length of the line as shown on the 6″ Ordnance Survey of 1897, published in 1900. [66]

Trains encounter a number of accommodation bridges/underpasses which allow field access under the line of the railway. The one shown below, at the highest magnification possible from the public highway, is typical of one type of culvert.

Just a short distance Southwest is another underpass, this time of stone arch construction.

The next length of the line as shown on railmaponline.com’s satellite imagery. [15]

Another few hundred metres to the Southwest a further underpass is a girder bridge.

The next underpass is a stone arched structure.

These two locations appear on the 6″ Ordnance Survey of 1897. …

The next length of the railway as shown on the 6″ Ordnance Survey of 1897, published 1900. [67]
These two extracts (this and the one above) from the 6″ Ordnance Survey take us as far along the railway as the last railmaponline.com satellite image above. [68]
The next loength of the line as it appears on railmaponline.com’s satellite imagery. The outskirts of Oban can be seem on the left of the image. [15]
Two extracts from the 6″ Ordnance Survey take us almost as far at the length of line on the railmaponline.com satellite imagery above. [68]
This third extract from the 6″ Ordnance Survey completes the length covered by the railmaponline.com satellite image above and covers the length on the right on the satellite image below. [69]
The final length of the line into Oban as shown by railmaponline.com. [15]
This extract from the 6″ Ordnance Survey of 1898 covers the length of the line on the bottom half of the satellite image above. [69]
Looking South out of Oban along the A816, Soroba Road, The railway crosses the road on a simply supported girder bridge. [Google Streetview, May 2022]
This extract from the 6″ Ordnance Survey of 1898 shows the final length of the line and the two stations (passenger and goods) which existed at the turn of the 20th century. [69]
The same area as it appears on Google Maps in the 21st century. Glenshellach Terrace marks the north side of what was the Goods Station. [Google Maps, December 2024]

Running into Oban the line is crossed by three road bridges:

The first of these is a stone-arch bridge which carries Lochavullin Road. [Google Streetview, May 2022]
The second was the stone-arch bridge which carried Glenshellach Terrace on which the photographer is standing. The third is Albany Street bridge which can be seen in the middle distance in this photograph. [Google Streetview, May 2022]
Looking back South from Albany Street bridge towards Glenshallach Terrace bridge. [Google Streetview, May 2022]
The Station Throat, Oban, © G.F. Gairns, Public Domain. [1: p14]
The view from Albany Street bridge into Oban Station. The bridge sits over the station throat. [Google Streetview, May 2022]
Oban Railway Station Building. [1: p10]
Oban Railway Station passenger facilities in the mid-20th century (c) Public Domain. [70]
Oban Railway Station building in the21st century. [Google Streetview, April 2011]
Oban Railway Station showing the railside of the terminus and platforms, © G.F. Gairns, Public Domain. [1: p14]

For the sake of completeness, we note that Gairns’ narrative returns to Connel Ferry for commentary on the Ballachulish Branch.

Commencing at Connel Ferry station, the branch train reaches the famous bridge by a viaduct approach over the village of Connel Ferry. The Connel Ferry bridge, claimed to be the Forth Bridge’s ‘biggest British rival’, was opened for traffic on 21st August 1903. The bridge, which is of cantilever type (hence the analogy suggested with the Forth Bridge), has a length of 524 ft. between the two piers, the clear span being 500 ft., and the headway above high-water level, 50 ft. Extreme height from high water to the topmost point of the bridge is 125 ft., while the middle span, carried by the two cantilever spans, has a length of 232 ft. This bridge not only enabled a district hitherto most inconveniently situated in regard to rail traffic to be placed in communication with the Callander and Oban Railway at Connel Ferry, but provided a means of crossing Loch Etive, where previously a very lengthy detour had to be made to get from one side to the other, the only alternative being a very uncertain ferry service,

The difficulty having been solved from the railway point of view, there still remained the problem of providing for the transit of motor-cars and other road vehicles across the Loch, and for several years after the opening of the bridge the Caledonian Railway Company conveyed private motor-cars across the bridge by placing them on flat trucks and hauling them, passengers included, by road motor vehicles adapted to run on rails across the bridge.

This … was continued for a considerable time, but, several years ago, the Caledonian Railway Company adopted the alternative method of adapting the bridge also for the passage of motor vehicles, cycles, etc., under their own power. There is not, however, sufficient room for a roadway clear of the railway track, so that it is necessary to restrict the passage of road vehicles to periods when no train is signalled. At each end of the bridge, therefore gates under the control of the bridge keeper, are provided to close the bridge to road traffic when a train is due, and the tablet instruments are controlled by electric circuits in connection with the road gates, to ensure that unless the gates are properly closed, a tablet cannot be used. The roadway over the bridge comes close up to the rails, there being just sufficient room for a vehicle to pass between the rails and the side of bridge, and the bridgekeeper has to see that vehicles from both directions are not allowed on the bridge at the same time. These facilities apply only to private motor-cars and horse-drawn vehicles, and not trade vehicles, of either class. Cyclists and pedestrians also use the bridge. In each case the crossing of the bridge is subject to toll, the men in charge at the Connel Ferry and Benderloch ends acting as toll-keepers. … In August [1922], the bridge was used by 6,009 foot passengers, by 852 motor-cars, and by 290 cycles. [1: p15-16]

Gairns continues:

Passing North Connel halt, at the North end of the bridge, the line follows the shore to Benderloch station. At Barcaldine Crossing a platform is provided, where trains call as required. So far, the country traversed has been ‘comparatively’ flat and uninteresting, but as it crosses a peninsula to reach the shores of Loch Creran, mountain vistas again open up. Short of Creagan station the line crosses the Narrows to the Loch by a two-span girder bridge with approach viaducts, fine views being had on both sides.

Again crossing a peninsula. Appin is reached, and for the remainder of the journey the line follows closely the shores of Loch Linnhe. As it curves round after leaving Appin station, a good view is had of the ruins of Castle Stalker. Alongside the Loch splendid views are had, and Duror and Kentallen stations are sufficiently picturesque to harmonise with the general character of the scenery. At Ballachulish Ferry station tickets are collected, and the line then curves round to follow the shores of Loch Leven to the terminus at Ballachulish. This is a neat two-platformed station, with dining and refreshment rooms, and the district is impressively mountainous. A short distance from the station is a small harbour, whence a David MacBrayne steamer used to ply three times daily to and from the Kinlochleven wharf of the British Aluminium Company, for goods, passenger and mail traffic. This steamer service has now been withdrawn, a road having been built by German prisoners during the [First World War] and opened for traffic at the end of [1922].” [1: p16]

The Branch terminus at Ballachulish, © G.F. Gairns, Public Domain. [1: p14]

As noted close to the start of this article, the Ballachulish Branch has been covered extensively in an earlier series of articles which can be found here, [2] here, [3] here, [4] and here. [5]

Gairns goes on to reflect on the use of the Callander and Oban line. He says that its use is “complicated by the fact that its gradients are systematically so severe.” [1: p16] Indeed 1 in 50 gradients occurred:

several times for considerable distances, curves are numerous, and in several places reduced speed is necessary owing to the danger of tumbling rocks, notably alongside Loch Lubnaig in Glen Ogle and the Pass of Brander, and automatic alarm wires are erected on some stretches, a fall of rock encountering them causing warnings to be given in adjacent signal cabins and watchmen’s huts, and putting the special signals to danger. On the steep grades both goods and passenger trains are operated under special restrictions, stops being made at the summits and brakes tested, or, on goods trains, a proportion pinned down before descending. Mountain mists and fogs, occasional torrential rainstorms or cloudbursts and other ‘episodes’ peculiar to mountain lines, also complicate the working at times. But even in winter there is a steady traffic in meeting the transport needs of the wide areas rendered accessible by this line, of the various townships and villages (many are centres for other places within a considerable radius), country houses, castles and large estates, and in carrying mails, supplying coal and, in due season, conveying cattle and other live stock.

The winter train services are, naturally, much reduced as compared with those of the summer, but even the winter service provides four through trains each way daily, a local each way between Oban and Dalmally, and several additional trains between Callander and Glasgow. Sleeping cars and through carriages are provided between Euston and Oban in winter on Fridays only from London, returning on Mondays. The down vehicles are conveyed on the 8.25 a.m. from Stirling, due in Oban at 12.15 p.m. It is also possible to reach Oban at 4.45 p.m. from London by the 11 p.m. from Euston the night before, and by the 5 a.m. from Euston at 9.50 p.m., the same night, though not, of course, with through carriages.” [1: p16-17]

Gairns goes on to cover train movements on the line in some detail. While the copious detail he provided need not detain us here, it is worth noting the care with which connections to the various railway branches, steamer and motor-coach services associated with the main line were arranged. There were also a significant number of excursions and tours to suit passenger’s differing budgets.

Gairns’ final paragraph concentrated on the motive power in use on the line in the early 1920s and is worth recording here:

The locomotives generally employed are the well-known ‘Oban’ 4-6-0s, with 5-ft. coupled wheels, together with Mr. Pickersgill’s new ‘Oban’ class recently introduced, though odd trips are taken by 0-6-0 goods engines, which also render assistance on the steep grades. On the Killin branch and the Ballachulish extension 0-4-4 tank engines of the 4 ft. 6 in. class are used. Between Dunblane and Callander main line 4-4-0 locomotives from Glasgow or Stirling and 0-6-0 goods engines are used, as well as the Oban 4-6-0s on the through trains, a change being sometimes made at Callander. The Callander and Oban line and the Ballachulish extension are controlled by electric train tablet apparatus. Ordinary train staff is used on the Killin branch.” [1: p18]

References

  1. G.F. Gairns; The Callandar and Oban Railway; in The Railway Magazine, London, July 1923, p10-17
  2. https://rogerfarnworth.com/2019/01/01/the-ballachulish-railway-line-part-1
  3. https://rogerfarnworth.com/2019/01/02/the-ballachulish-railway-line-part-2
  4. https://rogerfarnworth.com/2019/01/05/the-ballachulish-railway-line-part-3
  5. https://rogerfarnworth.com/2024/07/16/the-caledonian-railway-rail-motor-car
  6. https://maps.nls.uk/geo/explore/#zoom=15.9&lat=56.24212&lon=-4.20521&layers=257&b=ESRIWorld&o=100, accessed on 2nd November 2024.
  7. https://maps.nls.uk/view/75656127, accessed on 2nd November 2024.
  8. https://en.m.wikipedia.org/wiki/Callander_railway_station, accessed on 2nd November 2024.
  9. https://maps.nls.uk/view/75656013, accessed on 3rd November 2024.
  10. https://www.flickr.com/photos/david_christie/5764782485, accessed on 3rd November 2023.
  11. https://canmore.org.uk/collection/682143, accessed on 3rd November 2024.
  12. https://www.facebook.com/callanderheritage/photos/callander-railway-station-looking-west-no-date-around-1940s/760225246144844, accessed on 3rd November 2024.
  13. https://maps.nls.uk/view/82899621, accessed on 3rd November 2024.
  14. https://www.facebook.com/reel/655973169967306, accessed on 4th November 2024.
  15. https://railmaponline.com/UKIEMap.php, accessed on 4th November 2024.
  16. https://i.rcahms.gov.uk/canmore/l/SC00682139.jpg, accessed on 4th November 2024.
  17. https://maps.nls.uk/view/75655998, accessed on 4th November 2024.
  18. https://www.flickr.com/photos/96915808@N03/53340427048, accessed on 4th November 2024.
  19. https://maps.nls.uk/view/75655856, accessed on 4th November 2024.
  20. https://www.geograph.org.uk/photo/6564414, accessed on 4th November 2024.
  21. https://maps.nls.uk/view/75655850, accessed on 4th November 2024.
  22. https://maps.nls.uk/view/75655673, accessed on 4th November 2024.
  23. https://maps.nls.uk/view/82899030, accessed on 4th November 2024.
  24. https://maps.nls.uk/geo/explore/#zoom=17.0&lat=56.36156&lon=-4.30648&layers=168&b=ESRIWorld&o=0, accessed on 4th November 2024.
  25. https://en.wikipedia.org/wiki/Balquhidder_railway_station, accessed on 4th November 2024.
  26. https://www.geograph.org.uk/photo/1749724, accessed on 4th November 2024.
  27. https://maps.nls.uk/view/75655499, accessed on 4th November 2024.
  28. https://railwaycottagekillin.co.uk/history, accessed on 4th November 2024.
  29. https://www.wikidata.org/wiki/Q116203468#/media/File:Glendhu_Viaduct.jpg, accessed on 6th November 2024.
  30. https://maps.nls.uk/view/75655490, accessed on 6th November 2024.
  31. https://www.flickr.com/photos/irishswissernie/36542360150, accessed on 6th November 2024.
  32. https://www.facebook.com/photo/?fbid=980038522183226&set=pcb.800198413666581, accessed on 6th November 2024.
  33. https://www.facebook.com/photo?fbid=978725508981194&set=pcb.799156517104104, accessed on 6th November 2024.
  34. https://www.facebook.com/photo?fbid=978725332314545&set=pcb.799156517104104, accessed on 6th November 2024.
  35. https://maps.nls.uk/view/75655487, accessed on 6th November 2024.
  36. https://maps.nls.uk/view/75655649, accessed on 6th November 2024.
  37. https://en.wikipedia.org/wiki/Crianlarich_Lower_railway_station, accessed on 6th November 2024.
  38. https://www.facebook.com/photo/?fbid=10160616125076909&set=gm.28307289845525004&idorvanity=1730959503584733, accessed on 6th November 2024.
  39. https://maps.nls.uk/view/75655466, accessed on 6th November 2024.
  40. https://en.wikipedia.org/wiki/Tyndrum_Lower_railway_station, accessed on 6th November 2024.
  41. https://maps.nls.uk/geo/explore/#zoom=17.0&lat=56.42498&lon=-4.83030&layers=6&b=ESRIWorld&o=100, accessed on 7th November 2024.
  42. https://www.railscot.co.uk/locations/G/Glenlochy_Crossing, accessed on 7th November 2024.
  43. https://getlostmountaineering.co.uk/walks.php?id=1253, accessed on 7th November 2024.
  44. https://maps.nls.uk/geo/explore/#zoom=17.6&lat=56.40080&lon=-4.98135&layers=6&b=ESRIWorld&o=100, accessed on 7th November 2024.
  45. https://maps.nls.uk/geo/explore/#zoom=16.6&lat=56.40862&lon=-5.02492&layers=6&b=ESRIWorld&o=100, accessed on 7th November 2024.
  46. https://maps.nls.uk/geo/explore/#zoom=16.6&lat=56.40455&lon=-5.01399&layers=6&b=ESRIWorld&o=100, accessed on 7th November 2024.
  47. https://maps.nls.uk/view/75483093, accessed on 7th November 2024.
  48. https://maps.nls.uk/view/75483090, accessed on 7th November 2024.
  49. https://www.railscot.co.uk/locations/B/Ben_Cruachan_Quarry, accessed on 7th November 2024.
  50. https://maps.nls.uk/view/75483096, accessed on 7th November 2024.
  51. https://commons.wikimedia.org/wiki/File:Loch_Awe_Railway_Station_(22837896929).jpg, accessed on 7th November 2024.
  52. https://www.forgottengreens.com/forgotten-greens/argyllshire-acharacle/loch-awe-dalmally, accessed on 7th November 2024.
  53. https://maps.nls.uk/view/75483078, accessed on 7th November 2024.
  54. https://www.networkrailmediacentre.co.uk/news/awe-inspiring-works-taking-place-to-restore-200-year-old-viaduct-in-the-highlands, accessed on 7th November 2024.
  55. https://maps.nls.uk/view/75482830, accessed on 7th November 2024.
  56. https://en.wikipedia.org/wiki/Ach-na-Cloich_railway_station, accessed on 7th November 2024.
  57. https://maps.nls.uk/view/75482821, accessed on 7th November 2024.
  58. https://www.ebay.co.uk/itm/204060151459, accessed on 7th November 2024.
  59. https://www.railscot.co.uk/locations/A/Achaleven_Sidings, accessed on 7th November 2024.
  60. https://canmore.org.uk/site/299480/connel-ferry-station-sidings, accessed on 7th November 2024.
  61. https://www.britainfromabove.org.uk/image/SAW039391, accessed on 7th November 2024.
  62. John Thomas; The Callander &Oban Railway: The History of the Railways of the Scottish Highlands – Vol. 4; David St. John Thomas Publisher, Nairn, Scotland, 1966, 1990 and 1991.
  63. https://en.m.wikipedia.org/wiki/Connel_Ferry_railway_station, accessed on 1st December 2024.
  64. https://www.undiscoveredscotland.co.uk/connel/connel/index.html, accessed on 1st December 2024.
  65. https://www.scottish-places.info/features/featurefirst91901.html, accessed on 1st December 2024.
  66. https://maps.nls.uk/view/75482821, accessed on 21st December 2024.
  67. https://maps.nls.uk/view/75483058, accessed on 22nd December 2024.
  68. https://maps.nls.uk/view/75483043, accessed on 22nd December 2024.
  69. https://maps.nls.uk/view/75483055, accessed on 22nd December 2024.
  70. https://thisisoban.com/24-incredible-images-of-the-old-oban-railway-station, accessed on 22nd December 2024.

Some East Indian Railway branches and the Kalka to Simla Narrow Gauge Line.

A further article about the East Indian Railway appeared in the July 1906 edition of The Railway Magazine – written again by G. Huddleston, C.I.E. [1]

The first article can be found here. [2]

Huddleston looks at a number of different sections of the network and after looking at what he has to say about each we will endeavour to follow those railway routes as they appear in the 21st century. We will go into quite a bit of detail on the journey along the Kalka to Shimla narrow-gauge line. The featured image at the head of this post was taken at Taradevi Railway Station on the Kalka to Shimla line, (c) GNU Free Documentation Licence Version 1.2. [29]

Shikohabad to Farrukhabad

This branch line had, in 1906, recently been opened. Huddleston describes it as being 65 miles in length, running through the district of Manipuri from Shekoabad [sic] to Farukhabad on the River Ganges. Until 1906, Farukhabad [sic] had “only been served by the metre gauge line which skirts the river to Cawnpore. There was lots of traffic in the district and both the broad and metre  gauge lines completed for it, whilst the river and canals and camels compete with the railways.” [1: p40]

The journey from Shikohabad to Farrukhabad. Indian Railways spellings of the two locations differ from those used by Huddleston in 1906. [4]

We start this relatively short journey (of 63 miles) at Shikohabad Junction Railway Station. “The old name of Shikohabad was Mohammad Mah (the name still exists as Mohmmad mah near Tahsil and Kotwali). Shikohabad is named after Dara Shikoh, the eldest brother of Emperor Aurangzeb. In its present form, the town has hardly any recognisable evidence of that era. Shikohabad was ruled under the estate of Labhowa from 1794 to 1880.” [5] “Shikohabad Junction railway station is on the Kanpur-Delhi section of Howrah–Delhi main line and Howrah–Gaya–Delhi line. It is located in Firozabad district in the Indian state of Uttar Pradesh.” [6] The station opened in1866. “A branch line was opened from Shikohabad to Mainpuri in 1905 and extended to Farrukhabad in 1906.” [7]

Shikohabad Junction Railway Station, Uttar Pradesh. [Google Maps, October 2024]

Trains from Shikohabad set off for Farrukhabad in a southeasterly direction alongside the Delhi to Kolkata main line. In a very short distance as the railway passed under a road flyover (Shikohabad Junction Flyover) the line to Farrukhabad moved away from the main line on its Northside.

The rail bridge carrying the Farrukhabad line over the Lower Ganga Canal seen from a point to the North alongside the canal. [Google Streetview, May 2023]
Looking East-Northeast along the railway towards Farrukhabad from the AH1 Flyover. [Google Streetview, May 2023]
Basdeomai, Uttar Pradesh. The covered way either side of the underpass is typical of many locations where local roads cross railways. This view looks Northwest across the railway. [Google Streetview, May 2023]

The first stopping point on the line is at Burha Bharthara. As can be seen immediately below, it is little more than a ‘bus-stop’ sign!

Very soon after Burha Bharthara, trains pull into Aroan Railway Station which is a little more substantial that Burha Bharthara having a single building with a ticket office.

Takha Railway Station is next along the line.

Takha Railway Station. [Google Maps, October 2024]
The view East-northeast from Takha Railway Station, (c) Ketan Gupta. [October 2021 – Google Maps]

A couple of hundred meters short of Kosma Railway Station, the line crosses the Karhal to Ghiror Road at a level-crossing.

The level-crossing which takes the line across the Karhal to Ghiror Road, seen from the South. [Google Streeview, October 2023]
Looking East from the level-crossing towards Kosma Railway Station. [Google Streetview, October 2023]

Kosma Railway Station provides a passing loop to allow trains travelling in opposite directions to cross.

Kosma Railway Station. [Google Maps, October 2024]
Kosma Railway Station, (c) Rajat Singh, April 2023. [Google Maps, October 2024]
The railway bridges an irrigation canal, (another arm of the Lower Ganga Canal (?)), a little to the East of Kosma Railway Station. [Google Maps, October 2024]

A short distance further to the East is Tindauli Railway Station, after which the line crosses another arm the Lower Ganga Canal.

Tindauli Railway Station. [Google Maps, October 2024]
Another arm of the Lower Ganga Canal. [Google Maps, October 2024]

Further East the line crosses a number of roads, most now culverted under the line.

This is a view East from one of the more minor crossing points near Auden Padariya (not far West of the junction on the approach to Mainpuri) which has yet to have an underbridge constructed and still had its crossing gates in 2023. [Google Streetview, May 2023]
Passing under the Auden Mandal- Kharpari Bypass, the line meets the line from Etawah before running into Mainpuri Junction Railway Station. [Google Maps, October 2024]
Mainpuri Junction Railway Station. [Google Earth, October 2024]
Mainpuri Railway Station seen from the level-crossing on the Mainpuri-Kishni Road at the station limits. [Google Streetview, May 2023]

To the East of Mainpuri Railway Station, the next station is Mainpuri Kachehri Railway Station, just to the East of the Sugaon to Husenpur Road.

Mainpuri Kachehri Railway Station. [Google Maps, October 2024]

The next station was Bhongaon Railway Station which had a passing loop to allow trains to cross.

Looking East towards Bhongaon Railway Station from a couple of hundred metres to the West of the Station. [Google Streetview, May 2023]
Bhongaon Railway Station. [Google Maps, October 2024]
Just at the East end of the station site the Aligarh-Kanpur Road (Grand Trunk Road) crosses the line at level. This is the view from the level-crossing, East towards Farrukhabad. [Google Streetview, May 2023]
A short distance further East the line passes under the newly constructed Bypass. This view looks back under the modern viaduct towards Bhongoan Railway Station. [Google Streetview, May 2023]

Continuing on towards Farrukhabad, it is only a matter of a few minutes before trains pass through Takhrau Railway Station, where facilities are basic, and Mota Railway Station where facilites are a little more substantive.

Takhrau Railway Station building. (c) Pankaj Kumar, August 2017. [Google Maps, October 2024]
Mota Railway Station, (c) Vinod Kumar, May 2023. [Google Maps, October 2024]

The Railway then bridges the Kaali Nadi River and passes through Pakhna Railway Station.

The railway bridge over the (c) Shiv Shankar, January 2020. [Google Maps, October 2024]
Pakhna Railway Station. [Google Maps, October 2024]

The next stop is at B L Daspuri (Babal Axmandaspuri) Station.

Babal Axmandaspuri Railway Station. [Google Maps, October 2024]
Babal Axmandaspuri Railway Station, (c) Rajat Singh (September 2023). [Google Maps, October 2024]

Another short journey gets us to Nibkarori Railway Station.

Nibkarori Railway Station. [Google Maps, October 2024]
Nibkarori Railway Station seen from the Northeast, (c) Rakesh Verma (July 2021). [Google maps, October 2024]

The next stop is at Ugarpur Railway Station.

Ugarpur Railway Station. [Google Maps. October 2024]
Ugarpur Railway Station, (c) Desh Deepak Dixit (December 2017). [Google Maps. October 2024]

Not much further along the line we enter Shrimad Dwarakapuri Railway Station.

Shrimad Dwarakapuri Railway Station. [Google Maps, October 2024]

As the line reaches the town of Farrukhabad it turns sharply to the North.

On the South side of Farrukhabad the line turns to the Northwest. [Google Maps, October 2024]

It then enters Farrukhabad Junction Railway Station from the Southeast.

Farrukhabad Junction Railway Station. [Google Maps, October 2024]

Farrukhabad sits on the River Ganges. It is a historic city with a rich culture defined by the traditions of Ganga-Jamuni Tehzeeb (Ganges-Yamuna Culture), [10] which amalgamates aspects of Hindu and Muslim cultural practices, rituals, folk and linguistic traditions. [11] The city was begun in 1714, and Mohammad Khan Bangash (a commander in the successful army of Farrukhsiyar, one of the princely contenders for the Mughal throne, who led a coup which displaced the reigning emperor Jahandar Shah) named it after Farrukhsiyar. It soon became a flourishing centre of commerce and industry. [12]

Initially, under the colonial state of British India, Farrukhabad was a nodal centre of the riverine trade through the Ganges river system from North and North-West India towards the East. [12] Farrukhabad’s economic and political decline under British rule began with the closure of the Farrukhabad mint in 1824. [11]

Farrukhabad, according to the 2011 census had a population of 1,885,204. This was just under four times its size in 1901. Its population is predominantly Hindu. [13]

At the time of the 2011 Census of India, 94.96% of the population in the district spoke Hindi (or a related language) and 4.68% Urdu as their first language. [14]

Tundla to Agra

From Shekoabad, it is only a matter of 22 miles to Tundla but very few people would ever hear about Tundla, if it was not for the fact that it is the junction for Agra. …Agra would have been on the main line if the East Indian Railway had the original intention been followed of taking the line across the Jumna river at Agra and then following its right bank into Delhi; but, instead of doing this, it was decided … to build only a branch to Agra, and to run the main line on the left side of the Jumna. … If we want to visit Agra, we must change at Tundla and go along the 14 mile of the branch line.” [1: p41]

Huddleston tells us that:

Approaching Agra … from Tundla you see [the Taj Mahal] first on your left-hand side, wrapped in that peculiar atmospheric haze that adds charm to every distant object in the East, a charm even to that which needs no added charm, the marvellous and wonderful Taj Mehal [sic]. As you rapidly draw nearer it seems to rise before you in solitary dazzling grandeur, its every aspect changing as the remorseless train, which you cannot stop, dashes on. Once catch your first glimpse of the Taj and you have eyes for. nothing else, you feel that your very breath has gone, that you are in a dream. All the world seems unreal, and the beautiful construction before you more unreal than all. You only know it is like something you have heard of, something, perhaps, in a fairy tale, or something you have read of, possibly in allegory, and you have hardly time to materialise before the train rattles over the Jumna Bridge, and enters Agra Fort station.

There on one side are the great red walls of the fortress within a few feet of you, and there on the other side is the teeming native city, with its mosques and domes and minarets, its arches and columns and pillars. its thousand and one Oriental sights, just the reality of the East, but all quite different to everywhere else. … There are things to be seen in Agra that almost outrival the Taj itself, such, for instance, as the tomb of Ihtimad-ud-Daula, on the East bank of the river, with its perfection of marble carving, unequalled in delicacy by anything of the kind in the world. There are delightful places nearby of absorbing interest, as, for example, Fatehpur Sikri, and its abandoned city of palaces; there is enough in Agra and its vicinity to glut a glutton at sight seeing, but we must go back to the railway and its work. The Jumna Bridge, of which we have talked, belongs to the Rajputana Railway; the rails are so laid that both broad and metre gauge trains run over it, and above the track for trains there is a roadway.

But this is not sufficient for the needs of Agra, though supplemented by a pontoon bridge which crosses the river half a mile further up the stream. The trade of Agra first attracted the East Indian Railway, then came the Rajputana Malwa, and then the Great Indian Peninsular. Each of the latter two lines wanted a share, and the East Indian had to fight for its rights; to do its utmost to keep to the Port of Calcutta what the rival lines wanted to take to Bombay. Another railway bridge became a necessity, a bridge that would take the East Indian Railway line into the heart of the native city instead of leaving it on its outskirts, and the East Indian Railway began to construct it.” [1: p42-43]


In 1906 the new bridge over the River Jumna was under construction, due to be completed in early 1907. Huddleston describes the bridge under construction thus:

“The bridge will consist of nine soane of 150 ft., and there will be a roadway under the rails; the bridge is being built for a single line, and all the wells have been sunk to a depth of 60 ft , or more. The work … commenced in September [1905], and it is expected that the bridge will be completed in March 1907. It need only be added that the site selected for this new connection is between the existing railway bridge and the floating pontoon road bridge, and the chief point of the scheme is that, when carried out, the East Indian Railway will have a line through the city of Agra, and a terminus for its goods traffic in a most central position, instead of being handicapped, as it now is, by having its goods depôt on the wrong side of the river. Mr. A. H. Johnstone is the East Indian Railway engineer-in-charge of the work.” [1: p43]

We start the journey along this short branch in the 21st century at Tundla Junction Railway Station.

Tundla Railway Station. [Google Earth, October 2024]

We head Northwest out of the station alongside the main line to Delhi.

Looking West towards Tundla Junction Railway Station from the South side of the lines. The closest rail line is the branch to Agra. [Google Streetview, July 2023]

The first station along the branch was Etmadpur Railway Station.

Etmadpur Railway Station. [Google Maps, October 2024]
Etmadpur Railway Station, (c) Harkesh Yadav, March 2021. [Google Maps, October 2024]

The line to Agra next passes under the very modern loop line which allows trains to avoid Tundla Station.

Looking West, back towards Etmadpur Station under the modern relieving line bridge. [Google Streetview, June 2023]

The next photograph shows the older single track metal girder bridge a little further to the West of Etmadpur with the more modern second line carried by a reinforced concrete viaduct.

Seen from the North side of the line looking South, the older single track metal girder bridge with the more modern second line carried by a reinforced concrete viaduct. [Google Streetview, June 2023]

The line curves round from travelling in an West-northwest direction to a West-southwest alignment and then enters the next station on the line, Kuberpur Railway Station.

Kuberpur Railway Station. [Google Maps, October 2024]
Kuberpur Railway Station seen from the approach road to the North. [Google Streetview, June 2023]
Kuberpur Railway Station building seen from the platform, (c) sanjeev kumar, May 2018. [Google Maps, October 2024]
A low definition view of the line heading West towards Agra as seen from the modern concrete viaduct carrying what I believe to be Agra’s Ring Road (a toll road). [Google Streetview, June 2023]

As we head into Agra, the next station is Chhalesar Railway Station.

Chhalesar Railway Station. [Google Maps, October 2024]

From Chhalesar Railway Station the line continues in a West-southwest direction towards the centre of Agra. The next station is Yamuna Bridge Railway Station.

Yamuna Bridge Railway Station Agra. [Google Maps, October 2024]

South West of Yamuna Bridge Railway Station a series of bridges cross the River Yamuna.

Bridges across the River Yamuna. [Google Maps, October 2024]

The ‘Yamuna Railway Bridge’ crossing the River Jumna/Yamuna at Agra was opened in 1875, and connected ‘Agra East Bank Station’ to ‘Agra Fort Station’. The bridge carried the Bombay, Baroda and Central India Railway (BB&CIR) Metre Gauge ‘Agra-Bandikui Branch Line’, the East Indian Railway (EIR) and ‘Great Indian Peninsula Railway (GIPR) Broad Gauge lines. [18]

The first bridge over the Yamuna River at Agra. It is the more southerly of the two bridges shown on the 1972 map of Agra below. [17]
A map of Agra in 1962 which shows the two Yamuna River Bridges in place by then. Some of the significant features of the city can be identified clearly on this map: Agra Fort and its adjacent railway station appear close to the first Yamuna Bridge; the Taj Mahal is to the South East of the bridge on the South bank of the river; the Tomb of Itmad-ud-Daulah can be seen to the East of the river just North of the Strachey Bridge; a number of railway stations can also be picked out around Agra City. [20]

The ‘Strachey Bridge’, to the North the older bridge at Agra, was opened in 1908. It was a combined Road and Railway bridge and constructed by the ‘East Indian Railway Company’ (EIR). The bridge was named after John Strachey who planned & designed the bridge. The 1,024 metres (3,360 ft) long bridge was completed in 1908, taking 10 years to complete since its construction commenced in 1898. The ‘Agra City Railway Station’ was thus connected by the bridge to the ‘Jumna Bridge Station’ on the East bank. This Broad Gauge line became the ‘EIR Agra Branch Line’. [18]

The Strachey Railway bridge over the Yamuna River, The two-tiered bridge facilitated simultaneous movement of road traffic at the bottom level and rail transport at the upper level. Though the bridge is still in use today, it’s closed for road traffic and is used only by railways. This bridge appears on the satellite image above, on the South side of the Ambedkar Road Bridge. [19]

Once the Strachey Bridge (this is the one about which Huddleston speaks at length above) was opened in 1908. The EIR had access to the heart of the city and particularly to Agra City Station. We will look at City Station a few paragraphs below. But it is worth completing a look at the bridges over the Yamuna River with the bridge which replaced the first Yamuna River railway bridge.

The replacement Yamuna River Bridge, (c) Ãj Āshish jáykār, October 2023. In October 2023 a second bridge was under construction immediately on the North side of this bridge. [Google Maps, October 2024]
Both the existing bridge and that under construction appear on this satellite image. [Google Maps, October 2024]
Agra city centre immediately to the West of the Strachey Bridge which can be seen bottom-right. [Google Earth, October 2024]
The western end of the Strachey Bridge, seen from the North. [Google Streetview, November 2023]
The bridge over Chhata Road, seen from the North. [Google Streetview, November 2023]
The bridge over City Station Road, seen from the East. [Google Streetview, November 2023]
A little further to the West, this bridge spans a street which Google Streetview does not name. [Google Streetview, November 2023]
The bridge over Freeganj Road. The vegetation over the bridge extends round the site of Agra City Station. [Google Streetview, November 2023]
Agra City Station was the terminus of the Tundla to Agra branch of the EIR. [Google Earth, October 2024]

Delhi

Huddleston comments: “Delhi is one of the most important junctions on the East Indian Railway. The Rajputana Malwa, the North Western, Southern Punjab, Oudh and Rohilkhand and Great Indian Peninsular Railways all run into Delhi. There is a regular network of lines in and around, and the main passenger station is that belonging to the East Indian Railway. All the railways run their passenger trains into the East Indian Railway station, and most of the goods traffic passes through it also. For some years past Delhi has been in a state of remodelling; the work is still going on, and it will be some time before it is completed.” [1: p43]

He continues: “When you alight on one of the numerous platforms at Delhi station, there is a feeling of elbow room; the whole station seems to have been laid out in a sensible way. You are able to move without fear of being jostled over the platform edge, everything looks capacious, and especially the two great waiting halls, which flank either side of the main station building. These are, perhaps, the two finest waiting halls in India; passengers congregate there, and find every convenience at hand, the booking office, where they take their tickets, vendors’ stalls, where they get various kinds of refreshments, a good supply of water, and, just outside, places in which to bathe; a bath to a native passenger is one of the greatest luxuries, and he never fails to take one when opportunity offers.” [1: p44]

Wikipedia tells us that “Delhi Junction railway station is the oldest railway station in Old Delhi. … It is one of the busiest railway stations in India in terms of frequency. Around 250 trains start, end, or pass through the station daily. It was established near Chandni Chowk in 1864 when trains from Howrah, Calcutta started operating up to Delhi. Its present building was constructed by the British Indian government in the style of the nearby Red Fort and opened in 1903. It has been an important railway station of the country and preceded the New Delhi by about 60 years. Chandni Chowk station of the Delhi Metro is located near it.” [21]

Delhi junction Railway Station was the main railway station in Delhi at the time that Huddleston was writing his articles.

Delhi Junction Railway Station. [Google Maps, October 2024]
Delhi Junction Railway Station as it appears on OpenStreetMap. [21]
Delhi Junction Railway Station. [22]
New Delhi Railway Station is marked on this OpenStreetMap extract with a blue flag, it is just a short distance Southwest of Delhi Junction Railway Station which is marked by a grey train symbol to the top-right of the map extract and named ‘Old Delhi’. [23]

Delhi, Ambala (Umbala) and Kalka

The East Indian Railway proper terminated at Delhi Junction Railway Station but the railway company also operated the independently owned Delhi-Umabala-Kalka Railway.

A railway line from Delhi to Kalka via Ambala was constructed by the Delhi Umbala Kalka Railway Company (DUK) during 1889 and 1890 and operations were commenced on March 1, 1891. The management of the line was entrusted to the East Indian Railway Company (EIR) who were able to register a net profit in the very first year of operation. The Government of India purchased the line in 1926 and transferred the management to the state controlled North Western Railway. After partition, this section became part of the newly formed East Punjab Railway and was amalgamated with the Northern Railway on 14th April 1952.” [3]

The terminus of this line is at Kalka, 162 miles from Delhi. Huddleston tells us that, “In the beginning of the hot weather, when the plains are becoming unbearable, Kalka station is thronged with those fortunates who are going to spend summer in the cool of the Himalayas, and, when the hot weather is over, Kalka is crowded with the same people returning to the delights of the cold season, very satisfied with themselves at having escaped a grilling in the plains. Therefore, nearly everyone who passes Kalka looks cheerful, but, of course, there is the usual exception to the rule; and in this case the exception is a marked one. All the year round there is to be seen at Kalka station a face or two looking quite the reverse of happy, and, if we search the cause, we find it soon enough. The sad faces belong to those who have reached Kalka on their way to the Pasteur Institute, at Kasauli; Kasauli is in the hills some ten miles from Kalka. It is at Kasauli that Lord Curzon, when Viceroy, established that incalculable boon to all the people of India, a Pasteur Institute. Formerly, when anyone was bitten by a mad dog, or by a mad jackal, and such animals are fairly common in the East, he had to fly to Paris, and spend anxious weeks before he could be treated-some, indeed, developed hydrophobia before they could get there, or got there too late to be treated with any hope of success. Now, instead of going to Paris, they go to Kasauli.” [1: p44-45]

The western approach to Deli Junction Railway Station. The station is on the right of this satellite image. The lines to the New Delhi Railway Station leave the image to the South, to the left of centre. The line to Kalka leaves the image towards the top-left. [Google Maps, October 2024]
The view West from the bridge carrying Pul Mithai over the railway. The lines entering the photograph from the left are those from New Delhi Railway Station. Those ahead begin the journey to Kalka. [Google Streetview, February 2022]
Looking West from Rani Jhansi Road/Flyover. It may be difficult to make out, but the line to Kalka curves away to the right. [Google Streetview, February 2022]

The first station beyond the junction shown in the photograph above is Sabzi Mandi Railway Station.

Sabzi Mandi Railway Station. [Google Earth, October 2024]

Heading North-northwest out of Delhi, trains pass through Delhi Azadpur Railway Station, under Mahatma Gandhi Road (the Ring Road), on through Adarsh Nagar Delhi Railway Station and under the Outer Ring Road.

Outside of the Outer Ring Road the line passes through Samaypur Badli Railway Station which is an interchange station for the Metro; across a level-crossing on Sirsapur Metro Station Road; through Khera Kalan Railway Station and out of the Delhi conurbation.

Looking North-northwest from Sirsapur Metro Station Road Level-Crossing. [Google Streetview, April 2022]

The line runs on through a series of level-crossings and various stations (Holambi Kolan, Narela, Rathdhana, Harsana Kalan) and under and over modern highways before arriving at Sonipat Junction Railway Station.

A typical view from another level-crossing looking North-northwest along the line.[Google Streetview, April 2022]

Sonipat Junction Railway Station provides connections to Gohana, Jind and Palwal. [24]

(c) Mohit, March 2022.
(c) Arvind, August 2021.
(c) Rahul Singh, February 2019.

Northwest of Sonipat Railway Station a single-track line diverges to the West as we continue northwards through Sandal Kalan, Rajlu Garhi (North of which a line diverges to the East), Ganaur, Bhodwal Majri, Samalkha, Diwana Railway Stations before arriving at Panipat Junction Railway Station.

Panipat Junction Railway Station was opened in 1891. It has links to the Delhi–Kalka line, Delhi–Amritsar line, Delhi–Jammu line, Panipat–Jind line, Panipat–Rohtak line connected and upcoming purposed Panipat–Meerut line via Muzaffarnagar, Panipat–Haridwar line, Panipat-Rewari double line, via Asthal Bohar, Jhajjar or Bypass by the Rohtak Junction Panipat-Assoti Double line via Farukh Nagar, Patli, Manesar, Palwal. 118 trains halt here each day with a footfall of 40,000 persons per day. [25]

(c) Pintoo Yadav, May 2021.
(c) Sunil j, January 2023.

Just to the North of Panipat Junction Railway Station a double-track line curves away to the West. Our journey continues due North parallel to the Jammu-Delhi Toll Road.

A view North along the line from one of the access roads to the Jammu-Delhi Toll Road. [Google Streetview, June 2023]

North of Panipat the line passed through Babarpur, Kohand, Gharaunda, Bazida Jatan Railway Stations while drifting gradually away from the Jammu-Delhi Toll Road.

Beyond Bazida Jatan Station, the line turns from a northerly course to a more northwesterly direction before swinging back Northeast to a more northerly route. It then passes through Karnal Railway Station before once again swinging away to the Northwest and crossing a significant irrigation canal, passing through Bhaini Khurd, Nilokheri, Amin Railway Stations and then arrives at Kurukshetra Junction Railway Station.

Kurukshetra Junction Railway Station. [Google Maps, October 2024]

North of Kurukshetra Junction the line passes through Dhoda Kheri, Dhirpur, Dhola Mazra, Shahbad Markanda (by this time running very close to the Jammu-Delhi Toll Road again), and Mohri Railway Stations before it bridges the Tangri River.

The Tangri River Railway Bridge seen from NH44, the Jammu-Delhi Road. The photograph is taking facing Northwest. [Google Streetview, June 2023]

Not too far North of the Tangri River the line enters Ambala City and arrives at Ambala Cantt Junction Railway Station.

Ambala Cantt Junction Railway Station. [Google Maps, October 2024]

Ambala (known as Umbala in the past – this spelling was used by Rudyard Kipling in his 1901 novel Kim) is “located 200 km (124 mi) to the north of New Delhi, India’s capital, and has been identified as a counter-magnet city for the National Capital Region to develop as an alternative center of growth to Delhi.” [26] As of the 2011 India census, Ambala had a population of 207,934.

Travelling further North towards Kalka, trains start heading Northwest out of Ambala Cantt Railway Station. and pass through Dhulkot, Lalru, Dappar, Ghagghar Rauilway Stations before crossing the Ghaggar River and running on into Chandigarh.

The Ghaggar River Railway Bridge seen from the Ghaggar Causeway to the Northeast of the railway Bridge. [Google Streetview, June 2022]

Chandigarh Junction Railway Station sits between Chandigarh and Panchkula. it is illustrated below.

(c) Laxman YB (January 2022)
(c) Soniya Thapa (January 2023)
(c) Amit Gamer (July 2022)

North of Chadigarh the flat plains of India give way to the first foothills of the Himalayas. What has up to this point been a line with very few curves, changes to follow a route which best copes with the contours of the land. Within the city limits of Chandigarh, the line curves sharply to the East, then to the Southeast as illustrated below.

The route of the railway between Chandigarh and Kalka to the immediate North of Chandigarh Railway Station. [Google Maps, October 2024]

The line then sweeps round to the Northeast.

The route of the line is again marked by the thick blue line on this next extract from Google’s satellite imagery. [Google Maps, October 2024]
It is possible to glimpse the line from the Chandigarh-Kalka Road (NH5) at various points. This image looks from the road into Chandimandir Military Station. The bridge over the access road which can be seen above the gates carries the line to Kalka. [Google Streetview, June 2022]

The next railway station is that serving the military base, Chandi Mandir Railway Station. The line continues to the Northeast, then the North and then the Northwest before running into Surajpur Railway Station.

A glimpse of the railway North of Surajpur. The camera is facing West across the railway which is on a low metal viaduct. Kalka is some significant distance away off the right of this photograph. [Google Streetview, June 2023]

The line continues to sweep round to the Northeast before crossing the Jhajra Nadi River.

The Jhajra Nadi River Bridge seen from the Southeast on Jhajra Nadi Road. [Google Streetview, June 2023]

The line then runs parallel to the Jhajra Nadi River in a Northeasterly direction on its North bank before swinging round to the Northwest and entering Kalka Railway Station.

Kalka Station. [1: p40]
An East Indian Railway Mail Train leaving Kalka. [1: p43]
Kalka Railway Station. [Google Maps, October 2024]
Kalka Railway Station as illustrated on the IndiaRailInfo.com website, (c) Shubh Mohan Singh. The train on the right is, I believe, the ‘Himalayan Queen’.

The broad gauge terminates at Kalka and the journey on into the Himalayas is by narrow-gauge train.

Kalka to Shimla

Huddleston comments: “Simla [sic] is full of hill schools, and Kalka often sees parties of happy children returning to their homes; a common enough sight in London, perhaps, but in India quite the reverse. In India, European school children only come home for one vacation in the year, and that, of course, is in the cold season when they get all their holidays at a stretch. Many of them have to journey over a thousand miles between home and school. Needless to say, the railway is liberal in the concessions it grants, and does all it can to assist parents in sending their children away from the deadly climate of the plains. … At Kalka you change into a 2 ft. 6 in. hill railway, which takes you to Simla, the summer headquarters of Government, in seven hours. If you are going up in the summer, don’t forget to take thick clothes and wraps with you, for every mile carries you from the scorching heat of the plains into the delightful cool of the Himalayas, and you will surely need a change before you get to the end of your journey. … Kalka is 2,000 ft. above sea level, Simla more than 7,000 ft., therefore, the rise in the 59 miles of hill railway is over 5,000 ft., and the fall in the temperature probably 30 degrees Fahrenheit.” [1: p45]

Train of Bogie Coaches about to leave Kalka for Shimla. [1: p44]
A portion of the sinuous course of the Kalka-Shimla line’s climb into the Himalayas. [1: p45]

The plan is to try to follow the line of the railway as it climbs away from Kalka Railway Station. First a quick look at the narrow gauge end of Kalka Railway Station.

The North end of Kalka Railway Station is devoted to the narrow-gauge line to Shimla. [Google Maps, October 2024]
The narrow-gauge platforms at Kalka Railway Station seen from the Northwest. [Google Streetview, January 2018]
The Kalka-Shimla Line. Kalka station throat looking Southeast into the station complex. [Google Streetview, January 2018]

The two views above were taken from the rear of a Shimla-bound train. This will be true of many subsequent photographs of the line.

Looking back towards Kalka Station from alongside the Diesel Shed. [Google Streetview, January 2018]
The Kalka-Shimla line winds its way through Kalka. [Google Maps, October 2024]
The line continues to switch back and forth on its way to the first station at Taksal. [Google Maps, October 2024]
Taksal Railway Station. [Google Maps, October 2024]
From Taksal Railway Station the line continues to wander around following the contours, gaining height as it does so. The route can relatively easily be picked out on this satellite image. One length of tunnel has been highlighted in red. [Google Maps, October 2024]
The line continues towards Shimla following the contours and continuing to rise into the hills. Its course runs relatively close to National Highway No. 5 (NH5)

Koti Railway Station and tunnel portal just at the northern limits of the station. [Google Maps, October 2024]

Train arriving at Koti from Kalka (c) Meghamalhar Saha. (May 2024)
The tunnel portal at Koti (c) Divyansh Sharma. (April 2021)

Koti Tunnel (Tunnel No. 10) is 750 metres in length. Trains for Shimla disappear into it at the station limits at Koti and emerge adjacent to the NH5 road as shown below.

Koti Tunnel (Tunnel No. 10). [Google Maps, October 2024]
The Northeast portal of Tunnel No. 10(Koti Tunnel). [Google Streetview, January 2018]
Leaving the tunnel the line runs on the West side of the Kalka-Shimla Road (NH5). It can be seen here a couploe of metres higher than the road. [Google Streetview, June 2023]

For some distance the line then runs relatively close to the NH5. on its Northwest side and increasingly higher than the road. The central image below shows road and rail relatively close to each other. The left image shows the structure highlighted in the central image as it appears from the South. The right-hand image shows the same structure from the North. The structure highlighted here is typical of a number along the route of the railway.

For a short distance the line has to deviate away from the road to maintain a steady grade as it crosses a side-valley.

The line runs away North of the NH5 to allow gradients to remain steady. Top0-left of this image is a wayside halt serving the communities in this vicinity and as the line turns to cross the valley and return towards the NH5, there is a bridge carrying the line over the valley floor. [Google Streetview, October 2024]

The Halt and bridge shown in the image above on an enlarged extract from the satellite imagery. [Google Maps, October 2024]

The Halt. [Google Streetview, January 2018]
The stone-arched viaduct to the Northeast of the Halt, seen from the platform. [Google Streetview, January 2018]

The sort tunnels above are typical of a number along the line. Tunnel No. 16 takes the railway under the NH5.

The NH5 climbs alongside the railway line which can be seen on the left of this image. around 100 metres further along the line Tunnel No. 16 takes the railway under the road. [Google Streetview, August 2024]
The line crosses under the NH5 at the bottom left of this satellite image and can be seen following the contours on the Southside of the road across the full width of the image, leaving the photo in the top-right corner. [Google Maps, October 2024]
Looking back down the line towards Kalka through Sonwara Railway Station. [Google Streetview, January 2018]
Again looking back towards Kalka the structure that the train has just crossed is given its own sign board. It appears to be a 4 span stone-arched viaduct. [Google Streetview, January 2018]

The next tunnel on the line (No. 18) is a semi-circular tunnel.

Tunnels No. 21 and No. 22 are shown below. The first image in each of these cases is the line superimposed on Google Maps satellite imagery (October 2024). The other two images, in each case, are from Google Streetview, January 2018.

A short distance North from Tunnel No. 22 is an over bridge which is shown below.

The next station is Dharampur Himachal Railway Station.

Dharampur Himachal Railway Station. [Google Maps, October 2024]

Immediately beyond the station the line is bridged by the NH5 and then enters another tunnel.

The short tunnel to the North of Dharampur Himachal Railway Station which perhaps carried the original road, (c) Balasubramaniam Janardhanan. (Video still, April 2022) {Google Maps, October 2024]
The same bridge and short tunnel. [Google Streetview, January 2018]
The line running North beyond the tunnel. [Google Streetview, January 2018]

After a deviation away to the North, the railway returns to the side of the NH5. Tunnels No. 27 and 28 take the line under small villages. Another tunnel (No. 29) sits just before Kumarhatti Dagshai Railway Station.

Kumarhatti Dagshai Railway Station. [Google Maps, November 2024]
Kumarhatti Dagshai Railway Station building. [Google Streetview, January 2018]

As trains leave Kumarhatti Dagshai Railway Station, heading for Shimla, they immediately enter Tunnel No. 30.

Tunnel No. 30 is a short straight tunnel which takes the railway under the village and NH5. [Google Streetview, January 2018]

Two short tunnels follow in quick succession, various tall retaining walls are passed as well before the line crosses a relatively shallow side-valley by means of a masonry arched viaduct.

A short viaduct to the East of Kumarhatti Dagshai Railway Station. [Google Streetview, January 2018]

Tunnel No. 33 (Barog Tunnel) is a longer tunnel which runs Southwest to Northeast and brings trains to Barog Railway Station.

Barog Railway Station. [Google Streetview, January 2018]

Now back on the North side of the NH5, the line continues to rise gently as it follows the contours of the hillside. Five further short tunnels are encountered beyond Barog (Nos. 34, 35, 36, 37 and 38) before the line runs into Solan Railway Station.

Solan Railway Station. [Google Maps, November 2024]

Immediately to the Eat of Solan Railway Station trains enter Tunnel No. 39 and soon thereafter Tunnels Nos. 40, 41 and 42 before crossing the NH5 at a level-crossing.

Level-crossing on the main Kalka-Shimla Road. [Google Streetview, January 2018]

Further tunnels follow on the way to Salogra Railway Station.

Salogra Railway Station was oriented North-South approximately.

Looking North through Salogra Railway Station. [Google Streetview, January 2018]
Salogra Railway Station buildings seen from the South. [Google Streetview, January 2018]
Salogra Railway Station sign, (c) Travel More. (2015)

A further series of relative short tunnels protects the line as it runs on the Kandaghat Railway Station.

Kandaghat Railway Station. [Google Streetview, January 2018]
The stone-arched viaduct carrying the line over the NH5 (Kalka-Shimla Road) at the North end of Kandaghat Railway Station. [Google Streetview, July 2024]

Tunnels Nos. 56 and 57 sit a short distance to the East of the viaduct above. the line now accompanies a different highway which turns off the NH5 close to the viaduct.

The next significant structure is the galleried arch bridge below.

More tunnels, Nos. 58 to 66 are passed before the line crosses another significant structure – Bridge No. 541 – and then runs through Kanoh Railway Station.

Kanoh Railway Station. [Google Maps, November 2024]
Kanoh Railway Station, (c) Saumen Pal. (April 2022). [Google Maps, November 2024]

After Kanoh Station the line passes through a further series of short tunnels (Nos. 67-75) before meeting its old friend the NH5 (the Kalka to Shimla Road) again.

The Kalka to Shimla Railway line viaduct seen from the Southwest on the adjacent NH5 (Kalka-Shimla Road). [Google Streetview, July 2024]

Beyond this point the line passed through Tunnels Nos. 76 and 77 before arriving at Kathleeghat Railway Station.

Kathleeghat Railway Station.

Kathleeghat Railway Station. [Google Streetview, January 2018]

Immediately the Northeast of Kathleeghat Station the line enters Tunnel No. 78 under the Kalka-Shima Road (NH5) and soon heads away from the road plotting its own course forward toward Shimla through Tunnels Nos. 79 and 80, before again passing under the NH5 (Tunnel No. 81). Tunnels Nos 82 to84 follow and the occasional overbridge before the next stop at Shoghi Railway Station.

Shoghi Railway Station. [Google Maps, November 2024]

North East of Shoghi Station the line turns away from the NH5 and passing though a series of short Tunnels (Nos. 85-90) finds it own way higher into the hills before passing through Scout Halt and into a longer Tunnel (No. 91).

The North Portal of Tunnel No.91. [Google Streetview, December 2017]

North of Tunnel No. 91, the line enters Taradevi Railway Station which sits alongside the NH5.

Taradevi Railway Station.

Taradevi Railway Station, (c) William Matthews. (2023)
Taradevi Railway Station, (c) Gokul Gopakumar. (2021)
Taradevi Railway Station, (c) Iqbal Singh. (August 2019) [Google Maps, November 2024]

Immediately North of the station the line passes under the NH5 in Tunnel No. 92 and then runs on the hillside to the West of the road. It turns West away from the road and passes through Tunnels 93 to 98 before entering Jutogh Railway Station.

Jutogh Railway Station. [Google Maps, November 2024]

Leaving Jutogh Railway Station, the line turns immediately through 180 degrees and runs along the North side of the ridge on which the town sits. Tunnel No. 98 is followed by a short viaduct.

This viaduct sits just east of Tunnel No. 98, above the Shima-Ghumarwin Road. Just a short distance towards Shima, the same road climbs steeply over the railway which passes under it in Tunnel No. 99. [Google Streetview, January 2018]

east of the road, Tunnel No. 100 is followed by a long run before an overbridge leads into Summer Hill Station.

Beyond Summer Hill Station, the line immediately ducks into Tunnel No. 101 which takes it under the ridge on which Summer Hill sits and then returns almost parallel to the line whch approached Summer Hill Station but to the East of the ridge. It runs on through Tunnel No. 102 to Inverarm Tunnel (No. 103) which brings the line into Shimla.

Shimla Railway Station. [Gpgle Streetview, January 2018]
Shimla Railway Station. [Google Maps, November 2024]

Shimla is the end of this journey on first the East Indian Railway and its branches and then the line to Kalka before we travelled the narrow gauge Kalka to Shimla Line.

Wikipedia tells us that “the Kalka–Shimla Railway is a 2 ft 6 in (762 mm) narrow-gauge railway. … It is known for dramatic views of the hills and surrounding villages. The railway was built under the direction of Herbert Septimus Harington between 1898 and 1903 to connect Shimla, the summer capital of India during the British Raj, with the rest of the Indian rail system. … Its early locomotives were manufactured by Sharp, Stewart and Company. Larger locomotives were introduced, which were manufactured by the Hunslet Engine Company. Diesel and diesel-hydraulic locomotives began operation in 1955 and 1970, respectively. On 8 July 2008, UNESCO added the Kalka–Shimla Railway to the mountain railways of India World Heritage Site.” [28]

References

  1. G. Huddleston; The East Indian Railway; in The Railway Magazine, July 1906, p40-45.
  2. https://rogerfarnworth.com/2024/10/16/the-east-indian-railway-the-railway-magazine-december-1905-and-a-journey-along-the-line/
  3. https://hillpost.in/2005/01/kalka-shimla-railway/30, accessed on 24th October 2024.
  4. https://indiarailinfo.com/train/map/train-running-status-shikohabad-farrukhabad-passenger-485nr/6070/903/2192, accessed on 24th October 2024.
  5. https://en.wikipedia.org/wiki/Shikohabad, accessed on 25th October 2024.
  6. https://en.wikipedia.org/wiki/Shikohabad_Junction_railway_station, accessed on 25th October 2024.
  7. https://web.archive.org/web/20130728090858/http://mainpuri.nic.in/gaz/chapter7.htm, accessed on 25th October 2024.
  8. https://www.youtube.com/watch?app=desktop&v=1ehvDEs2pt4, accessed on 25th October 2024.
  9. http://64.38.144.116/station/blog/2193/0, accessed on 25th October 2024.
  10. https://en.wikipedia.org/wiki/Ganga-Jamuni_tehzeeb, accessed on 26th October 2024.
  11. https://en.wikipedia.org/wiki/Farrukhabad_district, accessed on the 26th October 2024.
  12. C.A. Bayly; Rulers, Townsmen and Bazaars: North Indian Society in the Age of British Expansion, 1770–1870; Oxford University Press, New Delhi, 2012.
  13. “District Census Handbook: Farrukhabad” (PDF). (censusindia.gov.in). Registrar General and Census Commissioner of India. 2011.
  14. “Table C-16 Population by Mother Tongue: Uttar Pradesh”. (www.censusindia.gov.in). Registrar General and Census Commissioner of India.
  15. Decadal Variation In Population Since 1901. (www.censusindia.gov.in)
  16. “Table C-01 Population by Religion: Uttar Pradesh”. (www.censusindia.gov.in). Registrar General and Census Commissioner of India. 2011.
  17. https://www.irfca.org/gallery/Heritage/JUMNA+BRIDGE+AGRA+-+1.JPG.html, accessed on 27th October 2024.
  18. https://wiki.fibis.org/w/Yamuna_Railway_Bridge(Agra), accessed on 27th October 2024.
  19. https://cityseeker.com/agra/723275-stretchy-bridge, accessed on 27th October 2024.
  20. https://www.etsy.com/no-en/listing/235077088/1962-agra-india-vintage-map, accessed on 27th October 2024.
  21. https://en.m.wikipedia.org/wiki/Delhi_Junction_railway_station, accessed on 27th October 2024.
  22. https://m.economictimes.com/news/politics-and-nation/now-swachh-drive-at-delhi-railway-station/articleshow/47754817.cms, accessed on 27th October 2024
  23. https://en.m.wikipedia.org/wiki/New_Delhi_railway_station, accessed on 27th October 2024.
  24. https://en.wikipedia.org/wiki/Sonipat_Junction_railway_station, accessed on 28th October 2024.
  25. https://en.wikipedia.org/wiki/Panipat_Junction_railway_station, accessed on 28th October 2024.
  26. https://en.wikipedia.org/wiki/Ambala, accessed on 29th October 2024.
  27. https://st2.indiarailinfo.com/kjfdsuiemjvcya0/0/1/8/2/933182/0/7226151664bda48a8152z.jpg, accessed via https://indiarailinfo.com/station/map/kalka-klk/1982 on 29th October 2024.
  28. https://en.wikipedia.org/wiki/Kalka%E2%80%93Shimla_Railway, accessed on 2nd November 2024.
  29. https://en.wikipedia.org/wiki/File:KSR_Steam_special_at_Taradevi_05-02-13_56.jpeg, accessed on 2nd November 2024.

The Railway Magazine Silver Jubilee (July 1897 to June 1922)

The June 1922 issue of The Railway Magazine celebrated its Silver Jubilee with a number of articles making comparisons between the railway scene in 1897 and that of 1922 or thereabouts.

In celebrating its Silver Jubilee, The Railway Magazine was also offering, in its June 1922 edition, its 300th number.

Reading through the various celebratory articles, a common theme encountered was statistical comparisons between 1897 and 1922.

This started in the first few words of J.F. Gairns article, Twenty-five Years of Railway Progress and Development: [1]

Railway mileage in 1897 was officially given as 21,433 miles for the British Isles, of which 11,732 miles were double track or more. In the course of the past 25 years the total length of railway (officially stated as 23,734 miles according to the latest returns available) has increased by 2,300 miles, and double track or more is provided on no less than 13,429 miles. Detailed figures as to the mileage laid with more than two lines in 1897 cannot be given; but there are now about 2,000 miles with from three to 12 or more lines abreast. Therefore, while the total route mileage increase is not so great indeed, it could not be, seeing that all the trunk lines and main routes except the Great Central London extension were completed long before 1897, and additions are therefore short or of medium length – there has been a very large proportionate increase in multiple track mileage. As the extent to which multiple track is provided is an important indication of traffic increase, this aspect calls for due emphasis. … The total paid-up capital of British railways, including in each case nominal additions, has increased from £1,242,241,166 to £1,327,486,097, that is, by some £85,000,000, apart from the cost of new works, etc., paid for out of revenue.” [1: p377]

In 1922, one of the latest LB &SCR 4-6-4T locomotives, No. 329 ‘Stephenson’, working a Down ‘Southern Belle’s Express, © O.J. Morris, Public Domain. [1: p373]
LNWR motive power in 1897 – This image shows a train worked by three-cylinder uncoupled 2,2,2,2 locomotive ‘Henry Bessemer’ on principal main line duties, piloted by a locomotive of the 2-4-0 ‘Precedent’ Class, ‘Alma’ which at that time shared most of the express workings with various ‘compounds’. Many were still at work in 1922, © F.E. Mackay, Public Domain. [1: p374]
LNWR motive power in 1922 – One of the latest four-cylinder 4-6-0 locomotives of the ‘Claughton’ class, No. 2035, ‘Private E. Sykes, V.C.’ This is one of three engines named after LNWR employees to whom the Victoria Cross was awarded for special gallantry and courage during the Great War. This photograph is further interesting in that ex-Private E. Sykes, V.C., is on the footplate, © P.F. Cooke, Public Domain. [1: p375]

Gairns went on to highlight newly constructed railways during the period which included:

  • The London Extension of what became the Great Central Railway in 1899;
  • The Cardiff Railway at the turn of the 29th century, which “involved a number of heavy engineering works. … Nine skew bridges, five crossing the Merthyr river, three across the Glamorganshire Canal, and one across the River Taff. Near Nantgawr the River Taff [was] diverted. The various cuttings and embankments [were] mostly of an extensive character. Ten retaining walls, 12 under bridges, 10 over bridges, a short tunnel and a viaduct contributed to the difficult nature of the work.” [2]
  • The Port Talbot Railway and Docks Company, which “opened its main line in 1897 and reached a connection with the Great Western Railway Garw Valley line the following year. A branch line to collieries near Tonmawr also opened in 1898. The lines were extremely steeply graded and operation was difficult and expensive, but the company was successful.” [3]
  • The London Underground, which had its origins in “the Metropolitan Railway, opening on 10th January 1863 as the world’s first underground passenger railway. … The first line to operate underground electric traction trains, the City & South London Railway… opened in 1890, … The Waterloo and City Railway opened in 1898, … followed by the Central London Railway in 1900. … The Great Northern and City Railway, which opened in 1904, was built to take main line trains from Finsbury Park to a Moorgate terminus.” [4] Incidentally, by the 21st century, “the system’s 272 stations collectively accommodate up to 5 million passenger journeys a day. In 2023/24 it was used for 1.181 billion passenger journeys.” [4]
  • Many Light Railways “by which various agricultural and hitherto remote districts have been given valuable transport facilities.” [1: p377]
Brackley Viaduct was one of many heavy engineering works entailed in the construction of the GCR extension to London which opened formally on 15th March 1899. It was built to carry the railway across the Great Ouse and the river’s flood plain, the 22 arch 755 foot viaduct was perhaps the most striking piece of architecture on the London Extension. It was demolished in the late 1970s. [1: p377][10]

Gairns goes on to list  significant lines by year of construction:

“In 1897, the Glasgow District Subway (cable traction, the first sections of the Cardiff and Port Talbot Railways, and the Hundred of Manhood and Selsey, and Weston, Cleveland and Portishead Light Railways were brought into use.

In 1898, the Lynton and Barnstaple narrow gauge (1  ft. 11 in.), Waterloo and City (electric tube, now the property of the London and South Western Railway), and North Sunderland light railways, were added.

In 1899, … the completion and opening of the Great Central extension to London, the greatest achievement of the kind in Great Britain in modern times.

In 1900, the Rother Valley Light Railway was opened from Robertsbridge to Tenterden, and the Sheffield District Railway (worked by the Great Central Railway) and the Central London electric railway (Bank to Shepherd’s Bush) were inaugurated. …

In 1901 the Bideford, Westward Ho! and Appledore (closed during the war and not yet reopened), Sheppey Light (worked by South Eastern and Chatham Railway), and Basingstoke and Alton (a “light” line worked by the London and South Western Railway, closed during the war and not yet reopened), were completed.

In 1902, the Crowhurst and Bexhill (worked by the South Eastern and Chatham Railway), Whitechapel and Bow (joint London, Tilbury and Southend – now Midland – and Metropolitan District Railways, electric but at first worked by steam), Dornoch Light (worked by Highland Railway), and Vale of Rheidol narrow gauge (later taken over by the Cambrian Railways) railways were opened.

[In 1903], the Letterkenny and Burtonport Railway (Ireland), 49 miles in length 3 ft. gauge; [the] Llanfair and Welshpool, Light (worked by Cambrian Railways), Lanarkshire and Ayrshire extension (worked by Caledonian Railway), Meon Valley and Axminster and Lyme Regis (worked by London and South Western Railway), Axholme Joint (North Eastern and Lancashire and Yorkshire – now London and North Western Railways), and Wick and Lybster Light (worked by Highland Railway) railways were opened.” [1: p377-378]

A number of the lines listed by Gairns are covered in articles on this blog. Gairns continues:

In 1904,  the Tanat Valley Light Railway (worked by the Cambrian Railways), Great Northern and City Electric (now Metropolitan Railway), Leek and Manifold narrow gauge (worked by North Staffordshire Railway but having its own rolling-stock), Kelvedon, Tiptree and Tollesbury Light (worked by Great Eastern Railway), Mid-Suffolk Light and Burtonport Extension Railways were opened.

1905 saw the Cairn Valley Light (worked by Glasgow and South Western Railway), and Dearne Valley (worked by Lancashire and Yorkshire Railway, now London and North Western Railway) railways opened.

1906 includes quite a lengthy list: part of the Baker Street and Waterloo electric (now London Electric), Bankfoot Light (worked by Caledonian Railway), Amesbury and Bulford Light (worked by London and South Western Railway), Burton and Ashby Light (Midland Railway, worked by electric tramcars), Corringham Light, North Lindsey Light (worked by Great Central Railway), Campbeltown and Machrihanish (1 ft. 11 in. gauge), and Great Northern, Piccadilly and Brompton (now London Electric) railways.

In 1907, the Charing Cross, Euston and Hampstead Railway(now London Electric) was added.

In 1908, the Bere Alston and Callington section of the Plymouth, Devonport and South Western Junction Railway, worked with its own rolling-stock, was opened.

In 1909, the Strabane and Letterkenny (3 ft. gauge) Railway in Ireland. Also the Cleobury Mortimer and Ditton Priors Light, Newburgh and North Fife (worked by North British Railway), and part of the Castleblaney, Keady and Armagh Railway (worked by Great Northern Railway, Ireland) in Ireland.

In 1910, the South Yorkshire Joint Committee’s Railway (Great Northern, Great Central, North Eastern, Lancashire and Yorkshire – now London and North Western – and Midland Railways) was opened.

1911 saw passenger traffic inaugurated on the Cardiff Railway, and the Shropshire and Montgomeryshire Light, East Kent, and Mawddwy (worked by Cambrian Railways) lines opened.

In 1912 the Cork City Railway was opened, the Dearne Valley line brought into use for passenger traffic, and a section of the Derwent Valley Light Railway opened.

In 1913 the Elsenham and Thaxted Light Railway (worked by Great Eastern Railway) was opened, and a part of the Mansfield Railway (worked by Great Central Railway) brought into use for mineral traffic.

Then came the war years, which effectively put a stop to much in the way of new railway construction, and the only items which need be mentioned here are: a part of the old Ravenglass and Eskdale, reopened in 1915 as the Eskdale Railway (15 in. gauge), and the Mansfield Railway, brought into use for passenger traffic (1917). The Ealing and Shepherd’s Bush Electric Railway, worked by the Central London Railway, was opened in 1920.

A lengthy list, but including a number of lines which now count for a great deal, particularly in regard to the London electric tube railways, … It must be remembered, too, that except where worked by another company and as noted, most of these lines possess their own locomotives and rolling-stock.” [1: p378-379]

Despite the extent of these new lines, Gairns comments that it is “the extensions of previously existing railways which have had the greatest influence.” [1: p379] It is worth seeing his list in full. It includes:

“In 1897, the Highland Railway extended its Skye line from Stromeferry to Kyle of Lochalsh, and in 1898 the North British Railway completed the East Fife Central lines. 1899 was the historic year for the Great Central Railway, in that its London extension was opened, giving the company a main trunk route and altering many of the traffic arrangements previously in force with other lines. Indeed, the creation of this ‘new competitor’ for London, Leicester, Nottingham, Sheffield, Manchester and, later, Bradford traffic, materially changed the general railway situation in many respects. In the same year, the Highland Railway direct line, from Aviemore to Inverness was opened, this also having a considerable influence upon Highland traffic. In 1900 the London, Brighton and South Coast Railway completed the new ‘Quarry’ lines, giving an independent route from Coulsdon to Earlswood.

In 1901, the Great Western Railway opened the Stert and Westbury line, one of the first stages involved in the policy of providing new and shorter routes, which has so essentially changed the whole character of Great Western Railway train services and traffic operation. In that year, also, the West Highland Railway (now North British Railway) was extended to Mallaig, adding one of the most scenically attractive and constructionally notable lines in the British Isles. The Bickley-Orpington connecting lines of the South Eastern and Chatham Railway, brought into service in 1902, enabled trains of either section to use any of the London termini, and this has essentially changed the main features of many of the train services of the Managing Committee.

In 1903, the Great Western Railway opened the new Badminton lines for Bristol and South Wales traffic, a second stage in the metamorphosis of this system. In 1906 the Fishguard-Rosslare route was completed for Anglo-Irish traffic, while the opening of the Great Central and Great Western joint line via High Wycombe materially altered London traffic for both companies in many respects. The same year saw the completion of connecting links whereby from that time the chief route for London-West of England traffic by the Great Western Railway has been via Westbury instead of via Bristol.

The year 1908 provided still another Great Western innovation, the completion of the Birmingham and West of England route via Stratford-on-Avon and Cheltenham.

In 1909 the London and North Western Railway opened the Wilmslow-Levenshulme line, providing an express route for London-Manchester traffic avoiding Stockport. In that year also the Thornhill connection between the Midland and the then Lancashire and Yorkshire Railway introduced new through facilities.

In 1910 the opening of the Enfield-Cuffley line of the Great Northern Railway provided the first link in a new route for main line traffic to and from London, though this is even yet only partially available, and opened up a new suburban area for development. The same year saw the advent of the Ashenden-Aynho line, by which the Great Western Railway obtained the shortest route from London to Birmingham, with consequent essential changes in the north train services, and the inauguration of the famous two-hour expresses by that route and also by the London and North Western Railway.

In 1912 the latter railway brought into operation part of the Watford lines, paving the way for material changes in traffic methods, and in due course for through working of London Electric trains between the Elephant and Castle and Watford, and for electric traffic to and from Broad Street and very shortly from Euston also. In 1913 part of the Swansea district lines were brought into use by the Great Western Railway, and in 1915 the North British Railway opened the new Lothian lines. [1: p379-380]

Many of the changes over the 25 years were far-reaching in character others were of great local significance, such as station reconstructions, widenings, tunnels, dock/port improvements and new bridges.

New long tunnels included: Sodbury Tunnel on the GWR Badminton line; Ponsbourne Tunnel on the GNR Enfield-Stevenage line; Merstham (Quarry) Tunnel on the LB&SCR ‘Quarry’ line.

An Intercity 125 close to the mouth of Sodbury (Chipping Sodbury) Tunnel in 2012, © Ray Bird and licenced for reuse under a Creative Commons Licence (CC BY-SA 2.0). [4]
Sodbury Tunnel as it appears on the OS Landranger Series mapping. [7]
The northern portal of Ponsbourne Tunnel on the section of line between Bayford and Cuffley stations. The photograph was taken on 27th April 2008 from the road bridge next to Bayford station (with a telephoto lens). Ponsbourne Tunnel is about 1½ miles long, © Talisman and licensed for reuse under a Creative Commons Licence (CC BY-SA 2.0). [5]
Ponsbourne Tunnel as it appears on the OS Landranger Series mapping. [5]
A Class 319 Bedford – Brighton “Thameslink” working  has just emerged from Quarry Tunnel on the “Quarry Line”. This is the name given to the line opened in 1899 by the LB&SCR, bypassing the original line through Merstham and Redhill owned by the SE&CRa. The Quarry Line now serves as the fast lines from London Bridge/Victoria to Gatwick Airport and Brighton. This photograph was taken on 10th May 2008, © Ian Capper and licensed for reuse under a Creative Commons Licence, (CC BY-SA 2.0). [6]
The two Merstham Tunnels as they appear on the OS Landranger Series mapping. [6]

Notable bridges included: the King Edward VII Bridge in Newcastle and the Queen Alexandra Bridge in Sunderland.

The King Edward VII Bridge in Newcastle. [8]
An extract from Britain from Above lmage No. EAW003166 © Historic England, 1946. The image shows the immediate area around the Queen Alexandra Bridge, Sunderland. [9]

Reconstructed/new/enlarged stations included: Victoria (LB&SCR); Glasgow Central (CR); Manchester Victoria (L&YR); Waterloo (L&SWR); Birmingham Snow Hill (GWR); Euston (LNWR); Crewe (LNWR) and Paddington (GWR)

Among a whole range of Capital Works undertaken by the GWR, was the new MPD at Old Oak Common. The LNWR’s new carriage lines outside Euston and the Chalk Farm improvements were significant, as were their system of avoiding lines around Crewe.

The MR takeover of the LT&SR in 1912 and their works between Campbell Road Junction and Barking are noteworthy. The L&SWR undertook major electrification of suburban lines, built a new concentration yard at Feltham, and made extensions and improvements at Southampton.

The LB&SCR’s widenings/reconstructions of stations on the ‘Quarry’ lines, which enabled through trains to run independently of the SE&CR line through Redhill were of importance. As we’re the SE&CR’s works associated with the improvements at Victoria, the new lines around London Bridge, the new Dover Marine Station and changes throughout their system.

The GCR London Extension is equalled in importance by the High Wycombe joint line and the GCR’s construction and opening of Immingham Dock in 1912. Gairns also points out that the NER and the H&BR works associated with the King George Dock in Hull should not be forgotten.

Also of significance were some railway amalgamations and some other events of historic interest between 1897 and 1922. Gairns included:

  • In 1897, the Manchester, Sheffield and Lincolnshire Railways name changed to ‘Great Central Railway’.
  • In 1899, the South Eastern and Chatham Joint Committee was set up.
  • In 1900, the Great Southern & Western Railway took over the Waterford & Central Ireland Railway and absorbed the Waterford, Limerick & Western Railway in 1901.
  • In 1903, the Midland Railway took over the Belfast & Northern Counties Railway.
  • In 1905, the Hull, Barnsley & West Riding Junction Railway & Dock Company became the Hull & Barnsley Railway; the Great Central Railway headquarters were moved from Manchester to London.
  • In 1906 the Harrow-Verney Junction section of the Metropolitan Railway was made joint with the Great Central Railway.
  • In 1907, the Lancashire, Derbyshire & East Coast Railway was amalgamated with the Great Central Railway; the Dublin, Wicklow & Wexford Railway became the Dublin & South Eastern Railway; and the greater part of the Donegal Railway was taken over jointly by the Great Northern of Ireland and Midland (Northern Counties section) under the County Donegal Railways Joint Committee.
  • In 1912, the London, Tilbury & Southend Railway was taken over by the Midland Railway.
  • In 1913, the Great Northern & City Railway was absorbed by the Metropolitan Railway.

Gairns also noted “the now almost universal provision of restaurant cars and corridor carriages of bogie type, Pullman cars upon many lines, and through carriages providing a wide variety of through facilities, culminating in the introduction last year of direct communication without change of vehicle between Penzance, Plymouth and Aberdeen, Southampton and Edinburgh, etc.” [1: p382]

In the period from 1897 to 1922, there had been essential changes to traffic characteristics:

  • notably in the abolition of second-class accommodation by all but a very few lines in England and Scotland, though it is still retained generally in Ireland and to some extent in Wales.” [1: p382]
  • the generous treatment of the half-day, day and period and long-distance excursionist, who in later years has been given facilities almost equal, in regard to speed and comfort of accommodation, to those associated with ordinary traffic.” [1: p383]

Gairns also provides, in tabular form, comparative statistics which illustrate some remarkable changes over the period from 1827 to 1922. His table compares data from 1897, 1913 and 1920.

Table showing comparative statistics for 1897, 1913 1920 and, in the case of cash receipts and expenditure, 1921. The year of 1913 was probably chosen as it was the last full set of statistics available prior to the start of the first World War. [1: p383]

In commenting on the figures which appear in the table above, Gairns draws attention to: the decline in numbers of second class passengers, the dramatic fall and then rise in the number of annual season tickets; the rise and then fall in tonnages of freight carried by the railways; and the significant increase in turnover without a matching increase in net receipts.

In respect of season tickets, Gairns notes that “whereas in 1897 and 1913 each railway having a share in a fare included the passenger in its returns, in 1920 he was only recorded once. … [and] that in later years the mileage covered by season tickets [had] considerably increased.” [1: p383]

He also comments on the way that in the years prior to the War, local tramways took significant suburban traffic from the railways, whereas, after the War, that traffic seemed to return to the railways.

Gairns also asks his readers to note the limited statistical changes to goods traffic over the period and to appreciate that in the 1920 figures freight movements were only records once rather than predicted to each individual railway company.

In respect of gross receipts and expenditure, he asks his readers to remember that in 1920 the Government control of railways under guarantee conditions was still in place and to accept that, “the altered money values, and largely increased expenditure (and therefore gross receipts) figures vitiate correct comparison, so that the 1897 and 1913 figures are of chief interest as showing the development of railway business.” [1: p383]

‘Articulated’ Sleeping Car, East Coast Joint Stock, designed by H.N. Gresley and built at Doncaster. [1: p382]
Two different Pullman Cars. The top image illustrates a First Class car on the SE&CR, the lower image shows a Third Class car on the LBSCR. [1: p384]

Gairns goes on to show rolling-stock totals for 1897 and 1920. …

Steam Loco numbers increased from 19,462 to 25,075; Electric Loco numbers rose from 17 to 84; Railmotor cars rose from 0 to 134; Coaching vehicles (non-electric) increased from 62,411 to 72,698; Coaching vehicles (electric, motor and trailer) rose from 107 to 3,096; Goods and mineral vehicles rose from 632,330 to 762,271.

A GWR Steam Railmotor and Trailer Car. [1: p385]

In 1897 the 17 electric locomotives were all on the City and South London Railway, and 44 of the electric motor cars on the Liverpool Overhead, and two on the Bessbrook and Newry line, with the 54 trailer cars on the City and South London, and seven on the Liverpool Overhead.” [1: p383-385]

Gairns notes as well that by 1922 there was a “widespread use of power for railway signalling with its special applications for automatic, semi-automatic and isolated signals.” [1: p385]G

Gairns completes his article with an optimistic look forward to the new railway era and the amalgamations that would take place as a result of the Railways Act, 1921. Changes that would come into effect in 1923.

References

  1. G.F. Gairns; Twenty-five Years of Railway Progress and Development; in The Railway Magazine, London, June 1922, p377-385.
  2. The Cardiff Railway in The Railway Magazine, London, April 1911.
  3. https://en.m.wikipedia.org/wiki/Port_Talbot_Railway_and_Docks_Company, accessed on 26th October 2024.
  4. https://en.m.wikipedia.org/wiki/Chipping_Sodbury_Tunnel, accessed on 28th October 2024.
  5. https://www.geograph.org.uk/photo/782781, accessed on 28th October 2024.
  6. https://www.geograph.org.uk/photo/804338, accessed on 28th October 2024.
  7. https://www.streetmap.co.uk/map/idld?x=378500&y=182500&z=120&sv=378500,182500&st=4&mapp=map[FS]idld&searchp=ids&dn=607&ax=373500&ay=183500&lm=0, accessed on 28th October 2024.
  8. https://rogerfarnworth.com/2024/10/26/the-new-high-level-bridge-at-newcastle-on-tyne-the-railway-magazine-july-1906.
  9. https://www.britainfromabove.org.uk/image/EAW003166, accessed on 28th October 2024.
  10. https://www.railwayarchive.org.uk/getobject?rnum=L2431, accessed on 29th October 2024.

The New High Level Bridge at Newcastle-on-Tyne – The Railway Magazine, July 1906

A contemporary account of the completion of the additional rail bridge over the River Tyne.

This is the Bridge that became known as the King Edward VII Bridge. It is a Grade II listed structure and has been described as “Britain’s last great railway bridge”. [4]

The King Edward VII Bridge, Newcastle, (c) Ardfern and licenced for reuse under a Creative Commons Licence (CC BY-SA 3.0). [5]
A map of the North-Eastern Railway at Newcastle -on-Tyne. This sketch comes from the article in The Railway Magazine and suffers from a minor problem that left me struggling, for a short while, to make sense of it. Surely Central Station, Newcastle is on the North bank of the Tyne? It was the lack of a North point on the map that left me confused! [1: p9]

The introduction to the article in the Railway Magazine says:

Travellers journeying by the East Coast route to and from places north of Newcastle-on- Tyne, have always commented on an anachronism of the twentieth century, that hitherto has required trains to run into a ‘dead end’ station, thus compelling a stop, with consequent delay, whatever might be the stress of competition between the rival routes. Now however, all this is to be altered. Readers of The Railway Magazine are acquainted with the fact that for some years past the North-Eastern Railway has had under construction a duplicate high-level bridge across the Tyne, by means of which trains north to south, and vice versa, will be enabled to pass through the Central Station, without stopping, if necessary, but, at all events, without having the direction in which the train is travelling altered. The plan [above shows] how this improvement is effected by means of the new bridge and connecting lines. His Majesty the King has consented to open the new bridge, and thus inaugurate the improvement, on Tuesday, 10th July, after which date it will be possible to work the North-Eastern Railway trains that pass through Newcastle-on-Tyne in a manner showing a considerable improvement in the system now [pertaining]” [1: p9-10]

The New High Level Bridge Carrying the North Eastern Railway across the Tyne at Newcastle. [1: p10]

From the South side of the River Tyne a triangular junction gives access to the bridge, which is described by The Railway Magazine::

“A stone viaduct of three spans forms the approach to the bridge proper, which consists of four girder spans; the first being 191 ft. between piers, the two centre ones each 300 ft., and the northern span 231 ft. between the piers; this is followed by a stone viaduct of 10 spans each 25 ft. wide. The height of the ten piers of this viaduct, from road level to the spring of the arch, is 18 ft., and the arches are semi-circular, the arch stones being 18 in. in depth. The distance from road level to rail level is 33 ft., the foundations being on clay and averaging about 7 ft. in depth. This arching rests on ashlar piers 4 ft. thick and 51 ft. transversely, each pier being relieved by three 7 ft. arches.

The new line is next carried by a bridge across Pottery Lane, and then enters the well-known Forth goods warehouse of the North-Eastern Railway at the first storey level by steel girders resting on brick piers. The spans through the warehouse are 40 ft., and the foundations for the piers are taken down to good clay beneath the cellar floor. The distance from rail to the bottom of the foundation is 40 ft. The roof of the warehouse is held up by a wind screen, resting on the piers outside the parapet girders, and the corner of the building, cut off by the railway, is now being used as offices for the goods staff.

Beyond the goods warehouse the new line continues to a junction with the Newcastle and Carlisle Railway, a short distance west of the Central station at Newcastle.

The new bridge carries four pairs of metals.

The total length of the main bridge, measuring from the first abutment on the north side to the abutment on the south side is 1,150 ft. The girders measure 48 ft. 6 in. from centre to centre of parapets, and the breadth of steel work overall is 50 ft., so that there is thus provided a space of 6 ft. between the tracks, and room for a pathway for the use of platelayers on either side. The girders are built of double lattice work, with top and bottom booms 3 ft. deep, and are braced together at the top and bottom by transoms, of which the lower are of lattice work and the upper of plate work 164 in. deep, the latter carrying the timberway on which the rails run. Each girder has panels of 23 ft., of which the struts or ties are lattice girders 4 ft. 1 1/2 in. wide.

The girders for the centre spans have a camber of 7 1/2 in. and the north span of 6 in. The parapets, which are 5 ft. high are bracketed to the outside of the girders and are of lattice work, and, in order to carry the railway over the piers, the opposite top booms are bracketed out towards each other leaving a space of 6 in. between the ends of the top booms of the girders. To provide for expansion these girders rest on roller bearings at one end of cast steel, with a base of 38 sq. ft. each. The total weight of steel for each of the spans is: North span, 950 tons; two central spans, 3,482 tons; southern span, 1,350 tons. As the rails begin to diverge on the pier in the southern side of the river they are some distance apart at the next pier, there being then 132 ft. between the parapets. For this span of 191 ft. there are also five girders, but they spread out towards the south like a fan instead of being parallel.

The river piers are of Norway granite, and the foundations have all been taken down to the same depth, namely, 69 ft. below high water, and they have been built in caissons. The adoption of the caisson method of constructing the foundations marks a difference between the new high-level and the old bridge, as the latter was built on piled foundations. It should, however, be remembered that in 1845, when Stephenson’s great work was undertaken, the Tyne could almost be forded at low water, whilst there is now a deep-water channel beneath both bridges.

The total length of the new railway is 4 furlongs 2 chains, whilst the loop to the south-east is 1 furlong 2 chains in length. Of this length of railway 19 chains is straight, including the crossing of the river, but the rails are on a 10-chain curve on leaving the west end of the Central station, and again, on a similar curve on reaching the south side of the river, the south-east curve having a radius of 7 chains. The line is level from the commencement on the north side as far as the pier on the south side of the river, when the main curve falls to the south-west on a gradient of 1 in 132, and the loop falls at 1 in 226. The new high-level bridge has been constructed from the designs of Mr. C. A. Harrison, the chief engineer of the Northern Division of the North-Eastern Railway, and this gentleman laid the foundation stone on 29th  July 1902, so that less than four years have been occupied in constructing the bridge and new approach railway to Newcastle Central station.” [1: p10-11]

Another view of the King Edward VII Bridge, Newcastle, (c) Nathan Holth, 13th May 2018. [6]

The original ‘High Level Bridge’ – designed by Robert Stephenson

The first High Level Bridge across the Tyne at Newcastle was opened in 1849. It was designed by Robert Stephenson, that bridge carried rail and road traffic and was the first in the world to do so.

Network Rail tells us that “the Newcastle & Berwick Railway secured the Act to build its line in 1845. It stipulated that the company should construct a combined road and rail bridge across the River Tyne between Newcastle and Gateshead, to be completed within four years. … The bridge was designed by Robert Stephenson and detailed drawings were made under the supervision of Thomas E Harrison. To avoid excessive width, and thereby expense, it was decided to carry the railway above, rather than beside, the roadway. The roadway itself was designed to be 20ft (6m) wide with a 6 1/2ft (2m) footway on either side. The combined width allowed three standard gauge tracks to run across the top rail level of the bridge. The overall length of the bridge was to be 1338ft (408m).” [2]

An extract from the contract drawings for Stephenson’s bridge. [2]

Network Rail goes on to describe the construction of the bridge:

The bridge was a tied arch (or bow-string) bridge with the main structural elements made of either cast or wrought iron. It had in total six spans each 125ft (38m) in length, the cast iron bows supporting the railway while wrought iron ties supported the road deck below. To enable a level line for the railway across the deep and wide Tyne valley, the roadway was built at 96ft (29m) and the railway 120ft (37m) above high water on the river. Contracts for the production of the ironwork were let to local firm Hawkes, Crawshay & Co. of Newcastle.

The bridge sits on five masonry piers, 50ft (15m) thick and 16ft (5m) wide. Although the River Tyne at the point the bridge is constructed was no more than 3ft (1m) deep at low water, its bed consisted of some 30ft (9m) of silt before underlying bedrock could be reached.

A recent invention, the ‘Nasmyth Steam Pile Driver’, was used for the first time in bridge building, enabling the piles for the bridge foundations to be driven down to the bedrock quickly and efficiently. Rush & Lawton of York were contracted to build the five main masonry piers and the land arches on each side carrying the approaches; 50,000 tons of stone was quarried near Newcastle, mainly at Heddon on the Wall.

To assist in the construction work a wooden viaduct was built immediately to the east of the permanent one. This temporary structure was opened to railway traffic on 29 August 1848, just a year before the High Level Bridge itself was opened by Queen Victoria on 28 September 1849. The public roadway over the bridge was not completed and opened until some six months later.” [2]

A Gallery of photos, drawings and engravings of Stephenson’s High Level Bridge. …..

References

  1. The New High Level Bridge at Newcastle-on-Tyne; in The Railway Magazine, London, July 1906, p9-11.
  2. https://www.networkrail.co.uk/who-we-are/our-history/iconic-infrastructure/the-history-of-the-high-level-bridge-newcastle, accessed on 25th October 2024.
  3. https://en.m.wikipedia.org/wiki/High_Level_Bridge,_River_Tyne#/media/File:Newcastle_high_level_bridge,_12_September_2010.jpg, accessed on 26th October 2024.
  4. David Morton; The Tyne’s King Edward VII railway bridge at 110: A brief history in 14 historic facts; in The Evening Chronicle, Trinity Mirror, Newcastle upon Tyne, 7th July 2016, accessed via https://web.archive.org/web/20120429085232/http://www.twmuseums.org.uk/discovery/buildingbridges/the-king-edward-vii-railway-bridge/ on 27th October 2024.
  5. https://commons.wikimedia.org/wiki/File:King_Edward_VII_Bridge,_Newcastle_upon_Tyne,_July_2015_(05).JPG, accessed on 27th October 2024.
  6. https://historicbridges.org/bridges/browser/?bridgebrowser=unitedkingdom/kingedward7bridge, accessed on 27th October 2024.

LNWR “Reversible” Steam Train

The Railway Magazine, August 1922. [1]

An unattributed article about these LNWR units was carried in the August 1922 issue of The Railway Magazine. From 6th February 1922 a ‘reversible’ or ‘push-and-pull’ train was in use for working locally between Manchester (Victoria) and Atherton.

Courtesy of Mr. Ashton Davies, M.Β.Ε., General Superintendent (Northern Division) of the LNWR, The Railway Magazine was able to illustrate and describe the equipment of the train employed:

“The train normally consists of a tank engine adapted to run with two bogie coaches, but can be increased to four or six coaches when the volume of traffic calls for further accommodation. The vehicles adapted for use in this way are arranged in pairs, providing nine third-class compartments in one vehicle, seating 108 passengers, while the composite carriage has two first-class and four third-class compartments seating 64 passengers, together with luggage and driver’s compartments. There is thus total accommodation for 172 passengers for each unit pair of vehicles. The length over buffers of each coach is 57 ft. 7 in. and the width over the body is 9 ft. The engine is a 2-4-2 radial tank, the diameter of the coupled wheels being 5 ft. 8 in. and of the radial wheels 3 ft. 7 in. Cylinders are 17.5 in. diam. and 26 in. stroke: boiler pressure is 180 lb. per square inch; length over buffers, 37 ft. 2 in. When the train is made up to six coaches the total length over buffers is 382 ft. 8 in. In one direction the engine is operated as with an ordinary steam train, but in the other direction the driver operates the engine from the driver’s compartment at the rear end of the train.” [1: p128]

A General View of a Two-Coach Train ‘Unit’ with the Driver’s Control Compartment Leading. [1: p128]

The locomotives used on the push-pull services in the old Lancashire and Yorkshire Railway area of the then very new combined company were Webb’s 2-4-2T locos. [4]

No. 761 appears in this official works photograph from the 19th century, © Public Domain. [5][6]

The LNWR 4ft 6in Tank was a class of 220 passenger 2-4-2T locomotives manufactured by the London and North Western Railway in their Crewe Works between 1879 and 1898. The ‘4ft 6in’ refers to the diameter of the driving wheels. “The design was an extension of the earlier 2234 2-4-0T built from 1876 which became known as ‘Chopper Tanks’. They had been designed for working local passenger trains. From 1909 many locomotives of the class were fitted for Push-Pull working, giving the nickname of ‘Motor Tanks’. … Withdrawals started in 1905: 118 were scrapped in the years up to 1923 grouping, leaving 90 to be passed to the London, Midland and Scottish Railway. They were allocated power class 1P, and assigned the numbers 6515–6600 and 6758–6761; although only 37 survived long enough to receive them: withdrawals restarted in 1924, and when the last was withdrawn in June 1936, the class became extinct. None were preserved.” [5]

The 2-4-2T engines were not the only locos adapted by the LNWR for push-pull working. From 1914 onwards some of the LNWR Webb ‘Coal Tanks’ “were fitted with push-pull ‘motor train’ equipment with the first so equipped being 576 and 597 which were then deployed on the Brynmawr to Ebbw Vale service. The system used by the LNWR involved the use of mechanical rods and linkages which ran beneath the axles of the locomotives. By 1921, the company was operating 30 branches by this method with many being worked by ‘Coal Tanks’. As a result, 55 locomotives had been equipped with the necessary equipment.” [2]

Webb built his class of 500 0-6-0 coal locomotives between 1873 and 1892 for slow freight work. Between 1881 and 1897 he built 300 0-6-2Ts which were tank engine versions of his of the 58320 class. These tank engines became known as ‘Coal Tanks’. “They had the same cheaply produced cast iron wheels and H-section spokes as the tender engines. A trailing radial truck supporting the bunker was added also with two similarly cast iron wheels. … They were almost entirely built of Crewe standard parts, including the radial rear axle. … Most were relieved of freight duties when the extent of their appalling brakes (initially made of wood) were uncovered, and some were fitted for motor train working.” [3]

The Interior of the 2-4-2T Locomotive Cab, Showing Regulator Fittings, Steam-Driven Air Compressor, etc. [1: p129]

The Railway Magazine article continues:

“The engine and train are fitted with the automatic vacuum brake. A compressed-air apparatus is installed to operate the regulator handle on the engine, when the driver is controlling from the driver’s compartment.

The regulator handle is shown connected to a rod by means of a French pin; the other end is coupled to an operating air cylinder by means of a bell crank lever. The operating cylinder contains two pistons, one larger than the other; both are mounted on the same piston rod. The chamber between the two pistons is directly connected to an auxiliary reservoir, to which air pressure is supplied through a back pressure valve, so that a sufficient air pressure is always available. The underside of the large piston can be put in communication with the main reservoir or the atmosphere under the control of the driver’s compressed air valve. When air pressure is supplied to the underside of the large piston it is placed in equilibrium, and the air pressure from the auxiliary reservoir then forces up the small piston, and opens the regulator. When the air pressure on the underside of the large piston is destroyed, by opening the driver’s compressed-air valve to atmosphere and closing the air supply from the main reservoir, the air pressure from the auxiliary reservoir forces down the large piston and shuts the regulator. By manipulating the driver’s compressed air valve any desired opening of the regulator may be obtained. … Movement of the regulator on the engine is repeated to the driver by an electrical indicator fixed over the look-out window in the driver’s compartment. The vacuum and pressure gauges are placed on each side of the electrical indicator in the driver’s compartment, above the observation window. A pneumatic whistle is provided to give warning on the road.

A special feature of this train is the driver’s ‘safeguard’ in the event of the driver becoming incapacitated when driving alone from the rear. If he releases his hold of the brake handle in this condition it will act as an ’emergency handle’, immediately shutting the regulator and applying the brake.” [1: p129]

Following the 1923 grouping, the London Midland & Scottish Railway (LMS) became responsible for this fleet of push-pull fitted 2-4-2T and 0-6-2T Locomotives. The LMS took the decision to adopt the Midland Railway’s vacuum-worked push-pull equipment instead of the LNWR system.

As we have already noted, withdrawals of the 2-4-2T locos started as early as 1905: 118 had gone before the 1923 grouping, 90 were passed to the LMS. “They were allocated power class 1P, and assigned the numbers 6515–6600 and 6758–6761; although only 37 survived long enough to receive them: withdrawals restarted in 1924, and when the last was withdrawn in June 1936, the class became extinct. None were preserved.” [5]

In all, 65 of the ‘Coal Tanks’ (0-6-2Ts) received the LMS vacuum-worked push-pull fittings, “12 of them formerly having had the mechanical type. … The use of push-pull equipped ‘Coal Tanks’ was long-lived with the last one running on the Bangor to Bethesda branch as late as 1951.” [2]

References

  1. ‘Reversible’ Steam Train, London & North Western Railway; in The Railway Magazine, London, August 1922, p128-129.
  2. https://www.keymodelworld.com/article/lnwr-webb-coal-tanks-0-6-2t-history, accessed on 25th October 2024.
  3. https://preservedbritishsteamlocomotives.com/2f-58880-58937-0-6-2t-lnwr-webb-coal-tank, accessed on 25th October 2024.
  4. https://www.discountmags.com/magazine/the-railway-march-1-2022-digital/in-this-issue/38, accessed on 25th October 2024.
  5. https://www.hattons.co.uk/directory/vehicledetails/3144969/2_4_2t_class_4_6_chopper_lnwr, accessed on 25th October 2024.
  6. https://en.m.wikipedia.org/wiki/LNWR_4ft_6in_Tank_Class, accessed on 25th October 2024.

The Border Counties Railway – Part 2 – Chollerton to Redesmouth Junction

This is the second article in a series about the Border Counties Railway. The first can be found here. [3]

An online acquaintance pointed me to a film made in the mid-1980s, ‘Slow Train to Riccarton’ which records something of the lives of people associated with this railway line:

https://youtu.be/cUOVM8ENOIg?si=f4sjHHSNsjn6qYm2 [2]

The film shows different lengths of the line and records a number of people speaking about their life on and around the line.

This first image is a still from the film which denotes where we are starting this next length of the journey along the line. A few more ‘stills’ will help to locate us as we travel along the line.

Chollerton Railway Station name-board. [2]
Chollerton Station Waiting Room on 25th August 1959. By then, the railway lines at Chollerton were becoming overgrown with weeds and grass. What was once the station waiting room was now the village Post Office. Media ID 21635767 © Mirrorpix [1]
Chollerton Railway Station and St. Giles’ Church. [5]
The same area in the 21st century. [Google Maps, October 2024]
Chollerton Railway Station building in the 21st century, now a private dwelling. [Google Streetview, July 2021]

The line travelled on, Northwest from Chollerton, much of the time in deep cutting as far as Dallabank Wood, by which time it was running on a northerly course. Soon after the wood, the line turned towards the Northwest, passed under the local road (Dalla Bank), crossed a short but high embankment under which Barrasford Burn was culverted, and entered Barrasford Railway Station.

The red line shows the route of the old railway immdiately to the North of Chollerton Railway Station. [Google Maps, October 2024]
The cutting South of Dalla Bank, Facing towards Chollerton in 2013, (c) Mike Quinn and licensed for reuse under a Creative Commons Licence (CC BY-SA 2.0). [15]
The line continued on as marked by the red line under Dalla Bank and on to Barrasford Station which was located at the top left of this extract from Google’s satellite imagery. [Google Maps, October 2024]
The view along the old railway line North-northwest from Dalla Bank. [Google Streetview, August 2023]
Barrasford Railway Station name-board. [2]

Barrasford Railway Station opened on 1st December 1859 by the North British Railway. The station was situated on a lane to Catheugh, around “200 yards northeast of the centre of Barrasford village. A siding adjoined the line opposite the platform and there was a further loop to the northwest. Both of these were controlled by a signal box, which was at the northwest end of the platform. The station was host to a camping coach from 1936 to 1939.” [4]

Barrasford station was closed to passengers on 15th October 1956 but remained open for goods traffic until 1st September 1958, although it was downgraded towards an unstaffed public siding.” [4]

The trackbed of the old railway looking back to the Southeast close to Barrasford Railway Station in December 2013, (c) Mike Quinn and licensed for reuse under a Creative Commons Licence (CC BY-SA 2.0). [11]
Barrasford Railway Station in 1962, 4 years after the final closure of the line, © Ben Brooksbank and authorised for reuse under a Creative Commons Licence (CC BY-SA 2.0). [4]
Barrasford Railway Station building in the 21st century – in private hands. [Google Streetview, August 2023]
Barrasford Railway Station was just a few hundred yards to the Northeast of the village of Barrasford. [6]
The same location in the 21stcentury. [Google Maps, October 2024]
The former Barrasford Station building seen from the East in 2013, (c) Mike Quinn and licensed for reuse under a Creative Commons Licence (CC BY-SA 2.0). [10]
Barrasford Railway Station in 2010, (c) Steve Wright and licensed for reuse under a Creative Commons Licence (CC BY-SA 2.0) [12]
Looking back Southeast towards Chollerton. A footpath follows the line of the old railway. [Google Streetview, August 2023]
The line ahead to the Northwest is marked by the red line. [Google Streetview, August 2023]

A short distance Northwest of Barrasford Railway Station, was Barrasford Quarry which was provided with its own siding.

The line Northwest of Barrasford Railway Station. [Google Maps, October 2024]
The track bed of the old railway a little to the Northwest of Barrasford Railway Station, looking back along the line towards the station in December 2013, (c) Mike Quinn and licensed for reuse under a Creative Commons Licence (CC BY-SA 2.0). [12]
Looking back towards Barrasford Station from Chishill Way. The line was carried at high level over the road. Only the embankments remain. [Google Streetview, August 2023]
A wintertime view along the old railway to the West from the East side of Chishill Way, in December 2013, (c) Mike Quinn and licensed for reuse under a Creative Commons Licence (CC BY-SA 2.0). [13]
Looking West from Chishill Way. The railway embankment is to the right of the trees. [Google Streetview, August 2023]
The track bed further West from Chswell Way, in December 2013, (c) Mike Quinn and licensed for reuse under a Creative Commons Licence (CC BY-SA 2.0). [14]
Barrasford Quarry Sidings and Tramway. [7]
Tarmac’s quarry at Barrasford is a much larger affair in the 21st century. [Google Maps, October 2024]
The entrance to Barrasford Quarry. The red line indicates the approximate route of the old railway which is treelined to the West of the quarry road and through open fields to the East of the quarry road. The siding was on the North side of the line. [Google Streetview, August 2023]
Just to the Northwest of Barrasford Quarry Siding was a branch line to Camp Hill, Gunnerton Quarry.This branhc was about 2 miles in length and is recorded on some maps as an old Waggonway. [8]
The same location in the 21st century with the old railways superimposed. [Google Maps, October 2024]

The Camp Hill Branch as shown on satellite imagery from Railmaponline.com. The branch was a short industrial line serving a relatively small quarry to the North of Barrasford Quarry. It appears to have been disused by 1920 as one of the local OS Map sheets across which the line travels shows the line lifted by that time and referred to as an ‘Old Waggonway”. The line is present on map sheets surveyed in 1895.

A short section of the Camp Hill Branch Line as shown on the 1920 25″ Ordnance Survey which was published in 1922. [18]
The view South along the line of the Clay Hill Branch towards the Border Counties Railway in February 2023, © Les Hull and licensed for reuse under a Creative Commons Licence (CC BY-SA 2.0). [30]
The Border Counties Railway to the Northwest of the junction with the Camp Hill Branch. [17]
The road overbridge on the road South from Gunnerton as shown in the Google Streetview image below. There was an adjacent siding with a crane at this location in 1920. This is an extract from the 1920 25″ Ordnance Survey. [19]
Looking to the Southwest along the road South from Gunnerton at the point where it bridged the Border Counties Railway in December 2013, (c) Mike Quinn and licensed for reuse under a Creative Commons Licence (CC BY-SA 2.0). [16]
The view Southeast from the bridge in the image above in December 2013, (c) Mike Quinn and licensed for reuse under a Creative Commons Licence (CC BY-SA 2.0). [22]

A little further to the Northwest, the access road to Short Moor crossed the old railway. Just before that lane there was another stone bridge which gave access between fields either side of the line.

Stone bridge Southwest of the Short Moor access road in December 2013, (c) Mike Quinn and licensed for reuse under a Creative Commons Licence (CC BY-SA 2.0). [28]
Two bridges crossed the line close to Short Moor. [29]

A distant view from the Southwest of the bridge carrying the access road to South Moor which is on the left of this image. The stone-arched bridge is just to the right of centre. [Google Streetview, April 2011]

Further to the Northwest, the line as shown on the railmaponline.com satellite imagery. {17}
The line ran on to the Northwest and this is the next significant point on the old railway. Close to Chipchase Castle the line was bridged by a minor road. [20]
The view across the old railway bridge from the Northeast. [Google Streetview, June 2009]
This next roadoverbridge carries an access road over the Border Counties Railway close to Kiln Plantation shortly before the highway turns away from the railway to the West along the North side of the plantation. [21]
The view from the South of the road bridge in the map extract above. [Google Streetview, April 2011]
The same structure in a photograph taken by Paul Hill and shared by him on the Border Counties Railway Facebook Group on 17th August 2020. [23]

A short distance to the Northwest another access road runs off the highway and crosses the Border Counties Railway.

This map estract shows the lane leading to Comogon in 1920, which was carried over the old railway by means of a private access bridge. [24]
The access road is private and this is the closest view of the old line at this location that is possible. The red lines show its route which was in a slight cutting to the right of the access road and a slight embankment to the left of the road. [Google Streetview, April 2011]
Wark Railway Station as shown on the 25″ Ordnance Survey of 1895. [25]
The view Southeast along the Border Counties Railway through Wark Railway Station. [Google Streetview, June 2009]
The Goods Shed at Wark Railway Station. [Google Streetview, June 2009]
Wark Signal Box when still in use. It sat just Northwest of the station platforms. This image was shared by Ian Farnfield on the Border Counties Railway Facebook Group on 6th April 2022. The provenance of this image is not known. [26]
Wark Signal Box in the 21st century. This image was taken by Ian Farnfield and shared by him on the Border Counties Railway Facebook Group on 6th April 2022. [26]

A short distance Northwest from Wark Railway Station the Border Counties Railway passed under another minor road.

This next extract from the 1895 25″ Ordnance Survey shows that bridge mentioned above crossing the old railway. [27]
The bridge mentioned above. [Google Streetview, July 2023]

From this point, the line turns to a more northerly direction as this next extract from the railmaponline.com satellite imagery shows. An accommodation track and Blind Burn next passed under the line of the railway. The image below shows the location.

The view Northeast along Piper Gate towards what was a bridge carrying the Border Counties Railway over the Burn and road. [Google Streetview, Aril 2011]

Northwest of Piper Gate a private access road follows the track bed to a private dwelling. Further North another access track passed underneath the line (shown in the first map extract below)

The access road to what is now R.D. Archer & Son. [31]
Over the next length of the line it ran quite close to the River North Tyne swinging to the East and then relatively sharply to the West Much of this length of the line was on embankment and a series of cattle-creeps were needed for access between farm fields. [17]
Close to Heugh, the line bridged a track which led West towards Countess Park at the river’s edge. [32]
The bridge adjacent to Heugh seen from the West in November 2020, © Andrew Curtis and licensed for reuse under a Creative Commons Licence (CC BY-SA 2.0). [35]
A second access road to Countess Park ran North-South and was also bridged by the old railway. [33]
The bridge shown on the map extract immediately above, seen from the North in May 2019, © Russel Wills and licensed for reuse under a Creative Commons Licence (CC BY-SA 2.0). [34]

Continuing North from Countess Park alongside the River North Tyne, the Border Counties Railway reaches Redesmouth Railway Station which was a junction station.

Redesmouth as shown on the OS Explorer Map Sheet. The dismantled railways can easily be seen. The Border Counties Railway bears Northwest from the Station and crosses the River North Tyne.

The two images immediately above focus on the railway infrastructure at Redesmouth which spreads over quite a large site surrounding the hamlet of Redesmouth. [Google Maps, October, 2024] [36]

The Signal Box and Waiting Room/Water Tower at Redesmouth Junction. [39]
The Signal Box and Water Tank (with waiting room beneath) at Redesmouth Station, seen from the South in May 1975 after closure and before renovation as a private home, © pt and licensed for reuse under a Creative Commons Licence (CC BY-SA 2.0). [37]
The renovated signal box and waiting room at Redesmouth as seen in May 2007, © Les Hull and licensed for reuse under a Creative Commons Licence (CC BY-SA 2.0). [38]
Redesmouth Railway Station seen from the North. The waiting room and signal box can be seen on the right of this image. [Google Streetview, April 2011]
A postcard image of Redesmouth Station in the very early years of its existence before the Signal Cabin was rebuilt to give a better view of the lines approaching the station. This image was shared on The Whistle Stop Facebook Page on 9th July 2017, (c) Public Domain. [40]

We finish this segment of our journey on the Border Counties Railway here at Redesmouth.

References

  1. https://shop.memorylane.co.uk/mirror/0300to0399-00399/railway-lines-chollerton-rapidly-overgrown-weeds-21635767.html
  2. https://youtu.be/cUOVM8ENOIg?si=f4sjHHSNsjn6qYm2, accessed on 24th September 2024.
  3. https://rogerfarnworth.com/2024/09/16/the-border-counties-railway-part-1-hexham-to-chollerton
  4. https://en.m.wikipedia.org/wiki/Barrasford_railway_station, accessed on 4th October 2024.
  5. https://maps.nls.uk/geo/explore/#zoom=17.6&lat=55.04171&lon=-2.11022&layers=168&b=ESRIWorld&o=100, accessed on 4th October 2024.
  6. https://maps.nls.uk/geo/explore/#zoom=17.3&lat=55.05695&lon=-2.12850&layers=168&b=ESRIWorld&o=100, accessed on 4th October 2024.
  7. https://maps.nls.uk/geo/explore/#zoom=17.3&lat=55.06153&lon=-2.14428&layers=168&b=ESRIWorld&o=100, accessed on 4th October 2024.
  8. https://maps.nls.uk/geo/explore/#zoom=17.1&lat=55.06274&lon=-2.14638&layers=168&b=ESRIWorld&o=100, accessed on 4th October 2024.
  9. https://www.geograph.org.uk/photo/2270834, accessed on 21st October 2024
  10. https://www.geograph.org.uk/photo/3788974, accessed on 21st October 2024.
  11. https://www.geograph.org.uk/photo/3788972, accessed on 21st October 2024.
  12. https://www.geograph.org.uk/photo/3788954, accessed on 21st October 2024,
  13. https://www.geograph.org.uk/photo/3788955, accessed on 22nd October 2024.
  14. https://www.geograph.org.uk/photo/3788956, accessed on 22nd October 2024.
  15. https://www.geograph.org.uk/photo/3579114, accessed on 22nd October 2024.
  16. https://www.geograph.org.uk/photo/3800747, accessed on 22nd October 2024.
  17. https://railmaponline.com/UKIEMap.php, accessed on 22nd October 2024.
  18. https://maps.nls.uk/geo/explore/#zoom=17.3&lat=55.06702&lon=-2.14178&layers=168&b=ESRIWorld&o=100, accessed on 22nd October 2024.
  19. https://maps.nls.uk/geo/explore/#zoom=18.3&lat=55.06677&lon=-2.15418&layers=168&b=ESRIWorld&o=100, accessed on 22nd October 2024.
  20. https://maps.nls.uk/geo/explore/#zoom=17.3&lat=55.07628&lon=-2.18538&layers=168&b=ESRIWorld&o=100, accessed on 22nd October 2024.
  21. https://maps.nls.uk/geo/explore/#zoom=17.3&lat=55.08081&lon=-2.19234&layers=168&b=ESRIWorld&o=100, accessed on 22nd October 2024.
  22. https://www.geograph.org.uk/photo/3785588, accessed on 22nd October 2024.
  23. https://www.facebook.com/photo/?fbid=176492280689846&set=pcb.2762530180657885, accessed on 22nd October 2024.
  24. https://maps.nls.uk/geo/explore/#zoom=17.3&lat=55.08364&lon=-2.19673&layers=168&b=ESRIWorld&o=100, accessed on 22nd October 2024.
  25. https://maps.nls.uk/geo/explore/#zoom=17.3&lat=55.08580&lon=-2.20367&layers=168&b=ESRIWorld&o=100, accessed on 22nd October 2024.
  26. https://www.facebook.com/photo/?fbid=10166275293725524&set=gm.4430757023690820&idorvanity=1005511202882103, accessed on 22nd October 2024.
  27. https://maps.nls.uk/geo/explore/#zoom=18.3&lat=55.08941&lon=-2.21047&layers=168&b=ESRIWorld&o=100, accessed on 22nd October 2024.
  28. https://www.geograph.org.uk/photo/3801813, accessed on 22nd October 2024.
  29. https://maps.nls.uk/geo/explore/#zoom=17.3&lat=55.07066&lon=-2.16799&layers=168&b=ESRIWorld&o=100, accessed on 22nd October 2024.
  30. https://www.geograph.org.uk/photo/7404692, accessed on 22nd October 2024.
  31. https://maps.nls.uk/geo/explore/#zoom=18.3&lat=55.10369&lon=-2.21770&layers=168&b=ESRIWorld&o=100, accessed on 22nd October 2024.
  32. https://maps.nls.uk/geo/explore/#zoom=18.3&lat=55.11812&lon=-2.20251&layers=168&b=ESRIWorld&o=100, accessed on 22nd October 2024.
  33. https://maps.nls.uk/geo/explore/#zoom=18.3&lat=55.12010&lon=-2.20643&layers=168&b=ESRIWorld&o=100, accessed on 22nd October 2024.
  34. https://www.geograph.org.uk/photo/6160483, accessed on 22nd October 2024.
  35. https://www.geograph.org.uk/photo/6691232, accessed on 22nd October 2024.
  36. https://maps.nls.uk/geo/explore/#zoom=16.4&lat=55.13241&lon=-2.21384&layers=168&b=ESRIWorld&o=100, accessed on 22nd October 2024.
  37. https://www.geograph.org.uk/photo/697704, accessed on 22nd October 2024.
  38. https://www.geograph.org.uk/photo/1699167, accessed on 22nd October 2024.
  39. https://maps.nls.uk/geo/explore/#zoom=18.4&lat=55.13217&lon=-2.21256&layers=168&b=ESRIWorld&o=100, accessed on 22nd October 2024.
  40. https://www.facebook.com/photo?fbid=1871550826442636&set=pcb.1871554073108978&locale=en_GB, accessed on 23rd October 2024.

Light Railways in the UK – the early years after the 1896 Act – The Railway Magazine, August 1905. …

A note in the August 1905 edition of The Railway Magazine mentions a 1904 report from the Light Railway Commissioners and comments from the Board of Trade in 1905. [1: p170]

The Regulation of Railways Act 1868 permitted the construction of light railways subject to ‘…such conditions and regulations as the Board of Trade may from time to time impose or make’; for such railways it specified a maximum permitted axle weight and stated that ‘…the regulations respecting the speed of trains shall not authorize a speed exceeding at any time twenty-five miles an hour’. [2]

The Light Railways Act 1896 did not specify any exceptions or limitations that should apply to light railways; it did not even attempt to define a ‘light railway’. However, it gave powers to a panel of three Light Railway Commissioners to include ‘provisions for the safety of the public… as they think necessary for the proper construction and working of the railway’ in any light railway order (LRO) granted under the act. These could limit vehicle axle weights and speeds: the maximum speed of 25 miles per hour (mph) often associated with the Light Railways Act 1896 is not specified in the act but was a product of the earlier Regulation of Railways Act 1868. … However, limits were particularly needed when lightly laid track and relatively modest bridges were used in order to keep costs down.” [2]

Sir Francis Hopwood’s report to the Board of Trade on the proceedings of the Light Railways Commission during 1902, indicated “a growing tendency to embark on private and municipal light railway schemes all over the country. Thirty-one fresh orders, of which only two for steam traction, were submitted, eighteen being confirmed, making a total of thirty-five for the year. No order was rejected. Since 1896, 420 applications [had] been made, more than half being confirmed. They represented 3,900 miles of line, with a capital expenditure of £30,371,193. The total mileage sanctioned during 1902 amount[ed] to 1,500 miles, with a capital expenditure of £10,148,900, or over a third of the aggregate for five years.” [10]

The short report in the August 1905 Railway Magazine highlighted the “number of applications made to the Commissioners in each year since the commencement of the Act, the number of orders made by the Commissioners, and the number confirmed by the Board of Trade, with mileage and estimates.” [1: p170]

Applications for Light Railway Orders (*From 278 applications. + From 237 Orders submitted). [1: p170]

Railways built under the Light Railways Act 1896 struggled financially and by the 1920s the use of road transport had put paid to the majority. Some survived thanks to clever management and tight financial control.

The Light Railways Act was repealed in 1993 for England and Wales by the Transport and Works Act 1992 and no new light railway orders were allowed to be issued for Scotland after 2007. … Until the Transport and Works Act 1992 introduced transport works orders, heritage railways in the UK were operated under light railway orders.” [2]

Among many others, Light Railways which were built under the Act include these examples:

Welshpool and Llanfair Light Railway, opened in 1903, closed in 1956, reconstructed and reopened between 1963 and 1981 on the entire route except Welshpool town section. Articles about this line can be found here, here and here.  [3]

Tanat Valley Light Railway, articles about the line can be found here and here. [4]

Shropshire & Montgomery Light Railway, five articles about this line and its rolling stock can be found here, here, here, here and here. [5]

Kelvedon & Tollesbury Light Railway, an article about this line can be found here. [6]

Campbeltown and Machrihanish Light Railway is referred to in this article. [7]

Bere Alston and Calstock Light Railway, the East Cornwall Mineral Railway and this line are covered in three articles which can be found here, here and here. [8]

Ashover Light Railway, is covered in three articles which can be found here, here and here. [9]

A parallel Act governed light railways built in Ireland.

References

  1. The Railway Magazine, London, August 1905.
  2. https://en.m.wikipedia.org/wiki/Light_Railways_Act_1896, accessed on 14th August 2024.
  3. https://rogerfarnworth.com/2022/07/24/the-welshpool-llanfair-light-railway/ and https://rogerfarnworth.com/2022/09/23/the-welshpool-llanfair-light-railway-an-addendum/.
  4. https://rogerfarnworth.com/2019/09/18/the-tanat-valley-light-railway-and-the-nantmawr-branch-part-1/ and https://rogerfarnworth.com/2020/03/17/the-tanat-valley-light-railway-and-the-nantmawr-branch-part-2/.
  5. https://rogerfarnworth.com/2019/05/18/the-shropshire-and-montgomeryshire-light-railway-and-the-nesscliffe-mod-training-area-and-depot-part-1/ and https://rogerfarnworth.com/2019/07/21/gazelle/ and https://rogerfarnworth.com/2019/07/27/gazelles-trailers/ and https://rogerfarnworth.com/2019/08/02/ford-railmotors-on-colonel-stephens-lines-in-general-and-on-the-smlr/ and https://rogerfarnworth.com/2019/08/12/the-shropshire-and-montgomeryshire-light-railway-and-the-nesscliffe-mod-training-area-and-depot-part-2/.
  6. https://rogerfarnworth.com/2019/01/29/the-kelvedon-and-tollesbury-light-railway/
  7. https://rogerfarnworth.com/2024/08/08/water-troughs-major-works-campbeltown-machrihanish-light-railway-welsh-highland-railway-and-other-snippets-from-the-railway-magazine-january-1934/.
  8. https://rogerfarnworth.com/2019/03/26/the-east-cornwall-mineral-railway-part-1/ and https://rogerfarnworth.com/2019/03/28/the-east-cornwall-mineral-railway-part-2/ and https://rogerfarnworth.com/2019/04/02/the-bere-alston-to-callington-branch/.
  9. https://rogerfarnworth.com/2019/01/15/the-ashover-light-railway-part-1/; and https://rogerfarnworth.com/2019/01/19/the-ashover-light-railway-part-2/ ; and https://rogerfarnworth.com/2019/01/19/the-ashover-light-railway-part-3/
  10. The Railway Magazine, London, July 1903.

Welshpool and Llanfair Light Railway again – The Railway Magazine, July 1903. ……

I was reading (in August 2024) the July 1903 Railway Magazine and came across an article about the Welshpool & Llanfair Light Railway. [1: p64-68] The article marked the opening of the line at the beginning of April 1903.

After the first railway entered Welshpool on 10th June 1862 – the Oswestry (by 1903, the Cambrian) Railway – a series of three different schemes were proposed to connect Welshpool and Llanfair Caereinion. The first scheme was put forward in 1864, the second in 1875, the third in 1887. None of these schemes came to fruition. However, “in 1896 a ray of light (the Light Railways Act) illumined the gloomy darkness of uncertainty and failure. Before the measure had received the Royal assent, Dr. C. E. Humphreys (Llanfair) had launched a scheme for connecting Llanfair with the Cambrian Railways, by means of a line through the Meifod Valley and Four Crosses. This was not allowed to pass unchallenged. Immediately Welshpool … entered the lists with a Bill for a 2ft. 6in. gauge light railway, to run from Welshpool to Llanfair. If Llanfair was to have a railway (which was of all things most desirable) that railway, said they, must run from Welshpool. … A spirited war of routes resulted, terminated by the Light Railways Commissioners giving the award to Welshpool for a 2ft. 6in. gauge railway from Welshpool to Llanfair.” [1: p64]

The successful company “was liberally supported by Welshpool, the Montgomery County Council, Forden District Council, and Llanfyllin Rural District Council.” [1: p64]. The Treasury granted a gift of £17,500 – one-third of the estimated cost. The new railway was planned as a single line, 2ft, 6in. gauge running from the road outside Welshpool Railway Station, along “the Lledan Gorge, over the Pass at Glyn Golfa to Castle Caereinion, through the Banwy Valley to Llanfair. An agreement was entered into with the Cambrian Railways to work and maintain the line; the construction of the line [was] … under the supervision of the Cambrian Railway’s Engineer, Mr. A.J. Collin: Mr. Strachan (Cardiff) being the contractor. On 30th May 1901, … Viscount Clive the son of the Earl and Countess Powys … cut the first sod for the new line. In February [1903] the line was completed; and passed by Major Druitt, of the Board of Trade.” [1: p64-65]

On 4th April 1903, the first passenger train navigated the new line. The Railway Magazine described the route: “The new railway [cut] through the town of Welshpool, over the brook and canal, and burrow[ed] its way up the Golfa Pass.” [1: p66]

The length of the line through the town of Welshpool has already been covered. For the relevant articles, please check these two links …

Those articles cover the length of the line abandoned when Welshpool undertook highway improvements, the run from Welshpool Railway Station as far as Raven Square, now a roundabout.

The roundabout at Raven Square appears top-right. The abandoned length of line heads off to the Northeast. The preservation line has a new station to the Southwest of the roundabout, approximately on the site of the passing loop shown here. 1:2500 Ordnance Survey SJ2007-SJ2107 – AA Revised: 1966, Published: 1967. [4]
A sketch map of the Welshpool & Llanfair Railway. [1: p64]

The preservation line occupies the trackbed of the line from Raven Square to Llanfair. It runs immediately alongside the A458 on the North side of Nant-y-caws Brook.

A first length of the line to the West of Raven Square. This extract, and the following map extracts, is from the OS Landranger map series as held by Streetmap.co.uk. [5]
The same length of the line as it appears on railmaponline.com’s satellite imagery. [6]
This extract from the OS War Office, England and Wales One-Inch Popular, GSGS 3907 – 1933-43, Sheet 60 – Shrewsbury & Welshpool was printed in 1943 on a base map dated around 1916. It shows the location of the halt at Raven Square (immediately above the ‘309’) and shows the line continuing Northeast towards the centre of Welshpool. [18]
Looking Southwest along the A458. The road and railway are separated by no more than a hedge or fence. [Google Streetview, May 2024]
Ungated crossing adjacent to the A458 at the junction with the lane which appears bottom-left in the map extract and satellite image above. [Google Streetview, May 2024]

The Railway Magazine continues: In the Golfa Pass, “by means of a series of curves of small radii and steep inclines, the great natural beauty of the surrounding country has been retained. Rising 300ft, in the first two miles it reache[d] Golfa … with its lung-filling expanse of common – its garden of fern, gorse, and broom –  where at 1,000ft above the sea level is presented a glorious panorama of typical Welsh pastoral scenery – the ideal of the pedestrian, artist, and rambler.” [1: p66]

The line then moves away from the A458 to enable it to best find its way up the valley at a reasonable grade. In doing so it follows the contours and passes through a series of tight curves. [5]
The same length of the line on satellite imagery. [6]
In Sylfaen Dingle, to the West of Barn Farm, it returns to run very close to the A458. [5]
Once again, this satellite image covers the same length of the line as the map extract above. [6]
The level crossing at Cwm Ln from the Northeast. [Google Streetview, May 2024]

The Railway Magazine continues to describe the route ahead, the line “threads the beautiful Pass of Sylvaen; there, far to westward, is spread the famous vale of Caerinion, where, silhouetted against the misty horizon, Cader Idris and The Arrans lend an air of magnificent solemnity to an impressive scene.” [1: p66]

The railway remains close to the road as far as Sylfaen Halt after which it turns away to the South. [5]
A similar length of the line on railmaponline.com’s satellite imagery. [6]
Farm/forest access road crossing just to the East of Sylfaen Halt. [Google Streetview, May 2024]
Sylfaen Halt seen from the A458. The photo is taken from the East. [Google Streetview, May 2024]
Gradients are shallower here, witnessed by the broadening of the contours. the line crosses Coppice Lane and passes to the North of the Sewage Works. [5]
A very similar length of the line as it appears on railmaponline com’s satellite imagery. [6]

Castle Caereinion is South of the line down Coppice Lane from the level crossing which can be seen in the bottom-left of the image above.

Coppice Lane level crossing seen from the South. [Google Streetview, May 2024]

Again, the article in The Railway Magazine continues: the village of Castle Caereinion is about 0.5 mile from the station bearing its name. The line passed the site of the Castle of Caereinion and ran on through Cyfronydd and along the banks of the Afon Banwy, also known as the Afon Einion. It crossed the Bryn-Elen Viaduct, “a very substantial piece of engineering. The rails [were] then carried across the dingle which [ran]up to Cwmbaw by a stone bridge of six arches, at a considerable height above the bottom of the ravine. Half a mile further on is the Banwy Viaduct.” [1: 67]

After another tight curve the line enters Castle Caereinion Station. It is here that some of the services from Llanfair on the preservation line terminate. The loco runs round its train and then shepherds its carriages back to Llanfair Caereinion. Immediately at the edge of the station site the line crosses the B4385 and turns sharply to the Northwest. [5]
Once again, a similar area to that covered by the OS map extract above. Along this length of the line trains for Llanfair first encounter Castle Caereinion Station, then cross the B4385 and, as they turn northward they again cross the B4385. [6]
Castle Caereinion Railway Station as seen from the first level-crossing with the B4385, looking East. [Google Streetview, May 2024]
The first rail-crossing on the B4385 seen from the South. Castle Caereinion Station is of the picture to the right. [Google Streetview, May 2024]
The vIew West along the line from the same level-crossing with the B4385. [Google Streetview, May 2024]
The second, more westerly, level-crossing over the B4385. [Google Streetview, May 2024]
The view back towards Welshpool. [Google Streetview, May 2024]
The line ahead towards Llanfair. [Google Streetview, May 2024]
The line runs Northwest towards Cyfronwydd Bridge and Cyfronydd Station from the crossing on the B4385. [5]
Railmaponline.com covers the same length of the railway. [6]

The line continues down through Cyfronydd Railway Station, over Bryn-Elen Viaduct to the banks of the Afon Banwy.

Just beyond Cyfronydd Station, the track crossed a minor road and ran out over Bryn-Elen Viaduct and then reaches the South bank of the Afon Banwy (Afon Einion). [5]
The same length of the line, through Cyfronydd Station and out onto Bryn-Elen Viaduct. [6]
Looking East through Cyfronydd Railway Station. [Google Streetview, April 2024]
The level-crossing on with the minor road at the West end of the Cyfronydd Station site, seen from the Northeast. [Google Streetview, April 2024]
The line West towards Llanfair Caereinion. [Google Streetview, April 2024]
The building of Bryn-Elen Viaduct. [7]
The Earl crossing Bryn-Elen Viaduct in the year 2000, © Keith Halton. This image was shared on the Welshpool and Llanfair Light Railway Facebook Page on 9th May 2020. [9]
One of a series of postcards produced in a set by Dalkeith, “On the Bryn-Elen Viaduct in GWR days.” [8]

After running for a while on the South bank of the Afon Banwy (Afon Einion) the line crosses the river on a three-span girder bridge, Banwy Viaduct. It turns West once again and enters Heniarth Railway Station. Opened as Heniarth Gate on 6th April 1903 the station was renamed ‘Heniarth’ on 1st February 1913. [16]

The railway crosses the Afon Banwy (Afon Einion)  on the Banwy Viaduct, just short of Heniarth Station. [5]
Close to the same length of line as shown by railmaponline.com. [6]
The approach from the East to the Banwy Viaduct, © John Firth and licensed for reuse under a Creative Commons Licence, (CC BY-SA 2.0). [13]
A mixed train crosses the Banwy Viaduct. [1: p66]
Another from the series of postcards produced in a set by Dalkeith, “Crossing the Afon Banwy, 1903.” [8]
‘The Earl’ heads a special enthusiasts’ train across the River Banwy bridge on the way back to Llanfair Caereinion in June 1968.
On 13th December 1964, the western masonry pier supporting the steel girder bridge was seriously damaged by flood waters and the bridge dislodged. During the spring and early summer of 1965 the 16th Railway Regiment of the Royal Engineers replaced the damaged masonry pier with a fabricated steel one and repositioned the span. Train services between Llanfair Caereinion to Castle Caereinion resumed on 14th August 1965. The steel pier is clearly evident in the photo. It has since been replaced by a masonry one, but more substantial than the one damaged in 1964, © Martin Tester and licensed for reuse under a Creative Commons Licence, (CC BY-SA 2.0). [11]
On the line between Heniarth Station and the Banwy Bridge. A view from the first coach behind ‘The Earl’, facing Southeast, © Martin Tester and licensed for reuse under a Creative Commons Licence, (CC BY-SA 2.0). [10]
Heniarth Gate Railway Station seen from the Banwy Viaduct, Llanfair Caereinion is away to the left, © John Firth and licensed for reuse under a Creative Commons Licence (CC BY-SA 2.0). [15]

Heniarth “is the centre for Meifod District. A short distance further on is the picturesque Melin [Dol-rhyd-y-defaid] where the rails are carried between the mill race and the River Banwy, by means of a substantial stone embankment.” [1: p67]

The railway is now on the North bank of the river. After leaving Heniarth Station it is met once again by the A458. Both railway and road pass a mill which, along with the mill race, separates the two. [5]
Almost the same length of line as shown on the map extract above. [6]
The line continues to follow the river bank into Llanfair Caereinion and it’s terminus adjacent to the river. [5]
The last of this series of extracts from the railmaponline.com satellite imagery bring us to the location of the terminus at Llanfair Caereinion. [6]
‘The Earl’ heads its train on the run-in to Llanfair Caereinion in April 1968. It is just passing the outer home signal about 100 metres from the station, © Martin Tester and licensed for reuse under a Creative Commons Licence, (CC BY-SA 2.0). [12]
‘The Earl’ at the water tank near Llanfair Caereinion Station – 1969. At the time this was the only watering facility on the railway. ‘Earl’ is seen heading a special train run by the Liverpool University Public Transport Society, © Alan Murray-Rust and licensed for reuse under a Creative Commons Licence, (CC BY-SA 2.0). [14]
This extract from the OS map SJ10 (33/10)-A
(Revised: 1900 to 1949), originally published: 1952, shows the railway approaching Llanfair Caereinion. Earlier mapping from 1901 does not show the line. The faded appearance of this extract matches the full map sheet provided by the NLS. [20]
The station at Llanfair Caereinion, a postcard view looking Northeast from the platform, © Public Domain. [19]
Llanfair Caereinion Railway Station in 1963. The original passenger service was withdrawn in 1931 in favour of a bus service. Lorries also began to poach traffic from the railway but the coal-powered trains came into their own again during the petrol scarcity of the Second World War, when Britain had to increase domestic food production. Local farms needed more feed for livestock but there was nowhere to store it at the terminus here. The solution was to place the bodies of two Victorian carriages (standard gauge) on the disused passenger platform. One is visible in this photograph, © Peter Clark. The photo comes from the history points.org website (https://historypoints.org/index.php?page=llanfair-caereinion-railway-station) and is included here by kind permission of the site owner.. [21]
The station buildings at Llanfair Caereinion looking Southwest towards the buffers from the rear veranda of one of the carriages on 1st June 2011, © John Firth and licensed for reuse under a Creative Commons Licence, (CC BY-SA 2.0). [22]

The Railway Magazine commented on the importance of this new railway: “This railway opens up and connects to an established system of railways, an area of over 100 square miles of Welsh scenery of great natural beauty-possessing abundance of excellent fishing and many other attractions. … Llanfair, a typical little Welsh town, is now within easy access, and the greatest obstacle to its success as a health resort has been removed. In the year 1824 (Montgomeryshire Collections) the medicinal properties of the springs of Llanfair, were discovered by one ‘Madock’, sulphur being present in one; another, close by, had chalybeat properties; while a third was saline. Pumps and other appliances were erected for the convenience of those who would make use of the springs, and the value of the waters becoming more widely known, the place was largely visited by invalids. The waters are still in good repute, and now that the difficulties consequent upon bad roads are removed, it is believed that they will become as popular as the waters of Llandrindod and Llanwrtyd in South Wales.” [1: p67]

The track is of a small gauge – 2ft 6in. The Railway Magazine described the rails as being “of the Vignoles section, flat bottomed, 421bs. per yard. The small radii of the curves, with their steep gradients, have necessitated a general use of check rails, sole-plates, and cross-stays to ensure a safe and substantial track.” [1: p67]

Although the railway gauge is only 2ft 6in “care in designing the rolling stock has prevented this line being catalogued under the title of ‘Toy Railways’, as will be apparent from the photographs. The responsibility of designing and providing the whole of the rolling stock devolved upon Mr. Herbert Jones, the Locomotive Superintendent of the Cambrian Railways, and is of a substantial and commodious character. The coaches, very roomy and comfortable vehicles – bogie type being built after the style of the one-storey electric car, are provided with first, third, and smoking compartments, divided by sliding doors; adjustable platforms, also, at the ends provide a convenient means of communication.” [1: p68]

The railway was initially worked by the Cambrian Railways, for 60 per cent. of the earnings. [1: p68]

Original Locomotives

The railway originally operated with two locomotives, No. 1, ‘The Earl’ and No. 2, ‘The Countess’.

‘The Earl’ at Raven Square Station taking on water in 2015, © Rwendland and licenced for use under a Creative Commons Licence, (CC BY-SA 4.0). [18]
The manufacturer’s photograph of The Countess. [1: p68]

As The Railway Magazine says: the engines were “two in number, named respectively ‘The Earl’ and ‘The Countess’, [they were] six-wheeled coupled, side tanks, with outside cylinders, built by Messrs. Beyer, Peacock and Co. Weight in working order, 194 tons; cylinders, 11in. diameter by 16in. stroke; diameter of cast-steel wheels, 2ft. 9in.; wheel base, 10ft.; steel boiler, 7ft long, 3ft. 5.5in. diameter; 119 copper tubes, 1.75in. diameter.” [1: p68]

With Walschaerts valve gear and a maximum boiler pressure of 150 lbf/in2 (1.03 MPa), they yielded a tractive effort of 8,175 lbf (36.36 kN). [17]

The Earl and The Countess ran the line from 1903 until closure of the railway in 1956. The engines were overhauled at Oswestry Works and were sent there on closure of the railway. [17]

By 1959, negotiations had begun with British Railways and the Welshpool and Llanfair Light Railway Preservation Company had leased the line from British Railways by the end of 1962. On 28 July 1961, The Earl returned after storage and overhaul at Oswestry Works, with Countess following not long after. They have continued to work on the line ever since. [17]

During their lifetime the locos have had many modifications, particularly after the takeover by the Great Western. During this period they were fitted with a larger cab, handles on the smokebox door, rather than the original wheel, a larger dome, a much larger and more sophisticated safety valve and two different funnels. They were painted in Great Western green. … When taken over by British Railways, their shunting bells and chopper couplings were removed, and were repainted black. … From 1997 to 2001, the locomotives were fully overhauled at Llanfair, which included the fitting of new boilers and cylinders. They are currently the same design as the BR era, but have worn different liveries in preservation. [17]

Original Rolling Stock

The Railway Magazine said: “The stock is painted in the Cambrian colours coaches, bronze, green and white; engines, black, picked out with red and yellow.” [1: p68]

3rd class bogie coach. [1: p67]

Carriage details were: “Length over headstocks, 35ft.; centres of bogies, 24ft.; width outside, 6ft. 6in.; wheel base of bogies, 4ft.; size of journals, 6in. by 3in. diameter; centres of journals, 4ft. The body [was] built of oak and mahogany, the steel underframes [were] fitted with the automatic vacuum brake, and a hand brake [was] placed on each carriage. Weight of carriage, 94 tons.” [1: p68]

Cattle Wagon. [1: p67]

The whole of the stock was fitted with central ‘buffer couplings’ and safety chains.” [1: p68]

Goods Brake Van [1: p67]

Sadly, the coaches purchased for the opening of the line did not survive into preservation. When passenger services were suspended in 1931 the coaches were sent to Swindon for ‘storage’ but never re-entered traffic and were broken up in 1936. That would have been the end of the story but for a desire by the preserved Welshpool & Llanfair Light Railway to reverse history and through the generosity of donors a complete new rake was built by the Ffestiniog Railway at their Boston Lodge works. [23]

References

  1. Welshpool & Llanfair Light Railway; in The Railway Magazine, London, July 1903, p64-68.
  2. https://rogerfarnworth.com/2022/07/24/the-welshpool-llanfair-light-railway/
  3. https://rogerfarnworth.com/2022/09/23/the-welshpool-llanfair-light-railway-an-addendum/
  4. https://maps.nls.uk/view/188900409, accessed on 18th August 2024.
  5. https://www.streetmap.co.uk/map?x=314500&y=307500&z=120&sv=Welshpool&st=3&tl=Map+of+Welshpool+and+Llanfair+Railway,+Powys&searchp=ids&mapp=map, accessed on 18th August 2024.
  6. https://railmaponline.com/UKIEMap.php, accessed on 19th August 2024.
  7. https://wllr.org.uk/our-railway/our-history, accessed on 21st August 2024.
  8. https://www.ebay.co.uk/itm/204467180155?mkcid=16&mkevt=1&mkrid=711-127632-2357-0&ssspo=tL4T-ZhGQ3-&sssrc=4429486&ssuid=afQhrar7TGK&var=&widget_ver=artemis&media=COPY, accessed on 21st August 2024.
  9. https://www.facebook.com/109476715927837/posts/pfbid0ENUcCSDiS5cYXkJut2j291owAcq3GZAJK7xmfZ25MjnkZJLhzaNgKexKV7fzbg8Jl/?app=fbl, 21st August 2024.
  10. https://www.geograph.org.uk/photo/7681103, accessed on 25th August 2024.
  11. https://www.geograph.org.uk/photo/7681029, accessed on 25th August 2024.
  12. https://www.geograph.org.uk/photo/6788156, accessed on 25th August 2024.
  13. https://www.geograph.org.uk/photo/1559805, accessed on 25th August 2024.
  14. https://www.geograph.org.uk/photo/6957406, accessed on 25th August 2024.
  15. https://www.geograph.org.uk/photo/5542428, accessed on 25th August 2024.
  16. https://en.m.wikipedia.org/wiki/Heniarth_railway_station, accessed on 26th August 2024.
  17. https://en.m.wikipedia.org/wiki/Welshpool_and_Llanfair_Light_Railway_No.1_The_Earl_and_No.2_Countess, accessed on 28th August 2024.
  18. https://maps.nls.uk/view/239291707, accessed on 29th August 2024.
  19. https://www.redbubble.com/i/poster/Welshpool-and-Llanfair-Light-Railway-by-Yampimon/9375190.LVTDI, accessed on 29th August 2024.
  20. https://maps.nls.uk/view/196757669, accessed on 29th August 2024.
  21. https://historypoints.org/index.php?page=llanfair-caereinion-railway-station, accessed on 29th August 2024.
  22. https://www.geograph.org.uk/photo/2437193, accessed on 129th August 2024.
  23. https://www.accucraft.uk.com/products/welshpool-llanfair-pickering-coaches, accessed on 17th September 2024.

Railway Statistics – The Railway Magazine, July 1903 and a brief look at modern figures. …

J. Holt Schooling produced a series of articles in The Railway Magazine after the turn of the 20th century. I came across the third of these in the July 1903 edition of the magazine. [1: p20-28] Elsewhere in the same magazine, there was a short note which highlighted the total net receipts of all Britain’s railways companies with the figures tabulated. [9: p59]

Headline figures for Britain’s railway companies for 1901 and 1902. [9: p59]

The figures show a small but significant increase between 1901 and 1902.

Holt Schooling’s article looked at some detailed statistics relating to British railways, with some comparisons made with statistics relating to the railways of the USA. …

Accidents

Holt Schooling highlighted the decrease in the chance of death or injury to railway passengers over the period from 1877 to 1901. Accidental deaths fluctuated over the period, injuries fell significantly in absolute terms (4,330 injured between 1877 and 1881 and 2,988 in 1897 to 1901)  during the same period, the number of passengers carried rose significantly (2.9 billion to 5.5 billion). In relative terms, the number of deaths and injuries improved dramatically. The proportion killed, reducing from 1 in 17.9 million to 1 in 75.6 million, and the proportion injured refusing from 1 in 700 thousand to 1 in 1.2 million.

Passenger accident statistics on British railways. [1: p20]

Comparable figures in the USA show that the chance of death or injury while travelling by rail in the USA is very much higher, close to eight times higher.

Passenger accident statistics on railways in the USA. [1: p20]

Holt Schooling notes that “This result, unfavourable to the United States, is partly qualified by the fact that American railway journeys are of greater duration than English railway journeys, American passengers thus being exposed to risk of accident for a longer time than the British pas- senger, and also the American returns do not explicitly state whether or not the accidents to passengers are ‘from causes beyond their own control’ – a condition that applies to the foregoing accident facts for British railways.” [1: p21]

Holt Schooling produced a 10 year summary of the causes of accidents. …

Causes of accidents in the British Isles during the ten years 1802-1901. [1: p21]

He notes that, “collisions account[ed] for 60% of all train accidents that happened, and that only two other causes of accidents had any material degree of frequency.” [1: p21] These were defects in the permanent way and trains entering stations at too great a speed.

Rates of Dividend on Ordinary Stock

In 1901, over £454 million was invested in railway companies ordinary stock. Schooling focuses on Ordinary Stock because it is the largest of the stocks under which railway capital is grouped. He explains that Guaranteed and Preference Stock amounted to more than £425 million, and Loans and Debenture Stock, just over £316 million.

Rates of Dividend Paid in 1901. [1: p22]

31% of Ordinary Stock paid a dividend between 2 and 3%. Interestingly, nearly 20% of the stock paid a dividend from 5 to 6%. [1: p22]

Working Expenditure

Railway costs per 1000 train-miles all rose between 1900 and 1901, with the exception of the cost of compensation which marginally decreased.

Railway Expenditure 1900/1901. [1: p22]

In absolute terms, the pattern is similar. Railway costs rose by just over £2.7 million between 1900 and 1901.

Railway Expenditure 1900/1901. [1: p23]

That increase in costs was only partially matched by a £1.5 million increase in gross receipts.

Train Mileage

Holt Schooling compared British and American figures for the year 1900 which was the latest year he had figures for. …

USA passenger train miles were 363.5 million, goods train miles were 492.6 million. A total of 856.1 million miles. The figures for the UK were respectively, 220 million, 180 million and a total of 400 million miles.

It is worth noting that freight mileage in the USA was considerably higher than passenger mileage. In the UK passenger mileage exceeded freight mileage. Train mileage in total in the USA was more than double that in the UK.

It is interesting, however, to consider the intensity of use of lines in the USA and the UK. This provides a very different picture. …

Train mileage per mile open for traffic. [1: p24]

Holt Schooling comments that on “average, each mile of American railroad is passed over by a train 4,400 times in the year, or twelve times per day. But each mile of British railroad is passed over by a train 18,300 times in the year, or fifty times per day. This is a striking fact, and it is another of those fundamental differences between the railway systems of the two countries …  Our railways are used more than four times as often as the American lines are used, and this fact necessarily carries with it many other important differences between the two railway systems and the methods by which they are worked.” [1: p24]

Classes of Passengers

Three different classes were used on Britain’s railways. Holt Schooling tabulates the figures for each class in 1901.

Patronage of British railways passenger trains by class in 1901. [1: p24]

Holt Schooling notes “the overwhelming preponderance of the third-class passenger … 91.2 per hundred. The [highest] proportion of third-class passengers [was] in Scotland; and the lowest proportion of third class passengers [was] in Ireland, 81.4 per 100.” [1: p24-25] It is worth reminding ourselves that the whole of Ireland, at this time, was still considered to be part of the UK.

Holt Schooling goes on to note that the highest proportion of second- and first-class passengers in the UK was in Ireland and then comments that these figures suggest that Irish travellers do not feel the need for thrift in the way others in the UK do. He seems to suggest that his figures show that Ireland was not as poverty-stricken as was currently being made out in 1903.

It seems to me that this is only one way of interpreting the figures. Surely it is, at least, just as possible that these figures suggest that relative poverty was greater in Ireland given that a lower proportion of people were able to afford to travel third-class. It is also possible to infer from the figures that there was a greater disparity between rich and poor in Ireland than in the rest of the UK.

Receipts from Passenger and Goods Traffic

Gross receipts of British railway companies in 1901 were £106.5 million of which over £99.5 million were traffic receipts (passenger and goods combined). Holt Schooling notes that “Goods Traffic yielded more than one-half of this amount namely, £53 million, and passenger traffic, £46.5 million.” [1: p25-26] He goes on to state that over the 10 years (1892-1901), passengers receipts had increased in relation to goods receipts as shown in the table below.

Traffic Receipts of the Railways of Britain. [1: p26]

Overall receipts had increased year on year from £78.6 million in 1892 to £99.6 million in 1901. Despite the slight discrepancy in figures between Holt Schooling’s narrative and the table above, it is clear that the relative proportion of income changed over the 10 year period from 45% passenger/55% goods, to 47% passenger/43% goods.

Holt Schooling looks behind these overall figures and notes that close to 77% of passenger receipts came from third-class passengers! The figures were: 76.8% third-class; 10.7% second-class; 12.5% first-class.

Comparison of some Individual Railway Companies

Holt Schooling provides some details of individual railway company receipts/expenditure in 1901. [1: p26]

The lowest percentage of expenditure to receipts that he quotes is for the Furness Railway, 51%, closely followed by the Great North of Scotland Railway (52%), the North British Railway (53%), the Caledonian Railway (56%), the Great Northern Railway of Ireland (56%), the Taff Vale Railway (58%), Midland Great Western Railway of Ireland (59%) and the Glasgow and South Western Railway (61%).

The average of all British railways was 63%, a figure which also applied to the GWR, the L&Y and the LNWR. Those with higher percentage of expenditure included: the Great Southern & Western Railway of Ireland, the London & South Western Railway and the Midland Railway (64%), the North Eastern Railway (65%), the Great Eastern Railway (66%), the Great Northern Railway (67%) and the Great Central Railway (70%)

Holt Schooling suggests that these figures are counterintuitive. Rather than the larger companies being the most efficient, it seems that it was the smaller companies for whom this was true. There also appears to be a Northwest/Southeast divide with the least efficient companies being to the South and East of the country, while the more efficient were in the North and West, including Ireland!)

Holt Schooling also looks at receipts per train mile in pence/mile. …

Railway company receipts per train-mile. [1: p27]

Holt Schooling comments: “Here, again, are very large differences. The Taff Vale Railway received nearly 7s. per train-mile run from passenger and goods traffic, while the Great North of Scotland Railway received little more than 4s., the mean result for all railways in the United Kingdom being almost exactly 5s. per train-mile run. There are many important railways in the above list whose receipts per train-mile run are appreciably below the average, although upon general considerations, one would expect them to be above rather than below the average.” [1: p27]

Delayed Arrival of Trains

The most recent figures available to Holt Schooling, issues by the Board of Trade, related to some companies’ long-distance train arrivals in London in the 3 month period, June-August 1895. …

Punctuality of Railway Companies’ Trains at London termini in June to August 1895. [1: p27]

Figures for trains originating more than 50 miles from London may well feel comparable for the first four companies in the table above. Given the greater distances travelled by trains in the GWR, it is to be expected that a smaller percentage would have arrived within 5 minutes of the scheduled time than other companies in the list.

Rail Usage, January to March 2024 and earlier.

How do the statistics from 1903 compare with modern figures? The Office of Rail and Road produces quarterly statistics about rail usage. At the time of writing, the latest statistics cover the period from January to March 2024. [2]

The ORR report is dated 13th June 2024.

A total of 1,610 million journeys (1.61 billion) were made by rail passengers in Great Britain in the latest year (1 April 2023 to 31 March 2024). This is a 16% increase on the 1,380 million journeys (1.38 billion) in the previous year (1 April 2022 to 31 March 2023). There were 405 million journeys in the latest quarter (1 January to 31 March 2024). This is a 13% increase on the 359 million journeys made in the same quarter in the previous year (1 January to 31 March 2023).” [2]

Total passenger revenue was £10.3 billion in the latest year. This is a 13% increase on the £9.1 billion in the previous year (when adjusted for inflation). In the latest quarter, total passenger revenue in Great Britain was £2.6 billion. This is 13% more than the £2.3 billion generated in the same quarter in the previous year (when adjusted for inflation).” [2]

Included within the ORR report was a graph showing passenger numbers since 1946.

Passenger numbers on British railways since 1946 [2]

In 1946, passenger numbers were 1,270 million. A nadir was reached in 1982, just 630 million passengers. The peak since then was reached at the end of the 2010s, 1,740 million. At the turn of the 20th century Holt Schooling reported annual passenger numbers as 1,712 million, almost the same as the figure for 2019/20. The effect of the pandemic was marked. In 2020/21, passenger numbers fell to 388 million, recovering to 990 million in 2021/22, 1,380 million in 2022/23 and 1,610 million in 2023/24.

Before 1946, figures were interrupted by the two world wars. It is possible, however, to produce a similar graph to that above covering the period prior to 1946. The ORR has done so and an extract from another of their regular reports is below.

Passenger numbers on British railways from 1872 to 1947 and beyond. [8]

Peak patronage of the country’s railways occurred in 1920 when the railways carried 2,186 million passengers.

Passenger train kilometres: distances are recorded in kilometres in 2024. Between January and March 2024, “there were 126 million passenger train kilometres travelled, … an 8% increase on the 117 million recorded in the same quarter in the previous year. However, this is 93% relative to the 136 million in the same quarter five years previously (January to March 2019).” [2] These figures record full train movements.

Passenger vehicle kilometres: “include both the distance covered by locomotives and the carriages they transport. In the latest quarter (January to March 2024), there were 764 million passenger vehicle kilometres operated. This is a 6% increase on the 722 million kilometres in the same quarter in the previous year. However, this is still slightly below prepandemic levels, at 96% relative to the 800 million five years ago (January to March 2019).” [2]

The ORR report summary says that the key results of their statistical work are:

  • A total of 1.61 billion journeys were made by rail passengers in Great Britain in the latest year (1 April 2023 to 31 March 2024). This is a 16% increase on the 1.38 billion journeys in the previous year (1 April 2022 to 31 March 2023).
  • There were 405 million journeys in the latest quarter (1 January to 31 March 2024). This is a 13% increase on the 359 million journeys made in the same quarter in the previous year (1 January to 31 March 2023).
  • Total passenger revenue was £10.3 billion in the latest year. This is a 13% increase on the £9.1 billion in the previous year (when adjusted for inflation).
  • A total of 60.1 billion passenger kilometres were travelled in the latest year. This is a 13% increase on the 53.0 billion passenger kilometres travelled in the previous year.

Rail Accidents to 2024

Annual rail safety statistics on mainline rail, London Underground, and other non-mainline networks (trams, metros, other light rail, minor and heritage railways) are provided by the ORR, “reporting on fatalities and injuries to passengers, members of the public and workforce in Great Britain. It also covers train accidents and (annual and quarterly) number of signals passed at danger (SPADs). These incidents are reported to the Office of Rail and Road under the Reporting of Injuries, Diseases and Dangerous Occurrences Regulation (RIDDOR).” [4]

The ORR reports on rail safety at the end of September each year, at the time of writing the latest report was published on 28th September 2023. [5]

There were eight non-workforce fatalities (passenger or public) in the latest year (April 2022 to March 2023), a decrease from 11 in the previous year. These included five fatalities which occurred in mainline stations and at the platform-train interface, two passenger fatalities at stations on the London Underground and one fatality from a collision between a member of the public and a tram.” [5] The 8 fatalities in the year are lower than those reported by Holt Schooling. The total number of passenger fatalities in the years 1887 to 1901 was 520 people. The average number of fatalities per annum during that time was close to 35. But the network in the 21st century is much smaller.

As of August 2024, the UK’s National Rail network is 10,072 miles (16,209 km) in Great Britain and 189 route miles (303 route km) in Northern Ireland. This network includes 20,000 miles of track, 30,000 bridges, tunnels, and viaducts, and around 2,500 stations.” [6]

By 1914, “the country had 23,000 miles of rail track and 4,000 stations, according to industry body Rail Delivery Group.” [7] Assuming the parameters are consistent, this means that the network in 2024 is less than 45% of that serving the country in 1914. If the network were of a similar size to that in 1914, the 8 fatalities in 2022/23 would equate to nearer to 15 fatalities after the turn of the 20th century. It is reasonable to think that, at least as far as fatalities are concerned, the modern rail network is safer than that operating in the early 20th century.

Conclusions

The statistics quoted and reviewed by Holt Schooling, provide an insight into the activities of railway companies at the turn of the 20th century. Passenger numbers were to increase further over the years and hit a peak in 1920 but then dropped to a low point in 1982 before recovering strongly. Only to see a drastic temporary reduction as a result of the pandemic.

Both passenger numbers and accidents are reported differently in the 21st century. However, as much as it is possible to compare figures from times more than a century apart, and as limited as this analysis has been, we can tentatively say that modern railways are comparably well patronised and safer than they were early in the 20th century.

References

  1. J. Holt. Schooling; Lessons from Railway Statistics; The Railway Magazine, London, July 1903, p20-28.
  2. https://acrobat.adobe.com/id/urn:aaid:sc:EU:57cdd71b-c52f-4e61-904f-41747a63401c, accessed on 17th August 2024.
  3. https://dataportal.orr.gov.uk/statistics/usage/passenger-rail-usage, accessed on 17th August 2024.
  4. https://dataportal.orr.gov.uk/statistics/health-and-safety/rail-safety, accessed on 17th August 2024.
  5. https://acrobat.adobe.com/id/urn:aaid:sc:EU:c4f6f4fb-bdf4-451b-8449-54a9c3535b95, accessed on 17th August 2024.
  6. https://www.networkrail.co.uk/who-we-are/about-us, accessed on 17th August 2024.
  7. https://www.networkrail.co.uk/stories/wwi-and-the-railway, accessed on 17th August 2024.
  8. https://acrobat.adobe.com/id/urn:aaid:sc:EU:4dbd5c90-5246-4d60-b948-9530c728c4ec, accessed on 17th August 2024.
  9. The Railway Magazine, London, July 1903, p59.