
Railway World magazine in early 1965 carried a two part article about Horwich Locomotive Works.
I always take note of articles about the Works when I find them as my paternal grandfather worked there in the early years of the 20th century, before the great depression when eventually he moved his family to Stapleford in the Derby/Nottingham area and where he took a job at the Loco Works in Derby as a blacksmith.
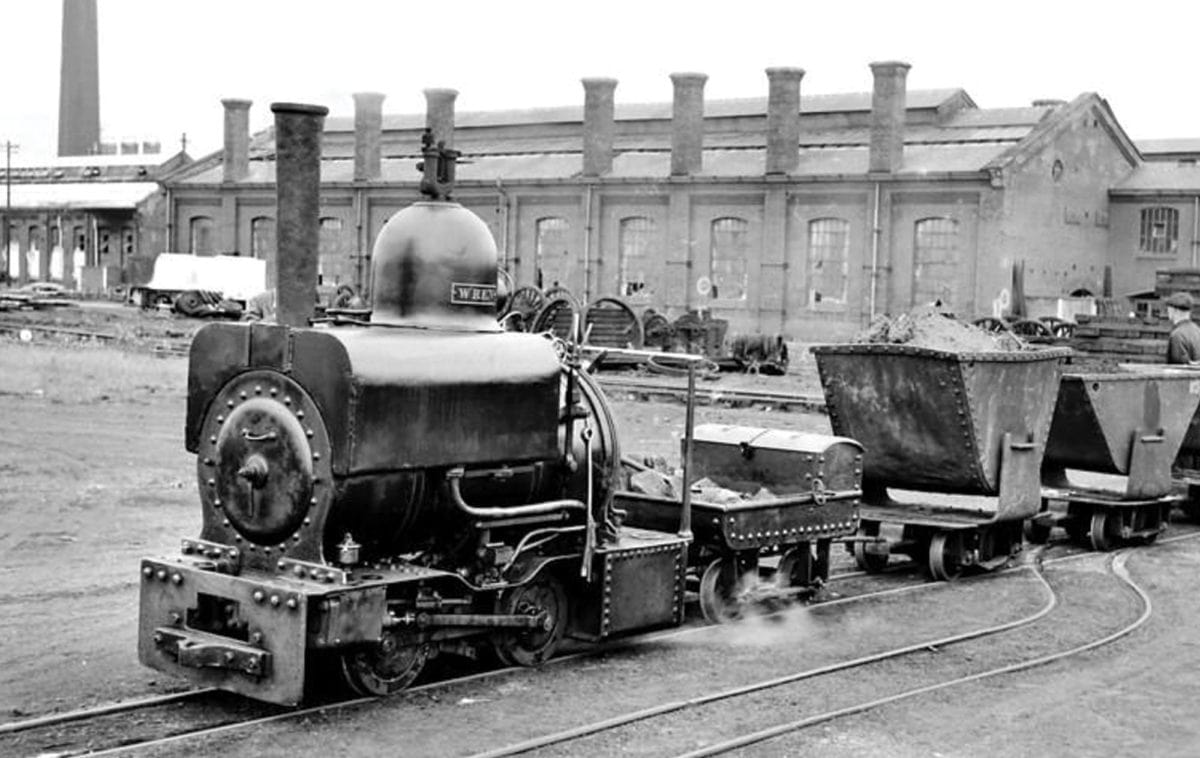
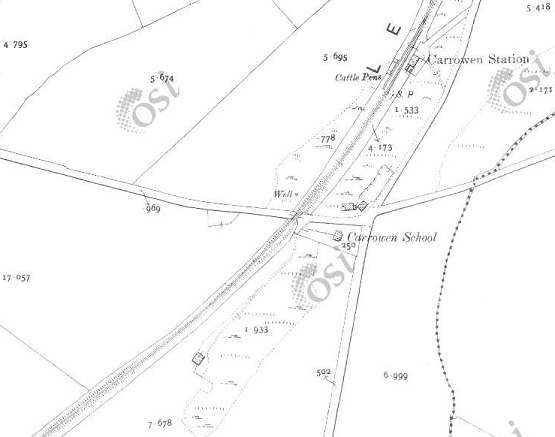
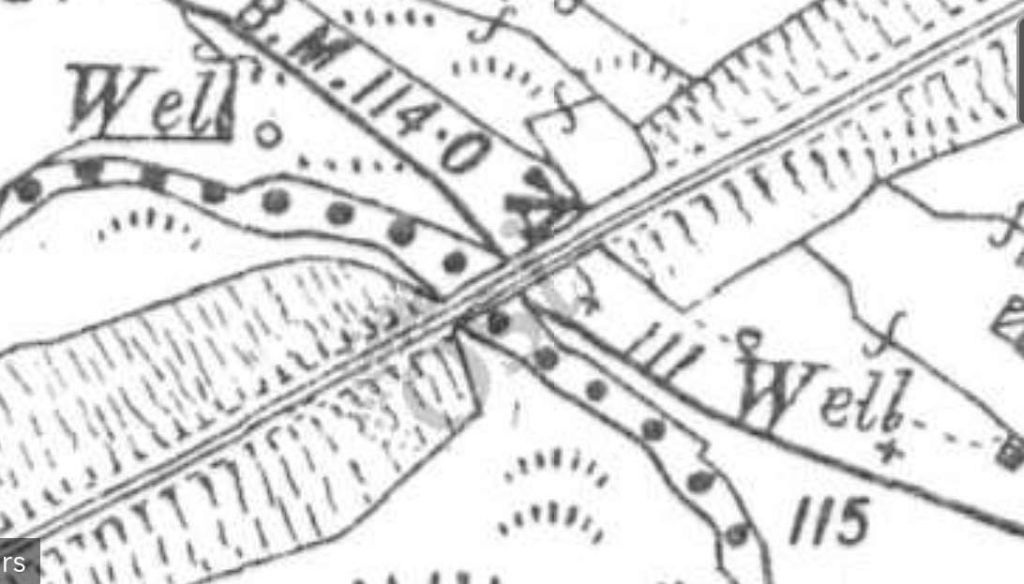
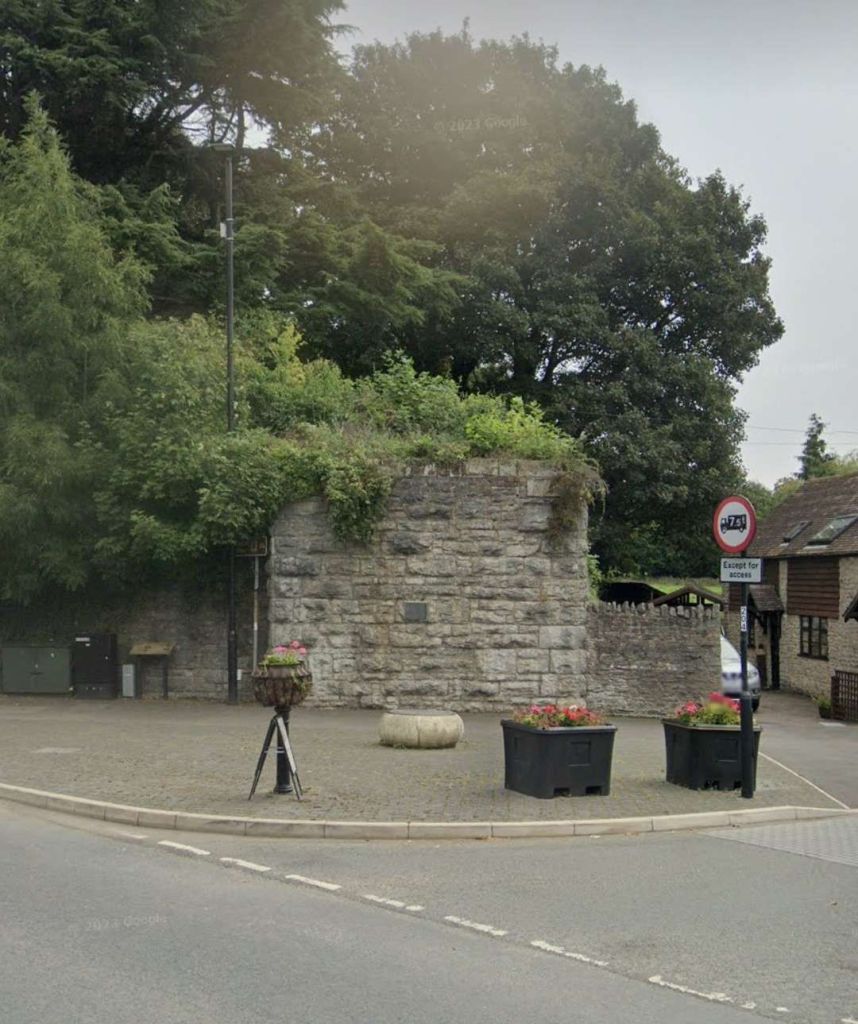
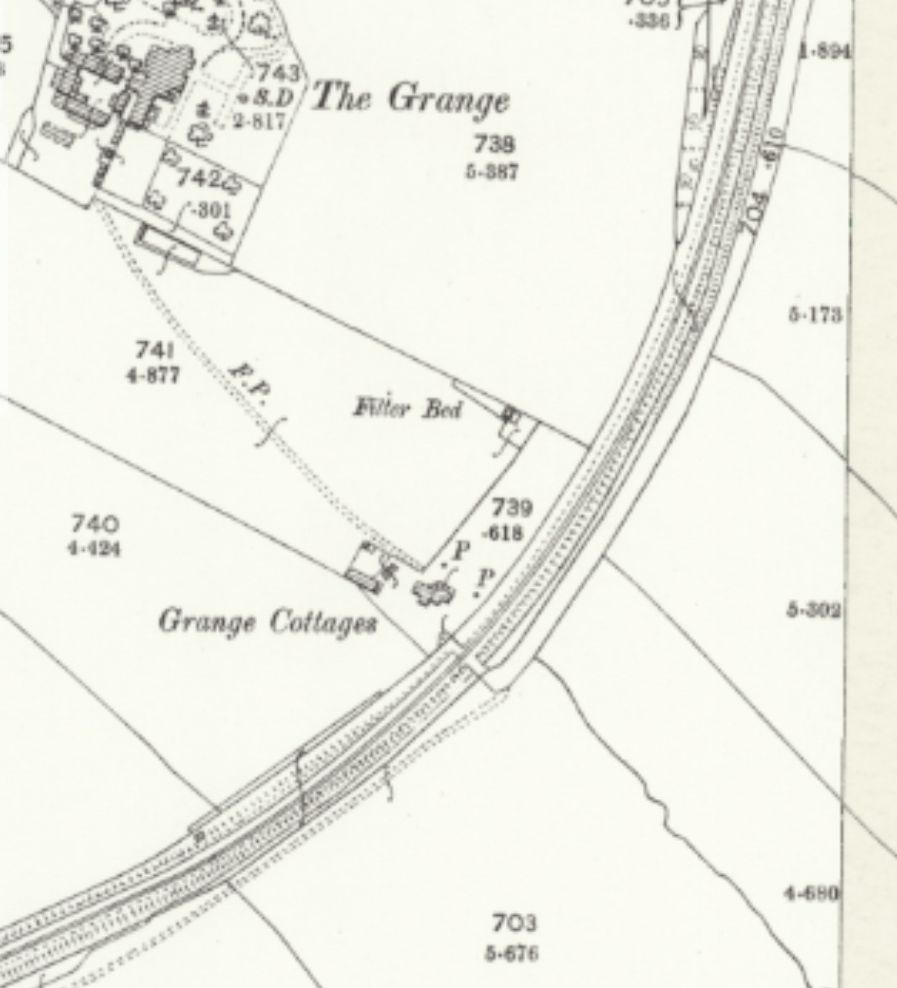
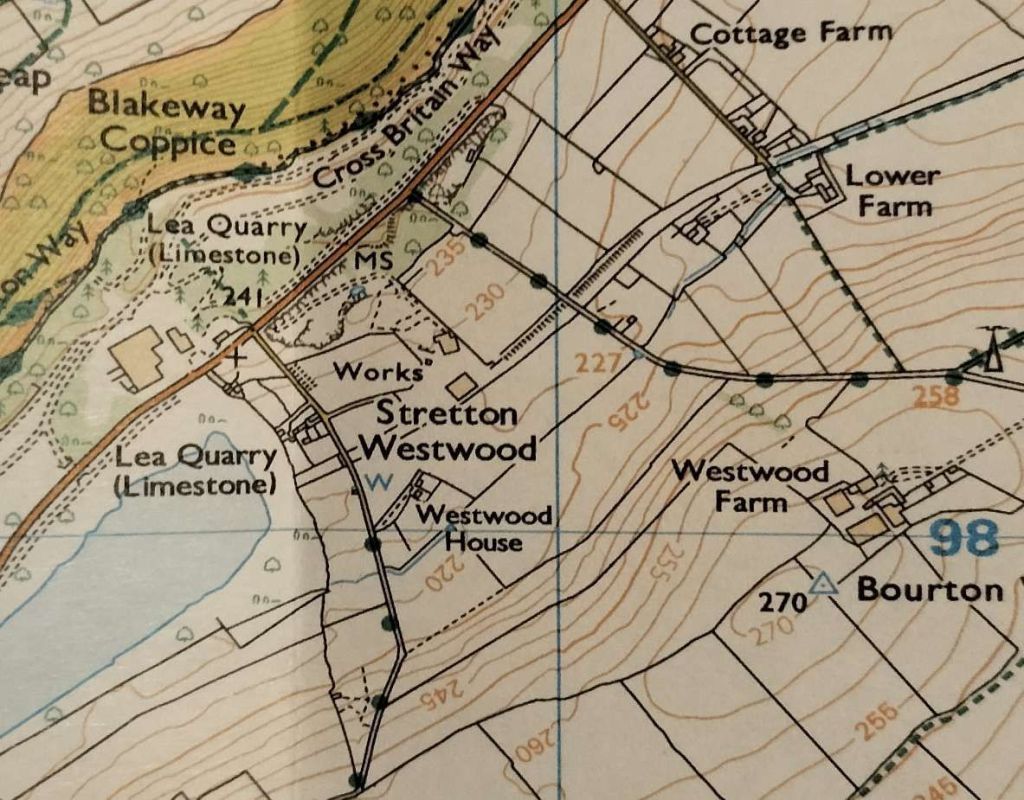
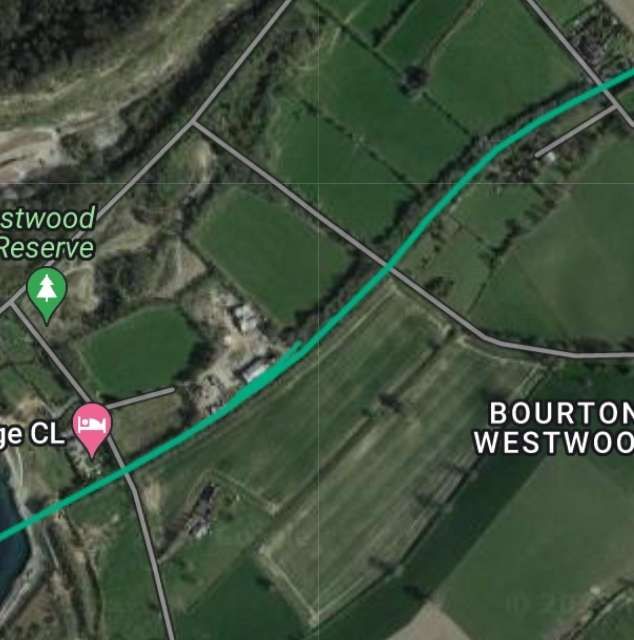
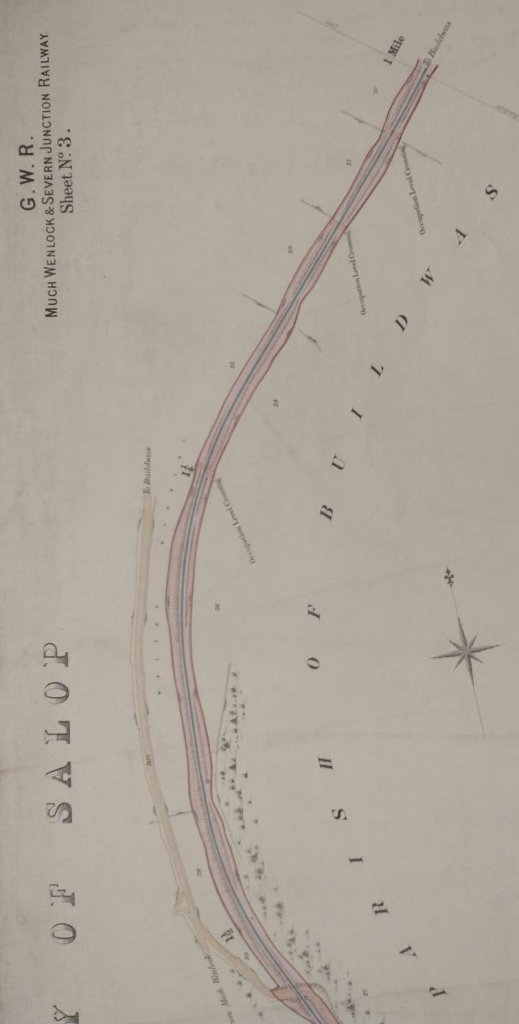
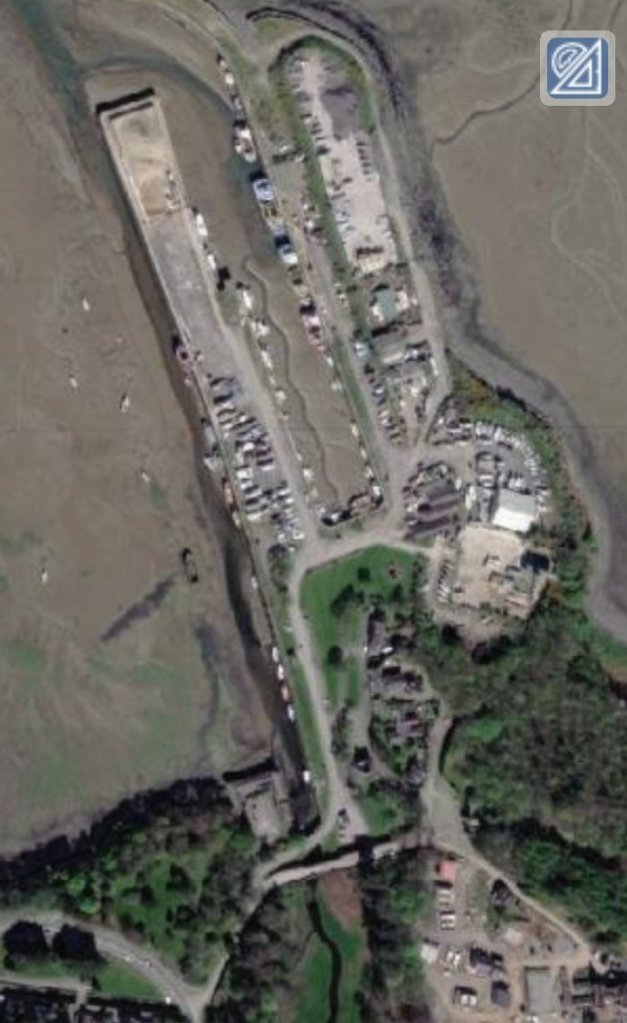
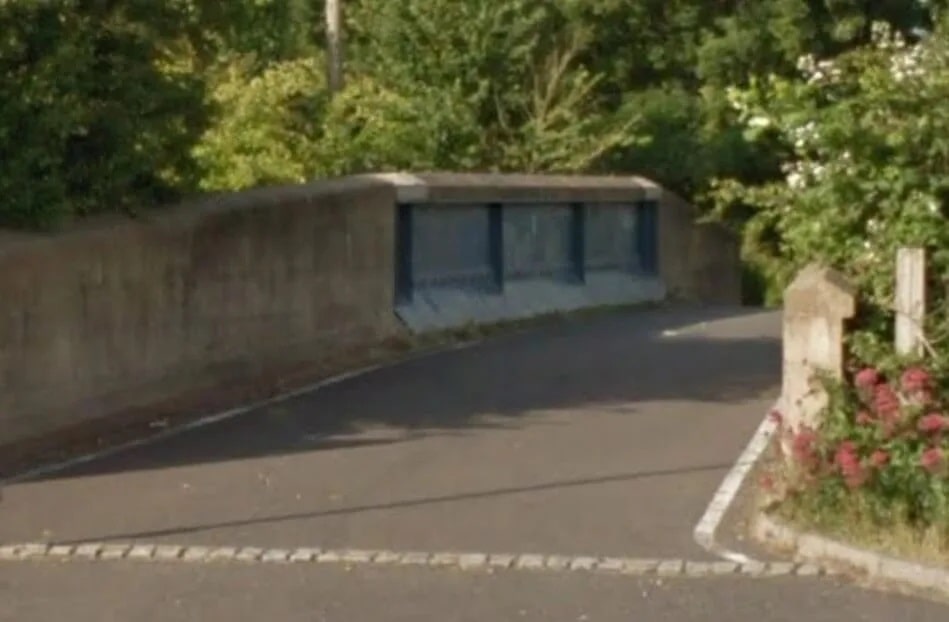
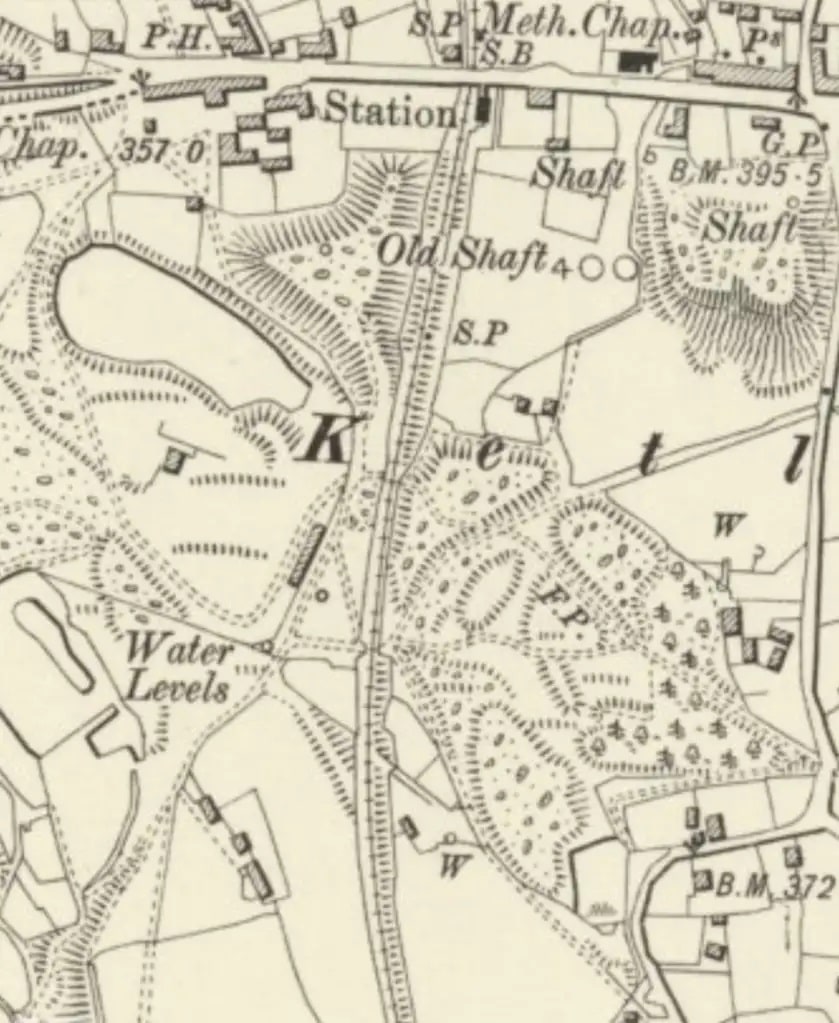
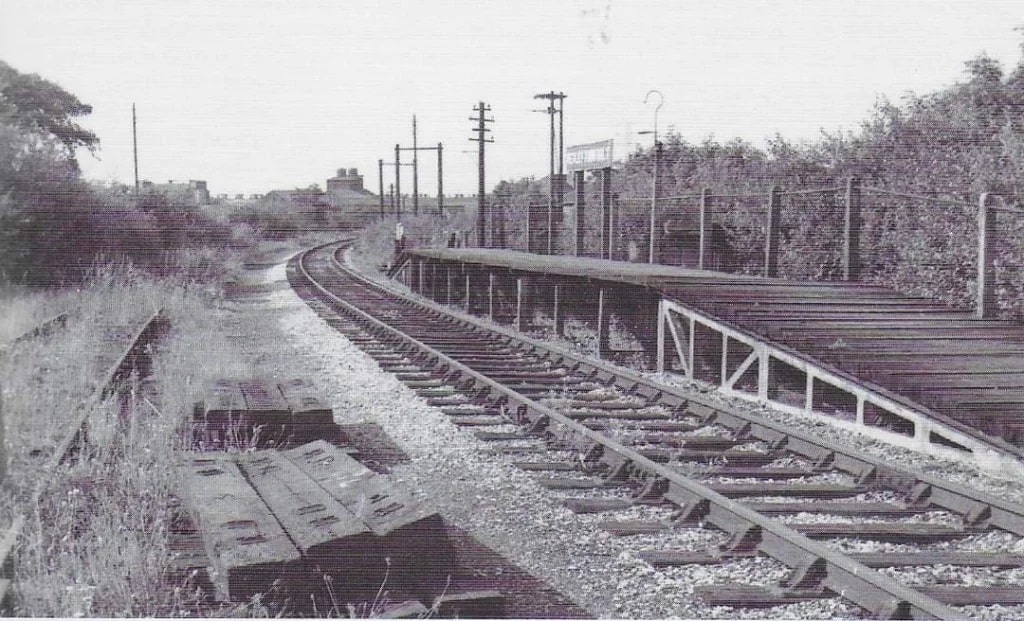
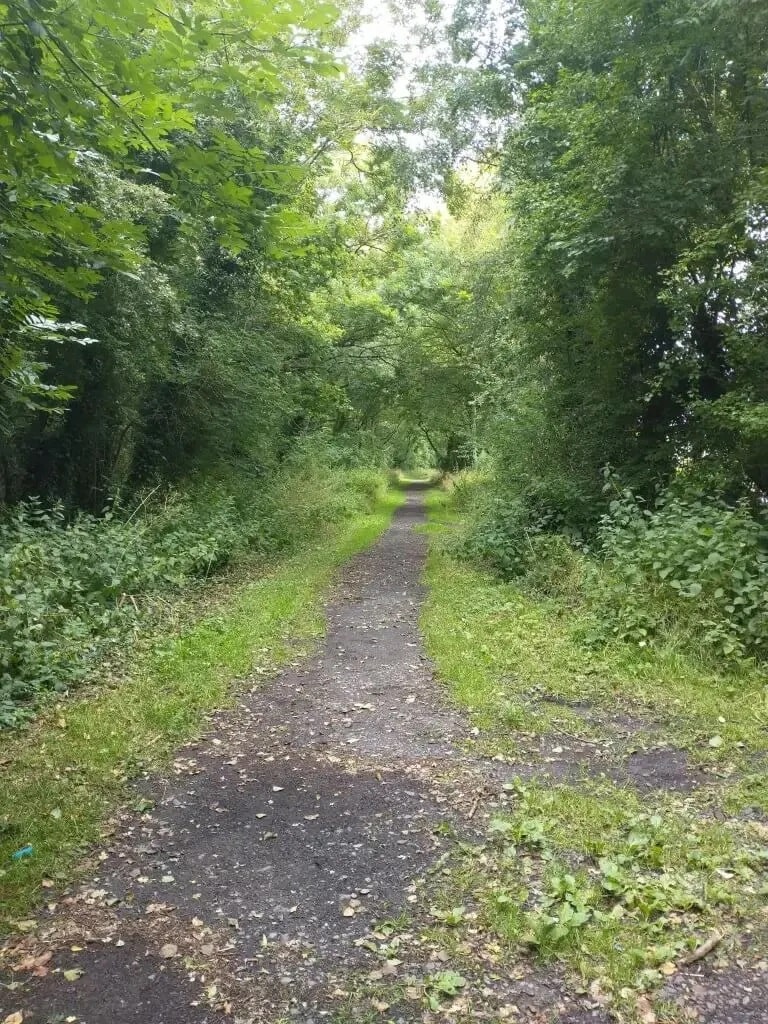
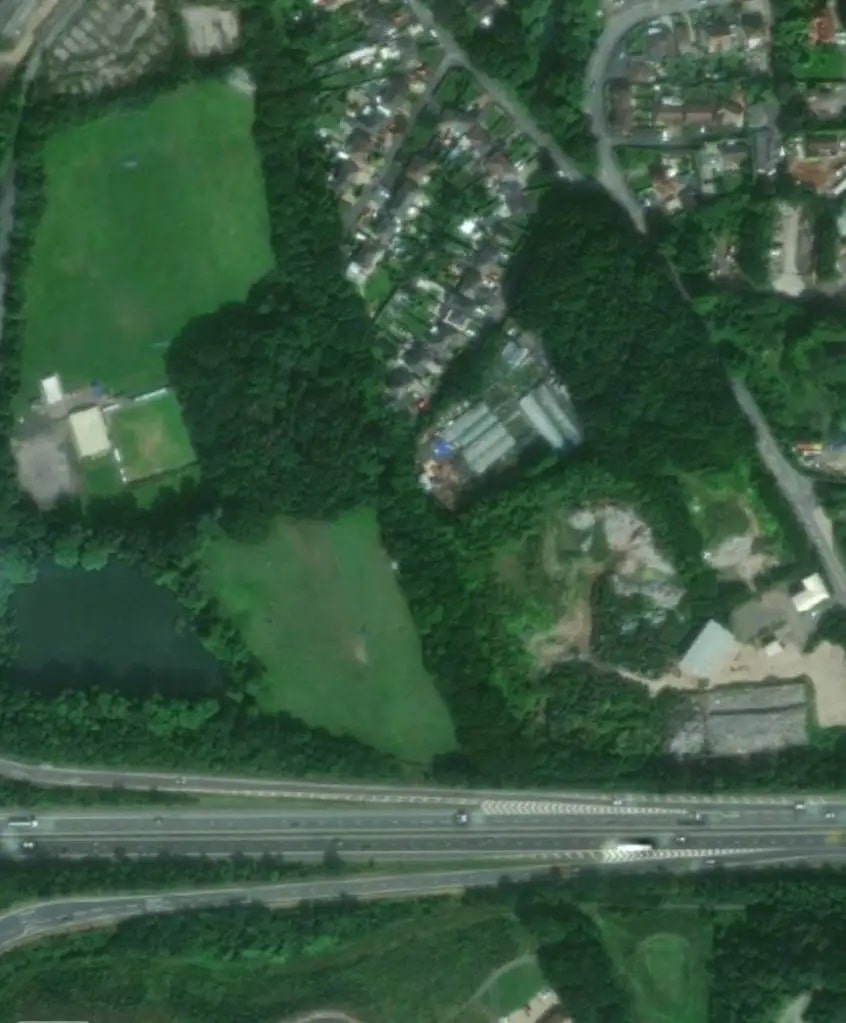
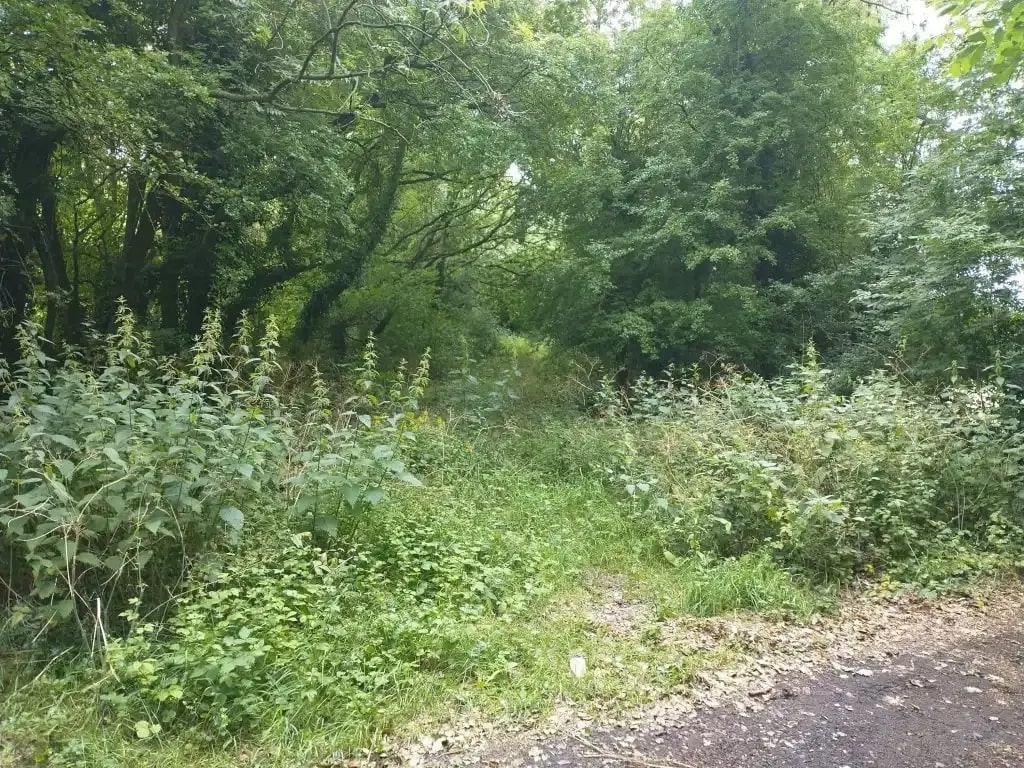
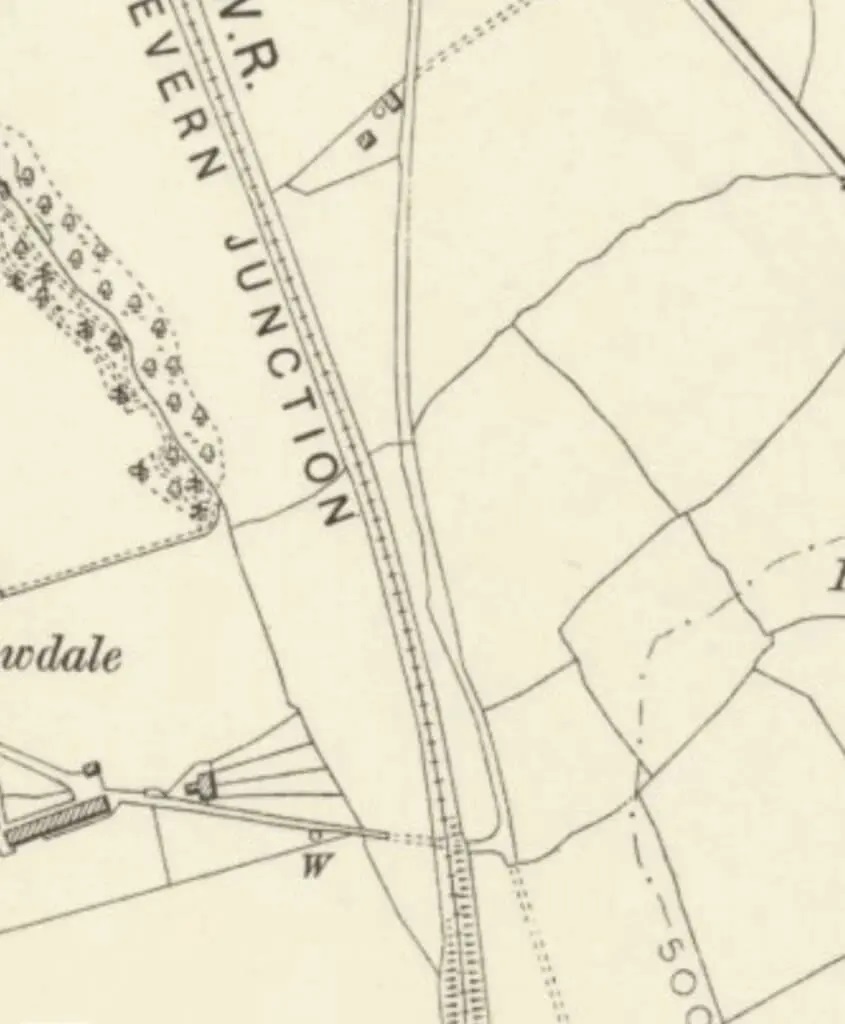
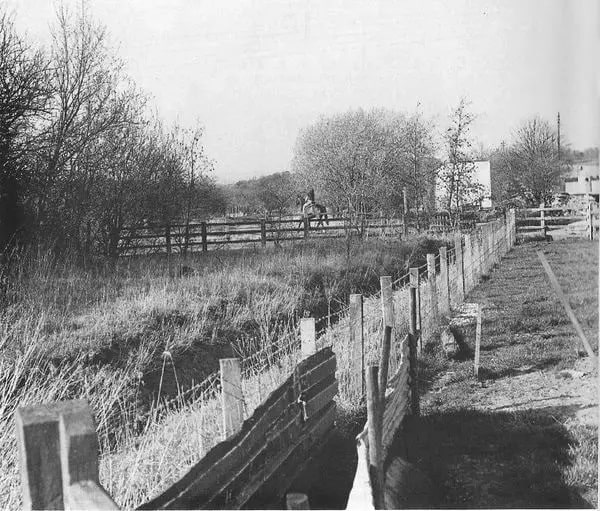
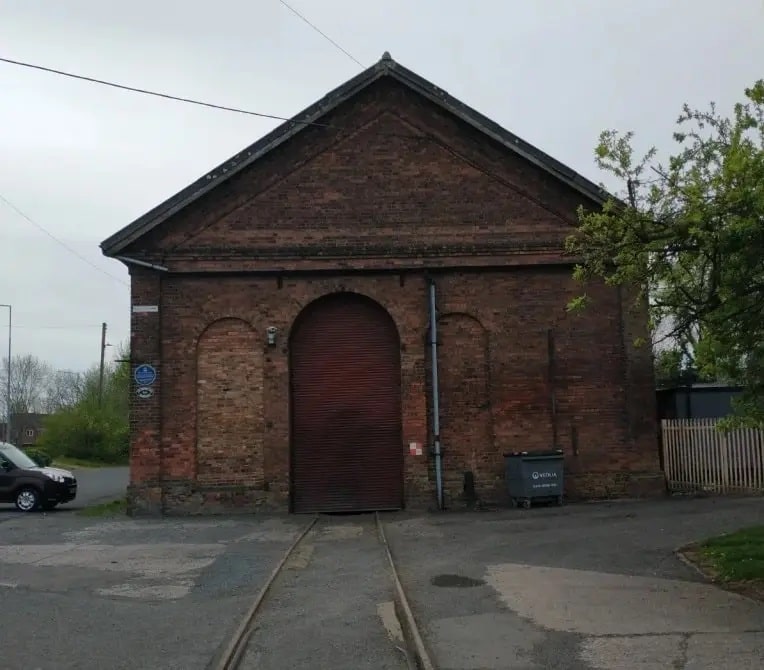
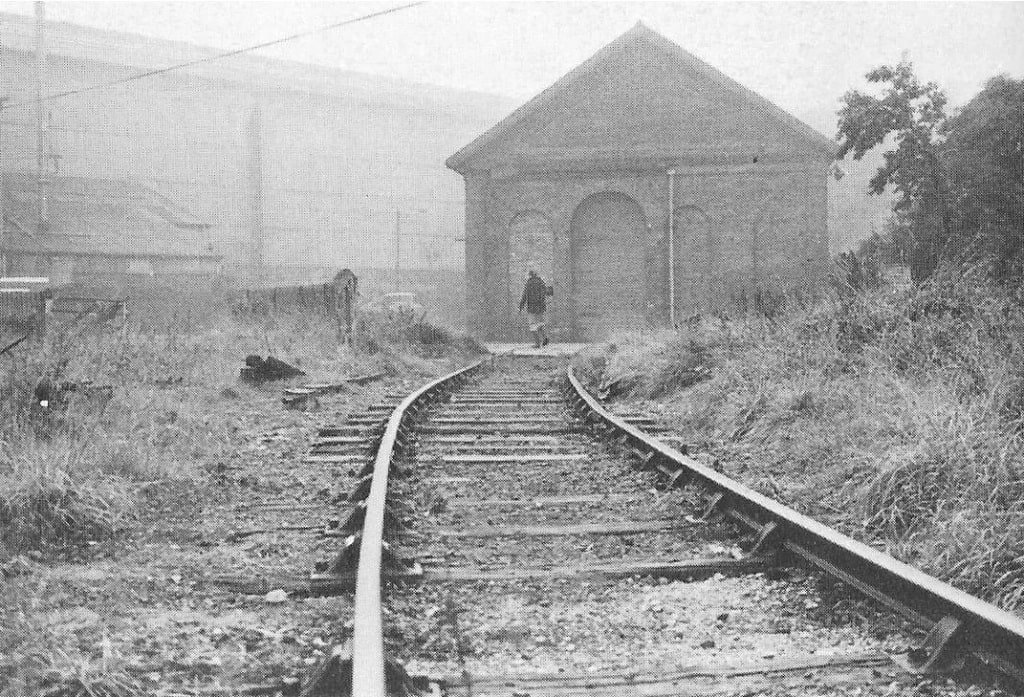
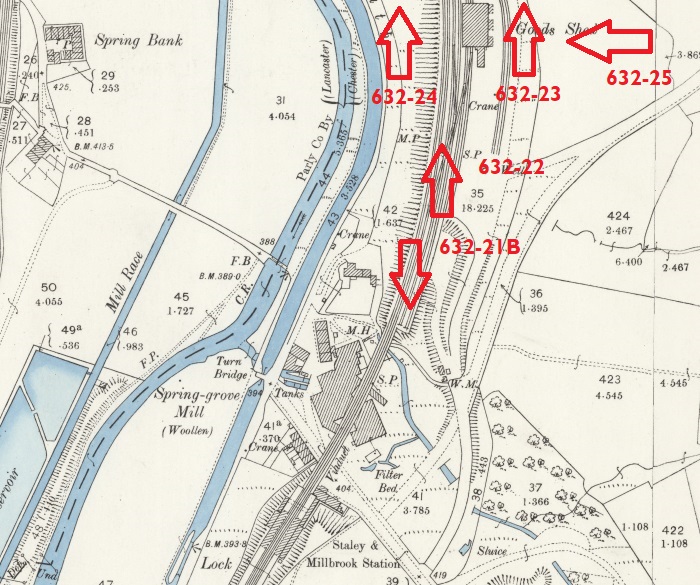
An article about the Works 18″ internal railway can be found here. [7]
The two-part article in Railway World was written by John Marshall and carried in the January and February copies of the magazine. This present article is substantively based on John Marshall’s work and sections of this article in “italics” come directly from Marshall’s article of 1965. [1]
“On 6th May 1964, Stanier 2-8-0 No. 48756 left Horwich works after a general overhaul, since when, the great works of the former Lancashire & Yorkshire Railway has been occupied entirely with rolling stock and road vehicles. The history of Horwich works goes back to 1884. When the main locomotive works of the L&YR opened under Sir John Hawkshaw in 1846, was on a very cramped and inconvenient site at Miles Platting, Manchester, almost surrounded by slums in the town.” [1: p22]
On 27th April 1873, “a serious fire caused considerable damage to the workshops but the pressure of work was such that the shops had to be rebuilt. It was during this period that ten Ramsbottom Newton class 2-4-0 engines were bought from the L.N.W.R. Repairs to locomotives were also carried out at the old East Lancashire Railway shops at Bury and smaller repairs were undertaken at several locomotive sheds, and it was therefore difficult to achieve any standardisation of work.” [1: p22]
During the 1870s, the L&YR was in a bad shape. “Train services were slow and unpunctual, and stations, carriages, services, goods and locomotive depots alike were some of the worst in the country. … The wretchedness of the railway was a popular theme upon which both counties of the roses were absolutely unanimous. By the early ‘eighties all this was being changed and it was now the turn of the locomotive works. Expansion at Miles Platting was not possible; a quarter of the machinery and other equipment there was out of date and ill-fitted to cope with work on the larger locomotives of W. Barton Wright. The obvious solution was to build a new works on a different site.” [1: p22]
After retiring because of ill health as Locomotive Superintendent of the LNWR in 1871, John Ramsbottom returned to railway work in 1883 and “became connected with the L&YR as a consulting engineer. At the L&YR directors’ meeting on 19th March 1884, he stated that locomotives could no longer be repaired satisfactorily at Miles Platting works and that it was essential to find a new site for the works. He recommended that in selecting a site the principal considerations should be the price of labour, a good supply of cheap water, cheap coal and a fairly central situation to avoid long runs by light engines. Various sites were suggested and Ramsbottom and Barton Wright were instructed to examine them and report back to the next meeting. Wright was also asked to ascertain the rates of wages in locomotive workshops in different parts of the country.” [1: p23]
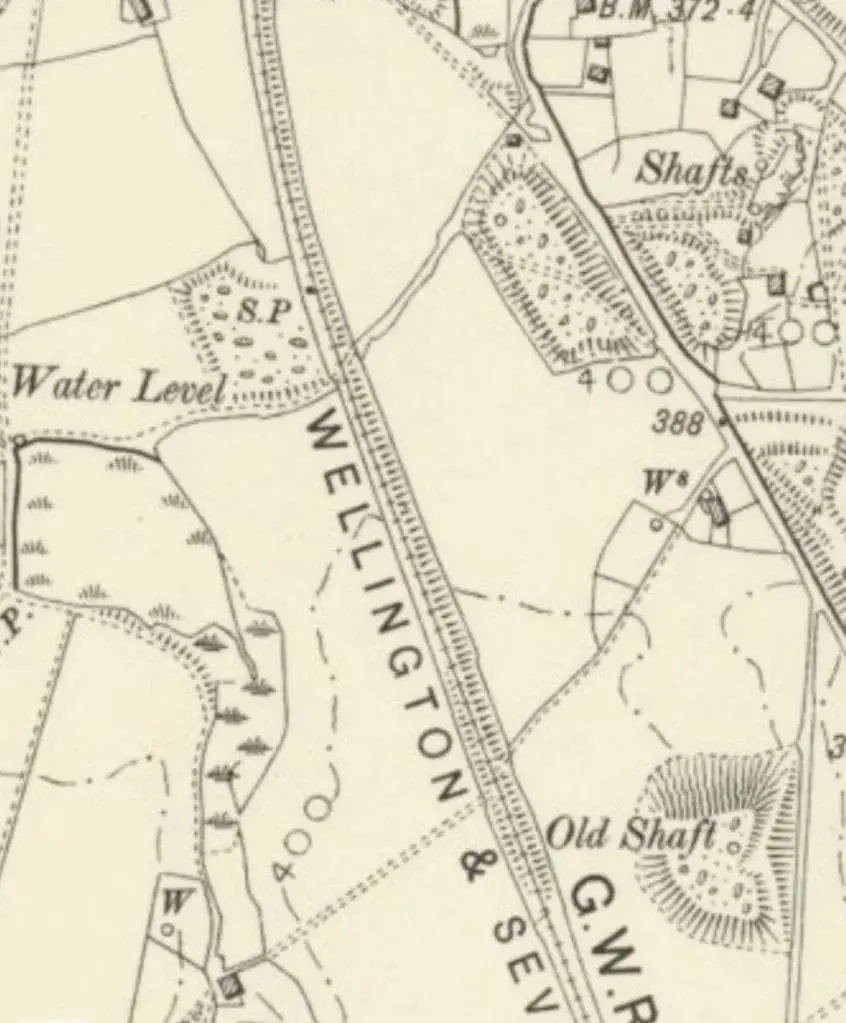
At the next board meeting on 21st May 1884 it was noted that an estate in Horwich was about to be auctioned. The board authorised a maximum spend of £65,000. The purchase was secured for £36,000.
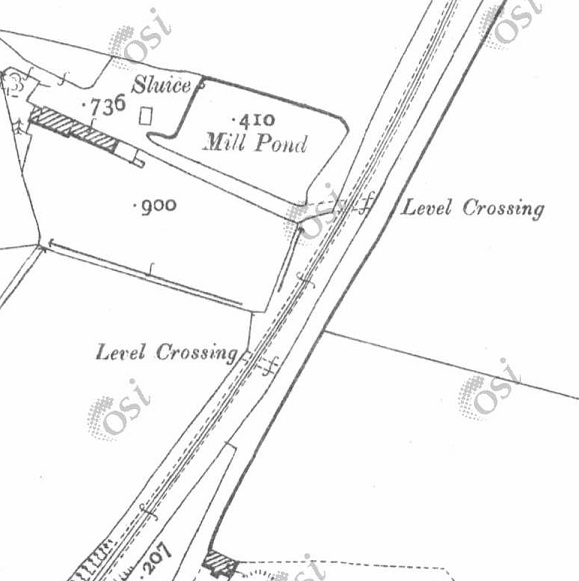
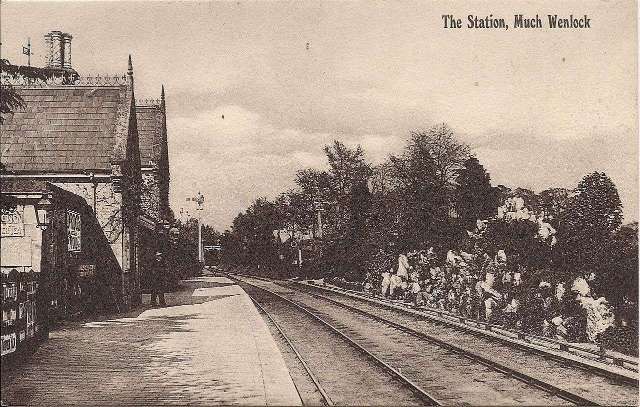
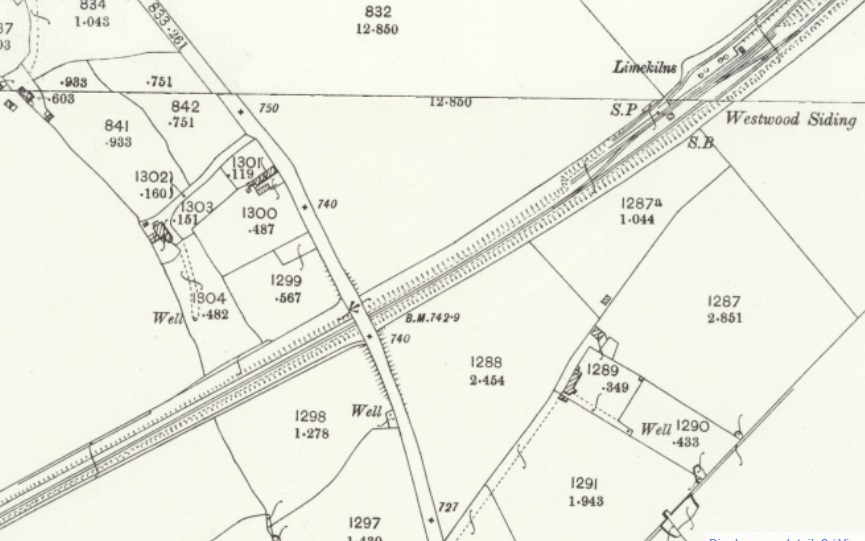
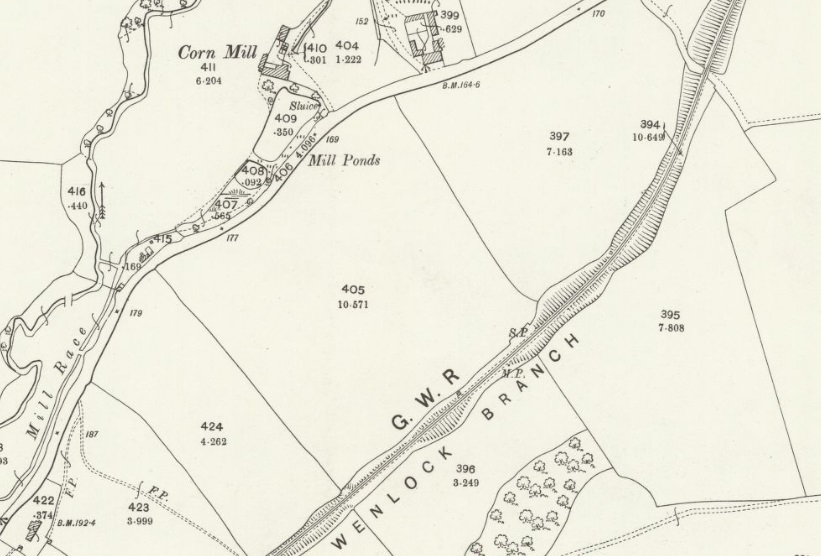
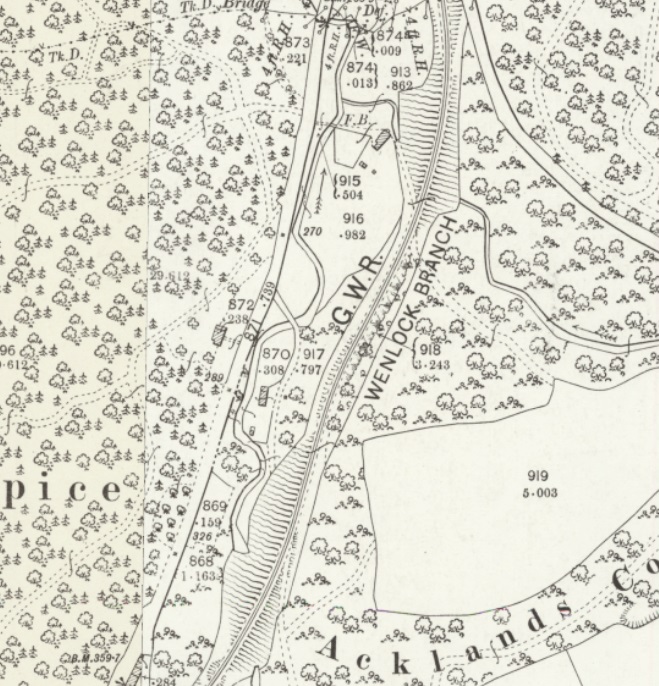
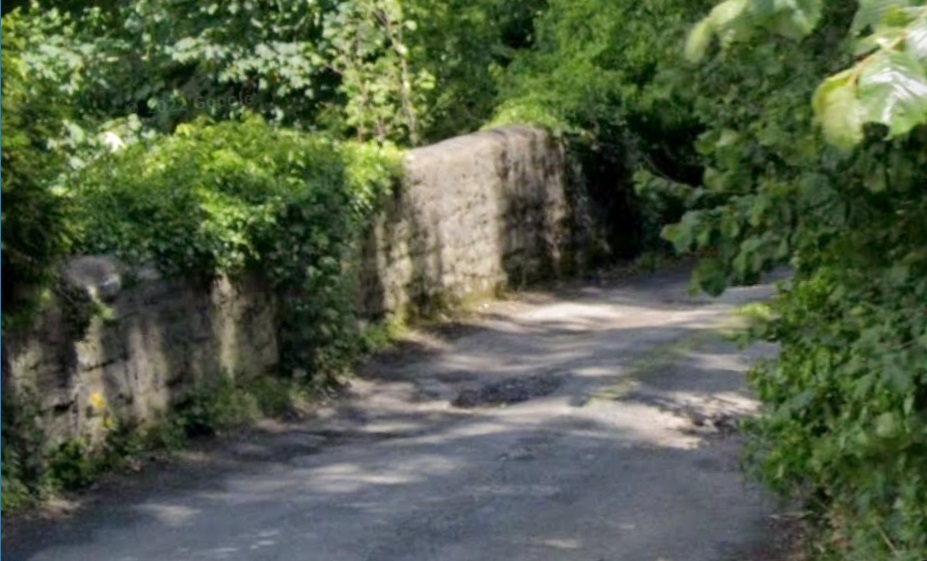
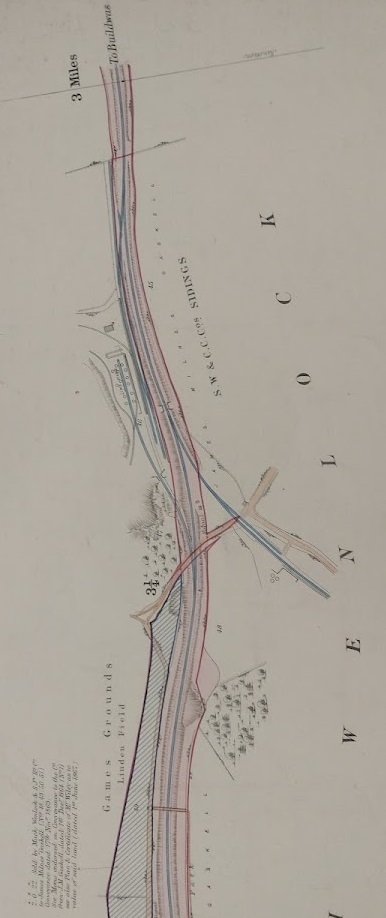
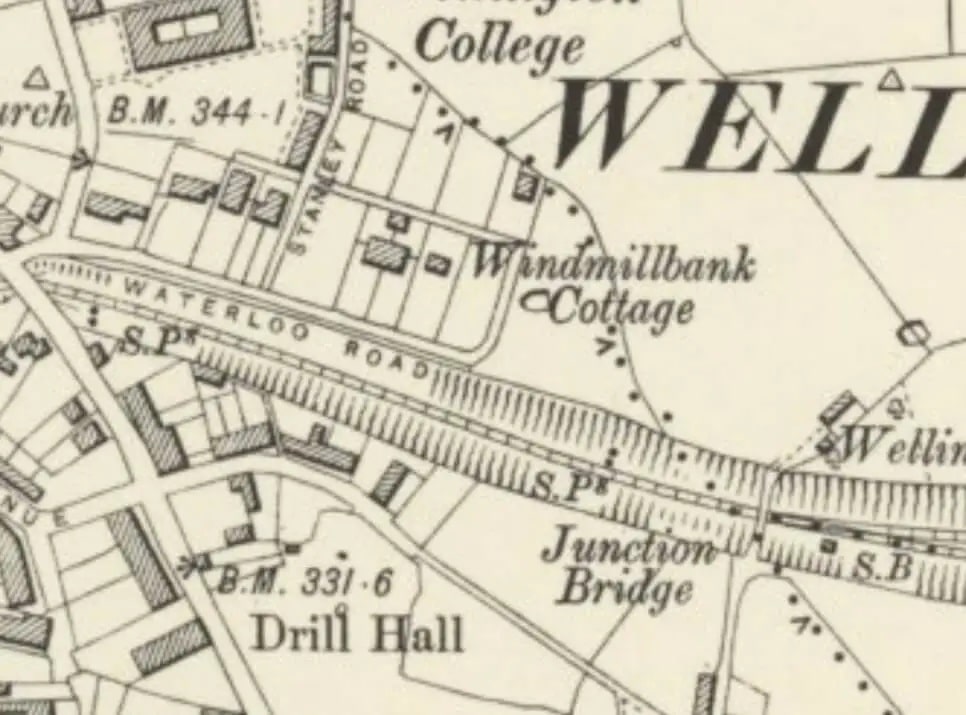
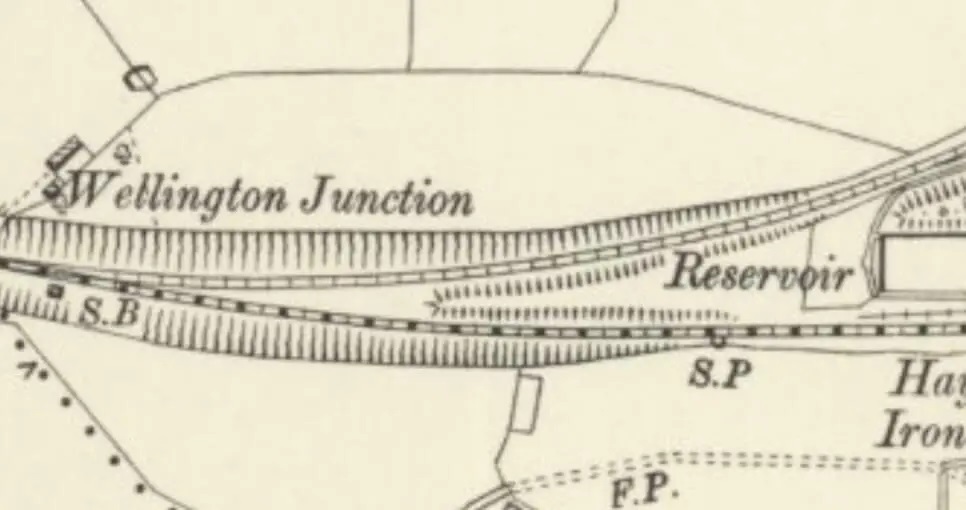
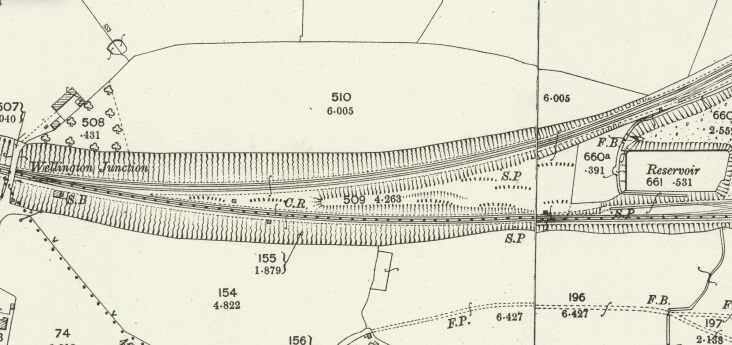
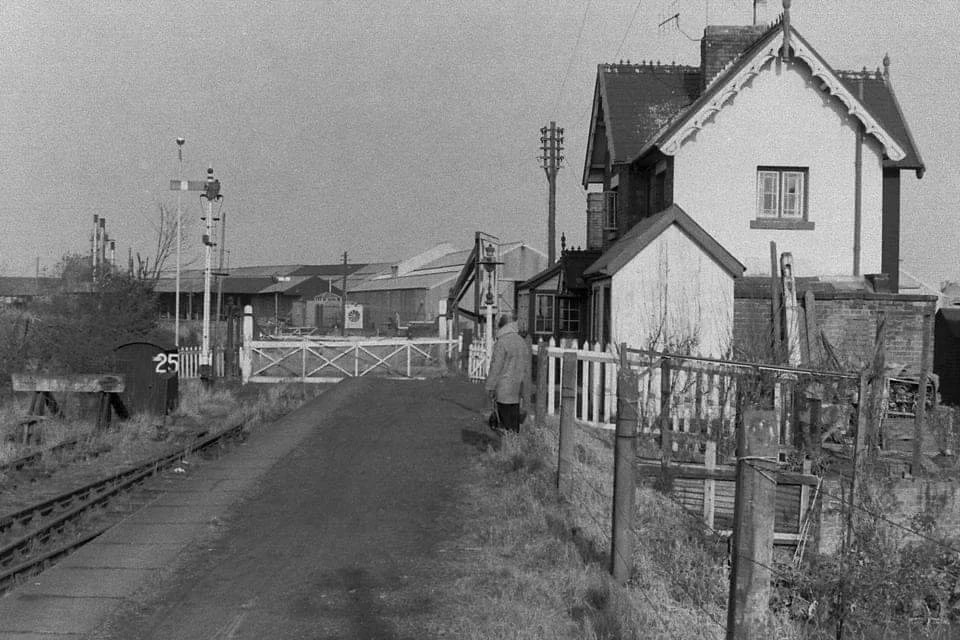
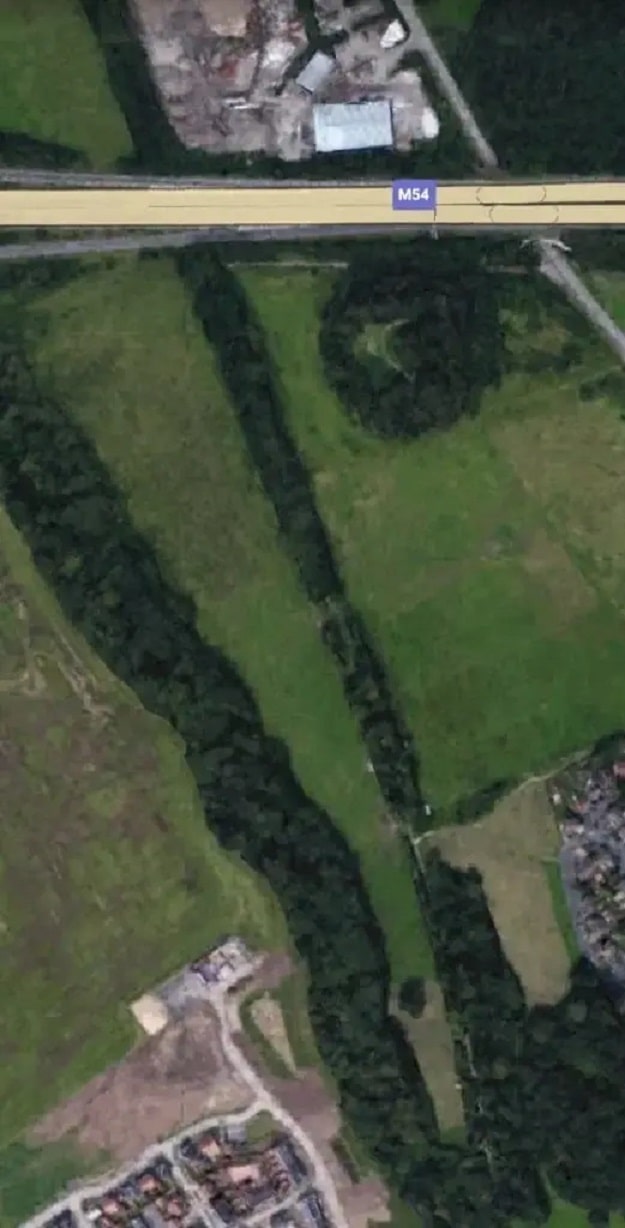
The site “was centrally situated and within easy reach of Bolton and Manchester. On 14th February 1870, a branch railway had been opened into the town from Blackrod, on the Bolton to Preston line. Horwich, at the foot of Rivington Pike at the western extremity of the Pennines, had a population of 3,761 in 1881.” [1: p23]
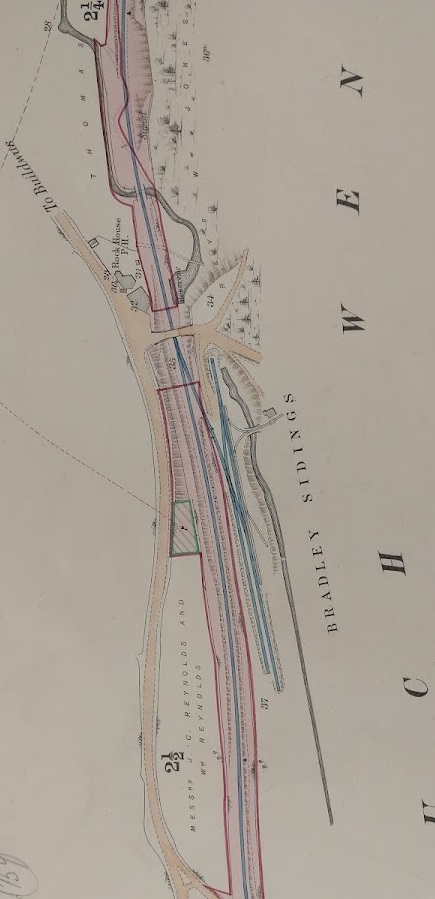
On 26th September 1884, Ramsbottom submitted drawings showing ground levels and locations for various buildings/workshops. The question of a curved connection from the Bolton direction was raised. “Plans were prepared and the ‘Fork Line’ was authorised by Parliament on 16th July 1885.” [1: p23]
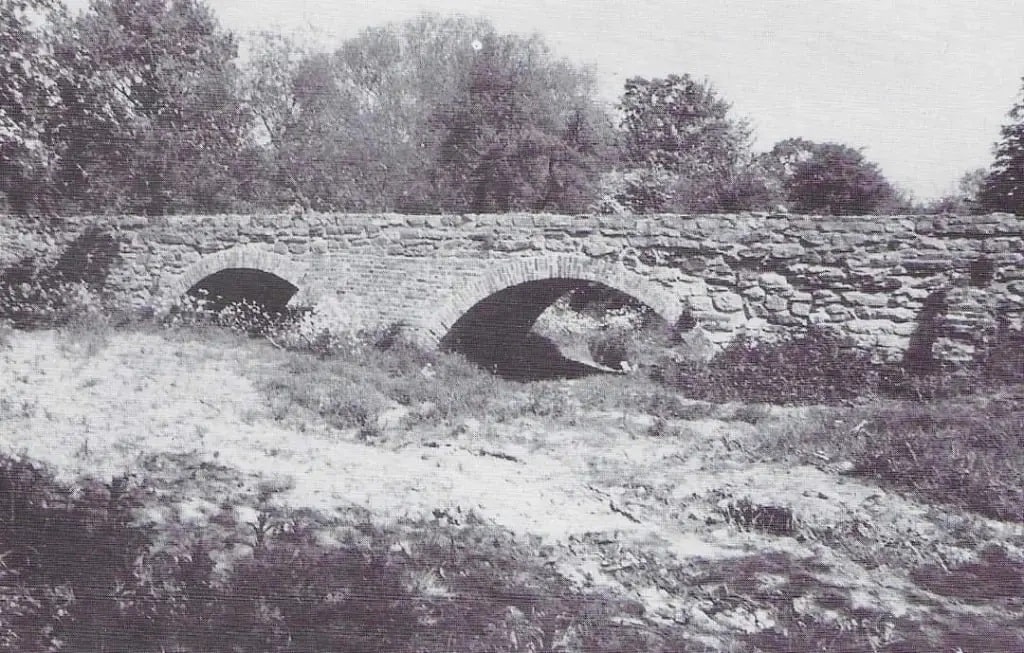
Work on the site required the legal closure or diversion of several footpaths. The Thirlmere Aqueduct, planned by Manchester Corporation, had to be diverted at L&YR expense.
Ramsbottom’s plans of the locomotive and wagon works and offices “showed that the locomotive works would occupy nearly 20 acres and accommodate 112 engines; the wagon works would have occupied about 14 acres, for 1,008 wagons, but they were not in fact built. In January 1885 Wright’s detailed elevation of the office building was approved; this included a clock tower which was later omitted.” [1: p23]
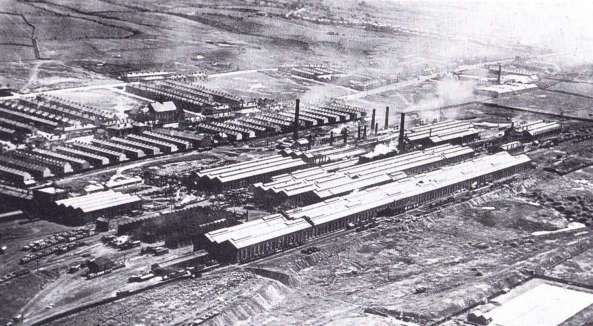
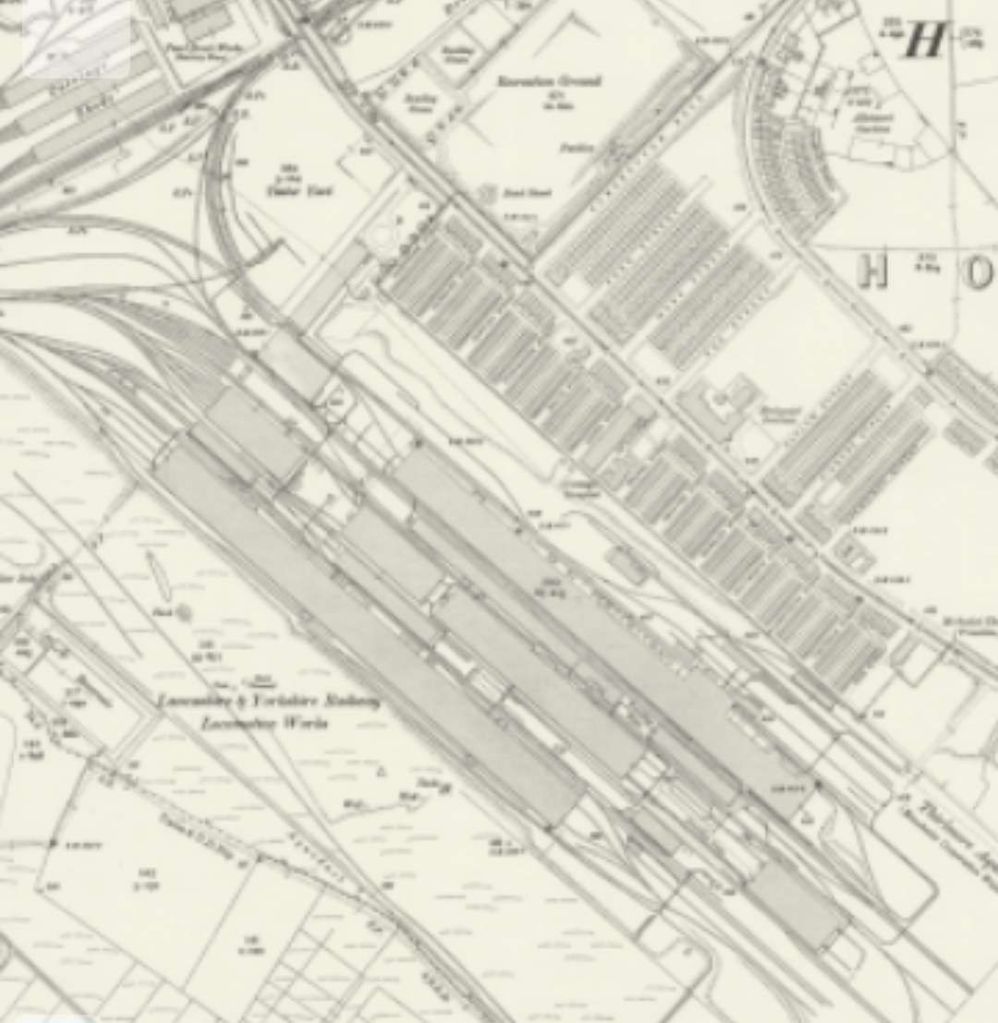
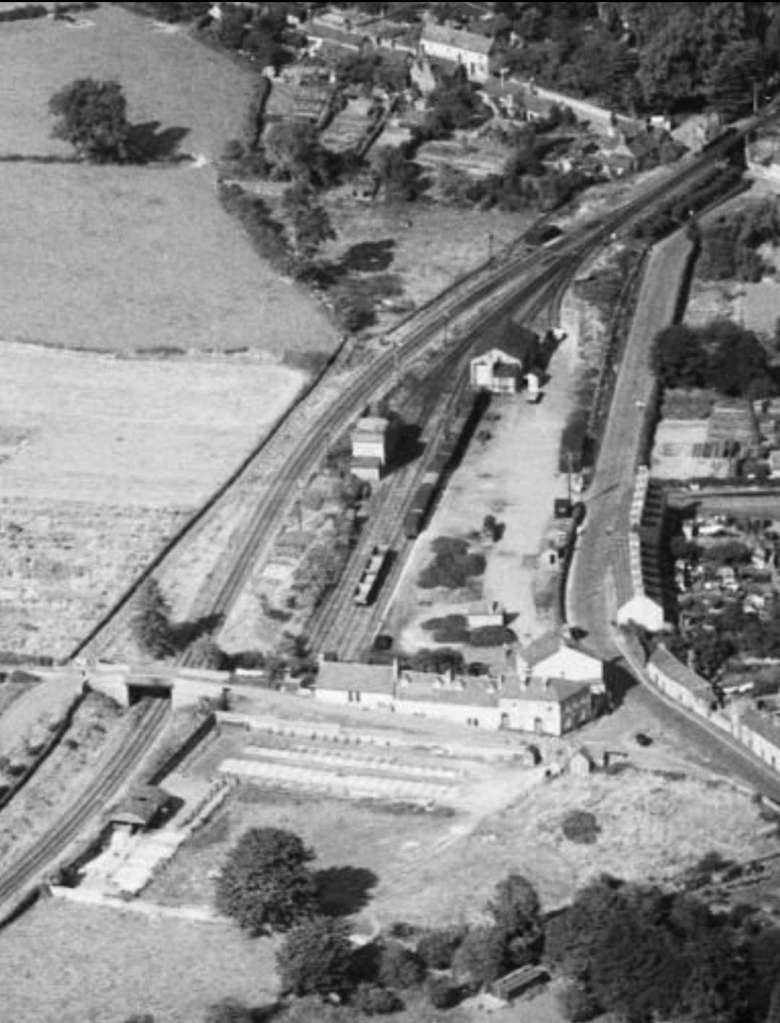
Contractors began work on 9th March 1885; “a siding was constructed to bring materials onto the site and a powerful crane and locomotive were soon at work. By August the excavations for the foundations of the erecting shop were almost complete. The next stage involved the removal of a hill on “old Hart’s Farm” containing some 450,000 tons of earth. To carry out this job in one year meant the removal of 1,500 tons daily, and a force of 350 men and boys, two steam navvies, five locomotives and 130 tipping wagons were employed continuously; work continued at night under electric light. … The erecting shop … [was] a vast building 1,520ft long (well over a quarter of a mile) and 118ft wide with three bays running the whole length, the two outer ones being wider than the centre.” [1: p23-24]
A careful review of the equipment at the Miles Platting and Bury works was undertaken showing that only around 50% was suitable for the new works.
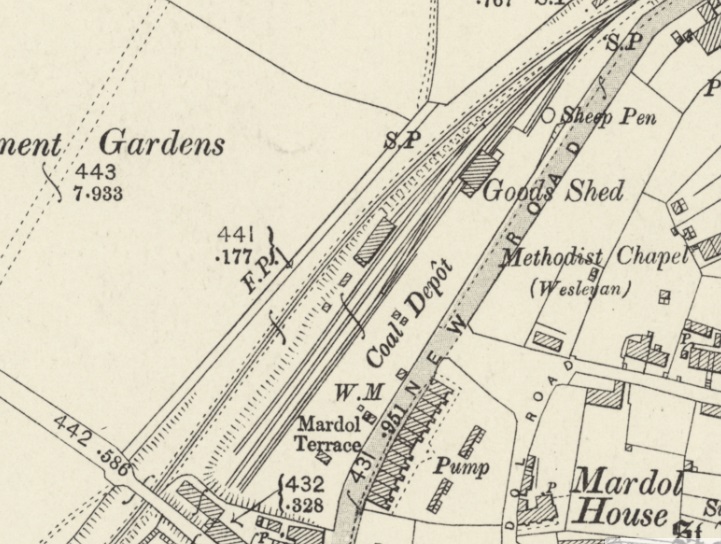
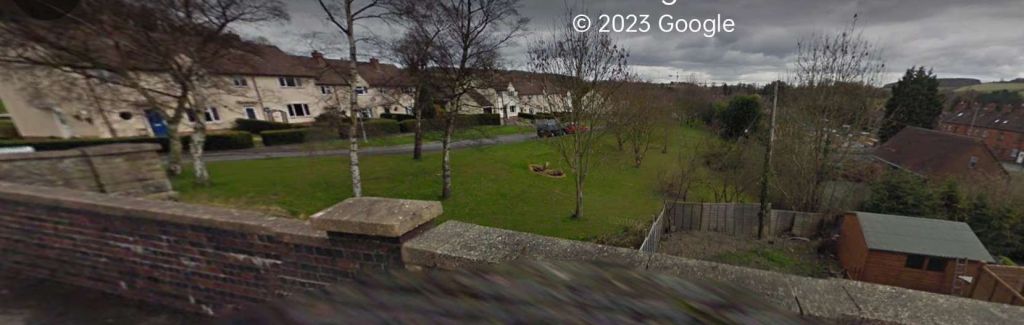
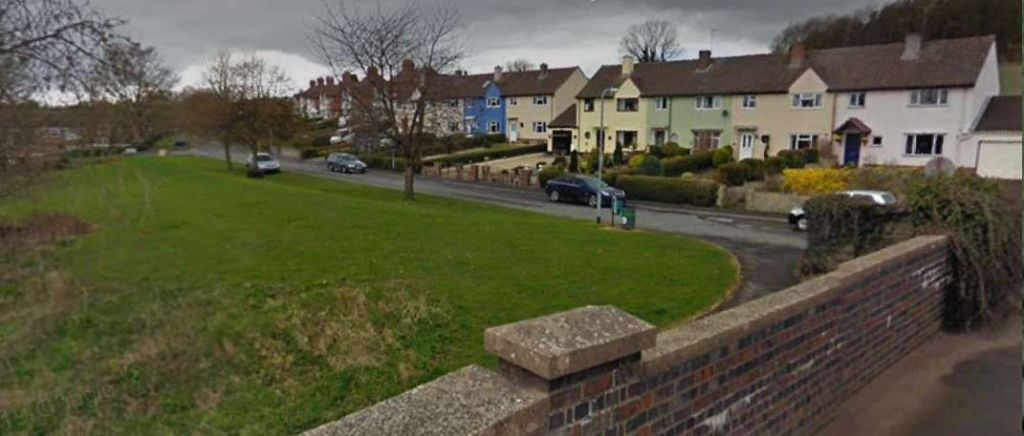
In September 1885, the disposal of surplus land to the northeast of the works began, “Some plots were … reserved, including sites for a hotel and a a bowling green but the rest was … sold for building. … Victoria Road and several streets leading from it were laid out by the company; the names chosen for the various streets … [included] Ramsbottom, Hawkshaw, Fairburn, Stephenson, Webb, Gooch, Brunel, Smeaton, Brindley, Telford, Armstrong and Siemens. … A letter was received the Bishop of Salford offering, one penny a square yard for a plot of land for a church, but the Company had already requested fourpence a square yard for a Wesleyan Chapel site.” [1: p24]
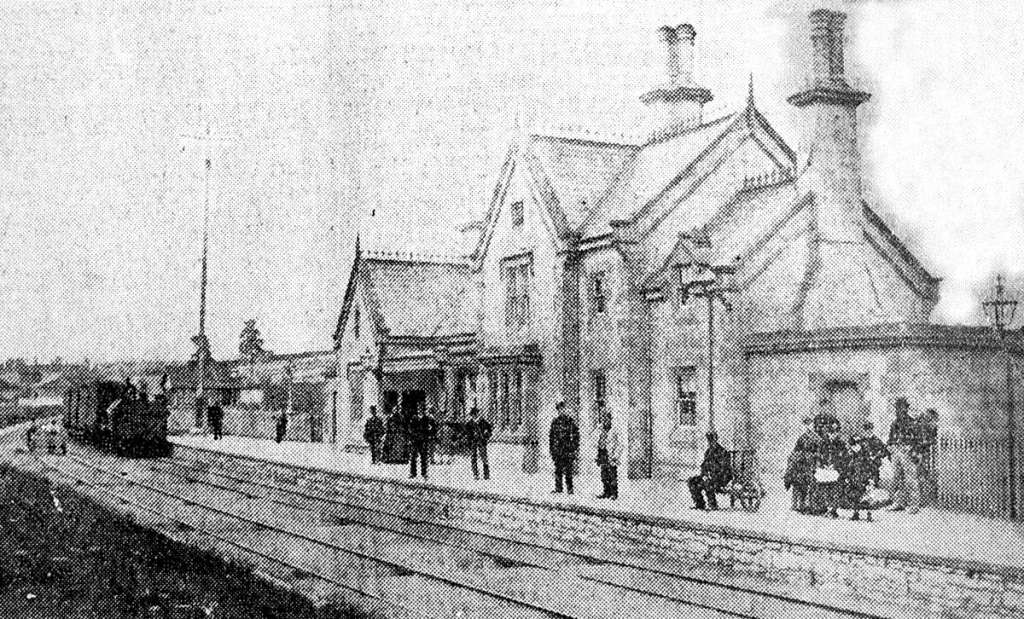
“Work on the office block, the boiler shop, the smithy, forge and foundry, a large store shed and a large water tank. The new gasworks was erected at this time. … Work on the Horwich fork line began on 21st September! it was opened for goods traffic on 20th June 1887, and for passengers on 1st July with an improved service between Horwich and Bolton and Manchester.” [1: p24]
On W. Barton Wright’s retirement in October 1887, in his place came J.A.F. Aspinall from Inchicore in Ireland to become Chief Mechanical Engineer. At the time of his appointment Aspinall was only 35 years of age.
He persuaded the Company to introduce a premium apprentice scheme and to fund a Mechanics Institute at Horwich. He also urged the immediate purchase of locomotives as prices at the time were relatively low. Based on his assessment of average mileage per locomotive in various railway companies he demonstrated that the L&YR needed a stock of 1,114 locomotives against an existing complement of 963. The shortage of engines was resulting in over use, engines becoming neglected and breakdowns being too frequent.
As an emergency measure, “Aspinall ordered 30 6ft 4-4-0s of Barton Wright’s design, but with Joy’s valve gear, from Beyer Peacock and from the same firm he ordered two small locomotives, at £250 each, for the 18in gauge internal railway system at the works. A third, ordered in 1887, cost £300. Aspinall quickly showed his concern for the well-being of the workers at Horwich. He was dissatisfied with the way the houses were being built and arranged for better supervision of the work. He also arranged for a local doctor to attend to accidents in the works until a permanent arrangement could be made.” [1: p24]
As construction work on the fitting, painting and erecting shops was nearing completion it was possible to “take in the first six locomotives for repair. They included the Barton Wright 4-4-0 No. 865 Prince of Wales, built by Dübs in 1885 and named in honour of a royal visit to Preston.” [1: p24]
The large office block, 323ft long and 58ft wide was brought into use on 19th February 1887 Beyer Peacock supplied two 18in gauge locos by 7th April and they were set to work in the erecting shop.
The foundry was completed next and work began here on 12th April. “The first castings were small engraved iron paper weights which were presented to the L&YR directors as a memento of the occasion. With the opening of the foundry Henry Albert Hoy, at that time manager at Miles Platting, was appointed works manager at Horwich and on Aspinall’s recommendation his salary was increased from £225 to £300, to become £400 in two years.” [1: p25]
Aspinall submitted further plans to the directors meeting on 27th September 1887, for a “further nine shops at an estimated cost of £26,738. For the whole of the work to be transferred from Miles Platting at an early date, it was necessary to start the brass foundry and copper shop at once and to cover in the space between the foundry and the forge to form the steel foundry. Of the shops proposed, the board sanctioned the erection of the tin and copper-smiths shop, the brass foundry, telegraph shop, steel foundry and an extension of the foundry for rail chairs.” [1: p25]
By the end of 1887, Miles Platting workshops were closed, “a few months later the shops at Bury were also closed, and all locomotive repair work was transferred to Horwich. The Miles Platting shops were converted into carriage sheds and the Bury shops used for stores.” [1: p25]
In January 1888, “work was started on the first order for new locomotives. This consisted of 10 2-4-2 tank engines of Aspinall’s design, the famous “radials”; the first one No. 1008, left the works on 20th February 1889, the second following in about three weeks. Because the steel foundry was not ready, the wheels and tyres were obtained from Germany, but the other parts of the engines were built entirely at Horwich. The tenth was completed during the following August.” [1: p25]
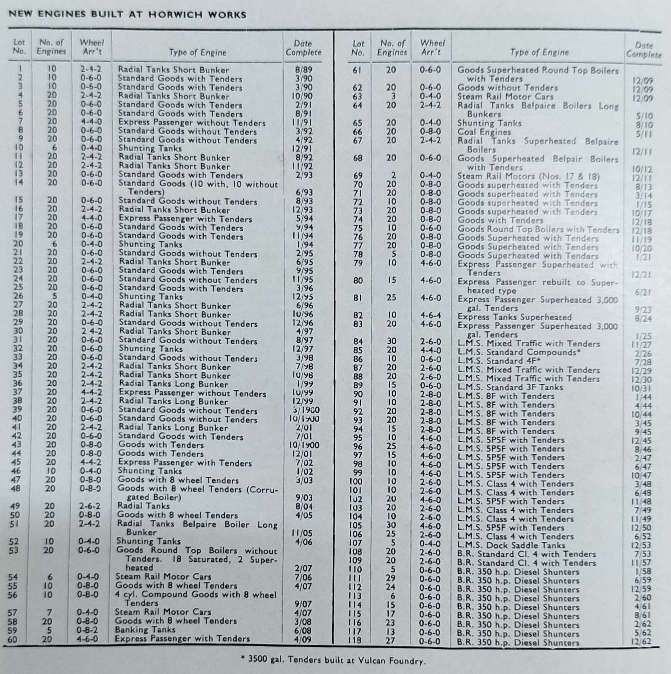
Work began on the first of the numerous Aspinall 0-6-0s in January 1889. The first order was for 10 engines, the first being completed in September and the last on 27th March 1890. Marshall’s article lists “the building dates of … all batches of locomotives built at Horwich until locomotive work ceased. Between 1891 and 1900 Aspinall rebuilt 230 of Barton Wright’s 4ft 6in 0-6-0s into saddle tanks for shunting. This released an equal number of serviceable tenders, hence the large number of locomotives built without tenders during this period.” [1: p25]
The Mechanics Institute building was opened in December 1888. Courses in electricity, mechanics, mathematics and machine drawing were introduced. There was a staff of 5 teachers with 90 students per week. “Fees were nominal, but if a student attended less than 21 classes in each subject, the charge was doubled.” [1: p26] The Institute was extended by the addition of a public hall to seat 900 people, a library, reading rooms and class rooms which were opened in October 1895.
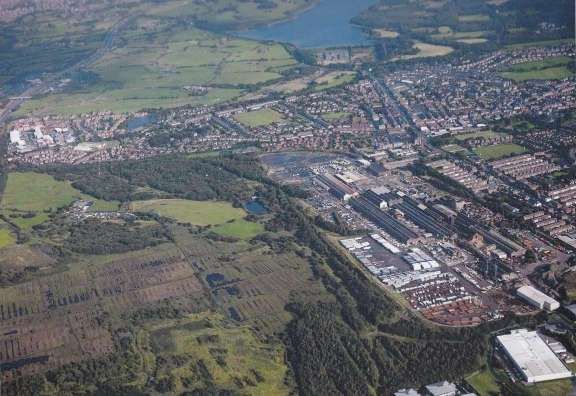
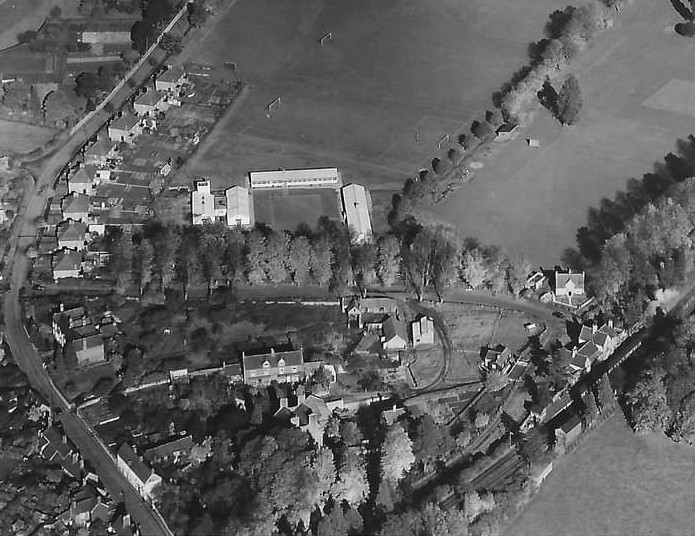
By 1892 “the works were in full operation and by this time Horwich had become a fair-sized town, the census of 1891 recorded a population of 12,850, and this continued to grow. Social and recreational amenities were provided by the company including a large dining hall with accommodation for 1,100 men, and a large recreation ground laid out with two bowling greens, tennis courts, a cricket ground and a children’s playground. … A cottage hospital was built and accidents could thus be attended to promptly. To serve the new population the company had about 70 shops erected along Chorley New Road. On 13th April 1900, the Bolton Corporation electric tram service was extended to Horwich and on 19th May a route was opened via Victoria Road and through the main street of the old town, but this was closed in December 1907. There is no doubt that the trams were the cause of the later reduction in the train service to Horwich from Bolton.” [1: p26]
Marshall described the Works soon after they opened: … “The main entrance in Chorley New Road is attractively laid out with gardens and lawns, and beyond, at right angles to the road and the rest of the works, stands the office block. A wide corridor runs down the centre giving access to various offices including the drawing office. This is a long room occupying much of the north-west side of the building. Connected to the office at the far end and conveniently accessible by road and rail is the general store, 198ft long and 111ft wide, arranged on two storeys with a gallery round the four sides leaving the centre open to the roof.” [1: p62]
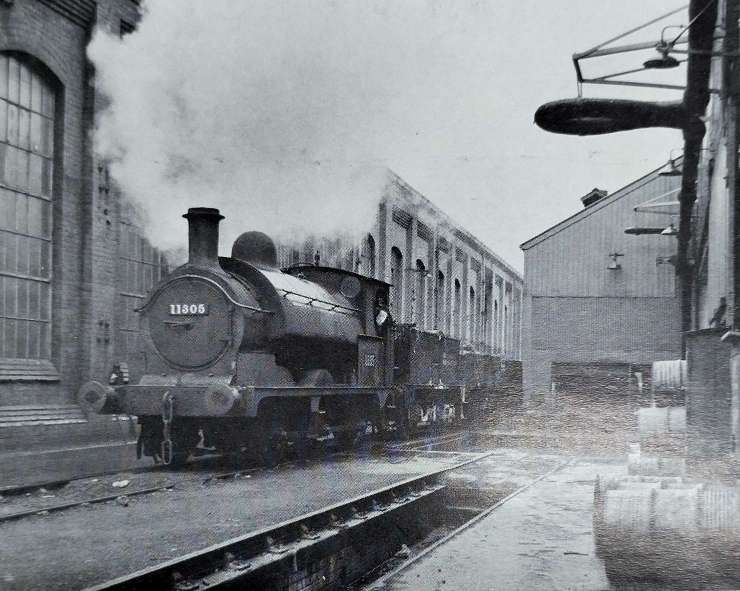
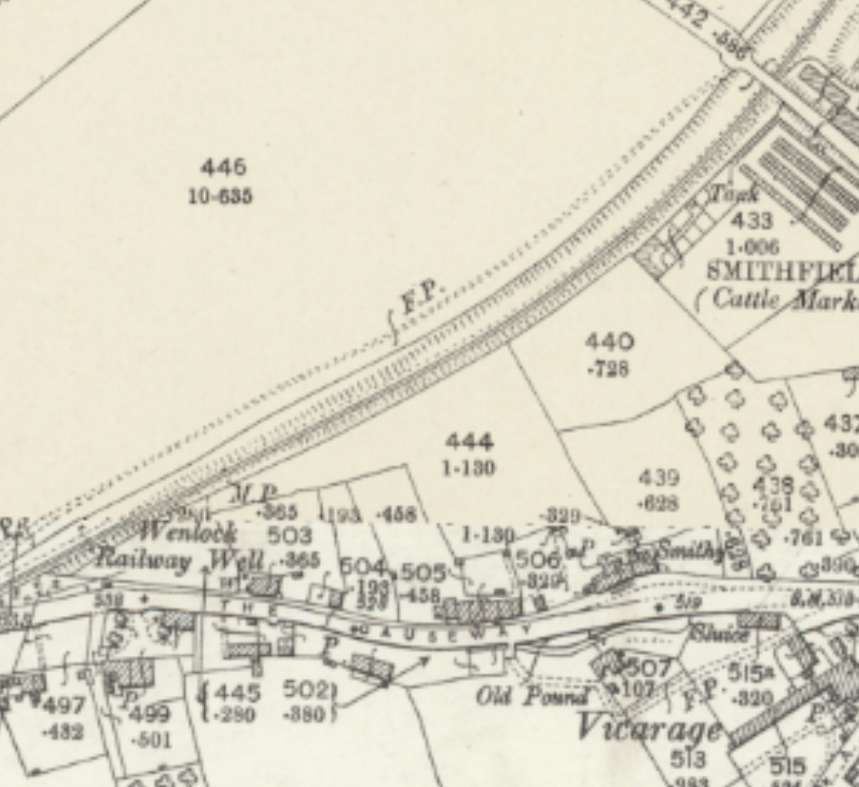
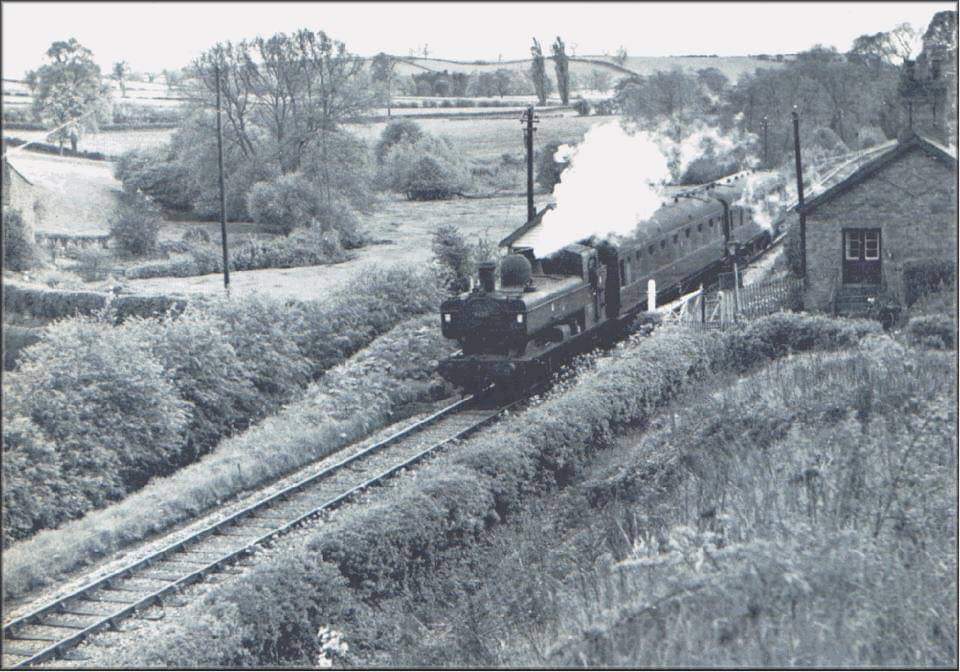
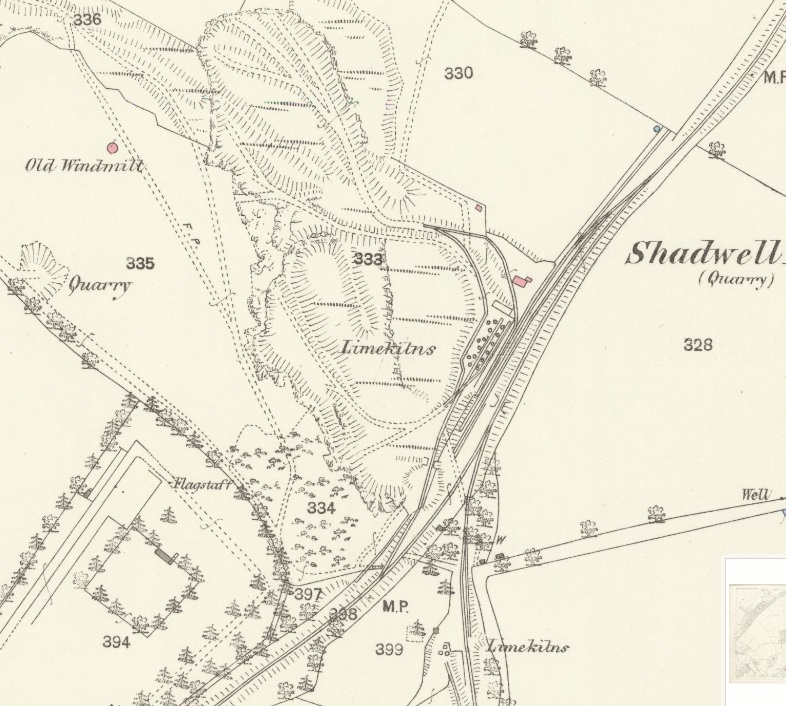
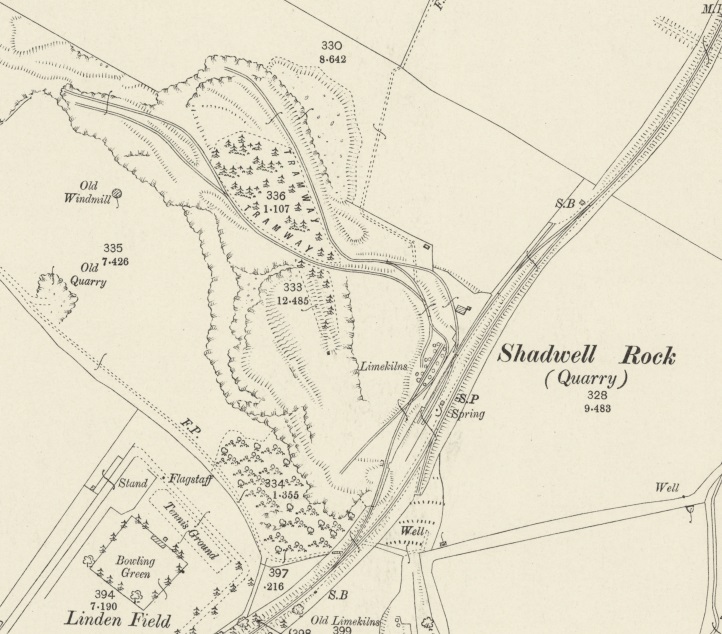
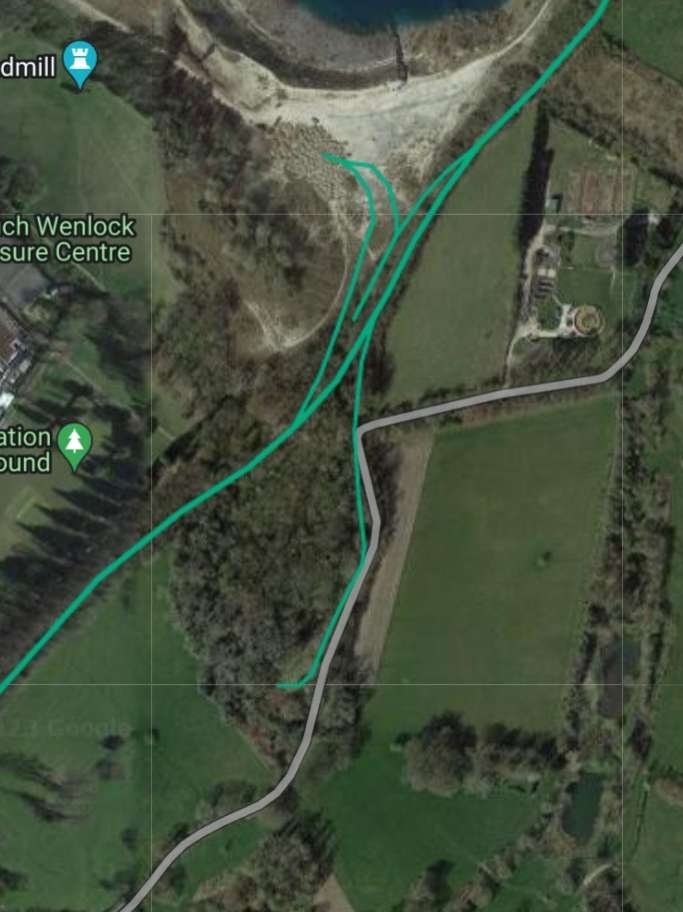
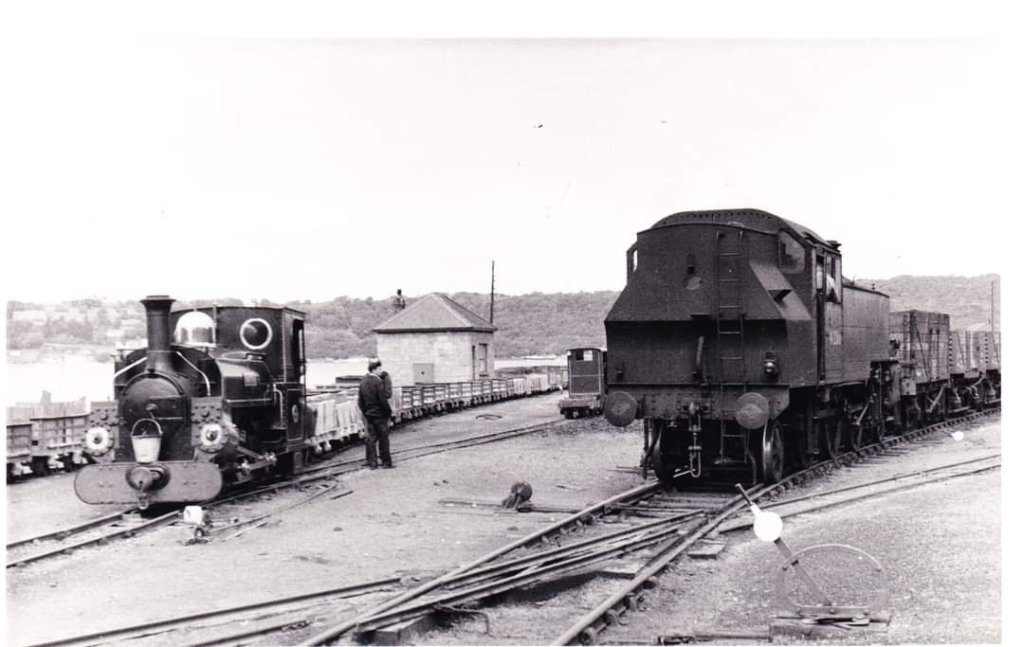
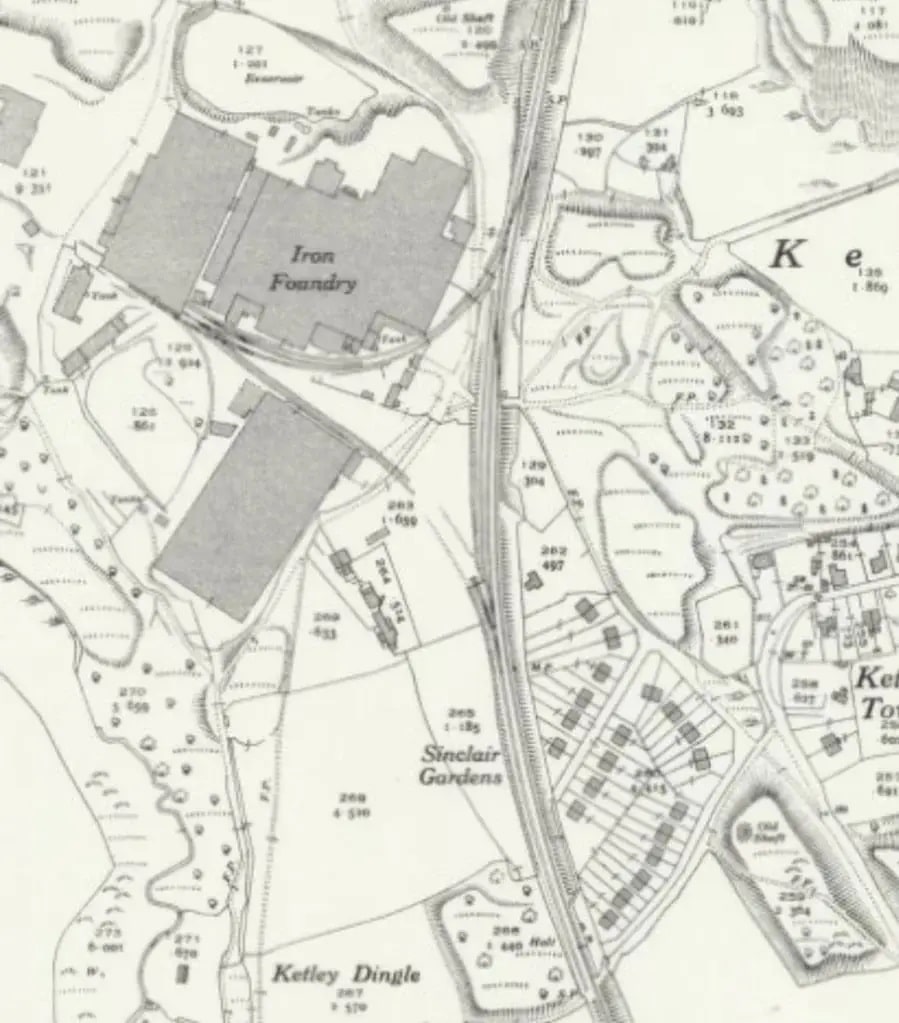
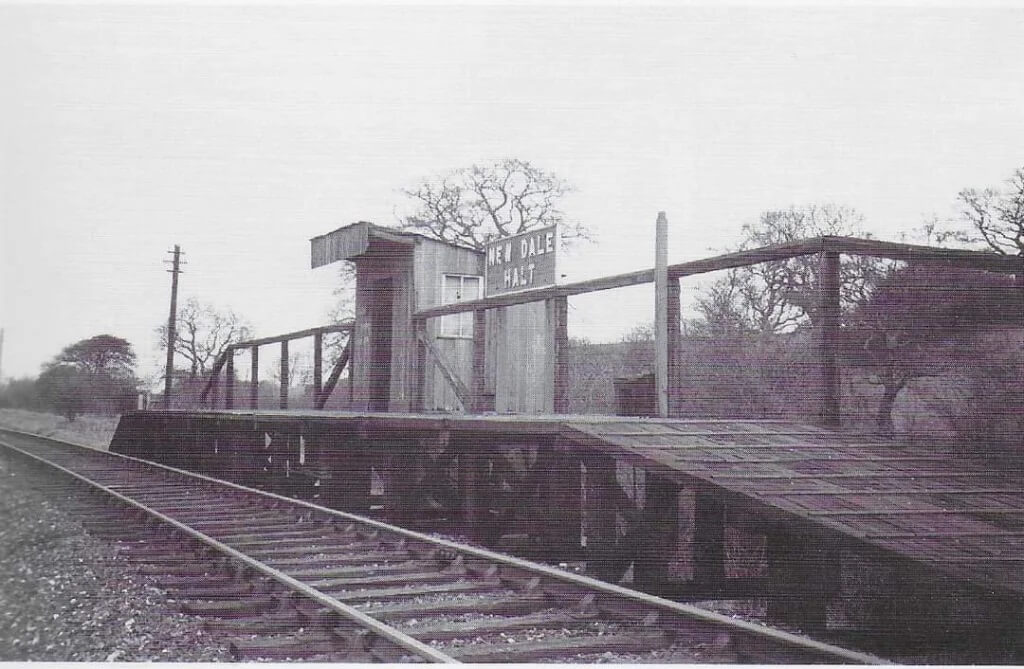
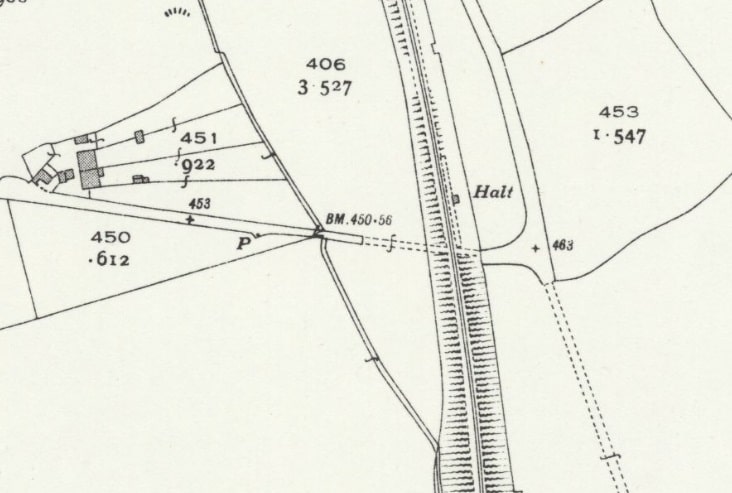
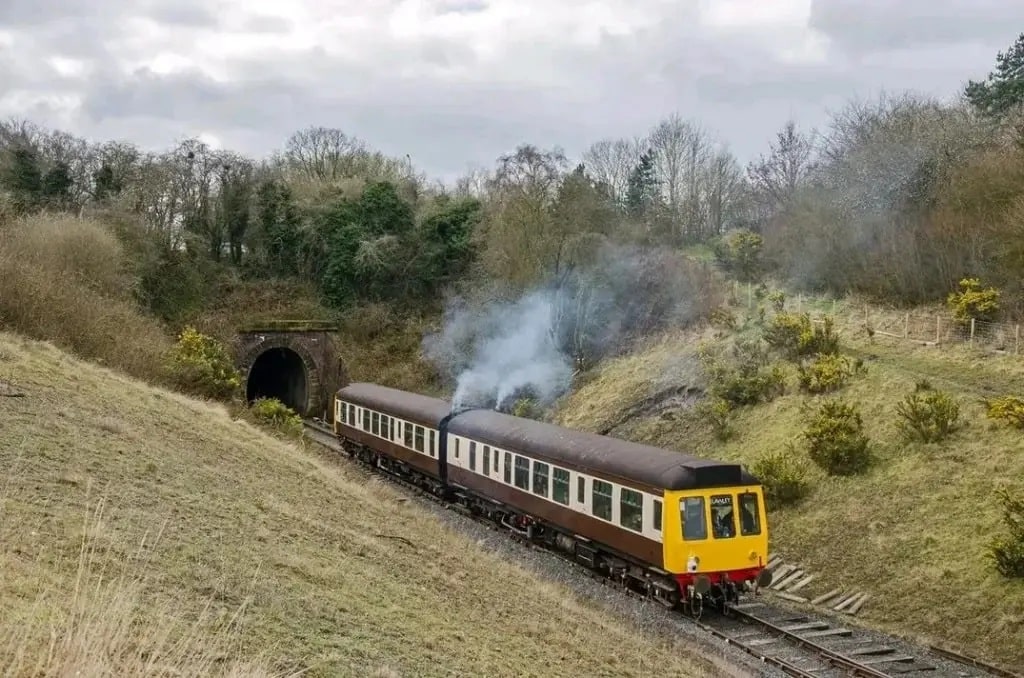
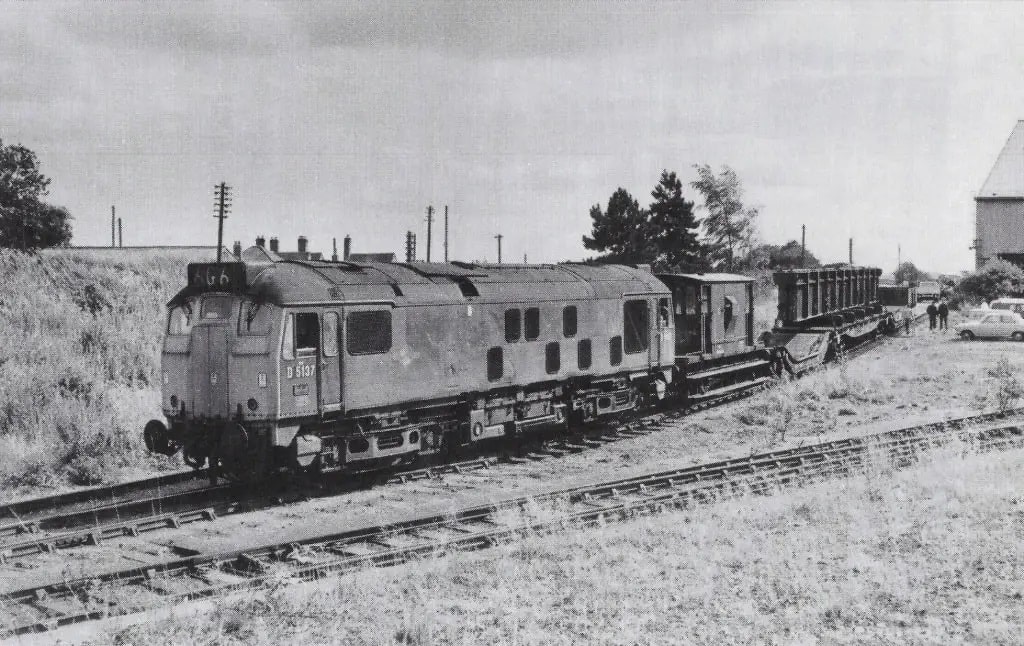
Marshall goes on to write about the 18in gauge internal railway which linked the stores with every part of the works, the length of track amounting to 74 miles. Eight 0-4-0 steam locomotives worked the system; Robin, Wren and Dot built in 1887, by Beyer Peacock and the others built at Horwich: Fly and Wasp in 1891, Midget and Mouse in 1899 and Bee in 1901. They had no works numbers and do not figure in the tabulated list of new engines above.. They had wheels of 16 in dia. and cylinders 5in dia. by 6in stroke.
He then returns to his description of the Works: … “The boiler shop is 439ft long and 111ft wide and its three bays are traversed by 12 ton and 20 ton capacity overhead cranes. For tapping stay holes Aspinall designed a multiple stay-tapping machine worked by ropes and pulleys. Boilers are rivetted up at the end of the shop in two Tweddle rivetting towers designed by Fielding and Platt. The whole of the machinery and equipment is arranged so that the progress of the work from the entry of the plates to completion proceeds step by step through the shop with no doubling-back or crossing to other machines. From the boiler shop we enter the boiler shop smithy, the same width and 120ft long. This is equipped with fires and hydraulic flanging presses for flanging firebox backs, tube plates, throat plates, ashpans and other pressings. The presses and rivetting towers use water at a pressure of 1,500 lb/sq in.” [1: p62]
Marshall’s narrative goes on to the next section of the building, the forge. It was the same width and 452ft long, and contained a series of Siemens regenerative furnaces for reheating. Among the machines were a 35 ton duplex hammer, one 8 ton and two 5 ton hammers. Beyond the forge, in the same row of buildings, was the steel foundry, 150ft long and 135ft wide, the iron foundry 212ft long and 111ft wide and the chair and plate foundry 124ft long and 128ft wide.
“In 1899 two 2 ton Tropenas Converters were installed in the steel foundry which [was] fitted also with Siemens Martin regenerative melting furnaces and facilities for annealing steel castings. The iron foundry and the steel foundry form[ed] a continuous building in three bays traversed from end to end by overhead 12 ton electric cranes. The ground on the north side of the iron and chair and plate foundries [was] at a higher level and from here the melting furnaces and cupolas [were] charged. In the iron foundry [were] produced railway castings of every type.” [1: p62]
The next row of buildings were narrower, only 47ft wide; “first [was] the tinsmith’s shop, 92ft long, next the motor shop, 153ft long, where electric motors and other equipment [were] maintained; the coppersmith’s shop, 89ft long and the brass foundry, 164ft long. … The central power station, next in the line, produce[d] electricity for the entire works and [was] 32ft long. The adjoining boiler house contain[ed] a battery of Lancashire Boilers, some fitted with underfeed mechanical stokers and Green’s Economisers, and others with forced draught grates for burning inferior fuel. In the fettling shop castings from the foundries [were] dressed. The carriage & wagon wheel shop, 200ft long, [was] equipped with lathes for turning and boring wheels, and presses for pressing tyres on to wheels for forcing wheels on to axles.” [1: p62]The middle row of buildings has a uniform width of 111ft. Opposite the stores is the paint shop, 234ft long, uniformly lit without glare by a north light type roof and maintained at an even temperature of 55 to 60 deg. F. by hot water
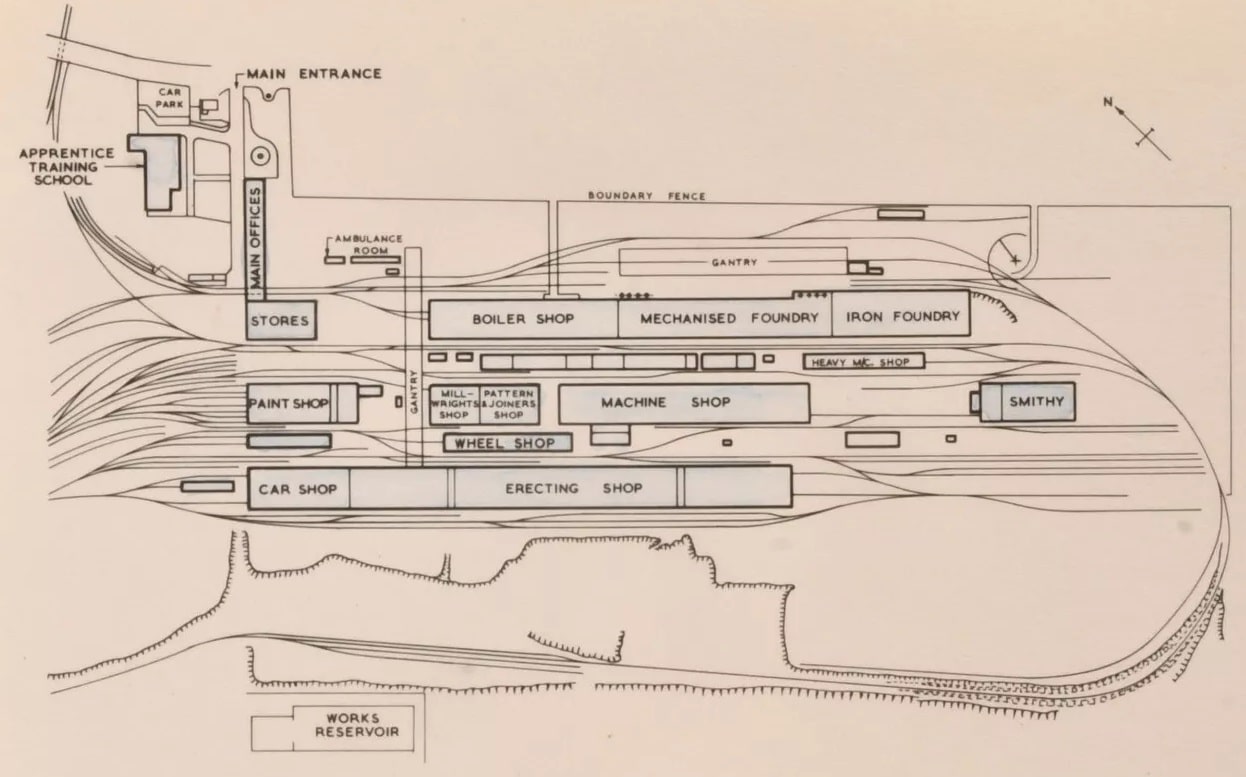
The middle row of buildings was uniformly 111ft wide: “Opposite the stores [was] the paint shop, 234ft long, uniformly lit without glare by a north light type roof and maintained at an even temperature of 55 to 60 deg. F. by hot water pipes laid along the engine pits. The shop accommodate[d] about 20 engines on six rows of pits 2ft deep, and include[d] a store from which all colours, oils, varnish and other materials [were] issued and a plant for mixing paints. It was the custom to spend about three weeks painting a new L&YR engine. After the filling and priming operations three coats of paint were applied followed by three coats of varnish.” [1: p62-63]
The testing shop occupied the next 27ft of the building. It was “equipped with a vertical 100 ton Buckton hydraulic testing machine using water at a pressure of 1,000 lb/sq in. Also working at the same pressure [was] a 100 ton horizontal chain testing machine. There [were] machines for preparing test specimens, a steam hammer and appliances for testing oil and springs. The chain smithy occupie[d] the last 28 ft of the building, and beyond it [was] a chain annealing furnace, Between this and the next shop, the yard [was] spanned by a large gantry used for handling boilers and other heavy items. … The millwright’s shop, 143ft long, maintain[ed] the various types of machines used on the railway. Adjoining this [was] the pattern makers’ and joiners’ shop, 164ft long, fully equipped with woodworking machinery and for saw maintenance.” [1: p63]
The fitting and machine shop sat at the centre of the Works. It was 508ft long. “Four 5 ton electric jib cranes travel[led] along the centre of the two outer bays and serve[d] the machines on each side. The end of the building [was] occupied by the points & crossings shop, 72ft long, and signal shop, 128ft long. … Some 150yd beyond the signal shop [was] the bolt shop, 60ft long, and the smithy, 212ft long. Among the equipment here [were] 11 double and 27 single hearths, steam hammers and drop stamps.” [1: p63]
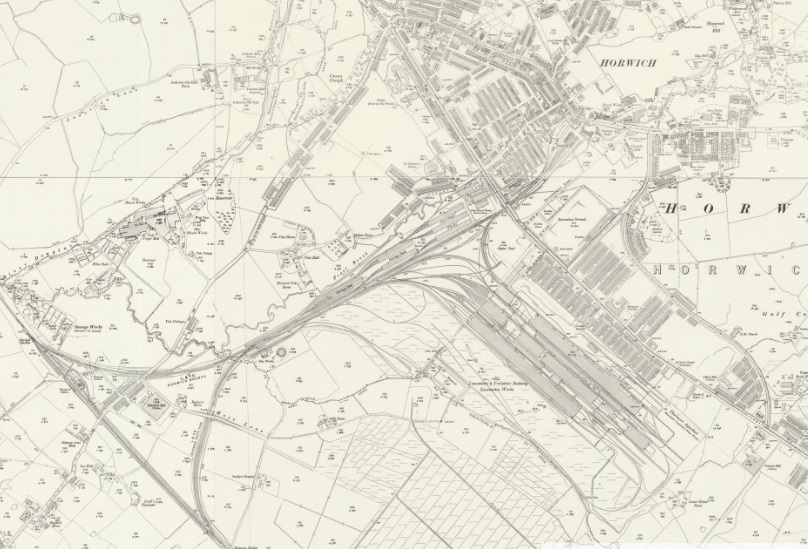
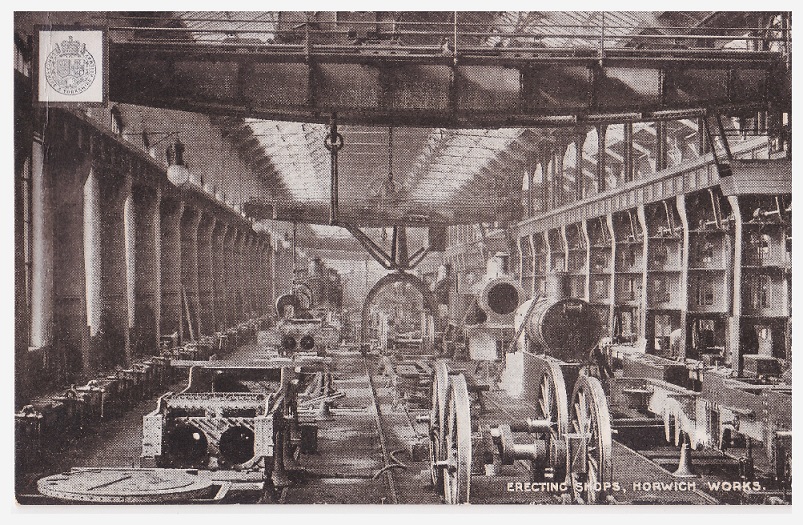
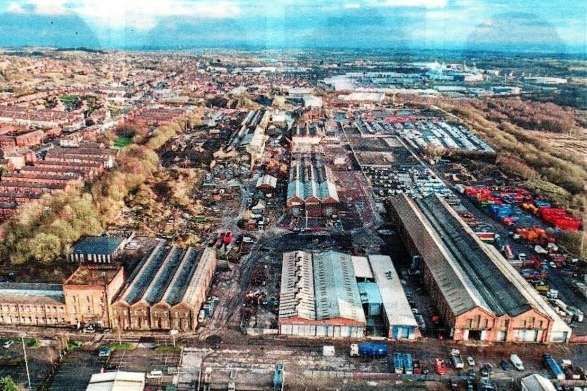
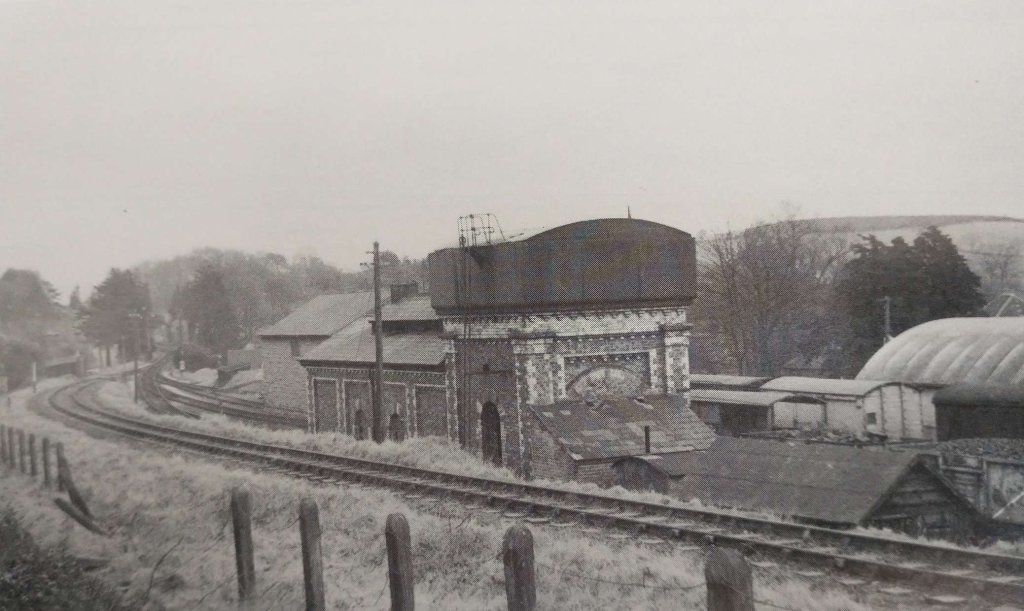
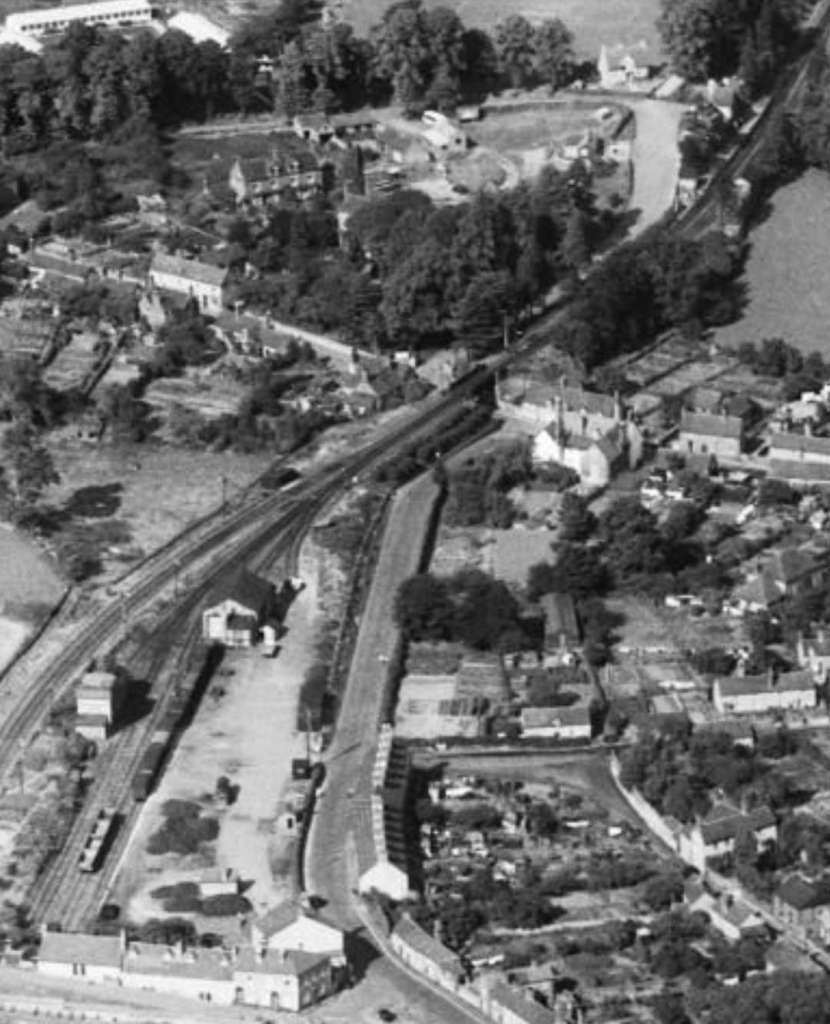
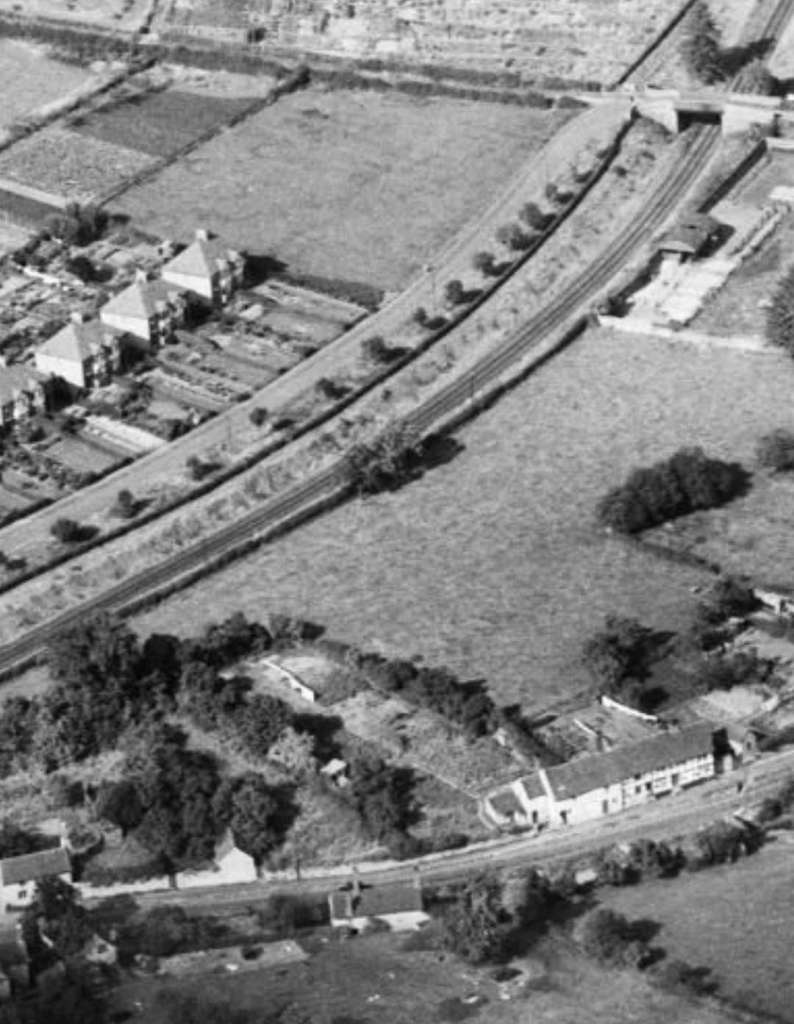
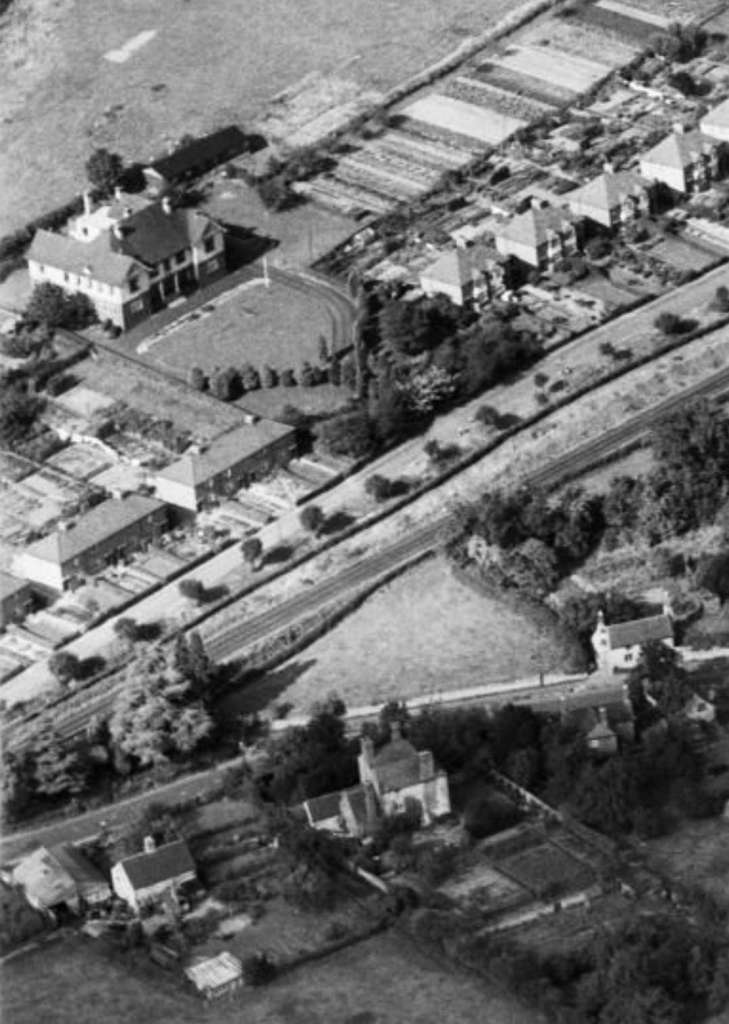
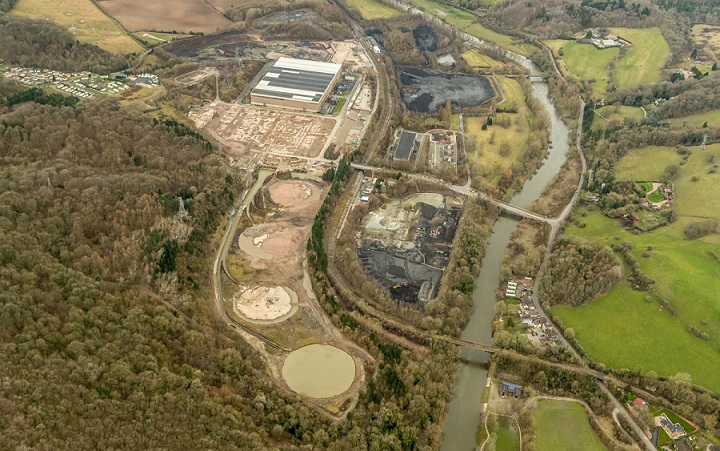
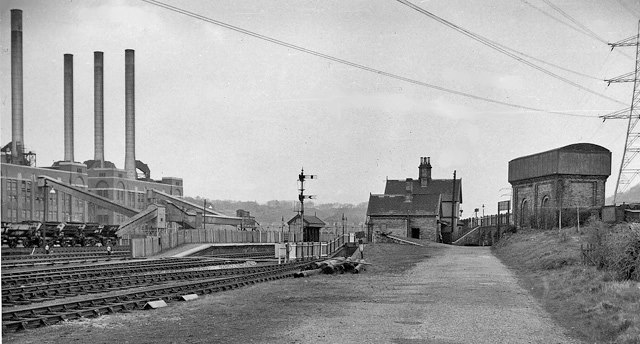
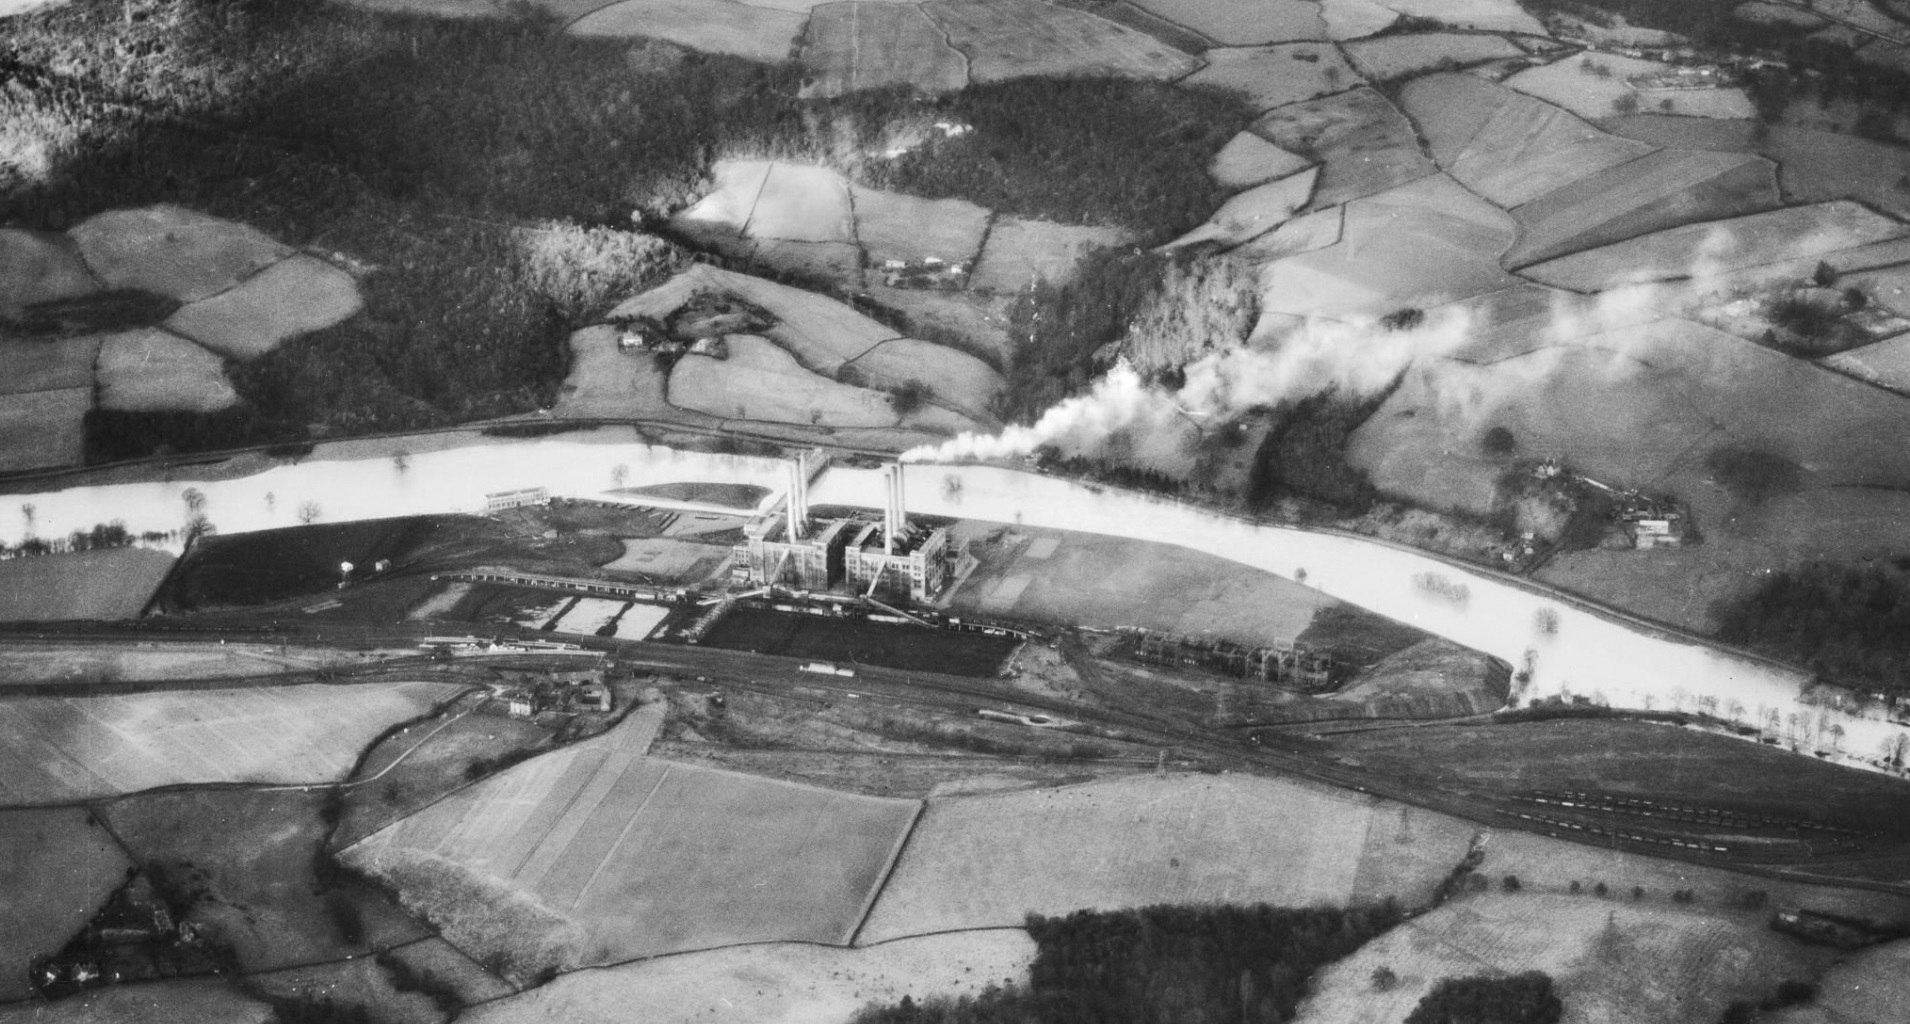
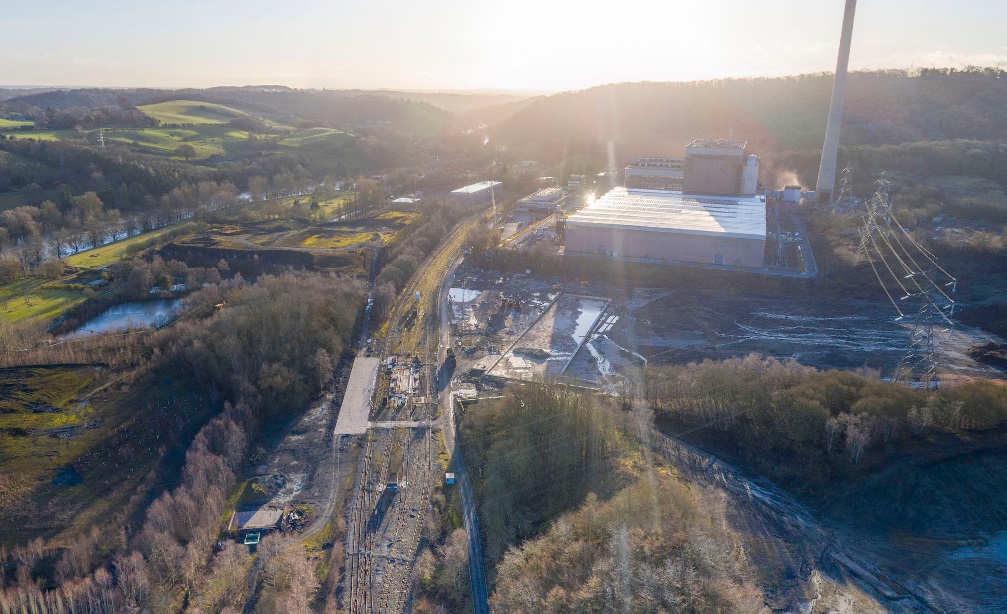
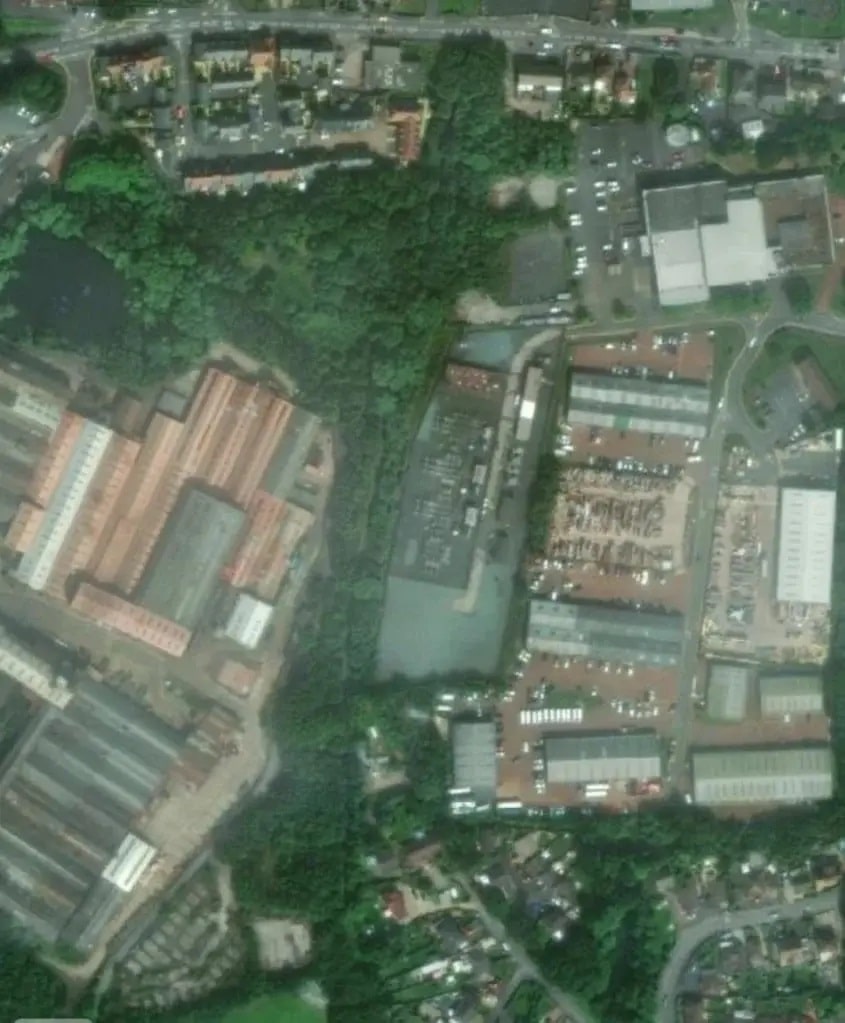
“The fourth row of buildings beg[an] with the engine shed, alongside the paint shop. The heavy machine shop, 360ft long and 48ft wide contain[ed] machines for straightening frame plates, and slotting, radial arm drilling machines and the means for making built-up crank axles. Beyond [was] the spring smithy, 153ft long, where spring plates [were] made. … Finally there [was] the enormous erecting shop … with room for 90 engines and 30 tenders. Access [was] by the ends and by two traversers 32ft wide. The shop [was] divided into five sections each equipped with four 40 ton capacity overhead travelling cranes, two on each side. The total area of the works [was] 81 acres of which the area covered by workshops [was] 17 acres.” [1: p63]
Aspinall was appointed General Manager of the L&YR in June 1899, by then, 677 locomotives had been built at Horwich. He was succeeded by H. A. Hoy, under whom a further 220 locos were built. Hoy was succeeded by George Hughes in 1904. Hughes was an internal appointment and he remained at Horwich until he retired in 1925. “The 1,000th locomotive to be built at Horwich. No. 15, one of the Hughes 0-4-0 Railmotor locomotives, Works No. 983, appeared in March 1907. … During the 1914-18 war Horwich works was engaged in manufacturing military equipment of all types. On 1st January 1922, the L&YR was amalgamated with the LNWR. and George Hughes became CME of the combined company. When the LMS was formed a year later, Hughes was appointed CME of the entire system. … For the next three years [Horwich] this became the CME’s headquarters for the whole of the LMS.” [1: p63]
Change occurred after Hughes retired in 1925. The LMS began centralising activities. “The telegraph shop, signal shop, points & crossings shop, forge, and steel foundry were closed and the work transferred elsewhere. The spring smithy was transferred to the general smithy and the original building became a tube and bar store. In about 1927, the high level boiler house was closed down. During the great depression in 1931, locomotive building was suspended after completion of a batch of 15 standard 0-6-0 tanks on 15th October and locomotive work was confined to repairs. From 1932, after the closure of Newton Heath carriage works, the electric multiple-unit trains on the Liverpool-Southport-Crossens and Manchester-Bury-Holcombe Brook services were taken to Horwich for repair, and occupied the north western end of the erecting shop, this section becoming known as the car shop.” [1: p63-64]
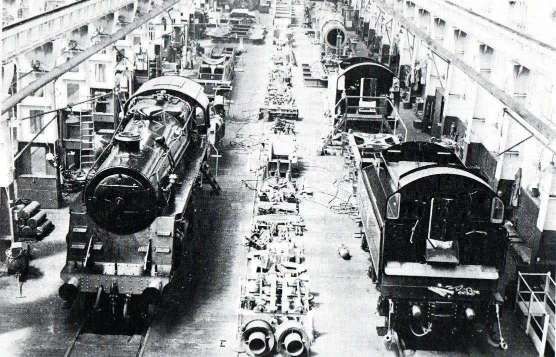
Part of the Works was used between 1939 & 1945 for the manufacture of armoured fighting vehicles and shells. “From May to November 1943, 33 American 2-8-0 engines passed through the erecting shop for some 30 modifications, chiefly the fitting of a Gresham & Craven combination injector and graduable steam brake valve, the overhaul of part of the motion and the fitting of hand brake gear to the tender. … In June 1943 locomotive building was resumed with a batch of Stanier 2-8-0s and tenders.” [1: p64]
“The last steam locomotive to be built at Horwich was B.R. Standard Class 4 2-6-0 No. 76099 which left the works on 27th November 1957. On 20th August 1958 work began on a series of 350 h.p. 0-6-0 diesel shunting locomotives. The last of these, No. D4157, was completed on 28th December 1962.” [1: p64]
Marshall tells us that, “after the war a mechanised foundry was built in the shop which was originally the forge. The casting of chairs was transferred to the new foundry. A typical year’s work during this period included 20 new locomotives, 350 heavy repairs and 240 light repairs to locomotives, and repairs to 200 boilers and 90 electric vehicles, and the general production work of castings, etc. With the closure of Gorton works in 1963 the manufacture of points and crossings began again at Horwich. During 1963 the number of locomotives for repair declined and the erecting shop was invaded by wagons, many of them the result of the running down of Earlestown works, and the last locomotives entered the shop in April 1964.” [1: p64-65]
“Altogether, some 50,000 locomotives [were] repaired in 76 years, an average of over 680 a year.” [1: p65]
Marshall concludes his articles by noting that Horwich Works were a place of training and development for a number of significant people in the history of railways in the UK: Sir Nigel Gresley, R.E.L. Maunsell, George Hughes and Sir Henry Fowler, and others of significance to railway history around the world, for instance J.P. Crouch, who became CME of the Argentine Central and Rupert Fawker, CME of the Sudanese Railways.
The Works were also an important place of employment for generations of people in Horwich. Inevitably, economic conditions varied over the years, families had to travel around the country to find other work when redundancies occurred.
My paternal grandfather and grandmother found alternative work and a new home in the Midlands. I guess that there were many like them, both in the 1930s and in subsequent generations right through to the eventual closure of the Works for whom redundancy brought family trauma, a loss of dignity and a sense of hopelessness. People who felt trapped in their circumstances, swept along by a tide of events over which they had little or no control. People who had to find a new route through life for themselves and their families and who showed the same courage and commitment in their own circumstances as those who were prime movers in the development of Horwich Locomotive works in the late 19th century.
Of additional interest relating to Horwich Locomotive Works is a short note in The Railway Magazine of September 1909 entitled “The Lancashire & Yorkshire Locomotive Stud.” …
“The usual summer convention of the Institution of Mechanical Engineers which this year was held at Liverpool, after a long interval, will be remembered as a railway convention, particularly as a Lancashire and Yorkshire Railway one. Firstly, because Mr. J. A. F. Aspinall, the chairman of the meeting and president of the Institution, is the General Manager of the Lancashire and Yorkshire Railway; secondly, because the principal paper was contributed by Mr. Geo. Hughes, the Chief Mechanical Engineer of the Lancashire and Yorkshire Railway; and lastly, because of the visit paid to the Horwich Works.” [8]
“Mr. George Hughes’ paper was entitled “Locomotives Designed and Built at Horwich, with some Results.” In it he stated that formerly there were in service on the Lancashire and Yorkshire Railway 29 types of passenger engines and 26 types of goods engines, the total stock being 353 passenger and 647 goods engines. There are now 1517 locomotives, of which 1,052 have been built at Horwich. About 1,100 are in steam daily. Mr. Aspinall, while chief mechanical engineer, had adopted the policy of reducing the number of types, introduced standardization, and, wherever possible, interchangeability. The number of types had now been considerably reduced. Experience with the Druitt-Halpin thermal storage tank had shown that where stopping places were frequent on rising gradients it led to distinct economy, the saving varying from 4 to 12 per cent. Experiments were now being carried out with a super-heater, the results of which would be communicated at a later date. The average life of boilers on the Lancashire and Yorkshire Railway for the three years ended December, 1908, was 14 years, representing an average mileage of 356,268. Copper fire-boxes ran from 150,000 to 275,000 miles, while over a period of 20 years it was found that the life of cylinders varied from 8 to 14 years. With the more severe modern conditions of service the solid type crank axle had been supplanted by the built-up pattern.” [8]
References
- John Marshall; Horwich Works – Parts 1 & 2; in Railway World, Ian Allan, January & February 1965.
- https://maps.nls.uk/geo/explore/#zoom=13.8&lat=53.59816&lon=-2.55472&layers=168&b=1&o=100, accessed on 7th July 2024.
- https://www.rivington-chase-horwich.co.uk/how-the-loco-works-transformed-a-town/#iLightbox[gallery1389]/0, accessed on 8th July 2024.
- https://www.theboltonnews.co.uk/news/17827041.loco-works-changed-horwich-sleepy-village-hive-industry/, accessed on 8th July 2024.
- https://www.ebay.co.uk/itm/134401504434?itmmeta=01J29FXDQ4GPYP215PRE0N39F4&hash=item1f4af434b2:g:UKsAAOSwDIhjuAQY&itmprp=enc%3AAQAJAAAA8FNo54t30Rd%2Btl1m%2ByAZZMpwRDAWscjnkRK6bHYqjrGvBGpfK9mly9U26cLrMARZPwDUAlA2UBgFUI%2Fc5asa02lj56eVZljw6L%2BcfSgmgab44UPVMvJ6wCrLdS4ANswjHHQLO8vfXMdOJlAbyisr8iBf%2FaDEk4tCxjLV0gRvRfAeRwrIDuoY5arXElpgW2%2BowLdJUPl168gsvIYII9wbeGjs%2BZOajGmYYkeHKD%2FxI%2FYv%2BfHSXv7xE4yFJIbDvegrL%2BgwtMsoe7zpnH%2BTB4idm2%2Fv1Exm2qalkdgLsN%2FW9k6BzP6rBmq34I1fykfcehmWMA%3D%3D%7Ctkp%3ABk9SR57c9a-SZA, accessed on 8th July 2024.
- https://archive.org/details/HorwichLocoWorksErectingShopsC1890, accessed on 8th July 2024.
- https://rogerfarnworth.com/2019/12/12/horwich-loco-works-18-gauge-railway-part-1
- The Lancashire and Yorkshire Locomotive Stud; in The Railway Magazine, September 1909, p256.


