
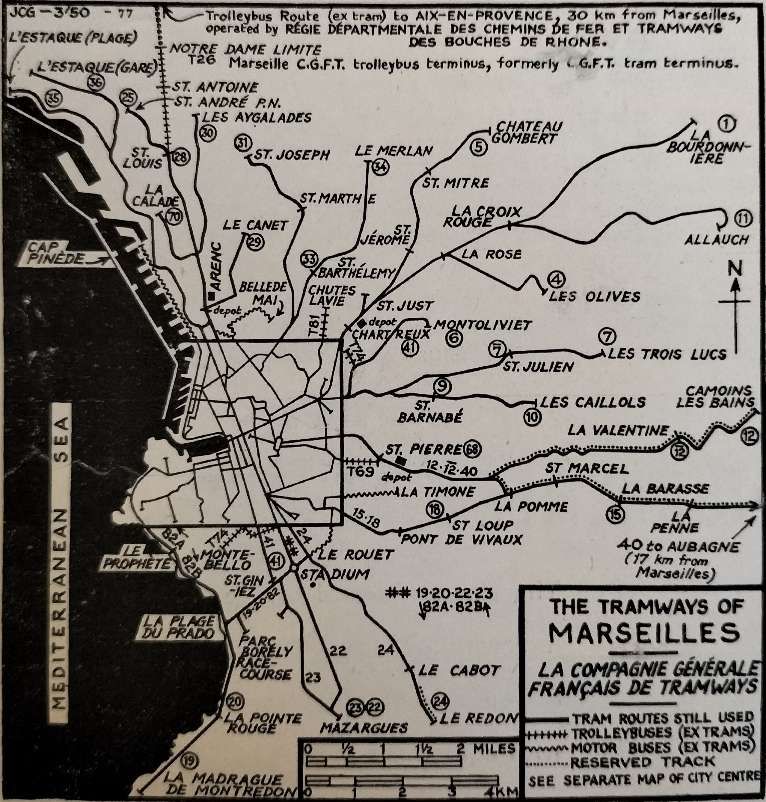
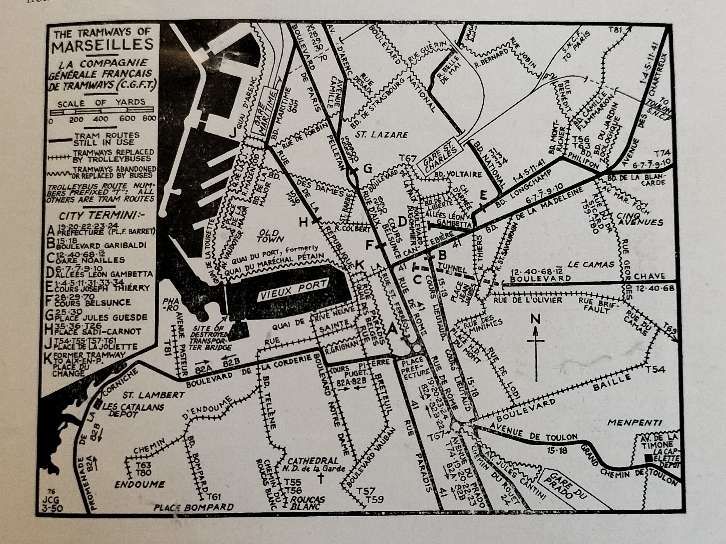
The June 1950 issue of The Modern Tramway carried a report by A. A. Jackson on the tramways in the French port of Marseilles.
Marseilles sits in a natural basin facing West into the Mediterranean and surrounded by hills on three sides. Jackson’s article was based on personal observations in 1945 and later information provided by D. L. Sawyer and N.N. Forbes. He writes:
“The suburbs extend to the lower slopes of these surrounding hills and they are connected to the centre of the city by a tramway system that is now the largest in France. The original operator was the Compagnie Genérale Française des Tramways (Réseaux de Marseille) but the tramways have been under sequester since 1946. The route mileage at the present time is kilometres and the gauge is standard (i.e. 1.44 metres).
The important dates in the history of the system are:
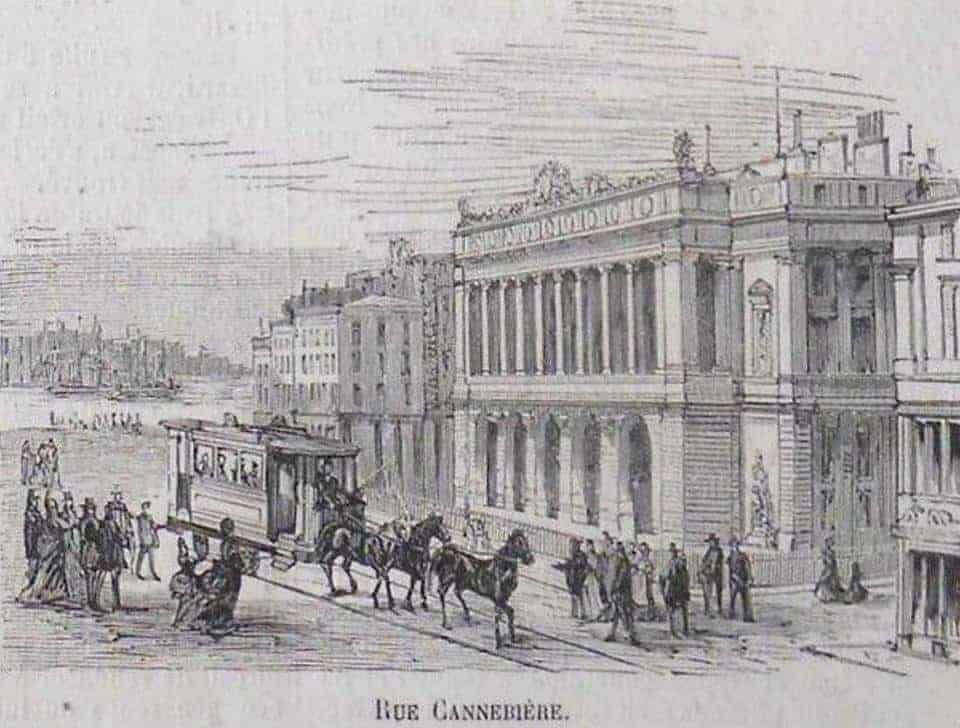
1873: First horse tramway. (This date is questioned by other sources with 1876 being quoted for the first use of horse-drawn trams. The French Wikipedia entry talks of planned routes dating from 1873 but the concession only being awarded in 1876.) [2][3][16]
1876: C.G.F.T. acquired the tramways (excluding the Aix interurban).
1890: Electrification begun.
1904: C.G.F.T. acquired and electrified the steam railway, L’Est-Marseille.
1907: Allauch (12 km.) and La Bourdonnière (12 km.) routes opened.
1910: Electrification completed. Le Merlan route opened.
1922: First rolling stock modernisation began.” [1: p134]

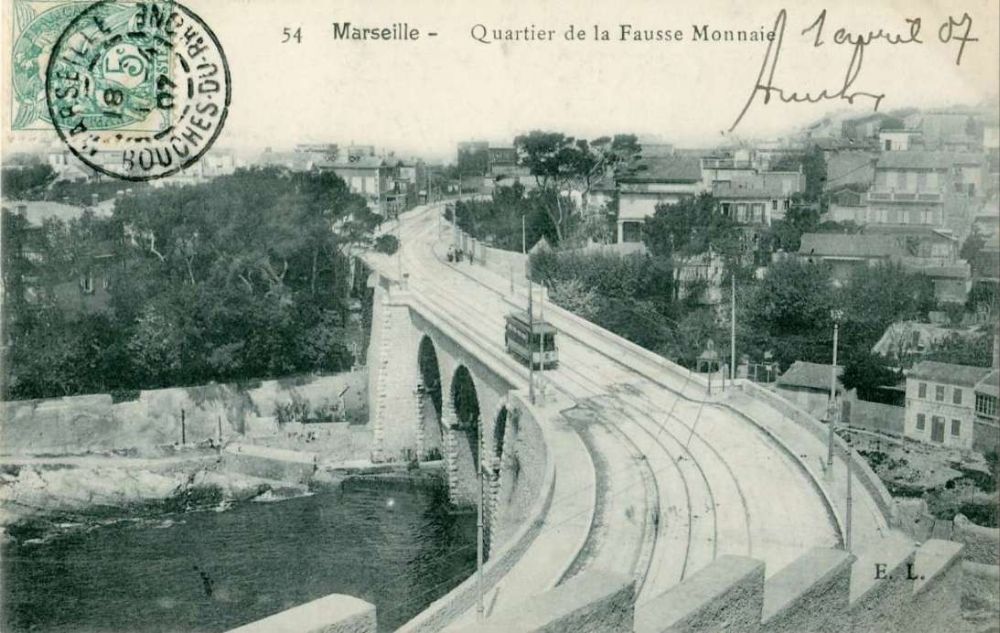
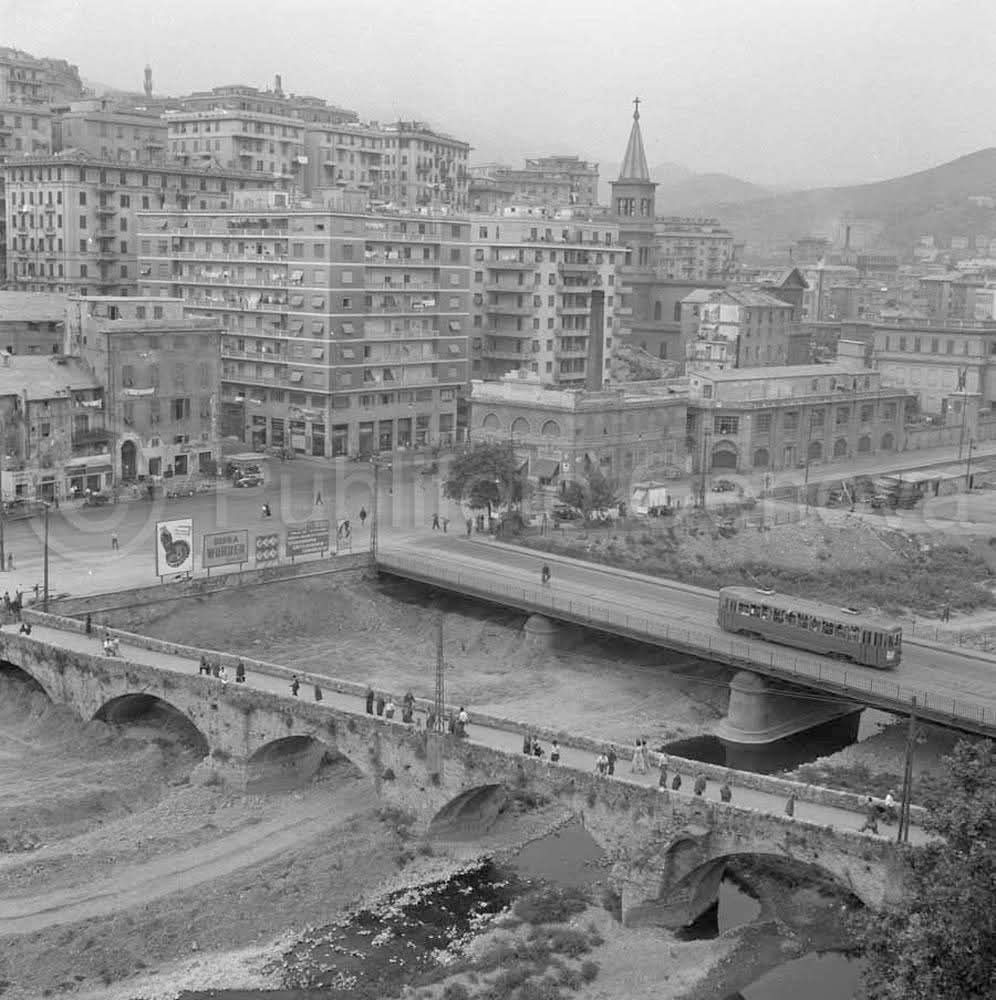
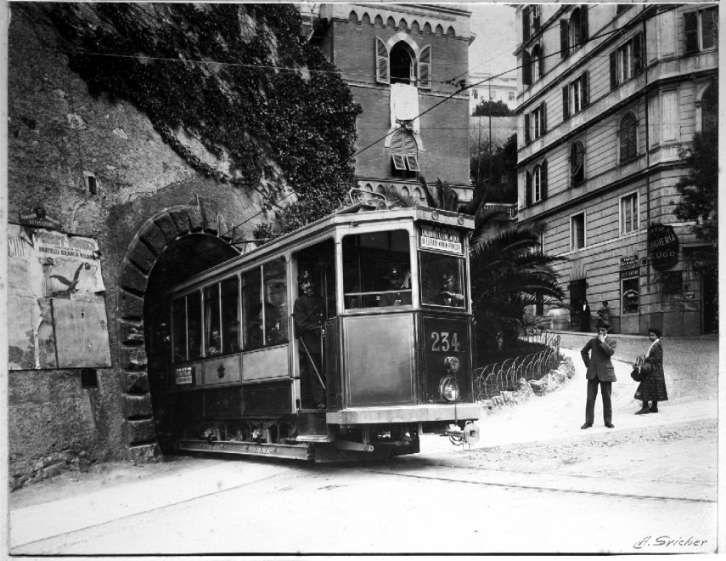
Scanned by Claude_villetaneuse, © Public Domain. [14]
These dates are not comprehensive. Jackson was writing at the end of the 1940s and could not be expected to cover later events. It is worth noting Wikipedia’s comment that, “Unlike most other French cities, trams continued to operate in Marseilles, even as through the 1950s and beyond trams disappeared from most cities around the world. The original tram system continued to operate until 2004, when the last line, Line 68, was closed. Trams remained out of operation for three years between 2004 and 2007, in advance of the effort to renovate the tram network to modern standards.” [2]
Wikipedia says that “the network was modernised by the constant introduction of newer tramcars, to replace the older ones. In 1938, thirty-three trailers were recovered from Paris. These meant that reversible convoys could be operated. In 1939, the tramway company owned and operated 430 tramcars, 350 trailers and 71 lines.” [2]
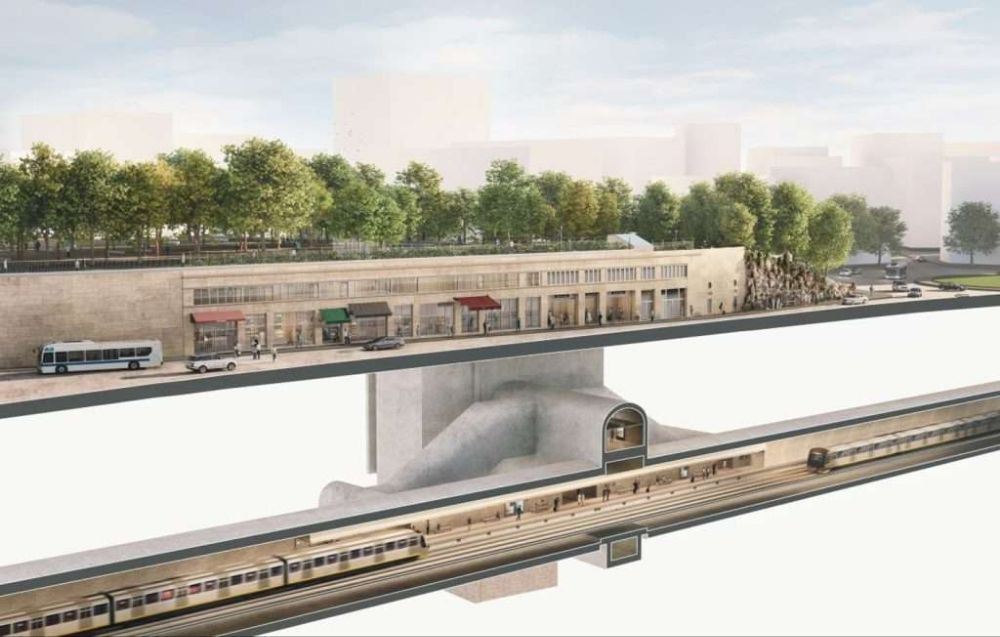
A 1943 proposal would, if it had been realised, seen tunnels provided in the centre of Marseilles, the busiest lines would have been brought together in two tunnels. This project did not come to fruition.
Wikipedia continues: “In 1949 a further modernisation occurred. The first articulated tramcars was designed and built (Algiers tramway possessed articulated SATRAMO tramcars). These were created by joining two older tramcars. These tramcars remained unique [in France] until 1985 when Nantes tramway opened.” [2]
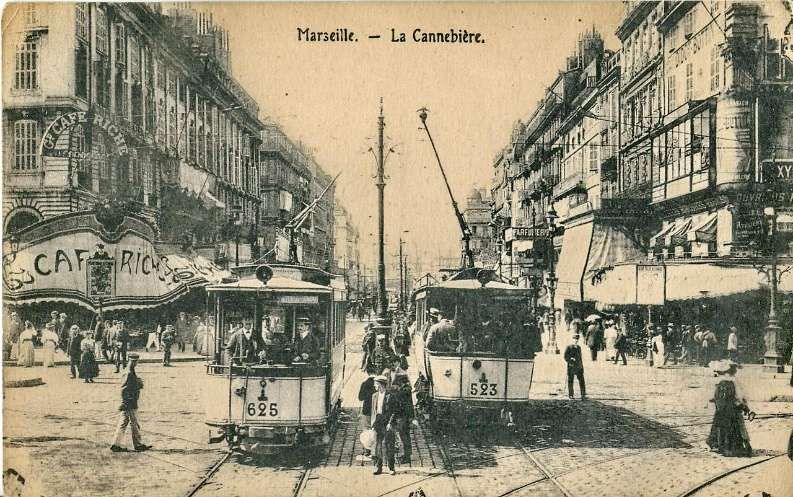
The city council did not want to keep its network of trams. The haphazard modernisation of tramcars was evidence of the council’s intentions. “The process of replacing tramways with trolleybuses and buses began after World War II in 1945 and accelerated from 1950. The first closures meant that Canebière was tramway-free from 1955. The last closure occurred on 21st January 1960.” [2] But not all lines closed. …
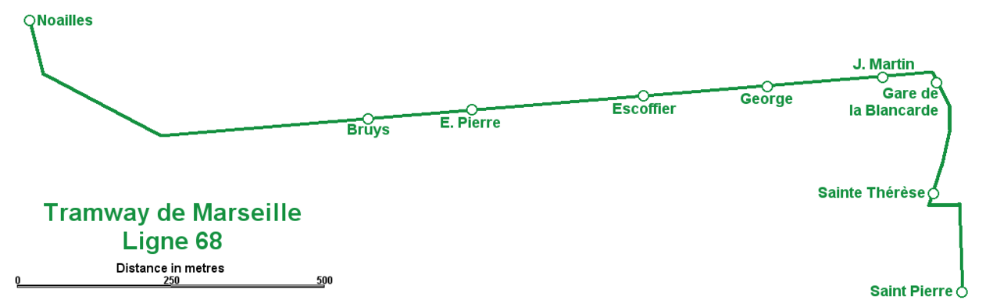
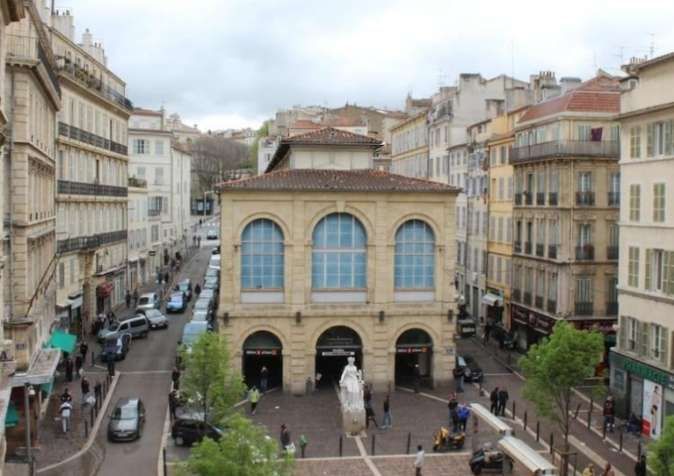
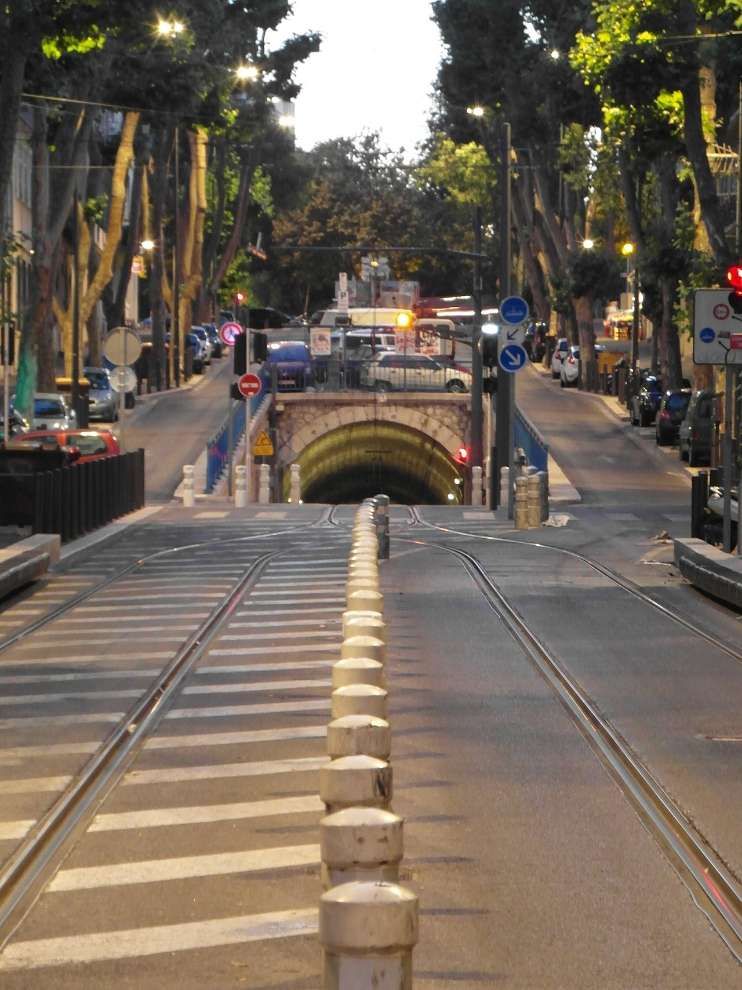
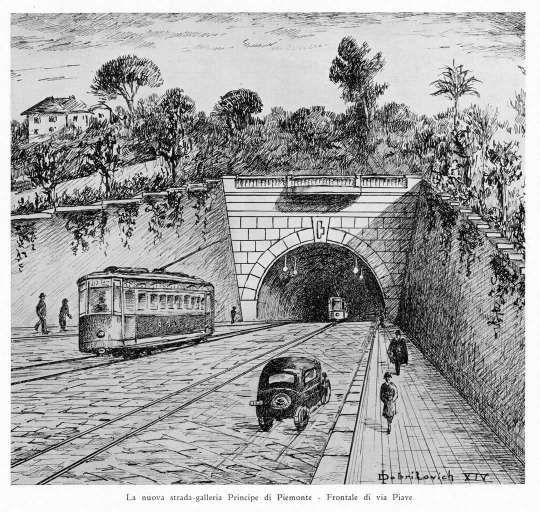
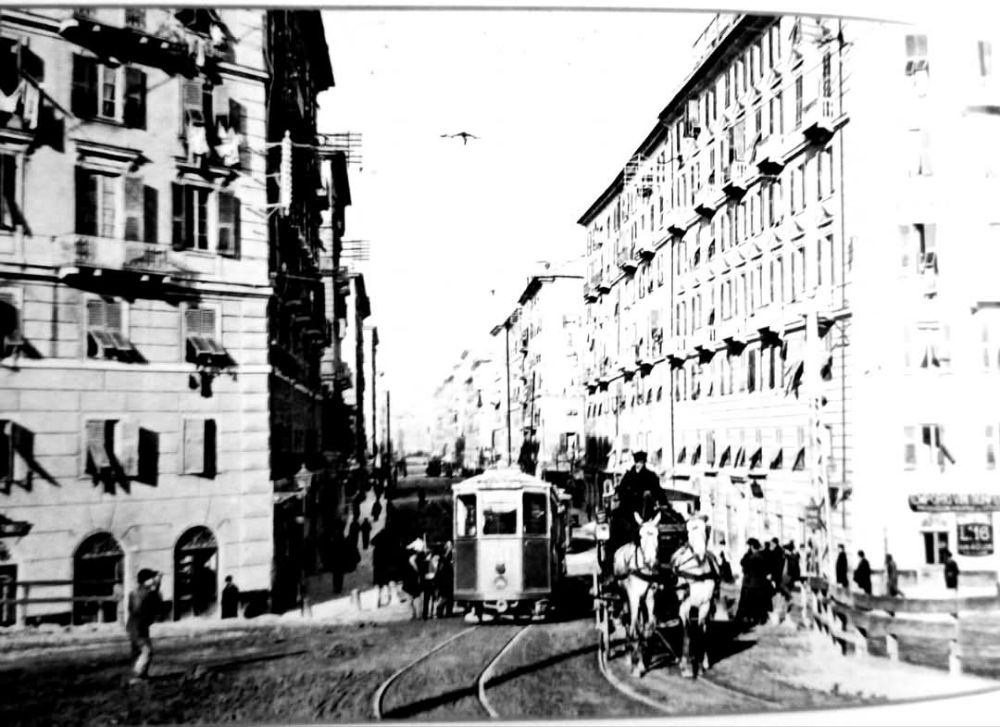
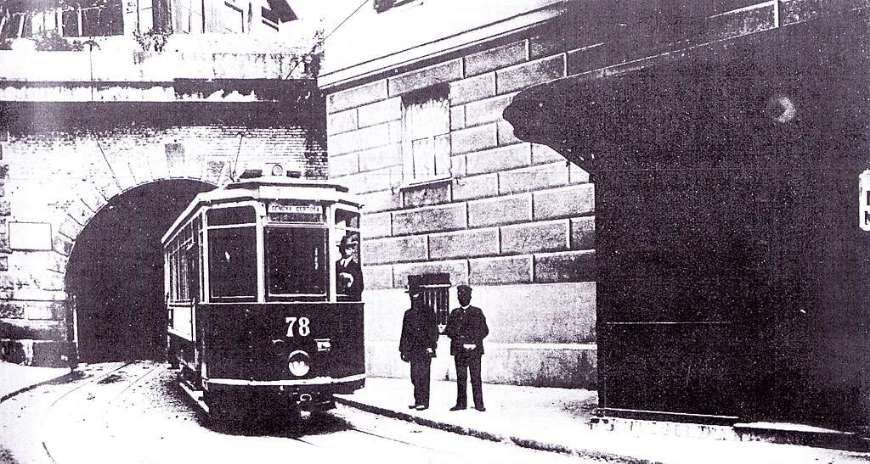
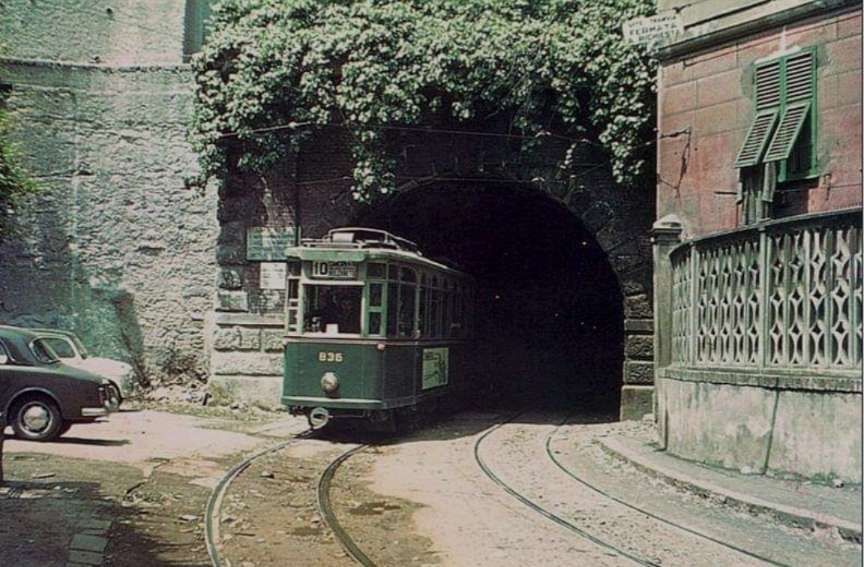
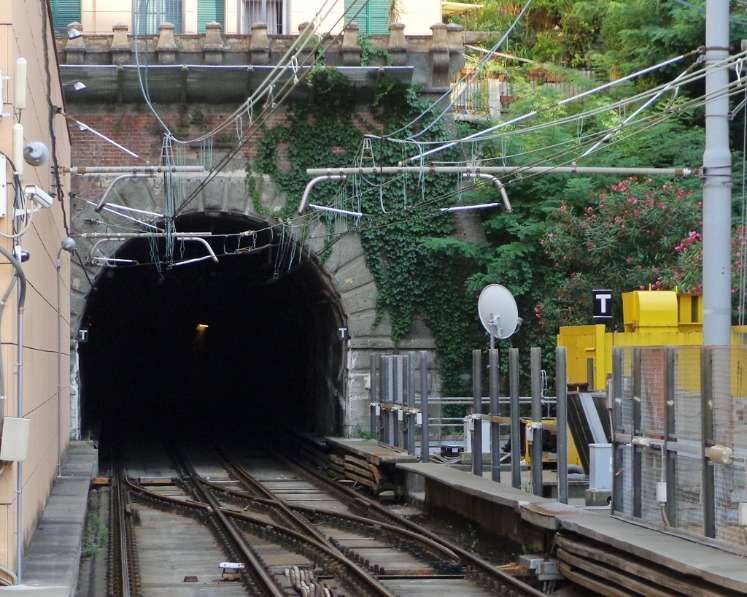
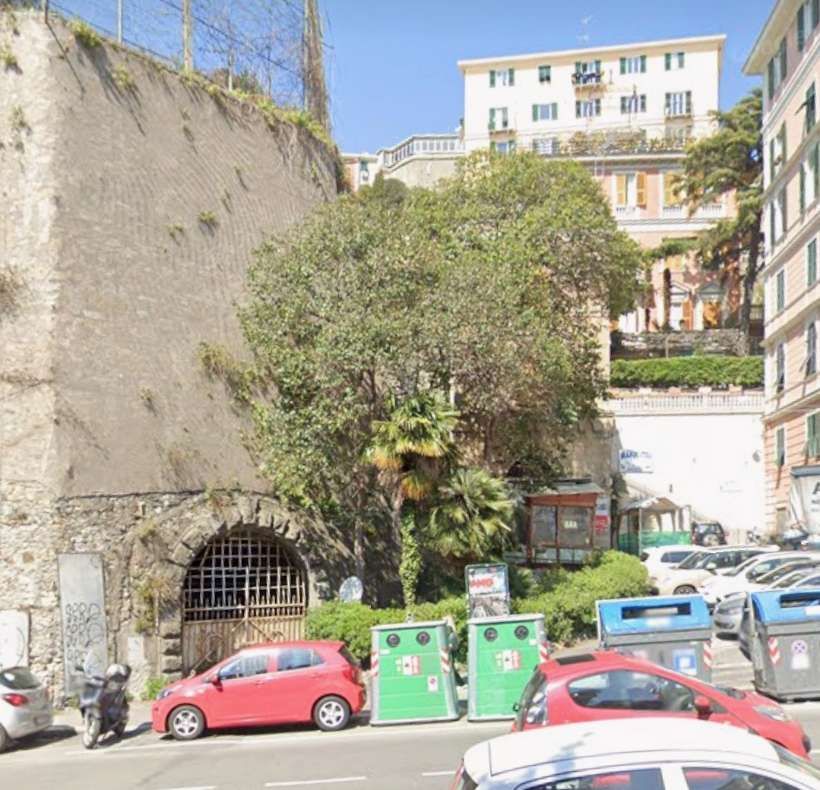
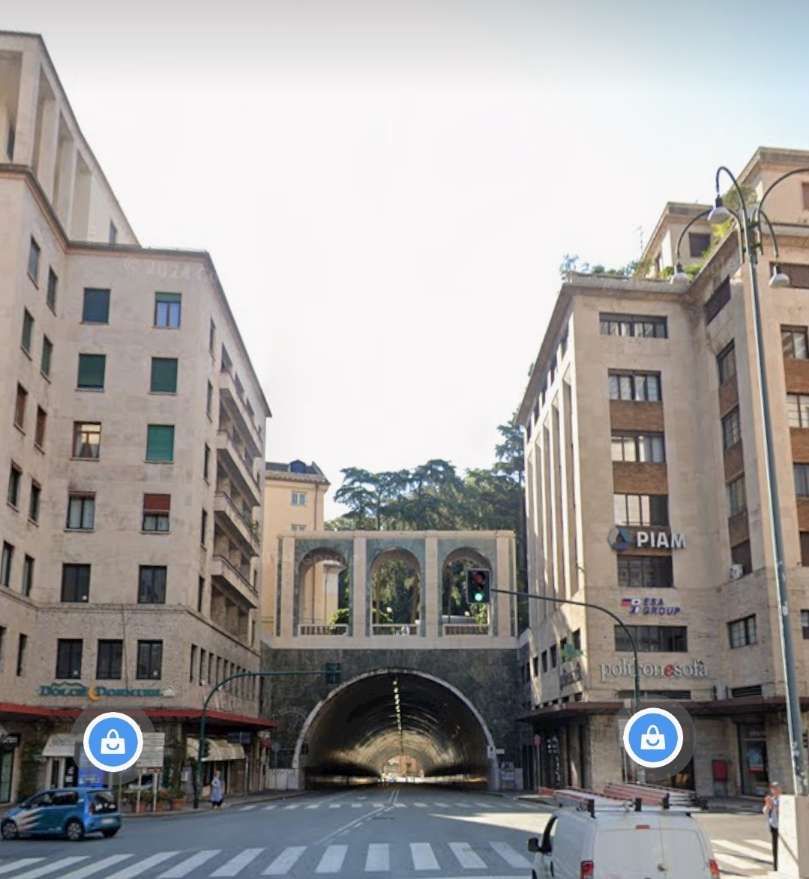
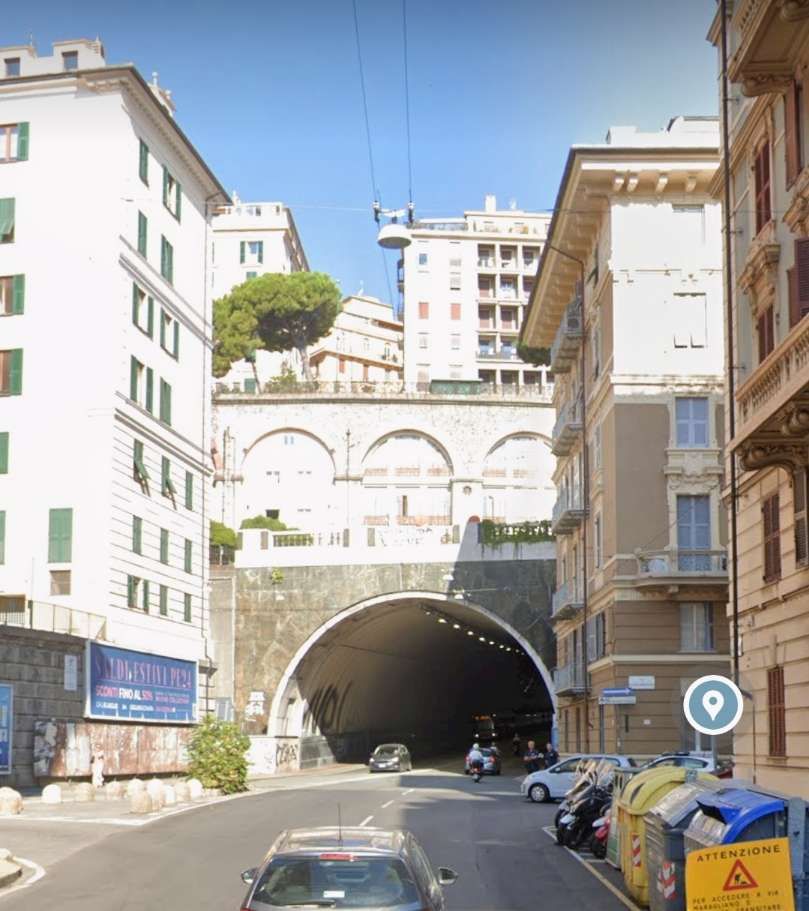
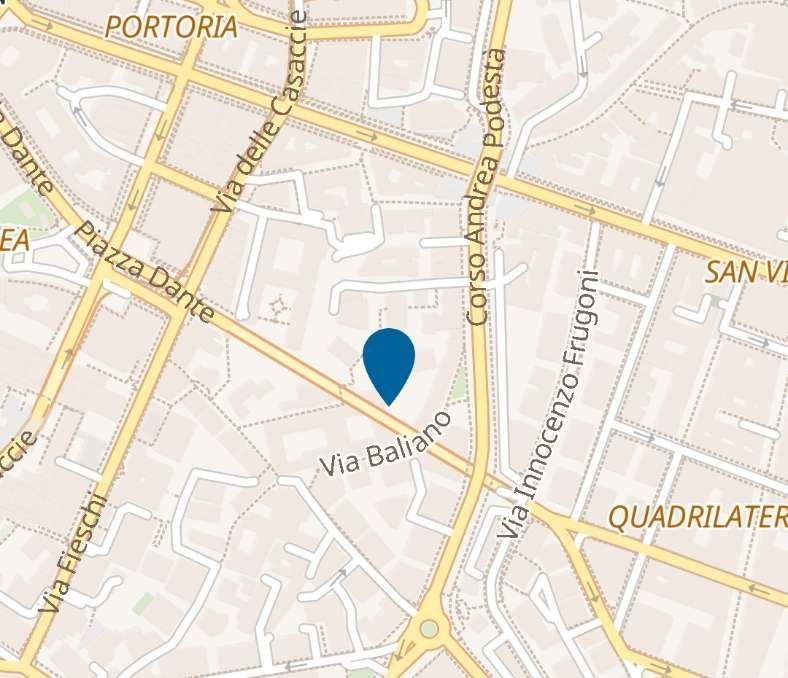
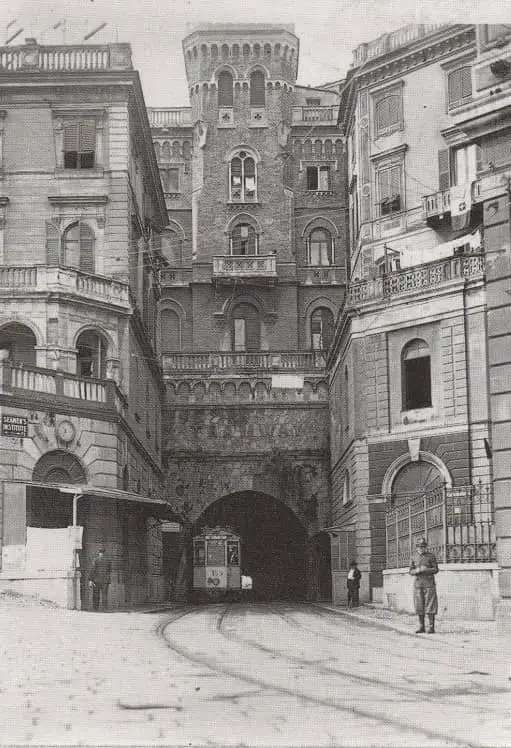
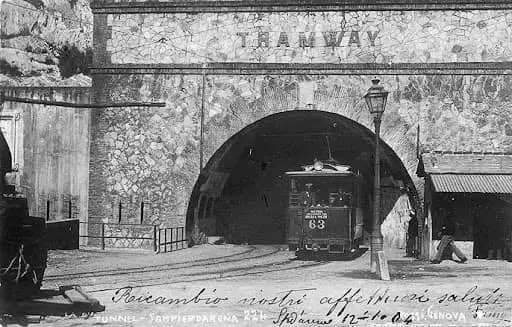
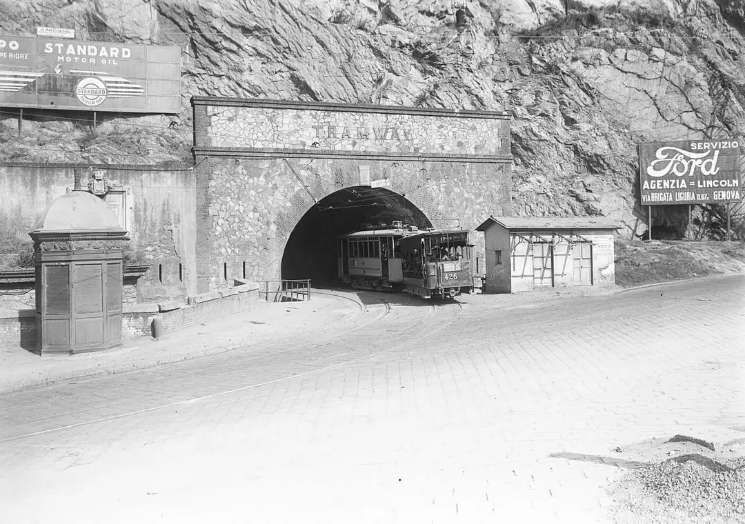
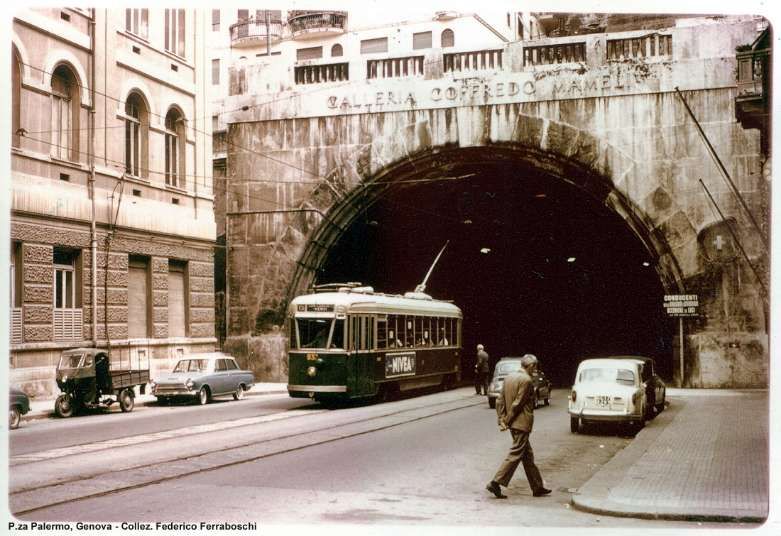
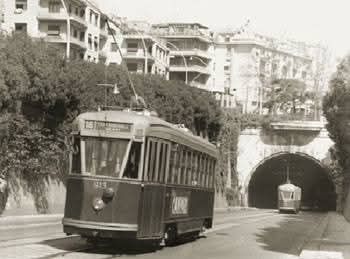
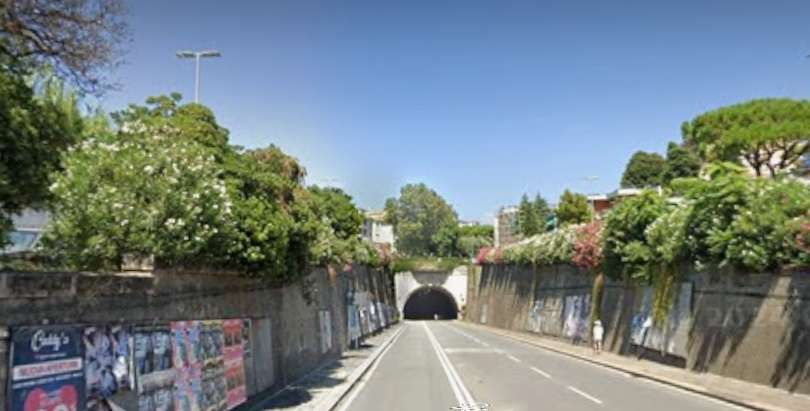
Line No. 68 opened in December 1893 and is the only tramway line to remain in service during the later part of the twentieth century. It “stretched from Noailles to Alhambra, serving La Plaine, the Boulevard Chave, the La Blancarde railway station and Saint-Pierre cemetery. The central terminus [was] situated in a tunnel. This tunnel, built in 1893, [was] unique in France and was built to give access to the city centre, avoiding the narrow streets of some of Marseille’s suburbs. Because of the problems involved in converting the line to bus use it was decided to keep the line operational.” [2]
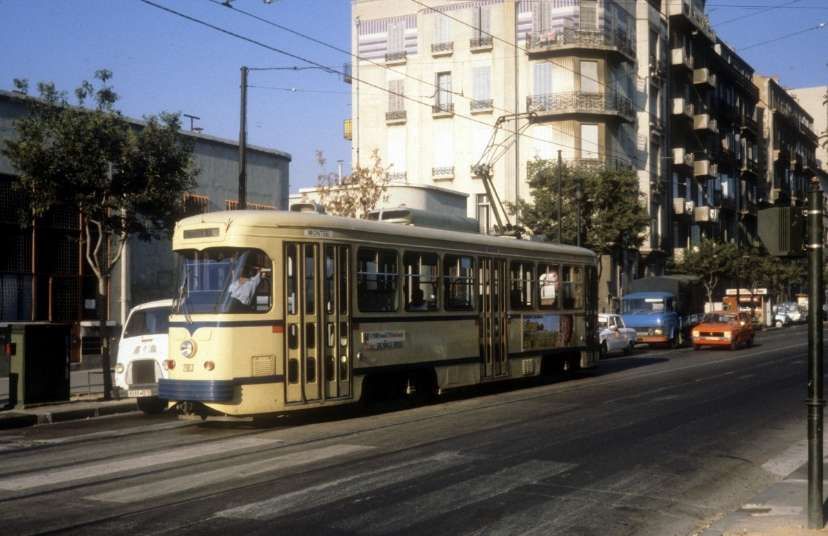
Line 68 [was] 3 km (1.9 mi) long and was out of use for a few years. The decision to modernise it was taken in 1965 and the line had reopened by 1969 when twenty-one PCC tramcars were purchased and the whole track relaid. “The first of the PCC cars arrived on 26th December 1968 and the first tram went into service on 20th February 1969. The last of the old tramcars was withdrawn that spring. Modernisation resulted in an increase in passengers. Numbers increased from 4,917,000 passengers in 1968 to 5,239,000 in 1973.” [2]
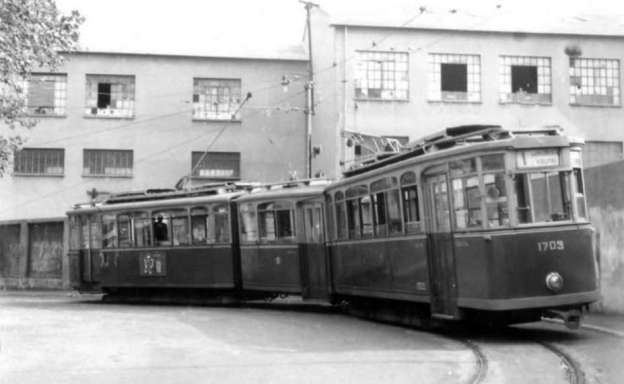
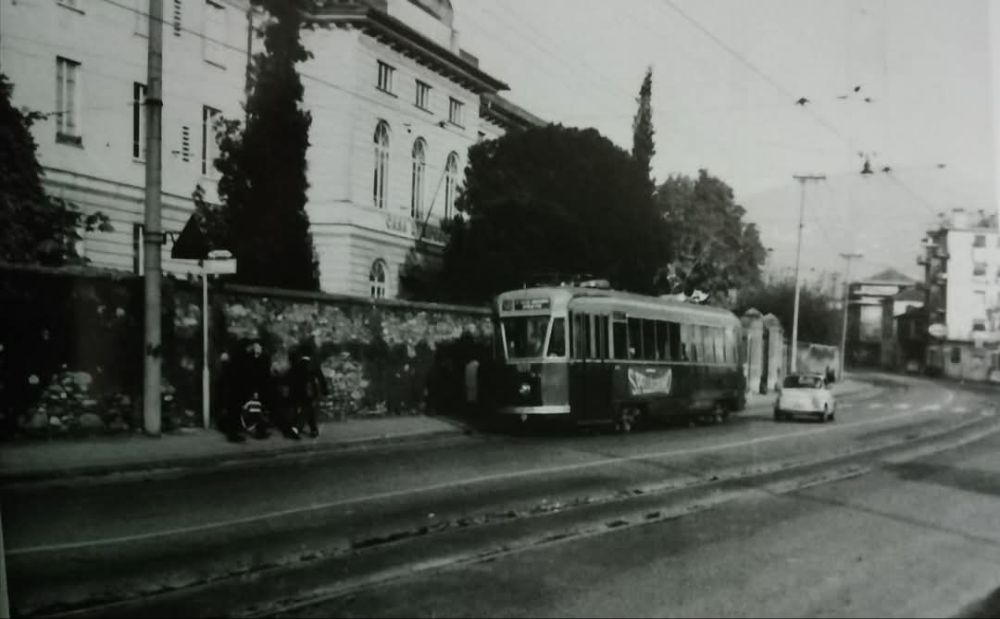
PCC trams in Marseilles had a different loading gauge and had a different look, as the images below show. …

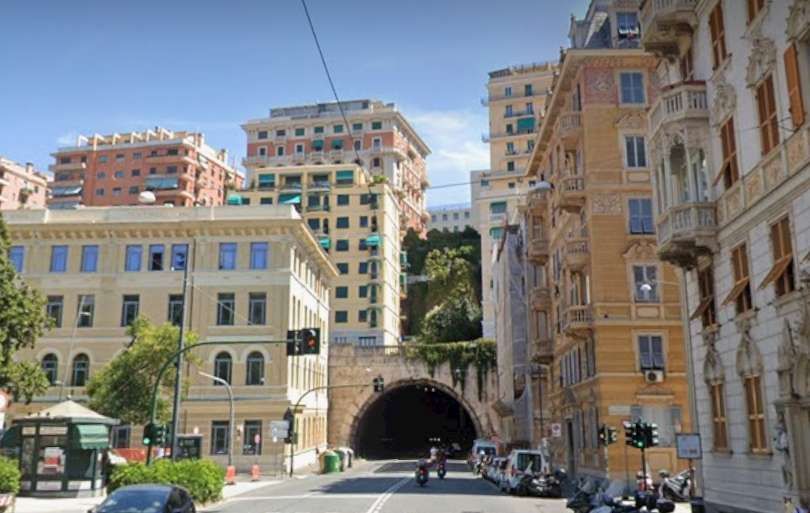
The PCC cars were later modernised in 1984. Three new cars were delivered and all cars made into double cars. The line operated successfully until 2004 when it closed for reconstruction. After refurbishment, “the short section between La Blancarde and Saint Pierre was reopened as part of a new network on 30th June 2007. The section along Boulevard Chave to Eugène Pierre [reopened later the same year] … the tunnel to Noailles was … [reopened in] …summer 2008.” [2]
Returning to Jackson’s article of 1949/50, he continues:
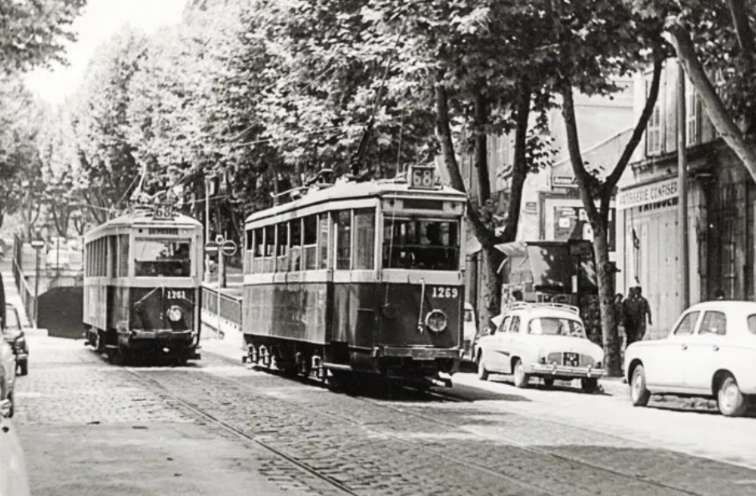
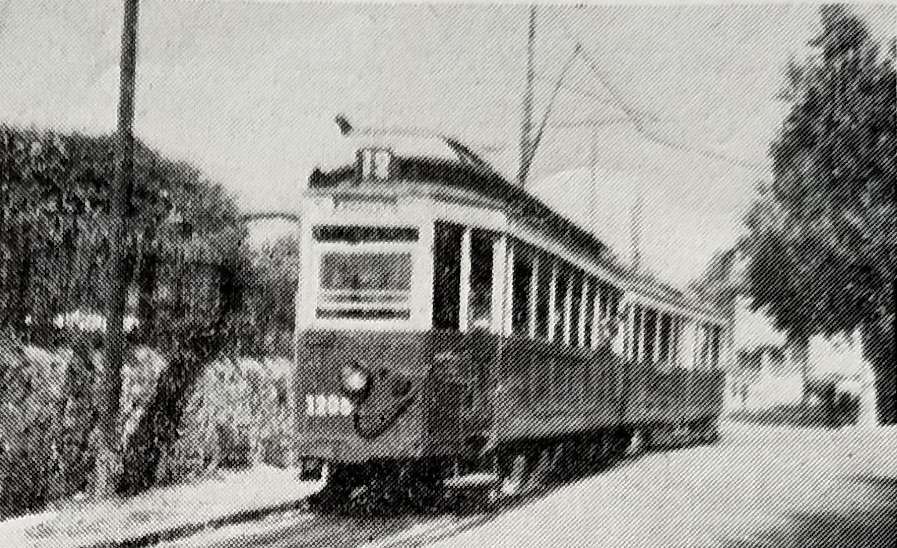
“The longest route is that to the industrial town of Aubagne, 17 km. inland (service 40) and this is further extended 14 km. eastwards by an original trolley-bus route (to Gémenos and Cuges). The Aubagne tram line, which also carries the associated service 12 to Camoins les Bains (12 km.) and a short working to St. Pierre (service 68), begins at the Gare Noailles, a sub-surface tramway station in the centre of the city and the trams leave this station in tunnel, proceeding thus for 1 km. with no intermediate stop, to emerge on a quiet, broad boulevard before branching, (service 12 to Camoins, 40 to Aubagne). After the junction, each of these two lines continues outwards on roadside reserved track for most of its length. The origin of these important suburban arteries was the steam railway L’Est Marseille which was constructed in 1892 from the Gare Noailles to St. Pierre, and converted to an electric tramway by the C.G.F.T. in 1904. Bogie cars and trailers provide a fast service on these routes and the local services to St. Pierre are worked by single-truck cars, One so often hears aesthetic criticism of tramways that it is interesting to note that a well-known League member once explored the Marseilles system and left the city, blissfully unaware of the existence of this interesting sub-surface terminus.” [1: p134-135]
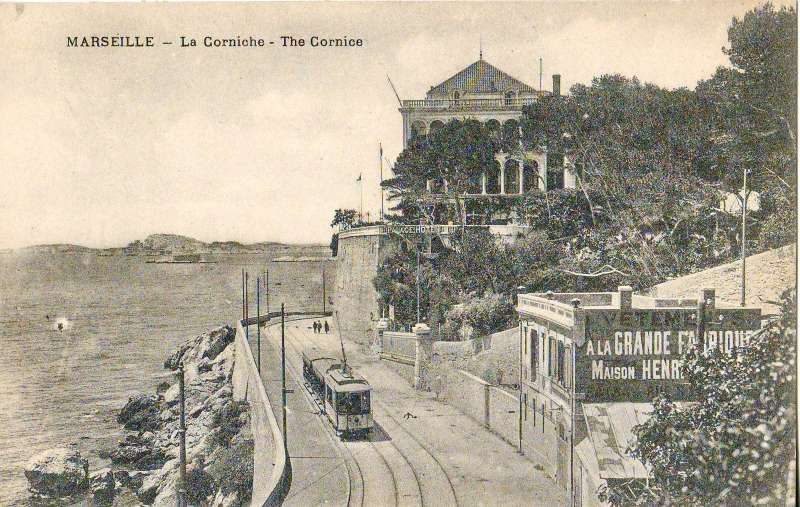
Jackson continues:
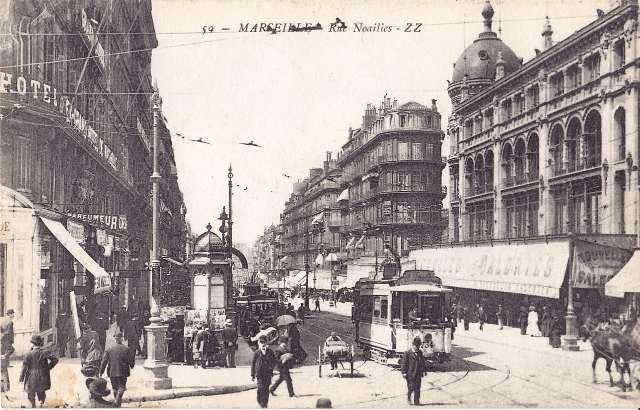
“The other City termini are in side streets off the main thoroughfare La Canebiere (Boulevard Garibaldi, Alliées Leon Gambetta, Cours Belsunce, Cours Joseph Thierry) also opposite the Préfecture, and on the two main streets leading north out of the city (Place Jules Guesde and Place Sadi-Carnot). To cross the city involves a change of cars in all but one instance, the sole remaining cross-city service being No. 41, Chartreux St Giniez. Coastal lines extended to L’Estaque in the north-west and to La Madrague in the south, the latter serving the popular beach and pleasure resort La Plage du Prado (rather similar to Sunderland’s Sear burn route). Other lengthy routes (mostly with rural termini) are: Chateau Gom bert (5), La Bourdonnière (1) Allauch (11), Les trois lucs (7), Le Redon (24) and Mazargues (22 and 23). The circular service, No. 82, serves the residential and coastal areas to the south of the city and enjoys wide roads and unrestricted run ning over most of its length; it traverses the scenic Corniche for part of its run. This is one of the few routes on which cars may be seen running without the almost inevitable trailer. In the older parts of the city many of the streets are narrow, but the greater part of Marseilles is planned on the usual French pattern and therefore possesses wide streets and boulevards well suited to tramway operation. As in Italy, the track in the boulevards is often placed against either curb, well away from the main traffic stream, and in such places the parking of cars is strictly controlled to ensure that tramway operation is unrestricted. At boulevard intersections such as the Rond Point du Prado there are well planned circular layouts joining all tracks. Four-wheeled trolleybuses of standard design and small oil buses have replaced the trams on a number of strictly urban routes unsuitable for tramway operation (the oil bus substitutions are presumably an intermediate stage with the eventual intention that they be replaced by trolleybuses). These trolleybus and oil bus substitutions retain the old tramway services numbers although in certain cases the original tramway route has been extended or slightly modified. Mr. D. L. Sawyer, who was in Marseilles recently, reports that the trolleybuses are not unaffected by the daily shaking up they receive from the rough, uneven street surfaces which gives one cause to reflect that an effective trolleybus installation in many European cities would prove to be a very expensive business as the traditional street surfaces would need to be completely replaced with a surface rather more kind to the not-so-sturdy trolleybus. The tram tracks, which suffered badly from war time neglect, were very noisy in 1945, but they have now been put in excellent condition.” [1: p135-136]
Jackson continues:
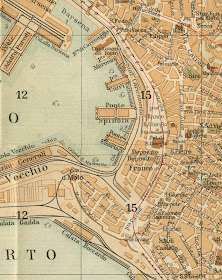
The “Régie Départmentale des Chemins de Fer et Tramways des Bouches du Fer et Tramways des Bouches du Rhône formerly operated a reserved-track roadside electric tramway from Marseilles to the university and cathedral city of Aix en Provence, 29 km to the north. This line was physically connected, by end-on junction, with the Marseilles system, and its Marseilles terminus was at the Place du Change, by the Vieux Port. The dark blue and silver bogie cars, towing one or more heavy bogie trailers, operated an hourly service with a journey time of just under 90 minutes. The Aix terminus was at the extreme end of the main street, the Cours Mirabeau, at the Place Forbin, and the depot and works were situated at the Pont de l’Arc, Aix. This line was converted to trolleybus operation during the winter of 1948-49 and the main trunk road has thus been burdened with additional vehicles. Mr. Sawyer states that the trolleybuses have reduced the journey time considerably; this is hardly surprising as the trams they have replaced were not modern and the number of stops on the tram route was unnecessarily large. New tramcars and a certain amount of track re-alignment would probably have produced an even greater improvement than the trolleybuses it is certain that they would have been a better investment.” [1: p136]
Rolling-stock
Jackson reports on the rolling-stock in use on the network:
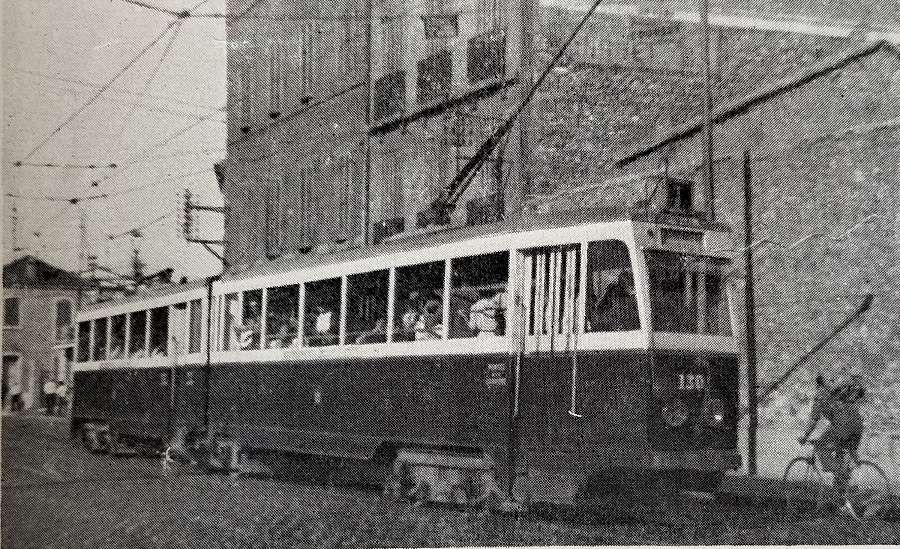
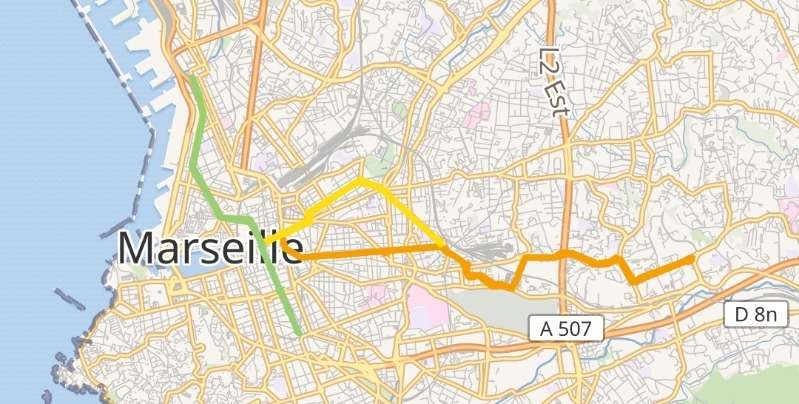
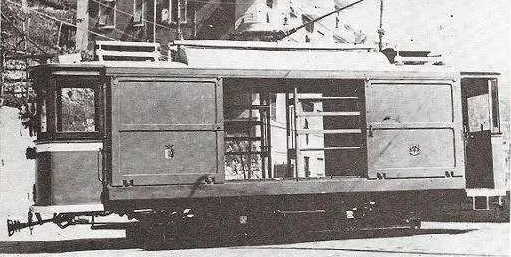
“The rolling stock of the Marseilles system is an interesting mixture of semi-modern and modernised cars, painted blue and cream and mostly of single-truck design. The trailers approximately equal the motor cars in number and are of even greater variety; one type, a covered toastrack, is known locally as ‘Buffalo’ and is very popular during the hot Mediterranean summer. Extensive use is made of twin-units in Marseilles thus obviating the necessity of shunting at termini. The cars are fitted with deep throated hooters and the sound of these, together with the clanging of the bells that announces the changing of the traffic lights is a characteristic of the city. The rolling stock is housed in five depots, all marked on the map, viz., Arenc, Les Catalans, Les Chartreux, La Capelette and St. Pierre. The repair and construction workshops are at Les Chartreux. The high price of materials and the financial situation forbid the purchase of new trams under present conditions and the current programme is therefore concerned with the rehabilitation of existing equipment. A fine and bold beginning has been made in car No. 1301, placed in service in the summer of 1949. This is an articulated car, built from two of the more modern motor cars and the result is a vehicle of pleasing and efficient appearance, 21 metres in length with a passenger capacity of 175 (35 seats) and a maximum speed of 50 km. per hour. One driver and one conductor only are needed (a saving of 35 per cent on personnel against the motor car and trailer type of unit); loading is through the front entrance, unloading through centre and rear exits. The car is double-ended and the doors are pneumatically controlled, one by the driver and the other two by the conductor. The tram cannot start until the central door is closed.
The tickets are issued on the usual carnet system and the books of tickets can be purchased at a reduced price at kiosks and tobacco shops, a book of twenty 5-franc tickets costing 85 francs. Two tickets are taken by the conductor for one section, three for two sections, and four for three sections or over. After 9 p.m. and on Sundays the rate is increased by one ticket and on special journeys to the Sports Stadium and Race Course, a minimum of five tickets is taken. The length of the sections is short and it is only on the longer suburban routes that the all-over fare becomes cheaper. Many cars are equipped for “pay as you enter” (although to use the word “pay” is not entirely accurate as the carnet system means that the conductor rarely handles money). On the Aubagne route (No. 40) a special fare tariff is in force; the complete journey requires five tickets costing eight francs each. Transfer tickets are not used as they have been declared unsuitable for Marseilles.” [1: p136-137]
The French Wikipedia entry for the trams of Marseilles gives some significant detail relating to the trams used on the network. The original, early, rolling-stock delivered between 1891 and 1925 was “cream-coloured, the colour adopted by the CGFT on all the company’s networks. All the motor cars had open platforms and could be transformed in summer, with the glass frames on the side walls being replaced by curtains. The numbers were painted in large figures on the four sides of the vehicles.” [16]
Two axle trams: [17]
- No. 501 to 524, “Saint Louis” motor car, 1891-95, power: 2 × 12 hp , empty weight 6.7 tonnes, ex No. 201 to 224 before 1900; (Drawings can be found here. [18])
- No. 525, prototype “K” engine, 1891-95, power: 2 × 27 hp, ex No. 301 before 1900;
- No. 526-530, “P”, 1898, power: 2 × 27 hp, ex No. 1 to 5 Marseille Tramways Company
- No. 531-541, “L”, 1898, power: 2 × 27 hp;
- No. 542-567, “Series A”, 1899, power: 2 × 27 hp;
- No. 568-642, “Series D”, 1899, power: 2 × 27 hp, empty weight 9.1 tonnes;
- No. 643-676, “Series D”, 1899, power: 2 × 36 hp, empty weight 9.1 tonnes;
- No. 677-751, “Series B”, 1900, power: 2 × 36 hp, empty weight 10.6 tonnes;
- No. 752, “U”, 1900, power: 2 × 27 hp, luxury, reserved for special occasions;
- No. 753-878, “Series B”, 1901, 1904-6, power: 2 × 36 hp;
- No. 879-933, “Series B”, (BGE-57), 1923-25, power: 2 × 57 hp;
- No. 934-944, reconstruction of old 1925 engines, power: 2 × 57 hp.
Bogie Trams: [17]
- No. 1000, “R”, 1899, “Maximum traction” bogies, power: 2 × 35 hp, empty weight 9.1 tonnes;
- No. 1002-1033, “C” 1905, “Maximum traction” bogies, power: 2 × 54 hp, empty weight 13.7 tonnes;
- No. 1034, bogies, prototype developed from a trailer, power: 4 × 27 hp, empty weight 12.5 tonnes.
2-axle trams: [17]
- No. 1035-1044, 1923, power: 2 × 50 hp, empty weight 11.5 tonnes;
- No. 1045, 1923, power: 2 × 50 hp, empty weight 11.5 tonnes,
Later rolling-stock (1923 to 1960)
From 1925, the engine bodies were modernized. They were rebuilt with closed platforms and their capacity was increased. The trucks (chassis) remained original, but the electrical equipment was reinforced to gain power. This fleet was completed by two series of new engines. All modifications were made according to the criteria of the “Standard” type, a standard defined for vehicles to use the future tunnel network. [17][24]
Bogie trams: [17]
- 1200, prototype of a closed platform tram;
- 1201-1231, 1924, transformation of the “C” trams, 1002-1033, power: 4 × 32 hp, empty weight 16.4 tons;
- 1232-1243, 1925, delivered new, power: 4 × 32 hp, empty weight 16 tonnes;
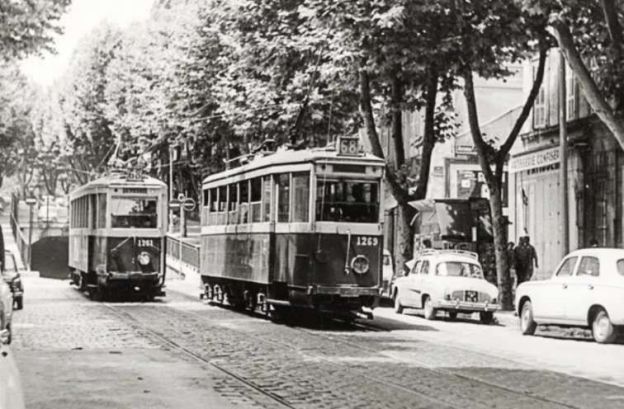
- 1251-1271, 1944, “Standard”, reconstruction of 1232-1243, power: 4 × 42 hp, empty weight 17.2 tons;
- 1291-1294, 1954, “Standard”, reconstruction of 1232-1243, power: 4 × 42 hp, empty weight 17 tons;
- 1301, 1949, “Standard”, prototype articulated train, power: 4 × 42 hp, empty weight 23 tons.
2-axle trams: [17]
- 1501-1526, 1928, ABD tram conversion, power: 2 × 50 hp, empty weight 11.6 tons;
- 1531-1560, 1930, ABD tram conversion, power: 2 × 50 hp, empty weight 11.7 tons;
- 1701-1781, 1933, LADB tram conversion, power: 2 × 50 hp, empty weight 11.6 tonnes;
- 1800, prototype “Standard”, conversion of “A” trams, power: 2 × 45 hp, empty weight 10.8 tonnes;
- 1801-1819, 1939, LAB tram conversion, power: 2 × 50 hp, empty weight 10.8 tons;
- 1831-1847, 1940, “Standard”, LAB tram conversion, power: 2 × 45 hp, empty weight 10.8 tons;
- 1850-1860, 1940, “Standard”, tram conversion, power: 2 × 45 hp, empty weight 10.8 tons;
- 1861-1886, 1941, “Standard”, AB tram conversion, power: 2 × 45 hp, empty weight 10.8 tonnes;
- 1888-1898, 1943, “Standard”, tram conversion, power: 2 × 36 hp, empty weight 10.8 tons.
Bogie Trams: [17]
- 2001-2004, 1929, known as “Pullmann”, delivered new, power: 4 × 42 hp, empty weight: 21.5 tonnes.
Trailers
The number of trailers varied between 400 and 500 depending on the period. The majority of trailers had 2 axles and were numbered in the series 1 to 500. These included: open trailers called “Badeuse” with side access to the rows of transverse benches; and closed trailers with access via end platforms. [17]
In addition there were a number of bogie trailers:
- 138-153, 1899, transformed into tram cars;
- 2051-2054, 1928, accompanying the “Pullmann” engines 2001-2004;
- 2201-2233, 1937, purchased from the STCRP (Parisian network) and coupled to the 1200 locomotives;
- 2551-2572, 1944, of the “Standard” type, coupled to the 1200 motor cars. [17]
Jackson continues:
“In 1945, overcrowding of trams had reached a peak as there then existed no other means of public transport and the number of cars in service had been reduced by the shortage of electricity and lubricants and the ravages of war-time lack of maintenance. Passengers were then to be seen riding on the steps, on the bumpers, on the roofs and even standing tightly jammed between the trailer and the motor car, precariously balanced on the couplings; indeed it was often difficult to see the cars for the passengers. This is only mentioned as a tribute to the sturdiness and reliability of electric tramways which here, as in many other cities all over the world, continued to operate and bear the brunt of all the city’s passenger traffic long after war conditions had forced other means of transport out of service.” [1: p137]
Looking forward, Jackson comments:
“With regard to the future, it is encouraging to know that the main tramway routes will be retained and modernised and that modern tramway equipment and reserved track routes of the electric light railway type will be a feature of the Marseilles of the future-a fine tribute to the planners of the original tramway system. It is officially recognised that trolleybuses would be unable alone to cope with the heavy traffic of this great French port, and only a small number of tram routes remain to be converted to trolleybus operation. Further tramway subways, including one under the Canebière, were proposed some years ago and it may be that these will, after all, be built as they would be considerably less expensive than the tiny network of underground railways that is part of the current plans.” [1: p138]
It is worth a quick look at the development of Marseille Metro further below.
Jackson also provides details of the different services in place in 1949 (his list was correct as at May 1949, but omitted some all-night services and short workings):
“1. Cours Joseph Thierry – la Bourdonnière.
4. Cours Joseph Thierry – les Olives.
5. Cours Joseph Thierry – Chateau Gombert.
6. Alliées Léon Gambetta – Montolivet.
7. Alliées Léon Gambetta – les Trois Lucs.
7. Alliées Léon Gambetta – St. Julien.
9. Alliées Léon Gambetta – St. Barnabé.
10. Alliées Léon Gambetta – les Caillols.
11. Cours Joseph Thierry – Allauch.
12. Noailles – les Camoms.
15. Boulevard Garibaldi – la Barasse.
18. Boulevard Garibaldi – St. Loup
19. Préfecture – Madrague.
20. Préfecture – Pointe Rouge.
22. Préfecture – Mazargues (via Bd. Michelet).
23. Préfecture – Mazargues (via St. Anne).
24. Préfecture – le Redon.
25. Place Jules Guesde – St. André P.N.
28. Cours Belsunce – St. Louis.
29. Cours Belsunce – le Canet.
30. Place Jules Guesden – les Aygalades.
31. Cours Joseph Thierry – St. Joseph.
33 Cours Joseph Thierry – St. Barthélemy.
34. Cours Joseph Thierry – le Merlan.
35. Place Sadi Carnot – l’Estaque (Plage).
36. Place Sadi Carnot – 1’Estaque (Gare).
40. Noailles – Aubagne.
41. Chartreux – St. Giniez.
68 Noailles – St. Pierre.
70. Cours Belsunce – la Calade.
82a. Circular: Préfecture, Prado, Corniche, Préfecture.
82b. Circular: Préfecture, Corniche, Prado, Préfecture.

The 21st Century
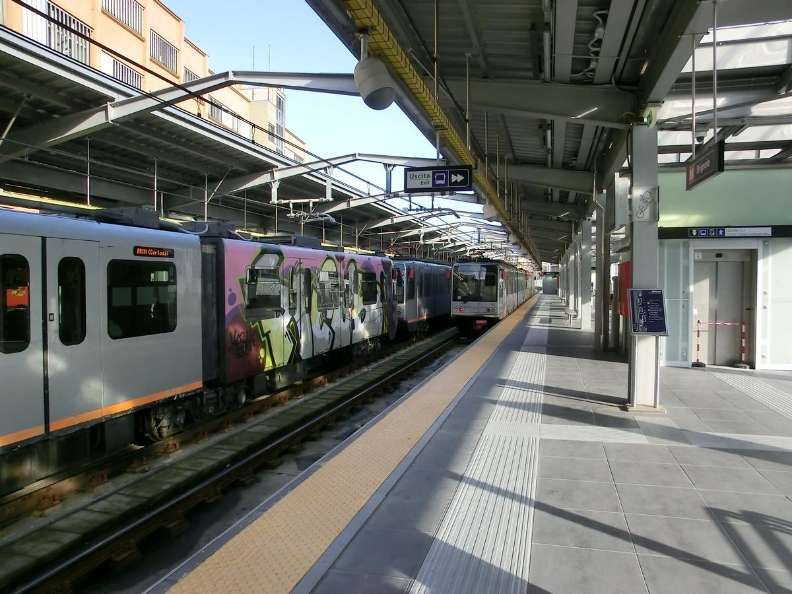
Marseilles modern tram network was inaugurated on 30th June 2007. The first phase of the new Marseille tram network opened on that date. It consists of one line linking Euroméditerranée in the northwest with Les Caillols in the east. Between Blancarde Chave and Saint-Pierre stations, it runs on part of the former Line 68.
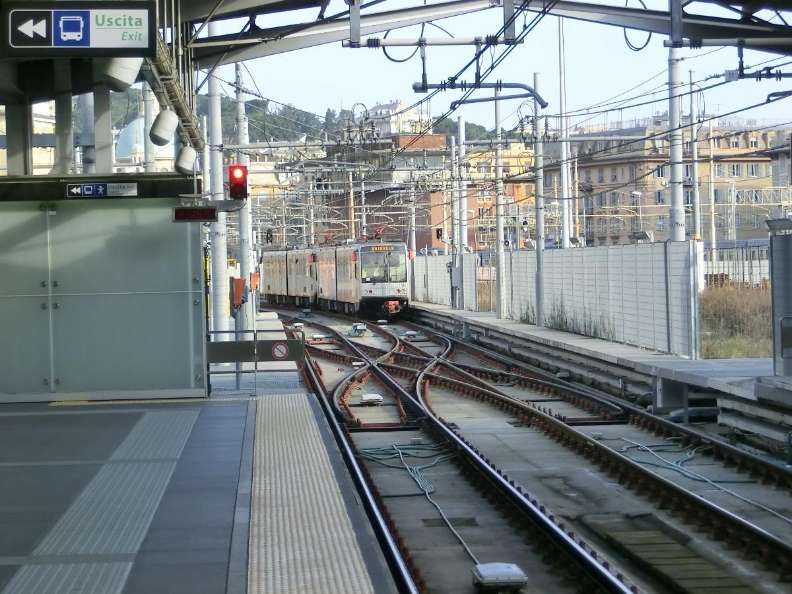
“In November 2007, the portion of the old Line 68 between Blancarde Chave. and E-Pierre (near the entrance to the tunnel) reopened, and two lines were created. Line 1 links E-Pierre and Les Caillols, and Line 2 runs from Euroméditerranée to La Blancarde, where a transfer between the two lines was created. La Blancarde train station is a transit hub: a station on Line 1 of the Marseille Metro opened in 2010, and it has long been served by TER regional trains to and from Toulon.” [2]
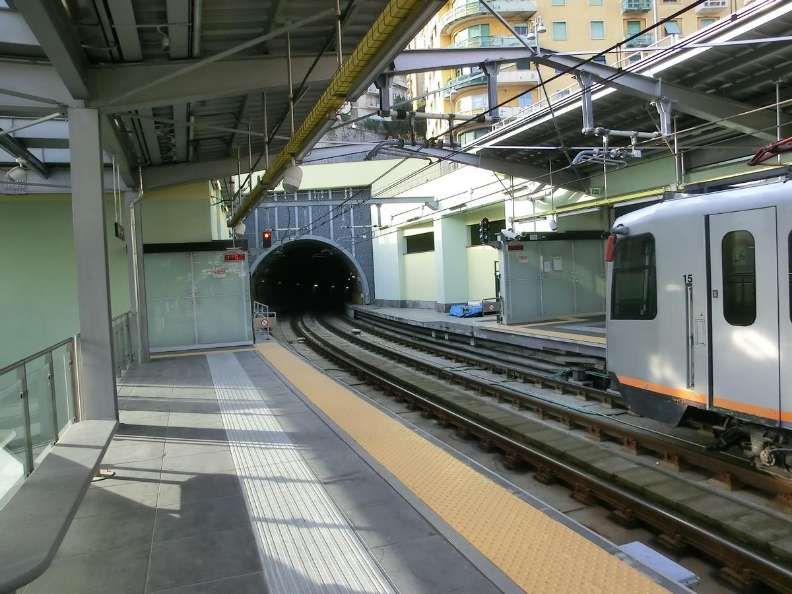
“In September 2008, Line 1 was extended to Noailles via the tunnel formerly used by line 68. This tunnel now carries a single track since the new trams are wider than the [PCC trams]. In March 2010, Line 2 was extended 700 metres North from Euroméditerranée-Gantes to Arenc.” [2]
“In May 2015, the 3.8 km (2.4 mi) Line 3 was inaugurated. It shares Line 2 tracks between Arenc and la Canebière where Line 2 turns west. Line 3 continues South on new track through Rue de Rome to Place Castellane. Line 3 extensions south, 4.2 km (2.6 mi) to Dromel and la Gaye, and 2 km north to Gèze are planned. Tram Line 3 will therefore continue to run parallel to the Dromel-Castellane-Gèze Metro Line 2, which may limit its ridership.” [2]
Rolling-stock: “Customized Bombardier Flexity Outlook trams are used on the new tram line[s]. Composed of five articulated sections, they were 32.5 m (106 ft 8 in) long and 2.4 m (7 ft 10 in) wide. Twenty-six were delivered in 2007.[2][3] They were extended by 10 m (32 ft 10 in) by adding two additional articulated sections in 2012. [6] In 2013, six new Flexity were ordered for the T3 line.” [2]
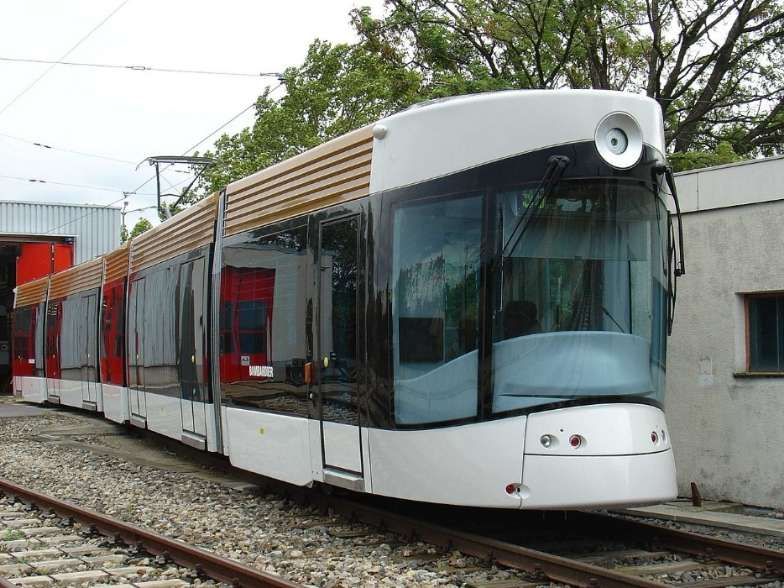
“Their exterior and interior appearance was designed by MBD Design. [6] The exterior resembles the hull of a ship, and the driver’s cabin resembles the bow. A lighted circle displays the colour of the line the tram is on. Inside the tram, the floor, walls, and ceiling are coloured blue, and seats and shutters are made of wood.” [2]
“The tram network is run by Le Tram, a consortium of Régie des transports de Marseille and Veolia Transport. The proposal to privatize the operation of public transit was unpopular, and resulted in a 46-day transit strike.” [7]
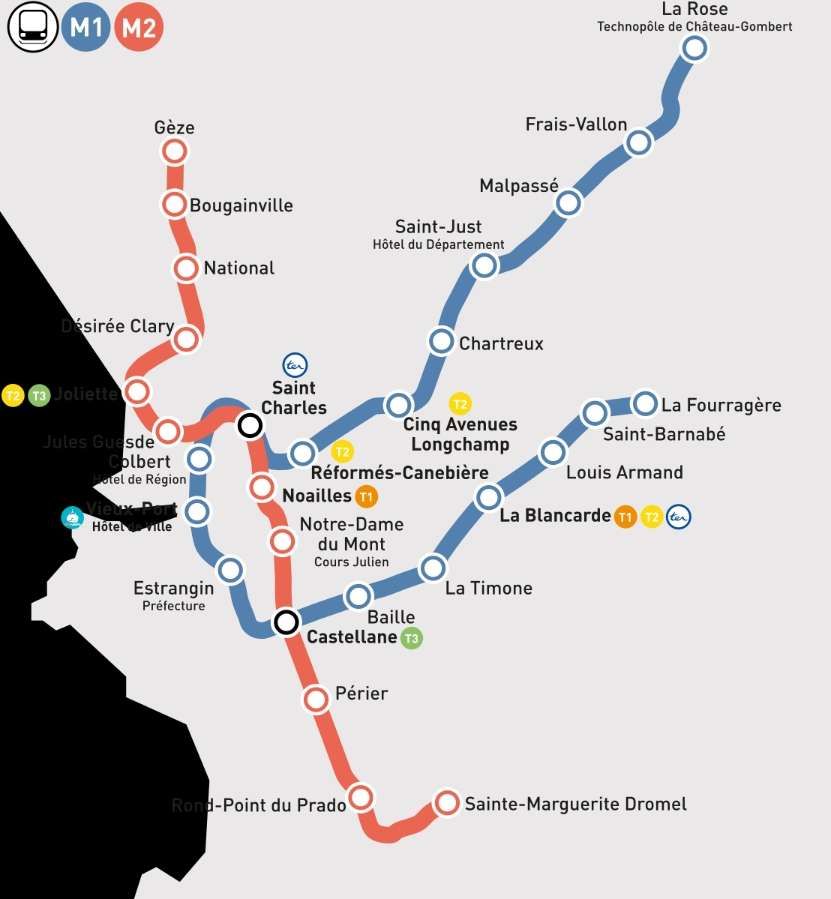
Marseilles Metro
The Marseilles Metro is independent of the tram network. It consists of two different lines, partly underground, serving 31 stations, with an overall route length of 22.7 kilometers (14.1 mi). [10] Line 1 opened in 1977, followed by Line 2 in 1984. Two stations, Saint-Charles and Castellane , each provide interchange between lines. [11]
References
- A. A. Jackson; The Tramways of Marseilles; in The Modern Tramway, Vol. 13, No. 150, London, June 1950, p134-138.
- https://en.m.wikipedia.org/wiki/Marseille_tramway, accessed on 11th January 2025.
- https://jedsetter.com/the-urban-form-and-transport-of-marseille, accessed on 11th January 2025.
- https://en.m.wikipedia.org/wiki/Marseille_tramway#/media/File%3ATramway_de_Marseille_-_plan_ligne_68.png, accessed on 11th January 2025.
- https://en.m.wikipedia.org/wiki/Marseille_tramway#/map/0, accessed on 11th January 2025.
- François Enver; Un navire sur rail; in Ville & Transports, No. 427, p34.
- L’alliance avec Veolia, un partage des risques et des bénéfices; in Ville & transports, No.427, p35.
- https://en.m.wikipedia.org/wiki/Marseille_tramway#/media/File%3AMarseille1.jpg, accessed on 11th January 2025.
- https://commons.m.wikimedia.org/wiki/File:M%C3%A9tro_de_Marseille.svg, accessed on 11th January 2025.
- https://www.rtm.fr/nous-connaitre/qui-sommes-nous, accessed on 11th January 2025.
- https://en.m.wikipedia.org/wiki/Marseille_Metro, accessed on 11th January 2025.
- https://en.m.wikipedia.org/wiki/Marseille_Metro#/media/File%3AMPM76_n%C2%B033_RTM_Bougainville.jpg, accessed on 11th January 2025.
- https://en.m.wikipedia.org/wiki/MPM_76, accessed on 11th January 2025.
- https://fr.m.wikipedia.org/wiki/Ancien_tramway_de_Marseille#/media/Fichier%3AZZ_59_-_MARSEILLE_-_Rue_Noailles.jpg, accessed on 11th January 2025.
- https://fr.m.wikipedia.org/wiki/Ancien_tramway_de_Marseille#/media/Fichier%3AINCONNU_-_Marseille_-_La_Cannebi%C3%A8re.JPG, accessed on 11th January 2025.
- https://fr.m.wikipedia.org/wiki/Ancien_tramway_de_Marseille, accessed on 11th January 2025.
- Jacques Laupiès & Roland Martin; Marseille’s tramways are one hundred years old ;Tacussel, 1990, 2nd ed. (1st ed. 1975)
- https://gallica.bnf.fr/ark:/12148/bpt6k55290313.pleinepage.f40.pagination.langFR, accessed on 11th January 2025.
- http://www.bahnbilder.de/bild/Frankreich~Stadtverkehr~Marseille+Strasenbahn/716065/marseille-rtm-sl-68-bn-pcc-2002.html, accessed on 11th January 2025.
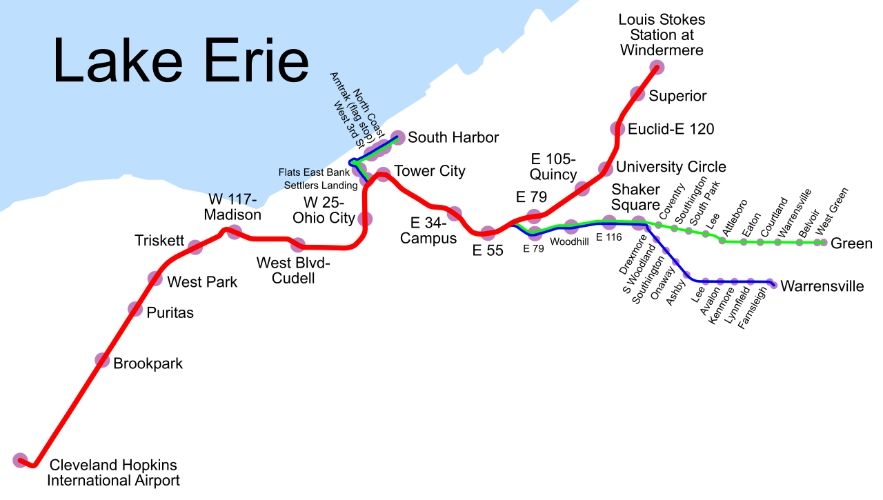
- https://akronrrclub.wordpress.com/tag/shaker-heights-rapid-transit-lines, accessed on 2nd January 2025.
- https://commons.m.wikimedia.org/wiki/File:Marseille-rtm-sl-68-bn-pcc-719236.jpg, accessed on 11th January 2025.
- https://fr.m.wikipedia.org/wiki/Gare_de_Noailles#/media/Fichier%3AMarseille_-_Tramway_-_Boulevard_Chave_(7668208458).jpg, accessed on 12th January 2025.
- https://www.hotels-in-marseille.com/en/property/noailles-experience-centre-marseille-vieux-port.html, accessed on 12th January 2025.
- Jean Robert; Histoire des transports dans les villes de France; Chez l’Auteur, 1974.
- https://madeinmarseille.net/28499-histoire-tramway-aix-aubagne, accessed on 12th January 2025.
- https://www.wikiwand.com/fr/articles/Ancien_tramway_de_Marseille#/media/Fichier:LR_-_MARSEILLE_-_Un_coin_du_Quai_des_Belges.jpg, accessed on 12th January 2025.
- https://commons.m.wikimedia.org/wiki/File:INCONNU_-MARSEILLE-_La_Corniche.JPG, accessed on 12th January 2025.
- https://commons.m.wikimedia.org/wiki/File:MARSEILLE_-_Quartier_de_la_Fausse_Monnaie.JPG, accessed on 12th January 2025.
- https://www.ebay.co.uk/itm/375224018302?mkcid=16&mkevt=1&mkrid=711-127632-2357-0&ssspo=CZ702YEYSaO&sssrc=4429486&ssuid=afQhrar7TGK&var=&widget_ver=artemis&media=COPY, accessed on 12th January 2025.
- https://www.geneanet.org/cartes-postales/view/7672471#0, accessed on 13th January 2025.


.jpg)
#/media/File%3AL04_163_Hp_Dinegro%2C_ET_37.jpg)