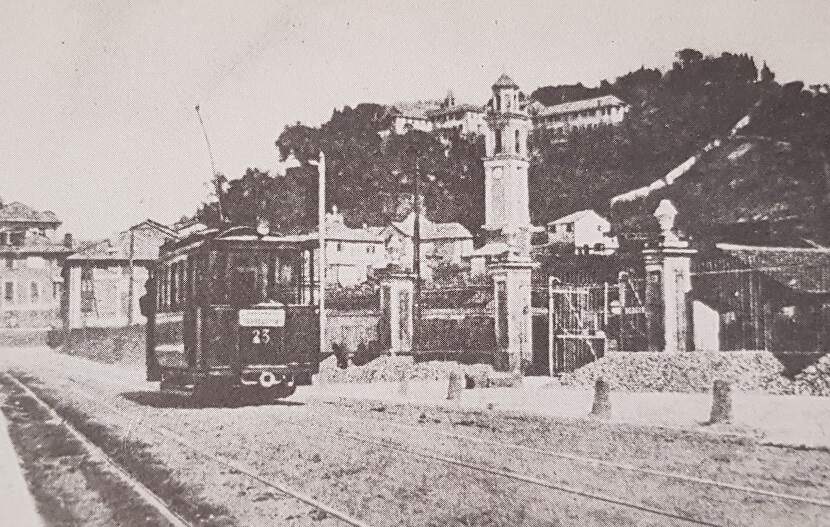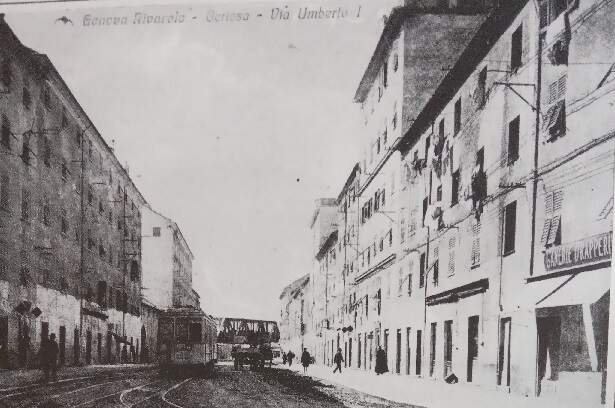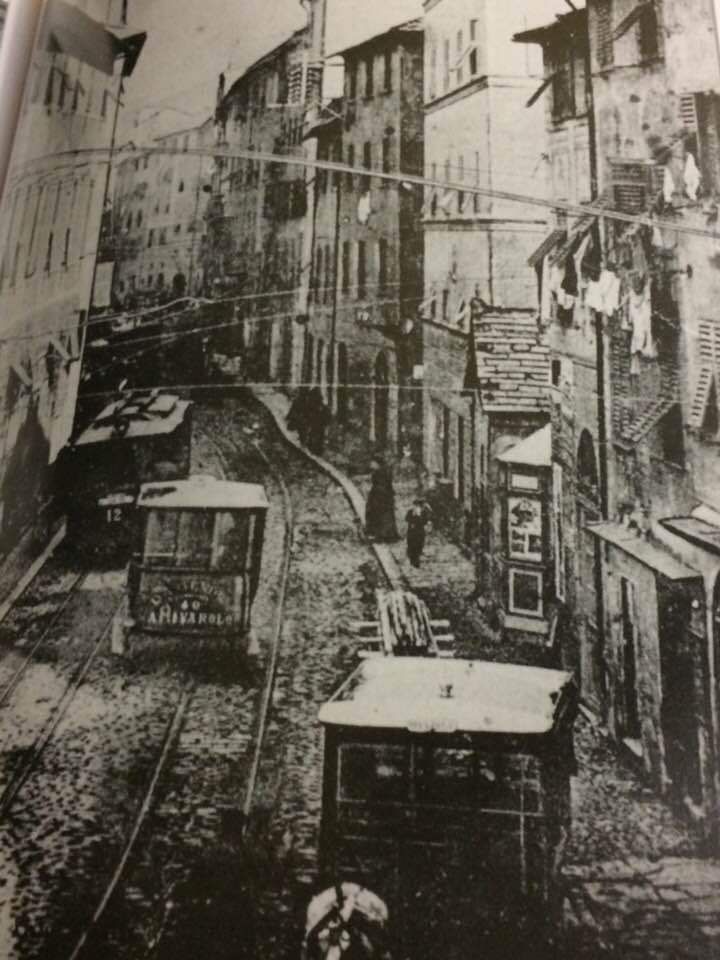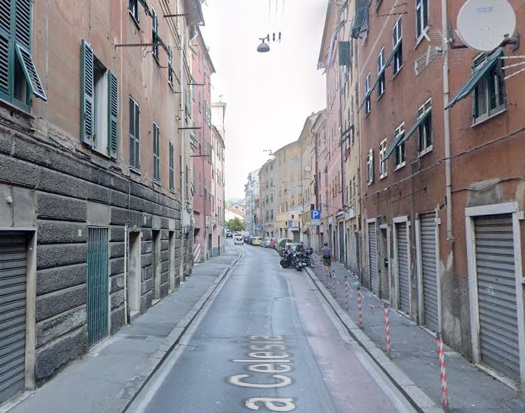
Tag Archives: Tramway

Genoa’s Early Tram Network – Part 1 – General Introduction, Tunnels, The Years before World War One, and the Early Western Network.

Introduction and Early History

We begin this article with a look at maps of the Piazza Raffeale de Ferrari and its immediate environs over the years around the turn of the 20th century. The Piazza became one of two focal points for tramways in the city (the other was Caricamento).

I found the series of maps interesting and they provoked a desire to find out more about the network of horse-drawn and later electric trams and tramways of Genoa. ….
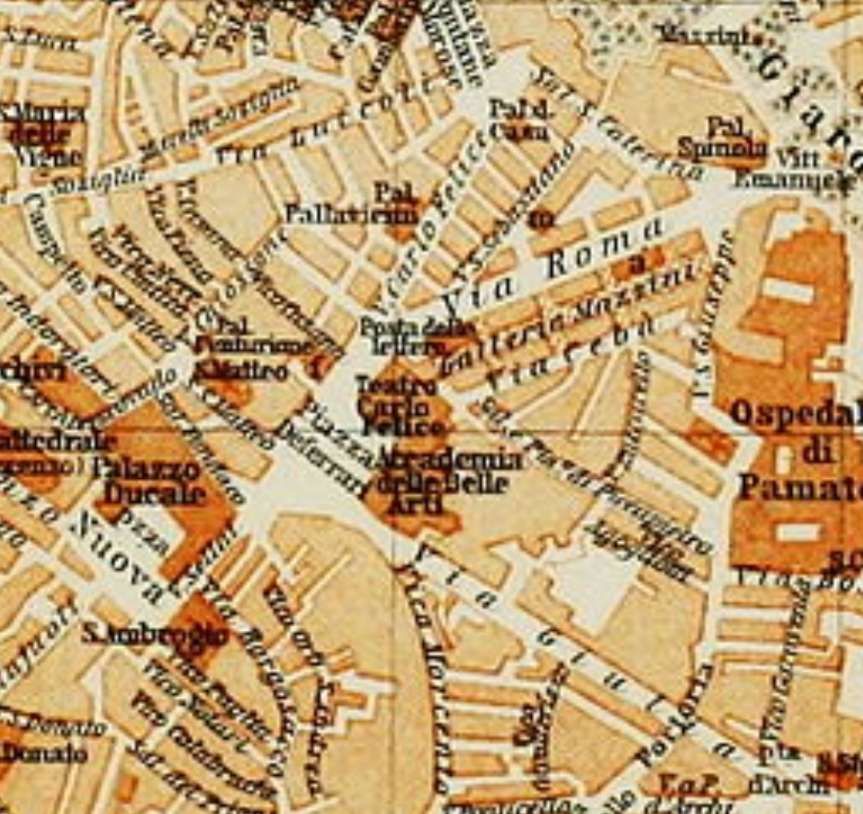
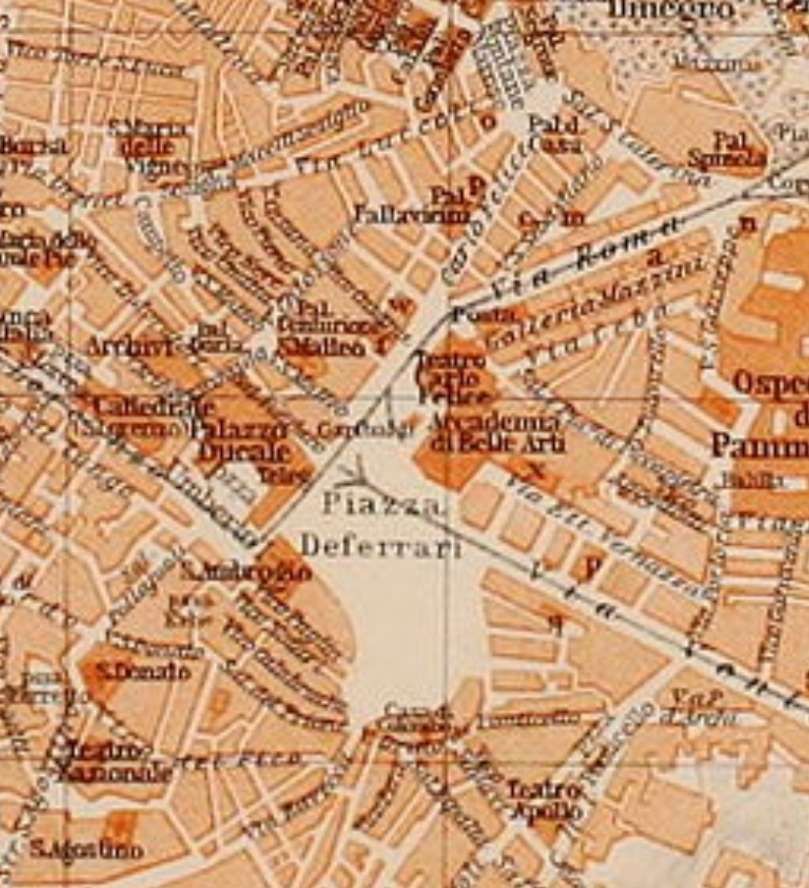
This map of 1886 shows the Piazza Raffeale de Ferrari a little to the left of the centre. Via Carlo Felice runs away from the Piazza to the North-northeast, Via Roma to the Northeast. The map extract is taken from the Italy Handbook for Travellers of 1886 produced by Karl Baedeker, © Public Domain. [10]
This map of 1906 is taken from Karl Baedeker’s Italy Handbook for Travellers. It shows an enlarged Piazza Raffeale de Ferrari, © Public Domain. [11]
This version of the map was produced for the 1913 Baedeker guide. This has tramways shown and the Piazza is beginning to take a shape that is more recognisable in the 21st century, © Public Domain. [12]

Italian Wikipedia informs us that: “The first public transport in Genoa was provided by a horse bus service linking the city centre and Sampierdarena, that started in 1873. In 1878, the French company Compagnia Generale Francese de Tramways (CGFT, French General Company of Tramways) began to build a horse tram system.” [16][17]
A map of the horse-drawn tramways operated by the French company Compagnia Generale Francese de Tramways, © Arbalete and licenced for reuse under a Creative Commons Licence (CC BY-SA 2.0). [19]

Towards the end of the century, the new urban plan led to the construction of new roads with wider carriageways, principal among these were:

  • Via Assarotti connecting Piazza Corvetto to Piazza Manin;
  • Via XX Settembre, built between 1892 and 1899, widening Strada Giulia and connecting the Palazzo Ducale (Piazza de Ferrari) with Porta Pila and the banks of the River Bisagno (once the eastern boundary of the city);
  • Corso Buenos Aires, once outside the city walls, was lowered to the level of Ponte Pila and the new Via XX Settembre, to form a single artery that would connect the centre with the Albaro district;
  • Corso Torino, perpendicular to Corso Buenos Aires.

After this work was done, the city began to look more modern and the widened streets made room for tramways in the centre and East of the city. The municipal administration began to plan new lines, both towards the eastern suburbs and in the central districts of the city. [19]

The city welcomed competition and set up a series of concessions which were given to different groups: the French Company kept the Western concession; Val Bisagno and the hilly areas to two Swiss businessman (Bucher & Durrer); and the east of the city was granted to a group of local businessmen. [19][20: p66]

The two parties, other than the French, formed companies:  Bucher created the Società di Ferrovie Elettriche e Funicolari (SFEF) in 1891. [20: p85] The Genoese entrepreneurs founded the Società Anonima Tramways Orientali (SATO) in 1894. [20: p120] The two companies took on the two concessions which envisaged electric traction on metre-gauge lines to accommodate running on the narrow winding streets of the city centre. [19]

By 1894, SFEF had achieved no more than a single short electric tram line between Piazza Manin and Piazza Corvetto, whilst SATO had not progressed beyond the planning stage. The CGFT system had extended through the city and the Val Polcevera, but was still horse operated.” [16][17]

In 1894, the German company Allgemeine Elektrizitäts Gesellschaft (AEG) … bought both the SFEF and SATO companies. The following year AEG created the company Officine Electrical Genovesi (OEG), … which took over the city’s existing electricity supply company, and the Società Unione Italiana Tramways Elettrici (UITE), … which purchased the CGFT’s concession. By the end of 1895, AEG had a monopoly of both electricity supply and public transport provision in the city.” [16][17] Under AEG’s “ownership, SFEF and SATO developed a tram network of more than 53 km (33 mi) reaching Nervi and Prato, whilst UITE electrified their lines to Voltri and Pontedecimo.” [16][17]

As we have already noted, the first electric traction line connected Piazza Corvetto to Piazza Manin, running along Via Assarotti. [20: p92] It was activated by SFEF on 14th May 1893 [20: p96] The single-track line was 800 metres long and ran on a constant gradient of 7% [20: p95]; the tickets cost 10 cents. The electrification (600 V DC) was via an overhead cable and was carried out by AEG of Berlin, which, as we have already seen, later acquired a significant shareholding in the company. [19][20: p86-87]

In subsequent years the SFEF network expanded rapidly; in 1895-96 the Monte line to the North of the city centre entered into service, including the Sant’Ugo spiral tunnel; in 1896 the line from Piazza Principe to Piazza Brignole was born. It included two tunnels in the Castelletto area. [21: p20] , In 1897, the Val Bisagno line up to Prato began operation. [19][21: p26]

The first SATO line entered into service on 26th July 1897, connecting Piazza Raibetta to Staglieno through the Circonvallazione a Mare, [20: p122] followed two years later by the long coastal line to Nervi. [20: p127] In 1900 the eastern trams reached the central Piazza de Ferrari, travelling along the new Via XX Settembre which was formed through widening of the old Via Giulia. [19][21: p53]

The two networks, SFEF and SATO, were technically compatible and the two companies, both controlled by AEG, soon unified the two networks. [20: p142]

Finally in December 1901, AEG merged SFEF and SATO into an enlarged UITE.” [16][17]
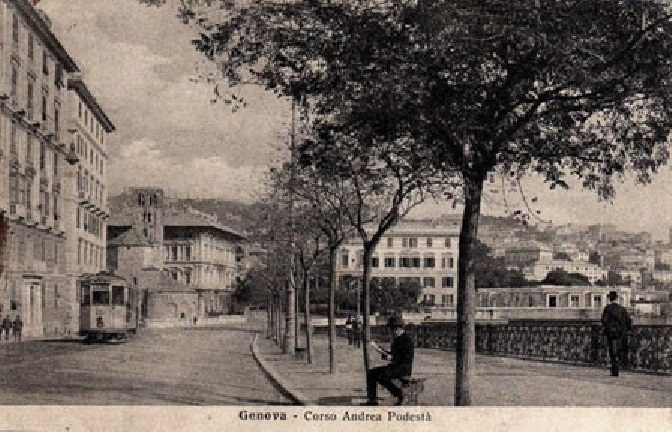
An early postcard image showing a tram at work on Corsa Andrea Podesta, © Public Domain. [19]
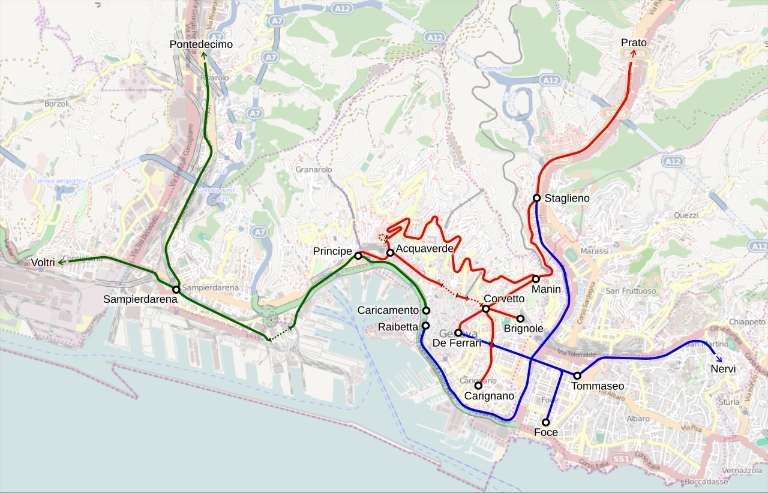
This map shows the three companies’ lines immediately prior to the date of unification under UITE. The Green lines were UITE (the former French Company). The Red lines were SFEF. The Blue lines were SATO, © Arbalete and authorisedd for reuse under a Creative Commons Licence (CC BY-SA 2.0. [19]

The enlarged UITE found itself managing 70 km of network, divided between the 30 km of the ‘Western network’: (formerly the French Company) and the 40 km of the ‘Eastern network’ (formerly SFEF and SATO). [20: p170-171] The unification of the network led to an increase in overall traffic, symbolised by the creation of the vast ring terminus in Piazza de Ferrari in 1906. [20: p129]

This seems the right time to look again at the ‘ring terminus’ in Piazza de Raffeale Ferrari. ….
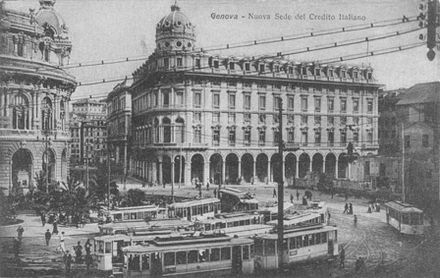
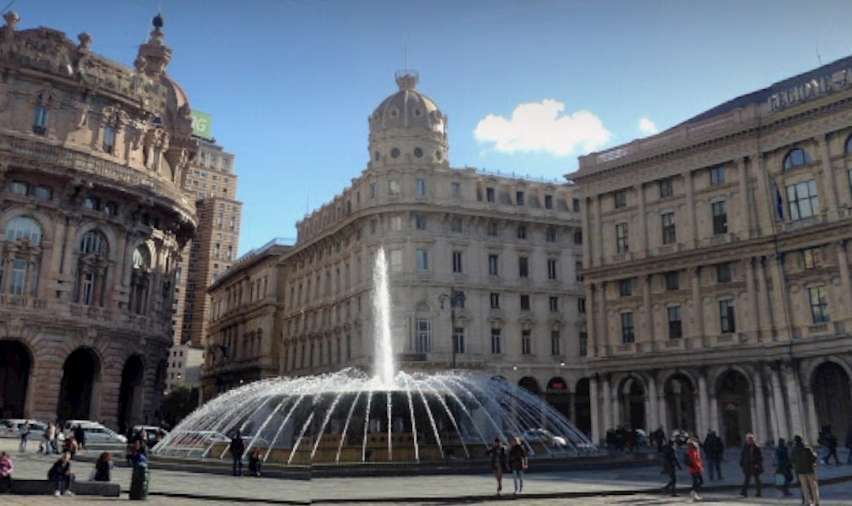
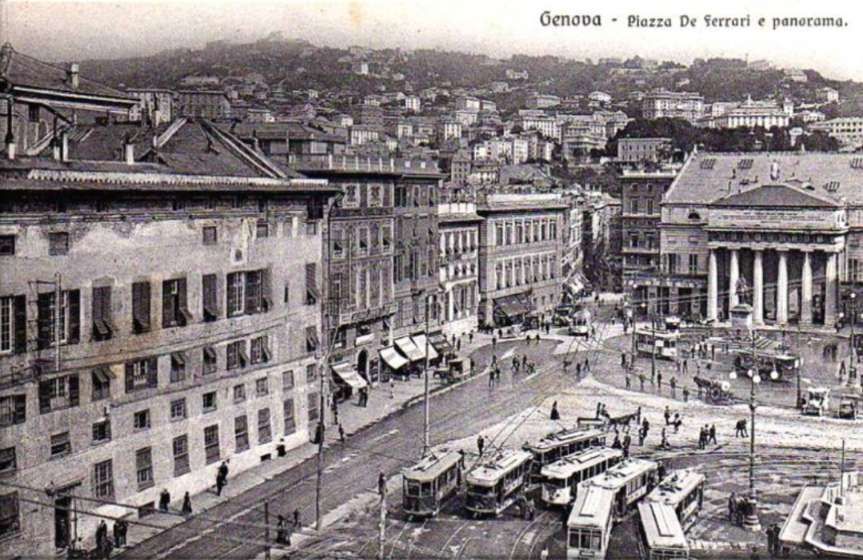
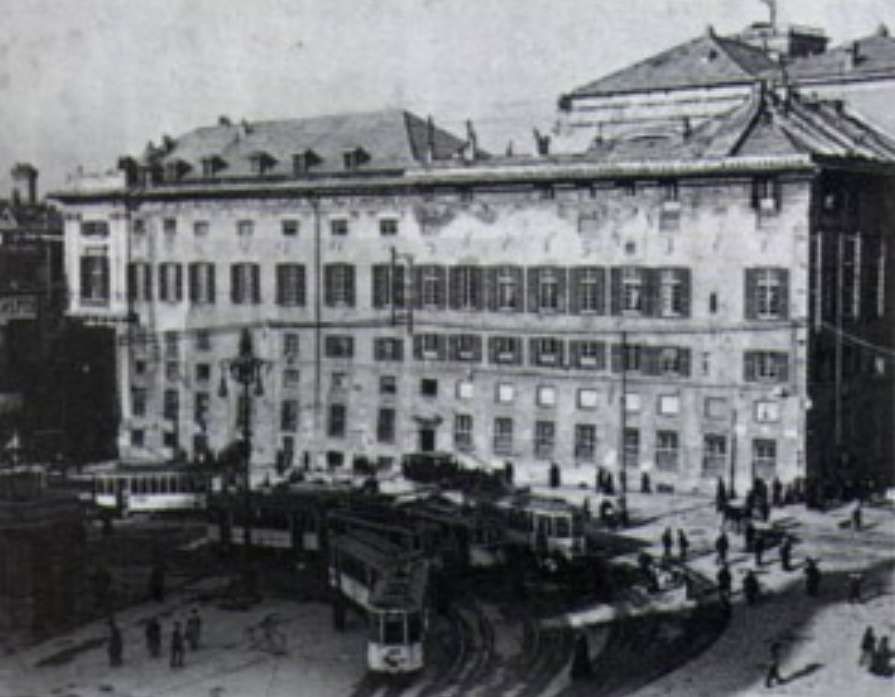
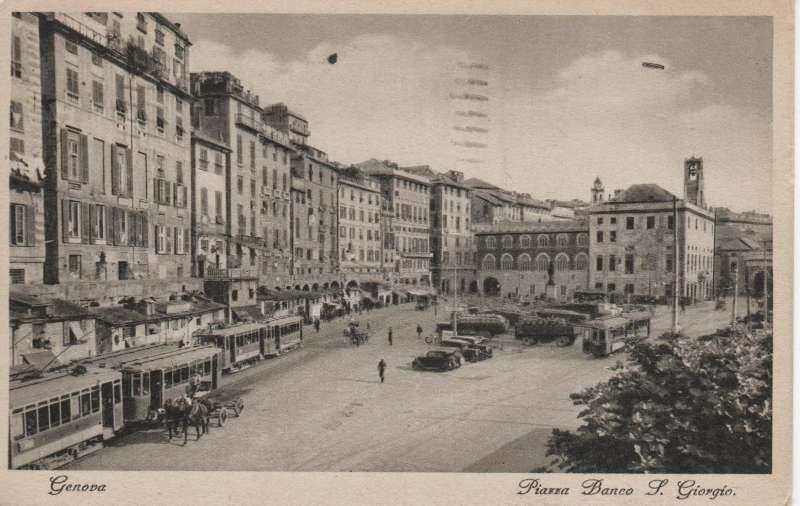
Trams on Piazza Raffeale de Ferrari Genoa (Genova), © Public Domain. [1]
A similar view in the 21st century. [Google Streetview, 2015]
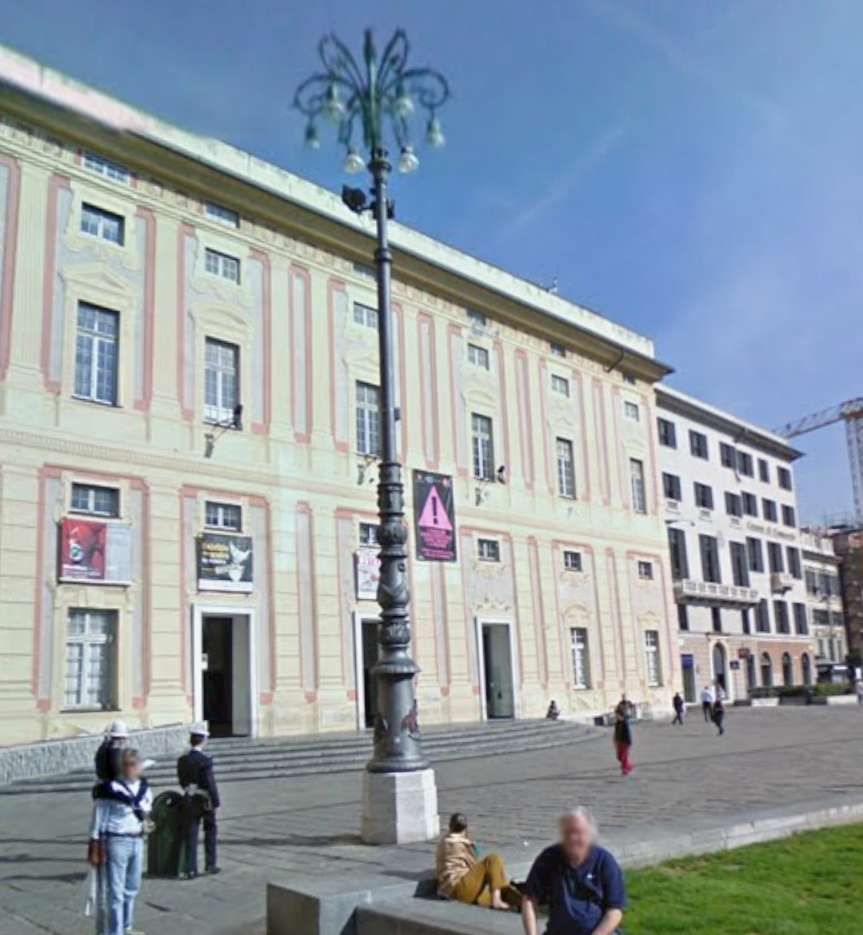
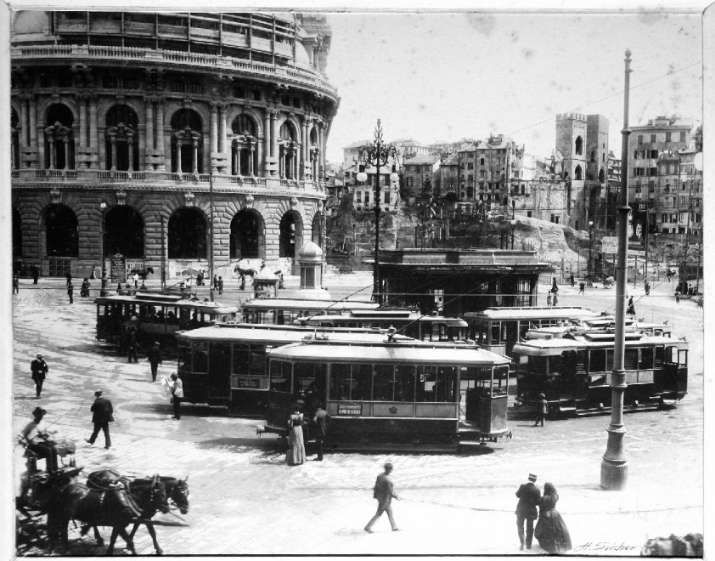
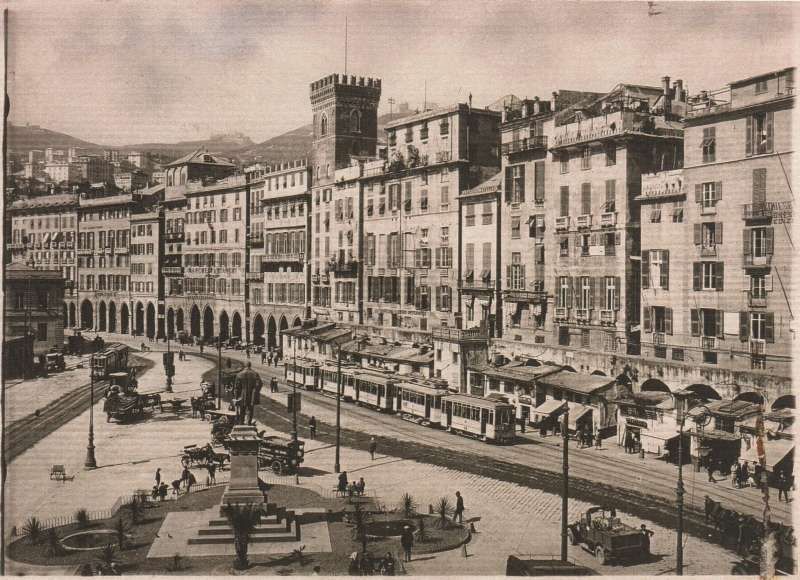
Trams on Piazza Raffeale de Ferrari, Palazzo Ducale is on the left of the photograph, © Public Domain. [7]
A ground-level view from a similar location.  [Google Streetview, 2009]
Another view of Piazza Raffeale de Ferrari and of Palazzo Ducale, © Public Domain. [8]
A similar view of Palazzo Scale from ground-level across the Piazza Raffeale de Ferrari. [Google Streetview, 2015]
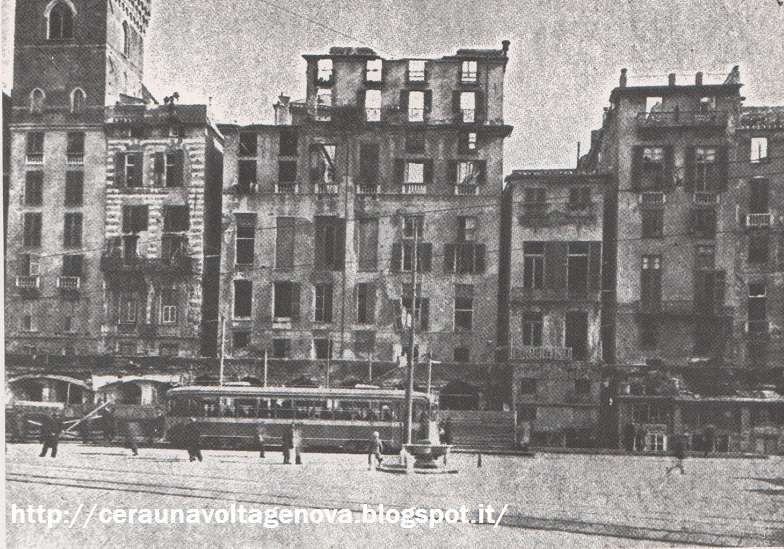
Also on Piazza Raffeale de Ferrari, trams gather again! But when is this? The building to the right in the image below is not present in this image, yet is present in the image of the Piazza earlier in this sequence of images, © Public Domain.
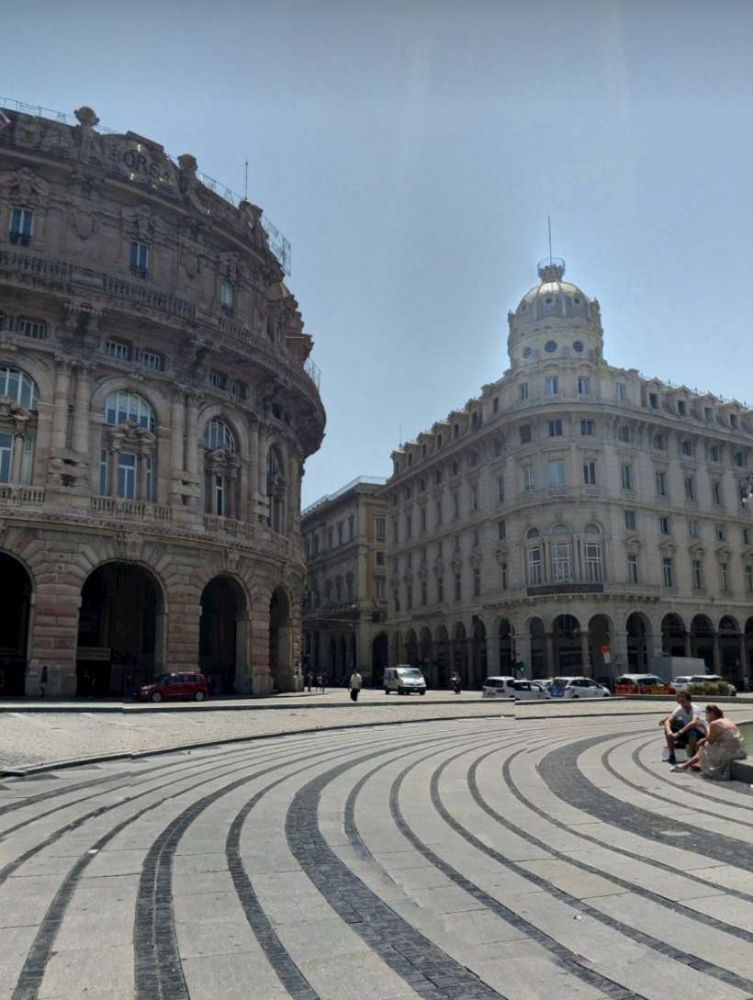
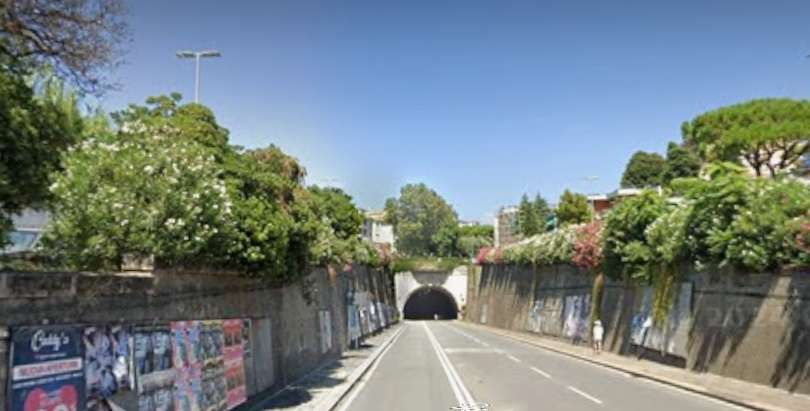
From a similar direction as the image above. The building on the left is very much the same as the building on the left in the monochrome image above. Was that monochrome photo taken prior to the building on the right being built, or was the building destroyed during the First World War and then rebuilt at a later date? [Google Streetview, 2016]
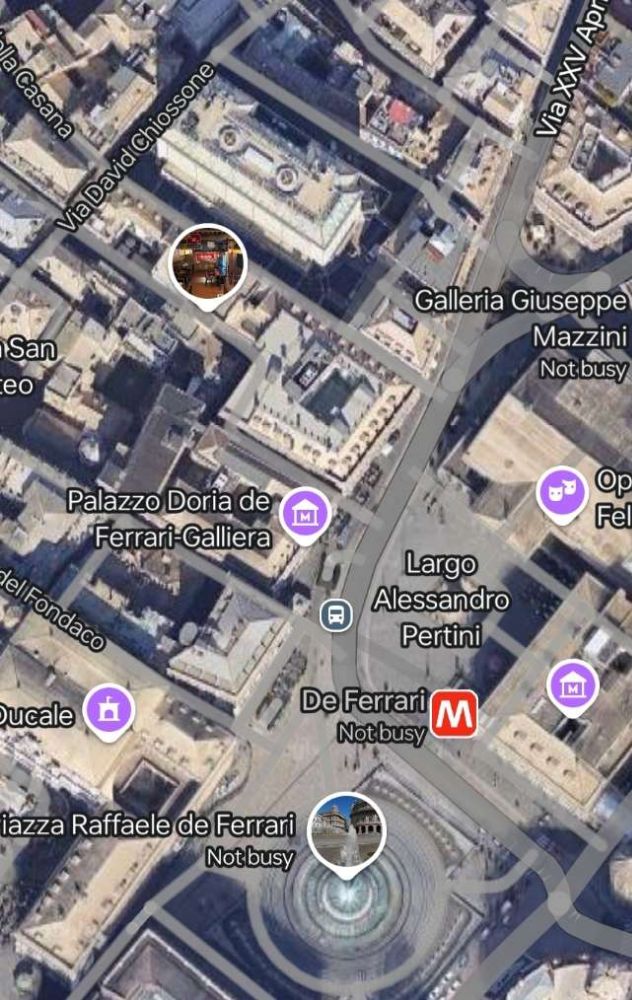
The Piazza Raffeale de Ferrari in the 21st century. North of the piazza, at the top-right of this image two streets run out of the piazza. Via Roma curves away to the Northeast and what was Via Carlo Felice (now Via XXV Aprile) heads North-northeast. [Google Maps, November 2024]
Piazza Raffeale de Ferrari, Via Roma (to the right of the building on the right side of this image), and Via Carlo Felice (now Via XXV Aprile), © Public Domain. [7]
The same location in the 21st century. Via Roma is on the right side of the building at the centre of this image. Via XXV Aprile (once Via Carlo Felice) is on its left. [Google Streetview, July 2015]

In 1908, after three years of construction work, Galleria Certosa (Certosa Tunnel) was put into use. It facilitated tram journeys to and from the Polcevera valley, avoiding the crossing of San Pier d’Arena. [19][21: p38] The tunnel connected Piazza Dinegro, in the port area, to the Rivarolo district in Val Polcevera. It was 1.76 km long. [22]

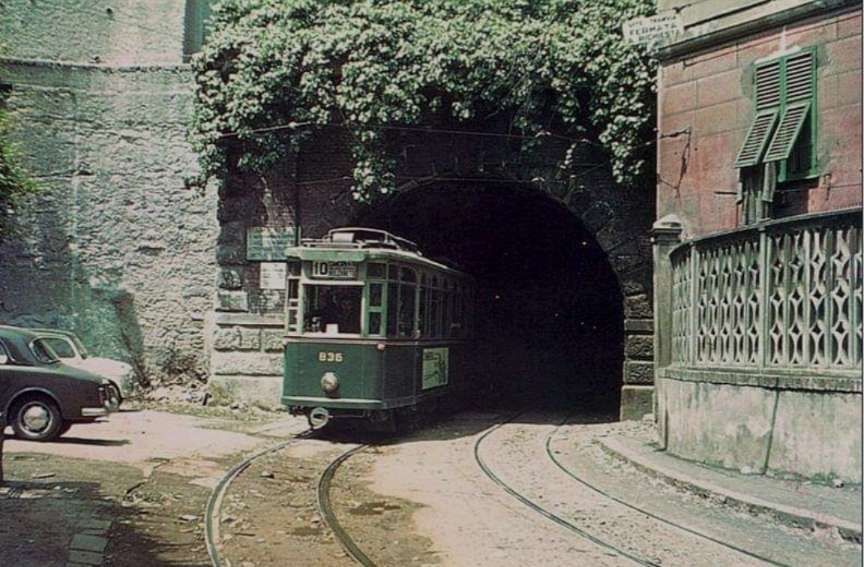
In 1934, Galleria Certosa was used every day by five lines: Tram No. 9 (San Giorgio-Rivarolo), tram No. 10 (San Giorgio-Bolzaneto), tram No. 11 (San Giorgio-Pontedecimo) and the two circular lines between San Giorgio and Sampierdarena. [22]
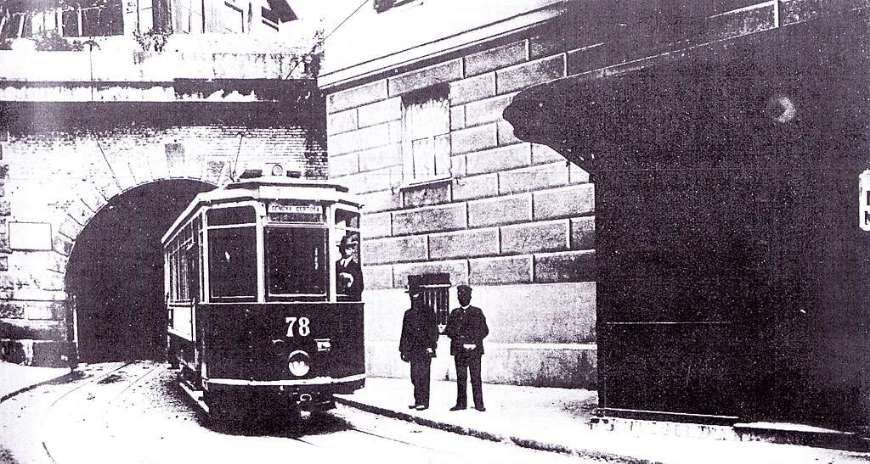
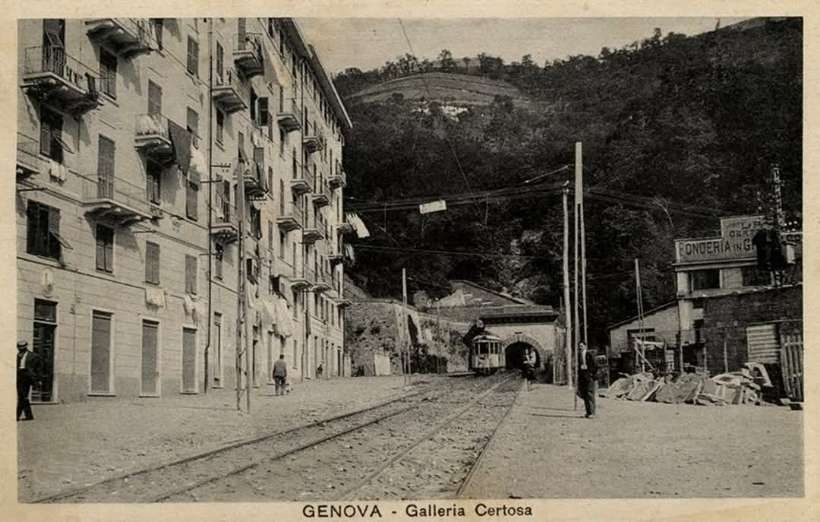
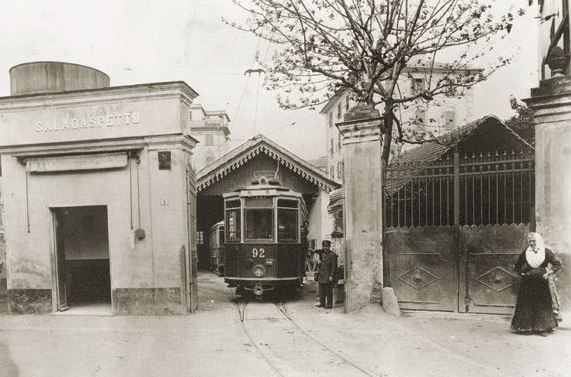
Tram No 78 at the southern entrance to Galleria Certosa, © Public Domain. [22]
In the mid-20th century, Tram No 836 providing the No.10 service exits the South Portal of the tunnel. This image was shared by Paolo Siri on the Sei di Certosa Se … Facebook Group on 2nd February 2014. [23]
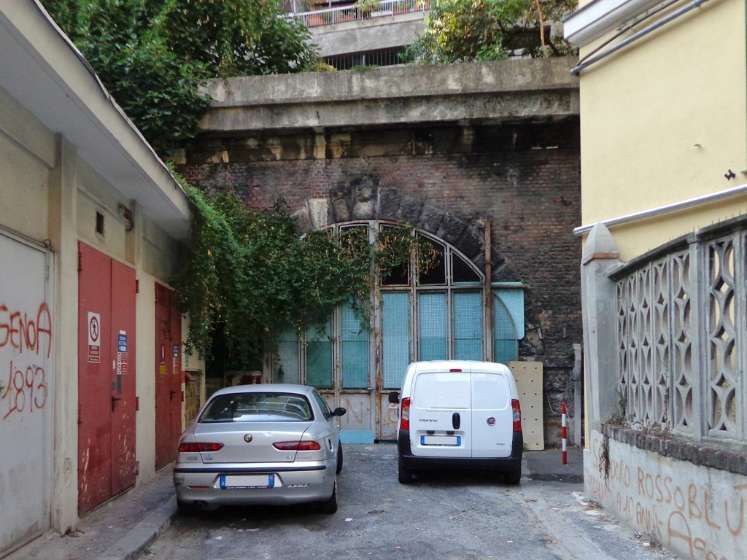
The South Portal (seen in the monochrome image above) is no longer in use, © Arbalete and authorised for reuse under a Creative Commons Licence (CC BY-SA 3.0) [22]
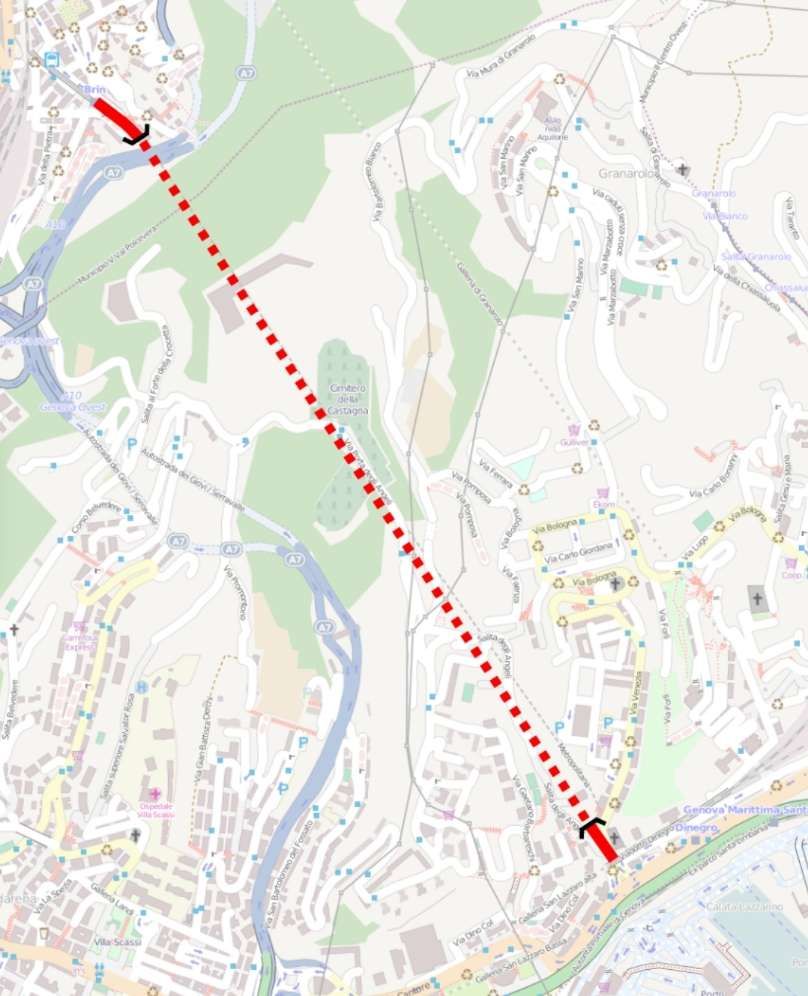
Galleria Certosa was a lengthy tunnel. It is shown here superimposed on a modern map of Genoa, © Arbalete and authorised for reuse under a Creative Commons Licence (CC BY-SA 3.0) [22]
A view looking towards Galleria Certosa from some distance to the Northwest through the site of what became Brin Metro Station. This image was shared on the Foto Genova Antica Facebook Group on 28th September 2020 by Pietro Spanedda, © Public Domain. [37]
Tram service No. 9 (Tram No. 831(?)) is about to enter the North portal of the tunnel. This image comes from the mid-20th century. [24]
The North Portal of Galleria Certosa. Much of the tunnel is now used by the Metro. Brin Metro Station is immediately behind the camera, © Arbalete and authorised for reuse under a Creative Commons Licence (CC BY-SA 3.0) [22]

Tram Tunnels (Galleria)

Having noted the construction of Galleria Certosa in the early years of the 20th century (above), it is worth looking at some other tunnels which were built to facilitate the movement of trams.

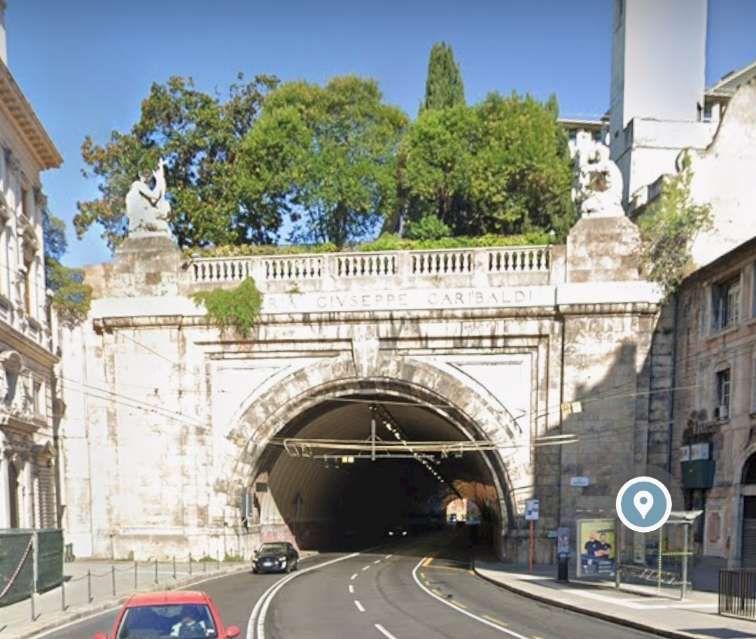
Galleria Vittorio Emanuele III (renamed Galleria Giuseppe Garibaldi on 27th November 1943)

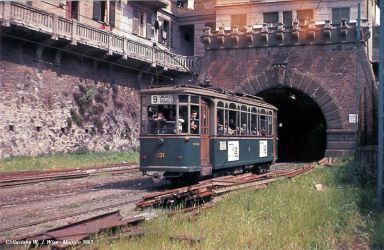
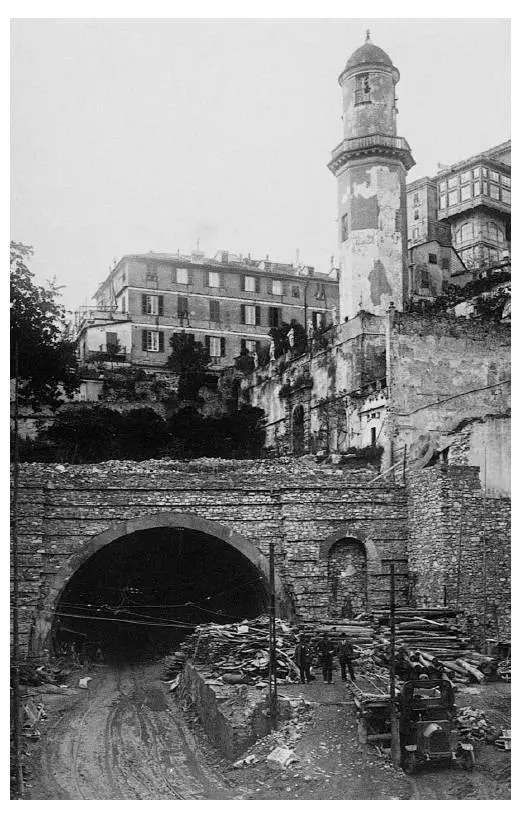
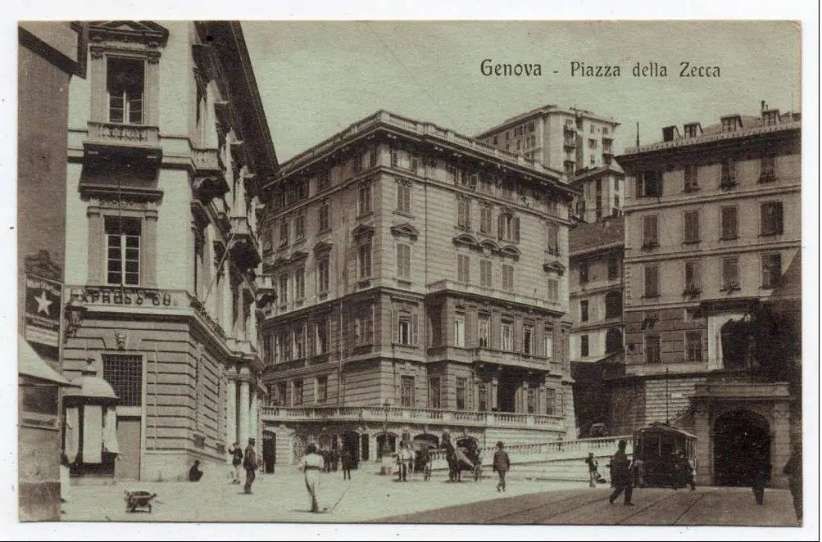
There seems to be quite a story to the life of this tunnel! The first two photographs show the first tunnel. They focus on the portal in Piazza Della Zeccan.
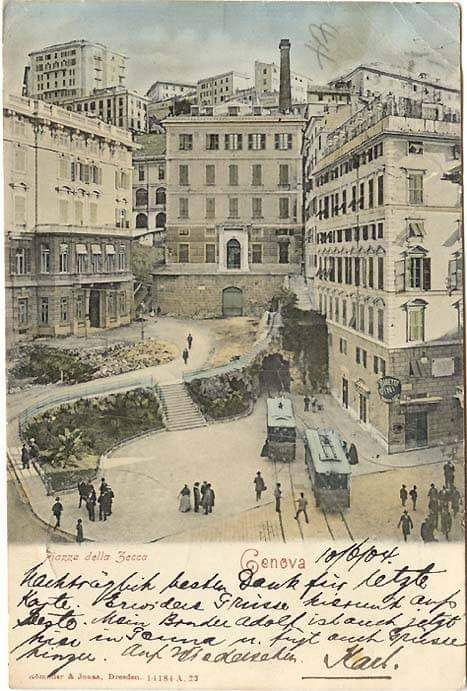
Piazza della Zecca with trams approaching and leaving a single track tunnel on the line of what will be Galleria Giuseppe Garibaldi. Piazza della Zecca has still not reached its fullest extent and the tunnel portal still has to be constructed, © Public Domain. [70]
Piazza della Zecca in a more complete form but still with a single track tunnel. [71]

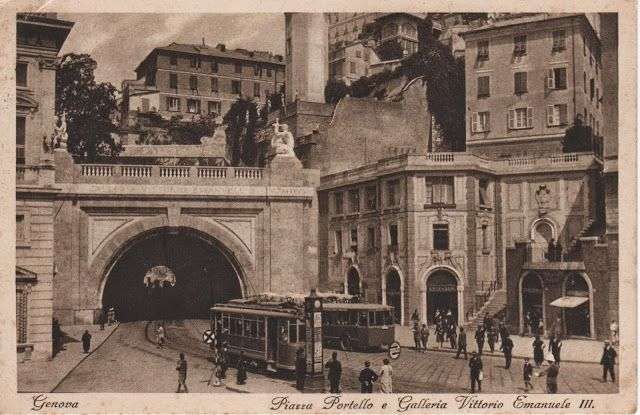
These next two photographs show the tunnel as it was first widened in the form which preceded the Galleria Vittorio Emanuele III which had a much smaller bore.
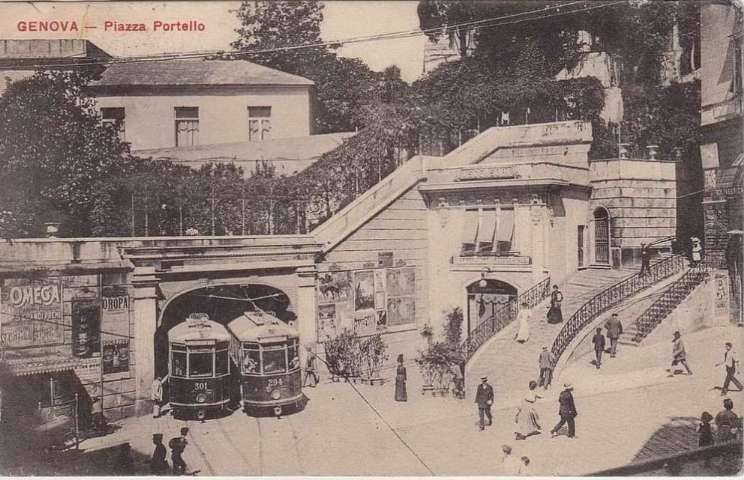
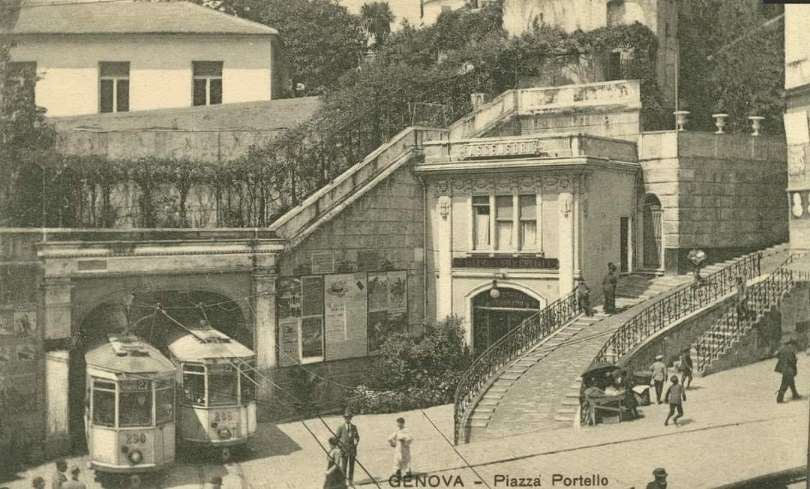
Two views of Piazza Portello with trams exiting and entering the Galleries which preceded Galleria Vittorio Emanuele III, © Public Domain. [38][39]
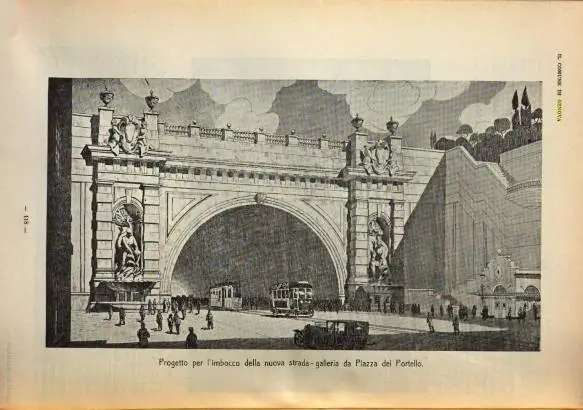
An engraving of the proposed Galleria Vittorio Emanuele III, © Public Domain. [26]
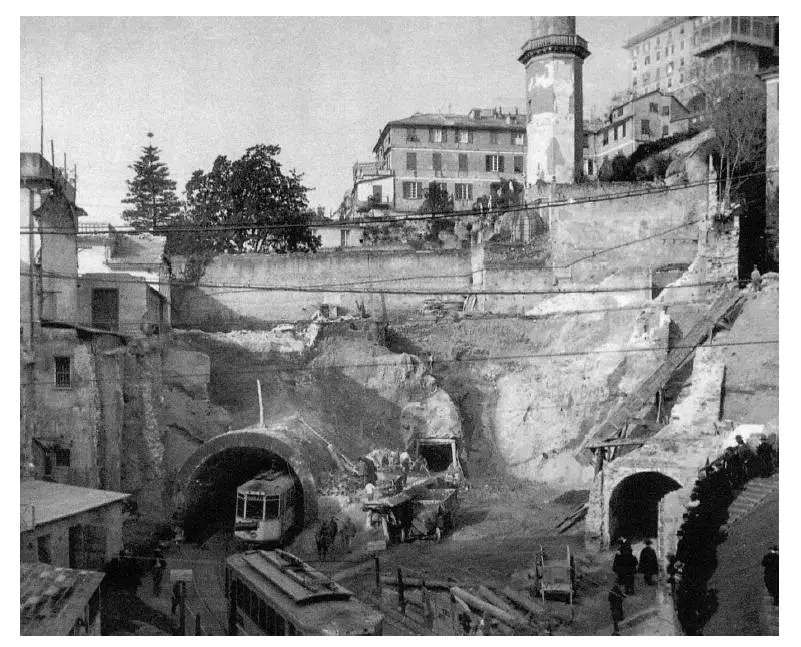
The Southeast end of Galleria Vittorio Emanuele III during construction with trams using the narrow older tunnel which preceded the larger bore seen on other photographs below, © Public Domain. [26]
Galleria Vittorio Emanuele III later during construction work the full size bore is now complete but the decorative portal still has to be built, © Public Domain. [26]
A postcard view of the Southeast Portal of Galleria Vittorio Emanuele III (later Giuseppe Garibaldi), © Public Domain. [26]
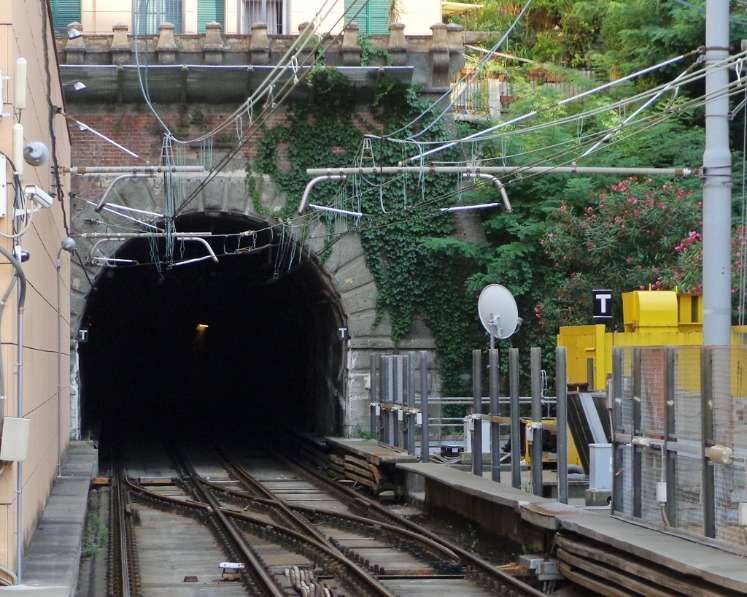
The Southeast Portal of Galleria Giuseppe Garibaldi in the 21st century. [Google Streetview, August 2024]
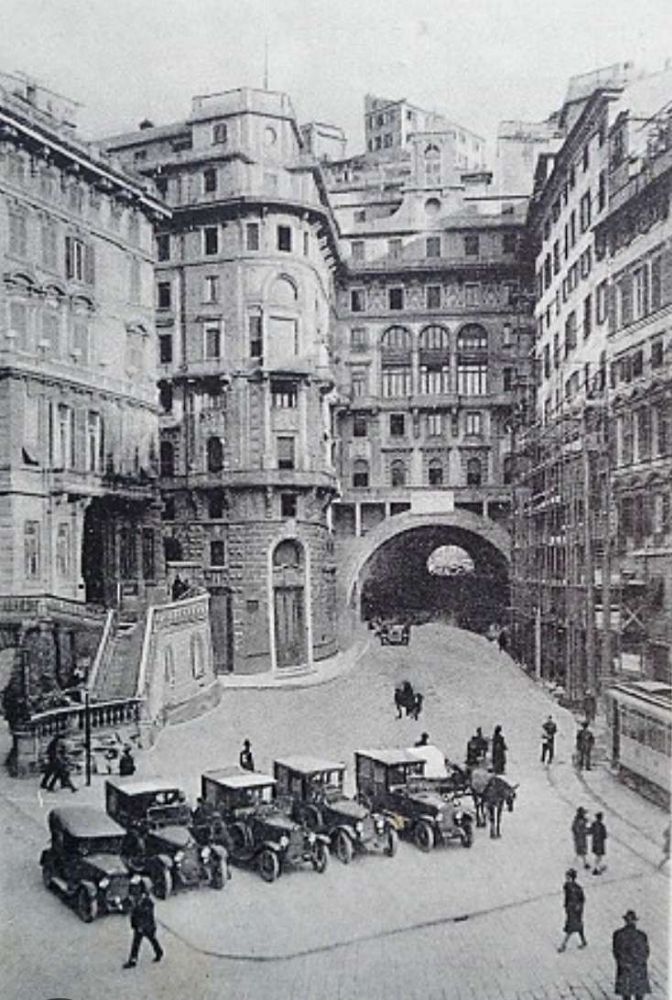
The Northwest Portal of Galleria Vittorio Emanuele III (later Giuseppe Garibaldi) soon after construction, © Public Domain. [25]
A 21st century view of the Northwest portal of Galleria Giuseppe Garibaldi. [Google Streetview, August 2024]

Galleria Sant’Ugo

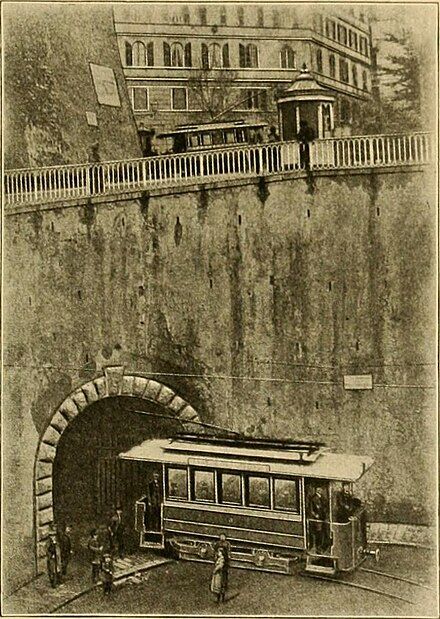
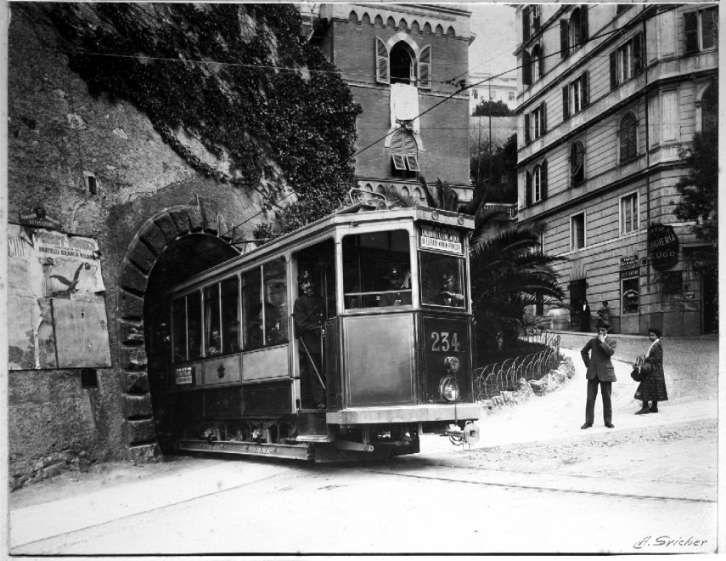
A tram at the lower Portal of Galleria Sant’Ugo, © Public Domain. [27]
The route of Galleria Sant’Ugo appears on city centre maps North of Principe Railway Station. Its lower entrance was on Salita Della Provvidenza. Its upper entrance only a very short distance away to the Northeast but at a higher level in Piazza Ferreira. [27]
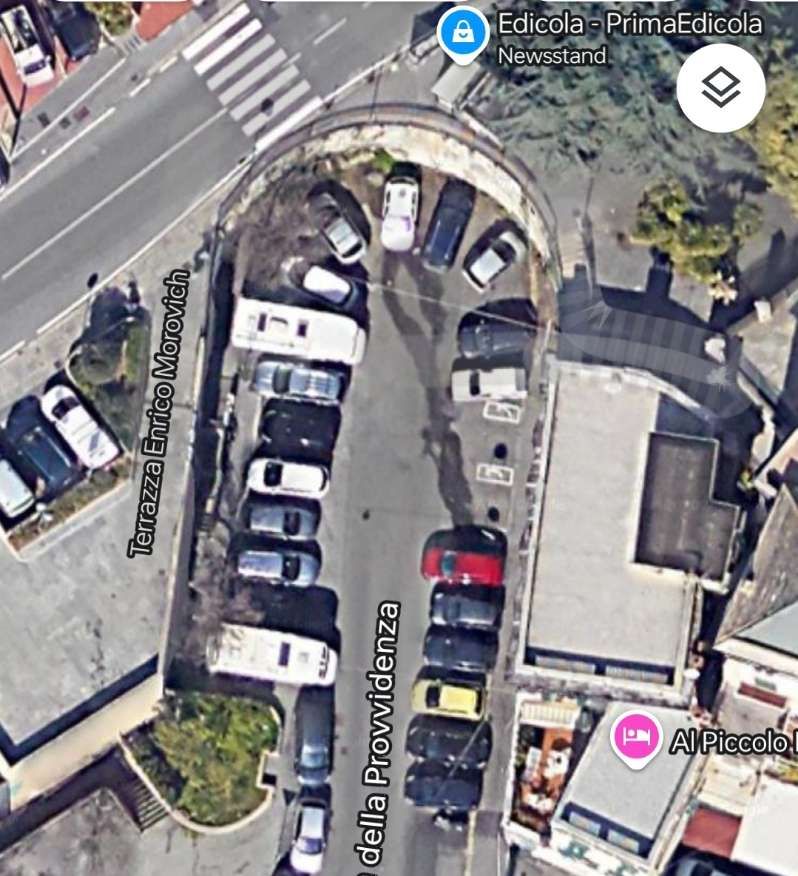
Galleria Sant’Ugo left the surface at the North end of Salita Della Provvidenza. [Google Maps, November 2024]
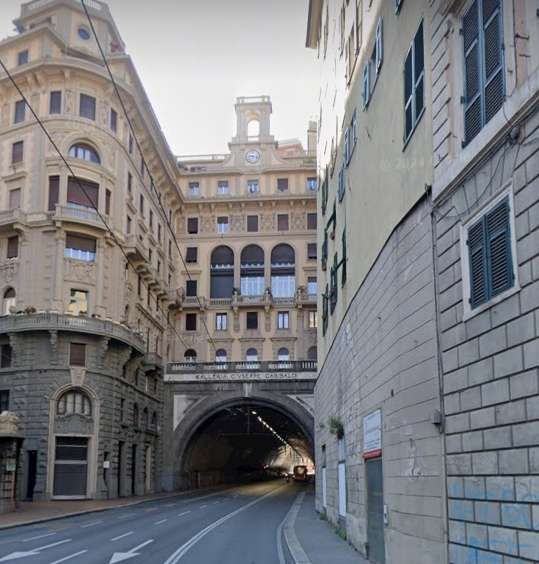
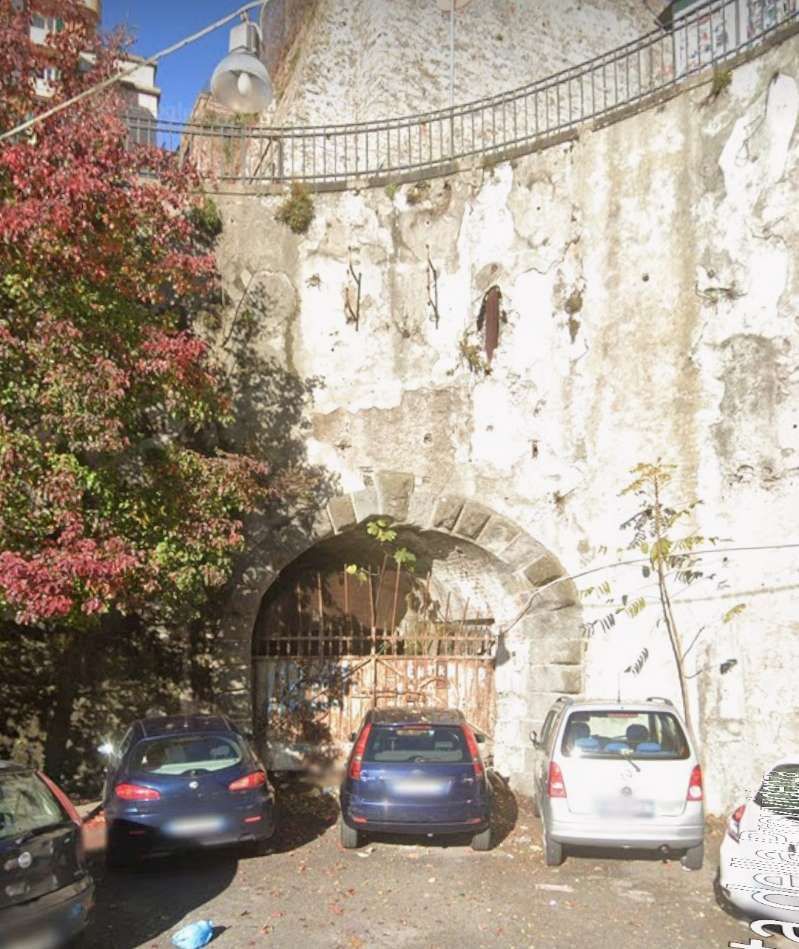
The lower entrance to Galleria Sant’Ugo in the 21st century. [Google Streetview, December 2020]
The Upper Portal of Galleria Sant’Ugo in Piazza Ferreira, © Public Domain. [28]
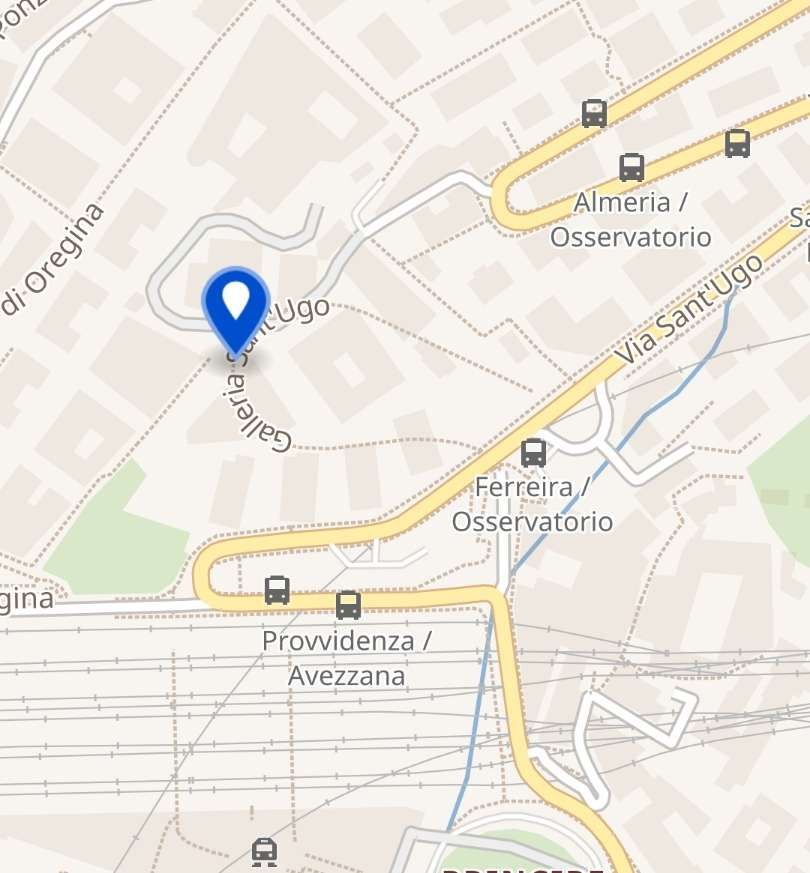
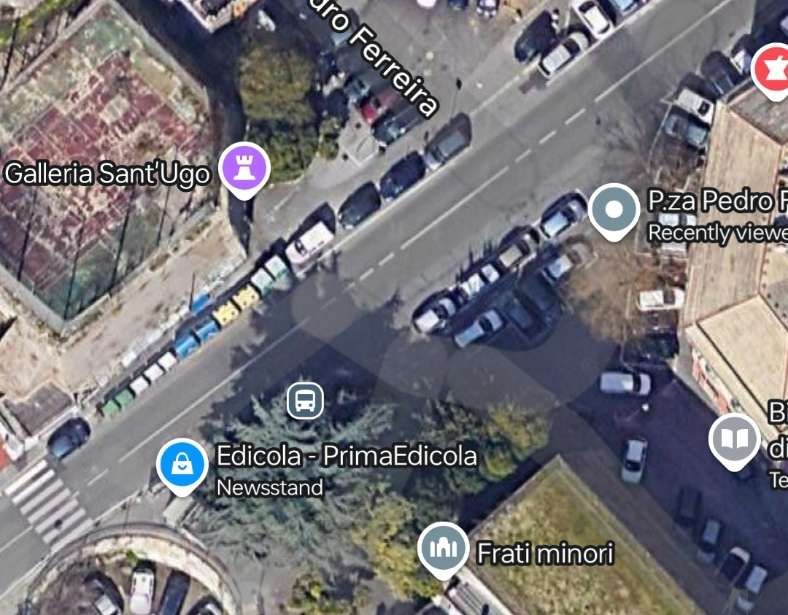
The upper (marked by the purple flag) and lower entrances of Galleria Sant’Ugo were geographically very close together! [Google Maps, November 2024]
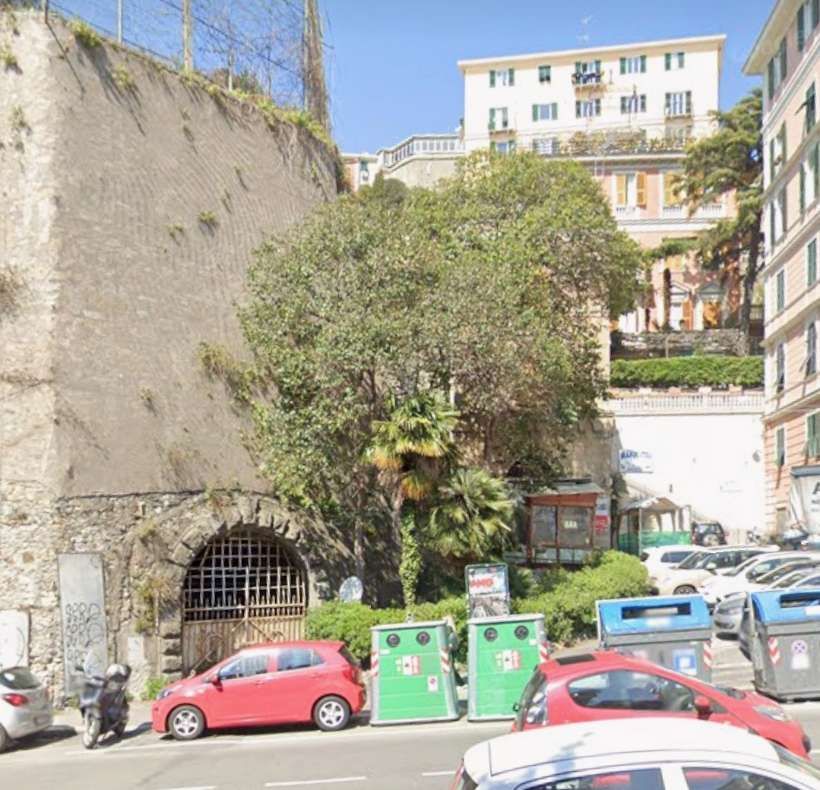
The upper entrance to Galleria Sant’Ugo in Piazza Ferreira. [Google Streetview, August 2024]

Galleria Chrisoforo Colombo

Named after Christopher Columbus, whose house was nearby, the gallery was opened to the public in the 1930s and was hailed as the city’s gateway to the sea. It connected Piazza de Ferrari and Piazza della Vittoria.
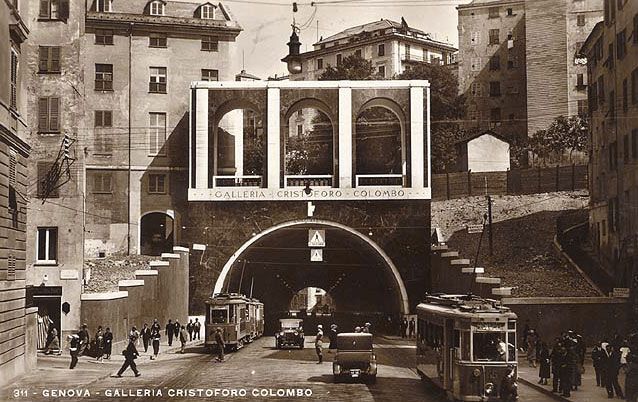
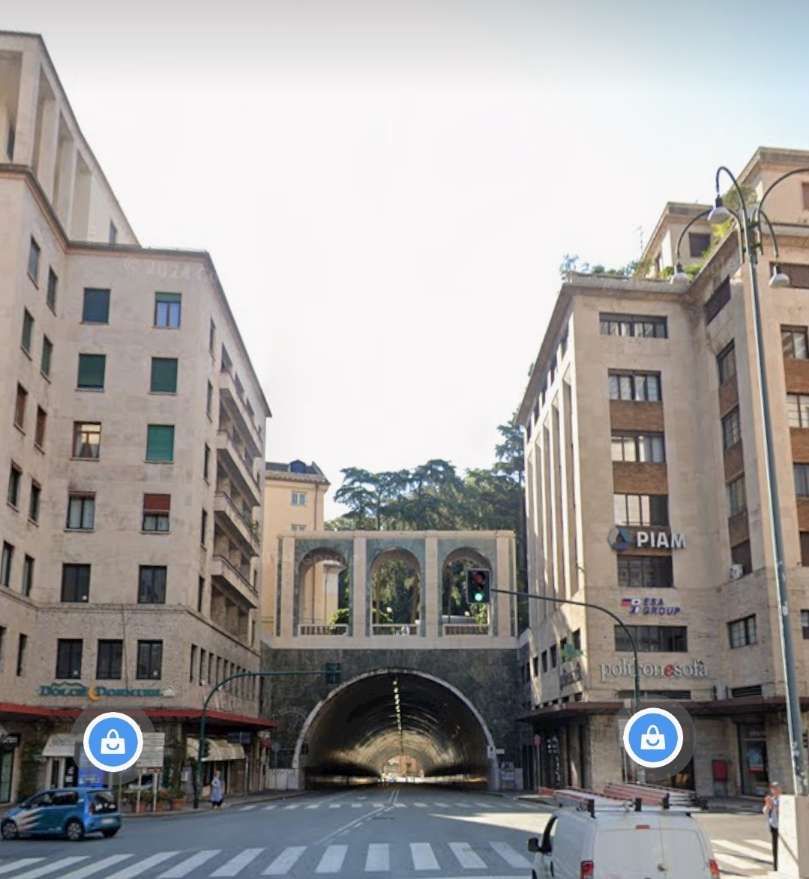
The Northwest Portal of Galleria Chrisoforo Colombo in its early years, © Public Domain. [28]
The Northwest Portal of Galleria Chrisoforo Colombo in the 21st century. [Google Streetview, August 2024]
The Southeast Portal of Galleria Chrisoforo Colombo in its early years, © Public Domain. [29]
The Southeast Portal of Galleria Chrisoforo Colombo in the 21st century. [Google Streetview, August 2024]
The blue flag points to the line of the Galleria Chrisoforo Colombo.
A closer view of the location.

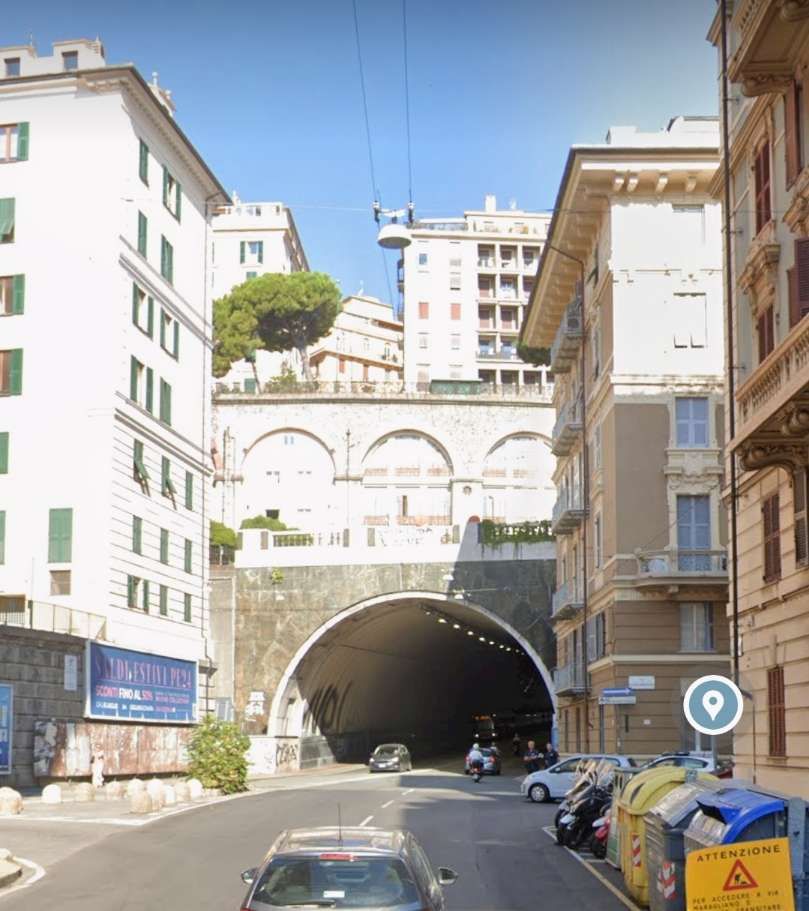
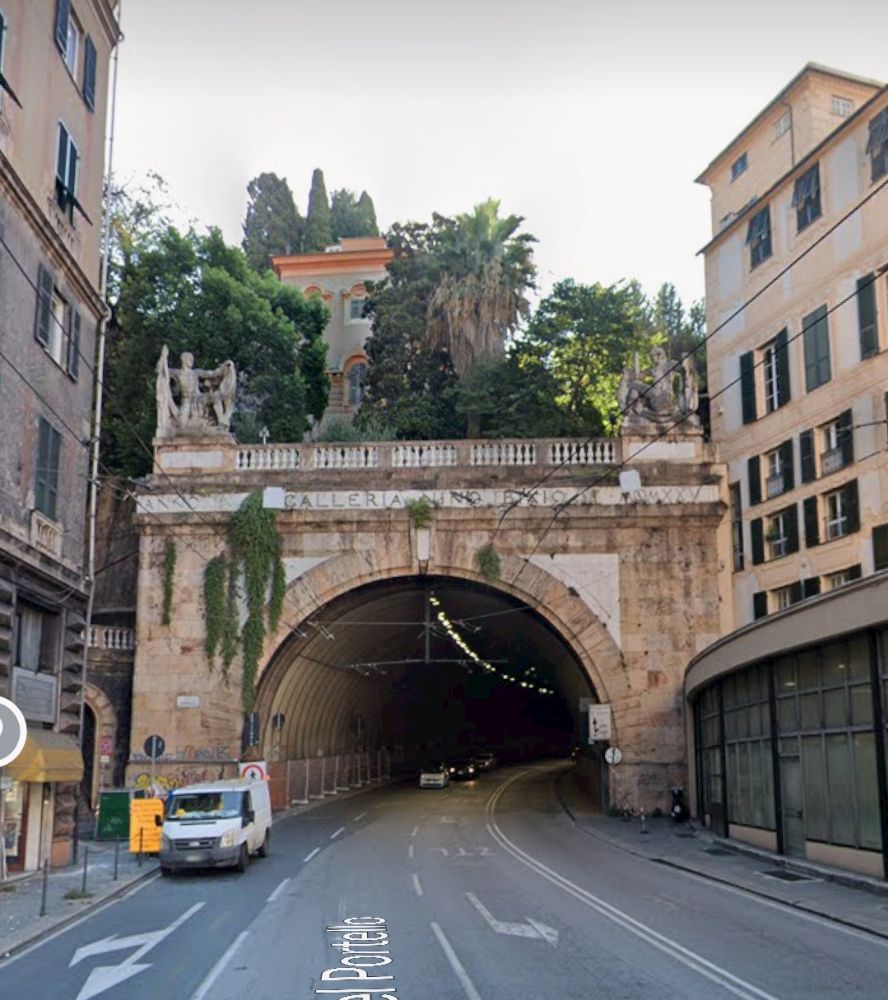
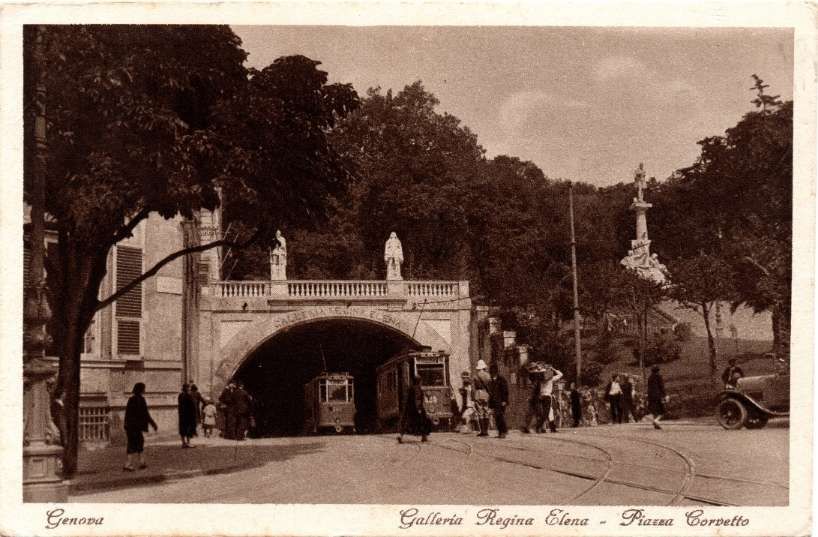
Galleria Regina Elena (today Nino Bixio)
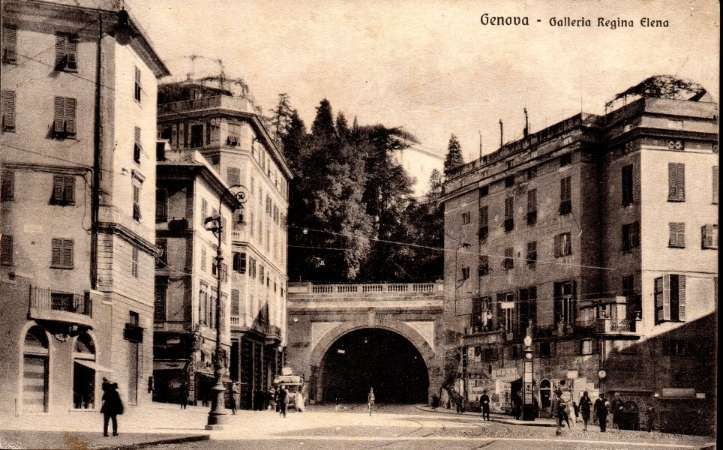
The West Portal of Galleria Regina Elena (now Nino Bixio), © Public Domain. [30]
The West Portal of Galleria Nino Bixio in the 21st century. [Google Streetview, August 2024]
The East Portal of Galleria Regina Elena (now Nino Bixio), © Public Domain. [30]
The East Portal of Galleria Nino Bixio in the 21st century. [Google Streetview, August 2024]
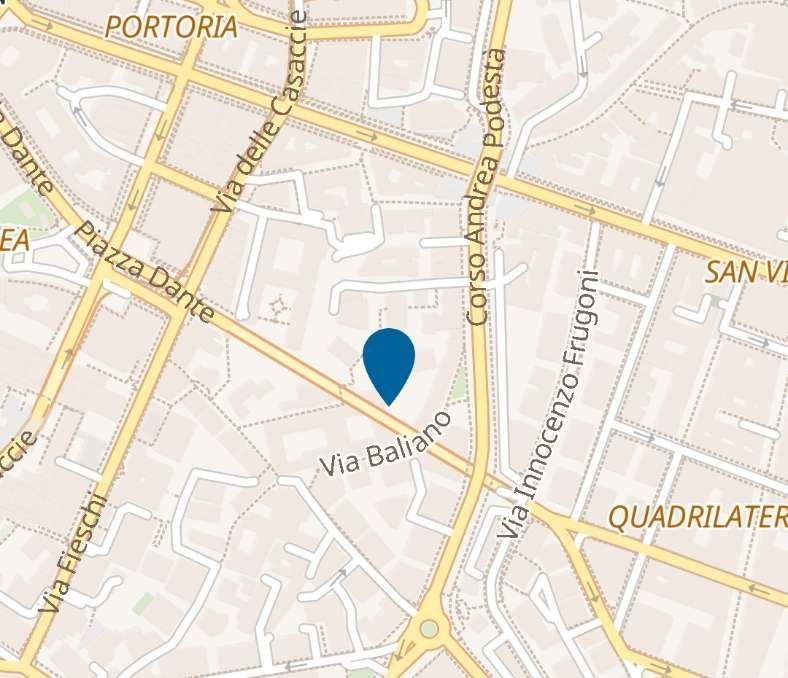
The location of Galleria Nino Bixio. [Google Maps, November 2024]

Galleria Dei Tram Via Milano

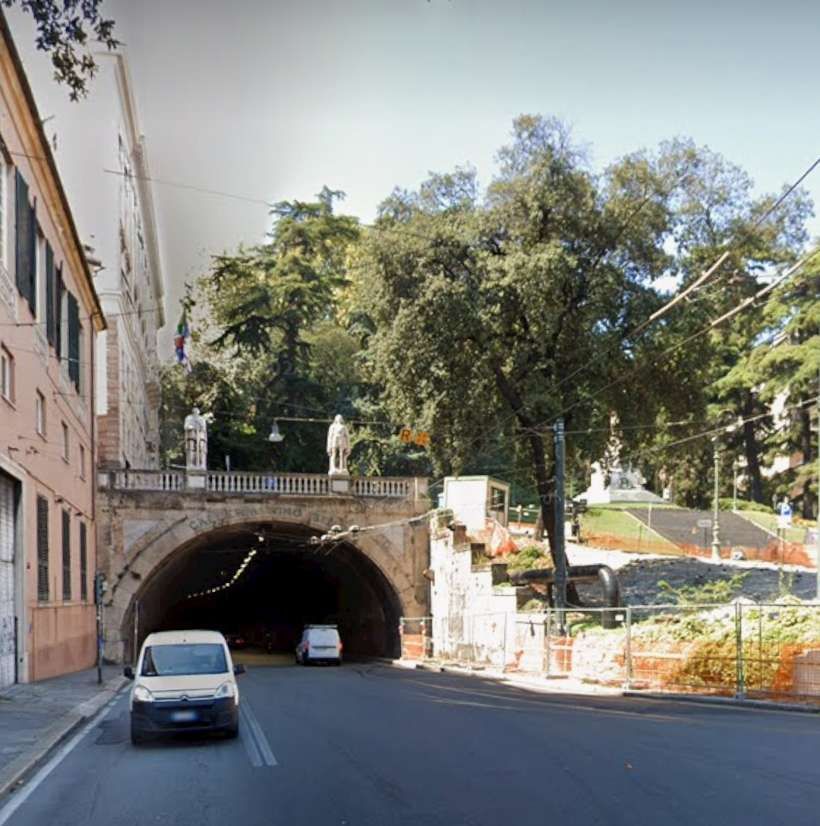
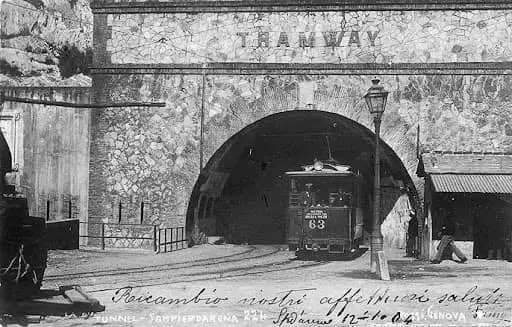
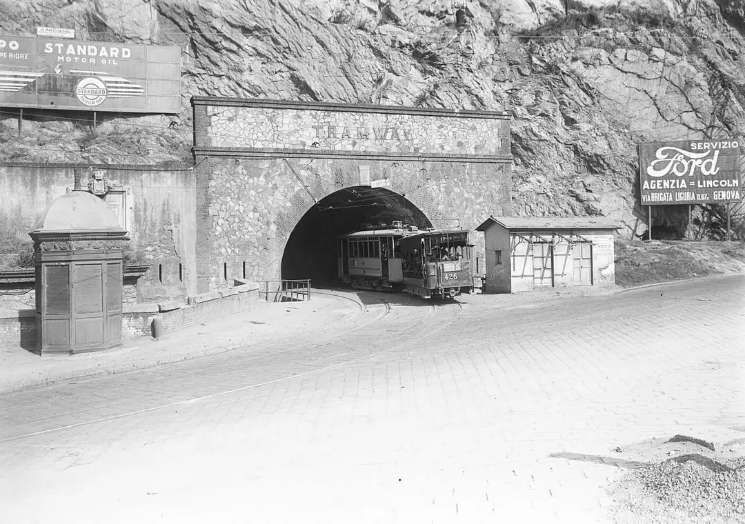
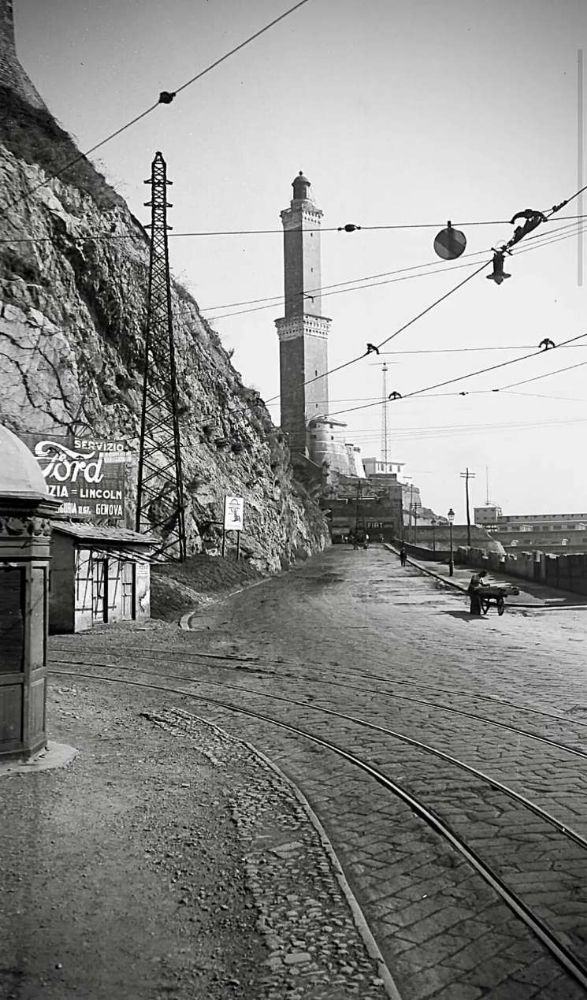
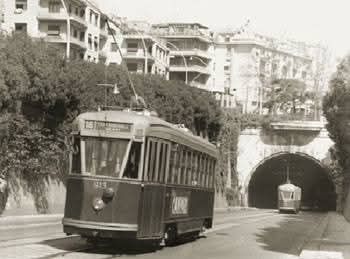
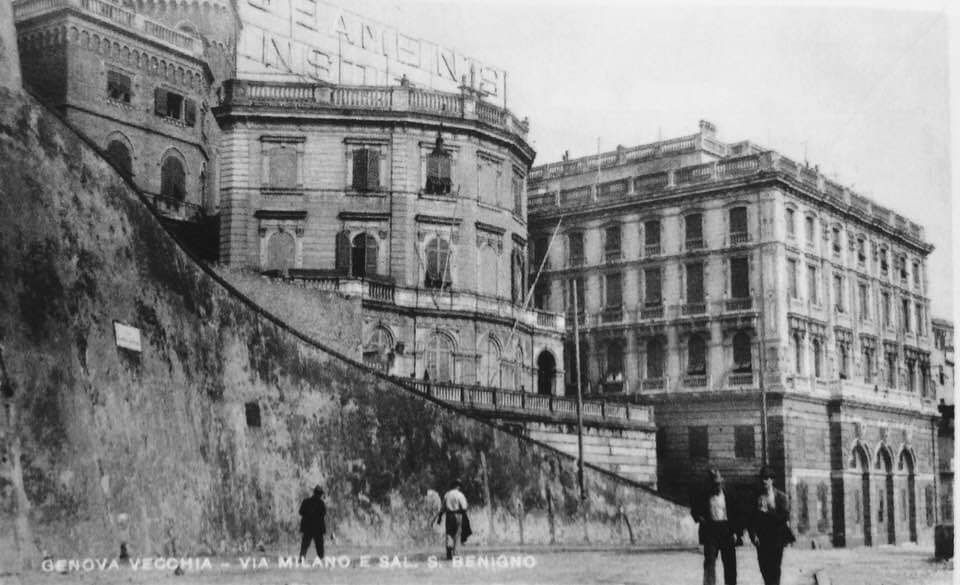
Now long gone, there was a tram tunnel on Via Milano to the Southwest of the city centre. It took the tramway (and roadway) under San Benigno Hill. It was.built in 1878 by the Compagnia Generale Francese dei Tramways for its horse-drawn trams. Its Southwest portal was in Largo Laterna. Its Northeast portal is shown in the first image below.
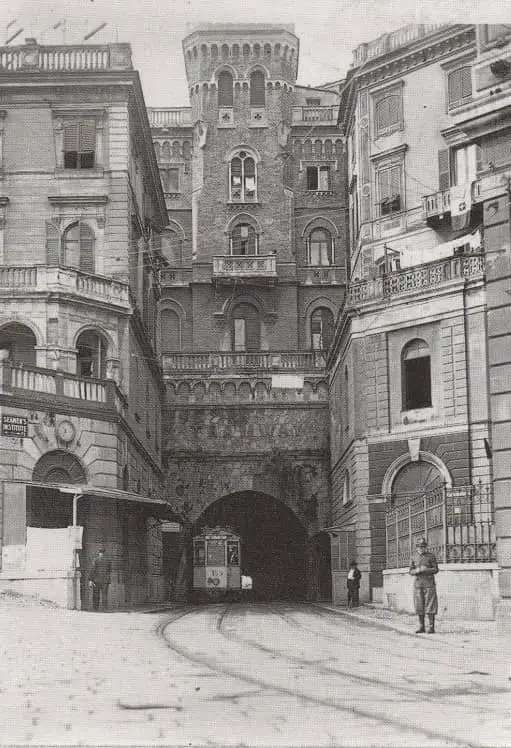
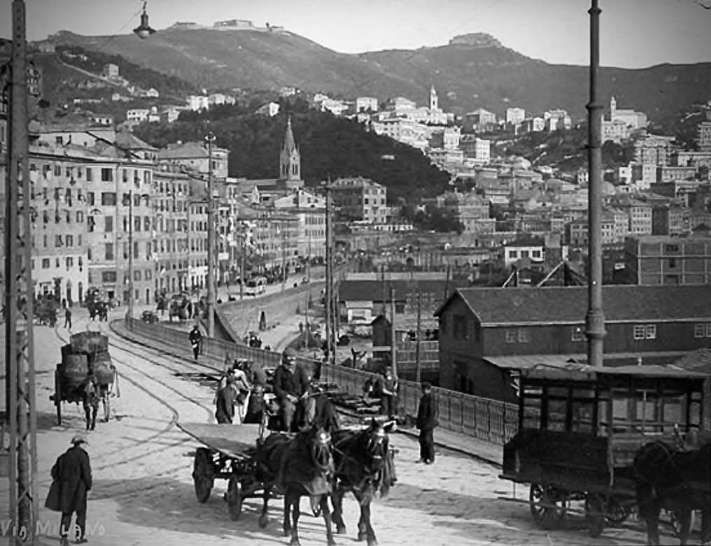
The Northeast portal of the Galleria on Via Milano before its demolition when the San Benigno Hill was raised to the ground. The three images below show the Southwest end of the tunnel. This image was shared by Silvia Brisigotti on the Foto Genova Antica Facebook Group on 3rd February 2024, © Public Domain. [34]
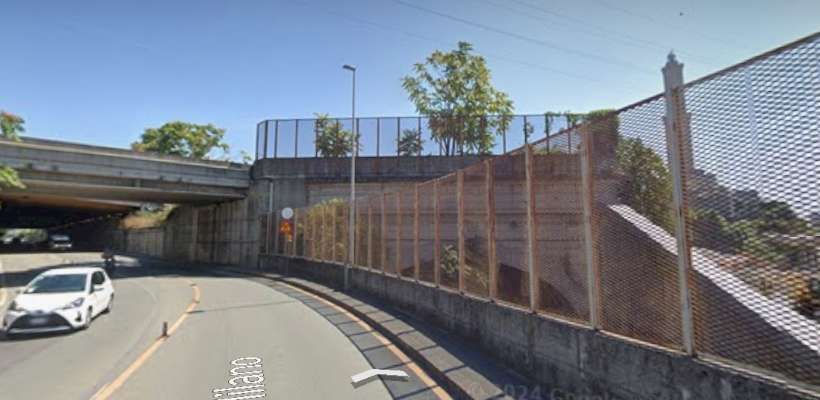
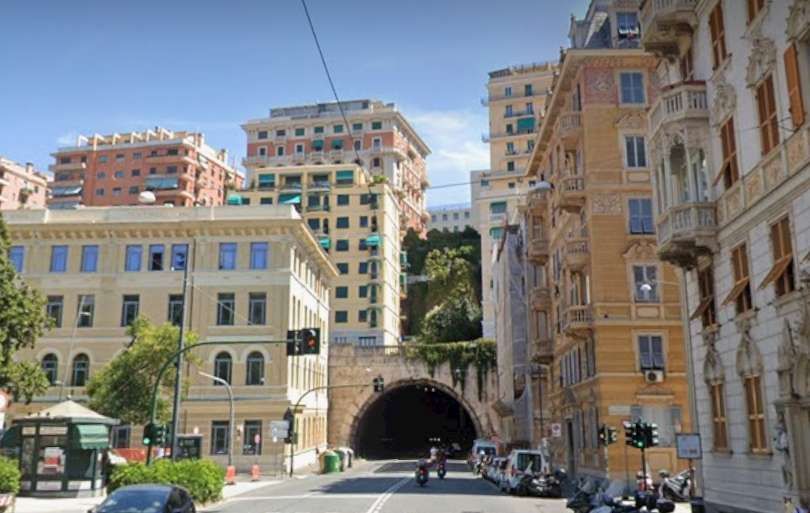
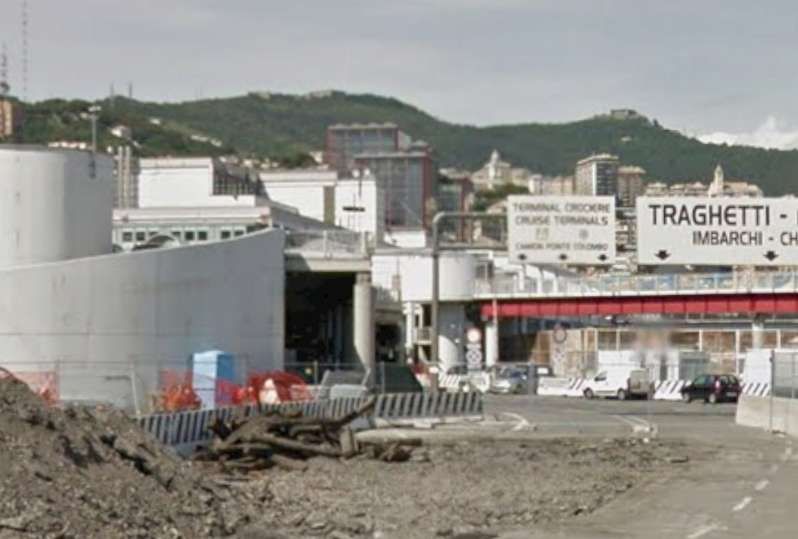
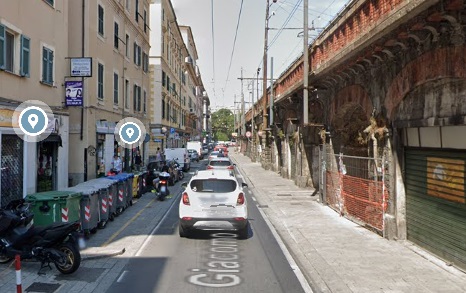
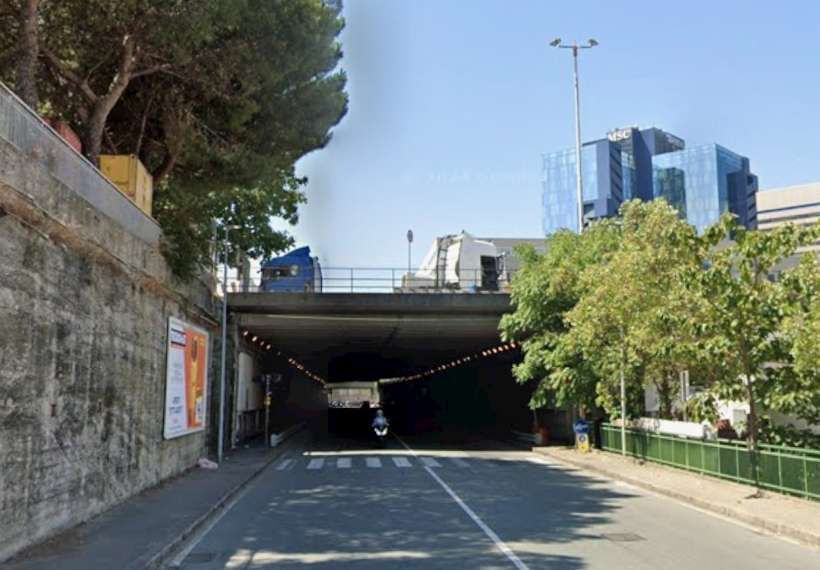
A similar location on Via Milano in the 21st century. There are no features to tie the two images together! [Google Streetview, August 2024]
Three different images showing the Southwest portal of the Galleria Via Milano and its immediate environment. The third of the images illustrates its proximity to Genoa’s (Genova’s) Lighthouse on Largo Laterna. These images were shared by Silvia Brisigotti on the Foto Genova Antica Facebook Group on 16th January 2024, © Public Domain. [35]
A similar location on Via Milano in the 21st century. The lighthouse can be seen on the right of this photograph. [Google Streetview, August 2024]

Until Galleria Certosa was constructed all tram services for the Western suburbs of the city had to pass through this tunnel.

Galleria Goffredo Mameli

This tunnel curved through the Eastern parts of the city from Via Piave to Via Carlo Barabino at the bottom of Piazza Palermo.
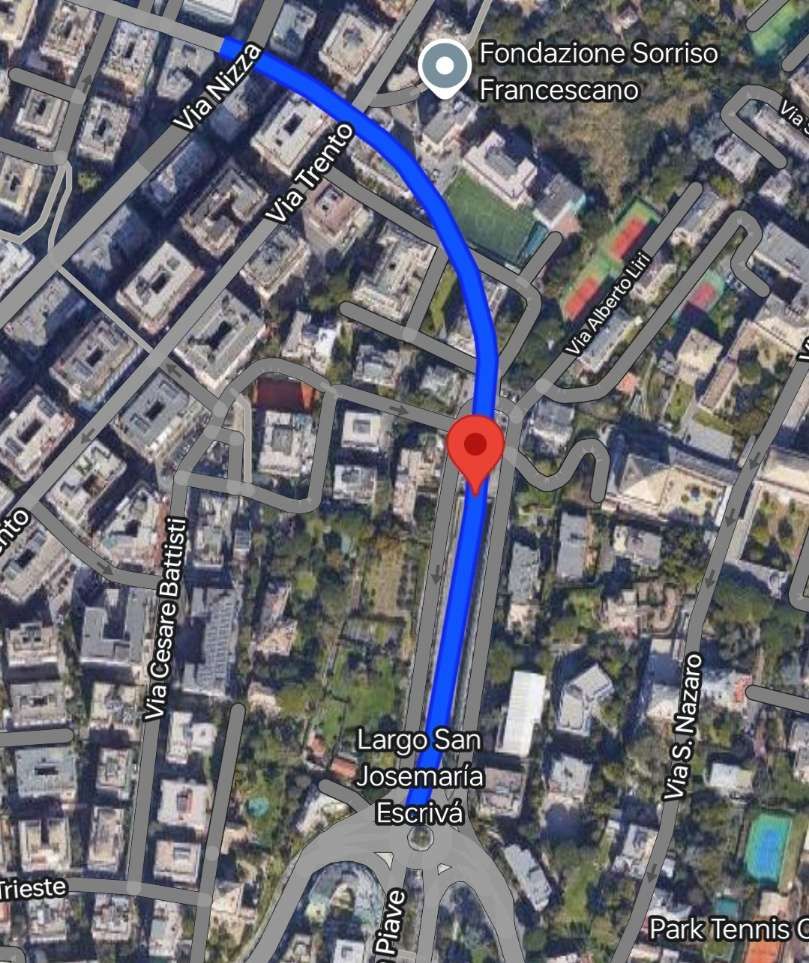
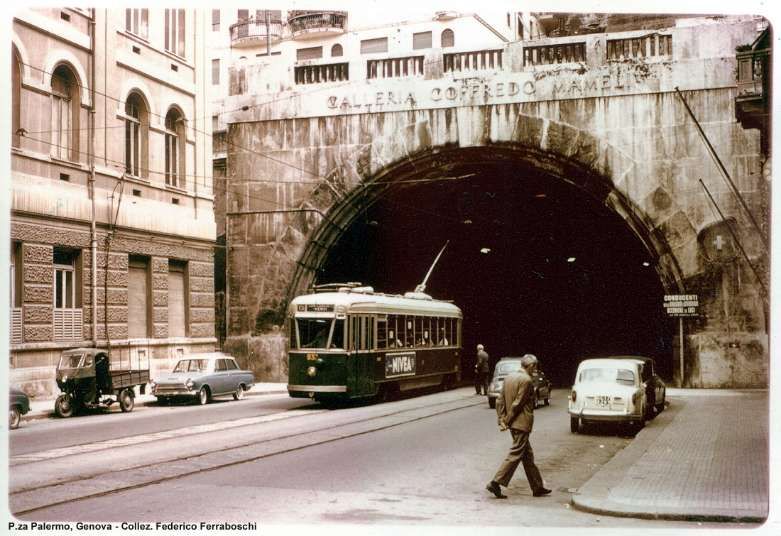
Galleria Goffredo Mameli. [Google Maps, November 2024]
In Piazza Palermo, UITE No. 937 exits Galleria Goffredo Mameli in service on the Line 15, De Ferrari – Galleria Mameli – Nervi Service in the later years of the network’s life, © Public Domain. [36]
Looking East at the bottom of Piazza Palermo towards the West Portal of Galleria Goffredo Mameli. [Google Streetview, August 2024]
The South Portal of Galleria Goffredo Mameli, © Public Domain. [40]
The South Portal of Galleria Goffredo Mameli. [Google Streetview, August 2024]

The Years Before World War One

In the early years of the 20th century, the municipal administration began to consider the idea of taking control of the tram service. In anticipation of this, in 1913, it built its own line from Marassi to Quezzi, known as Municipal Line A, it was operated by UITE on behalf of the Municipality. [19][21: p44]

Before the start of World War 1, the tram network provided these services: [19]

I. Western Network:

1 Caricamento – San Pier d’Arena (Sampierdarena in other sources) – Sestri – Pegli – Voltri
2 Caricamento – San Pier d’Arena – Sestri – Pegli
3 Caricamento – San Pier d’Arena – Sestri
4 Caricamento – San Pier d’Arena
5 Caricamento – San Pier d’Arena – Rivarolo
6 Caricamento – San Pier d’Arena – Rivarolo – Bolzaneto
7 Caricamento – San Pier d’Arena – Rivarolo – Bolzaneto – Pontedecimo
8 Caricamento – Galleria Certosa – Certosa
9 Caricamento – Galleria Certosa – Certosa – Rivarolo
10 Caricamento – Galleria Certosa – Certosa – Rivarolo – Bolzaneto
11 Caricamento – Galleria Certosa – Certosa – Rivarolo – Bolzaneto – Pontedecimo

II. Eastern Network:

21 De Ferrari – Manin – Staglieno
22 De Ferrari – Manin
23 De Ferrari – Manin – Castelletto
24 De Ferrari – Manin – Castelletto – San Nicholo
25 Circuit in the hilly suburbs
26 Piazza Principe – Corso Ugo Bassi
27 De Ferrari – Zecca – Principe
28 Caricamento – De Ferrari – Galliera ‘Ospital
29 De Ferrari – Carignano
30 Circular Raibetta – Brignole – Corvetto – Raibetta
31 De Ferrari – Staglieno – Molassana – Prato
32 De Ferrari – Staglieno – Molassana
33 De Ferrari – Pila – Staglieno
34 Staglieno – Iassa
35 Pila – Staglieno
36 Pila – Staglieno – Molassana
37 De Ferrari – San Fruttuoso
38 De Ferrari – Foce
39 De Ferrari – San Francesco – Sturla – Priaruggia – Quinto – Nervi
40 De Ferrari – San Francesco – Sturla – Priaruggia – Quinto
41 De Ferrari – San Francesco – Sturla – Priaruggia
42 De Ferrari – San Francesco – Sturla
43 De Ferrari – Villa Raggio – Lido
44 De Ferrari – Tommaseo – San Martino – Borgoratti
45 De Ferrari – Tommaseo – San Martino – Sturla
46 De Ferrari – Tommaseo – San Martino
47 De Ferrari – Tommaseo
48 Raibetta – Pila

III. Municipal line:

A De Ferrari – Quezzi

The Western Network, particularly before World War One
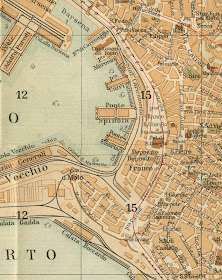
Lines 1 to 11 constituted the Western Network. All of these lines had their city centre terminus at Piazza Caricamento. The Piazza is shown on the adjacent 1916 map.

The map shows part of the Port area of Genoa (Genova) in 1916 with a significant series of standard-gauge railway sidings in evidence (black lines) and some red lines which indicate the metre-gauge tram routes. Piazza Caricamento is close to the water halfway down the map extract. [31]
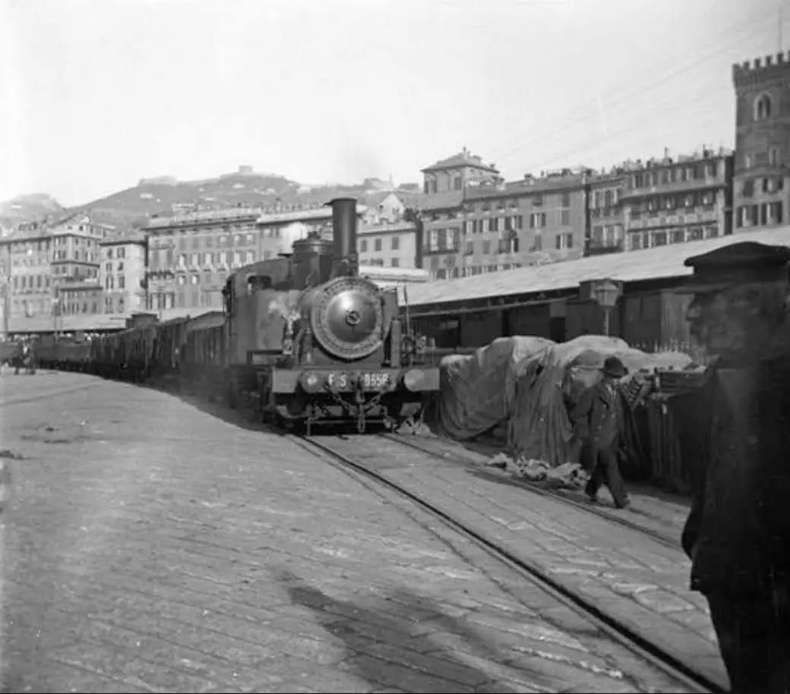
A typical photograph of a freight movement on the standard-gauge railway serving the port. The building behind the locomotive front onto Piazza Caricamento., © Public Domain and shared by Enrico Pinna on the Foto Genova Antica Facebook Group on 22nd January 2023. [33]

The postcard images below show trams operating in Piazza Caricamento at different times over the life of the tram network in the 20th century.

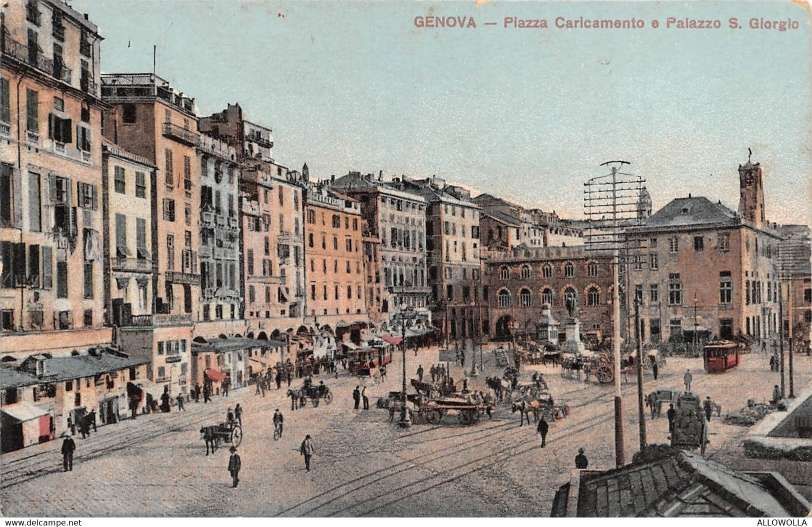
Piazza Caricamento, (postcard dated 1908), © Public Domain. [31]
Piazza Caricamento (postcard dated 1910), © Public Domain. [31]
Piazza Caricamento, (postcard dated 1936), © Public Domain. [31]
Piazza Caricamento, later than the previous view, © Public Domain. [31]
Piazza Caricamento in October 1942 sowing war damage to properties on the East side of the Piazza, © Public Domain. [32]

There were three main routes out of Piazza Caricamento, one of which followed the coast round to meet the lines on the East of the city. The other two shared the bulk of the services leaving the piazza. One of these two routes ran West through San Pier d’Arena (Sampierdarena), the other ran through Galleria Certosa.

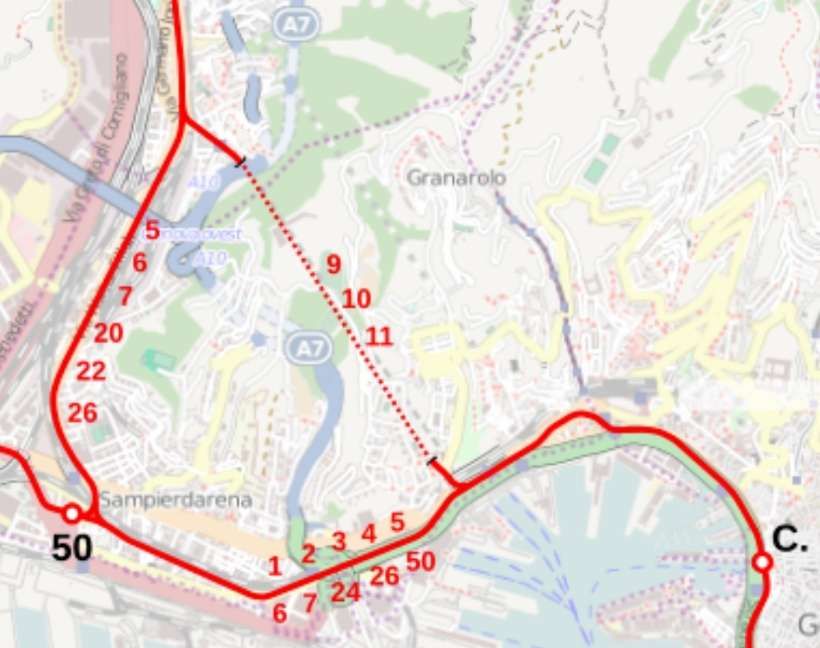
The only tramway route serving the western suburbs before the construction of Galleria Certosa is shown here in black between Pizza Caricamento, Principe and San Pier d’Arena (Sampierdarena), © Arbalete and authorisedd for reuse under a Creative Commons Licence (CC BY-SA 2.0). [19]
The distribution of tramway routes in the West of the city after Galleria Certosa was put into use, © Arbalete and licenced for reuse under a Creative Commons Licence (CC BY-SA 2.0). [19]

The route to San Pier d’Arena (Sampierdarena) closely follows the coast and ran through the Galleria on Via Milano before the San Benigno Hill was raised to the ground.
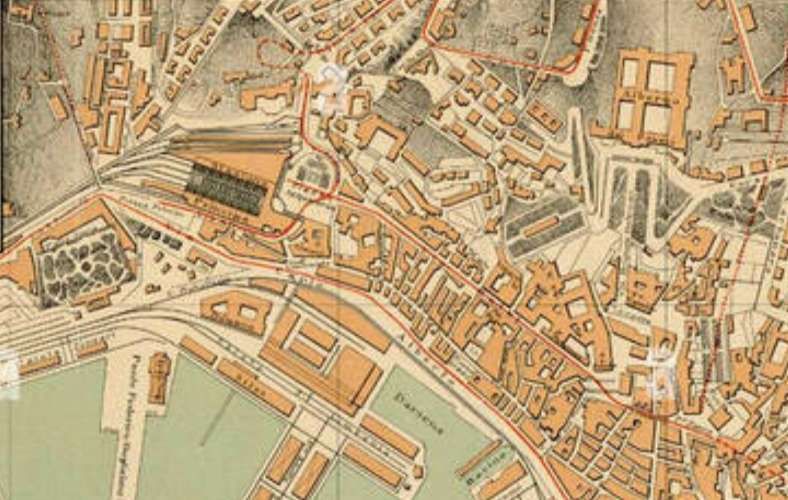
The 1916 map shows the first length of the tramway Northwest of Piazza Caricamento (red line) which served both the two routes mentioned above. It ran on the south side of Principe Railway Station across the top of the Port. [31]
A crowded Pizza Acquaverde, located in front of the Principe Station, dominated by the statue of Christopher Columbus. Among buses and trolleybuses there is a tram waiting at the station. Another tram (a 900) is on the route from Piazza Caricamento towards Sampierdarena. This image probably comes from the late 1950s or early 1960s, © Public Domain. [36]
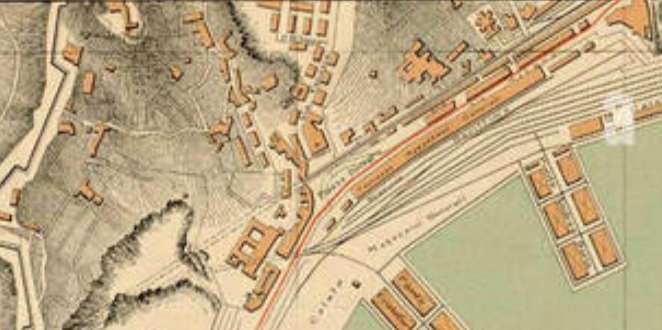
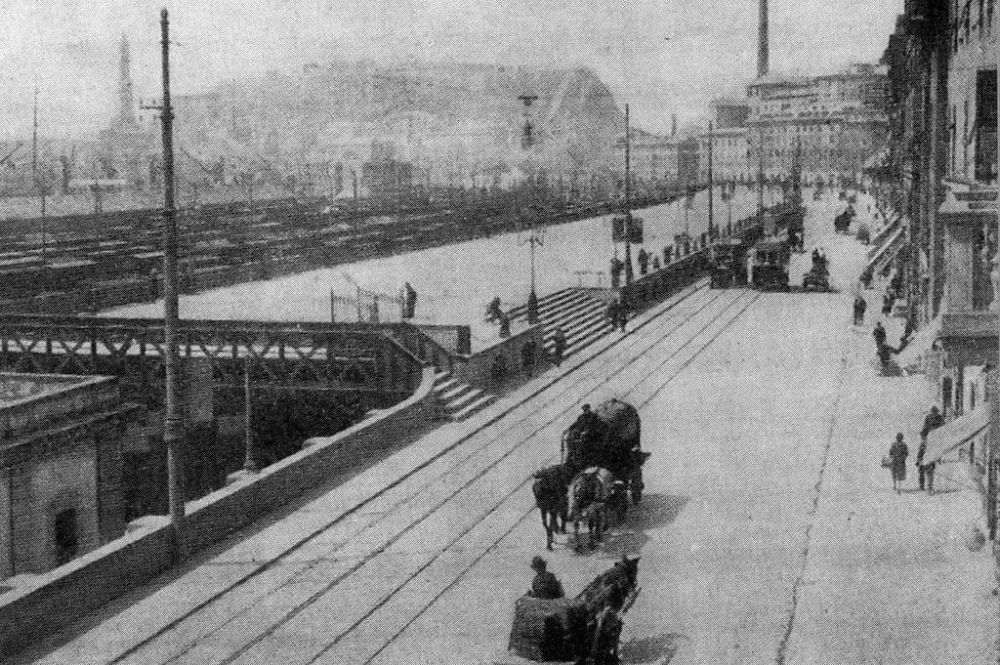
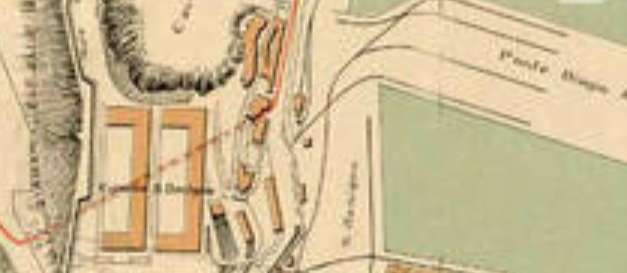
The redline marking the tramway runs down the West side of the Port on this next extract from the 1916 – Via Milano, later Via Bruno Buozzi. [31]
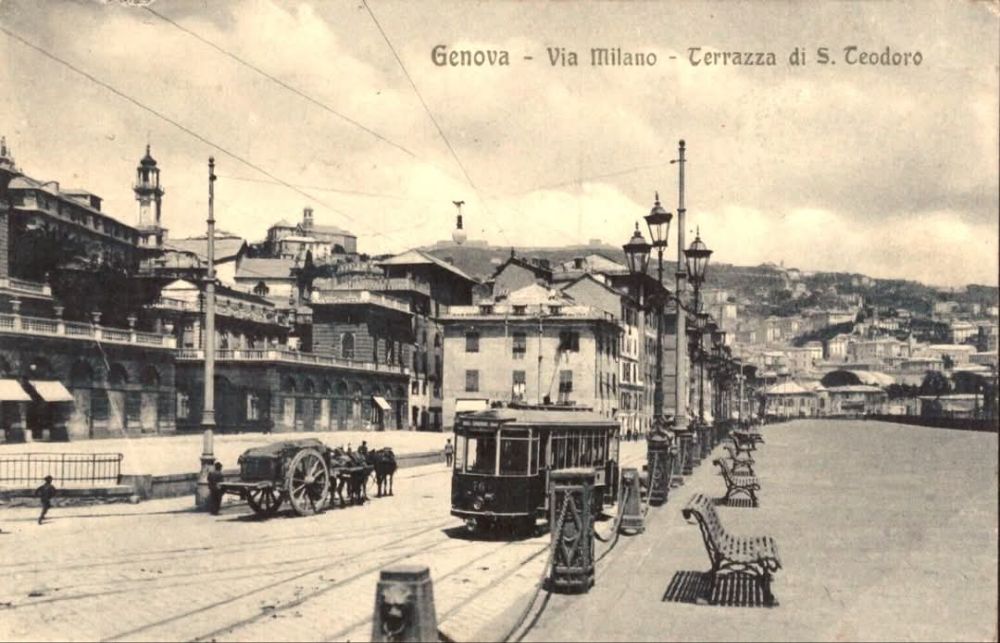
An early postcard image showing the curve from Via San Benedetto into Via Milano.[42]
The same location, also prior to the widening of Via Milano and the renaming of the fist length ahead as Via Bruno Buozzi. [41]
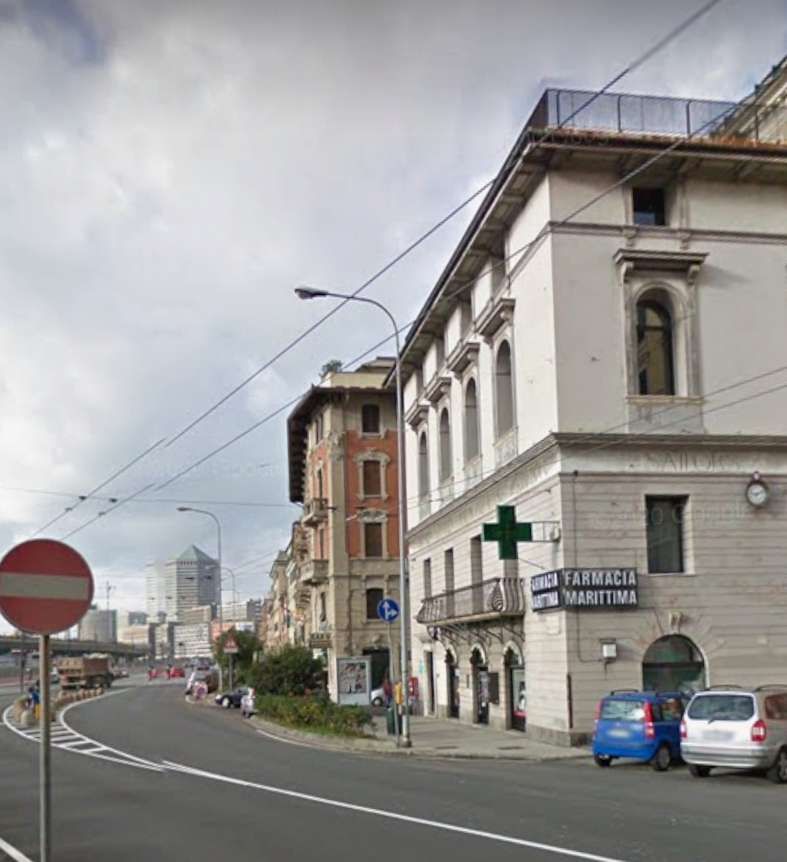
The same location in the 21st century. [Google Streetview, 2010]
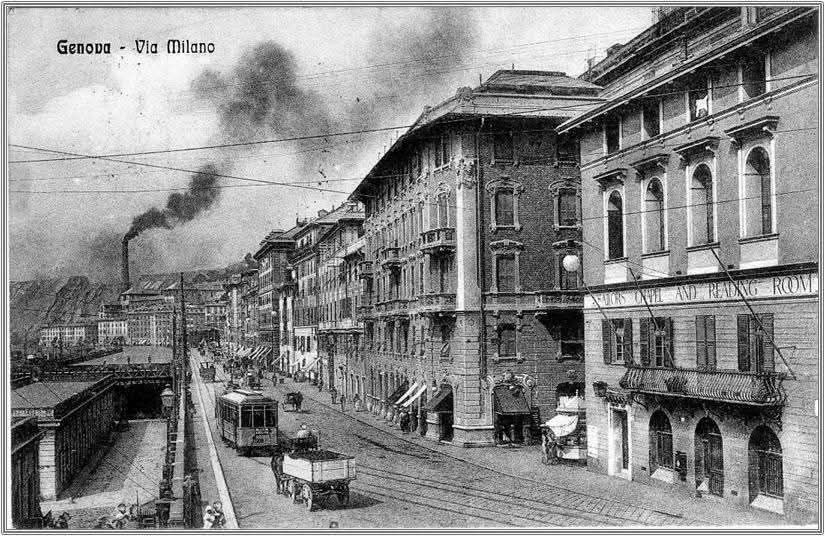
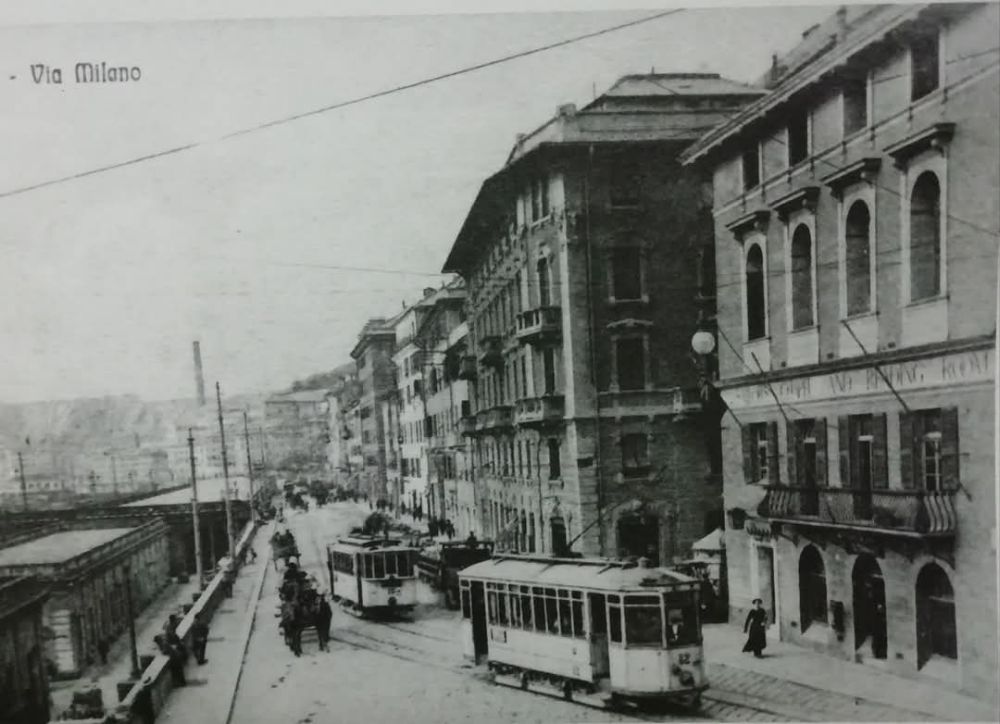
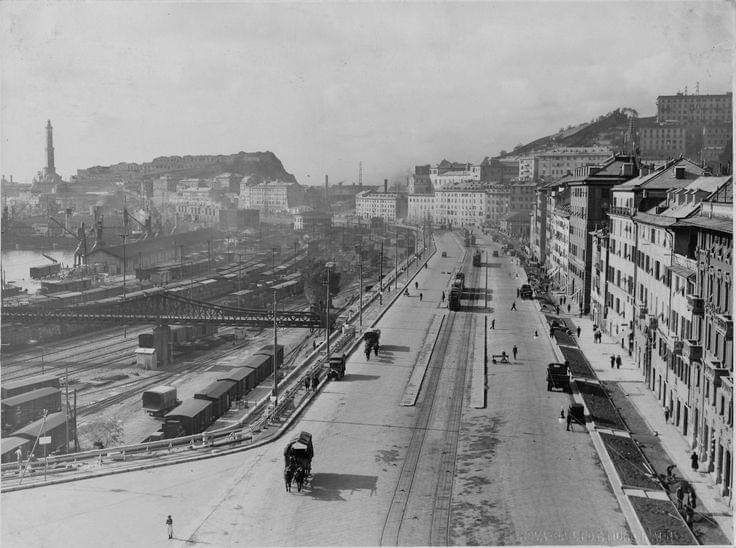
Via Milano (eventually Via Bruno Buozzi) with tram tracks on the seaward side. A promenade separates the FS sidings from the carriageway and trams, © Public Domain. [47]
A view Northeast along Via Milano before the widening of the highway and its renaming as Via Bruno Buozzi. [49]
A later view of Via Milano/Via Bruno Buozzi with tramway tracks in the centre of the widened carriageway, © Public Domain. [46]
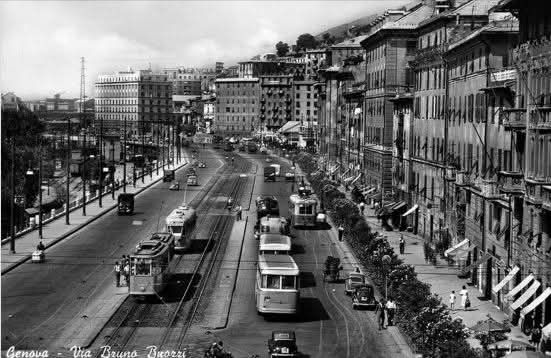
Somewhat later in the 20th century and taken a little further to the West, this postcard image shows the same centre-of-carriageway tracks the section of Via Milano seen here was renamed Via Bruno Buozzi. [45]
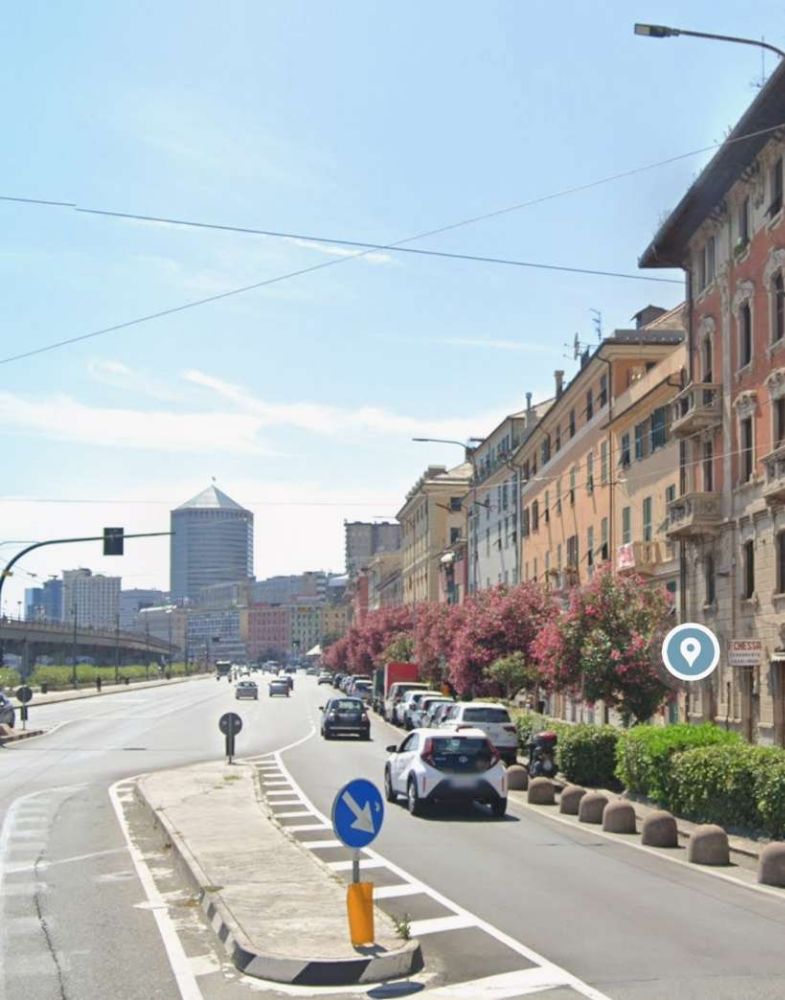
Via Bruno Buozzi in the 21st century. [Google Streetview, August 2024]
This extract from the same 1916 map shows the line of the Galleria which carried the tramway West towards San Pier d’Arena (Sampierdarena). [31]
The view back towards the centre of Genoa from the point where the tramway turned to run through the Galleria under San Benigno Hill, © Public Domain. [48]
It is difficult, given the modern layout of this area of Genoa, to be definitive about the location of the monochrome image immediately above. This image is taken from a very similar position. The skyline at the rear of this image is a very good match for that in the image above.  [Google Streetview, May 2014]
The tramway turned to the right to enter the tunnel under San Benigno Hill. The tunnel portal was beyond the end of the masonry wall behind the steeply inclined accessed road onto the hill. There is no practical modern equivalent to this view, © Public Domain.  [44]

Pictures of the Galleria can be seen earlier in this article.

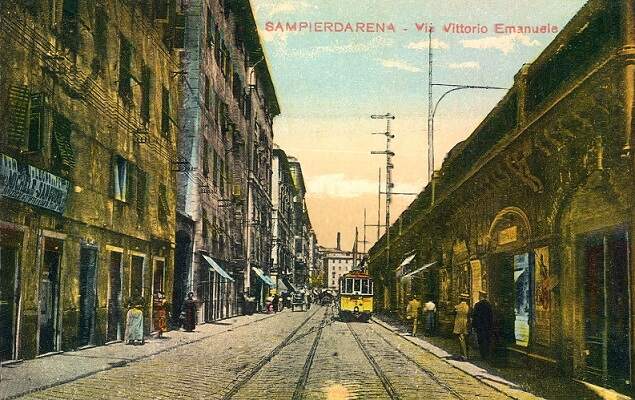
West of the Galleria, the original tramway ran along what is now Via Giacomo Buranello (what was Via Vittorio Emanuele) to Sampierdarena. This route appears to the North of the SS1 on the satellite image below.
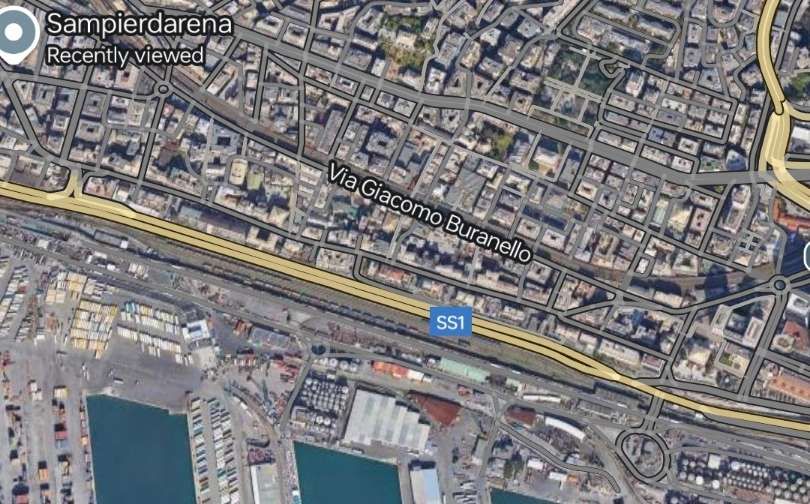
In this extract from Google’s satellite imagery Sampierdarena is marked top left. The modern SS1 runs along the line of what was Via Milano. Careful inspection of this image shows the railway sidings which remain on the South side of the SS1.
Via Vittorio Emanuele (later Via Giacomo Buranello) looking West, (c) Public Domain. [93]
The same view in the 21st century. [Google Streetview, August 2024]
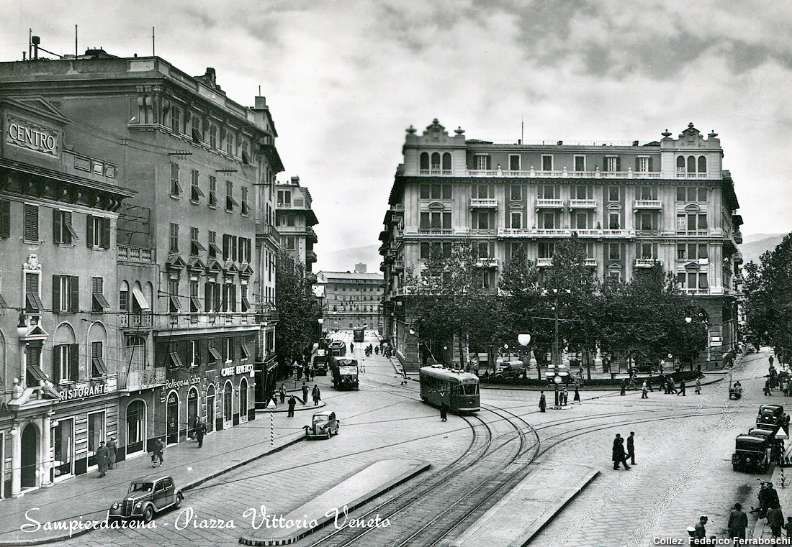
Looking West, Sampierdarena, Piazza Vittorio Veneto. A tram is arriving in the Piazza from the West. It has travelled along Via Cornigliano, © Public Domain. [50]
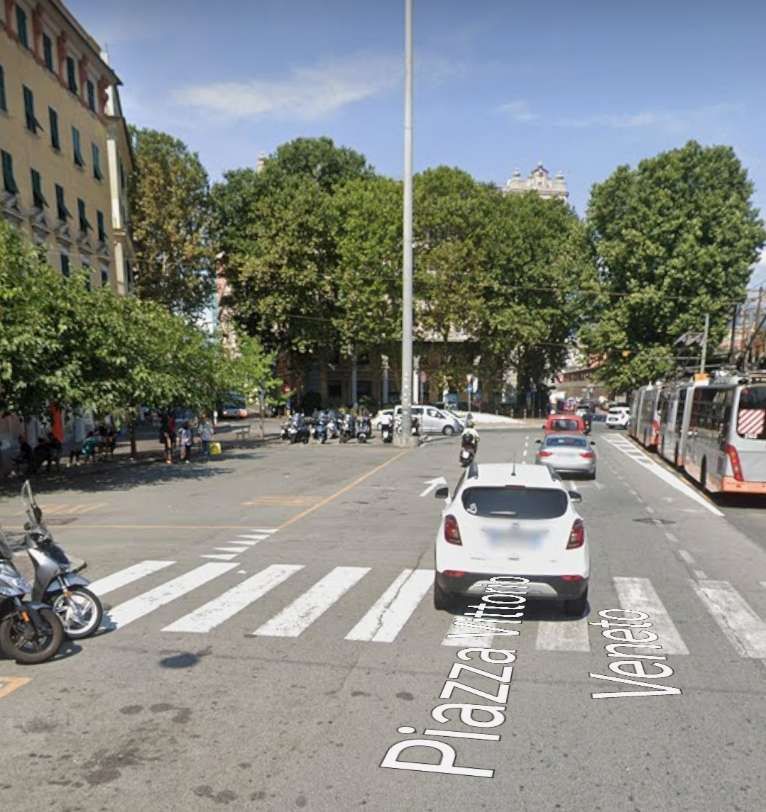
A view of Piazza Vittorio Veneto from a similar bearing, but this time at ground level in 21st century
  Via Cornigliano leaves the Piazza to the left rear. [Google Streetview, August 2024]

Before looking at line further West from Sampierdarena we need to note a line which was added to the network before WW1.

A second tramway was built which ran alongside the railway sidings on what is now the SS1, it was then Via Milano, towards Sampierdarena. The route is illustrated by the mid-20th century view below.
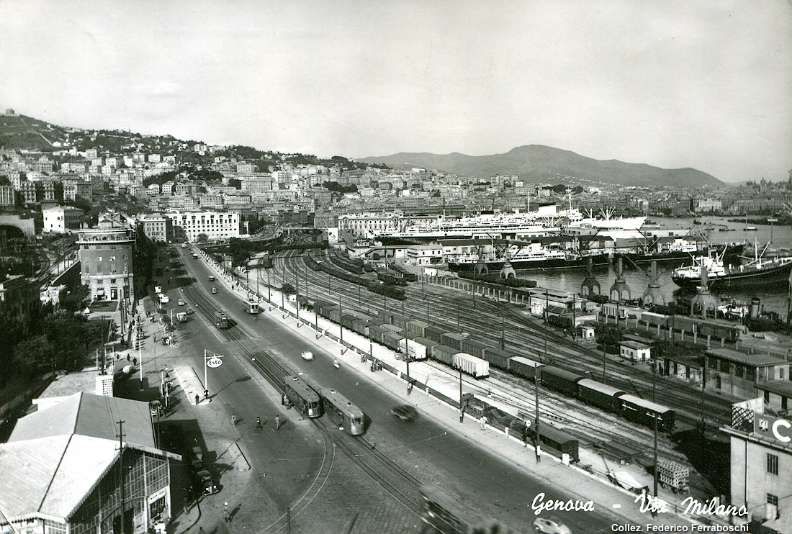
Trams on Via Milano/Via Sampierdarena – in this image, the tracks of the Genoese port can be seen, populated by a range of FS goods wagons. Two 900 UITE units are passing each other on tram tracks which occupy the centre of Via Milano, © Public Domain. [36]
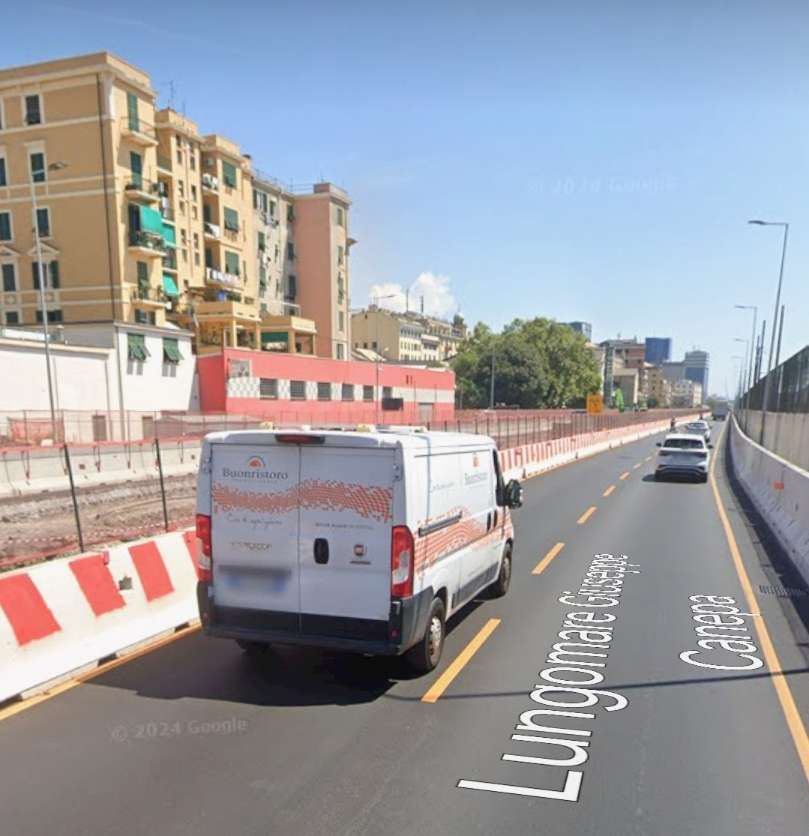
Looking East along the SS1 during some major roadworks. The railway sidings are just off to the right side of the photograph. [Google Streetview, August 2024]

That route along Via Sampierdarena (Via Milano and Via Colombo) and then Via Pacinotti is illustrated at the bottom of the map below. After running along the centre of Via Sampierdarena, trams turned inland, heading Northwest to join the earlier route, West of Piazza Vittorio Veneto on Via Pacinotti.
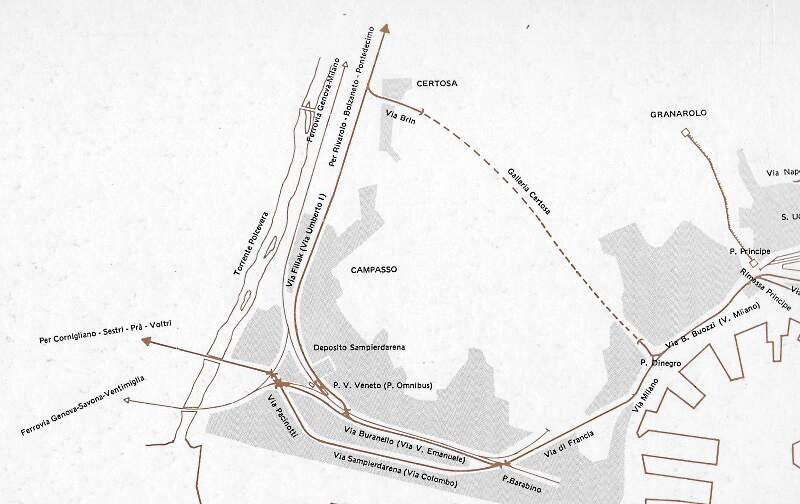
A map provided by the Marklinfan.com Forum which shows the new coastal tram route mentioned above. [92]

The Western Network’s Coastal Line(s)

At Sampierdarena the original lines of the Western network separated. Some lines continuing along the coast and others turning inland. The lines diverged at the West end of Piazza Vittorio Veneto. The coastal line ran along what is today Via Frederico Avio, then turned onto what is now Via Antonio Pacinotti, before turning West on what is now Via Raffaele Pieragostini, crossing the River Polcevera at Ponte di Cornigliano, running along Via Giovanni Ansaldo before joining Via Cornigliano at Piazza Andrea Massena.
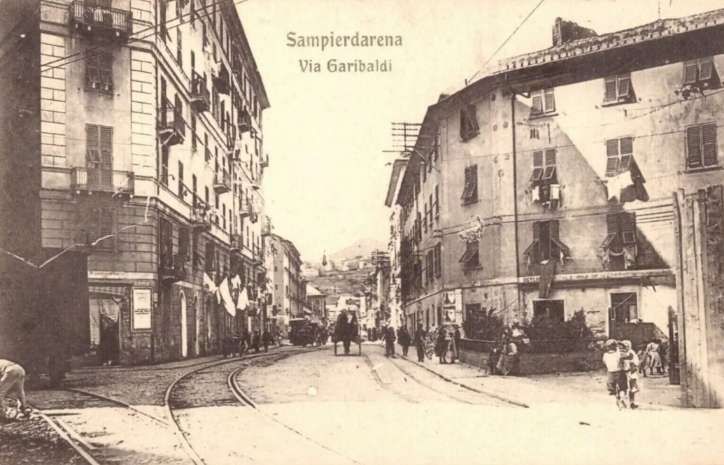
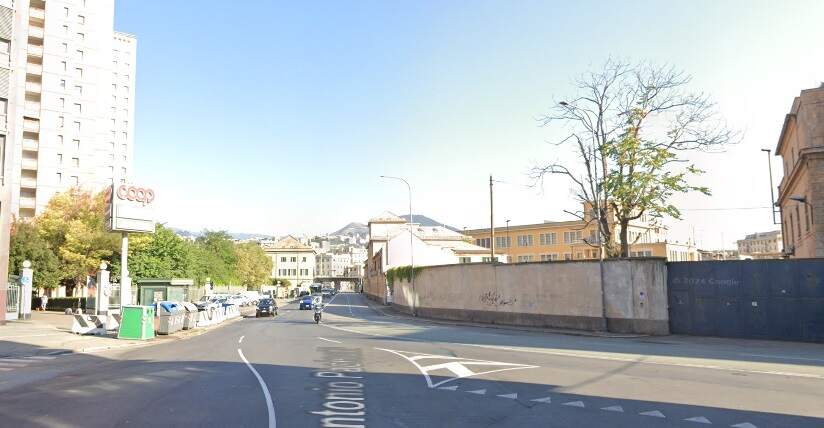
This image shows the tramway at what is now the junction between Via Frederico Avio (entering bottom right) and Via Antonio Pacinotti (which heads away from the camera). At the time this was Via Garibaldi. (c) Public Domain. [61]
The same location in the 21st century. The vacant lot is the location of the building on the right of the monochrome image above. [Google Streetview, August 2024]
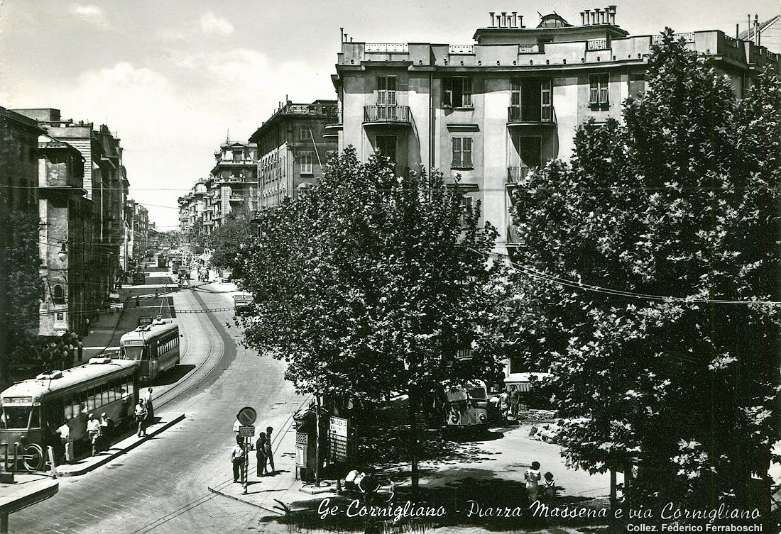
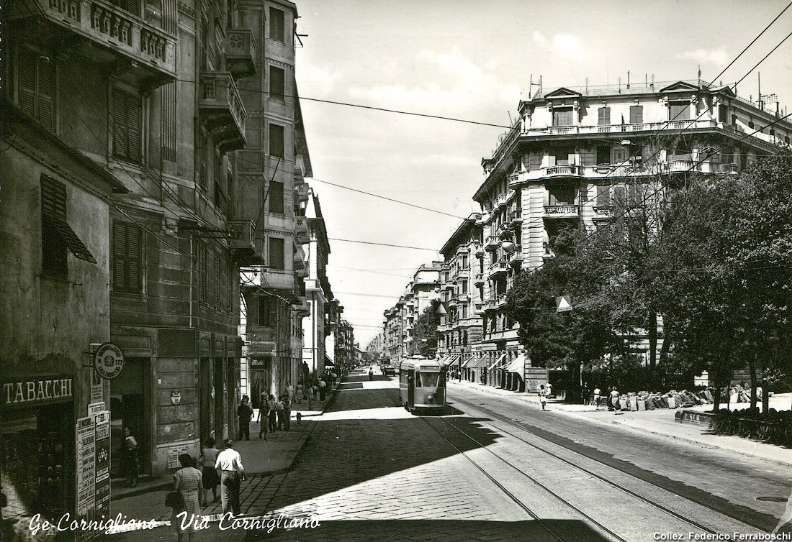
This mid-20th century postcard view shows trams following Via Cornigliano West of Piazza Massena, © Public Domain. [50]
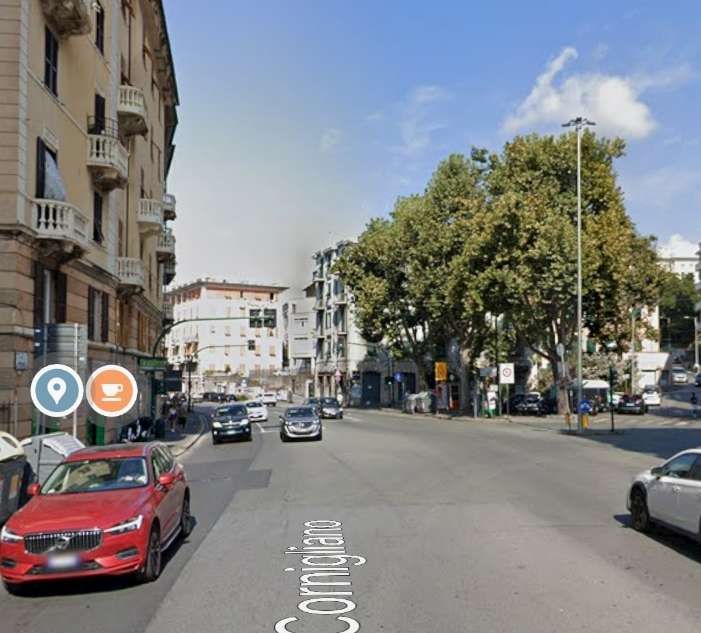
Piazza Massena at the East end of Via Cornigliano as it appears in the 21st century. The tramway followed Via Cornigliano round to the left ahead. [Google Streetview, August 2024]
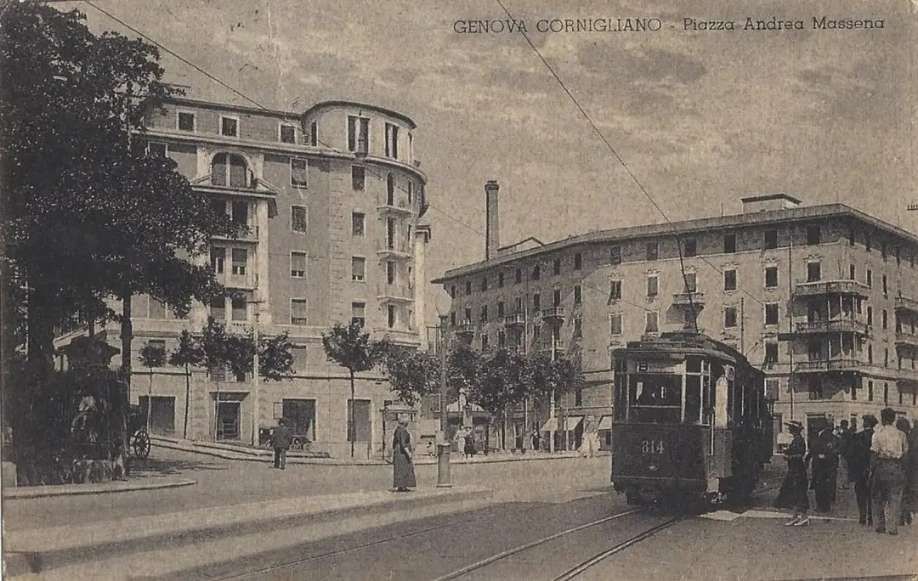
Another view of Piazza Massena in Cornigliano. This image was shared on the C’era una volta Genova Facebook Group by Gianfranco Dell’Oro Bussetti on 8th March 2017, (c) Public Domain. [2]
A similar view of Piazza Massena in 2024. [Google Streetview, August 2024]
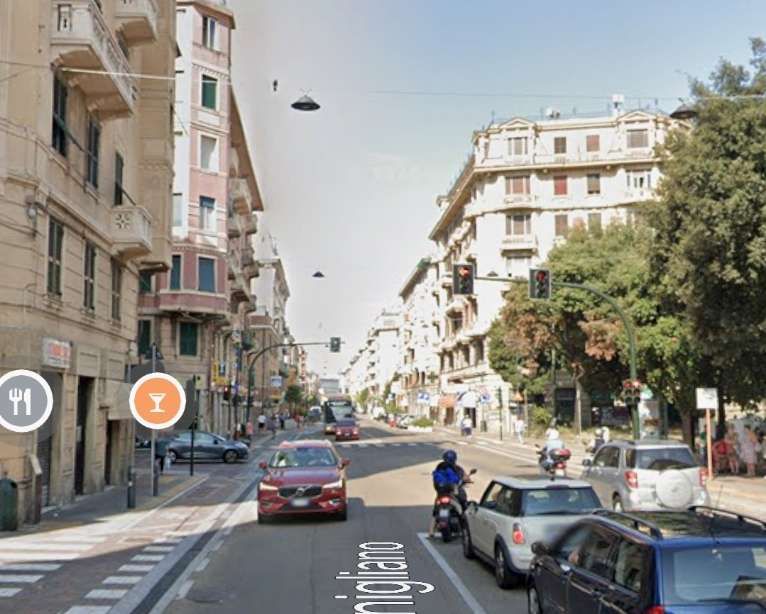
Looking West along Via Cornigliano to the West of San Pier d’Arena (Sampierdarena), © Public Domain. [36]
The same location in the 21st century. [Google Streetview, August 2024]
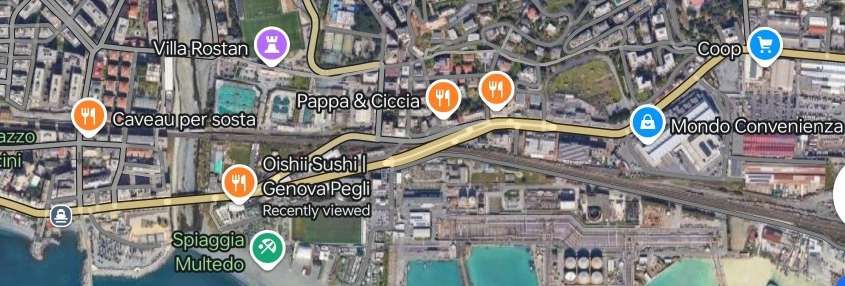
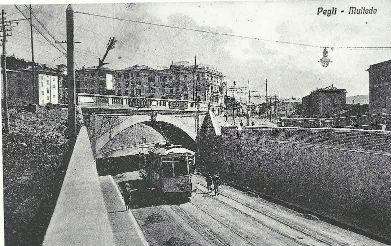
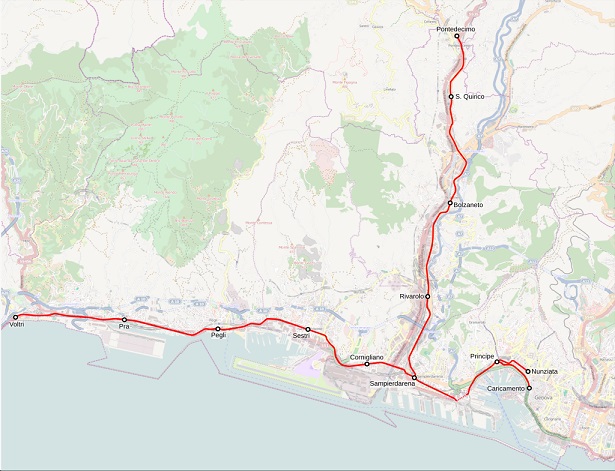
The route West followed the yellow road on this extract from Google Maps satellite imagery. A modern flyover takes the present SS1 over the railway. The original route of the tramway follo
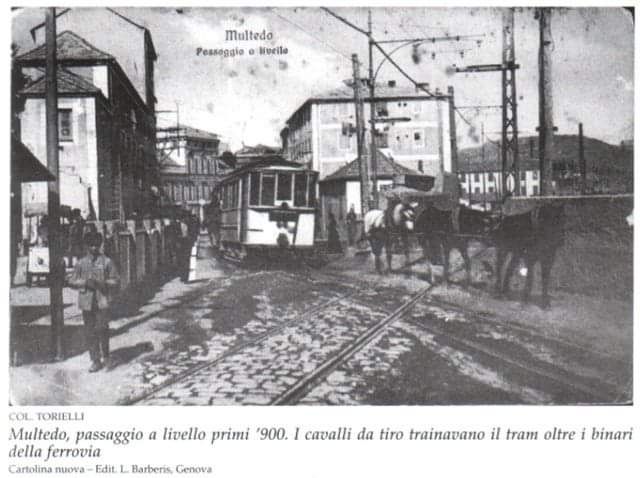
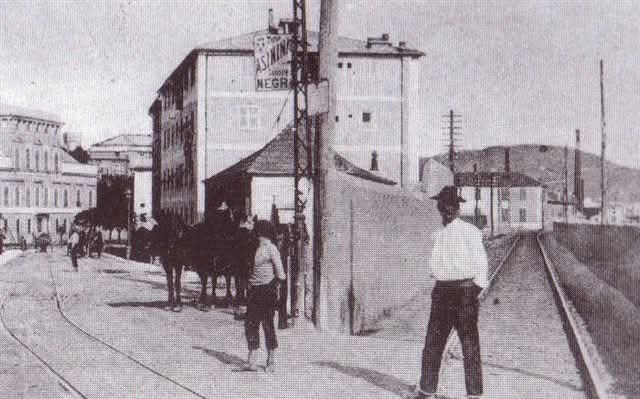
Two images which show the metre-gauge tramway crossing the standard-gauge railway, © Public Domain. [4]
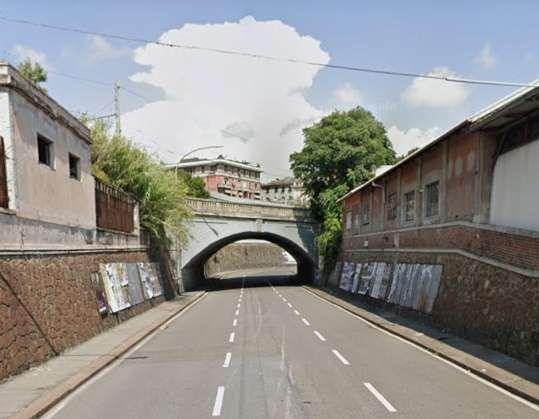
The tramway/road underpass built in the 1930s. A significant amount of excavation was required to take trams under the railway, © Public Domain.[5]
Looking West along the line of the Tramway towards the underpass in the 21st century
Looking back Northeast towards the underpass in the 21st century.[Google Streetview, Aug 2024]
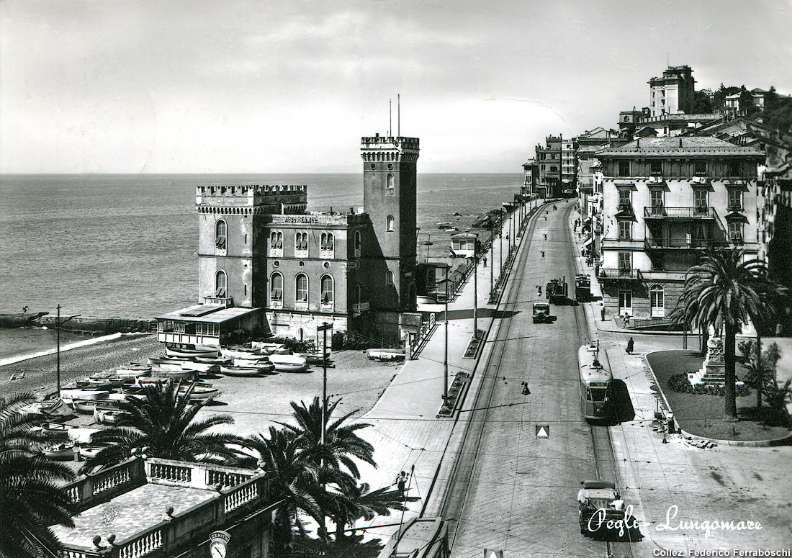
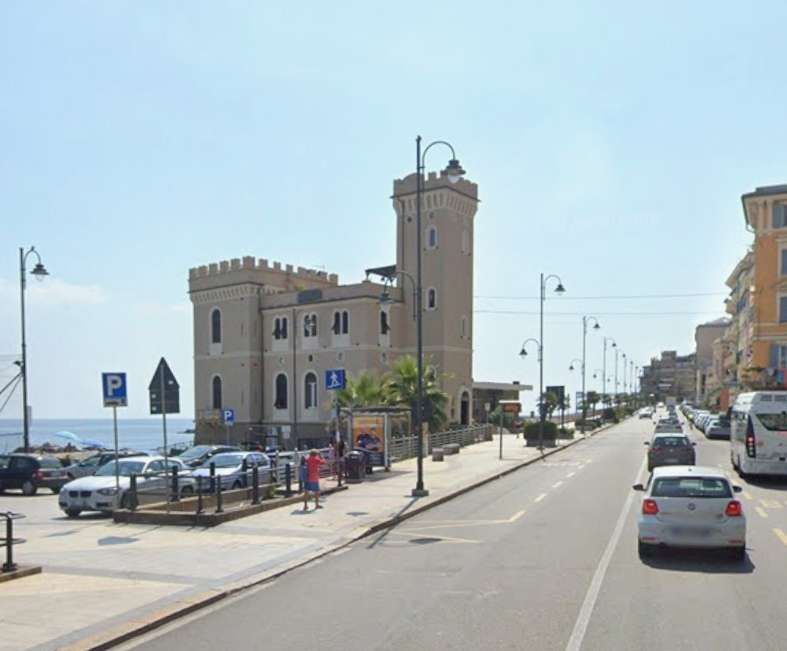
Tram No. 999, the last of the UITE series, is in transit on the Pegli seafront, in service on Line No. 1, Caricamento to Voltri. Miramare Castle is on the sea front. The Castle is in use as a hotel in the 21st century, © Public Domain. [50]
Lungomare di Pegli (SS1) and Miramare Castle in the 21st century. [Google Streetview, August 2024]
This photograph was taken from Miramare Castle. A 900 series tram is heading West and a tram is approaching from the West.  [50]
A similar view, taken from a point a little further to the West, in 21st century
Looking East at Pegli 1925. [58]
At ground level in the 21st century. Looking East from a similar location on the SS1( Via Pegli). [Google Streetview, August 2024]
The terminus of some tram routes at Pegli!, (c) Public Domain. [91]
The same location in the 21st century. [Google Streetview, August 2024]

Beyond Pegli, only Line No. 1 travelled on to Voltri. These next few photographs were taken in Voltri.
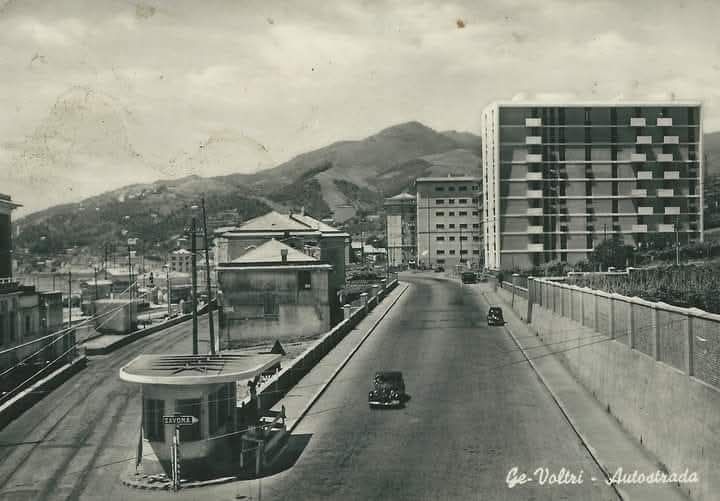
An early view West towards Voltri along Via Voltri. [52]
The same location in the 21st century. [Google Streetview, August 2024]
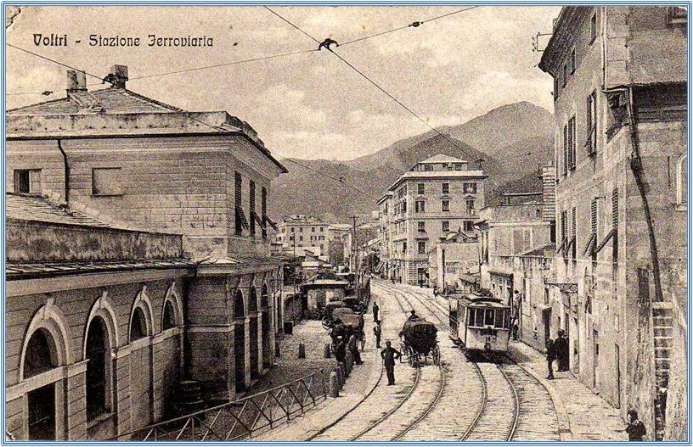
The tramway outside Voltri Railway Station, © Public Domain. [60]
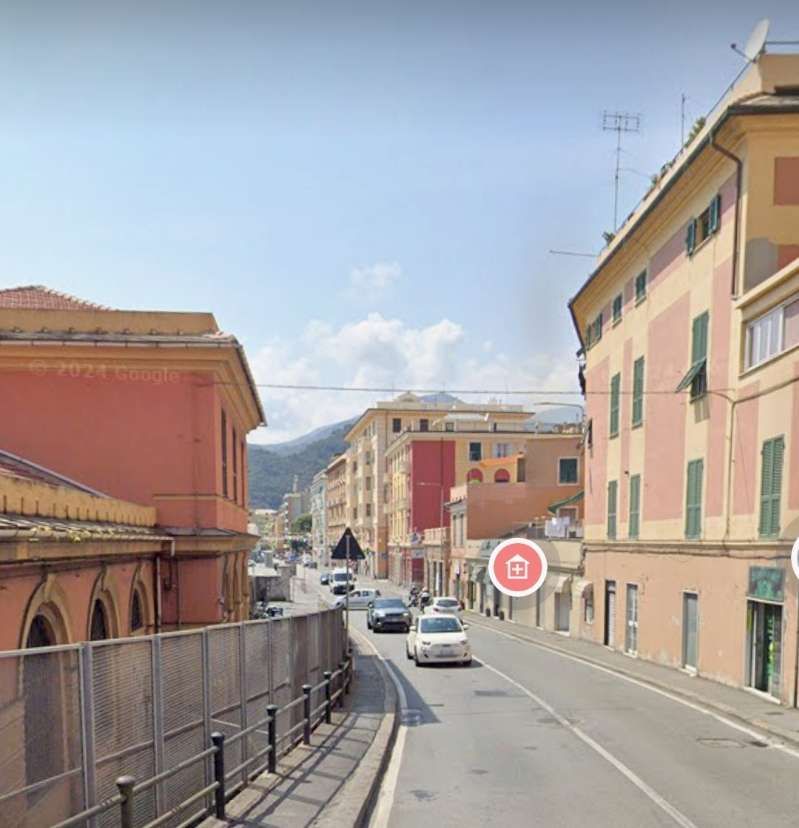
The same location in the 21st century. [Google Streetview, August 2024]
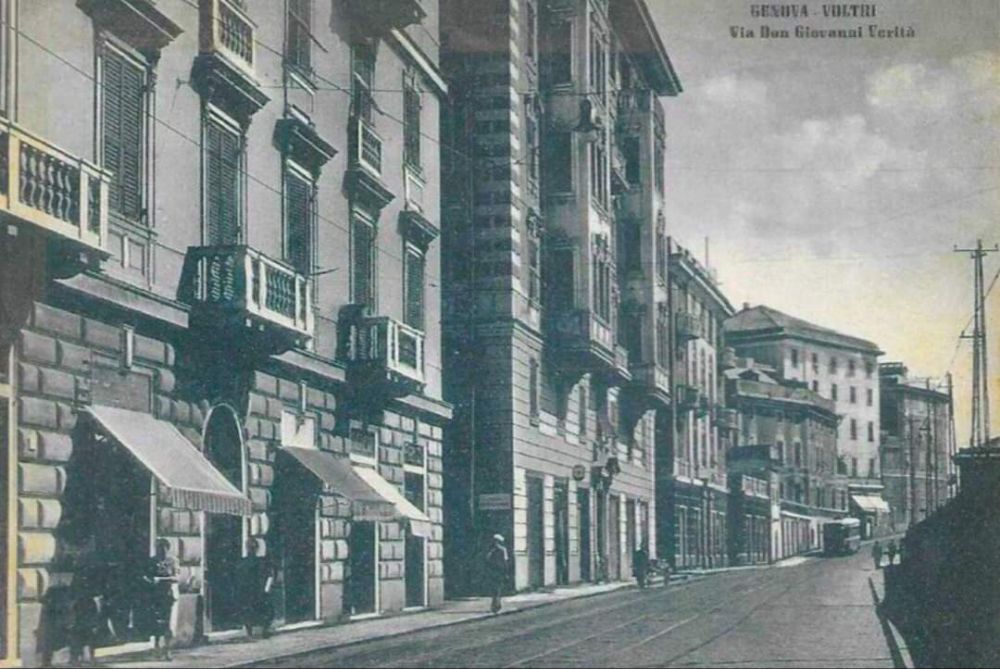
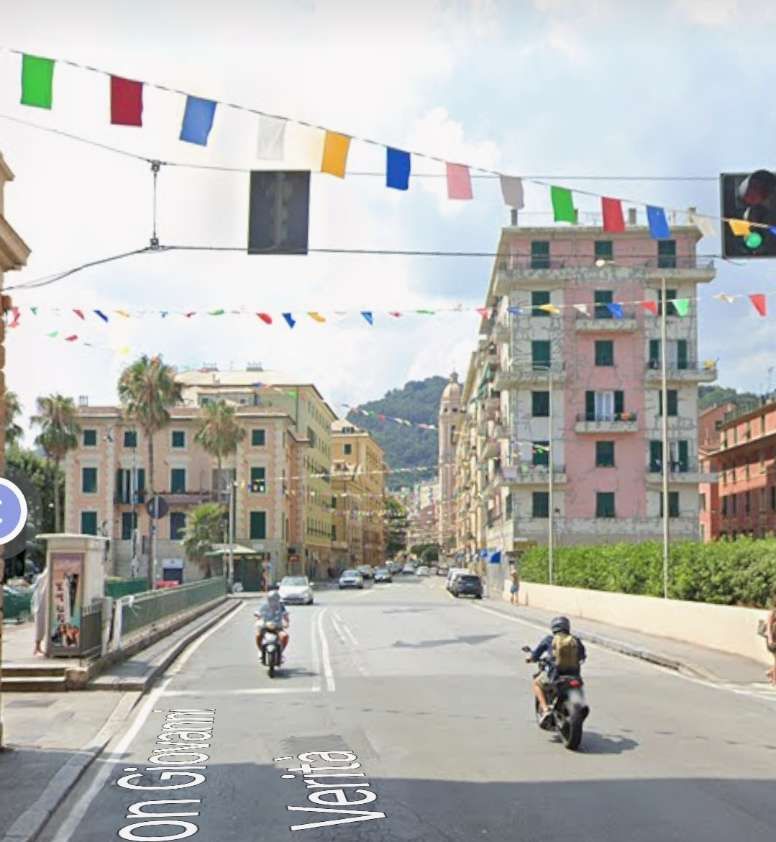
Looking East along Via Dom Giovanni Verita towards Genova, © Public Domain. [51]
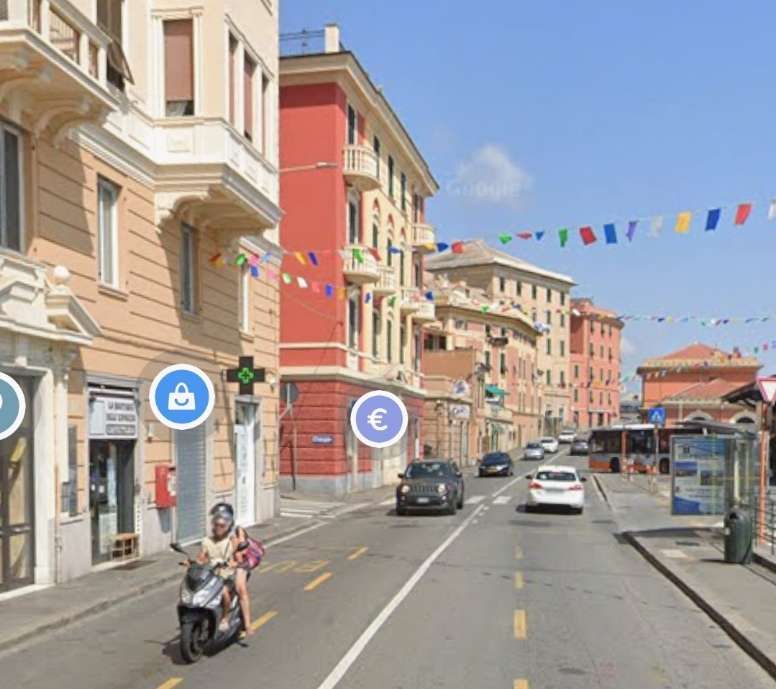
The same location in 21st century. The station building can be seen on the right of the image. [Google Streetview, August 2024
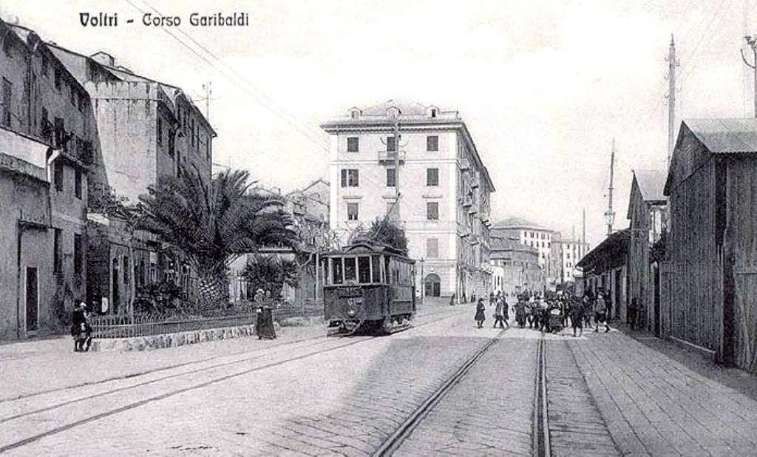
Back in the day, Via Dom Giovanni Verita was Corsa Garibaldi. This view looks East along the road towards the railway station. The buildings in the distance match those in the two images above., © Public Domain. [43]
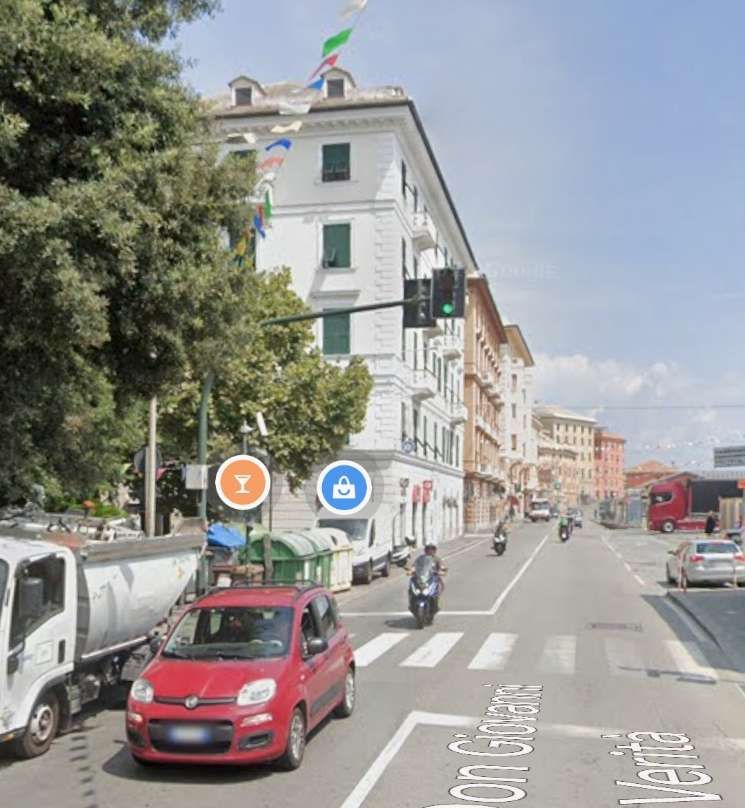
Looking West on Via Dom Giovanni Verita, the station building is just beyond the red lorry cab. The three roofs of the furthest buildings are the same as those in the three images above. [Google Streetview, August 2024]
Looking West across the bridge on Don Giovanni Verita, Voltri, early in the 20th century, © Public Domain. [54]
The same location, looking West. [Google Streetview, August 2024]
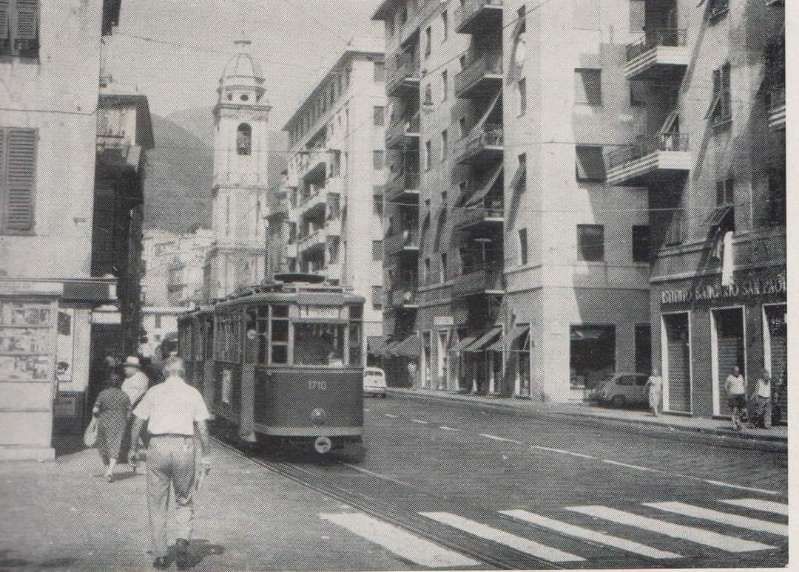
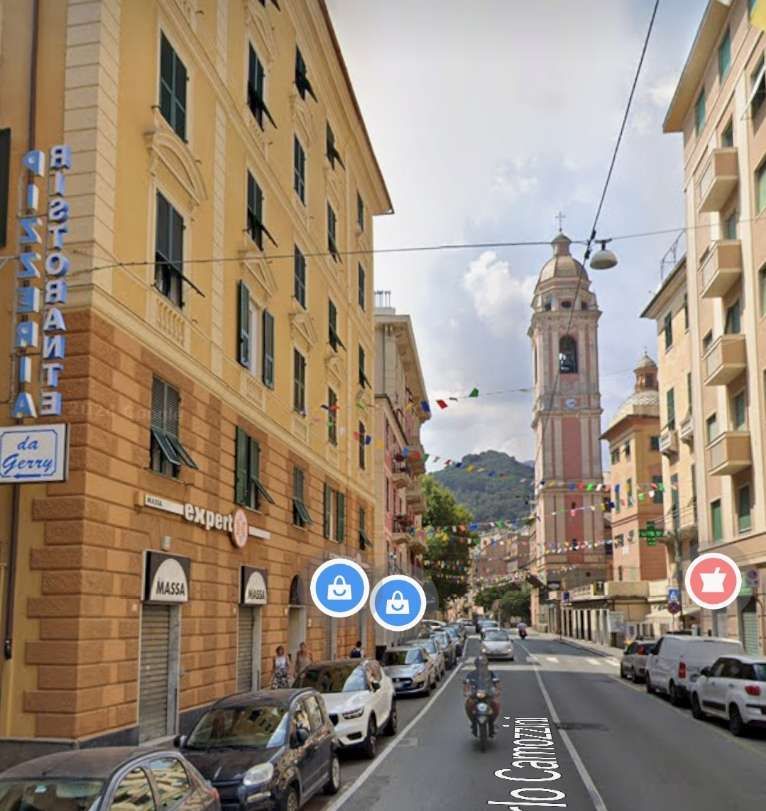
Looking West along Via Carlo Camozzini, Voltri in the mid-20th century, © Public Domain. [57]
Looking West from a very similar location on Via Carlo Camozzini. [Google Streetview, August 2024]

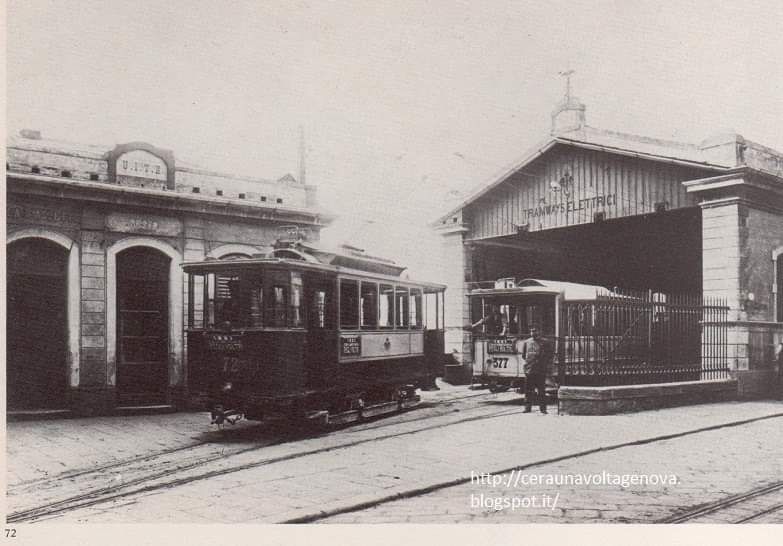
The tram depot was in Voltri close to the mouth of the River Cerusa (below).
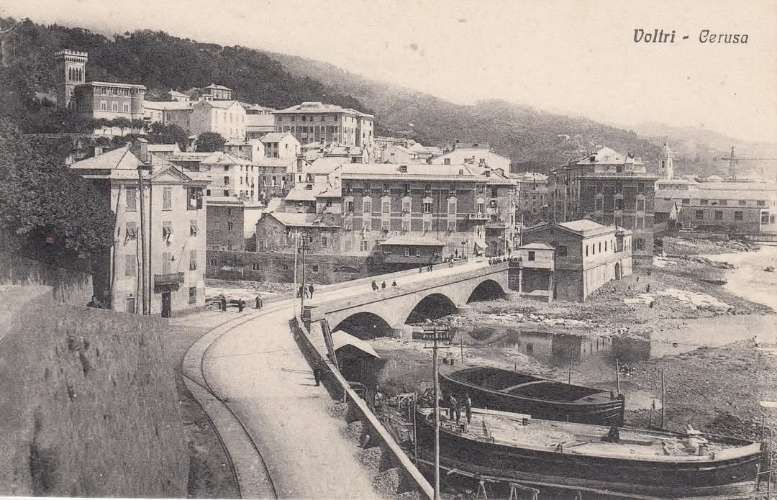
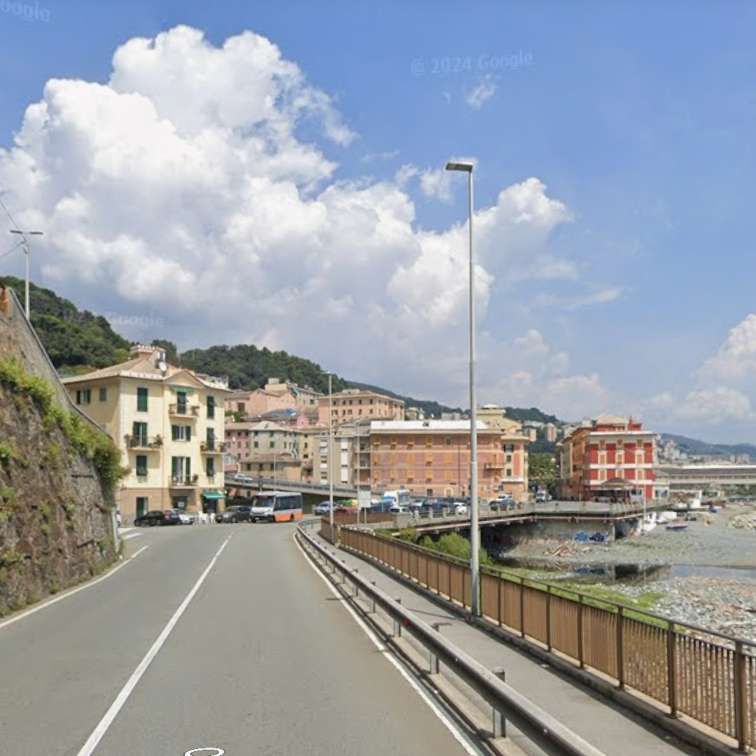
The bridge in this image spans the mouth of the Cerusa River. The photograph looks East towards Genoa. The building just beyond the river on a platform above the beach is the Tram Depot. There are clearly tram tracks running towards the camera which suggests that the line’s terminus was to the West of the Cerusa River. [56]
The same view in the 21st century. [Google Streetview, August 2024]
The tram depot in Voltri seen from the Northeast. The bridge over the River Cerusa is off to the right o, © Public Domain. [55]

We have followed the Western Network as far as we can along the coast. We now need to look at the line(s) of the Western network which ran up the valley of the River Polcevera from Sampierdarena.

To do this we need to return to Piazza Vittorio Veneto in Sampierdarena.

The Western Network and Val Polcevera (the Valley of the River Polcevera)

The lines to the North left Piazza Vittorio Veneto at its Western end, passing immediately through an underpass under the FS Standard Gauge railway.

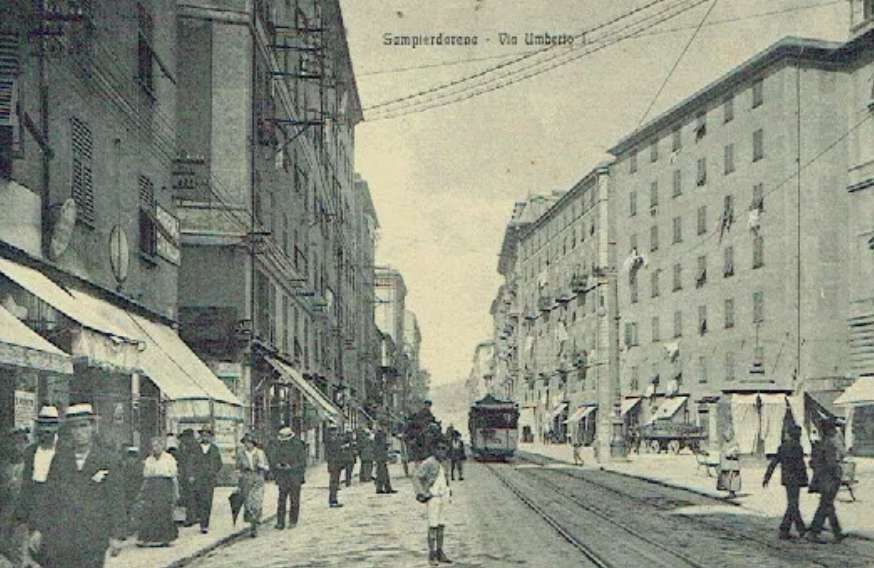
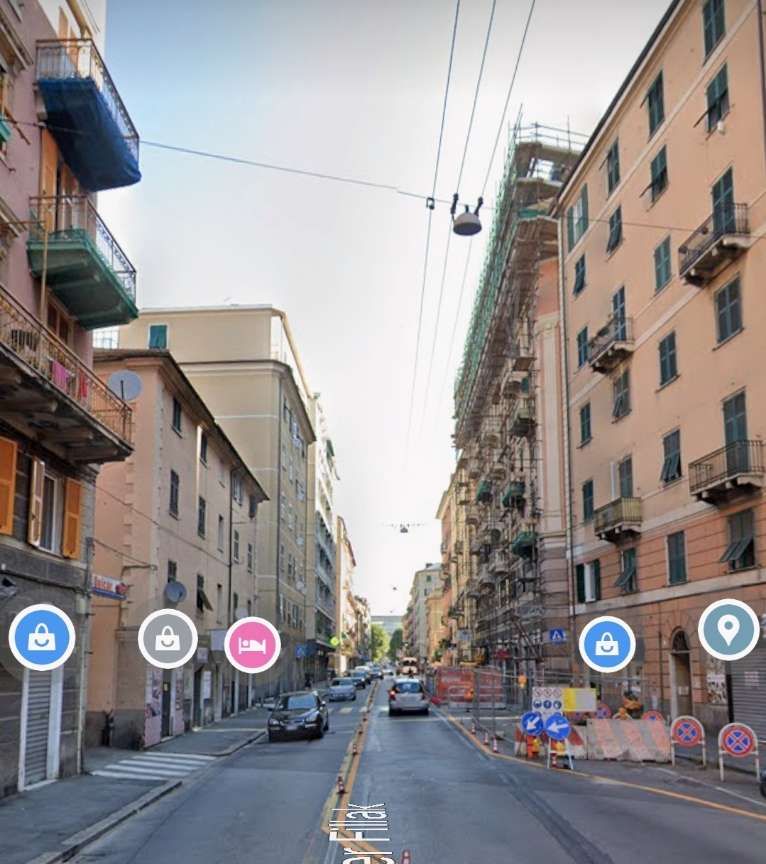
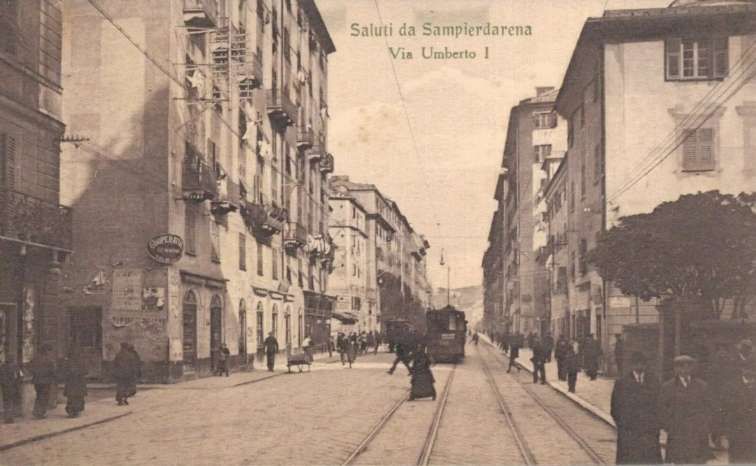
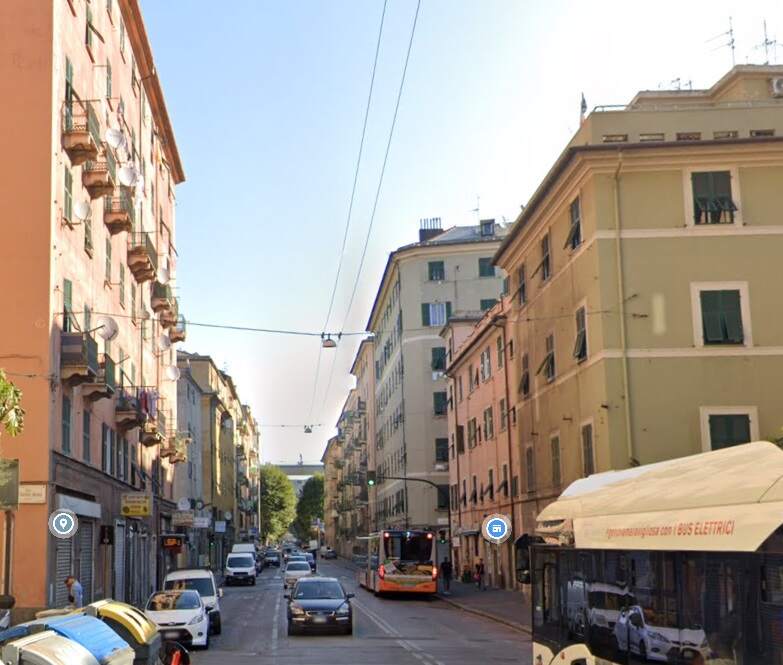
In the 19th century the route was known as ‘Via Vittorio Emanuele’. In the early years of the 20th century the road was renamed ‘Via Umberto 1’. In 1935, the city gave the road the name ‘Via Milite Ignoto’ (the Unknown Soldier). This decision appears to have been short-live as very soon the road was divided into two lengths, the more southerly length becoming ‘Via Martiri Fascisti’, the remaining length, ‘Via delle Corporazioni’. After the end of Word War Two renaming again occurred. In 1945 the names which continue to be used in the 21st century were chosen – ‘Via Paolo Reti’ and ‘Via Walter Fillak ‘. Fillak and Reti were partisans in WW2. [59][66]
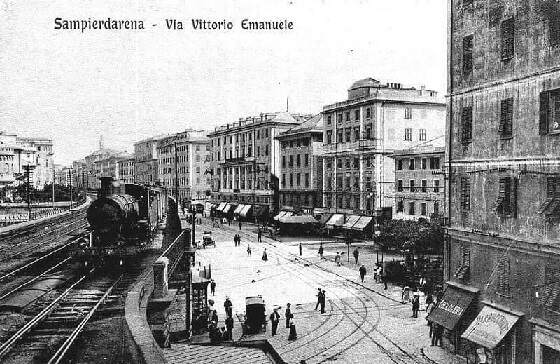
A view from above … This is Piazza (Via) Vittorio Emanuele seen from the West. The tram tracks can be seen heading away through the underpass in the foreground. [75]

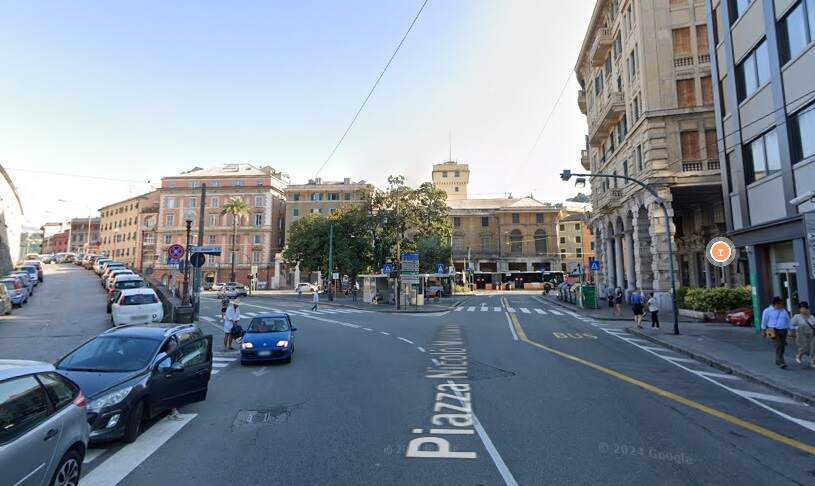
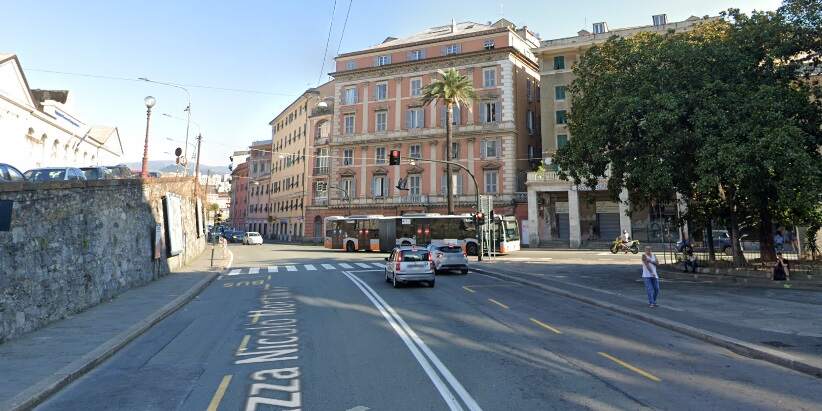
The route of this part of the old tramway network begins at this rail underpass (where the street is now named, ‘Piazza Nicolo Montano’, having once been Via Nino Bixio), [65] before running along Via Paolo Reti and then Via Walter Fillak. Just beyond the underpass the railway station access left the road on the left. The first old postcard views below show this location.
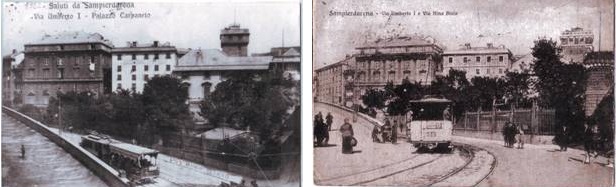
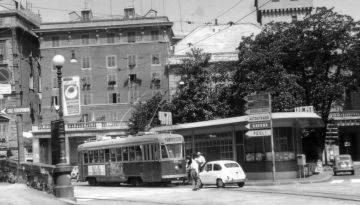
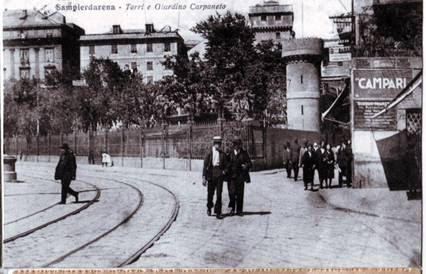
Two pixelated, low definition images showing the bottom end of what was Via Umberto 1. One the left in both images is the incline leading to the Sampierdarena Railway Station forecourt. [59]
A tram sits at a stop at Piazza Montano. This image was shared on the Foto Genova Antica Facebook Group by Annamaria Patti on 22nd May 2022. [3]
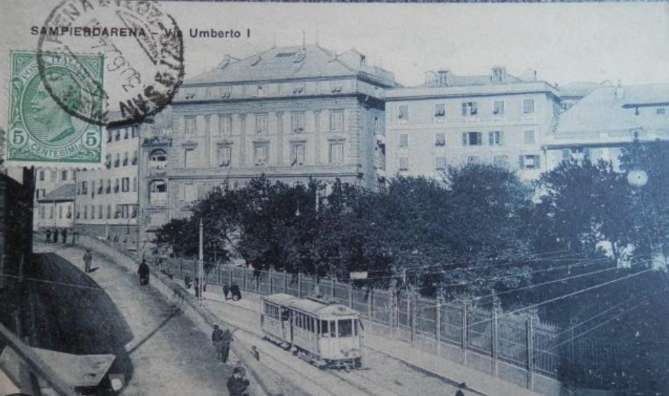
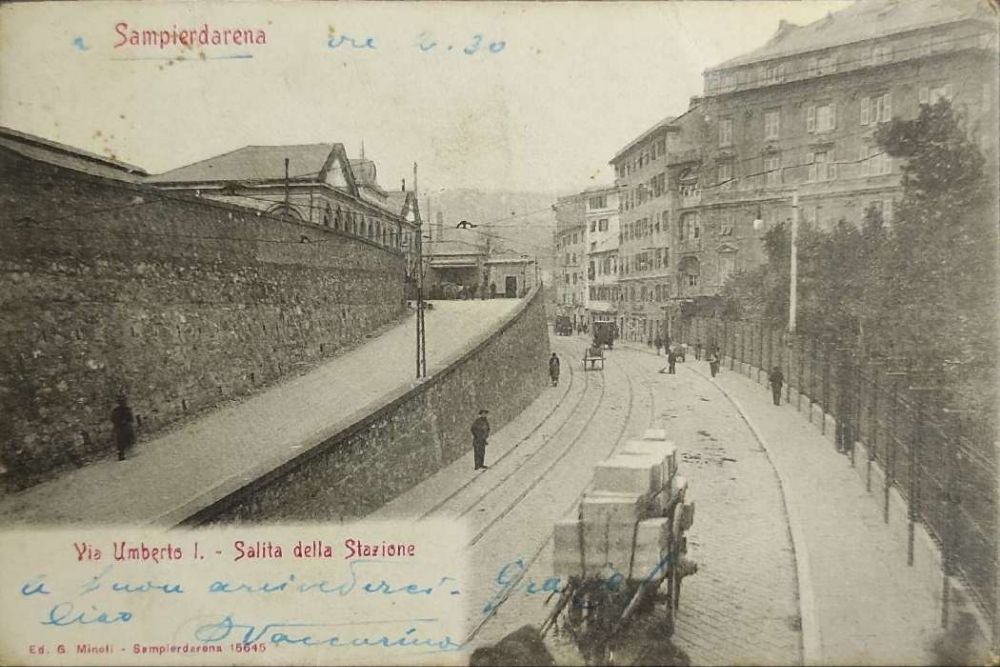
Three further postcard views, of better quality, of the bottom end of Via Umberto 1, (c) Public Domain. [59][62][63]
The view to the Northeast from the rail underpass in 2024. The station approach is on the left. The old tramway curved round to the left below the station approach’s retaining wall. [Google Streetview, August 2024]
Just a little further along the old tram route. The retaining wall on the left supports the station approach road. The tramway ran on along what is now Via Paolo Reti. For some distance the road was flanked by a retaining wall supporting the FS standard-gauge railway. [Google Streetview, August 2024]

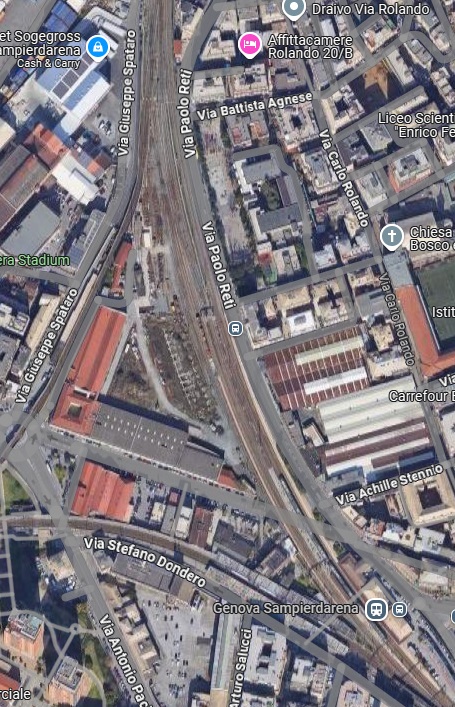
The adjacent Google satellite image shows roads over which the old tramway ran. In the bottom right is Piazza Nicolo Montano. It is also possible to make out the station approach ramp which has a number of cars parked on it. In the immediate vicinity of the passenger railway station, railway buildings can be seen separating Via Paolo Reti from the railway but very soon the road and the railway run side-by-side with the railway perhaps 2 to 3 metres above the road. Via Eustachio Degola passes under the railway just to the North of the station buildings. Towards the top of the satellite image, Via Paolo Reti can be seen turning away from the railway wall. [Google Maps, December 2024]
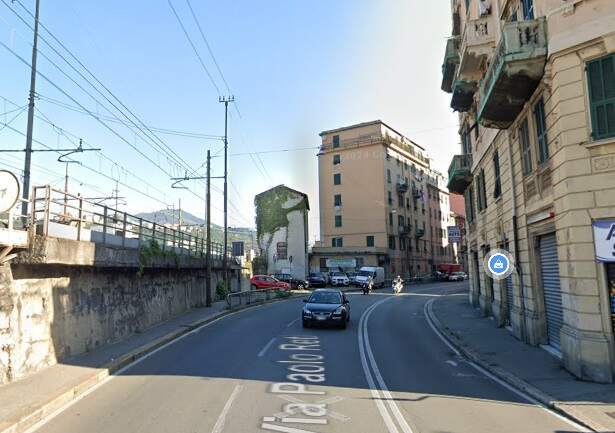
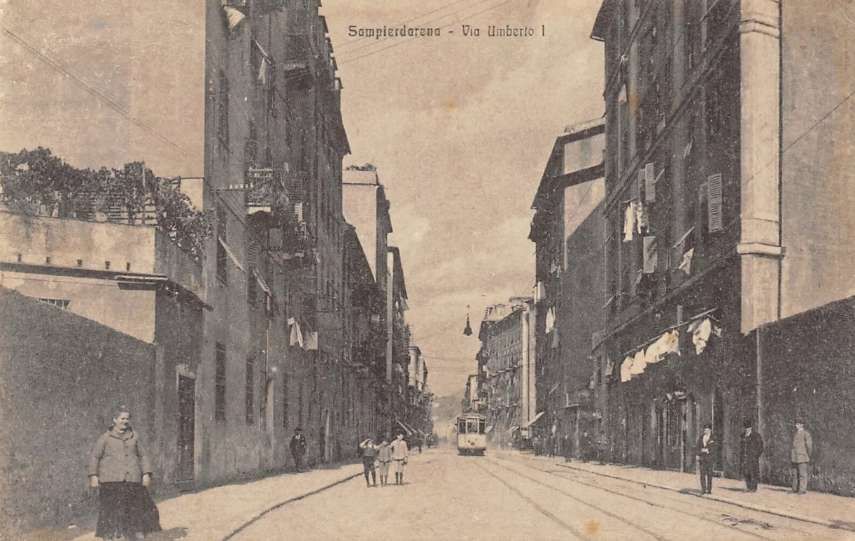
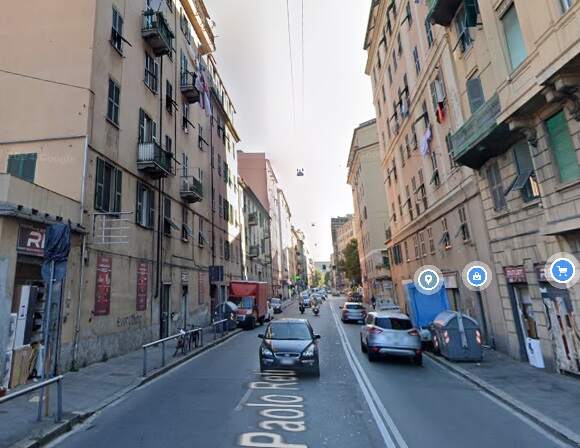
Via Paolo Reti (the former Via Umberto 1) turns away from the railway wall which is now much lower than it was near the station buildings. [Google Streetview, August 2024]
Via Umberto 1, looking North from the bend visible in the photograph above where the road leaves the side of the railway, (c) Public Domain. [68]
Via Paolo Reti (once Via Umberto 1) at the same location as the monochrome image above. [Google Streetview, August 2024]

The monochrome image below purports to show Piazza San Marino. As far as I can work out the piazza was historically, ‘Piazza Vittorio Emanuele III’ and later renamed for another partisan from World War 2 – ‘Piazza Ricardo Masnata’.
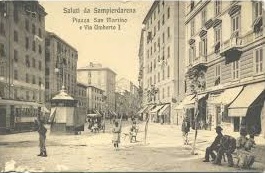
A relatively low quality image of Piazza San Marino and Via Umberto 1. The piazza later became Piazza Ricardo Masnata. This view looks North with a tram visible on the left, (c) Public Domain. [64]
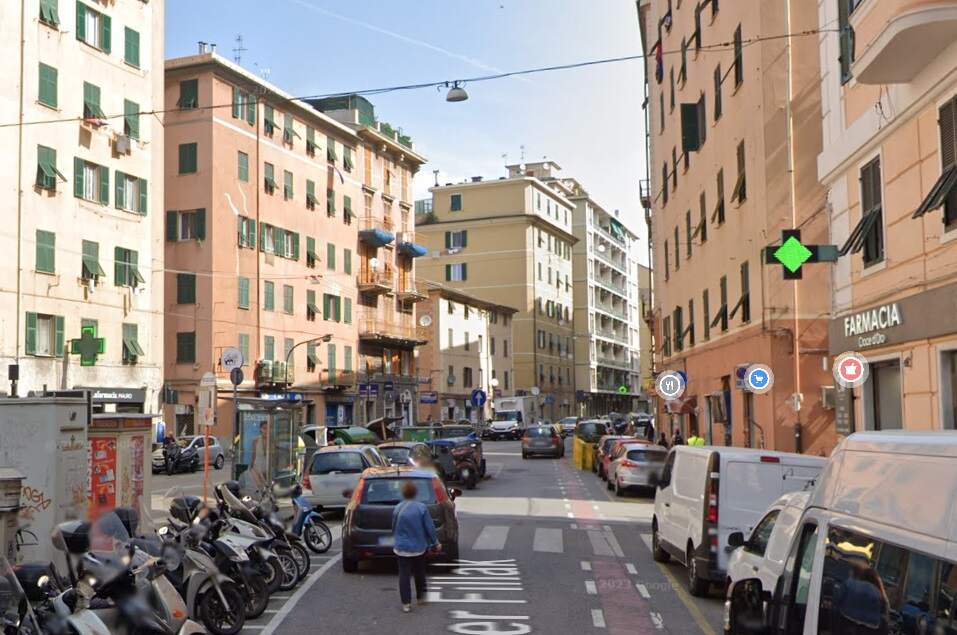
Piazza Ricardo Masnata, looking North. There is little to link this image from 2024 with the monochrome image above, other than the alignment of the roads and the shape of the piazza. However, at the centre of this image is a lower building which also appears in the monochrome image. [Google Streetview, August 2024]
Via Umberto 1 looking North from what became Piazza Ricardo Masnata, (c) Public Domain. [67]
The same location in the 21st century. [G
Via Umberto 1, now Via Walter Fillak with a tram heading towards Genoa. [69]
The same location on Via Walter Fillak in the 21st century. [Google Streetview, August 2024]

The line from Sampierdarena ran towards Certosa where, once Galleria Certosa was completed, it met the line through the tunnel.
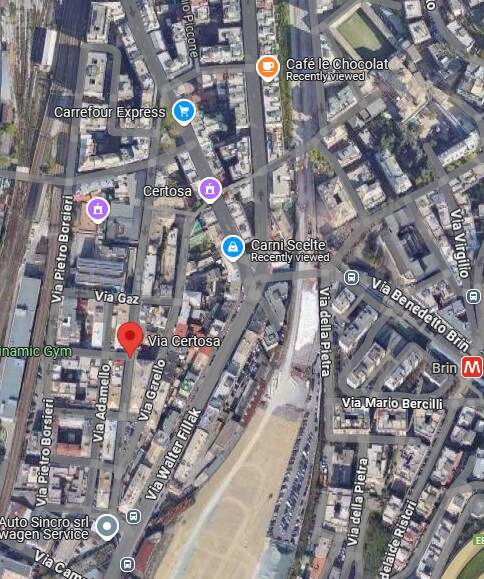
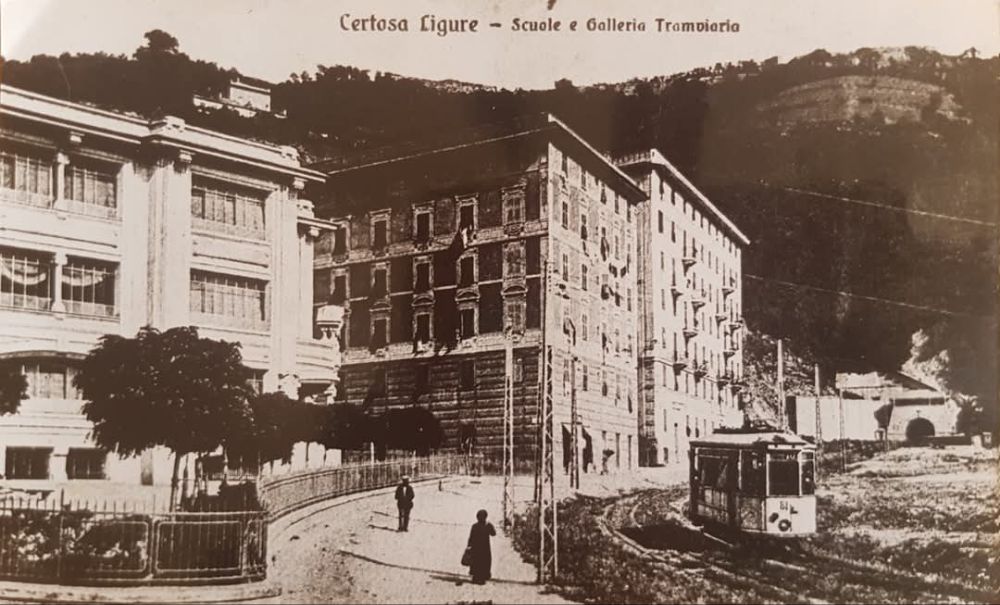
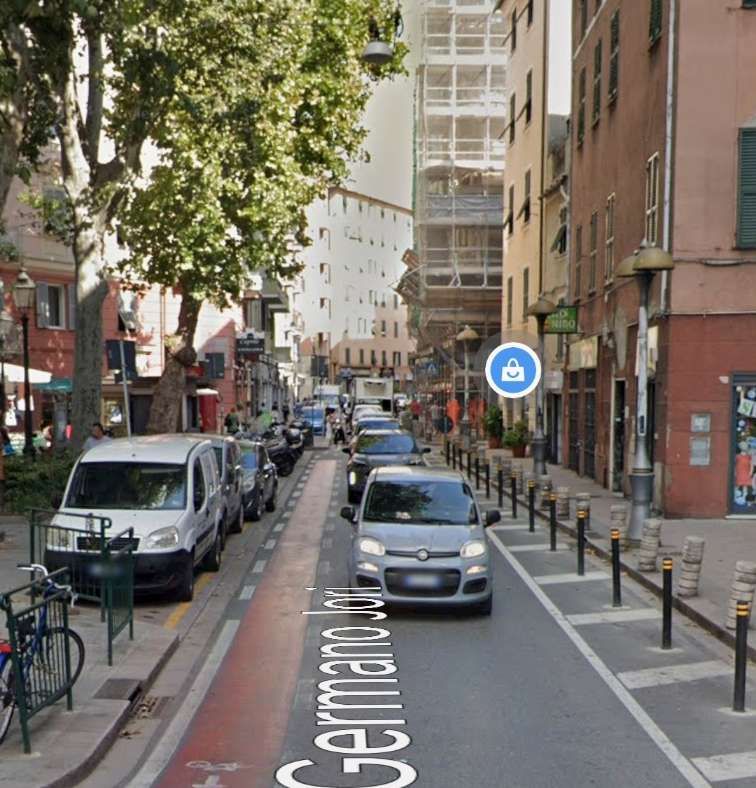
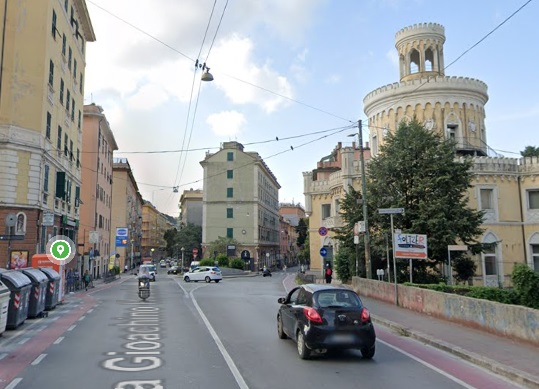
A satellite view of Certosa. Trams approached the centre of Certosa from the South-southwest on Via Walter Fillak, from the Southeast on Via Beedetto Brin and from the Northnorthwest on Via Germano Jori. [Google Maps, December 2024]
Galleria Certosa can be seen in the right background of this image. The tram is turning towards the underpass beneath the FS standard-gauge railway, © Public Domain. [72]
A similar view in the 21st century. The Metro station at Brin is at the high level. [Google Streetview, October 2020]
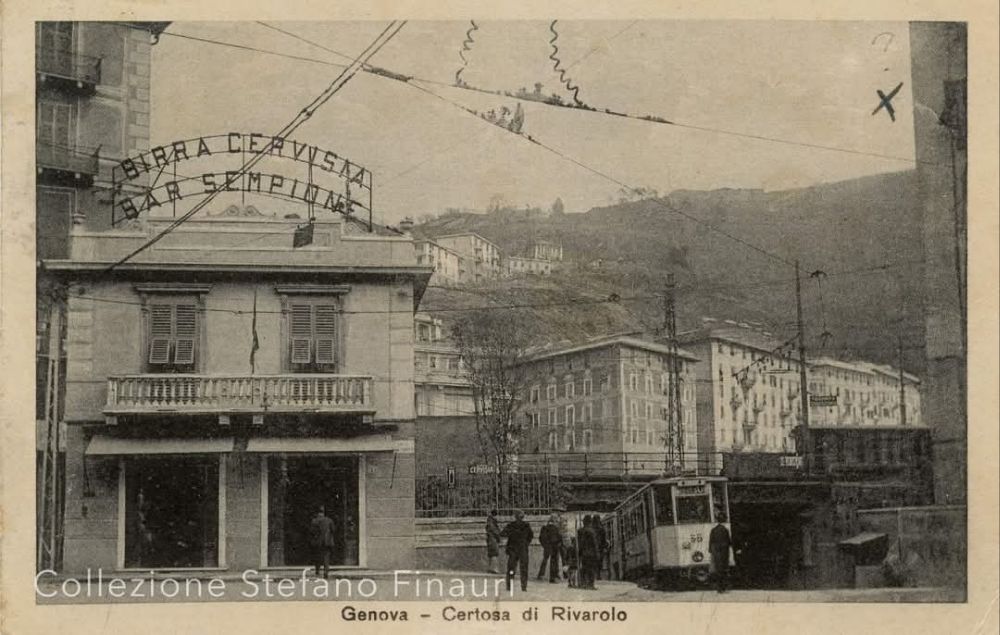
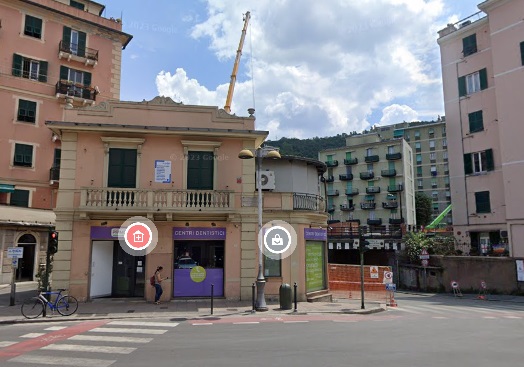
A tram has just passed under the railway (on Via Benedetto Brin) and is approaching the junction with Via Germano Jori (then Umberto 1) and Via Teresio Mario Canepari, © Collection of Stefano Finauri, Public Domain. [73]
A very similar view in the 21st century. [Google Streetview, August 2024]
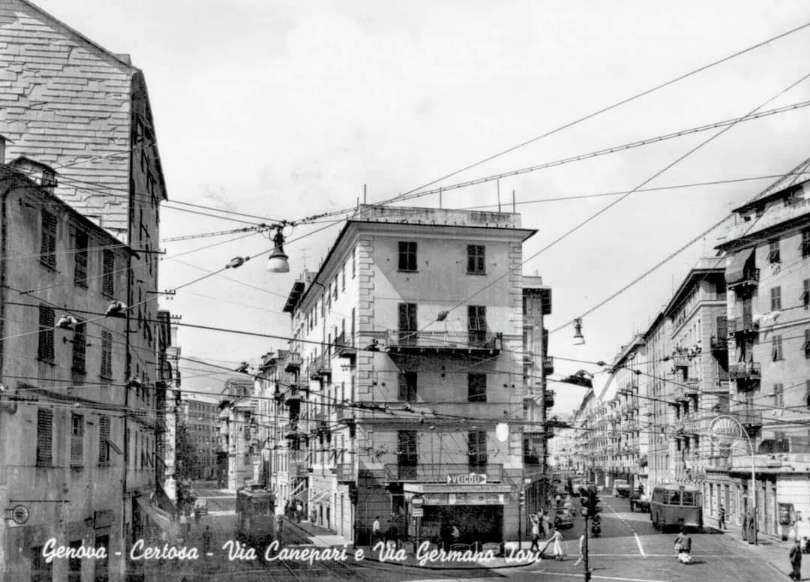
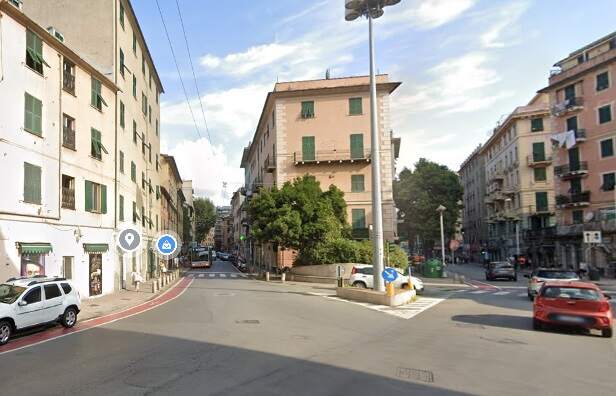
A mid-20th century postcard view, looking North from junction between Via Germano Jori and Via Teresio Mario Canepari. A tram is heading South along Via Germano Jori, © Public Domain. []
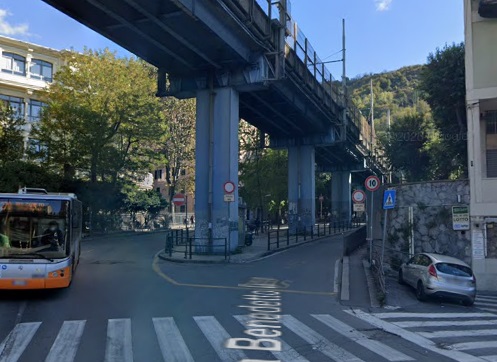
The same view in the 21st century, at the junction of Via Germano Jori, Via Teresio Mario Canepari and Via Benedetto Brin. [Google Streetview, August 2024]
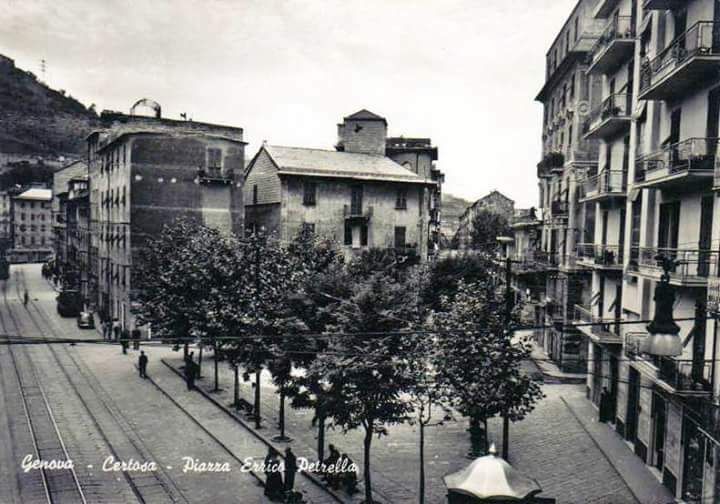
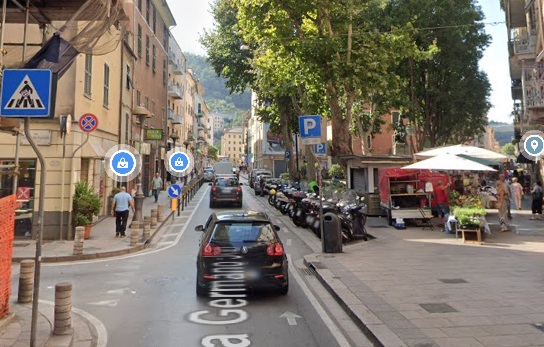
Piazza Errico Petrella looking South, Via Germaon Jori is on the left, Via Certosa on the right. A tram can be seen in the distance at the junction of Via Germano Jori with Via Benedetto Brin and Via Walter Fillak. [74]
Looking South from Piazza Errico Petrella with Via Germano Jori ahead and Via Certosa behind the white canopies to the right. [Google Streetview, August 2024]
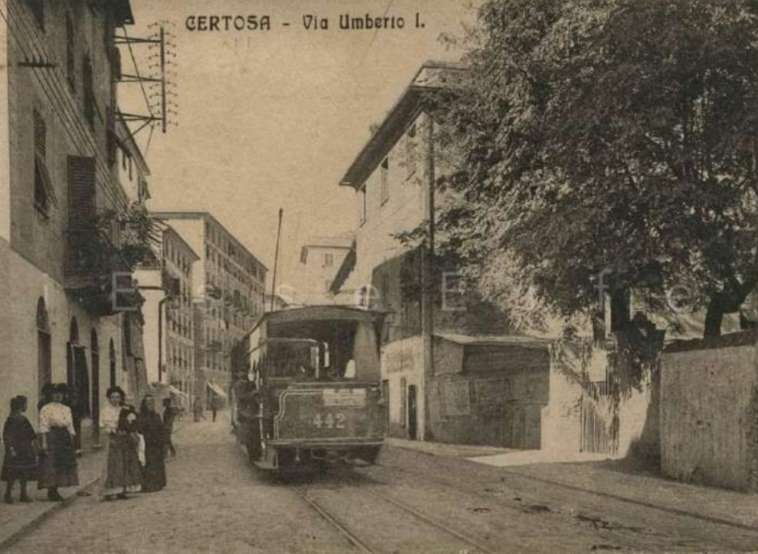
A tram on Via Umberto 1 in Certosa. It is difficult to locate this photograph in the 21st century as much of the built environment has changed but it is most likely a view North from Piazza Errico Petrella, © Public Domain. [53]
This is a possible location for the monochrome image above. This view looks North from Piazza Errico Petrella, the street geometry is similar, but the buildings do not match. In Certosa, northbound and southbound traffic is separated. This is Via Germano Jori. [Google Streetview, August 2024]
Looking South from the bridge over the River Torbella. The building on the right is the
Biblioteca Civica – Cervetto Rivarolo. Trams ran over this bridge and along Via Germano Jori which is the right fork in the road ahead. [Google Streetview, August 2024]
Looking North from the bridge over the Torbella river which separated Certosa from Rivarolo (Superior). This image was shared on the C’era una volta Genova Facebook Group by Luca Dasso on 17th December 2020, (c) Public Domain. [76]
A tram at the same location in the early 20th century. This image was shared on the C’era una volta Genova Facebook Group by Robert Cito on 19th October 2023, (c) Public Domain. [78]
A similar view North from the bridge over the River Torbella in the 21st century. [Google Streetview, August 2024]
This is a 1905 photograph looking North on Via Gioachino Rossini close to its junction with Via alla Stazione di Rivarolo (on the left). This image was shared on the C’era una volta Genova Facebook Group by Luca Dasso on 24th July 2018, (c) Public Domain. [81]
Continuing North through Rivarolo on what was still in the early years of the 20th century, Via Umberto 1. Tram No. 6 is heading for Bolzaneto. This image was shared on the C’era una volta Genova Facebook Group by Robert Cito on 18th October 2023. It is again difficult to accurately locate this image. A bridge similar to that shown on this photo remains but the landscape around it seems much altered, (c) Public Domain. [77]
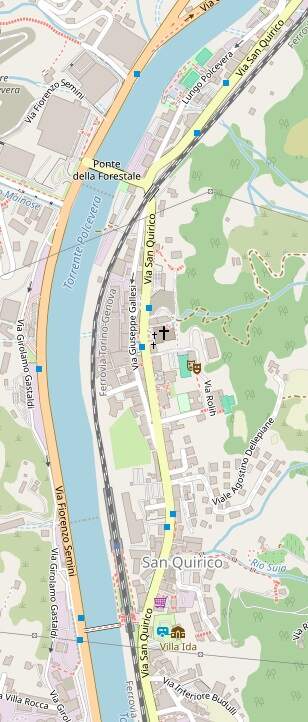
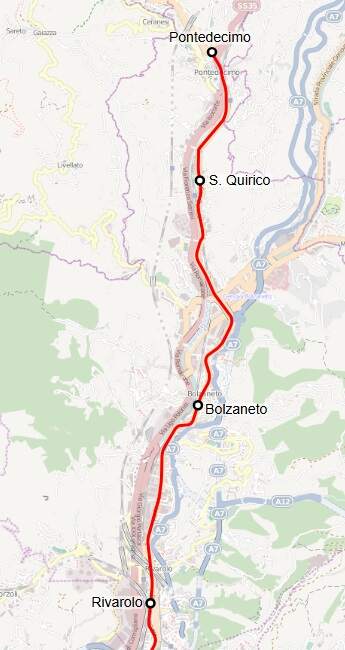
This extract from a file based on openstreetmap.org shows the remaining length of the tramway, from Rivarolo through Bolzaneto and San Quirico to Pontedecimo, (c) Arbalete, and authorised for reuse under a Creative Commons Licence (CC BY-SA 3.0). [19]

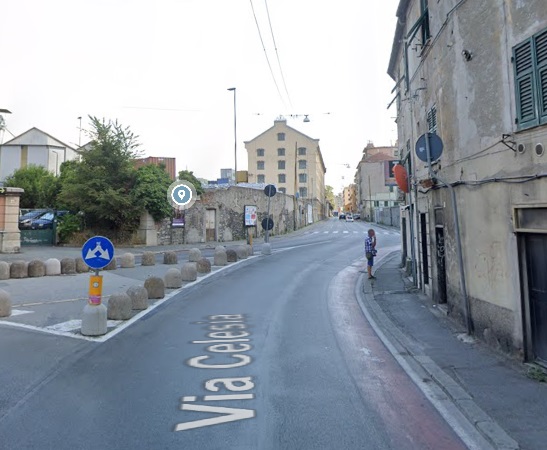
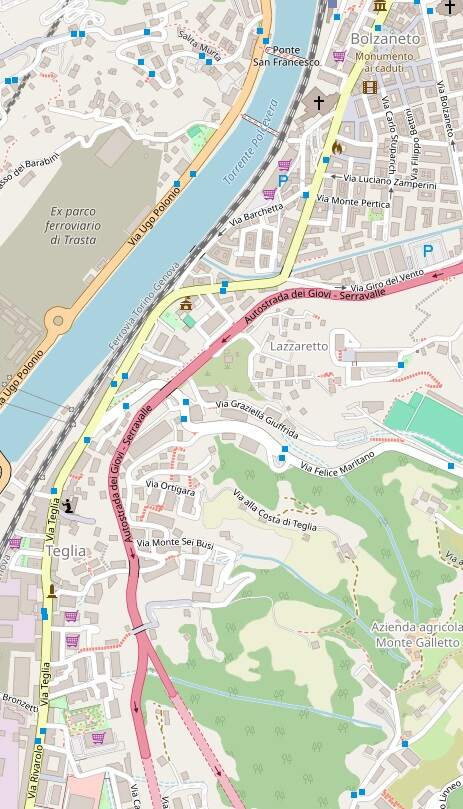
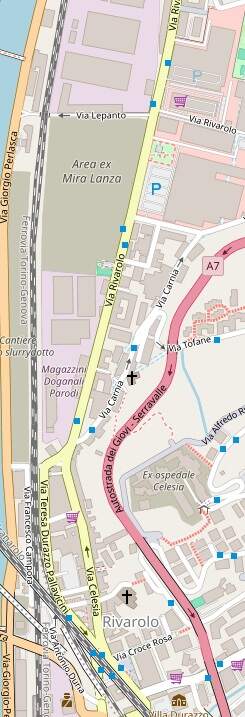
The tramway followed Via Celesia through Rivarolo (Superior). Rivarolo and Via Celesia can be seen at the bottom of this extract from openstreetmap.org. [79]

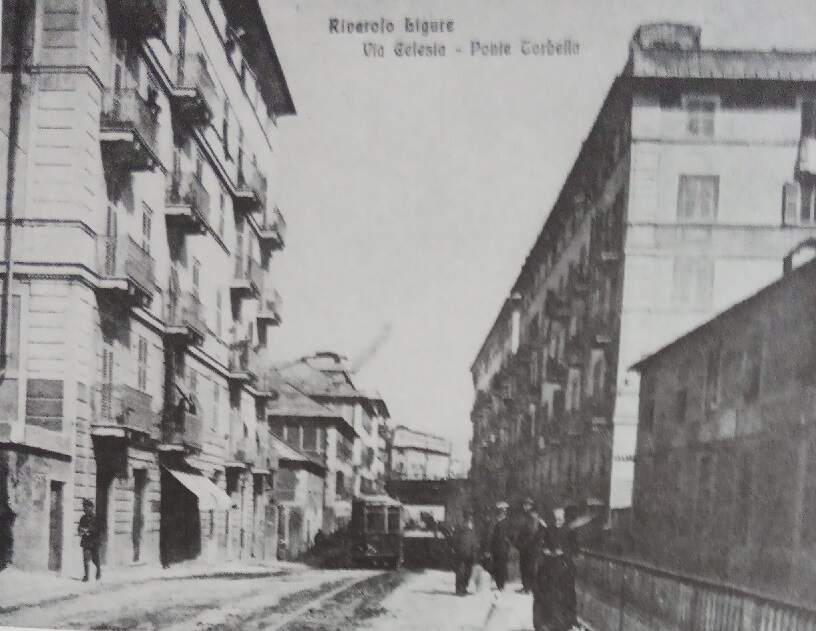
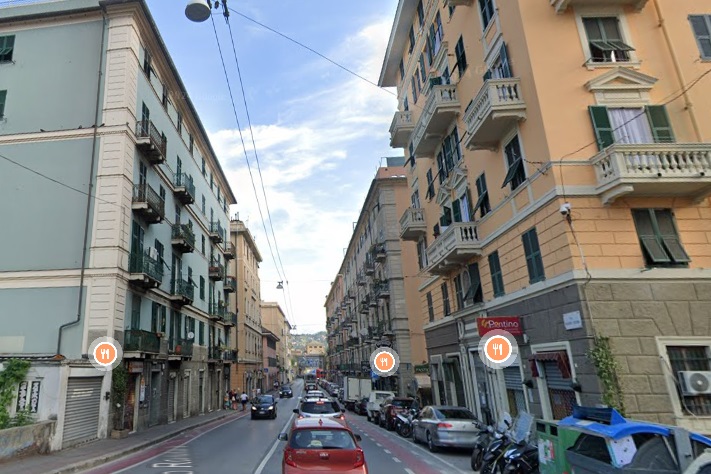
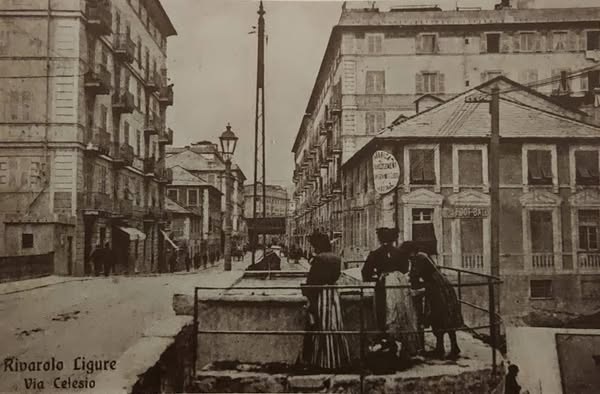
This image from the early 20th century looks North along Via Celesia. Space on the street was clearly at a premium! [80]
Via Celesia in the 21st century. [Google Streetview, August 2024]
North of Via Celesia, the tramway ran along Via Rivarolo.
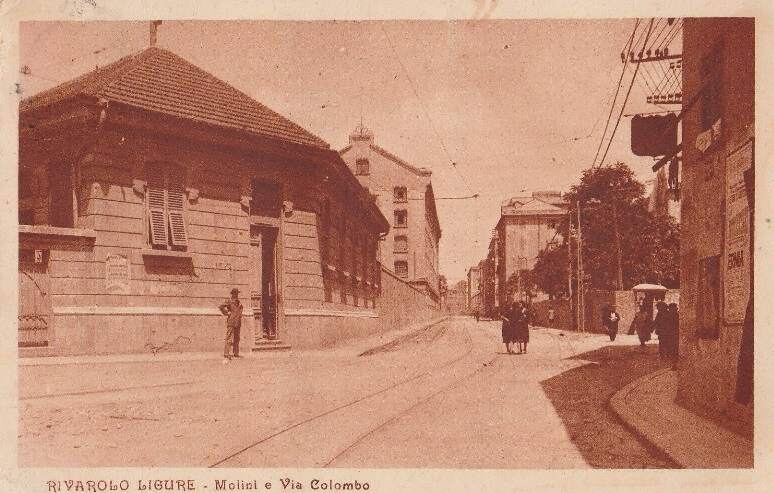
This postcard shows the junction at the North end of Via Celesia, circa. 1920s. Via Rivarolo is ahead. This image was shared on the C’era una volta Genova Facebook Group by Mario Vanni on 18th August 2019, (c) Public Domain. [82]
The smae location in the 21st century. [Google Streeetview, August 2024]
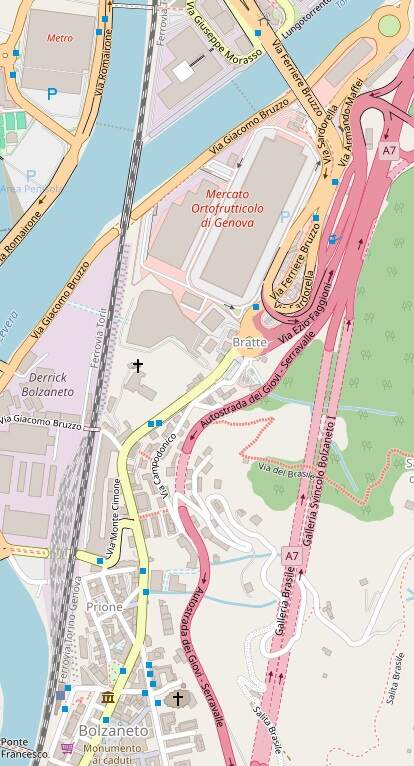
This next extract from openstreetmap.org shows Via Rivarolo entering bottom-left. Trams ran on into Teglia on Via Teglia and continued on to Bolzaneto (in the top-right of this extract) along Via Constantino Reta. [79]
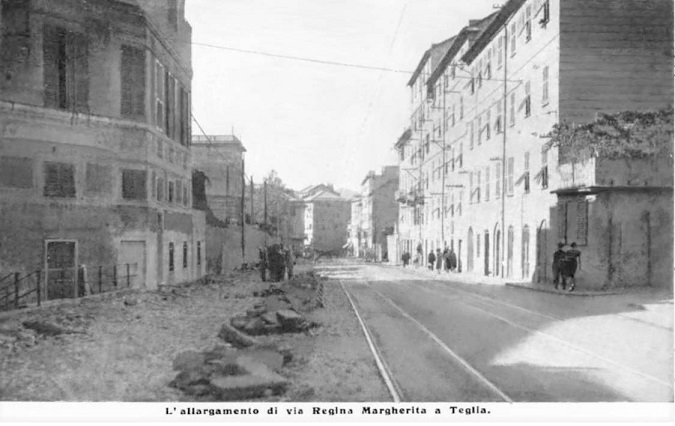
This postcard view looks South along what is now Via Teglia (then Via Regina Margherita. This image was shared on the C’era una volta Genova Facebook Group by Elio Berneri on 19th October 2020, (c) Public Domain. [83]
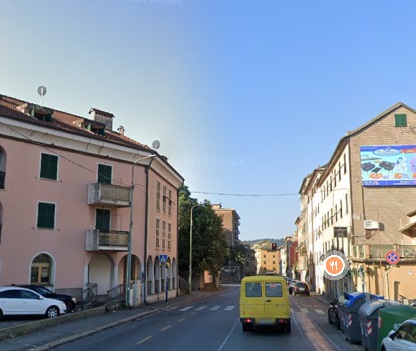
A very similar view at the same location in the 21st century. [Google Streetview, August 2024]
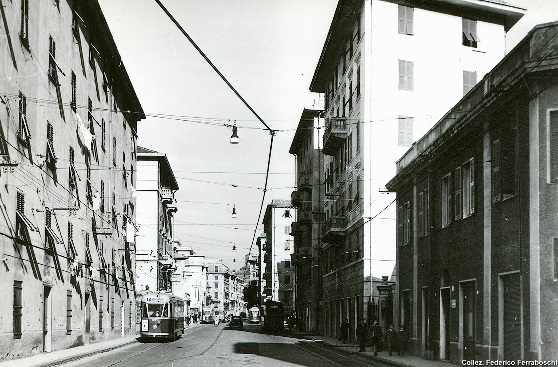
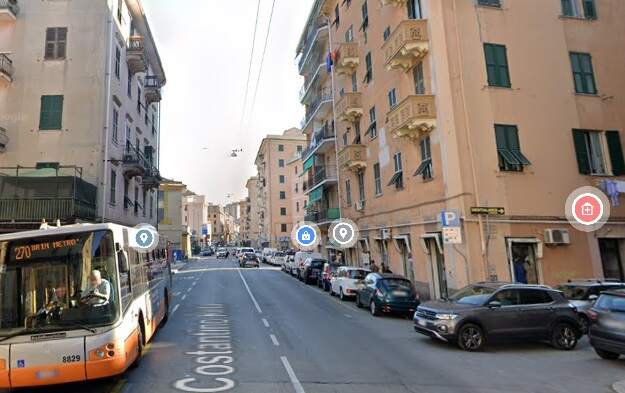
Car 906 in service on line 7 Caricamento – Pontedecimo, one of the longest of the UITE, is seen here running in Bolzaneto. The photograph was taken facing North. In the background you can see another Tramcar, as well as a third on the track in the opposite direction, (c) Public Domain. [84]
A similar North facing view in Bolzaneto in the 21st century. [Google Streetview, August 2024]
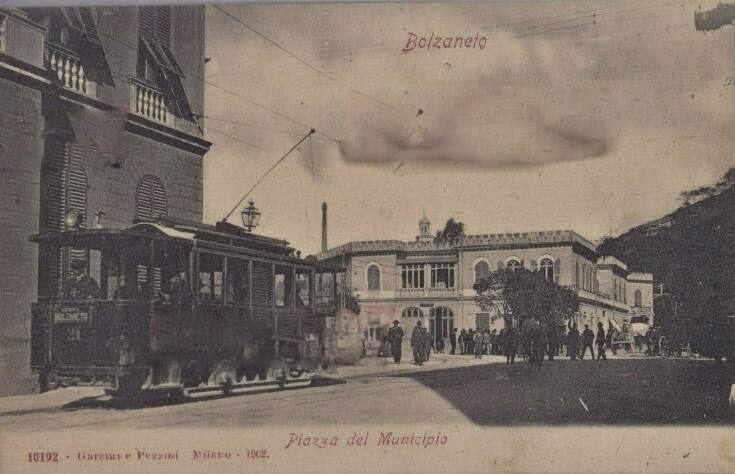
A tram waits at Piazza del Municipio in Bolzaneto. This image was shared by Mario Vanni on the C’era una volta Genova Facebook Group on 8th July 2021, (c) Public Domain. [85]
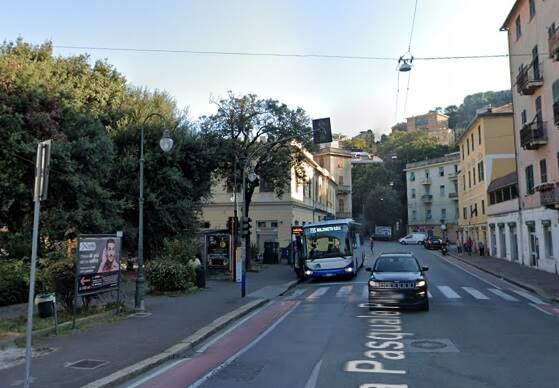
A very similat view of the same location in the 21st century. The road on which the bus is standing is now known as Via Pasquale Pastorino. [Google Streetview, August 2024]
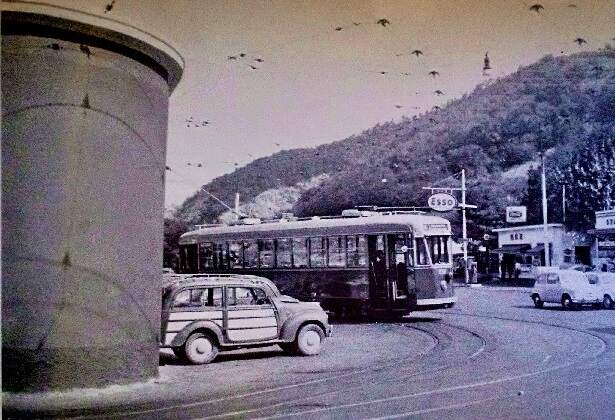
A few hundred metres to the Northeast is the area known as ‘Bratte’. A tram waits in the mid-20th century to set off for Caricamento. This image was shared on the C’era una volta Genova Facebook Group by Roberto Della Rocca on 12th December 2020. [86]
A similar view at the same location in the 21st century. [Google Streetview, August 2024]

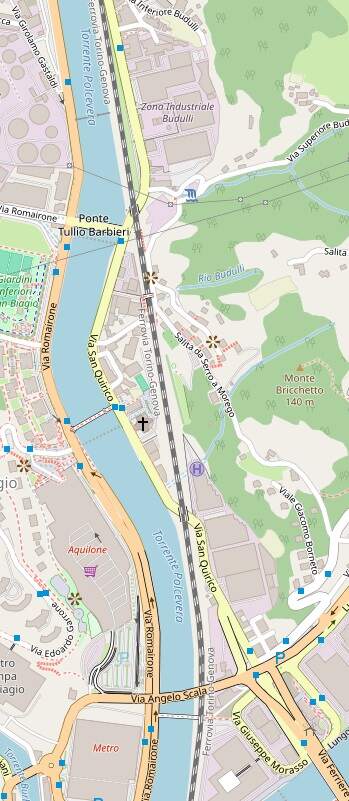
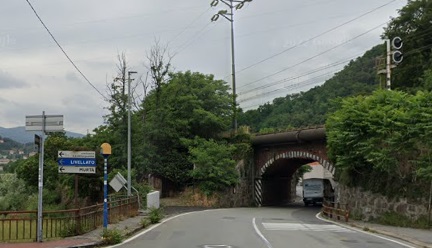
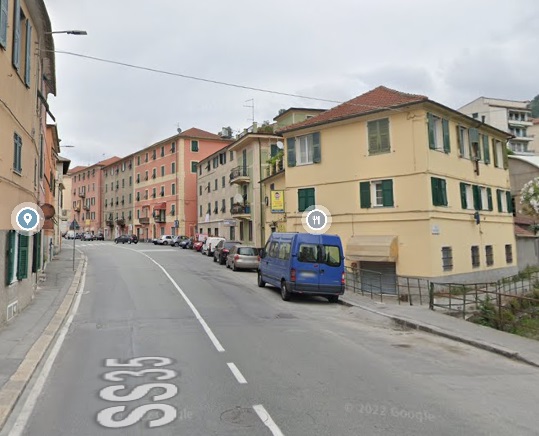
North of Bratte, Trams crossed the River Secca, a tributary of the Polcevera, following Via Ferriere Bruzzo and then continued North alongside the River Polcevera on Via San Quirico.
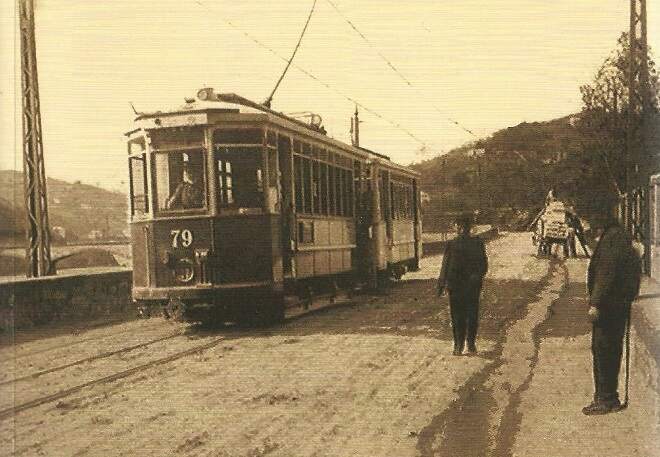
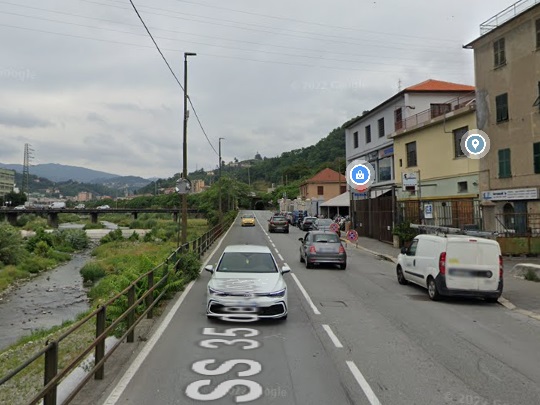
Tram No 79 leads a trailer car South on Via San Quirico in the first decades of the 20th century. It seems as though Ponte Tullio Barbieri can be seen behind the tram. This image was shared by Sergio De Nicolai on the C’era una volta Genova Facebook Group on 21st October 2018. [88]
A similar location on Via San Quirico in the 21st century. [Google Streetview, July 2022]

Trams passed under the FS Standard-gauge lines close to Ponte Tullio Barbieri. [Google Streetview, June 2022]
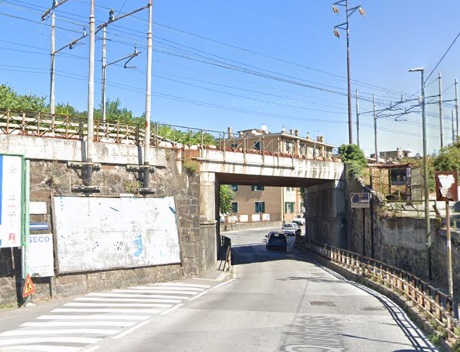
Trams ran on through the centre on San Quirico on Via San Quirico.
Before returning to the side of the river, passing under the railway again. [Google Streetview, July 2022]

The next length of the journey is the last. Trams terminated at Pontedecimo. [79]
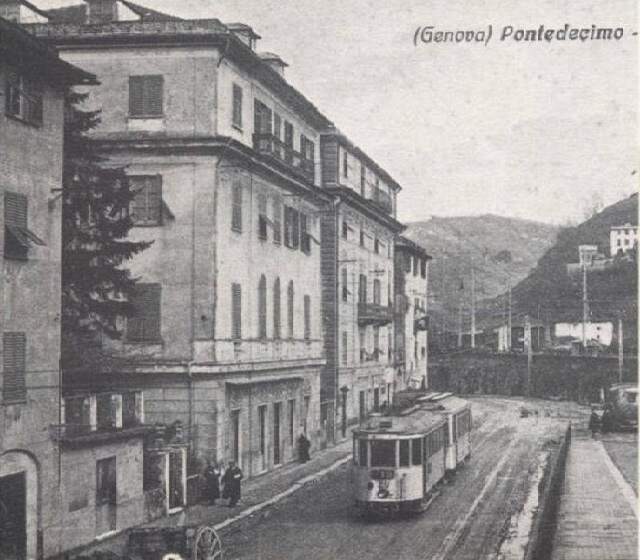
A tram and trailercar on Lungo Polcevera in Pontedecimo close to Pontedecimo Railway Station, This image was taken looking South along the river bank and was shared by Giorgio Gioli on the C’era una volta Genova Facebook Group on 4th November 2020. [89]
This view looks South along the bank of the River Polcevera at a location similar to that in the image above. [Googler Streetview, January 2021]
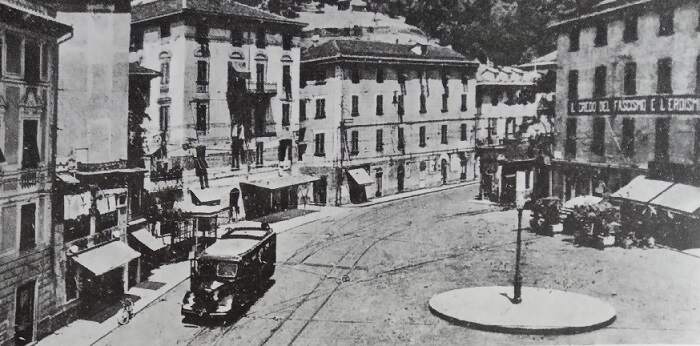
The central piazza in Pontedecimo. The terminus of the tram service. This image was shared on the C’era una volta Genova Facebook Group by Roberto Cito on 29th October 2023. [87]
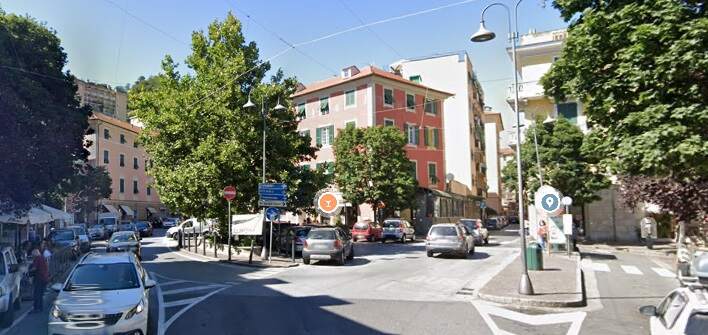
Trams terminated in Pontedecimo. [Google Streetview, July 2022]
The tram depot at Pontedecimo. This image was shared on the C’era una volta Genova Facebook Group by Alessandro Lombardo on 30th October 2019. [90]

References

  1. https://commons.m.wikimedia.org/wiki/File:Genova,_piazza_De_Ferrari_with_tram.jpg, accessed on 10th November 2024.
  2. https://www.facebook.com/photo/?fbid=1401973673209093&set=gm.1438159026228377, accessed on 4th December 2024.
  3. https://www.facebook.com/photo/?fbid=10225181204176020&set=pcb.4980915058674284, accessed on 4th December 2024.
  4. https://www.facebook.com/share/p/uff2Q5eUj27cv1zK, accessed on 4th December2024
  5. https://www.facebook.com/share/p/XS39hojRUKuee7Fk, accessed on 4th December 2024.
  6. Not used
  7. https://www.guidadigenova.it/storia-genova/portoria-piccapietra, accessed on 14th November 2024.
  8. http://www1.palazzoducale.genova.it/storiche/storica10, accessed on 14th November 2024.
  9. https://www.facebook.com/groups/gianfranco.curatolo/permalink/4283487231695528/?app=fbl, accessed on 14th November 2024.
  10. https://commons.m.wikimedia.org/wiki/File:Genoa_1886_-_Italy_handbook_for_travellers.jpg, accessed on 15th November 2024.
  11. https://commons.m.wikimedia.org/wiki/File:Genoa_1906_-_Italy_handbook_for_travellers.jpg, accessed on 15th November 2024.
  12. https://commons.m.wikimedia.org/wiki/File:Genova_italy_1913.jpg, accessed on 15th November 2024.
  13. https://www.stagniweb.it/foto6.asp?File=tram_ge&Inizio=1&Righe=1&InizioI=1&RigheI=50&Col=5, accessed on 15th November 2024.
  14. https://www.collectoravenue.it/index.php/en/shop/cartolinagenovapiazzacorvettotram194033892-detail, accessed on 15th November 2024.
  15. https://www.ebay.co.uk/itm/152214705370?mkcid=16&mkevt=1&mkrid=711-127632-2357-0&ssspo=JNiy4OlNSAG&sssrc=4429486&ssuid=afQhrar7TGK&var=&widget_ver=artemis&media=COPY, accessed on 15th November 2024.
  16. https://en.m.wikipedia.org/wiki/AMT_Genova, accessed on 15th November 2024.
  17. Storia [History] (in Italian). AMT Genova; https://www.amt.genova.it/amt/amt-istituzionale/storia, accessed on 15th November 2024.
  18. http://www.uwrbancenter.comune.genova.it/sites/default/files/quaderno_arch_2011_03_21.pdf, accessed on 16th November 2024.
  19. Rete tranviaria di Genova; https://it.wikipedia.org/wiki/Rete_tranviaria_di_Genova, accessed on 26th November 2024.
  20. AMT (ed.); History of public transport in Genoa; Genoa, SAGEP Editrice, 1980.
  21. Paolo Gassani; Photo history of the tramway in Genoa , Genoa, Nuova Editrice Genovese, 1982.
  22. https://it.m.wikipedia.org/wiki/Galleria_Certosa, accessed on 27th November 2024.
  23. https://www.facebook.com/share/yMAPjmu6yE9CdhCt, accessed on 27th November 2024.
  24. https://www.lapolcevera.it/news/id/2352/cat/0/tip/1/Quando-da-Certosa-si-arrivava-a-Dinegro-con-il-tram-.html, accessed on 27th November 2024.
  25. https://dearmissfletcher.com/tag/galleria-giuseppe-garibaldi, accessed on 27th November 2024.
  26. https://www.facebook.com/groups/gianfranco.curatolo/permalink/8064067336970813/?app=fbl, accessed on 27th November 2024.
  27. https://m.wikidata.org/wiki/Q57466295, accessed on 28th November 2024.
  28. https://uk.pinterest.com/mantero1059, accessed on 28th November 2024.
  29. https://pastvu.com/p/720638, accessed on 28th November 2024.
  30. https://www.genovacollezioni.it/Default.aspx?q=CARTOLINE%20PAESAGGISTICHE&t=GALLERIA%20REGINA%20ELENA, accessed on 28th November 2024.
  31. https://ceraunavoltagenova.blogspot.com/2014/10/piazza-caricamento.html?m=1, accessed on 28th November 2024.
  32. https://ceraunavoltagenova.blogspot.it, accessed on 28th November 2024
  33. https://www.facebook.com/groups/fotogenovaantica/permalink/5685345834897866/?app=fbl, accessed on 28th November 2024.
  34. https://www.facebook.com/groups/fotogenovaantica/permalink/6981769868588783/?app=fbl, accessed on 28th November 2024.
  35. https://www.facebook.com/share/p/drRbQXEGcmKJdz6A/?, accessed on 28th November 2024.
  36. https://www.stagniweb.it/foto6.asp?File=tram_ge&Inizio=1&Righe=10&InizioI=1&RigheI=50&Col=5, accessed on 29th November 2024.
  37. https://www.facebook.com/share/p/FMgB1iVAaWiPNnKh, accessed on 29th November 2024.
  38. https://jenikirbyhistory.getarchive.net/topics/tram+transport+in+genoa, accessed on 29th November 2024.
  39. https://www.facebook.com/share/p/d9oFanfv5vD5WaiNhttps://www.facebook.com/share/p/d9oFanfv5vD5WaiN/, accessed on 29th November 2024.
  40. https://www.facebook.com/share/p/wYt15NoX8Mr9ypWg, accessed on 30th November 2024.
  41. https://images.app.goo.gl/gsrU1q3rJALvZngS7, accessed on 30th November 2024.
  42. https://www.guidadigenova.it/en/museums-genoa, accessed on 30th November.
  43. https://uk.pinterest.com/antoniettasatta48, accessed on 30th November 2024.
  44. http://www.sanpierdarena.net/Miani.htm, accessed on 30th November 2024.
  45. https://www.stagniweb.it/foto6.asp?File=l_cart&righe=1&inizio=31&InizioI=1&RigheI=50&Col=5, accessed on 30th November 2024.
  46. https://genovaquotidiana.com/2019/01/18/via-buozzi-il-civ-fa-capitozzare-gli-oleandri-e-rivendica-il-gesto-su-facebook-ma-e-un-reato, accessed on 30th November 2024.
  47. https://www.facebook.com/share/p/ZWYfrGt7G1939S9u, accessed on 30th November 2024.
  48. https://it.pinterest.com/pin/484981453600622954, accessed on 30th November 2024.
  49. https://www.genovacollezioni.it/Default.aspx?q=CARTOLINE%20PAESAGGISTICHE/LE%20VIE%20%28GENOVA%29, accessed on 30th November 2024.
  50. Not used
  51. https://www.ebay.co.uk/itm/115763406405?mkcid=16&mkevt=1&mkrid=711-127632-2357-0&ssspo=Fbvtwm00Q0S&sssrc=4429486&ssuid=afQhrar7TGK&var=&widget_ver=artemis&media=COPY, accessed on 1st December 2024.
  52. https://picclick.it/GENOVA-VOLTRI-Autostrada-355749405047.html, accessed on 1st December 2024.
  53. https://www.facebook.com/groups/fotogenovaantica/permalink/8344927118939711/?app=fbl, accessed on 1st December 2024.
  54. https://www.facebook.com/share/p/6tSJoFzSasA4xmu3, accessed on 1st December 2024.
  55. https://www.facebook.com/share/p/zEf2KTXYZhPjguZX, accessed on 1st December 2024.
  56. https://www.facebook.com/share/p/4hRGt2WPmqNiZVbp, accessed on 1st December 2024.
  57. https://www.facebook.com/share/p/aGd9JKEJxxSRn9ia, accessed on 1st December 2024.
  58. https://www.facebook.com/share/p/idwwKc9CdoGfQZJw, accessed on 1st December 2024.
  59. http://www.sanpierdarena.net/Umberto%20I%20via.htm, accessed on 1st December 2024.
  60. https://www.facebook.com/share/p/HHN7WWEPXs9oNcEo, accessed on 1st December 2024.
  61. http://www.sanpierdarena.net/Garibaldi%20%20via.htm, accessed on 2nd December 2024.
  62. https://en.todocoleccion.net/postcards-europe/italia-sampierdarena-tranvia-via-umberto-i-postal-ano-1924~x354863523, accessed on 2nd December 2024.
  63. https://www.ade-commerce.com/genova/11488-444.html, accessed on 2nd December 2024.
  64. https://www.ebay.it/itm/174536201862, accessed on 2nd December 2024.
  65. http://www.sanpierdarena.net/Bixio%20Nino.htm, accessed on 2nd December 2024.
  66. http://www.sanpierdarena.net/MASNATA%20piazza%20.htm, accessed on 2nd December 2024.
  67. https://www.ebay.it/itm/224002923884, accessed on 2nd December 2024.
  68. https://www.ebay.it/itm/254349164553, accessed on 2nd December 2024.
  69. https://www.ebay.it/itm/393235493801, accessed on 2nd December 2024.
  70. https://www.facebook.com/share/p/An4Vodj6noSjruUM, accessed on 2nd December 2024.
  71. https://www.facebook.com/share/p/CYT3Wkb6YWLbAT24, accessed on 2nd December 2024.
  72. https://www.ebay.co.uk/itm/350908506772, accessed on 3rd December 2024.
  73. https://www.facebook.com/share/p/DXjPiBiqC7sCL643, accessed on 3rd February 2024.
  74. https://picclick.it/44459-Genova-Certosa-Rivarolo-Panorama-151828747218.html, accessed on 3rd December 2024.
  75. https://www.facebook.com/photo/?fbid=10232988450560527&set=gm.7724149347629282&idorvanity=903038299740455&__cft__[0]=AZVr5xtKCXiMxS-c4pGOUE3YGYCwwYGpM43-lfcKbcKTSCD-BJe-fmJqn0qZfyk9TQED9y_VPuVRzq39J0bFbkLKoFGz6kOLg0891_K6_MOv0Iq1Ppxm6nLu6CcX01puDbgn7DQaGoOiSU3LQ-XfdPP8CaXDW7hbVVaj06T_R6VqX7IqYNr9LOS5PfXk2EZygGbITURlAhuoWhjV1VaQ1mLb&__tn__=EH-R, accessed on 3rd December 2024.
  76. https://www.facebook.com/photo?fbid=3861773430513069&set=pcb.3821731724537750, accessed on 3rd December 2024.
  77. https://www.facebook.com/photo?fbid=299207253067928&set=pcb.7027731573937733, accessed on 3rd December 2024.
  78. https://www.facebook.com/photo/?fbid=299896119665708&set=pcb.7032010463509844, accessed on 3rd December 2024.
  79. https://www.openstreetmap.org/search?query=genova#map=13/44.47342/8.90957, accessed on 3rd December 2024.
  80. https://www.facebook.com/share/p/qf1DLAhNoiuB3JbA, accessed on 3rd December 2024.
  81. https://www.facebook.com/photo/?fbid=2032824086741355&set=gm.1992781060766168, accessed on 3rd December 2024.
  82. https://www.facebook.com/photo/?fbid=1285825284920697&set=gm.2607205412657060, accessed on 3rd December 2024.
  83. https://www.facebook.com/photo/?fbid=3732530906786449&set=gm.3658399444204313, accessed on 3rd December 2024.
  84. https://www.stagniweb.it/foto6.asp?File=tram_ge&Inizio=5&Righe=10&InizioI=1&RigheI=50&Col=5, accessed on 3rd December 2024.
  85. https://www.facebook.com/photo?fbid=1877966582373228&set=pcb.4394846693892914, accessed on 3rd December 2024.
  86. https://www.facebook.com/photo/?fbid=10218412266399363&set=gm.3808759165835006, accessed on 3rd December 2024.
  87. https://www.facebook.com/photo/?fbid=306188622369791&set=pcb.7071692396208317, accessed on 3rd December 2024.
  88. https://www.facebook.com/photo/?fbid=469944593414846&set=gm.1813515448747610, accessed on 3rd December 2024.
  89. https://www.facebook.com/photo/?fbid=10217065604864645&set=gm.3704153626295561, accessed on 3rd December 2024.
  90. https://www.facebook.com/photo/?fbid=2406380456348447&set=gm.2755847204459546, accessed on 3rd December 2024.
  91. https://commons.wikimedia.org/wiki/File:Genova_Pegli,_tramway_terminus.jpg, accessed on 10th December 2024.
  92. https://www.marklinfan.com/f/topic.asp?TOPIC_ID=4530&whichpage=1, accessed on 16th December 2024.
  93. https://www.facebook.com/photo/?fbid=851357163339749&set=gm.6796097163822722&idorvanity=574539035978597, accessed on 16th December 2024.
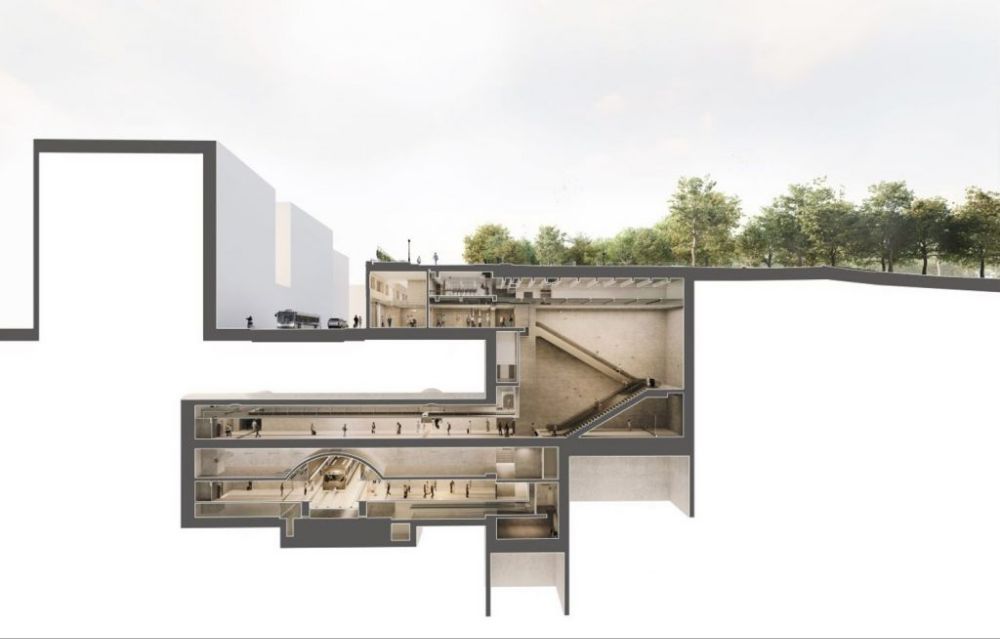
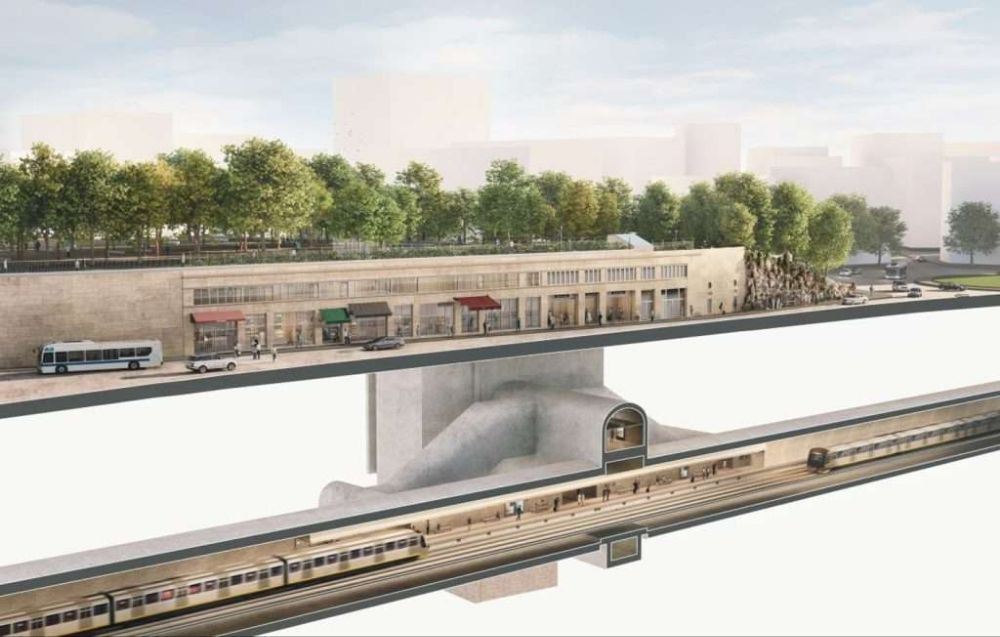
Genova’s (Genoa’s) Metro

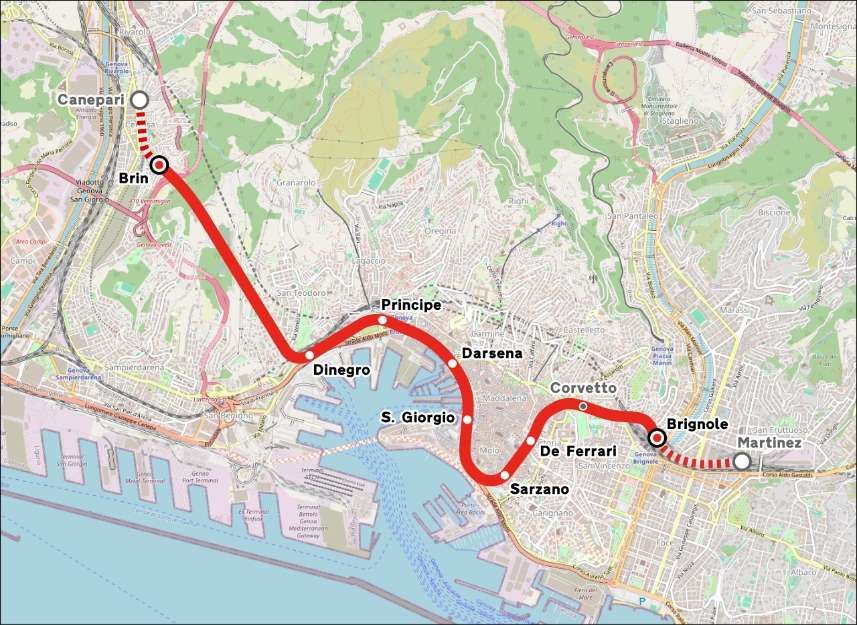
The Metropolitana di Genova is, in 2024, a single-line, double-track light rapid transit system that connects the centre of Genova, Italy with the suburb of Rivarolo Ligure, to the north-west of the city centre. It runs through to Brignole Railway Station in the East of the city. In 2024, the service is managed by Azienda Mobilità e Trasporti (AMT), which provides public transport for the city of Genoa. [1]

Genoa’s single Metro line, © Arbalete and authorised for reuse under a Creative Commons Licence (CC BY-SA 2.0). [1]

The Metro is a 7.1 kilometres (4.4 mi) long 1,435 mm (4 ft 8 1⁄2 in) (standard gauge) double-track line and is electrified with overhead lines at 750 volts DC. It has a direct connection with Trenitalia’s mainline railway station, Principe. [1]

The origins of a subway in Genoa date back to the beginning of the twentieth century; in 1907 Carlo Pfalz, who had already designed the Zecca-Righi Funicular, [2] was the first to explore the construction of an underground railway with electric traction. Several projects, including that of the engineer Angelo Massardo and those of Renzo Picasso (1911 and 1930), were proposed without being realized. Instead, a tram system at surface level was built which ultimately was abandoned in 1966. An attempt to introduce an alternative means of transport was made on the occasion of the International Exhibition of Marine and Maritime Hygiene of 1914: it was a ‘Telfer’, an elevated monorail that connected the Port (Giano Pier area) to the exhibition area in Piazza di Francia, in front of the Brignole station. The infrastructure was then abandoned and finally demolished in 1918. [1]

An article about the Telfer can be found here. [3]

The underground ‘Metro’ was built in a series of phases. “The first section, opened on 13th June 1990 in time for the 1990 FIFA World Cup, was 2.5 kilometres (1.6 miles) [6] between the stations of Brin and Dinegro. [7] The line was extended to Principe in 1992, [6] to San Giorgio-Caricamento in 2003, [6] to De Ferrari (the underground station at Piazza De Ferrari) in 2005, [6] and to Brignole in 2012.” [8]

Since 2024, citizens of Genoa have been able to use the subway free of charge without any time restrictions.[9]

Stations

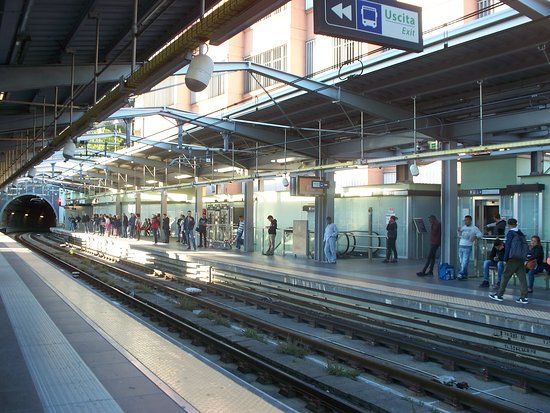
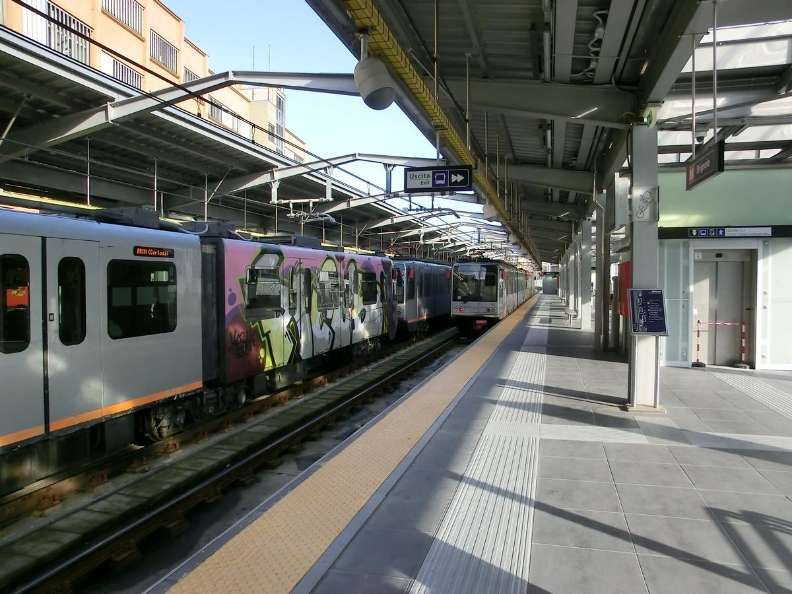
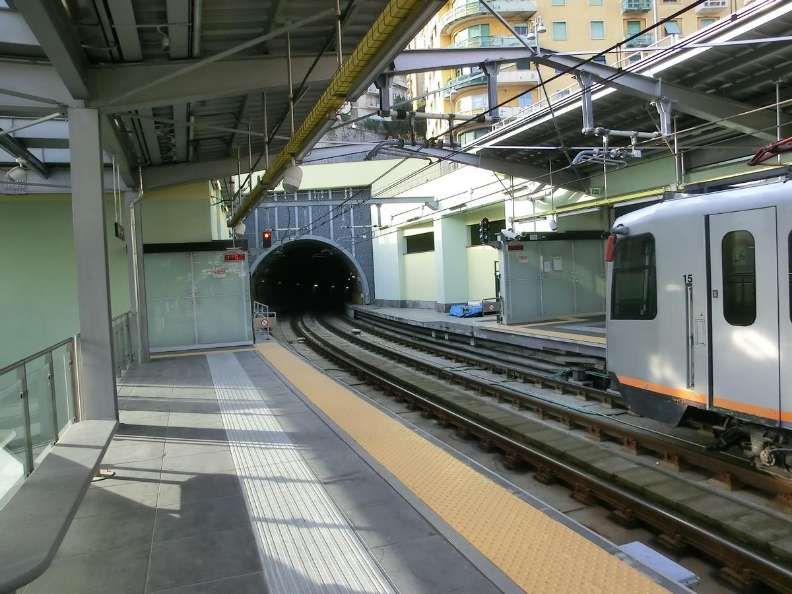
Brin Station – is currently (2024) the Northwest terminus of the line. It is situated along Via Benedetto Brin in the neighbourhood of Certosa in Rivarolo Ligure, a suburban area in the north-western outskirts of Genoa, Italy. The station, currently the terminus of the line, is located just west of the tunnel mouth on the line from Dinegro station. [10] It is built on a viaduct, which allows for the line to be extended to the north.

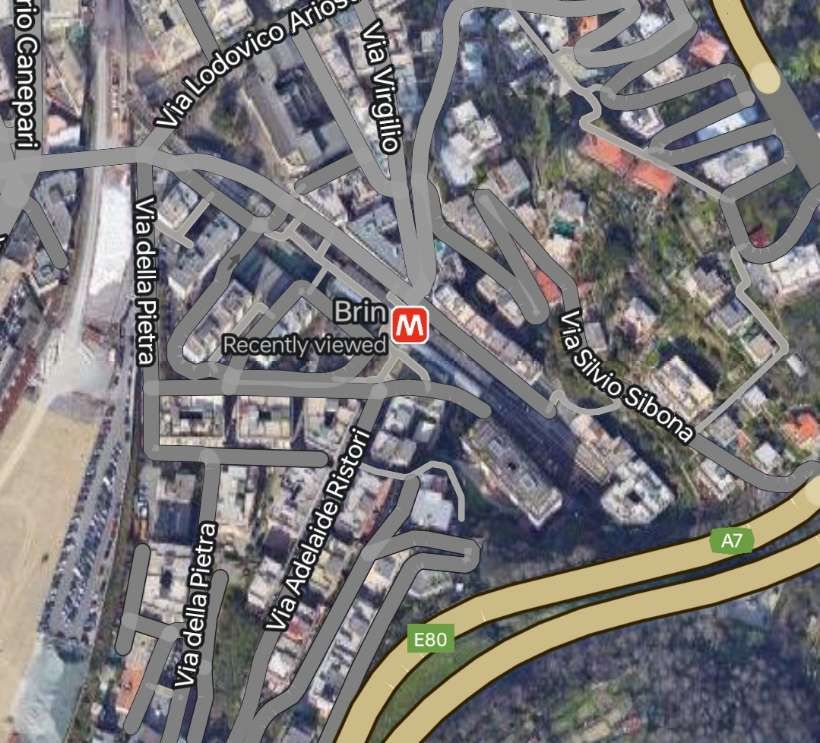
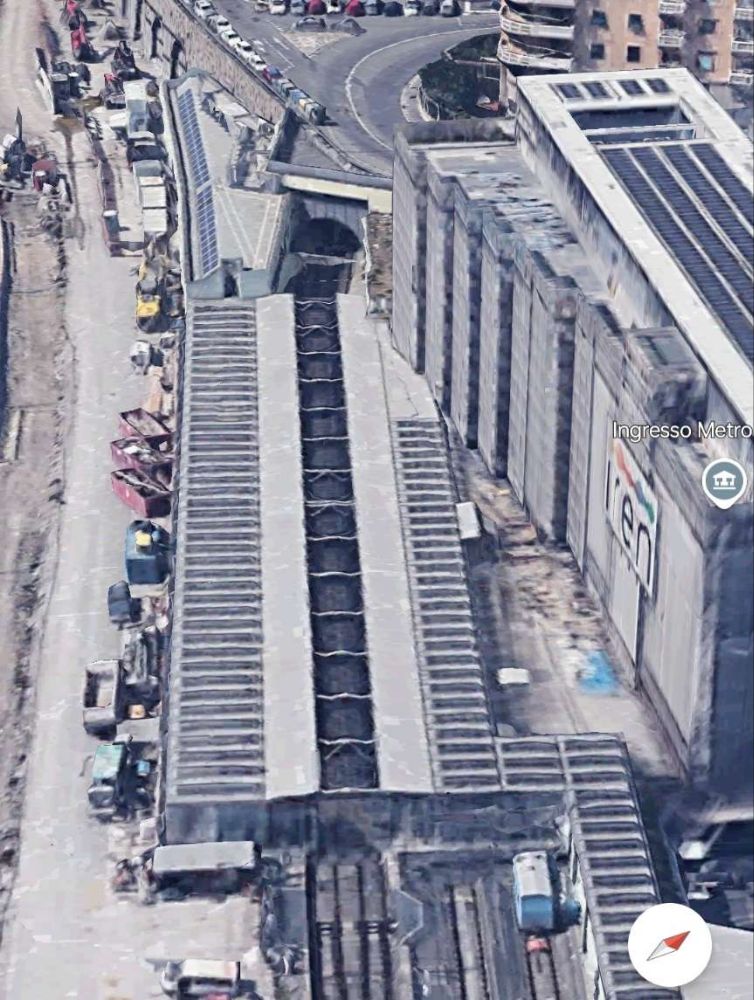
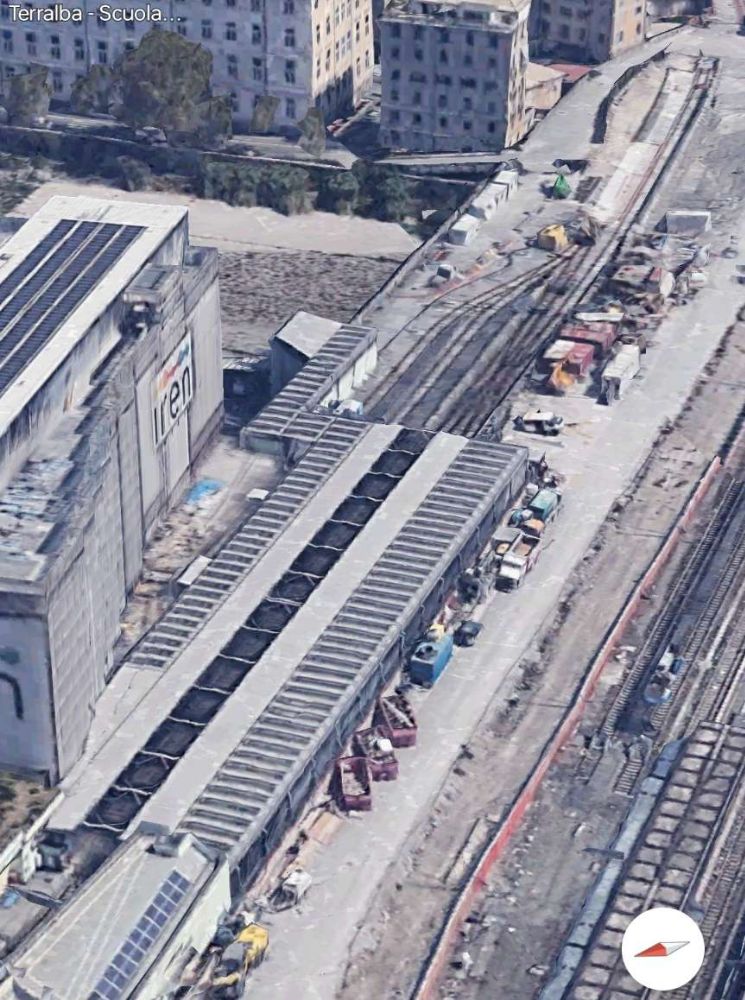
Brin Station sits just below the A7 Autostrada in the Northwest suburbs of Genova. [Google Maps, November 2024]
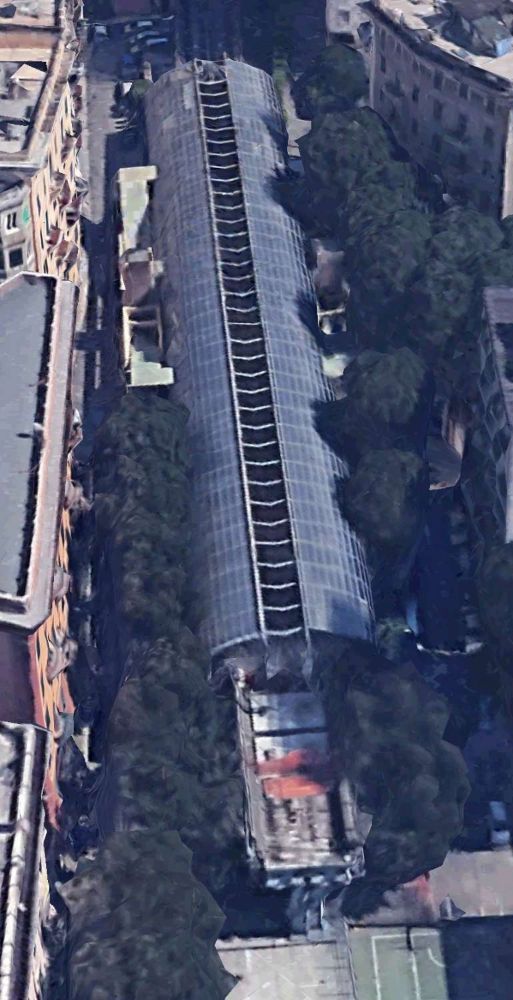
Brin Station seen from the Northwest. The tunnel is beyond the station in this view. The extension, when built, will run towards and beneath the camera. [Google Earth 3D, November 2024]
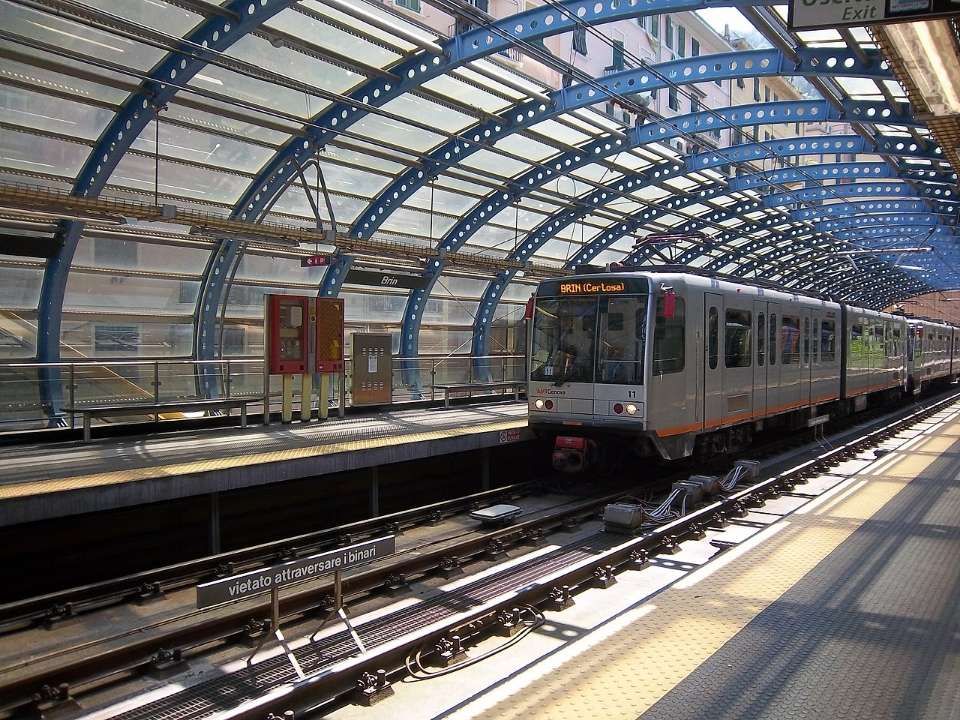
Brin Station sits above ground adjacent to the end of the tunnel, © Ewkaa and licenced for reuse under a Creative Commons Licence (CC BY-SA 3.0). [10]

The station was designed by architect Renzo Piano, the station’s official opening took place on 13th June 1990. [10]

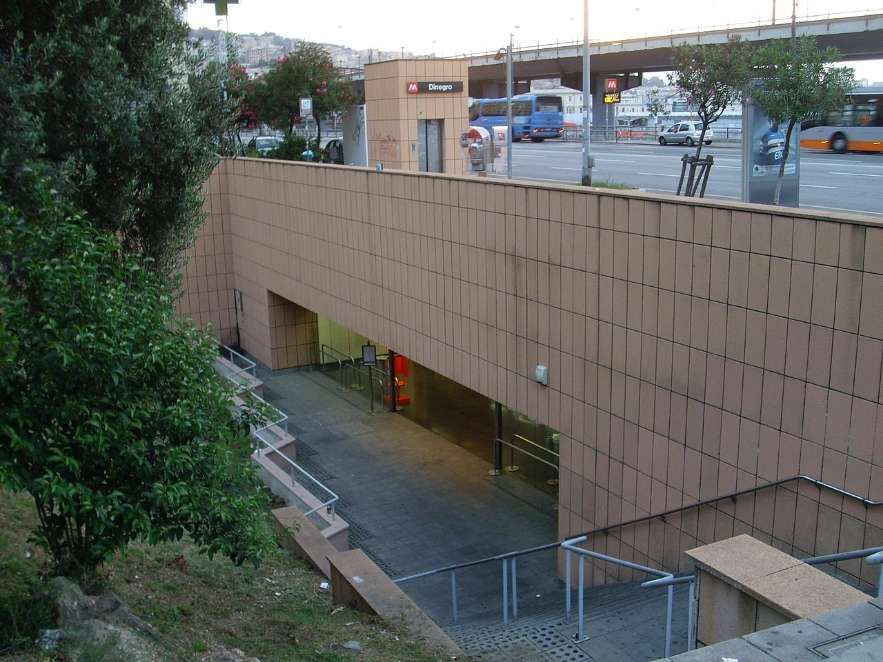
Dinegro Station is located under Via Milano, adjoining the Piazza Dinegro from which it derives its name, in the Fassolo area of Genova. It is just East of the business district of San Benigno and close to the ferry terminal.

The exterior of Dinegro Station, © Alessio Sbarbaro and licenced for reuse under a Creative Commons Licence (CC BY 3.0). [11]
Dinegro Station, © Falk2 and licenced for reuse under a Creative Commons Licence (CC BY-SA 4.0). [12]

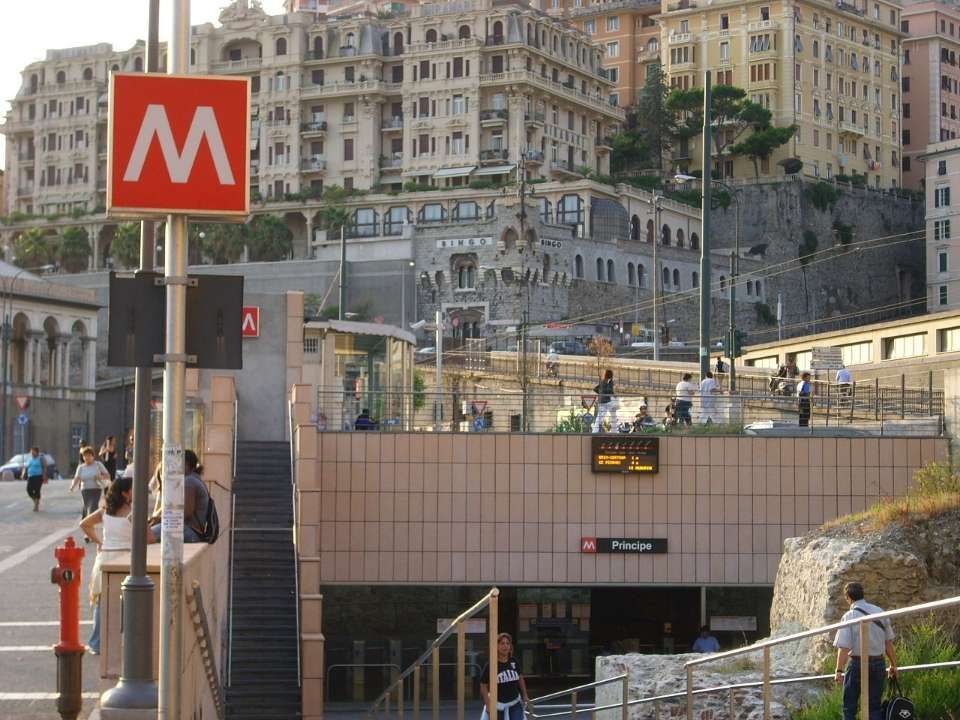
Principe Metro Station – its main entrance sits just outside the main railway station in Genova – Principe.

Principe Metro Station, © Yoggysot and authorised for reuse under a GNU Free Documentation License (CC BY 3.0). [13]
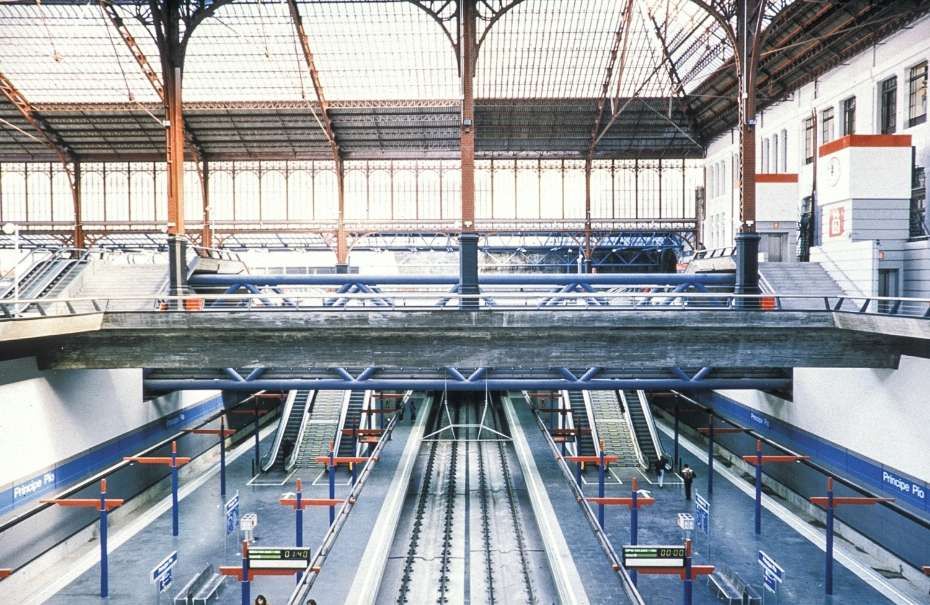
The interior of Principe Metro Station in 1994. [14]

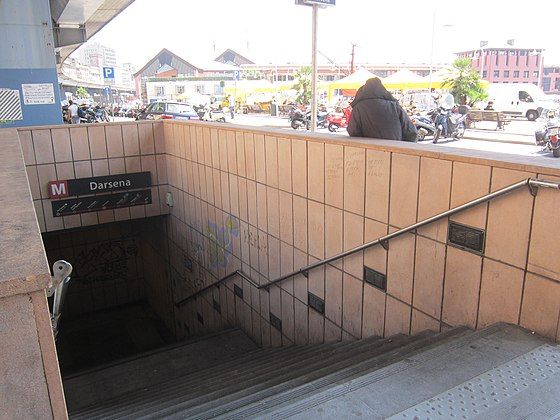
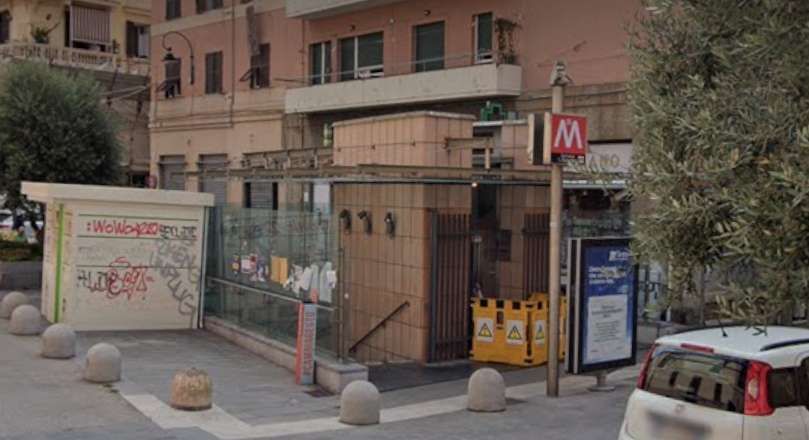
Darsena Metro Station is located on Via Antonio Gramsci close to Piazza della Darsena. ‘Darsena’ translates to ‘dock’ in English. The station serves the old port area of the city. [15]

The entrance to Darsena Station, © Ripetto and licenced for reuse under a Creative Commons Licence (CC BY-SA 3.0). [16]
The interior of Darsena Station, © Tiia Monto and licenced for reuse under a Creative Commons Licence (CC BY-SA 3.0). [15]

San Georgio Station is located under Piazza della Raibetta beside the Palazzo San Giorgio, after which it is named. It is in the Old Harbour area near the Aquarium of Genoa. It was opened together with Darsena Station on 25th July 2003 and saw its first trains on 7th August 2003. [17]

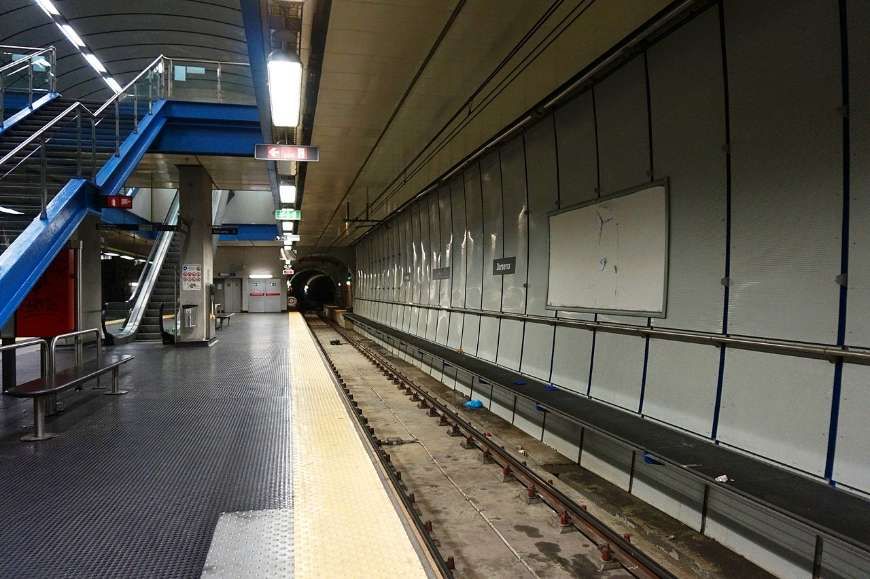
The tracks of the San Giorgio station run beneath the Piazza Caricamento underpass and its underground architecture is similar to the model adopted for the Principe and Darsena stops, that is, with the tracks on the sides of the single central platform. During 2006, some electronic display boards were installed to inform users of the arrival times of trains. [17]

The view from the stairs leading to the street-level entrance to San Giorgio Metro Station, © Alessio Sbarbaro and authorised for reuse under a Creative Commons Licence (CC BY-SA 3.0). [18]
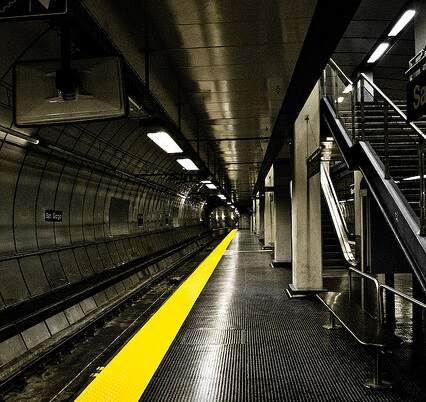
The view along the platform at San Giorgio Metro Station, © Umberto and authorised for reuse under a Creative Commons Licence (CC BY-SA 2.0). [18]

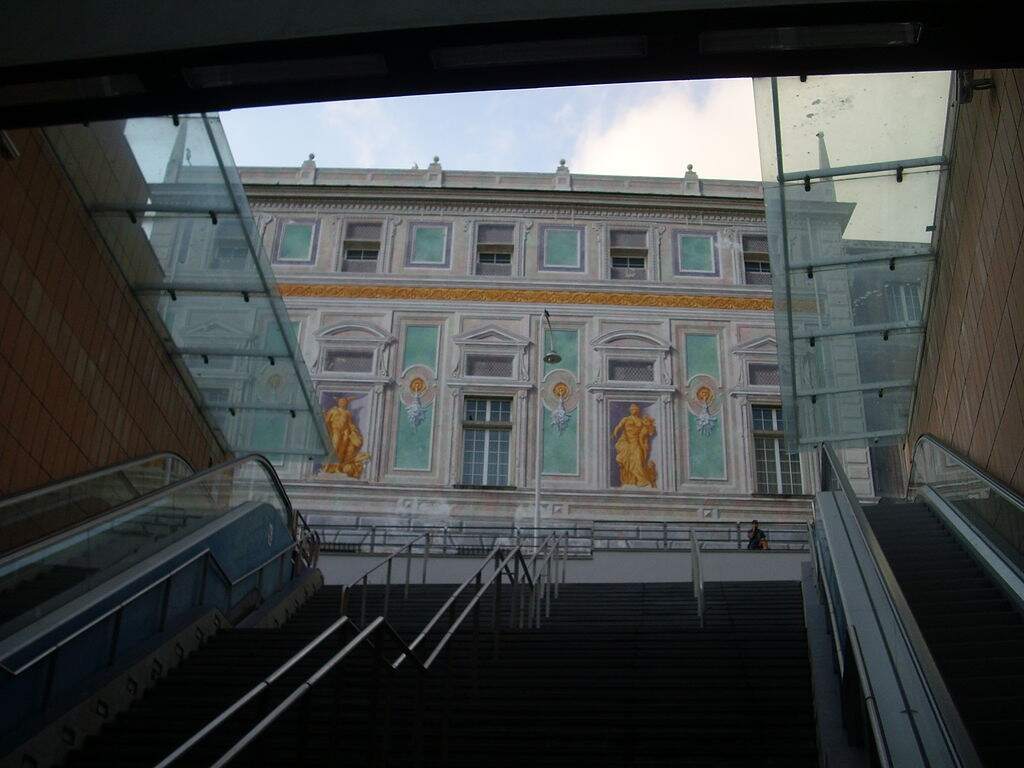
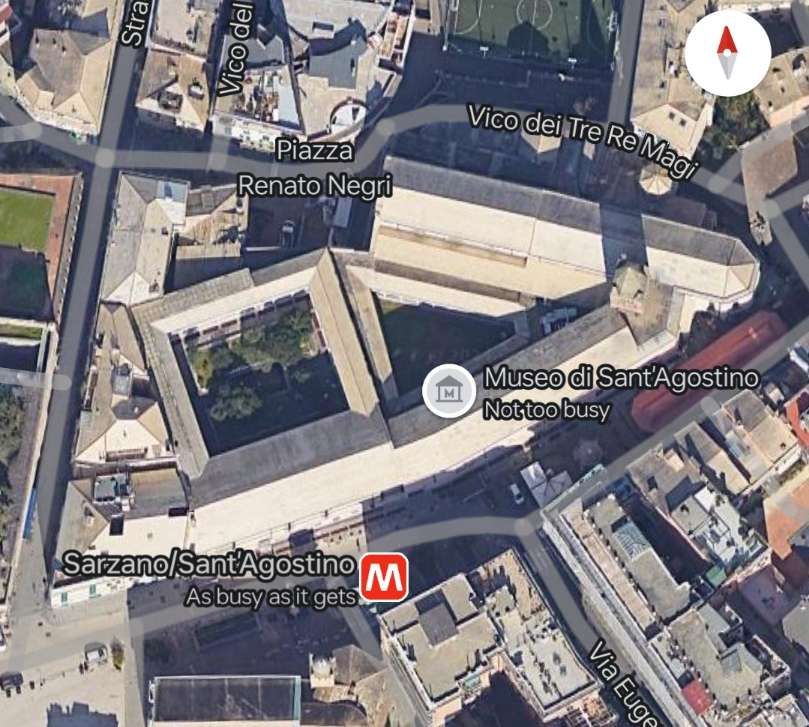
Sarzano/Sant’Agostino Station is located in the historical centre of Genoa. The main entrance is in the Piazza di Sarzano near the Church of St. Augustine, now deconsecrated and turned into a museum, with a second entrance on the Mura della Marina, the old seawall. It opened on 3rd April 2006. [19]

Sarzano/Sant’Agostino metro Station is immediately adjacent to the Museo di Sant’Agostino. [Google Maps, November 2024]
The Station entrance adjacent to the Museum. [Google Streetview, July 2022]
The access stairs to Sarzano Metro Station adjacent to the Museum, © Alessio Sbarbaro and authorised for reuse under a Creative Commons Licence (CC BY-SA 3.0). [19]
Platform level at Sarzano Metro Station, [20]

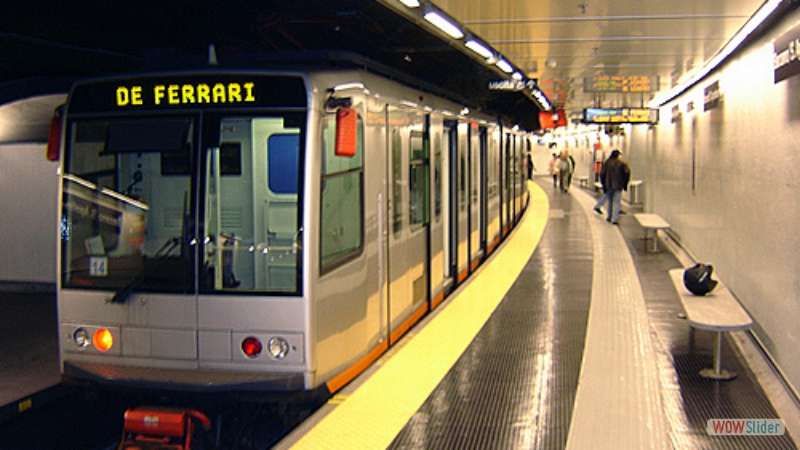
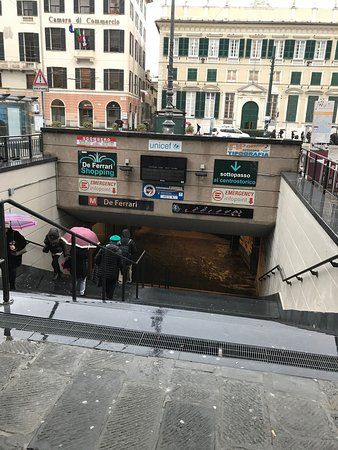
De Ferrari Station is close to Teatro Carlo Felice, Galleria Mazzini, the Doge’s Palace, and Via XX Settembre. It opened on 4th February 2005. It was originally designed, like others, by Renzo Piano with finishing touches by Renzo Truffelli. This used to be the last station on the line until the easterly extension towards Genova Brignole Railway Station opened in 2012. [21][22]

The entrance to de Ferrari Station. [23]
Platform level at de Ferrari Station. [€23]

Corvetto Station – In March 2024 3Ti Projeto announced that the design of Corvetto Station had been approved by the municipality. Work is expected to cost around 38.3 million Euros and be completed late in 2024 or early in 2025. [24][25][26]

These two images show the 3Ti Projeto design for Corvetto Station. [24]

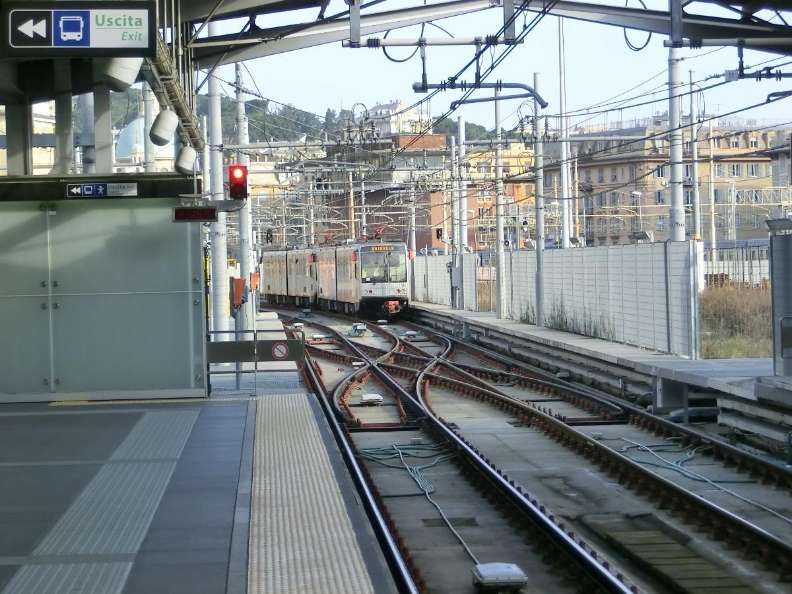
Brignole Station – sits close to the main line Brignole Station to the West of the city centre. It opened in 2012. [27]

Brignole Metro Station, © Eugenio Merzagora and shared by him on the Structurae Website on 30th March 2016, used with kind permission of the copyright holder. [28]
Brignole Metro Station, looking Southeast towards the extension, © Eugenio Merzagora and shared by him on the Structurae Website on 30th March 2016, used with kind permission of the copyright holder. [28]
Brignole Metro Station, looking Northwest into the tunnel mouth, © Eugenio Merzagora and shared by him on the Structurae Website on 30th March 2016, used with kind permission of the copyright holder. [28]
Brignole Metro Station seen from the Southeast. [Google Earth 3D, November 2024]
Brignole Metro Station seen from the West. [Google Earth 3D, November 2024]

Rolling Stock

Wikipedia tells us that Genova is just (in 2024) bringing a fourth generation of trams into service. The three previous generations each served the city well.

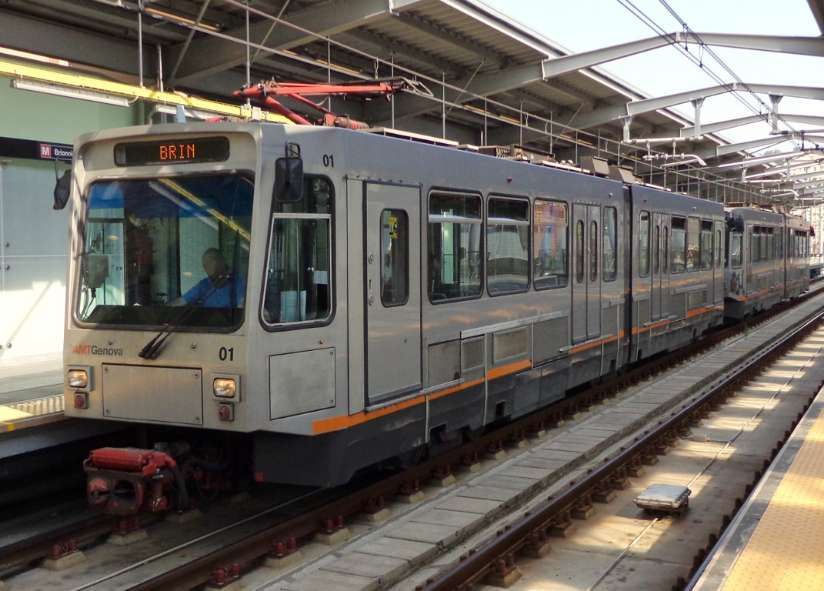
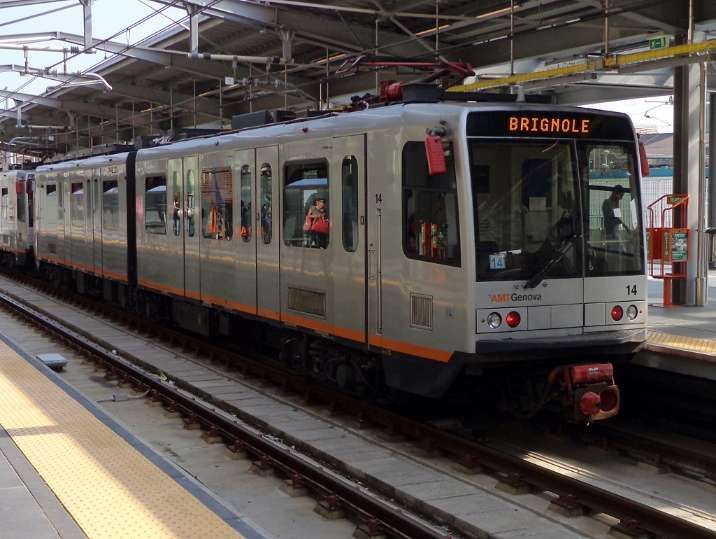
First Generation Rolling Stock – consisted of 6 sets of articulated cars, built by Ansaldo, and introduced in 1990. They were derived from the Zurich Tram 2000 tram used in Switzerland, but altered for standard gauge running. Each vehicle had two sections with one central articulation. They were supported on three bogies The two outer bogies were motorised. The vehicles were bidirectional and had four sets of doors on each side. They had blue seats in a transverse arrangement. The train were numbered 01 to 06. [1][29]

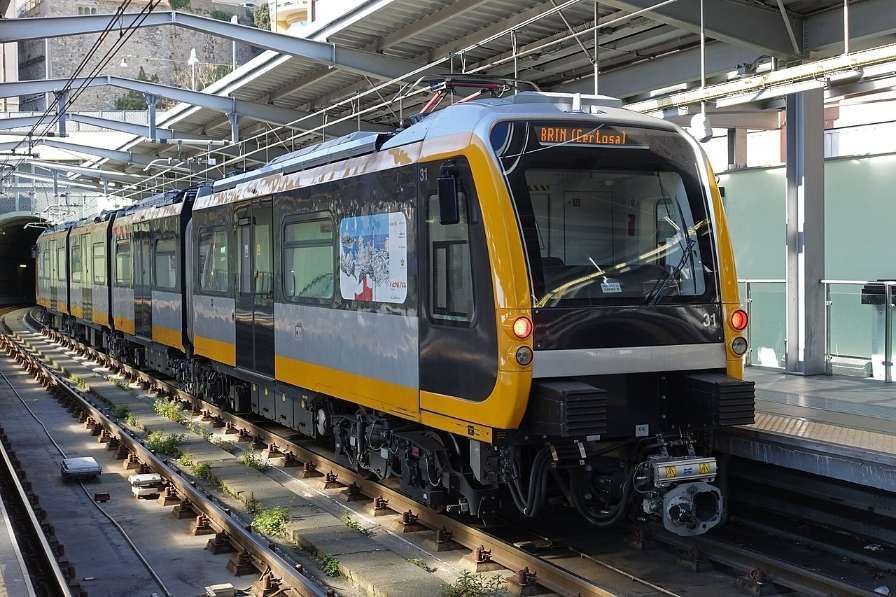
First Generation tram/train at Brignole Metro Station in 2013, © Arbalete and licenced for reuse under a Creative Commons Licence (CC BY-SA 3.0). [1]

Second Generation Rolling Stock – was made up of a group of 12 trains. Numbered 12 to 24. Like the first generation, each train was made up of two sections resting on three bogies, with the outer two motorised. The trains were bidirectional with six doors on each side, and the seats were arranged longitudinally. The trains were built by Ansaldo and introduced in 1992. [1][30]

Second Generation tram/train at Brignole Metro Station in 2013, © Arbalete and licenced for reuse under a Creative Commons Licence (CC BY-SA 3.0). [1]

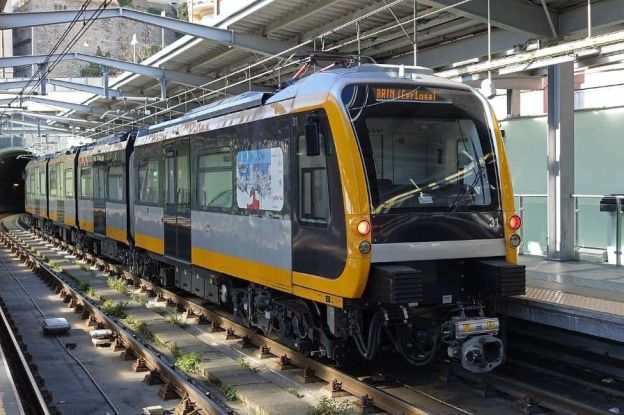
Third Generation Rolling Stock – these trams/trains significantly differ to the previous two. They were delivered by Hitachi Rail Italy in 2016. There are 7 trains numbered 31 to 37. The trains are longer than previous generations at 39 metres and four articulated sections with five bogies. Of the five bogies, the central three are motorised. There are a total of four doors per side of the bidirectional sets. [1][31]

Third Generation tram/train at Brignole Metro Station in 2019, © Bmazerolles and licenced for reuse under a Creative Commons Licence (CC BY-SA 4.0). [1]

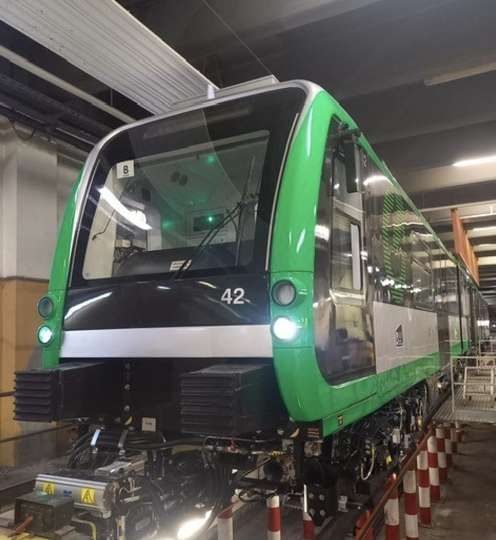
Fourth Generation Rolling Stock – In anticipation of the planned extensions (see below) and considering the now thirty-year service of the first generation trains, in 2020 the Municipality obtained a loan of 70 million Euros to purchase 14 new generation trains. [32] In 2021, Hitachi Rail signed the contract to supply the new trains on a rolling programme, monthly by month, to coincide with the inauguration of the Brin-Canepari and Brignole-Martinez routes. [33]

In June 2024, Sustainable Bus E-magazine reported that the first of these new units had arrived in Genoa. [26]

New tram/train No. 42. [26]

The new units will be numbered 41 to 54. “Each of the 14 new vehicles is made up of four half-cars, resting on five bogies, for a total length of 39 metres, will be able to accommodate up to 290 passengers, will be bidirectional, and will also run in double formation for a total length of 78 metres and a capacity of 580 passengers.” [26]

In order to ensure greater operating flexibility, these trains will also be able to operate in double traction with the 7 third-generation vehicles, the 31-37 series delivered in 2016, currently in service.” [26]

The new units entry into service will “allow the scrapping of the 6 first-generation trains, series 01-06, … the average age of the fleet will thus be lowered from 18.5 years to 9.8 years. The 10-series trains (11-22 series) built between 1991 and 1995 will be kept in operation.” [26] The fleet will therefore consist of the 21 trains of the 30, 40 and 10 series trains.

Extensions to the Network

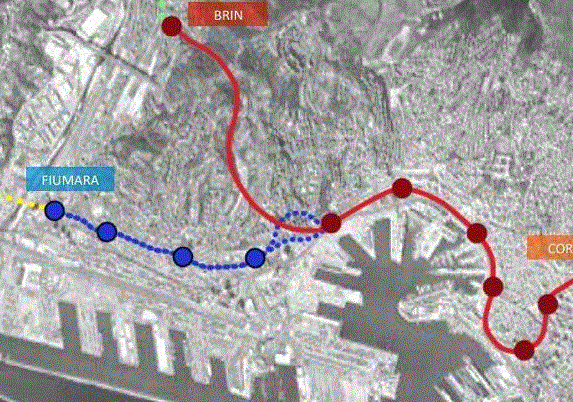
In 2022, the Railway Gazette reported that Genova municipality had approved plans for a 3 km western branch of the metro with four stations, linking Fiumara with the city centre. [4]

The western extension of Genoa’s Metro is shown in blue. [4]

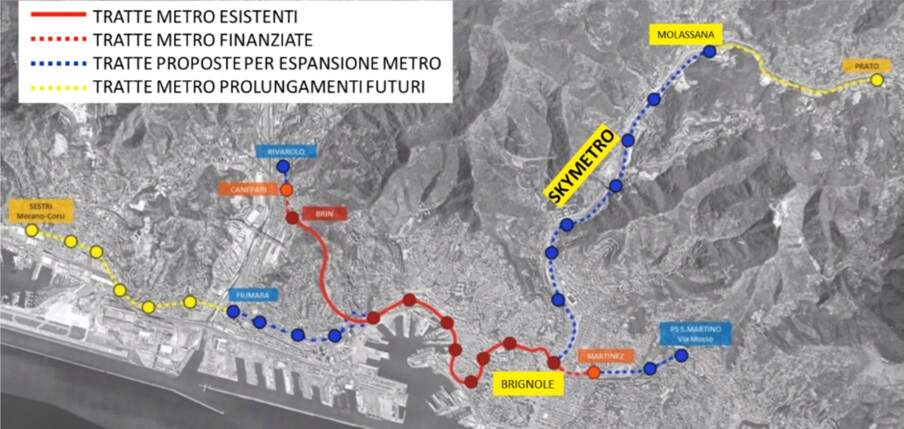
In September 2024, the city secured 74.5 million Euros to significantly expand the Metro network as shown on the map below. [5]

The planned Metro network for Genoa (Genova) as reported in September 2024. [5]
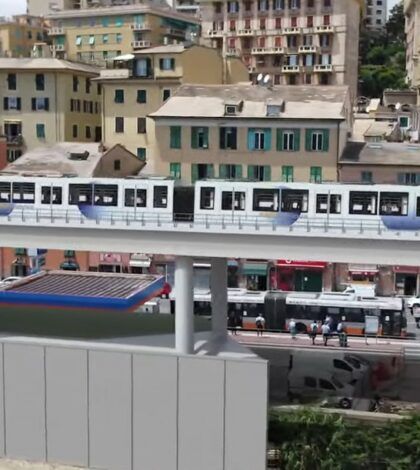
As can be seen in the map above these significant additions to the network include a length up the Val Bisagno of elevated railway (SkyMetro).

The planned SkyMetro, running up the valley of the River Bisagno. [34]

The planned investment is over 400 million Euros at 2022 prices. Genoa will receive 418.9 million Euros to finance the SkyMetro of Val Bisagno, the extension of the metro from Brin to Via Canepari and work associated with the Rio Maltempo. The majority of the new money (398.8 million Euros) is intended for the construction of the SkyMetro.

During rush hour, the new line will be able to transport eighty percent of the valley’s users, resulting in a significant reduction in the production of exhaust fumes from private cars. It will be seven kilometers long and will have a neutral energy balance thanks to the photovoltaic system mounted on the roof, which will make the SkyMetro partially sustainable. The project will reach as far as Molassana but the city has every intention to take the scheme further, as far as Prato. [34]

References

  1. https://en.m.wikipedia.org/wiki/Genoa_Metro, accessed on 9th November 2024.
  2. https://rogerfarnworth.com/2024/11/13/genoa-funicular-railways
  3. https://rogerfarnworth.com/2024/11/14/genoa-a-telfer
  4. https://www.railwaygazette.com/metros/genova-metro-expansion/62437.article, accessed on 25th November 2024.
  5. https://italy.cleancitiescampaign.org/pums-updates/genova-27-9-2024-ok-del-governo-al-a-745-milioni-di-euro-per-prolungamento-metro, accessed on 25th November 2024.
  6. HOME – Rete e orari – Metropolitana; http://www.amt.genova.it/orari/metropolitana.asp;  Azienda Mobilità e Trasporti S.p.A. (AMT),  2013, accessed on 25th November 2024.
  7. Modern Tramway and Light Rail Transit, October 1990, p354. Ian Allan Ltd./Light Rail Transit Association.
  8. Tramways & Urban Transit, April 2005, p149. Ian Allan Ltd./Light Rail Transit Association.
  9. Metropolitana; Azienda Mobilita’e Trasporti; https://www.amt.genova.it/amt/trasporto-multimodale/metropolitana, accessed on 25th November 2024.
  10. https://en.m.wikipedia.org/wiki/Brin_(Genoa_Metro), accessed on 25th November 2024.
  11. https://en.m.wikipedia.org/wiki/Dinegro_(Genoa_Metro), accessed on 25th November 2024.
  12. https://commons.m.wikimedia.org/wiki/Category:Dinegro_station_(Genoa_metro)#/media/File%3AL04_163_Hp_Dinegro%2C_ET_37.jpg, accessed on 25th November 2024.
  13. https://en.m.wikipedia.org/wiki/Principe_(Genoa_Metro), accessed on 25th November 2024.
  14. https://www.cfcsl.com/en/portfolio/principe-pio-madrid-transport-station-spain-1994, accessed on 25th November 2024.
  15. https://en.m.wikipedia.org/wiki/Darsena_(Genoa_Metro), accessed on 25th November 2024.
  16. https://fr.m.wikipedia.org/wiki/Darsena_(m%C3%A9tro_de_G%C3%AAnes), accessed on 25th November 2024.
  17. https://web.archive.org/web/20120120225605/http://www.metrogenova.com/sangiorgio.html, accessed on 26th November 2024.
  18. https://en.wikipedia.org/wiki/San_Giorgio_(Genoa_Metro), accessed on 26th November 2024.
  19. https://en.m.wikipedia.org/wiki/Sarzano/Sant’Agostino_(Genoa_Metro), accessed on 26th November 2024.
  20. http://www.metrogenova.com/sarzano.asp, accessed on 26th November 2024.
  21. https://en.m.wikipedia.org/wiki/De_Ferrari_(Genoa_Metro), accessed on 26th November 2024.
  22. https://web.archive.org/web/20120120003444/http://www.metrogenova.com/deferrari.html, accessed on 26th November 2024.
  23. https://www.tripadvisor.co.uk/LocationPhotoDirectLink-g187823-d8854114-i375721192-Genoa_Metro-Genoa_Italian_Riviera_Liguria.html, accessed on 26th November 2024.
  24. https://www.3tiprogetti.it/corvetto-underground-station-in-genoa, accessed on 26th November 2024.
  25. https://manelligroup.com/en/projects/corvetto-station-completion-works, accessed on 26th November 2024.
  26. https://www.sustainable-bus.com/trolleybus-tramway/discovering-genoas-new-subway-trains, accessed on 26th November 2024.
  27. https://en.m.wikipedia.org/wiki/Brignole_(Genoa_Metro), accessed on 26th November 2024.
  28. https://structurae.net/en/media/254830-brignole-metro-station, accessed on 26th November 2024.
  29. http://www.metrogenova.com/treniI.asp, accessed on 26th November 2024.
  30. http://www.metrogenova.com/treniII.asp, accessed on 26th November 2024.
  31. http://www.metrogenova.com/treniIII.asp, accessed on 26th November 2024.
  32. Veronica Pallotta; Metropolitane: Genova, Comune e Ferrovie siglano accordo per il prolungamento verso Canepari; in Ferrovie.Info (in Italian), 30th December  2020, accessed on 24th February 2022.
  33. Editorial; 14 nuovi treni per la metro di Genova a partire dal 2024. Li fornirà Hitachi Rail; in Liguria Business Journal (in Italian); https://liguria.bizjournal.it/2022/02/08/amt-dal-2024-hitachi-rail-fornira-14-nuovi-treni-per-la-metropolitana-di-genova, accessed on 26 November 2024.
  34. https://www.goamagazine.it/sky-tram-valbisagno-prolungamento-metro-brin-canepari-e-adeguamento-rio-maltempo-ecco-le-opere-del-mims, accessed on 26th November 2024.

The Burton and Ashby Light Railway – Part 2

An article by Seymour Glendenning in the July 1906 issue of The Railway Magazine focussed on the newly opened Burton & Ashby Light Railway. [1]

The light railway was a 3ft 6in gauge electric tram line supplied with electricity from a diesel generator plant near Swadlincote. [3] The power plant sat alongside the tram depot. [1: p56]

The first article about the line covered the length from Burton, through Newhall and Sawdlincote to Castle Gresley. It can be found here. [4]

Glendenning notes that the construction cost for the whole network was £150,000. [1: p57] He says that it served a population of about 100,000 inhabitants in the towns and villages through which it passed.

This second article about the line completes the journey, covering the length from Sawdlincote to Ashby-de-la-Zouch.

The route of the line(s) is shown in black on the map extract below.

The Burton and Ashby Light Railway. [2]

We start this second part of the journey at the tram depot which sat in Swadlincote on the North side of the Swadlincote and Woodville Branch of the Midland Railway and to the East of the Burton and Ashby Light Railway

The tram depot off Midland Road, Swadlincote, seen from the West. The trams on the depot are (left to right) Nos. 18, 5, 14, 9 and 10. On the left of the depot is the horse-drawn trolley tower. The map extract immediately below shows the depot (top-left). [3]
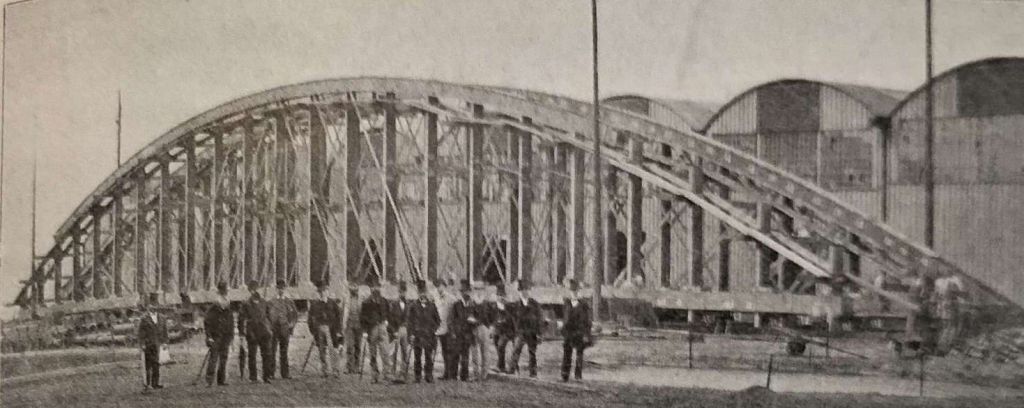
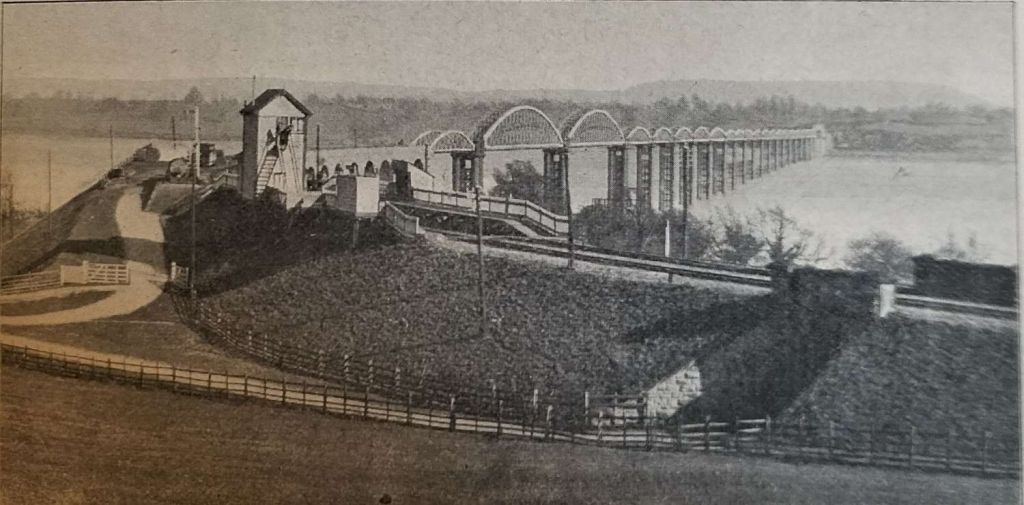
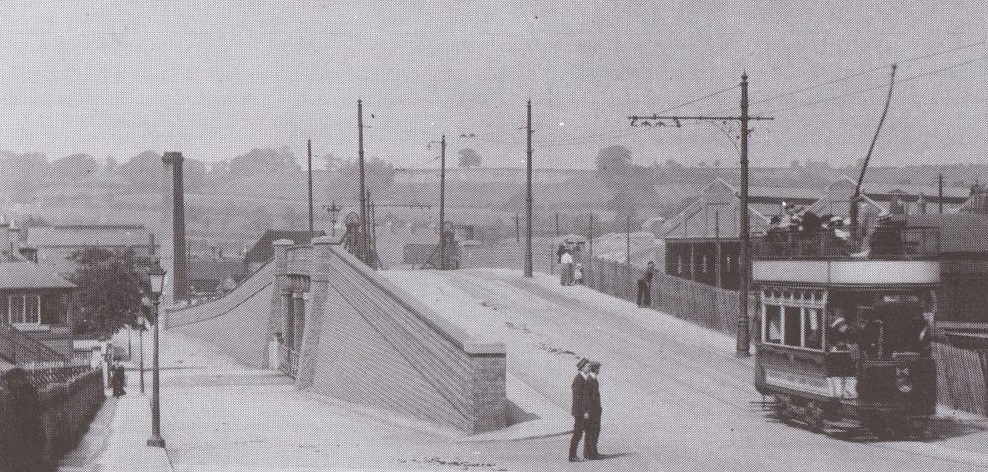
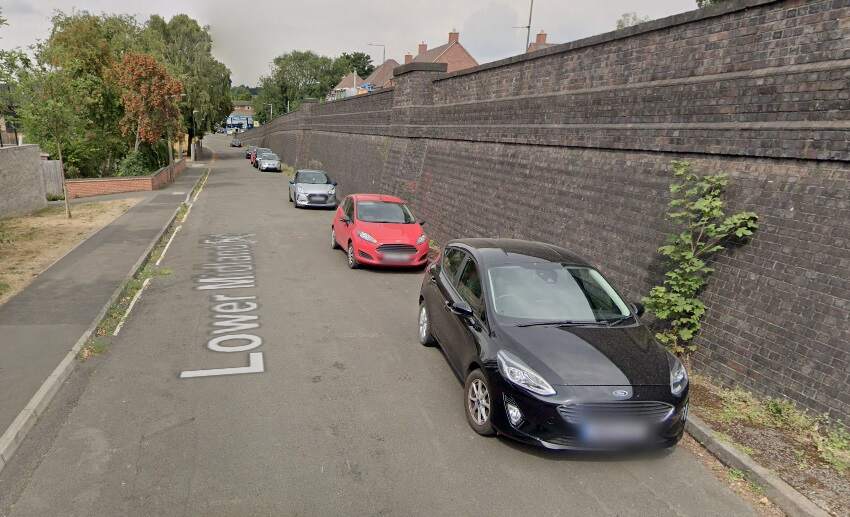
Glendenning provided a photograph of the bridge in this photograph under construction (see above). The bridge appears on the map extract immediately above and is seen here in use by the Burton and Ashby Light Tramway, (c) Public Domain. [13]
A similar view in the 21st century. [Google Streetview, August 2022]
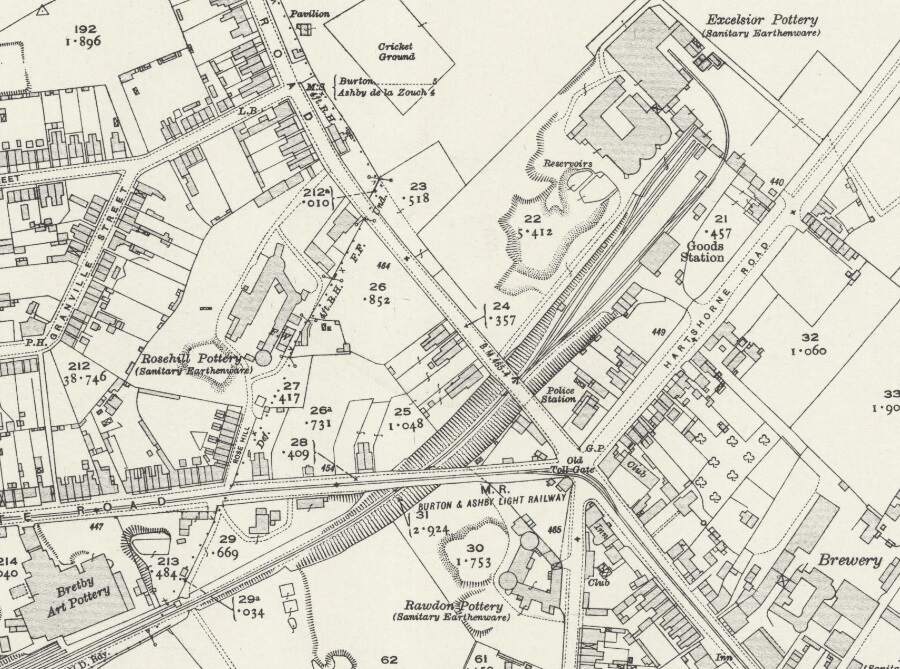
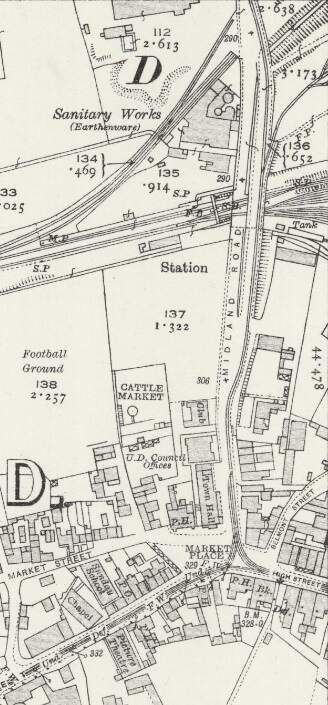
The tram depot sat to the East of the Burton and Ashby Light Railway and on the North side of the Swadlincote and Woodville Branch of the Midland Railway, just off the top-right of this extract from the 1920 25″ Ordnance Survey. As can be seen here, the branch into the tram depot left the mainline at high level adjacent to the North abutment of the bridge over the standard-gauge line. The Burton and Ashby Light Railway is shown heading South towards Swadlincote Market Place along Midland Road. Sitting to the West of the Light Railway Bridge and at a lower level was Swadlincote Railway Station. To its North were some Sanitary Earthenware Works.  [5]
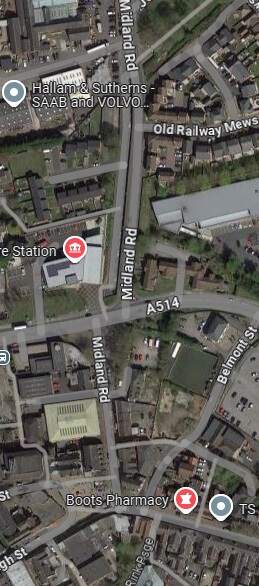
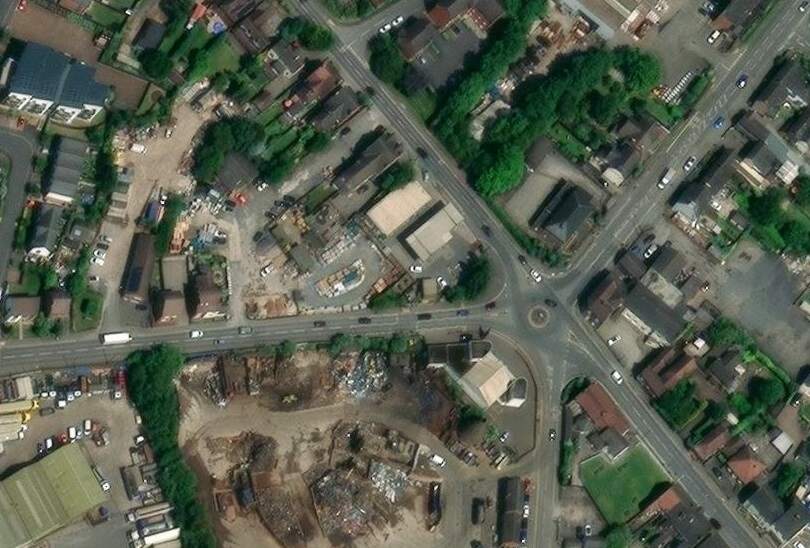
This extract from the 21st century Google Maps satellite imagery shows much the same area as the map extract above. The light railway ran down the full length of Midland Road as far as its junction with the High Street in Sawdlincote. [Google Maps, October 2024]
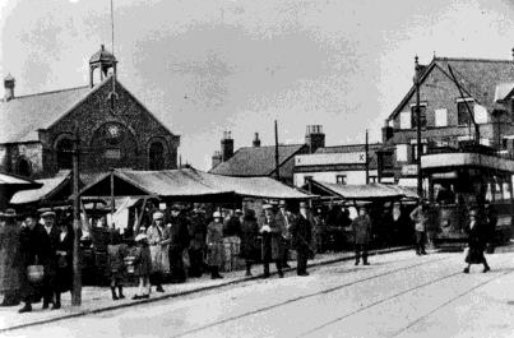
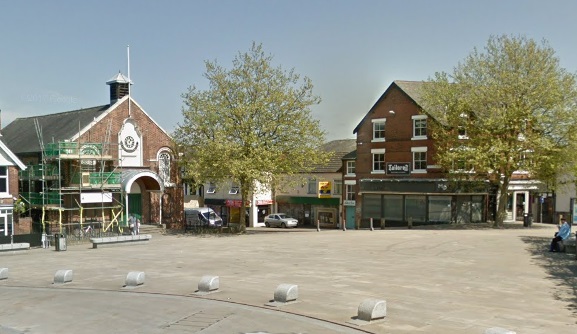
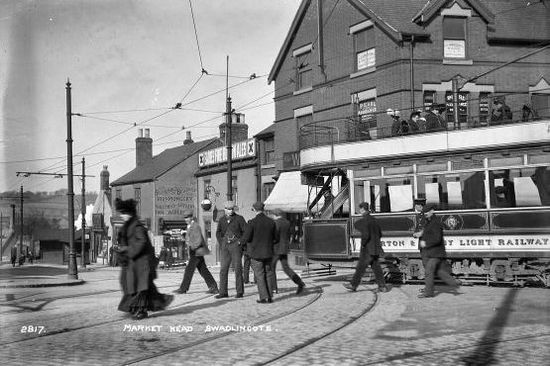
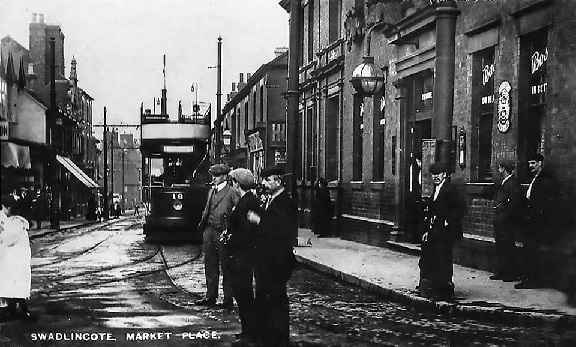
A tram sits on the South side of Market Place and is about to set off for Burton (turning left and running beyond the Town Hall which is at the left rear of the photograph), or Ashby (bearing to the right off the right side of the photograph), (c) Public Domain. [14]
A very similar view looking from West Street East into Market Place in the 21st century. [Google Streetview, May 2017]

At Swadlincote Market Place a branch left the main line to Ashby-de-la-Zouch. That branch ran South from Swadlincote to serve Castle Gresley. We followed that branch in the first article about the Burton and Ashby Light Railway.

In this article we follow the route of the line from Swadlincote to Ashby-de-la-Zouch which heads East from the Market Place.

A tram leaves the High Street, entering Swadlincote Market Place and heading towards Midland Road, © Public Domain. [28]

Glendenning describes this length of the journey:

The road towards Ashby rises continuously until it reaches a height of 569 ft. above sea level. It passes through the heart of the Derbyshire Potteries, where a great industry is carried on in the manufacture of furnace bricks, sanitary pipes, and common earthenware. Furnaces and kilns abound in Swadlincote, and the subsidiary industry of crate-making is also much in evidence.

There are numerous stacks arranged in the form of a lofty cone, of the long tapering branches of timber with untrimmed bark, which are used for making the big rectangular crates for the conveyance of heavy earthenware.

The clay for the pipes and pots is obtained on the surface, but the fire clay for furnace bricks has to be reached from a depth, by sinking shafts equipped with hoisting machinery.

Imperceptibly, Swadlincote grows into Woodville, where the large pipe works are situated, with their groups of ever-smoking furnaces and yards stacked with great heaps of pipes for sewerage and drainage purposes. But the broken pottery is even more aggressive than the sound ware. Every ‘grotto’, or ‘rockery’, is made of it; every garden path is edged with it, or with fused fire bricks. The mounds of refuse adjacent to the works are continually extending their borders and spreading over the country.” [1: p55]

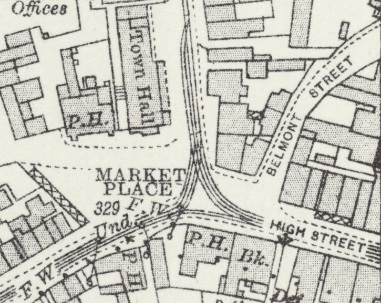
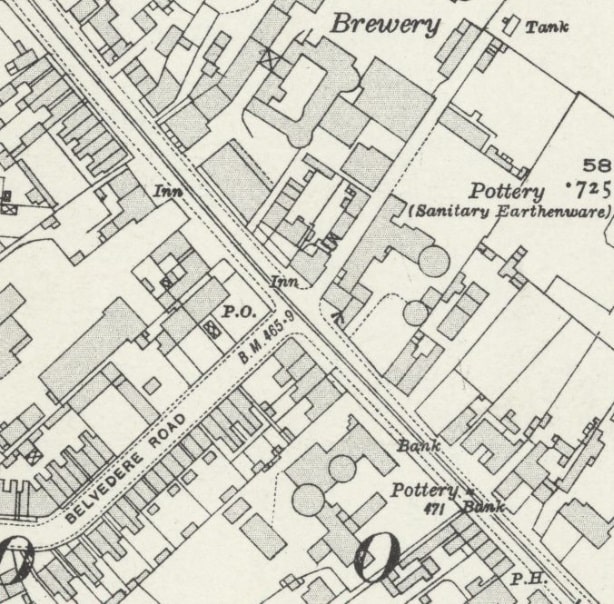
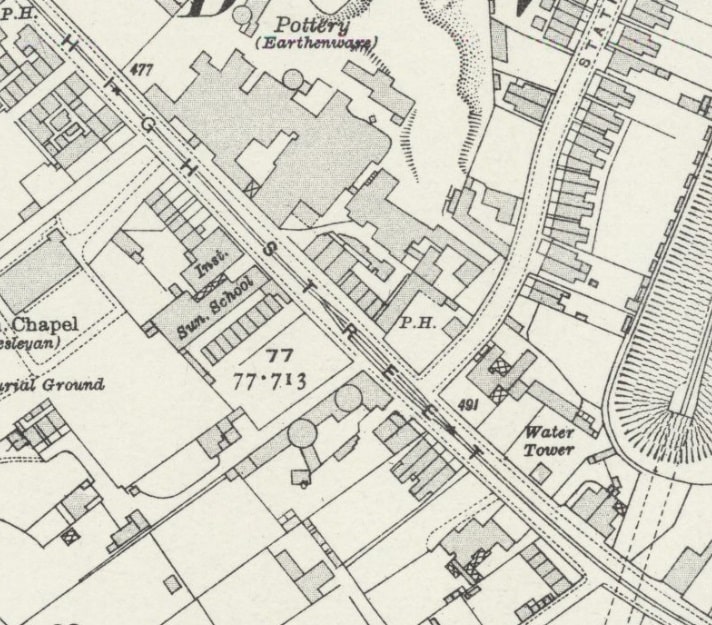
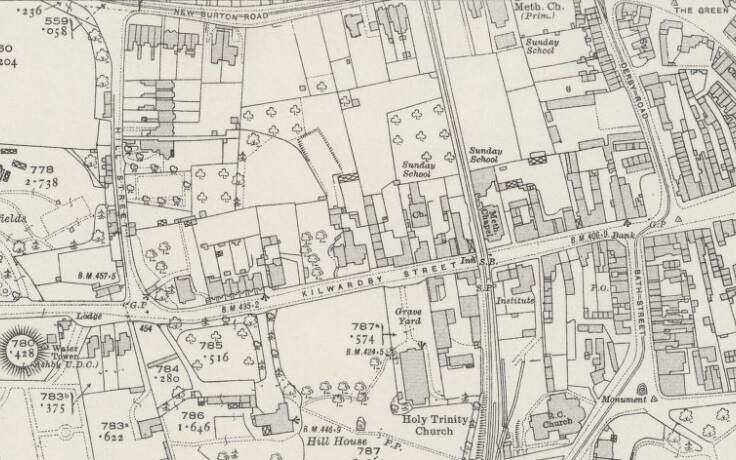
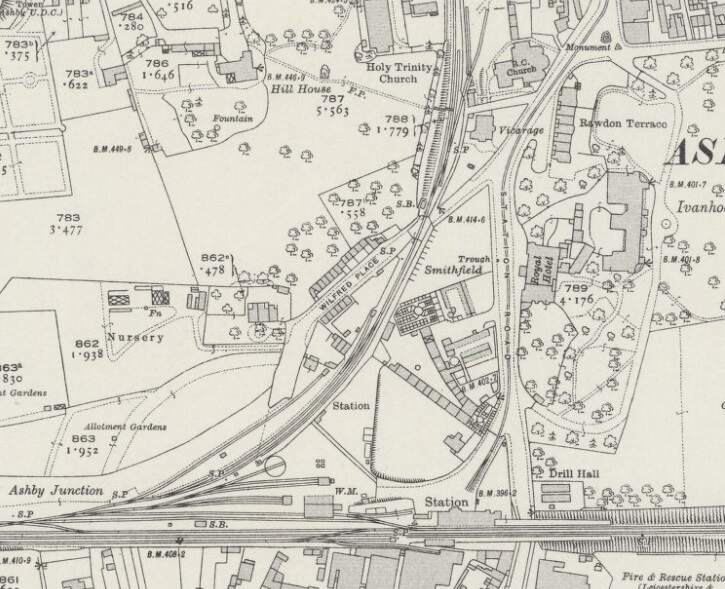
The road East of Swadlincote Market Place is High Street. As can be seen from the closely cropped extract from the 1920 25″ Ordnance Survey, the line was dual-tracked in the vicinity of the Market Place. Midland Road runs down to the Market Place on the East side of the Town Hall. Trams for Ashby left to the bottom-right of the map extract. [5]

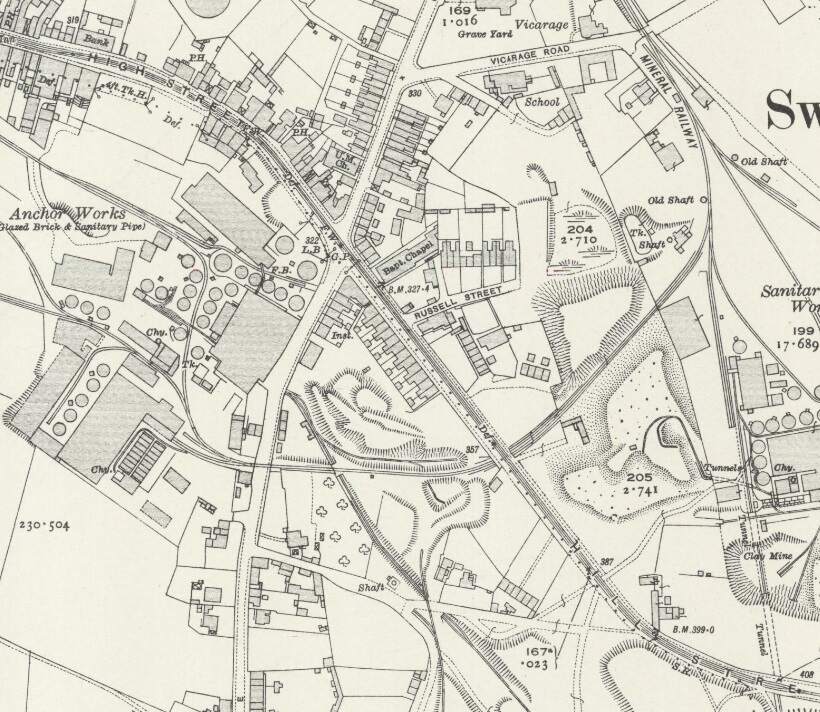
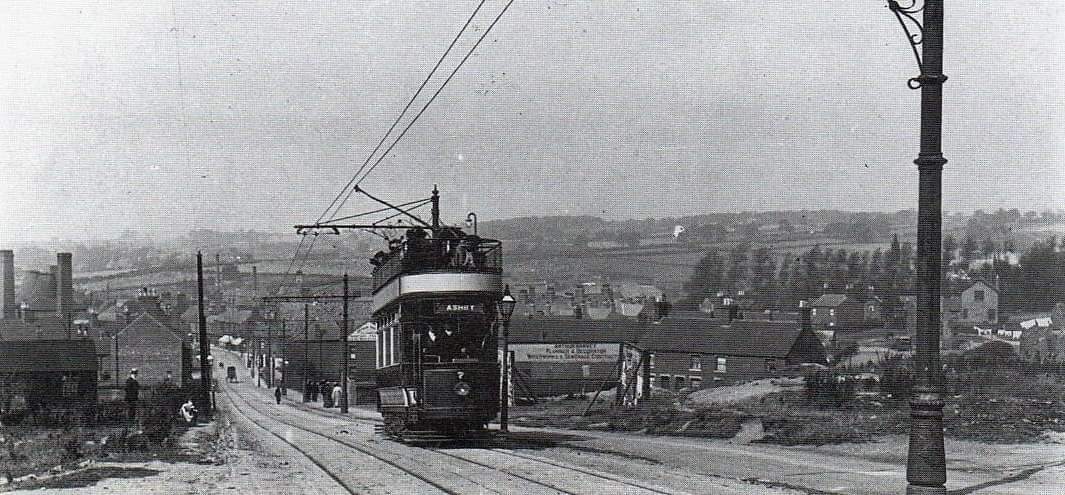
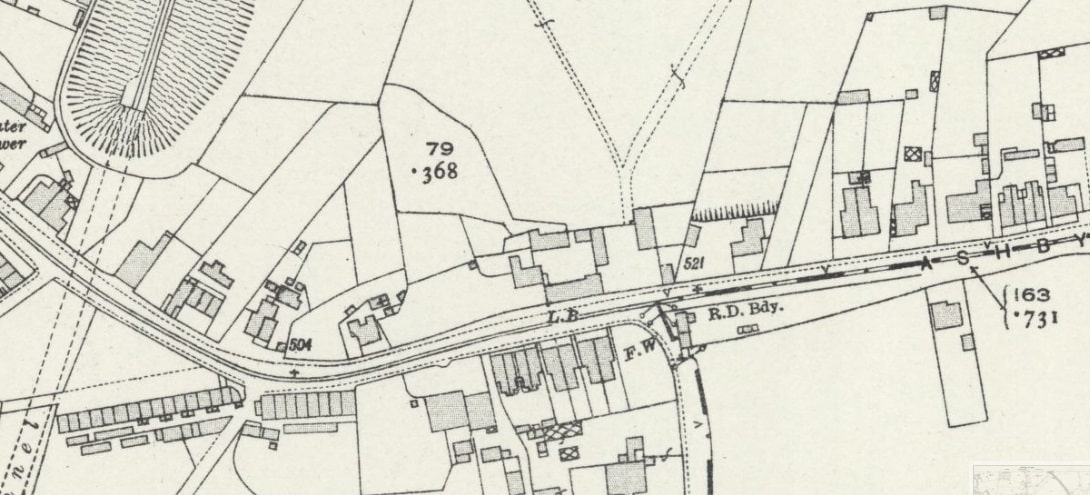
Trams ran East along High Street and turned Southeast and the road became Hill Street. The area to the East of the town centre was heavily industrialised. Different industrial concerns were linked by a network of tramways which were generally below the level of the public road and passed under it, as necessary, by means of bridges and tunnels as the map extract below illustrates.

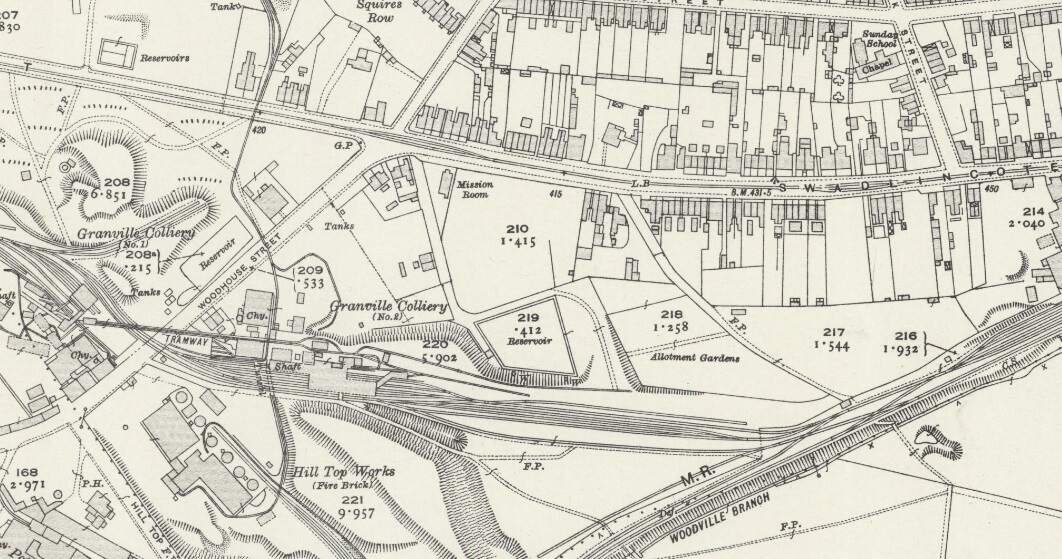
Another estract from the Ordnance Survey revised sheets of the 1920s. This sheet was surveyed/revised on the basis of what was present on the ground in 1921. [15]

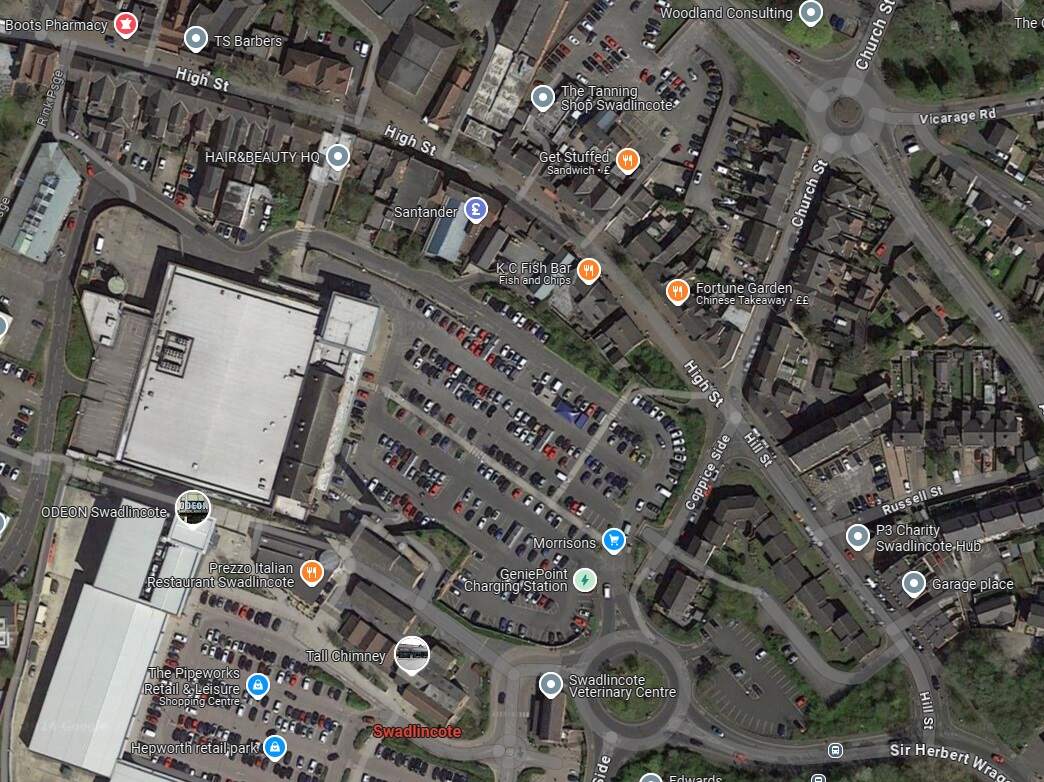
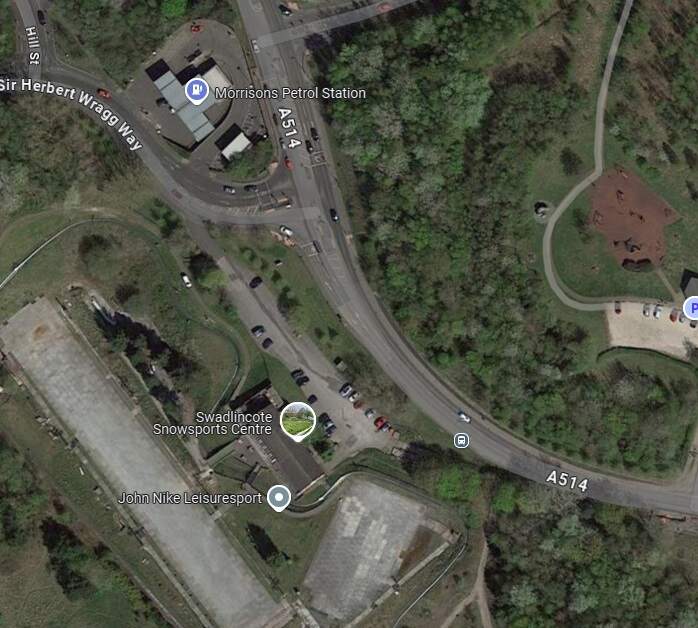
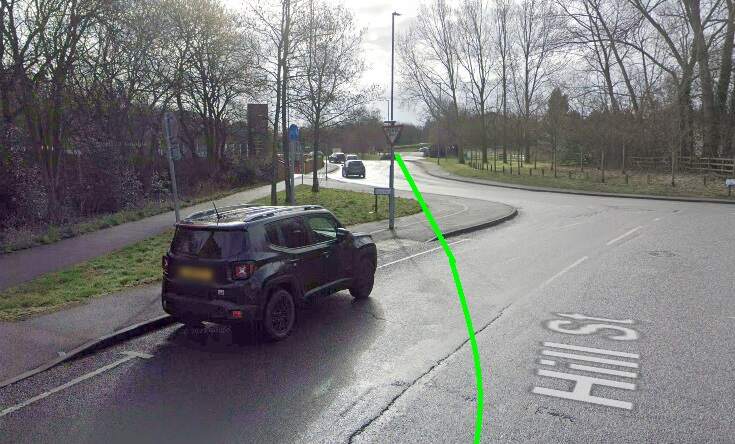
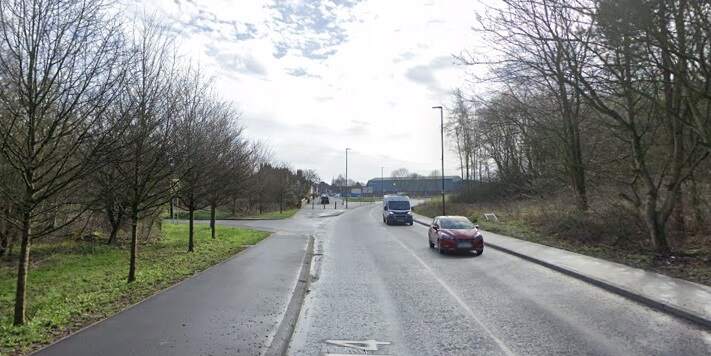
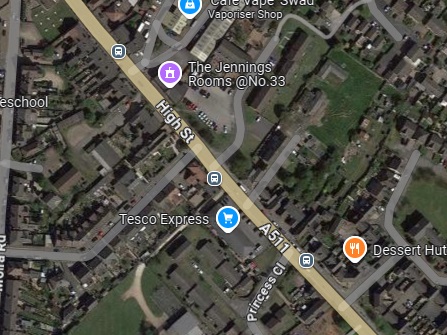
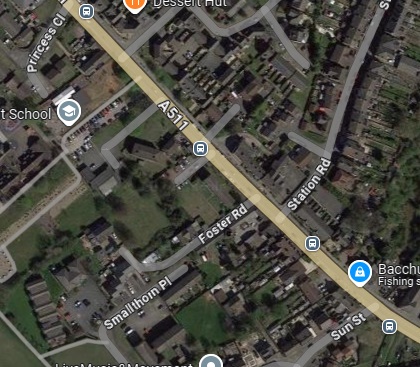
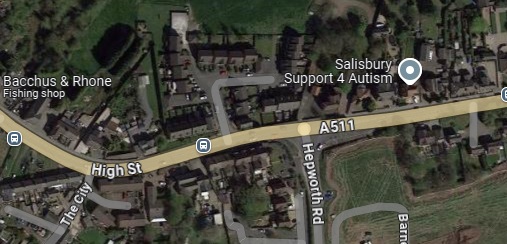
These two extracts from Google Maps satellite imagery cover the same length of the Light Railway as shown on the extract from the 1921 25″ Ordnance Survey above. The Southeastern length of what was Hill Street is now the A514 which bypasses the centre of the town. [Google Maps, October 2024]

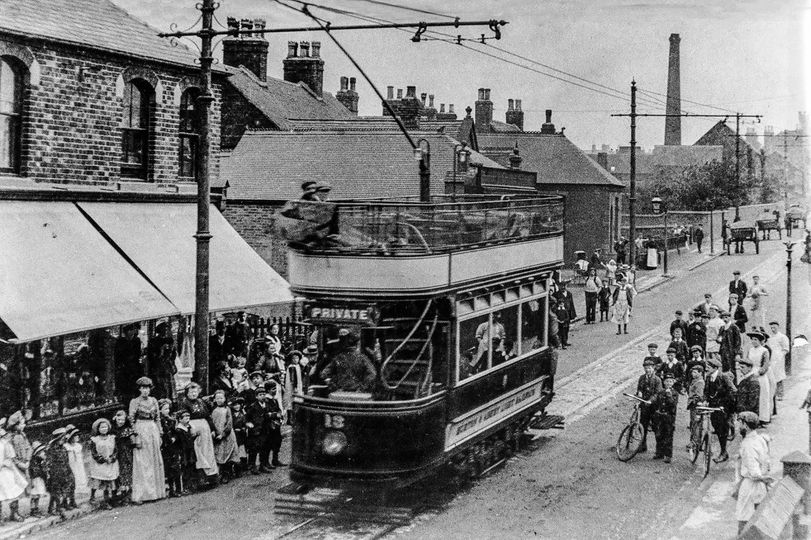
A view East along High Street, Swadlincote from the Market Place. This image was shared on the photographs New and Old of Swadlincote & Burton on Trent Facebook Group by Darren Jones on 8th July 2024. [17]
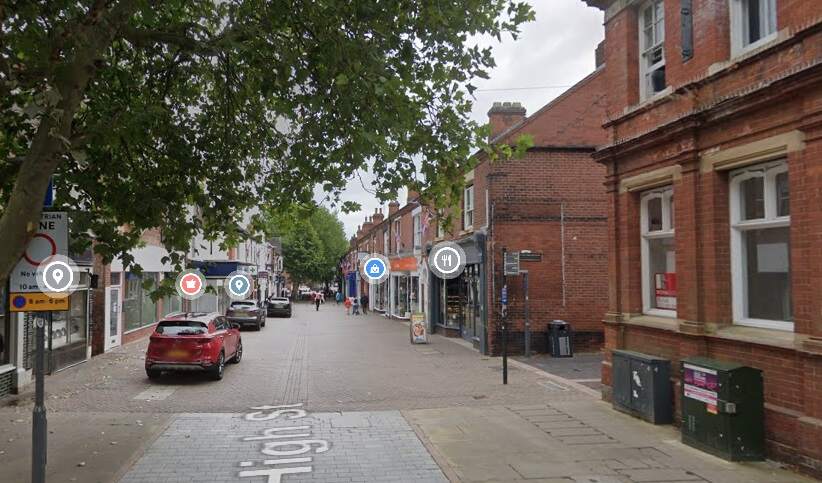
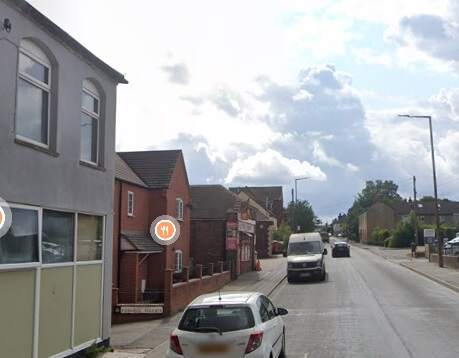
A similar view down High Street in the 2st century. [Google Streetview, August 2022]
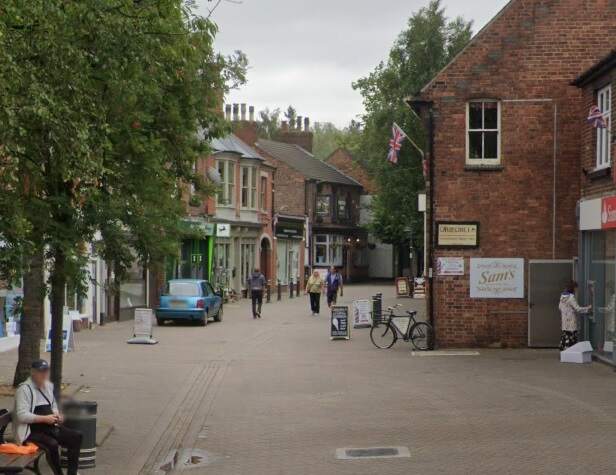
Facing Southeast along High Street, Swadlincote in the 21st century. [Google Streetview, August 2022]
A tram climbs Hill Street towards the Centre of Sawdlincote circa. 1910. This image was shared on the Swadlincote Area Railways, Tramways and Industrial History Facebook Group by Ian Siddalls on 24th February 2019. [33]
From Hill Street the line of the old Light Railway runs along a short length of Sir Herbert Wragg Way . Ignoring the junction with the A514, the old line continued to curve gently to the East to follow the modern A514. [Google Streetview, March 2023]
Facing East along the A514, the land either side of the modern road has been landscaped and shows little sign of its industrial heritage. [Google Streetview, March 2023]
This next extract from the 1921 25″ Ordnance Survey shows the Light Railway running East along Swadlincote Road. The Midland Railway Woodville Brach Line can be seen entering the extract from the South. [15]
Further to the East the Light Railway crossed the Woodville Goods Branch of the Midland Railway and ran through the centre of Woodville. [15]
The same location in the 21st century. The goods depot is long-gone as are both the road overbridges close to the junction. [18]
A tram on its way to Swadlincote passing New Inn, Woodville in the early part of the 20th century. This image was shared on the photographs New and Old of Swadlincote & Burton on Trent Facebook Group by Keith Townsley on 10th January 2023. [19]
A similar view looking Northeast on High Street, Woodville, A511 in the 21stcentury. New Inn is on the left of the photo. [Google Streetview, July 2023]
Woodville High Street on the 1921 25″ Ordnance Survey. [15]
A similar area in the 21st century. [Google Maps, October 2024]
Tram No. 13 on High Street Woodville on its test run in 1906. This image, which looks Southeast, was shared on the photographs New and Old of Swadlincote & Burton on Trent Facebook Group by Keith Townsley on 3rd May 2021. [16]
A similar vantage point in the 21st century. [Google Streetview, July 2023]
Further Southeast on Woodville High Street. [15]
A similar area in the 21st century. [Google Maps, October 2024]
Further to the Southeast once again. Trams followed the bend in the highway from High Street into Ashby Road. [15]
Approximately the same length of road in the 21st century. [Google Maps, October 2024]
High Street, Woodville bears left and becomes Ashby Road. [Google Streetview, July 2023]
This next extract from the 1921 25″ Ordnance Survey takes us to the East edge of the particular map sheet. [15]
Heading away from the camera circa 1911 Is Tram No. 7 en-route from Ashby to Burton on what is now the A511. In a minute or two, the tram would be running Northwest along High Street, Woodville. [34]
The same location in the 21st century, looking West towards Woodville. [Google Streetview, July 2023]

The next three extracts for the 1920 25″ Ordnance Survey follow the line across the next map sheet.

The Burton and Ashby Light Railway to the East of Woodville. [20]
The Burton and Ashby Light Railway further to the East. At Boundary the line/road run Southeast towards Ashby. [20]
Further to the Southeast, the bottom of this extract is also the bottom of the particular map sheet of the 25″ Ordnance Survey of 1920. [20]

Glendenning continues:

After passing Swadlincote and Woodville, – the top of a hill is reached, 569 ft. above the sea level. Cornfields and meadows abound on either side, and there is also the magnificent landscape of Charnwood Forest. Then comes the hamlet of Boundary, so called, as it is a boundary of shires, parishes, and manors. Close by is the notable village of Smisby, set amongst fine park-like scenery.

It can still boast of its tournament field, which Sir Walter Scott made allusion to in “Ivanhoe.” The situation is very exposed at Boundary; severe storms rage there periodically, and the inhabitants say that anyone who can live winter and summer at Boundary could live anywhere. After entering Leicestershire, the new line makes a quick descent into Ashby-de-la-Zouch. The old town has the refined air of a fashionable inland watering-place, though its medicinal saline baths are not more than a century old. The fourteenth-century castle was wrecked during the seventeenth-century civil wars; but even the portions that remain are magnificent, alike in size, strength and beauty of architecture.” [1: p55-56]

On its way down to Ashby-de-la-Zouch the road and light railway traverse another full 1921 25″ OS Sheet with little worthy of note. [21] The next image shows the line as it appears on the 25″ Ordnance Survey, much closer to Ashby-de-la-Zouch. [22]

The Burton and Ashby Light Railway approached Ashby-de-la-Zouch from the Northwest. The railway shown to the right of this map extract is the Midland Railway Ashby to Breedon Line. The light railway slips off the bottom of this OS Map sheet and appears again in the extreme bottom right of this extract. [22]
Looking East down Burton Road in Ashby-de-la-Zouch, (c) Public Domain. [25]
A similar view looking East on Burton Road in the 21st century. [Google Streetview, March 2023]
The Burton and Ashby Light Railway crosses the Ashby and Breedon Line (level-crossing) and then turns sharply to the South on Derby Road, Ashby-de-la-Zouch. [22]
The junction of Burton Road and Derby Road in Ashby-de-la-Zouch. The green line is the route of the Burton and Ashby Light Railway. The red line the route of the Ashby and Breedon Line. [Google Maps, October 2024]
A tram travelling down Burton Road in 1913 towards the junction with Derby Road, © Public Domain. [29]
Looking West up Burton Road from approximately the same position as the camera which took the image above. [Google Streetview, March 2023]
Burton Road runs left to right across this extract from photograph EPW01157 (c) Historic England, 1926. The line runnign top to bottom of the image is the Ashby and Breedon Line. Burton Road School is to the right of the railway line. The level-crossing gate can easily be seen, but it is difficult to make out the rails of the Light Railway in Burton Road. [26]
This aerial image looks East along Burton Road. It is an extract from Britain from Above photograph EPW015158 (c) Historic England, 1926. The level-crossing gates are much clearer. Two of the electricity supply poles for the Burton and Ashby Light Railway can be made out easily. The tracks of the Light Railway are more difficult to pick out in the road surface, although there is a hint of them in the centre of the road. [27]
This extract from EPW015158 shows the junction of Derby Road and Burton Road with the Light Railway’s route highlighted in green. Britain from Above photograph EPW015158 (c) Historic England, 1926. [27]
New Burton Road and the Burton and Ashby Light Railway transgress onto this OS Map sheet in the top left of this extract before crossing the Midland Railway Ashby and Breedon Line just off the top of the sheet (see that last map extract above). The Light Railway turned from Burton Road into Derby Road and ran South into the centre of Ashby. This can be seen to the right of this image. At the centre of the image, the standard-gauge line crossed Kilwardby Street[23]
This aerial image is also an extract from EPW015158 (c) Historic England (1926). Derby Road enters from the left, Market Street from the top, Kilwardby Street from the bottom and Bath Street from the right. The supply poles can be made out on the route along Derby Road and through the junction onto Bath Street. [27]
This second extract from EPW015157 (c) Historic England (1926) shows the same road junction, this time seen from the South with the tram lines and supply poles running from top to bottom of the image. [26]
A view looking South down Bath Street with a tram close to the Monument. This photograph was taken circa 1914 and is retained in the Derby City Council Archives (Picture the Past), (c) Public Domain. [31]
Approximately the same view in the 21st century. [Google Streetview, April 2023]
The final length of the light railway appears in this extract from the 1920 25″ Ordnance Survey. The line terminated on the station forecourt at Ashby Station. [23]
This final aerial image is a view across Ashby Railway Station from the Southwest and is an extract from Britain from Above image No, EPWW015162 (c) Historic England. The Railway Station is in the bottom-right of the photograph. The Royal Hotel is centre-top. The Light Railway terminus was in the forecourt of the standard-gauge railway station. [30]
Tramcar No. 13 standing in Station Road, Ashby in front to the Royal Hotel, a little to the North of the terminus at Ashby-de-la-Zouch Midland Railway station. The photograph was probably taken on 8th June 1906 on a testing and inspection run prior to opening the line, judging by the crowd of interested onlookers. A number of contemporary photographs exist of car No. 13 in various locations on the tramway on this occasion, two of which by Burton photographer J.S.Simnett are shown below, these being at Winshill and Newhall respectively. The postcard was published by George Brown of Ashby-de-la-Zouch.[8]
The front of the Royal Hotel in the 21st century. [Google Streetview, March 2023]
This image shows trams from the Burton and Ashby Light Railway on the station forecourt in Ashby-de-la-Zouch. It is held in the Burton Library Archive, (c) Public Domain. [32]
The Light Railway terminus at Ashby-de-la-Zouch Railway Station. This image was shared on the Rail Thing – Burton and Ashby Light Railway Facebook Group by Roger Larke on 29th June 2019. [24]

The Depot and Powerplant at Swadlincote

Glendenning tells us that:

The power station and car shed have been built at Swadlincote, which is about midway between Burton and Ashby. These premises are designed to give every facility for convenient and economical working, with ample margins for any extensions that may be necessary in future. The shed has six lines of rails, and underneath there are pits about 4 ft. deep, like a railway engine shed, so that the motor machinery on the cars may be easily got at for the purpose of examination and repairs. Adjacent to the car shed is the spacious and well-equipped power station. Here we find that not only is steam out of date for light locomotive purpose, on a short track, but it is also being superseded as a prime-mover for the generation of electricity; at any rate, in comparatively small and isolated stations, where a varying and not very heavy load has to be dealt with.” [1: p56]

Perhaps for an audience unfamiliar with the use of electricity as a power-source for a railway, Glendenning spends quite a few words explaining the reason for the choice of diesel engines to create electricity for the network. Not initially the most obvious choice in a coal-mining area. He goes on to say that:

There are two three-cylinder vertical engines of 240 18.1lp each with a huge fly-wheel weighing about nine tons, coupled direct to two cylinders, each capable of giving an output of 150 kilowatts.” [1: p57]

The Depot was “built with accommodation for 24 trams, 8 tracks x 3 deep but only 20 trams were owned.” [6]

Following closure of the system, “the tram sheds were used to accommodate Thomson’s Fair from 1935 into the 1940s and then for munitions during the Second World War.” [7]

Rolling Stock

Glendenning reports that the new line was to be operated by open-topped cars “with all the latest possible improvements, …  Built at the Brush Electrical Company’s Works, Loughborough.” [1:p57]

Glendenning goes on to describe the tramcars:

They bear the Midland Railway Company’s coat-of-arms, and are designed to carry 57 passengers each, 22 inside and 35 outside. They are mounted on Brush rigid wheel base trucks, with steel tyred wheels, provided with Hudson-Bowring-lifeguards, and magnetic track brakes. The electrical equipments, powerful motors, etc., were furnished by the British Westinghouse Electric Manufac- turing Company, of Trafford Park, Man- chester. Accommodation has been provided for the carrying of a limited number of parcels on the platforms of the cars, while, at a later stage, it is intended to carry booked parcels. Workmen’s cars, with special fares, will be run as soon after the formal opening of the line as possible.” [1: p57]

Electric Tramcar No. 2. [1: p56]

The LMS Society notes that: “The cars were in Crimson Lake and a white livery with ornate gold panelled lining and Midland crest. It was in this condition that the cars came into LMS ownership but all the cars were repainted in a simpler livery at Derby Works. The original white had weathered to a light cream and the later cream mellowed in a short life to a yellow. Although the method of tramsport to Derby Works is not certain the LMS owned bogie tramcar wagons and with an open top tramcar the bodies would almost certainly come within the loading gauge. The trolley pole, seats and wire screens were easily removed and so it is more than likely visits to works were by rail journey.” [6]

There was also a horse-drawn trolley tower/maintenance platform which can be seen in the photograph of the tram depot above.

The Service Provided

Glendenning notes that the frequency of service “between Ashby, Swadlincote and Burton [is] every half hour. … Between Woodville, Swadlincote, Newhall and Gresley, every 15 mins. … Ordinary service commences at 8 am. … Passengers between Ashby and Gresley change at Swadlincote Market Place or Woodhouse Road.” [1: p57]

This photograph was taken on West Street, Swadlincote. It is probably a picture of one of the Sunday School outings. The image was shared on the Photographs New and Old of Swadlincote and Burton on Trent Facebook Group by Keith Townley on 19th June 2021. [11]

The LMS Society goes on to tell us that:

Special services were often run, Sunday School Outings and other Club Outings, and even a Railway Club on 8th July, 1909 hired three trams for a return trip from Burton to Ashby. Special services to feed passengers to excursions from Burton Station before normal services, and upon their return after the last train, were another feature.

Three Aspect Colour light signalling was installed on the reserved country stretch between Stanhope Bretby and Sunnyside, Newhall where the line traversed the brow of a hill and the west passing loop was out-of-sight from both sides. The lights were operated by a trolley wheel contact on a solenoid, a system devised and installed by a firm, Bracknell, Munro and Rogers.” [6]

The safety record of the Light Railway “was marred by only one serious accident. No. 19 ran away and overturned at the foot of Bearwood Hill in 1915 but there were few injuries.” [6] Another source says that there was an accident in 1919 which resulted in the death of two people. [10]

The 1919 accident at the bottom of Bearwood Hill which resulted in the death of two people. [10]

The line was completed in 1906 and was assumed locally and by Glendenning to have a bright future. It was, in fact, short-lived:

“The Burton and Ashby Light Railway Company had a fleet of 20 tramcars and these operated until early in 1927. … With the increasing use of the motor bus, competition for passengers was intense and the tramway services were reduced to rush hours only. With costly maintenance required on the now 20 year-old trackwork, the tramways were beset with problems and finally the doors were closed on 19th February 1927.

Rail passenger services were still running through Castle Gresley, Swadlincote, Woodville and Ashby and motor buses took over the tram services.

The major undertaking ‘Midland Red’ or the Birmingham and Midland Motor Omnibus Co. Ltd., to quote its full title, in which the LMS had a controlling interest, took over the main services. Other local operators, Victoria Motorways, Regent buses, Brooks Blue buses ran alongside the trams for a period.” [6]

References

  1. Seymour Glendenning; The Burton and Ashby Light Railway; in The Railway Magazine, London, July 1906, p53-57.
  2. https://en.m.wikipedia.org/wiki/Burton_and_Ashby_Light_Railway, accessed on 12th October 2024.
  3. https://www.midlandrailwaystudycentre.org.uk/twochainplans/small/RFB00809sm.pdf, accessed on 16th October 2024
  4. https://rogerfarnworth.com/2024/10/19/the-burton-and-ashby-light-railway-part-1/
  5. https://maps.nls.uk/view/114591362, accessed on 17th October 2024.
  6. https://lmssociety.org.uk/topics/tramways.shtml, accessed on 18th October 2024.
  7. https://www.southderbyshire.gov.uk/our-services/things-to-do-and-places-to-visit/arts-and-culture/heritage-trails/midway-heritage-trail, accessed on 18th October 2024.
  8. https://www.tramwayinfo.com/Tramframe.htm?https://www.tramwayinfo.com/trampostcards/Postc200.htm, accessed on 18th October 2024.
  9. https://www.dfhs.org.uk/filestore/2019_June_137.pdf, accessed on 17th October 2024.
  10. https://www.derbytelegraph.co.uk/burton/man-who-job-righting-tram-2345427, accessed on 19th October 2024.
  11. https://www.facebook.com/share/p/2R6vHdibthqy15xd, accessed on 18th October 2024.
  12. This image was shared on the Newhall, Stanton & Bretby Yesteryears Facebook Group by Kevin Hallam on 19th February 2023, https://www.facebook.com/groups/1074190616309168/search/?q=tram, accessed on 18th October 2024.
  13. https://gsq-blog.gsq.org.au/travel-on-my-mind/swadlincote-tram_ed/, accessed on 17th October 2024.
  14. https://www.southderbyshire.gov.uk/assets/attach/5004/Swadlincote-Heritage-Trail-Town-Centre-leaflet-FINAL2.pdf, accessed on 19th October 2024.
  15. https://maps.nls.uk/view/114591365, accessed on 19th October 2024.
  16. https://www.facebook.com/photo/?fbid=286971863140713&set=gm.3943789782373007, accessed on 19th October 2024.
  17. https://www.facebook.com/photo/?fbid=7921013811278470&set=p.7921013811278470, accessed on 19th October 2024.
  18. https://maps.nls.uk/geo/explore/#zoom=18.0&lat=52.76966&lon=-1.53509&layers=168&b=ESRIWorld&o=100, accessed on 19th October 2024.
  19. https://www.facebook.com/photo/?fbid=712114870626408&set=pcb.5768333646585269, accessed on 19th October 2024.
  20. https://maps.nls.uk/view/114591374, accessed on 20th October 2024.
  21. https://maps.nls.uk/view/114592296, accessed on 20th October 2024.
  22. https://maps.nls.uk/view/114592356, accessed on 20th October 2024.
  23. https://maps.nls.uk/view/114592383, accessed on 20th October 2024.
  24. https://www.facebook.com/photo/?fbid=1341193816054846&set=pcb.2997610126945848, accessed on 20th October 2024.
  25. https://freepages.rootsweb.com/~brett/genealogy/photos/eng/dby/scarratt/fwscarratt0099.jpg, accessed on 20th October 2024.
  26. https://www.britainfromabove.org.uk/image/EPW015157, accessed on 20th October 2024.
  27. https://www.britainfromabove.org.uk/image/EPW015158, accessed on 20th October 2024.
  28. https://uk.pinterest.com/stephen_baldwin/burton-ashby-light-railway, accessed on 20th October 2024.
  29. https://www.pinterest.com/pin/469359592409742050, (the original image appears to have come from the National Railway Museum but the link is broken), accessed on 20th October 2024.
  30. https://www.britainfromabove.org.uk/image/EPW015162, accessed on 21st October 2024.
  31. https://picturethepast.org.uk, accessed on 21st October 2024.
  32. http://www.burton-on-trent.org.uk/page/2?p=hkwnwgtg, accessed on 21st October 2024.
  33. https://www.facebook.com/photo?fbid=10213834165548649&set=pcb.2048907168550697, accessed on 21st October 2024.
  34. https://www.facebook.com/photo/?fbid=10221709102377148&set=gm.5146941508747232&idorvanity=356398021134962, accessed on 21st October 2024.

The Severn & Wye Joint Railway and its Locomotives – The Railway Magazine, November 1899.

Reading the November 1899 edition of The Railway Magazine, I came across an article about railways and tramways in the Forest of Dean … ‘The Severn &  Wye Joint Railway’ by E.A. Clark. [1]

The article from 1899 adds something to the series of posts already made about the Forest and it railways

Clark says that “it was in the year 1809 that the initiative of the Severn and Wye took place. It had long been felt that there was great commercial scope in the Forest of Dean, and in this year Parliament sanctioned the construction of a tram road through the district. The undertaking was incorporated by the name of the Lydney and Lydbrook Railway Company, ‘for the purpose of making a railway or tramway from the River Wye at Lydbrook to the River Severn at Lydney, with various branches to serve the collieries in the Forest of Dean’. The Company finding their undertaking not complete, owing to there not being proper accommodation at Lydney for the export of coal, etc., in the following year (1810) obtained power by an Act of Parliament for the construction of a canal (over one mile in length) and docks or basins at Lydney to communicate with the River Severn, and the name of the Com- pany was changed by the same Act to the Severn and Wye Railway and Canal Company.” [1: p434-435]

A Horse Drawn Vehicle sitting on the Tramway. The stone sleeper and rail construction is evident in this image. The vehicle looks to be a passenger carriage which has the correct wheel-spacing for the track gauge – probably not typical of the routine use of the Tramway! [1: p434]

Clark goes on to tell us that “the cost of construction of the tramway was nearly £90,000. The tramway was laid with tram plates and worked by horse power until the year 1865, when the first locomotive engines were used. From 1810 to 1868, the concern worked very satisfactorily and good dividends were paid. The Great Western Railway Company had constructed a railway on the broad gauge principle to the Forest at one or two points, and this rendered it necessary for the Severn and Wye in 1868 to lay down a broad gauge railway upon that part of their undertaking which lies between the South Wales Railway (Great Western Railway) at Lydney and Wimberry Slade near to the station now known as Speech House Road. Parliamentary authority was obtained to confirm this and to extend the line from Wimberry Junction to Cinderford, also to construct a very important branch, known as the ‘loop Line’ which runs from a point known as ‘Tufts’ between Lydney and Whitecroft on the main line, passing round the eastern side of the forest with sidings to the various collieries, and meeting the main line again at a point known as Drybrook Road, where there is now a passenger station. The loop line is 6 miles 55 chains.” [1: p435]

Clark continues: “The following year, a further Act empowered the Company to convert the tramway on the Lydbrook section to a railroad, with connection with the Great Western Railway at Stowefield, now known as Lydbrook Junction. In 1872, the tramway to Milkwall was substituted by a railway from the main line at Parkend with an ex-tension to Coleford. In 1875 the ‘Foresters’ (as the natives of the district are called) had their first experience of riding behind a locomotive engine. For it was in 1872 that an Act of Parliament was passed, which sanctioned the Severn and Wye Railway conveying passengers. … The year 1872 was a very important one to the Foresters, for in addition to the powers obtained as above described, the Severn Bridge Railway Company [was] incorporated for the purpose of making a railway from the Severn & Wye Railway and the Great Western Railway at Lydney across the River Severn to Sharpness Docks … and the Midland Railway.” [1: p435-437]

The Severn Bridge Railway

The Severn Bridge was opened for passenger traffic on 17th October 1879. That year, the Severn  & Wye Railway & Canal Company amalgamated with the Severn Bridge Railway, and was incorporated under the name of the ‘Severn and Wye and Severn Bridge Railway Company’. This new departure was not a financial success, and the most important Act had yet to be passed, and that was in 1894, for vesting in the Great Western and Midland Railway Companies the whole undertaking of the Severn and Wye and Severn Bridge Railway Company (at a cost of over £447,000), and by the same Act the Midland Company were empowered to transfer to the joint Committee (fe. the Great Western and Midland Com-panies), their branch known as the ‘Gloucester and Berkeley New Docks Branch’ rom Sharp- ness to Berkeley Road, joining the Midland main line.” [1: p437]

One  of the large soans of the Severn Bridge during construction at Liverpool. [1: p439]
A postcard view of the Severn Bridge with Severn Bridge Station in the foreground. [1: p439]

There was much local opposition which meant compromise was necessary. Several conditions were therefore enjoined in the Act, one was the extension of the railway into Cinderford Cinderford, should be extended into the town.

At the time of the writing of the article (November 1899) there were over 40 collieries; two large tin-plate works; several iron ore mines; and numerous quarries. “Total traffic carried by Severn and Wye Railway Company:- 1875, 492,931 tons; 1890, 674,545 tons; 1898, 1,149,631 tons. Of course the great increase in the 1898 figures, as compared with the 1890 figures, [was] due to some extent owing to the traffic from Sharpness not being accounted for in the 1890 figures – the Berkeley Branch then belonged to the Midland Railway. … Passenger traffic [had] doubled during the last two years as compared with ten years [before].” [1: p438-439]

‘Little John’, its Class Mates and Later Locos

Clark provides two pictures of what he says was the first broad gauge locomotive belonging to the Severn & Wye Railway (‘Little John’). The pictures below show it as an 0-4-0WT locomotive. It is possible that, a few years earlier, the Company purchased a single loco on a trial basis. “This locomotive was [possibly] ‘Little Nell’, an 0−4−0 saddle tank, the first locomotive built at the Boyne Engine Works, Leeds, by Manning, Wardle & Company, and delivered to Sheepbridge on 5th February 1859.” [4]

Clark indicates that these photographs depict ‘Little John’, the first broad gauge locomotive owned by the Severn & Wye Railway Company. The loco shown was an 0-4-0WT loco. [1: p437]

Some notes on the Western Thunder website suggest that ‘Little John’ was one of three locomotives of the same design which were supplied to the Severn & Wye Railway (S&WR). The three locos were ‘Will Scarlet’, ‘Little John’ and ‘Alan-a-Dale’. The writer of those notes assumed that ‘Little John’ and its class-mates were 0-6-0WTs and mentions that the three locos were divided between the GWR and MR when the S&WR was taken into joint ownership in July 1894, ‘Will Scarlet’ (FJ 122) became GWR 1356, ‘Little John’ (FJ 140) became Midland 1123A, and ‘Alan-a-Dale’ (FJ 157) became Great Western 1355. [3]

It seems from the discussion on that website that six 0-6-0T locos were purchased by the S&WR, these were of various designs from different suppliers. Fletcher Jennings supplied locos as shown below.

Illustrations showing details of the six 0-6-0T locomotives supplied to the Severn & Wye Railway by Fletcher Jennings. These illustrations and the quoted text below appeared in the 30th April 1869 copy of ‘The Engineer’ [2]

The notes associated with the two images above say: “This somewhat remarkable engine – illustrated above … which is of the broad, or 7ft. gauge, has been specially constructed with a view to its being readily altered if occasion should require to suit the ordinary narrow gauge, and with as little expense as possible. To this end the axles are made, as will be seen by reference to the plan and section, with a third journal and wheel seat in positions proper for 4ft. 8.5 in. gauge, the coal-box, water tanks – except the one under footplate – fire-box, smoke-box, side foot-plates, and other parts are all made to suit the narrow gauge, so that when the alteration, which is anticipated, is required, little more is needed than to shorten the frame stays and buffer beams, remove certain brackets which support the fire-box and smoke-box, place the frames nearer together, shorten the axles, and remove one of each pair of wheels to its inner wheel seat. The cylinders are 14in. diameter, and the stroke is 20in.; the wheels 4ft. diameter, and extreme wheel centres 11ft. 3in.; tires, piston-rods, motion bars, crank pins, &c., are of steel. The fire-box is 3ft. 3in, long, 3ft. 3in. broad, and 4ft. 10in. deep. The boiler barrel, which is telescopic, is 3ft. 6in. mean diameter, and 8ft. Shin. long; the tubes are of brass . long, 2in. outside diameter, and 105 in number. … The total weight with a full supply of water and fuel is 28 tons 6 cwt., and this is distributed as follows:- Leading wheels, 9 tons; driving wheels, 9 tons 1 cwt.; trailing wheels, 10 tons 5 cwt. With partially filled tank and coal-box, the weight is equally distributed on the wheels.” [5]

Another source on ‘rmweb’ provides the following notes which were sourced from the RCTS publication, ‘Locomotives of the GWR – Part 3’. “Severn and Wye loco history is not simple. … They started to get steam engines in 1865, when there was thirty miles of 3’8” tramway. By 1867 they had five locos, and decided to go broad gauge, converting three engines. Two broad gauge engines were obtained, but in 1872 they decided to go to standard gauge, so the five broad gauge engines were converted to standard. The S&WR amalgamated with the Severn Bridge Railway in 1879. A receiver was appointed in 1883, and the railway was taken over jointly by the MR and GWR in 1894. … The first five engines were Fletcher Jennings 1864, with flangeless wheels for the tramroad. 1-4 were 0-4-0WT, 2-3 being the ones that were converted, 1 becoming a canal dredger.  5 was an 0-6-0ST which also went through two gauge conversions. All these had gone by the time of the receivership.

The RCTS publication, ‘The Locomotives of the Great Western Railway Part 3 Absorbed Engines 1854-1921‘, details the following locomotives as well:

  • Robin Hood, Fletcher Jennings 1868, MR 1121A – was broad gauge originally.
  • Will Scarlet, Fletcher Jennings 1873, GWR 1356.
  • Little  John, Fletcher Jennings 1874, MR. 1123A.
  • Alan-a-Dale, Fletcher Jennings1876 GWR 1355.
  • Friar Tuck, Avonside, 0-6-0T 1870  MR 1122A – was broad gauge.
  • Maid Marian, Avonside, 0-6-0T 1872 GWR 1357.
  • Ranger 0-6-0 (rebuilt ST), GWR 1358 – very complicated history.
  • Raven 0-6-0ST, Boulton, 1876 – sold on.
  • Wye 0-4-0T, Fletcher Jennings, 1876 GWR 1359.
  • Sharpness, Vulcan, 1880 MR. 1124A.
  • Severn Bridge, Vulcan, 1880 GWR 1354.
  • Sabrina, Vulcan, 1882 MR 1125A.
  • Forester, Vulcan, 1886 MR  1126A.
  • Gaveller, Vulcan, 1891 GWR 1353.
  • Four locos were hired from Boulton’s siding at different times.

The net result of these different notes is that the 0-4-0WT loco shown in Clark’s article in the Railway Magazine is unlikely to be ‘Little John’. ‘Little John’ was probably one of the later 0-6-0T locos and may well not have been a broad gauge engine at any time during its working life.

‘Forrester’, which Clark says was the first six-wheeled broad gauge locomotive of the S&WR. [1: p438] As the notes above suggest,  ‘Forrester’ was actually one of the later purchases by the S&WR. [6]
‘Robin Hood’ – Clark says that this was a six-coupled broad-gauge locomotive. [1: p438] The loco was built in 1868 as a broad-gauge locomotive. [6]

References

  1. E.A. Clark; The Severn & Wye Joint Railway; in The Railway Magazine, London November 1899, p434-441.
  2. https://www.gracesguide.co.uk/File:Im1869EnV27-p305.jpg, accessed on 10th September 2024.
  3. https://www.westernthunder.co.uk/threads/seeking-info-on-severn-wye-rly-fletcher-jennings-engines.5132, accessed on 10th September 2024.
  4. https://rogerfarnworth.com/2019/02/08/a-first-steam-locomotive-for-the-severn-and-wye-tramway
  5. https://www.rmweb.co.uk/forums/topic/131654-annies-virtual-pre-grouping-grouping-and-br-layouts-workbench/?do=findComment&com, accessed on 10th September 2024.
  6. The Locomotives of the Great Western Railway Part 3 Absorbed Engines 1854-1921;
    Railway Correspondence and Travel Society, 1976.

The Tramways of Nice:- Les Lignes de l’Arriere-Pays (The Lines of the Hinterland) Part 1 – First Generation Electric Tramways to Contes, Bendejun and La Grave de Peille, and a planned line to l’Escarene – (Chemins de Fer de Provence/Alpes-Maritimes No. 95)

This article looks at two tramway routes which were built. The first ran from Nice to Bendejun via Pont de Peille and Contes. The second branched of the first at Pont de Peille and ran to along the valley of the Paillon de Peille to La Grave de Peille. It also covers a proposed tramway to l’Escarene which was not constructed.

Nice to Contes and Bendejun

This line was approximately 18.6 km long. The first part of the route (from Nice Place Garibaldi as far as La Trinite Victor) ran along the same rails as the urban service – a length of around 6.5km.Just over 9 km of line (which was deemed to be part of the coastal (littoral) network) brought trams to Contes. The final length of the line was regarded as part of the TNLs ‘departemental’ network and took trams to the terminus at Bendejun.

Only approximately 0.5 km of the line and (as far as Contes) was on the level. The remainder of the line was set at varying gradients with the steepest being 55mm/m. The line rose from 12 metres above sea-level at Place Garibaldi to 189 metres above sea-level at Contes, and 260 metres above sea-level at Bendejun.

The following notes on the significant dates associated with the line are gleaned from Jose Banaudo’s book. [1: p70] …

The line from Garibaldi to Abbatoirs opened to the public on 21st February 1900. On 2nd June of the same year, the line opened from Abbatoirs to Contes. Goods were carried on this section of the line from 1st October 1900.

It was not until 1st February 1909 that passengers could travel between Contes and Bendejun and no goods were carried along that length of the line until 1st January 1911.

After just over a year, in February 1912, subsidence closed the length of the line between Contes and Bendejun. The line opened again in March. During the winter of 1916-1917, the line was closed by snow and landslides.

On 1st January 1923 tram services were given new numbers: Nice to La Trinite or Drap became No. 26; Nice to Contes or Bendejun, No. 27.

Sadly, after further problems with landslides, the line between Contes and Bendejun was permanently closed from 18th November 1926.

On 8th October 1934 renumbering led to the line to La Trinite being numbered 36 and the Nice to Contes service, 37.

A landslide affected the line between the cement works and Contes. It was closed from November 1934 to March 1935.

Late in 1935, the Nice terminus of these services was moved from Place Garibaldi to Rue Geoffredo.

After damage to the electricity substation adjacent to Pont-de-Peille on 12th February 1938, the passenger service from Drap to Contes was curtailed and the No. 37 service was replaced by buses. 

There was opposition to the bus service being provided by a single company. This saw a reopening of the tram service on Ligne 37 on 15th March 1938. There followed a period between 3rd August 1938 and December 1944 when tramway services were interrupted relatively frequently for a variety of reasons which included damage during WW2.

On 23rd December 1944 the tram service resumed from Nice to Pont-de-Peille with a bus service covering the remainder of the route to the North.

On 17th January 1945, goods transport between Contes and Nice resumed and, on 20th January 1945, passenger trams returned to Contes.

In the winter of 1948-1949 bad weather saw the interruption of services North of La Pointe de Contes.

January 1950 saw the closure of the line to passenger services with buses used to replace that service on a permanent basis. In May 1950, the goods service was also closed permanently.

The line to Bendejun followed the left bank of the River Paillon between the centre of Nice and its terminus in Bendejun. Its terminus in Nice was at the Northwest corner of Place Garibaldi, where a wooden kiosk served as its station building. It used the same tracks as the urban services through Abattoirs to La Trinité-Victor.

L’Octroi de Turin at Contes was the terminus of Ligne 37 – Thomson-Houston tram No. 204 from l’Octroi sits at the tram stops at Pont Michel in 1949, © P. Laurent from the private collection of Jean-Paul Bascoul. This image was shared by Jean-Paul Bascoul on the Comte de Nice et son Histoire Facebook Group on 10th December 2021. Jean Claude Lehoux commented as follows: This route together with the line to La Grave de Peille were the last TNL non-urban lines to be converted to bus operation. Apparently, before WW2 the line was already predominantly served by buses. During the War, the trams returned but ceased passenger operations in 1947 (La Grave de Peille) and 1949/50 (Contes). The line to Contes, despite still having significant freight traffic, seems to have been completely abandoned around 1951. A similar picture, featuring trams No. 104 and No. 212, taken at the present day Post Michel appears in José Banaudo’s book. In that image, No. 104, heading for La Trinité crosses paths with No. 212 coming from Contes à l’Ancien-Octroi-de-Turin. Banaudo says that at the boundary of Nice, close to the current “Michel Bridge”, this stop had three tracks to facilitate the crossing between urban services, those serving the Paillon valleys and goods convoys. [1: p67]

For a short distance trams ran on the verge of Route Nationale No. 204. Stops at Roma and Random (which had a passing loop) were followed by the stop in the village of Drap which was adjacent to the bridge to Cantaron.

The Route Nationale in Drap. Tram tracks can be seen in the centre of the road. This old postcard view was shared on the Comte de Nice et son Histoire Facebook Group by Alain Nissim on 18th May 2022. [4]
Drap again, this image shows La Place des Ecoles and the Route Nationale. A tram can be seen on the road at the extreme right of the picture. This old postcard view was shared on the Comte de Nice et son Histoire Facebook Group by Alain Nissim on 18th May 2022. [4]
La Place des Ecoles viewed from almost the same location as in the monochrome postcard image above. In the 21st century the Plane trees have gone and cars have taken over from the park that made up much of the square. [Google Streetview, November 2022]
Turning just a little to the right and wandering a little further along the Route Nationale, this image shows the passing loop at the tram stop in Drap. It was shared on the Comte de Nice et son Histoire Facebook Group by Jean-Paul Bascoul on 22nd February 2019, and comes from his private collection. [5] The same photograph appears in José Banaudo’s book. [1: p68]
Approximately the same location as seen in the 21st century. The school on the left has seen its roof raised by the addition of another floor. [Google Streetview, November 2022]

It appears that as late as 1955, the tram track was visible in the road surface in the centre of Drap. The two parallel images from the IGN website show it present on Avenue de General de Gaulle when the map on the left was surveyed in 1955.

The Place des Ecoles in the centre of Drap. The ‘cross’ on the older map on the left is superimposed over the line of the tramway which was in the centre of the road. [11]
A little further North the tramway can be seen leaving the centre of the road in the 1955 map extract. Presumably it ran along the verge between the road and the River Paillon. It might already have been lifted by 1955. The map is of little help with establishing its presence immediately North of this location. [12]

Leaving the centre of Drap, trams then passed under the PLM line between Nice and Cuneo for the third time at Pont des Vernes which also spanned the River Paillon. Trams ran between the river and the road.

Pont des Vernes in the 21st century. What was the old Route Nationale still passes under the most Easterly span of the truss girder viaduct which also spans the River Paillon. [Google Streetview, 2011]

The confluence of two arms of the River Paillon lay shortly beyond the railway bridge (Paillon de Contes and Paillon de L’Escarène). The Paillon de L’Escarène flowed in from the Southeast from the heights of Peillon, L’Escarène and Lucéram. It was spanned by a five-arched viaduct, some 140 metres in length which carried both the Route Nationale and the tramway. The construction of the bridge was started in the last years of the 18th century. While the bridge may well have been completed within a few years, the construction of the road of which it was a part, between Turin and Nice, was interrupted by conflict and was not completed until 1838. [1: p67]

A postcard view from the Southwest looking towards Pont de Peillon. The old road bridge (and its five arches) sits at the centre of the view. [7]
A modern view looking Northeast along the D2204 where it crosses the Paillon de L’Escarene. [Google Streetview, April 2023]
The same bridge, viewed from Chemin du Fontanil de Croves to the Southeast of the bridge. [Google Streetview, May 2019]
This next extract from the parallel imagery provided by the IGN shows the tramway returning to the centre of the Route National as it crossed the bridge in 1955. It might be inferred from this that from Drap to this point it was still present on the West side of the highway. Again, however, the map extracts cannot be seen as conclusive proof of this. At the centre-top of the 1955 map extract the tramway appears to leave the road carriageway for a short distance for a tram stop and passing loop, which is mentioned in the text below. However Jose Banaudo has a photograph of the location in his book which seems to show the tramway remaining in the carriageway with an electricity substation just beyond it. [1: p69] There is now a roundabout at the junction between the road to Contes/Bendejun and the road East to La-Grave-de-Peille. [13]

Trams faced gradients on either side of the central arch of the bridge – 41mm/m and 34mm/m. Very soon after crossing the bridge in a northbound direction, trams encountered the stop at Pont-de-Peille, “where an electrical substation was located and from which the La-Grave-de-Peille line branched off to the east.” [1: p67]

A 21st century view North from the bridge. [Google Streetview, April 2023]
The hamlet of La Pointe-de-Contes was beyond the North end of the bridge over the Paillon de L’Escarene. [3]

Beyond the hamlet of La Pointe-de-Contes, the line crossed the Ruisseau de la Garde (a tributary to Le Paillon de Contes) on a single-span bridge.

This next extract from the parallel mapping of the IGN shows the highway bridge over the Ruisseau de la Garde. The bridge sits in the bottom half of the two map extracts. The 1955 mapping appears to show tram tracks over the bridge at the centre line of the road. To the South of the bridge, it seems that the tramway was on the West verge of the road. North of the bridge it appears to switch to the East side verge of the carriageway. Only a short distance further North the tramway appears to cross back to the West side of the road. Road realignments in this area have resulted in a roundabout at the location of the old bridge. [14]
The bridge over the Ruisseau de la Garde at La Pointe de Contes in 1953. The image was shared by Pierre Richert in the Comte de Nice et son Histoire Facebook Group on 31st October 2017 [15]
A similar view in the 21st century. [Google Streetview, April 2023.

Banaudo says that the road junction adjacent to the bridge was the point at which the L’Escarene tram line would have branched off the line to Contes. Work on that line wasn’t completed. [1: p67]

From this bridge, the line to Contes and Bendejun followed RN15 (now D15) North past the Lafarge lime and cement factory.  “This, which was the main reason for the line’s existence, was served by two branches allowing the reception of fuel and the shipment of its products to Nice and its port.” [1: p67]

The location of the Lafarge factory. The 1955 map seems to show the tramway on the West side of the road. There also appear to be at least two sidings on the East side of the road. [15]
An aerial image of the Lafarge Cement Works at Contes. The River Paillon de Contes is in the background. [10]

About a kilometre further North, the Contes station was located in the La Grave district adjacent to the footbridge leading to Châteauneuf. 

Another extract from the parallel imagery provided by the IGN. The tramway can be seen, in the 1955 map extract on the left, following the verge of the road and immediately adjacent to the river channel. The bridge shown crossing The river at this point provided access to Chateauneuf which sat above the valley to the West. The tram stop was close to the bridge and a little to the Northwest of it. [17]

At Contes, the tramway had a small building and a siding by the river beneath the perched village.  

Contes Gendarmerie and tram stop. This image was shared by Pierre Richert on the Comte de Nice et son Histoire Facebook Group on 30th October 2017 as part of an extensive album of postcard views of Contes. [3]
A view from a similar position in the 21st century. The construction  site is on the land once occupied by the Gendarmerie. [Google Streetview, April 2023]
This image from the Jean-Henri Manara collection was colourised and shared by Demian West on the Comte de Nice et son Histoire Facebook Group on 13th December 2022. This original image was included in the comments attached to the colourised image on the Facebook group by Demian West. [16]
A similar view in the 21st century. [Google Streetview, April 2023]
The tram terminus at Contes. This postcard view was shared by Jean-Paul Bascoul on the Comte de Nice et son Histoire Facebook Group on 21st January 2017. It comes from the private collection of Jean-Paul Bascoul. [9]

From there, the line continued up the left bank of the Paillon. Banaudo tells us that there was only one further passing-loop which was in the district of Roccaya, near the Rémaurian footbridge.  “The Bendéjun terminus was in the Moulins district, in a steep site where the road crosses the Paillon and definitively leaves the bottom of the valley to rise in bends towards this village and that of Coaraze.” [1: p67]

The Bendejun terminus of the tramway was in the valley floor close to the mills and alongside the river. There was a bridge just beyond the tram terminus which took the road over the Paillon de Contes and a series of hairpin bends lifted the road quickly up the valley side. This is another extract from the IGN parallel mapping. The map on the left was published in 1955. [18]
The tram terminus at Bendejun, beyond this point the road turns sharply to the left to cross the river and then climbs through a series of hairpin bends to Bendejun and on to Coaraze. This image was shared on the Comte de Nice et son Histoire Facebook Group by Roland Coccoli on 30th May 2023. [19]
A view from a little further South in the 21st century. The properties on either side of the road both remain. That on the East of the road now appears to be rendered. Of interest in this view are what appear to be tram rails in the right foreground. [Google Streetview, April 2023]

We have already noted that the tramway service North of Pont-de-Peille was frequently interrupted by landslides, subsidence and weather events. Banaudo also writes of significant problems with the trailers used for goods services which were often in poor condition or overloaded and as a result caused damage to the relatively light-weight rails of the tramway. [1: p71]

Pont de Peille to La Grave de Peille

Two branch-lines from the tramway to Contes were planned, the first was a line to La Grave de Peille. When built it had a total length of just short of 6.6 km. Its maximum gradient was 39 mm/m and only 360m of the route was on the level. The line ran from 112 m above sea-level to 195 m above sea-level at La Grave de Peille.

The concession for the operation of the line to La Grave de Peille was given to the TNL in June 1904. The line opened to passengers and freight on 12th June 1911. The route was numbered 28 on 1st January 1923 and saw construction traffic for the Nice-Cuneo Railway between 1923 and 1928. The cement works at La Grave was established in 1924.

At the end of 1926 the service was interrupted by a landslide. Work was undertaken between 1926 and 1927 to improve the electrical supply and September 1928 saw the official inauguration of the freight service associated with the cement works.

The Bridges and Roads Authority undertook paving work along the line in the winter of 1928-29. In August 1929, a landslide disrupted the service once again and a deviation was put in place.

On 8th October 1934, the line was renumbered, Ligne 38. The service was interrupted, once again, in November 1934. This time it was by a landslide at Châteauvieux.

The terminus in Nice was moved, along with that of the line to Contes and Bendejun, from Place Garibaldi to Rue Geoffredo in November 1935 and another landslide interrupted the service at Ste. Thecla between December 1935 and December 1936.

This tale of woe continued throughout the next decade with closures due to landslides, floods, the failure of bridges, or deterioration of trackwork. Banaudo provides a full list of these events. [1: p75]Such an unreliable service maintained at significant cost was of little use to users (passengers and goods). Closure became inevitable and it occurred on 1st April 1947.

The route started immediately to the North of the Pont de Peille stop on the line to Contes. Banaudo describes this connection as “une aiguille en rebroussement” (literally, ‘a turning needle’). [1: p72] In context, this appears to be a point which allowed access to the branch-line from the North. Trams from Nice would stop at Pont de Peille and then execute a reversal just to the North of the stop to gain access to the branch. This presumably involved a powered car running round its trailer at the tram stop and then reversing towards Contes. Banaudo provides one photograph of the manoeuvre taking place. [1: p72]

Such an unreliable service maintained at significant cost was of little use to users (passengers and goods). Closure became inevitable and it occurred on 1st April 1947.

The route between Pont de Peille and La Grave de Peille started immediately to the North of the Pont de Peille stop on the line to Contes. Banaudo describes this connection as “une aiguille en rebroussement” (literally, ‘a turning needle’). [1: p72] In context, this appears to be a point which allowed access to the branch-line from the North. Trams from Nice would stop at Pont de Peille and then execute a reversal just to the North of the stop to gain access to the branch. This presumably involved a powered car running round its trailer at the tram stop and then reversing towards Contes. Banaudo provides one photograph of the manoeuvre taking place. [1: p72]

The junction of the D21 and the D15 is shown on the right of these two parallel IGN images. The reverse curve, mentioned in the text about the tramway above, appears to be shown on the image on the left. The cross marks its location. The tramway appears to have run on the South side of the road.[20]
The road to La-Grave-de-Peille and L’Escarene. Tge tramway ran along the verge of the old road or within the width of the carriageway over much of the journey to La-Grave-de-Peille. [Google Streetview, April 2023]

The branch-line followed the valley of the River Paillon de L’Escarène valley, a route also used by the PLM Nice-Cuneo line.  Banaudo tells us that “the tram first took the right bank, sometimes on the shoulder and sometimes on the roadway of Route Nationale No. 21 (now departemental road No. 21).  It passed through the hamlet of Borghéas, then entered the Châteauvieux gorge where a three-arch bridge brought the road and the track over to the left bank.  After passing the pumping station of a spring which supplied part of the city of Nice with drinking water, trams reached the hamlet of Ste. Thecla.” [1: p72]

The location of the three-arched bridge which is mentioned by Banaudo in the quoted text above. [21]
The same location as seen on Google Earth in 21st century. [Google Earth, 18th October 2022]
A 21st century view, looking Northeast across the bridge carrying the D21 over the Paillon de L’Escarene. [Google Streetview, March 2023]
The village of Ste. Thecle sits in the valley floor adjacent to the Paillon de l’Escarene. It hosts a railway station which is named Peillon-Ste. Thecle which serves the two villages. Paillon is high above, and to the East of the village of Thecle. [22]
A view of Sainte Thecle, the mills and Peillon which shows the tramway alongside the road. The view looks Eastnortheast towards Paeillon. Note the kerb marking the limits of the highway. Peillon can be seen high above Ste. Thecle in this photograph. The River Paillon de l’Escarene is below the road and tramway to the left. This old postcard image was shared by Jean-Paul Bascoul on the Comte de Nice et son Histoire Facebook Group on 5th October 2023 and comes from the private collection of Jean-Paul Bascoul. The location of this photograph is difficult to confirm in 21st century. The relative positions of Peillon and the rock outcrops behind make it clear that the location is in Ste. Thecle but changes in the buildings in Ste.Thecle make ascertaining the location difficult. No doubt someone with local knowledge might be able to firm up the position of the camera!  [6]
The tram stop at Les Moulins de Peillon seems to be marked on the 1955 map extract on the left. However, it is worth noting Banaudo’s comments below which seem to suggest that the tramway was on the East side of the road. The tramway is perhaps marked by the single line on the East side of the road. The location is named on the modern map extract to the right. The valley has, by this time, turned to the North. Access to the village of Peillon is via the steep road with hairpin bends in the top right of each map extract. [23]
The village of Peillon sits high above the valley floor. It is a car free mediaeval perched village. [24]

The next stop was in the valley closer to Peillon and set among the mills. This stop provided a passing loop, the only one on the line. Banaudo continues: “On the right, the picturesque village of Peillon stands at 376 m at the top of a rocky spur in a site worthy of a postcard.  Immediately afterwards, the valley narrows once again and forms the narrow Bausset gorge where the tramway line was established over 567 m on its own site overlooking the road, finding it again to cross the Paillon on a single-arch bridge.” [1: p72]

These comments from Banaudo suggest that the line was on the East side of the road, perhaps indicated by the single black line on the 1955 map extract above which crosses the side road to Peillon only a few meters to the East of the main road. It seems that North of this point the tramway was very close to the road but held above it by a retaining wall. Road and tramway came together again at the next bridge over the Paillon de l’Escarene. That bridge is marked on both of the map extracts (1955 and 2023) above. The bridge used by the old road and tramway is marked in grey on the modern map.

Looking East off the modern road bridge, the single masonry arch of the old bridge can be seen in a collapsed state. A modern road realignment at this location removed some dangerous bends and improved traffic flow. [Google Streetview, April 2023]

Beyond this point, with the tramway and the D21 now on the West bank of the river, the valley opens out and the route of the old tramway passes through Novaines before reaching the location of its terminus at La Grave-de-Peille.

The tramway ran along the old Route Nationale No. 21 to La Grave de Peille. As the road turned to re-cross the River Paillon de L’Escarene, the tramway continued for only a short distance to serve a cement works on the West bank of the river. [25]
The terminus of the passenger service at La Grave de Peille. This image was shared on the Comte de Nice et son Histoire Facebook Group by Roland Coccoli on 2nd December 2018. [8]

The terminus of the route was sited at the meeting point of the boundaries of three communes, Peillon, Peille and Blausasc, adjacent to a cement works which was operating from the mid-1920s and had its own branch-line  from the tramway. The cement works became particularly significant in the life of the branch-line once the PLM opened its line between Nice and Cuneo in the late-1920s. Passengers deserted the trams as a much quicker journey to and from Nice was offered by the PLM from its two stations, Peillon-Ste. Thecle and Peille.

The railway station at Peille with the cement works visible in the distance on the right side of the image. This colourised monochrome postcard image was taken with the camera facing towards the Southwest. Trams ran along the valley from/to the lefthand edge of this image as far as the cement works. [26]

Banaudo highlights a particular problem with the line to La Grave de Peille. [1: p74] The tramway was built with minimal investment – just enough to reach its terminus. Rails were the lightest possible; the TNL used existing bridges not designed for the loads imposed by trams and trailers; road carriageway widths were decreased to provide space for the trams, (ather than setting the rails in the roads).

Local protests began as early as 1908, but issues becameore acute after the Great War because of the increased traffic on both the road and the tramway resulting from the construction of the Nice-Cuneo railway and the opening of the cement plant at La Grave. “Neither the road nor the railway were able to withstand this additional load.  On 21st November 1928, the municipal council of Peillon reported that the Bausset bridge was in a lamentable state and, for lack of urgent measures, serious misfortunes occurred during the winter of 1928-29. Despite the protests of the TNL company which rightly feared for the sustainability of its rails, the Bridges and Roads Authority covered the rails with macadam to widen the roadway accessible to cars.  What was predictable happened: insufficiently drained under this coating and tired by high tonnages, the rails were too weak and the already tired sleepers soon began to disintegrate.” [1: p74] 

In 1937 proper maintenance was undertaken between Borghéas and Châteauvieux, “but the alarming state of the track, the insufficient electricity supply and the shortage of wagons led the TNL to provide its passenger service by bus” [1: p74] The cement factory also began to use road vehicles.

WW2 resulted in traffic (both goods and passengers) returning to the rails in the summer of 1940, but by the beginning of 1941 the track had deteriorated to such an extent that all tramway traffic had to be suspended.

Sufficient maintenance was undertaken to allow goods services to resume within a few weeks but the condition of the bridge at Bausset meant that the line North of the bridge could not be used by trams. Lime and cement, “went down by truck to the Peillon stop (Les Moulins),  where it was transhipped on a train of two wagons limited to 6 km/h to Pont-de-Peille… The end-to-end service resumed on 7th July 1941, but it was again interrupted in September 1943 by the destruction of the Pont de Peille then at the end of August 1944 by that of the Pont de Bausset bridge.” [1: p74]

A temporary structure of steel beams and a wooden deck was quickly provided but “the track formed such tight curves on either side of the structure that derailments were not rare.” [1: p74]

Early 1945 saw the reintroduction of passenger and freight services but the following winter saw heavy flooding which destabilised the temporary bridge at Bausset and the line was again closed, this time for two and a half months. Ultimately the increasingly erratic service on the line resulted in its final closure in the spring of 1947.

La Pointe de Contes to l’Escarene

Sadly, this line was never used in earnest. Much was done to create the line but circumstances combined to mean the work done did not come to fruition. Initially, l’Escarene was chosen as the final destination for the tramway from Pont de Peille via La Grave de Peille in 1904. The concession for the line between La Grave and L’Escarene was awarded on 26th June 1904, but it was rescinded early in 1906.

Banaudo tells us that, “after several decades of procrastination, the construction of a Nice-Cuneo railway line had been approved by an international convention, granted to the PLM and made public. As the route of this line was  established by the Paillon de L’Escarène valley which the tramway should have taken.” [1: p76]

The result of that decision was the truncation of the route from Pont de Peille to La Grave de Peille and L’Escarène at La Grave.

Banaudo goes on to explain that “the idea of connecting L’Escarène to the tram network was not abandoned, especially since some were still considering extending a line as far as Luceram and even Peirs Cava, at an altitude of 1400 m.” [1: p76]

In 1910 the Bridges and Roads Authority commenced discussions with the TNL. The steep Gradients likely to be required saw the TNL propose an option of a rack system.

It was not until 1913 that the route from La Pointe de Contes was confirmed. Work began in January 1914. The Great War saw work come to a standstill.

It was 1919, before rearranged contracts saw work recommence on the line. Ok about was in short supply and priority was given to the construction of the PLM line between Nice and Cuneo. In the end, the Departement suspended work on the line in 1926 because costs of materials had risen dramatically.

In 1928, Banaudo tells us, “at the request of the municipality of Blausan, the general council took the decision to develop the length of the tramway formation which was remote from the existing road, from Fuont-de-Jarrier to the Col de Nice which became the departmental road 321.” [1: p76] The planned tramway to L’Escarène was finally abandoned/decommissioned on 29th June 1933.

Had it been built, the total length of the tramway would have been just under 7.6 km with a maximum gradient of 55mm/m. It would have risen from a height of 131m above sea-level at La Pointe de Contes to around 410 m above sea-level at the Col de Nice.

The route was to have been served entirely by a single-track tramway leaving the line to Contes at La Pointe de Contes.

The red line shown on these map extracts provided by the IGN shows the route of the planned tramway as it left the route to Contes and Bendejun. A road now follows that line and appears on the modern mapping on the right. The road is named ‘Chemin du Tram’. The main road towards L’ Escarène leaves both extracts at the top right. [27]
Looking North along the main road towards Contes. Behind the camera the road to L’Escarène heads away to the East. The tram stop for La Pointe de Contes was along this length of road. Just to the North of the tram stop was the point where the tramway to L’Escarène would have set off to the East. [Google Streetview, March 2023]
The tramway to Contes and Bendejun ran ahead along what is now the D15. The route to L’Escarène would have run off to the right at what is now a road junction. [Google Streetview, March 2023]
The route of the planned tramway followed what is now called ‘Chemin du Tram’ which runs directly ahead of the camera. It is the road to the left of the trees at the centre of this image. [Google Streetview, March 2023]
A little further East along what would have been the route of the tramway. [Google Streetview, March 2023]
The planned route ran to the right of the retaining wall before joining the D2204. [Google Streetview, March 2023]
Looking back towards the D15 from the D2204. The tram route followed the retaining wall running away from the camera on the right side of the photograph, and then curved round between the two buildings seen beyond the parked vehicles. [Google Streetview, April 2023]

Initially, it would have followed the Route Nationale No. 204 (now the D2204) up the valley of the Ruisseau de la Garde.

Parallel map extracts, once again, provided by the IGN. The main features, which can be seen on both the 1955 extract and the 21st century extract, are the bridges which carried the road over the Ruisseau de la Garde. [28]
The location of the first of the two bridges. There is little at road level to indicate that it is crossing the stream which passes some metres below the road. [Google Streetview, April 2023]
The location of the second bridge is easier to make out. The modern road has been straightened and a new bridge constructed. The old road which would have been followed by the tramway bears away to the left with the new bridge directly ahead. [Google Streetview, April 2023]
The view from the new bridge across the Ruisseau de la Garde of the old road. [Google Streetview, April 2023]
The view Southwest along the D2204 in the 21st century. The old road can be seen on the right of the picture. [Google Streetview, April 2023]
Further Northeast on the D2204 the verge of which would have carried the proposed tramway. [Google Streetview, April 2023]
Again, further Northeast on the D2204 the verge of which would have carried the proposed tramway. [Google Streetview, April 2023]

At the hamlet of La Fuont-de-Jarrier, the tramway left the road and the valley to embark on a dedicated length of almost 4 km. Banaudo tells us that the route ran through “a landscape of arid hills where only pines managed to grow on ridges of gray marl.  The only locality encountered was the village of Blausasc, below which a stopping point was to be established.  The line continued northwards, passing through a small tunnel at a place called La Blancarde, to join the road approaching the Col de Nice.”  [1: p76]

La Fuont-de-Jarrier was the point at which the proposed tramway diverted from the highway. The formation intended for the tramway became the base for the new CD 321.  The new road is that shown leaving the established road to the right on the 1955 IGN map extract. [29]
The junction between the D2204 and the CD321 in the 21st century. The CD321 follows the formation of the intended tramway to L’Escarène. [Google Streetview, April 2023]
The next length of the CD321. [30]
Over the first few kilometres, the carriageway was wide enough for two full lanes of traffic. [Google Streetview, March 2023]
A further length of the CD321 with Blausasc above the road to the East. [31]
The CD321 continues to follow the planned route of the tramway. This rock cutting was cut for the tramway. The location is at the bottom of the twin maps above.  [Google Streetview, March 2023]
The tramway route (CD321) runs ahead and bears to the right. The road which crosses the route at this location is the D221. [Google Streetview, March 2023]
The red line marks the route of the CD321 which is built on the formation of the proposed tramway. The road crossing it at the staggered junction seen here is the D221 which linked Blausasc to the Route de la Col de Nice. [Google Earth, December 2023]
Looking North-northwest along the CD321 towards the top of the twin map extracts above. [Google Streetview, March 2023]
This next set of two parallel map extracts from the IGN show the Route de la Col de Nice marked by two heavy bold lines and the CD321 above it to the East. [32]

This next sequence of photographs show the road (CD321) running from the bottom of the twin extracts above towards the tunnel which can just about be picked out on the modern map extract above.

This sequence of four images shows the CD321 in the 21st century. Over this length, no attempt to widen the formation built for the intended tramway has been made. Retaining walls, where they exist, will most probably be those constructed by the contractors developing the tramway route. [Google Streetview, March 2023]
An enlarged dual map extract of the area at the top-left of the last twin map extracts from the IGN. Both this, and the last pair of extracts show, on the right-hand, modern extract, the tunnel bored for, but never used by, the planned tramway which is, however, now used by the CD 321 in the 21st century. [34]

This next sequence of three photographs show the CD321 in the vicinity of the tunnel built for the planned tramway.

These three photographs show the Route de Blausasc (the CD321) passing through the old tramway tunnel. [Google Streetview, March 2023]
Another set of twin map extracts from 1955 and the 21st century provided by the IGN. This pair of images provides the reason for the separation of the planned tramway route from the older Route de la Col de Nice. The hairpin-bends shown centre left on each of the images meant that the road would have been completely unsuitable for use by trams. Track curvature and gradient would have been insurmountable obstacles. To the North of the hairpin-bends, both routes converge. [33]
The Col de Nice was the high point in the proposed tramway. The Route de la Col de Nice and the planned tramway met just to the South of the Col de Nice. [35]

North of the tramway tunnel, the last kilometre or so of the CD321 and hence the last length of the independent tramway formation required the construction of a series of retaining walls. These next few photographs illustrate the size of the task undertaken by the contractors in the early 20th century. The four photos follow the Route de Blausasc North towards its junction with the Route de la Col de Nice.

These four photos follow the CD321 North, each shows the size of the retaining structures built for the tramway. [Google Streetview, April 2023]

A few hundred metres before its junction with the D2204, the CD321 runs parallel to it with the two roads gradually reaching the same height above sea level.

The D2204 and the CD321 run parallel with no more than a few metres height difference. [Google Streetview, April 2023]
The planned tramway, now the Route de Blausasc (CD321) meets the D2204 just short of the Col de Nice. [Google Streetview, April 2023]
The Col de Nice in the 21st century. [Google Streetview, April 2023]

Banaudo talks of the tramway running in a cutting below and to the right of the road and then reaching L’Escarène at the end of a steep descent. [1: p76]

This final example of the parallel imagery provided by the IGN shows the D2204 (Rue de Chateau) running down into L’Escarène.

In the first instance, the tramway would have been within the width of the modern highway, but as shown below it did run below and to the right of the road on its way down into L’Escarène.

The view along Rue du Chateau, L’Escarène from the Col de Nice. The tramway formation ran on the right side of the road. [Google Streetview, April 2023]
Heading down into L’Escarène evidence can be seen of the prepared tramway route to the right of, and just below, the highway. [Google Streetview, March 2023]
The separated tramway route, metalled, runs to the right of, and below, the Rue du Chateau much of the way down into the centre of L’Escarène. [Google Streetview, March 2023]
Closing in on the centre of L’Escarène, the proper tramway would have been within the width of the modern highway. [Google Streetview, March 2023]

I have not been able to establish the location in L’Escarène planned for the terminus of the tramway.

This article completes a series of articles about the early 20th century metre-gauge tramways and railways of Nice and its hinterland. Perhaps the next series of articles centred on Nice will look at the standard-gauge line between Nice and Cuneo? ……

References

  1. Jose Banaudo; Nice au fil du Tram: Volume 2: Les Hommes et Les Techniques; Les Editions du Cabri, 2005.
  2. https://m.facebook.com/groups/ciccoli/permalink/3819952794917228, accessed on 14th December 2023.
  3. https://m.facebook.com/groups/ciccoli/permalink/2035313676714491, accessed on 15th December 2023.
  4. https://m.facebook.com/groups/ciccoli/permalink/3394462134132965, accessed on 15th December 2023.
  5. https://m.facebook.com/groups/ciccoli/permalink/3026585994253916, accessed on 15th December 2023.
  6. https://m.facebook.com/groups/ciccoli/permalink/3777927129119795, accessed on 15th December 2023.
  7. https://www.cparama.com/forum/pont-de-peille-t16850.html, accessed on 15th December 2023.
  8. https://www.facebook.com/groups/ciccoli/permalink/2308750299370826, accessed on 15th December 2023.
  9. https://m.facebook.com/groups/ciccoli/permalink/1875504749362052, accessed on 15th December 2023.
  10. https://www.nicematin.com/vie-locale/lafarge-cest-notre-stade-du-ray-la-colere-des-habitants-de-contes-apres-lannonce-de-fermeture-de-lusine-640714, accessed on 16th December 2023.
  11. https://remonterletemps.ign.fr/comparer/basic?x=7.319900&y=43.756498&z=16&layer1=GEOGRAPHICALGRIDSYSTEMS.MAPS.SCAN50.1950&layer2=GEOGRAPHICALGRIDSYSTEMS.PLANIGNV2&mode=doubleMap, accessed on 16th December 2023.
  12. https://remonterletemps.ign.fr/comparer/basic?x=7.320322&y=43.760848&z=16&layer1=GEOGRAPHICALGRIDSYSTEMS.MAPS.SCAN50.1950&layer2=GEOGRAPHICALGRIDSYSTEMS.PLANIGNV2&mode=doubleMap, accessed on 16th December 2023.
  13. https://remonterletemps.ign.fr/comparer/basic?x=7.330307&y=43.766719&z=16&layer1=GEOGRAPHICALGRIDSYSTEMS.MAPS.SCAN50.1950&layer2=GEOGRAPHICALGRIDSYSTEMS.PLANIGNV2&mode=doubleMap, accessed on 16th December 2023.
  14. https://remonterletemps.ign.fr/comparer/basic?x=7.337594&y=43.781496&z=16&layer1=GEOGRAPHICALGRIDSYSTEMS.MAPS.SCAN50.1950&layer2=GEOGRAPHICALGRIDSYSTEMS.PLANIGNV2&mode=doubleMap, accessed on 16th December 2023.
  15. https://m.facebook.com/groups/ciccoli/permalink/3012578788987970, accessed on 16th December 2023.
  16. https://m.facebook.com/groups/ciccoli/permalink/3563932950519215, accessed on 16th December 2023.
  17. https://remonterletemps.ign.fr/comparer/basic?x=7.314738&y=43.809287&z=16&layer1=GEOGRAPHICALGRIDSYSTEMS.MAPS.SCAN50.1950&layer2=GEOGRAPHICALGRIDSYSTEMS.PLANIGNV2&mode=doubleMap, accessed on 17th December 2023.
  18. https://remonterletemps.ign.fr/comparer/basic?x=7.297577&y=43.835103&z=15&layer1=GEOGRAPHICALGRIDSYSTEMS.MAPS.SCAN50.1950&layer2=GEOGRAPHICALGRIDSYSTEMS.PLANIGNV2&mode=doubleMap, accessed on 17th December 2023.
  19. https://m.facebook.com/groups/ciccoli/permalink/3690729567839552, accessed on 17th December 2023.
  20. https://remonterletemps.ign.fr/comparer/basic?x=7.333183&y=43.768166&z=16&layer1=GEOGRAPHICALGRIDSYSTEMS.MAPS.SCAN50.1950&layer2=ORTHOIMAGERY.ORTHOPHOTOS&mode=doubleMap, accessed on 19th December 2023.
  21. https://remonterletemps.ign.fr/comparer/basic?x=7.351098&y=43.766957&z=16&layer1=GEOGRAPHICALGRIDSYSTEMS.MAPS.SCAN50.1950&layer2=GEOGRAPHICALGRIDSYSTEMS.PLANIGNV2&mode=doubleMap, accessed on 19th December 2023.
  22. https://remonterletemps.ign.fr/comparer/basic?x=7.363747&y=43.771203&z=14&layer1=GEOGRAPHICALGRIDSYSTEMS.MAPS.SCAN50.1950&layer2=GEOGRAPHICALGRIDSYSTEMS.PLANIGNV2&mode=doubleMap, accessed on 21st December 2023.
  23. https://remonterletemps.ign.fr/comparer/basic?x=7.372927&y=43.771664&z=15&layer1=GEOGRAPHICALGRIDSYSTEMS.MAPS.SCAN50.1950&layer2=GEOGRAPHICALGRIDSYSTEMS.PLANIGNV2&mode=doubleMap, accessed on 21st December 2023.
  24. https://www.thatonepointofview.com/peillon-france, accessed on 21st December 2023.
  25. https://remonterletemps.ign.fr/comparer/basic?x=7.374619&y=43.788157&z=14&layer1=GEOGRAPHICALGRIDSYSTEMS.MAPS.SCAN50.1950&layer2=GEOGRAPHICALGRIDSYSTEMS.PLANIGNV2&mode=doubleMap, accessed on 21st December 2023.
  26. https://www.cparama.com/forum/viewtopic.php?f=11&t=14570, accessed on 22nd December 2023.
  27. https://remonterletemps.ign.fr/comparer/basic?x=7.338814&y=43.782147&z=16&layer1=GEOGRAPHICALGRIDSYSTEMS.MAPS.SCAN50.1950&layer2=GEOGRAPHICALGRIDSYSTEMS.PLANIGNV2&mode=doubleMap, accessed on 26th December 2023.
  28. https://remonterletemps.ign.fr/comparer/basic?x=7.343790&y=43.787018&z=15&layer1=GEOGRAPHICALGRIDSYSTEMS.MAPS.SCAN50.1950&layer2=GEOGRAPHICALGRIDSYSTEMS.PLANIGNV2&mode=doubleMap, accessed on 26th December 2023.
  29. https://remonterletemps.ign.fr/comparer/basic?x=7.354474&y=43.794817&z=15&layer1=GEOGRAPHICALGRIDSYSTEMS.MAPS.SCAN50.1950&layer2=GEOGRAPHICALGRIDSYSTEMS.PLANIGNV2&mode=doubleMap, accessed on 27th December 2023.
  30. https://remonterletemps.ign.fr/comparer/basic?x=7.359935&y=43.800718&z=15&layer1=GEOGRAPHICALGRIDSYSTEMS.MAPS.SCAN50.1950&layer2=GEOGRAPHICALGRIDSYSTEMS.PLANIGNV2&mode=doubleMap, accessed on 27th December 2023.
  31. https://remonterletemps.ign.fr/comparer/basic?x=7.360607&y=43.809370&z=15&layer1=GEOGRAPHICALGRIDSYSTEMS.MAPS.SCAN50.1950&layer2=GEOGRAPHICALGRIDSYSTEMS.PLANIGNV2&mode=doubleMap,vaccessed on 28th December 2023.
  32. https://remonterletemps.ign.fr/comparer/basic?x=7.357550&y=43.814629&z=15&layer1=GEOGRAPHICALGRIDSYSTEMS.MAPS.SCAN50.1950&layer2=GEOGRAPHICALGRIDSYSTEMS.PLANIGNV2&mode=doubleMap, accessed on 29th December 2023.
  33. https://remonterletemps.ign.fr/comparer/basic?x=7.353730&y=43.821348&z=15&layer1=GEOGRAPHICALGRIDSYSTEMS.MAPS.SCAN50.1950&layer2=GEOGRAPHICALGRIDSYSTEMS.PLANIGNV2&mode=doubleMap, accessed on 29th December 2023.
  34. https://remonterletemps.ign.fr/comparer/basic?x=7.355818&y=43.816082&z=16&layer1=GEOGRAPHICALGRIDSYSTEMS.MAPS.SCAN50.1950&layer2=GEOGRAPHICALGRIDSYSTEMS.PLANIGNV2&mode=doubleMap, accessed on 29th December 2023.
  35. https://remonterletemps.ign.fr/comparer/basic?x=7.352163&y=43.826648&z=14&layer1=GEOGRAPHICALGRIDSYSTEMS.MAPS.SCAN50.1950&layer2=GEOGRAPHICALGRIDSYSTEMS.PLANIGNV2&mode=doubleMap, accessed on 29th December 2023.
  36. https://remonterletemps.ign.fr/comparer/basic?x=7.353504&y=43.833178&z=14&layer1=GEOGRAPHICALGRIDSYSTEMS.MAPS.SCAN50.1950&layer2=GEOGRAPHICALGRIDSYSTEMS.PLANIGNV2&mode=doubleMap, 29th December 2023.

The Tramways of Nice:- Les Lignes de l’Arriere-Pays (The Lines of the Hinterland) Part 1 – First Generation Electric Tramways to Levens and Sospel – (Chemins de Fer de Provence/Alpes-Maritimes No. 94)

The TNL (Tramways de Nice et du Littoral) had four lines which ran some distance inland from the coast. Three ran out from Nice, serving: Levens, Bendejun, and La-Grave-de-Peille. All followed valleys of the Paillon and its tributaries. As well as the line to La-Grave-de-Peille, the line to Contes and Bendejun was to have had another Branch to l’Escarene. Major work was undertaken on that line but it was never brought into use.

The fourth significant line operated by the TNL ran from Menton to Sospel. This line required some significant feats of engineering. The featured image above (public domain) shows one of the structures on this line.

You will find earlier articles about two of these lines on this website. They can be found by following these links:

Levens

Two earlier articles, the second of which involves some flights of fancy on my part – looking at a possible alternative routes for the tramway. As we will see below, those thoughts are not without merit given the discussions which took place around the best way for the tram network to serve Levens village.

The Nice to Levens Tramway – Part 1 (Chemins de Fer de Provence 55)

The Nice to Levens Tramway – Part 2 (Chemins de Fer de Provence 56)

Menton to Sospel

Three articles written at different times. In chronological order, these are:

Sospel to Menton Tramway

The Sospel to Menton Tramway Revisited (Chemins de Fer de Provence 51)

The Menton to Sospel Tramway Revisited Again! (Chemins de Fer de Provence 61)

Bendejun, and La-Grave-de-Peille

Bendejun and La-Grave-de-Peille will be covered in a future article. This article focusses on updating earlier articles about the tramways between Nice and Levens, and between Menton and Sospel. ……

Further notes on the Nice to Levens Tramway

The full length of the line from Place Masséna to Levens was just over 23 km of which a little less than 6km were part of Nice’s urban network (between Place Masséna and St. André).

Apart from the articles mentioned above, the first 6 km are covered in another, recent article (which also covers a number of lines which were part of Nice’s urban network), and can be read by following this link:

The First Generation Electric Tramways of Nice again. Five more lines. (Chemins de Fer de Provence/Alpes-Maritimes No. 89) …

These new notes are based around a section of José Banaudo’s French text: ‘Nice au fils de Tram, Volume 2: Les Hommes, Les Techniques‘ [1] Direct quotes are referenced.

In the main, the length of the line covered here is that from St. André to Levens (as built), and a section just over 1km in length which would have served the centre of Levens, Levens-Village but which was not completed because of the advent of WW1.

There was, however, a short length of tramway used by the Levens trams which did not follow the route of the urban trams to St. André. This detour followed the left bank of the River Paillon through Place Garibaldi, Rue de la République then Rue Barla and the Barla bridge, before rejoining the urban line of St. André on the right bank.

In addition, we need to note the significant impact of bad weather in the construction of the line in the area now known as ‘Pasteur’. Banaudo speaks of very significant storms during the winter 1907-1908. In particular, storms occurred on: 29th September; 3rd, 15th and 30th October; 3rd November; 10th and 27th December. Eventually work could recommence on 20th January and was finished on 27th March. Banaudo comments that “The additional work and necessary consolidations of the Paillon embankment ultimately increased the cost of the first construction contract for the Nice – Levens line by a third, compared to initial forecasts.” [1: p66]

Banaudo tells us that the maximum gradient on the whole line was 63mm/m and that less than 2 km of the line were level, having no gradient. At Place Masséna the line was only 9 metres above sea level, at Levens it reached 538 metres above sea level. [1: p62]

The St. André tram stop was the terminus of urban services. Banaudo tells us that “Beyond St. André, the tramway went up the valley of the Banquière or Gahre, right bank tributary of Paillon.  It passed several caves and two mills nestled at the bottom of deep gorges between the heights of Falicon and L’Ahadie.  Upstream of the Tinon bridge, the pass became so narrow that the tramway, hitherto on the shoulder, had to be embedded in the roadway with which it crossed the valley on several occasions. After the place called Les Clues, the valley widened a little and a tram stop served the hamlet of Moulin-de-Tourrette.” [1: p62]

Les Gorges de St. André de la Roche looking South towards Nice. The tramway can be seen on the right of the road. This image was shared on the Comte de Nice et son Histoire Facebook Group by Roland Coccoli on 26th September 2023. [6]
The tight Gorges de St. André looking towards Tourrette-Levens. The tramway is on the left of the road. This image was shared on the Comte de Nice et son Histoire Facebook Group by Alain Nissim on 3rd October 2022. [7]

From this point trams followed their own route a little removed from the main road for about 3 km, “punctuated by the curved Rio-Sec Viaduct and a short tunnel. The route overlooked the road, moved away from it, then finally rejoined it at the foot of the old village of Tourrette-Levens, renowned for its ancient castle. This locality, the most important encountered on the route. was served by a station established in the Quartier du Plan,” [1: p62] at the foot of the road serving the old village.

As noted above, a sequence of photographs of this separated tram route can be found here. [5]

Beyond Tourrette Levens, trams continued to climb through the Western slopes of the Mont Ferion range, “the line encountered two other passing places: at a place called Lava where a siding allowed wood to be loaded, and at the hamlet of Ste. Claire. The highest point of the line was reached on the plateau which forms the Grands Prés de Levens where festivals, sporting events and horse races are organized. The Levens terminus was located at a place called Les Traverses, where a wooden building housed a buffet enjoyed by travellers before the final climb on foot” [1: p62] to the village of Levens which is perched on a hillock at an altitude of 570 m above sea-level. “A superb site with both a Mediterranean and alpine appearance with the high peaks of the Vésubie valley in the background. In order to get closer to the center, a steep ramp extension including a curved line on its own site was undertaken to reach the current Lov Roux esplanade at the entrance to the village. Unfortunately, the war interrupted the work and this extension was never put into service.” [1: p62] Some further notes about the planned extension can be found after the review of key structures on the route.

Structures on the route included:

A. the Garibaldi and Barla bridges over the River Paillon (each made up of three cast iron arches);

This anonymous photograph (perhaps by Jean Walburg de Bray, 1839-1901), shows the Garibaldi Bridge and the right bank of the River Paillon. The view looks from southeast to northwest and is dated 1877. [2]

Three views of Pont Barla over the River Paillon in Nice, one even has a tram travelling over it! [3]

15th April 1912 – the line from Villa Caserta to Sospel was opened to passengers and the short branch to the PLM Station in Menton was closed.

B. the Tinon, Falicon and Clues bridges over the River Banquière (each a single masonry arch);

This extract from Google Maps shows the length of the M19 (Route de Levens) as it appears in November 2023. This area has experienced what might be termed some ‘remodeling’ as the quarrying works have expanded. The numbers superimposed on the satellite image are: 1: the location of an old road bridge across the River Banquière which also carried the tramway, referred to by José Banaudo as the bridge at Falicon; 2: the location of another old bridge spanning the river which, I believe, is that referred to by Banaudo as the bridge at Les Cles; 3: the present route of the M19 which appears to have once been the line of the old tramway; the line of the M19 before quarrying work expanded. The locations ‘1’ and ‘2’ are down in more detail below. The routes of the M19 denoted ‘3’ and ‘4’ are further illustrated by the map immediately below. [Google Maps, November 2023]
An extract from the mapping of http://www.mapsof.net. Location ‘1’ on the satellite image is bottom-right in this image. A narrow older road is shown and the bridge over the Banquière is hidden by the symbol for the Grottoes de Saint Andre de la Roche. The old tram route then followed the north bank of the river along the route indicated by grey/white dashes. It appears that the M19 ran to the North of this as shown and rejoined the valley of the river via two hairpin bends. The second bridge is at the top-left under the ‘M19’ indicator. [4]
A closer view on Google Maps of the location of the Falicon Bridge Location ‘1’ above. The new road bridge can easily be made out. The older bridge sits to the right of the Route de Levens close to the word ‘Services’. [Google Maps, November 2023]
Looking Southeast from the abutment of the new bridge at the location of the old structure. [Google Streetview, November 2022]
This is location ‘2’ above. One of the hairpin bends on the older M19 stands guard over the arch bridge which carried the older road over the River Banquière. The modern bridge is to its left. I think this is the bridge referred to by Banaudo as the bridge at Les Cles. [Google Maps, November 2023]
Looking from the hairpin bend in the image above across the old arch bridge. [Google Streetview, October 2022]
The next section of the M19 heading North. It crosses the River Banquière close to ‘A’ at the bottom of this extract from Google Maps, and again at D’. At location ‘A’ there is an older bridge across the Banquière which is probably the bridge referred to by Banaudo as the Tinon Bridge. This location is shown below.

Banaudo tells us that the tramway was remote from the main road on its own formation over this length for around 3 km “punctuated by the curved Rio-Sec Viaduct and a short tunnel.” [1: p62] That length of tramway commences at ‘C’ and continues through ‘E’ and onwards to Tourette-Levens. Some details of that length appear below but a fuller series of photographs can be found at https://rogerfarnworth.com/2018/03/20/the-nice-to-levens-tramway-part-1-chemins-de-fer-de-provence-54.
Location ‘A’ showing the modern M19 and the older road bridge over the Banquière. [Google Streetview, April 2023]
At location ‘C’ the tramway separated from the road and followed its own route to ‘E’. [Google Streetview, April 2023]
Looking South at ‘E’ the old tramway rejoined the M19 but only for a very short distance. [Google Streetview, April 2023]

C. the Rio-Sec Viaduct (a single curved masonry arch) and the Moulins tunnel (40 m) which were on an independent formation a short distance to the East of the M19;

The Rio-Sec Viaduct curves round the East side of the area marked ‘P’ for Parking. The Tunnel des Moulins is the shaded length of road to the North of the parking area. [Google Maps, 2018]
Almost as soon as trams began running alongside the road again, they separated onto their own route once more. This dedicated formation took trams over the Viaduc de Rio-Sec and through the Moulins tunnel. [Google Streetview, April 2023]
The Rio-Sec Viaduct, seen from the East. [Google Streetview, 2018
The Tramway formation over the Rio-Sec Viaduct. [Google Streetview]
The approach to the Moulins tunnel over the Rio-Sec Viaduct. [Google Streetview, 2018]
The Moulins Tunnel South portal. [Google Streetview, 2018]

D. the Levens tunnel (95 m, on the section built but not opened and now in use as a vehicular route into the centre of the village).

Some further observations ……..

Banaudo tells us that the process of agreeing the TNL tramway route serving Levens was different than for other routes (which were primarily dictated by the terrain and the orientation of the valleys). Early studies led to some elected officials recommending “linking Nice to St. Martin-Vésubie via the traditional stagecoach route via Tourrette, Levens, Duranus and St. Jean-la-Rivière.” [1: p66]
When the project took shape in 1904, three routes were considered:

  1. One extended the Cimiez line in the direction of Rimiez, L’Aire St. Michel, and Gairaut, from where it skirted the Mont Chauve massif to the west to serve the hilltop villages of Aspremont, Castagniers and St. Blaise, before arriving at Levens. This extremely picturesque cornice route would have served a well-populated area, but the travel time to Levens would have been prohibitive.
  2. Another left the Paillon valley in St. André and climbed in switchbacks to the village of Falicon, then it joined the previous route in Gairaut. This route would have been even longer and more tortuous!
  3. The last also left from St. André, but it went up the Gorges de la Banquière towards Tourrette, Ste. Claire and Levens. It served a smaller population than the previous ones, but had the advantage of being more direct route.

The third option was chosen and built between 1907 and 1909!

Banaudo continues to explain that the Compagnie du Sud [which ran the TAM tram network] applied for the concession of the Nice – Levens line, in the hope that, should an extension from Levens to St. Jean-la-Rivière be built it would connect with its own line in the Vésubie valley. But the chief engineer of bridges and roads decided to allocate the route to the TNL. His decision meant that the usage figures for the TNL network were reduced by this lightly populated route and as a result greater the line attracted greater subsidies from the State. [1: p66]

After the completion of construction in 1909, the commune of Levens lobbied for an extension into the village. Banaudo tells us that a route had already been considered by the Bridges and Roads Department which took the form of a long loop to keep gradients as low as possible. Initially a sizeable cutting was proposed which ultimately was superseded by a tunnel. [1: p66]

A contract was awarded and work started early in 1914. Work continued through to 1916-1917 slowed by the shortage of labour during the War. After the war, work restarted but disagreements over the financing of station facilities held up the works. Finally, the general council decided in 1926 to postpone the completion of the line and then, in 1929, proposed converting the route into a motorable road. It is in use as a road under traffic-light control in the 21st century. [1: p66]

Further notes on the Menton to Sospel line

Banaudo tells us that the total length of this line was close to 17.4 km of which the TNL saw the length from Place St. Roch along Rue Partouneaux to Villa-Caserta (2.4 km) and the short stub to Menton Railway Station (0.15 km) as part of its coastal network. The remaining length from Villa Caserta to Sospel (14.9 km) was deemed part of their departmental network. [1: p77]

This Baedeker map of Menton in the early 20th century (1902) has been annotated to show tram routes in red. The line from Monaco to Menton ran along Avenue Carno and Avenue Felix Faure. At Place St. Roch the line to Sospel left the coastal route and ran along Rue Partouneaux as far as Avenue de la Gare and then Northwest alongside the River Carei. A short branch left the line to serve the Railway Station, but was only in use for a few years. [21]

The line originated in Place Saint Roch and ran first along Rue Partouneaux.

Avenue Felix-Faure/Place St. Roch, Menton, looking Northeast. On the left we can see the waiting kiosk of the TNL tram urban lines. There is a tram waiting at the stop which will leave along Rue Partouneaux to the Careï valley which exits the photograph to the left. It will possibly stop at the Villa Caserta terminus, or it will continue towards Monti, Castllon, the valley of Bévéra and the Sospel terminus. This image was shared by Jean-Paul Bascul on the Monaco4Ever Facebook Group on 28th September 2023 (Collection privée J-Paul Bascoul). [15]
Looking into Rur Partouneaux from Place St. Roch. The Hotel des Postes is visible at the first junction down Rue Partouneaux. Note that it has an extra storey in the modern image. [Google Streetview, April 2023] This view is surprisingly similar to an early 20th century view which can be found on the Maonaco4Ever Facebook page on this link: https://www.facebook.com/MentonDuPasseAuPresent/photos/a.635924896587645/904791879700944/?__cft__[0]=AZX5F8XW__jQPAyygfwvR03xmeAlwW_69beRs7RwlwE6xsjQfZ63F76O9fVpVPdM1BJs7Sko4cCH399fbkWwRbZM3L9NxeGF889CfcQ1_7n1krmUaygG3KAdo2h7ZHbuHUUryowX6X5bDwpFxz0OAGE5IBIgQ4UTuX_U-hOLi7R9JLmGRwSgl8bz-28sshkfnjk&__tn__=EH-R . [20]
The view from close to Place St. Roch along Rue Partouneaux. The Hotel des Postes et Telegraphes is seen on the corner of the next junction. A tram travelling towards Les Jardins Biovès is seen immediately outside the building. [17]
A similar view in April 2023. The building has the additional storey noted above. [Google Streetview, April 2023]
Further Northwest along Rue Partouneaux. This old postcard view shows the road as it runs toward Les Jardins Biovès. The trees on the right of the road were Orange Trees. [18]
This is the same location in the 21st century. Rue Partouneaux runs towards what were Les Jardins Biovès. [Google Streetview, October 2022]
A tram leaving Rue Partnouneaux and about to turn North alongside Les Jardins Biovès. [19: p5]
The same location in the 21st century. Rue Partouneaux is directly ahead of the camera. The old tramway curved round to the North. Its route approximated to the curved line of bollards. [Google Streetview, March 2023]

The maximum gradient on the line was 68mm/m, only 0.144 km of the line was on a level formation. The line started in Place St. Roch at 3 metres above sea level and reached a maximum altitude of 572 metres above sea level at the Castillon tunnel. In all, trams had to negotiate 482 curves as they travelled the line of which 143 had a radius less than 40m. [1: p77]

Over 75% of the route was independent of the road between Menton and Sospel, now the D2566/D2566A. With its tight curves, “its imposing structures and its stations with spacious buildings, the Menton – Sospel line appeared much like a real  mountain railway.  In this way, it was more similar to the daring branches of the TAM network than to the other TNL lines in the Nice hinterland which retained the appearance of urban tramways.” [1: p77]

Banaudo tells us that “the line was entirely single track.  It met the coastal artery at a triangular connection on Place St. Roch, at the entrance to the old town of Menton.  The tram left from the western branch of the triangle, along which a wooden kiosk housed travelers and company agents.  Via Rue Partouneaux, trams accessed the Biovès public garden which occupies an esplanade created by covering the River Careï. At the top of Avenue de la Gare (today Verdun) there was a short branch of 147 m on a ramp of 40 mm/m which ended in a dead end at the entrance to the courtyard of Menton PLM station. [That branch] served as a terminus for urban shuttles from Place St. Roch.” [1: p77] The branch lineline was brief both in length and life since, “after only operating from 1903 to 1912, it was abandoned during the First World War.” [1: p77]

Immediately beyond the station branch, the tramway passed under the bridge of the PLM Nice – Ventimiglia line then continued up the right bank of the River Careï where there was a goods station. Banaudo says that, “the line passed at the foot of the L’Annonciade Hill, where a funicular served a hotel and a monastery.” [1: p77]

The Funiculaire de L’Annonciate served a hotel and Monetary at the summit of L’Annonciade Hill in 1919. The funicular railway opened in 1914 and closed circa. 1939. [8]

Continuing North, three passing-loops were provided at “Villa-Beau-Séjour, at the Gioan-Bosio property Ans at l’Octroi-due Careï. Soon after, “the Villa-Caserta tram stop marked the terminus of urban services. Upstream and downstream of this point, two dedicated branch lines allowed the Mercier and Gianotti companies to load materials to be sent to Sospel for the construction of the PLM Nice – Cuneo line.” [1: p77]

The route continued North along what is now the D2566 avoiding one tight bend by following its own course for approximately 450 metres. The hamlet of Monti had its own tram stop and was the location of a reinforced concrete viaduct which spanned both a ravine and the road. Pictures of this structure can be seen further down this article.

The tramstop and passing loop at Monti. [16]
A similar location in 2023. Both views look South from a point just to the South of Viaduc de Monti. [Google Streetview, March 2023]

Now running on its own formation, the tramway climbed above the road for 2.3 km. Banaudo explains that the road climbed to meet the tramway “at the Ubac-Foran forest house.  Arriving at a point where the valley narrows sharply and where the gradient becomes steeper, the track ran again on its own formation to span the road and the River Careï on the curved Careï viaduct, with five masonry arches.” [1:p77]

Over the River Careï the tramway continued climbing steeply in a Southeasterly direction to the location of the Caramel viaduct, “whose bold silhouette had already been visible for several minutes standing out against the mountainside.  This major [structure] on the line had thirteen arches with a total length of 120 m, which were part of an omega-shaped loop below the road.” [1: p77] To the Northwest of the Viaduct, two dead-end tracks were provided, one to serve a quarry, the other to stop trams whose brakes had failed before they ran out onto the viaduct.

Continuing its ascent, the tramway again left the road and approached the bottom of the valley where the Castillon tram stop was located. “It was in a damp and isolated site below the village and the pass of the same name. A substation incorporated into the station building provided the line’s electrical supply. This was also the location of the southern portal of the 763 m tunnel under the Col de Castillon, the longest structure of this type drilled for a tramway in the Alpes-Maritimes.” [1: p77]

At its Northern portal, the tunnel opened into the green valley of Merlanson at an altitude of 572 m, the highest point on the TNL network. “From there, the line descended on its own formation for 4900 m on the right bank of the river. To the west stands Mount Barbonnet crowned with a fort while in the background, at the foot of the amphitheater formed by the mountains of the Authion massif, the Bévéra valley widens to form the basin where the town of Sospel is located.” [1: p77]

Approaching Sospel, the tramway ran under the embankment of the PLM Nice – Cuneo line then ended its journey at the entrance to the town where a station was built with a passenger and goods facilities and a motor shed. Banaudo tells us that during the years of construction of the PLM railway, “the track extended to the platform of the future PLM station, where the materials could be supplied by the Mercier and Gianotti companies.” [1:p77]

Sospel showing the tram stop/station centre-left and the PLM station top-right. This is an enlarged part of a photograph taken after the completion of the construction of the PLM railway line. It was shared on the Comte de Nice et son Histoire Facebook Group on 15th March 2017 by Pierre Richert. [12]
Sospel tram station. This image was shared on the Comte de Nice et son Histoire Facebook Group by Roland Ciccoli on 11th September 2017. [13]
TNL Tram No. 13 is heavily laden with bags of cement and in charge of a long load affixed to two short, flat wagons. The photograph is taken close to Sospel with the works underway on the PLM Nice to Cuneo line. [19: p6]

Key Dates

Banaudo provides details of dates relating to the life of the whole line. [1: p78] The more significant of these are: 1903 (the line between Place St. Roch and the PLM Railway Station was opened to traffic); 1911 (the route between Avenue de la Gare, Menton and Villa Caserta was opened); 1912 (a courier service between Menton and Sospel was opened); 1913 (the goods service between Menton and Sospel was inaugurated); 1923 (the new numbering system was put in place: No. 45 was given to the urban service between Menton and Villa Caserta; No. 46 TP the interurban service Menton to Sospel); 1927 (the urban service (No. 45) was extended to Route-de-Monti); 1931 (trams on Ligne No. 46 were replaced by buses and the tram service (Ligne No. 45) between Villa Caserta and Route de Monti ceased); January 1932 (trams on Ligne No 45 between Avenue de la Gare and Villa Caserta were replaced by a bus service); March 1932 (the remaining length of the line between Place St. Roch and Avenue de la Gare was closed). In the summer of 1933 the full length of the line was decommissioned.

The full service between Menton and Sospel was active for less than 20 years!

The Main Structures on the Line

These were: the Peïrola Ravine Bridge; the Monti Viaduct (1 concrete arch of 36 m, total length 79 m); the Ture Ravine bridge; the Pian Ravine Bridge; the Careï Viaduct (5 arches of 8 m); the Caramel viaduct (13 arches of 8 m, length 120 m); and the Castillon Tunnel (763 m).

Structurae.net provides a number of photographs of the Viaduc de Monti which remains standing in the 21st century. These images can be found here. [9]

Viaduc de Monti in the early 20th century, probably 1910. [10] Banaudo tells us that this was chosen from five design submissions. The structure was designed by François Hennebique was selected in 1907 by the deputy chief engineer Amaud who judged it to be the most economical (38,000 francs), the most advantageous and the most satisfactory in appearance. [1: p81]
The Viaduc du Monti again. One of the very few times that steam was seen on TNL lines. We see the same consist at Viaduc du Caramel a little further down this article. [19: p7]
A tram crosses Viaduc de Careï having run down the gradient from the Viaduct du Caramel which can be seen in the distance. The tramway can be seen running below the road on the left of this image.
Viaduc de Careï seen from the hillside to the South. In the 21st century the viaduct looks very different as the D2566 has been widened and realigned. [11]
A photograph from a similar location showing the way in which the valley has been remodelled, realigning and lifting the road, so that the piers of the viaduct seem much shorter. [Google Streetview, April 2023]
This is an evocative photograph which pictures a small steam engine travelling up the Menton to Sospel tramway. The location is the Viaduc du Caramel and the photo is taken from the carriageway of what will become the D2566. The 0-6-0T locomotive is in-steam but the tram (TNL No. 13, which we have seen in an image earlier in this article) also has it supply pole raised and in contact with the overhead lines. It is positioned behind the locomotive presumably to give some tractive effort and perhaps also as a fail-safe needed because of the gradient of the line. The locomotive is being moved to work on the PLM railway line between Nice and Cuneo (Nice – Sospel – Breil-sur-Roya – Cuneo). [19: p4]
A view of the Viaduc du Caramel in March 2023, taken from a similar position as the monochrome image above. [Google Streetview, March 2023]
The approach to the Castillon Tunnel from the South in around 1920 with a tram heading for Menton. The hamlet of Castillon sits more than 130 metres above the tram stop. This image was shared on the Comte de Nice et son Histoire Facebook Group on 6th August 2021 by Alain Nissim. [14]
A modern view of the old tramway tunnel. The original bore is on the right. The new bore is on the left. The modern road is the D2566A which follows the line of the old tramway. The works underway in March 2023 were still being undertaken in November 2023 when we followed the route by car on the way from Sospel to Nice. [Google Streetview, March 2023]
The southern portal of Tunnel de Castillon (public domain). [22]
A closer view of the southern portal of the old tunnel in 2023. [Google Streetview, March 2023]
The northern portals of the two tunnels in 2023. [Google Streetview, March 2023.

The Tunnel de Castillon was an essential element of the scheme, the additional climb to the village would have required a significant series of loops either side of the pass and severe gradients. Structurae.net provides a number of photographs of the Tunnel which remains standing in the 21st century and is in use as a road tunnel. These images can be found here. [24]

Steep Gradients on the Menton to Sospel Tramway and the wider tram network

Banaudo’s book has a short feature relating to the exceptional gradients on the Menton to Sospel line and throughout the TNL and TAM networks. [1: p81]

99% of the Monton to Sospel tramway was on a gradient. The average gradient between Menton and the summit of the line at the North end of the Tunnel de Castillon was 46mm/m over almost 12.4 km. This was unique in the Alpes-Maritimes and “assez exceptionelles (quite exceptional) en France.” [1: p81]

Over 7.7 km was graded between 46mm/m and 60 mm/m. 60 mm/m was specified as the steepest grade permitted, but during construction it became obvious that complying with the specification would unduly lengthen the line. Ultimately, the Department of Bridges and Roads permitted over 4.1 km to be built with steeper grades (between 61 and 68 mm/m), mainly in the Careï valley.

Banaudo points out that at “the same time, in Switzerland, Italy and Austria, such lines were put into service with vehicles equipped with specifically adapted traction and braking mechanisms, the Departement des Alpes-Maritimes and concessionaires (the TNL on Menton-Sospel and the Sud-France on the entire TAM network) did not seem to appreciate the level of risk involved in such operations.” [1: p81]

The TNL had been successfully running 168 hp bogie trams equipped with compressed air brakes on the Contes and Levens lines. However, trials on the Menton-Sospel line demonstrated that their electrical equipment could not sustain the stresses imposed by such long and steep gradients. “As soon as sustained effort was required, the entire circuit was at best overheated, the circuit breaker tripped and the fuses blew, the wheels of the trolleys could melt, the controller would start to smoke, and soldered connections could melt and cables ignite. It was therefore decided to modify these trams and equip them with more powerful motors. But pressure from the Departement to put the Sospel line into service, meant that the service was opened in the spring of 1912 with two standard type T2 passenger trams and one self-propelled goods van. These two-axle vehicles only had a power limit of 70 and 84 hp which did not even allow for the lightest of wagons to be towed. The handbrake was supplemented by (un freinage rheostatique) rheostaic braking. No air-brake was provided!” [1: p81]

Banaudo goes on to explain that, “The inadequacy of this equipment was tragically brought to light on 11th September 1912, when a train carrying gravel for finishing work on the line ran down the steepest slope: The handbrake was unable to hold it and the power pole separated from the overhead supply, rendering rheostatic braking inoperative. The convoy ended up derailing and crashing at the foot of the Monti viaduct, killing the driver and the conductor.” [1: p81]

Sadly, just two weeks later the first of the modified bogie power cars Nos. 214 to 216 entered service (on 23rd September 1912). These were equipped with “hand, air and rheostatic brakes, developing a power of 240 hp, these tramcars proved to be better adapted and could tow two passenger trailers or three goods wagons on the steepest slopes. In June 1913, two self-propelled goods vehicles were modified in the same way and moved to the Sospel line, which ensured regular freight traffic from summer onwards. A third ‘tracteur’ of a similar design was put into service the following year.” [1: p81]

In the meantime a derailment of a train on the TAM line between Cagnes-sur-Mer and Grasse occurred on 17th September 1913 at the Viaduc de Cloteirol near Villeneuve-Loubet. “This disaster caused many deaths and the commission formed following this accident to improve the safety of the departmental network covered all the lines, including that of Sospel on 29th January 1914. Following its conclusions, the Department of Bridges & Roads limited tram speeds to 16 km/h uphill and 12 km/h downhill as well as when crossing viaducts. Four safety stops were established for descending convoys at points located at the top of steep slopes: above the Viaduc du Caramel viaduct, at l’Ubac-Foran, above the Pont de Monti and at km 3,350 between this hamlet and the stop at Villa Caserta. The first two stops, where the tramway could leave and pick up passengers, were equipped with a point directing an out-of-control convoy into a dead-end siding with a strong contrary slope. … In Villa-Caserta, a similar device was provided to stop any runaway of vehicles parked at the terminus of the urban service.” [1:p81]

References

  1. José Banaudo; Nice au fil de Tram, Volume 2: Les Hommes, Les Techniques; Les Editions de Cabri, Breil-sur-Roya, France, 2005.
  2. https://artplastoc.blogspot.com/2023/02/1292-nice-la-passerelle-et-le-pont.html?m=1, accessed on 21st November 2023.
  3. https://twitter.com/actualites_nrv/status/990903681389400064?t=rpQXwAb7jIlpMfdfM8RoIg&s=19, accessed on 21st November 2023.
  4. https://www.mapsof.net/saint-andre-de-la-roche-fr, accessed on 22nd November 2023.
  5. https://rogerfarnworth.com/2018/03/20/the-nice-to-levens-tramway-part-1-chemins-de-fer-de-provence-54.
  6. https://m.facebook.com/groups/ciccoli/permalink/3231219313790582, accessed on 23rd November 2023.
  7. https://m.facebook.com/groups/ciccoli/permalink/3504633499782494, accessed on 23rd November 2023.
  8. https://cronobook.com/pic/1e977519-3f4c-427f-9bdb-ba67e3c07054, accessed on 27th November 2023.
  9. https://structurae.net/en/structures/monti-viaduct, accessed on 27th November 2023.
  10. https://commons.m.wikimedia.org/wiki/File:Viaduc_de_Monti_(1910).jpg, accessed on 27th November 2023.
  11. https://upload.wikimedia.org/wikipedia/commons/1/1d/Viaduc_du_Carr%C3%A9i_%281910%29_Ouest.jpg, accessed on 27th November 2023.
  12. https://www.facebook.com/photo/?fbid=10210534413814255&set=a.10210534255570299, accessed on 28th November 2023.
  13. https://www.facebook.com/photo/?fbid=472351886472746&set=pcb.2011981832381009, accessed on 28th November 2023.
  14. https://m.facebook.com/groups/ciccoli/permalink/3158590614386786, accessed on 28th November 2023.
  15. https://www.facebook.com/groups/1389253567814679/permalink/9979281115478505/?mibextid=rS40aB7S9Ucbxw6v, accessed on 14th March 2023.
  16. https://m.facebook.com/franckasfaux06/photos/a.1412935558990256/1412939378989874/?type=3 accessed on 30th November 2023.
  17. http://dofusleguide.com/2019/12/photos-et-cartes-postales-anciennes-de-menton-06500.html, accessed on 30th November 2023.
  18. https://cartorum.fr/carte-postale/204383/menton-menton-la-rue-partourneaux-et-lallee-des-orangers, accessed on 5th December 2023.
  19. https://excerpts.numilog.com/books/9782903310608.pdf, accessed on 30th November 2023.
  20. https://www.facebook.com/MentonDuPasseAuPresent/photos/a.635924896587645/904791879700944/?__cft__[0]=AZX5F8XW__jQPAyygfwvR03xmeAlwW_69beRs7RwlwE6xsjQfZ63F76O9fVpVPdM1BJs7Sko4cCH399fbkWwRbZM3L9NxeGF889CfcQ1_7n1krmUaygG3KAdo2h7ZHbuHUUryowX6X5bDwpFxz0OAGE5IBIgQ4UTuX_U-hOLi7R9JLmGRwSgl8bz-28sshkfnjk&__tn__=EH-R, accessed on 20th November 2023.
  21. https://www.ebay.co.uk/itm/203526019792, accessed on 5th December 2023.
  22. https://commons.m.wikimedia.org/wiki/File:Ligne_du_tramway_de_Menton_%C3%A1_Sospel,_Tunnel_de_Castillon.jpg, accessed on 7th December 2023.
  23. https://structurae.net/en/structures/castillon-tunnel, accessed on 7th December 2023.

Monte-Carlo to Menton – La Ligne du Littoral et ses Antennes, First Generation Electric Tramways – (Chemins de Fer de Provence/Alpes-Maritimes No. 93).

This post covers the line from the Port of Monaco and Monte-Carlo to its terminus in Menton. A short article about this length of tramway was included in the French-language ‘Tram Magazine‘ of 1980 [7], and it is covered by José Banaudo in his book ‘Nice au fil du Tram, Volume 2‘ [1]

Earlier articles in this series can be found by following these links:

Nice to Antibes:

La Ligne du Littoral et ses Antennes, First Generation Electric Tramways – Nice-Cap d’Antibes (Chemins de Fer de Provence/Alpes-Maritimes No. 90) …

Nice to Monaco:

La Ligne du Littoral et ses Antennes, First Generation Electric Tramways – Nice-Monte Carlo (Chemins de Fer de Provence/Alpes-Maritimes No. 91) …

Branch-lines between Nice and Monaco:

Nice to Monte-Carlo Branch Lines – La Ligne du Littoral et ses Antennes, First Generation Electric Tramways – (Chemins de Fer de Provence/Alpes-Maritimes No. 92) …

Other articles about railways and tramways in and around Nice can be found here:

https://rogerfarnworth.com/category/railways-and-tramways-blog/french-railways-and-tramways/railways-and-tramways-around-nice/

A project for a steam tramway linking the principality of Monaco to Menton via the Basse Corniche dates back to 1892 but seems that it may have encountered opposition from the various communes along the route. It is possible that this opposition centred on the use of steam as the  power-source chosen.  [7]

However, the Monaco Tribune suggests that it was clear that the capacity of steam engines to pull adequate loads on the gradients needed to serve the principality was always in doubt. The Triune comments: “At the start of the 1890s, there was a project for a Nice-Menton tramway line which would run through Monte Carlo. Following the example of French towns that were opening up tramway networks, horse-drawn at first, then with mechanical traction and finally electric-powered, the Principality eventually accepted the necessity of a line crossing Monaco, from Le Rocher to Saint-Roman, passing through Monte-Carlo and serving the Casino. The Principality’s topography was an issue: horse-drawn and steam trams were not an option. Electric trams had to be developed.” [6]

The Monaco tramways had three lines:

  • Place d’Armes – Saint Roman, opened on 14 May 1898.
  • Gare de Monaco – Place du Gouvernement, opened on 11 March 1899.
  • Casino – Gare de Monte-Carlo, opened on 3 May 1900. [8]

In 1897, the TNL (Tramways de Nice et du Littoral) obtained the concession for a metre-gauge coastal line between Cagnes, Nice, Monaco and Menton.

The main difficulty encountered in establishing this route was crossing the principality of Monaco, where in 1898 a local company opened an urban tramway powered by underground electric cables. [7]

While waiting for the establishment of an agreement to allow the passage of their trams through the principality, the TNL transported part of their fleet of by rail to Menton and opened a section of tramway from Garavan to Cap-Martin on 20th December 1902. One year later, this isolated section was linked to the rest of the network with the commissioning  of the complete section from Monaco to Menton on 28th December 1903. [7]

In 1910, the TNL bought out the Monaco Tramways concession but continued to operate a split operation with connections in the principality between the Nice and Menton lines.  During the Great War, the TNL’s tramway experienced heavy passenger and goods traffic, with the PLM line being reserved primarily for strategic transport. [7]

After the war, the Monaco to Menton line was designated Ligne No. 43 in the TNL’s new operating plan.  But very quickly, road competition and the narrowness of the Basse Corniche roadway made sharing the road with lorries, vans and cars almost impossible. [7]

On 26th January 1931, the Nice to Monaco line was closed, followed a few months later by the departmental connection Menton (Villa Caserta) – Sospel.  As during its first years of operation, the Menton tramway found itself isolated from the rest of the network and continued for a few months with reduced service to Monaco Garavan and Menton Villa Caserta, with the equipment based at the small Carnolès depot.  This reprieve was only short-lived, because these lines were in turn closed in January 1932. [7]

This extract from the 1914 plan of Monaco shows the tramway running along the Condamine on the West side of the port before heading up the Avenue de Monte-Carlo. For a time there was a junction at the top of the gradient with trams for Menton turning North. [2]
Tram outside Monte Carlo International Sporting Club. The position of the pole shows that this tram is heading down hill to the Port. [9]
A similar view in 2011 looking down Avenue d’Ostende towards the Port. [Google Streetview, March 2011]
A later image showing a tram just a little further up l’Avenue de Monte-Carlo (now Avenue d’Ostende), but on the other tramline heading up hill towards the Casino. [11]
Tram outside Le Restaurant de Paris, Monte-Carlo. [10]
The  tram tracks outside Restaurant/Cafe de Paris. Apparently these tracks were only in use for a very short time around 1902/1903. This picture was shared by Jean-Paul Bascoul on the Monaco4Ever Facebook Group on 19th July 2023. (Collection privée J-Paul Bascoul). [12]
Trams heading for Menton turned Northwest on Rue des Lilas (now Avenue Princesse Alice). For a short while in the very early 20th century a short branch continued up towards the Casino. Trams for Menton turned right at the top of Rue des Lilas onto Avenue de la Costa. [2]
This extract from Google Maps shows the route of the tramway as the primrose yellow line snaking from the bottom to the top of the image. A little confusing because the North point of the 1914 map extract above is not the same as Google Maps. The tram route enters at the bottom of this extract along Avenue d’Ostende. It then turns through more than 90° to run along Avenue Princesse Alice, executing a reverse curve along the way and then turning onto Avenue de la Costa. [Google Maps, November 2023]
These trams sit at the junction of the line to Menton (turning away to the left) and that to the Casino. They sit directly in front of the old Office de Poste et Telegraph. This image was shared on the Monaco4Ever Facebook Group by Jean-Paul Bascoul on 7th July 2017. (Collection privée J-Paul Bascoul). [21]
The same location as appears in the colourised postcard view immediately above. This is the point at which the tramway turned Northwards from Avenue de Monte-Carlo onto what was Rue des Lilas (now Avenue Princesse Alice). Access to the Casino is along the road to the right which for a time carried a branch tramway serving Monte-Carlo Casino. [Google Streetview March 2011]
The trams for Menton followed Rue des Lilas (now Avenue Princesse Alice). This image looks Northwest from the Southern end of the Avenue in 2021, [Google Streetview, July 2021]
At the North end of Rue des Lilas (now Avenue Princesse Alice), trams turned right onto Avenue de la Costa. [Google Streetview, July 2021]
Looking Northeast along Avenue de la Costa in 2021, towards Boulevard des Moulins. [Google Streetview, July 2021]
Avenue de la Costa, after a short distance, led  straight onto Boulevard des Moulins. It was only a short walk from this point to access the funicular railway to La Turbie. The terminus can be seen at the top of this map extract. [2]
The primrose yellow line again indicates the line of the old tramway heading Northeast along Avenue de la Costa and then Boulvard des Moulins. [Google Maps, November 2023]
Looking Northeast from the bottom of Boulevard des Moulins in 2021. The Office de Tourism can be seen on the right of this image. [Google Streetview, July 2021]
Boulevard des Moulins continued in northeasterly direction towards Menton. Again, please don’t be fooled by the orientation of the North point on this 1914 map. [2]
A tram on Boulevard des Moulins heading Northeast. This image was included in a Monaco Tribune article about Monaco’s trams (Collection privée J-Paul Bascoul). It also appears in José Banaudo’s book where he notes the change to a single track line from a double-track length which ran from Avenue des Beaux-Arts to the edge of the St. Roman dustrict of the principality. He describes the dual length of track elsewhere as running from Credit Lyonnaise to Hotel du Littoral. Banaudo tells us that the tram in this image is TNL No. 27, a Thompson-built tram providing a Monte-Carlo to Menton service. [6][1: p57]
This postcard view of a tram on Boulevard des Moulins also appears in José Banaudo’s book. He notes that this tram is providing an urban service in Monaco and travelling Northeast on Boulevard des Moulins. [1:p57]
So much has changed. Much of Boulevard des Moulins would be unrecognisable to those who knew it in the early 20th century. This is a similar view looking Northeast along Boulevard des Moulins. It is possible that the tree, visible in each of the monochrome images above, is that which appears in this image. The building immediately beyond the tree, where the street curves away to the left seems to be common to all three images. [Google Streetview, July 2021]

Boulevard des Moulins led directly onto Boulevard d’Italie. Banaudo tells us that “the line became single track in the Boulevard d’Italie, where two sidings allowed the cars of the coastal line to pass those providing the urban service. The latter’s terminus was established in the St. Roman district where the three-track TM depot-workshop was also located, just before the border between the principality of Monaco and the French commune of Roquebrune.” [1: p56]

This extract from a map shared in an earlier article shows the tramway heading on from Avenue des Moulins along Boulevard d’Italie into St. Roman. The article from which this image was taken was shared on the Monaco4Ever Facebook Group by Jean-Paul Bascoul on 17th May 2015. [24]
A tram on Avenue d’Italie in St. Roman. [27]

After leaving the principality, Banaudo tells us that the road and the tramway ran through picturesque even grandiose scenery as they run through “Cabbé cove, bounded to the east by the tip of Cape Martin. Since leaving the principality, five passing loops and sections of double track of varying lengths followed one another on this route where the Basse, Moyenne and Grande Corniche come together below the picturesque medieval village of Roquebrune.” [1: p56]

Boulevard des Moulins finishes just at the bottom-left of this Google Maps satellite image. Avenue d’Italie runs diagonally from the bottom-left of the image to the top-right. The road is marked by the primrose yellow line. This was the route of the TNL tramway.close to the top right of the image the Avenue d’Italie gives way to the Avenue de France at the gyratory. [Google Maps, November 2023]
The primrose yellow line closest to the sea in this satellite image marks the route of the old tramway (now the D6098). Avenue de France gives way to Avenue Jean-Jaures towards the top right of the image. [Google Maps, November 2023]
The route of the old tramway continues along the present D6098 (Avenue Jean-Jaures) until it joins the D6007 (Avenue de la Cote d’Azur) and then curves around the valley at Cabbe.  [Google Maps, November 2023]
The route of the old tramway continues along the Avenue Cote d’Azur (A6007). [Google Maps, November 2023]


Shortly after the location where the Basse, Moyenne and Grand Corniches meet, the “national road 7 describes a series of tight turns on a steep slope to cut across the base of Cap-Martin.  In order to follow a more favorable route, the tramway penetrated quite far into the pine forest of the cape for approximately 1600 m on an independent platform.  Here it served housing estates, vast properties and villas, some of which were not yet connected to motorable roads.” [1: p57]

A tram runs along the highway, some distance above sea-level, having passed through the district of St. Roman. [23]
The tramway through Roquebrune and Cap-Martin was remote from the highway for about 1.6km. On careful inspection its route can be seen on this map. The pictures below show the length of tramway described by José Banaudo, which ran on its own formation for some distance. [17]
A Thomson TNL tram passes in front of the Roquebrune post office, in the Cabbé district. The tram is heading for Monaco. I have struggled to locate this image in relation to modern maps of the area. [7]

Banaudo continues to describe the route followed by the tramway. He says that the old tramway ran out onto the Cap-Martin peninsula where it “described a long hairpin loop at the bottom of which was a 108 m tunnel, in a curve with a radius of 35 m and a slope of 70 mm/m. From the Cap-Martin stop, located at the exit of the tunnel, the single track was subsequently doubled to facilitate crossings in this hilly sector. The descent on the eastern slope of the cape then offered a vast panorama of the town of Menton and the Ligurian Riviera. Since entering [Cap-Martin], the line had lost around sixty metres in altitude when it reached the seashore at the Victoria Hotel, not far from which the Cap-Martin depot was located.” [1: p57]

Close to Roquebrune, trams left the main road to follow a dedicated formation. The highway had a series of tight curves and significant gradients which were not suitable for trams. From this point, the trams travelled out onto Cap-Martin while gradually descending almost to sea-level. [16]
Approximately the same location as that shown in the photograph above, as it appears in the 21st century. [Google Streetview, October 2022]
Looking Southeast, the old mainroad followed the route on the left trams ran on a separate route which has been transformed to Avenue Paul Doumer, which appears on the right side of this photograph. [Google Streetview, October 2022]

Today, Avenue Paul Doumer (D52) follows the route of the old tramway fairly faithfully as it heads out onto Cap-Martin. Avenue Paul Doumer gives way to Avenue Sylvio de Monleon which follows the old tramway to and through the location of the tramway tunnel which has been supplanted by a road tunnel on the same alignment.

Avenue Paul.Doumer (D52) shown in grey follows the route of the old tramway. [Google Maps, November 2023]
The tram in this photograph is heading towards Roquebrune and then Menton. The single-track line is on its own formation, separated from the road both horizontally and vertically. [15]
Looking Southeast on Avenue Paul Doumer. The main road is marked by the green railings at a higher level. This is approximately the same location as that shown in the postcard view immediately above. [Google Streetview, March 2023]
The D52 continues to follow the old tramway route, although it takes the new name of Avenue Sylvio de Monleon on the right third of this extract from Google Maps. [Google Maps, November 2023]
The old tramway turned through a tight hairpin bend , the first part of which was in tunnel. [Google Maps, November 2023]
The road tunnel that replaced the narrower tramway tunnel. [Google Streetview, March 2023]
A tram leaves the tunnel on Cap-Martin and approaches the tram stop. The pedestrian access to the tram stop appears to the left of the tram in this image. [14]
From a slightly different angle, the modern tunnel portal close to the old tram stop is visible in this image. The image shows that the steps which provided access to the tram stop are mirrored by similar steps in the 21st century. [Google Streetview, March 2023]
The tram stop on Cap-Martin. The tram is heading for Monaco. [16]
This image shows the same location today. [Google Streetview, March 2023]
A tram running downhill towards the Plage de Carnoles. [26]
A similar location in the 21st century, looking down Avenue Sylvio de Monleon towards the Plage de Carnoles. [Google Streetview, April 2023]
Banaudo mentioned Hotel Victoria in his description of the tram route. In the 21st century it remains at the same location as in the early 20th century. It features at the bottom of this extract from Google Maps. South of the Hotel Victoria a block of flats can be seen adjacent to the tight curve on the D52. Those flats sit on the site of an old chapel – Chapelle du Cap-Martin. [Google Maps, November 2023]
The ruins of the Chapelle du Cap-Martin with dual tram tracks running close to its doors. [22]
A early postcard view showing a TNL tram running past the Chapel towards Menton. [34]
The same location in 2023. [Google Streetview, April 2023]
This extract from the map seen earlier in this article shows the tram route entering bottom-centre, close to what would have been the Chapelle du Cap-Martin, and running for just a short distance along Promenade du Midi before turning inland to pass under the PLM mainline. [17]
An early postcard view of La Plage de Carnoles, looking East from Cap-Martin. Tram tracks are clearly visible on the beach and a tram appears to be heading for Menton. [45]
Looking Southwest in 1910 towards Cap-Martin from La Plage de Carnoles. Banaudo notes that at the time it was built, the tramway sat on the beach. [25]
A similar view in the 21st century. [Google Streetview, April 2023]
This image shows a tram running along the edge of the beach in Carnoles. Just to the right of this image trams turned away from the beach. [7]

After running past the Chapelle du Cap-Martin trams ran alongside the beach for a short distance. The route they took has since become the Promenade du Midi. They turned inland at what is now Avenue Francois de Monleon and ran under the PLM mainline before turning to the right along Avenue Julia, a road which appears to no longer exist, and following the curve of that road as far as its junction with what is now the D6007. The length before that junction was along what is now Avenue du Marechal Foch.

This old post card image shows a tram on Avenue François de Monleon. It was shared on the Menton du Passé au Present Facebook Page on 3rd December 2017. [35]
Avenue François de Monleon in the 21st century at a similar location to the monochrome image above. [Google Streetview, November 2023]
Trams ran Northwest along Avenue François de Monleon passing under the PLM mainline through the bridge shown here. [Google Streetview, April 2023]
Running Northeast the tramway met the N7 (now the D6007) and then turned right along it towards the PLM mainline and the beach along what is now Avenue Aristide Briand. [17]
The primrose yellow D6007 shows the route of the old tramway. [Google Maps, November 2023]
This monochrome image shows a tram on Avenue Julia (now Avenue du Marechal Foch) adjacent to St. Joseph’s Catholic Church in Carnoles. The road on the right of the image is Route National 7 (RN7). [19]
This modern image shows approximately the same location in the 21st century. Google Streetview, October 2022]
Turning through about 120°, this view looks down Avenue Aristide Briand towards the railway bridge which is shown below. The tram tracks are clearly visible in the road surface. This old postcard image was shared on the Menton du Passé au Present Facebook Page on 9th August 2017. [18]
Trams once ran along what is now Avenue Aristide Briand (D6007) and passed through this railway bridge before running Northeast closer to the sea. [Google Streetview, October 2022]
Pont de l’Union sat at the boundary between Carnoles and Menton. This image is an early 20th century postcard view of Pont de l’Union. It looks East. The overbridge carrying the PLM line is directly ahead at the extreme left of this image. It is not possible to show a modern version of this image as the photograph is taken from a point inside one of the more modern buildings on Avenue Aristide Briand. [7]
The view East-northeast east along Avenue Aristide Briand which is the route being travelled by the tram in the monochrome image above. [Google Streetview, October 2022]

The TNL had a depot at Carnolès-plage from 1902 to 1932. [20] Banaudo notes that the tramway passed twice under the PLM Nice to Ventimiglia line. After “the second underbridge, the Union bridge over the Gorbio valley demarcated the territories of the communes of Roquebrune and Menton.” [1: p57]

Banaudo keeps his comments on the remainder of the old tramway route succinct. On entering the commune if Menton, he says, “the tram followed the Avenue de la Madone (today Général De Gaulle), the Borrigo Bridge, the Avenue Carnot, the Biovès garden which covers the Careï torrent then the Avenue Felix Faure.  Place St. Roch, where the Sospel line branched off, marked the entry into the old town of Menton. Here, the single track made its way through the very narrow Rue St. Michel then entered the port where it  followed the Quai Bonaparte.  The tramway entered Garavan beach then ended its course near the Hanbury fountain, a few hundred metres from the Italian border at that time.” [1: p57]

We will try to unpack Banaudo’s description with images that show the route through Menton. Trams entered Menton on the RN7 (now D6007). Until the mid-20th century people were expected to leave the tram at the boundary between Roquebrune Cap-Martin and Menton to declare the goods they were carrying. The Octroi, shown below, was the ‘custom point’.

Everyone crossing into Menton was expected to declare taxable goods at the ‘border’ of the commune. [7]
The location of le Pont de Borrigo at the point where Avenue Cernuschi met the RN7 (D6007). [Google Maps, November 2023]
Le Pont de Burrigo close to the beach on the road into Menton. The road over the bridge carried the tramway. [49]
A view West back across the location of Pont de Burrigo. [Google Streetview, October 2022]
The tram has stopped on Avenue Carnot next to Le Kiosque de Musique (Bandstand) in the gardens alongside the Promenade de Midi. [7]
Looking East along Avenue de Carnot, approaching the centre of Menton. This was the route taken by the tram. [Google Streetview, April 2023]

Trams continued along Avenue Carnot past l’Eglise Anglais and onto Avenue Felix Faure.

Avenue Carnot runs past St. John’s Church in Menton  (the Anglican Church). Tram tracks can be seen on the road surface in this image which was shared on the Comte de Nice et son Histoire Facebook Group by Pierre Richert on 8th January 2018. [37]
L’Avenue Carnot and St. John’s Anglican Church in 2023. [Google Streetview, March 2023]
St. John’s Church is shown on this extract from Google Maps with Avenue de Carnot on its South side. The D6007 turns right and then left to run along the Promenade. The old tramway ran straight ahead onto Avenue Felix Faure. [Google Maps, November 2013]
St. John’s Church can be seen in the bottom-left of this image. Avenue Felix Faure runs Northeast from St. John’s Church. It is the grey line, one block back from the Promenade. [Google Maps, November 2023]
Avenue Felix Faure, Menton, in the early 20th century, looking towards the old town. Tram tracks are visible in the road surface. [38]
Avenue Felix Faure in the early 20th century. This is a view from a very similar location as the image above, this time a tram can be seen heading out of the old town towards Monaco. [40]
The same location that appears in the two monochrome images above, as it appears in the 21st century. [Google Streetview, April 2023]
One street corner along Avenue Felix Faure, looking Northeast. The only thing in common with the present is the Hotel des Colonies building, which you can see on the left of image. [51]
Approximately the same view in the 21st century. [Google Streetview March 2023]
Avenue Felix Faure, looking Southwest from a point close to Place St. Roch. [50]
A similar view in the 21st century, looking Southwest. [Google Streetview April 2023]
This old postcard image shows Avenue Felix Faure entering Place St. Roch. It looks Southwest from Place St. Roch. Overhead tramway cables can be seen running in two directions, ahead into Avenue Felix Faure and right into Rue Partouneaux. The tram tracks leading into Avenue Felix Faure can be seen to the left of the photograph. Note the publisher shelter close to the centre of the image. [53]
A similar view to the one immediately above. A statue now sits in front of the building. [52]
A similar modern view looking across Place St. Roch towards the Southwest and Avenue Felix Faure. [Google Streetview, March 2023]

Rue Partouneaux on the North side of Place St. Roch was followed by trams for Sospel which set off from or terminated at the mouth of Rue St. Michel at Place St. Roch. This route is covered elsewhere in this series about trams in and around Nice:

Three articles written at different times, in chronological order are as below:

Sospel to Menton Tramway

The Sospel to Menton Tramway Revisited (Chemins de Fer de Provence 51)

The Menton to Sospel Tramway Revisited Again! (Chemins de Fer de Provence 61)

Avenue Felix-Faure in Menton, seen from Place St. Roch, looking Northeast. On the left we can see the waiting kiosk of the TNL tram urban lines. There is a tram waiting at the stop but rather than following the main route between Monaco and Menton it will leave along Rue Partouneaux to the Careï valley. It will possibly stop at the Villa Caserta terminus, or it will continue towards Monti, Castllon, the valley of Bévéra and the Sospel terminus. This image was shared by Jean-Paul Bascul on the Monaco4Ever Facebook Group on 28th September 2023 (Collection privée J-Paul Bascoul). [5]
A similar view, looking Northeast in the 21st century from Place St. Roch. [Google Streetview, April 2023]
Looking East from Place St. Roch along the most easterly length of Avenue Felix Faure, we see a tram heading West, although it is not clear whether it will head for Monaco or bear round in front of the camera onto Rue Partouneaux to the Carei Valley. [7]
An early 20th century postcard image of Rue St. Michel/Avenue Felix Faure, looking East, Tram tracks are visible in the road surface. [29]
The same location in the 21st century. [Google Streetview, April 2008]
An early postcard view of Rue St. Michel, looking West. [39]
Rue St. Michel in 2008 looking West at approximately the same location as in the postcard image above. [Google Streetview, December 2008]
Rue St. Michel in 2008 looking East. [Google Streetview, December 2008]
A powered car and trailer stopped at Place aux Herbes in the 1920s. This image was shared on the Monaco4Ever Facebook Group on 23rd March 2022 by Jean-Paul Bascoul. (Collection privée J-Paul Bascoul). [3]
The same location in the 21st century. [Google Streetview, 2021]
Rue St. Michel looking West in the early 20th century. The tramway track is easily seen in the cobbled road surface, the overhead cables in the sky! [46]
The same location, close to the eastern end of Rue St. Michel in the 21st century. [Google Streetview, 2008]
A further extract from Google Maps. The tramway ran along Rue St. Michel which enters this image just beneath the Carrefour City blue flag to the bottom-left of the image and runs in an approximately straight line East-northeast to meet the present D6007 (Quai Bonaparte). Here trams turned North along the D6007 before heading East towards Garavan. [Google Maps, November 2023]

Trams left the East end of Rue St. Michel and crossed Place du Cap before running out onto Quai Bonaparte.

An early 20th century postcard image of Place du Cap, Menton. Overhead wires for the trams cross the image and, to the right side of the image a tram can be seen turning into Place du Cap from Quai Bonaparte. [32]
This image was shared by Jean Claude Volpi on the Entraide Menton Monaco Roquebrune Cap Martin et sa région Facebook Group on 17th September 2021. It shows the tramway leaving Place du Cap. It refers to the Quai as ‘Quai de Monleon’. [48]
The old postcard image refers to the Quai as ‘Quai Boneparte. The camera is situated a little further to the North than the camera in the image above. [31]
A short distance to the North again, this old postcard image is annotated ‘Le Boulevard de Garavan’. Literally only a couple of hundred metres along the shore from the last postcard image. This colourised image comes from the early 20th century. [30]
The modern D6007 now follows the Quai Bonaparte/Quai de Monleon. A constant feature is the large building at the centre of this image which seems to have a central gable. In the 21st century this is the Menton campus of Sciences Po Paris. [Google Streetview, April 2023]
This last extract from Google Maps shows the remaining length of the old tramway. The line followed the Promenade de Garavan and is shown in primrose yellow. It was on the seaward side of the RN7 (D6007). The terminus was close to the grey flag at the right side of this image. It was adjacent to La Fontaine de la Frontiere. [Google Maps November 2020]
A tram heads towards Menton old town along Boulevard de Garavan. [7]
The view from a very similar location in the 21st century. [Google Streetview, March 2023]
A tram stopped on La Promenade de Garavan. Menton’s old town can be seen in the distance. [26]
A similar view from Porte de France in 2023. [Google Streetview, April 2023]
The terminus of the line is some distance ahead in this view. The tram is heading towards the terminus of the line. [26]
This image was shared on the Monaco4Ever Facebook Group on 23rd March 2022 by Jean-Paul Bascoul. Looking East, it shows a tram at the extreme Eastern end of the TNL network, about to set off for Nice. [4]
As can be seen close to the centre of this view looking East, the Fontaine de la Frontiere still stands in its historical location, although the Italian border has moved further East! [Google Streetview, March 2023]

The terminus of the TNL network was on La Promenade de Garavan, immediately West of the Fontaine de la Frontiere which itself was very close to the then Italian border.

The tram terminus was just to the West of the Fontaine de la Frontiere in almost exactly the same location as the earlier horse-drawn tram in this old postcard image. [47]
The Fontaine de la Frontiere in 2023. At one time the border with Italy was a little to the East of the fountain. [Google Streeview, November 2022]

Images in this article credited to Jean-Paul Bascoul can be found on his blog: Monaco 4Ever.blogspot.com.

References

  1. José Banaudo; Nice au fil du Tram, Volume 2: Les Hommes, Les Techniques; Les Editions de Cabri, Breil-sur-Roya, France, 2005.
  2. http://www.vidiani.com/maps/maps_of_europe/maps_of_monaco/large_detailed_old_map_of_Monaco_Monte_Carlo_1921.jpg, accessed on 13th November 2023.
  3. https://www.facebook.com/groups/1389253567814679/permalink/6968696949870285/?app=fbl, accessegraphs wered on 14th November 2023.
  4. https://www.facebook.com/groups/1389253567814679/permalink/7097087640364548/?mibextid=rS40aB7S9Ucbxw6v, accessed on 14th November 2023.
  5. https://www.facebook.com/groups/1389253567814679/permalink/9979281115478505/?mibextid=rS40aB7S9Ucbxw6v, accessed on 14th March 2023.
  6. https://www.monaco-tribune.com/2023/03/lancien-tramway-de-monaco, accessed on 14th November 2023.
  7. https://www.facebook.com/groups/1389253567814679/permalink/9166984710041487/?mibextid=rS40aB7S9Ucbxw6v, accessed on 14th November 2023.
  8. https://en.m.wikipedia.org/wiki/Trams_in_Monaco, accessed on 15th November 2023.
  9. https://collection-jfm.fr/p/cpa-monaco-monte-carlo-international-sporting-club-tramway-52606, accessed on 15th November 2023.
  10. https://www.ansichtskartenversand.com/ak/90-carte-postale-ancienne/34051-Monaco/11423949-CPA-Monte-Carlo-Le-Restaurant-de-Paris-tramway, accessed on 15th November 2023.
  11. https://fotonail.com/europa/monaco/monte-carlo/monte-carlo-avenue-tramway-horse-cart.html, accessed on 15th November 2023.
  12. https://m.facebook.com/groups/1389253567814679/permalink/9547920741947880, accessed on 15th November 2023.
  13. https://www.delcampe.net/fr/collections/cartes-postales/france/roquebrune-cap-martin/cpa-roquebrune-cap-martin-le-tram-de-menton-a-monte-carlo-transport-chemins-de-fer-tramway-giletta-946-461482676.html, accessed on 17th November 2023.
  14. http://transporturbain.canalblog.com/pages/les-tramways-de-nice—de-l-apogee-au-declin/31975780.html, accessed on 17th November 2023.
  15. https://www.ebay.co.uk/itm/253323731414?mkcid=16&mkevt=1&mkrid=711-127632-2357-0&ssspo=7-GeZfqtTnS&sssrc=4429486&ssuid=afQhrar7TGK&var=&widget_ver=artemis&media=MORE, accessed on 17th November 2023.
  16. http://www.en-noir-et-blanc.com/roquebrune-cap-martin-p1-813.html, accessed on 17th November 2023.
  17. https://www.antiquemapsandprints.com/categories/maps-by-cartographer/guides-bleus-hachette/product/roquebrune-cap-martin-vintage-town-ville-city-plan-alpes-maritimes-1930-map/P-6-070870~P-6-070870, accessed on 17th November 2023.
  18. https://m.facebook.com/story.php?story_fbid=pfbid02cEoY2Gk9V3e73notFARJaZR99QMhQmUgrKjiH1Uyd1yDhxgCAJnqMwcCKaWKFcKDl&id=635920043254797, accessed on 17th November 2023.
  19. https://www.ebay.co.uk/itm/204509560244?mkcid=16&mkevt=1&mkrid=711-127632-2357-0&ssspo=cTk_hvhSRfe&sssrc=4429486&ssuid=afQhrar7TGK&var=&widget_ver=artemis&media=COPY, accessed on 30th November 2023.
  20. https://m.facebook.com/groups/rcmentraide/permalink/1282944575478897, accessed on 17th November 2023.
  21. https://www.facebook.com/groups/1389253567814679/permalink/9478220598917895/?app=fbl, accessed on 17th November 2023.
  22. https://collection-jfm.fr/p/cpa-france-06-menton-saint-jean-vielle-chapelle-au-cap-martin-92913, accessed on 2nd December 2023.
  23. https://www.akpool.fr/cartes-postales/26659024-carte-postale-monte-carlo-monaco-tram-route-de-menton-monte-carlo-strassenbahn-panorama-vom-ort, accessed on 17th November 2023.
  24. https://www.facebook.com/groups/1389253567814679/permalink/9166981643375127/?app=fbl, accessed on 13th November 2023.
  25. https://images.app.goo.gl/PViRS5rGcYE3NVLg6, accessed on 18th November 2023.
  26. https://www.cparama.com/forum/viewtopic.php?p=52777, accessed on 19th November 2023.
  27. https://www.communes.com/cartes-postales-anciennes-roquebrune-cap-martin, accessed on 19th November 2023.
  28. https://m.facebook.com/story.php?story_fbid=pfbid028EjRwQCxRmB89rEsCt2h8YR32nMKhMhypGPSzF3CAAQc8H4wjmHSq3QRjiTzMGhHl&id=100064481811741, accessed on 19th November 2023.
  29. https://m.facebook.com/groups/1389253567814679/permalink/3565973976809283, accessed on 3rd December 2023.
  30. https://www.geneanet.org/cartes-postales/view/5938184#0, accessed on 3rd December 2023.
  31. https://www.ebay.co.uk/itm/196013394405?mkcid=16&mkevt=1&mkrid=711-127632-2357-0&ssspo=W9cRBoodQSO&sssrc=4429486&ssuid=afQhrar7TGK&var=&widget_ver=artemis&media=COPY, accessed on 3rd December 2023.
  32. https://www.cparama.com/forum/menton-t979.html, accessed on 3rd December 2023.
  33. Not used.
  34. http://www.en-noir-et-blanc.com/le-cap-martin-p1-2800.html, accessed on 2nd December 2023.
  35. https://m.facebook.com/story.php?story_fbid=pfbid028tjj9vrXVrhWDqtANF258PK7v3kCQKj5ePhuGN1QcsPL1qESvtW6c5BTopfn3LaWl&id=635920043254797, accessed on 20th November 2023.
  36. https://www.facebook.com/635920043254797/posts/pfbid0c9zVgpCcdqRCBhGj8tXT6kiiCNsmFDTTo7ASaxgFv5TFhaXcN845gT98PtXwof3yl/?app=fbl, accessed on 20th November 2023.
  37. https://m.facebook.com/groups/ciccoli/permalink/2071367206442471, accessed on 2nd December 2023.
  38. https://www.ebay.co.uk/itm/314237843895?mkcid=16&mkevt=1&mkrid=711-127632-2357-0&ssspo=nU4A5jgeRzm&sssrc=4429486&ssuid=afQhrar7TGK&var=&widget_ver=artemis&media=COPY, accessed on 2nd December 2023.
  39. https://collection-jfm.fr/p/cpa-france-06-menton-la-rue-saint-michel-223828, accessed on 3rd December 2023.
  40. https://www.ebay.co.uk/itm/186145306141?mkcid=16&mkevt=1&mkrid=711-127632-2357-0&ssspo=iaKZOZUrQmi&sssrc=4429486&ssuid=afQhrar7TGK&var=&widget_ver=artemis&media=COPY, accessed on 2nd December 2023.
  41. https://m.facebook.com/story.php?story_fbid=pfbid0UYtiYEptwyNi1Jw3dZWz9ZABkcPs8JRS6CATMHY1XYRyiM753KXLPM9CfsZ7AiKbl&id=635920043254797, accessed on 20th November 2023.
  42. Not used.
  43. Not used.
  44. Not used.
  45. https://www.geneanet.org/cartes-postales/view/186292#0, 23rd November 2023.
  46. https://m.facebook.com/story.php?story_fbid=275995965894297&substory_index=2275002982660242&id=274116476082246,  23rd November 2023.
  47. https://www.delcampe.net/en_US/collectibles/postcards/france/menton/menton-promenade-de-garavan-et-fontaine-de-la-frontiere-tram-a-chevaux-1911374856.html, accessed on 4th December 2023.
  48. https://m.facebook.com/groups/172267109778338/permalink/1524067927931576/, accessed on 30th November 2023.
  49. https://www.cparama.com/forum/viewtopic.php?p=2581, accessed on 2nd December 2023.
  50. https://www.fortunapost.com/menton/63773-06-menton-les-platanes-avenue-felix-faure-1914.html, accessed on 2nd December 2023.
  51. https://www.ebay.co.uk/itm/134689074112?mkcid=16&mkevt=1&mkrid=711-127632-2357-0&ssspo=_o2CiTs1S5m&sssrc=4429486&ssuid=afQhrar7TGK&var=&widget_ver=artemis&media=COPY, accessed on 2nd December 2023.
  52. https://www.communes.com/cartes-postales-anciennes-menton, accessed on 2nd December 2023.
  53. https://collection-jfm.fr/p/cpa-france-06-menton-la-place-saint-roch-102274, accessed on 3rd December 2023.

Nice to Monte-Carlo Branch Lines – La Ligne du Littoral et ses Antennes, First Generation Electric Tramways – (Chemins de Fer de Provence/Alpes-Maritimes No. 92) …

There were two branch lines worth noting between Nice and Monte Carlo: one from Pont-St. Jean to St. Jean-Cap Ferrat; one from Monaco-Gare to Monaco-Ville.

The tram route from Nice to Monte-Carlo is covered in an article which can be found by following this link:

La Ligne du Littoral et ses Antennes, First Generation Electric Tramways – Nice-Monte Carlo (Chemins de Fer de Provence/Alpes-Maritimes No. 91) …

Pont-St. Jean – St. Jean-Cap Ferrat

This branch line was just under 2 km in length and ran between Pont-St. Jean at 27 m above sea-level to a terminus in St. Jean-Cap Ferrat at 3 m above sea-level.

Construction of the line started in June 1906 and it was open to traffic by 7th December 1907.

Along with the rest of the network it received a line number on 1st January 1923 – No. 22. It remained in service as a tramway until 9th March 1931, when it was replaced by a bus service. Rails were lifted by 20th June 1933.

A postcard photograph of Pont St. Jean with a tram approaching from the terminus on St. Jean Cap Ferrat, the photograph was shared on the Comte de Nice et son Histoire Facebook Group by Laurent Mannu on 20th April 2022. Travelling the opposite direction a tram would almost immediately stop at l’Octroi. [6]
A very similar view in 2023. [Google Streetview, March 2023]

The line was single-track throughout with two intermediate passing places.  It left the mainline between Nice and Monte-Carlo at Pont-St. Jean which sat at the point where the communes of Villefranche and Beaulieu shared a common border and at the point where the PLM line between Nice and Ventimille was bridged to provide access to the coastline. This was also close to the Octroi de St. Jean which, as we have noted elsewhere, was a building which housed  municipal tax collectors and allowed them to control and tax goods transported by travellers.

After crossing the railway line trams headed down Avenue Denis Semaria (M25) out onto the peninsula. The ‘new’ road, M125, can be seen heading West alongside the railway line. [Google Maps, November 2023]

The peninsula was an attractive area to build a home and the Tramway found its way through villas and gardens set among pine trees.

St. Jean Cap Ferrat – a beautiful place! [2]
St. Jean Cap Ferrat, the primrose yellow road out onto the peninsula is route M25. The loop of road to the South is the M125, © OpenStreetMap made available under a Creative Commons Attribution-ShareAlike 2.0 license (CC BY-SA 2.0). [3]
The tramway ran along Avenue Denis Semeria, curving round Villa La Ligne Droit. [Google Maps, November 2023]
The route of the old tramway, approaching Villa La Ligne Droit. [Google Streetview, April 2023]
Villa Ephrussi de Rothschild sat to the East of the tramroad and Villa Andreae Nice to the West. [Google Maps, November 2023]

The M25 had to be rebuilt in to the West of and in parallel to its original route which was too narrow to accommodate both trams and other traffic. 

The Gardens of Ephrussi de Rothschild sat above the tramroad to the East and Villa Andreae Nice to the West was to the right. [Google Streetview, April 2023]

After a passing-loop close to the chapel of St. François in the middle of the peninsula, the line descended eastwards to reach its terminus located at the port of St. Jean-Cap-Ferrat. 

The tram route, as shown on a map of the area around Nice in 1914. [10]
The tramway continued along Avenue Denis Semaria close to Jardinerie du Cap-Ferrat Marcarelli. [Google Maps, November 2023]
The route continued to follow Avenue Denis Semaria and began to head down towards [Google Streetview, October 2022]
The tramway turned away from one arm of Avenue Denis Semaria to head down to the Port along another arm of the same named road and following the route number M25. [Google Streetview, October 2022]
The tramway continued round the curve on Avenue Denis Semaria. [Google Streetview, April 2023]

Avenue Denis Semaria runs first due East and then turns round to the South as it approaches the Port and the location of the tramway terminus. [Google Maps, November 2023]
Now heading due East on Avenue Denis Semaria (M25) and approaching the East coast of the peninsula. [Google Streetview, April 2023]
A tram en-route from Pont-St. Jean down to the Port curving down along Avenue Denis Semaria not far from the Port. This image was shared on the Monaco4Ever Facebook Group on 1st September 2014 by Jean-Paul Bascoul. (Collection privée J-Paul Bascoul). [11]
A very similar view in 2023. [Google Streetview, April 2023]
Turning through 180°, this is the view along Avenue Denis Semaria towards the Port. [Google Streetview, April 2023]
The bus terminus at Port-St. Jean. The tram terminus was a few hundred metres South , behind the camera. [Google Streetview, April 2023]
The tram terminus was established at the port of St. Jean-Cap-Ferrat, Place du Centenaire, near the statue of the Fisherman, the work of Claude Vignon-Rouvier, wife of the politician Maurice Rouvier. Around 1910. The tram in the picture is made up of a powered car and a trailer. [4]
A later view without a tram present. The buildings on the left have seen some significant work undertaken. The first is now a three-storey building and both that and the adjacent property have been extended towards the street. This image was shared on the Comte de Nice et son Histoire Facebook Group on 28th February 2022 by Alain Nissim. [5]
A similar view in 2023 looking through the location of the tramway terminus to the North. [Google Streetview, April 2023]
The cafe at the terminus of the tramway. The image was shared on the Comte de Nice et son Histoire Facebook Group by Alain Nissim on 18th February 2022. [9]
A postcard view of Saint-Jean-Cap-Ferrat – Place du Centenaire – Tram Stop – Publisher: Giletta N°830. The photograph was taken sometime around 1920 and shows a powered car running round its trailer ready for the journey back to Pont-St. Jean. [4]
A similar view in 2023 looking through the location of the tramway terminus to the South. [Google Streetview, April 2023]
The Namuoma Restaurant at St. Jean-Cap Ferrat, with the tramway tracks visible to the bottom right of the photograph. This image was shared on the Comte de Nice et son Histoire Facebook Group by Alain Nissim on 16th August 2023. [7]
Another view of the terminus. This image was shared on the Comte de Nice et son Histoire Facebook Group by Alain Nissim on 5th July 2021. [8]
A similar view in 2023 looking through the location of the tramway terminus to the South. [Google Streetview, April 2023]

Monaco-Gare – Monaco-Ville

This line was marginally over 1 km in length. It low point was at Place d’Armes, just 19 metres above sea-level, its high point was at 59metres above sea-level at Place de la Visitation. It was single track over its entire length with no passing places . It also did not have passing loops at its two termini as it only used powered cars with no trailers.

Banaudo tells us that, “Starting from the PLM station square, it went down Avenue de la Gare for 101 m to Place d’Armes. This node in the Monegasque network formed a connection point with the TNL line towards Nice and the TM line towards Monte Carlo and St. Roman. Crossing this, the single track climbed by a long ramp of 77 mm/m the Avenue de la Porte-Neuve to the end of the Rocher dominating Fort Antoine, then a sharp bend brought the line back into the Avenue des Pins. The terminus sat at the entrance to the old town of Monaco, on the Place de la Visitation where the government palace stands.” [1: p54]

A plan of the different tram and train lines in Monaco and Monte-Carlo in the early 20th century. The article from which this image was taken was shared on the Monaco4Ever Facebook Group by Jean-Paul Bascoul on 17th May 2015. The line between the station and the Place de la Visitation runs left to right at the bottom of the map. [15]
This map shows This branch line tramway ran from Monaco-Gare at the Northwest corner of this map extract through Place d’Armes and then along Avenue de la Porte Neuve before swinging sharply round to the West along Avenue des Pins, to terminate in Place de la Visitation. [16]
Monaco Railway Station in the early 20th century. [19]
Looking Northwest along Avenue Prince Pierre towards the location of Monaco Railway Station. [Google Streetview, July 2021]
Looking along Avenue Prince Pierre into Place d’Armes. [Google Streetview, July 2022]
The junction of Avenue de la Gare with Place d’Armes looking towards the railway station. This image was shared by Jean-Paul Bascoul on the Monaco4Ever Facebook Group on 23rd June 2017. (Collection privée J-Paul Bascoul). [13]
A tram on Place d’Armes in the 1920s. This image was shared by Jean-Paul Bascoul on the Monaco4Ever Facebook Group on 20th June 2020. (Collection privée J-Paul Bascoul). [14]
La Place d’Armes looking towards Monaco Railway Station which sits at the far end of Avenue de la Gare (now Avenue Prince Pierre). [12]
A colourised postcard view of the junction between Avenue de la Gare (now Avenue Prince Pierre) and Place d’Armes. [17]
Place d’Armes sat below the Palace of Monaco. It was the point at which trams from the railway station crossed the Nice to Monte-Carlo line and then headed up onto the rock. [16]
The tramway up onto the Rock followed Avenue de la Porte Neuve. The tramway to the casino (and on to Menton) followed the parallel Avenue du Port. [Google Streetview, 2011]
The tramway to the Casino and then on to Menton ran up the West side of the port. The tramway up onto the Rock via the Avenue de la Porte Neuve. [16]
The tramway turned from the Avenue de la Porte Neuve into the Avenue des Pins and heads to its terminus at Place de la Visitation. [16]
The tight curve of Avenue Saint-Martin leads round towards Avenue des Pins. [Google Streetview, 2011]
The tramway followed Avenue des Pins heading off to the right leading towards Place de la Visitation. [Google Streetview, 2011]
Place de la Visitation at the top of Avenue des Pins was the terminus of the tramway. [Google Streetview, 2011]

Images in this article accredited to Jean-Paul Bascoul come from his blog – Monaco4ever.blogspot.com.

References

  1. José Banaudo; Nice au fil du Tram, Volume 2: Les Hommes, Les Techniques; Les Editions de Cabri, Breil-sur-Roya, France, 2005.
  2. https://www.explorenicecotedazur.com/en/info/saint-jean-cap-ferrat-en, accessed on 11th November 2023.
  3. https://www.openstreetmap.org/#map=14/43.6881/7.3294, accessed on 11th November 2023.
  4. https://www.cparama.com/forum/saint-jean-cap-ferrat-t9821.html, accessed on 11th November 2023.
  5. https://m.facebook.com/groups/ciccoli/permalink/3325276507718195, accessed on 11th November 2023.
  6. https://m.facebook.com/groups/ciccoli/permalink/3372278223018023, accessed on 11th November 2023.
  7. https://m.facebook.com/groups/ciccoli/permalink/3745256885720153, accessed on 11th November 2023.
  8. https://m.facebook.com/groups/ciccoli/permalink/3132401830338998, accessed on 11th November 2023.
  9. https://m.facebook.com/groups/ciccoli/permalink/3325276507718195, accessed on 11th November 2023.
  10. https://theoldmapshop.com/products/1914-nice-south-of-france-town-plan-antique-baedeker-map-print-st-jean-cap-ferrat-villefranche-sur-mer, accessed on 12th November 2023.
  11. https://m.facebook.com/groups/1389253567814679/permalink/9801785099894775, accessed on 13th November 2023.
  12. https://www.akpool.fr/cartes-postales/24373465-carte-postale-monaco-la-cote-dazur-la-place-darmes-et-avenue-de-la-gare-strassenbahn, accessed on 13th November 2023.
  13. https://m.facebook.com/groups/1389253567814679/permalink/9397633530309936, accessed on 13th November 2023.
  14. https://www.facebook.com/groups/1389253567814679/permalink/5583715751701752/?app=fbl, accessed on 13thbNovember 2023
  15. https://www.facebook.com/groups/1389253567814679/permalink/9166981643375127/?app=fbl, accessed on 13th November 2023.
  16. http://www.vidiani.com/maps/maps_of_europe/maps_of_monaco/large_detailed_old_map_of_Monaco_Monte_Carlo_1921.jpg, accessed on 13th November 2023.
  17. https://www.facebook.com/groups/1389253567814679/permalink/8938416852898275/?app=fbl, accessed on 13th November 2023.
  18. https://www.facebook.com/groups/1389253567814679/permalink/8938416852898275/?app=fbl, accessed on 13th November 2023.
  19. https://www.monaco-tribune.com/2023/02/un-decor-de-carte-postale-la-gare-de-monaco-monte-carlo, accessed on 13th November 2023.

Early Railways in Plymouth

The first railways in the area were of wooden rails used during the construction of docks facilities. Some were in use in the Naval Dockyard in 1724, [2] and in 1756 John Smeaton laid some more to help move materials in his workyard on the mainland which was preparing stonework for the Eddystone Lighthouse. [4: p5-8] [1]

Smeaton’s Workyard near the location of Millbay Docks was used for a fastidious trial construction of the lighthouse to ensure that the massive stone blocks used in its construction would fit with each other before undertaking the work on site, 14 miles out to sea. To move these blocks around the Workyard, Smeaton made use of a ‘Rail Road’ which comprised of a four-wheel carriage running on a timber road. In Smeaton’s own words, stones were “delivered upon the four-wheel carriage that runs along the timber road, commonly called at the Collieries, where they are used, a Rail Road: and being landed upon the carriage, any stone can be delivered upon any of the Bankers in the line of the work-sheds on either side: or the carriage being turned a quarter round upon the Turnpike, or Turnrail, it can be carried along the road that goes up the middle of the yard, and be delivered upon any part of its area destined for their deposition; all the stones marked for the same course being deposited together; from which place they can be again taken up upon the carriage, run along the road, and be delivered upon any Banker in the line of sheds, or upon the Platform, and afterwards returned back to the same place of deposition, ready to be carried to sea in their proper orderA Banker in a mason’s yard is a square stone of a suitable size, made use of as a work-bench.” [4: p6-7]

In 1812, John Rennie laid a 3 ft 6 in (1.07 m) gauge metal tramway to help with the construction of the Plymouth Breakwater; rails were laid in the quarry at Oreston and on the breakwater, and loaded wagons were conveyed between the two on ships. [5][1]

Rennie’s use of a ‘Rail Road’ is recorded in three different contemporary accounts: “The first of these is ‘Two Excursions to the Ports of England, Scotland and Ireland in 1816, 1817 and 1818, with a description of the Breakwater at Plymouth and the Caledonian Canal‘ translated from the (French) original of Charles Dupin. The second book …  [was] published by J. Johns of “Dock” (soon to become “Devonport”) in a booklet dated November 1820 entitled ‘Interesting Particulars Relative to the Great National Undertaking, the Breakwater now Constructing in Plymouth Sound.’ From these two books, a good picture of Rennie’s little railway can be formed, whilst the third book, Rennie’s own mammoth publication provides yet another set of carefully-scaled drawings, similar to Smeaton’s previous records.” [4: p9-10]

An engraving in Rennie’s book which shows the wagons used on his ‘railway’ [4: illustration between p8 & p9]

Rennie’s 3ft 6in gauge railway allowed horses to bring large stone blocks on flatbed wagons (or smaller stones in wagons fitted with sides), from his quarry at Oreston to a quay where the wagons were turned on a turntable and loaded onto vessels with iron rails in their holds and taken to the sites of the breakwater. On arrival a form of tippler appears to have been used to discharge the wagonloads onto the sides of the breakwater. [4: p10-11]

A second engraving from Rennie’s book which shows the wagons in place in the hold and on the deck of one of the wessels which transported stone from the quarry to  the site of the breakwater [4: illustration between p8 & p9]

The building of the breakwater extended over some thirty years, and in its final stages a railway was actually constructed on the surface of the “wall” enabling the ships to be unloaded in the reverse manner to that of the loading at Oreston, even down to the provision of turn-tables. … This … has given rise to the claim that this was the first rudimentary ‘train ferry’.” [4: p12]

A further engraving from Rennie’s book which shows the breakwater with the railway on its surface. [4: illustration between p8 & p9]

Kendall noted in 1968, that the quarry at Oreston still continued to supply stone for the maintenance of the breakwater. [4: p12]

On their journey around England in 1826 and 1827,  Von Oeynhausen and Von Dechen visited the Plymouth Breakwater and the later Plymouth & Dartmoor Railway referred to below. [7: p51-55] Of the Breakwater Railway, they commented: “For the transport of the larger masses of stone, 10 ships of 80 tons burden have been built in the Royal Dockyard. These ships can carry 16 blocks, each of 5 tons weight, in two rows, each block resting on a wagon which runs on a railway. The two railways on the ships are extended to the breakwater by drawbridges; and then the wagons are drawn out of the ships by cranes and unloaded. In this manner, a ship of 80 tons can be unloaded in 40 or 50 minutes. The ships are brought to the place where the stones are required to be laid by the help of buoys.” [7: p55]

A more conventional tramway was opened on 26th September 1823. The 4 ft 6 in (1.37 m) Plymouth & Dartmoor Railway ran from Princetown to Sutton Harbour and the Cattewater. Branches were opened to Cann Quarry in 1829 and to Plympton in 1834, followed by the Lee Moor Tramway in 1854. Haulage on these lines in Plymouth was always by horses (although the Lee Moor Tramway did have two 0-4-0ST locomotives which spent most of their life at the Lee Moor end of the tramway). The Lee Moor line remained in use until 1960. [1][3][6: p9]

The Plymouth & Dartmoor Railway is covered in much greater detail in the article accessed via this link:

……………. (Currently being written) ……………………..

References

  1. https://en.m.wikipedia.org/wiki/Railways_in_Plymouth#:~:text=A%20more%20conventional%20tramway%20was,Lee%20Moor%20Tramway%20in%201854, accessed on 20th September 2023.
  2. Paul Burkhalter; Devonport Dockyard Railway; Twelveheads Press, Truro, 1996.
  3. Eric R. Shepherd; The Plymouth and Dartmoor Railway and the Lee Moor Tramway; ARK Publications (Railways), Newton Abbot, Devon, 1997.
  4. H.G. Kendall; The Plymouth & Dartmoor Railway; The Oakwood Press, Lingfield, Surrey, 1968.
  5. David St John Thomas; West Country Railway History; David & Charles, Newton Abbot, 1973.
  6. Russell Leitch; Plymouth’s Railways in the 1930s including “The Gear’s Poor Relation”; Railway Correspondence & Travel Society, Peterborough, 2002.
  7. C. Von Oeynhausen and H. Von Dechen; Railways in England 1826 and 1827; translated from the German by E.A. Forward and edited by Charles E. Lee and K.R. Gilbert; Newcomen Society, Cambridge, 1971.

Derry History – The Harbour Tramways/Railways

The ‘Modern Tramway’ Journal of September 1963 had a short article about the Harbour Tramways in Derry, written by J.H. Price. …

The 3-rail mixed gauge track of the dockside tramways in Derry. These were closed from 1st September 1962, © J.H. Price. [1: p315]

Friday 31st August, 1962, saw the closing of the dockside tramways of the Port and Harbour Commissioners in Derry. This was probably “a delayed outcome of the closing in 1957 of much of the hinterland railway system, which … diverted much traffic to Dublin, and since 1950 the rail traffic over the Commissioners lines has fallen from 200,000 tons to just over 10.000 tons per year. Now road transport is used for all traffic.” [1: p314]

The city of Derry was unusual in having four separate railway termini, two on each side of the River Foyle. On the western side was the Foyle Road, terminus of the Great Northern Railway’s 5ft 3jn gauge line to Omagh and Portadown, separated by nearly two miles of quays from the L&LSR’s 3 ft. gauge terminus at the Graving Dock. Across the river on the eastern shore was the Waterside terminus of the Ulster Transport Authority (ex-NCC) main line to Coleraine and Belfast, and further south on the same side was Victoria Road station, the terminus of the 3ft gauge line to Strabane owned by the Ulster Transport Authority and worked for them by the County Donegal Railway.

The narrow gauge lines were closed in 1953 and 1954 respectively, but the broad gauge lines were still in use in 1963.

To allow railway wagons to reach the town quays and the quayside warehouses, the … Port and Harbour Commissioners built from 1867 onwards a system of dock tramways worked initially by horses. Most of the lines were of three-rail mixed gauge. … In 1872 steam traction was introduced, with broad-gauge tank locomotives fitted with dual couplings so as to haul broad or narrow-gauge wagons; mixed gauge trains were not unusual.” [1: p314]

From about 1950 the Commissioners two latter-day locomotives (both 0-6-0 saddle tanks) were displaced by road tractors, but remained in their shed for another three years. Photographs of these two locomotives can be seen towards the end of this article.

For a short time in the 1880 the Lough Swilly passenger trains ran over the dock tramways as far as the Middle Quay, but this ceased in 1888, and a link for passenger traffle was provided instead from 1897 onwards by the 4ft 8in gauge horse tramway of the City of Derry Tramway Company, replaced by motor buses in 1920.” [1: p314-315]

Since part of the original scheme was to allow the railways of the eastern shore an access to the quays and warehouses on the western, or town, side, the layout included a railway across the lower deck of the Carlisle Bridge, and this was continued when the bridge was reconstructed as the Craigavon Bridge in 1933. The upper deck of the bridge carrie[d] a roadway and footpaths. Locomotives were not allowed on the bridge, and for many years the wagons were moved across by rope and capstan.” [1: p315]

The lower deck of the Craigavon Bridge in Derry showing one of the mixed gauge turntables, © J.H. Price. [1: p315]
The lower deck of the Craigavon Bridge in 2023. [Google Streetview, April 2023]

This installation included two of Ireland’s few mixed-gauge turntables (the others were at Strabane, Larne Harbour and Carnlough), and to ensure that the narrow-gauge wagons were balanced correctly on the turntables, the 3 ft. gauge track was brought to the centre of the broad gauge instead of remaining at one side.

Price commented that the whole layout was distinctly unusual. He considered it likely (in 1963) that some portions of the trackwork would remain in place for years to come.

Craigavon Bridge was designed by the City Architect, Matthew A Robinson. Construction began in the late 1920s and was finished in 1933. As we have noted, the lower deck of the bridge originally carried a railway line for freight wagons, but that was replaced by a road in 1968. At each end, a silhouetted mural of a railway station stands to mark the former railway. [2]

The Port and Harbour Commissioners Tramways have been carefully mapped by Chris Amundson after study of all available sources. His work covers track layouts throughout the life of railways and tramways in Derry. This is not the place to share large electronic files but his mapping can be found on the Irish Railway Modeller forum. His CAD map from the late 1940s can be found here. [3] Just a few extracts from that drawing. …….

This first extract shows the track layout close to Craigavon Bridge. The grey/black lines are those of the Port and Harbour Commissioners Tramways, the red lines are those of the County Donegal Railways Joint Committee. The turquoise blue lines are those of the Great Northern Railway (Ireland). It is worth noting the two wagon turntables, each of which sits at one end of the bridge, © Chris Amundson. [3]
Craigavon Bridge in 1949, as seen in a Britain from Above Aerial Image (XAW027082) © Historic England. [13]
A general aerial view of the quays at Derry with the centre of the city close alongside. The light roofed building adjacent to the ship at Prince’s Quay. Further to the North are the transshipment sheds opposite the Guildhall sitting between Prince’s Quay and Queen’s Quay. [11]
Abercorn Quay and the GNR(I) Foyle Road station with covered wagons sitting on the Port and Harbour Commissioners’ rails, on an extract from photograph XAW027081, © Historic England. [12]
This extract from photograph XAW027081 overlaps with the one above and also shows Abercorn Quay, © Historic England. [12]
Open wagons sit on the Port and Harbour Commissioners’ rails at the South end of Prince’s Quay on an extract from photograph XAW027081, © Historic England. [12]
The transshipment shed on the quayside between Prince’s and Queen’s Quays. The Guildhall is just off the extract on the left. This extract is also taken from photograph XAW027081, © Historic England. [12]
The Port and Harbour Commissioners Tramways ran along the City side (West side) of the River Foyle. This extract shows Abercorn Quay and Prince’s Quay, © Chris Amundson. [3]
This extract shows Queen’s Quay and includes the location of the Port and Harbour Commissioners Tramways Loco. Shed, © Chris Amundson. [3]
This photograph looks North from Prince’s Quay. The 2 cranes are unloading coal at Berths 12 and 13. Astern of the ship (Kelly’s ‘Ballyedward’) in the foreground are the Liverpool and Heysham berths and their transshipment sheds. The Guildhall is hidden by the buildings on the left. The large building to the left of the tip of the righthand crane is McCorkells grain store. The new City Hotel and Quayside are now on that site. The boat behind the ‘Ballyedward’ on the right is the Belfast SSCo’s ‘Ulster Drover’ which carried cattle to Glasgow until about 1958. Scrapped in 1959. This photograph was shared on the Derry of the Past Facebook Page on 22nd January 2017. [14]
The quay, before the 1890s as the Guildhall has yet to be built. You can see Harbour House and Custom House in the image (the Guildhall would have been just behind the Harbour House). The platform in the foreground is the Lough Swilly Railway’s original Middle Quay Station. This image was shared to the Derry of the Past Facebook Page by Michael Burns & J Knox on 9th August 2016. [5]
A similar view in 2020. Harbour House and Custom House are visible in this photograph which was taken when the leaves were not on the trees. The Customs House is closest to the right side of the image. The Guildhall beyond Harbour House. [Google Streetview, December 2020.
This view looks South from alongside the Transit Shed. The balconied building on the right is the Guildhall. The dual-gauge track enabled wagons of both gauges to access the various warehouses and quays along the River Foyle. This image was shared on the Irish Railways Past and Present Facebook Group by John McKegney on 9th December 2020. [5]
The best that we can do using Google Streetview to replicate the older image above. The Guildhall is on the right of this view camouflaged by the bare trees of winter. The Christmas tree is probably siting over the place that the old tracks in the image above would have run. [Google Streetview, December 2020]
Looking South towards the Guildhall (the clock tower is clearly visible) from Queen’s Quay, probably sometime in the first decade of 20th century. The smaller vessel, nearest the photographer, is the Screw Steamer ‘Harrier’. Built in 1892, she was torpedoed in 1943 (by U-boat U181). The larger steamer, just beyond, is the Packet Steamer ‘Duke of York’. Built in 1894, she was renamed the ‘Peel Castle’ in 1911/1912, and pressed-into service as an Armoured Boarding Vessel during WWI, © Robert French, held in the Lawrence Photograph Collection of the National Library of Ireland. [15]
North of the Guildhall and the large transit shed but South of the Loco Shed there is a second transit shed shown on the mapping . This photograph was taken in the 1980s looking South from alongside that transit shed towards the crane tracks. The crane is sitting at the North end of the tracks. The image was shared on the Derry of the Past Facebook Page by Joseph Keys on 7th July 2020. [6]
A similar view in September 2009. [Google Streetview, September 2009]
This final extract shows the northern extent of the Port and Harbour Commissioners Tramways. The Loco. Shed can be seen bottom-left. McFarland Quay and the Graving Dock appear to the South of the L&LSR Graving Dock station. The L&LSR’s tracks are shown by the green lines, © Chris Amundson. [3]

To the North of the Goods Shed and just off the North edge of the extract above the L&LSR crossed the Strand Road at level on a shallow angle.

This photograph is taken looking North through the level-crossing on Strand Road. It shows the final train on the L&LSR, entering Graving Dock Station from the North, crossing Strand Road. The Crossing Gates emphasise the width of the road and the shallow angle of the crossing. [16]
This extract from the Ordnance Survey at the turn of the 20th century shows the Graving Dock, the L&LSR Station and the Strand Road crossing. The Port and Harbour Commission’s dual-gauge tramroad enters the extract from the South and terminates alongside Graving Dock Railway Station where a connection is made with the L&LSR sidings. Ownership of the tracks switched from the Commission to the L&LSR at the Southwest end of the Graving Dock.
The view North from the mouth of Duncreggan Road in 2022. The western kerb of Strand Road was under the location of the car parked on the grass verge close to the centre of the picture, perhaps under the location of the offside rear wheel. The level crossing gates were perhaps a short distance to the North of the same car. [Google Streetview, October 2022]

The next two images show the Port and Harbour Commission’s Locomotive 0-6-0ST No. 1 at work on the West side of the River Foyle. Both are embedded Getty Images.

Londonderry Port & Harbour 0-6-0ST No.1. Locomotive & General Railway Photographs. Ireland, 1933.
Locomotive 0-6-0ST No. 1 in 1933, (Photo by Science & Society Picture Library/SSPL/Getty Images). [7]
Londonderry Port & Harbour 0-6-0ST No. 1
Locomotive 0-6-0ST No. 1 again, (Photo by Science & Society Picture Library/SSPL/Getty Images). [8]
Locomotive No. 1 again, this locomotive was built by Robert Stephenson & Co. (Works No 2738). It is on display in the Ulster Folk and Transport Museum at Cultra near Belfast. [9]
The Port and Harbour Commission’s Locomotive No. 3, ‘R.H. Smyth’. This locomotive is an Avonside Engineering Company locomotive, built in 1928, (Works No. 2021). Described as “generally similar to the B6 class 0-6-0 saddle tanks, but with a wheelbase of 9 feet and a gauge of 5 feet 3 inches”. The engine was designed to work on dual gauge track with both 5’3″ and 3′ gauge wagons, and had a pair of offset narrow gauge buffers. It was stood down from operational duties in 1959. By 1968 the engine had been out of use for several years and the Reverend L.H. Campbell decided to buy her to save her from the scrapyard. By February 1968 the engine was his, remaining for the time being in the Harbour Commissioners’ sheds. In 1972, the Reverend decided to pass the engine on to the Railway Preservation Society of Ireland so that it could be restored to working order. The handover officially took place on 1st May that year. It has an interesting history in preservation. [10]

No. 3’s story is taken up by the Railway Preservation Society of Ireland: “The little engine lay outside for many years until it became practical to overhaul her. She first steamed in preservation in summer 1977. For many years she served as yard shunting engine at Whitehead, and was a guinea pig for the inner firebox repair on No.85. Her public duties included train rides up and down the site at Whitehead, hauling early Easter Bunny and Santa trains before they became mainline trains. … In the summer of 2000 the loco was hired to contractors Henry Boot who were relaying the Bleach Green – Antrim line for NIR. A locomotive was needed to pull ballast hoppers, and as IÉ and NIR were not in a position to loan a locomotive, the RPSI was approached. The locomotive pulled over fifty thousand tons of stone from 18th June until 25th November 2000. On the latter date she returned to Whitehead and resumed her shunting duties. … By 2004 “R.H. Smyth” was in need of an overhaul, but didn’t seem likely to return to steam until the Guinness engine came out of traffic as steam shunting engine. Then the contractors relaying the Bleach Green – Whitehead line stepped in. They required an engine to haul ballast trains, just as Henry Boot had. The locomotive was given a thorough overhaul in double quick time, and was moved to Greenisland in early August 2005. After a busy five months ballasting, the engine returned home to Whitehead in December 2005. … From 2006 until 25th November 2012, when it returned to Whitehead, the engine was on loan to the Downpatrick and County Down Railway, although for the last couple of years of that stay, the locomotive was out of service awaiting a decision on boiler repairs. … In late 2019 the locomotive received a cosmetic overhaul and went on display in the Museum at the head of a mini goods train. The narrow gauge coupler has been reinstated.” [10]

References

  1. J.H. Price; The Londonderry Harbour Tramways; in Modern Tramway and Light Railway Review, Volume 26, No. 309; Light Railway Transport League and Ian Allan Hampton Court, Surrey; September 1963, p314-315.
  2. https://en.m.wikipedia.org/wiki/Craigavon_Bridge, accessed on 23rd August 2023.
  3. https://irishrailwaymodeller.com/uploads/monthly_2023_08/_com.apple.Pasteboard.nBUrho.png.5793b7e2d13018c0cf5dab48c9af4431.png, accessed on 24th August 2023.
  4. https://www.facebook.com/Derryofthepast/photos/a.1007190669332324/1210256352359087, accessed on 31st August 2023.
  5. https://www.facebook.com/photo/?fbid=10157961821301219&set=gm.1848708821949134, accessed on 31st August 2023.
  6. https://www.facebook.com/Derryofthepast/photos/a.1007190669332324/3528479063870126, accessed on 31st August 2023.
  7. https://www.gettyimages.co.uk/detail/news-photo/londonderry-port-harbour-0-6-0st-no-1-locomotive-general-news-photo/102725492?adppopup=true, accessed on 31st August 2023.
  8. https://www.gettyimages.co.uk/detail/news-photo/londonderry-port-harbour-0-6-0st-no-1-news-photo/102725493?adppopup=true, accessed on 31st August 2023.
  9. https://preservedbritishsteamlocomotives.com/1-londonderry-port-and-harbour-commissioners-0-6-0st-robert-stephenson-co-works-no-2738, accessed on 31st August 2023.
  10. https://www.steamtrainsireland.com/rpsi-collection/12/no3-rh-smyth, accessed on 31st August 2023.
  11. https://www.foyleport.com/history, accessed on 2nd September 2023.
  12. https://www.britainfromabove.org.uk/image/XAW027081, accessed on 2nd September 2023.
  13. https://www.britainfromabove.org.uk/image/XAW027082, accessed on 2nd September 2023.
  14. https://encrypted-tbn0.gstatic.com/images?q=tbn:ANd9GcR1FLJqvbOkkkChRaiNFNgSY3FWAMKYYHSyWg&usqp=CAU, accessed on 3rd September 2023.
  15. https://flic.kr/p/267Co9D, accessed on 3rd September 2023.
  16. https://www.derryjournal.com/lifestyle/travel/remembering-the-swilly-train-3330773, accessed on 10th September 2023.