
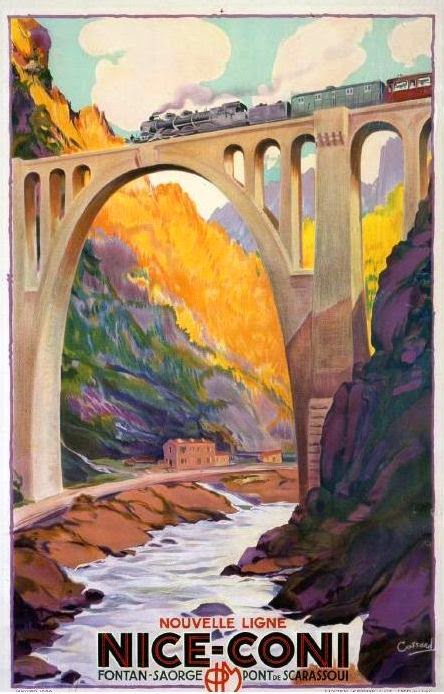
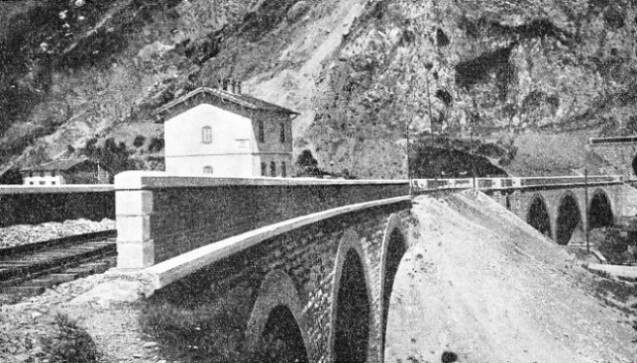
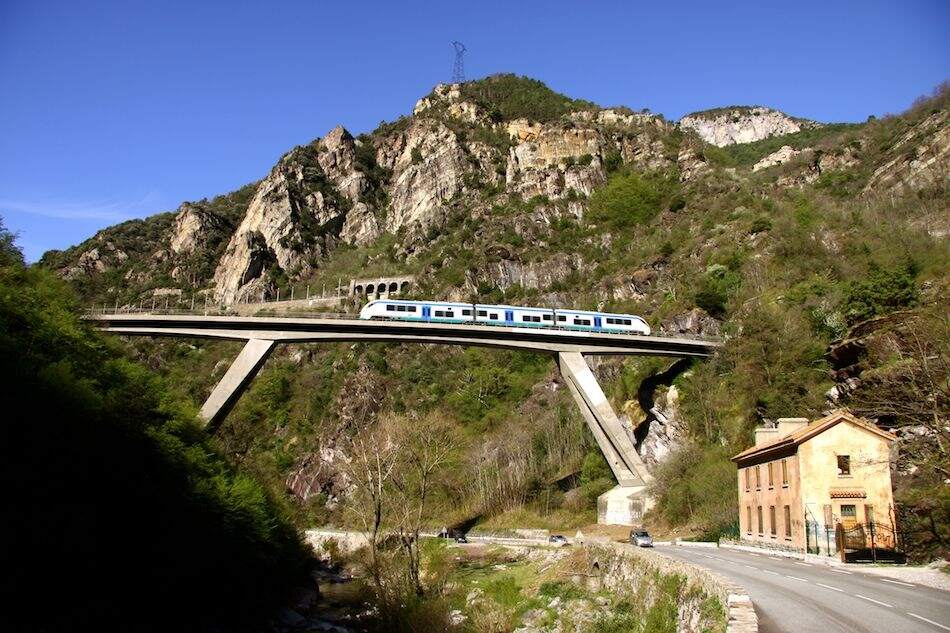
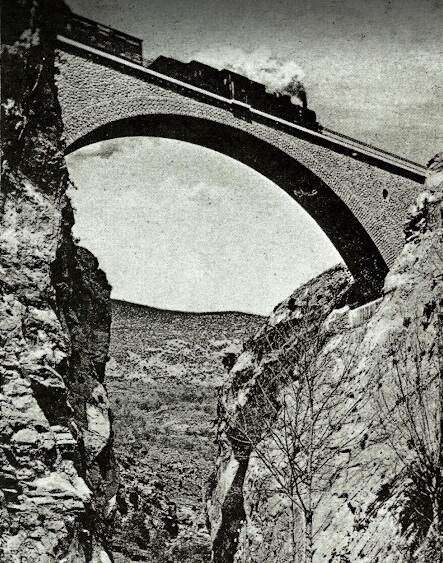
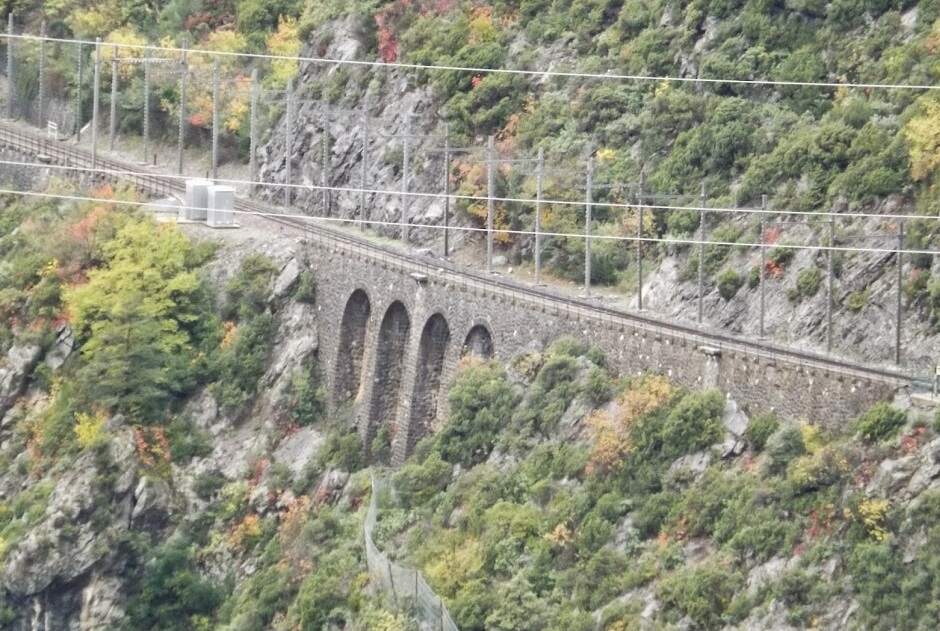
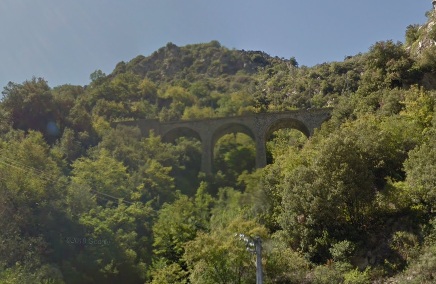
The featured image above is a poster for the Nice-Cuneo line. It shows Scarassoui Viaduct with a Northbound steam service between the wars (c) Adolphe Crossard. … Public Domain. [49]
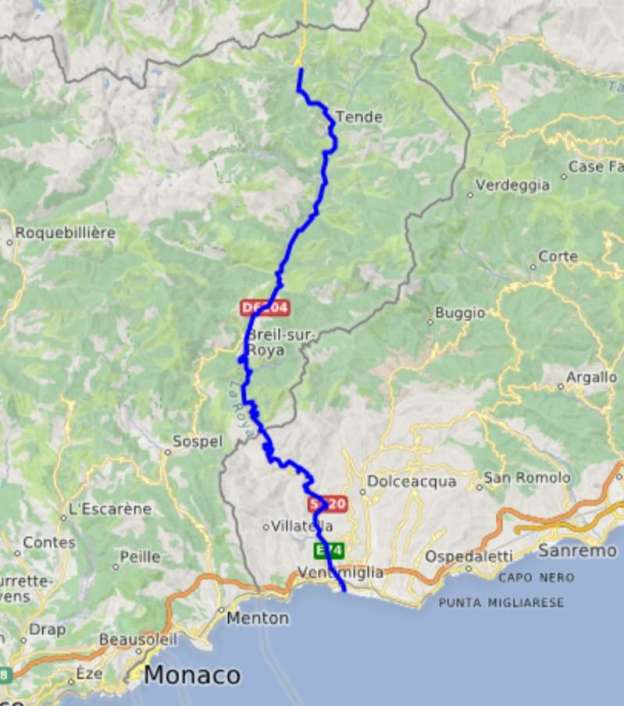
In the first three articles about the line from Cuneo to the sea we covered the length of the line from Cuneo to St. Dalmas de Tende. These articles can be found here, [9] here [10] and here. [11]
I also want to acknowledge the assistance given to me by David Sousa of the Rail Relaxation YouTube Channel https://www.youtube.com/@RailRelaxation/featured and https://www.railrelaxation.com and particularly his kind permission given to use still images from rail journeys that he has filmed on the Cuneo Ventimiglia railway line. [35][55]
1. The Line South from St. Dalmas de Tende as far as the French/Italian Border …
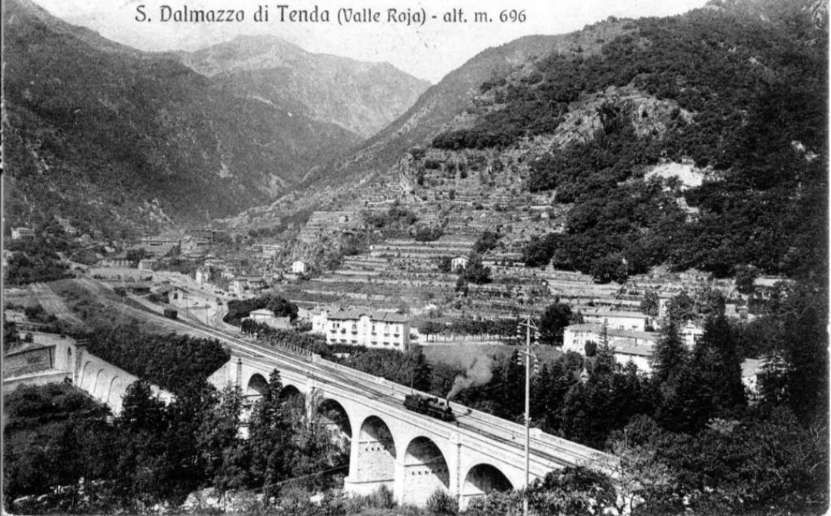
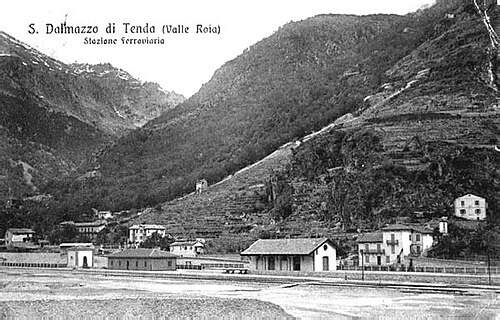
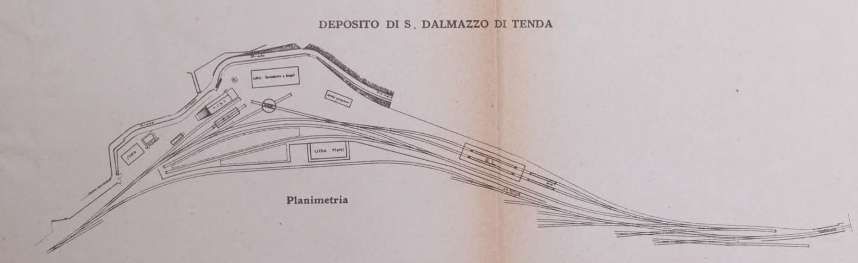
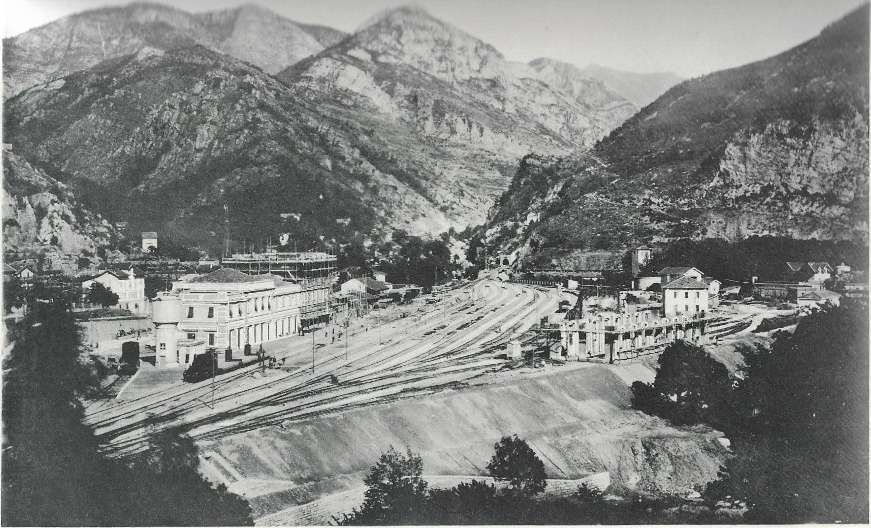
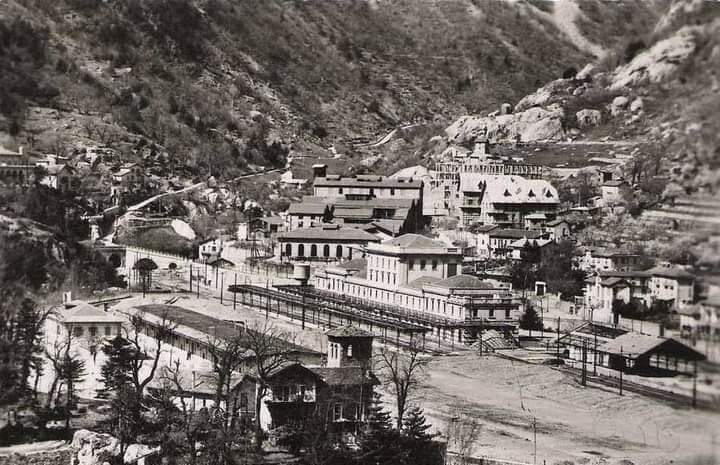
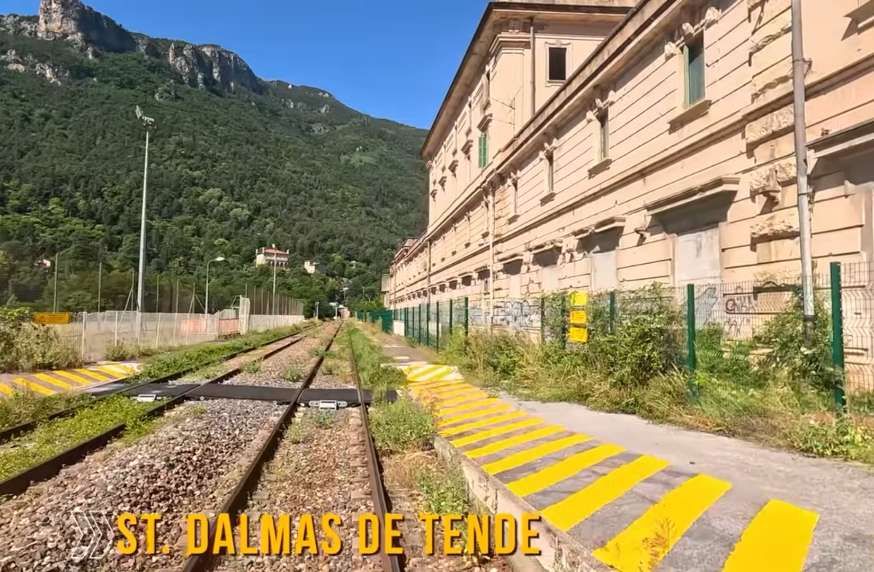
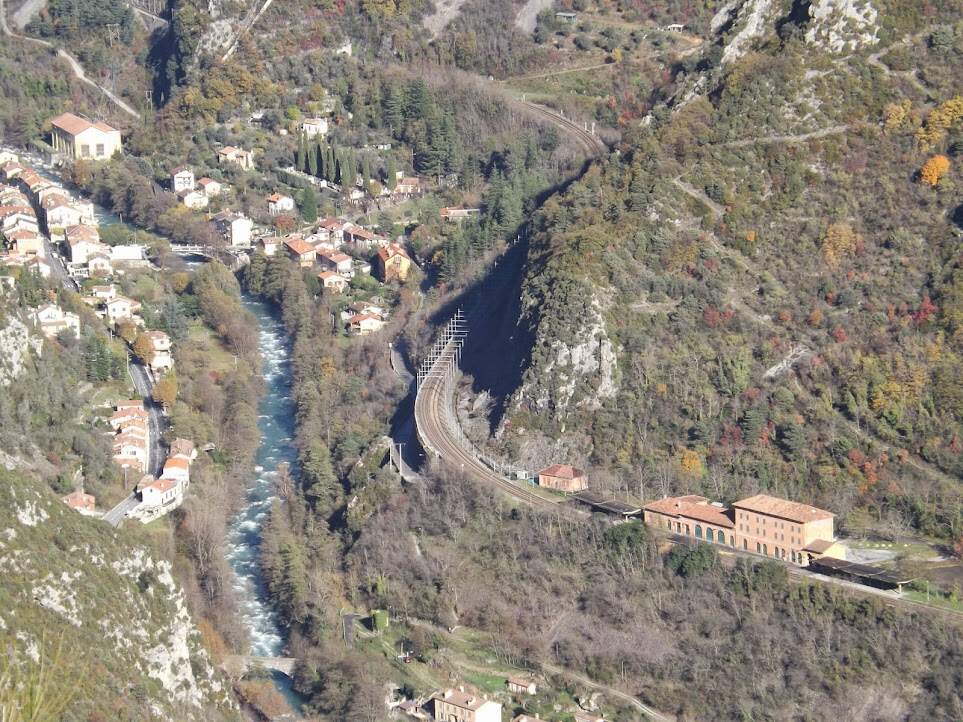
St. Dalmas de Tende (San-Dalmazzo-di-Tenda in Italian) was “the last station on Italian territory, before the northern border. This is where the French Forces would install a large-scale border station that will handle customs clearance operations in addition to the French facilities at Breil. In the first phase, a temporary passenger building and a small freight shed were built on the vast embankment created from the spoil from the tunnels upstream of the confluence of the Roya and Biogna rivers. The original layout includes four through tracks, one of which is at the platform, five sidings, three storage tracks, a temporary engine shed, a 9.50 m turntable, and a hydraulic power supply for the locomotives.” [1: p127]
It is here, at St. Dalmas de Tende, that we start this fourth part of our journey from Cuneo to the coast. Before we do set off southwards we note that the Tende to La Brigue “tranche of the work on the line was awarded to the Tuscan contractor Enrico Lévy, and the Briga to St. Dalmas de Tende tranche was executed by the Rosassa company of Alessandria. Work began in 1912 and progressed more quickly than upstream of Tende, thanks to the opening of the construction sites during public holidays and the use of new compressed air drills.” [1: p129]
The line from Tende (Tenda) to San-Dalmazzo-di-Tenda (St. Dalmas de Tende) was opened on 1st June 1915. The three of the four daily services were connected to the Southern arm of the line which by this time had reached Airole, by a coach shuttle. [1: p131]
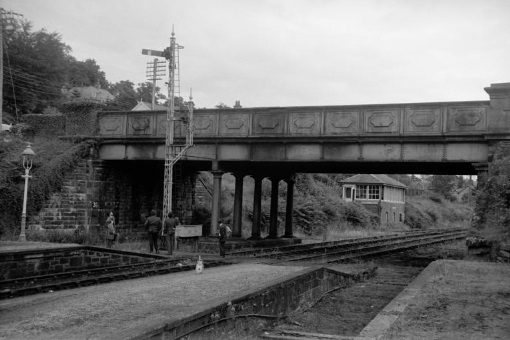
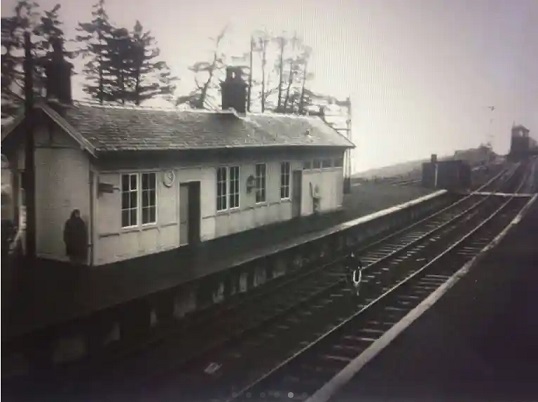
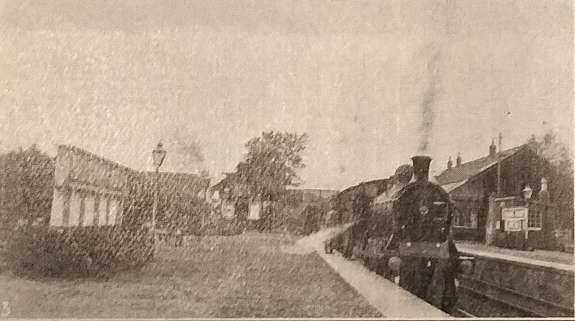
A temporary station was provided as a terminus of the line from Cuneo. It was sited to the Northeast of the present large station building which was not built until 1928.

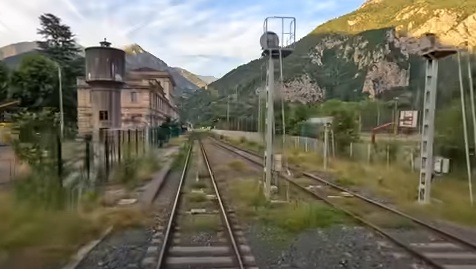
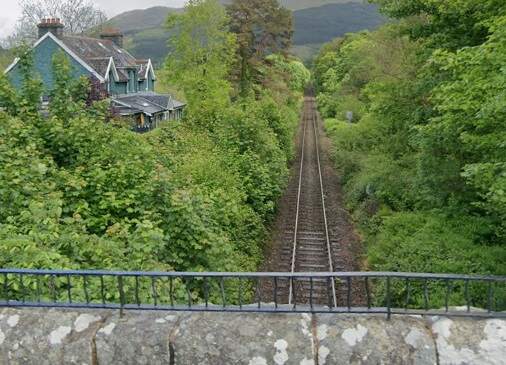
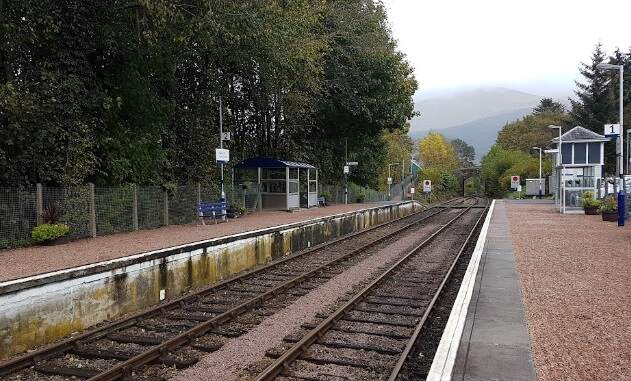
St. Dalmas de Tende Railway Station seen, looking Northeast, from the cab of a North-bound service. [35]


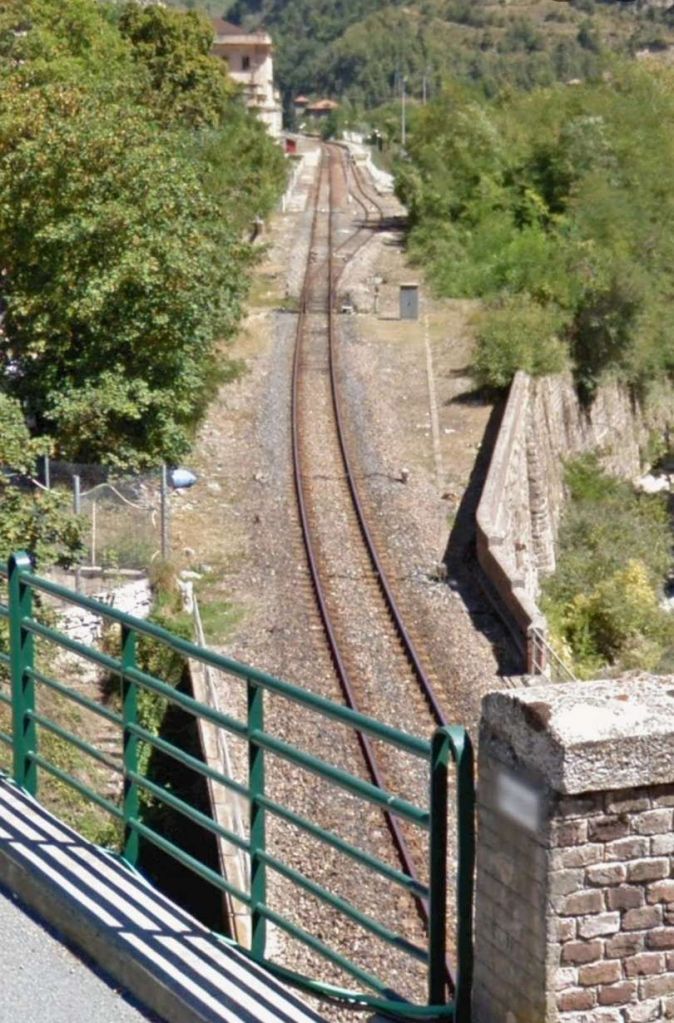
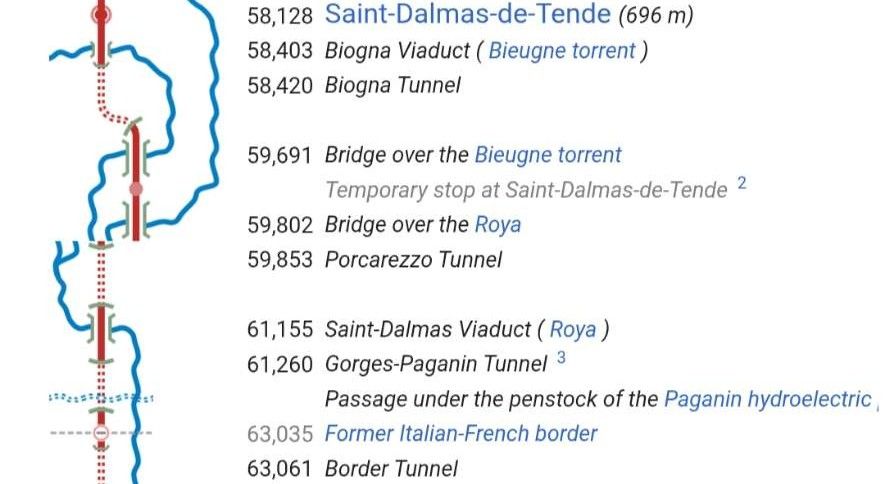
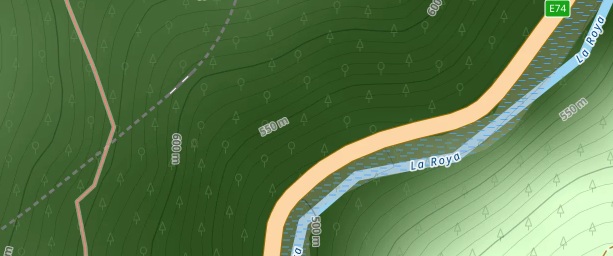
From San-Dalmazzo (St. Dalmas), the railway forms two horseshoe loops underground, crossing the Roya three times over a distance of just over a kilometre as the crow flies.
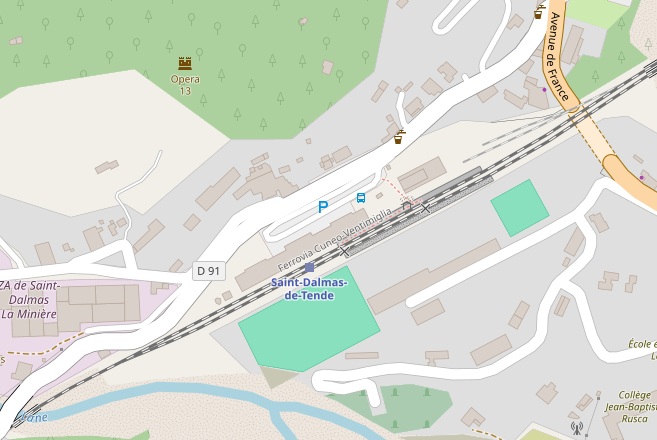
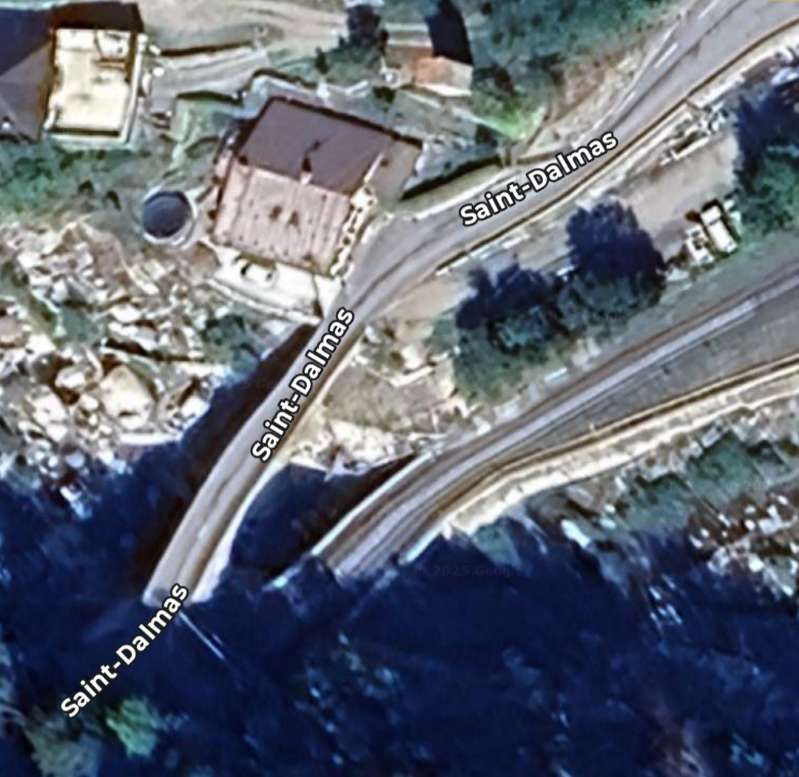
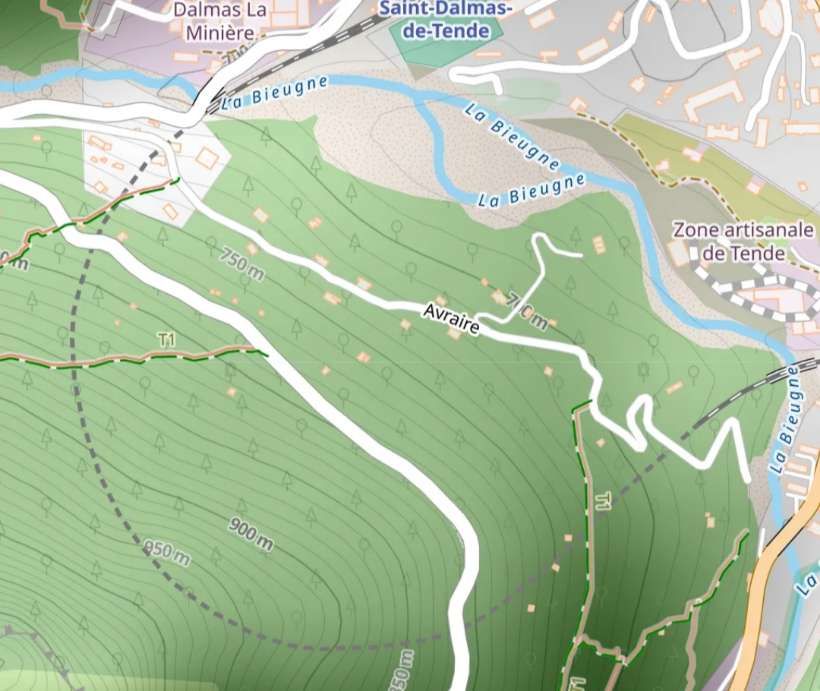
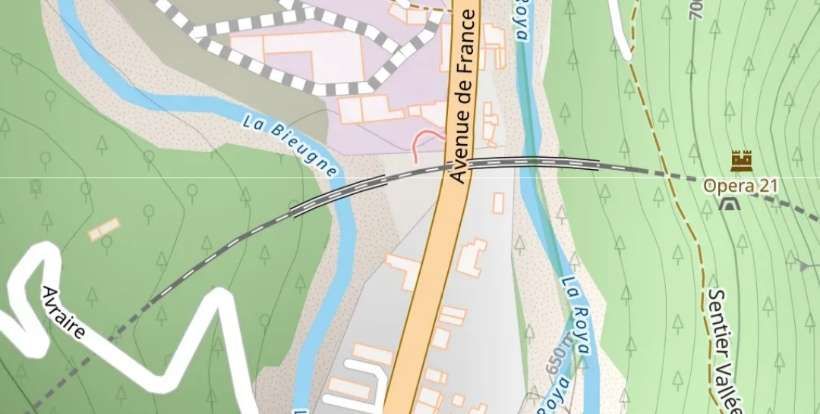
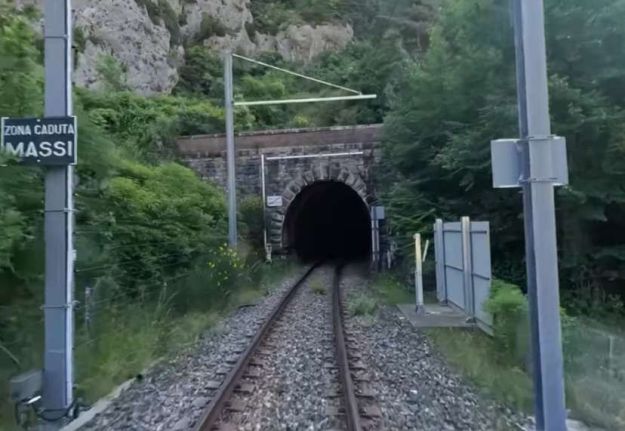
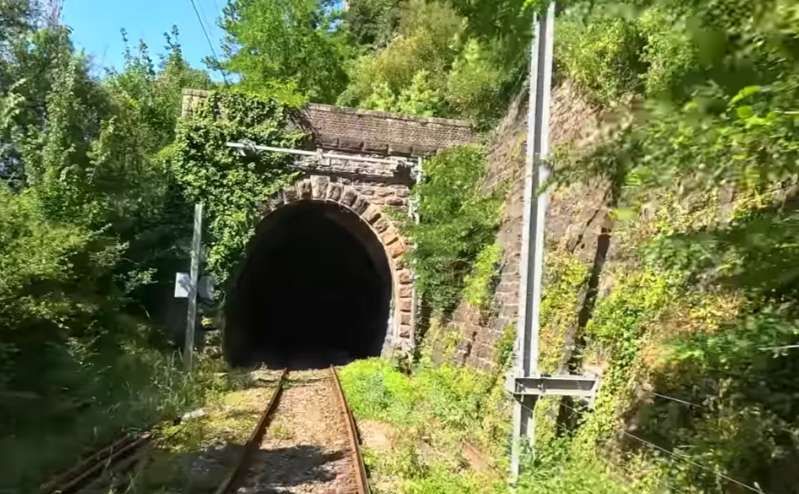
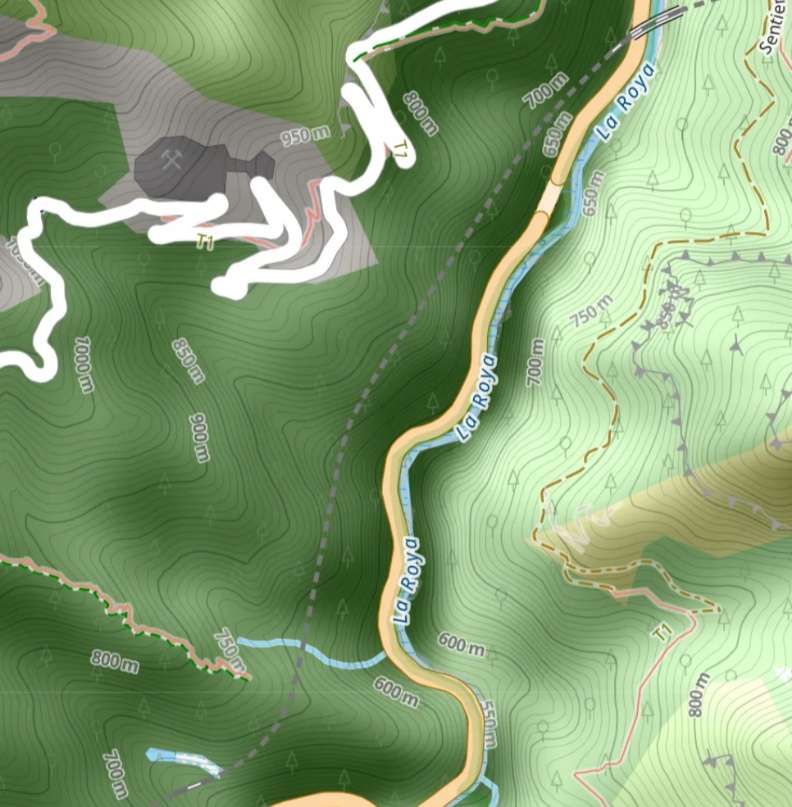
The Biogna Tunnel is the first of these horseshoe tunnels, it is 1154 metres long. We have already seen the approaches to the tunnel from St. Dalmas de Tende Railway Station. The tunnel’s horseshoe shape can be seen on the OpenStreetMap extract below. …
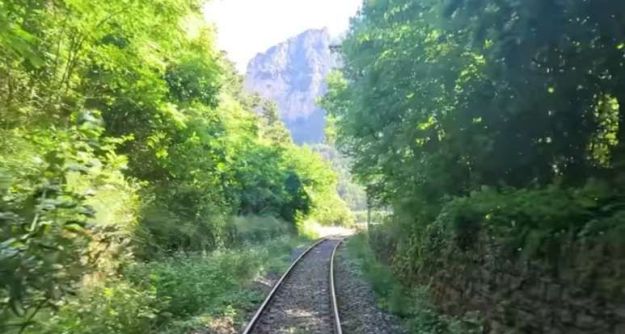
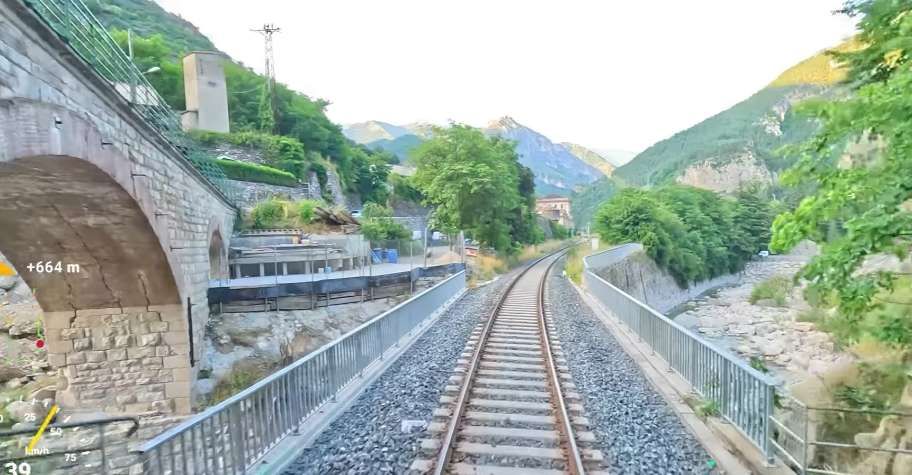
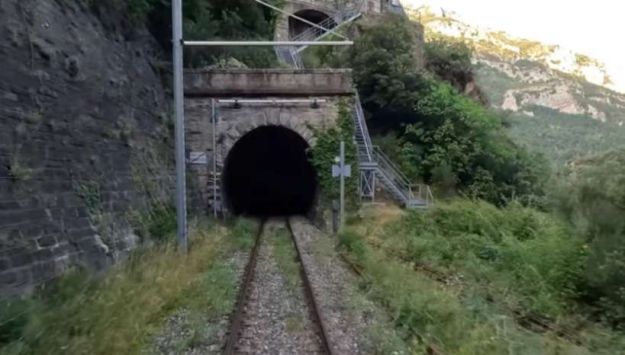
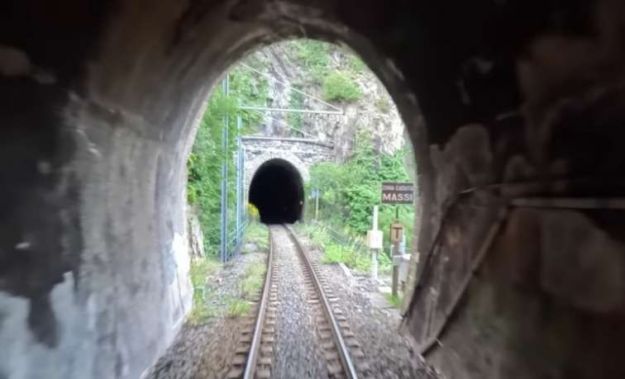
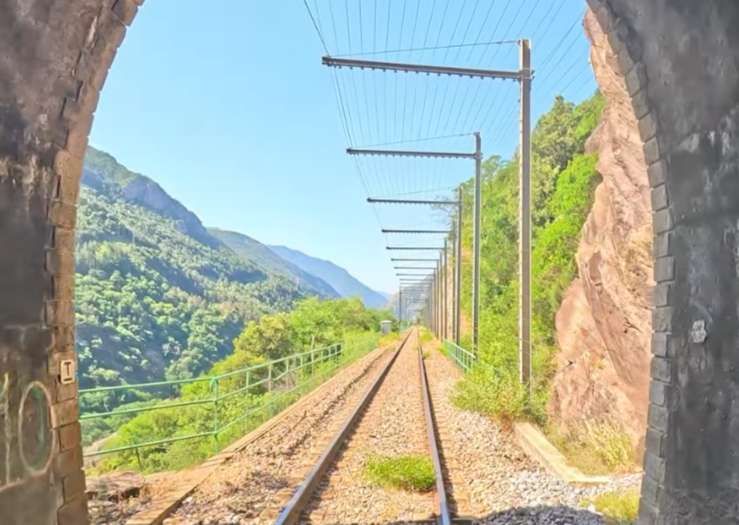
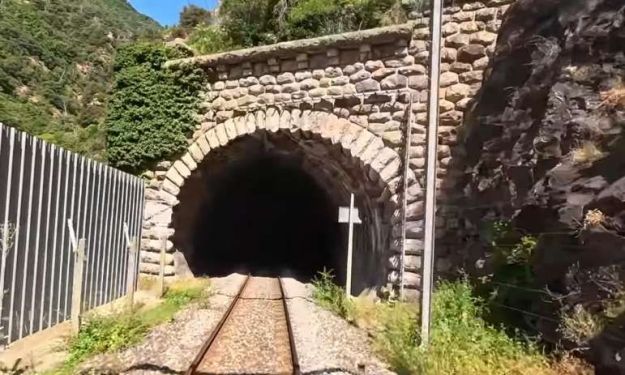
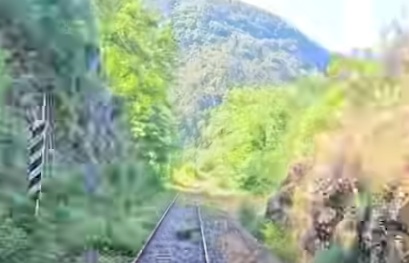
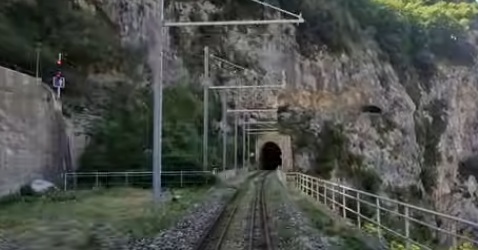
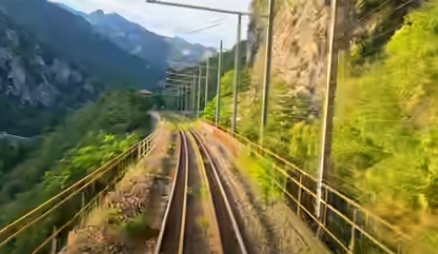
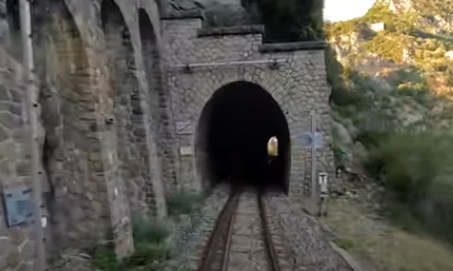
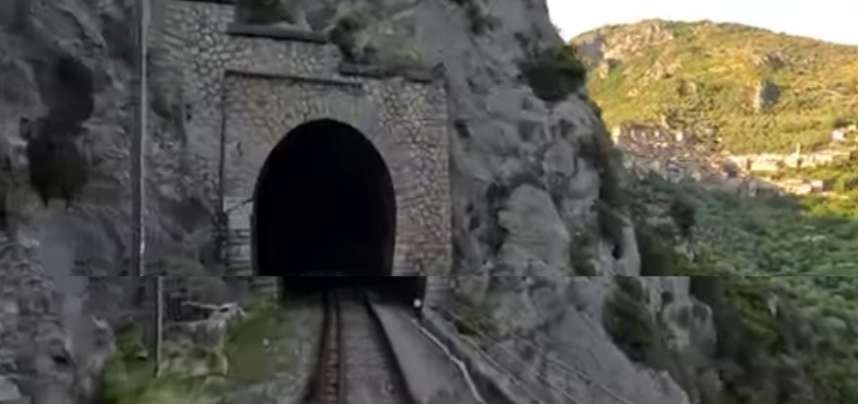
The view Northeast from the southern mouth of Biogna Tunnel. [55]
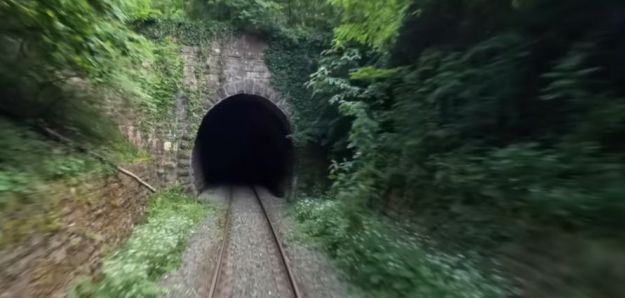
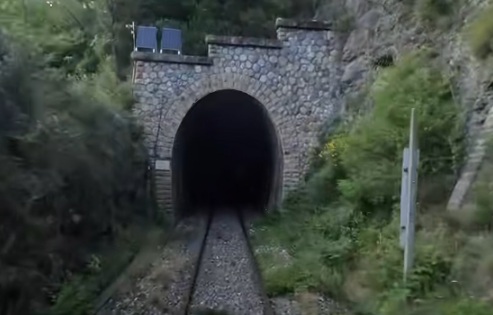
Turning through 180 degrees this is the mouth of the tunnel, seen from the cab of a Northbound train. [35]
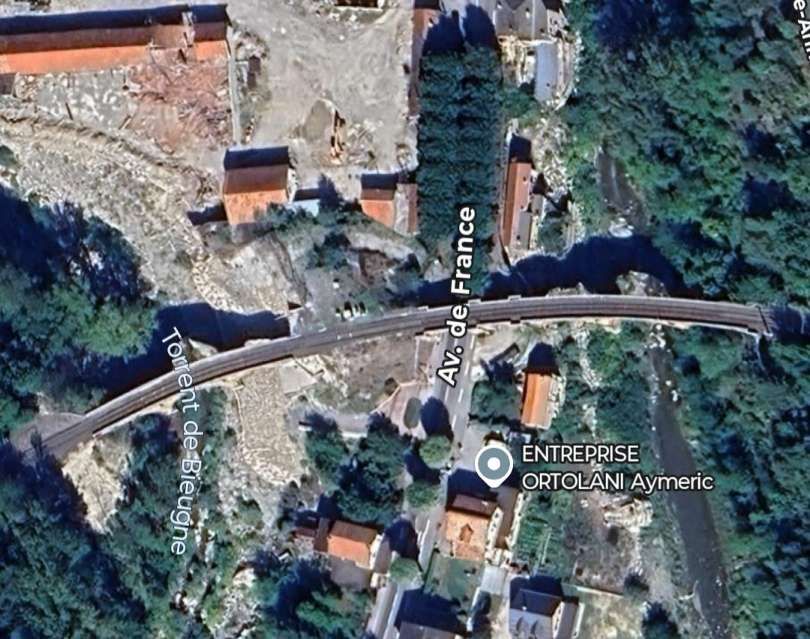
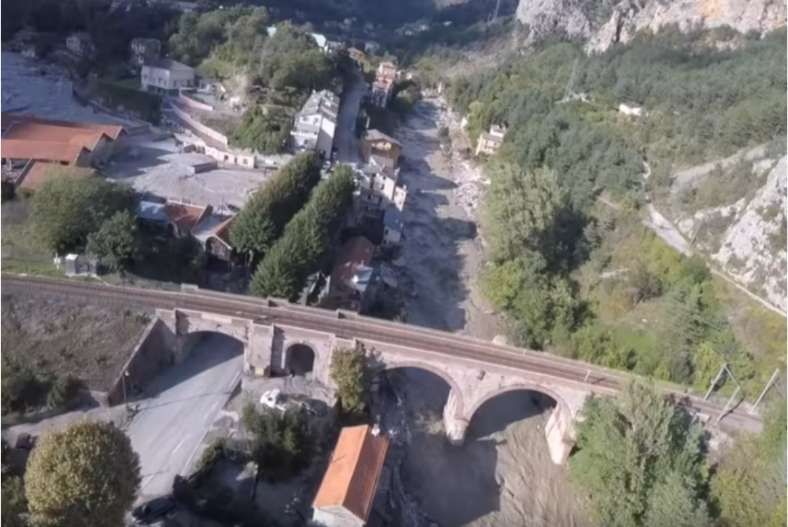
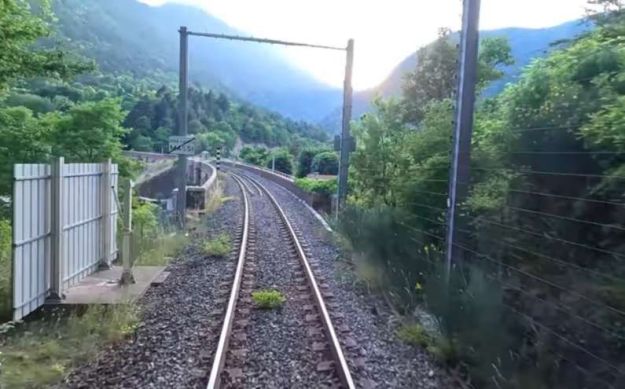
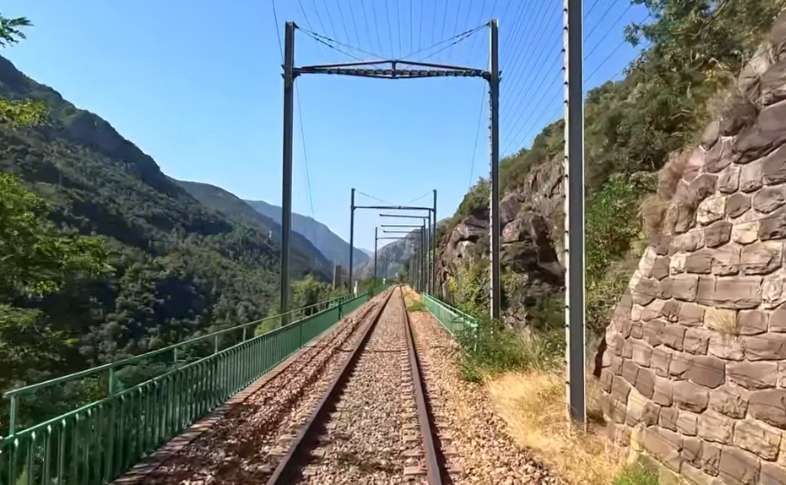
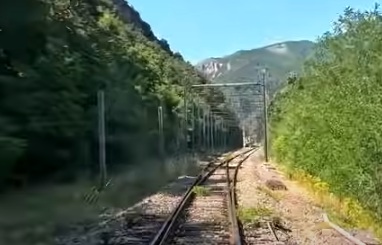
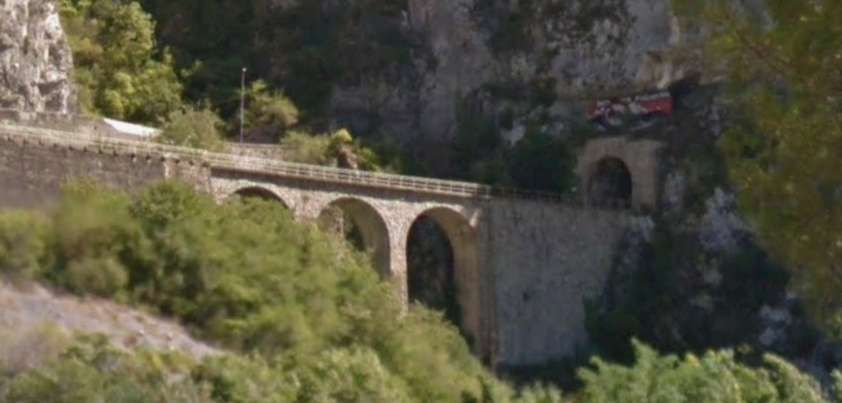
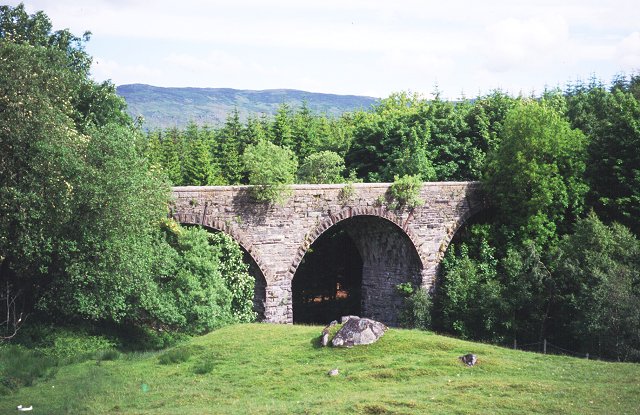
Looking East across San Dalmazzo II Viaduct which has three arched spans, each of 15-metres and crosses the Bieugne River. [55]
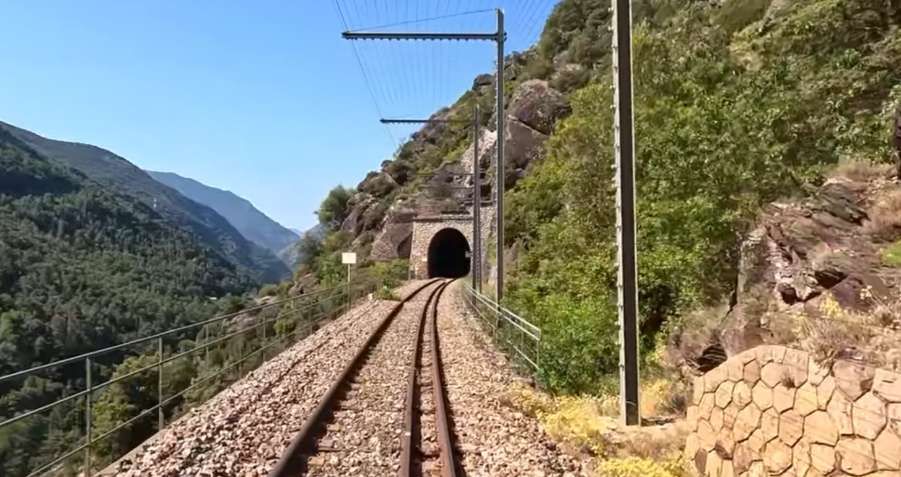
Looking East across San Dalmazzo III Viaduct which spans La Roya. This Viaduct has one opening for the road and a narrower archway for pedestrians and has three further 15-metre spans. The mouth of the Porcarezzo Tunnel is in shade. [55]
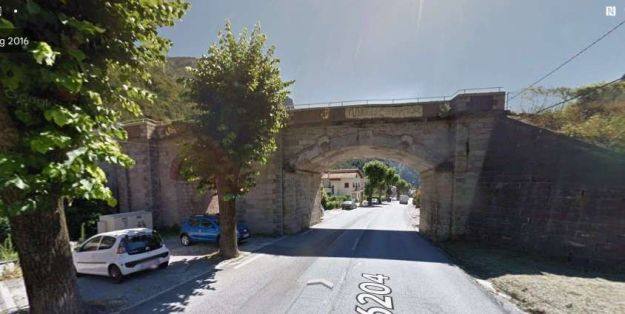
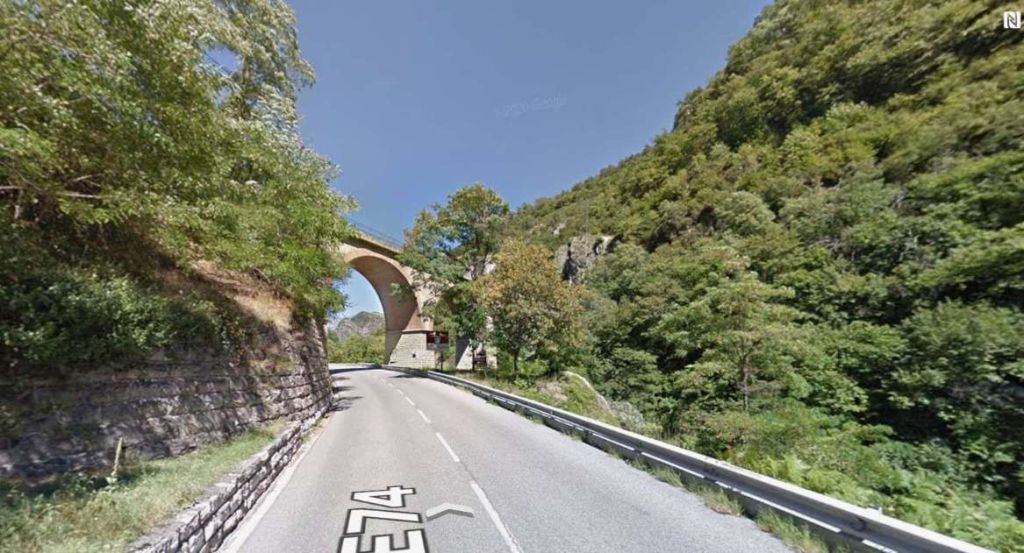
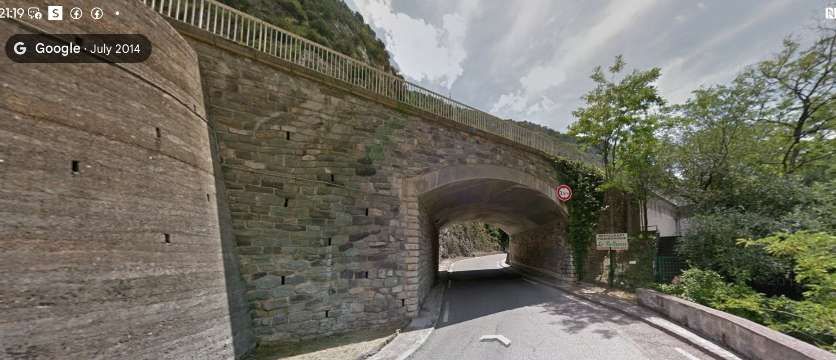
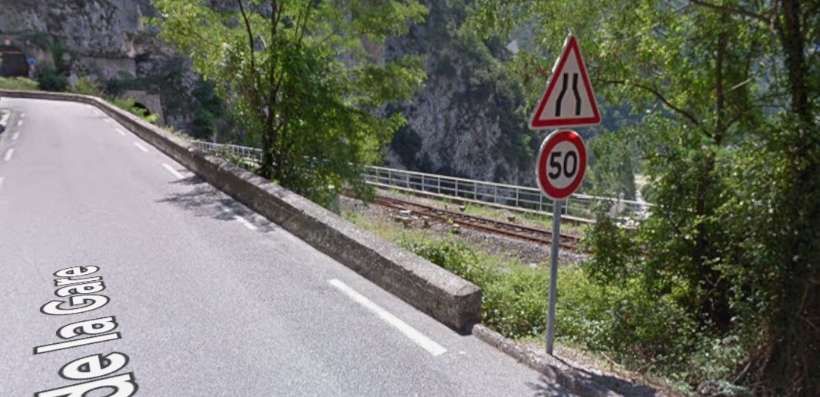
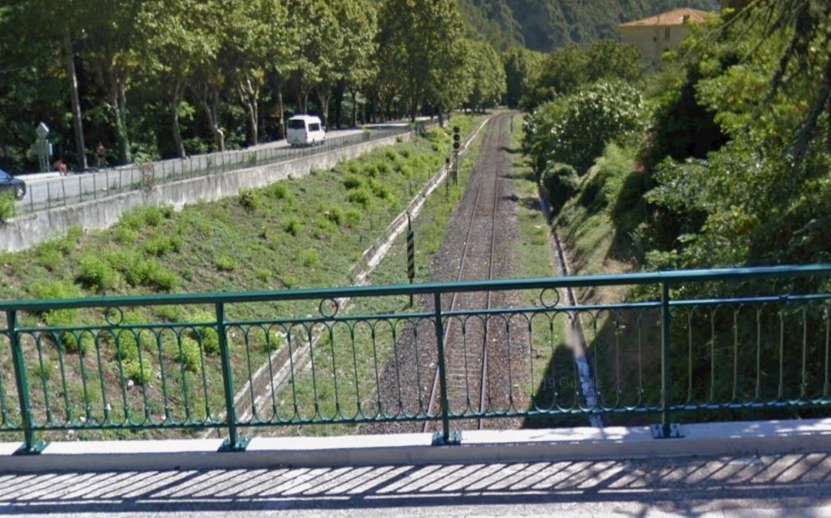
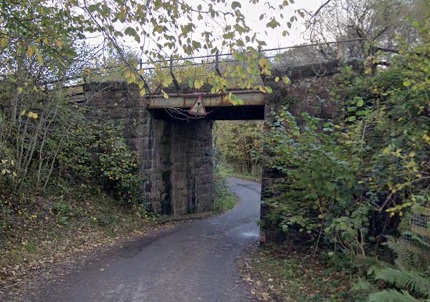
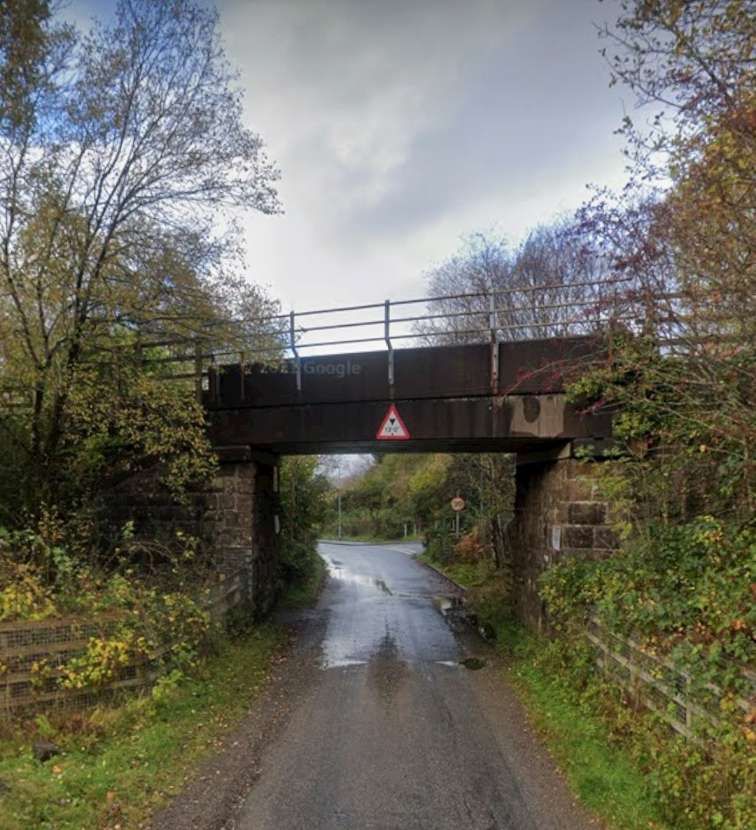
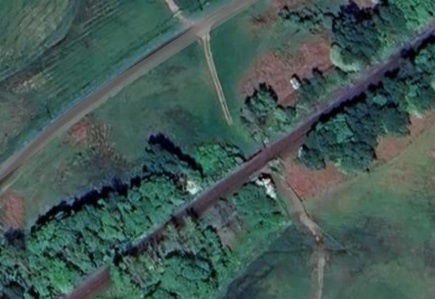
The bridge over Avenue de France seen from the North. [Google Streetview, August 2016]
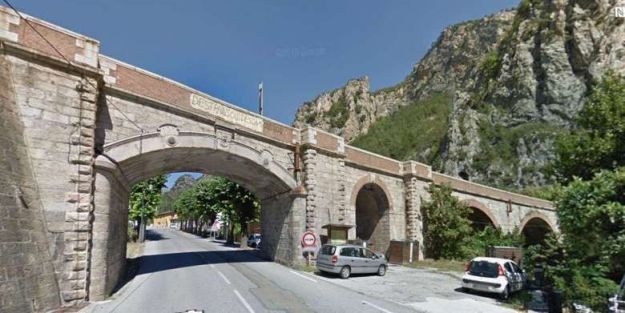
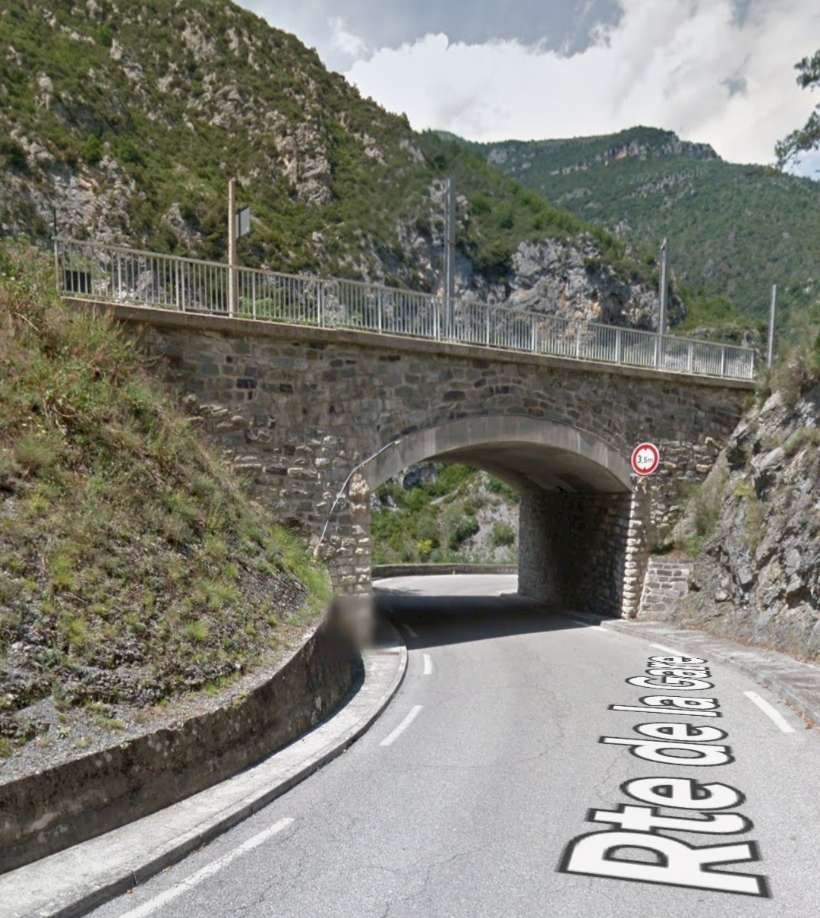
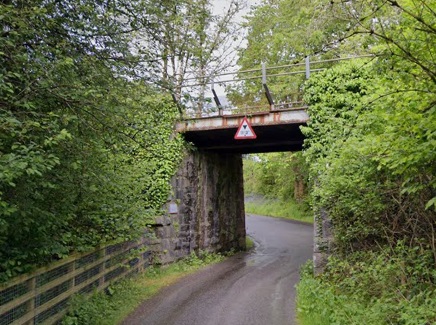
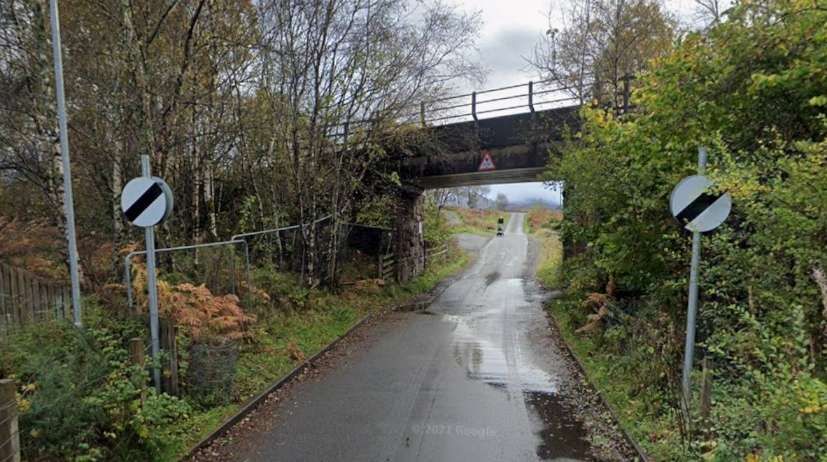
The same bridge seen from the South. In this image both the secondary (narrow) arch and the viaduct over La Roya can be seen. [Google Streetview, August 2025]
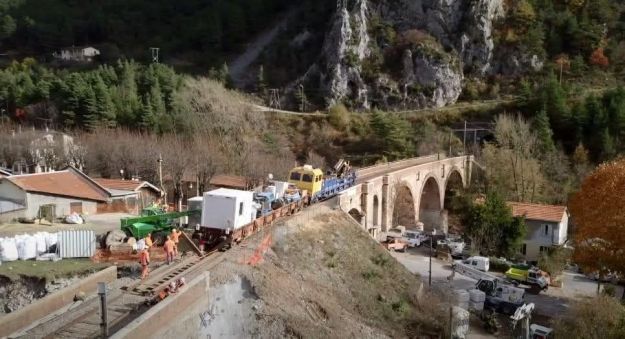
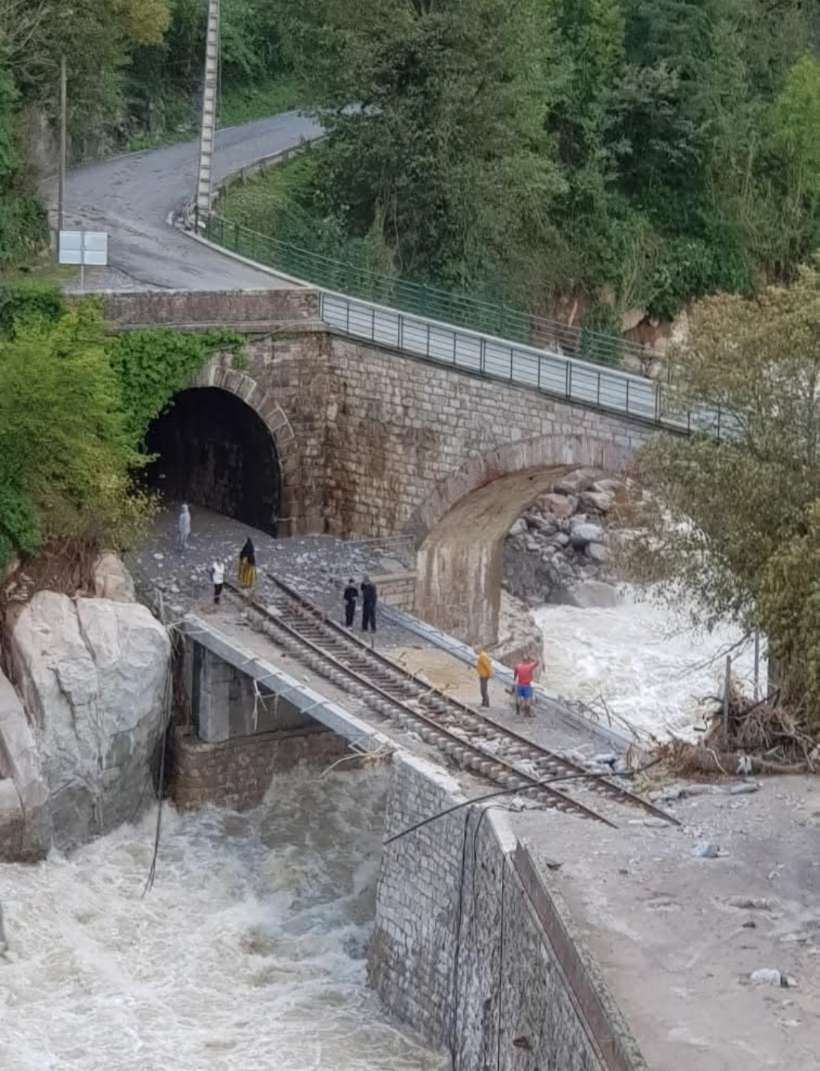
Reinforcement/repair works in November 2020 on San Dalmazzo di Tenda Viaducts II and III after the damage from Storm Alex on October 2 – 3, 2020. This image was shared on the Ferrovia Internazionale Cuneo-Ventimiglia-Nizza Facebook Group on 20th November 2020 by Mario Zauli, courtesy of Bernard Woignier. [23]
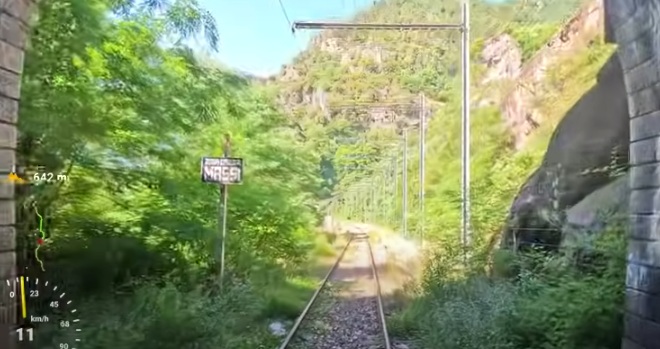
Looking West across the same viaduct towards the Biogne Tunnel. [35]
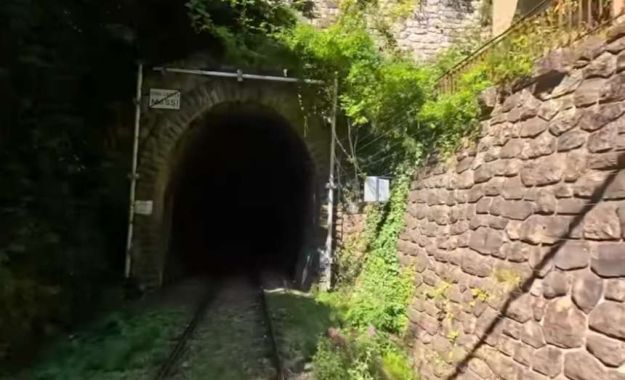
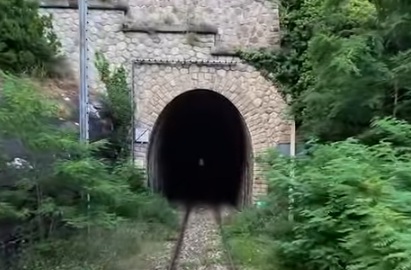
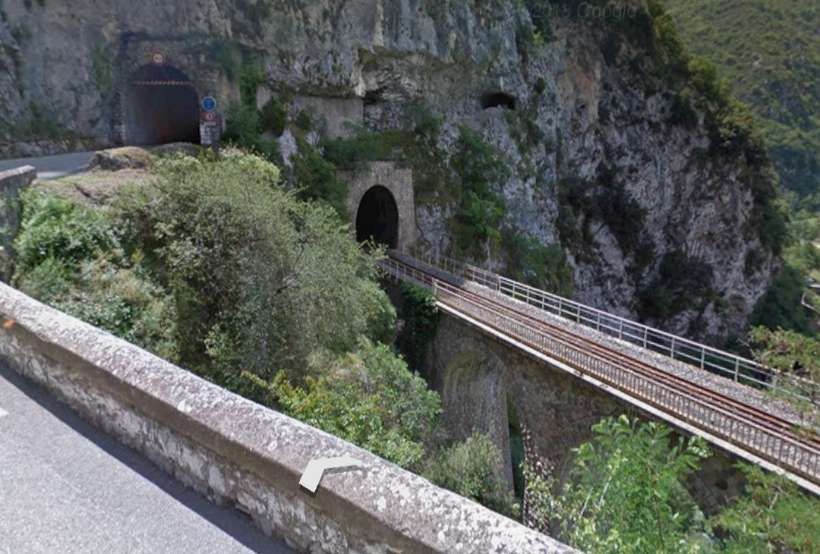
The Porcarezzo Tunnel mouth to the East of La Roya. [55]
Looking West from the Porcarezzo Tunnel mouth across the San Dalmazzo III Viaduct. [35]

The Porcarezzo Tunnel turns through 180°, continuing to drop at a gradient of 25mm/m. It is 1249 metres in length. [16]
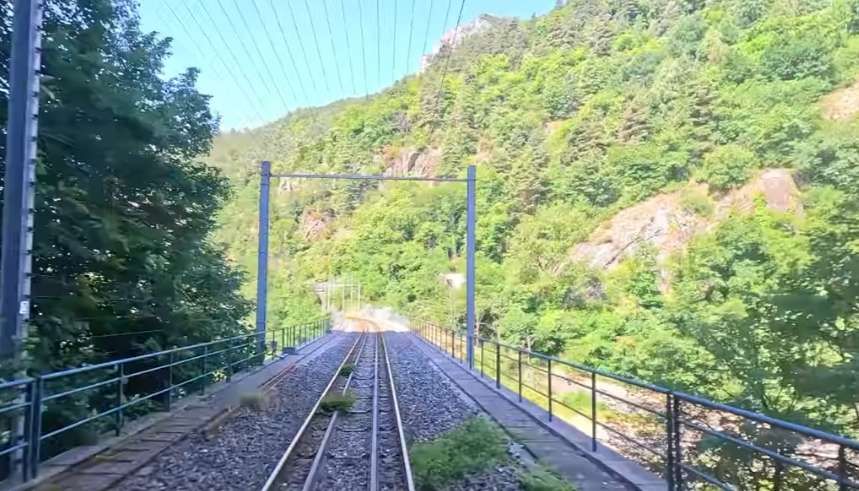
Southbound trains leave Porcarezzo Tunnel and immediately cross San Dalmazzo di Tenda Viaduct IV. [55]
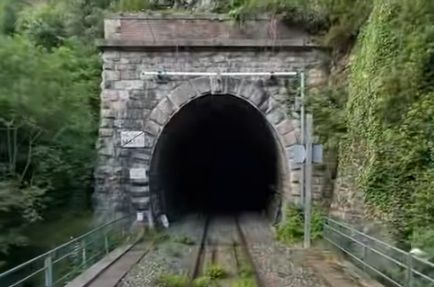
Turning through 180° we see the Southwest mouth of the Porcarezzo Tunnel which sits above La Roya and is seen here from the cab of a Northbound train on the San Dalmazzo IV Viaduct. [35]
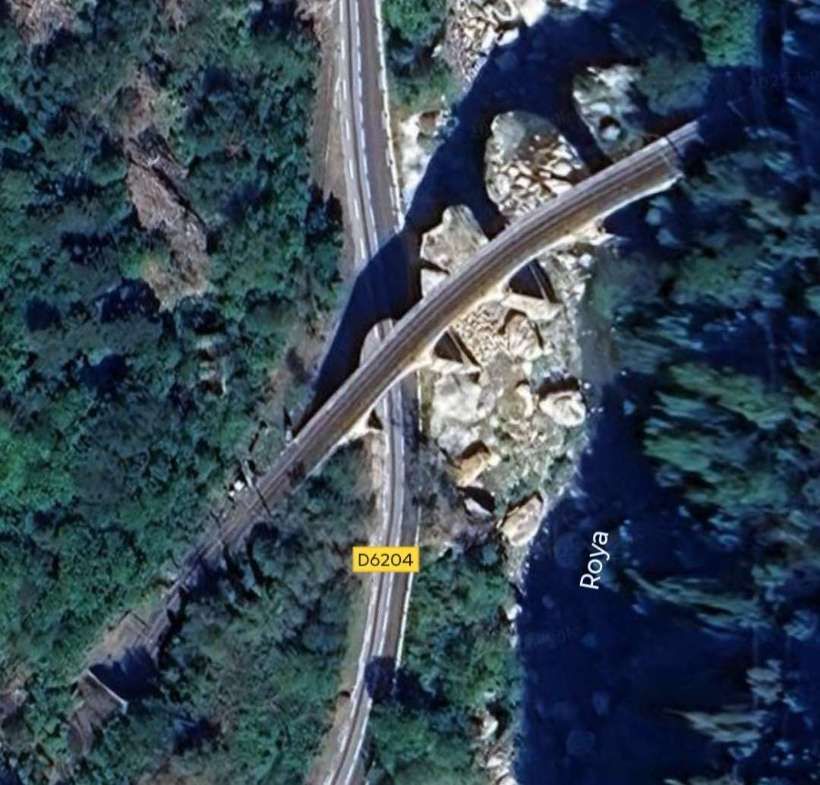
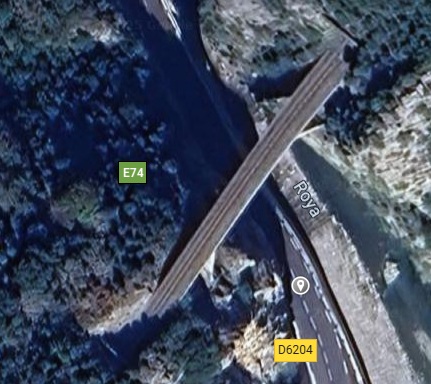
San Dalmazzo di Tenda IV Viaduct as it appears on Google’s satellite imagery. [Google Maps, August 2025.
The approaches to the Porcarezzo Tunnel from the Southwest cross the San Dalmazzo di Tenda IV Viaduct (six 15-metre spans) over La Roya and the E74/D6402. [35]
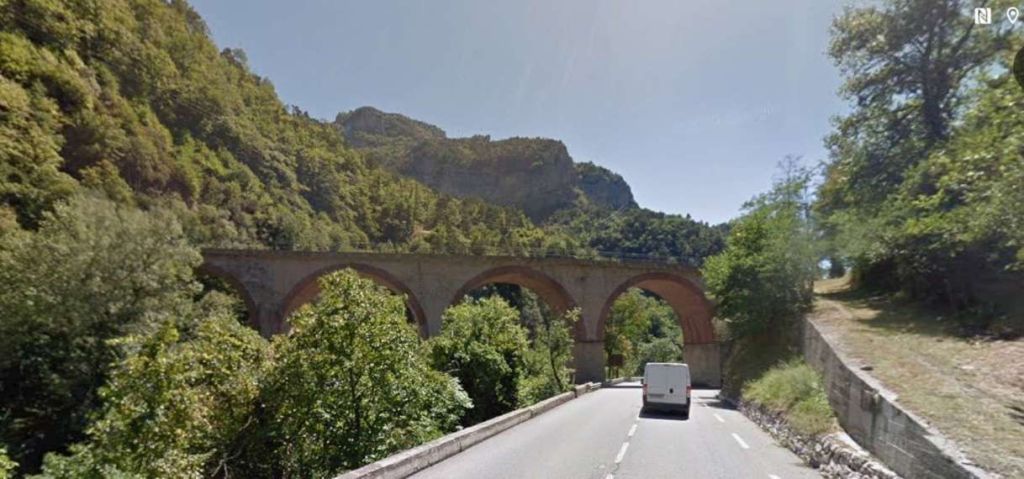
San Dalmazzo di Tenda IV Viaduct seen from the North. [Google Streetview, August 2016]
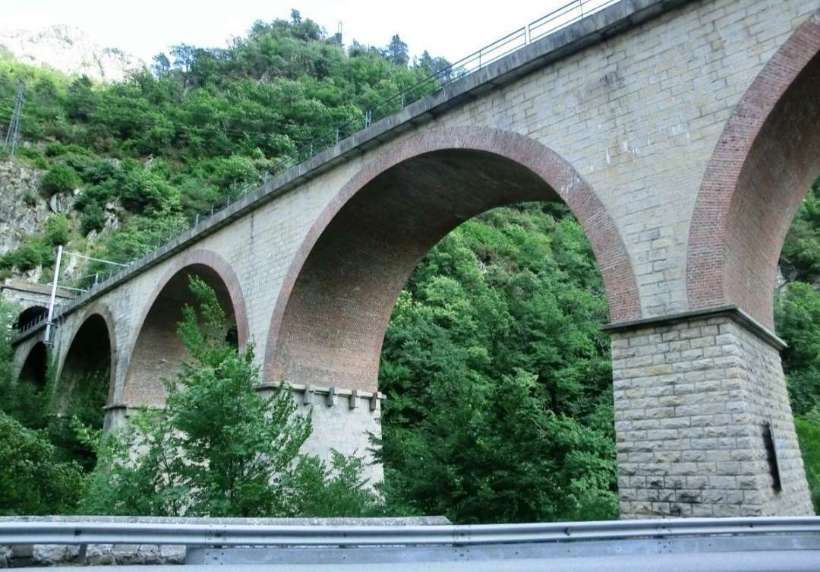
San Dalmazzo San Dalmazzo di Tenda IV Viaduct seen from immediately below on the North side. [Google Streetview, July 2014]
San Dalmazzo IV Viaduct di Tenda seen from the South. [Google Streetview, August 2016]
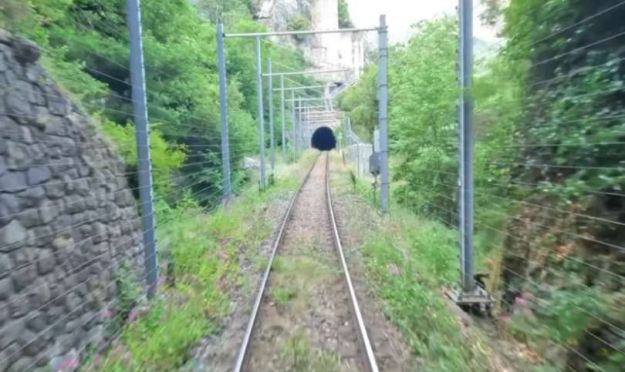
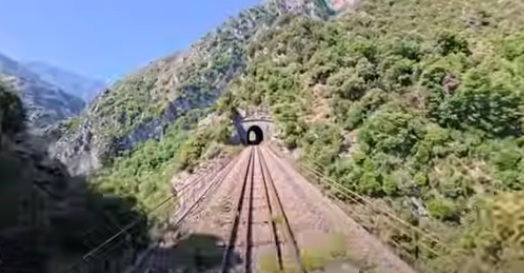
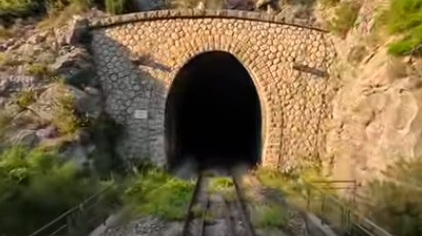
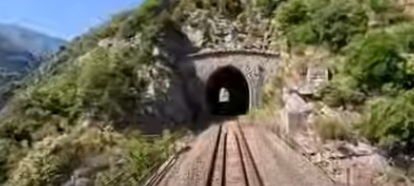
Once Southbound trains had crossed La Roya, it was just a short distance before they entered Gorges Paganini Tunnel. This is the tunnel mouth. [55]
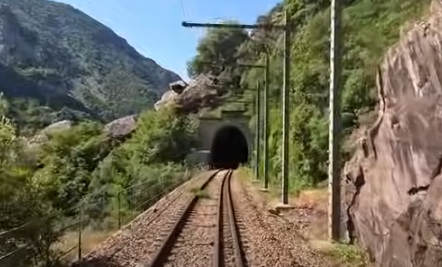
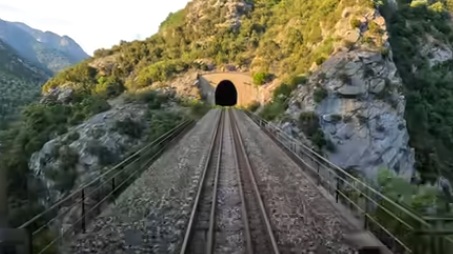
Turning through 180° this is the view from the cab of a Northbound train leaving Gorges Paganin Tunnel (1,702 metres in length). [35]
Gorges Paganin Tunnel runs South-southwest parallel to the valley of La Roya and only a few metres beyond the valleys western face, occasionally running close enough to the valley side for gallery openings to shed light into the tunnel.
The Gorges Paganin Tunnel is actually considered to be a series of six different tunnels separated by sections of galleries with arched openings into the valley side. These tunnels are: Foce (167m long); Tornau I (270m long); Tornau II (475 m long); Ravallone I (392m long); Ravallone II (91m long; and Balma (337m long). [1: p129]
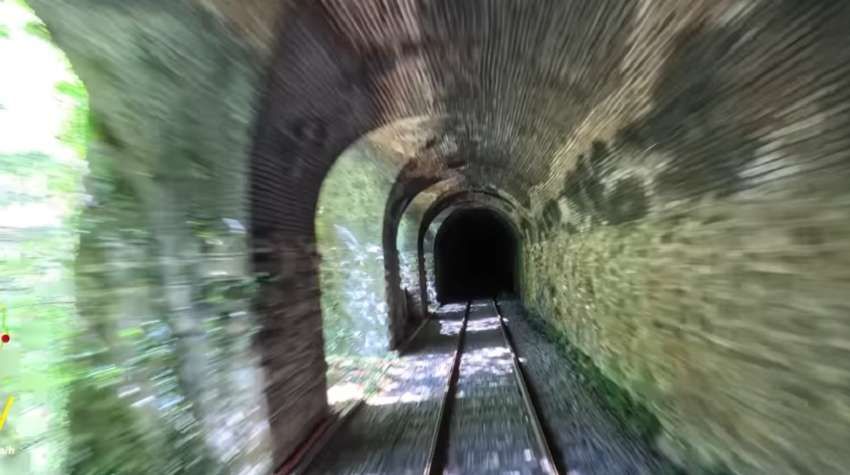
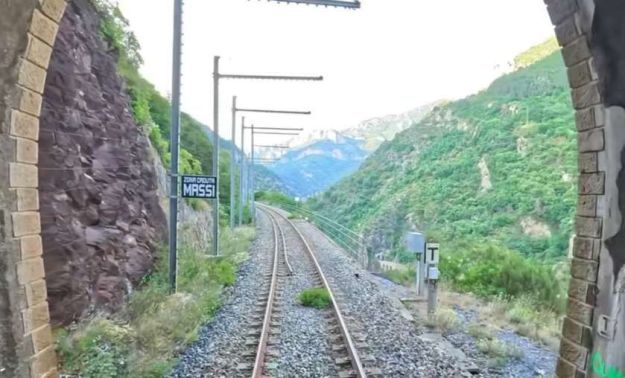
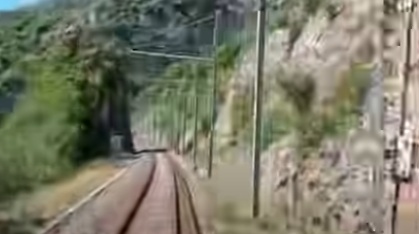
One of a series of gallery openings in the walls of Gorges Paganin Tunnel, seen from the cab of a Southbound service. [55]
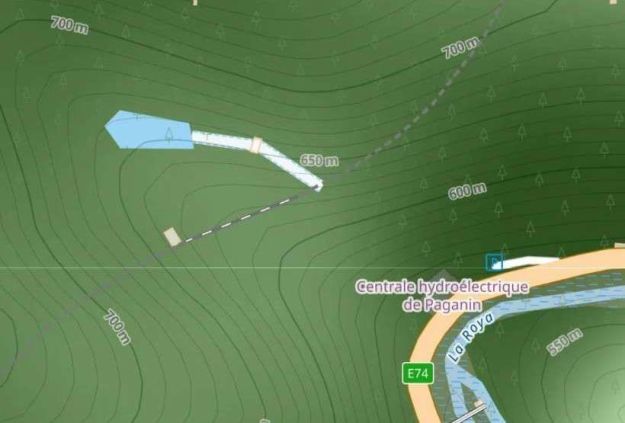
OpenStreetMap shows a short length of line within the Paganin Valley above the Hydroelectric Power Station which is next to the E74/D6204 in the valley of La Roya. [26]
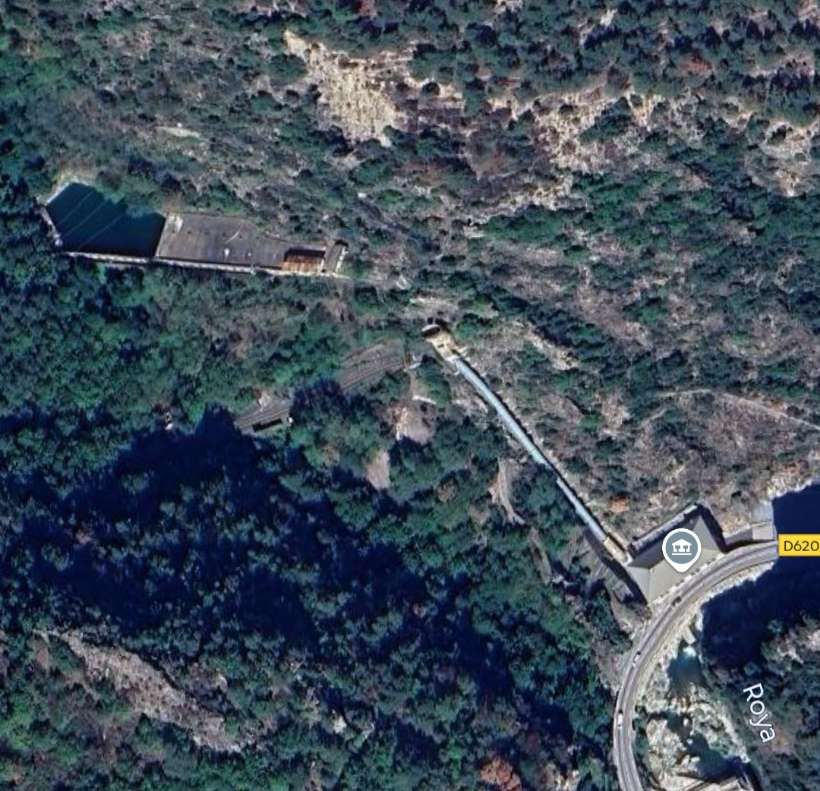
Banaudo et al tell us that at “the end of the tunnel, the line opens into the Paganin Valley, which marks the northern border between Italy and France. … In this wild and steep site, where a torrent and the penstock of the Paganin Hydroelectric Power Plant tumble, the portals of the last Italian tunnel and the first French tunnel face each other, each guarded by a roadside cottage in the typical style of the FS and PLM.” [1: p129]
Having reached the old French/Italian border we can stop and take stock. We will look at the construction of the line North from the coast once our journey reaches that portion of the line. Suffice to say that by 1915 tracklaying from the coast had reached Airole.
As far as the line heading South from Cuneo is concerned track laying had reached San Dalmazzo di Tenda and the structures and track formation was in place to the Northern French /Italian border.
2. The First World War
In 1915, Italy entered the war on the side of the allies. “Leading up to WWI, Italy had formed an alliance with the Central Powers of the German Empire and the Empire of the Austria-Hungary in the Triple Alliance. Italy should have joined on the side of the Central Powers when war broke out in August 1914 but instead declared neutrality.” [27]
“The Italian government had become convinced that support of the Central Powers would not gain Italy the territories she wanted as they were Austrian possessions – Italy’s old adversary. Instead, over the course of the months that followed, Italy’s leaders considered how to gain the greatest benefit from participation in the war. In 1915, Italy signed the secret Treaty of London and came into the war on the side of the Triple Entente (Britain, France, Russia). By its terms, Italy would receive control over territory on its border with Austria-Hungary stretching from Trentino through the South Tyrol to Trieste as well as other areas.” [27]
“After the war ended, at the Paris Peace Conference that led to the Versailles Treaty, the Italian government struggled against the other Allied leaders, the Big Three (Britain, France and the US), to gain all that they believed had been promised to them. Although Italy did receive control of most of the European requests, they failed to gain their colonial ambitions and felt they did not get what they had been promised. This engendered resentment towards the Allied countries, especially as Italians felt they had paid a high price, in terms of men and money, fighting for the Allies. These resentments helped drive the success of Benito Mussolini and his fascist movement – four years after the war, Mussolini and his blackshirts gained power.” [27]
Ultimately, the war stopped all progress on the line. Banaudo et el tell us that “the work begun thirty-two years earlier by the SFAI, then continued by the RM until nationalization, was thus virtually completed by the FS. The construction of the 80.3 km of line in Italian territory cost nearly 85 million lire compared to the 76 million initially planned, representing an average expenditure of 1,058,500 lire per kilometre.” [1: p135]
In France, the war caused all work to be halted. An attempt was made to continue the work in 1915, but failed because of underground conditions encountered. In 1917, an attempt to continue activity using prisoners of war was unsuccessful.
During the war, Italian authorities lifted track between Piena and Airole in the South for use on the front. Work on the new Cuneo railway station halted.
French and British troops were sent to augment Italian forces on 1917. It seems as though many of these passed through San Dalmazzo di Tenda. Between 19th October and 15th December 1917, “192 military convoys departed from San-Dalmazzo, and the Col de Tende line saw up to twenty movements of all categories on some days.” [1: p136]
After the war, resources were in short supply. In France priority was given to the devastated areas in the Northeast of the country. The PLM received very little support. Contractors found recruitment a problem because of the drastic loss of life among working age men. Banaudo et al tell us that in France “tunnels, abandoned for nearly five years, had suffered serious deformation, particularly in areas with high water infiltration. In Italy, the situation was no better, and construction of the new Cuneo station was suspended, even though an arch of the large viaduct over the Stura River, which was to provide access to it, was already being erected.” [1: p138]
Nevertheless, work did resume, supplies began to head North from Menton on the tramway to Sospel and supplies were arriving from the South via the FS on the Italian side of the border at Airole. Transport via Airole proved better than via the Menton-Sospel tramway and by 1920 the two main contractors on either side of the border (Giianotti and Mercier) ceased to use the Menton-Sosel route. [1: p138]
1920 saw a significant budget reduction for the works in French territory – 104 million Francs to 75 million Francs. Only 17 million Francs were allowed in 1920. “The Mercier company alone was spending 4 to 5 million francs per month on its construction sites.” [1: p140] Layoffs were necessary and work slowed significantly to remain within budget.
“In June 1920, the Inspector General of Public Works announced to companies that only 700,000 francs of credit remained to complete the year, an insignificant sum that forced construction to be suspended immediately, putting hundreds of workers out of work. Elected officials from the Alpes-Maritimes immediately rushed to Paris to meet with representatives of the ministry and the PLM management. After heated discussions, a new budget was allocated by the State for railway construction. The PLM had a credit of 41 million, 25 of which were allocated to the Nice – Cuneo line. Work could resume, but the engineers and contractors in charge of it would have to take into account the irregular arrival of funds until the end when organizing their construction sites.” [1: p140]
2. The Northern French/Italian Border South to Breil-sur-Roya
Two tranches of construction work covered the length of the line from the French/Italian border to Breil-sur-Roya. Banaudo et al tell us that this length of the line “contained the highest density of engineering structures on the French route, and, with a few exceptions, the war had interrupted work there in its early stages.“[1: p142]

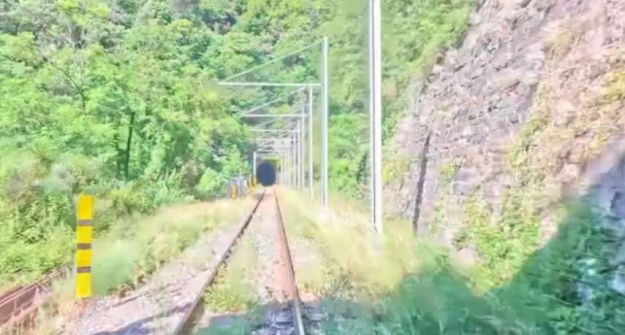
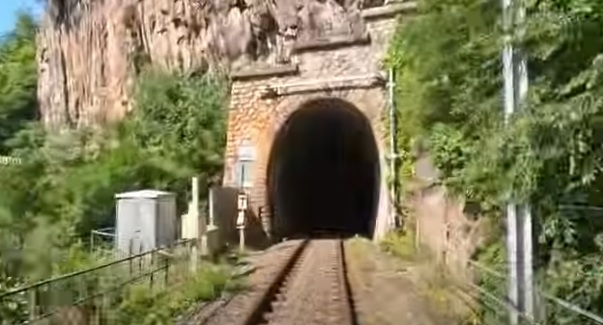
The view across the border from the North, a view from the cab of a Southbound service at the mouth of the Gorges Paganin Tunnel. [55]
Looking back North towards the southern portal of the Gorges Paganin Tunnel, a view from the cab of a Northbound train. [35]
Once on the French side of the border the line immediately entered the Frontiere Tunnel. …
The North portal of the Frontiere Tunnel, seen from the cab of a Southbound train. [55]
Looking North across the border from the cab of a Northbound service leaving the mouth of the Frontiere Tunnel [35]
The view from the cab of a southbound train just to the Southwest of the Frontiere Tunnel mouth. [55]
The short open section of track appears on the left of this extract from OpenStreetMap. Tree cover means it is impossible to show the short section of line on and extract from Google’s satellite imagery. [28]
The view from the cab of a Northbound train approaching the mouth of Malaba Tunnel. Ahead is the southern portal of Frontiere Tunnel. A very short length of line runs between Frontiere Tunnel and Malaba Tunnel. [35]
Malaba Tunnel is 389 metres in length. This image shows the view from the cab of a Southbound service as it leaves the tunnel. [55]
Turning through 180 degrees we see the Southwest portal of Malaba Tunnel from the cab of a Northbound train. [35]
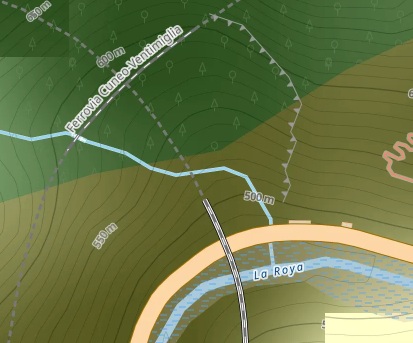
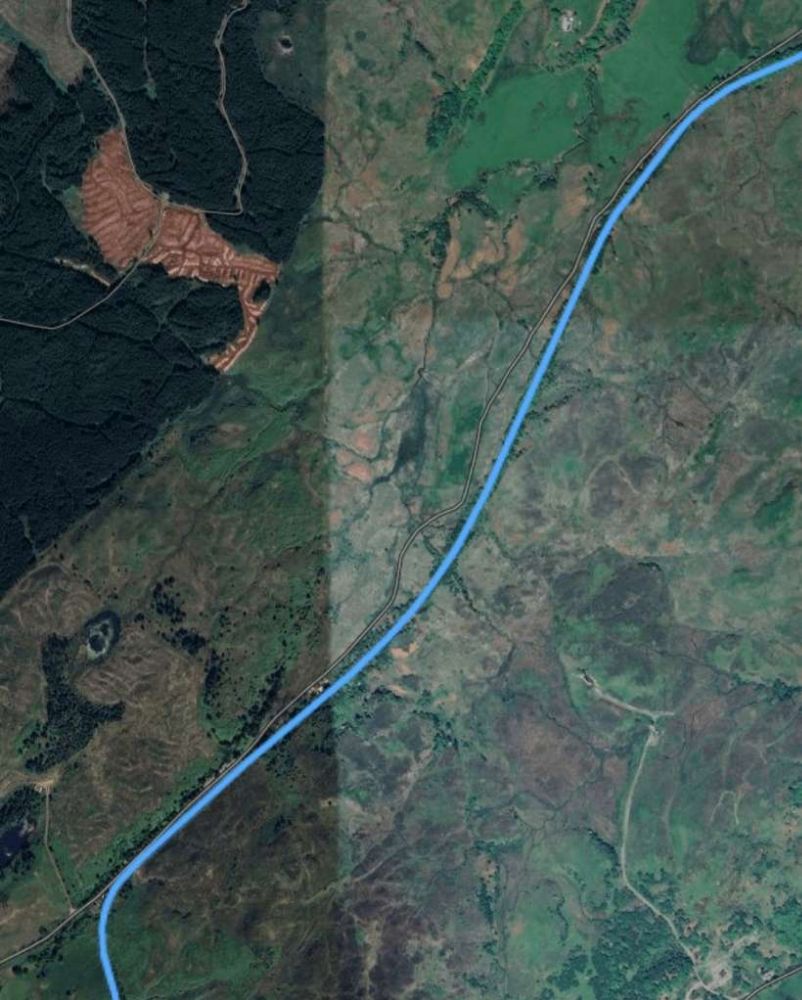
This extract from OpenStreetmap shows the next open length of track running from centre-top to bottom-left. We are just entering the first length of another spiral and can see the lower length of track in tunnel under the line and then bridging La Roya. [29]

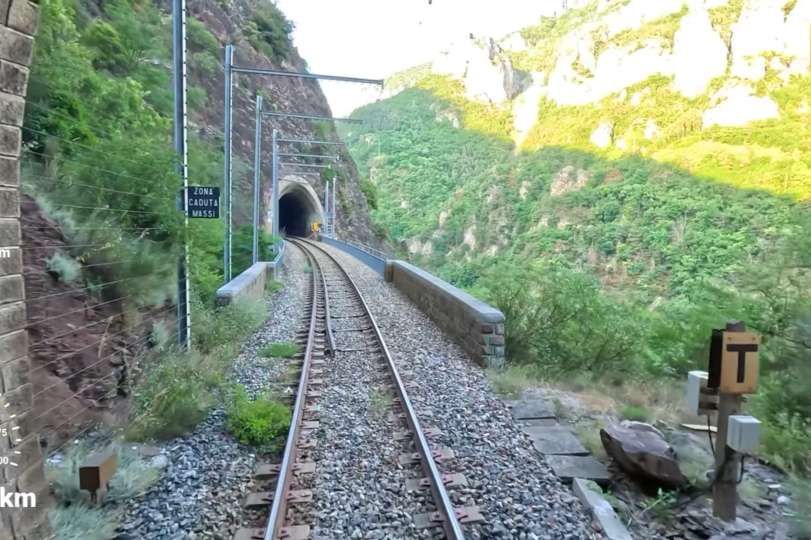
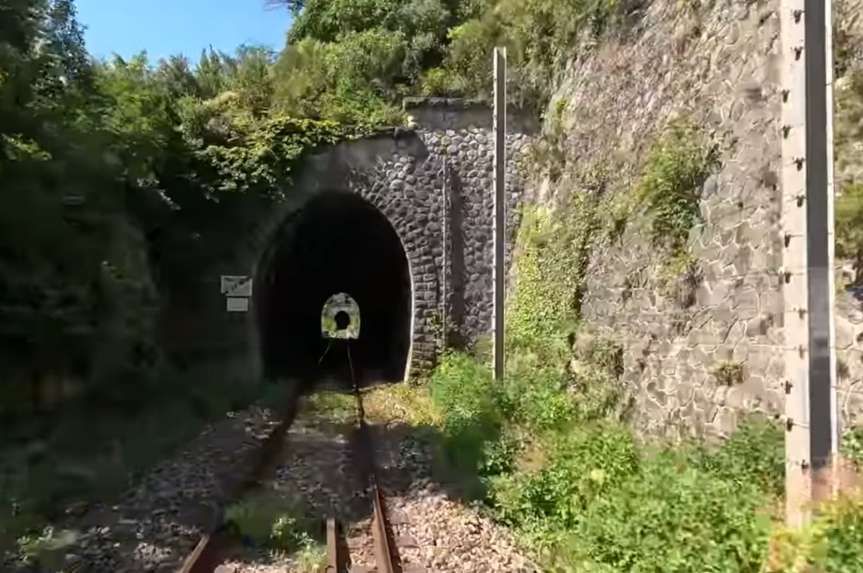
From the cab of the Southbound service, we see the mouth of Scarassoui Tunnel. The Tunnel is 181 metres in length. [55]
Turning through 180°, we look Northeast from the cab of the Northbound train as it leaves the Scarassoui Tunnel. [35]
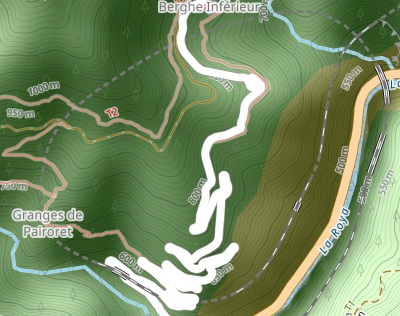
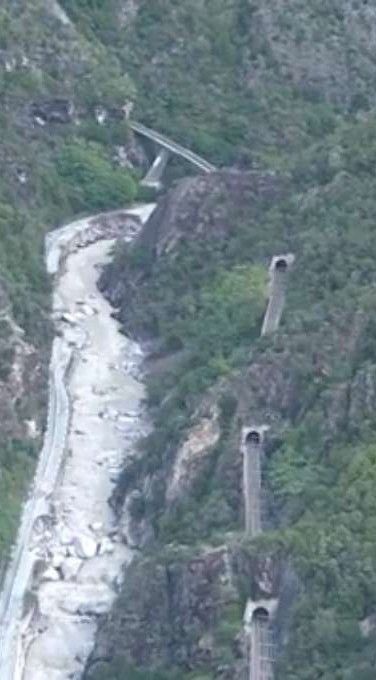
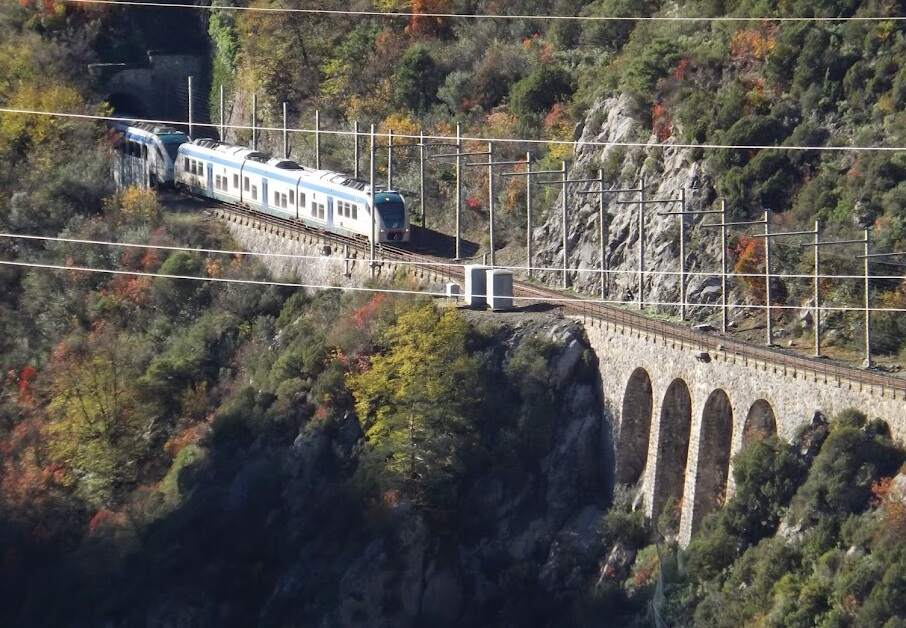
The spiral in this location consists of a number of tunnels and open lengths of track. The first tunnel encountered travelling South is the Scarassoui Tunnel (top-right) which has a gallery of a series of arches at its southern end. A length of open track leads to Peug Tunnel, Vernardo Tunnel, Caussagne Tunnel and then Berghe Tunnel. [31]

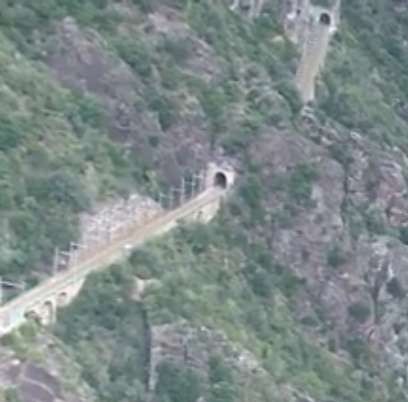
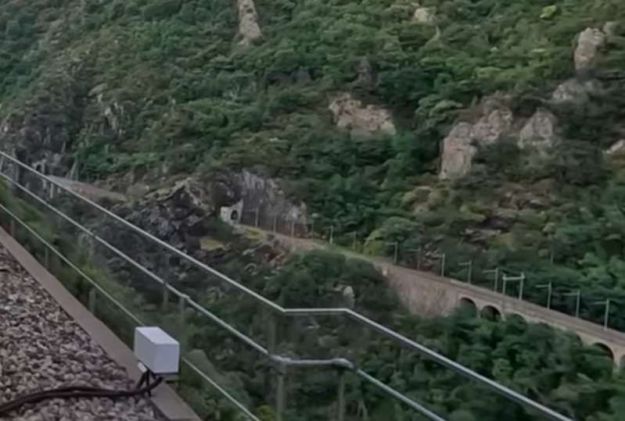
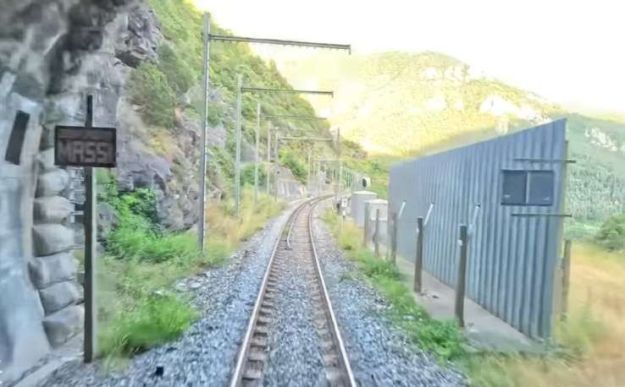
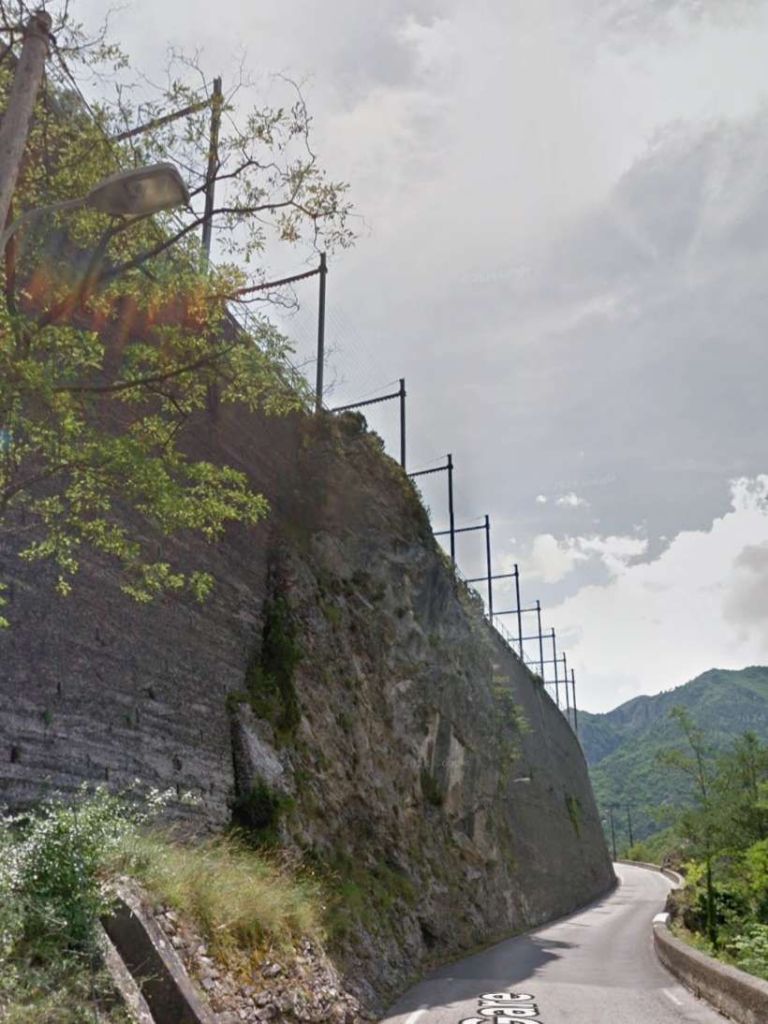
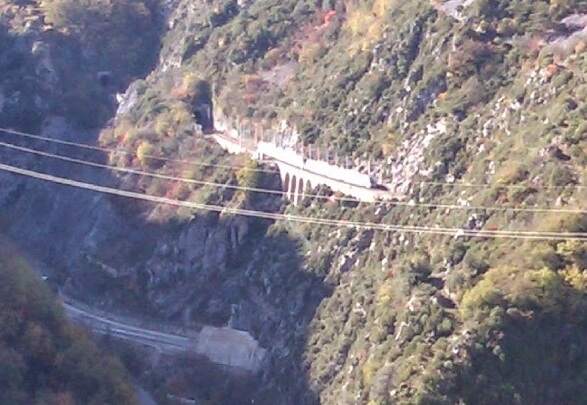
The high level tunnels of Scarassoui (its South portal can be seen at the top of this extract) and Peug. The metal frames over the open lengths of track are part of an avalanche warning system. [30]
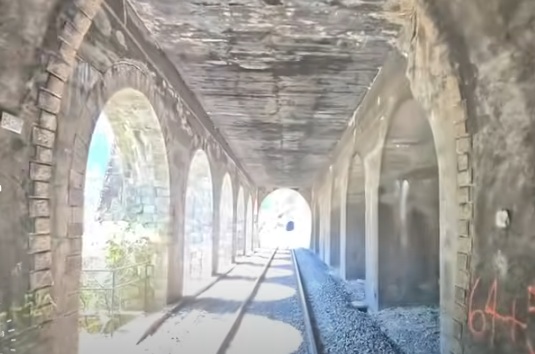
Two views looking South inside the gallery at the southern end of Scarassoui Tunnel. [55]

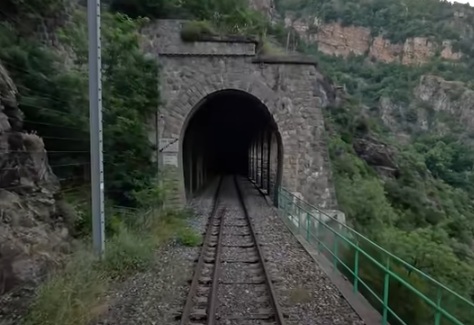
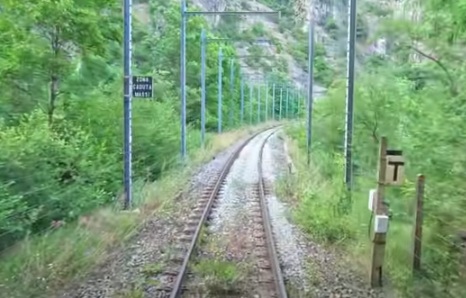
A driver’s eye view of the South end of Scarassoui Tunnel. [35]
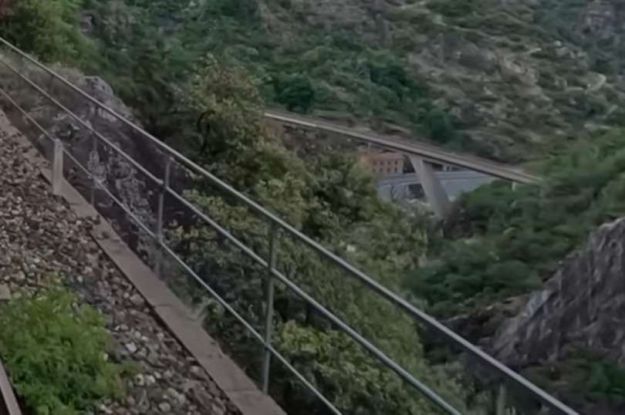
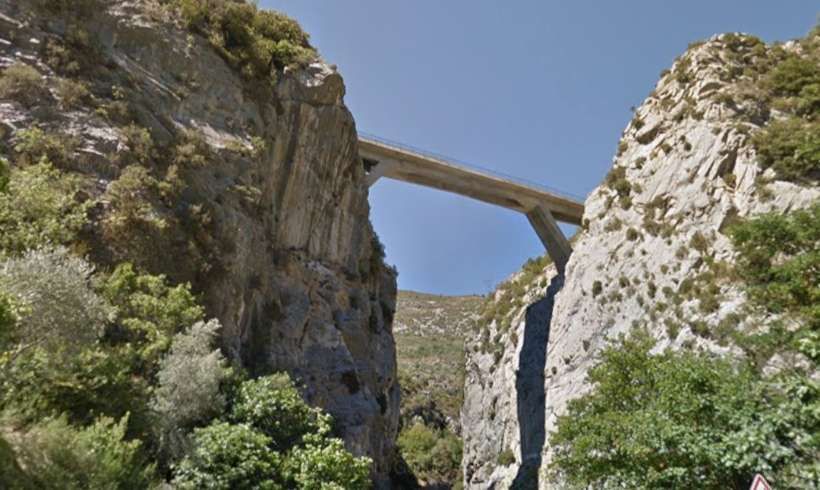
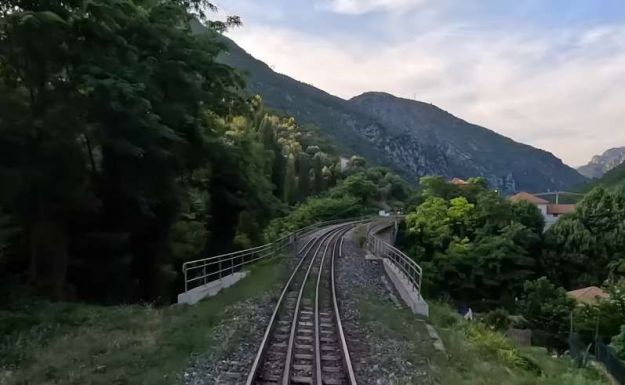
Just a short distance further South, we can look over our shoulder to see the modern Scarassoui Viaduct crossing the River Roya some distance below. In a short while we will cross that viaduct. [35]
Turning through 180°, this is the view South towards the North portal of Peug Tunnel which is just 75 metres in length. [55]
The view North from the mouth of the Peug Tunnel. [35]
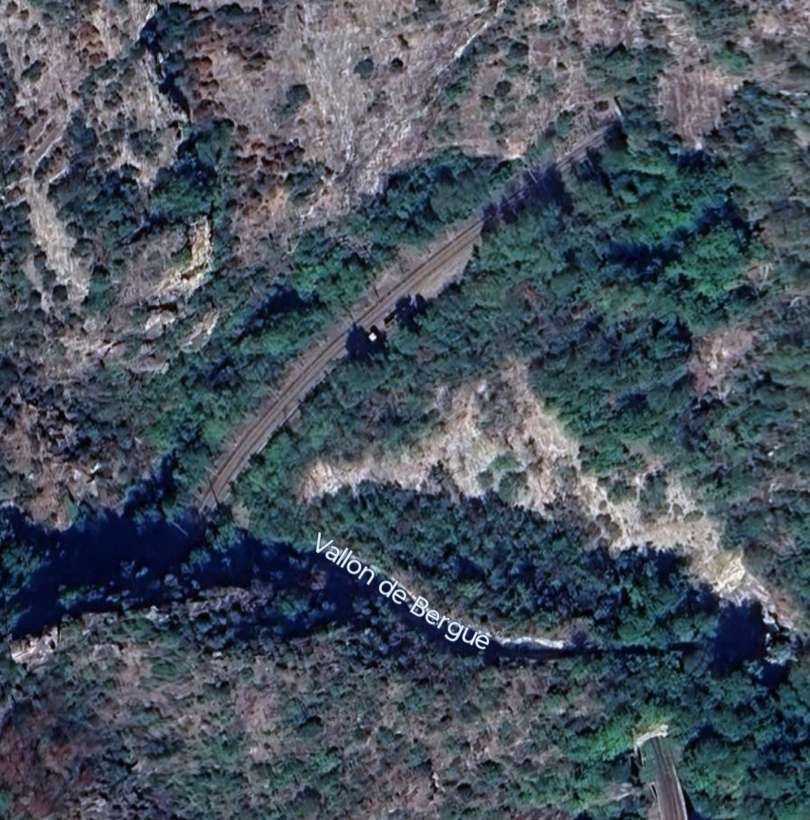
A view of the length of track between the Scarassoui and Peug tunnels can be found here. [29] It is a view from the valley floor close to the river, of the length of track between Scarassoui Tunnel on the right and Peug Tunnel on the left (its portal is just visible at the extreme left of the image. The gallery at the end of the Scarassoui Tunnel was added in the 1970s, © Eugenio Merzagora, courtesy of the Structure website. [29]
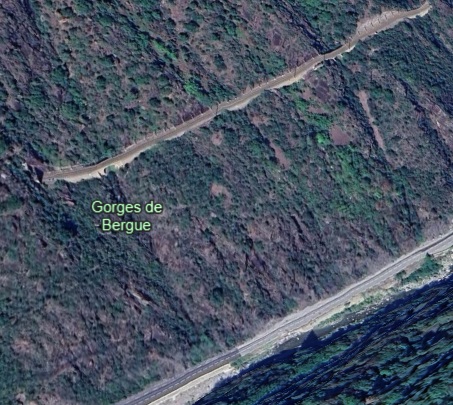
This Google Earth 3D satellite image gives good idea of how far up the valley side from the river and road the railway is positioned. [Google Earth, August 2025]
The view South from the mouth of Peug Tunnel, seen from the cab of a Southbound train. [55]

The southern portal of the Peug Tunnel seen from the cab of a Northbound service. [35]
A little further South and looking South from the cab of the Southbound service across the Peug Viaduct (50 metres long). [55]
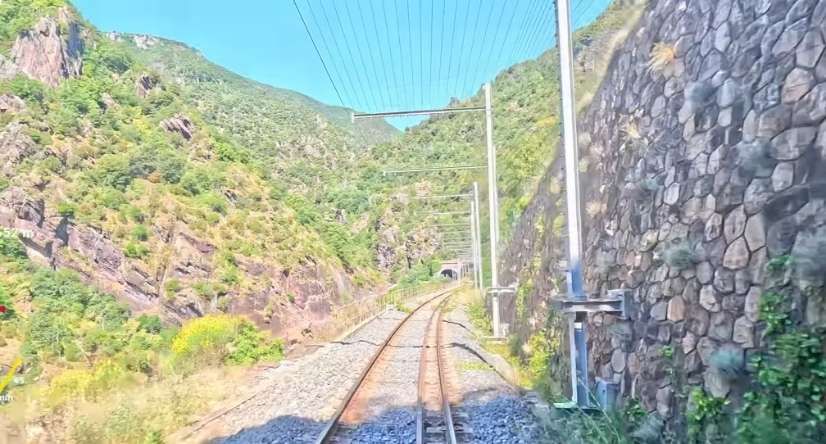
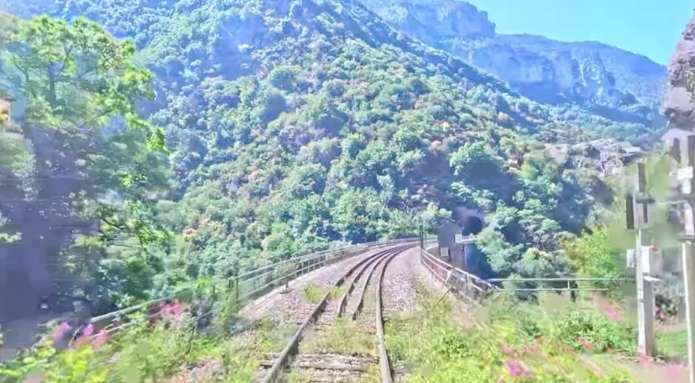
Looking across the valley of La Roya we can see the line heading South . Our train will travel along that length of the line in a short while. [35]
Further South again, a driver’s view from a Southbound service along Capuon Viaduct (45 metres long) towards the North Portal of Verardo Tunnel (53 metres long). [55]
Looking back at the southern mouth of Verardo Tunnel. [35]

The cab of the Southbound train again, looking from the southern end of Verardo Tunnel over Berghe Viaduct (30 metres long) towards the mouth of the Caussagne Tunnel (275 metres long). [55]
Caussagne Tunnel curves West into the valley of the Torrent de la Ceva. The far tunnel mouth faces West-northwest.
The view back towards Vernardo Tunnel over the Berghe Viaduct from the mouth of Berghe Tunnel. [35]
The view from the cab of the Southbound train as it leaves Caussagne Tunnel, heading Northwest up the valley of the Ceva. [55]

Turning through 180°, this is the tunnel portal, seen from the cab of a Northbound train. [35]
The Ceva valley is steep sided and the line sits on a narrow ledge supported above the valley floor by a retaining wall. Before entering the 1881 metre Berghe Tunnel it crosses the Ceva Viaduct (71 metres long).
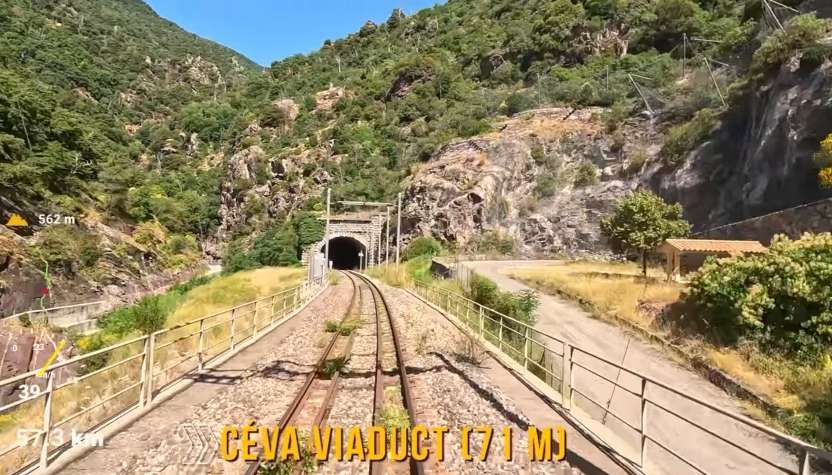
The view from the cab of a Southbound train crossing Ceva Viaduct before entering the Berghe Tunnel. [55]
The Mouth of the Berghe Tunnel, seen from the cab of a Southbound service. The Tunnel curves back to the North and then round to the Southeast. [55]
Turning through 180°, this is the View from the mouth of the Berghe Tunnel, seen from the cab of a Northbound service. [35]
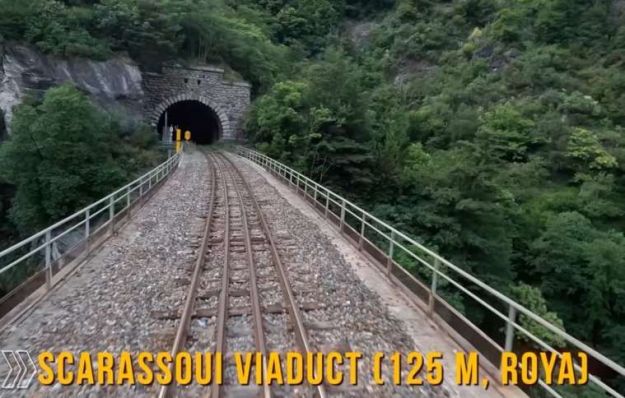
Throughout the spiral the line continues on a falling grade. It opens out, well below the level it enters the spiral, onto the Scarassoui Viaduct.
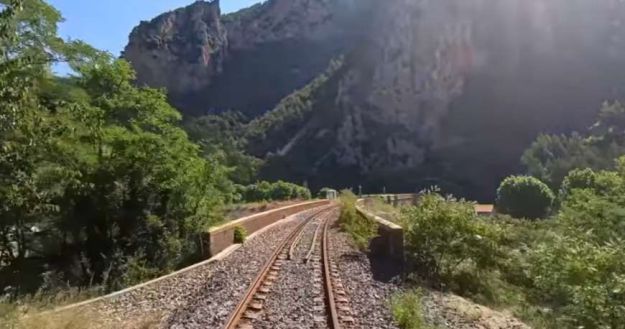
The view from the mouth of the Berghe e Tunnel across the Scarassoui Viaduct. [55]
Looking back towards the mouth of Berghe Tunnel. [35]
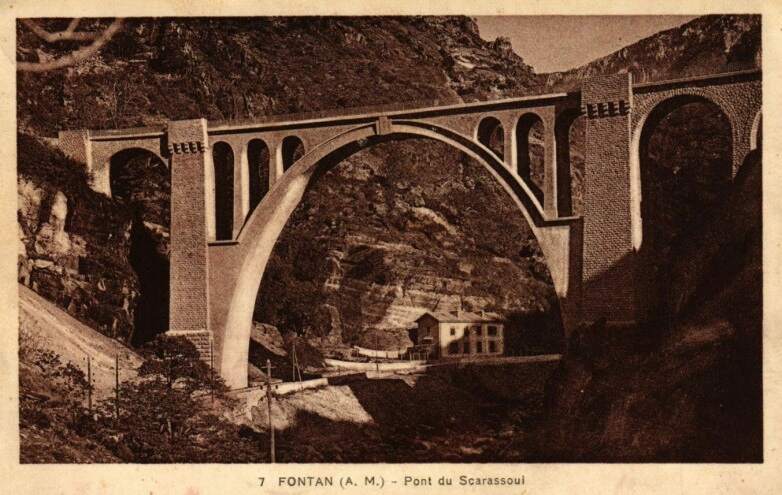
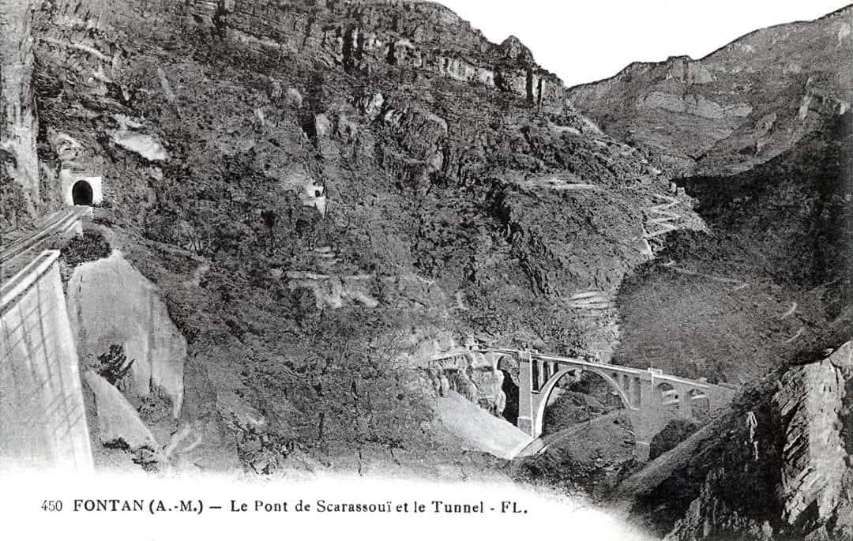
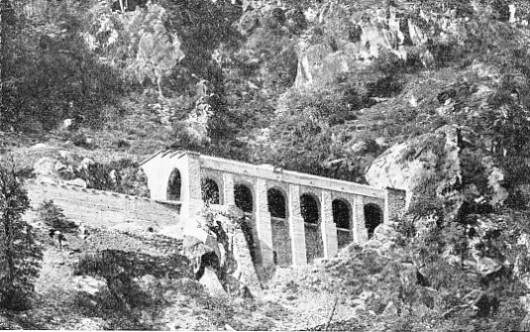
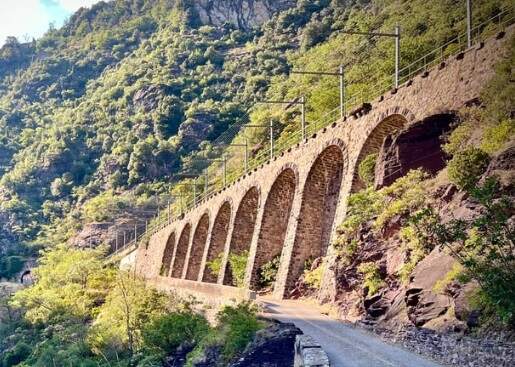
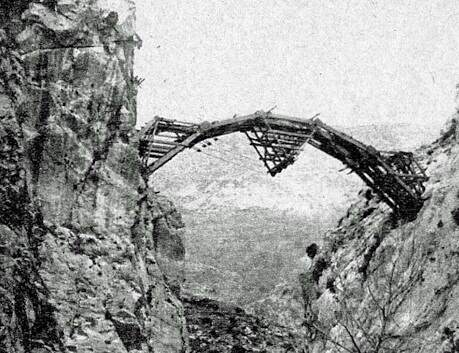
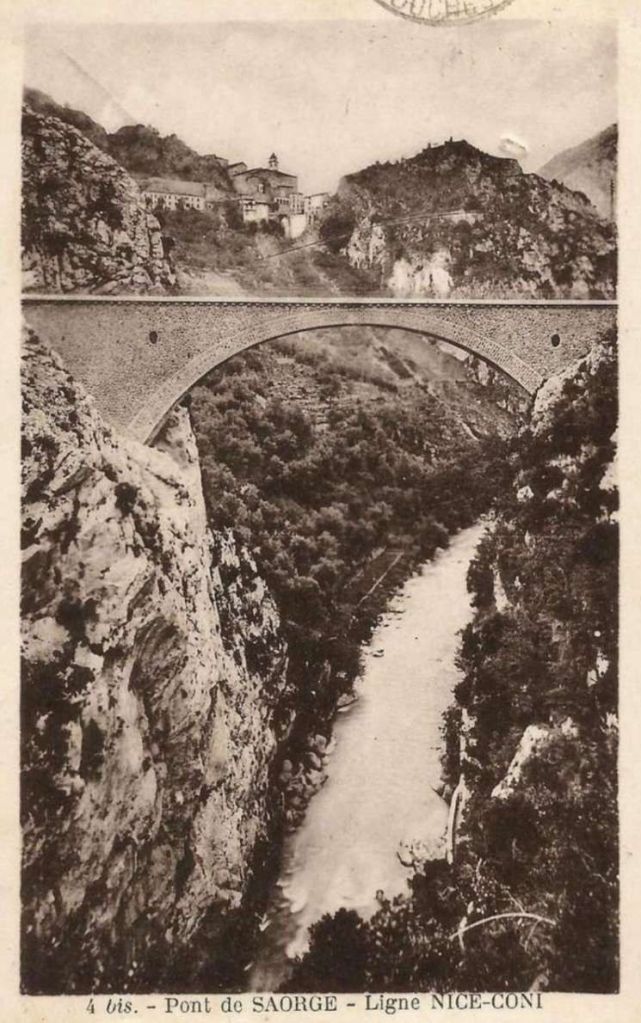
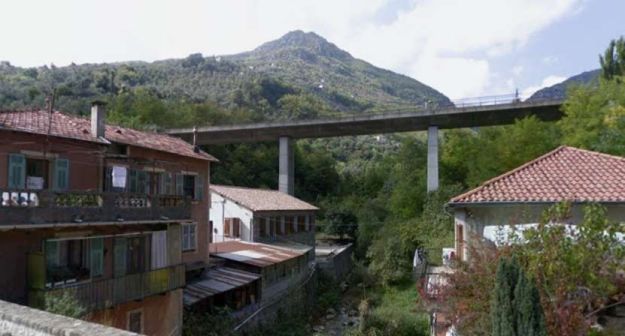
The French engineer, Paul Séjourné decided to create a significant structure at the location of the Scarassoui Viaduct. Banaudo et al quote Séjourné: “The Scarassoui Viaduct is the first French structure that one will see when coming from Italy. It is like a gateway to France; it must be worthy of it.” [1: p142] Séjourné was of the opinion that: “Of all the structures — I mean all, even the smallest — appearance matters. It is not permissible to make ugly. It is a strange opinion to consider expensive what is beautiful, cheap what is ugly.” [1: p142] The bridge Séjourné designed was a curved viaduct (radius 300 metres) carrying the railway on a falling grade of 21 mm/m. It was 125 m long, spanning both La Roya and the E74/D6204 at a height of 42 m. Banaudo et all, tell us that “two arches of 11 m on the Nice side and a 13 m arch on the Cuneo side give access to a central arch of 48 m decorated with six vaults, according to a design that Séjourné had applied on other works. … The central arch was supported by two massive pilasters with crenellated facings, whose bases were widened to compensate for the misalignment due to the curvature of the deck.” [1: p142]
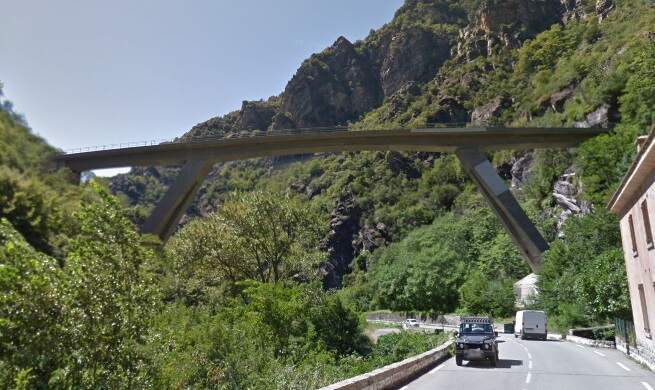
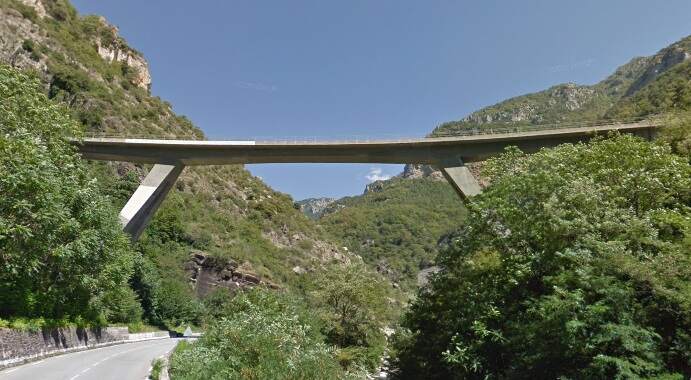
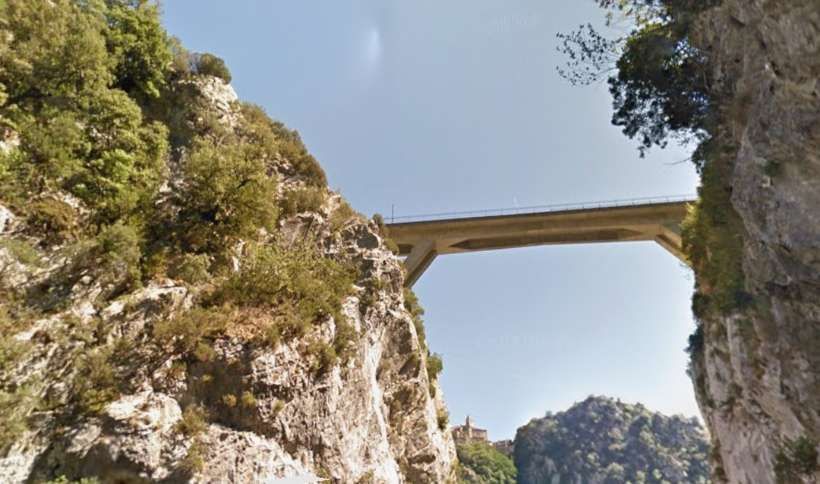
Sadly this bridge was destroyed by the retreating German forces in 1944 and it was not reconstructed in any form until the 1970s. Details of this bridge and photographs of its condition prior to reconstruction can be found here. [34] The replacement 1970s structure is shown below. …
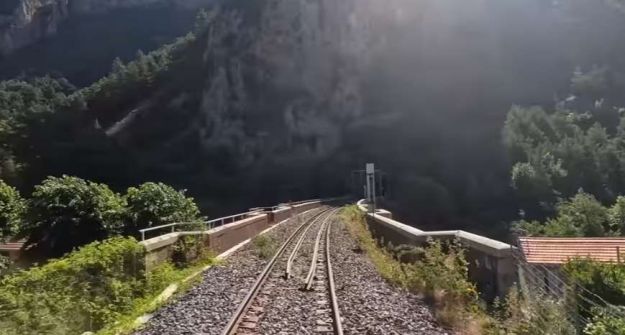
Scarassoui Viaduct crosses the River Roya close to the top of this image. Trains heading South then pass through a series of short tunnels following the East bank of La Roya. [30]
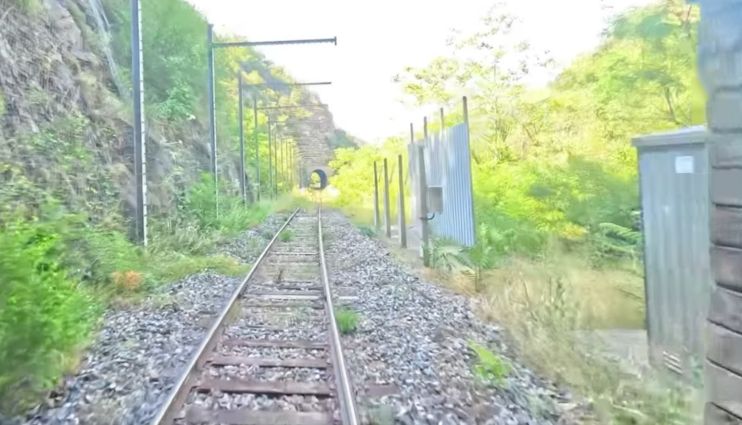
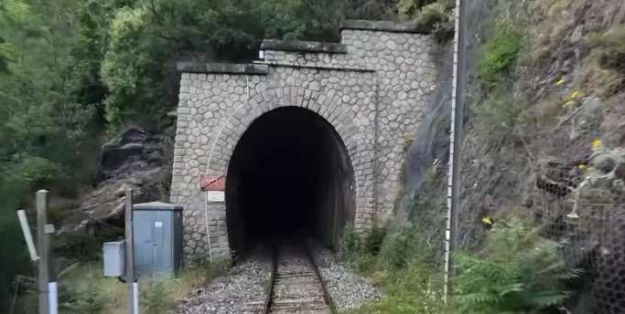
The northern portal of the Camera Tunnel is in deep shade. [55]
The view back across the Scarassoui Viaduct from the northern portal of the Camara Tunnel. [35]
The view South from the southern portal of Camara Tunnel. [55]
Looking back at the South Portal of the Camara Tunnel. [35]
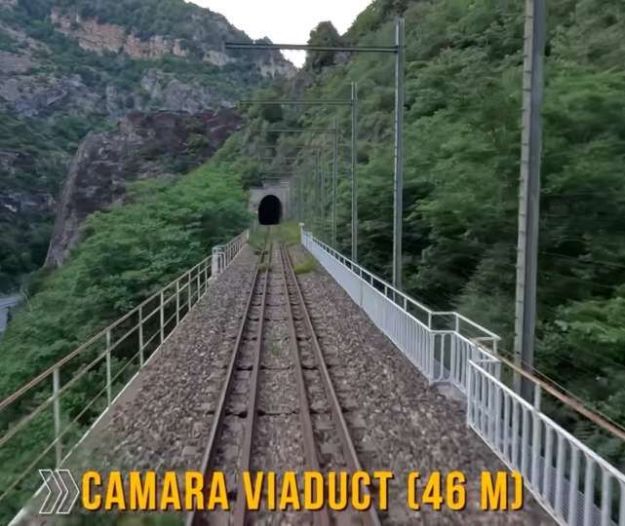
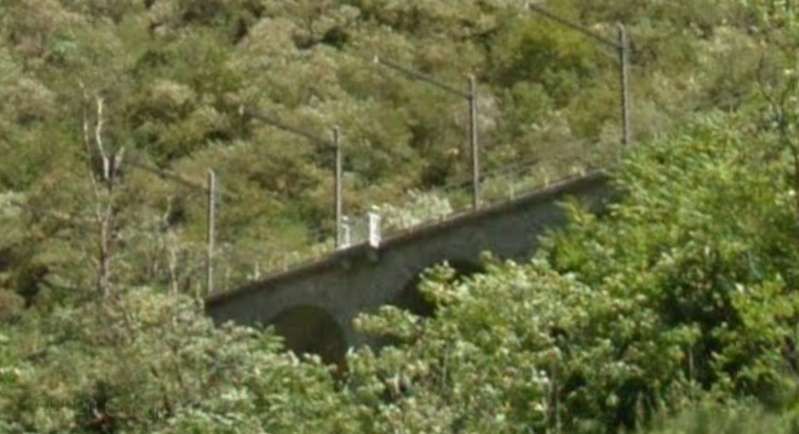
Just to the South of Camara Tunnel is Camara Viaduct, seen here from the cab of a Northbound train. [35]

The North Portal of Vallera Tunnel No. 1. [55]
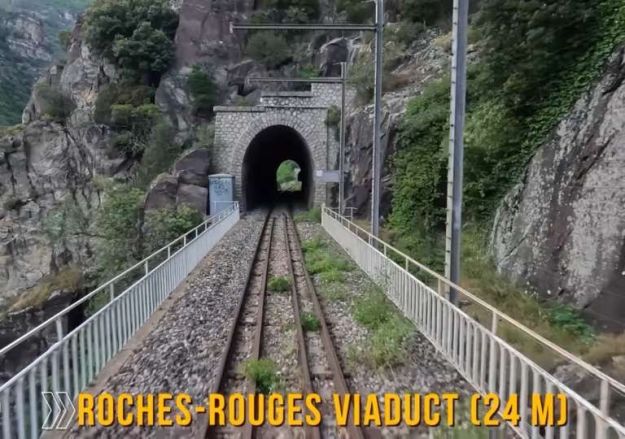
The view North from Roches-Rouges Viaduct towards the South Portal of Vallera Tunnel No. 1. [35]

The view South from Roches-Rouges Viaduct towards Vallera Tunnel No. 2. [55]
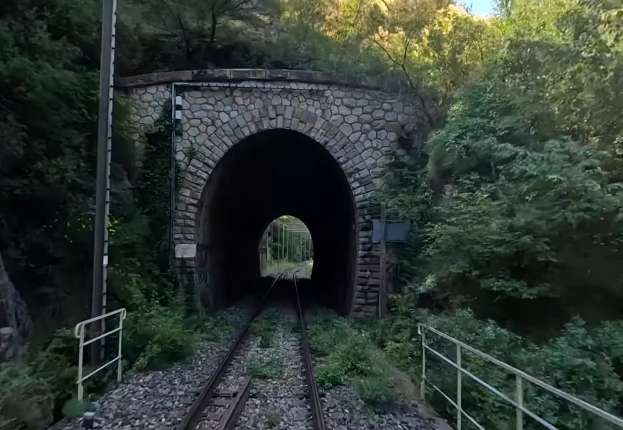
The North Portal of Vallera Tunnel No. 2. [55]
Looking North from the tunnel mouth above. [35]
Looking South from the southern tunnel mouth of Vallera Tunnel No. 2. [55]
Looking South along Vallera Tunnel No. 2 [55]
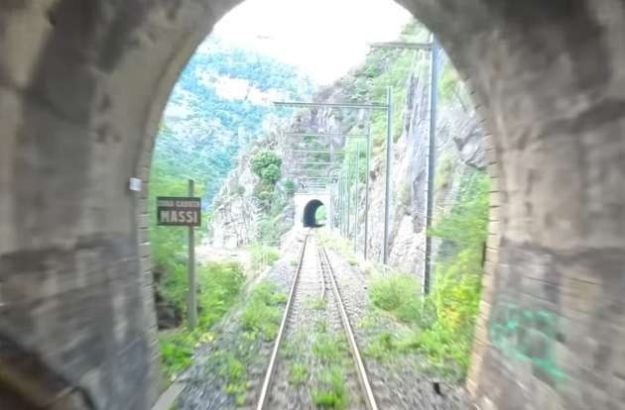
Looking back at the South Portal of Vallera Tunnel No. 2. [35]
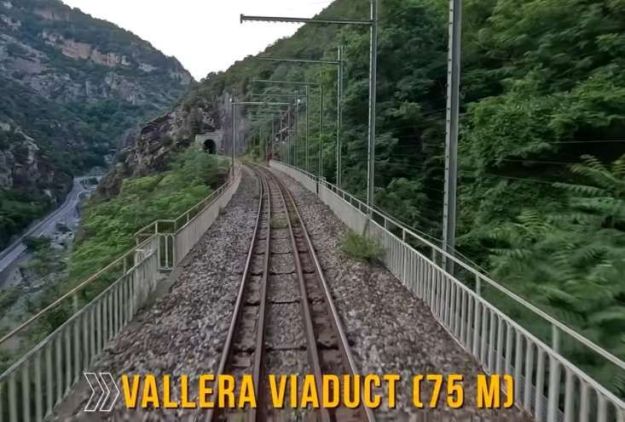
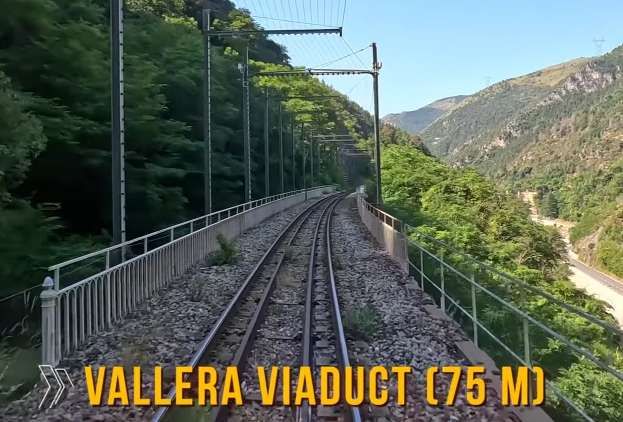
Looking North from Vallera Viaduct towards Vallera Tunnel No. 2. [35]
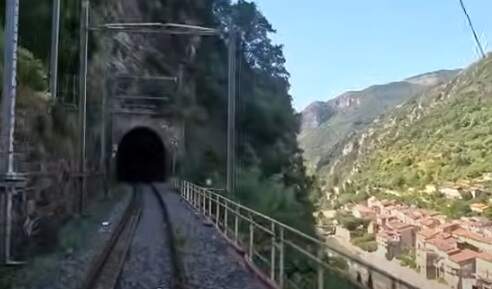
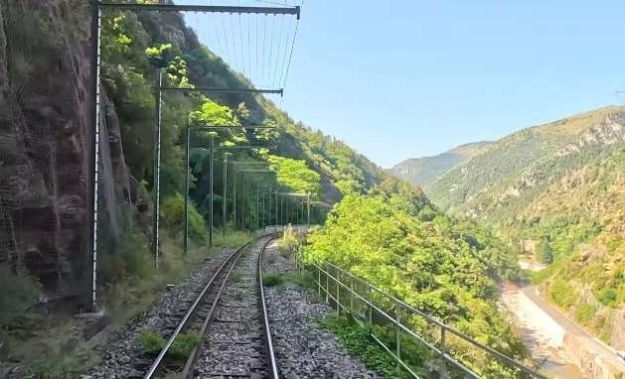
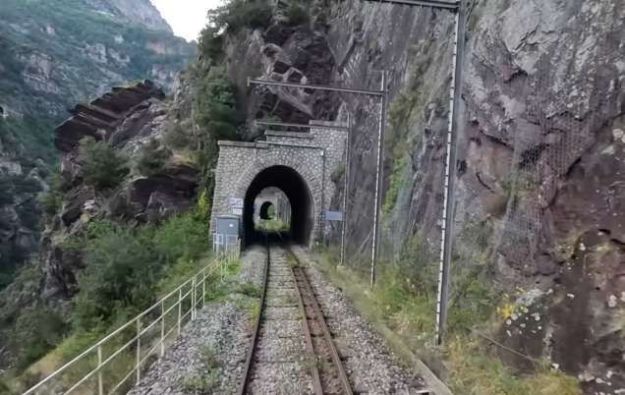
The North portal of Torette Tunnel (121 metres long). The village of Fontan can be seen to the right on the valley floor, [55]
The view from the Southern Portal of Torette Tunnel. [55]
The southern mouth of Torette Tunnel seen from the cab of a Northbound train. [35]
The the track duals to the North of Fontan-Saorge Railway Station. [55]
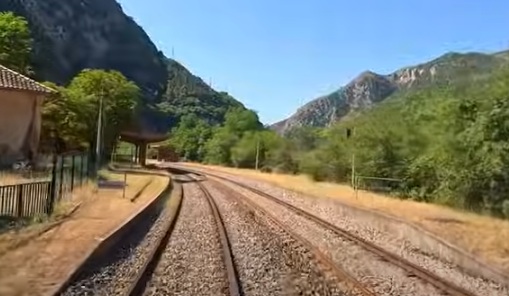
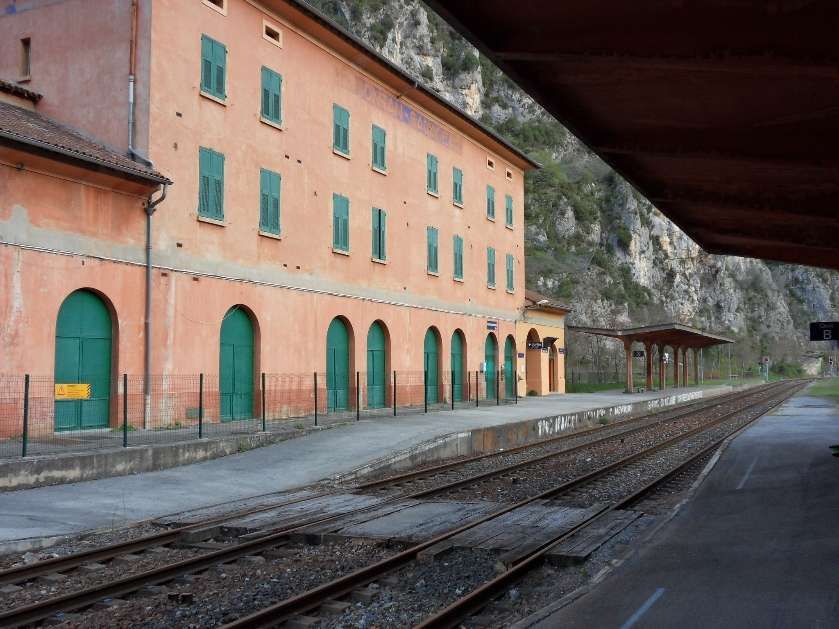
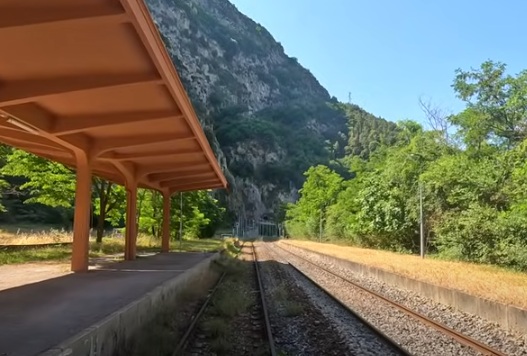
The final approach to Fontan-Saorge Railway Station. [55]
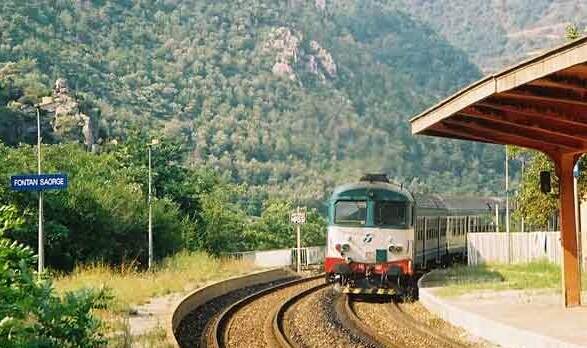
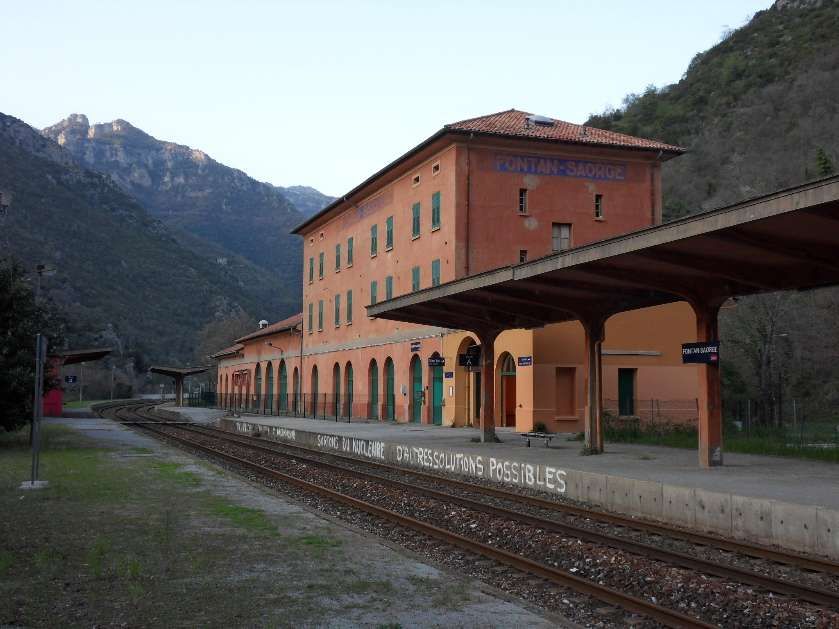
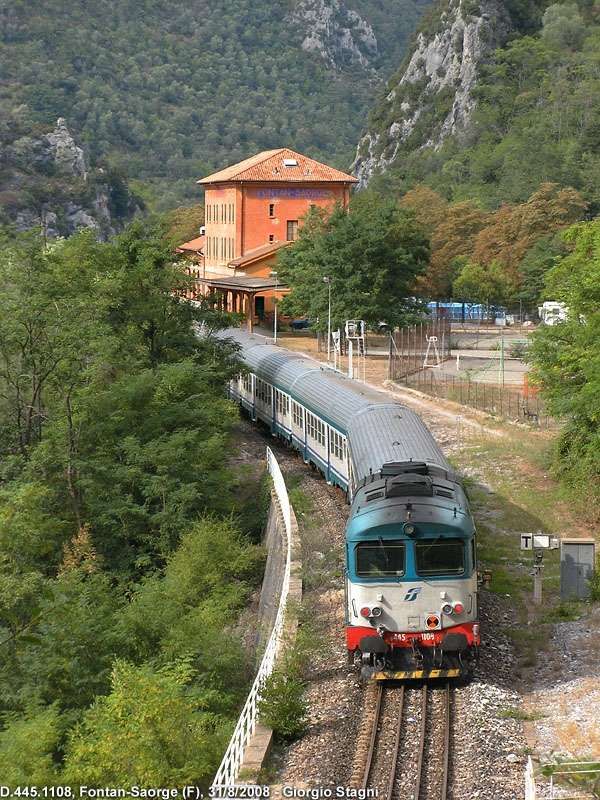
Fontan-Saorge Railway Station seen from the South, © Georgio Stagni and licensed for reuse under a Creative Commons Licence (CC BY-SA 3.0). [48]

Fontan-Saorge Railway Station, seen from the cab of a Southbound train. [55]
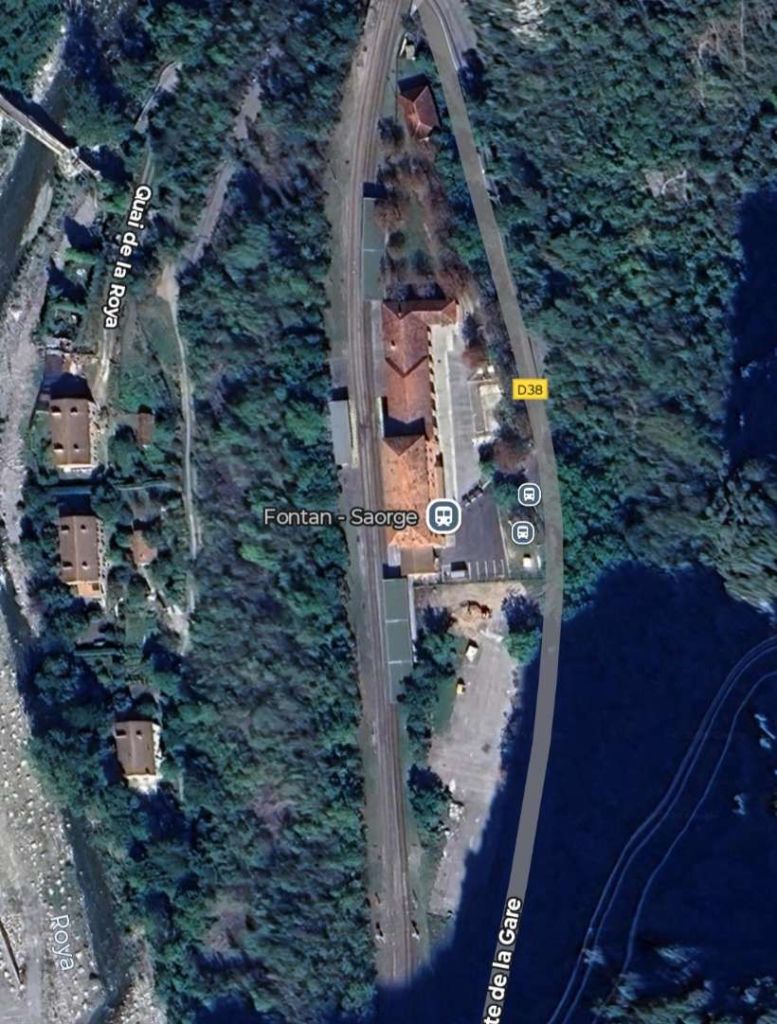
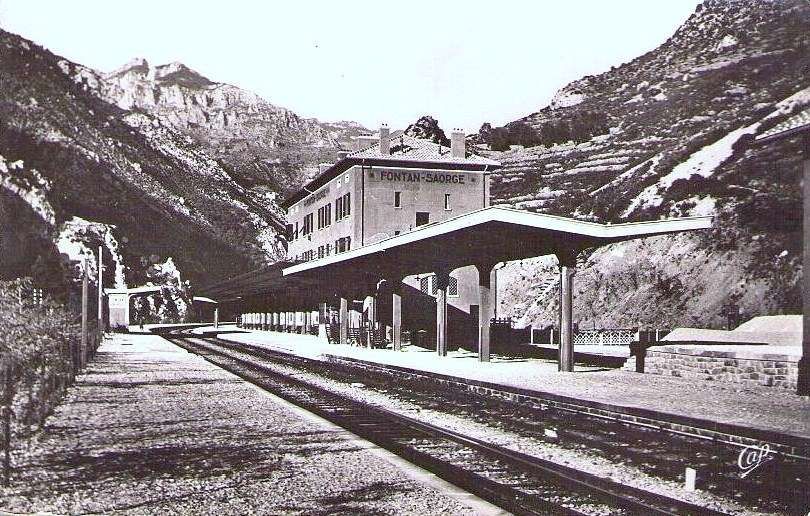
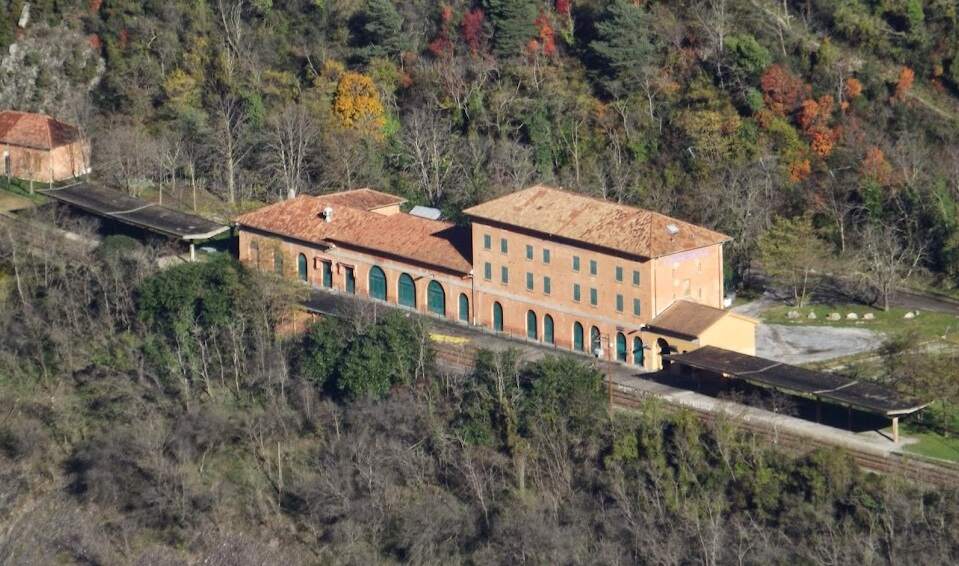
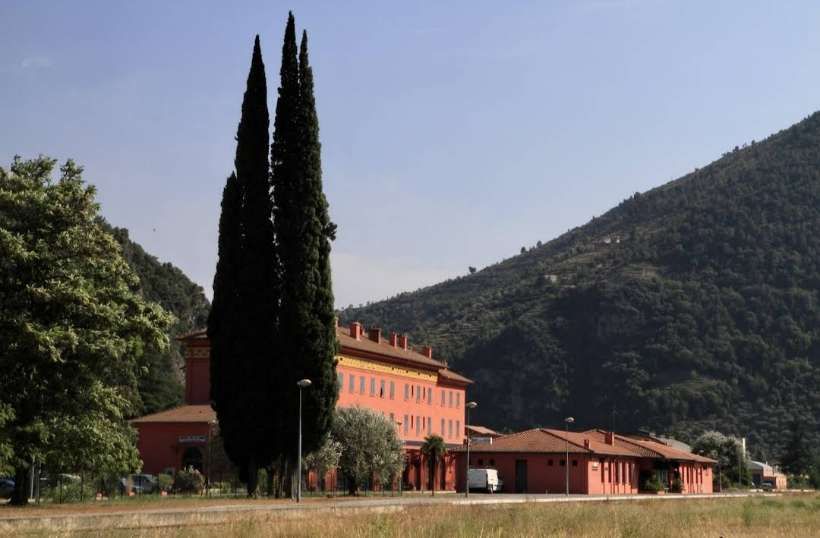
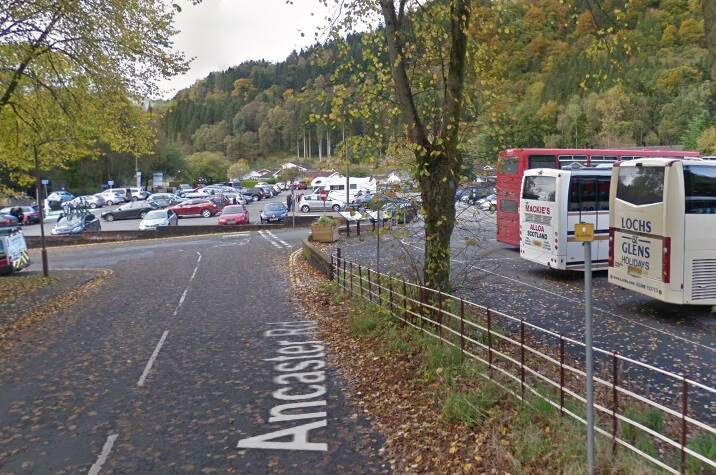
This extract from Google’s satellite imagery shows the site of the Fontan-Saorge Railway Station which sits between the two villages. It is a large site as it was designed to be a frontier station. The historic border between France and Italy was just a short distance North along the valley of La Roya. [Google Maps, August 2025]
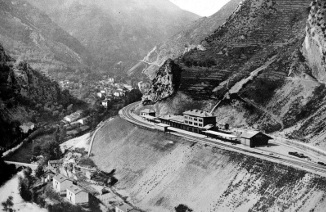
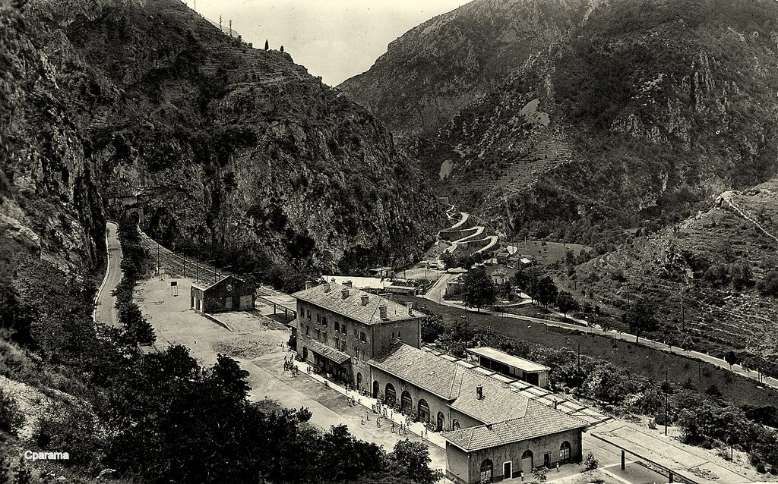
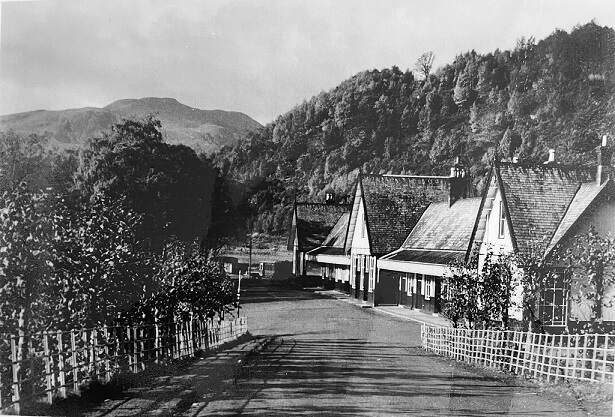
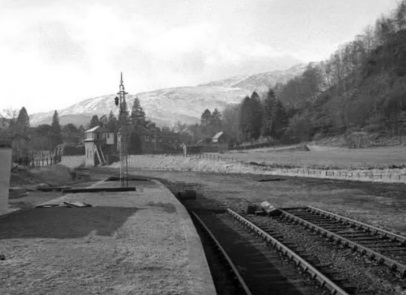
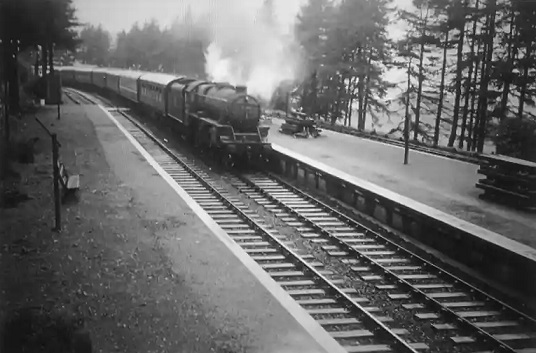
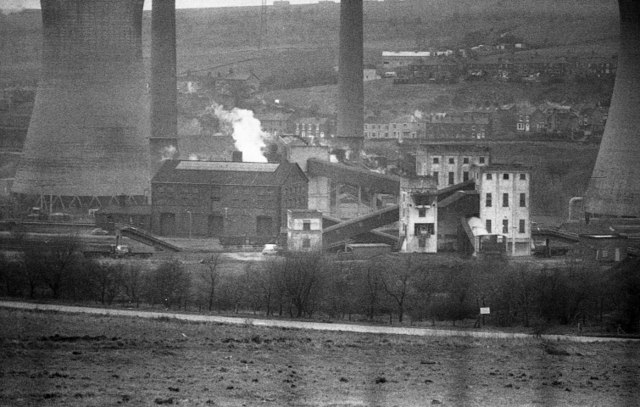
A view of the Fontan-Saorge Railway Station from high on the West flank of the valley of La Roya in 1927/1928. This image illustrates the significant earthworks needed to create a ‘plateau’ for the station (c) Public Domain. [50]

Fontan-Saorge to Breil-sur-Roya
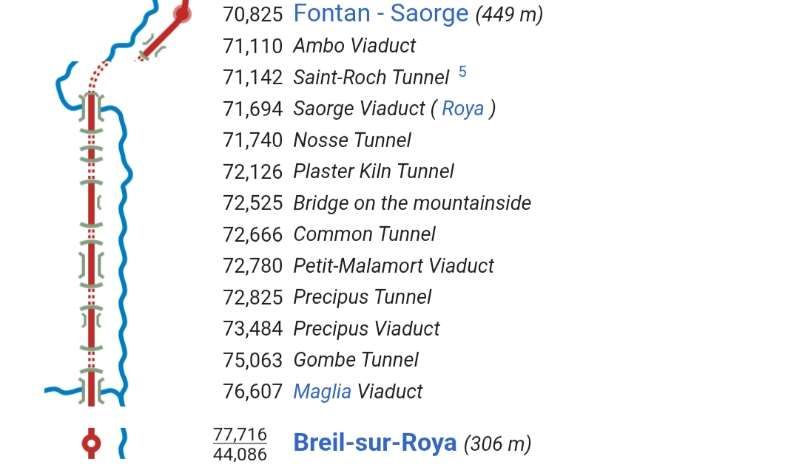
As trains head south from Fontan-Saorge they cross Ambo Viaduct (a short viaduct – just 36 metres in length) before entering Saint-Roch Tunnel . The wall on the left carries the D38 (the road to Saorge). [55]
The road to Saorge climbs above the level of the railway. [Google Streetview, July 2014]
The tunnel carrying the road to Saorge runs just above the railway tunnel. Saint-Roch Railway Tunnel is named for the church close to the road as it enters Saorge. [Google Streetview, July 2014]

Looking back along the line towards Fontan-Saorge Railway Station from the mouth of Saint-Roch Tunnel. The viaduct in the foreground is Ambo Viaduct. [35]
Looking Southwest across the bridge at Saorge from the cab of a Southbound service leaving the mouth of Saint-Roch Tunnel. Tracks cross the bridge 60 metres above the valley floor. [55]
Turning through 180 degrees this is the Southwest portal of the Saint-Roch Tunnel as seen from the cab of a Northbound train. [35]
The bridge at Saorge in the 21st century. It was rebuilt in the 1970s after destruction in 1944. [Google Maps, August 2025]
Work on the bridge at Saorge started “in February 1922 from the Saint-Roch and Nosse tunnels, between which a conveyor cable was stretched for the assembly of the 40 m lowered arch. A suspended footbridge was then launched over the precipice and a 0.60 m track was placed there to supply the materials onto small 500 kg load wagons, maneuvered by gasoline-powered shunters. … The main work of the bridge was completed in March 1923.” [1: p143]
Looking Northeast over the bridge at Saorge towards the Saint-Roch Tunnel from the mouth of Nosse Tunnel. [35]
Significant savings on construction costs were made (even when the cost of construction of the bridge was included) by following the right bank of La Roya down towards Breil-sur-Roya. [1: p142]
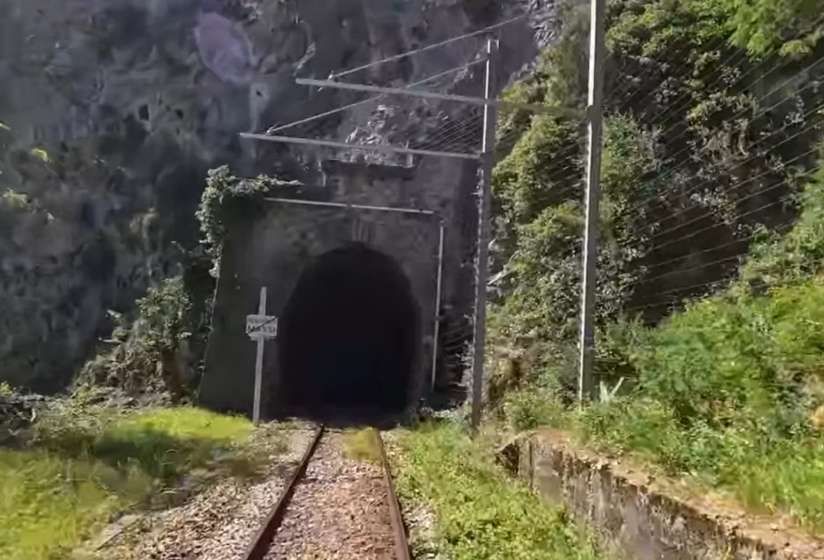
The Northeast portal of Nosse Tunnel (89 metres in length). [55]
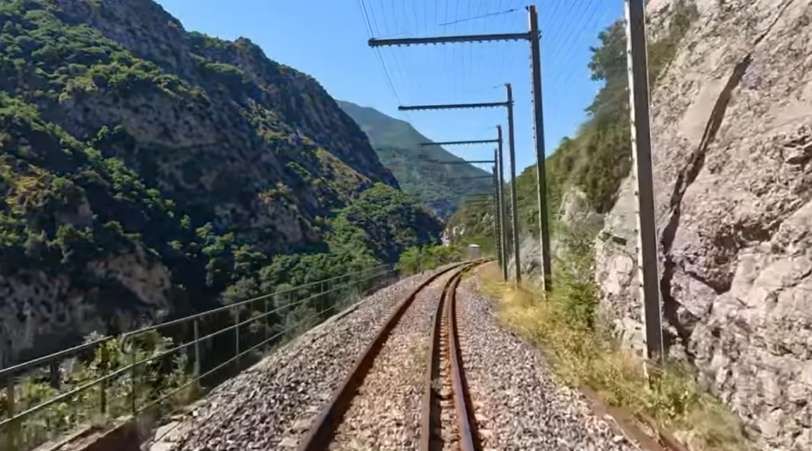
The view Southwest from the tunnel mouth of the Nosse Tunnel. [55]
Turning through 180°, looking Northeast into the mouth of Nosse Tunnel. [35]
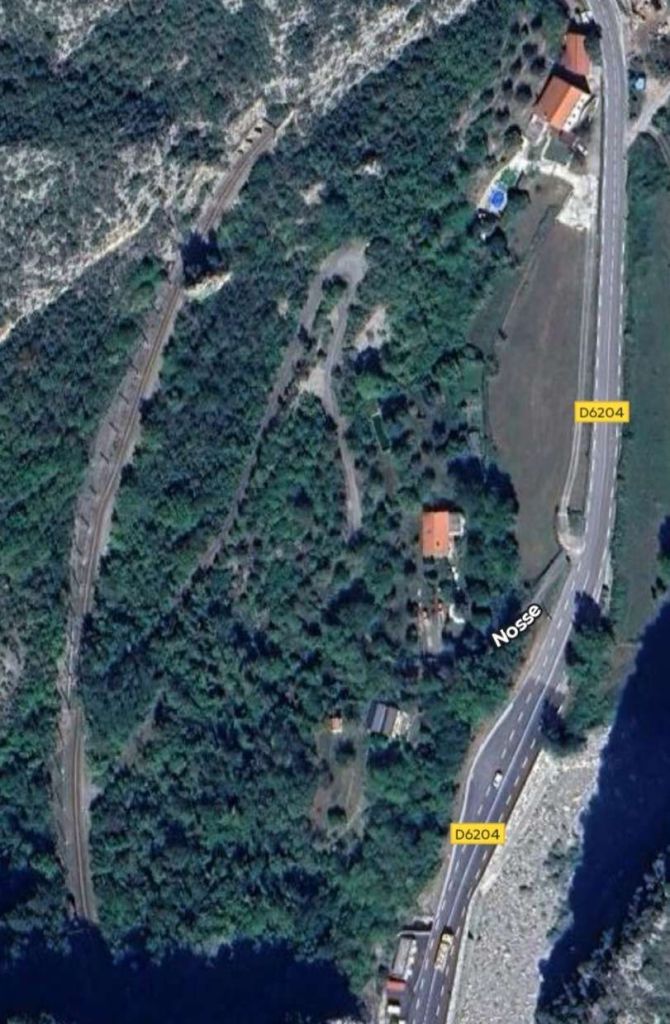
The open length of the line between Nosse and Four A Platre tunnels. [Google Maps, August 2025]
The North Portal of Four A Platre Tunnel (316 metres long), seen from the cab of a Southbound train. [55]
The view South from the South Portal of Four A Platre Tunnel. [55]
Turning through 180°, this is the South Portal of Four A Platte Tunnel. The village of Saorge can be seen in the sunlight on the right of the image. [35]

The length of line between Four A Platre (Plaster Kiln) Tunnel and Commun Tunnel. [Google Maps, August 2025]
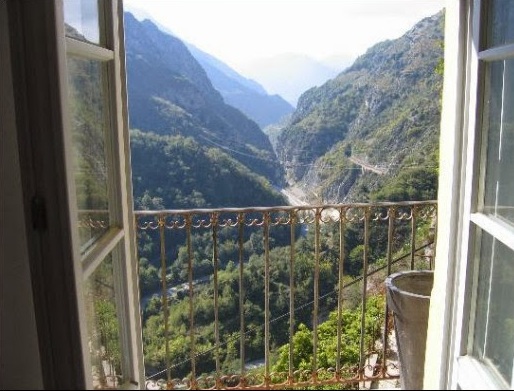
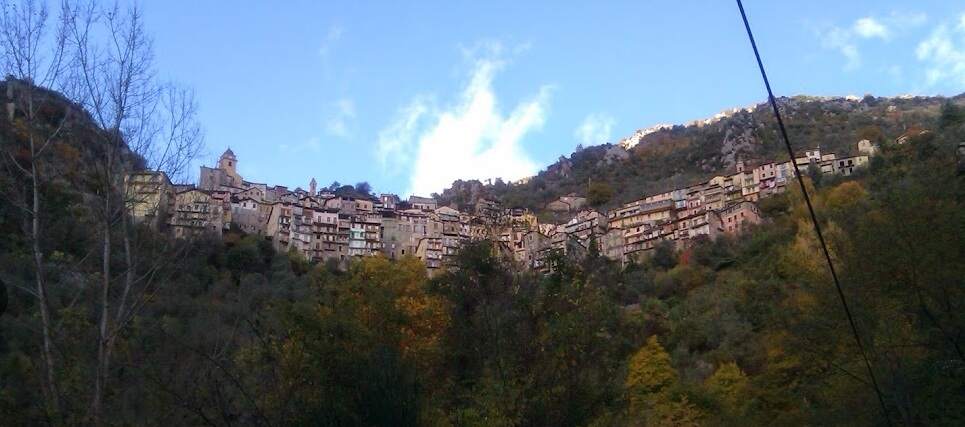
The village of Saorge is a lovely ancient perched village sitting high above La Roya. We have stayed there three times over the years renting the same small apartment each time that we have been there. Most recently, we were there post-Covid and after Storm Alex. That short holiday was in November 2023.
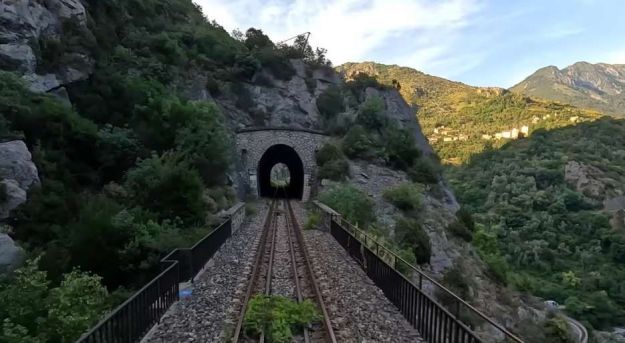
The northern mouth of Commun Tunnel (60 metres in length), seen from the cab of the Southbound service. [55]
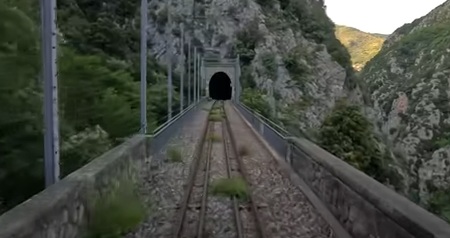
The view South from the South portal of Commun Tunnel towards Precipus Tunnel over the Petit Malamort Viaduct. [55]
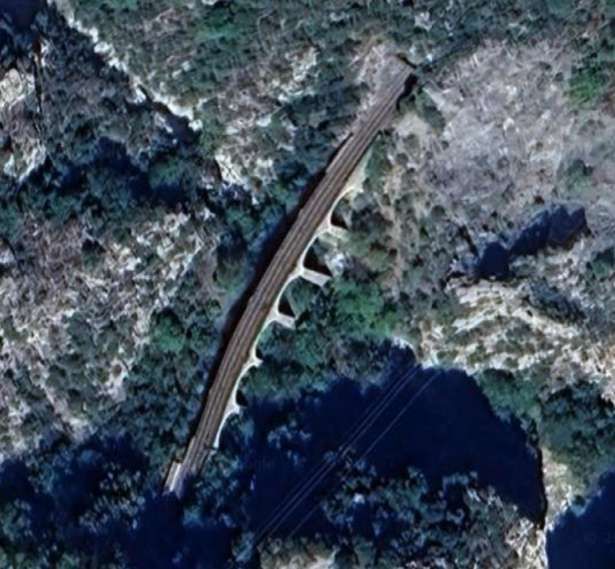
This satellite image shows Petit Malamort Viaduct which cannot easily be seen from the road network. [Google Maps, August 2025]
Turning though 180, just a short distance further along the line, this is the view back towards the South Portal of Commun Tunnel from the Petit Malamort Viaduct (56 metres long). [35]
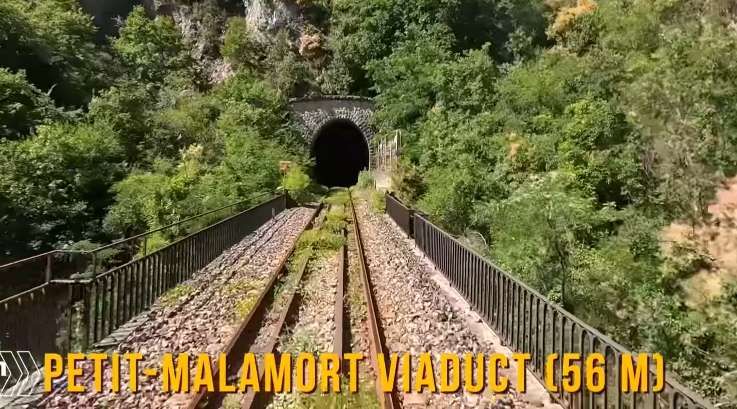
Petit Malamort Viaduct and the North portal of Precipus Tunnel (623 metres long). [55]
Between Saorge and Breil-sur-Roya construction works were delayed for a time by high pressure water ingress into tunnels. [1: p142]
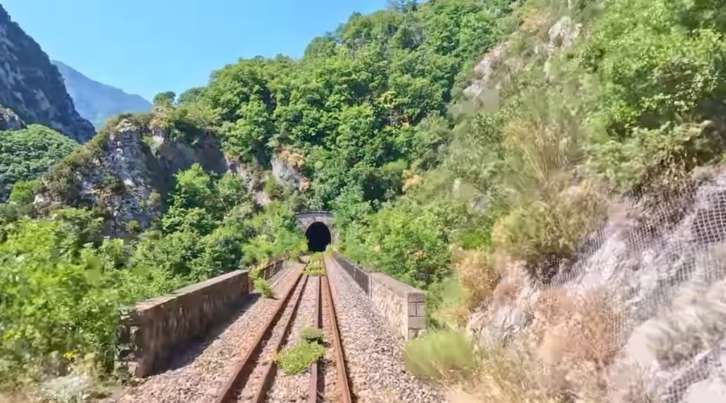
Looking North across Precipus Viaduct (46 metres long) toward the South Portal of Precipus Tunnel. [35]
The Precipus Viaduct seen, looking West from the D6204 in the valley floor. [Google Streetview, August 2016]
Looking North from the North Portal of Combe Tunnel. [35]
The South Portal of Combe Tunnel. [35] 262
Looking South across a minor road crossing on the North side of Breil-sur-Roya. [55]
Looking back North across the same road crossing to the North of Breil-sur-Roya, seen from the cab of a Northbound train. The D6204 is off to the right of the image, the museum is off to the left of the camera. [35]
Maglia Bridge looking South from the cab of a Southbound train. [55]
Maglia Bridge looking North from the cab of a Northbound service. [35]
Maglia Bridge seen from Route de la Giandola. [Google Streetview, October 2008]
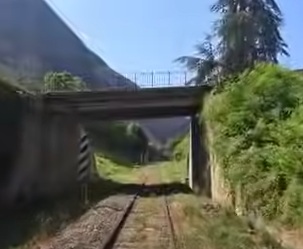
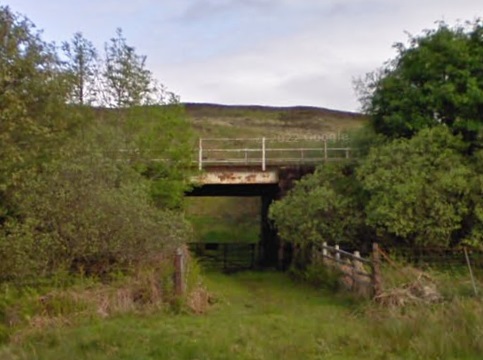
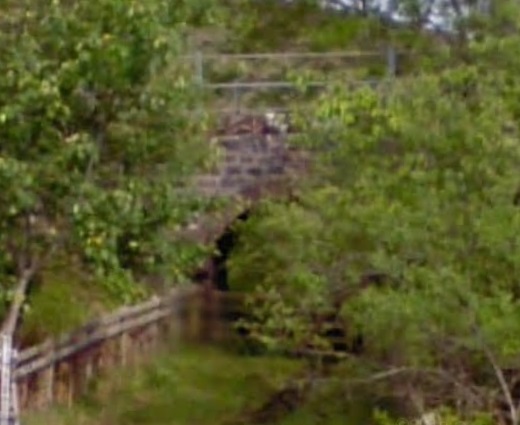
The bridge carrying the Route du Col de Brouis over the railway. [55]

Looking back North from the same bridge over the railway. [Google Streetview, August 2016]
Looking ahead towards Breil-sur-Roya Railway Station from the bridge which carries Route du Col de Brouis over the railway. [Google Streetview, August 2016]
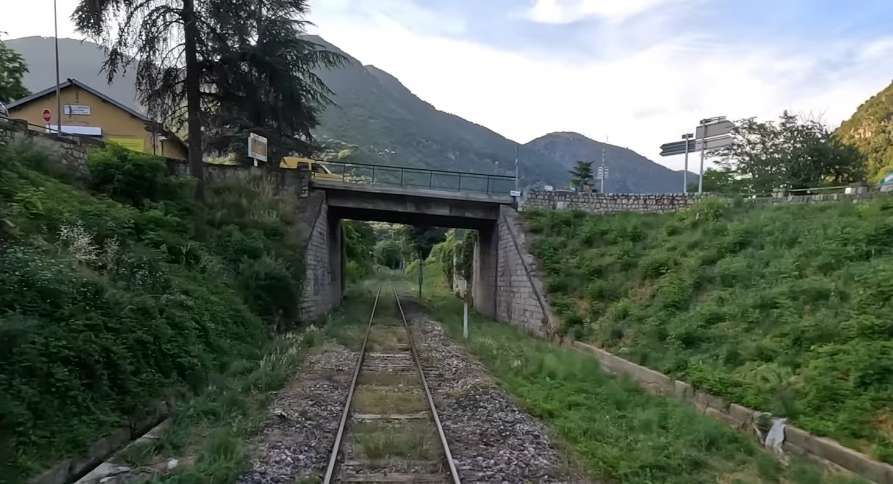
Looking Back North through the same bridge. This is the view from the cab of a Northbound train. [35]
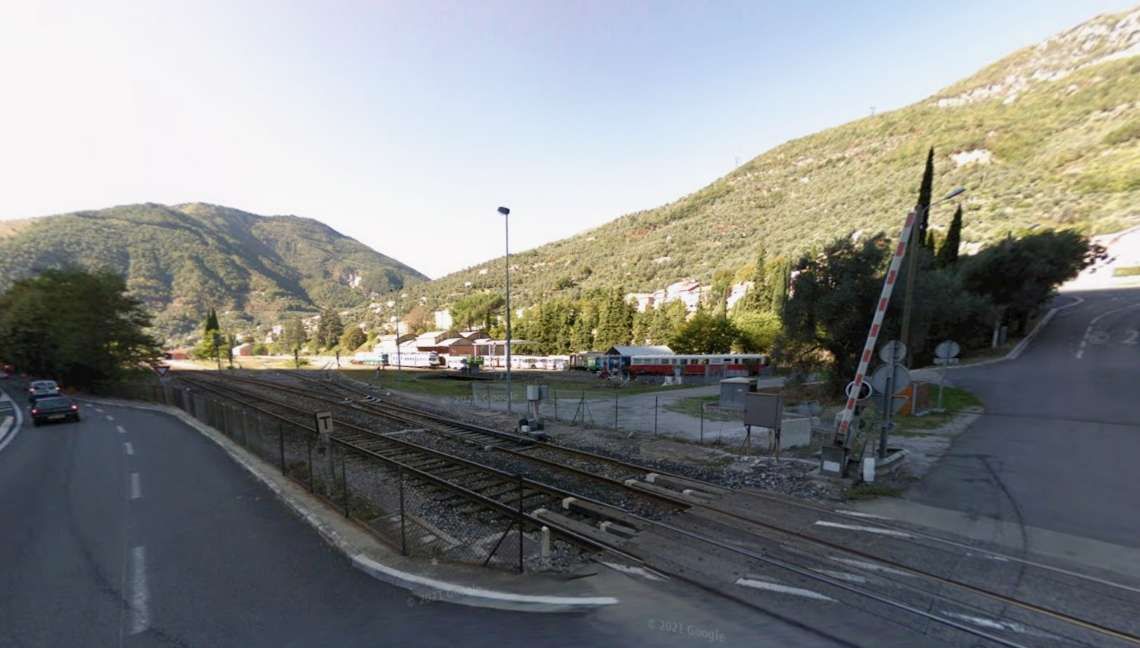
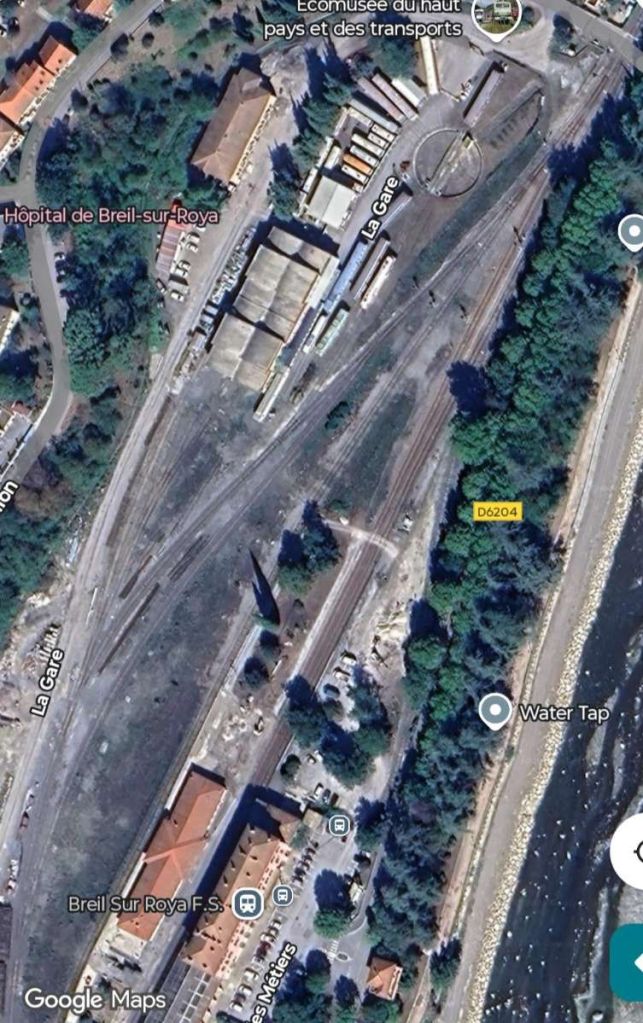
Looking South from the D6204 adjacent to the level crossing at the North end of the station site, along the line towards Breil-sur-Roya Railway Station. Beyond the crossing is the Eco Musee, Breil-sur-Roya, Haut-Pays et Transports, an exhibition of vintage trains, trams & buses. The road on the right is Avenue de l’Authion. [Google Streetview, August 2016]
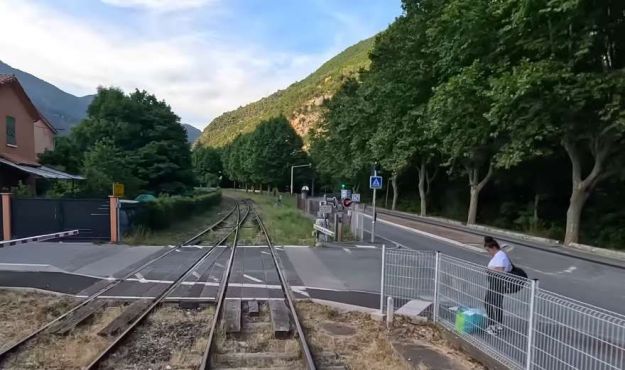
The same location looking to the North. The D6204 is on the right of the picture. [35]
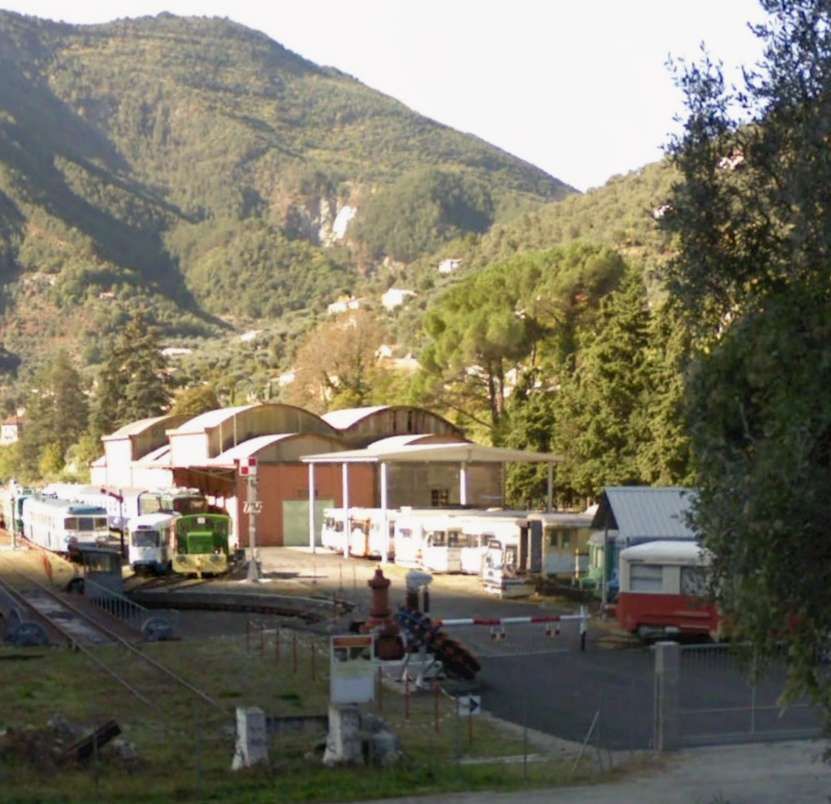
The Eco Musee at Breil-sur-Roya, seen from the road to its North, Avenue de l’Authion. [Google Streetview, 2009]
The Eco Museum was founded in 1989 to showcase the history and heritage of the Roya valley, it became a museum focused mostly on industrial heritage in 1991. It now houses exhibits of hydropower and transportation. The collection comprises lots of interesting locomotives, railcars, trams, postal vans and other vintage vehicles.
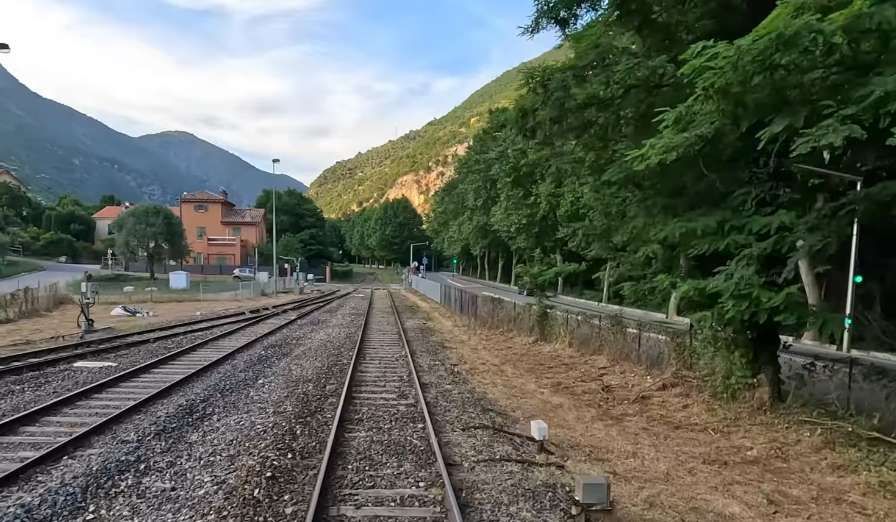
Looking North from adjacent to the end of the platform at Breil-sur-Roya Railway Station. [35]
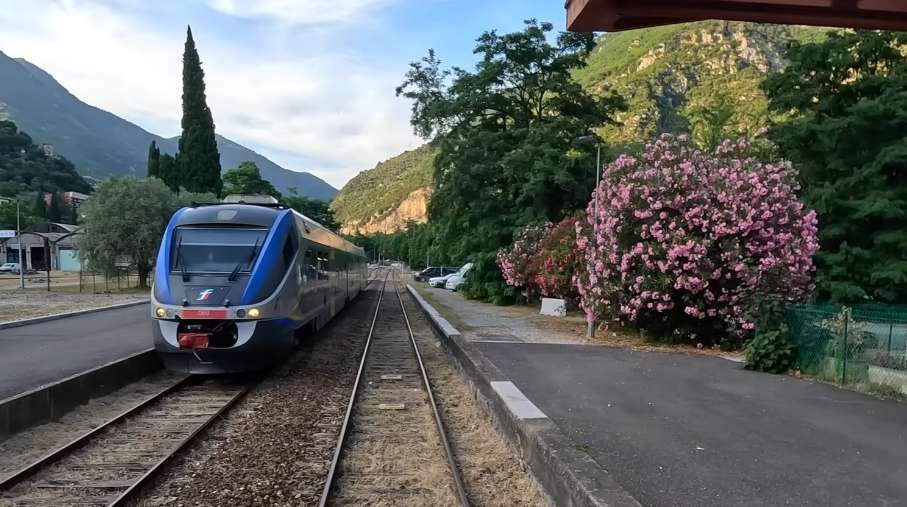
Looking North at Breil-sur-Roya as a Southbound service arrives at the Station. [35]
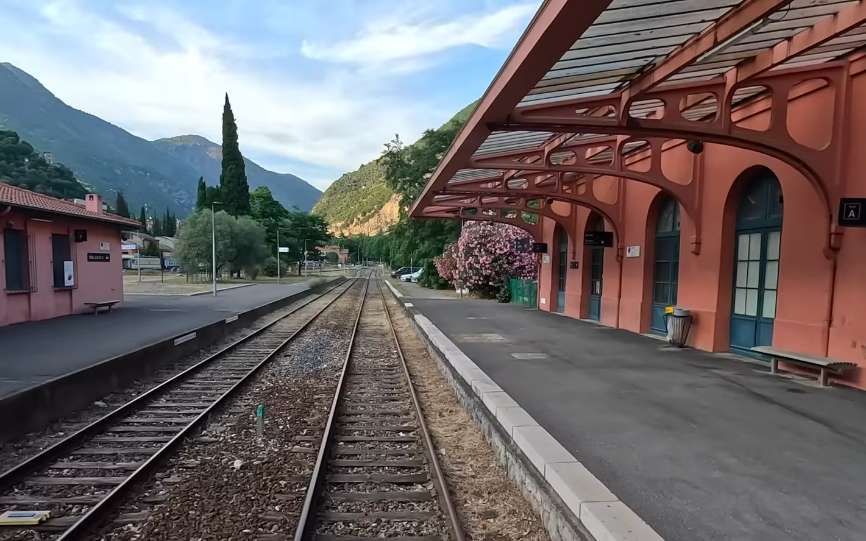
Breil-sur-Roya Railway Station facing North. [35]
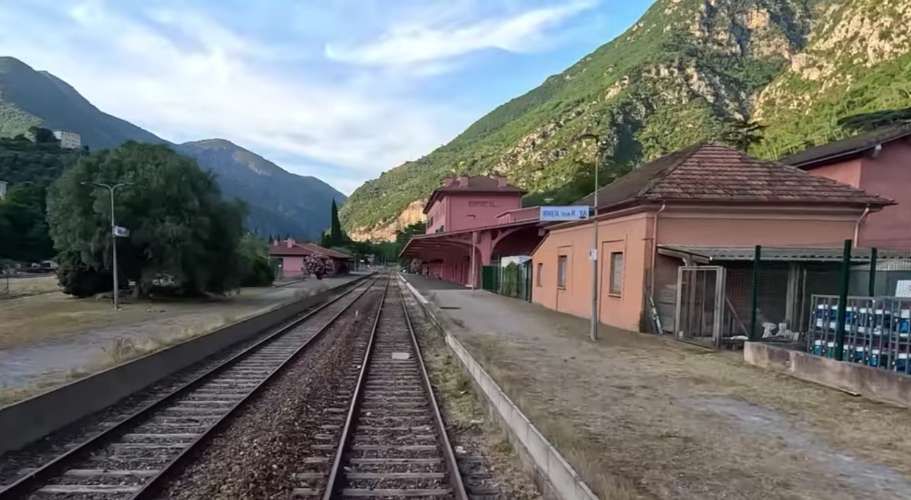
The approach to Breil-sur-Roya from the South, seen from the cab of a Northbound train. [35]
We finish this fourth length of the journey from Cuneo to the coast of the Mediterranean here at Breil-sur-Roya South of Breil, there are two routes to the coast. One heads to Ventimiglia, the other to Nice. The next article will look at the line heading South towards Ventimiglia.
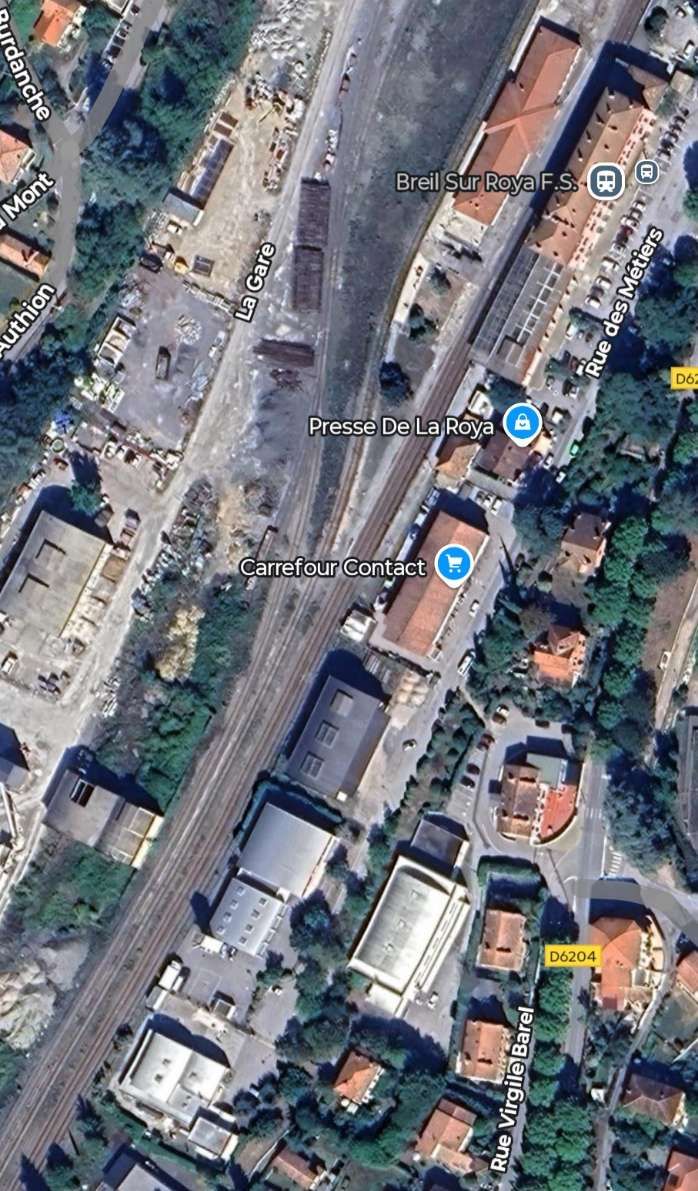
In Breil, the earthworks for the international station were constructed starting in June 1920. The area was around 1 kilometre in length and 300 metres wide. To build this the, “National Road 204 had to be diverted towards the Roya for about a kilometre, as was the Goulden power plant canal. The natural ground was cleared on the northern side and raised with excavated material from the tunnels on the southern half. At this end of the station, the modest single-arch bridge over the Lavina valley, which provides access to the Nice and Ventimiglia lines, required considerable work. The foundations for the abutment on the Nice side had to be dug into a gypsum bed sloping to a depth of 16 metres (compared to 2.20 metres on the Breil side, where hard rock quickly emerges). and a 15.12 m high reinforced concrete cantilever to the abutment anchored it in the loose fill.” [1: p141]
The next article in this series can be found here. [4]
References
- Jose Banaudo, Michel Braun and Gerard de Santos; Les Trains du Col de Tende Volume 1: 1858-1928; FACS Patrimoine Ferroviaire, Les Editions du Cabri, 2018.
- Jose Banaudo, Michel Braun and Gerard de Santos; Les Trains du Col de Tende Volume 2: 1929-1974; FACS Patrimoine Ferroviaire, Les Editions du Cabri, 2018.
- Jose Banaudo, Michel Braun and Gerard de Santos; Les Trains du Col de Tende Volume 3: 1975-1986; FACS Patrimoine Ferroviaire, Les Editions du Cabri, 2018.
- https://rogerfarnworth.com/2025/08/25/the-railway-between-nice-tende-and-cuneo-part-5-breil-sur-roya-to-ventimiglia/
- T.B.A.
- T.B.A.
- T.B.A.
- https://youtu.be/2Xq7_b4MfmU?si=1sOymKkFjSpxMkcR, accessed on 20th July 2025.
- https://rogerfarnworth.com/2025/07/22/the-railway-from-nice-to-tende-and-cuneo-part-1.
- https://rogerfarnworth.com/2025/07/26/the-railway-from-nice-to-tende-and-cuneo-part-2.
- https://rogerfarnworth.com/2025/08/06/the-railway-from-nice-to-tende-and-cuneo-part-3-vievola-to-st-dalmas-de-tende
- https://it.wikipedia.org/wiki/Stazione_di_San_Dalmazzo_di_Tenda, accessed on 6th August 2025.
- https://fr.m.wikipedia.org/wiki/Sch%C3%A9ma_de_la_ligne_de_Coni_%C3%A0_Vintimille, accessed on 22nd July 2025
- https://www.openstreetmap.org/#map=16/44.05269/7.58357&layers=P, accessed on 6th August 2025.
- https://www.openstreetmap.org/#map=17/44.053045/7.588590&layers=P, accessed on 6th August 2025.
- https://www.openstreetmap.org/#map=16/44.04865/7.59084&layers=P, accessed on 7th August 2025.
- https://www.facebook.com/share/p/1BAdGi6PXQ, accessed on 7th August 2025.
- https://www.facebook.com/share/p/19U2VzU6gT, accessed on 8th August 2025.
- https://www.facebook.com/groups/FerroviaCuneoVentimiglia/permalink/5329737250380256/?rdid=6Xne0EJn2Z4xCUiE&share_url=https%3A%2F%2Fwww.facebook.com%2Fshare%2Fp%2F1C8mWmX57o%2F#, accessed on 8th August 2025.
- https://www.facebook.com/groups/FerroviaCuneoVentimiglia/permalink/1747294131957937/?rdid=QhA9x5D943zrICPG&share_url=https%3A%2F%2Fwww.facebook.com%2Fshare%2Fp%2F1E6w5RsWSL%2F#, accessed on 8th August 2025.
- https://www.facebook.com/groups/FerroviaCuneoVentimiglia/permalink/2971697712850900/?rdid=pZp8Yw6OStV8hyrR&share_url=https%3A%2F%2Fwww.facebook.com%2Fshare%2Fp%2F1BGRNJYMxk%2F#, accessed on 8th August 2025.
- https://www.targatocn.it/2020/10/23/leggi-notizia/argomenti/attualita/articolo/da-domani-saranno-ripristinati-i-treni-tra-limone-piemonte-e-saint-dalmas-interrotti-dopo-la-tempest.html, accessed on 8th August 2025.
- https://www.facebook.com/photo/?fbid=801433303751161&set=a.157399714821193&__cft__[0]=AZVgB6QBUAuJT_DsZIqZ5_2XW0bESgQUEP3m5sxA2OJLo9XgziRW311bq9dmsWjaMc5L_ePAmzHP9npOmKEubKp7ERTvP3oBmTP94pOMjZYuw_o8iiIlqIzYH2OVjBbmlDI9E2K8X6HBY-CEio542oAV074y9Ax1zJ4eTCIZRryUdlu8cF2cwBh2YnzMKY4LZAM5xt-Jx-_1z4bzNFzanPZQEsRglGr2Xs3JPNfE9V75Bw&__tn__=EH-y-R, accessed on 8th August 2025.
- https://www.railwaywondersoftheworld.com/link-mediterranean.html, accessed on 8th August 2025.
- https://www.openstreetmap.org/#map=15/44.03686/7.58127&layers=P, accessed on 8th August 2025.
- https://www.openstreetmap.org/#map=17/44.030812/7.575750&layers=P, accessed on 8th August 2025.
- https://www.history.co.uk/articles/italy-in-world-war-one, accessed on 9th August 2025.
- https://www.openstreetmap.org/#map=17/44.024441/7.569864&layers=P, accessed on 10th August 2025.
- https://structurae.net/en/media/325629-peug-tunnel-northern-portal-on-the-left-and-scarassoui-tunnel-southern-portal-with-21-m-long-artificial-section-added-in-1970-s, accessed on 19th August 2025.
- Sadly, I cannot find the link to the original photograph. I failed to record it when downloading the image.
- https://www.openstreetmap.org/#map=15/44.01911/7.55805&layers=P, accessed on 10th August 2025.
- https://climbfinder.com/en/climbs/berghe-inferieur-fontan, accessed on 11th August 2025.
- https://cartorum.fr/carte-postale/210107/fontan-fontan-pont-du-sarassoui, accessed on 11th August 2025.
- https://www.inventaires-ferroviaires.fr/kc06/06062.01N.pdf, accessed on 11th August 2025.
- https://www.youtube.com/watch?v=_qX8v5gceVU, accessed on 31st July 2025.
- https://lamialiguria.it/en/2023/11/10-things-you-didnt-know-about-the-railway-of-marvels, accessd on 11th August 2025.
- https://www.cparama.com/forum/fontan-alpes-maritimes-t24510.html, accessed on 11th August 2025.
- https://www.geneanet.org/cartes-postales/view/186296#0, accessed on 11th August 2025.
- https://commons.m.wikimedia.org/wiki/File:Gare_de_Fontan_-_Saorge-7.JPG, accessed on 11th August 2025.
- Franco Collidà, Max Gallo & Aldo A. Mola; CUNEO-NIZZA History of a Railway; Cassa di Risparmio di Cuneo, Cuneo (CN), July 1982.
- Francohttps://www.geneanet.org/cartes-postales/view/186296#0 Collidà; 1845-1979: the Cuneo-Nice line year by year; in Rassegna – Quarterly magazine of the Cassa di Risparmio di Cuneo; No. 7, September 1979, pp. 12-18.
- Stefano Garzaro & Nico Molino; THE TENDA RAILWAY From Cuneo to Nice, the last great Alpine crossing; Editrice di Storia dei Trasporti, Colleferro (RM), EST, July 1982.
- SNCF Region de Marseille; Line: Coni – Breil sur Roya – Vintimille. Reconstruction et équipement de la section de ligne située en territoire Français; Imprimerie St-Victor, Marseille (F), 1980.
- https://commons.m.wikimedia.org/wiki/File:Gare_de_Fontan_-_Saorge-5.JPG, accessed on 11th August 2025.
- https://fr.m.wikipedia.org/wiki/Gare_de_Fontan_-_Saorge#/media/Fichier%3AFontan-Saorge_staz_ferr_D.445.jpg, accessed on 11th August 2025.
- https://www.cparama.com/forum/viewtopic.php?p=105348, accessed on 11th August 2025.
- https://www.cparama.com/forum/viewtopic.php?f=11&t=1224, accessed on 12th August 2025.
- The link to this specific photograph has been lost (12th August 2025).
- https://www.amazon.com/-/es/Adolphe-Cossard-ferroviario-c-1929-8-pulgadas/dp/B09M64HCCX?th=1, accessed on 12th August 2025.
- https://www.vermenagna-roya.eu/wp-content/uploads/2019/07/Ferroviaire-à-Fontan-et-Saorge.pdf, accessed on 12th August 2025.
- https://www.cparama.com/forum/viewtopic.php?t=26208&p=110561, accessed on 12th August 2025.
- T.B.A.
- T.B.A.
- T.B.A.
- https://www.youtube.com/watch?v=Hbzk68KoRj8&t=4533s, accessed on 4th August 2025.
- https://www.openstreetmap.org/#map=17/44.055854/7.584440, accessed on 5th August 2025.
- https://www.facebook.com/groups/194416750579024/search/?q=st.%20dalmas%20de%20tende, accessed on 5th August 2025.


.jpg)