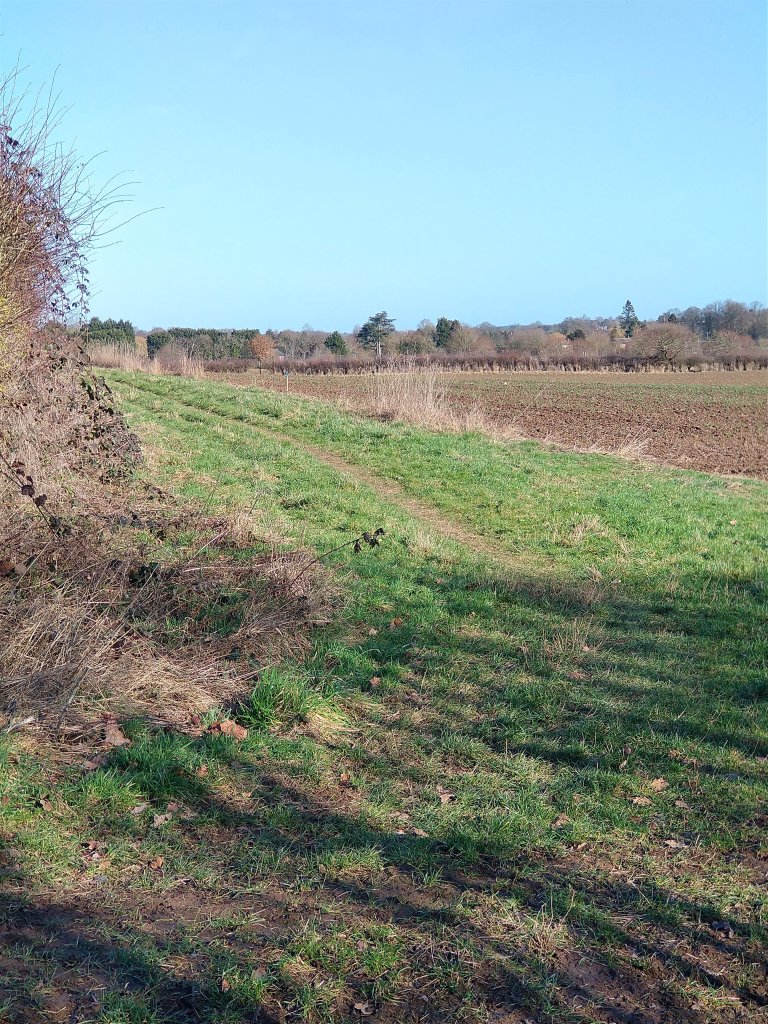
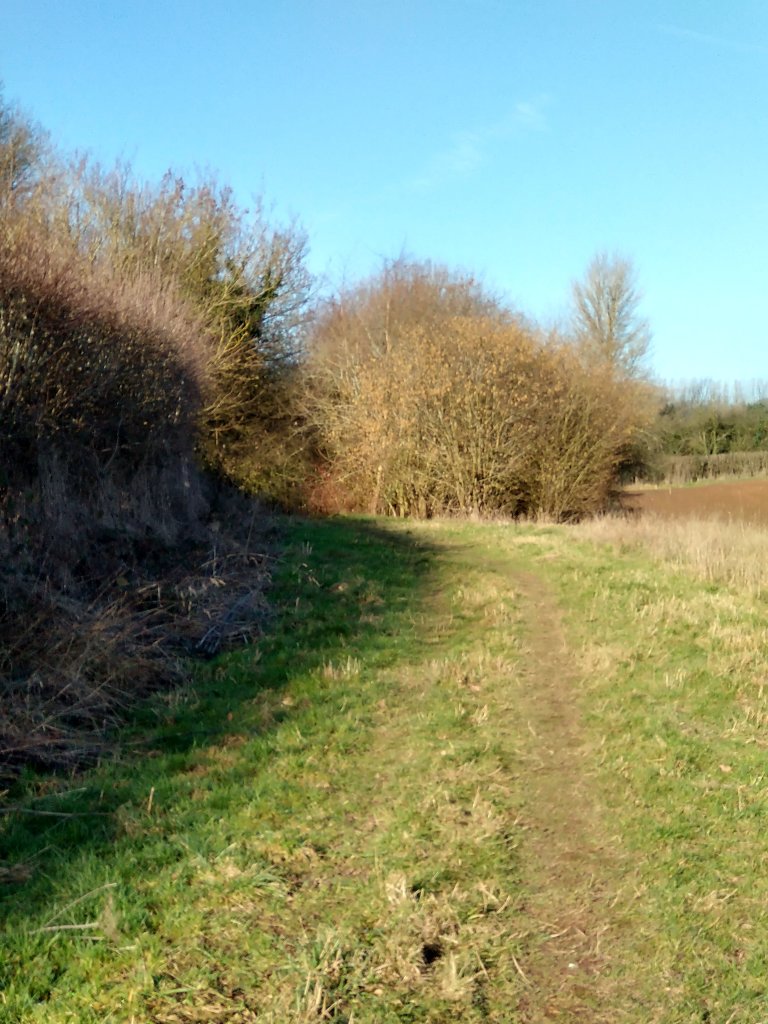
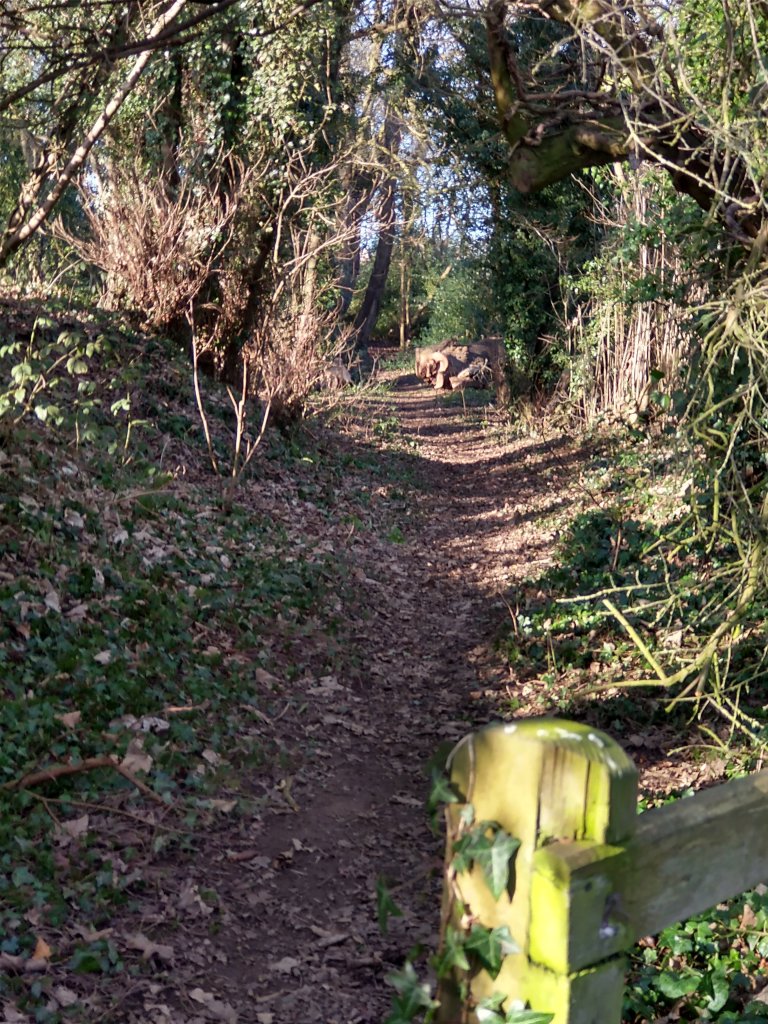
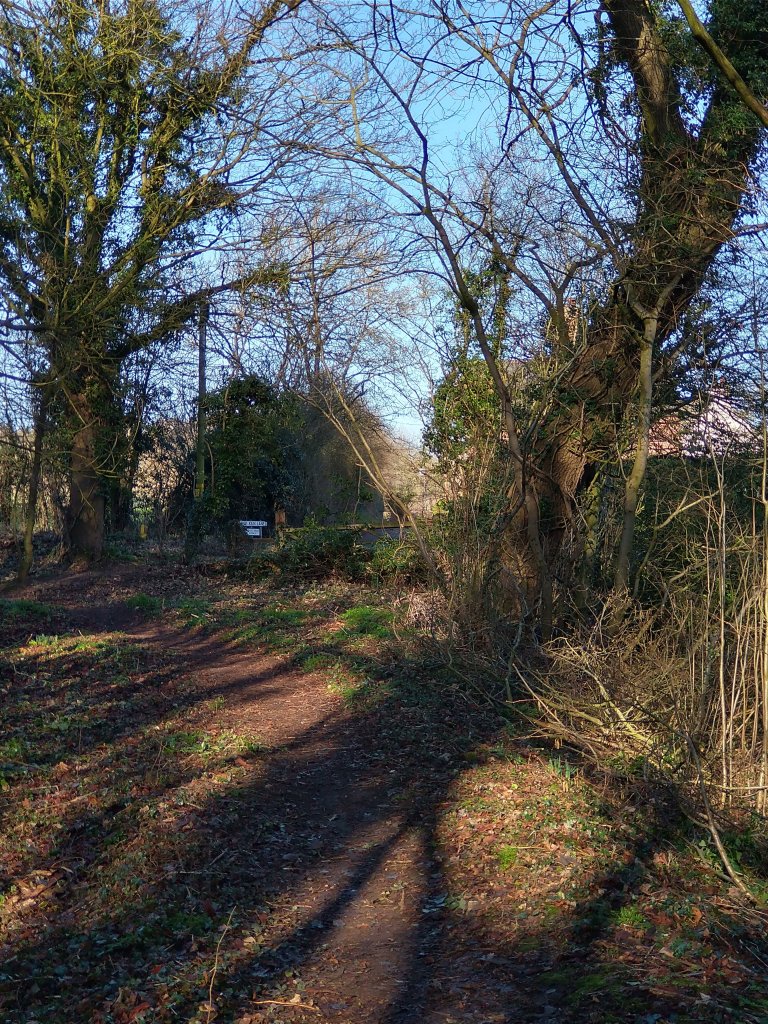
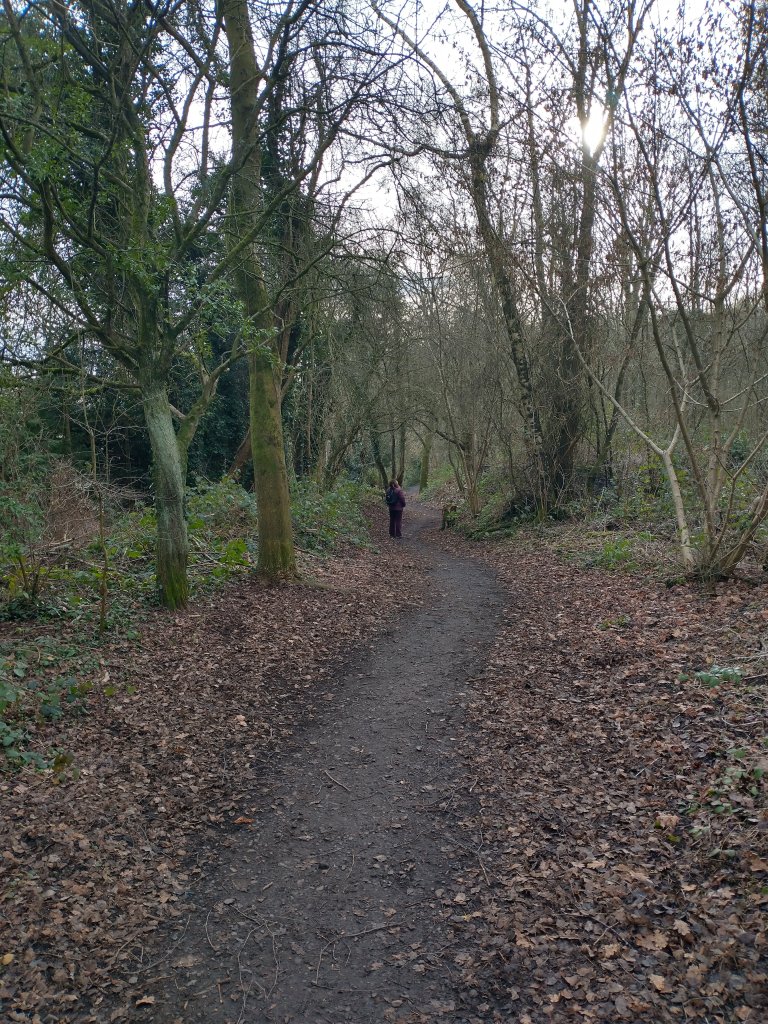
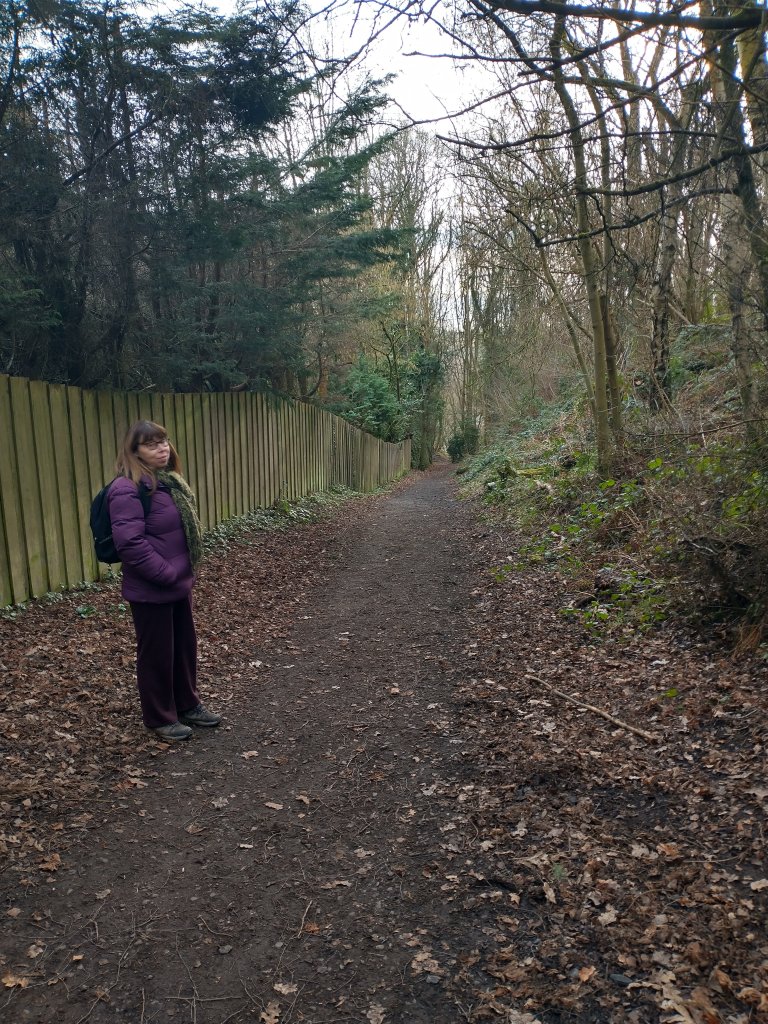
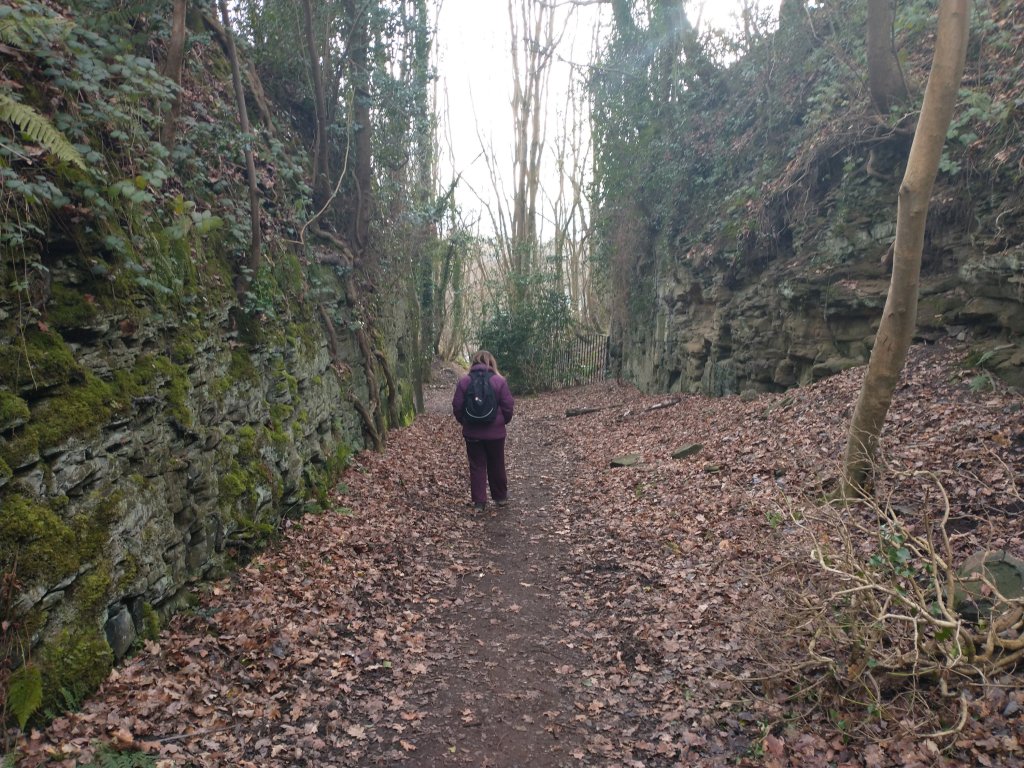
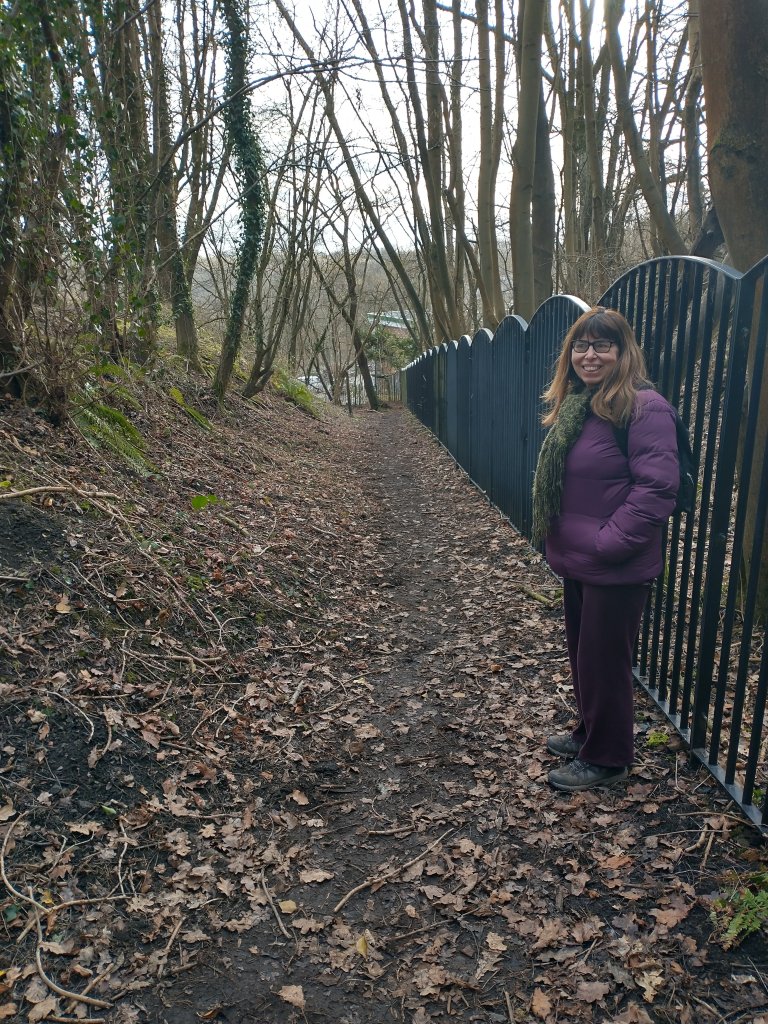
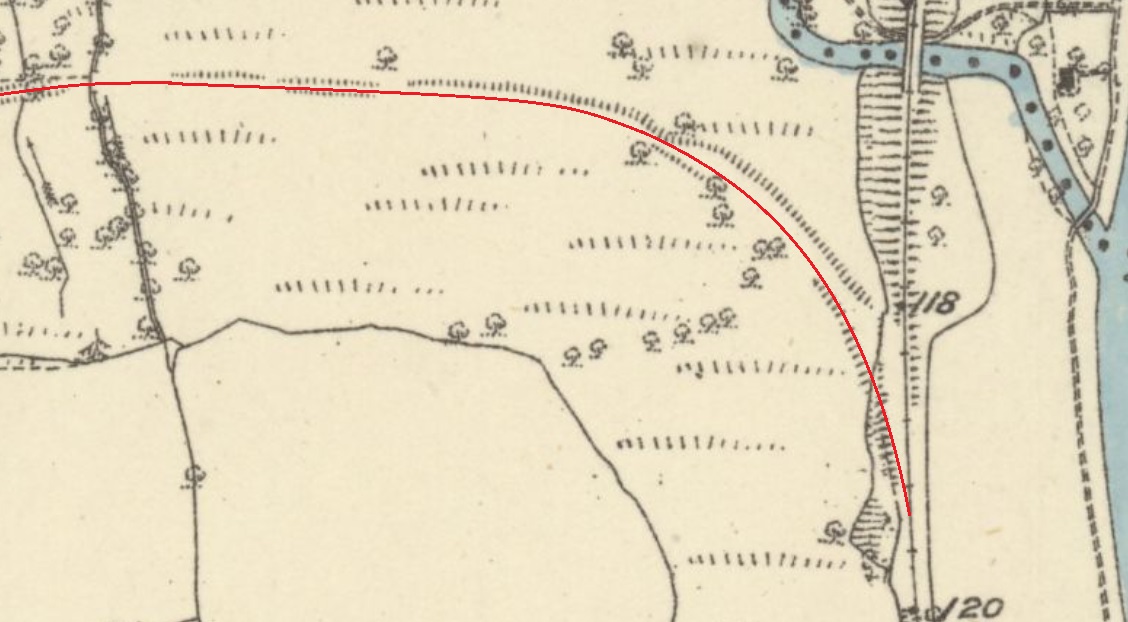
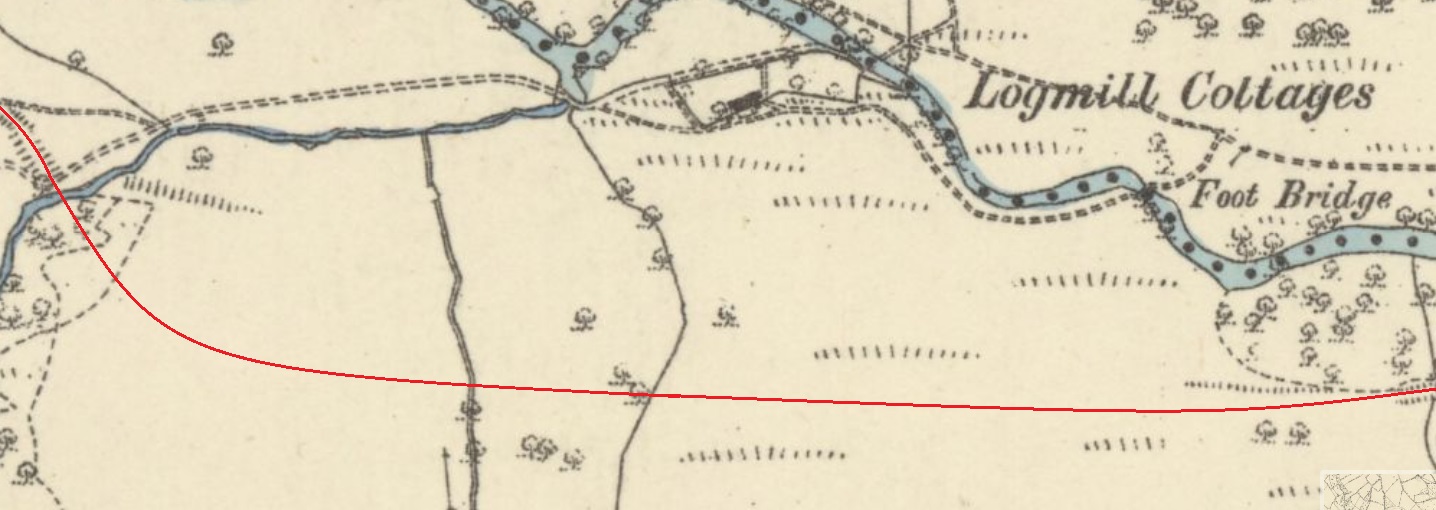
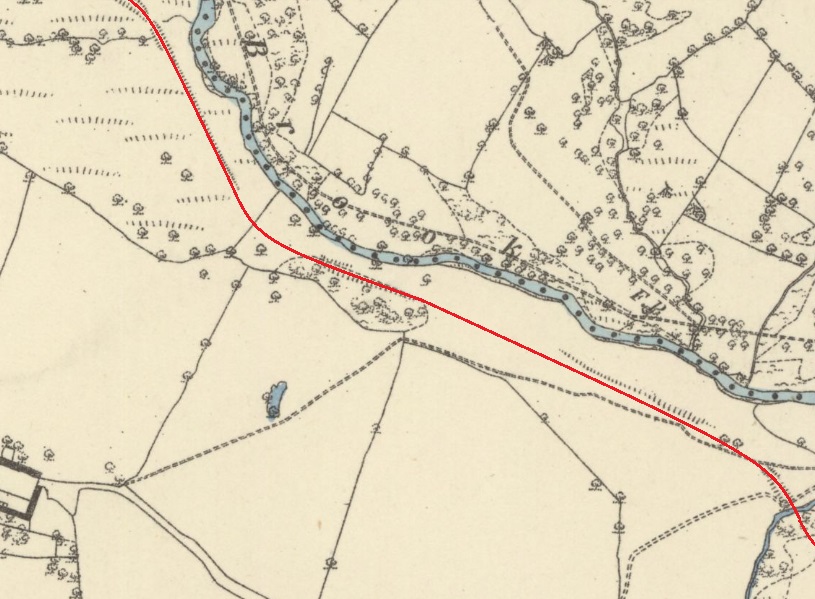
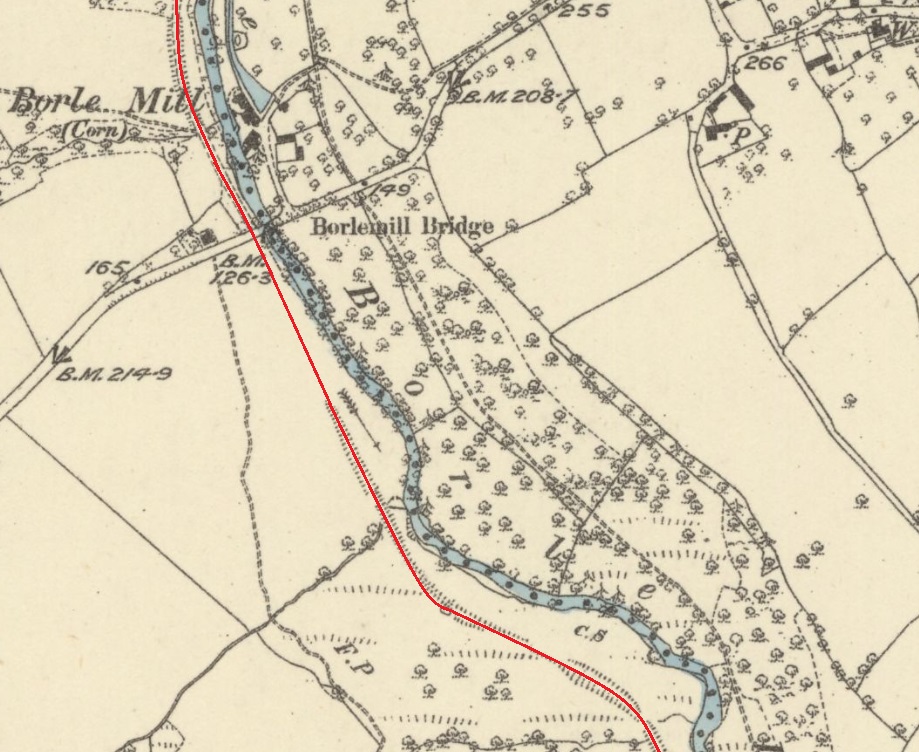
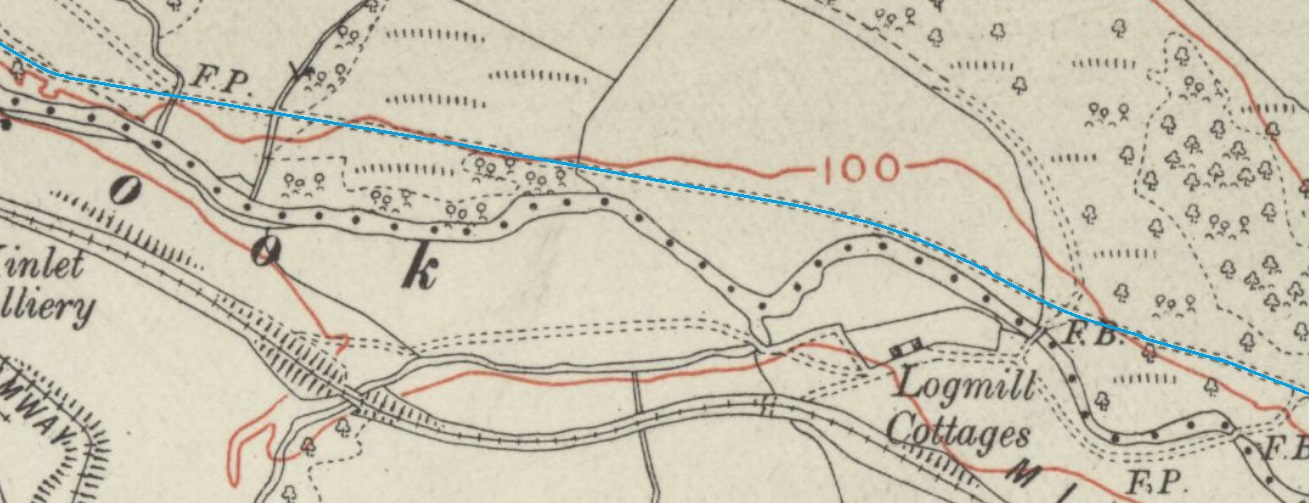
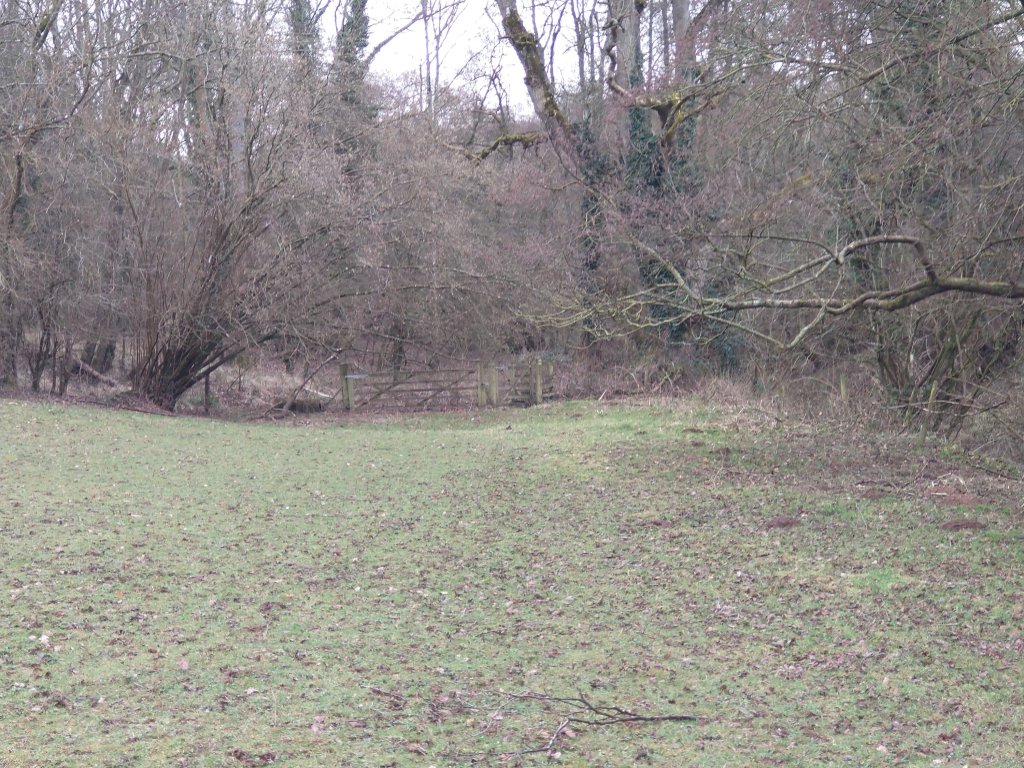
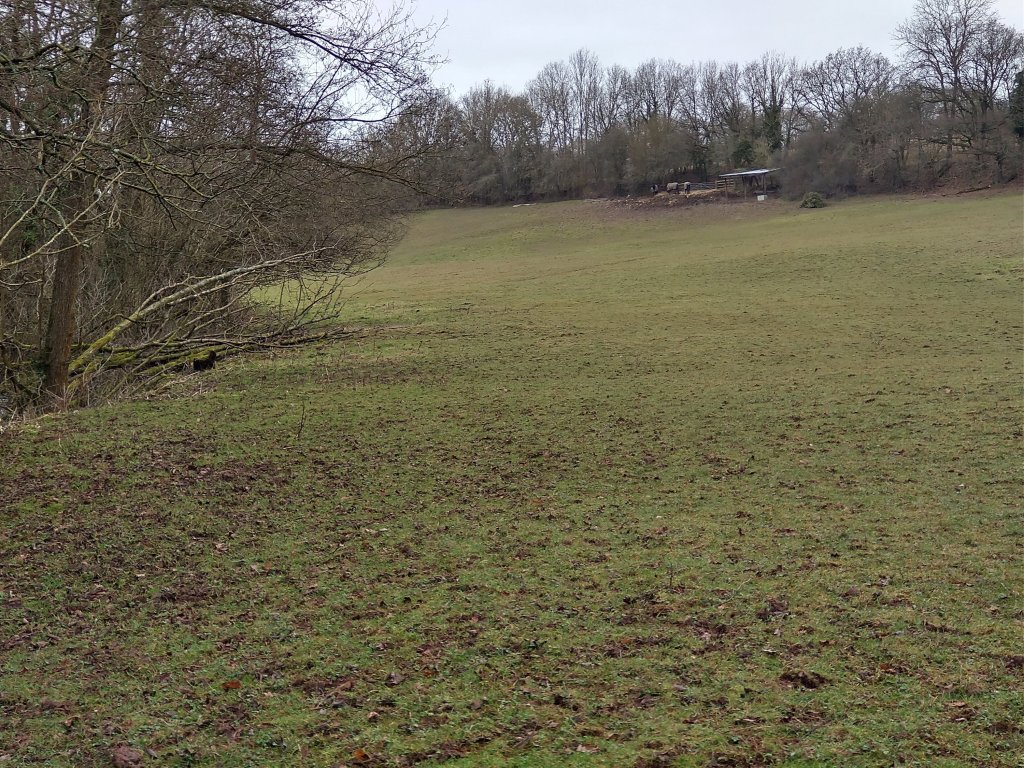
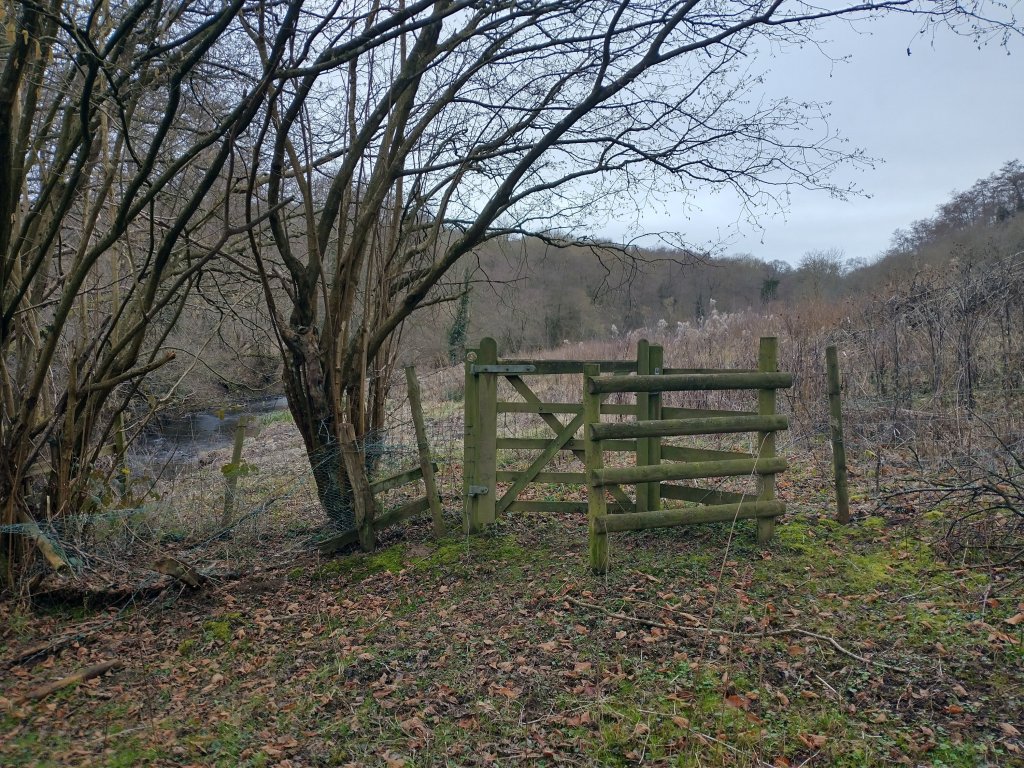
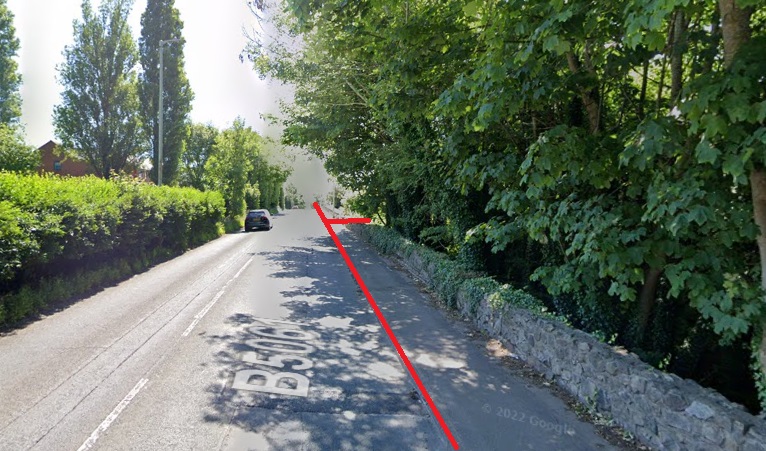
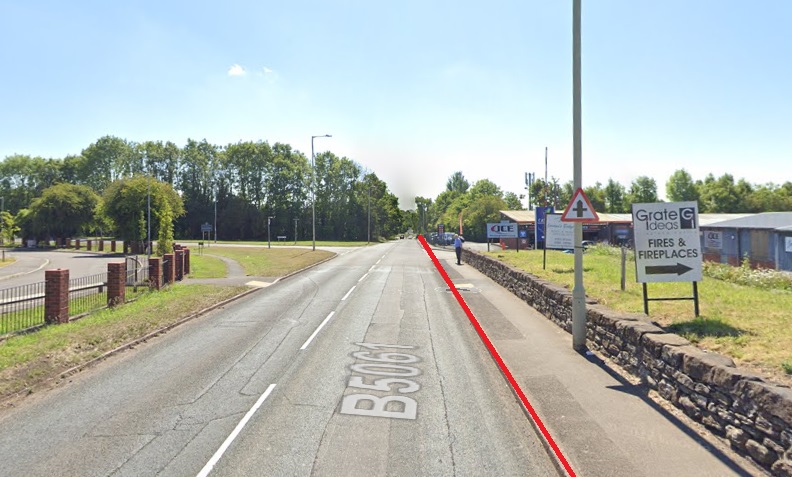
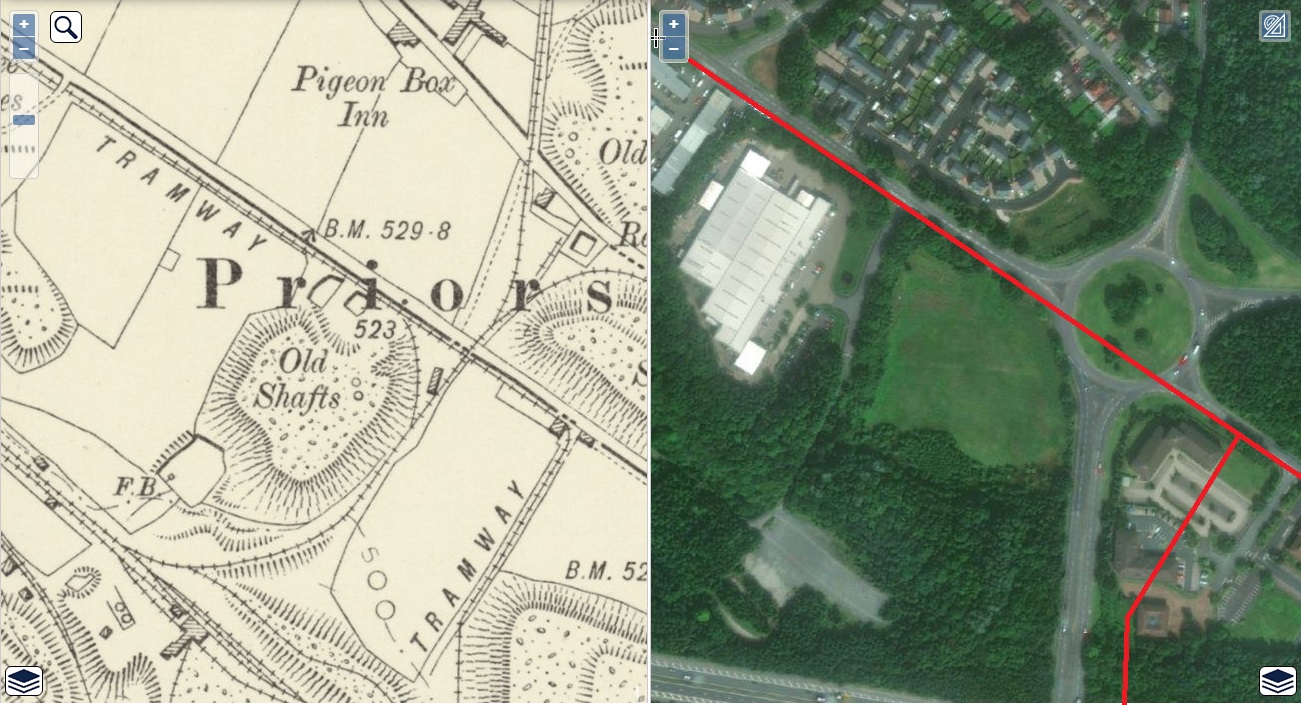
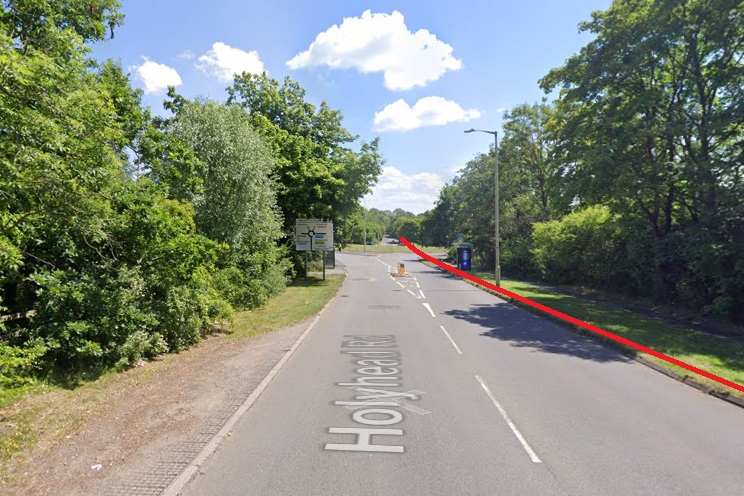
The Lilleshall Company was a dominant force in the East Shropshire area and developed a network of canals and tramroads to transport goods between their many different sites. “The company’s origins date back to 1764 when Earl Gower formed a company to construct the Donnington Wood Canal on his estate. In 1802 the Lilleshall Company was founded by the Marquess of Stafford in partnership with four local capitalists.” [31]
Bob Yate, in his important book, “The Railways and Locomotives of the Lilleshall Company,” introduces the historical development of the transport provision of the Lilleshall Company, referring first to the Company’s canal network. The construction of these canals which, while of some significance, was unable to provide for all of the sites being built and run by the Company.
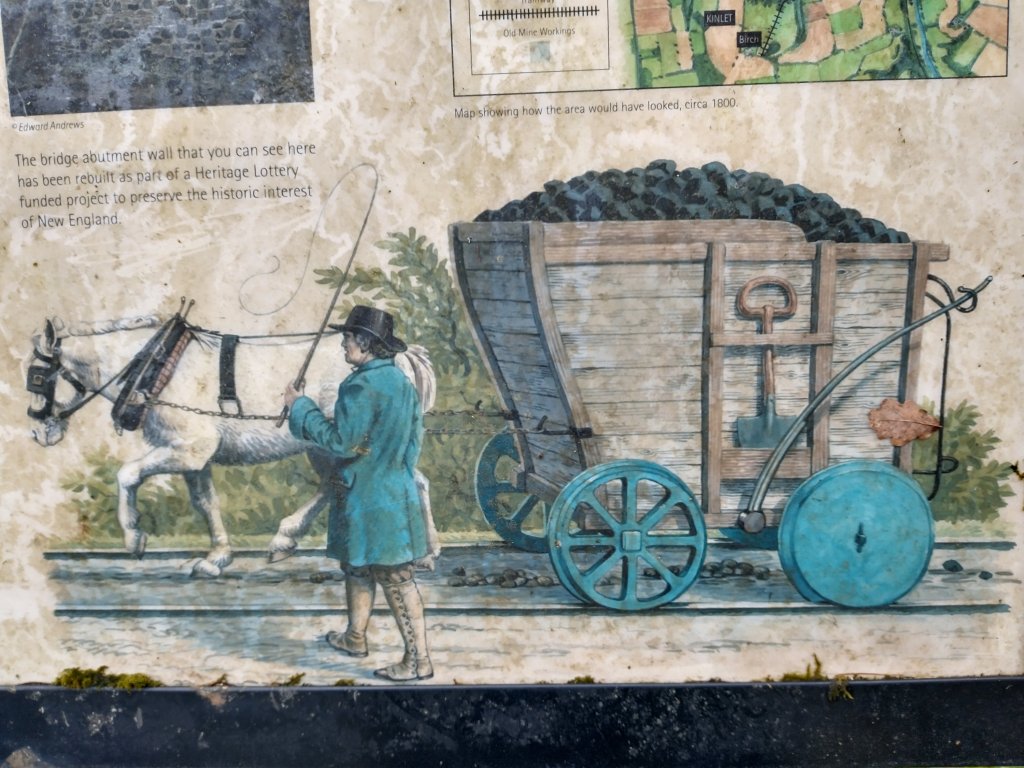
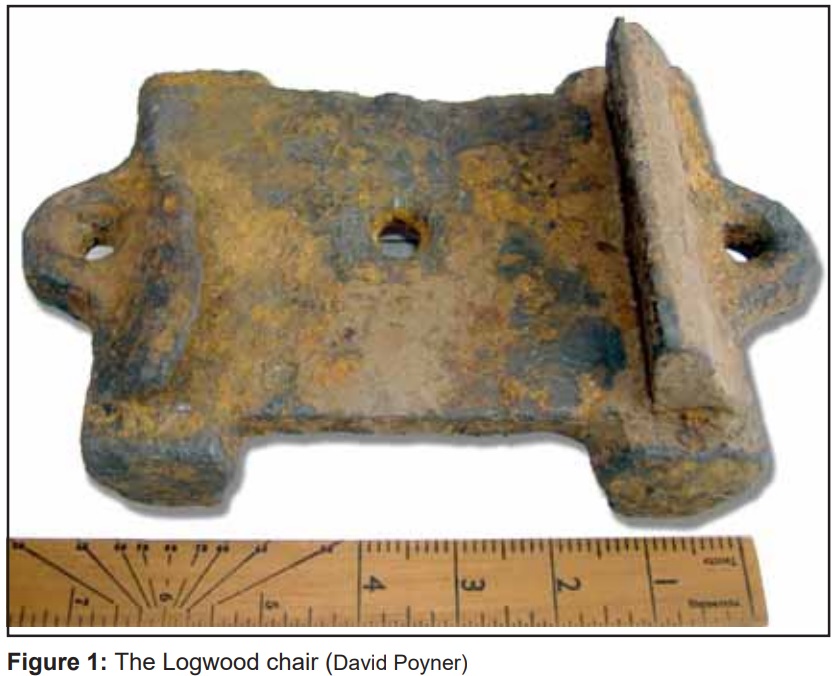
“In order to reach the workings of the pits, quarries and works that these canals served, a system of tramways was soon developed. These were almost certainly constructed using wrought iron rails from the start, and were definitely of plateway construction.” [1: p36]
Yate goes on to explain that the tramroads/tramways/plateways had various gauges and comments that these short lines “linking the workings to the canals, gradually lengthened as their usefulness became apparent. So it was that in October, 1797 the ironmaster Thomas Botfield agreed with his landlord, Isaac Browne to carry 1,200 tons of coal each month from Malins Lee (about two miles south of Oakengates):to some convenient wharf or quay adjoining the River Severn, and to the railway intended to be made by John Bishton & Co. and the said Thomas Botfield, or to some intermediate wharf or bank between the said works and the River Severn upon the line of the intended railway.” [1: p35]
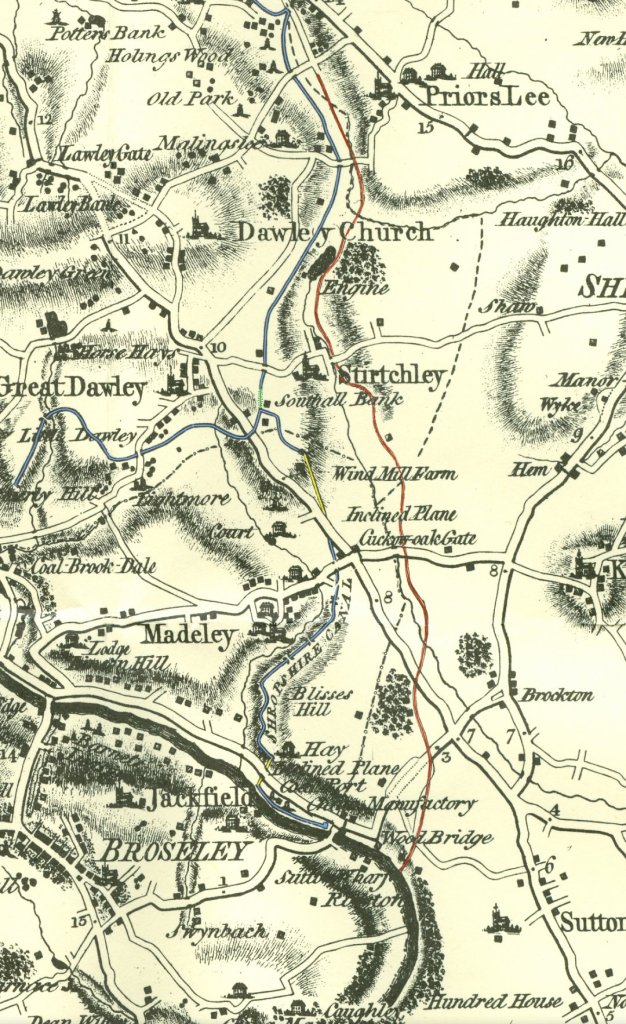
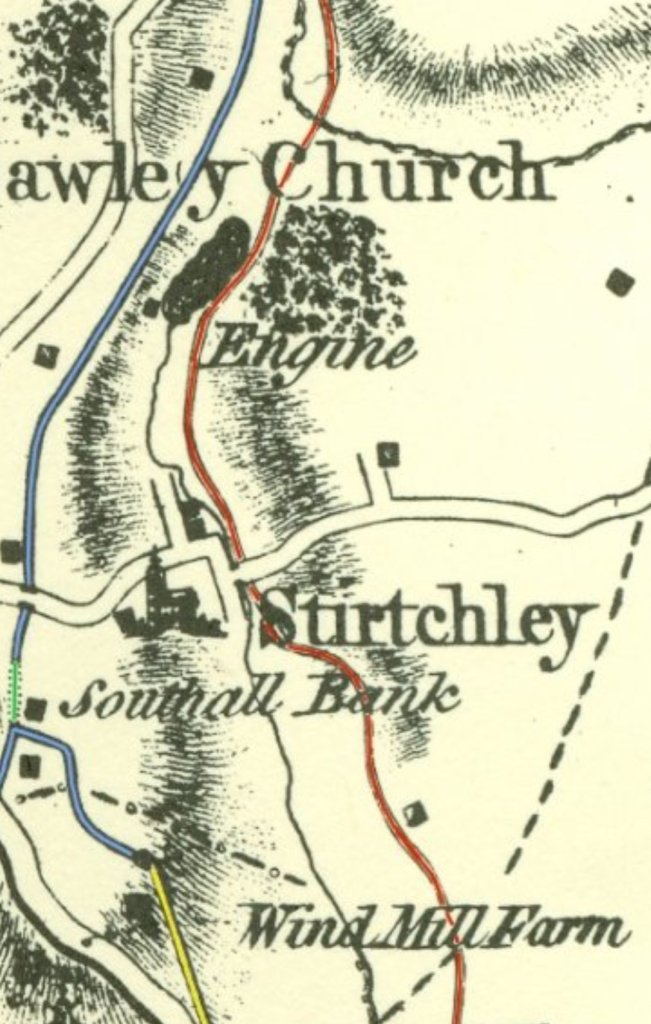
An extract from Robert Baugh’s Map of Shropshire of 1808. The red line drawn onto the map was added by ‘Dawley History’. The map from which the extract was taken is available on the ‘Dawley History’ website. It is worth noting that St. Leonard’s Malinslee, next door to which we live, is shown as Dawley Church. [7]
Yate continues: “This railway was working by 1799, running from Sutton Wharf, near Coalport, to Hollinswood, where it connected with several ironworks and mines to the north in the area of Priorslee. The total length of this line was about eight miles, and it is presumed to have been horse worked. Bishton and Onions, whose ironworks was situated at Snedshill, were certainly involved in the original line, and by 1812 it had become the property of the [Lilleshall] Company. This is recorded on Robert Baugh’s map of 1808, and again on the Ordnance Survey maps of 1814 and 1817, although in the latter two cases it is not shown in its entirety.” [1: p35]
Yate notes that the Company were sending down around 50,000 tons of coal annually and much iron. “However, the Shropshire Canal was not enjoying the most robust of business climates, and attempted in June 1812 to negotiate for the Company’s business, although this seems to have been unsuccessful. However, in April 1815, William Horton on behalf of the [Lilleshall] Company agreed that the tramway would be removed, and that its business would be transferred to the canal. In turn, the Company: received compensation of some £500. as well as favourable tonnage rates.” [1: p35]
This means that the direct tramroad link to the River Severn was very short-lived.
The closure of this mainline tramroad/tramway had little effect on the ‘internal’ network of routes serving the Lilleshall Company’s various pits and works. Yate tells us that, by 1833, the main tramways were: a line running along Freestone Avenue to Lawn Pit, near to Priorslee Hall, and to Woodhouse Colliery; branches east of Stafford Street, Oakengates and north of Freestone Avenue; a continuation of the main line northwards crossing Station Hill, Oakengates to the east of the Shropshire Canal, and on to meet the Wrockwardine inclined plane near to Donnington Wood. [1: p35]
“By 1856, further tramways had been laid around the area of Snedshill Ironworks linking to the canalside warehouses, and branches reaching out to the waste heaps south and west of the ironworks. These spoil heap lines continued to expand in subsequent years around the Priorslee Ironworks, and south therefrom.” [1: p35]
Several of the coal pits in the Donnington Wood area were, by 1837, linked directly to the Old Lodge Furnaces and no longer needed to make use of the canal network. These tramroads were horse-drawn with minor exceptions on short, level runs where trams were manhandled. Yate comments: “It is nonetheless interesting to consider that wayleaves were granted in 1692 at Madeley and in 1749 at Coalbrookdale to permit the use of oxen. Admittedly this was over the roads of the area, but a good case could possibly be made for their employment as motive power on the tramroads, as surely local customs would be a powerful influence.” [1: p35]
Using the canal network became increasingly problematic. The underground workings in the area caused some subsidence and as a consequence canals could require significant repairs and be out if action for a time.
The Lilleshall Company’s tramroads eventually developed into a significant standard-gauge network. The later part of the transport story of the Lilleshall Company is for another time and another article!
In this article we concentrate on, what was, a relatively early (1799 to 1815), wrought-iron plateway tramroad. Perhaps we should bear in mind that it is possible that the Lilleshall Company saw no major financial advantage in lifting the whole line from Sutton Wharf into the Company’s industrial heartland and that elements of this tramroad came to be used as part of a later network of tramroads or railways If this was not true for the wrought-iron plates/rails themselves, it is much more likely that any embankments and cuttings could be used in this way. This may perhaps be something we will discover along the way.
The Tramroad Running North from Sutton Wharf
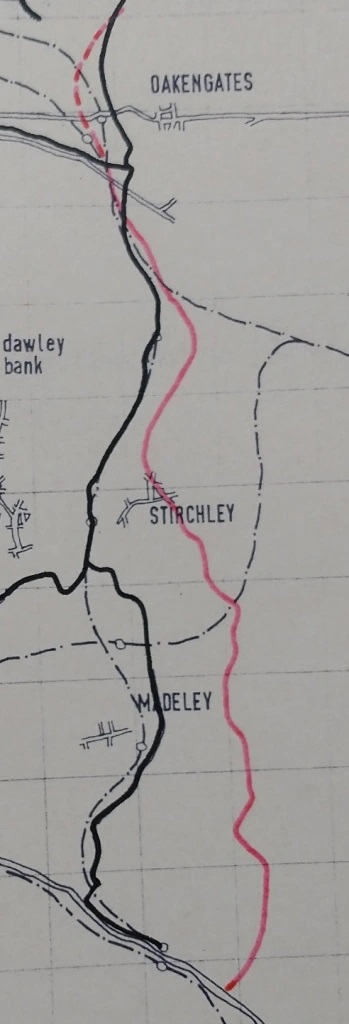
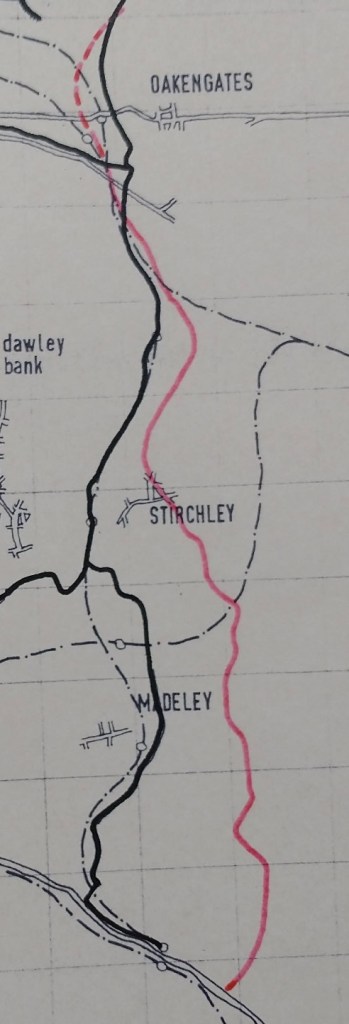
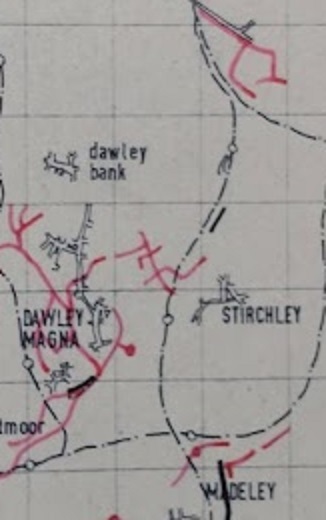
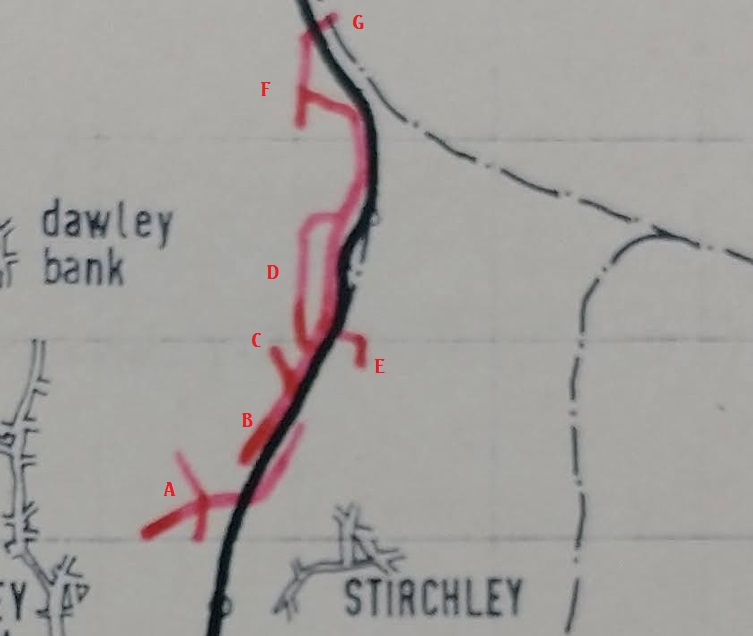
Savage and Smith provide some information about the line in their research in ‘The Waggon-ways and Plateways of East Shropshire‘. They provide two different series of drawings – the first set are 1″ to a mile plans relating to specific eras in the development of the local tramroads. The extract here is taken from the plan which relating to 1801-1820. [2: p85]
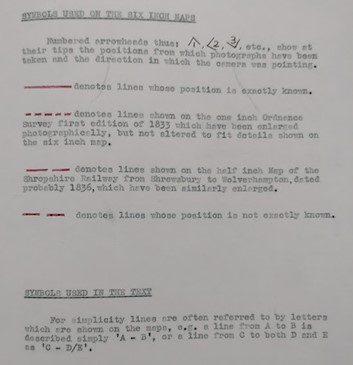
The line is shown in red ink, the Shropshire Canal is the heavy black line. The dotted and dashed thin lines are later railway routes. The short red dashes at the North end of the tramroad indicate that the route of the tramroad is not as certain as the length shown in continuous red ink.
Savage and Smith comment on the tramroad: “In 1808 Robert Baugh’s map of Shropshire shows the line from Oakengates to Sutton Wharf, but not with any great accuracy. Part of it is shown on the two inch ordnance survey of 1814 and 1817, but only as far as Holmer Farm. After this it disappears. Its owners seem to have been the Lilleshall Company and they sent down annually 50,000 tons of coal and much iron. It was agreed to remove it and transfer business to the Shropshire canal for compensation of £500 and a guarantee of favourable rates.” [2: p140]
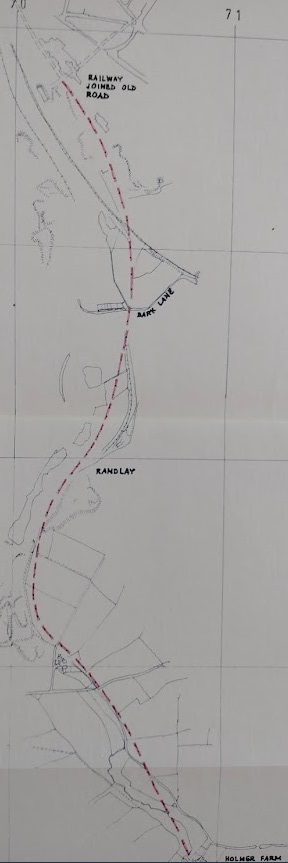
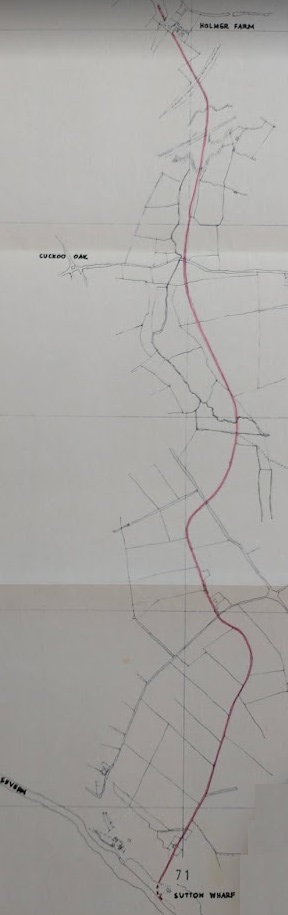
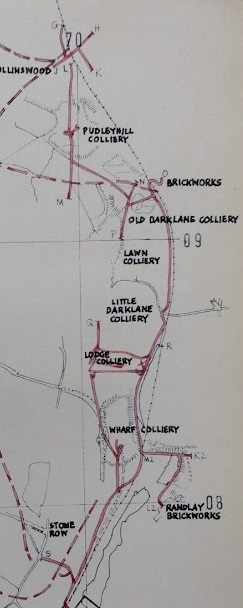
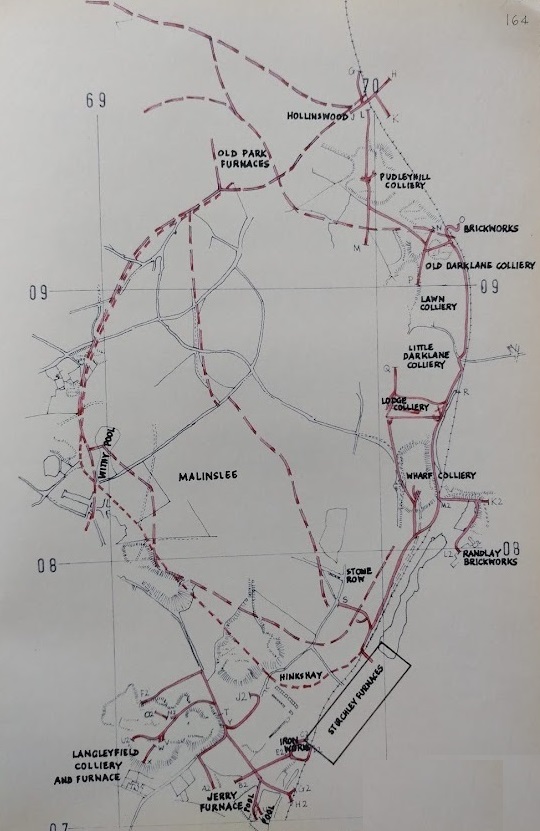
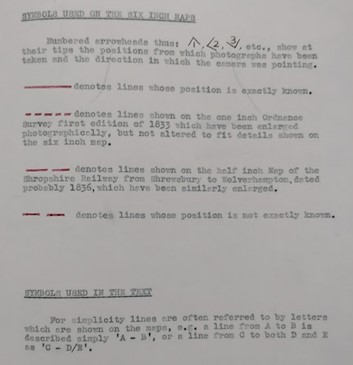
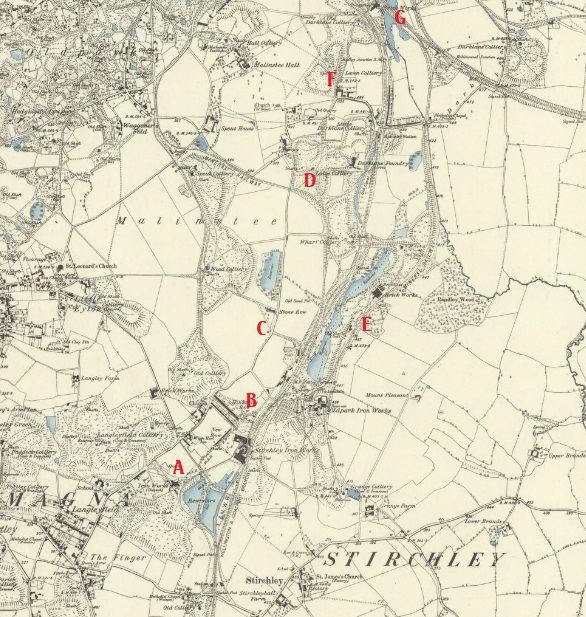
The second series of plans provided by Savage and Smith are to a scale 6″ to a mile. At this larger scale, it at first seems that they are not prepared to show the same level of certainty over the actual route of the tramroad than on the 1″ to a mile map above. In fact the difference between the two lines shown has as much to do with the scale of the source mapping used. The long dashed red line in the more northerly section of the plans produced here indicates that the route was obtained from a 0.5″ to a mile plan. So they acknowledge that, while the route definitely existed, issues with scaling inevitably mean that there is greater uncertainty over the detailed alignment. We are probably best advised to see the route from Sutton Wharf to Holmer Farm as relatively reliable and to check the detail of the route from that point North. The 6″ to a mile plan is a fold-out plan and because of its length, difficult to photograph.
Savage and Smith also only show the line running to the North of Dark Lane, rather than around the West of Oakengates. With these provisos Savage and Smith show much of the length of the Sutton Wharf tramroad.
My photographs of the 6″ plan are not of the greatest clarity. But the two images provided here give sufficient clarity to make out the significant features that Savage and Smith recorded in the 1960s. [2: p139]
Their contribution is important, as they were able, in their onsite surveys, to record details subsequently lost with the remodelling of the landscape and the construction of new transport arteries by the Telford Development Corporation.
Our investigation of the route of the tramroad begins at its southern end at Sutton Wharf.
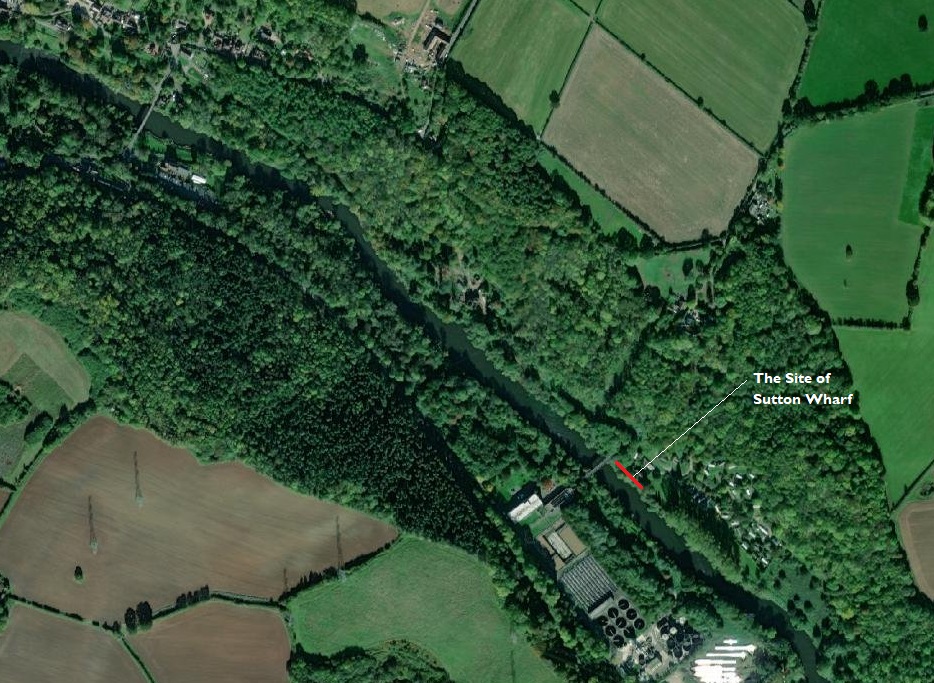
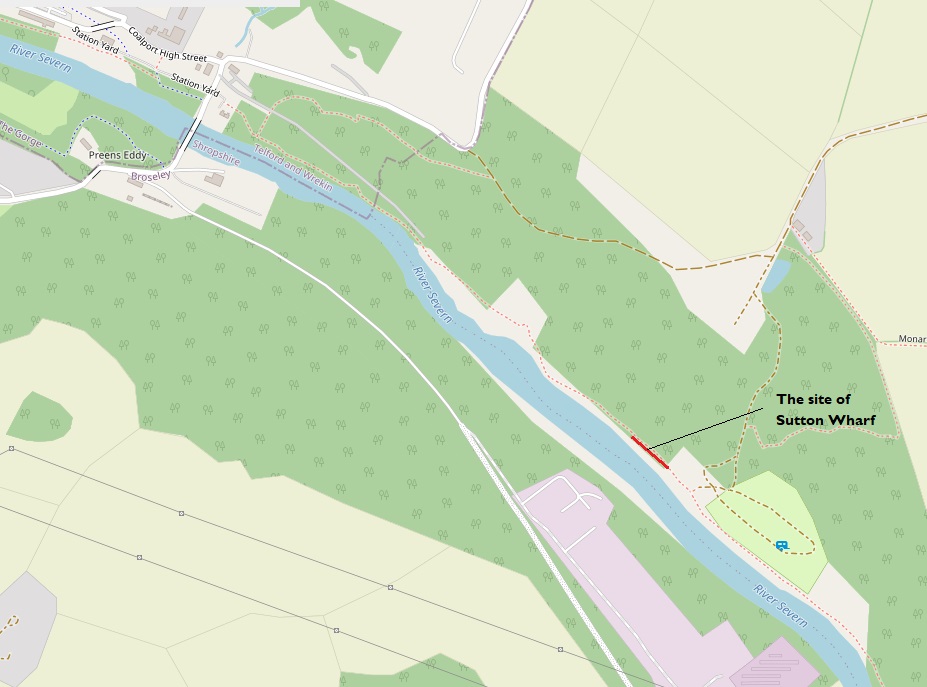
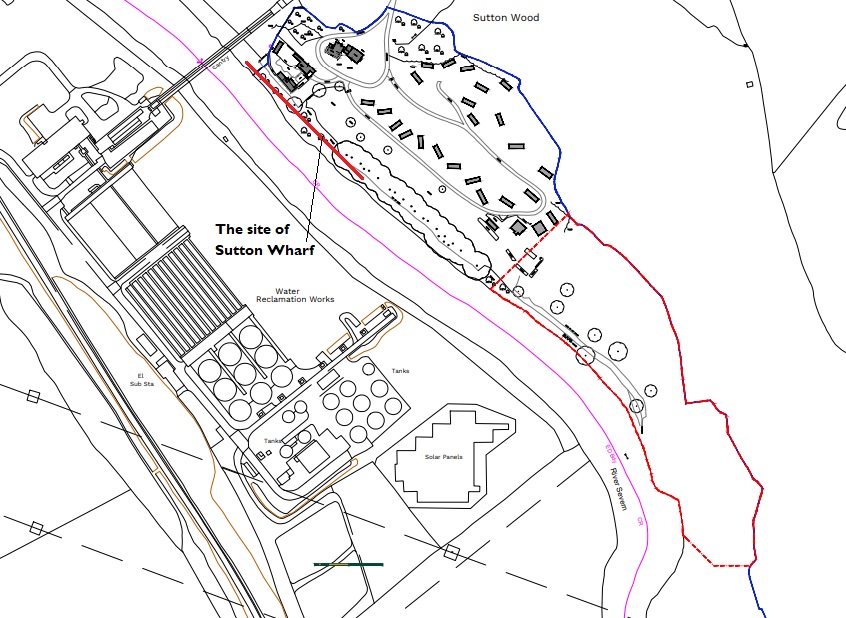
Below the key to Savage and Smith’s 6″ to a mile drawings there are a series of maps and satellite images showing the location of the Wharf.
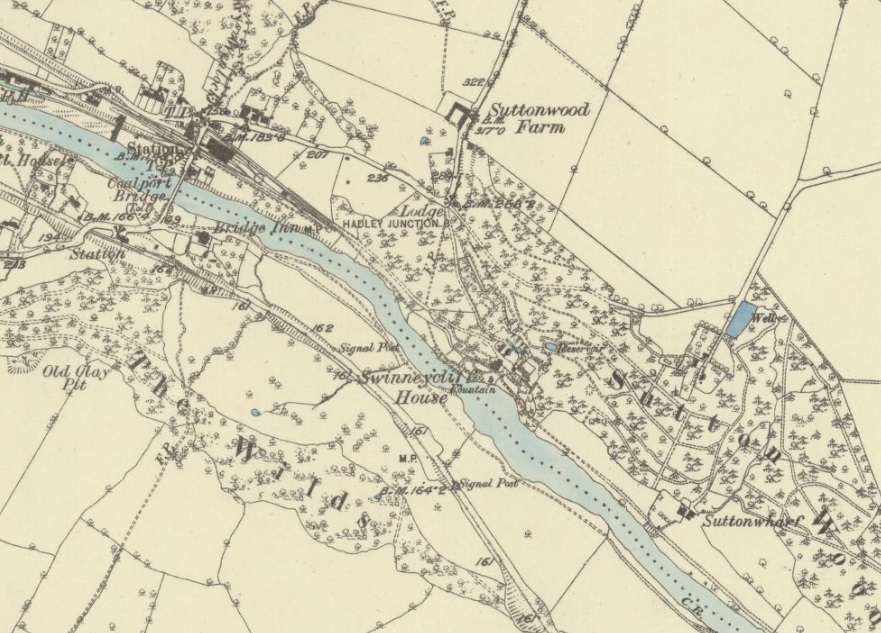
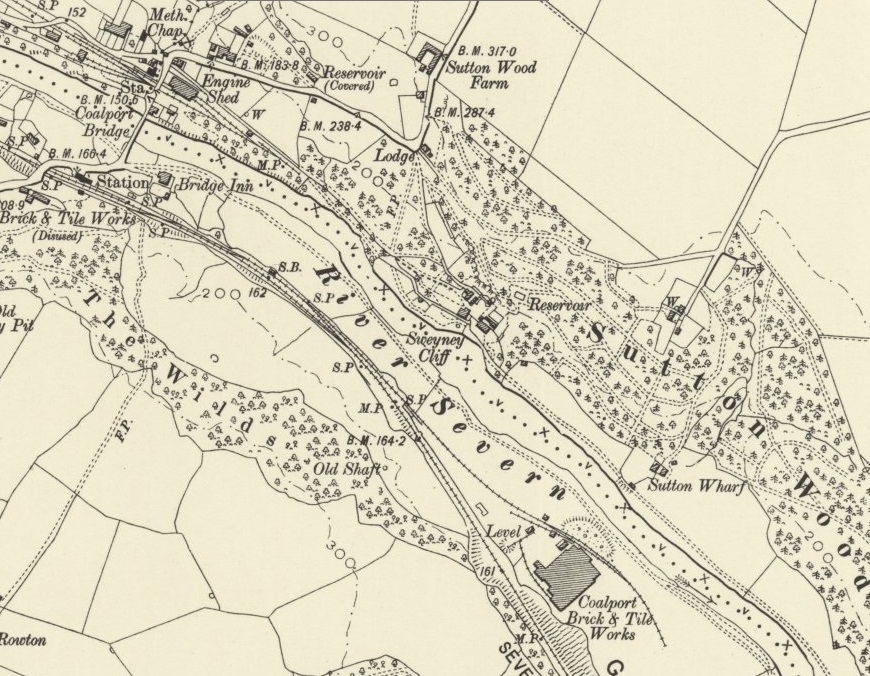
The 6″ Ordnance Surveys of 1881/82, published in 1883 and of 1901, published in 1902 show the railways serving the immediate area to the West and South of Sutton Wharf. The GWR Severn Valley Railway is to the South of the River Severn with its station close to Bridge Inn. The LNWR Coalport Branch is on the North side of the Severn. The two stations are linked by Coalport Bridge.
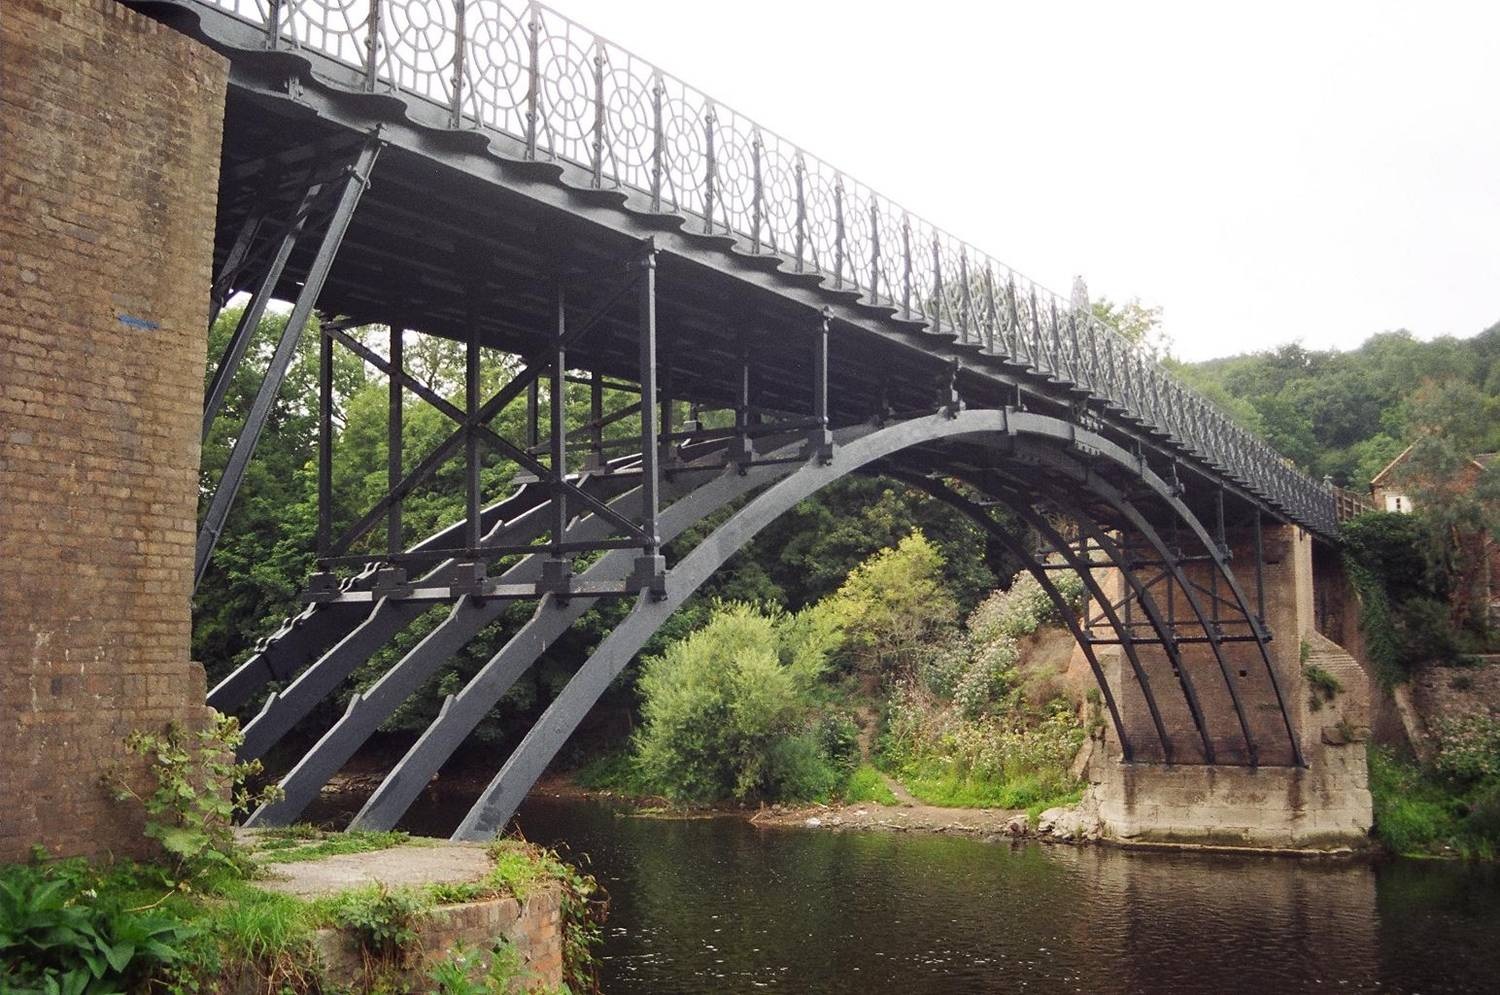
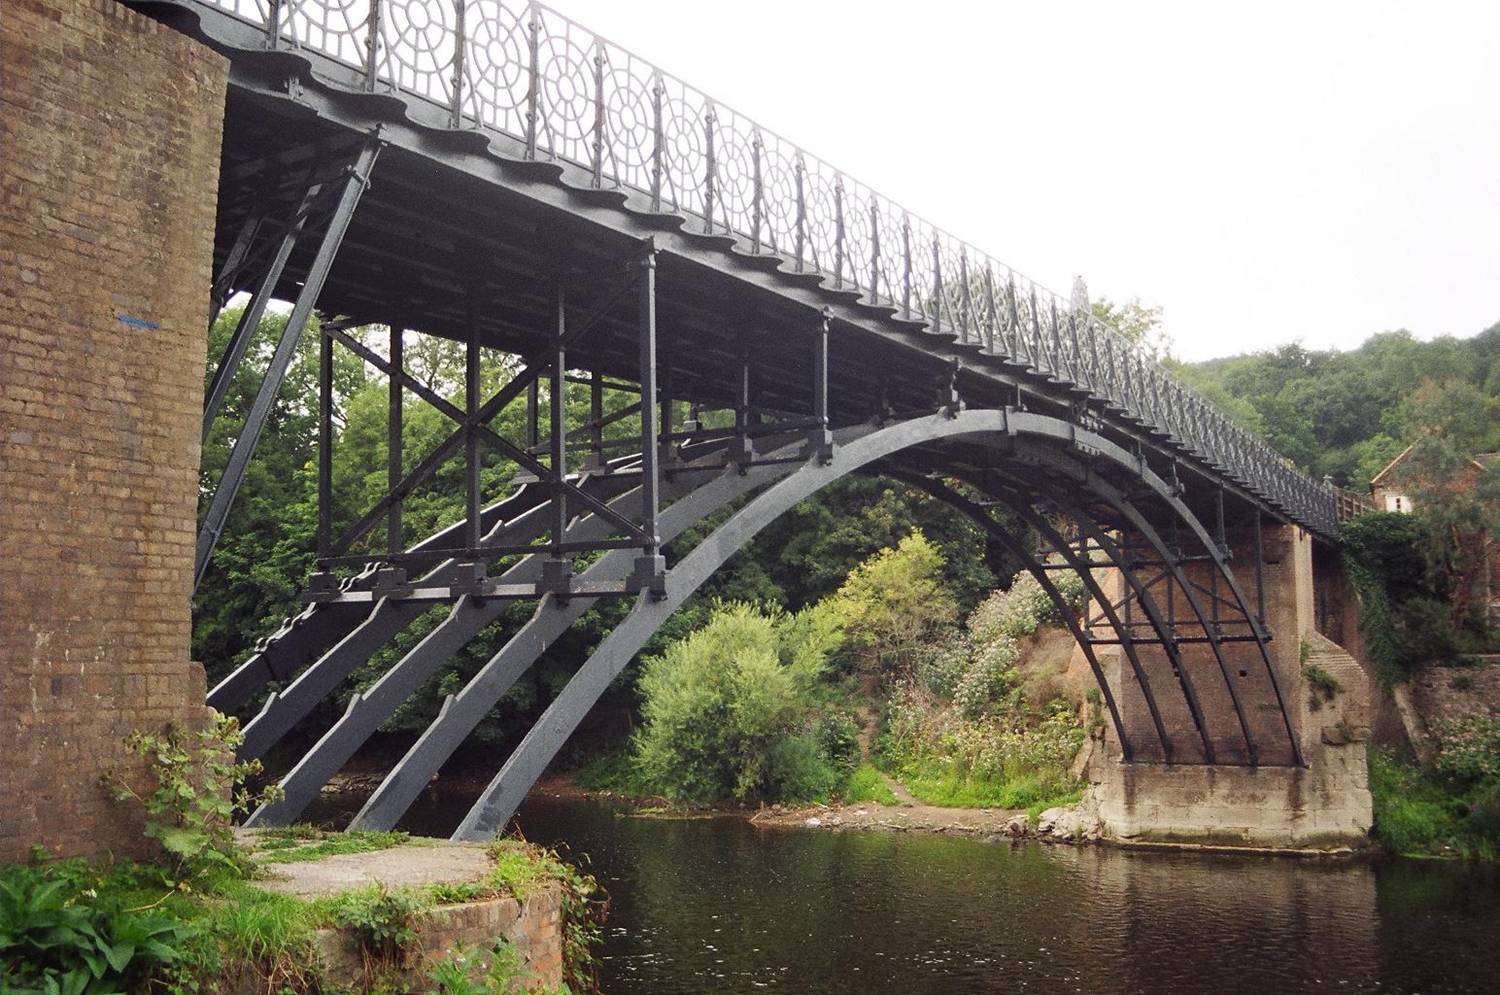
Coalport Bridge remains in use in the 21st century, the two railways have disappeared. One picture of the bridge as it appears in the 21st century is provided below. The LNWR line is now the Silkin Way which links the River Severn with the centre of Telford. The Severn Valley Railway Coalport Station is, in 2023, a site with a variety of different holiday accommodation available.
The 6″ Ordnance Survey of 1881/82 published in 1883. This shows the new railways serving the immediate area to the West and South of Sutton Wharf. The GWR Severn Valley Railway is to the South of The River Severn with its station close to Bridge Inn. The LNWR Coalport Branch is on the North side of the Severn. The two stations are linked by Coalport Bridge. [3]The same area as shown on the 6″ Ordnance Survey of 1901, published in 1903. Twenty years after the 1881/82 survey the most significant change in the immediate area of Sutton Wharf is the appearance of Coalport Brick & Tile Works on the South bank of the River Severn. [4]The same area as in the map extracts above but this time as shown on the modern ESRI satellite imagery also provided by the NLS (National Library of Scotland}. Coalport Bridge remains. The two railway stations have seen major changes. The station site on the North bank of the Severn is now the Southern end of the Silkin Way, a cycle path/footpath leading North to central Telford. The station on the South Bank is now, the 2023, holiday accommodation. There is a new private bridge across the River Severn just to the West of Sutton Wharf. [4]The same area once again, this time on OpenStreetMap with the location of the old wharf marked. The route of the old tramroad is identified by the dotted line which points towards the Wharf. It can be seen to the North of the northern boundary of Sutton Wood. [5]This photograh of Coalport Bridge has been released into the public domain by its author, Peterlewis at English Wikipedia. This applies worldwide. [8]
As an aside, here are some details about Coalport Bridge as provided on Wikipedia: “Architect and bridge-builder William Hayward (1740–1782) designed the first crossing over the Severn at Coalport, based on two timber framed arches built on stone abutments and a pier. It was originally built by Robert Palmer, a local timber yard owner based in Madeley Wood, and opened in 1780. The bridge, known as Wood Bridge, connected the parish of Broseley on the south bank of the river with the Sheep Wash in the parish of Madeley and Sutton Maddock on the north bank. … The wooden bridge was short-lived and lasted less than 5 years until 1795, when severe winter flooding virtually washed away the mid-stream supporting pier.” [9]
The bridge remained closed from 1795 until the Trustees had it rebuilt in 1799 “as a hybrid of wood, brick and cast-iron parts, cast by John Onions (Proprietor’s Minute Book 1791–1827). The two original spans were removed and replaced by a single span of three cast iron ribs, which sprang from the original outer sandstone pier bases. The bridge deck was further supported by two square brick piers, the northern one constructed directly on top of the stone pier base and the southern one set back slightly towards the river bank. The remainder of the superstructure was built of wood and may have reused some of the original beams. However, by 1817, this bridge was failing again, attributed to the insufficient number of cast iron ribs proving inadequate for the volume of traffic. Consequently, the bridge proprietors decided to rebuild Coalport Bridge once again, this time completely in iron. The quality of the castings is good, especially by comparison with the castings of the Iron Bridge upstream. The bridge was recently (2005) renovated and the static load lowered by replacing cast iron plates used for the roadway with composite carbon fibre/fibreglass plates, with substantial weight saving.” [9]
“The date of 1818 displayed on its midspan panel refers to this substantial work which allowed the bridge, subscribed to by Charles Guest, one of the principal trustees, to stand without major repairs for the next 187 years.” [9] In 2004-2005, during the closure (which lasted about a year), not only were major works undertaken to the span of the bridge, it was also necessary to reconstruct the two brick arches supporting the verges at the south side of the bridge. The bridge “still takes vehicular traffic, unlike the more famous Iron Bridge, albeit limited to a single line of traffic, a 3-tonne weight limit and a height restriction of 6 ft 6in (1.98 cm).” [9]
An extract from a plan submitted to Telford and Wrekin Council as part of a planning application for the extension of the Sutton Wharf Caravan Park. The approximate location of the Wharf is shown by the bold red line. [6]
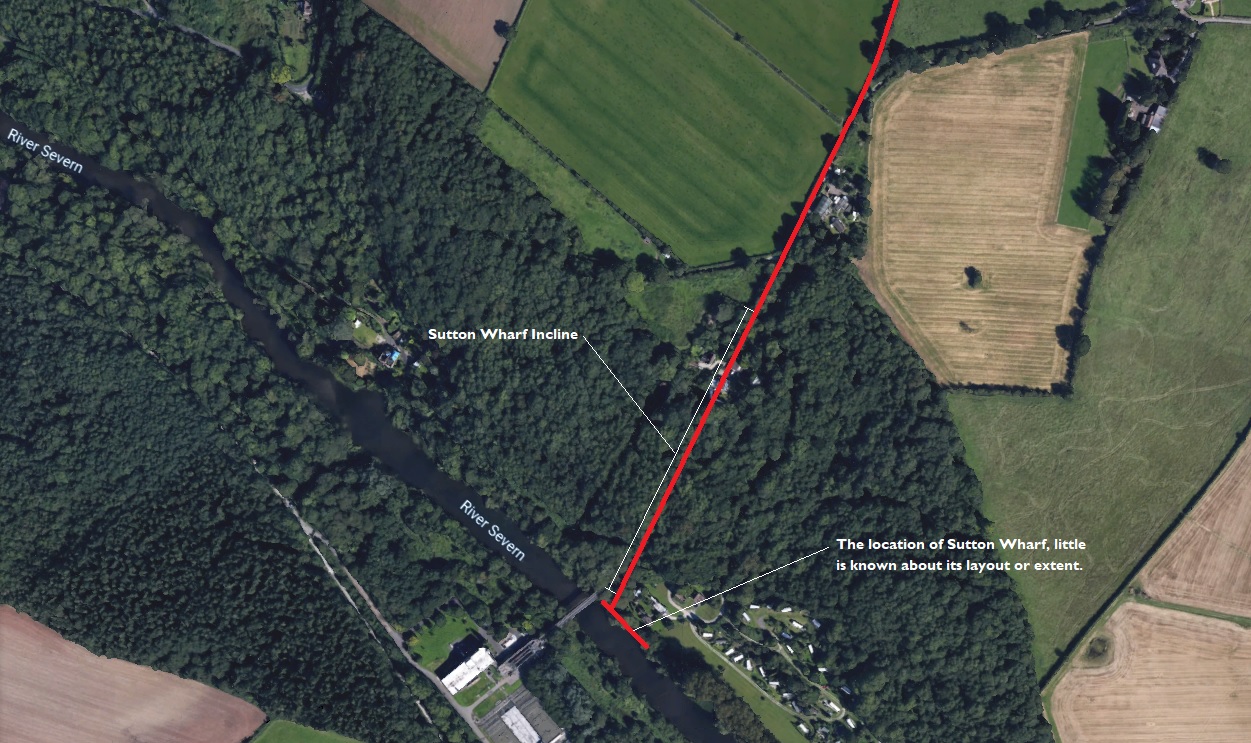
From the Wharf, an inclined plane was needed to gain height to the land above the Severn Gorge. The location of the incline is shown below.
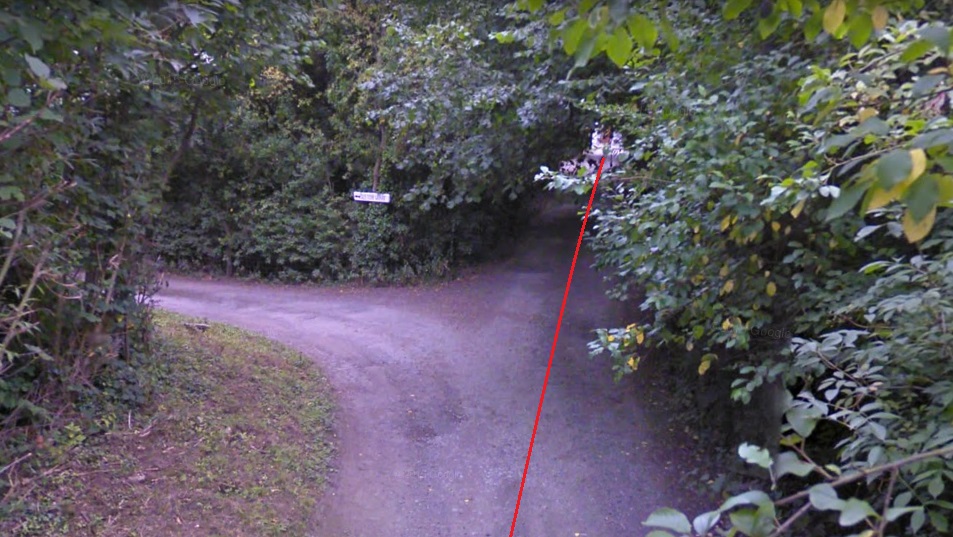
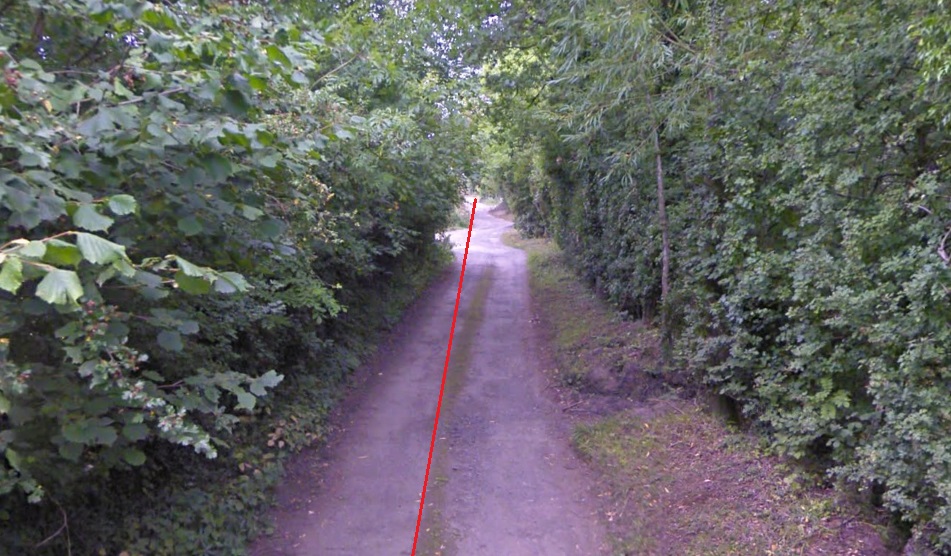
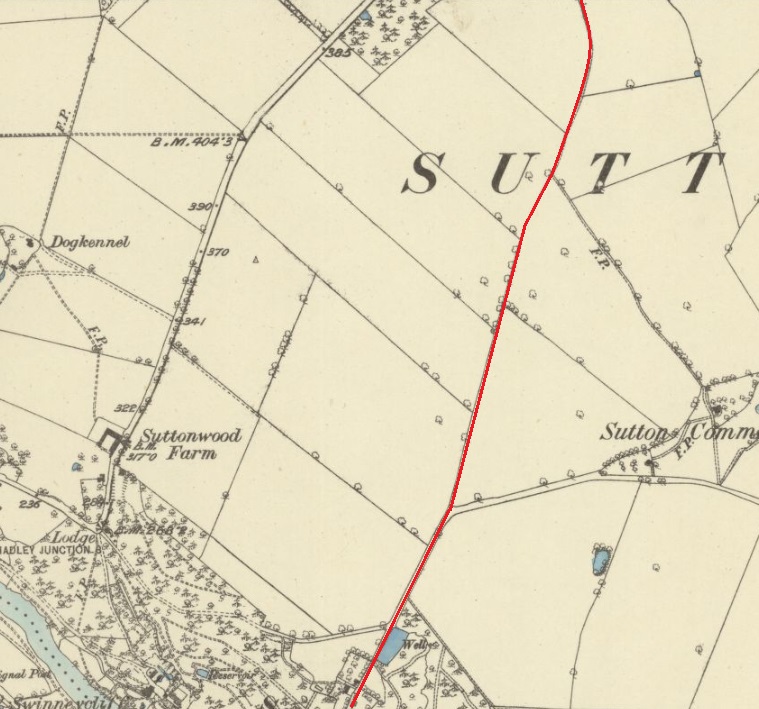
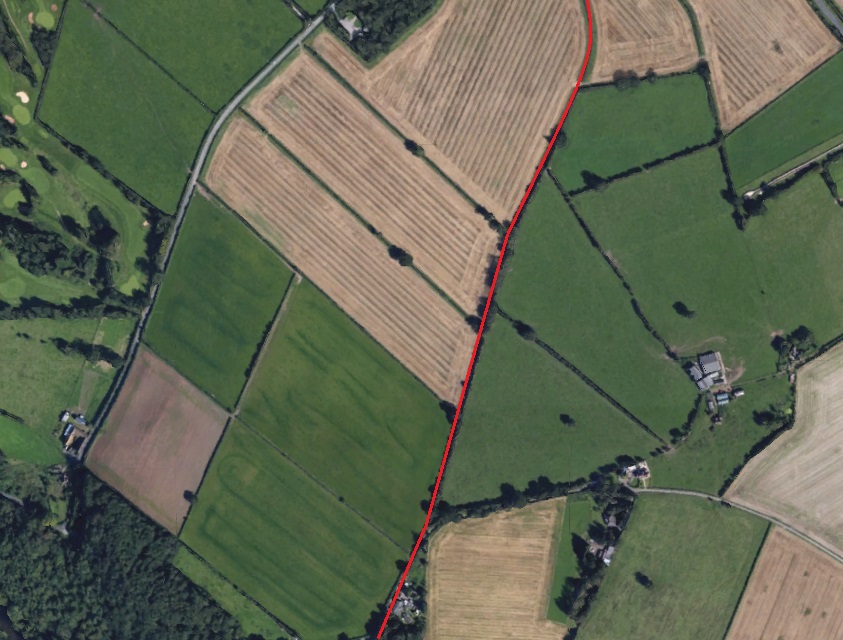
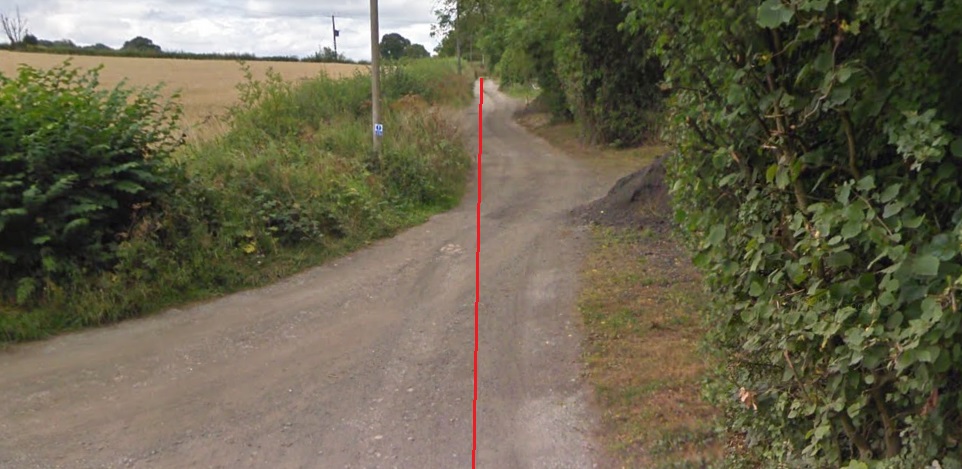
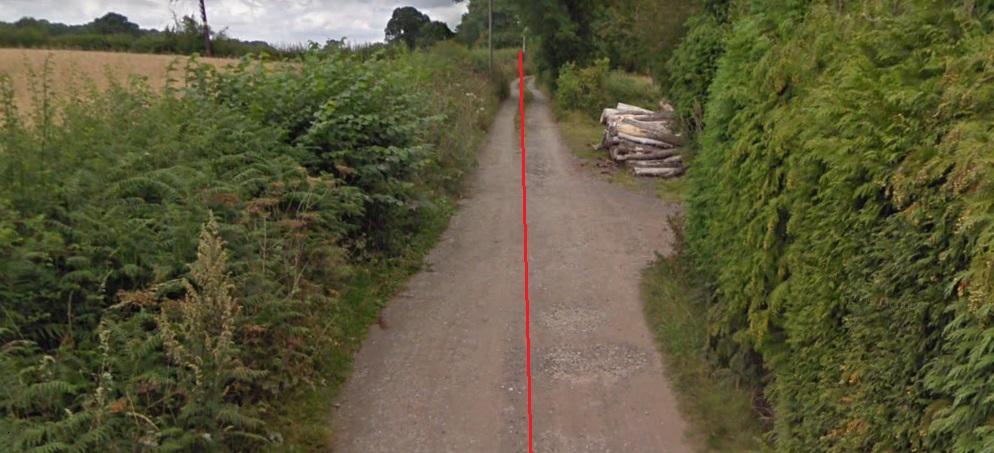
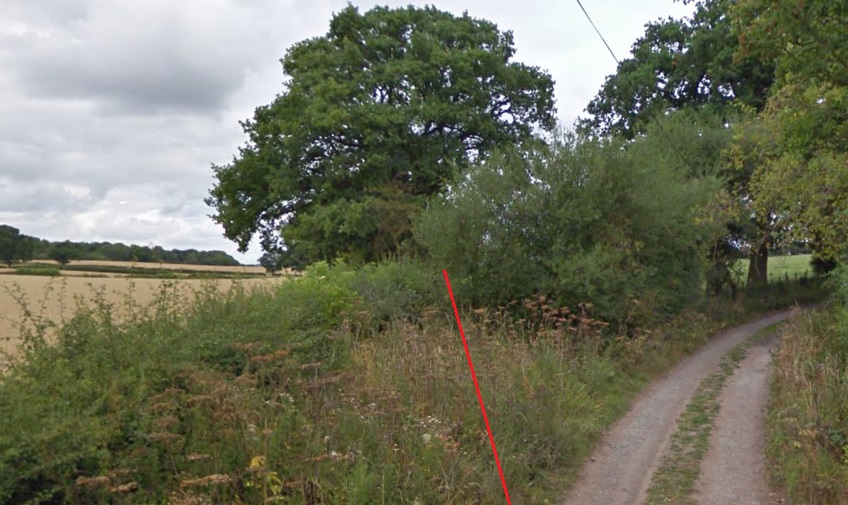
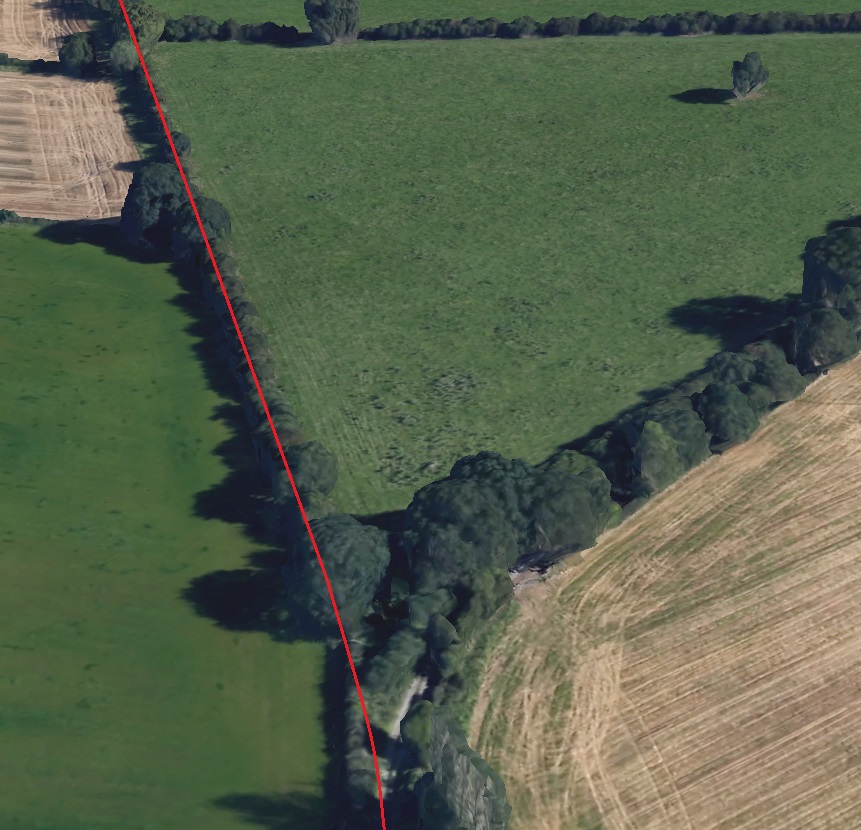
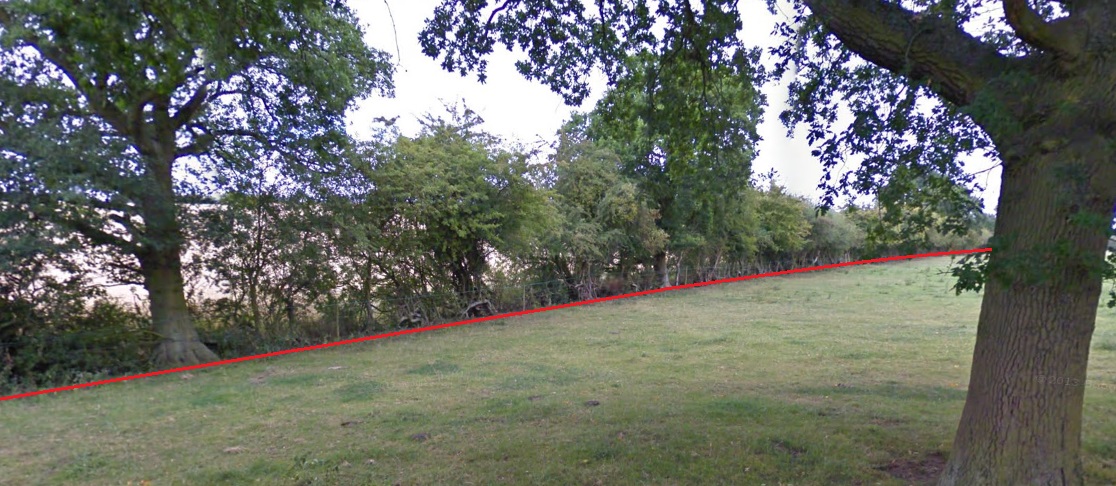
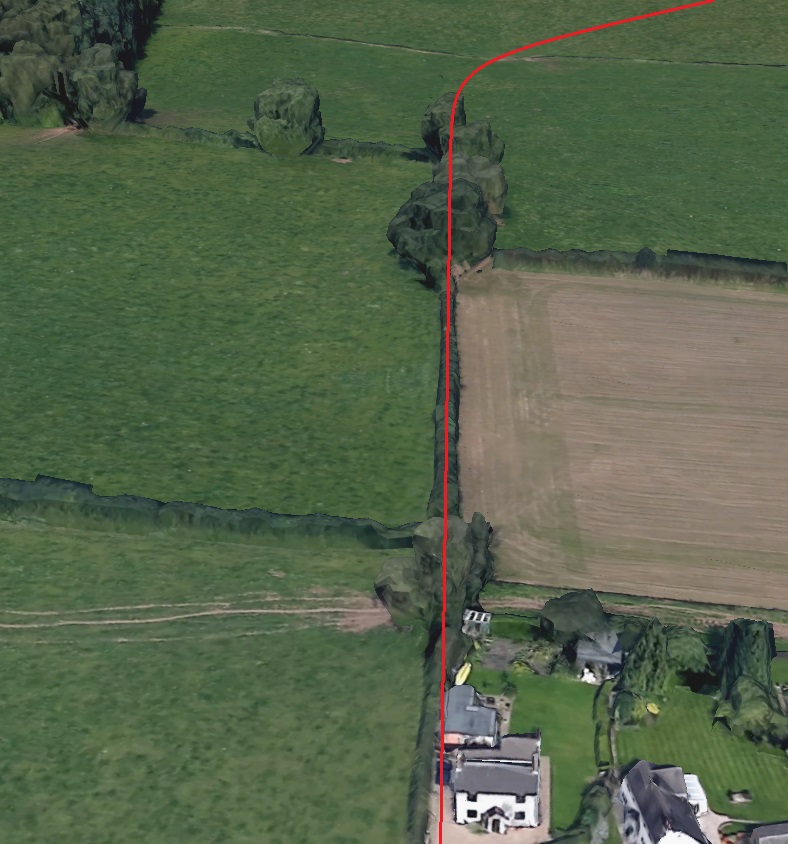
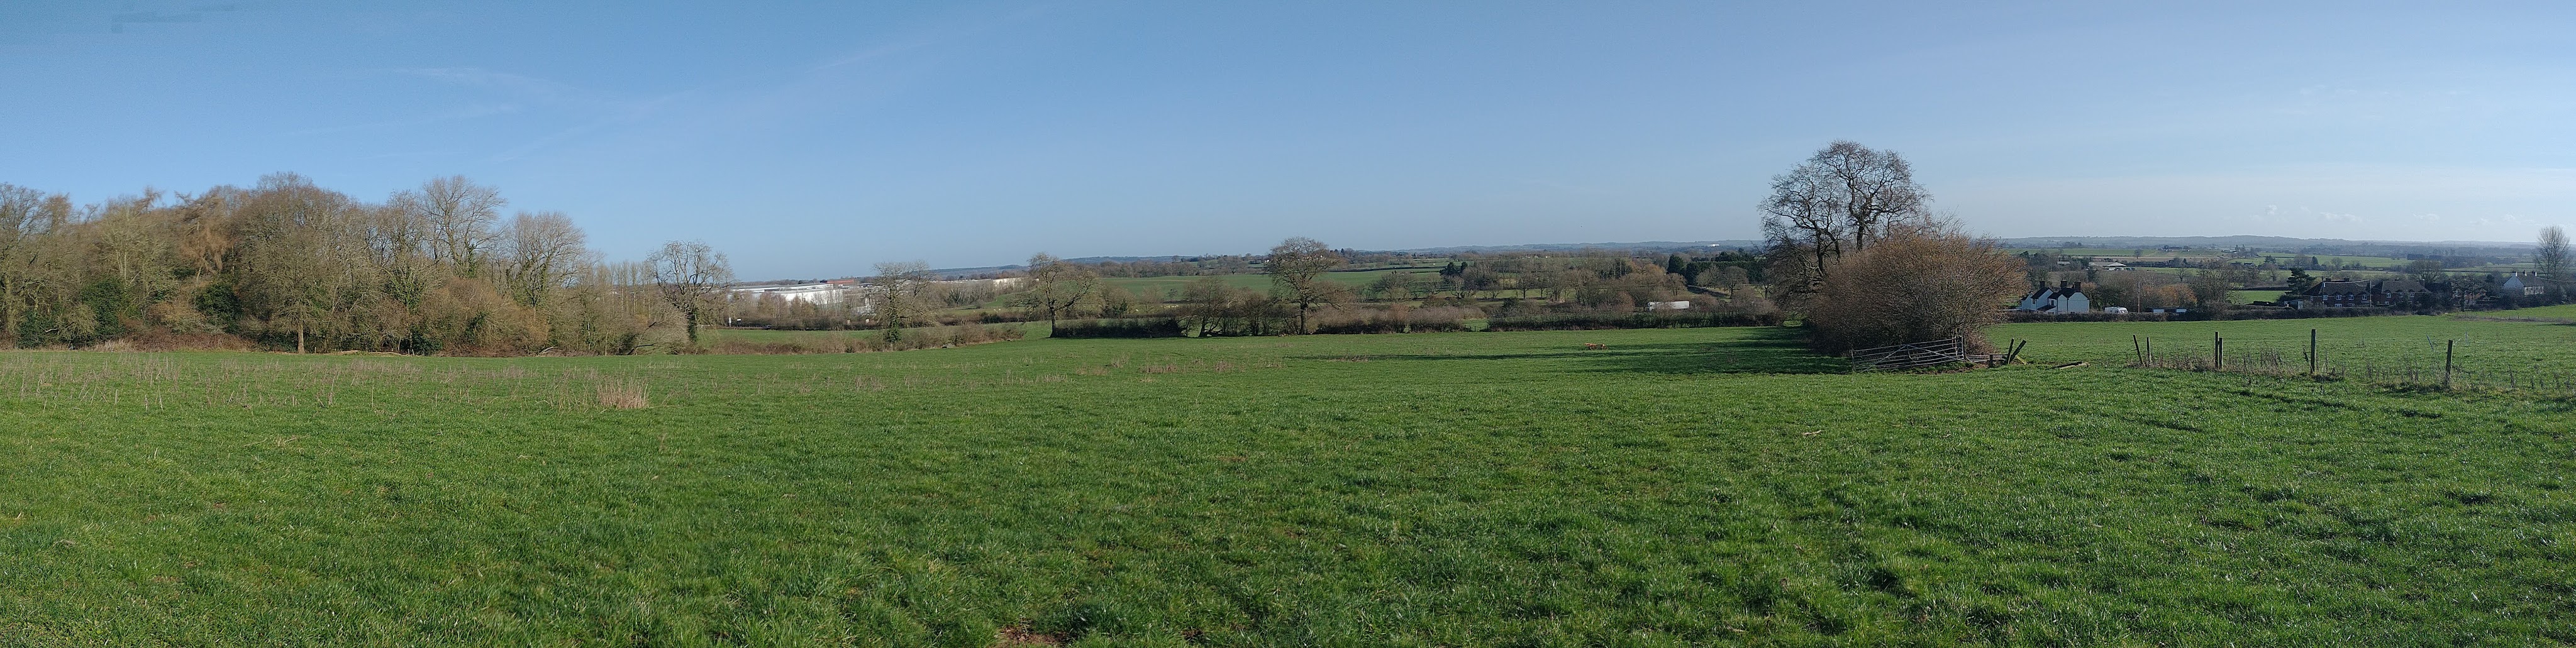
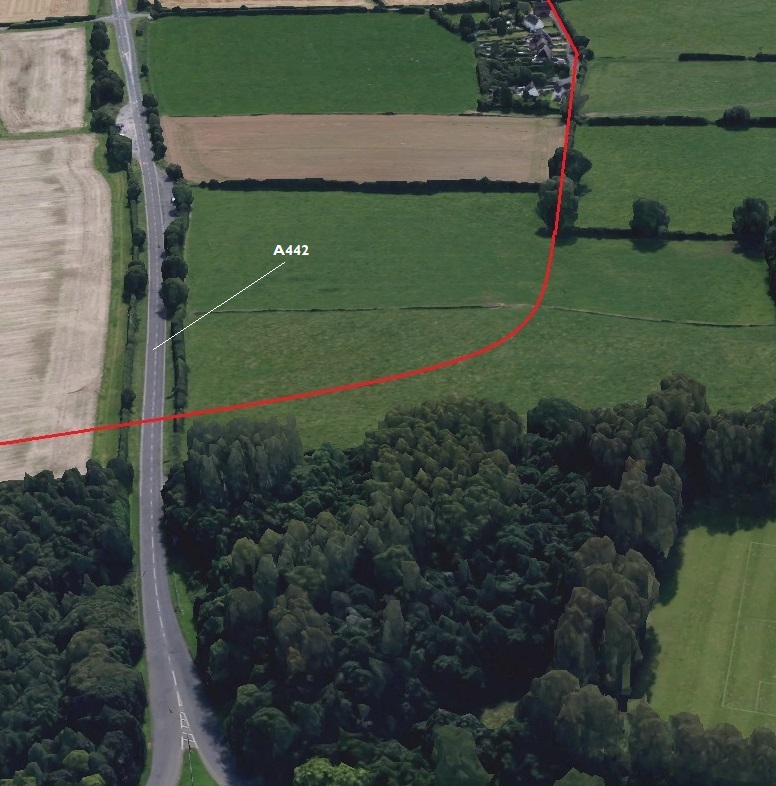
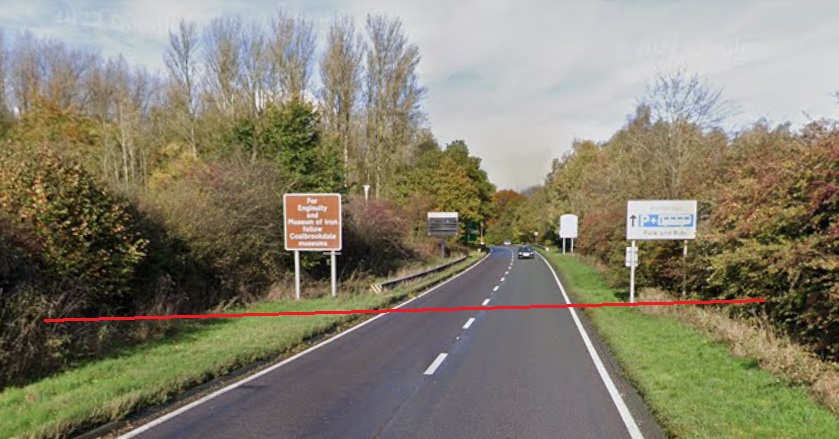
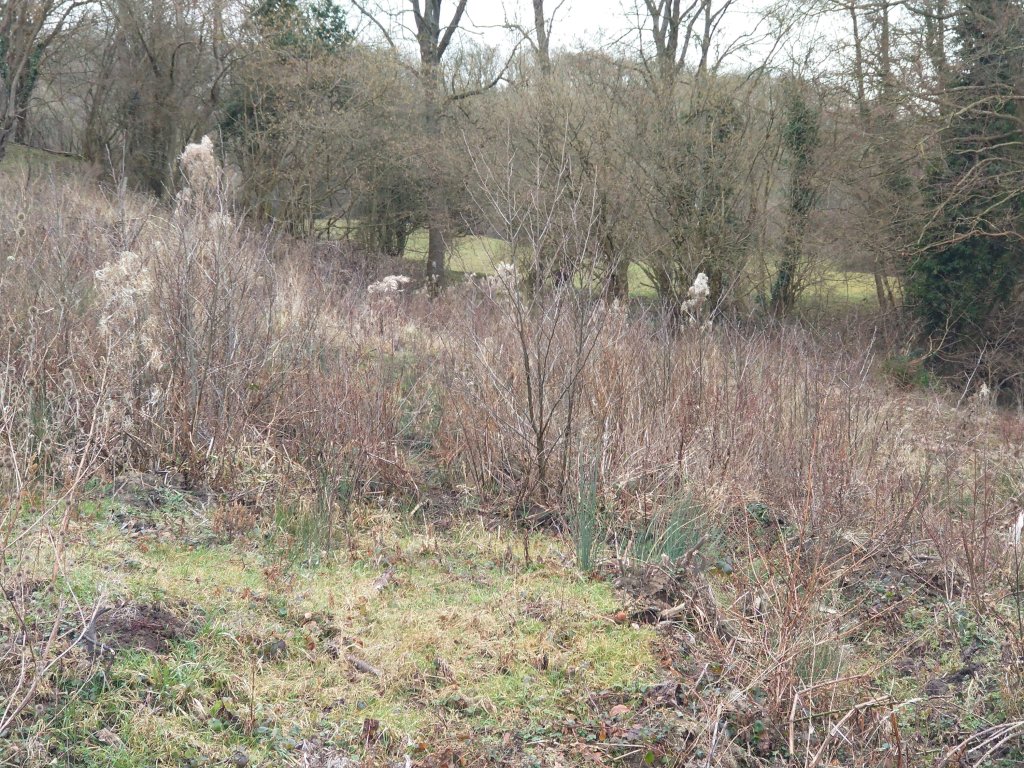
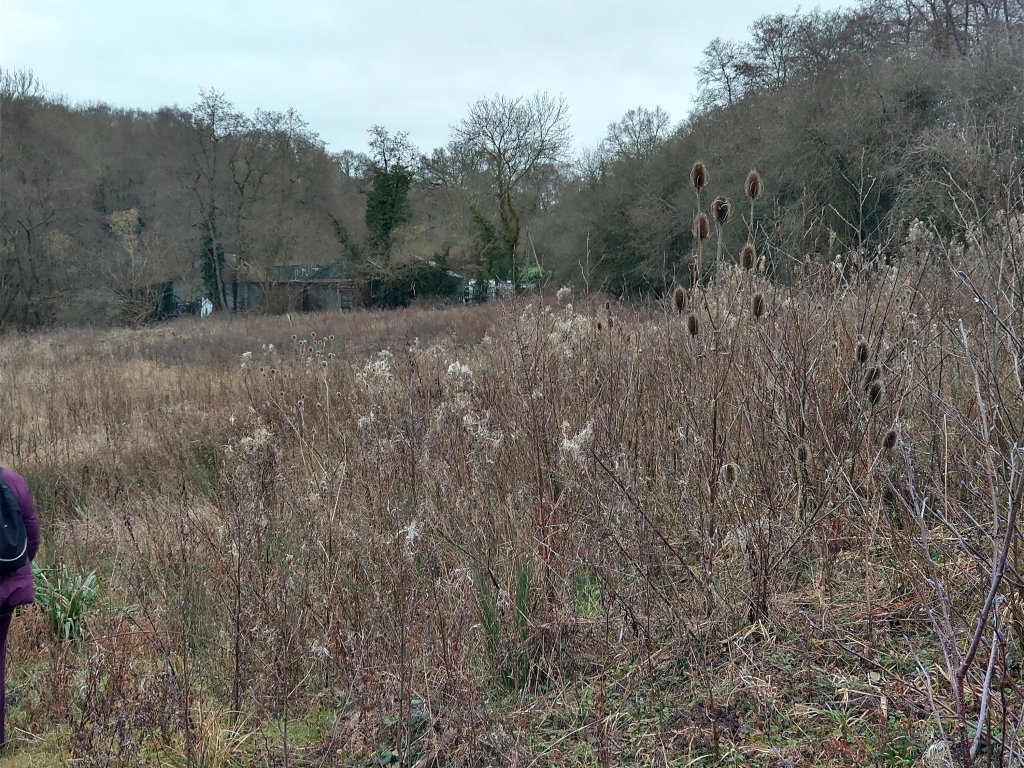
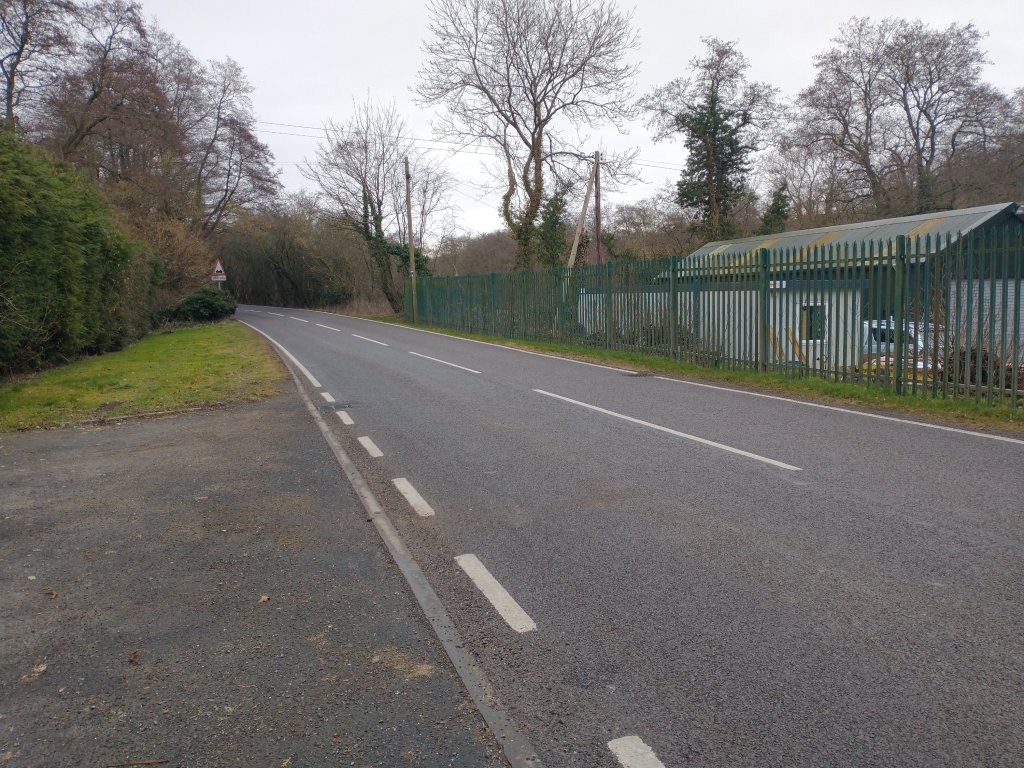
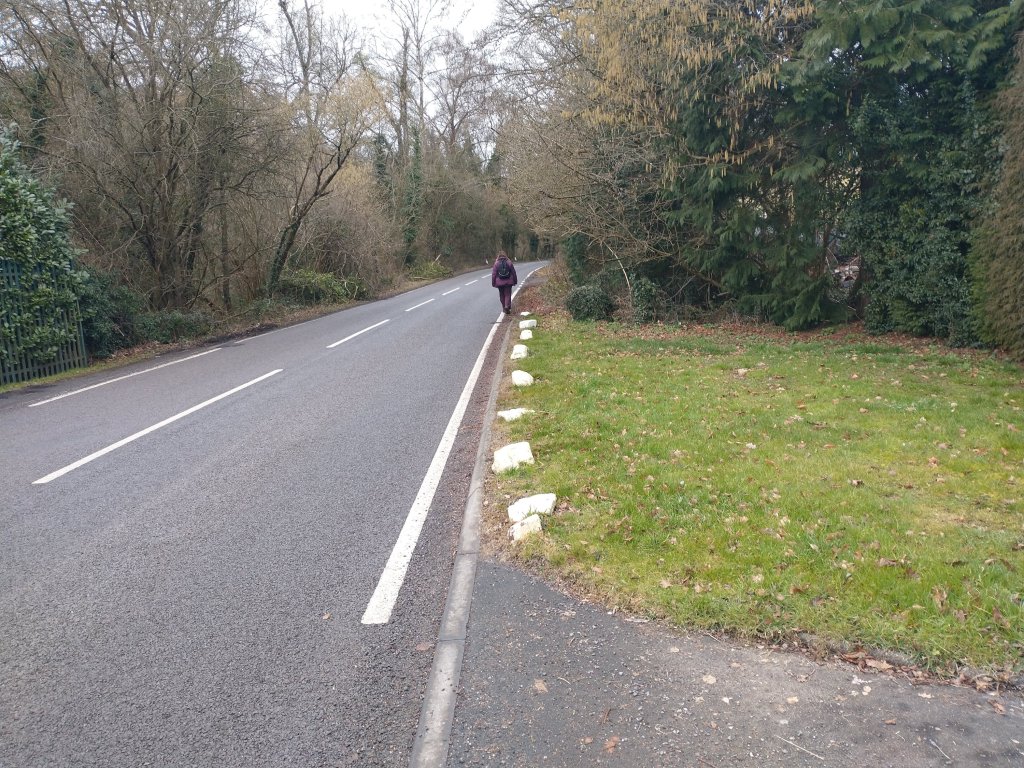
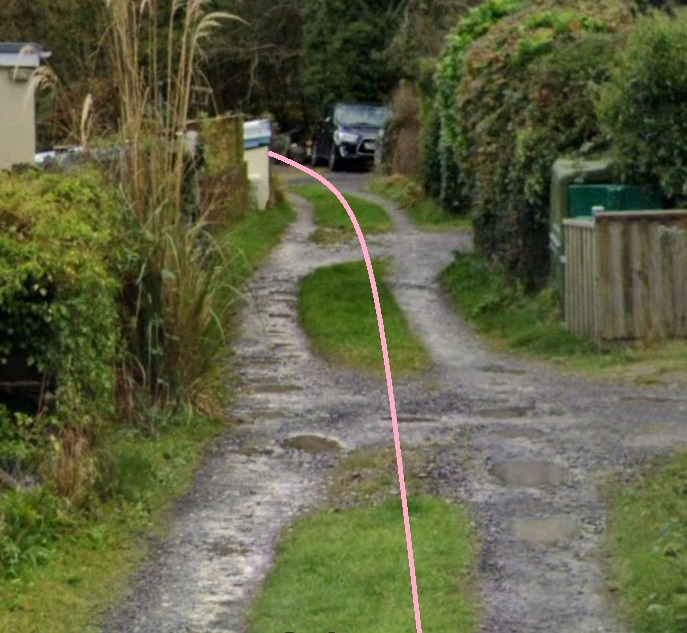
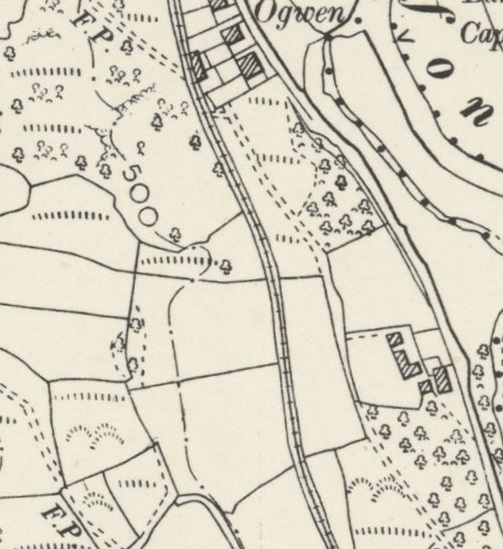
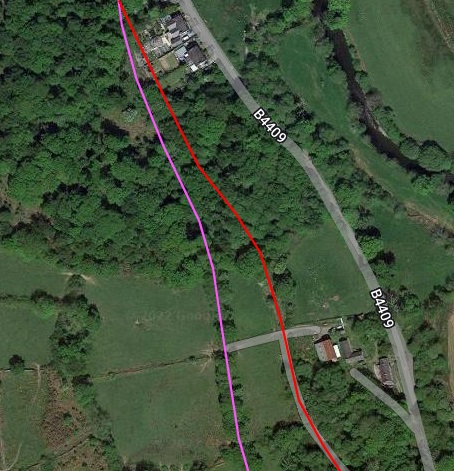
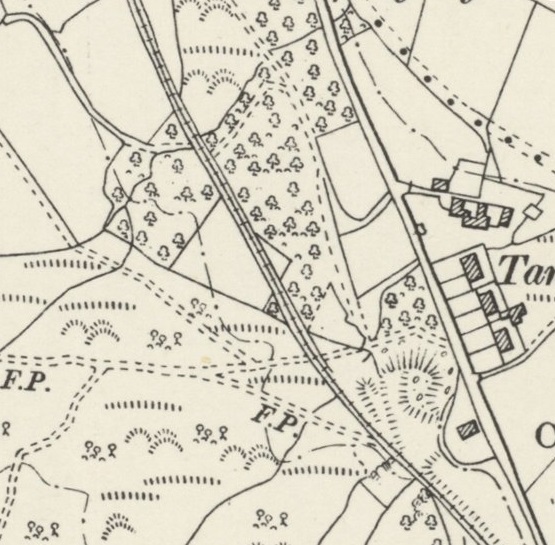
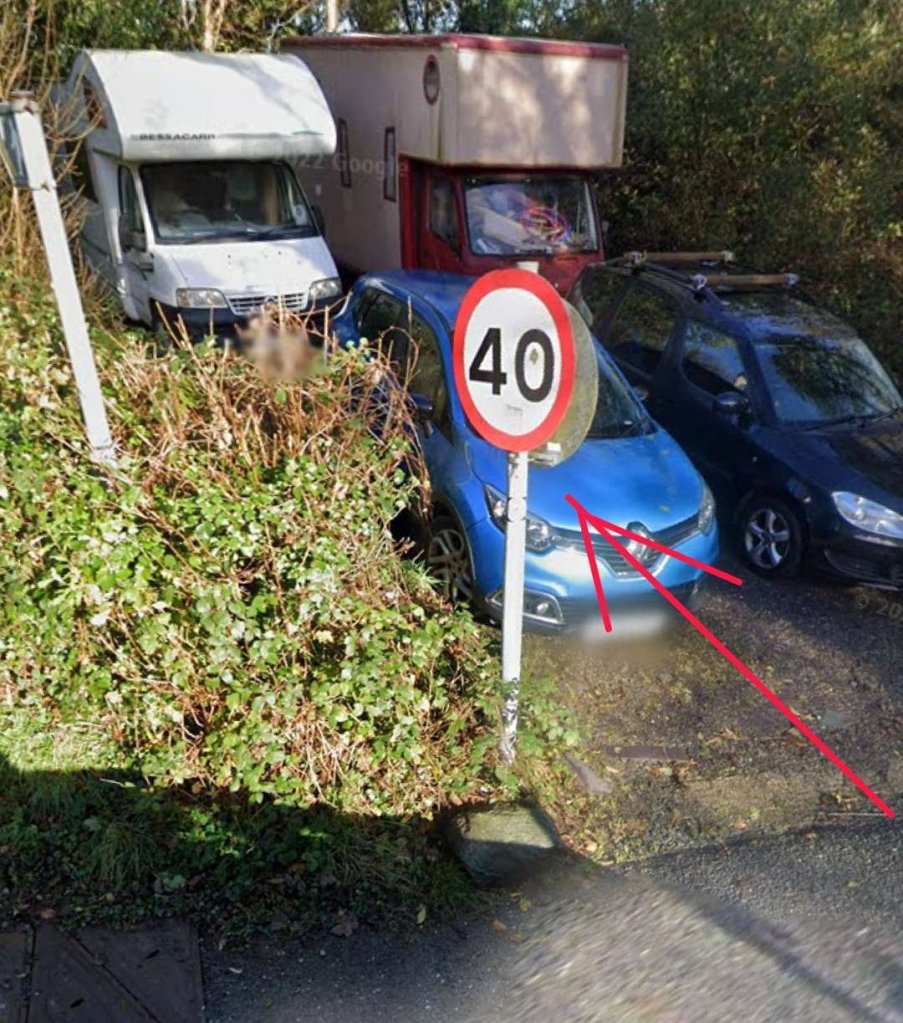
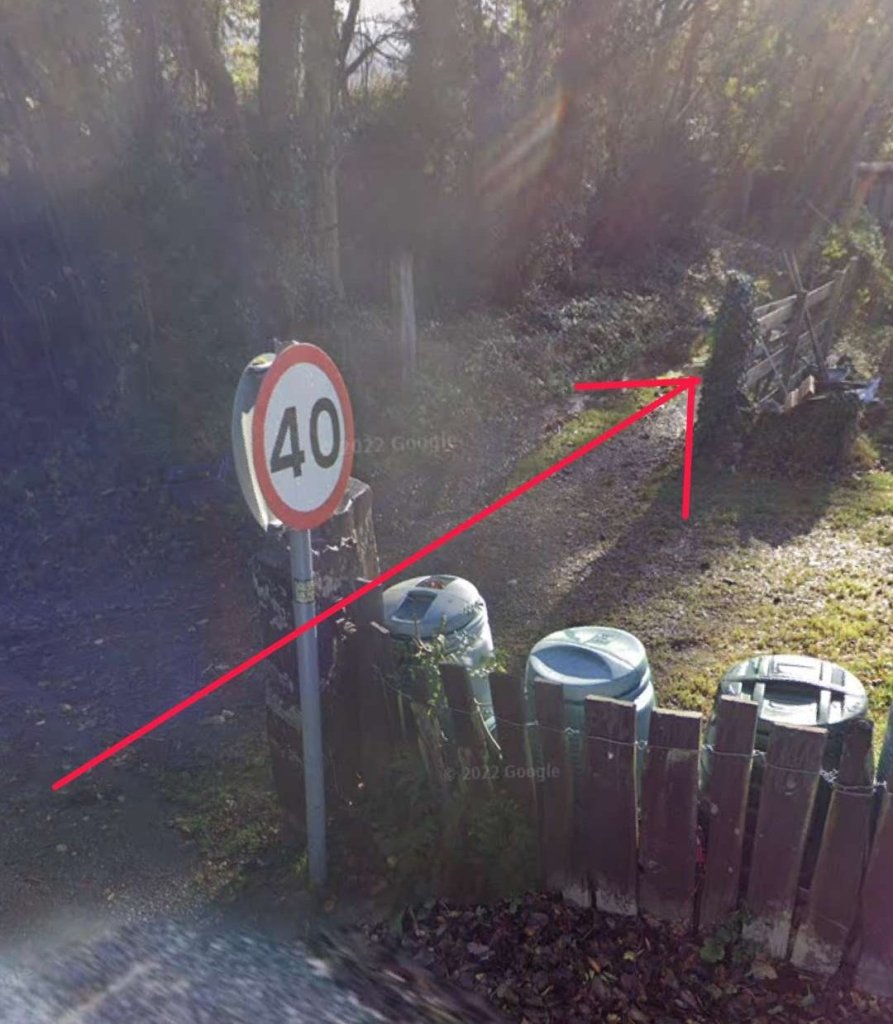
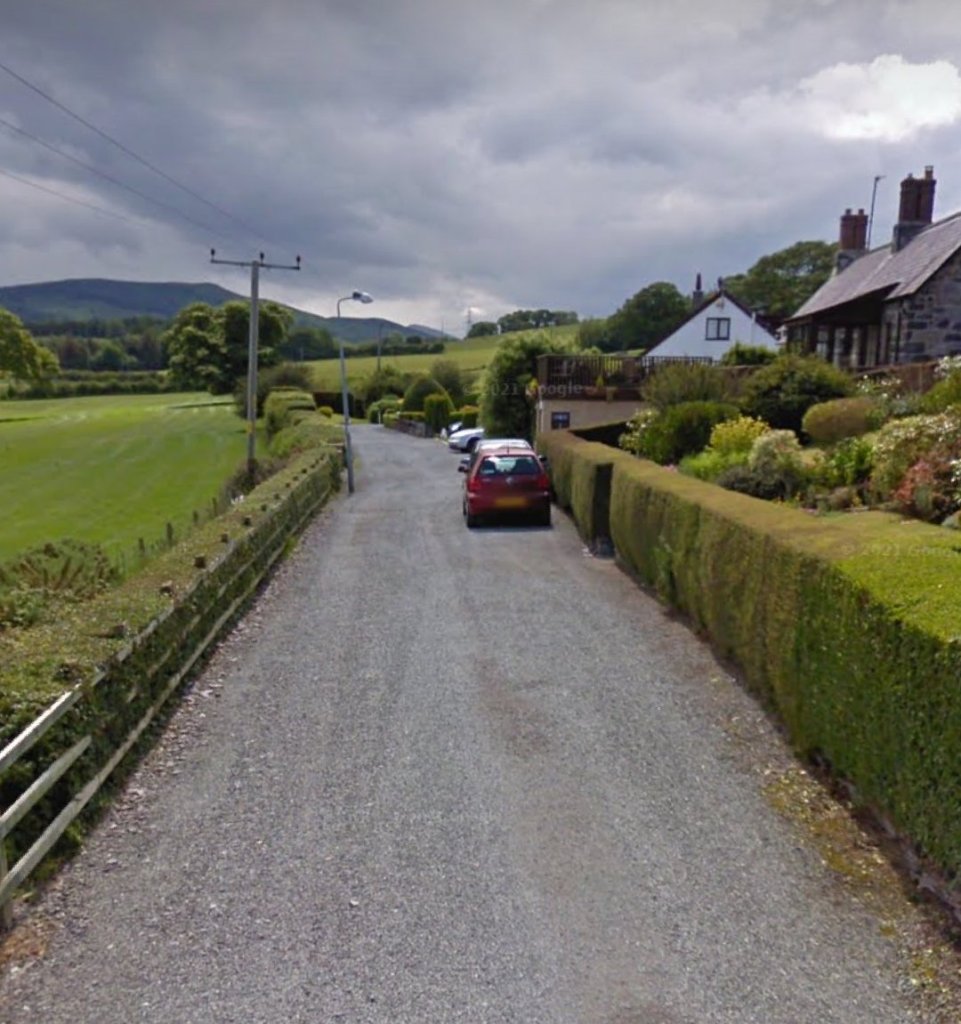
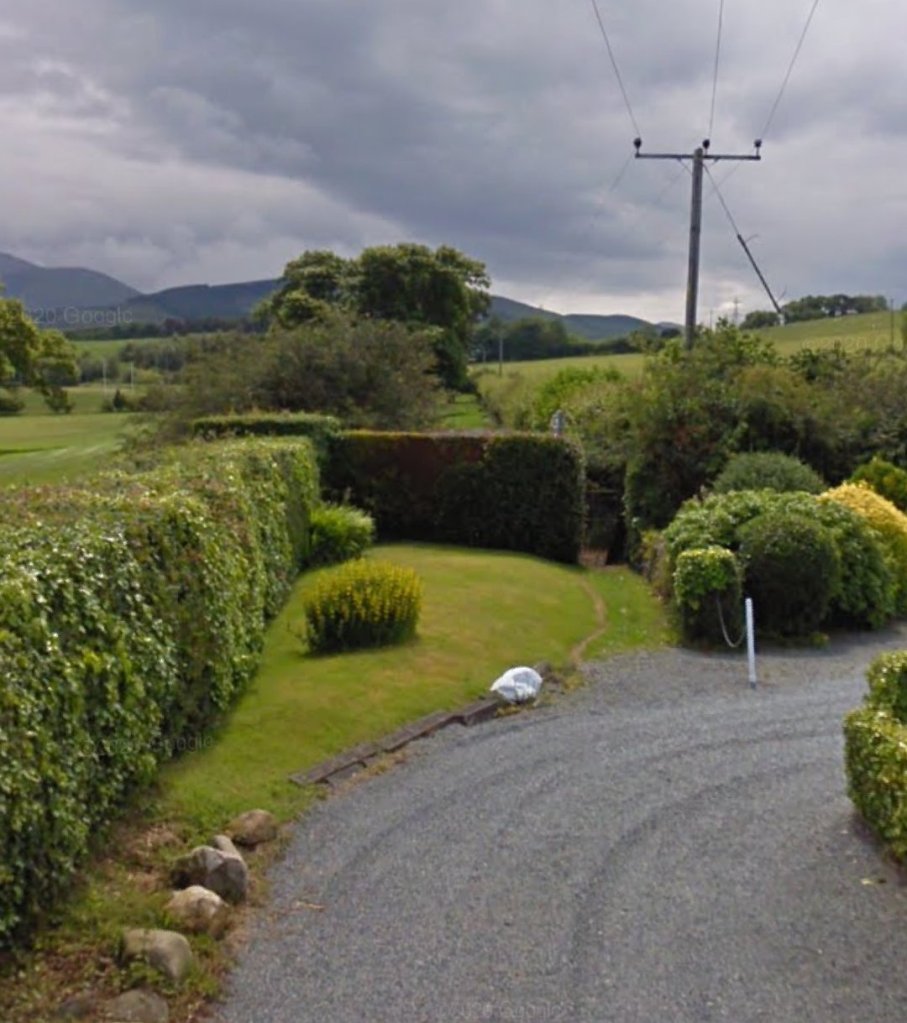
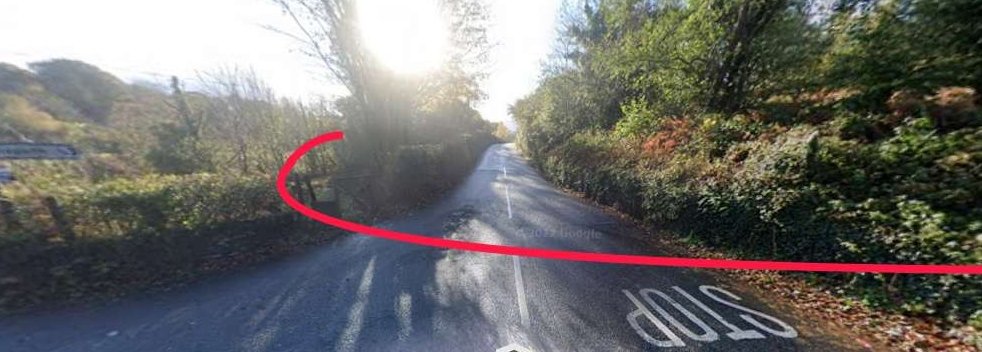
This Google Earth satellite image focusses on the North side of the River Severn and Sutton Wood. The Wharf location is again marked and the line of the Inclined Plane shown. Beyond the top of the incline the tramroad headed in a north-northeast direction following first a modern metalled minor road and then modern field boundaries. [Google Earth]The route of the tramroad as it approached the top of the Inclined Plane. This photograph is taken facing South on the line of the tramroad. [Google Streetview]Turning through 180 degrees to look along the route of the tramroad as it headed away from the River Severn. [Google Streetview]The old tramroad followed the field boundaries heading North. Towards the top of this extract from the 6″ Ordnance Survey its formation was used by a later footpath. [3]Approximately the same area as in the map extract above but shown, this time on modern satellite imagery [Google Earth]Continuing North along the line of the old tramroad. The formation from the top of the incline is followed, in 2023, by a minor road. [Google Streetview]The minor road continues northwards along the line of the old tramroad. [Google Streetview]The minor road turns towards the Northeast. The field boundary shows the line of the old tramroad. [Google Streetview]Google Earth’s bird’s eye view (3D) of the same location. The road turns away to the Northeast. The tramroad continues in a Northerly direction. [Google Earth]A very short distance along the minor road, we get this view of the field boundary and the route of the old tramroad. {Google Streetview]
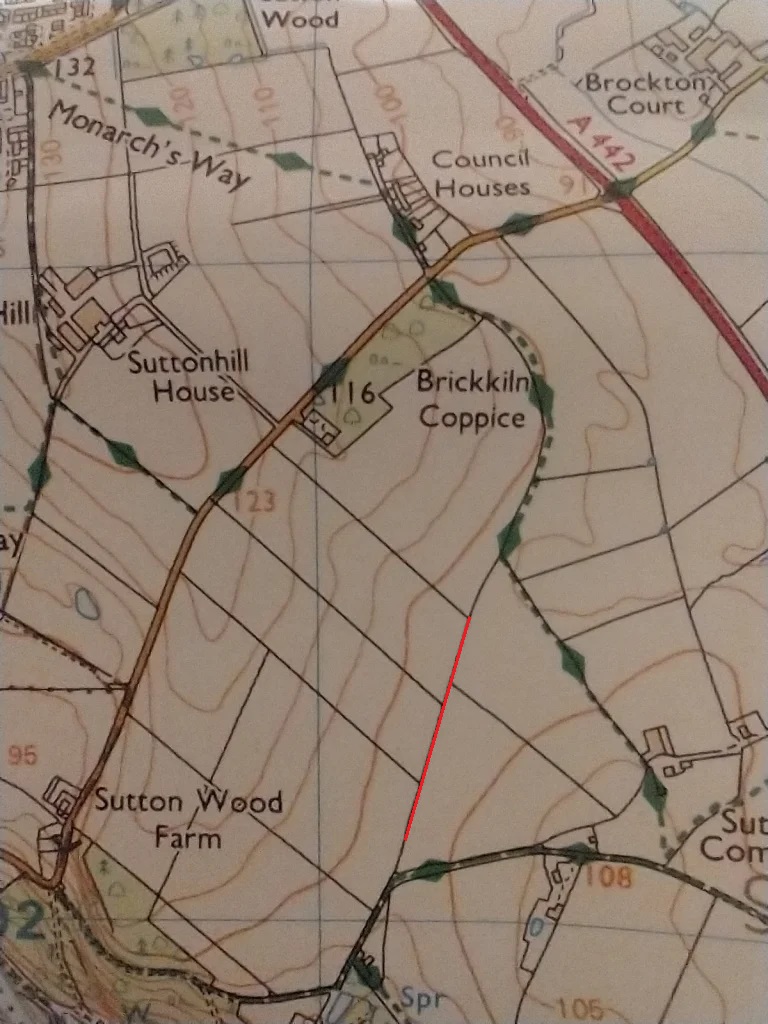
The next opportunity to look at the line of the tramroad comes at the point where its route is joined by a footpath which appears on the 1882 Ordnance Survey above and still is in existence today. The route appears on the modern 1:25,000 Ordnance Survey Explorer Series mapping as shown below.
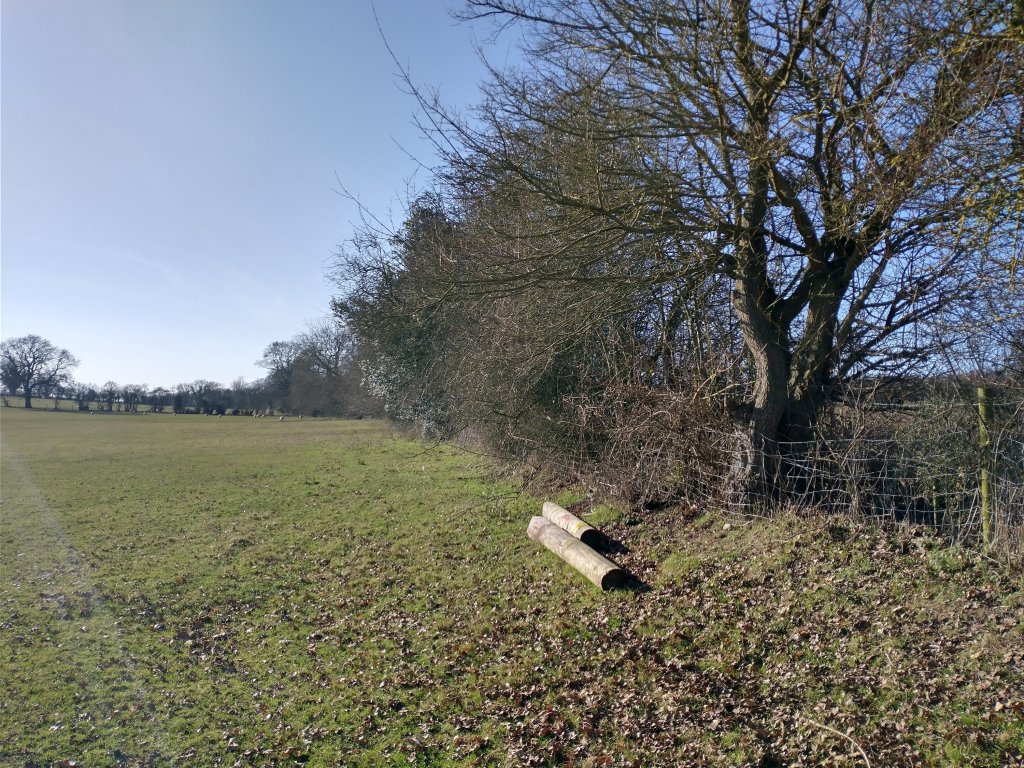
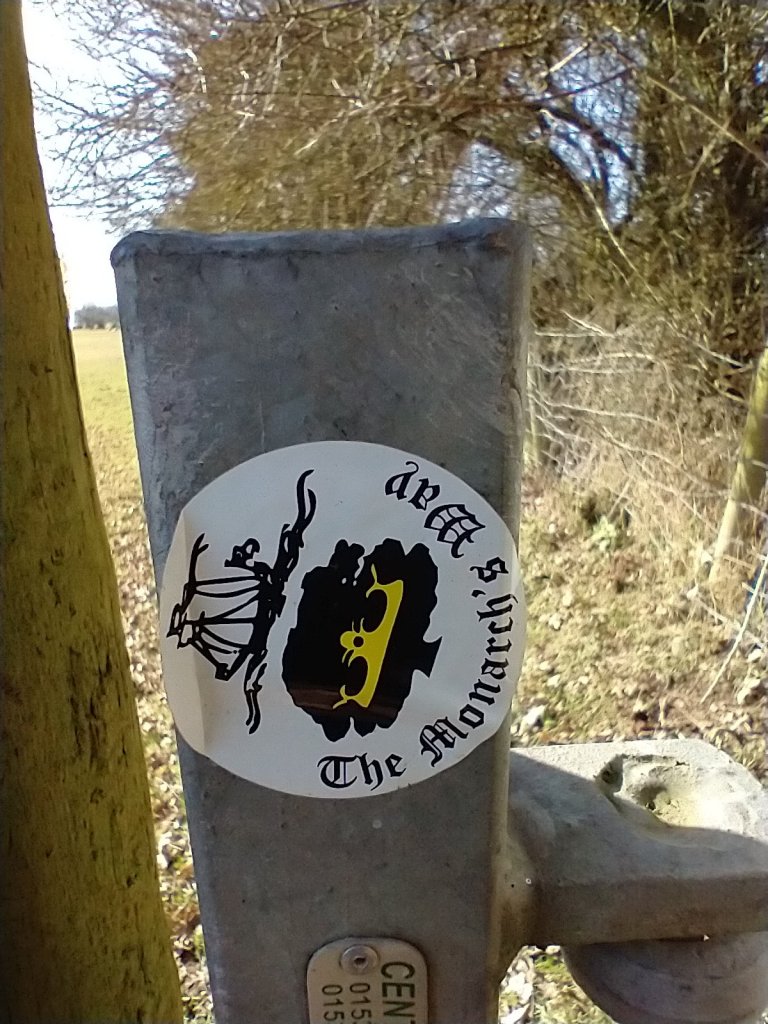
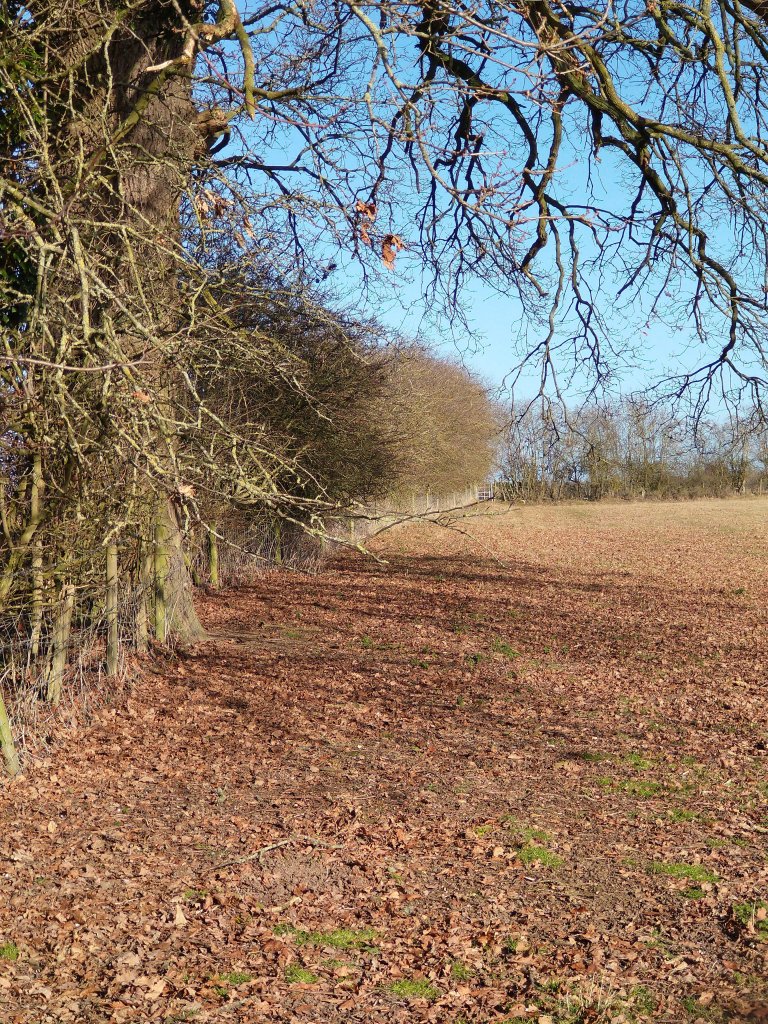
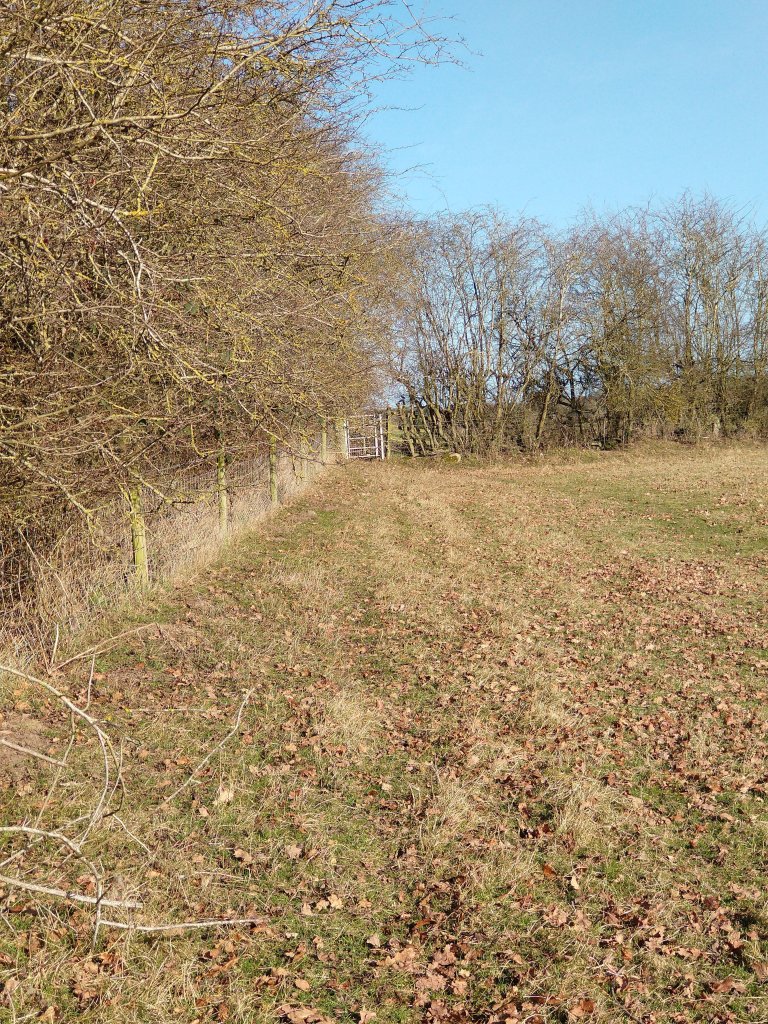
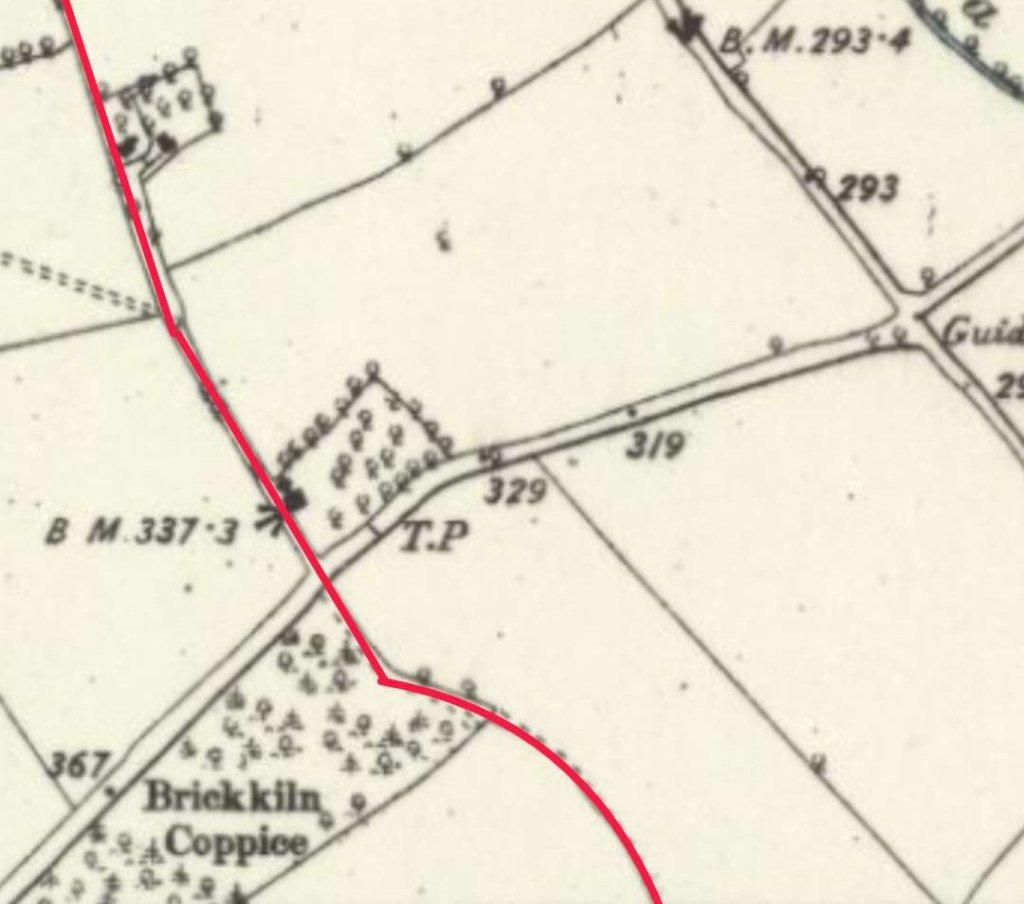
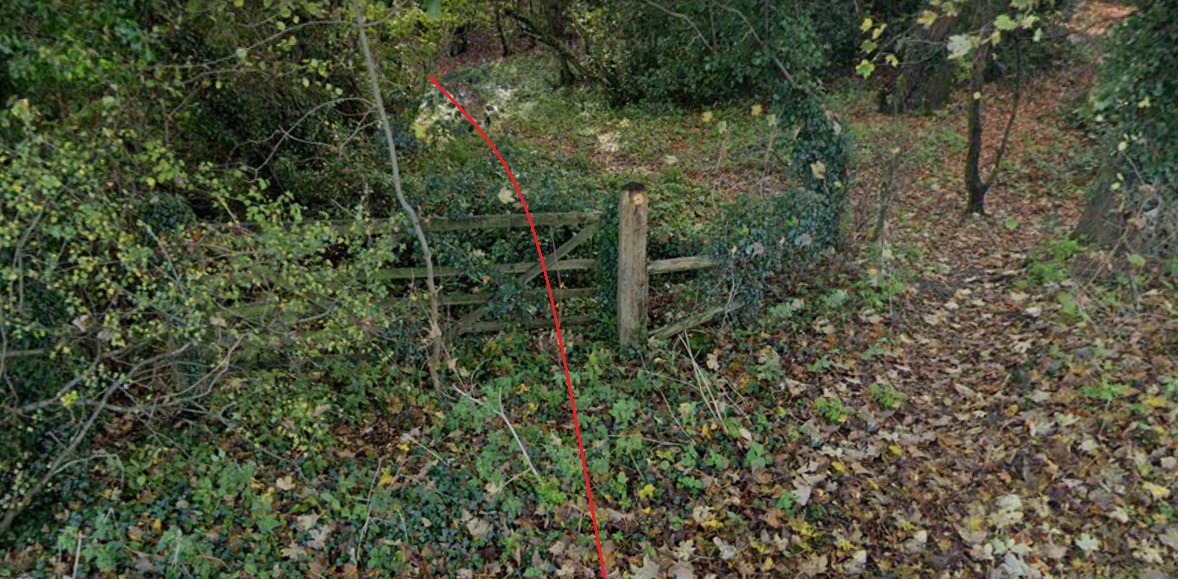
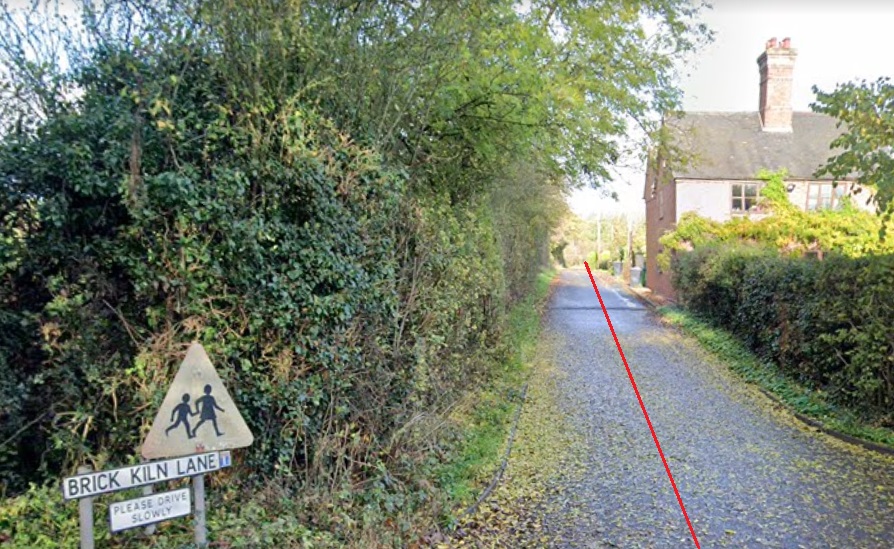
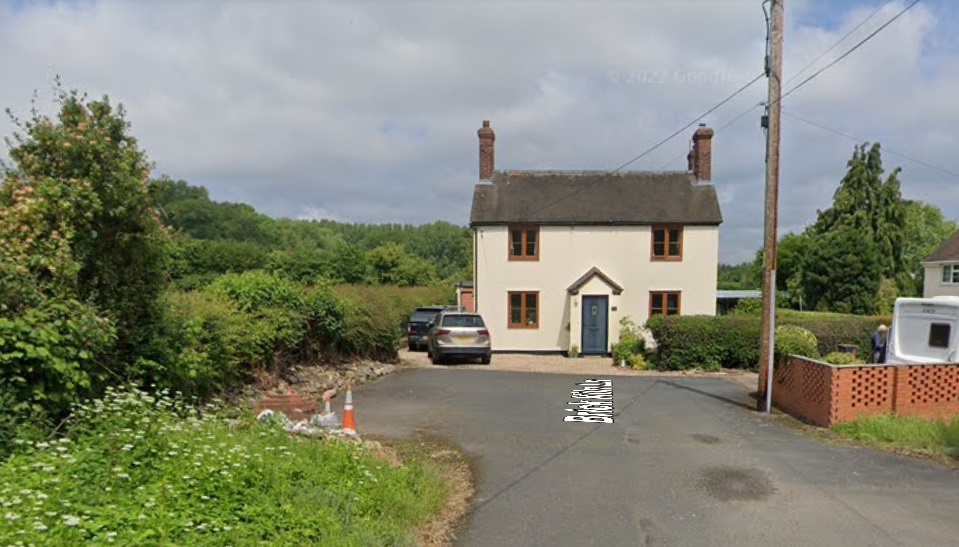
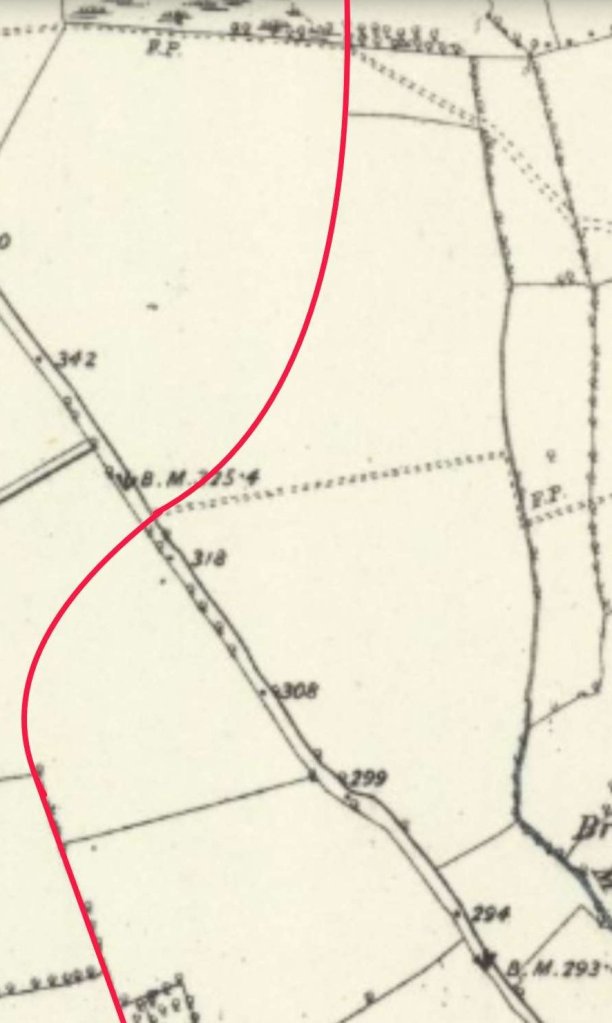
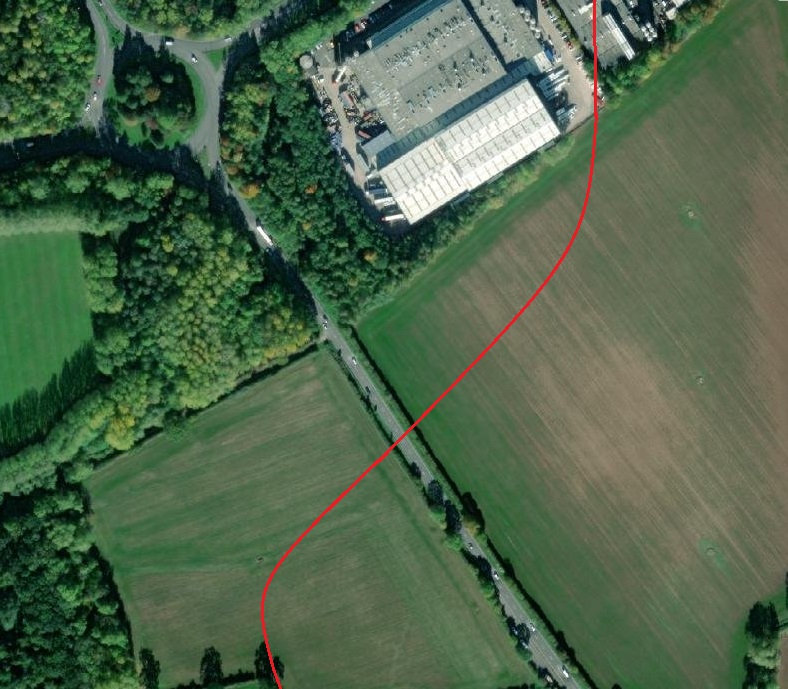
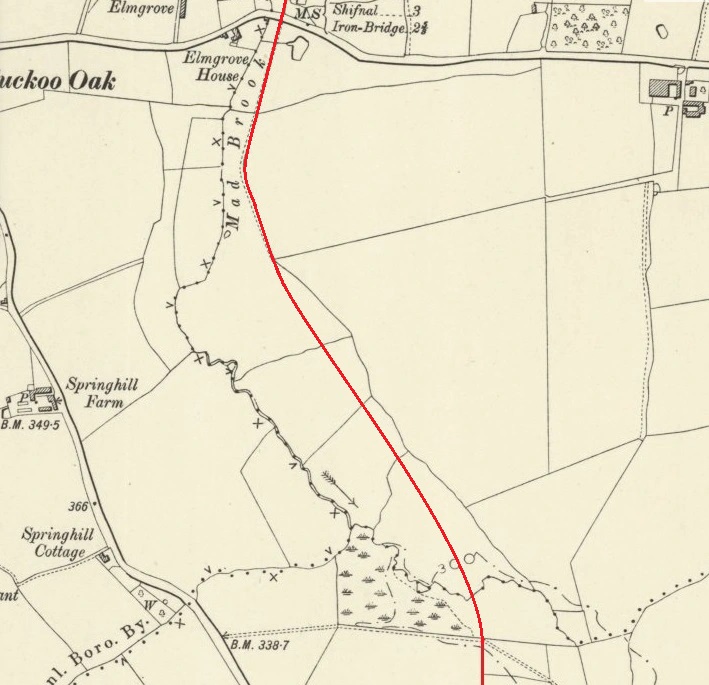
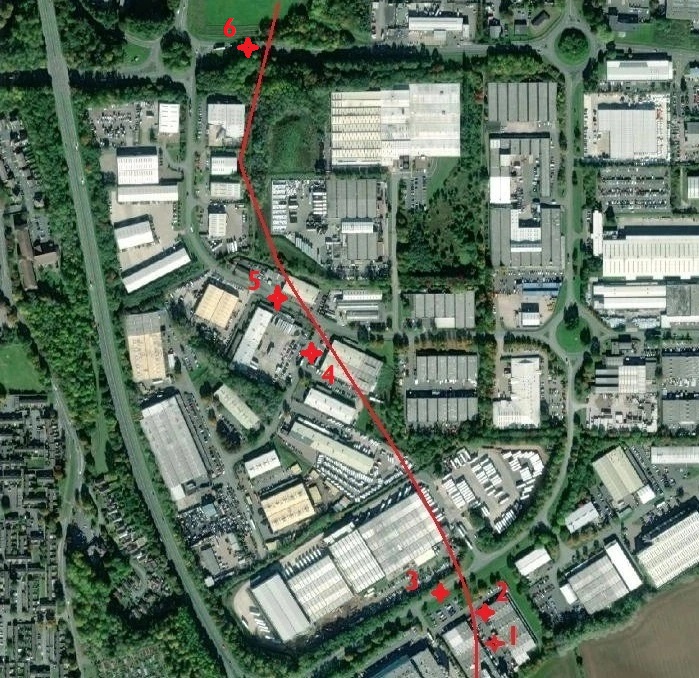
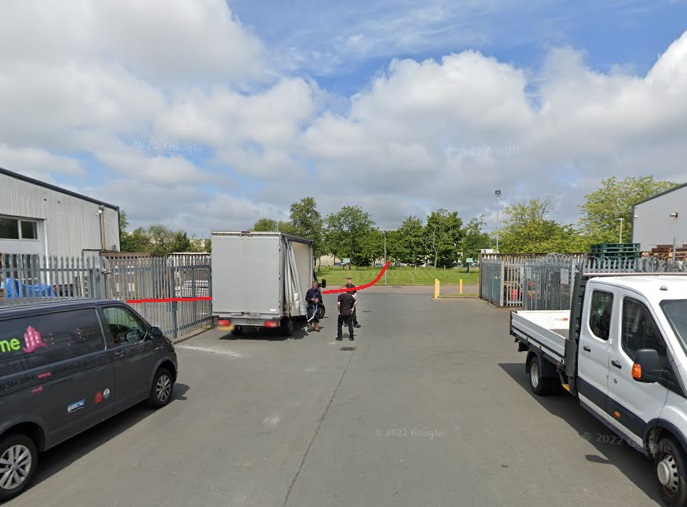
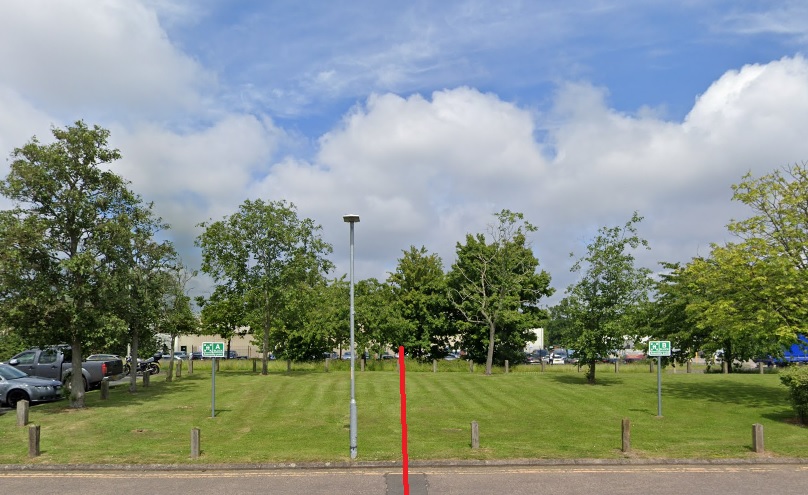
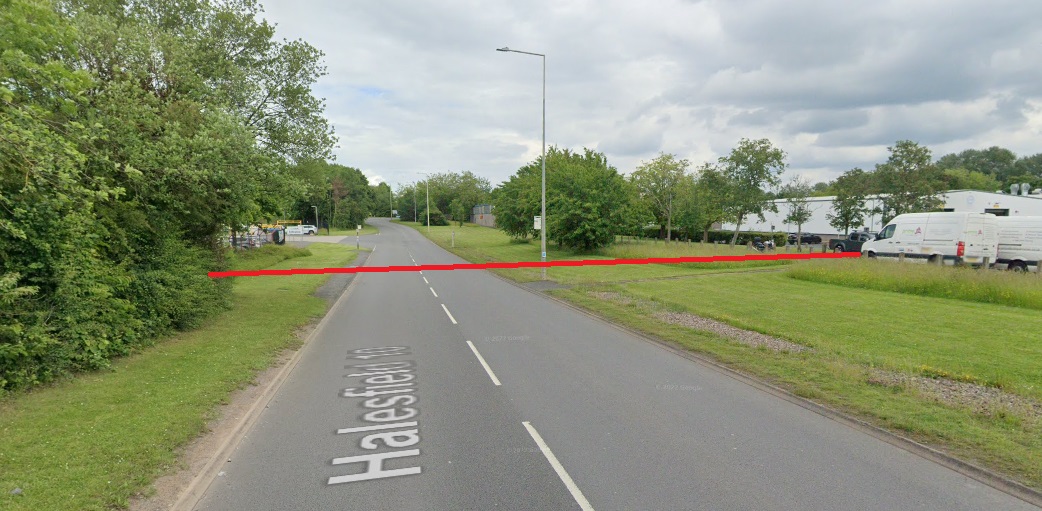
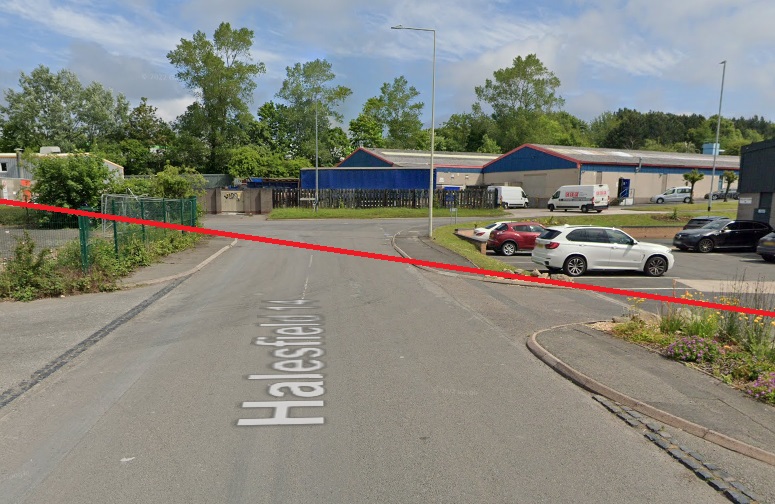
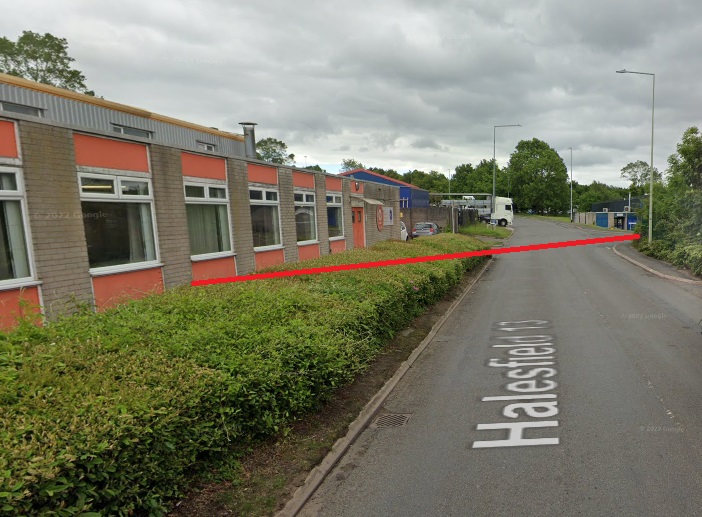
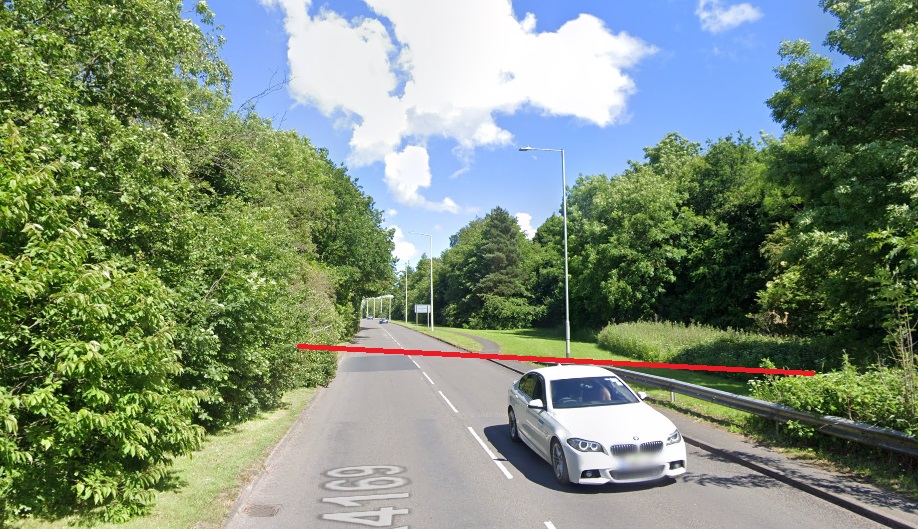
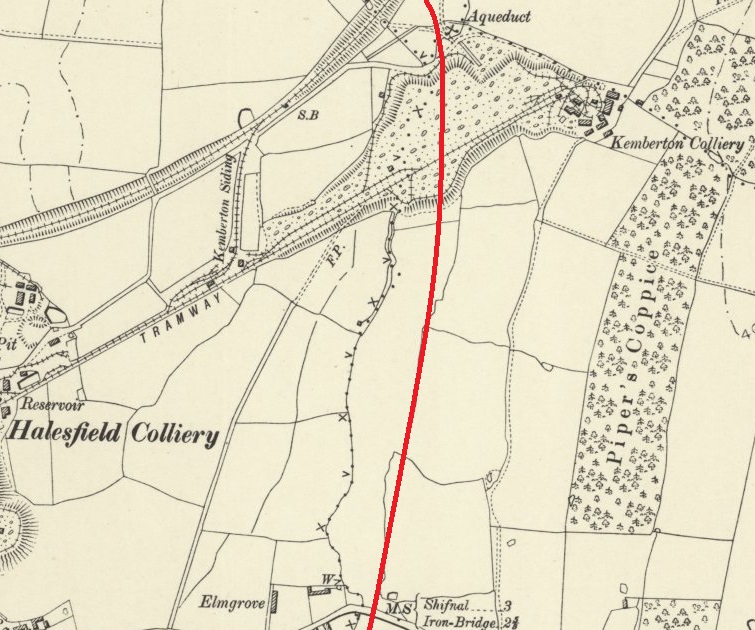
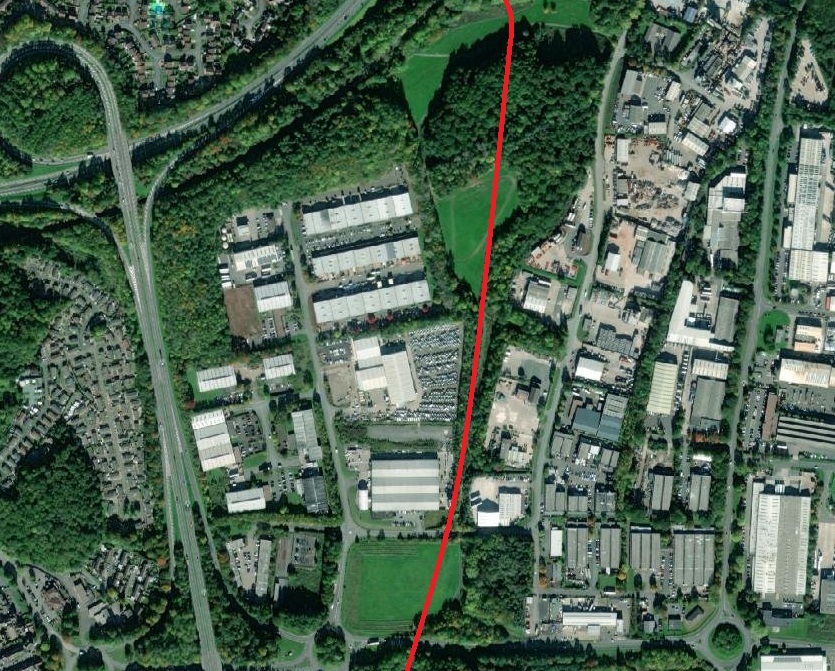
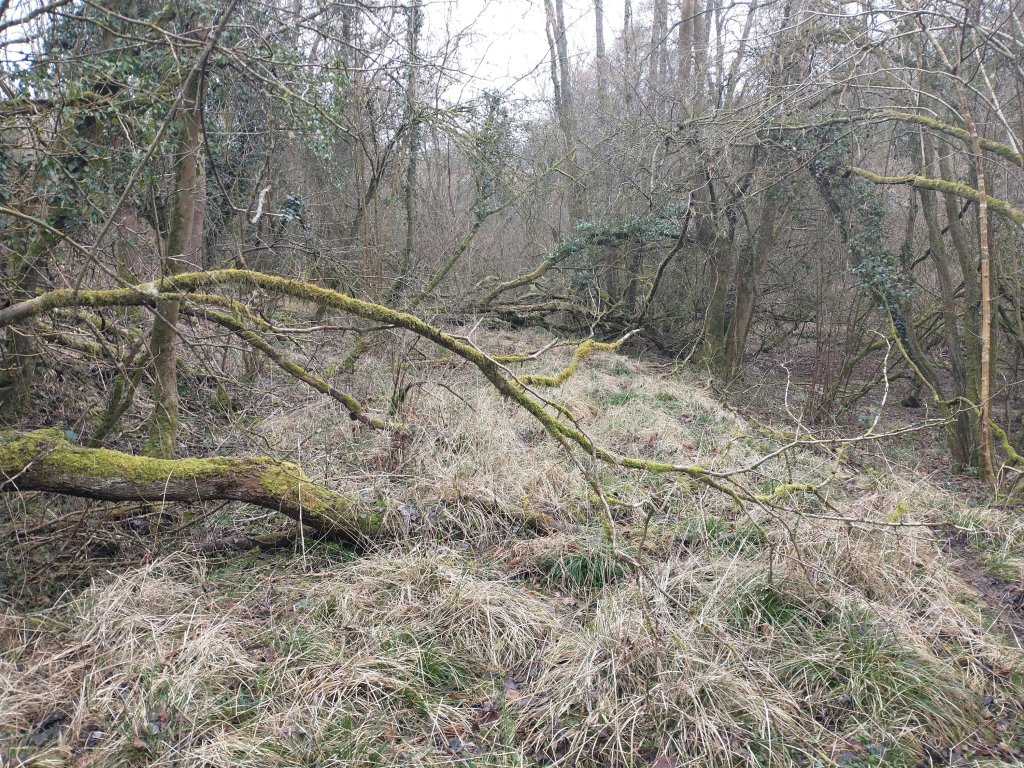
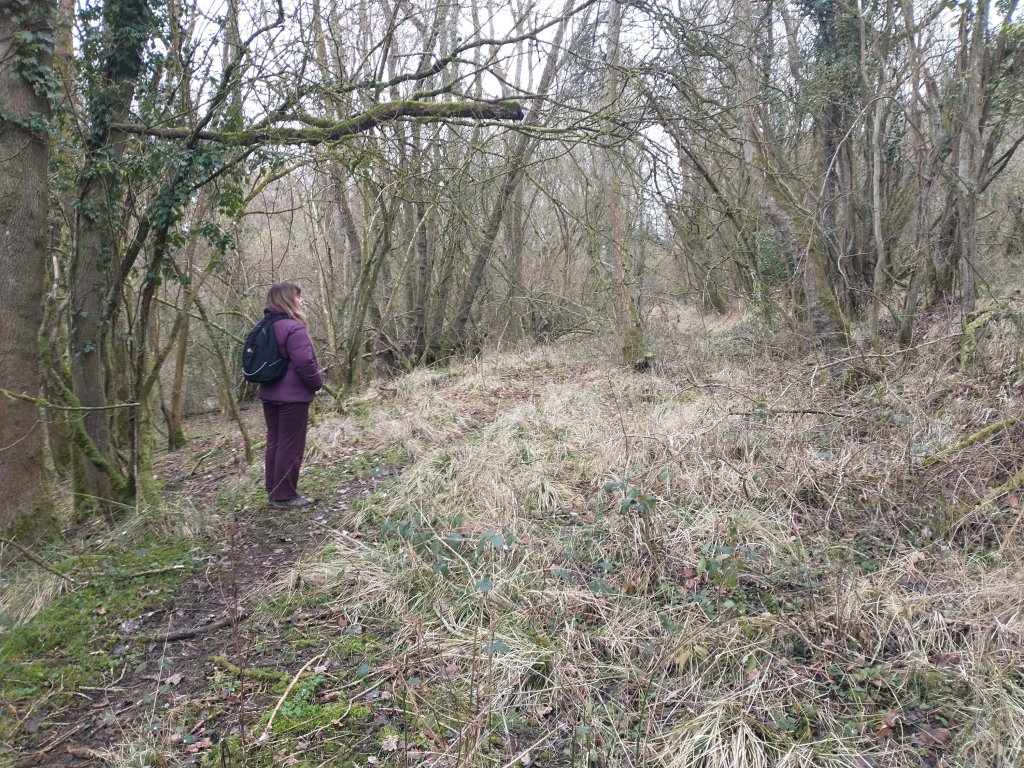
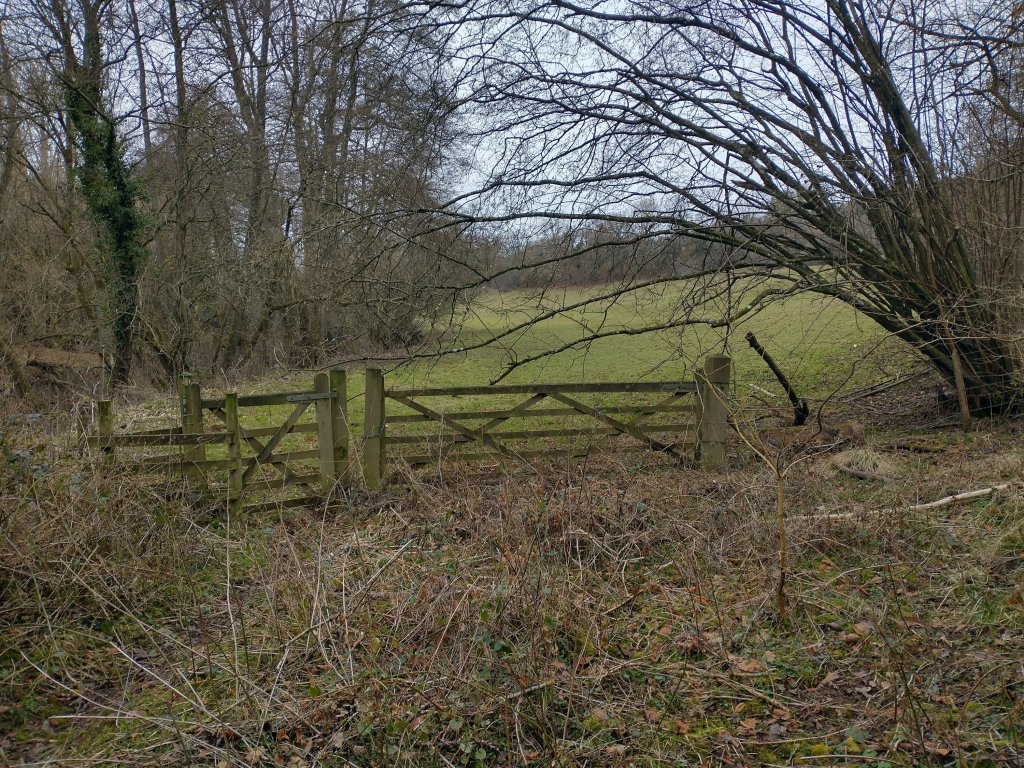
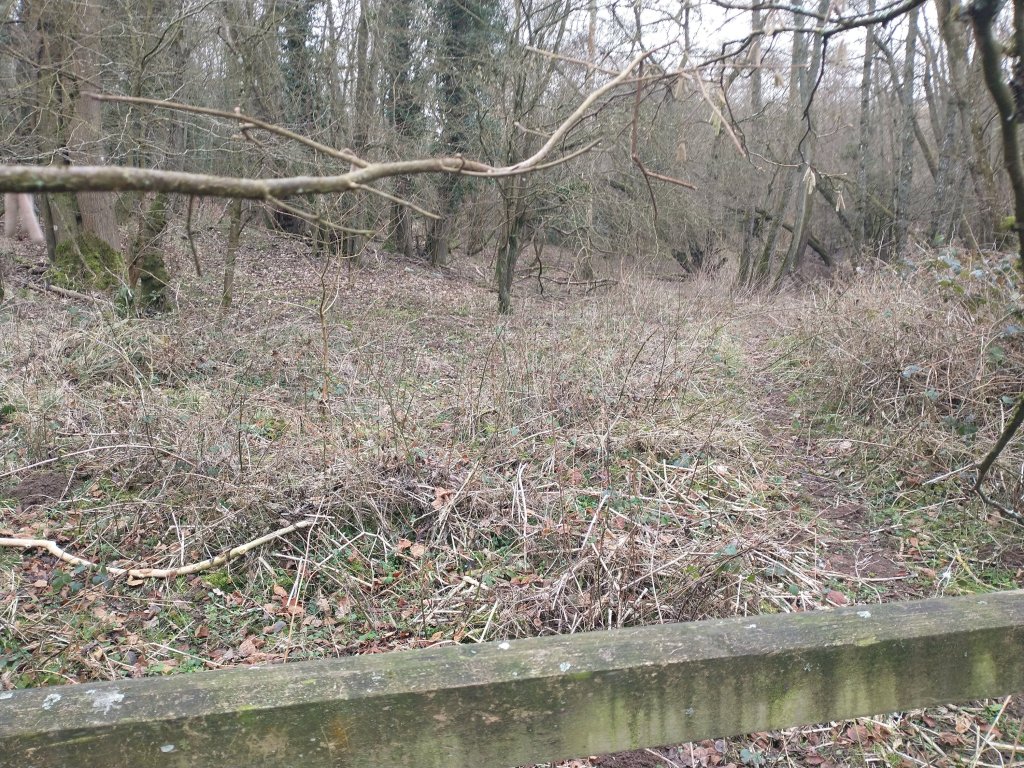
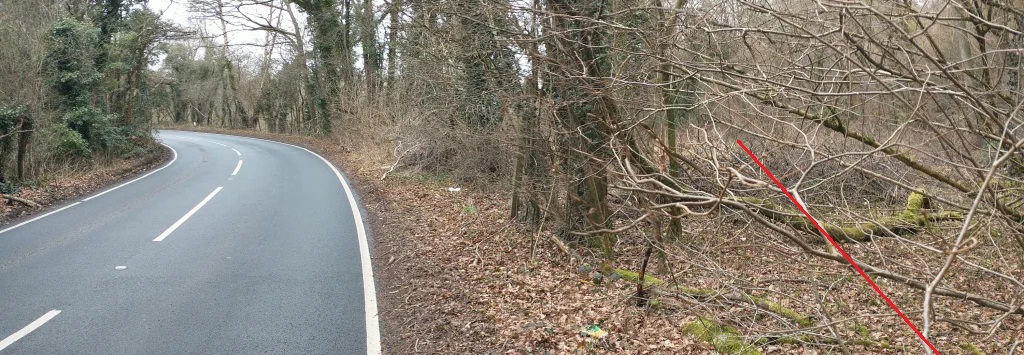
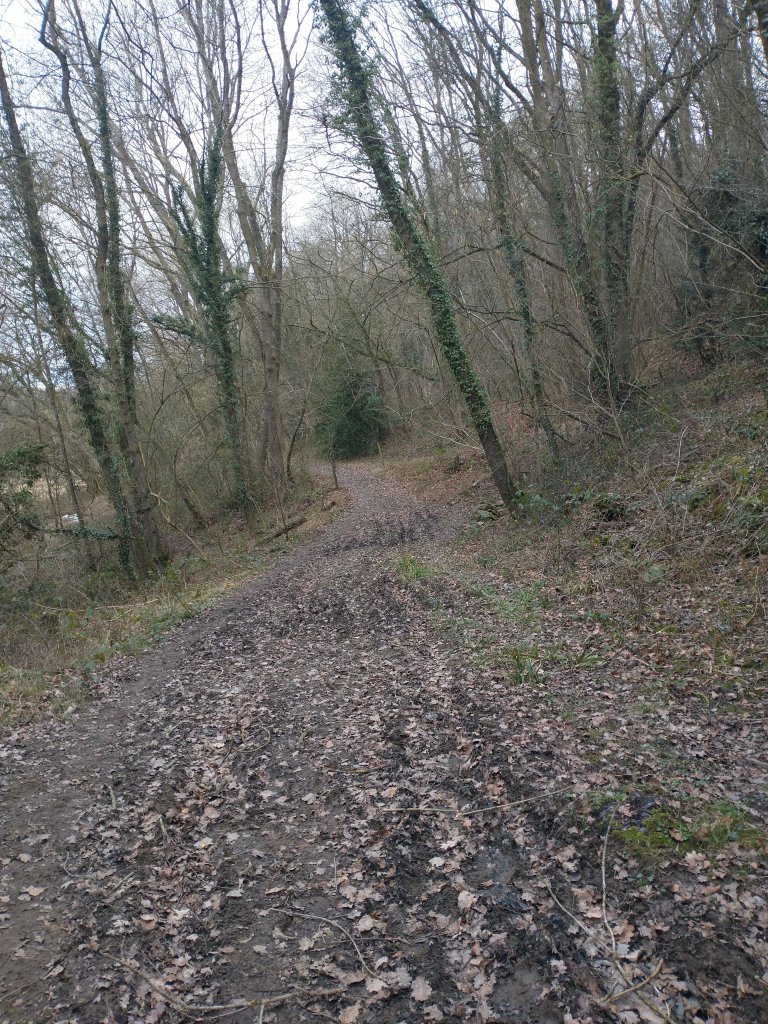
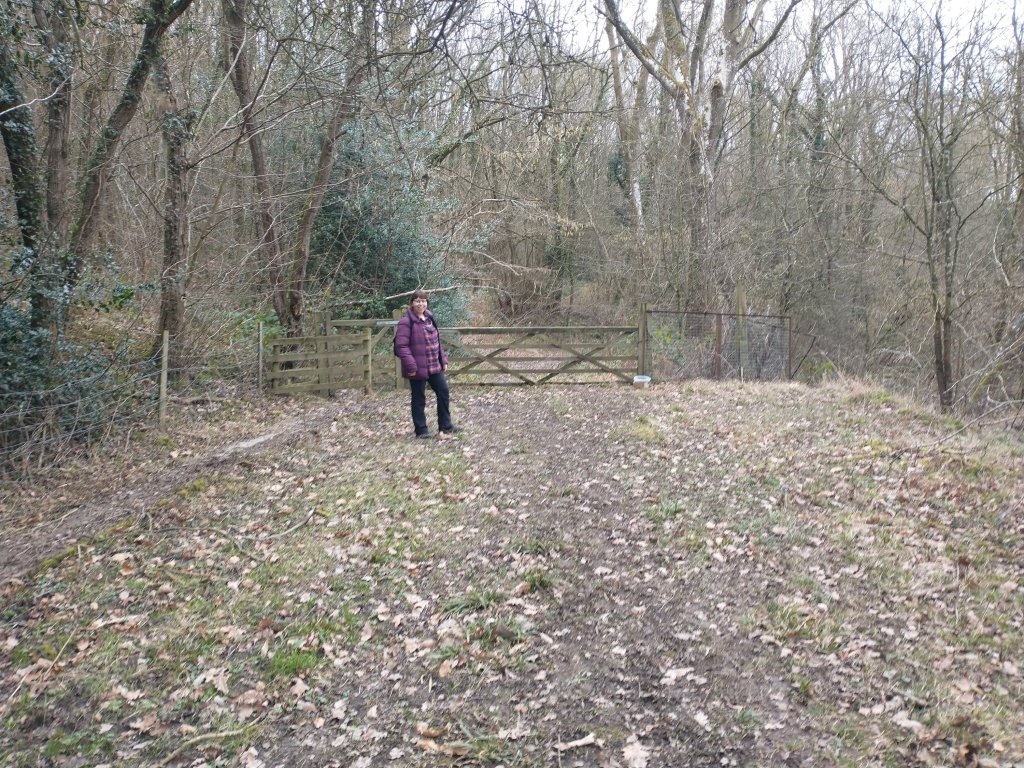
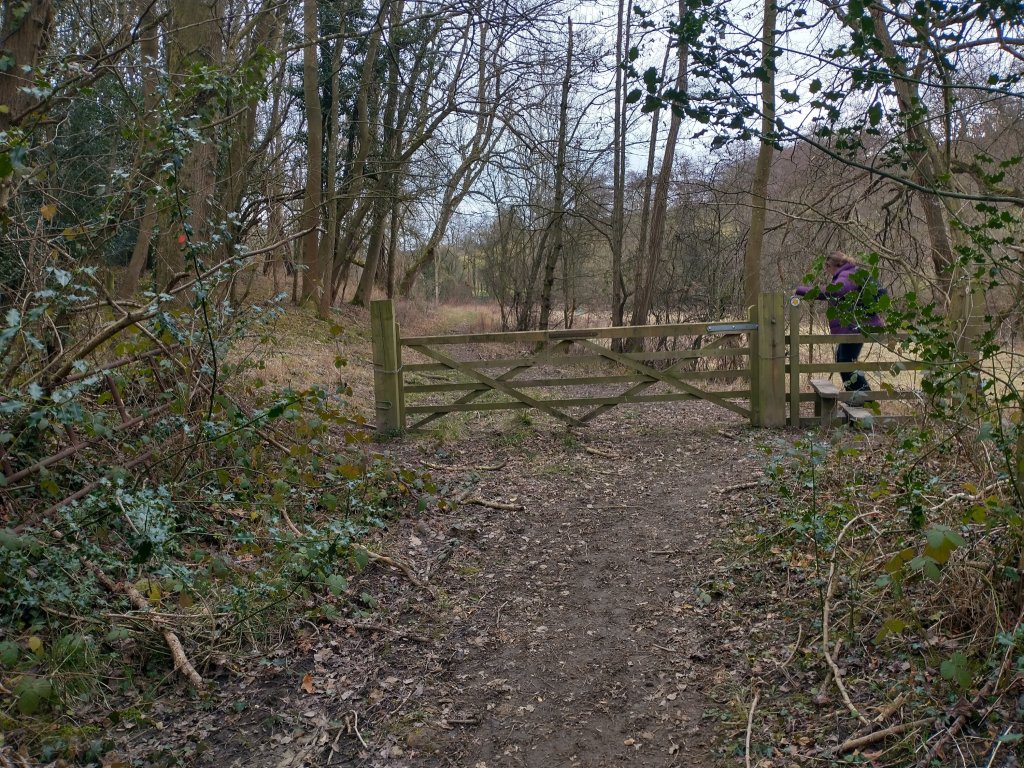
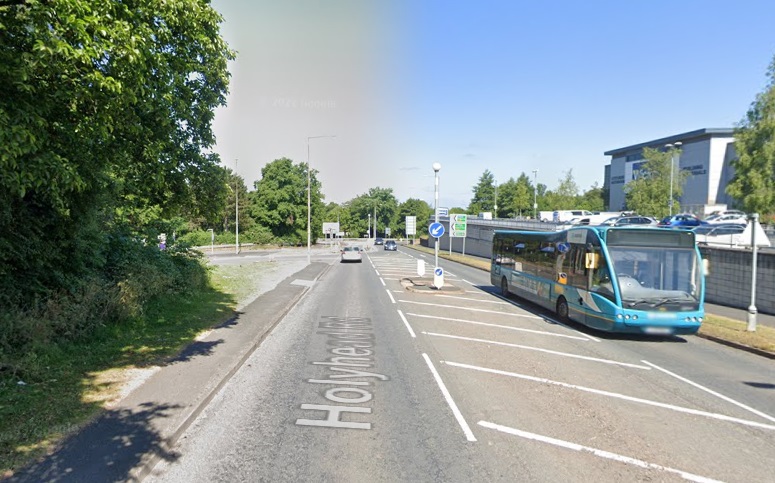
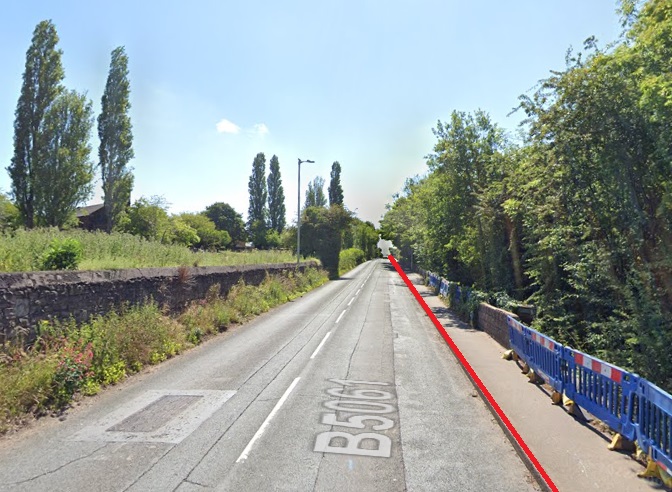
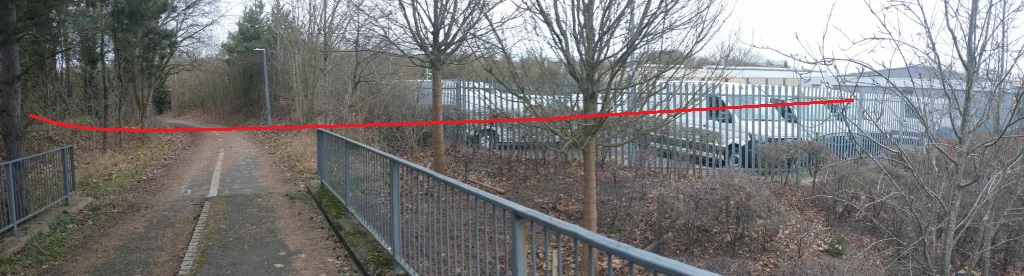
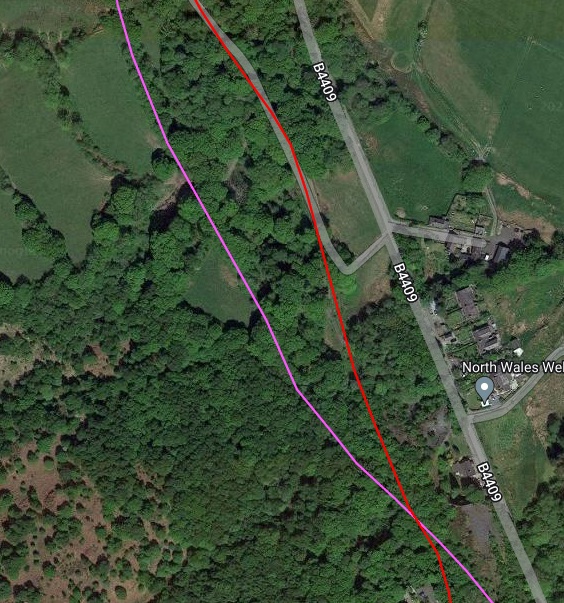
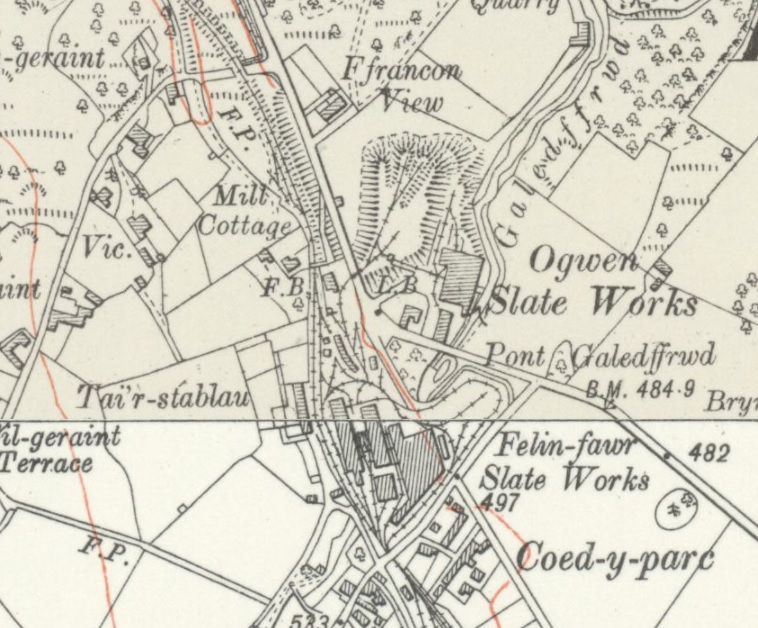
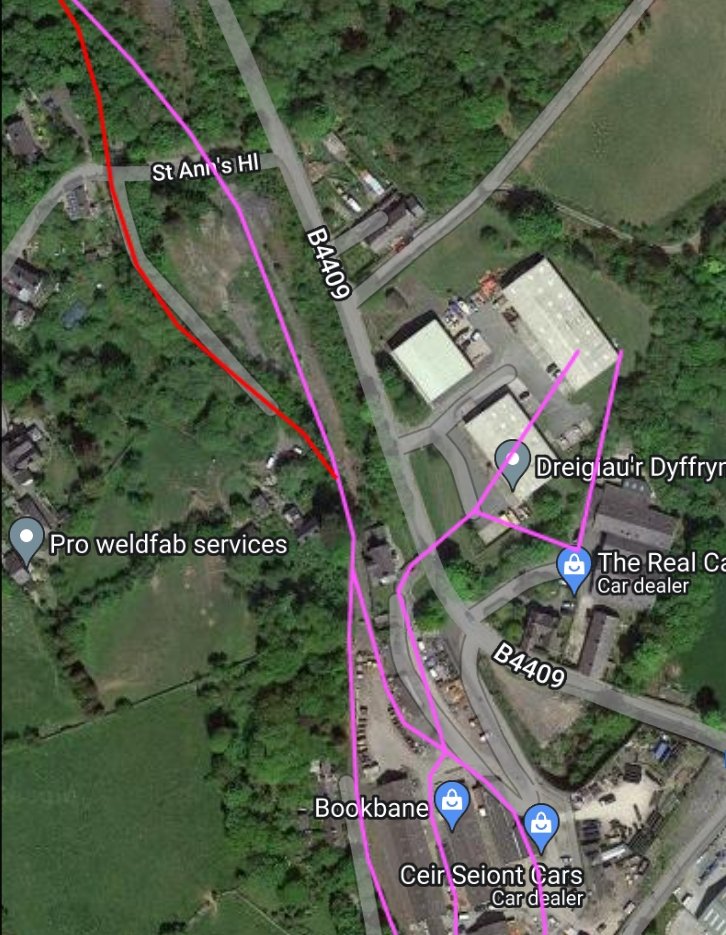
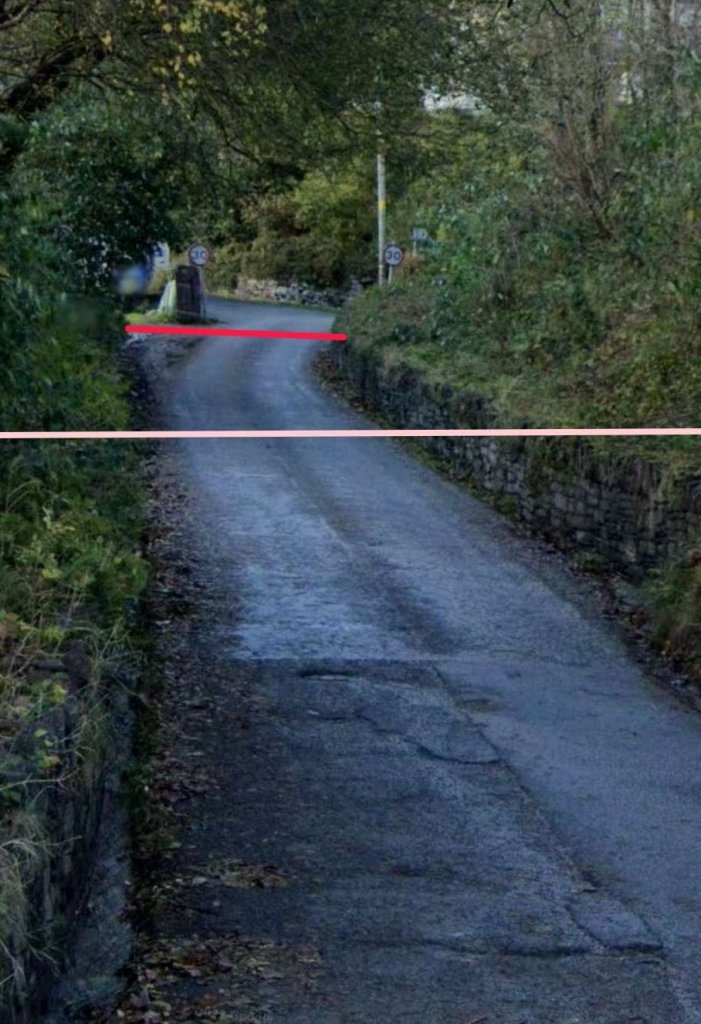
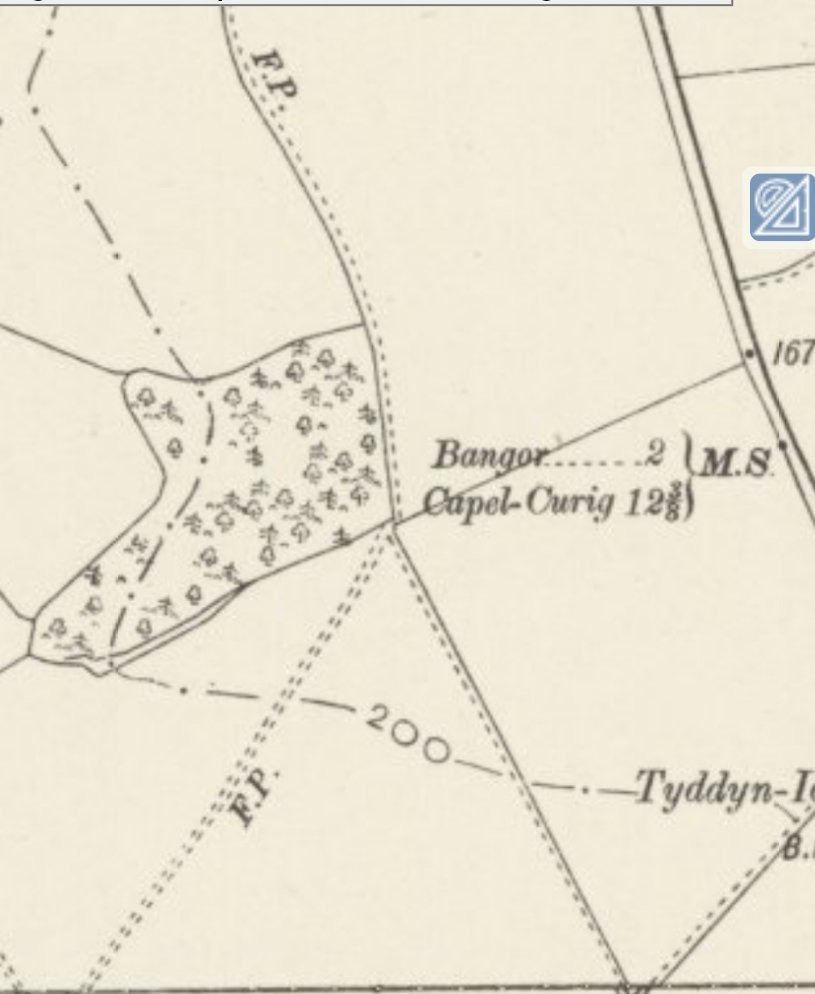
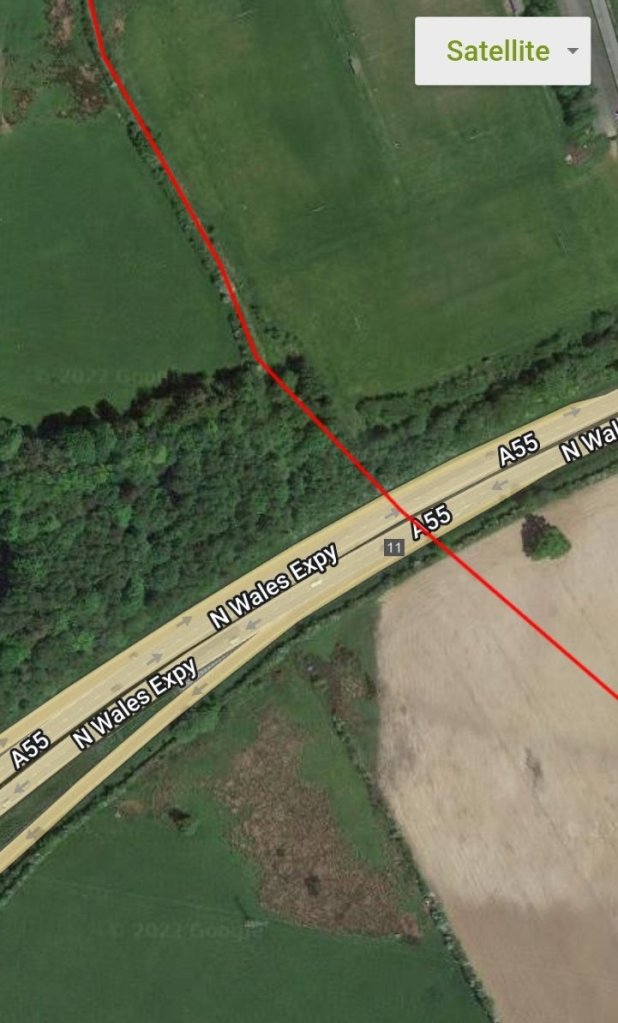
The route of the tramroad is shown by the straight red line along the field boundaries in the extract from the 1:25,000 Ordnance Survey. The route North of that red line curved around towards the Northwest following the line of the Monarch’s Way Footpath. It passes to the North of Brickkiln Coppice and crosses the road which links Coalport to the A442. [OS Explorer Sheet 242]Looking back South along the field boundary which marks the line of the old tramroad from the point that the Monarch’s Way begins to follow the route of the tramroad. [My photograph, 9th February 2023]The symbol for the Monarch’s Way which has been placed on various gateposts along the route. [My photograph, 9th February 2023]The old tramroad route continues to follow the field boundaries as it runs North. [My photograph, 9th February 2023]The old tramway route passes through the gate ahead and remains alongside the field boundaries beyond. [My photograph, 9th February 2023]Looking back to the South through the kissing gate which appeared in the last photograph. [My photo, 9th February 2023]The 6″ Ordnance Survey of 1882 has a redline imposed which shows that the old tramroad route curves round to the Northeast edge of Brickkiln Coppice, crosses the road between Coalport and the A442 and runs North-northwest along Brick Kiln Lane. [10]Looking North, once again, the tramroad route begins to turn away to the Northeast. [My photograph, 9th February 2023]The alignment of the old tramroad ran through the Northeastern edge of Brickkiln Coppice. [My photograph, 9th February 2023]The Monarch’s Way continues to follow the old tramroad route through the Coppice. [My photograph, 9th February 2023]The route of the old tramroad crosses the road from Coalport to the A442 and runs onto Brick Kiln Lane. [My photograph, 9th February 2023]Looking back along the line of the old tramroad from the road linking Coalport to the A442.The red line highlights the route through the Northeaast end of Brickkiln Coppice. [Google Streetview]The old tramroad route is now followed, in the 21st century, by Brick Kiln Lane. [Google Street View]The property ahead has been built across the line of the old tramroad which continued North from this point. Its route, at first, follows the line of modern field boundaries and then crosses open fields. [Google Streetview]This next extract from the 6″ Ordnance Survey shows the old tramroad running North-northwest and then curving round to cross the line of the A442 in a Northeasterly direction and then curving back to the North. [10]Google Earth’s 3D view looking North from the top of Brick Kiln Lane shows the line of the old tramroad running North. [Google Earth]This panoramic view is taken from the field to the East of the old tramroad route. The old tramroad line followed the hedge running across the picture. [My photograph, 9th February 2023]Google 3D image looking back to the South. The old tramroad turned towards the East at the end of the field boundary and crossed the line of the modern A442. [Google Earth]Looking North along the A442. The actual point at which the tramroad crossed the line of the road is difficult to determine. This location is approximately correct. [Google Streetview]In plan on this satellite image we can see the approximate alignment of the tramroad crossing the A442 and then turning to the North into what is now an industrial estate.The 1901 6″ Ordnance Survey with the next length of the route of the old tramroad shown. It crossed Mad Brook and ran North-northwest close to the field boundaries before turning North-northeast. [11]The same area as that covered by the Ordance Survey map extract immediately above. What was open fields is now the Halesfield Industrial Estate. It is only feasibile to provide approximate locations where the old tramroad route crosses modern industrial estate roads. [11]The view North-northwest from point ‘1’ on the satellite image above. [Google Streetview, June 2022]The view North-northwest from point ‘2’ on the satellite image above. [Google Streetview, June 2022]The view Northeast along Halesfield 10, from point ‘3’ on the satellite image above. [Google Streetview, June 2022]The view North-northeast along Halesfield 14, from point ‘4’ on the satellite image above. [Google Streetview, June 2022]The view East-southeast along Halesfield 13, from point ‘5’ on the satellite image above. [Google Streetview, June 2022]The view East along the A4169, from point ‘6’ on the satellite image above. [Google Streetview, June 2022]The 1901 6″ Ordnance Survey with the next length of the route of the old tramroad shown. It approximately followed field boundaries while heading North-northeast beofre curving round to the North. Tramroads/tramways are shown on the OS Mapping of 1901. These would not have been present while the tramroad we are following was active. Neither Halesfield Colliery nor Kemberton Colliery were active at the time that the Lilleshall tramroad was in use. The local landscape will have been significantly altered by the spoil heap shown on this 1901 mapping. [12]The same area as that covered by the Ordance Survey map extract immediately above. What was open fields is now, very much, part of the urban environment. It is only feasible to provide approximate locations where the old tramroad route crosses modern roads. [12]
Two collieries appear on the 1901 OS mapping – Halesfield and Kemberton Collieries. These would not have been present when the tramroad was active in this area. By the 1950s these two pits were worked as one by the NCB and together employed over 800 men. “John Anstice sank Kemberton Pit when director of the family company in 1864 mainly for coal but it also produced ironstone and fireclay. … Halesfield was sunk as an ironstone and coal mine in the 1830s and continued to work coal until the 1920s, it later became the upcast and pumping shafts for Kemberton pit.” [13]
Apart from the A4169 at the bottom of the satellite image (which is already shown above), the only modern road which crosses the line of this section of the old tramroad Is Halesfield 18. Google Streetview images in this area were taken at the height of Summer in 2022 when vegetation was at its most abundant and as a result show nothing of note.
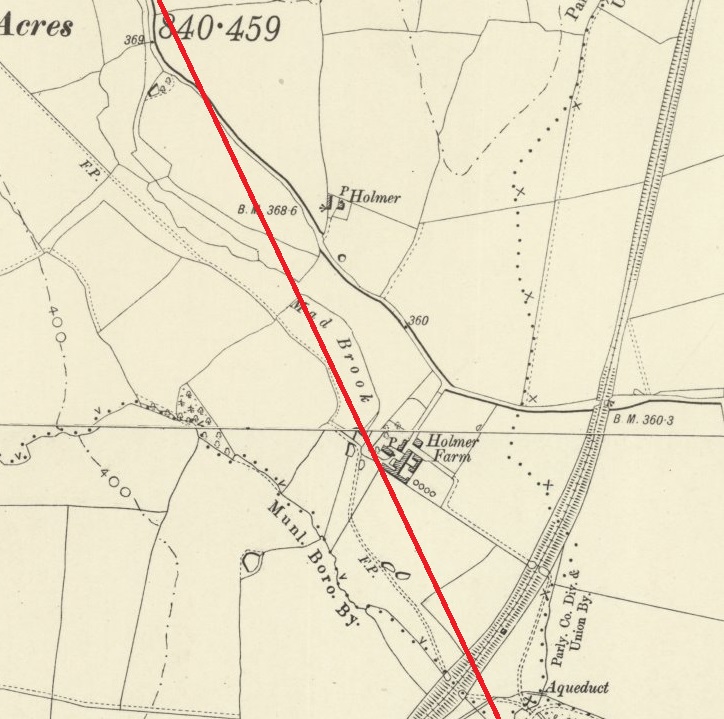
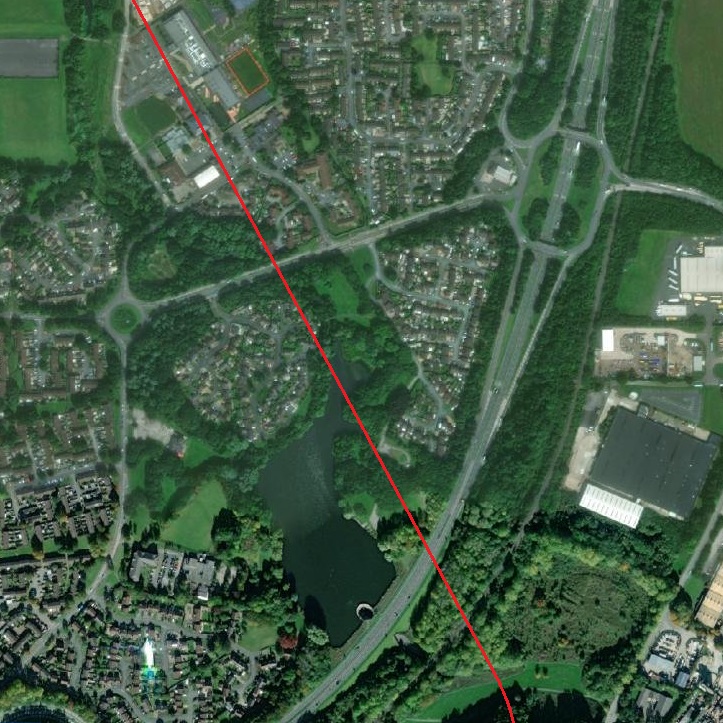
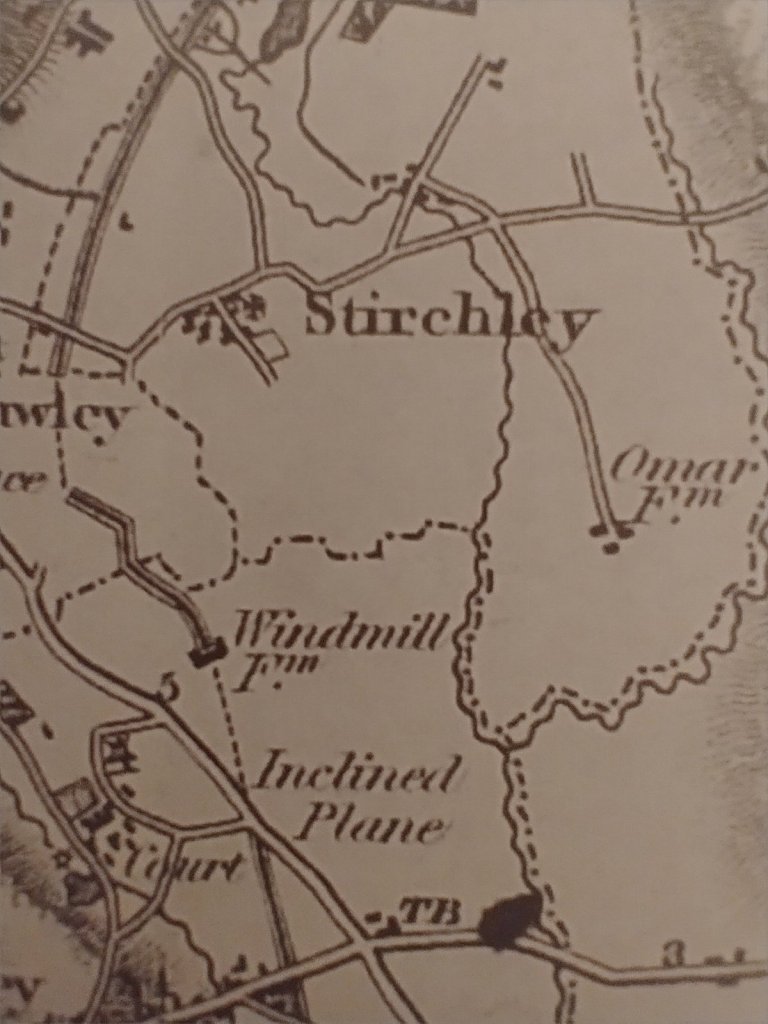
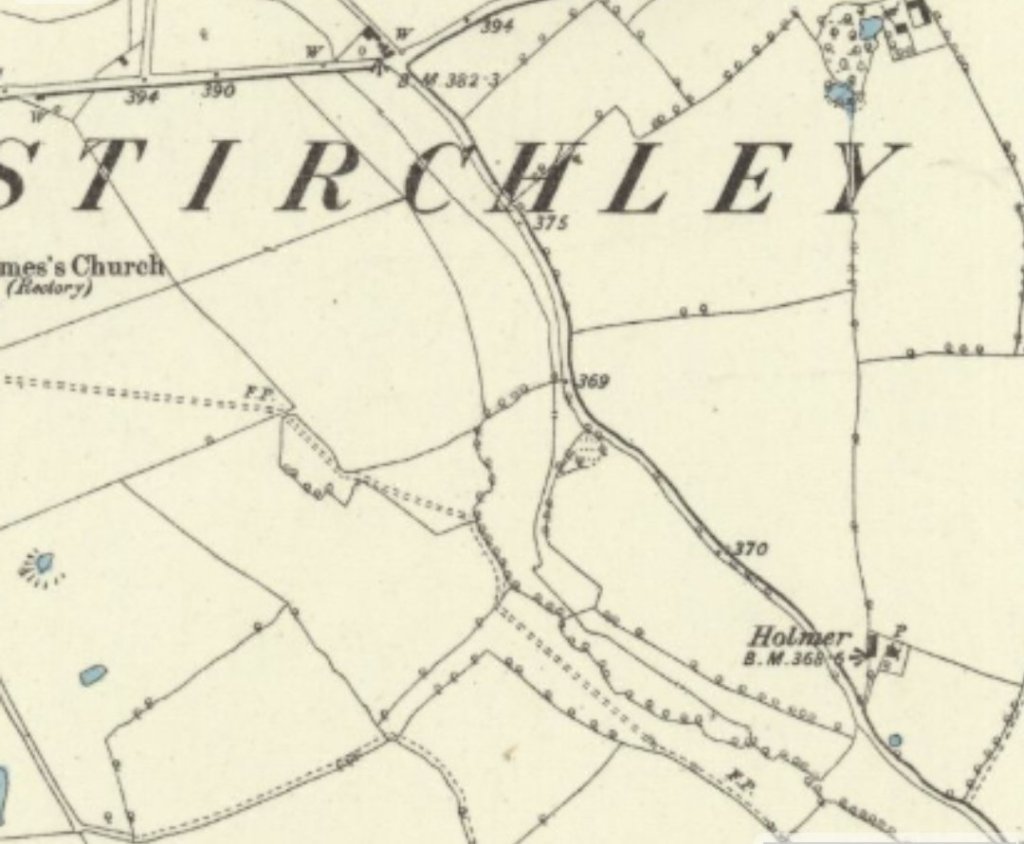
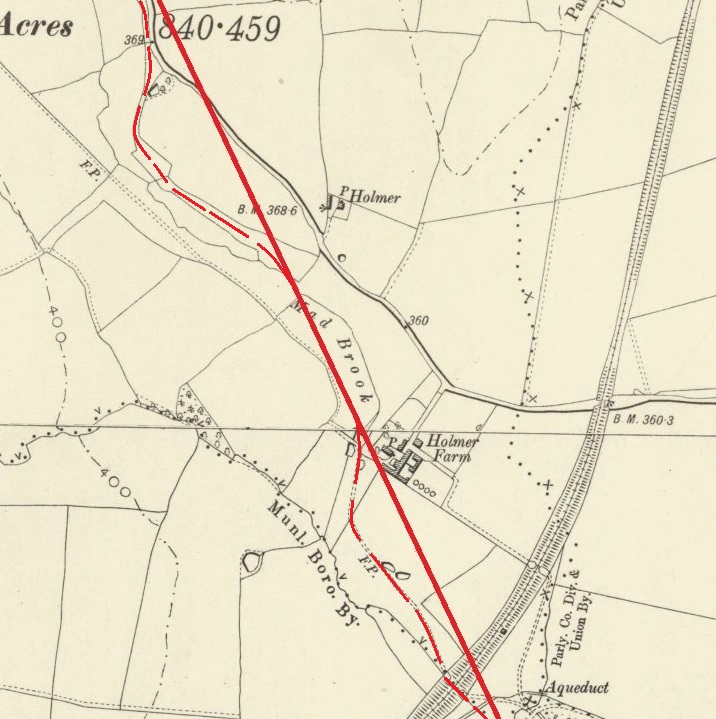
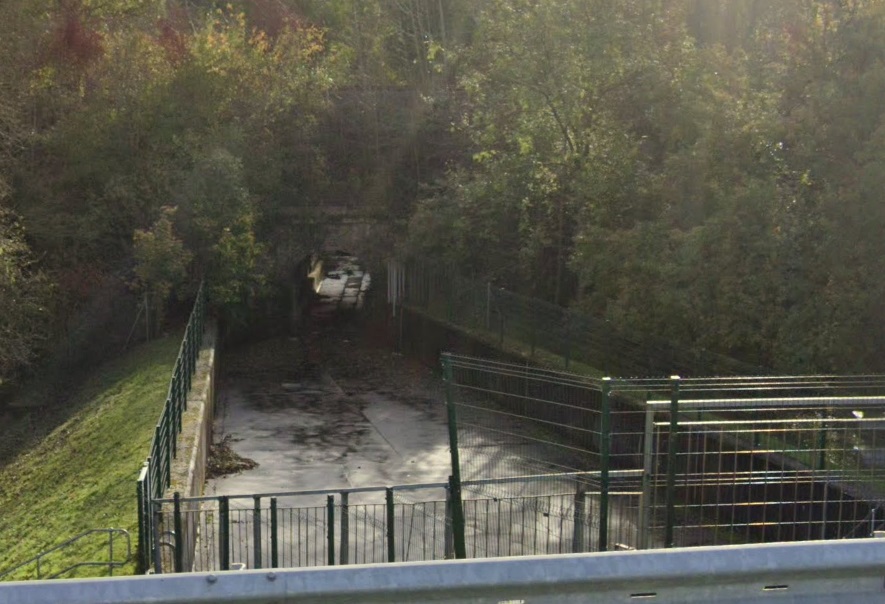
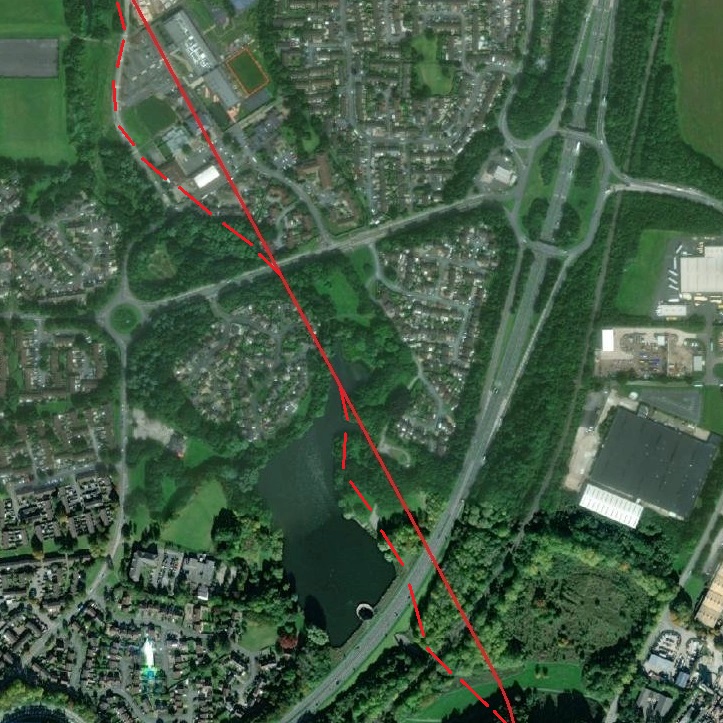
The next extract from the 1901 6″ Ordnance Survey has the line as drawn by Savage and Smith continuing North-northwest, running very close to the buildings of Holmer Farm and across Mad Brook twice before crossing the lane between The Hem and Stirchley, Northwest of Holmer. There are some reasons to question the Savage and Smith alignment. They have transferred the alignment from the 0.5 to 1 mile drawings produced in 1836 for the proposed Shropshire Railway between Shrewsbury and Wolverhampton. [14]The same area as shown in the 6″ OS map extract above but on the modern ESRI satellite imagery from the NLS. Savage and Smith’s alignment of the old tramway is superimposed again. [14]A closer extract from the Robert Baugh’s Map of Shropshire of 1808 which we have already seen. The red line drawn indicates the route of the Tramroad. The map from which the extract was taken is available on the ‘Dawley History’ website. At first sight, this map suggests a different alignment in the vicinity of Stirchley to that recorded by Savage and Smith, as it shows the village of Stirchley very close to the line of the old tramroad. However, it also shows Mad Brook very close to Stirchley. I am reasonably convinced that the old tramroad ran relatively close to the line of the brook. On this map this occurs close to Stirchley but to the south there is some distance between them. The position of the brook as shown on the 1827 and1836 maps below matches later Ordnance Survey mapping and aligns much more closely with the tramroad route shown on this extract from Baugh’s Map. [7]An extract from Greenwood’s Map of 1827 showing Mad Brook running further to the East. [18]This map was included in the British History Online Website. [16] It comes from A History of the County of Shropshire: Volume 11, Telford. [17] Sadly, for our purposes the line of what would by then have been a disused tramroad is no longer shown. However, the field boundaries in the vicinity of the brook are unusual. There appears to be a corridor roughly following the route of Mad Brook which appears on later mapping as well. In my naivety I would have expected the field boundaries to extend down towards the brook.Mad Brook is a lot less obvious on the 6″ OS Mapping of 1883, but the corridor of land is evident again. [15]Returning to the 6″ OS map extract from 1901 that we have already seen. Savage and Smith’s plotted line remains but I have added what appears to be the more likely route of the old tramroad as a red-dashed line. The illustrated discussion above covers the more northerly deviation. The more southerly deviation follows the line of a footpath which may well have been on the old formation. If correct then the tramroad would have run immediately alongside Mad Brook where by, by 1901, the brook passed under the more modern railway. However, the line shown seems more logical to me than the relatively arbitrary straight line. I’d be interested in any reflections on this from others. [14]If my assumption is correct that the tramroad ran close to Mad Brook at the bottom of the 6″ OS map extract above then this culvert is on its approximate line. When the railway was built, Mad Brook was culverted here. The outfall from Holmer Lake now runs under the A442 and through the stone culvert. The picture is taken from the Southwest bound carriageway of the A442, Queensway. [Google Streetview, October 2022]
Our discussion about the old tramroad alignment is essentially speculative. We are in a better position than Savage and Smith were to trace routes using modern technology, but even so our possible route remains speculative. I have reproduced in in approximation on the same modern satellite image as were encountered above. Should it be correct, then some of its route can be followed and some locations can be photographed but all with a healthy sense of scepticism.
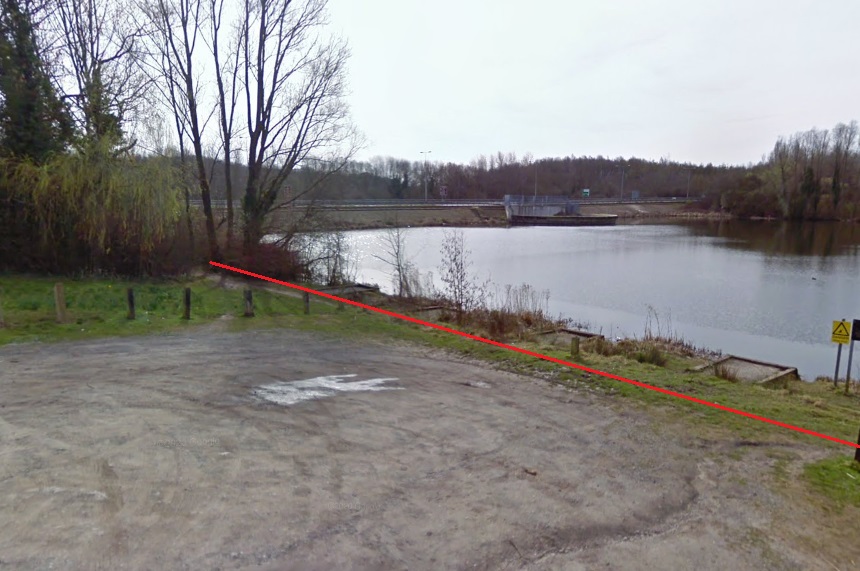
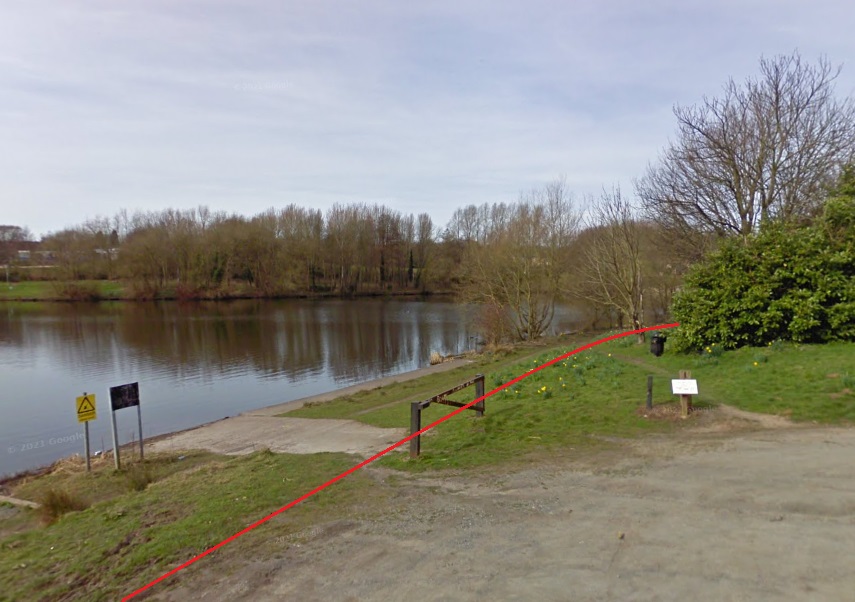
The ERSI satellite image which we have already seen, with a sketch of my suggested route of the tramroad included alongside the Savage and Smith alignment. MY suggestion is shown by red-dashed lines. [14]Holmer Lake looking South towards the outfall. The tramroad would have crossed the line of the a442 a few hundred feet to the left of the outfall. The redline shown on the photograph is an approximation to my suggested route of the tramroad. [Google Streetview, March 2009]
Holmer Lake is a reservoir owned by Severn Trent Water and serves Telford and the surrounding areas. The land around Holmer Lake includes areas of woodland and grassland. [19] Mad Brook was dammed in in 1968-70 to create a balancing reservoir at the behest of Telford Development Corporation. [16][17]
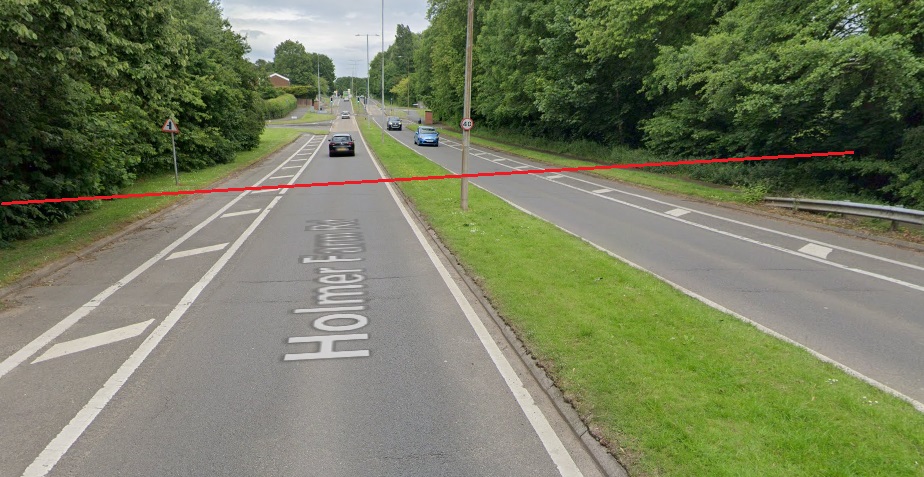
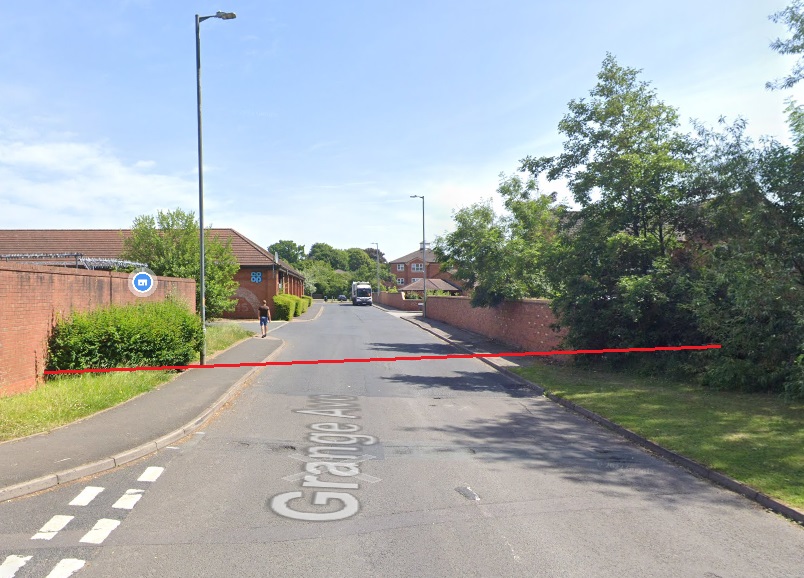
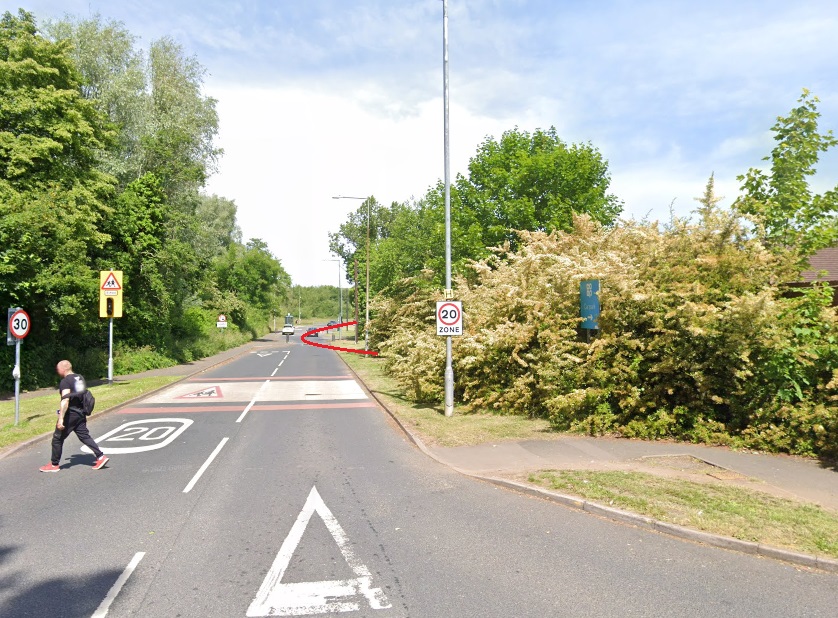
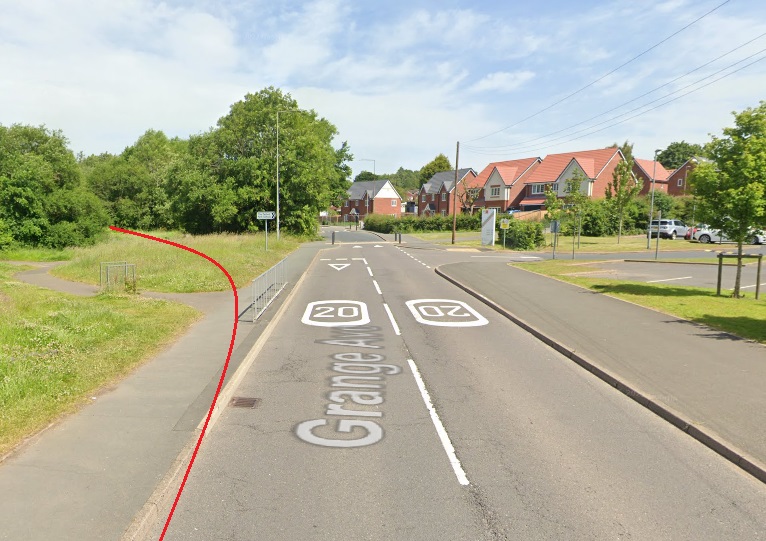
Holmer Lake agin, this time looking Northwest from the same spot in the photo above. [Google Streetview, March 2009]Looking East along Holmer Farm Road, showing, very approximately, the route of the old tramroad. [Google Streetview, June 2022]Looking East-Northeast along Grange Avenue showing the approximate line of the old tramroad. [Google Streetview, June 2022]Turning about 90 degrees to the North-Northwest, we look along another arm of Grange Avenue with the route of the old tramroad suggested by the red line, entering from the right, running for a distance along the road in a North-Northwest direction and approximately following the modern road as it curves to the right ahead. [Google Streetview, June 2022]Further North along Grange Avenue, the route of the old tramroad probably veered away from the modern road. Mad Brook still runs close to the old tramroad route and is just off to the left of this photograph. [Google Streetview, June2022.
The next length of the old tramroad brings us passed the site of Grange Farm and Grange Colliery, Stirchley Ironworks and close to Randlay Pool. Mad Brook meanders North, initially close to the line of the old tramroad, moving away West beyond Grange Farm and then getting lost in the midst of Stirchley/Oldpark Ironworks.
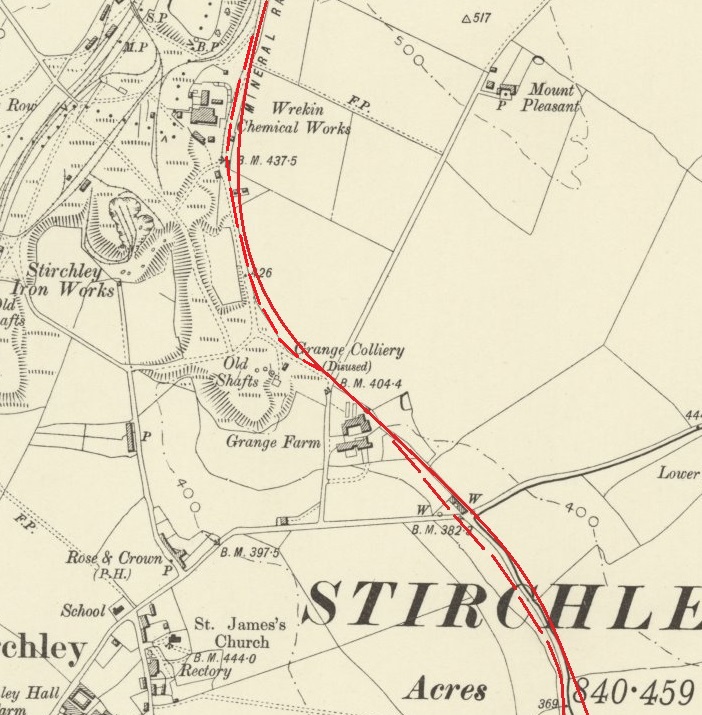
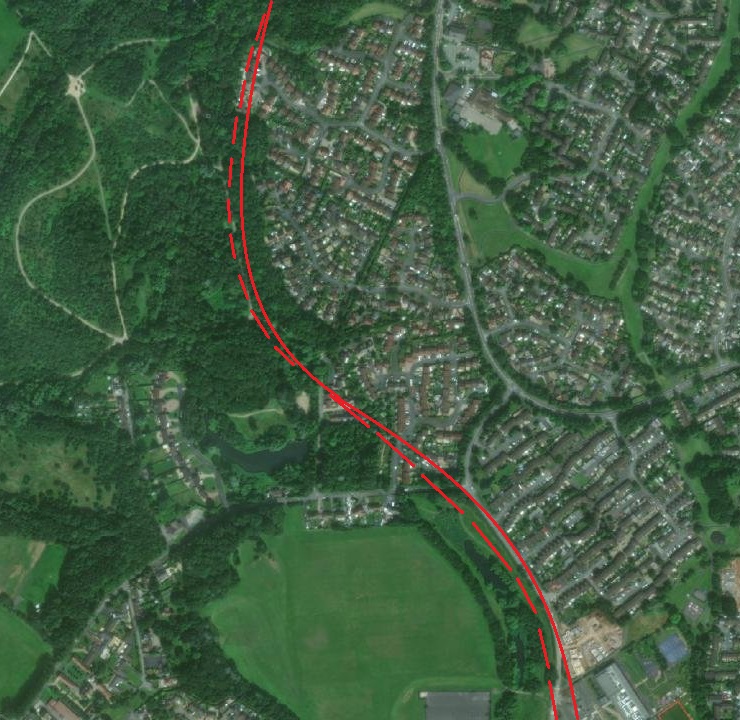
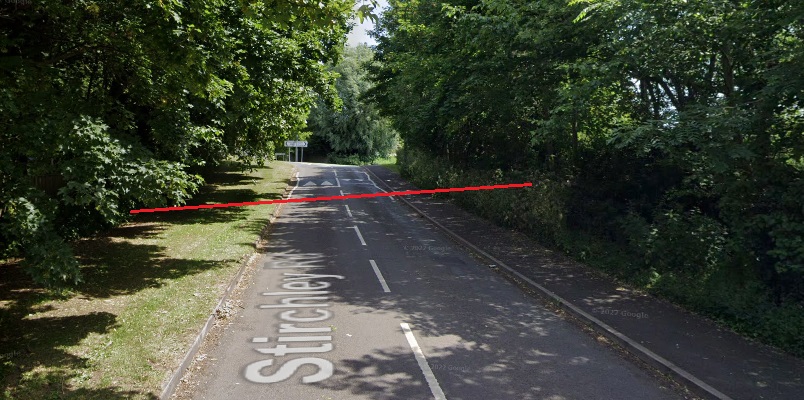
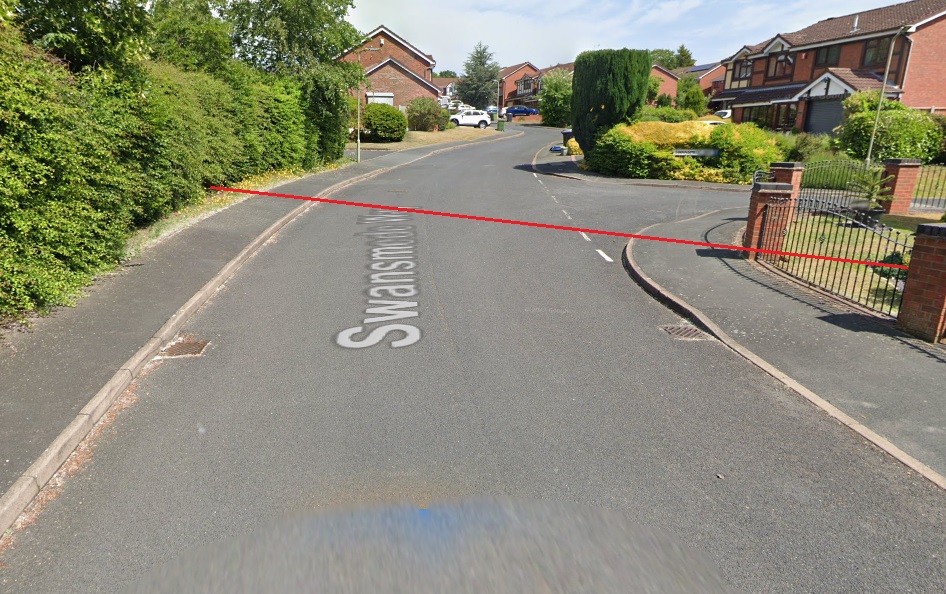
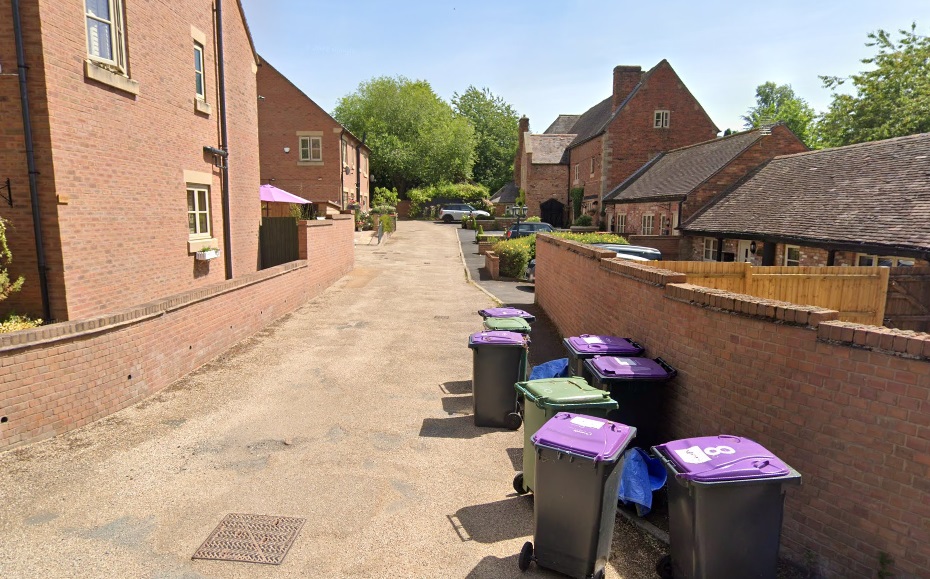
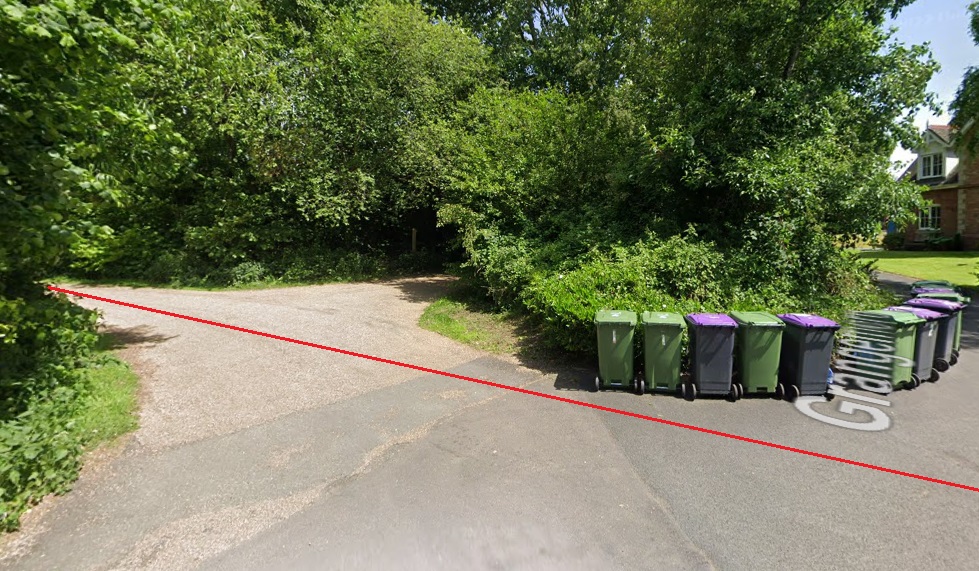
Savage and Smith’s traced alignment for the tramroad has been transferred to this next extract from the 6″ Ordnance Survey of 1901 as the solid, but sinuous, red line. It seems to me to be likely that the actual route was close to the line drawn by Savage and Smith, but just a very short distance to the West over the length Southeast of Grange Farm and a lesser distance to the West over the length immediately Northwest of Grange Farm. [20]A similar area to that on the OS map above with an imposed solid red line indicating, approximately, Savage and Smith’s traced tramroad route and my assessment of the likely route in the line of red dashes. There is very little difference between the two routes both have to have passed to the East side of Grange Farm. Both are difficult to plot on the modern landscape which is now heavily wooded. [20]Looking East on Stirchley Road towards Grange Avenue from above the line of Mad Brook. The Savage and Smith traced line of the tramroad would have crossed the line of Stirchley Road close to the junction. The red line shown is an approximation to my assessment of the route which seeks to follow map features on the older OS mapping. [Google Streetview, June 2022]Looking North along Swansmede Way across the probable line of the old tramroad. [Google Streetview, June 2022]The view from the West on Grangemere into the site old what was Grange Farm. The old tramroad would have run across the photograph beyond the older farm buildings on the right, probably in what is now a wooded area beyond. [Google Streetview, June 2022]Looking North at the top of Grangemere in the 21st century. The old tramroad alignment is suggested by the red line. [Google Streetview]
These images are taken at and around the site of Grange Colliery. On the image above, the spoil heaps from the colliery were immediately off-screen to the left the colliery yard ahead to the North. The image below was taken a from a point just to the North of the bins awaiting collection and looking to the left.
Grange Colliery probably opened by 1833. The extent of seams that could be worked was restricted by the Limestone fault, east of which the coal lay deeper. [21][17] By 1881 all the pits except Grange colliery had been closed. Despite the lease of mineral rights at Grange Colliery to Alfred Seymour Jones of Wrexham in 1893, the colliery was closed in 1894. [21][17]
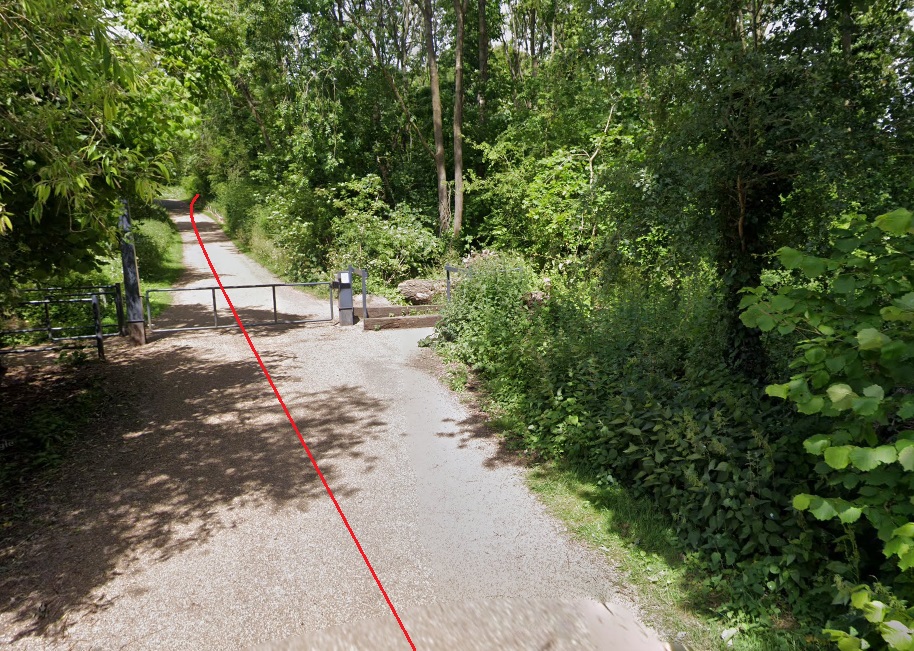
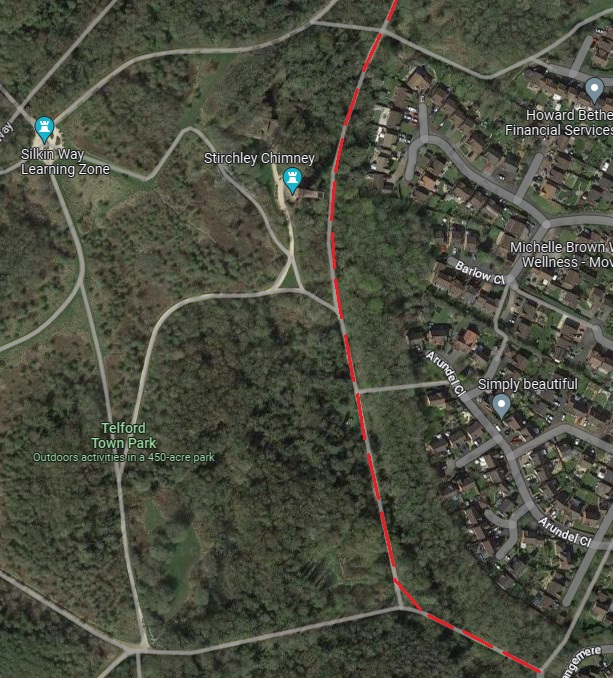
Looking Northeast from the top of Grangemere along a modern path which leads into Telford Town Park today. This track is likely to follow the line of the old tramroad from Sutton Wharf. In the area ahead and to the North there were a number of major industrial sites all linked by a series of tramroads which post-dated the tramroad that we are following but predated the later railways. [Google Streetview, June 2022]The route of the old tramroad from Sutton Wharf is show by a red-dashed line on this 2023 Google Maps satellite view. The paths in Telford Town Park are clearly marked on Google Maps. The path at the East side of the Park passing close to Stirchley Chimney is very likely to be on the line of the old tramroad. [Google Maps, February 2023]
The closer satellite view of part of Telford Town Park above gives us a good point to stop to think about the historical timeline in the immediate vicinity of Stirchley Chimney. The tramroads in this immediate area were looked at in an earlier article in this series which can be found here. [22]
Savage and Smith [2] and other sources provide sufficient information to allow us to pull together that timeline. We have already noted that the tramroad was operating by 1799 and abandoned by 1815. Other Tramroads around Stirchley and along the route of the Shropshire Canal came along, generally, in piecemeal fashion.
The canal predated the Tramroad. It was built to link Donnington Wood with Coalport on the River Severn, a distance of about 7 miles. Construction commenced in 1789 near Oakengates and reached Blists Hill relatively quickly. A shaft and tunnel were intended to get loads down to river level. However, it seems as though natural tar was found oozing out of the tunnel wall and it was turned into a tar extraction business. In its place the Hay Incline was built to bring tub boats down to river level. [23] The incline has also been covered previous articles: here [24] and here. [25]
Once the canal has been completed a number of businesses decided to use the canal as a route to the outside world. Before 1830 a wharf had been established on the West side of the Canal close to Hinkshay/Stirchley Pools which provided for colleries, brickworks and ironworks to the West and North.
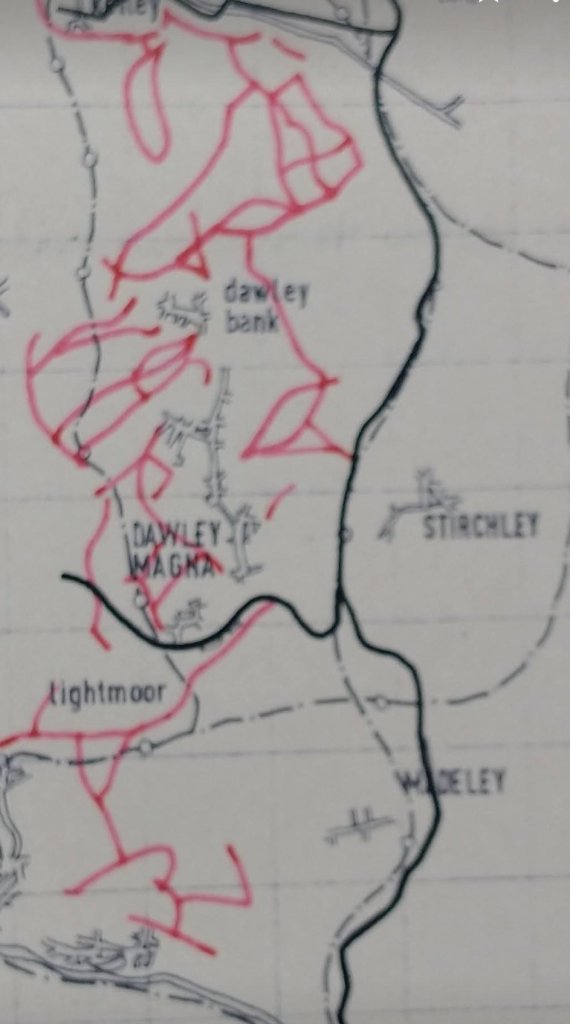
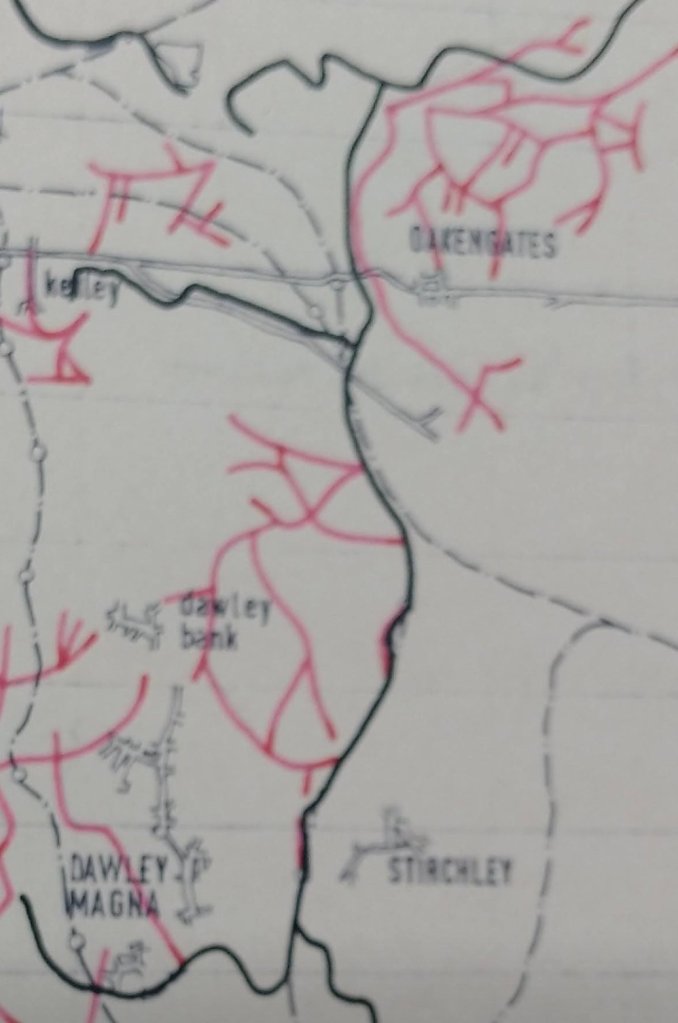
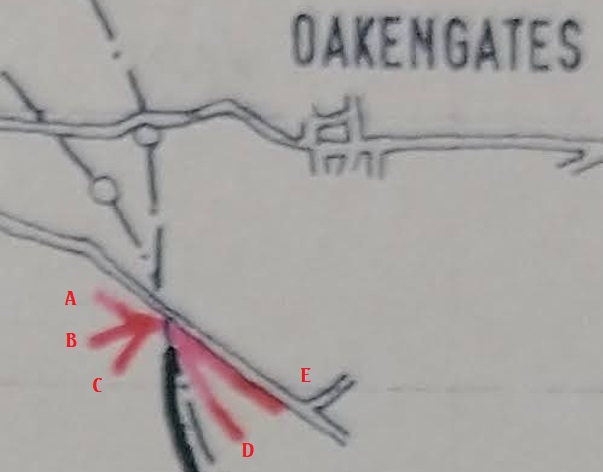
A somewhat out of focus extract from Savage and Smith’s 1″ to one mile drawing of local tramroads which appeared in the period 1821 to 1830. The black lines are the canal network, the red lines, the tramroad network. The Tramroad link to the wharf at the Shropshire Canal can be seen to the Northwest of Stirchley. [2: p87]Also rather out of focus, this extract is taken from Savage and Smith’s 1″ to one mile covering the period 1831 to 1840. There are additional links to the canal and a significant increase in Tramroads around Oakengates. [2: p89]
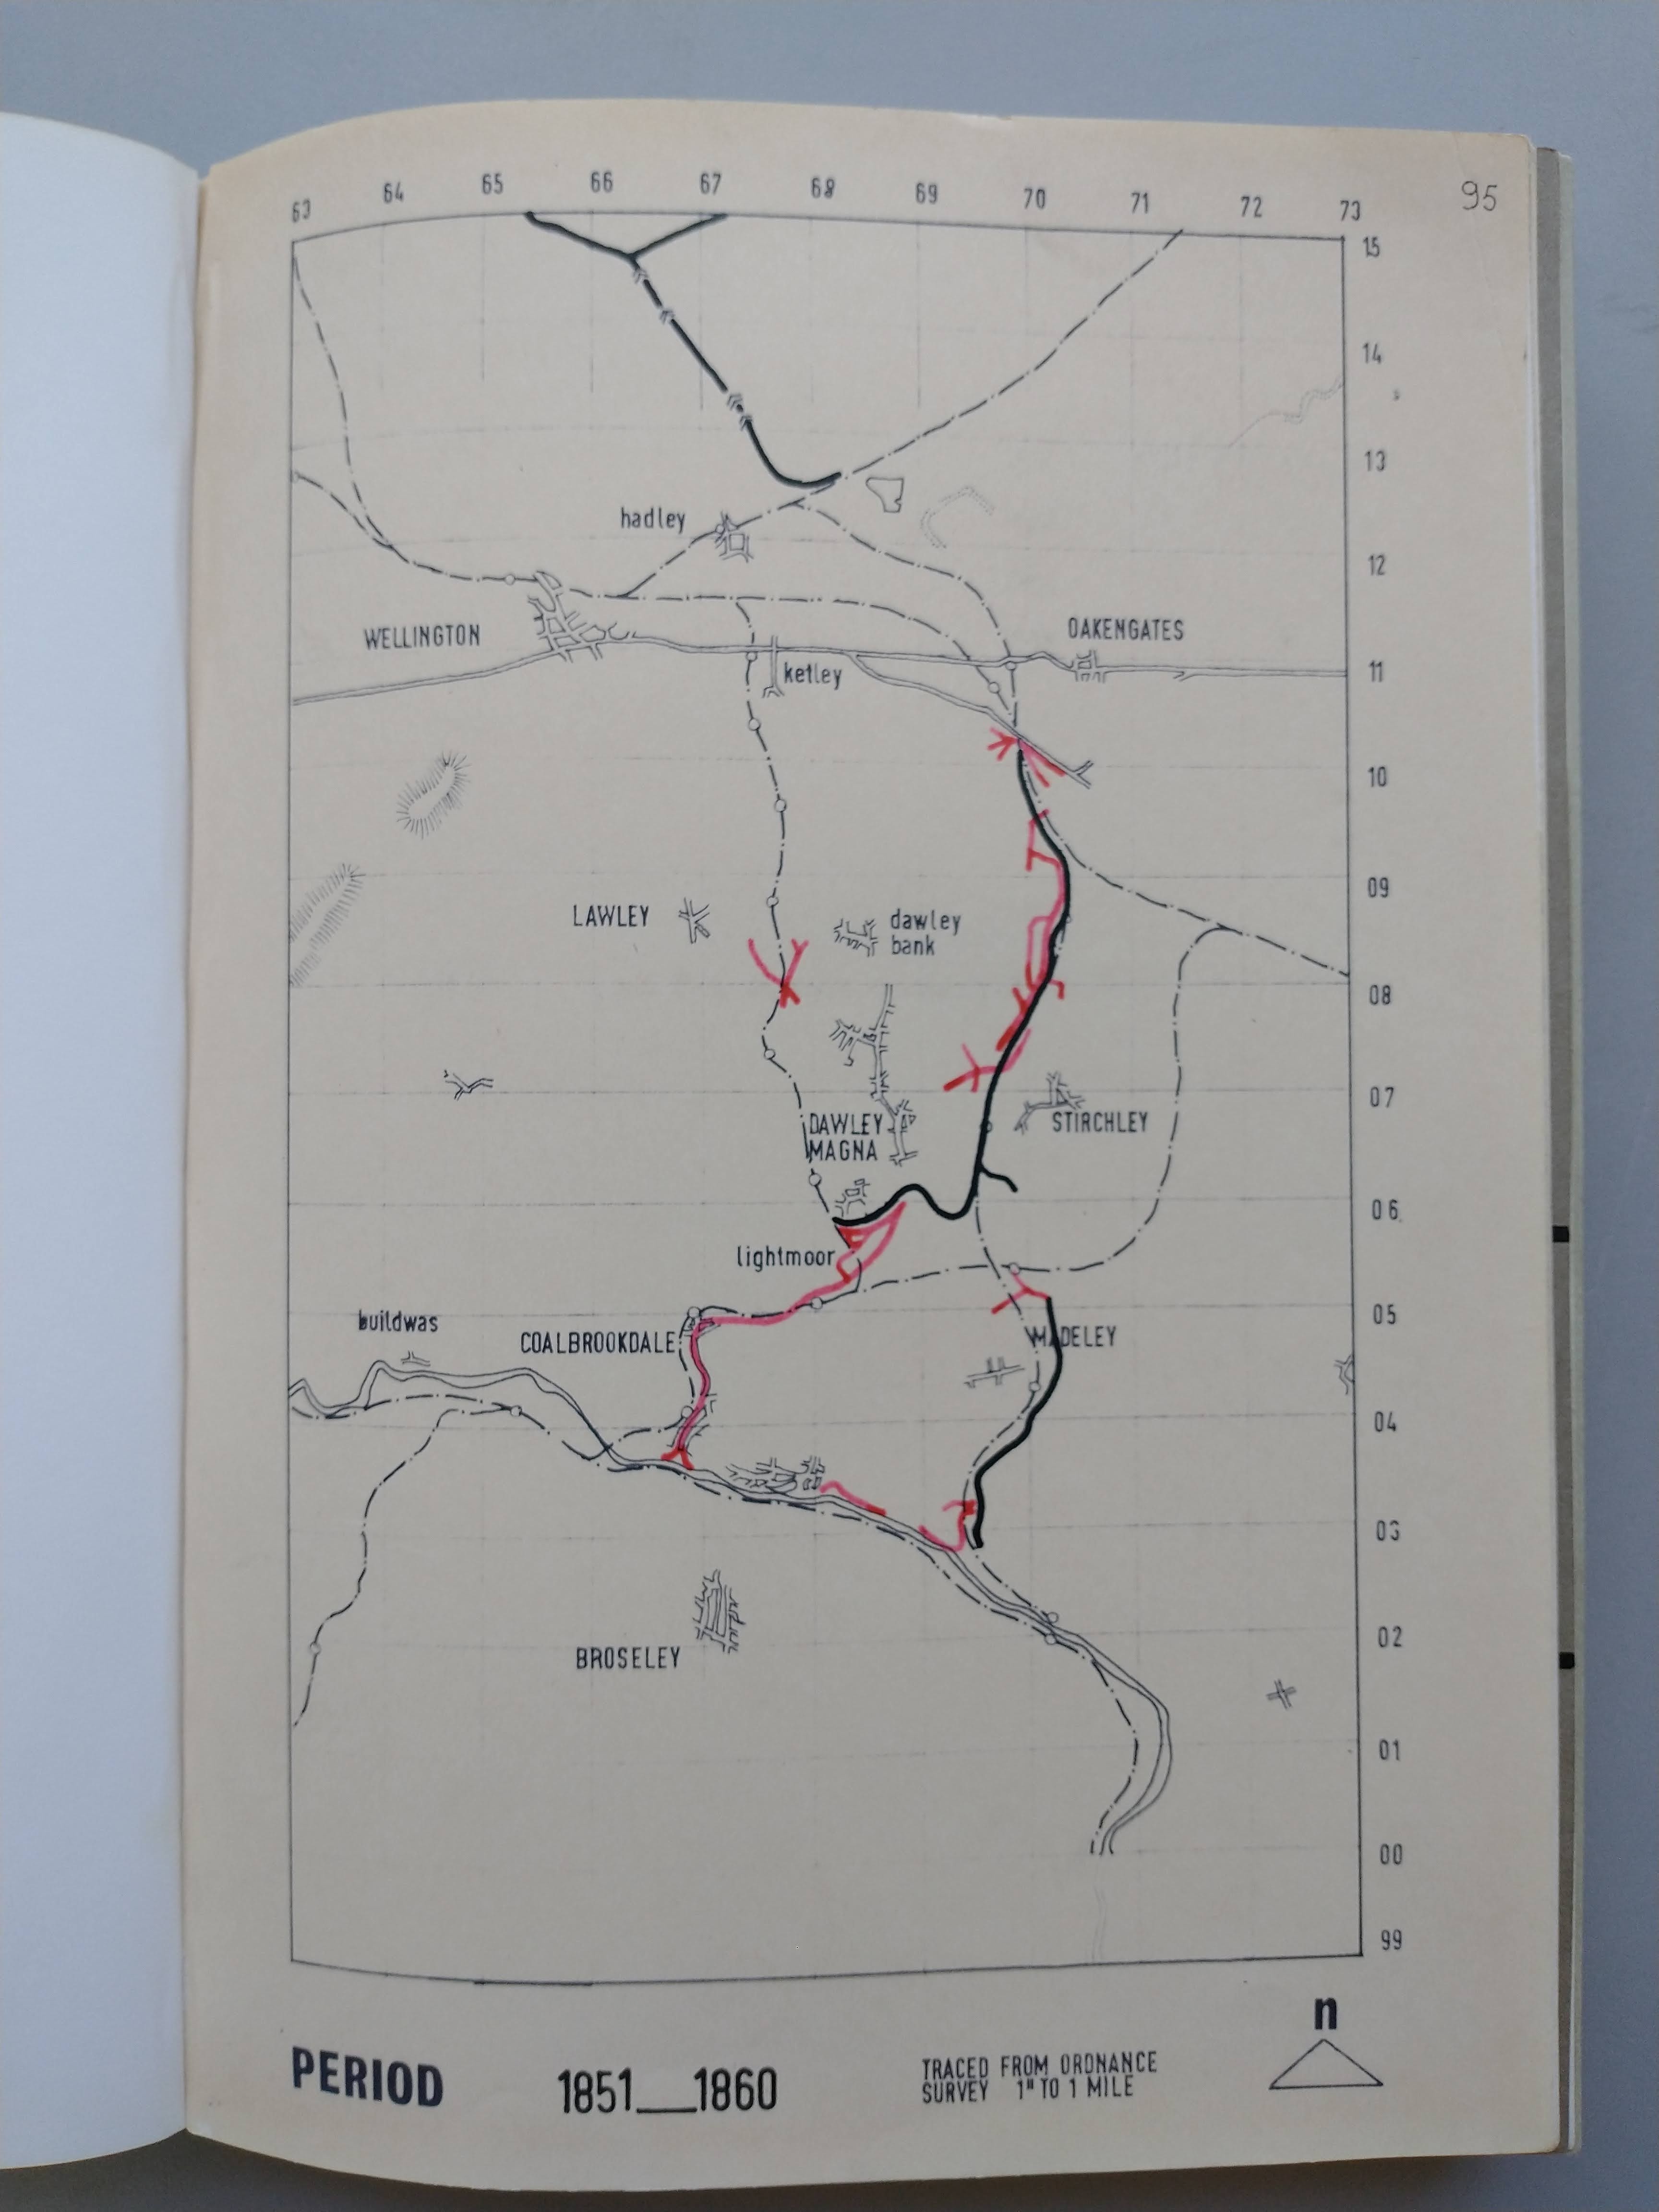
The 1840s saw minor additions to the tramroad network around Madeley (South of Stirchley), the next decade saw considerable developments alongside the canal as shown on the next Savage and Smith extract below.
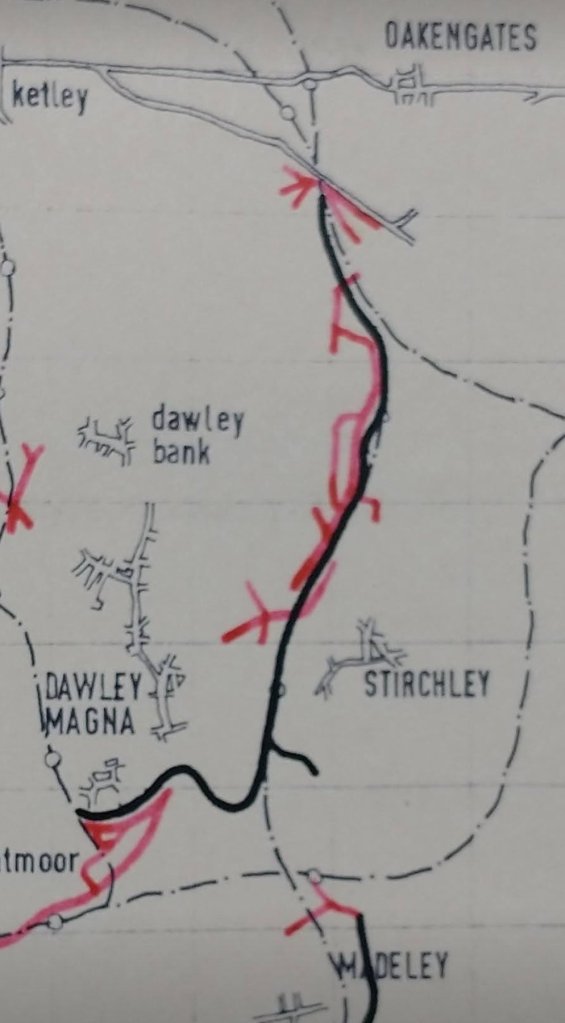
Better focus, this time! This extract is taken from Savage and Smith’s 1″ to one mile covering the period 1851 to 1860. There are additional tramroad routes following the canal and a small additions around Madeley. The canal is gradually becoming less significant and a length between Stirchley and Madeley has by this time been closed. Savage and Smith are still showing very little to the East of the Canal, just two short lengths. [2: p95]
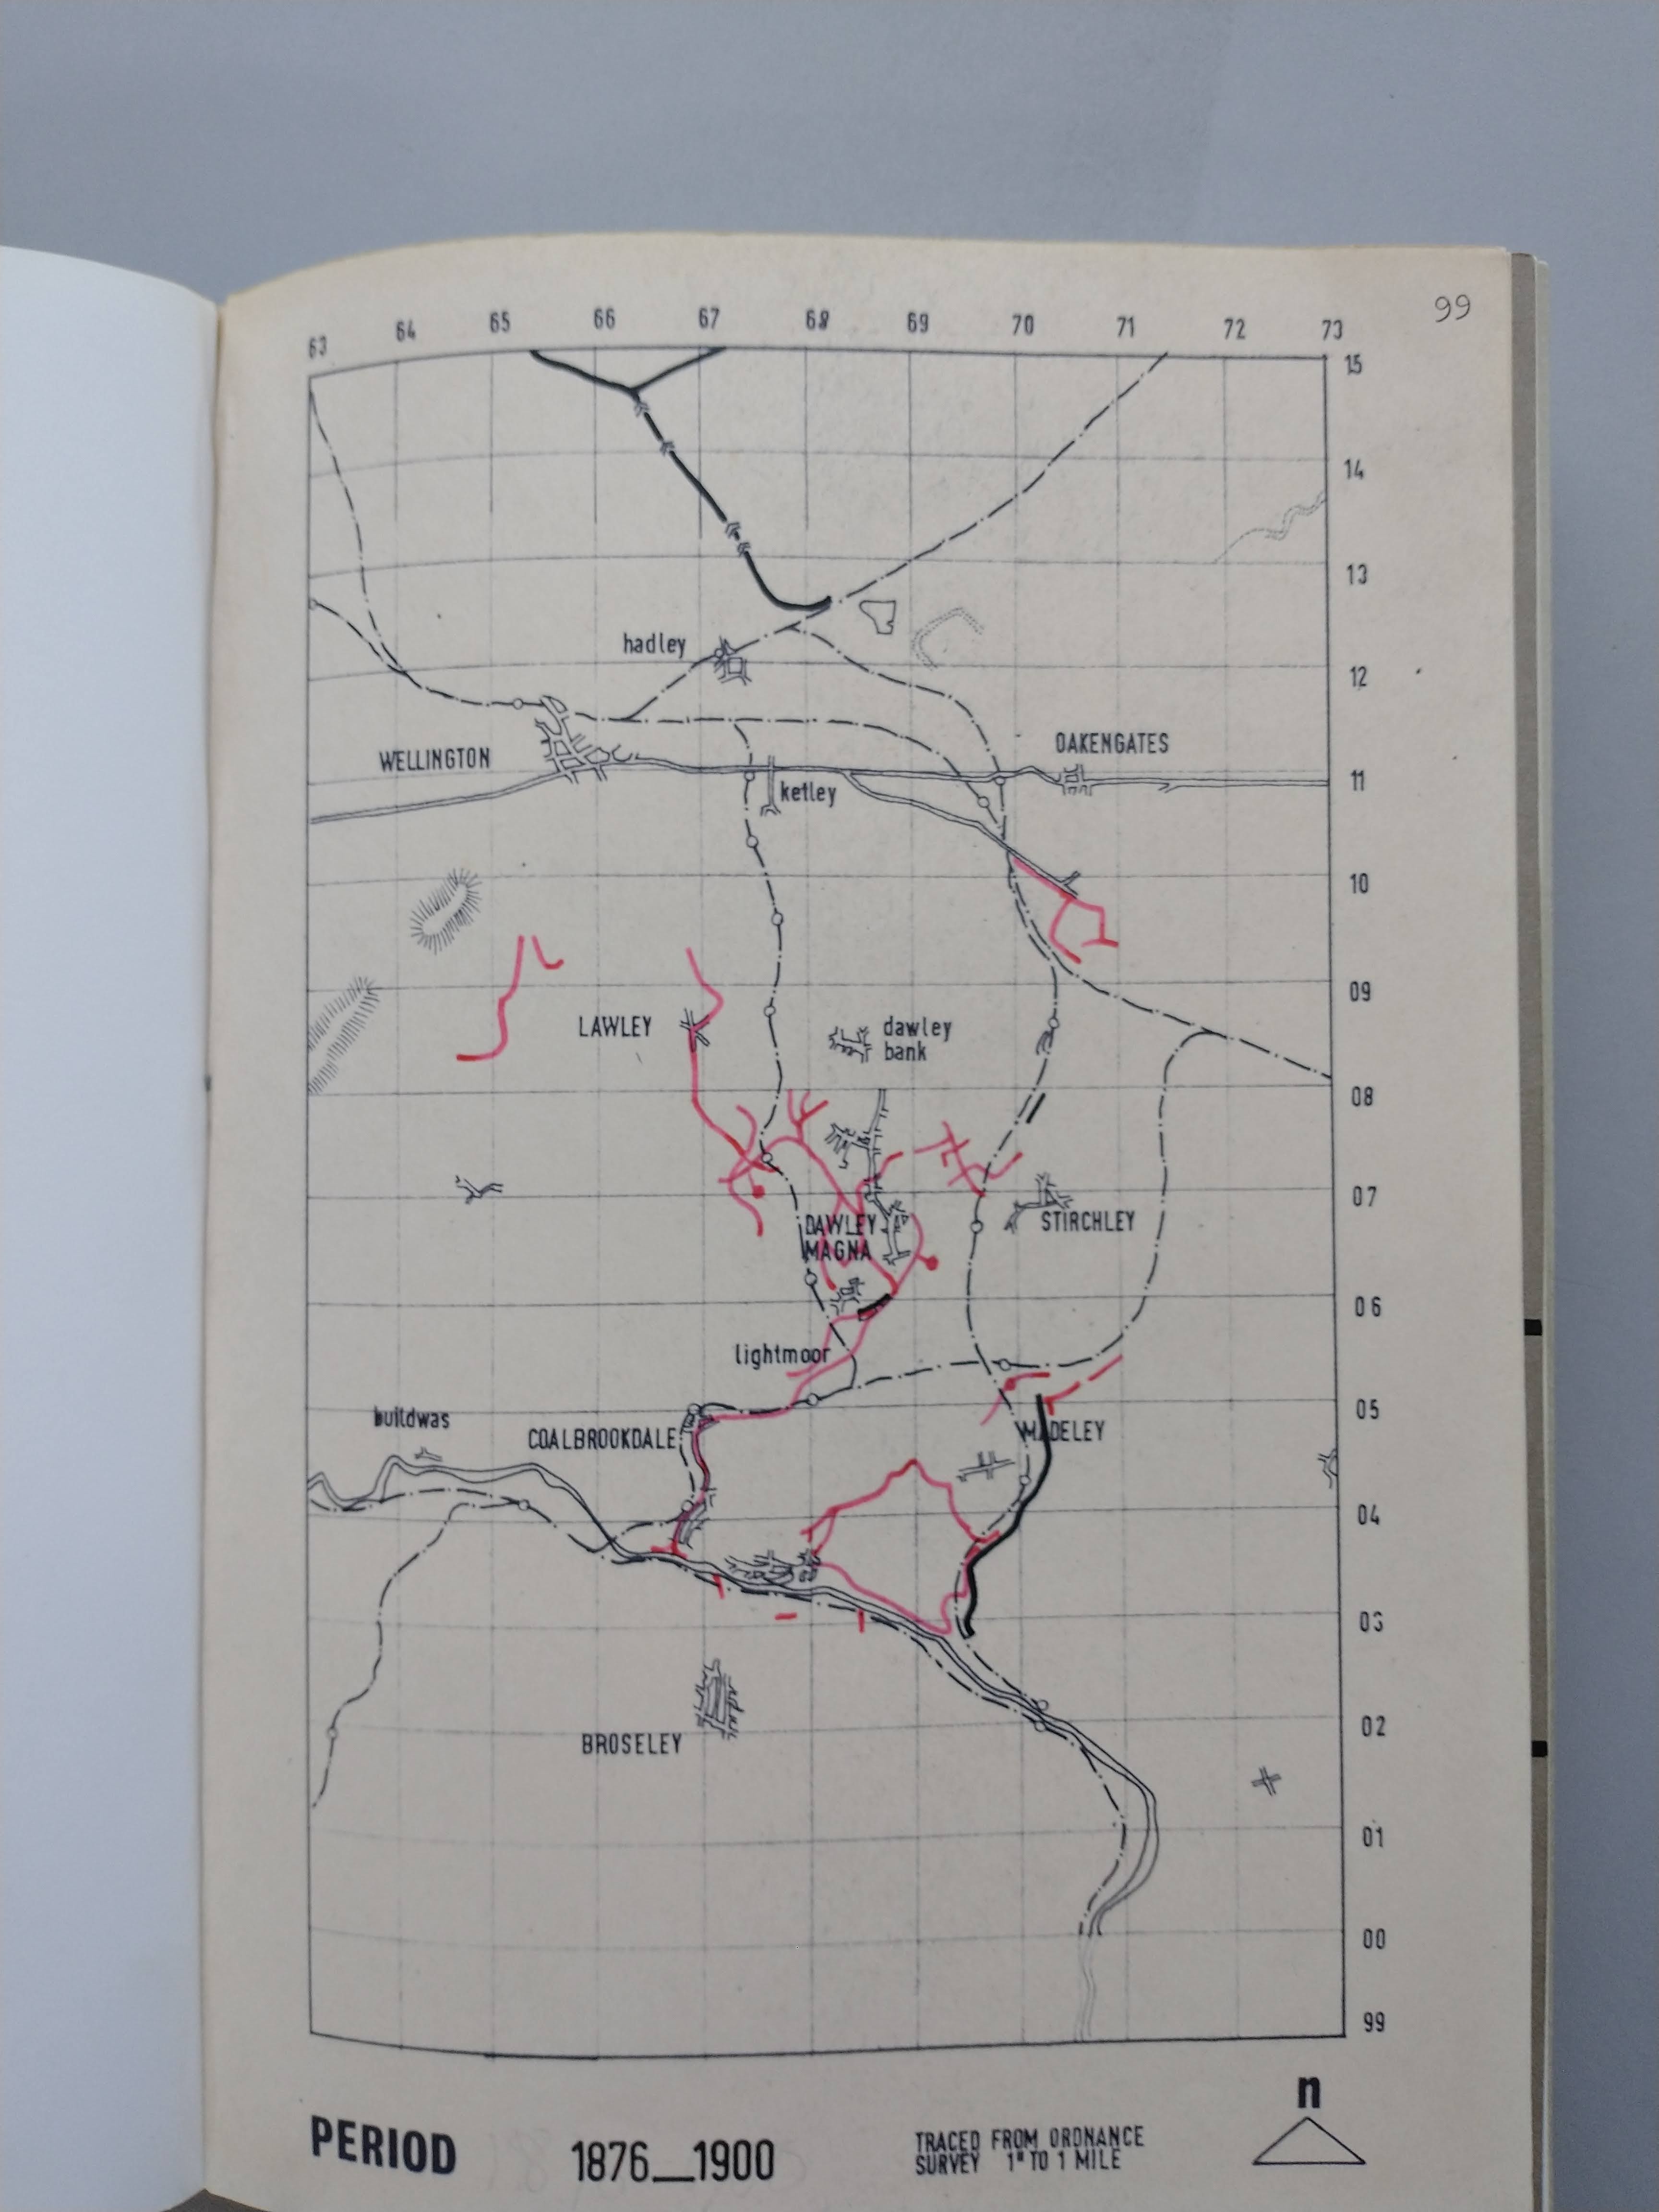
There was little change in the immediate area over the next 15 years. The next image covers the period 1876-1900 and again only shows minor changes to tramroads in the vicinity of Stirchley The railways now dominate the transport landscape.
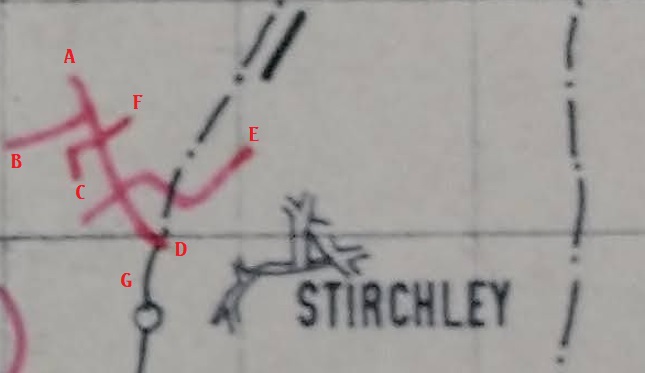
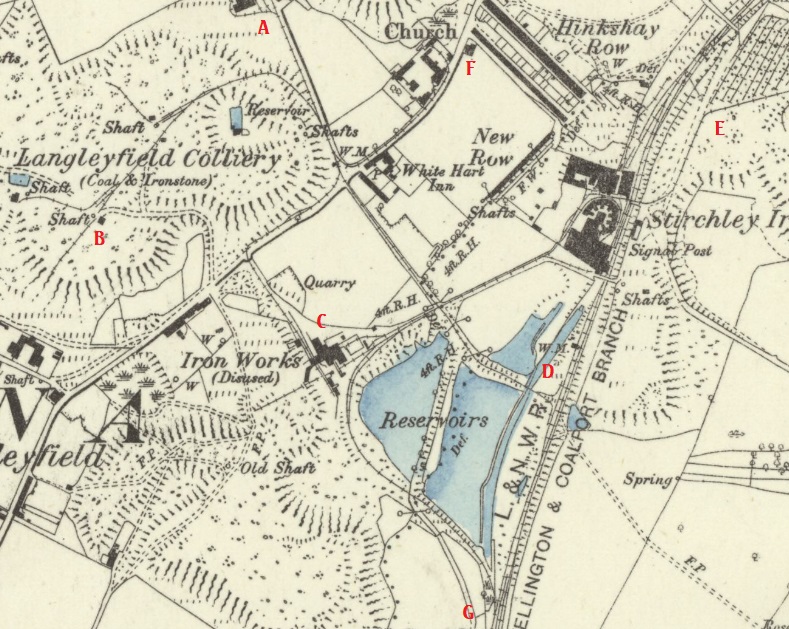
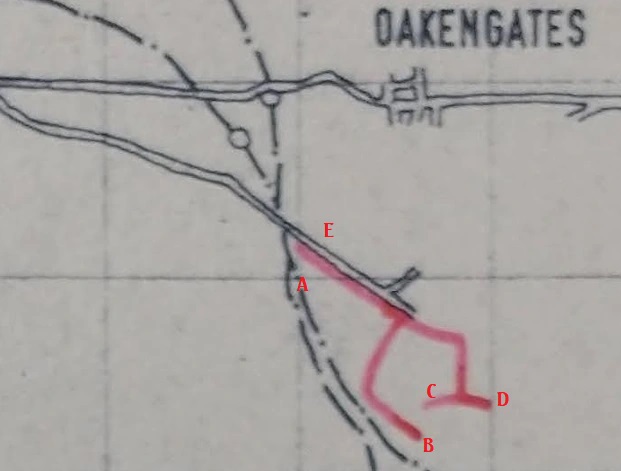
Savage and Smith’s plan covering 1876-1900. The Wharf on the canal Northwest of Stirchley is now a wharf alongside the LNWR Coalport Branch, a change that only required a bridge over a remain length of the canal. Significant tramroad changes can be seen to the West and serve pits in the Dawley Area taking goods to Lightmoor and Coalbrookdale. [2: p99]
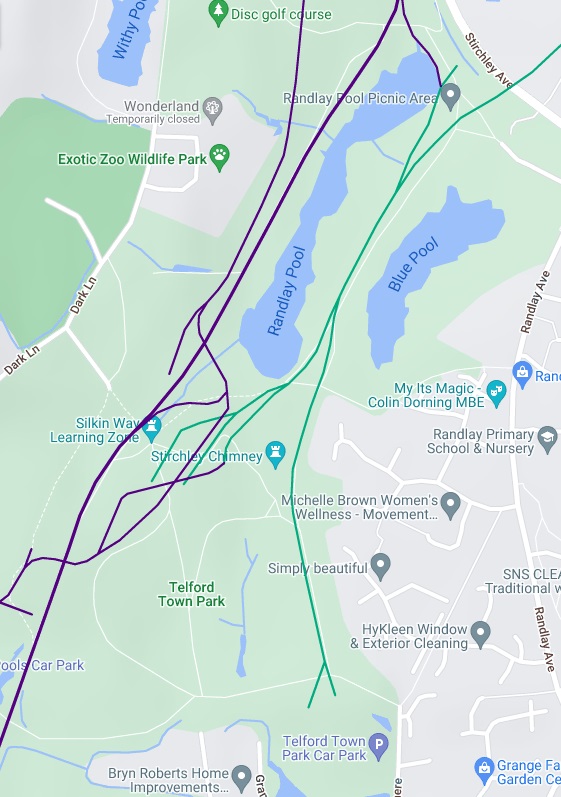
Missing from Savage and Smith’s 1″ to one mile drawings is the GWR branch parallel to the LNWR branch and running from the North down towards Stirchley. The route of that line is shown below in a turquoise colour on the mapping supplied by RailMapOnline.
RailMapOnline extract cover the area shown on the Google Maps satellite image above. As can be seen, its route replaced tramroad access to Grange Colliery and the Ironworks closer to Randlay Pool. [26]
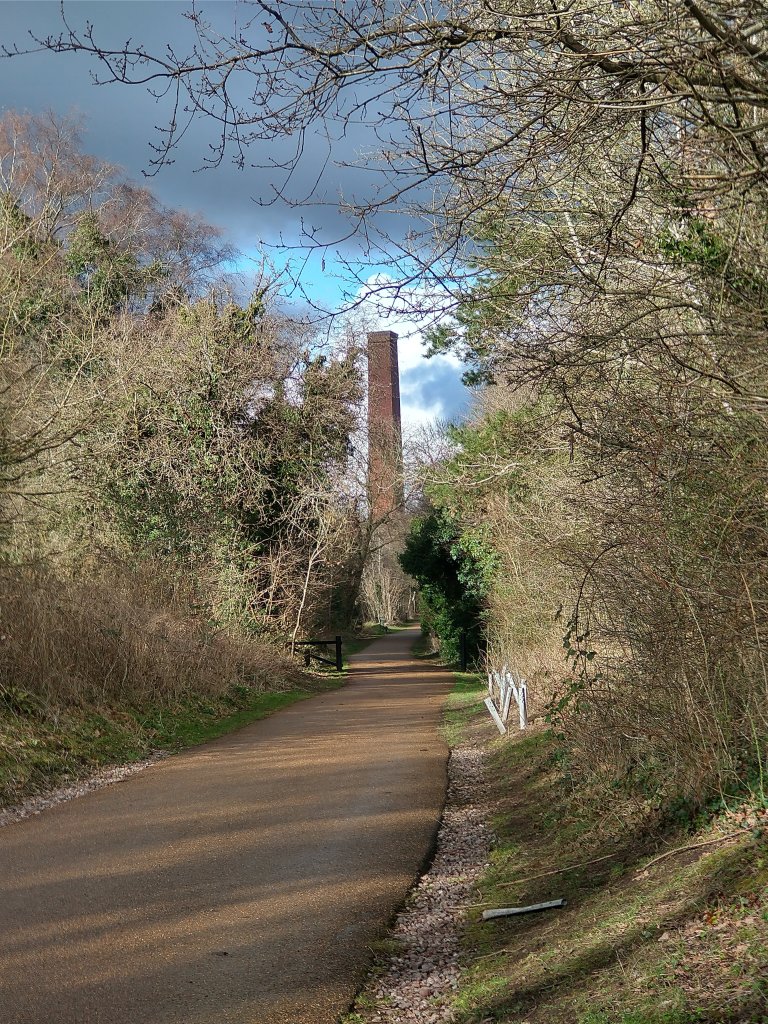
The next few photographs take us along the route of what is the old tramroad from Sutton Wharf and that of the GWR Mineral Line along the East side of Stirchley Chimney which still stands in the 21st century.
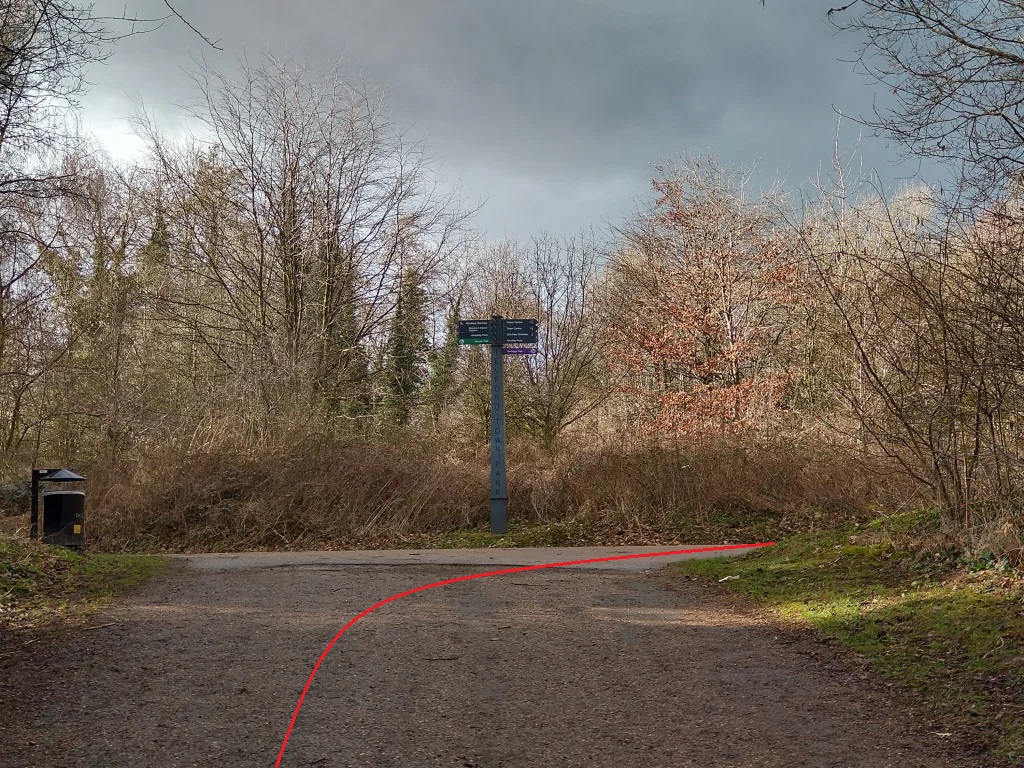
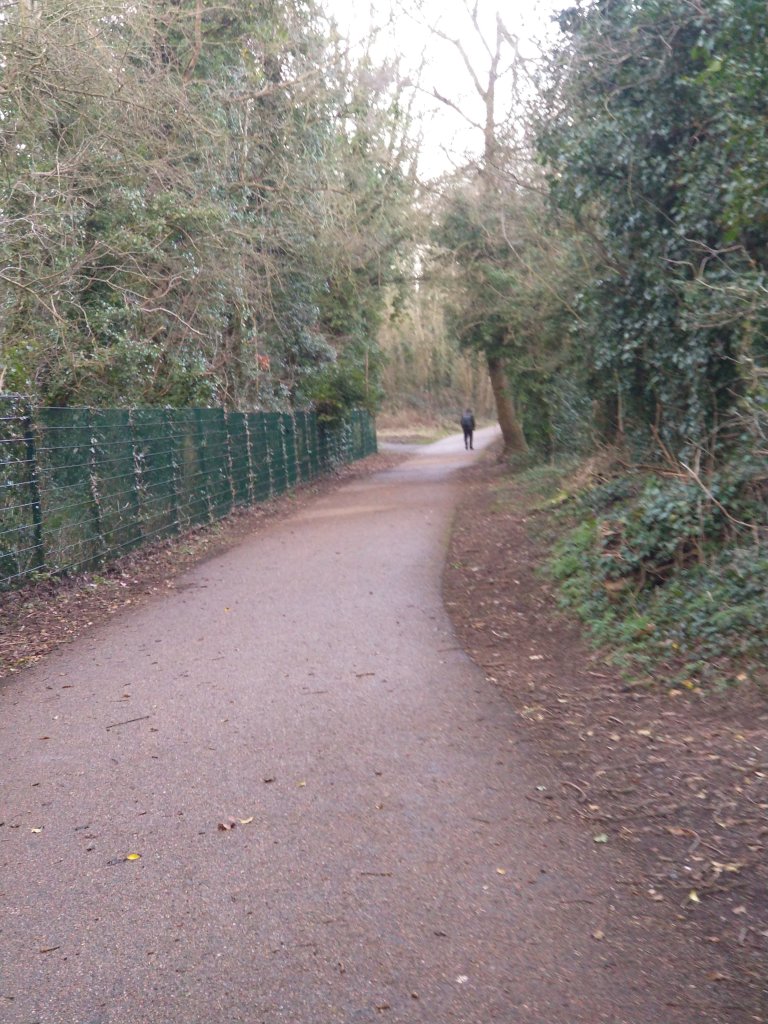
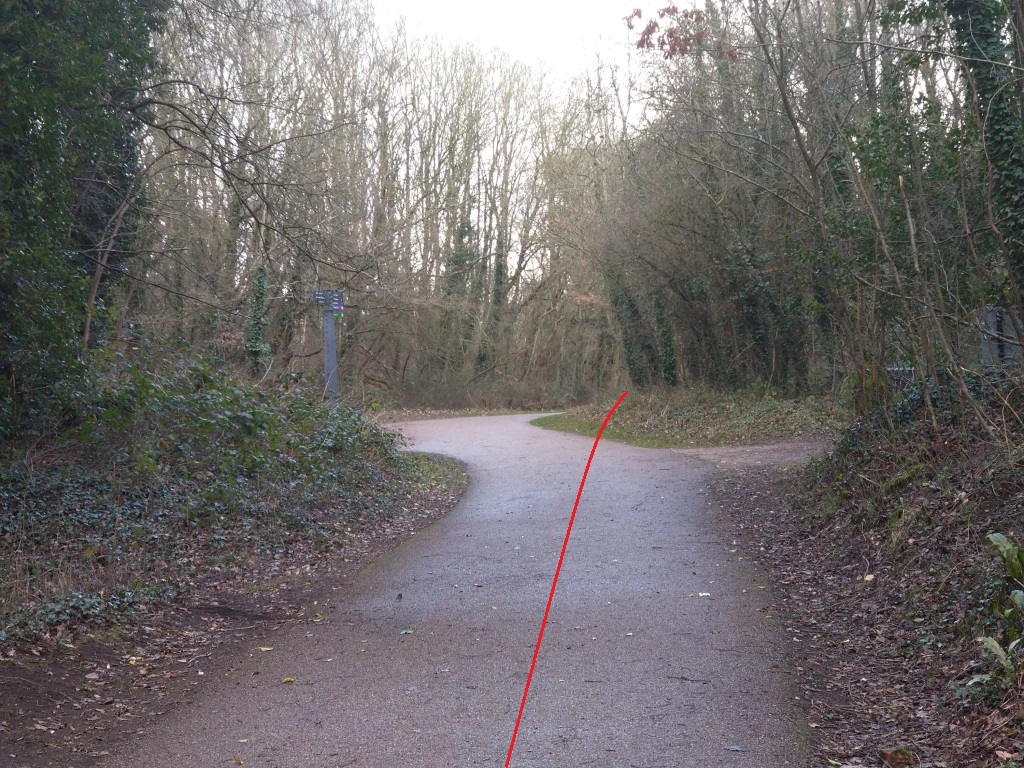
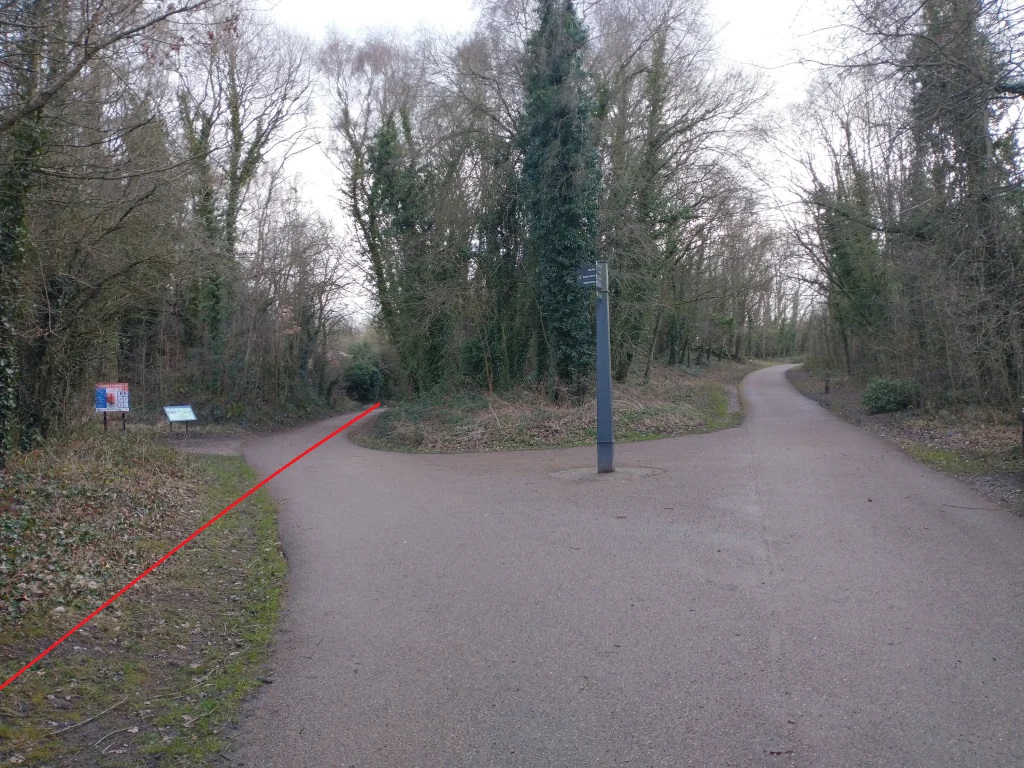
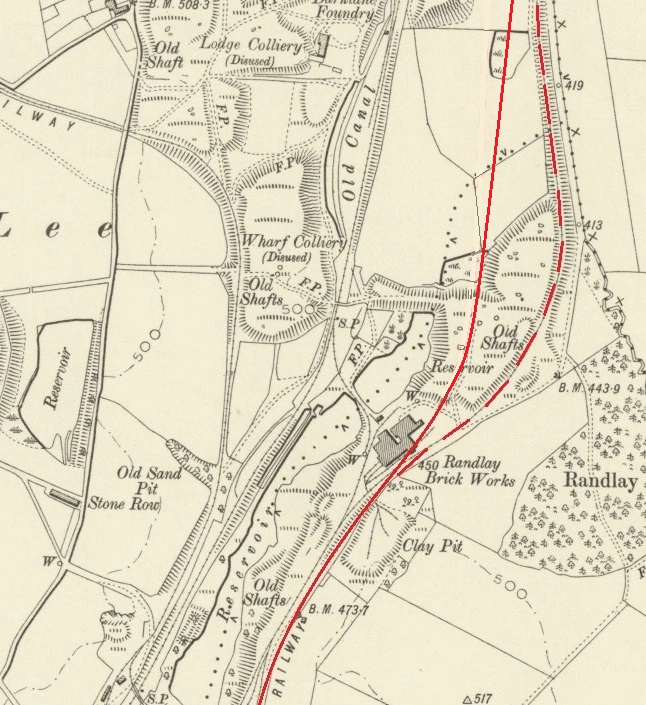
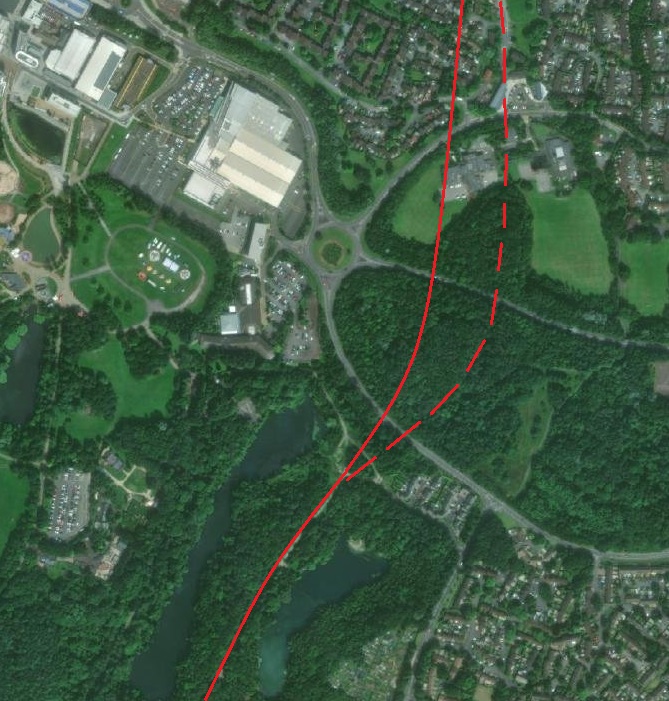
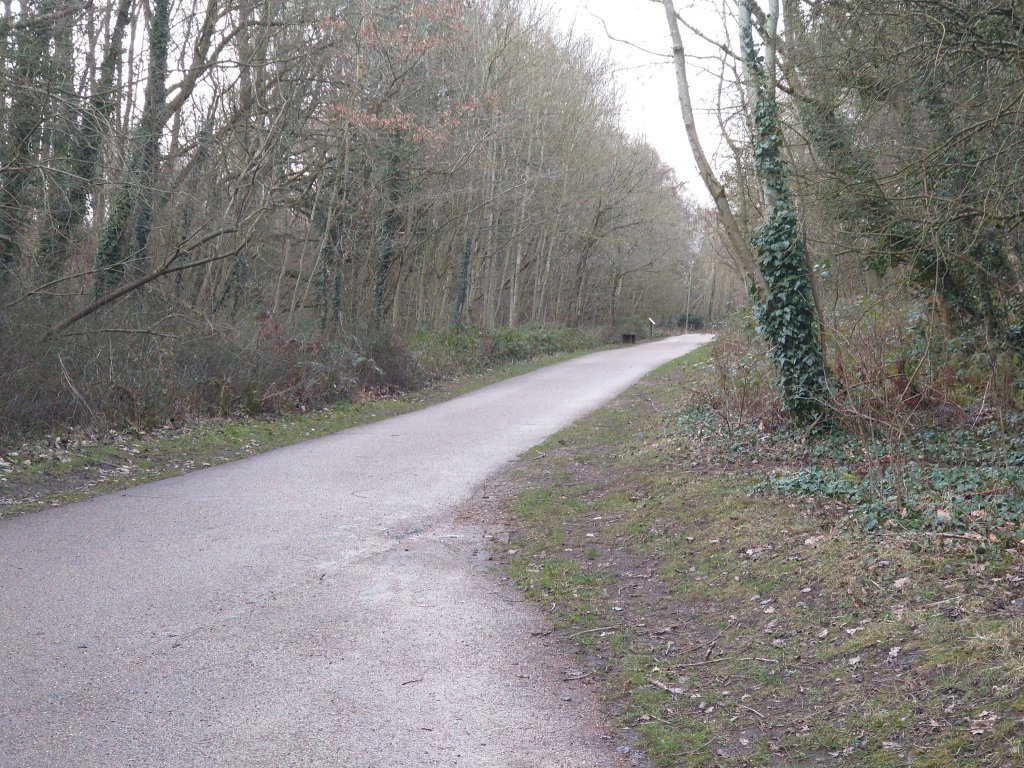
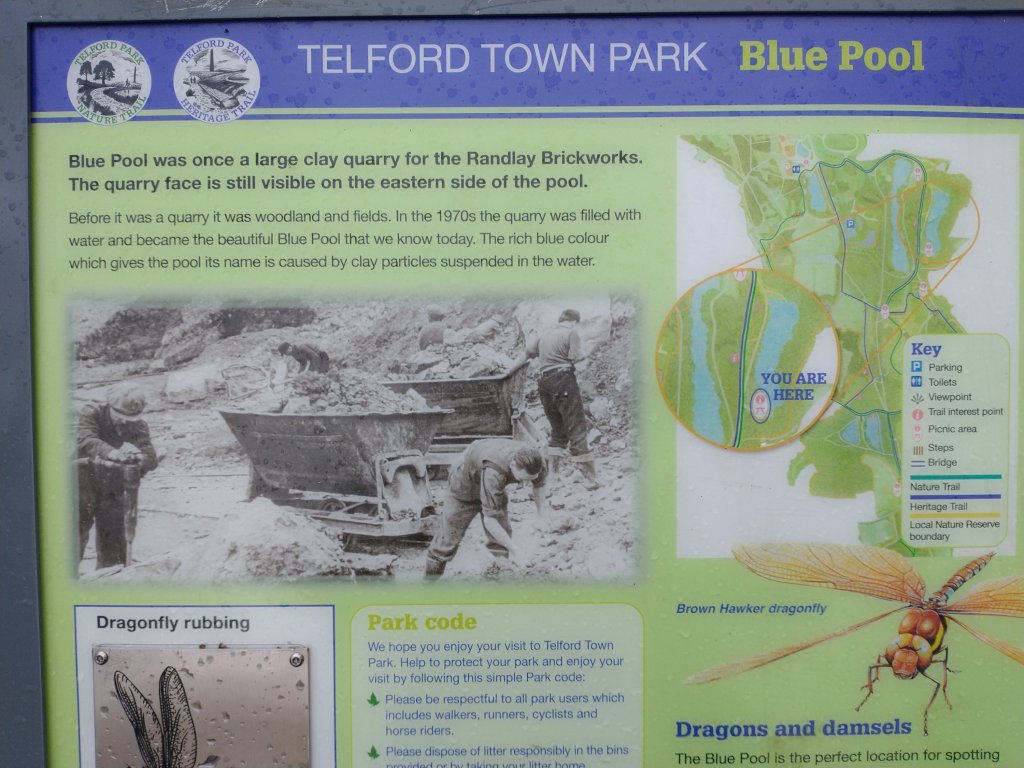
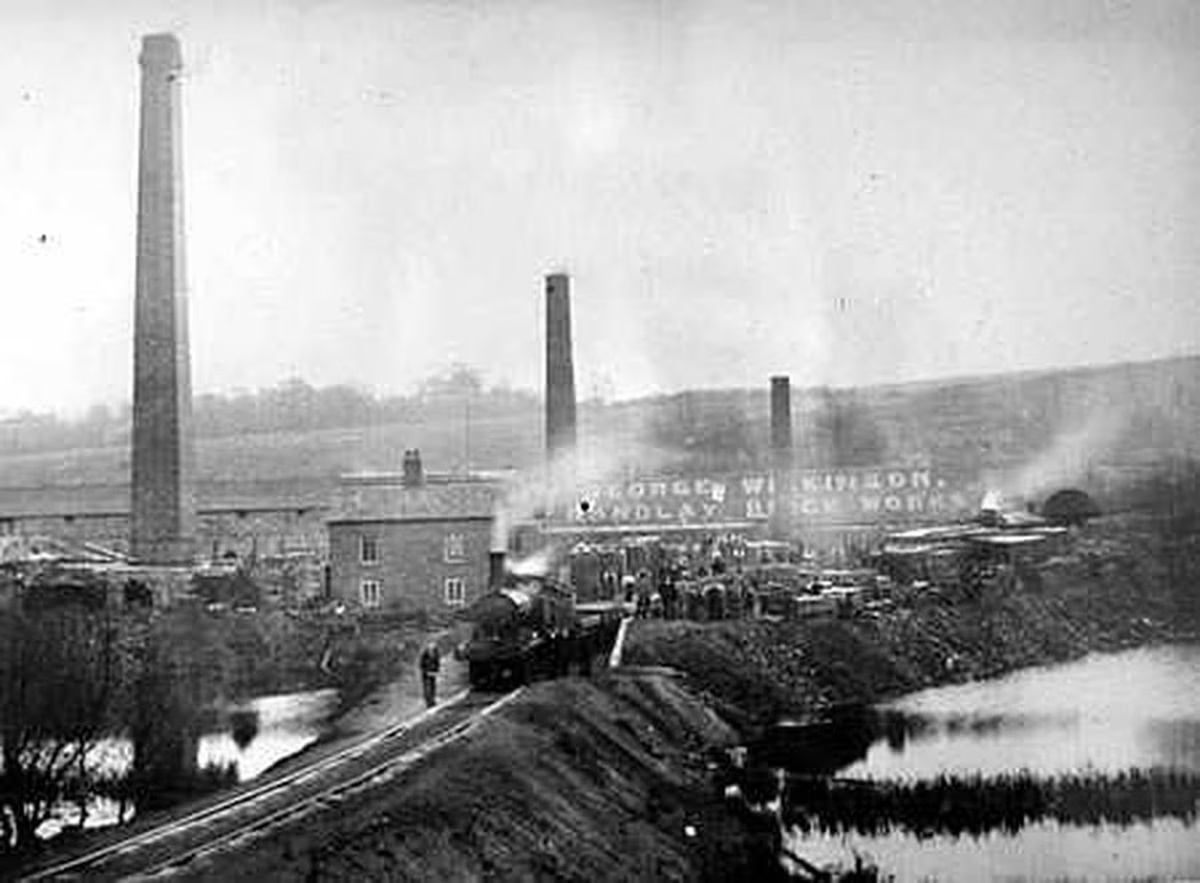
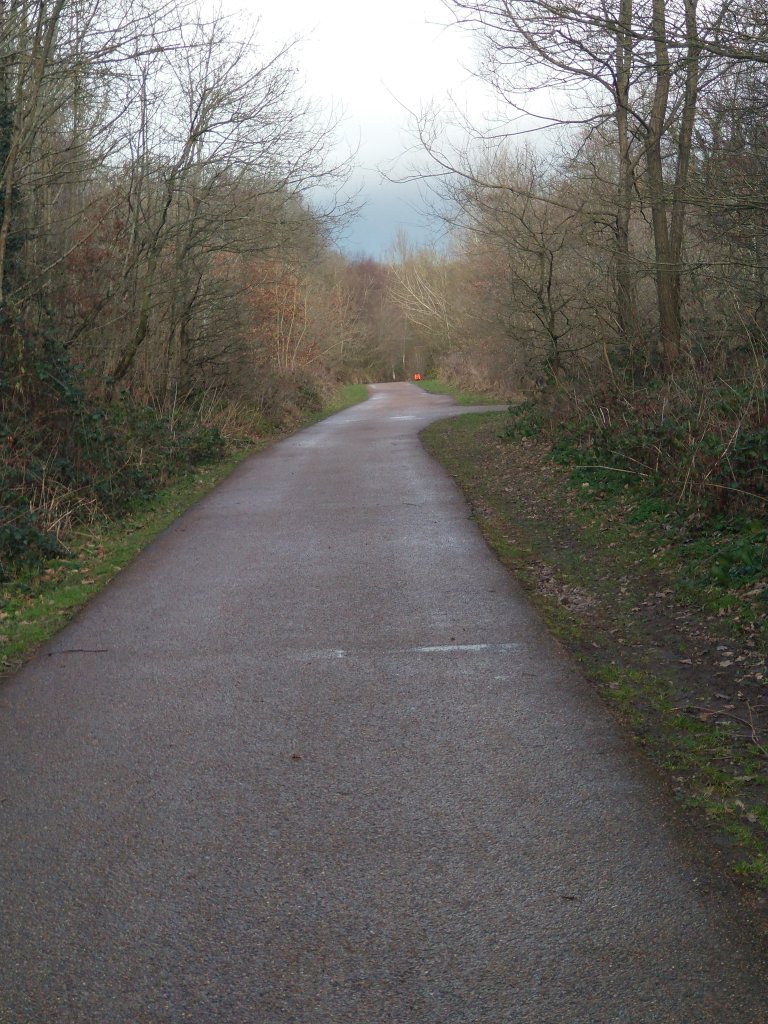
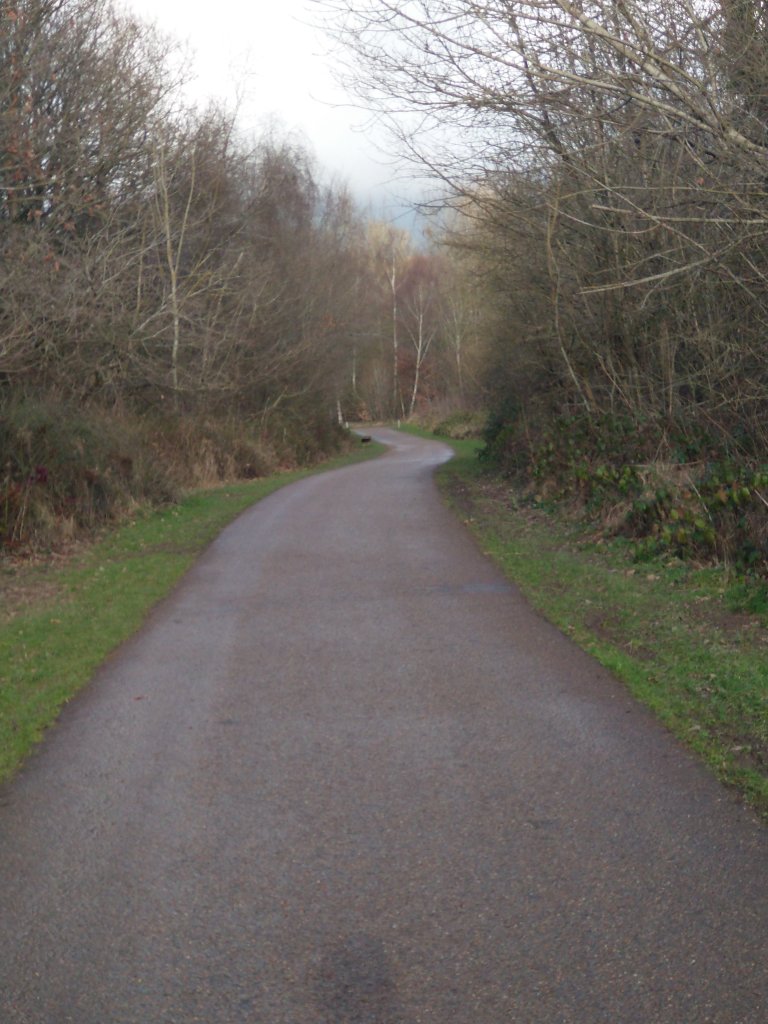
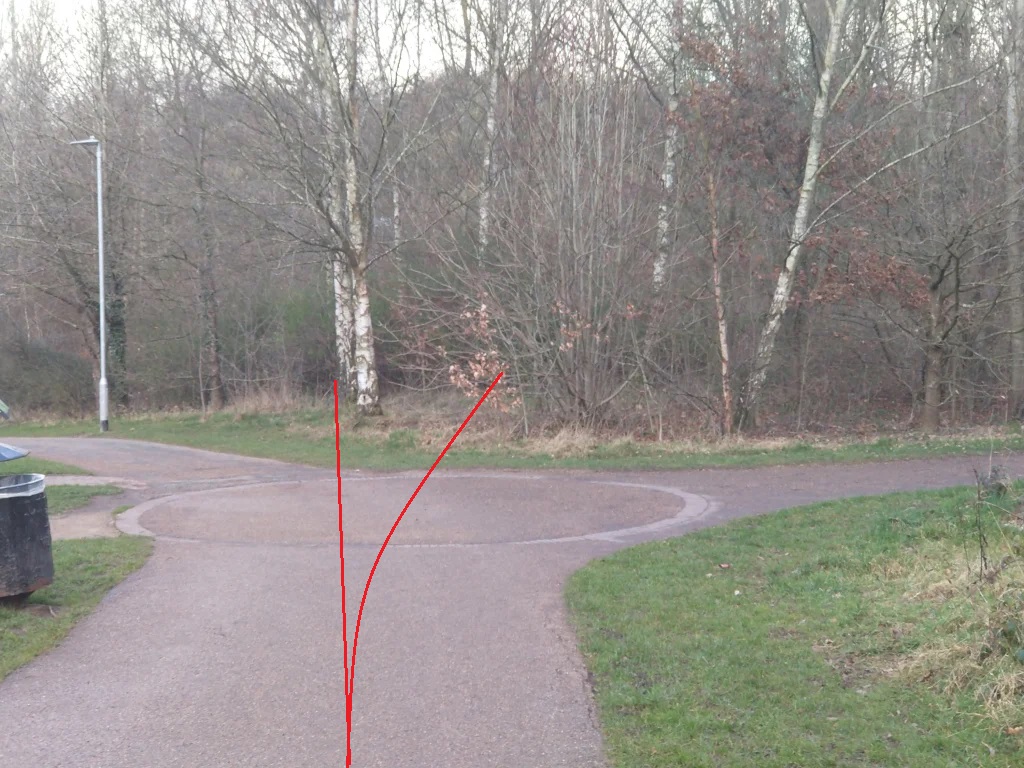
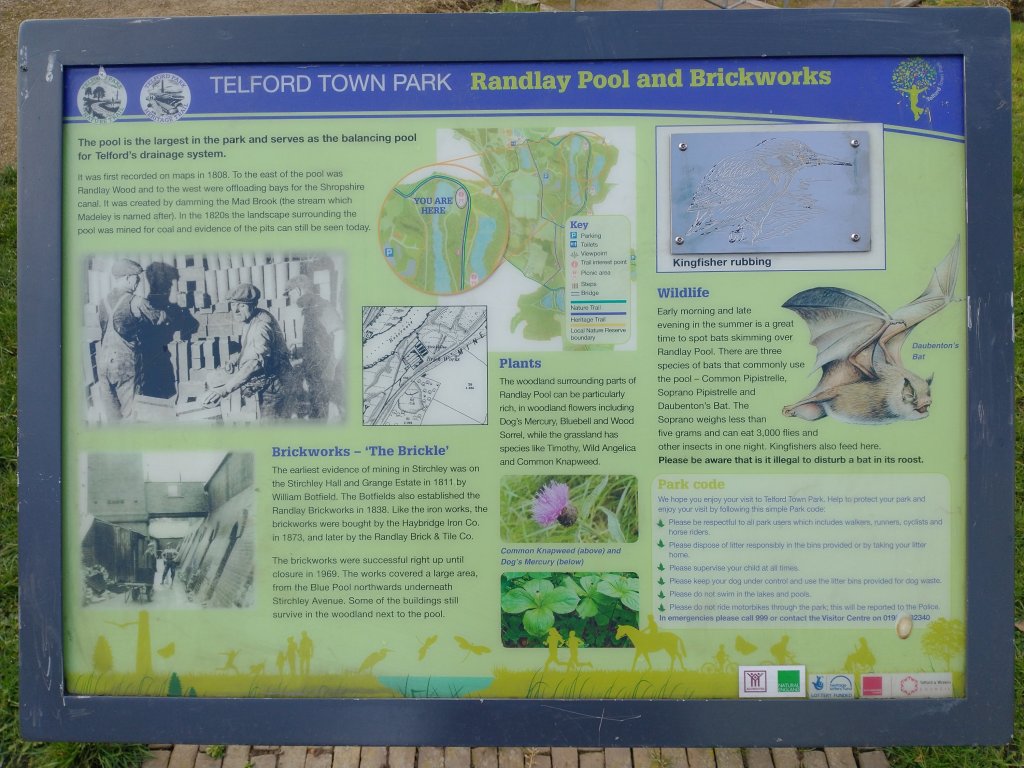
At the bottom-right of the Google Maps satellite image above, the old tramroad route runs from the top of Grangemere into Telford Town Park in a Northwesterly direction before turning North onto the line of one of two arms of the old GWR Mineral Railway. [My photo, 22nd February 2022]The route North runs close to Strichley Chimney. [My photo, 22nd February 2023]The line followed a large radius right-hand curve passing to the East of the remaining Stirchley Chimney which is just off this picture to the left. The fencing protects the public from what is a significant drop within the area immediately around the chimney. [My photo, 22nd February 2023]Looking North along the line of the old tramroad. Blue Pool is to the right of this image, Randlay Pool beyond the trees to the left. In later years, two branches of the old Mineral Railway met at this point. [My photograph, 22nd February 2023]Looking back to the South, the old tramroad alignment is shown as a red line, Blue Pool is to the left, Randlay Pools to the right and the paths follow the two branches of the later Mineral Railway. [My photograph, 22nd February 2023]This next extract from the 6″ Ordnance Survey of 1901 shows, as a solid red line, the approximate route of the old tramroad as plotted by Savage and Smith in the 1960s and taken from early 0.5″ to one mile scale mapping. There is no apparent indication of earthworks along this line. The railway embankments present on the 1901 OS mapping suggest that the line drawn by Savage and Smith is unlikely to be the actual route of the old tramroad. It is only my opinion, but it would seem more likely, given relative levels, that the earthworks used by later tramroads and the GWR Mineral Railway are likely to be enhanced versions of the earthworks required by the much earlier tramroad from Sutton Wharf. The difference in scale between Savage and Smith’s source drawings and the 6″ to 1 mile scale on which they plotted their route mean that there is every possibility that my alternative is correct and still remains within reasonable tolerances to allow their line to be seen as reasonably accurate given the resources available to them in the 1960s. [27]The same area as in the OS map extract above but on modern satellite imagery with the routes discussed shown as on the OS mapping. The area has been transformed beyond recognition. After the time of the OS map extract above a quarry was opened up to the East of the Randlay Pool, and when exhausted became what is known in the 21st century as Blue Pool. The large building top-left is Telford International Exhibition Centre. [27]The old tramroad and the later Mineral Railway run Northwards on what is now a path In Telford Town Park between Randlay Pool and Blue Pool. [My Photograph, 22nd February 2023]Part of the information board at Blue Pool. [My photograph, 22nd February 2023]An information board alongside the footpath which follows the route of the old tramroad and the Mineral Railway. [My photograph, 22nd February 2023]The image shown on the top-right of the information board is difficult to make out as there is fogging and scratching to the protective sheet over the face of the noticeboard. This is the same image, sourced from the pages of the Shropshire Star. It shows Randlay Brickworks which sat a couple of hundred metres North of the information board and features what is likely to be a LNWR locomotive on the branch on embankment across the Randlay Pool. If so, the old tramroad route and the GWR Mineral Branch would follow a line behind the buildings of the Works. [28]
The information board reads: “From at least 1882, the Great Western Railway (GWR) ran a mineral railway from Hollinswood down the Randlay valley to serve the coal and iron industries in Stirchley. Within the Town Park, this followed a course from Randlay Brickworks to the Grange. … The Mineral Railway stopped travelling South to the Grange between 1903 and 1929 and terminated at the Wrekin chemical works. [These were at the present location of Stirchley Chimney.] Its use finally reached the end of the line in 1954. The line of the Mineral Railway is preserved today on this pathway and evidence remains including posts, buildings and artefacts.” There is also a note on the board about a network of sidings which linked various industrial works to the main line of the mineral railway alongside a sketch-map of the area.
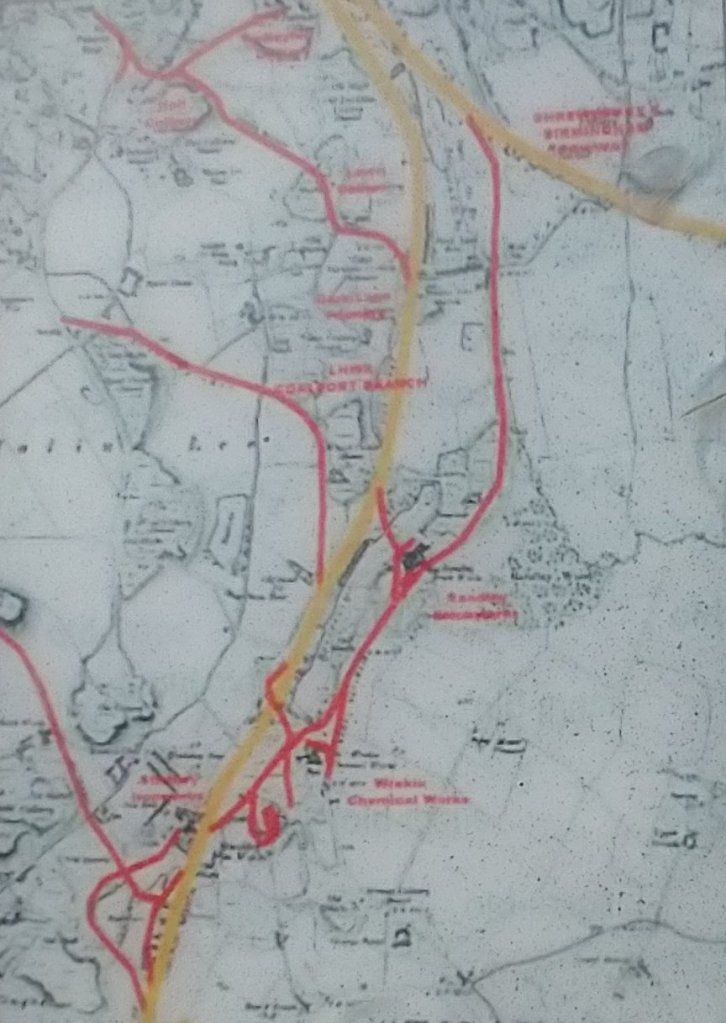
The sketch-map from the information board, a little out of focus and fogged because of the deterioration of the covering plastic protection to the board. Various industrial railways and tramroads are shown. The wide yellow line running North-South is the LNWR Coalport Branch, that in the top-right corner is the main line between Shrewsbury and Wolverhampton which was once part of the GWR. The red line leaving the GWr line close to the top of the image and running parallel to but to the East of the LNWR branch is the GWR Mineral Line to Stirchley. Other red lines give an impression of the different tramroads link with the teo standard gauge branch lines. [My photograph, 22nd February 2023]The footpath continues to follow the old tramroad and Mineral Railway line Northwards [My photograph, 22nd February 2023]Further North, approaching the site of the Randlay Brickworks, the footpath continues to follow the old tramroad and Mineral Railway line Northwards [My photograph, 22nd February 2023]To the left of this image is the site of Randlay Brickworks and beyond it the top end of Randlay Pool. The old tramroad and the later Mineral Railway continue northwards towards Hollinswood and Oakengates. Savage and Smith’s drawn route of the tramroad is approximately the left hand red line. The old mineral railway and my suggestion of the actual route of the old tramroad is the right hand red line. [My photograph, 22nd February 2023]The information board that the Randlay Brickworks site. [My photograph, 22nd February 2023]
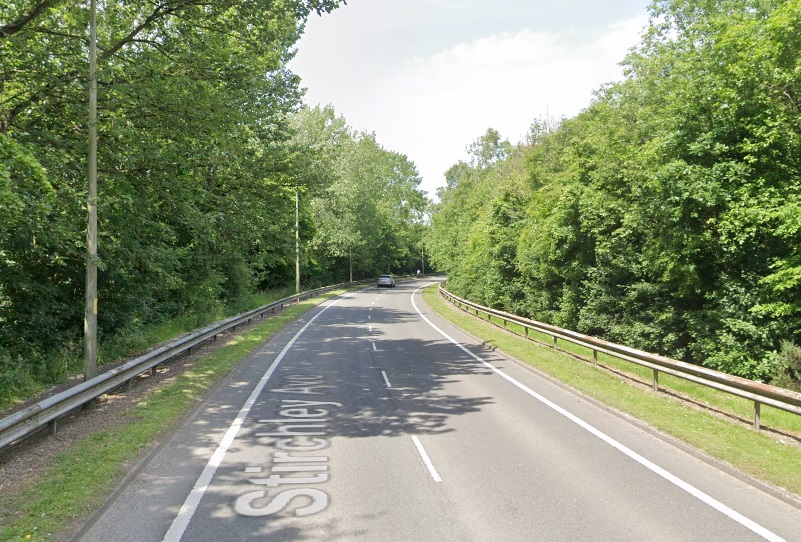
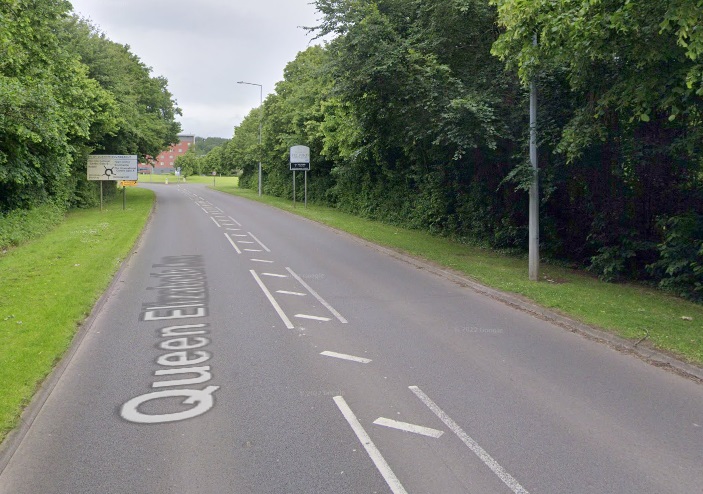
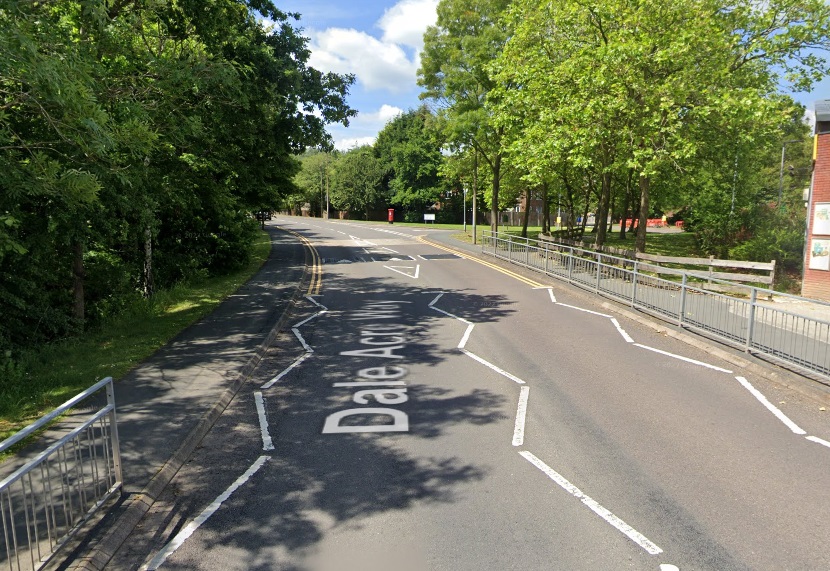
North of Randlay Pool the line of the old tramroad and the line of the GWR Mineral railway plunge into undergrowth and the topography of the area beyond this point for some distance is very unlikely to be the same as that present in 1901. In the top half of the satellite image above the lines crossed three modern roads, Stirchley Avenue, Queen Elizabeth Avenue and Dale Acre Way, then run geographically along the line of Downemead for a short way.
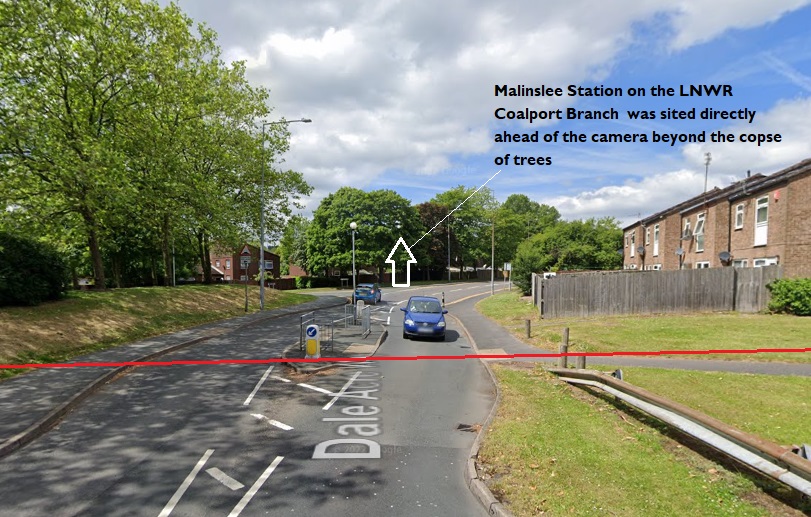
Stirchley Avenue looking Northwest towards the exhibition centre. The old tramroad crossed the line of the road somewhere on this curve. [Google Streetview, June 2022]Queen Elizabeth Avenue looking West toward the exhibition centre. The old tramroad crossed the road somewhere this side of the road signs ahead. [Google Streetview, June 2022]Dale Acre Way in Hollinswood, looking Southwest towards the roundabout close to the exhibition centre. The old tramroad route crosses Dale Acre Way between the camera and the Deercote Road junction ahead in the vicinity of Hollinswood Local Centre which is just off this picture to the right.A closer image of Downemead showing the approximate alignment of the old tramroad and the later Mineral Railway. [Google Maps, February 2023]
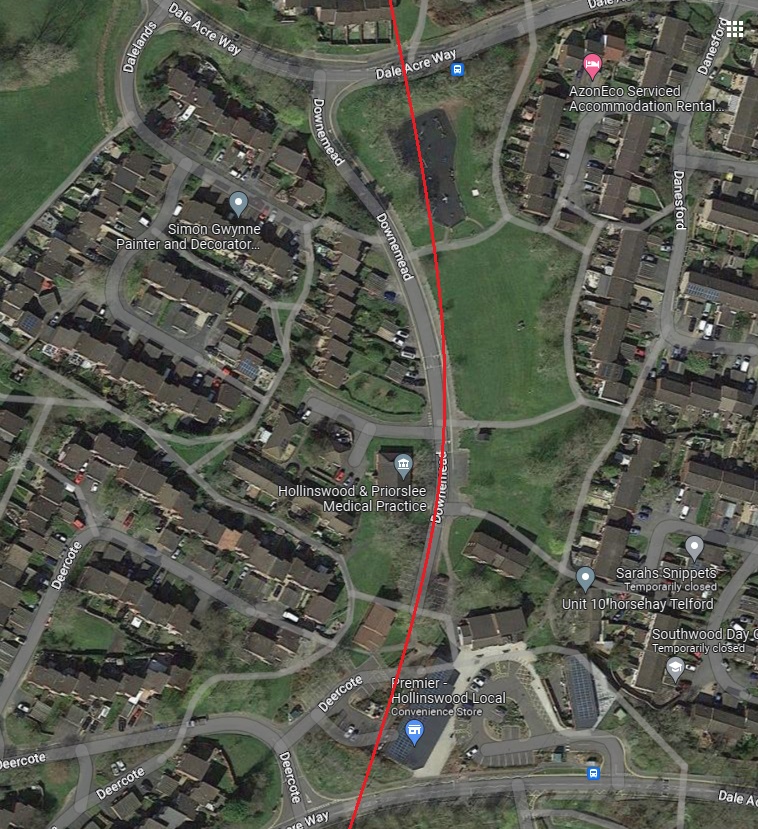
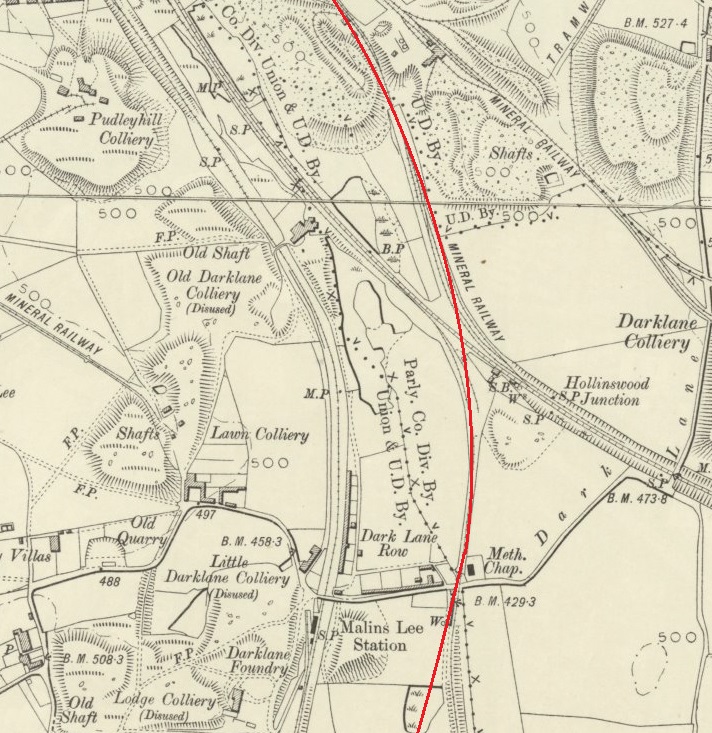
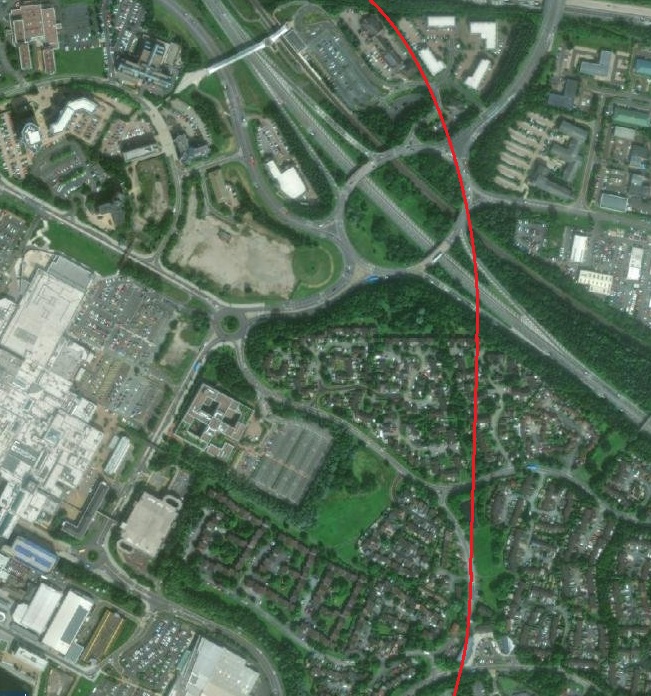
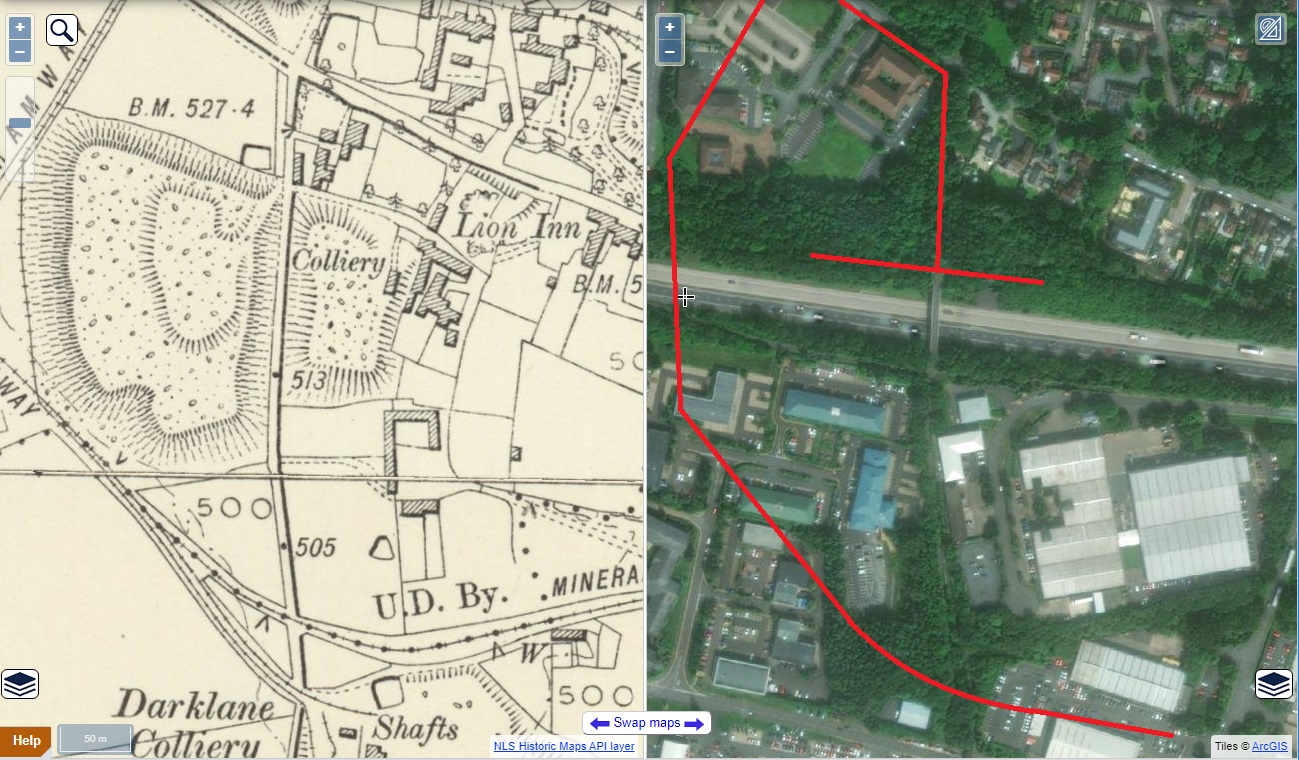
On the extract from the satellite imagery below the line is picked up running approximately along Downemead before crossing Dale Acre Way once again. At the point where Downemead meets Dale Acre Way at its North end, Dale Acre Way is running approximately along what was Dark Lane shown on the 6″ Ordnance Survey immediately below. Comparing the two images immediately below shows how much topographic change has occurred in the 120 years since the 1901 Ordnance Survey. Effectively the only feature which remains in the 21st century is the Shrewsbury to Wolverhampton Mainline railway which runs from top-left to bottom-right across both the map and the satellite image.
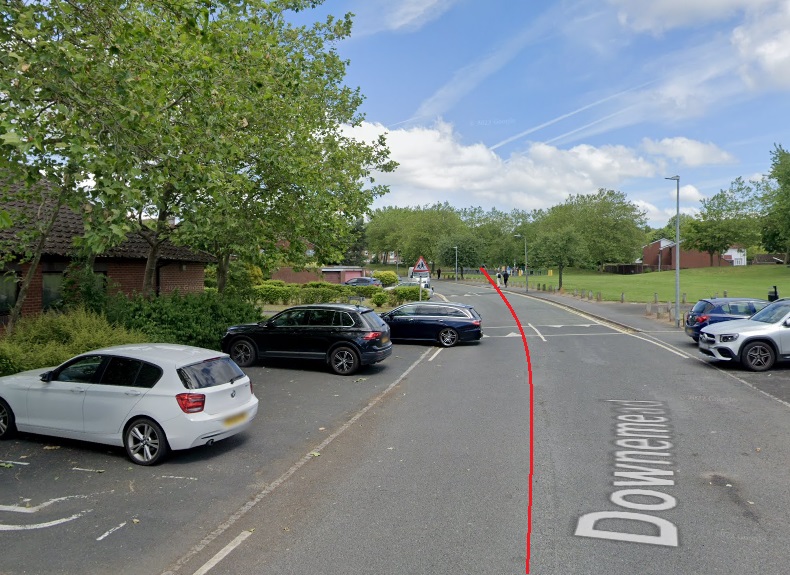
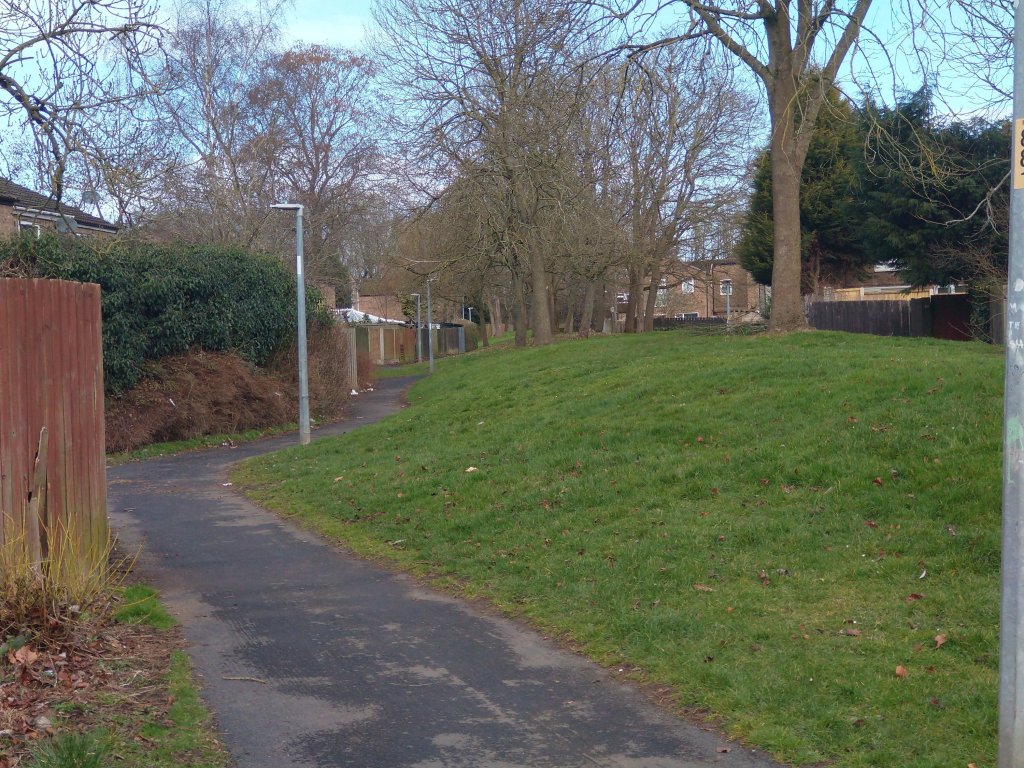
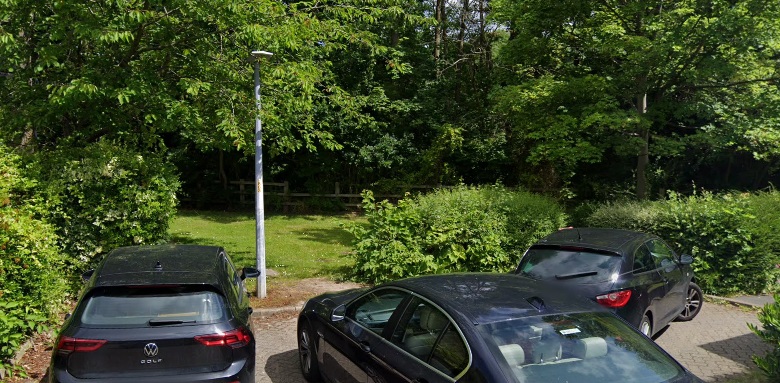
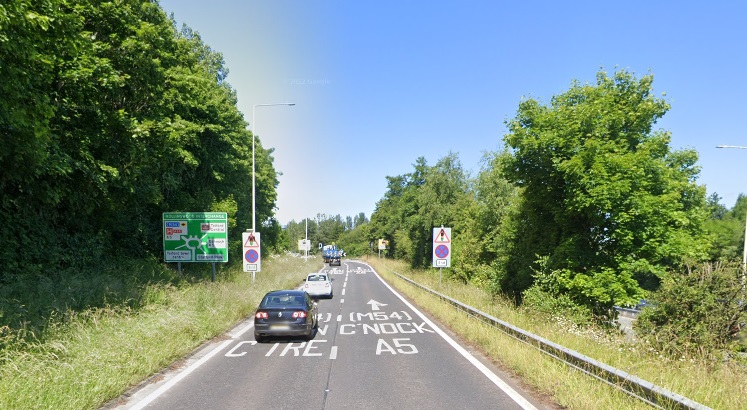
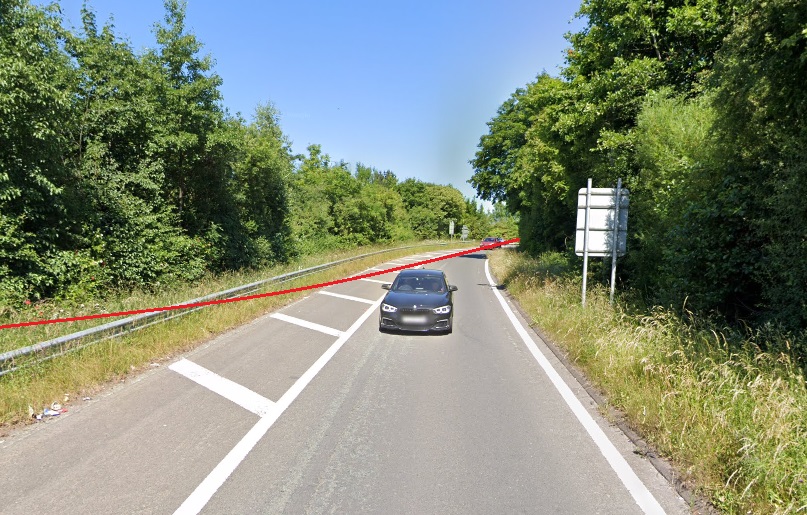
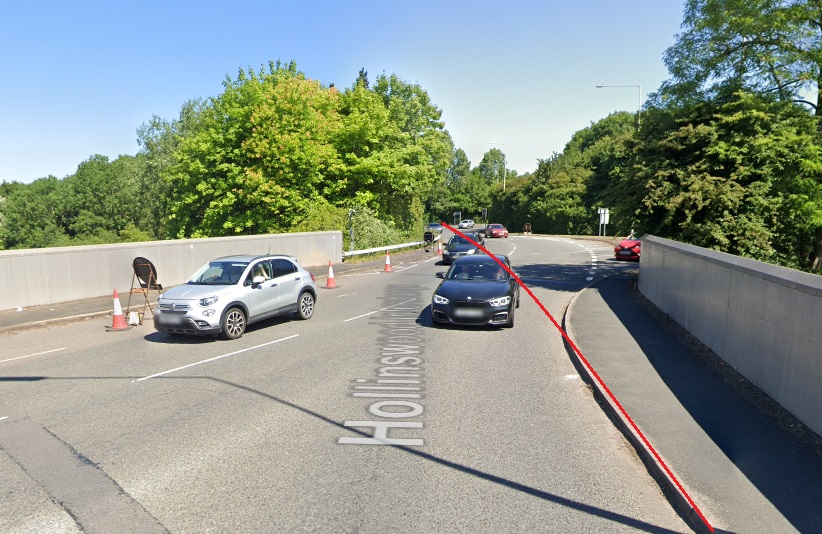
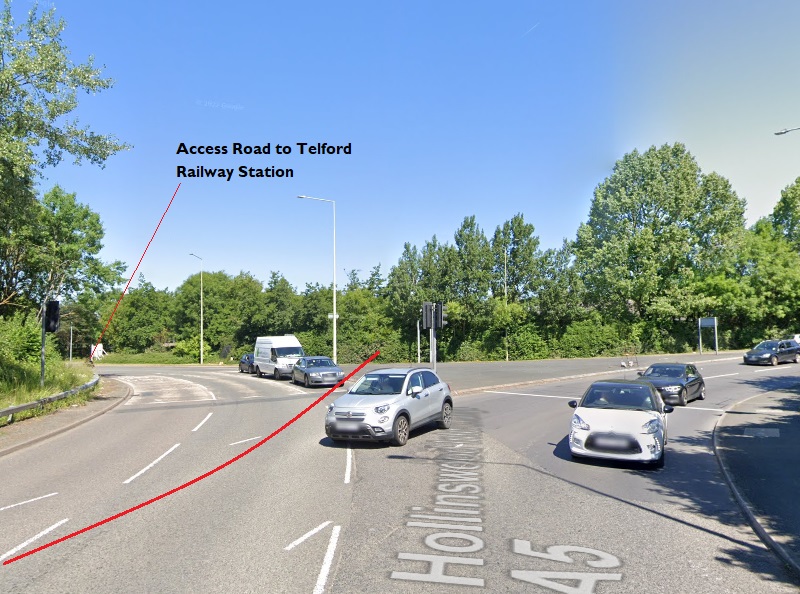
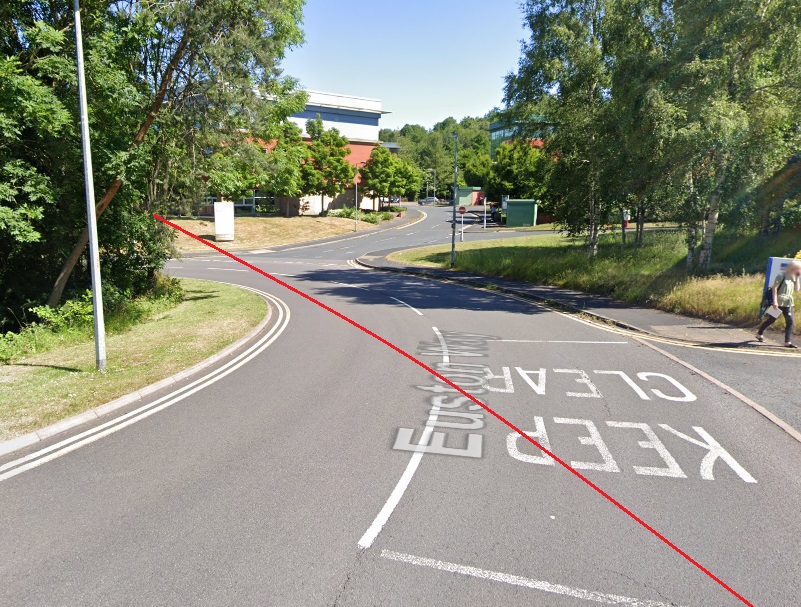
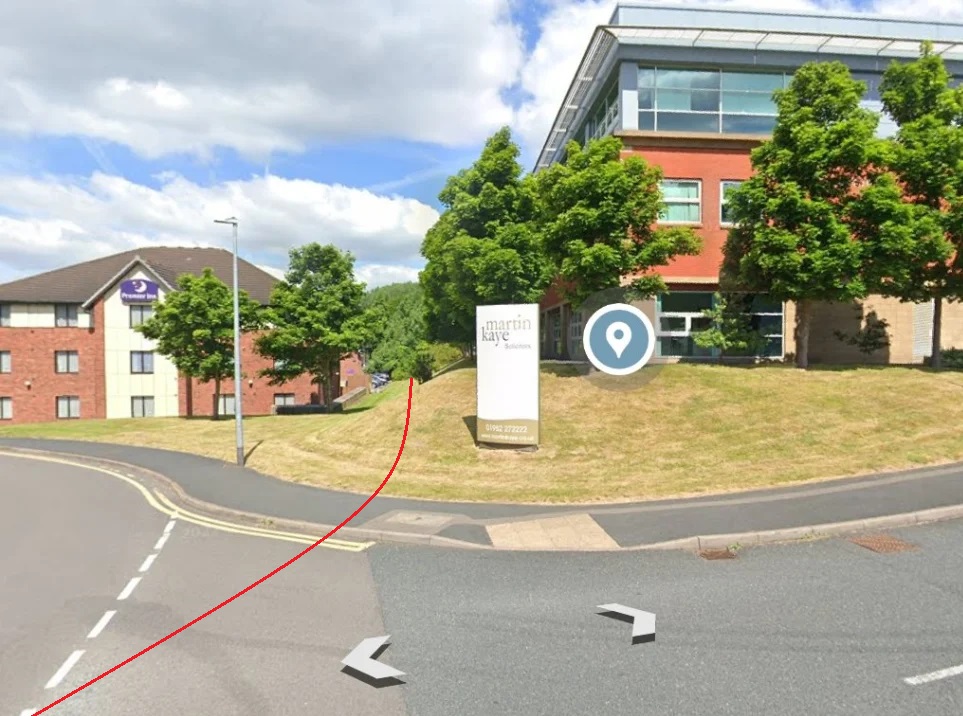
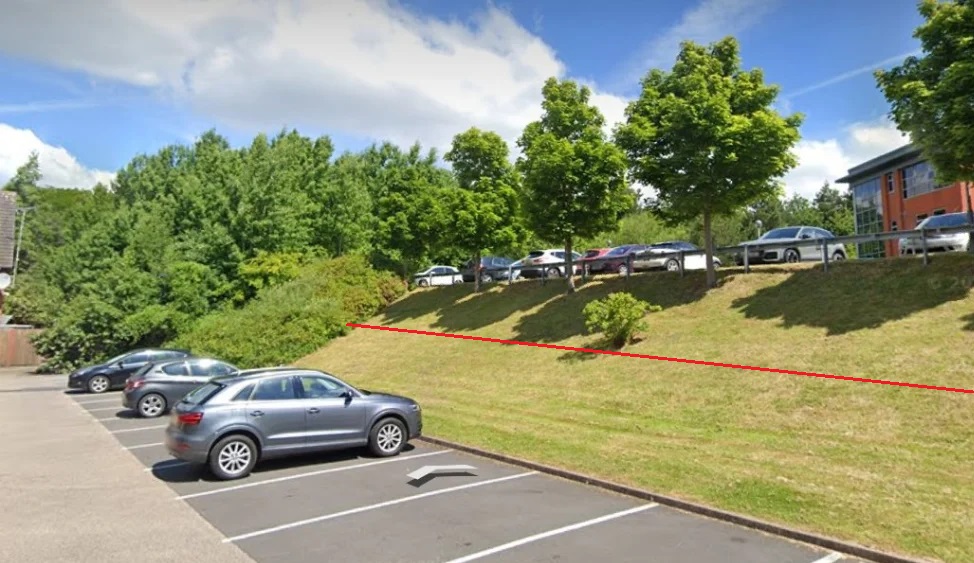
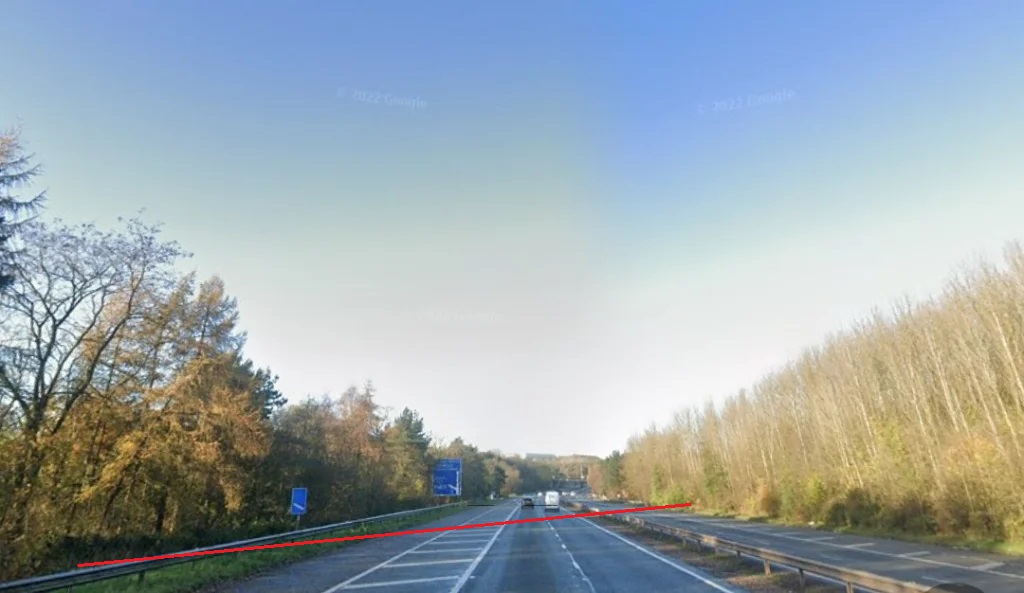
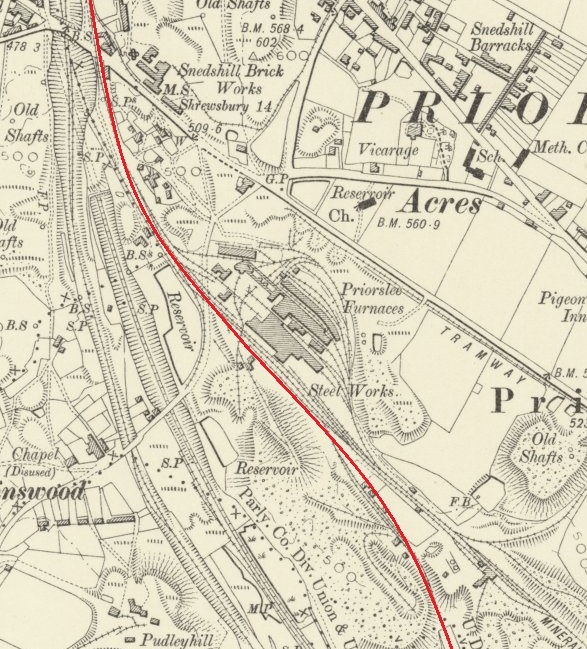
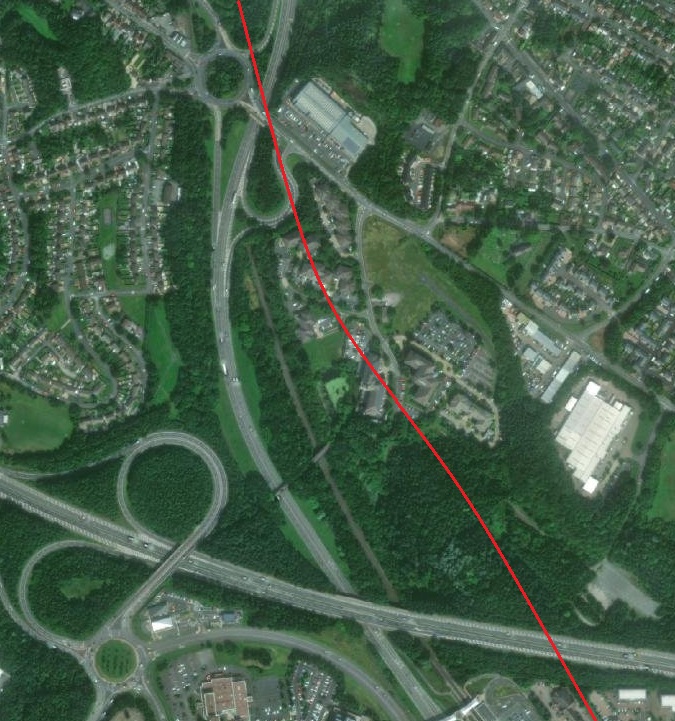
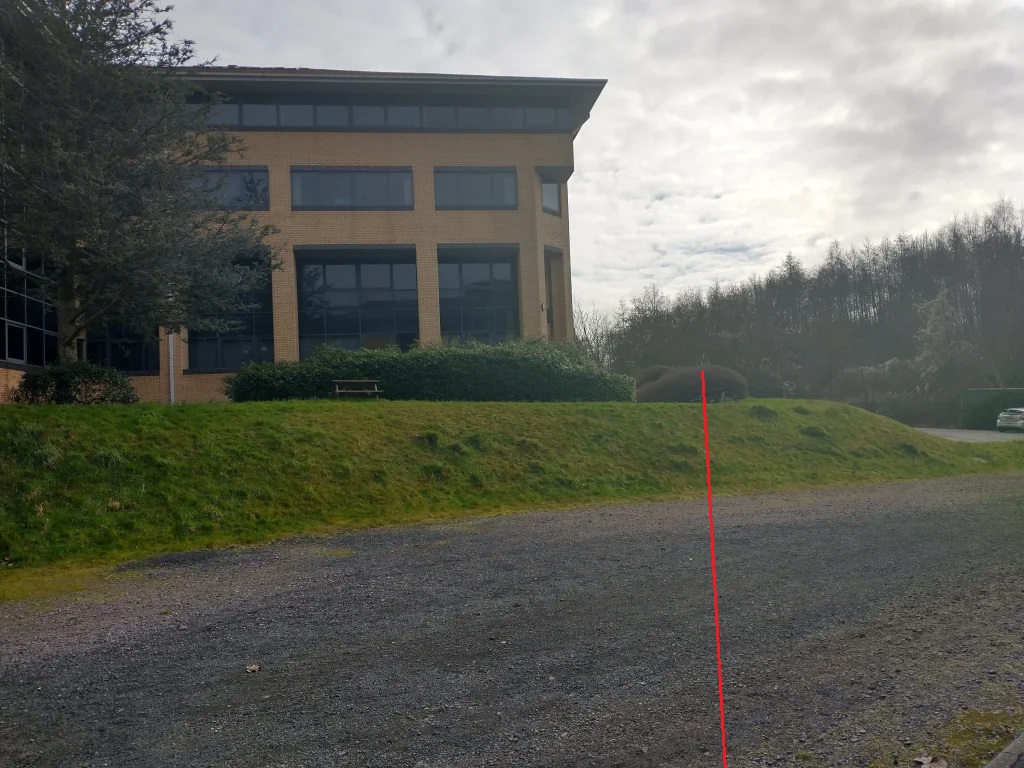
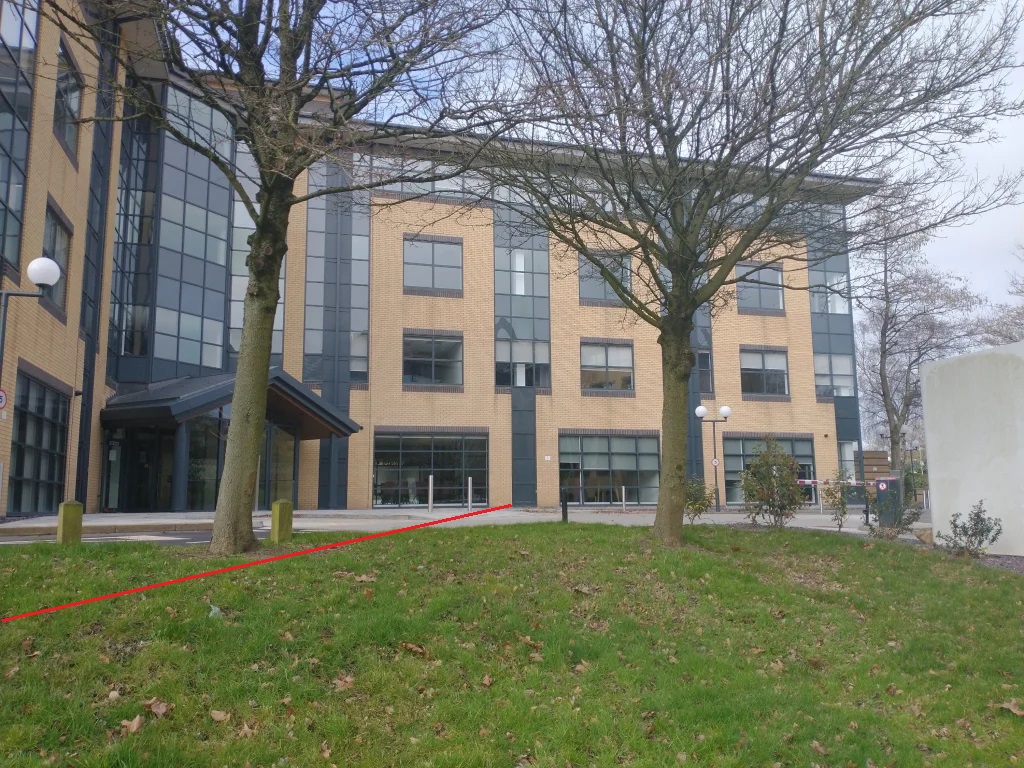
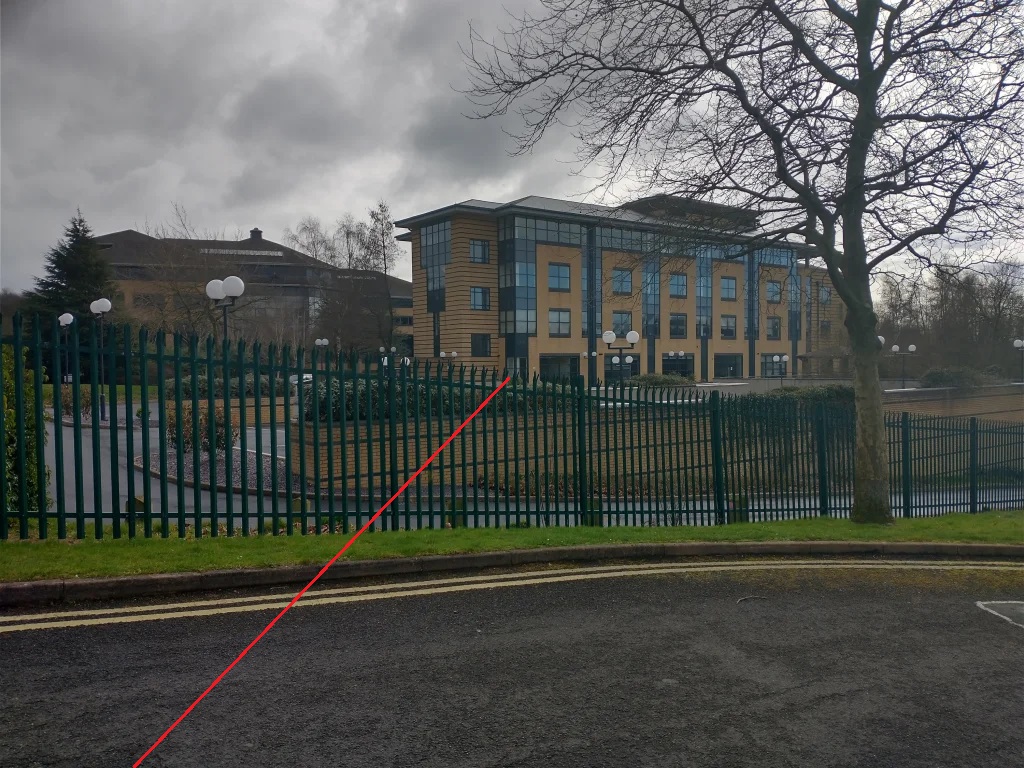
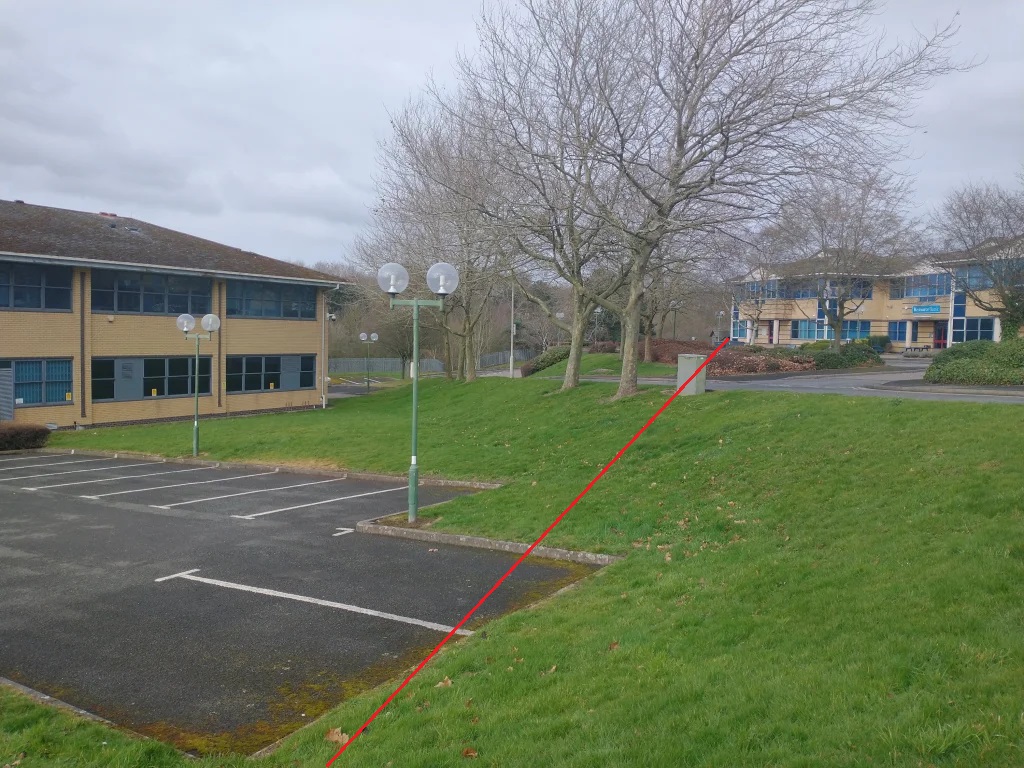
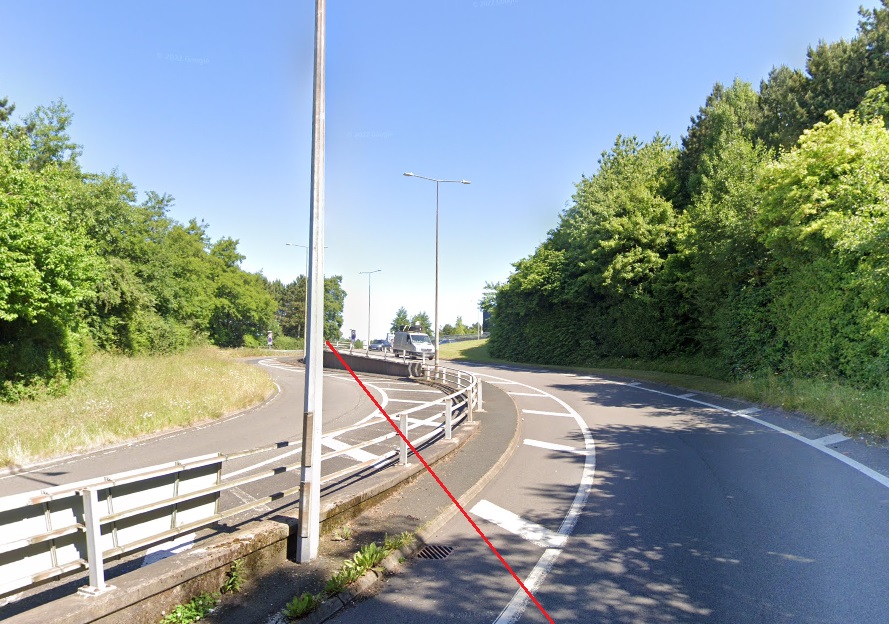
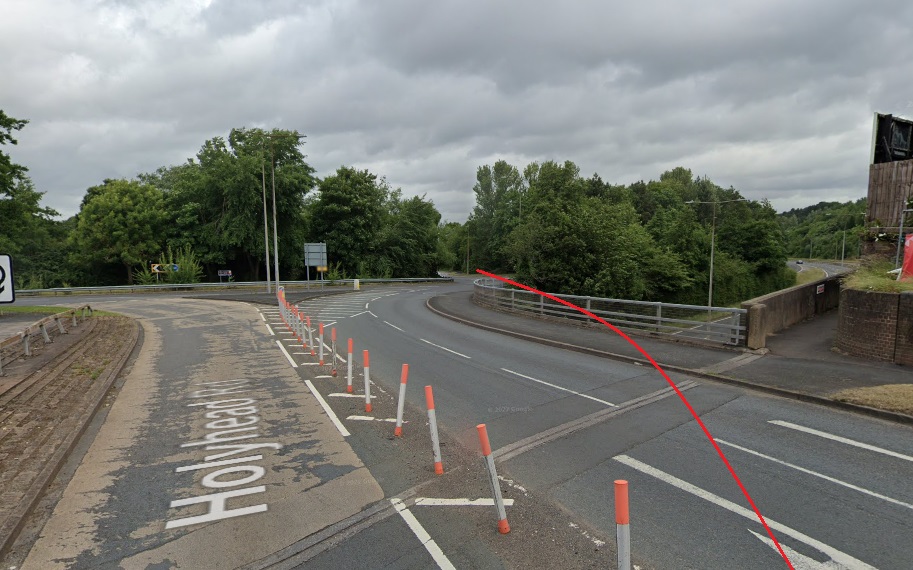
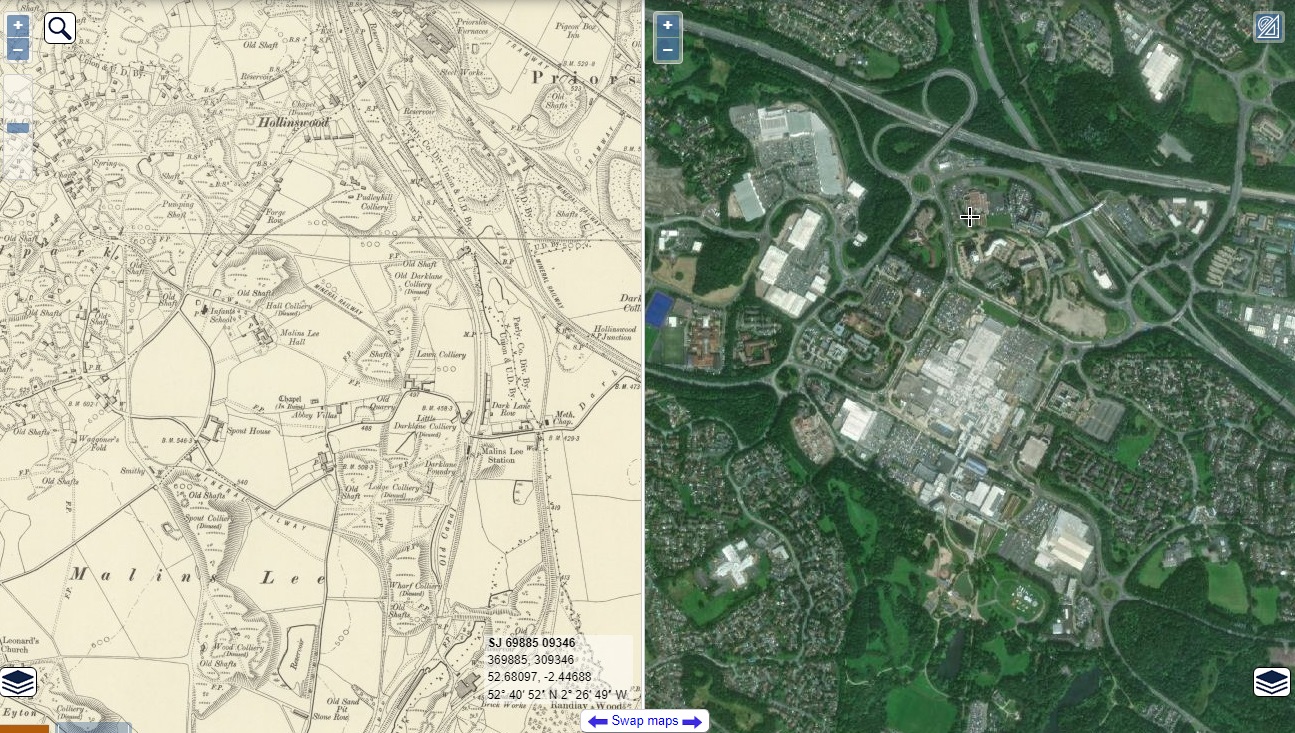
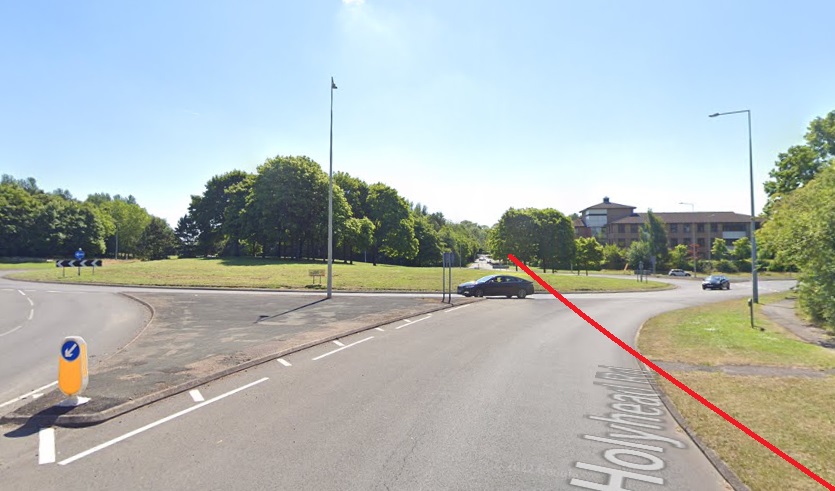
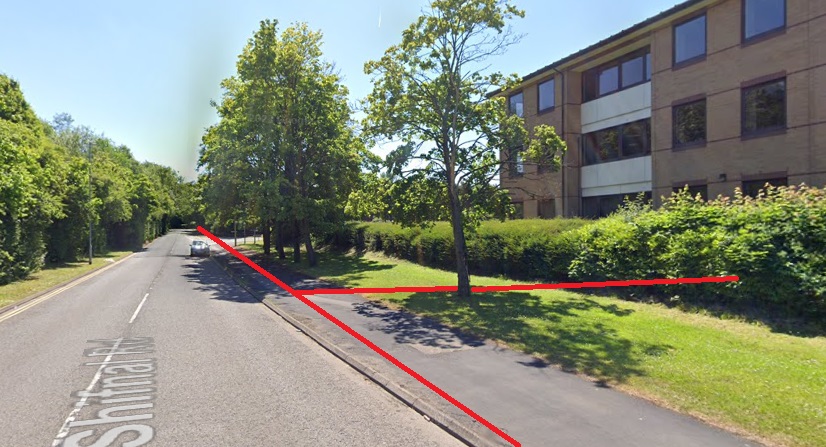
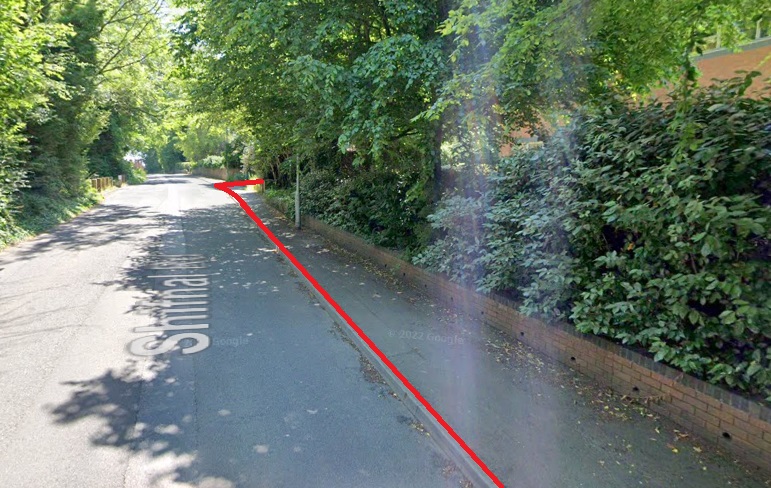
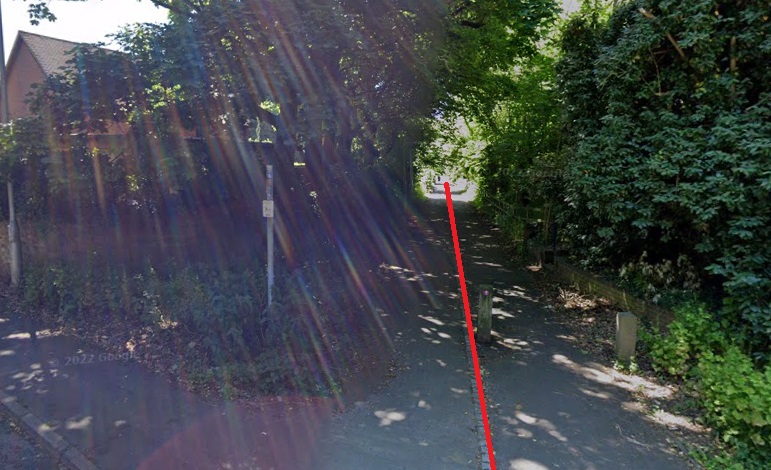
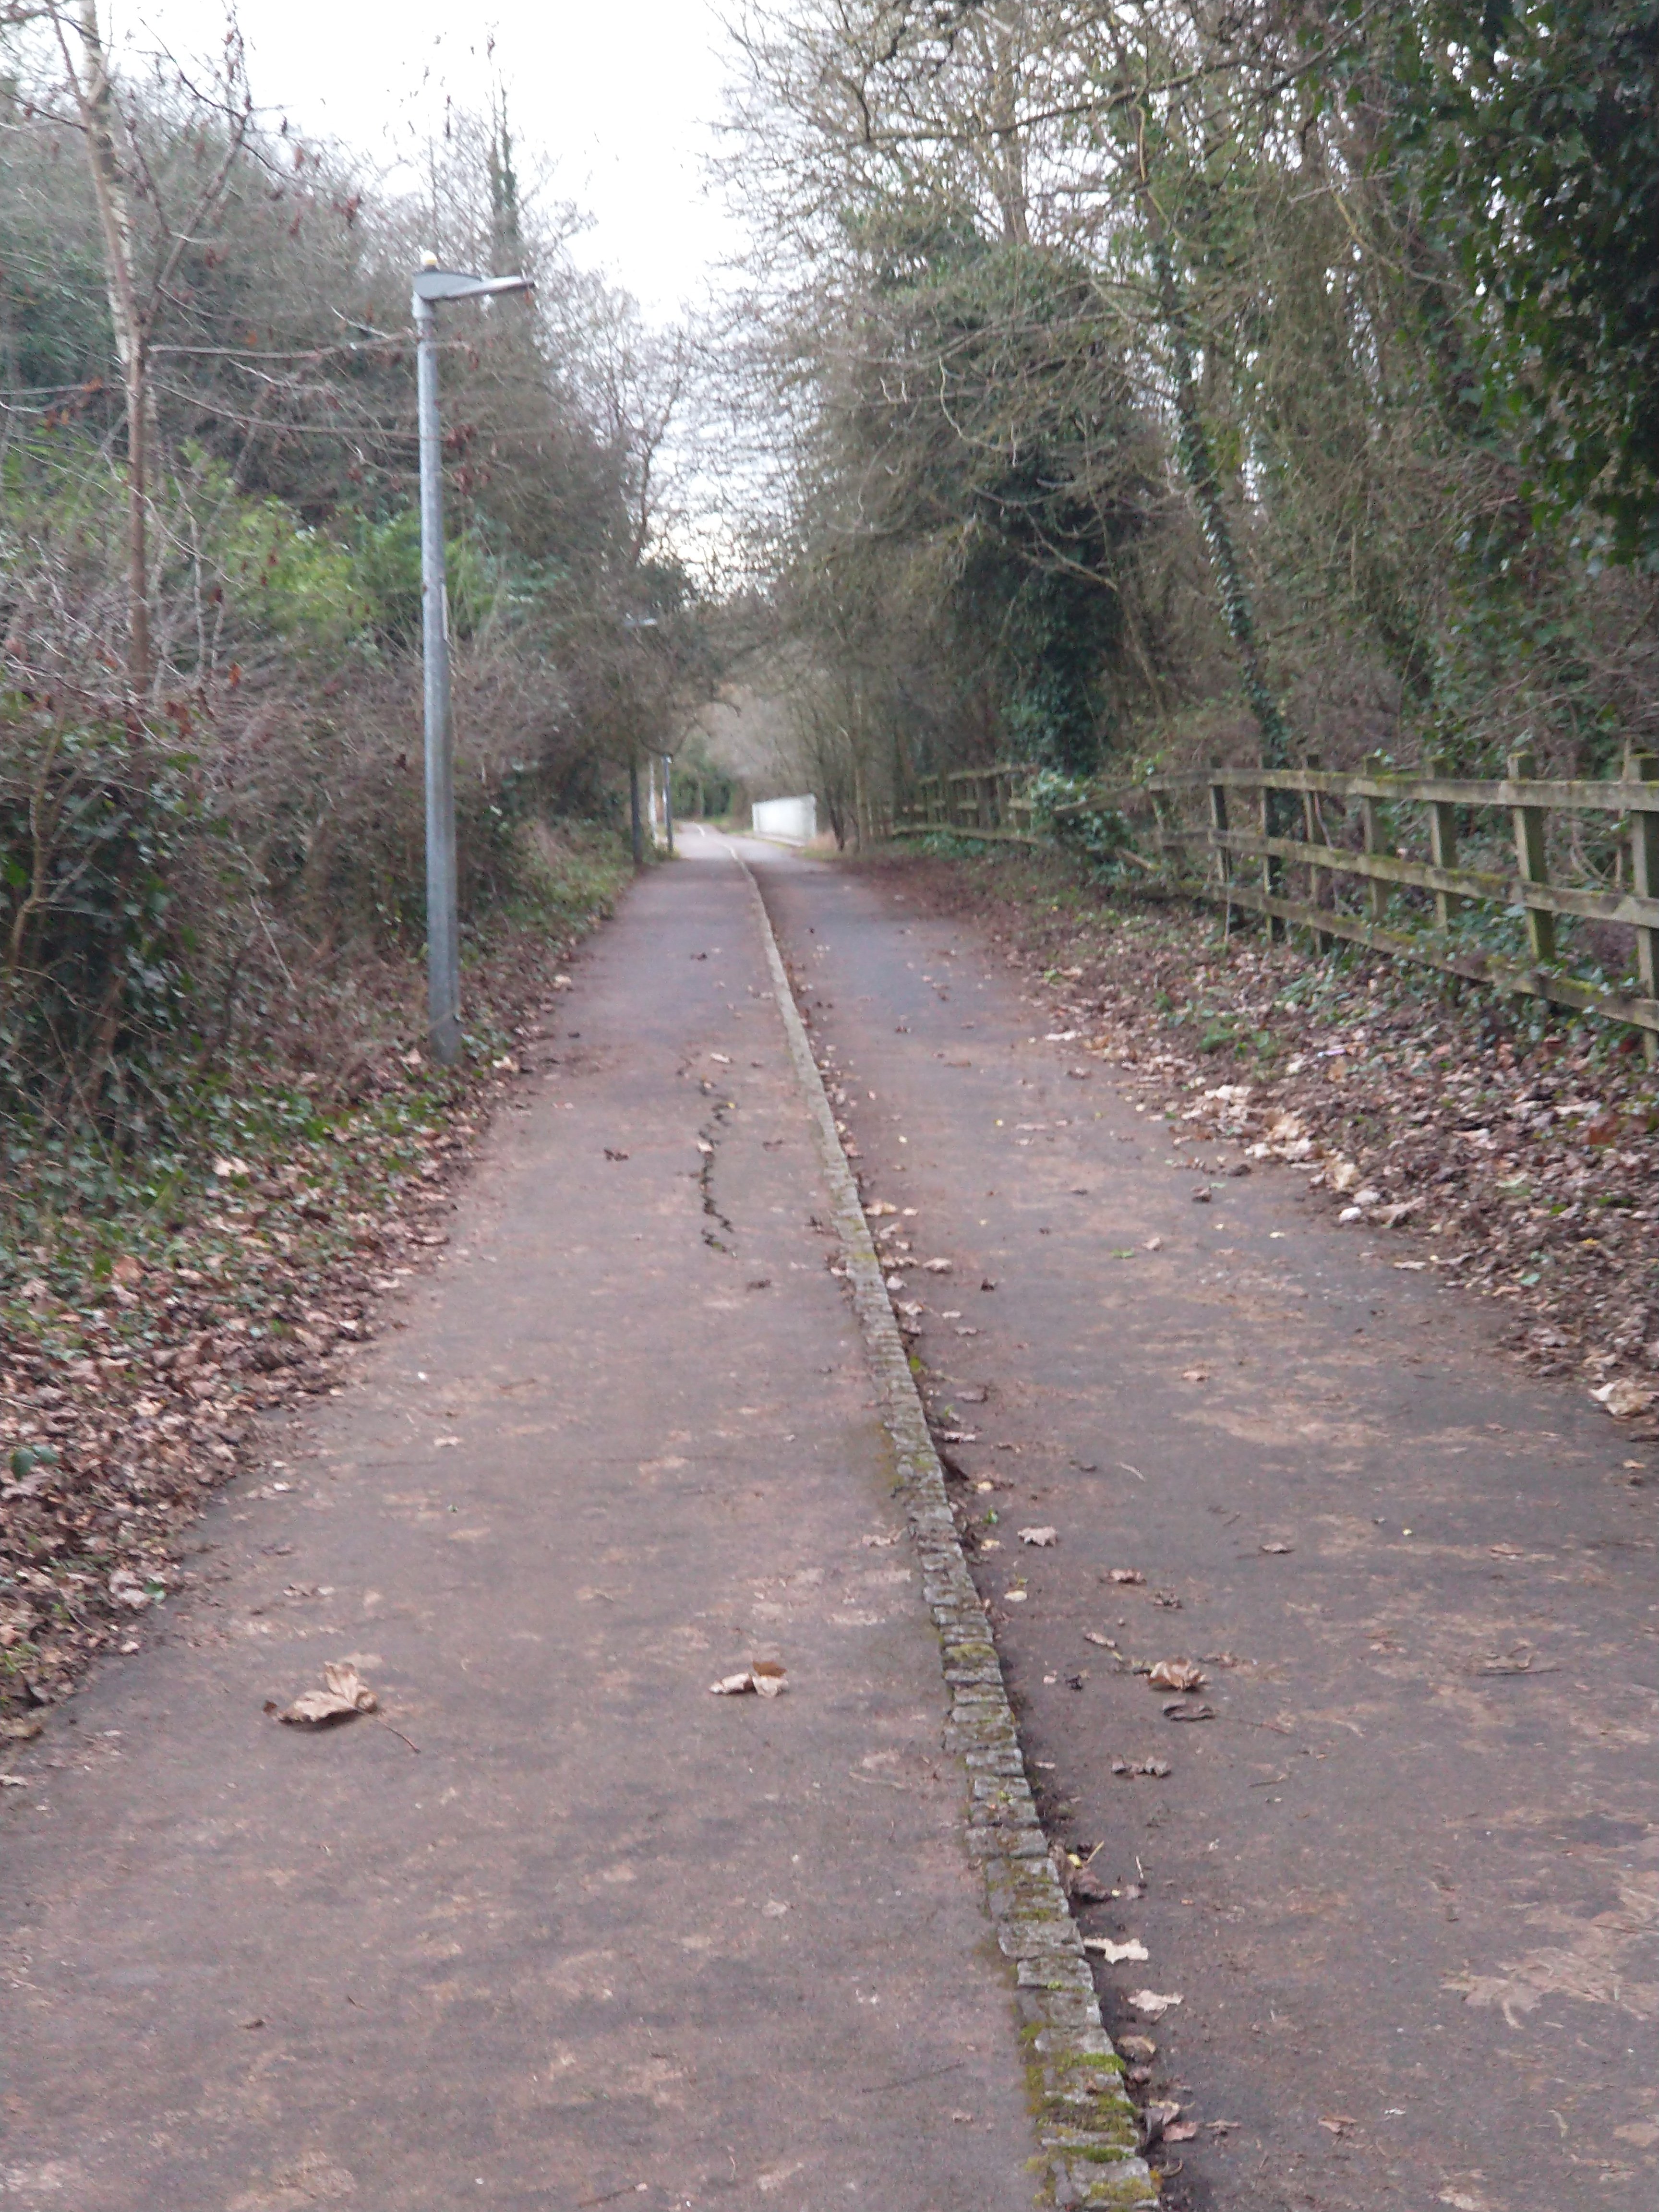
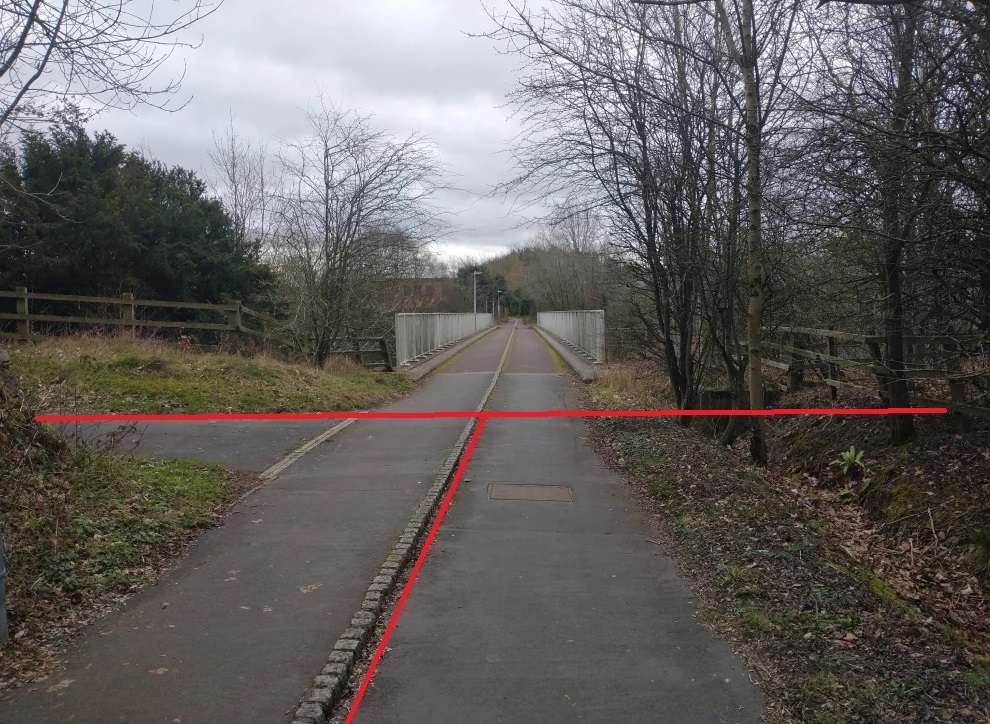
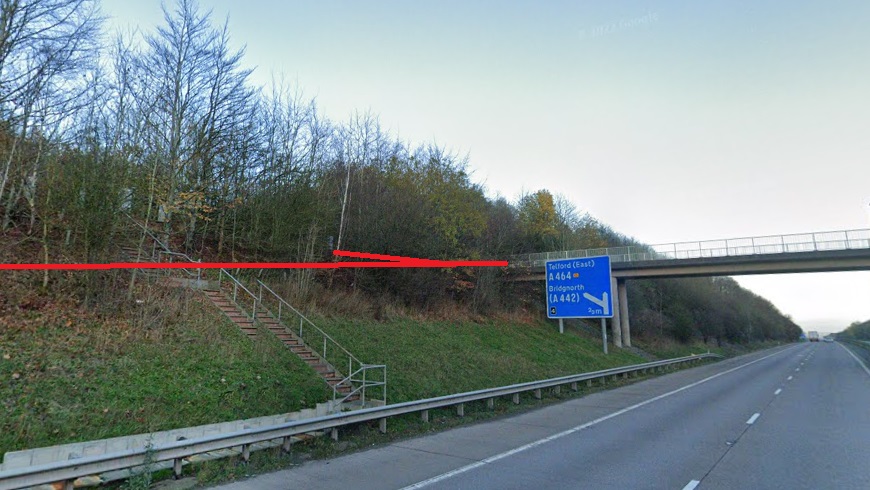
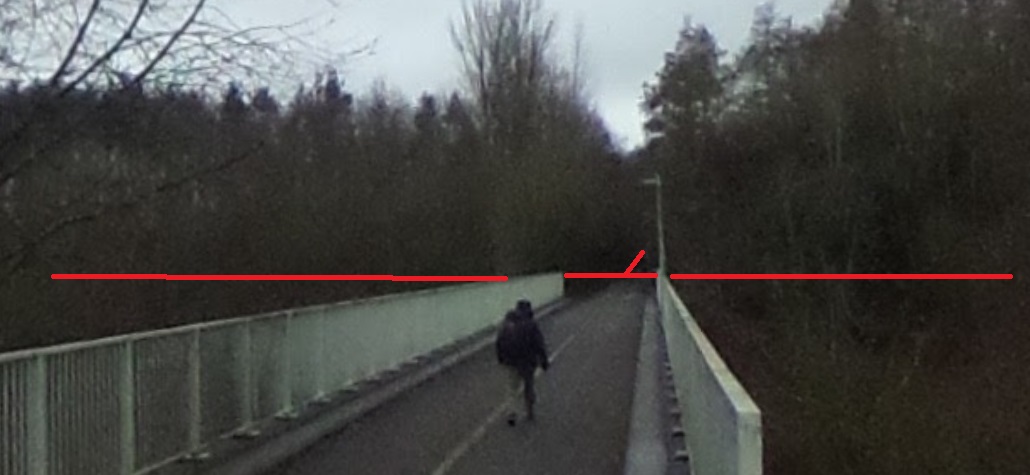
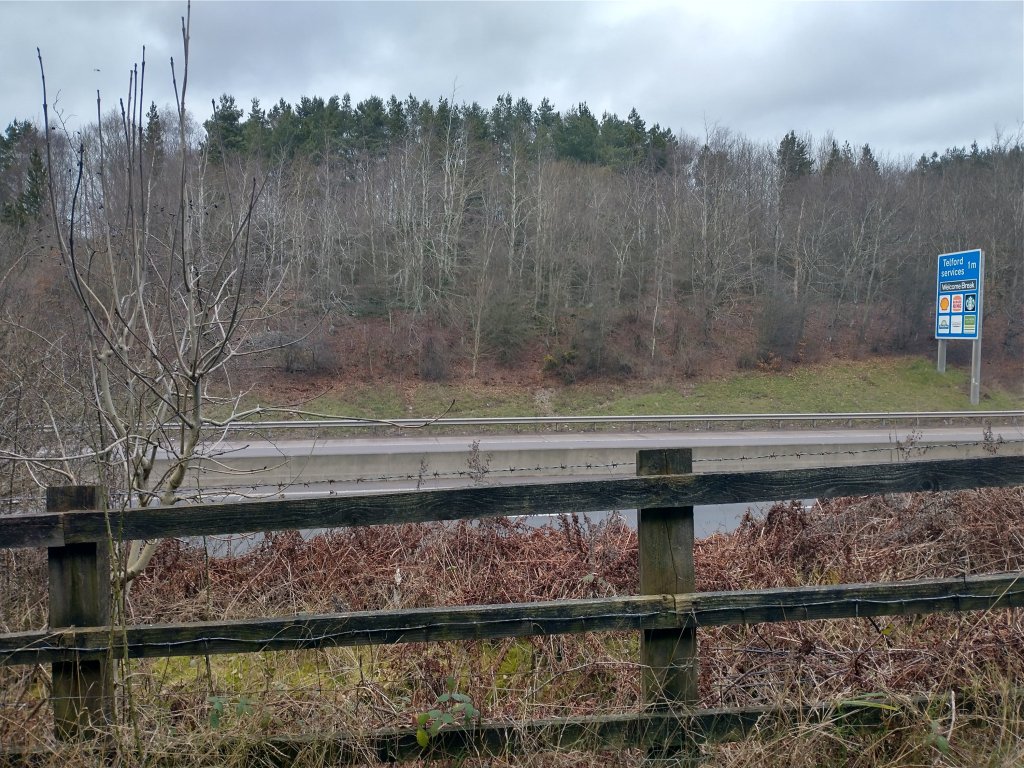
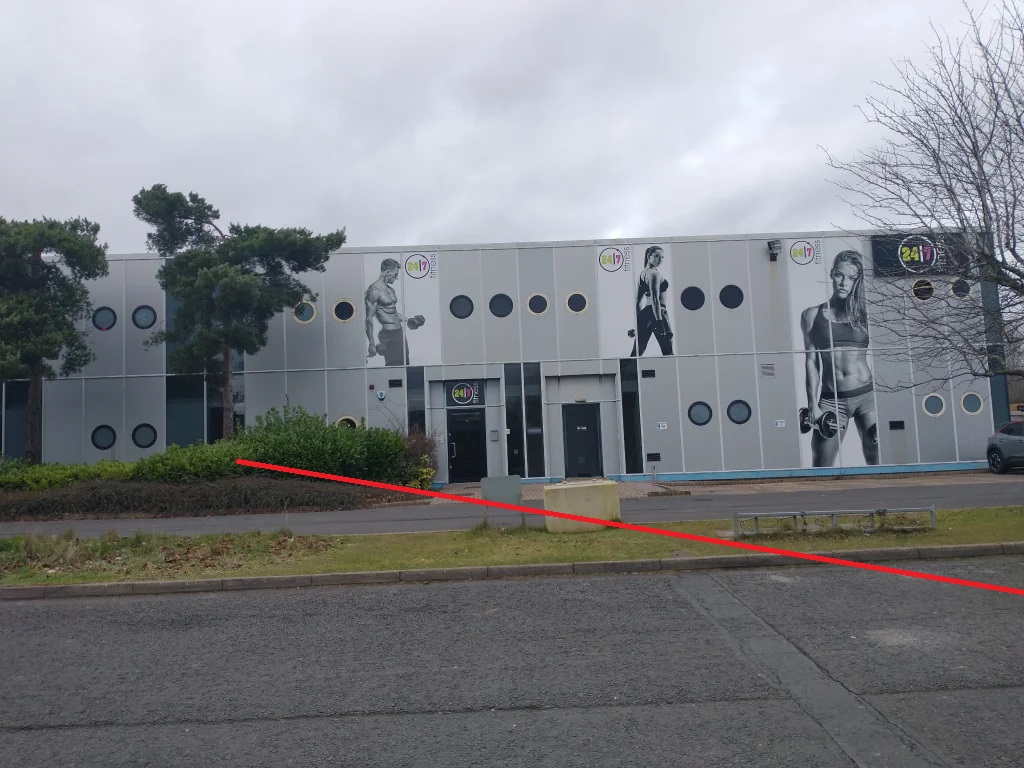
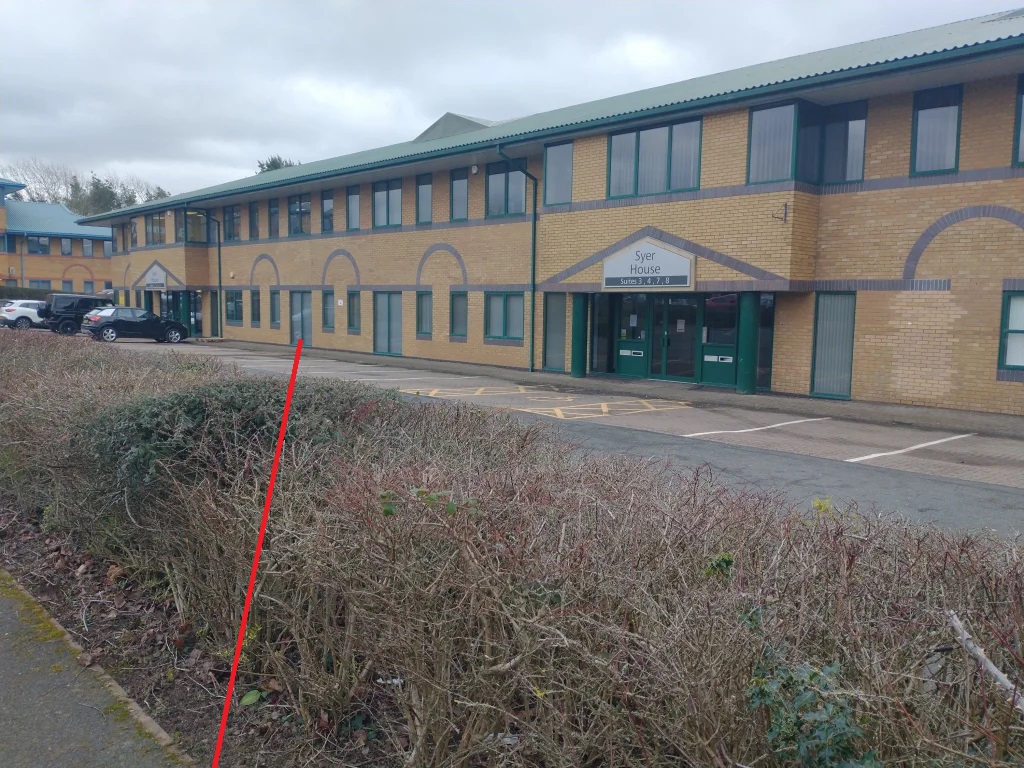
This next extract from the 6″ Ordnance Survey of 1901 shows, as a solid red line, the approximate route of the old tramroad/Mineral Railway. Both Savage and Smith’s plotted line and the old Mineral Railway resume the same course. [29]The same area on ESRI satellite imagery (NLS) as shown in the 6″ OS map extract above. The line drawn is inevitably approximate and represents a line transferred from the 6″ OS map extract, which itself is transferred from Savage and Smith’s 6″ to 1 mile drawing of the line. Savage and Smith scaled from 0.5″ to 1 mile original plans up to 6″ to 1 mile. [29]Looking North on Downemead along the approximate line of the old tramroad [ Google Streetview, June 2022]Further North on Downmead, the old tramroad alignment is shown running North through what is now a children’s play area to the East of Downemead. The junction of Downemead with Dale Acre Way can just be picked out ahead. [Google Streetview, June 2022]Looking West along Dale Acre Way across the line of the old tramroad and later Mineral Railway. [Google Streetview, June 2022]Looking North from Dale Acre Way along a green passageway which very approximately follows the line of the old Tramroad/Mineral Railway. The probable alignment is under the housing visible through the trees right of centre of the image. [My photograph, 25th February 2023]Looking North from the end of Duffryn towards the A442 which is just beyond the trees ahead. [Google Streetview, June 2022]Looking Northwest along the slip road from the A442. The old tramroad crossed the line of the slip road at around the position of the white-painted directions on the tarmac. It is impossible to be sure to the relative levels of road an old tramroad. {Google Streetview, June 2022]Looking Northwest along the other slip road to the A442 towards the roundabout which sits above the main road. The redline shows the approximate route of the old tramroad, but please note again, that it is impossible to be sure to the relative levels of the modern road and the old tramroad/Mineral Railway. [Google Streetview, June 2022]Looking North across the railway lie which passes under the roundabout. The line is still in use as the main line between Wolverhampton and Shrewsbury. Telford Railway Station is ahead to the left of the image beyond the trees. [Google Streetview, June 2022].Beyond the vegetation ahead the line of the old tramroad crosses the access road to the Railway Station. [Google Streetview, June 2022]Euston Way looking North-northwest. The line of the old tramroad runs to the left of the building at the centre of the image. [Google Streetview, June 2022]Looking Northwest at the junction of Euston Way and the access road to Titan House. The old tramroad/Mineral Railway route runs directly ahead between the Premier Inn on the left and the office block on the right. [Google Streetview, June 2022]The view North from the rear carpark of the Premier Inn. The old tramroad ran along what is now an embankment parallel to the kerb edge of the carpark. [Google Streetview, June 2022]The M54 looking West, the old Tramroad/Mineral Railway route crosses the motorway on an angle in the vicinity of the 100 metre marker for the junction slip road. [Google Streetview, November 2022]
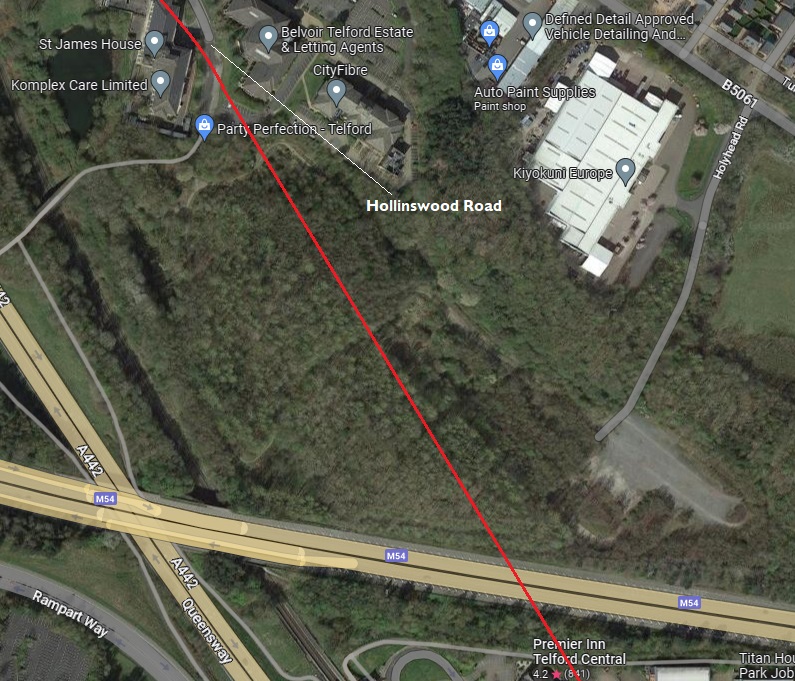
From the North side of the M54 as far as Hollinswood Road, the modern ladscape is heavily wooded and it would be impossible to pick out important features on the ground as the satellite image below shows.
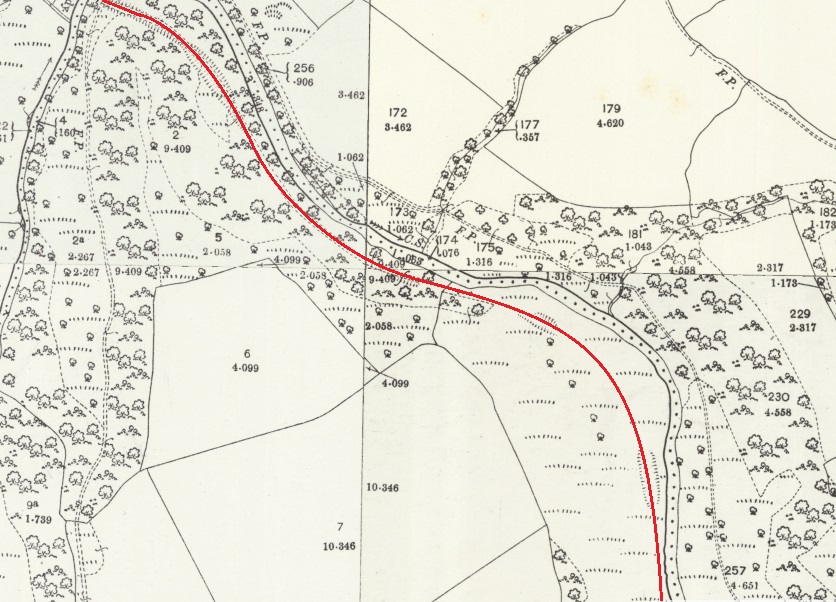
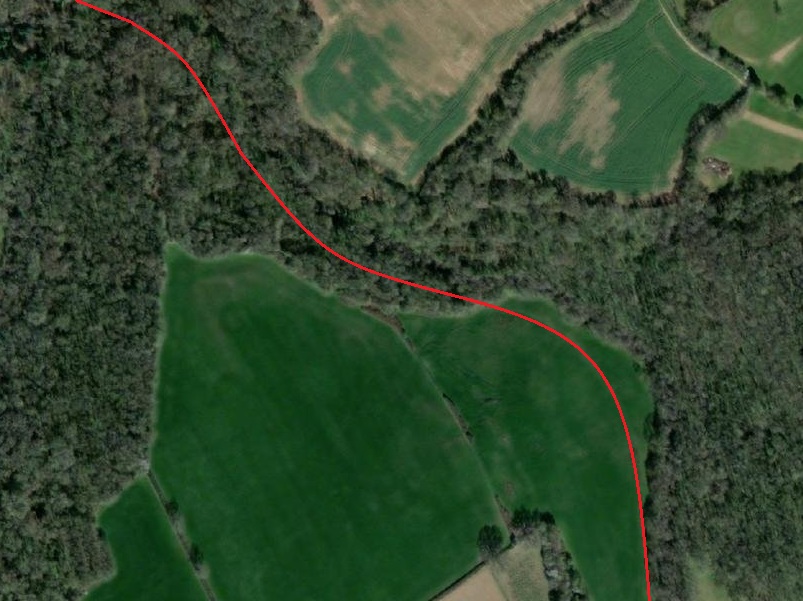
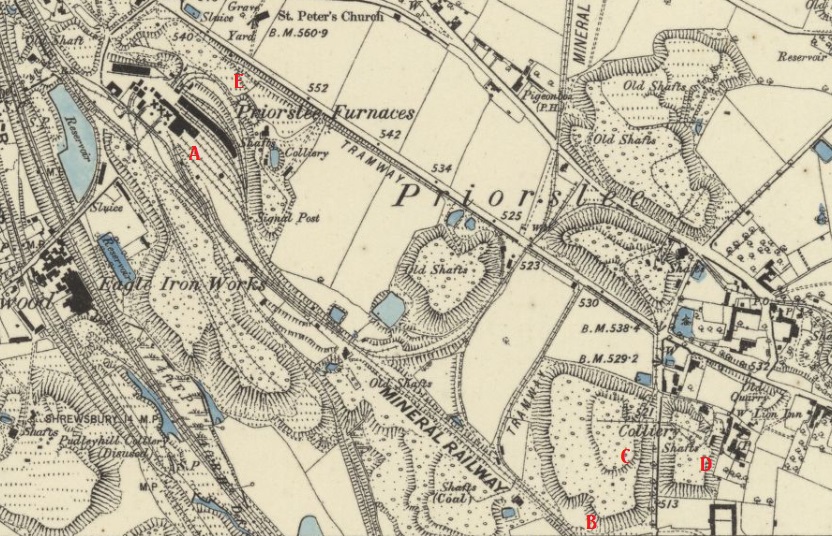
North of the M54 there are no features on the modern landscape until the old line crosses the modern Hollinswood Road. [Google Maps, February 2023]On this next extract from the 6″ Ordnance Survey of 1901, once again, the red line shows the approximate route of the old tramroad. Snedshill Brickworks and Priorslee Furnaces were close to the route of the old line. [30]A very similar area to that shown on the 6″ OS mapping above. [30]Looking back from the end of the tarmac on Hollinswood Road along the line of the old tramroad to the South East into the woods mentioned above. {My photograph, 25th February 2023]St. James House on Hollinswood Road with the route of the old tramroad travelling Northwest shown by the redline. [My photograph, 25th February 2023]Looking back to the South-southeast towards St. James’ House. [My photograph, 25th February 2023]Looking North-northwest along the line of the old tramroad. [My photograph, 25th February 2023]
Beyond the buildings shown above the old tramroad route crosses the A442 slip road which is just beyond the industrial estate as shown below. …
The A442 sliproad as shown on Google Streetview with the approximate route of the old line marked by the red line. [Google Streetview, June 2022]Looking North-northwest across the A442. The line of the old tramroad was close to straight through this length, linking the approximate points it passed through leaves a curve which is the result of image distortion in the camera! [Google Streetview, June 2022]The old line curved away North into what is now woodland running alongside the A442. [Google Streetview, June 2022]
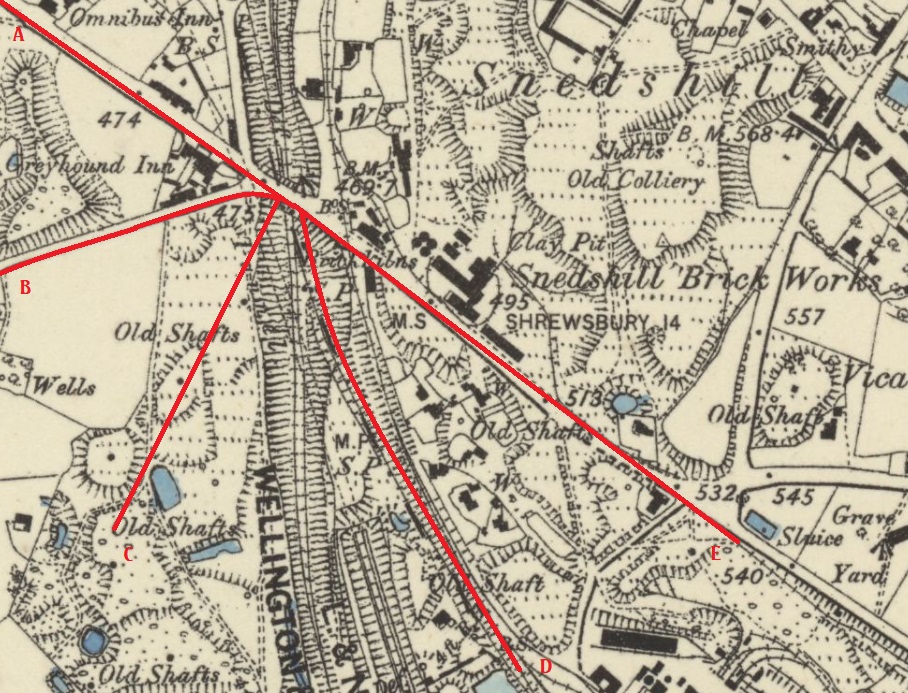
It is at this point that we leave the old line. We are close to Oakengates and there was at one time a very large number of different tramroads ahead, part of the Lilleshall Company’s internal network. We will pick up this tramroad when we look at that network.
References
Bob Yate; The Railways and Locomotives of the Lilleshall Company; Irwell Press, Clophill, Bedfordshire, 2008.
R.F. Savage & L.D.W. Smith; The Waggon-ways and Plateways of East Shropshire; Birmingham School of Architecture, 1965. Original document is held by the Archive Office of the Ironbridge Gorge Museum Trust.
A P Baggs, D C Cox, Jessie McFall, P A Stamper and A J L Winchester; Stirchley: Manor and other estates; in ed. G C Baugh and C R Elrington; A History of the County of Shropshire: Volume 11, Telford; London, 1985, p185-189; via British History Online, http://www.british-history.ac.uk/vch/salop/vol11/pp185-189, accessed 20th February 2023.
Christopher Greenwood; Map of the County of Salop, 1827; Facsimile Copy, Shropshire Archaeological and Historical Society, 2008.
South of Bridgnorth in the valley of the River Severn were:
Alveley Sidings and Alveley Colliery with a private railway/aerial ropeway;
Highley Station;
Highley Colliery & Sidings;
The Billingsley Railway & Collery; and
Kinlet Colliery and Sidings.
These locations were all within the Wyre Forest Coalfield. All were connected to the GWR Severn Valley Railway (SVR)
Alveley Sidings, Alveley Colliery, Private Railway and Aerial Ropeway.
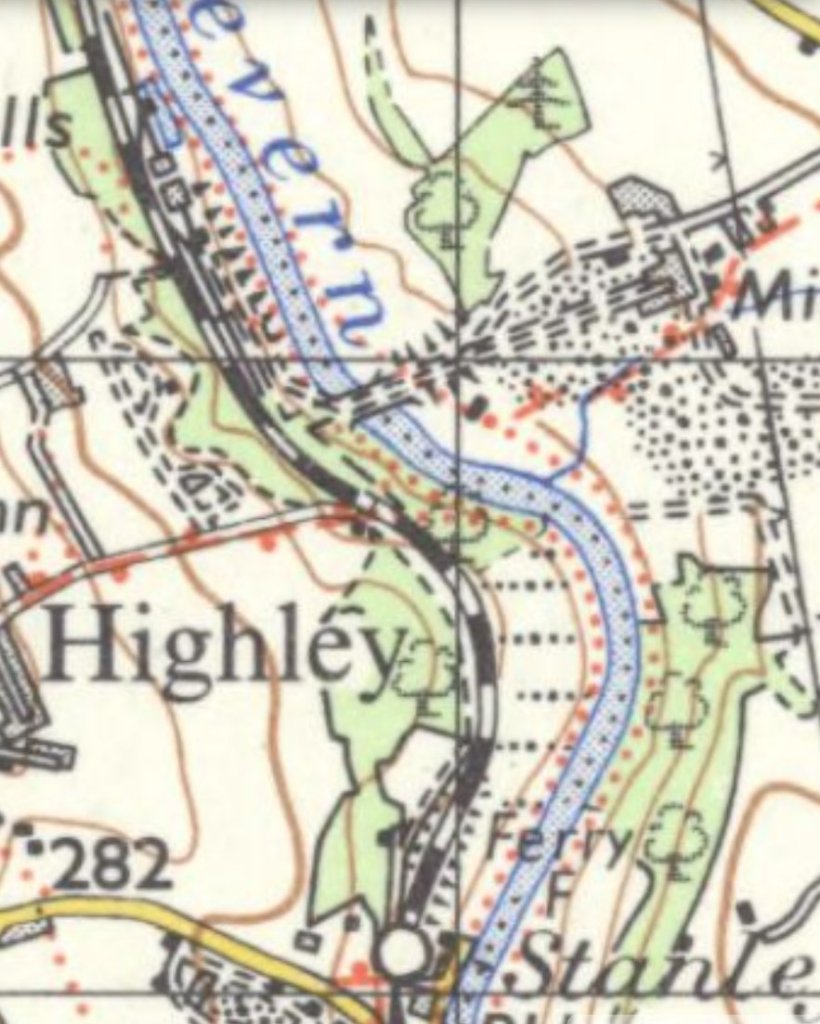
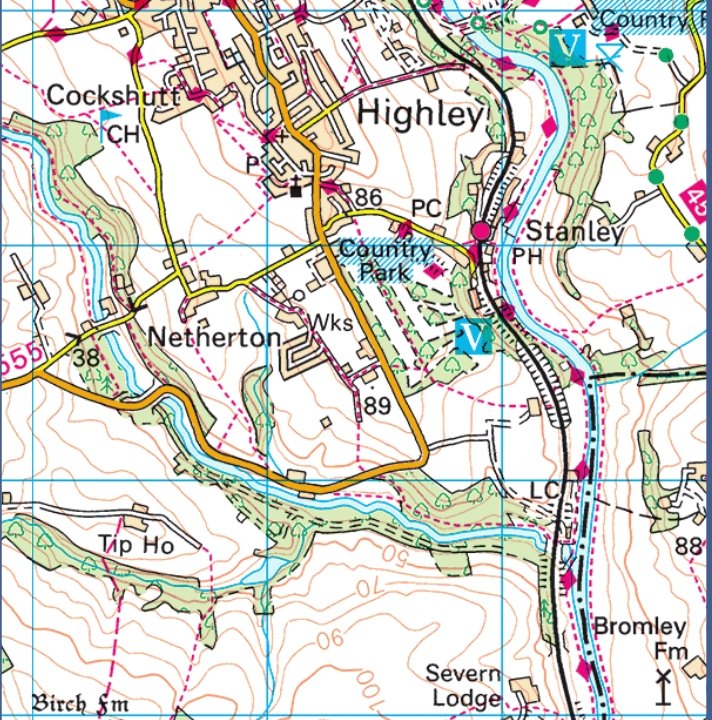
Of the locations looked at in this article the Alveley Sidings and Colliery were the closest to Bridgenorth. It was situated east of the River Severn, a little way north of Highley Station in the area now forming the Alveley section of the Severn Valley Country Park. [8][9]
The shaft at Alveley was sunk in 1935 to a depth of 360 yards by the Highley Mining Company. It was connected to their Highley shaft by underground workings which passed under the River Severn. Production started at the colliery in 1938. The shaft at Highley was then closed in 1939, only being retained for ventilation and as an emergency evacuation route. Alveley’s workings were very modern, with full use being made of electrical power and mechanical working at the coal face.
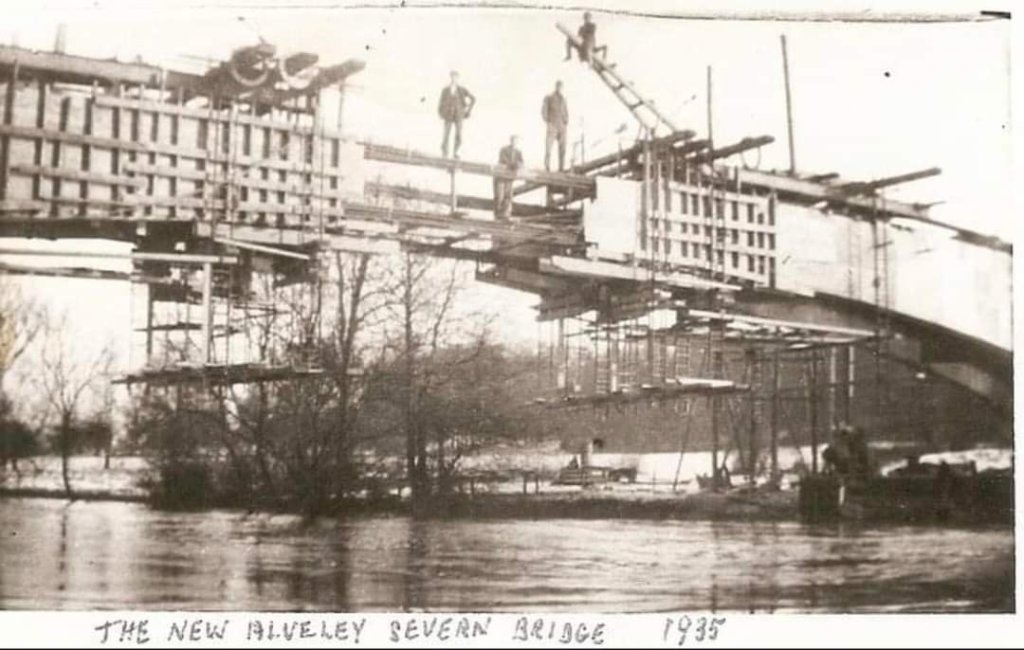
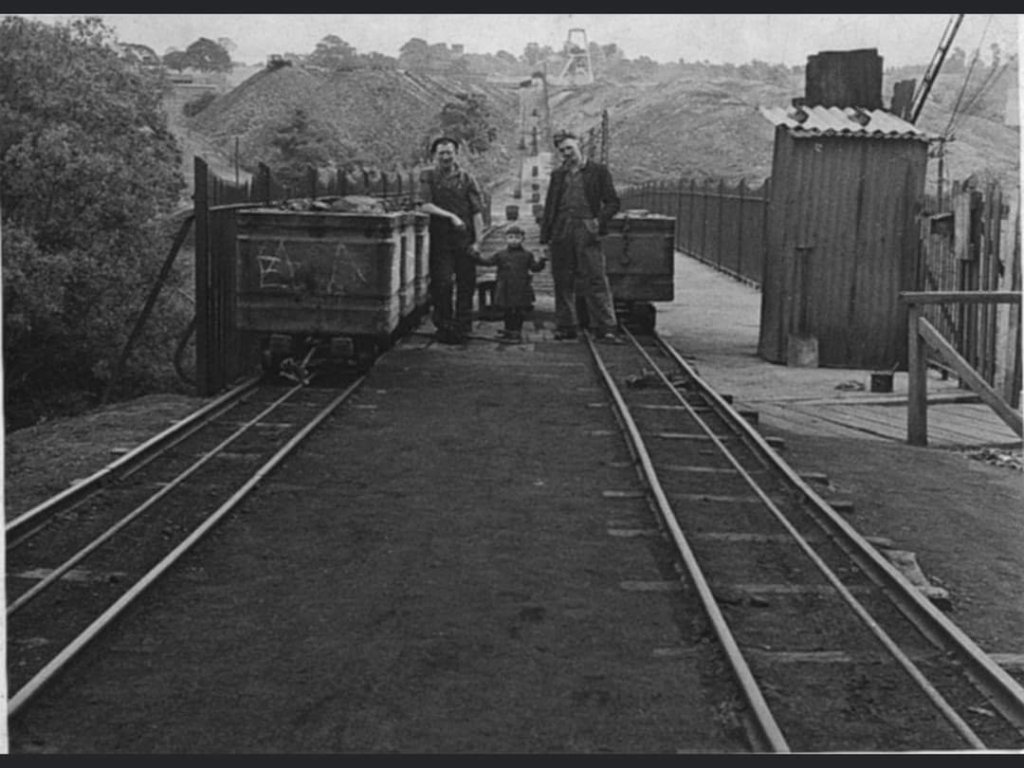
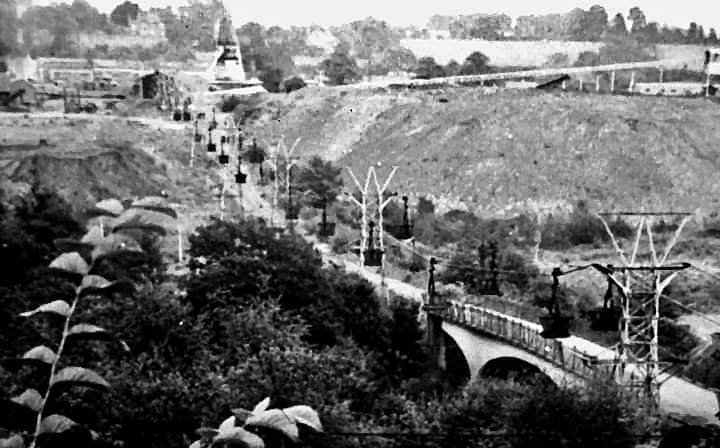
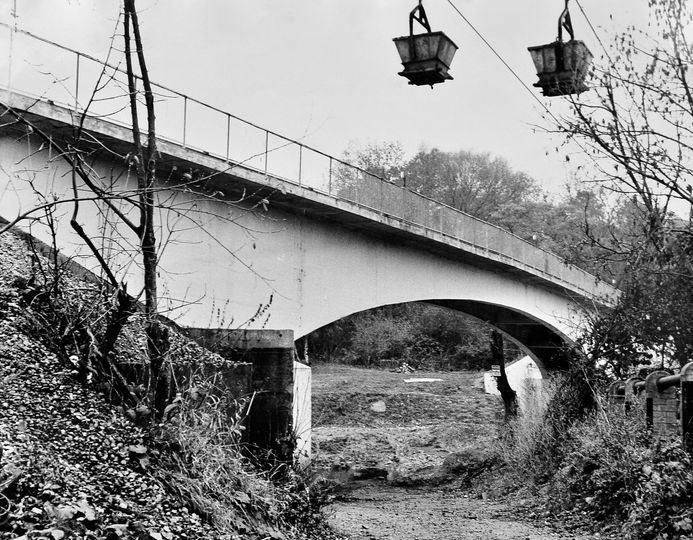
Coal was brought across the Severn by a rope-worked tramway across a bridge built to serve the mine, which was later replaced with an aerial ropeway in 1961. The colliery was connected to washeries, screens and sidings adjacent to the Severn Valley Railway by an endless cable-worked narrow gauge tramway which crossed the river on a concrete bridge bringing coal to the screens. The tramway was replaced later by an aerial ropeway. The sidings eventually became the location of Country Park Halt on the Severn Valley railway.
Colliery production reached “full output in 1944 with 275,000 tons raised, with that year’s record being 5,547 tons in one week, and a peak of 300,000 tons per year reached in the late 1950s. The colliery became part of the National Coal Bard (NCB) on nationalisation in 1947; at that time employment was 741, rising to over 1,250 in the mid-1950s, and falling to around 700 by the mine’s closure. A major expansion was undertaken in the late 1950s and early 1960s, completed in 1962, after large reserves of coal were found to the East of the current workings. These were purported to be enough to last the mine between 50 and 100 years, but a drop in the quality of coal combined with a reduction in demand due to a national over supply forced the closure of the mine in 1969, with the last coal being lifted on 31 January.” [8]
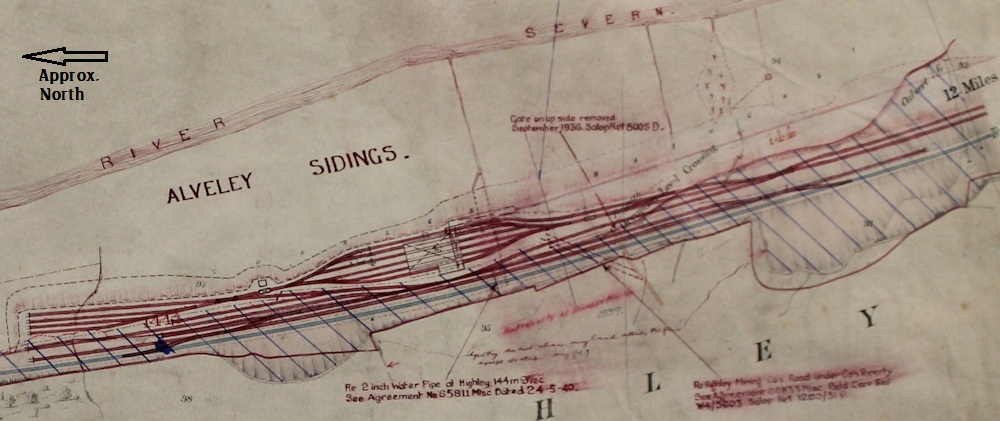
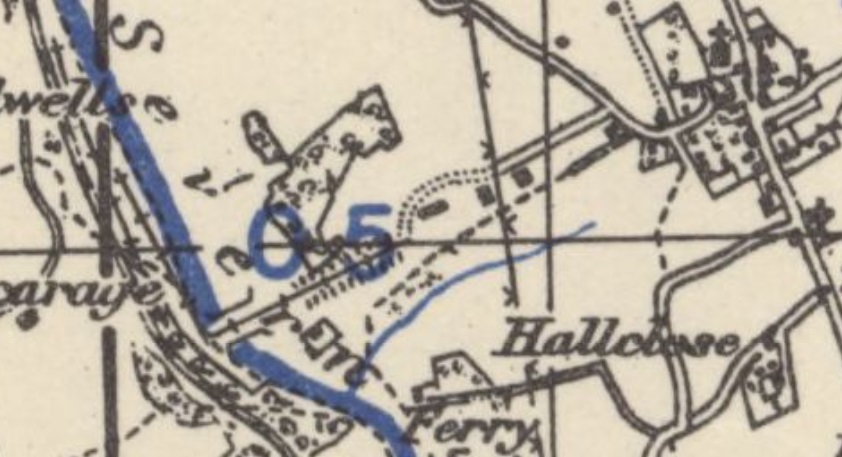
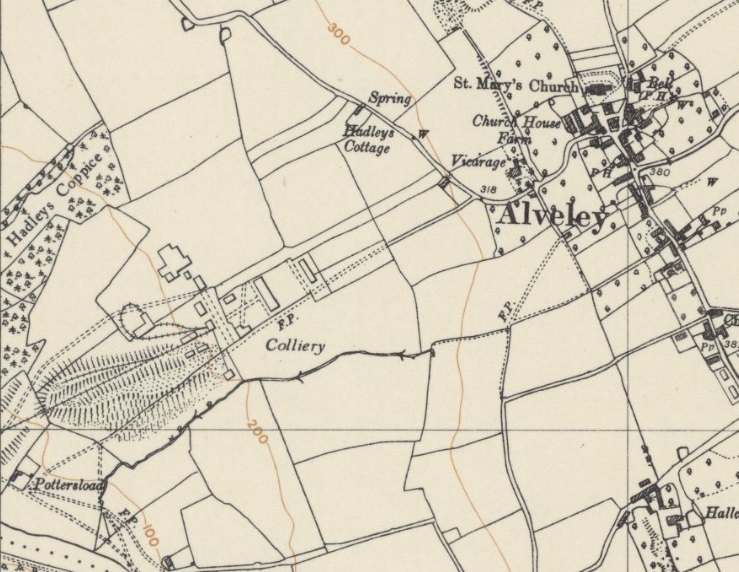
GWR Plan of Alveley Sidings. The GWR Severn Valley Line is shown in blue, with the sidings shown in red. The image is included here under a Creative Commons Licence, Attribution-ShareAlike 3.0 Unported (CC BY-SA 3.0). [8]The 1943 revision of the Ordnance Survey of 1916, shows inclined plane crossing the River Severn. Alveley Village is to the right side of the map extract. The mine’s sidings can be picked out on the left of the image, to the West of the River Severn. Mine building appear not to have been recorded in any detail. [11]The same area as it appears on the 1″ Ordnance Survey of 1963. The screens/washing plant can be seen adjacent to the Severn Valley Railway on the left of the map extract. The pithead and associated buildings are at the centre of the image. The aerial ropeway is shown operating between the two locations. [12]
A closer focus is provided on the National Grid Maps, two extracts follow, as the location runs across map boundaries. The Inclined Plane was not replaced by an aerial ropeway until 1960. [15: p16-18]
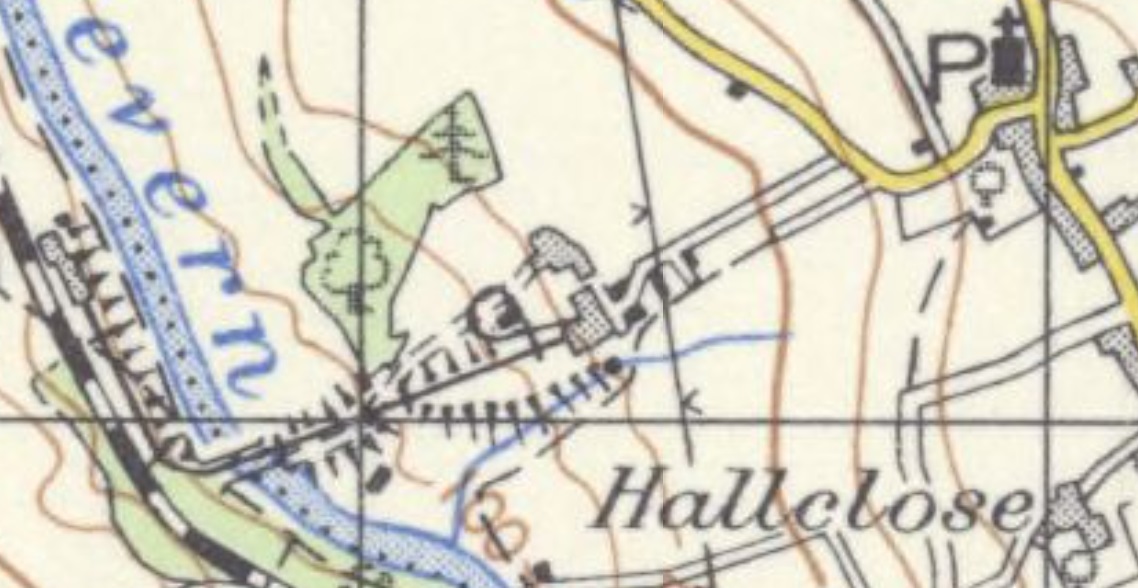
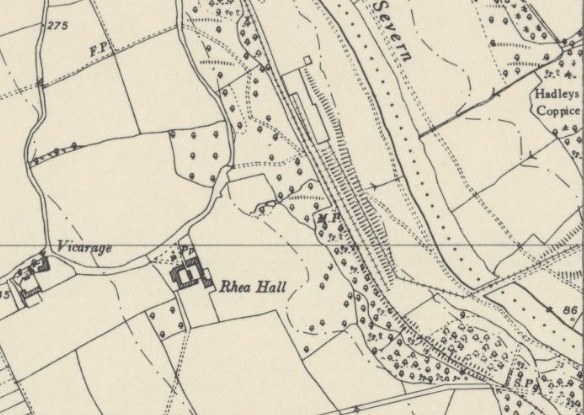
This extract is taken from Ordnance Survey SO78SE – A, Surveyed/Revised: Pre-1930 to 1954, Published: 1954. It shows the colliery site in more detail and highlights a loop of lines serving the colliery site as well as the inclined plane running down towards the River Severn. [13]This extract is taken from Ordnance Survey SO78SW – A, Surveyed/Revised: Pre-1930 to 1954, Published: 1954. It shows the site of the screens and sidings for Alveley Colliery in more detail. [14]
George & David Poyner tell us that the “surface haulage used a 7/8th inch rope. The length of the track was 1100 yards so the endless rope was 2200 yards long. The railway was 21″ gauge with wooden sleepers 3′ apart; 9″ rollers fixed in wooden boxes supported the rope. There were eight tubs to each journey: the tubs were made of wood and later of iron and held 10 cwt of coal. The rope took the tubs to the Barker Screens.” [15: p16]
At the pit head, tubs were clipped to the haul-rope in gangs of eight. The first and last tubs, being attached to the rope and the wagons were coupled together. There was an haulage engine at the top of the incline. Initially a skilled operative manned the engine, but later it was worked by signals. when the wagons reached the creeper at the screens, the tubs were unclipped and “they were sent up the creeper into the tippler on the screens and then returned down the retarder. The chalk numbers were removed and the tubs were clipped back onto the haulage rope to go back to the colliery.” [15: p17]
The empties were sent back up the incline to the pit head where they were “unclipped off the rope and sent up creepers to the top and bottom decks of the cage. The supplies were also brought by rail so there were six men loading the tubs with pit props and unloading railway wagons. The rails needed quite a lot of maintenance, during hot weather they would expand and buckle, requiring the joints to be loosened.” [15: p17]
As the Incline became too old for continued use, a case was made for the replacement of the incline with an aerial ropeway. This was considered in 1958 by the colliery reconstruction committee. Apparently, the rope worked incline “required 54 men from the pit to the washery. It was estimated that an aerial ropeway would require 15 mean and would cost £160,568. … Figures are not available to show how much money was actually saved by the aerial ropeway. However, at least in its early days it was plagued by breakdowns.” [15: p18]
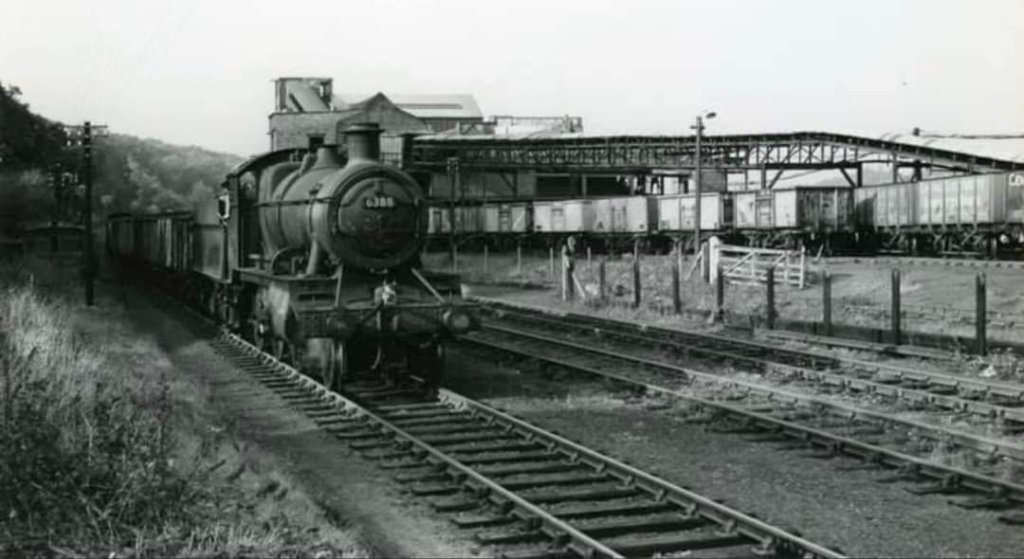
The bridge was constructed to carry the tramroad and it’s incline which linked the pit head at the Colliery to the screens and railway sidings on the West Bank of the River Severn. This photograph was shared by Margaret Sheridan on the Alveley History Bridgenorth Shropshire Facebook Group on 21st January 2023. [16]A view from the West Bank of the River Severn looking East towards the colliery. The bottom of the old Incline Plane is ahead. The line was rope-worked throughout from pit head to screens. This photograph was shared by Margaret Sheridan on the Alveley History Bridgenorth Shropshire Facebook Group on 21st January 2023. [16]A view from the West Bank of the River Severn, possibly from the colliery screens, which shows the 1935 bridge and the aerial ropeway which was installed in 1960. The pit head and winding gear is visible towards the rear of the photo. This image was shared by Bill Scriven in a comment on the Alveley History Bridgenorth Shropshire Facebook Group on 21st January 2023. [16]The Seven Valley Railway, Alveley Colliery screens and sidings on the West side of the Severn. This photograph was shared by Margaret Sheridan on the Alveley History Bridgenorth Shropshire Facebook Group on 21st January 2023. [16]The Alveley Colliery bridge across the River Severn with the aerial ropeway in use above. This picture was shared by the Shropshire Star on their Facebook Page on 28th November 2022. [38]
Further photographs can be found on the Alveley Historical Society web page:
The Station at Highley was just a short distance to the South of the Alveley Colliery sidings.
On this extract from the 1″ Ordnance Survey of 1967 (Sheet 130: Kidderminster – B Edition Publication date: Revised: 1949 to 1967, Published: 1967), the mine at Alveley, the 1935 bridge over the Severn, the sidings and screens on the West side of the river are clearly shown well within a mile to the North of Highley Station. [17]
The Station was built and opened at the same time as the Severn Valley line. It “opened to the public on 1 February 1862 and closed on 9 September 1963, before the Beeching axe closures.” [18]
The Station was important as “the transport hub of a colliery district, with four nearby coal mines linked to the Severn Valley line by standard and narrow gauge lines, cable inclines and aerial ropeways . There were extensive sidings along the line, and wagon repair works at Kinlet, half-a-mile south.” [18]
The station was too far from the village of Highley to be convenient. The advent of reliable bus services and better roads soon resulted in passenger use dwindling. However, the signal box at the station remained in use until the closure of Alveley Colliery in 1969. The site of the Station remained disused until it was rejuvenated by the preservation movement.
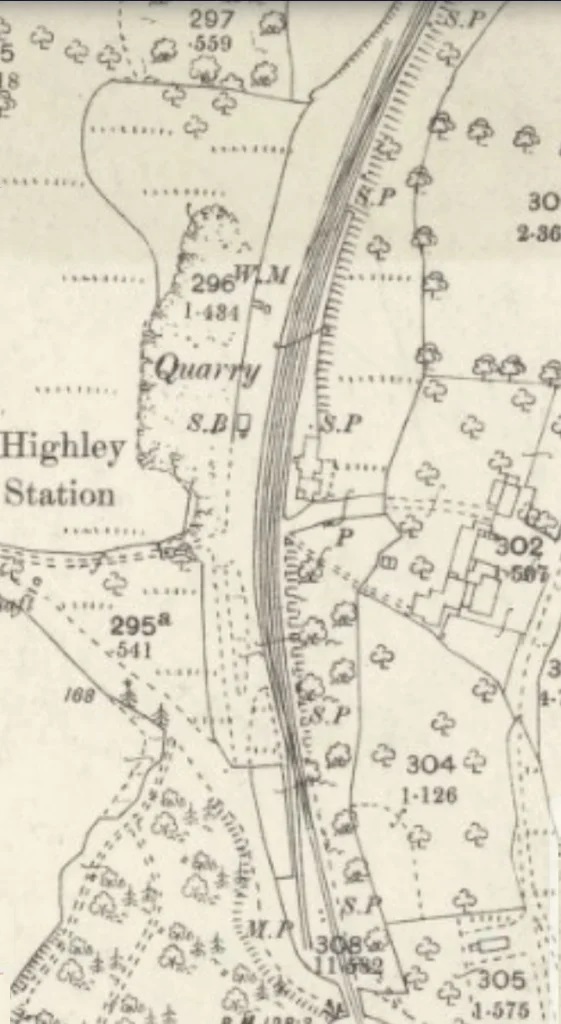
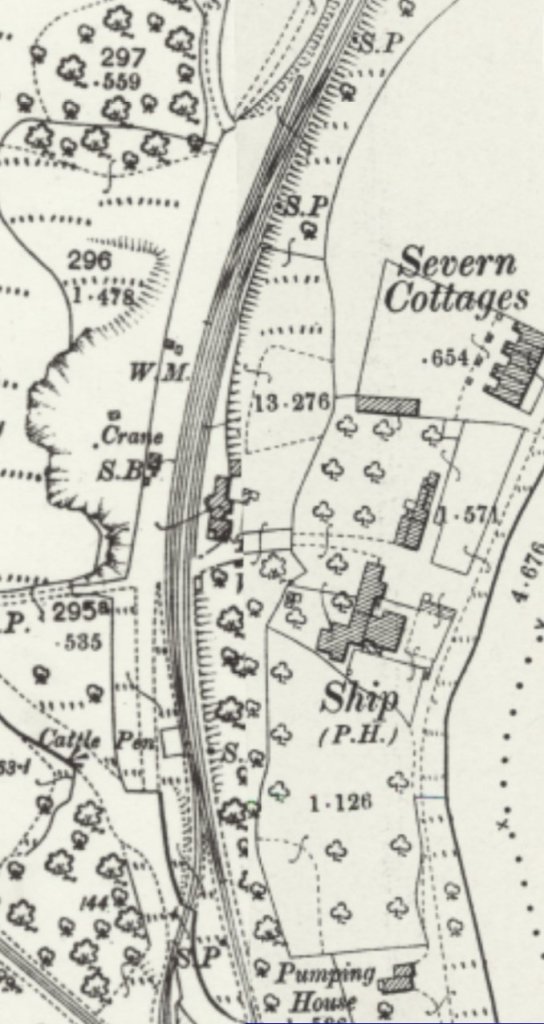
The map extracts below show the Station in 1882 and then at around the turn of the 20th century.
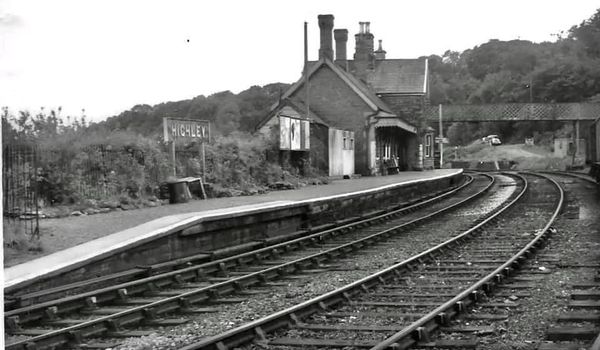
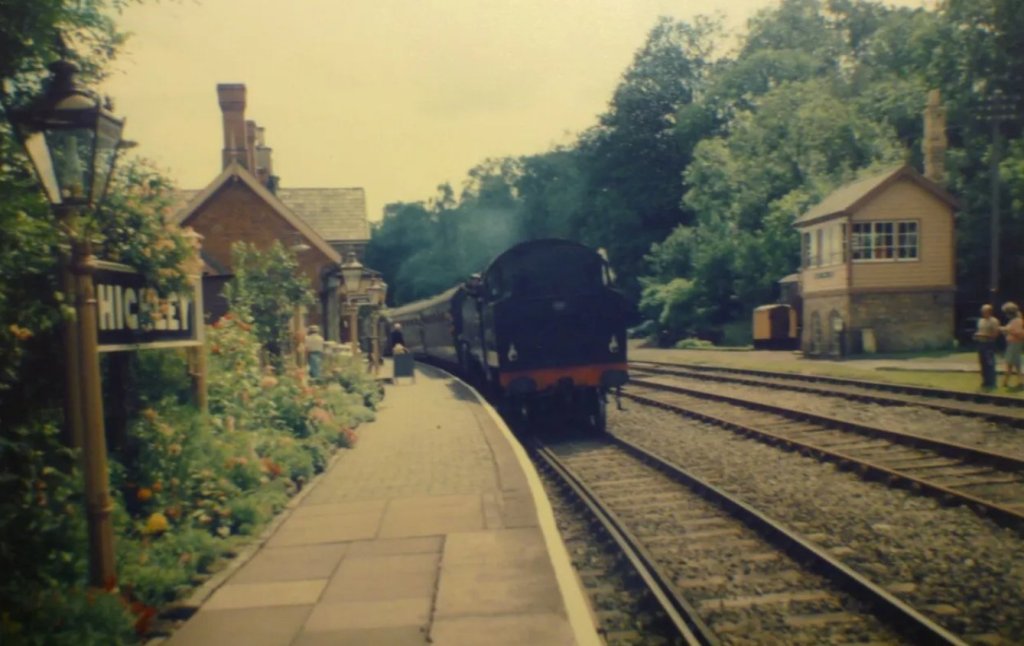
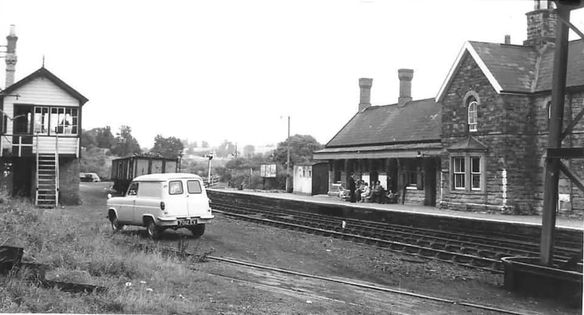
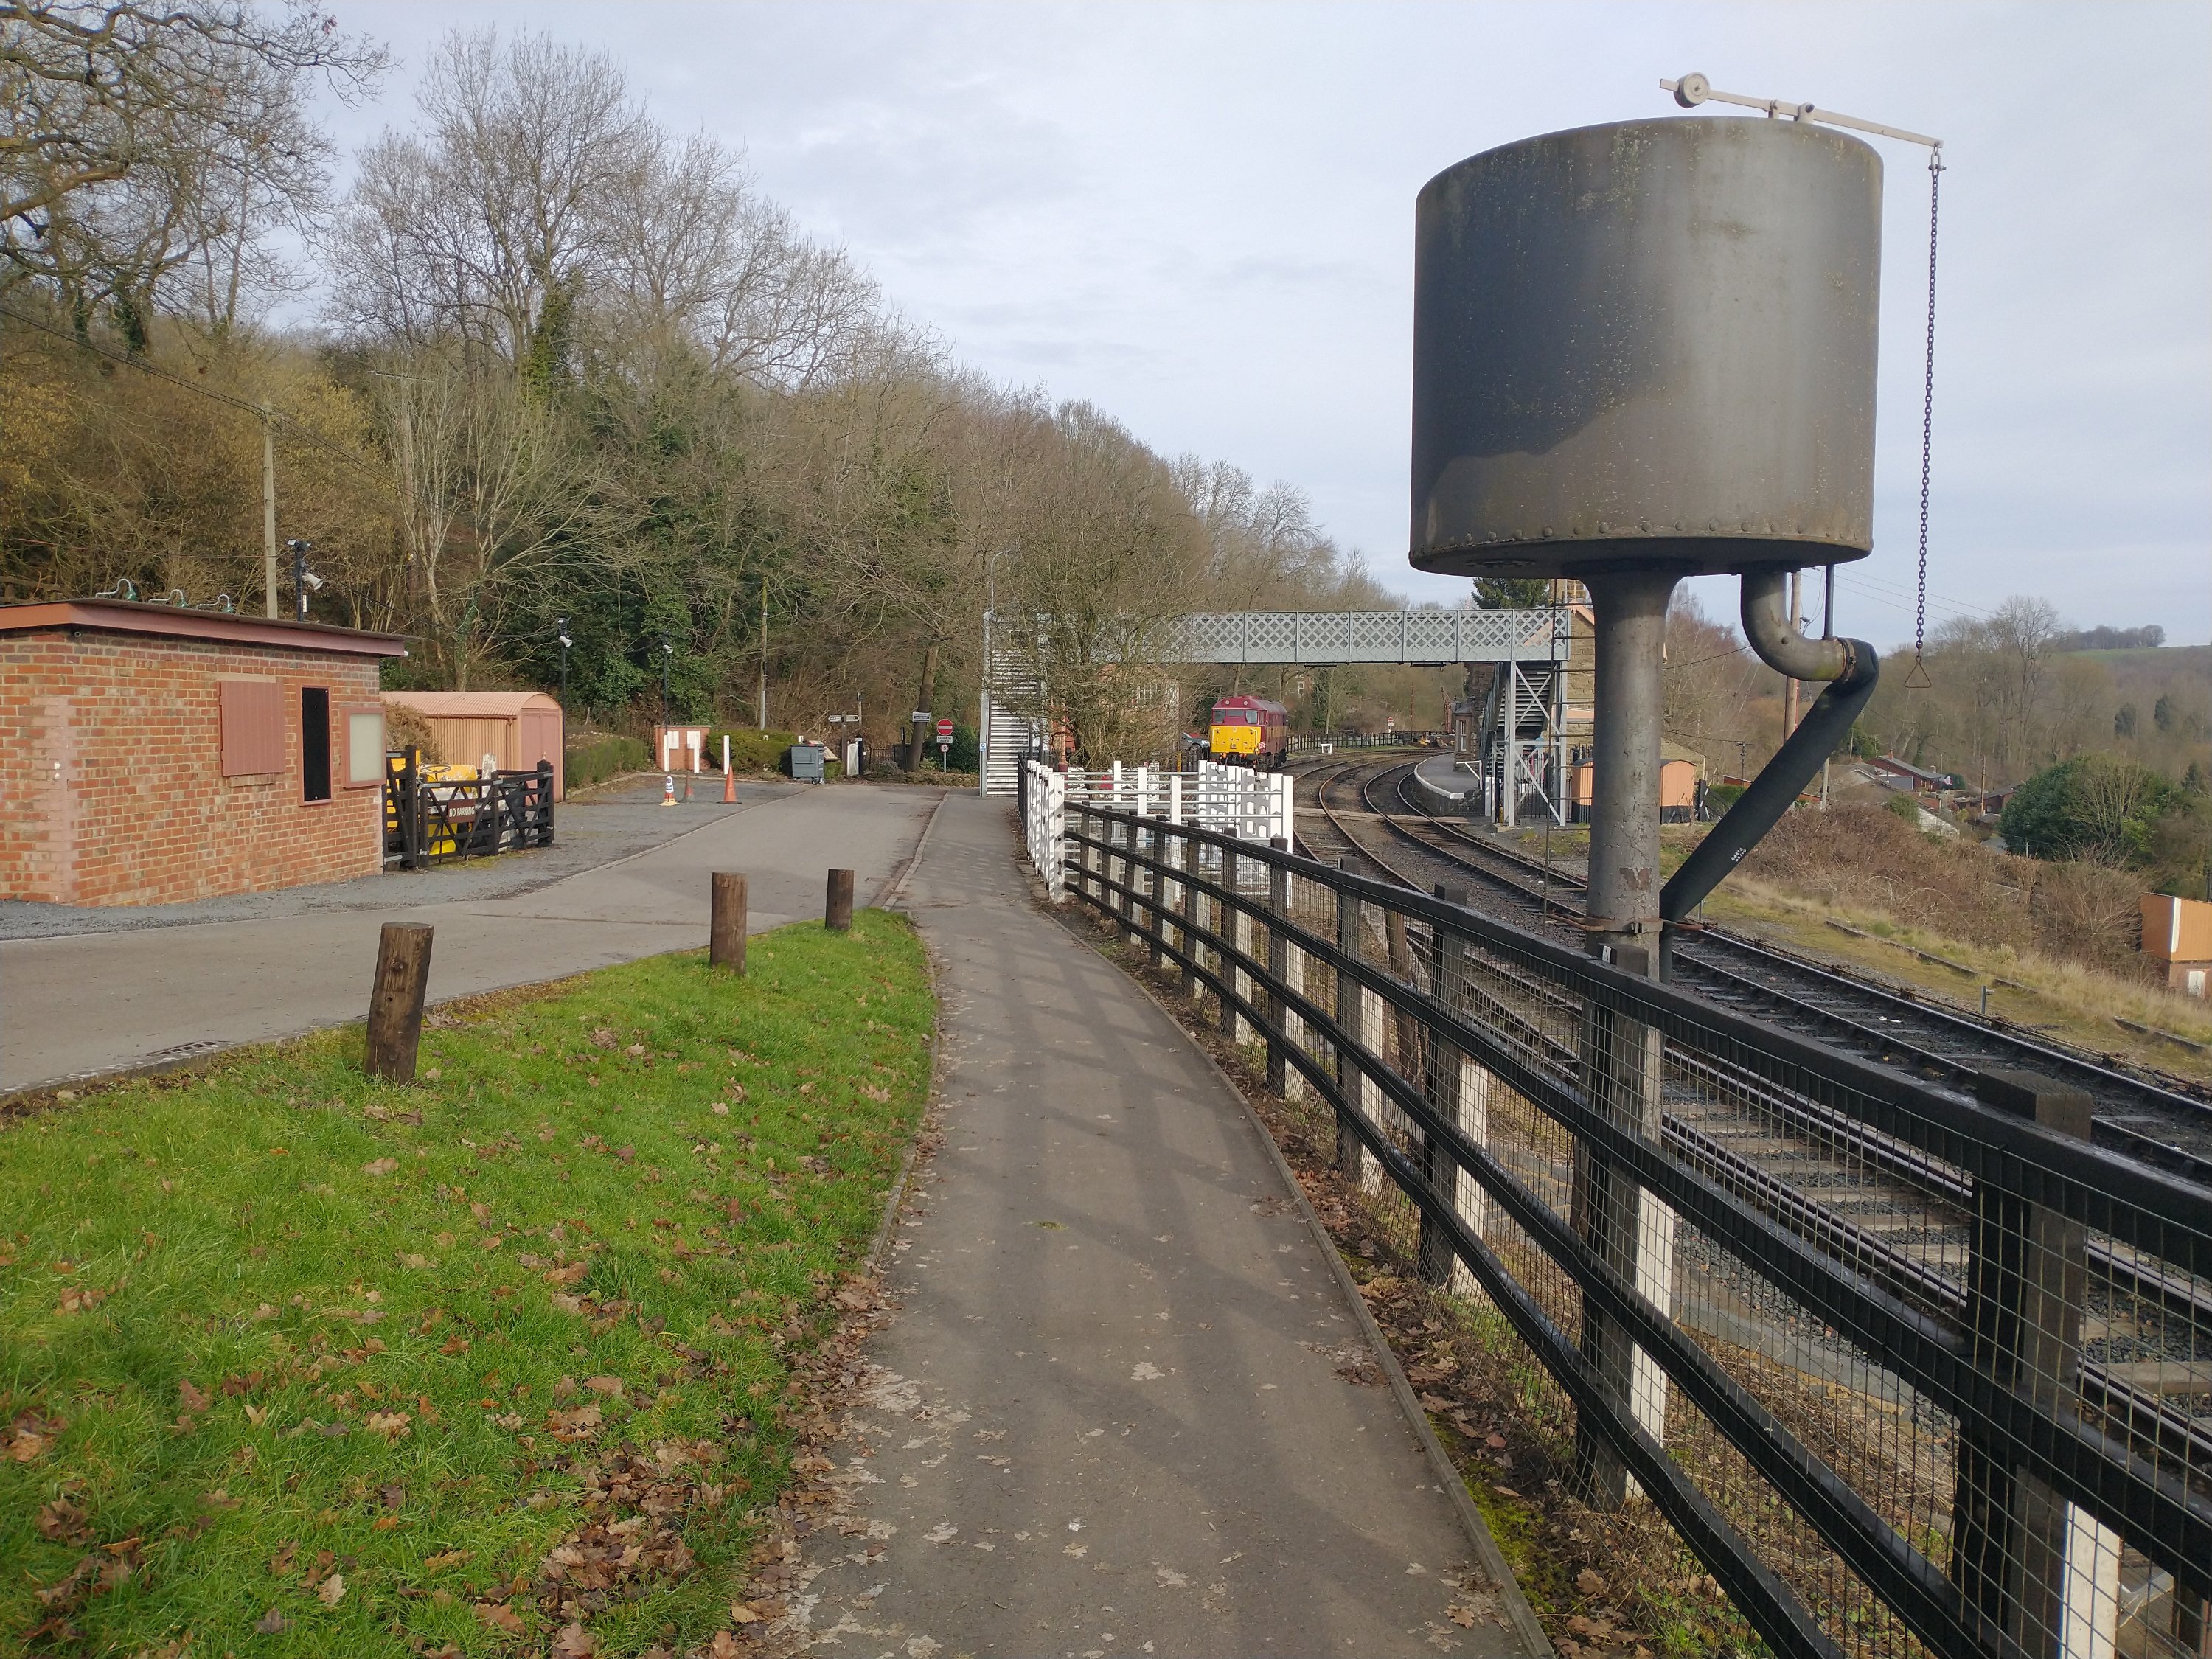
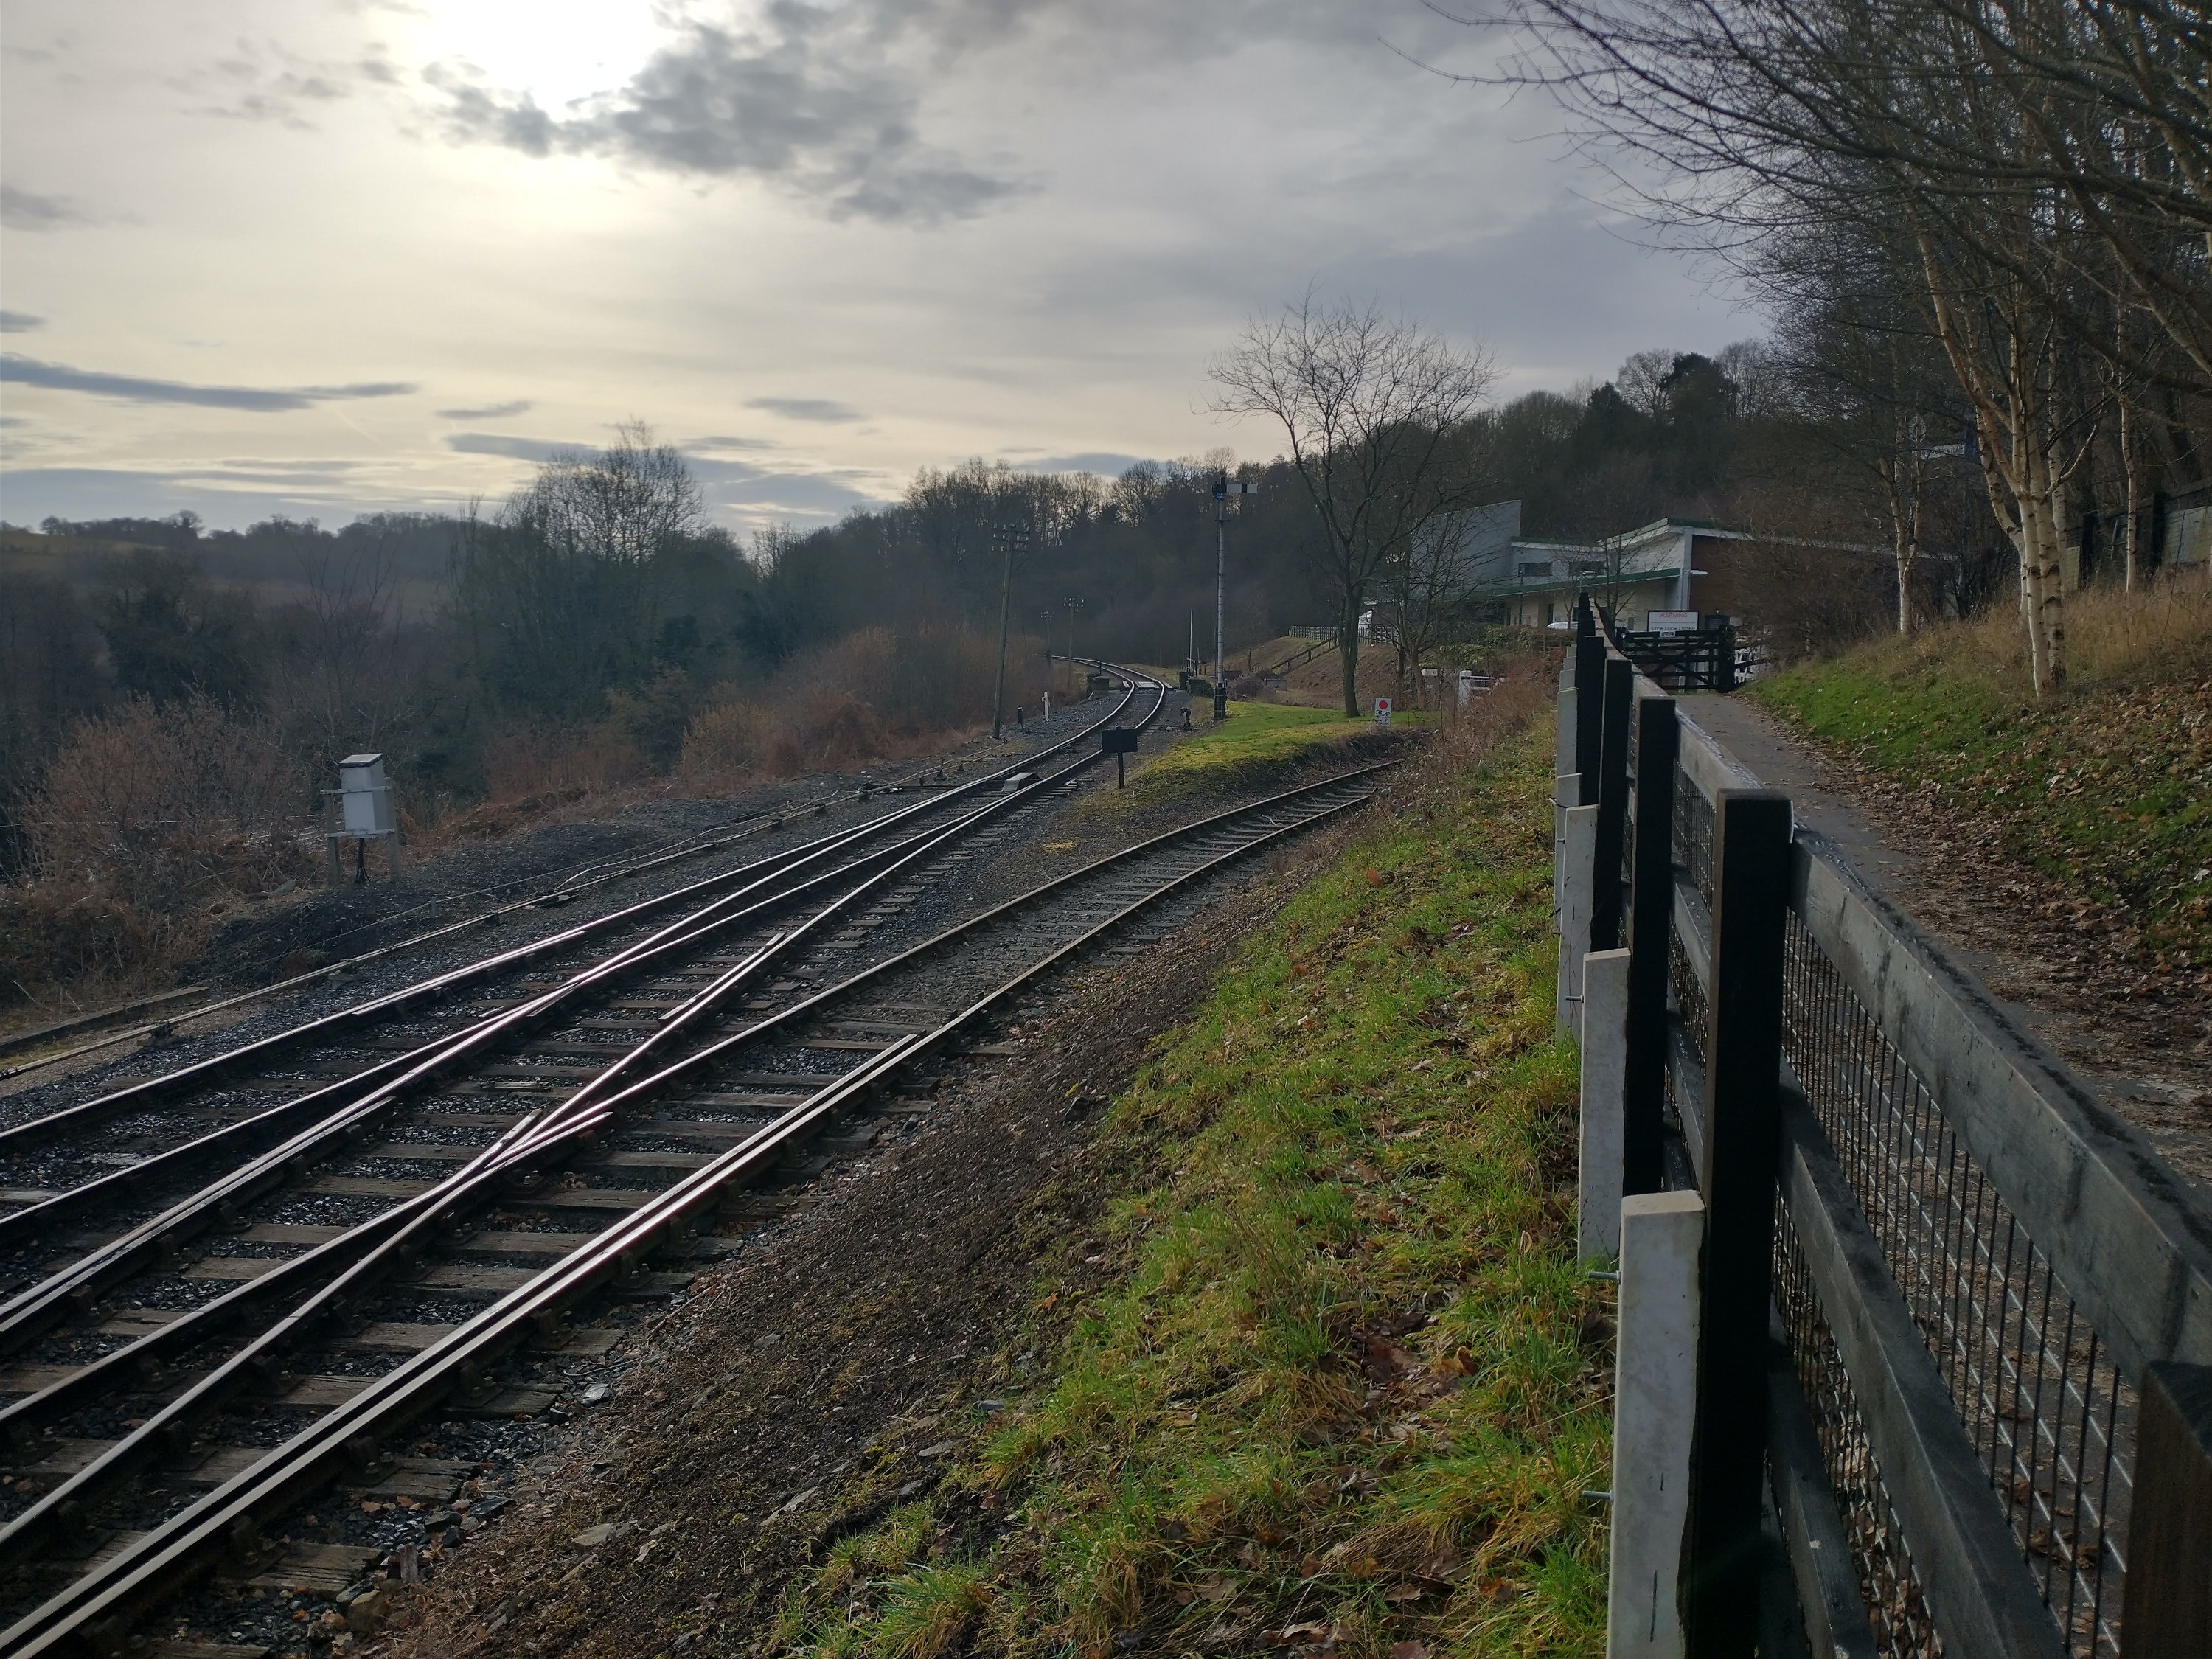
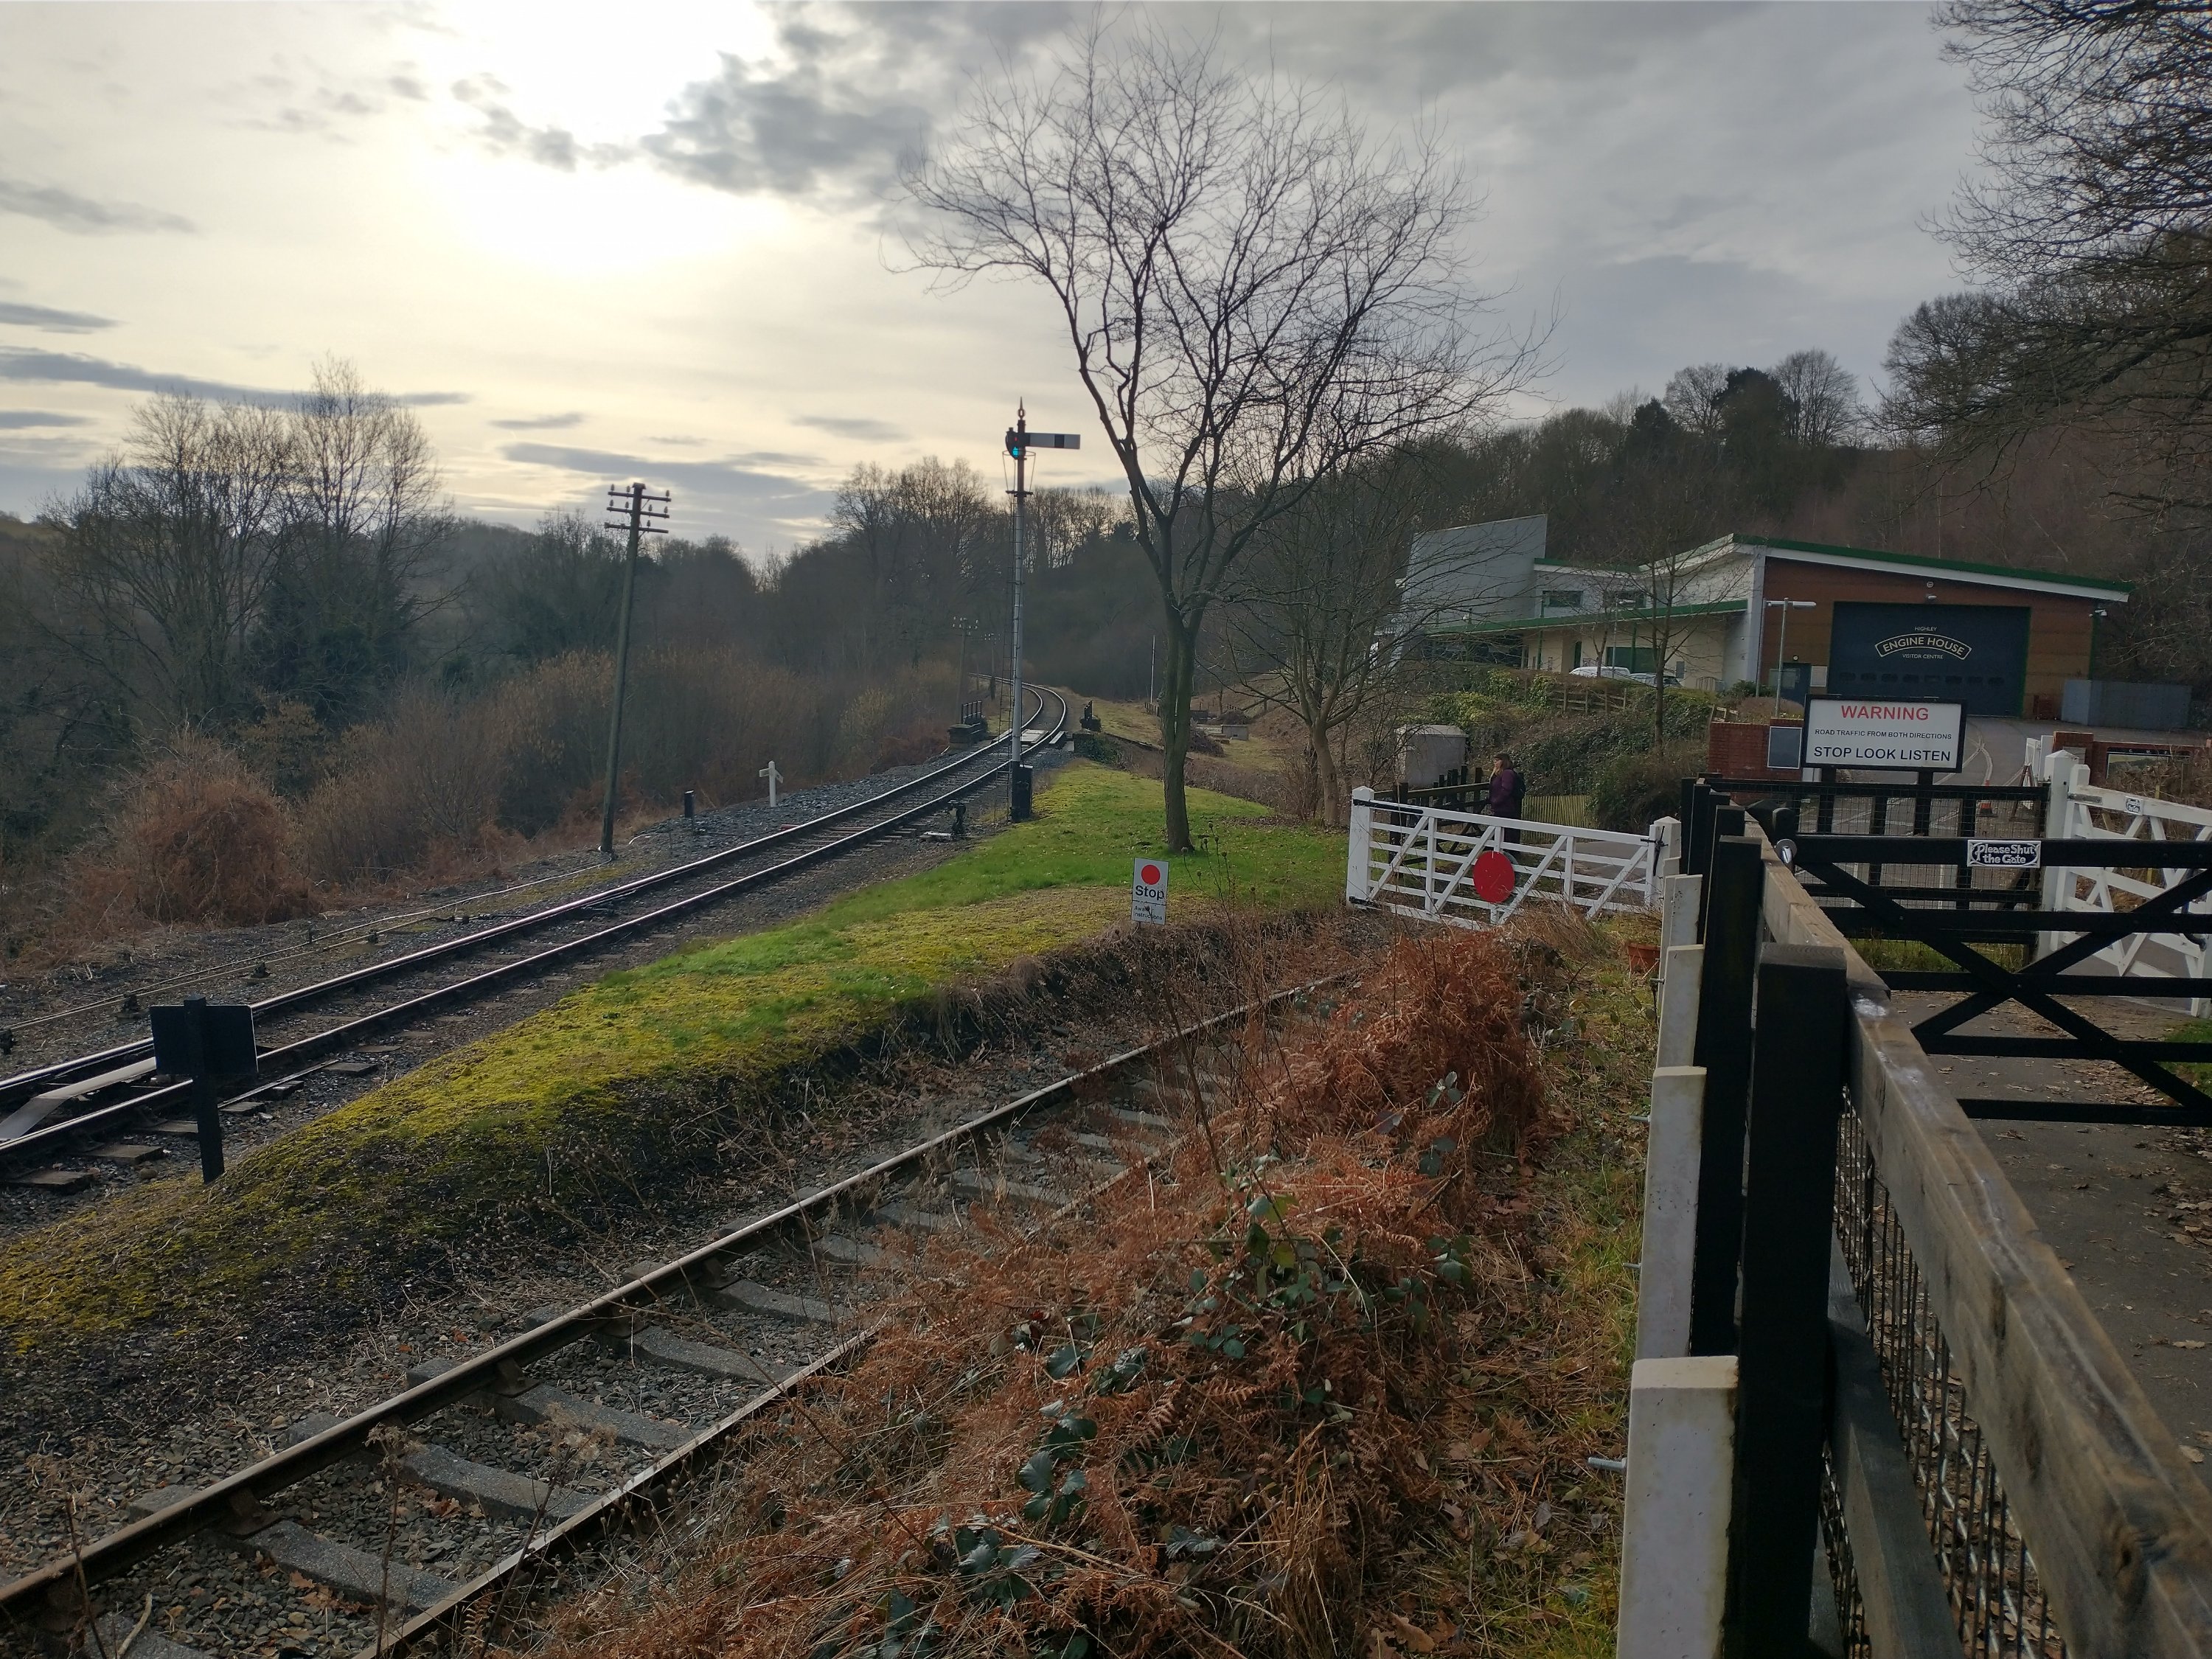
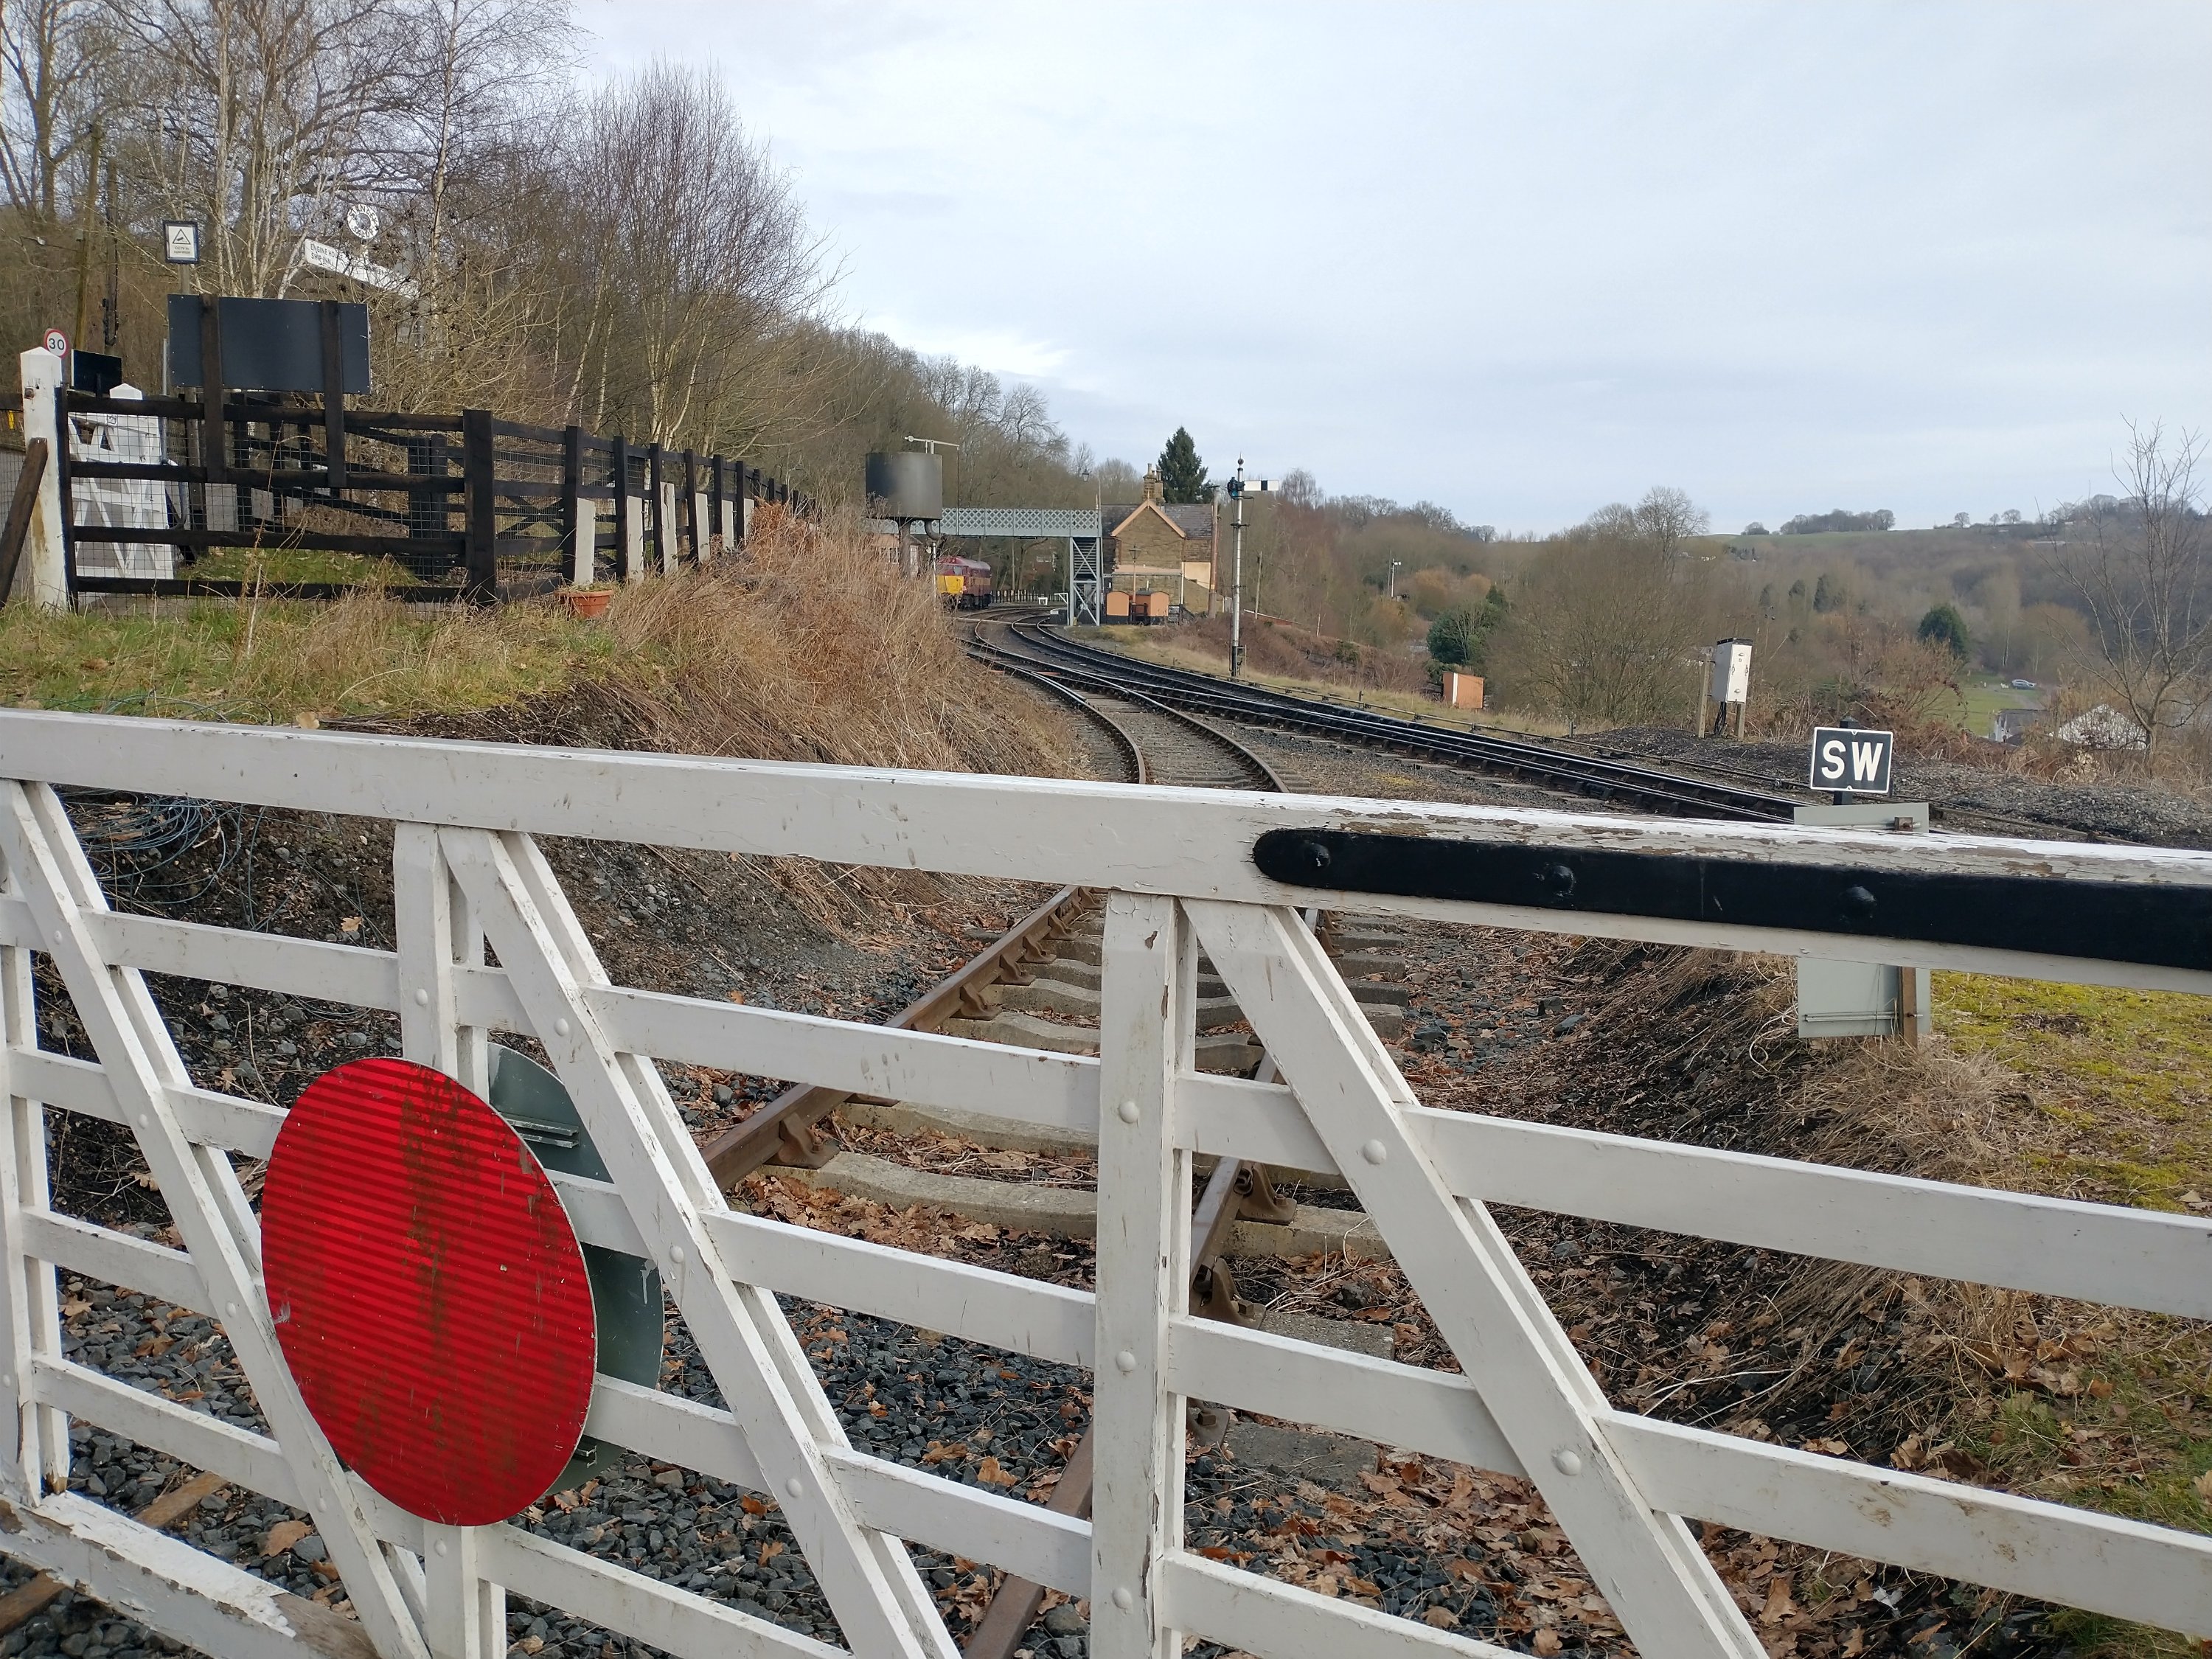
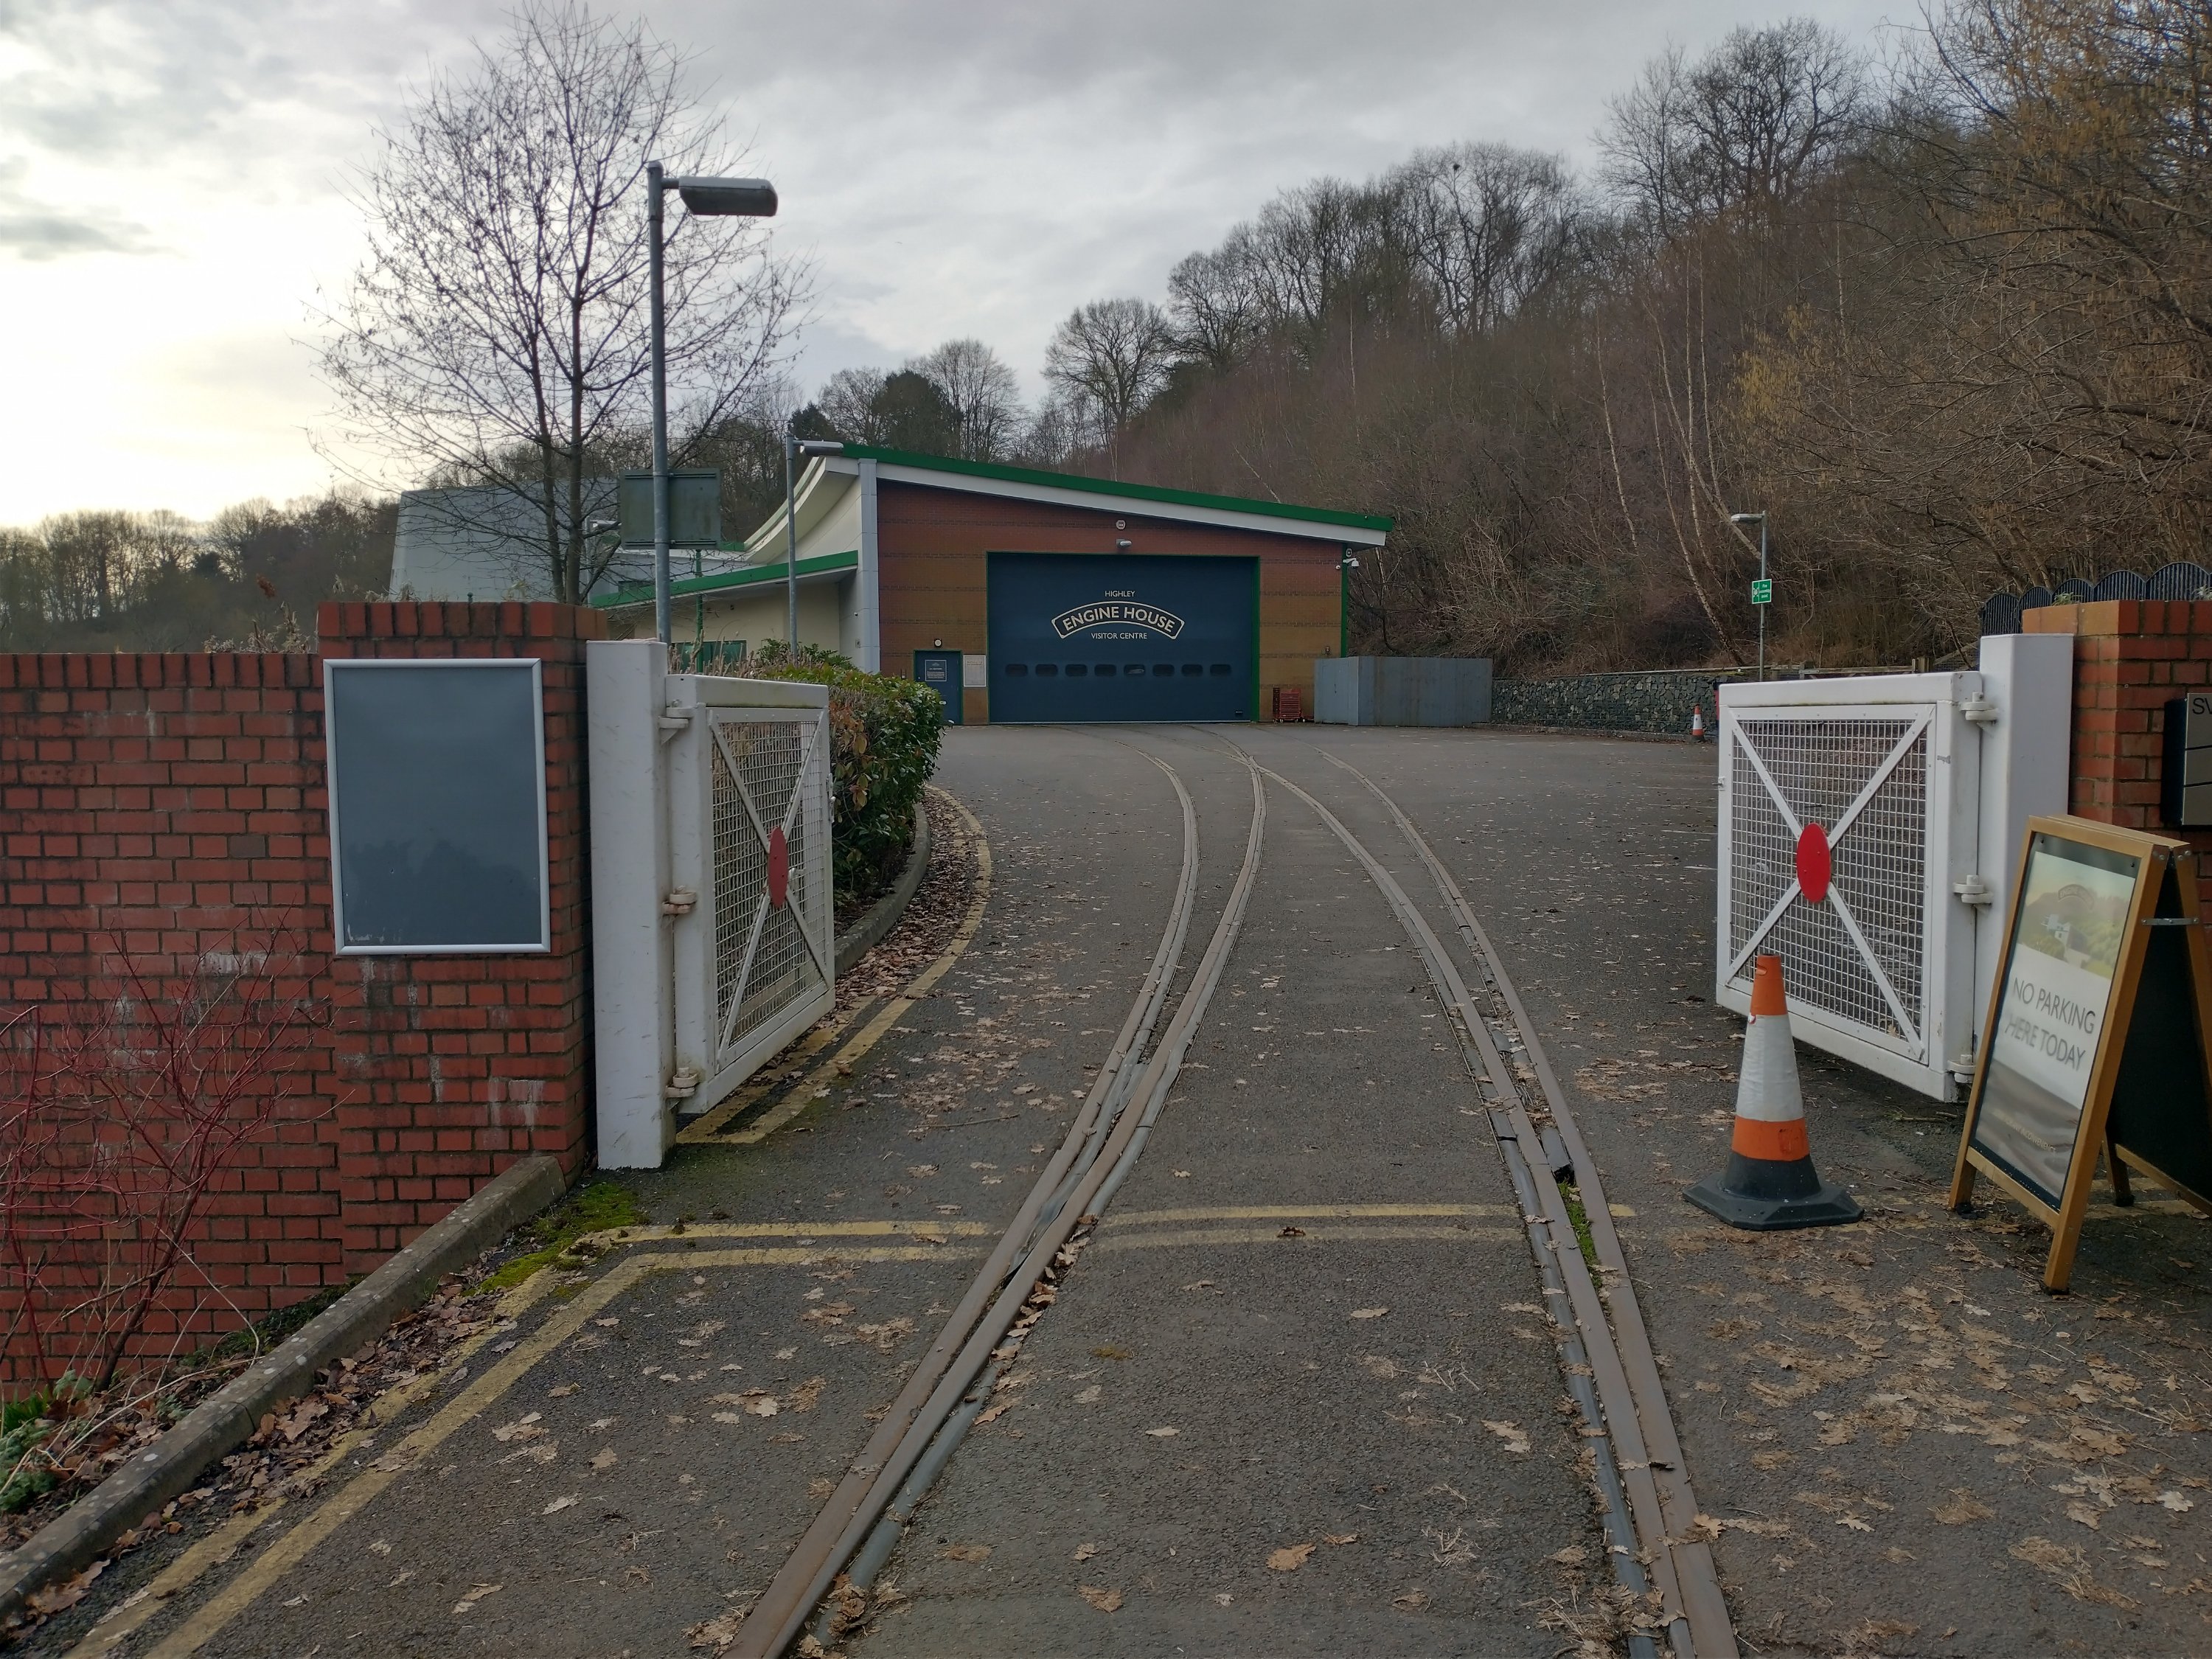
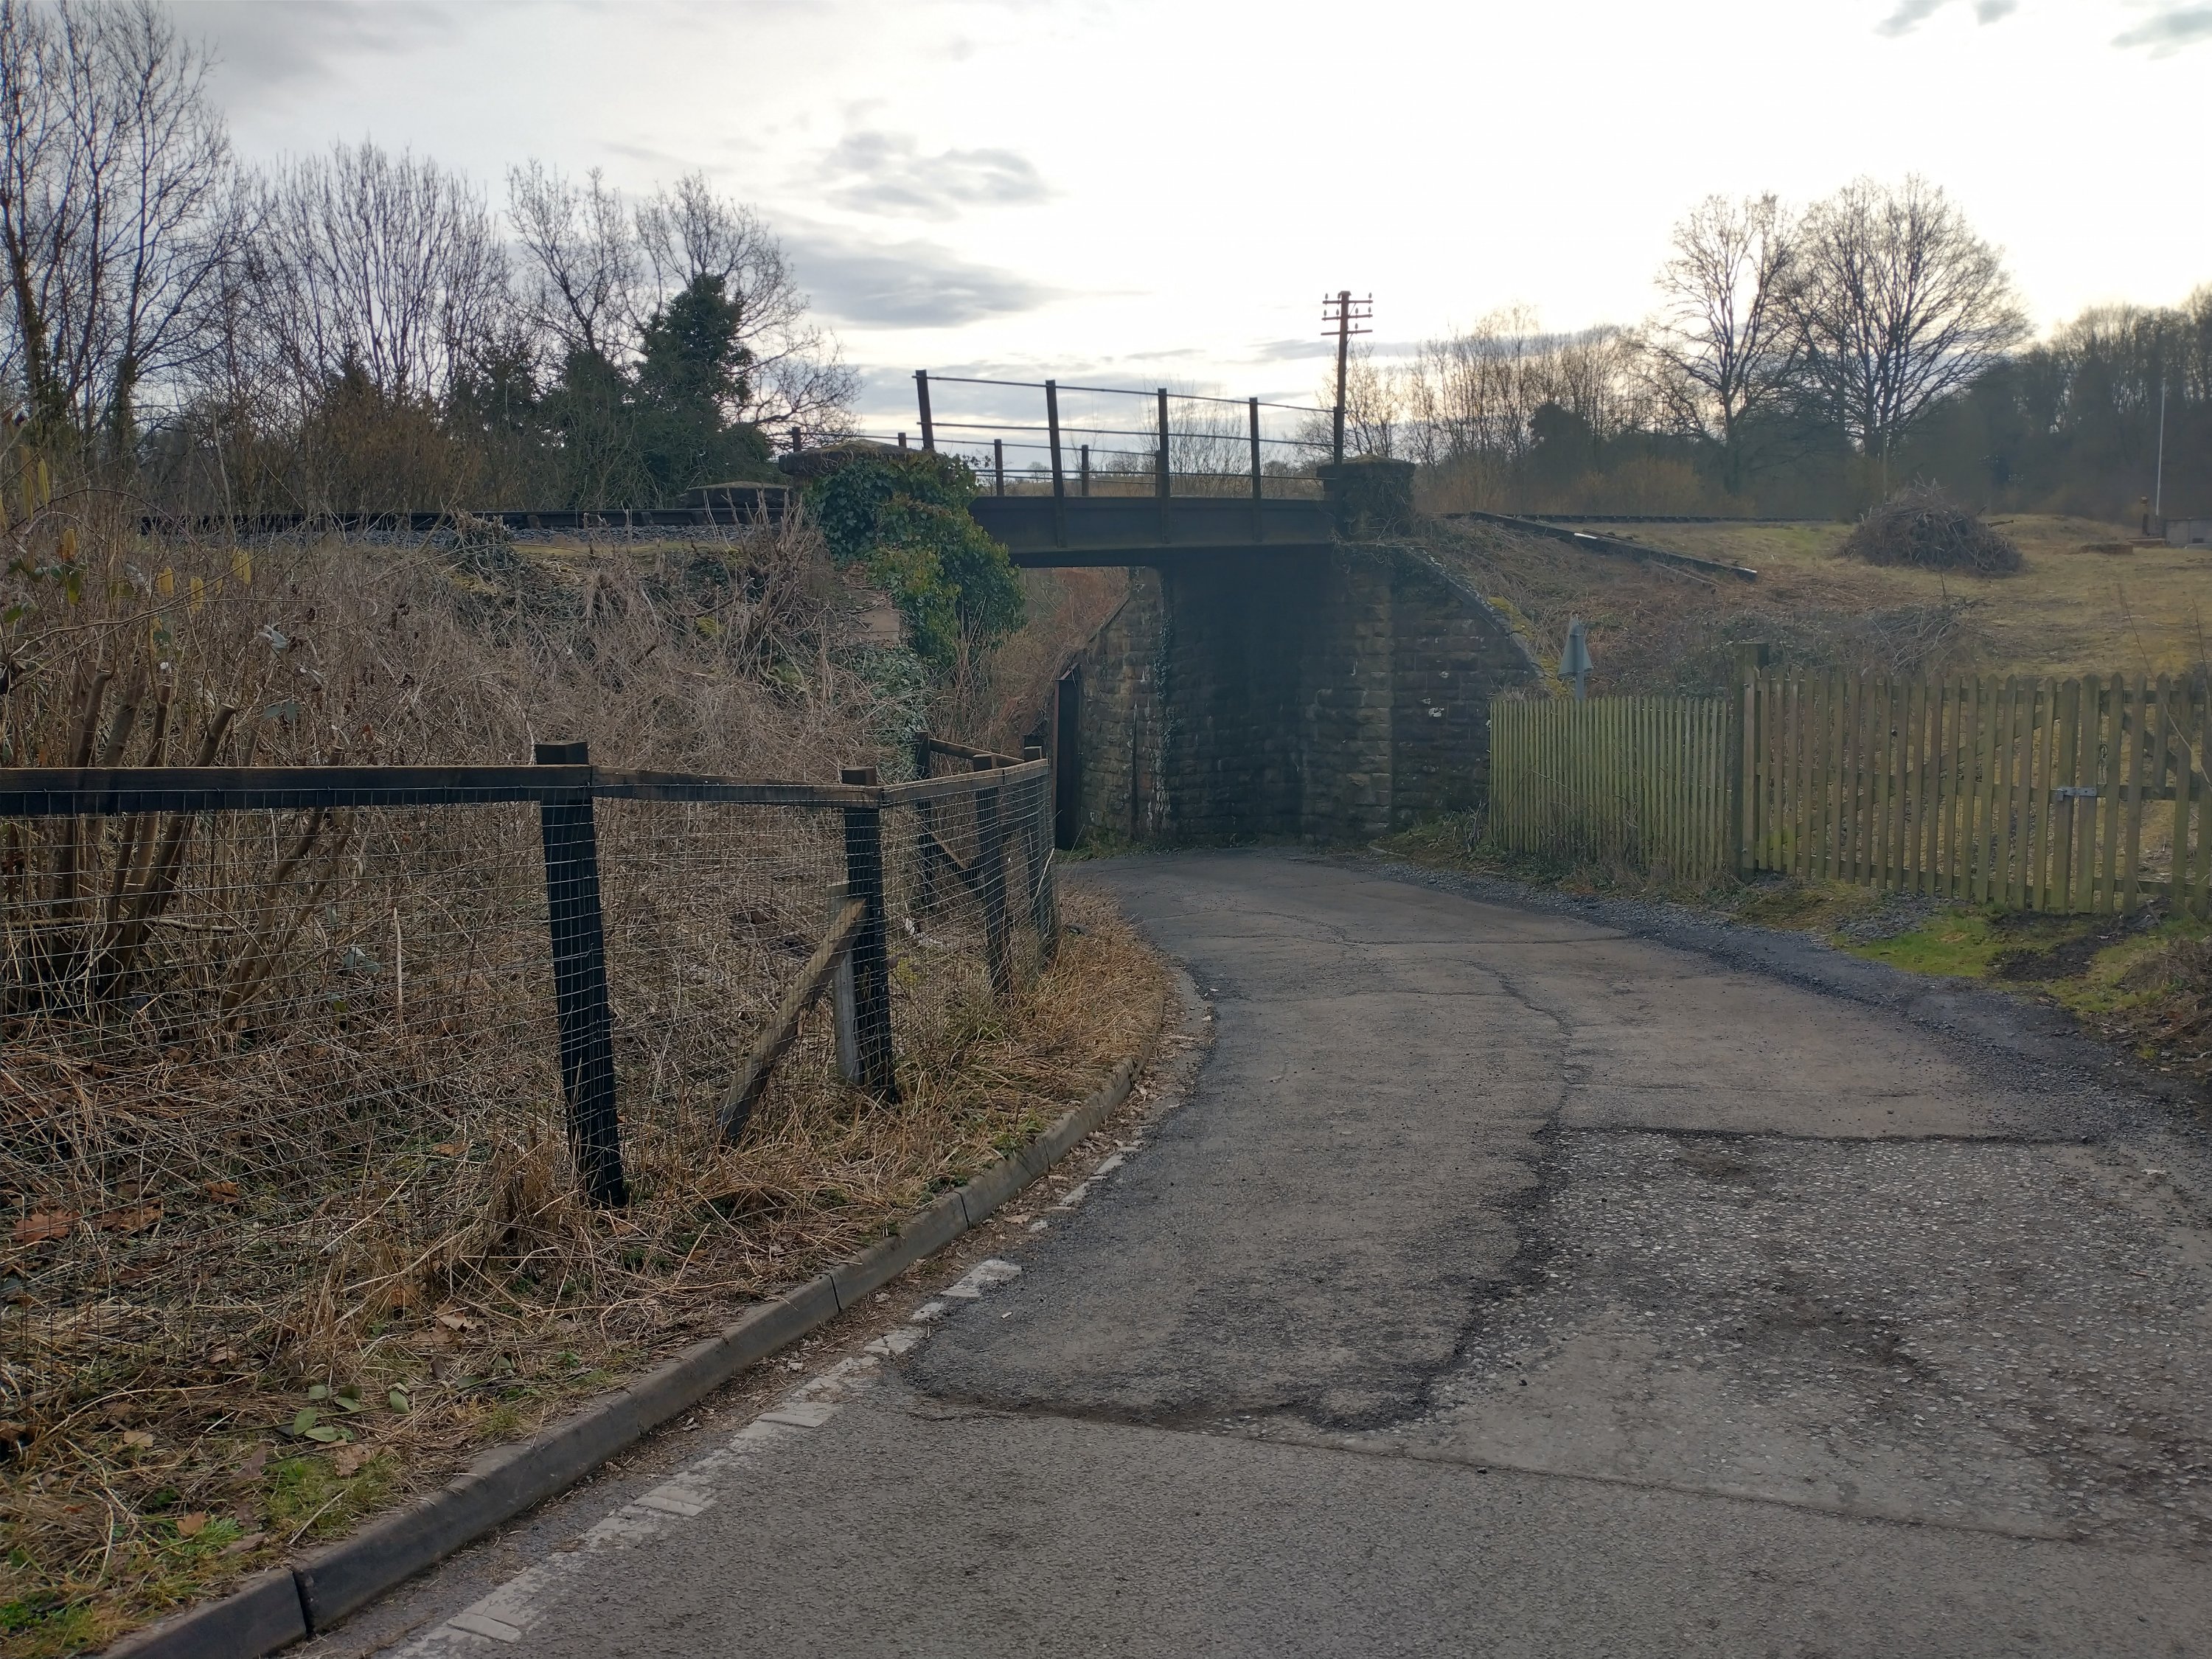
Henley Station on the 25″ Ordnance Survey of 1882 published in 1884. The junction for the Colliery exchange sidings has been installed. [4]Highley Station on the 25″ Ordnance Survey from the turn of 20th century. The junction for the colliery sidings appears to the South of the station, just beyond the Cattle Pen. [5]Looking South through Highley Station in the years prior to preservation. Shared on the Closed Railways Facebook Group on 10th July 2021 by Chris Chiverton. [36]Highley Railway Station & Signal Box: photo taken in association with the BBC Drama ‘The Signalman’ in the mid-1970s after the opening of the SVR heritage line. The photograph is taken looking to the South. [53]Looking North through Highley Station in the years prior to preservation. Shared on the Closed Railways Facebook Group on 10th July 2021 by Chris Chiverton. [35]Highley Railway Station buildings viewed from the Southwest across and engineers train. [Google Streetview] Highley Railway Station, photographed from the South end of the station adjacent to the water tower with a Class 31 diesel locomotive standing in the Station. [My photograph, 10th February 2023]The view South from the same point as the picture above. The modern Engine House which sits on the site of the old colliery sidings can be seen top-right. This illustrates the proximity of the old colliery sidings to the Station. [My photograph, 10th February 2023]Just a few steps further South, we can see the gate to the road crossing at the entrance to the sidings. [My photograph, 10th February 2023]The view from the crossing gate North towards the station. The close proximity of the sidings to the railway station is once again emphasised. [My photograph, 10th February 2023]The gated entrance to the modern Engine House on the site of the Highley Colliery Sidings. [My photograph, 10th February 2023]The lane crossed by the siding at the entrance to the yard is shown in this Southward facing image. The lane passes under the SVR with the line being carried by a steel girder bridge with stone abutments. Just under the bridge the lane provides access to the West bank of the River Severn. [My photograph, 10th February 2023]A view of the bridge from close to the West bank of the River Severn. [My photograph, 10th February 2023]
Highley Colliery and the Highley Mining Company
John Tennent tells us that in early days (1883), Highley Colliery was connected to the Severn Valley Railway (SVR) at Highley Station via a standard-gauge self-acting rope-worked incline with 3 rails splitting into four at the halfway-point to allow rakes of wagons to pass. A loco may have been used at the top of the incline. [1] There is no evidence of this incline at the station site on the 1883 Ordnance Survey. It may well be that the Incline referred to is that which is shown of the later Ordnance Survey from the turn of the 20th century. That incline just sneaks onto the bottom left of the map extract from the later survey above.
By 1892, the Hindley Mining Co. opened a site a short distance to the Southwest of Highley Station. This became Kinlet Colliery and its link to the SVR was completed by 1895. An agreement between the Company and the GWR dated 27/05/1895 which required the GWR to construct a junction and sidings at the expense of the Hindley Mining Company. John Tennent tells us that these sidings “became known as Kinlet Sidings and survived as a wagon repair yard long after the colliery railways had closed.” [1: p9]
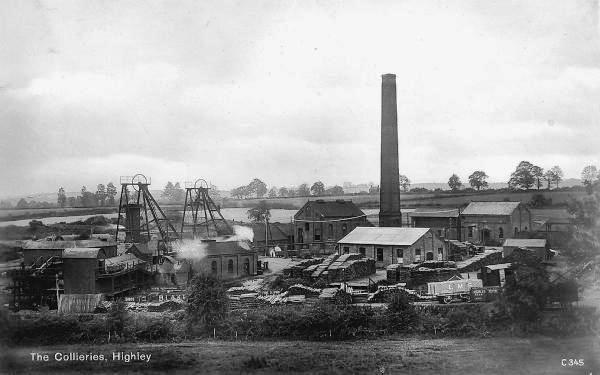
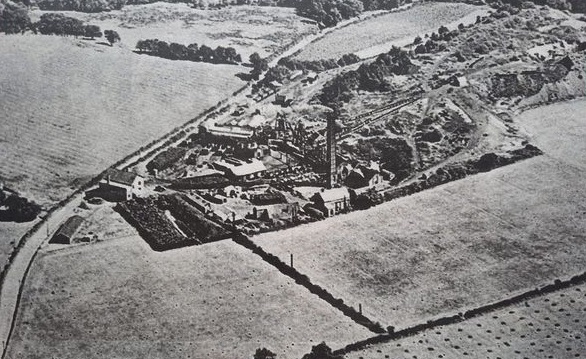
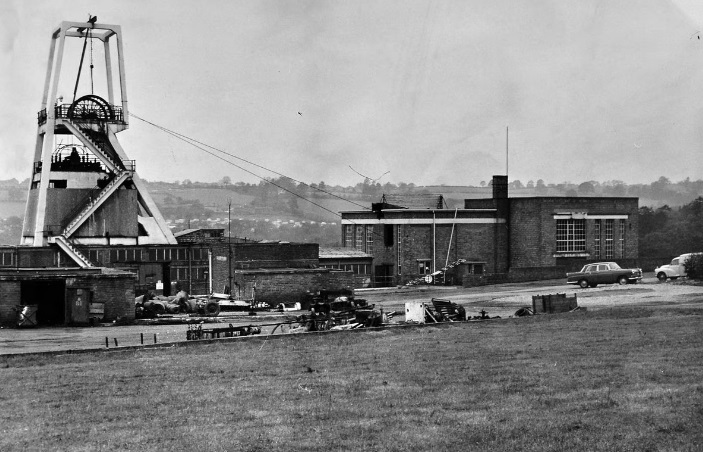
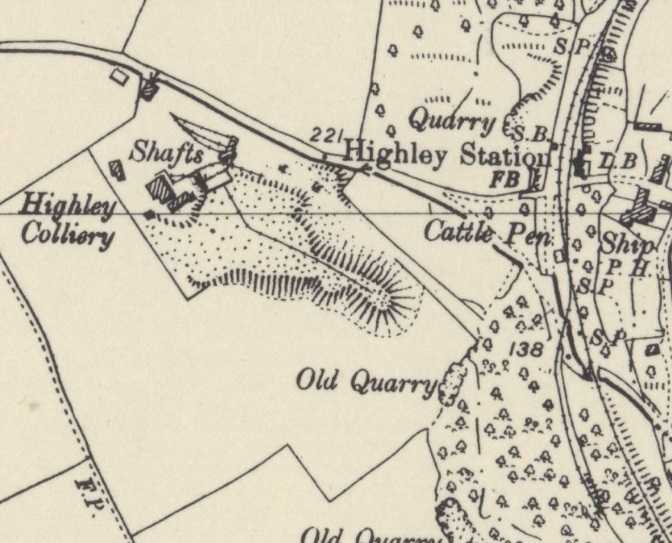
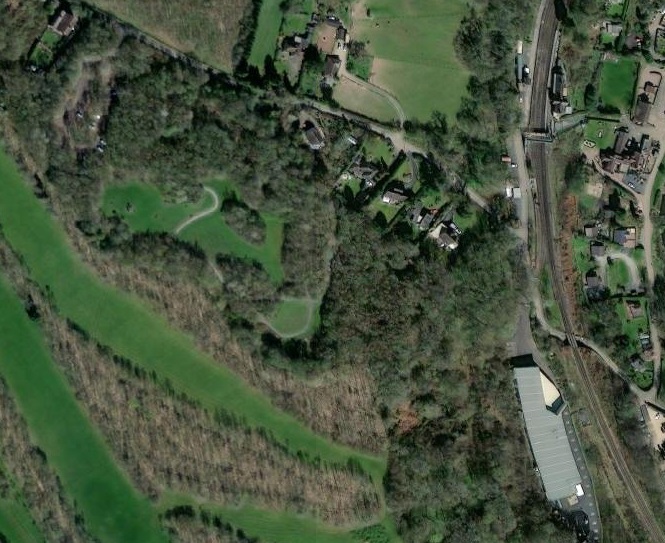
The exchange sidings for the Colliery as shown on the 25″ Ordnance Survey from the turn of 20th century.. [6]Approximately the same area on Google Earth in 2023. The approximate route of the incline from the sidings to Highley Colliery is marked by the red line. [Google Earth, 10th February 2023]The Colliery as shown on the 25″ Ordnance Survey from the turn of 20th century. [7]Approximately the same area on Google Earth in 2023. The approximate route of the incline from the sidings to Highley Colliery is marked by the red line. [Google Earth, 10th February 2023]An early image of Highley Colliery. [19]Highley Colliery in 1942. This image was shared on the Telford & Shropshire History Facebook Group by Caren Craft on 26th January 2023. [37]Highley Colliery pit head and buildings shortly before final closure in 1969. By this time the colliery was only in use as a ventilation and emergency egress point to allow the escape of underground staff at Alveley Colliery. [20]
“By 1900, about 240 men and boys were employed. … Main line railway trucks were filled with coal at the colliery, and then run down a standard gauge incline to the sidings, the layout of which can be seen on the extract from the Ordnance Survey Map, 1888-1913 series [above]. One of the main destinations of the coal was the carpet factories of Kidderminster.” [21]
“The Highley Mining Company ran the colliery successfully for many years, with the workforce increasing to 670 by 1937. As the workings moved under the River Severn towards Alveley, a new shaft was opened at Alveley. Once the Alveley and Highley workings had joined up in 1937, men and equipment were transferred to Alveley, and by 1940 Highley Colliery itself had closed, although the pithead remained open for ventilation. The former colliery sidings then became the landsale yard for Alveley Colliery.” [8]
This extract from the National Grid Ordnance Survey mapping of 1954 shows the much reduced railway infrastructure serving Highley Colliery. The Incline has been removed a single siding serve the landsale yard referred to above. Some small elements of the internal tramway at the pit head remain, as doe a short line out onto the spoil heap. [22]
The area of the former sidings was eventually bought by the SVR and is now the site of The Engine House.
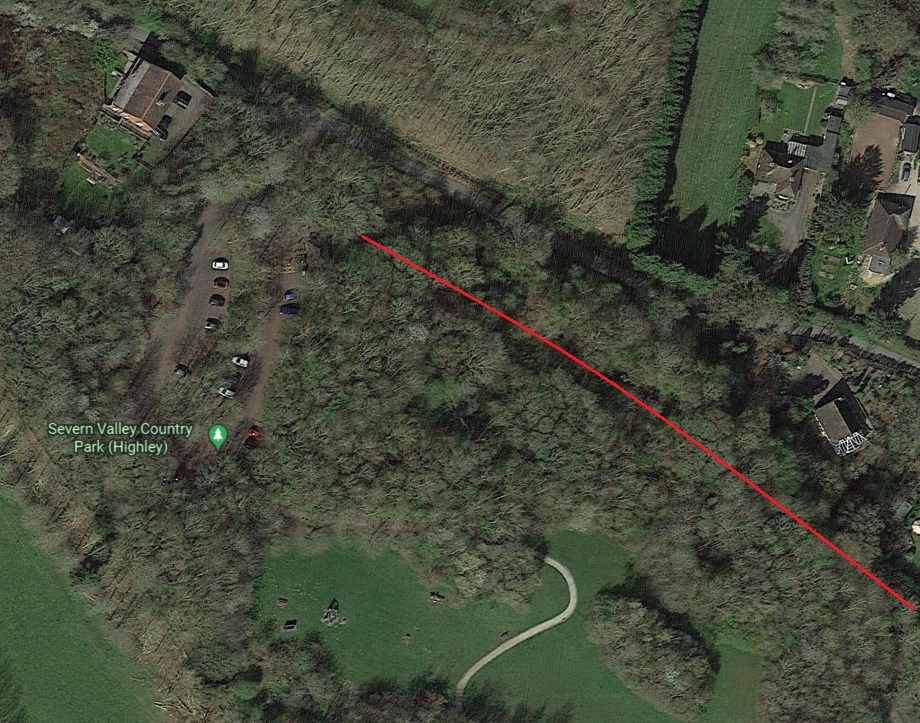
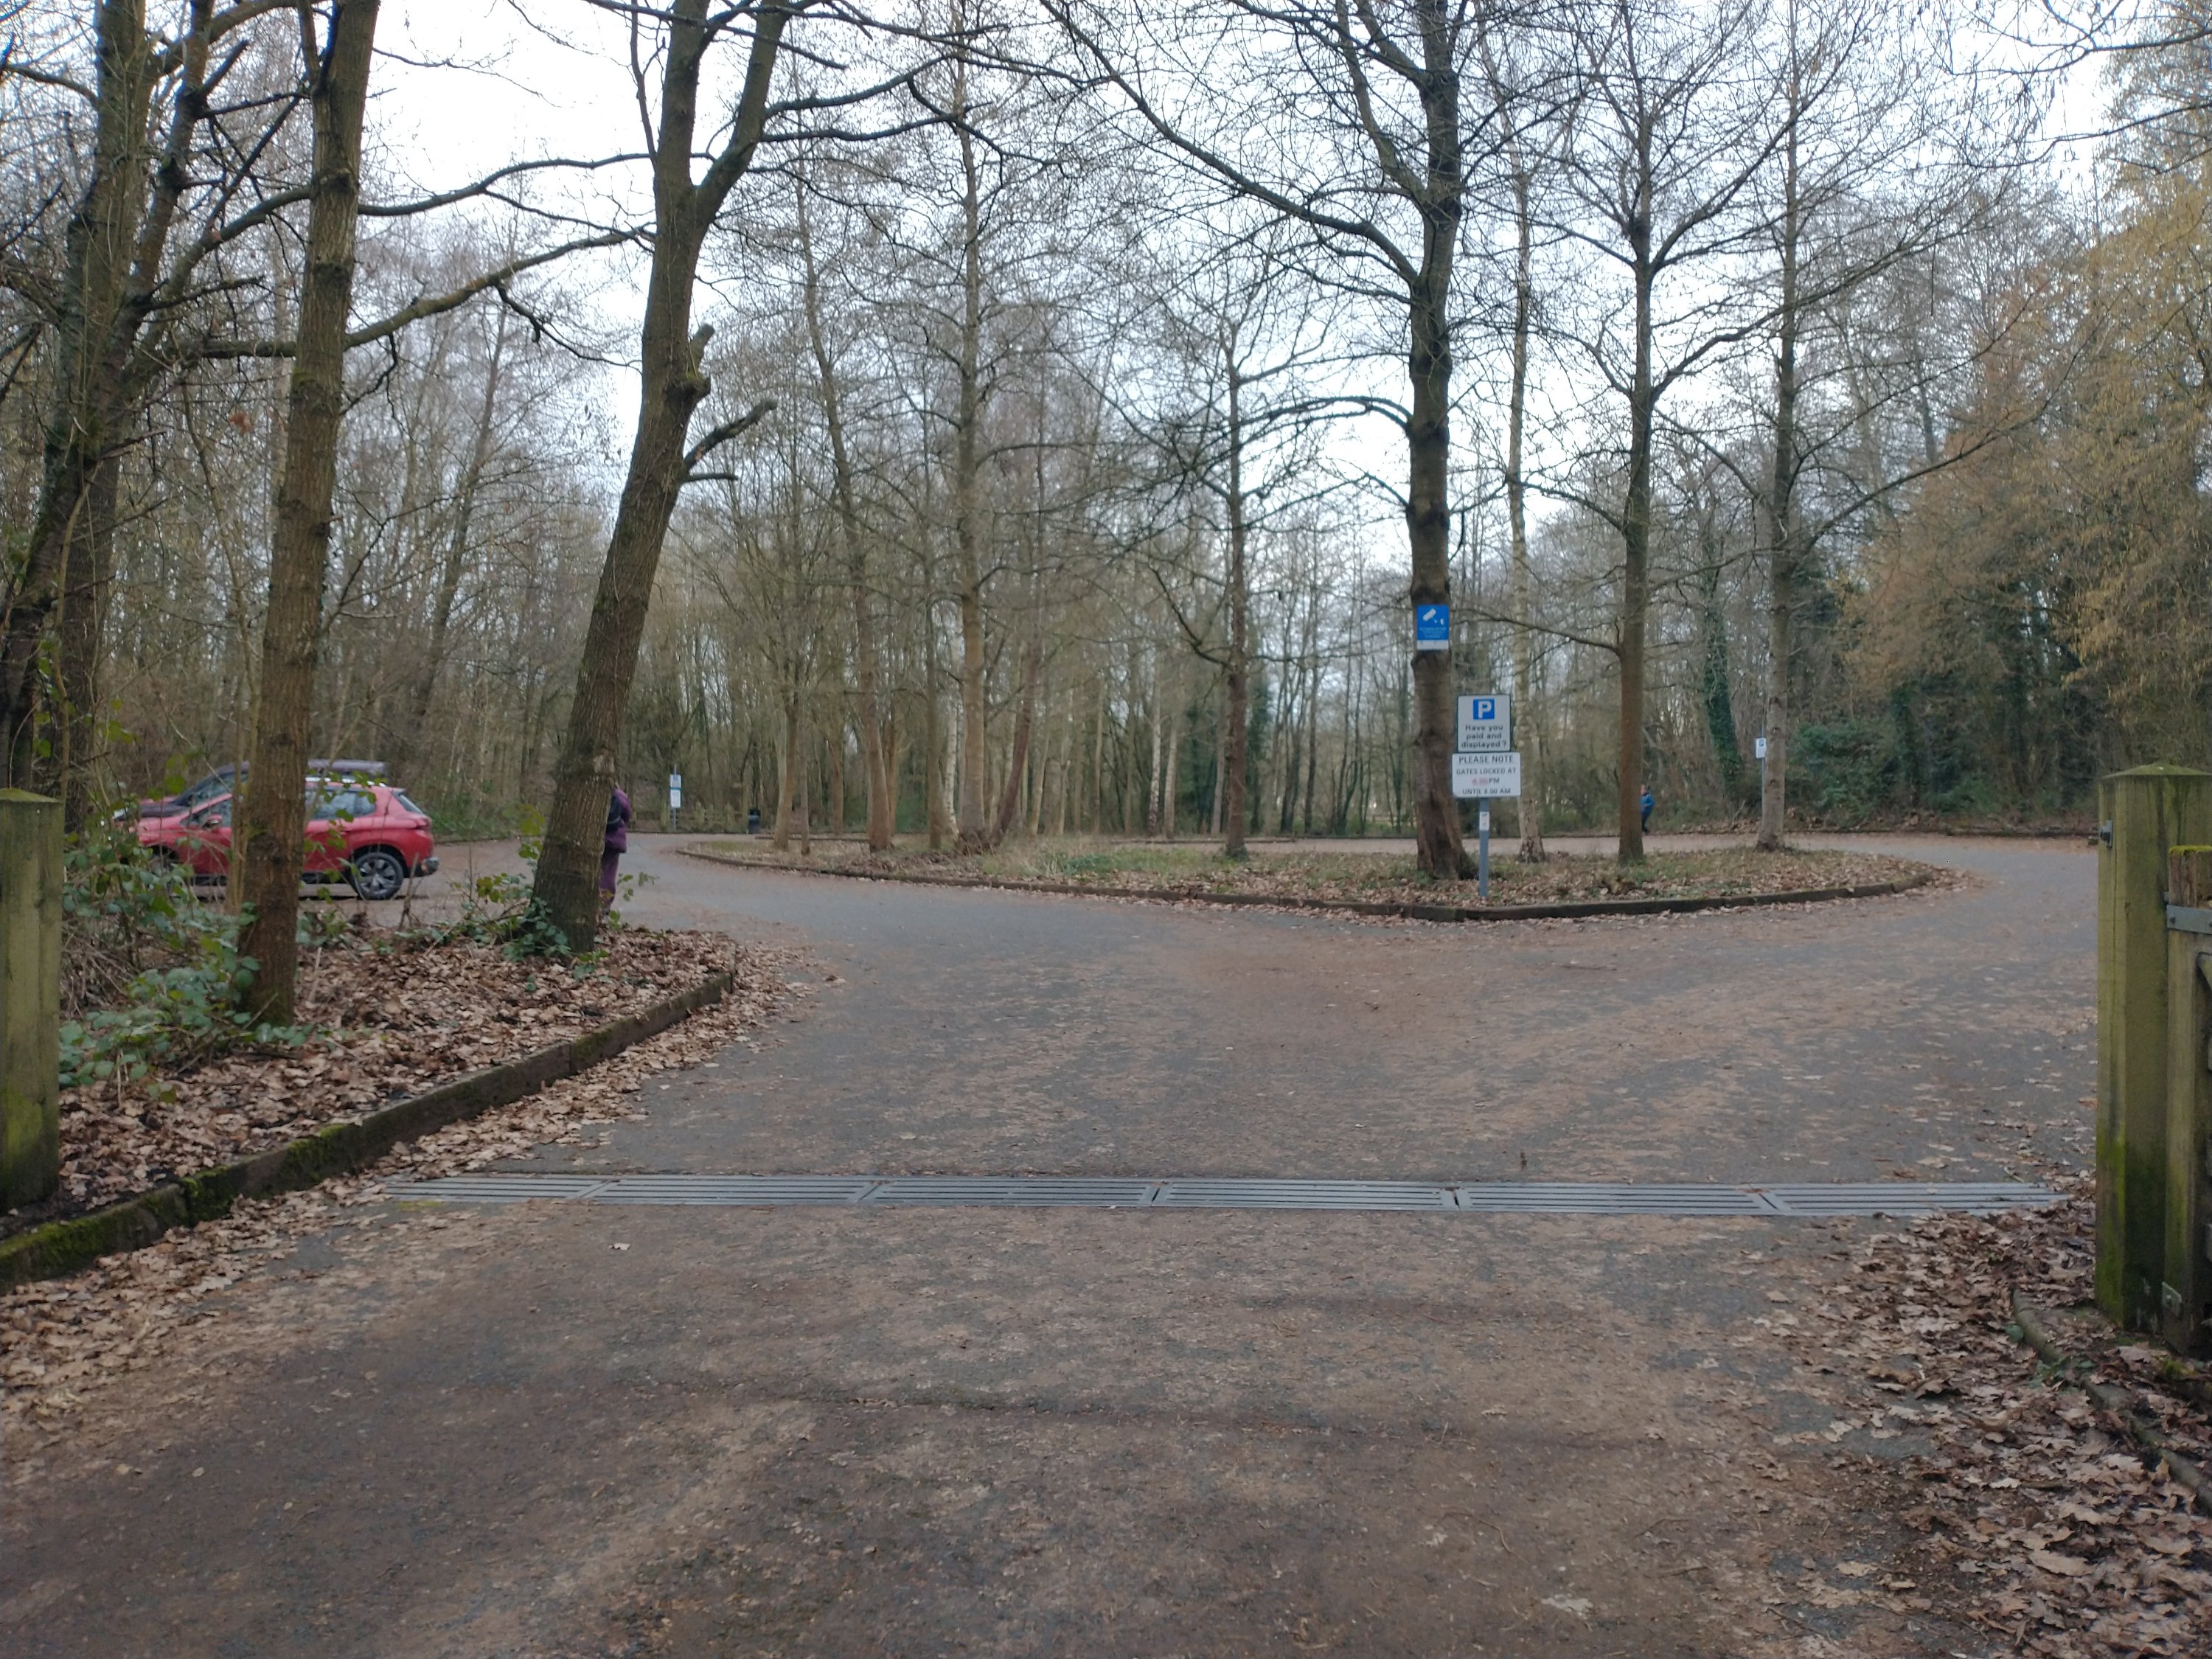
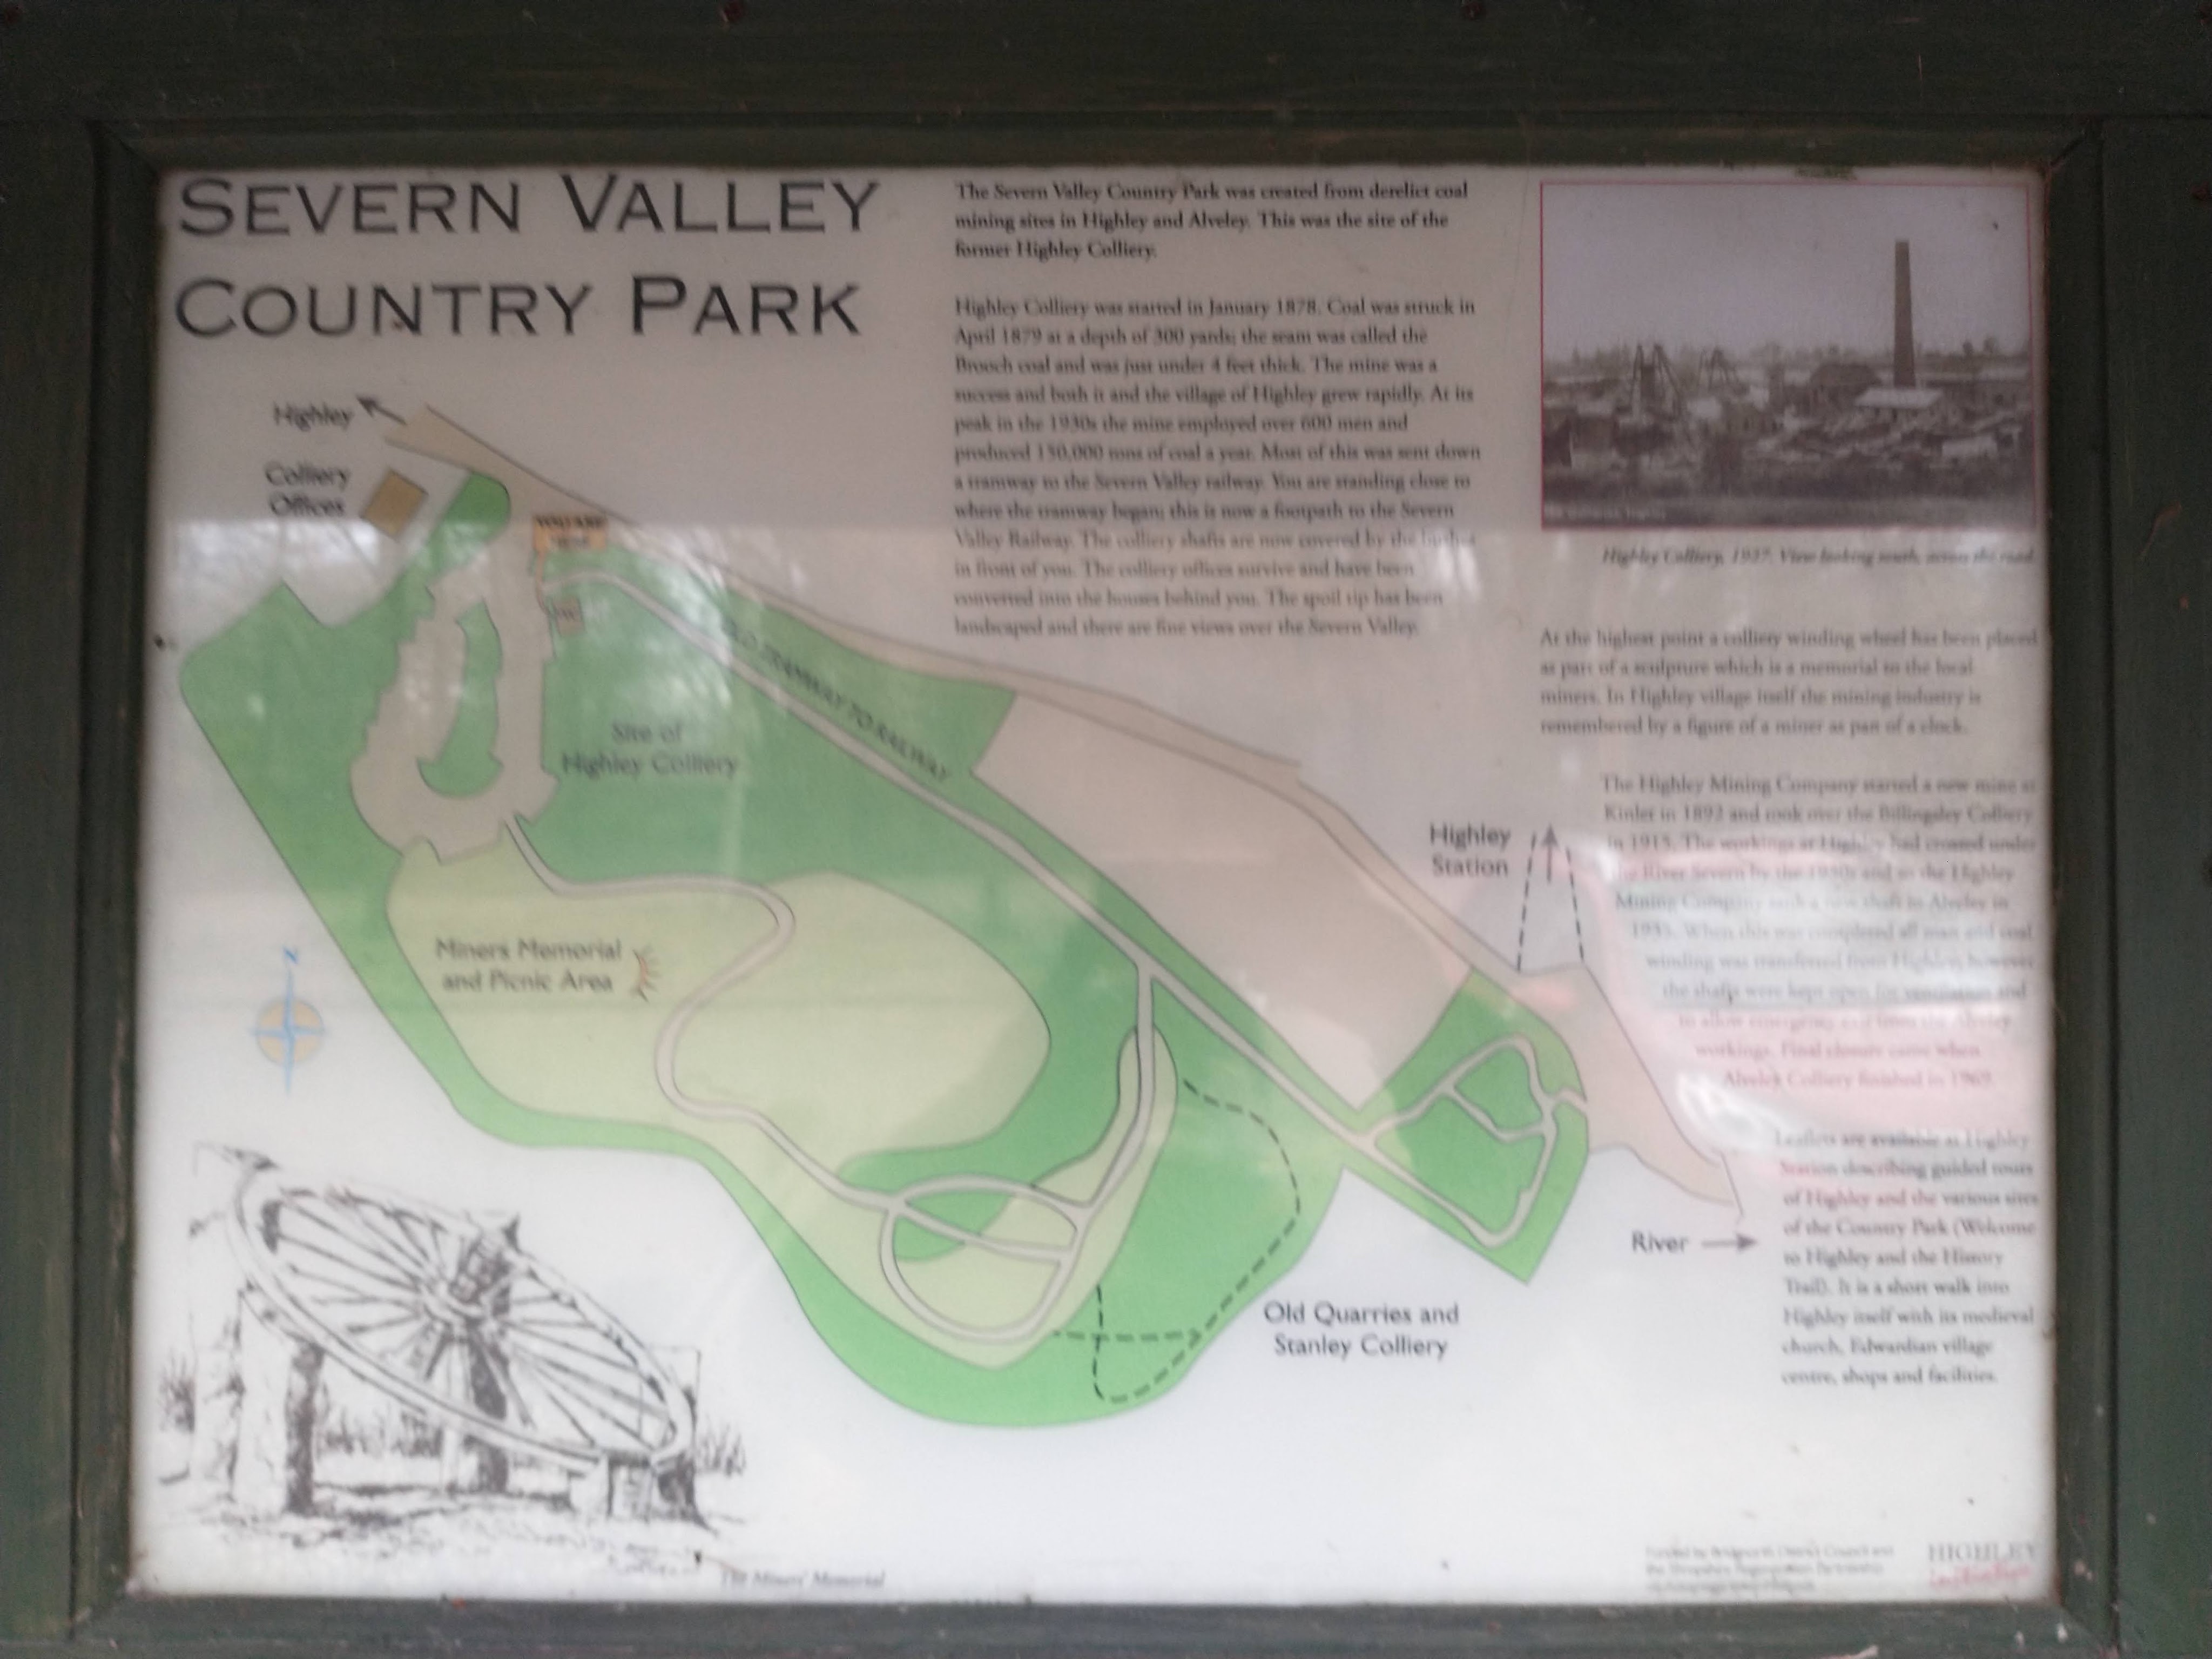
This modern satellite image shows a very similar area to that on the map extract above. The preserved station on the SVR is visible at the top-right of the extract. The SVR’s Engine Shed sits on what were once the colliery sidings and much of the Colliery site has reverted to nature. There is a modern carpark on the site of the old colliery in the top-left of this image [23]The view South into what was the Highley Colliery site which has been utilised as a car park for the SVR and the local nature reserve. To the left of this image, off scene are the carpark facilities which include a display board about the colliery site. [My photograph, 10th February 2023]The Severn Valley Country Park display board at the Highley Colliery site. The car park is to the left of the display and the line of the incline down to the colliery sidings is shown in a sandy colour. [My picture, 10th February 2023]
The next sequence of photographs show the path which follows the incline between Highley Colliery and the colliery sidings adjacent to the SVR.
The incline leads away Southeast from the Colliery site. [My photo, 10th February 2023]The incline continued towards the Southeast. [My photo, 10th February 2023]Creating the incline required excavation through the rock walls which flanked the valley of the Severn. [My photo, 10th February 2023]Beyond the valley side, the incline continued to fall steeply to the exchange sidings. [My photograph, 10th February 2023]
The Billingsley Railway
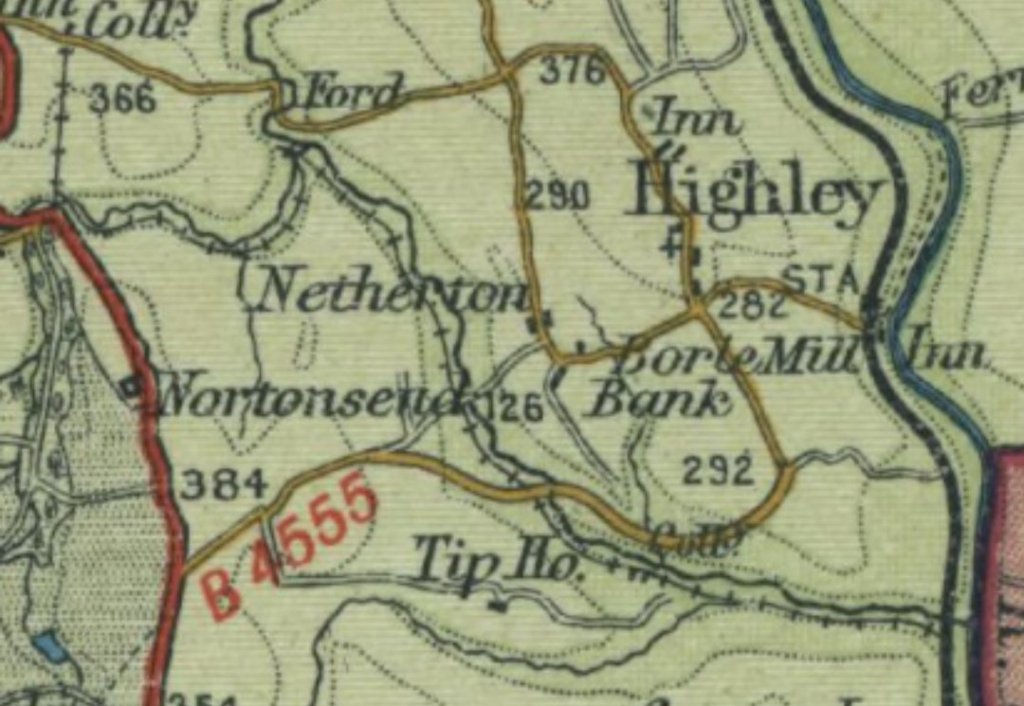
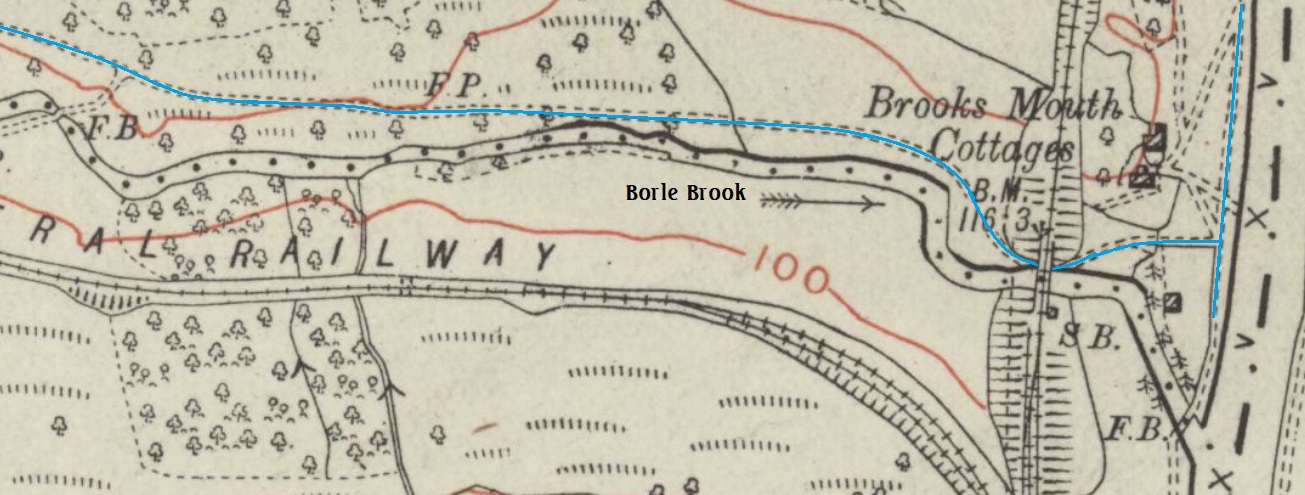
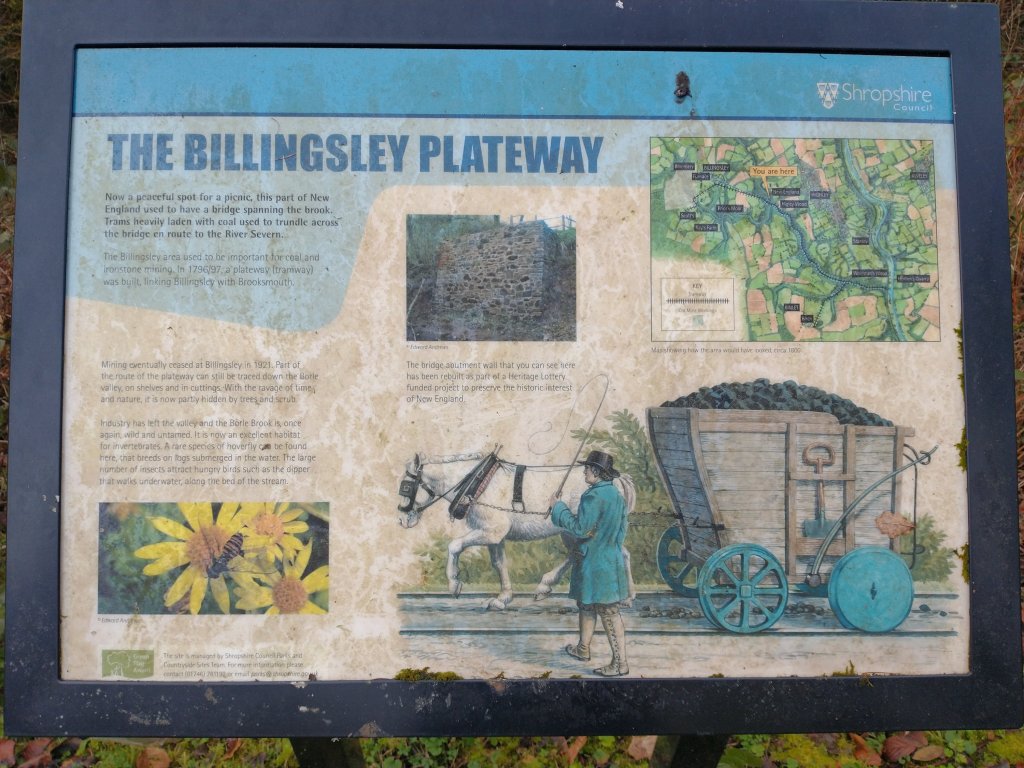
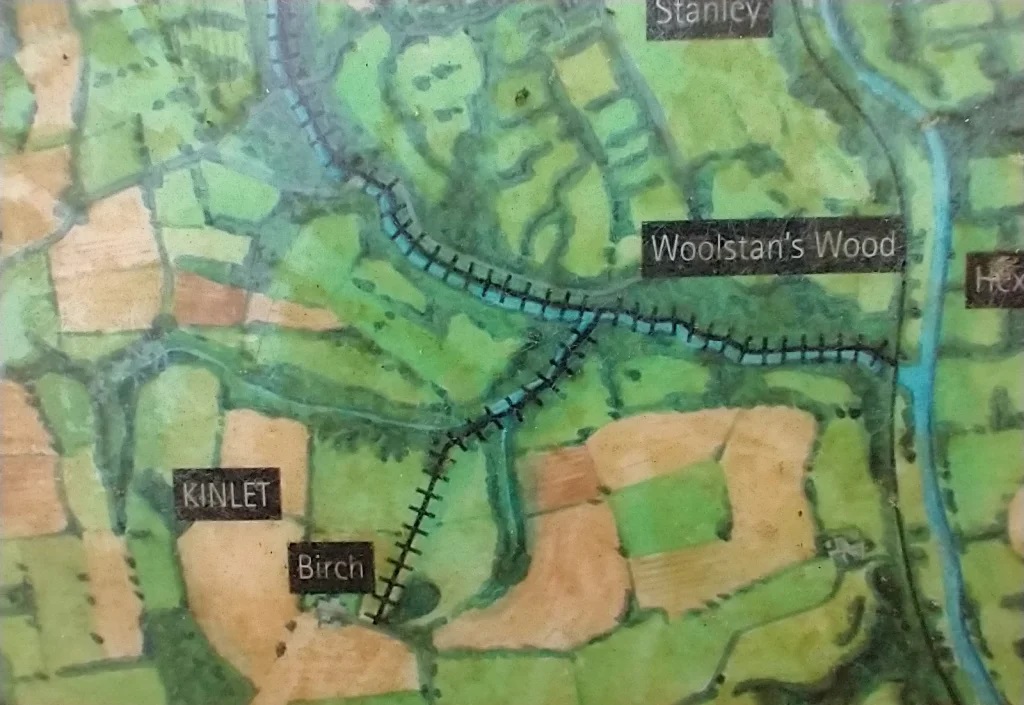
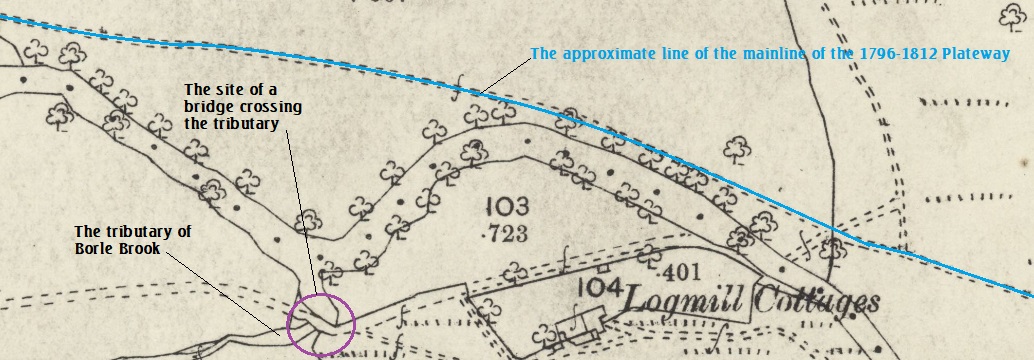
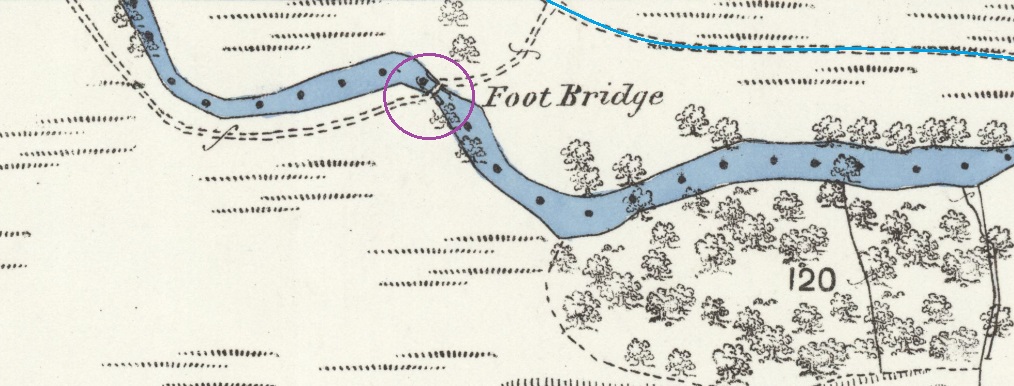
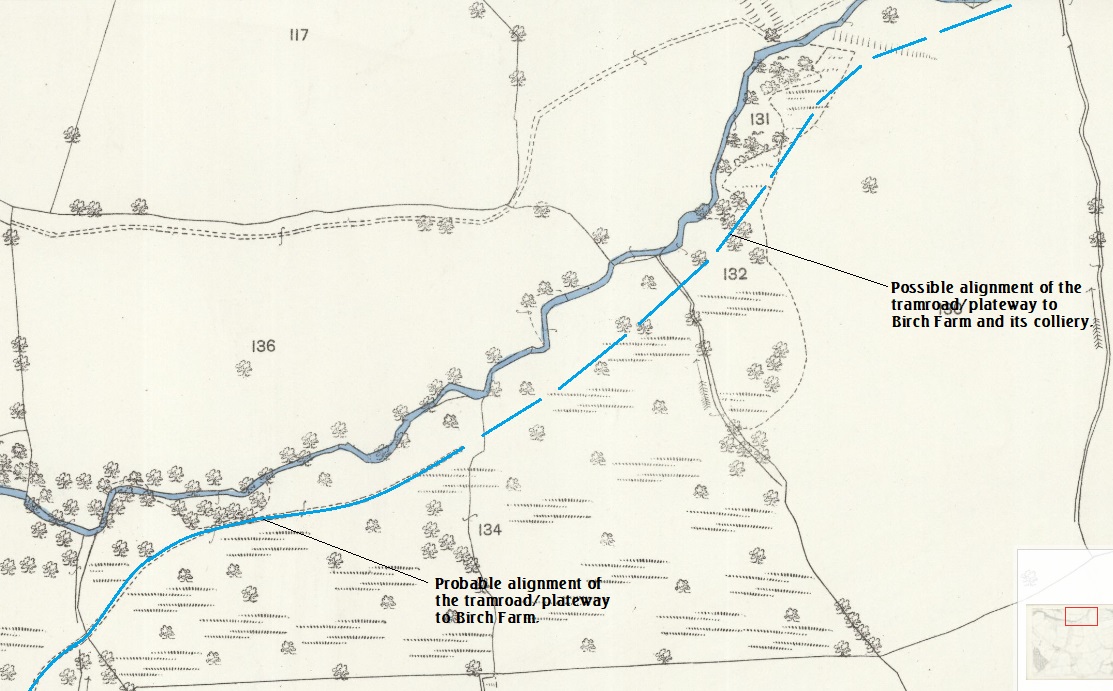
Highley, and the area immediately around, it has a long industrial history and the remains of numerous railways and tramways can be seen today. At the end of the 18th century coal mines and a blast furnace were opened in Billingsley. The coal and iron were brought alongside the Borle Brook through Highley by a horse-worked tramway to the River Severn where they were sent downstream in boats. The “tramway worked for no more than 15 years, but its route can still largely be traced on the North side of Borle Brook, running via shallow embankments and cuttings. A little later the Stanley Colliery (1804-1823) opened close to the site of the present Highley Station and this was also served by tramways, as were the numerous sandstone quarries by the river.” [26]
Stanley Colliery was just to the South of Highley Station. It was worked for that short period at the beginning of the 19th century in the sulphur coal at a depth of about 100 yards; the Brooch seam worked by the Highley Colliery was a further 200 yards below this. Stanley Colliery “is partially overlain by the trackbed of the Severn Valley Railway and sidings built by the HMCo. [Highley Mining Company] There are also extensive remains of the stone quarries which worked in this area from perhaps the Middle Ages to the 19th Century.” [21]
The old plateway/tramway/tramroad route is covered in an earlier article in this short series about railways to the South of Bridgenorth:
The tramroad was the first transport venture alongside the Borle Brook. It was some time before industrial development at Billingsley warranted the construction of another railway. In the early 1870s, a new mine had been sunk at Billingsley. The mine site was to the East of the Cape of Good Hope Inn. It “reached ‘Sweet Coal’ at 160 yards depth by Christmas 1872 (Sweet coal is low sulphur coal).” [24]
In the 1875 a public limited company, the Billingsley Colliery Company, was formed to work the mine and a decision was taken to link Billingsley Colliery to the Severn Valley Railway (SVR). [31]
Progress was slow, but eventually, in March 1877, a lease permitting the railway to cross land belonging to the Duke of Cleveland between the mine and the River Severn was signed. Further access rights were granted over land in Kinlet by February 1878 and, in December 1878, the GWR agreed a connection could be made to the SVR. [31]
The mine suffered significant cashflow problems in the late 1870s and the Company was bought out in 1878 by “Samuel Norton Dimbleby. The next year Dimbleby renamed it the Severn Valley Colliery Company and by various means … he raised enough money to allow construction of the railway to begin.” [31]
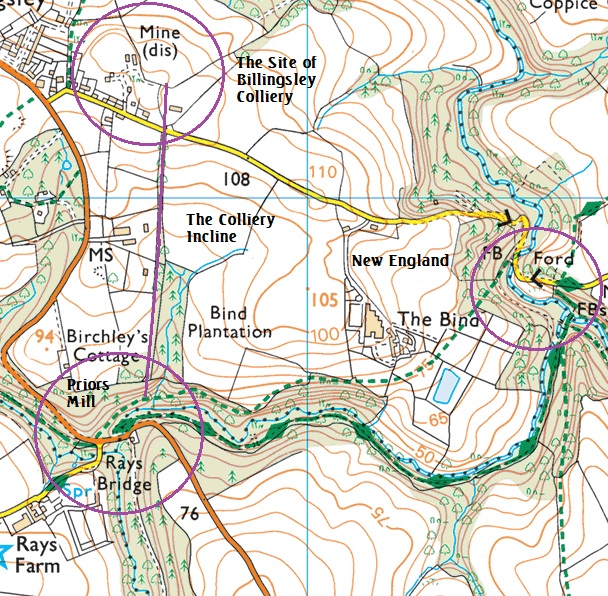
Work commenced in October 1880. The line was to follow the Borle Brook on its South side as far as New England. There it was to continue alongside the Borle Brook for a short distance “before striking due west to reach the colliery by a chain-worked incline, over half a mile long.” [31]
“The line was due to be completed by the end of January 1881 and open by 31st March. This was an ambitious target but the contractors, Messrs Drewitt and Pickering of Stoke on Trent, seem to have made good progress, quickly constructing all the earthworks as far as New England. Then work stopped.” [31] It seems likely that “Dimbleby and the company never had enough money to pay for the completion of the line.” [31]
For two years, Dimbleby strove to complete the railway but without success. “Finally, in October 1882, the materials on the line were sold, probably by Drewitt and Pickering in an attempt to get some of their money back.” [31]
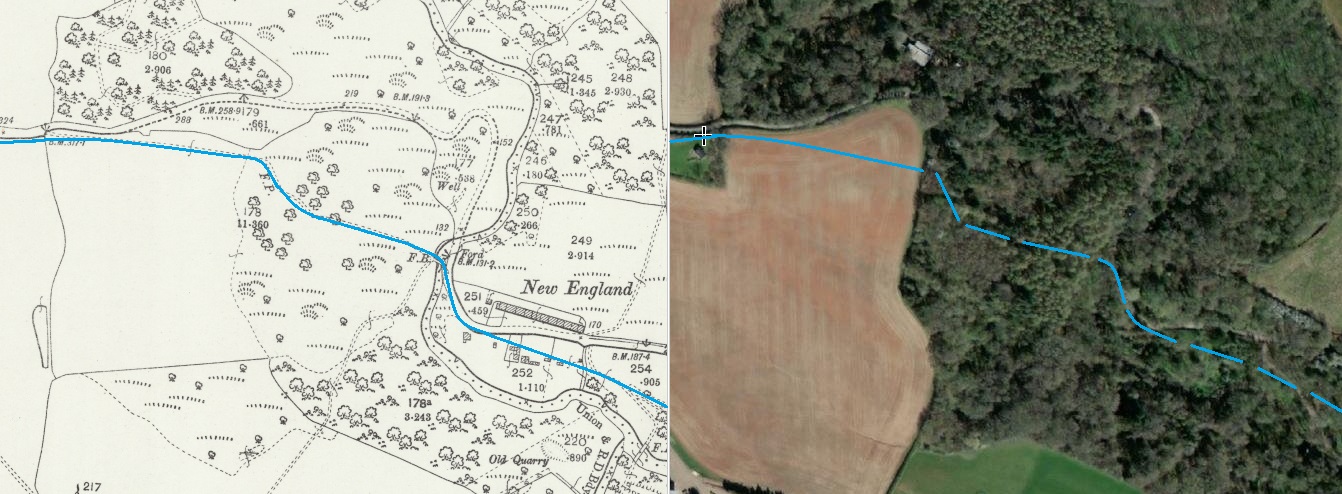
Dimbleby’s endeavours left a local landscape scarred by embankments and cuttings. The fruit of his labours is illustrated below on another series of extracts from the 6″ Ordnance Survey published in 1883.
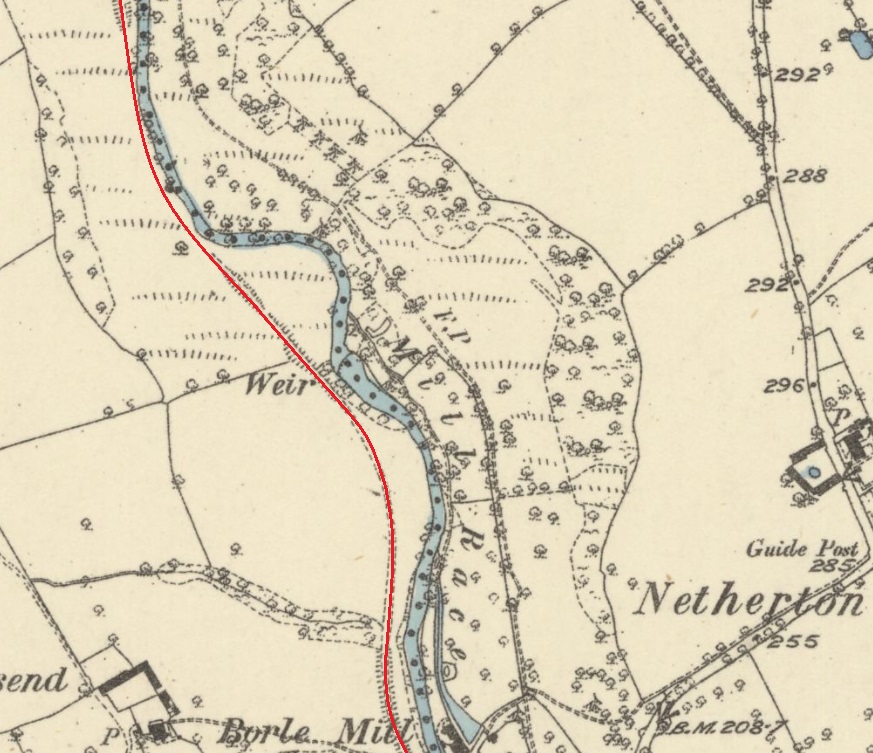
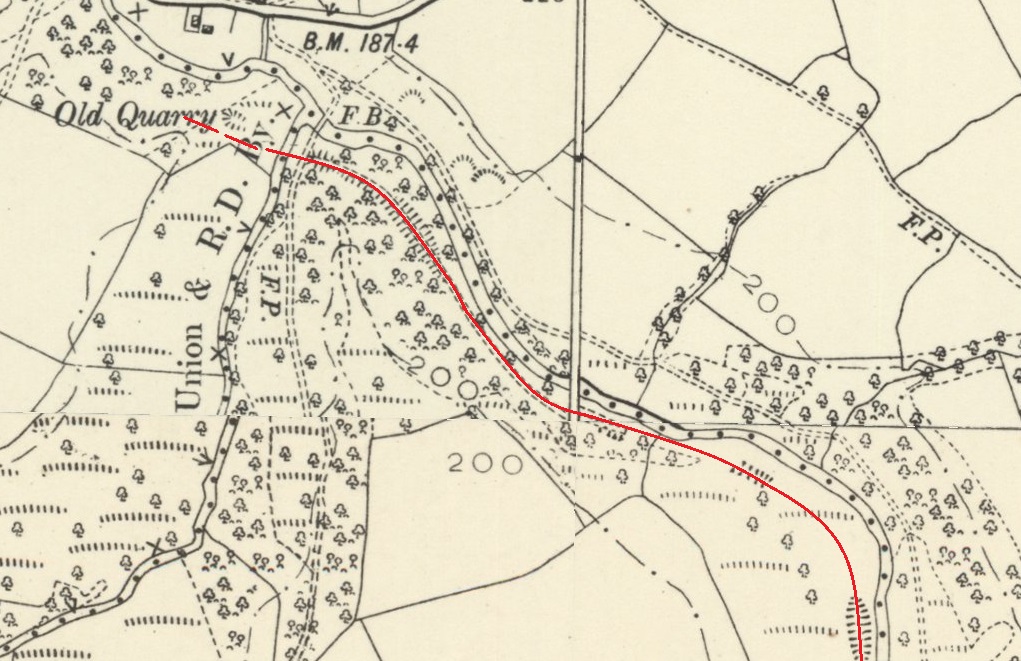
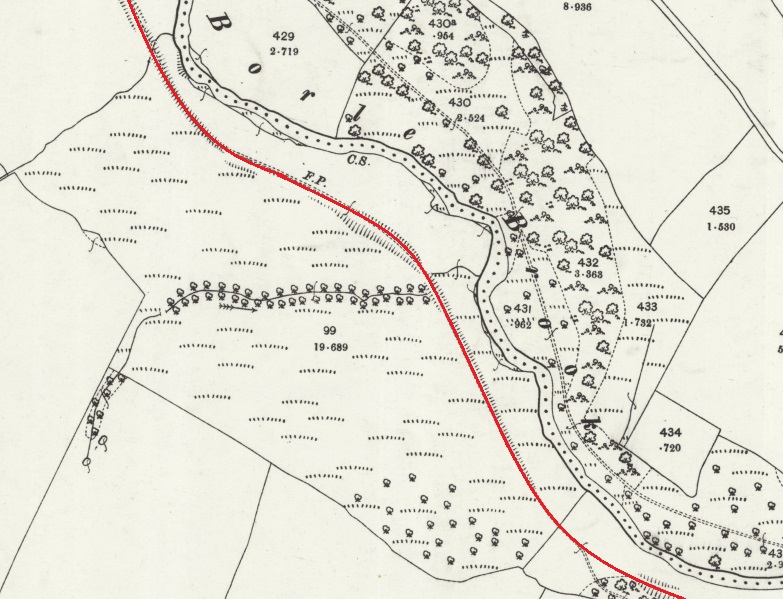
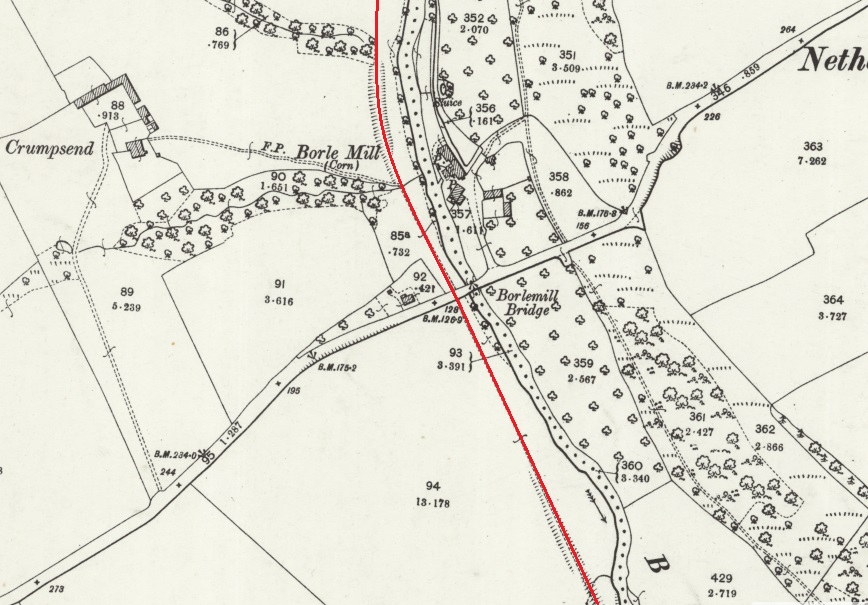
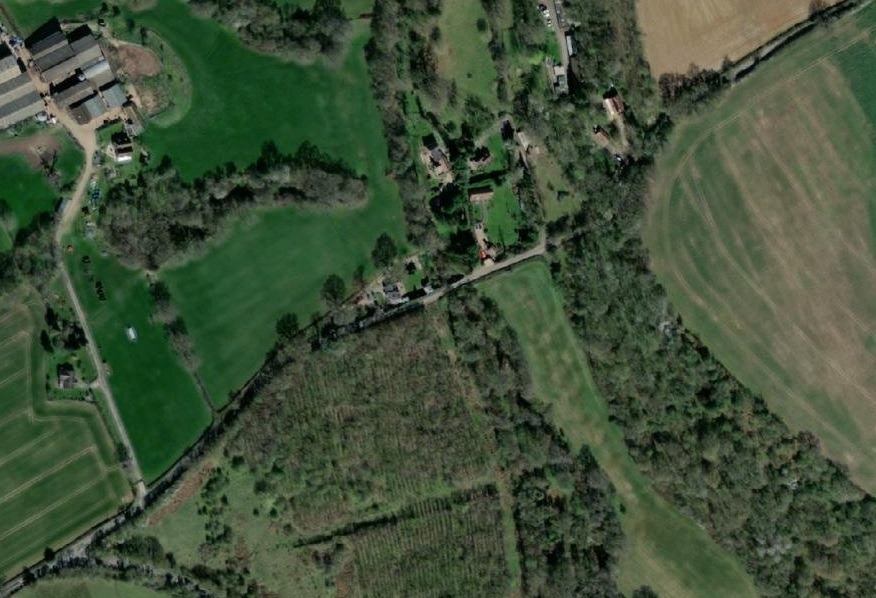
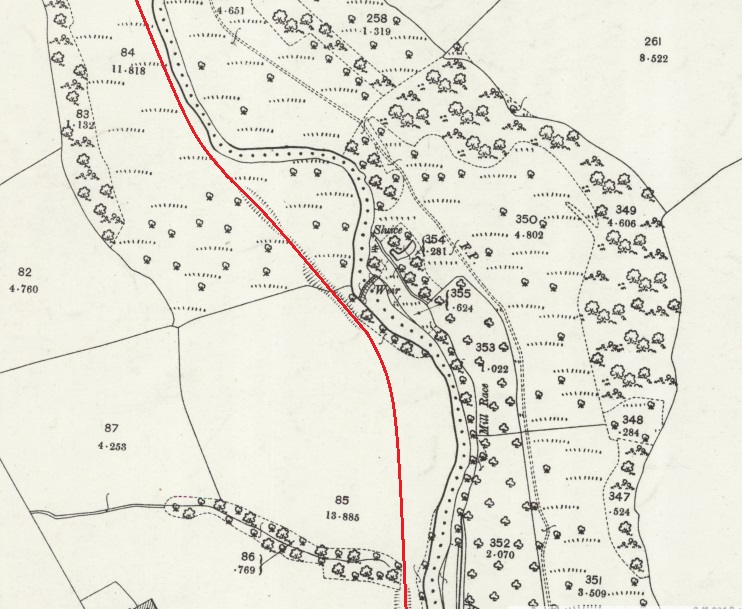
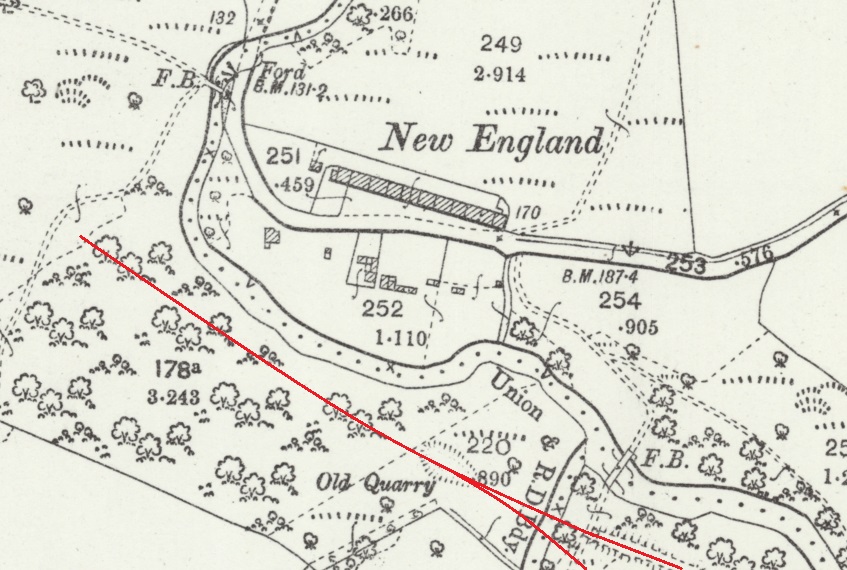
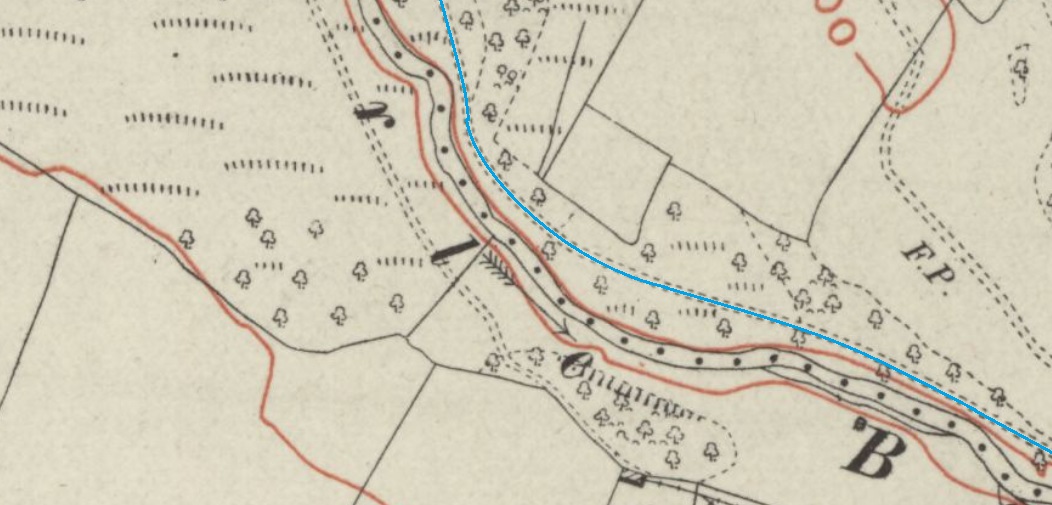
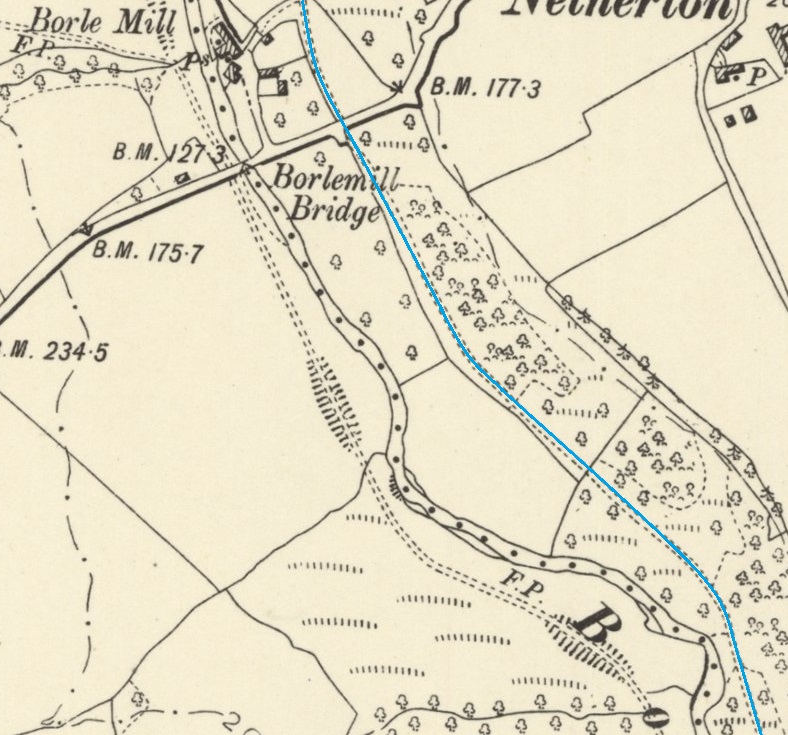
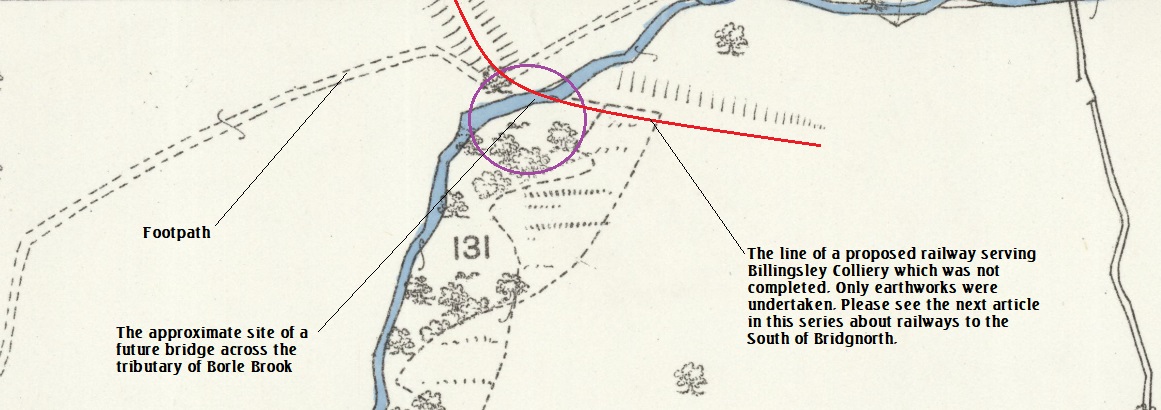
The 6″ OS Map (published in 1883), shows the remnants of Dimbleby’s intended railway at it’s planned junction with the SVR. Some embankments and cuttings remain along the proposed railway alignment heading West away from the River Severn. [27]The planned route continued West away from the River Severn. [27]The intended line followed the Borle Brook as its valley ran to the Northwest. [27]The route of the intended railway ran close to Borle Brook as it turned to the North near Borle Mill. [27]The line of Dimbleby’s railway continues to be marked by the red line imposed on the 6″ Ordnance Survey published in 1883. [27]The proposed railway’s alignment crossed the corners of four different Ordnance Survey sheets. I have resorted to using the later Ordnance Survey of the turn of the 20th century to show its route as the NLS (National Library of Scotland) kindly pieces the sheets for that series together. The different 6″ map sheets were published in 1904 and 1905. The route of the line becomes indistinct after it crossed the tributary of the Borle Brook into an old quarry. [28]
Dimbleby’s efforts were, ultimately, not to be wasted. The mine was purchased, along with Dimbleby’s Severn Valley Colliery Company, in 1882 by Alfred Gibbs. He continued to operate the mine successfully on a small scale until, after the turn of the 20th century, a new company, the Billingsley Colliery Company, was created. [24]
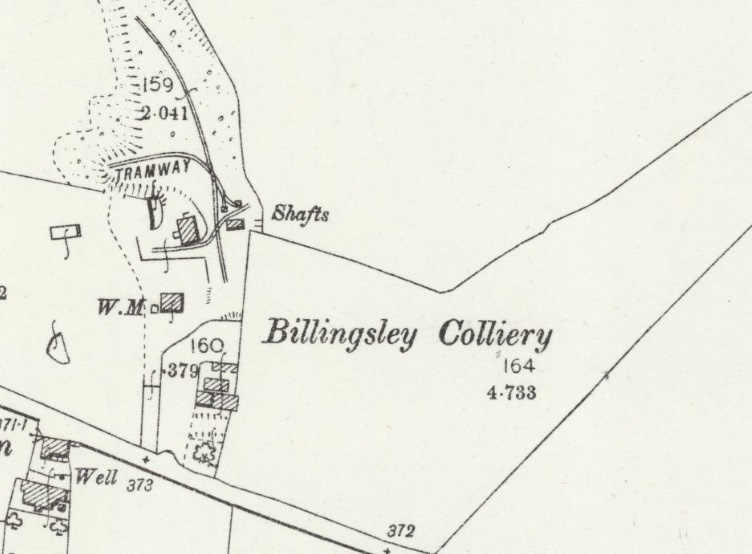
The Billingsley Colliery on the 1902 25″ Ordnance Survey which was published in 1903. [25]
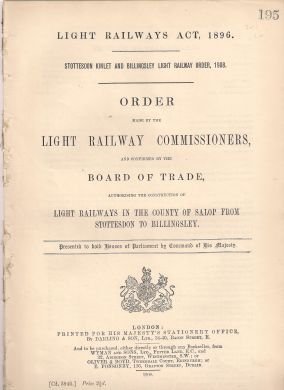
This new company brought great optimism and quickly sought to establish the mine as a significant local player. A connection to the SVR once again became paramount in their plans for the Colliery and a light railway order was sought under the 1896 Act.
The cover of the Order under the Light Railways Act 1896 for the Stottesdon, Kinlet and Billingsley Light Railway, which was made in 1907. [29]
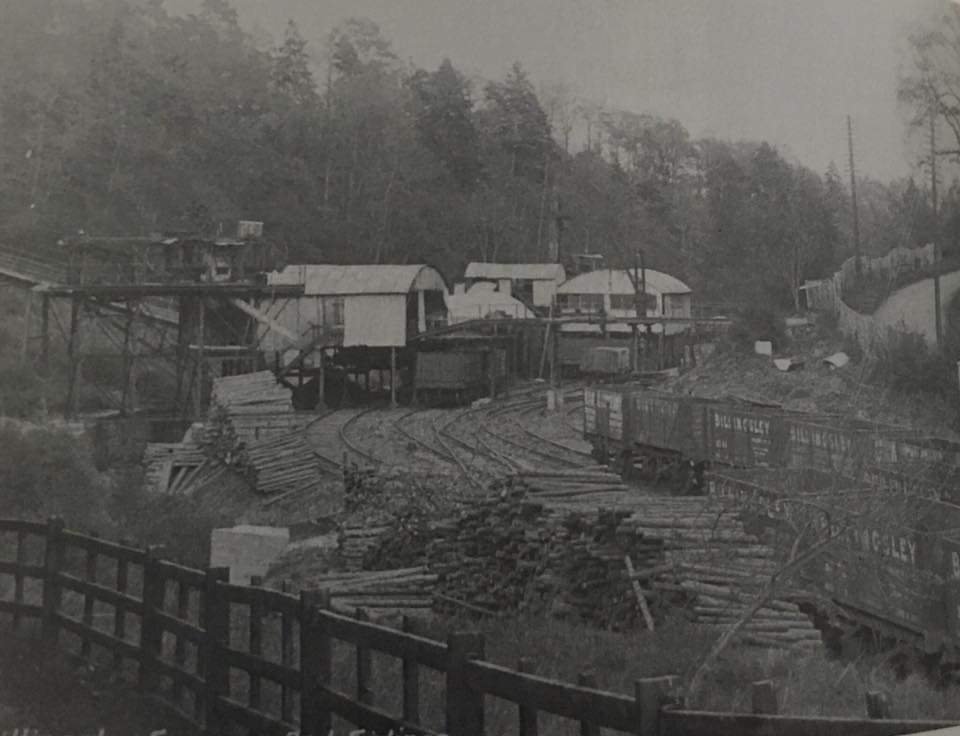
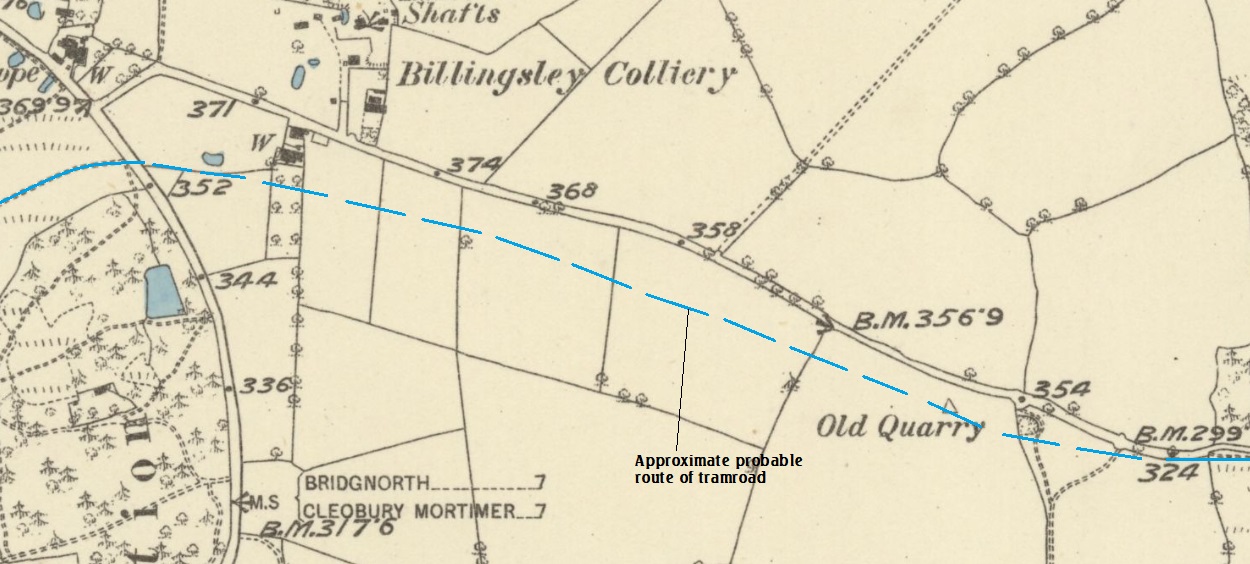
Billingsley Colliery Co. “undertook a major transformation of the mine, including a complete reconstruction of the surface buildings and alteration of the layout – adding a fan-house, lamp room, an electrical powerhouse, carpenters and fitters shops. Electric haulage was installed underground and a rope-hauled narrow gauge tramway built to drop coal tubs down to new railway sidings in a valley at Priors Moor about half a mile away and 300ft lower than the mine site. A new Garden Village was also built for the miners at Highley.” [24]
The Railway was built by 1913. The colliery screens were built at the head of the railway at Priors Moor. Coal came down the Incline was processed and loaded onto wagons. Waste from the screens and pit materials were sent up the Incline to the mine. [24][31]
Leaving the sidings alongside the SVR, the line initially ran parallel to the Kinlet railway, but continued for an extra 1½ miles to the colliery screens at Prior’s Moor. “This had no severe gradients although it did have a number of sharp curves. To work this railway, the Billingsley Colliery Company purchased a second-hand 0-4-0 saddle tank. No 599 built by Peckett’s of Bristol.” [41: p13]
In 1915. Billingsley Colliery was taken over by the Highley Mining Company, this means that they inherited No. 599. As we will see later in this article, they favoured No. 599 over their own locomotive ‘Kinlet’.
Much of the Railway from Kinlet to New England used the earthworks built by Drewitt and Pickering. From New England a spur was created which followed Bind Brook to Priors Moor where it met the narrow gauge ropeway. [31]
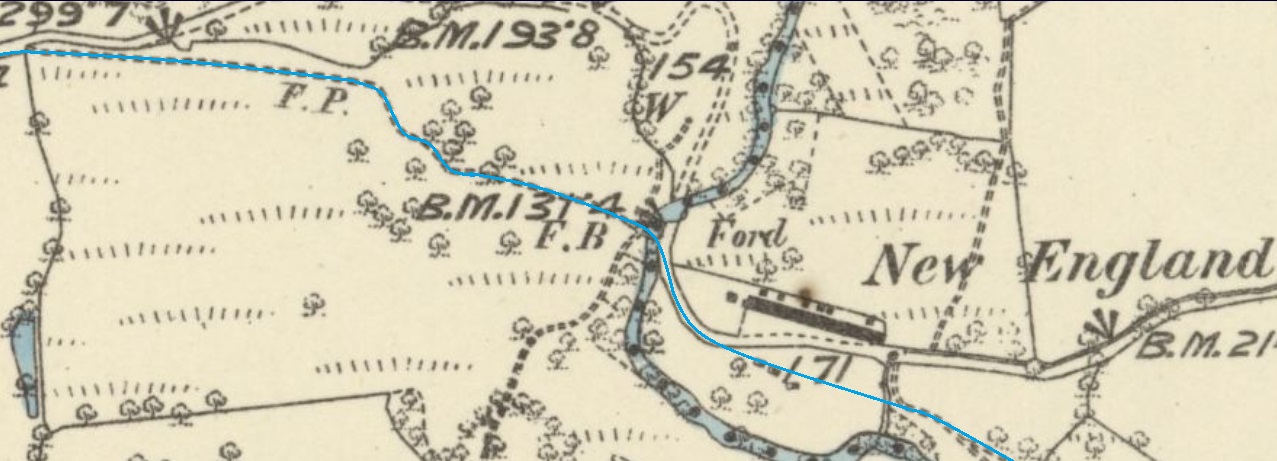
This extract from the Bartholomew 0.5 inch to the mile mapping shows the full extent of the Billingsley line. The reversing point at New England can be picked out close to the ‘Ford’ and Billingsley Colliery is at the extreme top-left of the image. There is little detail on the map, which is unsurprising given its scale. [33]
A brickworks opened in Billingsley in the late 1860s and was in use until the start of WW1. An aerial ropeway from the brickworks brought bricks, tiles and other products down to the sidings with coal for the kilns going back to the brickworks. [24][34]
The Colliery itself was relatively prosperous in the years around WW1. It was employing more than 200 men at that time. This prosperity was short-lived, Billingsley Colliery was taken over in 1915 by the Highley Mining Company after it had, had a number of financial and geological difficulties – they also took over the Garden Village housing development in Highley. [24]
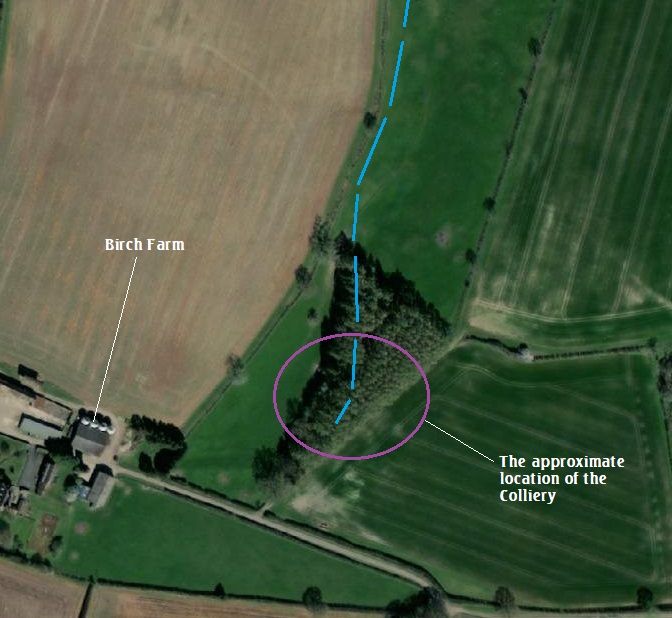
The Colliery closed very early in the 1920s. The railway to Priors Moor remained in use until the late 1930s, serving a landsale yard at its terminus near the colliery screens close to Priors Moor. A few of the mine buildings survive and have been turned into farm buildings. The track bed of this railway and some of the bridges survive largely intact. [24]
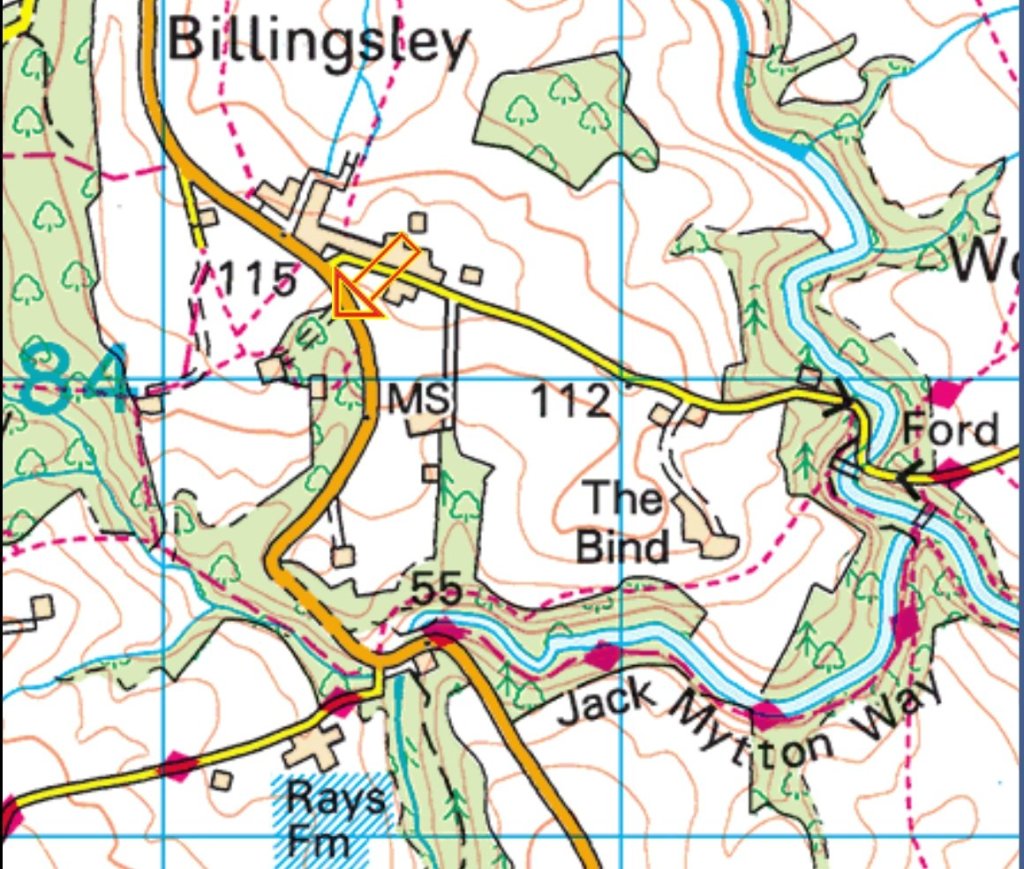
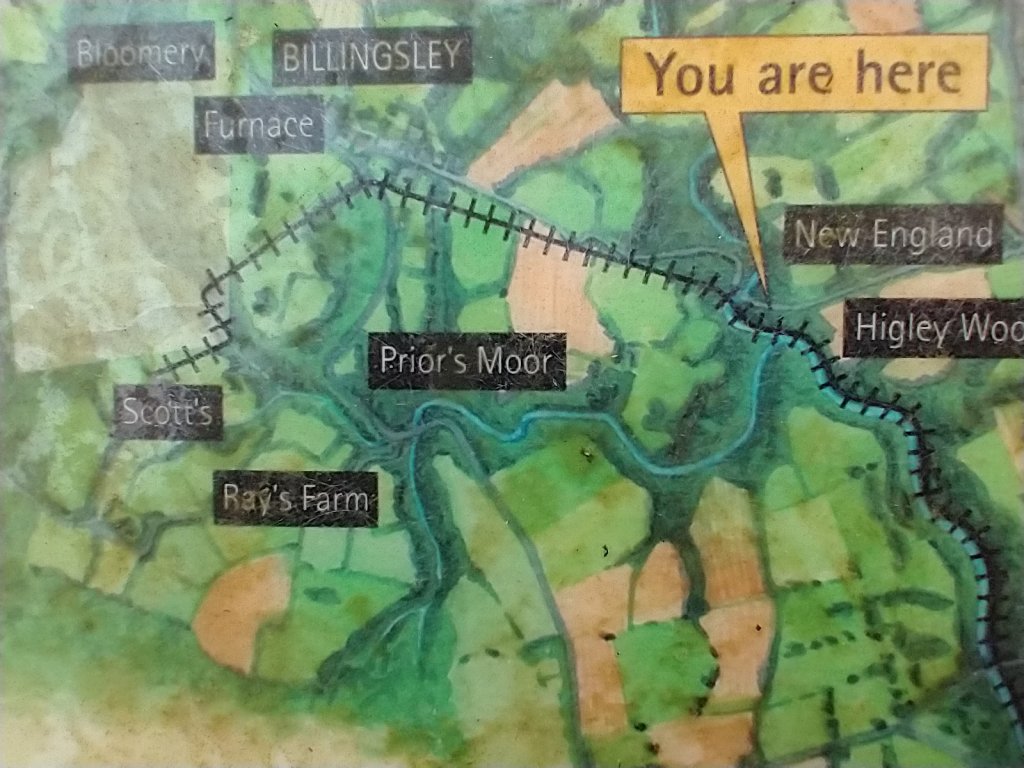
The landsale yard closed in the 1930s and the railway had been dismantled by the end of 1938. Much of the Billingsley line is now a public footpath; the stretch from Billingsley to New England in Highley forms part of the Jack Mytton Way, a long-distance bridleway. [24][32]
Although initially separate, the Billingsley and Kinlet (see further below) railways were later connected and worked until the closure of Kinlet Colliery in 1937, when the railway was closed. [24]
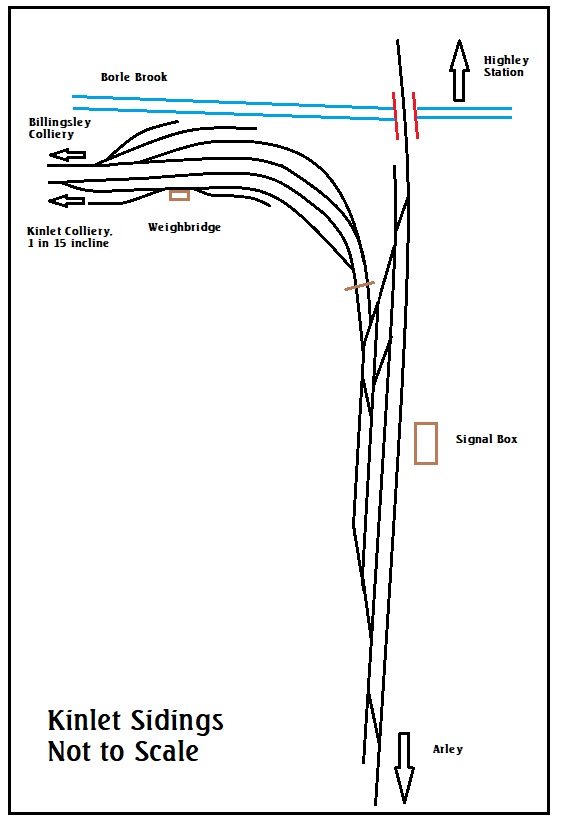
The Billingsley Railway was about 3 miles in length. It ran along the valley of Borle Brook as far as New England. For much of its life the first section of the line followed the Kinslet line only a metre or two to the North, closer to Borle Brook. The sketch map below is based on a map provided by John Tennent [1: p8] Both the Billingsley Railway and the Kinlet line were gated close to the sidings.
My sketch, based on a segment of a drawing in Tennent’s article. [1: p8]
In its latter years the loop and sidings shown above were removed and along with the branch mainline and a connection was made to the Kinlet line closer to the point at which the steepest gradient of the Kinlet line commenced.
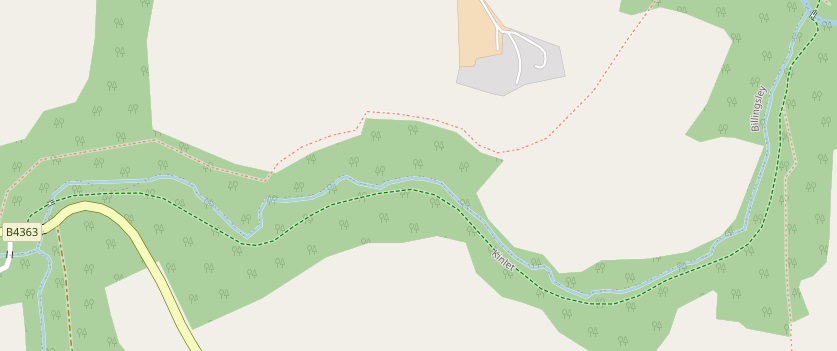
These two map extracts, taken from the OpenStreetMap website, cover the full length of the Billingsley Colliery Railway from Ray’s Bridge, Priors Mill (which is on the left of the first image), to the sidings alongside the Severn Valley Railway, (on the bottom-right of the second map extract). These extracts also cover the full length of the old Tramroad and the Kinlet Colliery Railway. [54]
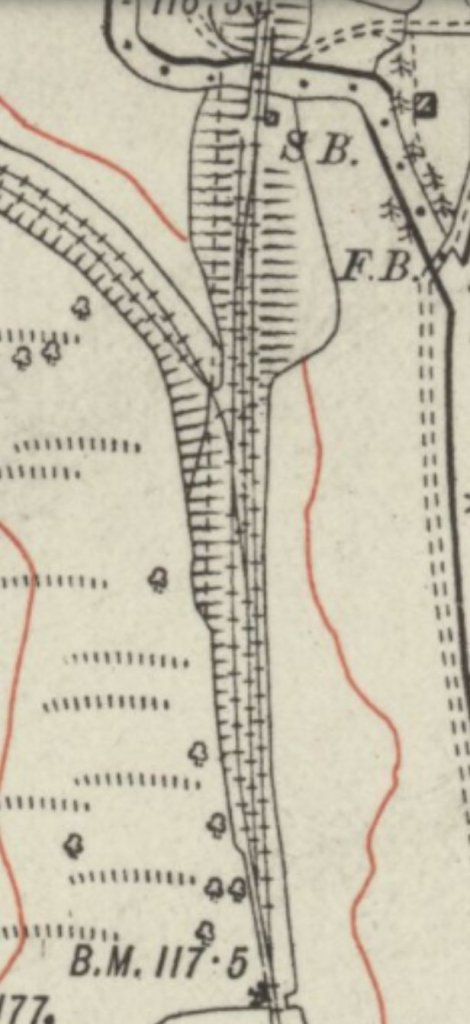
The Billingsley Railway is not shown on any of the extracts from the 25″ (1901/1902) and 6″ Ordnance Survey of 1925 shown in the notes about the Kinlet Colliery further below. I have imposed the approximate route of the line on the 25″ Ordnance Survey of 1901, published in 1902. A red line is shown on the 25″ Ordnance Survey extracts below.
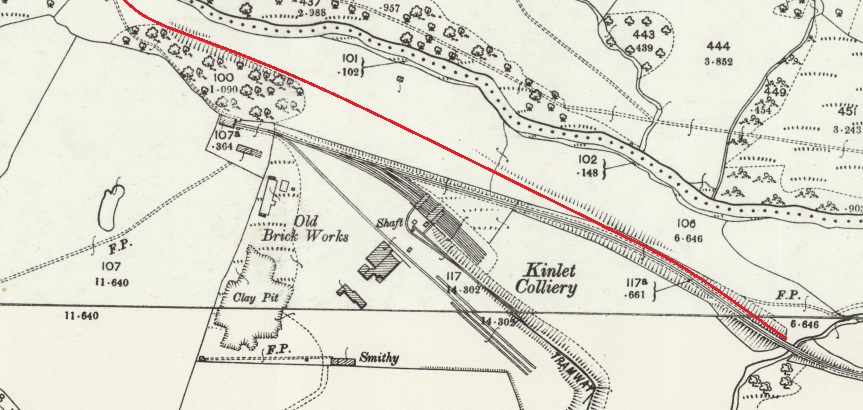
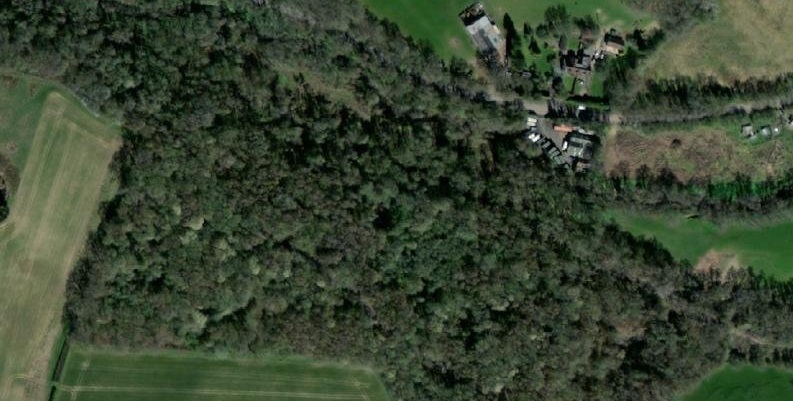
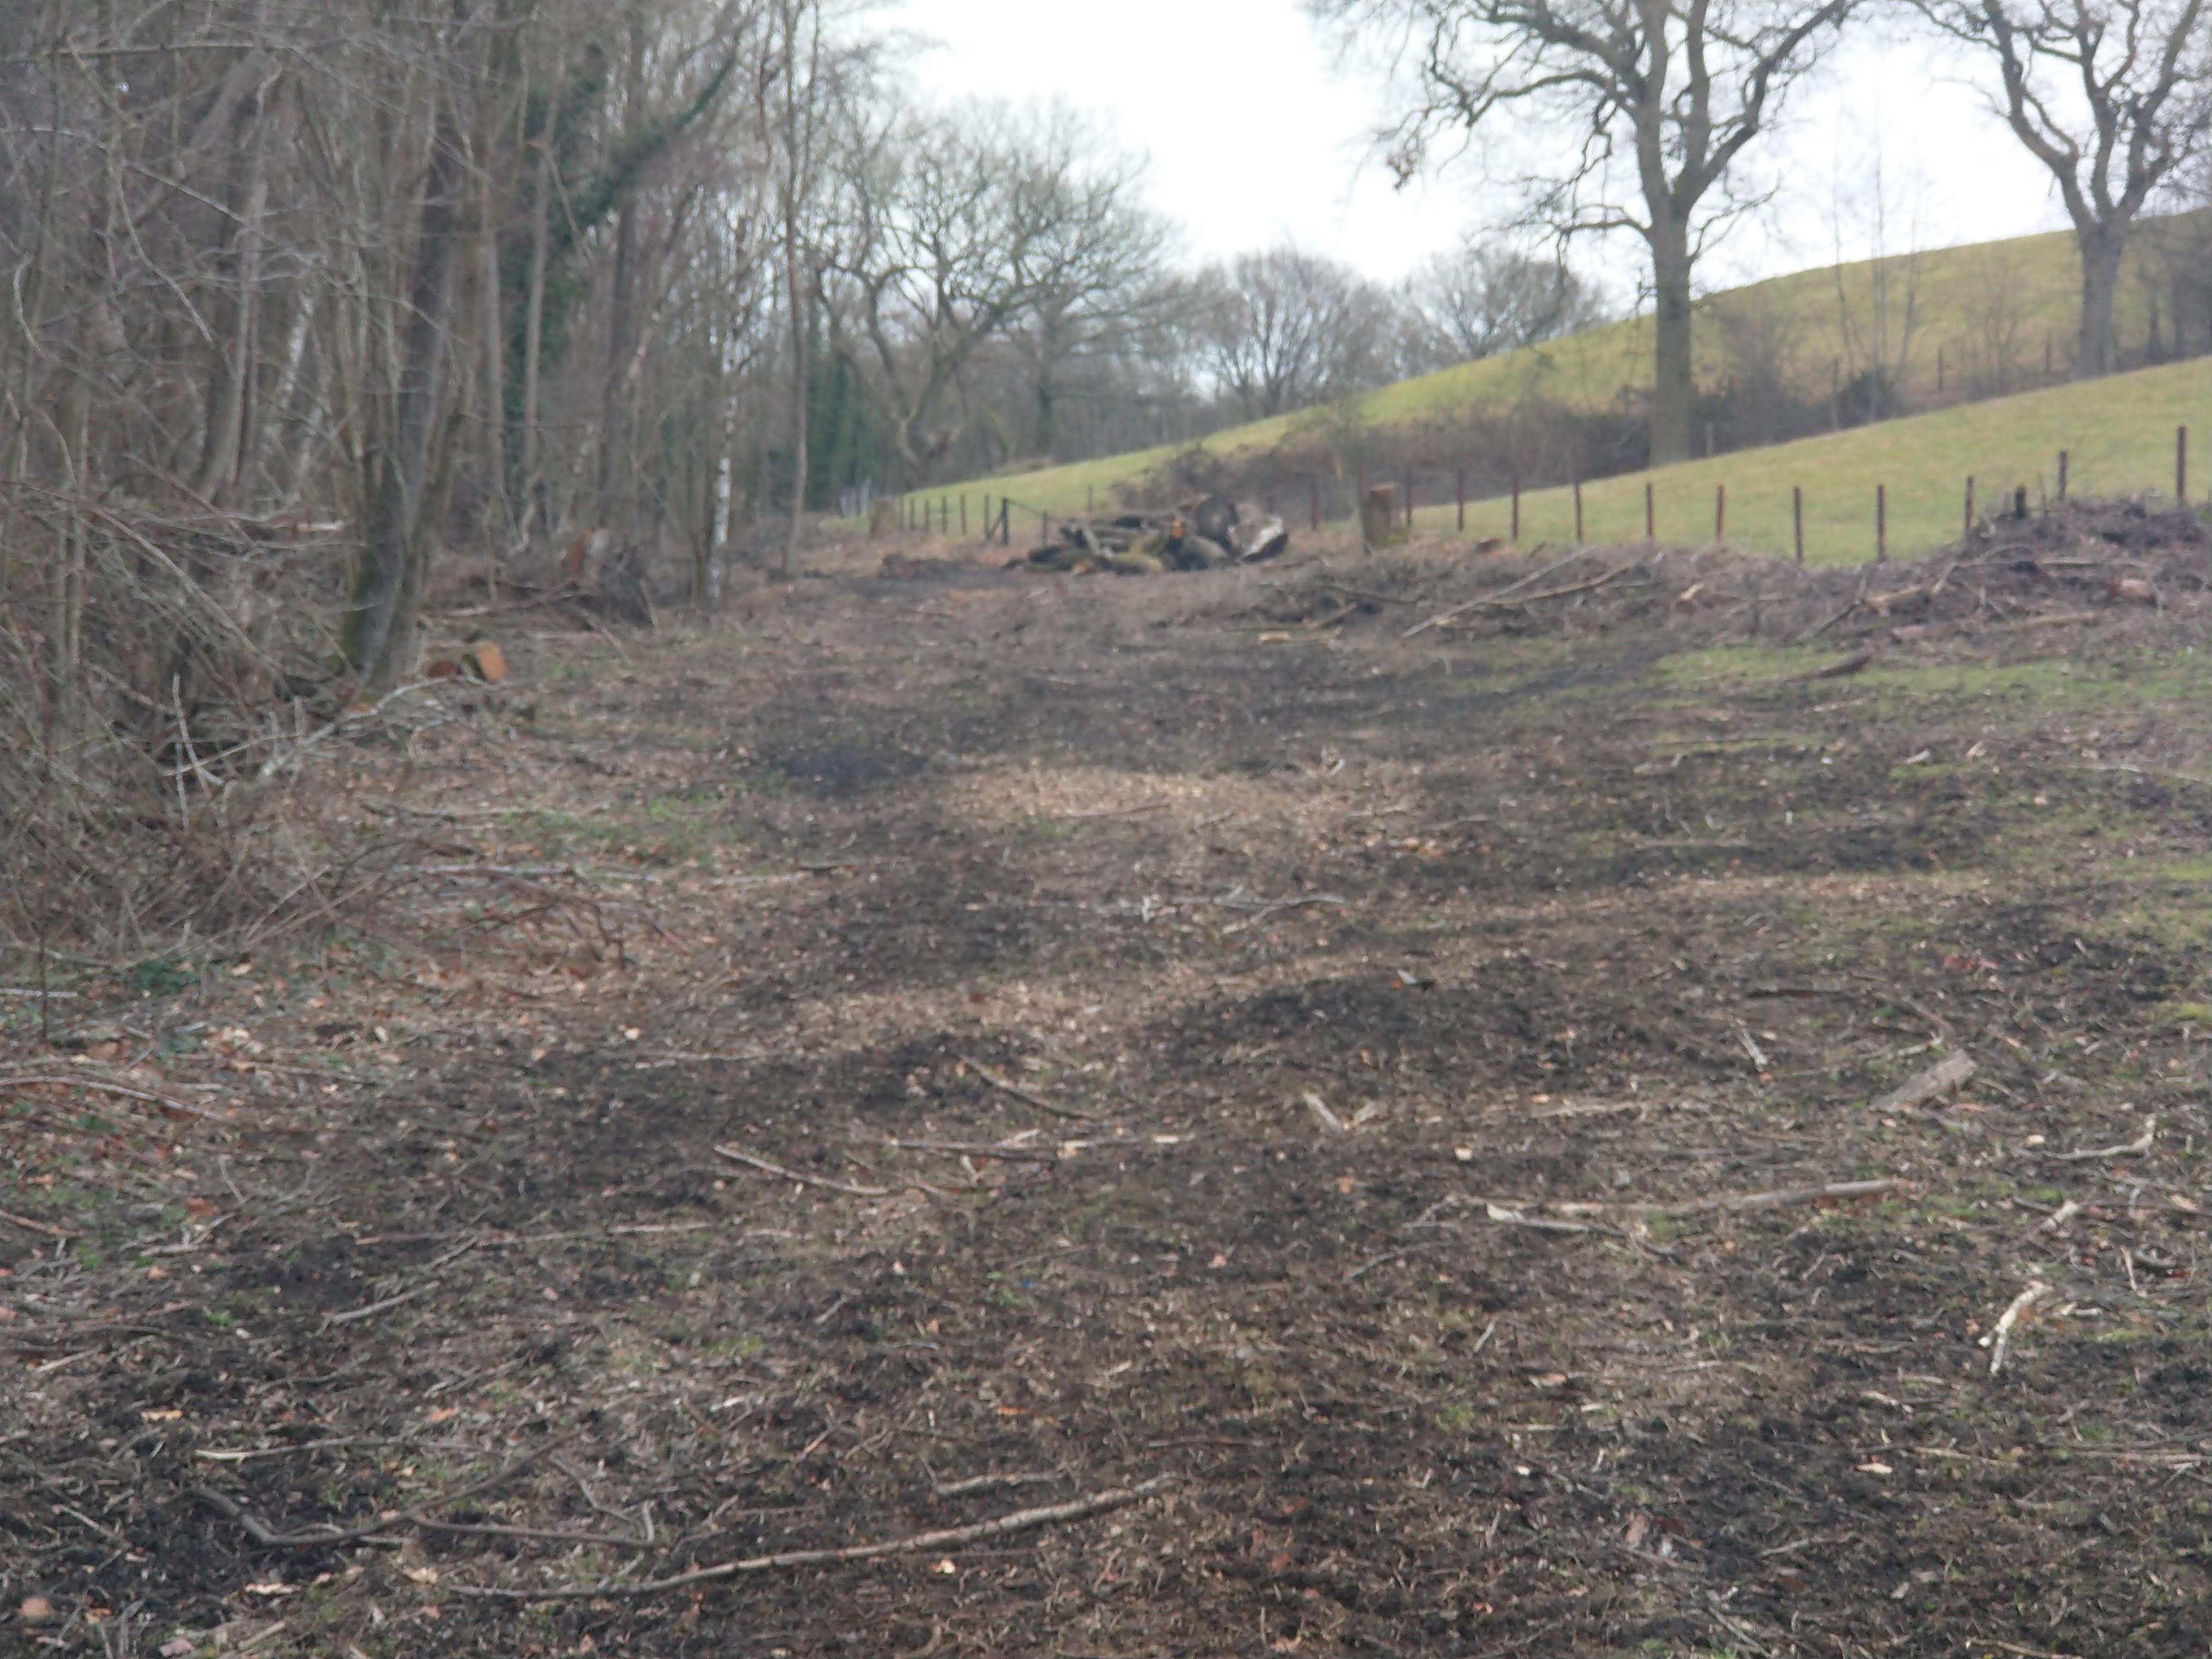
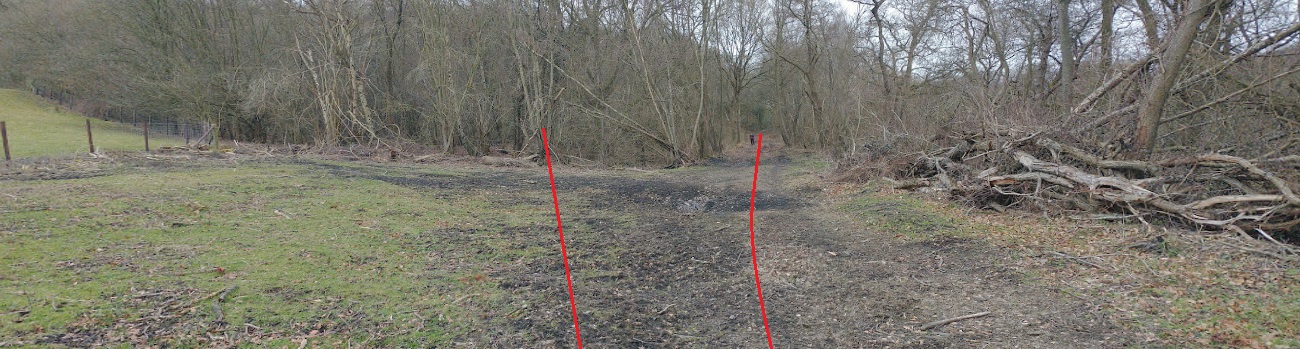
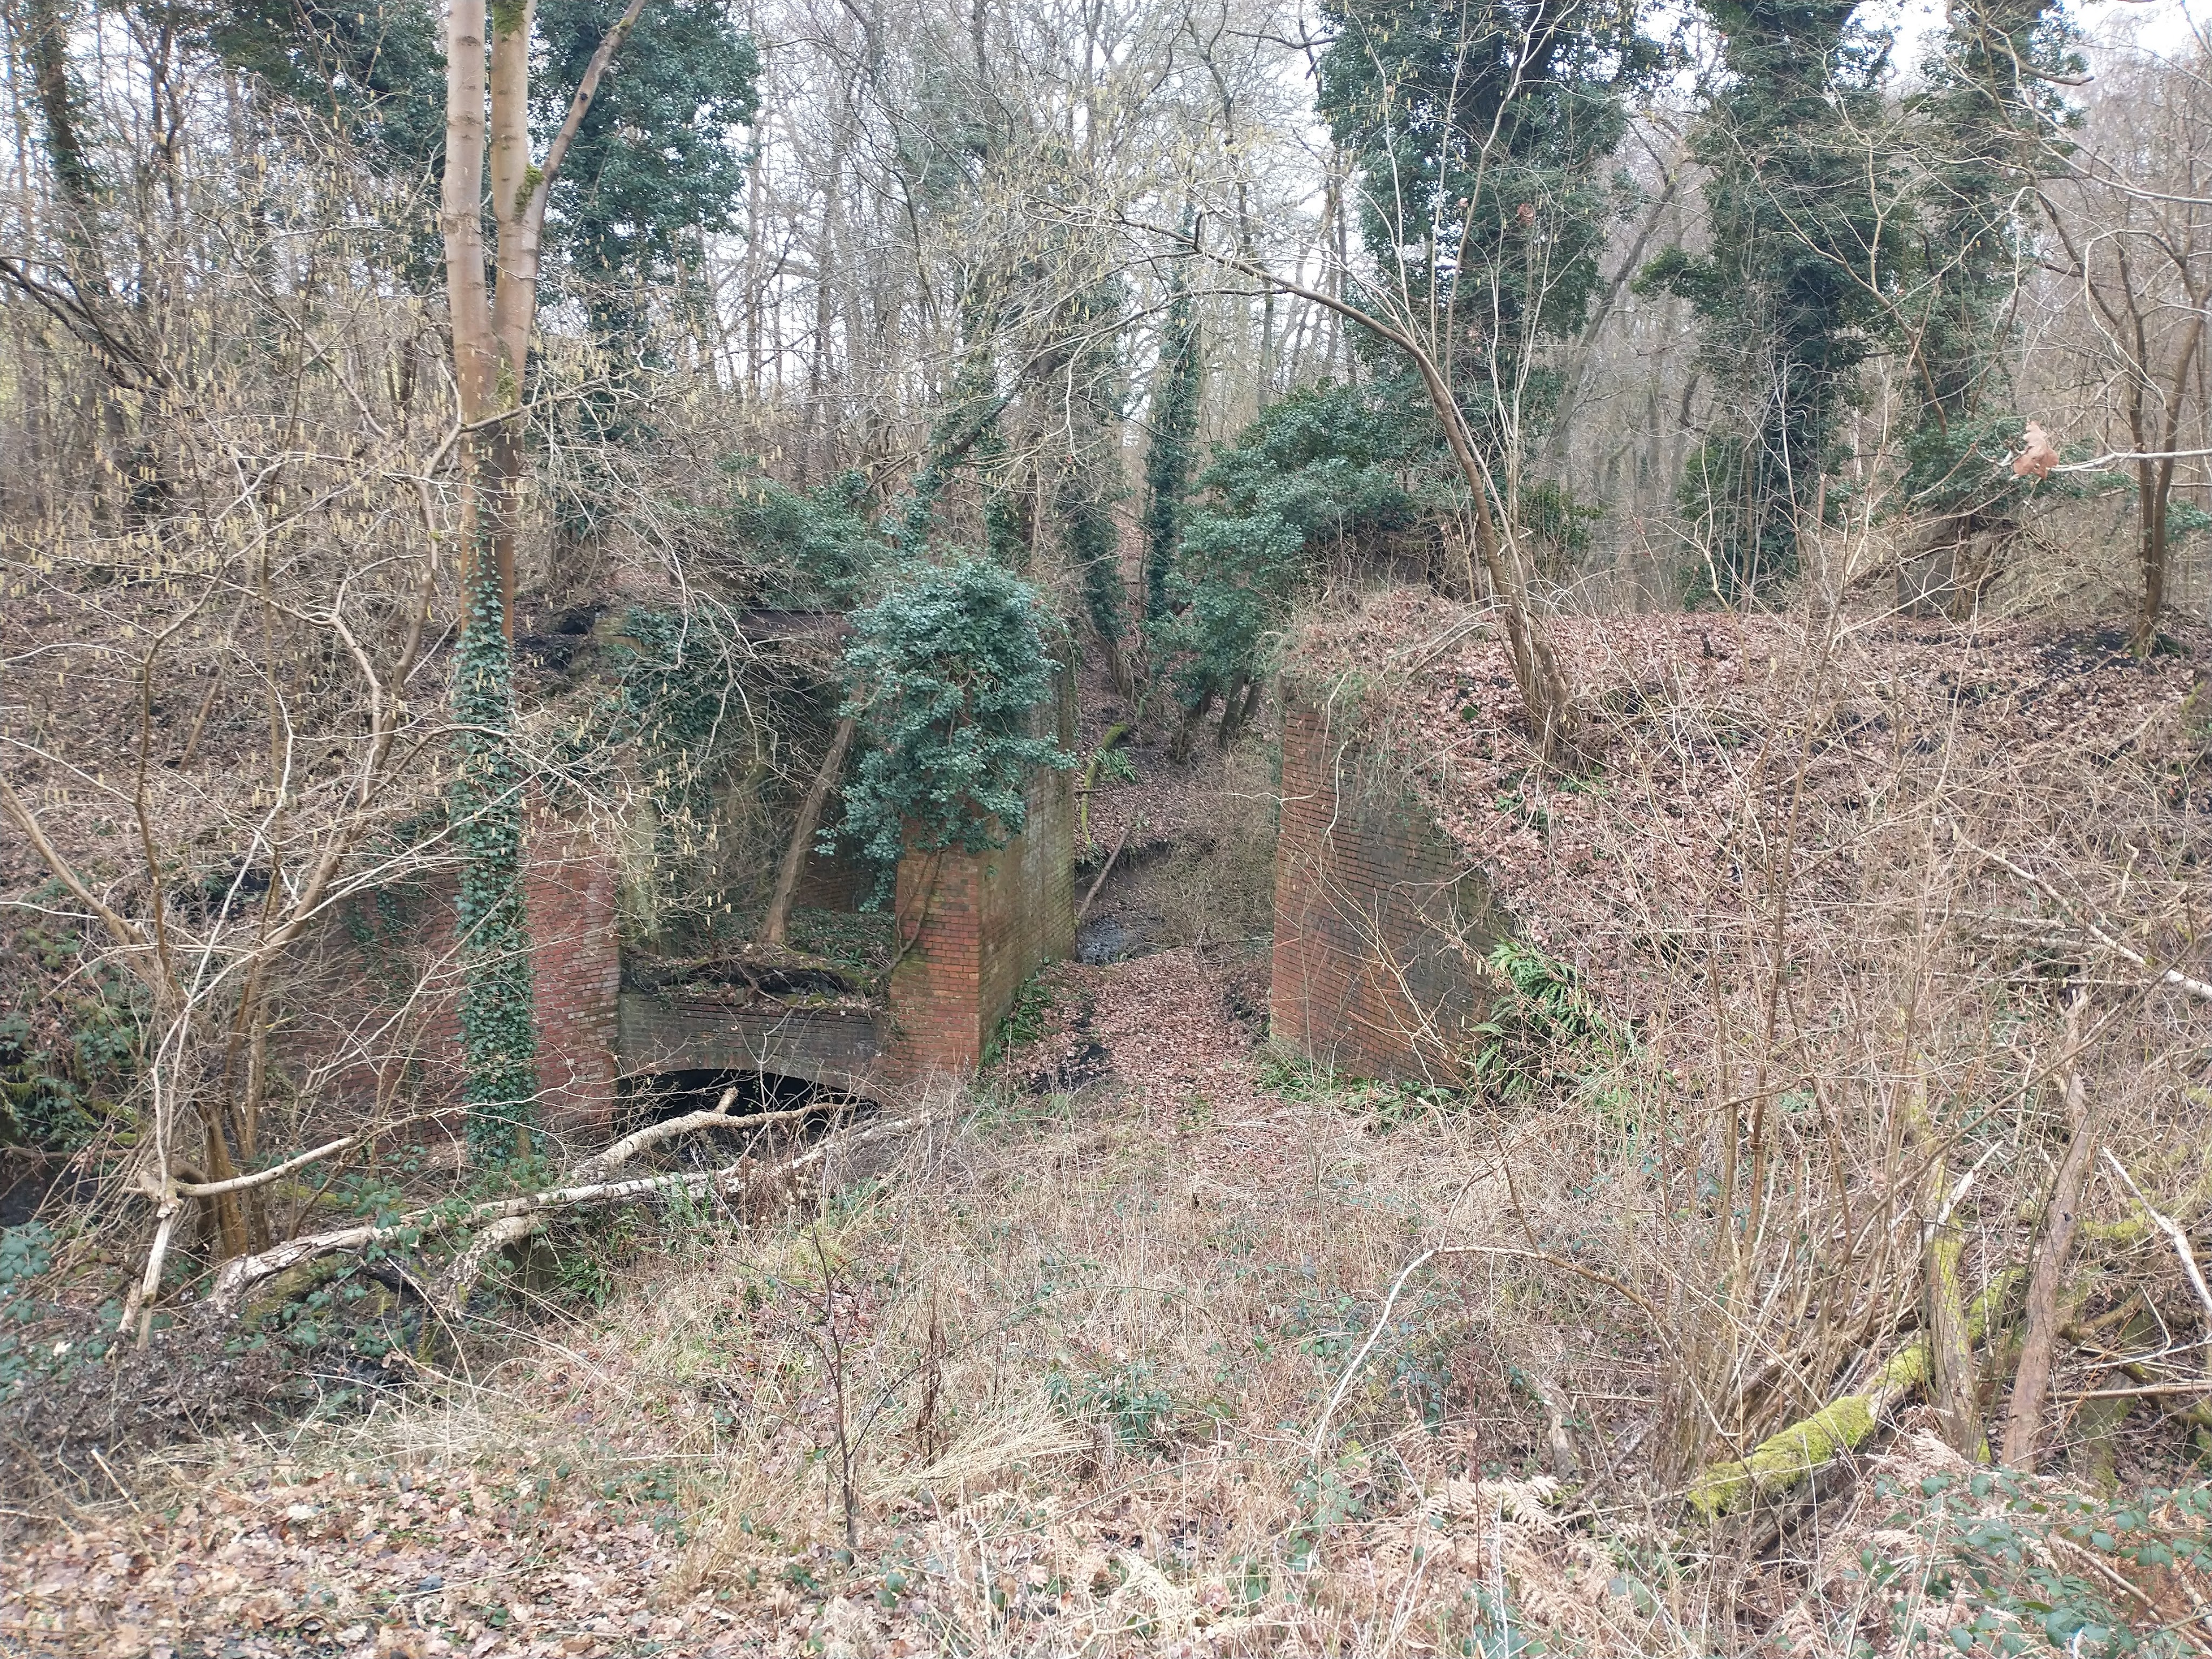
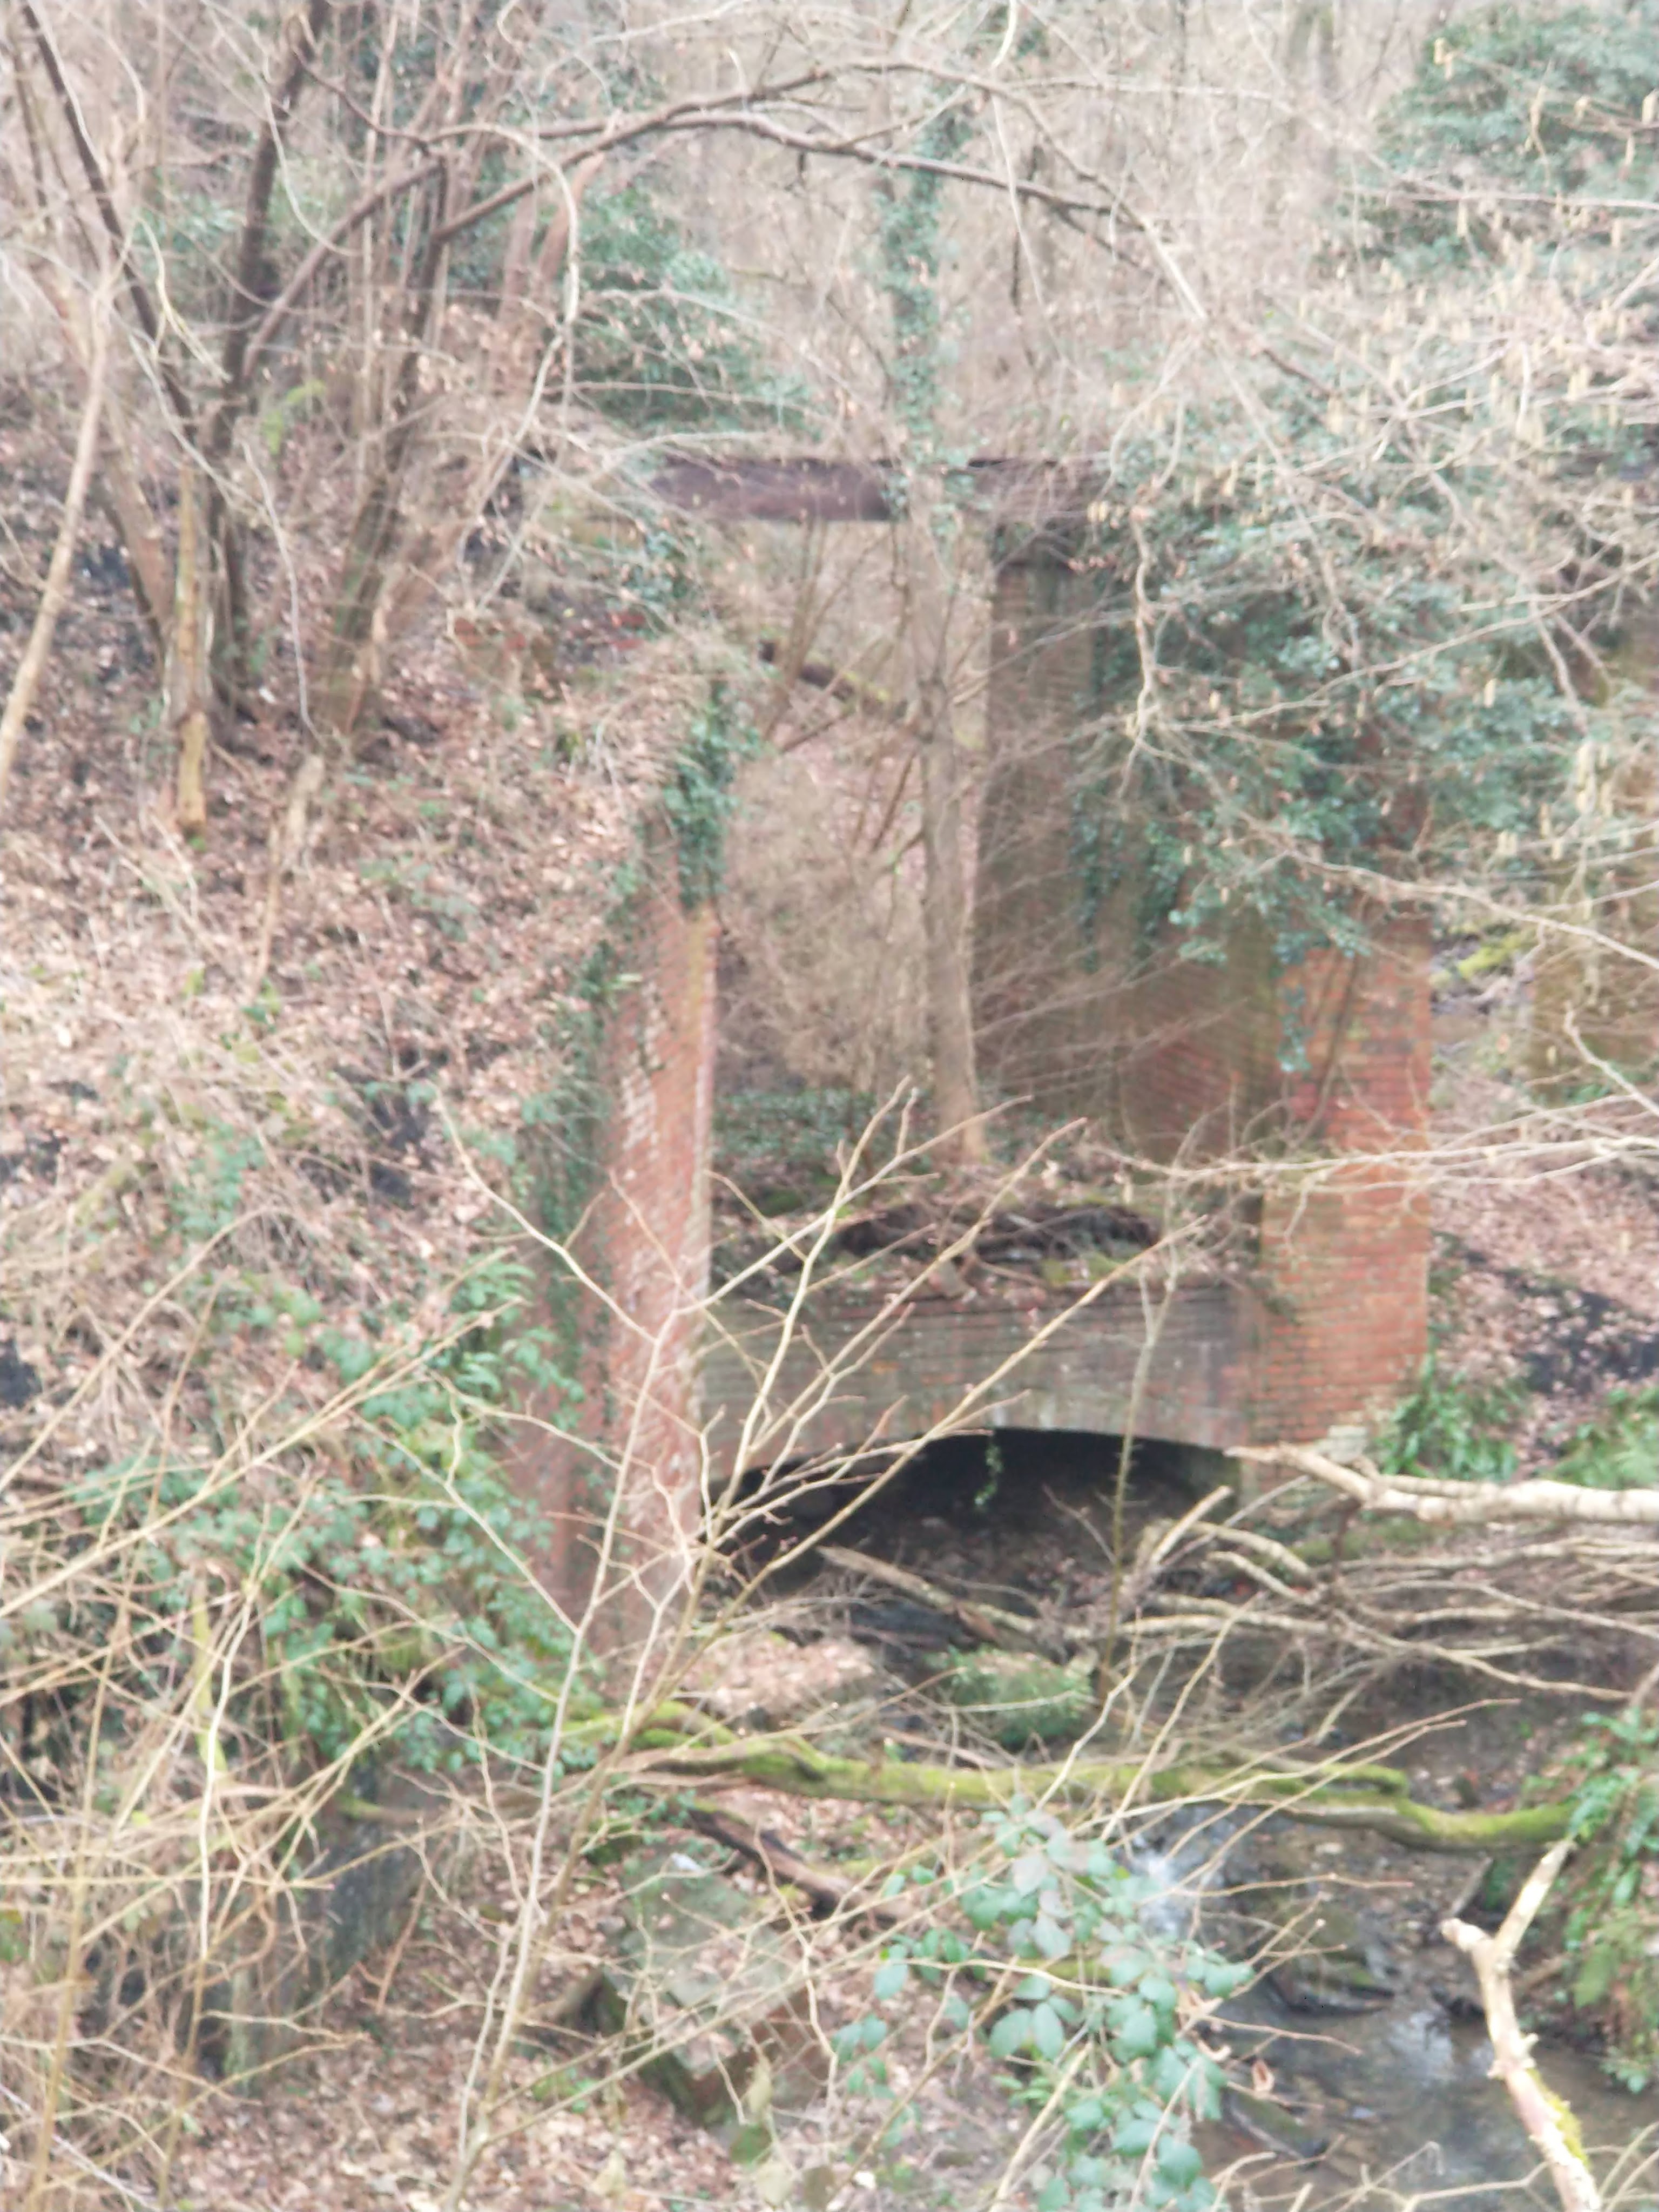
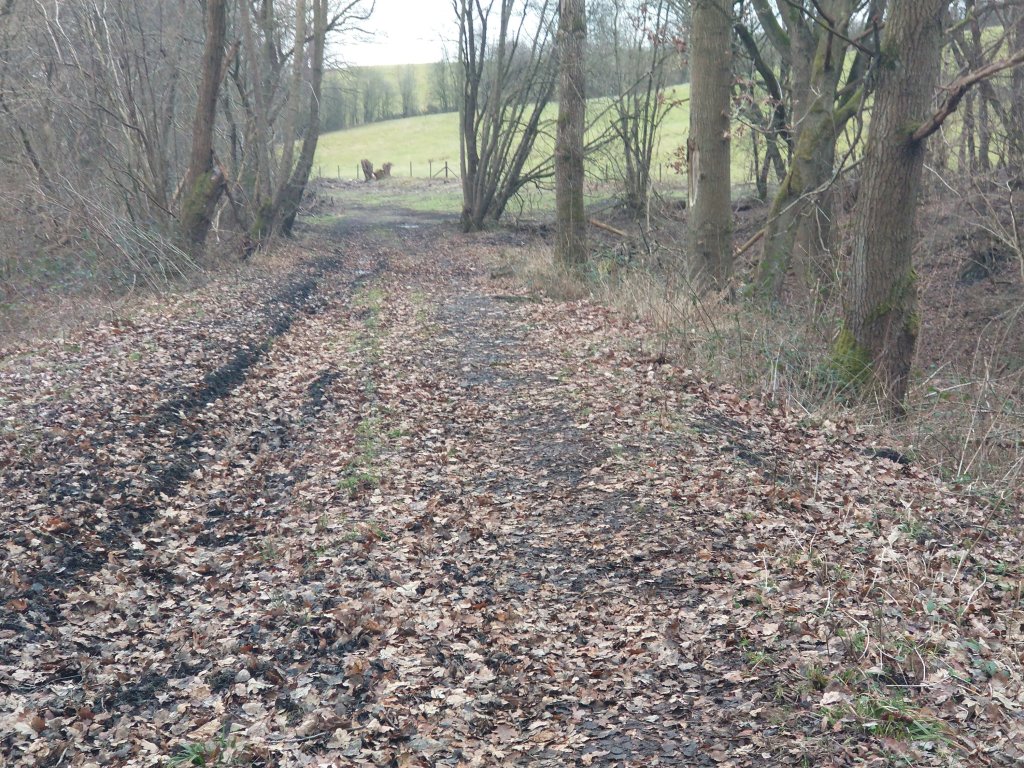
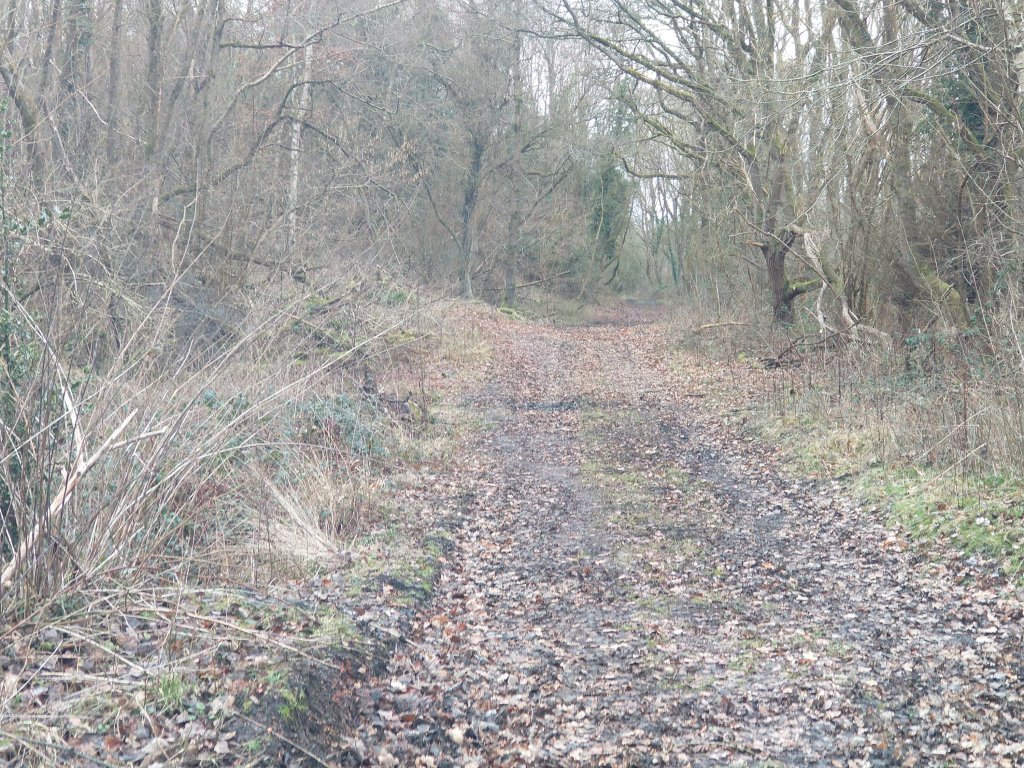
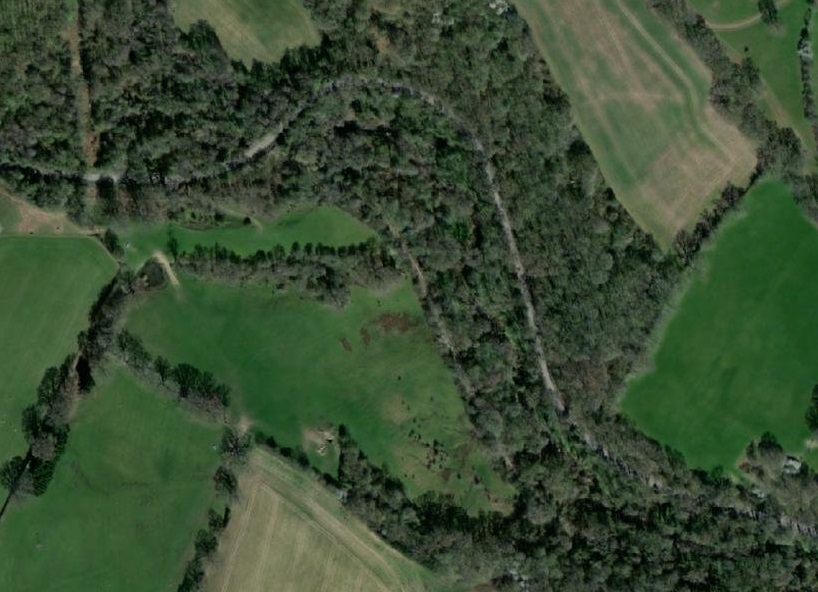
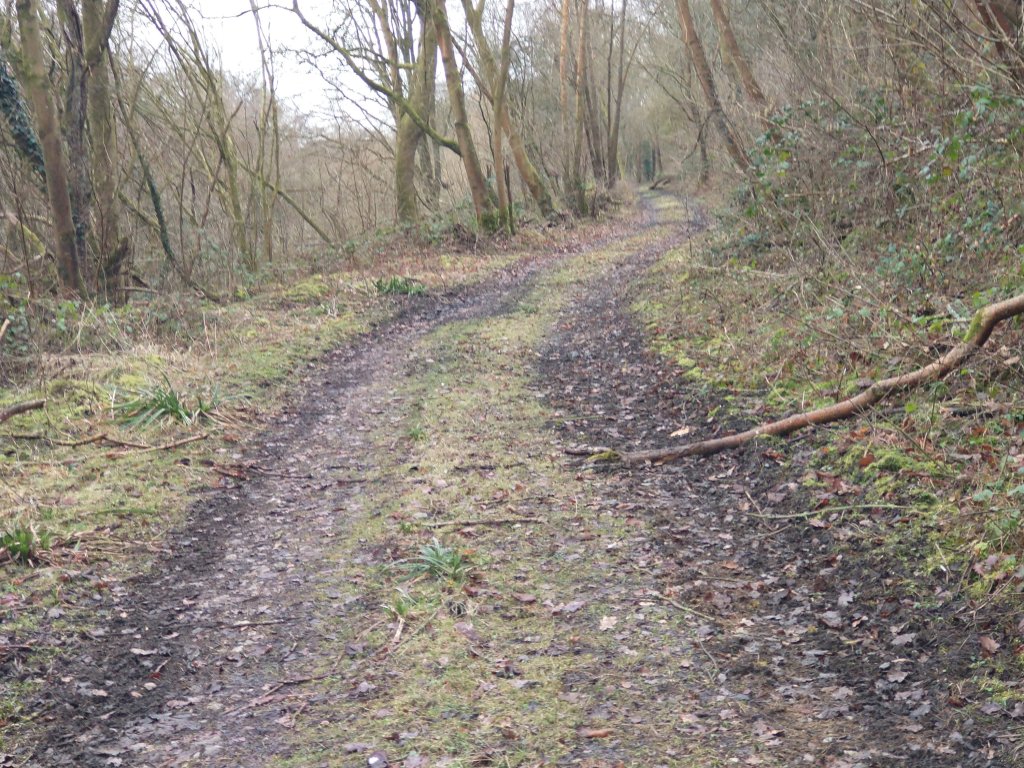
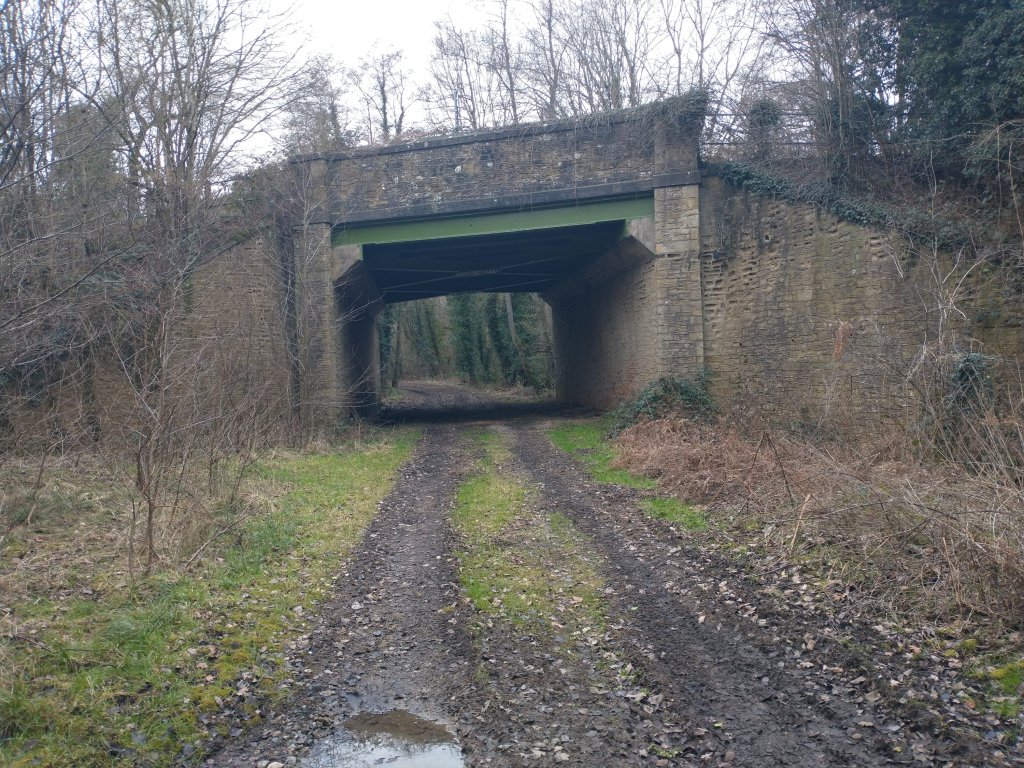
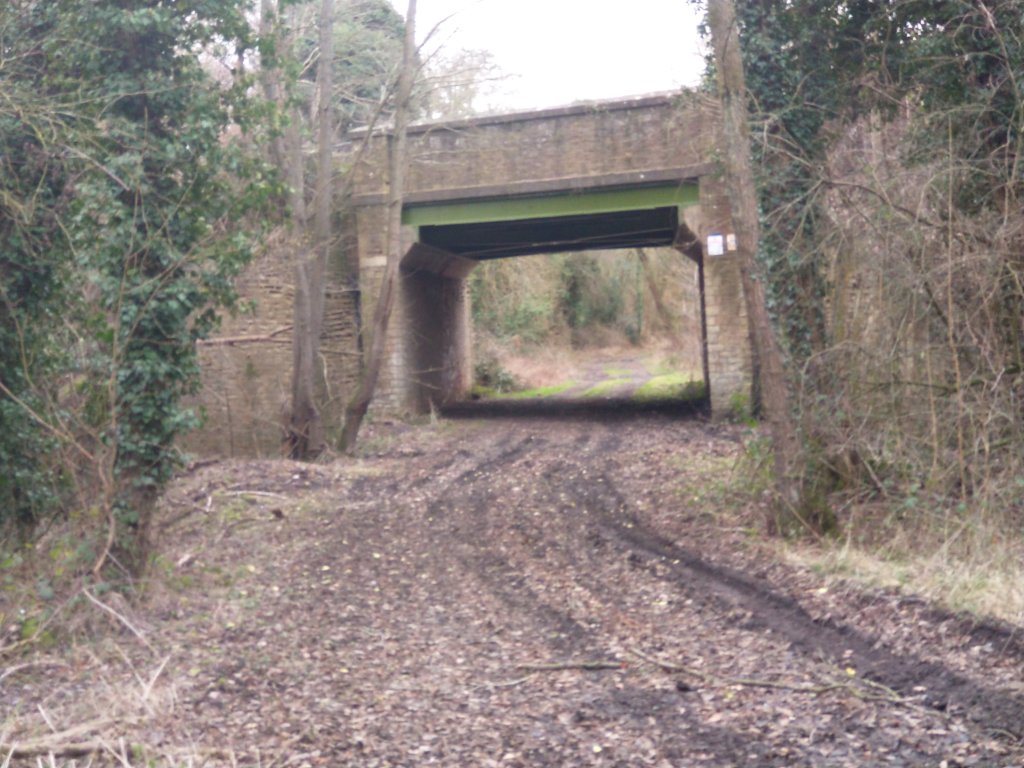
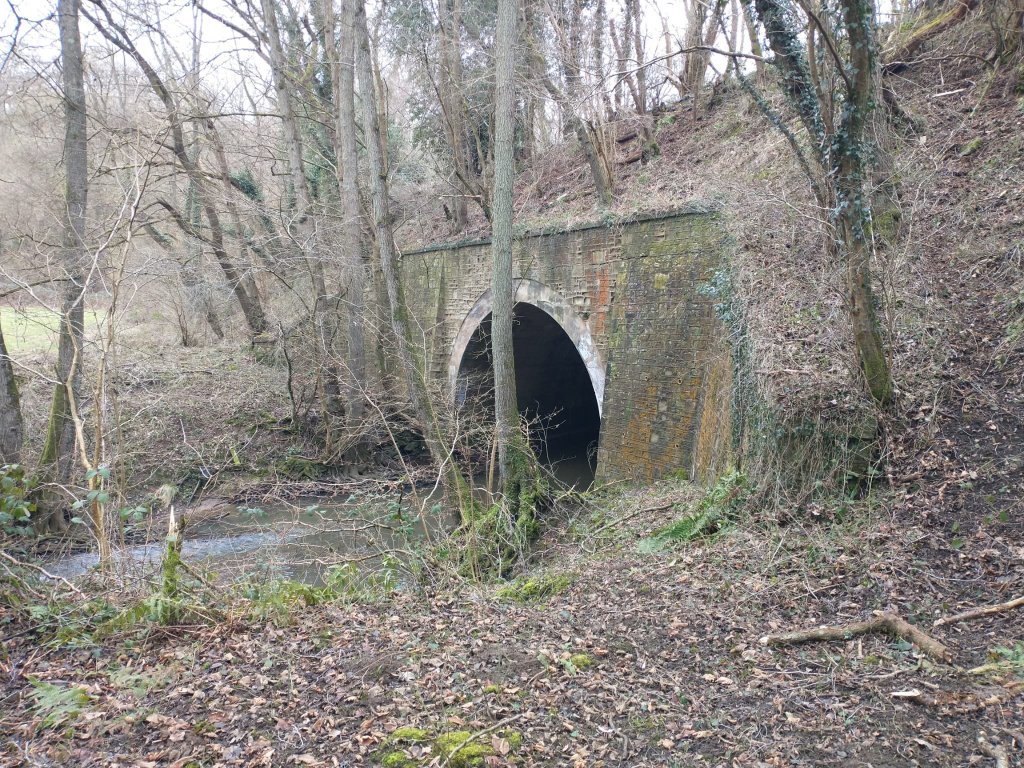
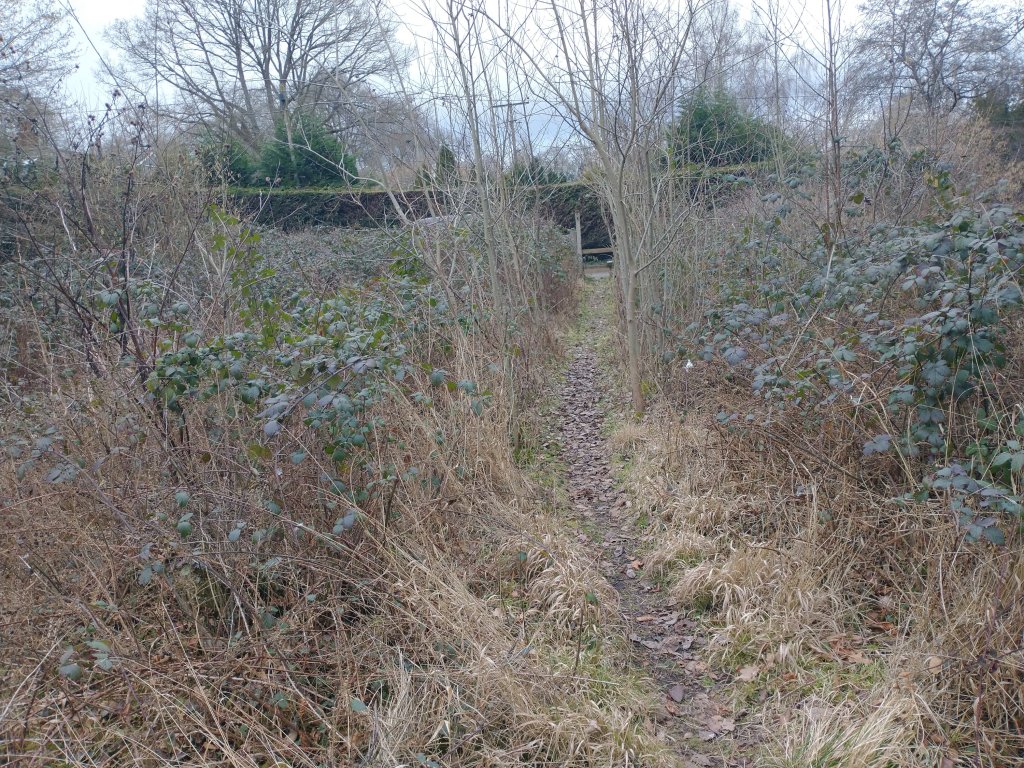
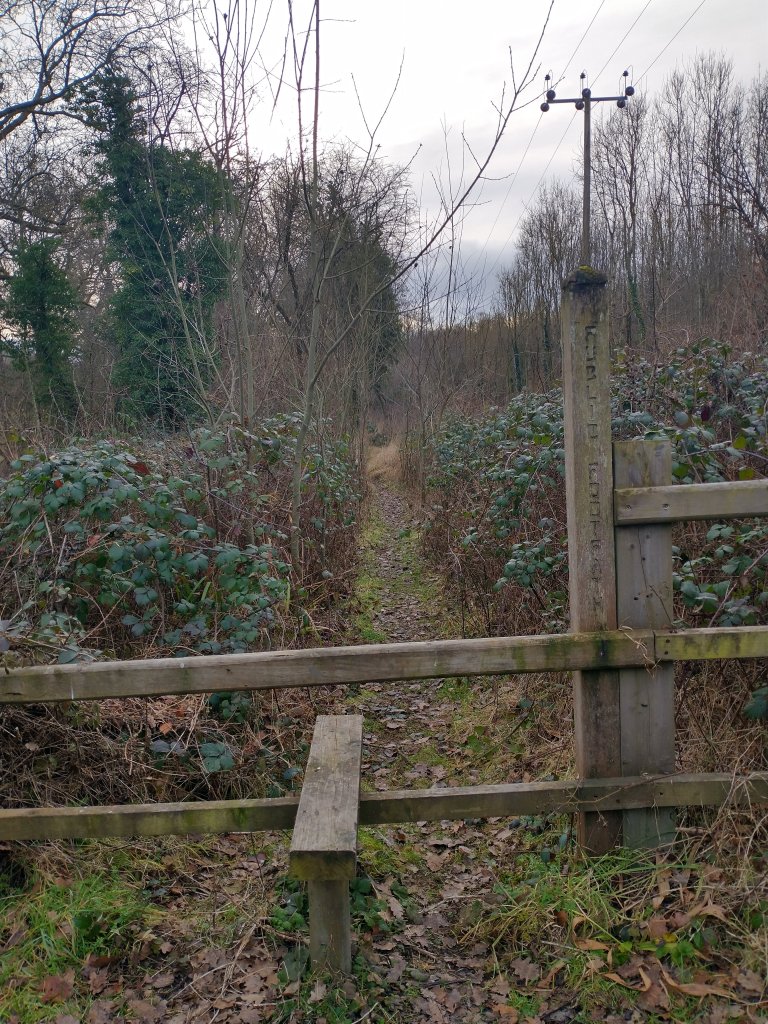
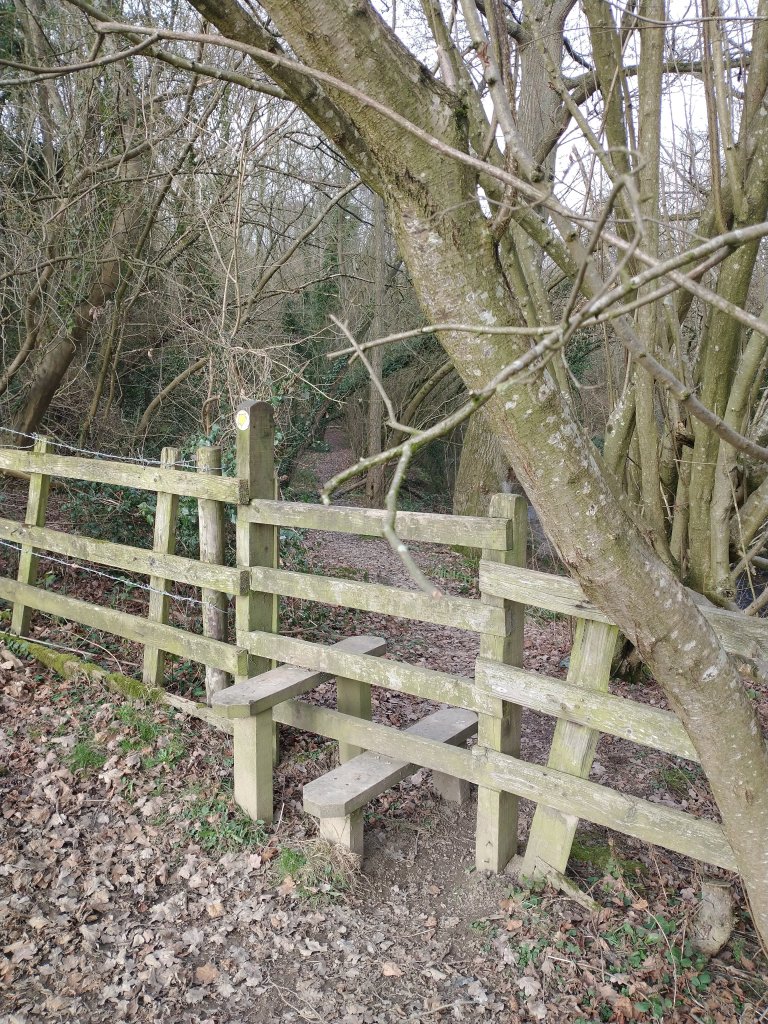
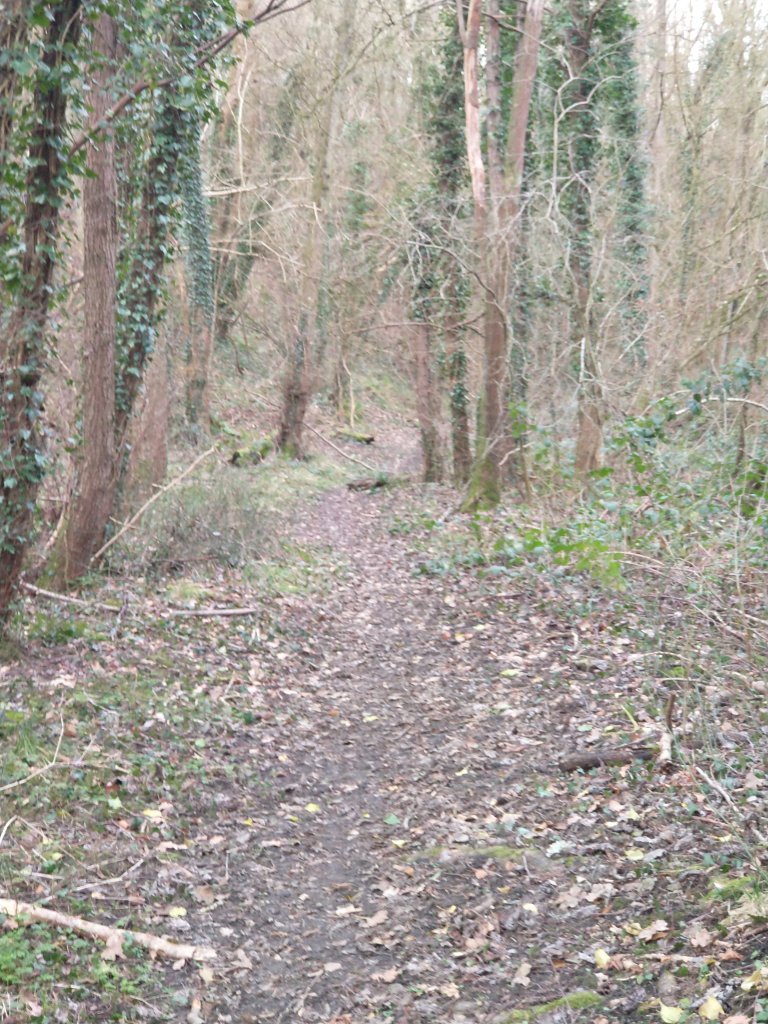
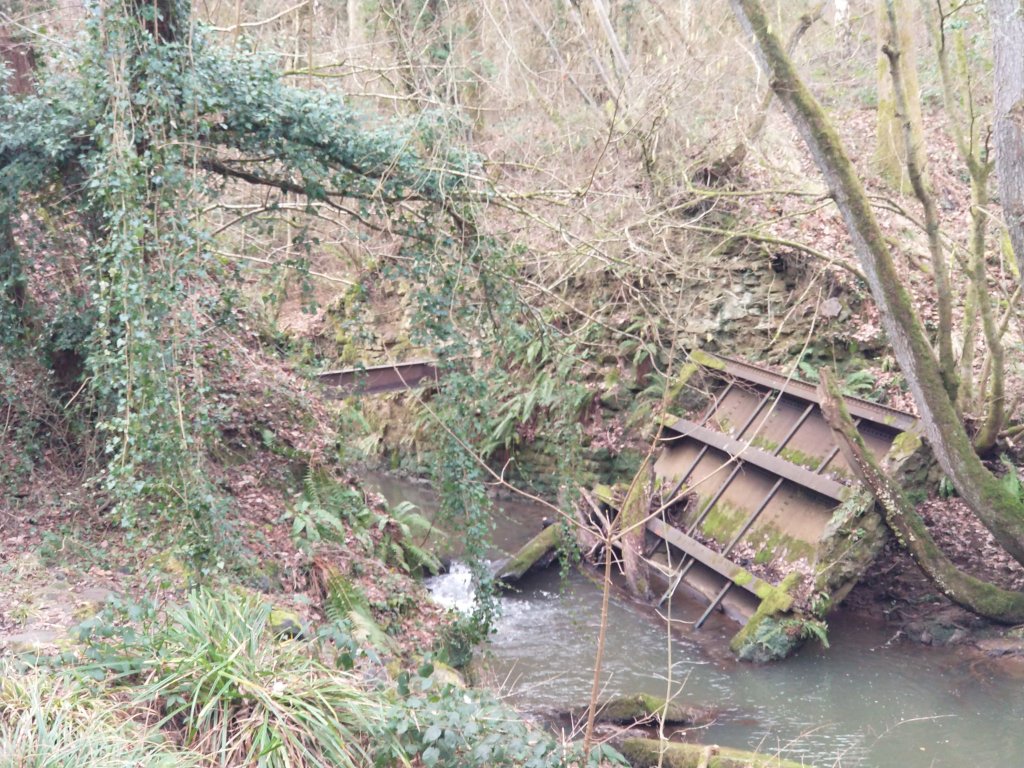
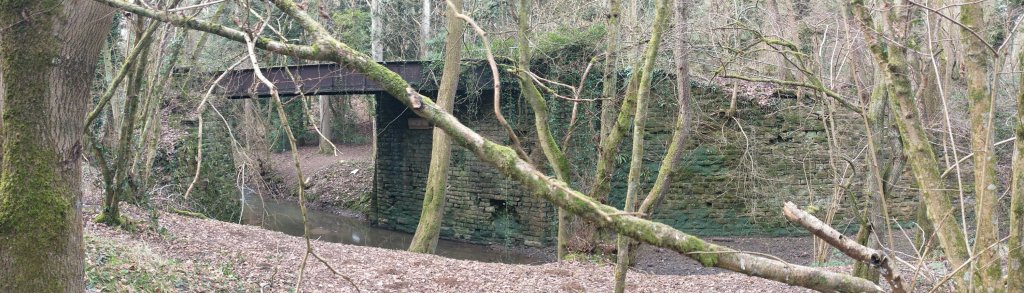
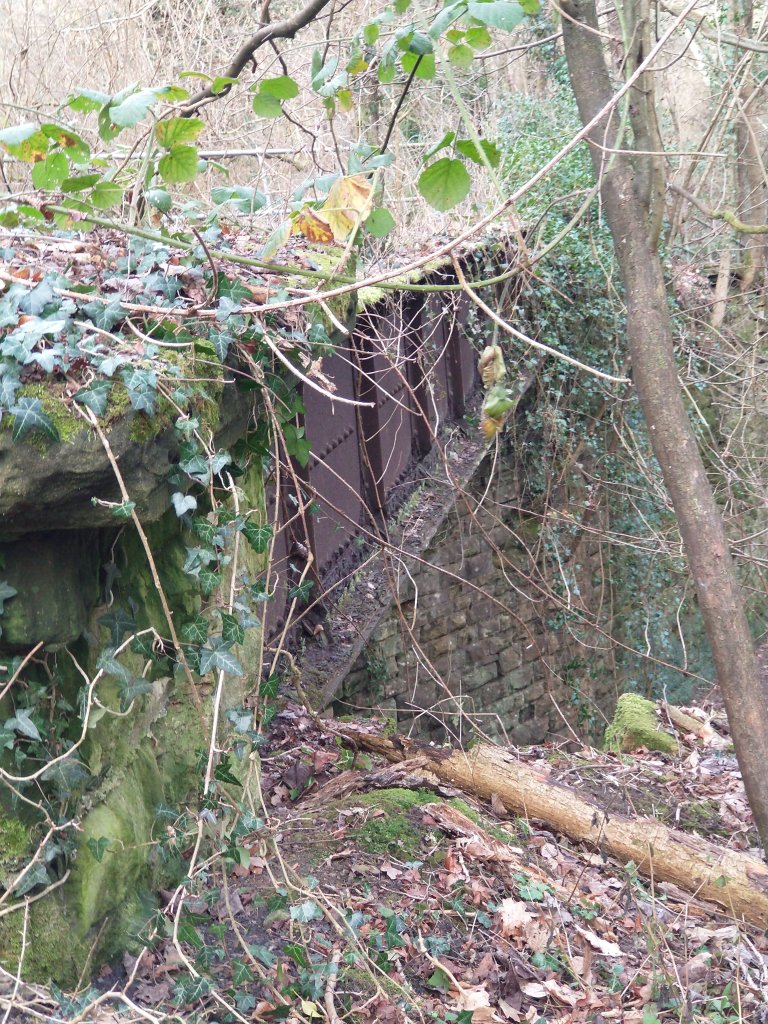
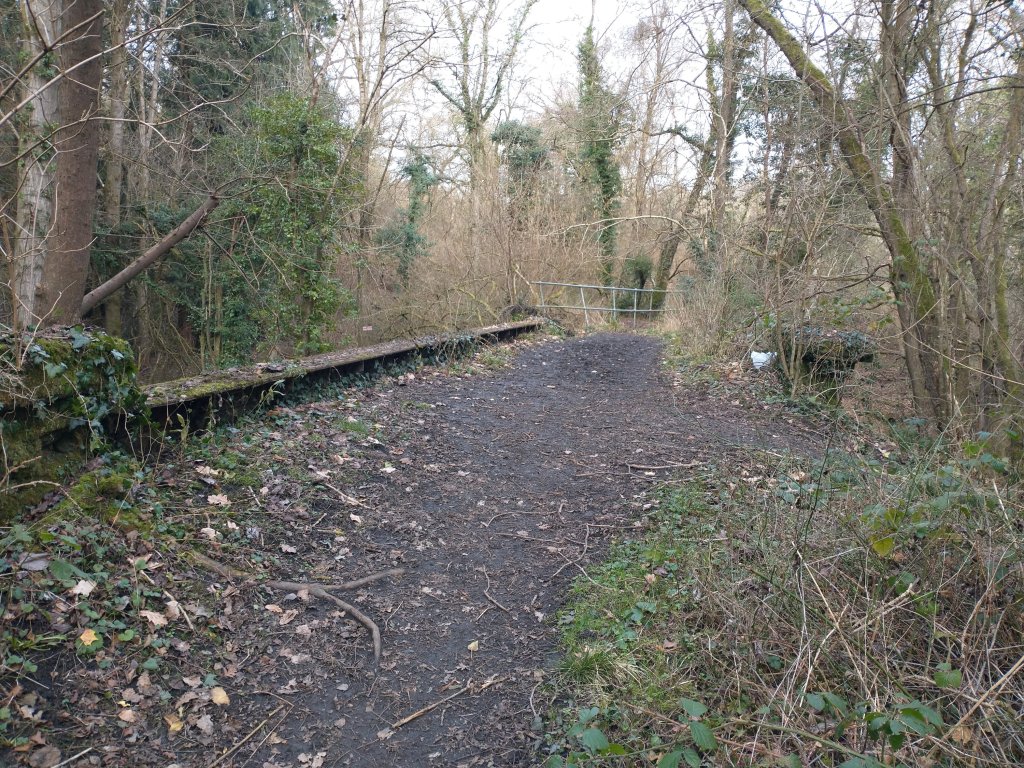
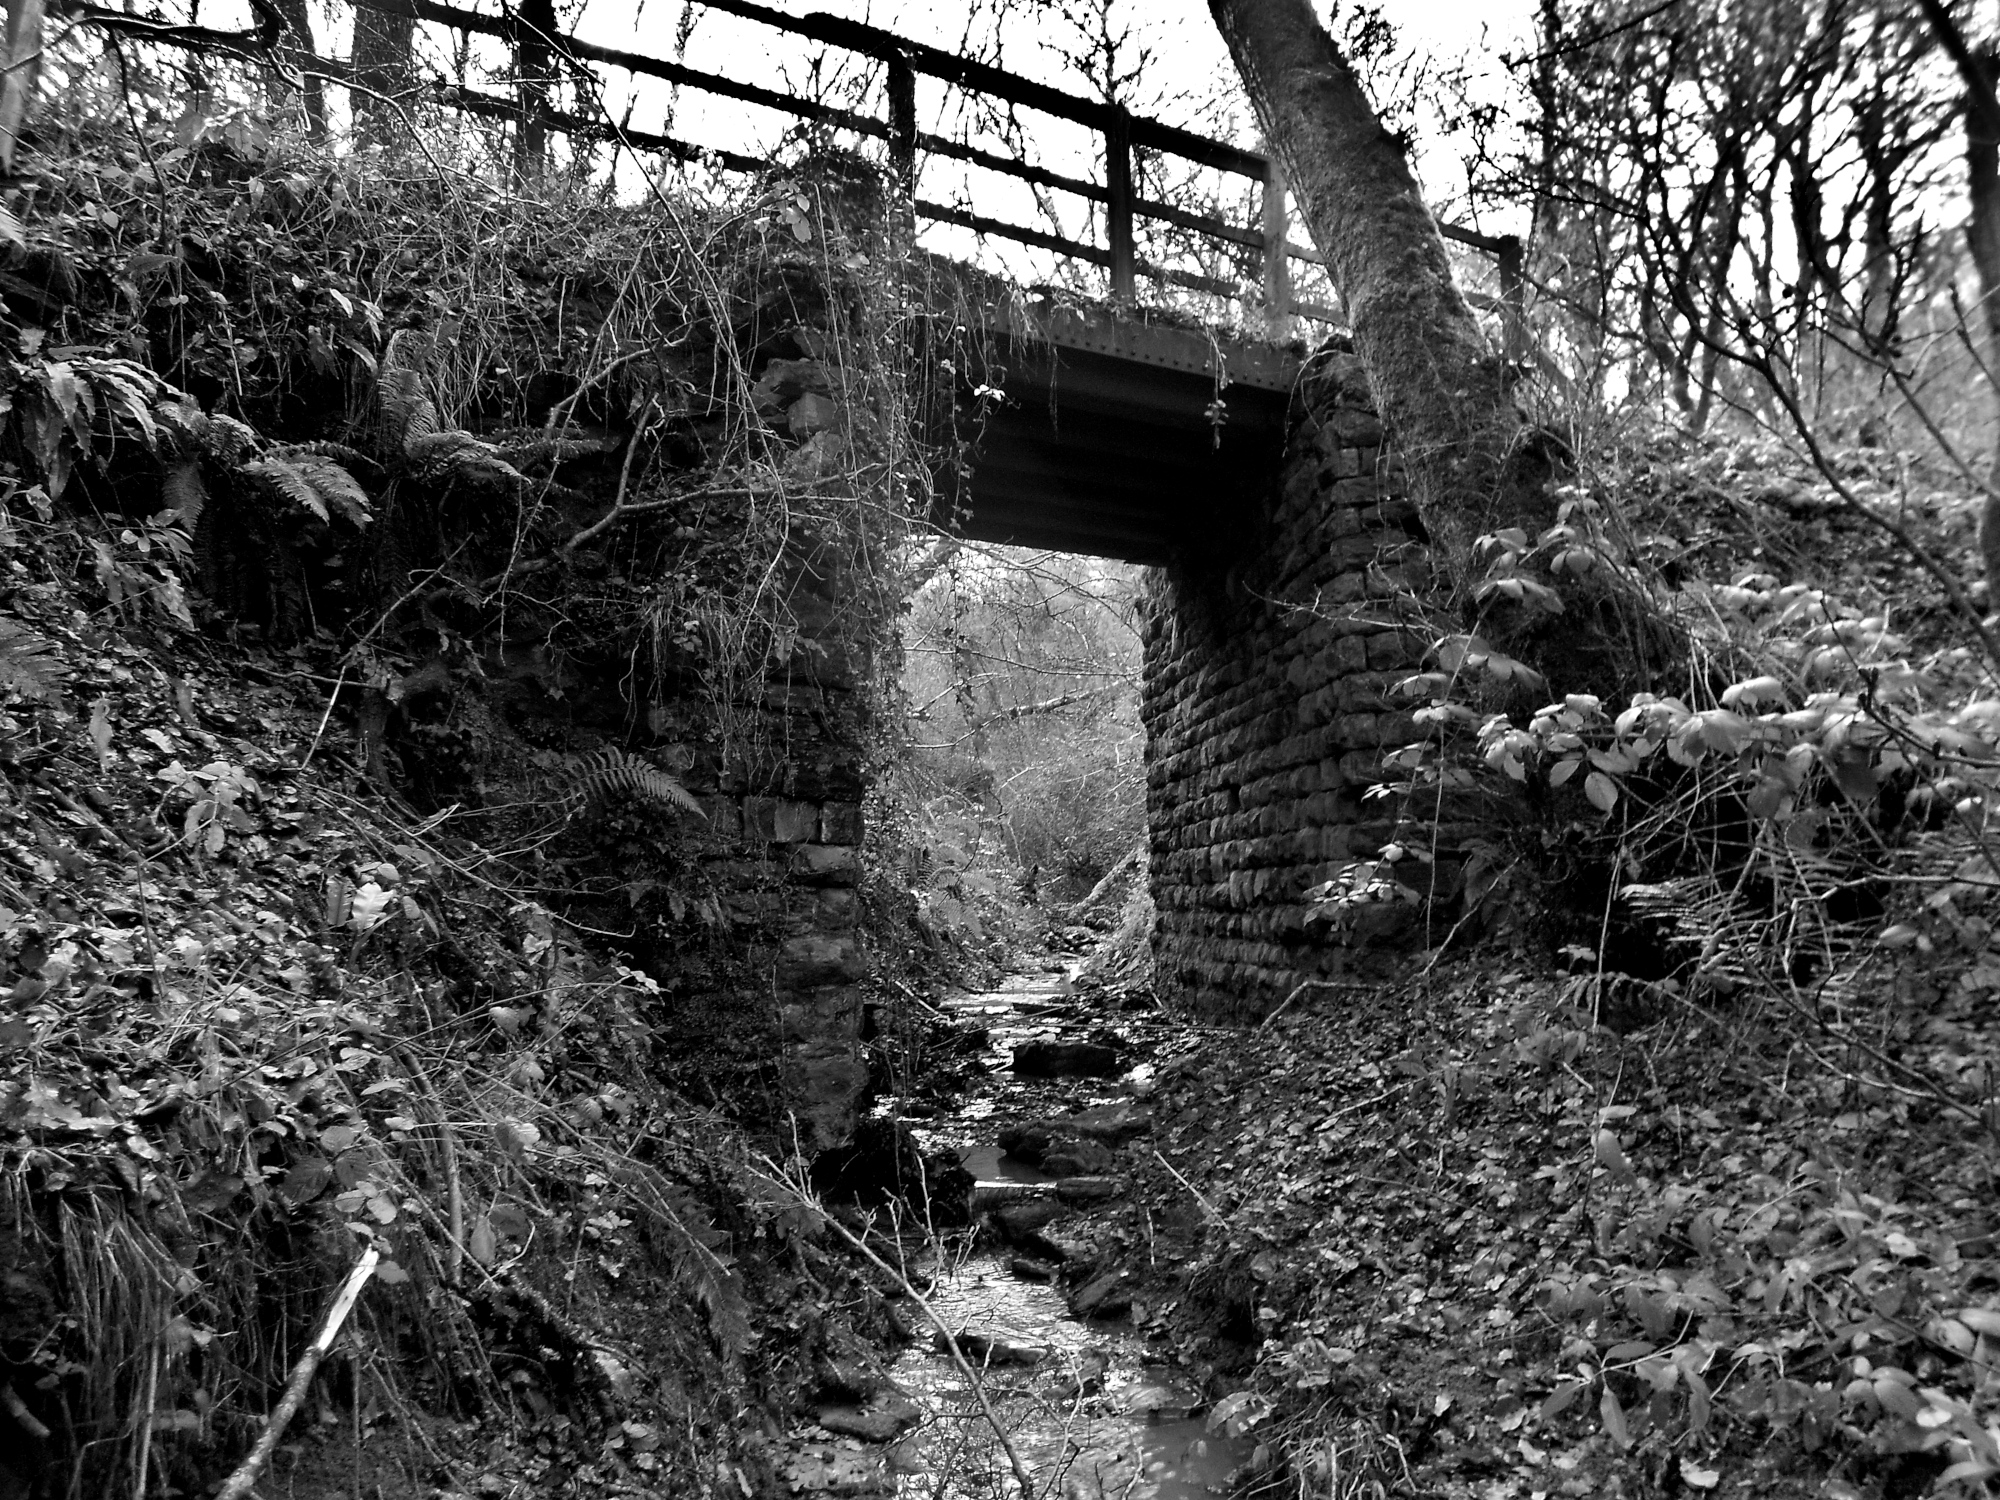
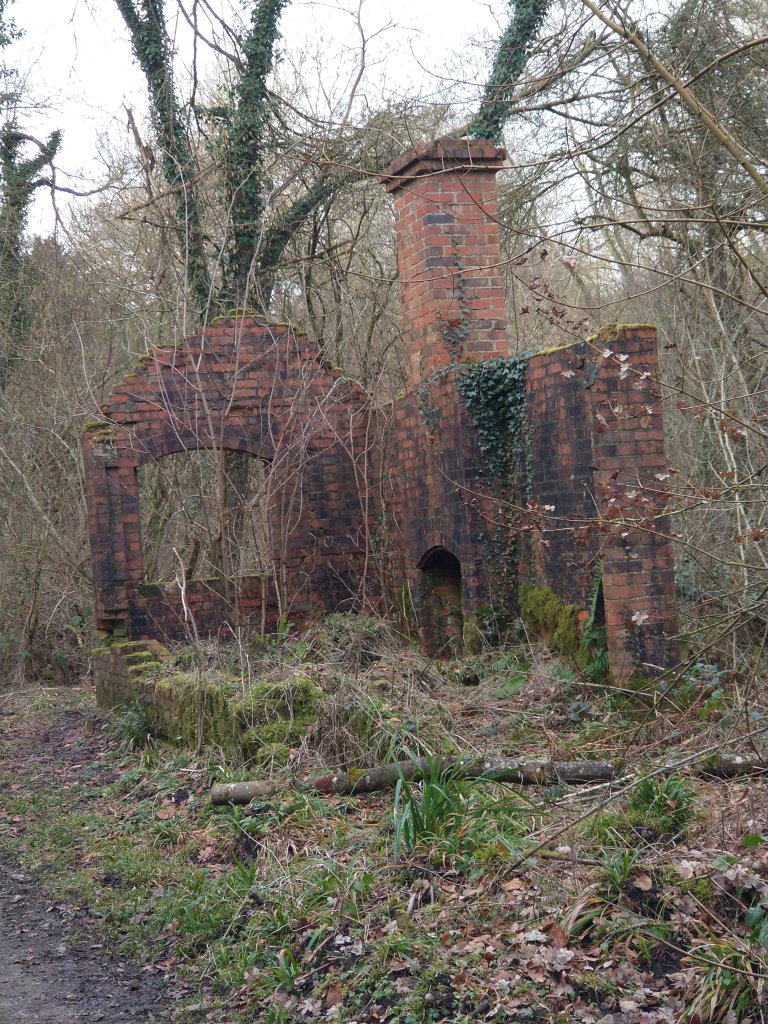
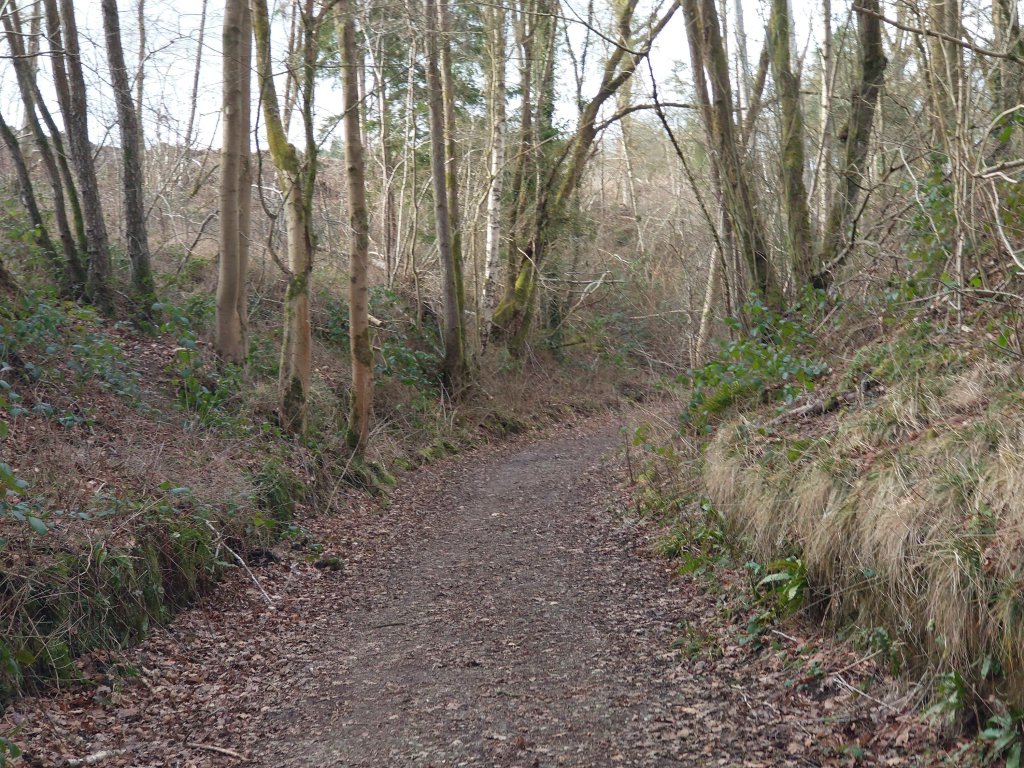
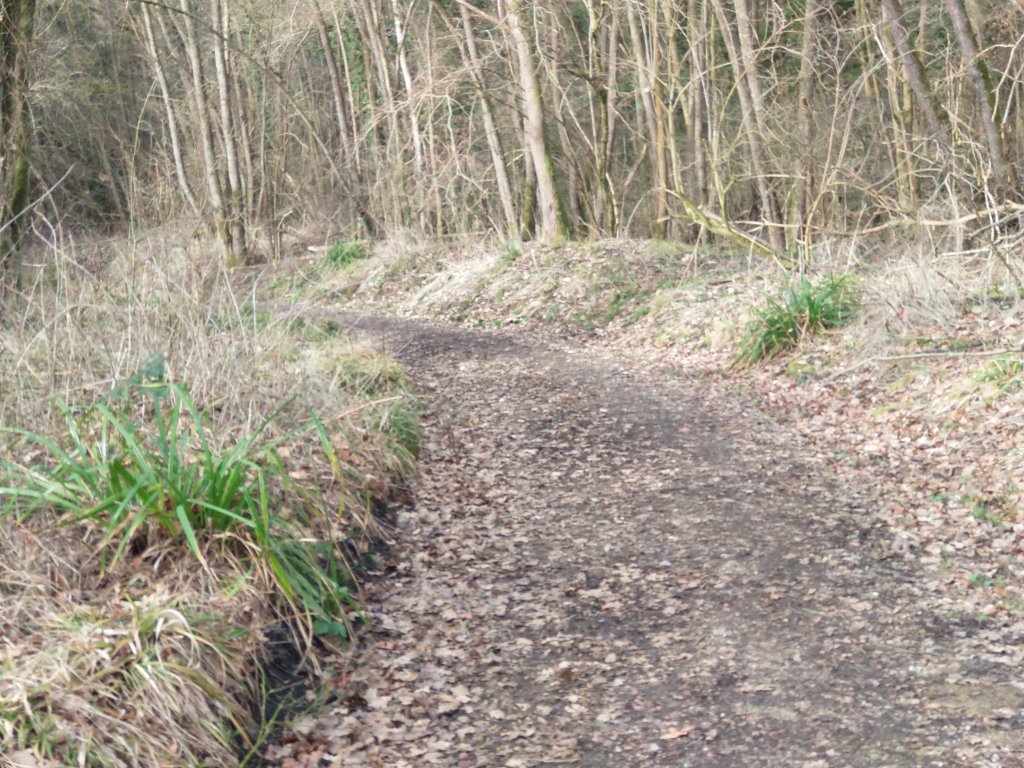
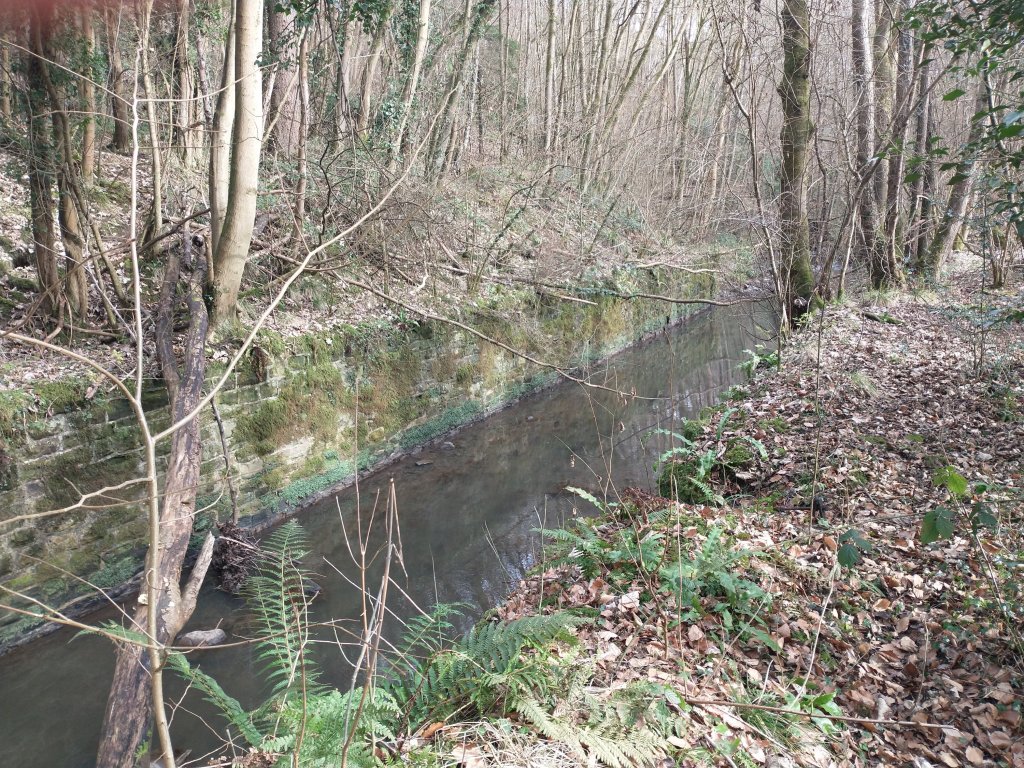
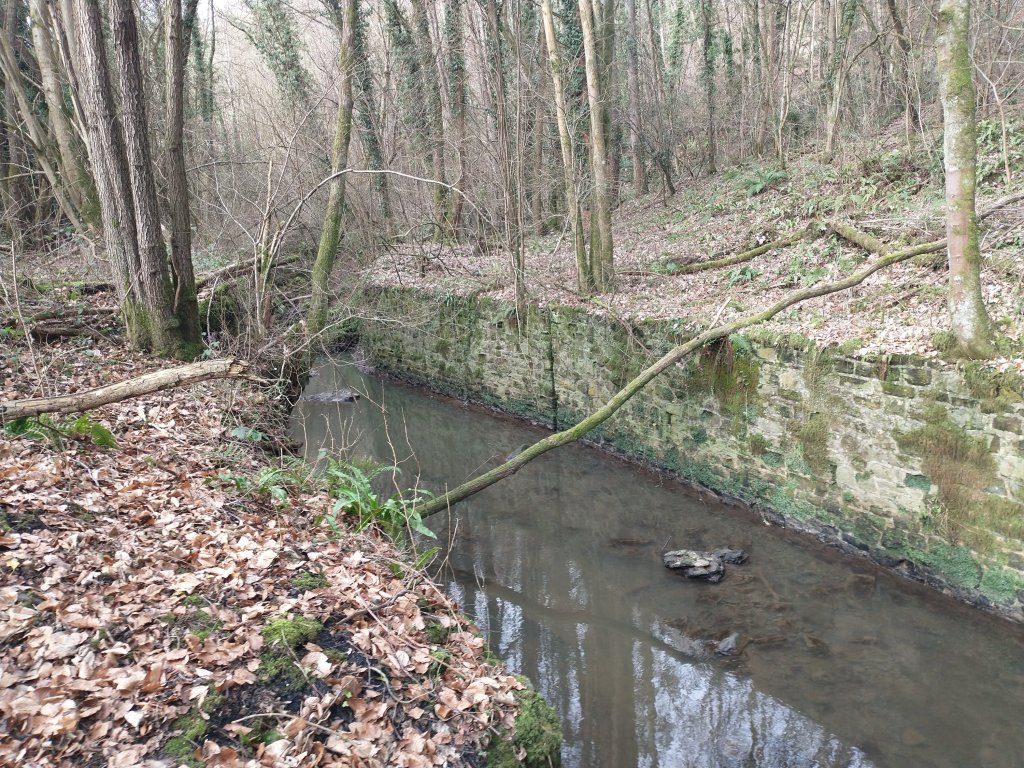
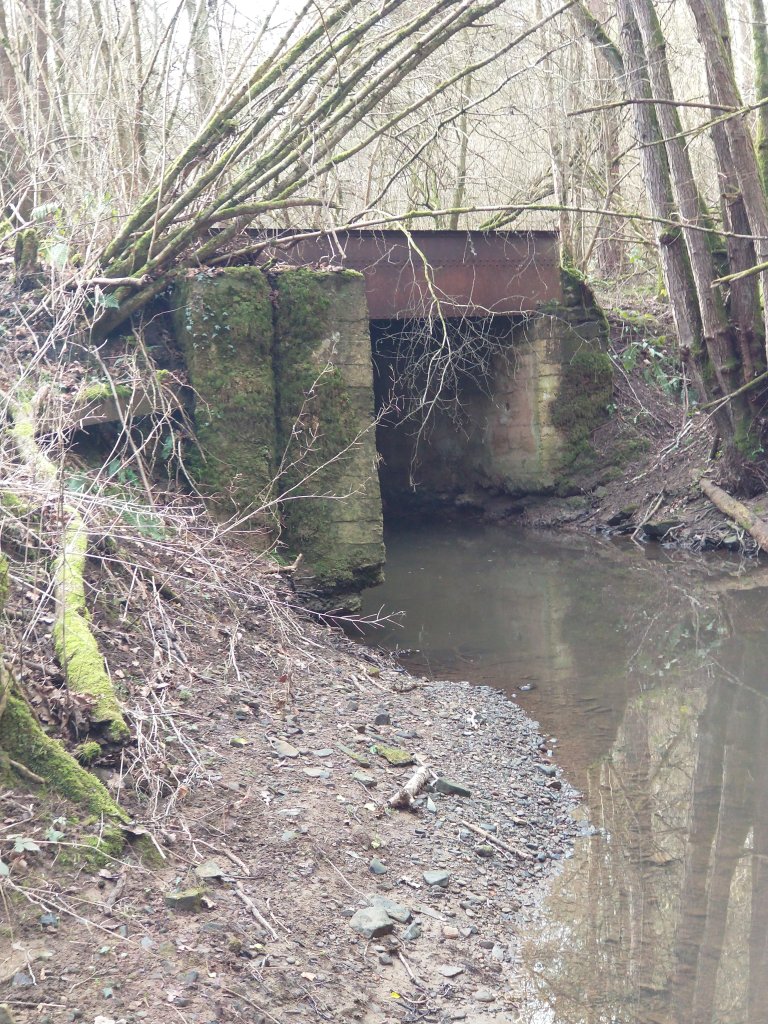
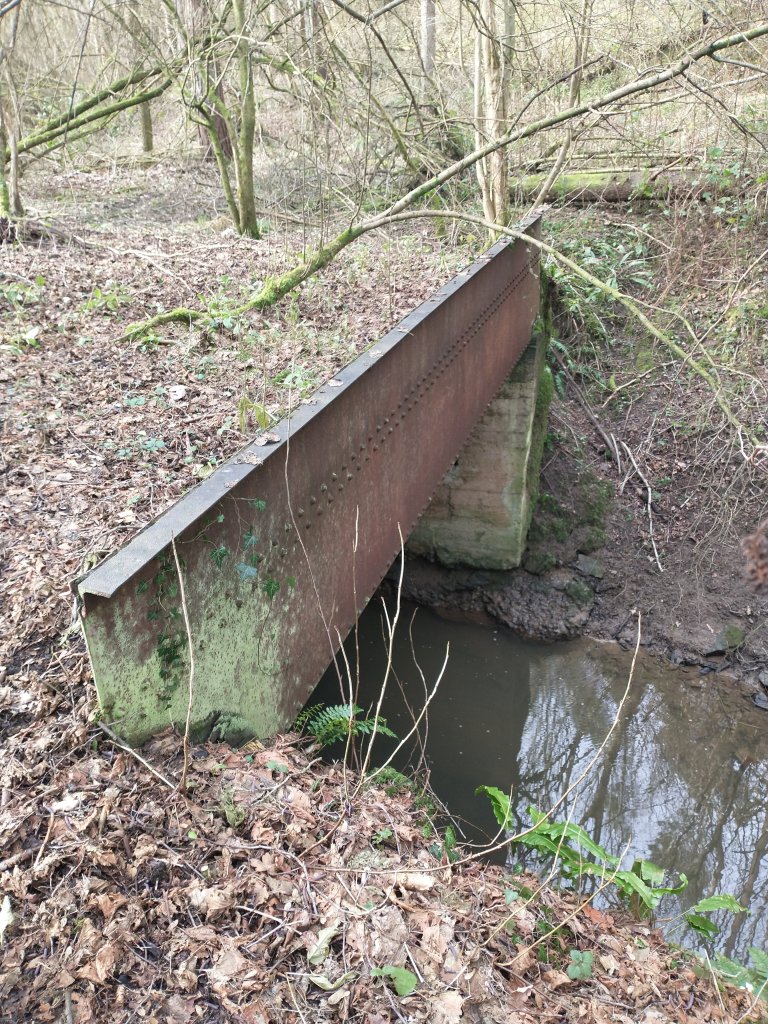
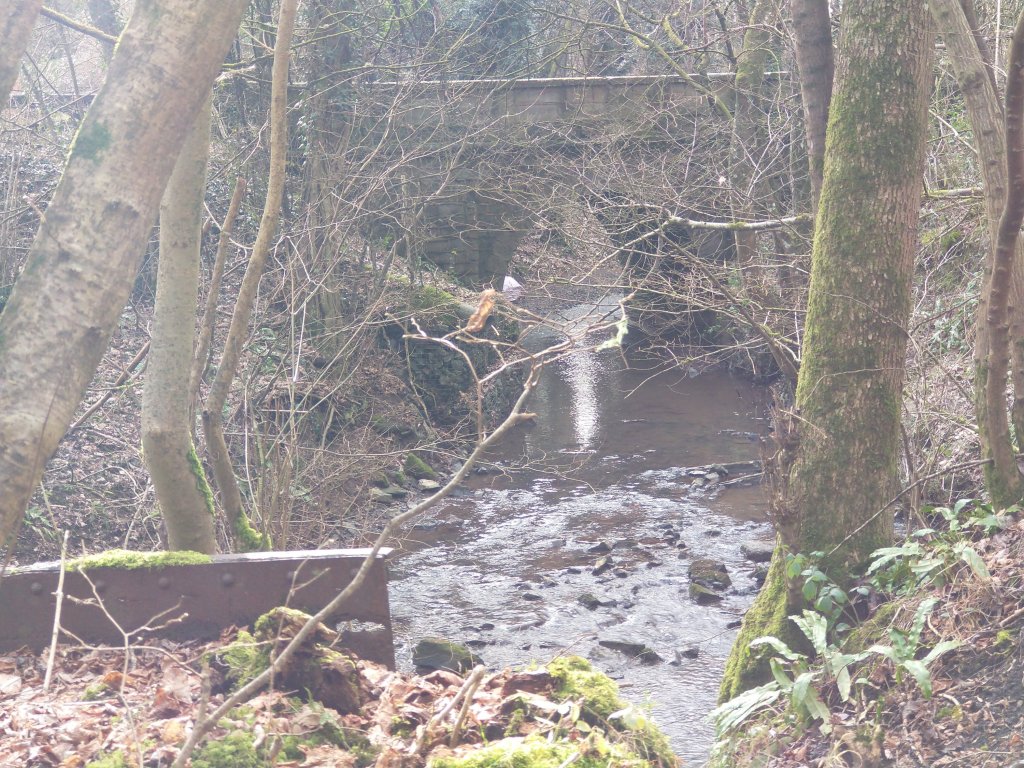
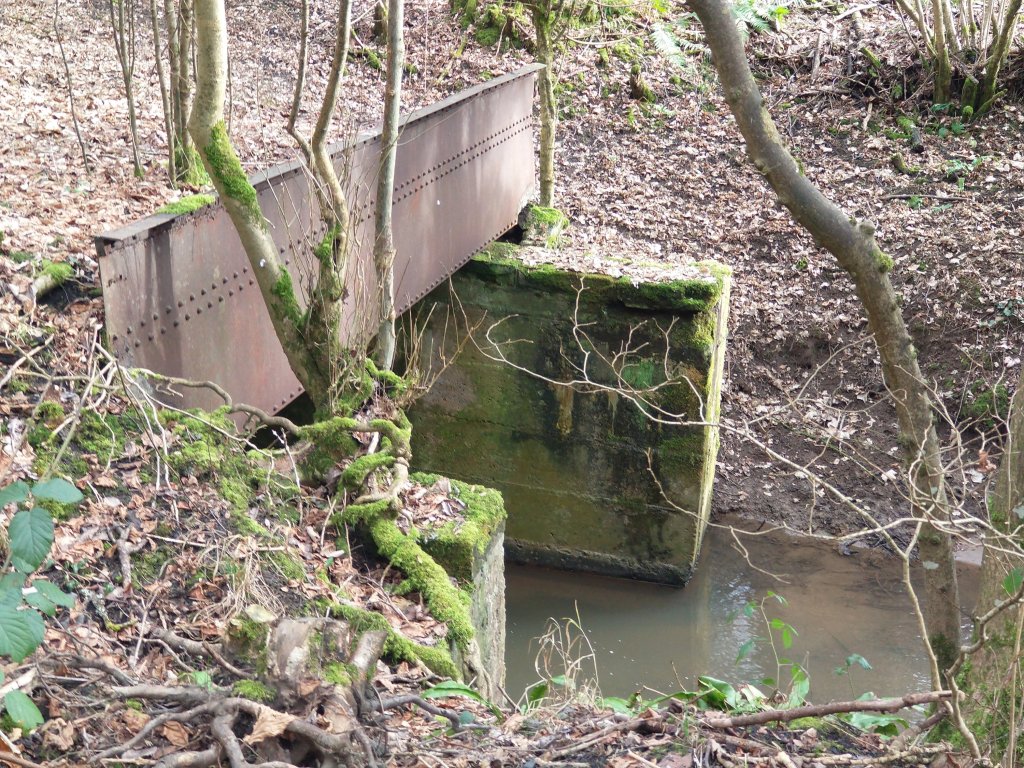
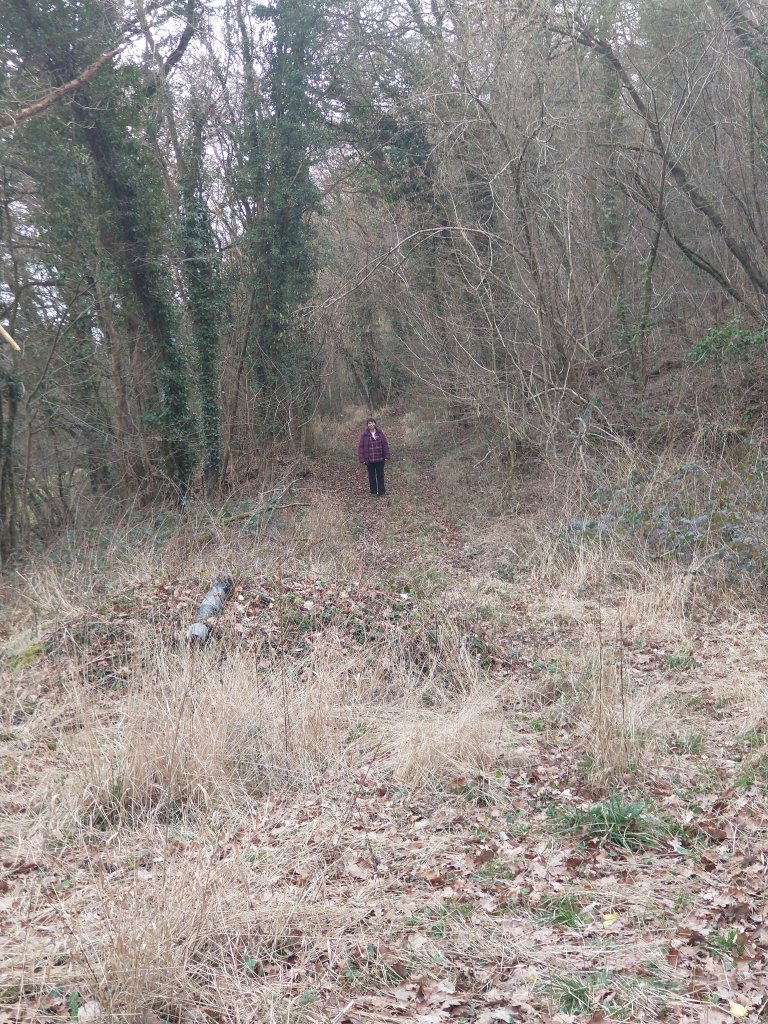
The 25″ OS map extract above shows Kinlet Colliery and its line, the red line imposed on it is the approximate line of the Billingsley Railway. The modern day satellite image shows that the Colliery site and the railway routes are now shrouded in woodland. It is difficult to make out any features. The tributary of Borle Brook which passed under the railway, can just about be made out on the satellite image in the bottom-right. [43]The view East along the line of the old railway from the point where the Billingsley Colliery line and the Kinlet Colliery line diverged. At the time of the photograph, the area had only very recently been cleared of trees and undergrowth. [My photograph, 10th February 2023]The line to Billingsley Colliery is indicated by the red line to the right, that to Kinley Colliery by the red line to the left. The line to Kinlet Colliery climbed steeply from this point. [My photograph, 10th February 2023]A short distance to the West as the Kinlet Colliery line begins its climb to the colliery, it crosses a tributary of Borle Brook. This is the remaining bridge structure (the abutments and pier and a single iron beam (as the picture below shows). This is the structural remains as seen looking South from the formation of the Billingsley Railway. [My Dolton John Smith, 10th February 2023]A closer view of the East abutment and the central pier of the bridge. It seems to have been strengthened by a lower brick arch close to the level of the stream. The remaining bridge beam can be seen in this image. [My photograph, 10th February 2023]Looking back to the East along the line of the Billingsley Railway from a point on the line adjacent to the bridge pictured above. [My photograph, 10th February 2023]
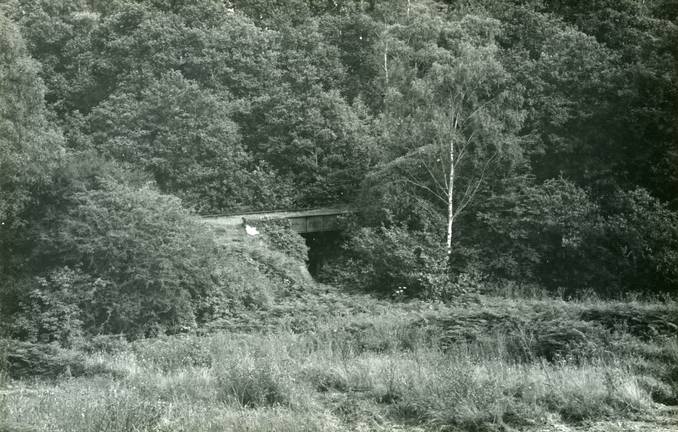
There was a culvert provided for this stream when the Billingsley Railway was built. A photograph of the culvert can be seen by following this link. [59]
Tennent tells us that there was a single siding on the South side of the line before the railway passed under a concrete bridge built for New Road. [1: p9] There is, unsurprisingly, no evidence of the sliding at the location in 2023!
Looking Northwest on the approach to the relatively modern overbridge which carried New Road over the old railway. Borle Brook flows off to the right of the image. [My photograph, 3rd February 2023]Looking back to the Southeast under the road bridge. [My photograph, 3rd February 2023]This photograph shows the culverted Borle Brook as it passes some distance below New Road. The photographer is standing close to the track bed of the old railway on the Northwest side of New Road and looking East, but perhaps 3 metres lower than the line of the Billingsley Railway. [Photograph taken by J.H. Farnworth on 10th February 2023 and included here with kind permission]About a third of the way along the trackbed between the New Road and Borlemill Bridge, looking North. [My photograph, 3rd February 2023]Approaching Borlemill Bank and Borle Mill Bridge along the line of the railway. [My photograph, 3rd February 2023]Looking South along the route of the old railway from Borle Mill Bank. [My photograph, 3rd February 2023]
The railway encountered the old road a few hundreds of yards to the Northwest of New Road. It crossed the road on the level. The old road, Borle Mill Bank, was very steep at either side of Borle Brook’s valley. Tennent says that, “the crossing gates were linked by wires to two semaphore signals at the top of the gradients on each side of the valley. When the gates closed to the road, the signals went to danger and road users stayed at the top of the hill if they had any doubts about the effectiveness of their brakes. Strangely, the signal arms were painted white or grey but not the usual red. They did, however, display the usual red or green lights at night. The west one was level with the top of Borle Mill Cottage garden and the east one was by the bend in the road near the house at the of the hill.” [1: p9]
This next segment of the mapping and satellite imagery shows the railway crossing Borlemill Bank close to Borle Mill and Borlemill Bridge. [45]Looking West-southwest along Borl Mill Bank across Borlemill Bridge towards the location of the Billingsley Colliery Railway Crossing which was just to the West of the Bridge. [Google Streetview]Still looking West-southwest, the red line shows the route of the old railway which is followed by a public footpath. There is a styal for the footpath just this side of the vehicle closest to the camera. [Google Streetview]A gate protects the footpath as it heads North away from Borle Mill Bank on the line of the old railway. [My photograph, 3rd February 2023]
The railway continued North alongside Borle Brook.
North of Borle Mill the line of the old railway crosses what is now open farmland. I have shown the approximate line of the railway on the satellite image as well as the 25″ Ordnance Survey as the route is indistinct. One of the short cuttings is still visible on the satellite image at the third point from the top of the image. [46]The first field boundary along the line of the old railway. [My photograph, 3rd February 2023]The line cut across the fields, alternately running close to the brook and then further away. [My photograph, 3rd February 2023]Borle Brook from the line of the old railway. [My photograph, 3rd February 2023]The line of the old railway follows Borle Brook closely on the way to New England, a small hamlet which was located just off the North West corner of these map and satellite extracts. [47]The styal at the entrance to the woodland shown above. The formation of the old railway runs ahead, now close to the brook. [My photograph, 3rd February 2023]The railway route alongside Borle Brook as it approached New England. [My photograph, 3rd February 2023]
About a mile from Borlemill Bridge, the line crossed a tributary stream and entered a short reversing line. Two bridges crossed the tributary and the ongoing line needed to curve sharply to the South to follow the tributary. The location was known as New England.
An enlarged extract from the 1901 25″ Ordnance Survey which was published in 1902. Note the ford across Borle Brook, the tributary to the South and the row of terraced cottages. This was a reversing point on the line to Prior’s Mill. [48]The area remains deeply wooded. Most of the evidence of the terrace of cottages has gone, the quarry workings and the route of the old railway are completely hidden by vegetation. An archaeological unit undertook a dig at the site and uncovered the remains of one of the end cottages. The remains are still on display. [48]The remains of New England Cottages. the reversing point was a few 10s of metres to the South of the lane at this location. [Google Streetview, August 2021]
“In 1807 two rows of stone cottages were built at right angles to each other. The cottages were occupied by colliers, woodsmen and labourers. There was also a brick washhouse on the site. By 1918 the cottages were empty and demolished. The footprint of one of the cottages can still be seen,” (as shown in the Google Streetview image above). [49]
The ford on New England Lane crossing Borle Brook. [Google Streetview, August 2021]
In addition to the cottages, there is a ford near the location and the remains of Highley’s first sewage works. The ford by which New England Lane crossed Borle Brook can be seen above. The site of the sewage works can be seen immediately below.
Picnic benches sit at what was the site of the Highley Sewage Works! [My photograph, 3rd February 2023]The information board at the picnic site. [My photograph, 3rd February 2023]
Three bridges at this location are shown on the Ordnance Survey below. All are shown with footpaths crossing them. The footpaths over the bridges crossing the tributary are now closed.
A sequence of three photos of the second bridge follows …..
A view from the footpath to the East of the stream, facing Southwest. [My photograph, 3rd February 2023]A view along the Eastern edge-girder of the bridge deck taken from the South. My photograph, 3rd February 2023]A view from the South across the bridge deck. The footpath beyond the bridge, to the North, is barriered-off but it remains possible to walk out over the bridge to look up and down the stream. [My photograph, 3rd February 2023]
After reversing at New England, trains crossed the tributary stream and followed its East bank to Priors Moor. There it terminated at the colliery screens.
The green dotted line on this extract from the OpenStreetMap shows the approximate line of the public footpath which follows the old railway formation. The detail at the confluence of Borle Brook with its tributary stream (top-right) does not quite match the Ordnance Survey extract above. This length of the railway formation now carries part of the Jack Mytton Way. [51]Ths extract from the OpenStreetMap website shows the main areas of interest on this section of the line. [54]After running to the South, the line turned to the West, heading toward Priors Mill. [My photograph, 3rd February 2023]For a time, the footpath along the route was no more than a narrow path, but it widened out to cover the full width of the formation of the old railway. Ahead, the formation crosses the line of a stream on the bridge shown below. [My photograph, 3rd February 2023]A small-span girder bridge which carried the old railway over a minor stream. [My photograph, 3rd February 2023]The same bridge in monochrome, shared on the Highley Forum by ‘badgerbrad’ and included here by kind permission of the photographer. [61]Approaching the Priors Mill site near Ray’s Bridge the line passed over the site weighbridge. This is what remains of the weighbridge office. [My photograph, 3rd February 2023]After the weighbridge, the line curved to the right. [My photograph, 3rd February 2023]The line then curved round to run alongside the screens. [My photograph, 3rd February 2023]
Priors Moor, the terminus of the standard-gauge Billingsley Railway: The railway terminated at the Billingsley Colliery screens at Priors Moor. Tennent tells us that “just before the terminus, a single road engine shed was passed on the right. The colliery was situated some 200 feet above the valley near Billingsley village and was connected to the screens by means of a rope-worked narrow-gauge tramway incline. The screens and railway yard were partly constructed on a girder bridge above the stream and this structure can still be seen from the adjacent road.” [1: p9-10]
We did not see any remnants of the engine shed on our site visit on 3rd February 2023. We found the channelled length of the stream and the culvert which carried the stream under the screens.
The walled channel of the diverted stream. [My photograph, 3rd February 2023]Another view of the walled channel of the diverted stream. [My photograph, 3rd February 2023]The East end of the culvert which supported the screens. The walled channel of the diverted stream. [My photograph, 3rd February 2023]Another view of the East portal of the culvert. [My photograph, 3rd February 2023]A view across the far end of the culvert towards Ray’s Bridge. [My photograph, 3rd February 2023]The West end of the culvert which supported the screens, seen from the North. [My photograph, 3rd February 2023]
The yard was also the terminus of a short-lived aerial ropeway serving a brick works near the Cape of Good Hope Inn. It seems that the brickworks were reopened in 1914. Tennent tells us that this was intended to “provide bricks for miners’ houses at the “New Village” at Highley … [The ropeway had a short working life as, following a dispute with the local council, building work ceased and the ropeway closed just a year after opening. It was not dismantled until 1937-38 when the railway was lifted. … The delivery of bricks was unbelievably complicated – ropeway to Priors Moor, Billingsley Railway to Kinlet Sidings, GWR to Highley Station and steam lorry to the building site. The latter caused complaints as it cut up the roads.” [1: p11]
The AditNow website has a number of photographs of the Priors Moor location, all of these were provided by I.A. Recordings. Rather than showing the images here, links are provided to the most relevant pictures to the Priors Moor site: [52]
Tennent provides an excellent monochrome postcard view of the Priors Moor site [1: p10] which shows that the sidings had four lines. The same image (below) was shared on the Bewdley Past Facebook Group in 2018.
Peckett & Sons Ltd. W4 Class 0-4-0ST (Works No. 599)
This locomotive was built in May 1895 for “Christopher Rowland, a shunting contractor of Swansea Docks: the works photograph shows that it carried “R No. 4” on its tank indicating that it was his fourth locomotive. In August 1891 Rowland was given a contract by the Swans Harbour Trust to load and discharge ballast and cargoes at the docks. … His business continued until his death in 1910 when it is probable that his work was taken over by Powesland and Mason, the main shunting contractors at the docks.” [41: p13]
No. 599 seems to have become surplus to requirements at this time and “was sold to C.D. Phillips, an engine dealer of Newport. … [by] May 1913 … the engine had probably been acquired by the Billingsley Colliery Company. William Foxlee, a director of the Billingsley Colliery Company was also a railway engineer who admired the products of Peckett’s Atlas works; he may have recommended purchase of [No.] 599.” [41: p13]
Several hundred of Peckett’s W4 Class locos were built over a period of 20 years from 1886. “As built, it was of peculiar appearance as it was adapted for extensive street running. … The wheels and coupling rods were hidden behind hinged panels and the exhaust steam from the cylinders was not discharged into the air but was led back by pipes to the tank where it was silently condensed. It is likely that, if these modifications still exited in 1913, they were removed by the Billingsley Colliery Company. The cab had no side panels above waist height as originally built, it is possible that more protection would have been offered to the crew when the engine ran to Billingsley.” [41: p13]
The Highley Mining Company bought Billingsley Colliery in 1915. When Billingsley Colliery closed in 1921. Poyner suggests that they favoured the 0-4-0ST which it seems was more than capable of managing the 1 in 15 incline and was more able to negotiate the sharp curves on the Billingsley Colliery line. It was retained and ‘Kinlet’ was sold.
Kinlet Colliery and Railway
Kinlet Sidings as shown on the 6″ Ordnance Survey as revised in 1925 and published in 1929. The line running to the West at the top of the extract serves the Colliery. The bridge shown at the top of this map extract is the Viaduct over Borle Brook which is illustrated in the section of this article about the Billingsley Railway. There is a signal box shown immediately South of the Viaduct and to the East of the SVR. [30]
“The first siding for the Highley Mining Company’s Kinlet Colliery was sanctioned for use by the Board of Trade on 9 October 1895. It was situated a short distance south of Borle Viaduct, and had a single south-facing connection to the main line. The GWR subsequently entered into a contract for coal from the colliery, and in 1899 the sidings were greatly enlarged and connected to a 320 yard loop off the main line, accessed by a ground frame at each end. The Kinlet Sidings North ground frame was located on the left (west of the line) at 142 miles 9 chains, and Kinlet Sidings South ground frame on the right (east of the line) at 142 miles 3.9 chains.” [58]
When the New Billingsley Colliery Company applied to the GWR for siding accommodation in 1911. This was provided at the point where Kinlet traffic was already dealt with.
“To handle the increased traffic from both collieries, a new signal box was opened in December 1913. Unlike all other signal boxes on the line, it was able to switch out, presumably only being open when required. The Signalling Record Society holds a document (SRS200701006) dated 16/08/1911, which references the new connection to Billingsley Colliery, including the provision of the new signal box. There are records of new tablet machines being provided in Arley and Highley signalboxes, used for long section working (short section working was by staff). The tablet machines on the long section were later replaced by token instruments. The box is recorded by the SRS as having 38 levers, making it one of the largest on the SVR. Of these, 32 were operational and 6 were spare. Presumably the existing ground frames were removed when the signal box was commissioned.” [57][58: p133]
Both of the lines to Billingsley Colliery and Kinlet Colliery “were removed at some time before 1941. The Highley Mining Company established a wagon repair works at the location, so when the signal box was closed in March 1943, it was replaced by two ground frames, once again referred to as Kinlet Sidings North ground frame and Kinlet Sidings South ground frame. These were locked by the electric train token for the Arley-Highley section. There was also an intermediate token machine provided in a cabin in the middle of the loop. Working Time Tables from 1948, 1949 and 1960 refer to these arrangements.” [57][58: p97]
The Kinlet Colliery Railway followed the line of the abortive earlier railway to Billingsley an reuses the groundworks highlighted on the 1883 Ordnance Survey as discussed ib the section about the Billingsley Railway above. This extract is also from the 1925 Survey. [30]Passing to the South of Logmill Cottages the Colliery Light Railway continues westward towards Kinlet Colliery. [30]The site of Kinlet Colliery as shown on the 1925 6″ Ordnance Survey. For some reason there is no record on this map series of the line to Priors Mill which was still in place until the mid- to late-1930s! The colliery incline started to the East of the bridge shown on the right of this map extract. [30] My pictures of this bridge are included in this article in the section about the Billingsley Railway above.
Further pictures of the bridge in the map extract above and of Kinlet Colliery buildings as they were in 2013 can be found by following this link and then scrolling through to the relevant pictures. [60]
In June 1885, agreement was reached with the Kinlet Estate of William Lacon Childe to bore for coal at the site of the proposed colliery. But it was not until 1892 that a shaft reached “the Brooch Seam – a good quality coal seam about 3ft. 9in. thick. Production started in the late 1890s, with the completion of the railway.” [39]
The Aditnow website records that “a large horizontal steam winding engine house was built in 1896, which wound from the Upcast shaft. Steam was provided by 4 Lancashire boilers. A fan house at the rear of the large winder house worked on the Downcast or ‘Back’ shaft – a small horizontal winder also worked this shaft.” [40]
“Screens were erected around the upcast shaft, with coal being loaded into railway wagons and sent down an incline to join the branch line from Billingsley Colliery and eventually the GWR main line of what is now the Severn Valley Railway.” [40] David Poyner notes that the 300-yard length of the colliery line closest to the pit was at a gradient of 1 in 15. [41: p13] He further suggests that the locomotive ‘Kinlet’ (see below) was able to bring empty wagons up the 1 in 15 gradient. [41: p13]
‘Aditnow’ also notes that “there was a brickworks on the West side of the large horizontal winding engine house, with the colliery loco shed at the top of the incline with a spur running round the hillside between the winder and headframe.” [40]
“There were hopes of finding additional seams, but these never materialised. Much of the seam consisted of basalt, which formed a hard rock mass difficult to cut through and destructive of the colliery screens. Conditions did eventually improve to the north of the shafts, but working Kinlet was never easy. Nevertheless it grew from employing about 150 men at the turn of the century to twice that by the start of the First World War with an output of about 50,000 tons a year.” [39]
The colliery closed in 1935 [1: p12] and was subsequently abandoned “in September 1937, when the leases on the Kinlet Estate expired. The mine had proved impossible to mechanise, and there were continued problems with basalt having burnt out the coal; ironically, at the time of closure, the workings entered some of the best ground ever encountered at the mine.” [39]
Steam at Kinlet
‘Kinlet’ – Andrew Barclay 0-6-0ST (Works No. 782)
Andrew Barclay 0-6-0ST (Works No. 782) ‘Kinlet’ (1896) at Blists Hill, Ironbridge Gorge Museum in 2009, (c) Copyright Gillett’s Crossing, authorised for use here under a Creative commons Licence (CC BY 2.0) [56]
Andrew Barclay built a locomotive in 1896 which was supplied to Kinlet Colliery and named ‘Kinlet’ it was an 0-6-0ST loco (Works No. 782). In the 21st century, it is held undercover at Blists Hill.
“The locomotive was sold to H S Pitt & Co at Pensnett near Dudley and moved there in 1938 to work at the coal depot. It worked there until around 1966 when it was replaced by a Rushton diesel. Whilst at Pesnett the locomotive carried the name Peter.” [39]
Tennent is less sure about the date when the locomotive moved to H S Pitt and Co. suggesting that the date might have been earlier since he records the purchase of a replacement engine in 1929. [1: p13]
Poyner suggests that the date of sale was probably the end of December 2021. [41: p14]
Peckett & Sons Ltd. W4 Class 0-4-0ST (Works No. 599)
This locomotive (see the details provided above under the heading ‘Steam on the Billingsley Railway’) was inherited by the Highley Mining Company when they took over the Billingsley Colliery in 1915. It worked alongside ‘Kinlet’ until ‘Kinlet’ was sold and No. 599 then continued working for the Company until 1929 when a Hawthorn Leslie 0-4-0ST was purchased.
Hawthorn Leslie 0-4-0ST (Works No. 3424)
It seems that No. 599 was replaced by this locomotive which probably remained in service until the closure of the colliery. This loco was built in 1919 and “obtained,” says Tennent, “from Thos W. Ward in 1929. Later, this locomotive went to the Steel Company of Scotland via Thos W. Ward. Possibly it was about when the colliery closed but another engine was acquired from Ward’s Charlton Works at Sheffield in 1937.” [1: p13]
The history of the locomotive is interesting. I was sent new “to India, to work on a railway system belonging to the City of Bombay Improvement Trust. When this was wound up it was returned to the UK probably being purchased by Wards for resale. … it had very similar specifications to the Peckett. The probability is that by 1929, the Peckett was considered to be at the end of its working life: its fate is not known but it may have been scrapped after over 15 years service at Billingsley and Kinlet. An added consideration is that from 1929-30 the Billingsley railway saw extra traffic connected with the construction of a new road following the valley of the Borle Brook by Shropshire County Council. It may be that [No.] 3424 was purchased with one eye on these extra duties. It probably had a short tenure at Kinlet. For, in 1933, Ward supplied another engine to the Highley Mining Company.” [41: p14]
Hudswell Clarke 0-4-0ST (Works No. 1401)
This locomotive was built in 1920 and worked at first for the Darton Main Colliery Company in Yorkshire It was purchased by the colliery from Thos W. Ward. Tennet indicates that this purchase took place in 1937. Tennent suggests that it may have been required for the clearance of the railway and colliery “because it left in 1941 for W. Gilbertson & Co Ltd, Pontardawe in Glamorganshire.” [1: p13] Poyner’s view, above, is that this locomotive replaced No. 3424 as early as 1933. [41: p14] He goes on to suggest that No.1401 may well have left Kinlett in 1937, rather than 1941. Poyner provides details of a further locomotive which saw employment with the Highley Mining Company at Kinlet.
Andrew Barclay 0-6-0ST (Works No. 1113)
This locomotive was built in 1907 for the Shelton Iron and Steel Company in Stoke and named ‘Bowood’. Poyner says that “the existence of this locomotive at Kinlet is known only from a photograph, showing the engine with a footplate crew of Highley Mining Company staff, and the associated oral evidence.” [41: p14]
Poyner goes on to explain that ‘Bowood’ must have arrived at Kinlet after May 1936, as it was photographed at the previous owners premises on 16th May 1936. [41: p14][42] He goes on to relate how the locomotive arrived at Kinlet: “The Shelton Iron and Steel Company operated the nearby Holditch Colliery via a subsidiary. In July 1937, this was put out of use by an explosion. This may have resulted in the steel company having surplus locomotives at exactly the time the Highley Mining Company was looking for a new engine to work their salvage trains. The board of the Highley Mining Company was mostly made up of individuals from north Staffordshire, and so they may have had links with the Shelton company, making it easy for them to either purchase or, more likely, hire the engine, Bowood was substantially more powerful than any machine that had previously worked at Kinlet. … It is possible it was obtained specifically to work heavier than usual trains to help the dismantling work. This stretched well into 1938; hard core was used from Kinlet pit mound for earthworks at the new screens being built for Alveley Colliery. It is not known what happened to 1401 after Bowood arrived: it may have been left straight away although it is possible that it was retained to work alongside Bowood to help with salvage. perhaps allowing recovery work to take place simultaneously on both the Kinlet and Billingsley lines. In 1938 Bowood returned to North Staffordshire, arriving at the Florence Colliery of the Florence Coal & Iron Co Ltd. a subsidiary of the Shelton company. It eventually [was] transferred to Holditch Colliery in March 1960 by the National Coal Board, where it was scrapped in 1964.” [41: p14-15]
The Later Years of Highley Mining Company
In the late 1920s, the Highley Mining Co was looking for new reserves of coal in the area. It established that the coal beyond the River Severn at Alveley was of good quality. A single shaft was (11) sunk there in 1935 but the Highley Colliery shafts were retained for ventilation and emergency access because there was good underground communication between the two pits. Alveley Colliery involved the use of modern equipment with coal cutters, electricity and underground conveyors progressively replacing pit ponies. It was connected to a new set of screens next to the Severn Valley Railway by an endless cable-worked narrow gauge tramway which crossed the river on a concrete bridge. The tramway was replaced later by an aerial ropeway. All coal and men haulage transferred to Alveley in 1940 marking the end of Highley Colliery.
Kinlet Colliery had closed in 1935 and been abandoned in September 1937 when the lease on the estate had expired. It had proved difficult to modernise the colliery and there were geological problems. The railway was lifted about 1940 and it had all gone by July 1941.
Kinlet Sidings had consisted of three parallel loops to the west of the Severn Valley Railway line just south of the bridge over the Borle Brook. A signal box was provided on the east side of the layout and the Kinlet and Billingsley railways had separate exits at the north end of the yard. Each exit was provided with a gate. The lines then ran parallel to each other along the valley of the Borle Brook. Both became double on leaving the yard but soon singled again. There was latterly one, possibly two, connections between the lines hereabouts and a weighbridge on the Kinlet track. The Kinlet railway soon began to climb the south side of the valley, while the Billingsley railway remained on the valley floor alongside the brook. The One Inch Ordnance Survey map of the period mistakenly shows only one line here. The Billingsley Railway suffers the indignity of not appearing on large scale maps as it came and went between two surveys; the One Inch detail being taken from a corrected earlier large scale sheet, now destroyed. The Kinlet Railway soon reached Kinlet Colliery perched high on the valley side and terminated at a single-road engine shed, the various sidings trailing back from a point just short of the shed.
As to the locomotives used on the Kinlet line, the Highley Mining Co purchased the new Andrew Barclay six-coupled saddle tank number 782 in 1896 presumably for the opening of the colliery. It had the following inscription painted on its tank – HIGHLEY MINING CO LD “KINLET”. The apostrophes appear to indicate that it was named KINLET and that the word was not just part of the address. It was sold to Guy Pitt & Co Ltd of Shutt End, Staffordshire at some date, being noted there by November 1946. Named PETER, it remained at Shutt End for the rest of its working life before being transferred to the Ironbridge Gorge Museum for preservation. It was replaced at Kinlet by Hawthorn Leslie 0-4-0 saddle tank, maker’s number 3424 of 1919, obtained from Thos W. Ward in 1929. Later, this locomotive went to the Steel Company of Scotland via Thos W. Ward. Possibly it was about when the colliery closed but another engine was acquired from Ward’s Charlton Works at Sheffield in 1937. This was a four-coupled saddle tank, Hudswell Clarke 1401 of 1920; it may have been needed for the site clearance because it left in 1941 for W. Gilbertson & Co Ltd, Pontardawe in Glamorganshire.
The loss of Highley and Kinlet Collieries was not felt by the mining company as, by 1945, Alveley was producing almost 250,000 tons of coal, more than the output of the earlier two combined. With the market for coal contracting, Alveley Colliery closed in January 1969, but remained active until March for clearance operations and so ended coal production in the area. The waste tips at Alveley have been landscaped into a country park and, amongst the relics on display, are two tramway tubs, one old wooden type and one modern metal one.
References
John Tennent; The Railways of the Highley Mining Company; in ‘The Industrial Railway Record’ No. 250, September 2022, p7-13.
D. Poyner & R. Evans: The Wyre Forest Coalfield; Tempus, Stroud, Gloucestershire, 2000.
M. Shaw, D. Poyner & R. Evans; Aerial Ropeways of Shropshire; Shropshire Caving & Mining Club, 2015.
George & David Poyner; The Surface Haulage at Alveley Colliery; in ‘Below’, the quarterly journal of the Shropshire Caving and Mining Club, Winter Issue 2002.4, 2002; viewed online at https://www.shropshirecmc.org.uk/below/2002_4w.pdf, accessed on 24th January 2023.
David Poyner; Railway Locomotives of the Highley Mining Company and Billingsley Colliery Company; in ‘Below’, the quarterly journal of the Shropshire Caving and Mining Club, Autumn Issue 2013.3, 2013, p13-15; viewed online at https://www.shropshirecmc.org.uk/below/2013_3w.pdf, accessed on 31st January 2023.
Highley, and the area immediately around, it has a long industrial history and the remains of numerous railways and tramways can be seen today. At the end of the 18th century coal mines and a blast furnace were opened in Billingsley. The story is recounted by Poyner and Evans in their history of the Wyre Coalfield: [13: Chapter 5]
“By the late 1770s, coal mining was well established in Billingsley with a water wheel being used to drain the mines … but unfortunately the owners of this colliery have not been recorded. There then follows a brief unrecorded period until the start of the 1790s, by which time much of Billingsley was owned by Sir William Pulteney, M.P. for Shrewsbury; a man with land-ownings over much of the country. Pulteney was an able politician and keen businessman; the patron of Thomas Telford, he would have been well aware of the potential value of the coal beneath his lands. As a national figure, he would have been able to obtain the advice of the best mining engineers in the country, and this must have led him to Newcastle to obtain the services of George Johnson.”
Johnson was one of the premier colliery viewers in the land, with international experience as a consultant. Thus by 1794, Johnson had put together a consortium of Newcastle-based landowners and professionals to go into partnership to lease the coal under Pulteney’s land. His backers included William Chapman, a noted engineer, Sir John Gray, an M.P. and most significantly Henry Gray MacNab, his brother-in-law. Trained at St. Andrews University as a physician, by the early 1790’s MacNab was established as an influential figure in the North-Eastern coal trade, with a number of pamphlets to his name. In June 1794 the draft leases were signed, and soon work began at Billingsley, initially using at least some men brought down especially from the North-East.
One of the first problems the partnership had to overcome was the lack of effective transport in the area. Billingsley was on the Bridgnorth-Cleobury Turnpike, but that was in no condition to take heavy coal traffic. A way had to be found to move the coal onto the River Severn. The first idea was for a canal, partly along the Borle Brook, possibly with an extension all the way to the limeworks at Oreton. It was at this point that a future thorn in the side of the works first became apparent, with the implacable opposition of William Lacon Childe to the mine. Childe’s property bordered Pultney’s estate on the south; more significantly he controlled the only practical route from Billingsley to the Severn at Highley. The canalisation of the Borle needed his wholesale co-operation, and this was not forthcoming. Childe’s motives for opposing the mines are not entirely obvious; he was not against collieries per se, as he had small working mines on his own estate. He claimed that the large mine at Billingsley could force these to close, ultimately forcing up the price of coal in the district. Childe was also a committed countryman. He was in the forefront of agricultural improvement, and also was a keen huntsman. He may have feared the impact of large-scale mining on all of this. Whatever his motives, he succeeded in killing off the canal. Instead the partners constructed a horse-operated plateway, following the line of the Borle Brook but as far as possible on the opposite side of the bank from Childe’s land. Even this was not entirely possible, for in Highley they did have to cross through a short section of his land. Childe drove a hard bargain, for he made the Partners lease the Birch Colliery and connect it to their plateway by means of a branch. As the Birch was a small mine working the Sulphur Coal (see above), it was of no value to Johnson & Co., but they had little choice in the matter.
The coal and iron were brought alongside the Borle Brook through Highley by a horse-worked tramway to the River Severn where they were sent downstream in boats. The “tramway worked for no more than 15 years, but its route can still largely be traced on the North side of Borle Brook, running via shallow embankments and cuttings. A little later the Stanley Colliery (1804-1823) opened close to the site of the present Highley Station and this was also served by tramways, as were the numerous sandstone quarries by the river.”
[13: Chapter 5 (of ‘The Wyre Forest Coalfield’) – quoted here with the kind permission of David Poyner]
As we have noted, Stanley Colliery was just to the South of Highley Station. It was worked for that short period at the beginning of the 19th century in the sulphur coal at a depth of about 100 yards; the Brooch seam worked by the Highley Colliery was a further 200 yards below this. Stanley Colliery “is partially overlain by the trackbed of the Severn Valley Railway and sidings built by the HMCo. [Highley Mining Company] There are also extensive remains of the stone quarries which worked in this area from perhaps the Middle Ages to the 19th Century.” [1]
Ray Shill also mentions the tramroad/plateway to Billingsley: “Billingsley Coal and Iron works was … served by an iron railway laid with iron rails and sleepers. The Billingsley railway, owned by iron master George Stokes, was about two miles long and included an incline to the Severn, a sale of 1818 mentioned the incline.”[8][9]
The old tramroad/plateway/tramway/railway route is shown below on a series of extracts from the 6″ Ordnance Survey revised in 1925 and published in 1929. Where possible I have also provided photographs taken on site.
The old tramroad route is now a footpath on the North side of Borle Brook. It is highlighted on this 6″ OS Map extract by the light blue line. South of Borle Brook. the later mineral railway serving Kinlet Colliery is also shown on the base maps. [3]Brooksmouth: the cast-iron arched bridge across Borle Brook just upstream of its confluence with the River Severn. This view looks to the North alongside the Severn. The wharf for the old tramway would have been beyond the bridge. The bridge is shown at the bottom right of the OS map extract above, close to the River Severn. [My photograph, 10th February 2023]
“Brooksmouth Bridge is a small cast iron footbridge, via which the towpath on the west bank of the River Severn crosses Borle Brook downstream from Borle Viaduct. It is a Grade II Listed Building under the name ‘Footbridge over Borle Brook.’” [23]
“The bridge consists of an elliptical arch with a slightly curving path, the spandrels being filled by conjoined diminishing circles. The balustrades, half of one side of which has been renewed, have an elongated diamond pattern. The stretcher bars across the main arch are inscribed ‘Coalbrookdale Company 1828’. The cast-iron foot plates appear to remain intact. The abutments are of sandstone with string courses and parapets, one side of both of the latter replaced in brick.” [23][24]
“The bridge was built by The Coalbrookdale Company of Ironbridge in 1828, pre-dating the building of the Severn Valley Railway by more than 30 years. At that time goods traffic was transported on the River Severn in barges called Severn Trows. These were hauled upstream against the current by horses, or by men known as ‘bow hauliers’, making use of the towpath.” [23]
Facing downstream alongside the River Severn towards the confluence of Borle Brook and the Severn. this photograph shows part of the area which would have encompassed the wharf which allowed transfer of loads to and from Billingsley to barges on the Severn. [My photograph, 10th February 2023]Looking North alon the West bank of the River Severn. This area will have been busy in the distant past with waggons from Billinsley unloading at the wharf onto Severn trows. [My photograph, 10th February 2023]Standing on the West bank of the River Severn looking along the line of the old plateway/tramroad which curved to the right beyond the field gate. [My photograph, 10th February 2023]The old tramroad curved round to follow the North bank of Borle Brook, passing under the viaduct as shown by the red line. [My photograph, 10th February 2023]
The old tramroad predated the Severn Valley Railway by many years. “Like other bridges on the Severn Valley Railway, it was built with the capacity for dual tracks but only ever installed for single line running. The viaduct is 42 yards in length, with four arches of 25ft span. Fishermen’s Crossing lies a few yards to the north, with the site of the former Kinlet and Billingsley Sidings a similar distance to the south. … The viaduct has suffered from mining subsidence over the years. Regular re-ballasting to overcome this … resulted in the line being above the original parapet walls.” [25] No edge protection on the viaduct was provided prior to preservation but post and rail fencing were added in the years after the viaduct was taken over by the preservation society. Significant maintenance was undertaken in preservation, first in 1977 and then in 2019.
Looking back towards the viaduct along the line of the old tramroad. [My photograph, 10th February 2023]Lookinf West along the line of the tramroad from the same position as the picture immediately above. [My photograph, 10th February 2023]Leaving the field close to the Severn Valley Railway, we were glad that we were walkign the line in the winter months with vegetation much less dense than in warmer times. We had to clamber over an old wooden gate which was held shut by barbed wire and not in good condition. The route of the old tramroad was difficult to determine in places. This picture looks West and shows a very shallow embankment along the line of must have been the route of the tramroad. [My photograph, 10th February 2023]Looking West again, some sections of the old tramroad route through the first length of woodland were easier to walk. [My photograph, 10th February 2023]Again looking West, the field gate provides access to a riverside meadow. The gate is approximately on the line of the old tramroad. [My photograph, 10th February 2023]Looking East along the line of the tramroad from the field gate in the picture above. The lightly used footpath follows the line. [My photograph, 10th February 2023]The route continues to the West running very close to the North bank of Borle Brook. This 1925 Survey show the location of Kinlet Colliery at the lefthand (West) side of the extract. [3]Just a little further West, this photo shows the field gate which appears in the pictures immediately above and shows the woodland that we had just traversed. [My photograph, 10th February 2023]Much easier going following the line to the West, at least while we were in the meadow. [My photograph, 10th February 2023]At the end of the meado, the kissing gate gave access to an area of significantly disturbed ground which may have suffered some movement towards Borle Brook in the past. [My photograph, 10th February 2023]Looking back East from within what would be dense vegetation in the Summer. The ground was soft and significantly broken up. [My photograph, 10th February 2023]Looking West again. The tramroad route heads to the right of the compound visible ahead and at that point joins New Road. [My photograph, 10th February 2023]This OpenStreetMap extract, provided by the NLS shows New Road which over the area of this extract follows the line of the old tramroad as far as the footpath (shown grey on the map extract) which itself follows the line of the old tramroad. [22]Looking Southeast along New Road with the aforementioned compound on the right. The old tramroad route is followed by New Road from this point for a few hundred metres. [My photograph, 10th February 2023]Looking Northwest along New Road. [My photograph, 10th February 2023]Just as New Road swings sharply to the left to cross first Borle Book and then the line of the later Billinsgley Railway, the tramroad diverged to the right into what is now heavy undergrowth. The red line shows its approximate route. At the centre of this image, to the right of the road, the footpath sign can be seen leaning against a tree. [My photograph, 10th February 2023]The old tramroad followed the North bank of Borle Brook as the course of the brook heads northwards. [3]
The images below show the route of the tramroad approaching Borle Mill from the Southeast.
The tramroad passed to the East of Borle Mill near Borlemill Bridge. [4]This first photograph was taken a little to the North of the point where New Road crosses the line of the old tramroad. It looks North towards Borle Mill. New Road does not appear on the Ordnance Survey of 1925. [My photograph, 3rd February 2023]This photo looks North along the old tramroad from a point much closer to Borle Mill. [My photograph, 3rd February 2023]The old tramroad crossed Borle Mill Bank directly ahead of the camera and ran along the valley side. The footpath turns away from the line of the tramroad from this point for a few hundred metres so as to avoid private land. [My photograph, 3rd February 2023]The tramroad continued in a northerly direction to the East the Mill Race. The footpath has been diverted to run closer to Borle Brook as far as the weir shown on this map extract. It returns to the tramroad alignment at that point. [5]Facing to the South along the route of the old tramroad at the point where the footpath leaves the old tramroad. [My photograph, 3rd February 2023]Looking North along the line of the tramroad from the same point. [My photograph, 3rd February 2023]Facing South towards the field boundary which crosses the line of the old tramroad to the North of the weir. [My photograph, 3rd February 2023]We were walking South along the tramroad rather than Northwards. Just after the photograph above was taken, we were joined by two gentle friends. [My photograph, 3rd February 2023]Looking South into the field in which the sheep live, from the North side of the field boundary at the bottom-right of the next map extract. [My photograph, 3rd February 2023]Looking Northwest from the same point. [My photograph, 3rd February 2023]The tramroad continued alongside Borle Brook in a Northwesterly direction. [6]Looking in a Northwesterly direction along an embankment which carried the tramroad to a bridge over a small tributary of Borle Brook. All that is left of the bridge is a gap in the embankment. [My photograph, 3rd February 2023]Another Northwesterly facing photo looking along the line of the tramroad. For much of the length between Borle Mill and New England the footpath is wide enough to occupy the full width of the formation of the old tramroad. [My photograph, 3rd February 2023]Looking Northwest and approaching New England the old tramroad passed through a narrow but relatively shallow cutting. [My photograph, 3rd February 2023]Looking Southeast along the line of the tramroad from close to New England. This is the Northwestern end of the cutting in the last photograph. [My photograph, 3rd February 2023]The line of the old tramroad can relatively easily be followed as far as New England, where for a very short diatance the tramroad followed the verge of the road before turning away to the West as the lane dropped down to ford Borle Brook. There is archaeological evidence, close to the Ford shown on this map extract, of a tramroad bridge over Borle Brook which indicates that the tramroad continued along the line of the footpath shown on this extract from the 1882 Ordnance Survey, published in 1883, to the West of Borle Brook. [7]The old bridge abutment is in the undergrowth to the left side of this image. Borle Brook is further to the left. Close to the level of the tramroad and roughly at road level today is an information board. It can be seen here towards the top-right of the image [My photograph, 3rd February 2023]The information board mentioned above. At the centre top of the board is a photograph of the historic abutment taken when heritage work was undertaken at the site. To the right of that picture is a schematic map of the tramroad/plateway. Below that is an illustration of the traffic which would have used the tramroad. [My photograph, 3rd February 2023]A closer view of the illustration of tramroad traffic. This picture raises a few questions in my mind. The wagon shown has flanged wheels and the rails seem to be continuous edge- rails. A plateway would usually be made up of short sections of rail and would most often have had L-shaped rails with wagons having flangeless wheels. [My photograph, 3rd February 2023]
The wagon illustrated on the information board at the site of the bridge abutment has flanged wheels and the rails seem to be continuous edge- rails. A plateway would have usually been made up of short sections of rail and would in many cases in Shropshire have had L-shaped rails with wagons having flangeless wheels. during the period that the plateway/tramroad was active (circa. 1796 – 1812). This is supported by David Poyner’s discoveries along the line of the old tramroad which he reported in the journal of the Shropshire Caving and Mining Club in 2010. He first describes the plateway:
“In the Wyre Forest Coalfield, a plateway was constructed from a wharf on the River Severn in Highley to a colliery at Billingsley in 1796; about this time or shortly afterwards a spur was constructed to more mines at Birch Farm in Kinlet. … The mines had all closed by 1812 and it is unlikely that the plateway saw much use after this. It was amongst the materials of Billingsley Colliery and associated blast furnace that was offered for sale. In 1814 “about 30 tons of straight and turned iron rails, and sleepers in proportion” with 43 railway wagons were put up for auction. This sale may have been a failure as the complex was offered again in 1817; lot VII included “about 50 tons of cast iron rails, sleepers etc now upon a rail road”. This suggests that the plateway had not yet been taken up. It appears that this sale was more successful as no more is heard about the mine, furnace or plateway after this date.” [10]
Poyner continues to describe his finds in the vicinity of the plateway – some years prior to his article, he found “a broken section of plate rail from this system whilst putting some steps into an embankment along the former track. Subsequently more pieces of rails and a chair were found by Simon Cowan and Hugh McQuade who were tracing its route.” [10] More recently, he came across a chair “from the system on the Kinlet bank of the Borle Brook at Logwood Mill. SO 740820 (Figure 1). It is cast iron, and approximately 6½” x 5″. At the one end there is 1″ high flange: at the other is a curled lip about ½” high which extends for only half the length of the plate; however, it is extended as a slight ridge in the casting which terminates in an inverted L-shape. There is a ½” diameter hole in the centre of the chair and two in projecting lugs at either end. There are also 4 lugs which extend beneath the chair.” [10]
The rail he found “from the plateway is 3½” x 24″; the casting is ½” thick. It has clearly been broken at the one end and may also have been fractured at the other.” [10]
The schematic map of the tramroad route included on the information board is enlarged here and in an image below. This first enlargement shows the route of the tramroad/plateway closer to the River Severn and shows a branch tramroad/plateway to Birch. [My photograph, 3rd February 2023]
The Birch Branch
The thematic or sketch map on the information board at New England shows a branch extending to Birch Farm, South of Borle Brook. For this line to form a junction with Borle Brook it would have needed to bridge the ‘river’. It then followed a tributary to Borle Brook before striking off to the South towards Birch Farm. The line was unnecessary in purely engineering and mining terms. It was constructed as part of a ‘quid-pro-quo’ arrangement between the Colliery Company and William Lacon Childe who owned all the land on the South side of Borle Brook and a parcel of land to the North of the Brook which the Colliery Company needed for wharves alongside the River Severn. Ultimately he granted access to the River Severn, conditional upon the Colliery Company building a plateway link to one of his small collieries, that at Birch Farm. [13: Chapter 5]
This image shows the location of Logmill Cottages, close to the confluence of the tributary and Borle Brook, on the 25″ Ordnance Survey of 1882, published in 1884. It shows no bridge existing over Borle Brook at this point towards the end of the 19th century. It does however show a bridge crossing the tributary. [11]A little to the Southeast of Logmill Cottages and on the next Ordnance Survey Sheet to the South, a footbridge is marked. Might this have been the location where the plateway crossed Borle Brook? Perhaps it served the mill, close to Logmill Cottages, which by the time of this Ordnance Survey had disappeared? [12]The tributary, once again. The 1882 mapping, published in 1884, shows some earthworks at various points on the South side of Borle Brook. One location where these are apparent is the possible location of a future bridge across the tributary. Might this be relevant to the seacrh of the route of the plateway branch to Birch Farm? Looking more widely at the 1882 mapping South of Borle Brook, there appears to be no residual evidence of a plateway immediately at this location. [12]
We have noted in the above map extracts that it is difficult to be specific about the route of the tramroad/plateway close to Borle Brook. The mapped details in the vicinity of Logmill Cottages show no real evidence of the tramroad.
A wider view of the 1882 Ordnance Survey showing the possible route of the plateway/tramroad between Borle Brook and Birch Farm. There is a track marked on the map, extending from the bottom-left corner of the extract to the second minor stream met along the route, travelling to the Northeast. The presence of the track is an indicator of the probable alignment of the tramroad. Across the rest of the map the blue line indicating the tramroad route is shown dotted over this length as there is nothing to confirm its actual route on the Ordnance Survey. [12]The 1882 Ordnance Survey once again. The plateway/tramroad branch continued to travel in a southerly direction. [12]The terminus of the tramroad/plateway was close to Birch Farm where William Lacon Childe had a small colliery. [12]
The line to Birch Farm is entirely on private land and access to its route is not possible. The best that I can offer is extracts from satellite images. These are those from the National Library of Scotland (NLS). …
Borle Brook is at the top of this extract from satellite imagery. Its tributary flows to the North of the dotted blue line which indicates the possible route of the tramroad/plateway to Birch Farm. [14]The line curved away from the stream and headed South towards Birch Farm. [15]Birch Farm and the location of the Colliery. [16]This second enlarged view shows the upper reaches of the tramroad which clearly continued some distance beyond New England. [My photograph, 3rd February 2023]
The Billingsley Area
Access to the length of tramroad/plateway beyond New England is just as difficult as access to the branch to Birch Farm, although is does come close to the public highway at one location and crosses it at another. Immediately to the West of Borle Brook there was an incline which brought the tramroad/plateway out of the valley and into the open fields above its scope. All of this, through to ‘Scot’s’ (the spelling on the OS Mapping) is on private land.
The blue line on these side-by-side images show the approximate line of the tramroad/plateway through New England and on to the West. Immediately on the West side of Borle Brook there was a rope-worked incline. [17]It is possible that the tramroad followed the route of Bind Lane which would have taken the tramroad closer to Billingsley Colliery and the Cape of Good Hope Inn, but the presence of the curved track at the West edge of this extract from the 1882 Ordnance Survey suggests that at least at that point the line was fixed a little to the South of Bind Lane. The dotted blue line follows approximately the line shown on the information board at the New England bridge abutment. [18]The junction of the B4363 and Bind Lane as shown on Google Maps Satellite Imagery in early 2023. The blue line represents the approximate line of the tramroad. The route of the line to the West of the B4363 becomes a matter of conjecture. [19]The approximate line of the tramraod has been imposed on this Google Streetview image looking North-northwest on the B4363. Bind Lane meets the B4363 at the junction ahead and runs in front of the new-build property to the right middle of the image. [Google Streetview, November 2021]
From the tentative line of the tramroad shown on the information board near the bridge abutment at New England (above) it appears that the old tramroad ran in a roughly Southwesterly direction as far as Southhallbank Farmhouse as suggested on the 1882 6″ Ordnance Survey map extract below.
Britishlistedbuildings.co.uk lists the Farmhouse. as a Grade II listed building predominantly constructed in the 17th century, perhaps with earlier origins, and with some 19th century rebuilding. It is “Timber-framed with red-brick infill and red brick. Plain-tile roofs.” [20]
If the tramroad ran as close to the farmhouse as is suggested in the map extract below, It is very likely that the owner of the building at the turn of the 19th century had a strong interest in the tramroad.
The continuing tramroad route shown on the 1882 Ordnance Survey. The tight bend at the Northwest corner of the farmyard of Southallbank Farm is shown on the information board close to the bridge abutment near New England. [18]Southwest of Southallbank Farm buildings I can only guess at the route of the tramroad and its length. My guess is shown on this extract from the 1882 6″ Ordnance Survey. It reflects the line drawn on the information board at the bridge abutment near New England and the fact that close to Scot’s Cottages there is a packhorse bridge which has been retained as a footbridge. [21]
Looking Forward
The tramroad was the first transport venture alongside the Borle Brook. It was some time before industrial development at Billingsley warranted the construction of another railway. The later history of railways in and around Borle Brook can be found in an article about the railway connections to the Severn Valley Railway in the area South of Bridgnorth. … To view this article please follow this link. …
Aris’s Gazette April 18th, 1814 and Aris’s Gazette 20/04/1818.
Ray Shill; The Long Road to the Permanent Way [part 9]; RCHS Occasional Paper 23 from the Railway History Research Group, the Railway & Canal Historical Society, Newsletter No. 33, December 2021.
David Poyner; An Early Chair from the Billingsley Colliery Plateway; in ‘Below’, the Quarterly Journal of the Shropshire Caving and Mining Club, Volume 2010.2, Summer 2010, p8-9.
The area covered by this article is the area on the East side of Savage & Smith’s tracing [1: p164] and is as shown in the adjacent extract.
They included the line of the Coalport Branch on their plan (the continuous thin black line with circular dots). The Stirchley Branch was a little to the East of the Coalport Branch. It ran down past the Randlay Brickworks towards Old Park Ironworks which were South of the bottom end of Randlay Pool. Savage & Smith grouped the two ironworks in the vicinity under one title of ‘Stirchley Furnaces’.
It should be noted that the Shropshire Canal pre-dated the Coalport Branch but was on very much the same line as the railway. Small deviations in the alignment remain visible in the 21st century, particularly the length close to Hinkshay Pools and that close to Wharf and Lodge Collieries.
Tramroads on the remainder of the tracing [1:p164] are covered in previous articles, particularly those noted below.
This is the full page referred to. [1: p164]
Earlier articles about the tramways covered on this map can be found at:
The tramways alongside first the old Shropshire Canal and the later LNWR Coalport Branch were not all operational at the same time. However, Savage and Smith were highly confident of the routes of most of these tramways. Only a few lengths are shown as dotted on these plans. The solid red lines are those which they could locate relatively precisely.
As can be seen on these drawings, the lines associated with the Shropshire Canal Coalport Branch and the later LNWR Coalport Branch railway are shown as solid red. The lines shown with the longer red dashes are translated from the 1836 Shropshire Railway Map. The scale of that map is relatively small – just ½” to a mile. The shorter red dashes denote lines as drawn on the 1833 1” Ordnance Survey. Enlarging from both of these maps leaves room for discrepancies to be introduced.
Savage and Smith highlight many of these lines on a 1″ to the mile map representing tramway additions between 1851 – 1860. During that decade their 1″ plan shows the Shropshire Canal as active to the North of Stirchley but without a northern outlet to the wider canal network. At the southern end of the active canal, the Lightmoor branch to the South of Dawley Magna suggests that much of the movement of goods on the canal was related to the Lightmoor Ironworks and the Lightmoor Brick and Tile Works. Unless there was only local movements during this period, perhaps associated with the Priorslee Furnaces and any other works in that immediate area.
Tramway/Tramroad changes in the 1850s. [1: p95]An enlarged extract from Savage & Smith’s 1″ to a mile plan of the Malinslee area (1851-1860), showing some of the tramroad routes alongside the Shropshire Canal. [1: p95]The Ordnance Survey of 1881/1882 published in 1888. The lettered locations match those on the Savage & Smith extract above. Further details are provided below. [2]
Savage & Smith provide notes about the Tramways/Tramroads close to the line of the LNWR Coalport Branch (and the Shropshire Canal Coalport Branch). They comment: “By 1856, there is a considerable amount of industry along the canal from Hinkshay to Shedshill. The upper reservoir at Hinkshay had appeared before 1833, but the site of the lower reservoir was in 1856 just a small canal basin with a line running to it probably from Langleyfield Colliery. A line from Jerry Furnaces to the ironworks at the rear of New Row crosses it at right angles and a common type and gauge of rail cannot be assumed. This second railway from Jerry Furnaces reverses and continues in to Stirchley Furnaces. … To the north of Stirchley Furnaces the line runs on the west side of the canal on the towpath. There is a branch near Stone Row, perhaps to pits; to Randley Brickworks and perhaps to pits to the north of the brick- works; to Wharf Colliery and Lodge Colliery; past Dark Lane Foundry; to old Darklane Colliery and Lawn Colliery with a branch to old Darklane Brickworks. After a reverse the line carries on to Dudleyhill Colliery and Hollinswood Ironworks ” [6: p166]
The tramroads marked are:
A: Tramroads in the immediate area of Stirchley Ironworks.
B: A line to the North of Stirchley Ironworks on the West side of the Canal, on or alongside the towpath.
C: a branch near Stone Row which probably extended further than shown by Savage & Smith to Wood Colliery to the Northwest of Stone Row.
D: a looped branch probably serving Wharf Colliery, Darklane Foundry, Lodge Colliery, Little Darklane Colliery and Lawn Colliery.
E: a short branch to pit heads to the Southwest of Randlay Brickworks, perhaps also serving the Brickworks.
F: Tramways around Old Darklane Colliery.
G: a short branch serving the Brickworks at Hollinswood.
Another enlarged extract from Savage & Smith’s 1″ to a mile plan of the Malinslee area (1851-1860), showing their remaining tramroad routes close to the Shropshire Canal. The red letters match those on the 6″ Ordnance Survey plan immediately below [1: p95]An extract from the 1881/1882 Ordnance Survey published in 1888. The redlines drawn on the extract match those drawn by Savage & Smith on their plan above. In the period from 1855 through to 1880 the profile of theland in this vicinity was markedly altered by the construction of the railways shown on the map. Lines to A, B, C and D have all gone by 1881. The line to E connects with the line running East-southeast from Priorslee Furnaces and shown on plans below. [2]
By the 1860s, Savage & Smith show that the Shropshire Canal was no longer in use. Between the 1870s and the turn of the 20th century, some further minor additions to the network in the immediate are of Stirchley and just to the South of Oakengates associated with the Priorslee furnaces can be seen on their 1″ to the mile
Tramway/Tramroad changes between 1876 and 1900. [1: p99]
The later changes to the tramroad/tramway network relate partly to the coming, in 1861, of the Standard-Gauge LNWR railway branch to Coalport. Stirchley and Jerry Furnaces – on the 1876-1900 map, have tramroad links to the railway.
The tramroad/tramway network changes to permit access to the LNWR line close to Stirchley. The locations marked with red letters match those on the OS map extract below. [1: p99]The Ordnance Survey of 1881/1882 published in 1888. The lettered locations match those on the Savage & Smith extract above. [2]
A: Langley Fields Brickworks, at on e time this line extended Northwest towards St. Leonard’s, Malinslee to serve Little Eyton Colliery.
B: Langleyfield Colliery.
C: Jerry Ironworks – serve by two different lengths of tramroad, one at high level and one at low level.
D: A connection which crossed the old Shropshire Canal to a wharf running alongside the LNWR Branch.
E: a line connecting Stirchley and Oldpark Ironworks to the network and so providing access to the wharf at D.
F: access to an ironworks to the Northwest of Hinkshay Row.
G: A line which curved round the West side of Hinkshay Pools to provide access to another length of wharf alongside the LNWR branch close to Dawley & Stirchley Railway Station. This is not shown on the plan drawn by Savage & Smith.
The other changes between 1876 and 1900 relate to Priorslee, where tramroads are shown to the Southeast of Priorslee Furnaces. The 6” Ordnance Survey of 1903 shows the bottom arm at this location linking Darklane Colliery to the Furnaces. The upper arm is shown on the 6” Ordnance Survey of 1885 as serving a colliery adjacent to the Lion Inn. The tramroad link to the colliery is not shown on the later survey.
The tramroad/tramway network changes associated with Priorslee Furnaces. The locations marked with red letters match those on the Ordnance Survey extract below. [1: p99]The 1880/1882 Ordnance Survey published in 1885 showing the Oakengates/Priorslee area. The locations marked by red letters match those highlighted on the Savage & Smith extract above. [3]
A: Priorslee Furnaces.
B: Darklane Colliery.
C & D: tramroads serving a colliery adjacent to the Lion Inn..
E: the tramroad access from Priorslee Furnaces.
Telford in the 21st century
The area covered by these maps has been dramatically altered by the construction of Telford Town Centre. The centre of Telford sits directly over the area covered by this article. This is demonstrated by the side-by-side image provided below. 21st century satellite imagery is set alongside the 1901 Ordnance Survey.
The National Library of Scotland provides a version of its mapping software that allows two different images to be placed side by side and geographically related to each other. The image on the right covers the same area as that on the left. [4]
The area around Priorslee Furnaces in 1901 and in the 21st century. By 1901 the Furnaces made use of the Mineral railway to their Southside rather than access to the tramroad along Holyhead Road. On the 1901 mapping the tramroad link into the works ahs been cut. This suggests that the line along Holyhead Road was probably no longer active by 1901. [5]Facing Northwest along Holyhead Road in June 2022. The access road from the A442 Queensway is ahead on the left. The old tramroad would have run roughly where the footpath is on the left. [Google Streetview]Turning through 180 degrees and now looking Southeast, the tramroad was on the south side of the road. [Google Streetview, June 2022]A little further to the Southeast and the tramroad was still alongside Holyhead Road (B5061). [Google Streetview, June 2022]we are now running alongside the site of what were Priorslee Furnaces. There was a tramroad access from the site to the tramroad running alongside Holyhead Road. [Google Streetview, June 2022]Further Southeast the tramroad continued to follow the verge of Holyhead Road. [Google Streetview, June 2022]East of Priorslee Furnaces the tramroad ran on the South side of Holyhead Road. A branch headed South towards Darklane Colliery. The ‘mainline’ only contiued a short distance further East. [6]Further Southeast and now approaching the modern roundabout shown on the side-by-side image from the NLS above. [Google Streetview, June 2022]Looking Southeast across the roundabout towards Shiffnal Road. The tramroad alignment remains on the south side of the road. [Google Streetview, June 2022]On the other side of the roundabout and now on Shiffnal Road. The tramroad ‘mainline continues Southeast toward Stafford Colliery, the branch heads towards Darklane Colliery and, as it is under modern buildings cannot be followed on the North side of theM54. Photos of the area it travelled on the South side of the M% can be found further below [Google Streetview, June 2022]Both the Darklane branch and the ‘Mainline’ terminate in these images. The DarkLane route cannot easily be found on site, apart from the approximate location of what would have been its at-level crossing of what was once a road and is now a footpath. That to the Stafford Colliery near the Red Lion Pub can still be followed! [7]For a short distance further the tramroad remained alongside the old road before turning sharply to the South along what is now a footpath and cycleway. [Google Streetview, June 2022]Looking South from Shiffnal Road along the footpath/cycleway which follows the route of the old tramroad to Stafford Colliery. [Google Streetview, June 2022]Looking South from a point 100 metres or so along the footpath/cycleway which follows the route of the old tramroad to Stafford Colliery. [My photograph, 2nd February 2023]The approximate limit of the tramroad heading South. [My photograph, 2nd February 2023]This view from the Eastbound carriageway of the M54 shows the footbridge which carries the path that followed the line of tramroad. The Stafford Colliery was on the North side of what is now the motorway. Somewhere close to the top of the motorway cutting is the location of two tramroad arms which ran approximately East-West serving the Stafford Colliery site. [Google Streetview, November 2022]Looking North along the line of the footbridge which crosses the M54. Shiffnal Road is ahead beyond the site of the old Stafford Colliery. The redlines are indicative of the tramroads serving the colliery. [Google Streetview, March 2021]
The tramway/tramroad route which led to Darklane Colliery crossed the line of the M54 a short distance to the West of the modern footbridge.
Looking North across the M54, on the approximate line of the old tramroad/tramway. [My photograph, 2nd February 2023]Looking approximately in a northerly direction. The old tramway ran approximately as shown by the red line. [My photograph, 2nd February 2023]Turning through around135 degrees to the East this is the view along the line of the tramway/tramroad. The alignment is roughly as shown by the red line. [My photograph, 2nd February 2023]The tramroad ran on a line which now runs from the rear of Syer House towards the Volkswagen dealership on Stafford Park 1. It would have passed the spoil heaps from Darklane Colliery as it did so. Darklane Colliery straddled the line of Stafford Park 1.Sketch of the old tramroad route on the modern ‘Street Map’ of the immediate area. [8]The footbridge over Stafford Park 1 sits over the site of Darklane Colliery. [My photograph, 2nd February 2023]Looking East along Stafford Park 1 which is spanned by a modern footbridge. The photograph is taken from within the site of Darklane Colliery. [My photo, 2nd February 2023]Two views looking South over the site of Darklane Colliery from the footbridge spanning Stafford Park 1. [My photo, 2nd February 2023]This final photograph looks North along the footpath/cycleway and shows the approximate route of the tramway/tramroad which terminated a short distance to the East of the modern footpath. [My photograph, 2nd February 2023]
References
R.F. Savage & L.D.W. Smith; The Waggon-ways and Plateways of East Shropshire; Birmingham School of Architecture, 1965. Original document is held by the Archive Office of the Ironbridge Gorge Museum Trust.
This is the second article about the tramroad and railways which served Penrhyn Quarries. The first provided a short history of the line and then followed the tramroad which was first used to replaced pack horses carrying slate and other goods between the quarries and Porth Penrhyn. That article can be found at:
The featured image at the top of this second article about the Penrhyn Quarry railways comes from the camera of K.H. Cribb and is included here with the kind permission of his son Russ Cribb.
The first picture is an embedded link to a photograph on Ernie’s Railway Archive on Flickr and is general view of Porth Penrhyn looking South towards the port headquarters.
The second image shows the port headquarters in 1961, a few years before final closure of the line. The photograph appears to have been taken from the bridge over the line and looks North into the port area.
The headquarters building at Port Penrhyn, Bangor, and part of the quay photographed in August 1961. The last narrow gauge train to carry slates ran on 28th June 1964. The Penrhyn quarry route is now a public path. [41]
The Penrhyn Quarry Railway (PQR) left Porth Penrhyn running alongside a standard-gauge LNWR branch which also served the port and linked it with the national rail network.
The older tramroad occupied the same formation area as the two later lines of the PQR. The standard-gauge line was built while the horse-drawn tramroad was operating.
The PQR and the standard-gauge line ran in close proximity for some distance after leaving the port. Both used the same bridges over the Afon Cegin.
The two railways ran on different gradients after a second crossing of the Cegin. The next photograph shows the two lines passing under the old A5. As illustrated, the Shrewsbury to Holyhead road (A5) crossed the PQR and the standard-gauge line. Each line had its own bore in a tall stone embankment. “The Penrhyn bore being 36ft long and of its basic loading gauge Viz. 15ft wide and 11ft 10in. height from rail to top of arch with 7ft horizontal clearance at the foot of the walls.” [29: p60]
The old structure shown above was later replaced by a more modern structure spanning only the PQR, as shown below. The structure now carries the A5 over the Lon Las Ogwen cycle-route.
After passing under the A5, the LNWR line rose to join the main Chester to Holyhead line west of Llandygai tunnel. The PQR ran on its own course as it travelled on from the A5 at Maesgierchen.
The Penrhyn Quarry Railway opened in 1879. Its route is shown as a red line, this map is rendered with Maperitive, text and integration: Pechristener Wales in United Kingdom.svg: TUBS United Kingdom location map.svg: NordNordWest • CC BY 3.0. [4]The routes of three railways can be seen on this extract from the 6″ OS Maps from around the turn of the 20th century. It shows the area South of the A5 road bridge referred to above. On the right of the image, running South from the Incline Cottage at the top of the extract, field boundaries define the alignment of the old Tramroad. To the West of the A5, which runs down the centre of the extract, are two lines which were in use when the survey was undertaken. Running closest to the A5 is the be LNWR standard-gauge branch. The narrow-gauge Penrhyn Quarry Railway is to the West of the standard-gauge line and follows the East bank of the Afon Cegin. [5]The same area as shown on the OS 6″ Map above. The alignment of the old tramroad is illustrated by the red line. The newer narrow-gauge railway is shown light-blue. Parallel and immediately adjacent to the East of the Penrhyn Quarry Railway was the standard-gauge LNWR line. The two lines began to separate to the Southwest of the A5 road. The approximate alignment of the standard-gauge line is shown in purple. The A5 runs down the centre of the image. [5]
The old tramroad is covered in the first article in this short series:
This article follows the Penrhyn Quarry Railway which was operational from the 1870s. Motive power was given some consideration in the earlier article.
In this extract from the 6″ Ordnance Survey from the turn of the 20th century we see the two routes diverging on their way South. [6]Approximately the same area as appears in the 6″ Ordnance Survey above but focussing on the PQR. Shown, this time, on the RailMapOnline satellite imagery. The route of the Penrhyn Quarry Railway is shown in pink. [7]
At a gradient of 1 in 209 the PQR left the Nant Maes-y-Geirchen gorge crossed the occupation crossing to Felin-Esgob and approached the fine spectacle of the Chester & Holyhead Railway’s Cegin Viaduct.
The Cegin Viaduct “has seven semi-circular arches each of 35ft span – it has masonry piers but the stone arches are faced in brick (Ref: Public Record Office, M.T. 27/49.).” [29: p60]
As an aside, The Bethesda Branch which runs along a similar route to the PQR was a 4.25mile (6.8 km) line between Bangor and Bethesda in Gwynedd, North Wales. Its primary purpose was to bring quarried slate down to the main line for onward transport. It existed in competition with the private PQR. It opened in July 1884, and a local passenger service was run as well as trains for the mineral traffic.
Competition with the PQR was healthy and the two lines managed to co-exist until increasing road competition led to the cessation of ordinary passenger services on the branch in 1951; goods traffic and occasional passenger excursion journeys kept the line going until its complete closure in October 1963. [19]
Wikipedia tells us that the line climbed all the way from the main line, rising for much of the way at 1 in 40. Major features on the branch included the Ogwen Viaduct and the Tregarth Tunnel which was 279yards (255metres) long. Apart from the terminus at Bethesda, there were two intermediate stations on the route – at Felin Hen and at Tregarth. [19]
The Bethesda Branch formation now provides a cycle and walking route to Bethesda from Porth Penrhyn – known as the Ogwen Trail, part of the Sustrans 82 cycle-route.
Continuing to look at the Penrhyn Quarry Railway …. we head South from the Cegin Viaduct.
At about 70ft above sea-level, there was a halt for the Workmen’s Train adjacent to Lon Cefn Ty. The bridge here (once just a footbridge) carried the road over the PQR. To the West of the bridge, the Lon Cefn Ty crossed the Afon Cegin by means of a ford (with a footbridge for pedestrians) and then passed under the Bethesda Branch which was on a steep falling grade from its junction with the mainline just to the East of Bangor Tunnel.
The PQR left the East side of the Afon Cegin and crossed the Glas-yn-Fryn embankment, passing Coed-Hywel-Uchaf Farm on its left then passed 15ft below the LNWR Bethesda Branch by means of an acutely-skewed bridge. Boyd tells us that the LNWR retrieved this bridge from another site and cut it down “to a 31ft span for re-use here; it formed a ‘tunnel’ almost 43 ft long for the narrow gauge and gave generous vertical clearance of 14 ft and 14 ft horizontal!” [29: p59]
As the satellite image above shows, to the South of the A55, the alignments of the PQR and the LNWR Bethesda branch converged and ran parallel to each other at different levels. Immediately South of the A55, the PQR formation ran across what is now an open field. before passing under the Bethesda branch. On the adjacent map extract, to the East of Glasinfryn. The Bethesda Branch is highlighted in purple and the PQR in pink.
The Bethesda branch Felin-hen station was Immediately to the South of this point. It appears at the top of the 6″ Ordnance Survey map extract below. The PQR can be seen drifting away to the Southwest alongside the A4244 (Felin Hen Road).
The PQR runs in a large arc round to the East passed a Gravel Pit which had its own connection to the line. [13]This satellite image covers the same area as the map extract above. [7]
The line curved to the right and then to the left left and crossed the Felin-Hen Road on a 17ft lattice ironwork span and the Felin-Hen stopping point before passing through a heavily wooded area in cutting.
The view along Felin Hen Road from the Northeast. The Bethesda Branch was carried over the Felin Hen Road on a girder bridge. The PQR ran alongside the road in a Southwesterly direction for a short distance before crossing the road at its junction with the B4409. [Google Streetview]The route of the PQR crosses the Felin Hen Road at its junction with the B4409. [Google Streetview]
Continuing to curve to the left, trains passed a short siding alongside on the left which did not have a permanent connection to the PQR. This siding served “a small gravel pit and connection was made as required – and probably since 1881 – by a set of portable Spoon Points which were lifted off after use. On Mondays a wagon was manhandled down to here from Coed-y-Parc, pushed through the narrow curved cutting into the working and loaded up as required; output was small being only about 150 tons a year, with 1912-14 being the best period. An embarrassing accident occurred to the Up Workmen’s Train here one Monday morning, when, the Spoon Points having been inadvertently left in position, the train engine tried to enter the gravel pit and was derailed. The Engineer’s diary records the date, 3rd February, 1941, that the engine was CEGIN – an unusual choice – and that the train ‘Arrived Mill 10.30 a.m’.” [29: p59]
The PQR then continued to sweep round in a wide arc towards the East, gaining height as it travelled. Completing the curve to the left the PQR was then running West-northwest and to the North of Moel-y-ci Farm which is now, in the 21st century, the site of a Farm Shop (Blas Lon Las). The route of the PQR crosses the access road to the Farm Shop and gradually converges with the line of the Bethesda branch. There was an overbridge carrying the Moel-y-ci Farm lane.
James Boyd says that along this section of the PQR there was a long (250 yard) loop together with a long siding on the North side. “trains passed each other on the right. Unusually, iron railings fenced the route here, whereas elsewhere the ubiquitous estate fence made of slabs stuck into the ground on edge and wired together near the top, was (and is) a feature of the district.“[42][36: p58]
Clicking here will take you to an image of ‘Linda’ on a PQR main line up train a few years before closure in 1961 which includes the slate slab and wire fencing mentioned by Boyd. [40]
“Until the reduction in trade made the running of but one train (from 4th May, 1928) sufficient to move stocks, trains passed here regularly. There was a water tank used by Up trains which stopped if required. … There was no signalling. The loop, Pandy (or sometimes Tyn-y-Lon) was an original stopping point for the Workmen’s Train and boasted one of the four Waiting Huts, but a stone throwing incident during the Great strike so displeased His Lordship that the stop was removed.” [36: p58-59]
The two railways may be running very close together on the map or satellite image but the vertical separation was significant with the LNWR line in deep cutting.
Boyd comments that the Workmen’s Train Halt in Tregarth was behind Shiloh Chapel, it was “linked with the nearby road by footpath and wicket gate. No trains ever seemed actually to stand there, for it was sufficient for the Workmen’s rake to run slowly past as the men jumped on or off!” [36: p58]
It appears from the annotated map extract sent to me by Robin Willis, that the Workmen’s Halt was on the East side of the main road rather than behind Shiloh Chapel. Nonetheless the quote from Boyd remains apposite.
Looking from the South along the B4409 in Tregarth: the approximate line of the PQR is shown by the pink line. It passed under the road at this point. There is a footpath/cycleway at the right side of this image running away to the East which appears to be on the line of the old PQR. This is the Lon Las Ogwen and is shown on the next Streetview image below. [Google Streetview]The Lon Las Ogwen again at the point where the PQR crossed under the main street in Tregarth. At the rear of the gardens of the adjoining properties, the Lon Las Ogwen bears left, heading back to the old Bethesda Branch, while the line of the PQR continues in an East-northeast direction. The land level dropped down to the level of the PQR and then the line was on embankment for a short distance as the map extract below shows. [Google Streetview]Tregarth Station on the Bethesda Branch of the LNWR is shown on this extract from the 6″Ordnance Survey. The PQR can be seen crossing the map extract to the South of the LNWR line. [16]The next length of the PQR crosses open ground in a East-northeast direction. the satellite image is once again provided by RailMapOnline. [7]
The PQR passed under the main road in Tregarth through what James Boyd describes as “the ‘standard’ form of road overbridge, stone with brick facings.” [36: p58]
After crossing over the Bethesda Branch the route of the PQR is shown on the 6″ Ordnance Survey looping tightly round following the contours to run due South. It is high enough to cross the metalled lane to the East of Tregarth. The Bethesda line is shown in tunnel on this map extract with the PQR crossing it’s line once again above the southeastern end of the tunnel. [17]This small extract from satellite imagery shows an area one-third down the left side of the extract above from the 6″ Ordnance Survey. The lane to the East of Tregarth was crossed by the PQR after the PQR ( pink line) crossed the LNWR branch at high-level. [Google Maps]
The bridge was a skew single arch structure in brick and was funded by the LNWR.. the Bethesda Branch was 31ft below the PQR at this point. [36: p58] Details of the bridge over the lane can be found below. Immediately below are two pictures taken from road level of the 21st century remains of the bridge over the lane.
Facing Southeast along the lane referred to above. The abutments of the girder bridge which used to carry the PQR are clearly visible. [Google Streetview, November 2022]Facing Northwest along the same lane. [Google Streetview, November 2022]The satellite imagery provided by RailMapOnline covering the same area as the 6″Ordnance Survey above shows the significant loop in the line of the PQR and its relation to both the older tramroad route (red line) and the LNWR branch (purple line). The Tramroad alignment meets the newer PQR at the top of the Ddinas Incline and then follows the same route South. [7]
After crossing the LNWR, which was in deep cutting, the PQR ran along a very short embankment before bridging the Tal-y-Cae to Hen-Durnpike road which climbed steeply beneath it. The bridge was originally a 25ft timber span (which was replaced in steel) on stone abutments. Just beyond the bridge was the Corrig-Llwydion Workmen’s Train halt, then a shallow cutting followed by an equally shallow causeway. The line was now climbing at 1 in 93 and at approximately 400ft above sea level.
As both the 6″ OS map extract and the satellite image above show, the line turned very sharply to the right round the flanks of Pen-Dinas. Apparently, the tightest radius on the line was at this location (85ft) and the Baldwin locomotives purchased by the PQR were known to derail here on occasions. The line here was supported on low walls. Boyd tells us that the right of way of the PQR widens out at the head of the old Incline. There used to be stabling loops for the Incline at this point. [36: p58]
Between the old tramroad incline and Hen-Durnpike in Bron-Ogwen the newer PQR followed the line of the old Tramroad. Boyd describes this section: “the line was carried on a stone shelf. … Parallel and below, the old road to the Quarry kept company.” [36: p57]
Boyd describes this road crossing as: “a close-walled road and rail intersection with protective tall semaphore signal (its signal hut perched on the walling, the enceinte of successive Mrs. Parry – gatekeepers) and twin road gates, made all the more risky as several roads met hereabouts. The hut, wooden walled and slate roofed, survived the closure. Here the line was 420 ft above sea level, and there were ‘Whistle’ boards on each side of the gates; this was a most dangerous and narrow place, more especially for the road-user! The position of the approaching train could be determined quite exactly by long forewarning of its steam hooter, each main line engine having an individual tone.” [36: p57]
Behind the road crossing and running along the backs of the properties in Bron-Ogwen on the B4409, initially on a shallow grade, then climbing at a gradient of 1 in 36 the PQR reached open land. Here, at first, it ran on a causeway spanning a footpath, and then it passed through a series of rock cuttings, one being only 8ft wide at formation level. [36: p57]
As we noted above the route of the PQR and the earlier Tramroad diverge close to the top of this extract from the 6″ Ordnance Survey. The PQR was still in use at the turn of the 20th century and it appears as an active line. The route of the old tramroad passed through the bottom of the garden of the properties to the East of the PQR and then followed the route first delineated by the dotted lines. The route is shown on the following satellite image. [28]The same area shown on satellite imagery which includes the two routes as plotted on RailMapOnline. [7]
Over open land to the West of the modern B4409 the PQR ran on a high embankment/causeway, 18ft high and 10ft wide. The outer walls of which were formed of stone slabs which were then back filled with earth/arisings from the Quarry.
The two separate routes continue onto this next map extract and cross to the bottom right of the image. The later PQR was carried through this area on a slate-slab embankment crossing the footpath at high level by means of a 5ft span bridge. [36: p56] [29]The same area as above as it appears on the satellite imagery from RailMapOnline with the two routes plotted. [7]For a short distance the old tramway route runs to the West of the PQR, as the lines drawn on the satellite image below demonstrate. [30]This satellite image brings the PQR to the industrial complex at the North end of the Quarry site. [7]The view West from the B4409 along St. Ann’s Hl. The pink line shows tha approximate alignment of the PQR which crossed St Ann’s Hl on a bridge. The red line marks the route of the old tramway. Both the lines were at high level over the road which was in a deep cutting, as over the years the spoil heaps either side of the road had built gradually built up to levels that required high retaining walls. Once the rails had gone the bridges could be removed and road levels raised on St. Ann’s Hl and the main road. Boyd tell us that the bridge carrying the PQR “was formed in the ‘standard’ method used elsewhere viz. a square-section timber beam supported on slab piers, 4-hole chairs being used thereon to carry each rail. And this was not all, as an adjacent tip line also had its own bridge over the road until the site was full and the tip abandoned. Here too a junction in the tipping system had once thrown off a spur line which passed off the top of the ‘fortress walling’ and crossed the old turnpike road by a wooden span; it led on to further spoil banks on the east side of this road, which at a later date were linked by an incline which dropped a tramway into the Ogwen Tile Works.” [36: p56] On the North and South sides of St. Ann’s Hl the PQR was carried on a slate-slab embankment which held it above the growing spoil heaps. [Google Streetview]Looking North, back along the line of the old tramroad towards Porth Penrhyn. [Google Streetview]Looking South along the line of the old tramroad towards Penrhyn Quarry. [Google Streetview]
After crossing St. Ann’s Hl the old Tramroad continued on to the South towards the Felin-Fawr Slate Works and the Quarry. The later PQR route and the Tramroad route meet once again just before a footbridge. Felin-Fawr House was just beyond the footbridge to the left and Mill Cottage was on the right. James Boyd notes that the footbridge was constructed by John Foulkes in 1823 and framed wooden gates to close off access along the line to the Slate Works.[36: p55]
A short distance beyond the footbridge the trains reach the summit of the line. At that point they had climbed 550ft from Porth Penrhyn. [36: p56]
The summit was close to a point where a standpipe was on the retaining wall which ran down the West side of the Slate Works site, to the right of the line. It was along this length of the line that loaded slate trains were prepared for their journey down to the port.
The mainline stayed close to the wall which can still be seen on site in 21st century. The photograph below shows a port-bound slate train being prepared to for the journey North with ‘Linda’ in charge.
To the East of the mainline there were three sidings between it and the original slate-slab mill. One of these sidings was increasingly used for locomotives which had been taken out of service. The mainline continued South beyond the slab mill and then, once it has been built in 1900, under an overbridge which, like the footbridge’ was gated to control access to the site of the Quarry. Beyond the overbridge were the main sidings where slate wagons were marshalled either for their journey to the coast (if they were full).
We finish this portion of our journey with a look at some of the locomotives which were stored at Felin-Fawr and some of the rolling stock in the immediate area.
Terry Dorrity writes of the photograph above: “This was the bitter-sweet sight that met visitors to the Coed y Parc Penrhyn Works at Bethesda in Snowdonia. The sad line of withdrawn locomotives resting and rusting, apparently beyond saving, in a sort of mini Barry scrapyard must have encouraged many a daydream but fortunately every one of them, except SKINNER, has been preserved.” [47]
The Locomotives are: “EIGIAU; STANHOPE; the de Winton, KATHLEEN; JUBILEE 1847; frames wheels and part of the cab of SKINNER; LILLA, and SGT MURPHY await their fate with LILLIAN, which was next in line but out of sight.” [47]
Terry Dorrity continues: “EIGIAU is an Orenstein and Koppel 0-4-0 well tank built in 1912 (works number 5668) which was originally supplied to C L Warren contractors in Cheshire and named SUNLIGHT. In 1916 it was sold to the Aluminium Corporation of Dolgarrog for use in building Cowlyd reservoir and renamed EIGIAU after a lake in Snowdonia. It became a Penrhyn locomotive in 1928. It was taken out of service in 1949 and was bought for preservation by Mr G J Mullis and removed in pieces to Droitwich in January and February 1963 and restored to working order. It ran at Bressingham Gardens for some time but it is now part of the Bredgar and Wormshill Light Railway collection.” [47]
A number of photos taken by Barry Fitzpatrick, Ron Fisher and Ken Cribb, included here follow, all of locos on the line at Felin-Fawr. All pictures used by permission of the photographers or, in Ken’s case, with permission from his son Russ.
I have recently undertaken a detailed review of a book by R.F. Savage and L.D.W. Smith entitled, The Waggon-ways and Plate-ways of East Shropshire. [1] This was a research paper produced in 1965. The original document is held in the Archive Office of the Ironbridge Gorge Museum Trust. It was a timely document. Large parts of the area surveyed by the authors were changed almost beyond recognition as the Development Corporation got to work on creating what became the new town of Telford, where (in 2023) I now live. Their work included a detailed series of drawing produced by hand, tracing as best they could the lines of tramroads from smaller scaled plans onto 6″ to the mile and 1″ to the mile drawings. There are two examples of their 6″ to the mile plans below.
Savage & Smith’s 6″ to the mile plan of the Madeley Wood and Bedlam Furnace Area on the North side of the River Severn Gorge. [1] Savage & Smith’s 6″ to the mile plan of the Madeley Court Area to the North of the River Severn Gorge. [1]
Savage & Smith were diligent in their research and careful in their documenting of the historic sources and information gleaned on site. The resulting document is wonderful and I have enjoyed engaging with it. This document alone would justify a research visit to the Ironbridge Gorge Museum Trust Archive. My thanks to the Archive for the welcome offered to me and their generous agreement to my using the material from this resource.
As a result of undertaking this and other research at the Archive, I was asked to give a talk at one of the meetings of the Friends of the Ironbridge Gorge Museum Trust. The detailed notes associated with the talk and a PowerPoint presentation can be downloaded using the links below.
The PowerPoint presentation used on 18th October 2023.
I hope that these notes and slides are of interest to some. It is possible that you may read them and find things in the notes that are incorrect. If so, please do let me know. I will be using this material for future talks. I would really appreciate any comments that you might have.
References
R.F. Savage & L.D.W. Smith; The Waggon-ways and Plate-ways of East Shropshire, Birmingham School of Architecture, 1965. An original document is held by the Archive Office of the Ironbridge Gorge Museum Trust.
A great Christmas purchase from Rossiter Books in Leominster! (£12.99, ISBN 978-1-910839-60-7, Paperback, 176 pages, 242 x 171mm).NB: The images in this article are sourced from the internet.
Horse-Drawn Tramways of the Wye Valley [1] by Heather Hurley, published by the Logaston Press in Novber 2022, is an excellent introduction to the early tramways in the Wye Valley. A short-lived transport system of horse-drawn waggons on rails, operating from the late eighteenth century to the introduction of steam locomotives in the middle of the nineteenth century, primarily used for transporting goods such as coal and wood.
Heather Hurley explores all of the tramways known to have existed in and around the Wye Valley from Kington, through Brecon and Hay to Abergavenny, Monmouth, the Forest of Dean and Hereford; the routes taken, the companies that built and ran them, and the people who used them. She draws on extensive research of Tramway Company archives, Acts and ledgers, maps and plans, newspapers and journals, archaeological reports, books and illustrations, as well as detailed fieldwork.
As the back cover states, Hurley’s book is richly illustrated and offers captivating insights into early nineteenth-century transport history, trade routes and the beginnings of the steam railways on the Welsh border.
Heather Hurley has a keen interest in local history. She has written several books, including ‘The Scudamores of Kentchurch and Holme Lacy’, ‘The Story of Ross’ and ‘Landscape Origins of the Wye Valley’. She is planning to produce a parallel volume about the railways of the Wye Valley in due course.
Horse-Drawn Tramways of the Wye Valley is an easy to read but well-researched introduction to tramways in the Southern Marches. Evidence of Hurley’s detailed research can be found in the extensive notes which support each chapter. Solid research does not, however, mean that this is primarily a dry academic book. It is accessibly produced with appropriate illustrations and a confident narrative.
The first chapter gives an overview of transport systems which predated the introduction of tramways. A chapter is devoted to the development of the horse-drawn tramways which includes an important section focussing on the horses used, before the more usual engineering matters of waggons, rails and stone ‘sleepers’ are covered.
Two further chapters cover some local tramways of interest and the coming of steam-power.
The history of each of the major lines is recounted is some detail, each route is surveyed and details of goods carried are provided. For each line, some notes are provided on remains visible in the 21st century and on where documents recording its life can be found.
The extent of the coverage in a paperback book of 176 pages is to be commended. No doubt some readers will want to look at one or more of the routes portrayed in more detail than is possible in a book of this nature. The book might have benefitted from the addition of maps to support the detailed route descriptions provided towards the end of each of the major chapters. The book is, however, a wonderful introduction to its subject and has been an excellent post-Christmas read!
I wholeheartedly recommend this book to anyone interested in the industrial history of the Welsh Marches and the Forest of Dean. Anyone interested in the history of tramways/tramroads in the UK would do well to purchase a copy, not only for the informative narrative and illustrations but also for the detailed endnotes.
The Logaston Press takes its name from the hamlet of Logaston, in the beautiful countryside of rural north-west Herefordshire. It was here that Logaston Press was set up by Andy Johnson in 1983, and later run by Andy together with his wife Karen.
In 2018 Andy and Karen handed over the reins to Richard and Su Wheeler, who now run Logaston Press from the nearby village of Eardisley.
Logaston Press publishes books on local history, landscape, archaeology, architecture, and a range of walks guides – all focussed on the ‘Logaston heartlands’ of the Southern Marches: Herefordshire, Shropshire, Worcestershire and Gloucestershire, Radnorshire, Breconshire and Montgomeryshire.
In almost four decades, Logaston Press has published more than 350 titles, with more than 100 books currently in print. Its books are beautifully produced, ethically printed and reasonably priced. They are are a pleasure to own.
Logaston Press is rooted in the people and places of the Southern Marches and is dedicated to publishing books that explore and illuminate this extraordinary part of the world.
References
Heather Hurley; Horse-Drawn Tramways of the Wye Valley; Logaston Press, Eardisley, 2022.
A short history of the line is followed by some information about the locomotives used on the line. This first article then focusses primarily on the horse-powered tramroad which preceded the later Penrhyn Quarry Railway.
Penrhyn is the Welsh word for ‘promontory’.
“The history of Port Penrhyn can be traced back as early as 1713 when it was recorded that 14 shipments totalling 415,000 slates had been sent to Dublin. In 1720, another 8 shipments totalling 155,000 slates were sent to Dublin, two to Drogheda (20,000) and one to Belfast (35,000). Two years later, a shipment of 80,000 slates were sent to Dunkirk. After these few shipments only coastal traffic left from Aber-Cegin (Port Penrhyn) until Richard Pennant took over the ownership of Penrhyn Estates and appointed Benjamin Wyatt in 1786 as agent.” [23]
Porth Penrhyn in the mid- to late- 19th century. [23]
The Penrhyn Railway opened as a tramroad in 1801 which ran from quarries a few miles inland from Bangor in North Wales to the coast at Port Penrhyn. The gauge of the tramroad was 2ft 0.5in. It was constructed by Lord Penrhyn at a cost of around £175,000. [1][2] The alignment was as shown on the map immediately below.
The Penrhyn Railway 1801 to 1878: rendered with Maperitive, text and integration: Pechristener Wales in United Kingdom.svg: TUBS United Kingdom location map.svg: NordNordWest • CC BY 3.0. [1]
It was thought that there was an earlier line which ran between Port Penrhyn and Llandegai. That tramway, if it existed, was constructed in 1798. Its route paralleled that of the northern end of Lord Penrhyn’s tramroad. One theory is that this earlier tramway was operational until 1831. [1] There appear to have been two inclines on the Llandegai Tramway, one close to the port and the other directly adjacent to Llandegai Penlan Mill at Llandegai at the Southern end of that line. Both are shown on the image below.
The Llandegai Tramway: rendered with Maperitive, text and integration: Pechristener Wales in United Kingdom.svg: TUBS United Kingdom location map.svg: NordNordWest • CC BY 3.0. [1]
Research in 2021 suggests that the earlier tramway did not exist. [2]. If it did, it is likely that it was subsumed into the tramroad built by Lord Penrhyn. There is also research, undertaken in 2019, which suggests that a tramway was probably constructed in 1798 in connection with the Penrhyn Mills on the lower Ogwen. [35] My thanks to David Elis-Williams for providing a link to this research by Barrie Lill.
Lill comments that the Penrhyn Mills at Llandegai had a part in the development of the tramway/tramroad which eventually served the Penhryn Quarry: “The mill had what David Gwyn believes to be part of the first iron-railed overland edge railway of any length in the world, and the first iron edge railway built for the mass movement of stone. However, whereas James Boyd conjectures that originally the Penlan railway only extended from Port Penrhyn to the mill at Llandegai, pre-dated the Penrhyn Quarry Railway by three years, and was only later extended to the Quarry, [36] Gwyn does not agree. Instead he believes that the Penlan line merely was an off-shoot from the Quarry Railway. [37] At present there is no available evidence to confirm either theory, although there is a belief that prior to publishing his book on the Penrhyn Quarry Railways, Boyd had obtained supporting documents which no longer are publicly available. Irrespective of the above it seems unlikely that the mill would have opened without an adequate transportation system such as some simple form of tramway being in place, and in this scenario it is likely that the problems encountered with the working of this system are what prompted Wyatt to adapt the system and introduce the iron-railed edge railway to which David Gwyn refers.” [35]
Lord Penrhyn was persuaded by William Jessop to build the tramroad. “Jessop and his partner Benjamin Outram were then constructing the Little Eaton Gangway in Derbyshire. Samuel Wyatt was also involved in the construction of the gangway, and his brother Benjamin was the Penrhyn estate manager.” [1][2]
“Benjamin Wyatt was put in charge of building the tramway. Construction started on 2 September 1800, with the first slate train travelling on 25 June 1801. … The track used oval rails designed by Benjamin Wyatt, and their quoted gauge of 2 ft 1⁄2 in (622 mm) was measured between the centres of the rails. The railroad was operated by horse power along with gravity and three balanced inclines – “Port” (sometimes called “Marchogion”), “Dinas” north east of Tregarth and “Cilgeraint” a short distance north of Coed-y-Parc workshops in Bethesda. The longest was 220 yards (200 m).” [1]
Before the tramroad was constructed, slate was transported to the port by horses along mountain paths. After the tramroad was brought into service the local costs of transport fell from 4 shillings/ton to 1 shilling/ton. [1][4: p42-43]
In 1832, “Wyatt’s oval rails were replaced with more conventional … rails. The gauge of this new track was 1ft 10.3⁄4in (578 mm), measured between the inner edges of the rails – the conventional way of measuring track gauge.” [1][3]
In 1876 the tramroad was “rebuilt on a new course with steel rails laid on wooden sleepers. Steam locomotives were introduced, supplied by De Winton & Co. Engineers of Caernarvon.” [5]
Thomas Middlemass tells us that De Winton supplied ten locomotives to the line. “Seven were to be used at the quarries, three were to work the ‘main line’ to the coast, and all* were vertical-boilered 0-4-0 tanks.” [6: p16] They had two cylinders secured below the running plate with direct drive to one axle. The total weight varied between 4 and 5 tons. [7]
* … It appears that Middlemass has overlooked the fact that 3 of the 10 locomotives were fitted with horizontal boilers and were 0-4-0ST locos. They were named ‘Edward Sholto’, ‘Hilda’ and ‘Violet’, and were supplied in 1876, 1878 and 1879 respectively. [34]
Between 1882 and 1909 the Hunslet Engine Company of Leeds supplied sixteen four-wheeled locomotives for use in the quarry and on the line to Port Penrhyn.” [5]
One surviving Penrhyn locomotive is 0-4-0 vertical-boiler tank engine “George Henry,” which was built in 1877 and still looks good 140 years later at the Narrow Gauge Railway Museum in Tywyn, Wales.
The new route to suit steam-power obviated the need for the inclined planes, maintaining the easiest possible gradients. “Between coast and quarry it rose 550 feet, and, allowing for a stretch of 1/4 mile at 1 in 37 and 3 miles at 1 in 40, the average gradient emerged as 1 in 91. Flat bottomed rails were laid at first, but these were replaced in 1894 by the 50 lb bullhead variety.” [6: p15-16]
The new route of the Penrhyn Railway which opened in 1879: rendered with Maperitive, text and integration: Pechristener Wales in United Kingdom.svg: TUBS United Kingdom location map.svg: NordNordWest • CC BY 3.0. [1]
“The first locomotives used on the new railway were three De Winton’s. … Although successful, these locomotives were not powerful enough for the substantial traffic that passed down the line.” [1]
In 1882 the railway ordered ‘Charles’, a large 0-4-0ST from Hunslet. Charles proved very successful and was followed by ‘Blanche’ and ‘Linda’ in 1893 to the same basic design. These locomotives were the mainstay of the railway for the rest of its life.
In 1882 Penrhyn switched to more conventional locomotion, ordering “‘Charles’, a large 0-4-0ST from Hunslet. Charles proved very successful and was followed by ‘Blanche’ and ‘Linda’ in 1893 to the same basic design. These locomotives were the mainstay of the railway for the rest of its life.” [1]
“Between then and 1909 a positive spate of tank locos flowed, new, from Hunslet Engine Co. All were 0-4-0 saddle tanks, with weight and power variations introduced to meet specific Penrhyn requirements. Three were designed to work the ‘main line’, three were employed shunting at Port Penrhyn. Four of the smallest were confined to quarry work, and these were supplemented a few years later when six larger tanks arrived. As it happened, the latter were the last new purchases by Penrhyn.” [6: p16]
Among the Hunslet locomotives were the Penrhyn Port Class of three locomotives “built for the Penrhyn Quarry Railway (PQR). These locomotives were built by the Hunslet Engine Company between 1883 and 1885 and supplied specifically to work at Port Penrhyn near Bangor, North Wales. They were a variant of the standard Dinorwic Alice Class design.” [8]
“The Penrhyn Main Line class was a class of three narrow gauge steam locomotives built for the Penrhyn Quarry Railway (PQR). These locomotives were built by the Hunslet Engine Company between 1882 and 1893 and supplied specifically to work the railway that connected the Penrhyn Quarry near Bethesda in north Wales to Port Penrhyn on the Menai Strait.” [9]
“All three locomotives were preserved after the closure of the PQR. Charles was donated to the Penrhyn Castle Railway Museum. Linda was loaned to the nearby Ffestiniog Railway in July 1962. For the 1963 season the locomotive was re-gauged to the Ffestiniog’s 1 ft 11.5 in (597 mm) and purchased, along with Blanche at the end of the year. Both have since received extensive modifications including tenders, pony trucks and superheating.” [9]
The post-First World War years brought such economic instability that second-hand locos were not hard to find. Penrhyn bought 15 such from 1922 onwards. [5]
In 1923, three ex-US Army Baldwin 2-6-2Ts were also imported for ‘main line’ use, but, as happened elsewhere in Britain, they were never popular, and their working life was short.
The railway was private, providing no public service for either goods or passengers. Quarrymen’s trains were run, paid for by the quarrymen themselves.” [5]
“Today Porth Penrhyn in Bangor still serves the Penrhyn Quarry at Bethesda. Although today slate production and exports are not at 19th century levels it continues to be a key part of the business of slate. Exports of crushed slate (aggregate) by Penrhyn Quarry, through Porth Penrhyn currently to Rotterdam, or ports along the south coast of England, have grown to become a significant proportion of Welsh Slate sales in addition to several containers of roofing slates being shipped every month to Australia alone (taking approximately 45 days).” [23]
“Welsh slate is now covering the roofs of buildings as prestigious as the New South Wales Supreme Court and historic as Unwin’s Stores, both in Sydney Australia, as well as the Arts Centre in earthquake-hit Christchurch, New Zealand 2012. Europe also is a prime destination for Welsh slate with shipments of slate and decorative aggregate within Europe continuing to grow and evolve in particular.” [23]
All rail connections to the quarry disappeared in the mid-20th century under competition from road transport
The Post-1879 Route of the Railway
We start at the North end of the old railway at Porth Penrhyn. Porth Penrhyn) is a harbour located just east of Bangor in north Wales at the confluence of the River Cegin with the Menai Strait.
We follow the route on the Ordnance Survey 6″ Maps from around the turn of the 20th century as supplied by the National Library of Scotland (NLS). [10]
Before the future A5 was developed as a turnpike in 1820, the tramroad ran within the width of the old highway from this point for a few hundred yards. When the turnpike was created, the road level was lifted and the tramroad crossed beneath the renewed highway and ran along the Southwestern side. The sketch below shows this.
The old tramroad which was operational until 1879 was diverted to accommodate the construction of the turnpike. We start following the route of that old Tramroad. This sketch is based on a drawing in James Boyd’s book. [36: p11] He refers to the diversion in the text of the book as well.[36:p22]In this extract from the 6″ Ordnance Survey from around the turn of the 20th century, the short standard-gauge branch meets the mainline. The route of the old tramroad has now crossed the A5. The Penrhyn Quarry Railway only appears fleetingly in the top left corner if the map extract. [24]The same area as shown in the 6″ OS map above, as recorded on the ESRI satellite imagery provided by the NLS. The colour coding remains the same as in previous satellite images. [24]
A. The old tramroad
Beyond this point, we first follow the line of the old Tramroad to Penrhyn Quarries. …..
This next extract from the 6″ Ordnance Survey shows the route of the old tramway flanked by walls and passing in front of the Grand Lodge of Penrhyn Castle at Llandegai. [25]The same area now shown on the ESRI satellite imagery provided by the NLS. The lodge can be made out just to the Northeast of the red line which shows the approximate route of the old tramway crossing the roundabout on the A5 at Llandegai. [25]The approximate route of the old tramway is marked on this picture, as before, with a red line. The photograph is taken from the roundabout on the A5 at the entrance to Llandegai Industrial Estate which is in the top left of the satellite image above. The line ran just a few metres to the Southwest of what is now the A5. [Google Streetview]The approximate line of the old tramway runs across the next roundabout on the A5 before curving round to the South. [Google Streetview]Looking along the line of the old Tramroad from the modern roundabout, with the A5 heading South on the right. [Google Streetview]This is a repeat of the sketch shown earlier which is based on a drawing from James Boyd’s book. [36: p11] After being diverted from its original route, the tramroad ran on the Southern side of the highway before turning away to the South. The Smithy shown in the sketch appears on the 6″ map extract below. Just to the North of the Smithy there was a branch from the old tramroad which served the bottom of the Llandegai Incline which connected the Upper Penrhyn Mill to the tramroad. There were two level crossings at this location, one of which became an over ridge when the turnpike was built in 1820.The route of the old tramway continues on this next extract from the 6″ Ordnance Survey. At the top of the extract it is just to the left (West) of the Smithy. It crosses the standard-gauge line which is in tunnel at this point the Llandegai Tunnel). Further the south the formation, at the time of the survey was being used as an accommodation road to access ‘Bryn’ and then even further South, it was being used as a footpath. [26]This is an extract from ‘RailMapOnline’ which shows the route of the old railway plotted on modern satellite imagery. The purple line close to the top of the image is the line of the Llandegai Tunnel on the standard-gauge mainline. [27]Just to the South of the underground route of the standard-gauge mainline (Llandegai Tunnel), the old tramroad alignment crosses the access road to the A5 and runs South along the accommodation road visible to the left of the road in this image. [Google Streetview]The old tramroad route followed this lane South. [Google Streetview]At the end of the lane, a footpath can be seen running South. The hedge ahead in this image partially blocks the route but allows pedestrian access. [Google Streetview]The route of the old tramroad and the later footpath remain on the same alignment as far as the top corner of the woods shown in this map extract. From that point southwards the Tramroad route crossed the fields in a Southeasterly direction. [28]The same area as shown on the 6″ Ordnance Survey extract above. The North Wales Expressway is the notable modern addition to the image [27]The obvious features on this next extract from the 6″ Ordnance Survey which mark the line of the tramroad are the walls to the rear (West) of the cottages at Tyddyn-Iolyn. South of these properties the tramroad ran alongside the road for a very short distance. After which it curved away to the Southwest before curving back towards the Southeast to a point to the South of Llan-isaf Cottage. [29]The route described in the notes to the 6″ map extract immediately above are illustrated on this satellite image. [27]Facing South along the lane to the South of Tyddyn-Iolyn, showing the approximate line of the old tramroad in red. [Google Streetview]Looking back to the North along the lane to Tyddyn-Iolyn showing the point at which the old tramroad crossed the line of the lane. To the East of this point the Tramroad turned to the South and then to the West. [Google Streetview]The walled route of the Tramroad can still easily be picked out on the 6″ Ordnance Survey. After a short distance travelling in an West to East direction and before reaching the banks of the Afon Ogwen at a point to the North of Tyddyn-Dicwn it turned once again towards the South. [30]On the modern satellite imagery from RailMapOnline, the tramroad route appears to be within the width of the modern A5. There are signs that the actual formation of the old tramroad runs through the woodland to the South of the A5. Boyd shows this diversion on his map of the route. [36: p11] Its route can be picked out some metres to the South of the A5 but then rather than following a curving hedge line to the North and the East of Tyddyn-Dicwn at the bottom right of this satellite image. It continued towards the road junction, crossing the Southbound road just to the South of the junction. [27]The probable route of the old tramroad at the point where it crossed the road South towards Tregarth. From this point it travelled South between the road and the Afon Ogwen for a few hundred yards. [Google Streetview]The route of the old tramroad can again be picked out easily on the West Bank of the Ogwen passing an old quarry and then running immediately adjacent to Pen-isa’r-allt and on to meet Lon Ddinas. [31]RailMapOnline shows the tramroad crossing fields to the South of Lon Ddinas to join the route of the later Penrhyn Quarry Railway. This extract shows that route. Looking at the gradients involved and the 6″Ordnance Survey, it seems possible that this was the case only if an incline was used. There is no evidence of this on the ground. It seems more likely that Lon Ddinas runs along the line of the old Tramroad and may well, in times past have shared the same formation. The gradient along Lon Ddinas would have been much more suitable. However, records indicate that there was an incline at this location – known as the Ddinas Incline. [27]The lane which can easily be confused with the route of the old tramway is clearer on the 6″ Ordnance Survey. However, the Ddinas Incline followed the present field boundaries from close to Ddinas Farm up the relatively steep escarpment to meet the later Penrhyn Quarry Railway route. [32]
“The Ddinas Incline was one of three gravity-worked inclines on the original line of the Penrhyn Railway, built 1800-1801 to transport slate from the Penrhyn quarries to Port Penrhyn. … About half-way up the incline was an overbridge carrying a minor road, now widened and straightened at this point. To the north a cutting can still be seen, but the lower part of the incline has been destroyed by construction of a sewage works. To the south the line is visible as a terrace in the field. A ruined wall constructed of large roughly squared stone blocks near the top of the incline may be a surviving fragment of the winding house.” [33] W J Crompton, RCAHMW, 5 November 2009.
From this point on, the old Tramroad and Penrhyn Quarry Railway followed approximately the same route. The second article about these lines will follow the Penrhyn Quarry Railway to this point at Tregarth.
Dan Quine; The development of Port Penrhyn, Part One: 1760-1879; Archive. No. 110. Lightmoor Press, June 2021.
James I.C. Boyd; Narrow Gauge Railways in North Caernarvonshire, Volume 2 The Penrhyn Quarry Railways; The Oakwood Press, Usk, 1985. (The British Narrow Gauge Railway No. 5.)
Susan Turner; The Padarn and Penrhyn Railways; David & Charles; Newton Abbot, 1975.
This post is a short addendum to my post about the pre-railway age and the tramways of Pembrokeshire. In that post there was a section about the Porthgain to Abereiddi Tramway. In writing about that tramway, I failed to include details of the 3ft-gauge clifftop tramway which linked the slate quarry at Pen Clegyr Point with Porthgain.
I also failed to note the detail of the tramway tunnel between St. Bride’s Quarry and Porthgain Harbour. The original post can be found here:
Much of this current post about the Clifftop Tramway is summarised from a book by R.C. Jermy – “The Railways of Porthgain and Abereiddi,” which is an excellent study of the location. [2]
The 1906 6″ OS Map shows the clifftop tramway. [1]By the time the 1906 survey was undertaken the tramway tunnel and St. Bride’s Quarry were abandoned and the tramway rails through the tunnel had been lifted. The two short branches of the clifftop tramway can be seen to good effect on this map extract. [1]
By 1906, lines which linked St. Bride’s Quarry with the harbour via two inclines had been removed. The later tramway tunnel was also redundant and the tramway rails had been lifted. “Traces of the earthworks and inclines, including the lines to the spoil tips, are the only remains on the 1906 map. There remained on the clifftop just the lines of the horse-drawn tramway fetching stone from the quarries at Pen Clegyr Point. From loading sidings in the quarry the line entered a shallow cutting passing a small smithy on the right, after which maps indicate a short passing loop. The line then climbed upwards towards the summit close to Pentop Gate at which point it curved right, passing the weighing machine which measured the wagon weights. The line then forked into two, one track leading to each of the stone crushers located above the storage hoppers. Small passing loops were located on each of these tracks.” [2: p17]
There is, for me, an interesting connection between this area and the Forest of Dean. In 1900, the Forest of Dean Stone Firms were registered in Bristol.”This concern took over the harbour and mining interest at Porthgain but after November 1909, and until it was finally wound up in 1922, its interests were managed by United Stone Firms, another Bristol-registered Company. This firm raised a mortgage of £200,000 on the Dean Forest and Porthgain interests in 1910 and indeed this was the time when the crushed stone demand was reaching its peak. Sailing ships and powered vessels called regularly, the quarry and harbour railway systems were well developed and the Company ran its own fleet of steam coasters, each of about 350 tons.” [2: p10]
However, by 1913, despite the success of its Porthgain operations the parent company passed into the hands of the receiver. It remained so until 1926 “when it was reorganised and taken out of receivership by Walter Bryant of Coleford, Gloucestershire, who formed United Stone Forms (1926) Limited.” [2: p10]
However,by July 1931, that company became insolvent and was closed by 31st August 1931.
The 1948 revision of the 6″ Ordnance Survey was published in 1953. As far as the map extract is concerned all remnants of the clifftop railway have disappeared. This seems to be an over simplification of the situation as a number of remnants were still present even if not recorded. [5] The line of the track can still be traced as a levelled strip on the clifftop, adjacent to the path to Porthgain harbour. [4] R. C. Jermy includes a number of photographs, taken in 1951 by H. Townley, which show the engine shed (with ‘Newport’ gently rotting away on one of the roads) and the remains of two traction engines, ‘Daisy’ and ‘Dinah’. Dinah was sited at Pen Clegyr and was used as a winding engine. Daisy sat on the clifftop. [2: centre-pages]
Jermy notes that “by 1908 the demand for roadstone had increased and the Forest of Dean Stone Firms made the decision to invest in a steam locomotive for operating the clifftop system. … It was realised that with the arrival of a heavy locomotive complete relaying with heavier track would become a necessity. Accordingly 200 sleepers were ordered … and … between 20th and 22nd January, 1909 the tramway was [re-laid] with heavy rails and sleepers from Pentop Gate by the water tank to the winding engine house at the top of the incline leading from the lowest quarry levels. A new engine shed was constructed, the roof over the single road being completed just six days after the arrival of the first locomotive! An inspection pit was located between the rails in the shed. Later, in November 1909 a ten ton weighbridge was installed in a brick building close to the water tower.” [2: p18]
Later, two further locomotives arrived at Porthgain necessitating the addition of a second road to the engine shed.
Records appear to show that one of these locomotives, Singapore, was too heavy for the tramway rails in place when they arrived and as a result in some expenditure was necessary to upgrade the tramway. In fact, the prevailing weather conditions and the weight of the locomotives seem to have resulted in a significant regular maintenance programme being implemented.
Jermy shows two plans of the railway – the first shows it much as on the 1906 6″ Ordnance Survey. He dates his sketch plan to 1905. [2: p20]. The second is the result of a survey of the line by Jermy in the 1980s which seems to show the small network at its fullest extent in around 1925. [2: p21] This sketch plan shows the engine shed in its position on the Northeast side of the St. Bride’s Quarry, three roads serving the crushers and hoppers, a small Yard on the North side of St. Bride’s Quarry, a weighbridge and water tank to the Northwest of the Yard, a long straight length of line with two tracks, one known as ‘The Cutting’, the other as ‘Jerusalem Road’. These two line led to the Upper Level of Pen Clegyr Quarry and, via a cable-worked incline to the lower level of the quarry. [2: p21]
Locomotives
The first locomotive was named ‘Portgain‘. It was built in 1909 by Andrew Barclay in Kilmarnock. It was Works No. 1185. … No. 1185 was an 0-6-0T with 7″ x 13″ outside cylinders, 2ft 2½in wheels 3ft gauge. … Despatch Date: 26th July 1909. [2: p23][3] This locomotive was out of use by 1929 and was scrapped on site shortly after 1931. [4]
The second, ‘Charger‘ was built in 1891 by W.J. Bagnall in Stafford and had the Works No. 1381. It had a copper firebox, brass tubes and two 5½in x 10in outside cylinders. It passed through a number of ownerships before, in September 1912, it was moved to Porthgain. [2: p29-30] This locomotive was scrapped shortly after 1931. [4]
The third, ‘Singapore‘, was a 0-4-2 saddle tank built at the Kerr-Stuart works in Stoke-on-Trent and had Works No. 659. It had 9½in x 15in outside cylinders. It was built in 1899. It was first bought by the contractor G. Pauling and Co. It was shipped to Ireland and was used on the Burtonport Extension contract which Pauling’s were undertaking for the Londonderry and Lough Swilly Railway. Sold in 1903, it went to Scotland and remained there until 1912 when it was transferred to Porthgain. [2: p31-33] This locomotive was out of use by 1929 and was scrapped on site shortly after 1931. [4]
The fourth locomotive was ‘Newport‘, a 0-4-0T loco. It was built by Hudswell, Clarke and Company of Leeds. It was originally built as a 2ft 10in gauge loco with Works No. 311 in 1889. In 1900 it was owned by Kellett & Sons who worked on the Hagley to Frankley section of the Elan Valley Aqueduct. It went through a number of ownerships after this before entering service at Porthgain in May 1929 after an overhaul. [2: p33-36] This locomotive remained in the Porthgain Railway Locomotive Shed after closure until scrapped in 1953. [4]
This post includes a selection of news items about Kenya Railways in the period from 2018 to the Autumn of 2022. The items included are by no means exhaustive but they might be of interest! ……..
The Birth of a Nation: preserving records on the Kenya-Uganda railway line (EAP1143)
In 2018 the British Library funded a small pilot project undertaken in Nairobi Railway Museum’s archive. This was a low cost 6 month pilot which identified the condition of the archived documents and photographs and improved storage and access to them.
The photographs which were digitised all seem to predate the construction of the railway and document the life and times of people who lived on its route. [1]
The Standard-Gauge Line
In 2018, NPR reported that the “Standard Gauge Railway station in Nairobi is easily the most impressive public building in Kenya.” [8] The station is “adventurous. It’s all gray and modern. Geometric shapes form an abstract locomotive, and red neon announces the “Nairobi Terminus.”” [8]
The Standard-gauge Railway Station at Nairobi. [8]
NPR continues: “The train runs 293 miles from Kenya’s capital city to the port of Mombasa and back twice a day and represents the biggest infrastructure project since Kenya’s independence 54 years ago. The Chinese financed it; a Chinese company built it; and the Chinese will operate it for many years to come. … The project, which launched in the summer of 2017, has not only come to signify Kenya’s ambitions, but also China’s ambitions on the African continent. In the past decade, China has become the biggest lender to governments in Africa. The money has helped build ports, roads, bridges, airports and trains. But critics warn the loans are full of traps that could leave African countries in the lurch. Kenya alone owes $5.3 billion to China.” [8]
On 16th October 2019, VOA News reported that Kenya opened the second phase of the Standard Gauge Railway Project: “Kenya’s President Uhuru Kenyatta officially opened on Wednesday the second phase of his flagship infrastructure project: a Chinese-funded and built railway that will eventually link the port of Mombasa to Uganda. … The latest stretch of track cost $1.5 billion and runs from Nairobi to the Rift Valley town of Naivasha.” [9]
After the official opening, the president then joined the first ride along the line. … “The train stopped at every station, where a cheering crowd awaited the president. He promised them that the new railway will bring prosperity. … Kenyatta said that if the railway comes here, development also comes here.” [9]
The new track is 120 kilometers (75 miles) long and has 12 stations. Passengers can ride the trains, but the railway is mainly for cargo. The track will eventually lead to an inland container depot, (see below) from where containers will be distributed to Uganda and Rwanda, and to South Sudan. [9]
On 20th August 2021 the Ugandan newspaper, ‘The Independent’ reported that Kenya’s Standard-gauge railway line transported 2.31 million tons of cargo between January and the end of May that year: “an increase of about 45 percent from the similar period in 2020, according to data released on Thursday from the Kenya Railways Corporation.” [10]
“The rise in cargo volumes saw an increase in revenue generated during the months to 6.2 billion shillings (about 57 million U.S. dollars), up from 41.4 million dollars generated from January to May in 2020, it said. … The number of passengers using the train during the first five months of 2021 nearly doubled amid COVID-19 pandemic. … Some 601,201 passengers were ferried between the capital Nairobi and the coastal city of Mombasa during the period, up from 330,232 in 2020 when the country grappled with COVID-19 pandemic, the corporation said. … This generated revenue of 5.9 million dollars, up from 3.3 million dollars generated between January and May in 2020.” [10]
Refurbishment of Nairobi Central Station
Major renovations at Nairobi Central Station began on 27th July 2020. By January 2021, the work was well-advanced. Kenya Railways reported that the work would facilitate the use of the new DMUs due to arrive in the country.
Renovation work at Nairobi Central Station in January 2021. [5]
Kenya Railways stated on 13th January 2021 that, “as the rehabilitation works continue[d], stringent measures [were] put in place to safeguard daily commuters as they access[ed] the station.” [5]
Designated boarding points were set for various trains to facilitate safe movement of passengers within the Nairobi Central Station. For instance, Kikuyu and Ruiru trains, the boarding point was designated on the Western end of the Nairobi Central Station and it was to be accessed from Railways Police station. While passengers boarding Syokimau & SGR Link trains boarded the trains from the Eastern end of the station with the access point being adjacent to Guava restaurant.
Kenya Railways stated that, “The rehabilitation of Nairobi Central Station will not only give it a new face but also show KR is dedicated in making transportation better.” [5]
Plans for the full renewal of Nairobi Central Station were published in May 2022. The project has been sponsored by both the British and Kenyan Governments.
Design office view of the proposed renewed Central Station. [6]
THE British and Kenyan governments unveiled the final design of Nairobi’s new Central Railway Station and surrounding public area, which has been developed as part of the Nairobi Railway City redevelopment programme. [6]
The IRJ reported that, “The design was developed by SNC-Lavalin subsidiary Atkins and submitted to Kenya Railways and the Ministry of Transport. … The station is designed to accommodate up to 30,000 passengers per hour at peak periods, and will have 6000m2 of concourse space. The station will offer a new covered public space for the city with retail outlets and other amenities …. It features separate entrance and exit routes to avoid conflicting flows and ensure passengers can get to and from the platforms efficiently. … Three existing platforms will be joined by six additional passenger platforms, and four dedicated freight lines will be built. Two platform bridges will be built, with one for passengers entering the station and one for passengers exiting.” [6]
A few design office perspective views are shown below:
The SGR to MGR link at Naivasha
In July 2022, President Uhuru Kenyatta officially commissioned the Standard Gauge Railway – Metre Gauge Railway Passenger Rail Link at the Kenya Railways Mai Mahiu Station in Naivasha, Nakuru County. The ceremony took place on Tuesday, 26th July 2022.
The 5km link will enable passengers traveling to Western Kenya by train to switch from the standard-gauge service to that of the metre-gauge and vice versa. Kenya Railways reported that it would as a result be possible to travel exclusively by rail from Mombasa through Kilifi, Kwale, Taita Taveta, Makueni, Machakos, Kijiado and Nairobi onwards to Nakuru, Kisumu, Eldoret, Kitale, Nyahururu, Nanyuki, Malaba and Bungoma. [2]
Naivasha Inland Container Depot
On the same day (26th July 2022) the Naivasha Inland Container Depot (ICD) was officially opened by President Uhuru Kenyatta.
The Naivasha ICD facility which incorporates both the Standard Gauge Railway and the Metre Gauge Railway line will handle mainly transit cargo to the Great Lakes Region including Uganda, South Sudan, DR Congo, Northern Tanzania, Rwanda, and Burundi, which account for around 30% of imports and exports through the Port of Mombasa.
The SGR/MGR Link referred to above will greatly facilitate the transshipment process. All Transit cargo can now be delivered to the facility straight from the Port of Mombasa as either Through Bill of Lading (TBL) or merchant haulage (Non-TBL), while exports and empty containers can also be consolidated at the Naivasha ICD and railed to the Port of Mombasa for onward shipping.
Kenya Railways reported that, “The depot is linked to the Mombasa Port container terminal by a rail-tainer service on the Mombasa to Suswa Standard Gauge Railway line. It will serve to bring port services closer to customers and reduce congestion at the Port of Mombasa, Nairobi Inland Container Depot and on the roads. It is convenient for East African partner states who will not have to cover an entire 572 kilometres by road between Mombasa and Naivasha. From Naivasha ICD to Malaba Railway Yard, cargo will be transported over 36 hours and it will cost $860.”
Kenya Railways also affirmed that, “The Naivasha ICD includes a one-stop centre for ease of operations and efficient service delivery. The port houses all the Government agencies involved in handling of cargo namely Kenya Railways, Kenya Ports Authority, Kenya Revenue Authority, Kenya Bureau of Standards, Port Health (Public Health) and Revenue Authority officers from partner states of Uganda, Rwanda and Tanzania.” [3]
Nakuru Railway Station
President Uhuru Kenyatta officially commissioned the revitalized 217km Nakuru-Kisumu Metre-Gauge Railway (MGR) and the 465km Longonot–Malaba segment as well as the refurbished Nakuru Railway Station.
Kenya Railways reported on 28th July 2022 that the re-commissioning had taken place: “The iconic Nakuru Railway Station is a key transit station for cargo and passenger train services to and from Western Kenya, and is the aggregation hub for farm produce from the agriculturally rich Central Rift region for onward freight to the Coast for export.” [4]
“Nakuru town started as a railway station on Kenyan-Uganda railway line at the turn of 20th century. It was built in 1900 and later expanded in 1957. It sits on the east side of the centre of Nakuru. The town is part of the famous ‘White Highlands settlement’ areas established by the British during the colonial era. The areas surrounding Nakuru town are mainly known for their vast agricultural potential especially cash-crop farming i.e wheat, barley, pyrethrum, sisal, maize and beans. Nakuru Railway Station was built in order to serve the rapidly growing economy of the town.” [4]
Refurbished Nakuru Railway Station [7]
“Later branch lines were built to link the station to farming areas. Among these was the line linking the station to the sisal producing Solai area. Just 6.9 kilometres from Nakuru town lies Nakuru Junction station. This is the point at which the lines to Malaba and Kisumu diverge.” [4]
Suburban Services in Nairobi
Nairobi Commuter Rail Services now run regularly to Ruiru, Embakasi Village, Limuru, Syokimau and Lukenya in Kitengela. There is also a Madaraka Express Commuter Service that operates between Nairobi Terminus and Ngong station and a link service between Nairobi Central Station and the Standard-gauge Station runs at 0630hrs, 1200hrs and 2010hrs each day. [11]