Stanley Jenkins comments: “Situated at the head of a fertile valley some five miles inland from the Cromarty Firth, Strathpeffer was once famous as a health spa and fashionable holiday resort. Although the medicinal value of the local mineral springs had been known for many years, the village did not really develop until the Victorian era when the Countess of Cromartie was instrumental in creating a Central European-style spa in this remote part of Scotland.” [1: p53]
When the first section of the Dingwall & Skye Railway opened on 19th August 1870 the Strathpeffer area became much better connected. However, the new line ran well to the North of the village. The line had a station named ‘Strathpeffer’ but it was 2 miles from the spa and at a much higher level. The station ended up in that location because of the opposition of a local landowner to a far better route for the Dingwall & Skye line, which would have passed through the village. The result was a steeply inclined (1 in 50) line climbing to the summit at Raven Rock
The distant station meant that the increasingly popular spa had to provide a horse-drawn road service for increasing numbers of upper-middle class clients. Stanley Jenkins tells us that “It soon became clear … that a direct rail link was needed. Meanwhile, in 1880 the Dingwall & Skye Railway was merged with the Highland Railway, and following this development it was agreed that a short branch line would be built to Strathpeffer. The proposed line would follow a route similar to that suggested for the Dingwall & Skye Railway in the 1860s, albeit with a terminal station in Strathpeffer, rather than a through station as originally planned. Accordingly, on 28th July 1884 powers were obtained for the construction of a 2 mile 38 chain railway from Fodderty Junction, on the Dingwall & Skye Railway, to Strathpeffer. The authorised line ran west-south-westwards across easy terrain towards its destination, and with few physical obstacles to hinder the work of construction good progress was made. The single-track branch was opened on 3rd June 1885, the original Strathpeffer station on the Dingwall & Skye route having been renamed Achterneed just two days earlier.” [1: p53]
The line was single-track and had no intermediate stations. As there was no station at Fodderty Junction, trains ran to and from Dingwall. Jenkins comments that the railway terminated at Strathpeffer “in a spacious terminus, while at Dingwall the Highland Railway company provided a new junction station with much improved facilities.” [1: p53]
Jenkins notes that lines like that serving Strathpeffer “attracted a certain amount of excursion and leisure traffic during the Edwardian period. Indeed, the Strathpeffer branch was albeit briefly – served by a ‘named’ train. In 1911, the ‘Strathpeffer Spa Express’ was introduced as a special Tuesdays-only working that left Aviemore at 2.30pm and ran non-stop to Dingwall; the train then continued westwards to Strathpeffer, with an arrival time of 4.15pm. This prestigious service ran in conjunction with a train that left Perth at 11.50pm, the idea being that through travellers would be able to reach their hotels with time to wash and change before dinner. Curiously there was no corresponding up service, and one assumes that travellers were expected to return southwards on normal branch services. A similar through service was available on Saturdays during the Edwardian period; this working normally left Inverness at 3.00pm, and it called intermediately at Beauly, Muir of Ord, and Dingwall. In the up direction the balancing southbound service departed from Strathpeffer at around 8.15pm. These through workings catered primarily for visitors to the larger hotels in Strathpeffer, and in this context it is interesting to note that the Highland Railway opened its own hotel in 1911. The through services were withdrawn at the start of World War I, the ‘Strathpeffer Spa Express’ being deleted in 1915, while the Inverness through trains ran for the last time in 1914.” [1: p53]
The two extracts below from the 25″ Ordnance Survey of 1904 give an overview of Dingwall Railway Station and village. The full length of the station site and the junction of the line to Skye are included on this extract from the 25″ Ordnance Survey from the turn of the 20th century. [14]
Jenkins notes that “In its later years the route was treated as a minor branch line, with a service of around half a dozen trains each-way between Strathpeffer and the junction station at Dingwall. The latter station was opened on 11th June 1862 when the first section of the Inverness & Ross-shire Railway was brought into operation. In its early years the station was a very basic affair which hardly seemed appropriate for the county town of Ross & Cromarty. The station became a junction following the opening of the Dingwall & Skye Railway on 19th August 1870, but Dingwall did not reach its fully-developed form until the construction of the Strathpeffer line in the following decade.” [1: p55]
Jenkins tells us that “In view of the importance attached to the Strathpeffer scheme, it was decided that new and much-improved station buildings would be constructed, while a separate bay platform was installed at the north end of the station for use by terminating branch trains. The new station building was in effect a de-luxe version of the usual Highland Railway design, stone being utilised instead of the normal timber construction, while the building was given a substantial glass & iron platform canopy formed of seven transverse bays. The up and down platforms were linked by a lattice girder footbridge, and there was a small waiting-room block on the up side.” [1: p55]
“The track layout at Dingwall incorporated a number of loops and sidings, while the goods yard contained a range of facilities for all forms of traffic including coal, livestock, vehicles, and general merchandise; a 4ton yard crane was capable of dealing with timber or other large or heavy consignments. The station was signalled from two standard Highland Railway signal cabins known as Dingwall South and Dingwall North boxes.” [1: p55-56]
The junction between the line to Kyle of Lochalsh and the line North to Wick. The line to the North of the station, bridges the River Peffery (which is still tidal at this point) just to the South of the junction. Strathpeffer trains followed the Kyle of Lochalsh line to the West as far as Fodderty Junction. This is an extract from the ESRI satellite imagery provided by the NLS. [14]The road from Dingwall to Strathpeffer crossed the line at a level crossing. The crossing-keepers cottage can be seen on the South side of the railway line, to the East of the road. This is another extract from the 25″ Ordnance Survey from the early years of the 20th century. [19]The same area on the 21st century ESRI satellite imagery. [19]Looking North along the A834 through the level crossing with the Kyle of Lochalsh railway line. [Google Streetview, March 2023]Looking East from the A834 at the level crossing with the Kyle of Lochalsh railway line. [Google Streetview, March 2023]Looking West from the A834 at the same location. [Google Streetview, March 2023]
Jenkins tells us that, “On departure from Dingwall, branch trains proceeded westwards along the Kyle of Lochalsh line for a distance of 2 miles 22 chains. At Fodderty Junction the Strathpeffer route continued westwards, whereas the Kyle line turned sharply north-westwards on its way to Raven Rock Summit.” [1: p55-56]
Immediately to the North of Fodderty Junction, just off the top edge of the two images above, the Kyle of Lochalsh line crosses the modern A834 – the road from Dingwall to Strathpeffer.
“Until 1936, Fodderty Junction was worked from a small signalbox controlling home and distant signals in each direction, as well as the junction points. The junction was later operated by a hand generator from Dingwall North Box, with key-token operation on the ‘main-line’ section between Dingwall North and Achterneed, and one-engine-in-steam working for branch trains between Dingwall North and Strathpeffer. This mode of operation presented certain problems in that there had to be various ‘fail-safe’ arrangements between the two systems of single-line working. The Strathpeffer branch was therefore worked by a Tyer’s Occupation Key, which prevented conflicting movements on the main line between Dingwall North and Fodderty Junction, and ensured the safe operation of the one engine-in-steam section between Fodderty Junction and Strathpeffer.” [1: p56]
“Fodderty Junction Signal Box was reopened in June 1940 in connection with heavy wartime traffic on the Kyle of Lochalsh line. This situation pertained until August 1944, when the box was again closed. The box itself was a typical Highland Railway structure, while a small stone cottage was available nearby for the benefit of the signalman and his family.” [1: p56]
“Having gained their own line at Fodderty Junction, branch trains proceeded generally westwards along the south side of a fertile valley. The route was not quite straight, and as the railway approached its destination the single line was heading approximately west-south-westwards. Slowing for the final approach to the terminus, down trains passed a fixed distant signal, after which they came to rest in an attractive station, some 2 miles 38 chains from Fodderty Junction and 4 miles 60 chains from the start of the journey at Dingwall.” [1: p56]
Incidentally, for those who are unfamiliar with the full range of imperial units, a ‘chain’ is 22 yards in length (66 feet) and there are 80 chains to one mile. Initially the length of a chain varied between different jurisdictions but standardisation occurred in 1824 with the introduction of the imperial system of units. [2] A 66 ft. chain was made up of 100 links. [3]
The journey along the branch was relatively easy work for the locomotives employed. The approximately 2.5 miles to the terminus at Strathpeffer was on easy grades.
“Like other Highland Railway branch-line stations Strathpeffer was well laid-out, with a lengthy platform for passenger traffic on the up side and a small goods yard on the down side of the line. The platform line was flanked by an engine-release road, which was equipped with a short dead-end spur at its western end. Although only one platform was provided, there was sufficient space for a second platform on the down side if traffic requirements had ever justified such a facility. There was a short loading dock beside the spur at the end of the run-round loop, and this could, if necessary, have been extended eastwards to form a second full-length platform.” [1: p56]
“The station building was similar to those at other Highland branch-line terminals, albeit somewhat larger. This typical single-storey timber-framed structure was clad in the usual vertical weatherboarding, while its low-pitched slated roof was punctuated by an array of squat chimney stacks. As at Dingwall, an extensive ridge & furrow platform canopy was provided, eleven transverse bays being supported on a dozen vertical iron columns with ornate quatrefoil spandrels. The Highland Railway was not, by any definition, a rich company, and the provision of this lavishly-appointed station underlined the company’s commitment to the development of passenger traffic at Strathpeffer.” [1: p56]
https://canmore.org.uk/collection/44840 shows Stroudley 0-6-0 saddletank locomotive LMS 16118 (originally named ‘Balnain’ and later ‘Dornoch’) in Strathpeffer Station. [NB. This image can only be viewed on canmore.org.uk website as is not available for download.]
“The goods yard contained three dead-end sidings, one of which passed through a typical Highland Railway timber goods shed while another terminated alongside a raised loading bank. The yard was entered by means of a siding connection on the up side of the running line, the single turnout facing the direction of down trains. The main form of goods traffic handled here was domestic coal for consumption in the nearby hotels and guest houses, although it seems likely that a considerable amount of building material would have been handled at Strathpeffer during the Victorian period when many new buildings were being erected in the immediate vicinity.” [1: p56]
“The terminus was signalled from a small signal cabin on the down side of the run-round loop. The box contained an 11-lever frame with three spare levers. There was just one working signal, this being an up starting signal that was locked in the ‘danger’ position when the key token for the Dingwall North to Strathpeffer section was placed in the Strathpeffer key-token instrument. As a further safety measure a catch-point and sand-drag was provided beside the starting signal, and once set for the sand-drag the catch-point could not be reset until the key-token had been withdrawn from the Strathpeffer instrument.” [1: p57]
“Other features of interest at Strathpeffer station included a water tank and a well-built stone cottage for the stationmaster, both of these structures being situated to the south of the platform on the down side of the line. The station was well-sited in relation to the village (or ‘The Strath’, as it was known locally), and visitors arriving by train did not have far to walk in order to reach their hotels.” [1: p57]
“Strathpeffer was well-equipped with shops, golf courses, gardens and a pump room, all of these amenities being designed to cater for the needs of upper-middle class Victorian visitors.” [1: p57]
“Sadly, the heyday of Strathpeffer as a fashionable resort came to an end with the outbreak of war in August 1914, and in retrospect the LMS era was a period of slow but inexorable decline. Passenger services lingered on until the end of World War II, but the end came on 23rd February 1946 from which date the railway was closed to passenger traffic. Goods services continued until March 1951, after which the branch was closed in its entirety. Demolition was soon accomplished, but the once-elegant station building at Strathpeffer survived in a derelict condition.” [1: p57]
“In due course the delights of Strathpeffer were rediscovered by spa enthusiasts, conservationists, and students of Victorian architecture, and in recent years the Spa Pavilion and other buildings have been lovingly restored. Happily, the station building was sufficiently intact to attract funding for its restoration, and in 1980 this timber-framed Highland Railway structure was reopened as a craft centre and museum. In its new role, the restored station forms a fitting memorial, not only to the Strathpeffer line, but also to the other minor lines that once abounded in this corner of Scotland.” [1: p57]
Stanley Jenkins; Highland Railway Minor Lines: 2; in Rex Kennedy (ed.); Steam Days; Red Gauntlet Publications, Bournemouth, Dorset, January 2002; p48-57.
William John Macquorn Rankine; A Manual of Civil Engineering (2nd ed.); Griffin Bohn & Company, London, 1863, p3.
Flicking through a number of old magazines passed to me by a friend here in Telford, I came across a supplement published by The Railway Magazine in December 1990, “Eric Treacy: The Classic Years.” [1]
The Rt. Revd. Eric Treacy MBE, LLD, Lord Bishop of Wakefield from 1968 until 1976, died on Appleby Station on 13th May 1978. He left behind a large collection of railway photographs, taken over more than four decades.
In 1932, he was ordained deacon in the Church of England and priest a year later, serving as curate at Liverpool parish church from 1932 to 1934. [4] Wikipedia tells that “he took up railway photography, being inspired by visiting Liverpool Lime Street and getting to know his parishioners who worked on the railway. His photographic work appeared in various magazines during the 1930s.” [3]
His railway photography “was interrupted by the Second World War when he served as Military Chaplain. On 12th March 1940, he was commissioned as Chaplain to the Forces 4th Class (equivalent to captain). [5] On 10th May 1945, it was announced that Treacy had been Mentioned in Despatches ‘in recognition of gallant and distinguished services in North West Europe’. [6] He was promoted to a Chaplain to the Forces 3rd Class (equivalent to major). On 24th January 1946, he was appointed a Member of the Order of the British Empire (MBE).” [7][3]
In 1946 Treacy published his first book which contained images of L.M.S. locomotives. [8] On demobilisation he became Rector of Keighley and in 1949 was appointed Archdeacon of Halifax. [9] In 1961, he became Bishop of Pontefract [3] and in 1968, Treacy became Bishop of Wakefield. [1: p2]
The Railway Magazine Supplement comments that Treacy was “a devout man of the church as well as a talented lineside photographer (and frequent footplate passenger!) his atmospheric work never failed to portray his passionate love of railways, quickly establishing him as one of Britain’s foremost railway photographers.” [1: p2]
By 1935, “he was sending work regularly to The Railway Magazine signed ‘Rev E. Treacy, 2 Edge Lane, Liverpool’, showing London Midland & Scottish trains, many of them still worked by former London & North Western Railway locomotives, around that great city. Shap was an early discovery, and he spent many hours walking the fells and awaiting Anglo-Scottish expresses as they slogged their way to the summit. The zenith of his work undoubtedly came with the Stanier Pacifics, and to those who remember, it is virtually impossible to think of Eric Treacy without also the thunderous reminder of a ‘Princess Royal’ or ‘Coronation’ Pacific unleashing its full fury against that formidable climb with 15 bogies and more in tow.” [1: p2]
Lorna Hogger says that “Treacy befriended drivers and firemen in his congregation and often persuaded them to make smoke effects for his pictures. … He took time to plan his photographs days in advance, checking the weather and position of the sun at the time the train was due, and coming to know the locations well. Treacy rarely took unplanned shots, the equipment and large glass negatives being too expensive for acting on impulse.” [8]
Lorna Hogger also tells us that Treacy “joined the Railway Photographic Society in 1935, but unlike many of his peers he described his pictures as ‘emotional rather than technical’, enabling him to create stunning landscapes. This is evident in the photograph below which shows a goods train crossing the Ribblehead Viaduct.” [8]
The Railway Magazine Supplement continues: “No less atmospheric were his photographs of departures from major stations: think of Treacy, and sooty masterpieces of ‘Royal Scot’ or ‘Patriot’ 4-6-0s getting to grips with heavy trains at the foot of the deep rock cuttings out of Liverpool Lime Street come to mind, or perhaps an A4 Pacific trying to find its feet at the head of an Edinburgh-bound express at Kings Cross.” [1: p2]
The Railway Magazine Supplement concludes: “Throughout the transformation of the ‘Big Four’ to British Railways, and into modernisation when diesel locomotives began appearing on major routes, Treacy was there, and his legacy of ‘Deltics’ at Leeds or ‘Peaks’ on trans-Pennine services have all the richness and imagination of his steam photos.” [1: p2]
Photograph albums of Treacy’s work include:
Canon Eric Treacy; My Best Railway Photographs: No.1 L.M.S.; Ian Allan Ltd, London, 1946.
Eric Treacy; Roaming the Northern Rails; Ian Allan Ltd, London, 1976.
Eric Treacy; Roaming the East Coast Main Line; Ian Allan Ltd, London, 1977.
Eric Treacy; Lure of Steam; Ian Allan, London, 1969, 1980.
Eric Treacy; Glory of Steam; Ian Allan, London, 1981 (reprint?)
G. Freeman Allen; Great Railway Photographs by Eric Treacy; Peerage Books, London, 1982.
P.B. Whitehouse & G. Freeman Allen; Eric Treacy: Railway Photographer; David and Charles, Newton Abbott, 1983.
P.B. Whitehouse & J. Powell; Treacy’s Routes North; 1985.
P.B. Whitehouse & J. Powell; Treacy’s British Rail; 1990.
Eric Treacy; Portrait of Steam; 1991(reprint).
Eric Treacy; The Best of Eric Treacy; Atlantic Transport Publishers, 1994.
David Jenkinson & Patrick Whitehouse; Eric Treacy’s L.M.S.; Oxford Publishing Company, 1988.
References
Eric Treacy: The Classic Years; in The Railway Magazine (supplement), December 1990.
The featured image above shows a Caledonian Railway West Coast Dining Train hauled by Caledonian Railway 4–6–0 Locomotive No. 49.
Wikipedia tells us that “The Caledonian Railway (CR) was one of the two biggest of the five major Scottish railway companies prior to the 1923 Grouping. It was formed in 1845 with the objective of forming a link between English railways and Glasgow. It progressively extended its network and reached Edinburgh and Aberdeen, with a dense network of branch lines in the area surrounding Glasgow. It was absorbed* into the London, Midland and Scottish Railway in 1923. Many of its principal routes are still used, and the original main line between Carlisle and Glasgow is in use as part of the West Coast Main Line railway (with a modified entry into Glasgow itself).” [3]
* technically the Caley was not ‘absorbed’ but rather ‘amalgamated’ into the LMS.
Paul Drew says, “A little after eight o’clock on daylight weekday evenings in the years just before World War I, at Carlisle Citadel Station there was performed a colourful ceremony; it was the arrival from Euston of ‘The 2pm’ the West Coast Anglo-Scottish express par excellence and its making over by the London & North Western Railway (LNWR)to the Caledonian Railway (CR), with a change of engine. The occasion was impressive after sunset too, but the gaslight killed the colours of the locomotives and coaching stock; not only LNW and Caledonian were to be seen, but also Midland, North Eastern, Maryport & Carlisle, North British, and Glasgow & South Western. The seven railways and their several liveries made Carlisle Citadel the epitome of pre-1914 variety and splendour on Britain’s railways. The 2pm was sometimes called ‘The Corridor’ because in the 1890s it was the first West Coast train to include corridor stock.” [1: p4]
A Dunalastair II Locomotive, northbound with a mixture of the best Caledonian and West Coast joint stock. [86]
He continues: “In would come the 2pm behind an Experiment or, later, a Claughton 4-6-0 in LNWR blackberry black, austere perhaps, with a black tender devoid of identification for everybody should know an LNW engine. The coaches would be lettered WCJS (West Coast Joint Stock) but they would be the latest achievement of LNW design, specially built for the 2pm. The livery would be LNW-cream above the waistline and, below, that indescribable mixture of dark purple and brown; nearby, just for contrast, there might be some Caledonian main-line stock in cream and purple-lake, ruddier than the LNW lower panelling, and wearing the Caledonian coat of arms. (It was far more eloquent heraldry than the groups of shire and city arms favoured by most other companies, signifying among other things the Kingdom and Royal House of Scotland.) The 2pm consisted of seven, or sometimes up to nine, 12-wheel vehicles, with portions for Glasgow Central and Edinburgh Princes Street, which divided at Symington or Strawfrank Junction, or sometimes Carstairs.” [1: p4]
The Caledonian Railway Coat of Arms. [2]
Drew continues his evocative description of a late afternoon and early evening at Carlisle: “The North Western engine would run off into the yard and then would appear a massive eight-wheel Azure-Blue tender bearing on its side the Caledonian arms flanked by the initials CR. Beyond, there would loom into sight the great bulk of one of the Cardean class of inside-cylinder 4-6-0s, perhaps No 903 Cardean itself, a vision of Azure boiler, splashers and cab sides, purple-lake underframes, and scarlet buffer beam, and one of the most powerful and efficient inside-cylinder 4-6-0s, and indeed of any 4-6-0s, of a British railway.” [1: p4]
The CR was the first major railway to adopt a blue livery for its locomotives. The CR adopted the colour in the very early days of the company. Drew tells us that, “the CR’s ‘Azure Blue’ was achieved by mixing white paint at the company’s St Rollox (Glasgow) works with expensive darker blue, to economise; some CR engines painted in the Perth shops were finished in darker blue without the white admixture. Neither livery and especially the lighter has been surpassed by any of the blues essayed by other railways in the later years of steam.” [1: p4]
Caledonian Railway Class 60 4-6-0 steam locomotive, No 14652, banked by a Caledonian Railway 0-4-4T, No 15163 on the West Coast Main Line in 1935. Travelling into Scotland, the West Coast Main Line faces a formidable climb of ten miles at 1 in 100 from Beattock station to the summit. In steam days nearly all trains were assisted from the rear, as shown in this photograph. The train also appears to consist of ventilated vans and containers for meat traffic. [87]
Drew continues: “Cardean or a sister-engine would be coupled up and, after a blast of the Caley whistle, the miniature foghorn that contrasted so well with the shriller piping of other companies’ locomotives, the express pulled out on its 39.7-mile 44-minute run to Beattock at the foot of the 10-mile Beattock Bank. A stop of only two minutes was allowed at Beattock for buffering up the banking engine and ‘The Corridor’ was off on its next lap to Symington or other point of detachment of the Edinburgh vehicles. Overall timing allowed from Carlisle to Glasgow was 123 minutes, so that the train was due at Central at 22:16, eight hours 16 minutes after leaving Euston, and only one minute after the 84-hour Euston-Glasgow and Kings Cross-Edinburgh timings which the West and East Coast companies had agreed between themselves rather unprogressively after the second series of the so-called Races to the North of 1895.” [1: p4]
Close co-operation between the CR and the LNWR was the order of the day, as was a similar co-operation between The North British Railway and the North Eastern Railway on the east coast of the UK. But Carlisle was the frontier between the two and the Cr was independent of the LNWR in most things.
A general map of the Caledonian Railway network, Public Domain. [4]
In the 1830s and 1840s much thought was given to building a railway from central Scotland to join the growing English railway network. The hilly terrain and sparse population of the Southern Uplands made the choice of route contentious. [5]
Caledonian Railway 4-6-0 steam locomotive No. 910 on a heavy passenger duty! [90]
Drew tells us that “the Caledonian was conceived as a link between England and central Scotland and Glasgow before the most northerly component of the railways – the Lancaster & Carlisle Railway, eventually amalgamated into the LNWR – was projected. Alone of the four Anglo-Scottish trunk routes proposed in the late 1830s, the CR line from the south. from Carlisle via Annandale and Beattock, forking near Symington for Glasgow and Edinburgh, served both cities equally well. The Annandale route was chosen by that great engineer Joseph Locke. after some hesitation, in preference to the route via Dumfries. Nithsdale and Kilmarnock, which was more or less the alignment of the Glasgow & South Western and could not reach Edinburgh except through industrial Lanarkshire or by a detour through difficult terrain south of Glasgow.” [1: p5]
Wikipedia comments that, “the Caledonian Railway succeeded in opening its line by way of a summit at Beattock in 1847 and 1848. It connected Glasgow and Edinburgh with Carlisle, and there was a branch to connect with another railway to Perth. The approaches to Glasgow were over existing mineral lines, but a superior route was later built.” [5] The Carlisle-Glasgow main line was the Caledonian’s first trunk route. The Caledonian Railway Act received the Royal Assent on 31st July 1845, and the first section was opened from Carlisle to Beattock on 10th September 1847. The two cities of Edinburgh and Glasgow were reached by 15th February 1848. Drew tells us that, “the Glasgow terminus, Buchanan Street, was not opened until the following year. The station first used was Port Dundas, approached over the metals of the Glasgow, Garnkirk & Coatbridge [Railway], which the CR absorbed.” [1:p5]
Wikipedia comments: “Glasgow was reached over the Glasgow, Garnkirk and Coatbridge Railway (successor to the Garnkirk and Glasgow Railway), and the Wishaw and Coltness Railway, which the Caledonian had leased from 1st January 1847 and 1st January 1846 respectively. The Glasgow station was [initially] the Townhead terminus of the Glasgow, Garnkirk and Coatbridge Railway.” [3][8]
Wikipedia continues: “During the process of seeking Parliamentary authorisation, the Caledonian observed that the Clydesdale Junction Railway was being promoted. The Caledonian acquired that line during its construction, and it opened in 1849. It gave an alternative and shorter access to another Glasgow passenger terminal, named South Side, and to the Clyde quays at General Terminus (over the connected General Terminus and Glasgow Harbour Railway). The South Side station was already being used by the Glasgow, Barrhead and Neilston Direct Railway, worked by the Caledonian. One day, they hoped, they might extend that line into Ayrshire. Meanwhile, the line was leased (for 999 years) to the Caledonian in 1849.” [3][8][21][24]
“The Caledonian recognised that the Townhead terminus was unsatisfactory and constructed a deviation from Milton Junction to a new Glasgow terminus at Buchanan Street. It opened on 1st November 1849.” [3]
Glasgow Buchanan Street station buildings remained essentially unaltered over the years until their closure to passenger traffic in November 1966 when all remaining services transferred to Queen Street Railway Station.
Drew comments that the other two routes considered for trunk routes between the central belt of Scotland and the English network were one via the East Coast and the other inland from Newcastle via Hexham. He states that, “by the East Coast route of the North British from Berwick-on-Tweed there was no reasonable alternative to passing through Edinburgh (or through hilly country in its southern suburbs) to get to Glasgow. The fourth projected Anglo-Scottish route was from Newcastle to Edinburgh via Hexham and inland from the eventual East Coast main line; only disjointed branch lines, mostly closed, mark part of its course today.” [1: p5]
The Caledonian’s Edinburgh terminus was originally on Lothian Road. It opened in 1848 and had a single platform which served both arrivals and departures, and a two-road goods shed with a single loading platform. During 1865, the Caledonian was considering how to improve it, and considered making arrangements with the North British Railway to use Waverley Station. The local authority was anxious that there should be a single main station in the city. However the North British was hostile in principle, and the idea came to nothing. [7][8]
Major extension was essential, and “on 2nd May 1870 a new temporary station was opened adjacent to, and to the north of Lothian Road; it was named Princes Street. It was a wooden structure; the Caledonian was short of cash at this time and a more imposing terminal was not affordable. The passenger part of the station now had two platforms.” [7]
During 1890 the wooden terminus building at Princes Street was partly dismantled in preparation for improvement, “when on 16th June a fire broke out, substantially destroying much of the buildings. The new, spacious station accommodation was progressively brought into use in 1893 and 1894; it had nine platforms, and had cost over £250,000. Powers were obtained for building an adjacent hotel, but it was not opened, as the Caledonian Hotel, until December 1903.” [7][8]
The Caledonian Railway eventually served nearly all the economically important areas of the Lowlands other than the Fife coalfield. It was an outlet to the rest of the UK for trafic from the Northeast – particularly fish. It was in strident competition in and around Glasgow and throughout the central Lowlands with the NBR and GSWR. In Edinburgh, Perth, Dundee and along the coast to Aberdeen it was striving against the NBR, and at Ardrossan it battled against the GSWR. “It had to fight hard for most of its traffic, which comprised coal and other minerals, livestock, distillers’ grain and other agricultural produce; Glasgow and Edinburgh suburban commuters including train and steamer passengers ‘doon the water’ to and from the Clyde coast and islands; Glasgow-Edinburgh and Glasgow-Dundee inter-city passengers; and a high proportion of the Anglo-Scottish freight and passenger traffic because so much of England – for example, the West Riding and the Midlands could be reached equally well by Carlisle and by Berwick.” [1: p7]
Wikipedia comments that “as 1849 drew to a close, the Caledonian Railway had completed its first task: the railway was open from Glasgow and Edinburgh to Carlisle, with through trains running to and from London. Between Glasgow and Edinburgh a competitive service was run, although the Edinburgh and Glasgow Railway completed the journey faster. Carlisle Citadel station was in use, jointly owned with the London and North Western Railway. Through trains ran to Stirling and Perth over the Scottish Central Railway line from Greenhill.” [5]
The Caledonian’s trunk line progressed North towards Aberdeen from Peth and a branch was provided from Perth to Dundee. “Joseph Locke played the chief part in planning and co-ordinating the construction of a series of independent concerns which, after rather complex amalgamations, in 1866 took Caledonian trains into Aberdeen on CR tracks. Chief among them were the Scottish Central [Railway] and the Scottish North Eastern [Railway]. … The relatively low cost of construction through Strathmore and complications involving the North British [Railway] in Angus … influenced the main route eastwards from Perth via Glamis and Forfar to meet the North British at Kinnibar Junction. … Dundee was a CR terminus for most CR traffic. East of Dundee (and with a separate passenger terminus in that city) was the Dundee & Arbroath Joint line (CR and NBR). CR Aberdeen trains did not run via Dundee, as they do today after closure of the Strathmore line.” [1: p7]
The Caledonian Railway had intended to lease, or absorb, the Scottish Central Railway (SCR), which obtained its act of Parliament on the same day as the Caledonian. The SCR needed a partner railway to get access to Glasgow and Edinburgh, that was provided by the Edinburgh and Glasgow Railway (E&GR). The SCR opened from Greenhill Junction with the E&GR to Perth on 22 May 1848, and the Caledonian opened its branch to reach Greenhill Junction on 7 August 1848. The SCR remained independent for some time, building Perth General station. Because it provided access for a number of railways to Perth, the station was managed by a Joint Committee. The Perth General Station Joint Committee, later the Perth Joint Station Committee, was formed in 1859 to manage Perth railway station, initially consisting of the Scottish Central Railway, North British Railway, Scottish North Eastern Railway, and the Inverness and Perth Junction Railway, later including the Caledonian Railway, North British Railway and Highland Railway. [9][10]
The SCR itself managed to absorb some local railways; the Crieff Junction Railway had opened from Crieff to what later became Gleneagles station in 1856, and it was worked by the SCR and absorbed in 1865. [9]
In 1858 the Dunblane, Doune and Callander Railway was opened in 1858. It achieved considerable significance as the starting point for the Callander and Oban Railway. It was absorbed by the SCR in 1865 immediately before the SCR amalgamated with the Caledonian Railway on 1st August 1865, finally having gained Parliamentary approval to do so. [9]
The Scottish Midland Junction Railway (SMJR) “built a line from Perth to Forfar; at Perth it used the Scottish Central Railway joint station. The main line ran through the fertile area of Strathmore and the SMJR adopted two existing short lines that were on a suitable alignment. They were the Newtyle and Coupar Angus Railway and the Newtyle and Glammiss Railway. Both were unsuccessful adjuncts to the Dundee and Newtyle Railway, built using stone block sleepers and a track gauge of 4 ft 6+1⁄2 in (1,384 mm). The two short lines were modernised and altered to double track using standard gauge. At Forfar the SMJR joined the Arbroath and Forfar Railway, another earlier stone block railway, in this case using the track gauge of 5 ft 6 in (1,676 mm). The SMJR opened in 1848.” [3]
The NBR had, for many years, running powers over the CR, from Kinnaber to Aberdeen but was not competitive in the speed to the journey North until the 1890s, after completion of the Forth Bridge. Drew tells us that “railway strategy in Scotland was utterly changed by the failure of the Caledonian in the 1850s to amalgamate with the poverty-stricken 47-mile Edinburgh & Glasgow Railway. (The CR at that time had financial and administrative troubles of its own, which had led it in 1849 to propose operation of the CR system by the LNWR, which Euston turned down flat.) The CR continued to run its own Glasgow-Edinburgh trains over its own route, which remained circuitous at the western end until Glasgow Central was opened in 1879. The Edinburgh & Glasgow was absorbed into the NBR in 1865.” [1: p7] That take-over secured access for the NBR to Glasgow, the Firth of Clyde and much of the central Lowlands.
Drew comments: “The NBR improved the Glasgow Edinburgh passenger services and developed them as both inter-city and Anglo-Scottish trains. Only later did the CR begin to run rival, and in some ways better, Glasgow-Edinburgh expresses over its slightly shorter though more steeply graded line: it was spared, of course, the Cowlairs incline up from the North British Glasgow Queen Street terminus.” [1: p7]
The Aberdeen Railway was “to run north from Guthrie, a few miles northwest of Arbroath. Joining the Arbroath and Forfar Railway (A&FR) there, it obtained access to both termini of that line. It was authorised to lease the A&FR. The Aberdeen Railway may have underestimated the cost of upgrading the A&FR’s stone block track, and it ran out of money building its own main line; its construction was delayed and it encountered political difficulty in Aberdeen itself. It opened in 1850 to Ferryhill, on the southern margin of the city, extending to Guild Street station in 1854. There were branches to Brechin and Montrose.” [3]
From its inception, the Caledonian Railway saw itself as the creator of an extensive network in Scotland, and “it set about gaining control of as many other Scottish railways as possible. It did so not by purchasing them, but by leasing them. This had the advantage that no payment was required at first, only a periodical payment much later. The Caledonian negotiated with the SCR, the SMJR and the Aberdeen Railway and believed it had captured them, but the SCR had other ideas. Much later the Caledonian found that the periodical lease payments were unaffordable, and it was rescued by the legal opinion that the lease agreements had been ultra vires.” [3]
An important development in the history of Scottish railways was the “completion in 1863 of the Perth to Inverness via Forres route of what became soon afterwards the Highland Railway (HR). It gave much better access from the south to the central and northern Highlands and was just in time to enable the Caledonian to profit [from] the rapid growth of tourism in the Highlands. The CR was the chief source of HR passenger and freight traffic from and to the south. During the grouse-shooting and deer stalking seasons the trains between Euston and HR stations [via] the West Coast route, the CR and Perth included many horses and carriages.” [1: p7] These were only replaced by motor vehicles as the Edwardian era developed. The Caledonian encourged the upper class passtimes. “It was indulgent about attaching and detaching horseboxes, carriage flats and motorcar vans at its own stations … Many of the extra West Coast expresses during the season included such vehicles, which caused relatively minor marshalling problems south of Perth.” [1: p7]
At Perth, “long caravans of miscellaneous vehicles were made up and remarshalled. They included not only West and East Coast Joint Stock but also Midland & North British sleeping cars which ran between St Pancras and Inverness via Carlisle, Edinburgh and Perth.” [1: p7]
The Highland main line was mostly only a single track: there was often a motive-power shortage at peak periods, so that trains were often made over late to the CR at Perth. Northbound LNWR trains were often late at Carlisle, perhaps due to difficulties securing sufficient motive power. The LNWR had frequent recurse to double-heading until more powerful locomotives appeared in the early years of the 20th century. The Caledonian often found itself having to make up for the delayes caused by these other companies.
The Caledonian’s own mountainous route – the line from Dunblane via Callander and Crianlarich to Oban – is covered in a separate article which can be found here. [11] The punctuality record on that line was good, “partly because there was competition with the NBR West Highland line from 1898 onwards for traffic to the Western Isles.” [1: p8]
Drew tells us that, “a service which was more inter-city than its name implied, the ‘Grampian Corridor Express’ of 1905, from Glasgow and Edinburgh to Aberdeen, was selected for the allocation of new trainsets of magnificent 12-wheel vehicles. The Grampian ran from Buchanan Street to Perth, where it combined with an Edinburgh Princes Street portion that ran over part of the NBR Edinburgh-Glasgow main line from near Edinburgh to Larbert.” [1: p8] … He also notes the “CR’s regard for its Glasgow-Edinburgh expresses, for which some of the new coaches were 12-wheel non-bogie coaches with elliptical roofs.” [1: p8]
Drew draws attention to: the expansion of the Caledonian’s Clyde shipping services in the late 19th century, with new branches, stations and piers; and the construction of the Caledonian sub-surface lines under the centre of Glasgow (the Glasgow Central Railway. [1: p8]
The Glasgow Central Railway was built by the Caledonian Railway, running in tunnel east to west through the city centre. “It was opened in stages from 1894 and opened up new journey opportunities for passengers and enabled the Caledonian Railway to access docks and industrial locations on the north bank of the River Clyde. An intensive and popular train service was operated, but the long tunnel sections with frequent steam trains were smoky and heartily disliked.” [12] The CR’s line in the centre of the city “paralleled the North British Railway routes in the area, and after nationalisation of the railways the line declined and was closed in stages from 1959 to 1964.” [12]
Drew, writing in 1975, points forward to possible future uses of the closed tunnels [1: p8] and in 1979, “the central part of the route was reopened as an electrically operated passenger railway, the Argyle Line; this was greatly popular and enhanced connecting routes to west and east made this a valuable link through the city once more. The Argyle Line section is in heavy use today, but the other parts remain closed.” [12]
Wikipedia tells us that the Argyle Line “serves the commercial and shopping districts of Glasgow’s central area, and connects towns from West Dunbartonshire to South Lanarkshire. Named for Glasgow’s Argyle Street, the line uses the earlier cut-and-cover tunnel running beneath that thoroughfare. … The term ‘Argyle Line’ is commonly used to describe:the extensive urban passenger train service that connects the towns and suburbs of North Clyde with Motherwell, Larkhall, and Lanark, to the southeast. Of the 48 stations, 4 are in West Dunbartonshire, 4 in East Dunbartonshire, 17 in Glasgow City, 10 in North Lanarkshire, and 13 in South Lanarkshire; and thecentral portion of railway infrastructure encompassing less than 5 miles (8 km).” [12]
Drew continues: “Associated with the underground lines was the rebuilding and expansion of Glasgow Central passenger station including a low-level station on the CR underground; widening of the bridge over the Clyde to 20 tracks and creation of what for many years was, and in many ways still is, Britain’s most convenient major passenger terminus, in the heart of the city. Electrification and dieselisation have enabled Central to swallow the traffic (admittedly smaller than before as regards the number of trains) previously dealt with at St Enoch Station on closure by British Rail of the former GSWR terminus.” [1: p8]
The Caledonian Railway Bridge crosses the River Clyde at Broomielaw adjacent to Glasgow Central Station. The first structure built between 1876 and 1878 for the Caledonian Railway Company and opened on 1st August 1879, “was engineered by Blyth and Cunningham and built by Sir William Arrol & Co. It consisted of wrought iron lattice girders linked at the top by a light arched lattice girder, and carried on a cast iron arch over twin piers in the river. The piers are formed of cast iron cylinders sunk to bedrock and filled with concrete, and then extended above the river with Dalbeattie granite.” [14]
“The approach span over Clyde Place to the south was 60 feet (18 m) long and over Broomielaw to the north of the river was 90 feet (27 m) long. The navigation spans were 164 feet (50 m), 184 feet (56 m) and 152 feet (46 m) long. The bridge carried four tracks into the new Glasgow Central Station.” [15][18]
The second bridge was built between 1899–1905 during the expansion of Central Station, to a design by D. A. Matheson, chief engineer of the Caledonian Railway. Arrol and Co. was the contractor for this bridge as well. [17] “The foundations for the bridge are rectangular sunk caissons, sunk by the compressed air chamber method used on the Forth Bridge to a depth of up to 48 feet (15 m) below the river bed. The central span is 194 feet (59 m) long with Linville truss girders 15 feet 9 inches (4.80 m) deep. The parapet girders are around 10 feet (3.0 m) deep, and suspended on curved brackets. There are a minimum of eight parallel main girders in the width. The spans are of lengths 160 feet (49 m), 200 feet (61 m) and 178 feet (54 m), and the structure contains 11,000 tonnes (11,000 long tons; 12,000 short tons) of steel. [17] The total length of the bridge between the abutments is 702 feet 6 inches (214.12 m).” [18][19]
“The bridge varies in width from 35 to 62.5 metres (115 to 205 ft) and carries up to ten tracks. [17][18] It leads immediately into Glasgow Central Station on the north bank of the river. At the time of its opening, it was believed to be the widest railway bridge in existence.” [18][19]
A Caledonian Railway coke train, Plean, circa. 1910. [89]
The Caledonian’s goods operations were always commercially enterprising. The CR served all of Sctland’s main coalfields, with the exception of that in Fifeshire, and most of the heavy industry in the Glasgow area. “It was linked directly with the ports of Glasgow and its outposts on the Firth of Clyde with Leith (Edinburgh), Dundee and Aberdeen, and it virtually created Grangemouth. The Caledonian led the way in designing and providing for its customers’ new wagons, including high-capacity vehicles, for a variety of consignments. It was an early operator of fast freight trains. One of its major feats was co-operation with the English lines during World War I in moving vast tonnages of coal for warships in Scapa Flow in the Orkneys. The trains ran mostly from South Wales and the CR accepted them at Carlisle and made them over to the Highland at Perth. HR had the hardest task, of working heavy coal trains over its 300 miles of route from Perth via Inverness to Thurso, for shipment to Scapa.” [1: p9]
Although the CR was formed as an inter-city trunk line it coped manfully with other demands. “Local interests in Lanark promoted a branch line to their town, opening in 1855. Coal owners in South Lanarkshire [22] pressed for a railway connection, and the Lesmahagow Railway was formed by them, opening in 1856. It was later absorbed by the Caledonian, but other lines followed in the sparsely populated but mineral-rich area. As new coal mines opened, so new branches were needed, connecting Coalburn, Stonehouse, Strathaven, Muirkirk and Darvel and many other places, with new lines built right up until 1905. When the coal became exhausted in the second half of the 20th century, the railways were progressively closed; passenger traffic had always been light and it too disappeared. Only the passenger traffic to the Lanark and Larkhall branches remain in operation.” [3][8][21]
“In North Lanarkshire, the North British Railway was a keen competitor, having taken over the Monkland Railways. The area contained the rapidly-growing iron production area surrounding Coatbridge, and servicing that industry with coal and iron ore, and transport to local and more distant metal processing locations, dominated the Caledonian’s activity in the region. The Rutherglen and Coatbridge line, later linking Airdrie, and the Carfin to Midcalder line were routes with significant passenger traffic. Many lines to coal and iron ore pits further east were built, but serving remote areas the lines closed when the mineral extraction ceased.” [3][8][21]
Busby and East Kilbride: After rail connections became established at Barrhead (we noted above that the CR took a 999 year lease on the Glasgow, Barrhead and Neilston Direct Railway, the Glasgow & South Western Railway also built a branch to Barrhead. [26]) various interests in Bushby demanded a railway connection. This was opened by the CR in 1866. It was extended in 1868 to East Kilbride, although at that time the then small village did not generate much business for the railway. [3][8][21]
Branches South of Carstairs: When the main line was built, no branches were provided in the thinly populated terrain of the Southern Uplands. Subsequently, four independent companies made branches themselves, and the Caledonian built two. “The Symington, Biggar and Broughton Railway was opened in 1860, having been taken over by the Caledonian during construction. It was extended to Peebles in 1864.” [3][21]
The independent Dumfries, Lochmaben and Lockerbie Railway was opened in 1863. It “was encouraged by the Caledonian Railway, giving westward access into Dumfriesshire, and worked by it; the Caledonian acquired the line in 1865.” [3]
The Portpatrick Railwayopened “between Castle Douglas and Portpatrick in 1861–62 and the Caledonian Railway worked that railway; it obtained running powers over the G&SWR between Dumfries and Castle Douglas, and at a stroke the Caledonian had penetrated deep into the south-west, and to the ferry service to the north of Ireland, territory that the G&SWR had assumed was its own. The Portpatrick Railway later reformed with the Wigtownshire Railway as the Portpatrick and Wigtownshire Joint Railway; the Caledonian was a one-quarter owner.” [3][27][28]
Wikipedia continues: “The North British Railway opened its branch line to Dolphinton, east of Carstairs, and the Caledonian feared that the next step would be an incursion by the NBR into Caledonian territory, possibly seeking running powers on the main line. To head this off, the Caledonian built its own Dolphinton Branch from Carstairs; it opened in 1867. Dolphinton had a population of 260 and two railways, and traffic was correspondingly meagre, and the line closed in 1945 to passengers and in 1950 to goods.” [3][21]
“The independent Solway Junction Railway was opened in 1869, linking iron mines in Cumberland with the Caledonian Railway at Kirtlebridge, crossing the Solway Firth by a 1,940 yd (1,770 m) viaduct; the company worked the line itself. It considerably shortened the route to the Lanarkshire ironworks, and was heavily used at first, but the traffic was depleted by cheap imported iron ore within a decade. The Scottish part of the line was acquired by the Caledonian Railway in 1873, and the whole line in 1895. Serious ice damage and later heavy maintenance costs made the line seriously unprofitable and it was closed in 1921.” [3][29]
After 1880, the Caledonian’s network continued to expand. Wikipedia tells us that, “The Moffat Railway was opened from Beattock on 2nd April 1883. It was just over 1.5 miles (2.4 km) long. It was worked by the Caledonian and absorbed on 11th November 1889. The Caledonian Railway sought to develop both Moffat and Peebles as watering places, and ran The Tinto Express from both places, combining at Symington, to Edinburgh and Glasgow for several years.” [3][21]
The “Leadhills and Wanlockhead Branch was opened as a light railway from Elvanfoot in 1901–02. With challenging gradients to reach Scotland’s highest village in otherwise remote territory, the line scraped a bare living and closed in 1938.” [3][21]
In 1862, “the Greenock and Wemyss Bay Railway was authorised. It was an independent company intending to provide a fast connection from Rothesay on the Isle of Bute; it opened on 13th May 1865 and in August 1893 it amalgamated with the Caledonian Railway, having been operated by the Caledonian Railway since its opening.” [3][8][30: p78]
Wikipedia tells us that in 1889, the CR “opened an extension line from Greenock to Gourock, more conveniently situated than Greenock; this involved the expensive construction of Newton Street Tunnel, the longest in Scotland.” [3][31]
At this time after feeling frustrated with the performance of independent steamer operators, the CR sought powers to operate the vessels directly; this was refused by Parliament. So the company founded the nominally independent Caledonian Steam Packet Company (CSPC) in 1889. “The CSPC expanded its routes and services considerably; following nationalisation of the railways in 1948 it became owned by British Railways, but was divested in 1968 and later became a constituent of Caledonian MacBrayne (CalMac), which remains in state ownership.” [3][32]
Late in the 19th century, the CR began to focus on the development of suburban lines around Glasgow and Paisley. Wikipedia notes that “The Cathcart District Railway was promoted as an independent concern but heavily supported by the Caledonian. It opened in 1886 from Pollokshields to Mount Florida and Cathcart (the eastern arm of the present-day Cathcart Circle Line) in 1886, and was extended via Shawlands to form a loop in 1894. It was worked by the Caledonian, although the company retained its independence until 1923.” [3]
We have already noted the the Glasgow Central Railway which eventually became The ‘Argyle Line’. [3][25] “The Paisley and Barrhead District Railway was incorporated in 1897 and transferred to the Caledonian in 1902; it [linked] Paisley and Barrhead [to] enable a circular service from Glasgow. The line was substantially ready in 1902 but by now street tramways were electrically operated and eminently successful. It was plain that a passenger service would not be viable against tram competition and the intended passenger service was never started.” [3][30]
North of the River Clyde was both heavily populated and highly industrialised. Initiallt it was the preserve of the North British Railway and its satellites, but its importance encouraged the Caledonian to enter the area. “The Lanarkshire and Dumbartonshire Railway[33] was nominally independent, running from near Maryhill to Dumbarton, opening progressively between 1894 and 1896. In 1896 the Caledonian gained access to Loch Lomond with the opening of the Dumbarton and Balloch Joint Railway (originally built by the Caledonian and Dumbartonshire Junction Railway), built jointly with the NBR.” [3][33][36]
In 1888, the Lanarkshire and Ayrshire Railway opened a 6.5-mile (10.5 km) line “from Giffen on the Glasgow, Barrhead and Kilmarnock Joint Railway to Ardrossan. Its purpose was to shorten the route for Caledonian mineral traffic, and it was worked by the Caledonian. In 1903–04 it was extended eastwards to Cathcart and Newton, enabling the heavy mineral trains to avoid the Joint Line and the congested area around Gushetfaulds from the Lanarkshire coalfields to Ardrossan Harbour.” [3][21][34][35] Today, the only operational sections of the line are those between Newton and Neilston. Now two suburban branch lines (Newton to Glasgow Central via Kirkhill and Neilston to Glasgow Central via the Mount Florida side of the Cathcart Circle). Electrified in the early 1960s, these lines carry frequent suburban passenger trains. [35]
Around Edinburgh, an intersting development was the construction of theGranton Harbour Branch which opened in 1861, funded equally by the harbour authorities and the CR. Granton Harbour was a large industrial harbour built by lighthouse engineer, Robert Stevenson. [37]. In 1864, the Leith North Branch from the Granton line at Pilton to Leith was built, opening to passengers in 1879. [38] When, after 1900, “the port authorities built new modern docks to the east of the former Leith docks, and the Caledonian further extended its Leith line to reach the new facilities: the Leith New Lines opened in 1903. It had been planned to open a passenger service on the line, and passenger stations had been built, but tram competition made it clear that an inner suburban passenger railway was unviable and the passenger service was never inaugurated.” [3]
Wikipedia continues: “The Edinburgh main line passed close to numerous mineral workings, and several short branches and connections were made to collieries, iron workings and shale oil plants. The Wilsontown Branch from Auchengray, opened in 1860 was the most significant, and carried a passenger service.” [3] The Wilsontown Branch was a three and three-quarter mile long railway line that served the village of Wilsontown in Lanarkshire and several collieries, running from a bay platform at Auchengray Railway Station to Wilsontown Railway Station, which was the passenger terminus. [39]
The Wishaw and Coltness Railway, ran for approximately 11 miles from Chapel Colliery, at Newmains in North Lanarkshire … to the Monkland and Kirkintilloch Railway near Whifflet, giving a means of transport for minerals around Newmains to market in Glasgow and Edinburgh. built to 4ft 6 in gauge, it had several branches serving pits and ironworks. [40] The line was leased by the CR and re-gauged. In 1869, the line was extended from near Cleland Ironworks “to Midcalder Junction on the Edinburgh main line, passing through Shotts, Fauldhouse and Midcalder. This line connected to many further mines and industrial sites, and gave the Caledonian a passenger route between Glasgow and Edinburgh that competed with the North British Railway’s route through Falkirk.” [3]
The CR’s main line did not connect with a significant industiral area on the Water of Leith Southwest of Edinburgh. To address this, a branch line from Slateford to Balerno opened on 1st August 1874. [41] “The line was successful in encouraging residential building, especially at Colinton, and also leisure excursions: for a time it was known as ‘the picnic line’, but it too succumbed to more convenient transport facilities by road, and it closed to passengers in 1943.” [3]
Speculative residential development encouraged the construction of the Barnton Branch, Barnton was West of Edinburgh. “The branch line opened on 1st March 1894; the terminus was named Cramond Brig at first. The Caledonian intended to make the line into a loop, returning to the city by way of Corstorphine, but this idea was shelved.” [3][8][21]
The Callander & Oban Line was initially an independent company, it had been promised financial support by the Scottish Central Railway (SCR). The Caledonian absorbed the SCR in 1865 and the directors were dismayed at the level of commitment to a difficult construction scheme barely started. Construction took many years, reaching a station serving Killin in 1870 and Oban in 1880. The line ran on a shoestring – finances were always tight and the line was never profitable although it contributed greatly to the development of the town of Oban. A branch serving Killin was opened in 1886, [42] and another to serve Ballachulish, opened in 1903. [3][43] Articles about the Ballachulish Branch can be found here, [44] here, [45] and here. [46]
The western part of the line from Crianlarich to Oban remains open, connected to the ex-NBR West Highland Line, but the remainder has closed. [3][47][48] An article about the Callander & Oban Railway can be found here. [11]
The Strathearn Lines: “the Perth, Almond Valley and Methven Railway opened in 1858 to connect Methven to the SMJR network; it was extended to Crieff when the Crieff & Methven Railway opened in 1866.” [3][49] It eventually became part of the CR network through acquisitions and mergers.
“The upsurge in tourism in Strathearn encouraged many visitors, who used Crieff as a railhead and continued by road. In 1893 the Crieff and Comrie Railway made a short extension into Strathearn, and this encouraged ideas of completing a link right through to the Callander and Oban line. There were wild dreams of Irish cattle imports coming to Perth markets over the route. This became the Lochearnhead, St Fillans and Comrie Railway; due to serious problems raising capital, it took from 1901 to 1905 to open fully. The through traffic never developed and passenger connections at Balquhidder were poor, discouraging through travel.” [3][51]
The CR wanted the extension to Lochearnhead and the Callander and Oban line. “Moreover, it was concerned that the rival North British Railway would build such a line, abstracting much of its traffic in the area. When the Comrie company opened discussions with the Caledonian about selling their line, they found that the Caledonian was willing. In fact its offer was remarkably generous: they would repay the share capital in full, pay off the mortgage loan, and settle MacKay’s claim. This was put to a Special Shareholders’ Meeting on 9th February 1898. The shareholders agreed and the company was vested in the Caledonian Railway by Act of 1st August 1898.” [50][51]
Locomotives of the Caledonian Railway
The Caledonian Railway Locomotive Works were originally at Greenock but moved to St. Rollox, Glasgow, in 1856. Greenock Works and Shed opened in 1841 adjacent to the Greenock terminus of the Glasgow, Paisley & Greenock Railway (GP&GR). [53] The Caledonian Railway leased to GP&GR line in 1846 and at that time the Greenock Shed and Works wer enlarged to accommodate the CR’s needs. [53] The shed remained in use until 1885 when a railway extension from Greenock to Gourock required its removal and rellocation to Greenock Ladyburn Shed. [54]
“The class number used for Caledonian Railway engines was the stock number of the first member of the class to reach traffic. Hence earlier/lower numbered classes could well have appeared later in time. … Until the appointment of Dugald Drummond, unlike most other British railways, almost all engines had outside cylinders, and the 0-6-0 arrangement was quite rare, goods engines being of type 2-4-0 or 0-4-2. Passenger engines were normally 2-2-2.” [52][55]
Wikipedia tabulates all of the locomotives used by the Caledonian Railway under the names of the railway’s Chief Mechanical Engineers. The tables can be found here. [52]
Lightmoor Press published two excellent books about locomotives of the Caledonian Railway. The first by David Hamilton – Caledonian Railway Locomotives: The Formative Years – in 2019. [63] The second by H. J. C. Cornwell – Caledonian Railway Locomotives: The Classic Years – in 2020. [64]
The following series of images cover a range of examples of the Caledonian Railway’s motive power:
Drew comments that, “all Caledonian locomotives had to work hard. Every route, even Glasgow Central to Edinburgh, had its testing sections, and the Glasgow-Edinburgh expresses stopped relatively frequently to cater for outer-suburban passengers. Apart from the Glasgow-Carlisle main line, most Caledonian express passenger working involved getting away from the numerous stops necessitated by the sparse population. Some of the most exacting work was on the Clyde steamer boat trains, where every second counted in competition with the NBR and GSWR.” [1: p11]
Caledonian Railway Rolling Stock
Carriages: Lightmoor Press has released a book by Mike Williams which covers the passenger rolling-stock of the Caledonian Railway: Mike Williams; Caledonian Railway Carriages; Lightmoor Press, Lydney, 2015. [69] Mike Williams describes the carriages owned and operated by the Caledonian Railway from its opening until the 1923 Grouping, with 250 photographs and over 300 drawings. A well-produced and informative volume commensurate with the usual standard of Lightmoor Press publications.
Lightmoor Press describes the content: “The topics covered include the CR’s reaction to technological developments in railway passenger transport and the increasing attention paid to passenger comfort and convenience. The description of its carriage livery challenges some aspects of ‘received wisdom’ and deals with furnishing and internal décor. General service stock is reviewed to the end of McIntosh’s tenure in 1914, plus the carriages acquired from the West Coast Joint Stock fleet, the Pullman cars and the final designs in the Pickersgill regime. The CR Ambulance Train and other carriages in war-time service are described along with vehicles which were not part of general service stock. Saloons, Invalid carriages, Post Office vehicles, the Prison Van, Inchture horse bus and the Connel Ferry rail motor are all covered, along with some proposed designs that never saw service, including a steam rail motor. Appendices give information about the number of carriages in the fleet, their numbers, carriage orders and building dates and list the available drawings of carriages and components, with their location.” [70]
The Railway Wonders of the World article about the Caledonian Railway includes these paragraphs:
“The passenger work of the Caledonian is of high repute for speed and accommodation. As we have said enough of the West Coast service we will content ourselves here with the Grampian Corridor Express as an example. This train is made up of four varieties of coaches, composite, brake composite, brake third, and third. Each of these is 65 ft long in the body, and 68 ft 6-in over buffers, the width being 9 ft. The under-frames over headstocks are 64 ft 10-in, 44 ft between the bogie centres, and 7 ft 5-in over the sole bars, the wheel base being 56 ft.
In the composite the space between the partitions is 7 ft 4⅝-in in the first class, and 6 ft 4½-in in the third; in the brake composite it is 7 ft in the first class and 6 ft in the third, the brake compartment taking up 12 ft 2¾-in. In the brake third, in which the brake compartment occupies 27 ft 4½-in, it is 6 ft, and in the third it is 6 ft 2⅝-in. The composite seats 30 first-class passengers three aside and 24 third class four aside, the brake composite seats 18 first and 32 third, the brake third seats 40, and the third 72. The composite weighs 38 tons 4 cwt, the brake composite weighs 38 tons 11 cwt, the brake third weighs 35 tons 5 cwt, and the third 36 tons 10 cwt. These details are given to show, among other things, that appearances may be deceptive; in carriages seemingly alike there may be a difference in the knee-space making all the difference in the comfort, though in this case the smallest, 6 ft, is ample for any one of reasonable stature and attitude.
This heavy train – the Grampian – does 30 miles an hour up Dunblane bank, part of which is 1 in 73, for Beattock is not the stiffest gradient on the line, that being the 1 in 40 on the Bonnybridge branch. It is the 10 a.m. out of Buchanan Street and the 9.30 out of Edinburgh joining at Perth, where the restaurant car is put on; and the Glasgow portion weighs over 250 tons. It is not the fastest on the line, that being the 10.5 from Forfar to Perth, 321 miles in 33 minutes, the longest non-stop being the 2.17 a.m. from Carlisle to Perth, 150¾ miles in three hours; but with the exception of the Granite City Express, leaving Glasgow at 5 p.m, it is perhaps the best known.” [73]
Drawings of the Caledonian Railway Coaching Stock can be found on the Caley Coaches Ltd. website. [85] Caley Coaches Ltd. provides drawings and photographs to support its range of kits including for: 57′ Non-corridor coaches; 57′ Semi-corridor coaches; 57′ Corridor coaches; Grampian Stock; 65′ Slip Coaches; Edinburgh & Glasgow Stock; and 4 wheel “Balerno Branch” Coaches.
Wagons and Non-Passenger Coaching Stock: Lightmoor Press has also released a book by Mike Williams which covers the non-passenger rolling-stock of the Caledonian Railway: Mike Williams; Caledonian Railway Wagons and Non-Passenger Caoching Stock; Lightmoor Press, Lydney, 2013. [71]
Mike Williams details the history of the Caledonian Railways wagons from 1847 until the grouping in 1923 when the Company became part of the LMS.
Lightmoor Press says that research for the book is “based on Board minutes and other official sources, whilst over 250 official drawings have been examined. The introduction details the sources of information used and a chapter on the industrial development of Scotland outlines its influence on the size and diversity of the wagon fleet. The types of wagons and numbers in service are tabulated and the financial pressures which hamstrung the modernisation programme begun in the early 1900s are also described. An overview is offered of technical developments, which discusses how two Locomotive Superintendents transformed the wagon fleet. The liveries of wagons and Non-Passenger Coaching Stock are next described, supplemented in each case by the systems used by the Caledonian to allocate running numbers. Photographic evidence and drawings depict a far more complex picture than that presented previously. Eleven chapters then deal with different types of wagons, ranging from those built by the thousand, to small numbers of wagons for special traffic. Building dates are given for each design, whilst design developments are described and supported by photographs and works drawings. Sample running numbers are included for modellers. A further chapter describes the Caledonian’s relationship with the private traders who ran wagons over the system. Appendices list the construction orders undertaken by the company and outside contractors. The surviving works drawings are listed, with their archive references, and the photographs in an official album dating from 1900 are described. A final appendix gives information about drawings for the modeller, supported by specially commissioned drawings of details characteristic of Caledonian wagons. Produced in association with the Caledonian Railway Association.” [72]
These next few images show a few different Caledonian Railway good wagons:
Two Caledonian Railway bogie flat wagons loaded with a large steel column and base, in Glasgow, circa. 1910. [88]
To Conclude …
Paul Drew concludes his article with these words: “The Caledonian achieved its zenith in the years 1900-14. There was no activity in which it did not shine; passenger stations such as Glasgow Central, Edinburgh Princes Street, Stirling, Dundee West. and (with the Great North of Scotland) Aberdeen Joint; hotels; signalling, both semaphore and the pioneer electro-pneumatic installation at Glasgow Central; and Pullman cars, which it ran on the Oban line (as observation cars), the Glasgow-Edinburgh service and elsewhere. … [It] undoubtedly justified its claim to be the premier line of Scotland.” [1: p11]
References
Paul Drew; Caledonian Retrospect; in, Brian Stephenson (ed.), Trains Illustrated No. 14, Ian Allan, Walton-on-Thames, 1975, p4-11.
D. A. Matheson; The New Clyde Bridge of the Caledonian Railway at Glasgow. (Including Appendix and Plates); in The Institution of Civil Engineers, Minutes of the Proceedings, No. 182, (Paper No. 3764) 1910, p4–58; via https://www.icevirtuallibrary.com/doi/10.1680/imotp.1910.16924, accessed on 18th March 2025.
John Thomas revised J. S. Paterson; A Regional History of the Railways of Great Britain: Volume 6, Scotland, the Lowlands and the Borders; David and Charles, Newton Abbot, 1984.
John Thomas; The Callander and Oban Railway; David and Charles, Newton Abbot, 1966
John Thomas and David Turnock; A Regional History of the Railways of Great Britain: Volume 15: North of Scotland; David and Charles, Newton Abbot, 1989.
Charles Rous-Marten; British Locomotives in 1903; in the Bulletin of the International Railway Congress.
R. Essery & D. Jenkinson; An Illustrated History of L.M.S. Locomotives, Volume Three: Absorbed Pre-Group Classes, Northern Division; Oxford Publishing Company, 1986.
David Hamilton; Caledonian Railway Locomotives: The Formative Years; Lightmoor Press Lydney, 2019.
H. J. C. Cornwell; Caledonian Railway Locomotives: The Classic Years; Lightmoor Press, Lydney, 2020.
In the first article [4] in this short series, we finished the first part of our journey from Oswestry along the Llanfyllin Branch just after passing through Carreghofa Halt with its adjacent combined canal aqueduct and road bridge. Just beyond the bridge we noted the Nantmawr Branch heading away to the North while trains for Llanfyllin ran round a short chord to meet what was the original alignment of the Llanfyllin Branch.
This photograph was taken from the road/canal bridge to the Northwest of Carreghofa Halt. Trains for Llanfyllin took the chord to the left. The Nantmawr Branch heads away to the North. [4]This extract from the 6″ Ordnance Survey of 1900, published in 1902, shows the relationship of the old and new routes taken by branch trains for and from Llanfyllin. The earlier alignment is shown as dismantled and runs to the North of the later alignment. The chord linking the two is on the left of this extract with the line to Llanfyllin leaving the left side of the extract. [5]This satellite image picks out the routes of the lines discussed as they appear in the 21st century. Just to the North of Llanymynech, the original line of the Llanfyllin Branch can be made out. A line of trees gives way travelling westwards to field boundaries that follow the route of the old line. To the South of Llanymynech, the more recent alignment is highlighted by field boundaries becoming tree lined as it approaches the location of Carreghofa Halt and then passes under the modern B4398 and the line of the canal. Immediately to the North of the Canal/Road Bridge the chord connecting the newer line to the older alignment of the Llanfyllin Branch is still described by a line of trees and then by field boundaries. [Google Earth, 28th February 2025]
After leaving the 26-chain chord trains headed due West for Llansantffraid across “a tract of pleasant agricultural countryside.” [3: p635] Within a short distance the Grove Viaduct was reached. It was a 90-yard long viaduct which sat about 7.7 miles from Oswestry.
This extract from the 6″ Ordnance Survey of 1900, published in 1903, shows the Llanfyllin Branch heading West over Grove Viaduct which is close to the centre of the image. The Afon Vyrnwy can be seen on the left side of the extract. [6]This satellite image covers approximately the same length of the Llanfyllin Branch as does the 6″ OS map extract above. [Google Earth, March 2025]
A minor road bridged the line to the East of Grove Viaduct. The railway cutting has been infilled but the bridge parapets and the deck under the road remain.
Looking North along the minor road in April 2024. [Google Streetview, April 2024]Looking East along the old railway from the bridge towards Llanymynech. [Google Streetview, April 2024]Looking West along the line of the old railway towards Grove Viaduct and Llansantffraid. [Google Streetview, April 2024]This is how the Grove Viaduct is shown on the 6″ OS map published in 1885 and surveyed during the years before that date. [9]The location of the Grove Viaduct over the Afon Tanat as it appears on modern satellite imagery. [Google Earth, March 2025]The line continues towards Llansantffraid. [6]A similar length of the line as it appears in Google Maps in March 2025. [Google Maps, March 2025]An aerial image looking Southeast showing Bryn Vyrnwy Holiday Park in the 21st Century. The access road running diagonally across the image follows the line of the old railway. [13]Looking West across Bryn Vyrnwy Holiday Park – the line of the old railway is paved, running between the two hedges. [13]Looking Southwest towards the hills the two hedge lines define the extent of the old railway land. [13]Llansantffraid-ym-Mechain Railway Station was the only passing place on the Branch. It is a large village about 7 miles (11 km) south-west of Oswestry (9.2 miles along the line) and 8 miles (13 km) north of Welshpool. It is at the confluence of the River Vyrnwy and the River Cain. The station can be seen just below the centre of this map extract. [6]
Llansantffraid-ym-Mechain
Jenkins tells us that Llansantffraid Railway Station was “the principal intermediate station on the branch. Its facilities included a single platform for passenger traffic on the up side of the line with a crossing loop immediately to the west, and a gated level-crossing to the east. The well-equipped goods yard included accommodation for coal, minerals, livestock, vehicles, and general merchandise traffic.” [4: p635]
The village of Llansantffraid-ym-Mechain as it appears in Powys Council’s local development plan. [12]A closer view of the railway on the OS map of 1885 where it crossed what is now the B4393 to the North of the river bridge. [6]The same location as it appears on the NLS ESRI satellite imagery in the 21st century. [14]Looking North from the river bridge towards the A495. The old railway crossed the road at the near side of the white walled property on the left of this image. [Google Streetview, April 2024]Looking East, the line of the old railway is marked by the driveway protected by the green gates. [Google Streetview, April 2024]Looking West, the old railway ran to the left of the buildings. [Google Streetview, April 2024]
Llansanffraid (Llansantffraid) means “Church of Saint Bride” in the Welsh language; ym-Mechain refers to its location in the medieval cantref of Mechain and distinguishes it from other places with the same or similar names. [7]
“The name is based on the story of St Bhrid, who is said to have floated across the Irish Sea on a sod of turf, or to have been carried to Scotland by two oystercatchers. The followers of St Bhrid possibly set up new settlements known by the Welsh as Llan Santes Ffraid, Church of (Lady) Saint Bhrid. In recent years the spelling of the village name, with or without a ‘t’, has been a contentious issue (as it has been at Llansantffraid Glyn Ceiriog).” [7]
Approaching the railway station, the old line crossed Lletty Lane on the level.
Looking East from Lletty Lane away from the site of the station. The level crossing location is off to the left of this image. [Google Streetview June 2021]
Jenkins continues: “Llansantffraid was the only crossing place between Llanymynech and Llanfyllin, although it was not [ideal] for passing two passenger trains because the loop was sited beyond the platform. It was nevertheless possible for one passenger train and one freight train to pass here, although the timetable in force in later GWR days ensured that this was not normally necessary. In the 1930s this only took place on Wednesdays when the 9.05 am (WO) passenger service from Llanfyllin to Oswestry passed the 9.12am (WO) light engine from Oswestry to Llanfyllin at 9.27 am.” [3: p635]
“The station building at Llansantffraid was a brick-built structure incorporating a two-storey residential portion for the stationmaster and his family. Although, like many Welsh stations, it was of comparatively plain appearance, the facade was enlivened by the provision of a bay window in the house portion, together with elaborate barge-boards and tall ‘ball & spear’ finials at the end of each gable. The stationmaster’s house was to the left (when viewed from the platform), while the booking office was to the right; the house was an L-plan structure with its gabled cross-wing facing the platform and a subsidiary wing that was parallel to the track.” [3: p636]
To the immediate West of the station building, a SPAR convenience store and a small industrial estate are built over the line of the old railway. A little further to the West, what is now the A495 turned South and bridged the line of the railway.
A closer view of the bridge at the West end of the village of Llansantffraid-ym-Mechain as shown on the 1885 6″ OS Map. [15]The same location in the early 21st century, as it appears on the NLS ESRI satellite imagery. The road (A495) has been widened, the bridge carrying the highway is long-gone. [15]This more recent satellite image shows a small new estate being built over the line of the old railway to the West of the A495. The route of the railway on the East side of the road is better defined in this image and the road Maes Y Cledrau sits on the line of the railway on the West side of the road. [Google Maps, March 2025]Looking East from the A495 along the line of the old railway. It passed to the left of the house visible on the right of the image. [Google Streetview, July 2024]Looking West from the A495 along Maes Y Cledrau. The old railway ran on the left side of the trees on the right of the image. In the distance, the newly built houses sit over the line of the railway. Closer to the camera it centre-line approximated to the kerb line of the road. [Google Streetview, July 2024]
The B4393 ran parallel to the line to the North. The line climbed towards Llanfechain on a gradient of 1 in 75.
The old railway closely followed what became the B4393. The road ran on the North side of the railway. [16]The same area as it appears on Google Earth satellite imagery in the 21st century. [Google Maps, March 2025]Looking West along the B4393 the line of the old railway can be identified, delineated by the two hedge lines on the left of this photograph. [Google Streetview, April 2024]The road and railway continued West immediately adjacent to each other. [17]The same area on 21st century satellite imagery. [Google Maps, March 2025]Again the old railway formation continues West alongside the B4393. [Google Streetview, April 2024]On this next extract from the 6″ Ordnance Survey a side road to the B4393 crosses the line of the railway. [18]The same area in the 21st century. [Google Maps, March 2025]Looking North across the bridge noted above. [Google Streetview, April 2024]Looking East along the old railway alignment from the road bridge. [Google Streetview, April 2024]Looking West along the old railway formation from the road bridge. [Google Streetview, April 2024]This next map extract shows Llanfechain Railway Station. [19]The same area in the 21st century. Note the way that the old railway turns away to the Southwest after passing through the station. [Google Maps, March 2025]The station at Llanfechain was a good walk from the centre of the village and not at the closest road crossing to the village. [21] The facilities at the station were limited, although the main station house was as substantial as that at Llansantffraid-ym-Mechain. The station site was framed by a road bridge. [21]
Llanfechain
Llanfechain was near to 11 miles from Oswestry. Jenkins tells us that “The layout at Llanfechain echoed that at neighbouring Llansantffraid in that there was just one platform on the up side. A small goods yard was able to deal with coal, livestock, and other forms of traffic. … The station building was of ‘Victorian house’ design incorporating residential quarters for the local stationmaster. The presence of a two-storey house portion made these stations appear much bigger than they actually were, the booking office and waiting-rooms being only one portion of the main structure.” [3: p636]
Leaving Llanfechain Railway Station “heading south-westwards, the single line climbed steadily through pastoral countryside towards the penultimate stopping place at Bryngwyn” [3: p636] which was a little over 12.5 miles from Oswestry.
Looking West-southwest along the line of the old railway in 2024. [Google Streetview, April 2024]The line headed Southwest as it left Llanfechain. Note the footbridge in the top-right of this map extract, the road bridge just below and to the left of the centre of the image and the accommodation bridge in the bottom-left. [20]The same area in the 21st century. At the top-right of this image what was once a footbridge over the old railway has been converted into an access road. On both this image and the map extract above another minor road can be seen bridging the line of the old railway just below the centre of the image. The line was in a cutting at this point. [Google Maps, March 2025]The road bridge seen from the Northwest. [Google Streetview, April 2024]Looking Northeast along the line of the old railway towards Llanfechain Railway Station. [Google Streetview, April 2024]Looking Southwest along the line of the old railway. [Google Streetview, April 2024]In this next 6″ map extract the accommodation bridge noted before, appears top-right and a further bridge bottom-left. The line remained in cutting along this length. [25]This extract from Google’s satellite imagery covers a similar area to the map extract above..It also shows the bridge noted above which carried another local access road over the old railway. [Google Maps, March 2025]On this next extract from the 6″ Ordnance Survey of 1880s the line begins to turn towards the West, from a southwesterly heading. What becomes the B4393 crosses the line at Bryngwyn Flag Station (a halt at which passengers had to signal the train to stop to collect them). The road curving round the bottom-left corner of the extract was to become the A490. [26]Much the same length of the line appears on this 21st century satellite image. The A490 can be seen on the bottom-left of this image. [Google Maps, March 2025]A closer view of the location of Bryngwyn Halt. The old railway can be seen bridging the old road which had to dog-leg to pass under the line. [26]Looking Northeast along the line of the old railway from the B4393. The bridge at this location was removed and the road was realigned after the closure of the railway. The level difference between the two is still evident. [Google Streetview, April 2024]Turning through 180°, looking Southwest along the line of the old railway. The realignment of the road required the removal of the bridge abutment and a short length of embankment which once also supported the Bryngwyn Halt. [Google Streetview, April 2024]
Bryngwyn Halt
Bryngwyn did not open with the line. Jenkins tells us that “having been opened by the Cambrian Railways as an unstaffed halt in the mid-1860s. The single platform was sited on the down side of the line with access from a nearby road. Interestingly, Bryngwyn was an early example of a ‘request stop’, a semaphore stop-signal being worked by intending travellers. The platform was originally of timber trestle construction with a small open-fronted waiting shelter, although a concrete platform and corrugated-iron shelter were later provided.” [3: p636]
“From Bryngwyn the route continued westwards for the final two miles to Llanfyllin. With the A490 road running parallel to the left, the line passed beneath a minor road bridge and, slowing for the final approach to their terminus, branch trains passed an array of parallel sidings before finally coming to rest beside a single-platform station some 8 miles 41 chains from Llanymynech, and 14 miles 48 chains from the start of the through journey from Oswestry.” [3: p636-637]
Over this next stretch of the old railway, the line continues to curve round towards the Northwest. The road that became the A490 runs parallel to the line but to its South. An access track Plas-ywen crossed the line at an un-manned crossing. A little further West the line was bridged by a lane running North from the main road. [27]Much the same area on modern satellite imagery. [Google Maps, March 2025]Looking North along the lane which crossed the old line. The railway was in cutting at this location so there are no significant gradients on the approaches to the bridge. The brick parapets of the bridge remain in place. [Google Streetview, Summer 2022]Looking East, the line of the old railway is camouflaged by tree growth. [Google Streetview, Summer 2022]Looking West, it is possible to see the old formation with the hedge following the old railway boundary. [Google Streetview, Summer 2022]The road and railway continued in parallel across this next extract from the 6″ Ordnance Survey. The River Cain runs just to the North. [28]The same area on modern satellite imagery. At the left of both these images a farm access track crosses the line of the old railway. [Google Maps, March 2025]The old line continued to curve towards the Northwest. [29]A very similar length of the old railway in the 21st century. The route of the railway can still be seen easily curving to the Northwest on the South side of the River Cain. [Google Maps, March 2025]The final length of the line which terminated to the Southeast of the centre of Llanfyllin. [30]The same area of Llanfyllin as it appears on satellite imagery in the 21st century. [Google Maps, March 2025]The centre of Llanfyllin in the 21st century. [Google Maps, March 2025]
Llanfyllin
Jenkins says that “Llanfyllin was a surprisingly spacious station, and although its track-plan was relatively simple, the goods yard and other facilities were laid out on a generous scale, the distance from the turnout at the eastern end of the run-round loop to the terminal buffer stops being around 34 chains, or slightly less than half a mile. The passenger platform was situated on the down side, and it had a length of around 385ft. The platform was flanked by two long parallel lines, one of which functioned as an engine release road while the other formed a lengthy goods reception line. These two lines were linked by intermediate cross-overs which allowed greater flexibility during shunting operations.” [3: p637]
The goods yard contained two goods sheds, one of these being situated on a loop siding that was laid on a parallel alignment to the passenger station. A long siding for “coal and other forms of wagon-load traffic extended along the rear edge of the goods yard; this siding branched into two shorter sidings at its western end, the second goods shed being served by one of these short spurs. The main goods sidings ended at loading docks at the western extremity of the station, while a further siding to the east of the platform on the down side served a cattle-loading dock. The latter siding was entered by means of headshunt from the engine shed siding, a reverse shunt being necessary before vehicles could be propelled into the cattle dock.” [3: p638]
Nearby the “engine shed was single-road structure with a length of about 50ft, … this normally accommodated just one locomotive. Water was supplied from a stilted metal tank beside the engine shed, this structure being fitted with flexible hoses through which the water could be delivered.” [3: p638]
The station throat at Llanfyllin Railway Station is framed by the road bridge carrying Derwlwyn Lane. This map extract comes from the 25″ Ordnance Survey of 1900, published in 1901. [33]
The image above is embedded from the Flickr site of Katerfelto, who comments: “Trains arriving at Llanfyllin passed a ground frame and then passed under a single-span iron bridge which carried Derwlwyn Lane over the line. From the south side could be seen the engine shed and water tower followed by some cattle pens and Llanfyllin signal box, before the single platform and its substantial station building announced the journey’s end.” [34]
Opposite the platform were the goods shed, a warehouse, several buildings and the run-round loop.
The terminal buffers were in a shallow cutting and short approach road led from the station building to the public road.
Jenkins continues: “Llanfyllin station building was similar to the other station buildings on the branch, being a typical ‘Victorian house’ design with a two-storey stationmaster’s house and attached single-storey booking-office wing. The window and door apertures were simple square-headed openings with large-paned window frames, but this otherwise plain brick building was enlivened by the provision of decorative barge-boards and elaborate pointed finials. The front of the booking office was slightly recessed to form a covered waiting area, and this feature contributed further visual interest to this former Oswestry & Newton Railway building.” [3: p638]
Llanfyllin had a population of around 2,000. Wikipedia tells us that “the community … population in 2021 was 1,586 and the town’s name means church or parish (Llan) of St Myllin (‘m’ frequently mutates to ‘f’ in Welsh).” [30]
What were the circumstances which brought about their existence?
History does not make it easy to take out one example from a steady continuum of change. …
David Wilson writes: “There have been track or plateways since Roman times. You might say that these could be brought within the term railway and therefore the Romans invented the railway.” [1: p61]
Except there were railways of a sort, at least as far back at 600 BCE, possibly going back even further, maybe as far back as 1000 BCE. The clearest example being the Diolkos Trackway. [2] This was a paved trackway near Corinth in Ancient Greece which enabled boats to be moved overland across the Isthmus of Corinth.
David Wilson continues: “For most people, however, the railways began with the Stockton and Darlington (S&D), though I’m sure many people already appreciate that history is not always what it seems.” [1: p61]
David Wilson tells us that if one wished to take the view that the first ever railway was the first to have been authorised by Parliament, then the first railway was built in Leeds – The Middleton Railway. “The Middleton Railway was given Parliamentary Assent in 1758 and began using steam traction in 1812, two years before the advent of Mr Stephenson’s first locomotive, ‘Blucher’, and 13 years before the opening of the S&D.” [1: p61]
But there is more to consider. … The Lake Lock Rail Road opened in 1798 (arguably the world’s first public railway). It carried coal from the Outwood area to the Aire and Calder navigation canal at Lake Lock near Wakefield. [3][4] The Surrey Iron Railway was the first railway to be authorised by the UK Parliament (21st May 1801). It was a horse-drawn railway which ran between Wandsworth and Croydon. [5][6][7][8][9] It was followed by The Carmarthenshire Railway or Tramroad (authorised by Act pf Parliament on 3rd June 1802). It was a horse-drawn goods line, located in Southwest Wales, the first public railway first authorised by Act of Parliament in Wales.[3][10][11][12]
The Low Moor Furnace Waggonway was constructed in 1802. It connected Barnby Furnace Colliery to Barnby Basin on the Barnsley Canal. It was replaced in 1809 by The Silkstone Waggonway which operated until 1870. [19][20] The Merthyr Tramroad, between Merthyr Tydfil and Abercynon, also opened in 1802. [5][13][14][15][16][17][18] The Lancaster Canal Tramroad (also known as the Walton Summit Tramway or the Old Tram Road), was completed in 1803. It linked the north and south ends of the Lancaster Canal across the Ribble valley. [21][22]
The first steam locomotive to pull a commercial load on rails was Penydarren (or Pen-y-Darren) was built by Richard Trevithick. It was used to haul iron from Merthyr Tydfil to Abercynon, Wales. The first train carried a load of 10 tons of iron. On one occasion it successfully hauled 25 tons. However, as the weight of the locomotive was about 5 tons the locomotive’s weight broke many of the cast iron plate rails. [5][13][14][15][16][17]
We could go on to mention:
The Croydon, Merstham & Godstone Goods Railway opened in 1805; [23]
The Sirhowy Tramroad opened in 1805; [24]
The Ruabon Brook Tramway (also known as Jessop’s Tramway or the Shropshire Union Tramway) also opened in 1805; [25][26][27][28]
The Middlebere Plateway (or Middlebere Tramway) opened on the Isle of Purbeck in 1806; [29][30][31][32]
The Monmouthshire Canal Tramway, open by 1806; [33][34]
The Oystermouth Railway, opened in 1806; [35][36] and
The Doctor’s Tramroad, Treforest which opened in 1809. [37][38][39]
The Monmouth Railway authorised by the UK Parliament in 1811. [5][72][73]
The Kilmarnock & Troon Railway which opened in 1812. [5][74][75][76][77]
The Killingworth Waggonway of which a first stretch opened in 1762 and which was extended in 1802, 1808 and 1820. [78][79][80][81][82][83]
The Haytor Granite Railway of 1820 which not only transported granite from Dartmoor as freight but ran on granite rails. [84]
We could list other railways opening before the S&D in 1825. The use of steam power at The Merthyr Tramroad and The Middleton Railway preceded its use on the S&D. A very strong claim to be the most significant development in the early 1800s could be made on behalf of The Middleton Railway. But it is the Stockton & Darlington (S&D) Railway which has caught the imagination and it is the 200th anniversary of the S&D which is being celebrated in 2025 as the beginning of the railway age.
Why is this?
It is clear that the claim to fame of the Stockton and Darlington (S&D) is lessened, at least, by the prior claim of the Middleton Railway both as first to be sanctioned by Parliament and first to make commercial use of steam power. The claims associated with other railways which preceded the S&D also must be significant. However, there is one important and fundamental difference between it and them. David Wilson says that, unlike the Middleton Railway, “the S&D was constructed with a view to carrying other companies’ goods and, to a lesser extent, to carry people.” [1: p61]
In addition, he says, “Bear in mind the distinction between the carriage of goods and people, and between carrying one’s own goods and those of others. In many ways this type of division is what distinguishes the modern concept of the railway as a system for the transport of goods and passengers on a hire and reward basis from the early plateways and railways such as the Middleton, which were not essentially built to carry anything other than goods, typically coal, for their owners.” [1: p61]
Perhaps, though, there are more grounds for the place taken in history by the S&D. Rather than just running between a pithead and a coal wharf on a canal, river or road and serving specific industrial concerns, the S&D also was built by public subscription and linked one town to another.
David Wilson continues: “To arrive at a description of what constitutes a railway we have to enlarge our definition to include not only Parliamentary Sanction, the use of rails or tracks, and the carriage of goods, but also the carriage of the public, the carriage of public goods and that one settlement be joined to another by the laying of a line paid for through the issue of shares. Thus … a railway is a set of tracks laid between two centres of habitation, which carries goods or people for commercial reward and has been authorised by Act of Parliament. It will have been built through the raising of public funds, either through the sale of shares in it or via government spending from the public purse.” [1: p61]
Let’s return to the era before the existence of the steam locomotive, the era of that list of lines highlighted above (and many more).
David Wilson comments: “The growth of the coal mining industry in the later part of the 17th and early 18th century had led to a growth in the plateway systems used to move the coal from the pit head to [a road], canal or river for shipment to the growing cities and the newly built mills. By as early as 1645 there were wagonways taking coal from the Durham coalfields down to the Tyne. By 1800 there were more than 100 miles of these plateways in the Tyneside area alone.” [1: p61]
Similar developments were taking place elsewhere in the UK:
The first overground railway line in England may have been a wooden-railed, horse-drawn tramroad which was built at Prescot, near Liverpool, around 1600 and possibly as early as 1594. Owned by Philip Layton, the line carried coal from a pit near Prescot Hall to a terminus about half a mile away. [40]
The Wollaton Waggonway in Nottinghamshire was in use by 1604. [5]
In East Shropshire and around the Severn Gorge; [41][42] A railway was made at Broseley in Shropshire some time before 1605 to carry coal for James Clifford from his mines down to the River Severn to be loaded onto barges and carried to riverside towns. It is possible that Clifford’s ‘railway’ was in use as early as 1570 and a similar line may well have been constructed by William Brooke near Madeley, again down to the River Severn. [43: p21] By 1775, there were a number of both short and long tramroads in the area around the Severn Gorge.
The Tranent to Cockenzie Waggonway was built by the York Buildings Company of London, to transport coal from the Tranent pits to the salt pans at Cockenzie and the Harbour at Port Seton, in Haddingtonshire, now East Lothian. [5][44]
The Alloa Wagon Way was constructed in 1768 by the Erskines of Mar in Alloa, to carry coal from the Clackmannanshire coalfields of central Scotland to the Port of Alloa. [45]
The Halbeath Railway opened in 1783, from the colliery at Halbeath to the harbour at Inverkeithing. [46][47]
The Charnwood Forest Canal, sometimes known as the ‘Forest Line of the Leicester Navigation’ was, under the guidance of William Jessop, using railways to supplement the canal between Nanpantan and Loughborough wharf, Leicestershire by 1789. [5][48]
The Butterley Gangroad (or Crich Rail-way) was built by Benjamin Outram in 1793. [49][50][51][52][53][54][55][56][57]
The Earl of Carlisle’s Waggonway opened in 1799 from coal pits owned by George Howard, 6th Earl of Carlisle around Lambley to Brampton, Cumbria. [51][58] There is some confusion over dates. The earliest opening date quoted is 1774, the latest 1799. [59] Dendy Marshall says that it was built in 1775. [60] C.E. Lee says it was constructed in 1798. [59][61]
It is perhaps easy to loose sight of the scale of these industrial undertakings. The rapid expansion of mining, plateways and railways “led to an increase in the numbers of horses in use … and a growth in the amount of horse feed needed. By 1727 The Tanfield Waggonway, in Co. Durham, carried 830 wagon loads of coal daily that’s a lot of horses.” [1: p61][5][62][63] “In 1804, the Middleton Colliery line was carrying 194 loads per day. Each wagon held about 2.5 tons and required the use of one horse and driver.” [1: p61]
A crisis in the use of horses and wagons occurred early in the 19th century with the advent of the Napoleonic Wars. The conflict became a significant drain on both horse and horse feed availability. The resulting inflation in the price of horses and feed lowered the profitability of each wagon load of coal. David Wilson says that, “The more visionary (or greedy, depending on your point of view) pit owners started to search for alternatives to the horse to move their goods to market. They provided their pit engineers with money and materials to experiment with steam power to replace horse power.” [1: p61]
Of course, steam power wasn’t new. Knowledge of the power of steam had been around since before the Common Era in Greek society [64][65][66] and the pits themselves had steam engines for pumping out the water and for lifting coal to the surface, or as winding engines on rope-worked inclines. [66][67] Newcomen’s first engine was installed for pumping in a mine in 1712 at Dudley Castle in Staffordshire. [66][68] What was new was first, the expiry of Boulton & Watt’s patent for a high-pressure steam engine, [5][69] and second, the idea of making the steam engine mobile, thus creating the steam locomotive. What eventually became even more revolutionary was the idea of creating a network of railways to serve the whole country. [1: p61]
We sometimes talk of a ‘perfect storm’ (a particularly violent storm arising from a rare combination of adverse meteorological factors), when we are talking about a series of adverse conditions occurring at the same time – a situation caused by a combination of unfavourable circumstances. The opposite of a ‘perfect storm’ is usually assumed to be a period of calm. However, the true opposite of a perfect storm is the occurrence (co-occurence) of a series of positive factors which combine to produce something significantly valuable. Wilson says that “as with almost anything man-made, there must be certain ingredients present. To bake a cake you need eggs, flour, milk etc. and in creating a railway you need, metalworking skills, engineering expertise, labour, capital and an incentive.” [1: 61]
The early years of the 19th century saw a timely co-incidence of these and other factors:
growing shortages of horse and feed coupled to the rising prices of both;
poor road conditions;
a rapidly developing understanding of engineering – Wilson suggests that this was “as a consequence of the more theoretical works of philosophers such as Newton, Descartes and Leibniz. … Such men have a reputation as creators or exponents of the mechanistic world view. Prior to the works of these men many had thought, and indeed some still do think, that the earth was a living entity. However, the views espoused by Newton, Descartes and Leibniz came to be accepted, the world was made up of dead, lifeless and inert matter, here to benefit mankind;” [1: p62]
the availability of skilled and unskilled labour – particularly the ‘navigators’ who were skilled in the techniques of earthworks, tunneling and bridge building – the men who had earlier built the canals. (“These men were to become the skilled labour of the railway construction industry and in turn they passed on their skills to the former farm labourers who were recruited to railway works as the lines progressed along their routes“); [1: p62]
developing metalworking skills – “the Darby family, who set up the … Coalbrookdale foundry. had acquired new skills in metalworking from tinkers, in what is now the Netherlands;” [1: p62] After constructing Ironbridge, “the Coalbrookdale ironmasters began to widen their horizons. One of their number, John “Iron Mad” Wilkinson, constructed what was reputedly the first iron barge and, more importantly, … the smiths of Coalbrookdale collaborated with Richard Trevithick in the construction of his locomotive – they cast the cylinder block and the plates for the construction of the boiler;” [1: p62]
the increasing availability of financial capital;
the increasing birth rate and the better health of the work-force which provided the necessary labour while engineering work was still labour-intensive.
The Availability of Capital
Among the physical factors listed above is an interesting financial factor which will bear some scrutiny. Wilson tells us that “the capital to build the world’s first public railway came, not from the Government, but from the Society of Friends, the Quakers.” [1: p62] He notes too that the Darby family whose Coalbrookdale plant had such a formative influence in the early days of the industrial revolution, were also Quakers. Wilson explains that Quakers were isolated from much of society and public life because of a refusal to sign up to the articles of faith of the established church. However, the same religious views made them sympathetic to works performed for the public good. Various Quaker families began to take an interest in the developing railway sphere. The website quakersintheword.org [70] tells the story of the significant role played in financing railways played by the Quakers.
“In 1818 a small group of Quaker businessmen, including Edward Pease and his son Joseph from Darlington, Benjamin Flounders and the banker Jonathan Backhouse, met to discuss the possibility of building a railway from Darlington, passing several collieries, to the port of Stockton.” [70]
The Act of Parliament required for the work to take place faced significant delays in the parliamentary process. “The delay proved very significant, as in April 1821 Edward met George Stephenson and recruited him as an engineer for the railway. The original intention had been that the coaches would be horse drawn, just like all the others now in existence. However, George convinced Edward that steam engines were the future for railways, and that he could build them. The Pease family then put up much of the capital that enabled Stephenson to establish a company in Newcastle, where he built the locomotives.” [70]
After the opening of the Stockton & Darlington Railway, “the railway network grew under the guidance of Edward’s son Joseph, who opened the Stockton & Middlesbrough branch in 1828. … In 1833 Joseph became the first Quaker to enter Parliament and the railway interests passed to his brother Henry. In 1838, Henry opened the Bishop Auckland & Weardale line, followed by the Middlesbrough and Redcar line in 1846. Henry wanted to traverse the Pennines and in 1854 he started the Darlington & Barnard Castle line, which opened in 1856.” [70]
Quakers were often involved in railway developments in the 19th century, for instance, “in 1824, a group of merchants, including Quaker philanthropist and anti-slavery campaigner James Cropper, went to see the Stockton and Darlington railway. They soon began building the Liverpool and Manchester railway, which opened in 1830.” [70]
Incidentally, Quakers “were also responsible for two innovations that improved the way these new passenger railways worked – timetables and tickets. James Cropper produced a 12-page timetable for the Liverpool and Manchester railway, probably the first railway timetable ever. It was the forerunner of Quaker George Bradshaw’s Railway Companion, published in 1839. Bradshaw’s became a household name for anyone using the railways. … The second innovation was the railway ticket. In 1839 Thomas Edmundson, another Quaker, was appointed station master at Milton, on the Newcastle and Carlisle line. He was unhappy that customers paid their fares directly to him without receiving a receipt. Consequently he introduced the railway ticket, which came into general use with the creation of the Railway Clearing House in 1842.” [70]
The Birth Rate and Increasing Health of the UK Population
Wilson points us to one more significant factor in the development of railways in the early 19th century. “Seemingly disconnected and irrelevant factors were playing their part. During the period from the end of the civil war (1649) onwards there was a growing awareness of the value of the human being as resource, and a concerted effort was made to increase the birth rate and to cut the death rate. … This did not stem from any rise in humanitarianism but from a recognition that people were worth money. After all, in the 1640s and on into the 19th century, slavery was still common throughout the so-called civilised world, including Britain. Improvements in diet and sanitation increased life exресtancy. It is no coincidence that the first workhouses began to appear around the middle of the 17th century – a reasonably fit and healthy population produced more than a sickly and unfit one.” [1: p62]
“By the beginning of the 19th century, the conditions were in place for a major economic expansion. A growing empire and military strength ensured the supply of raw materials and provided a growing market place for the products made from them. An expanding population provided the physical means by which the empire might be held together. Technology provided the ability to carry out the grand design. The workhouses and other reforms had created a disciplined workforce.” [1: p62-63]
By 1850, a quarter of a million workers – a force bigger than the Army and Navy combined – had laid down 3,000 miles of railway line across Britain, connecting people like never before. [71]
And Finally …
Wilson suggests one other, less definable, reason for the dramatic welcome given to steam technology in particular. He suggests that there was a more visceral connection to steam power which predisposed humanity to embrace the technology.
No doubt, the S&D was at the forefront of engineering developments it was “the white heat of technology, the frontier of science.” [1: p63] Wilson asks us to consider that there was (and still is) a connection between “a piece of primitive industrial technology, the steam locomotive and its enduring popularity, and an ancient, and some might say mystical, view of the world.” [1: p63]
Wilson says: “Prior to the advent of the mechanistic world view in which cause and effect, hard science and hard facts are the order of the day, people held to a more animistic philosophy. Miners would pray to the earth before digging it up. … In this more mystic view of the world things were not made of chemicals and atoms, molecules and the force of gravity. They were composed of the four elements – earth, air, fire and water.” [1: p63] He asks us to consider whether “the reason so many people took to the steam engine and the railway when it began was that the steam locomotive has a unique blend of the four elements not only in its construction but in the very forces and requirements necessary for its movement. … [It] is made from the ores of the earth, heated by fire which needs air to burn. The metals from the forge are then tempered by water whilst being shaped on the anvil. In order to make the steam locomotive work, coal, or part of the earth, is consumed along with air in a fire which turns water into steam which in turn brings the locomotive to life.” [1: p63]
We all know that all men, are just little boys at heart. Increasingly women are involved in the preservation movement. There seems to be a deep emotional connection for many of us between the steam beasts of earth, wind, fire and water that reigned over the railway networks for the world for more than a century and a half and our own psyche, something deeply ‘elemental’!
Whatever the cause, the early 19th century saw humanity embrace steam-power and the benefits it brought with open arms and wallets.
References
David Wilson; Mother of Inventions; in the Evening Mail Supplement, 1st June 1993, p61-63.
Peter King, The First Shropshire Railways in G. Boyes (ed.), in Early Railways 4: Papers from the 4th International Early Railways Conference 2008, Six Martlets, Sudbury, 2010, p70–84.
An oblique aerial photograph taken facing north shows a general view in 1928 of Alloa, its Town Hall, Marshill and Church Street. The wagon road which was used to transport coal from the Holton area of Sauchie to Alloa harbour. Although the tracks are gone the road still exists from Station Hotel down to South School. https://www.britainfromabove.org.uk/image/SPW020247, accessed on 7th January 2025.
Hero (Heron) of Alexandria, described in detail what is thought to be the first working steam engine. He called it an aeolipile (“wind ball”). His design was a sealed caldron of water was placed over a heat source. As the water boiled, steam rose into the pipes and into the hollow sphere. The steam escaped from two bent outlet tubes on the ball, resulting in rotation of the ball. The principle he used in his design is similar to that of today’s jet propulsion. Hero (Heron) did not consider this invention being useful for everyday applications: he considered his aeolipile invention as a novelty, a remarkable toy. https://www.smith.edu/hsc/museum/ancient_inventions/steamengine2.html, accessed on 3rd March 2025. The same device was also mentioned byVitruvius in De Architectura about 100 years earlier. [66]
In 1712, Thomas Newcomen’s atmospheric engine became the first commercially successful engine using the principle of the piston and cylinder, which was the fundamental type of steam engine used until the early 20th century. The steam engine was used to pump water out of coal mines. [66]
Steven Johnson; The Invention of Air: A story of Science, Faith, Revolution and the Birth of America; Riverhood Books, New York, 2008.
The Llanfyllin Branch was featured in an article by Stanley Jenkins in the October 2003 issue of Steam Days magazine. [3]
The immediately adjacent Tanat Valley Light Railway is covered elsewhere on this blog. The articles about that line can be found here [4] and here. [5]
The two lines ran into the hills to the Southwest of Oswestry. The local Cambrian network is shown diagrammatically in the image below.
Trains on the branch ran from the Welsh border town of Oswestry to Llanfyllin in the Berwyn Mountains. The branch left the Oswestry & Newtown Railway at Llanymynech, where the station nameboard called on passengers for Llanfyllin and Lake Vyrnwy to disembark and change trains. The lake is a nearby beauty spot where there is a reservoir supplying water to Liverpool.
In July 1864, the Oswestry & Newtown Railway joined with other local concerns to form the Cambrian Railways Company with its headquarters at Oswestry.
Llanfyllin’s townfolk formed a company to secure a rail link to the Cambrian network. The Cambrian began to show some interest when ideas of an East-West mainline came to the fore.
A 10-mile branch was agreed from Llanfyllin to Llanymynech which, in the view of the companies which would soon form the Cambrian, would hinder any rival’s attempt to construct a mainline between the Midlands and the Welsh coast.
The modest scheme received Royal Assent on 17th May 1861 and the Act empowered the Oswestry & Newton Railway to build branch lines to Llanfyllin and Kerry. The Llanfyllin Branch was soon pegged out in advance of construction. It presented few engineering challenges as “for much of its length the proposed branch line would follow a comparatively easy course along convenient river valleys, and with few physical obstacles to impede [the] work.” [3: p627]
“The line was substantially complete by the early months of 1863, a significant event being the arrival of the locomotive Nant Clwyd at Llanfyllin in March of that year. The railway was opened on 10th April 1863 and branch trains began running through to Oswestry on 17th July 1863.” [3: p627]
The railway “was single track throughout, with intermediate stations at Llansantffraid and also Llanfechain. At Llanymynech the junction was situated to the North of the station, and this necessitated an awkward reversal when trains entered or left the branch. There were no tunnels on the branch, although several overbridges or underbridges were required including a 90-yard viaduct between Llanymynech and Llansantffraid. An additional stopping place was opened at Bryngwyn in the first few months of operation, although this new station was merely a request stop with no provision for goods traffic. The trains travelling eastwards to Oswestry were regarded as up workings, while westbound trains were down services.” [3: p627-628]
The new railway was soon functioning as a typical country branch line with a modest service of around five trains each way. “Minor changes took place at Llanymynech in 1866 in connection with the opening of the Potteries, Shrewsbury & North Wales Railway, but in the event this undertaking was more or less a total failure. Much later, in 1896, the Llanfyllin branch junction was re-aligned using part of the PS&NW route.” [3: p628]
“The Llanfyllin branch found a welcome, unexpected source of heavy freight traffic in the 1880s when Liverpool Corporation obtained powers for the construction of a massive dam at Llanwddyn, about seven miles to the west of Llanfyllin. By this means the surrounding valley was turned into a reservoir known as Lake Vrynwy from which water was supplied to Liverpool via a 75mile-long aqueduct. Materials needed in connection with this gigantic feat of Victorian engineering were delivered by rail to Llanfyllin, which became an important railhead while the reservoir scheme was under construction.” [3: p628]
In 1922, the Cambrian became an integral part of an enlarged GWR as part of the grouping required by the Railways Act of 1921.
Road competition led the GWR to become “a large-scale user of motorised road transport, with railway-owned lorries being employed for local cartage work in urban areas and as ‘country lorries’ for collection and delivery work in rural areas. Certain stations were selected as ‘country lorry centres’, while others were down-graded in various ways so that, by the later 1930s, many smaller stations were handling very little carted freight traffic. Oswestry and Llansantffraid, for example, both became ‘country lorry centres’, and a large rural area was then served by road transport, with GWR vehicles running on regular routes. In this way the railway could fight back against the road-transport operators.” [3: p628]
The GWR was also a pioneer in the use of motorised road passenger services. “By the post-Grouping period the GWR had introduced road feeder services on a very large scale, rural Wales being regarded as an ideal area for the employment of such vehicles. Oswestry emerged as an important centre in the company’s motor-bus network, with services radiating to towns such as Llangollen, Welshpool, and to Llanfair Caereinion. These extensive road services needed a relatively-large allocation of motor vehicles, among the buses working from Oswestry during the 1920s being Burford 30cwt buses Nos. 801, 807, and 861, and Thornycroft 30cwt vehicles Nos. 911 and 936. The GWR buses … worked in close conjunction with the trains as useful feeders for the railway system.” [3: p628] This was an early example of an integrated transport network!
To regularise its practice, the GWR obtained new legal powers “under the provisions of the Great Western (Road Transport) Act of 1928. This new legislation enabled the GWR to own, work, and use motor vehicles in its own right, and to enter into arrangements with other parties for the operation of road transport services. By virtue of these powers the railway company at once entered into detailed negotiations with certain road transport companies, and by 1933 all of the GWR motor-bus services had been handed over to ‘associated’ bus companies such as Crosville Motor Services Ltd.” [3: p629]
“This arrangement was supposed to lead to greater co-ordination between road and rail transport, but there is no doubt that in many areas the buses began to compete with the railways for what little transport was available in rural areas. The situation in respect of the Oswestry area seems to have been particularly disadvantageous as far as the GWR was concerned in that many buses ran on a Llanymynech-Oswestry-Gobowen axis in open competition with the rail service.” [3: p629]
“In some instances Crosville (or the other railway-associated bus companies) assisted the GWR by collecting and delivering parcels traffic, while goods traffic was handled by GWR motor lorries, some of which had been converted from former railway buses. Oswestry-based road motors Nos. 891, 897 and 861 … were adapted for use as lorries between 1926 and 1929. …They retained their old GWR fleet numbers. … Buses were more flexible than the railways, … to mitigate this the GWR opened numerous unstaffed halts. … One of these … was established in 1938 at Carreghofa in the Llanfyllin Branch, near Llanymynech.” [3: p629]
Jenkins tells us that the train services on the branch were similar throughout the years of its operation with five up passenger services to Llanymynech from Llanfyllin each weekday and five down trains. Occasionally these services worked through to Oswestry but, with the exception of the 1.43pm service, such movements were not always timetabled. The reverse workings, often unadvertised, ran from Gobowen through Oswestry and Llanymynech to Llanfyllin. Wednesdays and Saturdays, market days in Oswestry, were different, with two morning trains running through to Oswestry and two early afternoon trains back to Llanfyllin. There was no Sunday service. A daily branch goods train “generally departed from Llanymynech at 12.25pm and arrived at the terminus at 1.35pm, having called intermediately at Llansantffraid where half an hour was allowed for shunting operations. The return working left Llanfyllin at 2.30pm and, after spending another half an hour at Llansantffraid, … arrived at Llanymynech at 3.42pm.” [3: p629]
Jenkins comments that “the line was worked by short-wheelbase coaching stock for many years, although in GWR days 2-coach ‘B-sets’ and other formations were employed.” [3: p629]
The Cambrian Railway had very few small tank engines which meant that tender engines worked many of their small branch lines. Usually these would be ‘Queen’ class 0-6-0 locomotives. Following the grouping, GWR locos began to appear on the branch lines around Oswestry, particularly Armstrong and Collett 0-4-2Ts. Jenkins tells us that “these newcomers included ‘517’ 0-4-2T No 848 which worked on the branch at various times until its withdrawal in 1945, being out-stationed in the branch sub-shed at various times. The familiar Collett 0-4-2Ts were introduced by the GWR in 1932 as replacements for the veteran ‘517’ class 0-4-2Ts on local passenger services.” [3: p630]
The first examples of the non-auto ’58XX’ locomotives appeared on the branch in the 1930s. Jenkins notes that No. 5816 was sent to Llanfyllin shed as early as August 1933, while by 1947, the resident branch engine was No. 5806. The auto-fitted ’48XX’ class also arrived at Oswestry in the mid-1930s. These locos could also be seen on the Llanfyllin Branch. [3: p630] Dean goods 0-6-0 locos were also seen at times on the branch. Jenkins notes appearances of Nos. 2482 and 2535. No doubt the branch was served by a number of pannier tank (0-6-0PT) locomotives of different classes that were stabled at Oswestry. After nationalisation, by the mid-1950s, a group of Ivatt ‘2MT’ 2-6-0s were allocated to Oswestry and were employed on the branch. “As there was no turntable at the terminus the Ivatt Moguls generally ran tender-first towards Llanfyllin and then returned to Oswestry facing in the right direction. Several Llanfyllin branch services were at this time through trips to Gobowen which continued northwards over the Great Western branch to connect with the Shrewsbury & Chester main line. … At Gobowen it was found that the clearance between the stop block at the end of the down bay platform was insufficient for an Ivatt 2-6-0 running tender-first, and drivers were therefore instructed to enter the bay running chimney-first; this instruction probably explains why the engines normally faced northwards when they were running on the Llanfyllin route!” [3: p631]
The Route
We commence our journey at Oswestry Railway Station. We noted first that from 1860 onwards there were two separate stations in Oswestry – a GWR station and a Cambrian station.
The first 25″ OS map extract below shows the general arrangement of railway facilities in the centre of Oswestry at the turn of the 20th century. The second focusses on the two railway stations.
A series of photographs of the railway station can be found on the Disused Stations website. [32]
Oswestry Railway Station (at the top of this image) and the Cambrian’s Works (nearer the camera) seen in an aerial view looking from the Northeast across Oswestry (EAW056424, 1954). Historic England. [30]
After the grouping in 1922 the GWR set about rationalising their inheritance. The old Cambrian station became the town’s passenger facilities and the GWR station was converted into the hub of an enlarged goods yard. “The Cambrian platforms were extended by 300ft, and a new branch bay was created on the west side of the station on a site that had previously been occupied by a large goods shed. At the same time the main up and down platforms were equipped with new canopies, and electric lighting was installed in place of gas in the goods yard and engine sheds. … Goods facilities were provided on a lavish scale, with sidings at both the north and south ends of the station. The main goods yard, which incorporated the original Great Western terminus, was situated to the north of the passenger station; the former terminus remained largely intact after its conversion to a goods depot, although part of the platform canopy was boxed-in to form a goods loading area.” [3: p632]
Goods facilities extended both to the North and South of the enlarged passenger station. Oswestry engine shed contained six terminal roads and sat to the North of the station complex, between the lines to Whitchurch and Gobowen. Jenkins tells us that a “standard GWR raised coaling plant was erected as part of the post-Grouping improvements, and this replaced an earlier Cambrian coaling stage. The Great Western coal stage was surmounted by a 45,000gallon water tank, while the old 45ft-diameter locomotive turntable was taken up and a new 65ft-diameter GWR one erected.” [3: p632]
South of Oswestry, trains for Llanfyllin travelled along the GWR Whitchurch to Aberystwyth main line as far as Llanymynech, passing Llynclys junction where the Tanat Valley Light Railway diverged westwards on its way to Blodwell Junction and Llangynog. Llynclys Railway Station was situated a short distance beyond the junction. It “was a wayside station with a small but substantial station building on the up side and a waiting shelter on the down platform. In architectural terms the station building, with its two-storey stationmaster’s house and single-storey booking-office wing, was very typical of Oswestry & Newton practice. The nearby goods yard contained facilities for coal, livestock, and general merchandise traffic.” [3: p633]
The length of the line from Oswestry to Llanymynech is covered by the next sixteen extracts from the 25″ Ordnance Survey of 1900 and accompanying satellite images and photohgraphs.
A short distance to the South of Oswestry town centre the line passed under Salop Road adjacent to the gates of the town cemetery. [9]The same location in the 21st century. [Google Earth, February 2025] The line South from Oswestry is single track, it is part of the Cambrian Heritage Railways based at both Llynclys and Oswestry in the restored Oswestry Railway Station. It was formed after the 2009 merger of the Cambrian Railways Society and the Cambrian Railways Trust, it aims to reinstate the infrastructure required to operate trains from Gobowen to Llynclys Junction (for Pant) and to Blodwel. Cambrian Heritage Railways also operates the Cambrian Railways Museum in the Oswestry railway station’s former goods depot. [17]This schematic map shows the lengths of the line between Gobowen and Welshpool that have been restored as of the end of 2024. [17]
The Cambrian Heritage Railway is extending and repairing track from Llynclys South northwards towards Oswestry to enable trains to run into the former Cambrian Railway headquarters at Oswestry. [17]
Looking North from Salop Road bridge in the first quarter of the 21st century. [Google Streetview, April 2024]Looking South from Salop Road bridge in the first quarter of the 21st century. [Google Streetview, April 2024]The line continued South from the Salop Road bridge. [9]Further South, the line continued to track South-southeast. [9]The line passed to the East of the small village of Weston. [10]The same location in the 21st century. This is Weston Wharf Station on the Cambrian Heritage Railway. [Google Earth, February 2025]Looking North from Weston Road in the 21st century. [Google Streetview, April 2024]
Weston Wharf Railway Station on the Cambrian Heritage Railways’ line to the South of Oswestry. “Plans to extend the line from Oswestry were reported in January 2016. The work was scheduled to proceed in three stages: phase one from Oswestry to Gasworks Bridge which carries the B4579 Shrewsbury Road over the line, phase two to make Gasworks Bridge passable and phase three to reach Weston Wharf. [24] At Gasworks Bridge, the track had to be lowered to allow trains to pass under the steel girder frame installed to strengthen the bridge. Funding was received from Shropshire Council and Oswestry Town Council.” [25][26][28]
“By April 2022 the 2 miles (3.2 km) of track from Oswestry to Western Wharf, which lay abandoned for more than 50 years, had been reinstated. The station was officially opened on 2 April 2022 by Helen Morgan MP and Vince Hunt, Chairman of Shropshire Council. It consists of a single platform, a run-around loop and a siding. Previously, there was no station here, only a goods depot.” [27][28]
Weston Wharf Railway Station development proposals as shown in the Cambrian Heritage Railway’s newsletter in 2019. [27]
Looking South from Weston Road in the 21st century. [Google Streetview, April 2024]The line continues South-southwest [10]The modern day A483 crosses the line of the railway a little to the South of Weston Wharf. [Google Earth, February 2025]Looking North from the A483 in the first quarter of the 21st century. [Google Streetview, July 2024]Looking South from the A483 in the 21st century. [Google Streetview, July 2024]The line continued South-southwest. [10]And passed under one minor road and then over another (just at the bottom edge of this extract. [11]The first of the two bridges in the 21st century. [Google Earth, February 2025]Looking North from the minor road bridge in the 21st century. [Google Streetview, April 2024]Looking South from the same minor road bridge in the 21st century. [Google Streetview, April 2024]The second of the two bridges in the 21st century. [Google Earth, February 2025]Looking South through the bridge spanning Albridge Lane. [Google Streetview, April 2024]Looking North through the bridge spanning Albridge Lane. [Google Streetview, April 2024]Beyond Albridge Lane Bridge, the line continued Southwest passing under another minor road bridge which carried Church Lane and which can just be seen at the bottom of this extract from the 25″ Ordnance Survey of 1900. [11]Church Lane Bridge as it appears on satellite imagery in the 21st century. [Google Earth, February 2025]Looking North-northeast from Church Lane Bridge. [Google Streetview, April 2024]Looking South-southwest from Church Lane Bridge. [Google Streetview, April 2024]On this next extract, the minor bridge appears at the very top. South of that bridge the village of Llynclys was passed after the Tanat Valley branch left the main line heading West. [12]The same location as it appears on the ESRI [satellite imagery provided by the National Library of Scotland (NLS). [20]
The Tanat Valley Light Railway is covered by two articles which can be found here [18] and here. [19] The route of the main line and that of the Tanat Valley Light Railway are defined by the lines of trees in the 21st century. The village has extended across the railway line.
Looking North from the B4396 at Llynclys. The building is Llynclys Railway Stationmaster’s House and booking office which are now in private hands. Jenkins describes the station as a “wayside station with a small but substantial station building on the up side and a waiting shelter on the down platform. In architectural terms the station building, with its two-storey stationmaster’s house and single-storey booking-office wing, was very typical of Oswestry & Newton practice. The nearby goods yard contained facilities for coal, livestock, and general merchandise traffic.” [Google Streetview, April 2024]Looking South from the B4396 at Llynclys along the preservation line. … Llynclys South Railway Station was built by the preservation railway to replace the original Llynclys Railway Station. [Google Streetview, April 2024]
Llynclys South Railway Stationis located just South of the original located Llynclys station, “on the other side of the B4396 road bridge. During the original commercial operation of the line, the site was used for goods handling. … The station was built as an alternative to the original Llynclys station, which has become a private house. Work on the South station began in 2004 and opened to the public in 2005. CHR currently keeps the bulk of its rolling stock here, on a number of sidings, and a new carriage shed is set to be built after having gained planning permission in 2007.” [23]
More photographs and maps of Llynclys Railway Station can be found on the Disused Stations website. [33]
South of Llynclys trains ran on through Pant to Llanymynech which was nearly 6 miles South of Oswestry.
The old line continues South-southwest from Llynclys Railway Station. [12]And then ran parallel to and on the West side of the Shropshire Union Canal. Close to the mid-point on the West side of this image the line is bridged by Penygarreg Lane. [13]The same area in the 21st century as it appears in the NLS ESRI satellite imagery both highlighted by the lines of trees. Penygarreg Lane and bridge can be seen quite easily on this image. The length of the Montgomery Canal (Shropshire Union Canal) in the vicinity of the village of Pant is known as the Shropshire Gap. The Shropshire Union Canal Society is working to renovate the derelict length of the Canal. [21][22]The view North-northeast from Penygarreg Lane. The bridge forms the end of the heritage line. The view South from the lane is completely blocked by a high Leylandii hedge. This is the Southern limit (in 2025) of the preservation line. [Google Streetview, April 2025]A little to the South of Penygarreg Lane, Pant Railway Station is at the centre of this next extract from the 25″ Ordnance Survey of 1900. [14]A closer view of the immediate area around the station at Pant is worthwhile. It shows the wharf at the canal side and transshipment facilities for the standard-gauge line. The tramway served Crickheath Quarry. By the 21st century, much of this area has changed significantly. [14]The same location in the 21st century. A comparison of this satellite image with the map extract immediately above is illuminating. Access to the canal wharf from the West was a shared underbridge. Both the tramway and the road passed under the bridge. The road then turned sharply to the South running parallel to the canal before turning East to cross the bridge over the canal which is still in place in the 31st century. Removal of the railway had meant that a new alignment of the road on the West side of the canal has been possible. [Google Earth, February 2025]Looking North along the line of the railway towards Llynclys and Oswestry. [Google Streetview, April 2024]Looking South along the line of the railway towards Llanymynech. [Google Streetview, April 2024]The line continued South towards Llanymynech bridging the Montgomery Canal on a skew bridge. [14]The location of the bridge over the Montgomery Canal. Well house Lane runs on the South side of the old canal.The remains of the railway bridge over Wellhouse Lane seen from the Northeast. The northern abutment is hidden by vegetation. The Montgomery Canal, in its overgrown state, is off the right side of this image. [Google Streetview, April 2024]The remains of the railway bridge over Wellhouse Lane seen from the Southwest. The northern abutment is hidden by vegetation (on the left of the road). The Montgomery Canal, in its overgrown state, is further to the left. [Google Streetview, April 2024]After crossing the Canal and Wellhouse Lane, the line passed through a shallow reverse curve and bridged another lane. [14]
The location of the bridge in the map extract above is shrouded by the tree canopy. A modern satellite image would show very little as does the Streetview image below.
Looking Northwest through the location of the bridge at the centre of the map extract above. The bridge, including its abutments, is no longer present. The road leaving the lane to the left climbs onto the old railway embankment and follows the route of the line for a few hundred metres, giving access to a private dwelling and a sewerage farm. [Google Streetview, April 2024]The 25″ Ordnance Survey of 1900 shows the original junction between the Cambrian’s Whitchurch to Aberystwyth line and the Llanfyllin Branch to the North of Llanymynech Railway Station. With this junction facing North, trains from and to Llanfyllin were required to undertake and awkward reversal along the main line into Llanymynech Station. The replacement alignment can be seen towards the bottom of this extract. It followed the line of the old extension to the Potteries, Shrewsbury and North Wales Railway (PS&NWR) By the time of this survey the length of the original branch just to the West of this map extract had been abandoned. A short chord (also off the left of this extract) linked the branch to the PSNWR. [15]This extract from the 6″ Ordnance Survey from before the turn of the 29th century shows the alterations necessary close to the main line. The PS&NWR crossed the line to Newton from Oswestry on the level at a diamond crossing. A new chord was necessary to allow trains access to and from the main line. That chord was placed to the South of the original line (the earthworks of the original line can be seen to the North of the new chord). [35]The same area shown on Google Maps’ satellite imagery. Station Road crosses the site of the old station at the top-right of this image. The mainline runs South down the right side of the image. The route of the Llanfyllin Branch is marked by the track marked in grey running West from the location of the junction to the A483. [Google Maps, February 2025]Looking from the West along Station Road (B4398) on its approach to the bridge over the old railway. The railway station was under this bridge. [Google Streetview, April 2024]Looking West along Station Road from the location of the East abutment of the bridge over Llanymynech Railway Station. [Google Streetview, April 2024]This extract from the 6″ Ordnance Survey of 1900, published in 1902, shows the relationship of the old and new routes taken by branch trains for and from Llanfyllin. The earlier alignment is shown as dismantled and runs to the North of the later alignment. The chord linking the two is on the left of this extract. The bridge which carried the main road South from Llanymynech over the branch can be seen at the right of this map extract. [16]
Llanymynech Railway Station was the point of departure for Llanfyllin Branch trains from the main line. In early year this required trains serving Llanymynech from Oswestry to undertake a reversal in order to travel along the branch. The same applied to trains from Llanfyllin needing to call at or terminate at Llanymynech.
This was addressed by providing a short chord line from the Llanfyllin Branch to what was once part of the Potteries, Shrewsbury and North Wales Railway (PS&NWR). “This remodelled layout enabled branch trains to serve Llanymynech station without reversing, although the new junction arrangements necessitated the abandonment of a small portion of the original Oswestry & Newton branch. … Further changes ensued in 1911 when a connection was established between the former PS&NW line and the Tanat Valley route at Blodwell Junction. This new line created a useful loop line between the Llanfyllin and Tanat Valley branches, although in the event the two-mile connecting line between Llanymynech and Blodwell Junction had a comparatively short life, and it was closed in the mid-1920s.” [3: p635]
Llanymynech grew as a Victorian village after the opening of the Montgomeryshire Canal in 1797. This length of Canal became part of the Shropshire Union Railways and Canal Company and then part of the LNWR. The Canal was only abandoned after the LNWR became part of the LMS. The Canal was not abandoned until towards the end of the Second World War (1944). Although Llanymynech has a Welsh name it sits on the English side of the border with Offa’s Dyke running through the parish. [3: p635]
The Oswestry & Newton Railway “constructed a simple two-platform station southeast of Llanymynech, plus an adjacent goods yard, to enable shipping of locally quarried limestone, and created products of quick lime and lead. However, under its Act of Parliament, it had agreed not to disturb the operations of the existing local tramways or canals, and hence access across each would either be over (bridge) or under (aqueduct). … The Hoffmann kilns were located on the opposite side of the canal to the chosen station site, and if accessed on the level would have required an aqueduct to be built under the canal. Not having the money to achieve this, the O&NR agreed to junction with the local tramways north of its station at “Rock Siding”. It hence built a bay platform on the northwest side of the station, from which line extended to the “Rock Siding”. To access the Hoffmann kilns, trains would firstly enter the bay, then reverse up the slope to the “Rock Siding”, where they would then change direction again by pulling forward over a bridge to the Hoffmann kilns.” [34]
Details and more photographs of Llanymynech Railway Station can be found on the Disused Stations website. [36]
Once the chord linking the old Llanfyllin Branch and the PS&NWR had been built and the chord between the main line and the PS&NWR was complete, trains from Oswestry and Llanymynech diverged West off the main line just South of Llanymynech Railway Station.
The Llanfyllin Branch
After running off the main line, trains for Llanfyllin passed under what would become the A483. The bridge appears on both of the last OS Map extracts above.
Looking South along the A483. There is nothing to see, at road level, of the bridge over the old railway. The line ran on the near side of the terrace visible on the right. [Google Streetview, July 2024]
Carreghofa Halt was the first stop on the Branch, it was just a short distance from the mainline close to the chord which served to link the old branch and the PS&NWR line. It was an unstaffed stopping place, opened by the GWR on 11th April 1938, “its facilities comprised a short platform on the down side of the running line. The platform was of earth & cinder construction with revetting of old sleepers. A small wooden shelter was provided for the comfort of waiting travellers, while the simple platform was fenced with tubular metal railings. … Other features of minor interest at Carreghofa included a sleeper-built permanent-way hut to the east of the platform and an unusual overbridge immediately to the west of the halt. The bridge, which crossed the railway on a skewed alignment, was a single-span structure carrying the B4398 road and the Montgomeryshire Canal.” [3: p635]
Having passed beneath the road/canal bridge, “trains reached the junction between the Potteries, Shrewsbury & North Wales branch to Nantmawr and the short connection which gave access to the original Llanfyllin route. This 26-chain curve was opened on 27th January 1896 as a means of linking the PS&NW route to the original 1863 branch.” [3: p365][4][5]
A relatively low quality view from the road bridge/canal aqueduct looking Northwest. The stored wagons on the right sit on the Nantmawr Branch. The chord to Llanfyllin heads off to the left. [40]
Now heading pretty much due West the branch sets off for Llansantffraid. We will pick up this next length of the route in the second article in this short series.
Henry Robinson Palmer (1793-1844) was a British engineer who designed the first monorail system and also invented corrugated iron!
Born in 1793 in Hackney, he was the son of the Revd Samuel Palmer, a nonconformist minister, and his wife, Elizabeth, née Walker. [1] He was baptised in Tooting [2] and was educated at the academy run by his father and between 1811 and 1816 was an apprentice at 1811-16 Apprenticed to Bryan Donkin and Co.
When he finished his apprenticeship, Palmer was taken on by Thomas Telford, working for him for 10 years and involved with a variety of road/canal surveys and associated designs. In 1818, Palmer was one of three young engineers key to the founding of the Institution of Civil Engineers and on 23rd May 1820, he formally became a member of the Institution. [3]
Elijah Golloway recorded Palmer’s ideas for a Suspension Railway in the image above which is dated 1822. It seems as though Galloway’s book, History of the Steam Engine, From Its First Invention to the Present Time: Illustrated by Numerous Engravings From Original Drawings, Made Expressly for This Work, was not published until 1828 by B. Steill. [4][5]
On 22nd November 1821, Palmer patented his proposed monorail system. [6][19: p57]
In 1823, Palmer wrote his short book, Description of a Railway on a new Principle, (J. Taylor, 1823) about his monorail ideas. [7]
The illustrations immediately below come from a copy of that book which is held by the Science Museum. [7]
Palmer was unaware of the experimental work being undertaken in Russia at around the same time. The work of Ivan Kirillovich Elmanov is covered here. [26]
These images are taken from H.R. Palmer; ‘Description of a Railway on a New Principle’ and are released by the Science Museum under a Creative Commons Licence (CC BY-NC-SA 4.0) [7]
In his book, Palmer refers to examples of railways already constructed. It is clear that he is talking of railways which operate on more traditional principles. He tabulates those to which he is referring in a table which is reproduced below: the Llanelly Tramroad; the Surrey Tramroad; the Penrhyn Slate Quarries, edge rail road; the Cheltenham Tram Road; a branch of the Cheltenham Tram Road; Edge Rail Roads near Newcastle-upon-Tyne. These he compares with his own proposed railway which was built in Deptford Dockyard in London in 1824. [6]
Table showing the resistance form the rails of various railways in use in the early 19th century. [8: p29]
History only seems to record two of Palmer’s monorails in the UK. The first was constructed at Deptford as we have already noted. The second was built at Cheshunt and opened about 3 months prior to the Stockton & Darlington Railway (in June 1825) and was described, that month, in The Times newspaper. [9] Although his ideas were attempted in at least one other place. The railway built in what is now Hungary in 1827 (15th August). It was a fleeting experiment about which more details can be found here. [10]
Palmer is recorded as having given evidence, in 1825, in favour of navigation interest and against the Liverpool and Manchester Railway. [4] He was appointed resident engineer to the London Docks in 1826, where, for 9 years, he designed and executed the Eastern Dock, with the associated warehousing, entrance locks, bridges, and other works. While undertaking this role, in 1828, he inventedthe “Corrugation and Galvanisation” of sheet iron. [11]
Regarding Palmer’s invention of corrugated iron, Dr. Pedro Guedes wrote that “Palmer exploited the unique properties of metal, creating a lightweight, rigid cladding material, capable of spanning considerable distances without any other supports, helping to make lightweight iron buildings and roofs possible. Palmer’s invention completely broke with precedent and tapped into another level of thinking. The sinusoidal corrugations that Palmer imagined as the means to impart strength to his sheets of wrought iron have continued virtually unchanged for close on two centuries.” [11]
In 1831, he was elected as a Fellow of the Royal Society, publishing two papers on the movement of shingle in Philosophical Transactions, 1831 and 1834. In 1833, he took out patents for improvements in the construction of arches and roofs. [12] In 1835, he moved to Westminster and worked as a consulting engineer and was involved in numerous surveys for projected railways, and the design and construction of several docks and harbours, including those at Port Talbot, Ipswich, Penzance, and Neath. He carried out the original surveys for the South Eastern Railway, assisted by P. W. Barlow, and would have executed the scheme but ill health intervened. His original surveys for a Kentish railway dated from the time he was associated with Telford.
He died on 12th September 1844. [13]
C. von Oeynhaussen & H. von Dechen inspected both of Palmer’s monorails during their visit to the UK in 1826 and 1827 and comment on both. First they describe the principles involved: “To facilitate laying out a railway with reduced friction, and to make it independent of the small unevennesses of the ground, Mr Palmer has proposed and built a kind of railway which consists of a single bar, and the wagons have only one wheel on each axle. The track is erected on posts or columns at a suitable height above the ground, and the load hangs so far below the wheels that the wagon frame cannot overturn. [16] This railway has the disadvantage that its construction is not solid, or it becomes very expensive; that it can compensate only for very small unevenness of the ground; that the motive power can operate only with an inclined pull; and that special precautions must be taken for unloading and loading the wagons. Therefore, the scheme has not come into general use. Excepting the two now to be mentioned, no railways of this kind appear to have been built in England.” [14: p75-76]
Palmer’s Deptford Railway
C. von Oeynhaussen & H. von Dechen describe this railway: “This railway leads from the Thames across the yard of the Victualling Office up to the warehouse, and serves to transport provisions out of the warehouse to the ships, or the reverse. The railway consists of cast-iron columns which project from 3 to 5 ft out of the ground; these are provided with fork-shaped seats at the top and are spaced 10 ft apart. Planks 9 in. high and 3 in. thick rest in the forks on double wooden wedges, so that they can be set at the correct level very easily. On the upper edge of these planks, wrought-iron bars are spiked, which are 3½ in. wide, somewhat convex, and in. thick in the middle. The ends of these bars are not square, but cut in a broken line, and rest, not directly on the plank, but on a small iron plate let into the wood.” [14: p76]
“The line is nearly horizontal, and has a fall of only about 20 minutes of angle to the river. … The wagons which run on this line have three wheels of 18 in. diameter, one behind the other; they have two flanges and the groove is shaped to fit the rail. These wheels are fixed to a wrought-iron frame which consists of three stirrups going over the wheels with connecting pieces below. The stirrups reach 2 or 3 ft below the railway, and are provided on both sides with an inclined platform, on which are placed the casks to be conveyed. For loading the wagons, there are two sloping frames at the same height as the wagon platforms, and between which the wagon has just room to pass. A wagon is loaded with 10 casks which weigh about 4½ cwt each, therefore totalling 45 cwt. The wagon can be taken at 5 cwt, so that the whole weight comes to 50 cwt, which can be moved up the line easily by four men.” [14: p76]
The Cheshunt Railway – The first passenger carrying monorail
Cheshunt had a railway three months before the Stockton and Darlington line was opened. It was a horse-drawn monorail, built by Henry Robinson Palmer, who had previously built one in Deptford Dockyard, the first in the UK. The Cheshunt Railway, his second venture, was opened on 26th June 1825, running from Mr Gibbs’ Brick Pit (to the west of Gews Corner), to a wharf on the River Lea, not far from the site of the current Cheshunt Station. Its original purpose was to haul bricks, but it was also utilised for carrying passengers. For such a short distance, it must have been principally a novelty; regardless of this, it was the first passenger monorail in the world. [15]
The design was an overhead track from which carriages were suspended, drawn by a single horse. The line crossed the main road by a section hinged like a gate, enabling it to be moved off the road. No sign of the monorail has survived, but its legacy gives Cheshunt a vital, if little-known, position in the history of railways. [15]
C. von Oeynhaussen & H. von Dechen describe the railway: “From the lime and brick kilns at Cheshunt, in Hertfordshire, about 20 miles north of London, which lie on a main road, a Palmer railway leads to the Lee Canal in the flat and level Lee valley. The railway has a fall of 5 to 10 minutes of angle towards the canal; it is mile Engl. (580 fathoms Pruss.) long and serves to transport lime and bricks. The line rests on wooden posts which project on average 34 ft out of the ground; towards the limekiln, however, the bottom of the line is in a cutting in the ground, so that the posts stand in a kind of dry trench, the base of which is 9 ft wide. The wooden posts stand 10 ft apart, are 4 in. thick, and 7 in. wide; the top is fork-shaped 3 in. wide and cut 16 in. deep. In the bottom of this fork lies a block 12 to 15 in. long, in different heights, which is supported by a pair of inserted angle-pieces 14 in. high and 2 in. thick. Two wedges 2 ft long rest on this block with their inclined faces lying against one another, so that a horizontal support is always afforded to the plank which lies thereon. The planks are 101 in. high and 3 in. thick; they are 30 ft long and always meet in the middle of a post. Iron bolts with screws go through the post to hold together its fork-shaped end. There are oblong holes in the planks through which these bolts pass, so that the underlying wedges can be adjusted when necessary. On top of the planks a wrought-iron convex rail is laid, 4 in. wide, 1 in. thick at the edges, and in. thick in the middle. [14: p76]
C. von Oeynhaussen & H. von Dechen continue: “The rails are 20 ft long with their ends cut obliquely, and they are fixed by no more than two or three spikes of in. diameter with their heads countersunk in the rails. The rails have some spare holes which are used when one or other of the spikes breaks. Some posts are made of three parts fixed together. The pieces are 6 in. wide; the middle piece is 3 in. thick, the side pieces are 21 in. thick, and they are bound together by three screw-bolts; the wedges lie upon screwed-in blocks which are 1 ft long at the top. Although these planks are very thick, they have become bent at some places because of the great distance between the posts and are propped up by pillars set under them subsequently.” [14: p77]
“There is a siding on the railway in the vicinity of the canal. Here the line is made double for a length of about 30 ft, and between the double piece and the single track there is a strong door 10 ft wide which is hinged to the single rail and may be fastened to either of the two tracks. The railway lies on the upper edge of the door. Directly over the hinge is a small turning piece of rail by which the severe angle which the door makes with the main railway is reduced. This railway passes over an ordinary road by a similar door.” [14: p77]
“The wagons on this railway have only two cast-iron wheels, 26 in. diameter, with two flanges; they are 51 in. wide including the flanges, which are in. thick and project 11 in. They have six spokes and a nave 6 in. long and 2 in. wide. The wheel turns with a hollow cast-iron axle 2 in. thick and 12 in. long, which lies in round brass bushes at both ends; these have an inside diameter of 11 in., an outside diameter of 2 in., and are 3 in. long inside. They are fitted to seats on the wrought-iron stirrups which form the main frame of the wagon. Through the hollow cast-iron axle and the brass bushes is a wrought-iron axial bar 26 in. long, and 1 in. thick, the ends of which are fastened to the stirrup. This makes a firmer connection with the wagon frame. The two wheel centres are 46 in. apart. The platforms on which the wagon bodies are placed are 40 in. below the axle centres and are 17 in. apart. There is one wagon body on each side of the wagon, and each holds 20 cu. ft. One such body is laden with 20 cwt of lime or bricks, and therefore a wagon takes 40 cwt. One horse draws two such wagons or 80 cwt, exclusive of the bodies and the wagon.” [14: p77]
“On a disused standing wagon, there is a special arrangement for reducing the friction of the wheels on the axles, which is neither properly devised according to theory nor well carried out practically. The brass bushes wherein the cast-iron axle turns have a circular-segment-shaped slot, in. wide, cut in the upper part, and in this notch rests a 4 in. high iron friction wheel, on which the whole load of the wagon bears, while the brass bush is not entirely held fast in the wagon frame.” [14: p77]
The Cheshunt Railway is also featured in the Register of Arts and Sciences No. 47, 2nd July, 1825, [17] where the illustration below appears, along with a detailed description of the opening of the railway.
The Cheshunt Railway. [17: p353]
The article is reproduced in full below at Appendix A.
C.F. Dendy Marshall also refers to Palmer (and his monorails) in his history of railways to 1830. He notes that “Palmer was prominent in connexion with the London and Brighton schemes, and was [a] principal founder of the Institution of Civil Engineers. He wrote a paper in the Journal of the Franklin Institute in 1828, advocating the use of sails on railways. An illustration is given [below] of his railway with that method of propulsion, from Hebert’s Practical Treatise on Rail Roads (1837). [19] Two short lines were made on Palmer’s principle, on which horses were used: one at the Victualling Yard, Deptford; and one from some lime-kilns and tile-works near Cheshunt to the Lea Canal. The best account of these lines is given by von Oeynhausen and von Dechen, in ‘Ueber Schienen Wage in England, 1826-27.” [18: p171]
Marshall was writing in 1935, over 30 years before the Newcomen translation of von Oeynhausen and von Dechen’s German text was published, so he took the trouble to provide his own translation of their words in full. [18: p171-173] He also points his readers to an article in the Mechanics Magazine of 6th August 1825 which concluded: “One carriage, which has been constructed for the purpose of trying the application of the plan to the conveyance of passengers, differs from the others. Its boxes partake partly of the shape of a gig, and partly that of a balloon-car; in each are two cushioned seats vis-à-vis, with a little dickey behind, the whole carriage being covered with an awning.” [18: p173-174]
Palmer’s Idea for sail propulsion on his patented monorail. [18: p171][19: p62] At times we may feel a sense of ridicule at proposals which were coming to the fore in the early days of railways, but we need to remember that railways were the most up-to-date, advanced technology of the day and that progress would not have been made if a whole range of ideas were being put forward and tried.
Hebert discusses Palmer’s ideas in his book, Practical Treatise on Rail Roads (1837): “Mr. Palmer’s railway consists of only one, which is elevated upon pillars, and carried in a straight line across the country, however undulating and rugged, over hills, valleys, brooks, and rivers, the pillars being longer or shorter, to suit the height of the rail above the surface of the ground, so as to preserve the line of the rail always straight, whether the plane be horizontal or inclined. The waggons, or receptacles for the goods, travel in pairs, one of a pair being suspended on one side of the rail, and the other on the opposite side, like panniers from the back of a horse. By this arrangement only two wheels are employed, instead of eight, to convey a pair of waggons; these two wheels are placed one before the other on the rail, and the axle-trees upon which they revolve are made of sufficient length and strength to form extended arms of support, to which are suspended the waggons.” [19:p57]
Hebert provides an illustration of the line in use. And the principles by which various obstacles were overcome. In the image below, “on the left is seen a jointed rail, or gate, that crosses the road over which the carriages have just passed, and the gate swung back, to leave the road open; the horse and man having just forded, the train of carriages is proceeding in its course, and following another train, part of which is seen on the right, crossing a rail bridge, simply constructed for that purpose.” [19:p59]
An Illustration of Palmer’s Suspension Railway. [19: p59]
“Provision is made for trains of carriages that are proceeding in opposite directions, by means of ‘sidings’ or passing places. With respect to loading, if both receptacles be not loaded at the same time, that which is loaded first must be supported until the second is full. Where there is a permanent loading place, the carriage is brought over a step or block; but when it is loaded promiscuously, it is provided with a support connected to it, which is turned up when not in use. From the small height of the carriage, the loading of those articles usually done by hand becomes less laborious. The unloading may be done in various ways, according to the substance to be discharged, the receptacles being made to open either at the bottom, the ends, or the sides. In some cases, it may be desirable to suspend them by their ends, when, turning on their own centres, they are easily discharged sideways.” [19:p59]
“Among the advantages contemplated by the patentee of this railway, may be mentioned that of enabling the engineer, in most cases, to construct a railway on that plane which is most effectual, and where the shape of the country would occasion too great an expenditure on former plans – that of being maintained a perfectly straight line, and in the facility with which it may always be adjusted; in being unencumbered with extraneous substances lying upon it; in receiving no interruption from snow, as the little that may lodge on the rail is cleared off by merely fixing a brush before the first carriage in the train; in the facility with which the loads may be transferred from the railway on to the carriages, by merely unhooking the receptacles, without displacing the goods, or from other carriages to the railway, by the reverse operation; in the preservation of the articles conveyed from being fractured, owing to the more uniform gliding motion of the carriages; in occupying less land than any other railway; in requiring no levelling or road-making; in adapting itself to all situations, as it may be constructed on the side of any public road, on the waste and irregular margins, on the beach or shingles of the sea-shore, indeed, where no other road can be made; in the original cost being much less, and the impediments and great expense occasioned by repairs in the ordinary mode, being by this method almost avoided.” [19: p59-60]
Hebert goes on to talk of the line built in Cheshunt in 1825. In that case, “The posts which support the rails are about ten feet apart, and vary in their height from two to five feet, according to the undulations of the surface, and so as to preserve a continuous horizontal line to the rail. The posts were made of sound pieces of old oak, ship timber, and in a, the slot or cleft at the upper ends of the posts, are fixed deal planks twelve inches by three, set in edgeways, and covering with a thin bar of iron, about four inches wide, flat on its under side, and very slightly rounded on its upper side; the true plane of the rail being regulated or preserved by the action of counter-wedges between the bottom of the mortices, and that of the planks. By this rail, on the level, one horse seemed to be capable of drawing at the usual pace about fourteen tons, including the carriages.” [19: p60]
Hebert quotes Tredgold, who commented: “We expect that this single railroad will be found far superior to any other for the conveyance of the mails and those light carriages of which speed is the principal object; because we are satisfied that a road for such carriages must be raised so as to be free from interruptions and crossings of an ordinary railway.” [19: p60][20]
Hebert notes a particular problem with Palmer’s design: “It has generally been considered a defect in Mr Palmer’s arrangement, that in order to make turns in the road, it is necessary that a portion of the rail should be made to turn with the carriages upon it. This defect, Mr. T. Chapman, of Royal Row, Lambeth, proposed to remedy, by so constructing the carriage, as to enable it to turn itself upon a fixed suspension rail, whether curved or straight, or from one angle to another. Fig. 1 … exhibits an end view of the carriage, and Fig. 2 a side view of the same, partly in section. … aa is the rail, bb two wheels on the rail; these carry the turning plates cc, each having four friction-rollers: ee, upper plates; ff, the vertical axis of the wheel-frames or turn-plates cc; they pass through the plates d and e, from which the boxes gg are suspended, by the lateral arms hh and ii. Now as the wheels and frames b c can turn freely on their axis ff, they each require four guiding rollers jjjj to keep them in a right line with the rail, and to cause them to turn as the rail turns. These carriages should not be further asunder than is absolutely necessary for the required curve of the rail. The bottom of the carriage has a joint at one third of its length, and is held up at this by the hooks kk; by removing these, the contents may be let out: the fixed portion of the bottom is made sloping, so that it may be readily emptied.” [19: p60-61]
Hebert now turns to consideration of the force of the wind: “About thirteen years ago it occurred to [him], that the force of the wind might be beneficially employed as an auxiliary power for propulsion on railways; and considering that the suspension principle, which had just then been promulgated by Mr. Palmer, was better adapted to that object than any other, he wrote a short paper on the subject, which was inserted in the eighth number of the Register of Arts, for January, 1824, under the signature of “L. H.” The plan also embraced a proposition for enabling boats from the sea, a river, or canal, to pass out of the water, at once upon the rail, and thereon be propelled precisely in the same manner as the receptacles provided by the inventor are, and from which they scarcely need to differ in shape. Both of these propositions have been treated with abundance of ridicule, by persons who were either incapable or indisposed to reason. But one of them having, according to the newspapers, been recently carried into actual practice at Sunderland, and under less favourable circumstances, (i.e. on the common ground rail) the writer need not dilate upon its feasibility. And as respects the other propositions, he will only observe, that believing it to contain the germ of something that may hereafter prove of public benefit, he hesitates not to place it before the judgment of the reader. The following are extracts from the paper alluded to. ‘The inhabitants of small islands, and of the sea-coast gene-rally, subsist chiefly upon fish; and as they are remarkable for robust constitutions, it follows that their food must be strengthening and wholesome. I propose, therefore, a railway, on Palmer’s principle, from London to the nearest seaport town or fishing-place, that shall give to the inhabitants of this city the advantages of a plentiful supply of the cheap and wholesome food enjoyed by those in maritime situations. In the drawing which accompanies this [see the sail propulsion drawing above], the scene sketched is entirely imaginary, and intended, first to represent a railway leading to a sea-port, with the carriages being propelled, according to the modes projected by Mr. Palmer; the first train of carriages being drawn along the rail by a locomotive steam-engine, the second, more in the perspective, is supposed to be drawn by a horse. Brighton is perhaps the most eligible situation for such an undertaking. By a railroad from that place, the London market might be supplied with a prodigious quantity of fish within three or four hours after their being taken from the sea, at the mart trifling expense of carriage; and if the wind were to be employed as an auxiliary propelling force, which I propose, the rapidity with which the fish might generally be brought lo our markets would give us all the advantage of a sea-port town in the purchase of it If the Hollanders have found it practicable (as is well known) to sail over land in four-wheeled carriages, how much more practicable and advantageous would it be to bring into use the admirable facilities furnished by Mr. Palmer in his new suspension railway, in which the resistance to the motion of the carriages is reduced to one-twentieth part; or in other words, wherein the facilities are twenty times greater. As objections will of course he raised, on the score of the variableness of the wind, I must repeat, that I only propose it. as an auxiliary power. It would rarely happen that the wind would not he favourable in going or returning; and it is well known that S.W. winds prevail more than any other in our quarter, which would be favourable for the principal traffic; that is to London. In the absence of a steam-engine, a horse should always be in attendance; so that when employed in drawing a train of carriages, if a favourable breeze should spring up, the sails might be spread, and the horse be-put into one of the receptacles, where, over his bag of corn, he might regale and invigorate himself for fresh exertions, should the wind fall off.” [19; p61-62]
Hebert goes on, even more fancifully in my view, to explain how Palmer’s design can be adapted to one of Hebert’s own ideas of overcoming the need for transshipment between canals and railways, and perhaps to overcome the need for locks altogether as lengths of canal could be linked by Palmer’s monorail, provided the canal vessels were designed to suit. So, Hebert says: “The railway I propose Is to be constructed as usual, elevated upon pillars, and not to terminate on arrival at the look gates B, but to pass over it, and terminate at the other end, just within the second gates A, and be supported upon pillars from the floor of the lock, the same as on dry ground. In [drawing](which is a plan) the double train of vessels are supposed to have all entered the lock, half on one side of the rail, and half on the other, and they are hooked on to the axle-trees of the wheels which are already upon the rail for that purpose. The gates next to the river or canal are then closed, and all being fast, the water is let out of the lock by a sluice at D. till it falls below the bottom of the outer gates; at which time the vessels are all suspended on their axles in the air. The gates being next opened, and the wind fair, they sail across the valley or are propelled by other means provided by the patentee.” [19: p62-63]
Hebert’s proposed transfer lock – canal to Palmer’s monorail. [19: p63]
Further Immediate Developments
As early as 1826, the German railway pioneer Friedrich Harkort had a demonstration line of Palmer’s system built at his steel factory in Elberfeld (today part of Wuppertal), but objections prevented the construction of a public railway. [22]
Soon after, the first Hungarian railway line was completed on 15th August 1827, and led from Pest to Kőbánya. It was a monorail built on the principles outlined by Palmer. [23][24]
H.R. Palmer; Description of a Railway on a New Principle: With Observations on Those Hitherto Constructed and a Table Shewing the Comparative Amount of Resistance on Several Now in Use; J. Taylor, London, 1823. [NB: a second edition was published by J. Taylor in 1824]
The Leicester Chronicle, or Commercial and Agricultural Advertiser; Saturday, 15th February 1834.
The Ipswich Journal, Saturday, 14th September 1844.
C. von Oeynhaussen & H. von Dechen; Railways in England 1826 and 1827; translated by E.A. Forward and edited by C. E. Lee & K. R. Gilbert; Heffer &b Sons Ltd, Cambridge, for the Newcomen Society, 1971.
This refers to a device patented by Henry Robinson Palmer (1795-1844) on 22nd November 1821 (Patent No. 4618). The line in the Royal Victualling Yard, Deptford, appears to have been brought into use in the latter part of 1824. The Cheshunt line was opened with considerable ceremony on 25th June 1825.
Appendix A – The Opening of the Patent Suspension Railway at Cheshunt, Herts
The Register of Arts and Sciences No. 47, 2nd July, 1825
We had the gratification on Saturday last of witnessing a practical demonstration of the advantages of Mr. Palmer’s new Suspension Railway, the nature and construction of which having been fully described in the 7th and 8th numbers of this Work, to those articles we refer our readers, as connected with our present account.
A line of railway on these beautiful principles having been erected at Cheshunt, in Hertfordshire, by Mr. Gibbs of that place, the same was opened for public inspection on the above-mentioned day, when a numerous and highly-respectable company of persons attended by invitation to witness the operation of the carriages, and partake of a rural entertainment provided for the occasion. The weather proved fine during the forenoon, but the rain which after-wards occasionally descended in showers, would have been felt very inconveniently by the numerous fair visitors, had they not been provided with large booths, in which were erected ranges of elevated seats, commanding a view of the entire piece of rail-road, besides affording a fine prospect of the surrounding country, which is beautifully picturesque. Near to these was stationed a band of music, which played a variety of national airs; and the flags of England, France, America, and other nations, waving their colours in different parts of the beautiful meadows, gave a delightful effect to the scene, independently of the highly interesting business of the day.
The chief object of the proprietor of this undertaking is the conveyance of bricks across the Marsh to the River Lea for shipment, and the carriages have consequently receptacles adapted to that peculiar purpose. But on the present occasion each receptacle was fitted up with temporary seats, for the conveyance of the persons in the manner represented in the engraving; each receptacle being likewise loaded with a quantity of bricks as ballast, which were stowed away under the seats, making, perhaps, a total weight to each receptacle of one ton; and there being two receptacles to a carriage (one suspended on each side of the rail) will make the whole weight about fourteen tons. The first carriage shewn in the train * had the receptacles expressly made for passengers, and were elegantly constructed in the barouche style, the passengers sitting opposite to each other. The whole of this immense train was drawn by a single horse by means of a towing rope attached to the first carriage, and with so little exertion apparently, that it was evident the strength of a good average horse would be sufficient to draw double the weight operated upon. The rail was proved to be upon a level plane by the animal drawing the load with equal facility, in either direction. The posts which support the rail are about ten feet apart, and vary in their height from two to five feet according to the undulations of the ground, so as to preserve the horizontal line of the rail. Under the rail, and between a cleft of each of the posts are placed reverse wedges, which admits of a facile and almost instantaneous adjustment of the plane, in the nicest manner. [a] The posts are made of that almost ever-lasting stuff, sound old ship timber, and securely fixed in the ground in a peculiar manner; the rail is constructed with 3-inch planks, 12 inches wide, which are placed edgeways between the clefts of the pillars. The upper surface of the rail is covered with a bar of iron four inches wide and about a quarter of an inch thick, and a little con-vexed on the upper side, to suit the occasionally inclined position of the wheels, and to prevent (as we suppose) a too extended contact of their surfaces.
Our object in giving another sketch of this truly excellent invention has been, chiefly to shew its admirable application for the conveyance of persons as well as goods. The vehicles glide so smoothly over the surface of the country, as to be compared only to the floating of boats in the stream of a river; and it is evident that no mode of travelling can possibly be less free from danger.
The simplicity and effectiveness of this new railway was the subject of general admiration; among the spectators we noticed several engineers of eminence, who, very honourably to themselves, awarded their meed of praise, so justly due to the inventor, for the erection of (unquestionably) the best rail-way hitherto constructed. [b] The uses and advantages are indeed so obvious to every observer, that it is impossible not to believe that it will become of general adoption in all situations suited to a work of the kind.
Notes
This simple method of adjustment is one of very considerable importance in every point of view. In the common railroads, when the surface has become irregular by the sinking of particular parts, the rails must be taken up of necessity, and a complete re-bedding of their foundations made, which is of course attended with considerable expense and inconvenience. By Mr. Palmer’s plan a tap or two with a hammer sets the whole straight.
Even Mr. Vallance, who may be regarded as unfriendly to railways generally, very candidly says in his pamphlet on the subject, “By the effects produced on different railroads, it is proved, that a power which will raise one pound perpendicularly, will move above 100 lbs. horizontally at the same rate; and on a railway of Mr. H. R. Palmer’s invention, it may at any time be seen, that the same power will produce the same effect on above 300 lbs!”
P.W. Gentry wrote about Stockport’s trams in the July 1949 issue of Modern Tramway.
He says: “Besides possessing several interesting features of its own, the Stockport system today commands added attention as the last last surviving member of that once network of standard gauge undertakings encircling Manchester. It is an unusually pleasing system by virtue of its compact and simple arrangement, its focal point being Mersey Square.” [1: p123]
The article in Modern Tramway caught my attention because for about 9 years I worked in Stockport as a highway engineer.
This is a second article looking at Stockport Corporations Tramways. The first article which looked at the history of the network and followed one axis of that network can be found here. [2]
Mersey Square was the main hub of Stockport’s tramway network and appeared as a schematic plan in Gentry’s article in The Modern Tramway. …
Before looking at the remaining tram routes operated by Stockport Corporation it is worth noting the trams which Stockport Corporation used to operate the network. P.W. Gentry listed these as follows:
This table is taken from Gentry’s article. [1: p126]
Edgeley to Mersey Square and Mersey Square to Reddish andGorton
This first axis of the network was covered in my first article about Stockport Corporation Trams, here. [2] Two further axes are worth our attention: the first, below, that between Gatley and Bredbury; the second that between Manchester and Hazel Grove.
Gatley to Mersey Square and Mersey Square towards Bredbury
Tram services entered Mersey Square and crossed the Mersey. Services to the West of the town commenced here and ran along Princes Street to Bridge Street. That length of the network is covered in an earlier article which can be found here. [2]
We resume this article at the Northeast end of Princes Street and its junction with Bridge Street and then follow the route to Hyde.
This completes the length of the tramway from Stockport to Hyde. The next article in this short series will cover the line from Manchester to Hazel Gri
References
P.W. Gentry; Stockport Corporation Tramway; Modern Tramway, Vol. 12 No. 138, June 1949, p123-126.
Harry Postlethwaite, John Senior & Bob Rowe; Super Prestige No. 14, Stockport Corporation; Venture Publications, Glossop, Derbyshire, 2008. This document is made freely available by MDS Books as a .pdf: https://www.mdsbooks.co.uk/media/wysiwyg/Stockport_Download_1.pdf, accessed on 14th January 2025.
In this second article we look at Par and its harbour, include some information about Treffry’s Tramway which transported goods to and from the Port and take note of St. Blazey Loco Shed. …
“Par Harbour was built in 1829 by a local entrepreneur Joseph Thomas Treffry who was known as the “King of Mid Cornwall”. [1: p13]
“The first ships used the port at Par in 1833 and it was finished in 1840. The breakwater enclosed 36 acres (15 hectares) of harbour and was capable of taking up to about 50 vessels of 200 tons each. The port is tidal so the vessels would sit on the bottom at low tide. Cornish granite was exported from Par in the early days for such famous landmarks as Waterloo Bridge in London, Chatham Docks, Gibraltar Docks & Glasgow Docks.” [33] As the china clay industry grew during the 19th century this became the main export through the port.
The first map below comes from the Ordnance Survey 1st series of the very early 19th century.
Par Harbour, OS First series, early 19th century. [5]Old map of Par Harbour shared on the St. Blazey and Par Old Photos and Postcards Facebook Page on 18th June 2019. [6]
Coal needed to be imported from Wales to power Treffry’s mines, and copper, lead, and granite needed to be exported all over the country. Treffry, as a leading industrialist of the time, “had an urgent need for a harbour to serve his mines and quarries and the narrow streets of Fowey hampered the process when cargos could only be transported from the mines by mules and wagons. After he had completed his safe haven, up to fifty small sailing vessels of the time could be accommodated in the harbour, while larger ships lay at anchor in St Austell bay where their cargoes were loaded from barges. Other industries and businesses developed inside the port area such as ship repair, rope works, sail making, timber and coal merchants and brickworks.” [1: p13]
Hugh Howes notes that the new harbour “was a vital outlet for minerals particularly the expanding china clay industry and a rival to Fowey, Pentwan and Charlestown. [Teffry’s] Fowey Consols Mine was reaching its peak production in the late 1830s at 15,000 tons. The output at Par Consols Mine peaked a little later at nearly 8,500 tons. They were producing profitable amounts of copper at that time. … He had brought industrial success firstly with the copper mines in Tywardreath and St. Blazey, then with the granite workings at Luxulyan, and finally with china clay extraction to serve the fast developing ceramics industry in the Potteries.” [27: p48-49]
The Par Canal was built by Treffry to transport his minerals from Pontsmill to Par Harbour and was operational from 1833 [8][33], 1842 [1: p21] or 1844 [10], depending on which source you rely on. A number of tramway inclines were associated with it. One from Fowey Consols Mine to a location to the South of Pontsmill was in use by 1835. A second, was built a little to the South of the first, both seem to have served Fowey Consols Mine. A third tramway inclined plane was built between Par Consols Mine and Par Harbour. That inclined plane was working by 1841. [8] The Canal was closed in 1873. [10]
The Treffry Tramway was built in stages. The first length headed North from Pontsmill to Colcerrow Quarry and included an incline to lift the line out of Pontsmill. This line was extended to Molinnis near Bugle. To get there a large viaduct was needed, to cross the valley of the River Par (the Luxulyan Valley). The Teffry Viaduct, was 648 feet in length with ten arches, and was 98 feet high. It was the first large granite viaduct in Cornwall. This section of Treffry’s tramway opened in early 1844. [8]
Construction of the Tramway continued from it’s planned Northern terminus at Newquay. There were delays as a result of Treffry’s death in 1850 but his work was eventually continued by his cousin who had the Hedra Incline operational by 1857 at the latest, possibly as much as five years earlier. [7]
The Fowey Consols Mine was geologically exhausted by 1865. It closed, as did the connecting tramway inclines. Copper extraction in the area was in steep decline, tin ore extraction proved commercially unsuccessful, but granite quarrying “enjoyed an upsurge, and new quarries opened on a small scale at Rock Mill Quarry and Orchard Quarry, above Pontsmill on the south-west side of the river. In 1870 a branch of the tramway was extended from near Pontsmill to serve the two quarries. The line was on the north-east side of the river, and it had two branches for the quarries; each of them crossed the river, and the Orchard Quarry line had an incline to reach the site. The tramway on the incline may have been narrow gauge and was probably gravity operated.” [7][12][14]
Joseph Treffry’s decision in 1844 to use horse-power meant that by the 1870s his tramways were becoming inefficient. Modernisation was essential but the Teffry Estate’s finances precluded that work being undertaken solely by the estate. [7]
In 1872 William Richardson Roebuck leased the tramways. He formed a limited company, the Cornwall Minerals Railway Limited and obtained “parliamentary authority on 21st July 1873 to acquire the lines, form a new railway to connect them, and to make an extension to Fowey, and to improve the original tramway sections so as to make them suitable for operation by steam locomotive.” [7][11][6][15]
“The Cornwall Minerals Railway (CMR) took over Treffry’s lines and improved them. They quickly built the link between Hendra and Molinnis, and their new line to Fowey, and Treffry’s vision of a through line from Newquay to Fowey was realised when on 1 June 1874 the CMR opened the line throughout.” [7] The line required a “new route up the Luxulyan Valley so as to avoid the rope-worked Carmears Incline.” [7]
“The new line in the Luxulyan Valley by-passed the Treffry Viaduct, but Colcerrow Quarry continued to be rail served. Traffic from the quarry reversed at the junction with the old main line at the Par end of the viaduct, and then crossed it, joining the new line at Luxulyan. This operation was horse worked, and the track was still the original Treffry stone-block type in 1933.” [7][17] By 1959 the Colcerrow route at Luxulyan had been shortened to a stub siding. [7][16: p21]
Passenger operation commenced in 1876. The GWR leased the lines from the CMR in 1877, and purchased them in 1896. “The East Wheal Rose branch remained a mineral section until the Great Western Railway (GWR) … built its line from Newquay to Perranporth and Chacewater, partly taking over the line of route.” [7]
The Treffry Tramways and the Par Canal warrant separate articles in this series which will be written in due course. …..
These next set of extracts from the Ordnance Survey belong together but cross the boundary between two OS Map sheets and come from the 1881 survey which was published in 1888. Treffry’s harbour is shown, as is the canal he built. The rail track shown running alongside the canal follows the route of the Treffry Tramway.
As well as the Treffry Tramway and the, already closed, Par Canal, there is a railway shown running roughly North to South on the first two map extracts. This was the Cornwall Railway, the railway company which built the majestic Royal Albert Bridge over the River Tamar. Because of the difficult terrain it traversed, it had a large number of viaducts, built as timber trestles because of the shortage of money. It was a 7 ft 1⁄4 in (2,140 mm) broad gauge railway from Plymouth in Devon to Falmouth in Cornwall, built in the second half of the nineteenth century. It was constantly beset with shortage of capital for the construction, and was eventually forced to sell its line to the Great Western Railway (GWR) in 1889, a little after the date of the 1881 Survey. [9]
Stephen Austin, in a May 2003 article in Steam Days, describes the workshops and depot this:
“At Par, the Cornwall Minerals Railway set up a new headquarters and engineering depot on a piece of flat ground between the river and the original valley side where once ships moored in front of the Sloop Inn.
It was fortunate that the Cornwall Railway line, at the south end of this site, was elevated on a viaduct, for its five arches now spanned the canal, the Cornwall Mineral Railways main line to Fowey, a branch into Par Harbour, the river, and a public road. At the north end the new line swung across the river on a sharp reverse curve to join the 1855 causeway. On this length from Par Bridge to Middleway Bridge the original railway between the river and canal was abandoned, and is today a public footpath where some of the sleeper blocks may still be seen.
The railway depot, finished by the end of 1873, had two main buildings. One was a wagon repair shed and the other contained a Signal & Telegraph repair shop, smithy, boiler room, water tank, a two-storey office suite, machine shop, and locomotive repair shop. Adjoining the latter was a locomotive running shed constructed in what was then a frequently-used layout – a segment of a circle-covering tracks which radiated from a turntable in the centre of the circle. This shed, which became known locally as ‘the roundhouse’, contained nine tracks, each with its own gable-ended roof, of which the middle three extended through the back wall into the repair shop.
The buildings at the depot were handsome, elegantly-proportioned brick structures. The whole workshop group cost £16,000 and was a huge development for the time and place of its construction, exceeding the Cornwall Railway Works at nearby Lostwithiel. … The reason for the nine roads in the running shed was that it was to accommodate the whole of the company’s locomotive fleet. They ordered eighteen 0-6-0Ts from Sharp Stewart & Company of Manchester. The design was attributed to Francis Trevithick, formerly of the L&NWR and a descendant of the great Richard Trevithick, and was conventional except that the cab had no back. The intention was to run the locomotives in pairs, coupled back to back, with one crew. This was because Robert Fairlie had recently created a sensation with his double-ended locomotive mounted on two power bogies, able to do the work of two smaller engines without the expense of two engine crews; the Cornwall Mineral Railways’ idea was to obtain this last benefit without having to pay royalties to Robert Fairlie.
The prospect of a driver having to leap from one footplate to another whenever a control needed adjusting is an alarming one, but in practice it was seldom, if ever, put to the test. Far from needing two locomotives to a train, one was ample, and half of the new fleet of locomotives was never used at all. The staple traffic on which the hopes of the firm were raised iron-ore from the Perran Iron Lode never appeared. All that was offered was stone, and the then-modest output of china-clay, and within a year it was clear that the railway was a financial failure.” [31: p279-280]
The next few images show a number of the areas in greater detail. All these extracts come from the 25″ OS mapping published in 1907.
The GWR Loop between St. Blazey Railway Station and Par Railway Station. [25]St. Blazey Engine Shed and Par Green with the GWR Par Loop visible at the top of the map extract. [24]The area North of the Quay including the Fowey branch on its causeway. [23]The immediate area around the Quay. [22]The area between Pembroke Mine and Porth on the North side of the mainline. [21]Par Harbour, as it appears on the 1943 Admiralty Chart. [4]
Par Docks saw significant developments in the late 1940s. The image below is an aerial image of Par taken in 1950 for English China Clay.
An aerial image of Par Docks taken on 20th April 1950, shared under a Creative Commons Licence (Attribution-Share Alike 2.5 Generic (CC BY-SA 2.5)). [26]
Railway Bylines has at least two articles about Par Harbour. The first, a 10 page article about the history of the Harbour, appeared in Railway Bylines Volume 2 No. 5 of August/September 1997. The second, an article entitled ‘Cornish Cream’ with text and photography by Tom Heavyside, was included in Railway Bylines Volume 9 No. 12 of November 2004. [28] It focussed on the diminutive locomotives which served the port’s railways. … Alfred and Judy were still at Par in 1977 when Tom Heavyside visited. Judy was no longer in working order. Alfred was ‘in steam’ on Wednesday 15th June. Alfred was stood-down in August 1977 with its duties being undertaken by a tractor with the occasional use of a BR ’08’ shunter from St. Blazey depot as and when required. Both Alfred and Judy were subsequently removed from the site and saved for posterity.
Tom Heavyside comments: “Fortunately, Alfred and Judy we both saved for posterity. Initially, Alfred went to the Cornish Steam Locomotive Society depot at Bugle and Judy to the Wheal Martyn China Clay Museum near St.Austell. However, in 1987 Alfred moved to the Bodmin & Wenford Railway and in the autumn of 2002 Judy also moved to the Bodmin & Wenford. Fittingly, Alfred became something of a celebrity, not only at Bodmin but elsewhere; I well remember e it making a guest appearance at the Exeter Rail Fair in April/May 1994 when it mingled with a number of much larger steam locomotives including a couple of Bulleid Pacifics and a GWR King.” [28: p590]
Wikipedia tells us that: “Alfred and Judy are two 0-4-0 saddle tank steam locomotives. They were built by W. G. Bagnall for use at Par Docks in Cornwall, United Kingdom. The unusually low design was required to cope with extremely tight curves and a very low bridge under the Cornish Main Line. The locomotives are both preserved in operational condition on the nearby Bodmin and Wenford Railway and inspired the Reverend Wilbert Awdry to include them in The Railway Series of children’s books as Bill and Ben.” [29]
The bridge under the Cornish Mainline served the china clay works. It had a maximum headroom of 8ft. Operating curves in the Port were as tight as 70ft radius. The locomotives used in the Port needed to meet these stringent restrictions. A series of different locomotives were used over the years. One of those locomotives was ‘Toby’, a low-profile Sentinel, which served the Port throughout much of the first half of the 20th century. By September 1937, demands on the older locomotives were such that a new locomotive was required to work alongside Toby.
W. G. Bagnall & Co. built a suitable locomotive which was delivered to Par in 1937. That locomotive was to be given the name ‘Judy’ in 1955. The locomotive was delivered at a cost of £1200 carrying the works number 2572. “By 1952, ‘Toby’ required replacement and an upturn in traffic meant an order was placed for another locomotive. In 1954, Alfred was delivered (named after the manager of the harbour Alfred Truscott). Whilst nominally the same, Alfred had some differences to Judy with different bunker style, tank and handrail alterations (such as a tank filler that opened in the opposite direction) and a different purchase price – this time £7500.” [30]
The Imerys Blueprint for Cornwall, published in 2003, provided information about the history of china clay production in Cornwall. It included information about the amount of china clay that was shipped out of Par Docks between 1858 and 2002:
1858 – 15,154 tons of china clay
1885 – 86,325 tons of china clay
1987 – 700,000 tons of china clay
2002 – 313,425 tons of china clay, 134,810 tons of aggregates.
Incidentally, the blueprint also noted: the sale of the harbour by the Teffry Estates to English China Clay (ECC) in 1964; the construction of dryers at the site in the 1950s and 1960s; and the closure of the port in 2007.
After closure the port was used as a Milling Centre and a Grade Dryer with all bins clay shipment being handled by Fowey Docks.
Stephen Austin notes the use of the locomotive shed over the years from the 1980s to the new millennium as follows:
“St Blazey depot, much diminished as it was, was still very much alive. It maintained a dedicated fleet of china-clay wagons introduced in 1954, and from 1970 a fixed cover for these wagons was designed and fitted in the Wagon Works, producing the distinctive ‘Clay Hood’. The staff was proud of their self-sufficiency, and when the Clay Hoods were replaced by the Type CDA hopper wagons in 1987 the fitters, on their own initiative, rebuilt the example which now stands as gate-guardian at the Wagon Works. Other freight business disappeared, and the Newquay line was reduced to a long siding on which a railcar shuttled desultorily, but following the break-up of British Rail in 1993 there was renewed optimism.
The depot was taken over by a company named English, Welsh & Scottish Railway Company … and St Blazey was that company’s only depot in Cornwall. It stabled and serviced the TPO coaches of the mail services which were tripped empty from and to Plymouth and Penzance every day, and wagons carrying cement to Blue Circle at Moorswater and products from Fitzgerald Lighting Ltd at Bodmin were staged through the yard. In 1995 some of the locomotives allocated in Cornwall were given names of local association. Among them was No. 37674 St Blaise Church 1445-1995, named after the nearby parish church and unveiled in the yard. In 1998 St Blazey began operating the new locomotives imported by EWSR (Class 66) on the china-clay trains.
On 11th August 1999, in its 125th anniversary year, St Blazey hosted perhaps the biggest assembly of preserved coaches ever gathered on the national network, and excursions brought people down to view the total eclipse of the sun. On 26th February 2000 diesel locomotive No 67008 arrived to begin the depot’s association with the Class 67 diesel then the fastest true self-contained locomotives running anywhere in the world, and worthy successors to those little Sharp Stewart tank engines. …
… The new millennium brought more uncertainty to St Blazey’s future. The last train conveying Fitzgerald Lighting’s wagons, the last consignment of any West Country manufacturer’s goods to be sent out by railway, left the yard on 25th July 2001. The remaining customers, the cement, china-clay, and the mails, made it clear that if the railway did not satisfy them on price and speed they would take to the roads. The only hope [lay] in the fact that … after 128 years of service, St Blazey is still very much a going concern.
Notwithstanding the unique nature of St Blazey Works, it received no attention at all from the enthusiasts in the fields of railways, architecture, or history, nor from the ‘official’ bodies paid to safeguard these things. The roundhouse building was divided up and rented by local traders, and the yard was a dump for rubbish and wrecked cars. However, even the tracks into the building remained intact, and apart from the demolition of the coaling stage nothing else was done until the summer of 2001 when the ownership changed hands, and plans were announced for new building on the site. Thus the original character of the Works, and the practicality of returning it to railway use, will finally be extinguished.” [31: p284, 286]
The news in 2024/2025 is that the anticipated removal of the St. Blazey roundhouse did not occur. St. Blazey Engine Shed has recently been restored as the base for MPower Kernow CIC (MPower), a new Cornish social enterprise company. [34]
The restored depot at St. Blazey. [34]
In April 2023, World of Railways reported that “the ongoing restoration of the turntable and the creation of a servicing facility for steam locomotives is expected to provide many and varied training opportunities for a broad cross section of the community and MPower is already working with local education and training organisations to provide hands-on experience in a range of skills, from woodwork to plumbing, electrics, construction and engineering.” [34]
Future articles?
It is, finally, worth noting that the Cornwall Minerals Railway had a total of 46 miles of track with “a main line from Fowey to Newquay … and branches from Bugle to Carbis, St Dennis Junction to Melangoose Mill and Newquay to East Wheal Rose. These connected clay works, quarries, mines and harbours (Newquay, Par and Fowey) in the area with the headquarters and works being sited at St Blazey (part of which is still in use).” [1: p21]
“Other clay lines were built in later years, Bugle to Carbean Siding in 1893 and Trenance Junction (just West of St Austell on the main line), to Bojes Sidings in 1520 Two narrow gauge lines were also in use at various times. The Gothers Tramway of … from Pochin’s siding near St Dennis Junction to a clay works a Gothers opened in 1884 and closed in 1931.” [1: p22]
These lines will hopefully be covered in future articles.
References
Pit to Port; The Cornish Steam Locomotive Preservation Society, 2009.
I am indebted to ‘David’ for an update on the Plevin owned railway land in Mossley. …
It is a few years since I wrote a series of articles about the Micklehurst Loop which can be found on this blog. Circumstances have since changed at what was the Plevin site. Plevin’s relocated in 2024 to another site and their yard has been gradually deteriorating since then.
The original series of articles can be found here. [1] Following the link takes you to the latest blog post on the theme (which will be this one), scrolling down the webpage will bring you to the start of the series. My articles about the line follow the line from Stalybridge to Diggle. You will note that there are a number of addenda to the main series of articles.
When we walked the line as exercise during COVID it was not possible to gain access to Plevin’s site. Plevin’s property was covered in the second of four substantive articles about the line which can be found here. [2]
This coloured version of the 25″ Ordnance Survey of 1890/1891 was published in 1894. It shows Mossley’s stations on the Micklehurst Loop. At the top of the image the passenger station stands on embankment with the station building a little to the South on the East side of the line. The goods station which primarily consisted of the large goods shed is towards the bottom of the map extract. The railway and yard sit high above the Huddersfield Narrow Canal. [4]A closer satellite view of Plevin’s site in 2025 – this is the latest view of the site available on Google Maps. The lighter roof is that of the old goods shed the darker grey roofing is over later buildings built over the running lines of the Micklehurst Loop. [Google Maps, January 2025]The same buildings but this time as seen on Google Earth 3D imagery seen from the South. This is the current view on Google Earth at the beginning of 2025. [Google Earth 3D, January 2025]
‘David”s report on 28dayslater.co.uk is a comprehensive look at the site and its history. That report can be found here. [3] ‘David’ kindly sent through some of his photographs, of which a selection appear below.
‘David’ commented in January 2025 that the site is suffering some vandal damage now that no security is provided. A fuller impression of the site and its condition in 2025 can be gained by consulting David’s post on 28dayslater.co.uk.

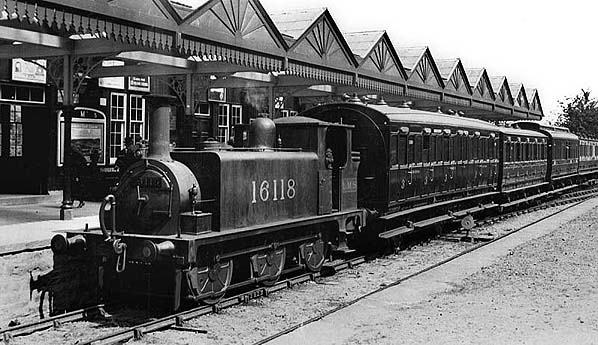
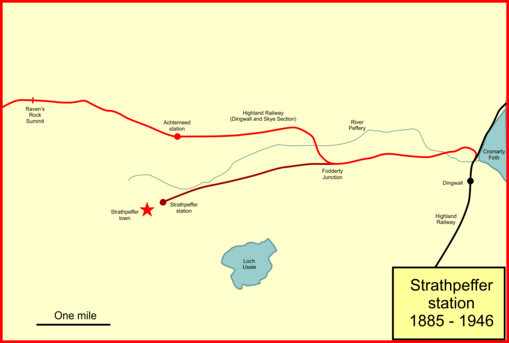
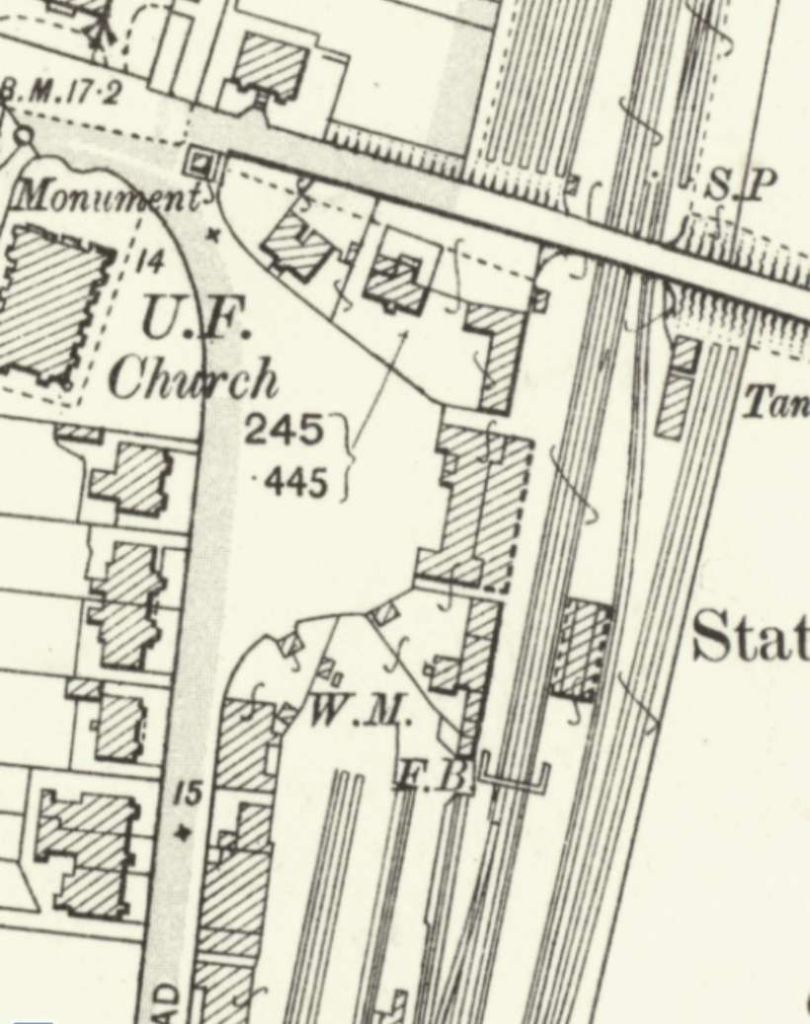
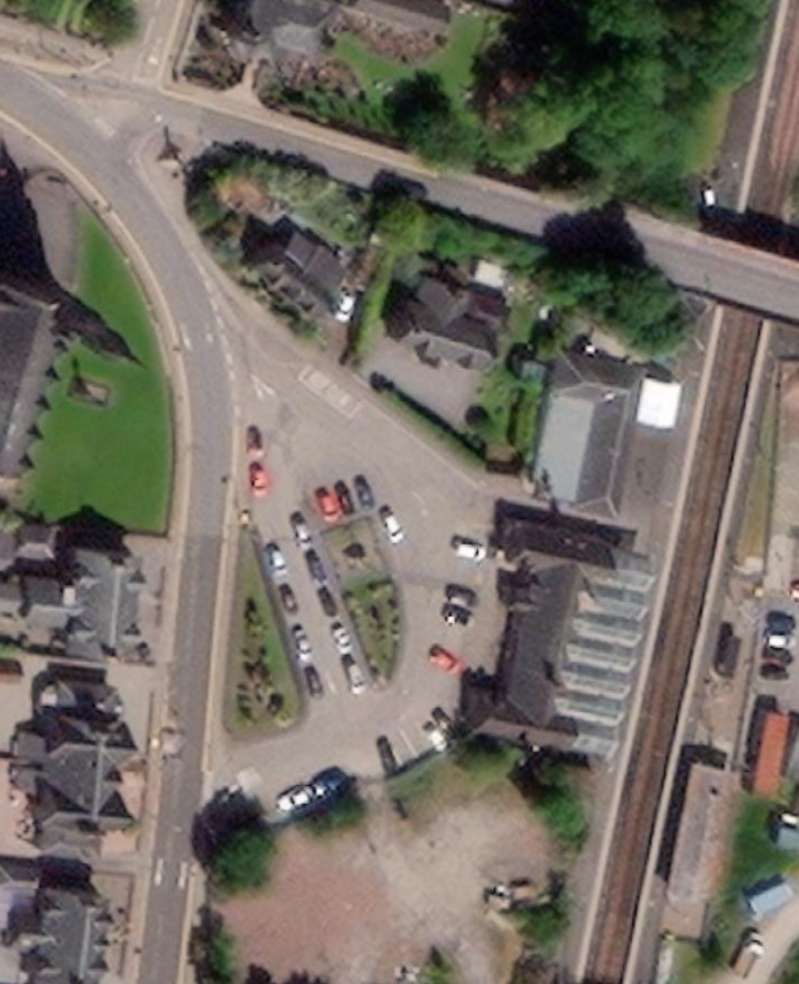
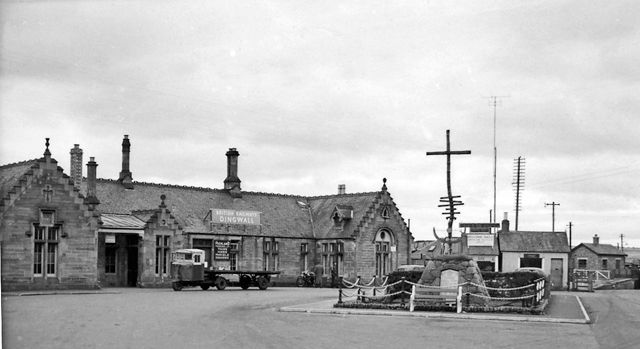
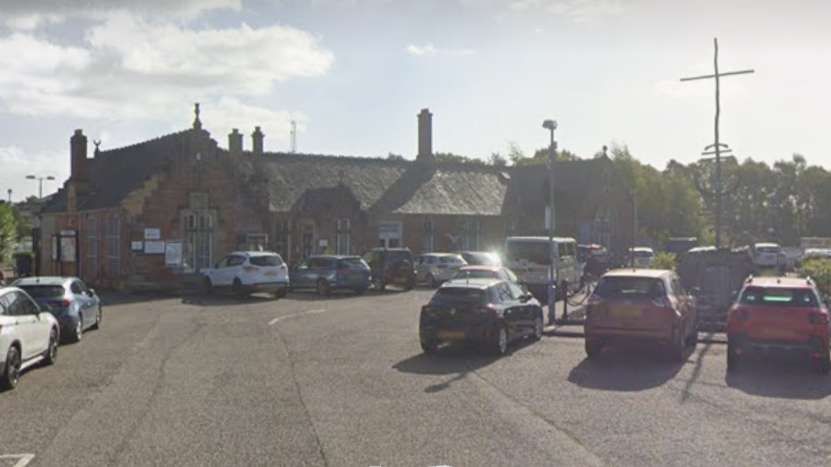
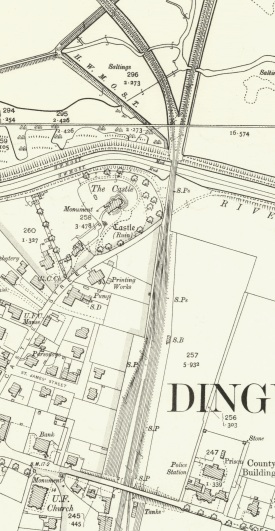
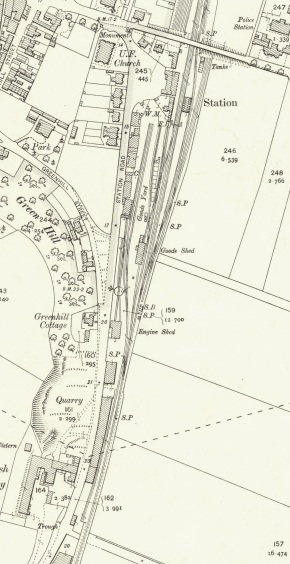
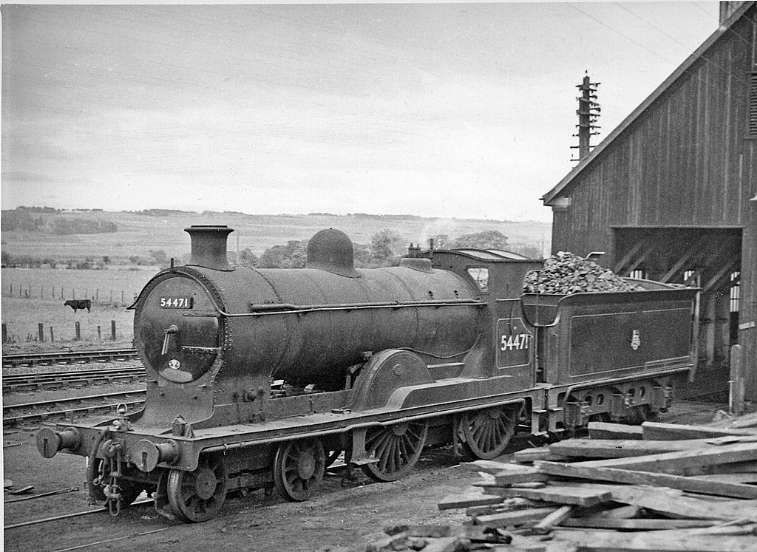

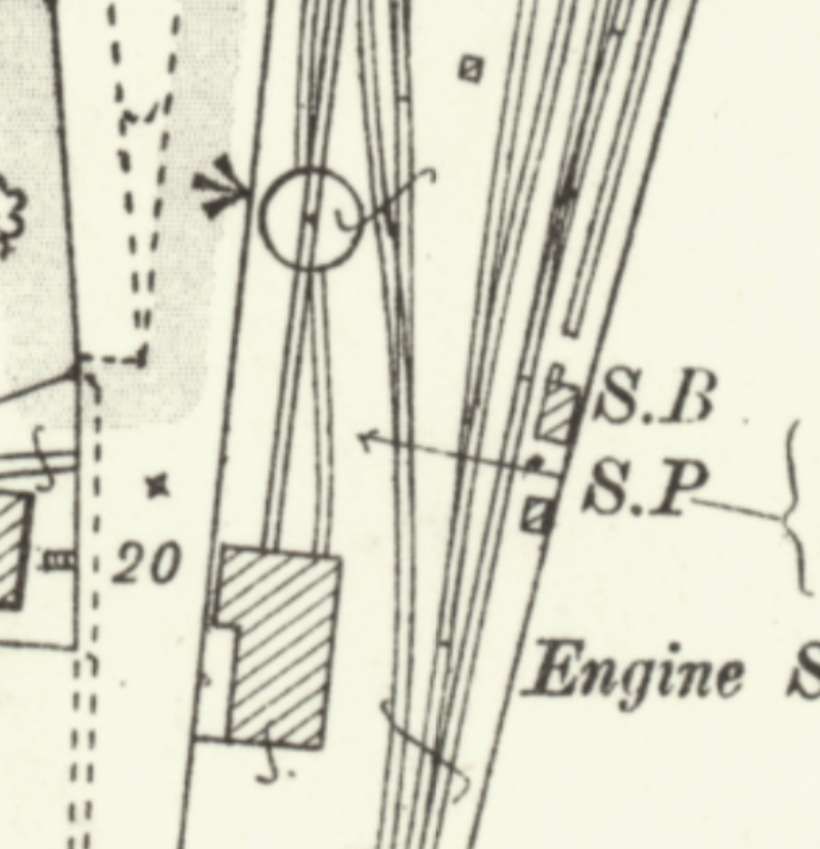
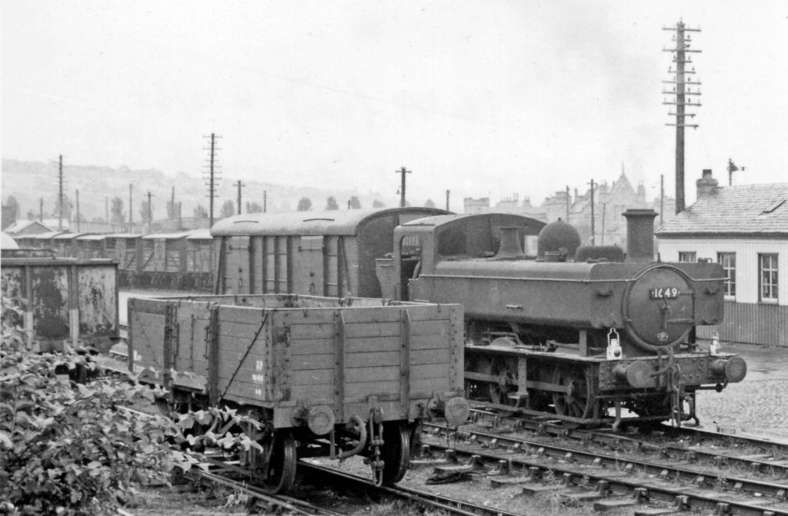
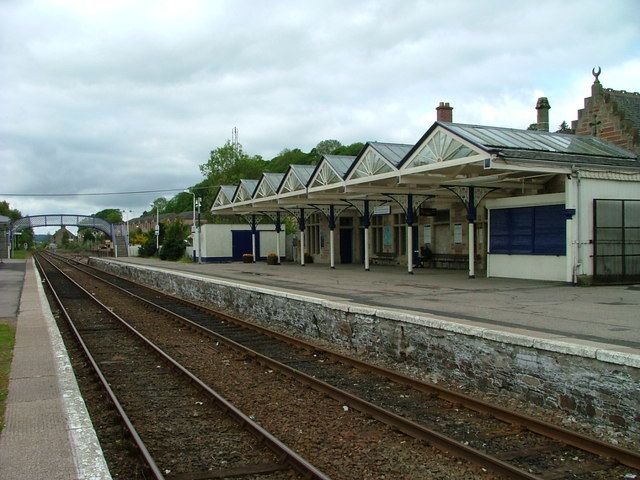
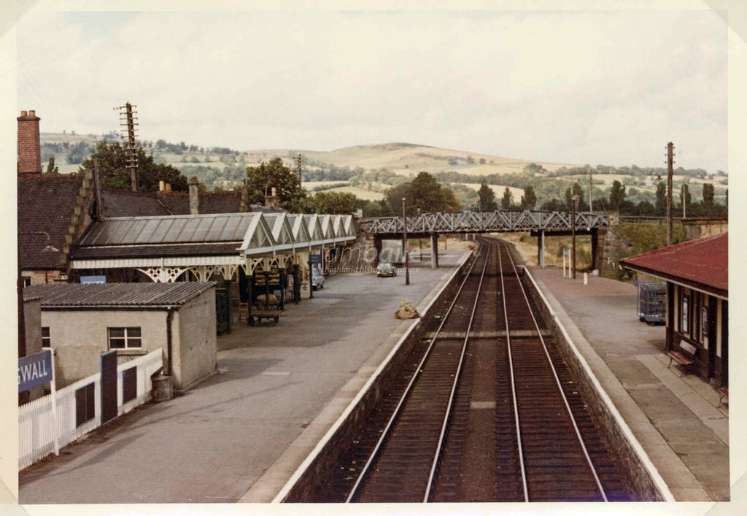
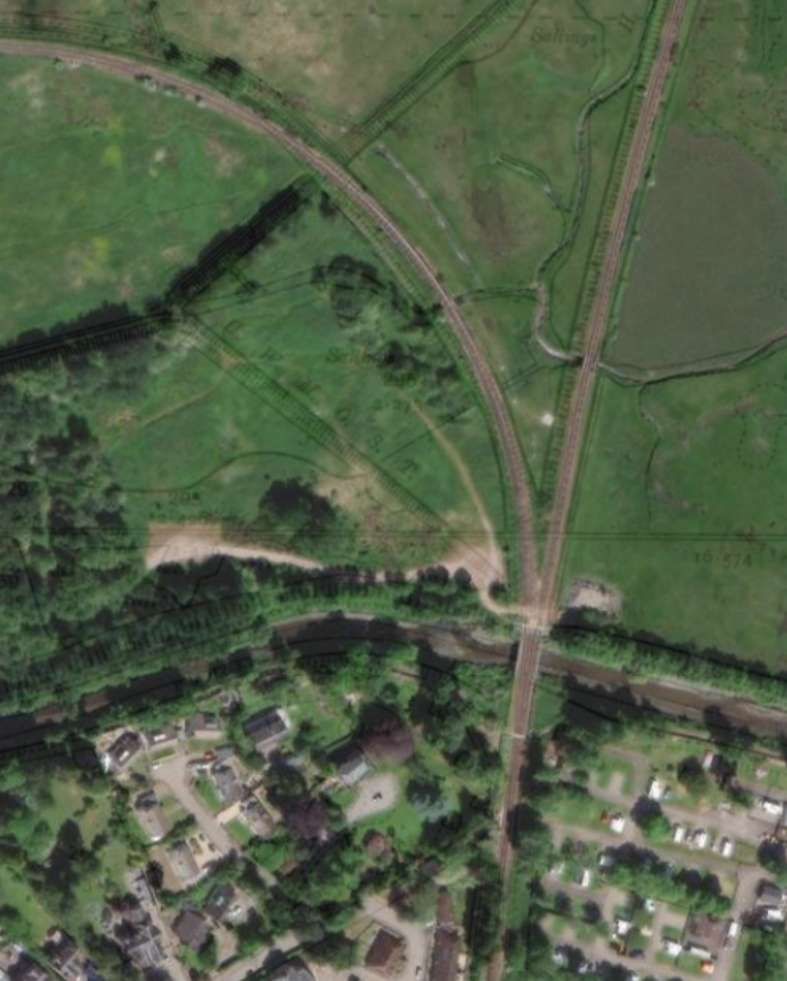
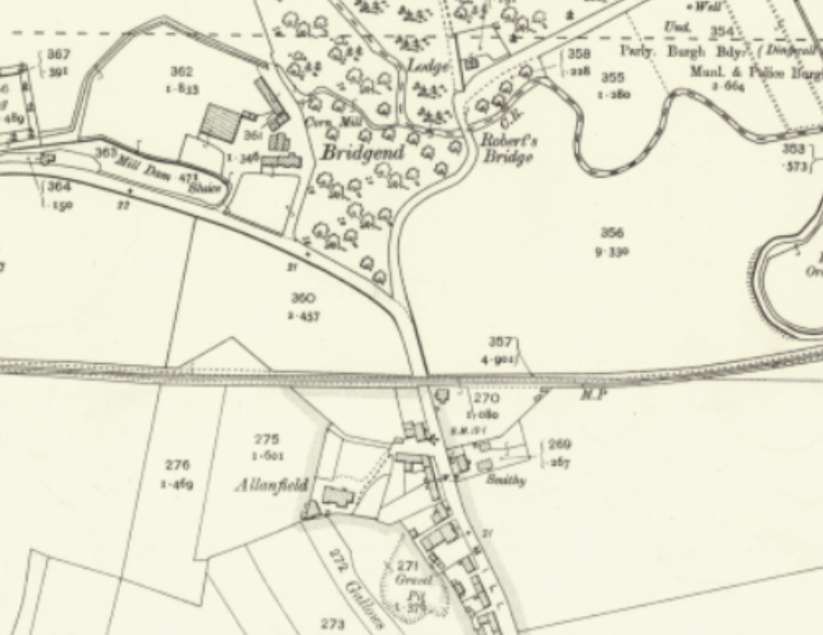

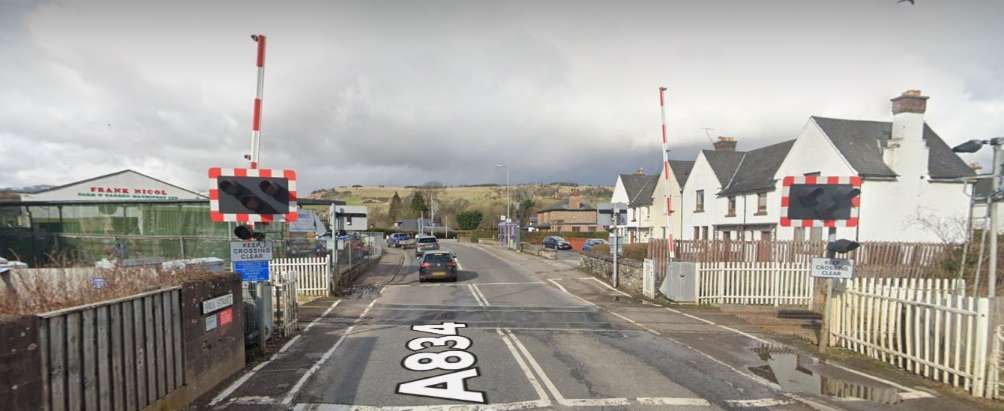
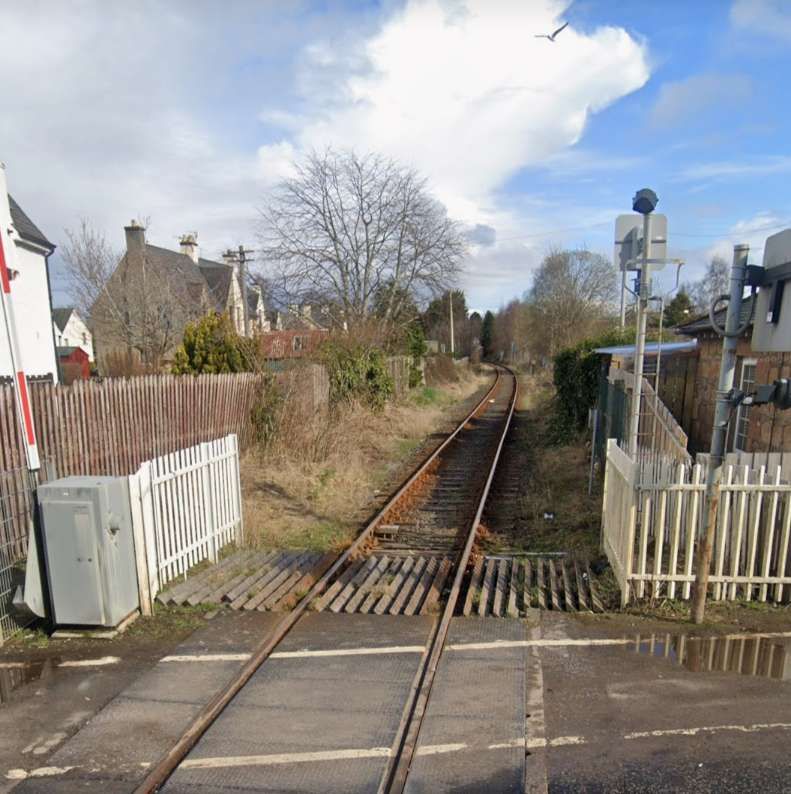
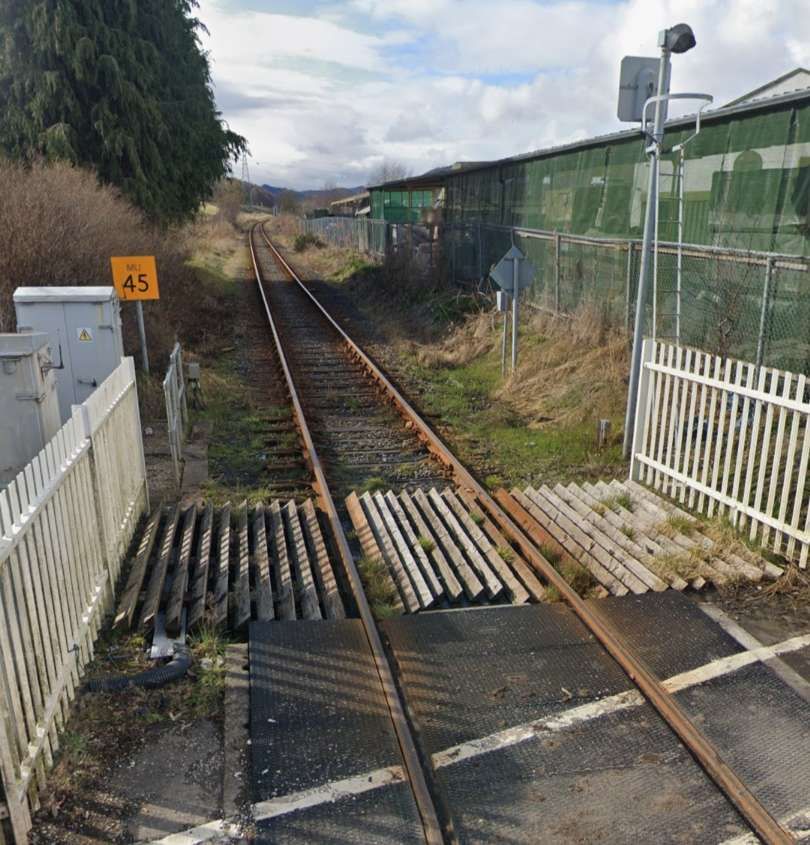
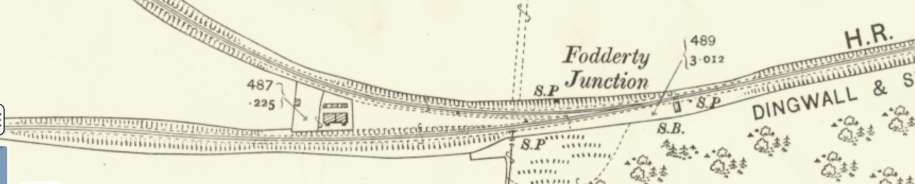

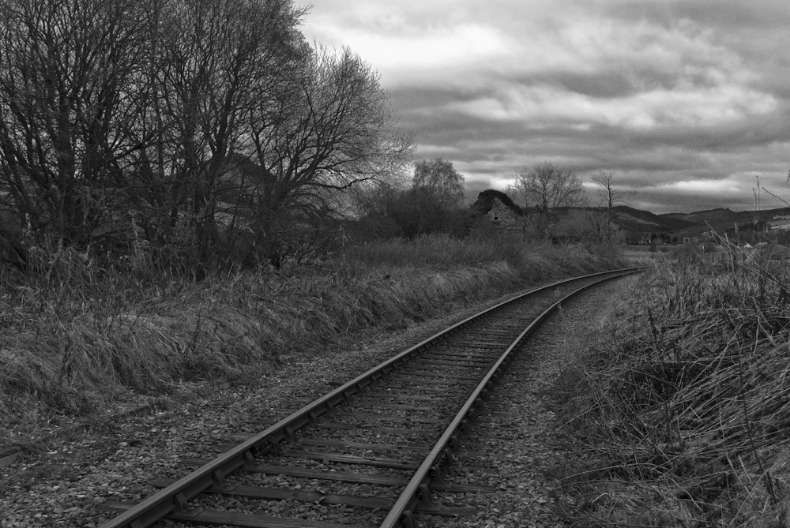
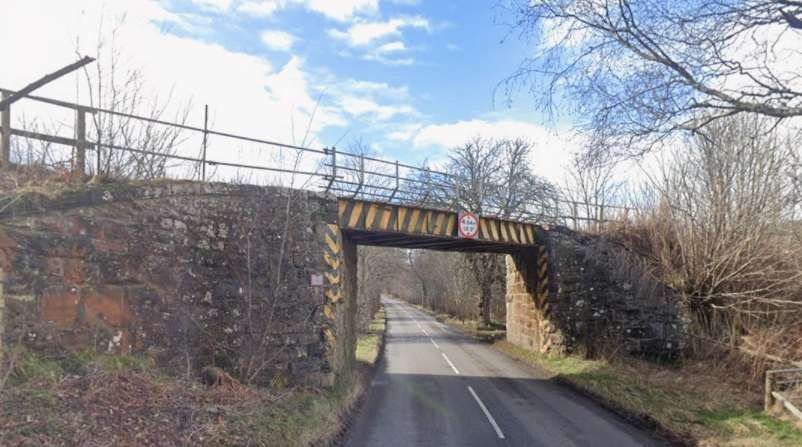

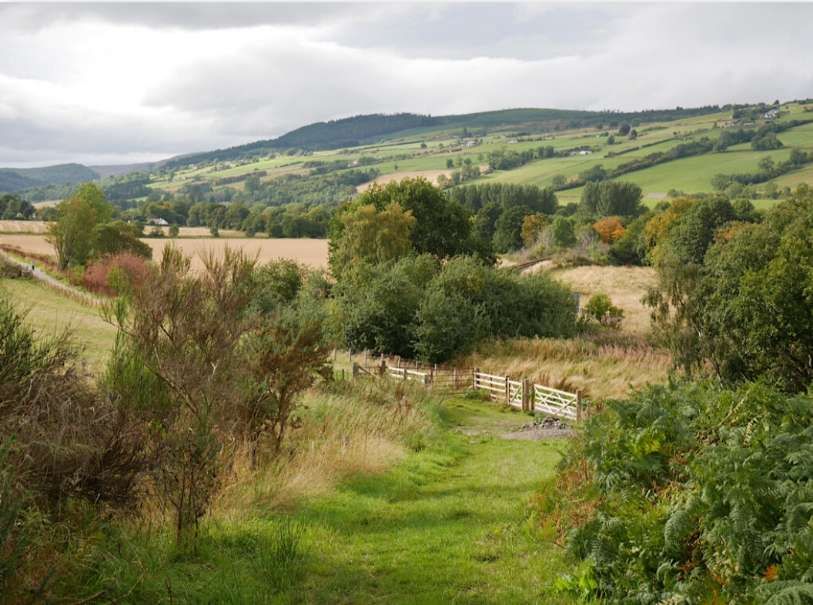
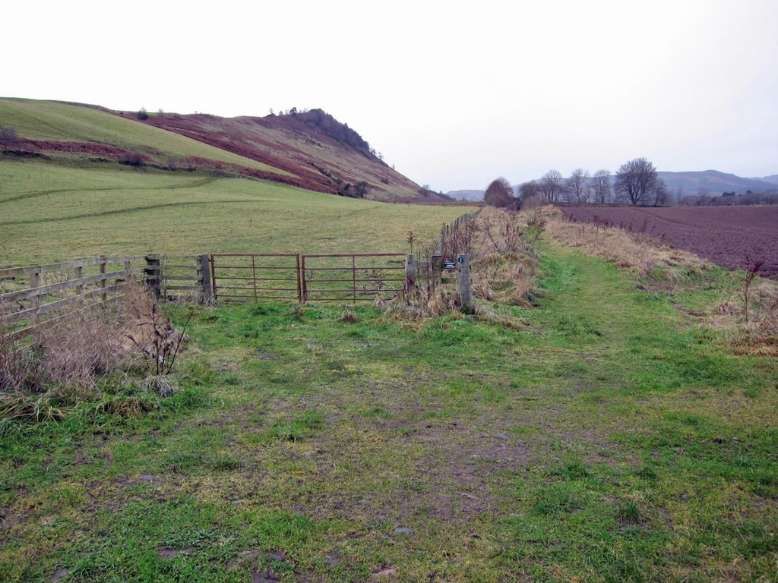
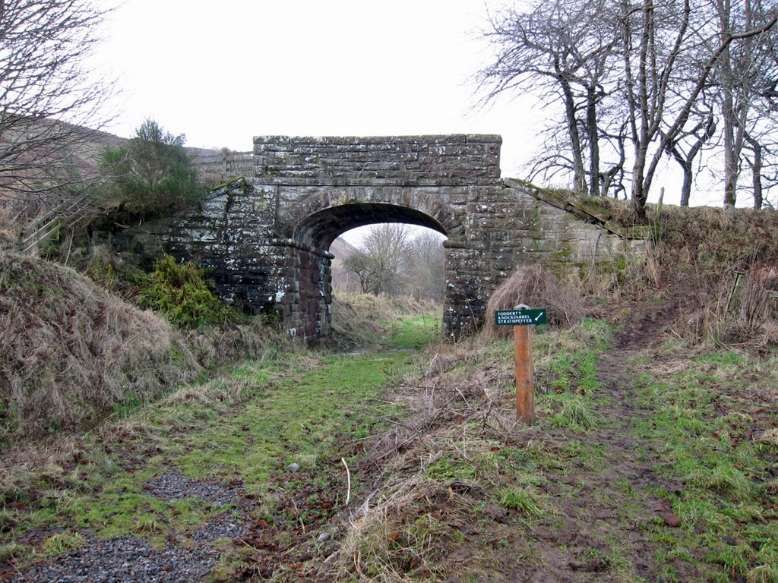
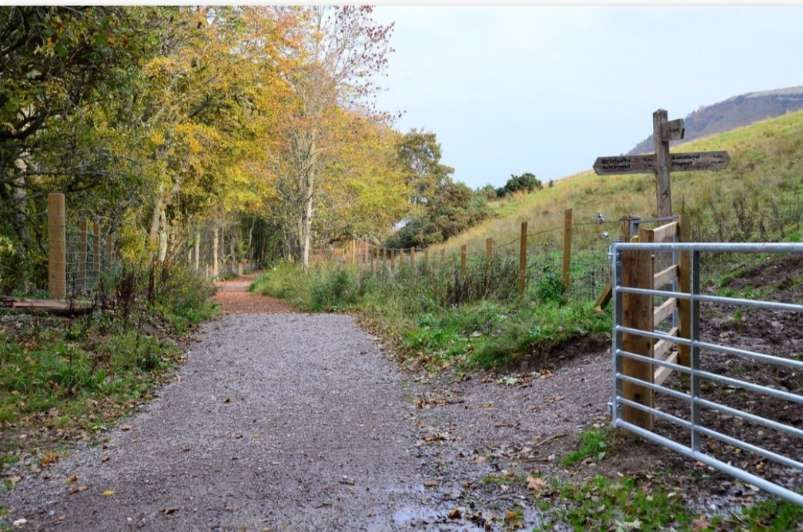
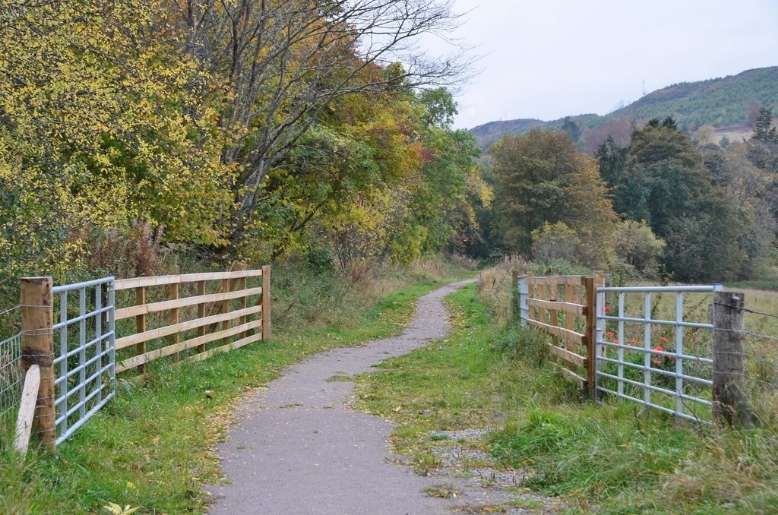
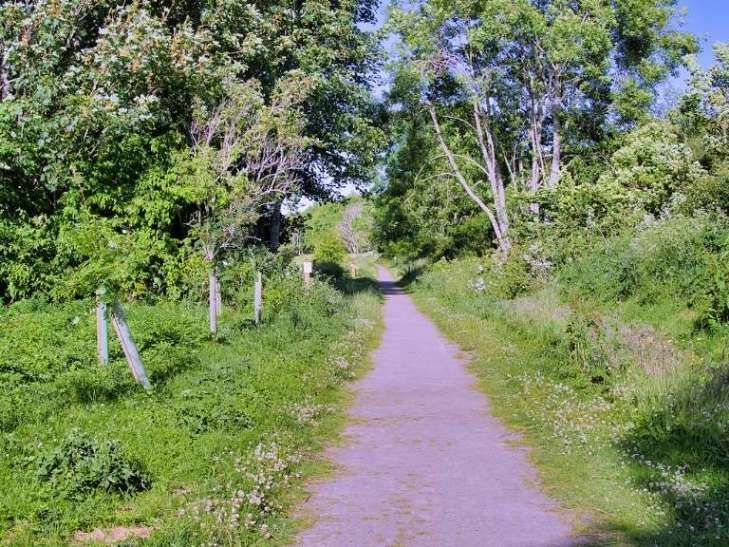
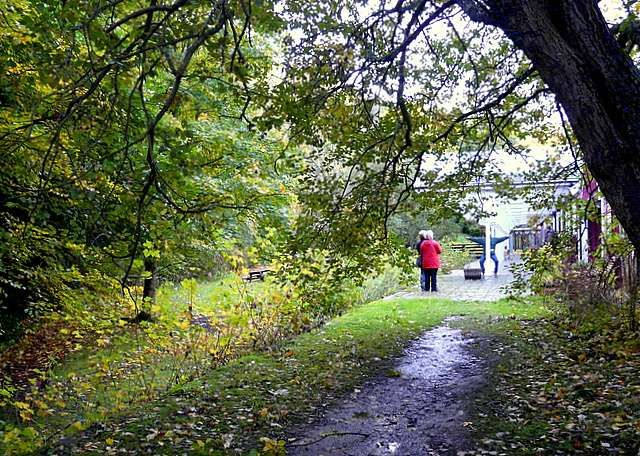
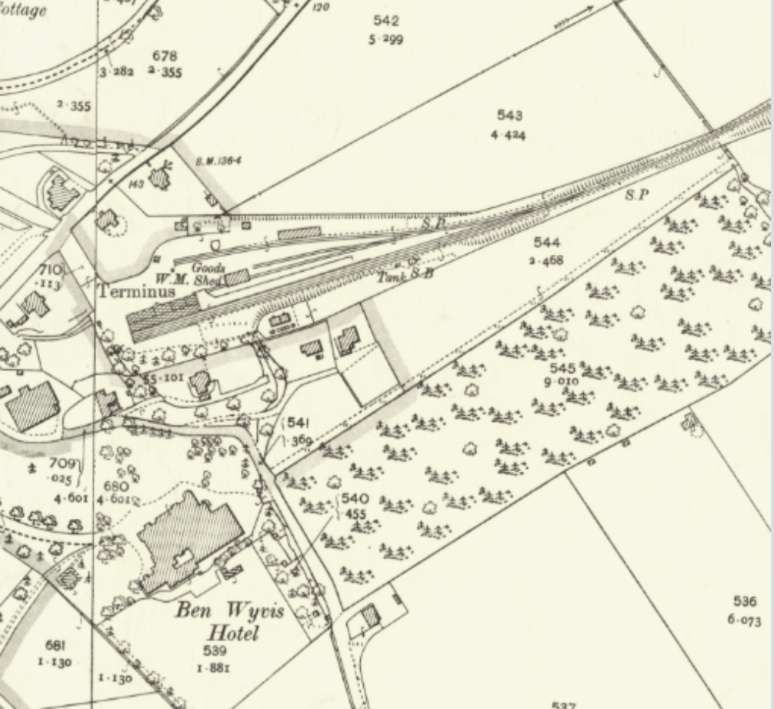
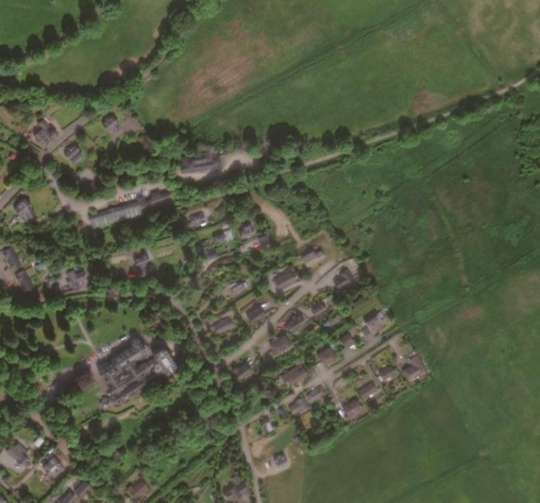
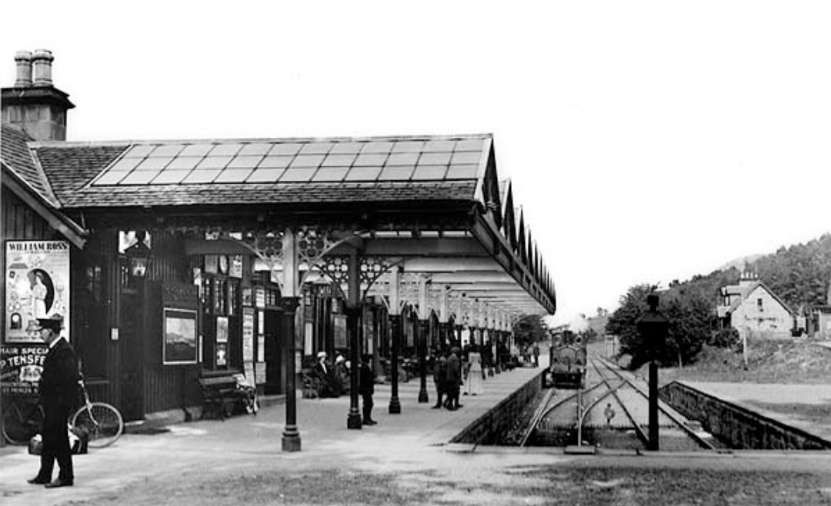
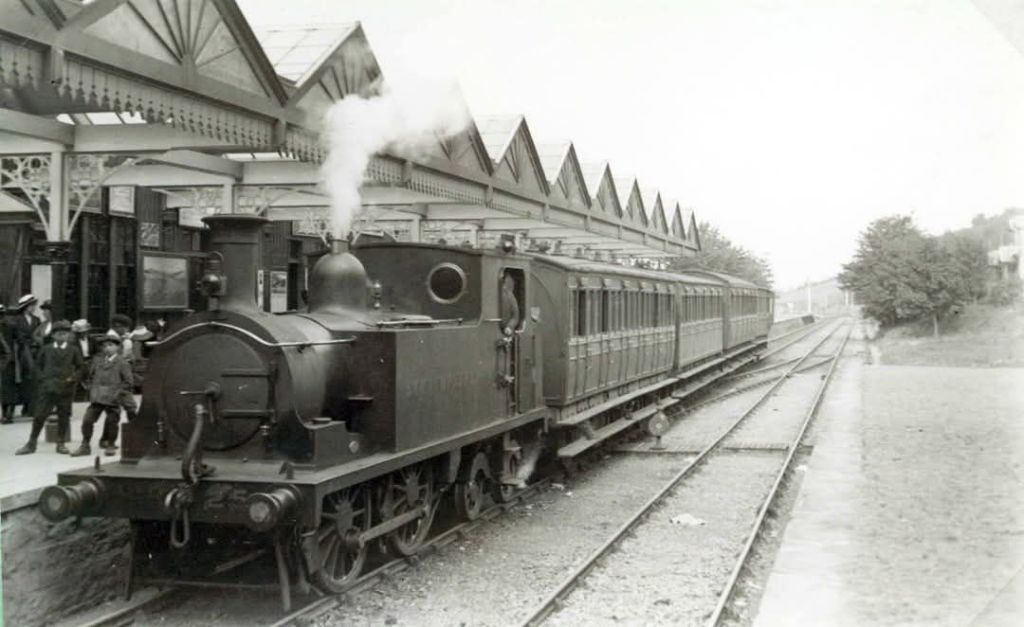
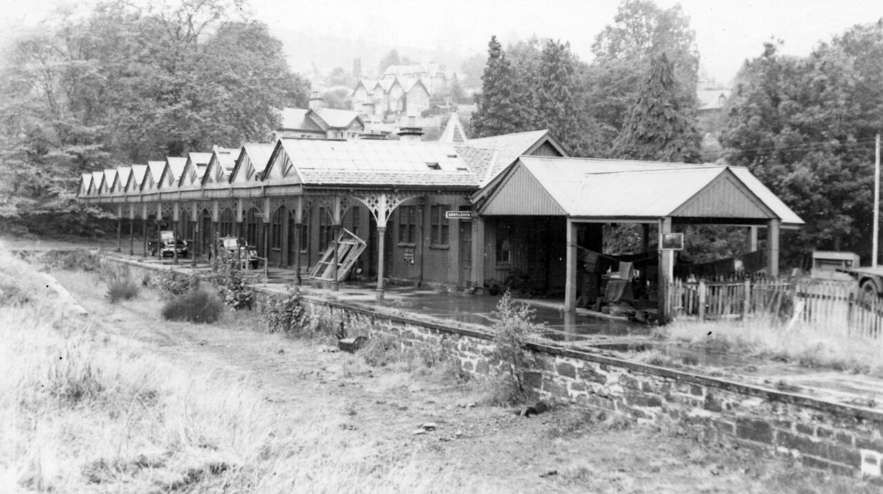
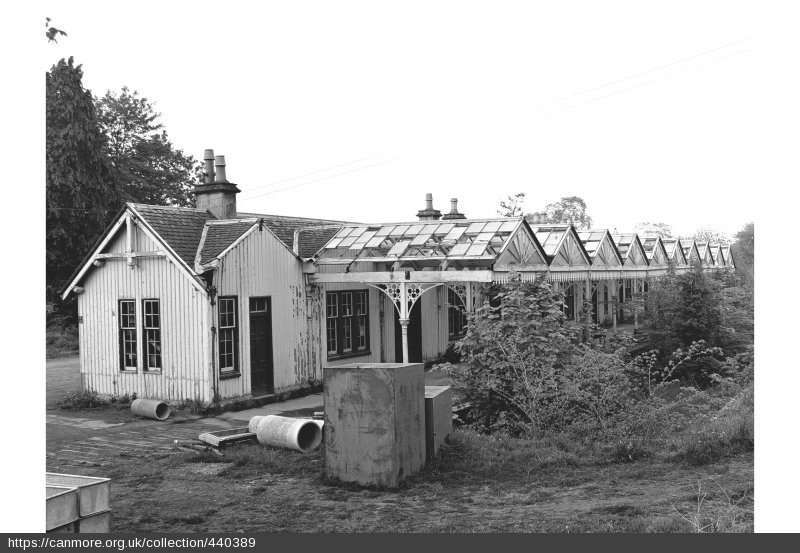
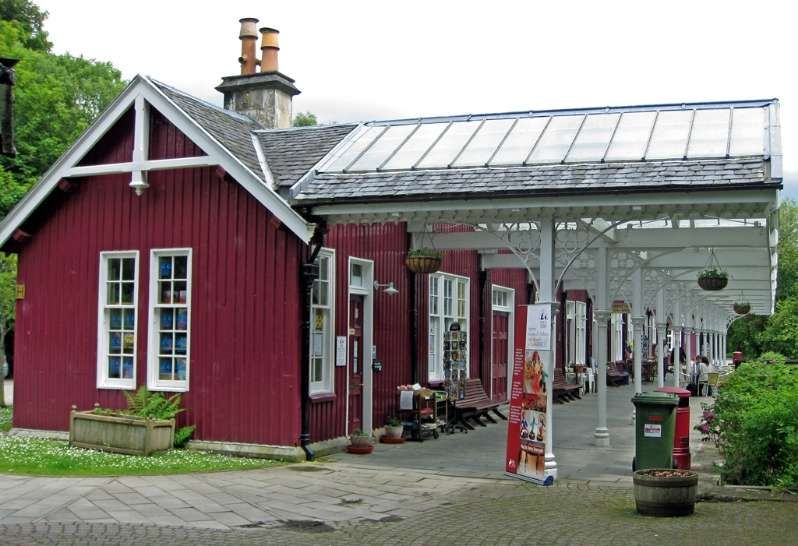
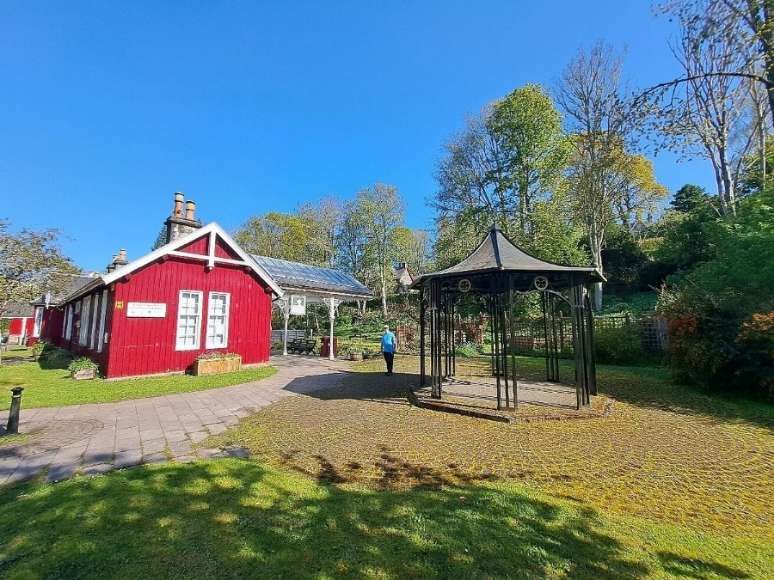
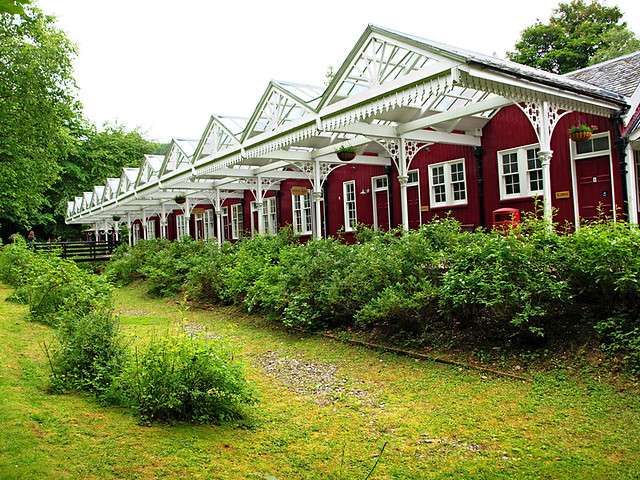
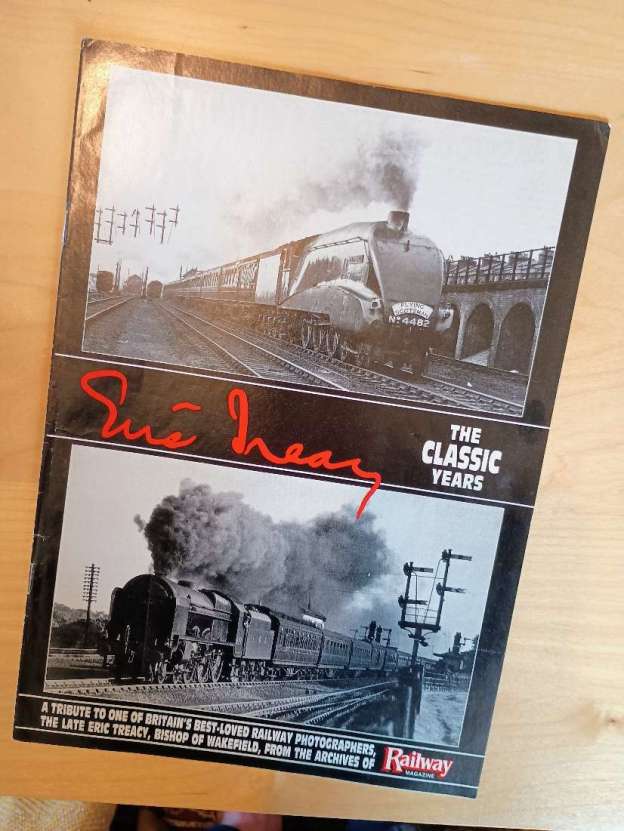
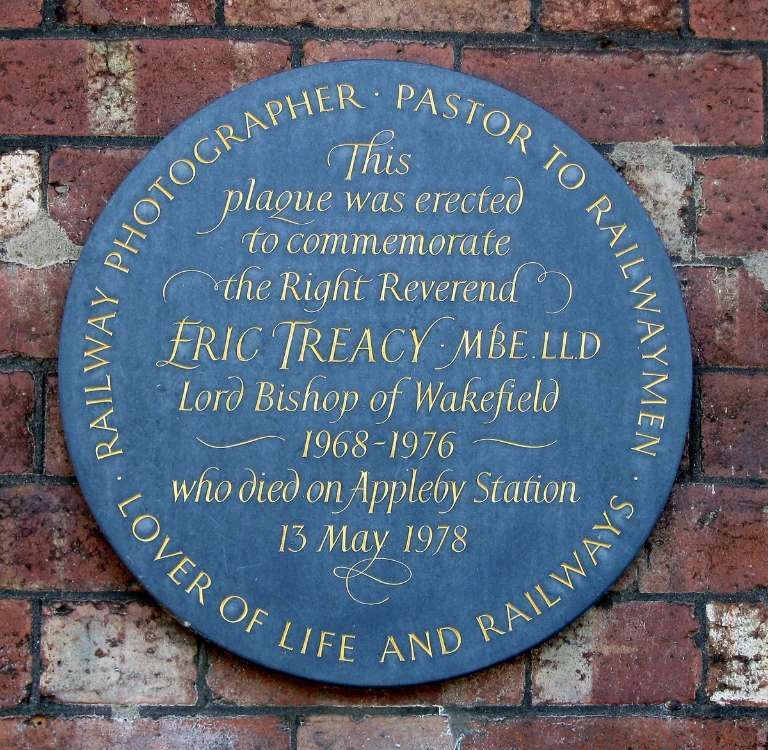

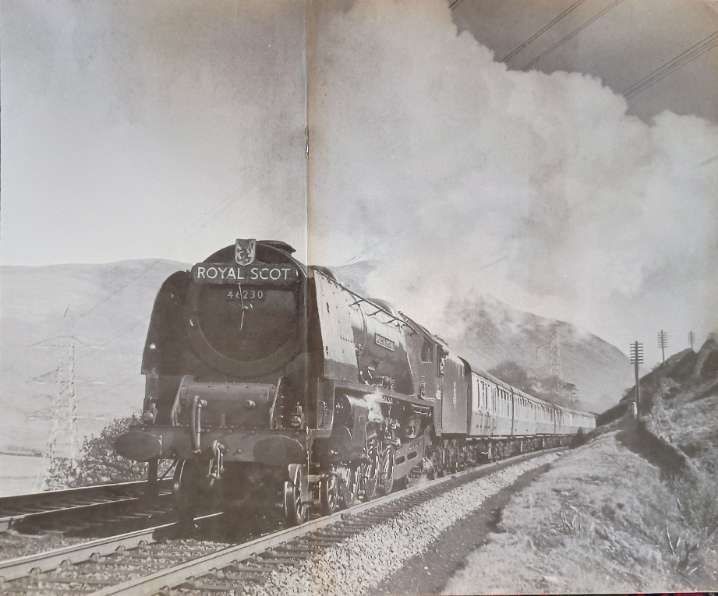
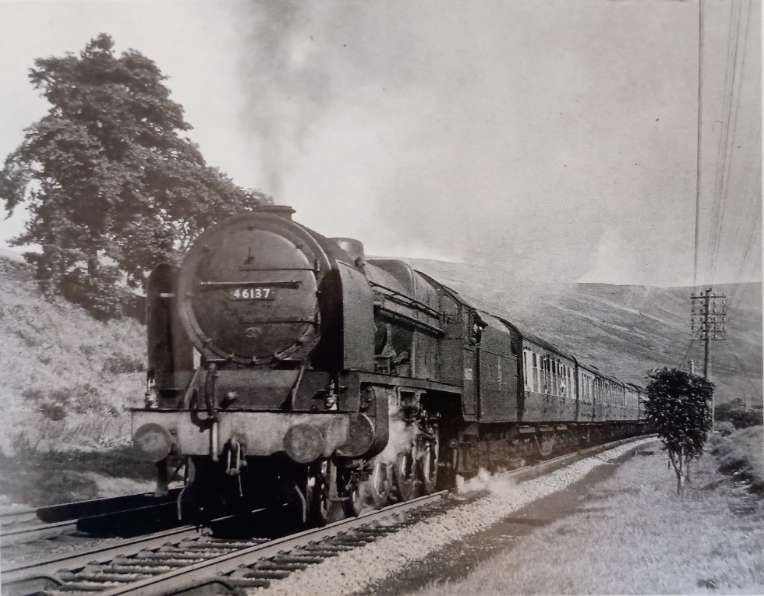
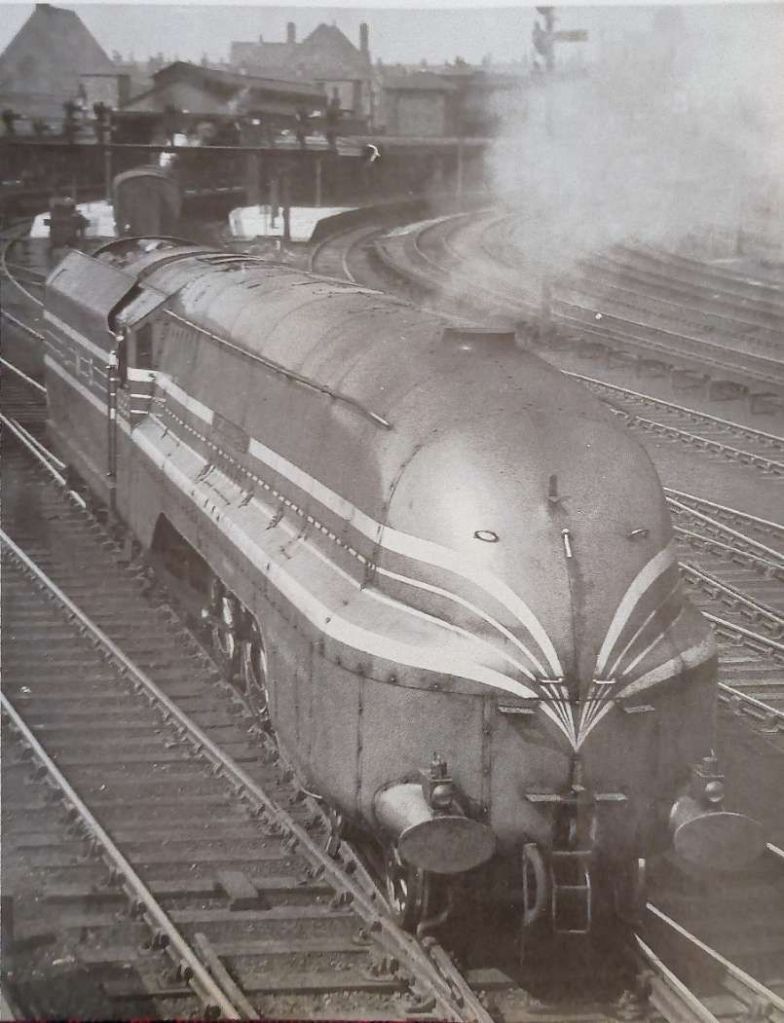
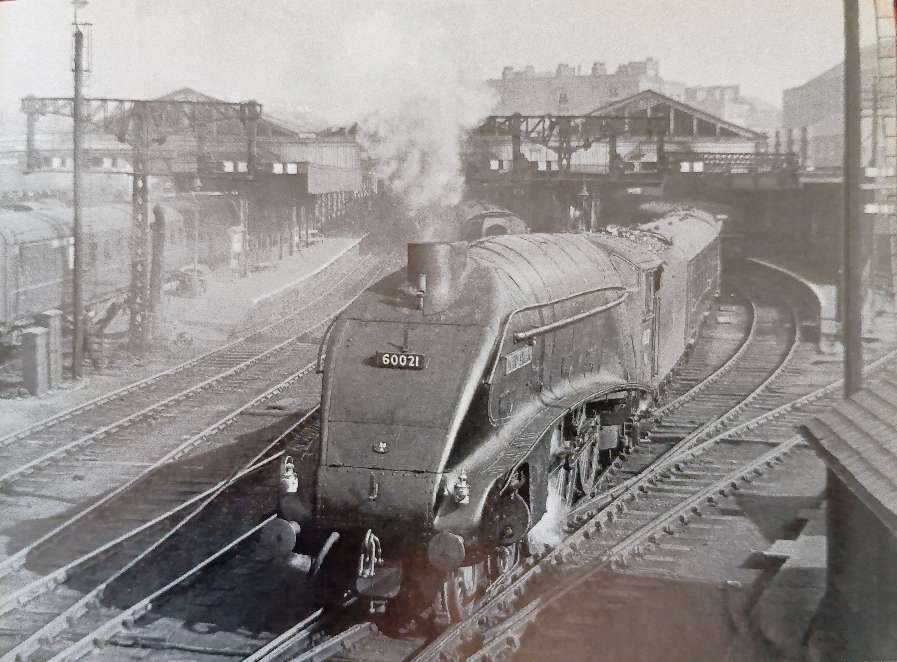
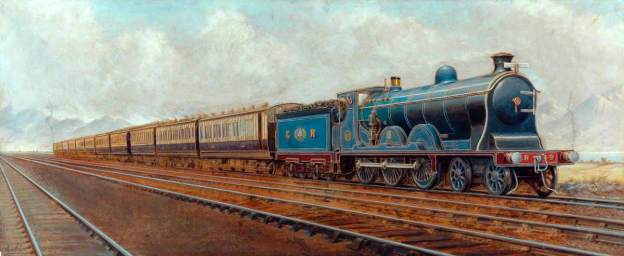
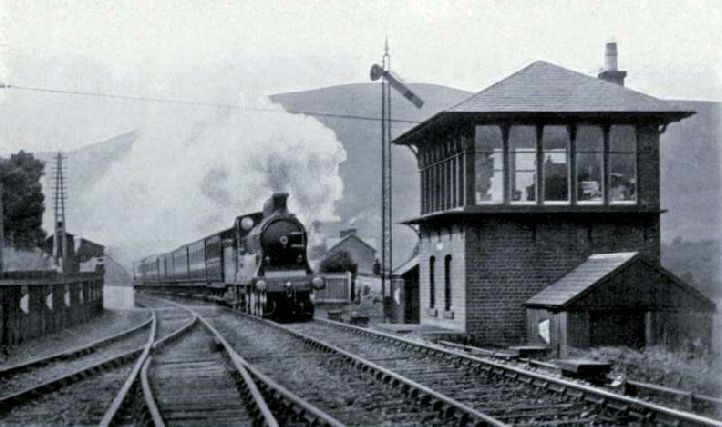
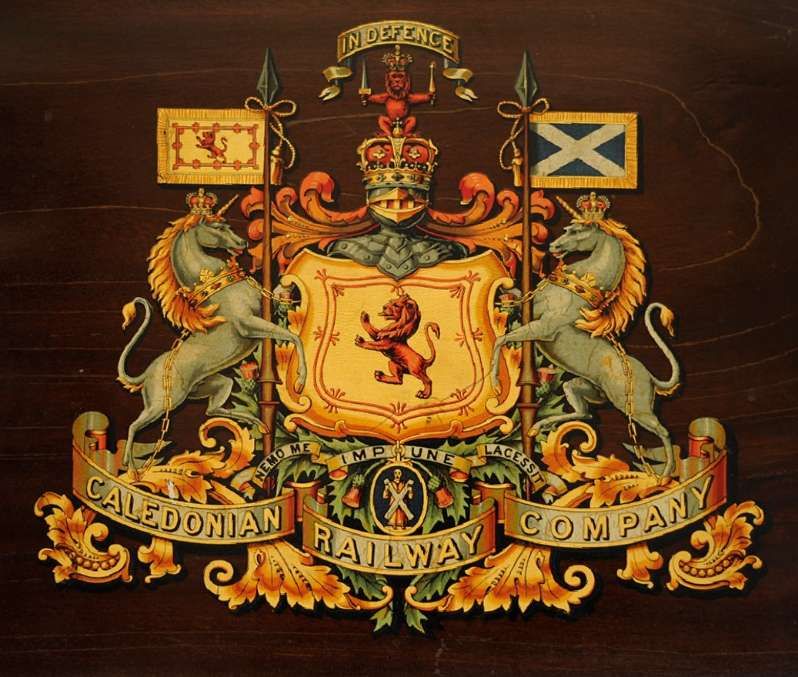

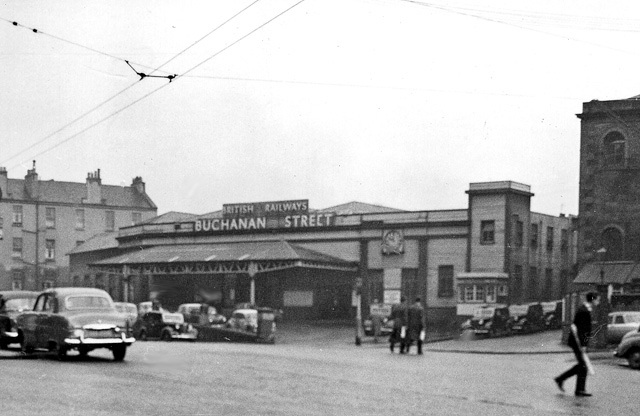
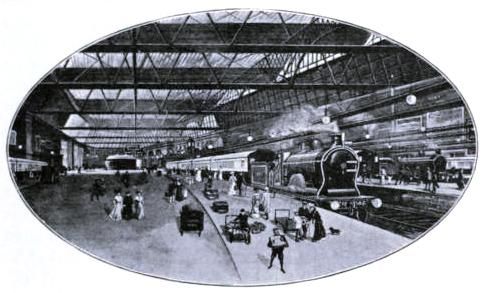
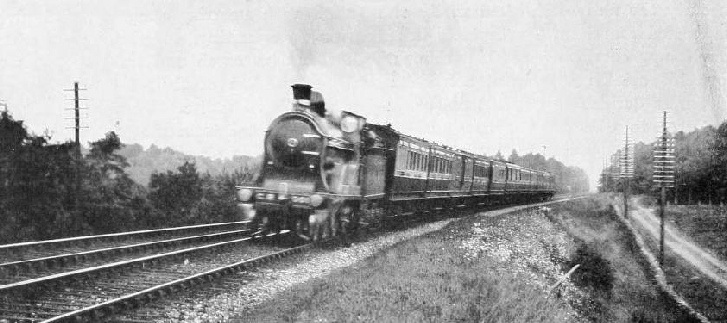

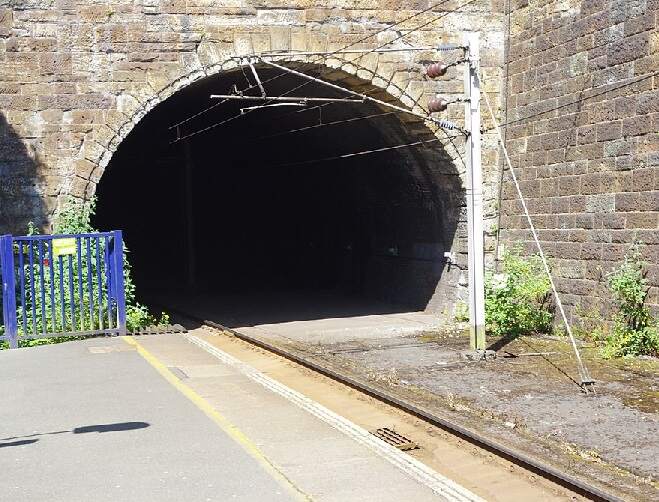
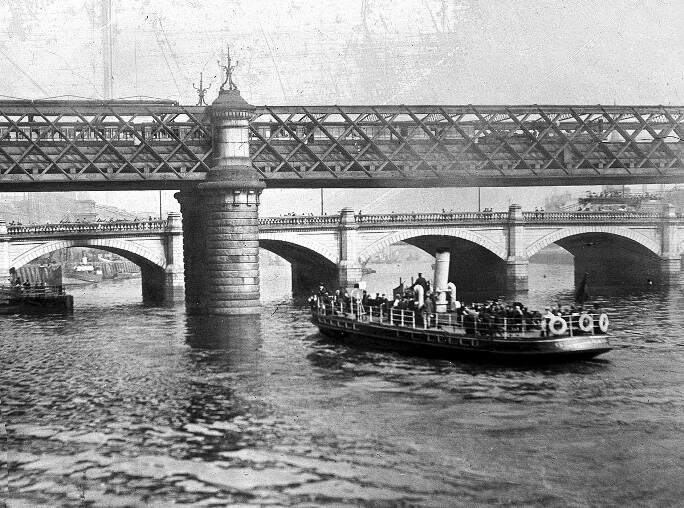
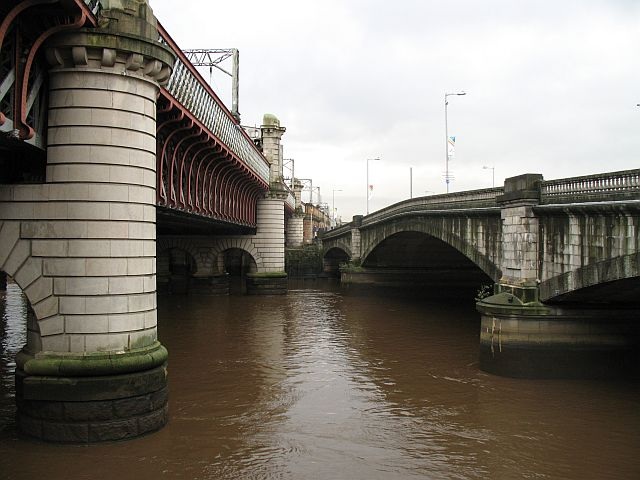
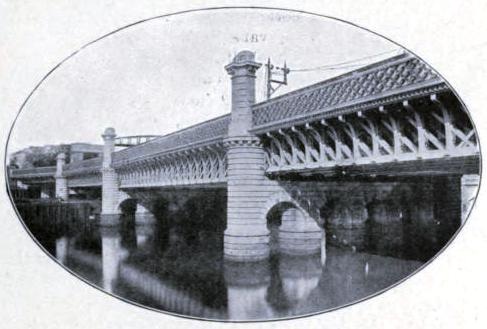
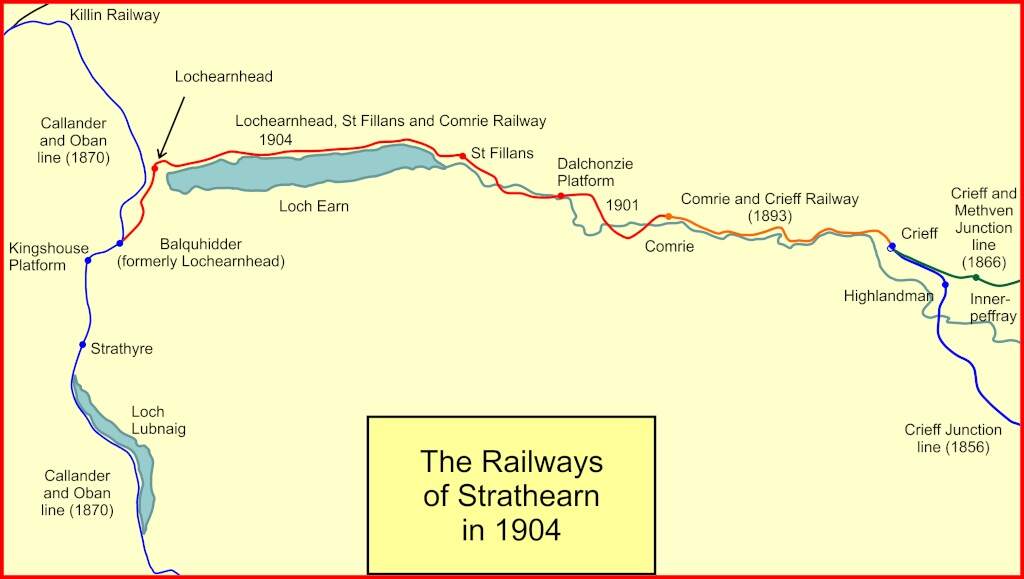
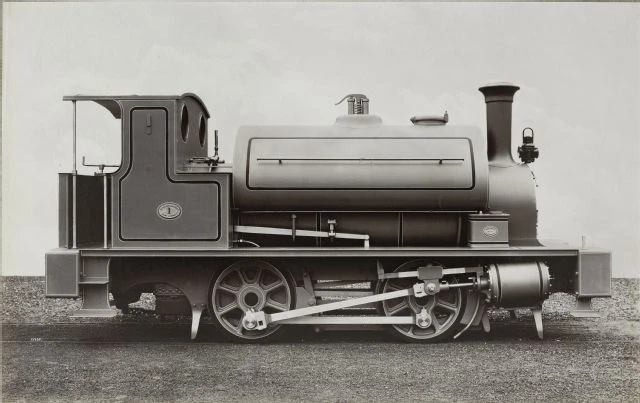
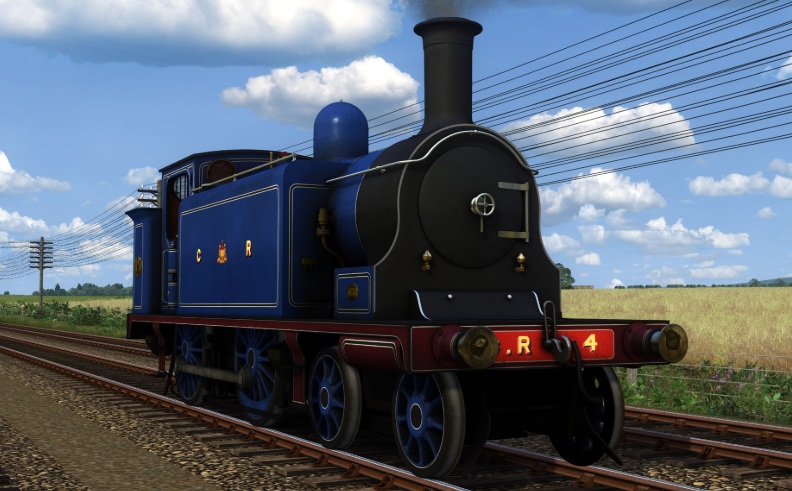
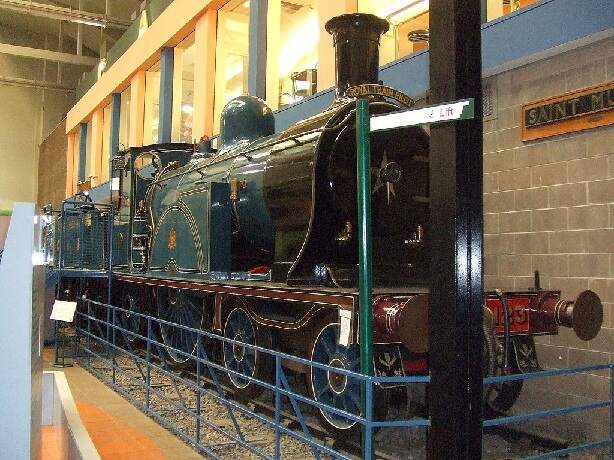
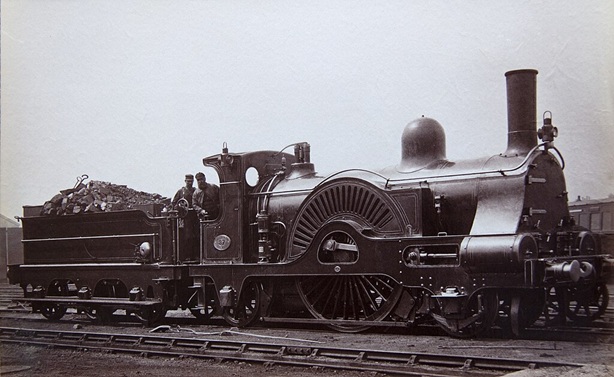
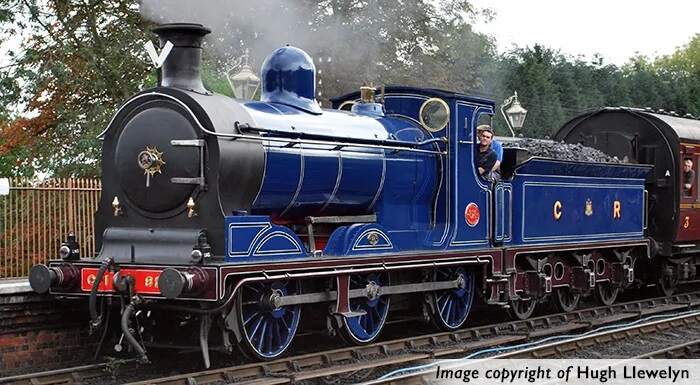
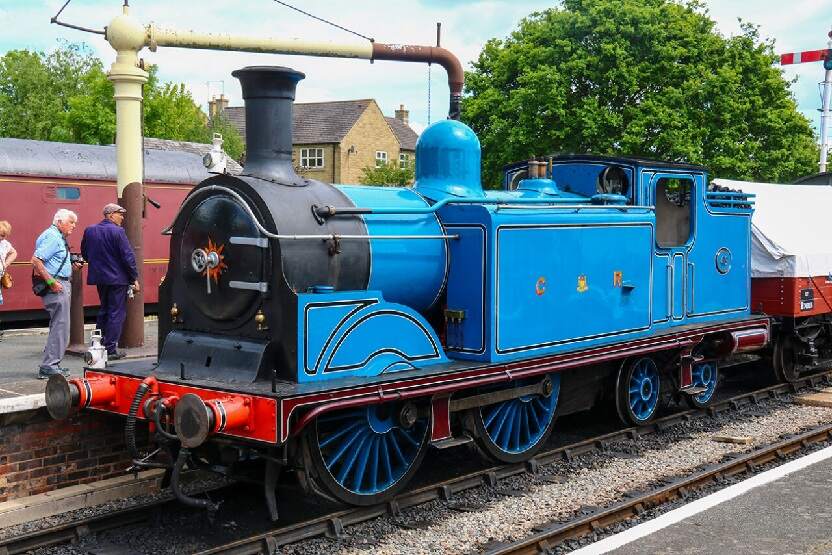
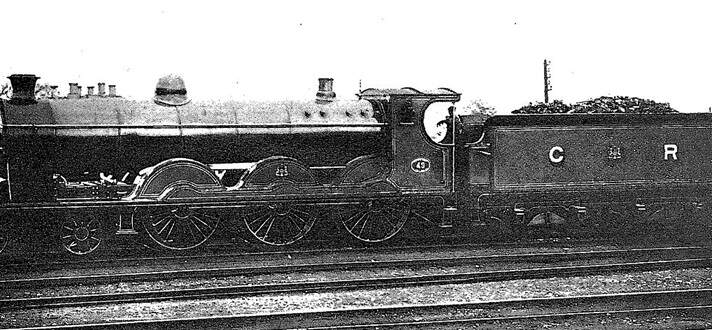
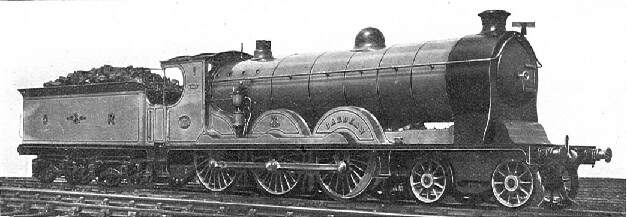
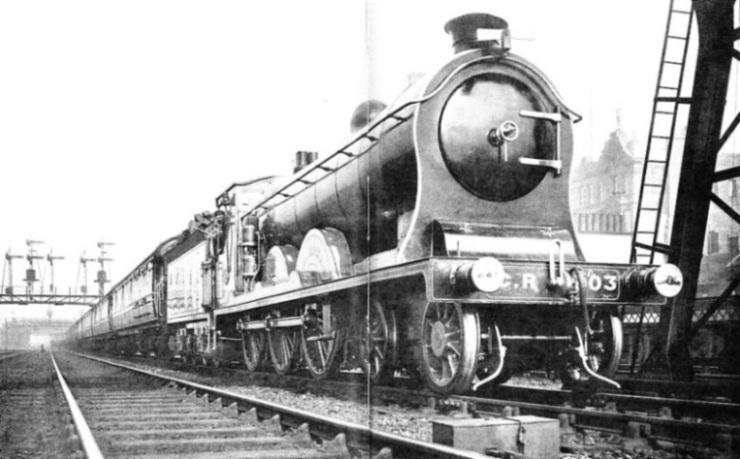
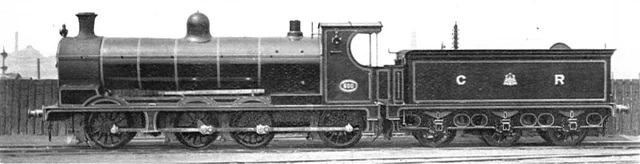
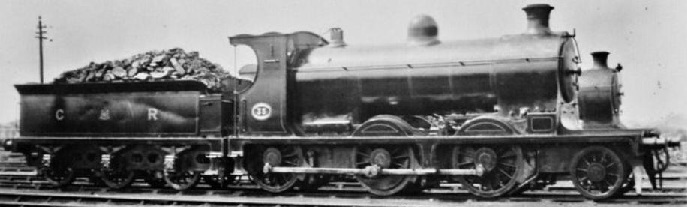

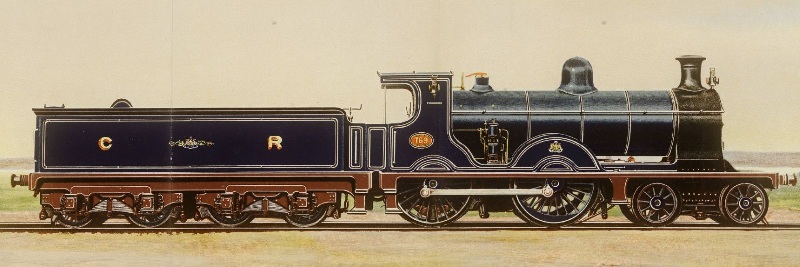
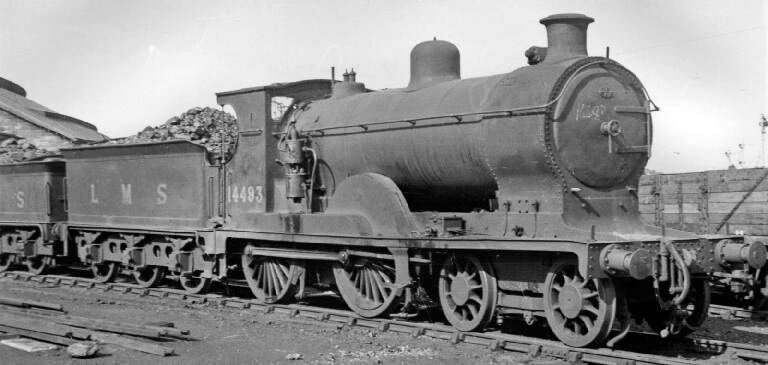
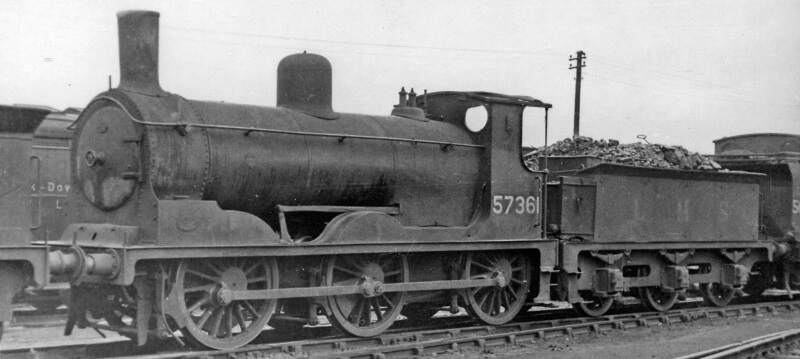
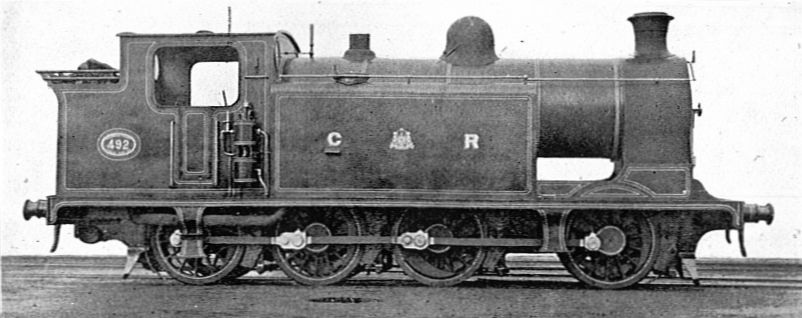

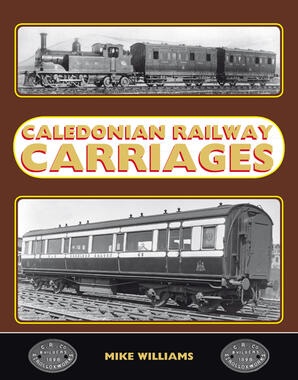
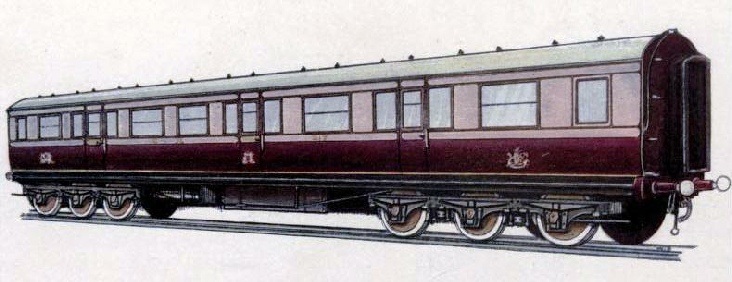
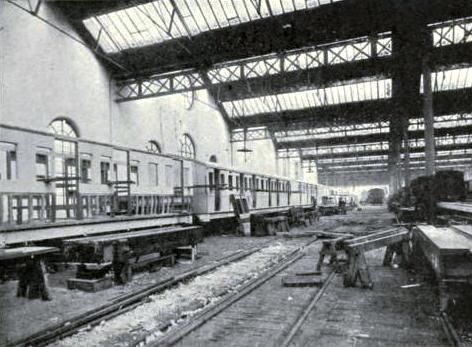
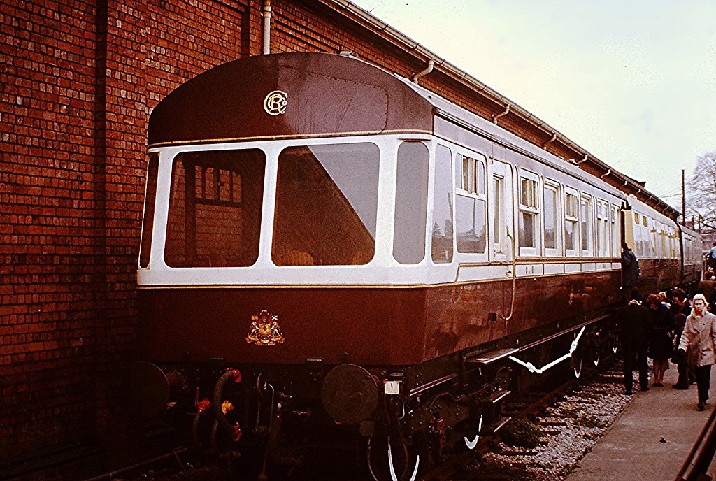

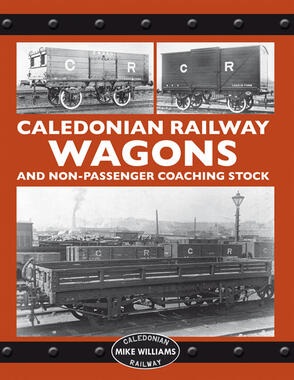
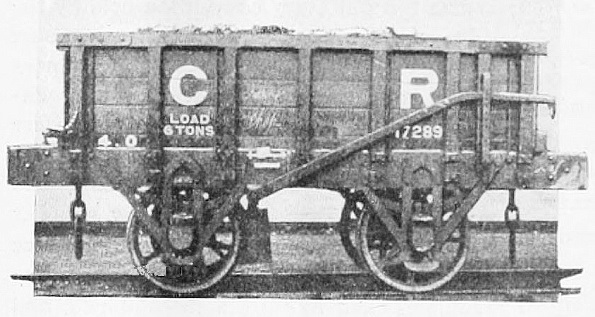
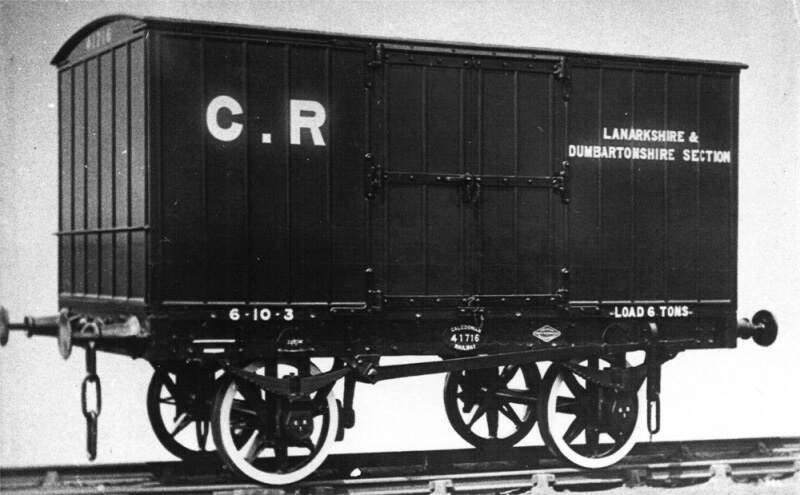
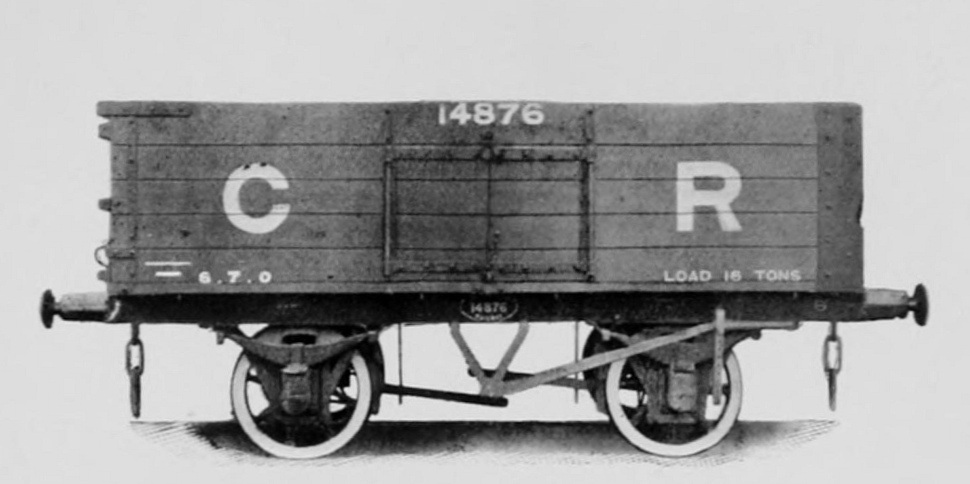
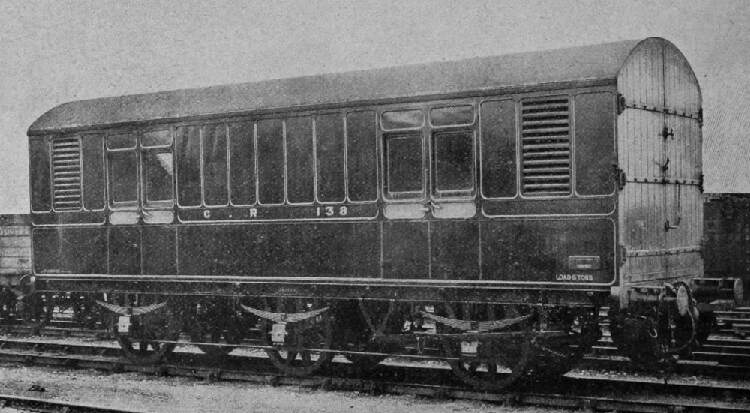
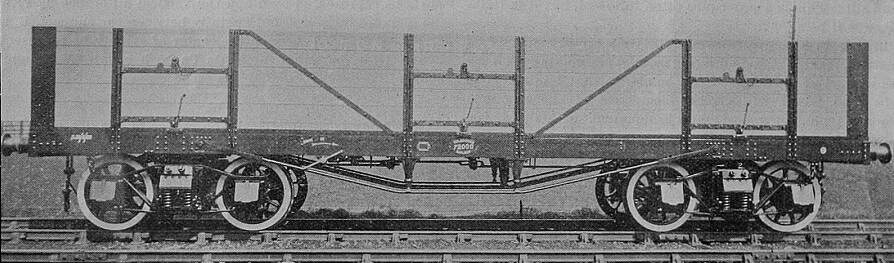
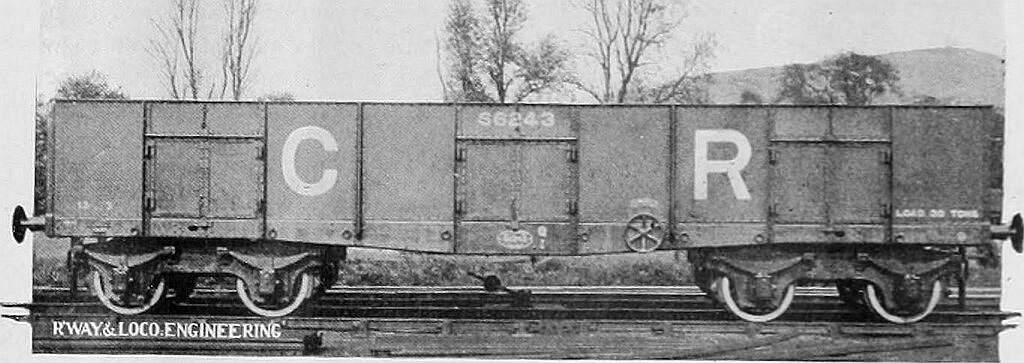
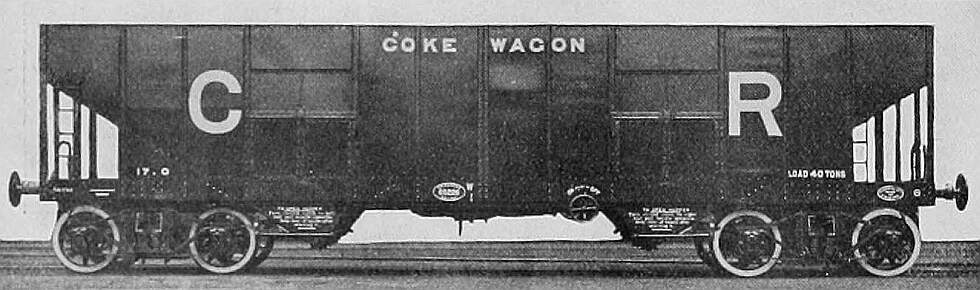
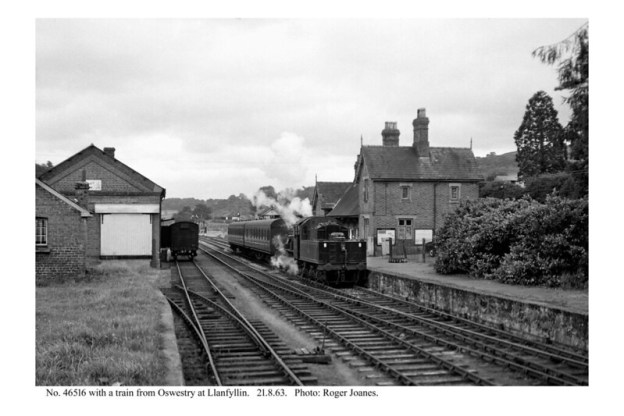
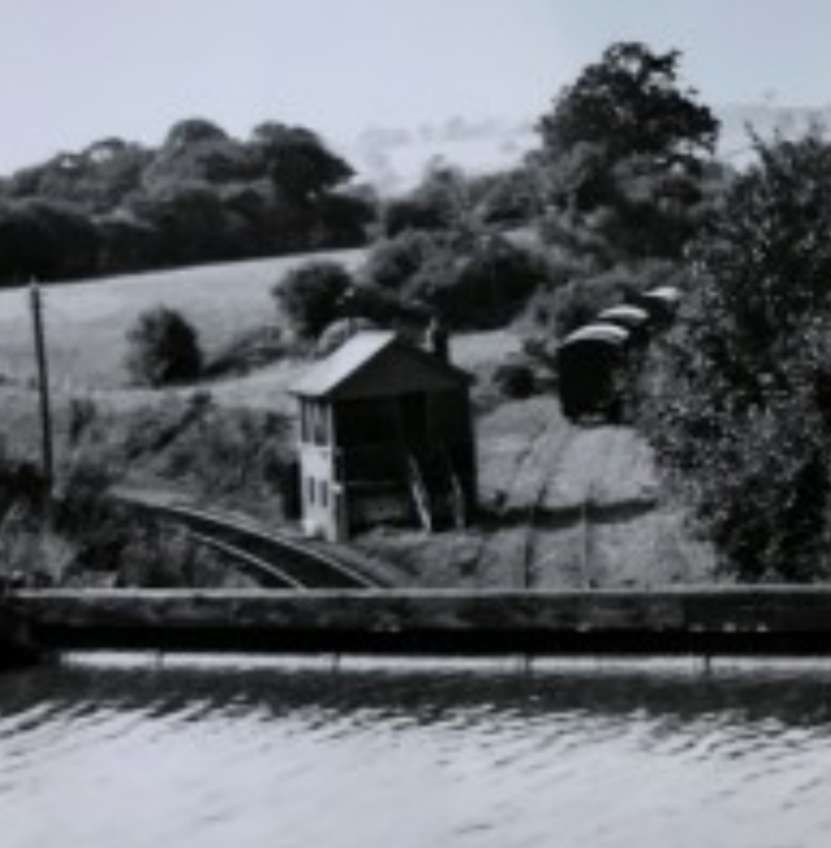
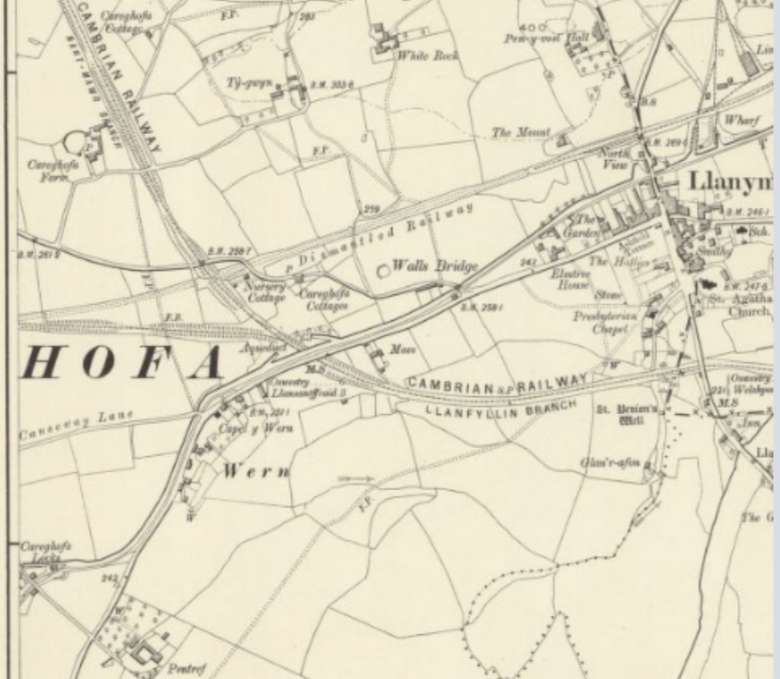
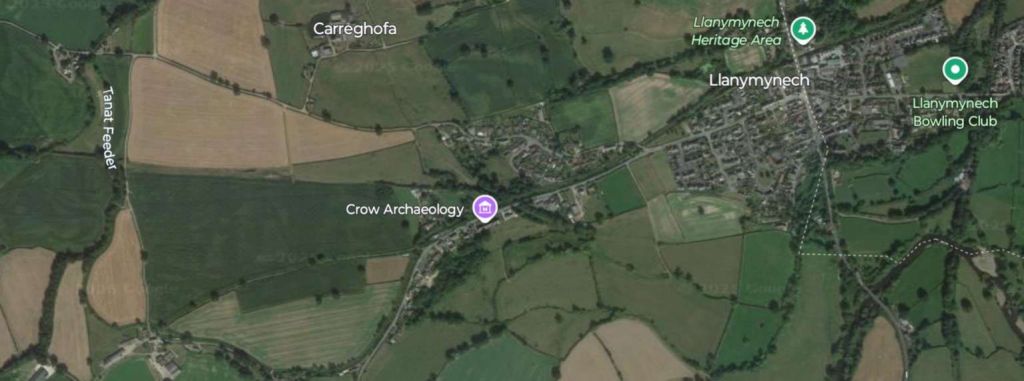

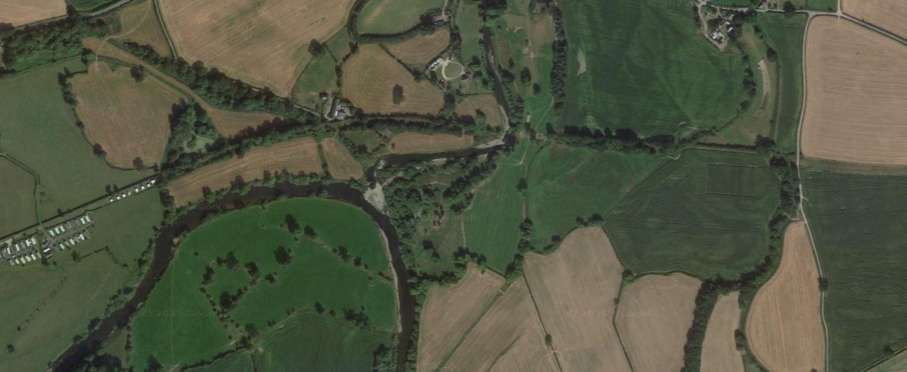
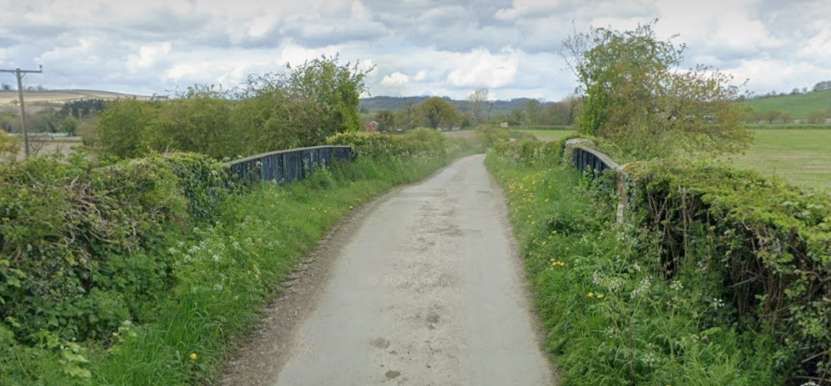
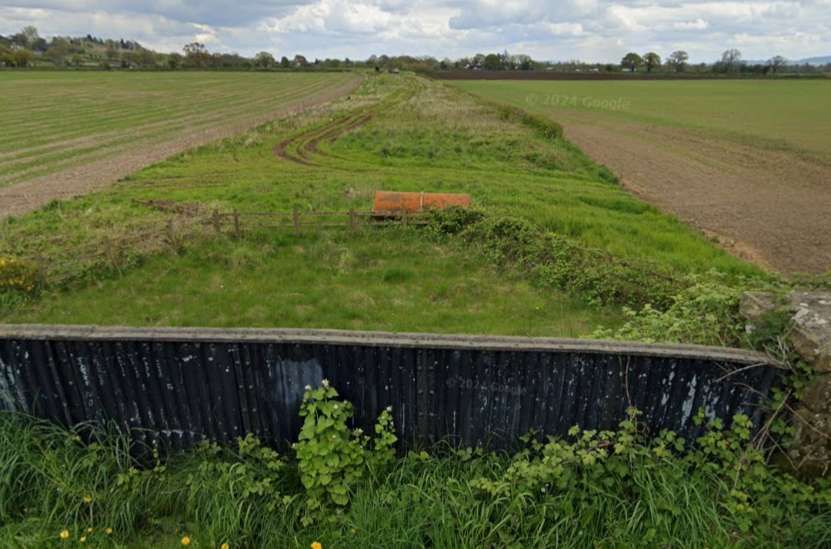
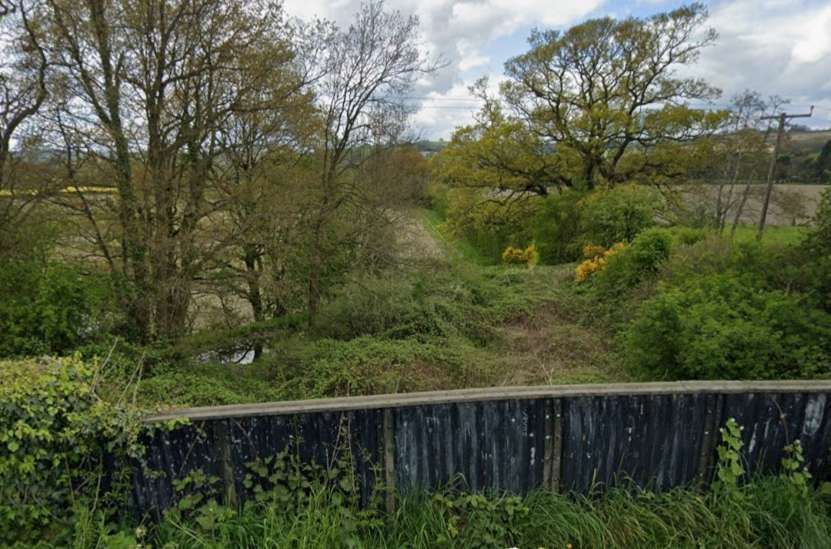
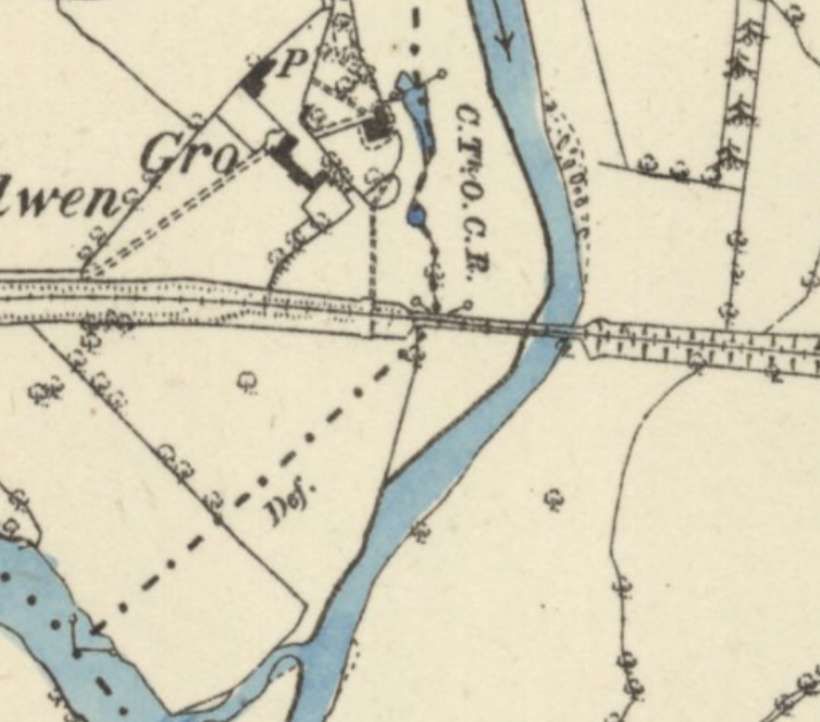
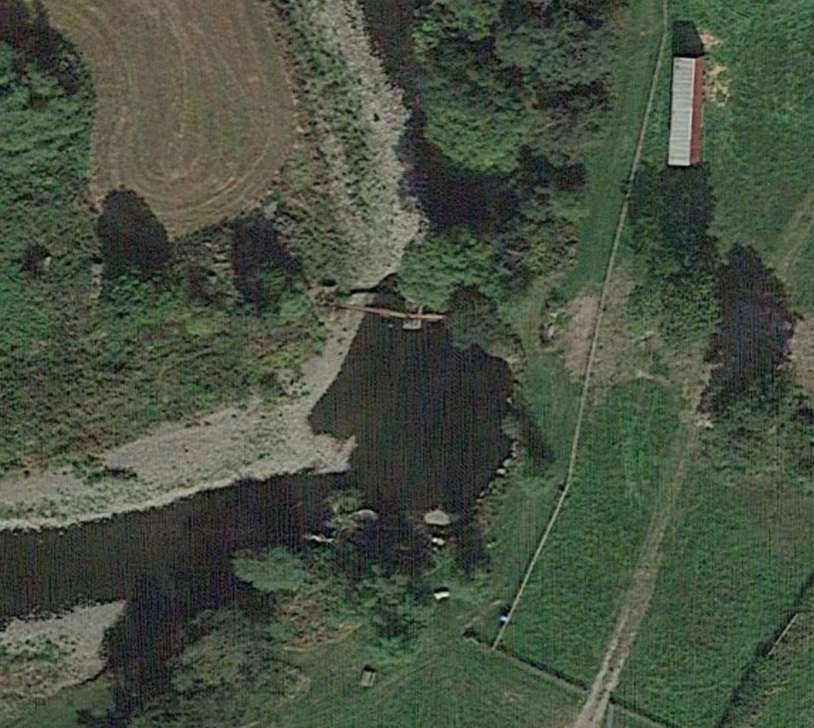
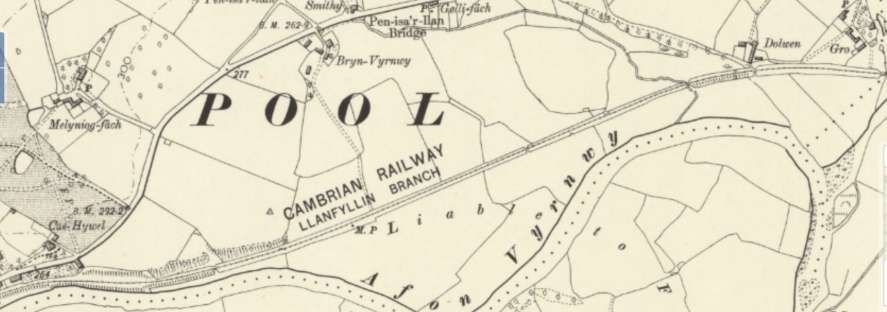
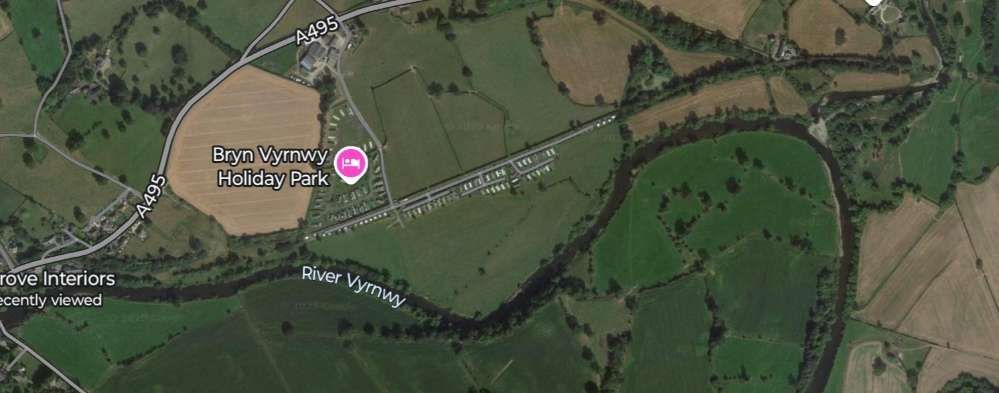
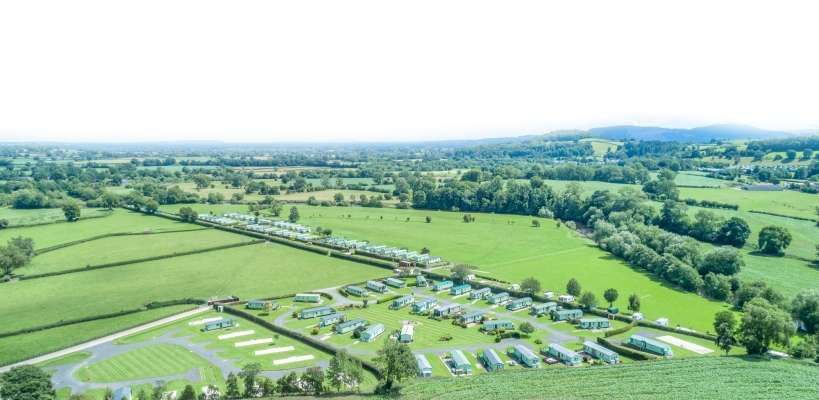

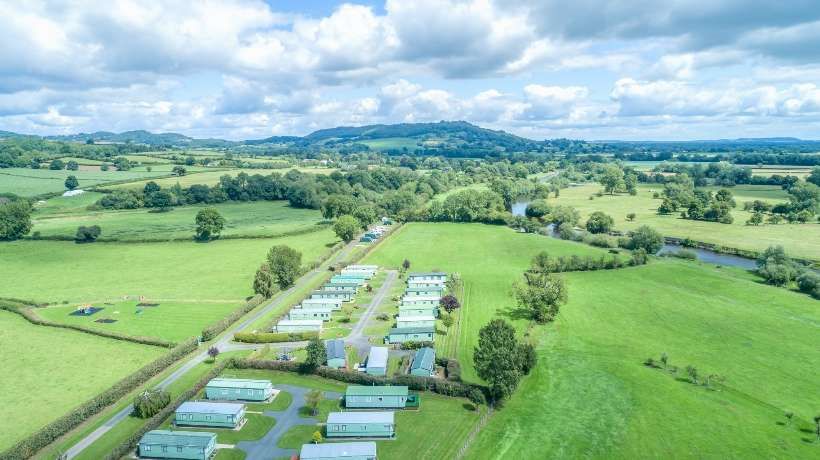

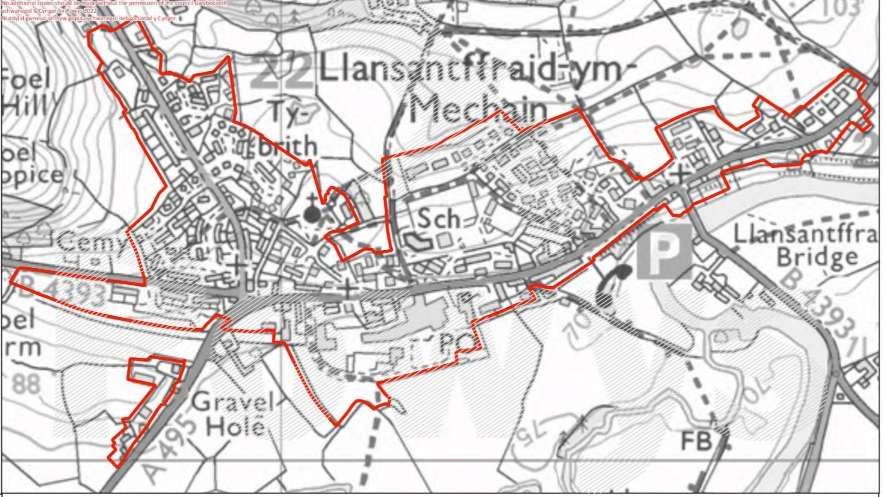
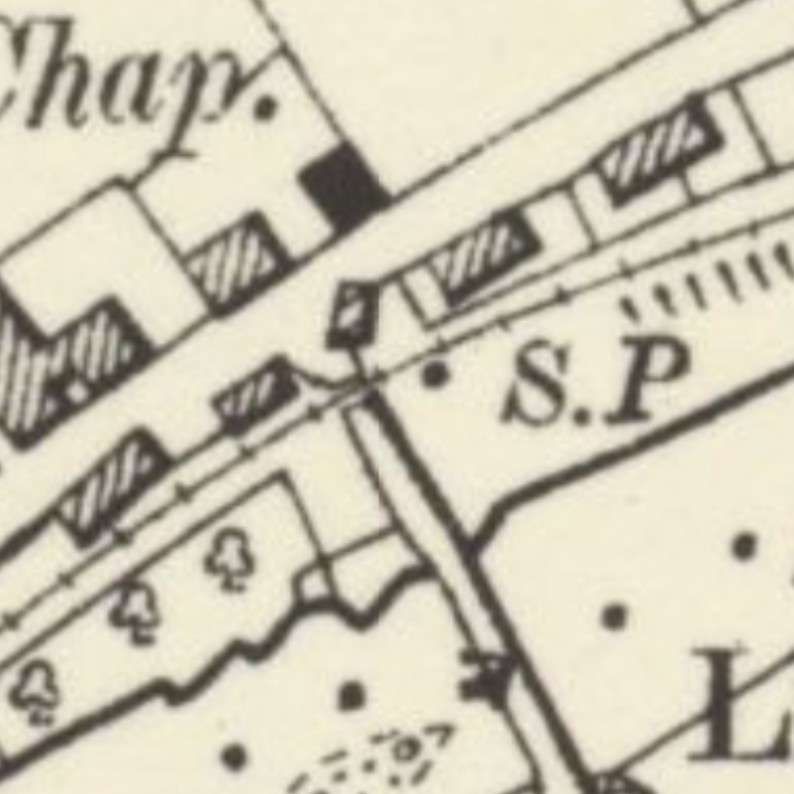
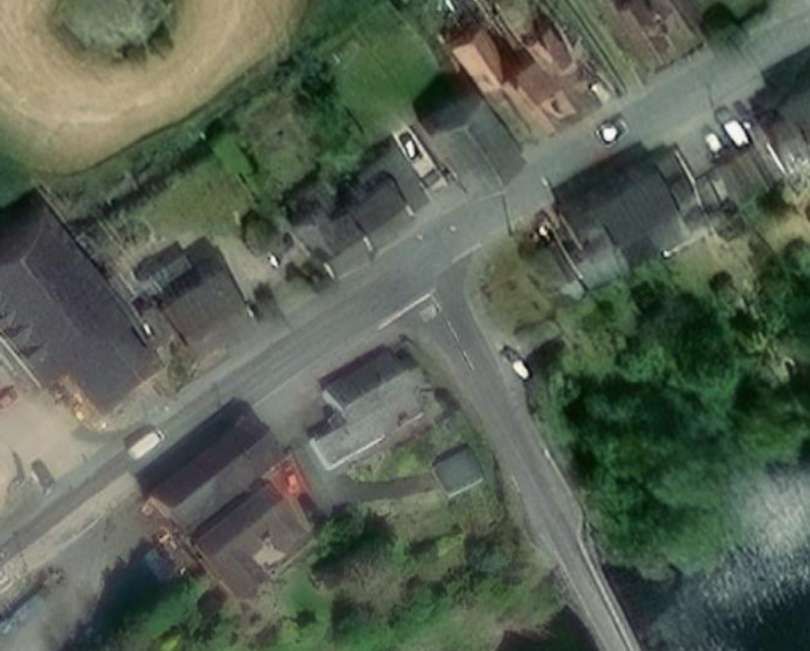
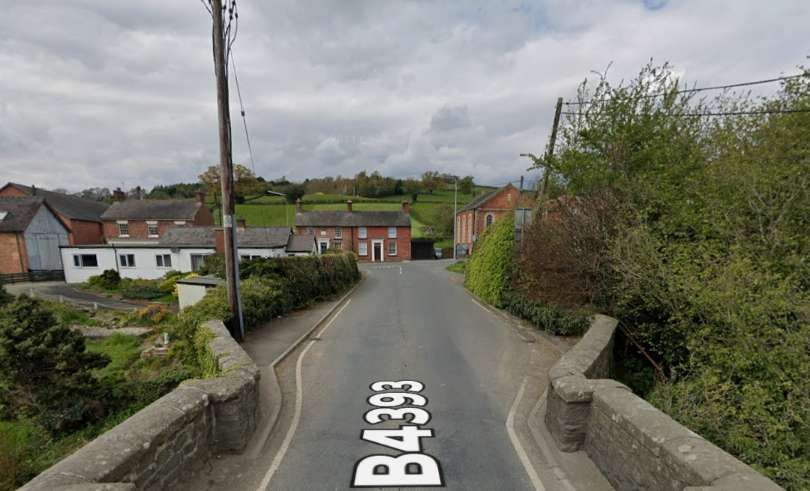
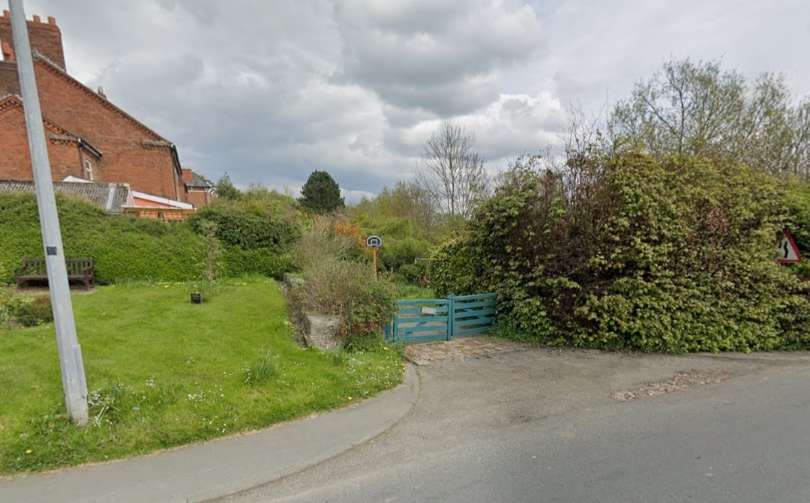
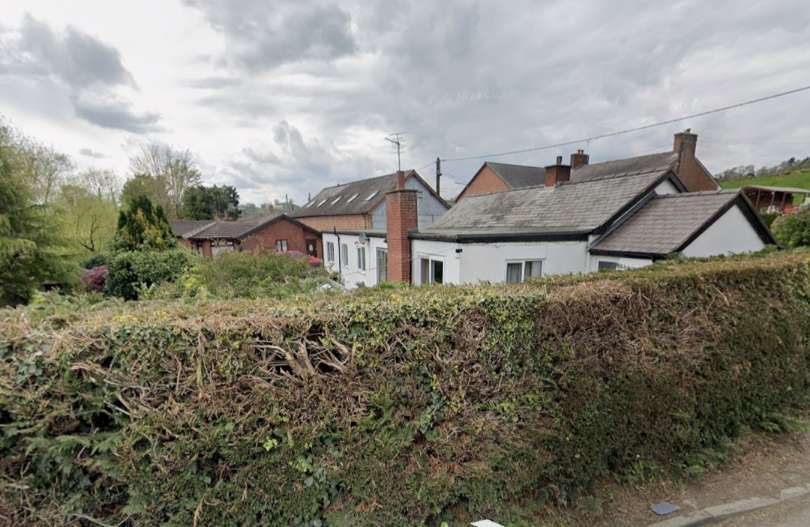
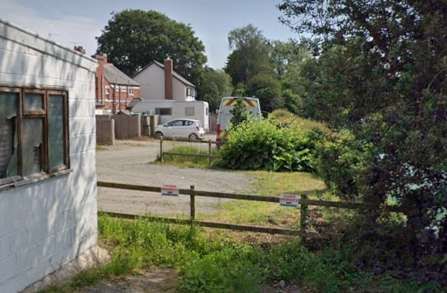
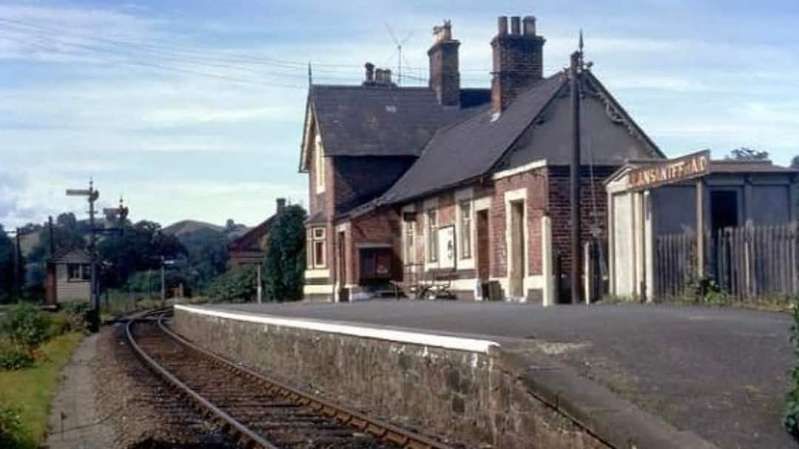
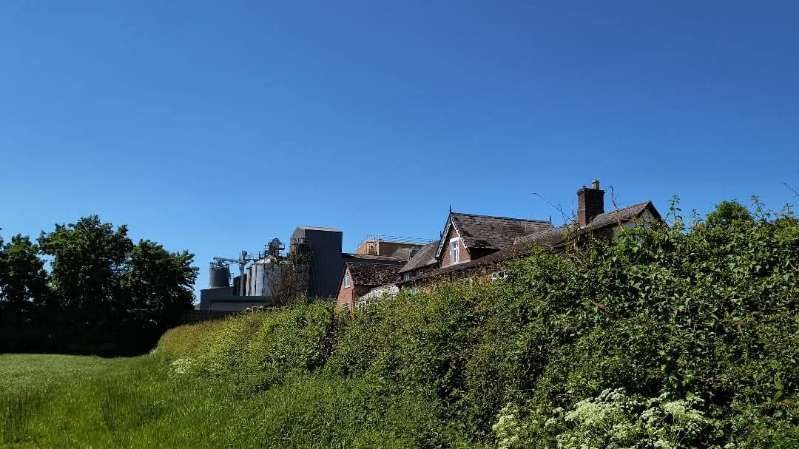
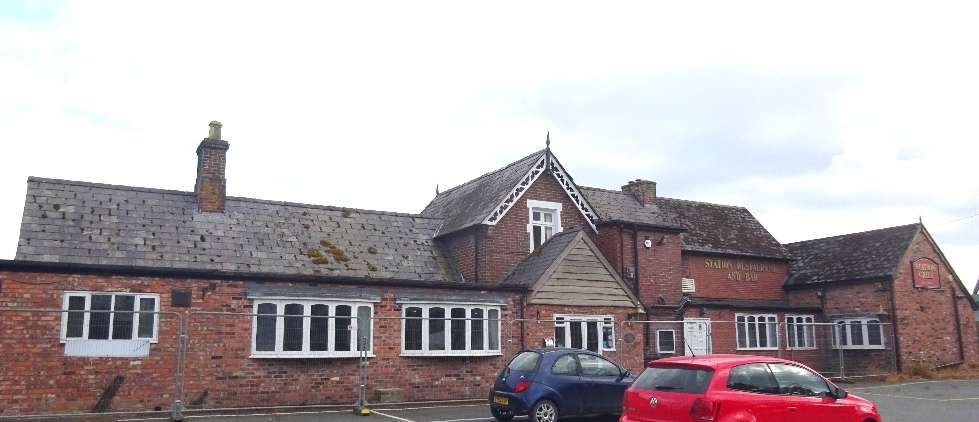
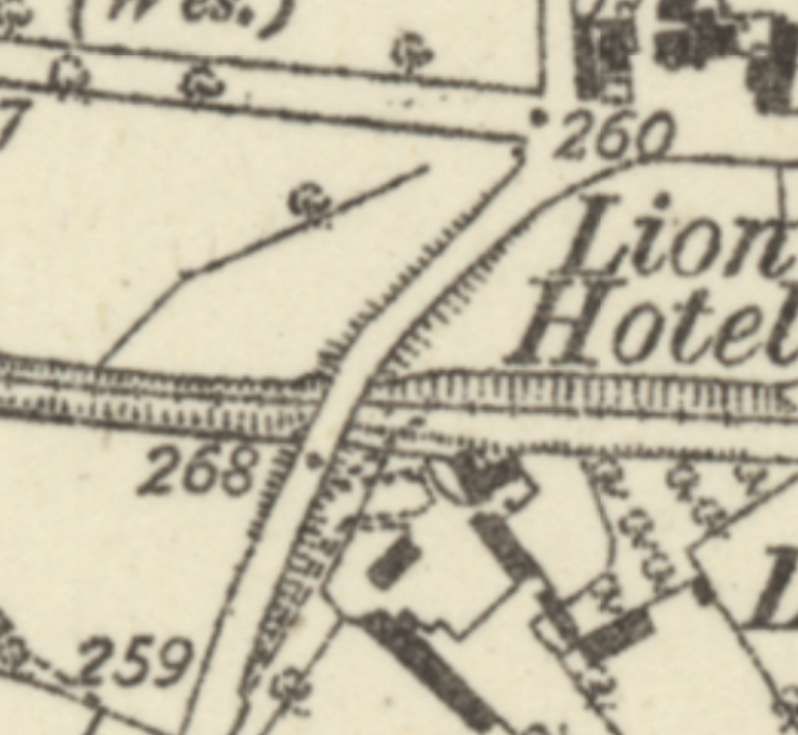

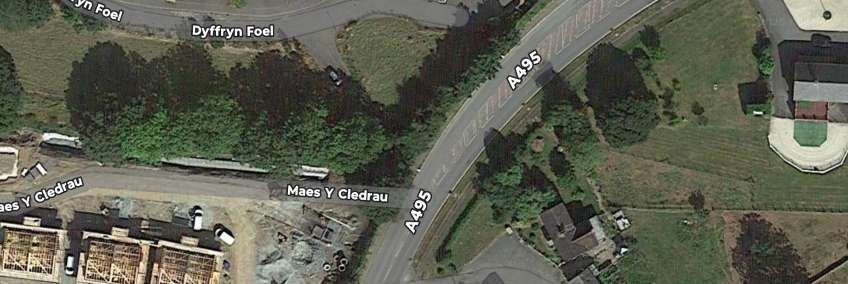
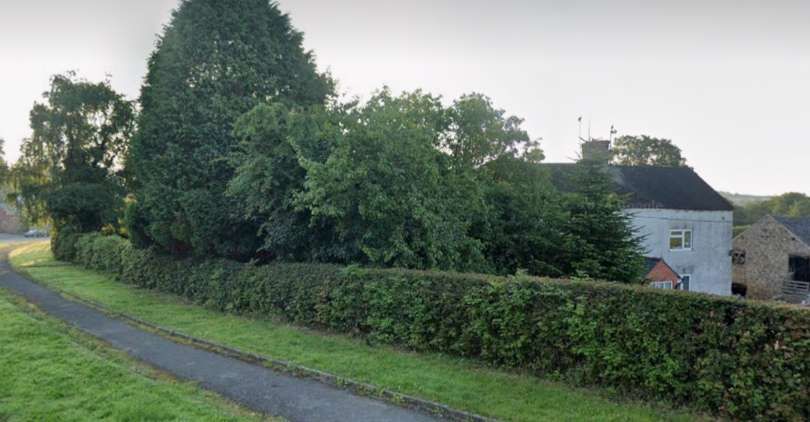
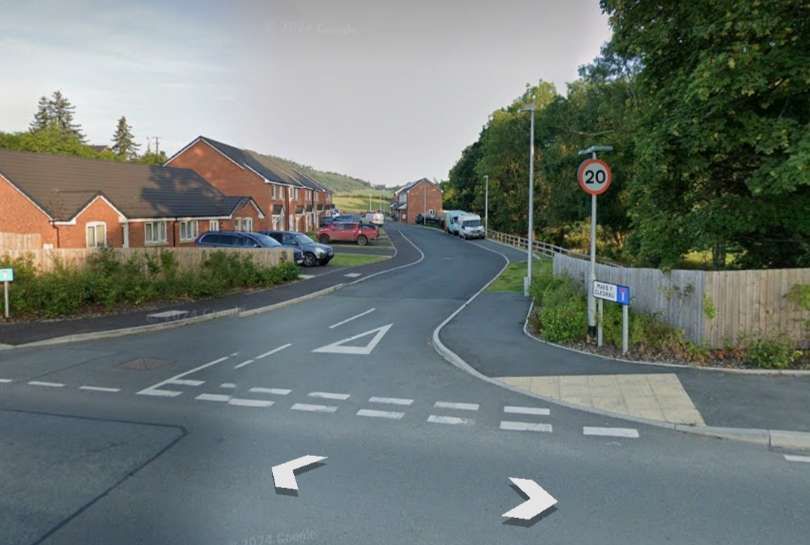
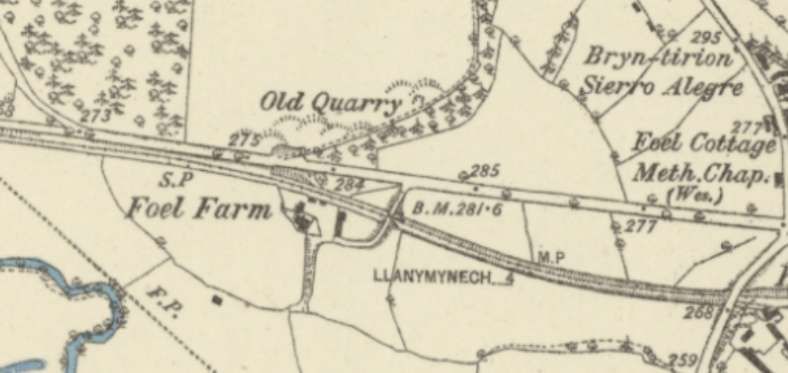

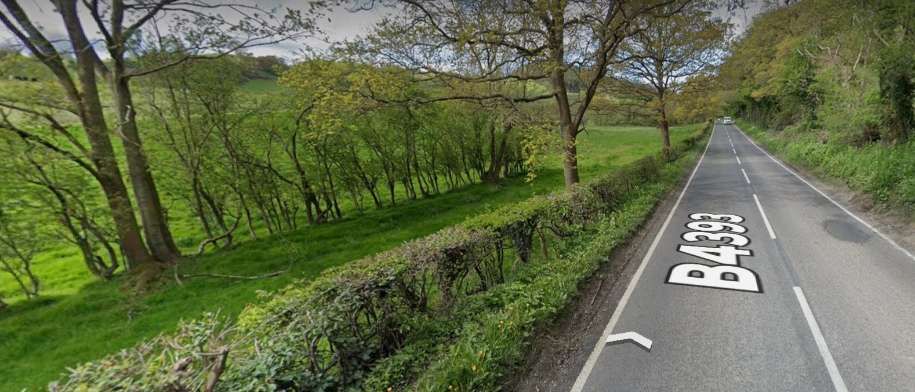
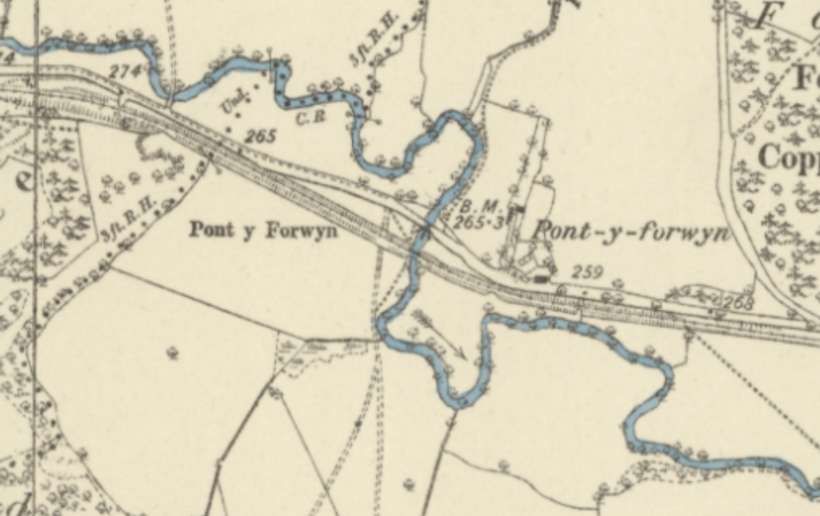

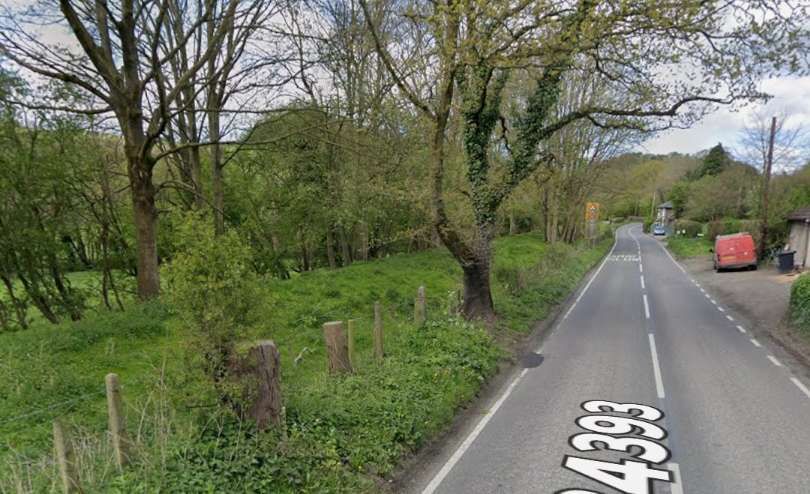
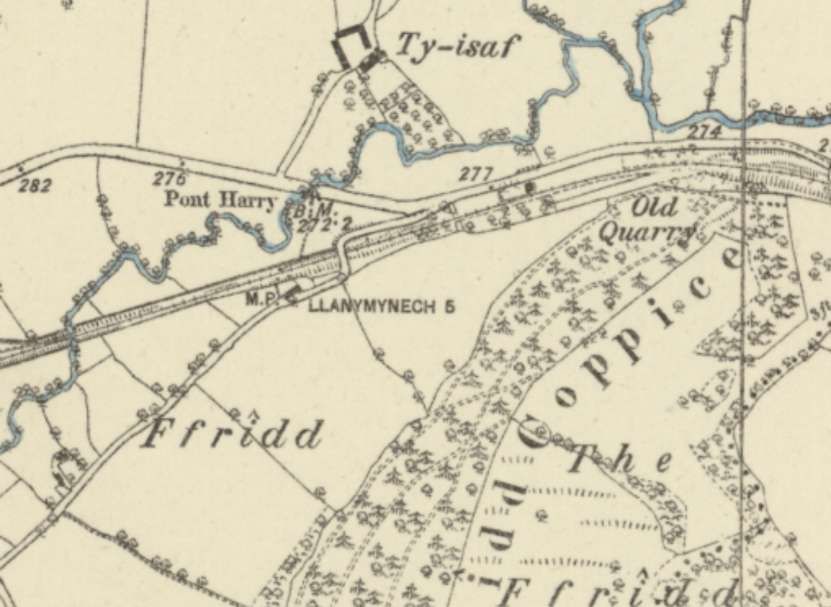
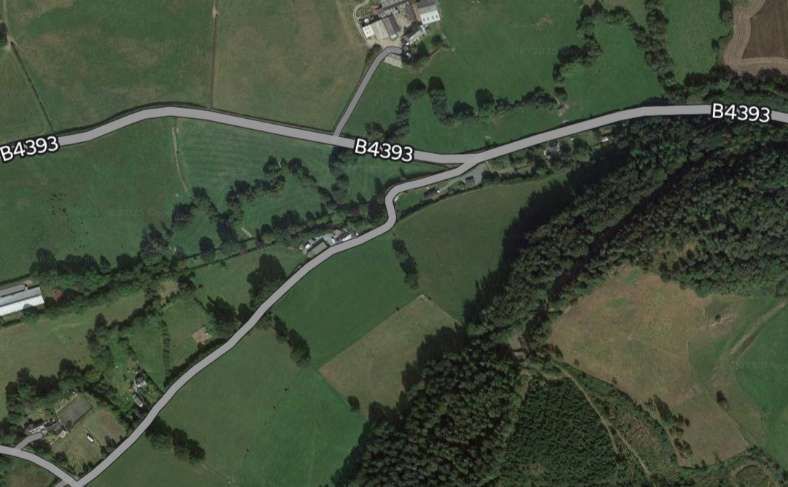
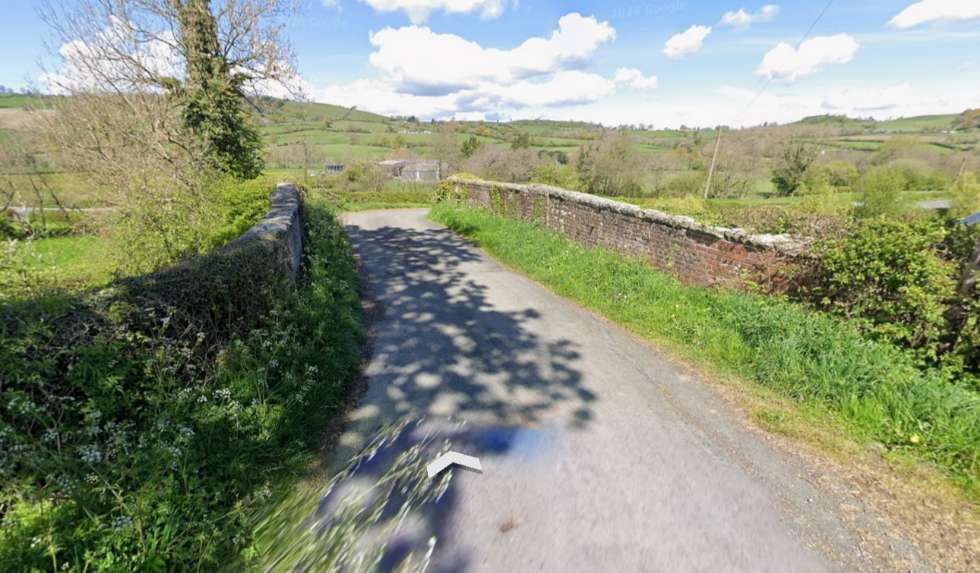
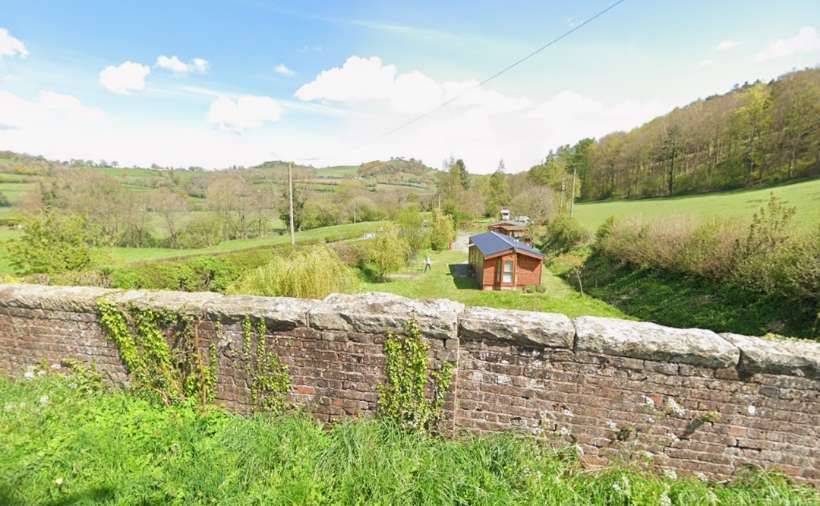
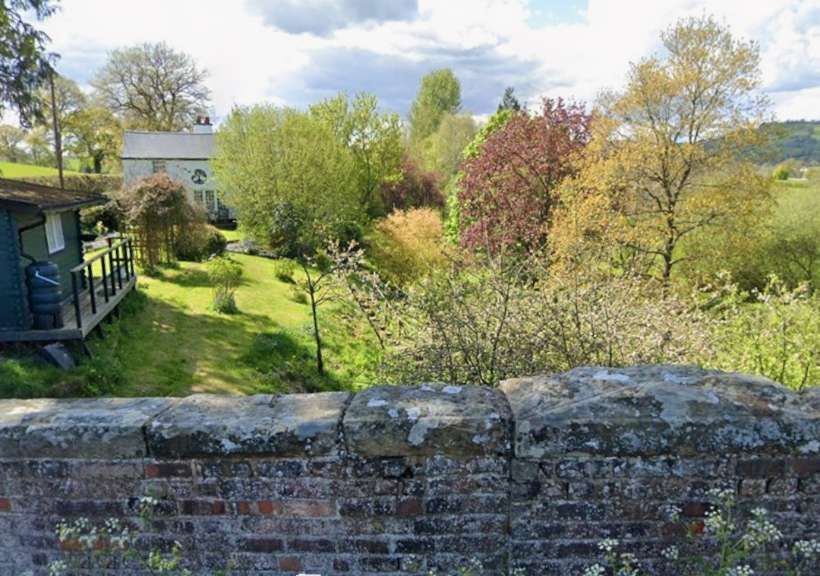
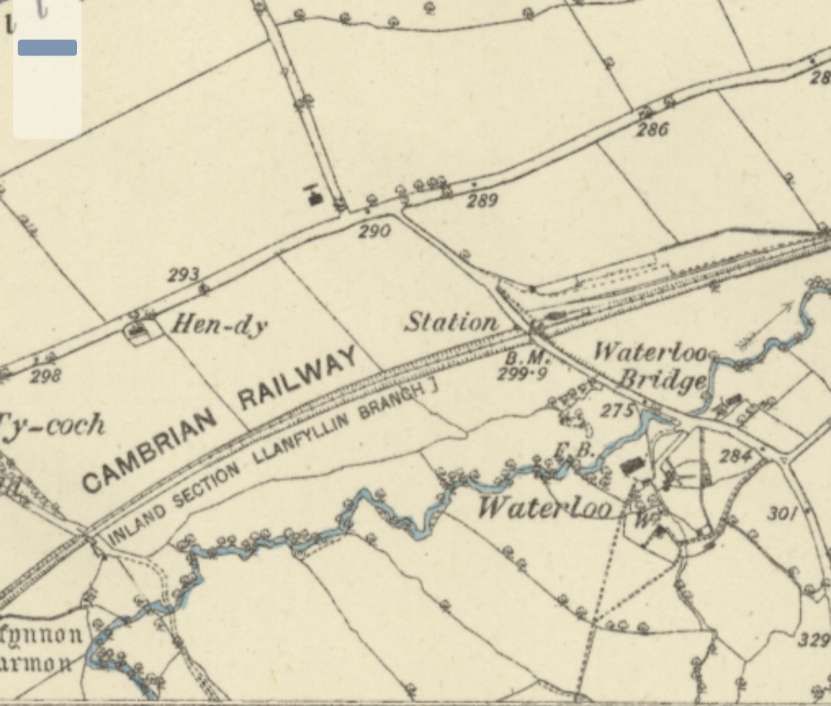
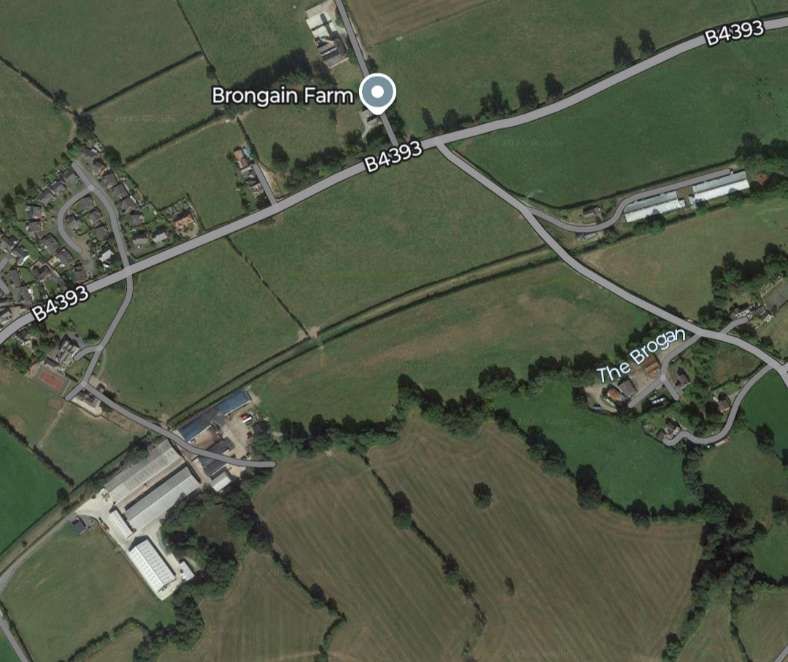
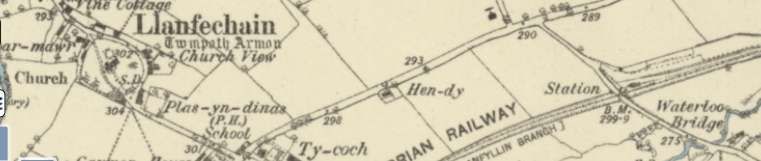
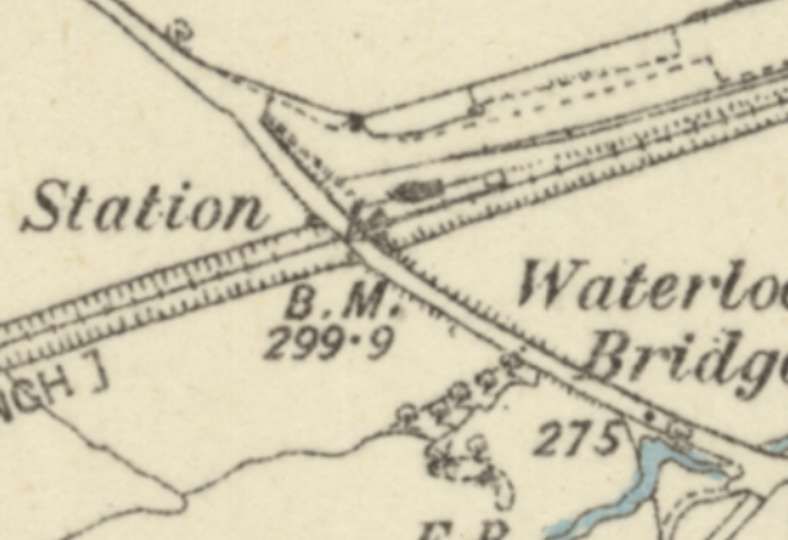
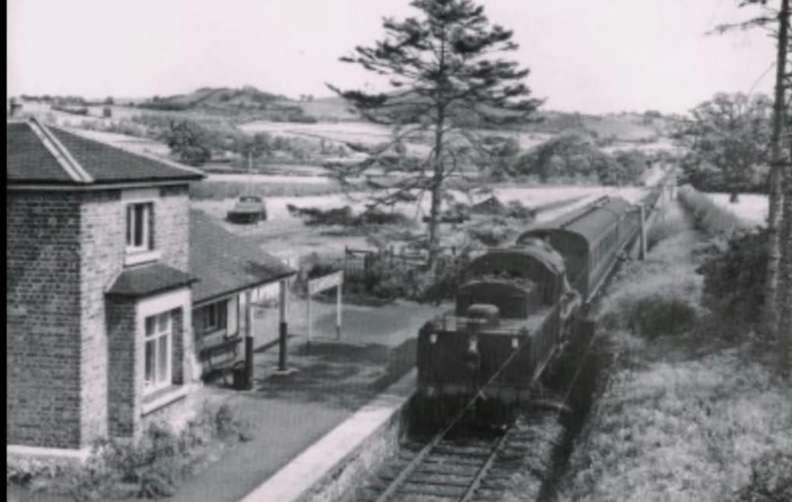
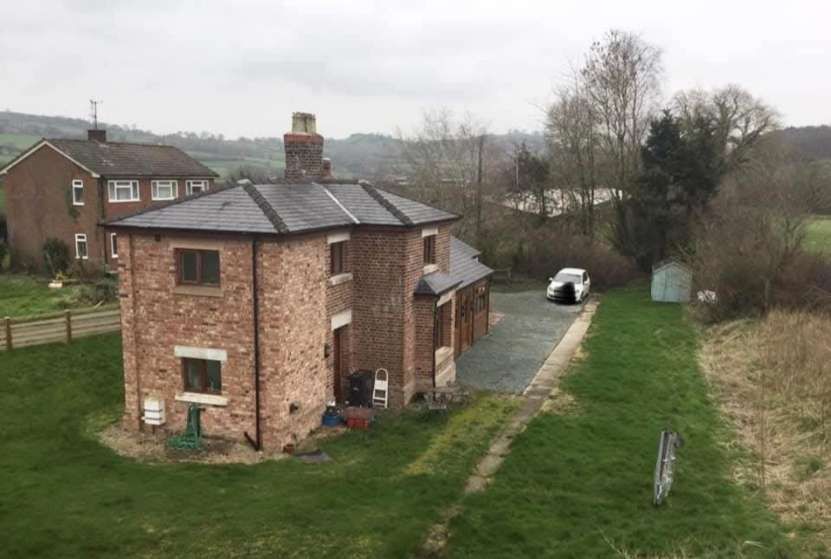
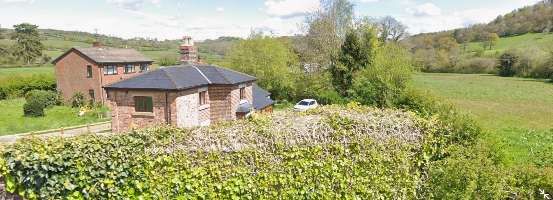
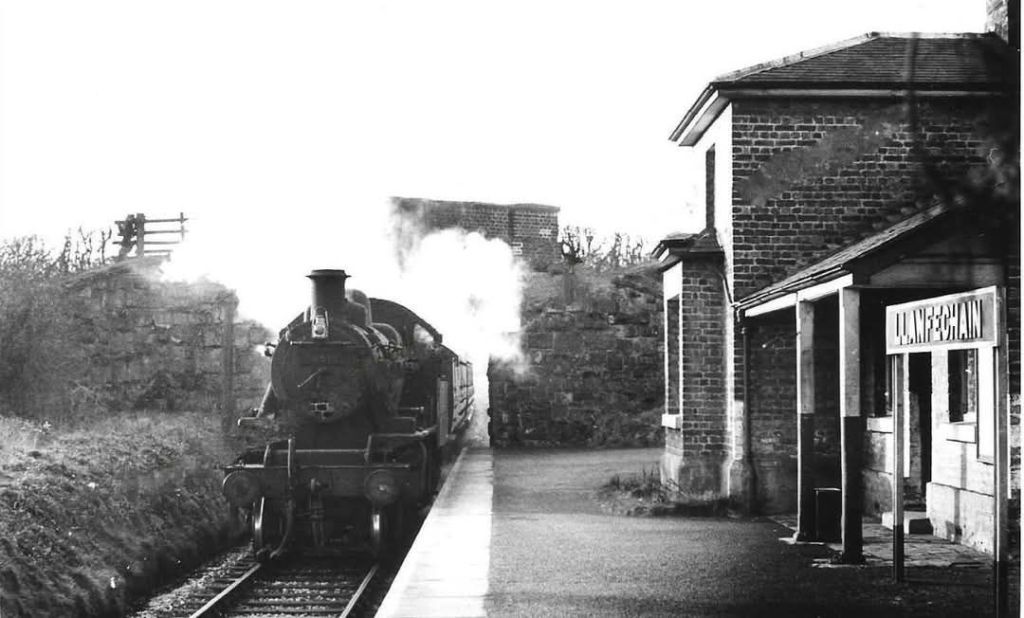

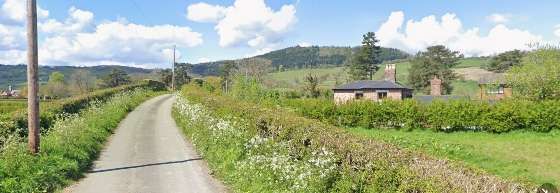
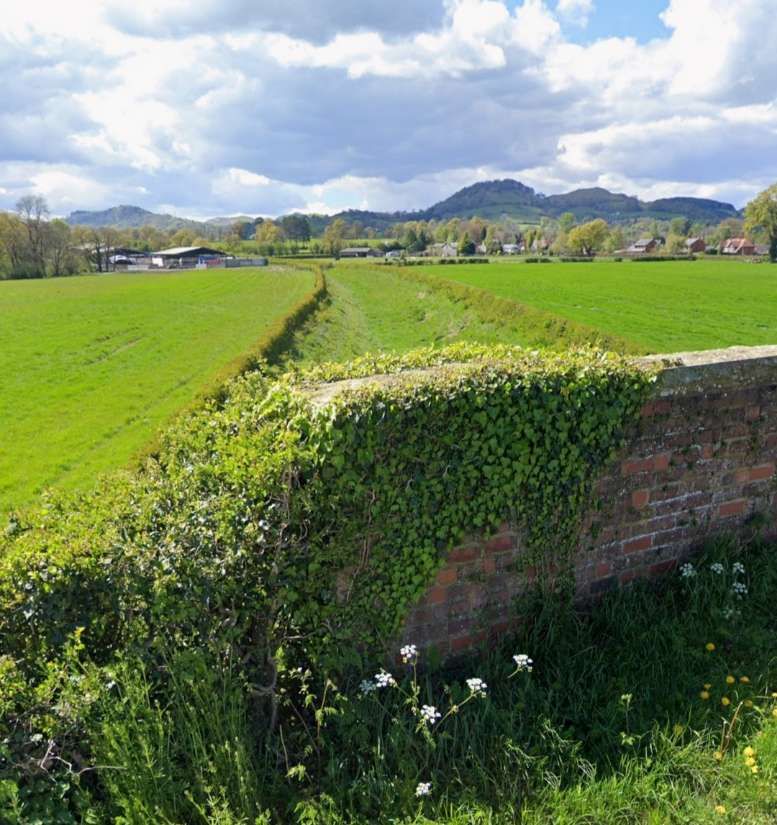
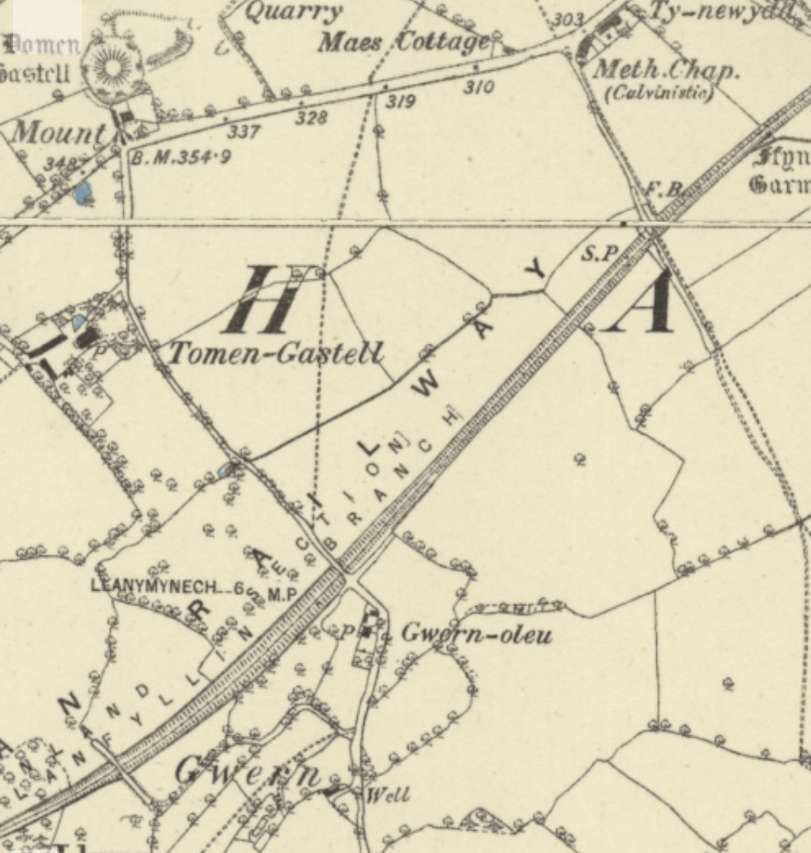
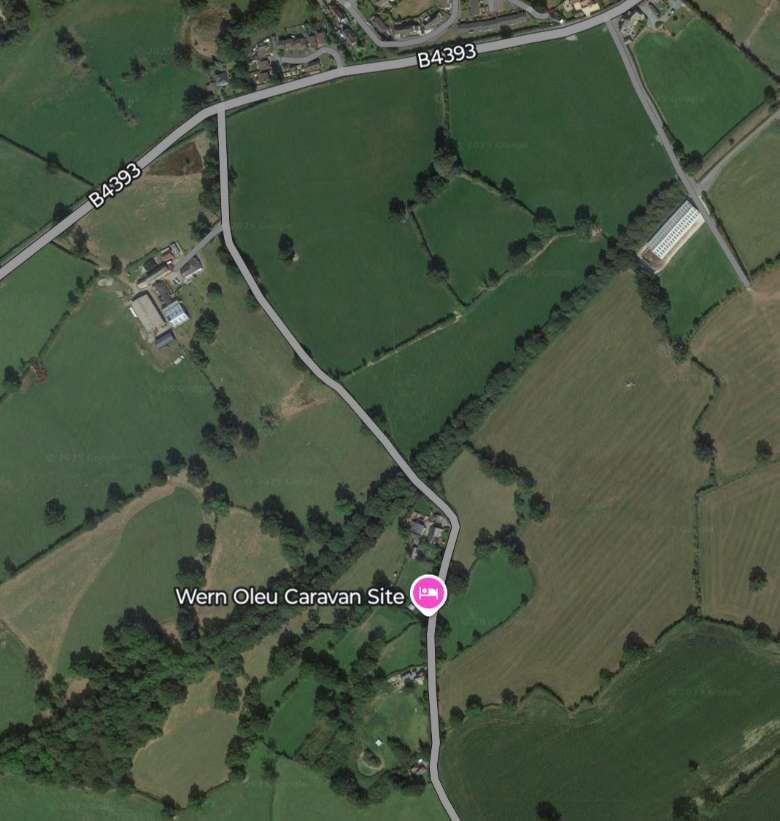
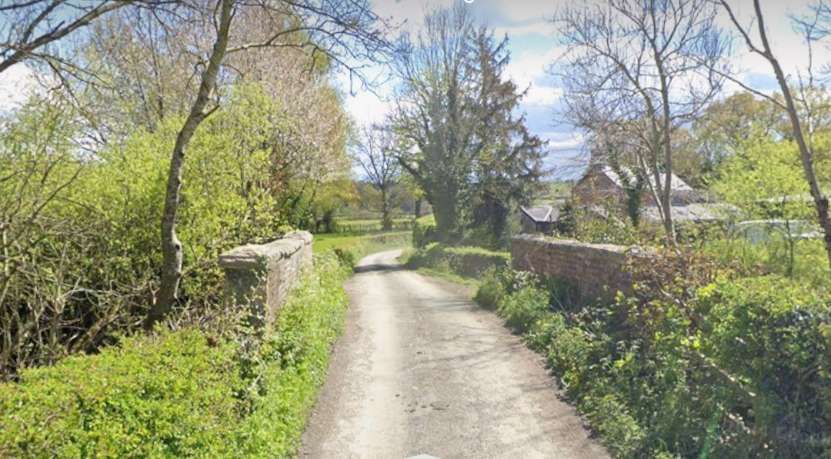
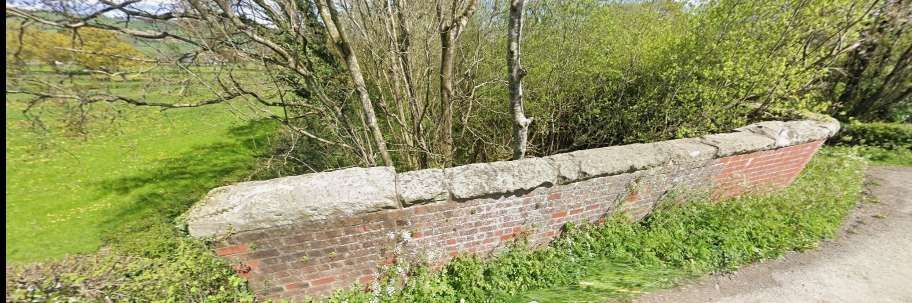
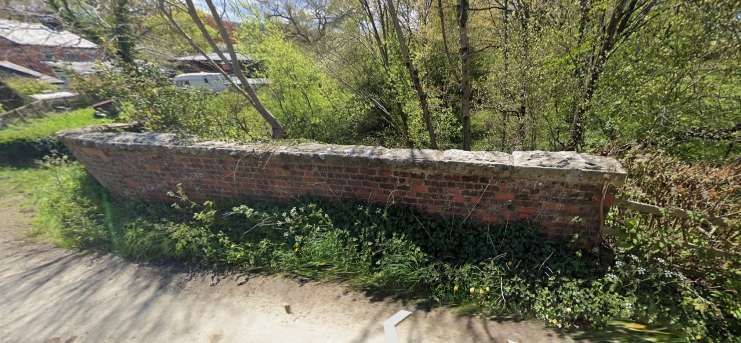
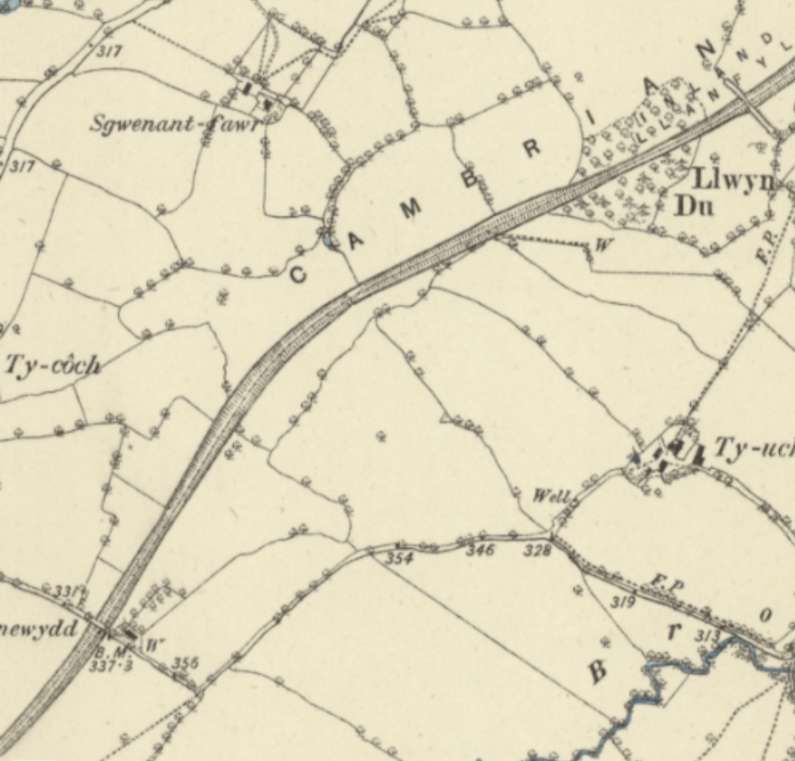
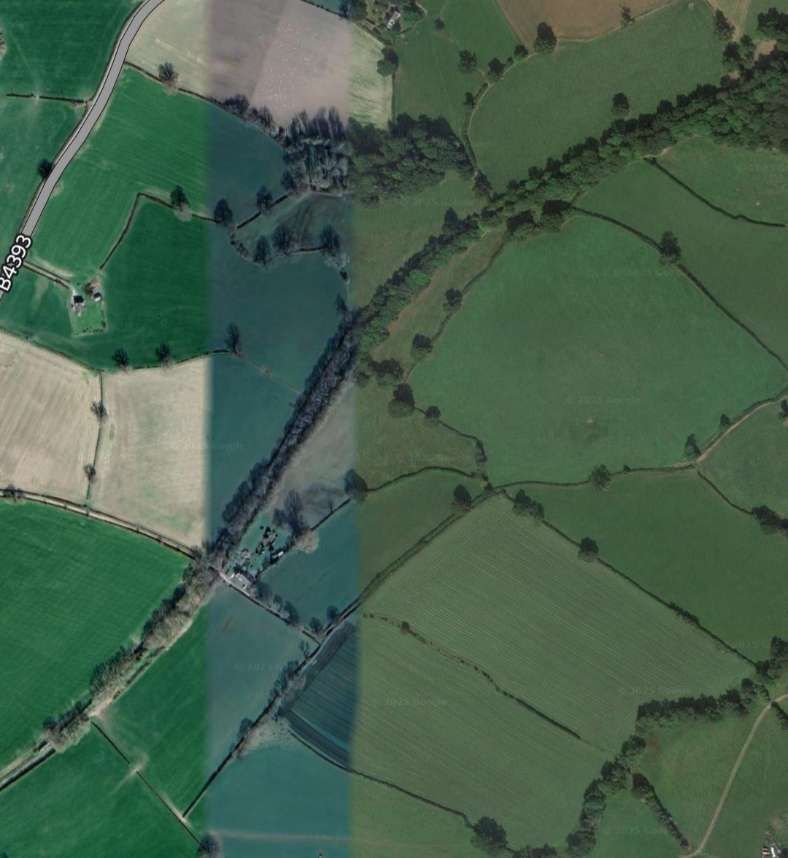
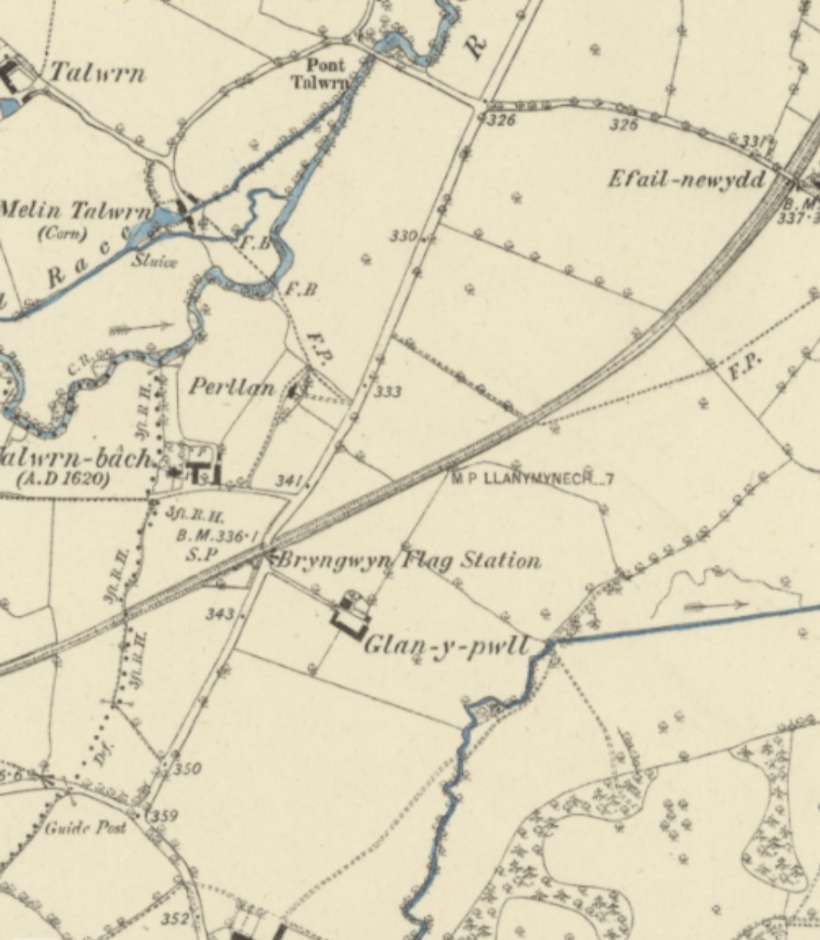
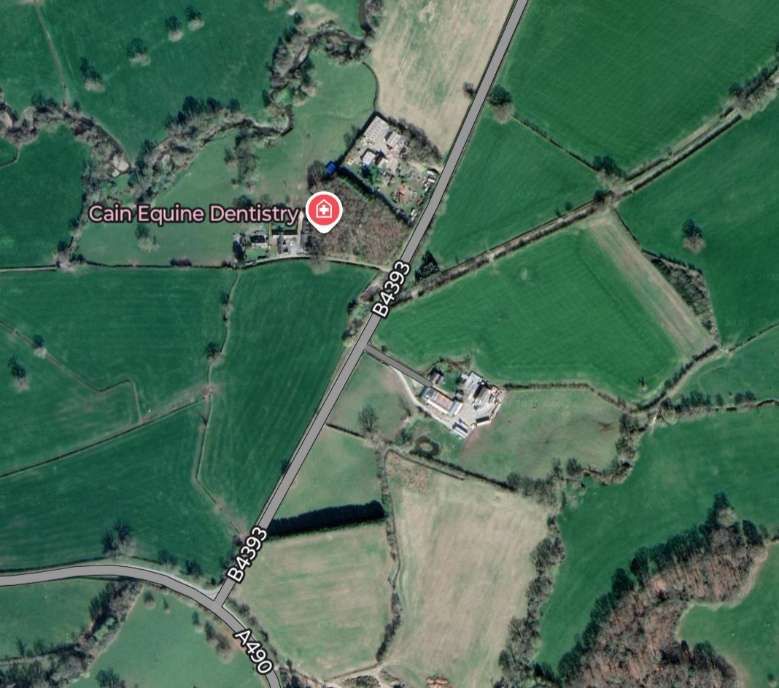
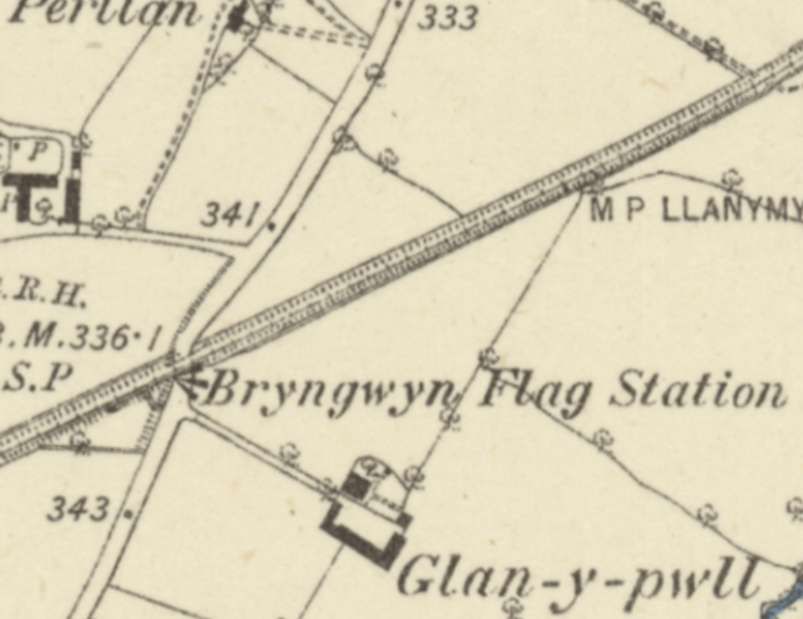
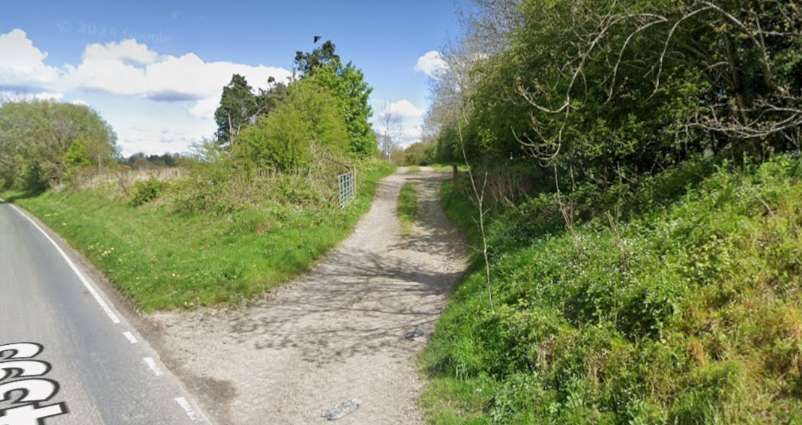
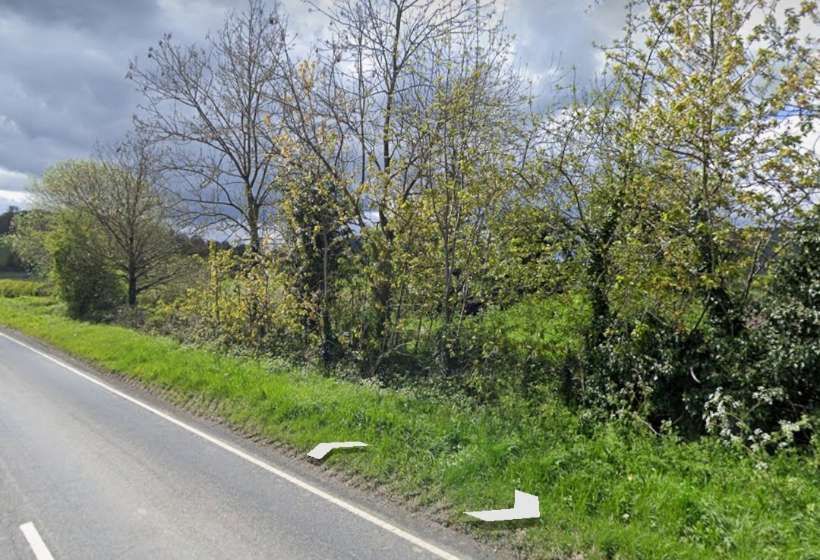
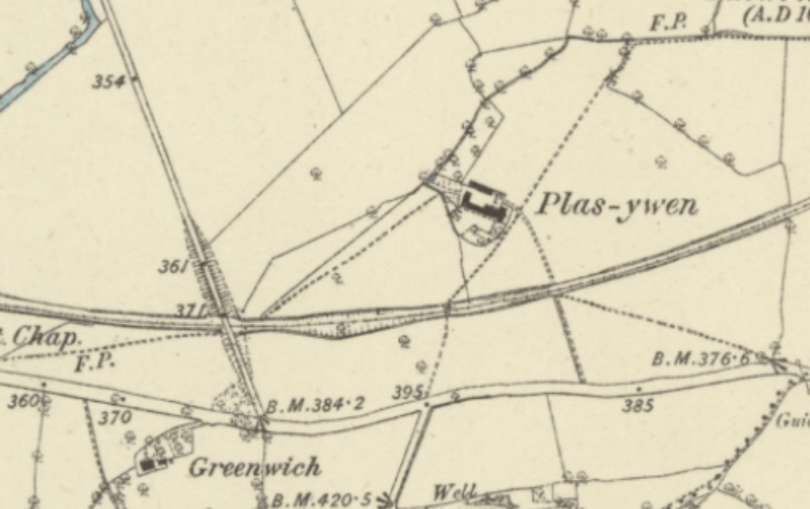
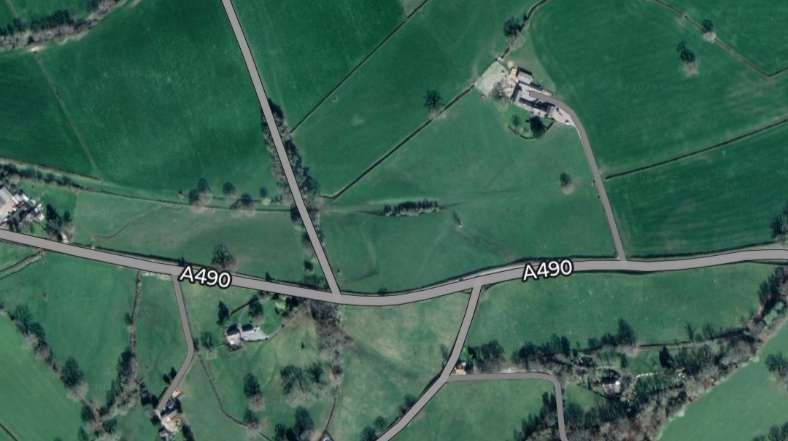


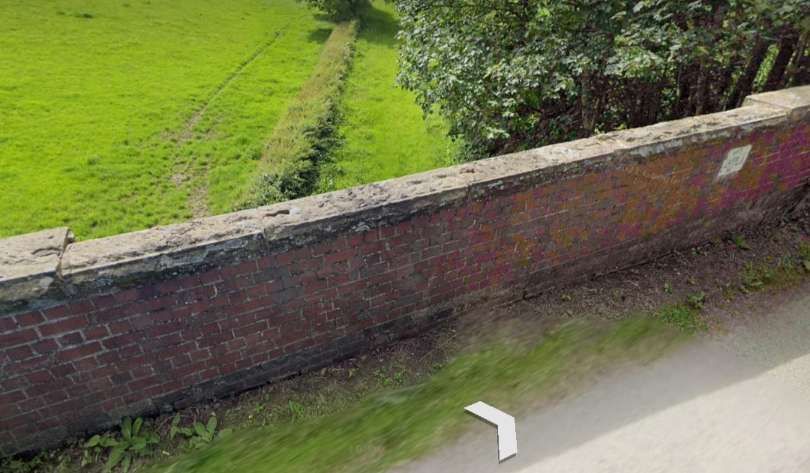
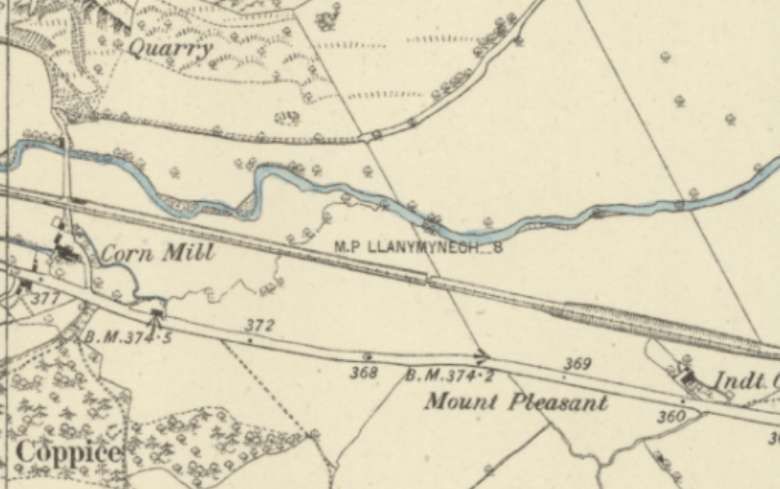
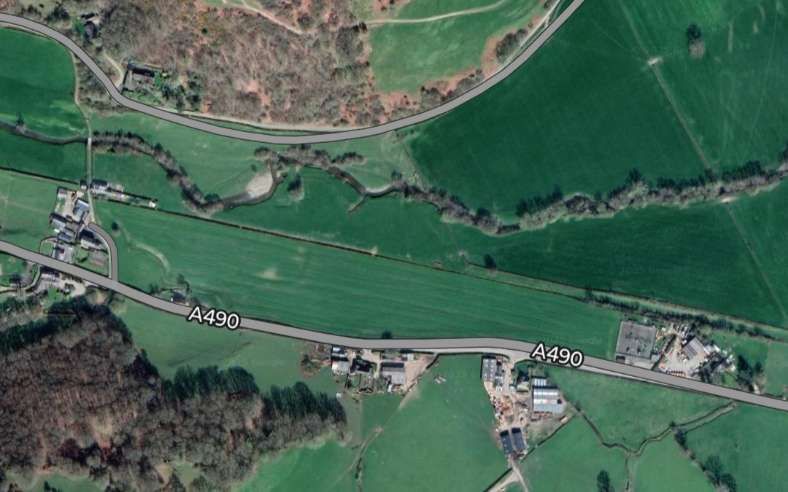
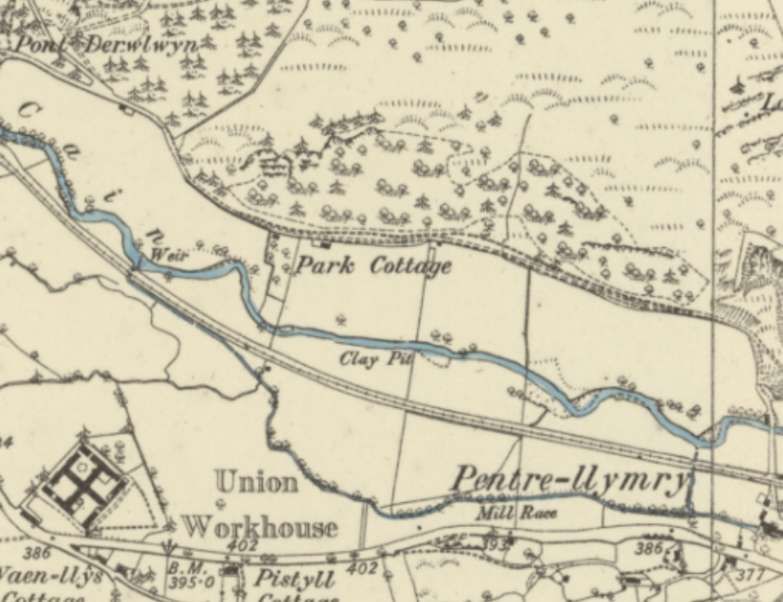
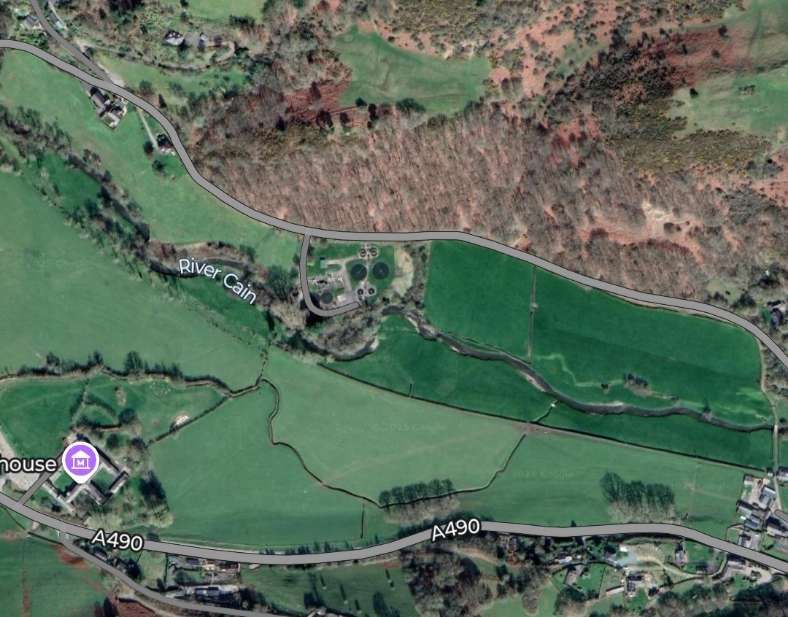
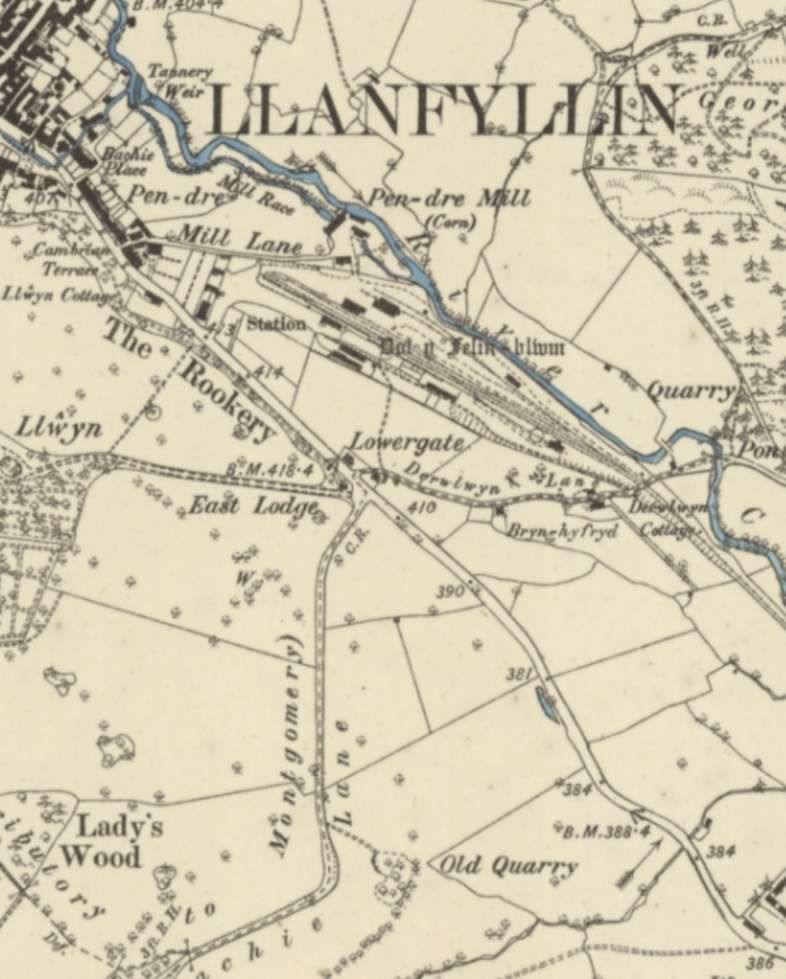
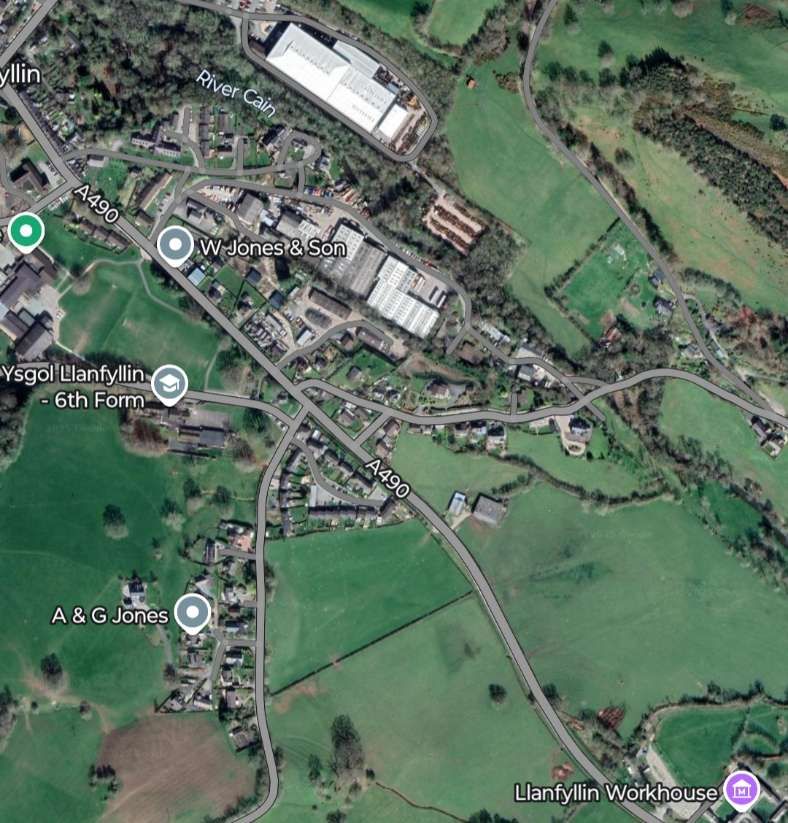
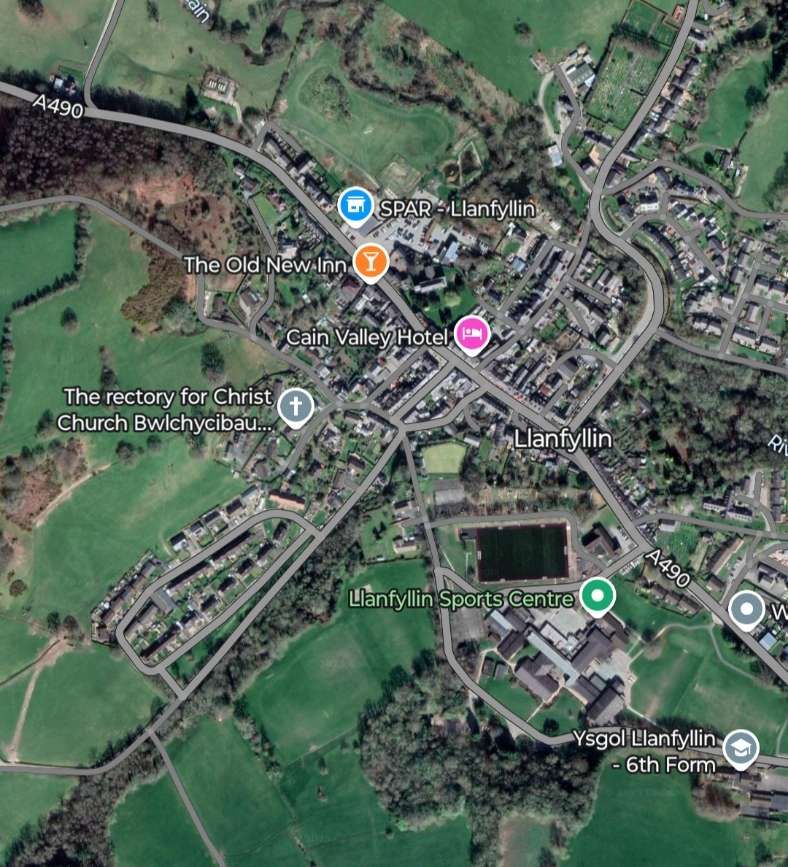
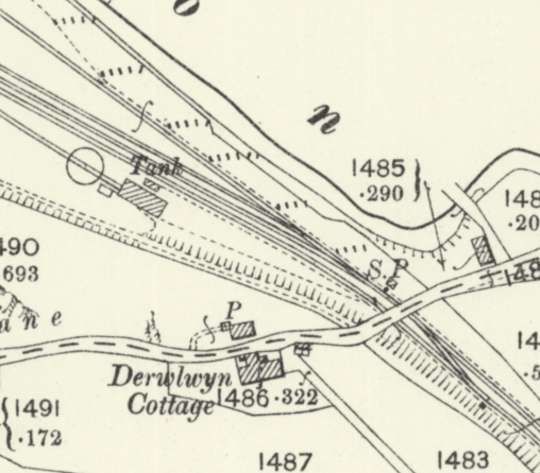

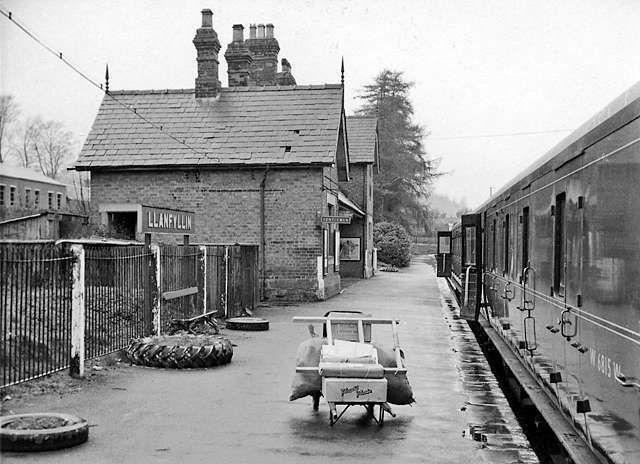
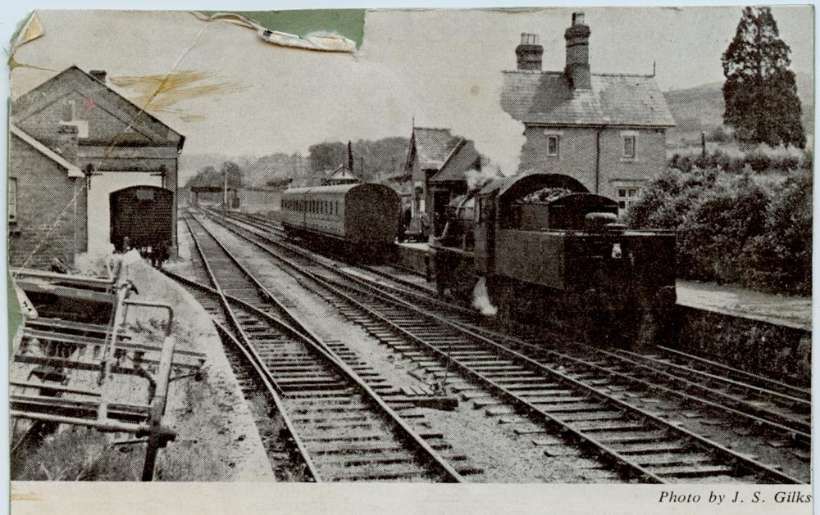
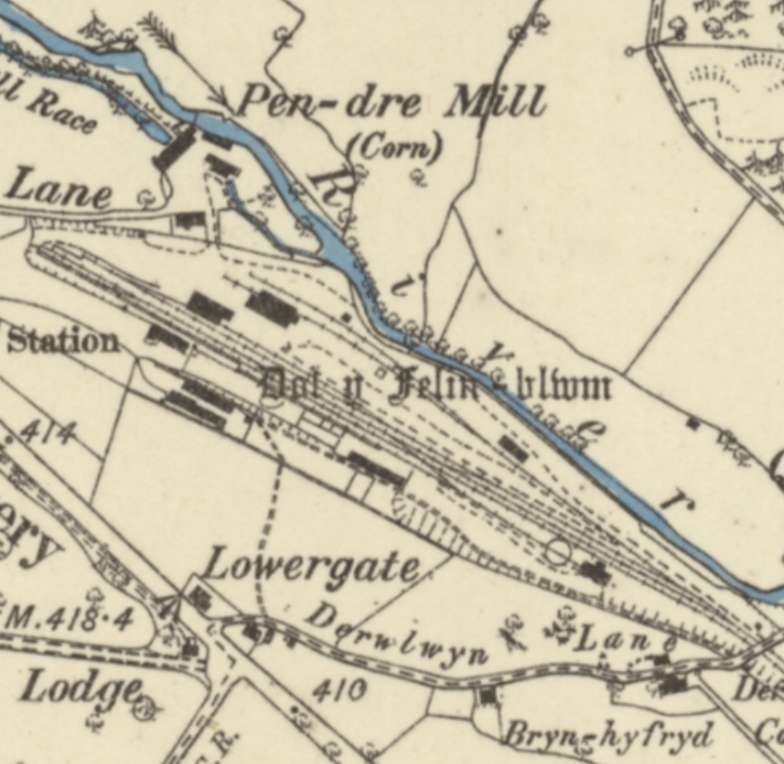
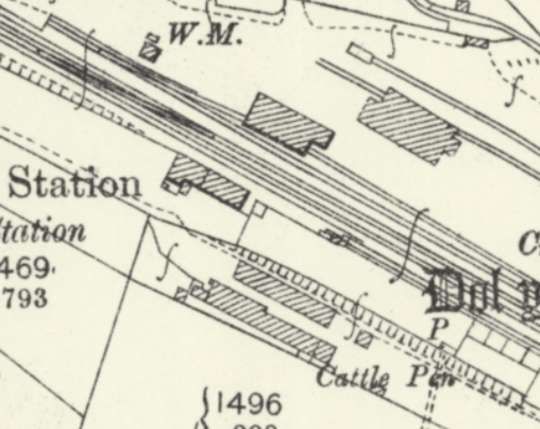

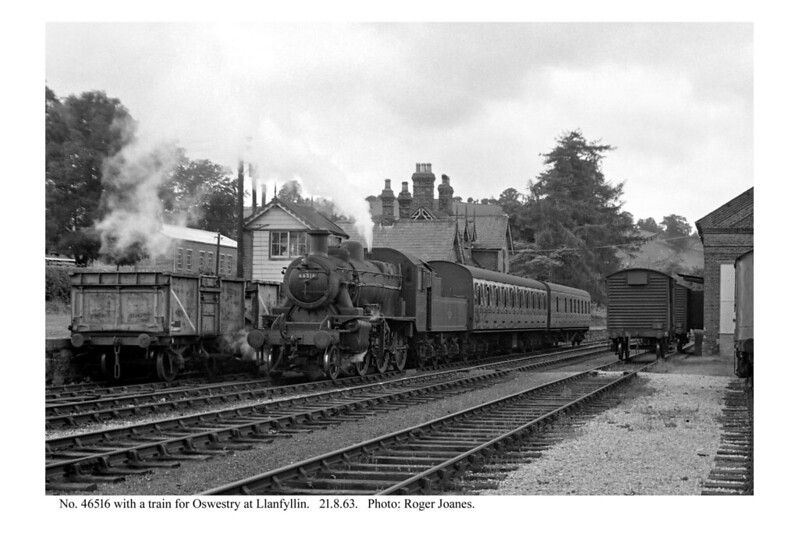

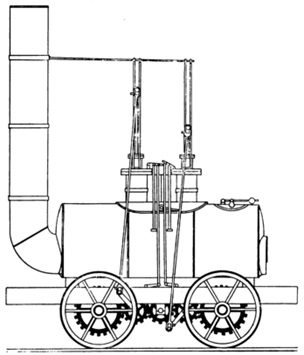

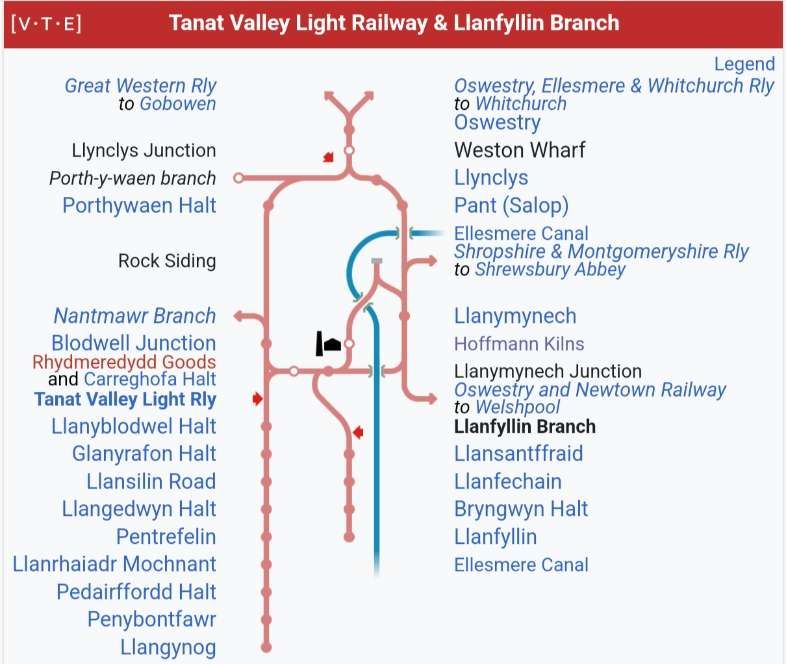
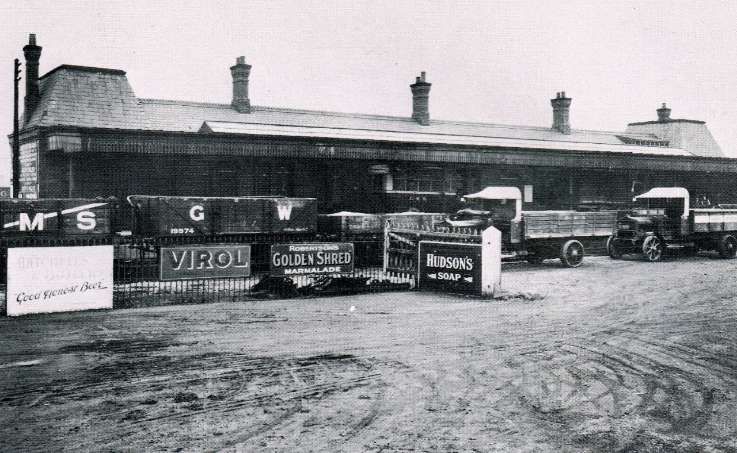
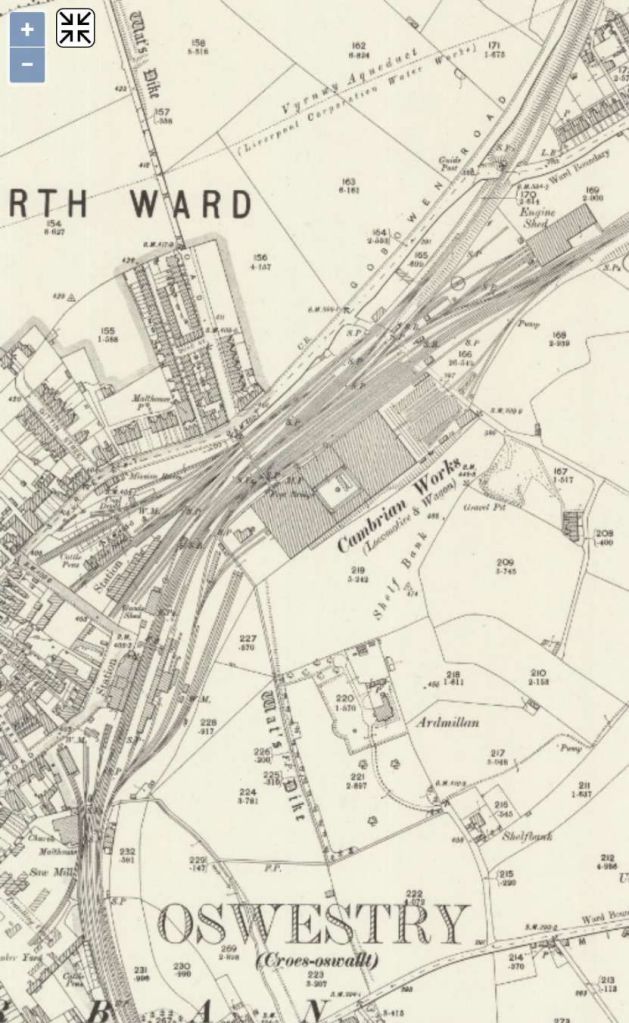
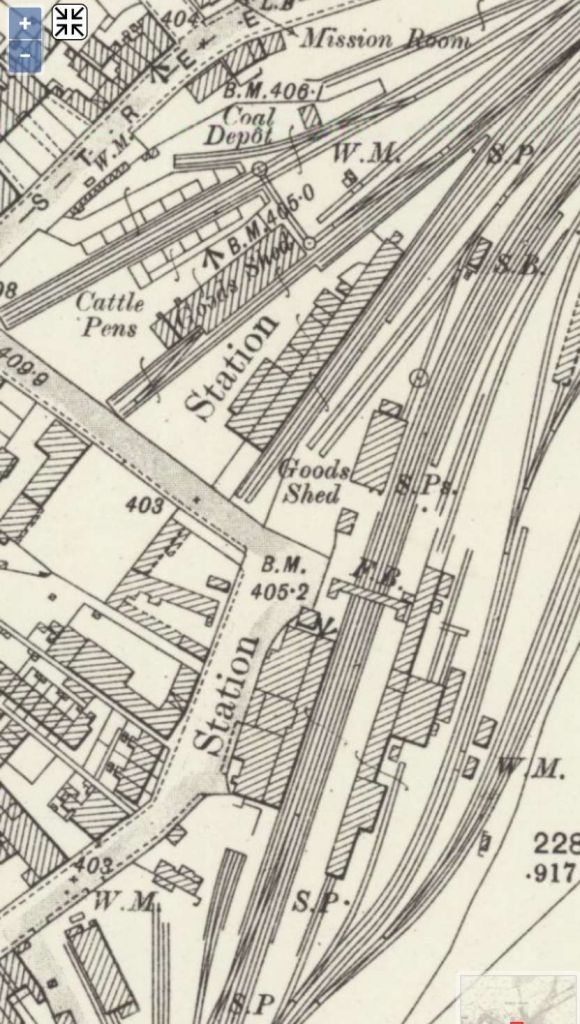
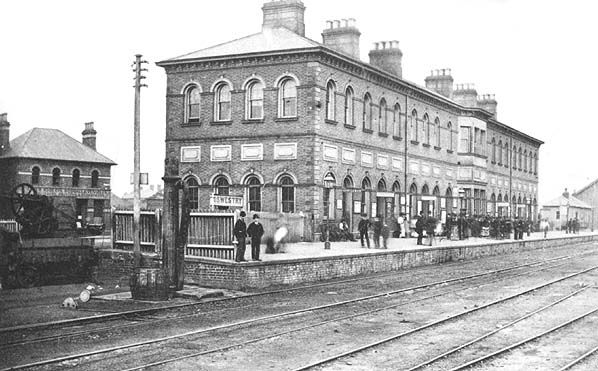
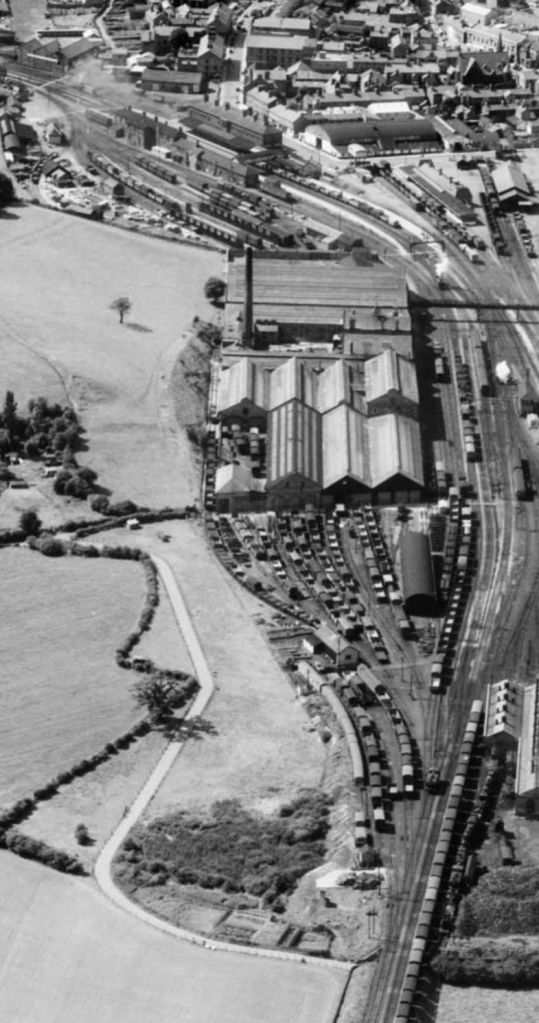
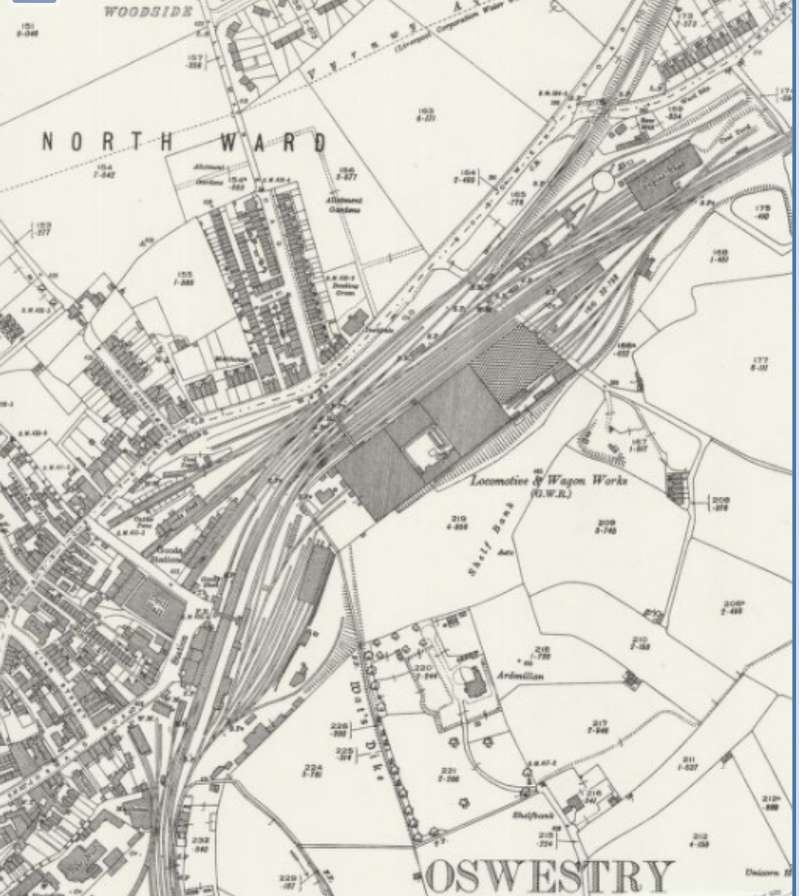
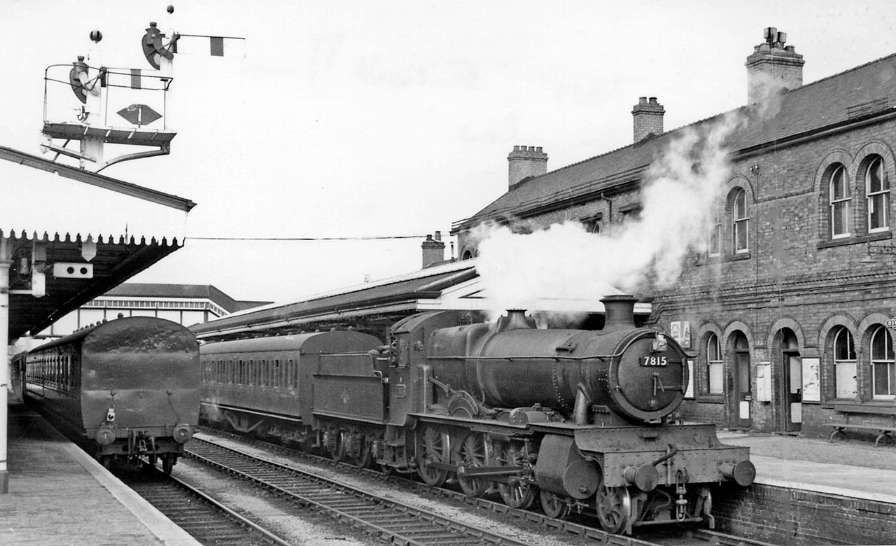
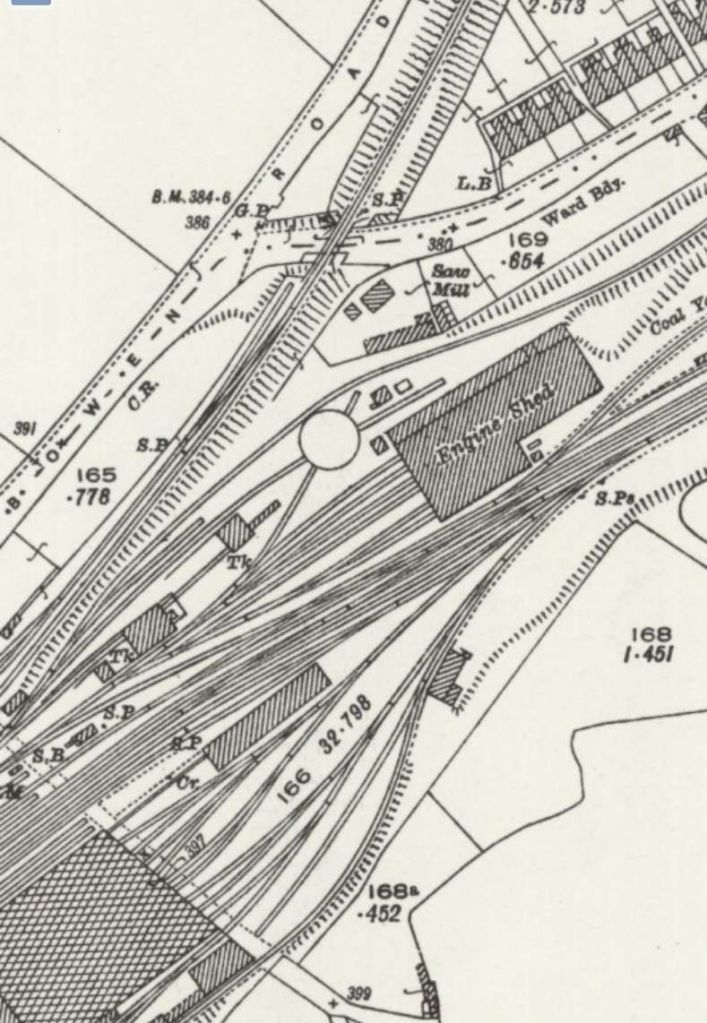
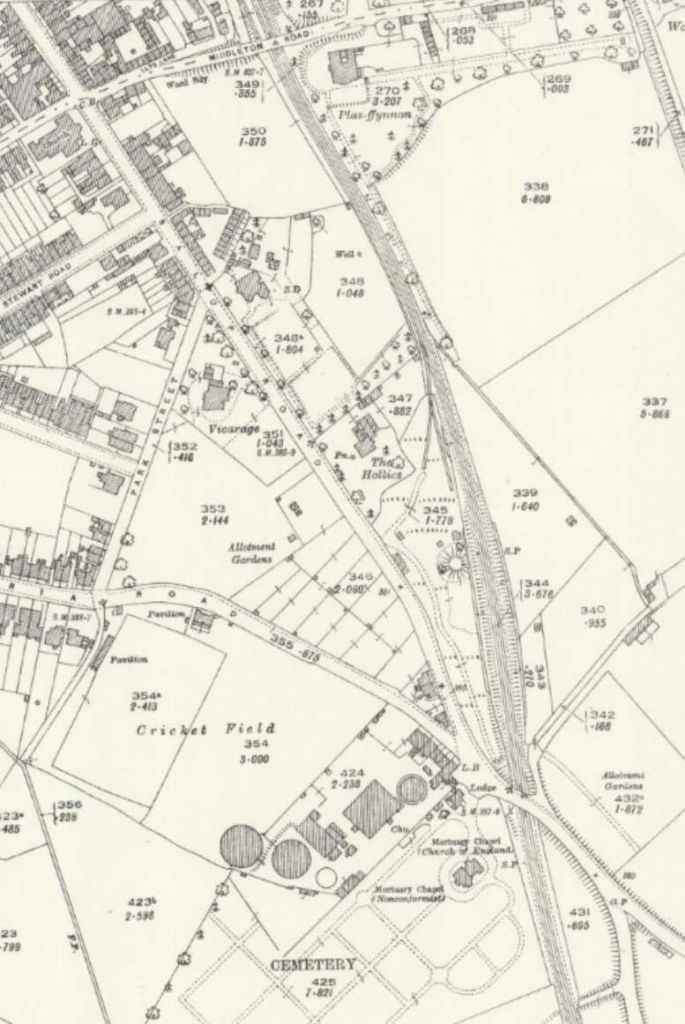
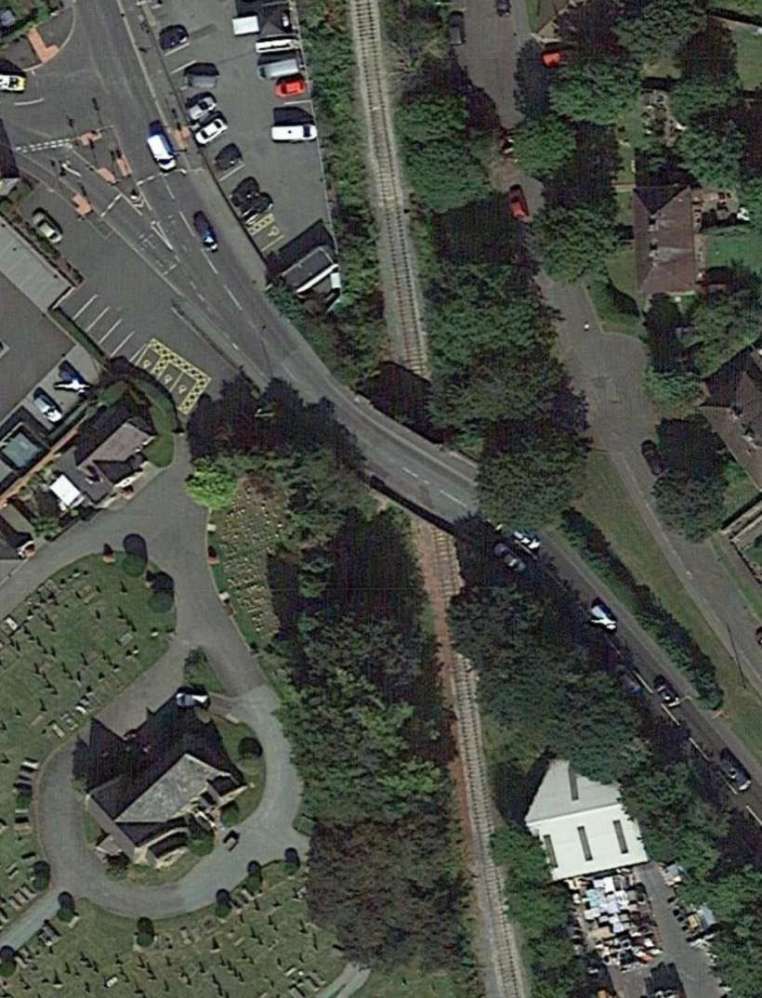
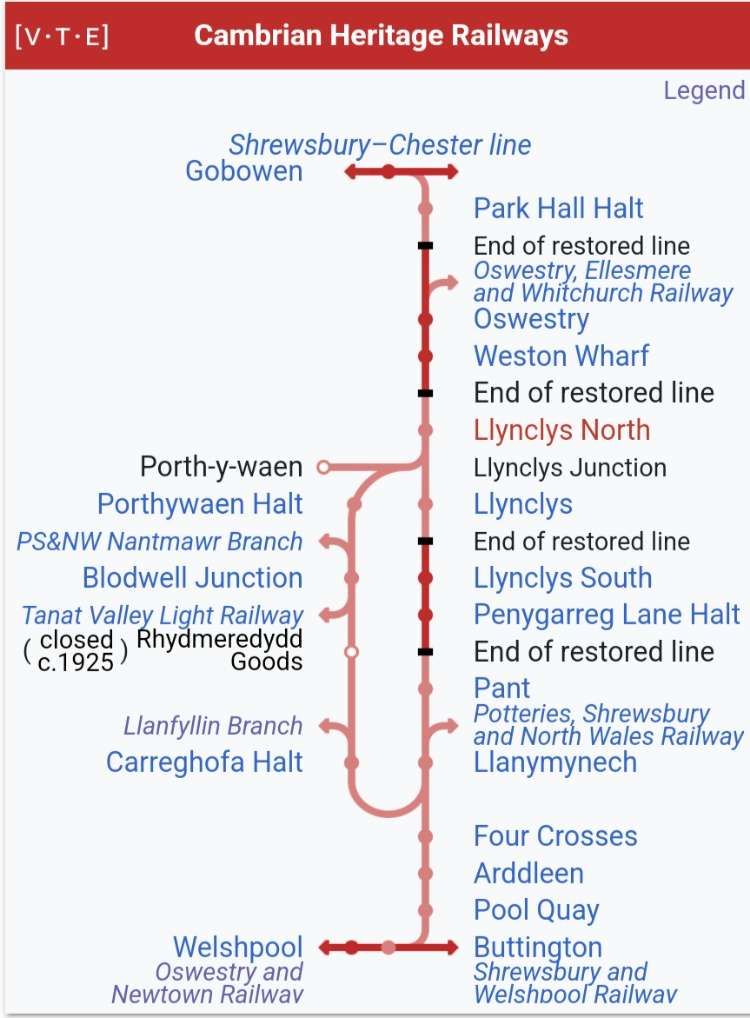
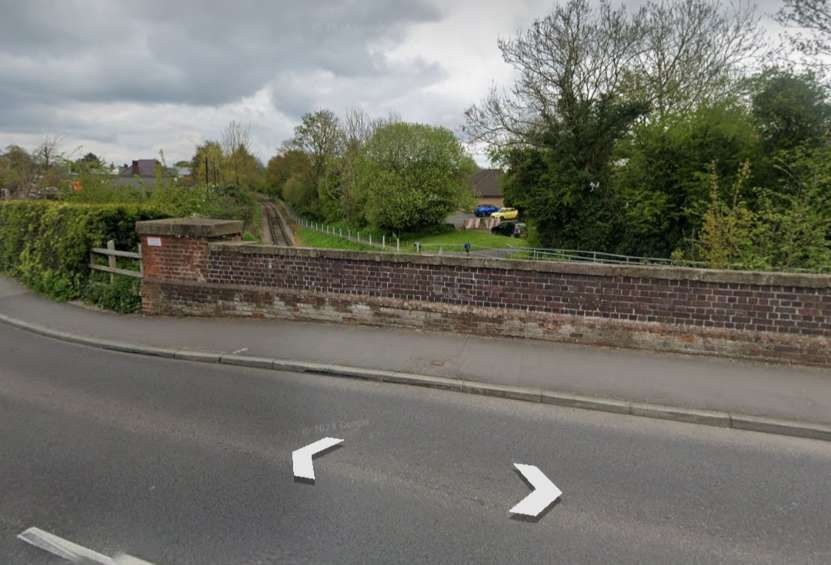
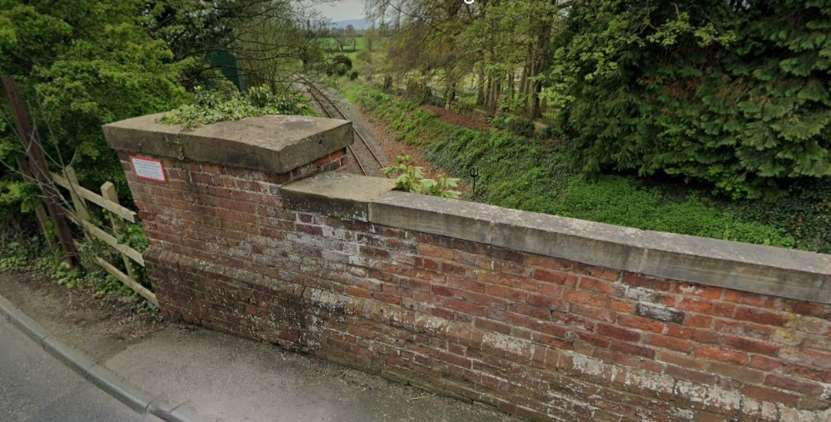
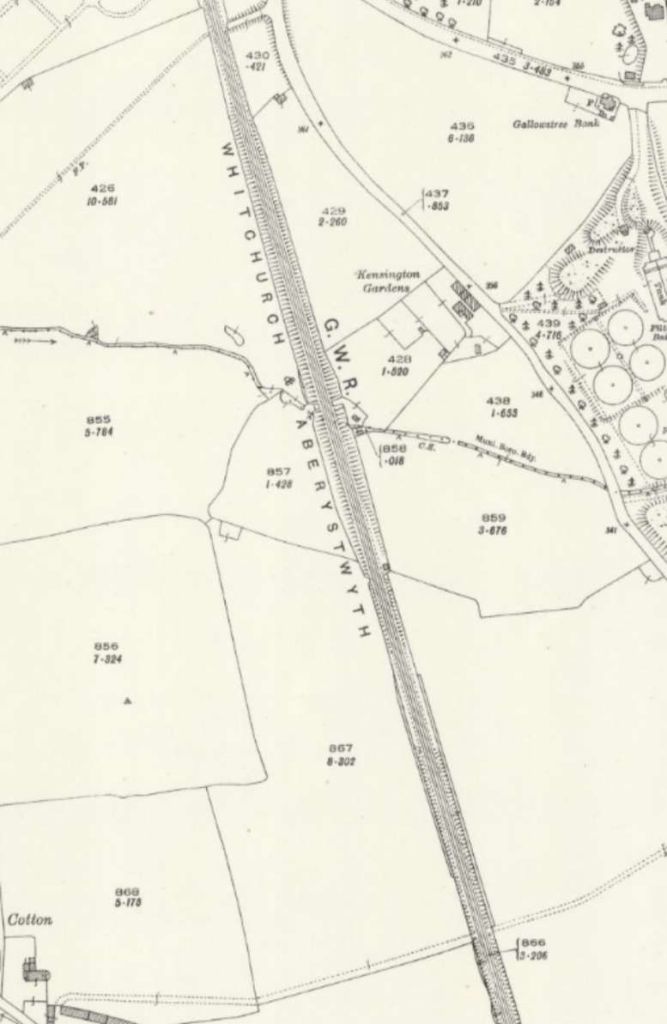
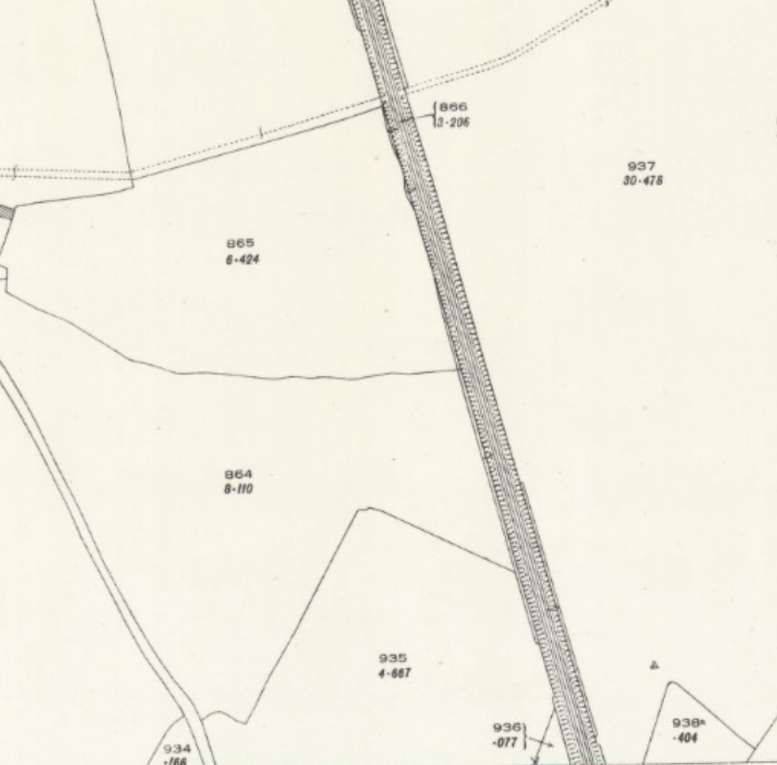
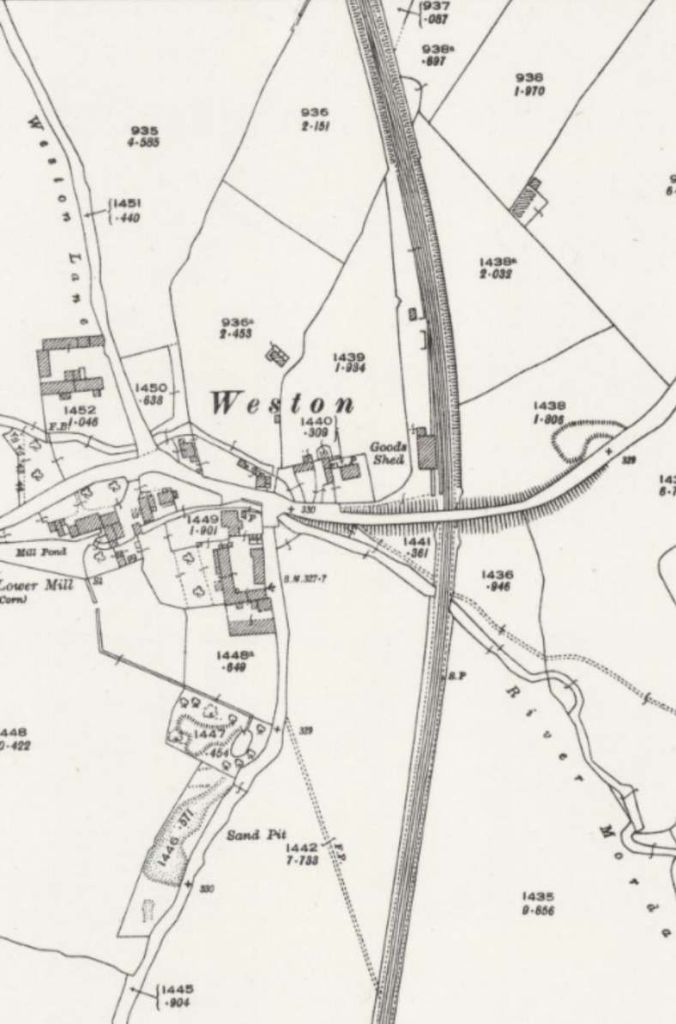

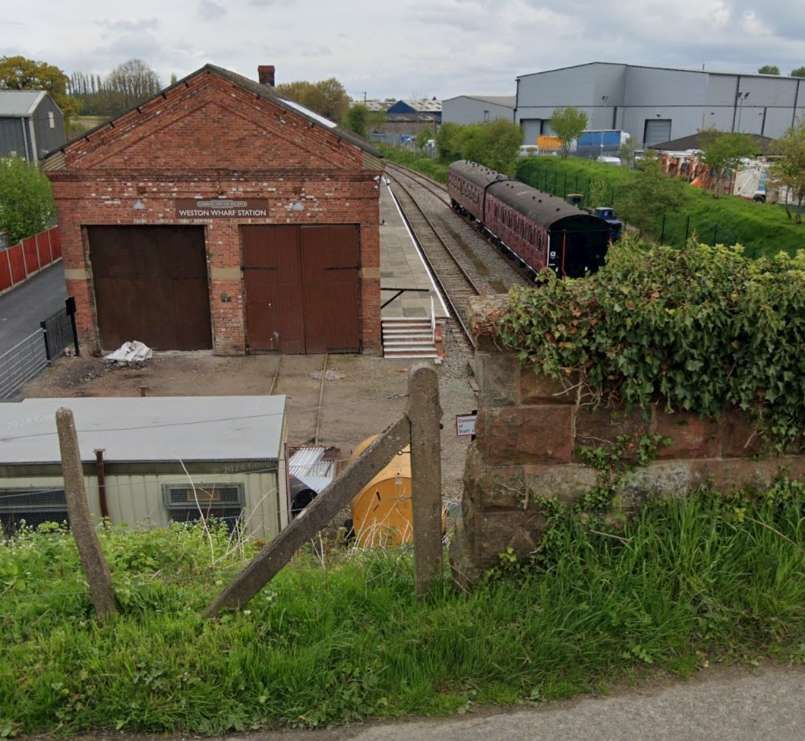
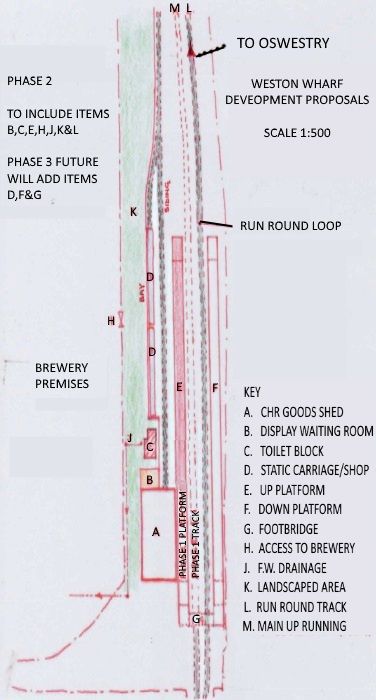
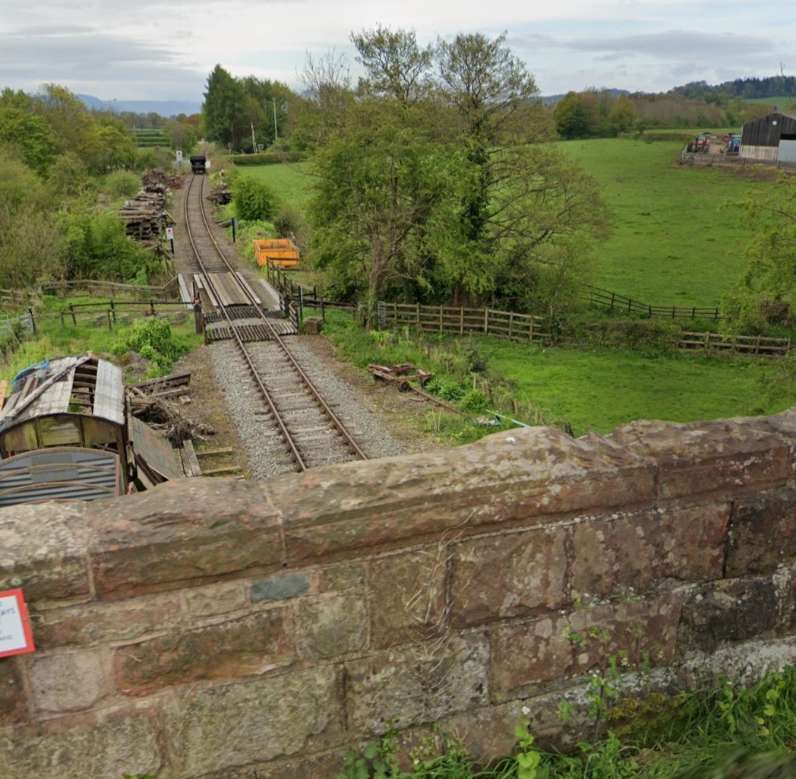
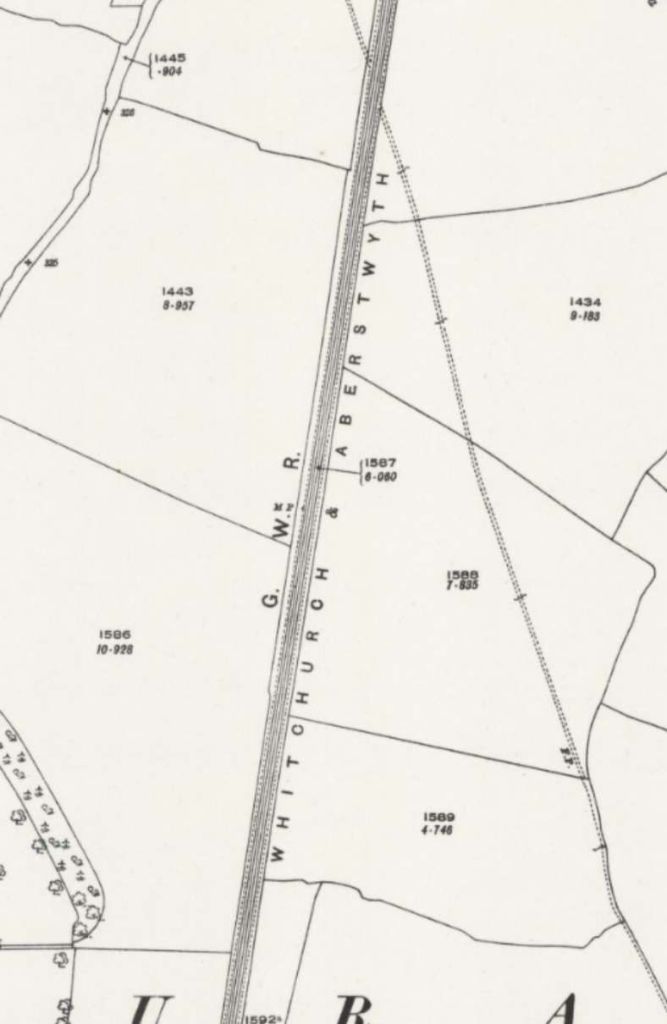
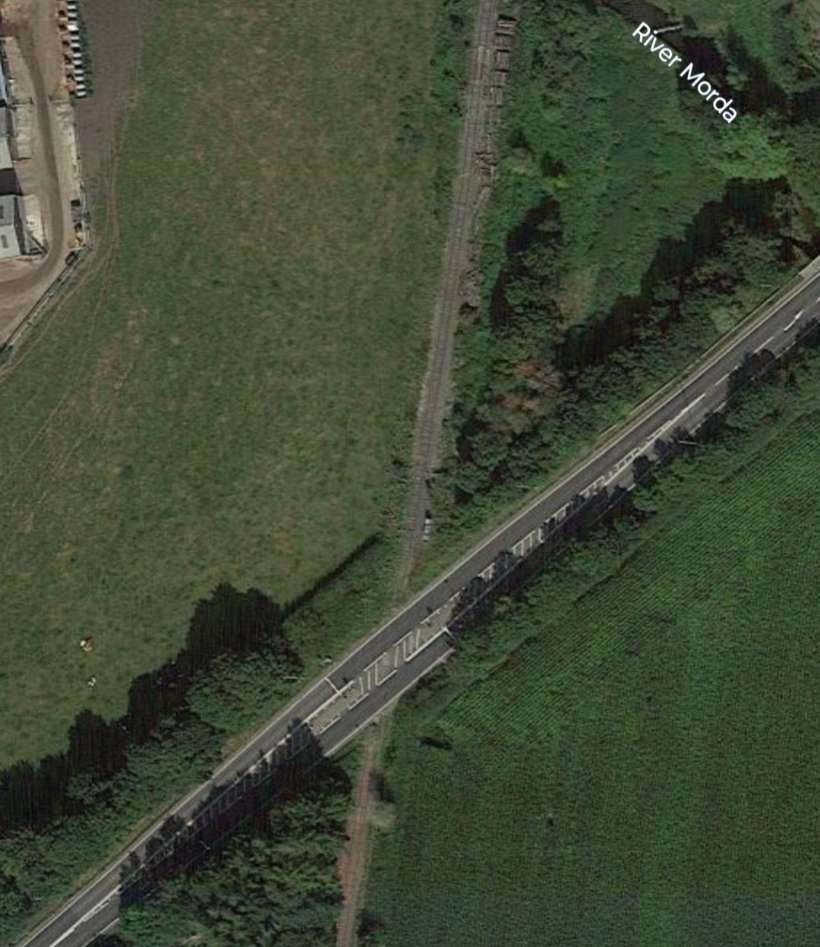
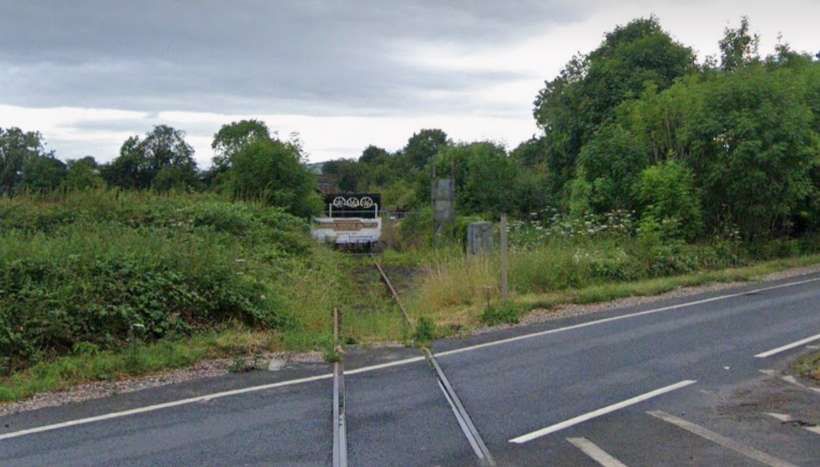
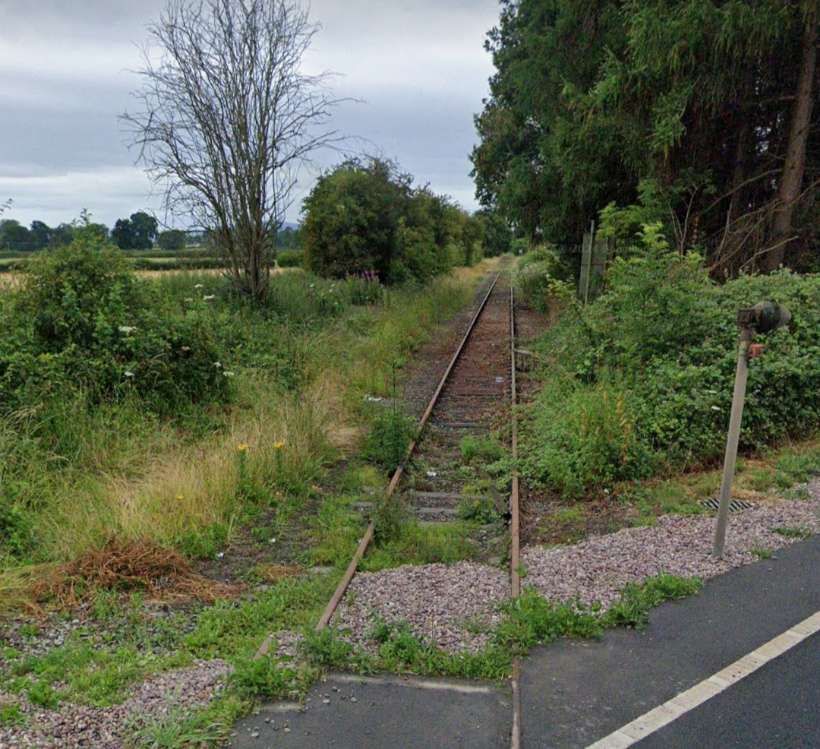

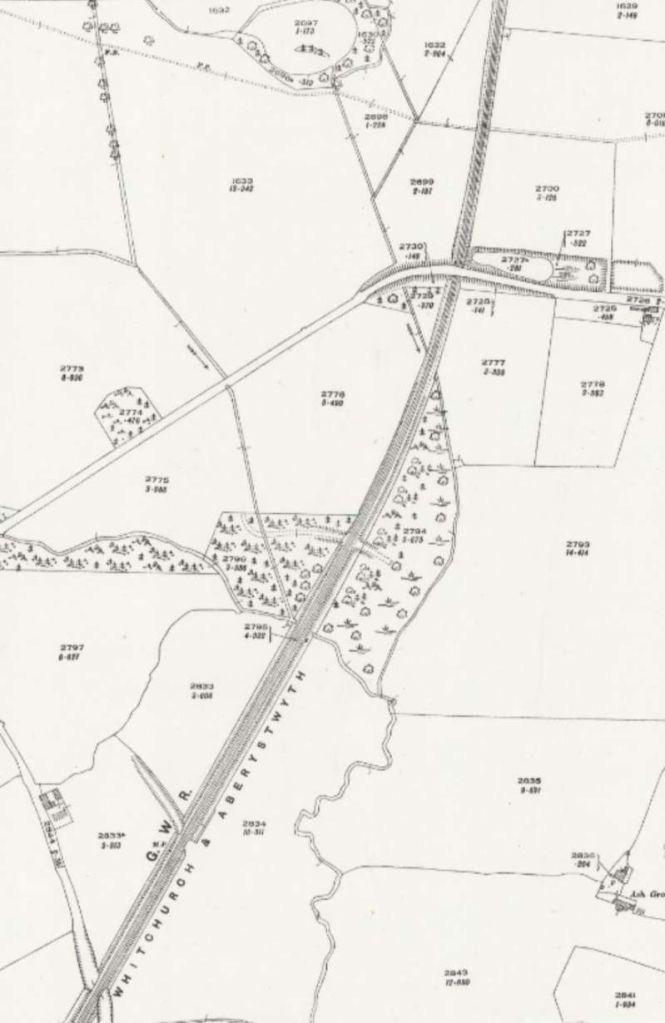
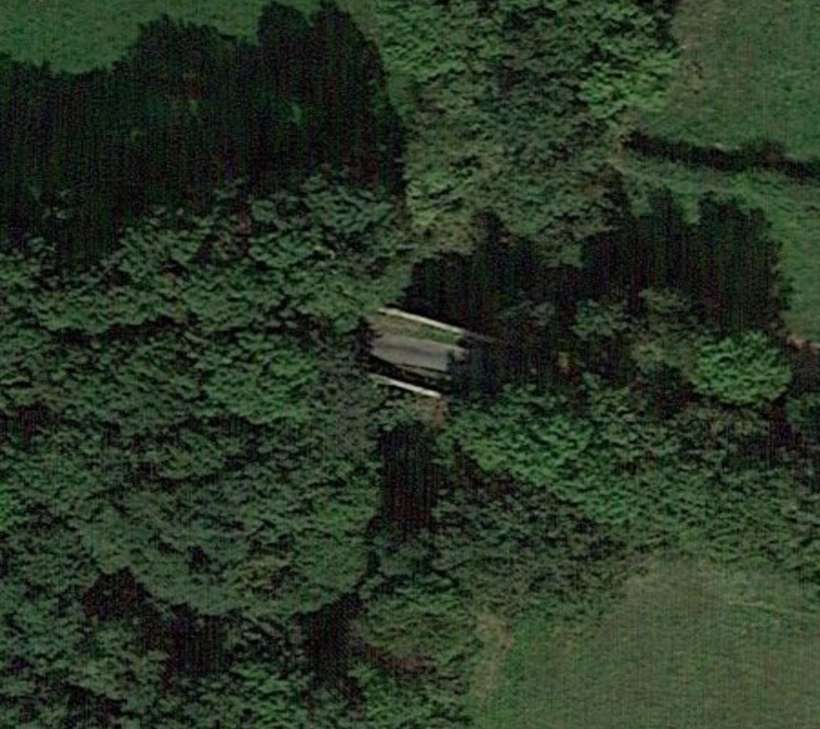
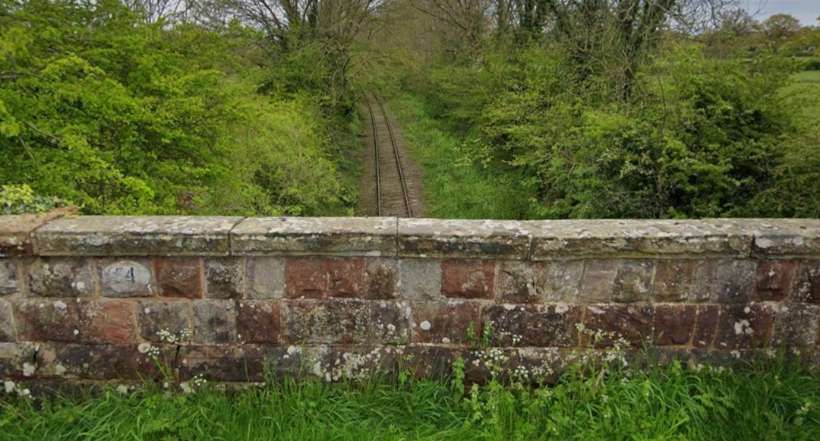
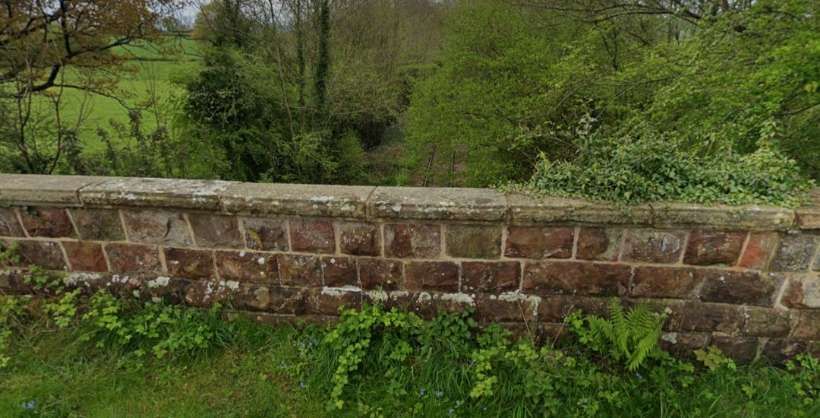
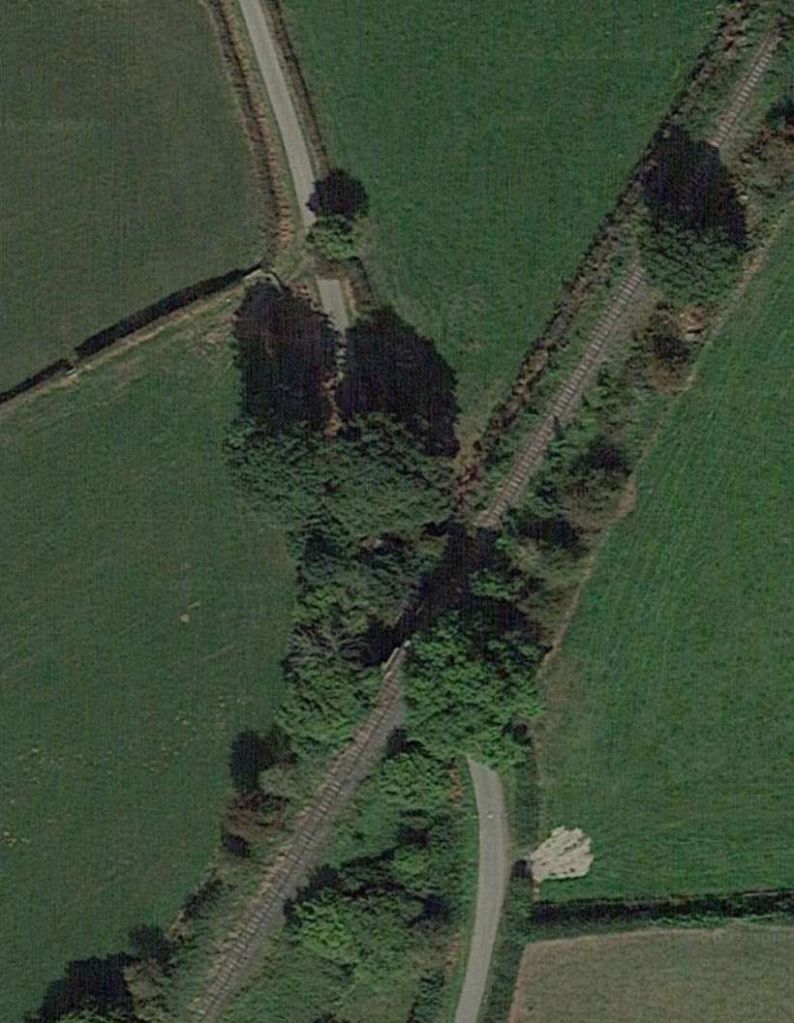
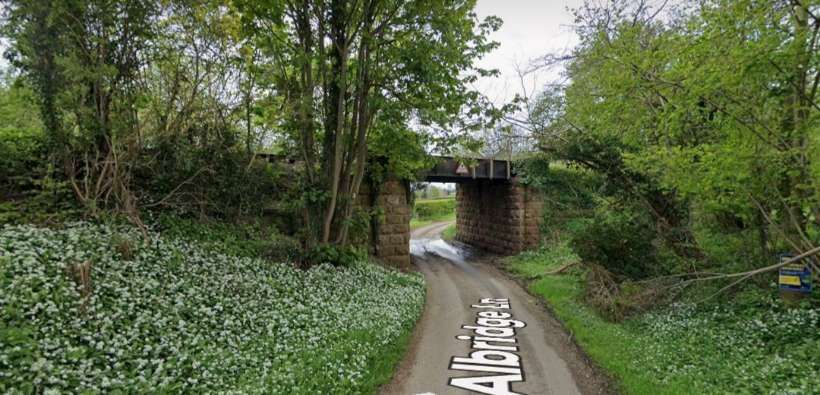
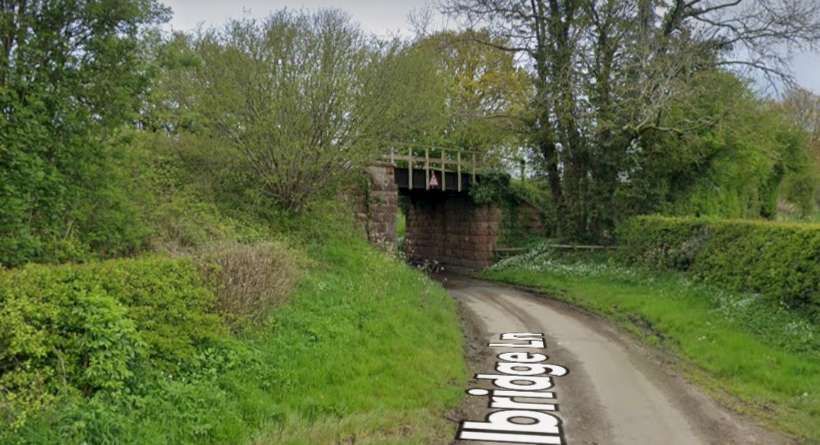
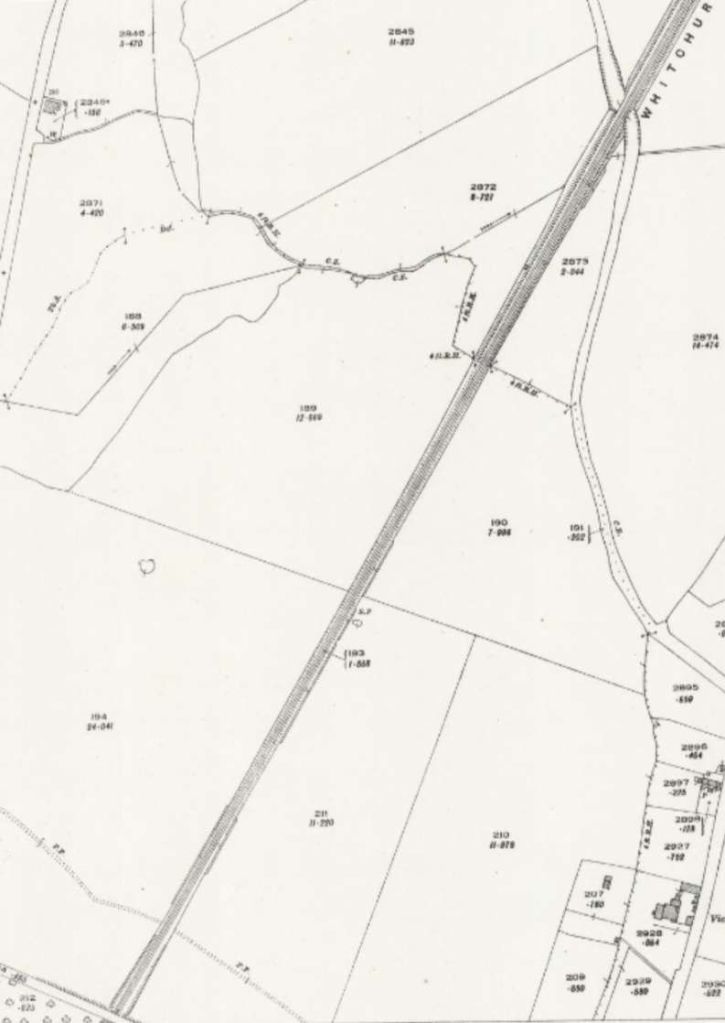
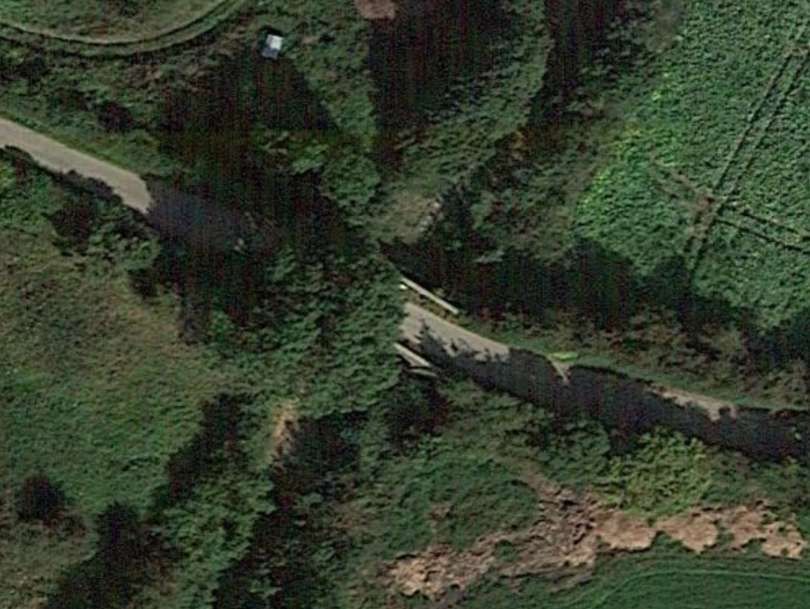
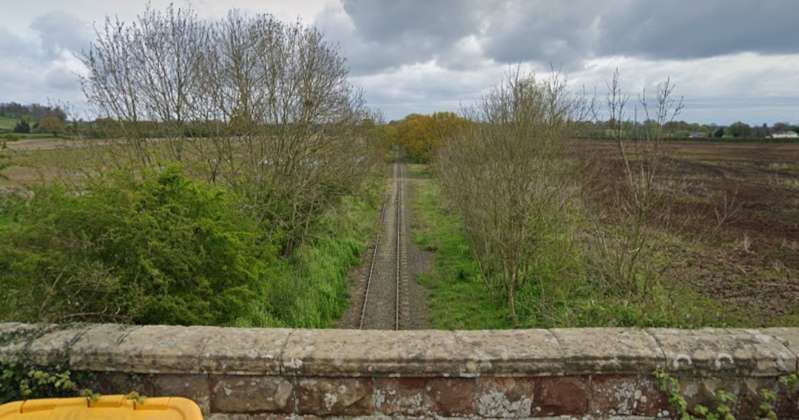
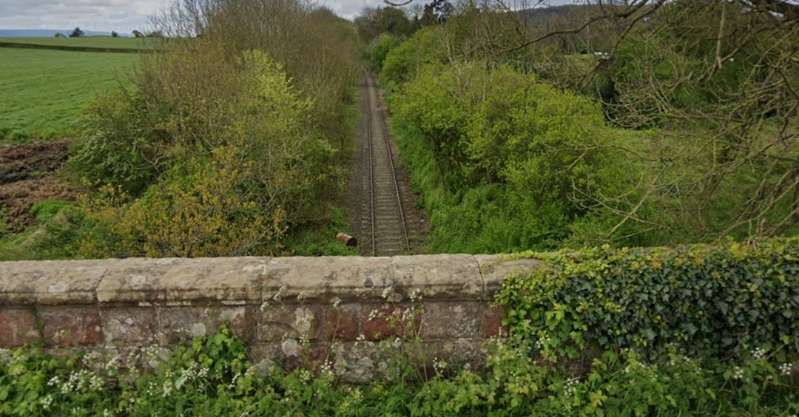
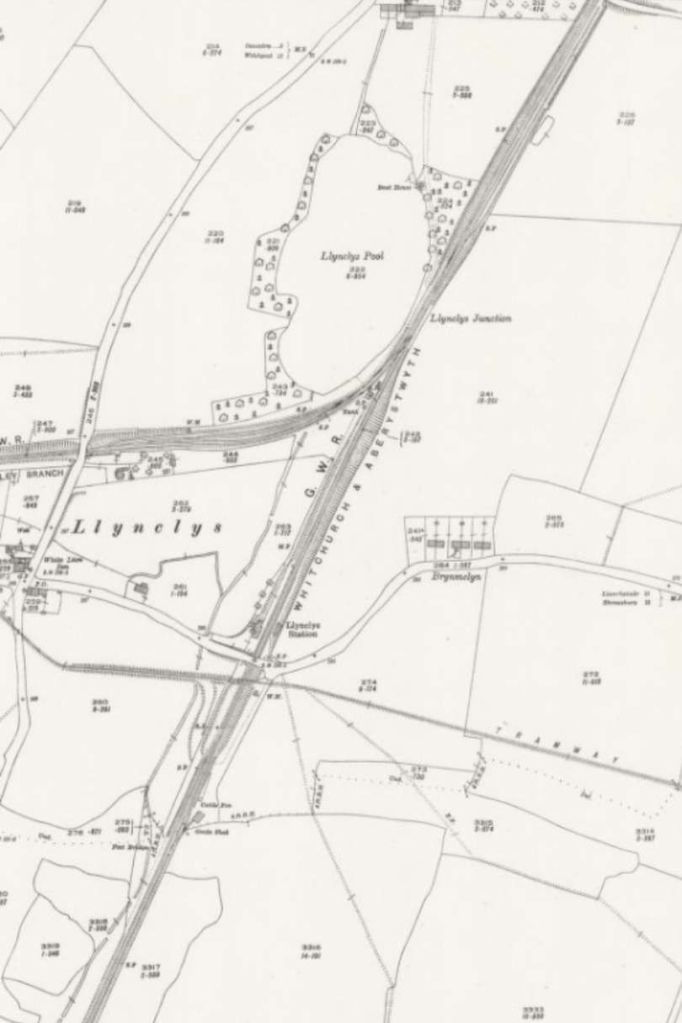
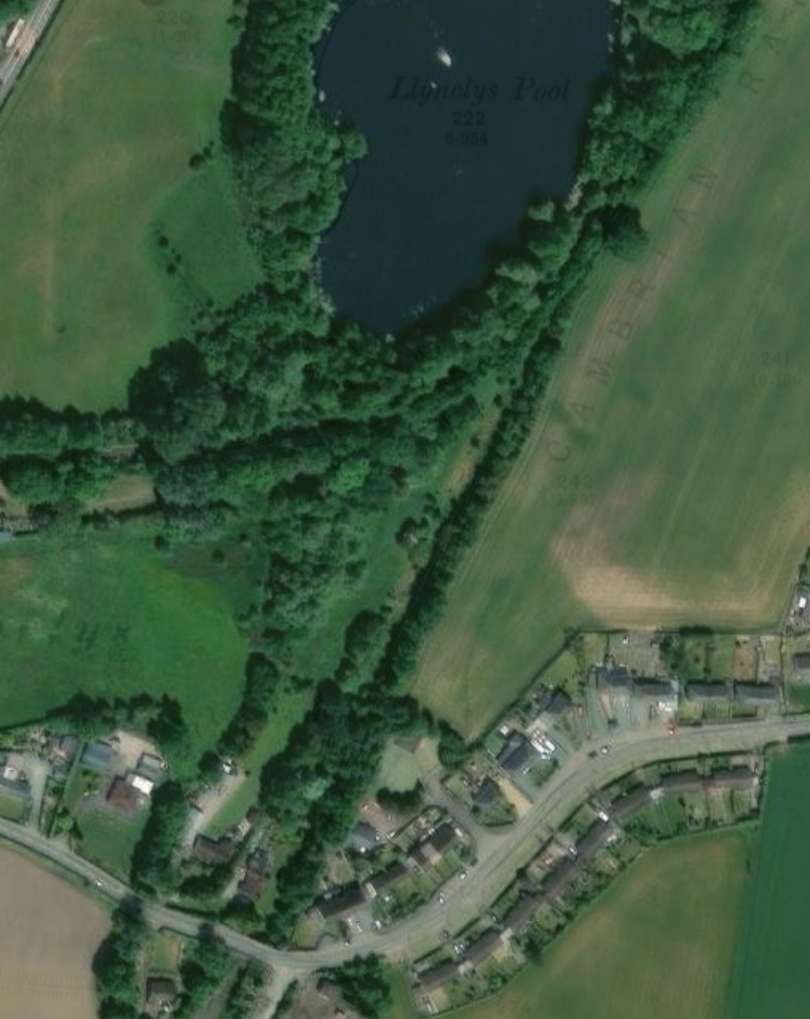
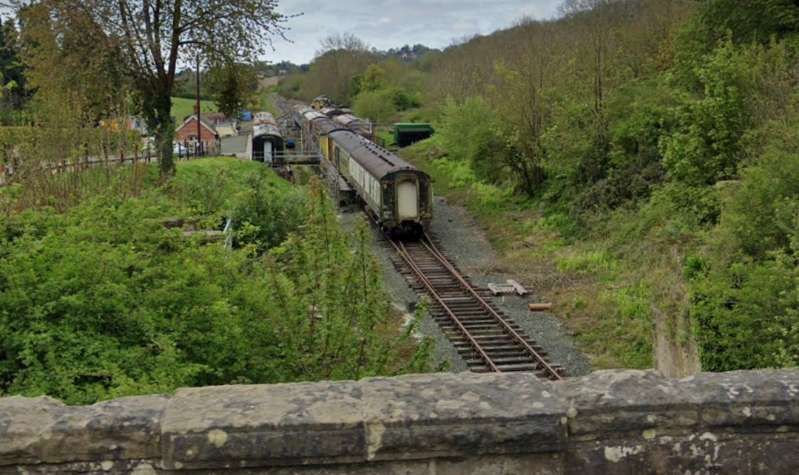
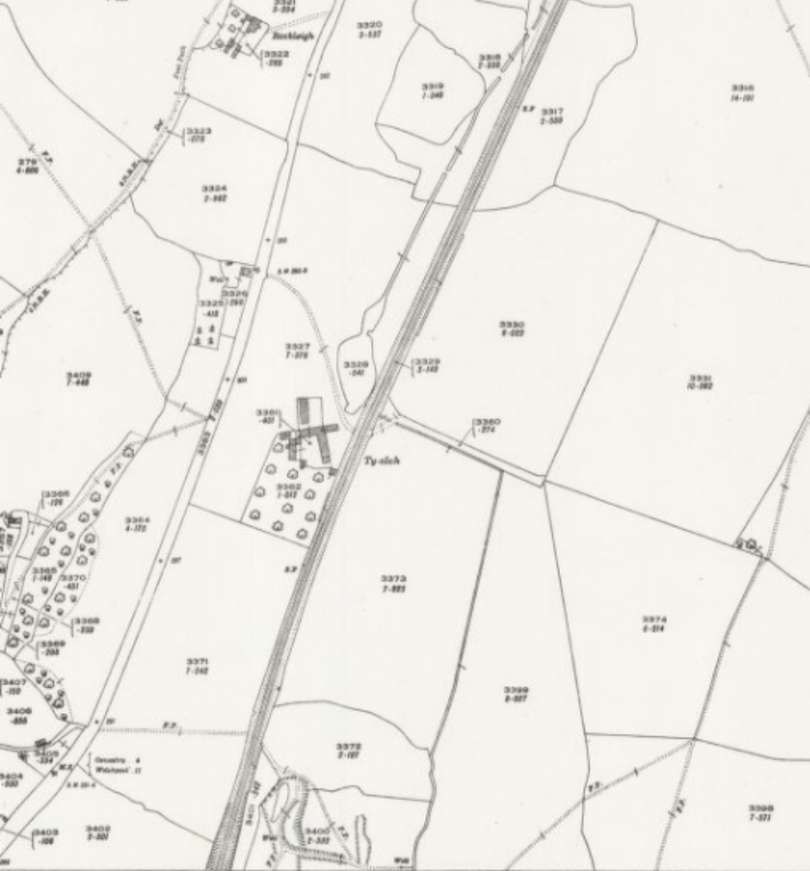


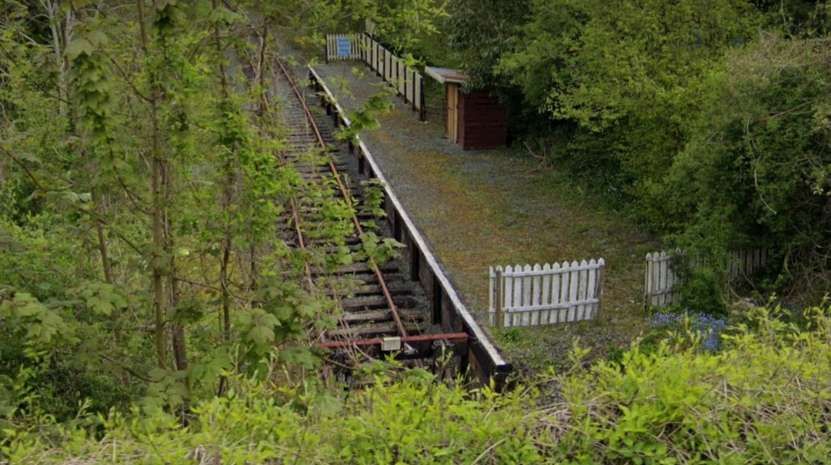
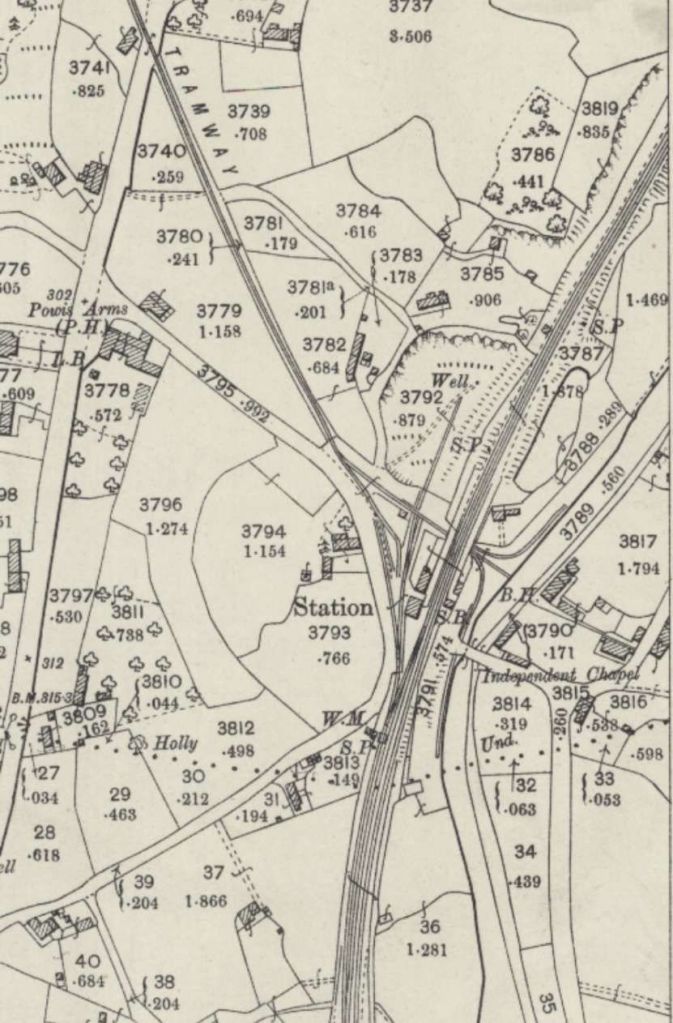
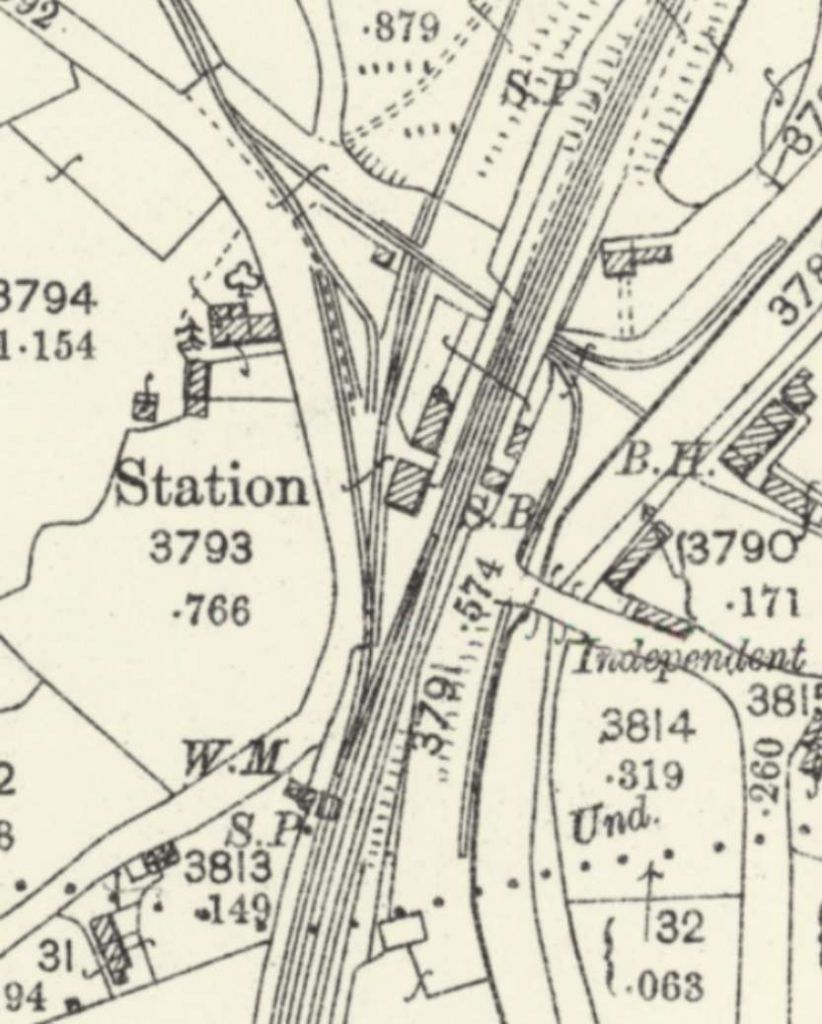
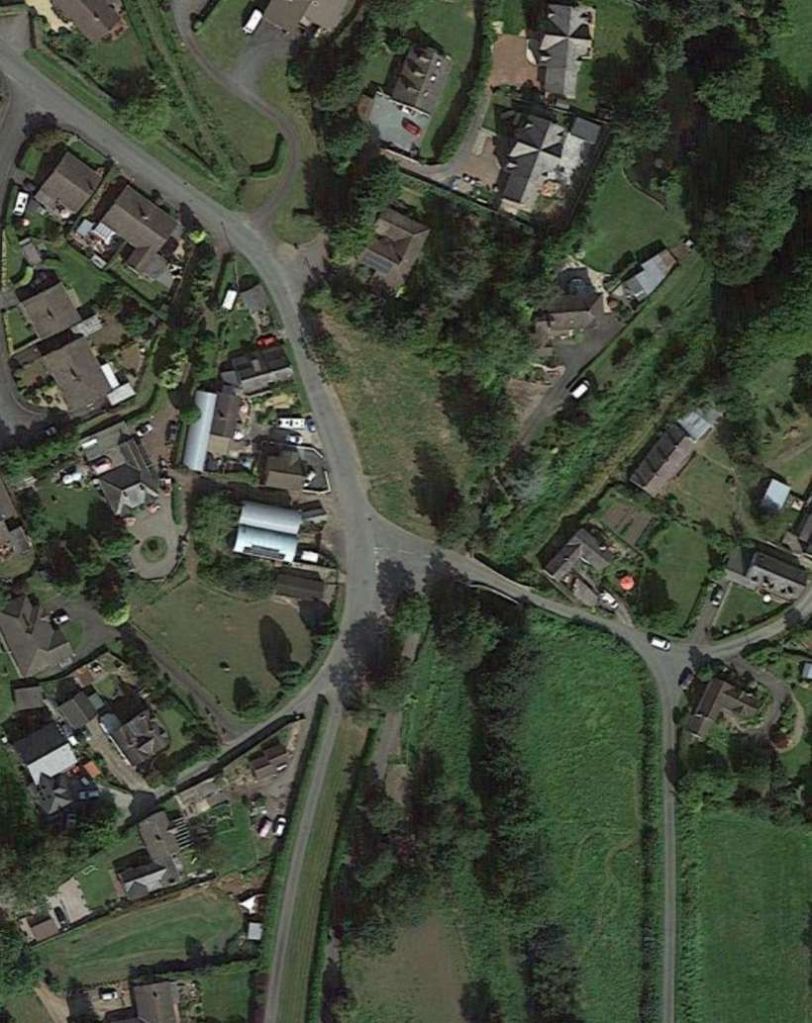
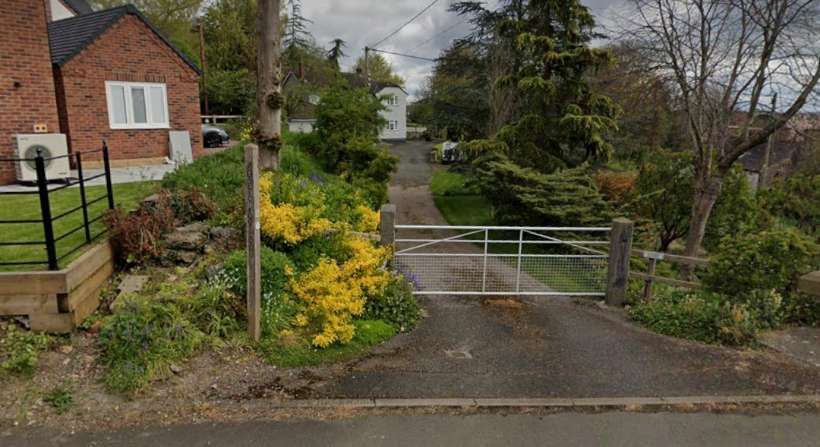
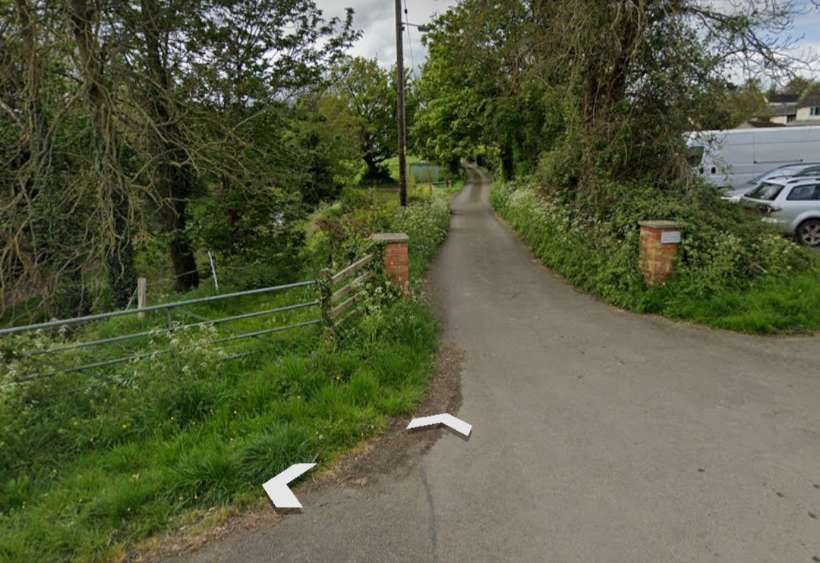
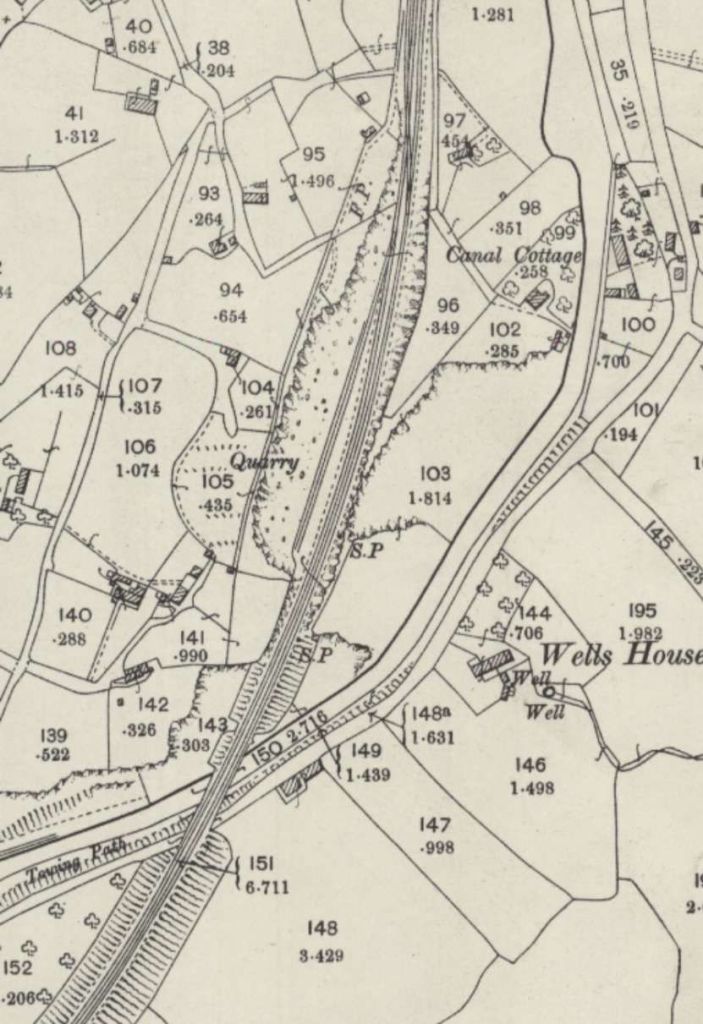
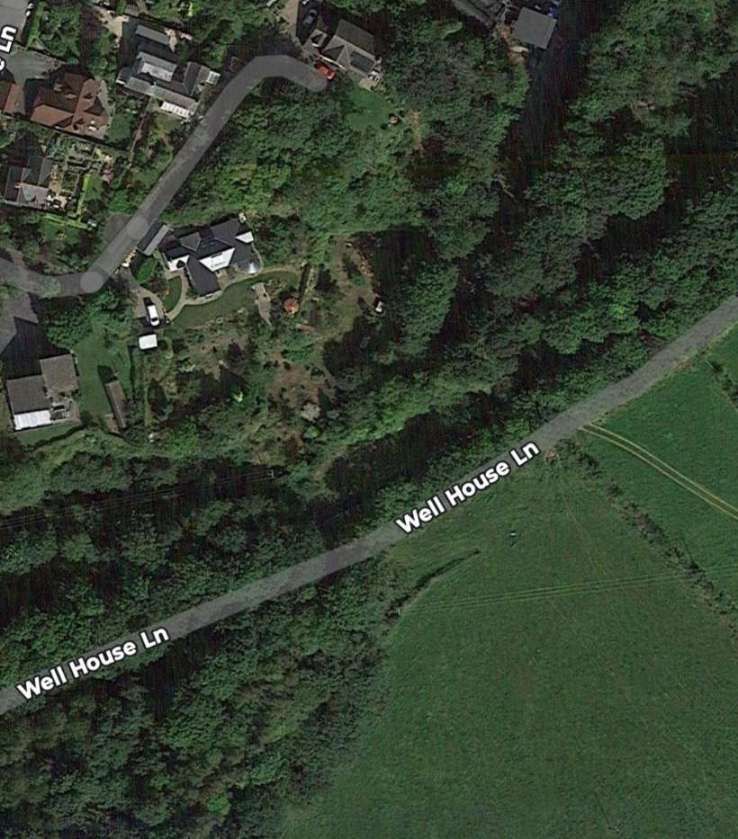
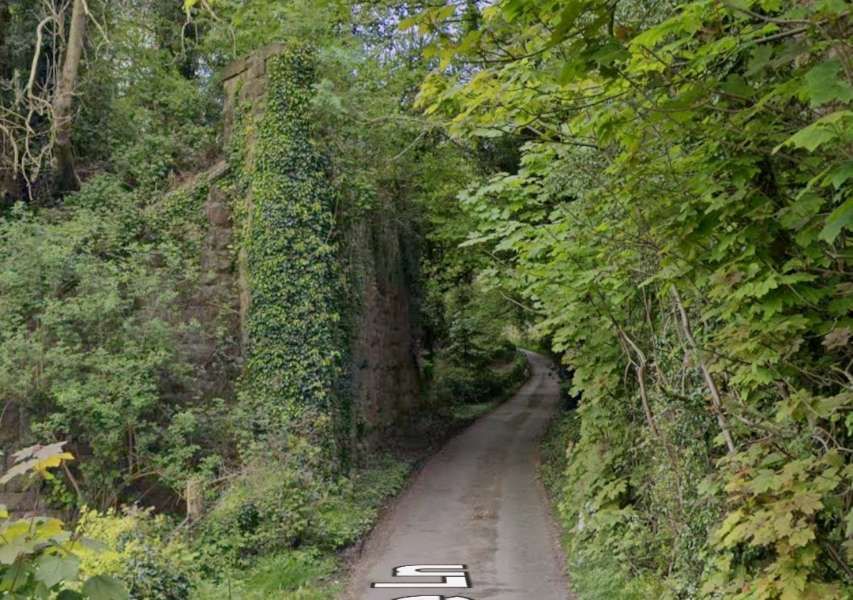
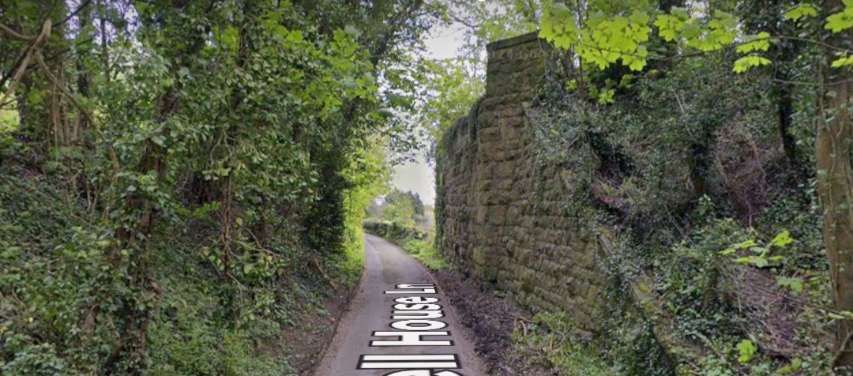
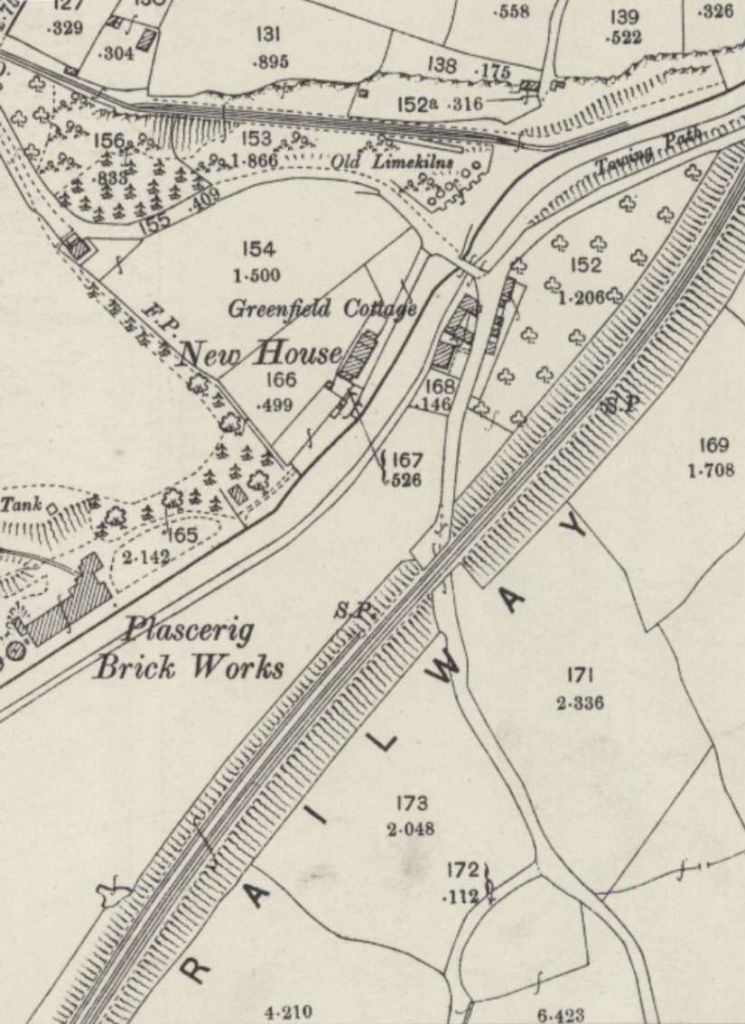
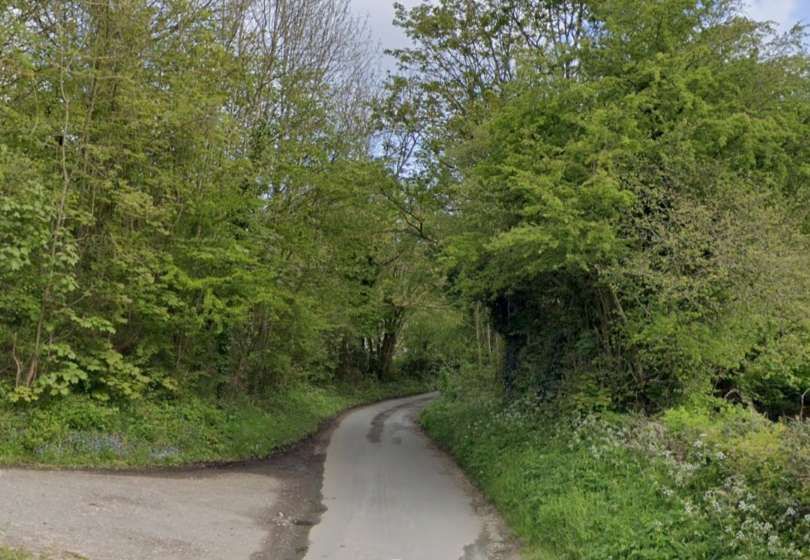
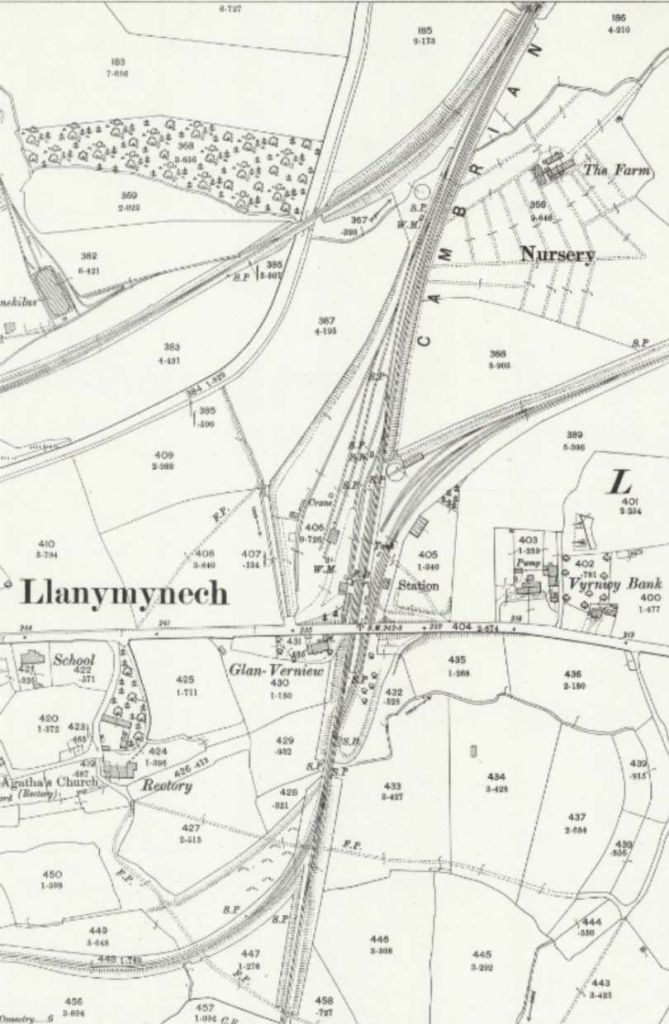


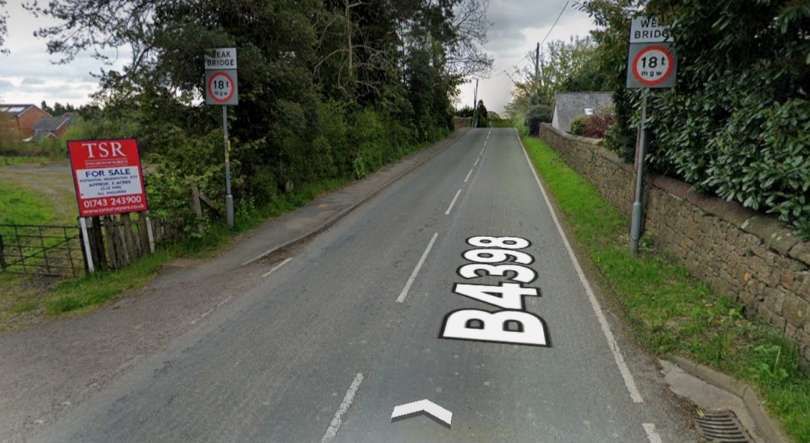
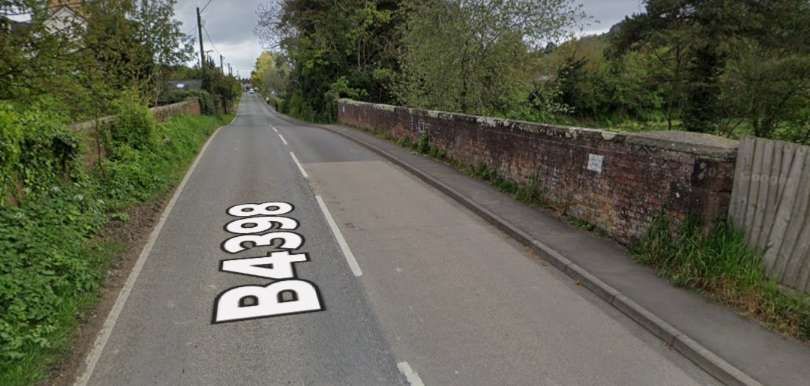
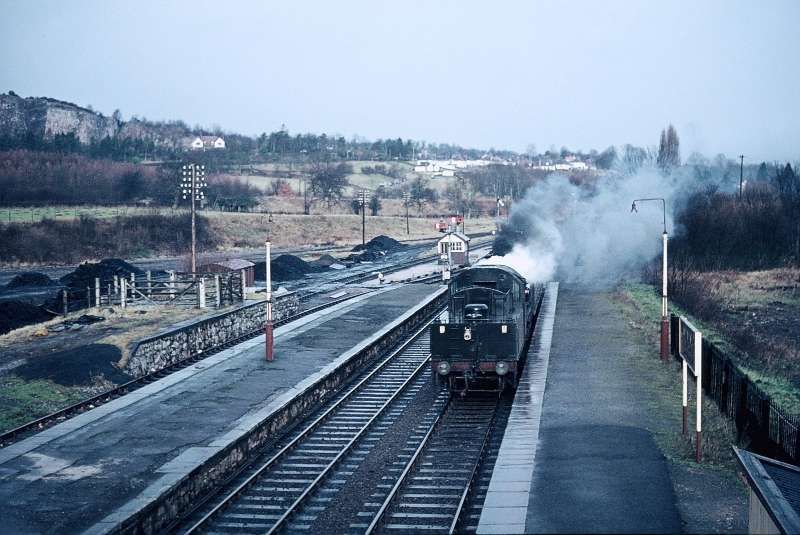
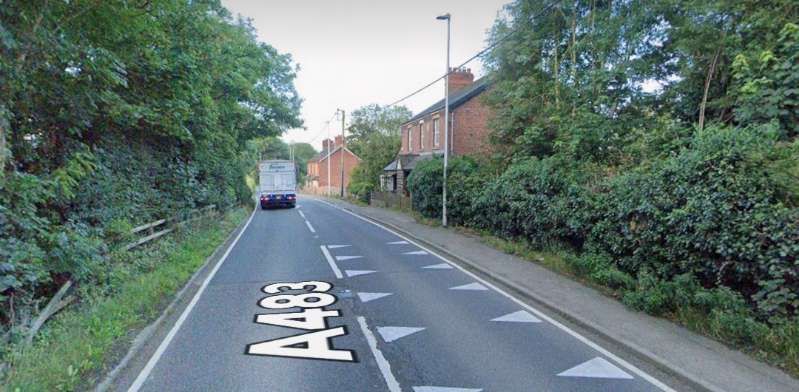
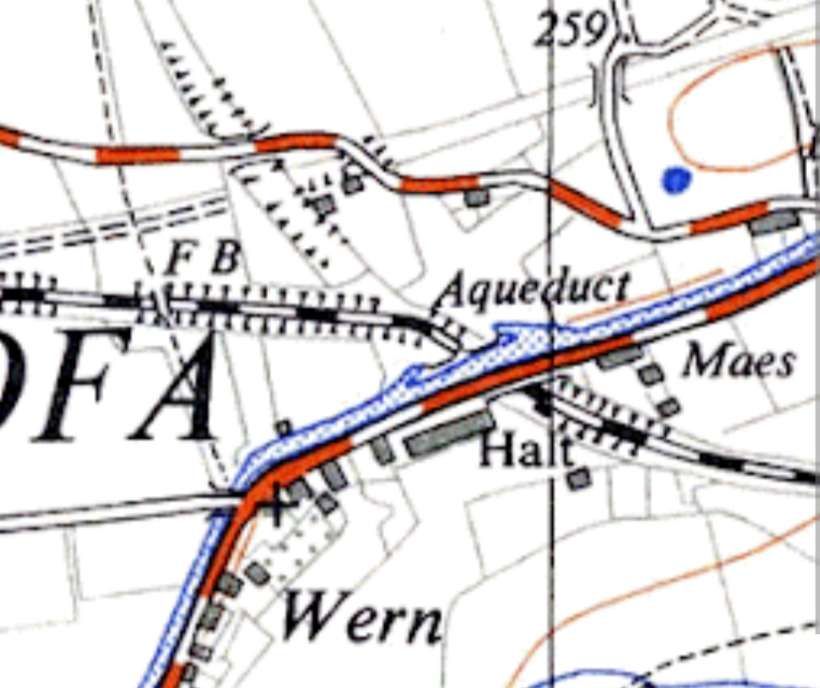
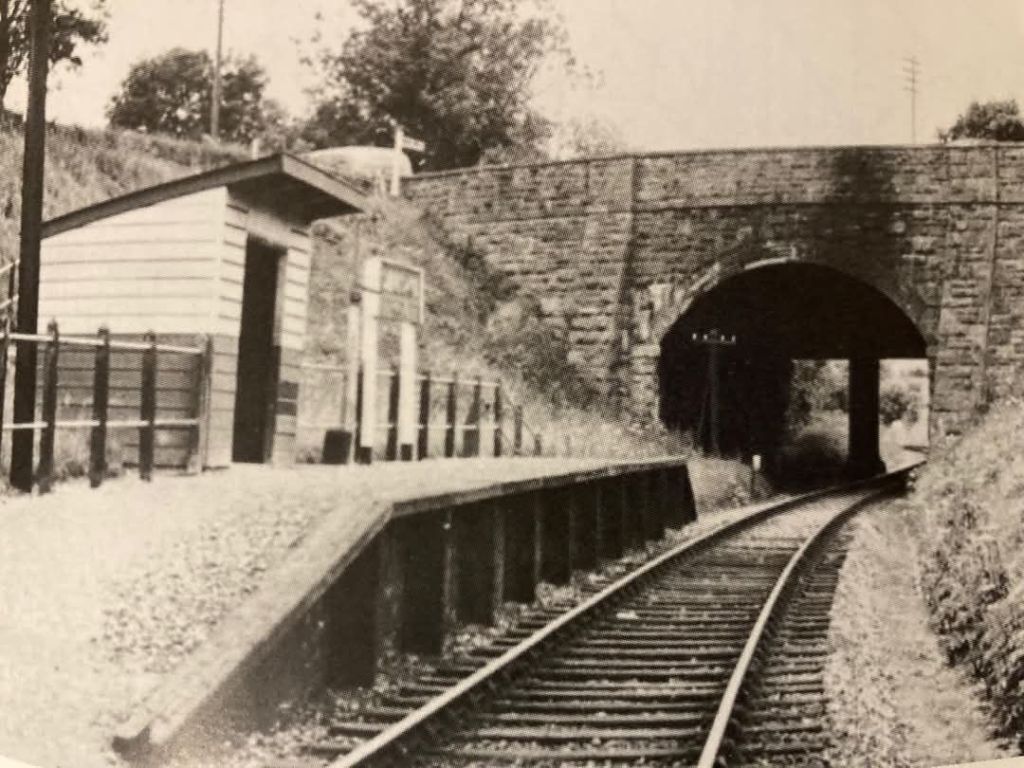
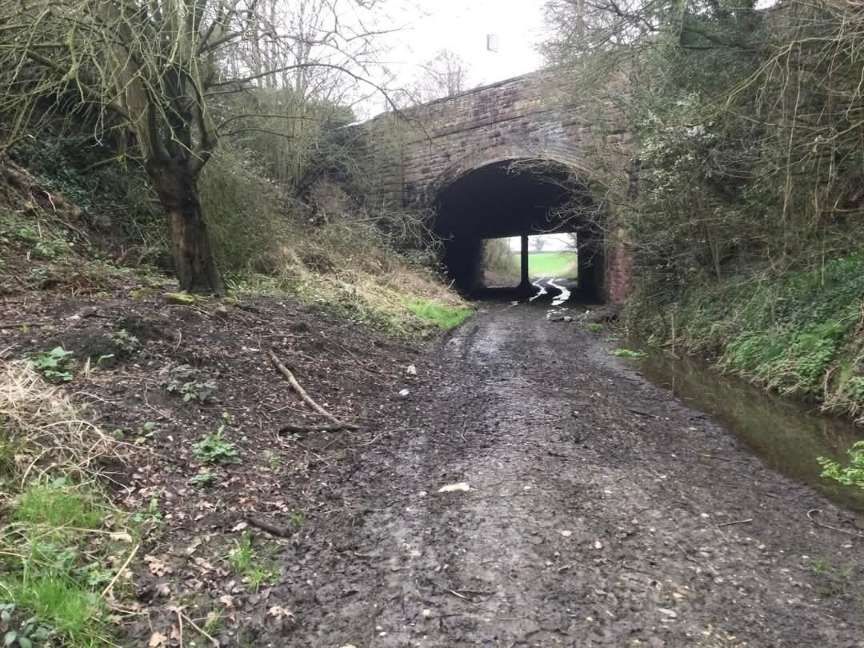
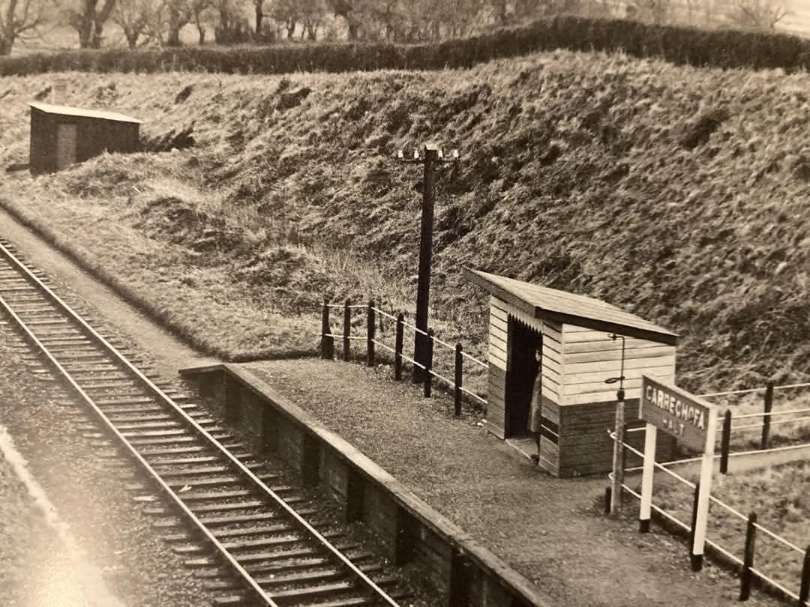
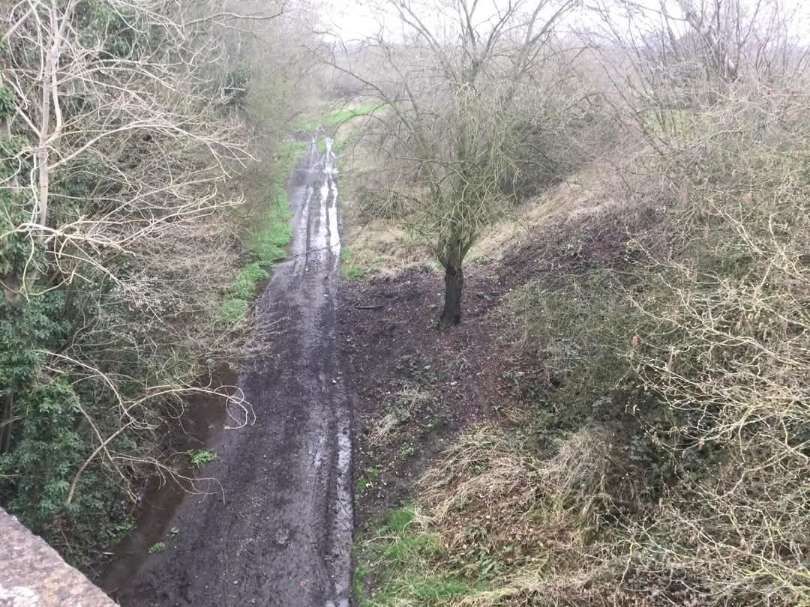
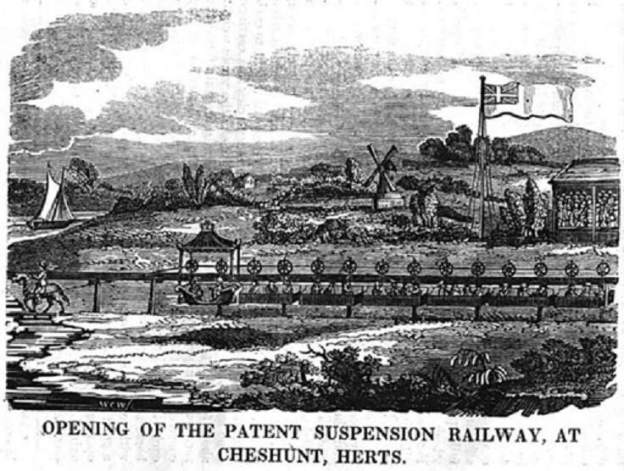
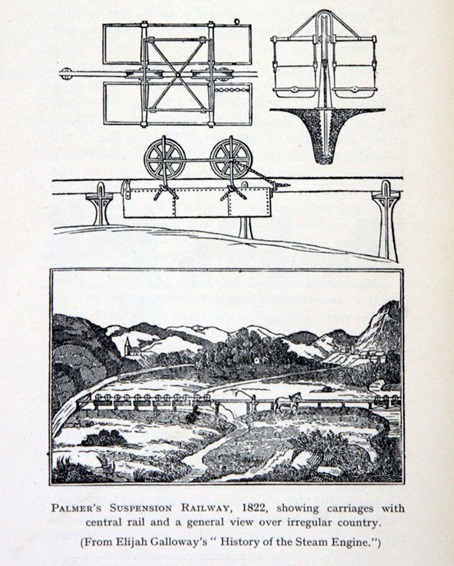
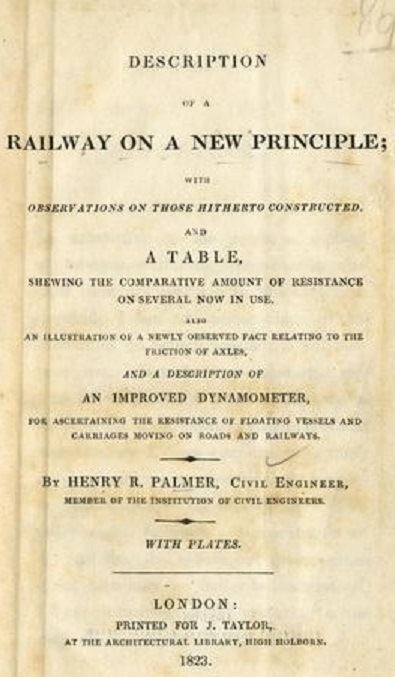
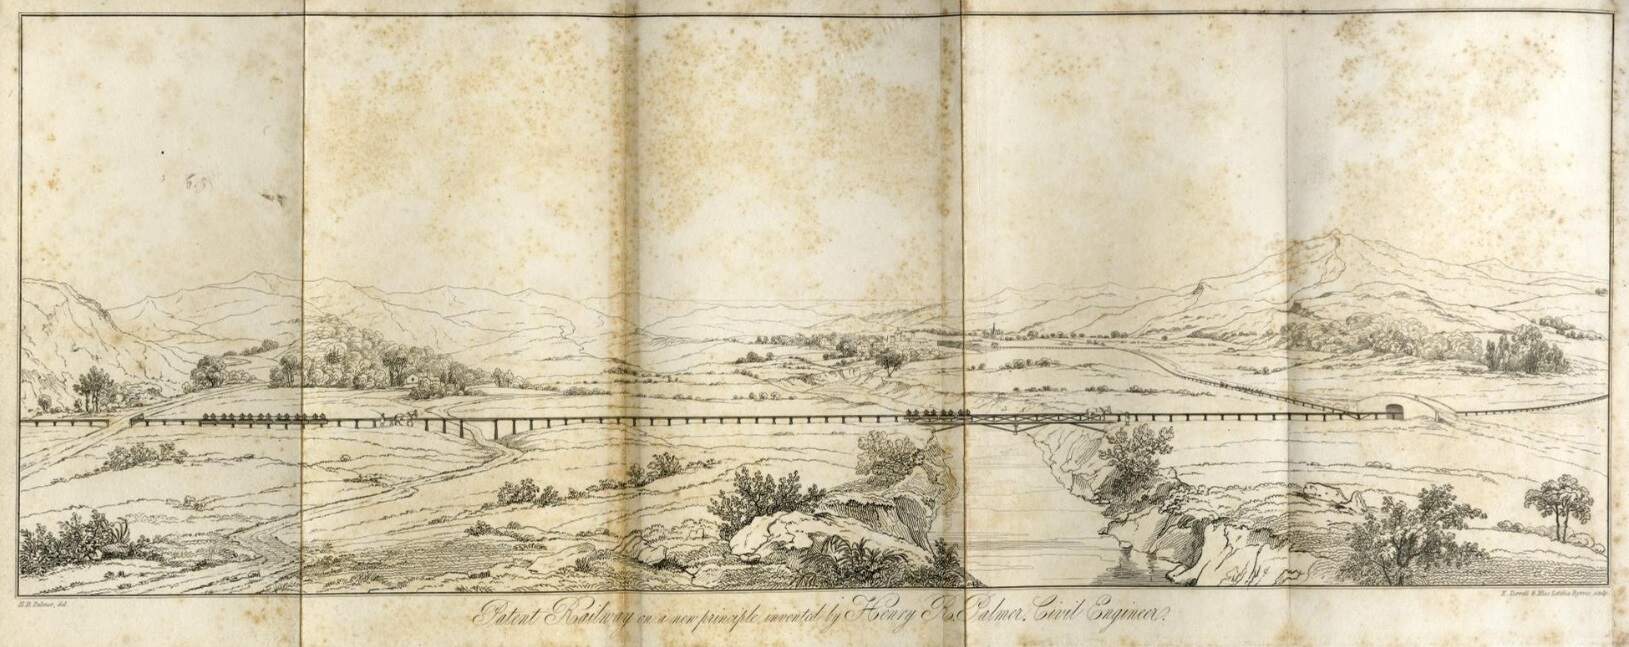
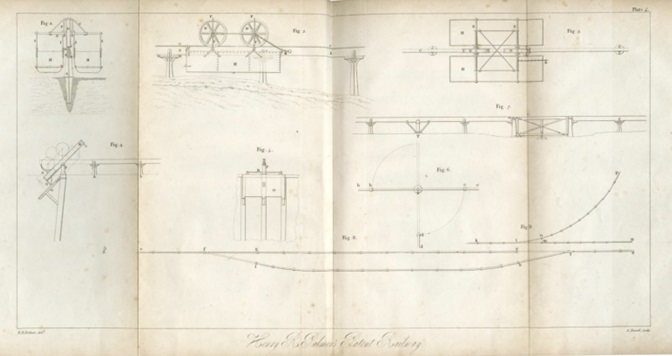
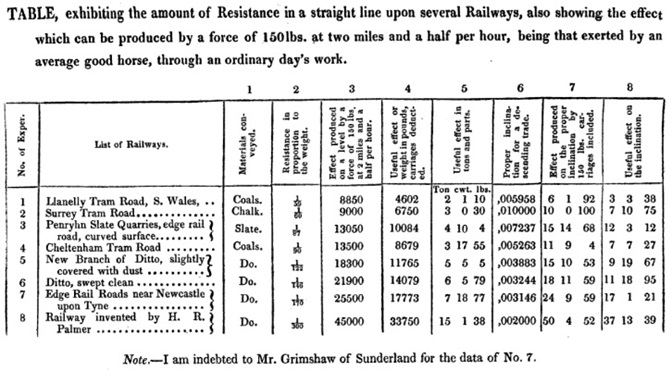

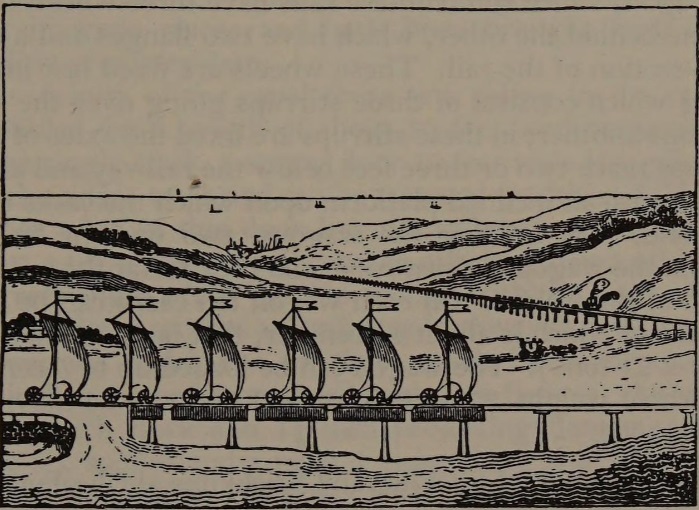

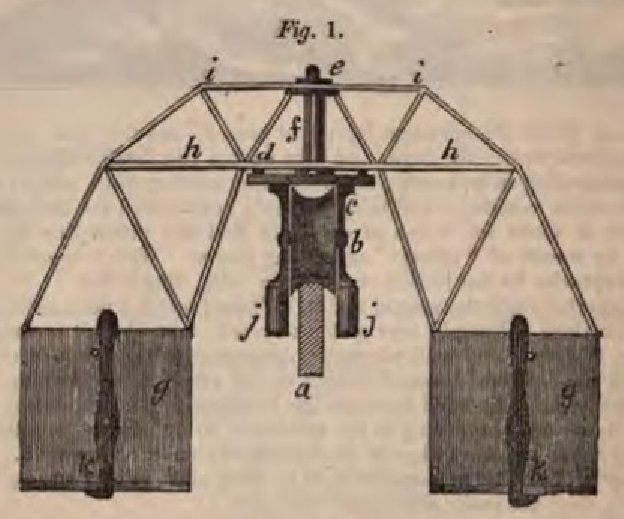
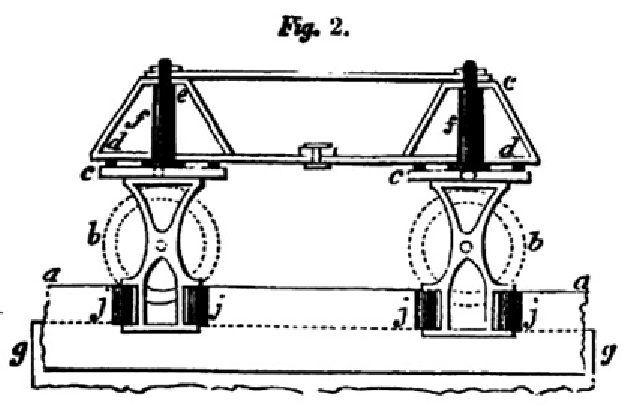
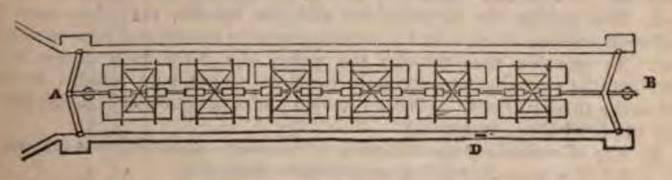
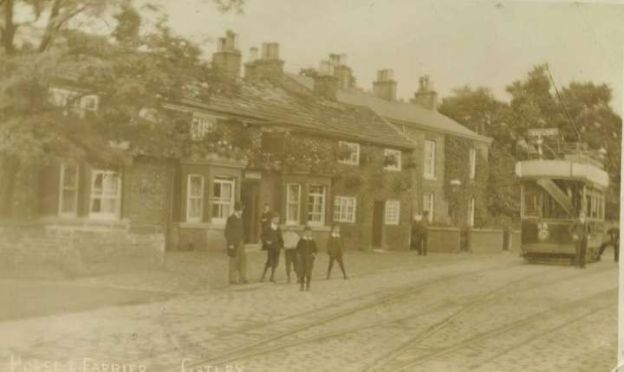
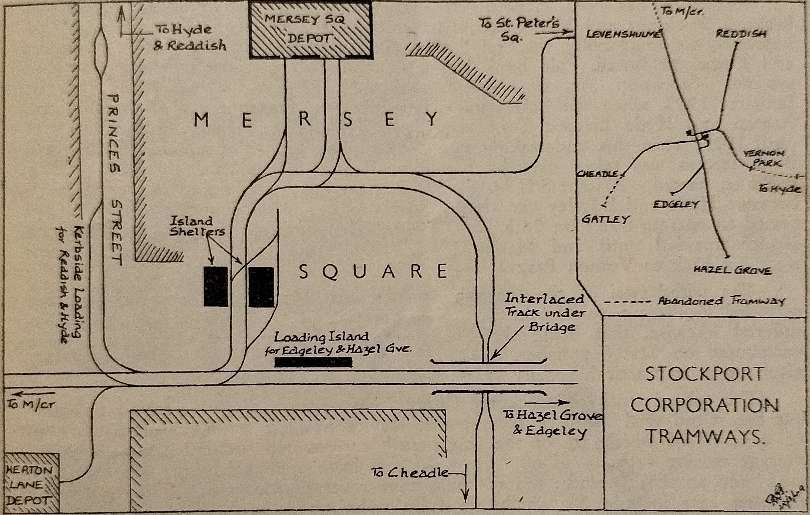
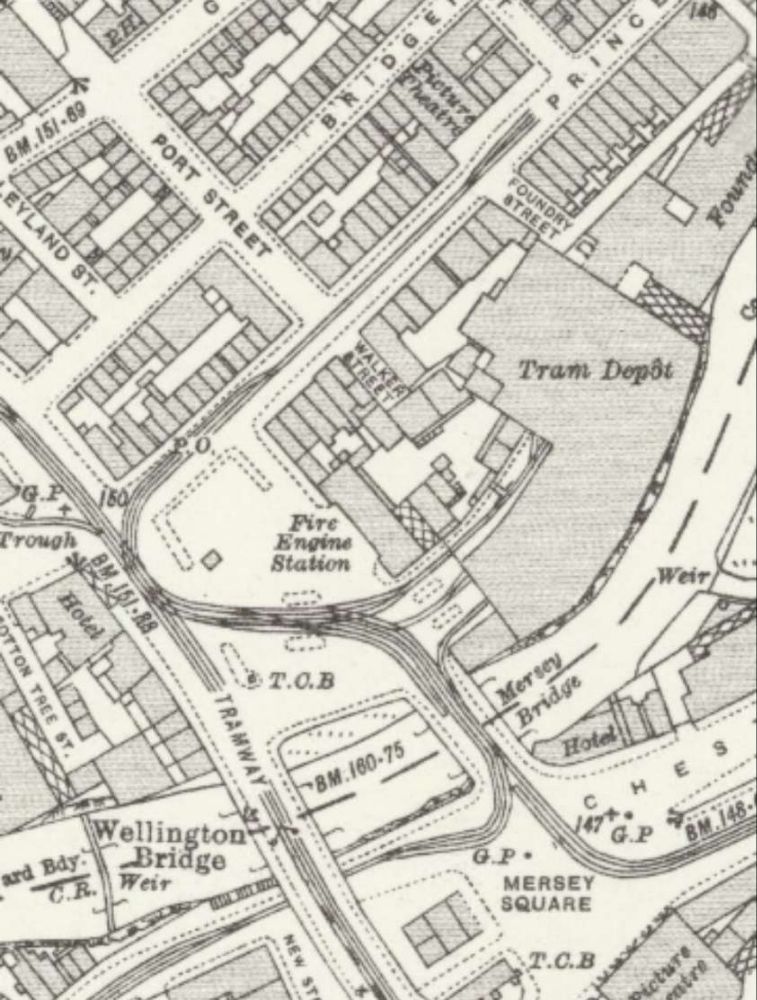
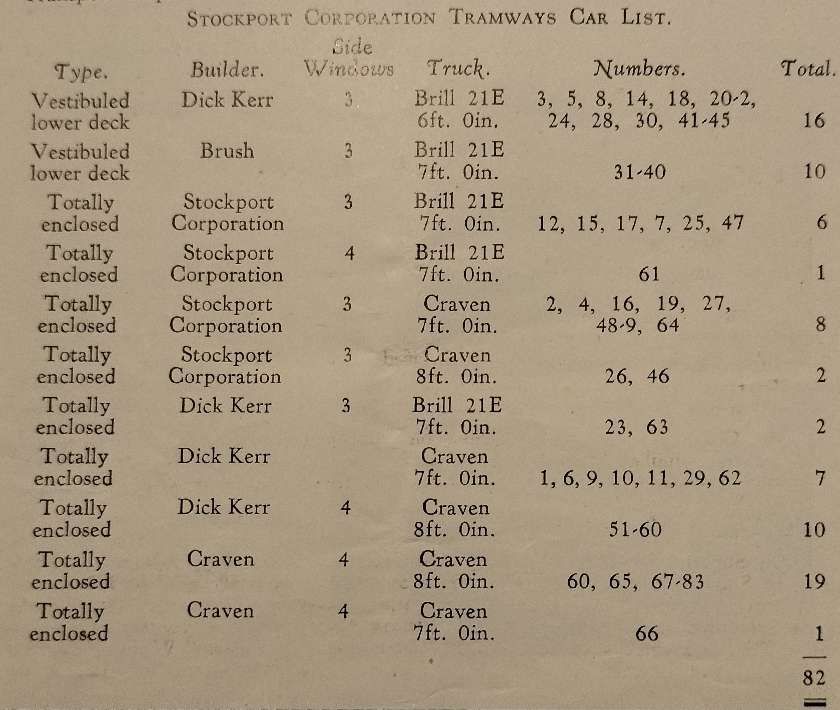
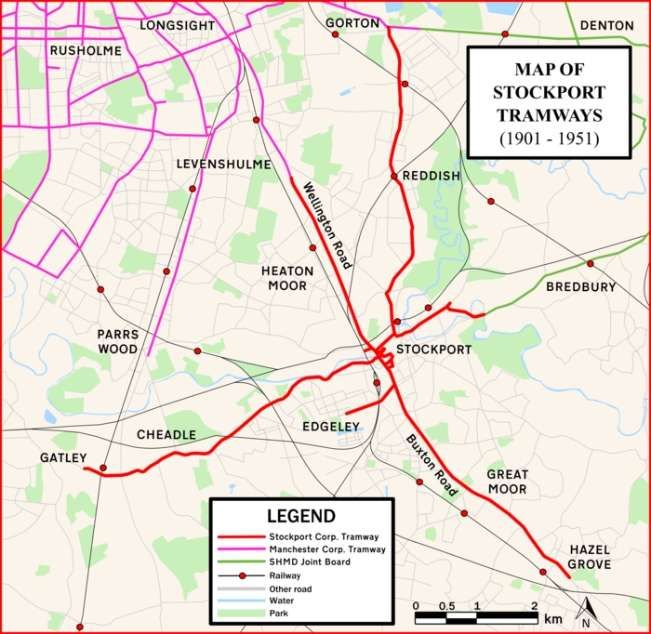
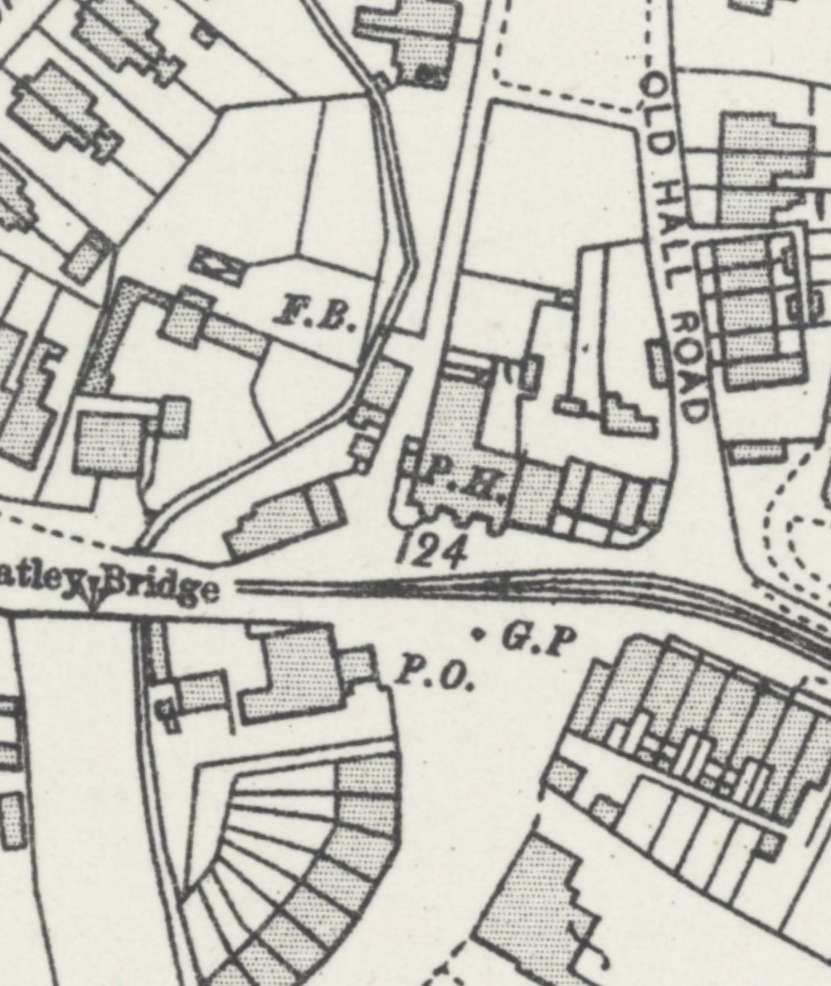
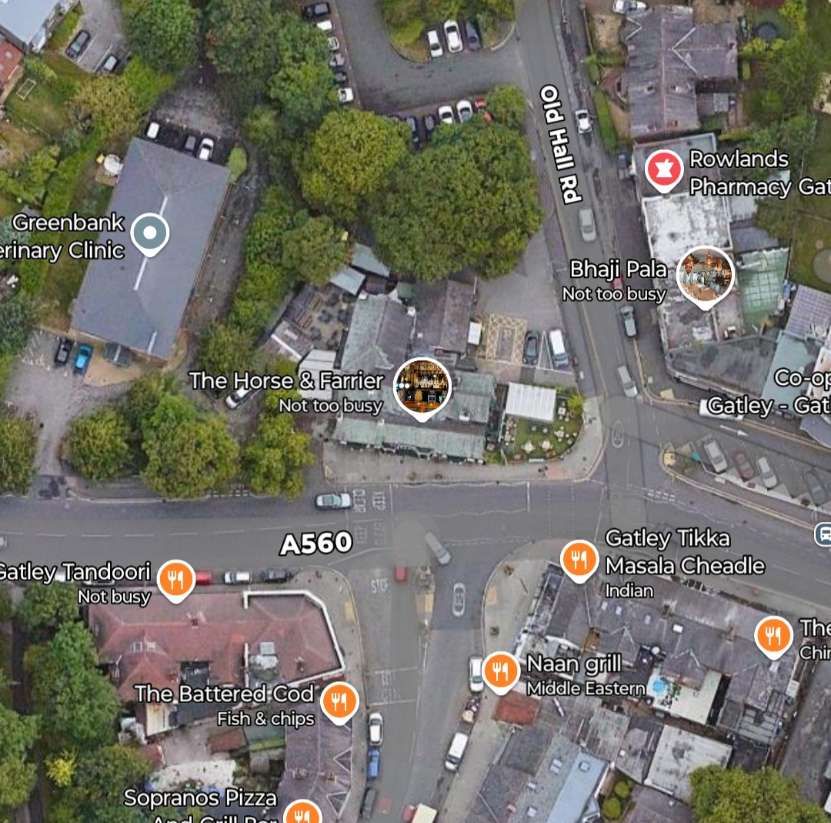
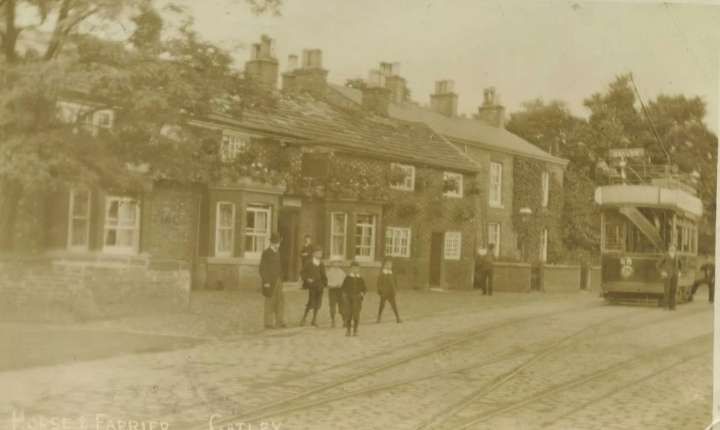
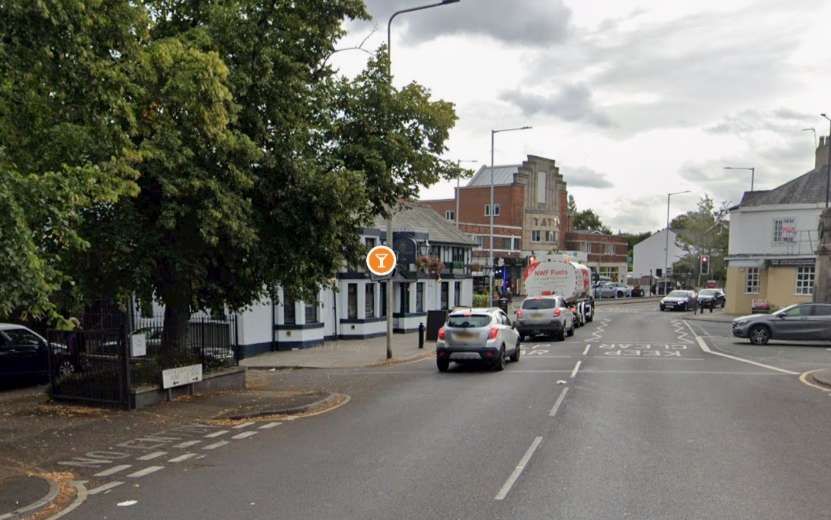
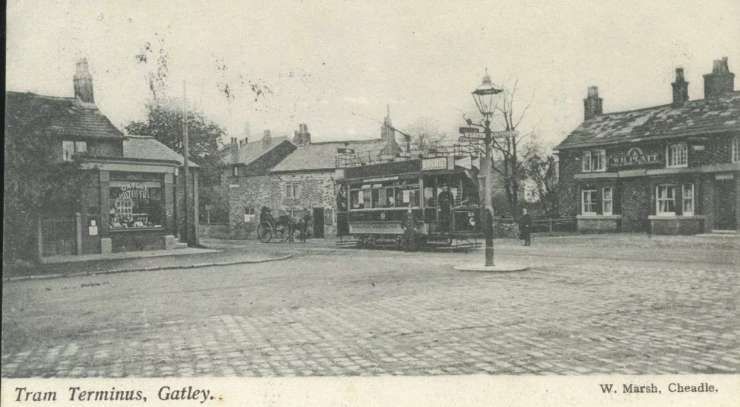
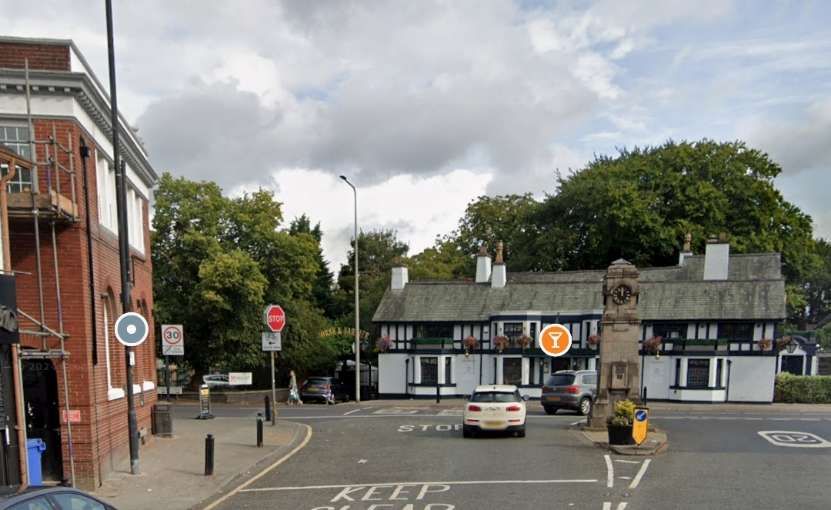
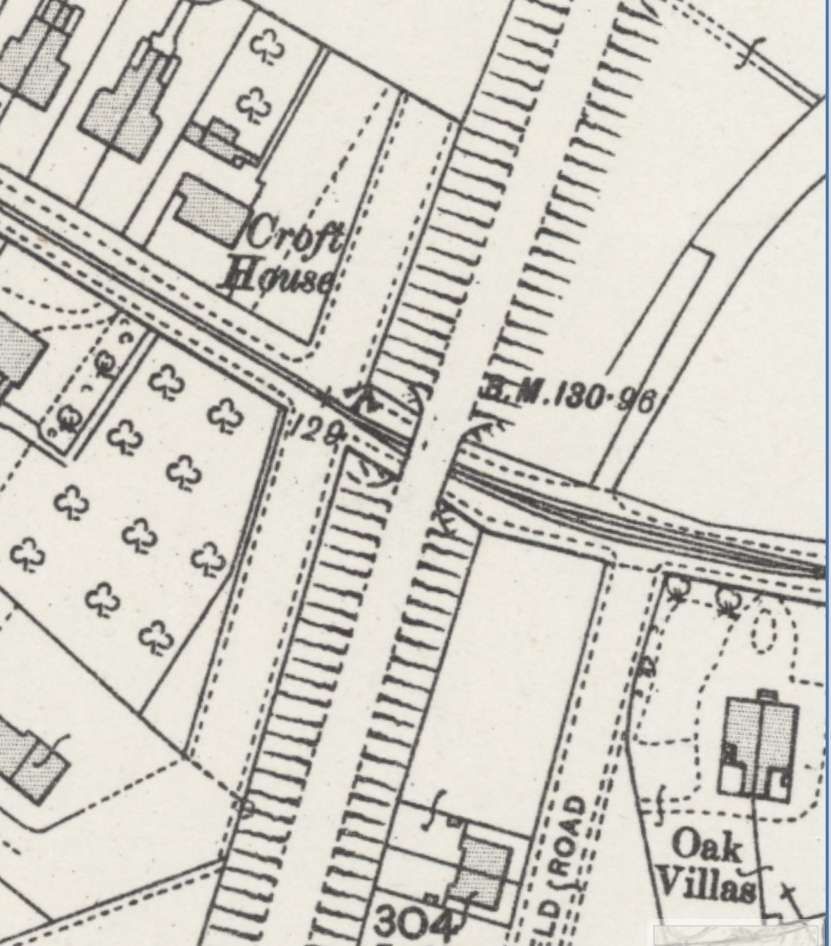
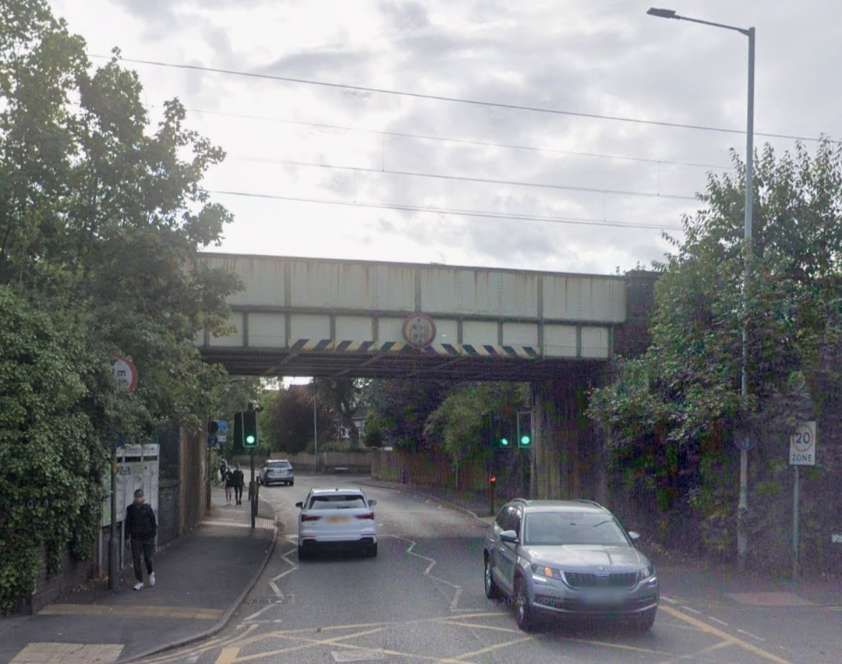
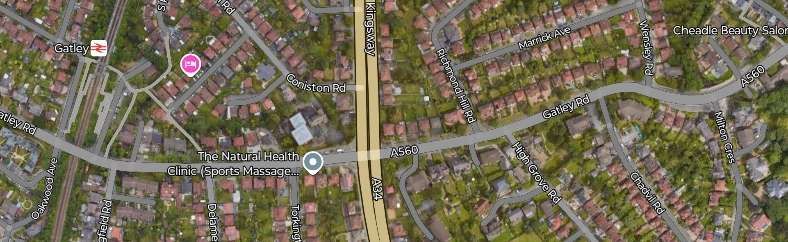
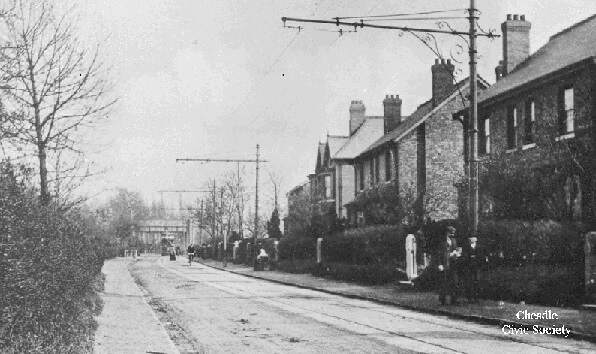
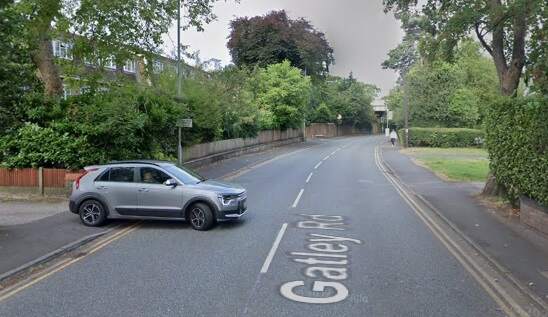
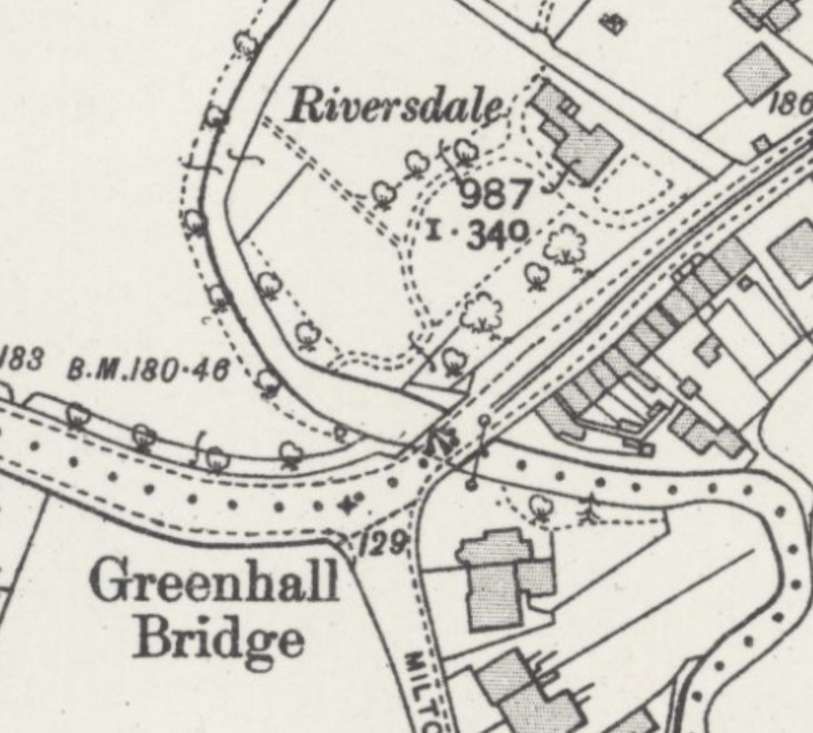

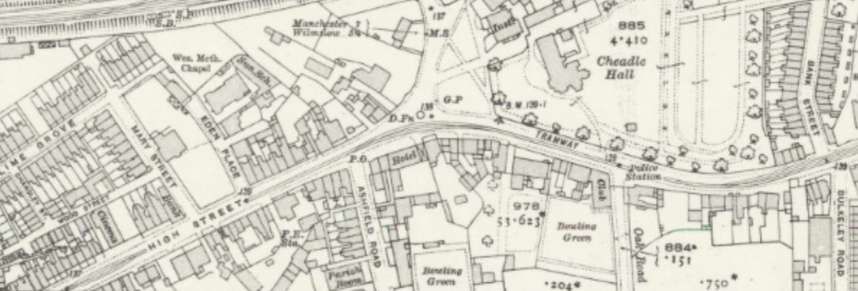
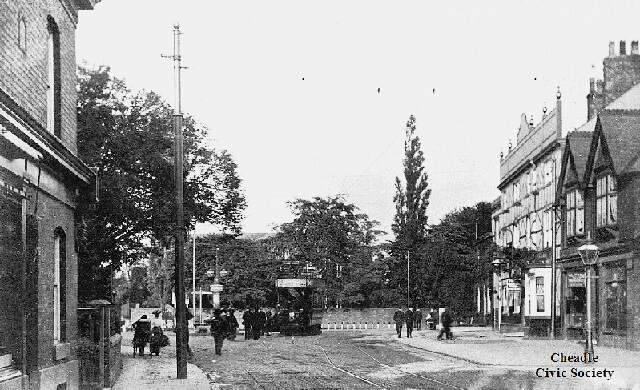
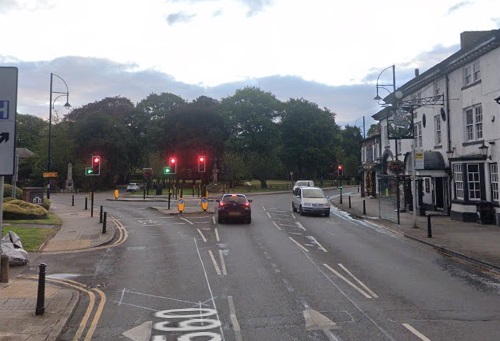
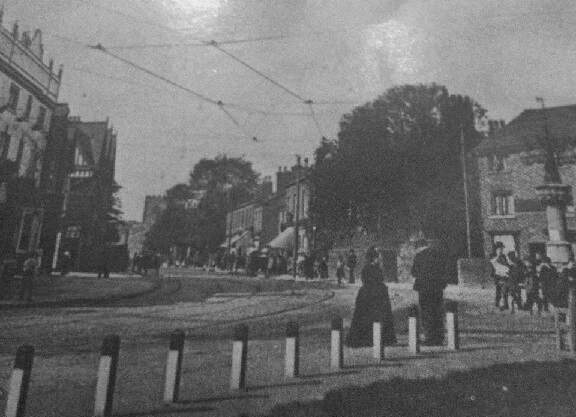
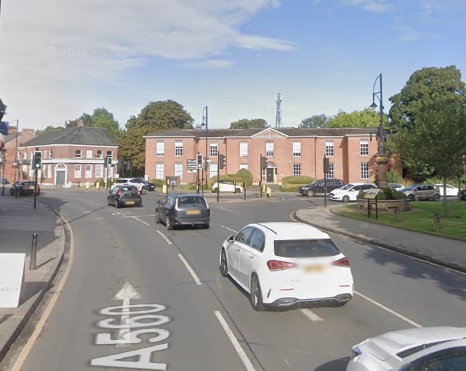

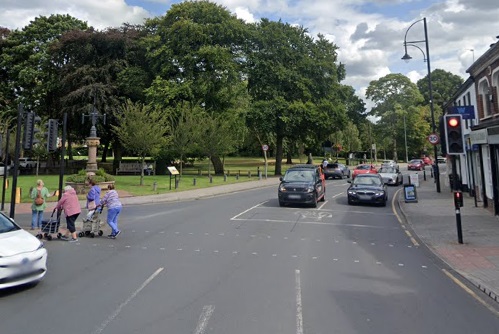

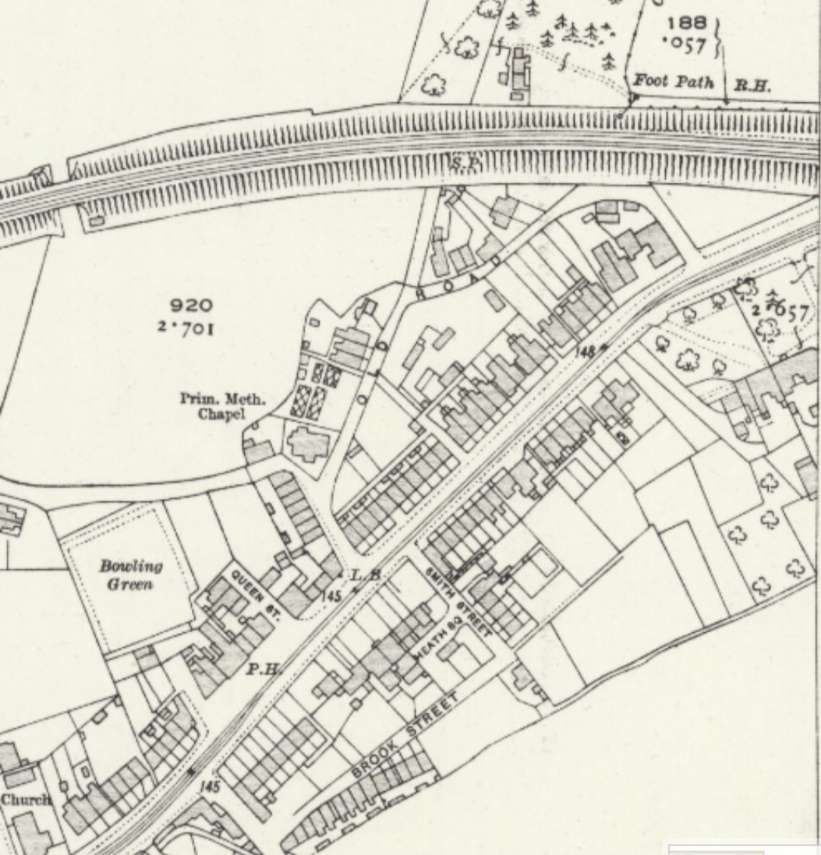
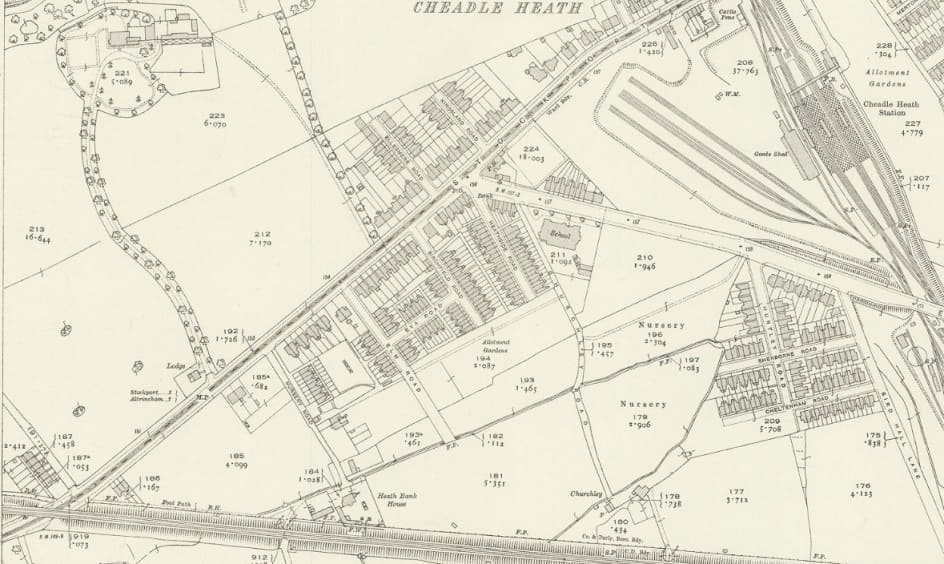
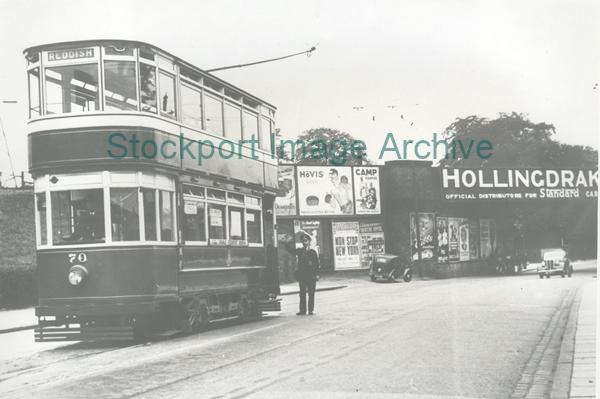
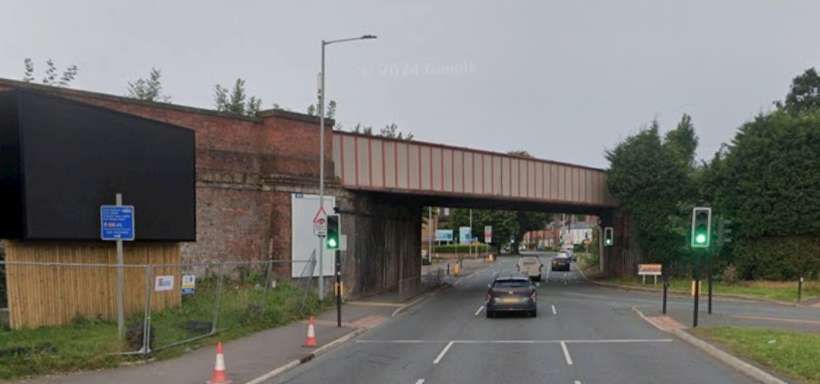
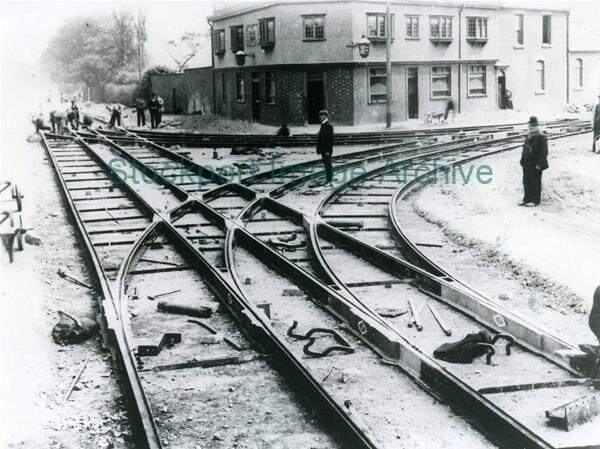

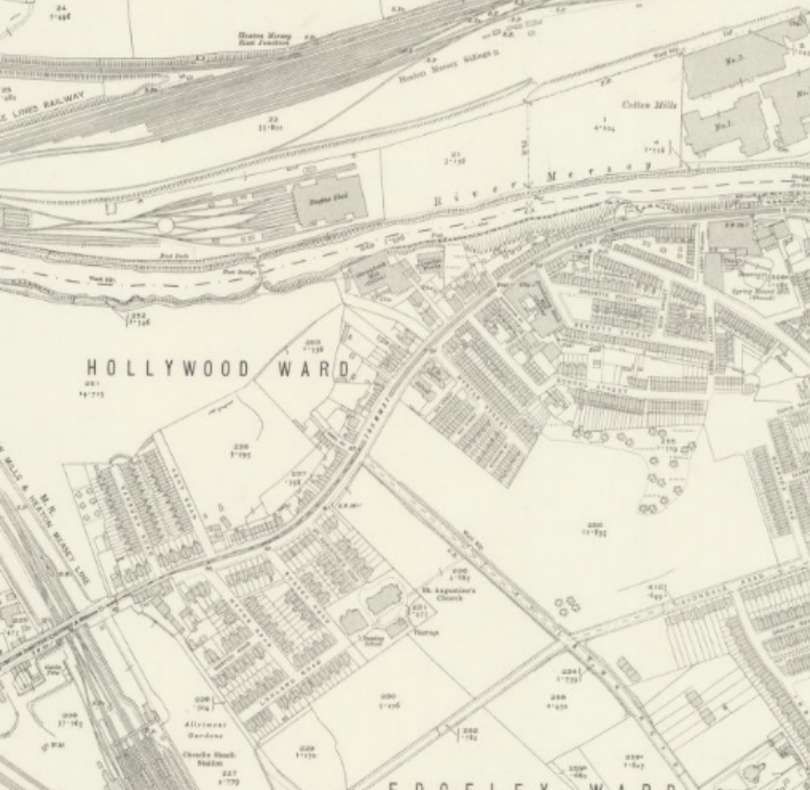
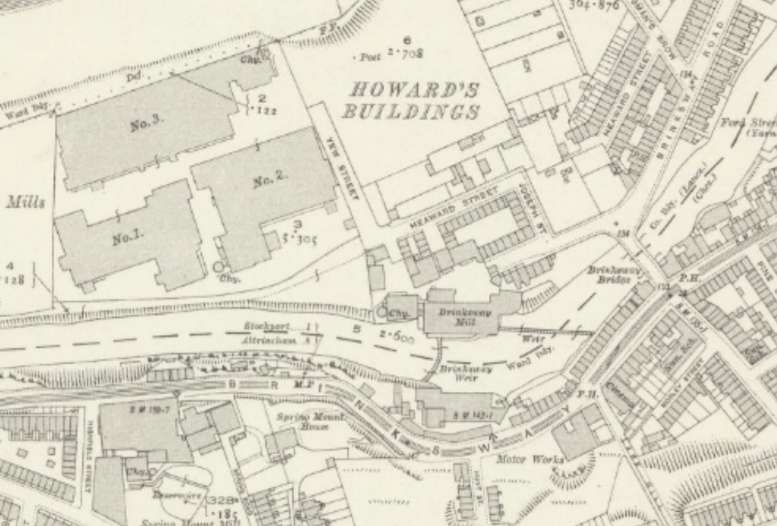
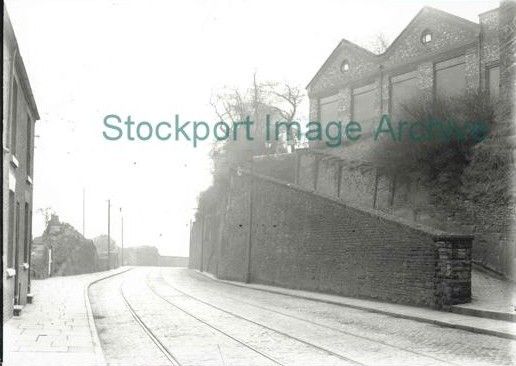

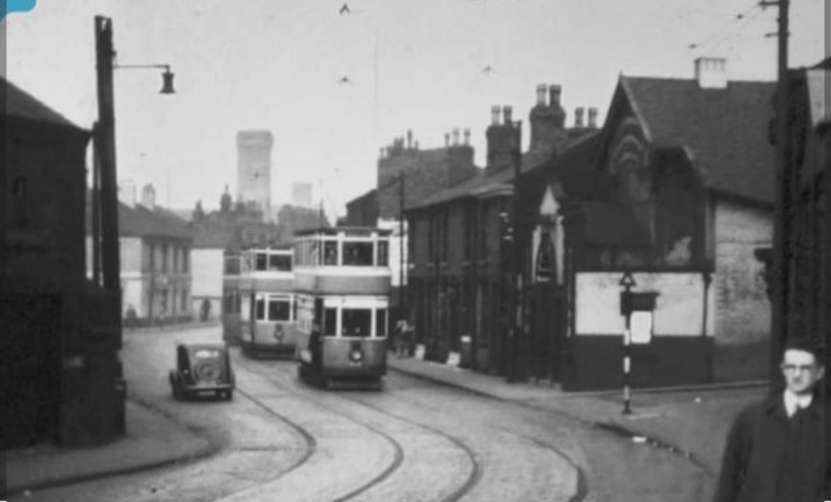
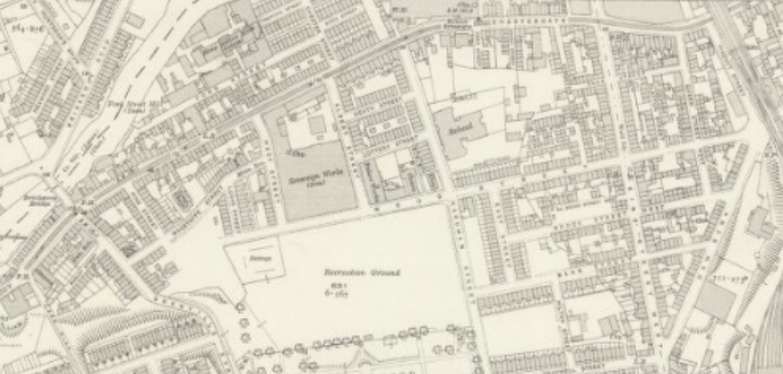
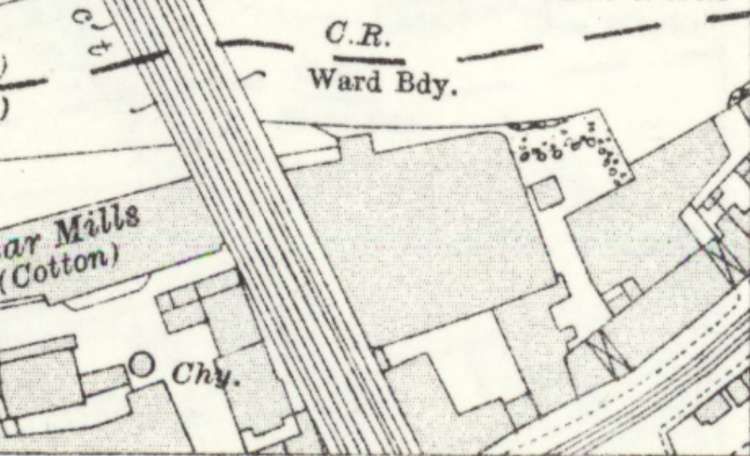
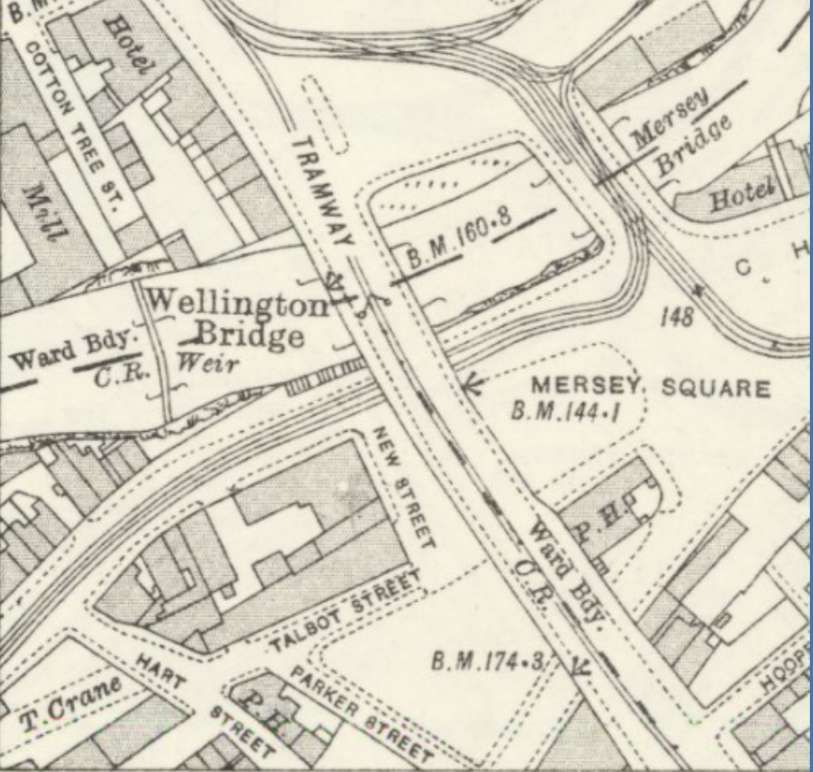
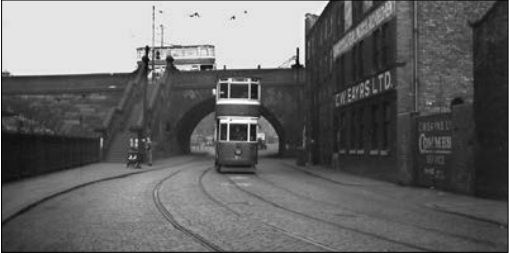
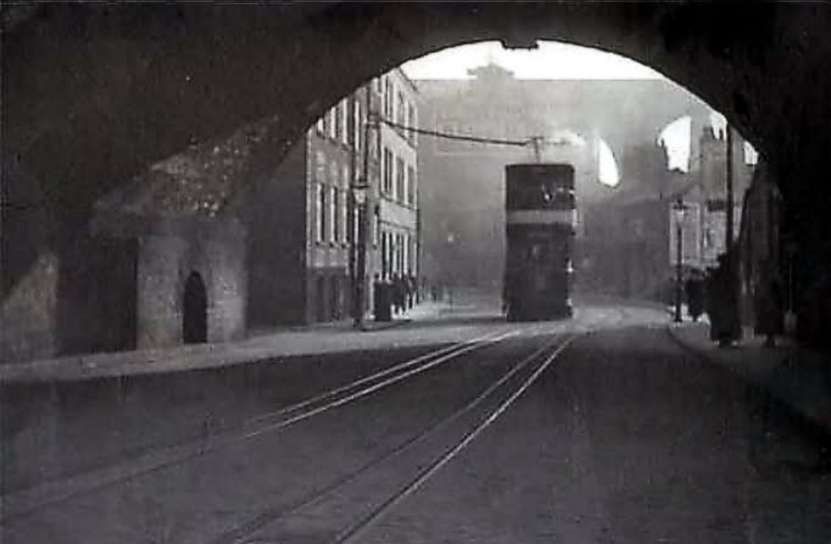
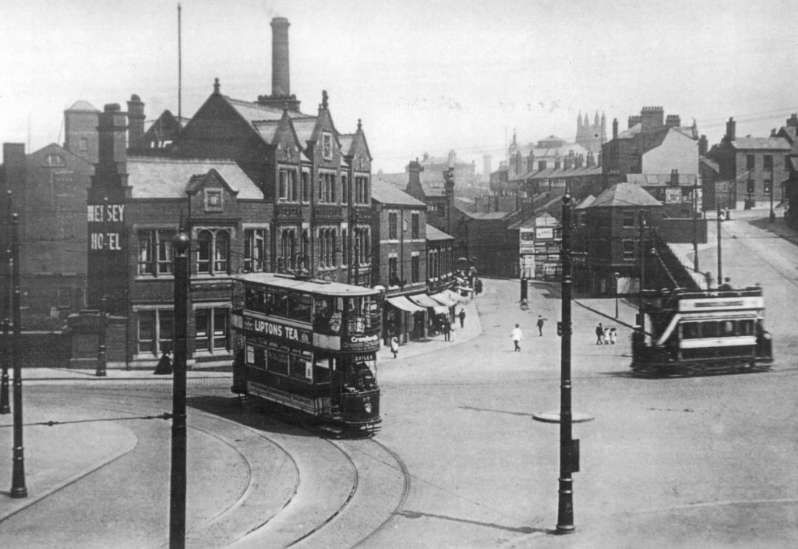
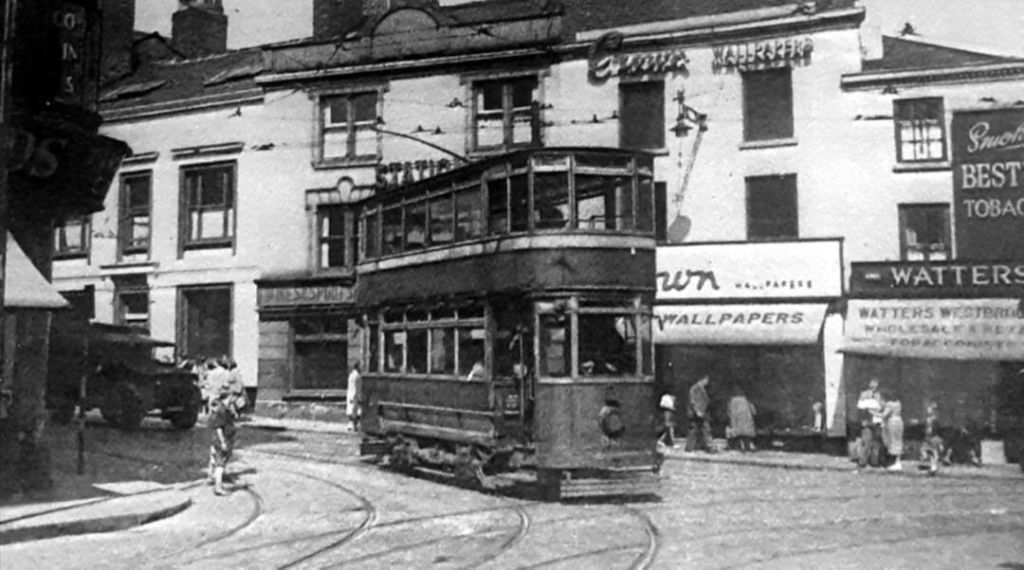
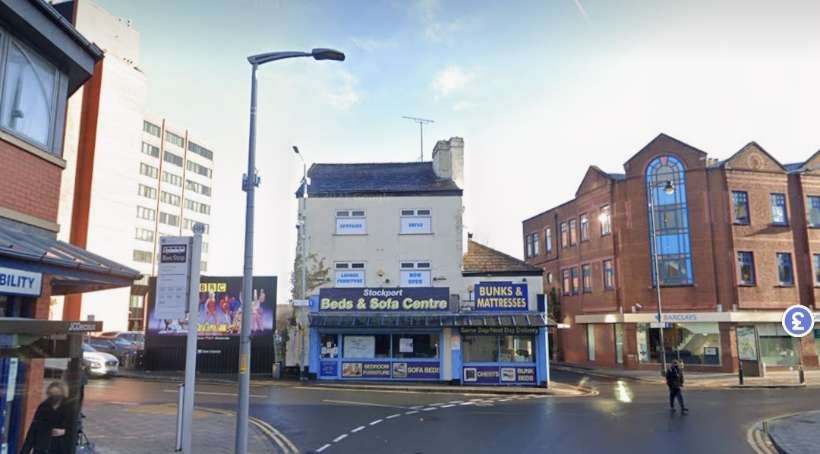
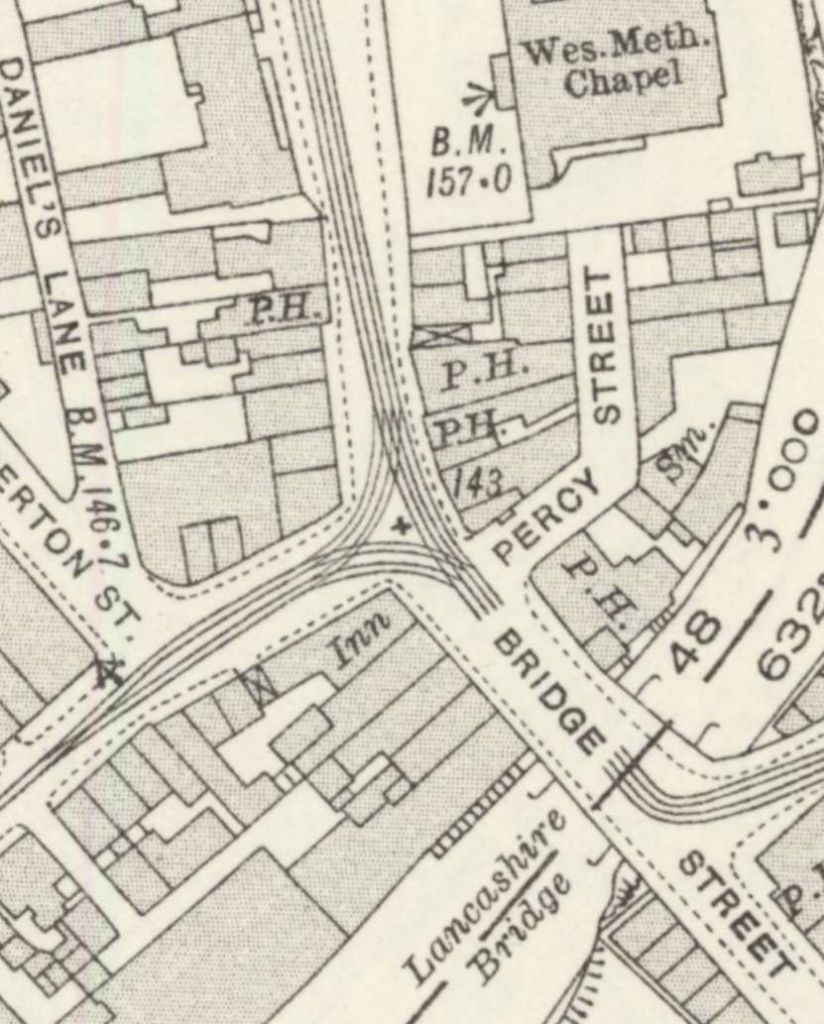
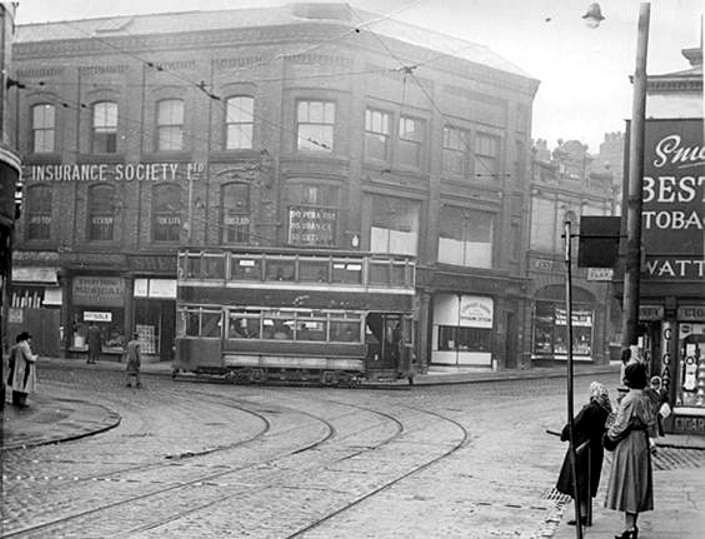
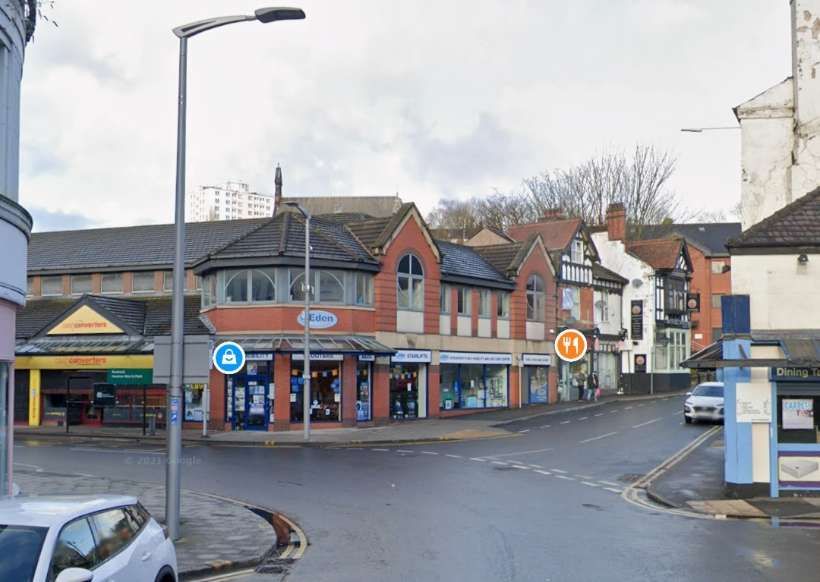
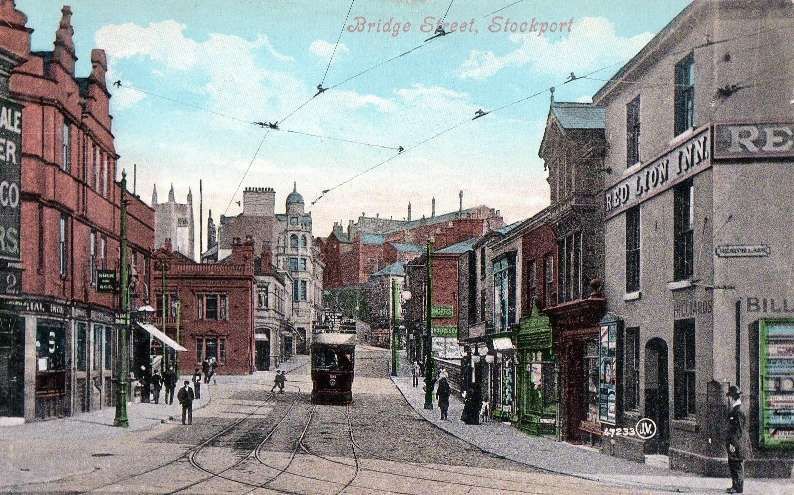
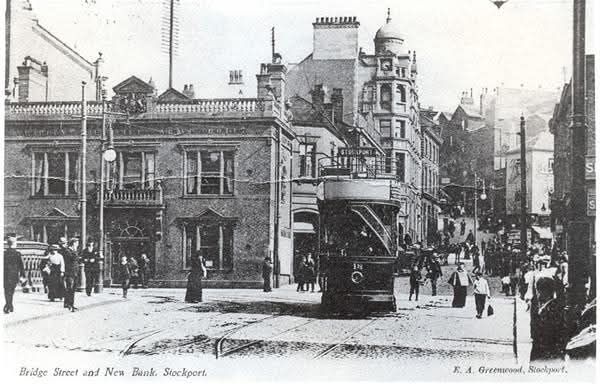

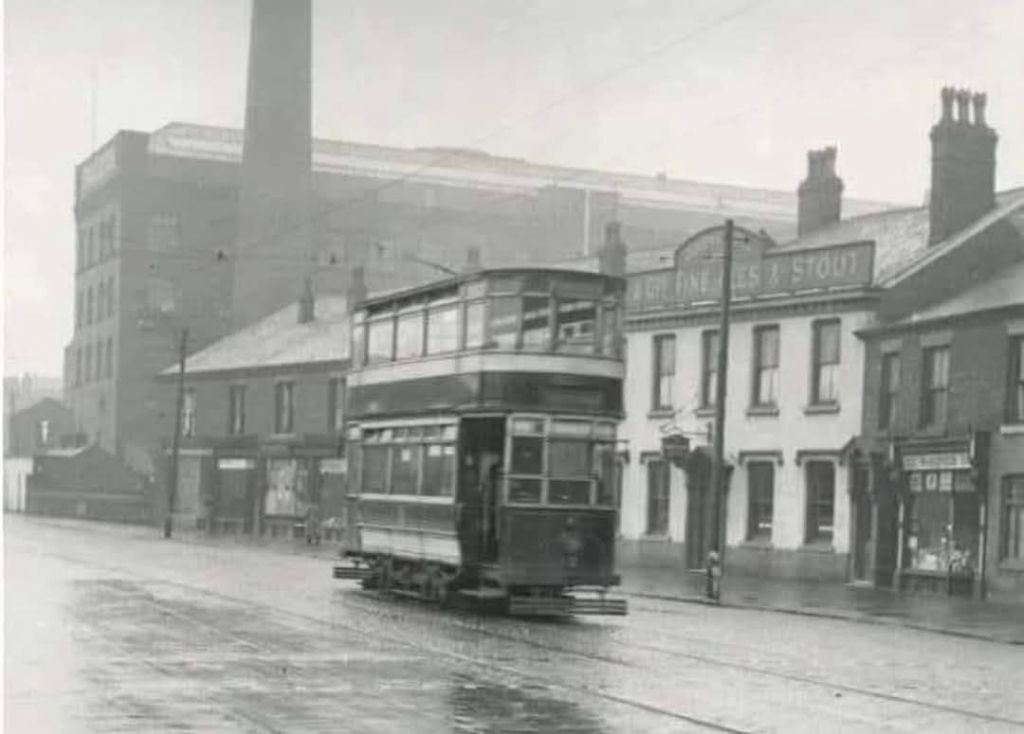
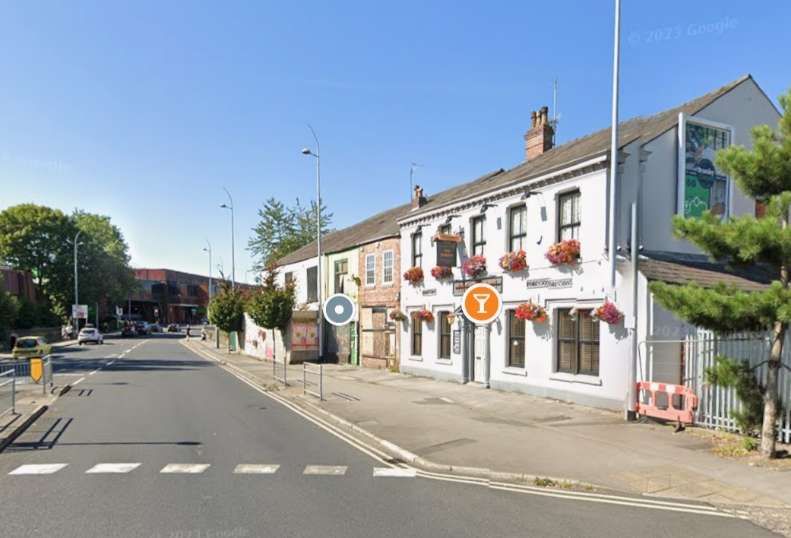
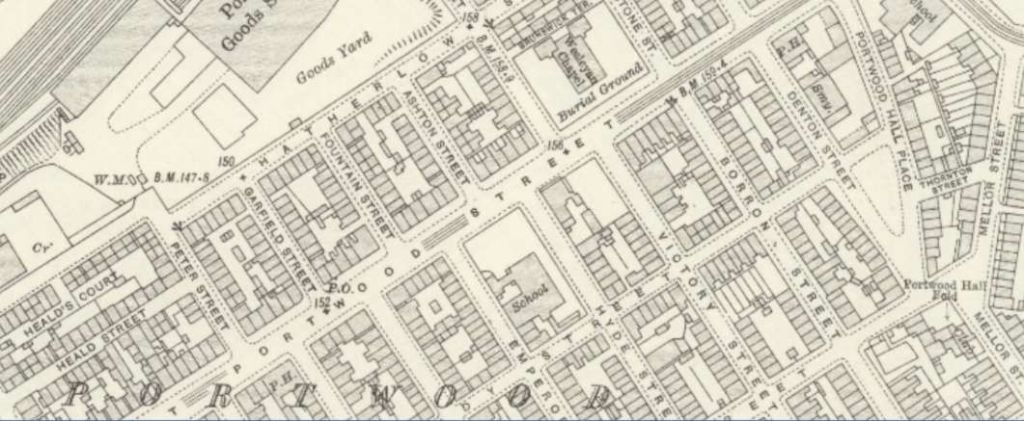

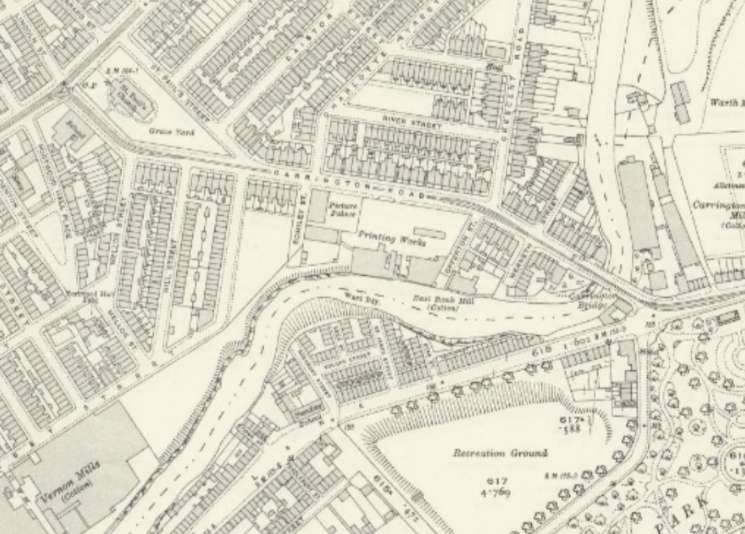
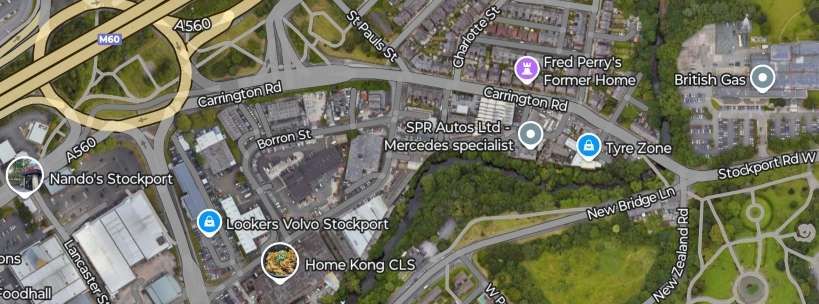

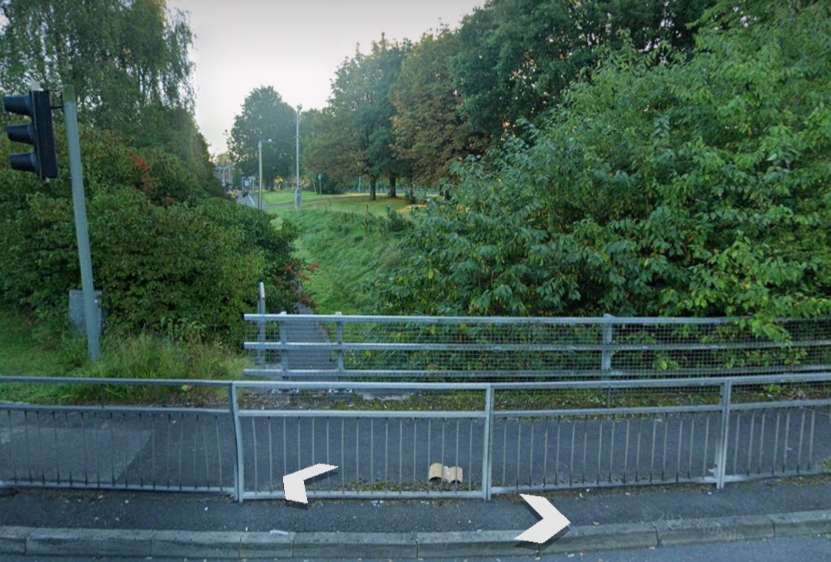
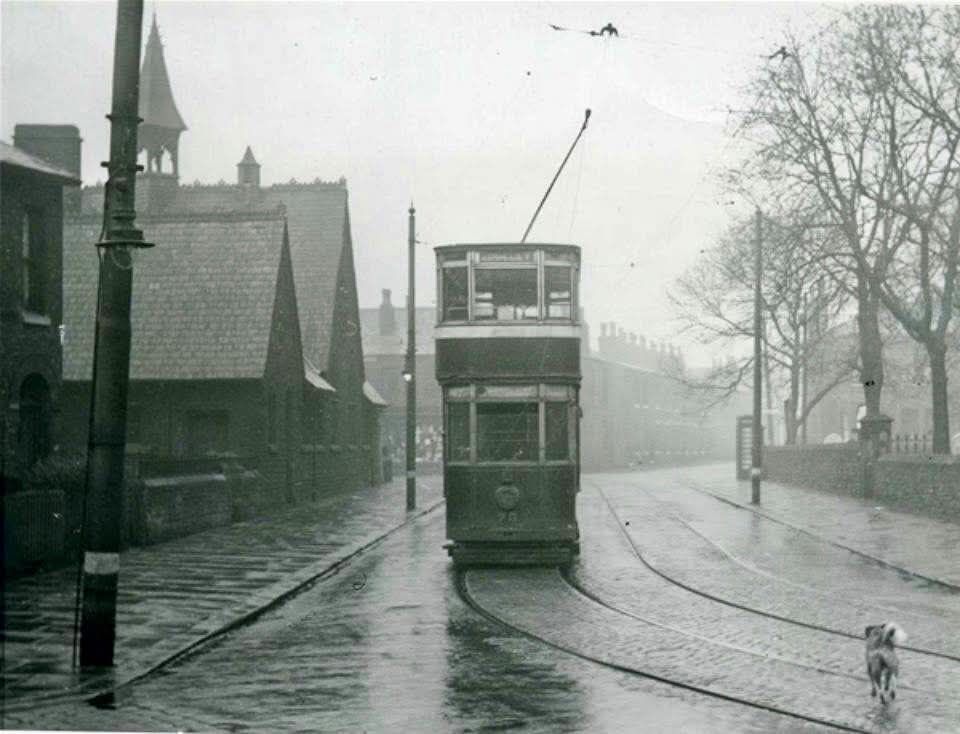
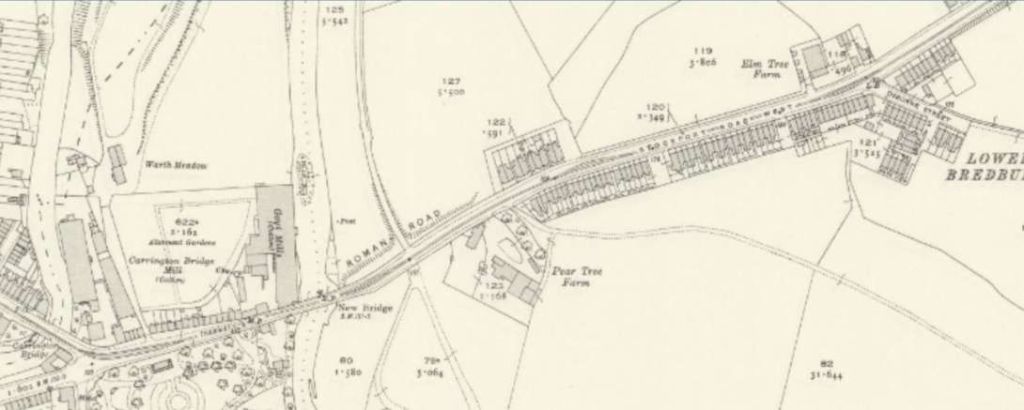
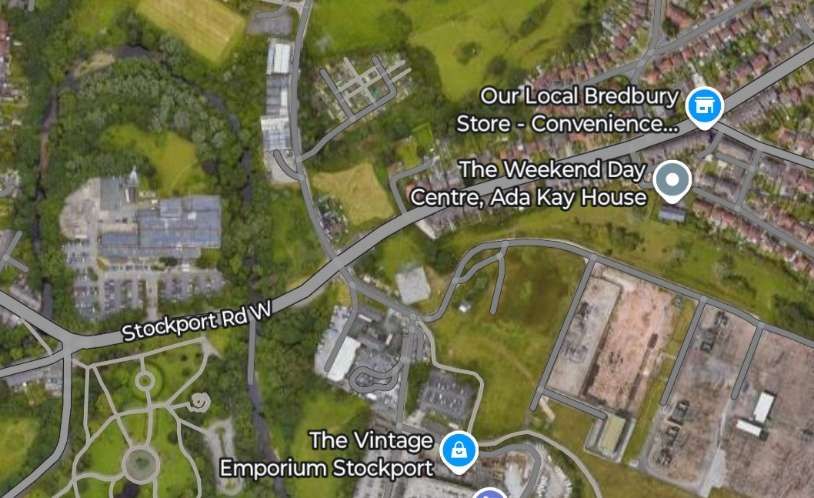
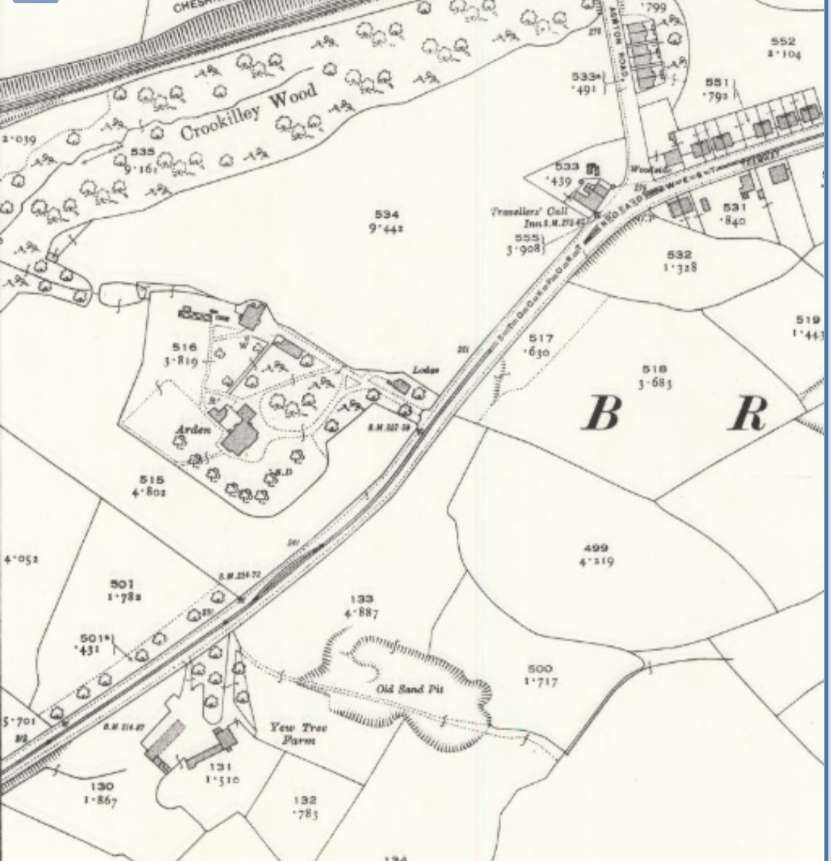
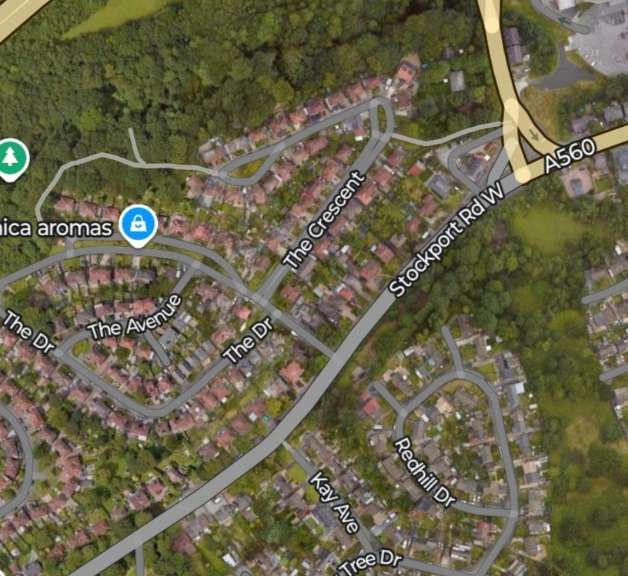
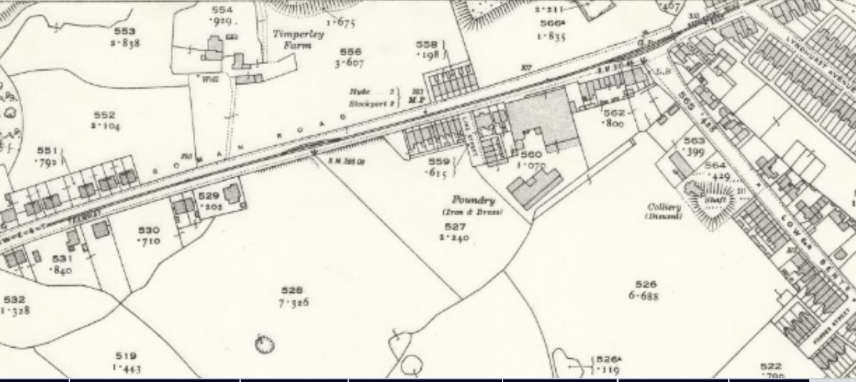
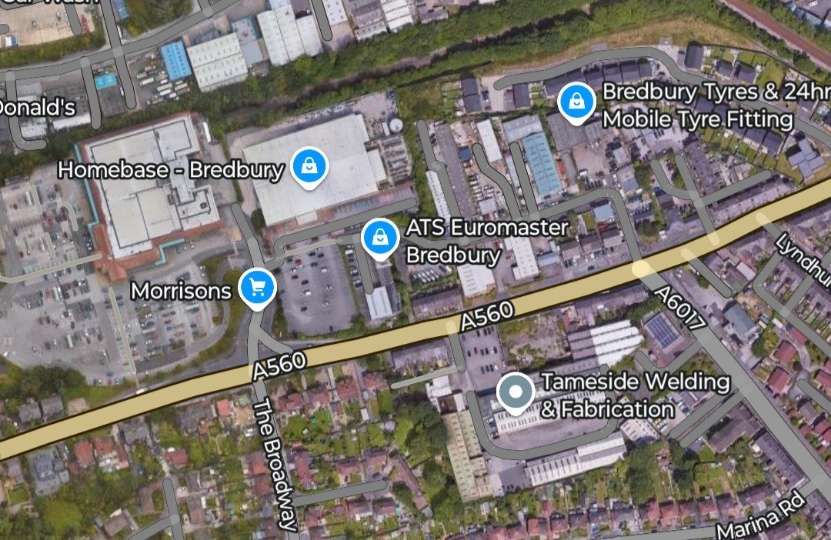
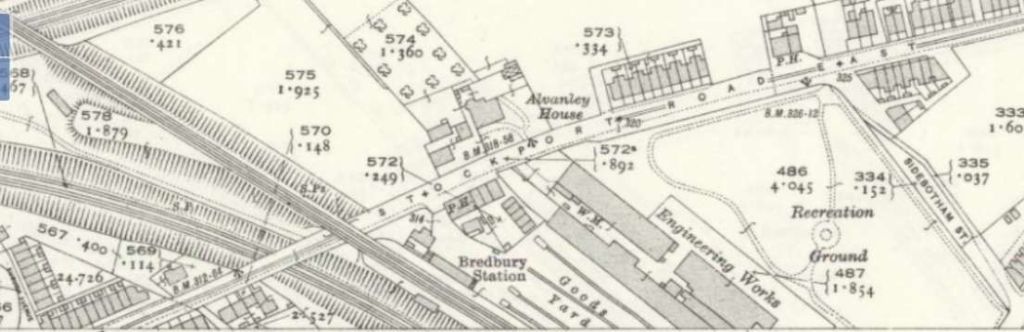
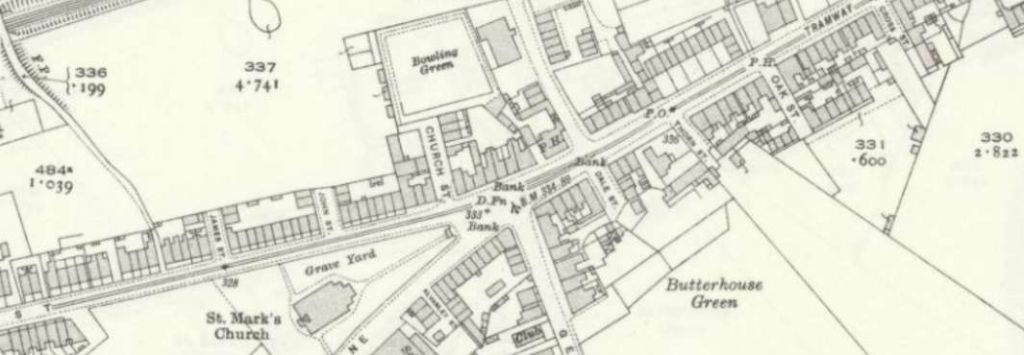
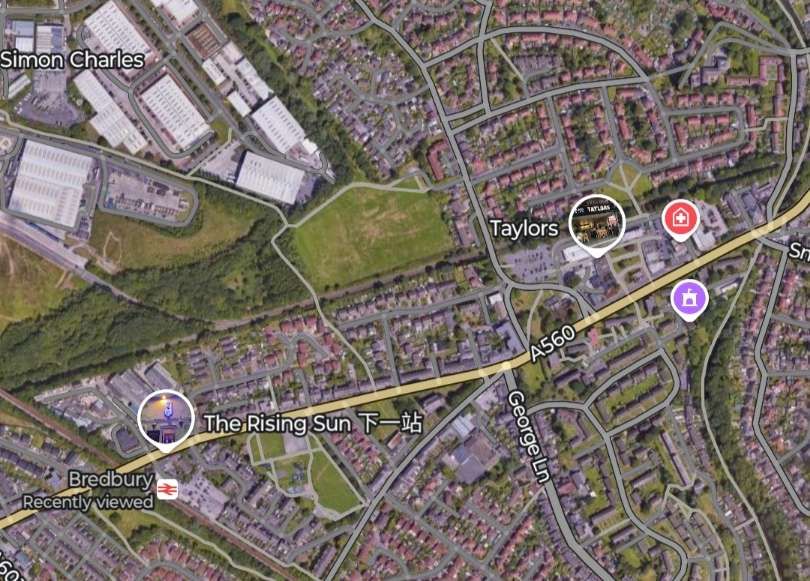
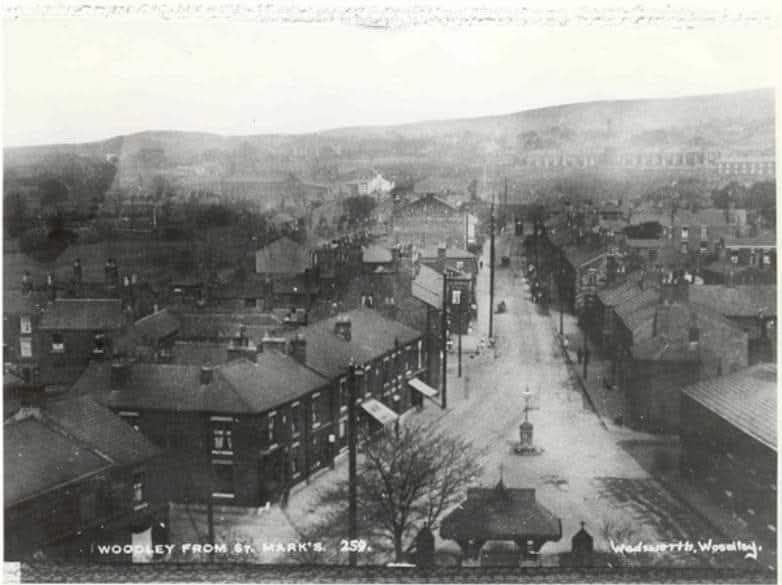
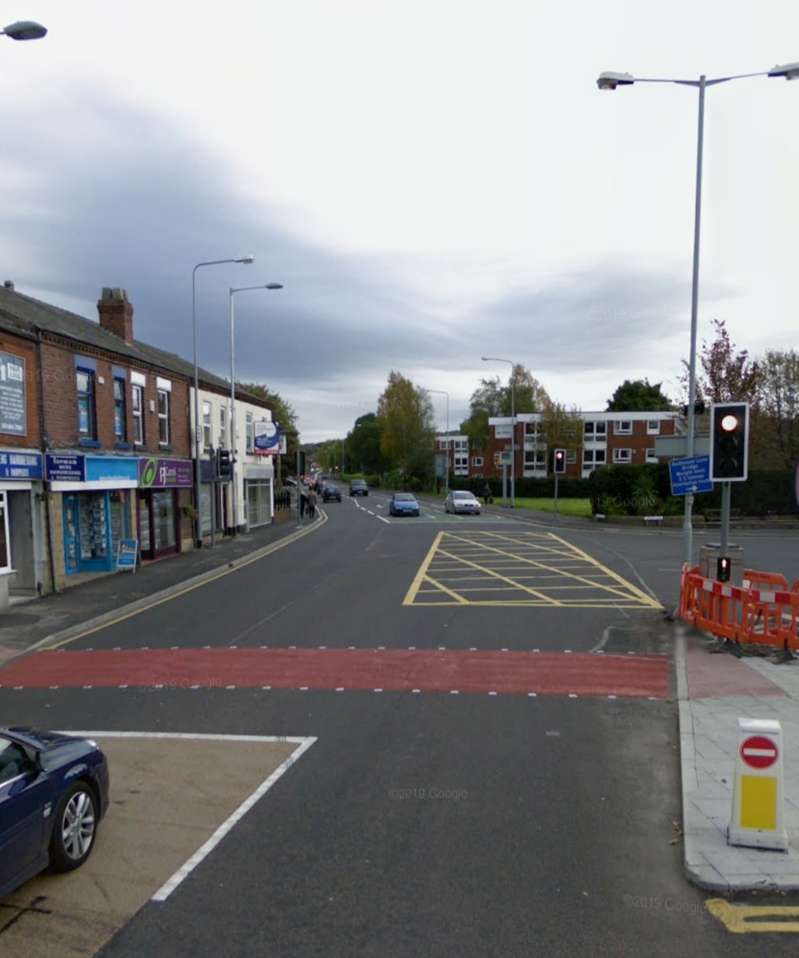
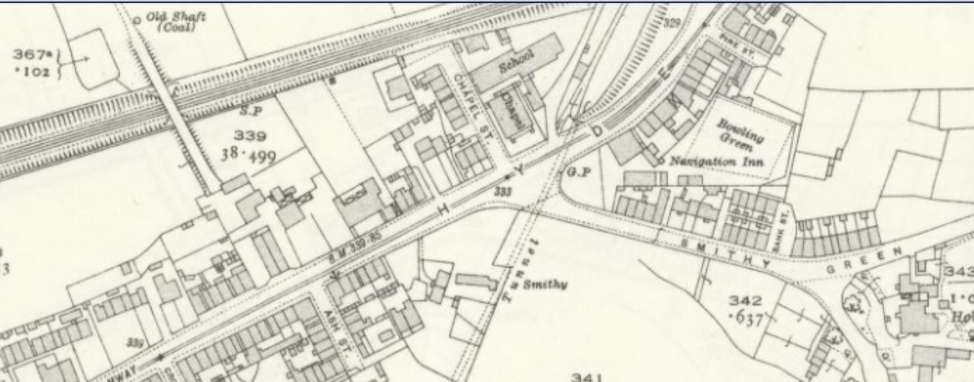
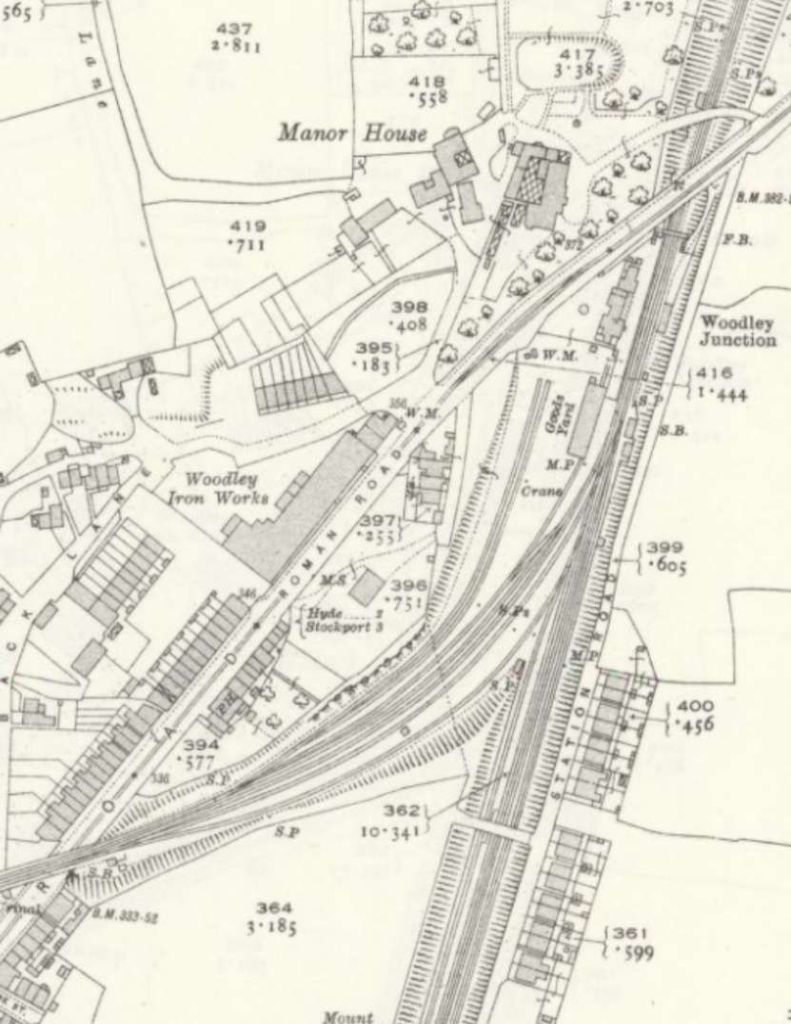
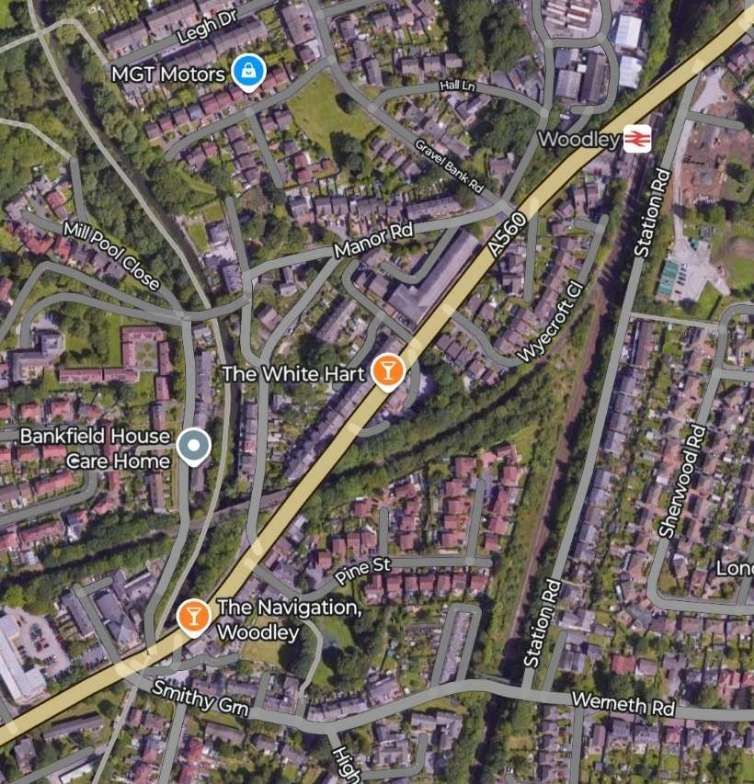
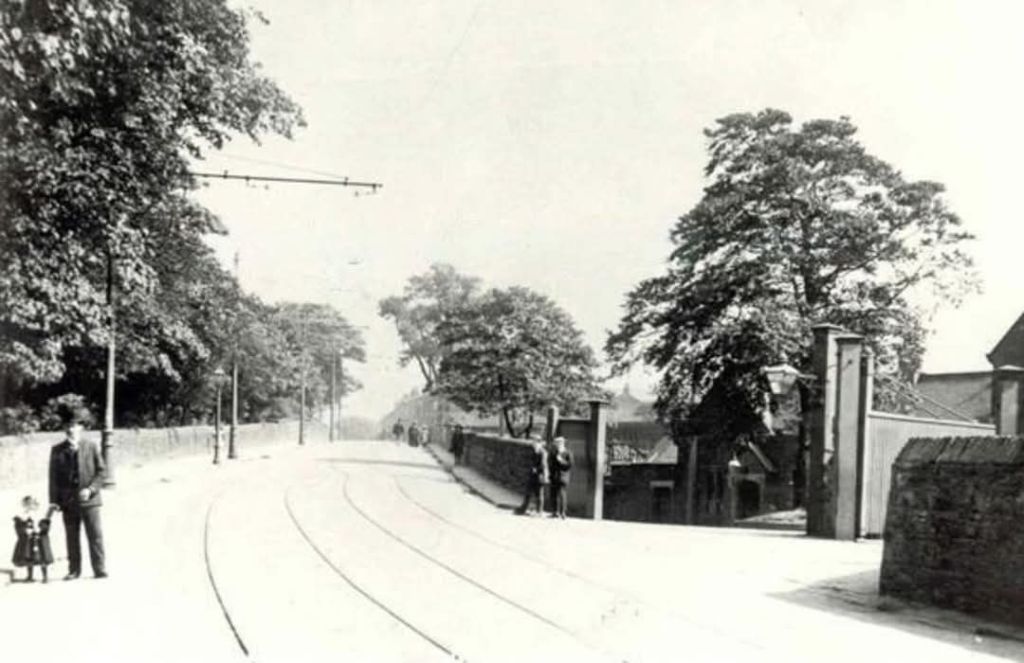
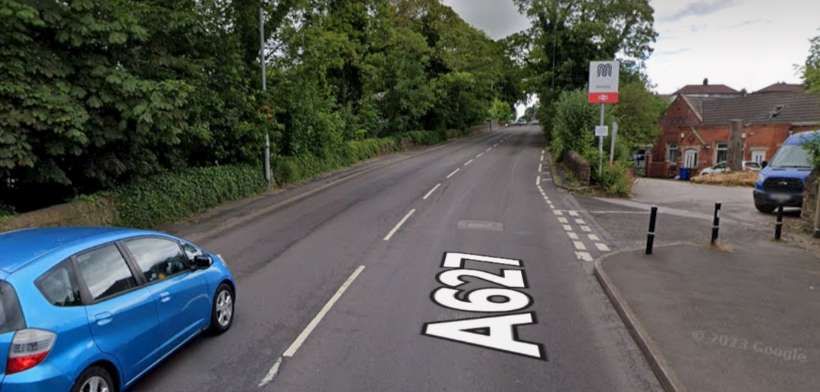
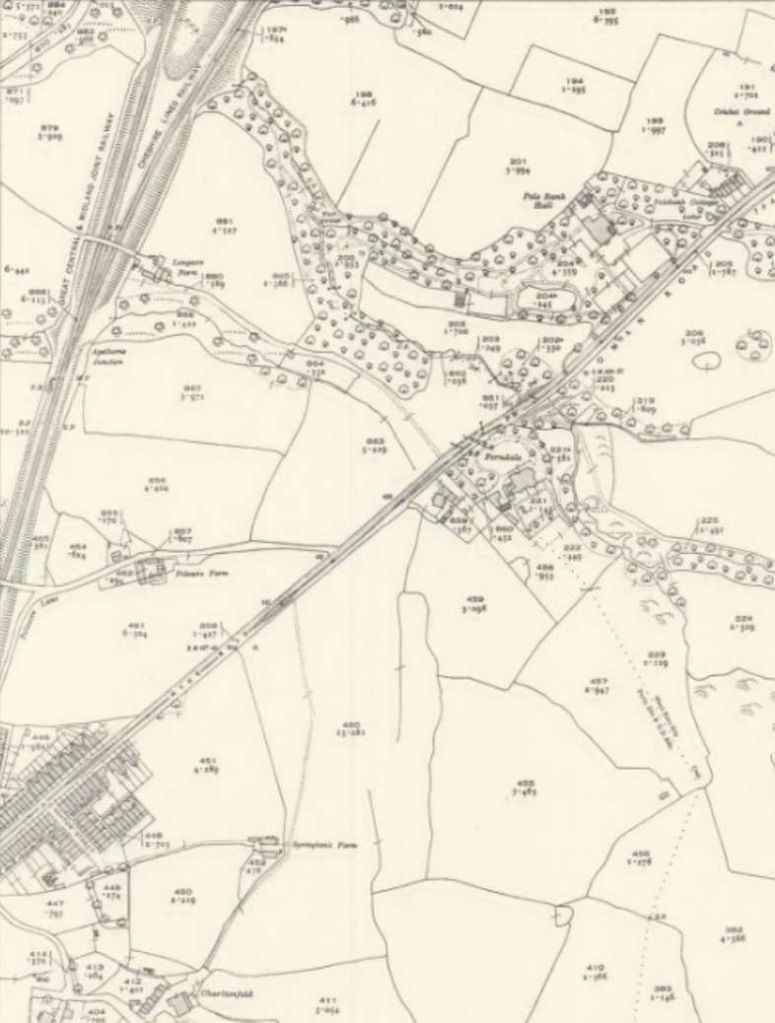

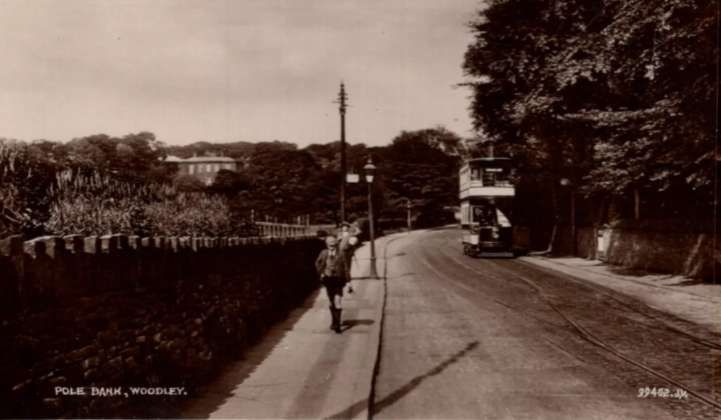
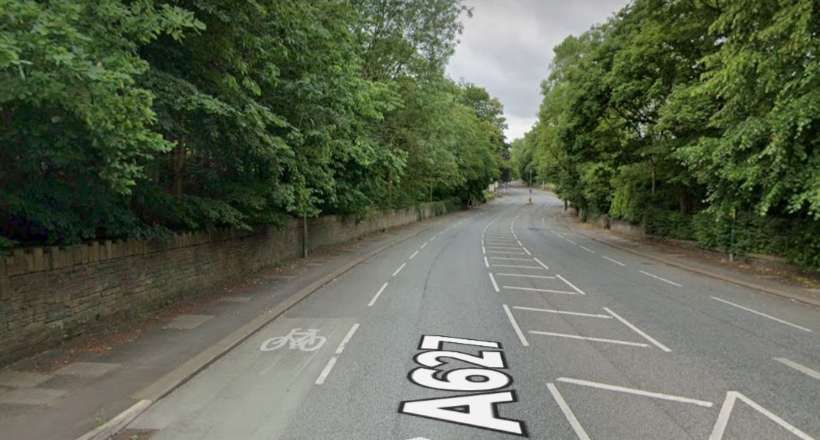
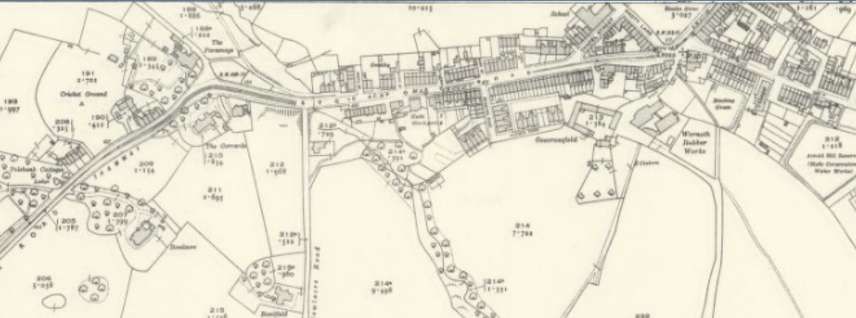
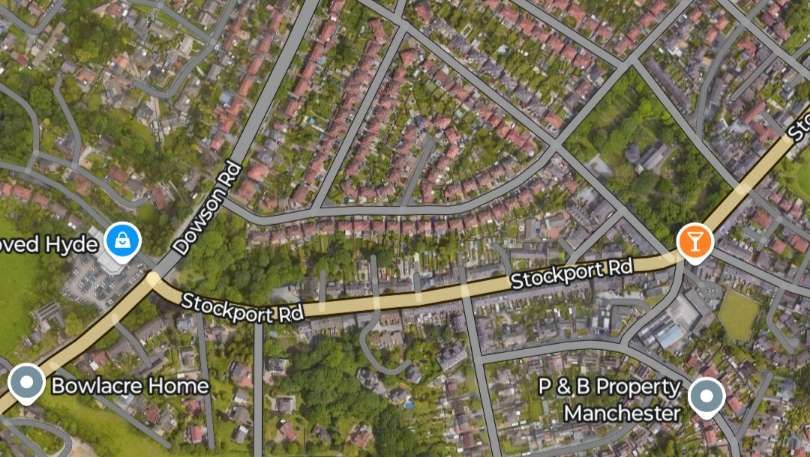

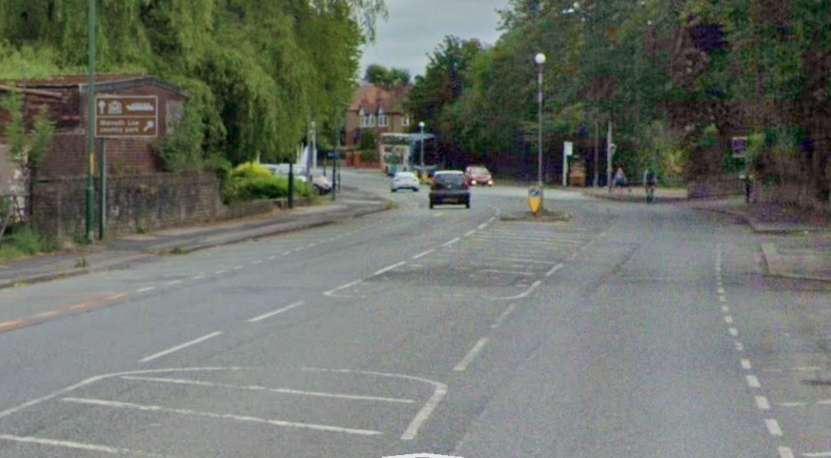
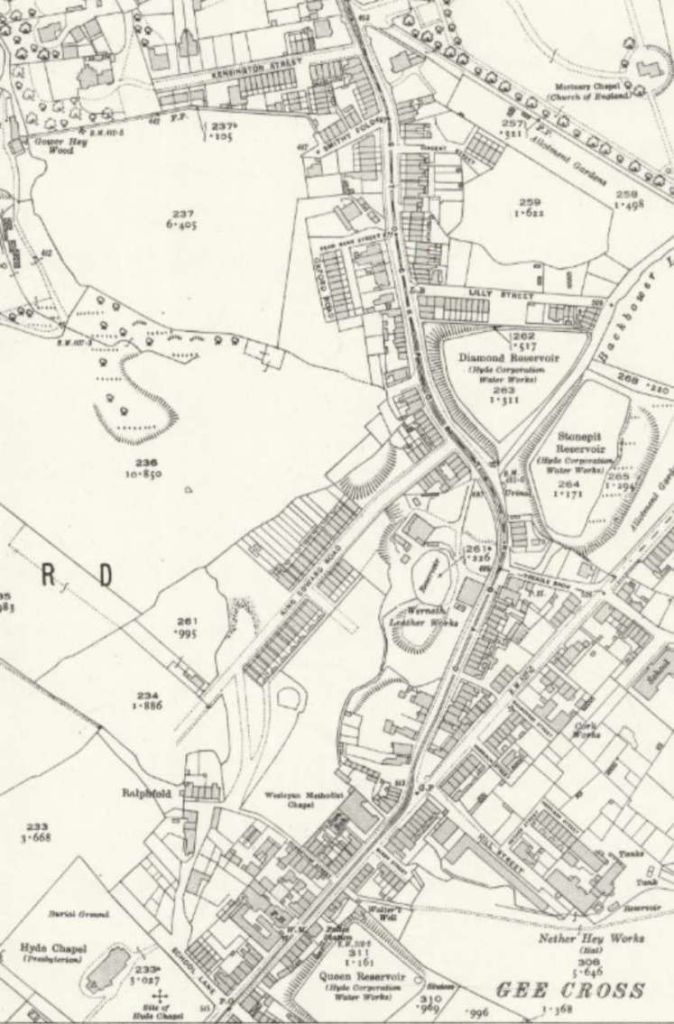
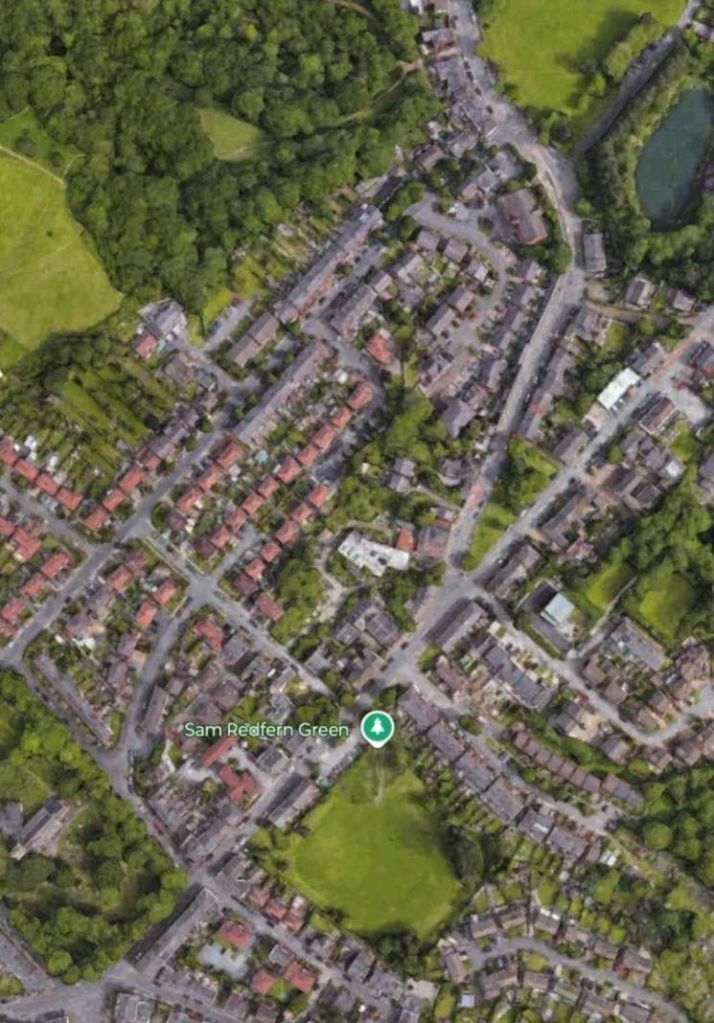
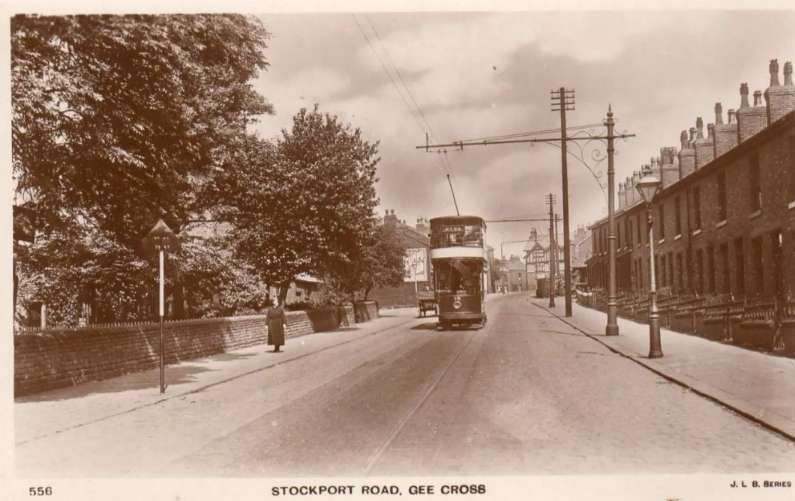
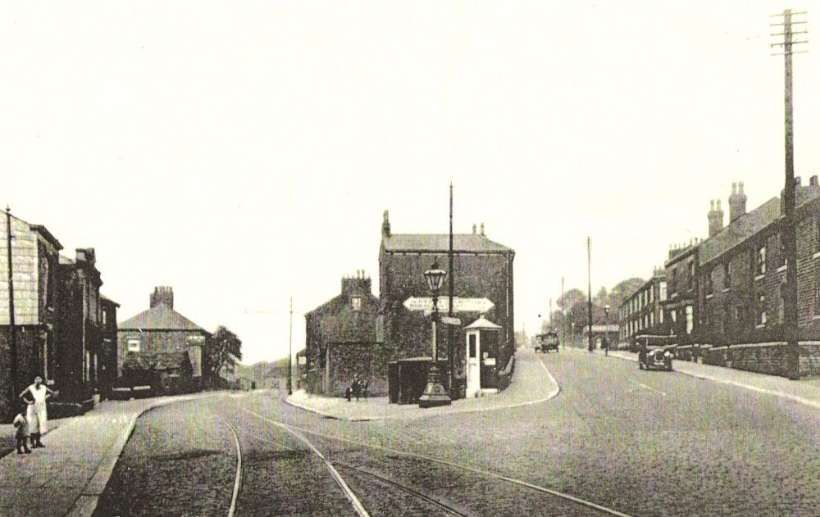

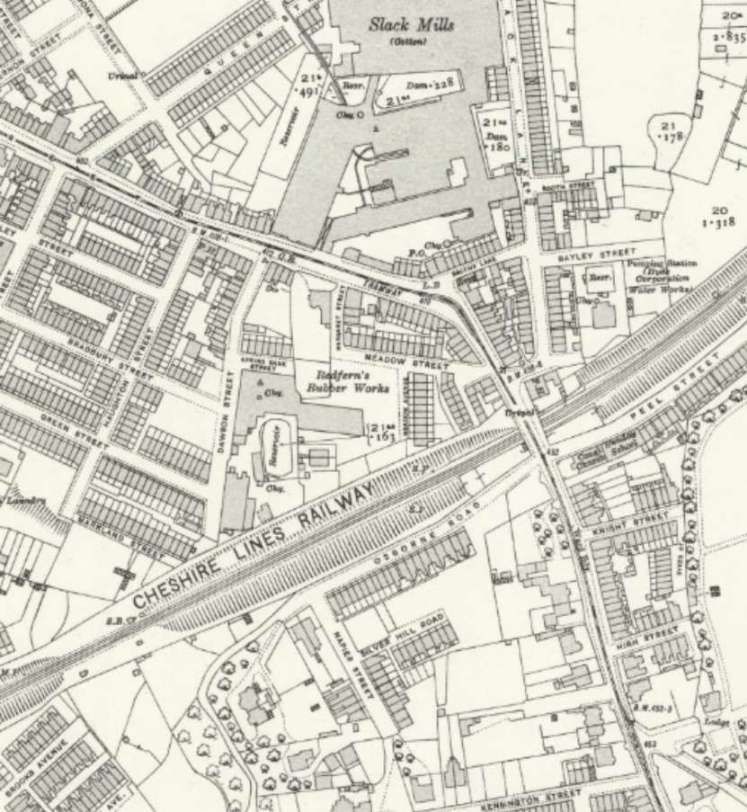
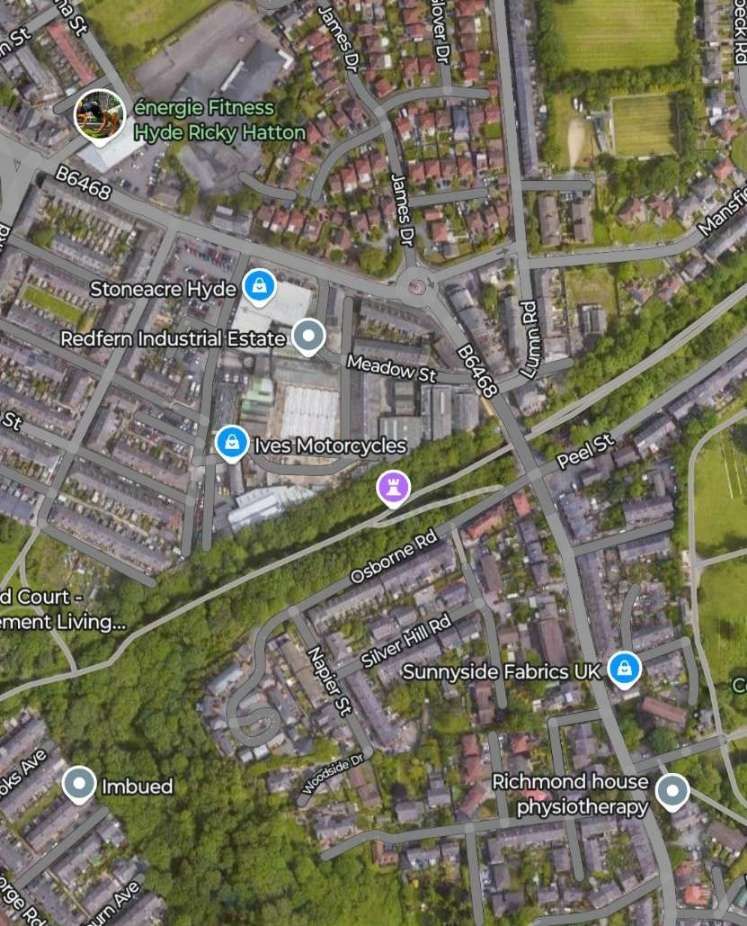
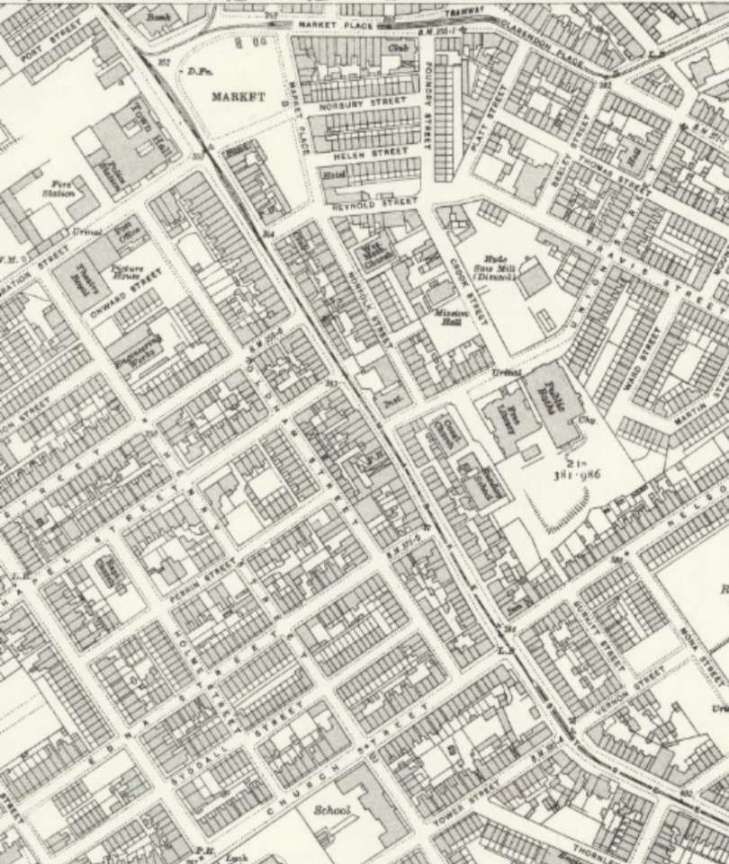
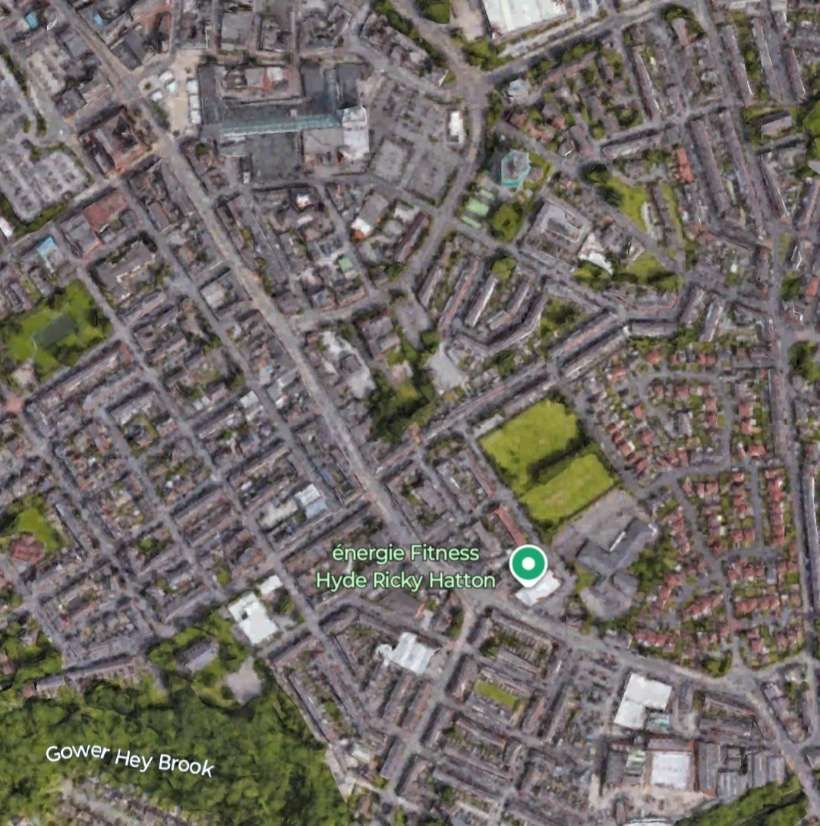
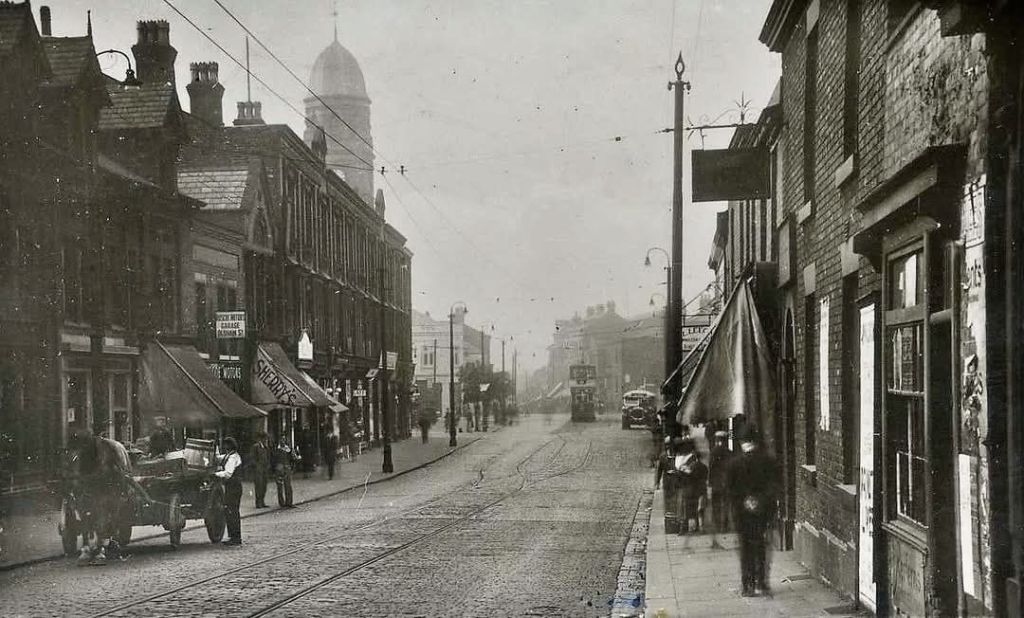
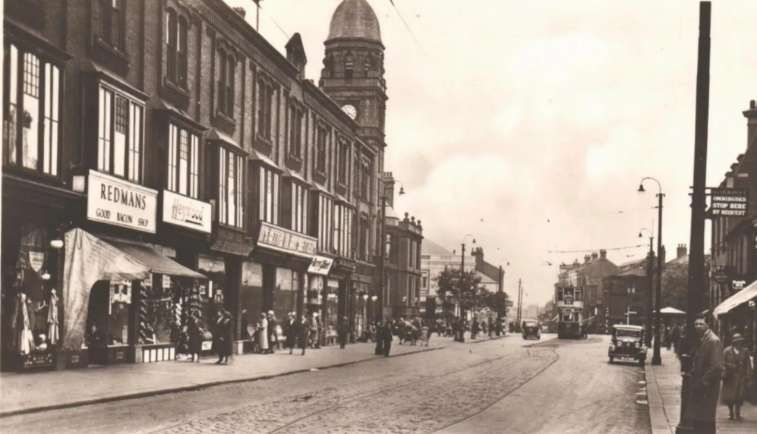
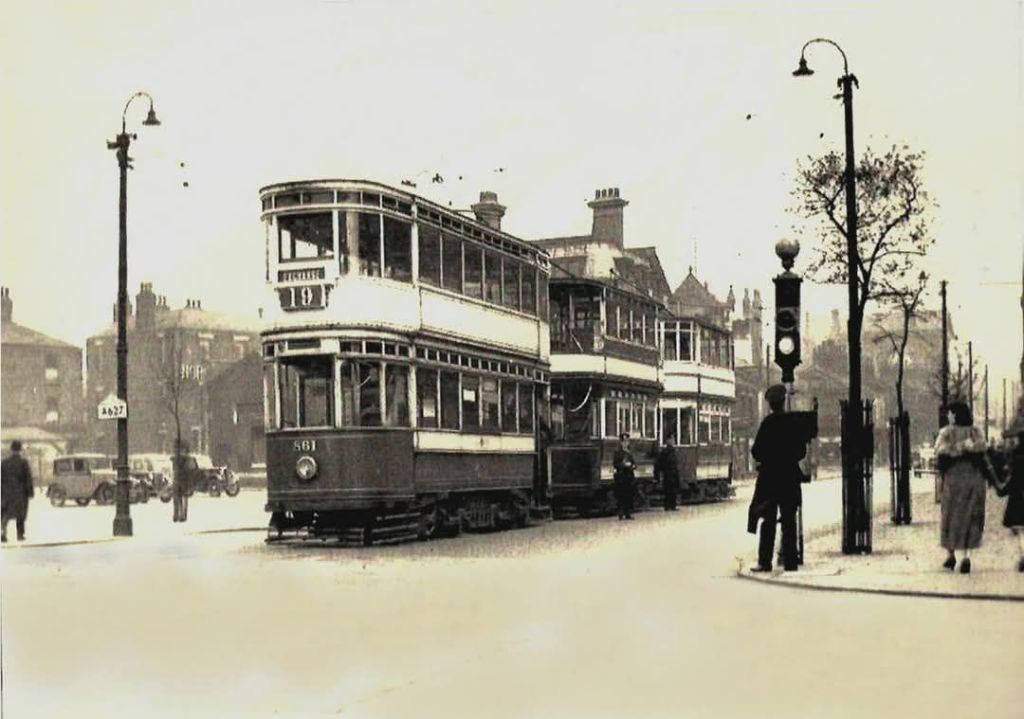
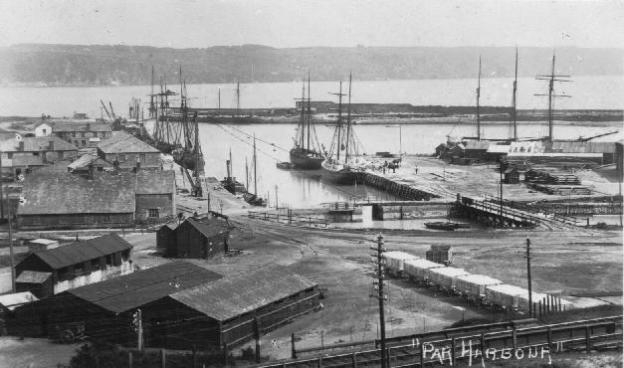
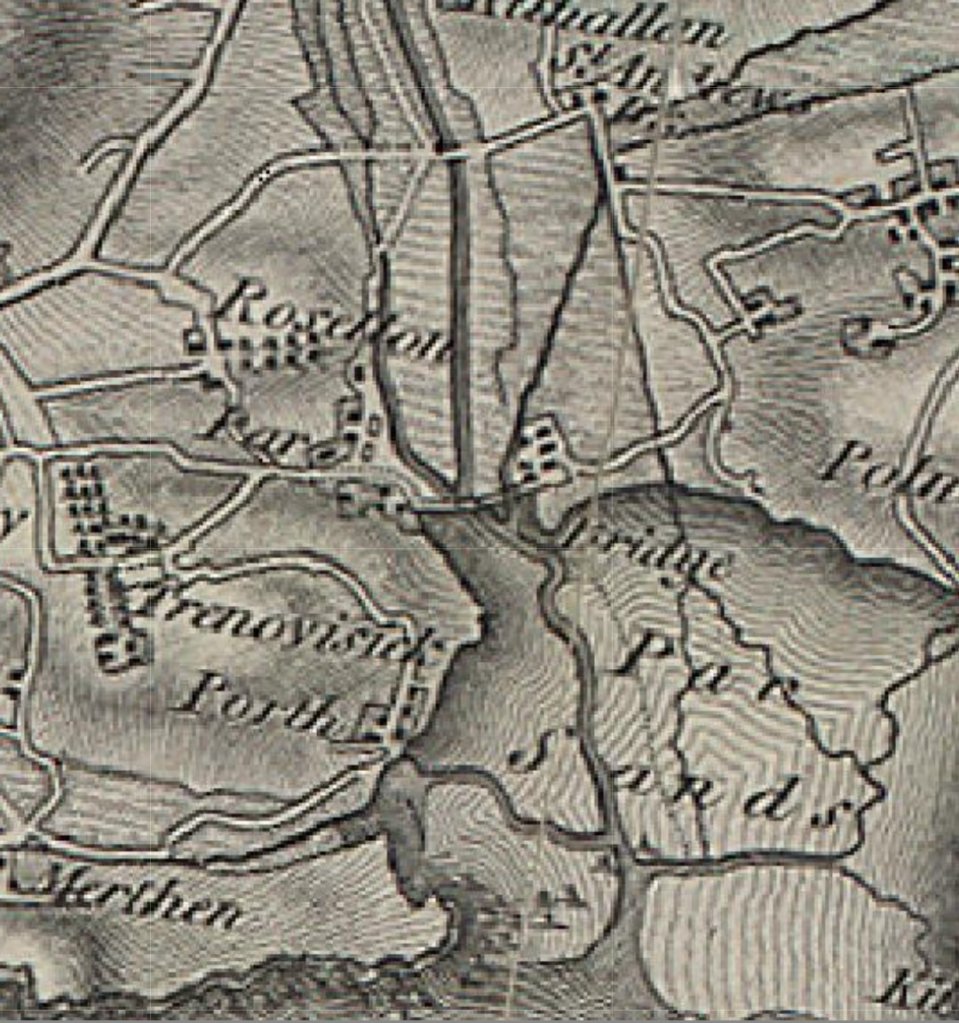
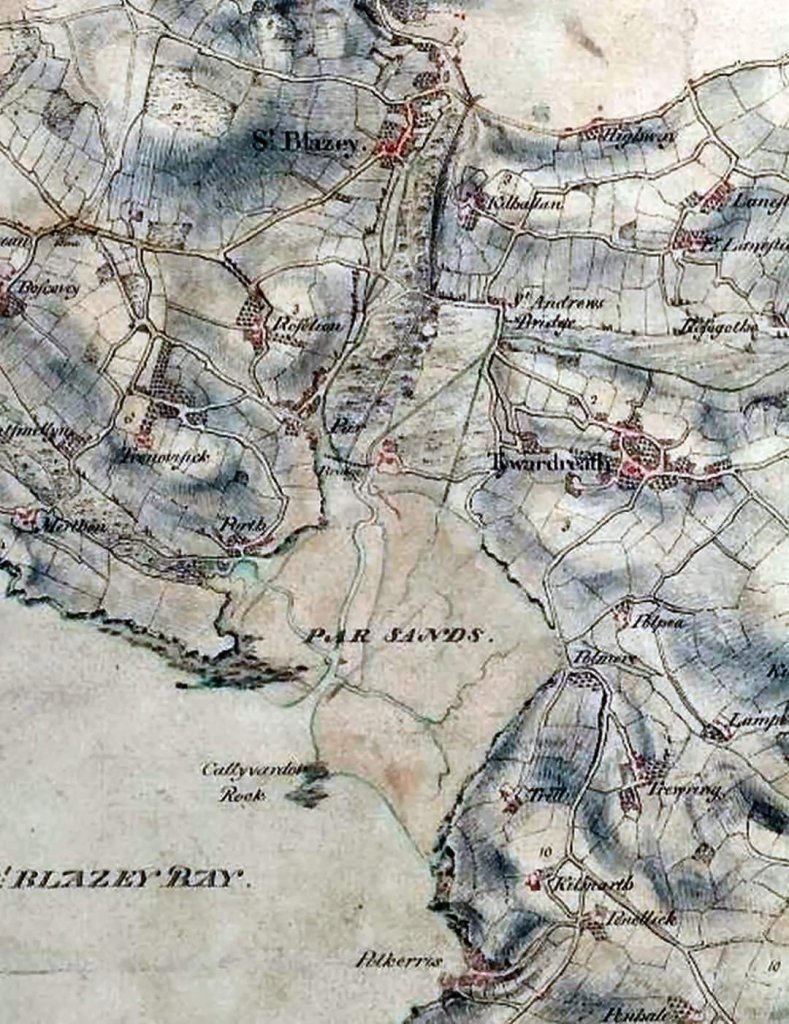

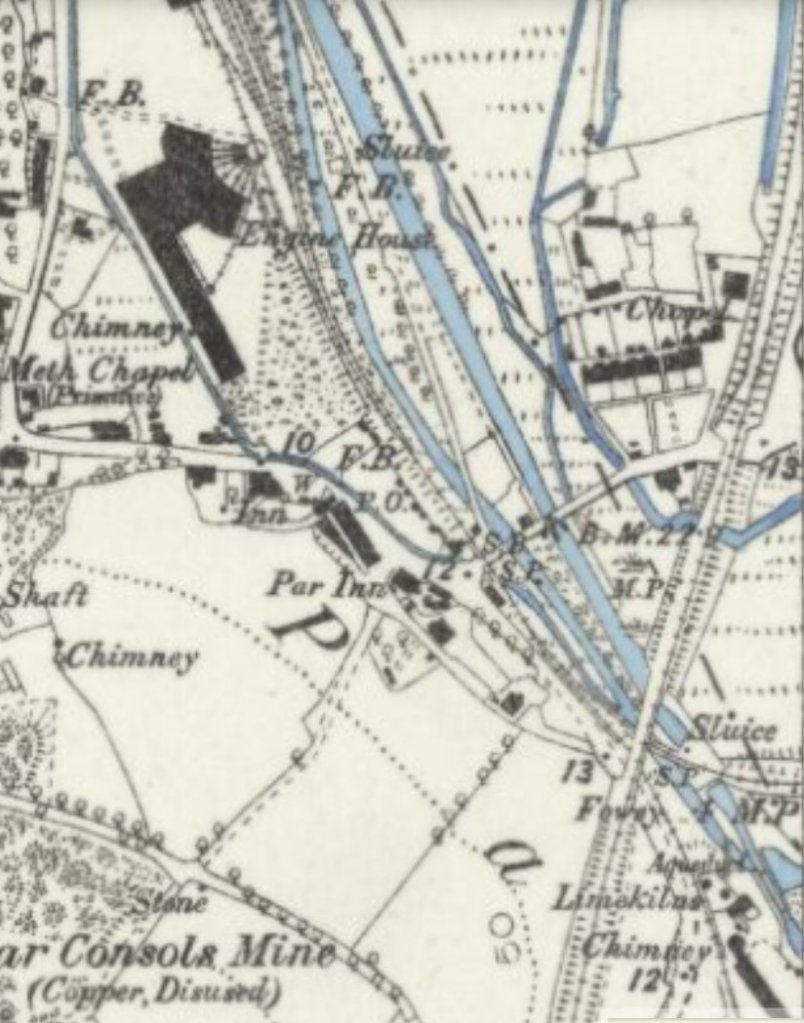
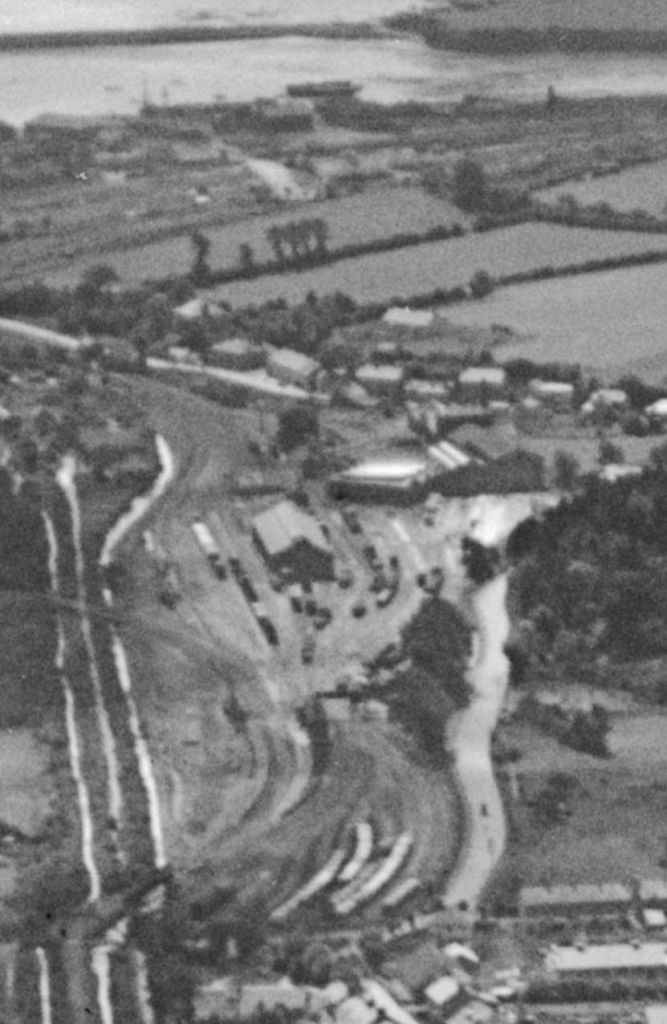

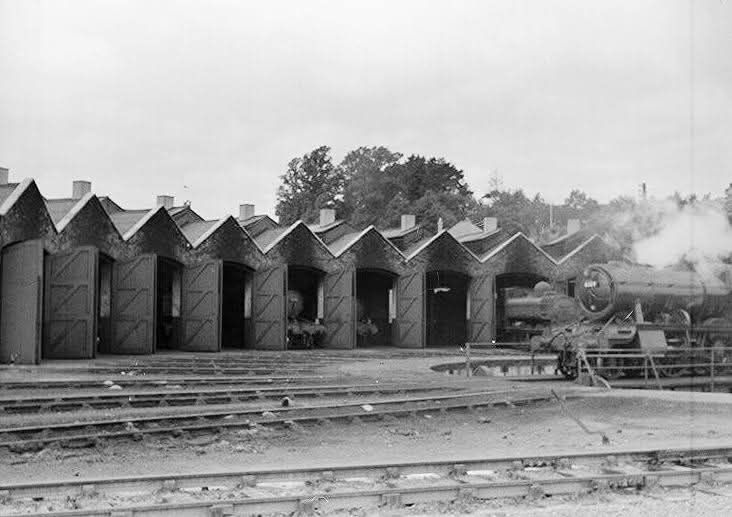
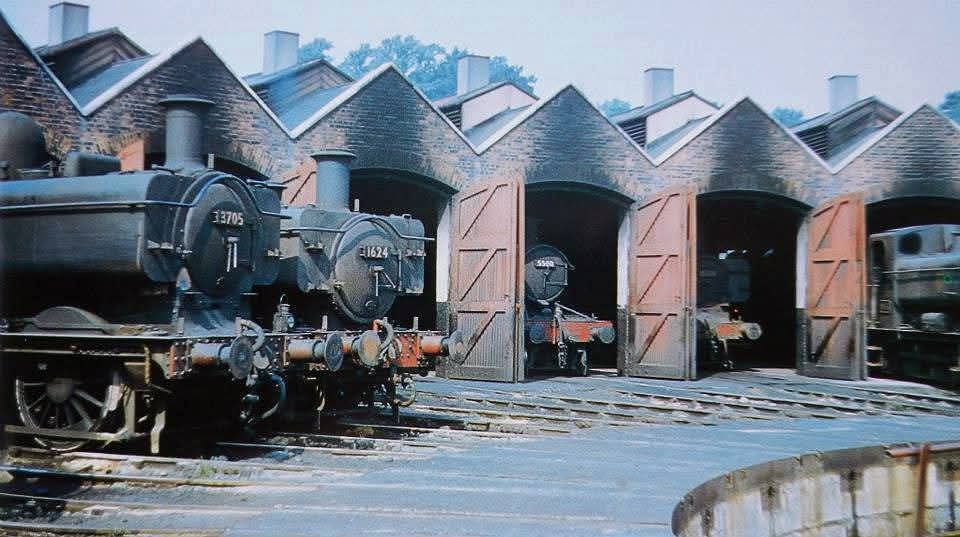
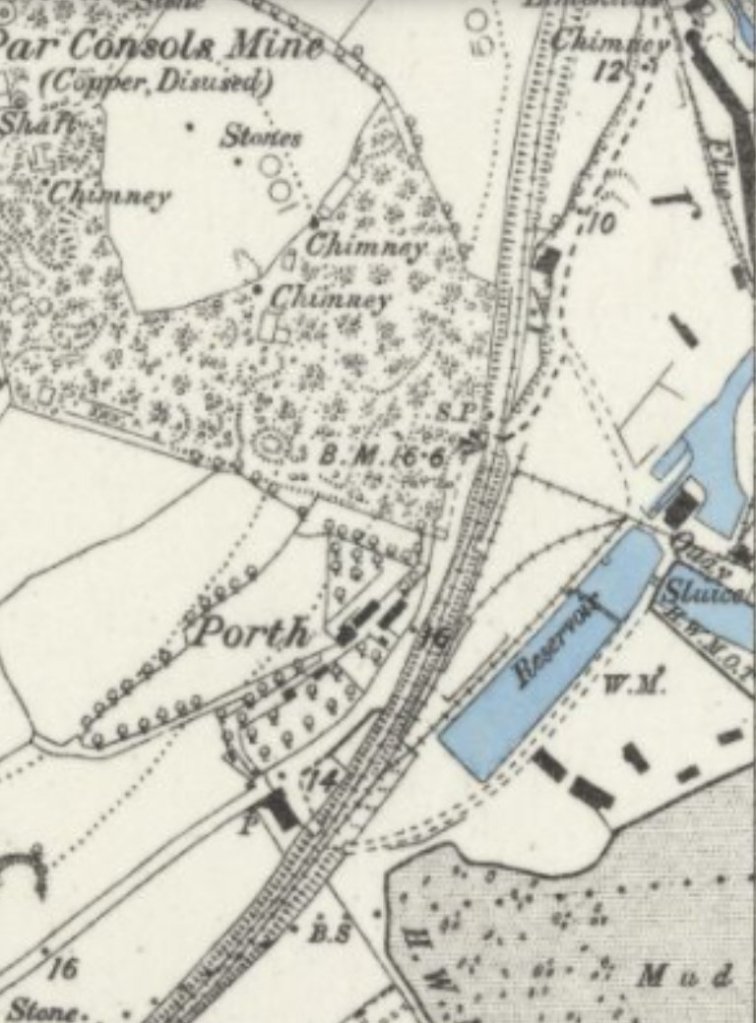
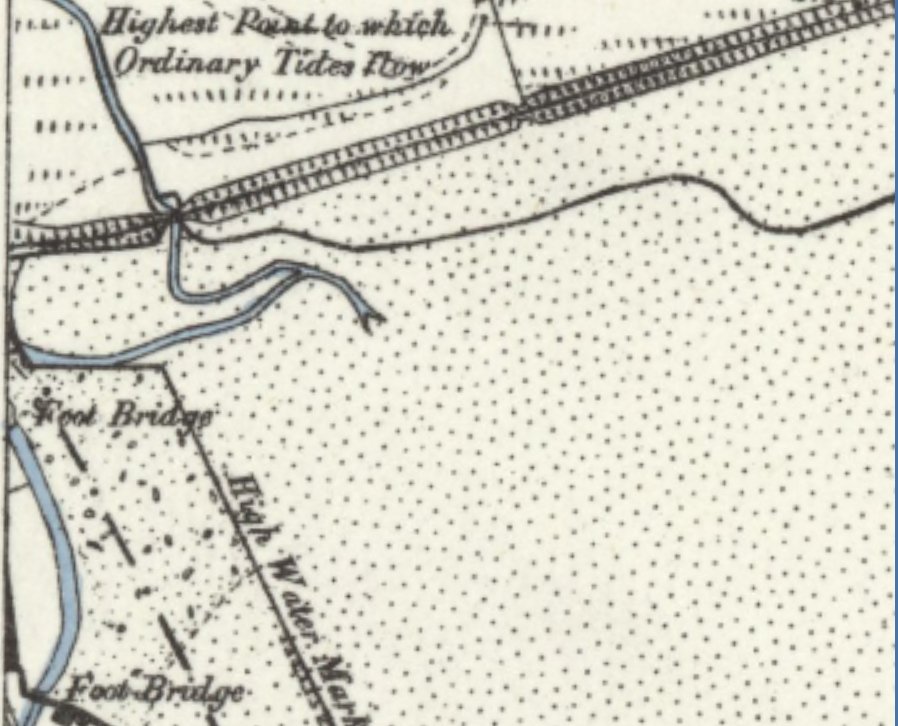
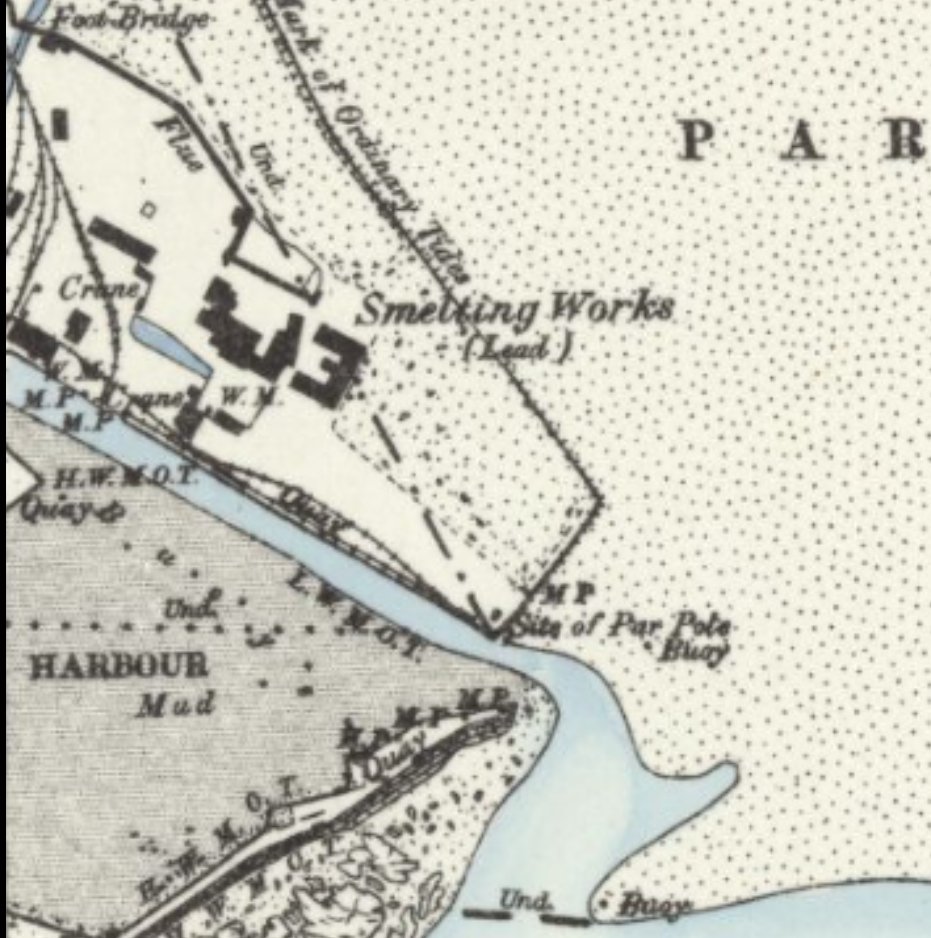
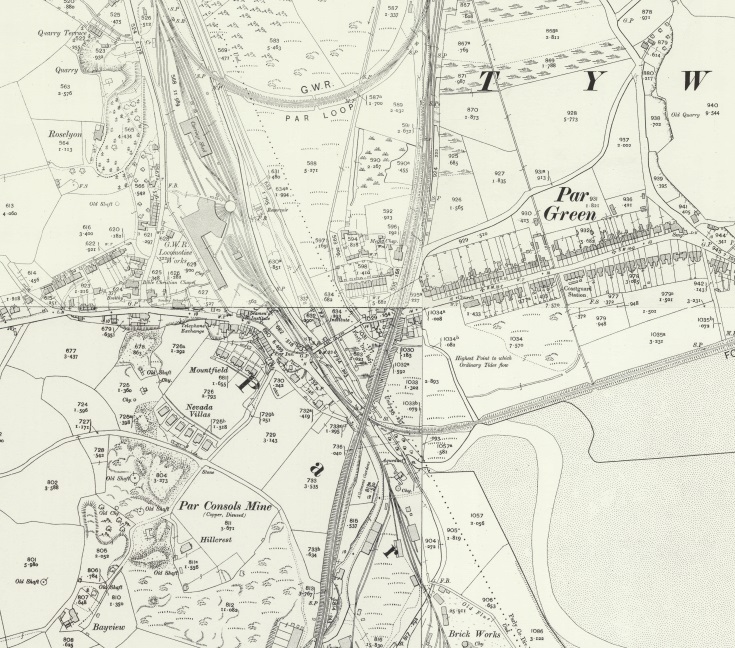
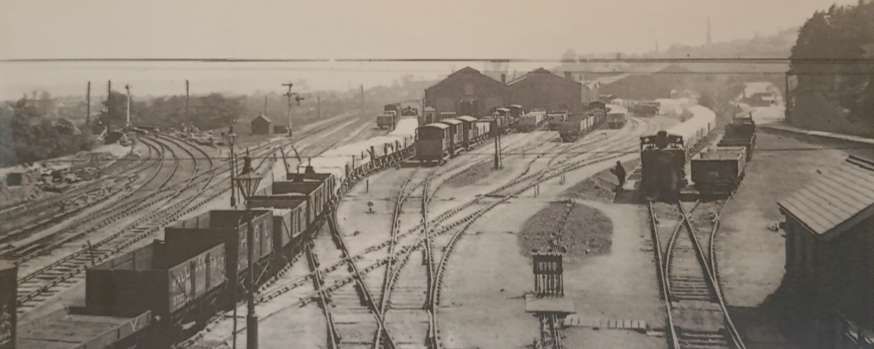
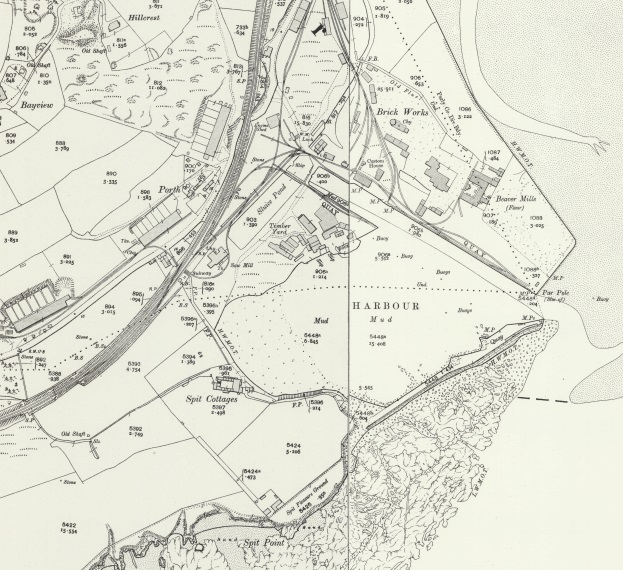
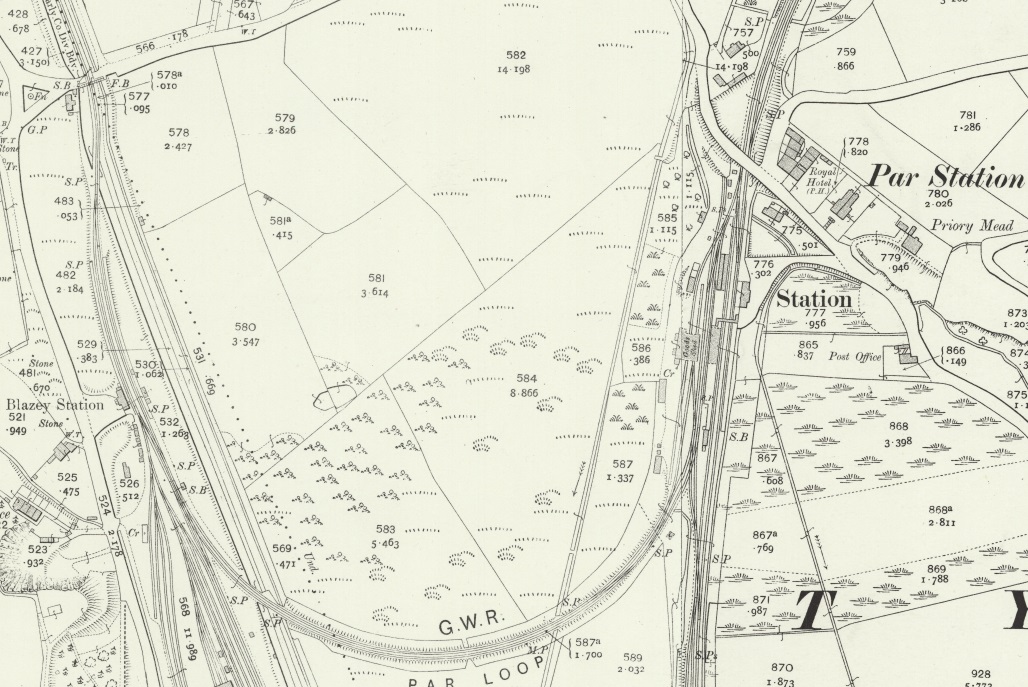
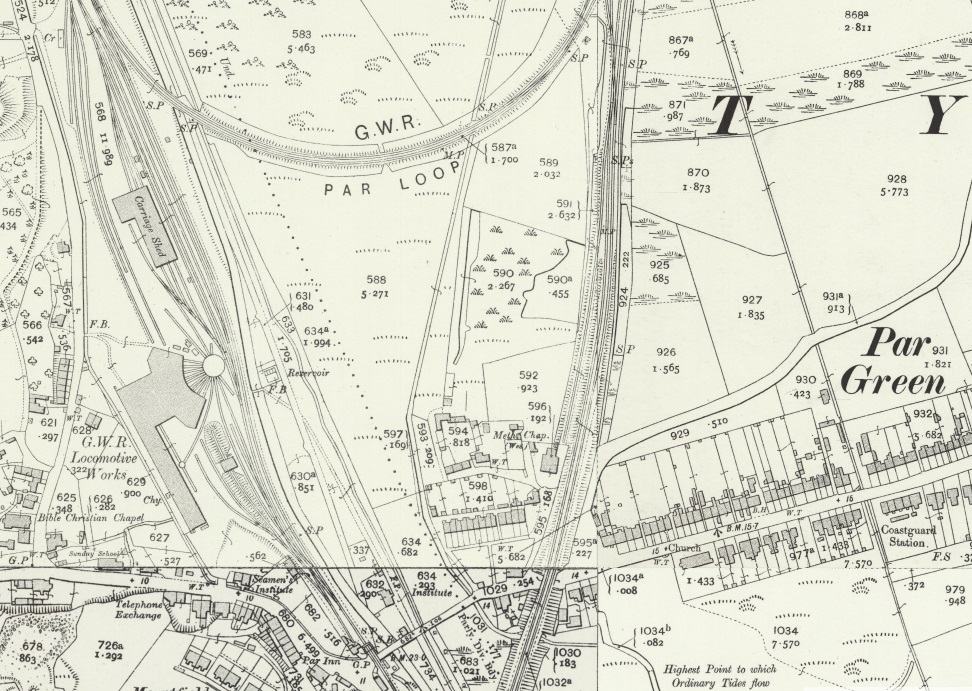
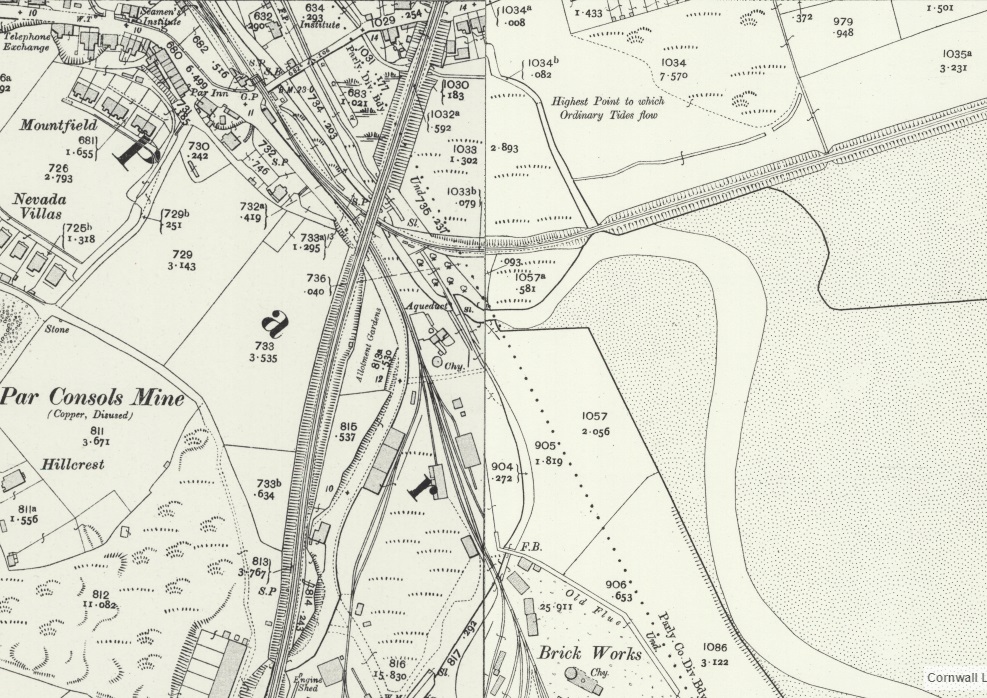
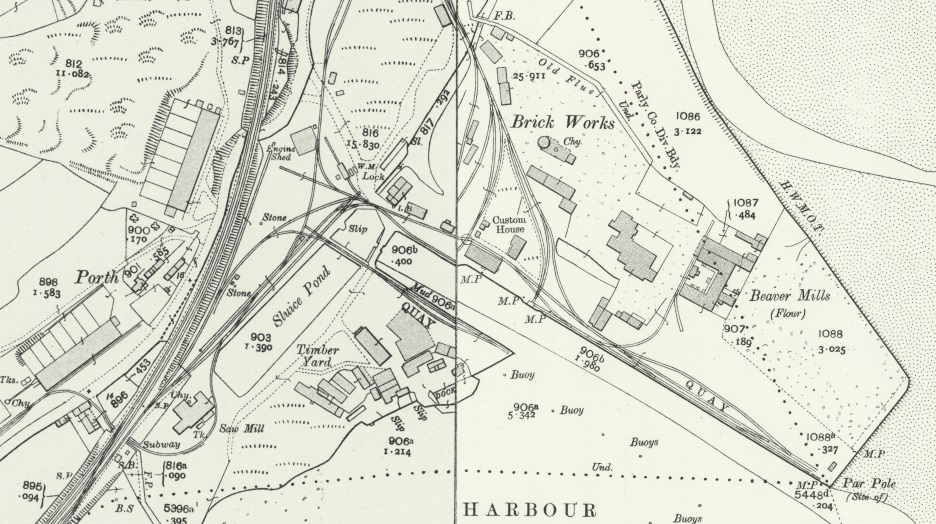
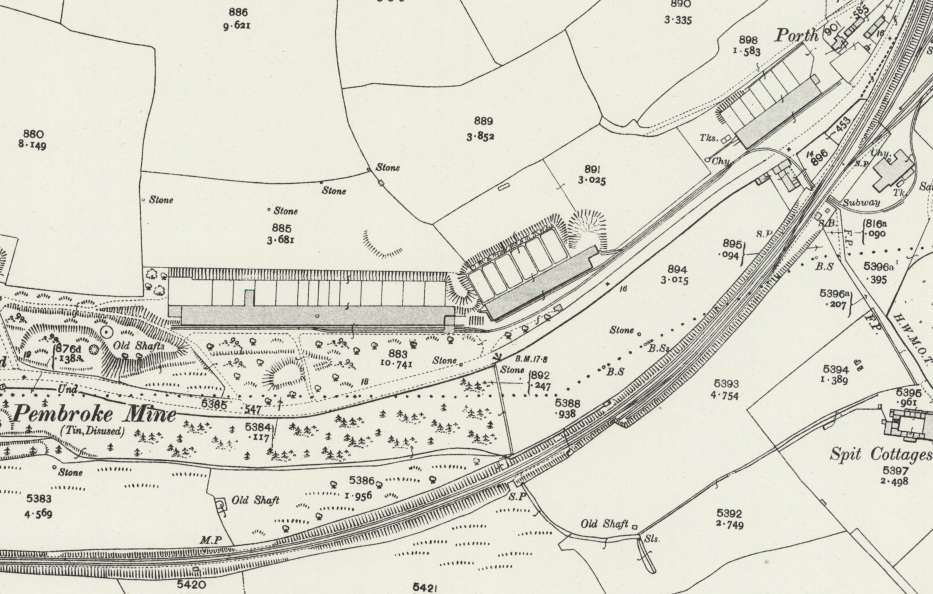
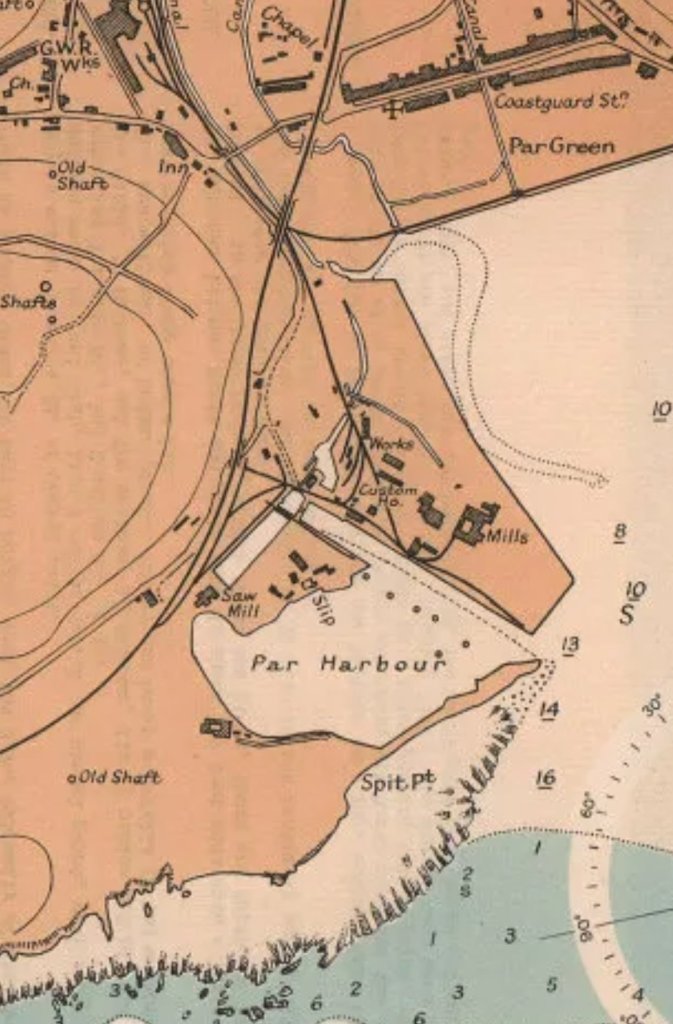
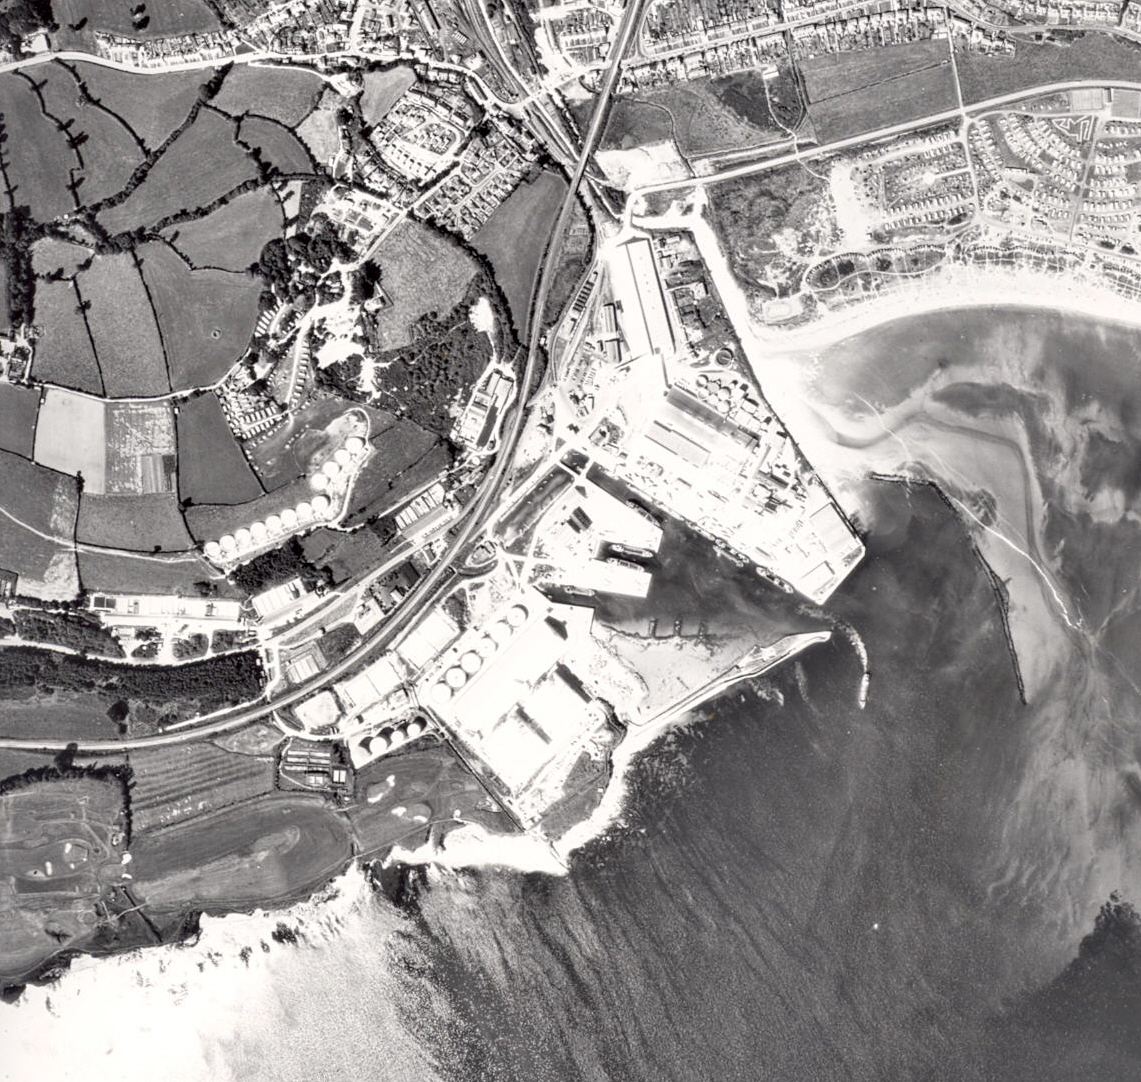
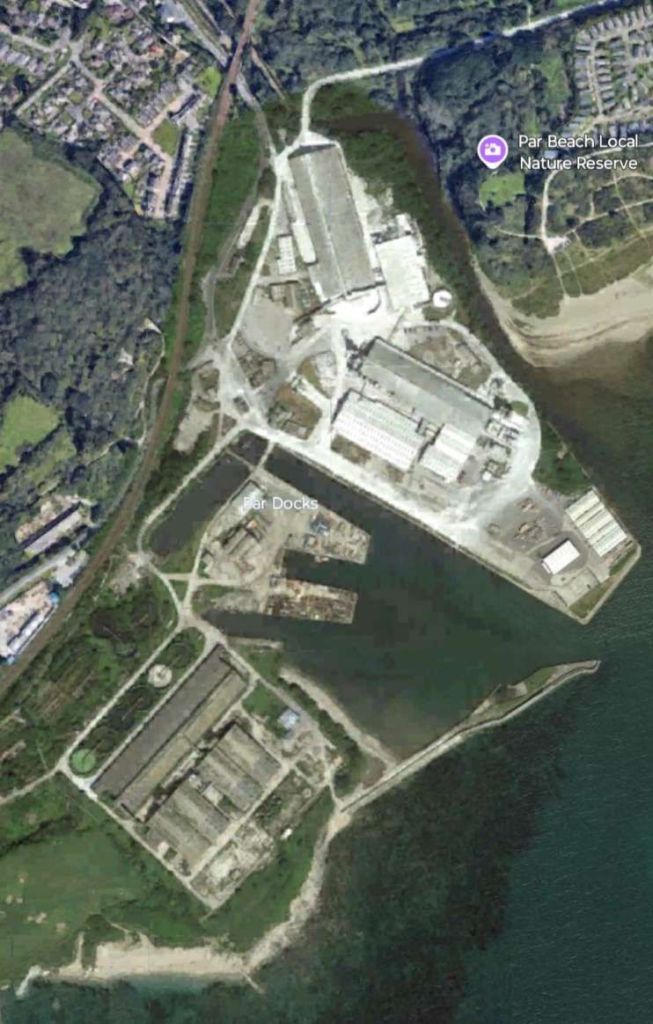

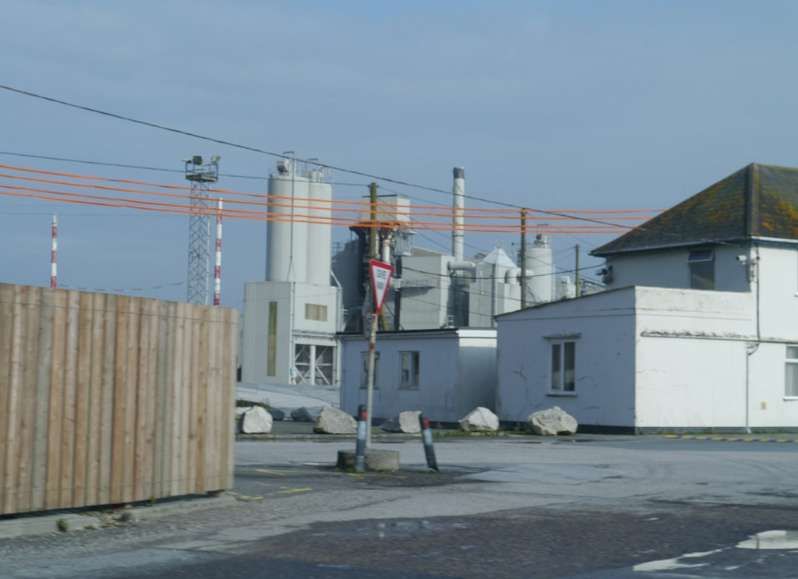
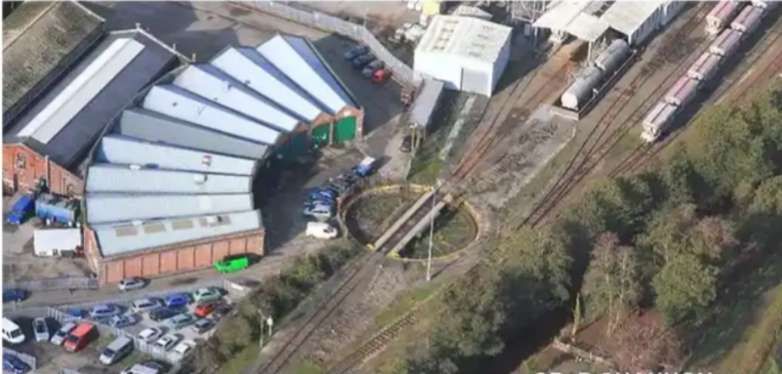


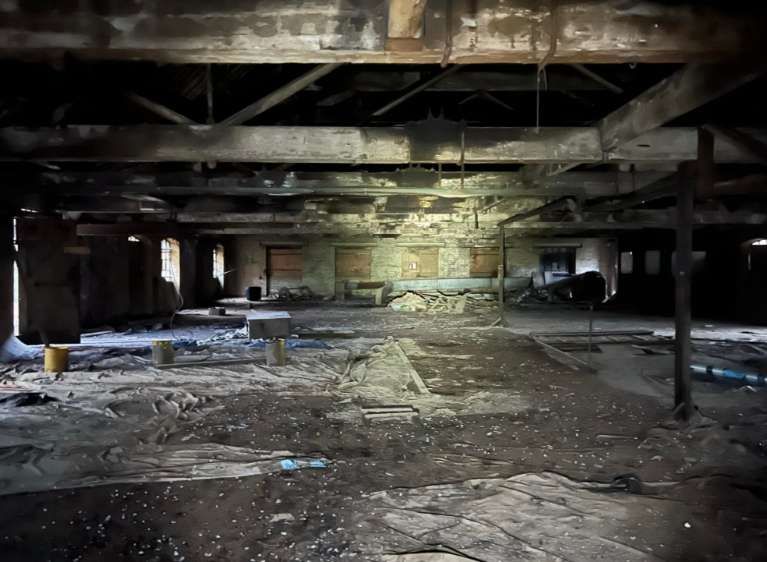

.jpg)
.jpg)
.JPG)