Friday 31st August, 1962, saw the closing of the dockside tramways of the Port and Harbour Commissioners in Derry. This was probably “a delayed outcome of the closing in 1957 of much of the hinterland railway system, which … diverted much traffic to Dublin, and since 1950 the rail traffic over the Commissioners lines has fallen from 200,000 tons to just over 10.000 tons per year. Now road transport is used for all traffic.” [1: p314]
The city of Derry was unusual in having four separate railway termini, two on each side of the River Foyle. On the western side was the Foyle Road, terminus of the Great Northern Railway’s 5ft 3jn gauge line to Omagh and Portadown, separated by nearly two miles of quays from the L&LSR’s 3 ft. gauge terminus at the Graving Dock. Across the river on the eastern shore was the Waterside terminus of the Ulster Transport Authority (ex-NCC) main line to Coleraine and Belfast, and further south on the same side was Victoria Road station, the terminus of the 3ft gauge line to Strabane owned by the Ulster Transport Authority and worked for them by the County Donegal Railway.
The narrow gauge lines were closed in 1953 and 1954 respectively, but the broad gauge lines were still in use in 1963.
“To allow railway wagons to reach the town quays and the quayside warehouses, the … Port and Harbour Commissioners built from 1867 onwards a system of dock tramways worked initially by horses. Most of the lines were of three-rail mixed gauge. … In 1872 steam traction was introduced, with broad-gauge tank locomotives fitted with dual couplings so as to haul broad or narrow-gauge wagons; mixed gauge trains were not unusual.” [1: p314]
From about 1950 the Commissioners two latter-day locomotives (both 0-6-0 saddle tanks) were displaced by road tractors, but remained in their shed for another three years. Photographs of these two locomotives can be seen towards the end of this article.
“For a short time in the 1880 the Lough Swilly passenger trains ran over the dock tramways as far as the Middle Quay, but this ceased in 1888, and a link for passenger traffle was provided instead from 1897 onwards by the 4ft 8in gauge horse tramway of the City of Derry Tramway Company, replaced by motor buses in 1920.” [1: p314-315]
“Since part of the original scheme was to allow the railways of the eastern shore an access to the quays and warehouses on the western, or town, side, the layout included a railway across the lower deck of the Carlisle Bridge, and this was continued when the bridge was reconstructed as the Craigavon Bridge in 1933. The upper deck of the bridge carrie[d] a roadway and footpaths. Locomotives were not allowed on the bridge, and for many years the wagons were moved across by rope and capstan.” [1: p315]
This installation included two of Ireland’s few mixed-gauge turntables (the others were at Strabane, Larne Harbour and Carnlough), and to ensure that the narrow-gauge wagons were balanced correctly on the turntables, the 3 ft. gauge track was brought to the centre of the broad gauge instead of remaining at one side.
Price commented that the whole layout was distinctly unusual. He considered it likely (in 1963) that some portions of the trackwork would remain in place for years to come.
Craigavon Bridge was designed by the City Architect, Matthew A Robinson. Construction began in the late 1920s and was finished in 1933. As we have noted, the lower deck of the bridge originally carried a railway line for freight wagons, but that was replaced by a road in 1968. At each end, a silhouetted mural of a railway station stands to mark the former railway. [2]
The Port and Harbour Commissioners Tramways have been carefully mapped by Chris Amundson after study of all available sources. His work covers track layouts throughout the life of railways and tramways in Derry. This is not the place to share large electronic files but his mapping can be found on the Irish Railway Modeller forum. His CAD map from the late 1940s can be found here. [3] Just a few extracts from that drawing. …….
To the North of the Goods Shed and just off the North edge of the extract above the L&LSR crossed the Strand Road at level on a shallow angle.
This photograph is taken looking North through the level-crossing on Strand Road. It shows the final train on the L&LSR, entering Graving Dock Station from the North, crossing Strand Road. The Crossing Gates emphasise the width of the road and the shallow angle of the crossing. [16]This extract from the Ordnance Survey at the turn of the 20th century shows the Graving Dock, the L&LSR Station and the Strand Road crossing. The Port and Harbour Commission’s dual-gauge tramroad enters the extract from the South and terminates alongside Graving Dock Railway Station where a connection is made with the L&LSR sidings. Ownership of the tracks switched from the Commission to the L&LSR at the Southwest end of the Graving Dock.The view North from the mouth of Duncreggan Road in 2022. The western kerb of Strand Road was under the location of the car parked on the grass verge close to the centre of the picture, perhaps under the location of the offside rear wheel. The level crossing gates were perhaps a short distance to the North of the same car. [Google Streetview, October 2022]
The next two images show the Port and Harbour Commission’s Locomotive 0-6-0ST No. 1 at work on the West side of the River Foyle. Both are embedded Getty Images.
Locomotive 0-6-0ST No. 1 in 1933, (Photo by Science & Society Picture Library/SSPL/Getty Images). [7]Locomotive 0-6-0ST No. 1 again, (Photo by Science & Society Picture Library/SSPL/Getty Images). [8]Locomotive No. 1 again, this locomotive was built by Robert Stephenson & Co. (Works No 2738). It is on display in the Ulster Folk and Transport Museum at Cultra near Belfast. [9]The Port and Harbour Commission’s Locomotive No. 3, ‘R.H. Smyth’. This locomotive is an Avonside Engineering Company locomotive, built in 1928, (Works No. 2021). Described as “generally similar to the B6 class 0-6-0 saddle tanks, but with a wheelbase of 9 feet and a gauge of 5 feet 3 inches”. The engine was designed to work on dual gauge track with both 5’3″ and 3′ gauge wagons, and had a pair of offset narrow gauge buffers. It was stood down from operational duties in 1959. By 1968 the engine had been out of use for several years and the Reverend L.H. Campbell decided to buy her to save her from the scrapyard. By February 1968 the engine was his, remaining for the time being in the Harbour Commissioners’ sheds. In 1972, the Reverend decided to pass the engine on to the Railway Preservation Society of Ireland so that it could be restored to working order. The handover officially took place on 1st May that year. It has an interesting history in preservation. [10]
No. 3’s story is taken up by the Railway Preservation Society of Ireland: “The little engine lay outside for many years until it became practical to overhaul her. She first steamed in preservation in summer 1977. For many years she served as yard shunting engine at Whitehead, and was a guinea pig for the inner firebox repair on No.85. Her public duties included train rides up and down the site at Whitehead, hauling early Easter Bunny and Santa trains before they became mainline trains. … In the summer of 2000 the loco was hired to contractors Henry Boot who were relaying the Bleach Green – Antrim line for NIR. A locomotive was needed to pull ballast hoppers, and as IÉ and NIR were not in a position to loan a locomotive, the RPSI was approached. The locomotive pulled over fifty thousand tons of stone from 18th June until 25th November 2000. On the latter date she returned to Whitehead and resumed her shunting duties. … By 2004 “R.H. Smyth” was in need of an overhaul, but didn’t seem likely to return to steam until the Guinness engine came out of traffic as steam shunting engine. Then the contractors relaying the Bleach Green – Whitehead line stepped in. They required an engine to haul ballast trains, just as Henry Boot had. The locomotive was given a thorough overhaul in double quick time, and was moved to Greenisland in early August 2005. After a busy five months ballasting, the engine returned home to Whitehead in December 2005. … From 2006 until 25th November 2012, when it returned to Whitehead, the engine was on loan to the Downpatrick and County Down Railway, although for the last couple of years of that stay, the locomotive was out of service awaiting a decision on boiler repairs. … In late 2019 the locomotive received a cosmetic overhaul and went on display in the Museum at the head of a mini goods train. The narrow gauge coupler has been reinstated.” [10]
References
J.H. Price; The Londonderry Harbour Tramways; in Modern Tramway and Light Railway Review, Volume 26, No. 309; Light Railway Transport League and Ian Allan Hampton Court, Surrey; September 1963, p314-315.
The Lightmoor Press has developed a reputation for producing a substantial number of high quality railway-interest books. One of their latest has been produced about the Tralee and Dingle Railway in Co. Kerry, Ireland. The author is Michael Whitehouse. [1] It is another excellent publication.
The book is an enlarged and extended version of that written by Michael’s father, Patrick Whitehouse (PWB) in collaboration with John Powell in the mid-1950s.
The Lightmoor Press edition is given the status of a second edition with PWB’s 1954 book called the first edition. [2]
The ‘first edition’ book about the Tralee & Dingle Railway written by P.B. Whitehouse. [2]
Wikipedia tells us the Tralee and Dingle Light Railway and Tramway was a 32 mile (51 km), 3 ft (914 mm) narrow gauge railway running between Tralee and Dingle, with a 6.2 mile (10 km) branch from Castlegregory Junction to Castlegregory, in County Kerry on the west coast of Ireland. It operated between 1891 and 1953; the Castlegregory branch closed shortly prior to the outbreak of the Second World War. [3]
It was one of the most westerly railway lines in Europe, but the terminus of the Valentia Harbour branch to the South was further west.
As the Lightmoor Press says, “The Tralee & Dingle Railway still stirs the hearts and imagination. Many ferro-equinologists, including the author’s father, flocked to the railway, but most only just in time. They saw the last rites of the monthly cattle train serving the Dingle fair in the early 1950s and experienced the thrill of a lifetime riding the narrow gauge train and even the footplates of the steam locomotives as they rushed the steep gradients and flew down the other side, brushing red fuchsias into disarray. All spiced by the general hazards of near-derelict rolling stock running over grass-covered and barely maintained track, often wet from Irish rain and mountain mists and over some of the most frightful curves and gradients ever engineered on a narrow gauge railway.” [4]
“The Dingle peninsula has some of the best scenery in Ireland to travel through which is a draw all of its own. Fact and folklore generated by this three-foot narrow gauge railway was all quite remarkable, as was its involvement in the developing Irish political environment.” [4]
In this book, “Michael Whitehouse revisits the story of this remarkable railway using his father’s photographs and research notes, together with considerably expanded text to place the railway in its political, economic and social context.” [4]
The book begins with a series of different prefaces before chapters 1 to 4 cover a history of the line. Chapter 5 relates the story of the short-lived preservation line, the Tralee & Blennerville Railway and the surviving stock from the old railway which found its way to other locations.
Whitehouse then takes readers on a journey on the line (in Chapter 6), the political and economic environment in which it operated (in Chapter 7), the work of the running department: the men and the locomotives (in Chapter 8). He devotes a chapter to the carriages and wagons used on the line (Chapter 9). Two chapters cover the development of operations and signalling on the line and significant accidents (Chapters 10 & 11). A series of appendices including, among other things, facsimile copies of: the full text of The Tralee & Dingle Light Railway Order, 1888; the Bye-laws & Regulations; and the Working Timetables & Rules which detailed what were the Company’s expectations of its staff.
The book is published on high quality glossy paper held between strong board covers. It is a detailed, well-illustrated and comprehensive account which qualifies admirably as a final word on the Tralee & Dingle Railway.
The costs of publication of specialist, high quality books is high and is rising. The recommended retail price is £60.00. The Lightmoor Press will supply it direct and it can be bought from other outlets as well.
Highly recommended!
References
Michael Whitehouse; The Tralee & Dingle Railway: 2nd Edition; Lightmoor Press, Lydney, Gloucestershire, 2023.
Patrick B. Whitehouse; The Tralee & Dingle Railway; Locomotive Publishing Co Ltd., 1954.
On 28th February 2022 the Donegal Railway Heritage Centre announced that, with funding provided through the “Creative Ireland” programme administered by Donegal County Council, they completed the production of a map of County Donegal showing some of the main Donegal railway heritage still to be seen across the County and into Northern Ireland.
Niall McCaughan, Manager of the railway Museum stated: “In recent years there has been an increased interest in railway heritage, locally, nationally and internationally. Here in Donegal is no different, but the uniqueness of the railways that operated across Donegal has a special place in the hearts of the local population, not to mention too the international interest it rightly deserves. Although much of our great railway heritage has disappeared over the decades, there still is surprising a lot about, hidden in plain sight and some of Donegal’s railway heritage is still in operation for different purposes, including as the Bus Éireann bus station in Letterkenny and their depot in Donegal town, both previously part of the Donegal railway network. This includes Station buildings, halts, Gatehouses, bridges, etc. With this in mind, we have produced a simple easy to read folded “Heritage Trail” guide for the county, as well as some locations just across the border.” [1]
I picked up one of these leaflets at the Heritage Centre in Donegal Town. It is a really well-prepared fold-out map with a significant number of important locations on both the Londonderry and Lough Swilly Railway (which served the Northern half of County Donegal from its station in Derry) and the Co. Donegal Railways network.
If you are planning a holiday in Co. Donegal then writing off for one of the leaflets would be worthwhile. They are supplied free, provided the buyer covers postage and packing costs. Alternatively, the leaflet is also available to download as a .pdf file, here. [2]
This is a low resolution copy of the map which forms part of the heritage trail leaflet. Each of the numbered locations has its own short note and photograph on the reverse side of the leaflet. [2]Just a few of the locations highlighted in the leaflet. [2]
This is an excellent leaflet providing a great way to plan a trip round Co. Donegal to find railway heritage and to enjoy Donegal’s wonderful scenery. Don’t get so focussed on the railway history that you miss the superb beaches and the rugged moorland scenery.
The leaflet’s suggested stop-off points can supplemented by some excellent railway walking.
The first 6 km of the line from Burtonport (on the L&LSR [3]) is an easily accessible, well-maintained walk. Full details of the walk and associated historic photographs can be found on this link:
A further excellent walk, part metalled, runs between Falcarragh Railway Station and the Foot of Muckish Trailhead, also on the L&LSR, which can be found within this link:
Lough Connell, Meenderrynasloe, Co. Donegal. The old railway ran along the North side of the lough. Parking is available at the West end of the lough. [Google Maps, 5th June 2023]
It is also possible to follow other lengths of the line which are part of other walking trails or which require a little more adventurous spirit. The full length of the Burtonport Extension of the L&LSR is covered by the series of of which the three above are a part.
The featured image above shows one of the last tram journeys in Belfast. This tram is travelling along Castle Place on 27th February 1954, heading for Ardoyne Depot. [7]
In ‘The Modern Tramway’ of August 1953, [1] there was a report of an expedition by members of the Light Railway Transport League in June 1953 which toured a number of Ireland’s Light Railways. [1: p150-155] The visits included:
CIE., Tralee and Dingle section, 3 ft. 0 in. Steam.
Irish Turf Board, Clonsast bog railway … 3 ft. 0 in. Steam & diesel.
In 1953, this represented all the remaining Irish narrow gauge railways and tramways, with the exception of the derelict Schull and Skibbereen and Ballycastle lines and certain industrial lines (Guinness Brewery, British Aluminium Company, several Irish Turf Board lines and a few others) The Lough Swilly and Tralee and Dingle railways were both to close in the summer of 1953.
The tour commenced in Belfast on Saturday, 6th June and the morning was spent on the Belfast Bangor section of UTA, which was served by 3-car diesel trains. In the afternoon, a tour of Belfast Corporation Tramways ran from the Mountpottinger Depot in an old tram (No. 340). It was noted that tramcars and track on the Belfast network were in a very poor state. Belfast had just purchased 100 surplus London buses which would hasten the closure of the tramway network.
A visit to the Hill of Howth Tramway consumed much of the next day.
On the Cavan and Leitrim, the tour party travelled behind 2-4-2T No. 12L. The train consisted “two open platform coaches and a sting of vans, some of which were detached and shunted at Mohill.” [1: p152] The description of the time on the Cavan & Leitrim continued: “At Ballinamore our coach was transferred to another, smaller train behind 4-4-0 tank locomotive No. 31, complete with cowcatcher for the roadside journey, to Arigna. This line is the last roadside steam tramway with passenger service in the whole of the British Isles, and is kept open by reason of the fact that it serves the Arigna coal mines. The speed is quite brisk, despite some really abrupt curves and switchback gradients, but the journey was cut short by an encounter with a road vehicle at Mahanagh (Shannon Crossing), through no fault of the train crew.” [1: p152]
After a short hiatus while a policeman from Drumshambo took everyone’s particulars the tour continued to Manorhamilton and then to Enniskillen and Fintona Junction where they enjoyed a short return journey on the newly reconditioned Fintona horse tram (G.N.R. No. 381), continuing later to Omagh and then Derry (Londonderry).
From Derry, the tour party travelled to the border behind 4-6-2T No 15. This loco was replaced by 4-6-2T No. 10 for the remainder of the outward journey to Buncrana. The article continues: “The return journey from Buncrana was run as a mixed train. At Pennyburn sheds were locomotives Nos. 2, 4, 5, 6 and 8 – Nos. 5 and 6 are 4-8-4 tanks, the most powerful locomotives ever built for the Irish narrow gauge.” [1: p152]
The article reported that at the time of the visit, Derry had “four quite separate railway termini, each served by a different company and linked only by mixed gauge tracks laid along the quays and across the lower deck of the Craigavon Bridge. One railway, the 3 ft. gauge Londonderry and Lough Swilly, is to close down very shortly, and the special 3-coach passenger train provided on 9th June to take the L.R.T.L.-I.RR.S. party to Buncrana and back is likely to be the last; regular passenger service ceased in 1948.” [1: p152]
After a morning spent on the Lough Swilly, the party travelled to Strabane to explore parts of the Co. Donegal Railways system. They were taken from Strabane to Stranorlar in Railcar No. 19 and toured the company’s workshop. They noted what at the time was “probably the oldest surviving railcar in the British Isles, a small 8-seater built as an inspection car in 1906 and fitted latterly with a Ford engine for use in pass- enger service; it [was] still in working order, and … stored at Stranorlar together with the Directors’ Saloon, which [was] still used once per year for an annual inspection by representatives of the Joint Committee. The locomotive shed housed two locomotives in startling brick-red livery as [were] the coaches and railcars.” [1: p153]
From Stranorlar, Railcar No. 19 took the party non-stop through Barnesmore Gap to Donegal town, where it coupled with Railcar No. 10 and ran on to Killybegs. Returning to Donegal town the party transferred to a train of “Railbus No. 14, observation saloon No. 30 and trailer No. 1 for the last section to Ballyshannon, which ran fast to Rossnowlagh Friary halt and there picked up about 70 churchgoers from the Tuesday evening service at the Fransiscan Friary, some of whom were subsequently set down at their cottages along the line.” [1: p153]
Wednesday, 10th June started with a long cross-country journey to Ennis for a visit to the West Clare section. In 1952, the section had received 4 new railcars and a demonstration run between Ennis and Kilkee was provided for the tour group.
The following day saw the group travelling on the Tralee and Dingle Railway. By this date only monthly trains timed for the Dingle Fair were timetabled. The visit was on a Thursday and a special train was provided. 2-6-0T No. 8 took charge of two bogie vans fitted with new wooden benches and a few from the station platforms. The journey to Dingle took more than three hours and was followed by a return journey which also lasted longer than three hours and included a marvellous view of the sun setting over Tralee Bay.
Other visits followed before the tour returned to Dublin. None of which quite measured up to their experiences on the Tralee and Dingle!
Associated news carried by The Modern Tramway in the same issue of the journal included:
The end of the Londonderry and Lough Swilly
“The Londonderry and Lough Swilly Railway, a light railway, which together with the Burtonport Extension, was once Ireland’s largest narrow gauge railway (99 miles of route) closed finally on 1st August. At its fullest extent, the line once extended from Londonderry to Burtonport with a long branch to Cardonagh. The Company, unlike its railcar-minded neighbour, the County Donegal Railway, decided that its future lay on the roads, and in 1929 began to operate buses, closing the railway between Buncrana and Carndonagh six years later. The Gweedore Burtonport section was closed on 3rd June, 1940 and the Letterkenny-Gweedore section in 1949. Occasional passenger trains during the holiday season, to relieve double-deck buses, ran to Buncrana until August, 1951.” [1: p159]
Belfast
“The General Manager stated recently that in conformity with the policy of abandoning tramcar operation at the earliest possible date, tramway repairs and maintenance have been reduced to the minimum consistent with safety. The Queen’s Road tramway will not be replaced by trolleybuses but by motorbuses as the movement of large pieces of machinery to and from the shipyard is inconvenienced by overhead wires (in the past the tramway wires have occasionally been temporarily removed to allow “out-of-gauge” loads to pass along this way). During June and July the following tramcars were withdrawn and scrapped: [300, 301, 320, 337, 338, 340, 341, 369, 392, 394, 400, 413, 415, 419, 428].” [1: 159-160]
Late News from Ireland
“Two steam-worked light railways visited during the Irish Tour have just been finally closed. On the Tralee and Dingle Railway, the last train ran on Wednesday 22nd July, to collect wagons from Dingle station yard. On the Londonderry and Lough Swilly Railway, the last goods train was due to run on 10th August.” [1: p160]
On Saturday 3rd June 2023, I attended the Craven Arms and District Model Railway Circle Annual Show at Ludlow Racecourse. The visit did not disappoint. …
One of the layouts on display was Glenties in 00n3 by Alastair Knox. A general view of the layout appears as the featured image above [My photograph, 3rd June 2023]
Having just been in Donegal for a few weeks, the presence of the Glenties layout at the Show was a pleasant surprise.
The track layout seems correct but the buildings appear to have been a little compressed to keep the layout within the available space. The stock seems to be mainly from Backwoods Miniatures. [4]
Railcar No. 12 approaches the station throat at Glenties. [2]Railcar No. 12 crosses the stream on the approach to Glenties Railway Station. [My photograph, 3rd June 2023]No. 3A, a 2-6-4T locomotive crosses the road on the way into Glenties Station. [3]Phoenix shunting the goods yard at Glenties. [3]Railcar No. 12 trundles into the platform at Glenties. [My photograph, 3rd June 2023]Railcar N0. 12 brings its short train to a halt at Glenties Railway Station. The station buildings on the model have been condensed in the model form from their size in real life. This can be seen when comparing images of the model with the pictures at the end of this article. [My photograph, 3rd June 2023]No. 12 is now being turned ready for departure for Stranorlar. The turntable at Glenties saw a lot of use as all of the railcars used on the Co. Donegal network only had a driving position at one end. [my photograph, 3rd June 2023]No. 12 heads to the station throat before setting back onto its short train of wagons. [My photograph, 3rd June 2023]No. 3A has just left its train in the goods yard to be marshalled by Phoenix and awaits clearance to run back past the train and to then be serviced and turned in the loco depot. [My photograph, 3rd June 2023]No. 3A on the turntable at Glenties. [My photograph, 3rd June 2023]Glenties Railway Station after closure, (c) Roger Joanes. This picture is included here under a Creative Commons Licence (CC BY-NC-ND 2.0). [5]
The main station building remains in use in Glenties as a B&B. Pictures from the booking.com website for the property appear below.
As can be seen here, the actual buildings at Gentlies were longer and wider than the model could accommodate. The passenger station on the model appears to have been compressed in length and width but not in height. [1]A view along the station platform in the 21st century. [1]
The line from Stranorlar to Glenties is covered in the two articles below:
00n3 is “the description given to modelling 3 ft (914 mm) narrow gauge railways in 4 mm scale with 12 mm (0.472 in) gauge track. 3 ft (914 mm) prototypes were common in Ireland and the Isle of Man, but the scale is not generally used outside the British Isles. 12 mm (0.472 in) gauge track is the same as that used in TT scale and HOm, so some components used for those scales can be used.” [6]
These two images are stills from a video of the Glenties layout taken at the Liverpool Model Railway exhibition in 2022, https://www.youtube.com/watch?v=PZT3hYrtfiE, accessed on 9th June 2023.
At the end of a fortnight’s holiday in Co. Donegal my wife and I had 3 nights staying close to Dublin. We chose to stay in Howth as it was at the Northern end of the DART, but perhaps also because of its history and particularly for the Hill of Howth Tramway, or to give it it’s formal title, “The Sutton and Howth Electric Tramway.” The tramway should not be confused with the Clontaff and Hill of Howth Tramroad.
The Tramway served Howth Head, near Dublin. The termini were at Sutton railway station, by the entrance to the peninsula, and Howth railway station by the village and harbour of Howth.
The tramway operated from 17th June 1901 to 31st May 1959 and was run by the Great Northern Railway (Ireland) (GNR(I)), which viewed it as a way to bring more customers to its railway stations at Sutton and Howth. The tramway replaced a horse bus service, which had run since 1867. [1][2]
When it opened, “the Hill of Howth Tramway had eight trams, open-top 67-seaters built by Brush of Loughborough. … Traction current at 550 volts dc was drawn from the overhead wires by conventional trolleypoles. … In 1902, two further trams … were obtained. Nos. 9 and 10 were 73 seaters built by Milnes, the firm which also supplied Dublin’s first electric trams in 1896. There were 41 seats upstairs and 32 inside seats.” [9]
“The tramway also had a freight and engineering car, No. 11, built in 1903. This … had a cab at each end, with a wagon body between. No. 11 also had a maintenance tower and at least in its later years was fitted with a telephone which could be connected into the wires along the line.” [9]
“Around 1918, the original crimson lake and ivory livery gave way to varnished grained teak. When the colours changed again around 1930 to blue and cream, Nos. 9 and 10, being used so seldom, remained in teak. Reasons for their lack of use included [an] awkward seating layout and a tendency to derail because the motors were outside the wheelbase. Furthermore, cross springs were not fitted between the bogies: when these were added in the fifties, their performance improved. By then these two cars were in constant demand and the invariable choice of the many enthusiast groups visiting the line in its twilight years.” [9]
“No. 9 was the last tram to run in public service on the Hill of Howth on 31st May 1959, and thus the last to operate anywhere in Ireland. Following the closure, No. 10 was sent to Britain’s National Tramway Museum at Crich in Derbyshire, while No. 2 went to California and No. 4 to Belfast. Due to vandalism and apathy, No. 9 was the only survivor of three cars set aside for inclusion in a future museum” [9] at the National Transport Museum at Howth Desmesne.
“On 1 October 1958, Córas Iompair Éireann (CIÉ) took over GNR(I)’s operations in the Republic of Ireland, including the Howth Tram. [7: p32] A year later, the tramway was closed down. It was initially replaced by two CIÉ bus routes – numbers 87 (Sutton to Ceanchor Road) and 88 (Howth to Windgate Road). [8] Two routes were necessary, as several narrow hill curves were not passable by the buses used. Eventually, sections of the disused tram route between the Baily post office and the Summit were expanded to form an extension of Carrickbrack Road; this enabled a single bus route (number 88) to be used.” [1]
The area was then served by the 31, 31a and 31b bus routes, which operated from Abbey Street in the city centre. In winter, icy roads on the hill occasionally cause the bus service to be suspended, unlike the tram, which ran in all weather conditions. A public footpath now follows the tram route between Howth station and the Summit.
It is important not to confuse the Hill of Howth Tramway with the Clontarf and Hill of Howth Tramroad, a completely different company which ran trams from Dublin to Howth.
The Clontarf and Hill of Howth Tramroad Company (C&HoHT) “operated a tram service from central Dublin via Dollymount in Clontarf to Howth Harbour in the Dublin area of Ireland from 1900 to 1941. Formed in the 1880s, it was a separate entity from the other Dublin tramways, notably the Dublin United Tramways Company (DUTC), but worked closely with the latter, who owned the line as far as Dollymount, for most of its operating existence.” [5]
A horse-drawn or steam tram service for the Howth area was first proposed in 1883, by the Great Northern Railway (Ireland) (GNR), to bring more passengers to Howth and/or Sutton railway stations. The Clontarf and Hill of Howth Tramroad Company (C&HofHT) raised the idea of a circular line around Howth Hill. “Neither idea progressed, not least because the slopes of the hill were too steep to be safe for horses, or practical for steam power, though a line may have been considered using a viaduct over Balscadden Bay, just beyond Howth village, to keep gradients within the range of steam propulsion.” [5]
In 1890, the C&HofHT sought an Order in Council to allow it to build a tram line from Howth Harbour to Dublin’s fish market. It was intended that the line should have “a gauge of 3 feet, with lines running from Mary’s Lane past Halston Street to Capel Street, and then along Parnell Street and Summerhill, through Ballybough, Fairview, Killester and Raheny, then along the coast through the fields of Kilbarrack to Sutton and Howth. While this matter did not proceed, the company developed two new proposals after the DUTC received permission to electrify its lines. The proposed lines, at a gauge of 5 feet 3 inches, were from the DUTC’s terminus in the Clontarf area, via the hamlet of Raheny-on-the-Strand and Sutton, to Howth Harbour, and from the Summit on Howth Hill down past Howth Station and the Howth Estate to the gates of Claremont. The GNR made a two-part counter proposal, seeking to electrify their railway line from Amiens Street Station to either Sutton or Howth, and to provide a circular tram line, with connections at Sutton Cross and Howth, and with the trams able to move all the way to Dublin’s centre. The C&HofHT added a third element to their proposal, for a tram line from Sutton Cross to the Summit, and the GNR then objected to the whole package, and won. The GNR then received permission for its proposed circular line, which became the Hill of Howth Tramway, and dropped the idea of electrification from the peninsula to Amiens St., and so of trams through-running around Howth and to the city centre.”
The C&HofHT eventually received “permission for a line from the DUTC’s depot at what had become Dollymount in Clontarf to Howth Harbour, and this was enshrined in a Private Local Act of 1898, The Clontarf and Hill of Howth Tramroad Bill, 61 & 62 Victoria I, cap. clxxxii. This Act had its Second Reading on 3 March, and on 18 July was the subject of debate about the possible insertion of a clause requiring the purchase of rolling stock from England, the promoters having expressed a preference for buying from the DUTC, or failing that, from the United States. The bill was returned to the House of Lords on 26 July, and later completed its passage.” [5][6]
Construction costs ultimately came to £71,624. Much of the work was “straightforward, allowing for the challenges of building at the water’s edge, but there were difficulties with Lord Ardilaun, the Guinness heir, whose estate of St. Anne’s ran to the coast where the line was to be laid. At the time, there was no coastal road, and Lord Ardilaun sought multiple conditions in return for removing objections to the project. He received most of what he sought, including the provision that the trams would not stop along the margin of his property, and line construction proceeded. The line opened on 26 July 1900.” [5]
The company purchased twelve large tram cars (larger than those of the DUTC) “for its operations, each seating 74 passengers, 29 inside and 45 on the upper deck. The enclosed lower deck had a driver’s cab, and separate areas for each of First, Second and Third Class. The journey from Nelson’s Pillar to Howth took 45 minutes, and the price for much of the operating period was 2 shillings and 6 pence.” [5]
The C&HofHT approached Howth on the main road across the isthmus, ran close to St. Mary’s Church and to the railway station, under the viaduct which carried the actual Hill of Howth Tramway, before running along the Harbour wall. [10]A C&HofHT approaching the terminus at Howth on the main road and passing under the viaduct carrying the Sutton and Howth Electric Tramway just as a tram is crossing that viaduct. This photograph was shared on the Old Howth Photos Facebook Group on 7th March 2021 by Liam McLoughlin. [28]The terminus of the C&HofHT was at the East end of Harbour Road close to the Martello Tower at the landward end of the East Pier. [10]Looking East along the harbour wall towards the terminus of the C&HofHT. This image was shared by Hugh Walsh on the Old Howth Photos Facebook Group on 22nd February 2023. [14]A C&HofHT tram standing at the terminus at the landward end of the East Pier at Howth. This photograph was shared on the Old Howth Photos Facebook Group on 12th October 2020 by Liam McLoughlin. [31]Another C&HofHT tram standing at the terminus. This photograph was shared on the Old Howth Photos Facebook Group on 13th March 2020 by Liam McLoughlin. [33]
“During the 1930s, the line became unprofitable, and when the GNR put forward a proposal to run a competing bus service on the Howth Road, and launch a bus to Malahide, the Board of the C&HofHT offered to end their service if the GNR agreed not to run a bus to Malahide. The line ceased operation on 29th March 1941, with the last tram to Howth, No. 294, departing Nelson’s Pillar at 11.45 pm, driven by Dick Ward. The company was wound-up on 1st July 1941, and the remaining tram cars were transferred to the DUTC’s Dalkey route, where they served until that line closed in 1949.” [5]
As we have noted already the Hill of Howth Tramway was more correctly called the ‘Sutton and Howth Electric Tramway‘. It was GNR(I) owned but made little or no profit for the Company. When Córas Iompair Éireann (CIÉ) took over GNR(I)’s operations in the Republic of Ireland, it reviewed all of the lines (including this tramway) over which it took control and the Howth Tram was replaced by buses within 8 months. It’s removal opened the way for the construction of a housing estate over a length of the route from Howth to the Summit Station. As we will see, this makes it difficult to be precise about the course of the line over that length. Much of the rest of the line can be followed relatively easily, either on foot or in a car.
The Routeof the Hill of Howth Tramway
The Ordnance Survey of Ireland (OSi) have relatively recently released both a 6″ and a 25″ national survey from the early 20th century. We will follow the route of the tramway as shown on the 25″ beginning at Howth and finishing at Sutton.
On this 25″ OSi map extract the ‘headshunt’ of the Hill of Howth Tramway can be seen running alongside the GNR(I) lines from the Claremont Hotel into Howth Railway Station. The C&HofHT can be seen as a single track tramway with a passing loop on the bed to the East of the Manse. [10]That headshunt was long, seemingly much longer than necessary. It certainly provided some storage space for the trams owned by the Tramway. This is a second extract showing the Tramway from the 25″ OSi mapping. [10]This next extract from the 25″ OSi mapping shows the terminus of the GNR(I) line. The Hill of Howth Tramway can be seen running to the rear of the railway station platform and then turning away onto the viaduct which took it over the Harbour Road. [10]A very similar area as shown on Google Maps satellite imagery in 2023. [Google Maps, 8th May 2023]
The photograph above shows Tram No. 3 about to leave Howth Station for Sutton via Summit Halt. This image is embedded here from David Bradley’s webpages with his kind permission. [13]
Looking West from the end of the platform at Howth Station. a single tramway line ran parallel to the main GNR(I) lines for some distance beyond the Signal Box before it was lifted with the rest of the tramway tracks. [My photograph, 8th May 2023]This view of the GNR(I) station at Howth from close to the signal Box, looking East, shows the tram stop backing onto the platform. This photograph was shared on the Old Howth Photos Facebook Group on 22nd December 2020 by Shay Larkin. [27]A view from adjacent to the Signal Box in 2023, looking East along what was once the tram line. [My photograph, 8th May 2023]Tram No. 2 and a sister tram at Howth Station. This image was shared by Liam McLoughlin on the Old Howth Photos Facebook Group on 6th October 2015. [18]Tram No. 4 at Howth Station. This image was shared by Hugh Walsh on the Old Howth Photos Facebook Group on 22nd February 2023. [19]A particularly crisp image of Tram No. 6 at Howth (c) Eamon J. Martin and shared by him on the Old Howth photos Facebook Group on 28th December 2021 [20]Howth Station with the tram stop backing onto the GNR(I) platform. This photo was shared by Liam McLoughlin in the Old Howth Photos Facebook Group on 22nd August 2020. [24]A similar view of Howth Station, this time in colour. This picture was shared by Liam McLoughlin on the Old Howth Photos Facebook Group on 4th October 2015. [25]Tram No. 6 at Howth Station. The Signal Box beyond the tram faces out onto the platform of the GNR(I) Station at Howth. This photo was shared by Liam McLoughlin on the Old Howth Photos Facebook Group on 8th April 2020. [26]Tram No. 7 leaving Howth Station with a service for Sutton via the Summit of the Hill of Howth. This photo was shared by Liam McLoughlin on the Old Howth Photos Facebook Group on 4th October 2015. [25]Tram No. 3 arriving at Howth Station just having crossed the viaduct. This photo was shared by Lorenzo Caira on the Old Howth Photos Facebook Group on 4th October 2015. [36]Tram No. 1 comes off the viaduct on its way to the terminus at Howth Station. This picture was shared on the Old Howth Photos Facebook Group by Liam McLoughlin on 25th August 2020. [34]Looking along the viaduct at Howth from the GNR(I) Railway Station. This photo was shared by Lorenzo Caira on the Old Howth Photos Facebook Group on 4th October 2015. [35]The Hill of Howth Tramway Viaduct facing West towards Sutton. This photograph was taken in 1902 early in the life of the tramway. [11]The Hill and of Howth Tramway Viaduct facing East towards the Harbour. This photograph was taken in March 1959 shortly before the closure of the line. It is in the public domain and is held by the National Library of Ireland and shared by them on Flickr [12]Given the vehicle visble under the viaduct this photo dates from the era when only trams No. 9 and No. 10 remained in the teak livery mentioned above. This probably means that the tram on the viaduct is No. 9 or No. 10. This photo was shared by Liam McLoughlin on the Old Howth Photos Facebook Group on 17th June 2021. It was also shared by Gary Hitchcock on the same Group on 1st March 2019, he dates the photo as being taken sometime in 1959. [37]Looking East under the viaduct in the 1950s. This photograph was shared by Liam McLoughlin on the old Howth Photos Facebook Group on 7th January 2016. [38]The viaduct, looking West. This must have been taken very early in a morning as there is no sign of any road or tramway users/vehicles. This photo was shared by Liam McLoughlin on the Old Howth Photos Facebook Group on 17th June 2021. [39]Looking across the R105 along the line of the old viaduct (from the South). [My photograph, 8th May 2023]The abutment of the viaduct hidden by the advertising hoarding. [My photograph, 8th May 2023]This extract from the 25″ OSi mapping shows the old tramway running away to the South after crossing the Viaduct. [10]Google Maps staellite imagery for the same area shows a footpath on the alignment of the old tramway. The length of the footpath which follows this length of the tramway is shown in photographs below. [Google Maps, 8th May 2023]After a short steep length of footpath from the R105 the footpath joins the formation of the old tramway which curves away to the South.[My photograph, 8th May 2023]These two photographs show that curve which brings the tramway onto a southerly path. [My photographs, 8th May 2023]The old tramway route heading South, viewed from the North. [My photograph, 8th May 2023] The footpath continues South. [My photograph, 8th May 2023]And again, looking South. [My photograph, 8th May 2023]A view back along the tramway looking North. The fencing is the boundary of Howth Deer Park. [My photograph, 8th May 2023]Looking South once again, with the Deer Park on the right. [My photograph, 8th May 2023]And again, further South and looking South. [My photograph, 8th May 2023]This view looks Southeast alongside the line of the tramway which at this point has begun to curve to the East through the back gardens of properties built after its demise which are on the left of this image behind the trees. The footpath leaves the tramway at this point. A housing estate has been built over the line of the old tramway from this point. [My photograph, 8th May 2023]Looking back along the old tramway route as it begins to curve to the East. Behind the camera, the footpath heads South away from the tramway, which at this point is approximately under the hedging to the right of the photograph. [My photograph, 8th May 2023]The 25″ OSI mapping shows the tramway curving first to the East and then back to the Southwest. [10]The satellite imagery from RialMapOnline.com becomes very useful from this point on as it maps the old tramway over the satellite image of the 1960s estate. The footpath, in grey, can be seen diverting away South from the line of the tramway as it turns East. [4]Tram No. 6 heads North towards the Howth terminus. The deer park is behind the trees to the left. The tram is just about to enter the straight length of line which bordered the deer park. This image was shared by Liam McLoughlin on the Old Howth Photos Facebook Group on 6th October 2015. [21]Tram No. 4 in the final livery version is heading North towards the camera and Howth Station. The passing loop seen here is not shown on the early OSi 25″ mapping that is available. The school in this image also postdates the mapping. This image was shared by Liam McLoughlin on the Old Howth Photos Facebook Group on 8th April 2020. [16]Looking Northeast on Grace O’Malley Drive with the school on the right. The green line superimposed on the photograph illustrates the line of the tramway. [Google Streetview, July 2019]This photo is taken looking down the line towards Howth. The low white wall prominent in this image can be seen beyond Tram No. 4 in the photograph of that tram in the last but one image. This image was shared by Liam McLoughlin on the Old Howth Photos Facebook Group on 22nd August 2020. [22]The 25″ OSi mapping then shows another sharp curve which swept the old line back again towards the East. [10]The same area in the 21st century. The Deer Park is to the left of the image. [4}Looking Northeast on another length of Grace O’Malley Drive. The green line superimposed on the photograph illustrates the line of the tramway. [Google Streetview, July 2019]Tram No. 6 in its earliest livery climbing through the curves on its way to the Summit. It is probably travelling along what became Balkill Park. This image was shared by Liam McLoughlin on the Old Howth Photos Facebook Group on 8th April 2020. [17]Looking North on Balkill Park. The old tramway route seems to skirt the left side of the end of terrace above, continuing to bear right through its garden and the properties on Grace O’Malley Drive behind. [Google Streetview, July 2019]Turning through 180° to look South, Balkill Park follows the line of the old tramway. [Google Streetview, July 2019]This next extract from the 25″ OSi mapping shows the tramway crossing Balglass Road at a level crossing. [10]The same area as shown on the map extract above as it appears on RailMapOnline.com. [4]Looking East-southeast from Balkill Park across Balglass Road/Balkill Road. at the junction the route of the old tramway heads East-southeast. [Google Streetview, July 2019]An unidentified tram crossing Basglass on 31st May 1959, (c) Barry Lacy. This image was shared on the Old Howth Photos Facebook Group by Kevin Rickard on 27th September 2020. [15]Very approximately the same view as the monochrome image above but in the 21st century. The route of the old tramway is indicated by the green line. [Google Streetview, July 2019]Looking ahead to the Southeast along the route of the old tramway from the junction of Balkill Park with Balglass Road/Balkill Road. [My photograph, 7th May 2023]Looking back towards Howth along the line of the old tramway with Balkill Park ahead. [My photograph, 7th May 2023]The 25″ OSi mapping shows that the next passing point on the line was Dungriffan Halt which was situated to the North of Dungriffin Road between Cliff House and Boggeen Lane. [10]The same area in the 21st century shows a similar road layout and the footpath following the route of the old tramway. [4]Looking Southwest towards what was the location of Dungriffan Road Halt. [My photograph, 7th May 2023]Trams passing each other at the next halt on the route, Dungriffan Road Halt. This photo was shared on the Old Howth Photos Facebook Group by Lorenzo Caira on 9th January 2022. [23]Tram No. 7 seems to be leaving Dungriffan Road Halt heading South towards the Summit Inn. This photo was shared on the Old Howth Photos Facebook Group on 6th October 2015 by Liam McLoughlin. [43]Looking Southeast into the site of what was Dungriffan Road Halt. [My photograph, 7th May 2023]The location of Dungriffan Road Halt as it appears in the 21st century. This view looks Southeast from the centre of the Halt towards Dungriffin Road. [My photograph, 7th May 2023]Looking South across Dungriffin Road. [My photograph, 7th May 2023]Looking back North across Dungriffin Road. [My photograph, 7th May 2023]The view South from Dungriffin Road in 2019. [Google Streetview, July 2019]This image shows an unidentified tram heading South towards the Summit Inn from Howth. It was shared on the Old Howth Photos Facebook Group by Lorenzo Caira on 4th October 2015. [44]This view looks back towards Howth. Another unidentified tram heads towards the Summit Inn. This photo was shared on the Old Howth Photos Facebook Group by Lorenzo Caira on 4th October 2015. [40]This view looks North down this length of tramway and appears to show Tram No. 6 heading South towards the Summit of Howth Hill. This photo was shared on the Old Howth Photos Facebook Group by Liam McLoughlin on 6th October 2015. [41]The view South along the line of the old tramway between Dungriffin Road and Grey’s Lane. [My photograph, 7th May 2023]Looking South across Grey’s Lane. [My photograph, 7th May 2023]The view Northwest along Grey’s Lane across the line of the old tramway. [Google Streetview, July 2019]Looking North across Grey’s Lane. [My photograph, 7th May 2023]The next length of the tramway Southeast from Grey’s Lane as shown on the 25″ OSi mapping. [10]The same area as shown by RailMapOnline.com. [4]Looking South along the line of the old tramway a 100 metres or so from Grey’s Lane. [My photograph, 7th May 2023]Looking South along the line of the old tramway a 100 metres or so further from Grey’s Lane. [My photograph, 7th May 2023]In this extract from the OSi mapping the old tramway first crosses Kitestown Road and then turns to cross what was Lighthouse Road and in the 21st century is called Balkill Road. The Summit was reached after crossing Lighthouse Road. [10]The same area as shown on the map extract above as it appears on RailMapOnline.com. The new road is the route of the R105, Carrickbrack Road, which from this point follows the line of the old tramway. [4]Looking North along the line of the old tramway across Kitestown Road. [My photograph, 7th May 2023]Looking Southeast along Kitestown Road across the line of the old tramway. [Google Streetview, July 2019]Looking Southeast from Kitestown Road along the line of the old tramway. [Google Streetview, July 2019]Looking North along the line of the old tramway from the junction of Balkill Road and Carrickbrack Road. [My photograph, 7th May 2023]The view Southwest along Carrickbrack Road (R105). The green line marks the route of the old tramway. [Google Streetview, July 2019]The Summit Cafe. This photo was shared on the Old Howth Photos Facebook Group by Liam McLoughlin on 6th October 2015. [42]The Summit Inn in the 21st century. [Google Streetview, July 2019]Two trams pass at the Summit. Tram No. 3 is heading for Howth and Tram No. 4 for Sutton. This picture was shared on the Old Howth Photos Facebook Group on 7th September 2016 by Liam McLoughlin. [49]In this image it is trams Nos. 6 and 7 passing at Summit Station with No. 6 heading for Howth and No. 7 for Sutton. This photo was shared on the Old Howth Photos Facebook Group on 4th October 2015 by Lorenzo Caira. [47]Tram No. 10 at the Summit Station. This picture was shared by Dermot Kane on the Old Howth Photos Facebook Group on 2nd June 2020. It looks Northeast along Carrickbrack Road. The Summit Inn is visible on the right of the picture. (R105). [50]A similar view at the Summit in the 2020s. The Summit Inn is visible on the right of both this and the colour photograph above. The single storey building near the centre of this image can be seen behind the tram in the last image. [Google Streetview, March 2023]What looks like Tram No. 6 at the Summit Station heading for Sutton with two unidentifiable trams behind. This image was shared on the Old Howth Photos Facebook Group on 4th October 2015 by Lorenzo Caira. [46]Looking Northeast again at the Summit with Tram No. 1 in the foreground, heading for Howth and an unidentifiable sister tram beyond, heading for Sutton. This photo was shared on the Old Howth Photos Facebook Group by Lorenzo Caira on 4th October 2015. [45]Looking Northeast at the Summit Station with Tram No. 10 waiting to set off for Howth. This photograph was shared on the Old Howth Photos Facebook Group on 6th October 2015 by Liam McLoughlin. [48]
The Summit was the usual tourist stop and was accessed either from Howth or from Sutton. Having reached the Summit from Howth, we now start the journey down to Sutton.
Trams left Summit Station in a Southerly direction. The road to the East of the line is Thormanby Road which was not suitable for the bus service which replaced the trams on the closure of the line. [10]The same area as that covered on the map extract above. This time as it appears on the satellite imagery on RailMapOnline.com. This length of Carrickbrack Road was constructed after the closure of the line. [4]This next extract from the 25″ OSi mapping shows the line continuing South. [10]The same area in 21st century. Carrickbrack Road continues to follow the route of the old tramway. [4]This next extract from the 25″ OSi mapping shows the next passing point on the line which was at the point the line met Thormanby Road. [10]The same area as it appears on RailMapOnline.com’s satellite imagery. [4]The confluence of the old tramway and Thormanby Road. The passing point on the OSi mapping is just off the image to the left. The picture was shared on the Old Howth Photos Facebook Group by Lorenzo Caira on 4th October 2015. [56]Tram No. 3 at the same location. The passing loop is just visible beyond the tram. The building on the right appears on the postcard image above. This image was shared on the Old Howth Photos Facebook Group on 9th October 2019 by Padraig Druimeanach. [55]The same location again, after the lifting of the tramway tracks and before the construction of Carrickbrack Road. This image was shared on the Old Howth Photos Facebook Group on 25th February 2020. [53]The Tramroad continues in a westerly direction towards the Stella Maris Convent, as shown on the 25″ OSi mapping. [10]The same area on RailMapOnline.com. [4]The same location in the 21st century, Carrickbrack Road (R105) eventually replaced the old tramway. [Google Streetview, March 2023]Stella Maris Convent (Glenavena) owned land on both sides of the old tramway. The tramway was carried over the driveway on a stone arch bridge with retaining walls extending upwards on each side. [10]Approximately the same area as portrayed in the map extract above. [4]The tramway leaving Thormanby Road/Carrickbrack Road and crossing the stone arch bridge over the driveway.Tram No. 7 travelling to the Summit from Sutton is about to cross Thormanby Road/Old Carrickbrack Road. This image was shared by John Maguire on the Old Howth Photos Facebook Group on 22nd January 2021. John tells me that the wall still has the hinges in place for the gate that can be seen in this image. [82]Looking West on Carrickbrack Road, the high wall on the left behind the speed limit sign is the same wall as shown in the monochrome images above. [Google Streetview, March 2023]About 100 metres West of the last photograph, this is the route the tramway was followed, alongside the high wall. [Google Streetview, March 2023]The full height wall and bridge carrying the tramway. The tram in this image is in almost exactly the same position as the one in the monochrome image above. This image was shared on the Old Howth Photos Facebook Group by Shay Larkin on 3rd March 2017. [51]The next length of the tramway on the 25″ OSi mapping. [10]And a further length of the tramway on the 25″ OSi mapping. [10]RailMapOnline.com shows the area covered by the two map extracts above. [4]Looking West along Carrickbrack Road towards the location of Baily’s Post Office Halt which was sited just beyond the location of the bend ahead. [Google Streetview, March 2023]The next passing loop at Baily Post Office Halt. [10]The new Carrickbrack Road somewhat smooths out the tramway alignment through the site of Baily’s Post Office Halt. [4]Tram No. 9 at the Baily Post Office Halt. This image was taken facing Southeast and was shared on the Old Howth Photos Facebook Group by Liam McLoughlin on 23rd October 2018. [52]Tram No. 1 at Baily’s Post Office Halt. This picture is taken facing West through the location of the Halt and was shared on the Old Howth Photos Facebook Group on 3rd March 2017 by Shay Larkin. [54]Looking West through the location of Baily’s Post Office Halt in 2023. [Google Streetview, March 2023]Looking East through the location of Baily’s Post Office Halt in 2010. [Google Streetview, July 2010]The tramway continued Northwest from Baily’s Post Office Halt. The 25″OSi map extract shows that from this point the old Carrickbrack Road ran alongside the old tramway, with the tramway on its South side. [10]The tramway continues Northwest on its way towards Sutton. [10]This RailMapOnline.com satellite image shows the length of the old Tramroad covered by the two map extracts above. [4]Looking Northwest from the location of Baily’s Post Office Halt along Carrickbrack Road in 2010. [Google Streetview, July 2010]And again, further to the Northwest. A passing loop can be seen to the Northwest of Rockfell. This was the Barren Hill Halt. [10]This extract from RailMapOnline.com’s satellite imagery shows much the same area as that in the map extract above. [4]Two trams pass at Barren Hill Halt. The nearest tram appears to be No. 6, the tram heading towards the camera is either No. 9 or No. 10 ( both of which retained the teak livery through to the closure of the line. The picture was shared on the Old Howth Photos Facebook Group on 15th October 2020 by Phil Hanlon. [57]The view Northwest through the site of Barren Hill Halt in the 21st century. [Google Streetview, March 2023]The 25″ OSi mapping continues to show the tramway heading Northwest for Sutton, at this point, before curving round to a northerly trajectory. [10]The next passing loop was just to the North of St. Fintan’s Well. [10]This extract from RailMapOnline.com covers the combined length of the two map extracts above, from Barren Hill Halt to the location of St. Fintan’s Halt. [4]Tram No. 3 at St. Fintan’s Halt, looking South. This photo was shared on the Old Howth Photos Facebook Group on 6th October 2015 by Liam McLoughlin. [58]The tramway continued Northwest running alongside St. Fintan’s Graveyard. Another passing loop can be seen at the top of this extract from the 25″ OSi mapping. [10]Tram No. 4 in the passing loop mentioned in the notes to the OSi map extract above, heading for Howth. This photo was shared on the Old Howth Photos Facebook Group on 9th October 2015 by Liam McLoughlin. [59]The tramway continues heading Northwest. [10]And again, the tramway runs on towards Sutton in a northwesterly direction. [10]This extract from RailMapOnline.com covers the same length of the old line as the two map extracts above. [4]This next extract from the 25″OSi mapping shows the passing loop adjacent to Strand Road. [10]This RailMapOnline image shows the ame area as the 25″ OSi map extract above. The Strand Halt is in the bottomright corner of each image. [4]Tram No. 10 sits at the Strand Road Halt on its way Southeast towards the Summit of the Hill of Howth. This image was shared on the Old Howth Photos Facebook Group on 22nd February 2023 by Hugh Walsh [61]The tram in this picture is just to the Northwest of the Strand Road Halt. It is difficult to make out whether it is travelling towards Howth (ahead via the Summit of the Hill of Howth) or Sutton (behind the camera). The photo was shared on the Old Howth Photos Facebook Group on 6th October 2015 by Liam McLoughlin. [62]This image is not clear enough to be able to give the tram number. The tram pictured has just left the Strand Halt heading for Sutton. The image was shared on the Old Howth Photos Facebook Group on 18th December 2015 by Liam McLoughlin. [60]Bus No. 31 heading for Sutton at a similar location after the closure of the tramway. This image was shared on the Old Howth Photos Facebook Group on 9th April 2017 by Liam McLoughlin. [63]The tramway ran Northwest along the South side of Carrickbrack Road with the water on its left. [10]it continued alongside the road heading towards the Strand Hotel. Both these map extracts are from the 25″ OSi mapping. [10]This extract from the satellite imagery on RailMapOnline.com shows the length of the tramway route covered in the two map extracts above. [4]Sutton Cross as shown on the 15″ OSi mapping. Its tramway halt was immediately to the Northwest of the junction. It can be seen on the top-left of this extract. [10]A similar area on RailMapOnline.com. As throughout this article the green line represents the Hill of Howth Tramway, the yellow line indicates the route of the Clontaff and Hill of Howth Tramroad. [4]Looking through Sutton Cross junction from the Southeast. The halt can be seen ahead. This image was shared on the Old Howth Photos Facebook Group on 18th December 2015 by Liam McLoughlin. [64]A tram crosses the main road at Sutton Cross. The road to Howth is ahead of the camera. This photo was shared on the Old Howth Photos Facebook Group by Liam McLoughlin on 12th October 2016. [67]The view along the R105 towards Howth taken from a similar location to the photograph above. [Google Streetview, November 2022]Tram No. 3 just setting off from the Sutton Cross Halt. It appears to have just met and passed another tram heading towards Sutton Railway Station. That tram can be seen in the distance on its way to the terminus. This photo was shared on the Old Howth Photos Facebook Group by Liam McLoughlin on 28th August 2017. [65]The site of Sutton Cross Halt in the 21st century. This view looks along Station Road from the junction at Sutton Cross. [Google Streetview, May 2021]A tram has just crossed the main road at Sutton Cross and is entering the Halt on its way to Sutton Railway Station. This photo was shared on the Old Howth Photos Facebook Group by Liam McLoughlin on 3rd December 2018. [69]Tram No. 1 is just leaving Suttion Cross Halt and will cross the main raod before heading for the Hill of Howth. This photo was shared on the Old Howth Photos Facebook Group by Lorenzo Caira on 4th October 2015 [70]Tram No. 5 sits in the loop at Sutton Cross Halt. Given the height of the photographer it is likely that they are at the front of the top deck of another tram which has left Sutton Railway Station on its way to the Hill of Howth and eventually to the Howth terminus of the line. This photo was shared on the Old Howth Photos Facebook Group by Liam McLoughlin on 21st March 2018. [66]Tram No. 3 at Sutton Cross Halt heading towards Howth via the Hill of Howth. This image looks to have been taken from the top deck of another tram waiting in the loop at Sutton Cross, looking toward the terminus at Sutton Railway Station. It was shared on the Old Howth Photos Facebook Group by Hugh Walsh on 22nd February 2023. [68]This extract from the 25″ OSI mapping shows the final approach to the terminus at Sutton Railway Station. [10]A similar length of Station Road Sutton as it is shown on Google Maps in 21st century. The tramway ran along the South side of the road. [Google Maps, May 2023]The view Northwest on Station Road in 2023. [Google Streetview, March 2023]The end of the line, or the beginning of the line, depending on your perspective! This last extract from the 25″ OSi mapping shows the GNR(I) railway station at Sutton, the Tramway Depot and the Electricity Generating Station built for the Tramway. [10] The same area in the 21st century. [Google Streetview, May 2023]Thye approach to Sutton Station from the Southeast on Station Road (R106). The tramway lines are represented by the green line superimposed onto the photo. The station building is much as it was when trams were running. The road is probably a little wider. The signal box is still present (in dark green on the left of this image). [Google Streetview, March 2023]
The photograph above shows a tram running parallel to Station Road with Sutton Cross 200 yards to the right and Sutton Station 25 yards to the left on the opposite side of the road. This photo is embedded here from David Bradley’s webpageswith his kind permission. [29]
Looking Southeast from close to the point where trams would swing to their right to cross Station Road and enter the tram terminus which sat directly alongside the GNR(I) Railway Station at Sutton. Sutton Cross is some distance ahead of the camera. The photo was shared on the Old Howth Photos Facebook Group by Phil Hanlon on 15th December 2020. [76]Tram No. 6 or No.8 is just setting off from the Sutton terminus towards Sutton Cross. This photo was shared on the Old Howth Photos Facebook Group by Liam McLoughlin on 5th August 2019. [75]Sutton Railway Station with a tram approaching on the Sutton and Howth Electric Tramway. This photograph looks East from what is now the R106. The photo was taken in 1902. [30]The view of the station approach from adjacent to the level crossing gates in 2023. While the tram tracks are long gone, the station building is very similar in appearance to that shown on the 1902 image above. [My photograph, 8th May 2023]Tram No. 6 waits at the Sutton Terminus before setting off towards Sutton Cross. This photo was shared on the Old Howth Photos Facebook Group by Lorenzo Caira on 4th October 2015. [79]Sutton terminus once again, this time on the final day of the service. There is a suggestion in the notes under the photo that this is the final tram on that day. It may have been, although the numbers waiting toclimb aboard suggest that there may be other trams in the depot waiting to move forward to take a full load of passengers. This photo was shared on the Old Howth Photos Facebook Group by by Hugh Walsh on 22nd February 2023. [71]Tram No. 1 leaves the depot and prepares to cross Station Road as it heads for the terminus at the railway station. This photo was shared on the Old Howth Photos Facebook Group by Hugh Walsh on 22nd February 2023. [71]The 21st century view alongside the signal box looking to where the Tram depot was sited. [Google Streetview, March 2023]Tram No. 10 leaves the depot and is about to cross Station Road to enter service at the tram terminus at Sutton Railway Station. This photo was shared on the Old Howth Photos Facebook Group by Lorenzo Caira on 4th October 2015. [74]Tram No 10 retained its teak livery until the end of the network’s life, as did Tram No. 9. Tram No. 10 is waiting for the tram to the right of the picture to clear the road from the terminus, before setting off from the depot to collect passengers. This photo was shared on the Old Howth Photos Facebook Group by Lorenzo Caira on 4th October 2015. [78]The road crossing at the West end of Sutton Station. The tram depot was immediately West of the Station. This image was shared by Liam McLoughlin on the Old Howth Photos Facebook Group on 3rd July 2017. [32]Tram No. 6 sits outside the shed in the tram depot waiting to go out on service. This photo was shared on the Old Howth Photos Facebook Group by Liam McLoughlin on 13th December 2020. [73]Two other trams (no. 1 and No. 3) sit outside the shed in the tramway depot. GNR(I) main line carriages sit in the siding adjacent to the shed. This image was shared on the Old Howth Photos Facebook Group by Liam McLoughlin on16th June 2019. [72]Tram No 10 is being wheeled out of the shed by hand. This photo was taken after closure and after the removal of overhead power lines. It was shared on the Old Howth Photos Facebook Group by by Hugh Walsh on 22nd February 2023. [71]Tram No. 9 in its teak livery sits in front of sister trams inside the shed at the Tramway depot. This photo was shared on the Old Howth Photos Facebook Group by Liam McLoughlin on 10th January 2016. [81]Another view of the interior of the shed at the tramway depot. The rather odd looking tram on what seems to be the central road is Tram No. 11 which was used for maintenance work on the network. This photo was shared on the Old Howth Photos Facebook Group by Padraig Druimeanach on 15th October 2019. [77]Tram No. 11 out at work on the network at St. Fintan’s. This photo was shared on the Old Howth Photos Facebook Group by Liam McLoughlin on 9th October 2015. [80]The Tramway Depot seen from the East with the Electricity Generating Station behind. This image was probably taken after the closure of the network. It was shared by Liam McLoughlin on the Old Howth Photos Facebook Group on 7th March 2021. [31]
As we have noted already the Hill of Howth Tramway was GNR(I) owned but made little or no profit for the Company. When the nationalised compnay, Córas Iompair Éireann (CIÉ) took over GNR(I)’s operations in the Republic of Ireland on 1st October 1958, it reviewed all of the lines (including this tramway) over which it took control and the Howth Tram was replaced by buses within 8 months!
London: Hansard, vol. 62, c. 1291 – 26 July 1898, House of Lords Sitting, Private Bill Business, “Returned from the Commons agreed to, with Amendments, ‘Clontarf and Hill of Howth Tramroad Bill'”
Michael Corcoran; Through Streets Broad and Narrow — Dublin’s Trams; The Sir John T. Gilbert Commemorative Lecture, Dublin City Public Libraries, 2008.
Hill Of Howth Tramway Closure; in Irish Railfans’ News. Railway Preservation Society of Ireland. Volume 5 No. 3; 6th July 1959.
Kincasslagh Road Railway Station as seen in Joe Begley’s article about the January 1921 ambush. [1]
The next four photographs come from Dave Bell and Steve Flanders book,’The Londonderry and Lough Swilly Railway: A Visitor’s Guide‘. [2: p82]
The passenger building at Kincasslagh Road Station as it appeared in the late 1980s. [2: p82]The view Southwest through the site of the Station from what was once the level crossing. [2:p82]Stepping beyond the pillars which supported the crossing gates, this view again looks Southwest through the site of the Station. [2:p82]The old road and level crossing at the site. The road was diverted to the East of this location. The building on the left is the Crossing Keeper’s Cottage (No. 21). [2:p82]
The undergrowth at this location, (and possibly the garden planting too) has grown significantly in the last 30 years.
These pictures featured at the end of the first article about the Burtonport Extension. [My photographs, 23rd April 2023]
We start this part of the journey with a short time to reflect at Kincasslagh Road Railway Station. The station was the location of the first action in the War of Independence in 1918. The memorial shown below sits on the road at the Northeast end of Kincasslagh Road Station.
The English text on the memorial reads: TO COMMEMORATE THE FIRST ACTION IN THE WAR OF INDEPENDENCE, WHEN THE IRISH VOLUNTEERS RESCUED TWO COMRADES, JAMES WARD & JAMES DUFTY FROM BRITISH TROOPS THIS PLACE ON THE 4TH DAY OF JANUARY 1918.
Joe Begley has written an excellent piece on a later ambush which occurred on 12th January 1921 and the events that surrounded it. [1] That ambush took place in a cutting to the Northeast of Kincasslagh Road Railway Station, known locally as Paddy Ghráinne’s Cutting.
An extract from OSi mapping as shared by Joe Begley. The location of Kincasslagh Road Railway Station is marked in the bottom left of the image. The cutting where the 1921 action took place is marked top-right. [1]The same area as shown on the map extract above but now on modern satellite imagery. [Google Maps, 30th April 2023]The cutting where the January 1921 action took place, Paddy Ghráinne’s Cutting. [Google Streetview as shard be Joe Begley][1]
Joe Begley explains that the area close to Kincasslagh Road Railway Station was often in the news in the War of Independence and this latest episode brought a temporary end to services on the Burtonport Extension. [1]
Looking back through the site of Kincasslagh Road Railway Station. The garage sits on the line of the old railway. The old railway crossing is hidden behind the undergrowth beyond. The Crossing Keeper’s Cottage (or Station House) can be seen just above the vegetation to the left of the garage. [Google Streetview, April 2022] The view Northeast along the old railway from the newer road crossing its route. A road ran parallel to the old railway on its South side. Much of the next length of the old line is overgrown. Google Streetview, April 2022]Looking Northeast from a point to the East of Kincasslagh Road Railway Station. The old railway ran alongside the road on the left side of the picture. Its route has been reclaimed by nature. [Google Streetview, April 2022]
The satellite image above shows the route of the old railway in today’s landscape. Leaving Kincasslagh Road Railway Station in a Northeasterly direction the line passes through cuttings and over low embankments curving first towards the North and then back to the Northeast. Just before it reaches the cutting where the 1921 action took place it crosses a minor road at level.
I have searched a widely as I can and have only found a couple of images of rolling stock on this section of the line, both relate to the same incident in February 1923.
It is difficult to make out the line of the old railway as it runs North on the East side of Crolly village. RailMapOnline.com can be a real help in these circumstances. An extract from their map base with the line shown in orange is provided below.
RailMapOnline.com is able to show the line of the old railway imposed onto Google Maps satellite imagery. The bridge which has been demolished was close to the concrete works at the bottom of the image. The bridge in the picture above is seen between houses across the N56 from the petrol station. [11]
Not every sheet of the 25″ OSi mapping is available through the OSi historic maps portal so for the next length of the Burtonport Extension Railway we need to rely on the 6″ OSi mapping.
The old railway ran high above the village of Crolly. The road rose as it travelled North and by the top of this map extract road and railway were at the same level. [3]The same area is shown the base Google Map satellite imagery used by RailMapOnline.com. The route of the old railway is again shown by the orange line. [11]
On its way Northeast the old line crossed what would have been an unmetalled road aas shown on the satellite image above. That track is in the 21st century a metalled minor road as shown below.
As we have already noted the Clady Canal feeds water to the Clady Power Station. The Clady Hydroelectric Station is a 4.2 MW power station situated in the Gweedore area of Co. Donegal.
“Construction started in 1954, with the station going into full operation in 1959, when it also synchronised to the Donegal 38 kV network. Two lakes form the basis of this hydro scheme: Dunlewey Lough and Lough Nacung are situated in a valley 61m above sea level and are drained by the Clady River, which enters the sea at Bunbeg.” [18]
Both of the lakes were enlarged to create the storage capacity needed to run the station. Dunlewy Lough through the construction of the Cung Dam at the promontory between the two lakes. The Clady River has been partially diverted by Gweedore Weir into a 2.5 km canal which runs across country to the rim of a deep valley which forms the tidal estuary of the Gweedore River. This is the canal that we have noted. As we will see, its route conflicts with what was the route of the Burtonport Extension Railway.
“A 500m steel penstock carries the water from that canal down to the generating station at sea level. … Overall, the normal range of storage is from 60.96m OD (Ordnance Datum) to 63.70m OD. Gweedore Weir has also raised the level of Lough Nacung with a storage range from 60.96m OD to 61.57m OD. … The powerhouse is equipped with a horizontal Francis-type turbine, coupled to a generator with a capacity of 4.2 MW.” [18]
This next extract from the 1906 6″ OSi survey shows the old railway line reaching the Station at Gweedore. [3]This satellite image covers approximately the same area as the map extract above. The Clady Canal runs adjacent to the N56 and from the left edge of the image to the access bridge at the centre of the image follows the line of the old railway. East of that point the line slips away in a Northeasterly direction,, heading for what was its bridge over the River Claddy to the North. [Google Maps, May 2023]The minor road bridge over the Clady Canal. To the right of this bridge the route of the old railway slides away to the North. [Google Streetview, September 2021]The view West along the Clady Canal from the North end of the bridge in the last photo. The old railway and the canal follow a similar line to this point. [My photograph, 3rd May 2023]The view East from the North end of the same bridge. The old railway route and canal gradually separate from this point. The canal curves away to the right and is crossed by the N56. The railway heads towards its bridge over the River Clady. [My photograph, 3rd May 2023]This enlarge extract from the 6″ mapping shows the bridge on the approach to the Station from the West. A level crossing took the line over what is now the R258 and the line ran through the station. The track layout shown on this OSi map extract is not correct. A passing loop was provided at the station and there were also goods facilities. [3]A similar area on the modern satellite images provided by Google Maps. The immediate area of the station has been redeveloped but some signs of the old railway and it’s station remain.The abutments of the railway bridge over the River Clady seen from the Northeast and looking along the side of the old bridge towards the Southwest. [My photograph, 3rd May 2023]The Southwest abutment of the bridge over the River Clady seen from alongside the Northeast anutment. [My photograph, 3rd May 2023]This photograph shows the station throat as seen from the lattice girder bridge over the River Claddy in the 1950s. A road (now the R258) crossed the line between the bridge and the station. The Goods Shed can be seen on the left of the image. A waiting shelter is the next building to the right. The dark structure to the right of centre is the water tower. This photograph was shared on the Burtonport Heritage Facebook Group by Joe Begley on 31st August 2020. [12]Looking East through Gweedore Railway Station before the closure of the station and the lifting of the railway tracks. The waiting shelter can be seen on the left with the water tower beyond. This photograph was shared by Joe Begley on the Lower Rosses/Gweedore History Discussion Forum Facebook Group on 19th November 2016. [13] The waiting shelter at Gweedore Railway Station survived the dereliction of the site through to the present day. This is an undated photograph. It was shared by Joe Begley on the Lower Rosses/Gweedore History Discussion Forum Facebook Group on 19th November 2016. [13] It also appears in the book about the line that Joe Begley co-authored with Steve Flanders and E.M. Patterson. 4: p169]This modern photograph shows the station site in May 2023 as viewed from the West. The Goods Shed appears to have been replaced by houses, the western end of the station appears to be in the grounds of a newer property which can just be seen on the right side of the image. Carefully preserved in the grounds of that property is the waiting shelter noted in the three images above. The platform edge has been retained as a dwarf wall in front of the waiting shelter. [My photograph, 3rd May 2023]This photo was shared on the Burtonport Old Railway Walk Facebook Page on 26th November 2011 with the following comment: “‘An Mhuc Dubh’, the Black Pig, at Gweedore Station – very very hard to imagine, when you look at the wild countryside, that big trains like this used to travel back and forth to Derry every day. We will never see their like again.” [21]Looking West through Gweedore Railway Station before the closure of the station and the lifting of the railway tracks.bThe station name is carried by the building on the left. The wooden structure on the right probably houses a ground frame which controlled the points in the vicinity of the station. This photograph was shared by Joe Begley on the Lower Rosses/Gweedore History Discussion Forum Facebook Group on 19th November 2016. [13]Looking West through Gweedore Station in the early 1970s. At that time the platforms remained, if grassed over. The two buildings noted below are present as is the watchtower, This photo was shared as a comment by Pete Leigh on a post on the Londonderry and Lough Swilly Railway Facebook Group in April 2022. [16] This picture shows the building of which a gable end fronted onto the platform on the South side of the railway station. In 2017, Joe Begley and Steve Flanders commented that this building was still present along with the waiting shelter shown above. [4: p169] As can be seen in the image below it has survived at least until 2023! This photograph was shared by Joe Begley on the Lower Rosses/Gweedore History Discussion Forum Facebook Group on 19th November 2016. [13]A slightly wider angle view of the station site from the East. The building on the left in this image is on the left of the older image above. The platform has gone on both sides of what would have been the running lines where the articulated lorry trailer is standing. [My photograph, 3rd May 2023]The East end of Gweedore Railway Station with Errigal in the distance. This photograph was shared by Liam O Siadhail on the Lower Rosses/Gweedore History Discussion Forum Facebook Group on 18th November 2016. [14]Leaving Gweedore Railway Station heading East. This photograph was shared on the Lower Rosses/Gweedore History Discussion Forum Facebook Group by Séimidh Ó Dubhthaigh on 15th October 2015. [15]This photograph shows Locomotive No. 2 at the East end of Gweedore Railway Station. The loco is possibly running round a train or shunting at the station. This picture was shared as a comment about the picture immediately above, also by Séimidh Ó Dubhthaigh in October 2015. [15]This photograph is my attempt to replicate the three monochrome images above in May 2023. The track ed of the old railway East of Gweedore Railway Station is overgrown with gorse bushes. [My photograph, 3rd May 2023]
Beyond Gweedore Railway Station, the line of the old railway has become overgrown. It runs along the North side of the N56 for some distance.
It seems as though the An Chuirt Hotel has expanded and that its site now includes what was once railway land. The Errigal View Pet Zoo also straddles the line of the old railway.
The An Chuirt Hotel and the Errigal View Pet Zoo. The line of the old railway is illustrated by the orange line at either side of this Google Maps image. [Google Maps, 3rd May 2023]
Immediately to the East of the Errigal View Pet Zoo two larger properties straddle the route of the old railway.
It seems that there were two crossings close together at the bottom of the slope to the left of the road. These can be seen on the map extract to the left below, either or both may have been gated but I have not been able to establish whether either were.
It is possible to see the more northerly of the two crossings from the road close to the Crossing Keeper’s Cottage and I have provided a photo below which also shows the route of the old railway in orange.
The location and f one of the crossings adjacent to Crossing Keeper’s Cottage No. 14. [Google Streetview, September 2021]
North of the Cottage the minor road splits with one arm crossing the railway on a stone arch bridge and the other heading towards Cashelnagor Railway Station passing on the Southeast side of Lough Doo.
The stone arch of the bridge can be seen through the trees on the left of the road as one approaches by road from the South. [My photograph, 24th April 2023]The bridge parapets seen from the East. [My photograph, 24th April 2023]The South face of the structure seen from the Southwest corner. [My photograph, 24th April 2023]Looking South over the bridge parapets back towards Lough Trusk. [My photograph, 24th April 2023]Looking North over the bridge parapets. The railway cutting is overgrown. [My photograph, 24th April 2023]The railway continues North on the West side of Lough Doo. The 25″ OSi mapping is still unavailable for this length of the line on-line. This is the 6″ OSi mapping of 1906. When we reach Cashelnagor we will be able once again to view the 25″ mapping. [3]This satellite image covers much the same area as the map extract above. Both the old railway route and the present day road can be seen either side of Lough Doo at the bottom of the image. [Google Maps, 4th May 2023]Looking back Southwest along the old railway towards Lough Doo. [Google Streetview, March 2010] This length of the route is in private hands, despite this it seems as though the Google camera car covered the metalled track South from Cashelnagor twice in 2010.At the end of the metalled length of private road, looking Northeast towards Cashelnagor. [Google Streetview, March 2010]About 200 metres further Northeast. [Google Streetview, March 2010]And again, a further 200 metres Northeast. [Google Streetview, March 2010]Cashelnagor Railway Station comes into sight on the horizon. [Google Streetview, March 2021]Cashelnagor Railway Station features towards the top of this 1906 6″ OSi map extract. [3]Cashelnagor Railway Station as shown on the 25″ OSi mapping. It had reasonably substantial buildings, both passenger and goods, and stood in a remote position high in the moorland if Co. Donegal. [3]The station site as it appears on Google Earth. In 2923, the passenger facilities have been restored and now provide a unique holiday rental property. The outline of the old goods shed is still marked [Google Earth, May 2023]Looking back to the Southwest along the line of the old railway from the road outside Cashelnagor Railway Station. [My photograph, 24th April 2023]Cashelnagor Railway Station as it appeared in 2010. [Google Streetview, March 2010]
The next few photographs show Cashelnagor Railway Station as it appeared in the late 1980s/early 1990s.
The four monochrome photos above are courtesy of Steve Flanders and Dave Bell and are used with the kind permission of Jim McBride acting on behalf of the Donegal Railway Heritage Centre. [2]
Joe Begley very kindly sent this next series of photos by email. They represent the condition of the buildings in 2004.
Dave Bell & Steve Flanders; Donegal’s Railway Heritage Guide No. 2, The Londonderry & Lough Swilly Railway: A Visitor’s Guide to the old railway and all the bits that can still be seen; County Donegal Restoration Society, Donegal Town, Co. Donegal, 198…
Joe Begley, Steve Flanders & E.M. Patterson; The Lough Swilly Railway: Revised Edition; Colourpoint Books, Newtownards, 2017.
Joe Begley very kindly sent me a number of photographs as attachments to an email which were taken during the preparation of the book immediately above.
On Saturday 22nd April 2023, I had the pleasure of dropping into the Railway Heritage Centre in Donegal Town. We had planned a holiday in Co. Donegal in 2020 but we were foiled by the COVID-19 lockdown. This visit was well overdue.
The Donegal Railway Heritage Centre records and celebrates “the operations of the County Donegal Railways Committee which operated two narrow-gauge railways in County Donegal from 1863 until 1959. The County Donegal Railway Restoration Society restored the centre, which opened in 1995 and is housed in the old station house in Donegal Town. Today, it operates as a visitor attraction comprising a museum, information centre and shop. On display are rolling stock, historical artefacts and an audio-visual presentation on the railways’ history.” [1]
Over the period of lockdown quite a lot happened at the Heritage Centre.
The most significant event was the home-coming of No. 5, ‘Drumboe’, the Co. Donegal Railway Joint Committee 2-6-4T Locomotive on 9th October 2021. This locomotive was originally built by Nasmyth, Wilson and Company [2] in 1907 and served on the railways of Co. Donegal until the end of 1959. Now cosmetically restored, ‘Drumboe’ has pride of place at the entrance to the Heritage Centre.
No. 5, ‘Drumboe’ in service at Barnesmore Gap in the late 1950s. [5] [My photograph, 22nd April 2023]‘Drumboe’ underwent an extensive restoration job in Whitehead, Co. Antrim. The locomotive is shown here at the Works prior to being returned to Donegal. [3]‘Drumboe’ on its way home. [4]‘Drumboe‘ settled in its new home. It is undercover to protect it as much as possible from the elements! The text on the display board reads: Built in 1907, Nasmyth Wilson/Manchester. Drumboe’s original name was No. 17 Glenties. She was renamed in 1937 to No. 5, Drumboe. In 1907/8 the CDRIC ordered 5 new modern steam locomotives to deal with the growing traffic as the CDR network expanded. They were called the Class 5 locomotives and numbered 16-20. All of them were 2-6-4Ts: the numbers stand for the wheel arrangement and the T for tank engine. On the evening of 31 December 1959 Drumboe hauled the very last train from Stranorlar to Strabane and back as the CDR finally closed as a railway. [My photograph, 22nd April 2023]
Preparing for Drumboe’s arrival at the Heritage Centre required a significant re-organisation of the centre’s outside exhibits. All are now protected from the worst that the elements can throw at them by a series of different roof structures. Just a few photographs from 222nd April 2023.
The Red Van in its new location: the text on its display board reads: Built in 1887, Metropolitan Carriage & Wagon Company for the Clogher Valley Railway. Red Vans only transported goods. They were for lighter use, up to the capacity of 2 tons. The Clogher Valley Railway (1887-1941) was a 37 Mike long narrow-gauge railway in County Tyrone and County Fermanagh. After the closure of the Clogher Valley Railway in 1942 the County Donegal Railway (CDR) bought all the red vans. These covered vans were converted to run behind the CDR Railcars. Our red van retains its original wooden chassis from 1887 and all original metalwork. [My photograph, 22nd April 2023]The Grey Van(No. 84) in its new display position: the text on its display board reads: Built in 1893, the Oldbury Carriage & Wagon Company. The grey vans were used for heavy freight up to 7 or 8 tons this could be the transport of livestock or general goods. Grey vans were normally only used in steam hauled freight trains. Our grey van 84 was built as a sliding door van.It was withdrawn in 1960 and sold off before being rescued by the NWIRS (North West Irish Railway Society) in the early 1990s. Grey Van 84 was stored in Derry where it was set on fire in the early 2000s. After the closure of the Foyle Valley Railway it was moved to Donegal town. [My photograph, 22nd April 2023]Coach No. 58</strong>: the text on its display board reads: Built in 1928, Coach 58 was built on a second-hand frame 41 feet and 3 inches in length. The CDR bought this coach along with two others in January 1952 from the NCC numbering them 57-59. Formerly Coach 318 became CDR 58. Coach 58 was one of the three most modern on the whole of the Irish narrow gauge lines. It came to the County Donegal Railway on the closure of the NCC (Northern County Committee) lines near Larne in 1950. Though Coach 58 was built on an original chassis from 1879, it provided modern accommodation for Donegal excursions, and later on as a railcar trailer until the railway closed. [My photograph, 22nd April 2023]: the text on its display board reads: Built in 1928, Coach 58 was built on a second-hand frame 41 feet and 3 inches in length. The CDR bought this coach along with two others in January 1952 from the NCC numbering them 57-59. Formerly Coach 318 became CDR 58. Coach 58 was one of the three most modern on the whole of the Irish narrow gauge lines. It came to the County Donegal Railway on the closure of the NCC (Northern County Committee) lines near Larne in 1950. Though Coach 58 was built on an original chassis from 1879, it provided modern accommodation for Donegal excursions, and later on as a railcar trailer until the railway closed. [My photograph, 22nd April 2023]Railcar No.15 passenger unit: the text on the railcar body’s display board reads: Built in 1936, Walker Brothers & the Dundalk Works (GNR). Railcar 15 was the first articulated Railcar. This means that the driver’s cab was separated from the railcar body. The railcar cost £2,275, seated 41 passengers and could transport a weight of 12 tons. The County Donegal Railway pioneered the use of diesel railcars introducing the first one in 1931. The passenger unit of railcar 15 survives here at the museum, restored after a period of dereliction following the railway’s closure in 1959. Railcar 15 was withdrawn in 1960 and was sold at auction in 1961.The body of Railcar 15 was acquired by the CDRRS in 1995 and moved to Donegal Town. [My photograph, 22nd April 2023]
On entering the museum, which occupies the ground floor of the old passenger station building, one has the opportunity to look at an excellent model railway which depicts Donegal Town Railway Station and Inver Station. Inver Station was on the branch from Donegal Town to Killybegs. All six of the pictures immediately below were taken by me on 22nd April 2023.
As well as this working model a number of other models of railway vehicles are on static display. Just a couple of examples here. The first is a Walker Brothers Railbus, the second is Phoenix a unique diesel shunter. Both of the pictures below were taken by me on 22nd April 2023.
Phoenix was built by Atkinson-Walker Wagons Ltd of Preston in September 1928 as one of their Class A3 engines. After a short trial on the Clogher Valley Railway, it was found to be totally unsuitable. No buyer to be found and the engine lay idle at Aughnacloy coach and wagon shed until 1932. It was bought by Henry Forbes for the County Donegal Railway and converted at the Great Northern Railway’s Dundalk workshop to diesel power. It was fittingly named the “Phoenix” and worked on the County Donegal Railway till its closure in 1959. It can now be seen in the Ulster Folk & Transport Museum.
The major part of the indoor space at the Heritage Centre is dedicated to a series of displays centring on the different stations on the network. Each includes a track plan and a series of photographs of the location. Carefully placed around the Centre are artifacts and railwayana from the Co. Donegal Railways.
Of particular interest to me were the track plans of the various stations on the network. Some of these are shown below. Much of the text attached to each station plan comes from the Heritage Centre’s displays …
Donegal Town Railway Station was opened in 1889 and closed in 1959 it was about 19 miles from Stranorlar. The West Donegal Railway was opened between Stranorlar and Lough Eske (Druminin) on the 25th April, 1882. From 1882 to 1889, the journey between Stranorlar and Lough Eske took some 40 minutes and then passengers transferred to horse-drawn road cars for the last four miles down into Donegal. The fare was 6 pence. The final section to Donegal town was inspected on the 9th of September 1889 and opened on the 16th of September 1889. [My photograph, 22nd April 2023]Killybegs Railway Station opened in 1893 and closed in 1959. The journey from Killybegs to Donegal was 19 miles. The line out to Killybegs from Donegal Town was the result of government intervention some forty years after the famine. For the promotion of the local food industries (agriculture, fishing and food processing) a good transport infrastructure was needed. Railway travellers were reminded of their arrival in Killybegs by the intense smell of the fishmeal factory when entering the town. The Killybegs line served the local communities it passed with regular passenger and freight. In summer it was often the destination for excursions from Derry and Strabane. There are many fond memories of steam-hauled specials cautiously winding their way along the Atlantic coast. There is very little evidence of the station in Killybegs in the 21st century. Killybegs is now a thriving port which has seen major redevelopment. [My photograph, 22nd April 2023]Stranorlar Railway Station was opened in 1863 and was due to close in 1959, however, it remained open to goods until 6th February 1960 because road improvements necessary for lorries had not been completed by 31st December 1959. It was 13 miles from Strabane. Stranorlar Station was first constructed as a branch from the GNR station at Strabane. With the construction and operation of the West Donegal Railway to Donegal Town the station became an important junction. Stranorlar was at the heart of the Co. Donegal Railway network. The extensive layout of Stranorlar reflected its key role in all of the operations of the railway and it was the headquarters for all administration and the running of the system. Skilled jobs specific to the railway were signalmen, drivers, guards and shunters. Stranorlar Station and the associated offices, depots and fitters’ shops was a major employer. Practical skills included engineering, joinery, coachbuilding, foundry work, smithies and clerical workers. [My photograph, 22nd April 2023]Glenties Railway Station opened in 1895 and closed in 1952. It closed to passengers in 1947 and all traffic 1952. Glenties is 24 miles from Stranorlar. I have covered the branch in two previous articles.
The line never paid its way and services were lightly used at all times though there were occasional heavy workings associated with market days. Hugging the valley floor and in company with the river and road it continued north-westwards from Stranorlar. Proceeding on through the now bleak and windswept moorland the line continued alongside Lough Finn down into Glenties Station.
I have covered the branch to Glenties in two previous articles.
Letterkenny Railway Station was opened in 1909 and closed in 1959. The Strabane and Letterkenny Railway began life to promote the prosperous farmland north-west of Strabane. Letterkenny to was 19 miles. It was intended to facilitate trade and agriculture in the area of south-east Donegal north of the Finn Valley. Letterkenny was also served by the Lough Swilly Railway to Derry and Burtonport. [My photograph, 22nd April 2023]
I have covered the line between Strabane and Letterkenny in a series of three previous articles:
Strabane Railway Station opened in 1863 and was due to close in 1959, however, it remained open to goods until 6th February 1960 because road improvements necessary for lorries had not been completed by 31st December 1959. Strabane was approximately 13 miles from Stranorlar. Strabane to Stranorlar was the first stretch of line in Co. Donegal. The line was built by Finn Valley Railway as 5’3″ gauge. It was re-gauged to the narrow (3′) gauge in the summer of 1894 over only one weekend to match with the rest of the Donegal network! The partition of Ireland in 1922 led to serious delays and other complications for the Railway. All of its extensive freight traffic and all passengers had to clear through customs at Lifford (Republic of Ireland) and Strabane (Northern Ireland). [My photograph, 22nd April 2023]Derry Railway Station was opened in 1900 and closed.in 1954. It was just under 15 miles from Strabane. The County Donegal Railway’s own line to Derry improved the handling of the substantial through goods traffic of imported coal from the Foyle quayside to the many customers throughout the system. This station was adjacent to the twin-deck Craigavon Bridge which, at its lower level, gave rail access to Derry’s three other railway stations and the Harbour Commissioners’ own lines. The Derry line was always steam worked for both passenger and freight services. This was to gain maximum benefit from cheaper coal in Northern Ireland and to save depleting stocks at the company’s depot at Strabane. [My photograph, 22nd April 2023]
The featured image shows No. 14 on the turntable at Burtonport. The photograph was taken in April 1940 and was shared by Joe Begley on the Burtonport Heritage Facebook Group on 21st October 2020. [15]
In April 2023 we stayed close to Burtonport, adjacent to Loch Meela, in Co. Donegal. On the first full day of our stay, we walked the Burtonport Old Railway Walk. [1] A 6km length of the Burtonport extension of the Londonderry & Lough Swilly Railway has been made into an accessible path. The weather was great and the walk very enjoyable. We were impressed by the investment in the walk made by the local community and Donegal County Council.
After the closure of the line it seems that it remained undisturbed for many years. Apparently, in 2009, however, “there was a heavy snowfall, and some of the old railway line was cleared to access water mains that needed repairing. The remaining section was later cleared and gradually developed as a walkway with the support of the local community. A massive effort has gone into creating this beautiful and peaceful walk.” [1]
This first length of the old railway extends from Burtonport as far as Kincasslagh Road Station and, apart from a short length close to the latter, can be walked with relative ease.
The route of the old railway between Burtonport and Kincasslagh Road Station as shown on historic mapping provided by the Ordnance Survey of Ireland dating from the early 1940s. The latter station was located to the East of Lough Waskel, to the top right of this map extract. [6]The map displayed on the information board in Burtonport shows the length of the old railway covered in this first article. [My photograph, 23rd April 2023]
The whole of the Burtonport Extension features in a guide written in the late 1980s by Dave Bell & Steve Flanders. [2] In that guide, they provide a series of relatively low resolution monochrome photographs of the railway in operation and as they found it in the 1980s. This article is the first in a series looking again at the line and what can be found along its route.
At Burtonport, Bell and Flanders provide a station plan and a number of photographs from before closure and at the time of their survey.
Bell and Flanders describe arriving at the station from the South in the 1980s by car, the old trackbed now being a narrow road: “You drive through a small cutting before entering the railway’s terminus at Burtonport. … Just before the station itself you drive through a fish processing plant then, suddenly, on the left, you can see the engine shed, recognisable by its characteristic round-top windows and door.” [2: p83]
They go on to describe the station as they found it on their visit: “In the middle distance is the terminus station itself with a length of platform still in existence on the right-hand side of the road. The station house and offices still stand but are now derelict. They and the [engine] shed are now the only railway structures left at Burtonport. … Originally a siding ran along the quayside so that fish vans could be loaded directly from the fishing boats. Burtonport is still an important centre for Ireland’s fishing industry but today refrigerated articulated lorries haul the catches to their markets. It’s also from here that the ferry service runs to Aran Island, known as Arainn Mhór, Big Aran.” [2: p84]
Kincasslagh Railway Station and Crossing Keeper’s Cottage No. 21 are now in private hands. This article finishes with some older pictures of the site and some taken in 2023.
Kincasslagh Railway Station looking Southwest along the line towards Burtonport The Goods Shed is to the left and the passenger facilities are towards the end of the platform on the right. The station was built in 1913 and closed with this length of the line in 1940. This image was shared on the Burtonport Heritage Facebook Group by Patrick Boner on 15th February 2013. [12]The remains of the Goods Shed in the 21st century, seen from the public road to the South. [My photograph, 23rd April 2023]A 1959 view through the site of Kincasslagh Railway Station from Southwest of the Goods Shed seen in the right foreground. The Crossing Keeper’s Cottage is partially masked by the Goods Shed and the passenger facilities are on the left. This photo was taken in May 1959 by Michael Davis and was shared by Patrick Boner on the Burtonport Heritage Facebook Group on 1st September 2018. [13]A view looking Northeast through the site of the station from the location of the goods shed. The passenger building is on the left and crossing keeper’s cottage on the right. The photograph was taken in 1965 by Michael Davis and was shared by Patrick Boner on the Burtonport Heritage Facebook Group on 3rd September 2018. [14]This satellite image is at a slightly larger scale than similar images above it shows the location of what was Kincasslagh Railway Station. [Google Maps, 28th April 2023]The passenger station building and platform as they appear in the 21st century. The site is very well maintained. [My photograph, 23rd April 2023]Crossing Keeper’s Cottage No.21. [My photograph, 23rd April 2023]The view from what used to be the Level Crossing, looking Southwest into the site of the station. [My photograph, 23rd April 2023]Turning through 180°, this is the view Northeast from the old level crossing location. The modern road is ahead beyond the gorse bushes.The view Southwest from the modern road. The Crossing Keeper’s Cottage is just visible above the gorse. The garage is on the line of the old railway. [My photograph, 23rd April 2023]This is a memorial adjacent to the line of the old railway to the first action in the War of Independence. [My photograph, 23rd April 2023]
The next article in this short series can be found on this link:
Dave Bell & Steve Flanders; Donegal’s Raulway Heritage Guide No. 2, The Londonderry & Lough Swilly Railway: A Visitor’s Guideto the old railway and all the bits that can still be seen; County Donegal Restoration Society, Donegal Town, Co. Donegal, 198…
Jim McBride; The Lough Swilly Remembered; County Donegal Railway Restoration CLG, 2021. Illustrations from this book are reproduced here with the kind permission of Jim McBride.
Joe Begley, Steve Flanders & E.M. Patterson; The Lough Swilly Railway: Revised Edition; Colourpoint Books, Newtownards, 2017.
Belturbet Railway Station viewed from the West. The main passenger facilities are on the left behind an unidentified C&L locomotive with its mixed goods/passenger train. The 3ft gauge C&L entered Belturbet Railway Station from the West and it’s trains used the North face of the platform. Great Northern Railway (GNR) trains entered the station from the East and were able to make use of the protection afforded by the station roof as they used the South face of the station platform. The GNR water tower, shown here on the right of the image was relocated during the renovation of the site to occupy the location of the C&L Engine Shed which would, at the time of this picture been some distance behind the photographer and over to the right. [5]Taken from further Northwest this photograph, which was shared by the Heritage Railway Magazine on its Facebook page on 8th August 2021, shows the transshipment platform and shed at Belturbet with the broad gauge on the right of the platform and the 3ft gauge C&L to the left. On the right are the C&L Engine Shed and Water Tower and in the distance to the left, the GNR Engine Shed and at the extreme left of the image the passenger station’s roof. [6]A view of Belturbet Station from the East, only GNR broad gauge is visible in this image. [7]
In April 2023 we were able to drop in at Belturbet Railway Station on our way to Co. Donegal. The Station Museum was open Fridays, Saturdays and Sundays from 12noon to 5pm throughout the Summer season. [1][2][3] A small group of enthusiast’s have turned a derelict site into a good museum and rescued the majority of rail related buildings on the site. A patient wife allowed me a pleasant hour or so looking round the Museum.
Belturbet was the terminus for two different railway lines: the Irish standard gauge (5ft 3in) line from Ballyhaise on the Cavan Branch of the Great Northern Railway (GNR), and the Cavan and Leitrim Railway (C&L) – a 3ft gauge line which served Dromod to the Southwest and Arigna to the West with its three 3ft gauge lines meeting at Ballinamore in Co. Leitrim). At Dromod the C&L connected to the Midland Great Western Railway mainline from Dublin to Sligo.
Closure of the Station occurred in 1959. The site remained derelict for 36 years until, in 1995, Belturbet Community Development Association commenced restoration work. That work was completed in 1999. Further development of the site is planned which will see original track being relaid and with the intention of seeing trains running once again in Belturbet.
Belturbet Railway Station as shown in publicity material for the Station Museum. A North point has been added to the plan so as to avoid confusion if comparing the plan with maps of the location. [4]
The plan of the Station Site is numbered to allow easy identification of different buildings. The 3ft gauge line enters the schematic plans from the West (the right side of the image), the 5ft 3in gauge line enters from the East (the left side of the image). The buildings are:
The Main Station Building and Museum – the dressed stone buildings were the main reception area, office and waiting rooms for the Great Northern Railway (GNR) at Belturbet. What is now a single reception room was originally two separate rooms, the first being the main concourse for access to the platforms. To the East were two waiting rooms, one for the general public and one (with toilet) for ladies holding first class tickets. To the West of the main reception area (behind the museum reception desk was the ticket office leading to the Station Master’s office, which had a connecting door to his house.
The Station Master’s House – has been restored. It would have originally been a family home but can now be booked for self-catering holidays.
Railway Lines and Platform – Belturbet railway station, which opened in 1885, was built and operated by the Great Northern Railway Company of Ireland (GNR). It was the last station of the GNR broad-gauge railway line – 5ft. 3 in. (1.6 m.). In 1887 the Cavan & Leitrim (C&L) narrow-gauge line – 3 ft. (0.9 m.) was built, Belturbet was the first station on this line. On the newly extended platform, passengers transferred from one line to the other. GNR and C&L trains stopped on opposite sides of the platform. There was a roof over the platform immediately adjacent to the station buildings.
GNR Goods Shed/Store – Goods Wagons were positioned alongside the small platform in front of the Goods Store. Wagon floors were level with the platform which made it easy for the porters with their barrows to move goods on and off the wagons. A crane was used to load and unload heavy items.
Cattle Dock and Ramp – The Cattle Dock was virtually unchanged from its opening in 1885 until its closure on March 31st, 1959. The dock was used to load livestock onto the wagons. This was particularly useful on the first Thursday of every month, when Belturbet Fair took place on the Fair Green.
GNR Signal Box – this building was no longer on site when the preservation work commenced.
GNR Turntable – The circle of stones indicate the position of the turntable. It was so well balanced that one man could single- handedly turn around a 50 ton engine.
GNR Engine Shed – The GNR Engine Shed, refurbished to original specifications, is where an engine was housed at night. The large vent in the roof allowed smoke and steam to escape when the engine was in steam.
Transshipment Shed – For many years GNR coal trains were filled from C&L coal wagons by local men using only shovels, barrows and planks of timber. The demand for Arigna coal ensured that Belturbet Station remained open five or six years longer than many similar stations.
C&L Engine Shed and Water Tower – the C&L shed and water tower were demolished before renovation of the station site commenced.
GNR Water Tower – In 1997 the GNR water tower was dismantled and reassembled on the site of the original C&L Engine Shed and Water Tower, which had been demolished.
C&L Turntable – this had been removed before renovation commenced.
C&L Goods Shed/Store – this was the only building on the station site to have survived the period of dereliction with its original slate roof and wooden doors.
There are a significant number of historic photographs on display cover both the broad gauge line and the narrow gauge line.
The following photos were taken by me on 21st April 2023.
The viaduct which carried the C&L across the River Erne on its approach to Belturbet Railway Station. [My photograph, 21st April 2023]Crossing the viaduct on the C&L on the way to Belturbet Railway Station. [My photograph, 21st April 2023]Continuing our approach to Belturbet Railway Station. [My photograph, 21st April 2023]The historic 25″ OSi mapping shows the C&L approach to Belturbet Railway Station across a level crossing which had an associated Crossing Keeper’s Cottage. [8]Crossing the road on the C&L’s final approach to the station. The Crossing Keeper’s Cottage still stands in very good condition in the 21st century. [My photograph, 21st April 2023]The Station site at Belturbet close to the turn of the 20th century as recorded on 25″ OSi mapping. [8]The Transshipment Shed viewed from beyond the West end of its platform. It was primarily used for the transfer of Arigna coal from the C&L to the GNR. [My photograph, 21st April 2023]Just a little closer in. The GNR engine shed is visible just to the left of the roof of the Transshipment Shed. C&L trains from Arigna drew in to the near face of the platform. GNR trains approached the rear of the platform from beyond the Shed. On the right, the water tower base can just be made out. [My photograph, 21st April 2023]The GNR water tower base was dismantled and reassembled (in 1997) on the site of the original C&L Engine Shed and Water Tower, which had been demolished. [My photograph, 21st April 2023]The GNR Engine Shed as seen from the Southwest. The stones which mark the location of the GNR turntable can just be seen beyond. [My photograph, 21st April 2021]The GNR Engine Shed viewed from the East. [My photograph, 21st April 2023]The location of the GNR turntable. The building beyond the turntable to the left is the roof which covered the GNR passenger platform. The buildings directly behind the turntable were built on the site a long time after closure. The house a men’s charity. The GNR water tower was relocated to allow this building to be built. [My photograph, 21st April 2023]The Transshipment Shed, seen from the East with broad gauge track in evidence to the left of the platform. [My photograph, 21st April 2023]The trainshed roof over the GNR platform is on the left of this image with the passenger facilities beyond. The two storey building is the Station Master’s House. [My photograph, 21at April 2023]The GNR Goods Shed to the East of the main station buildings. [My photograph, 21st April 2023]Two views from the station approach roads, both show the main facade of the station. [My photographs, 21st April 2023]


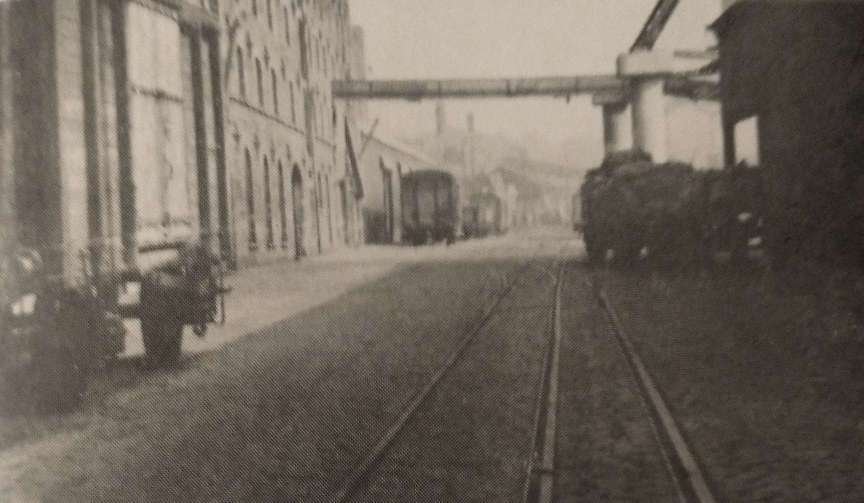
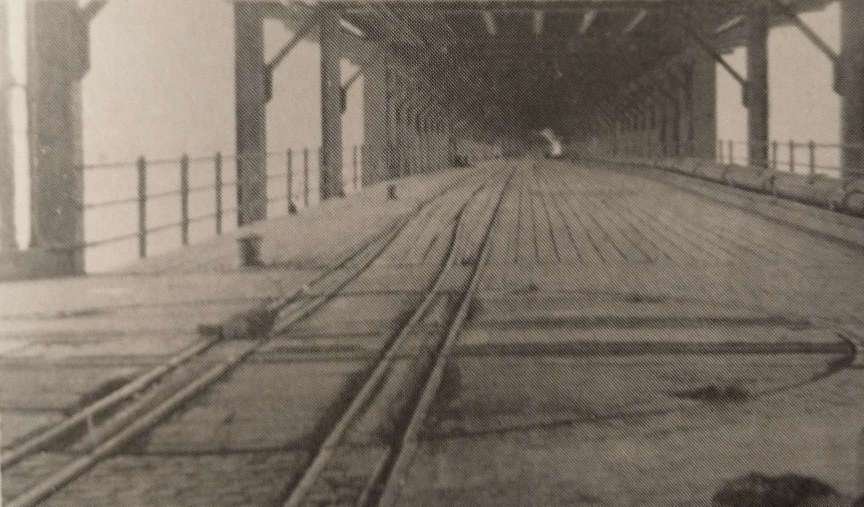
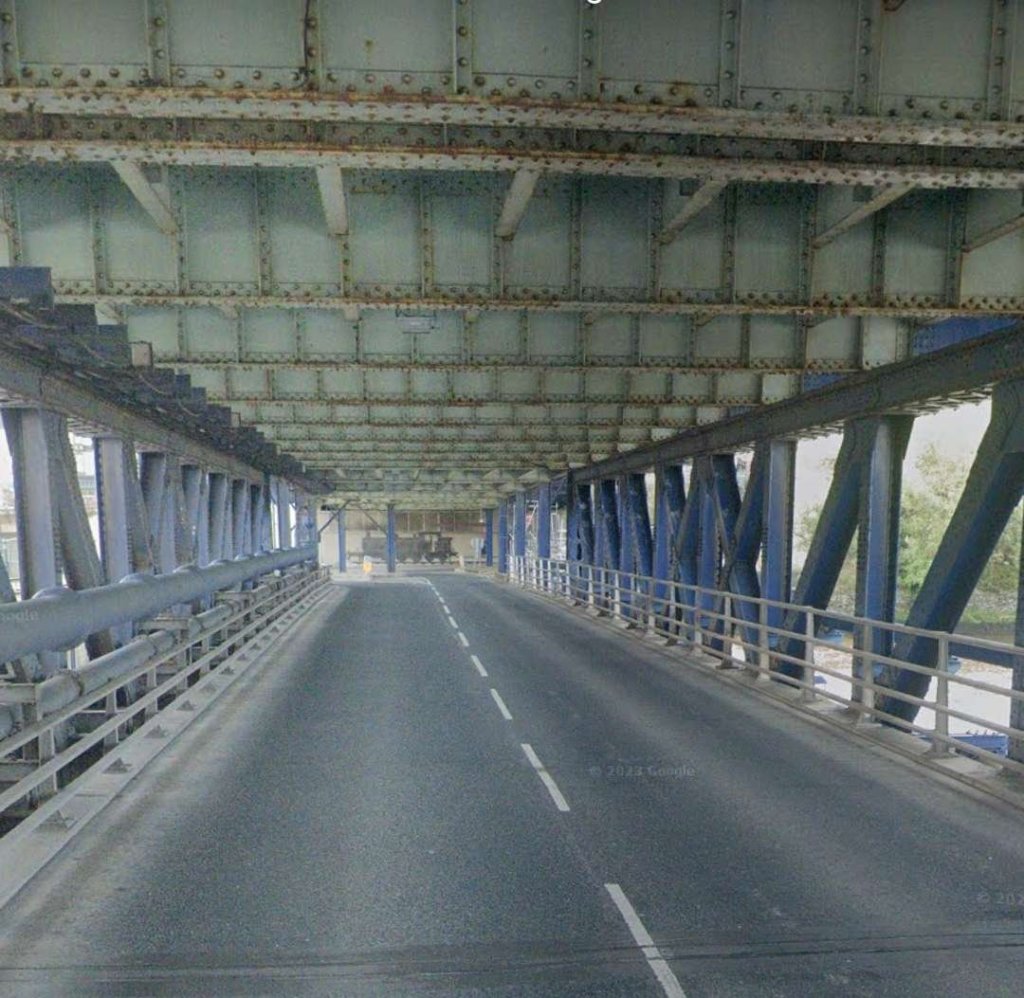
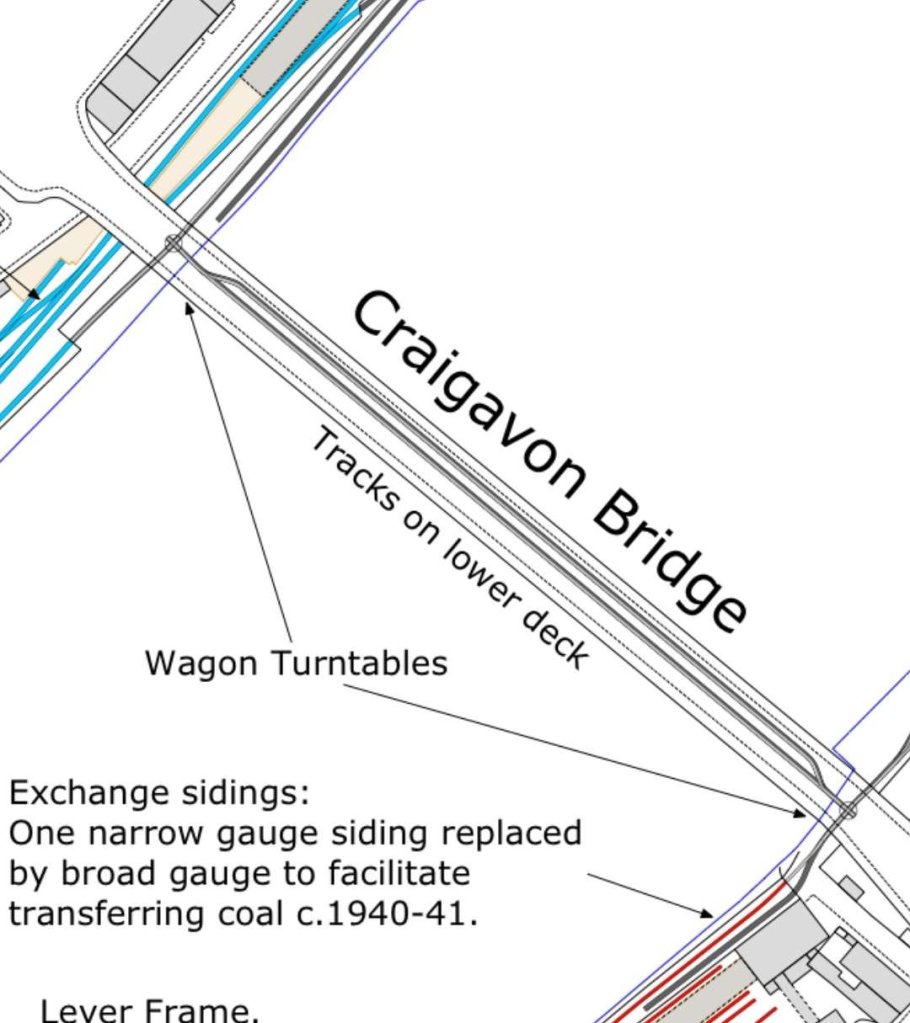
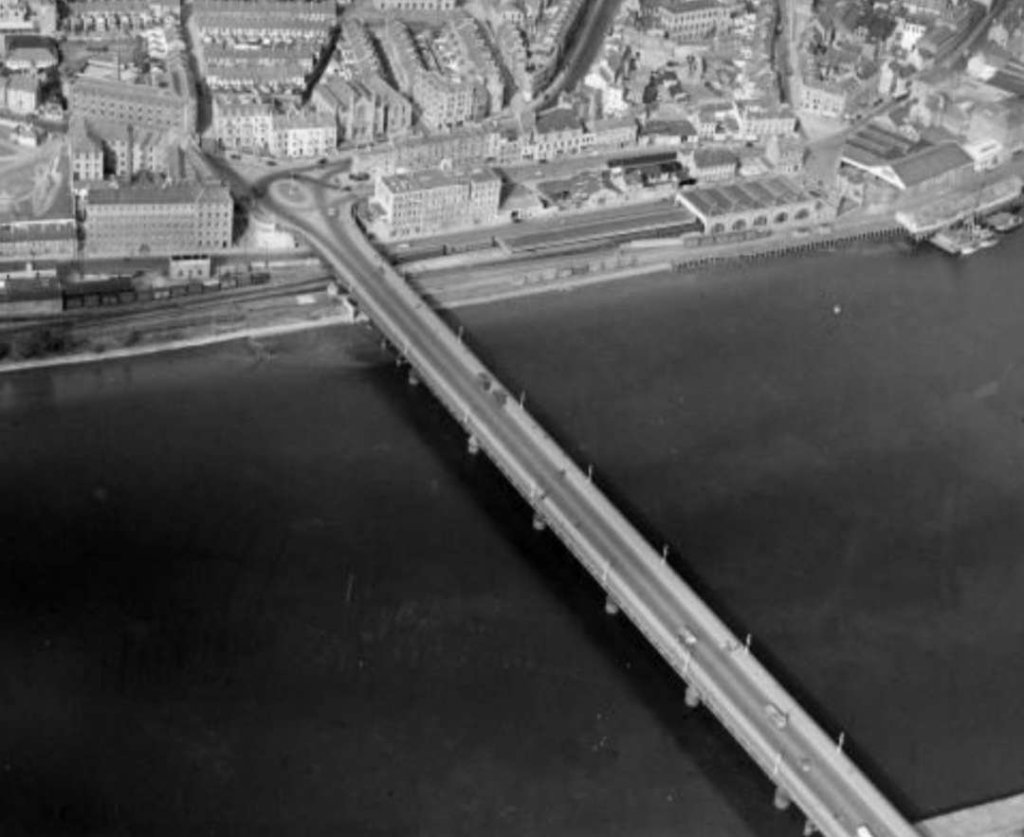
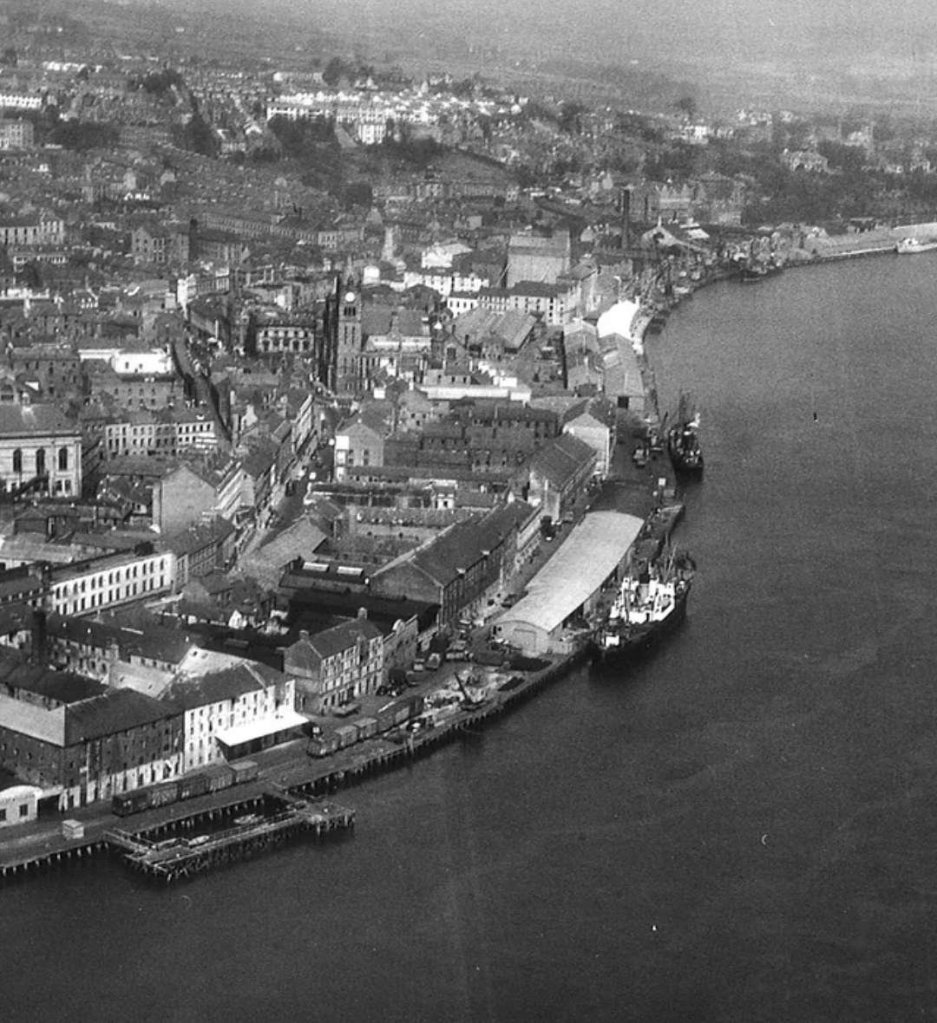
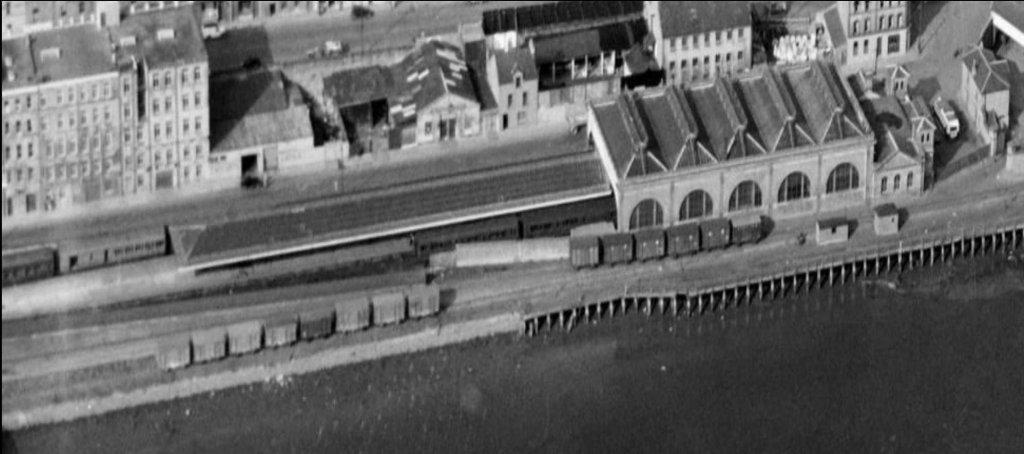


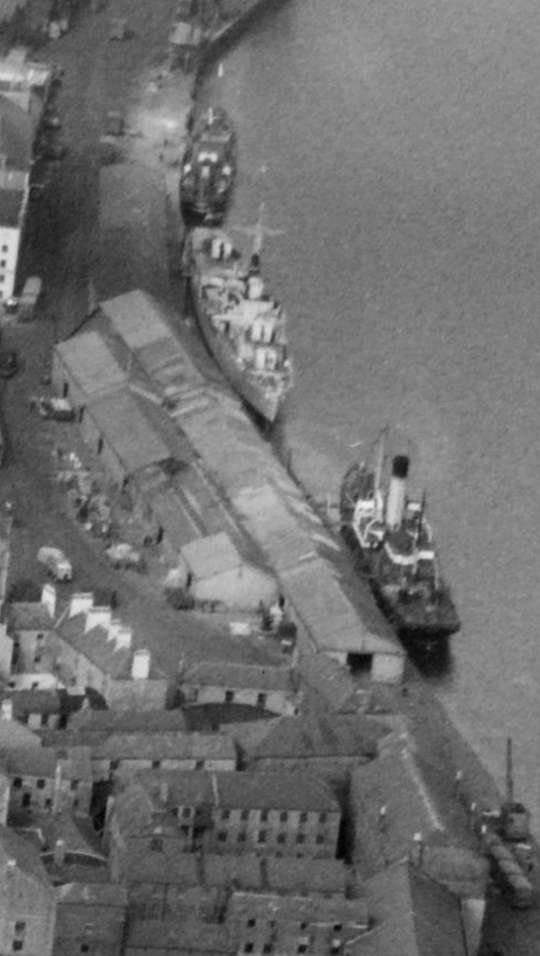
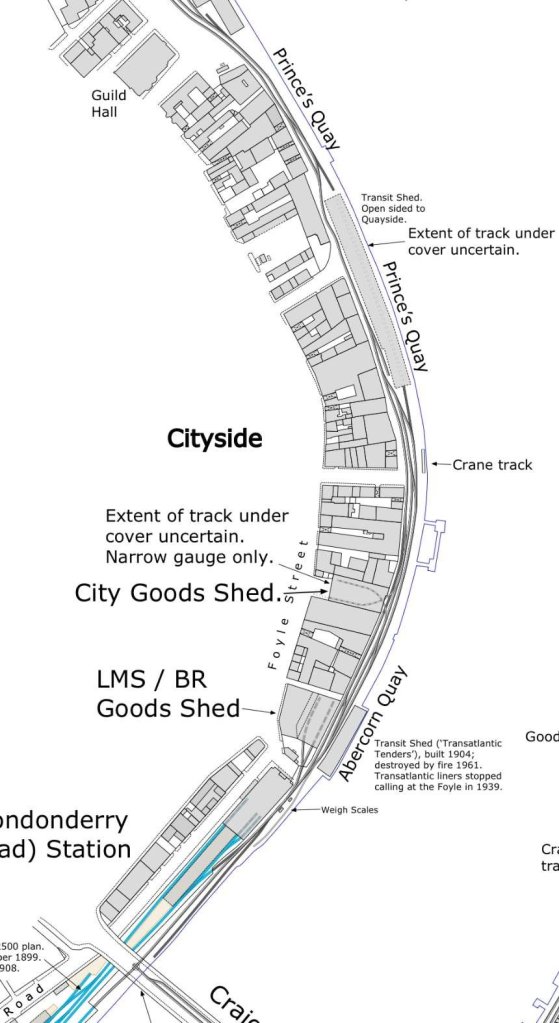


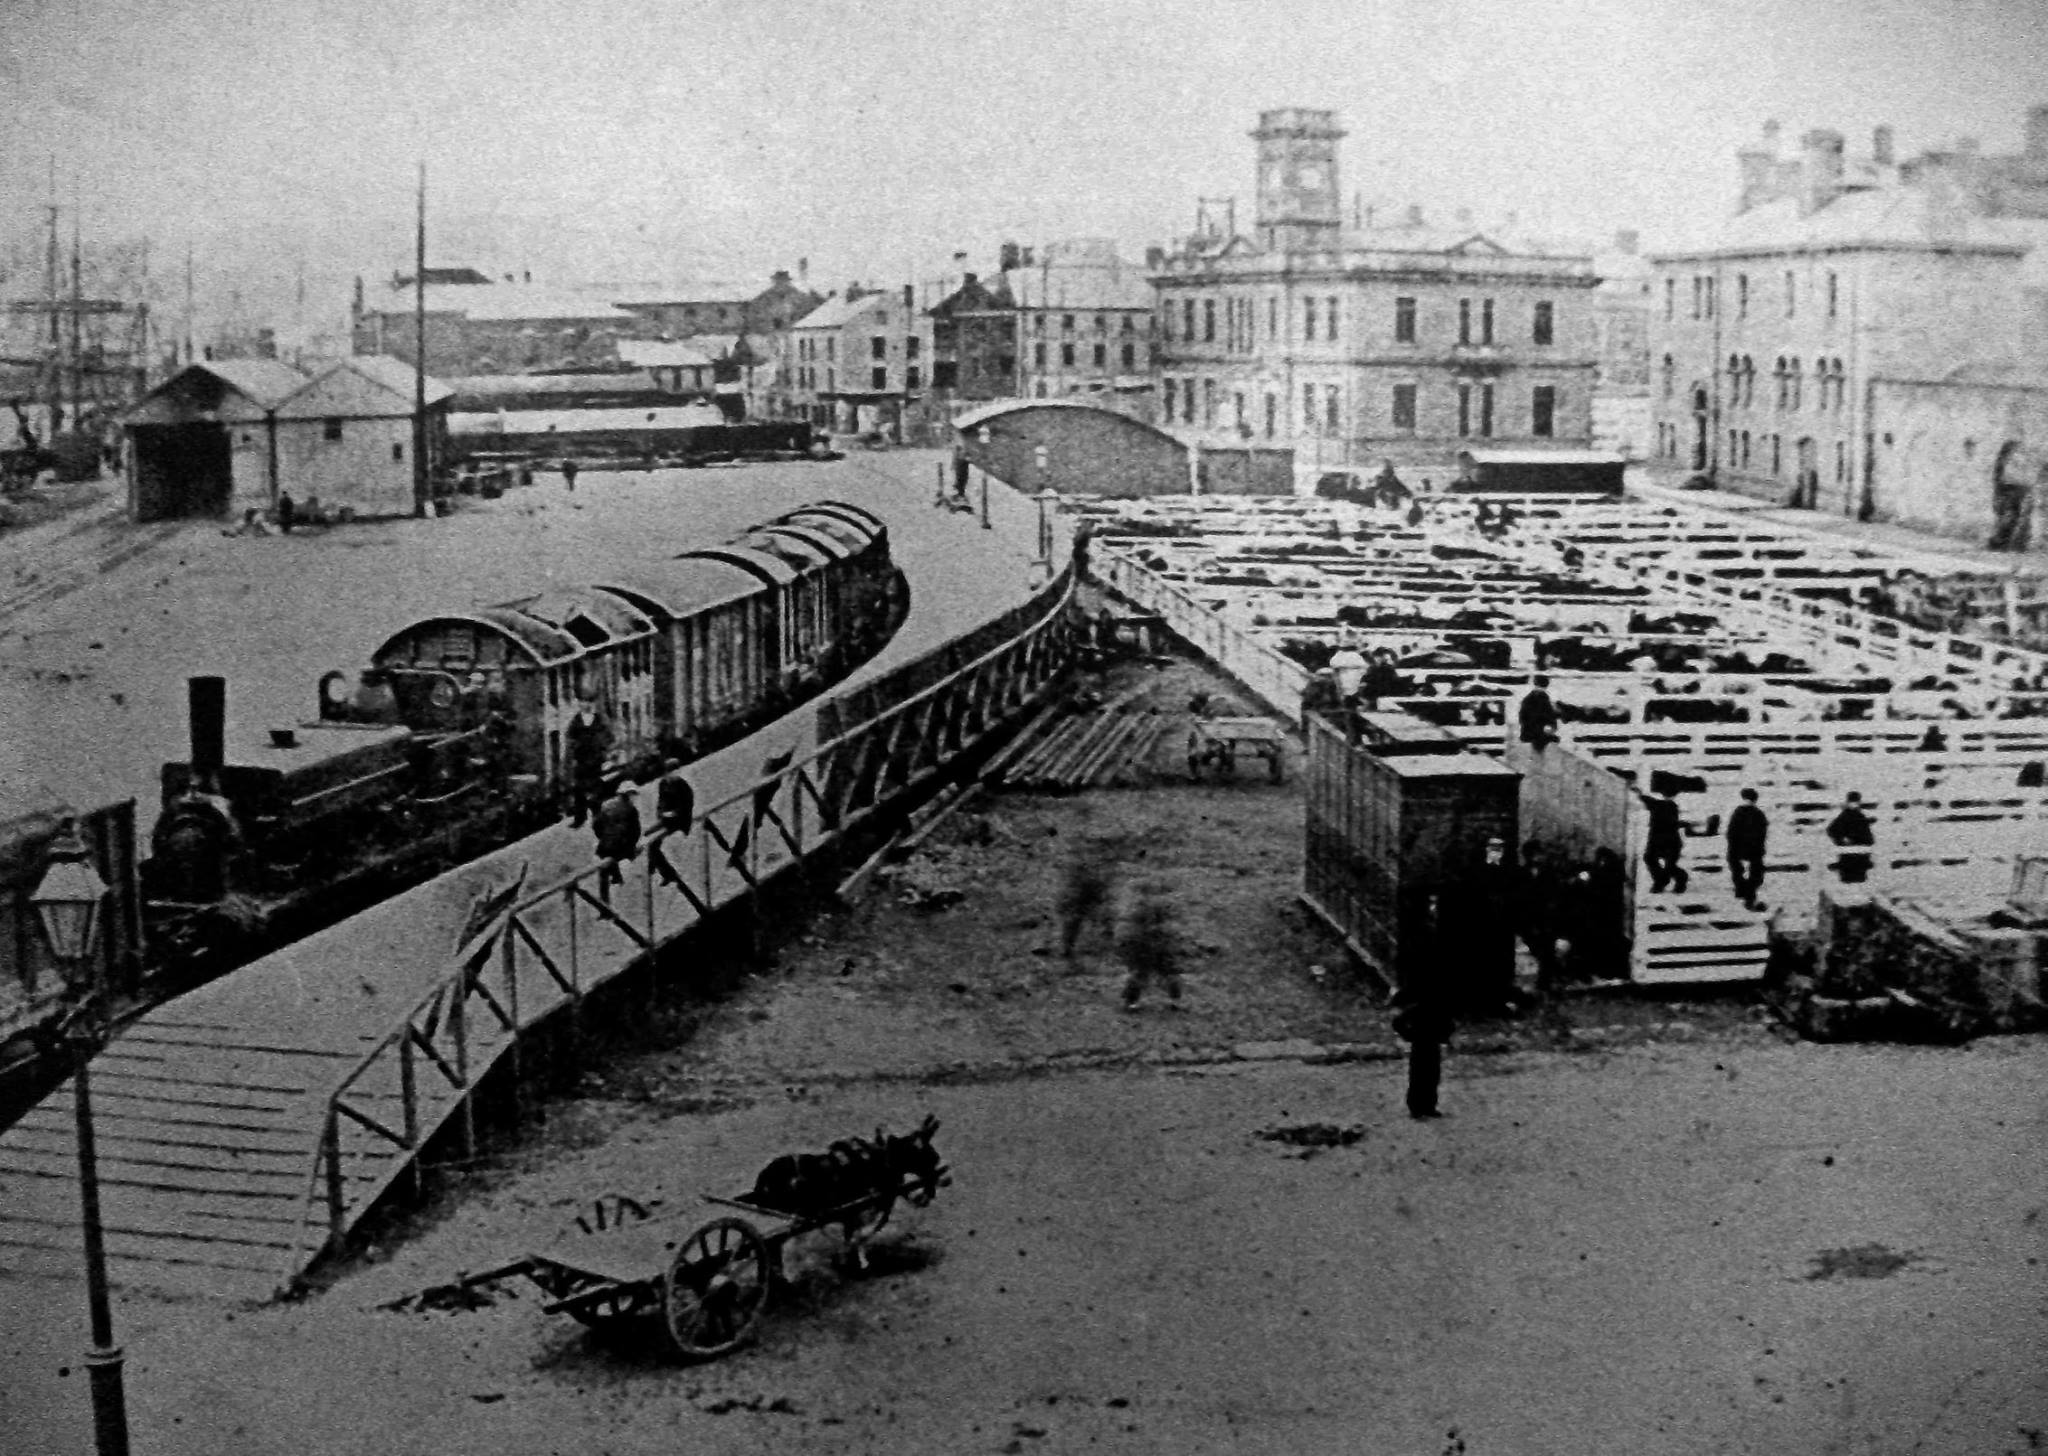
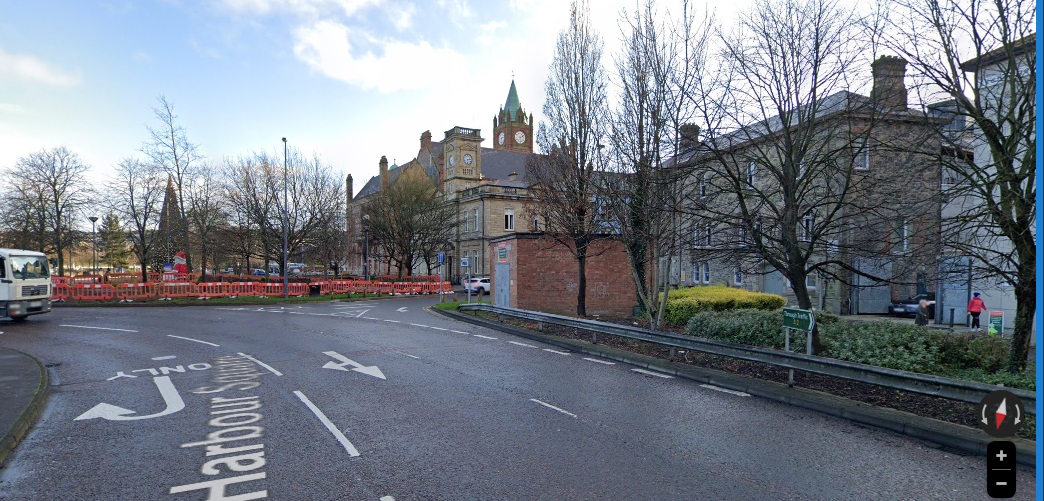
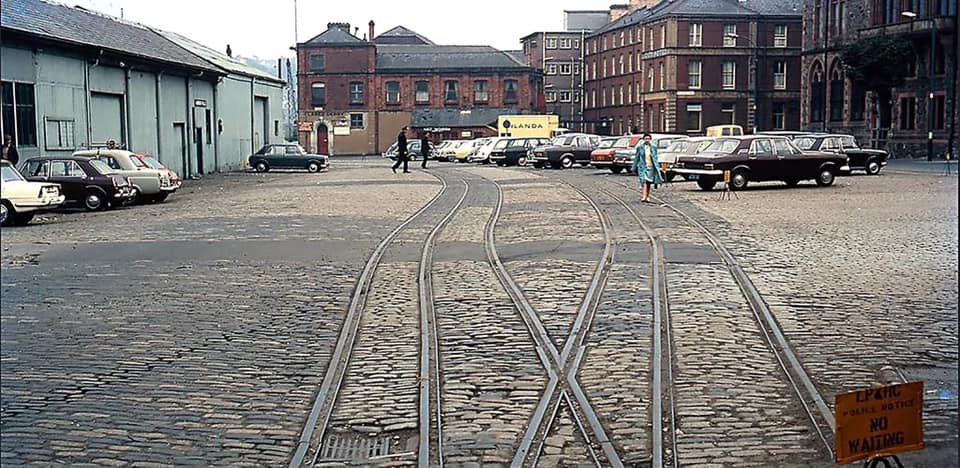
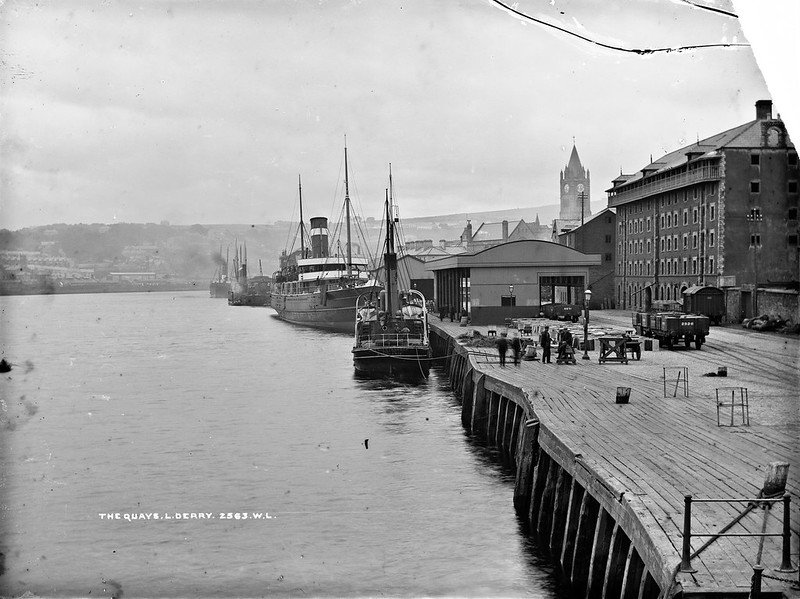
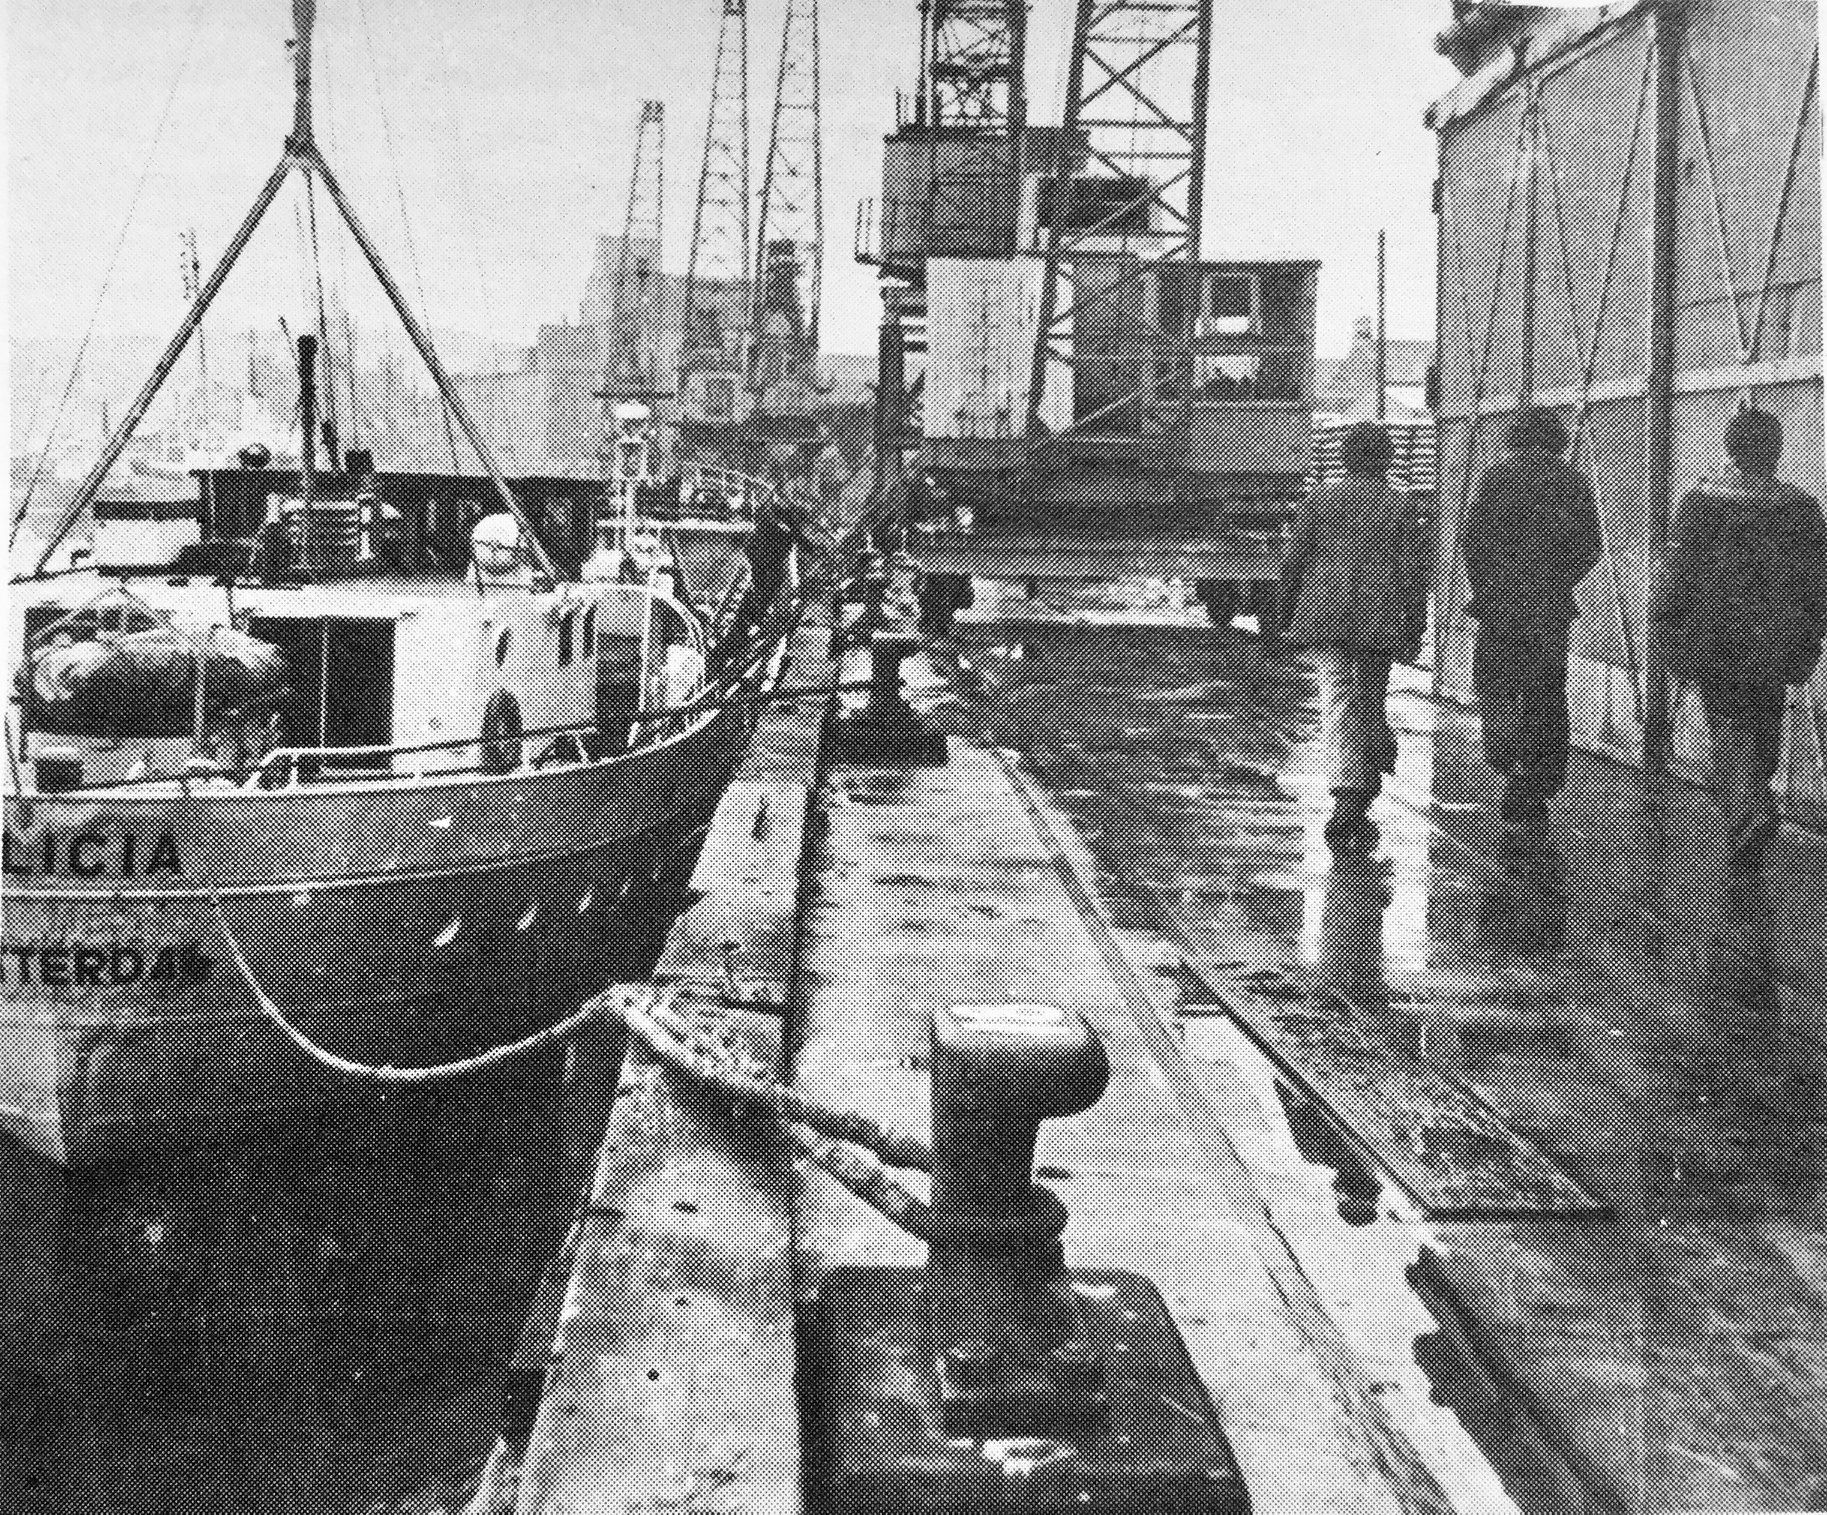
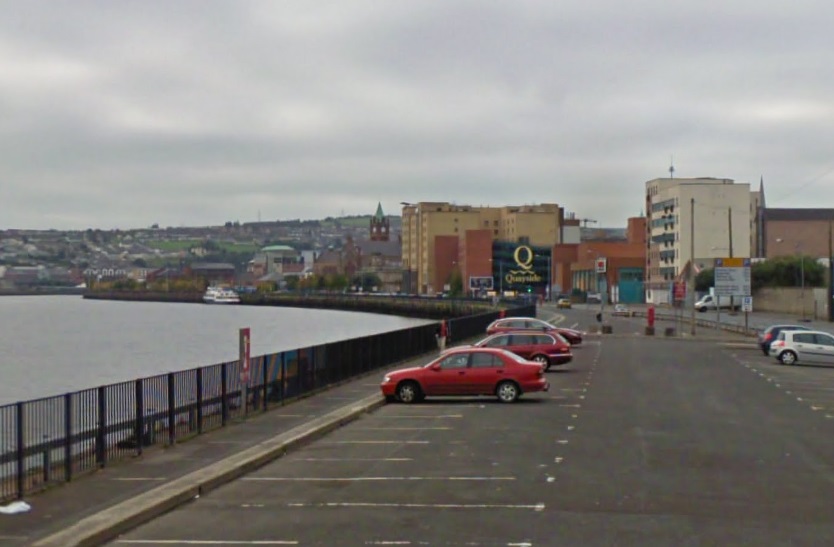
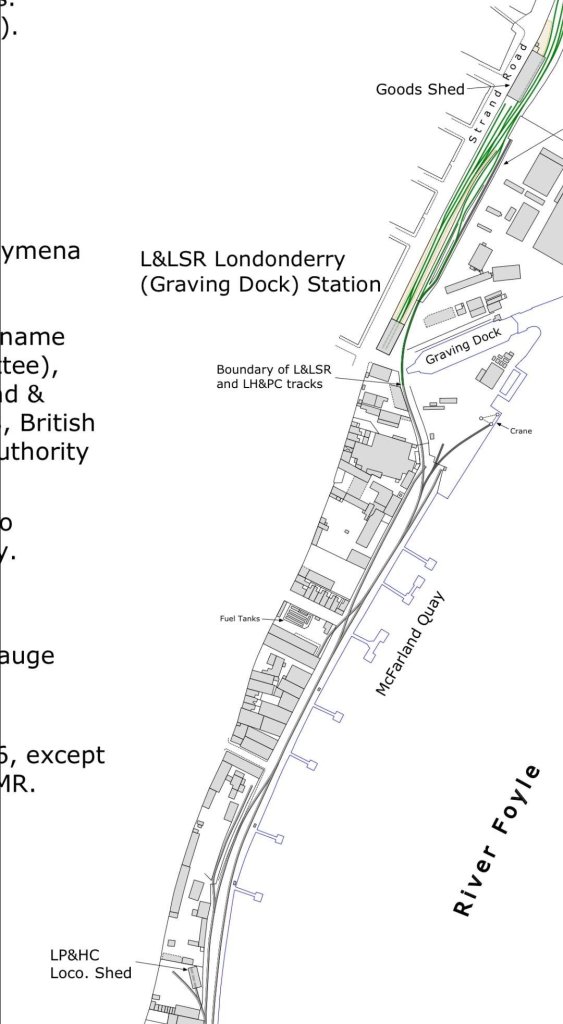
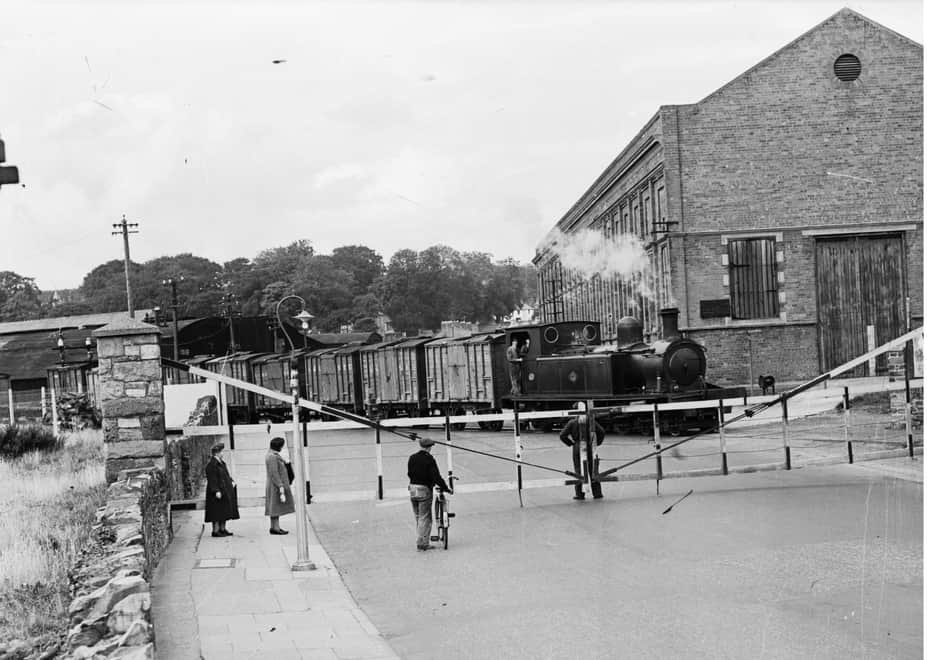
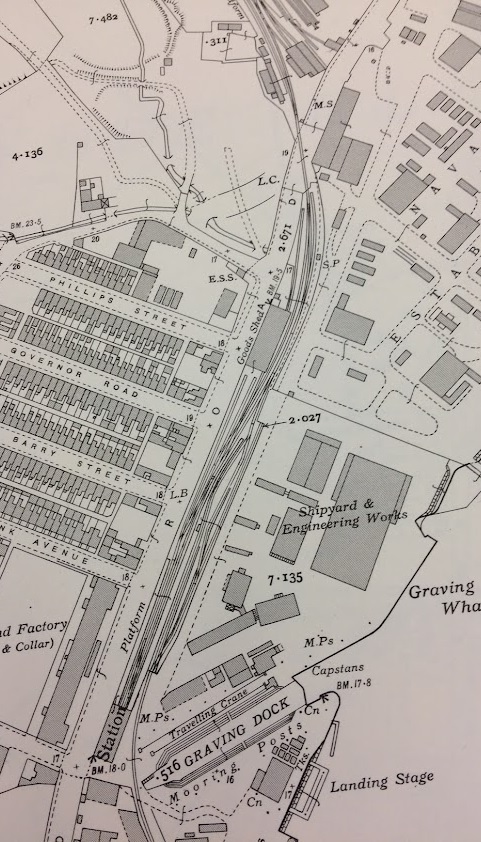
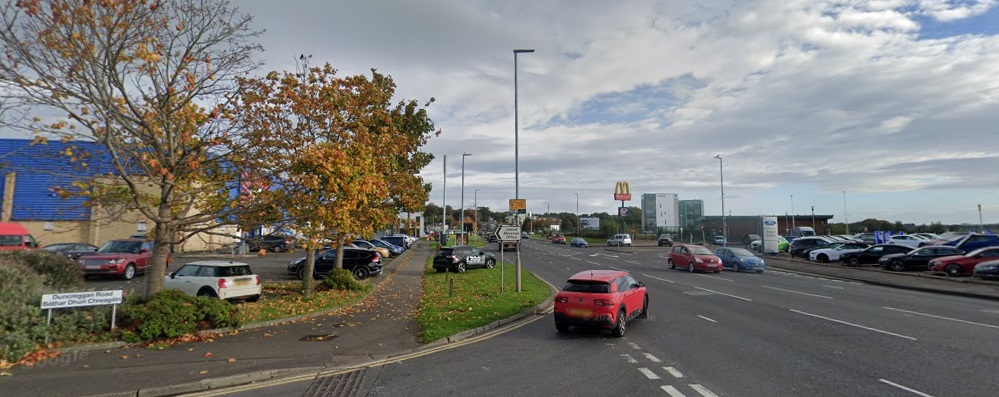


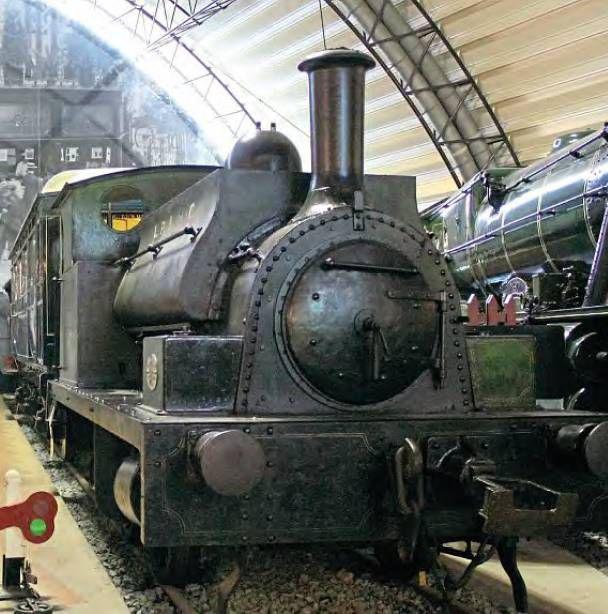
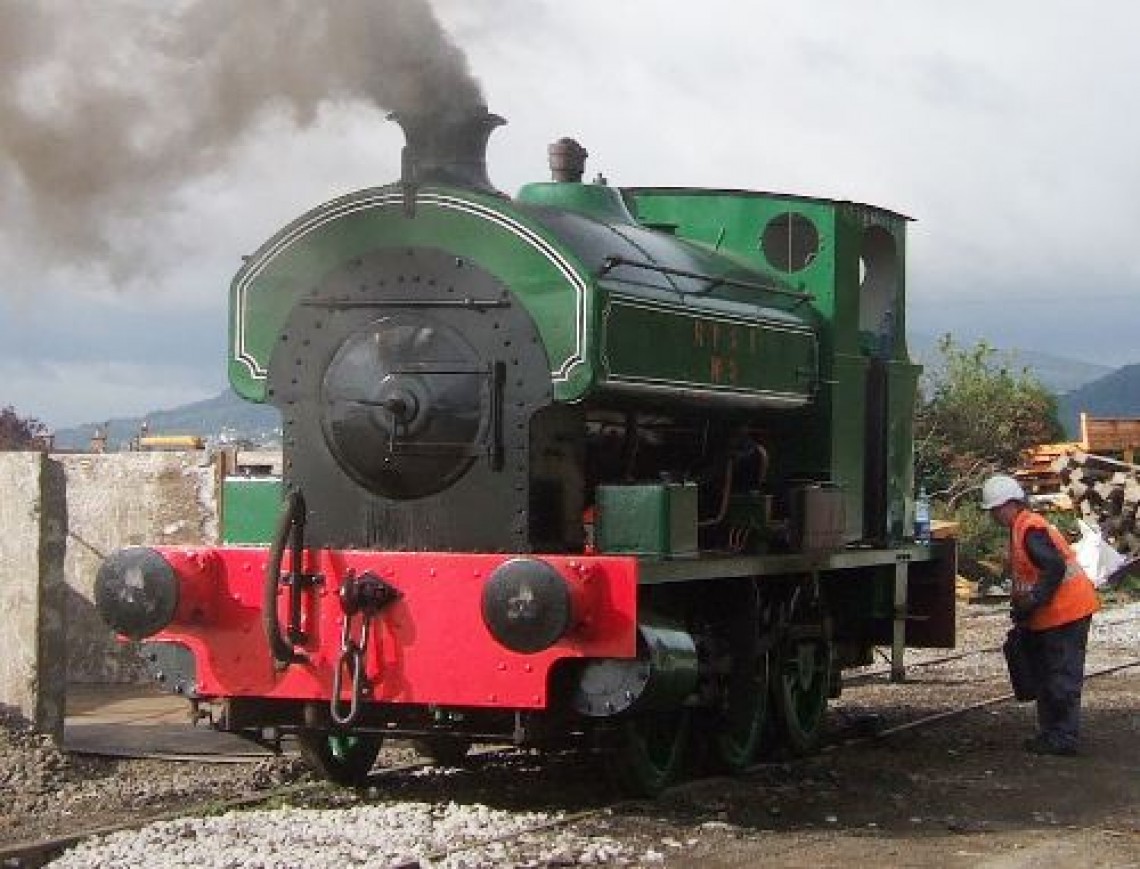
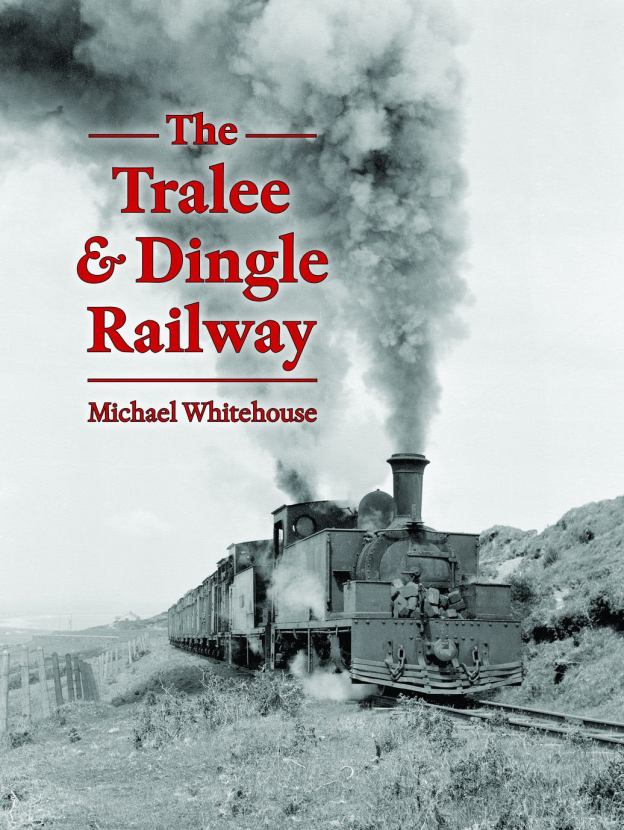
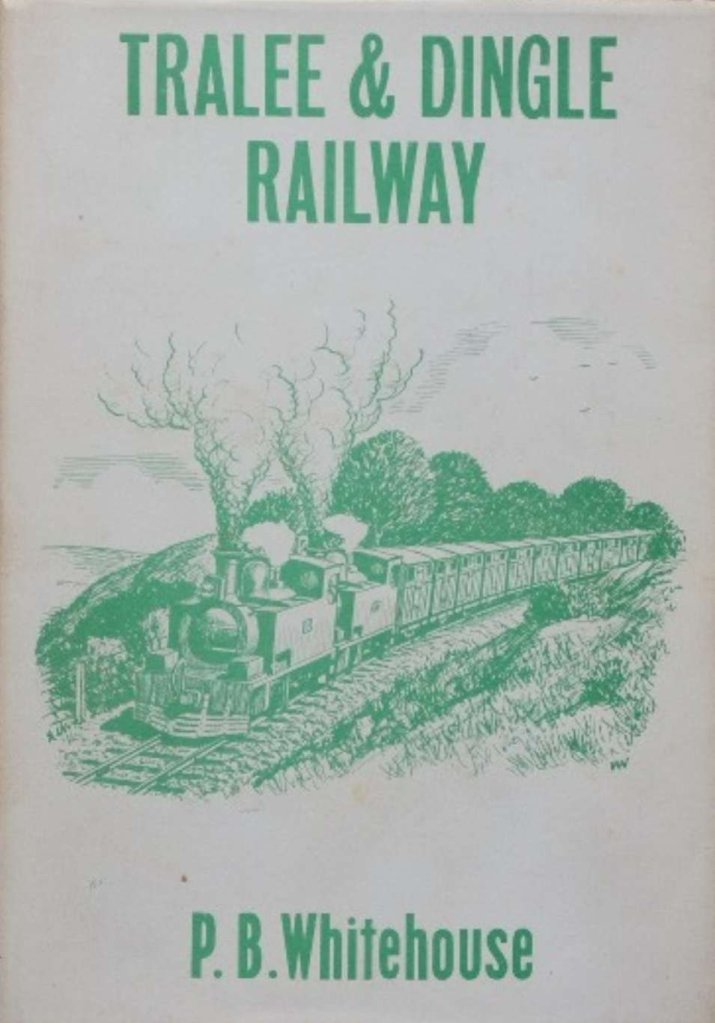
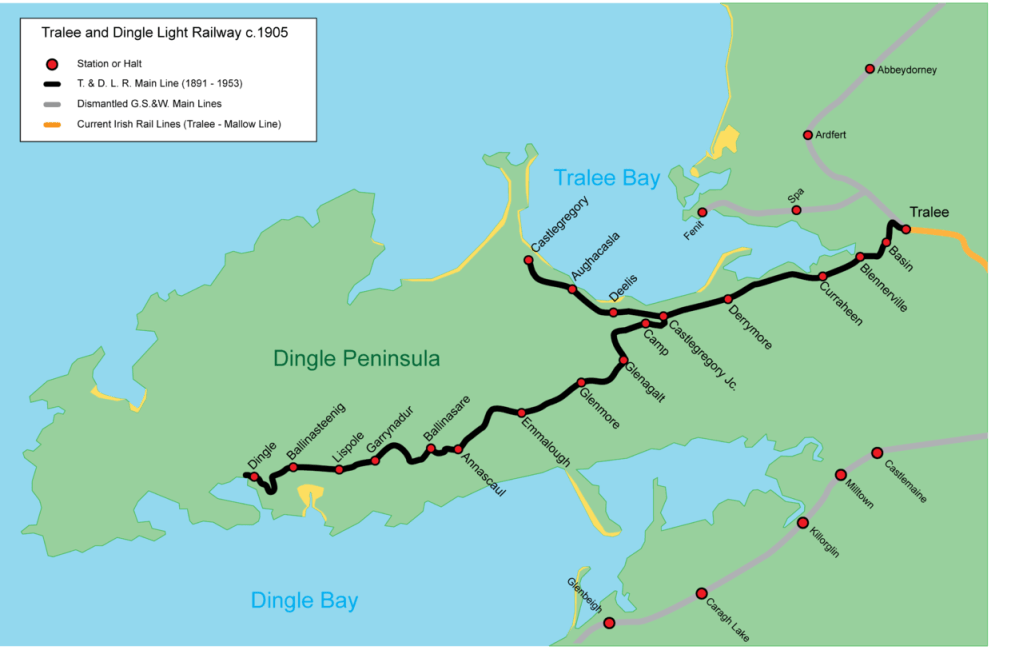

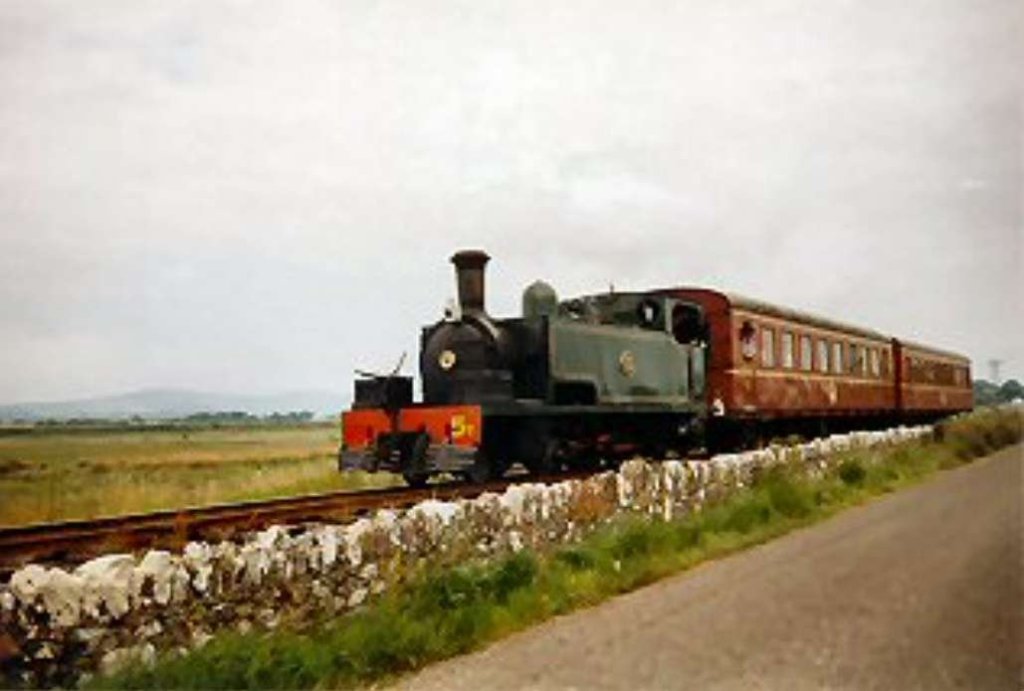

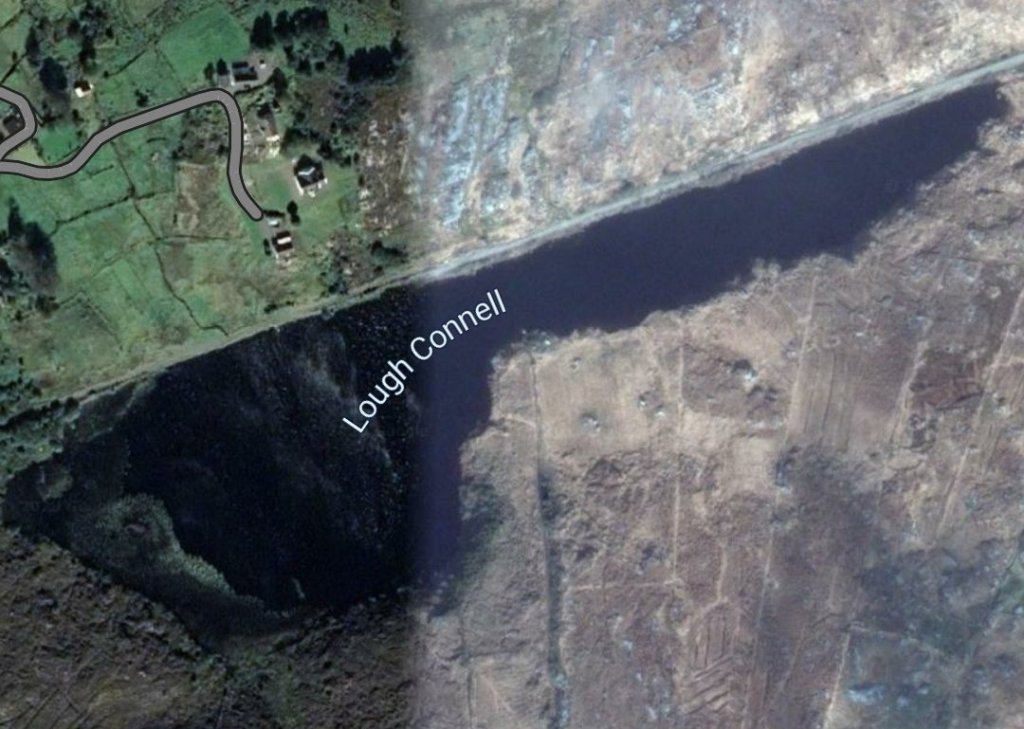

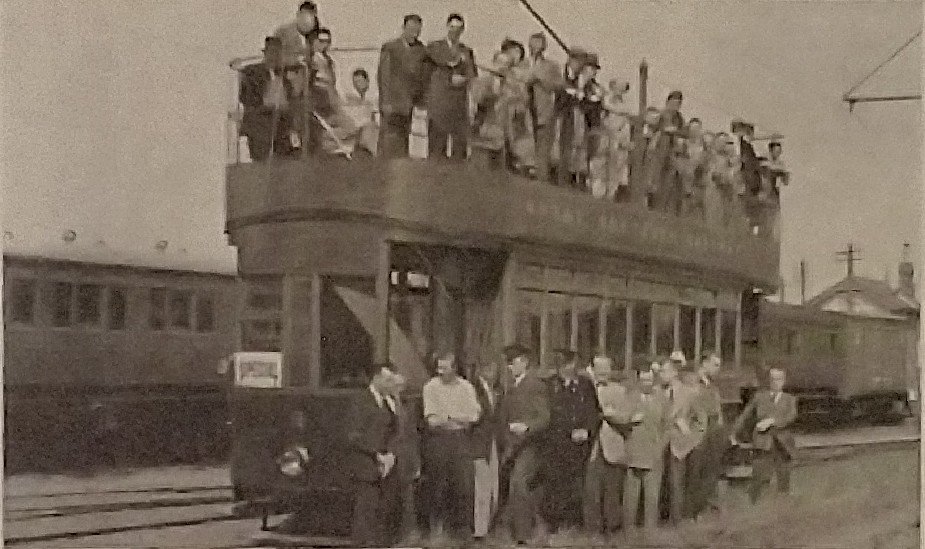
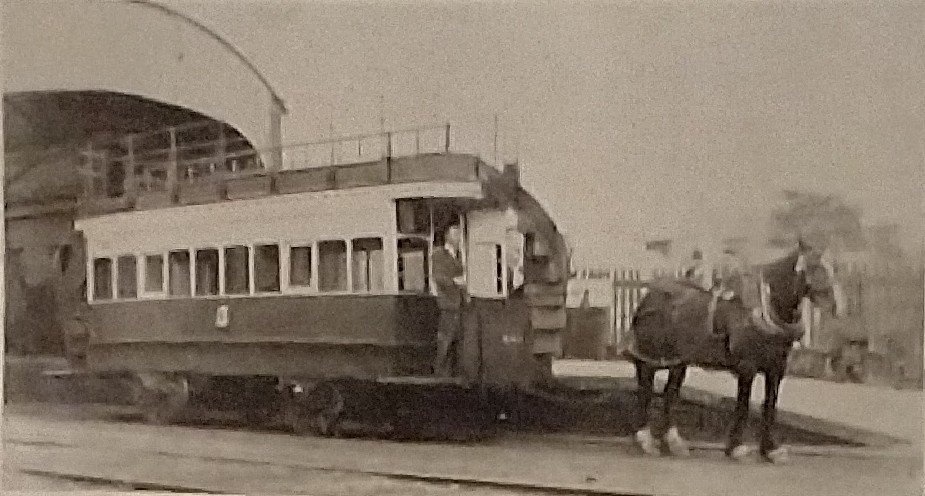
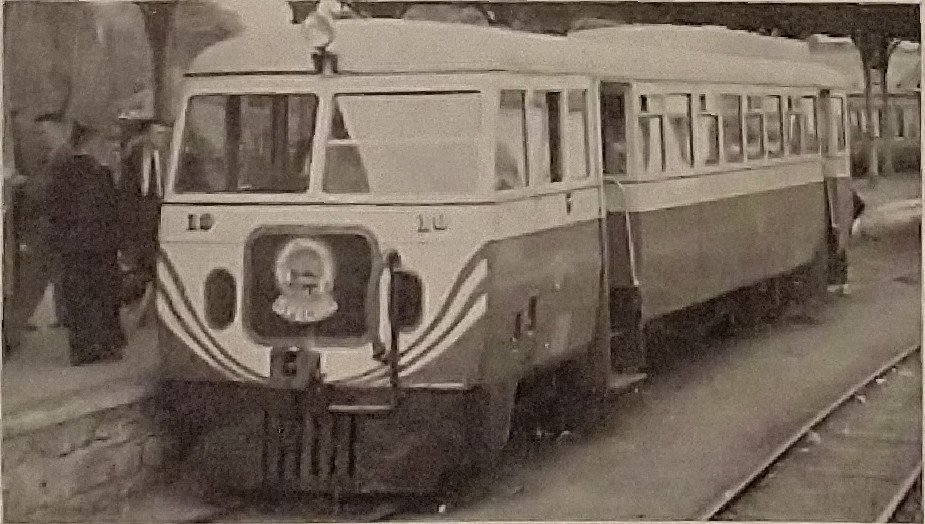
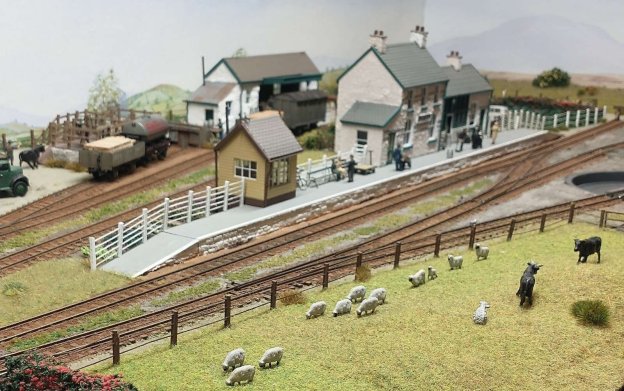
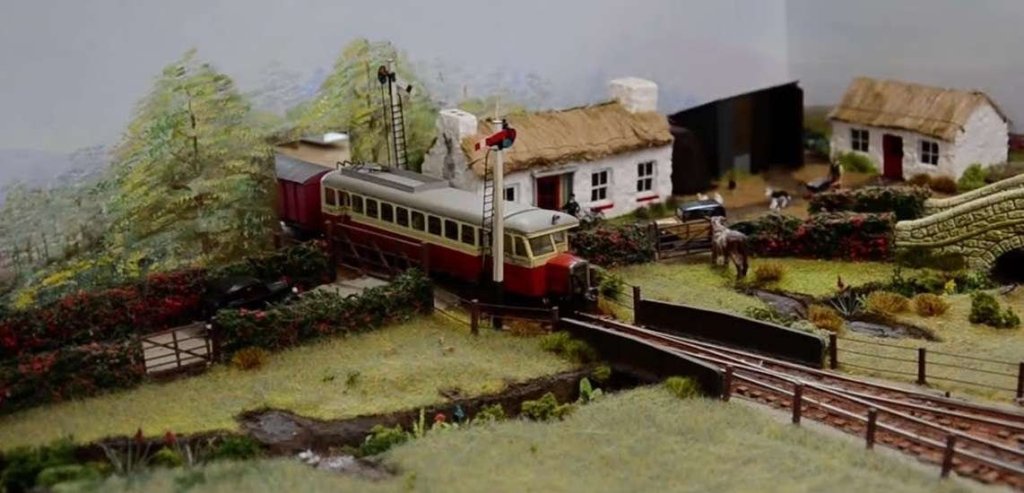
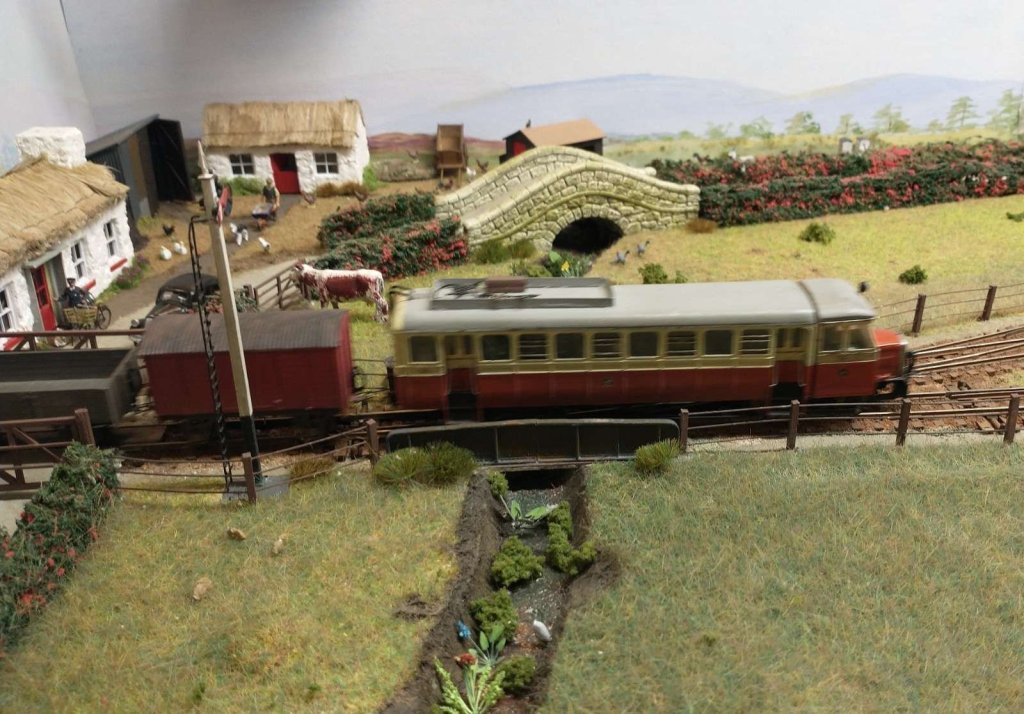
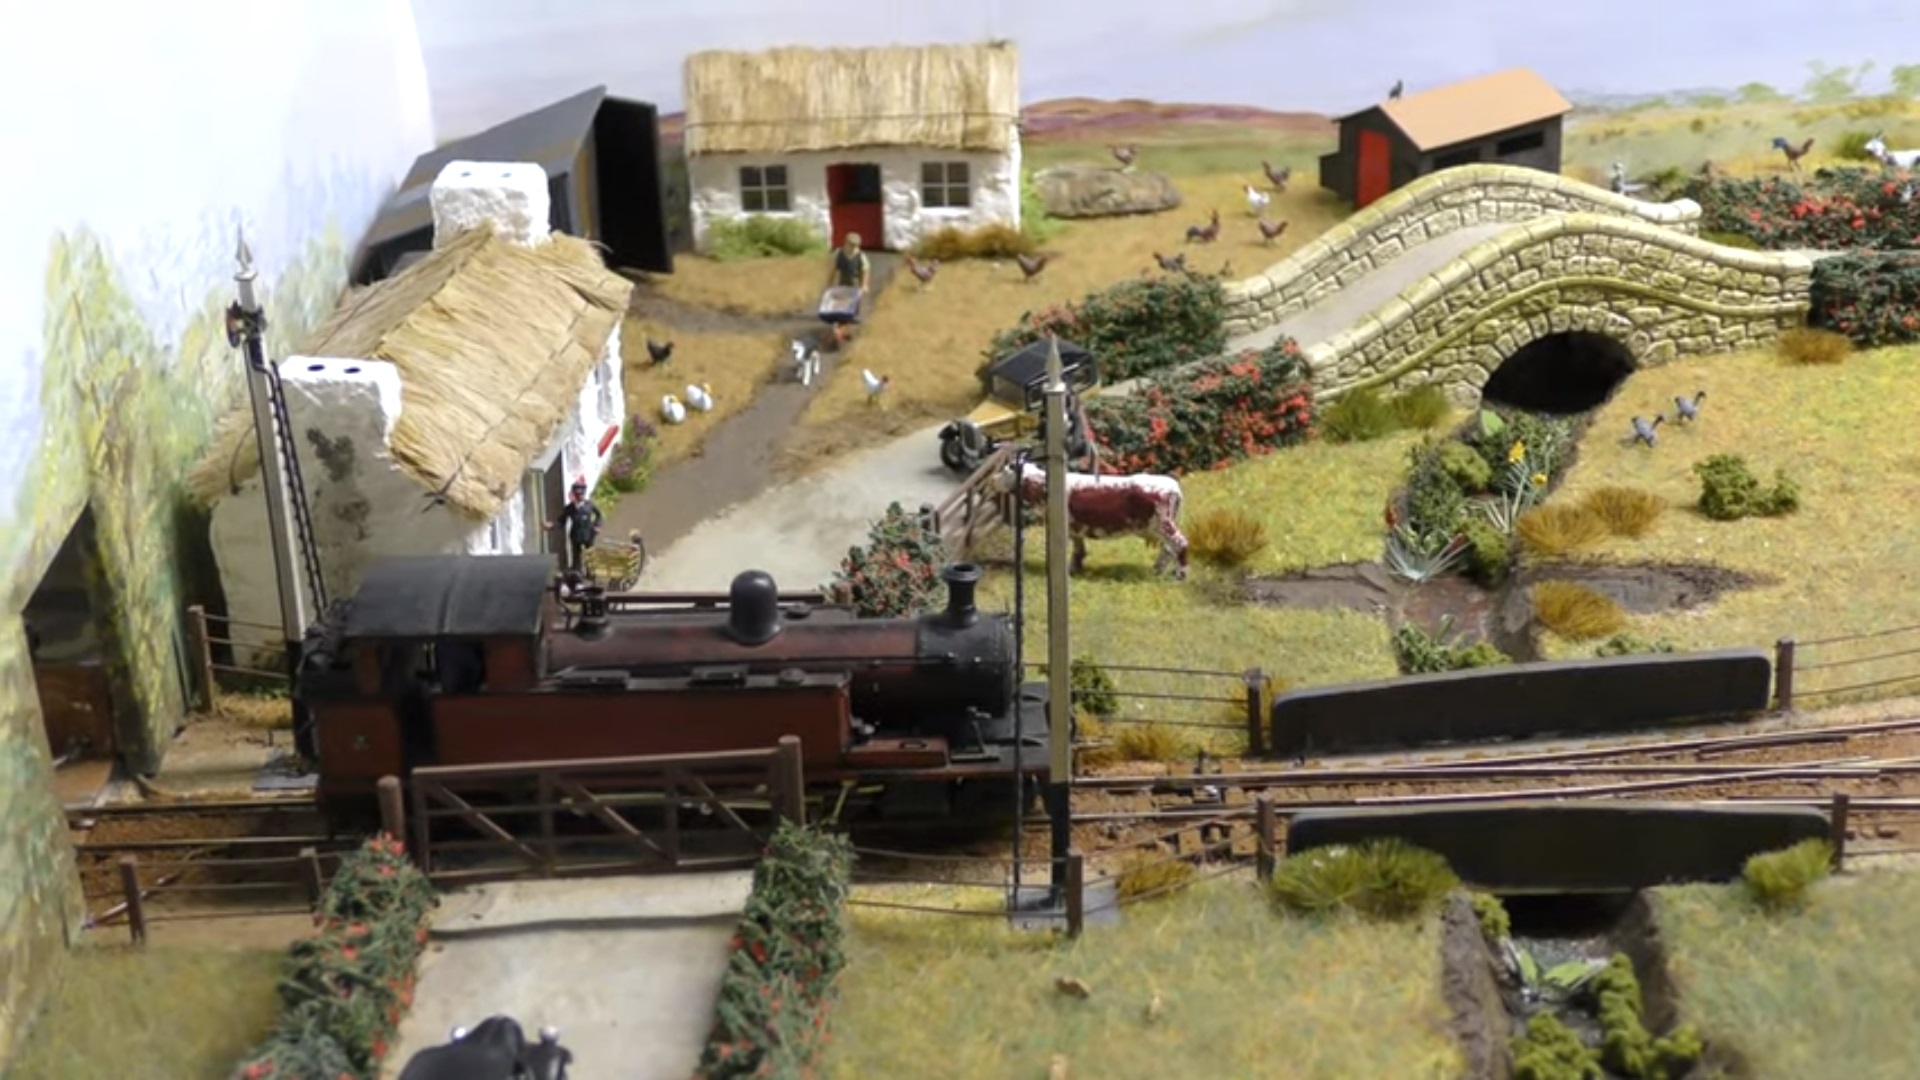
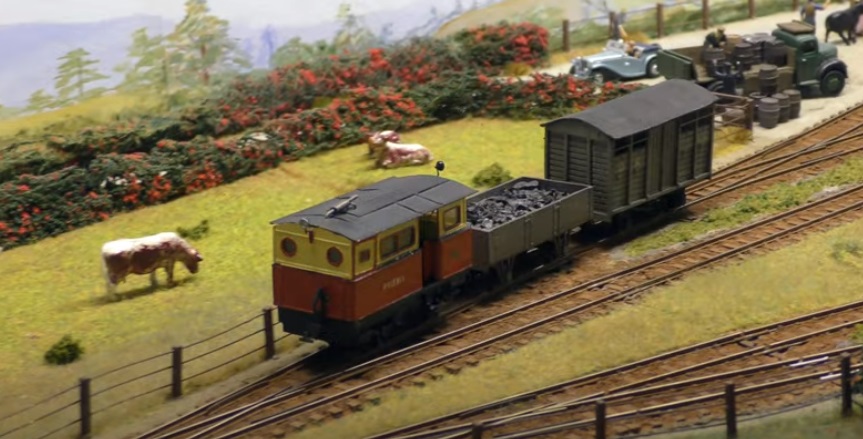
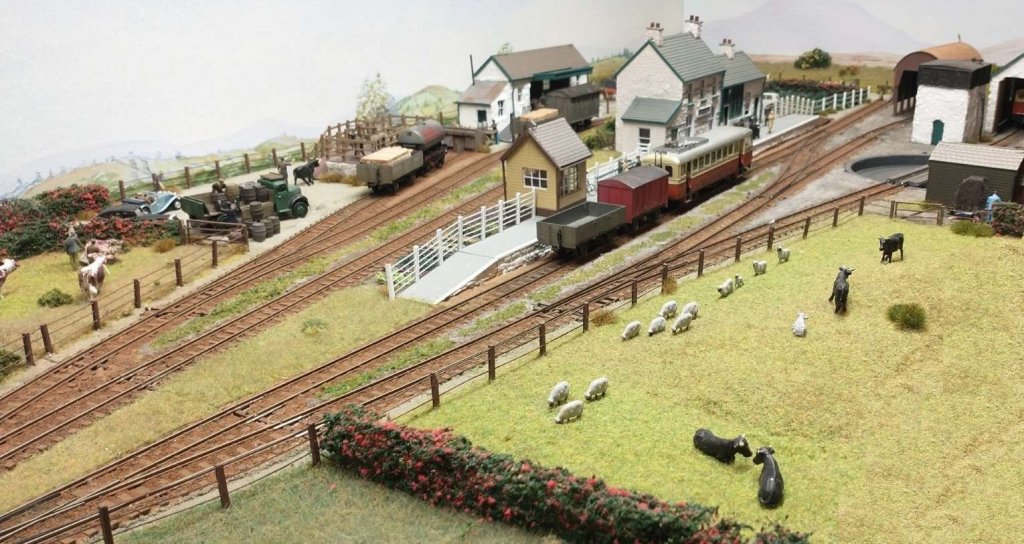
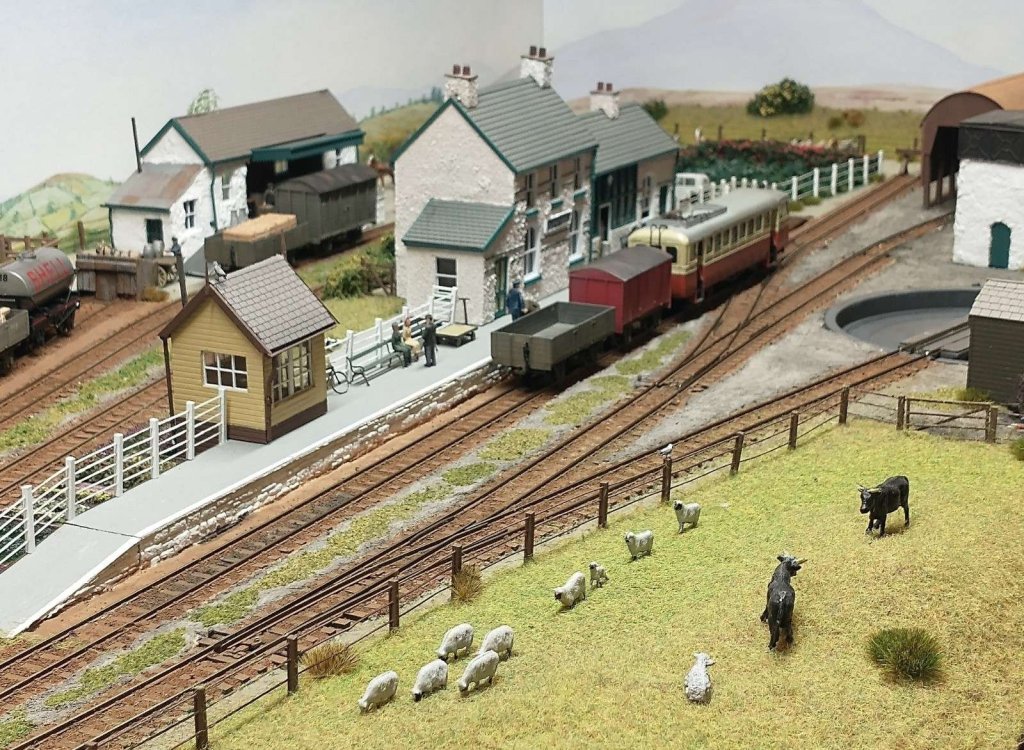
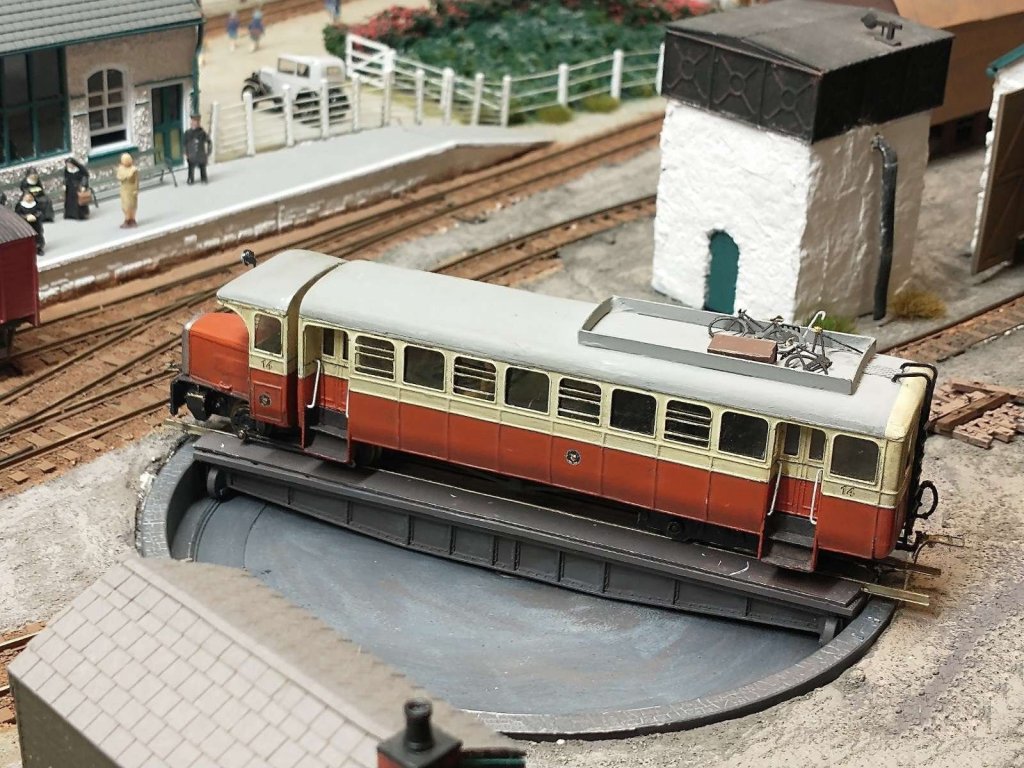
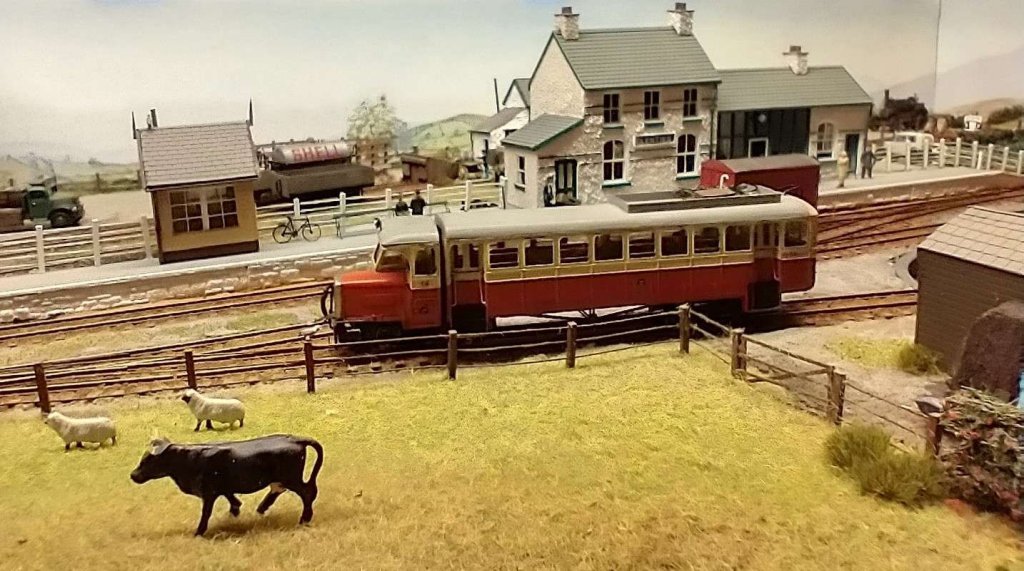
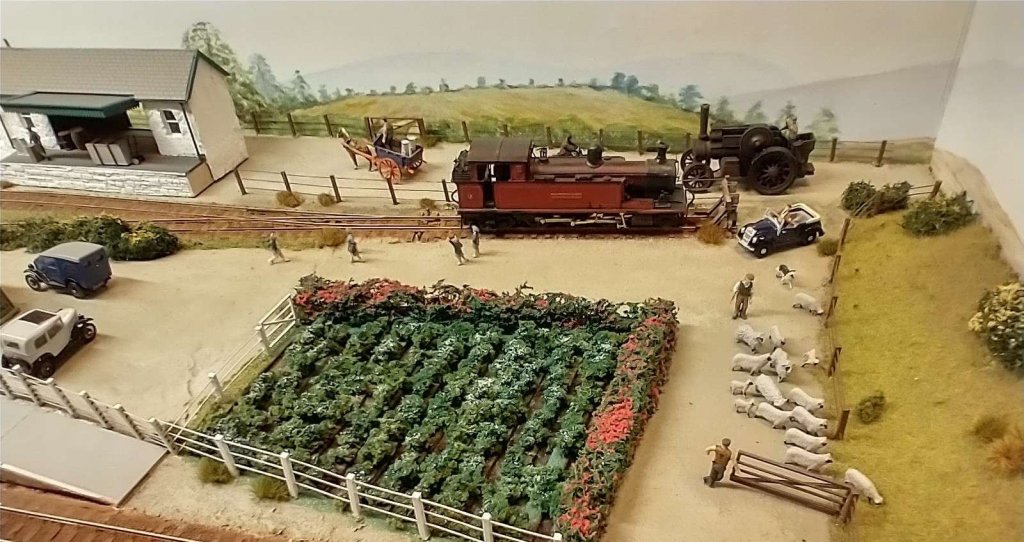
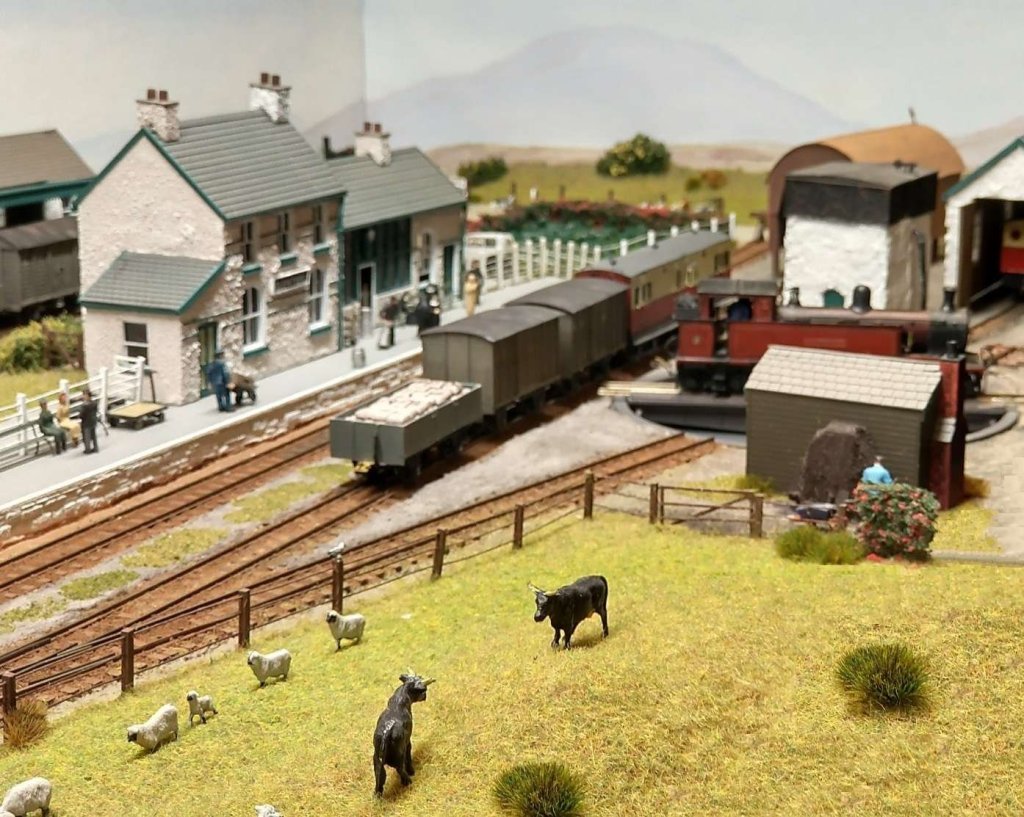
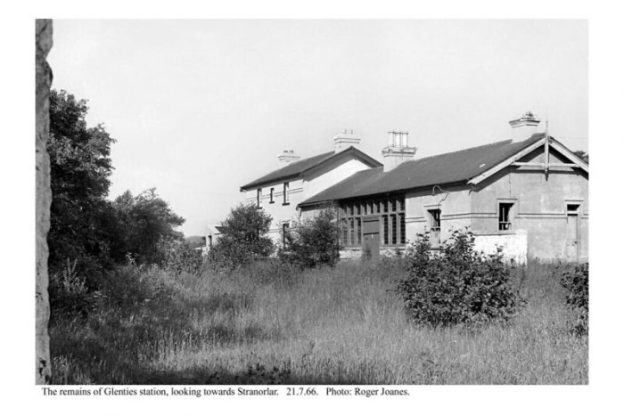

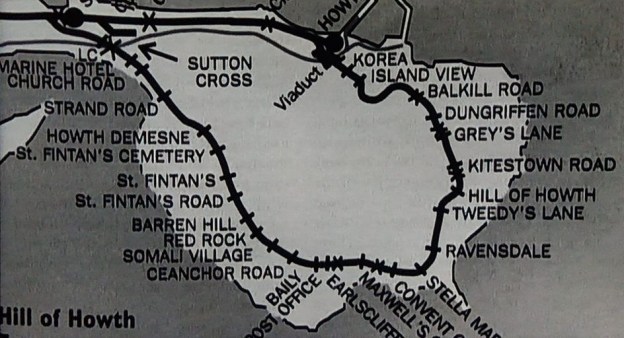
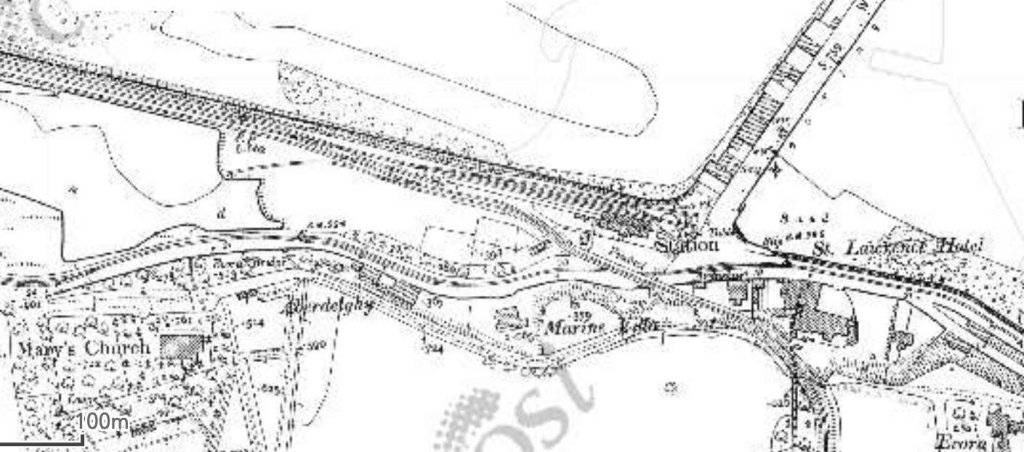
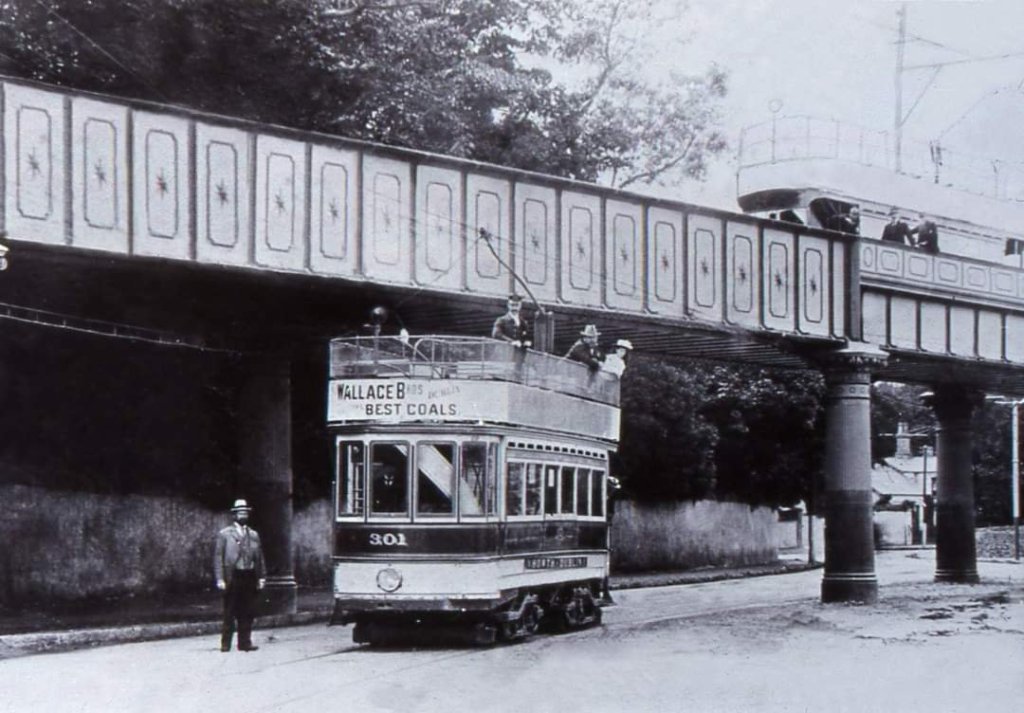
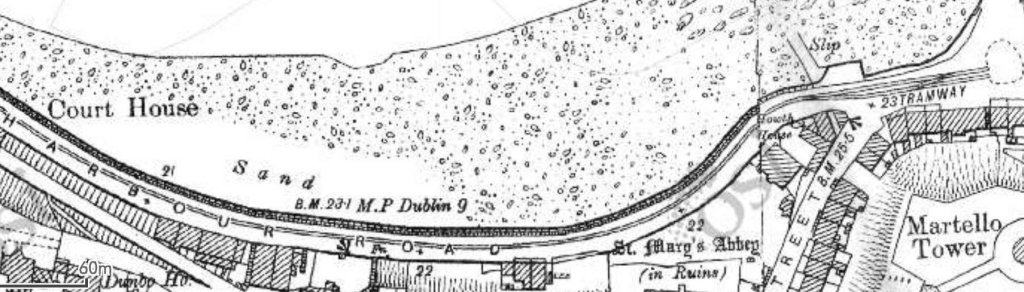
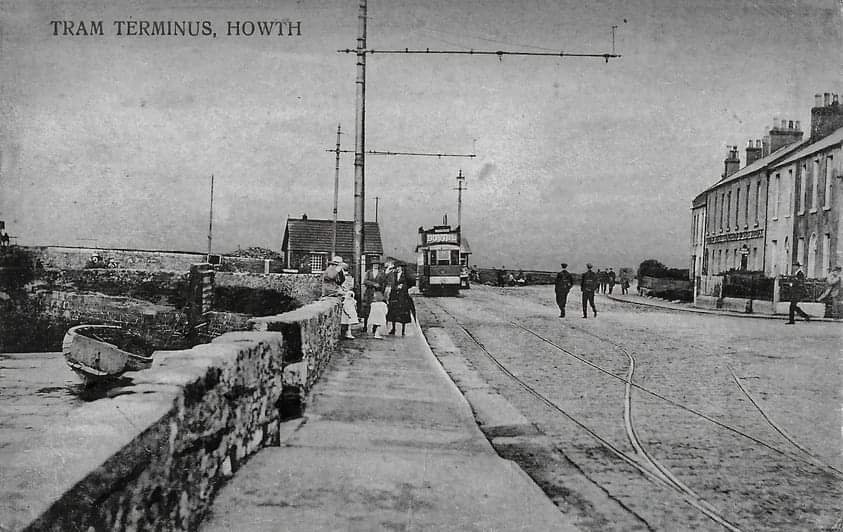
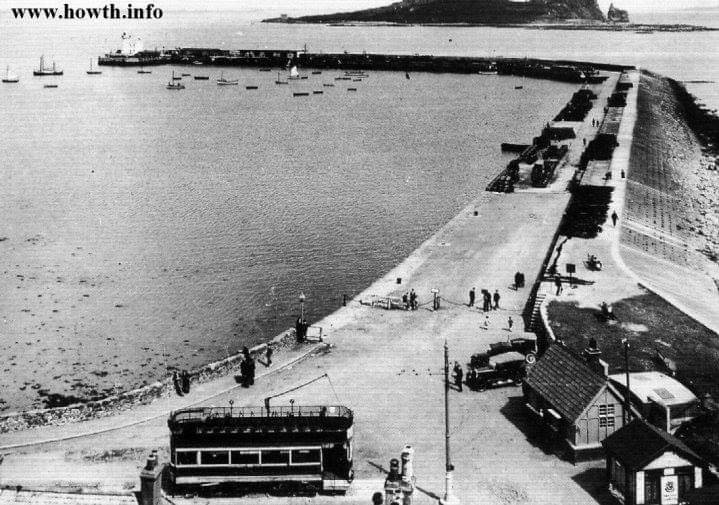
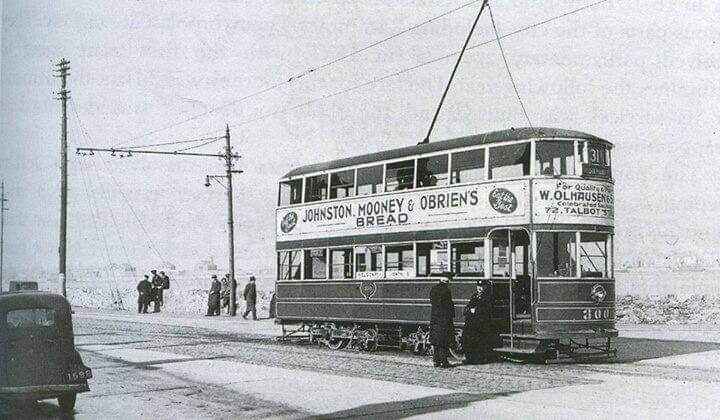
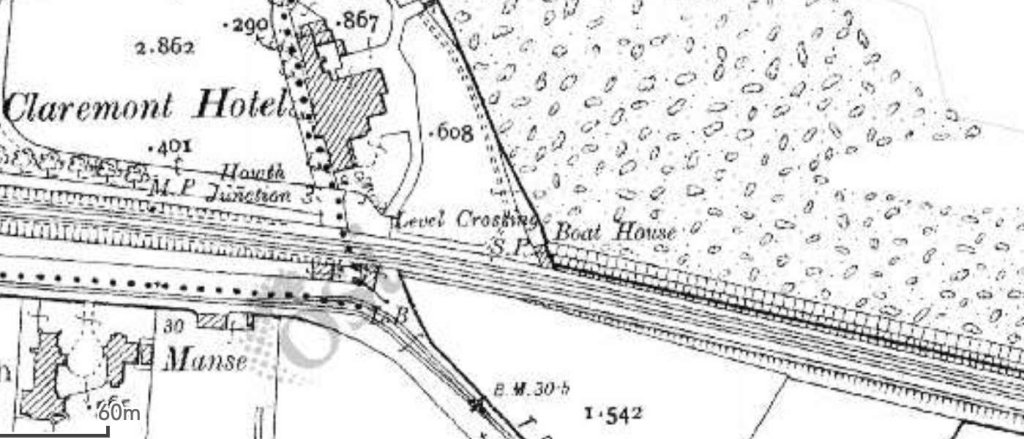
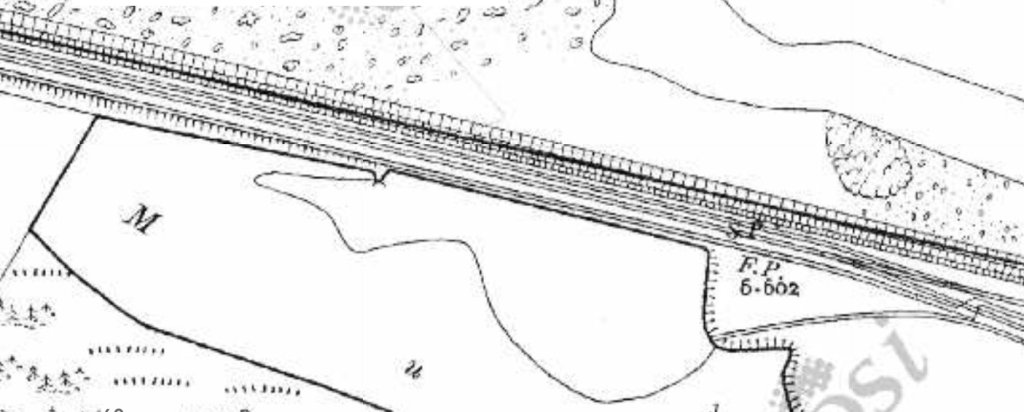
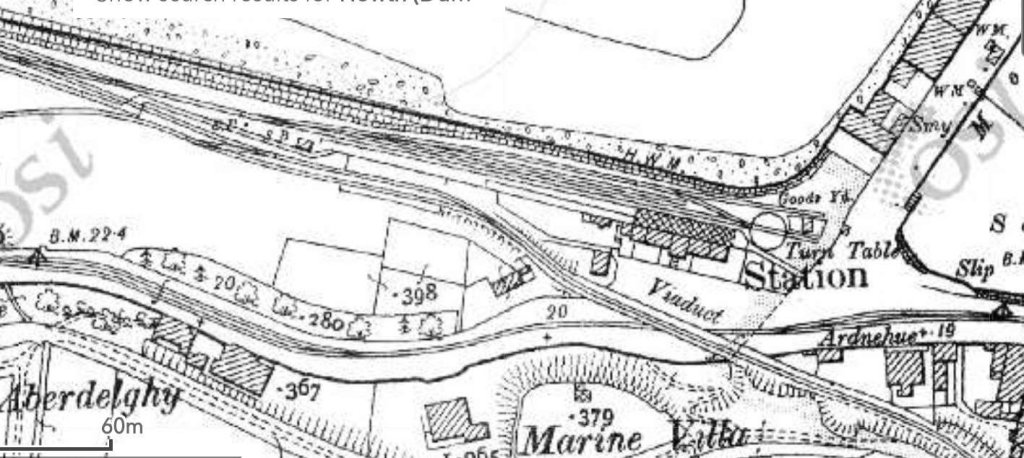


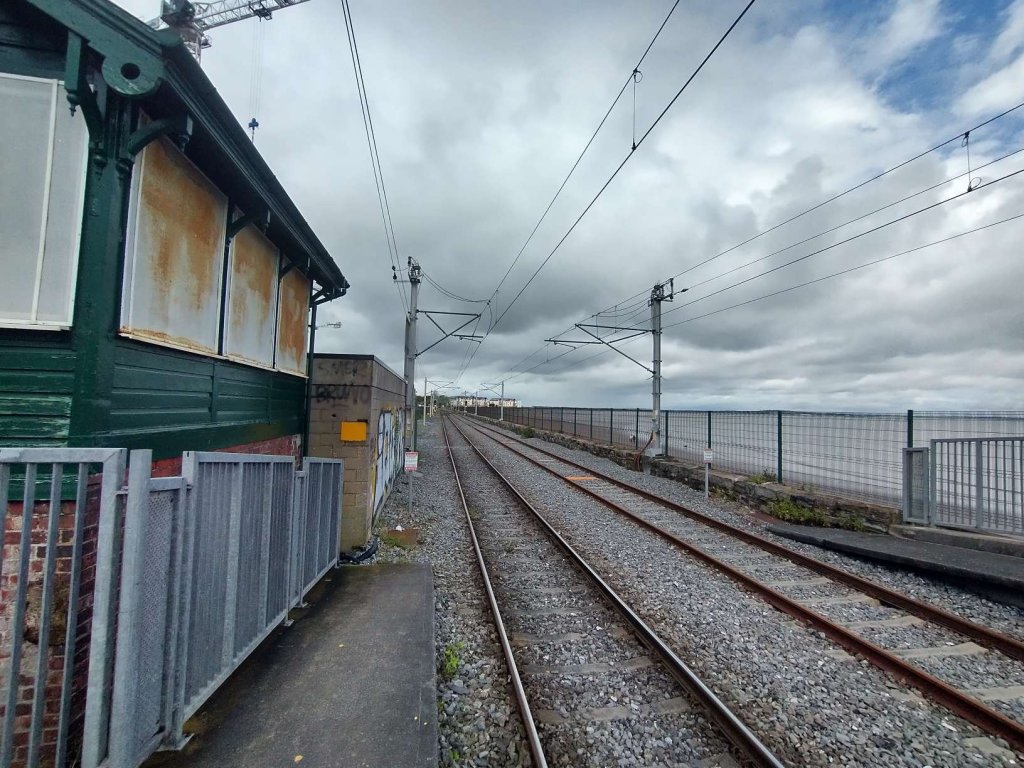
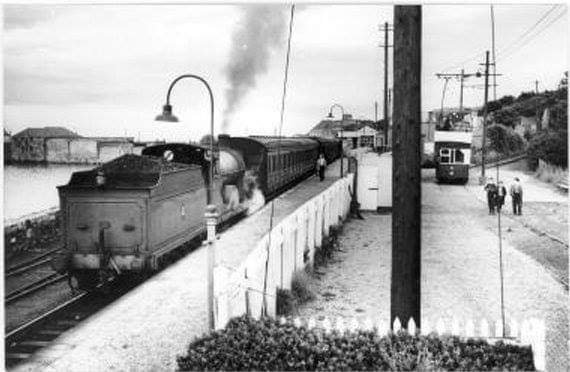
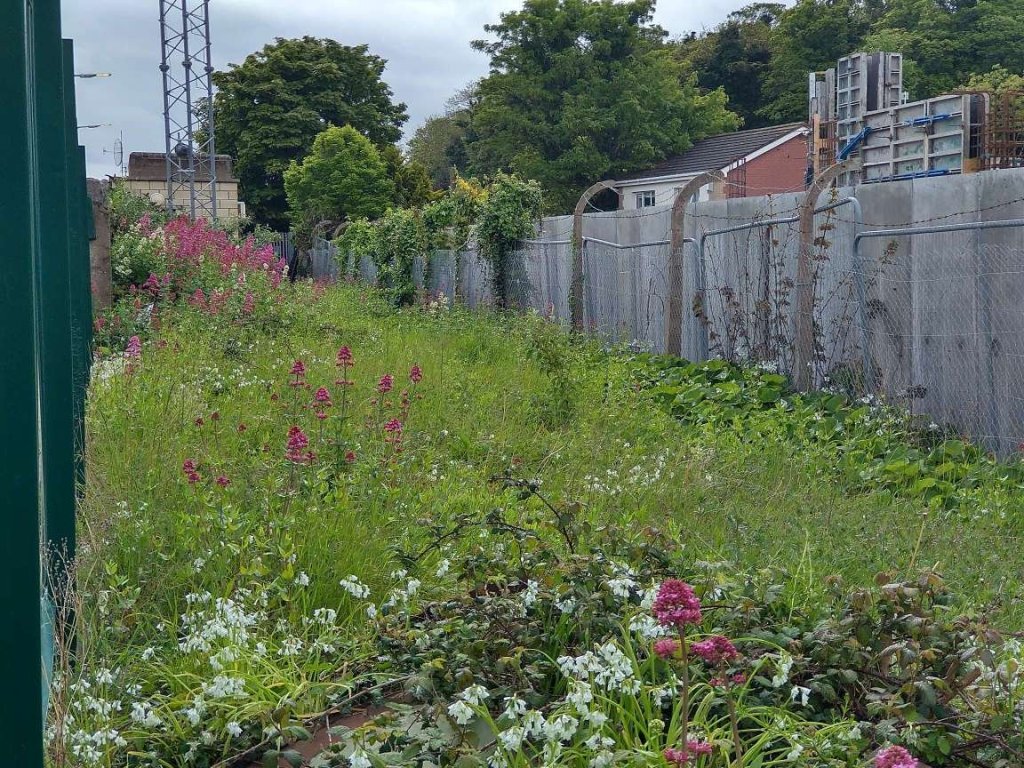
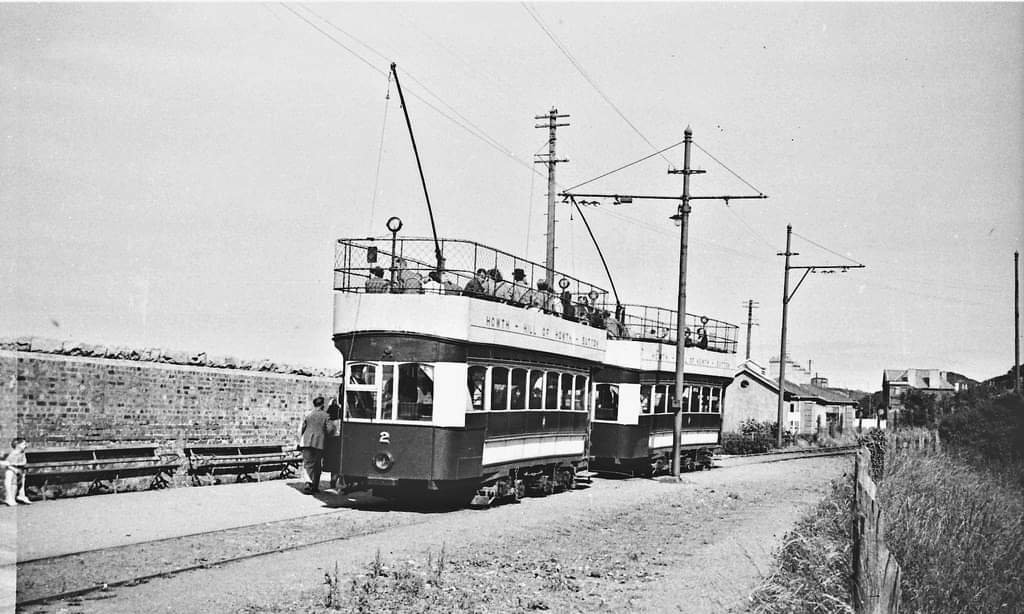
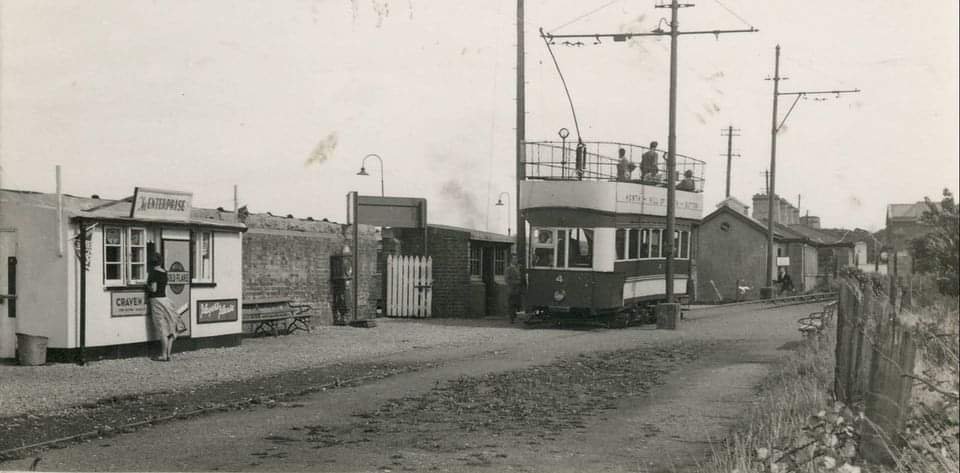
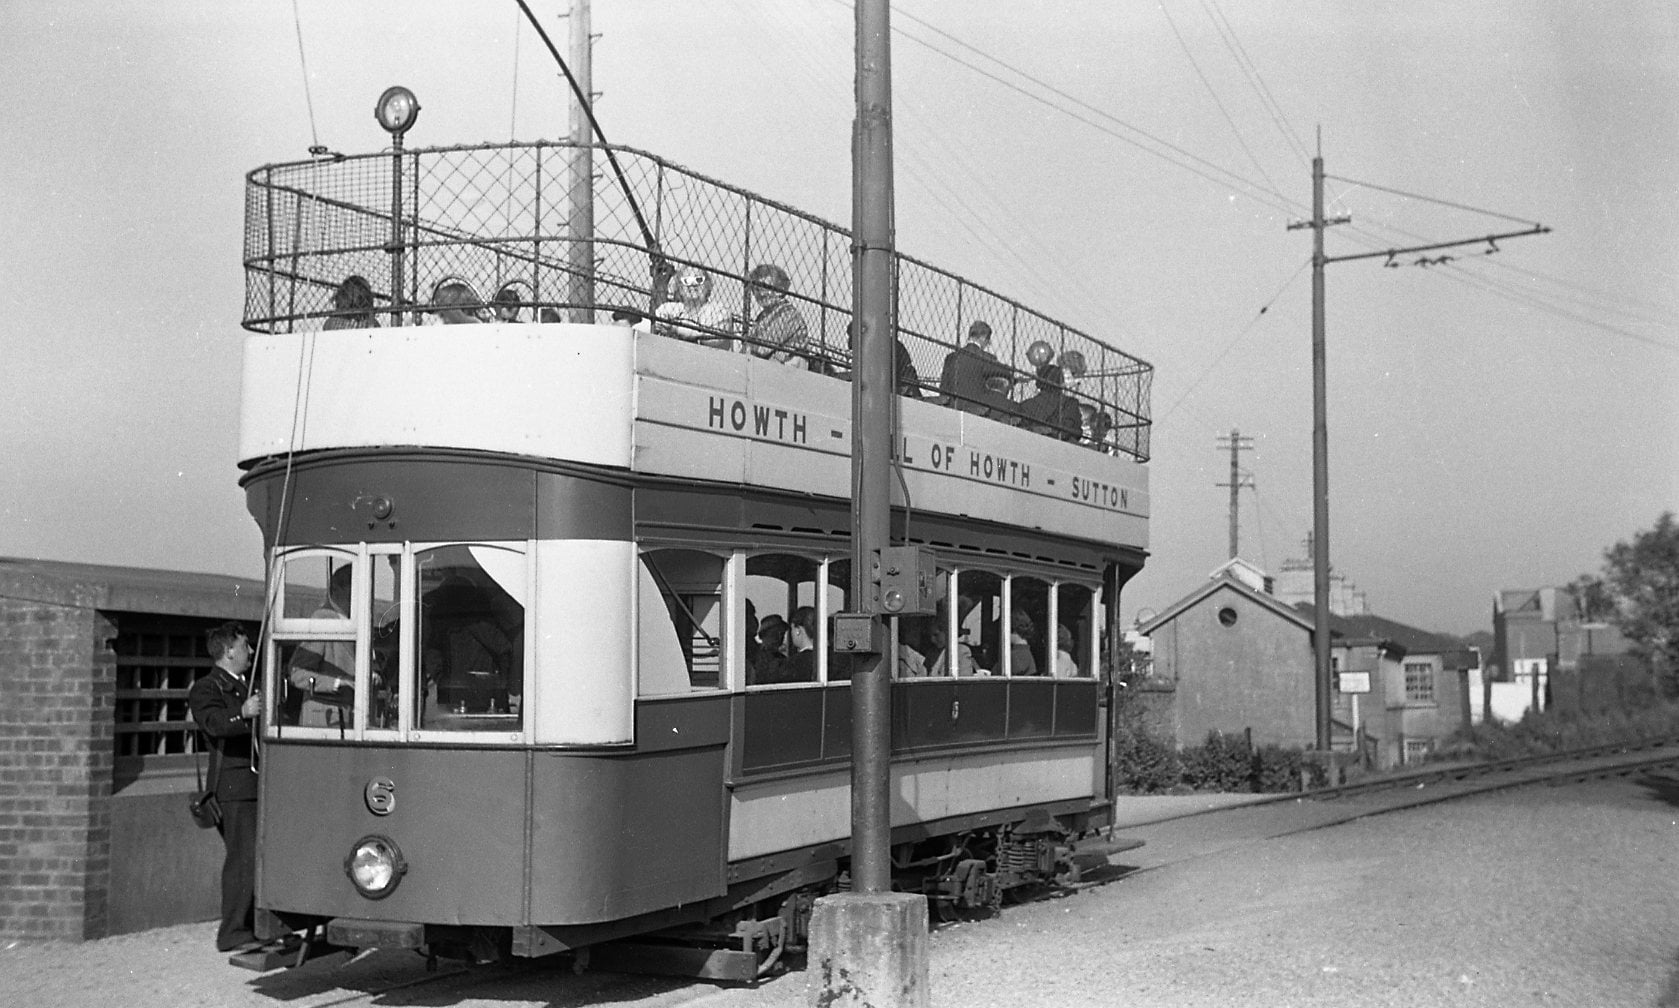
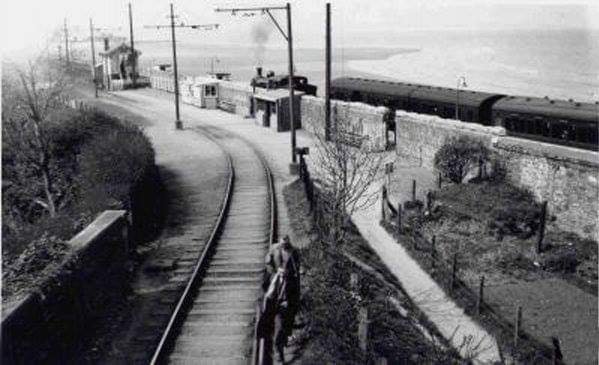
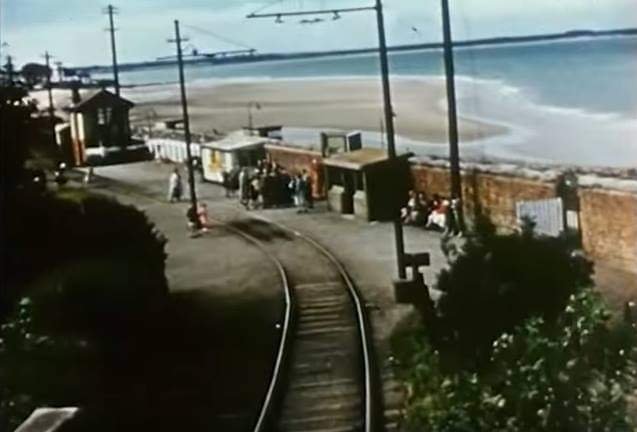
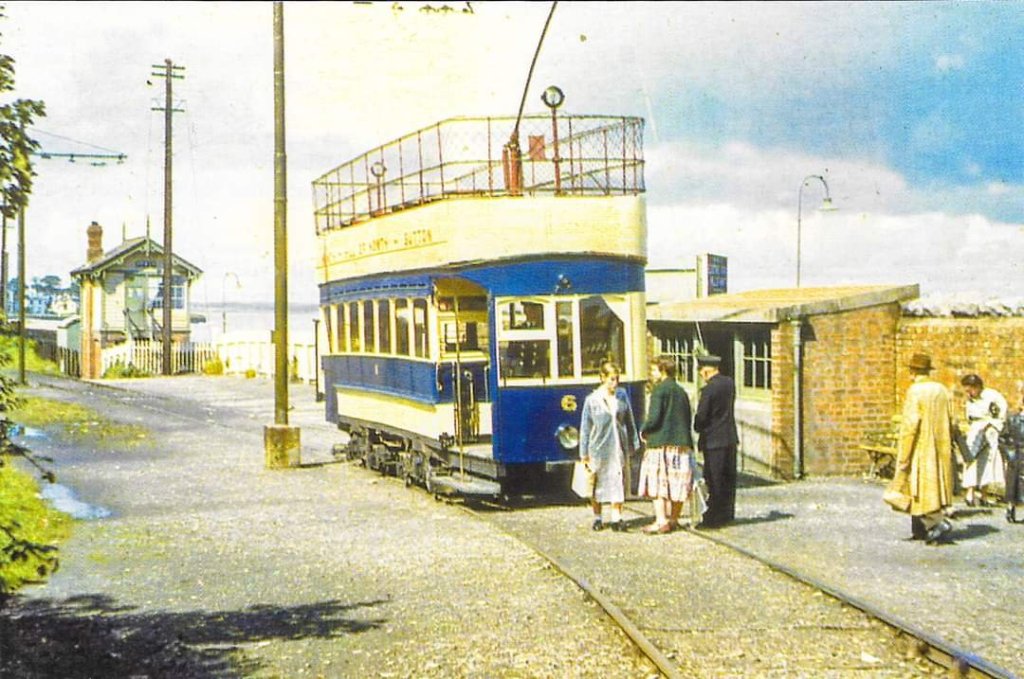

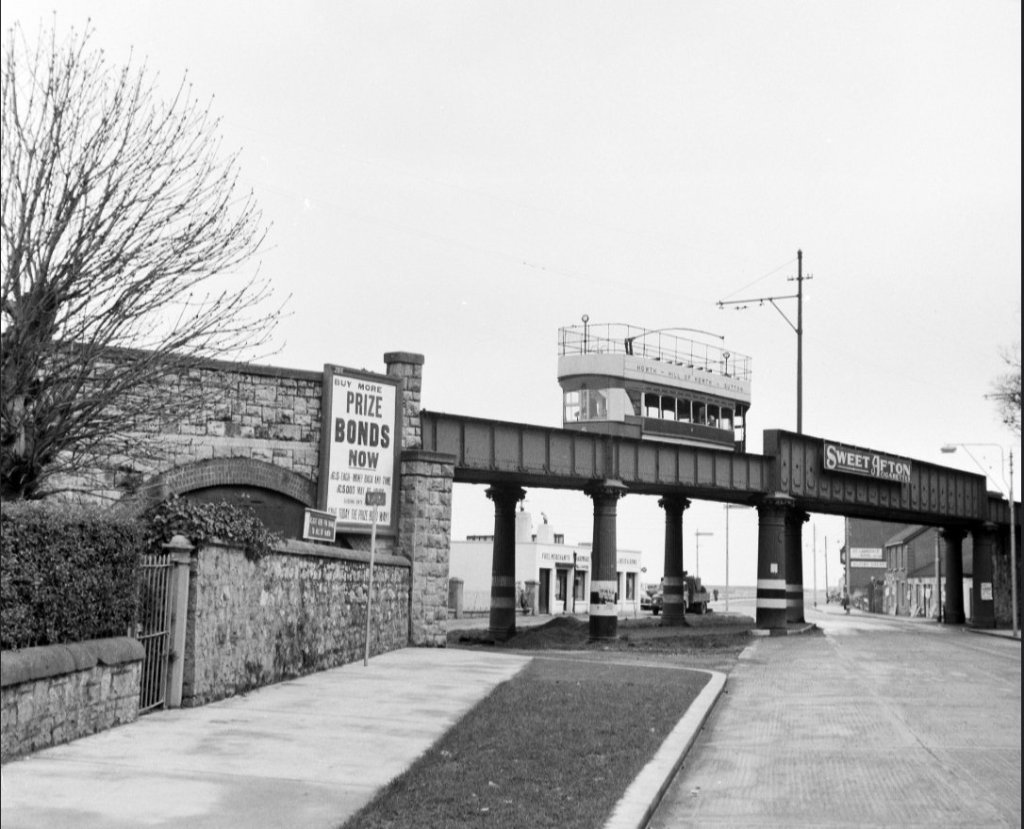

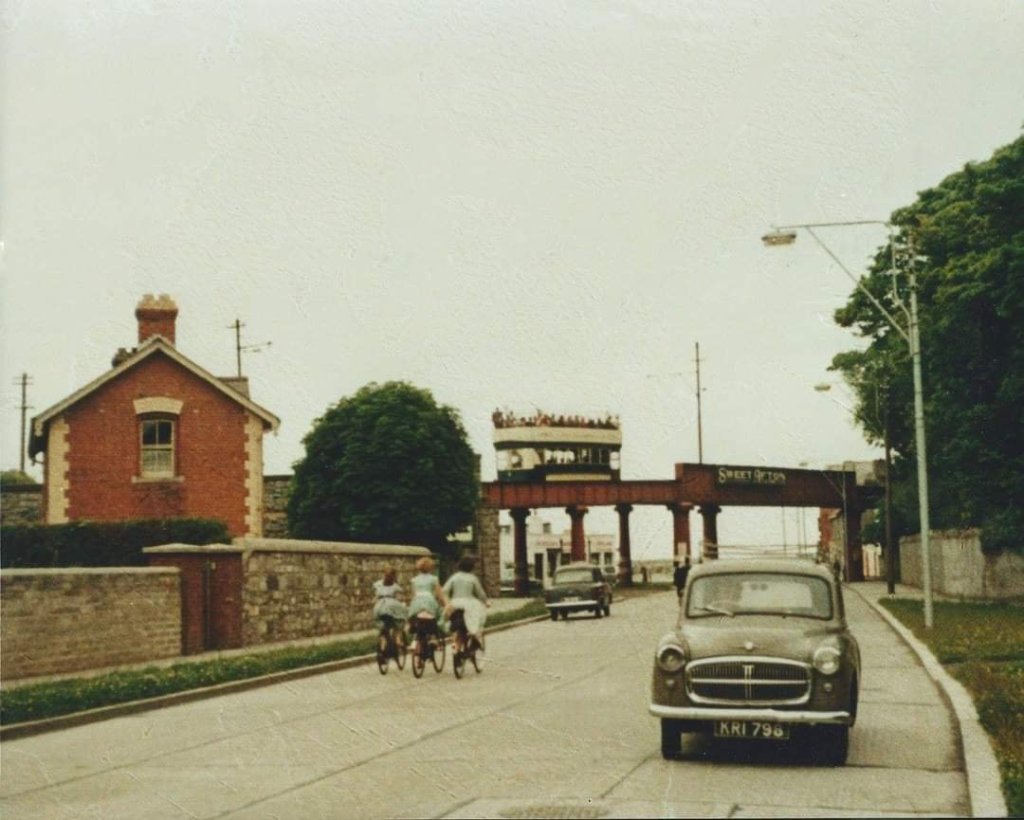
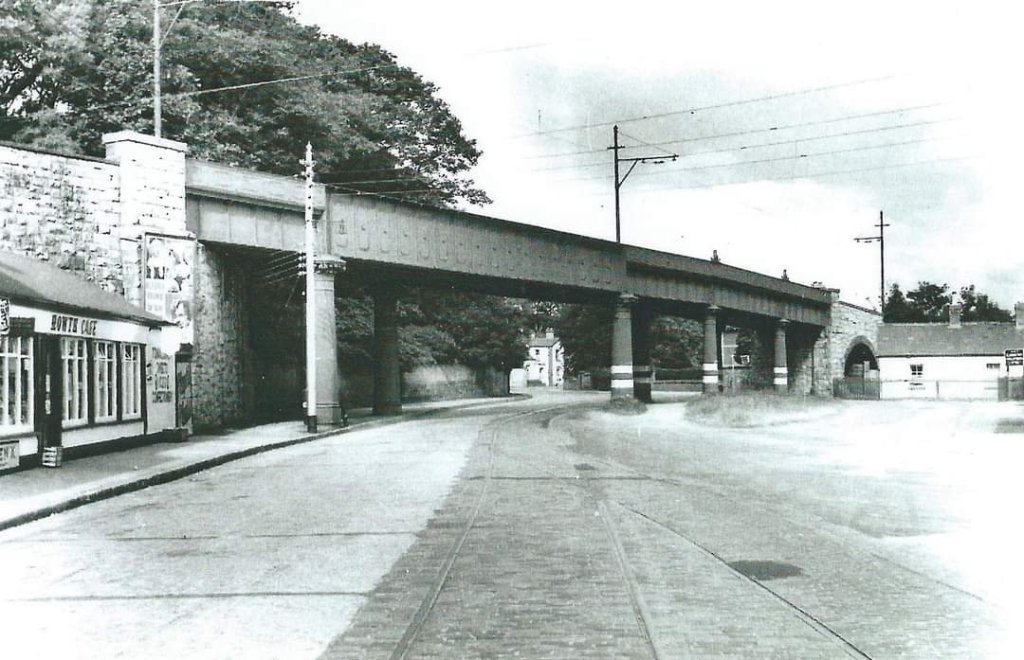

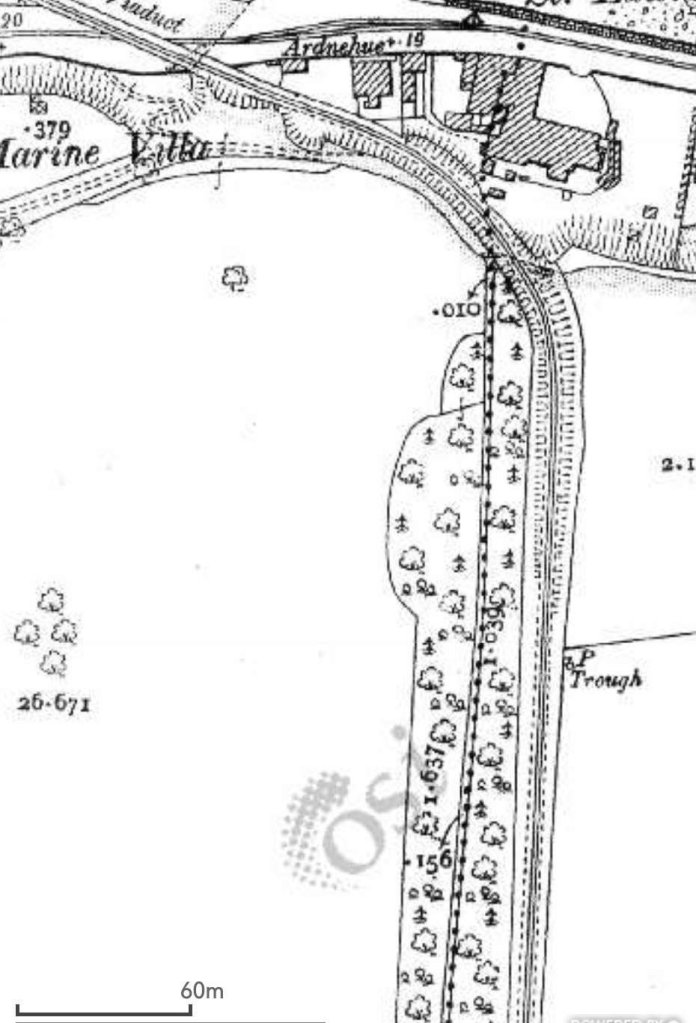
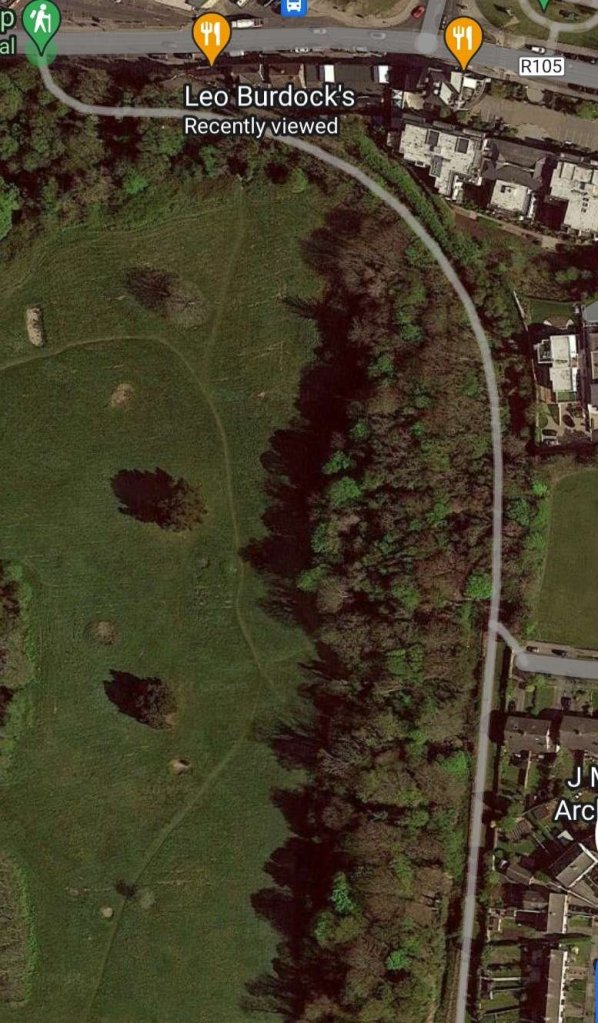
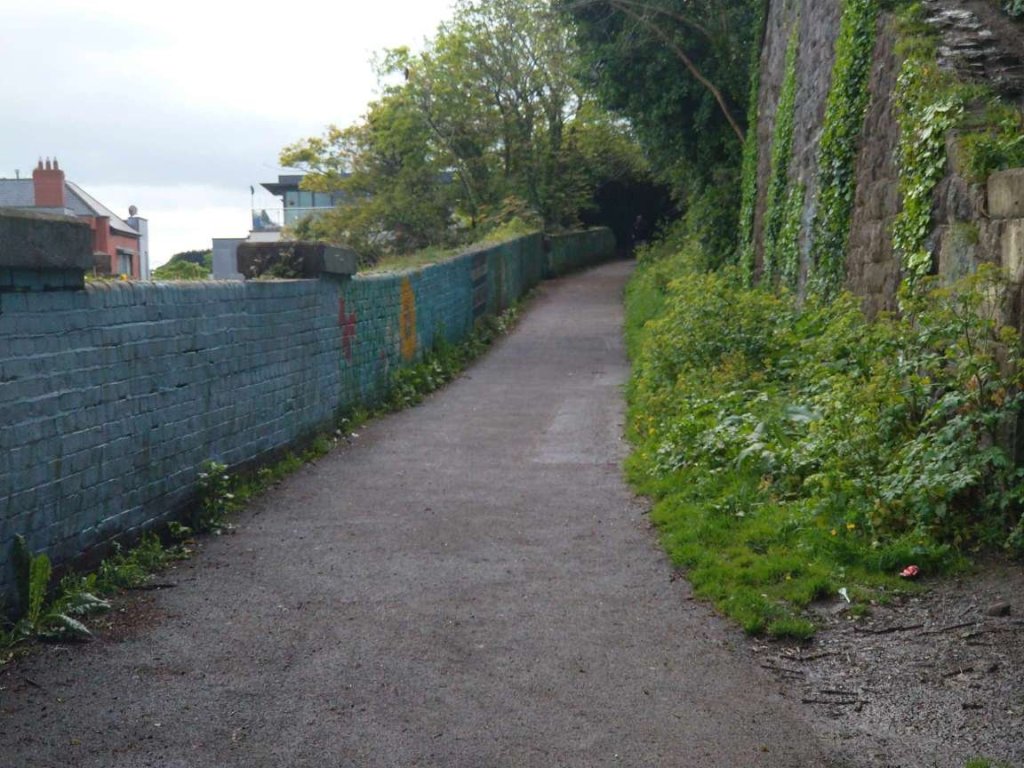
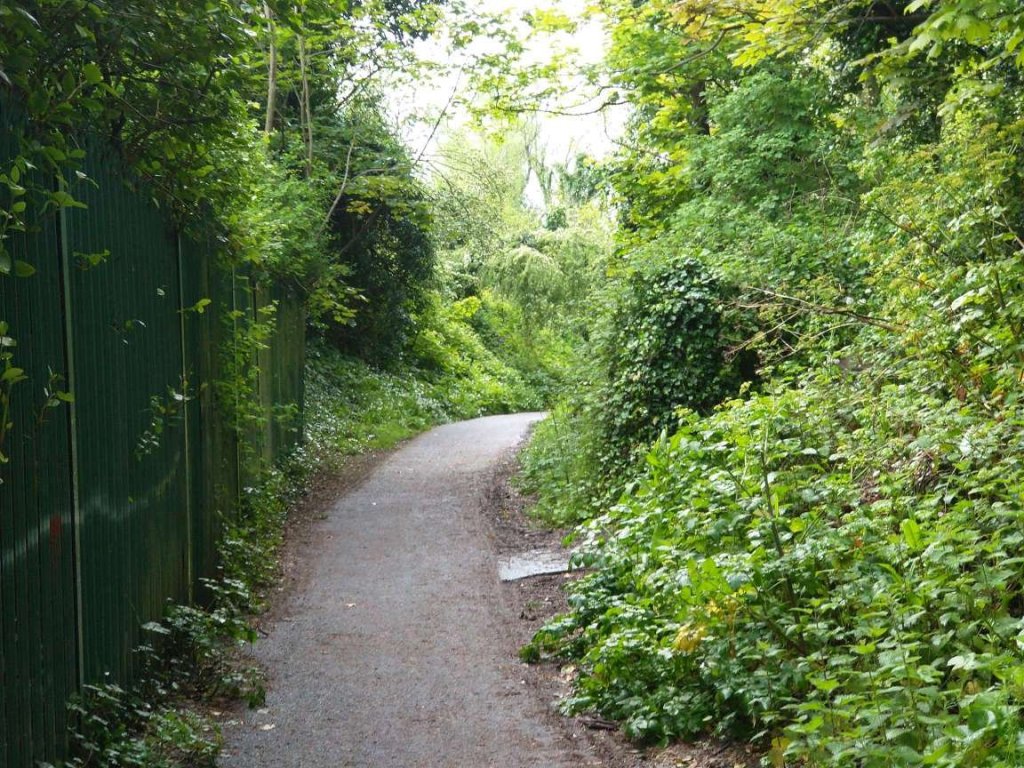
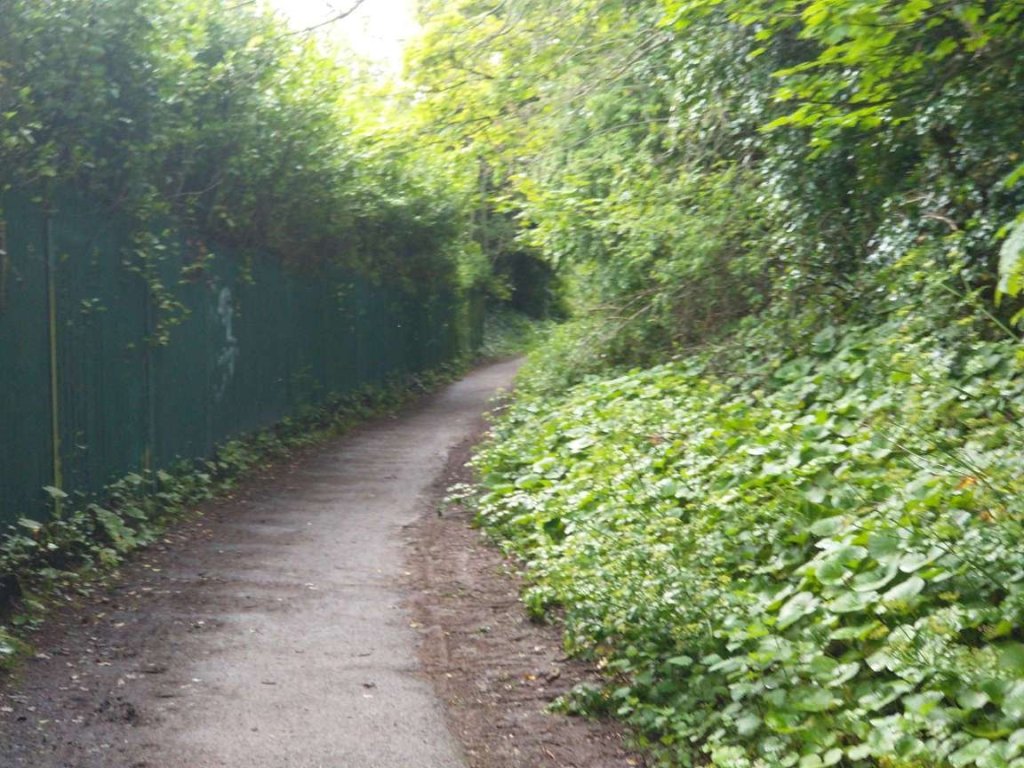
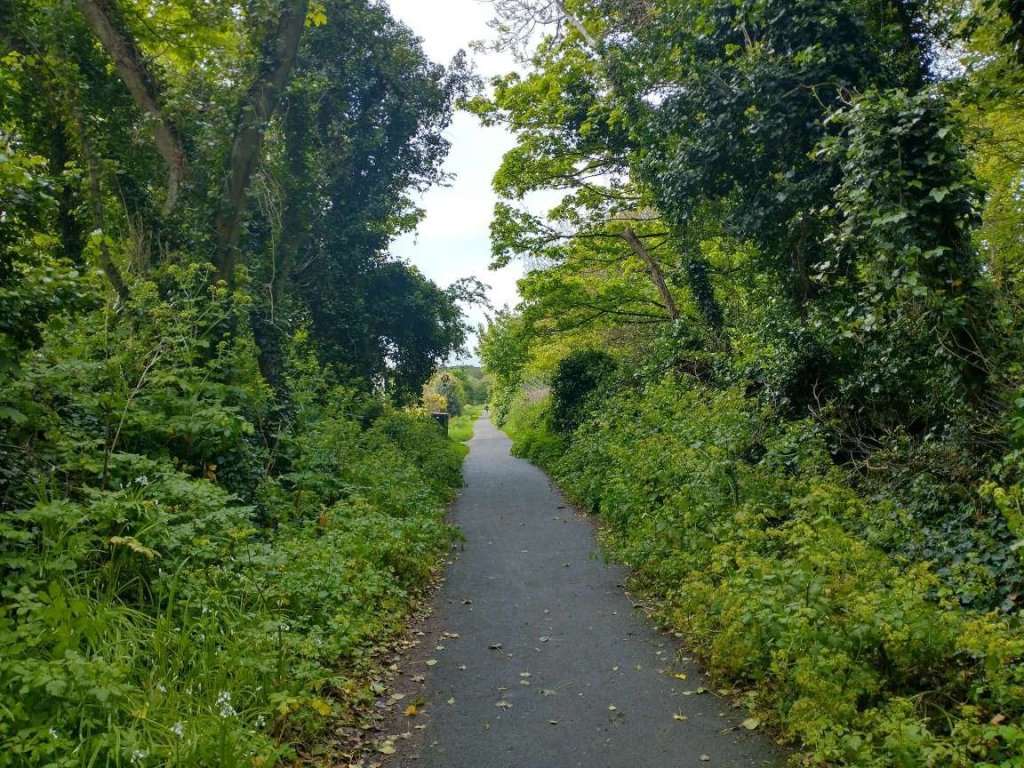
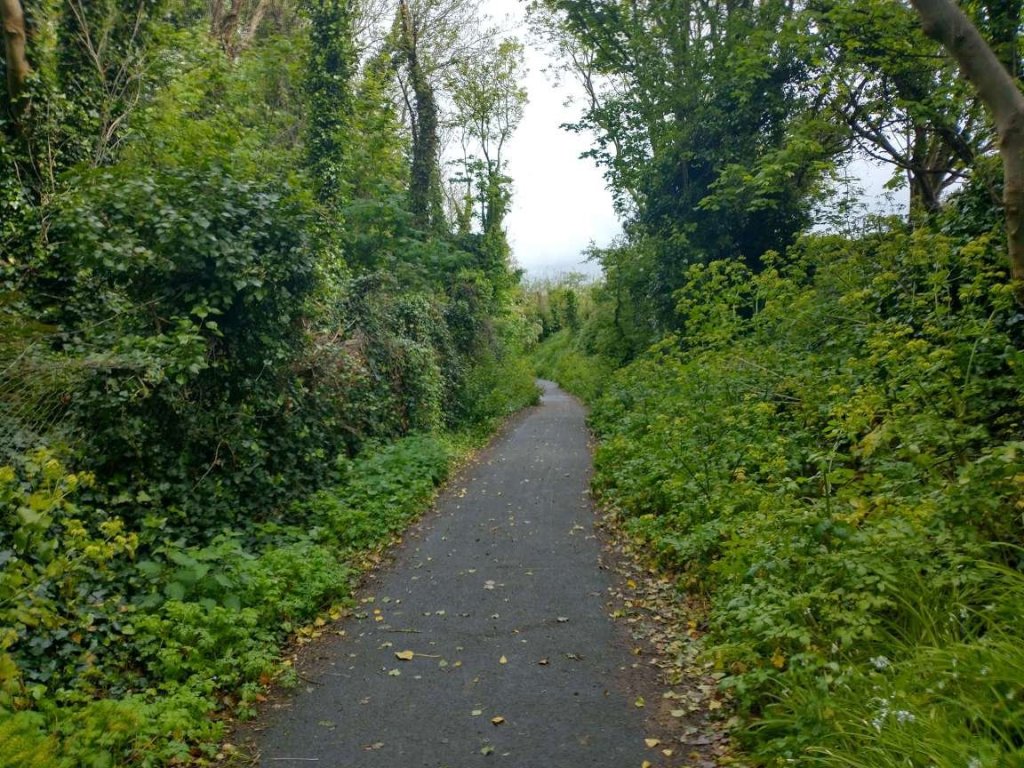
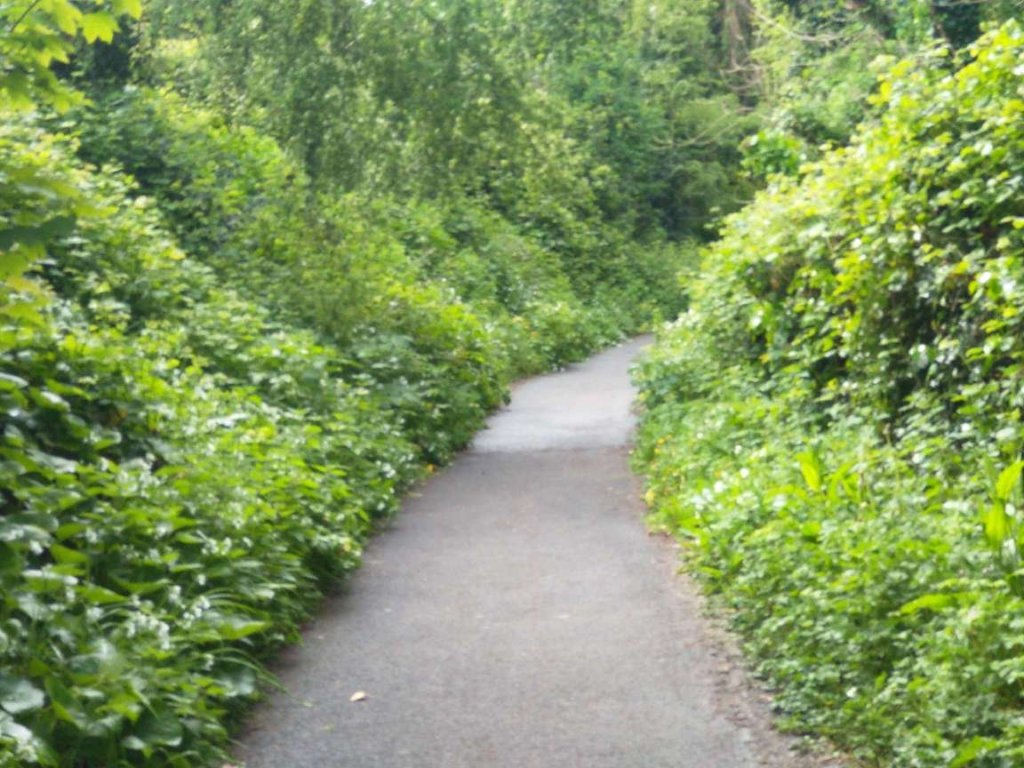
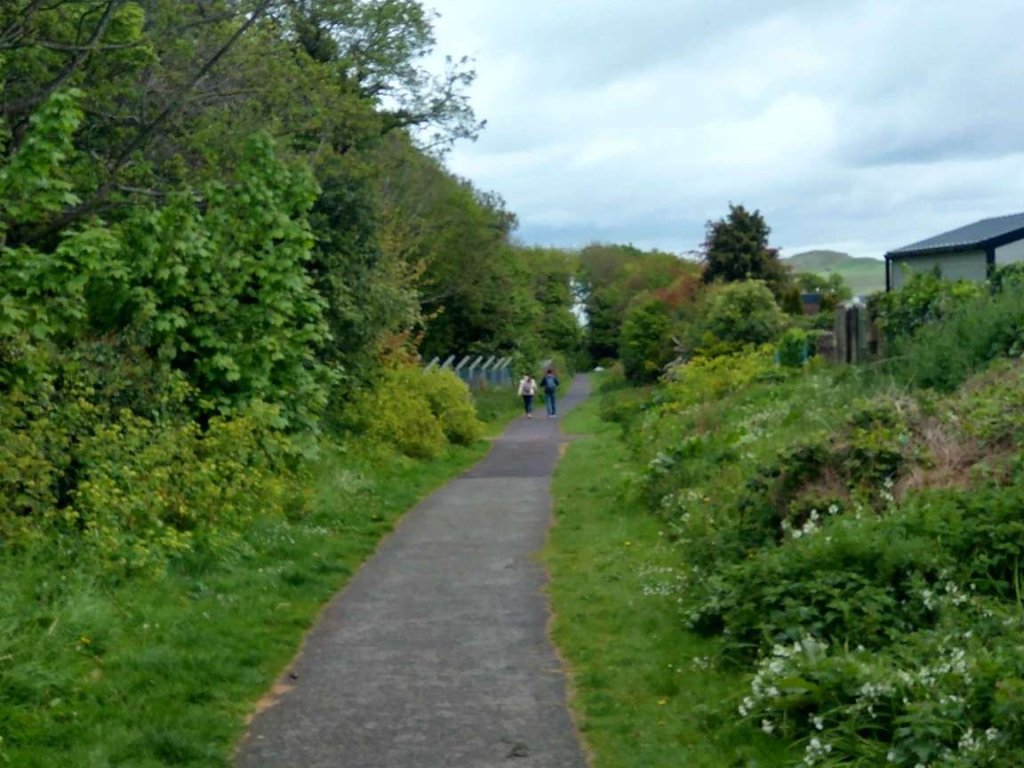
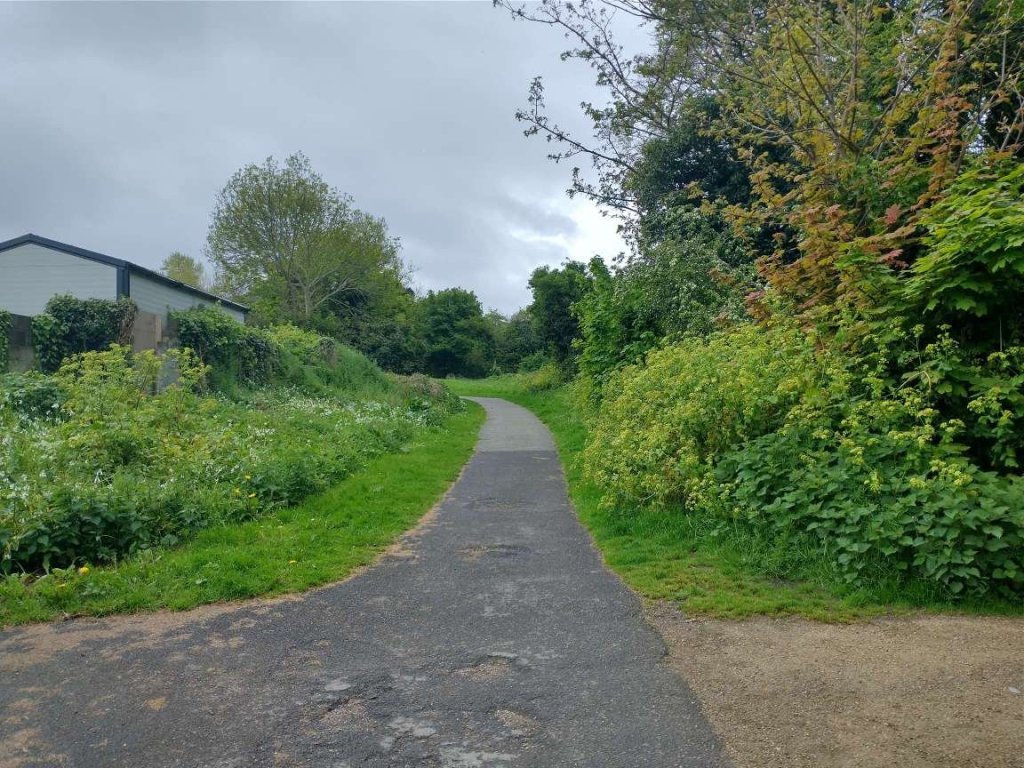
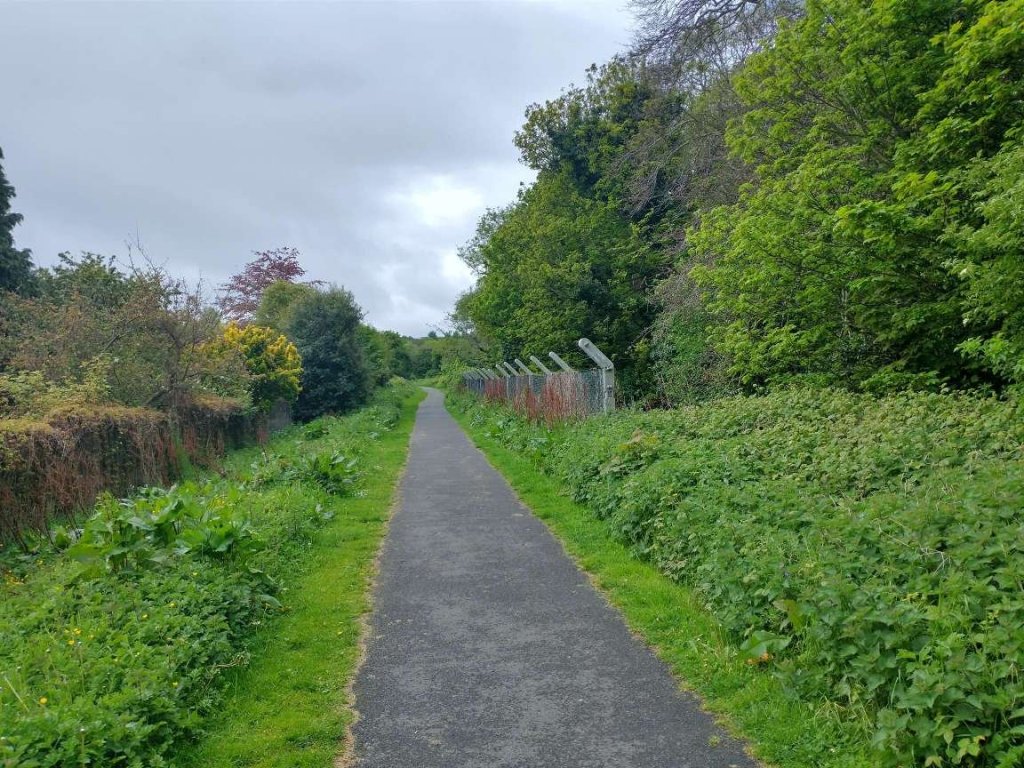
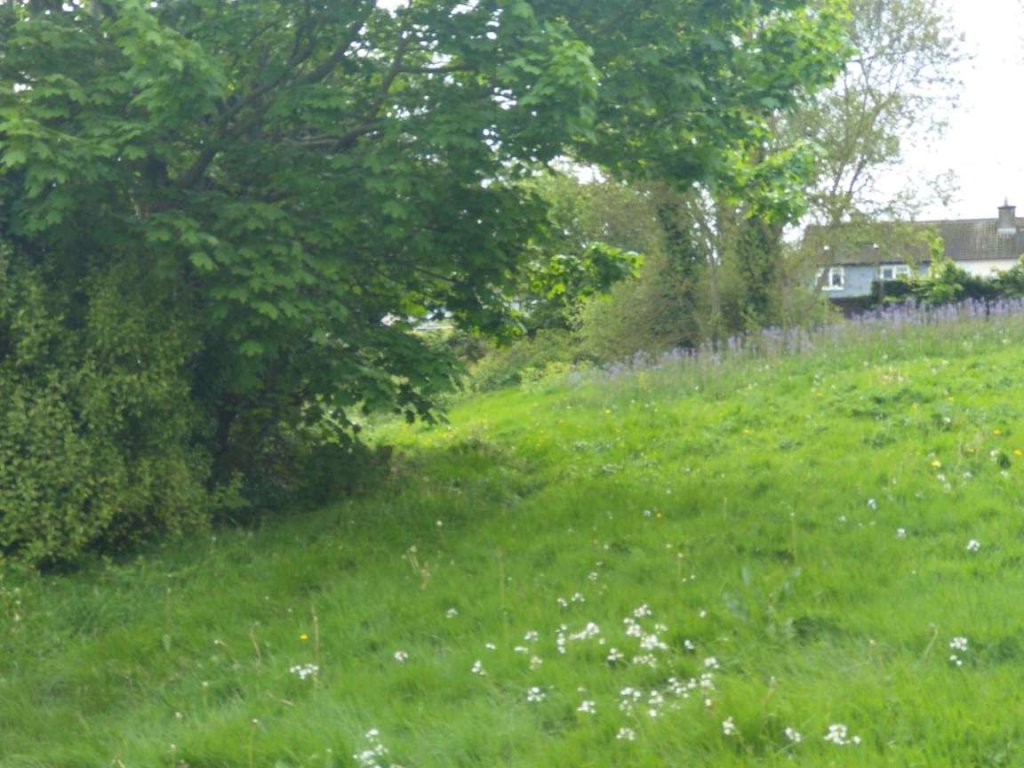
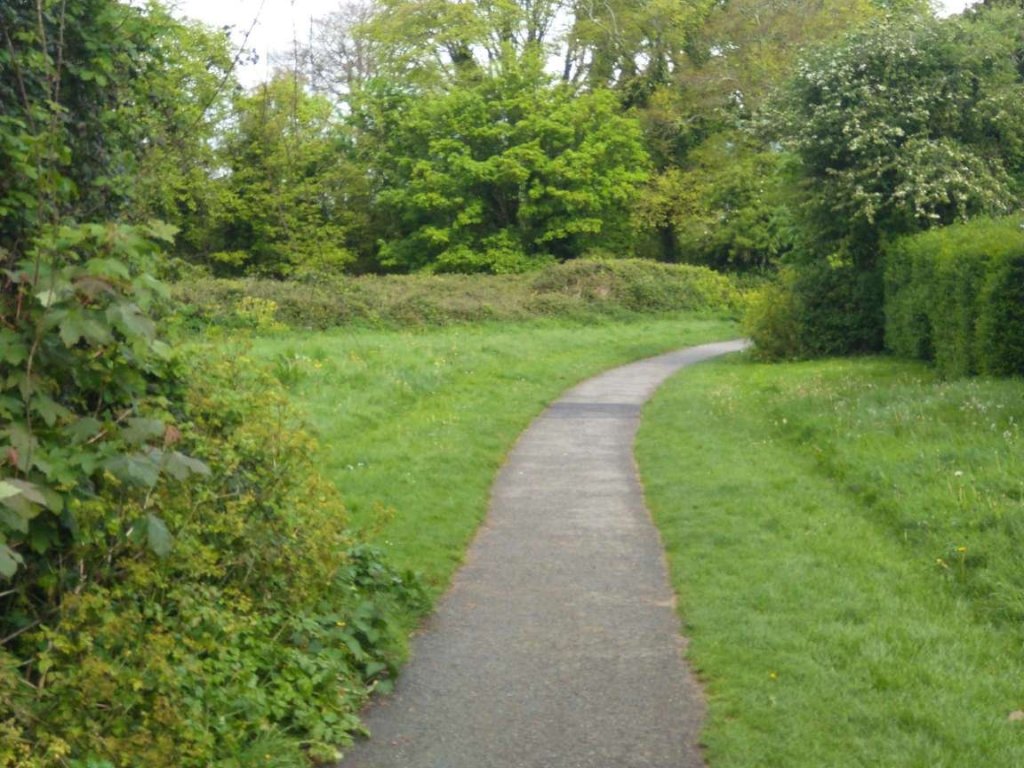
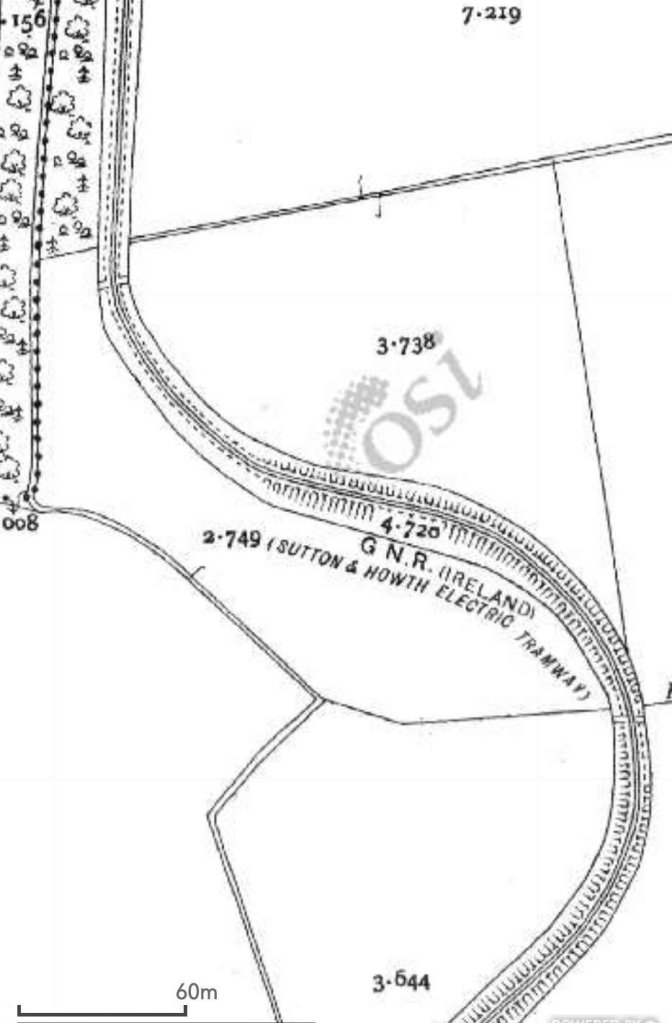
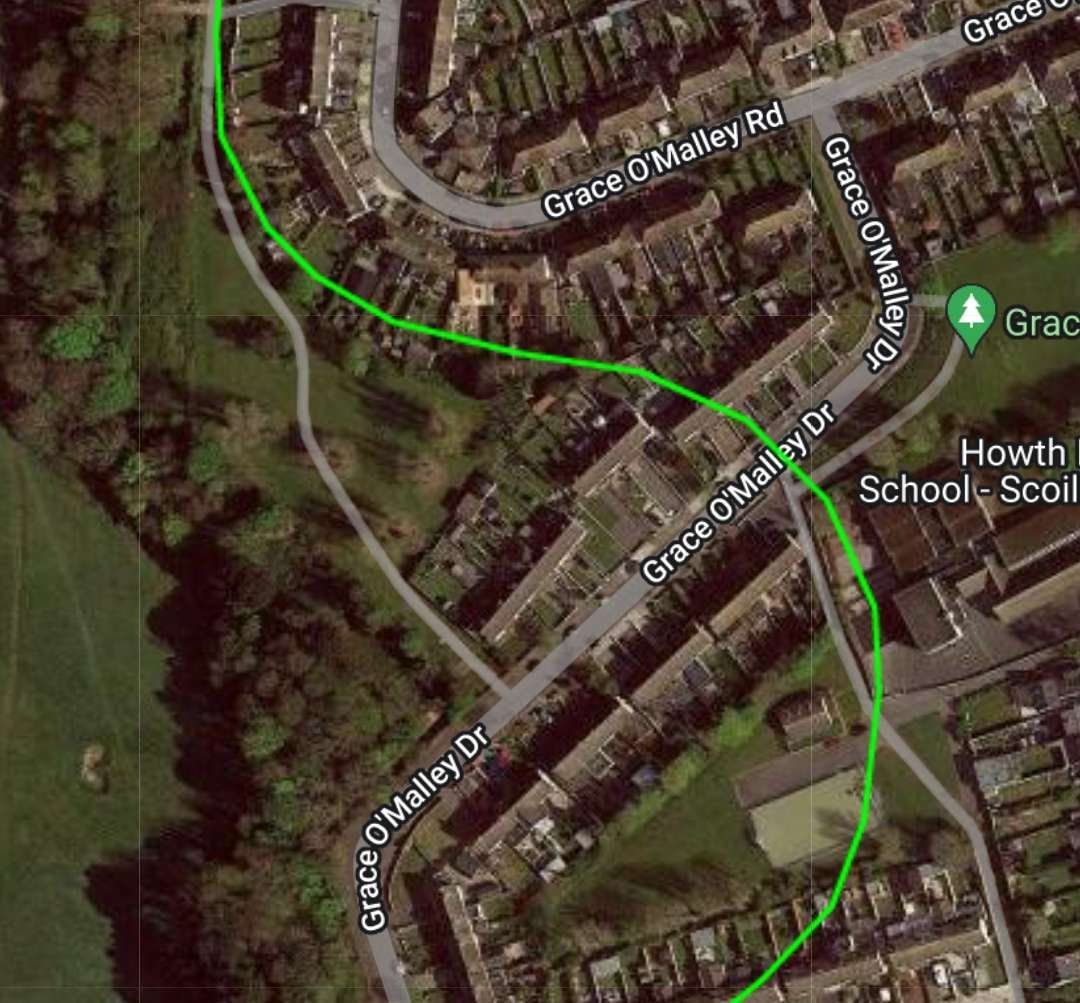
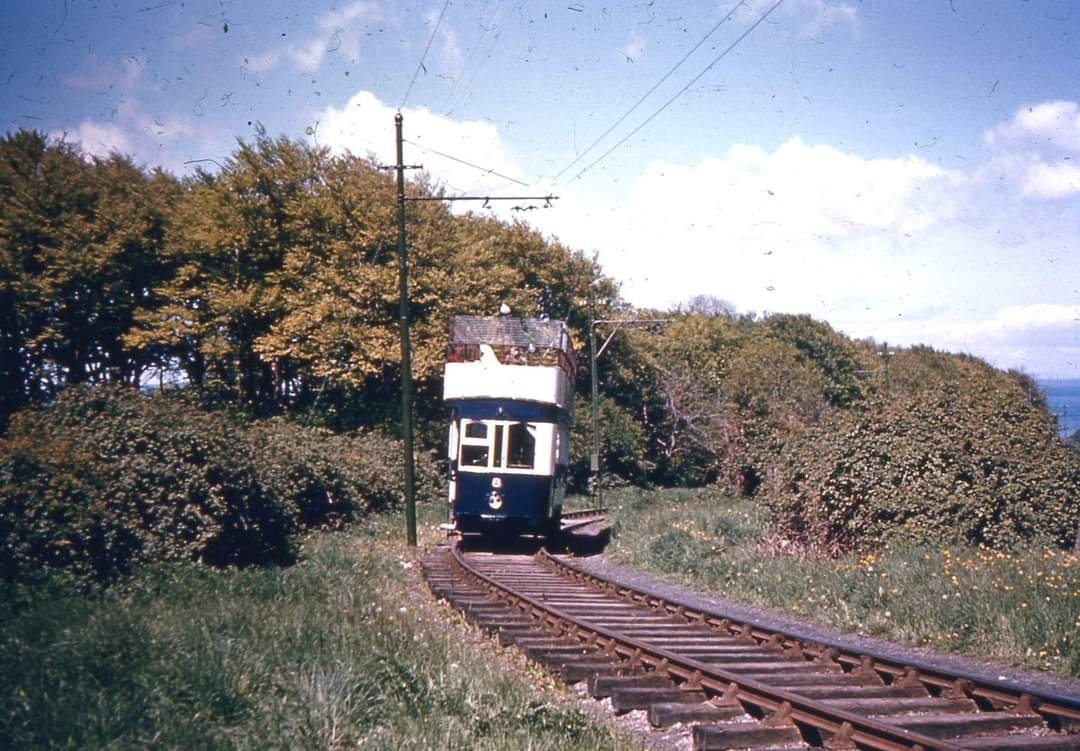
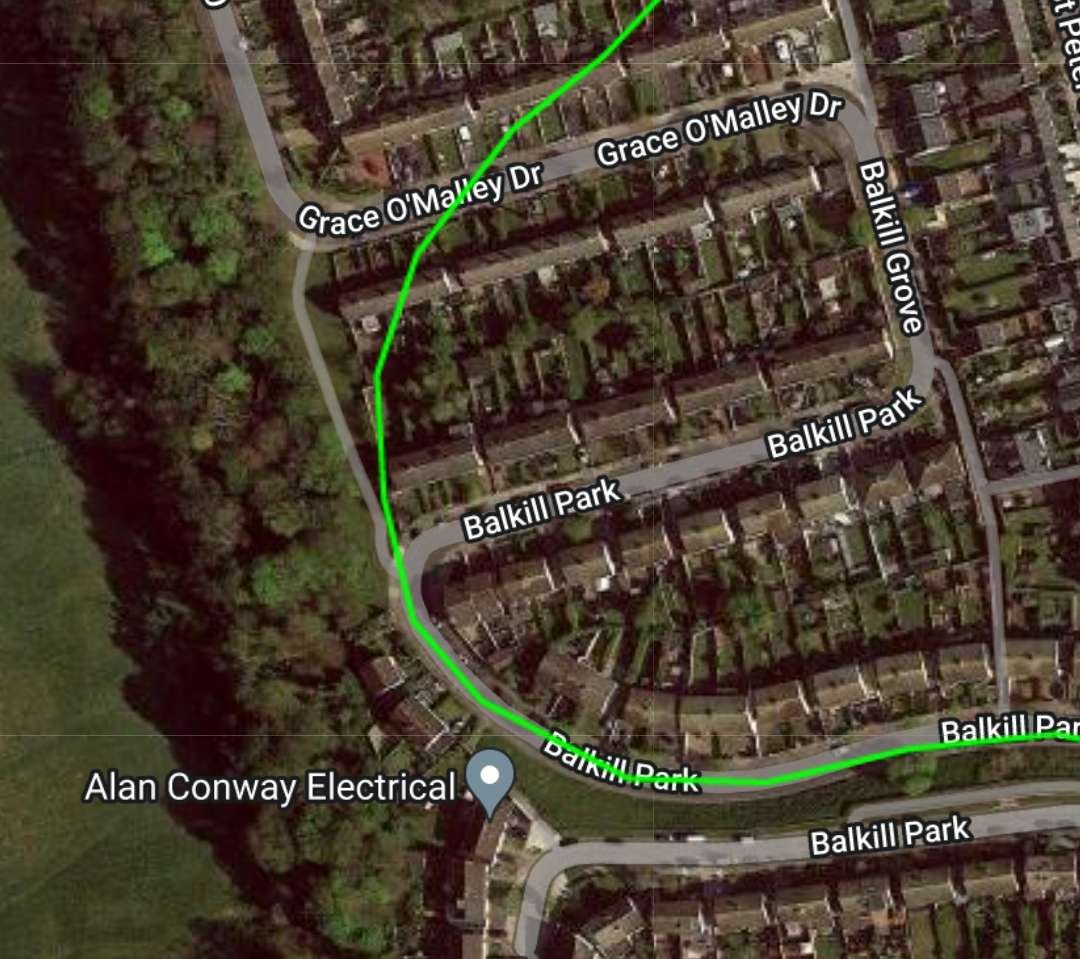
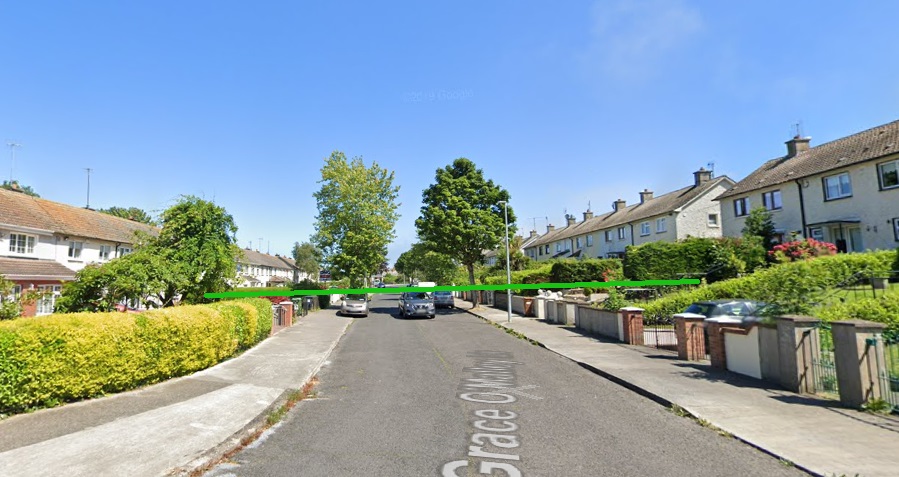
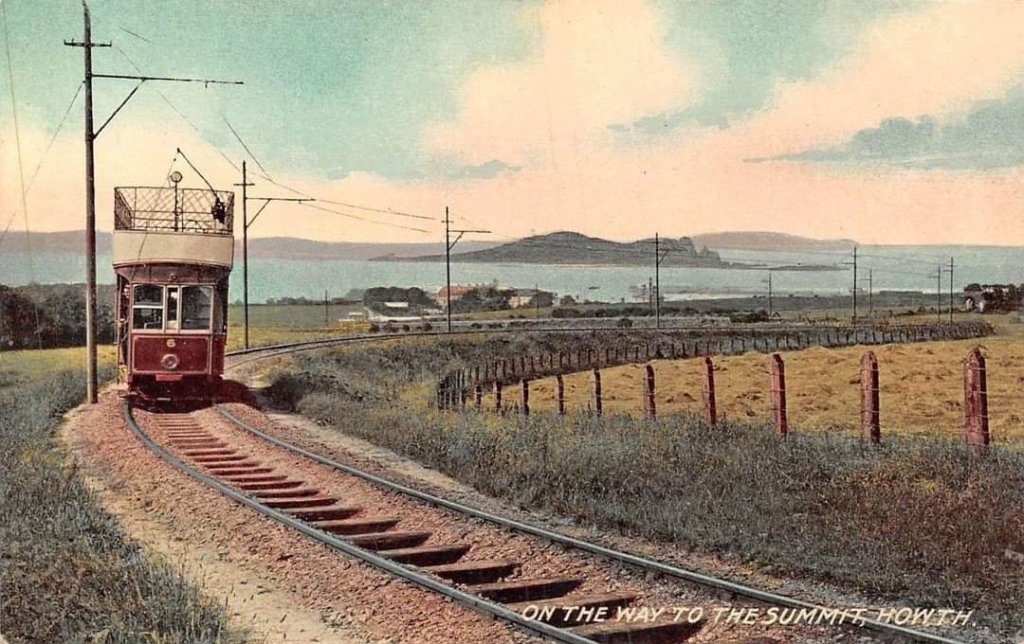
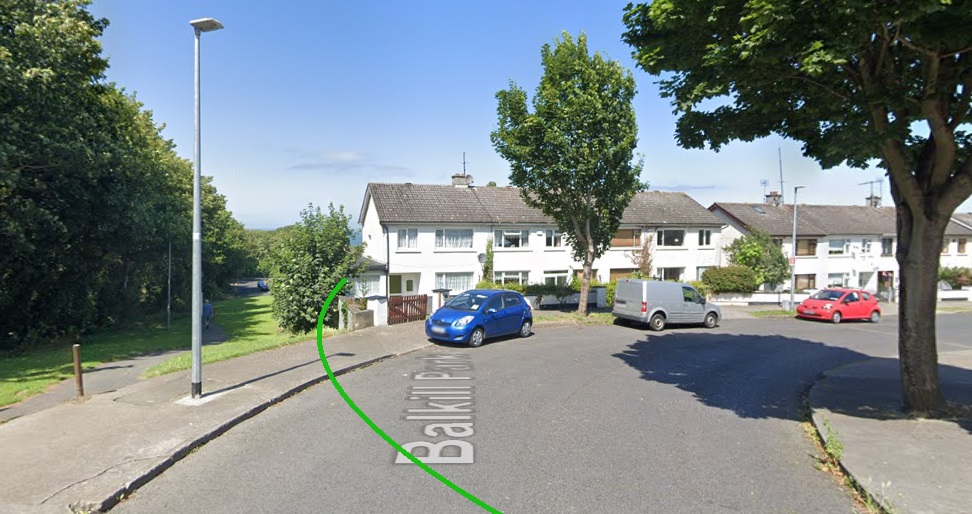
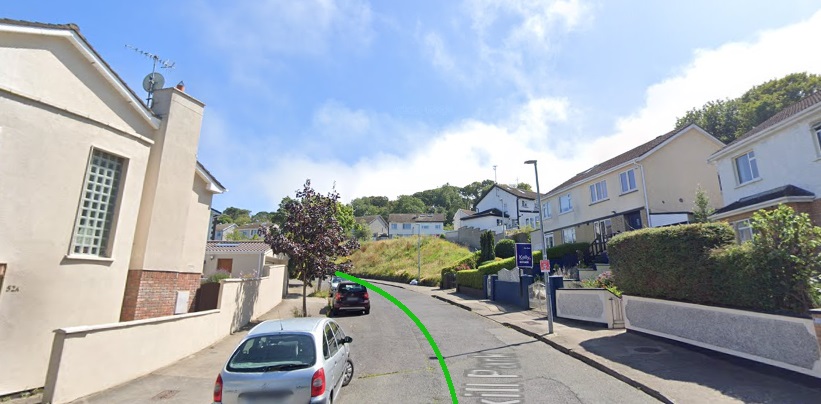
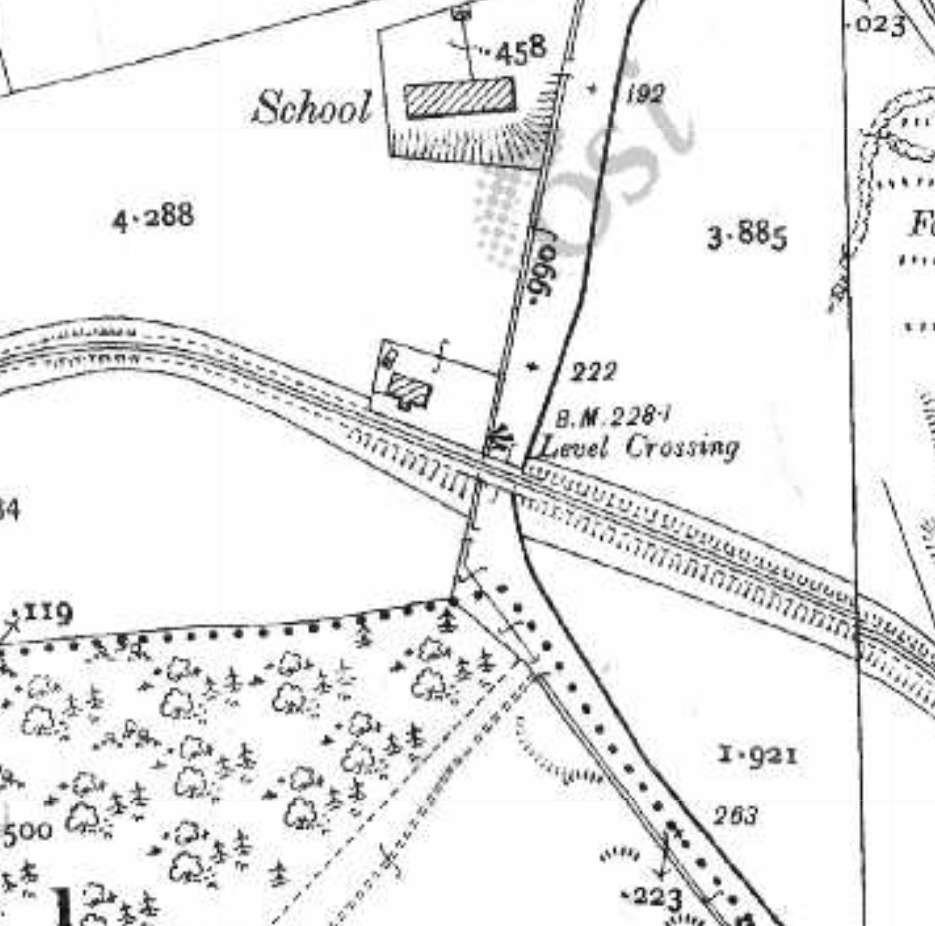
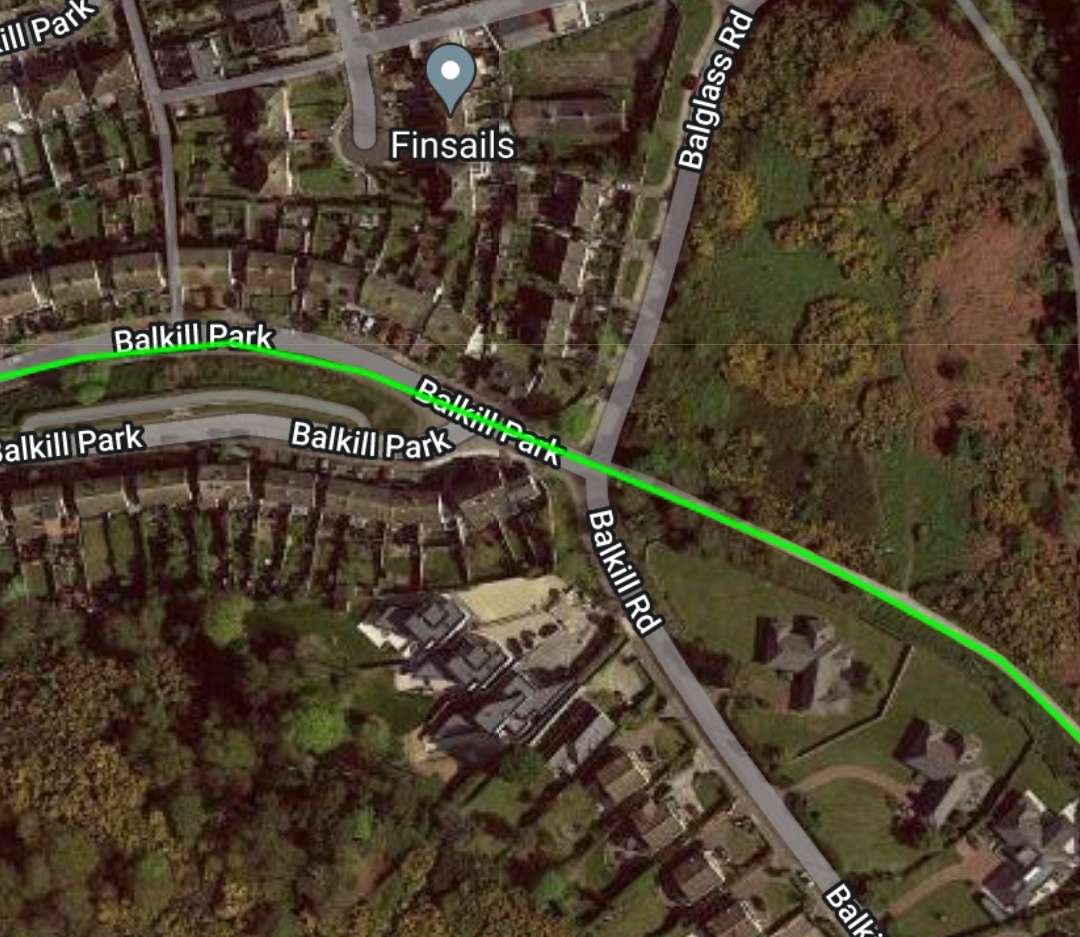
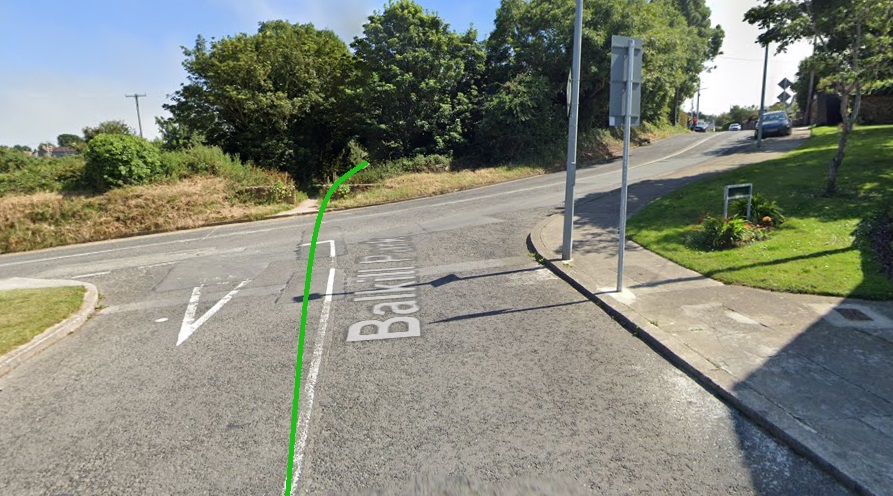
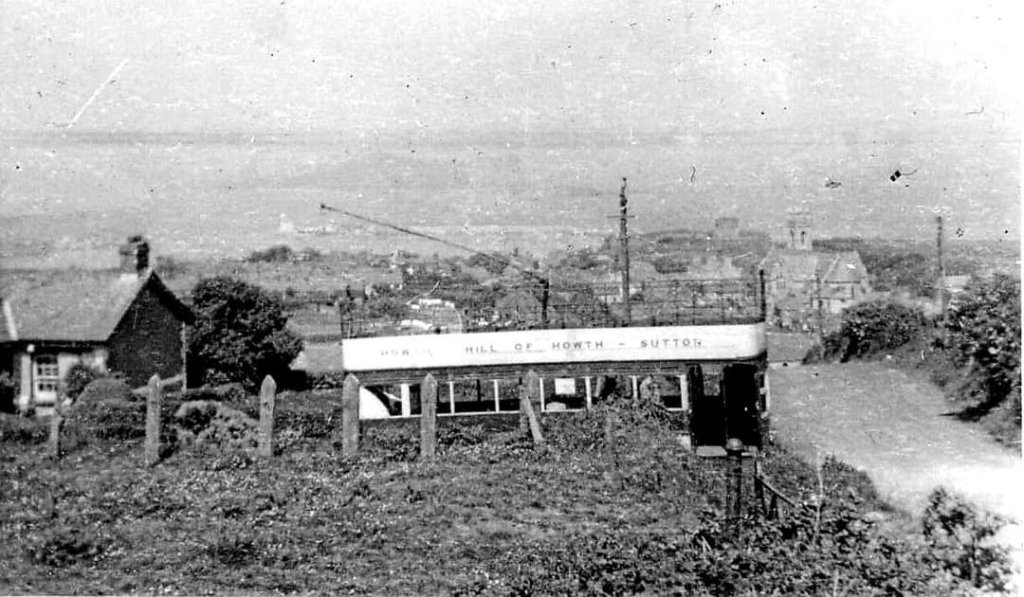
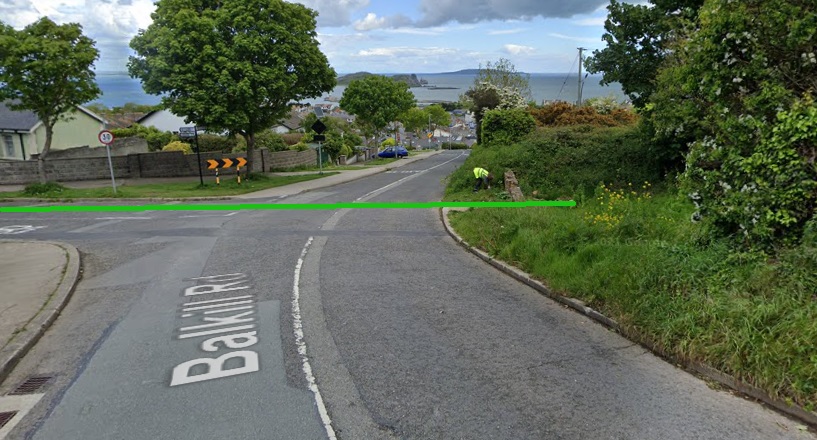
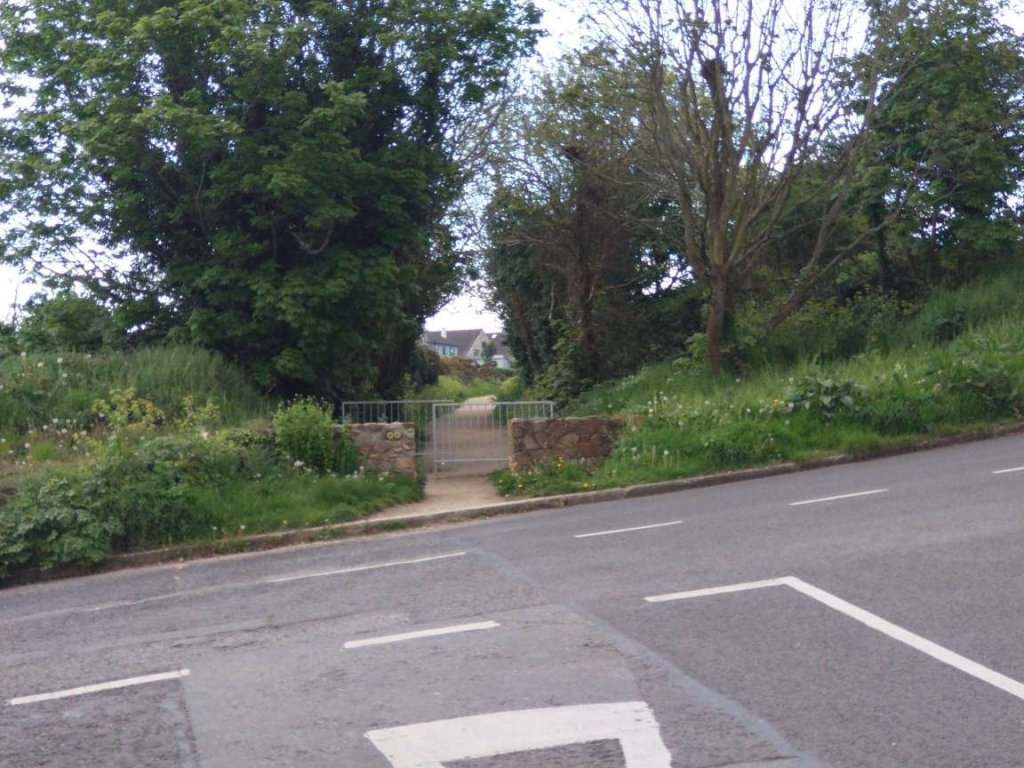
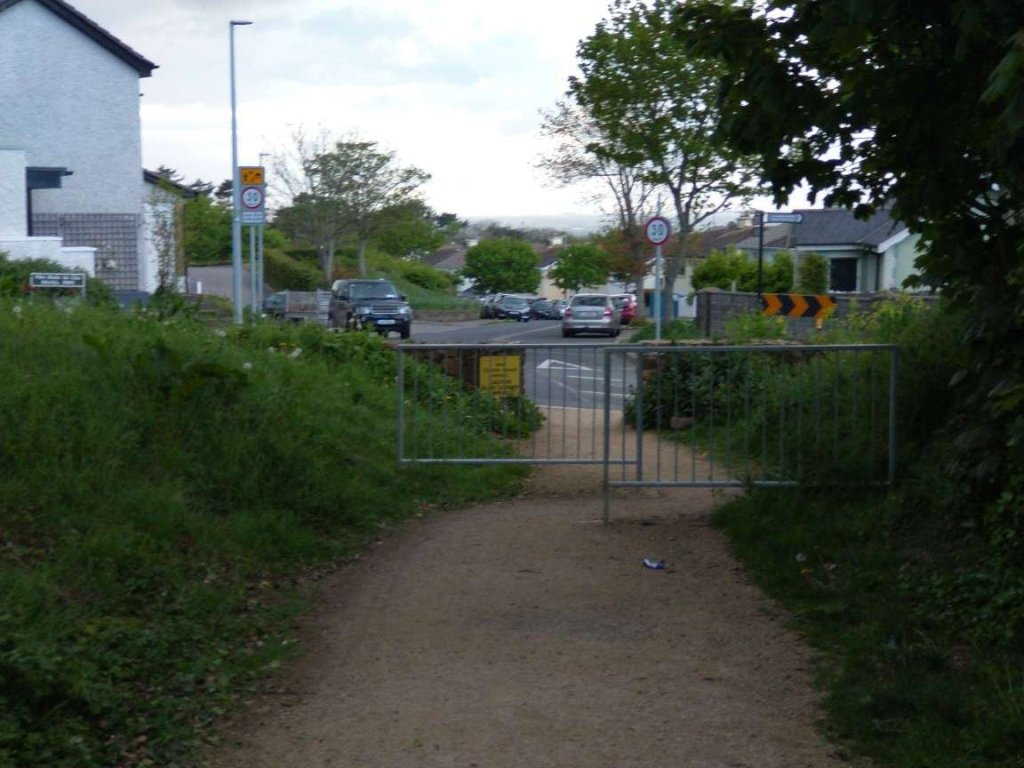
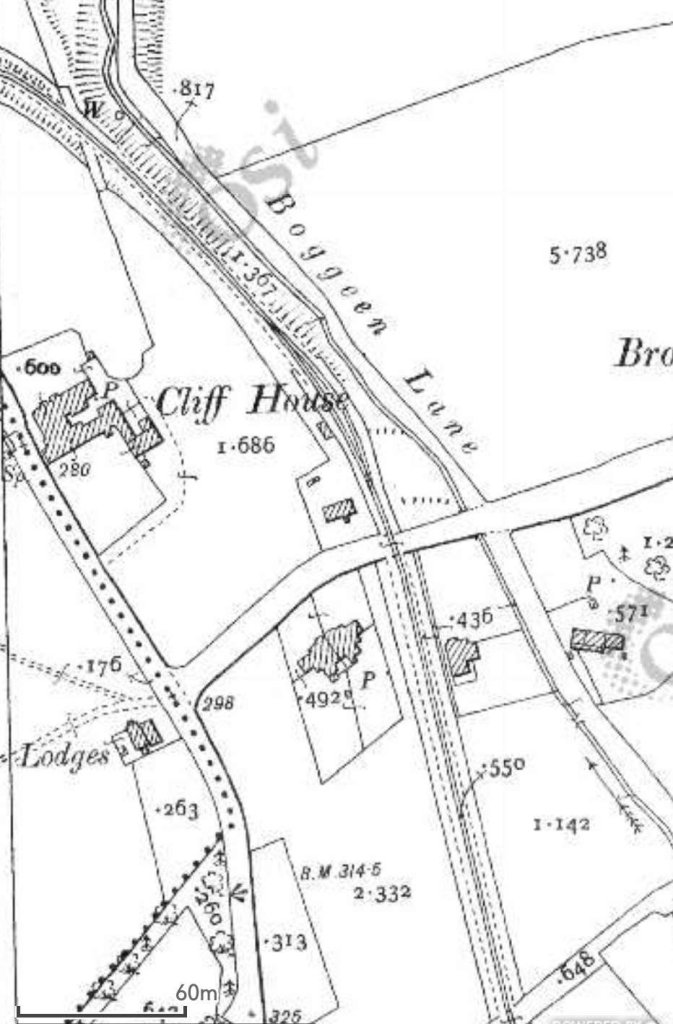
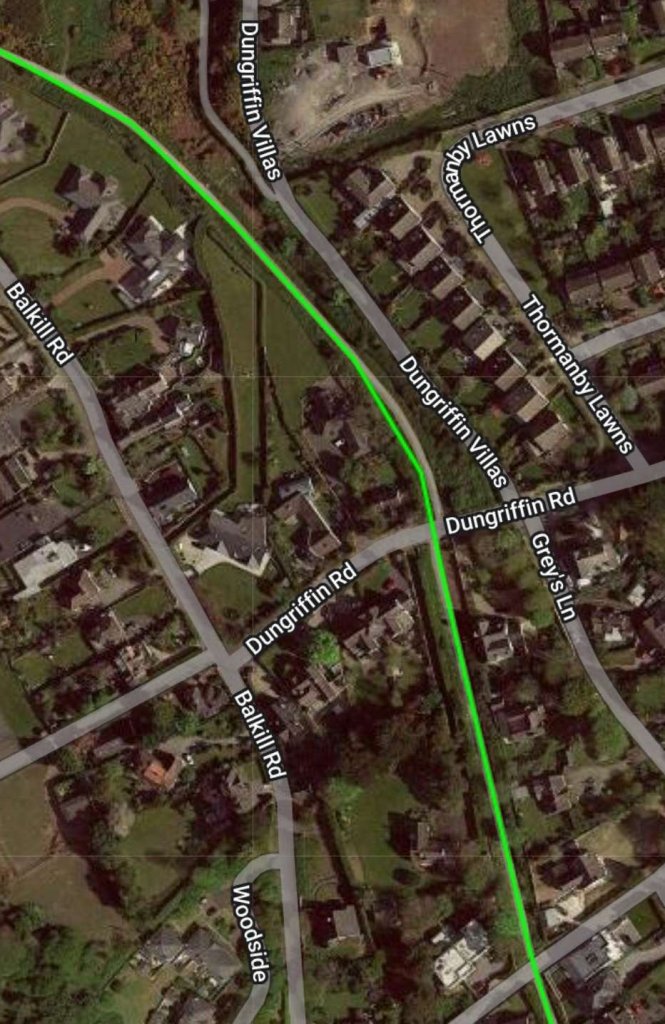

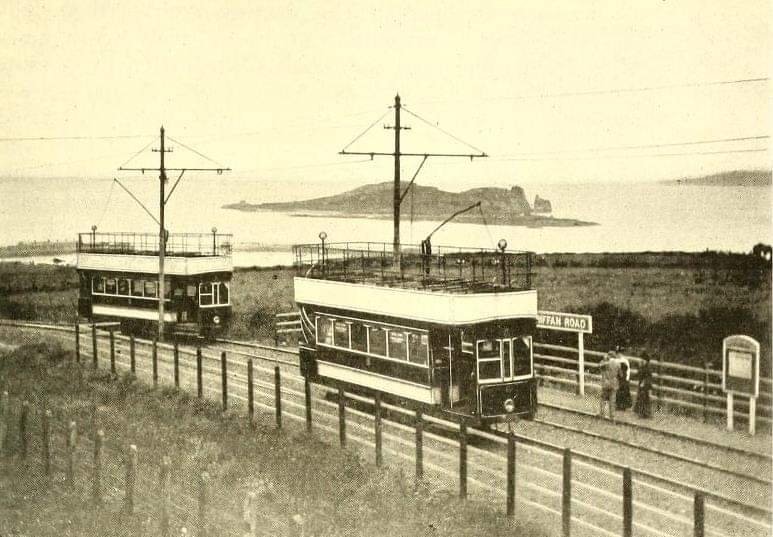


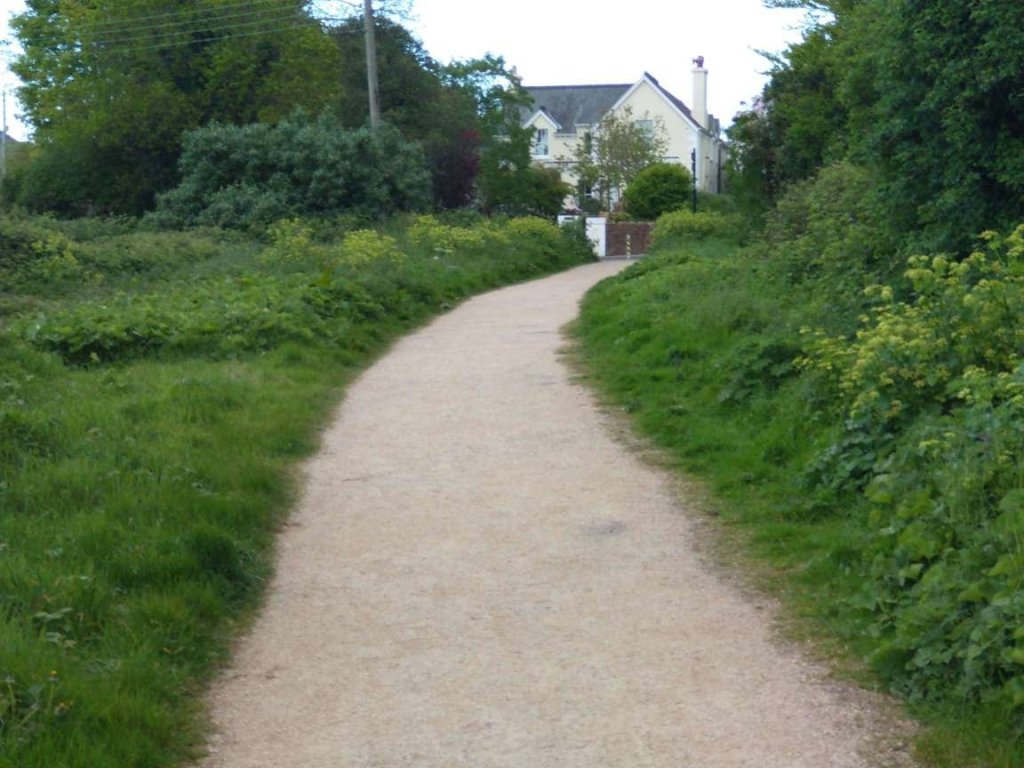


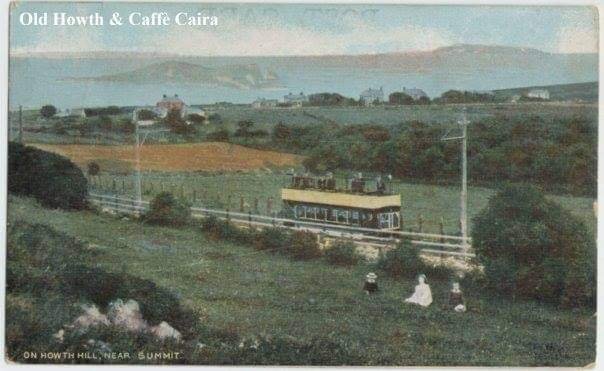
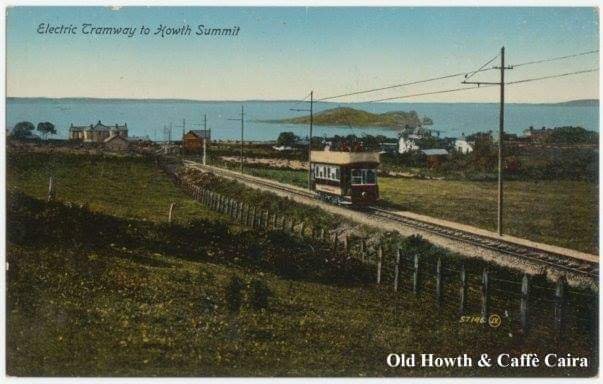
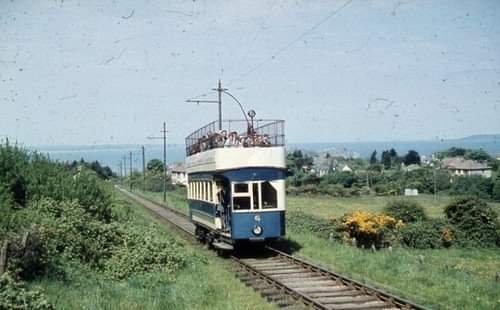
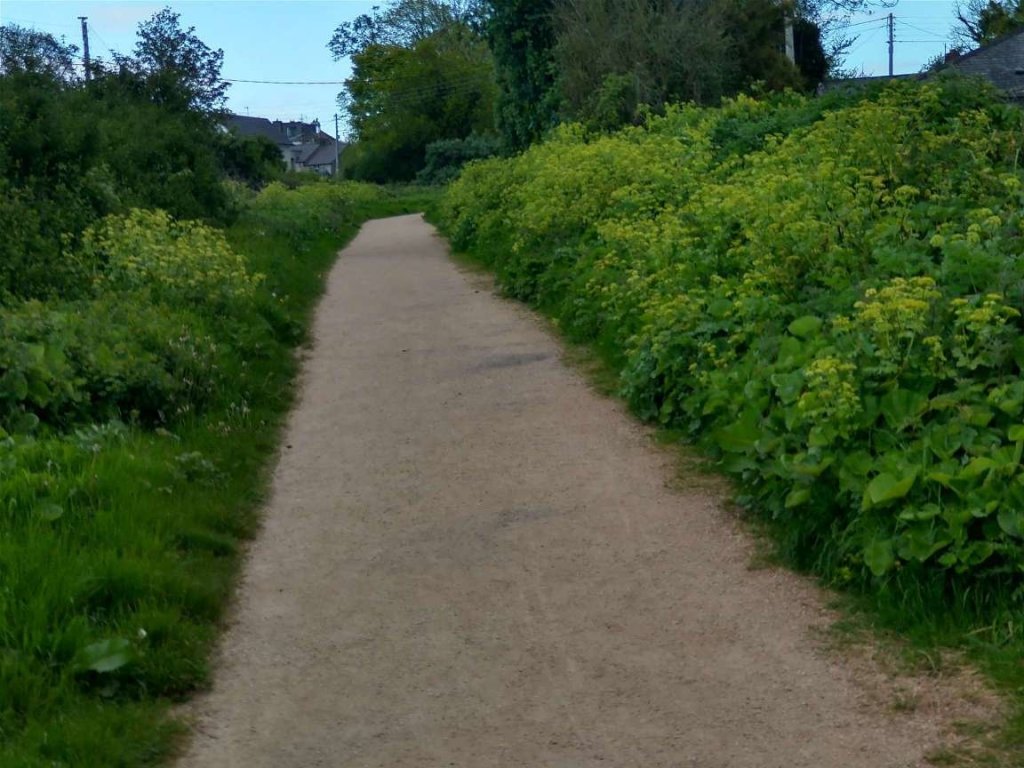
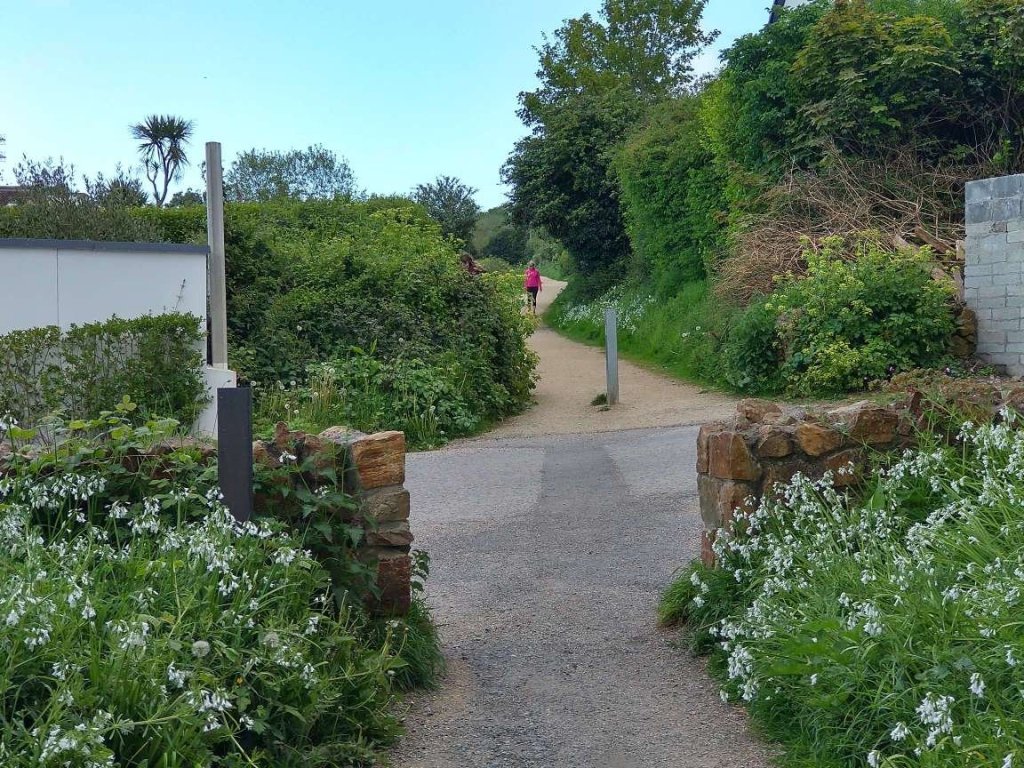
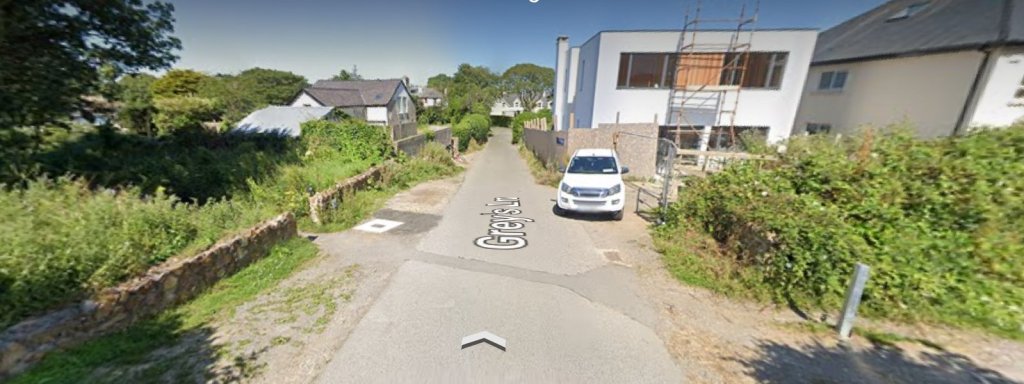
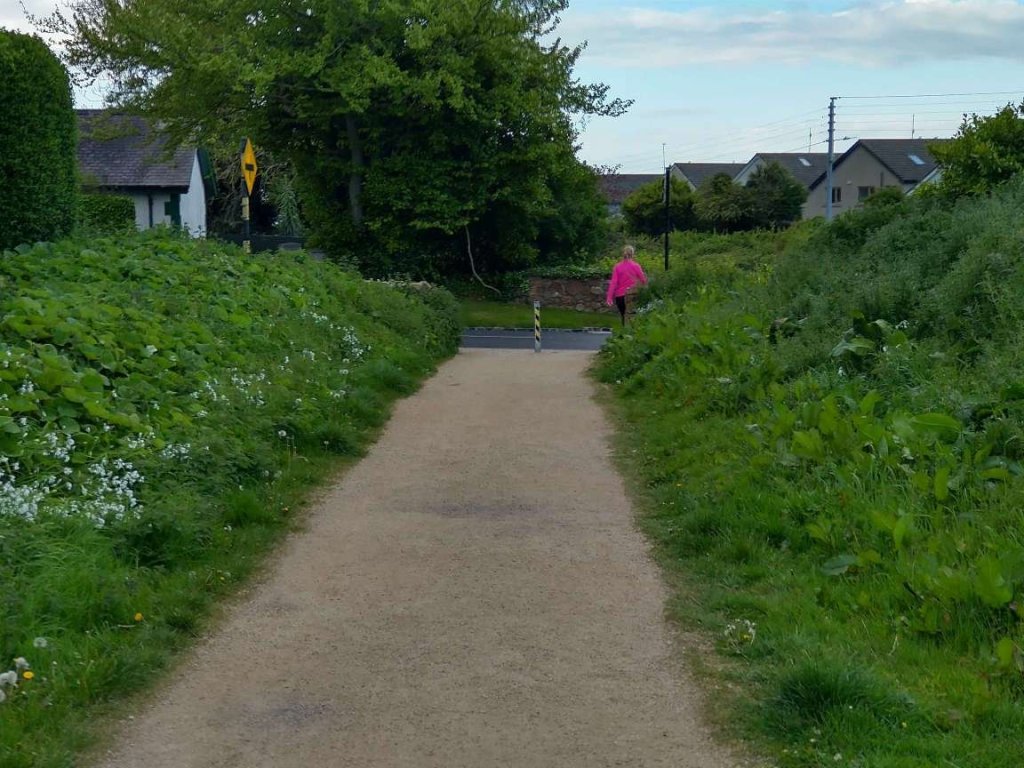
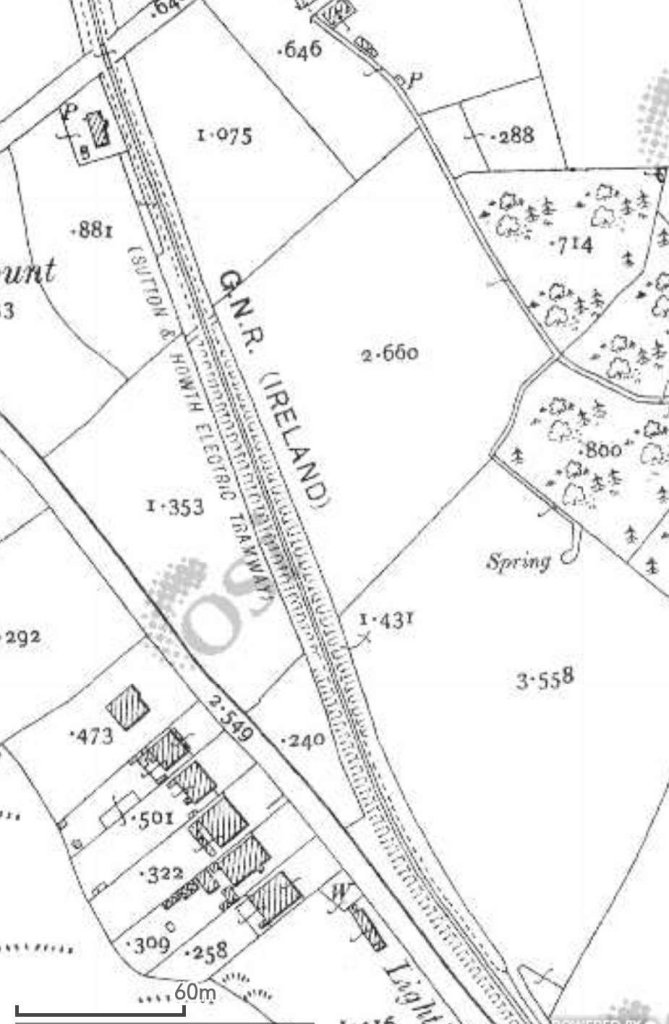
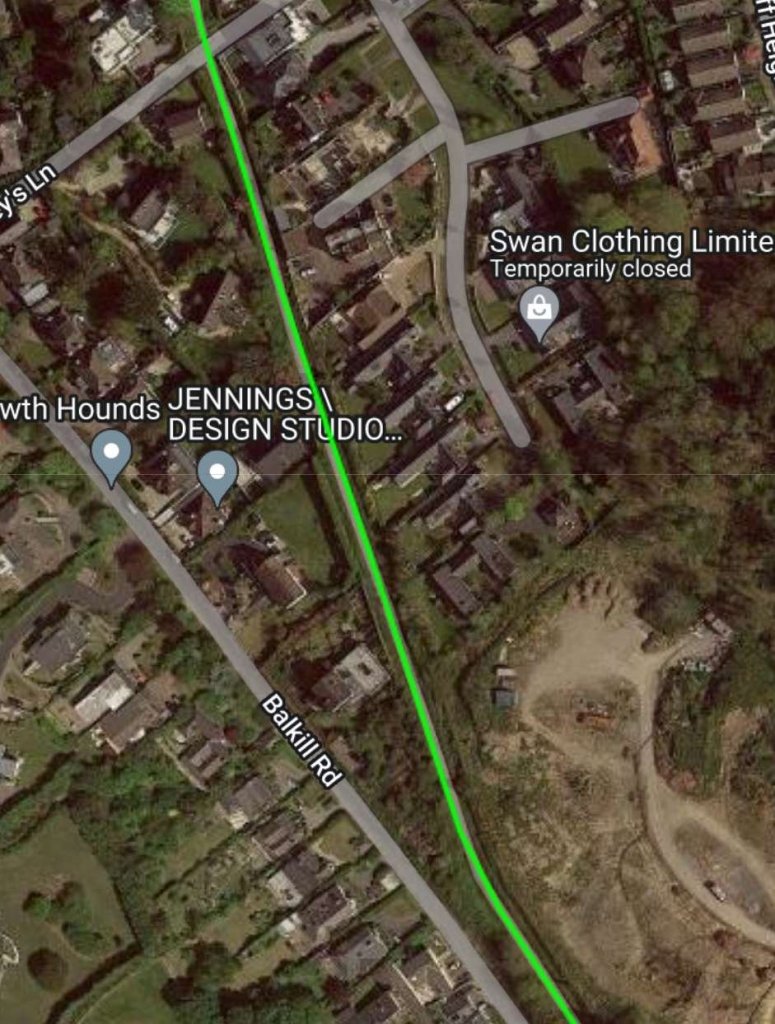
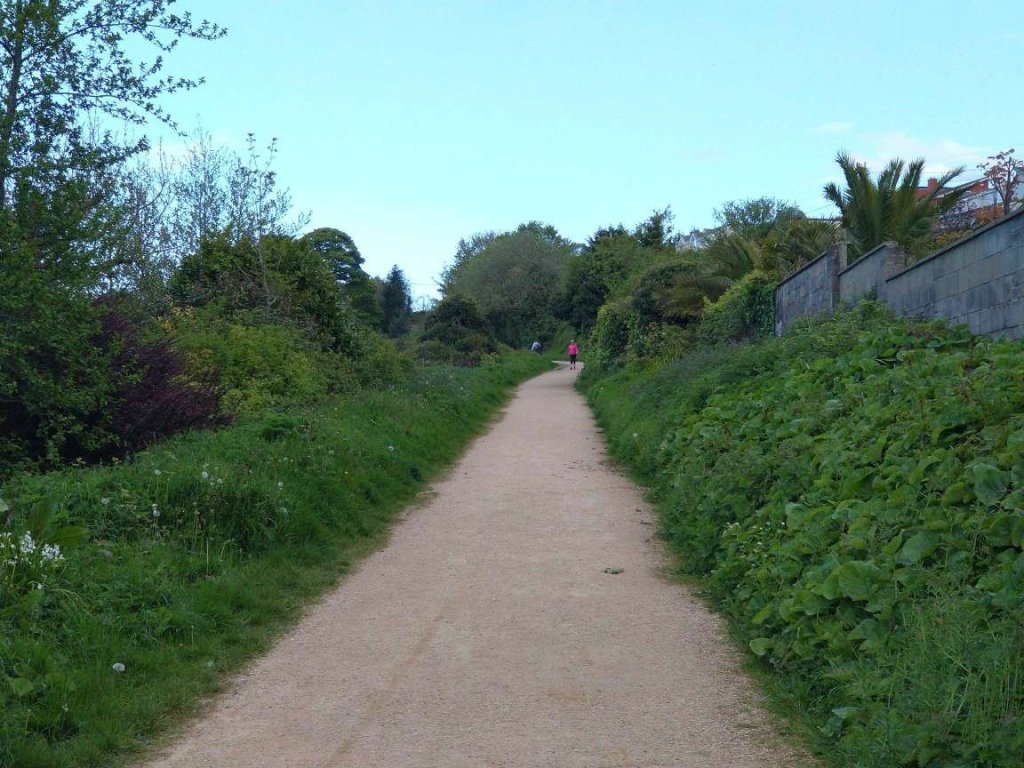
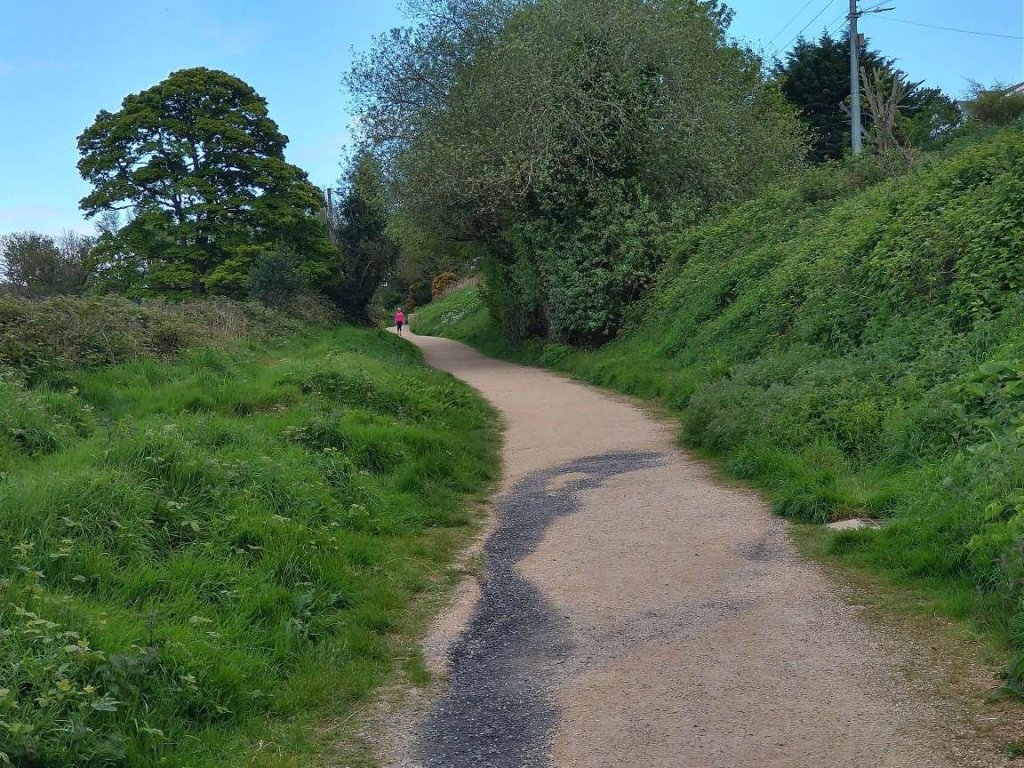
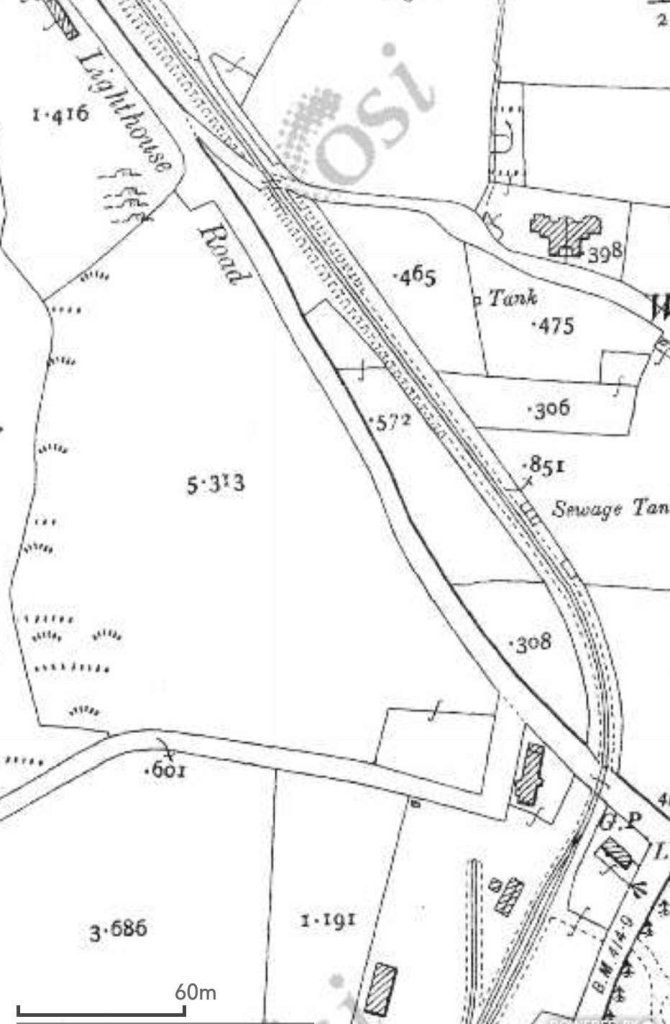
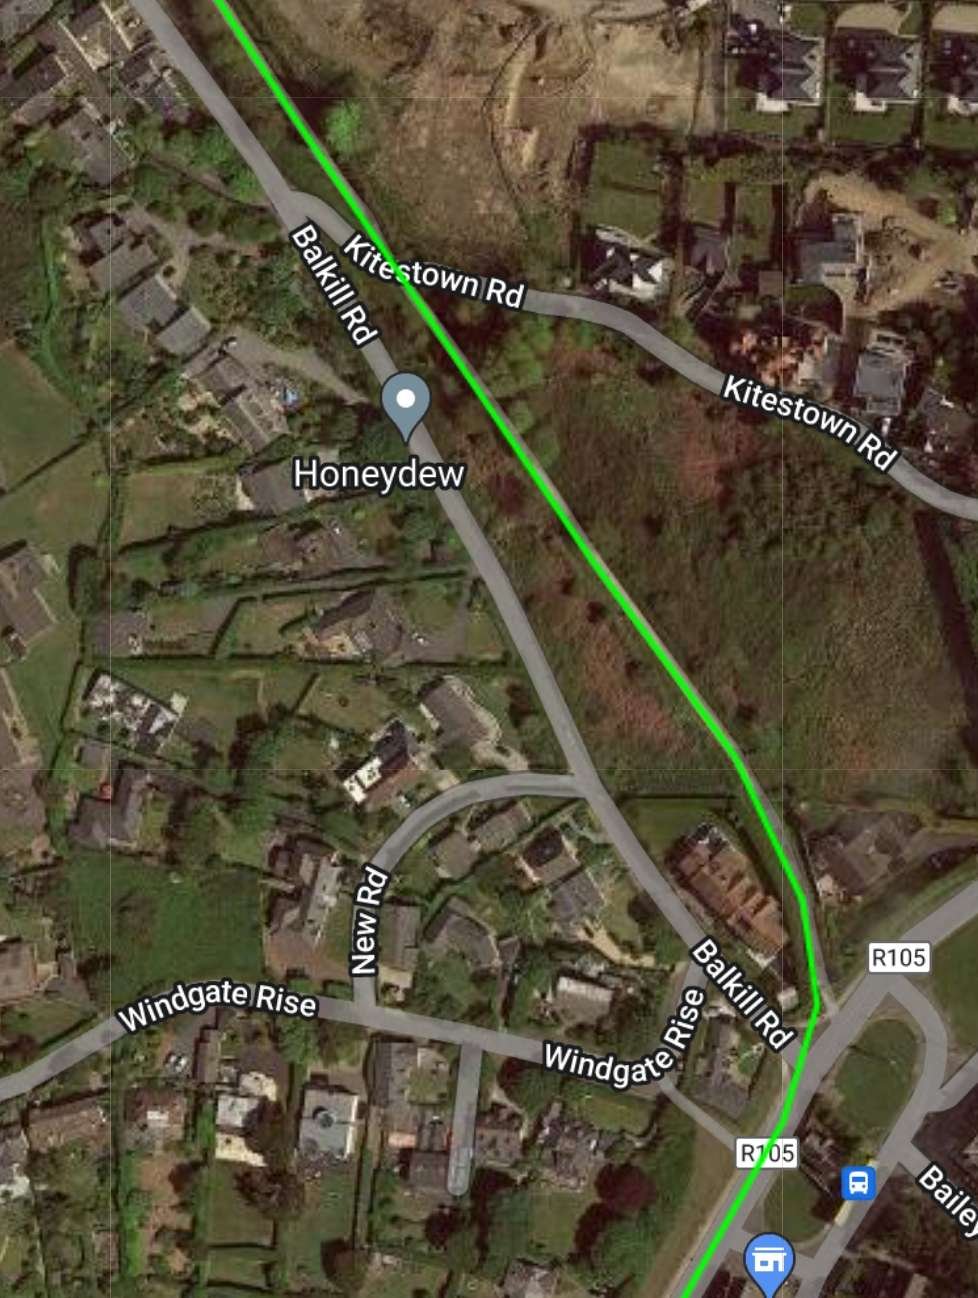
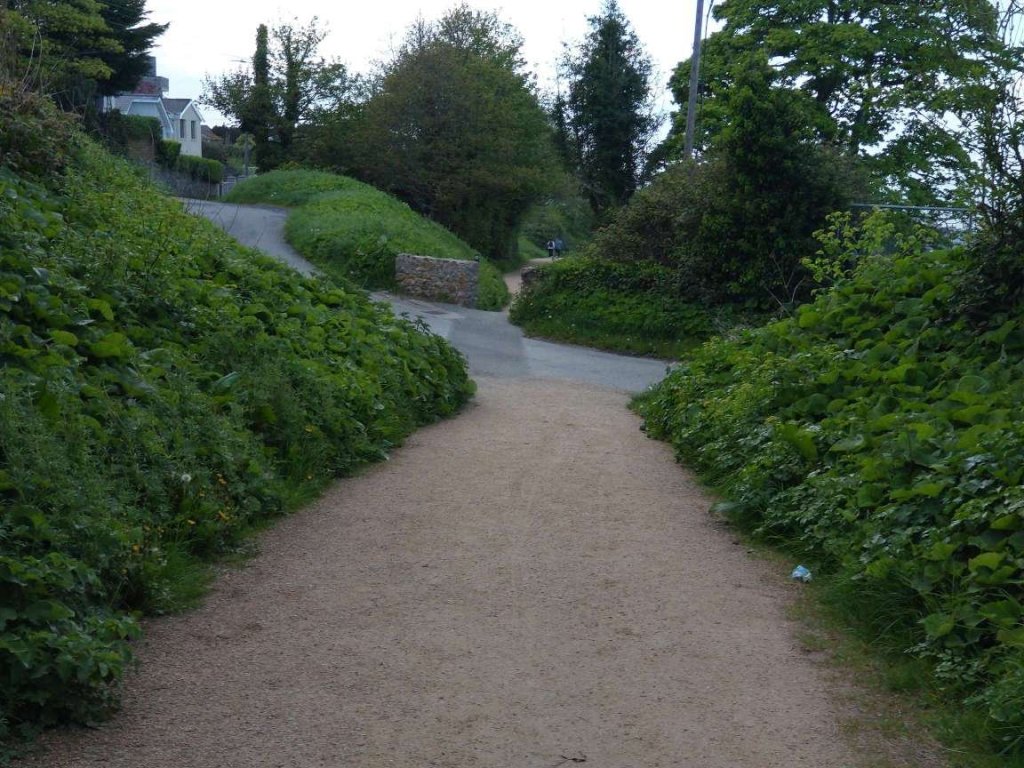
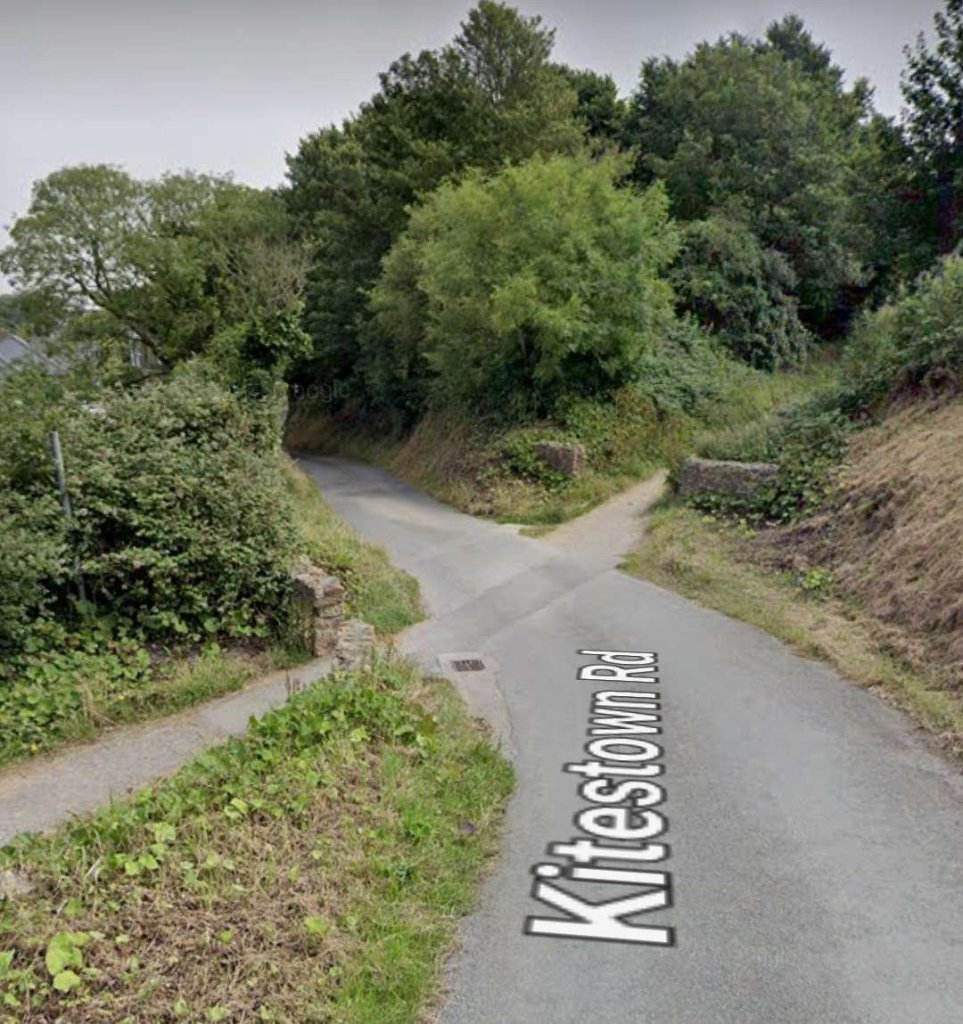
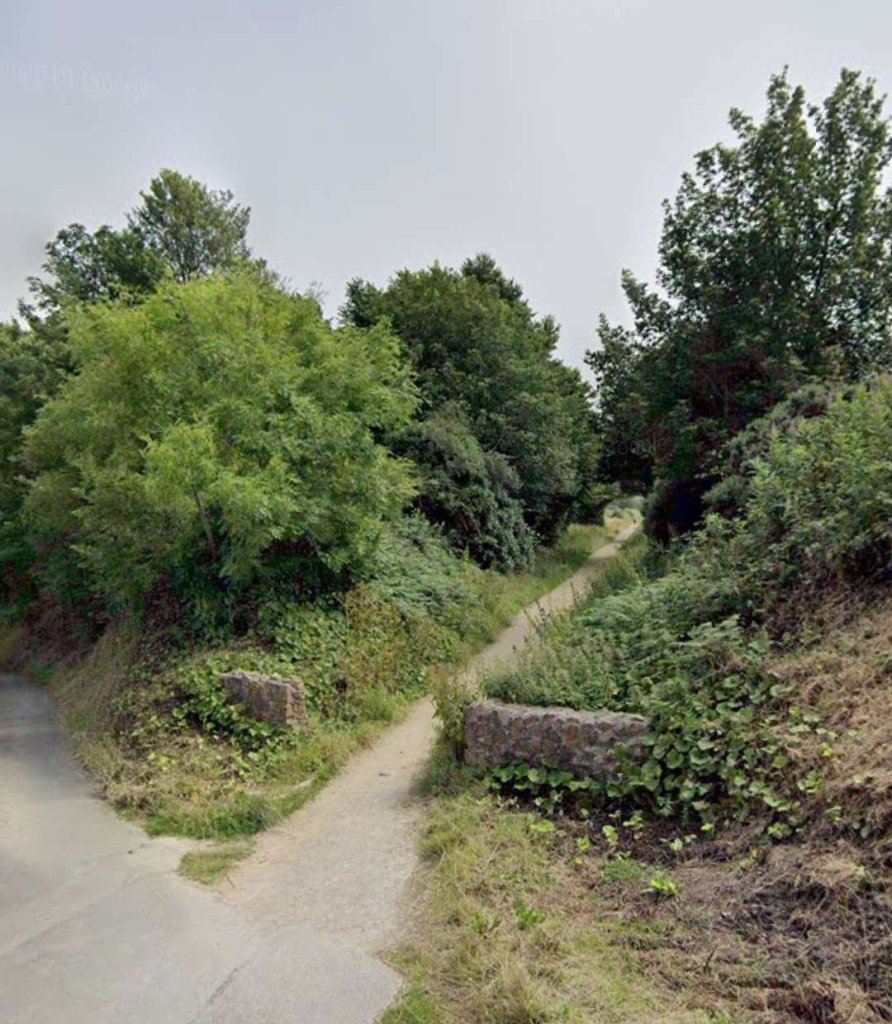
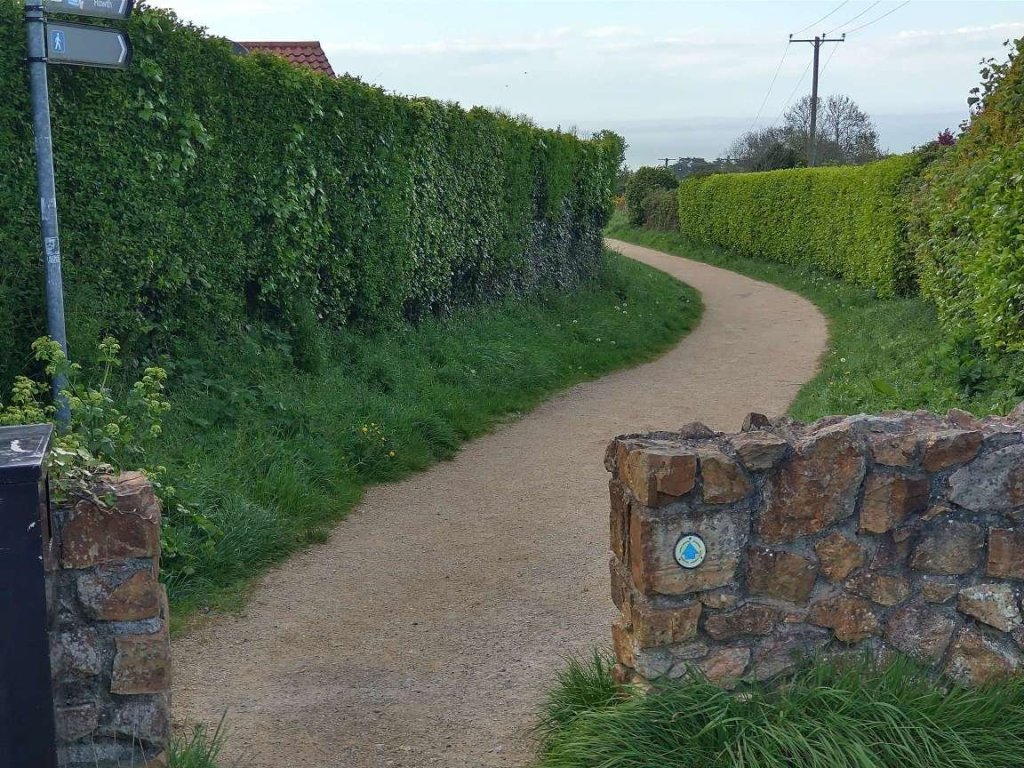
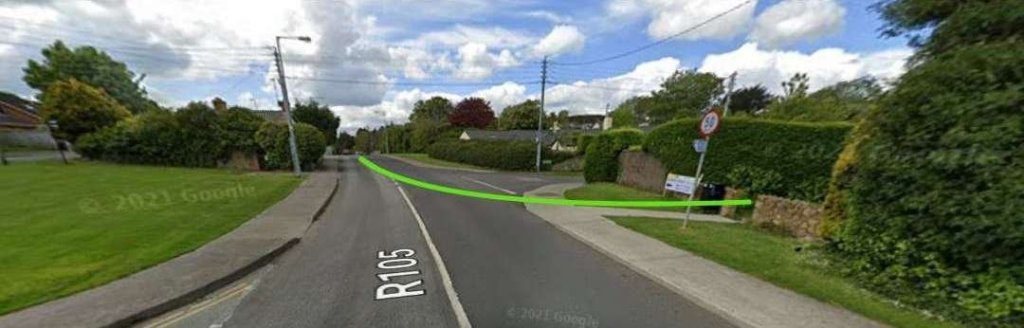
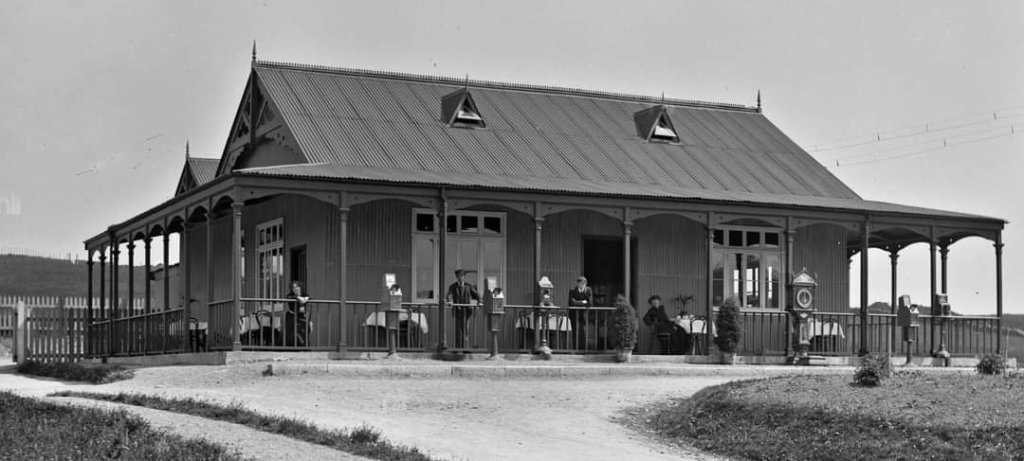
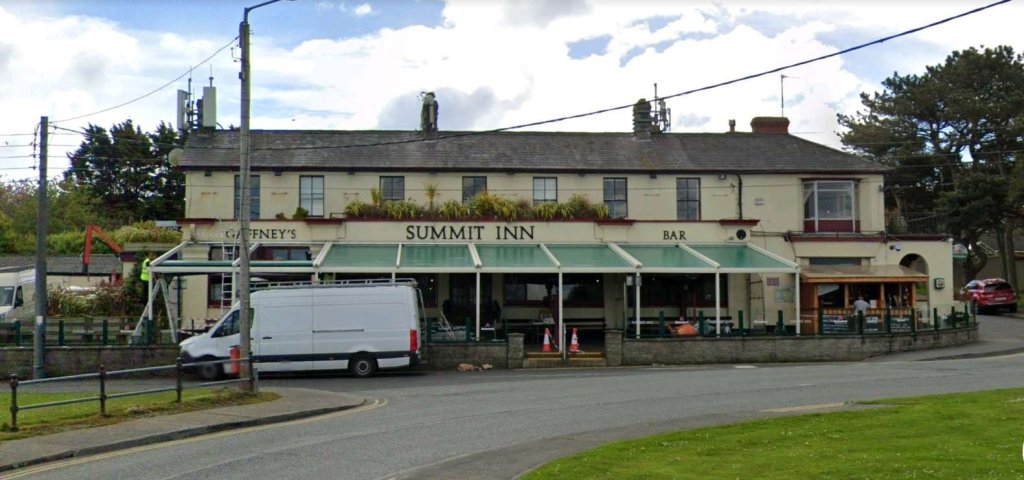
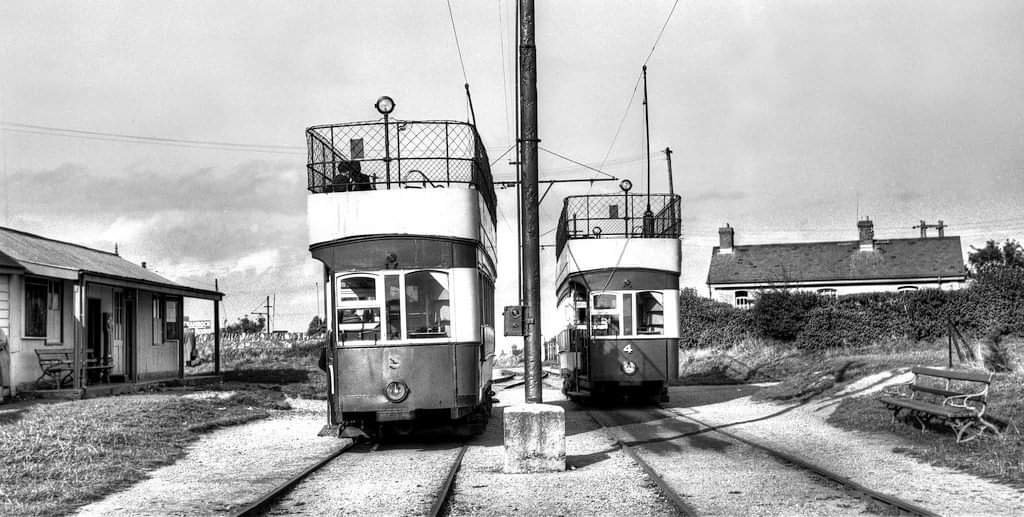
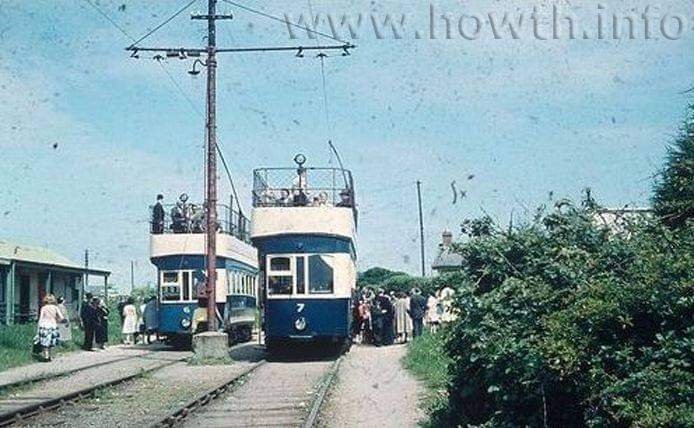
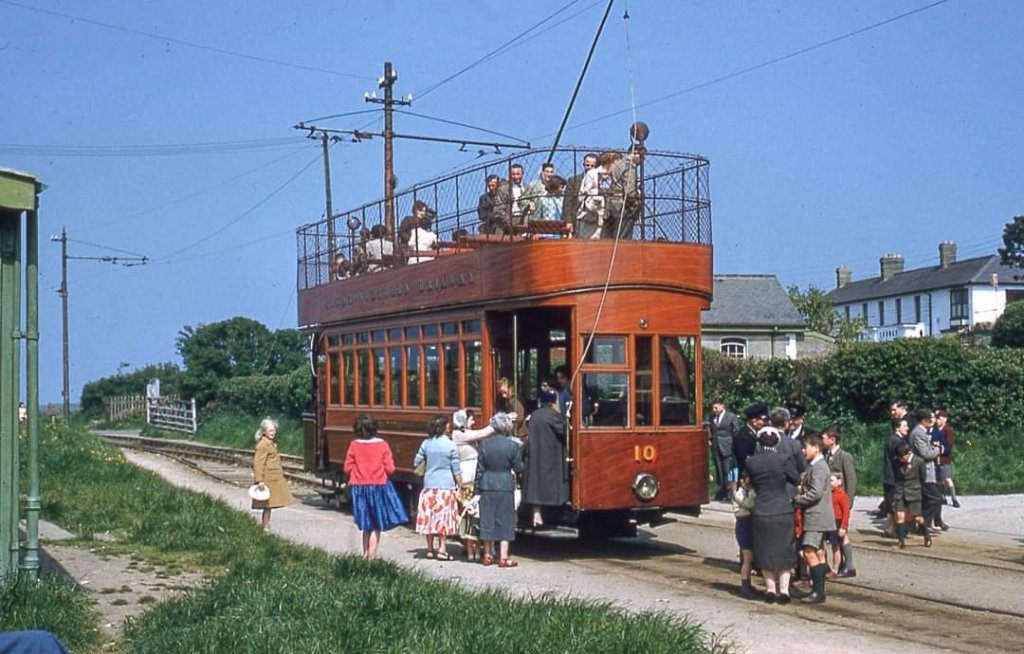
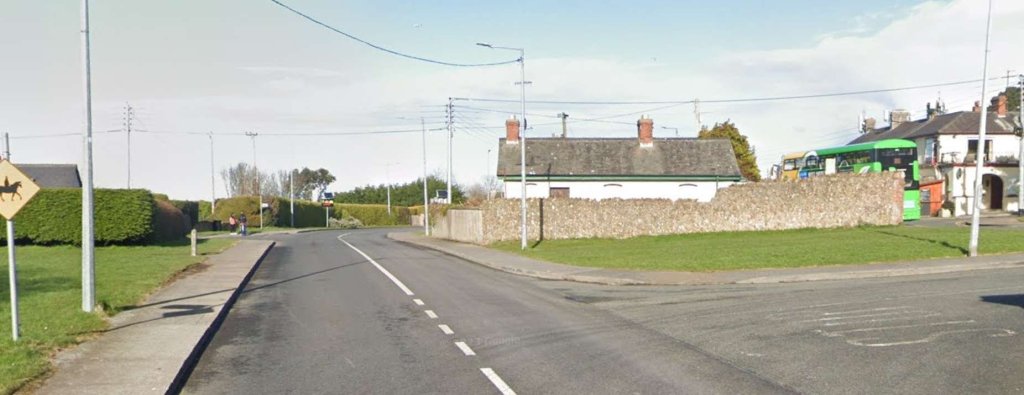

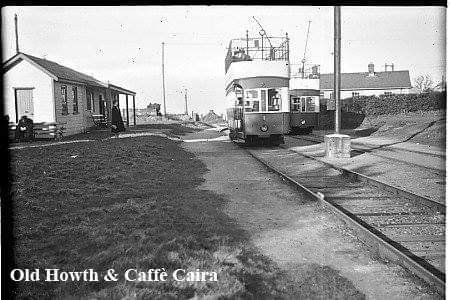
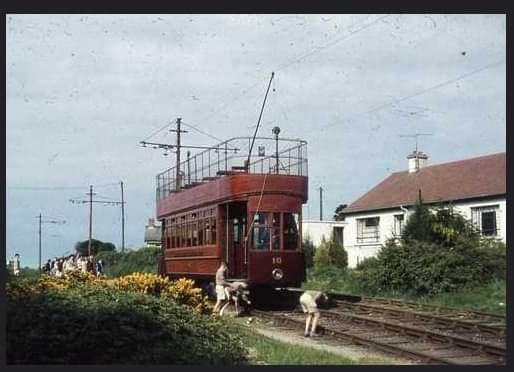
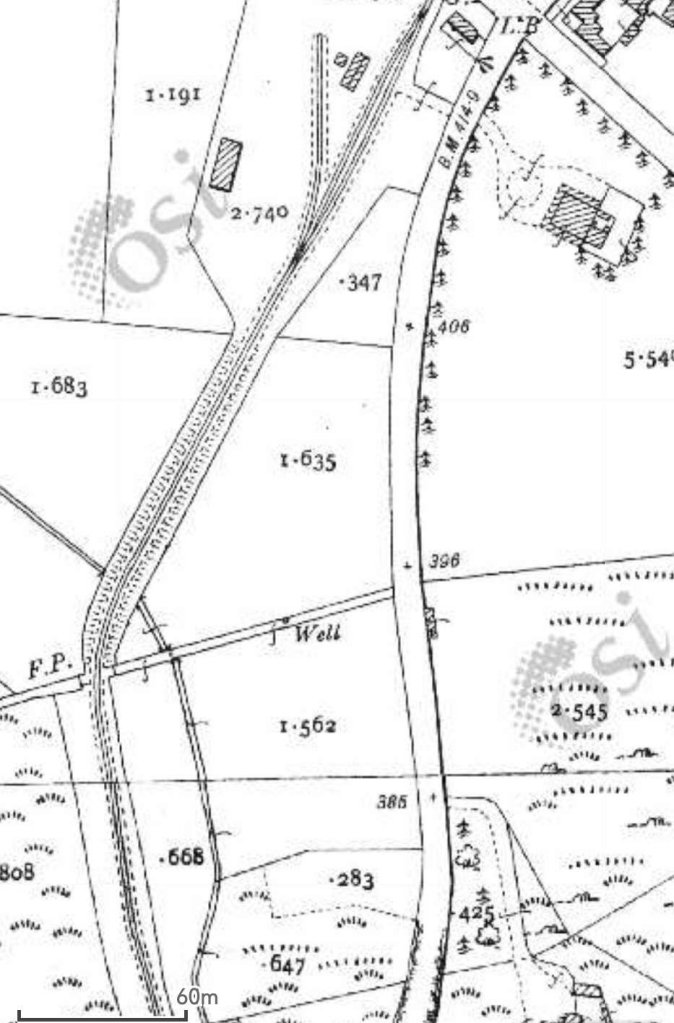
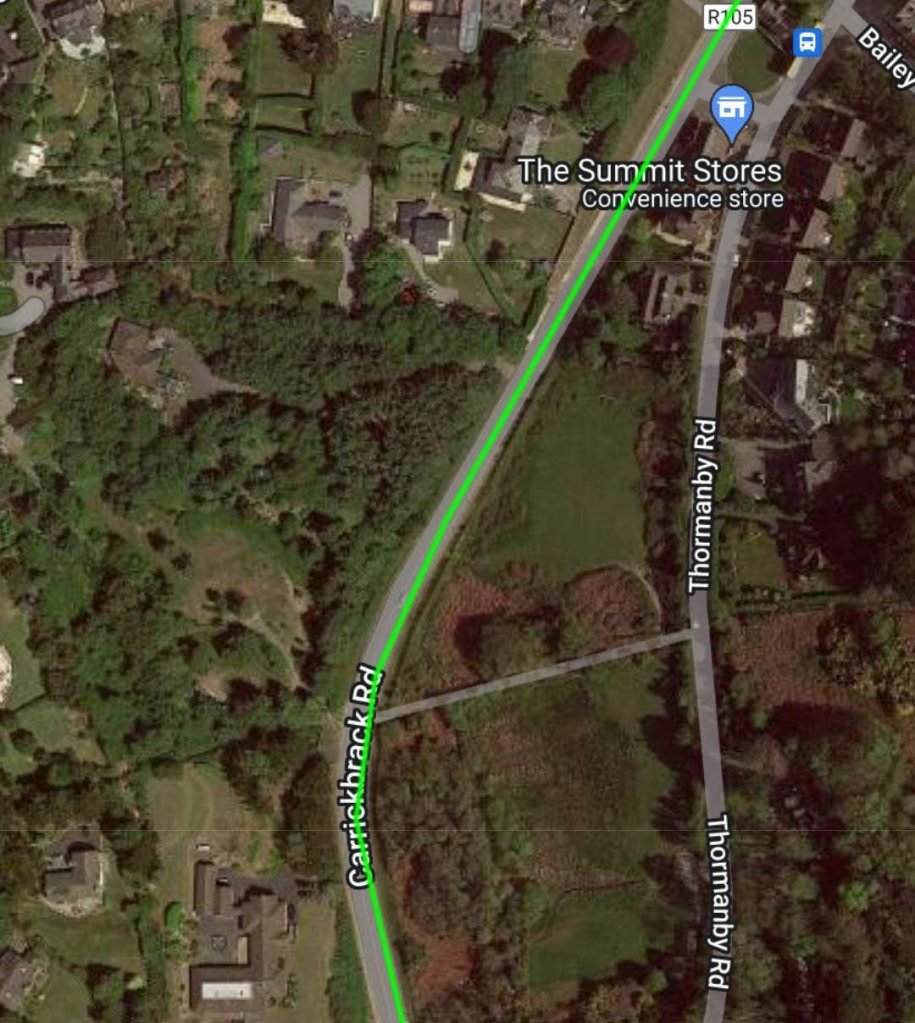
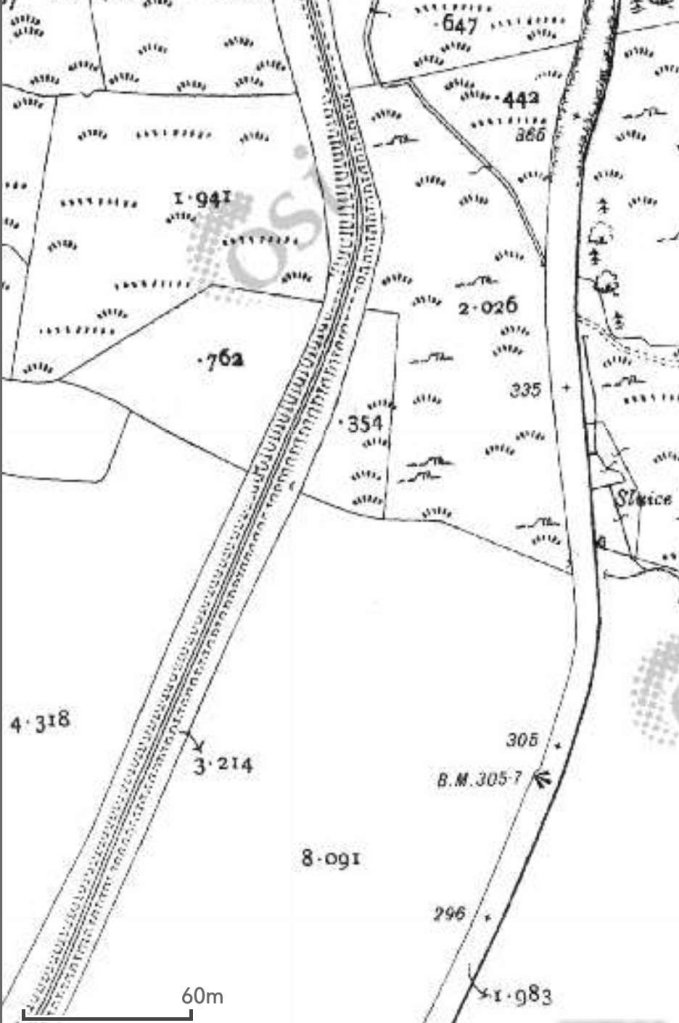
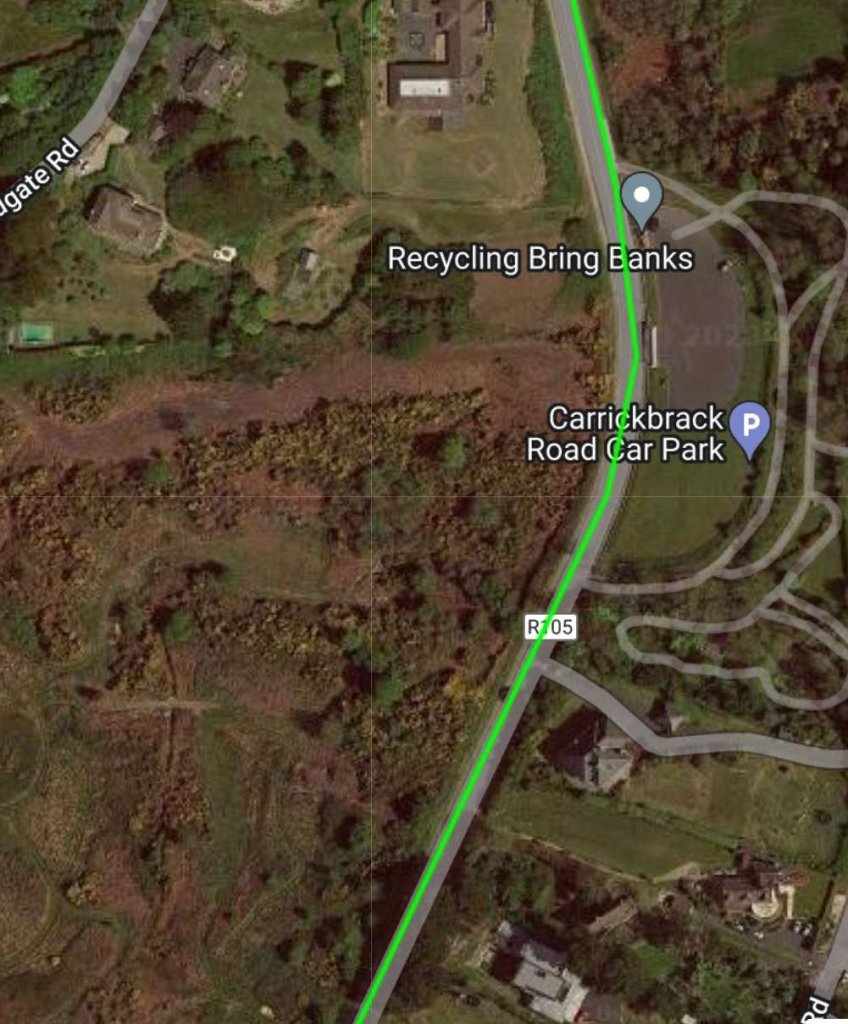

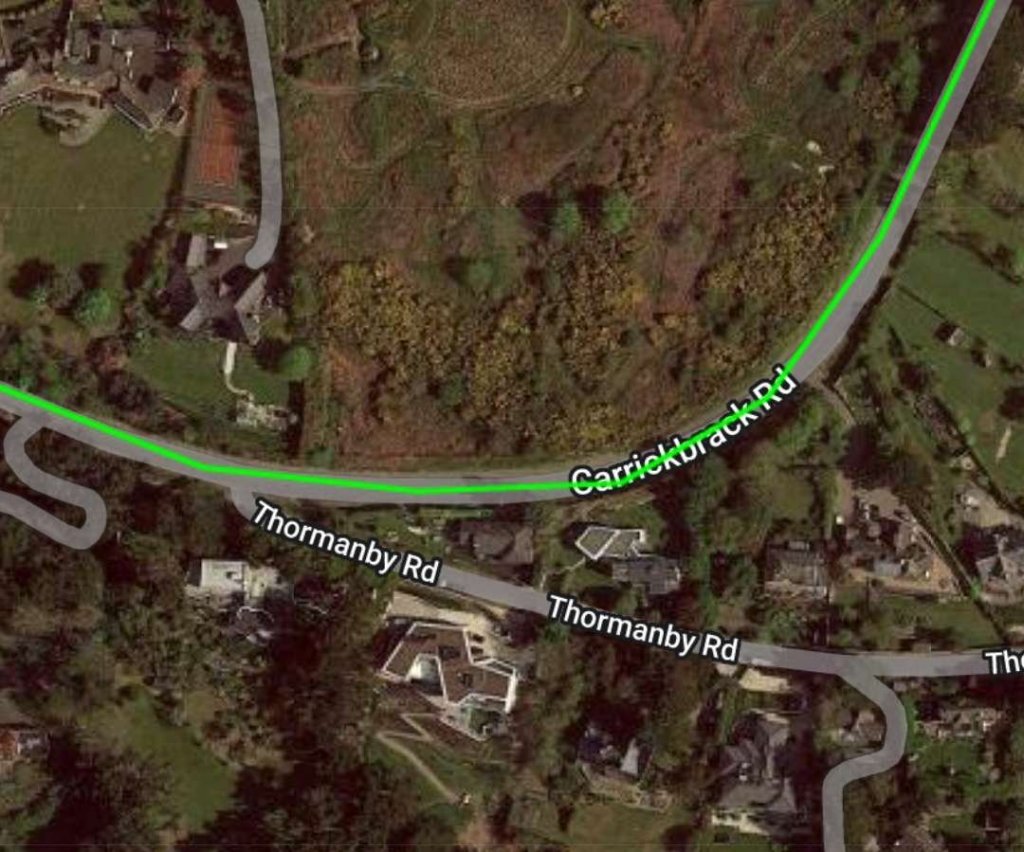
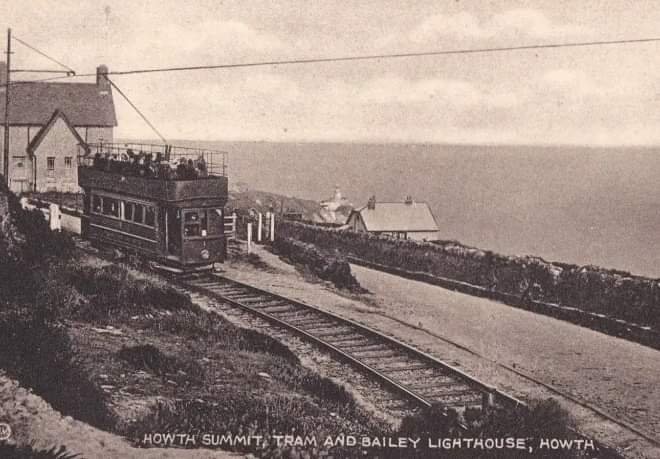
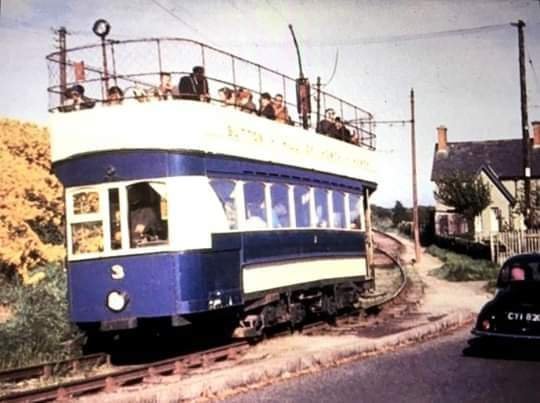
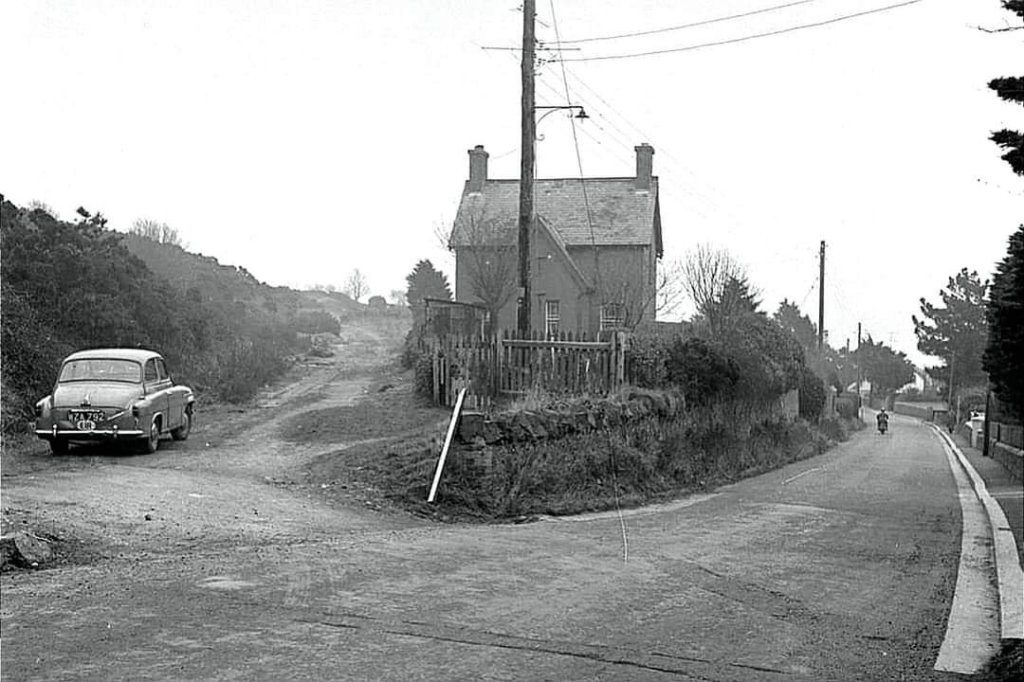
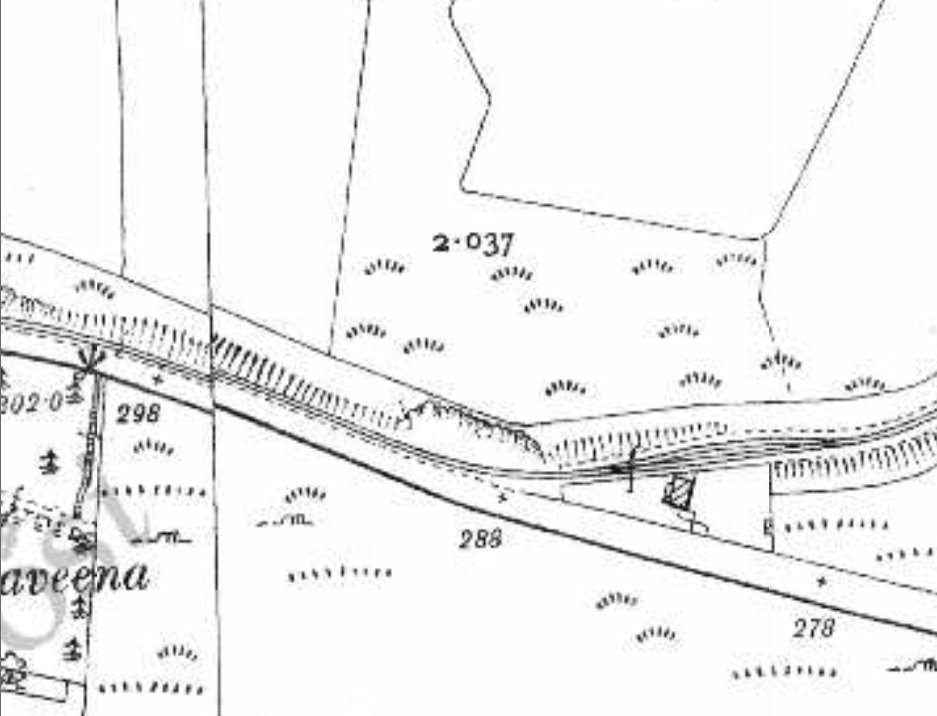
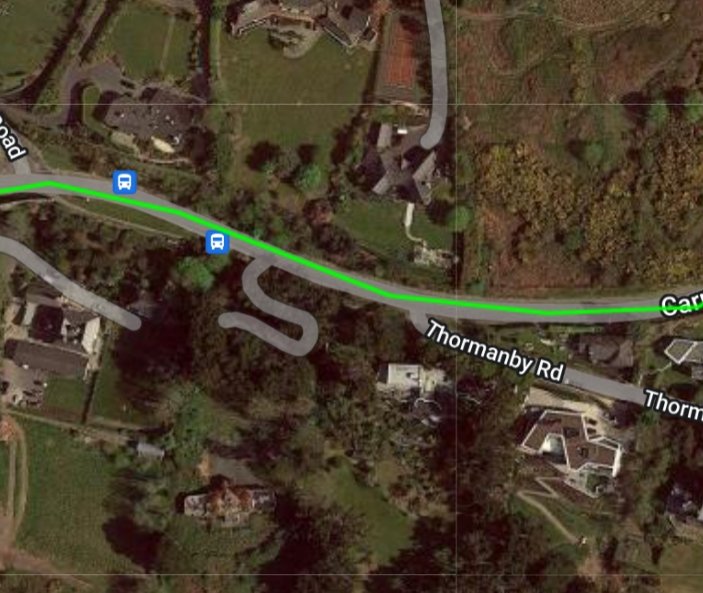
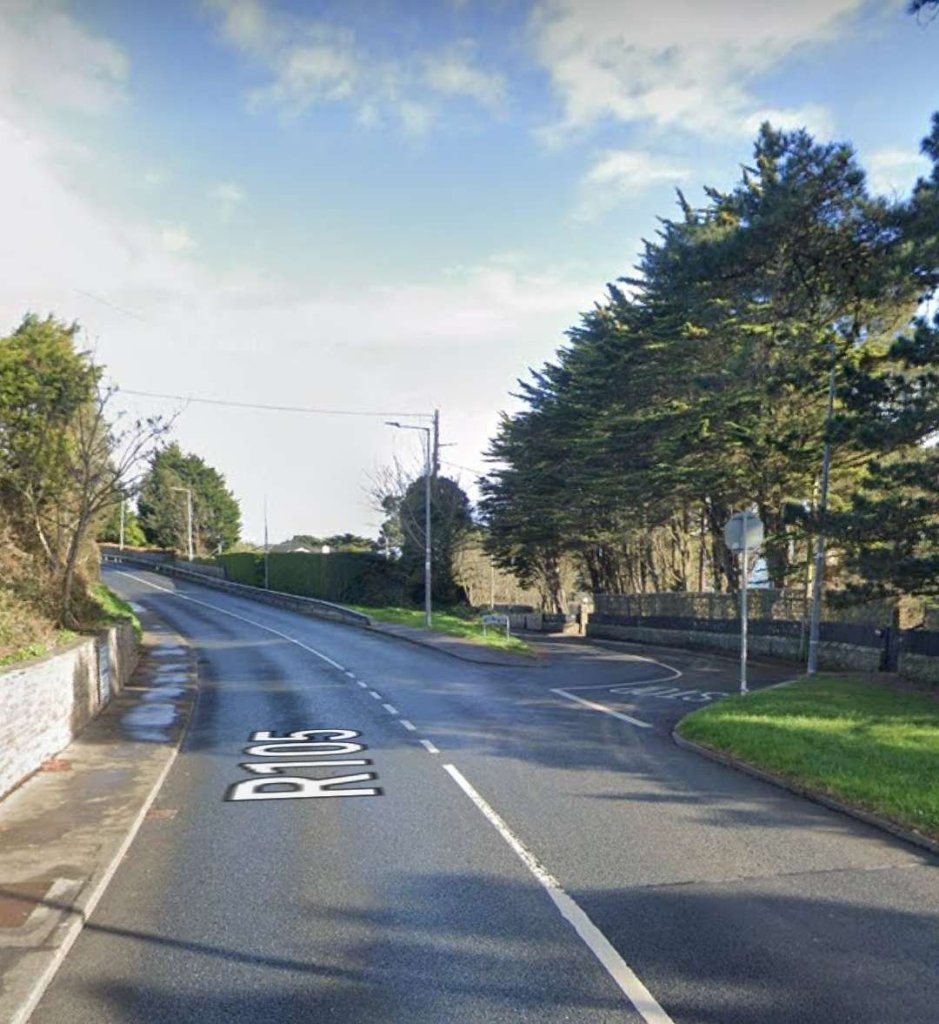

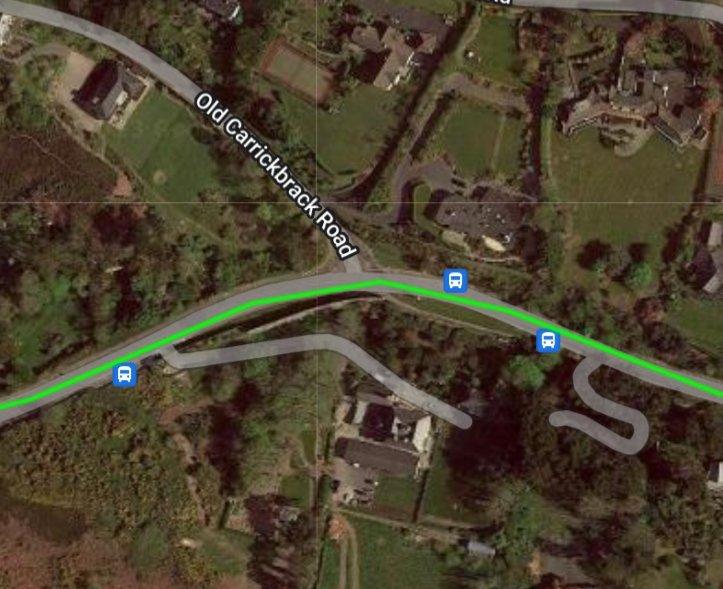
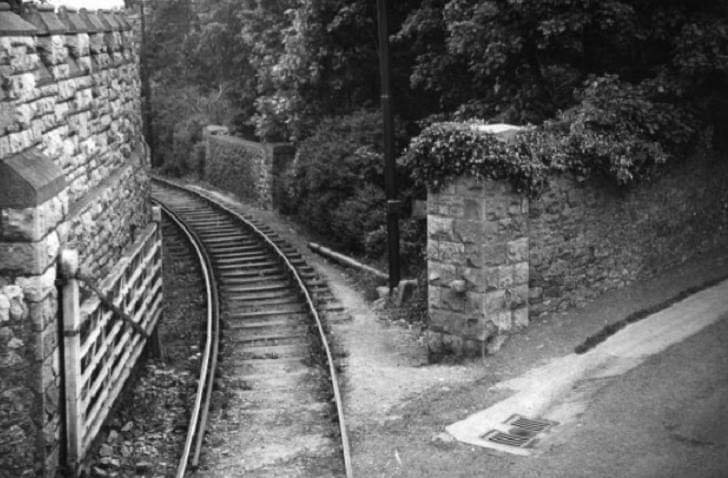
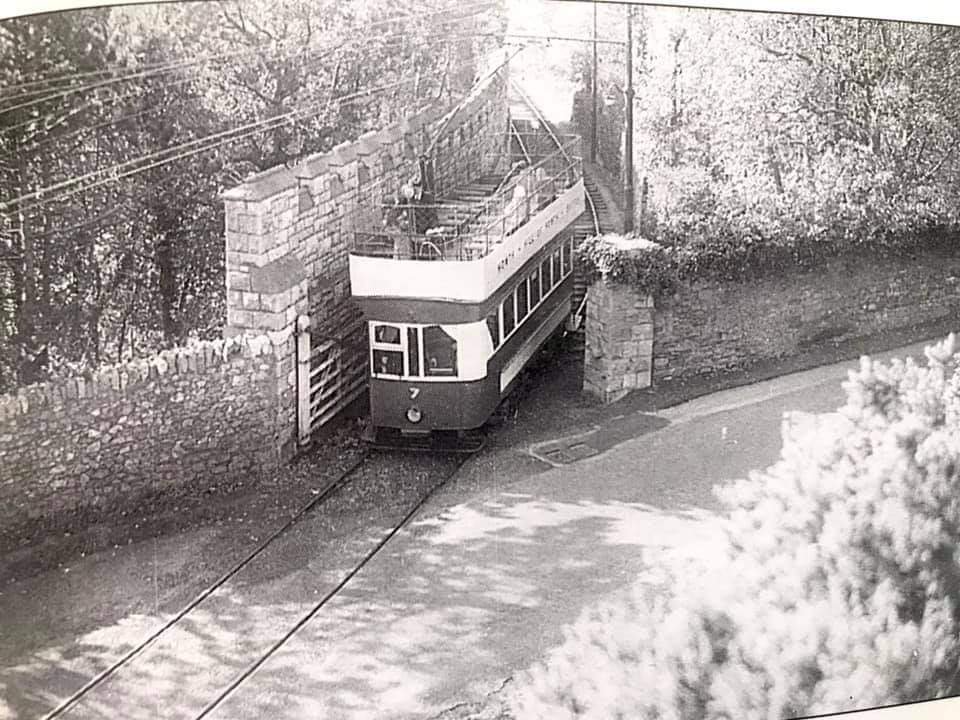
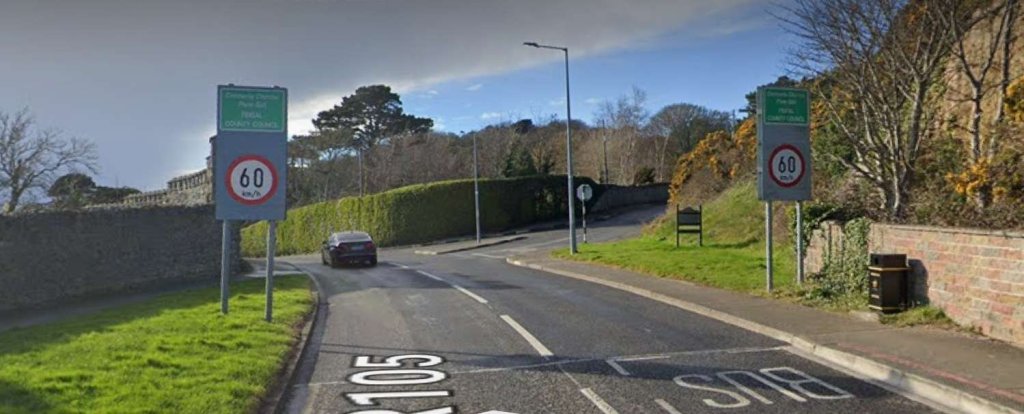
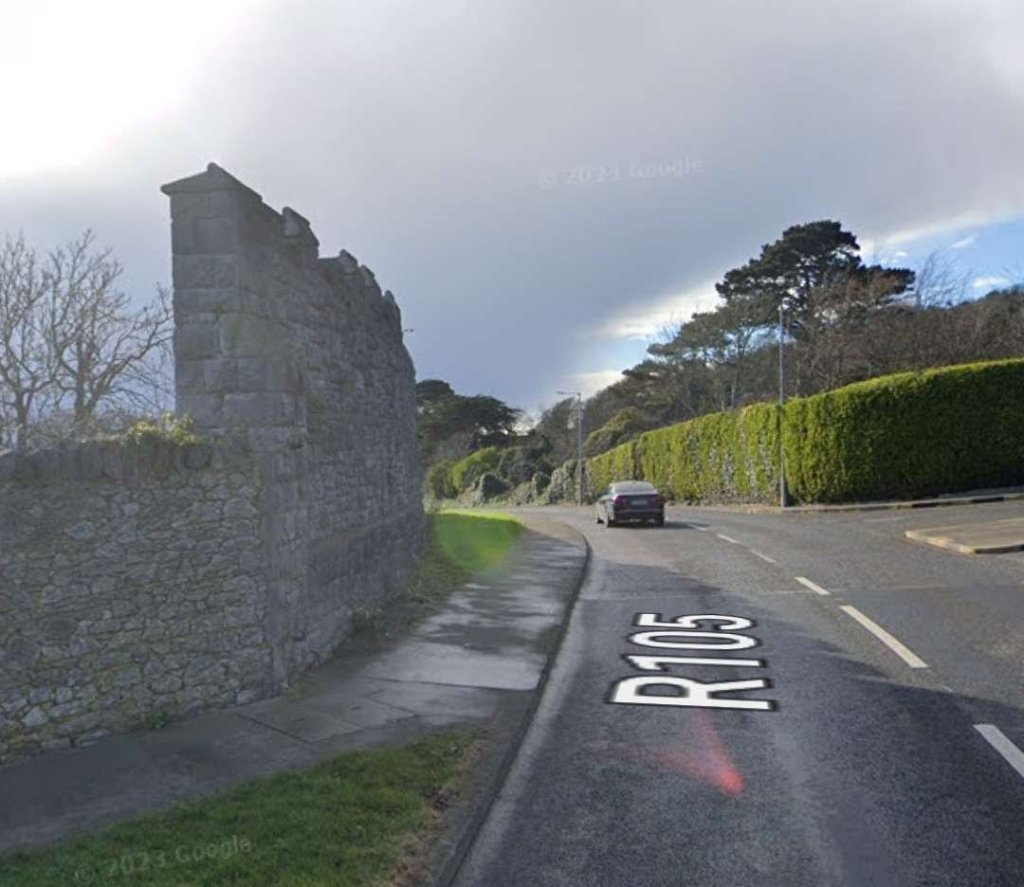
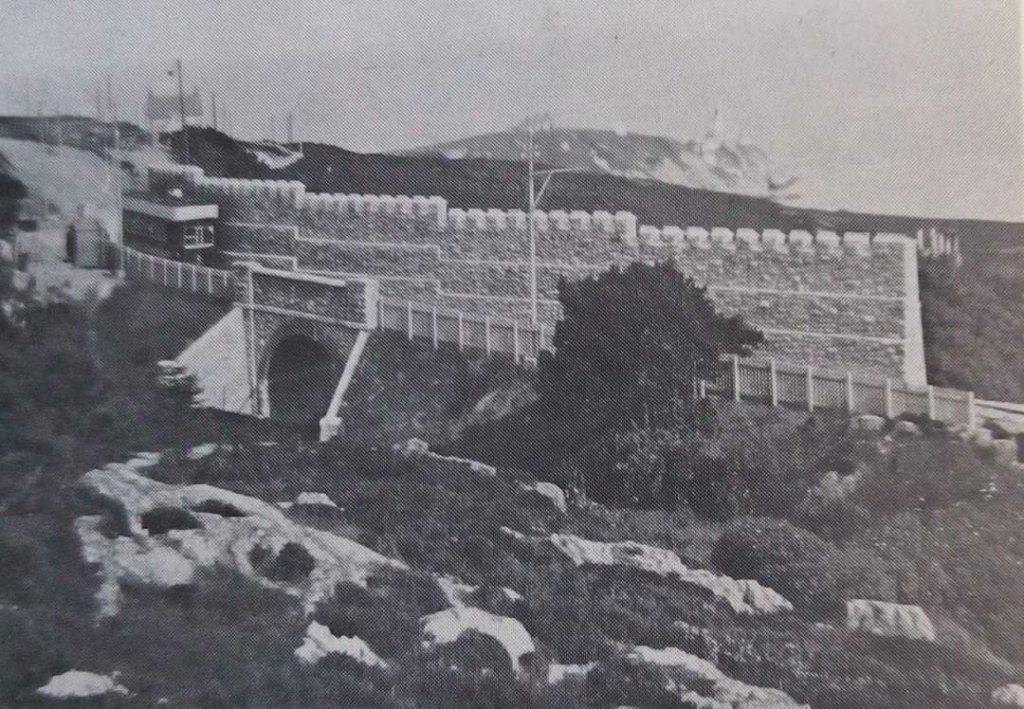
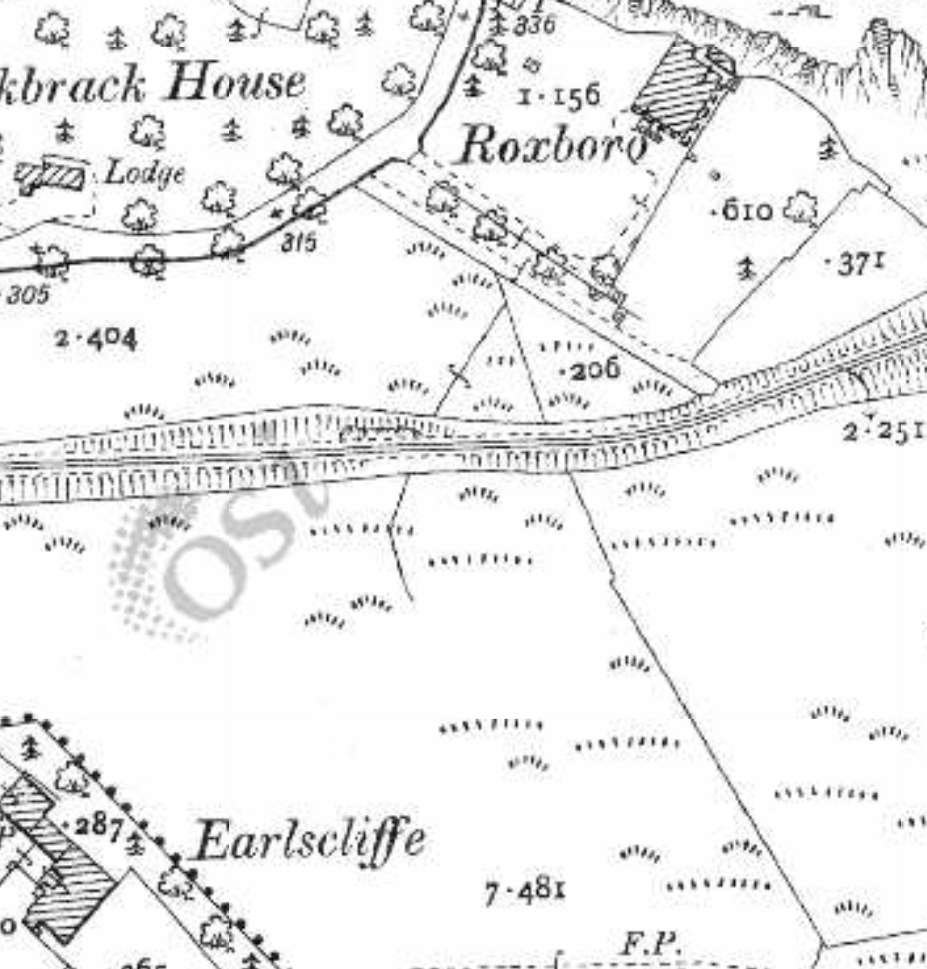
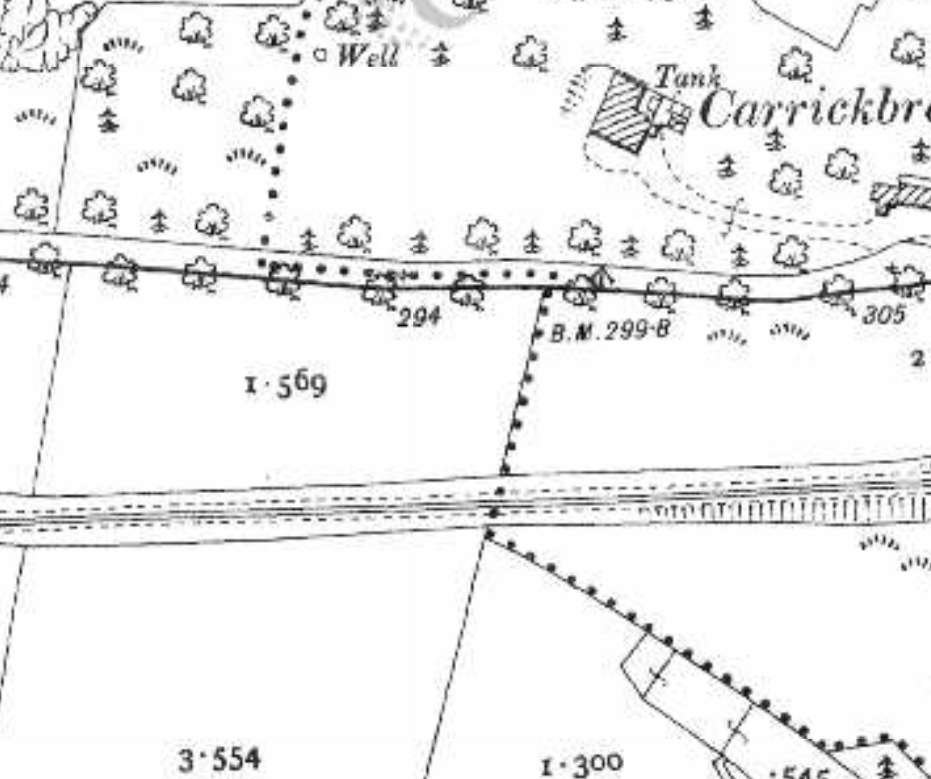
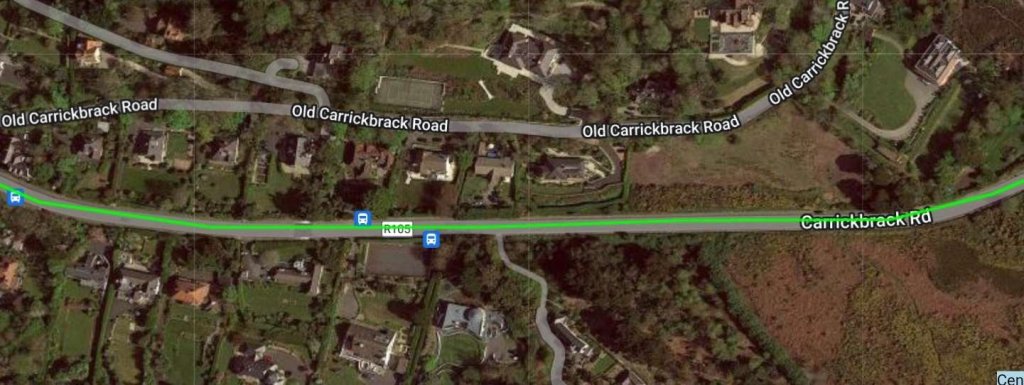
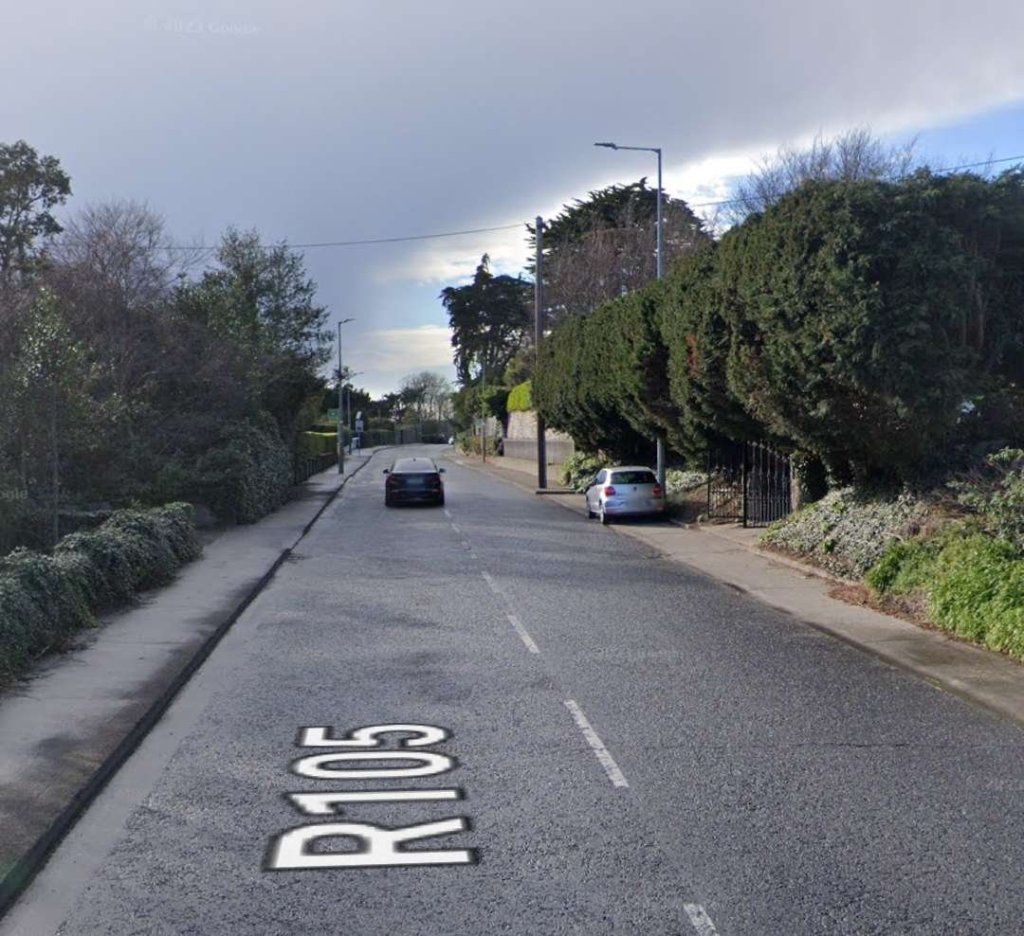
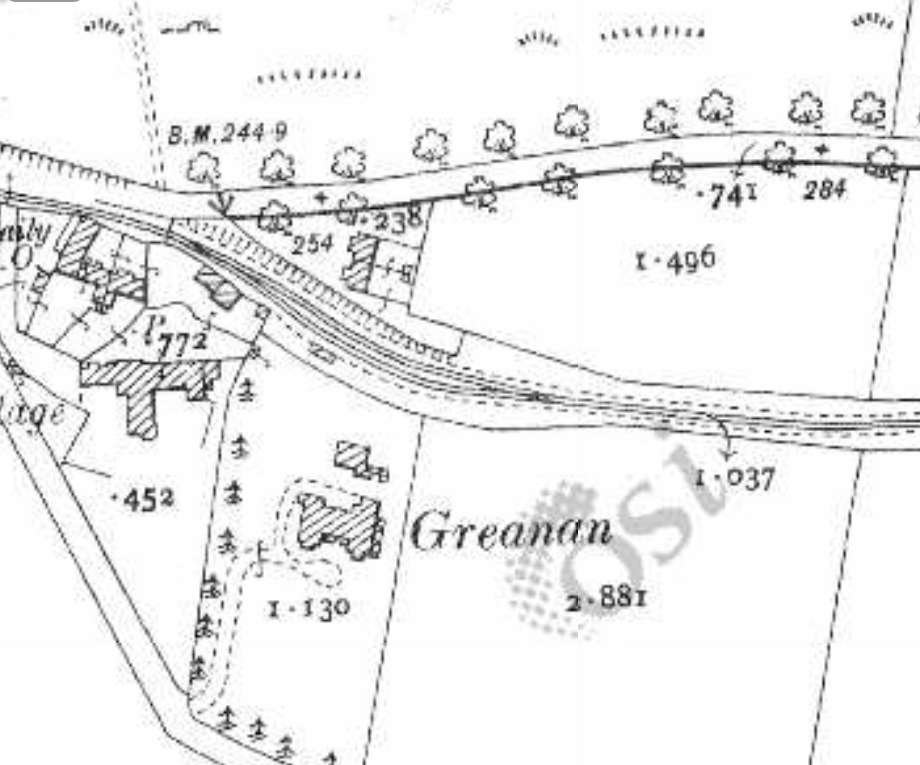
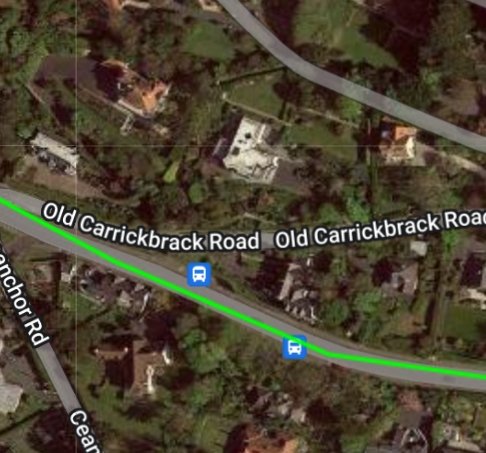
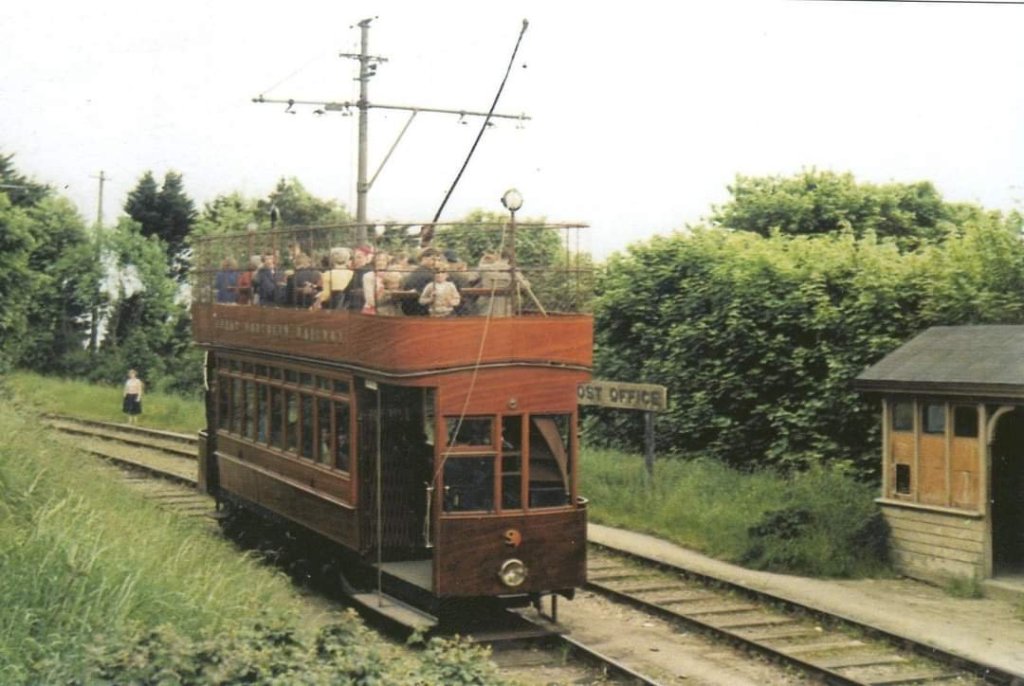
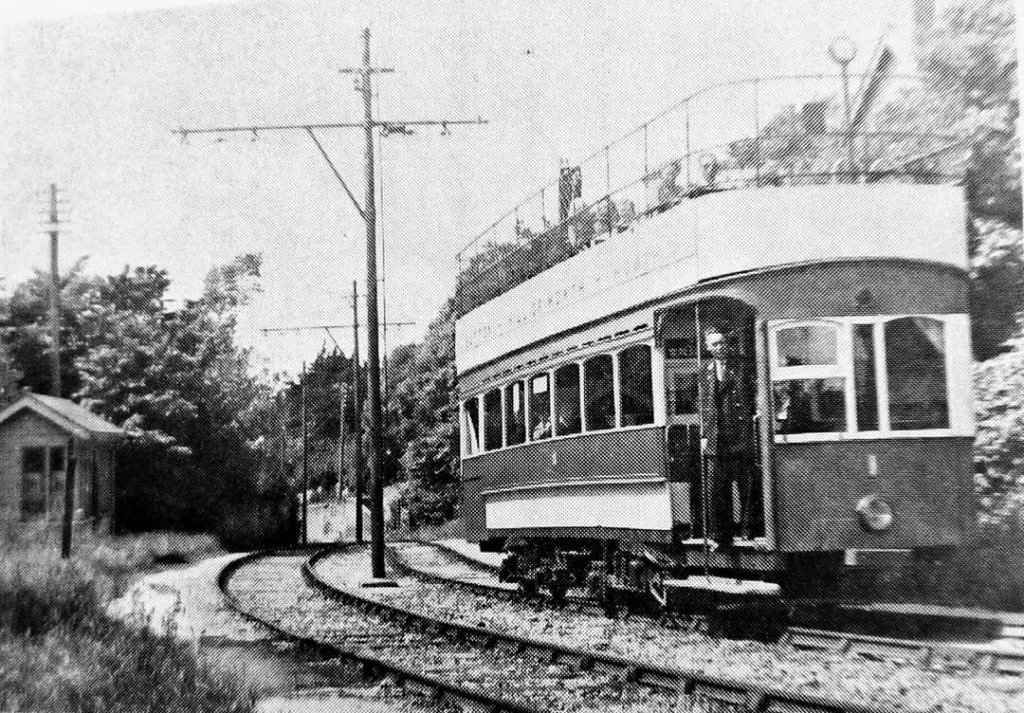
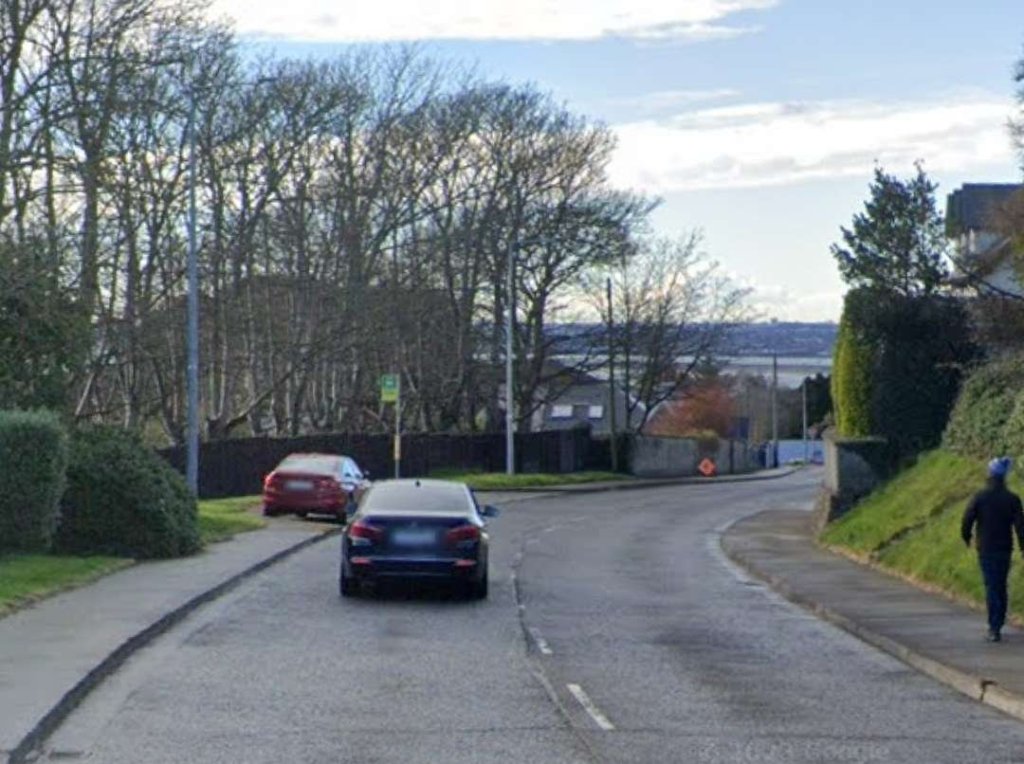
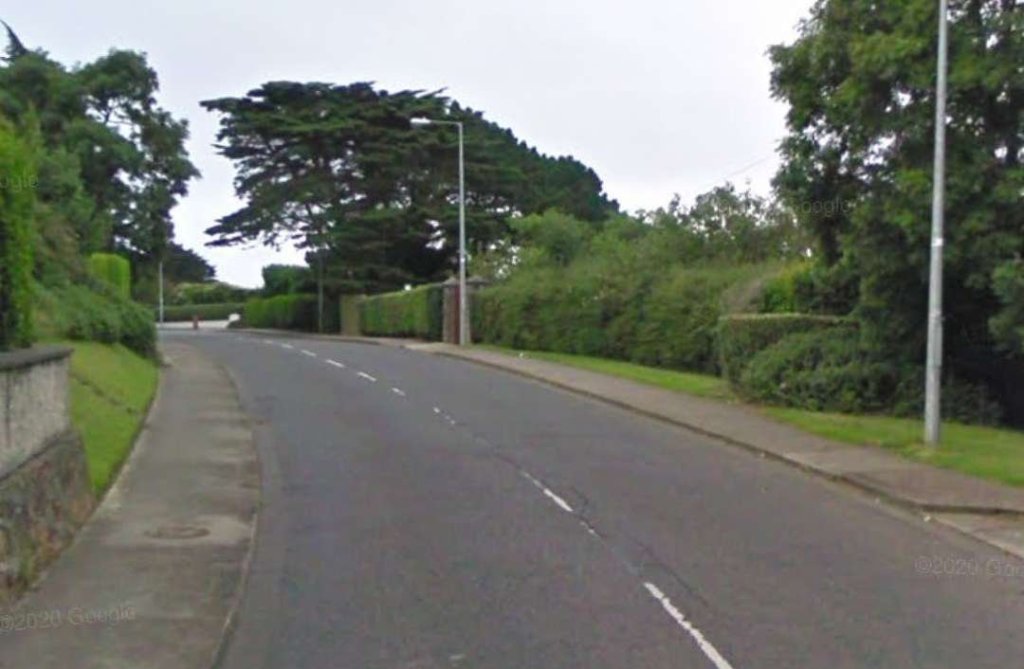
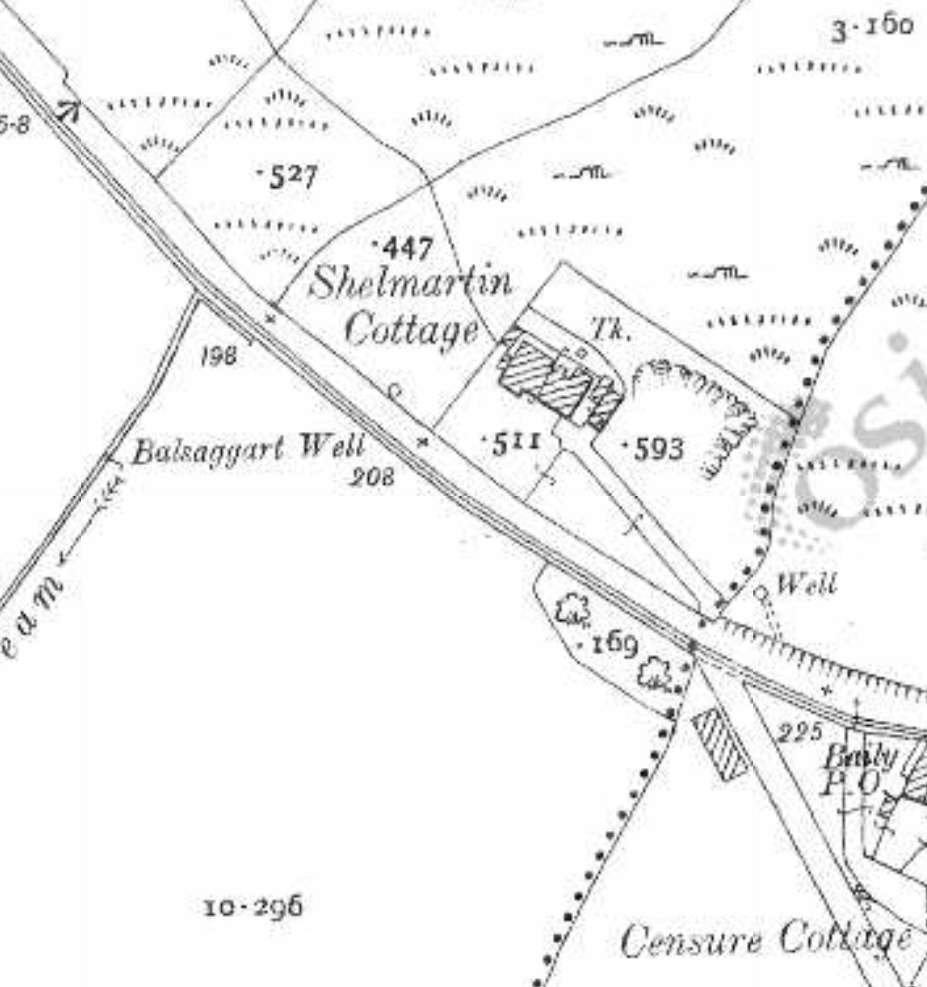


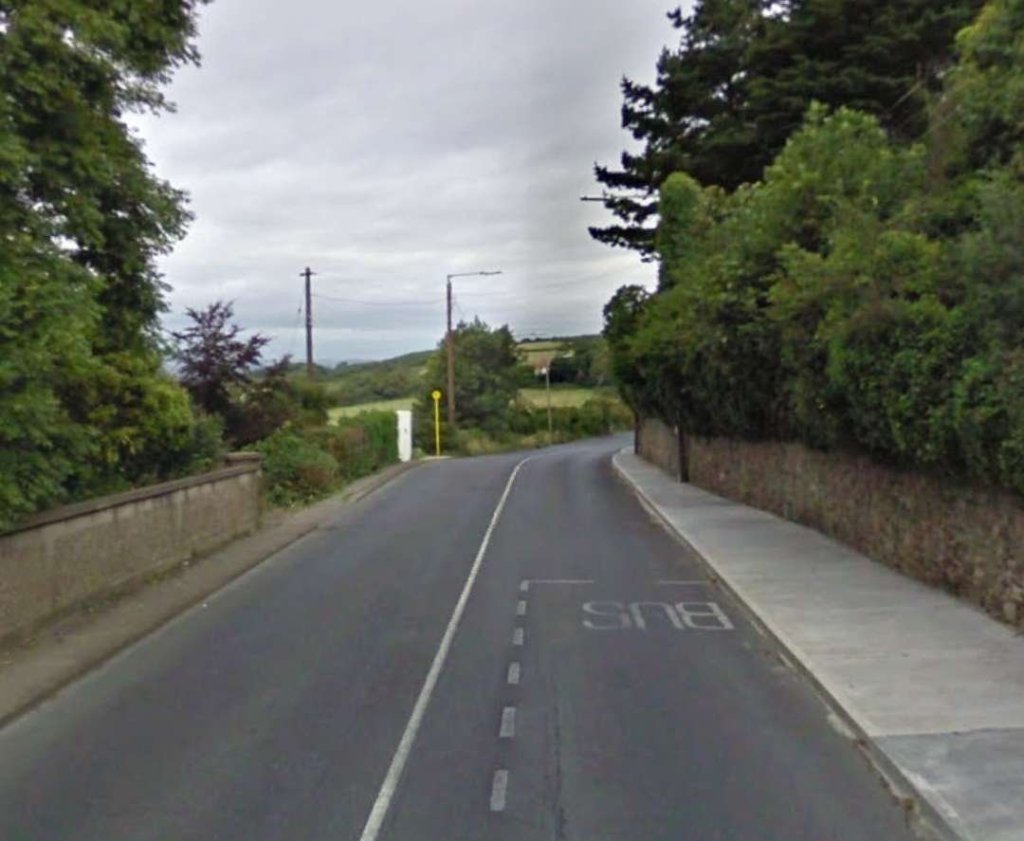
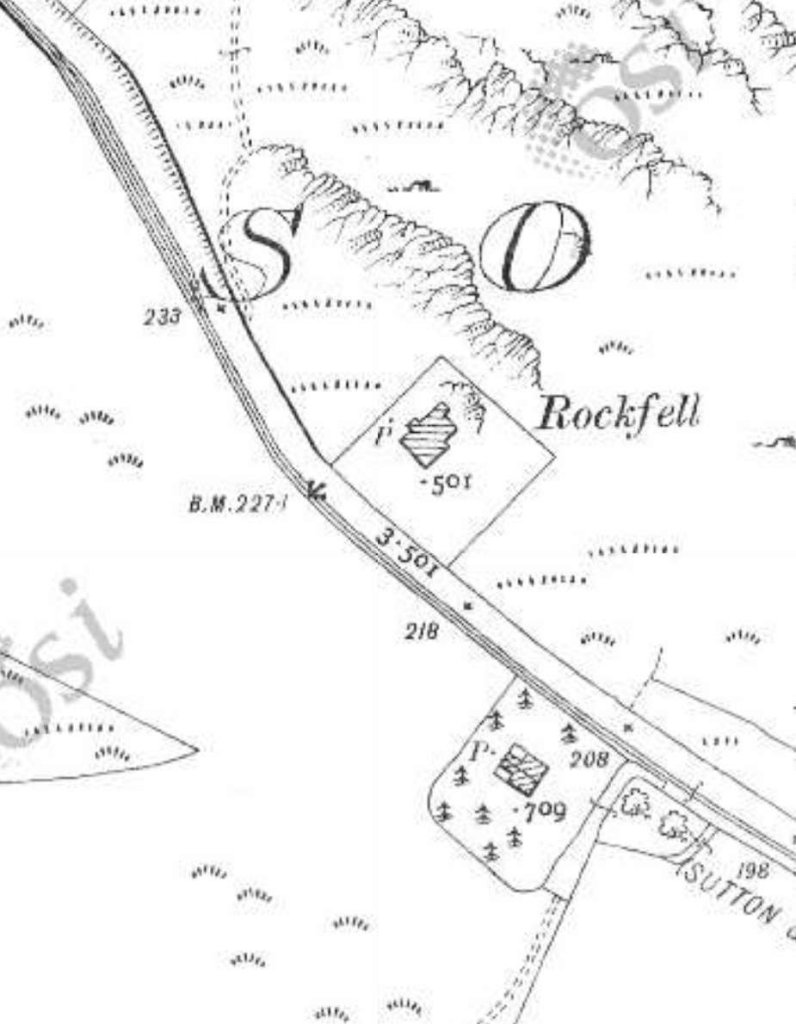
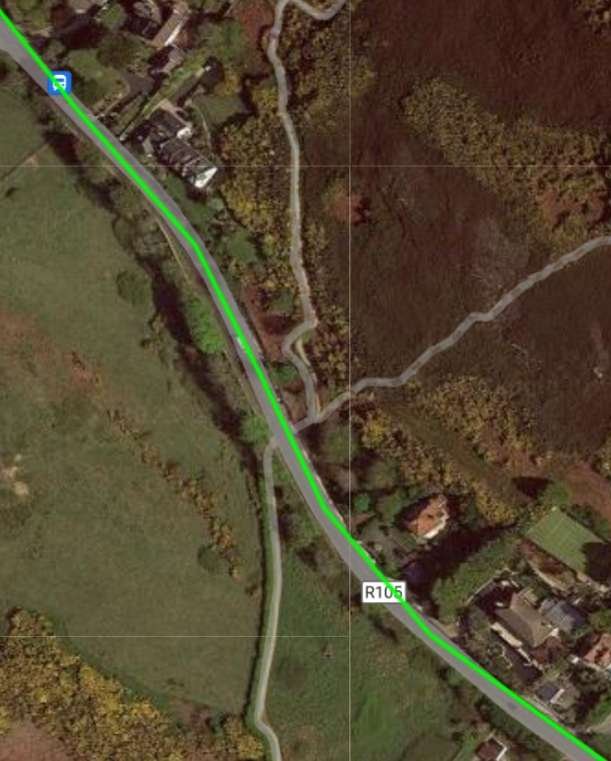

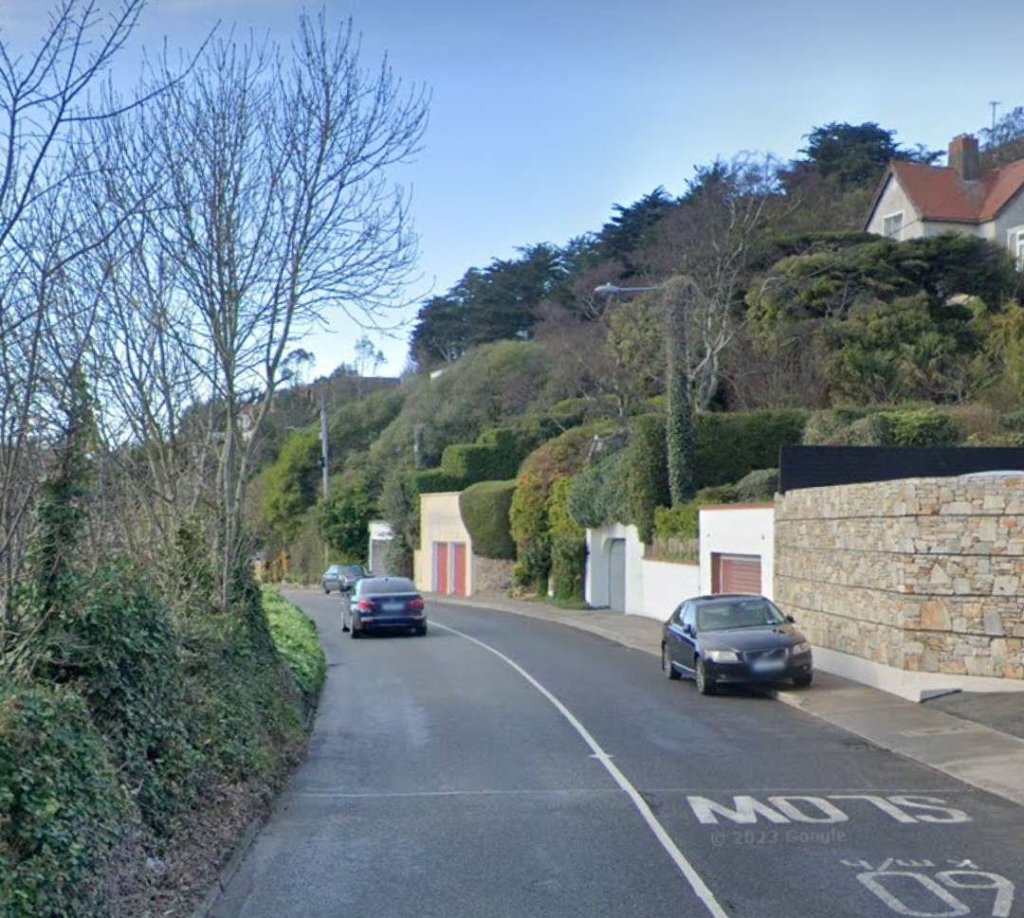
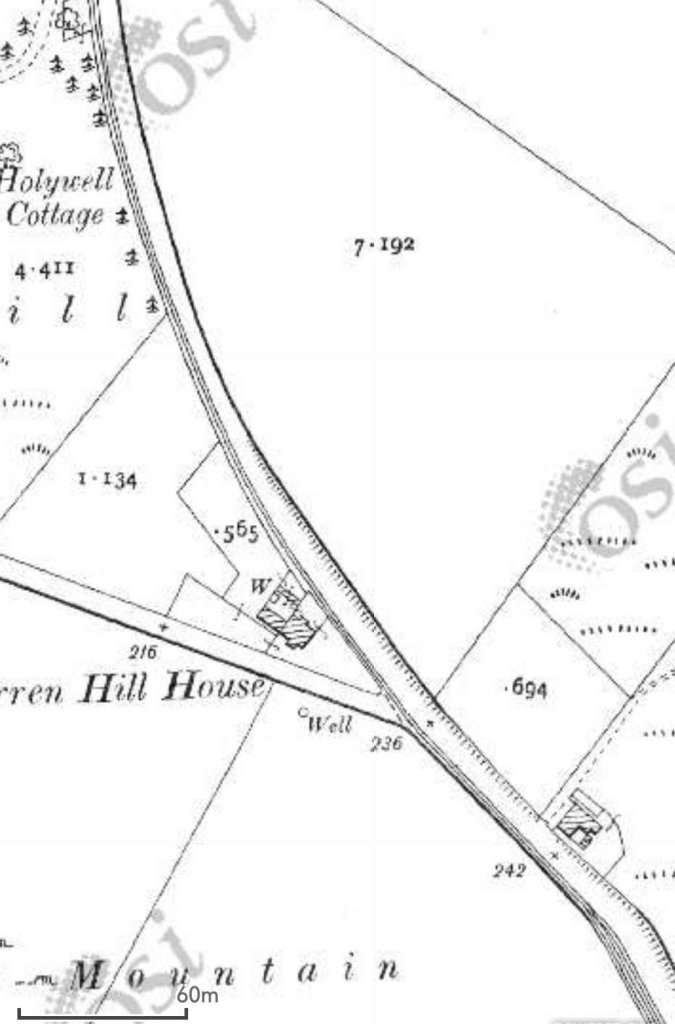
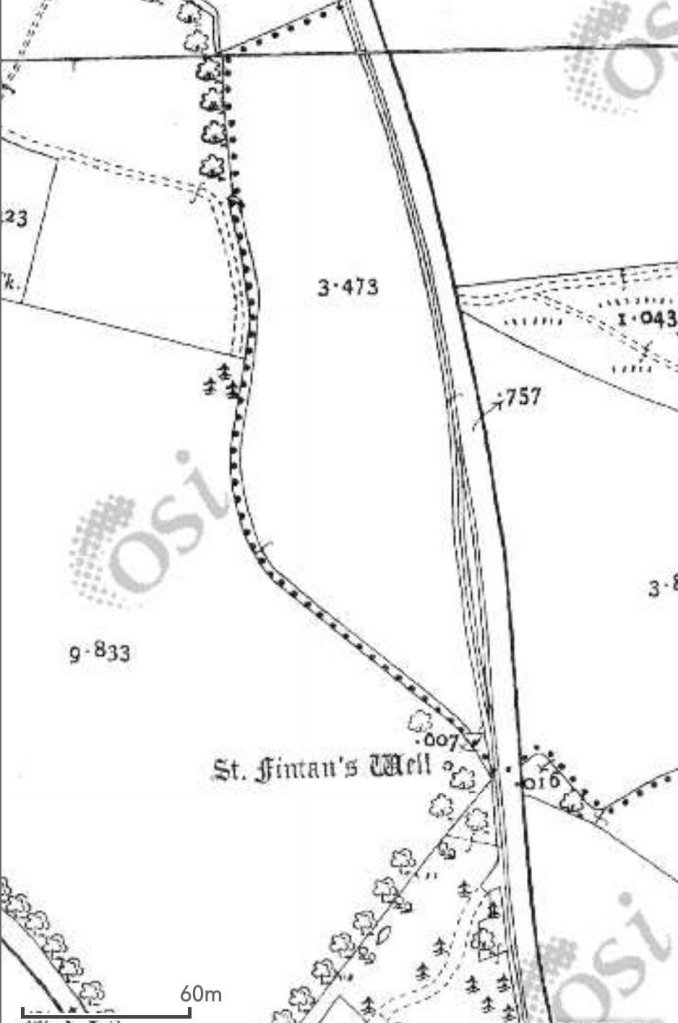
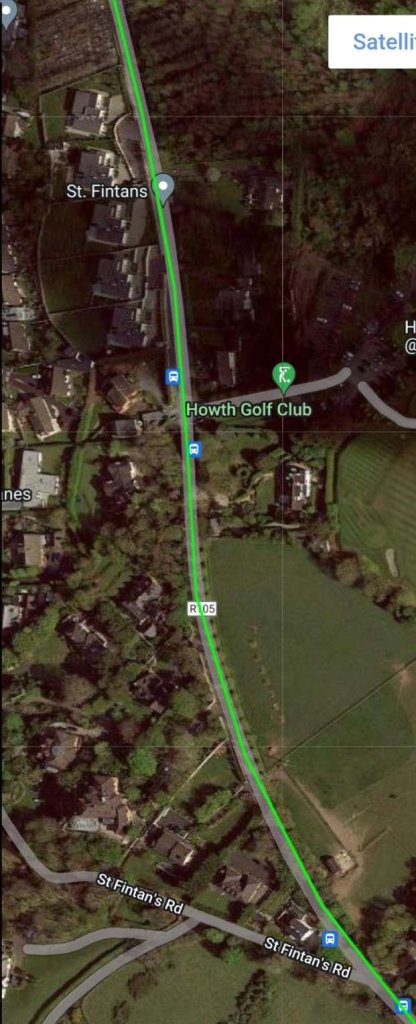
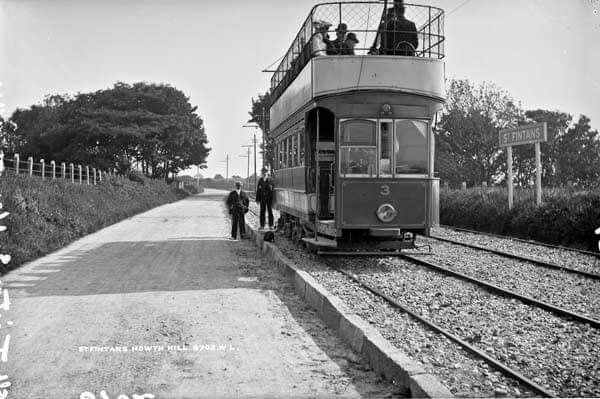
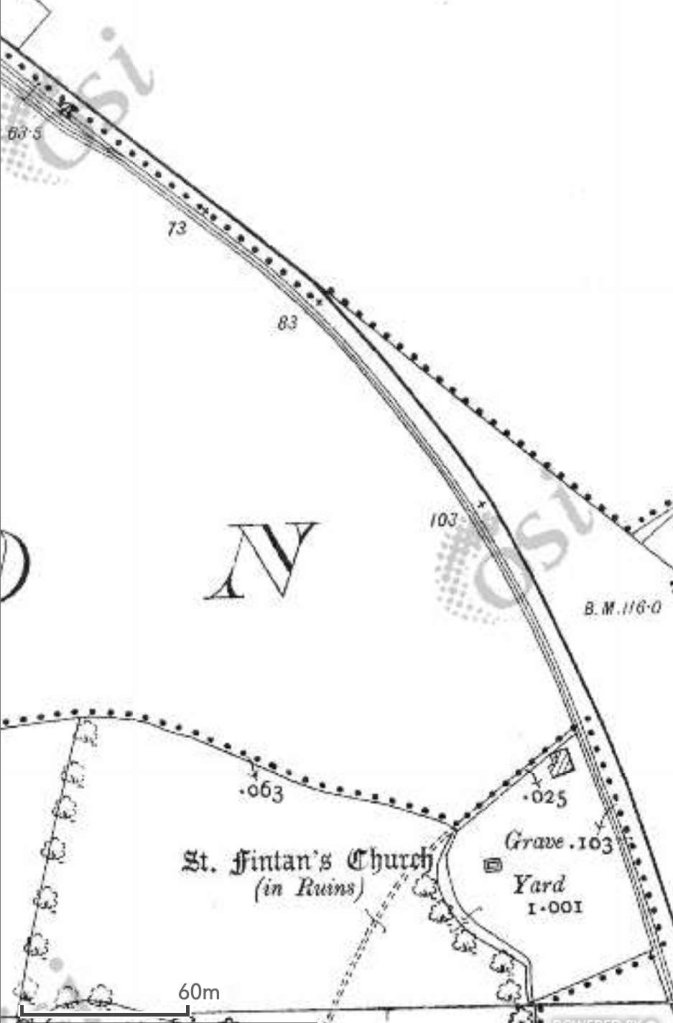
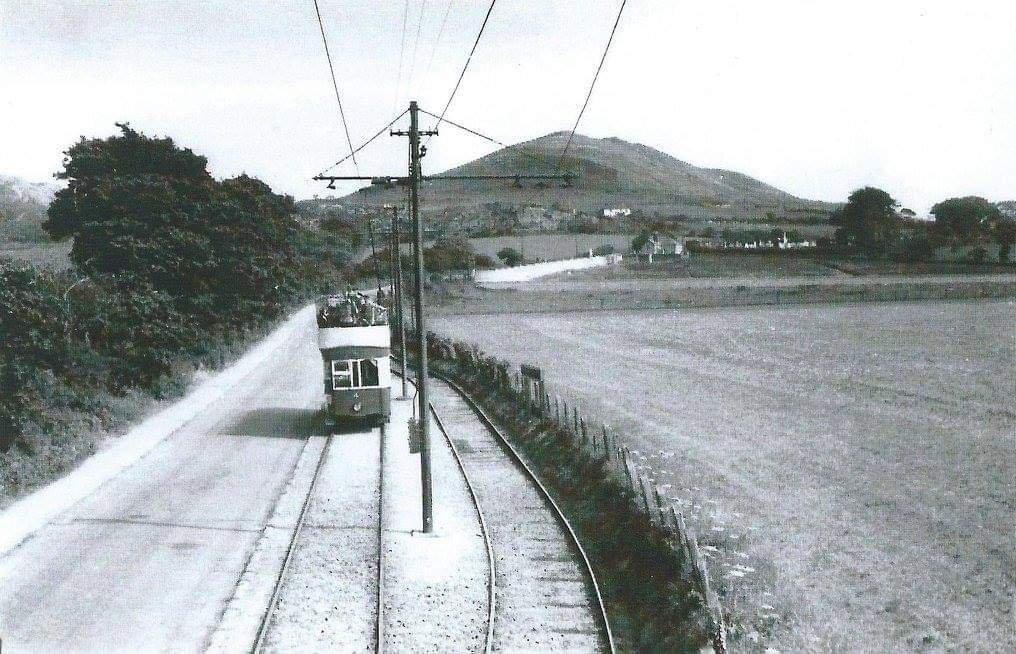
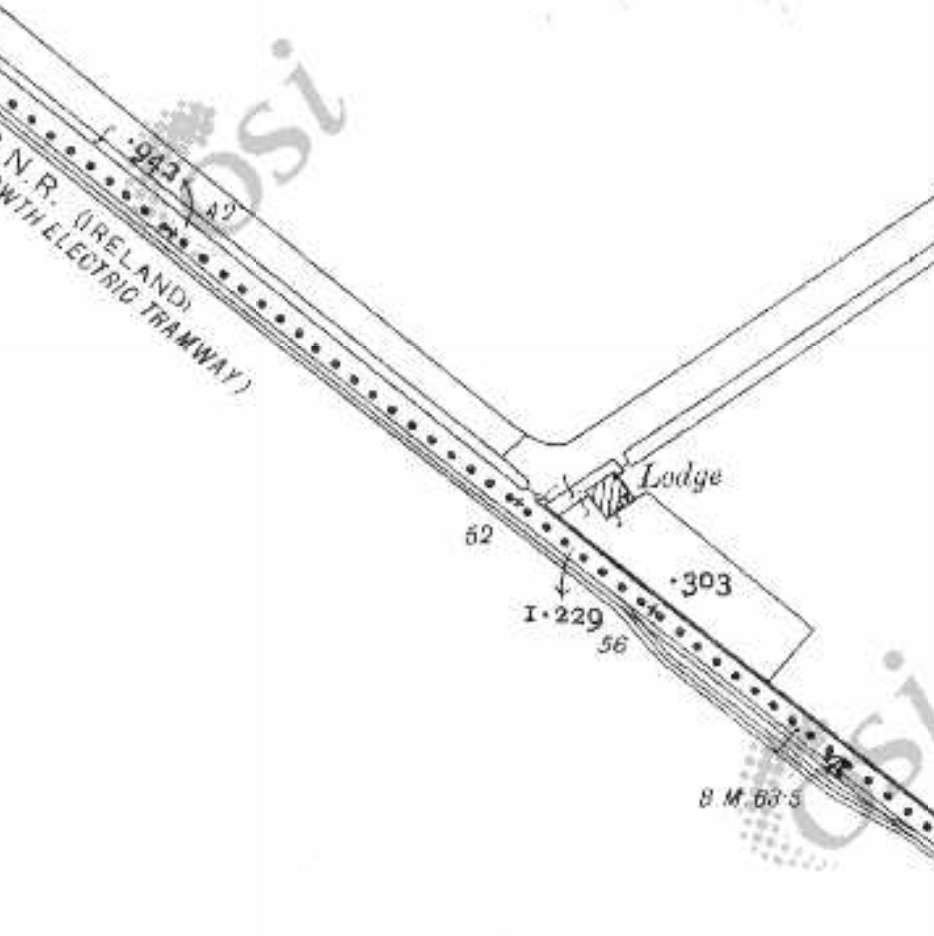
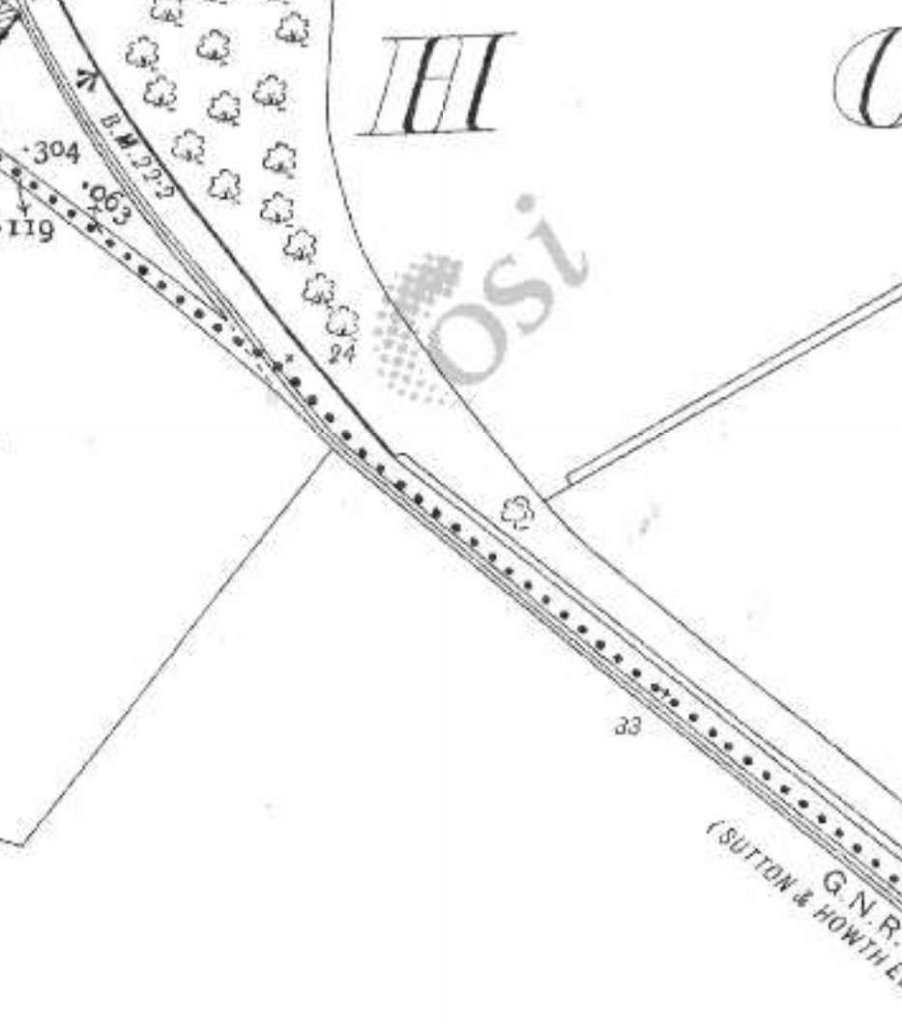

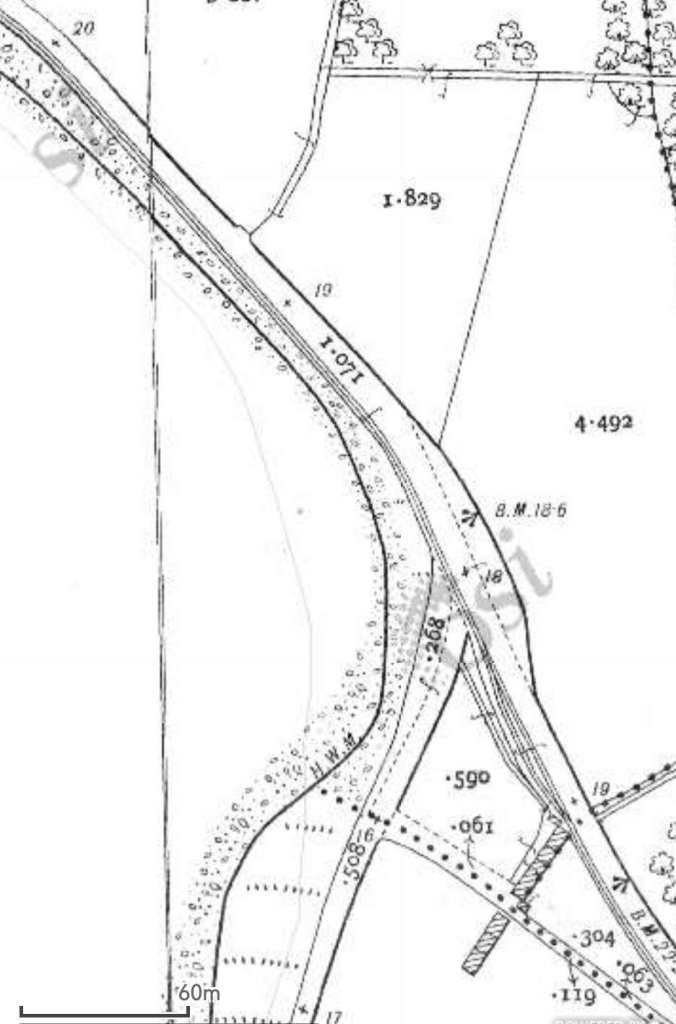
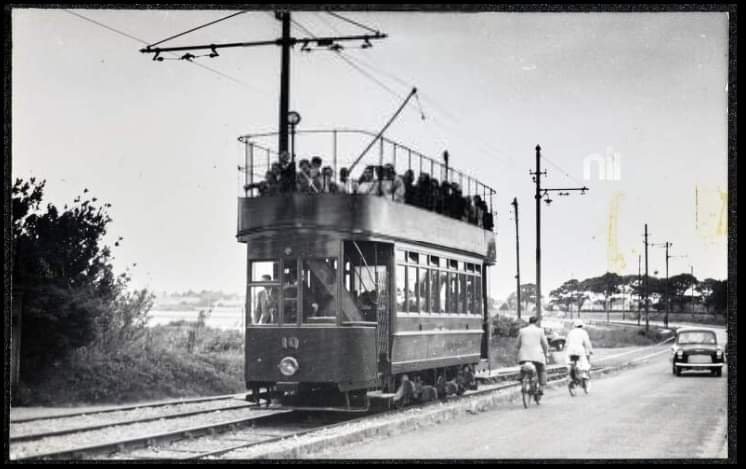


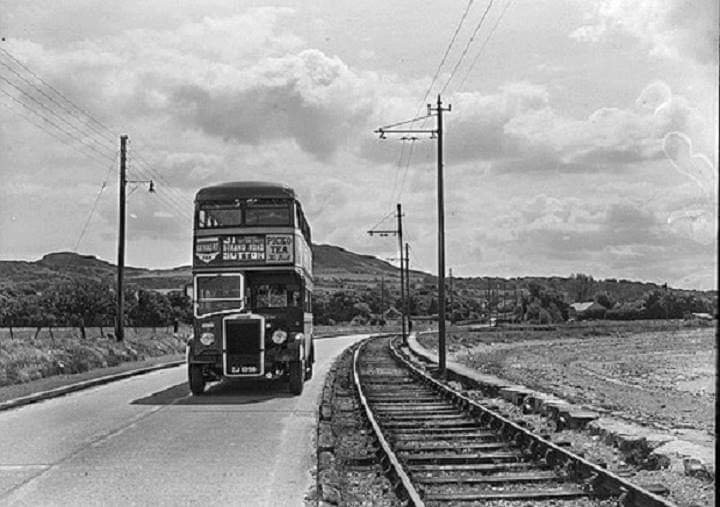

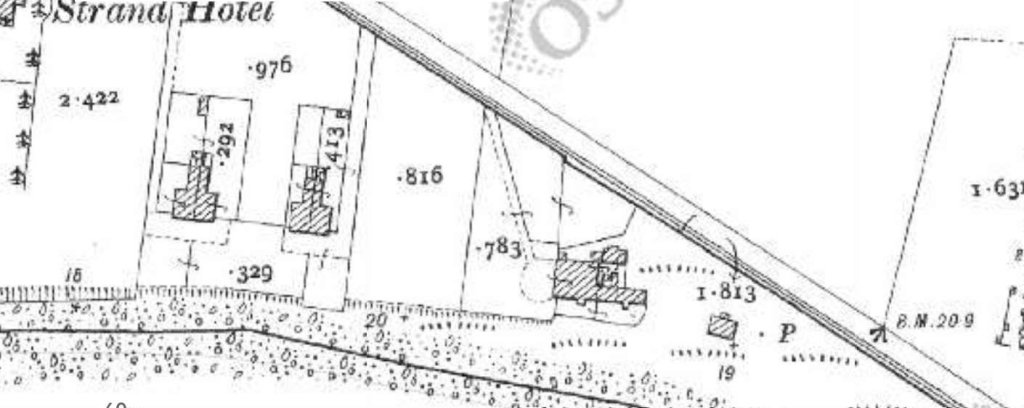

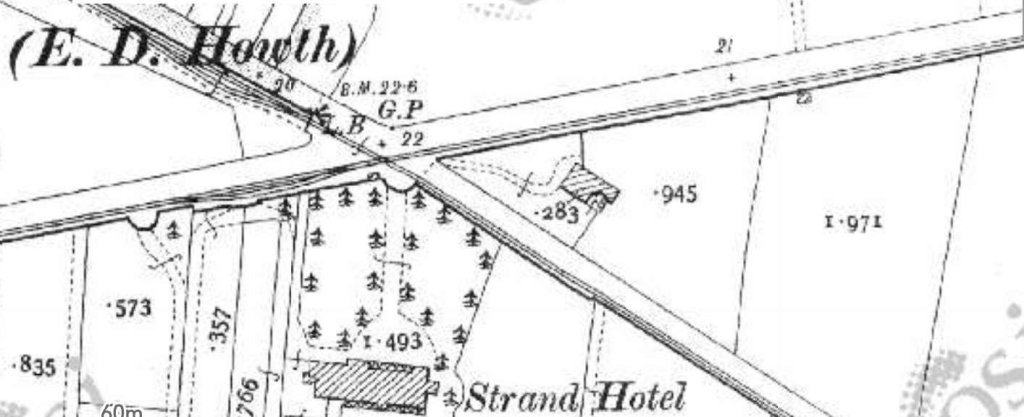
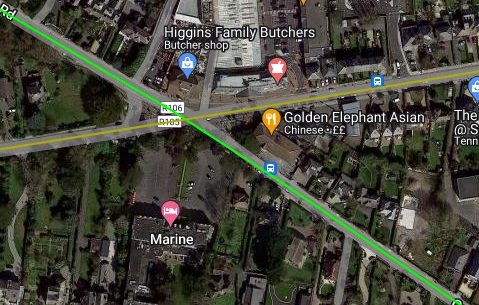
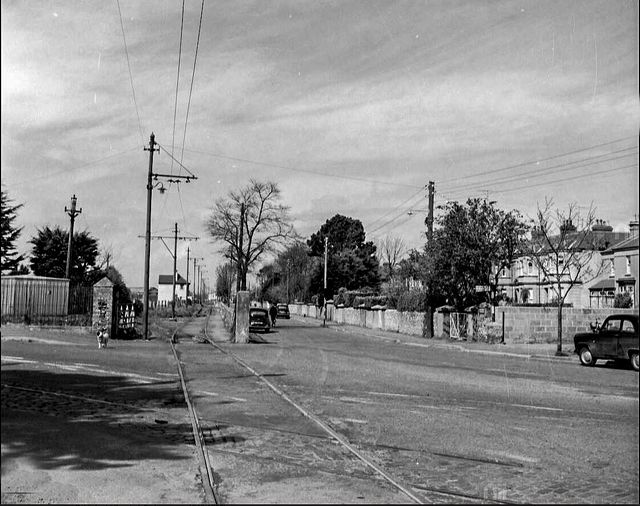
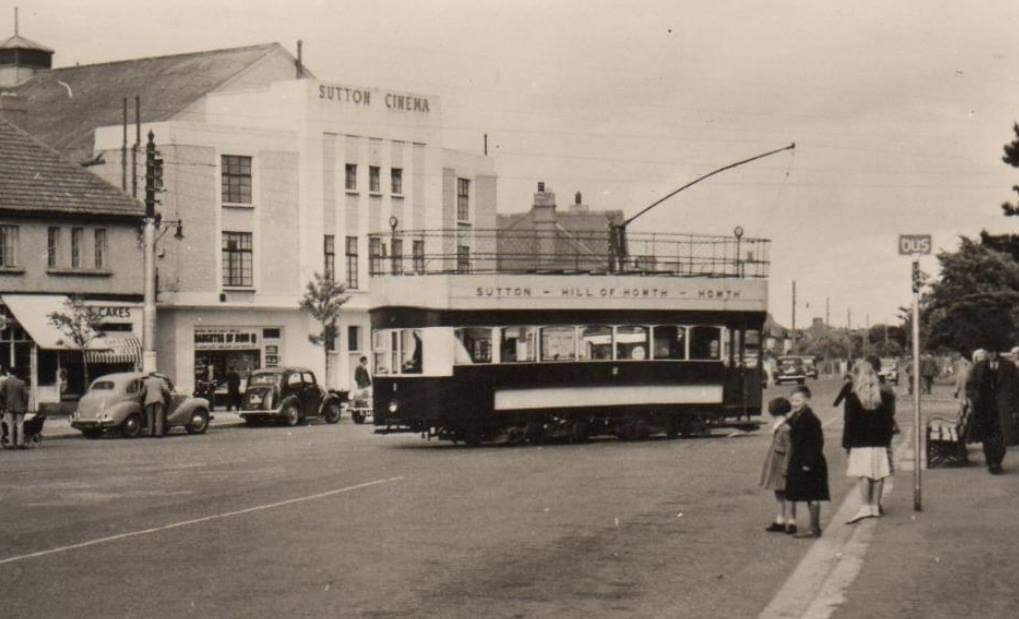
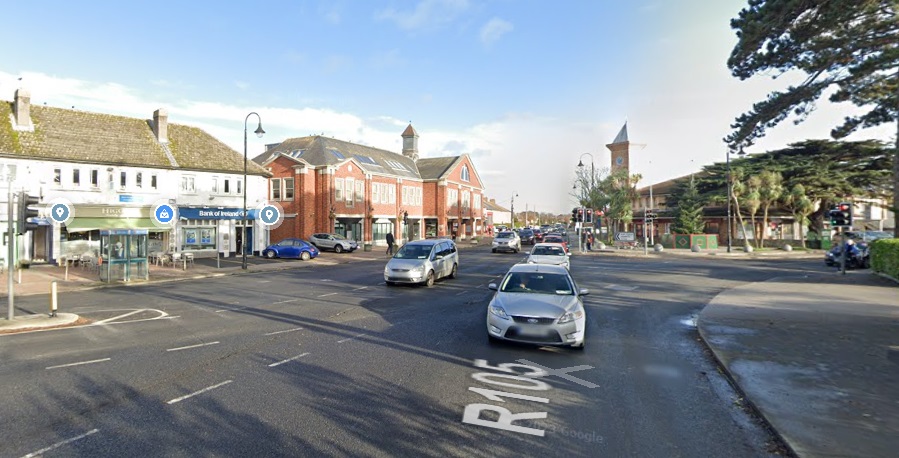

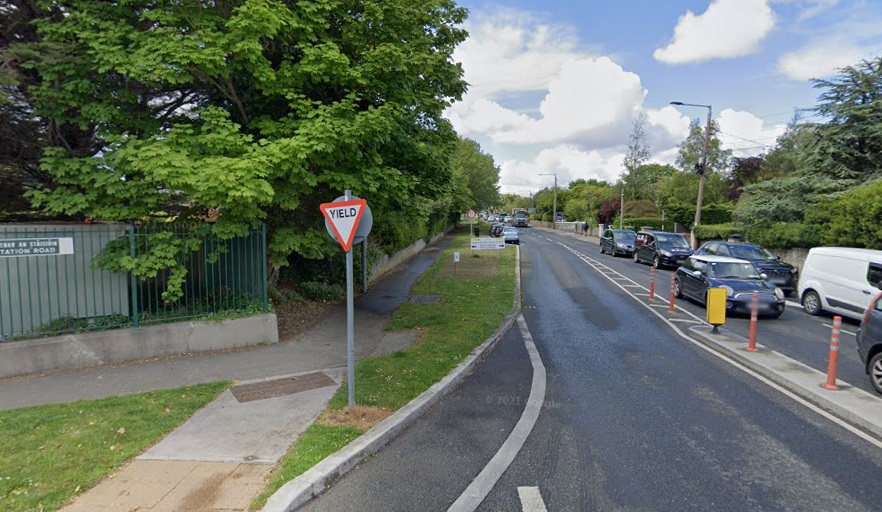
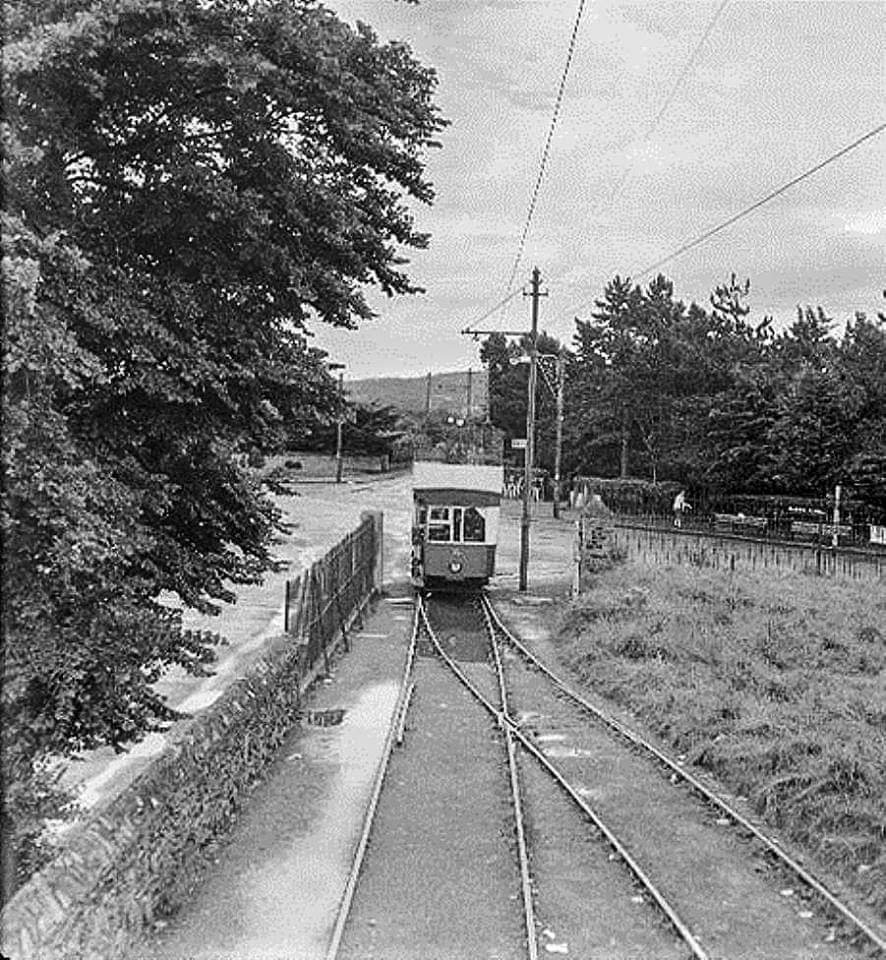
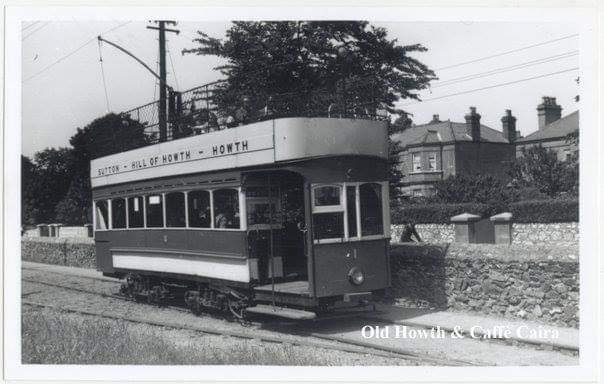
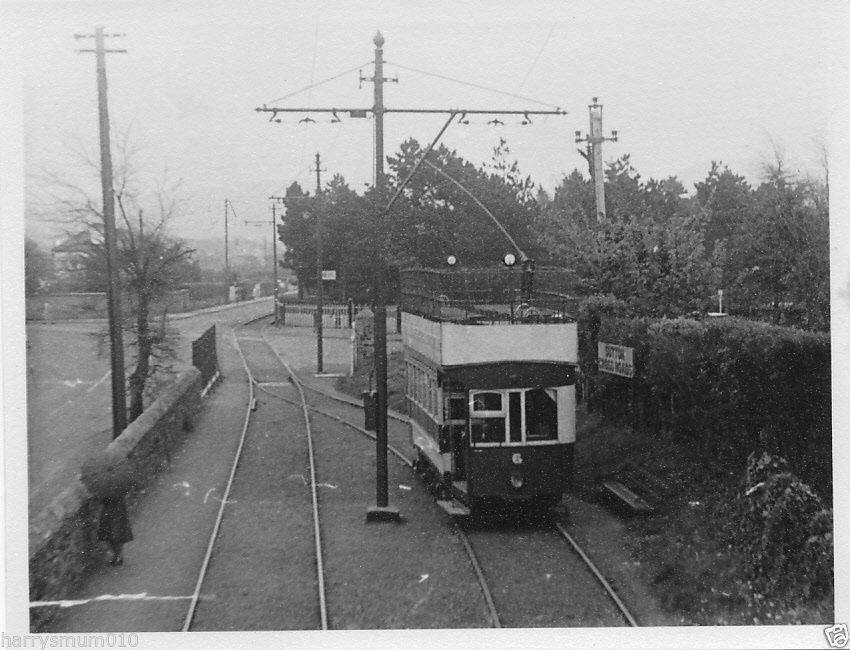
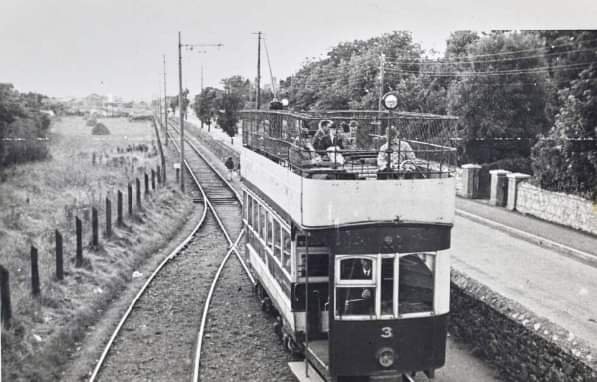
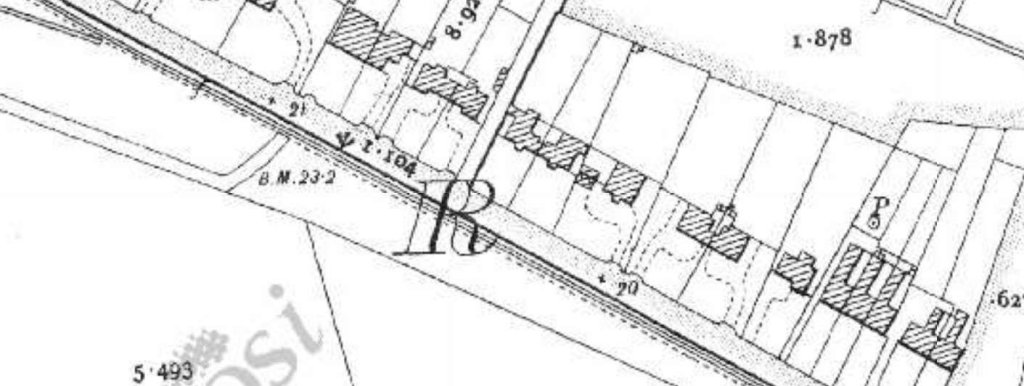
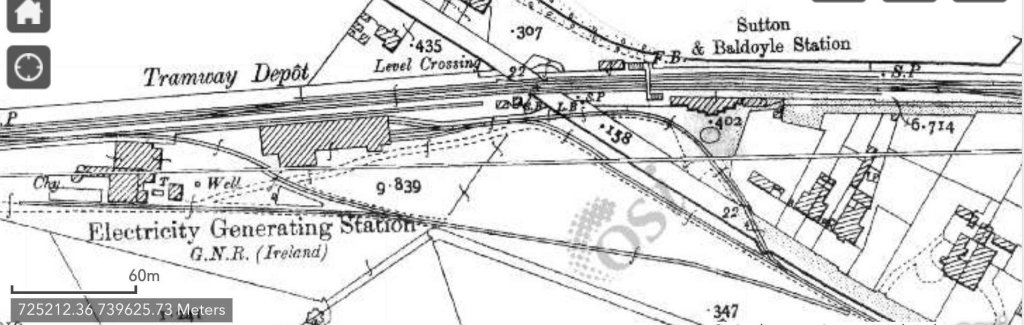
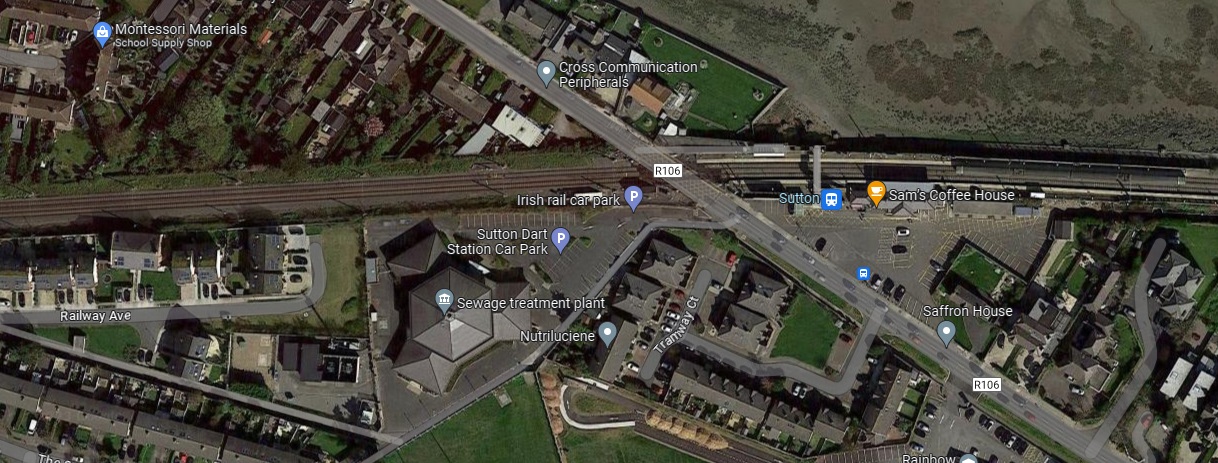
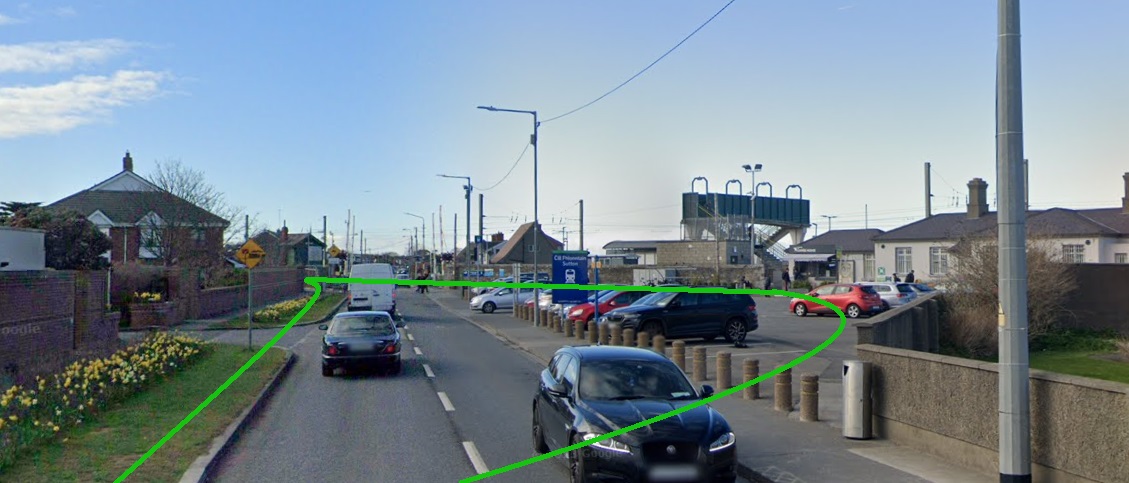
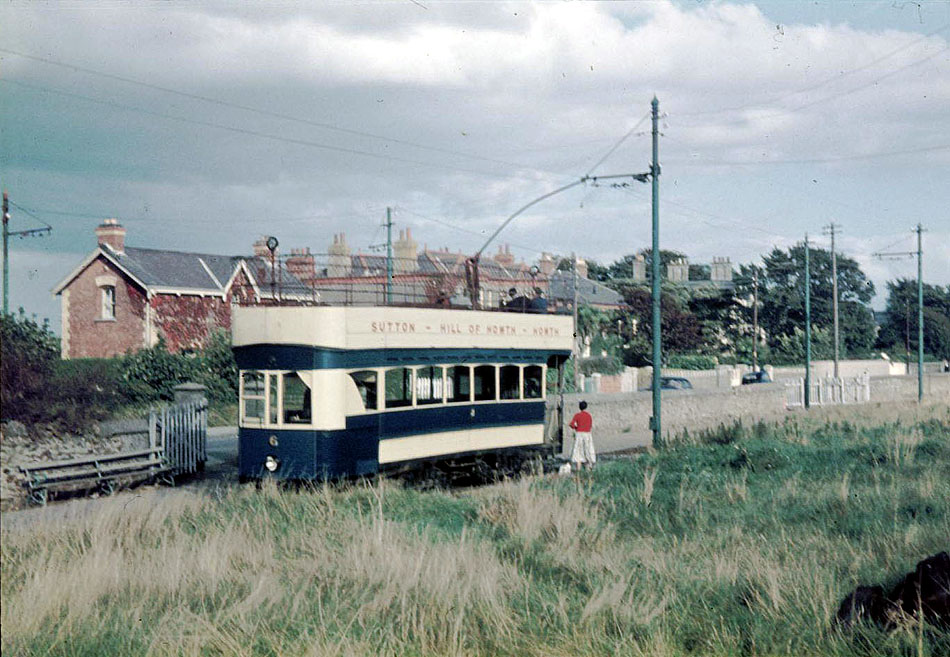
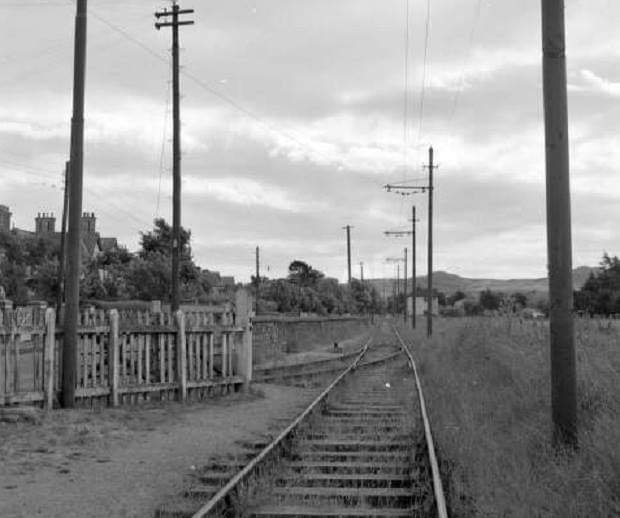
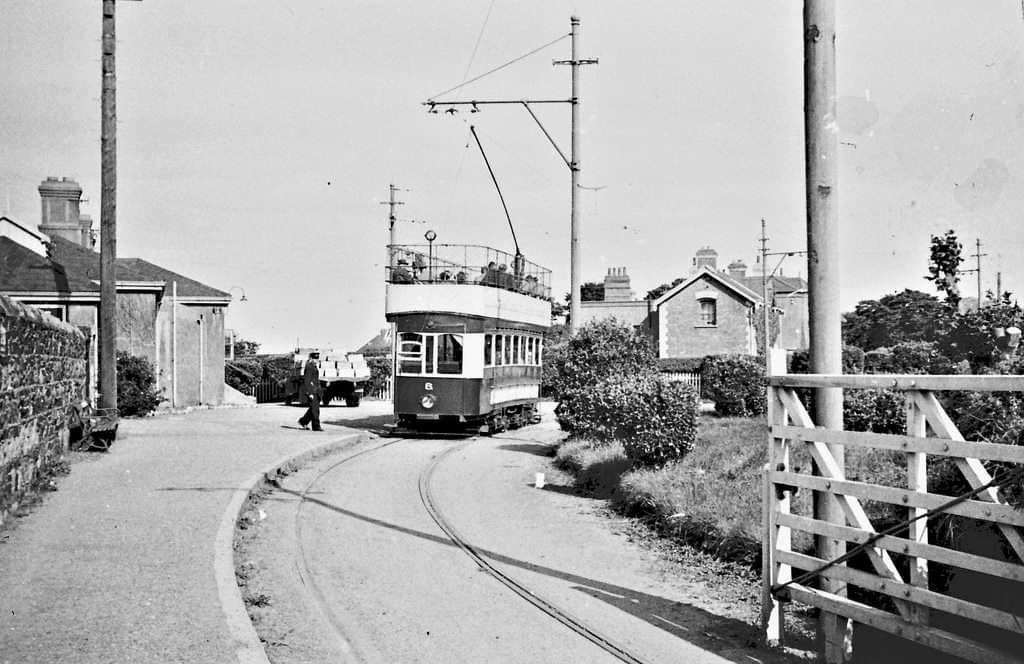

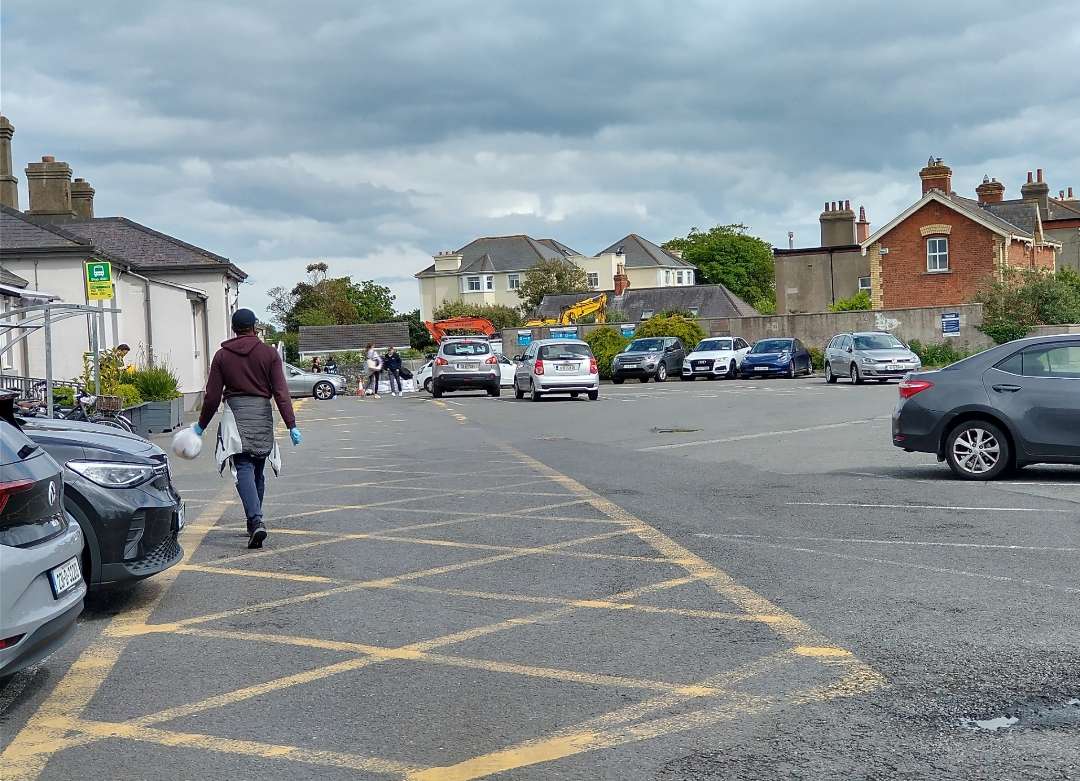
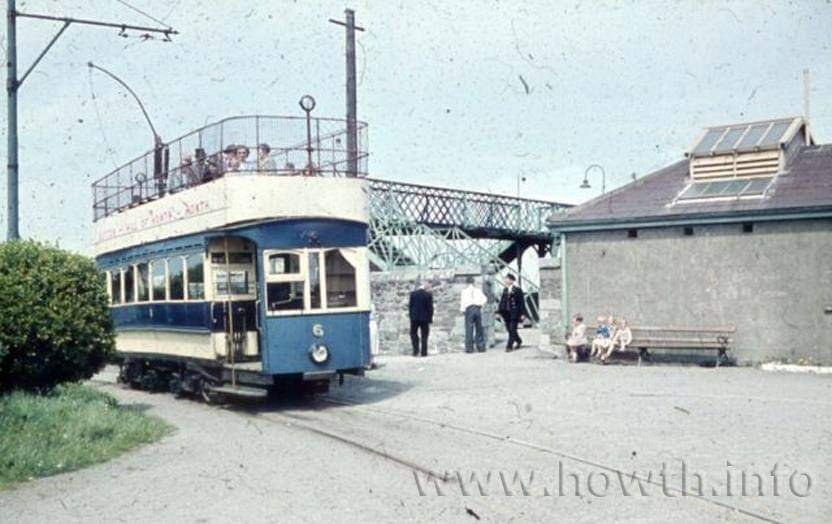
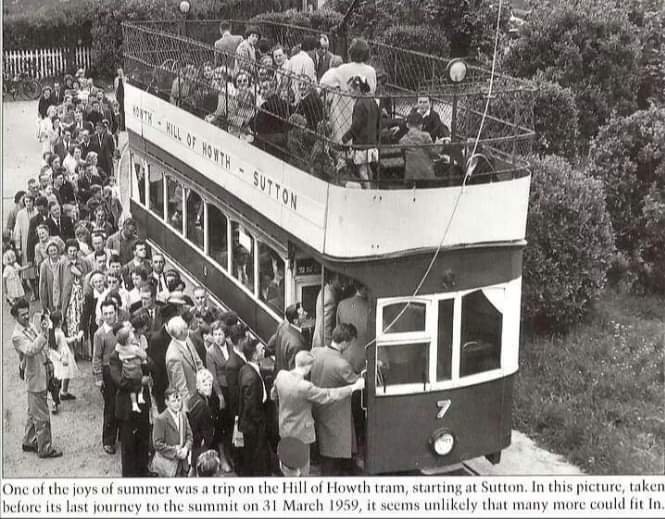
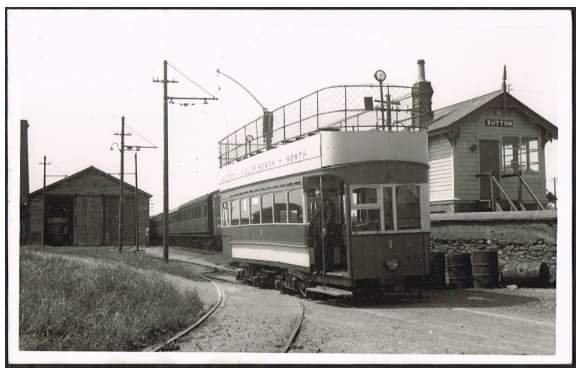
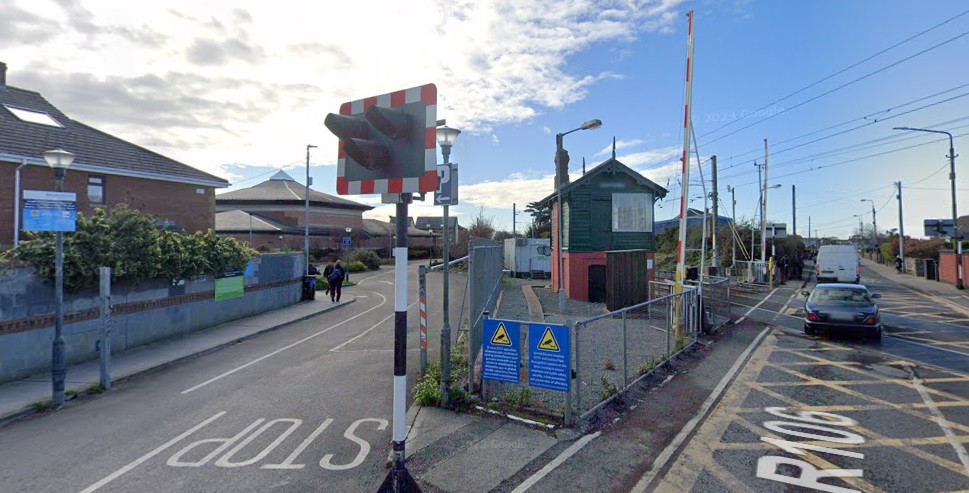
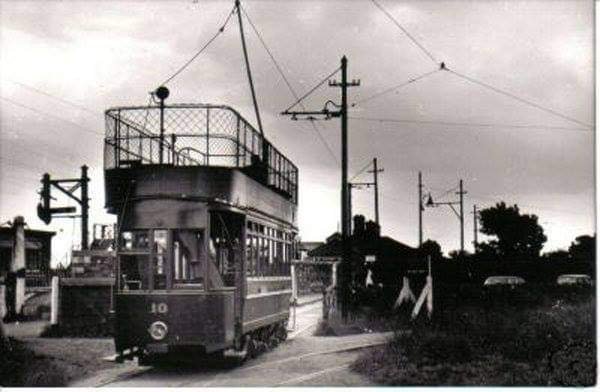
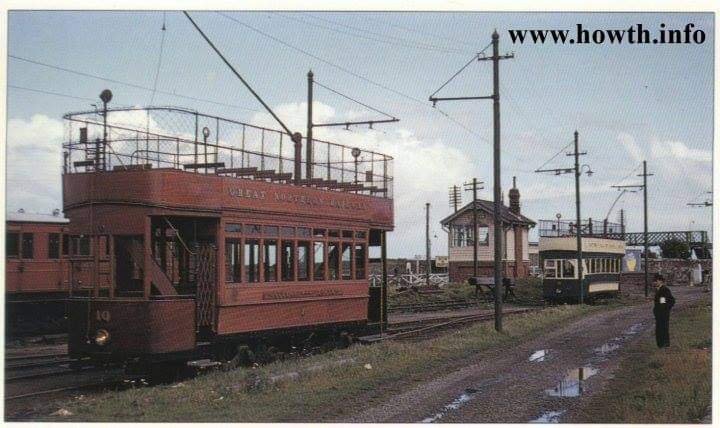
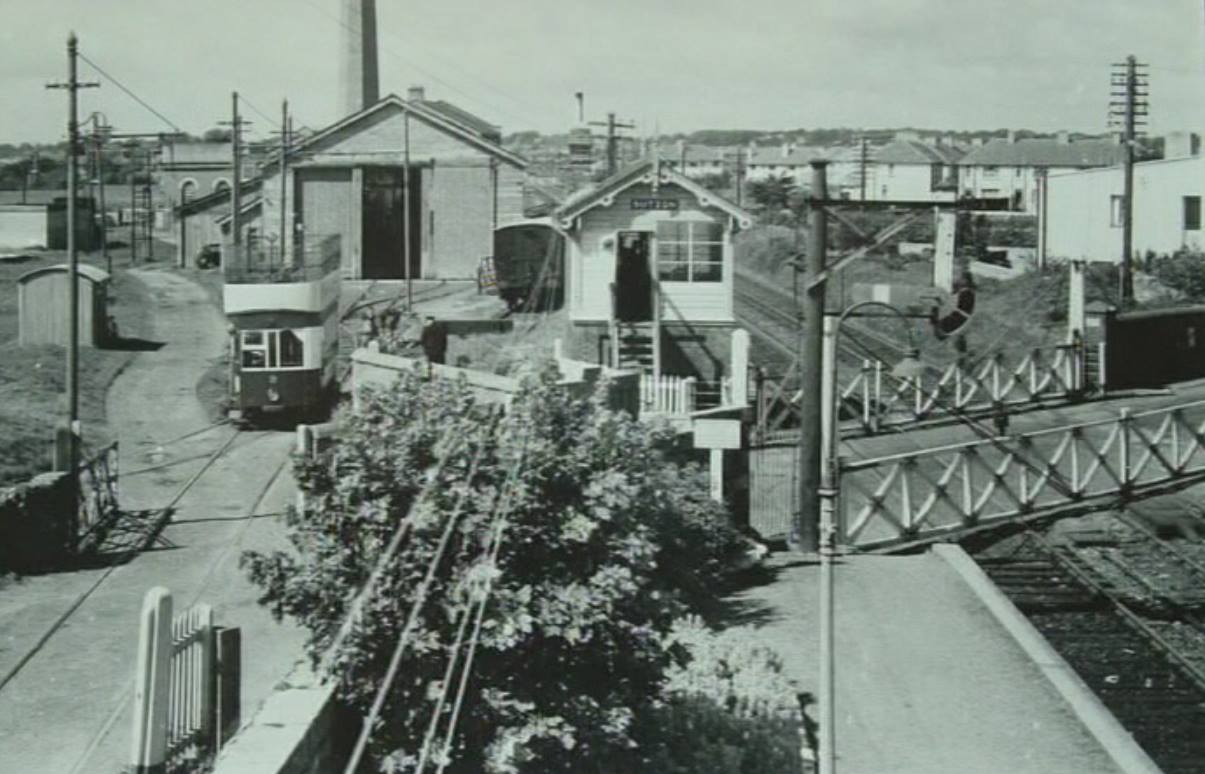

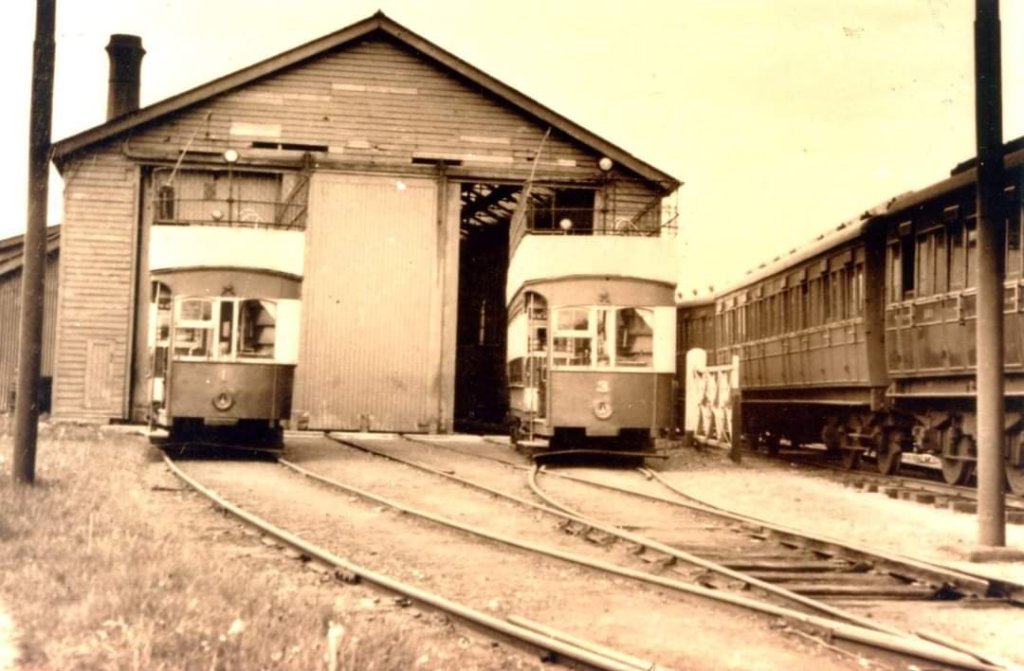
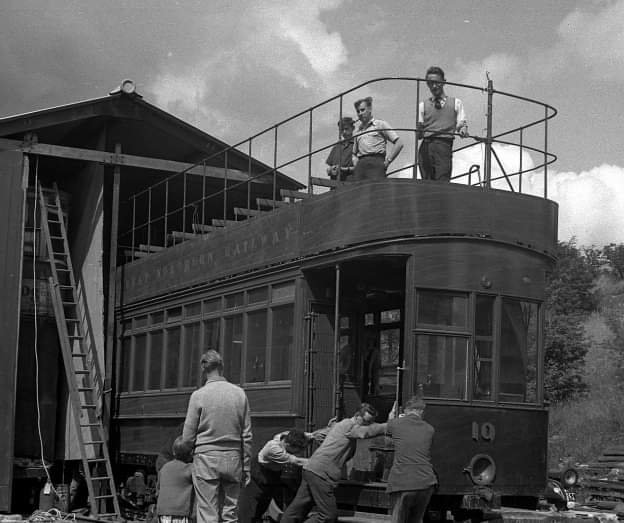
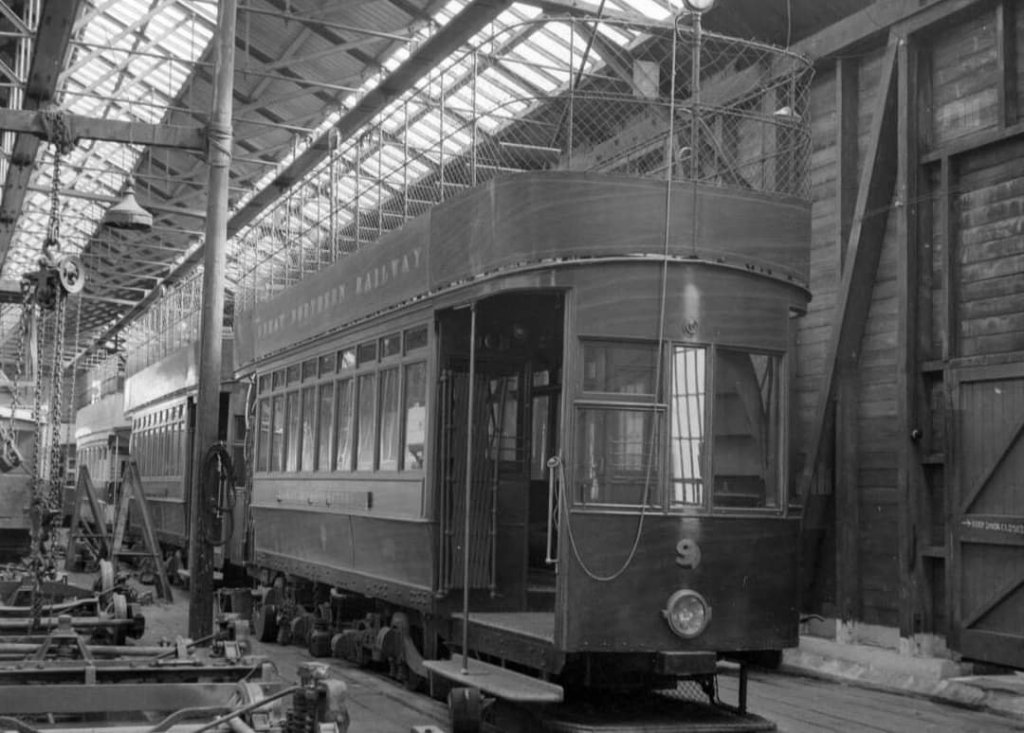
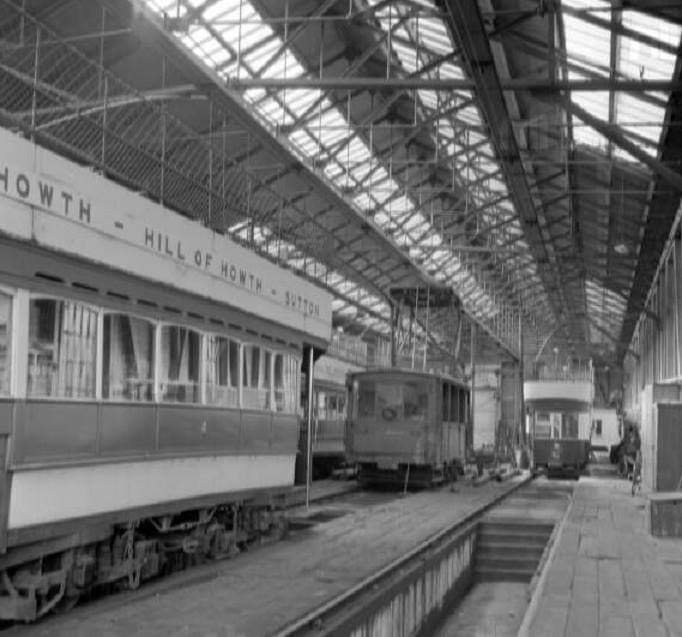
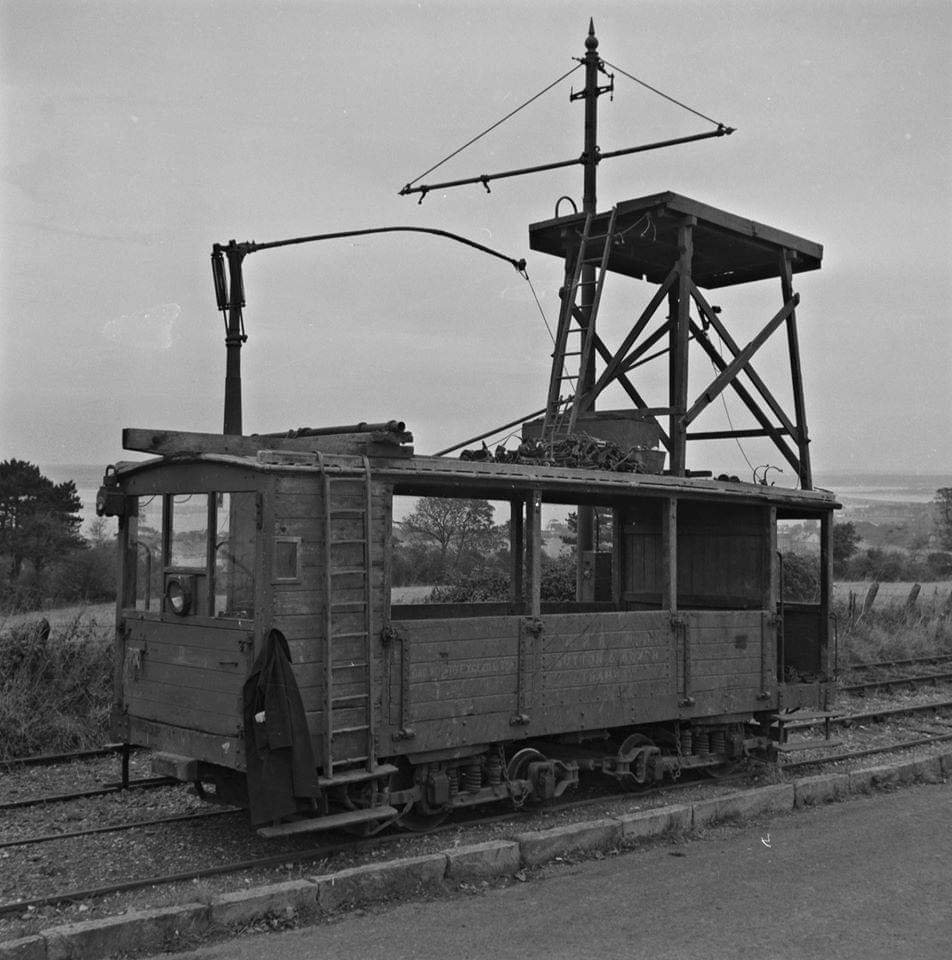
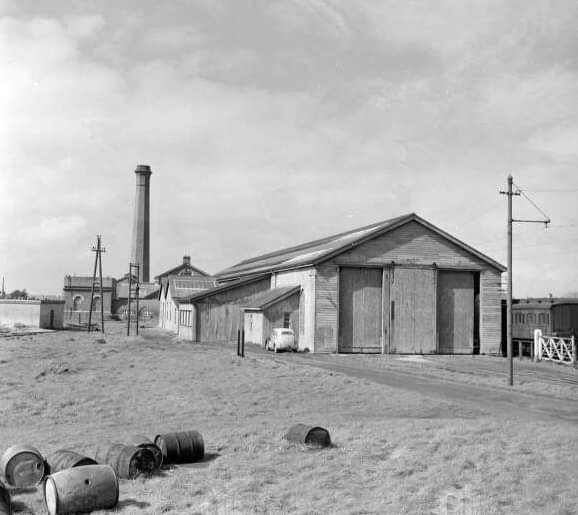
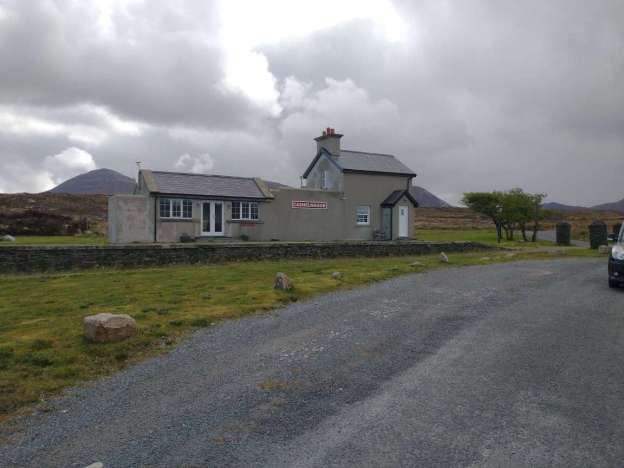
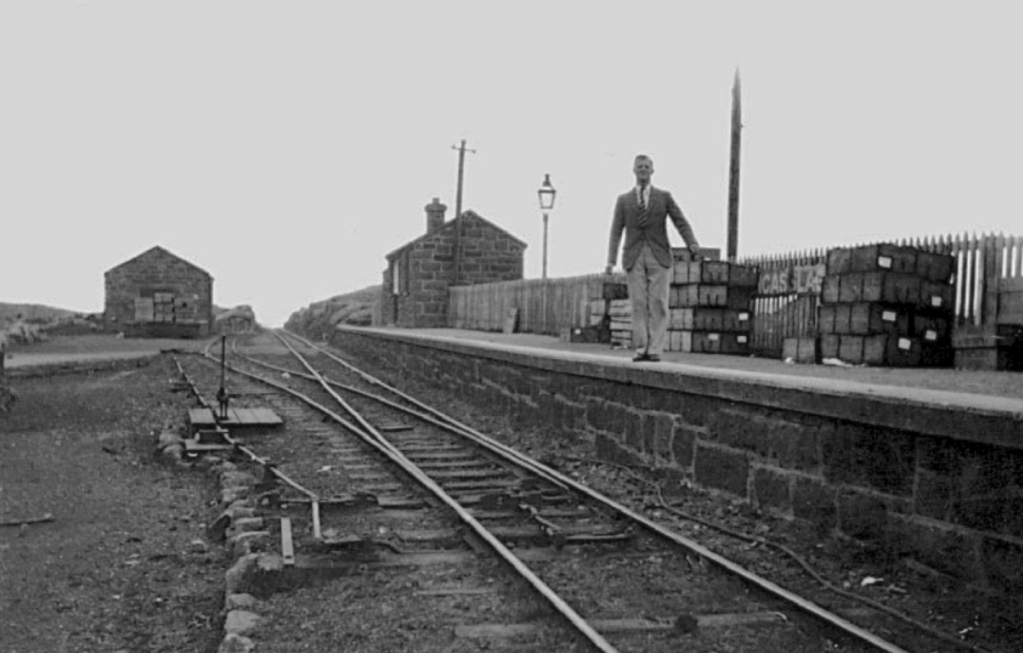

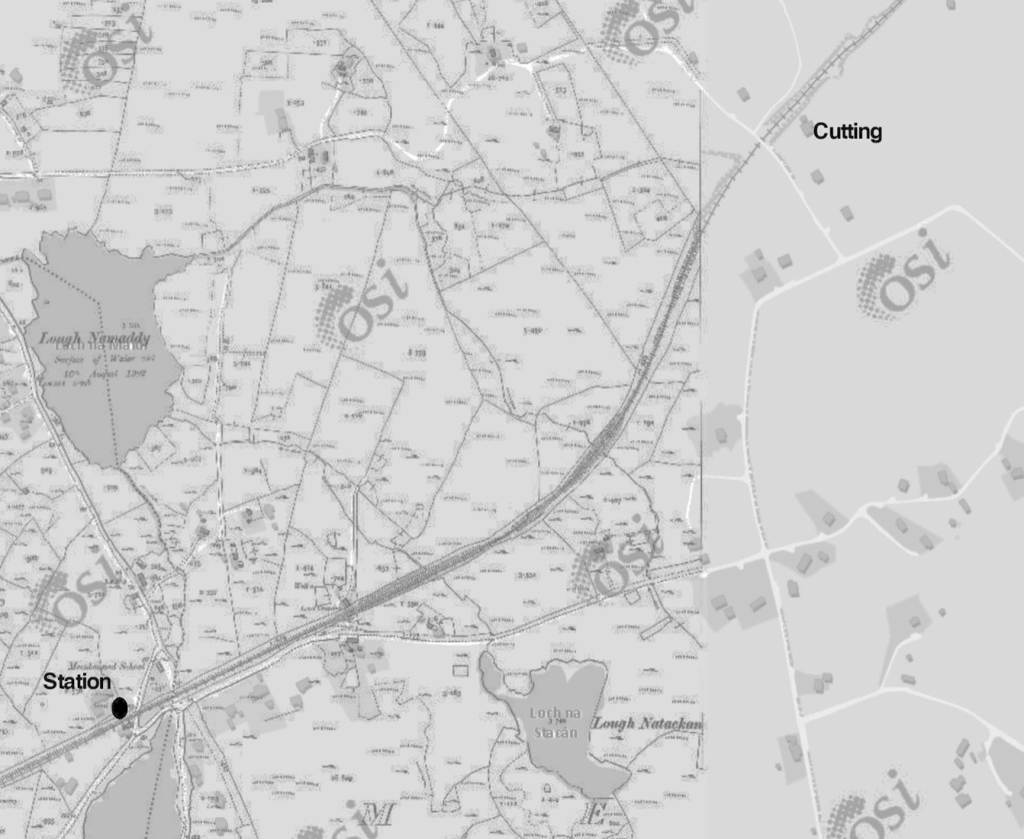


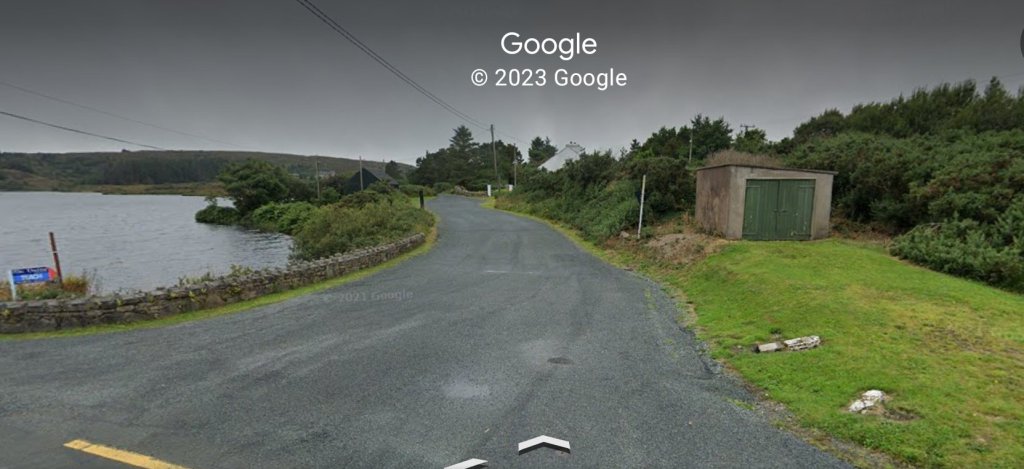
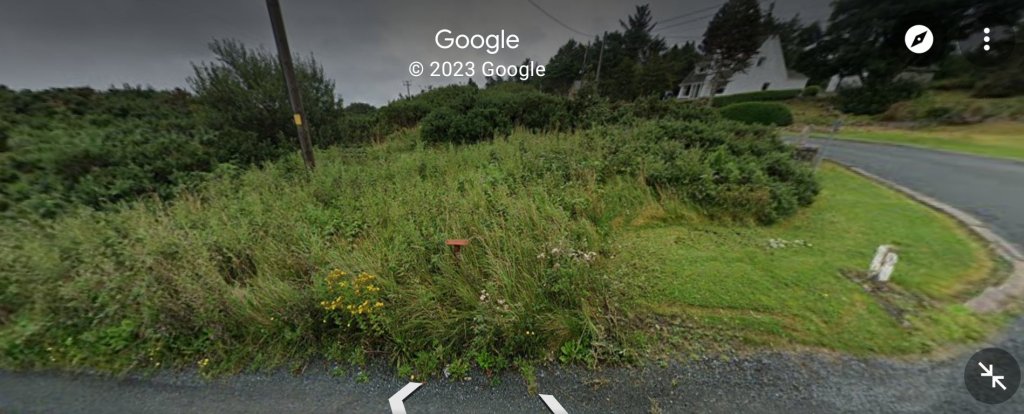
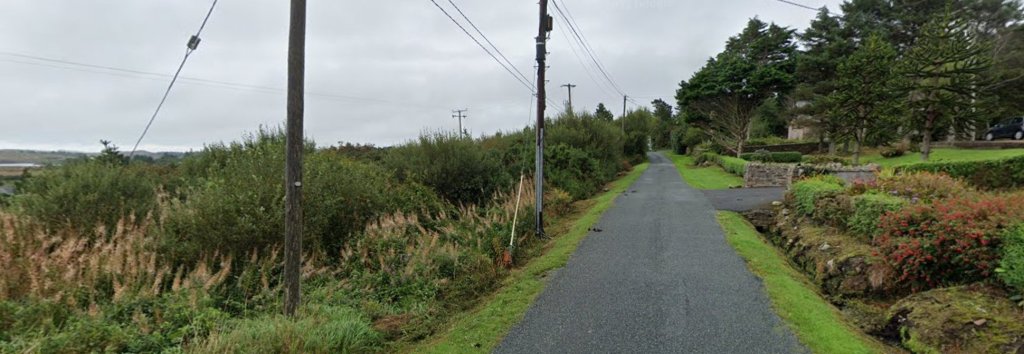
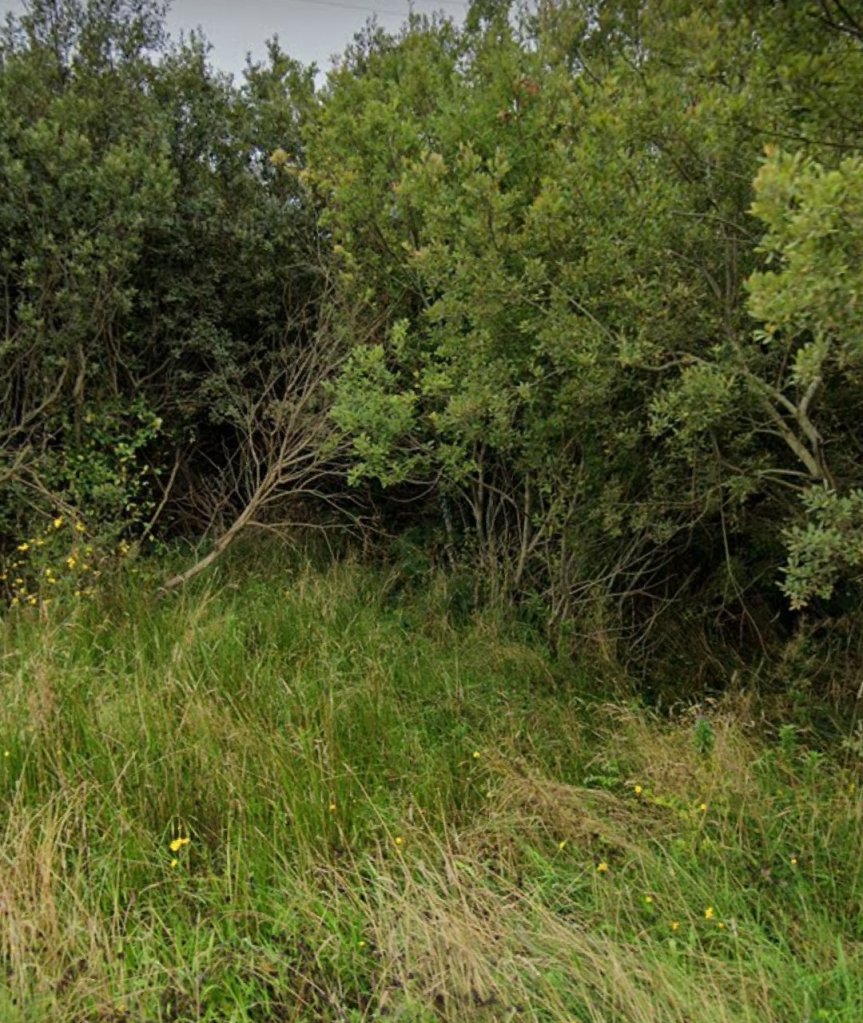
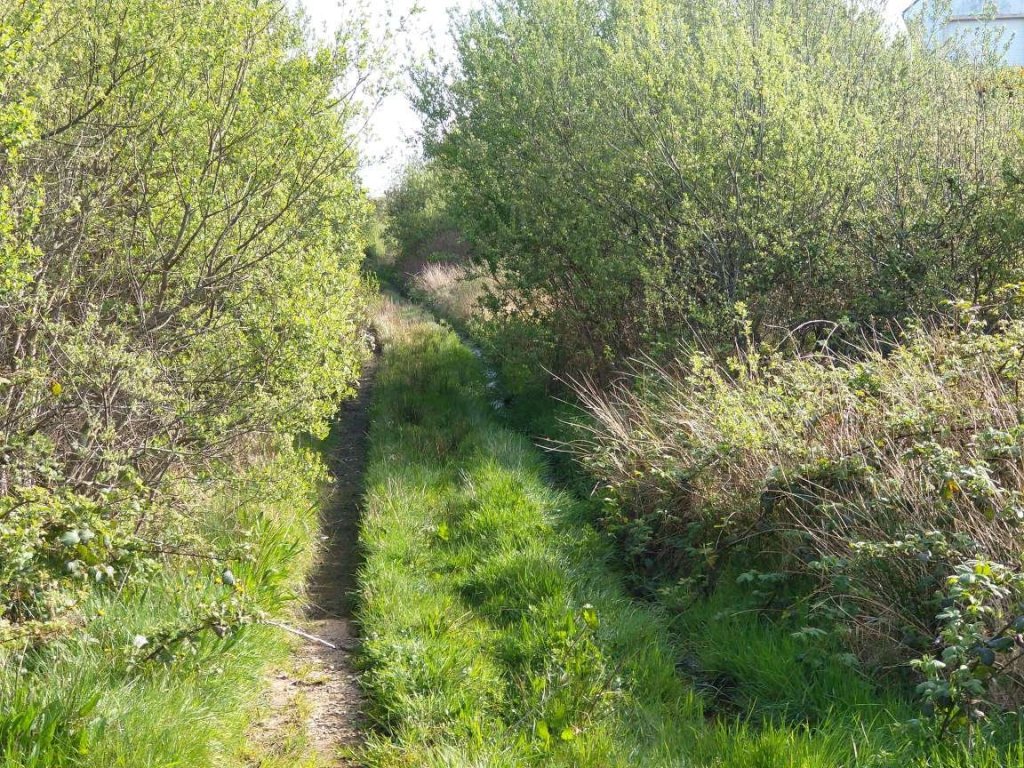
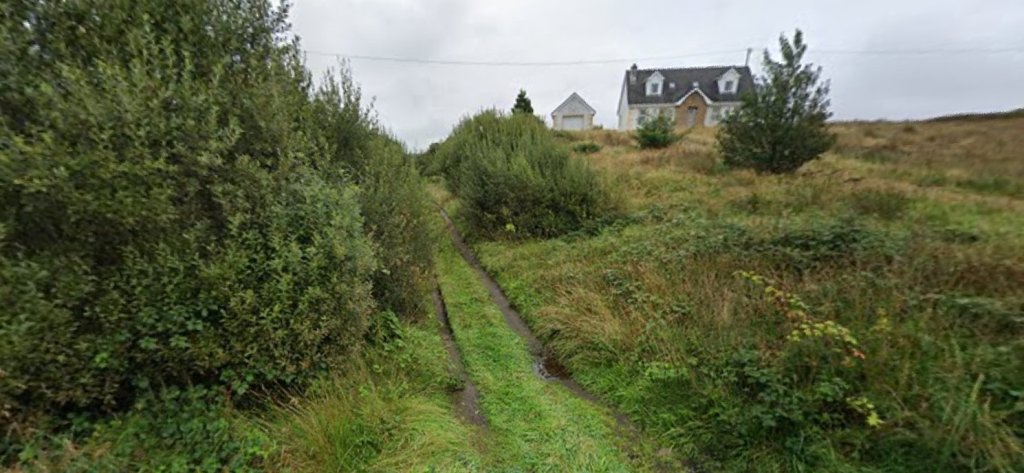
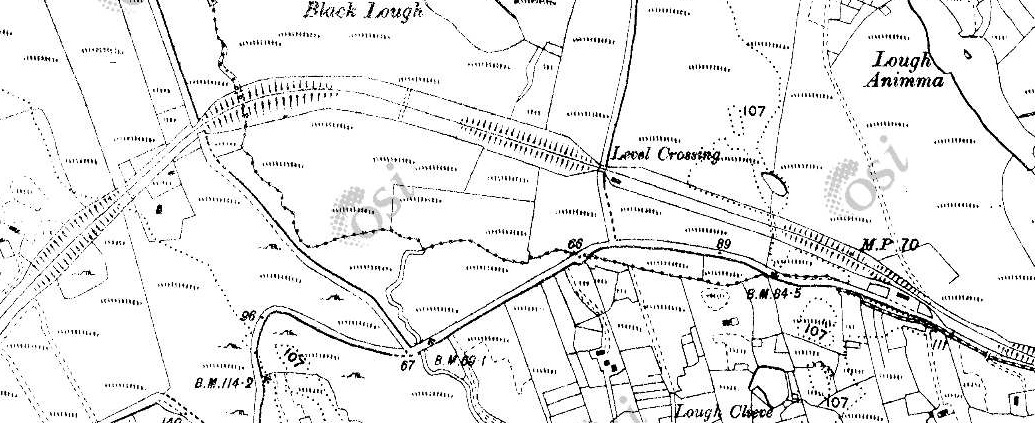
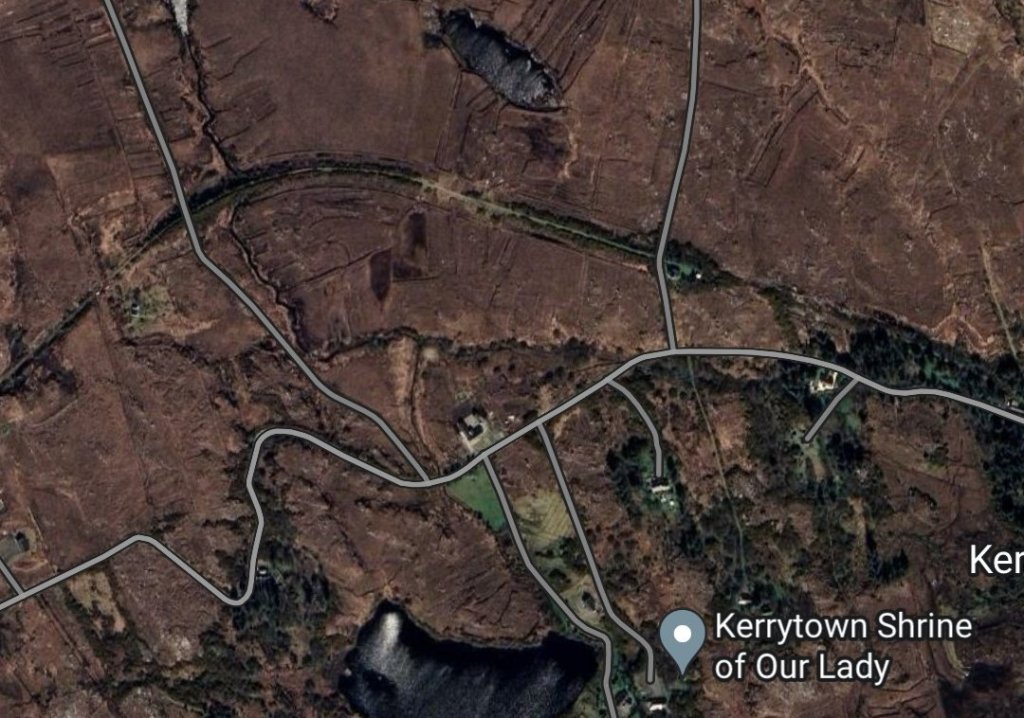
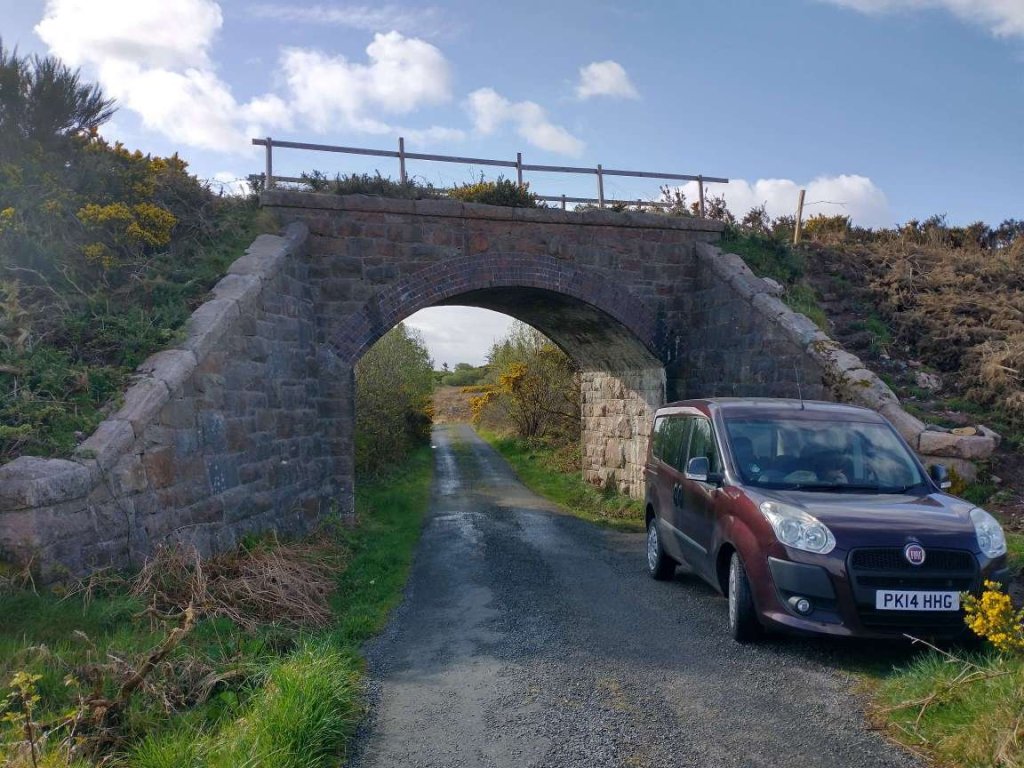
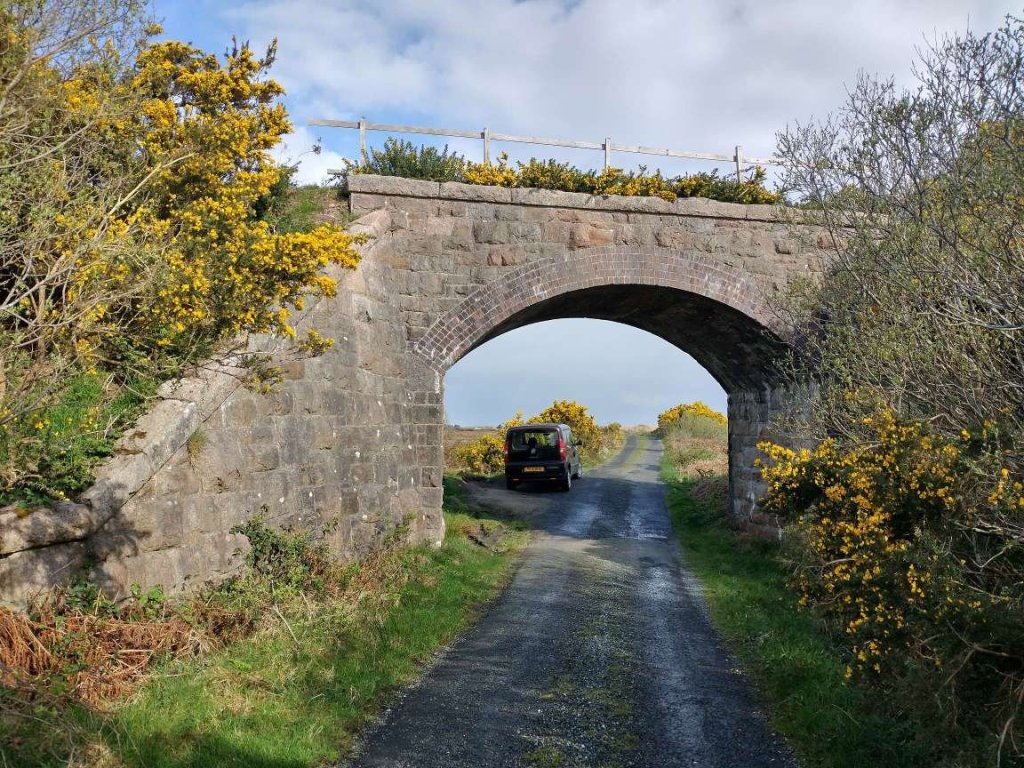
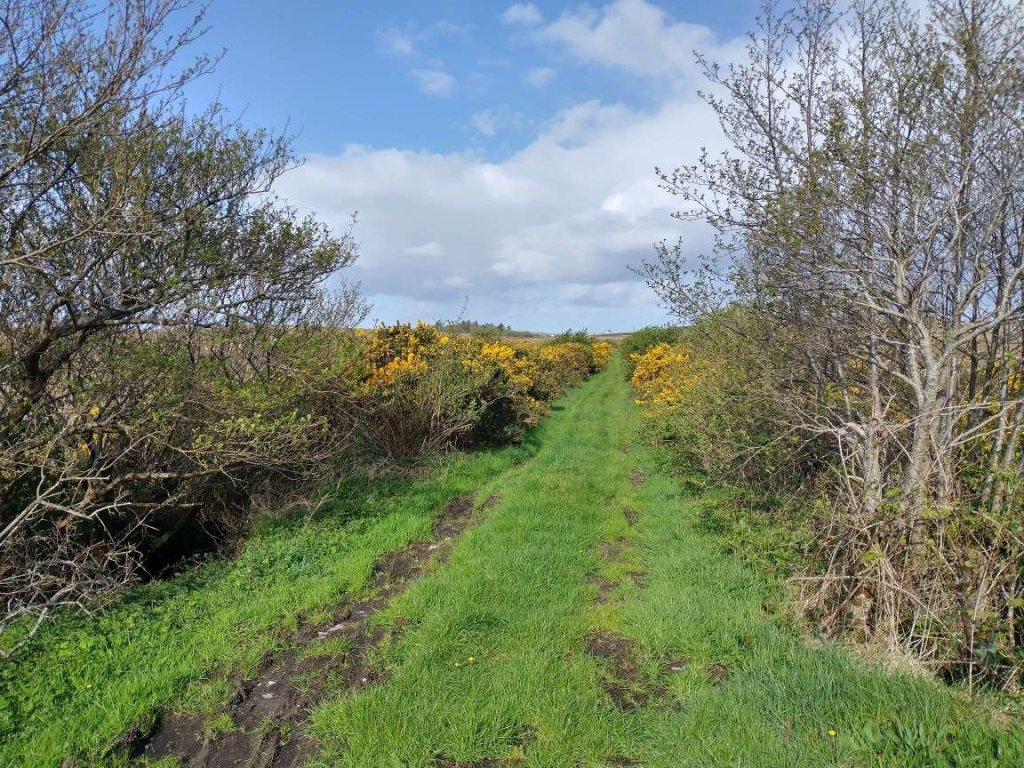
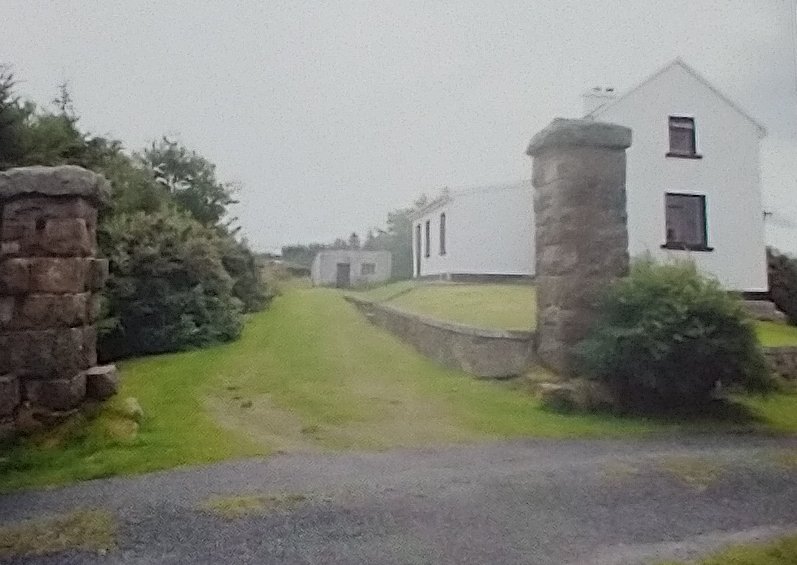
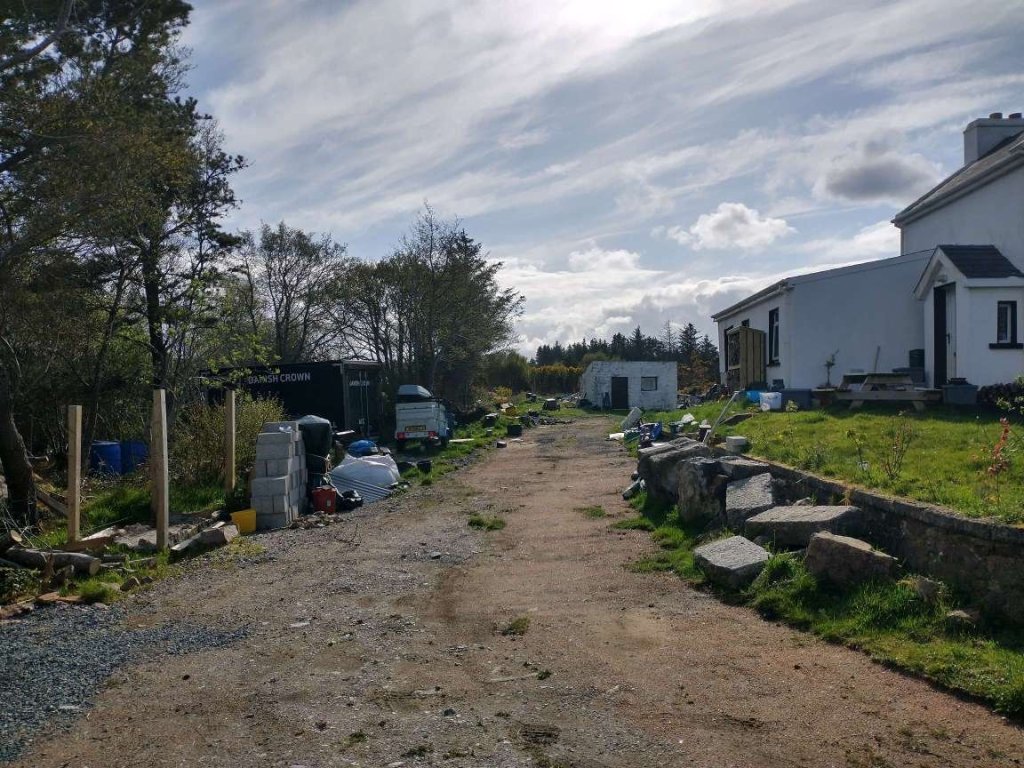

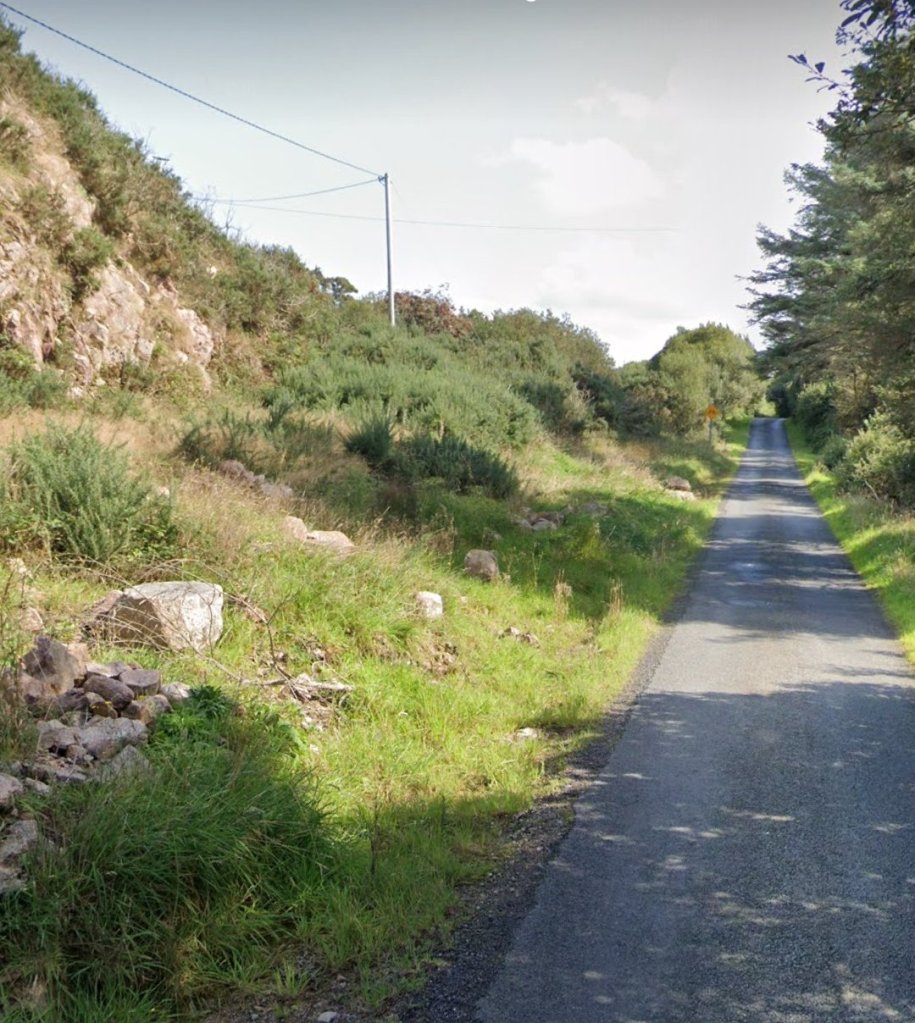
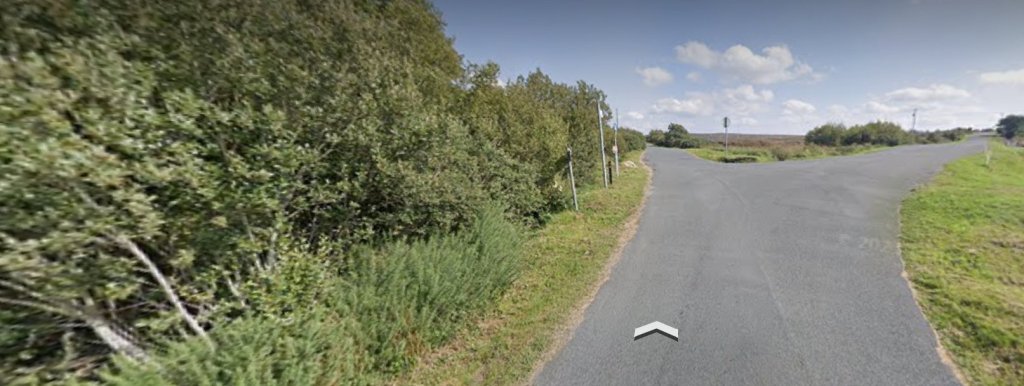

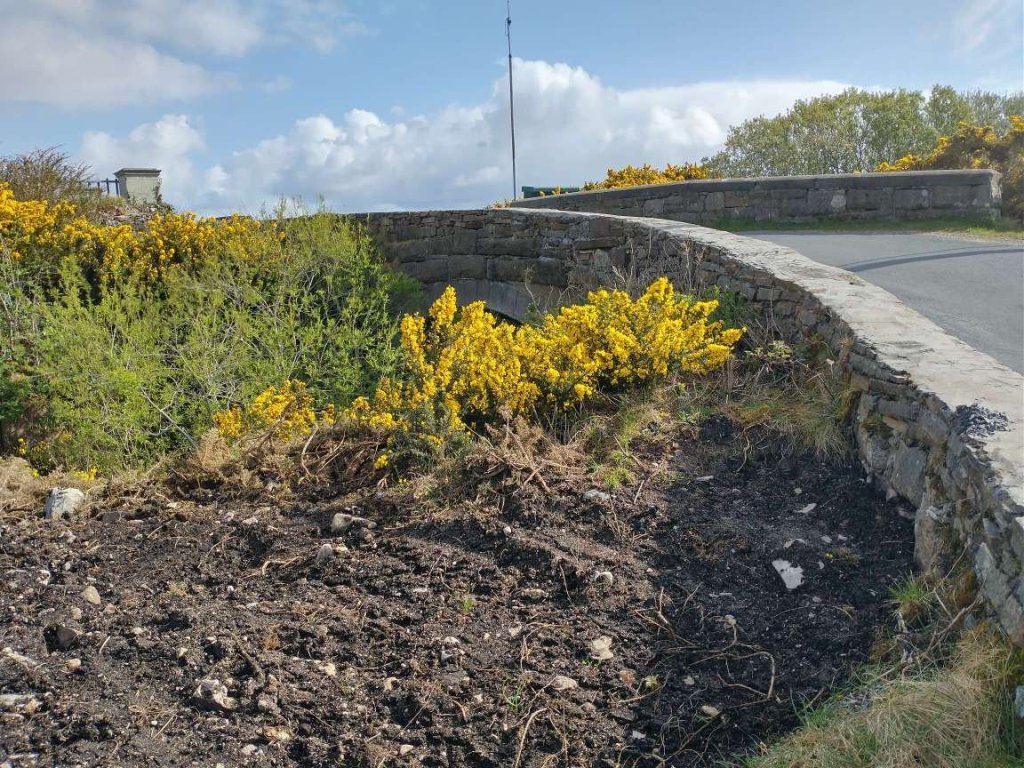

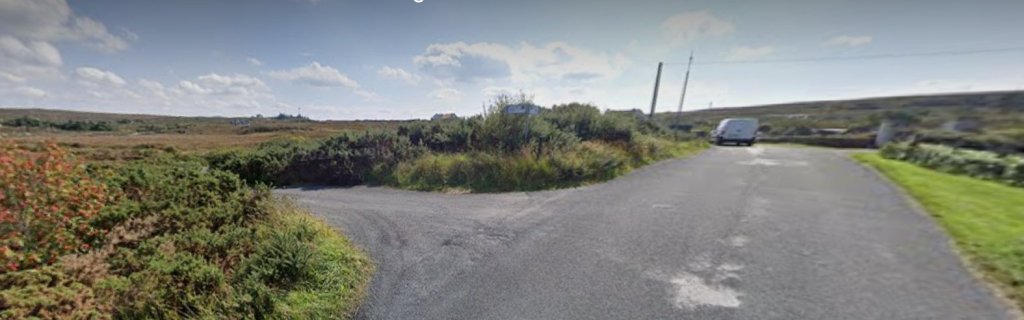
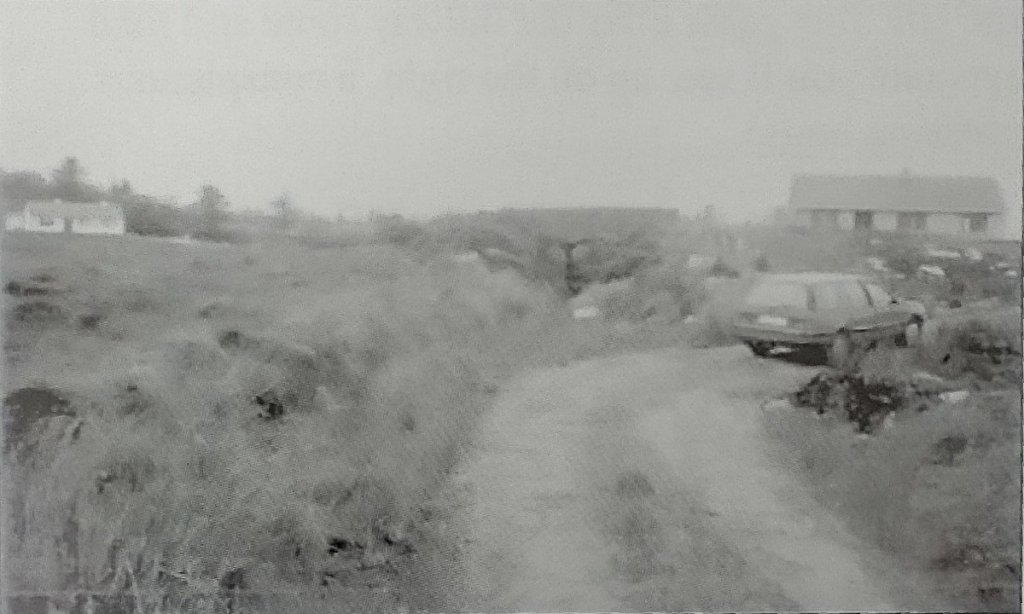
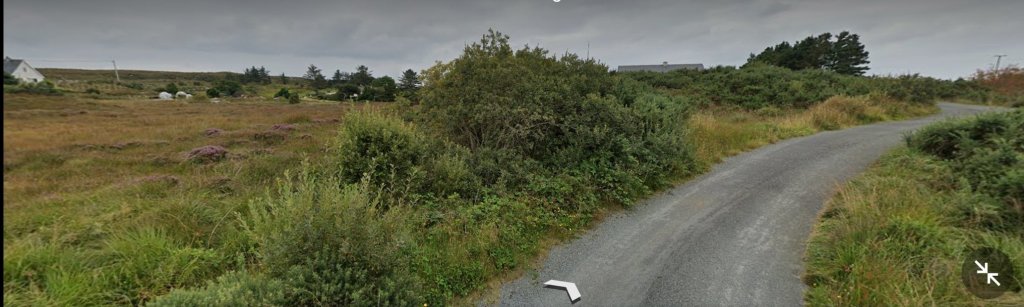
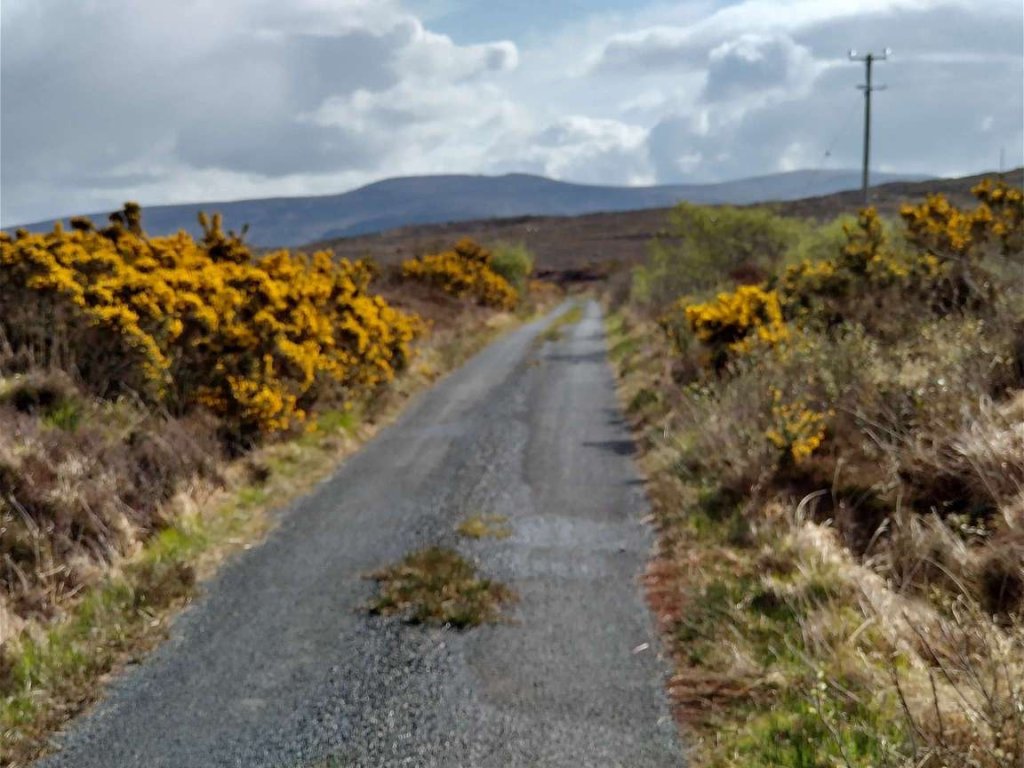
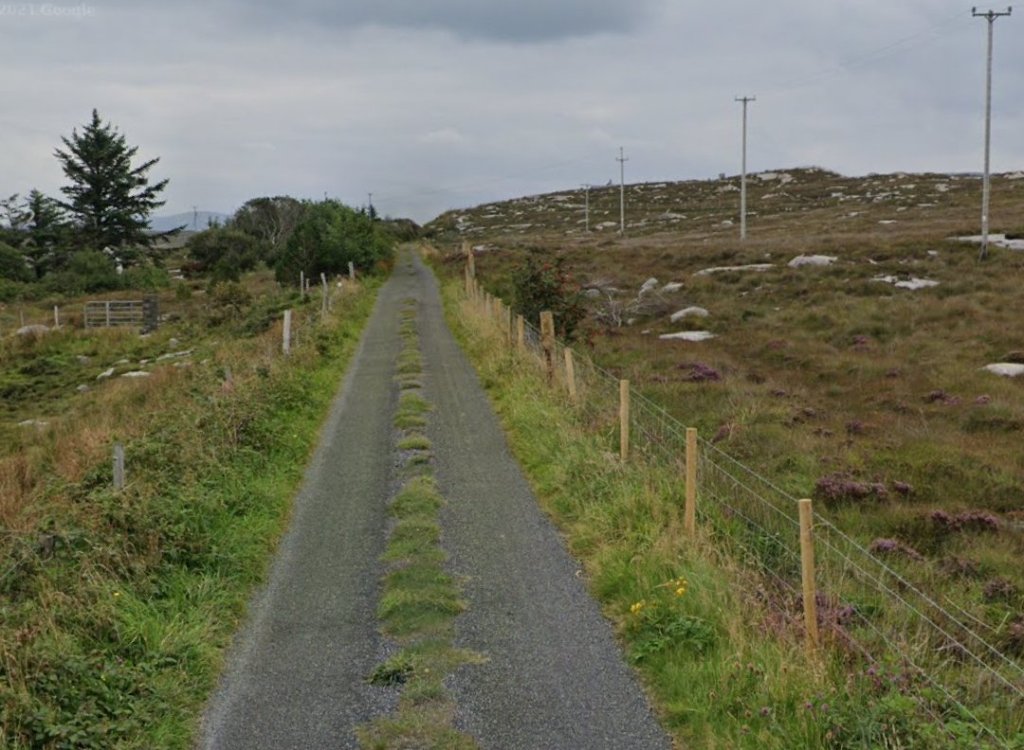


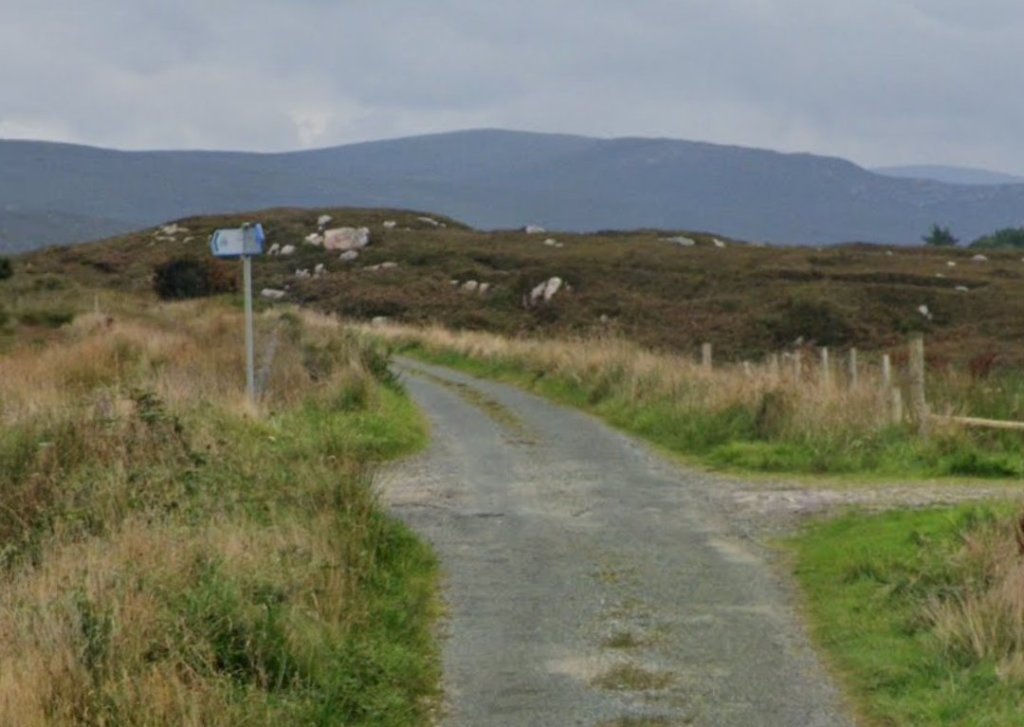
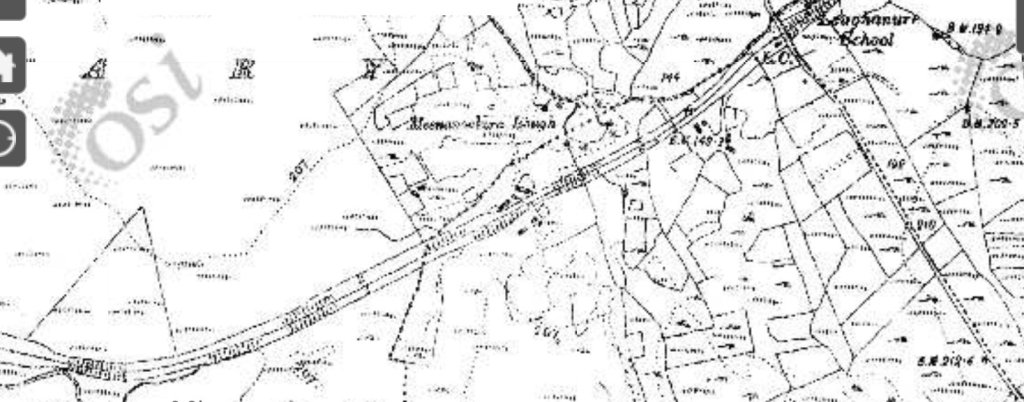
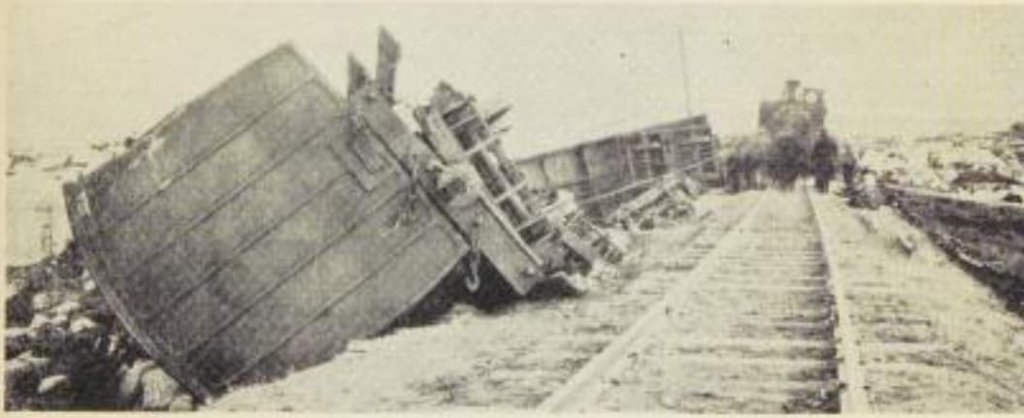
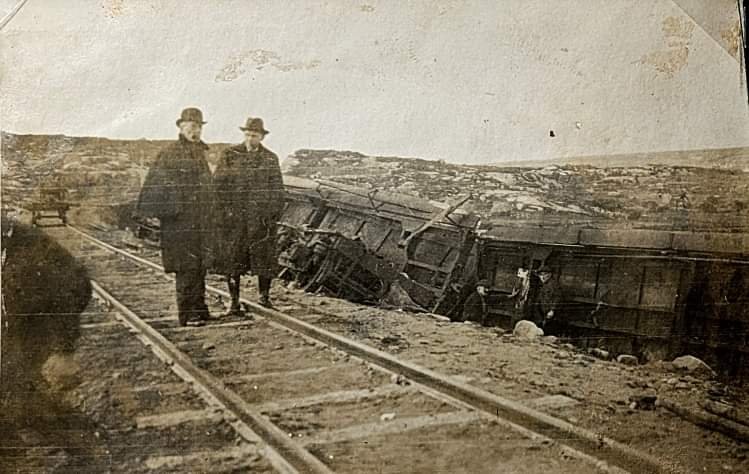
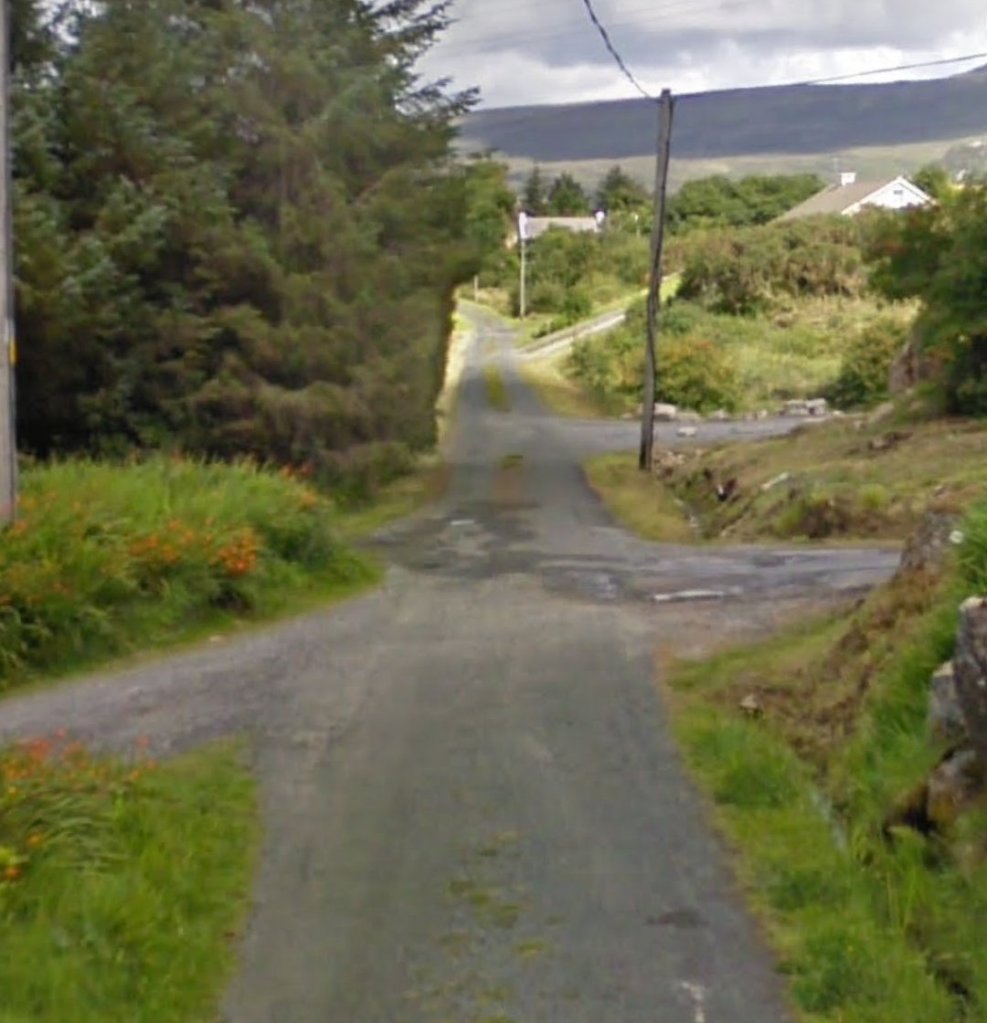
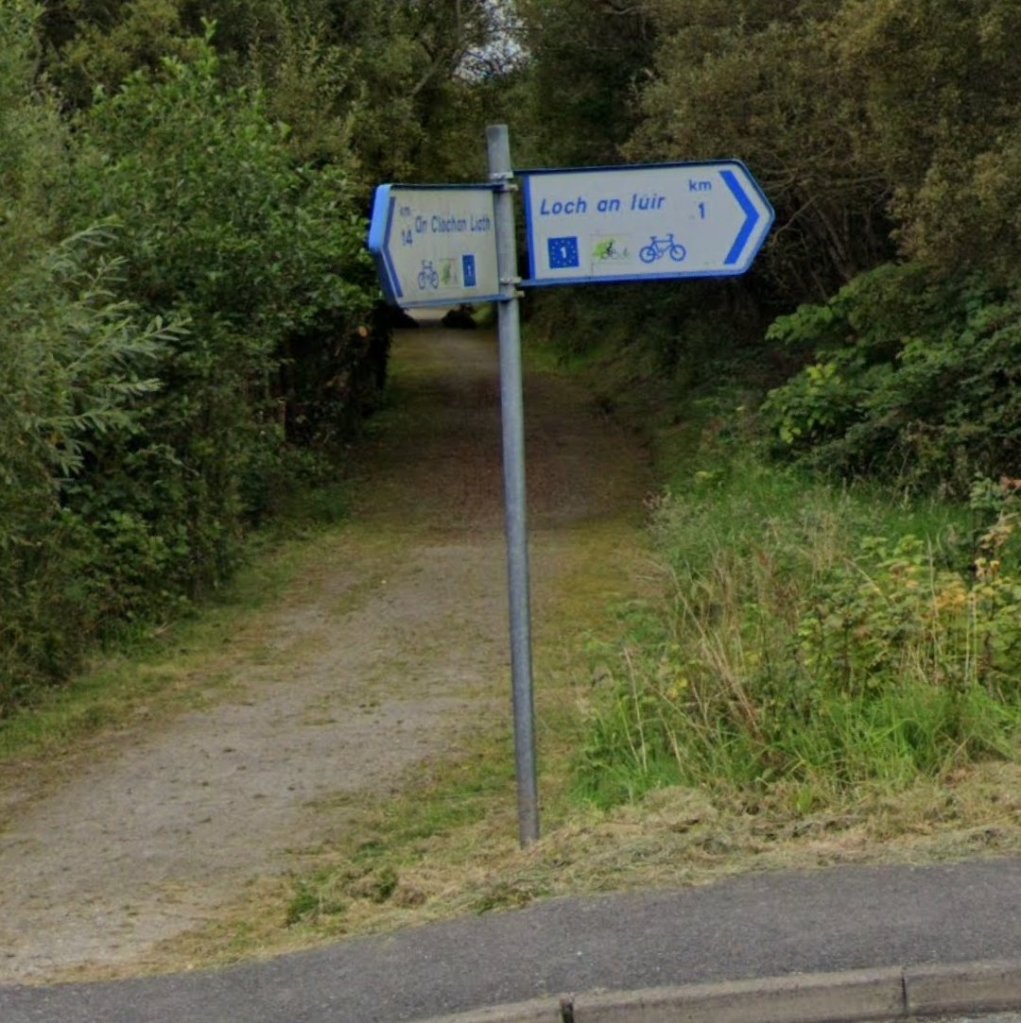
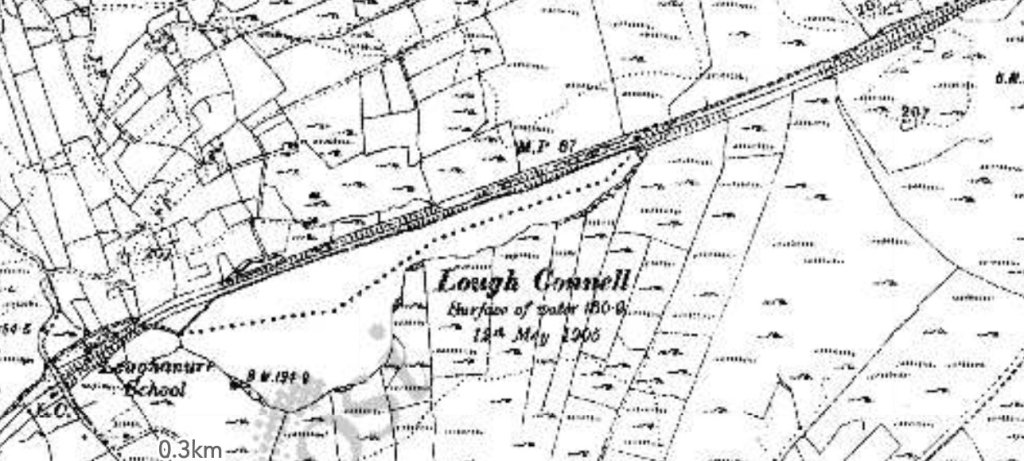
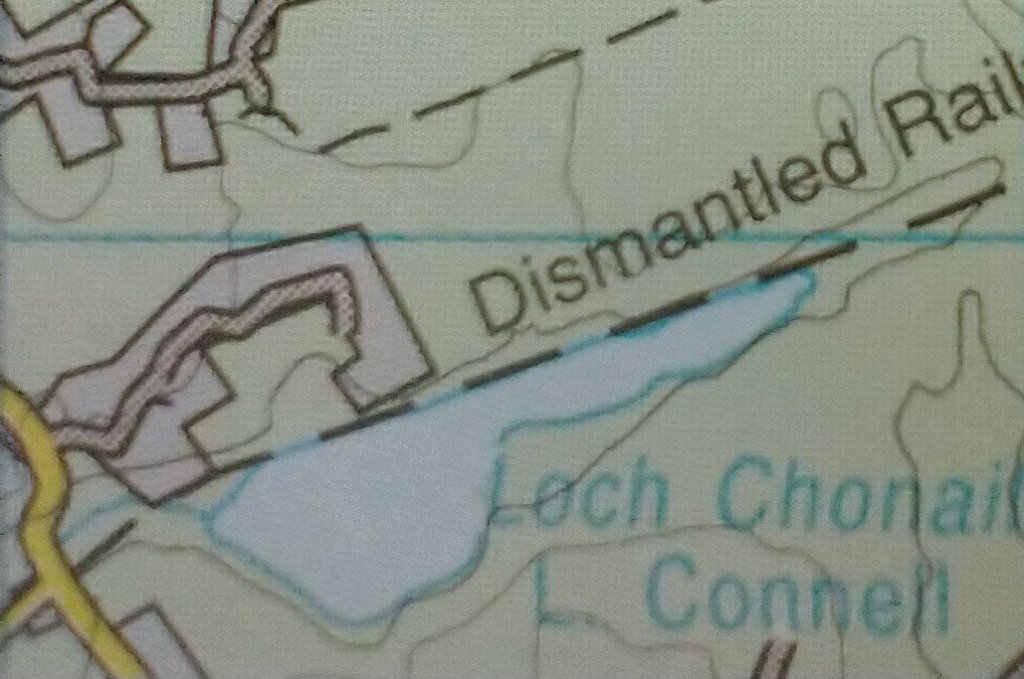
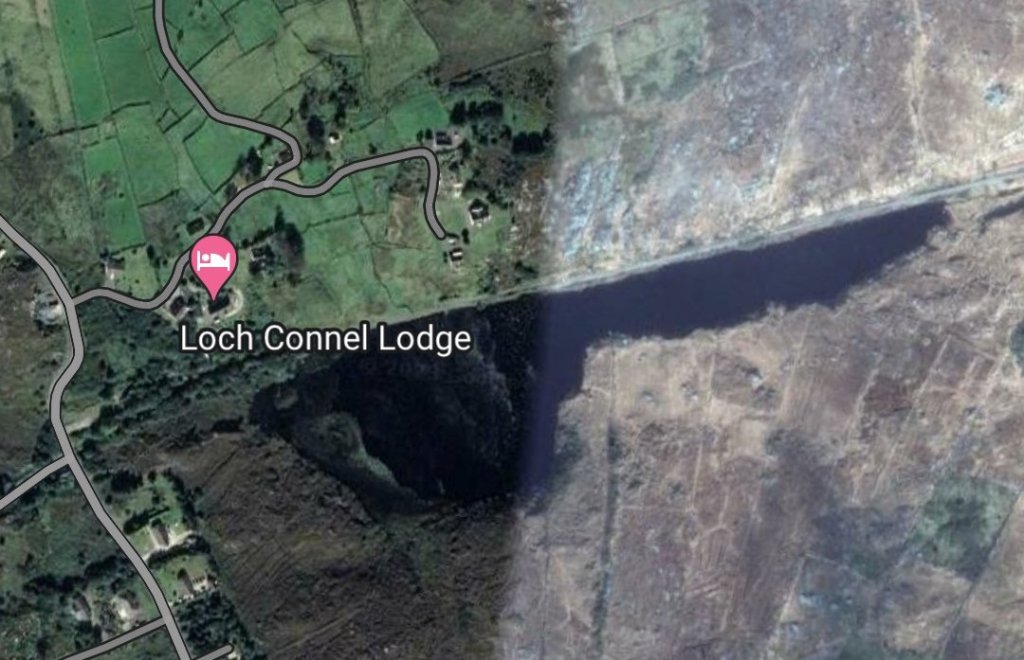
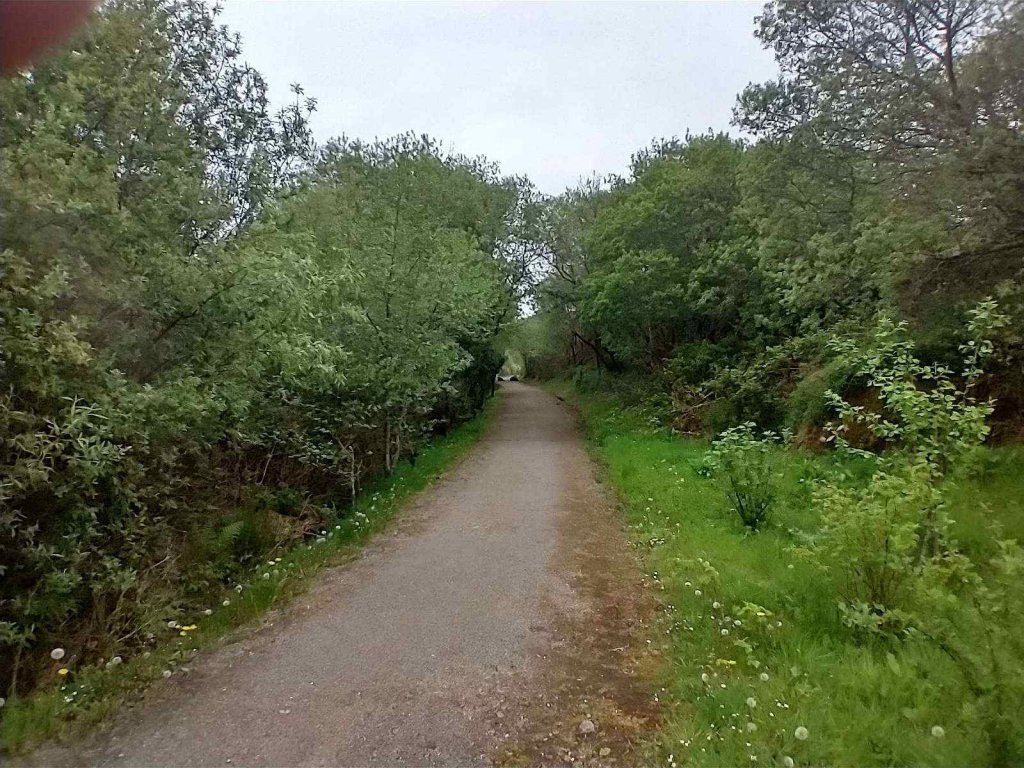
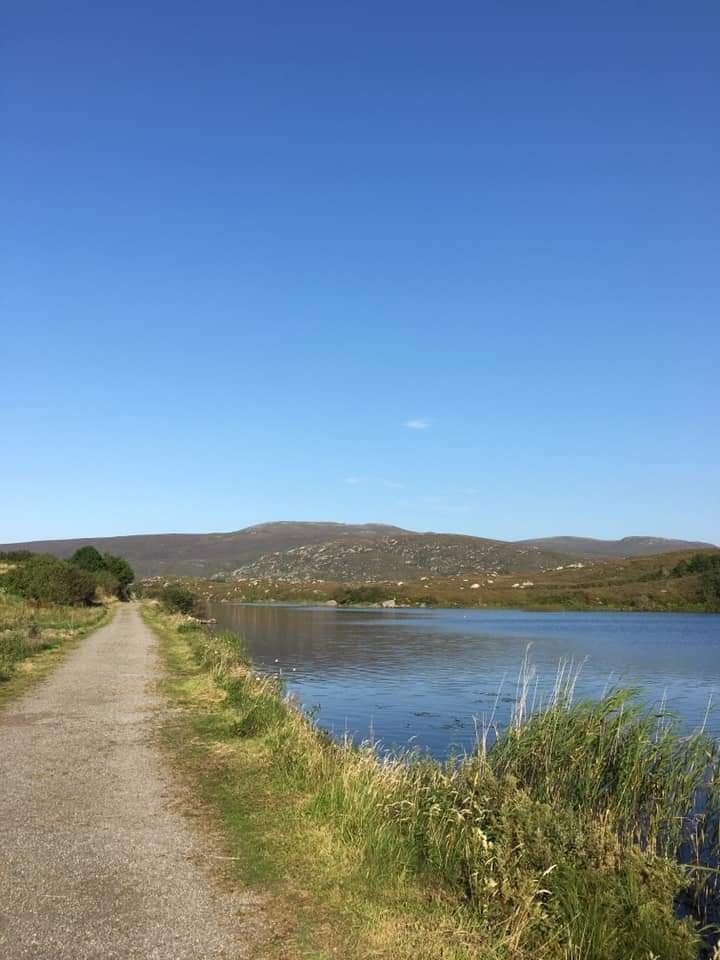
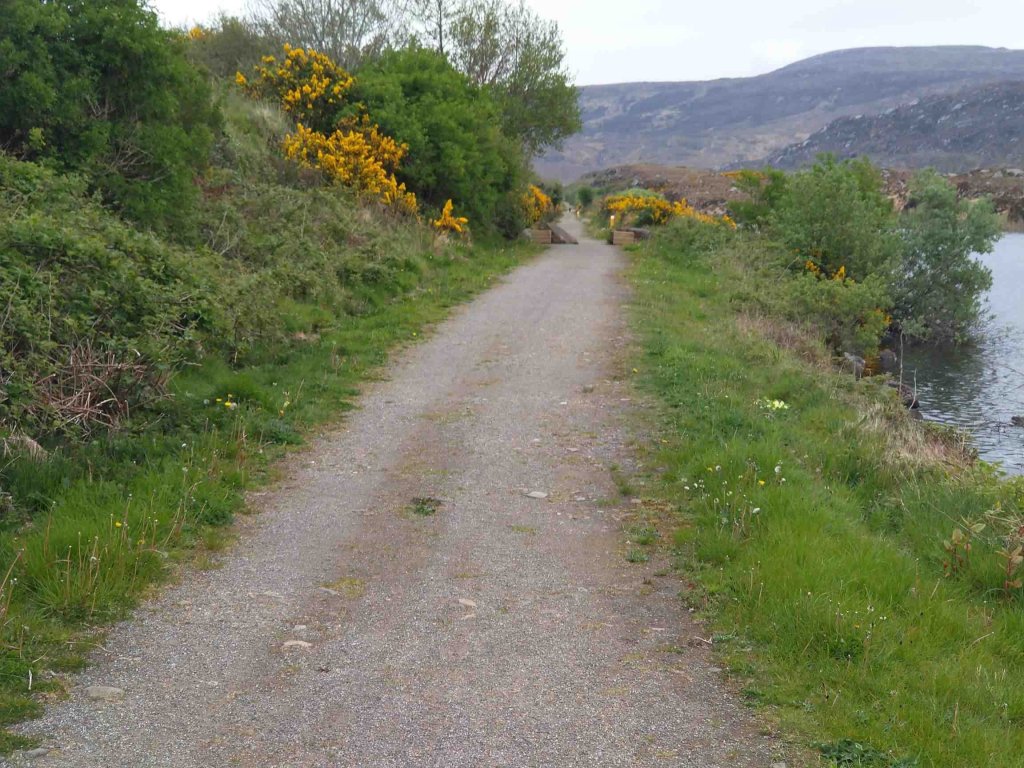
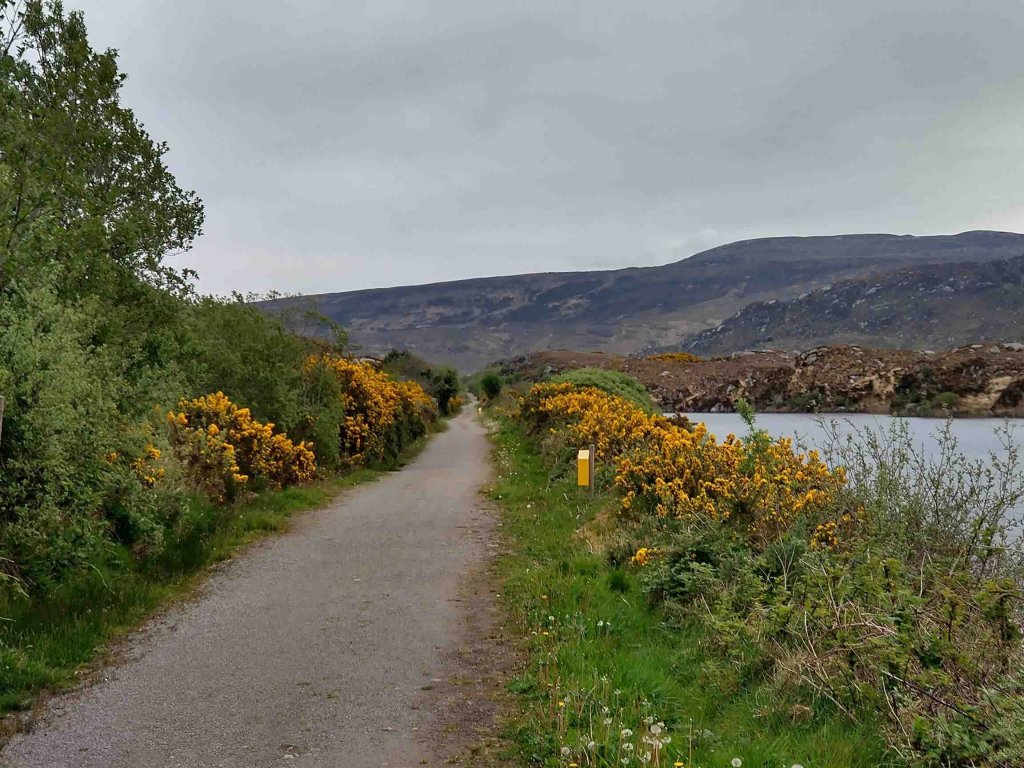
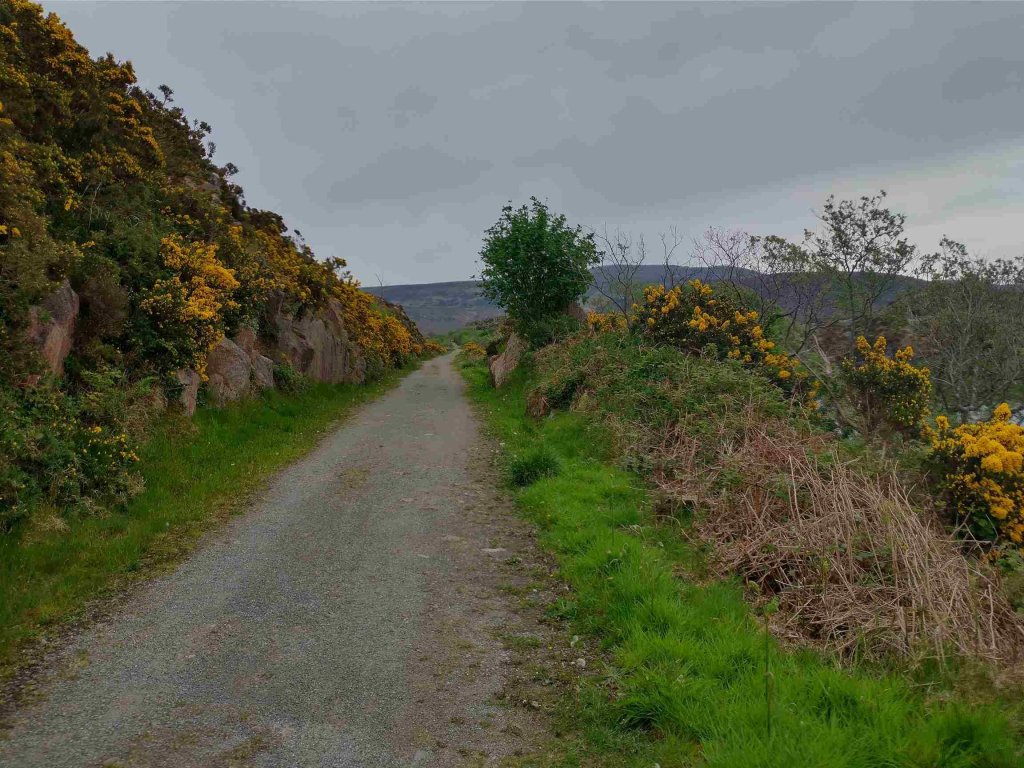
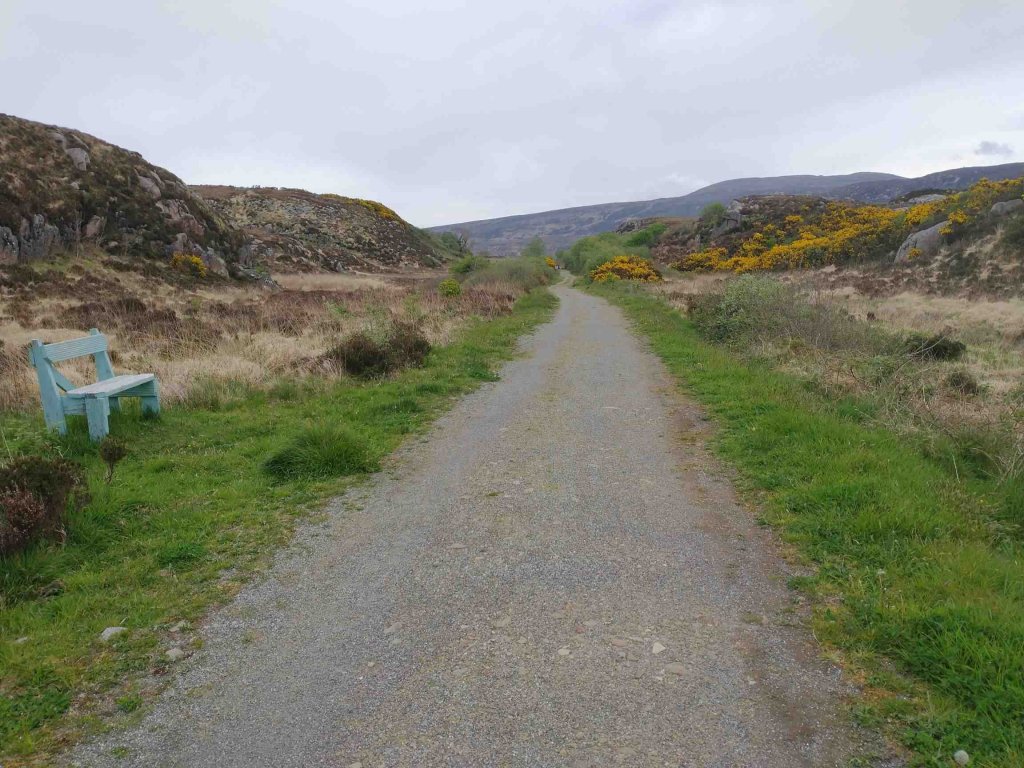
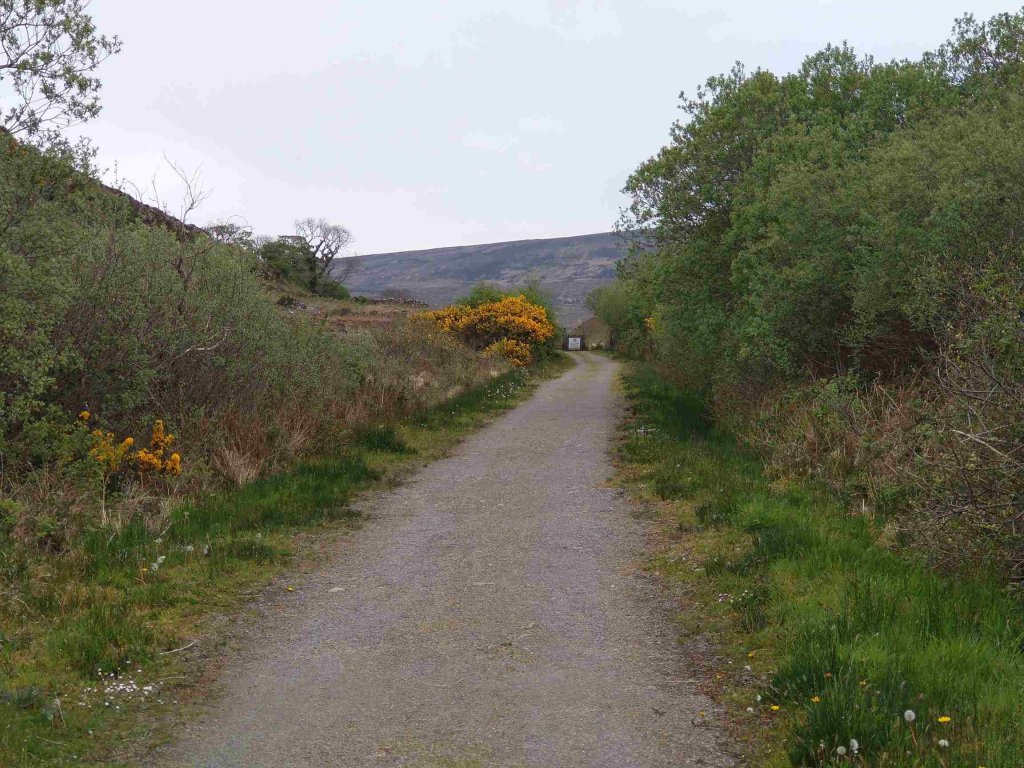
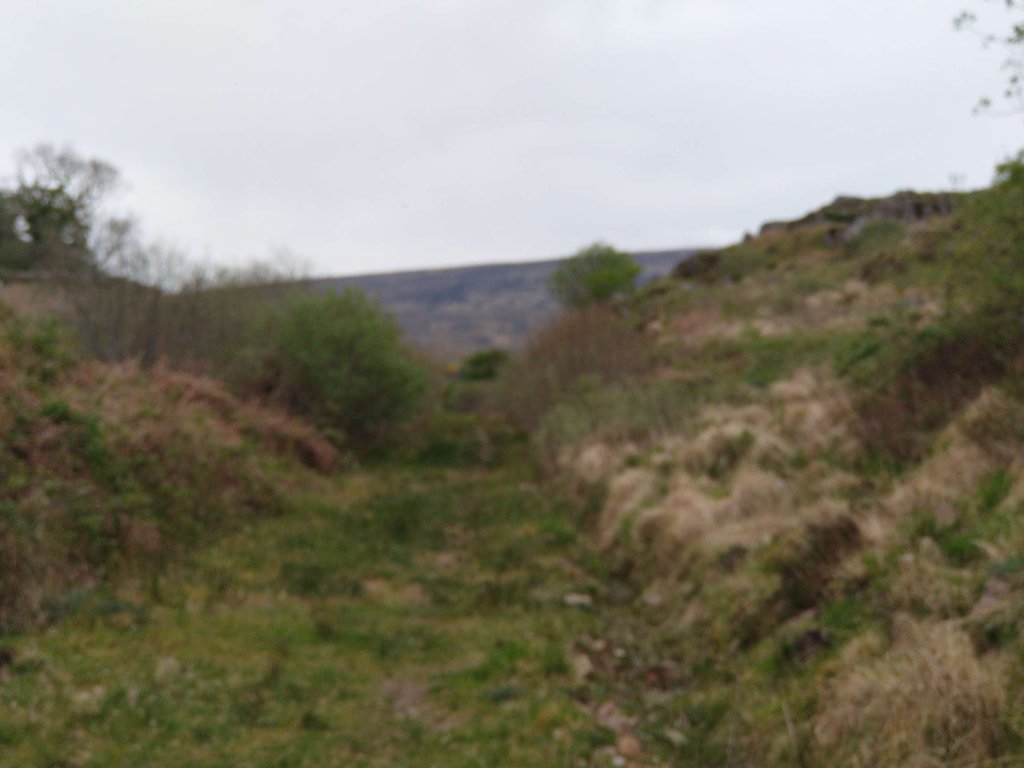
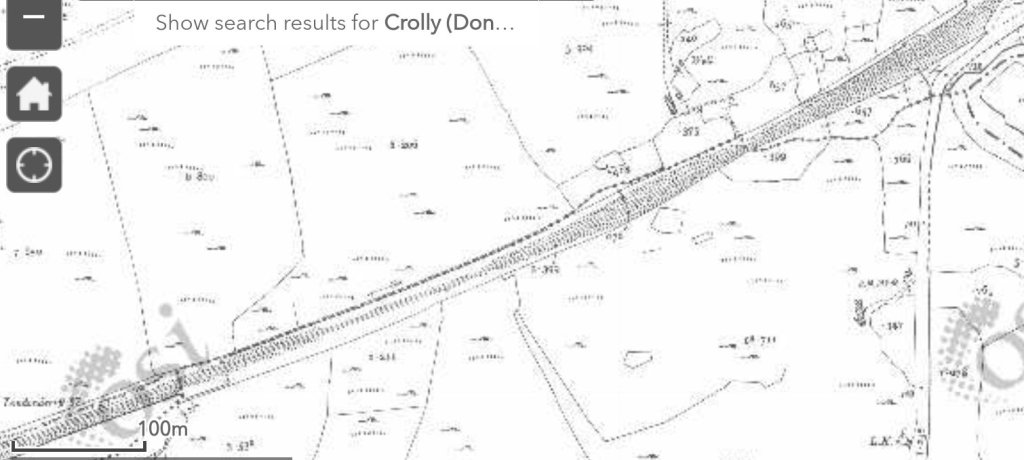
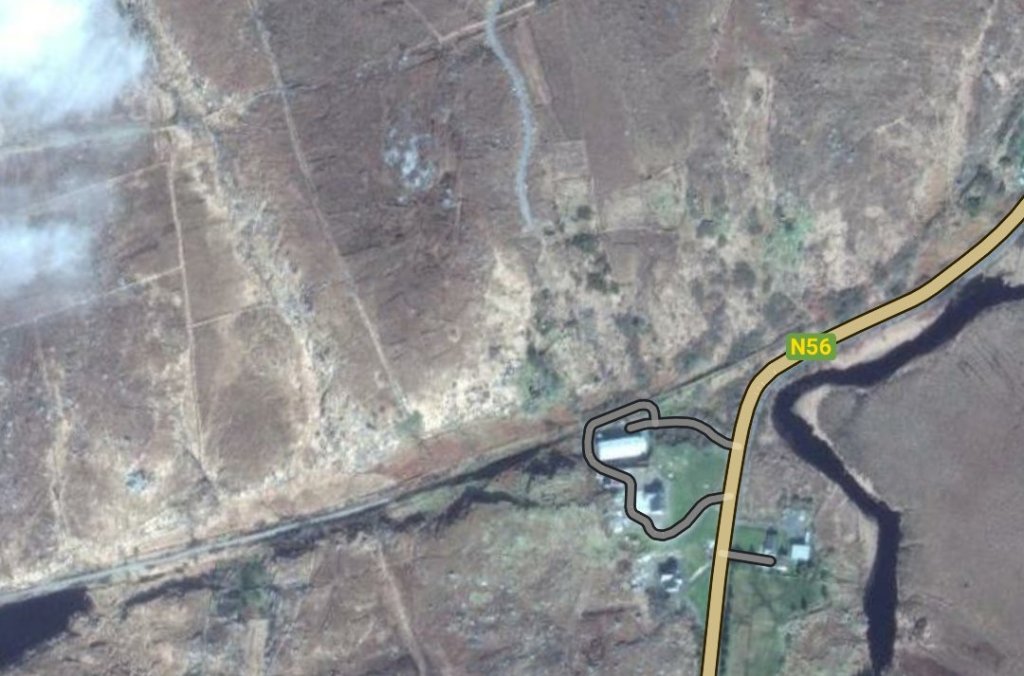
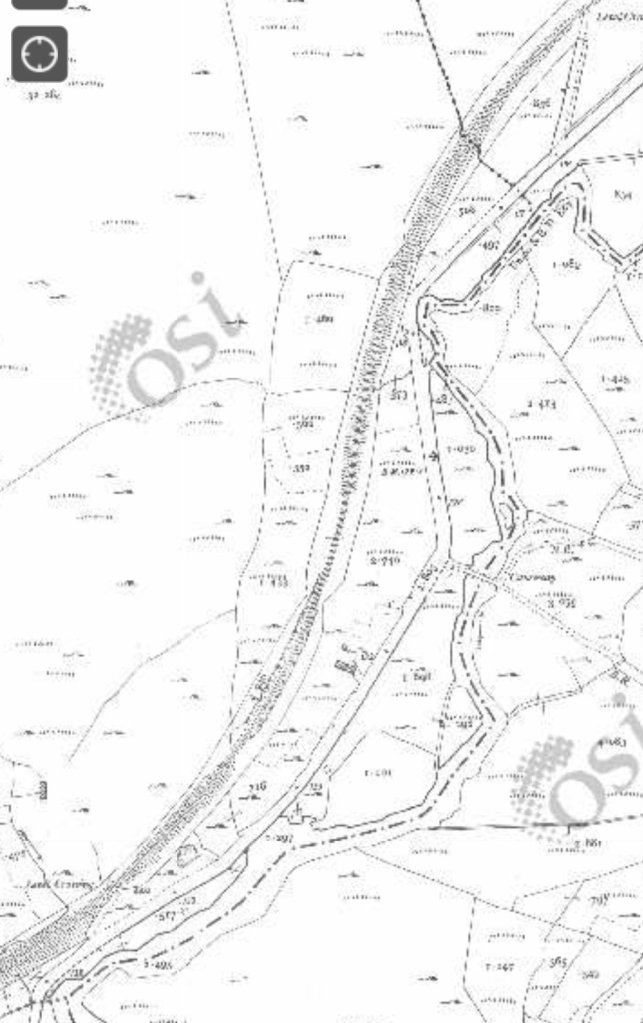
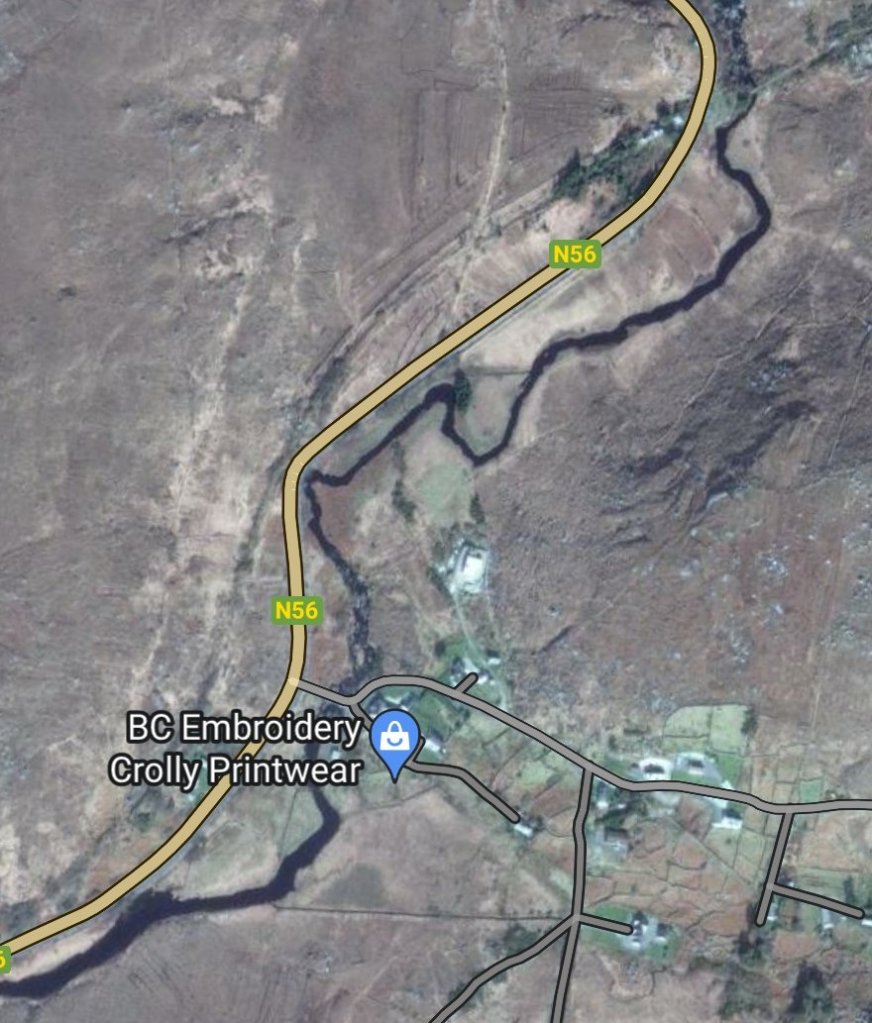
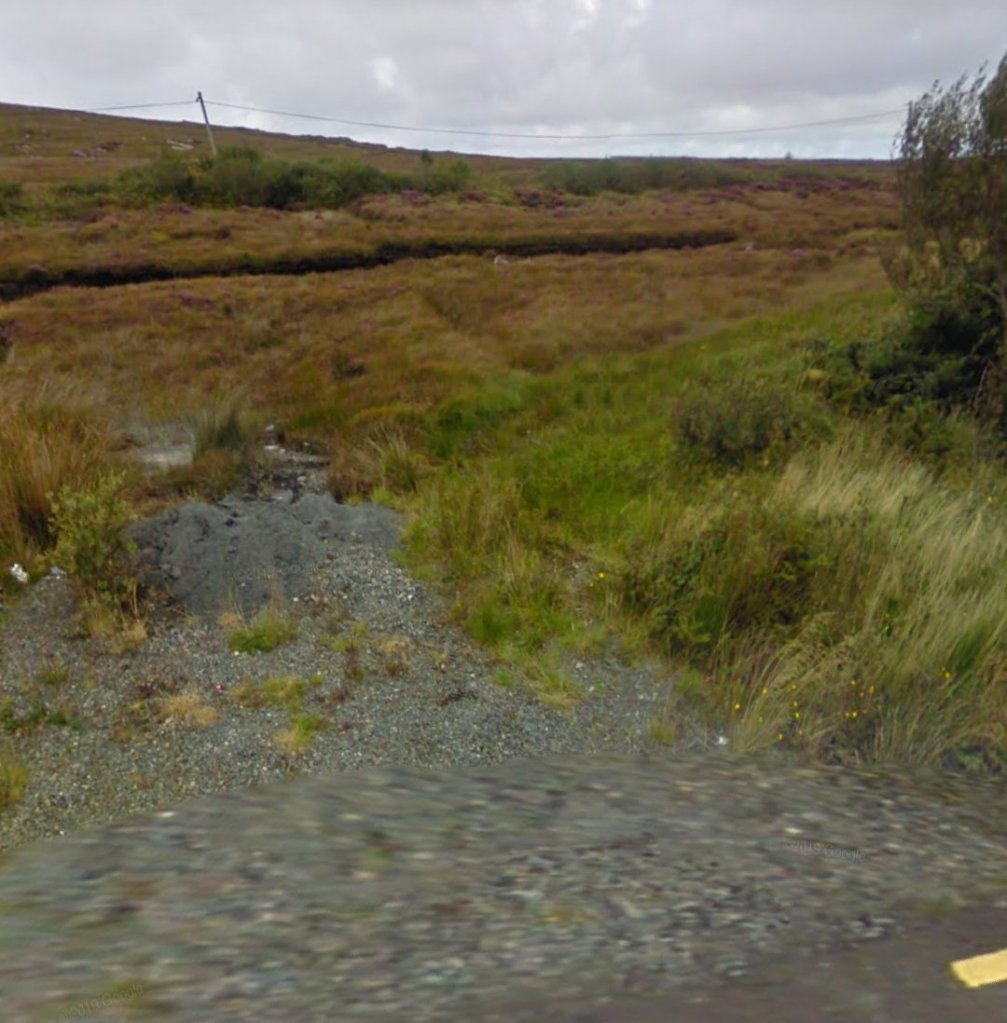
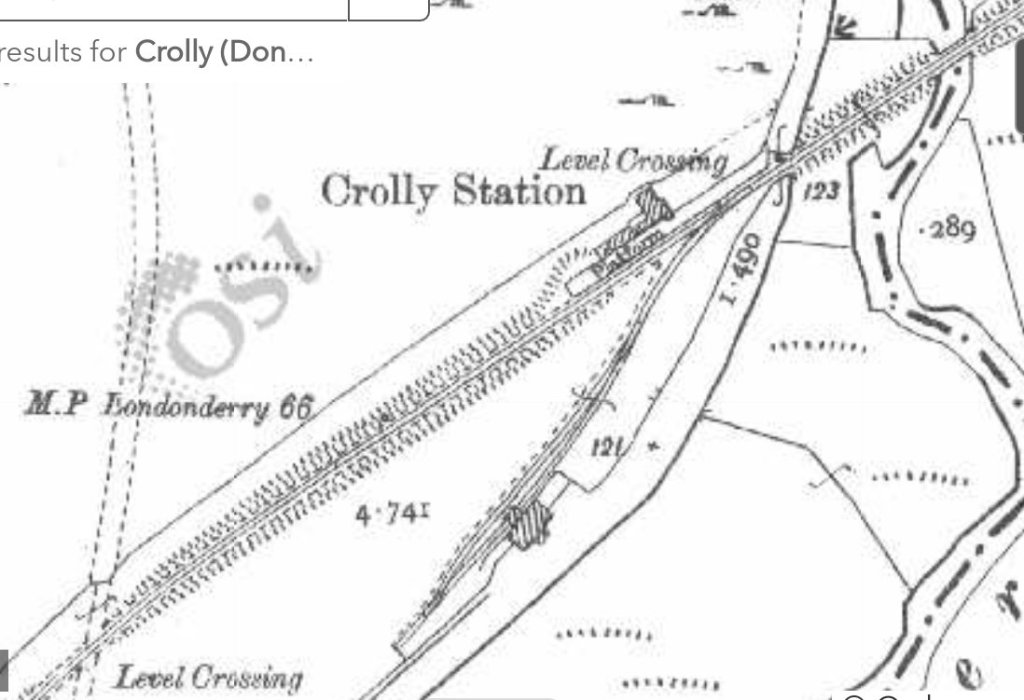
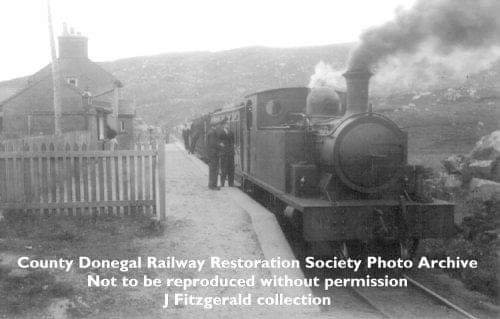
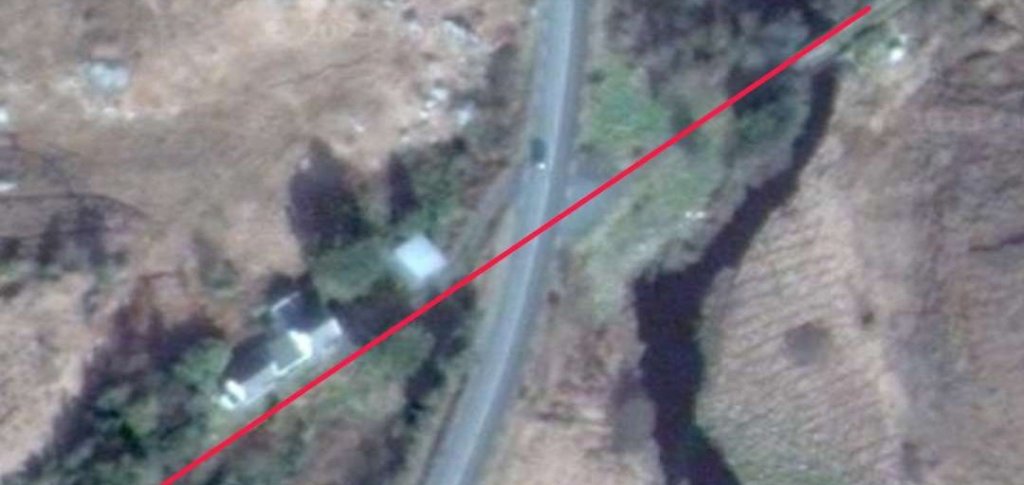
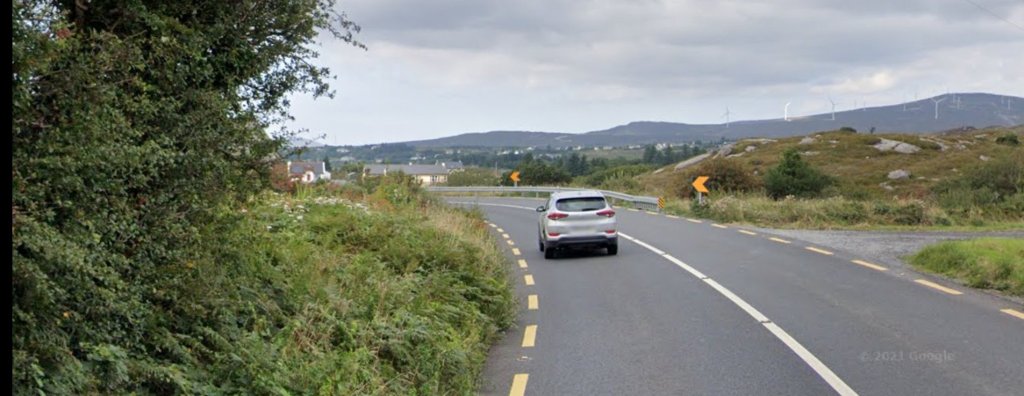
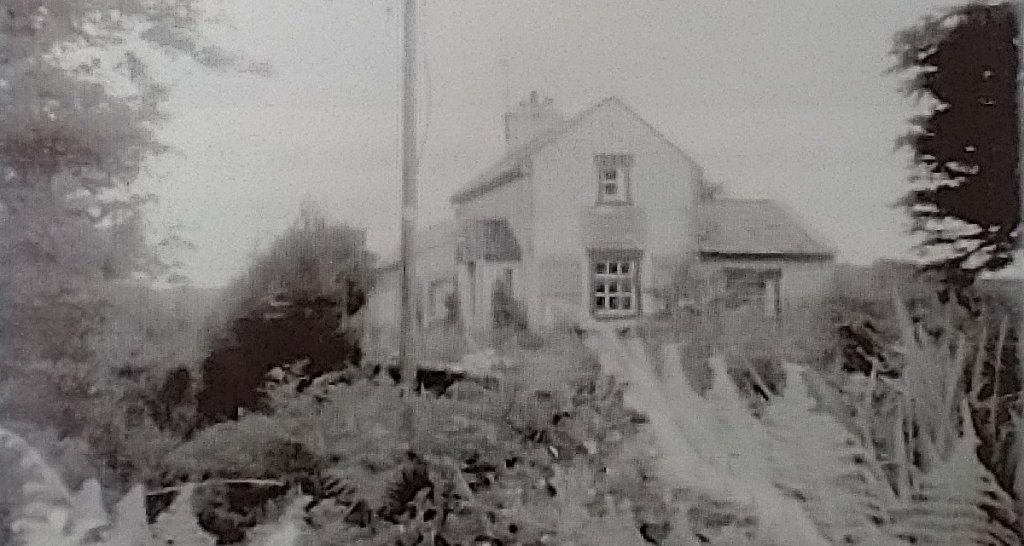
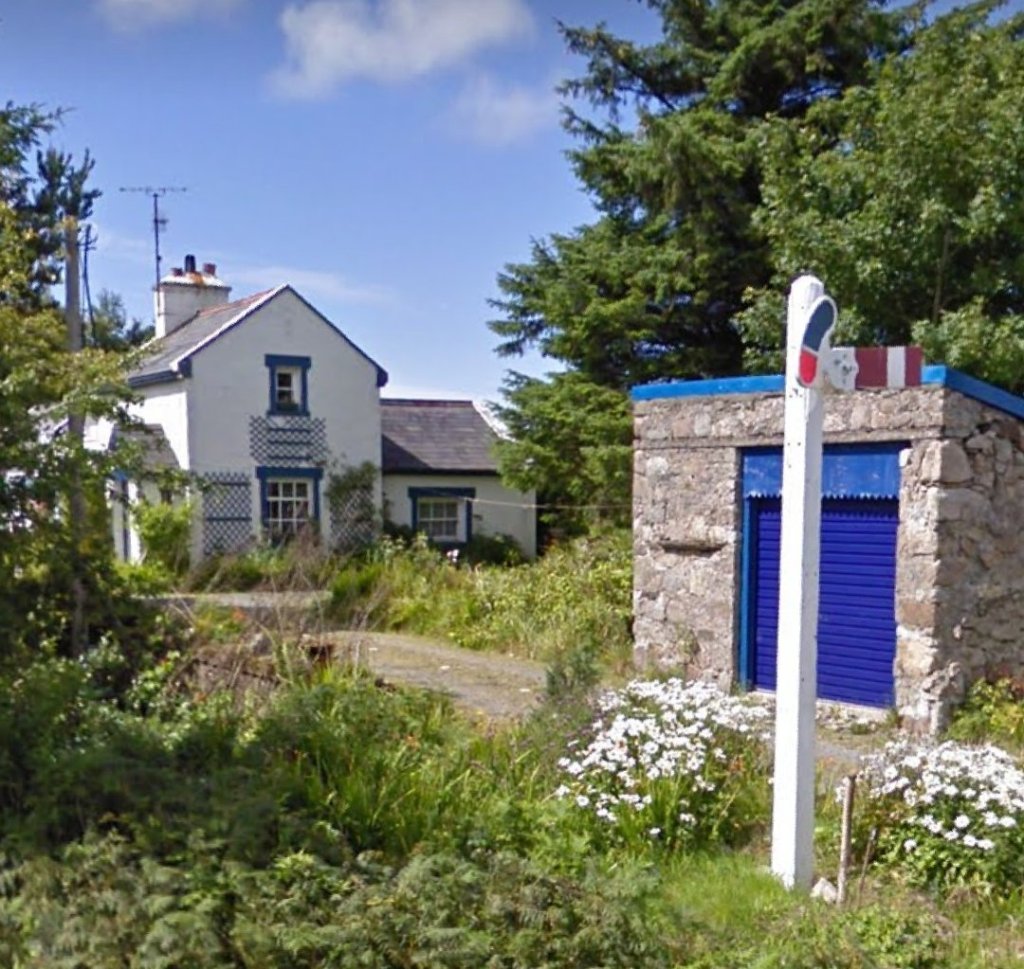
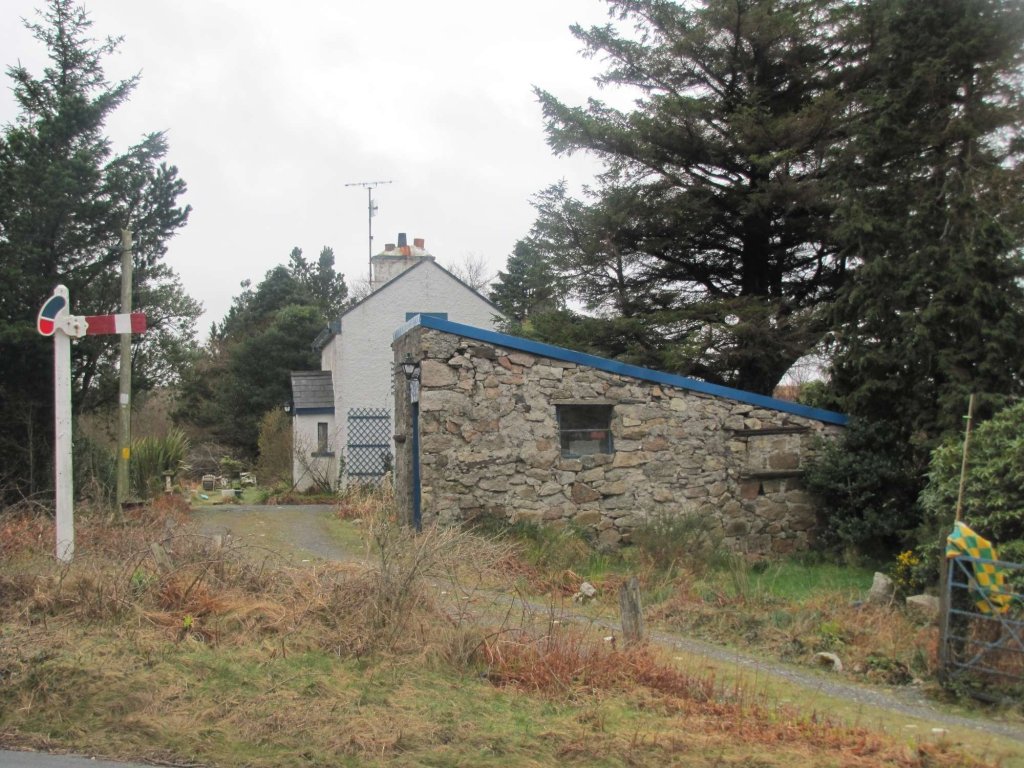
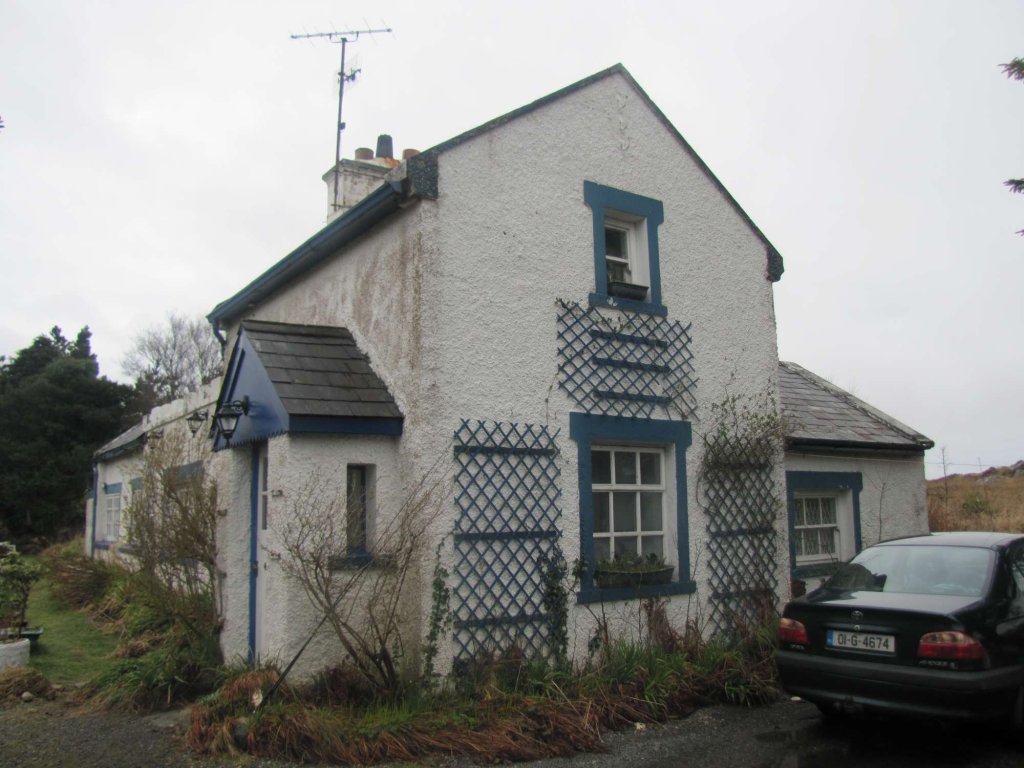
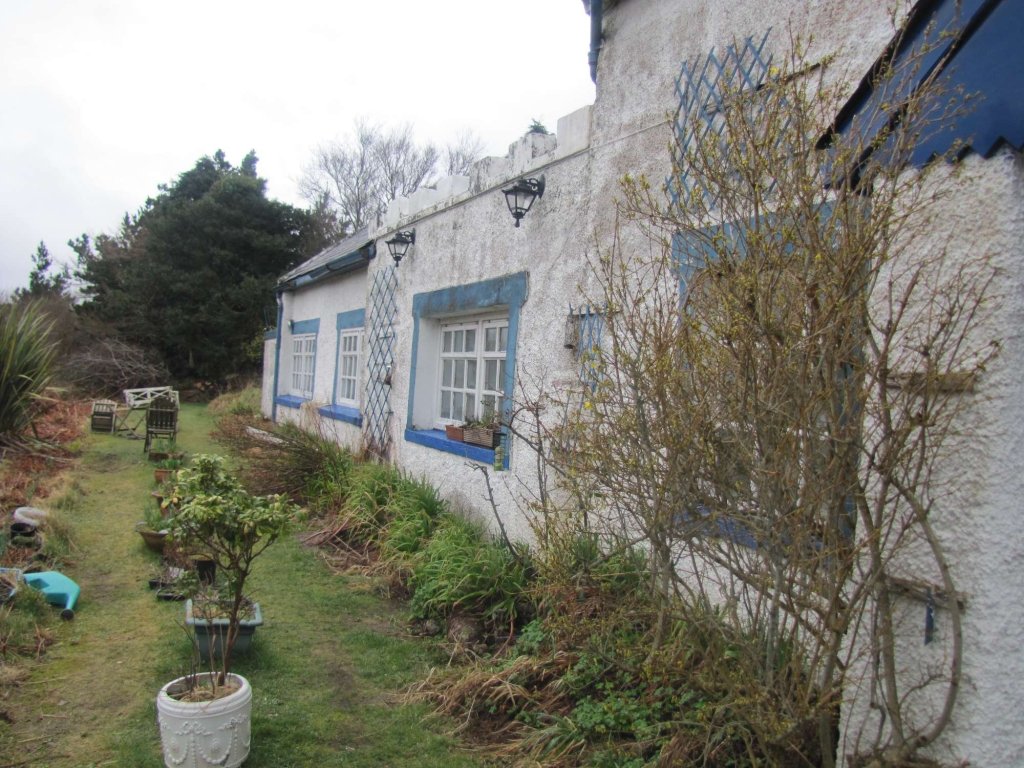
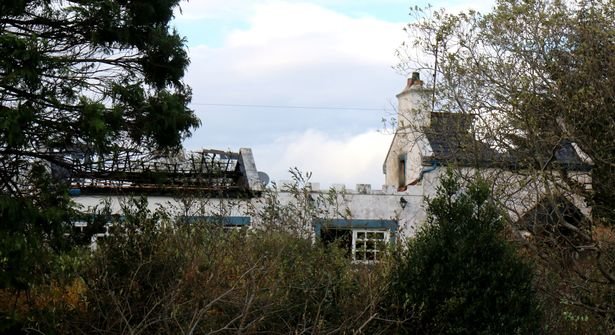

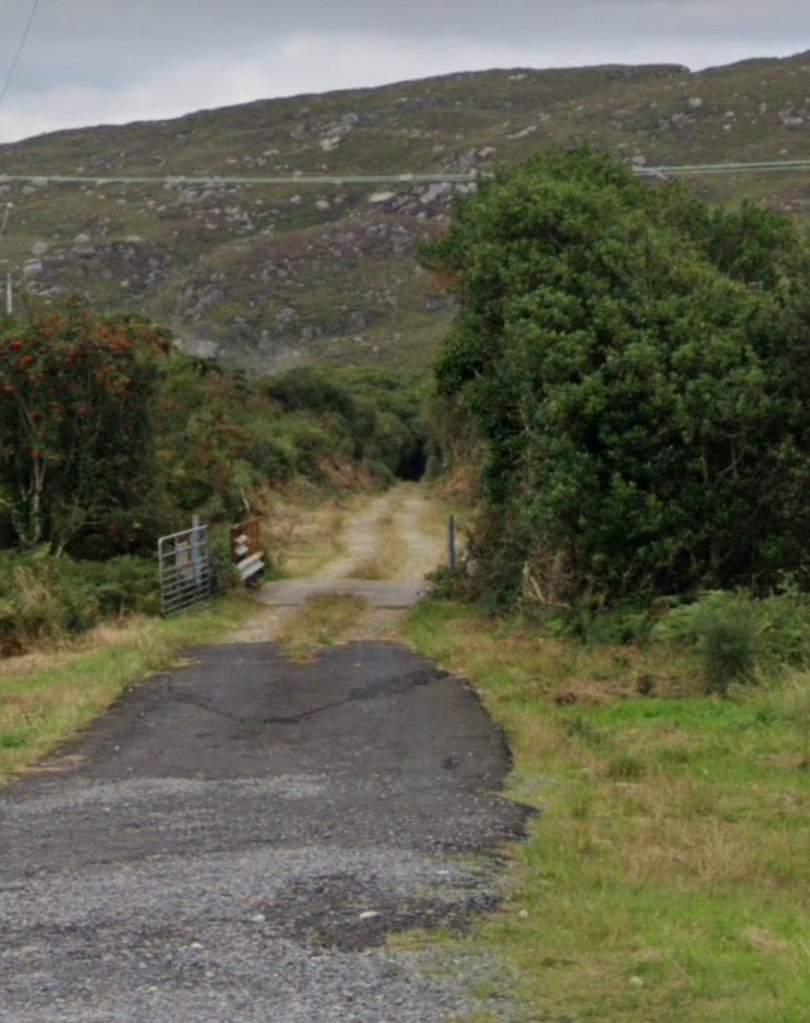
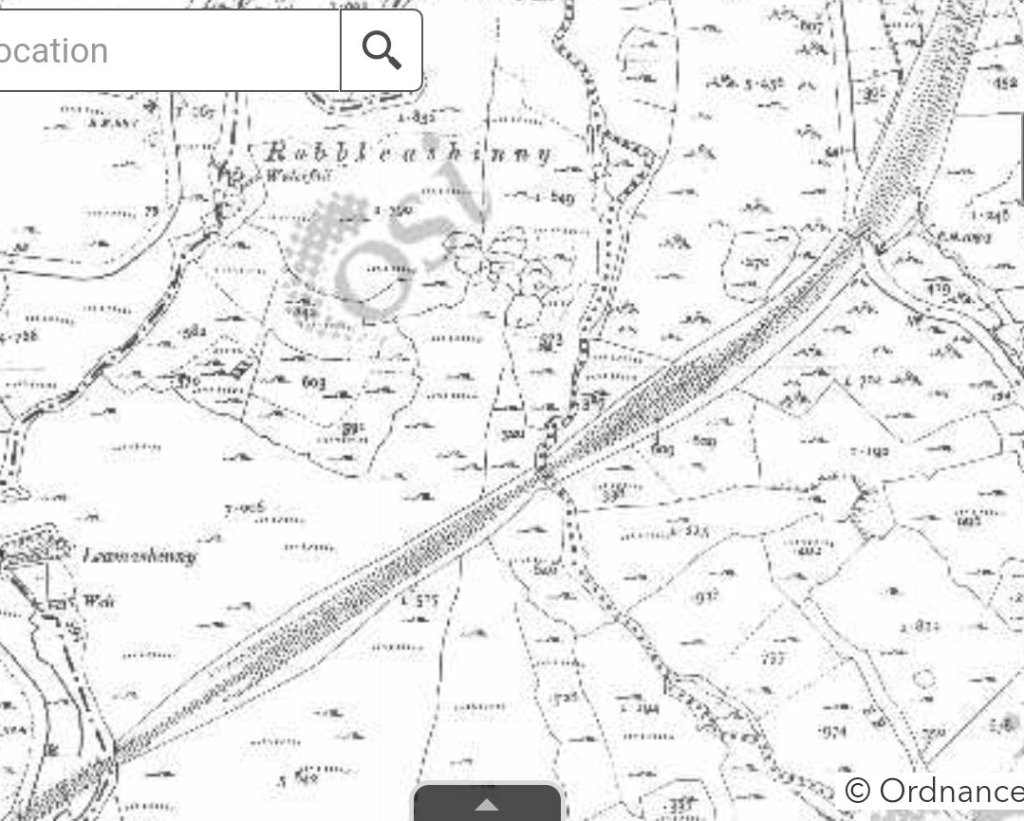
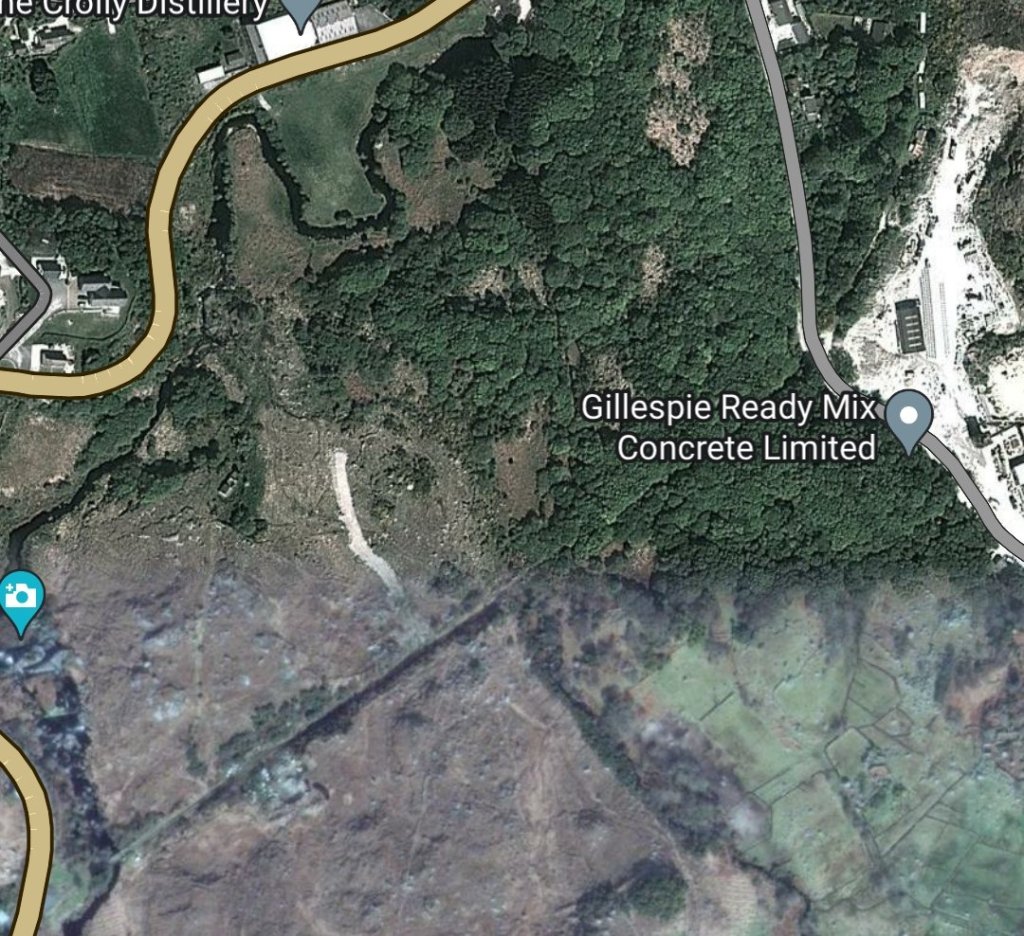
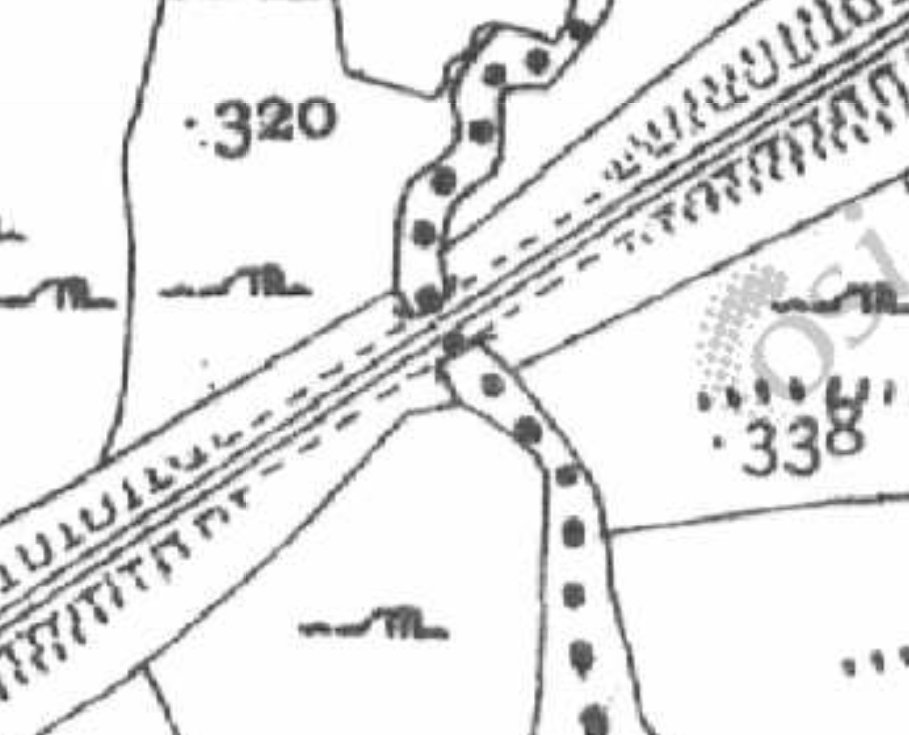
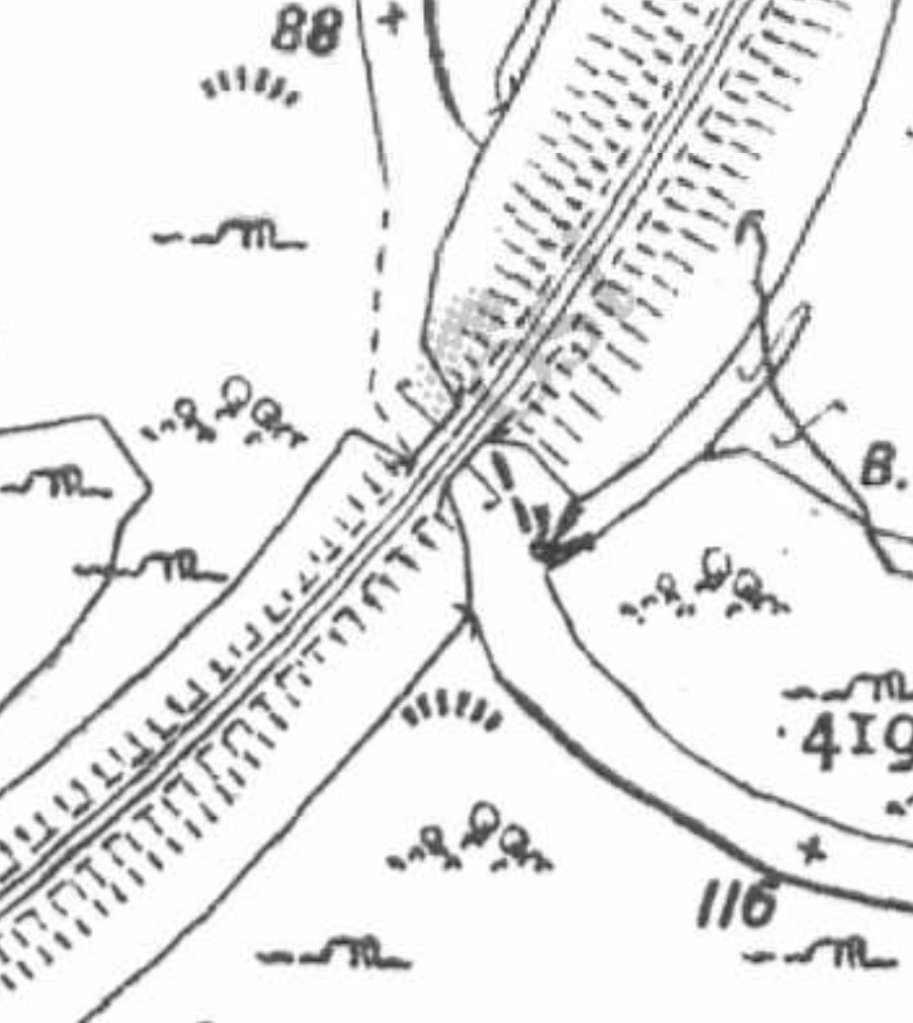
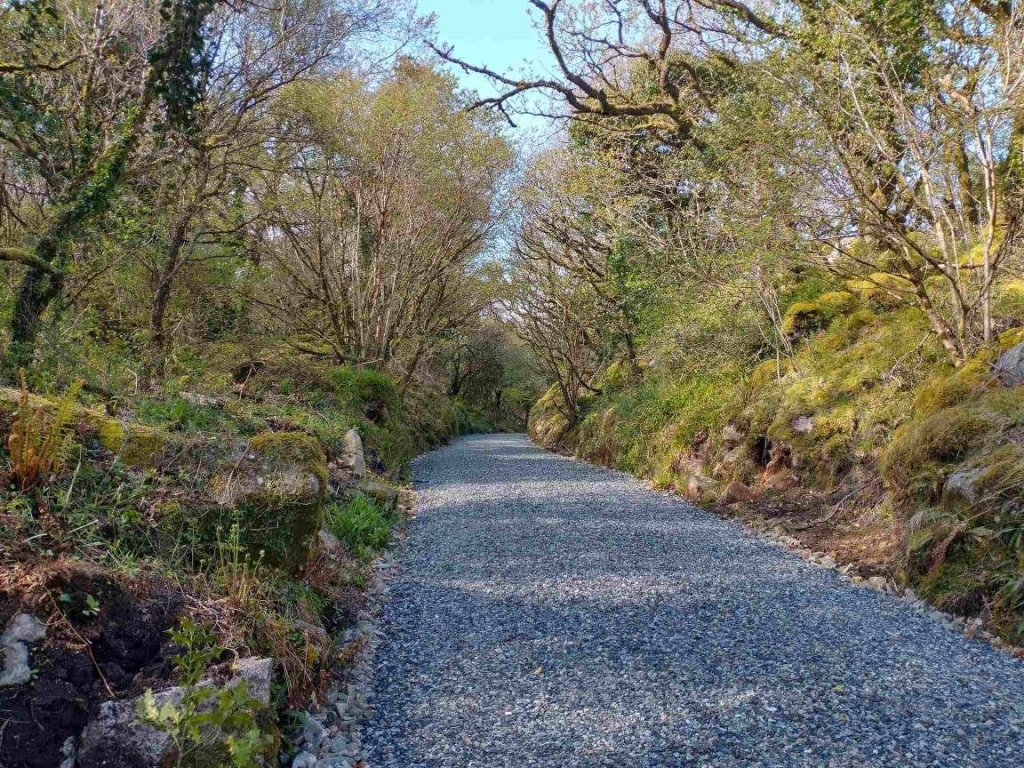
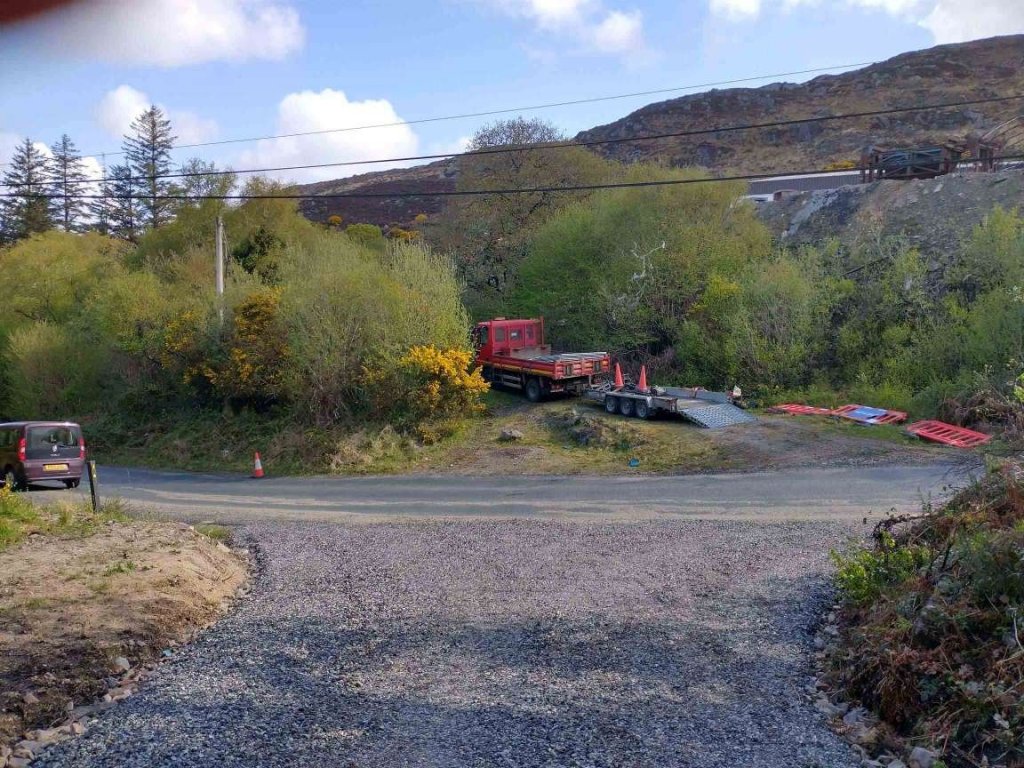
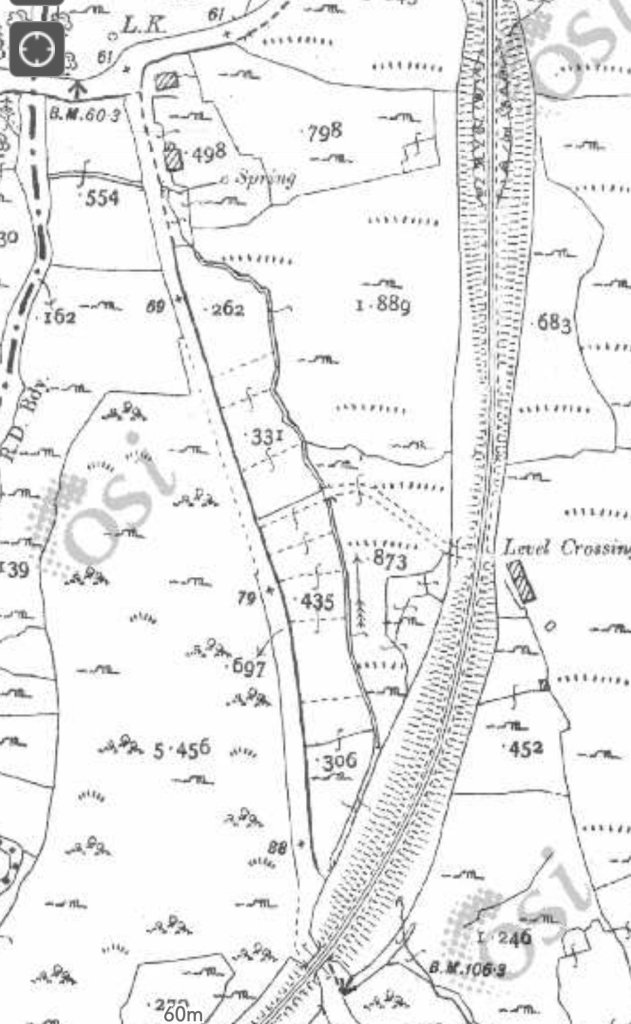
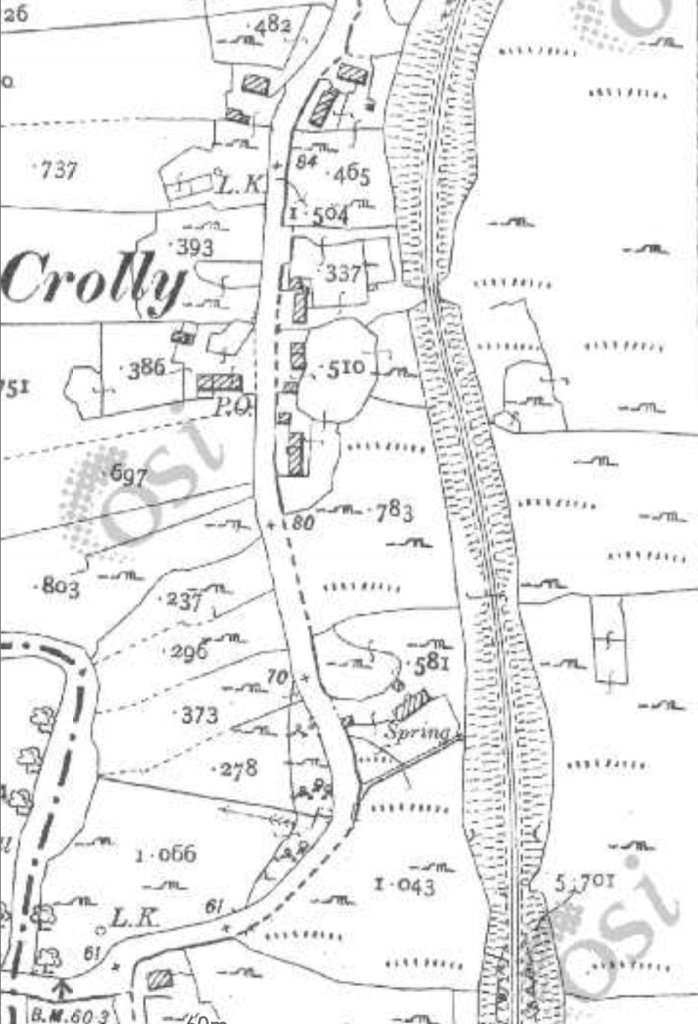
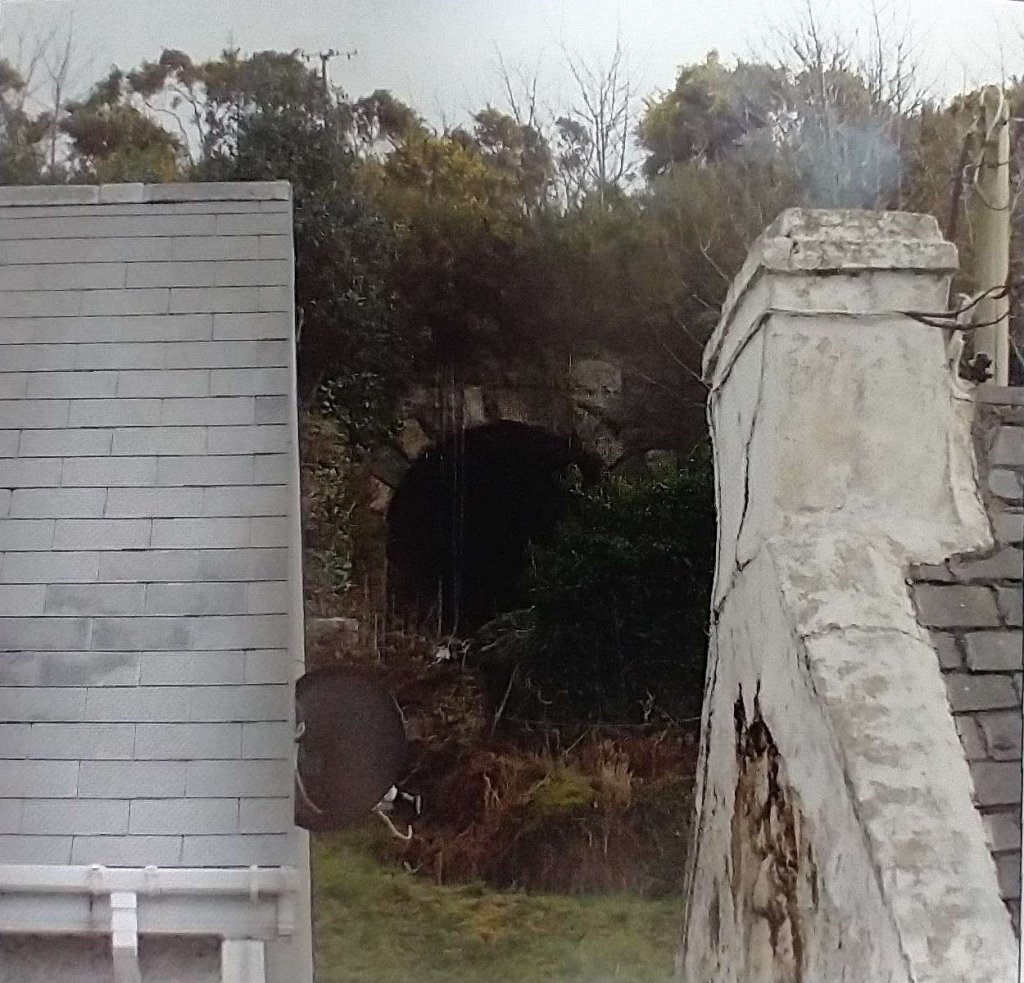
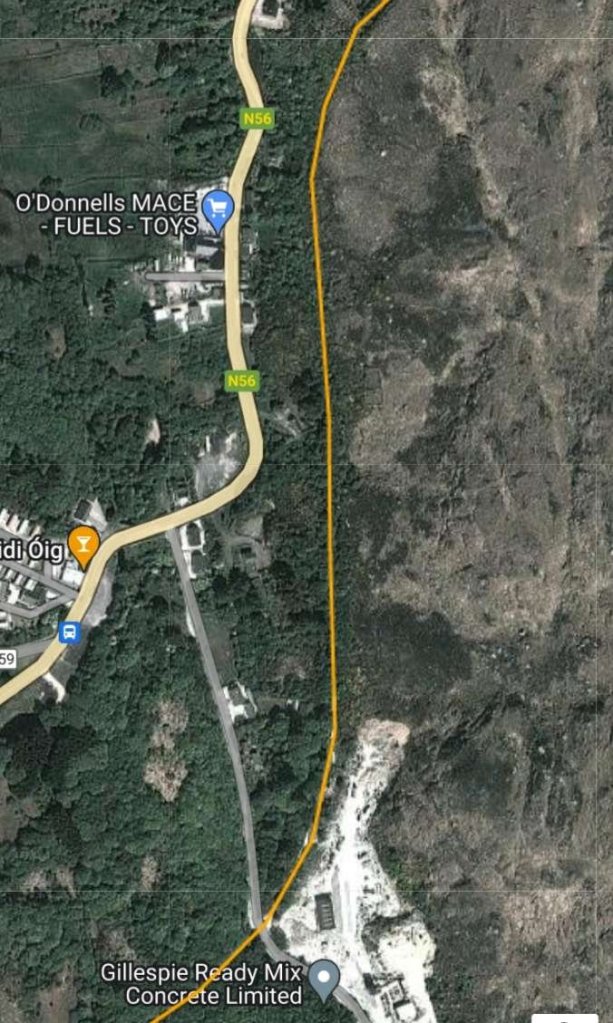
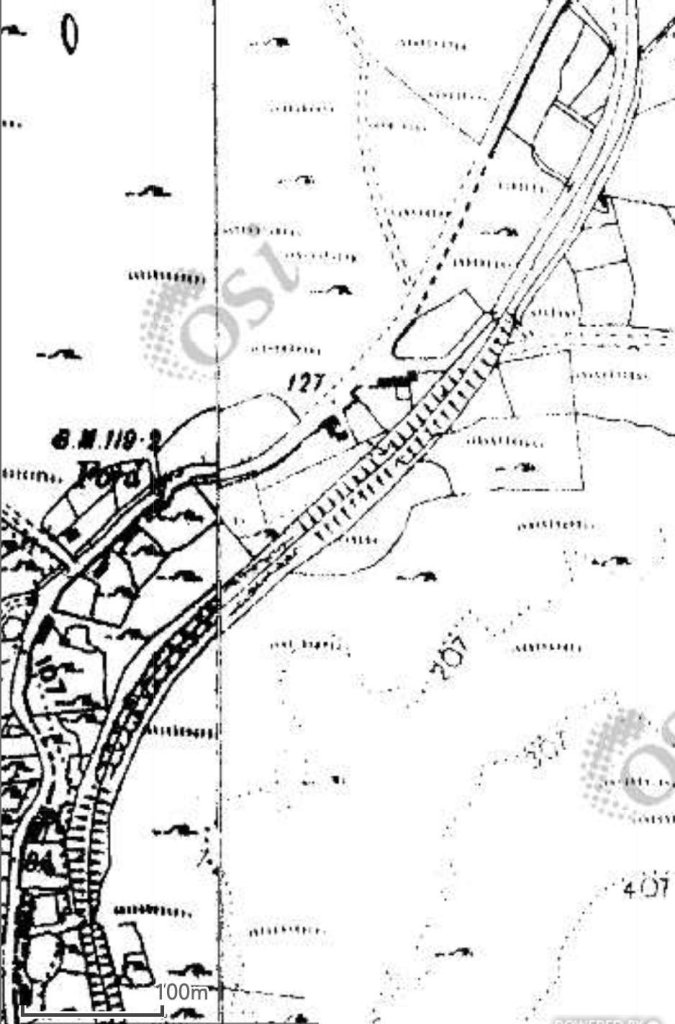
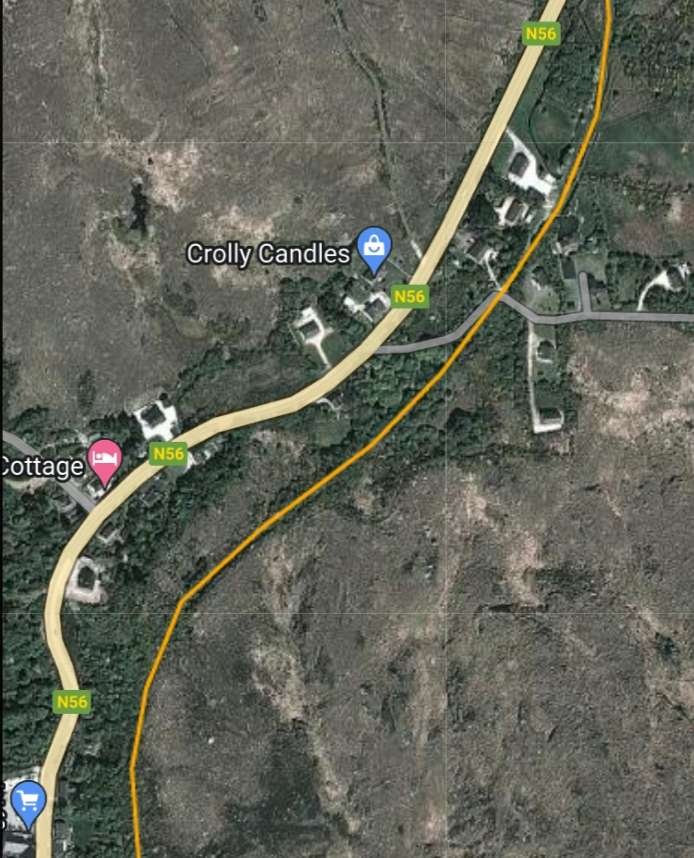
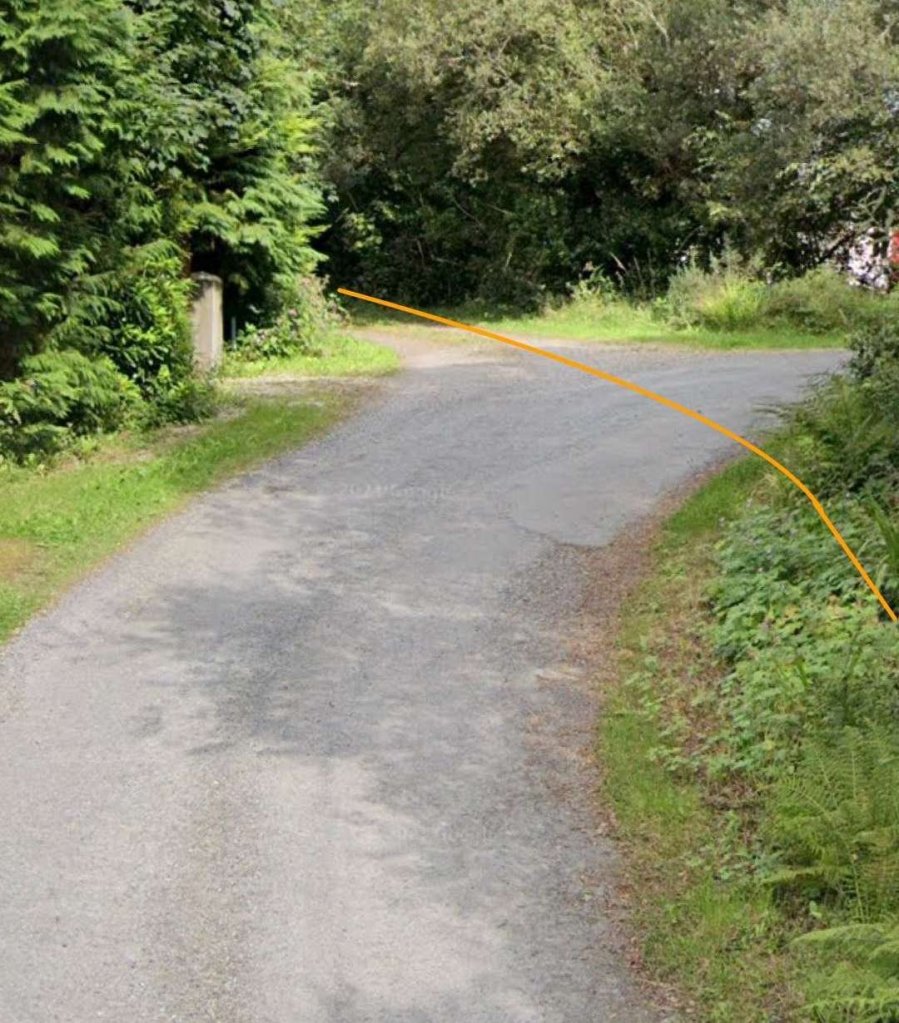
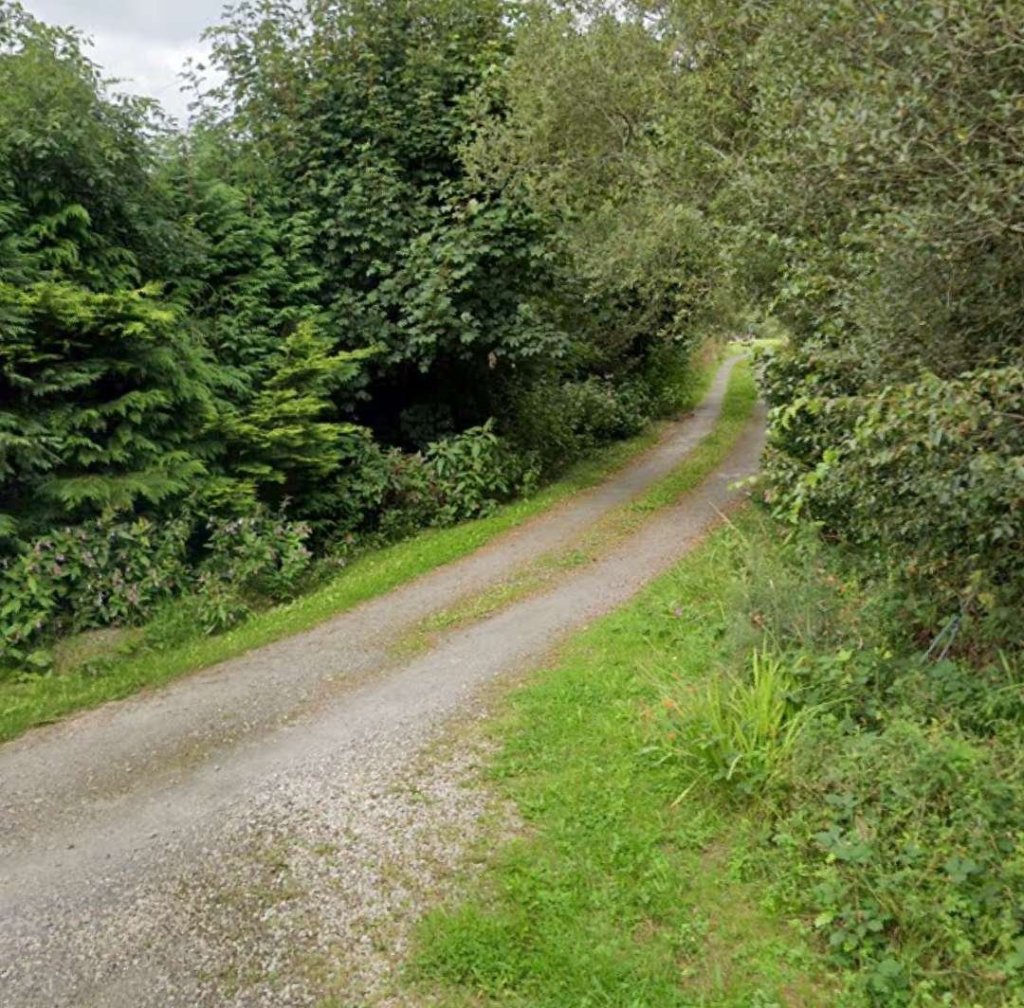
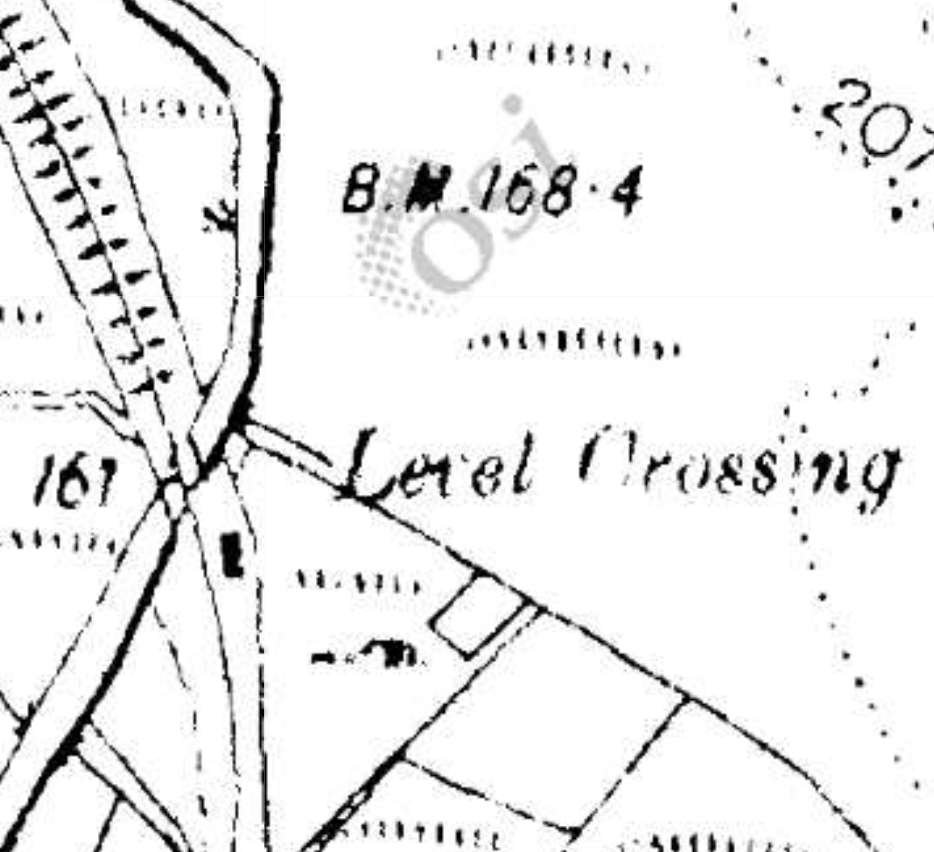
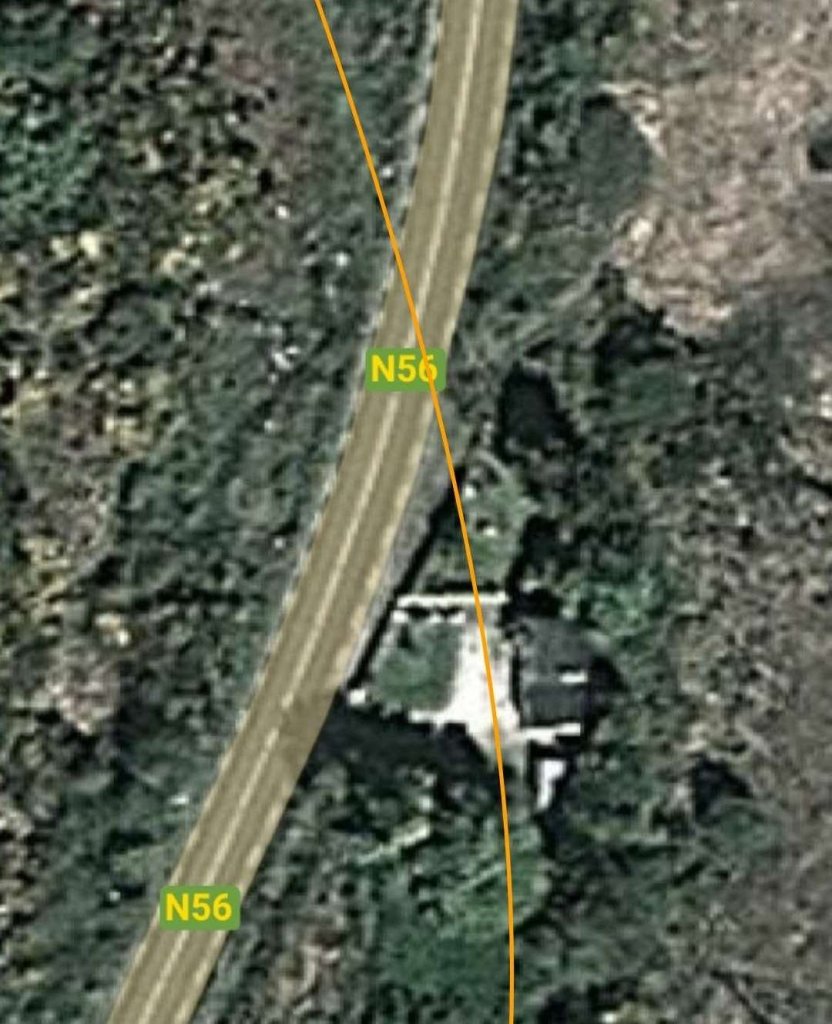
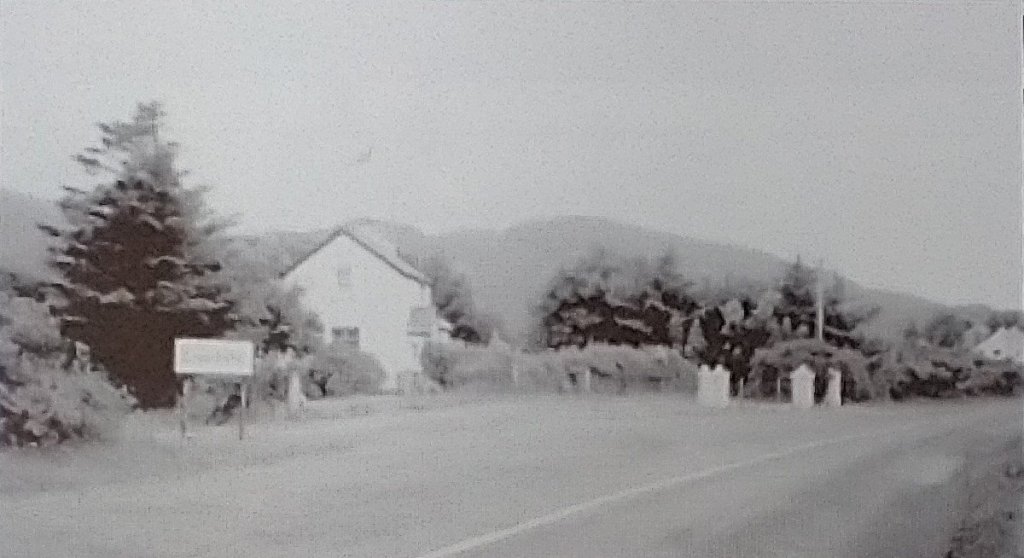
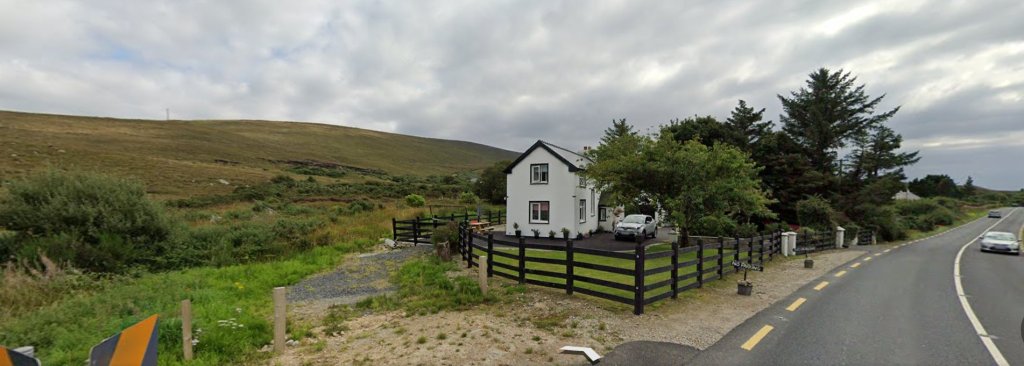
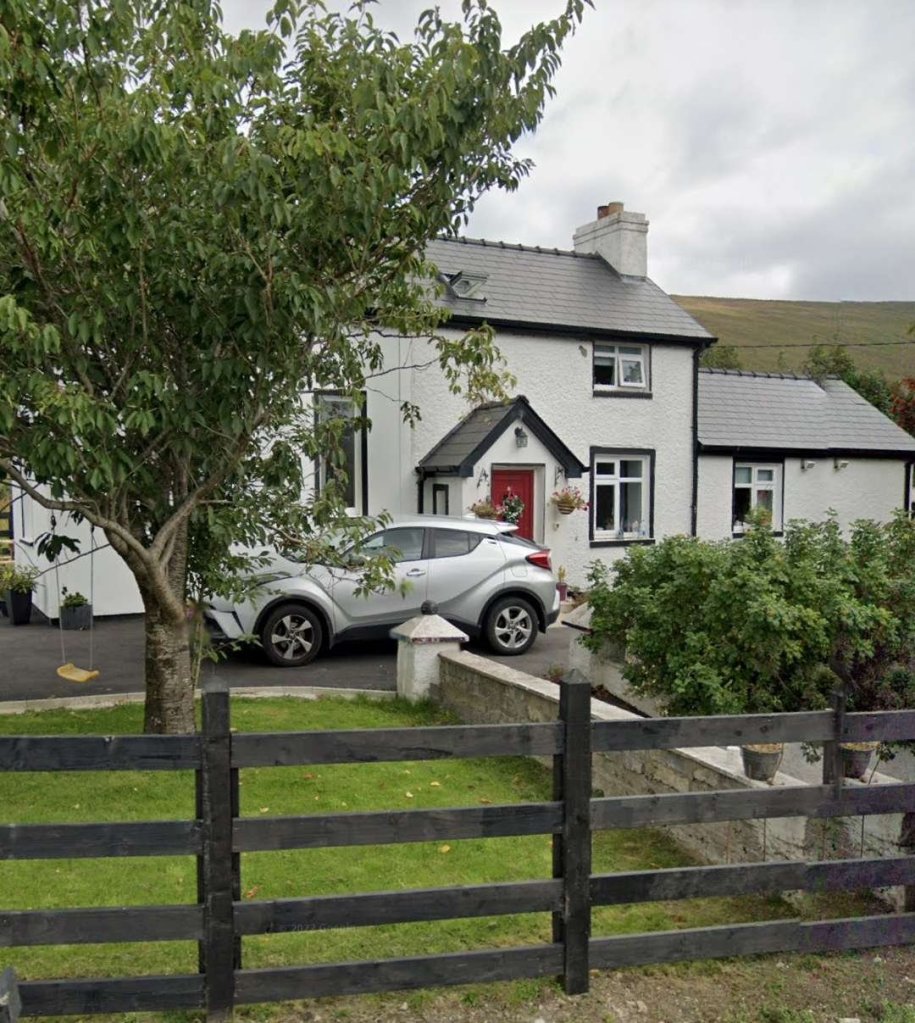
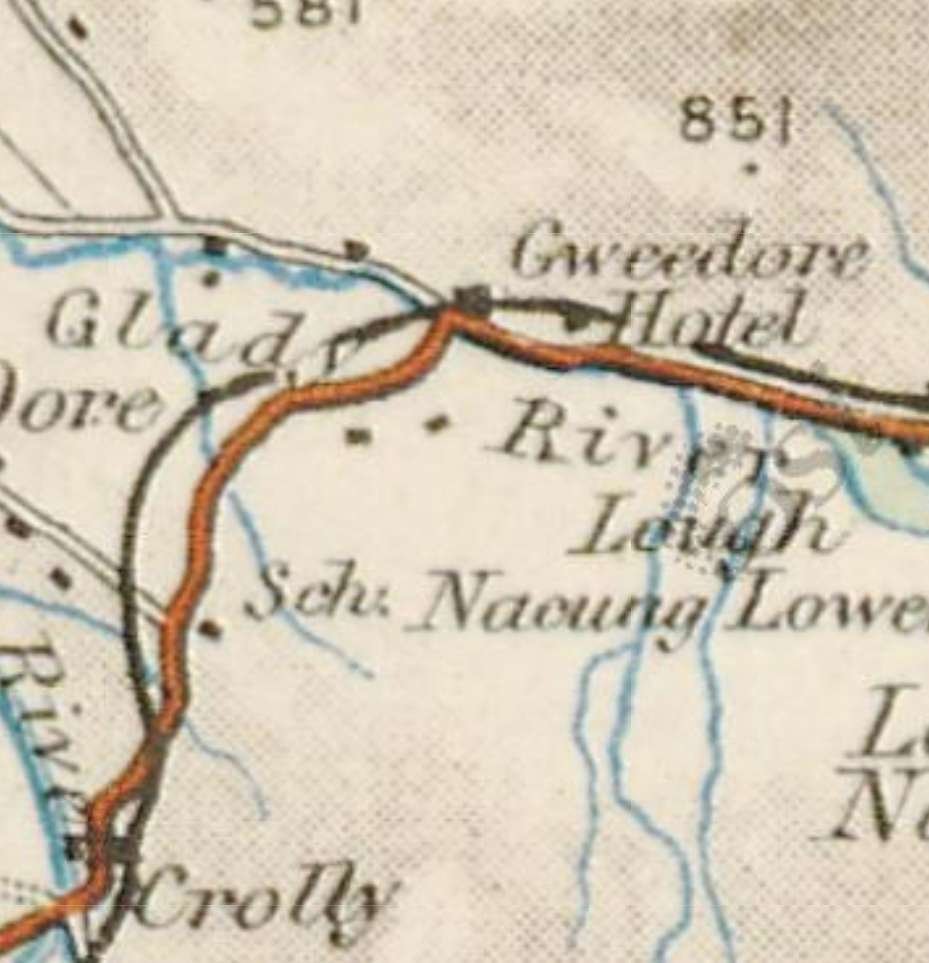
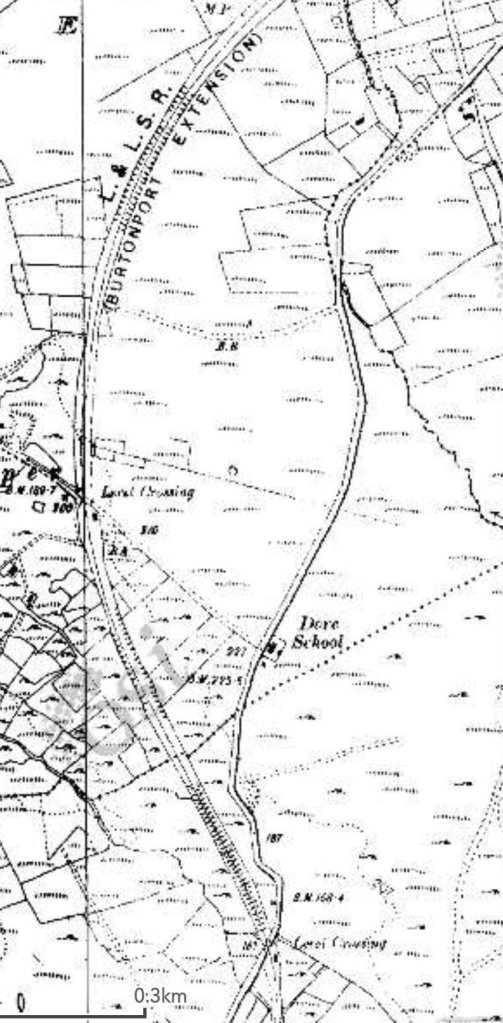
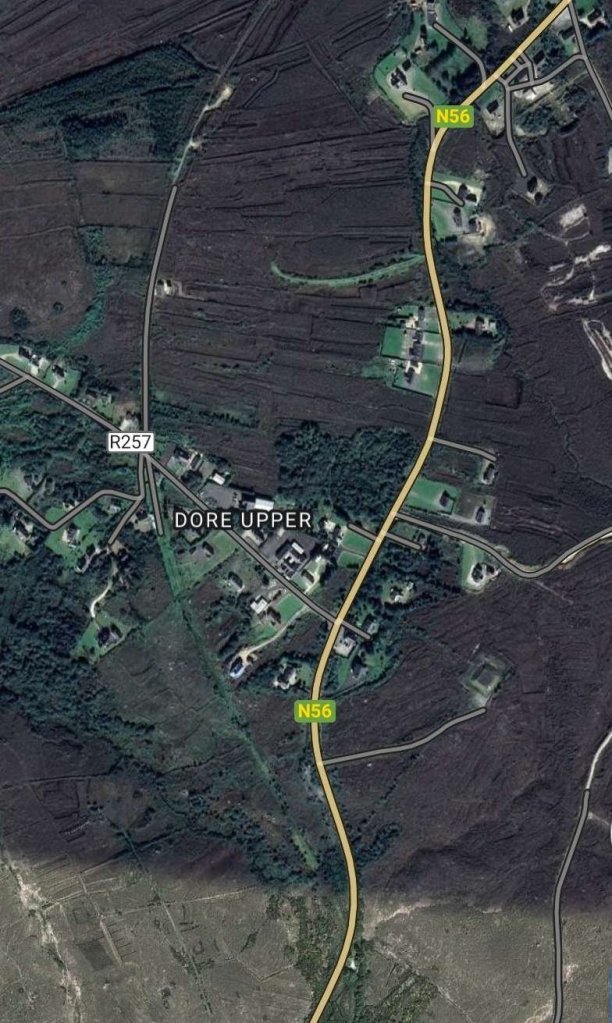
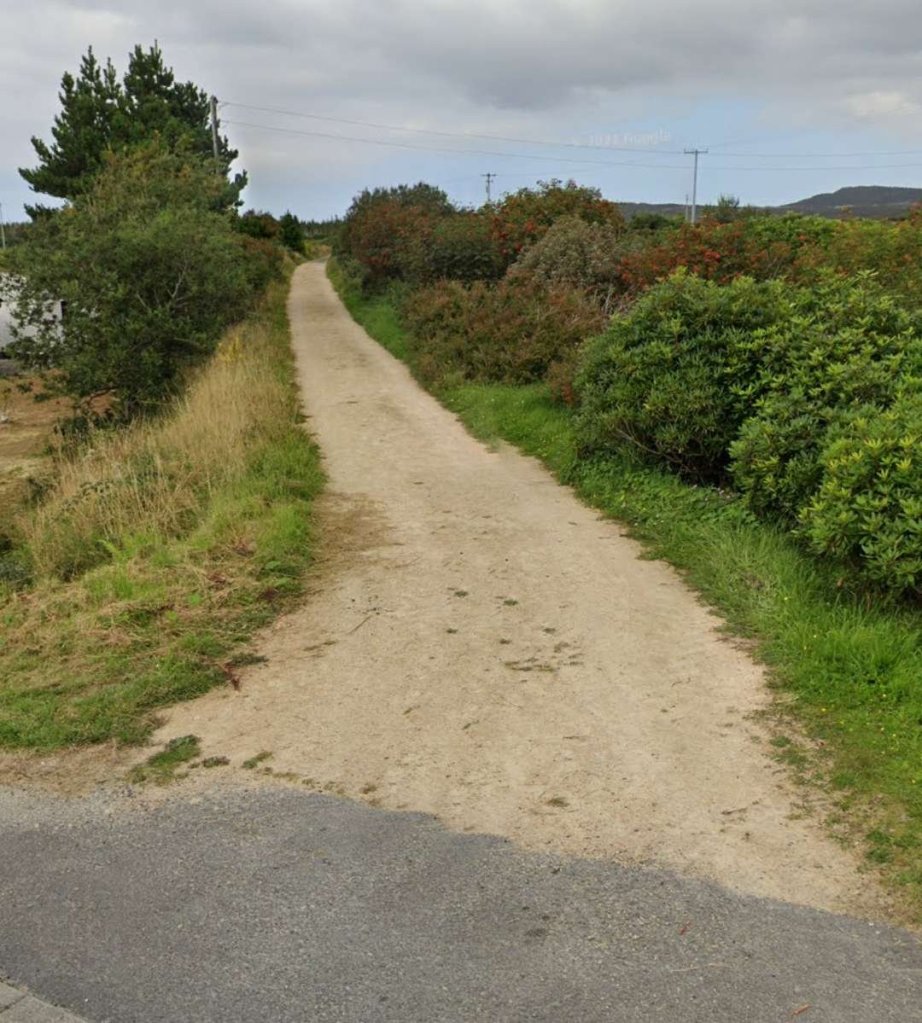
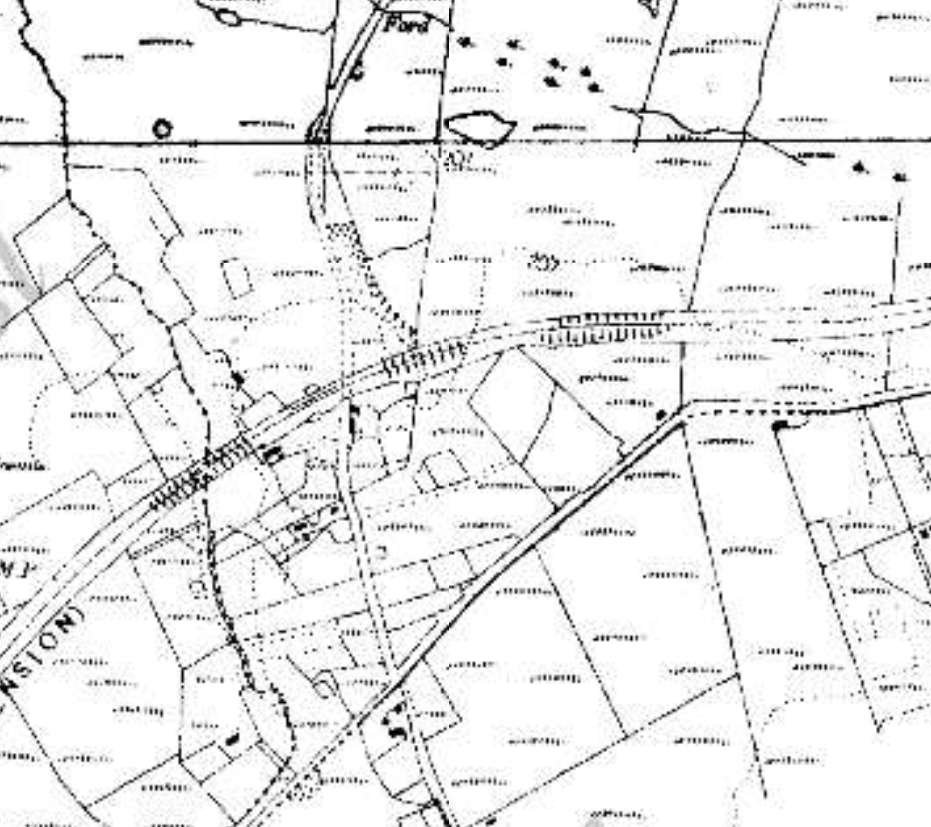

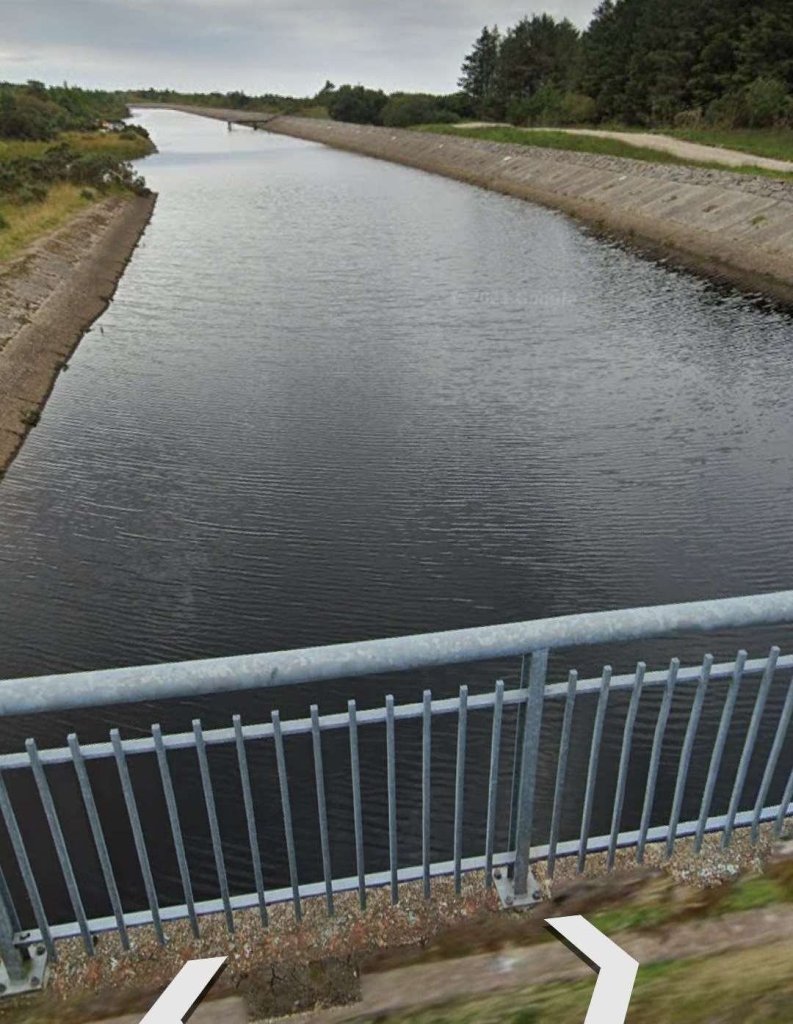
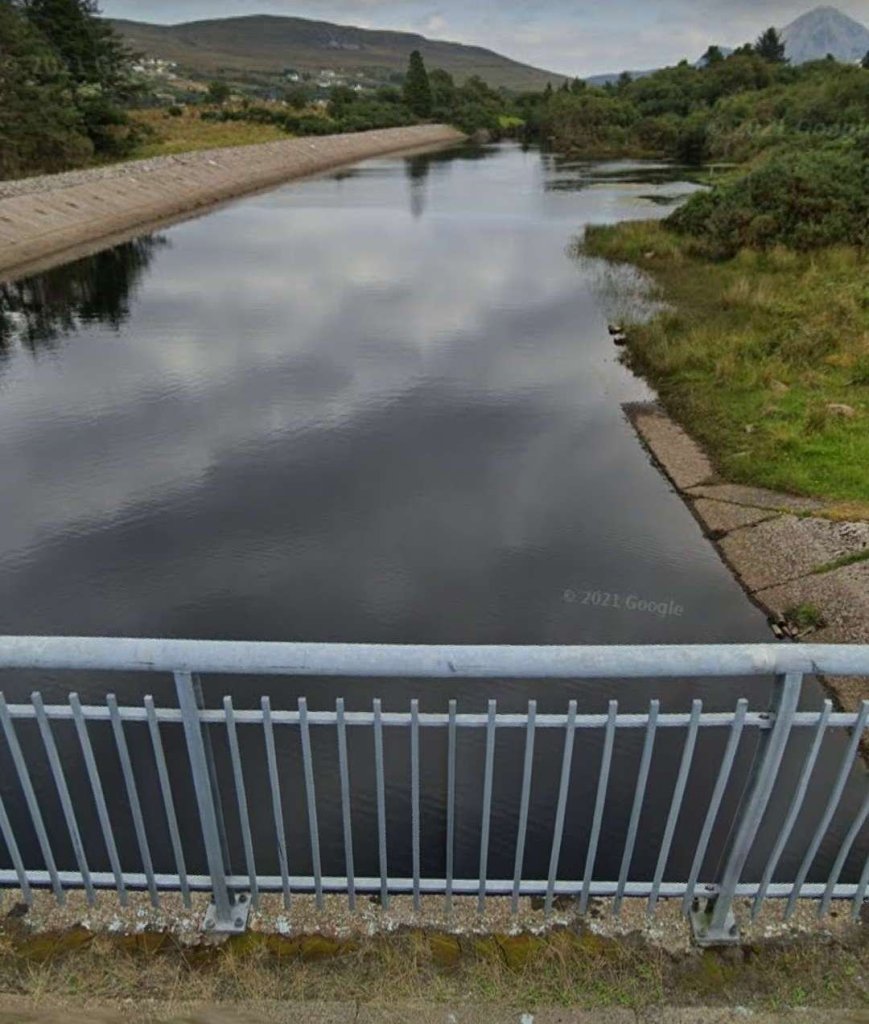
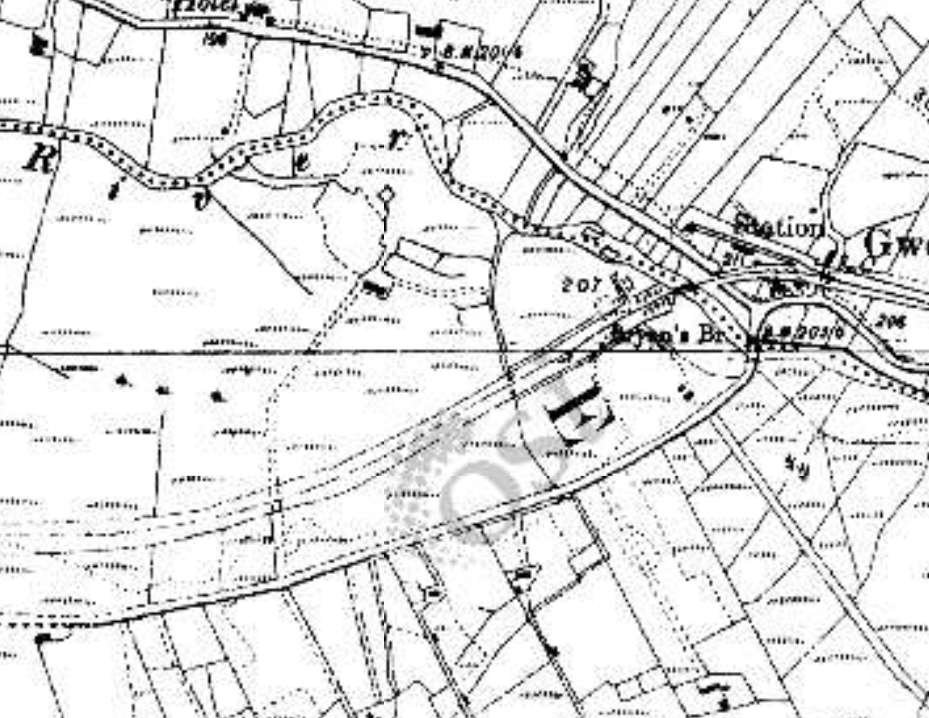
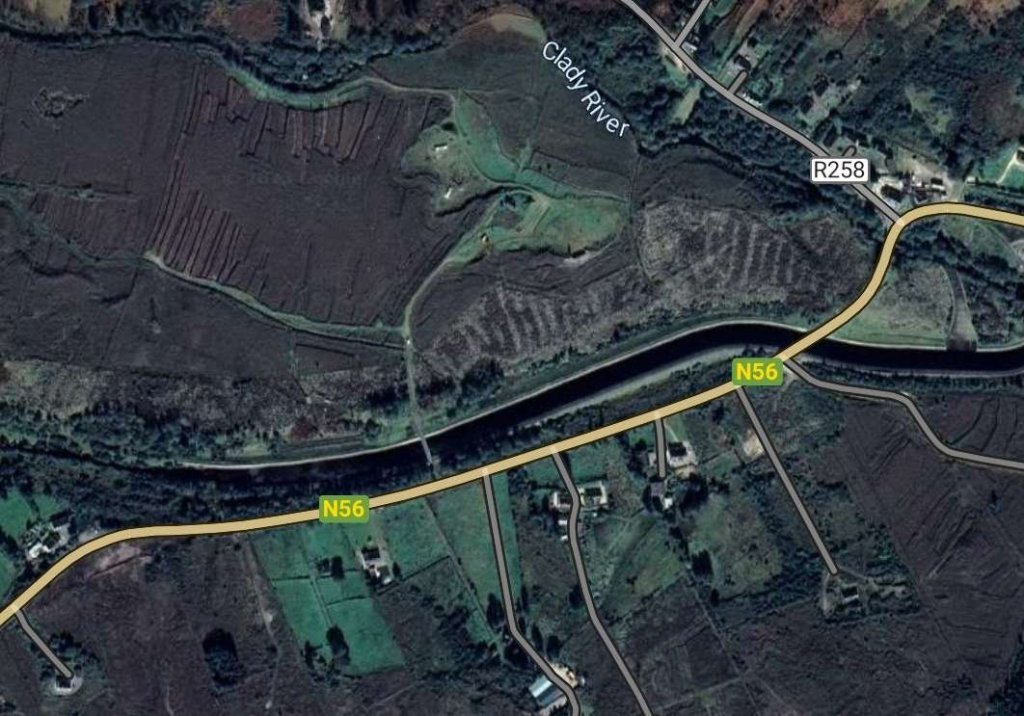
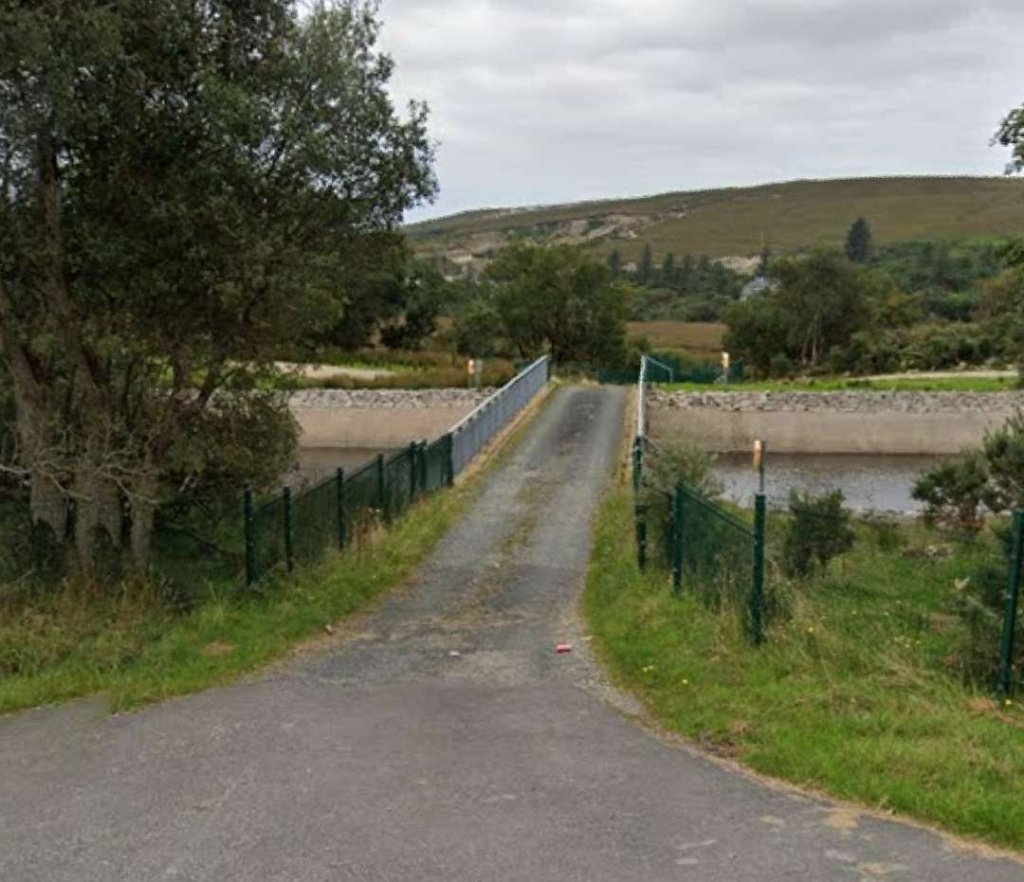
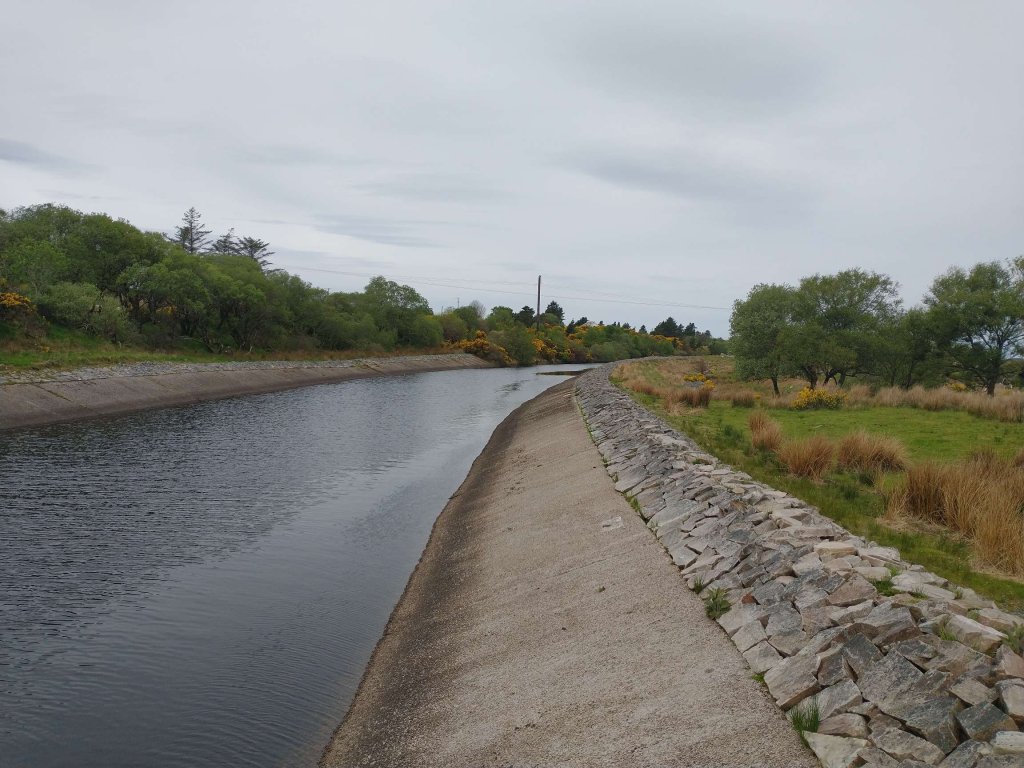
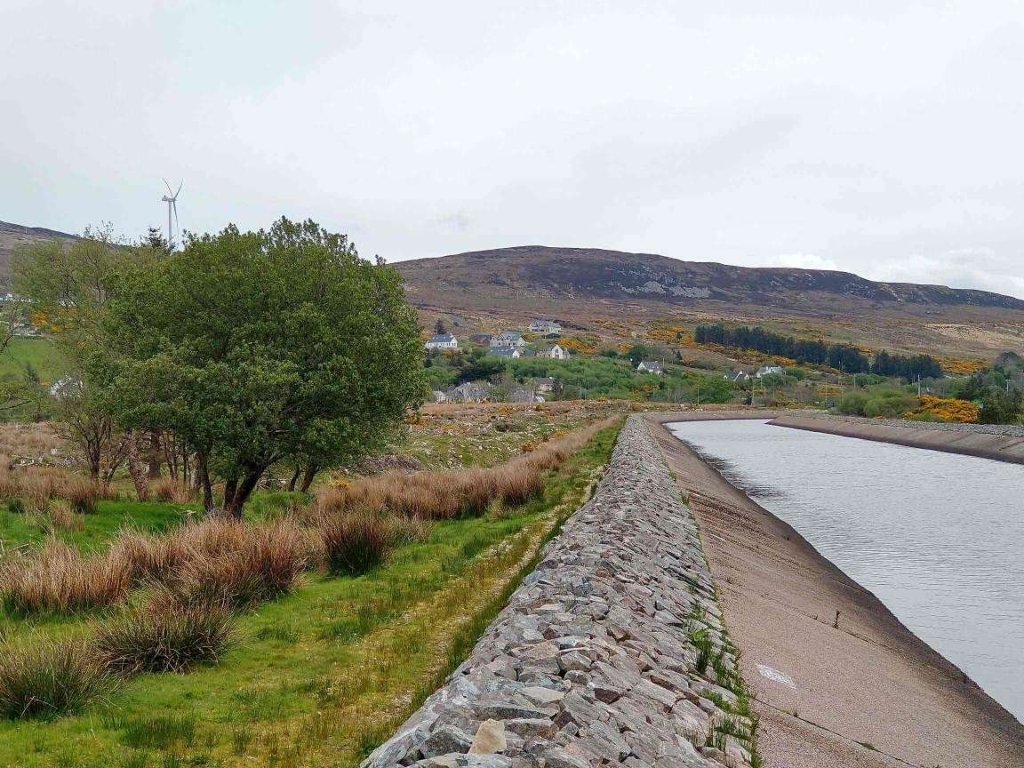
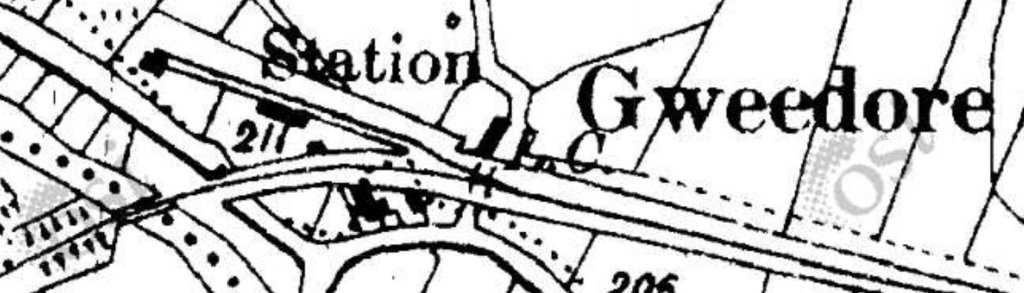
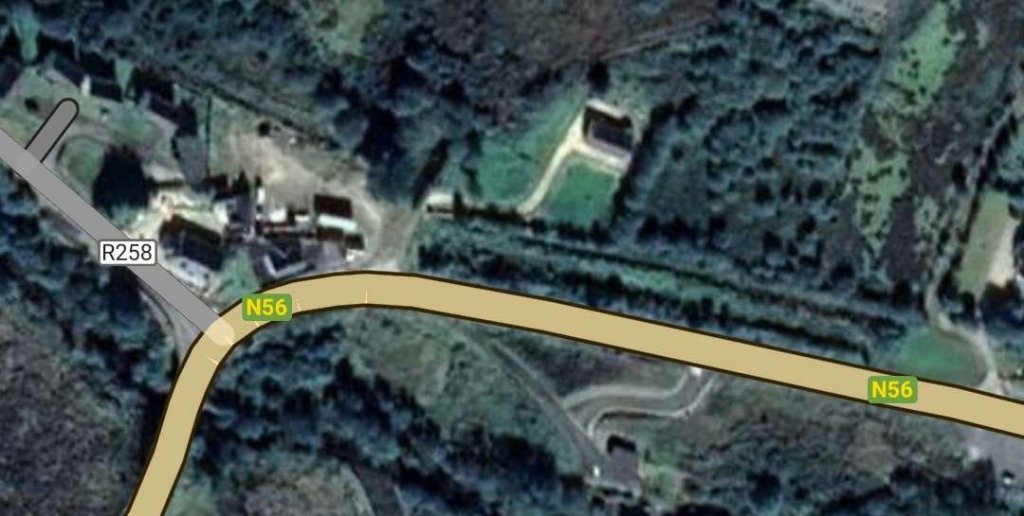
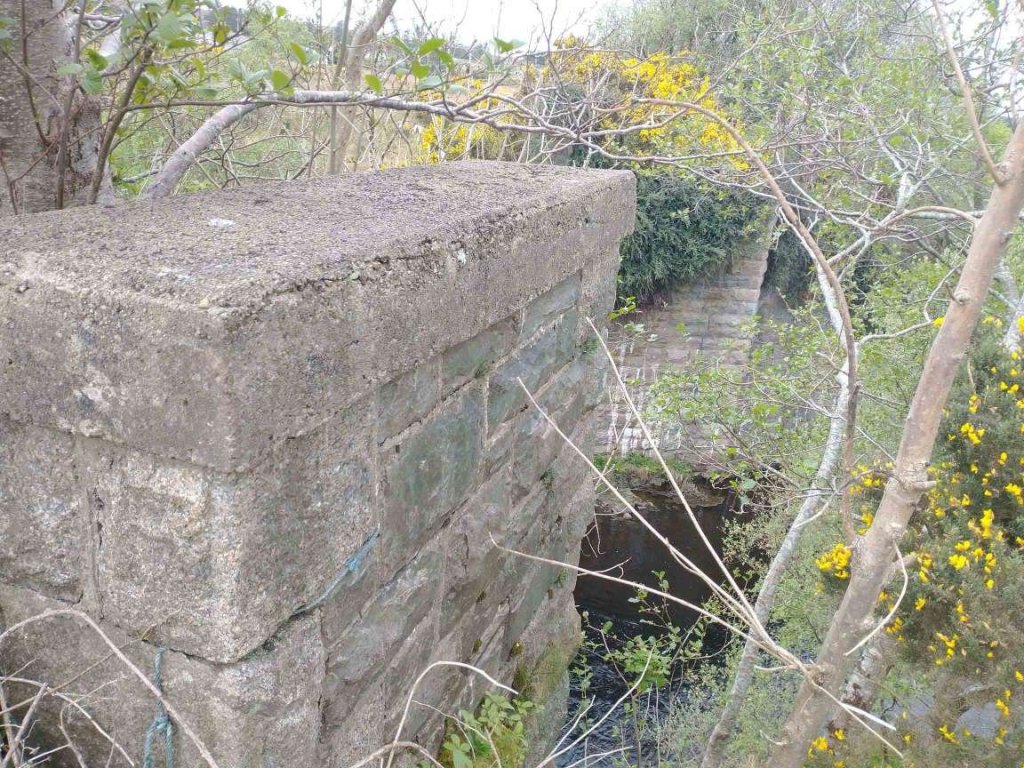
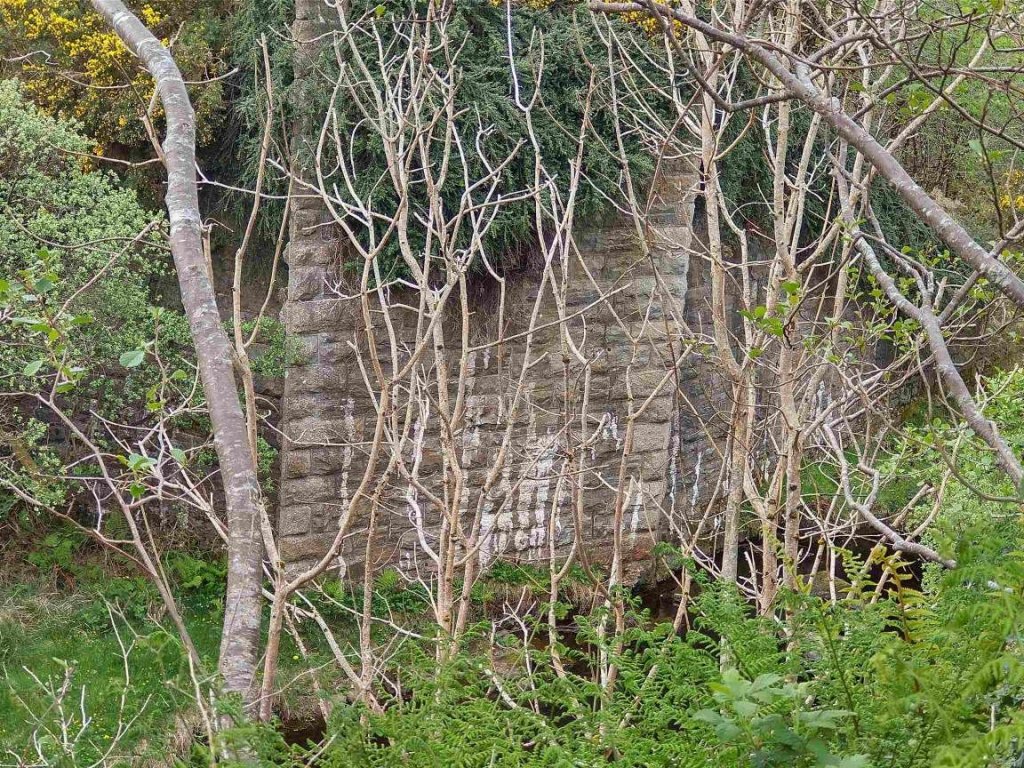
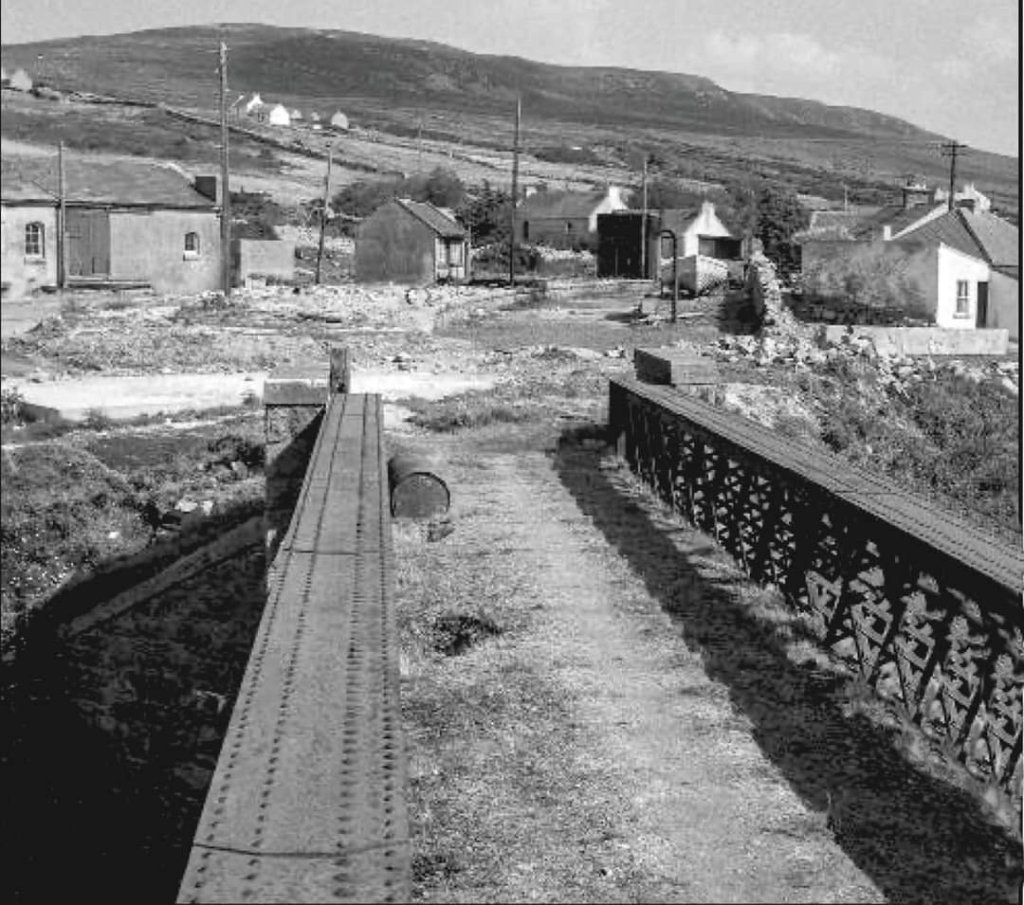

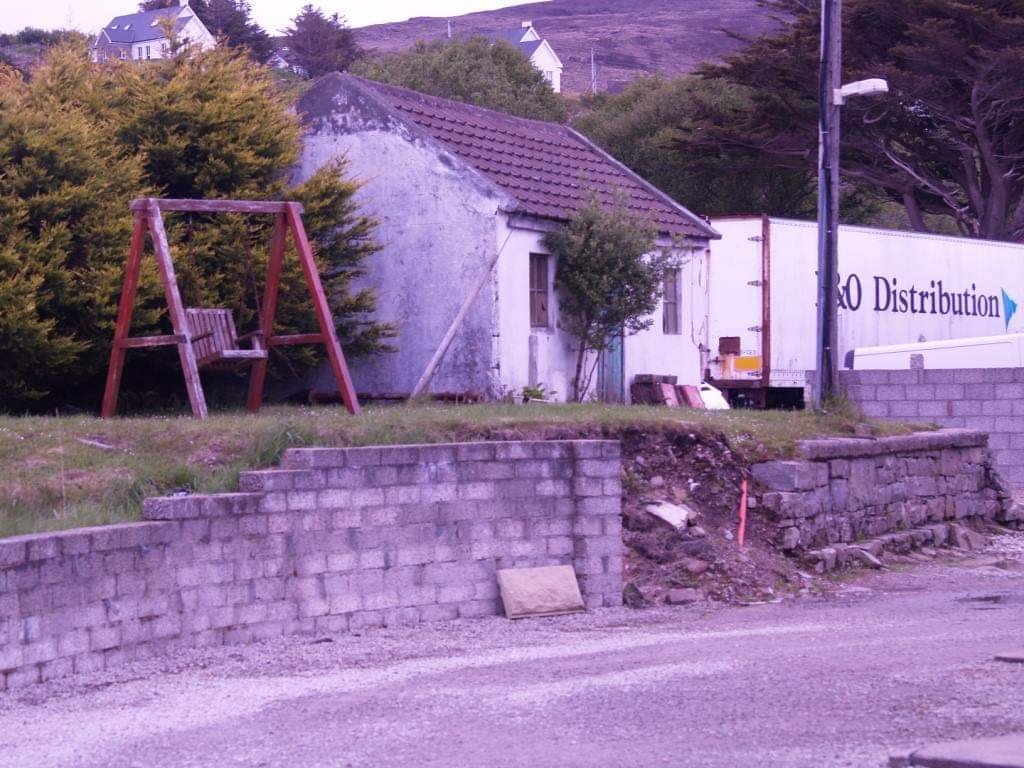
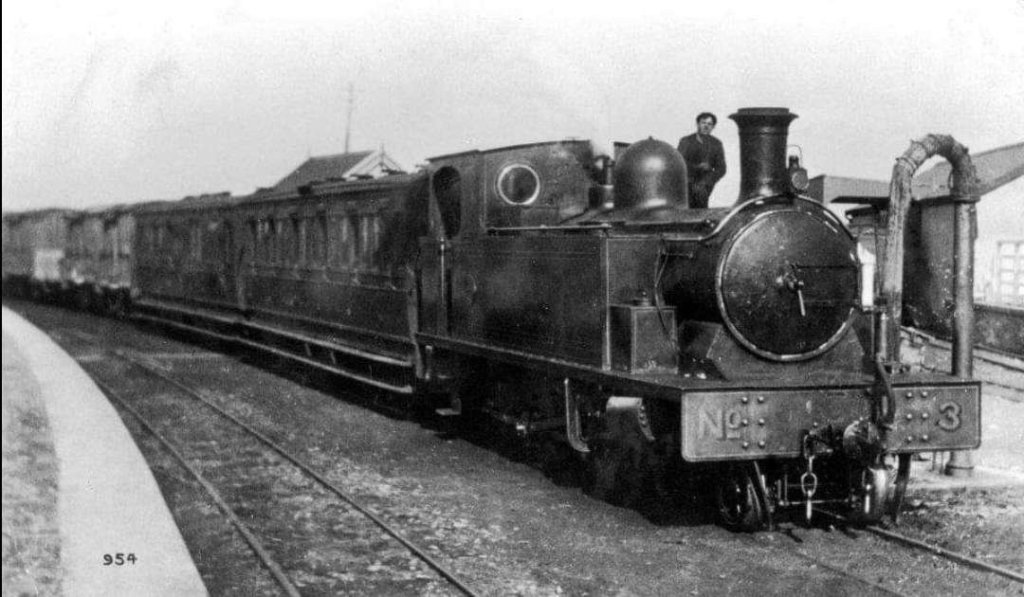
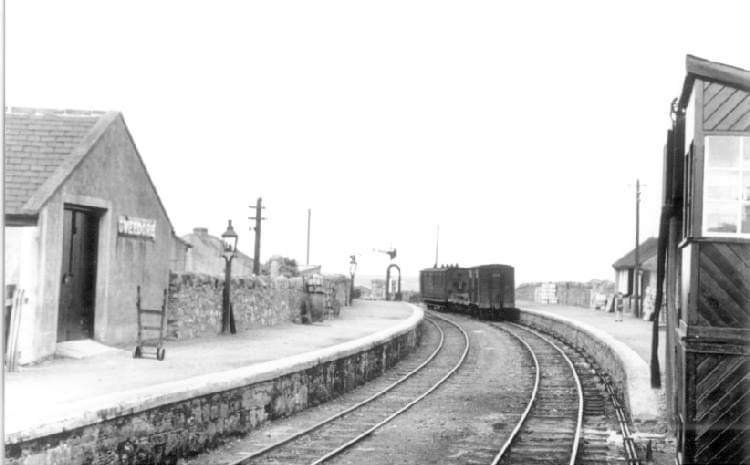
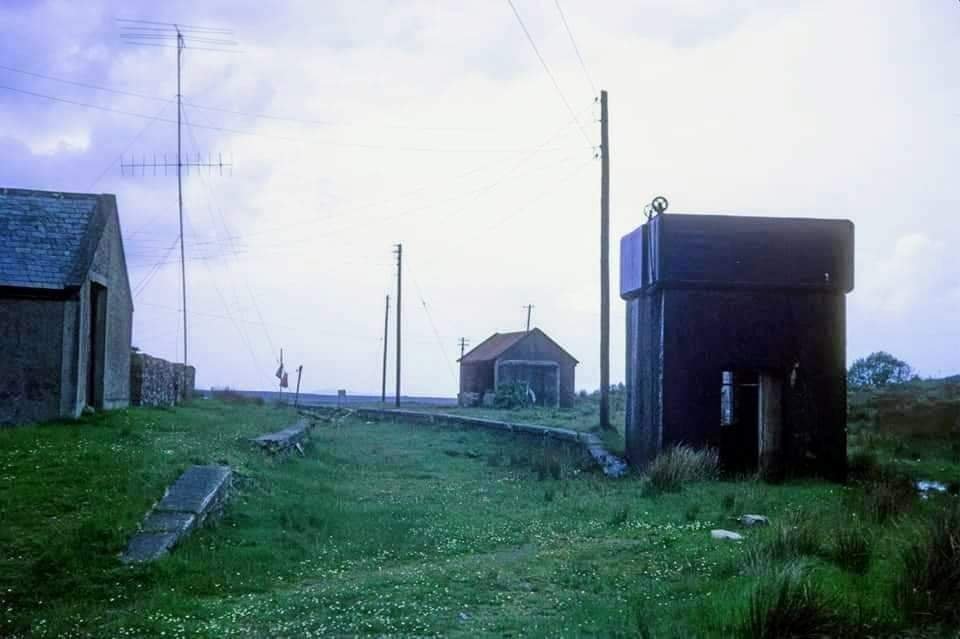
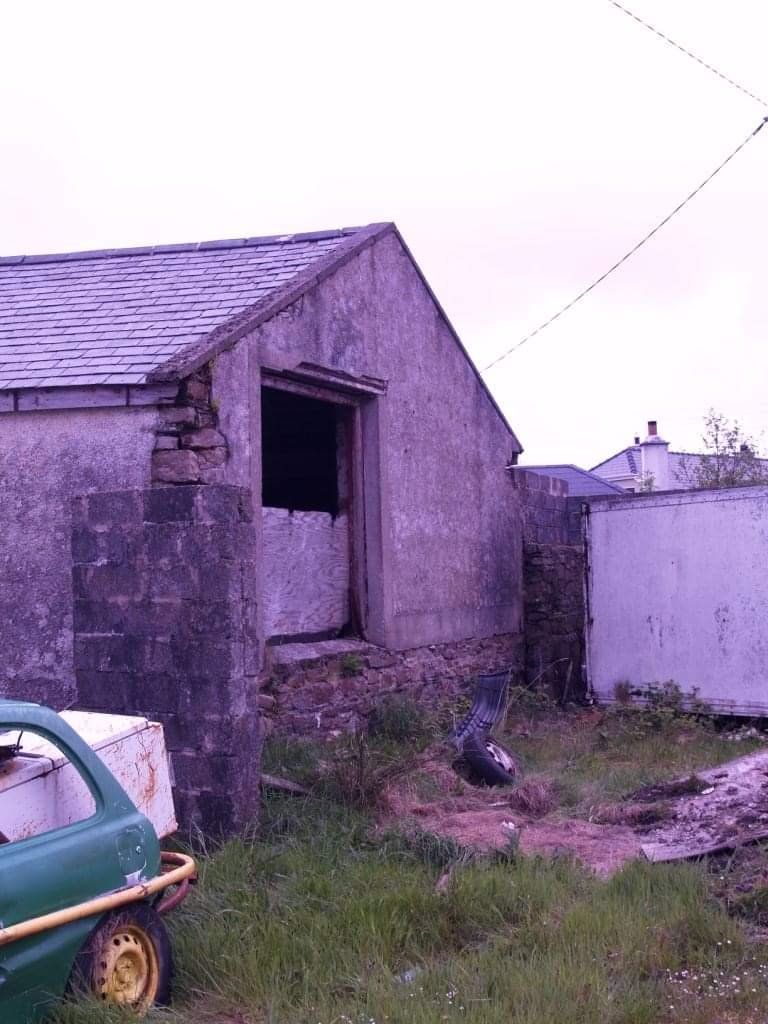
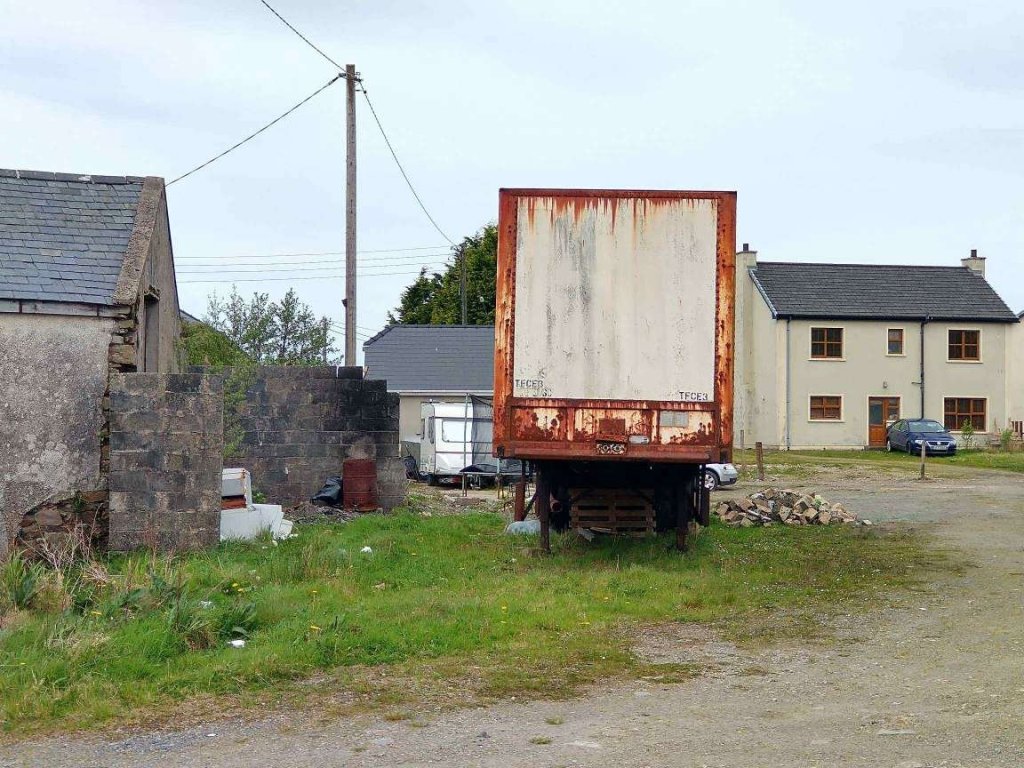
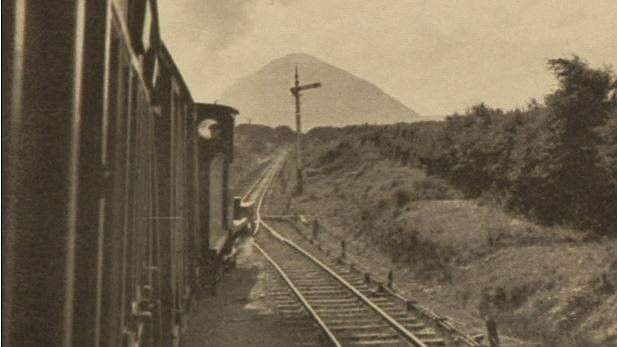
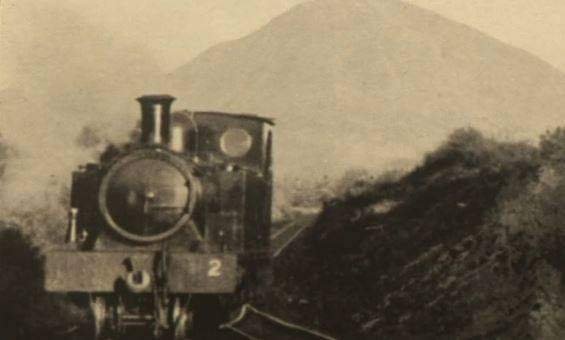
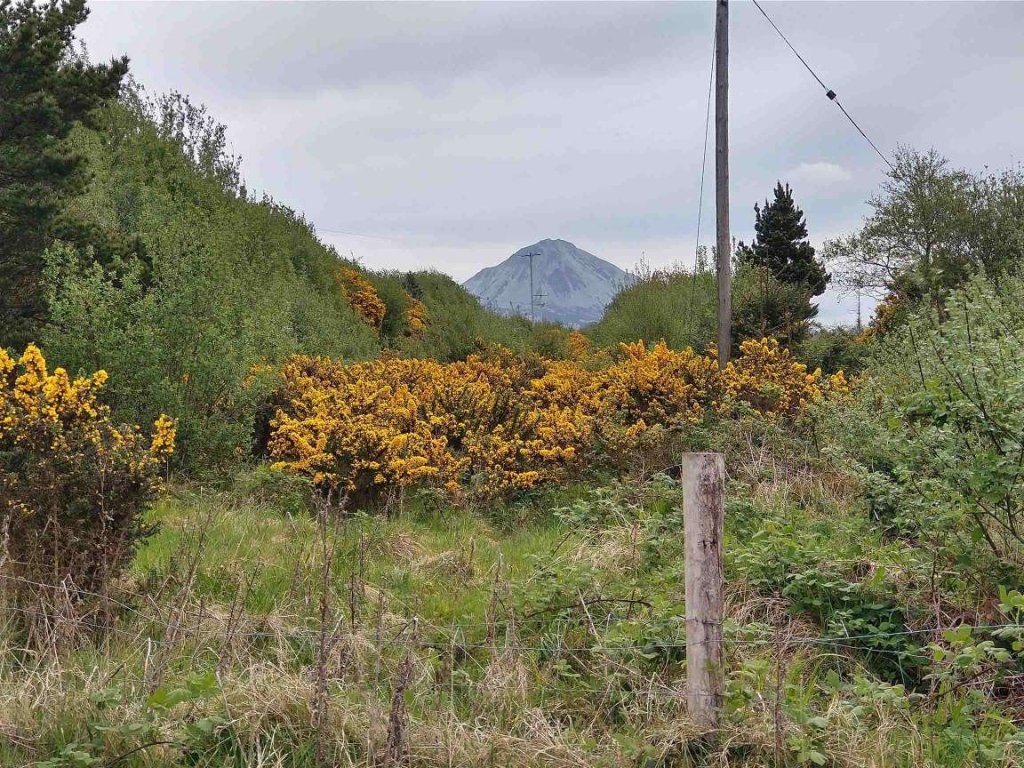

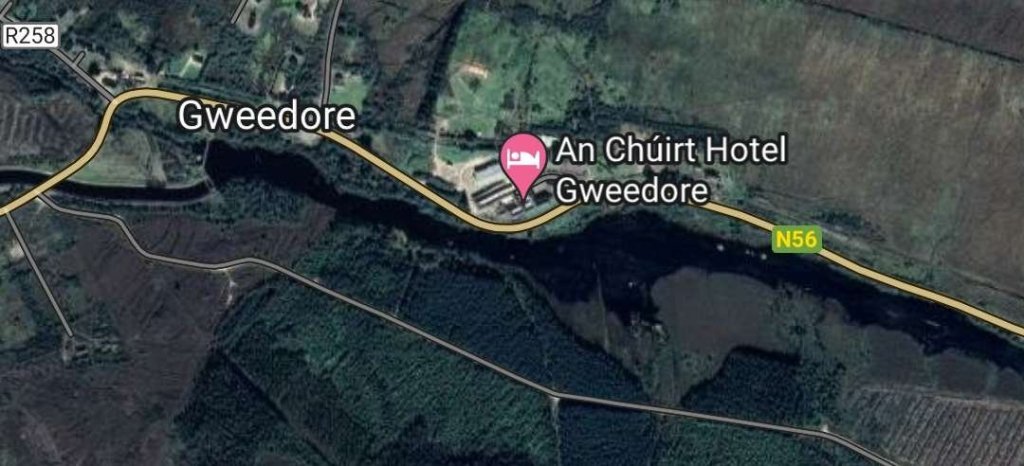
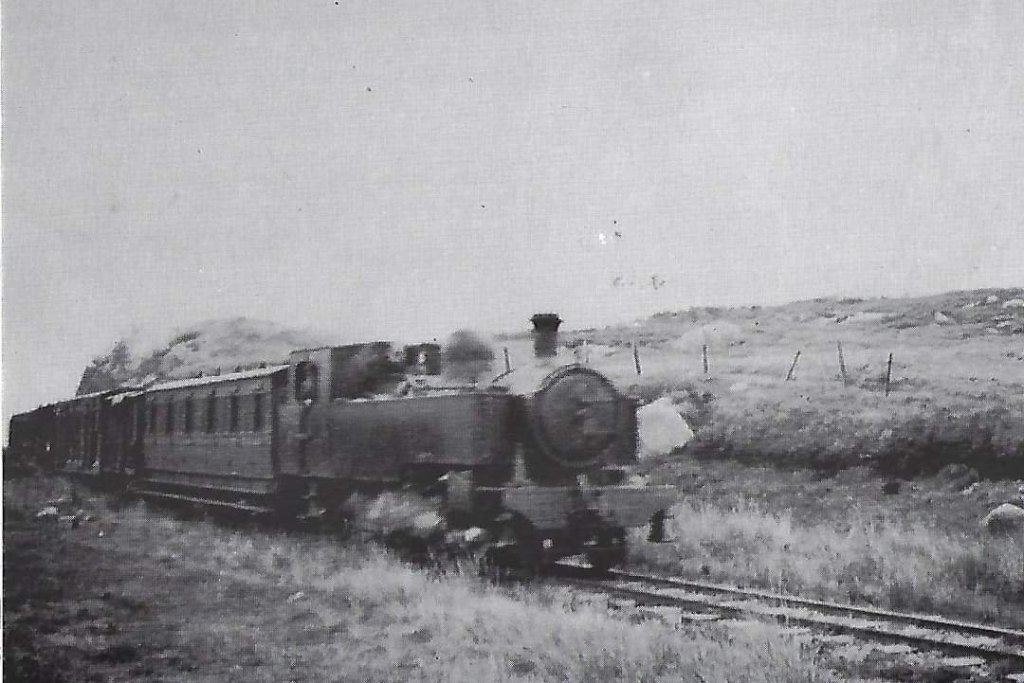
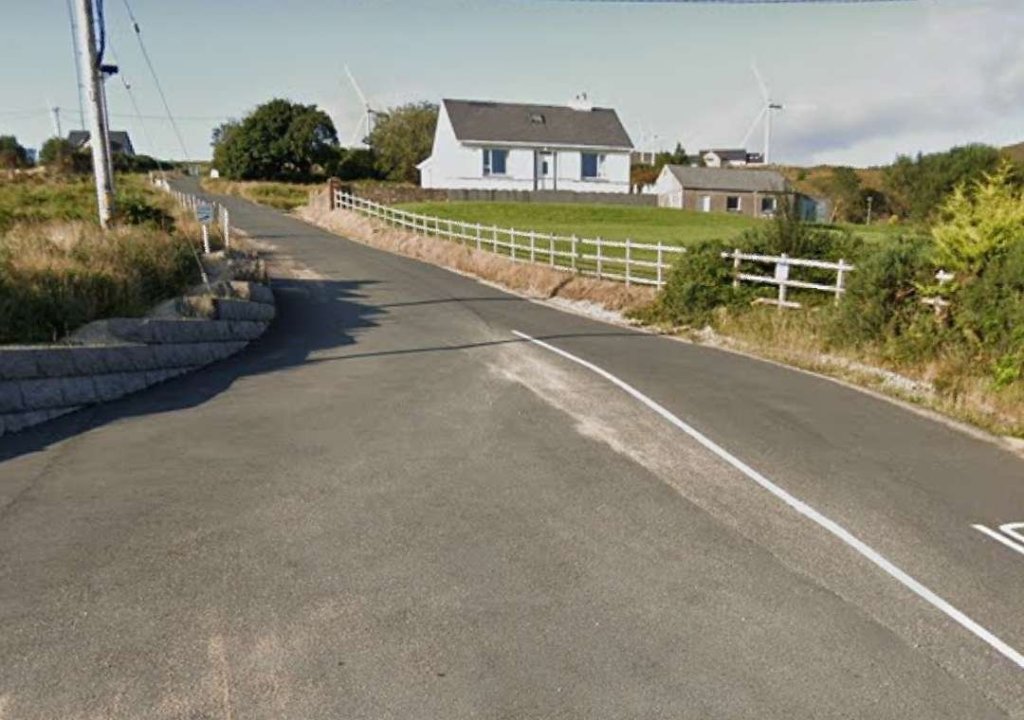
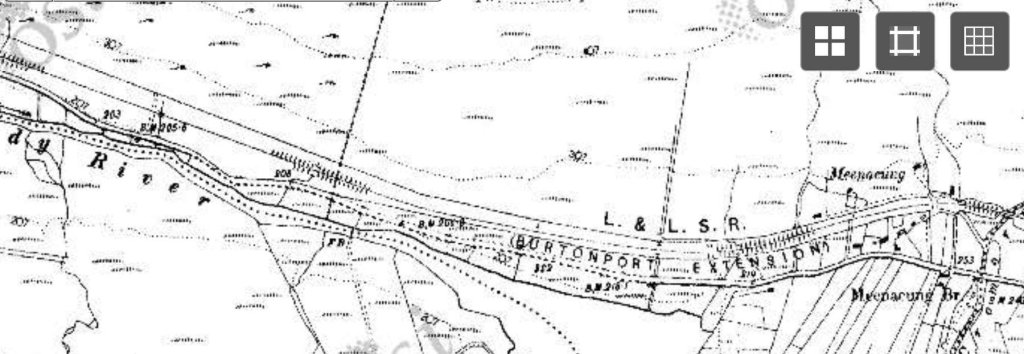

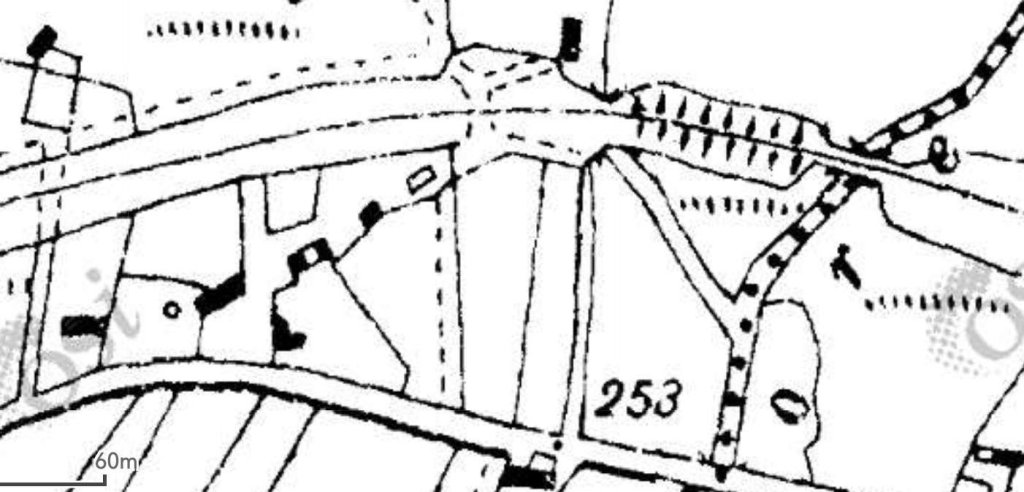
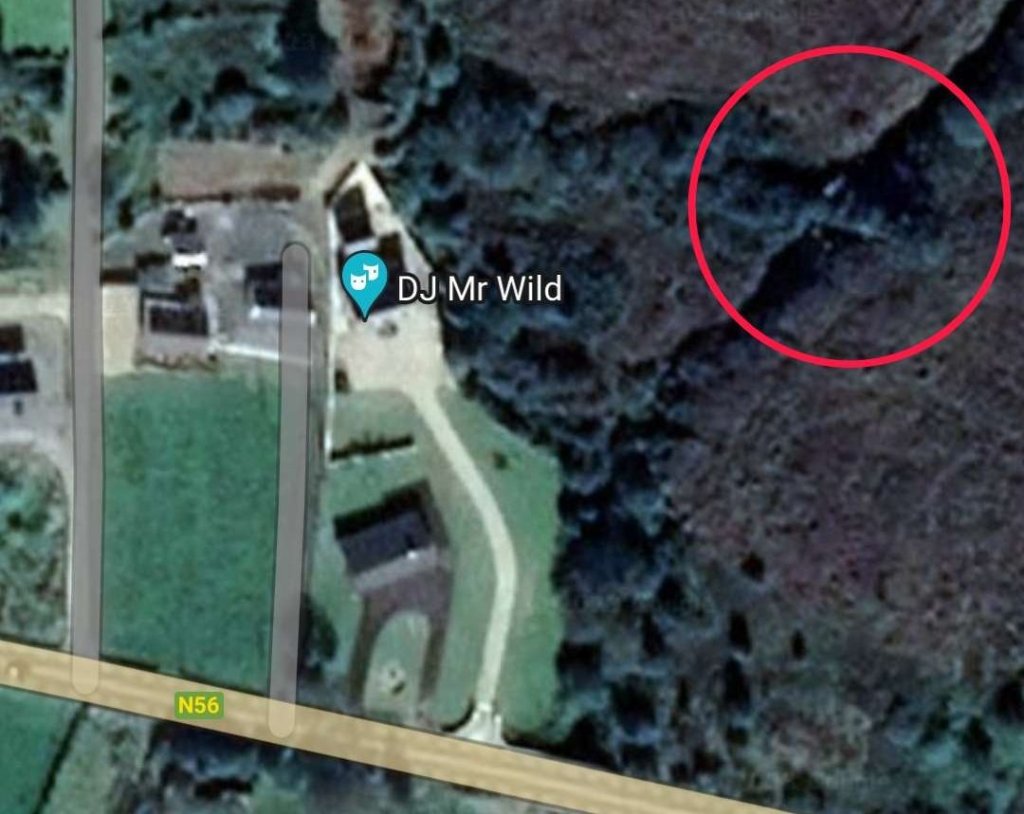
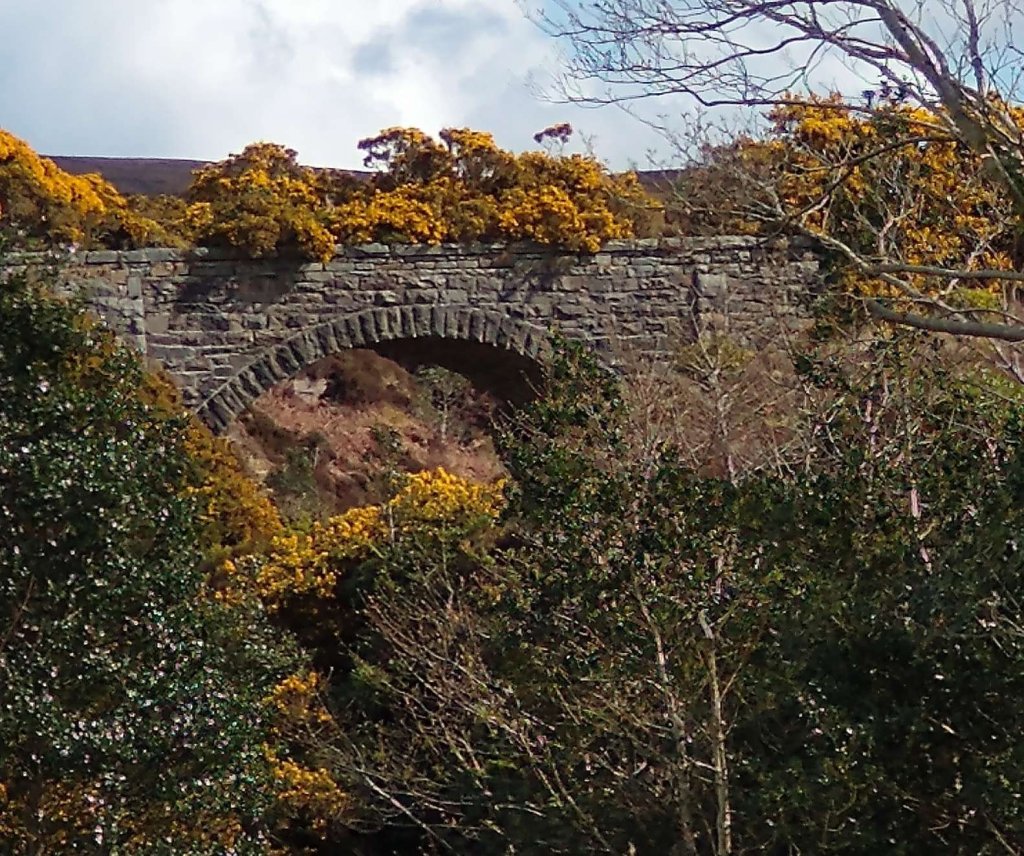
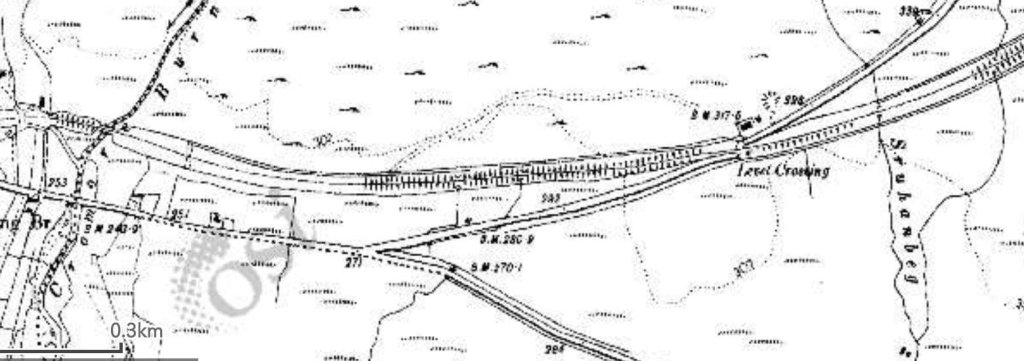
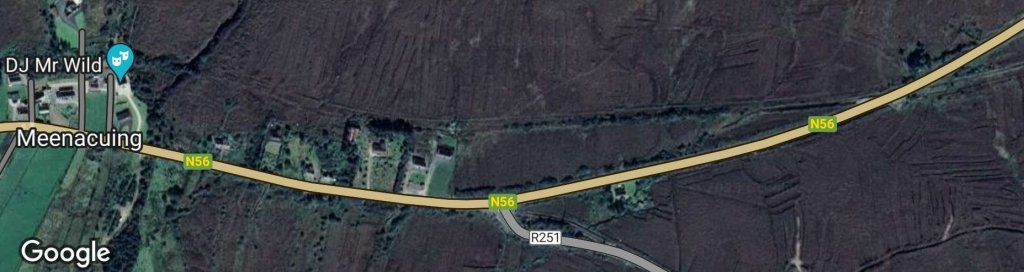
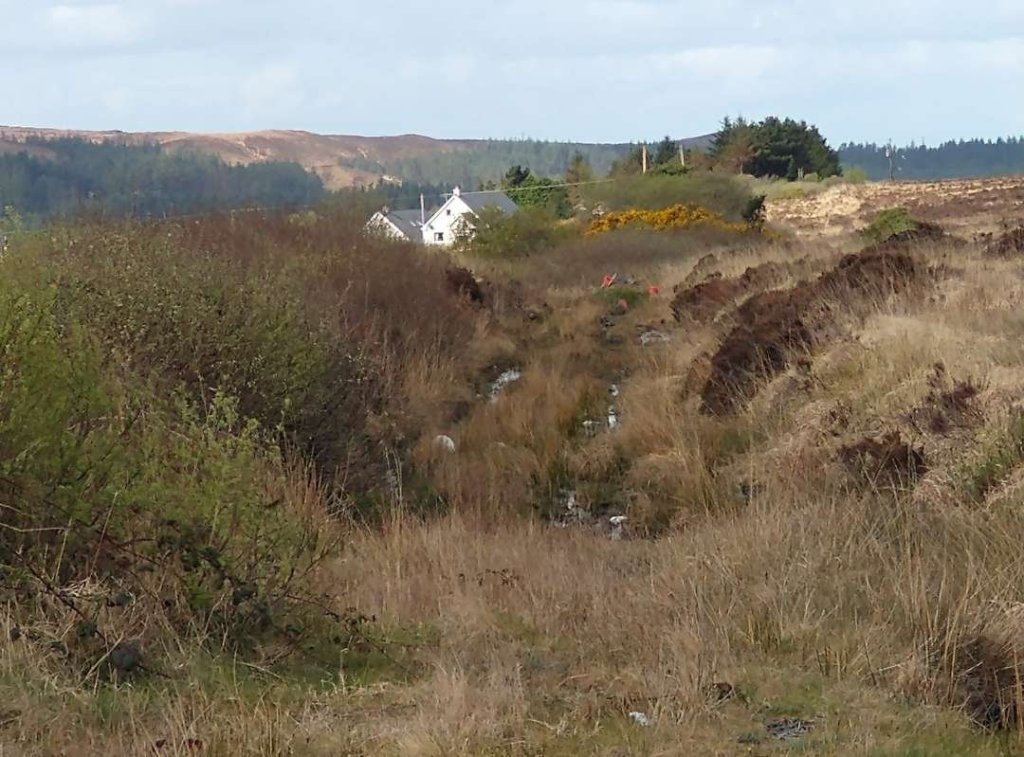
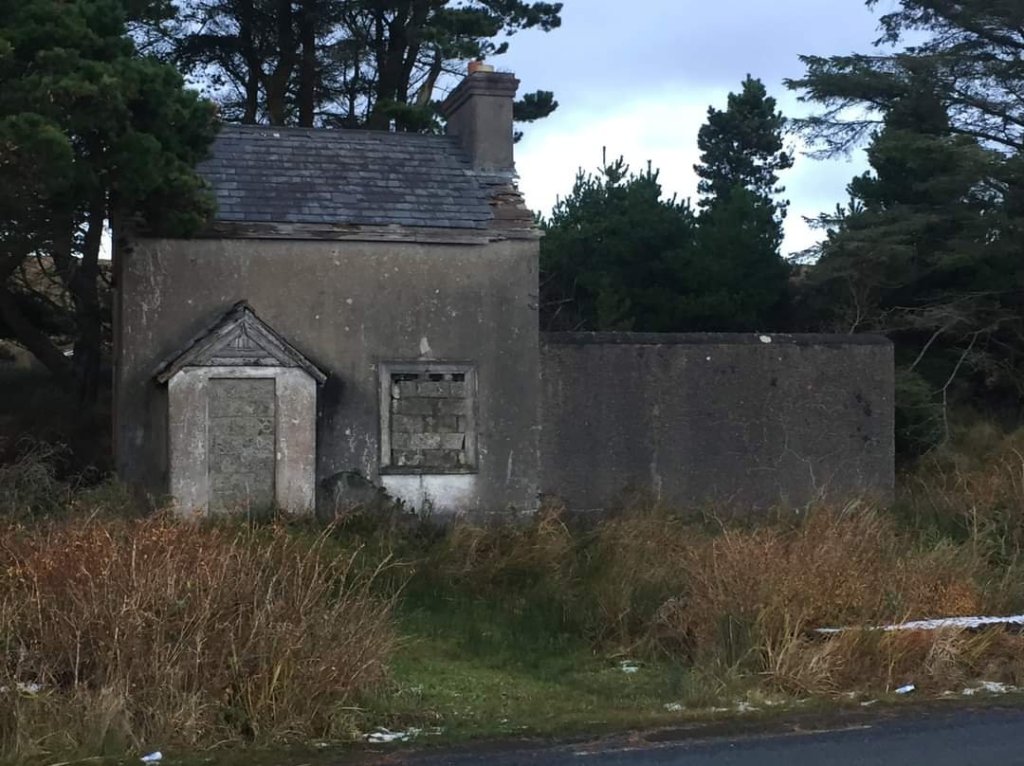
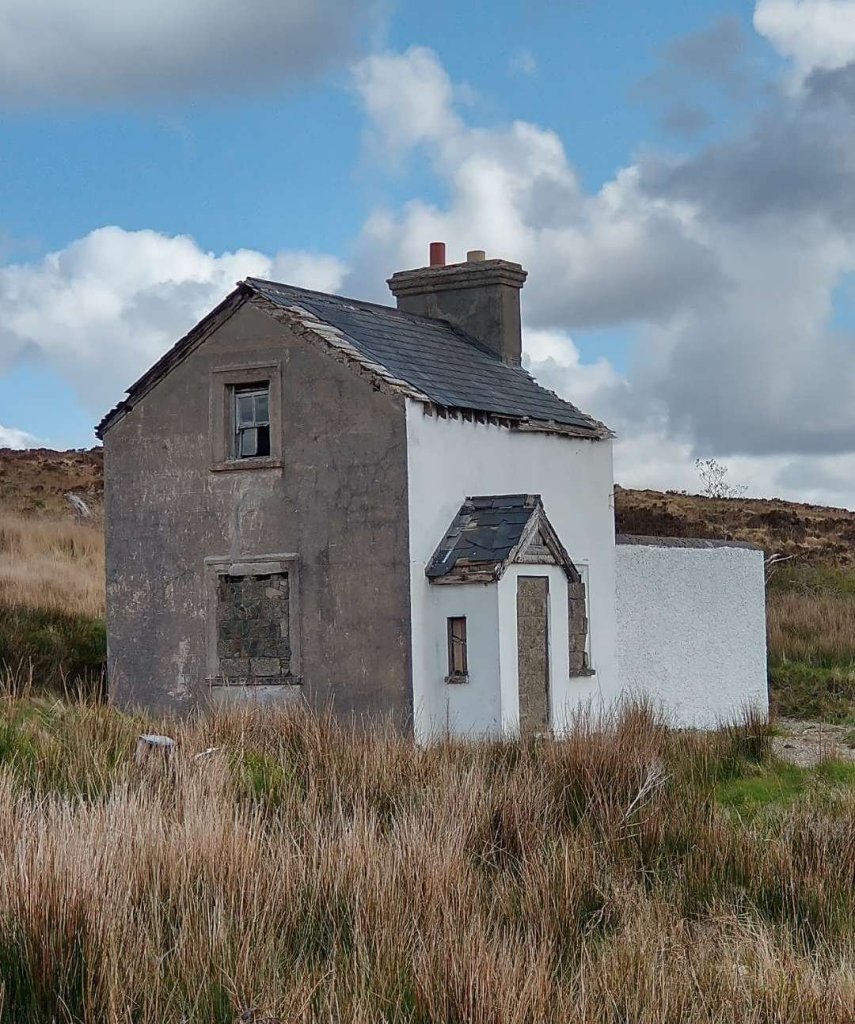
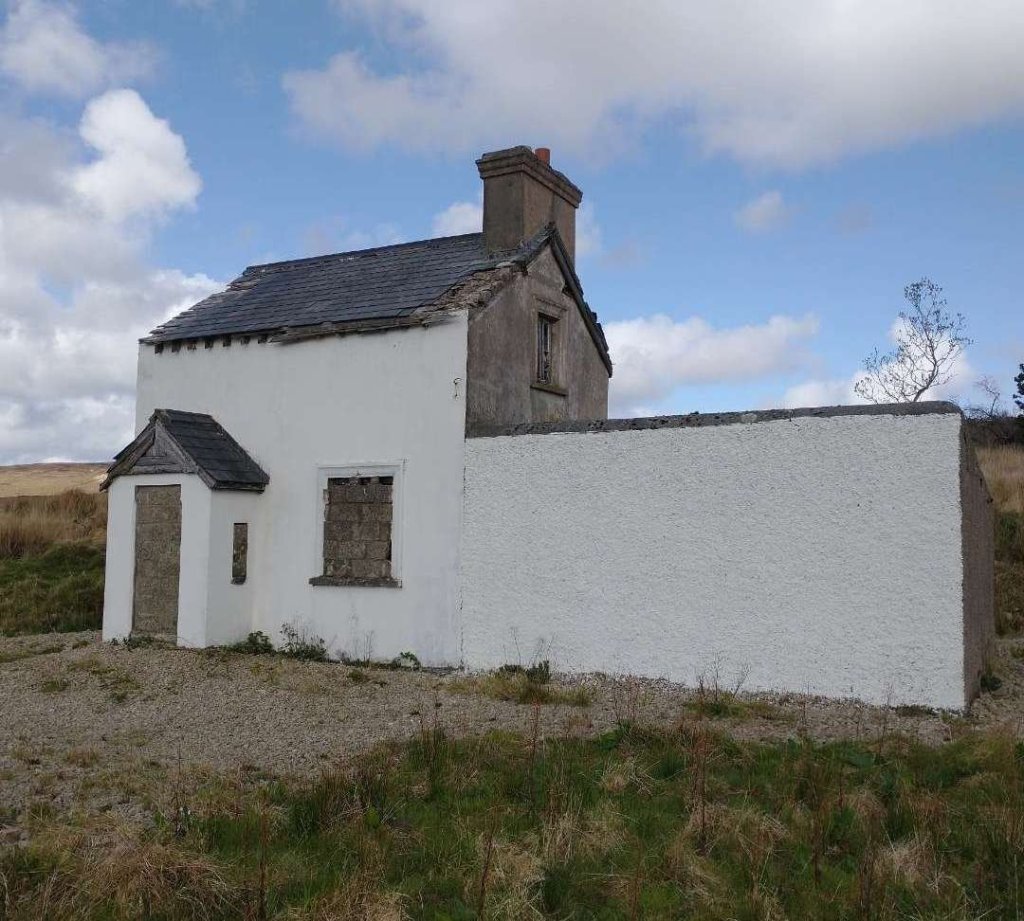

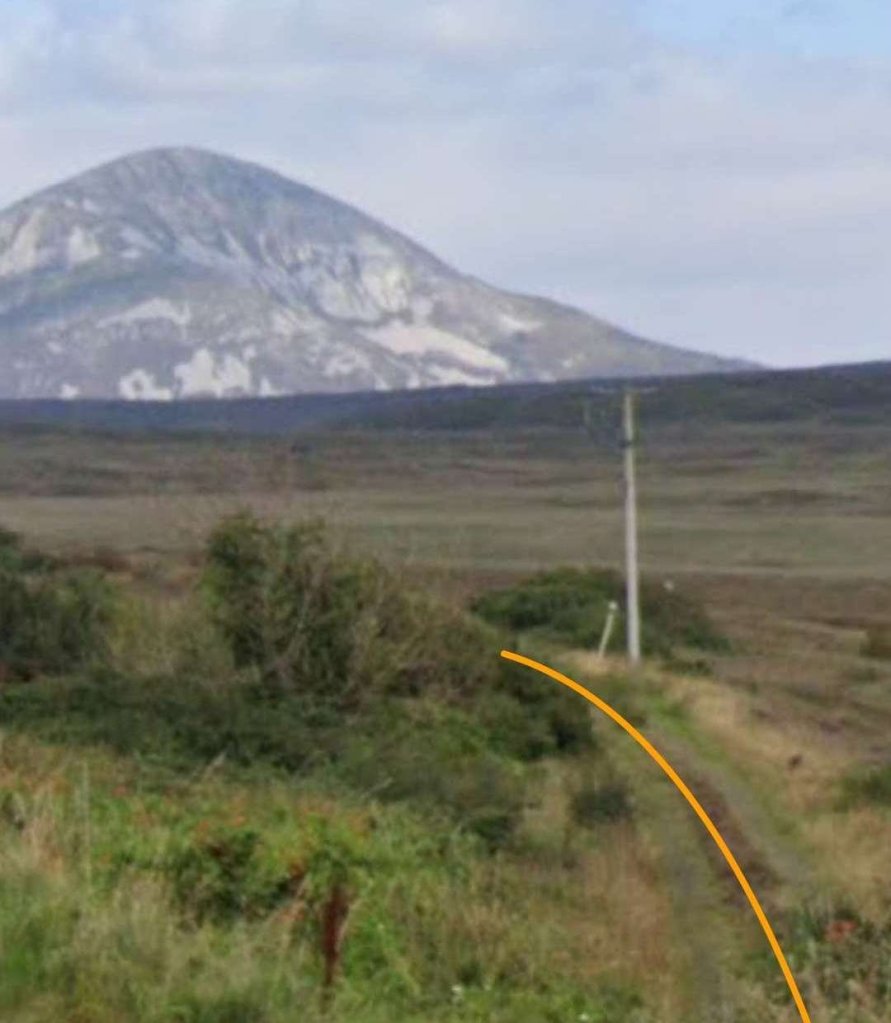
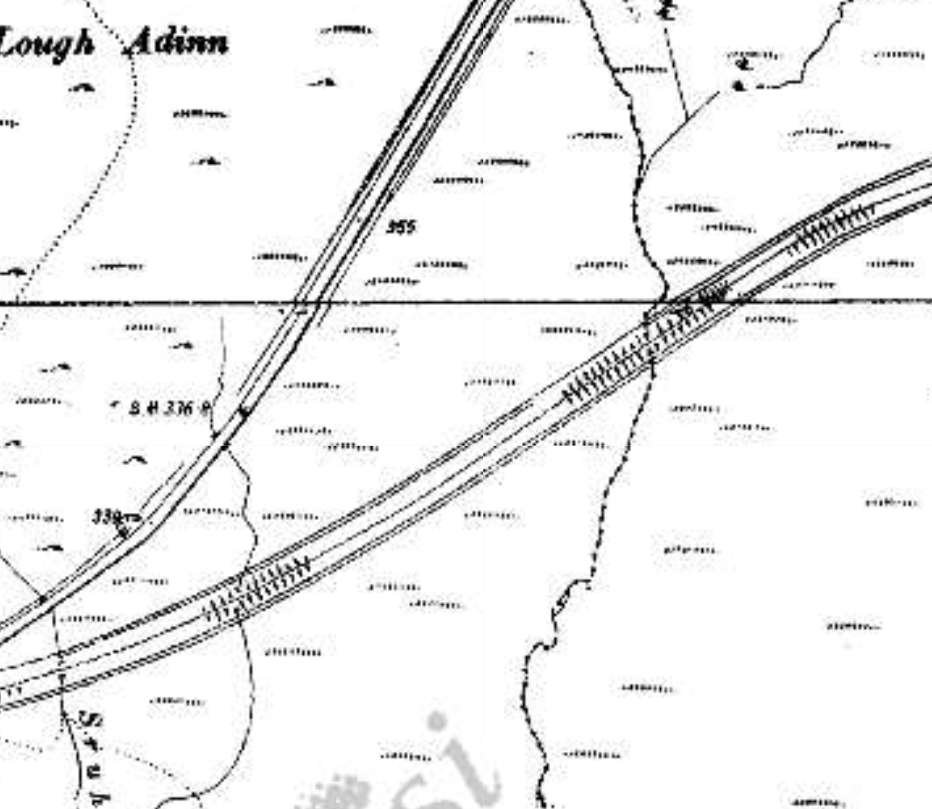
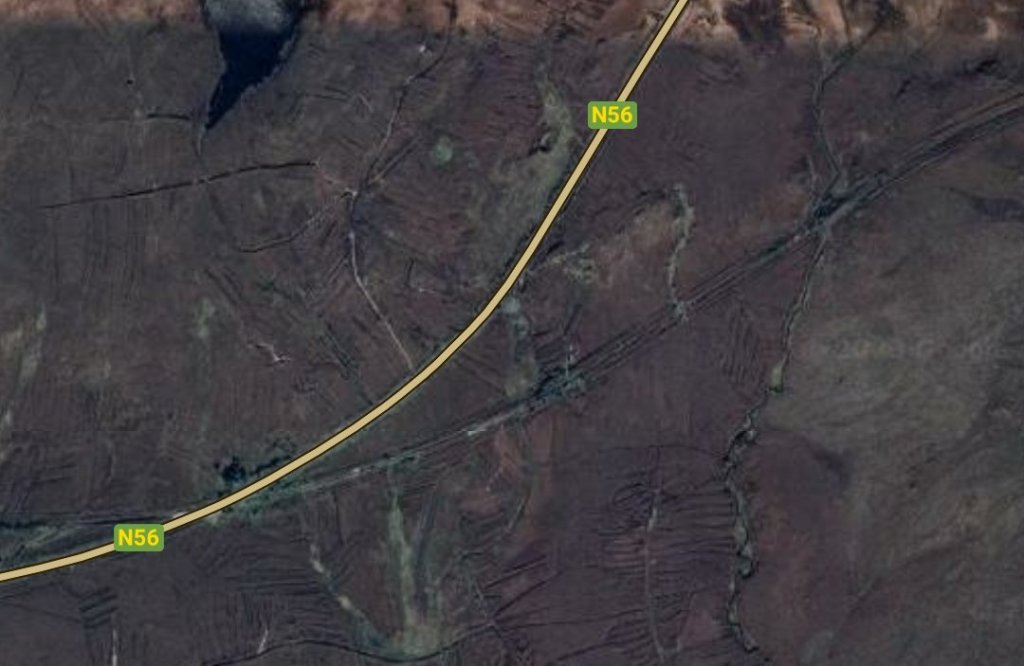
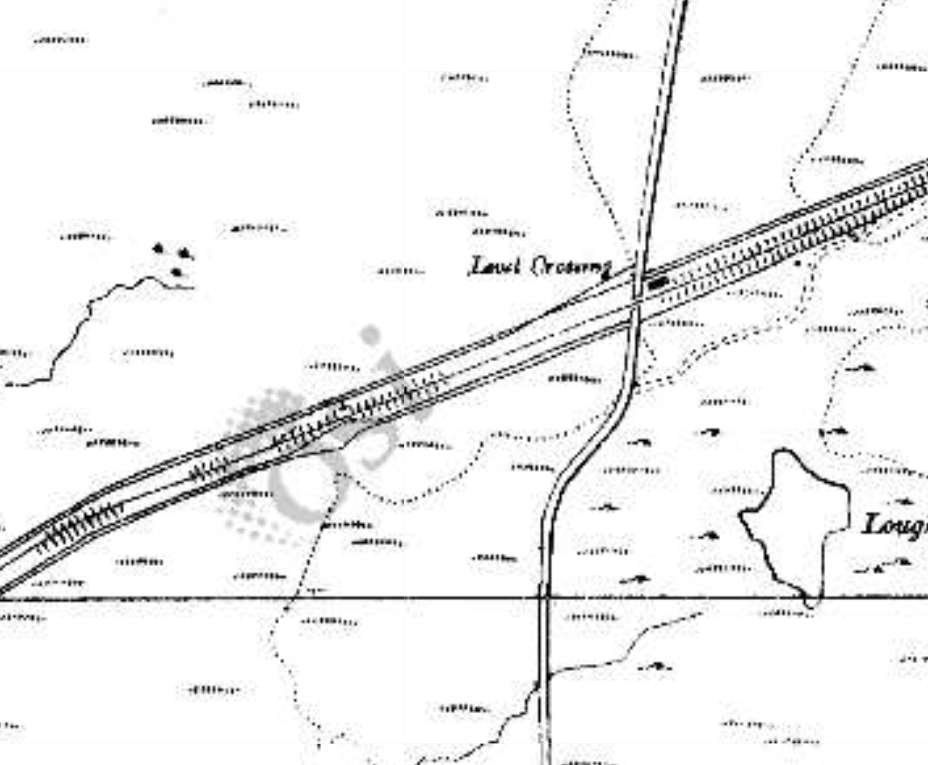
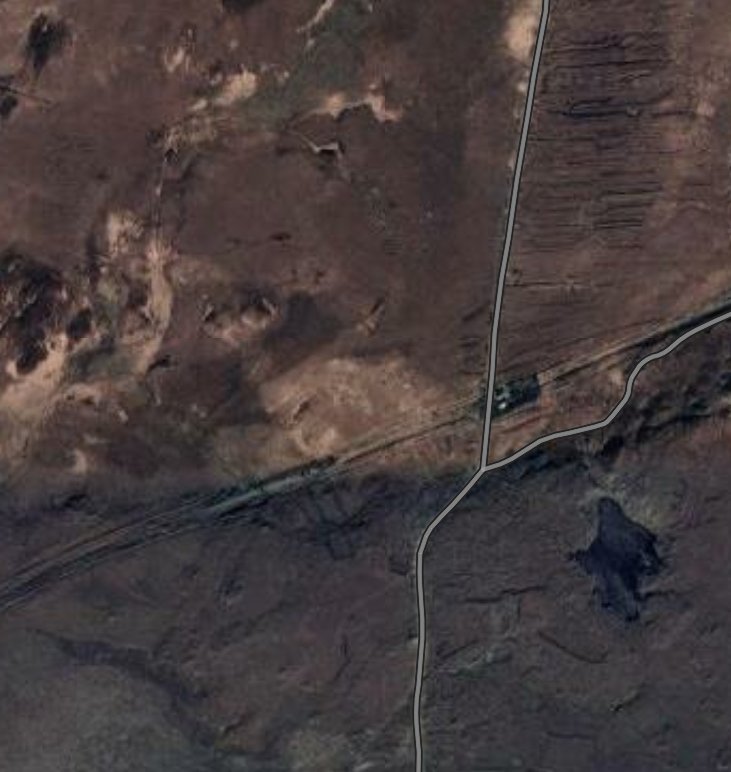
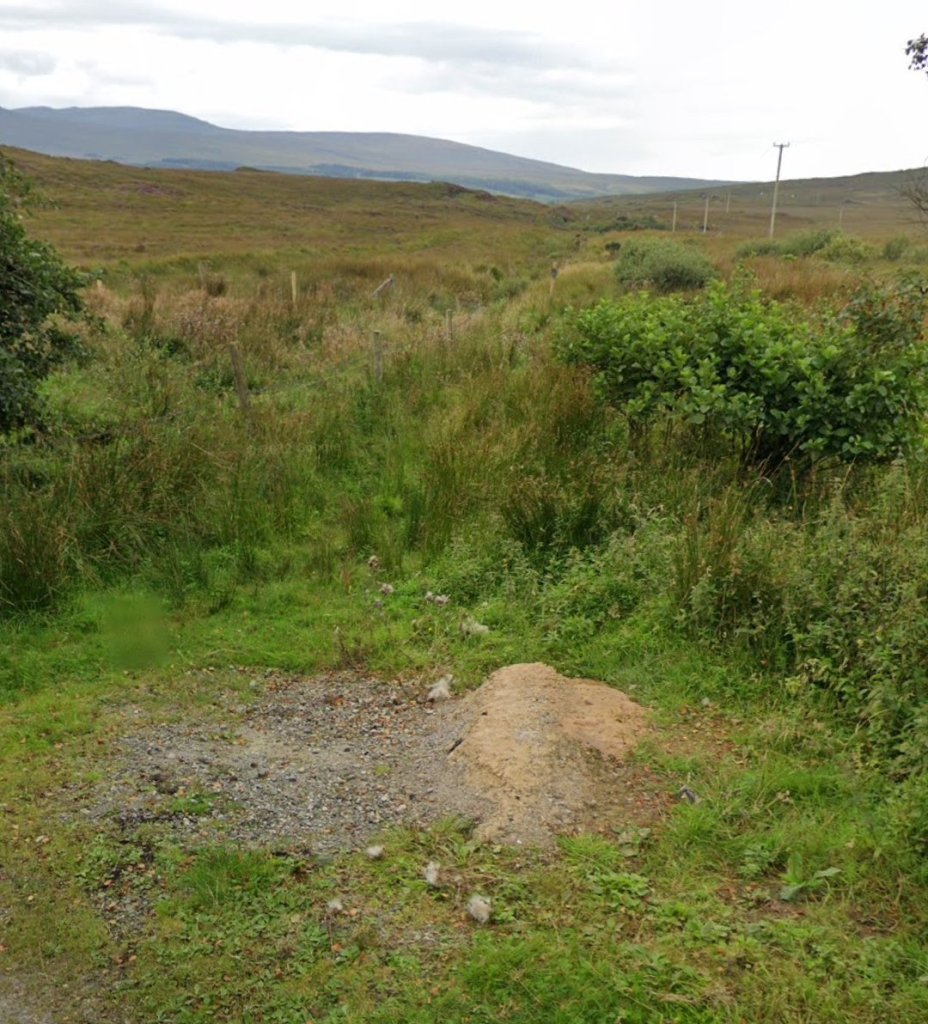
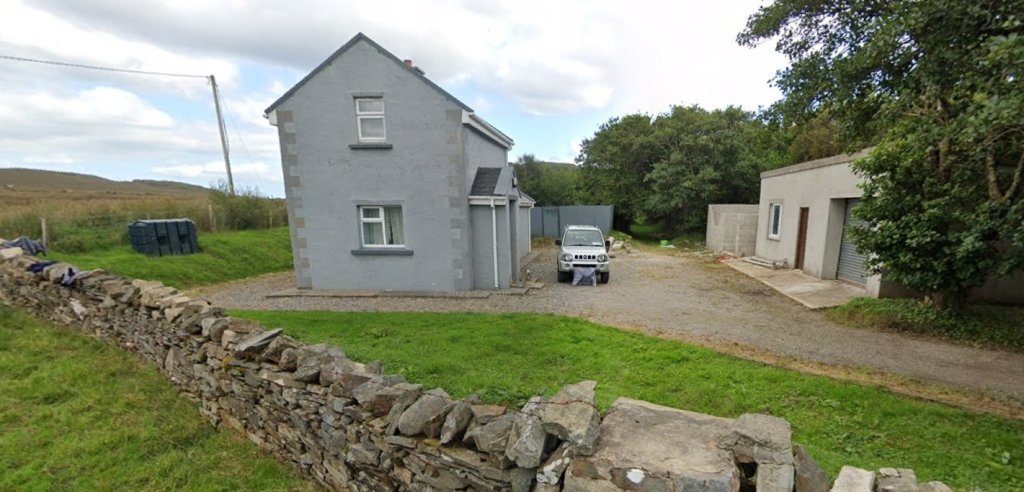
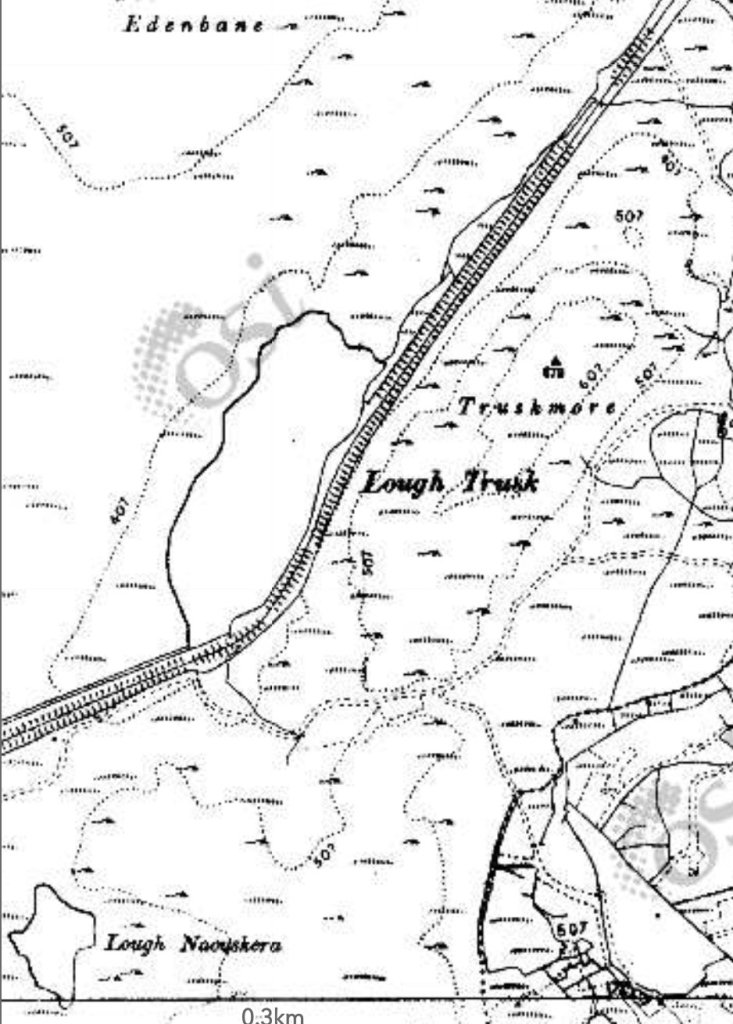
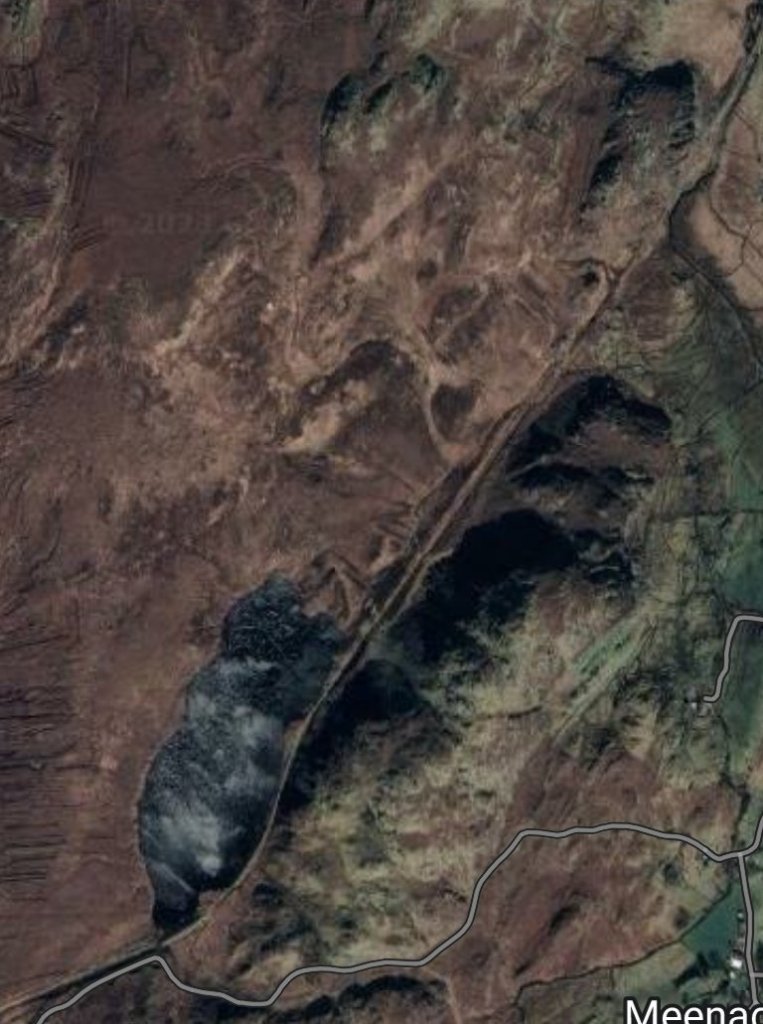
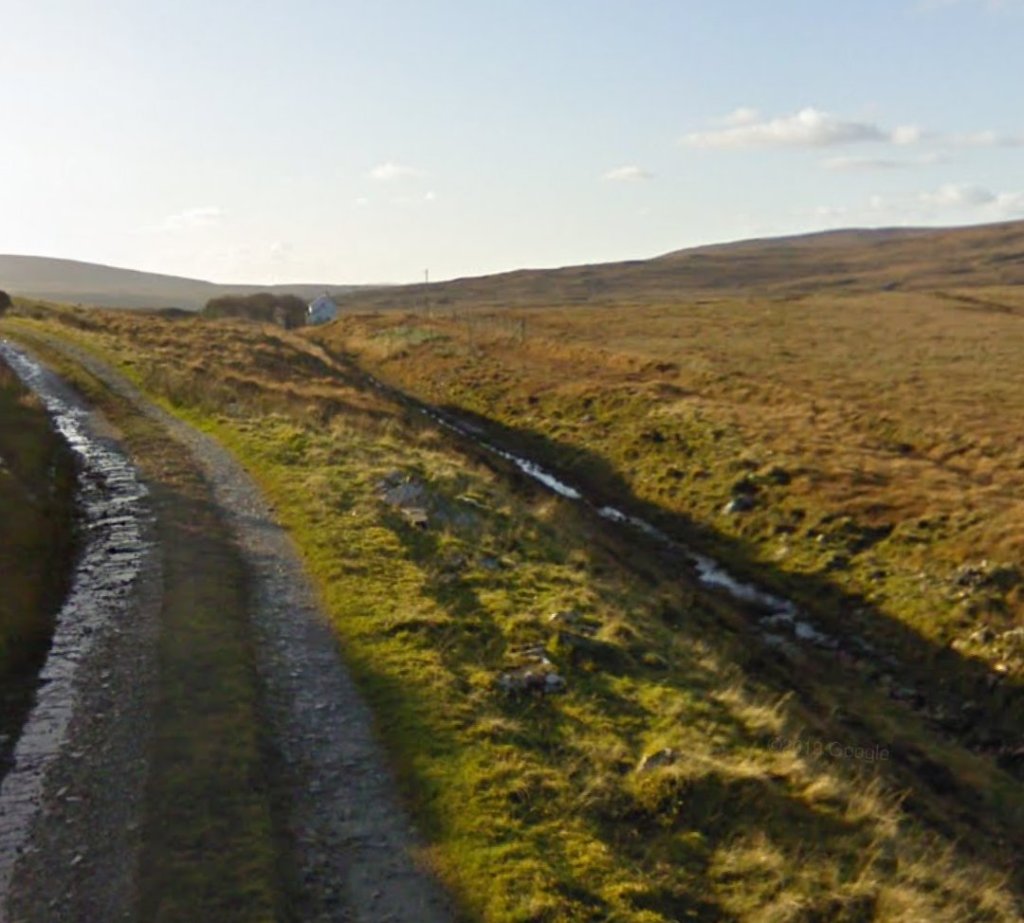
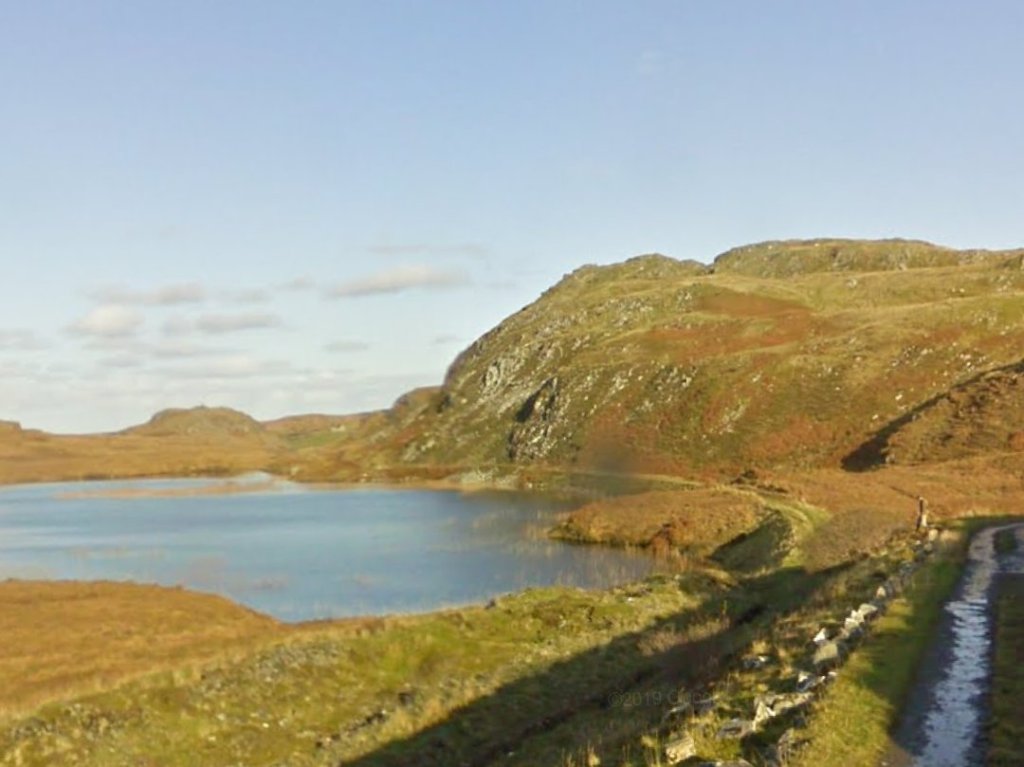
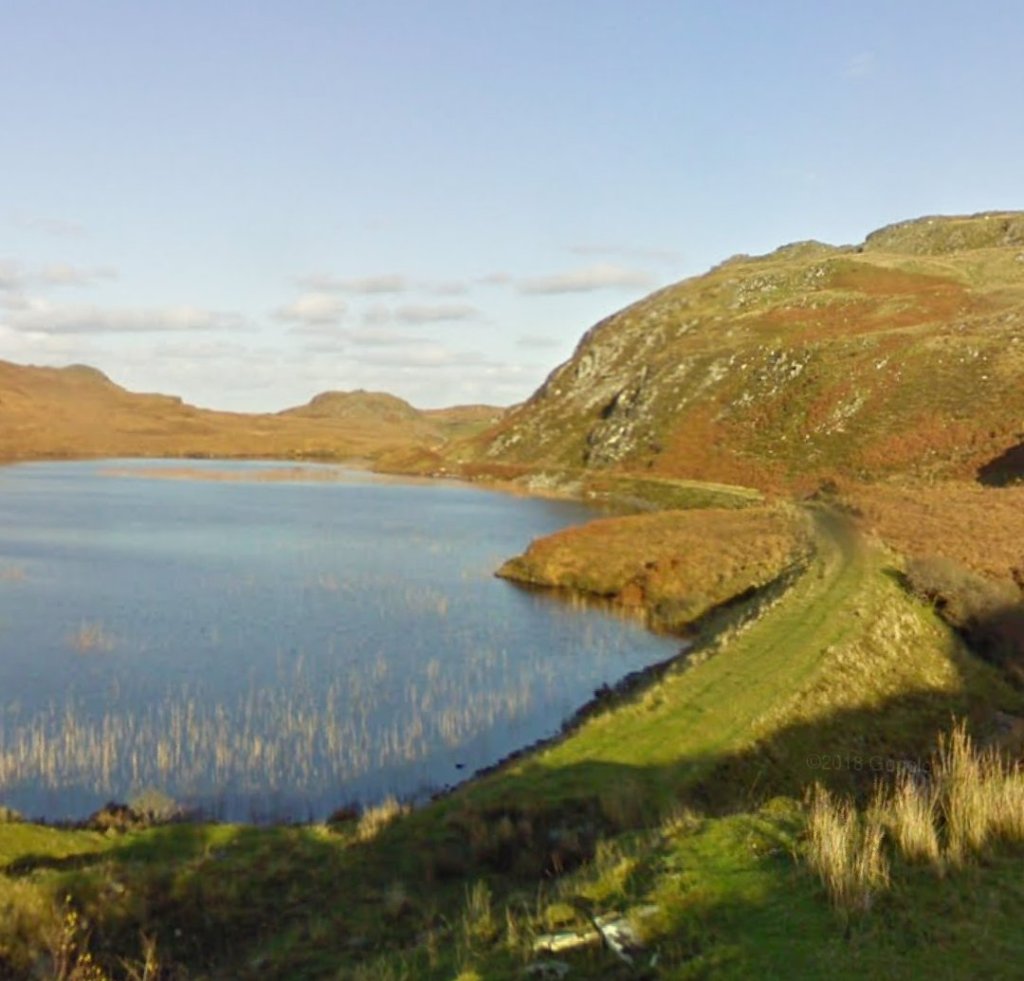

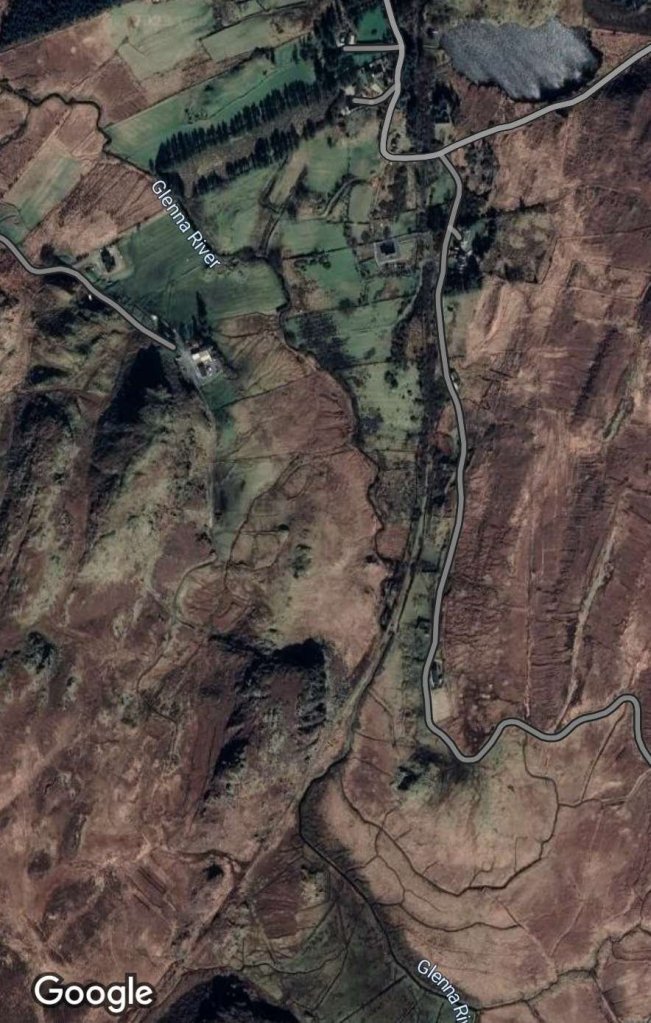
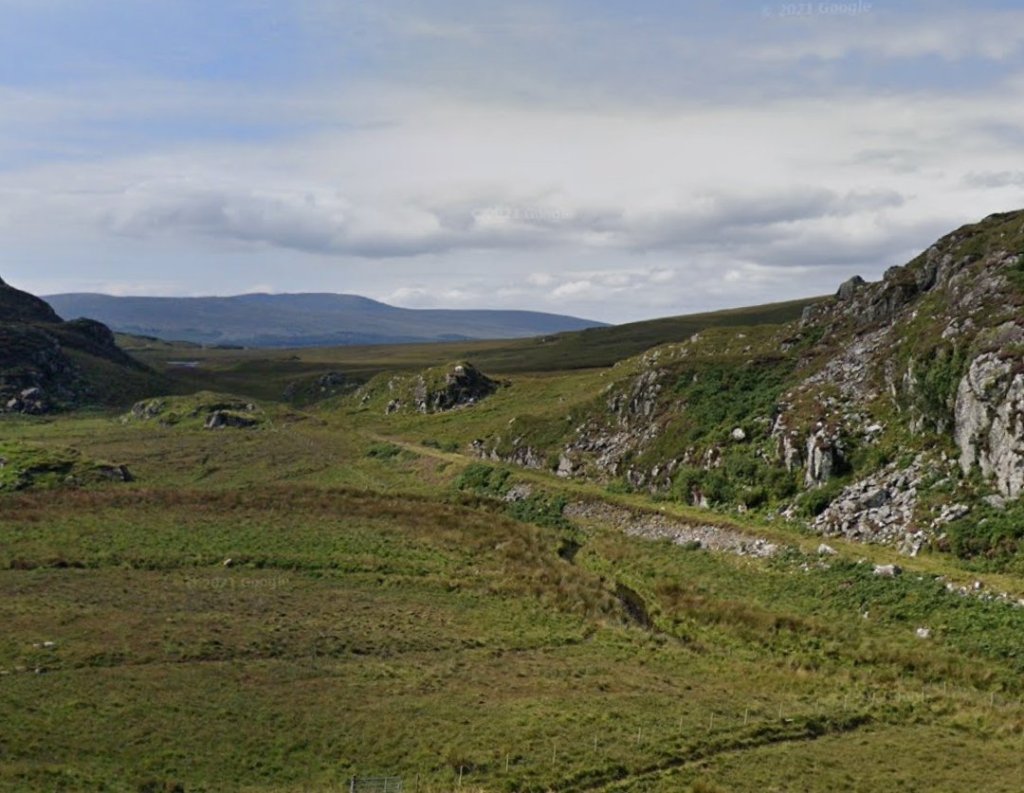
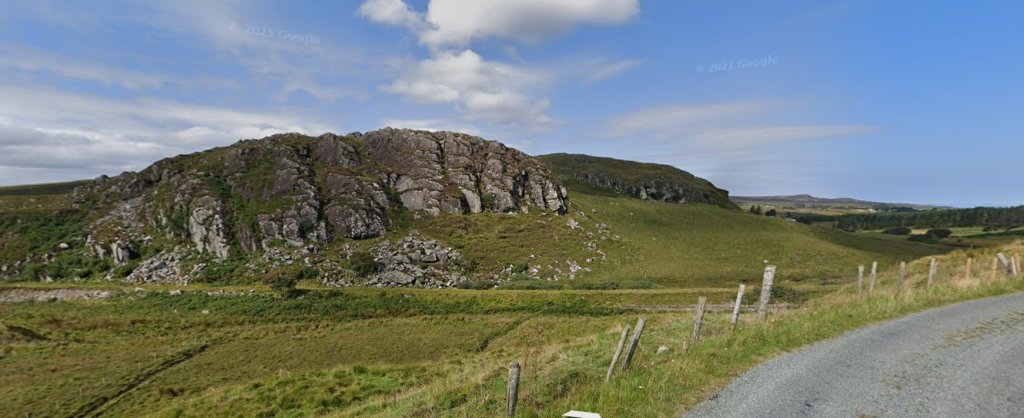
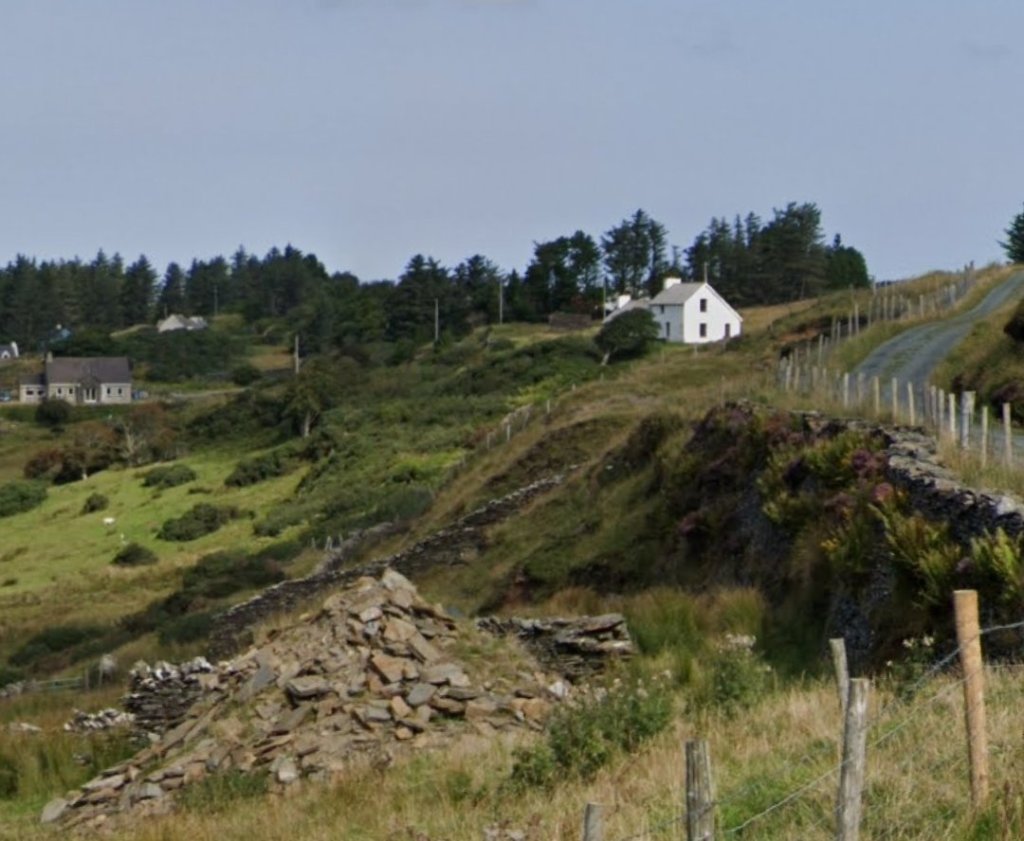
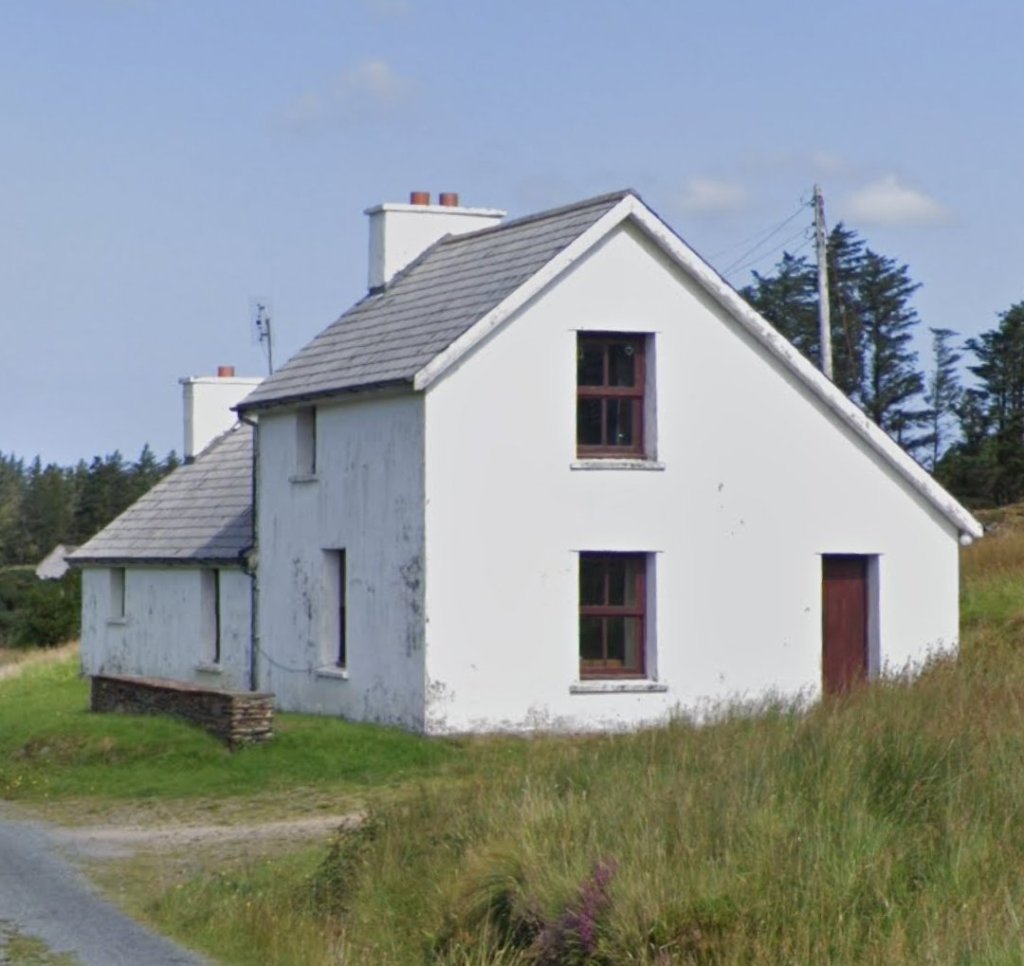

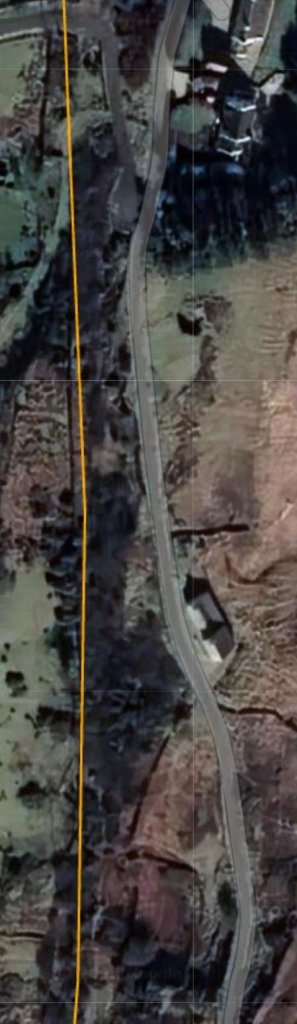
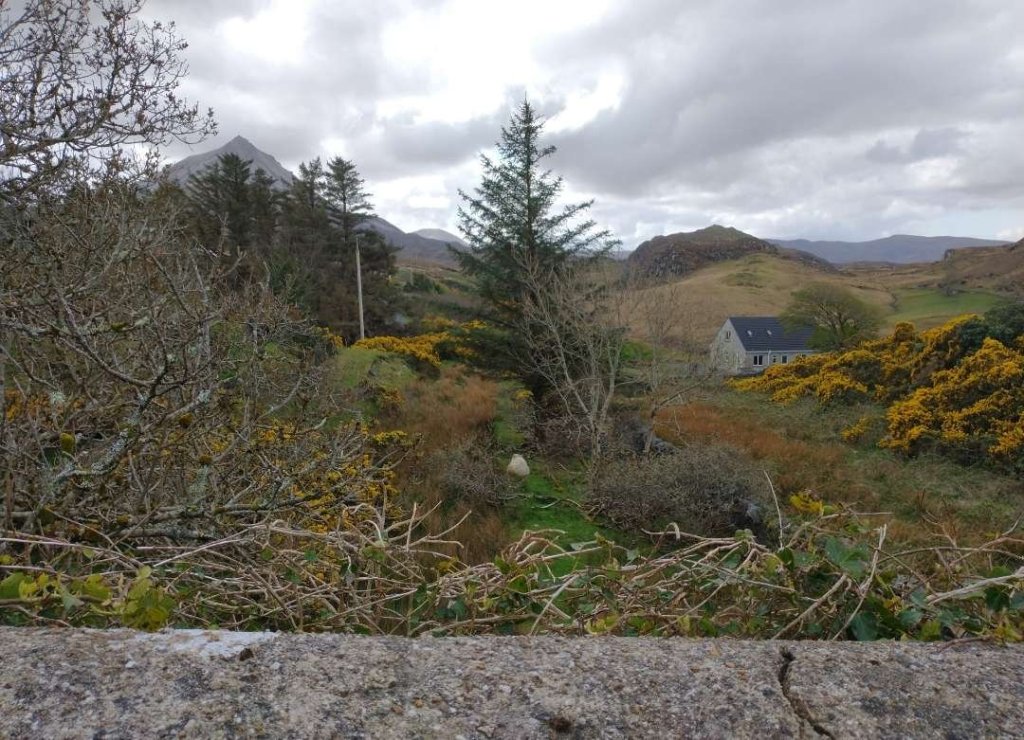
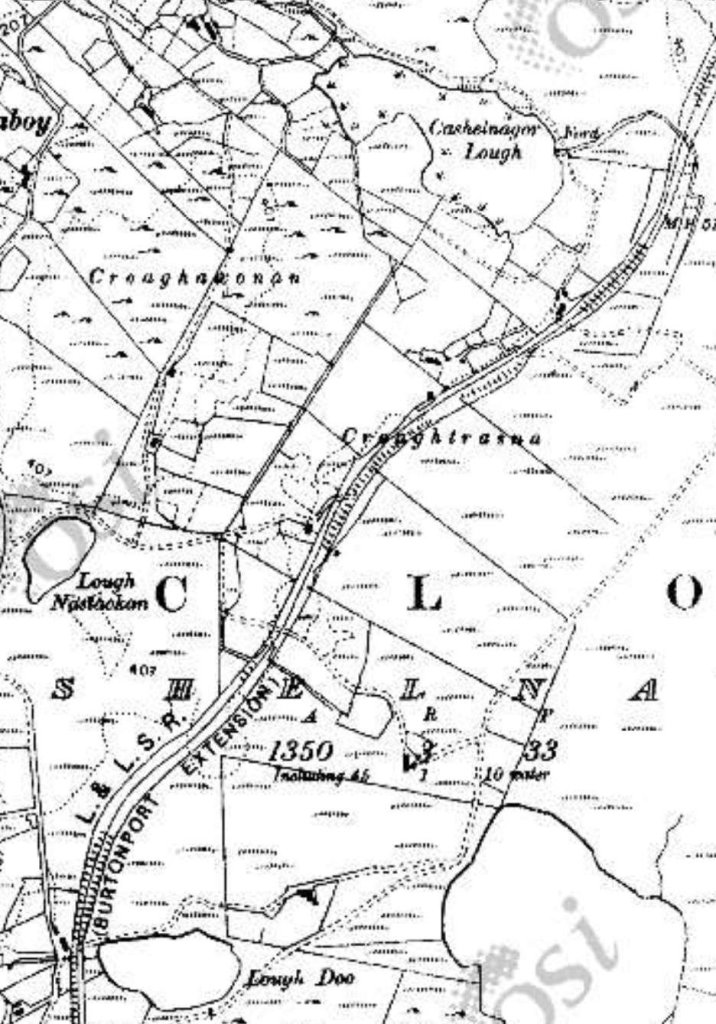
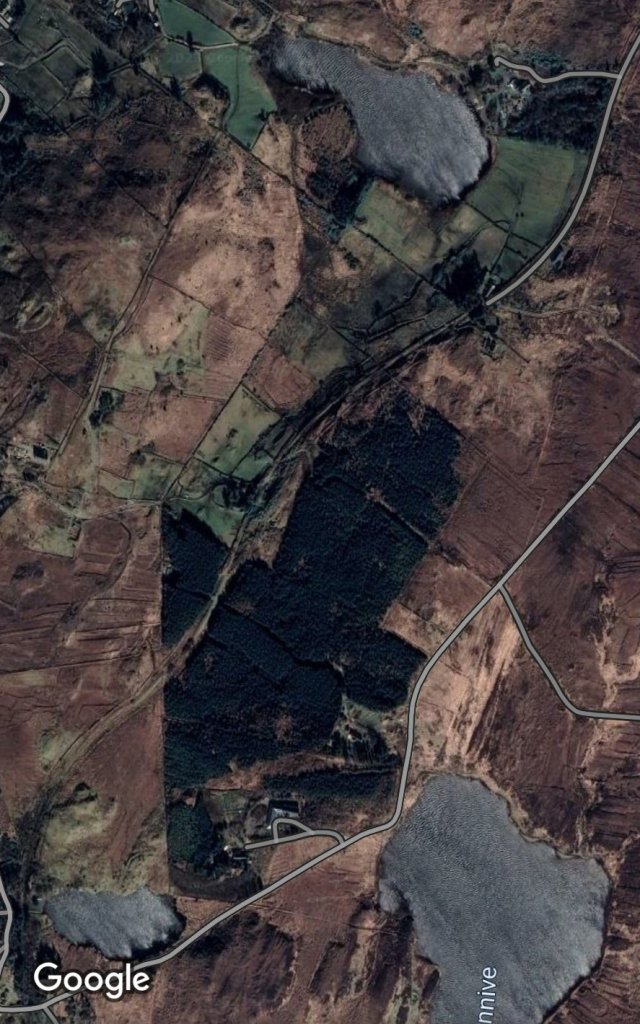
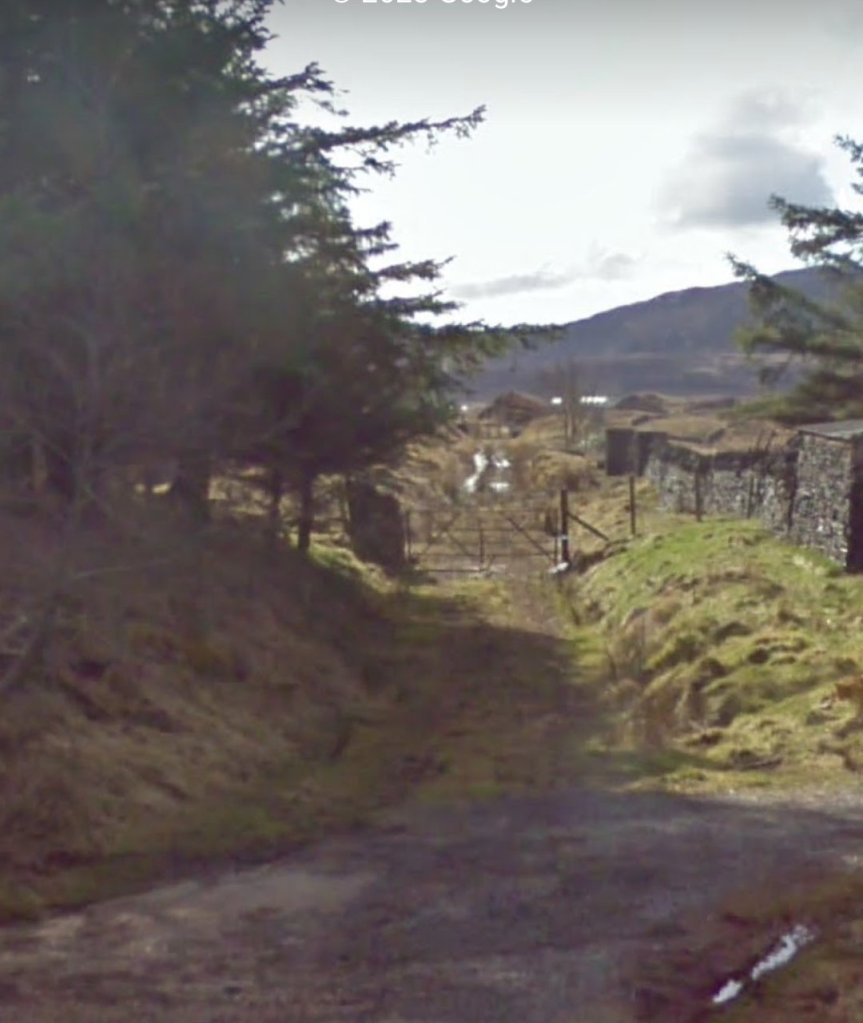
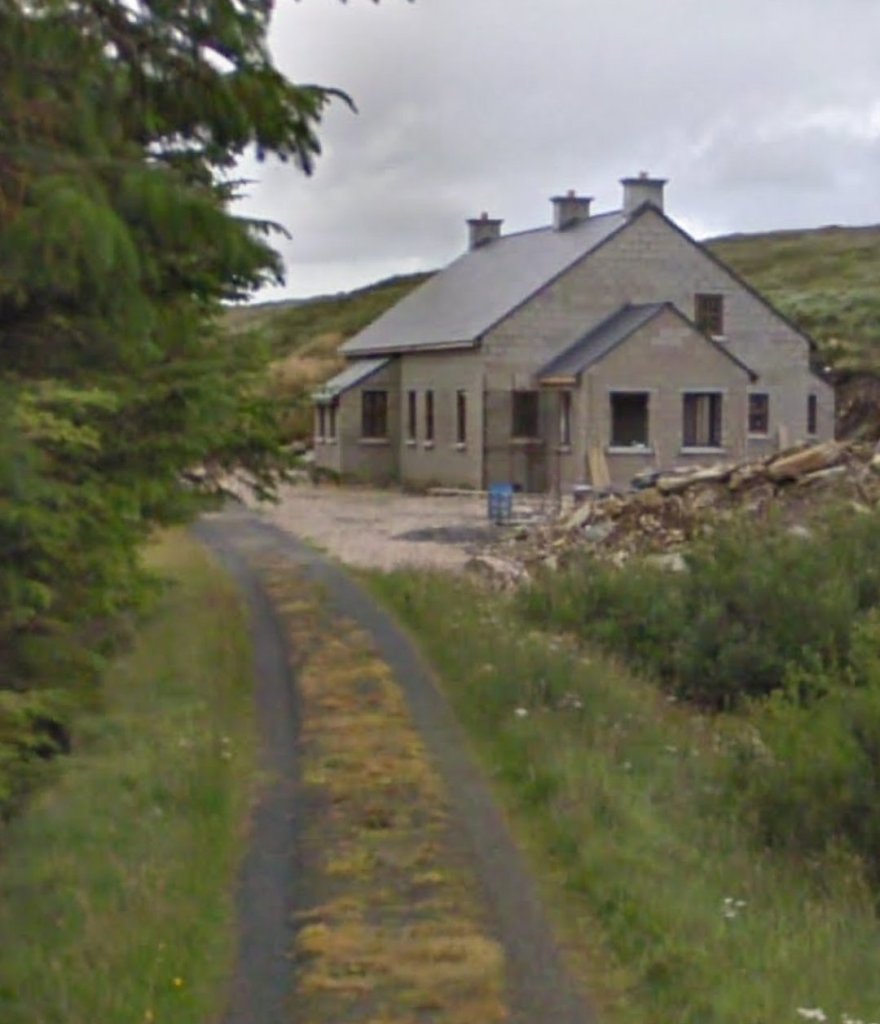
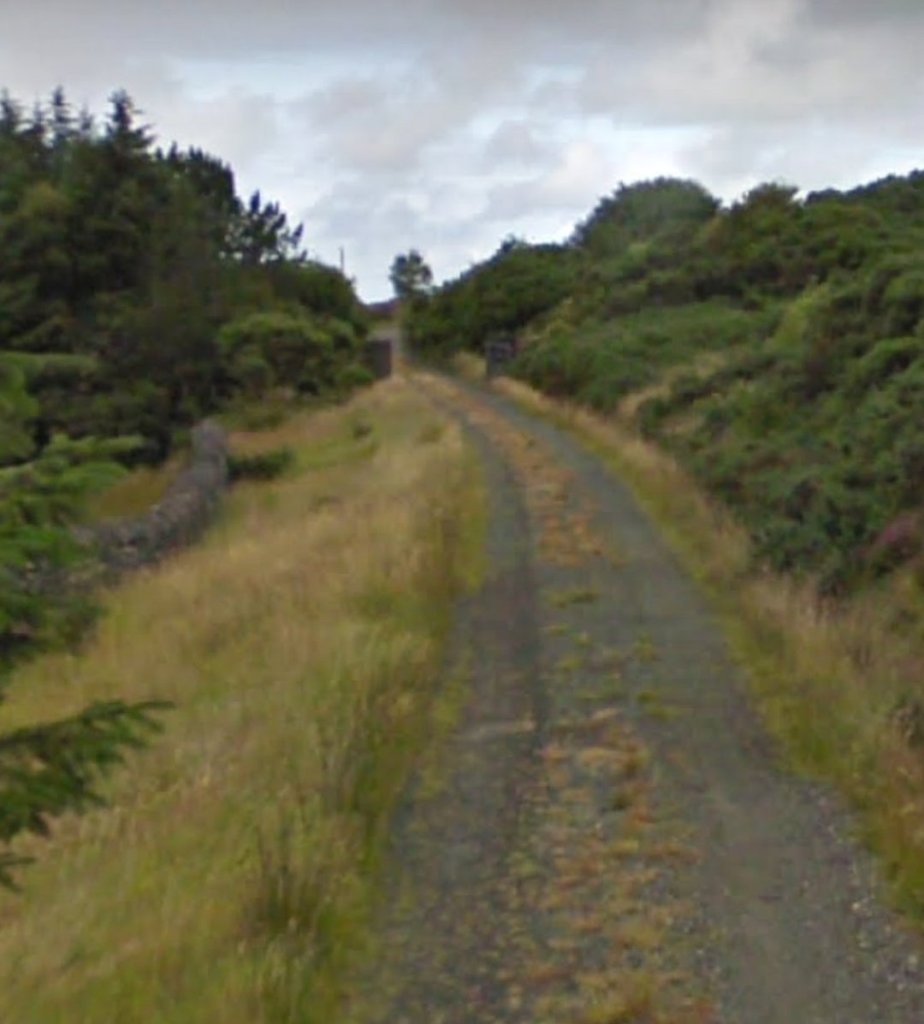
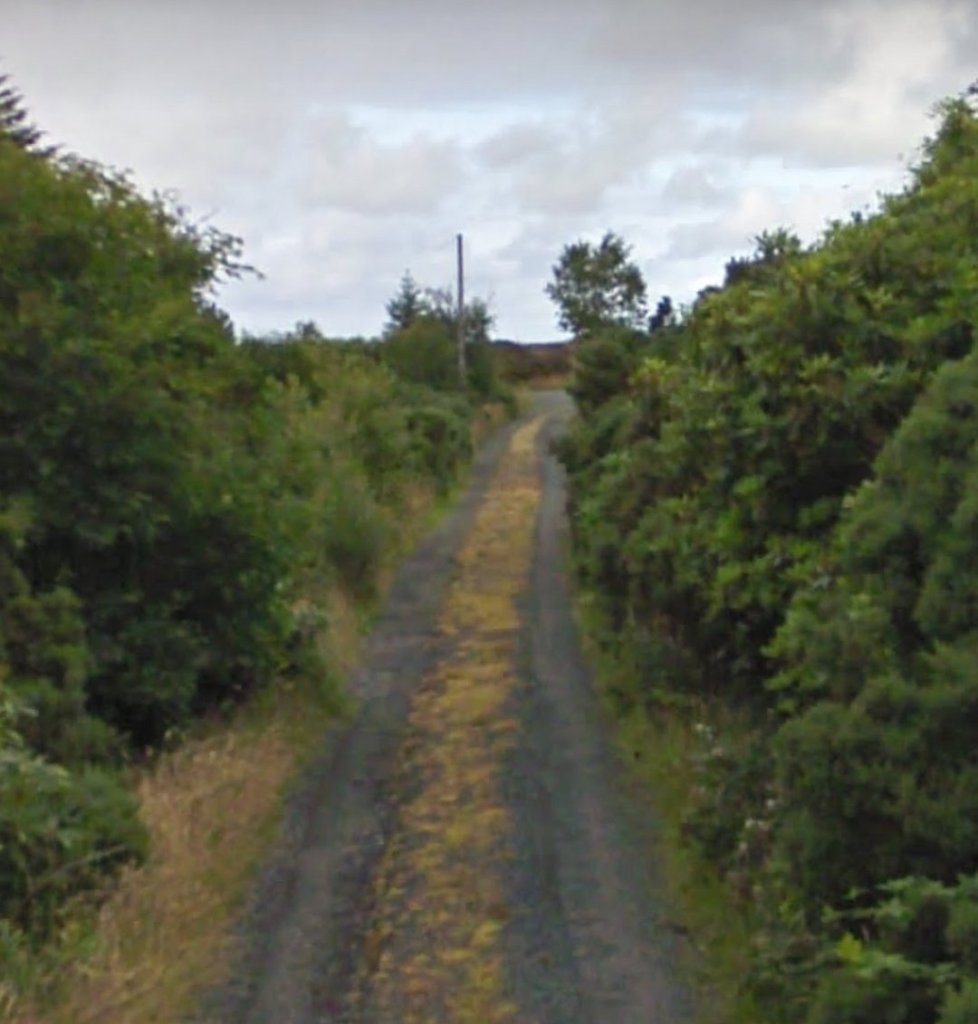
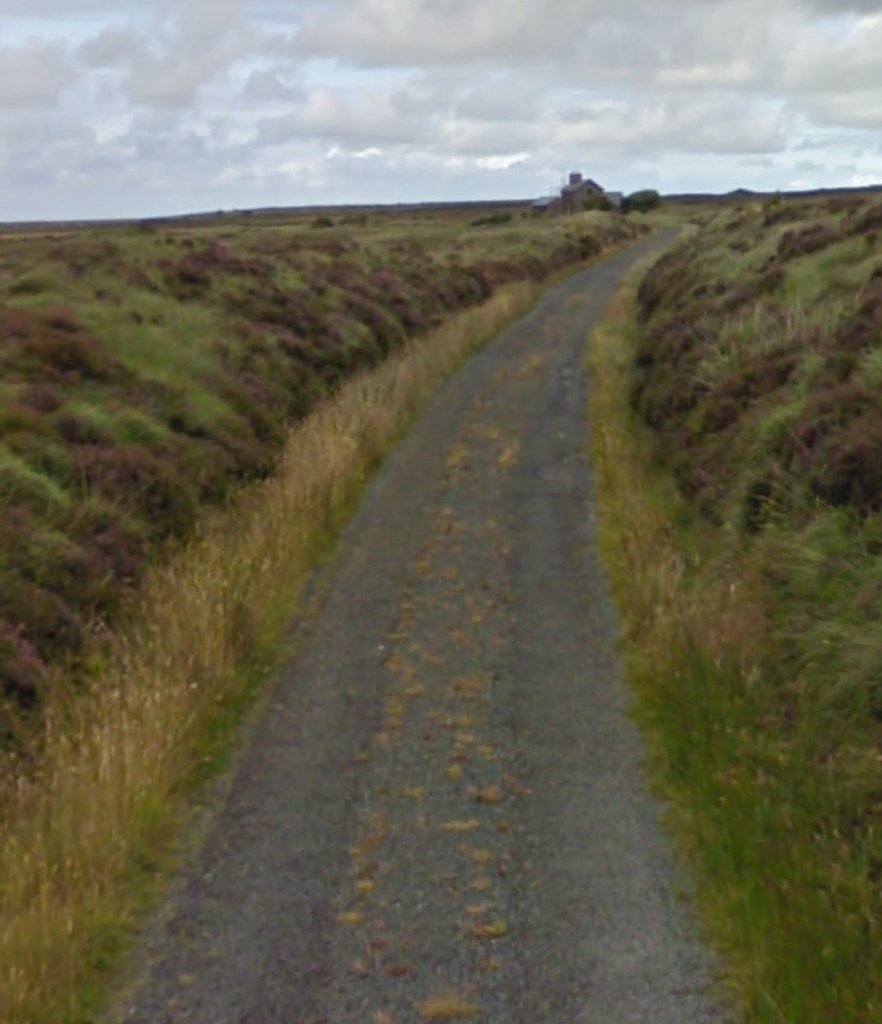
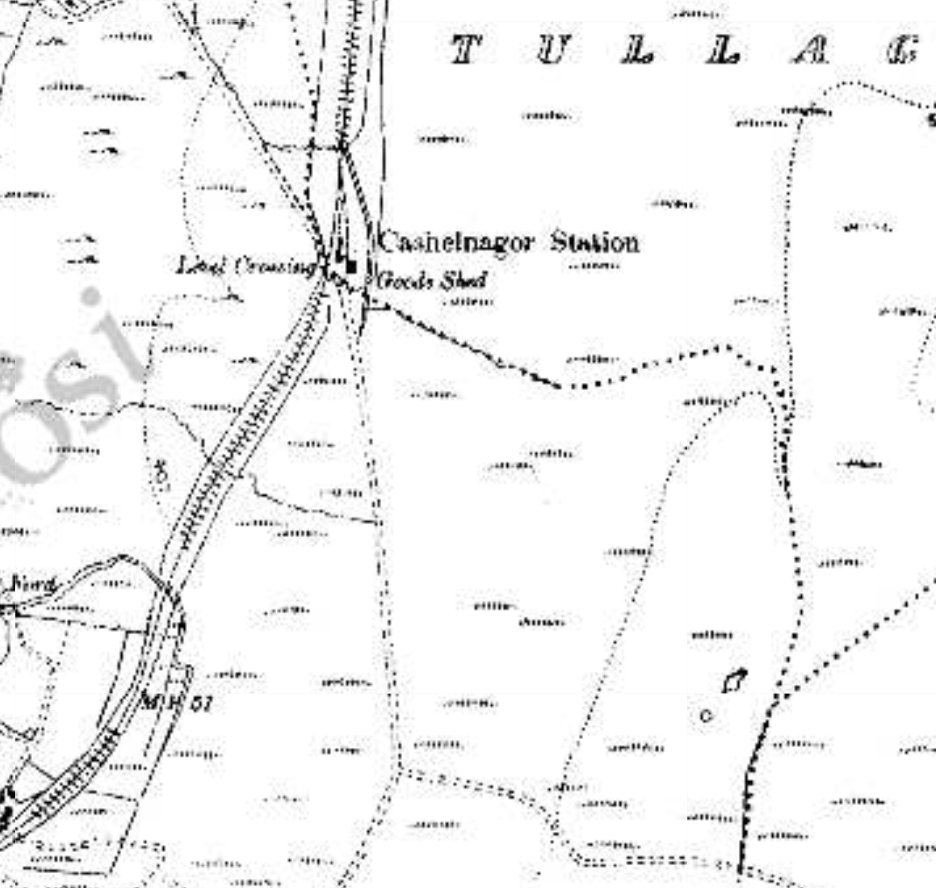

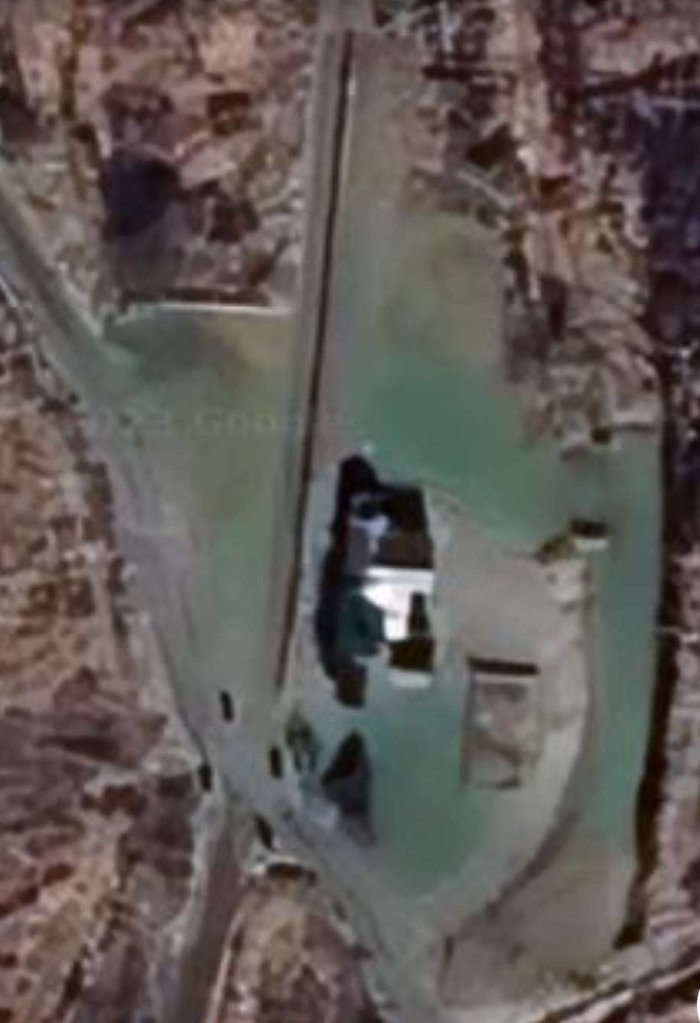
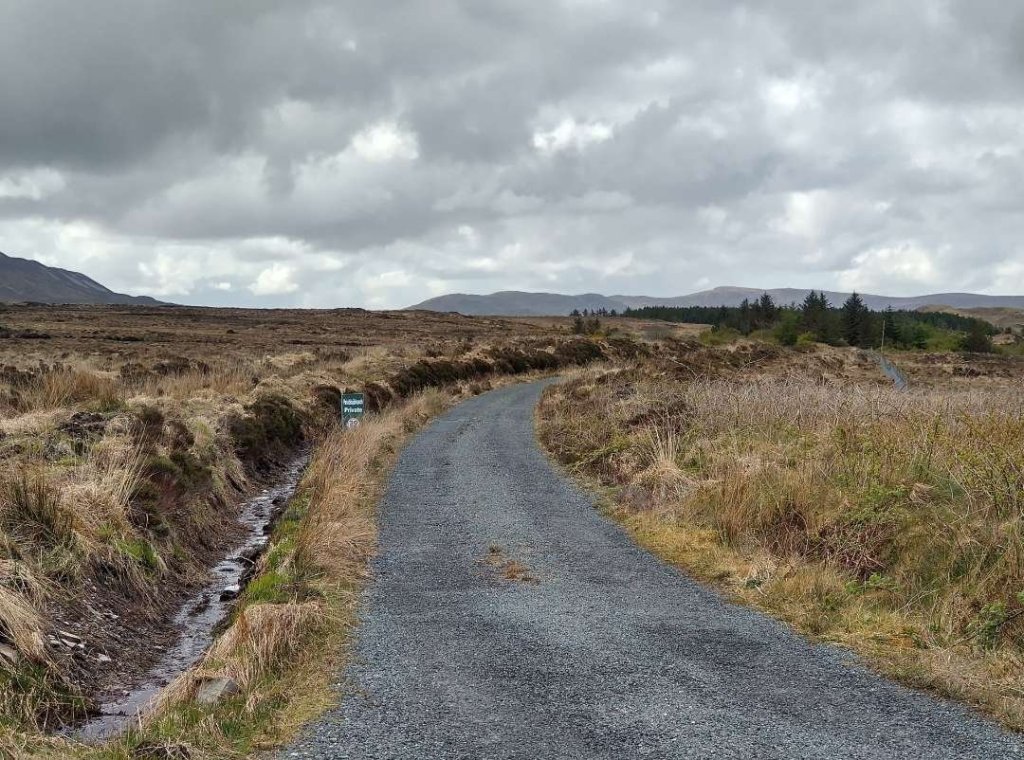
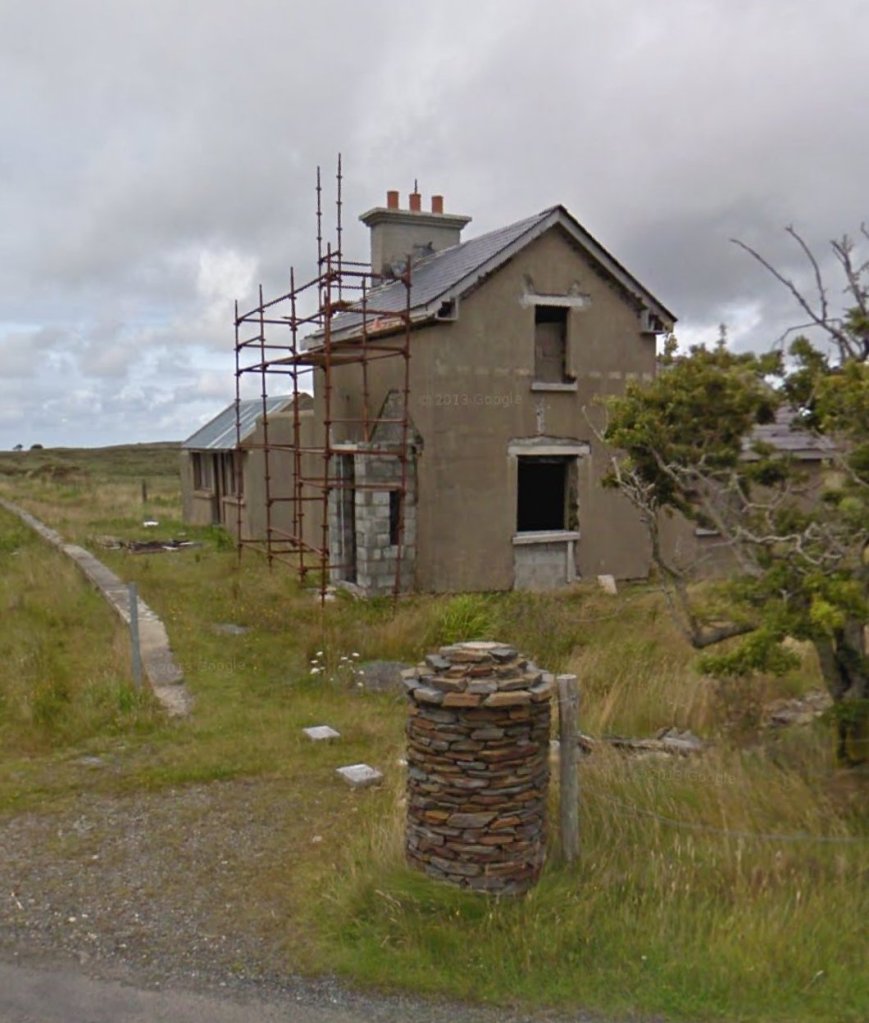
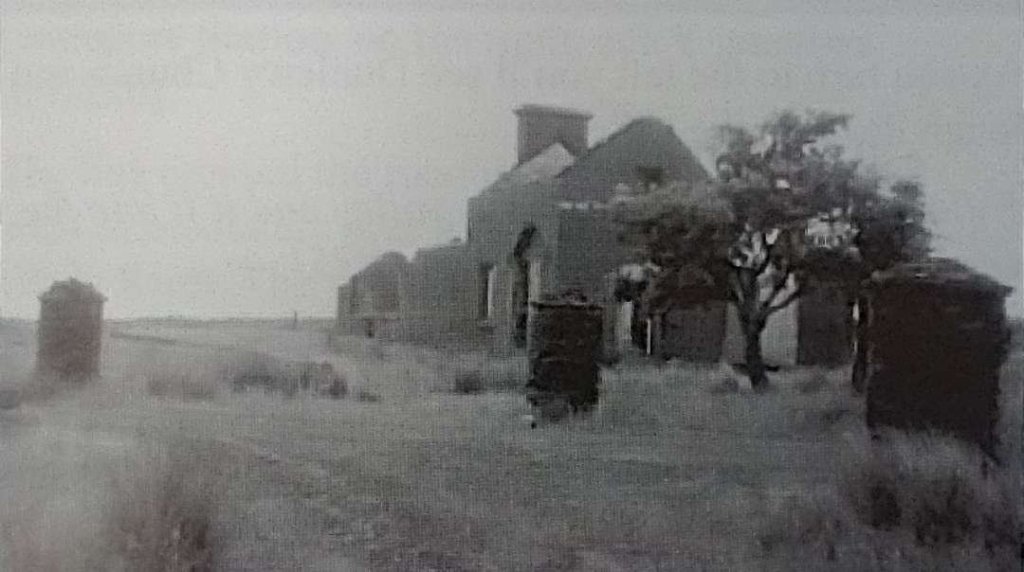
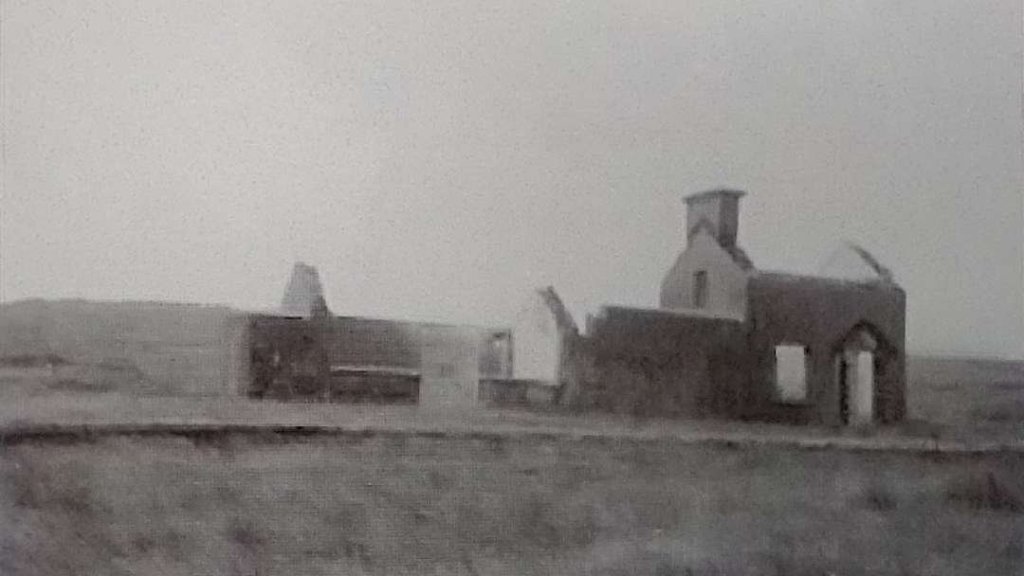
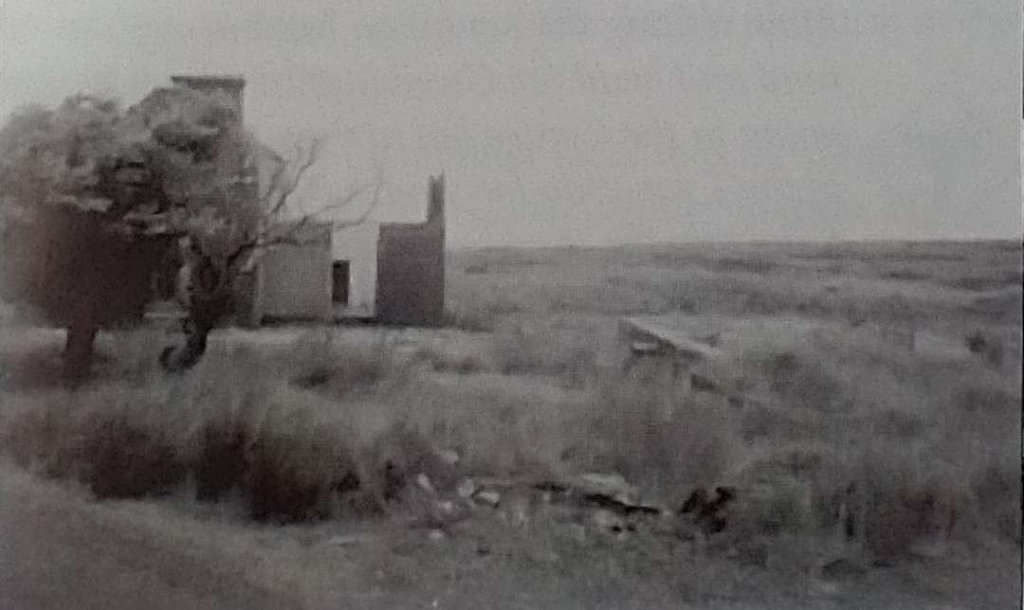
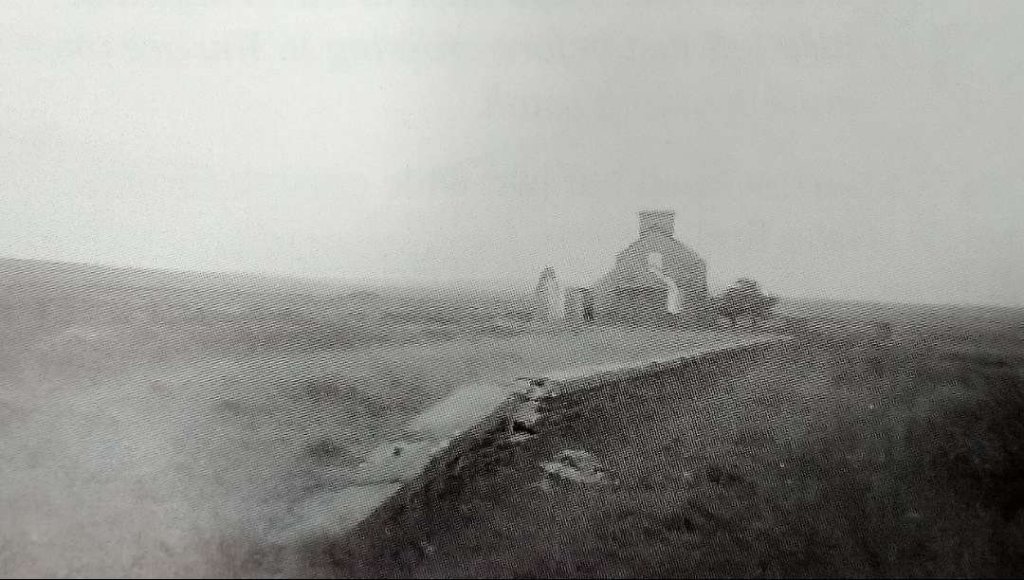
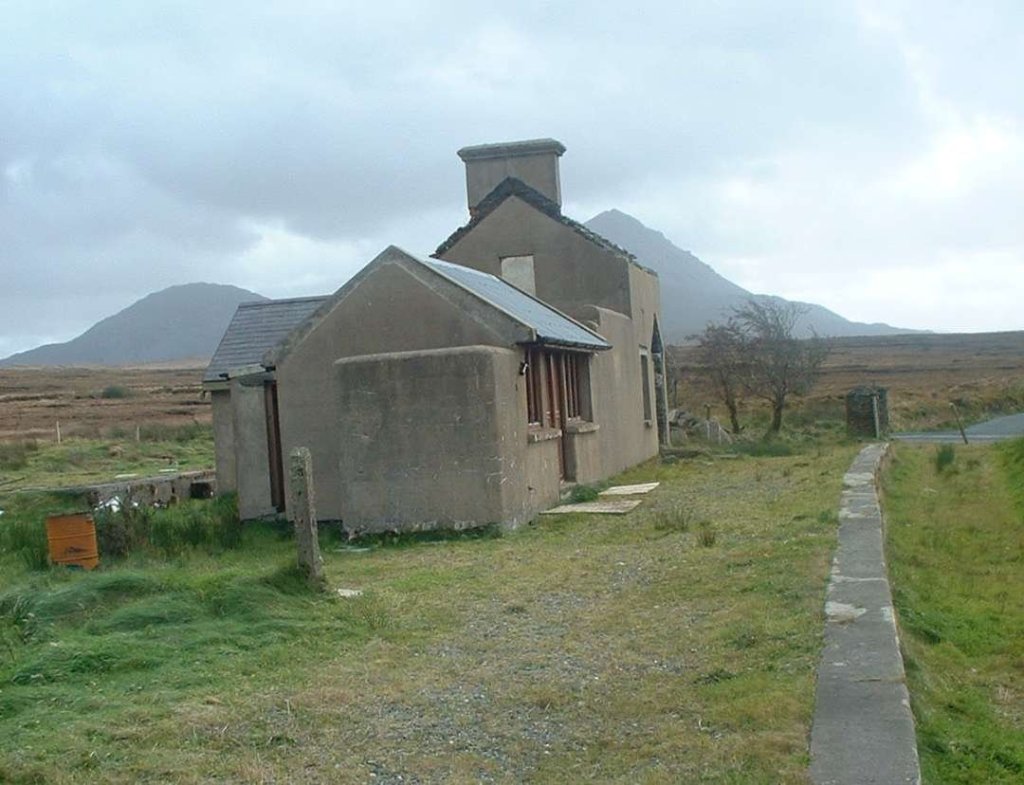
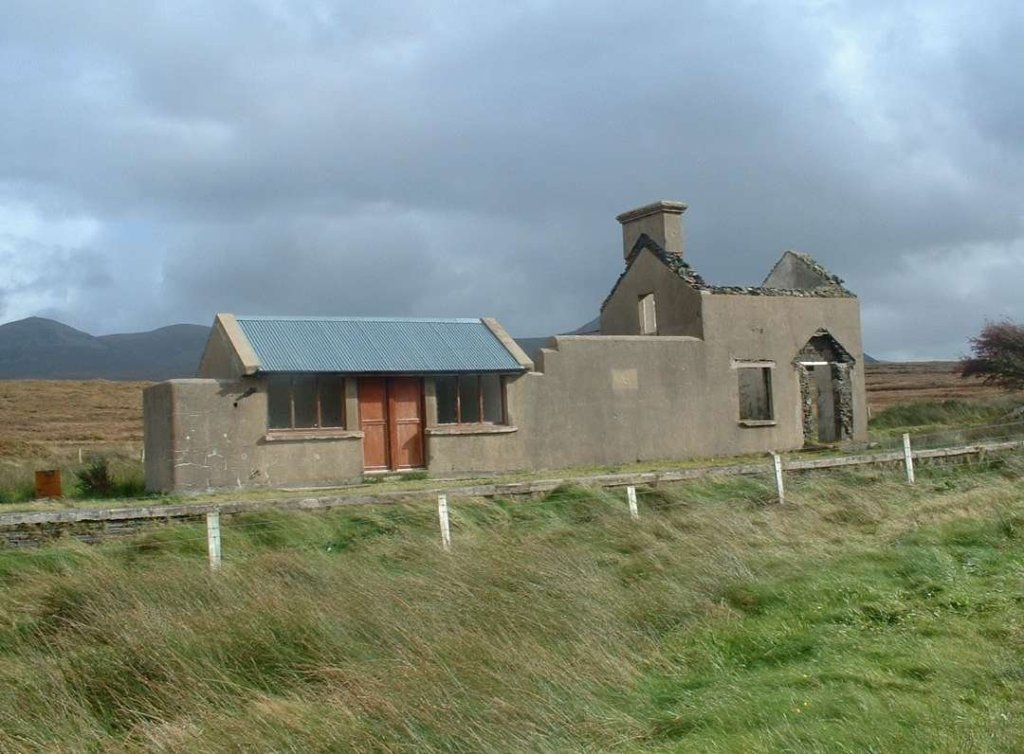
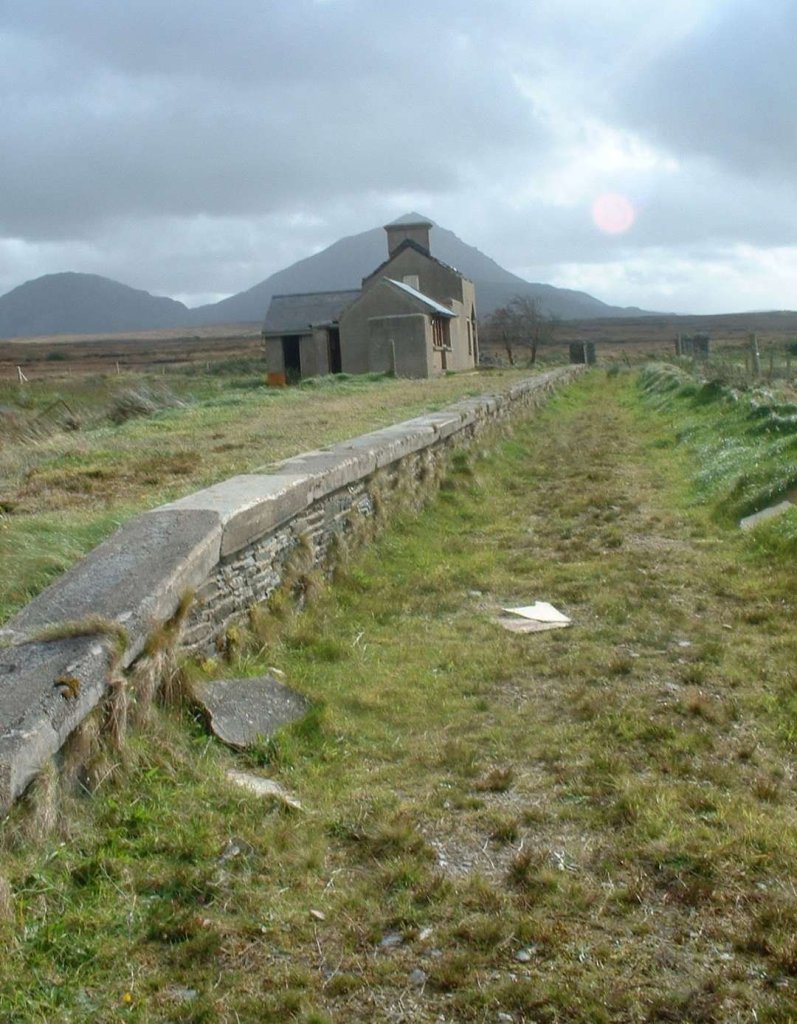

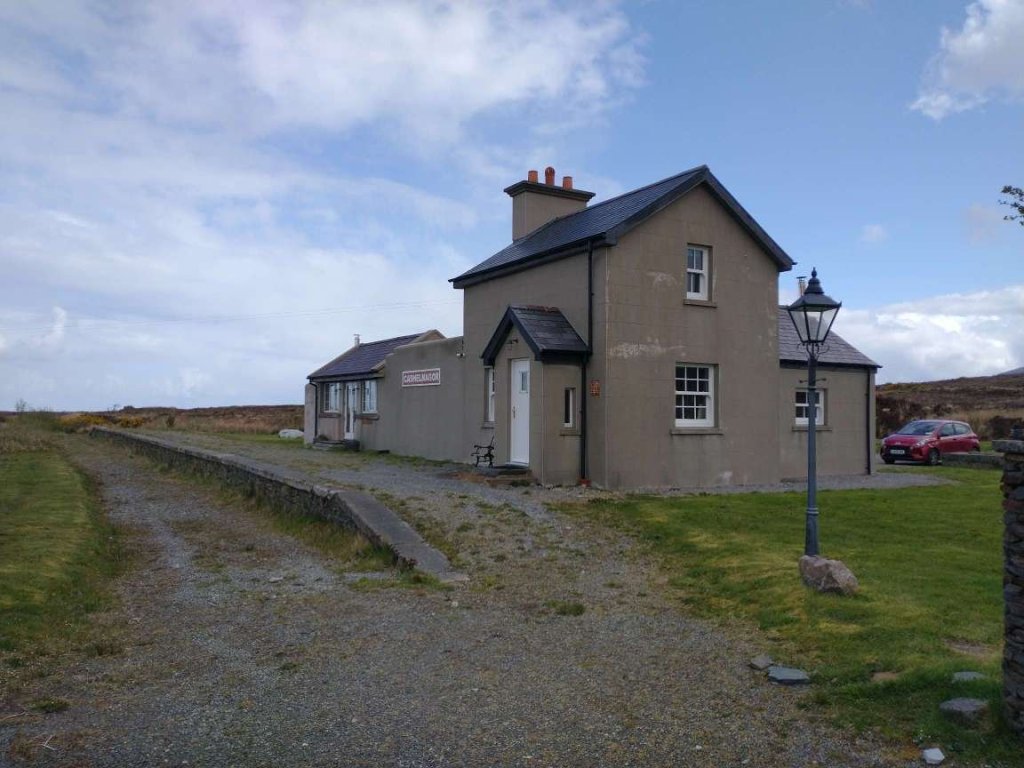
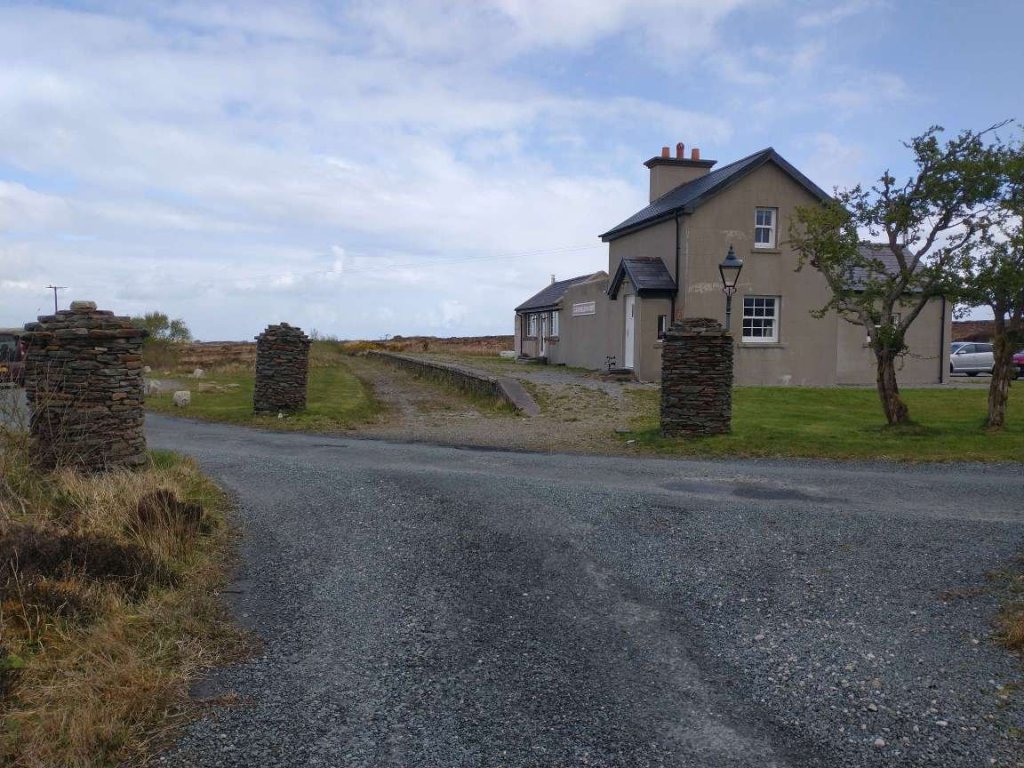
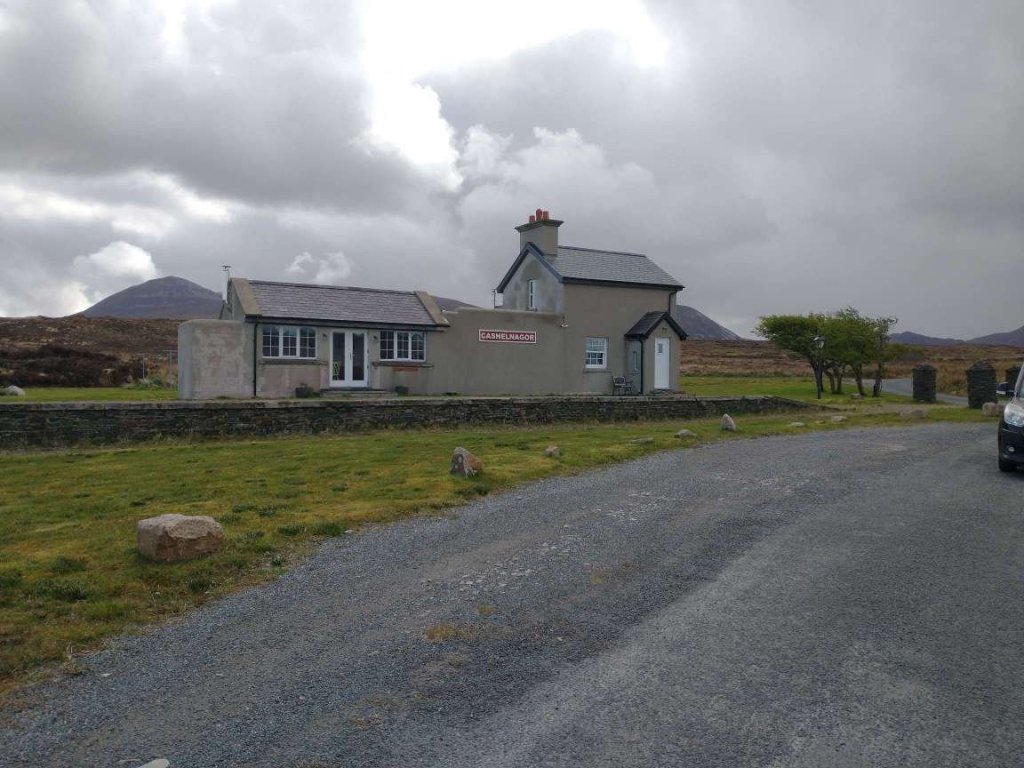
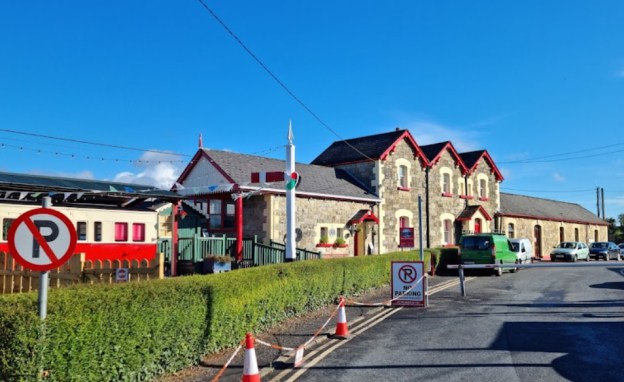
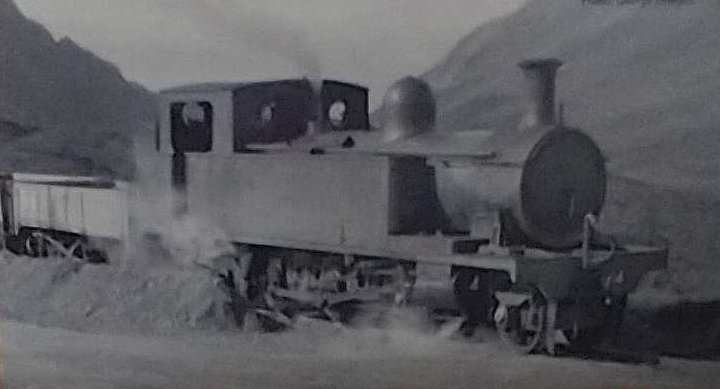
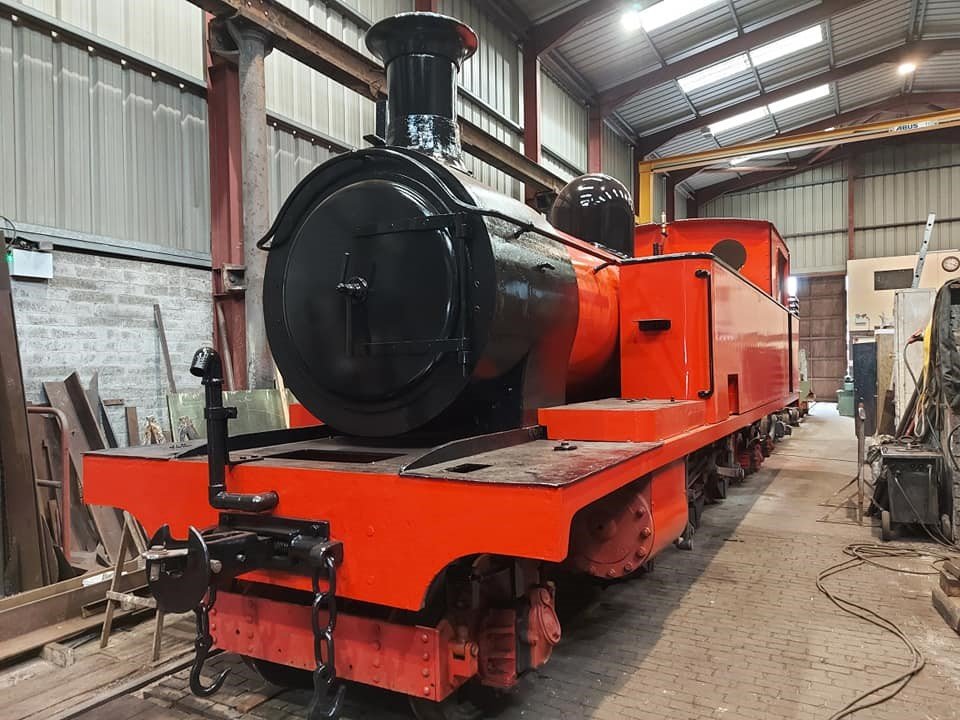
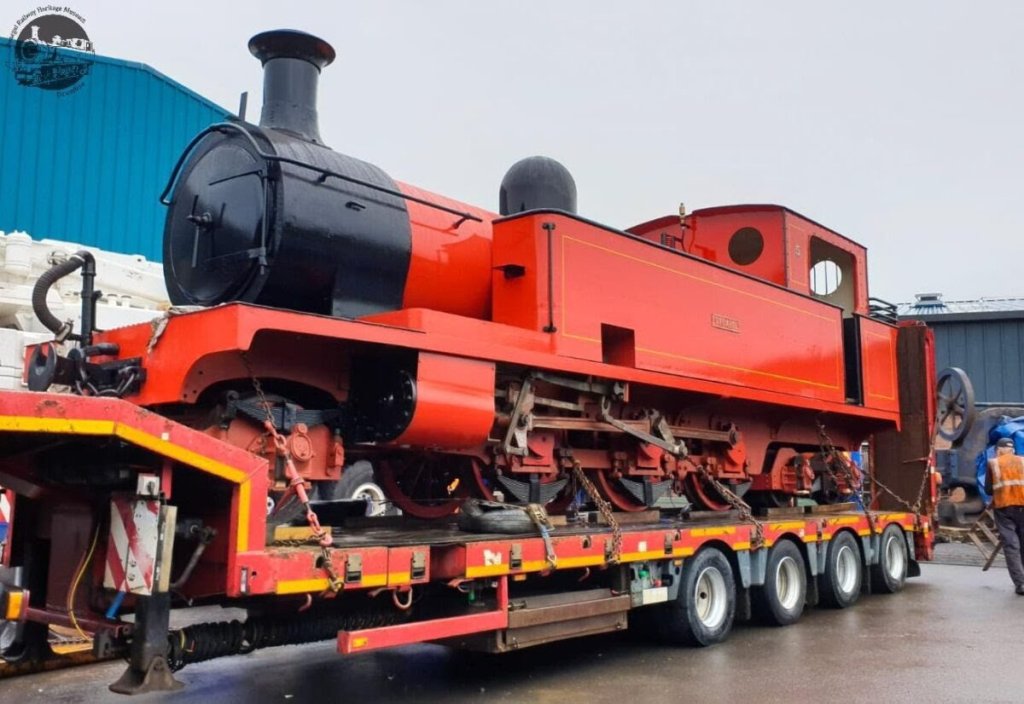
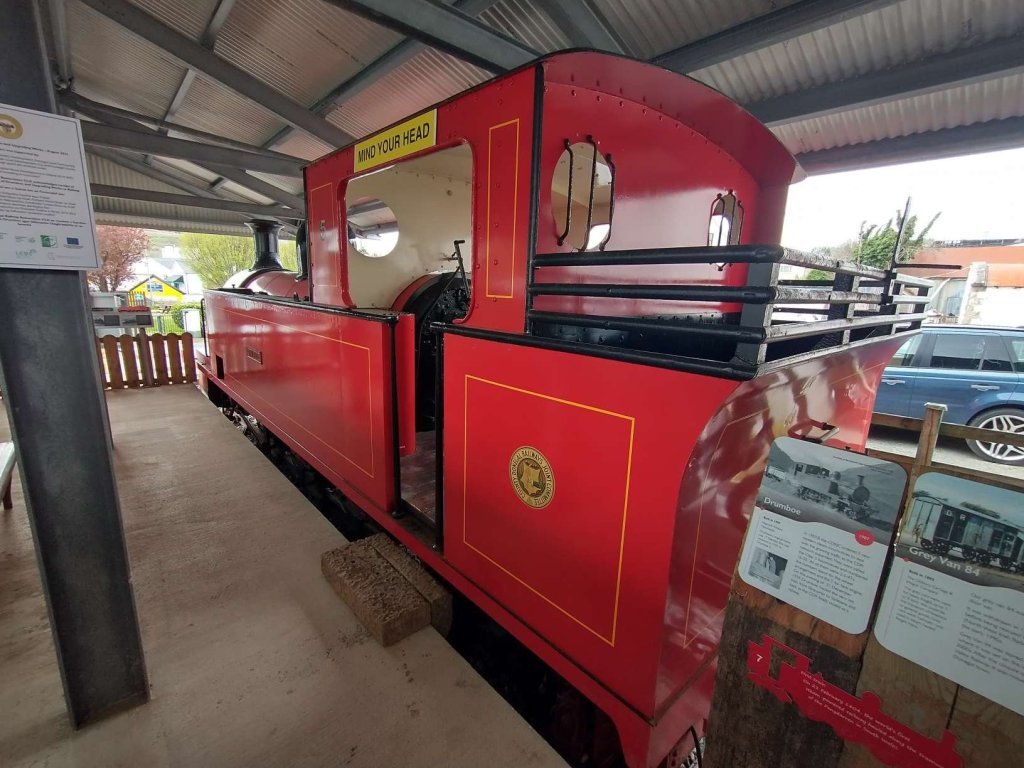
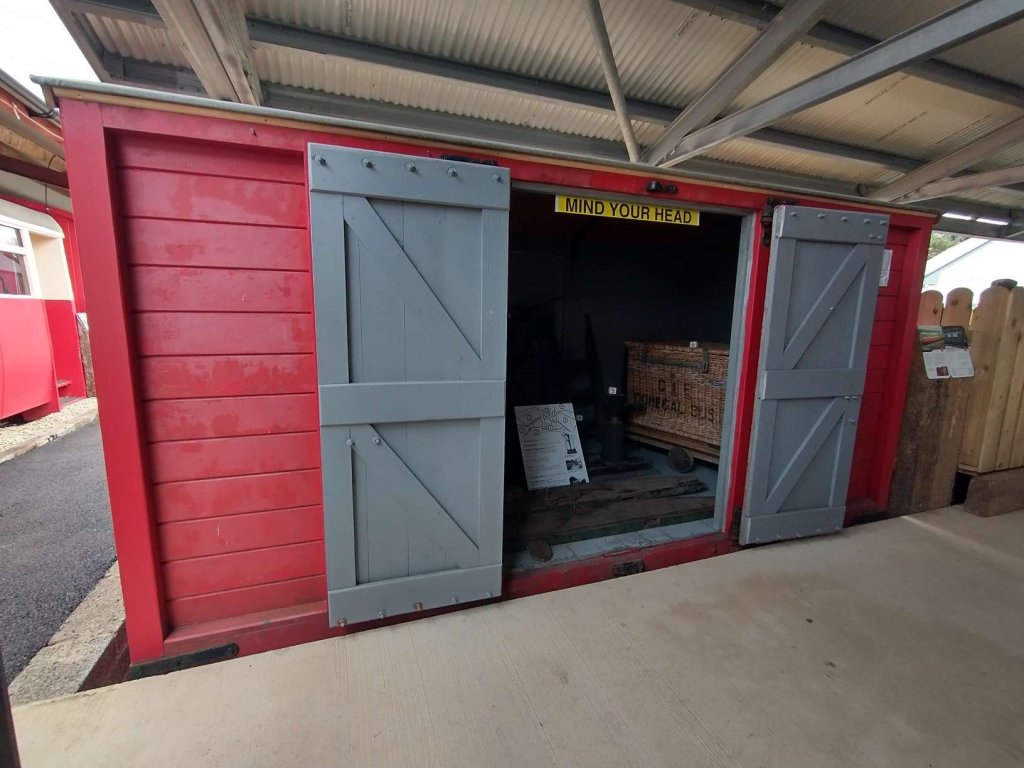
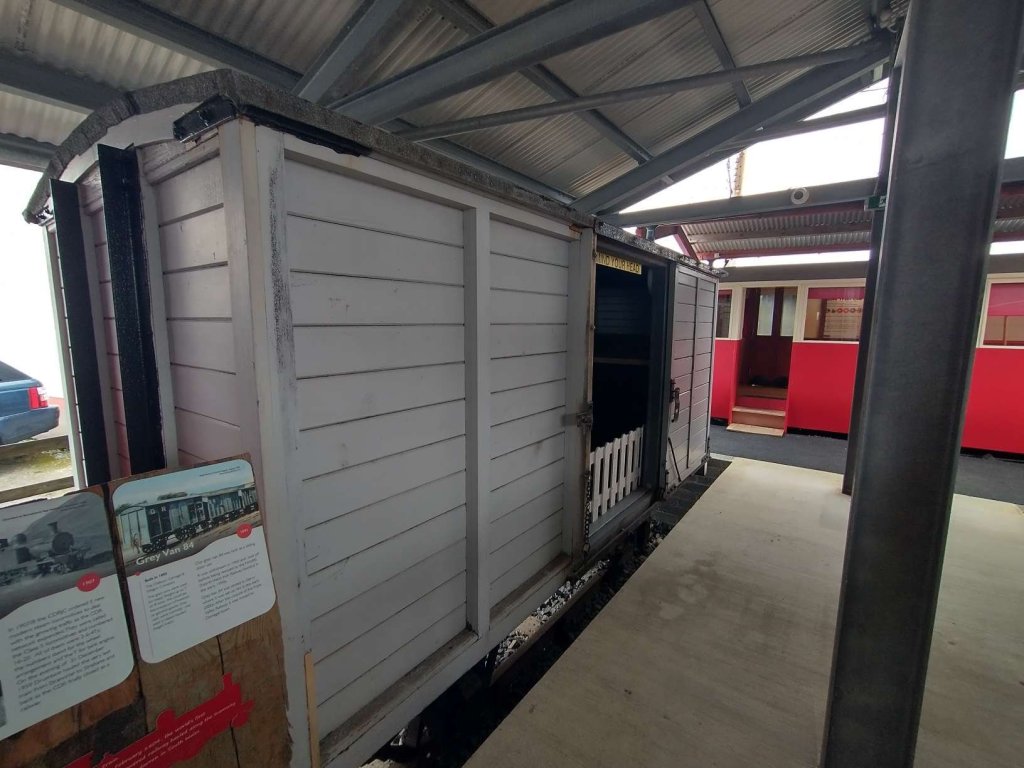

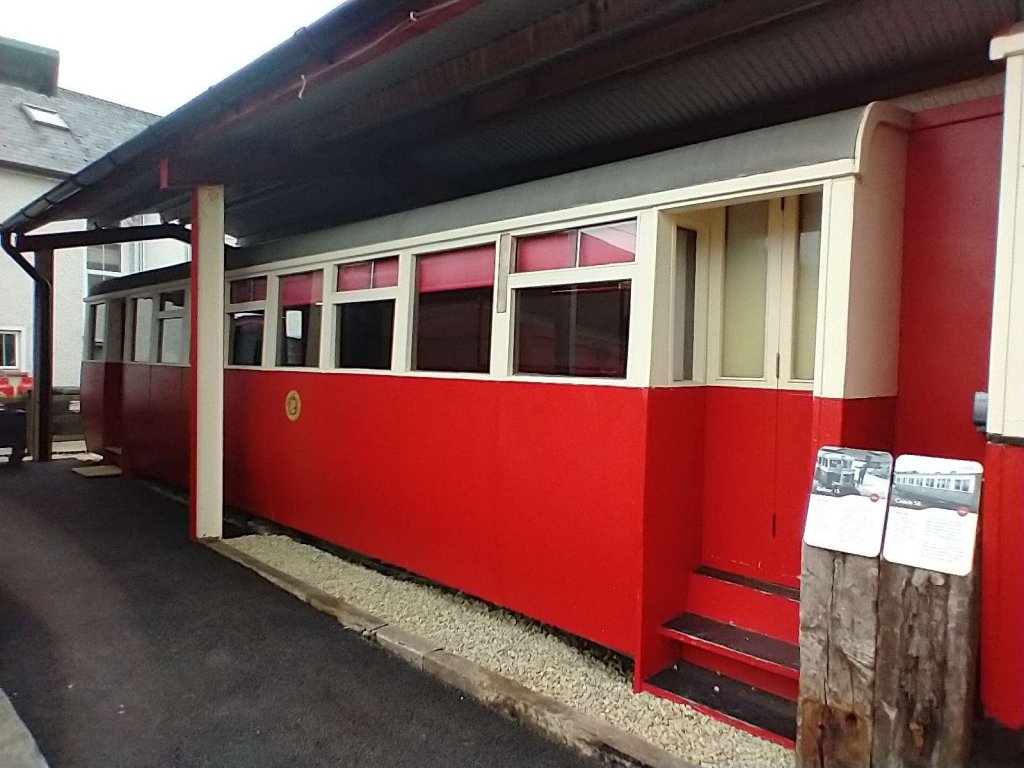
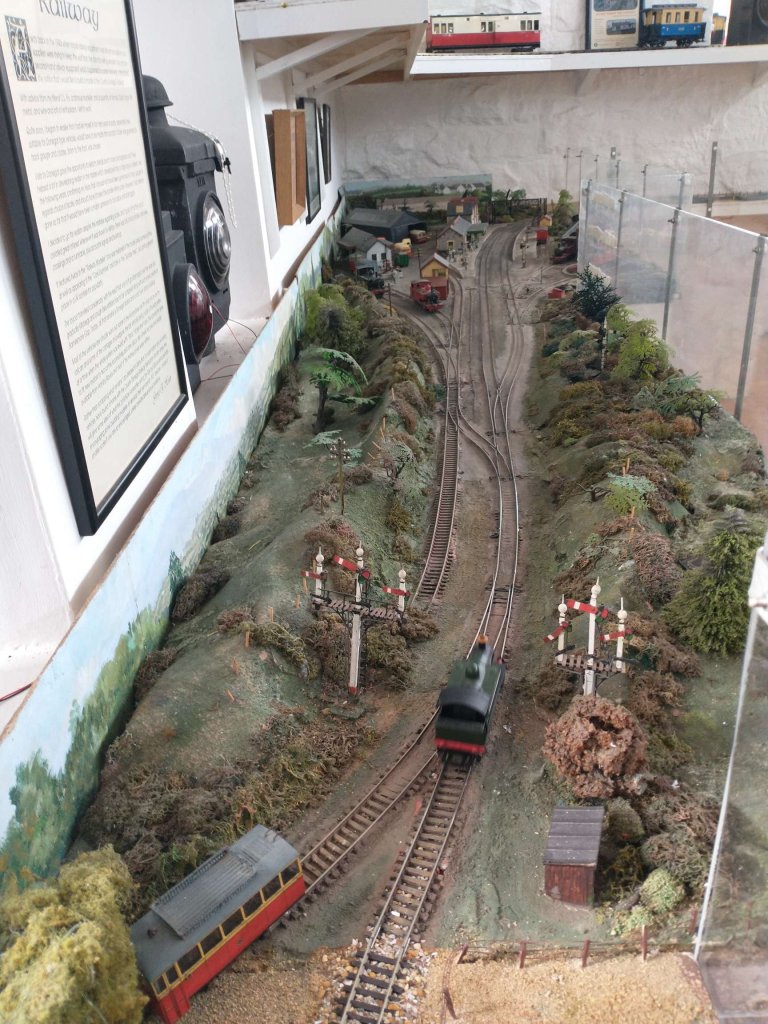
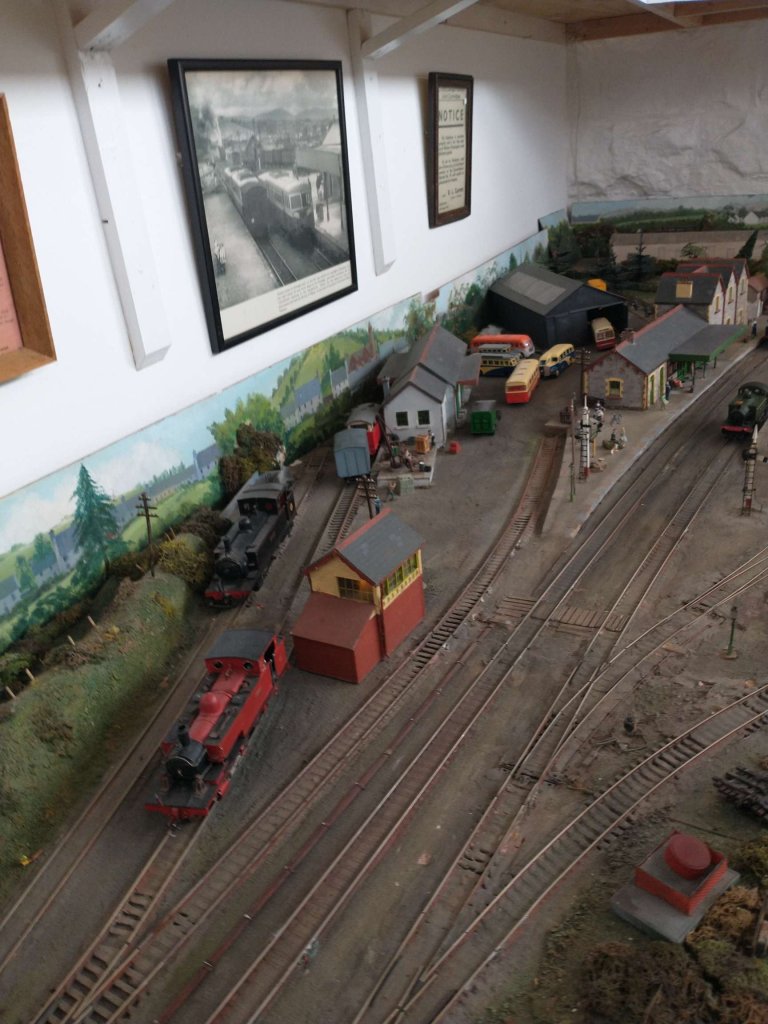
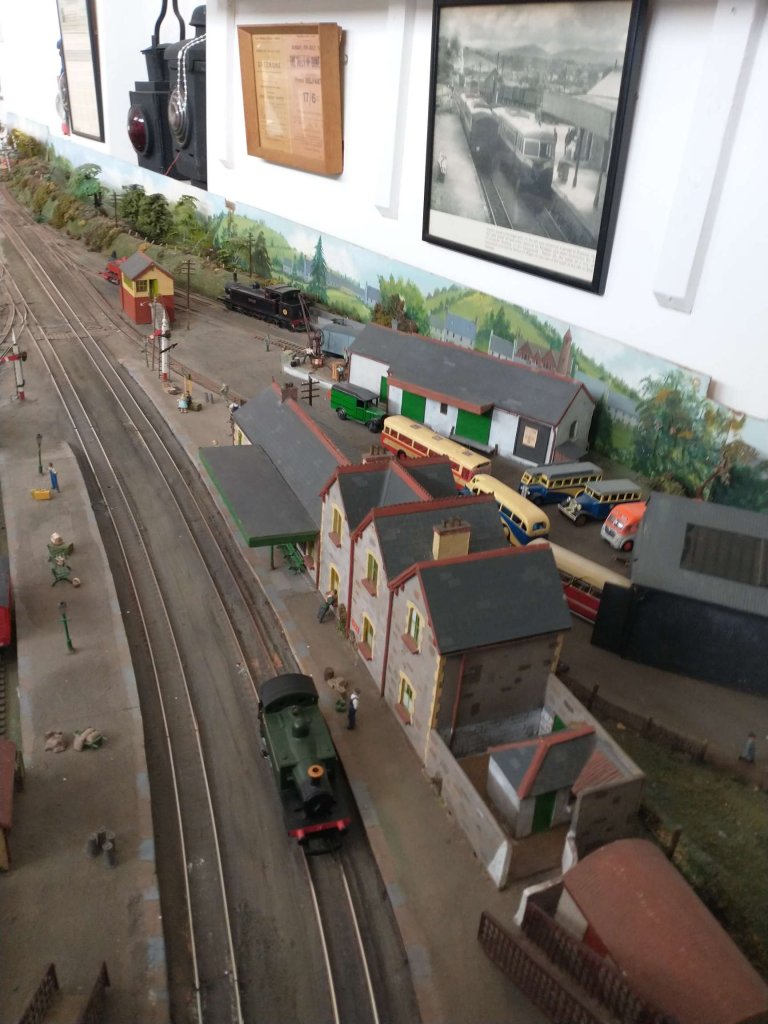
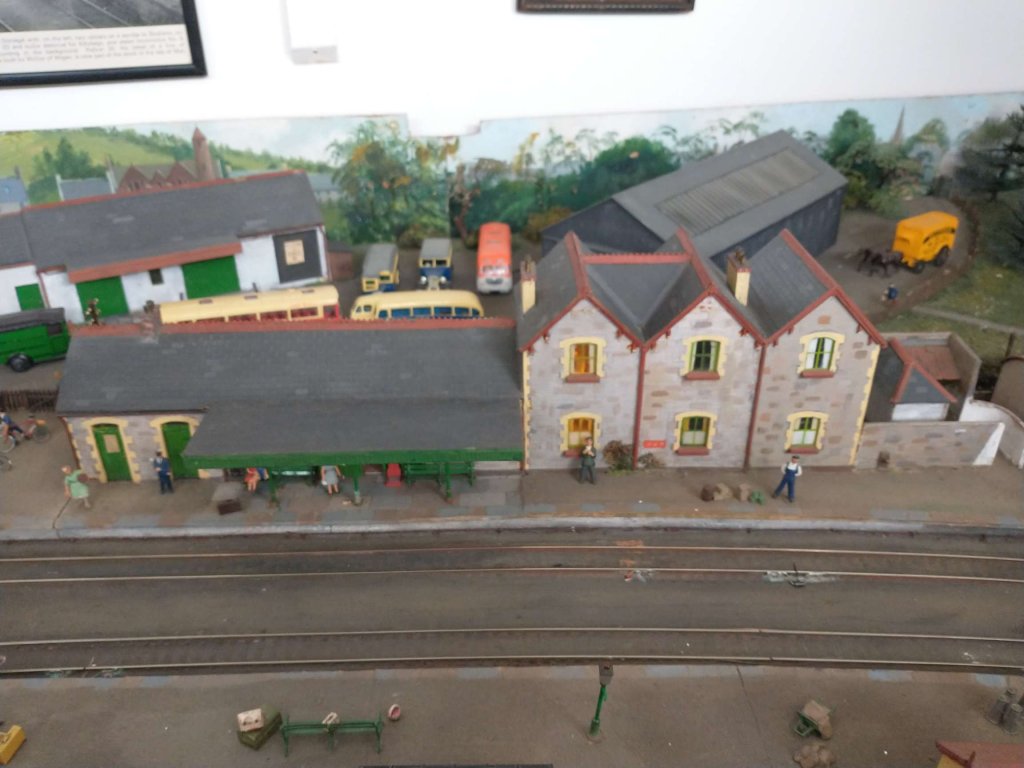
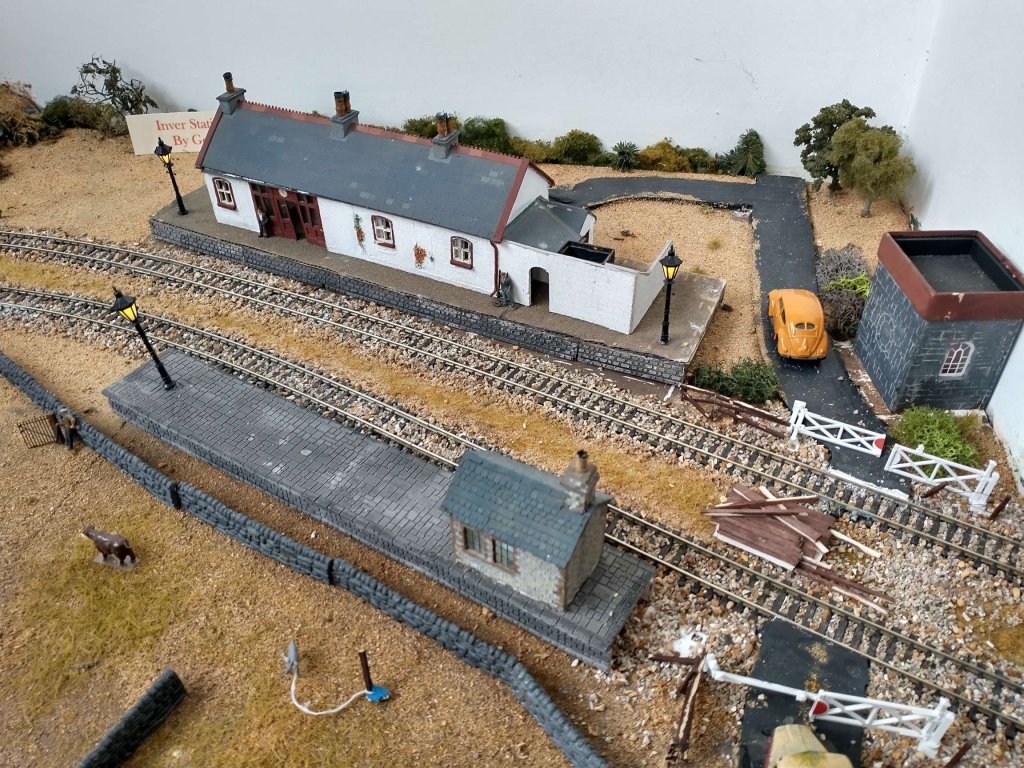
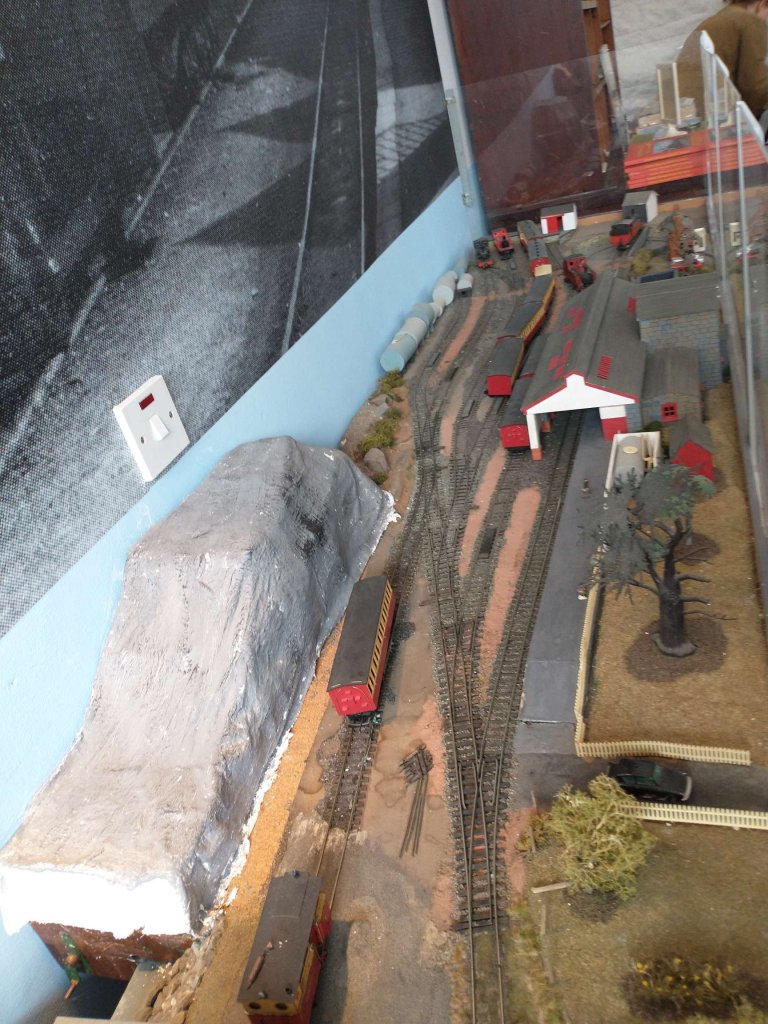
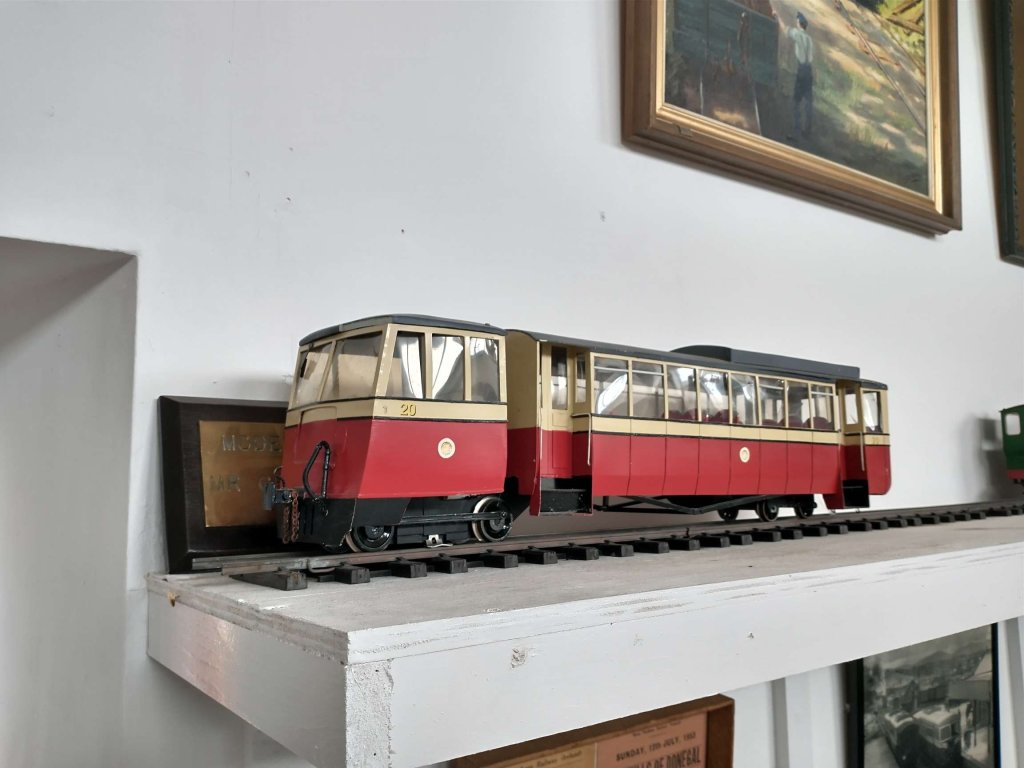
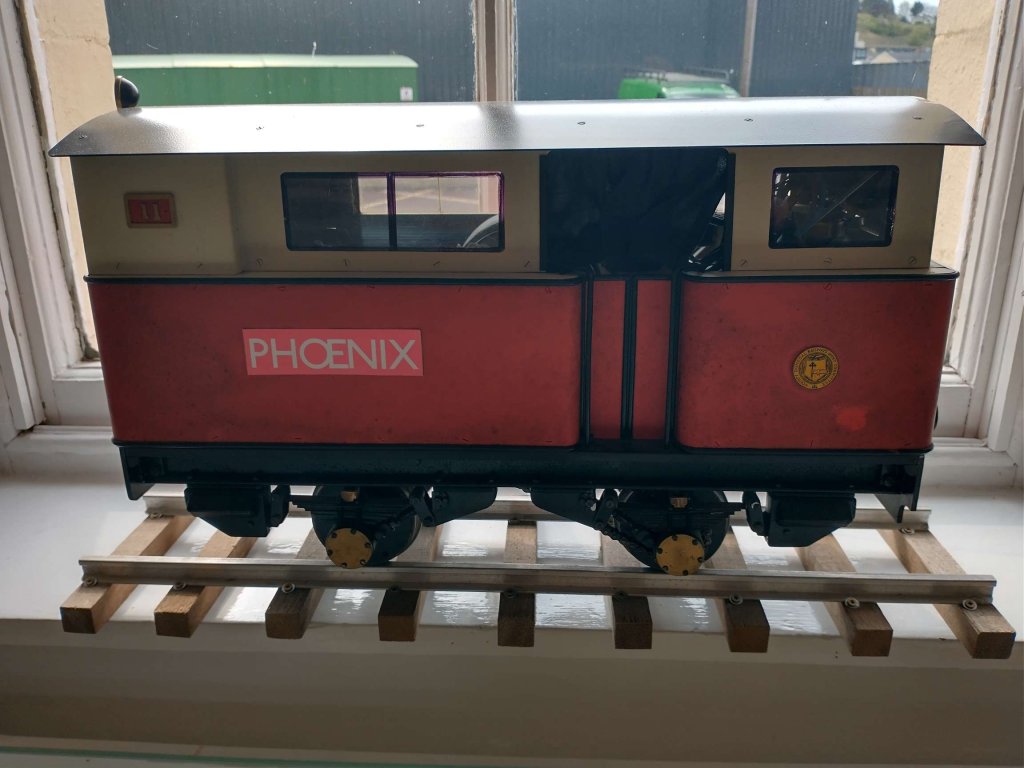
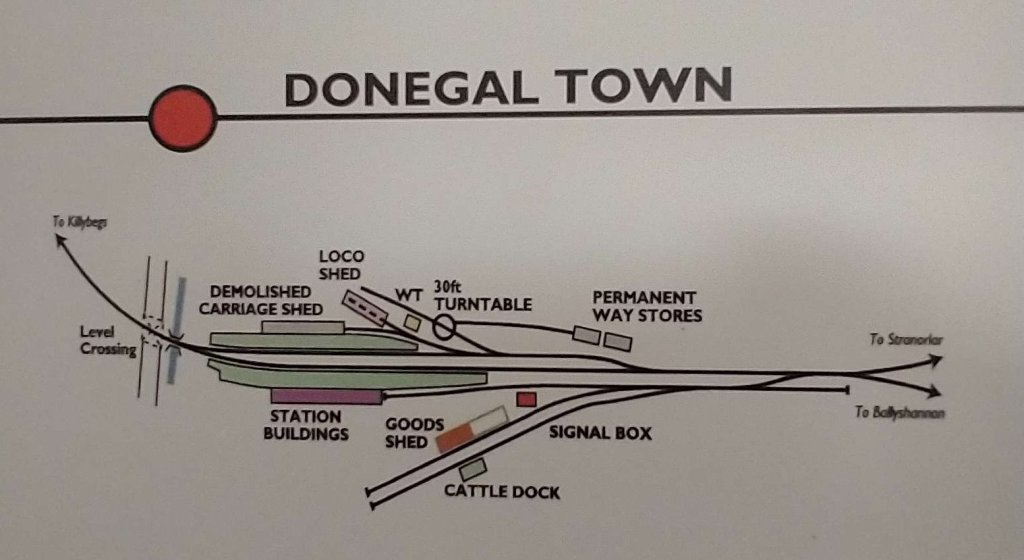
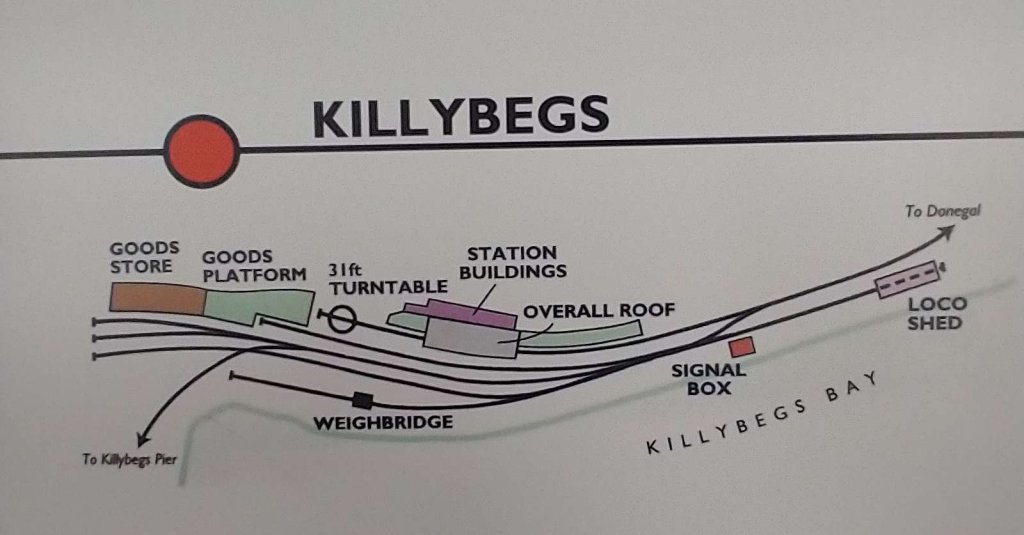
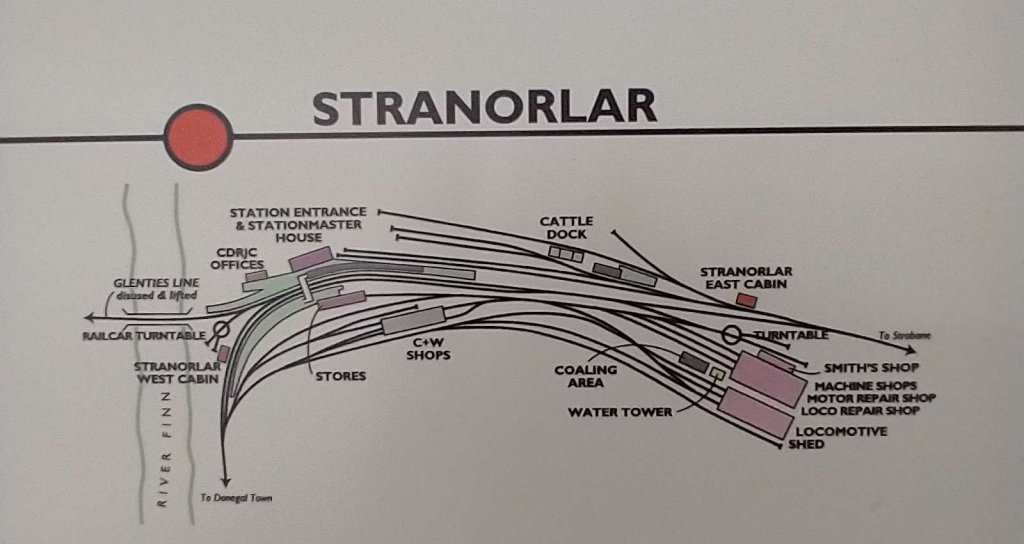
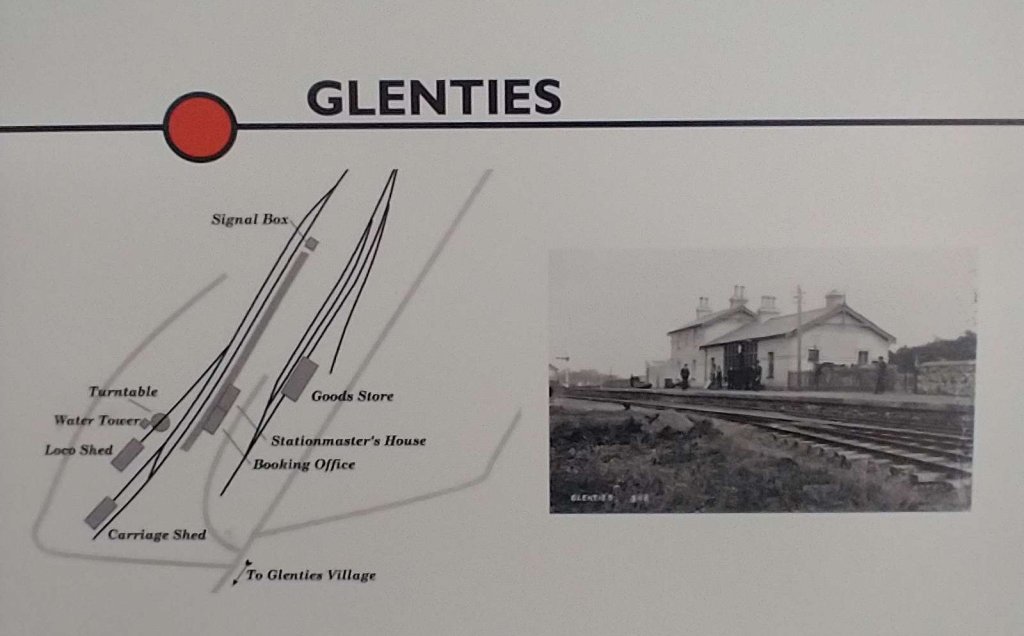
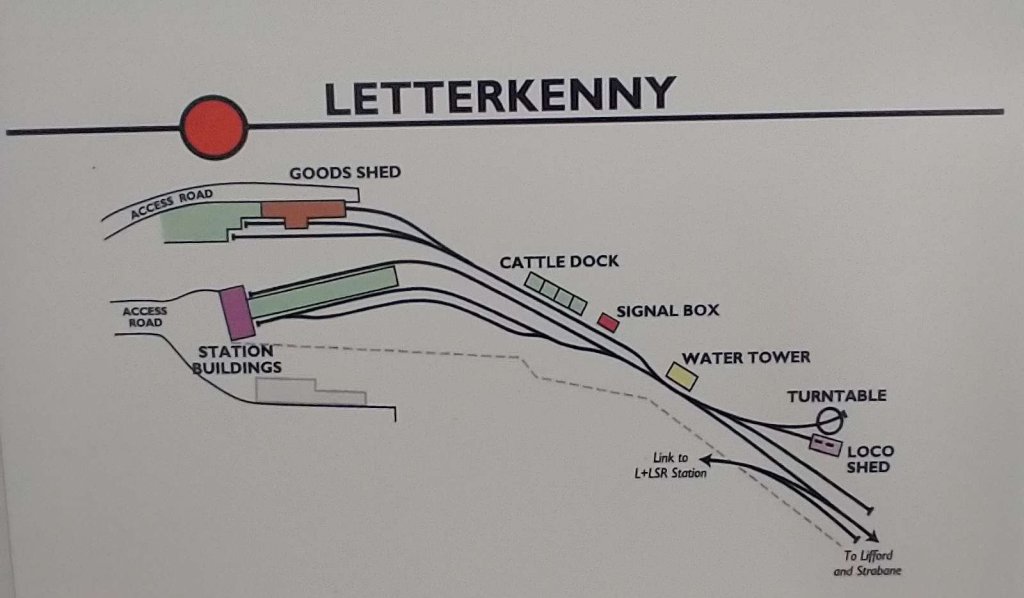
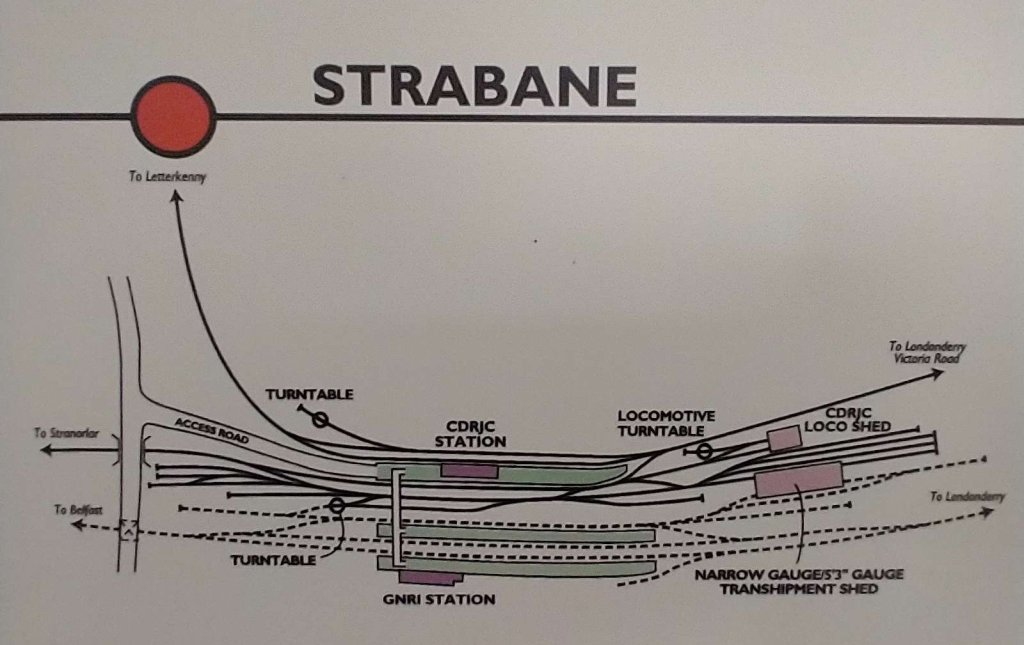
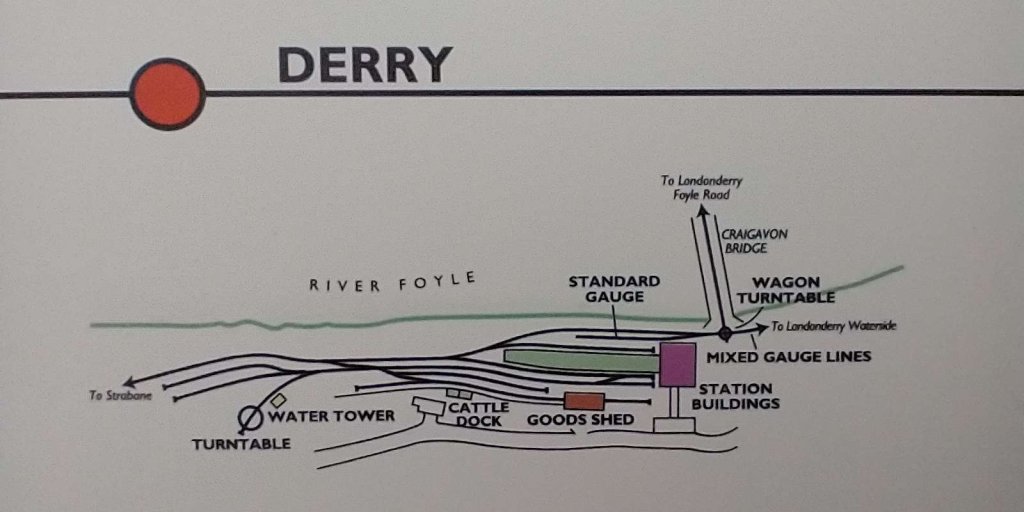
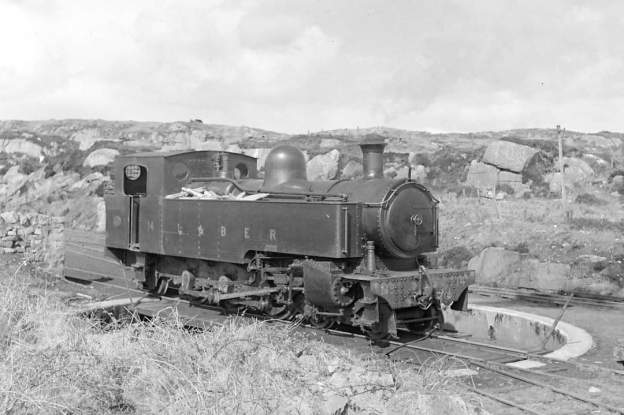
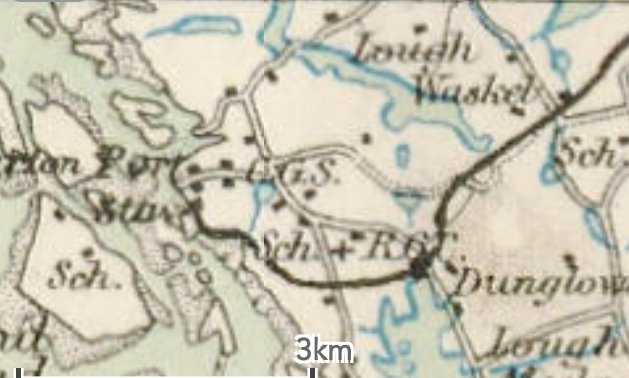
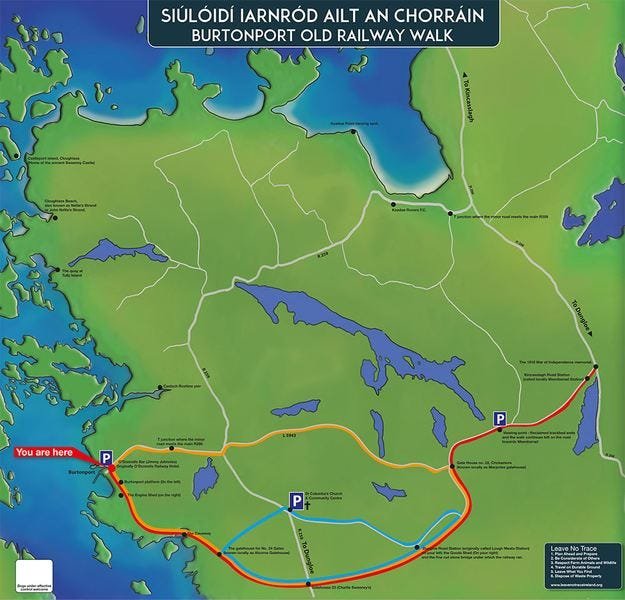
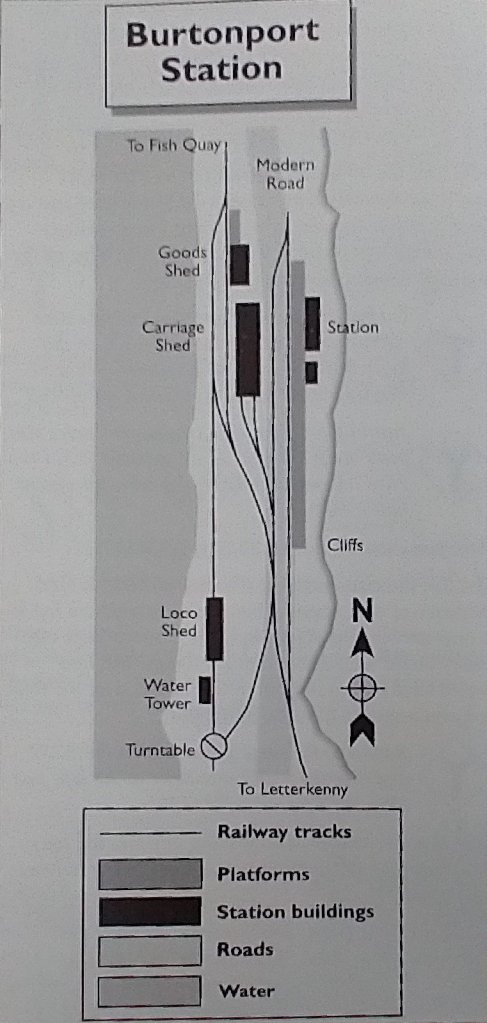
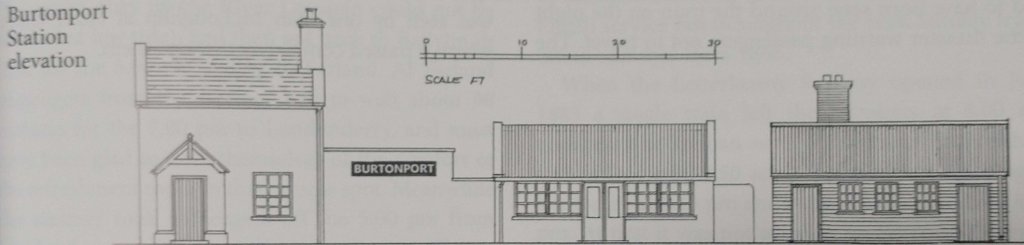
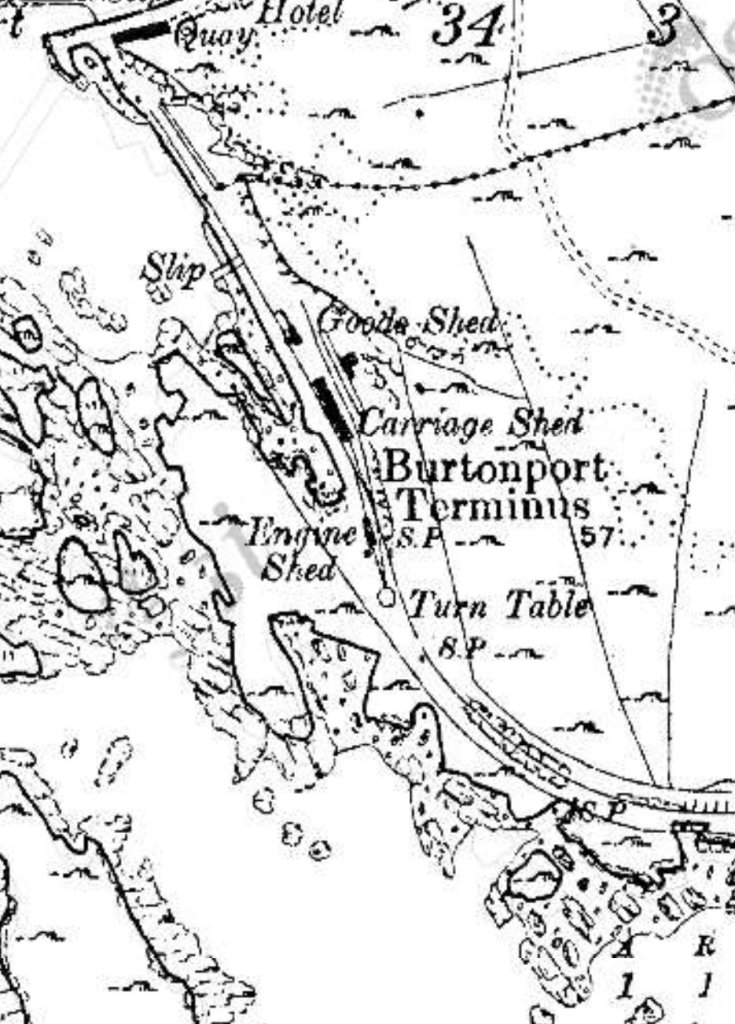
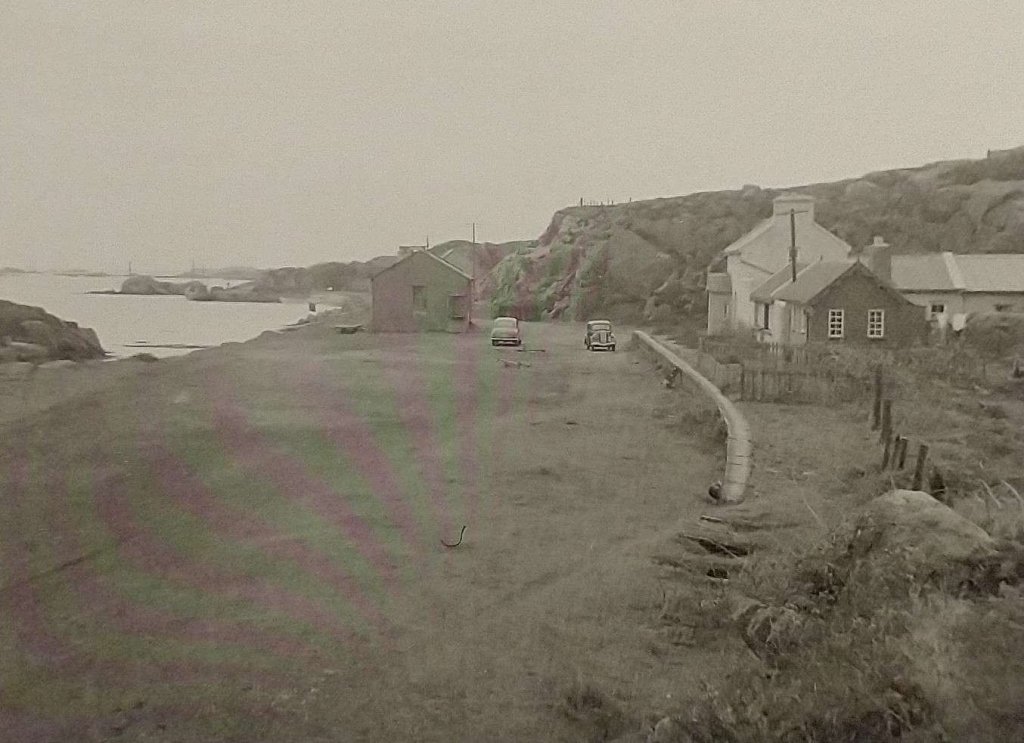
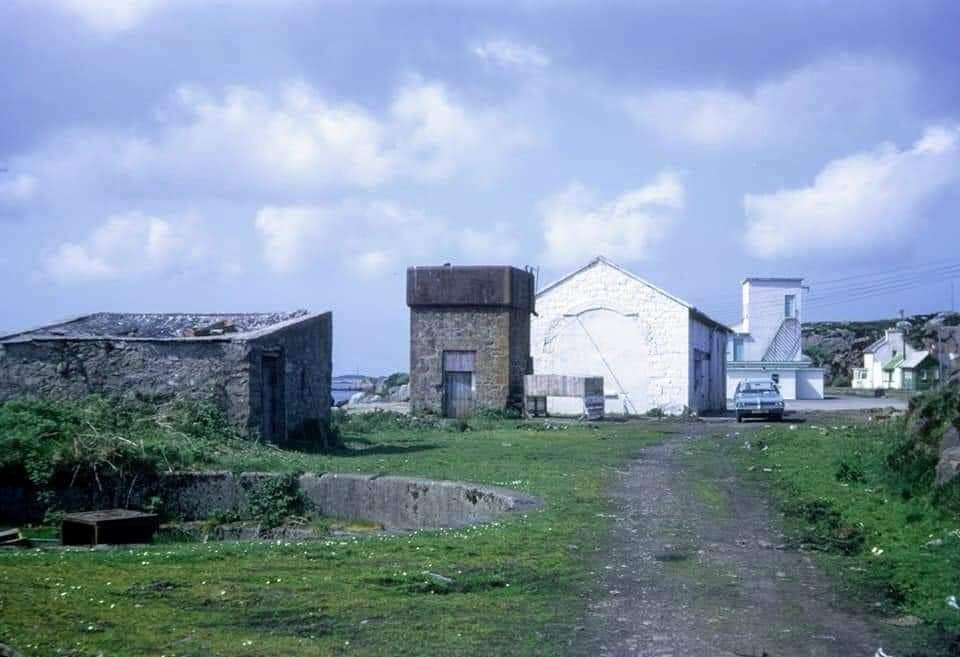
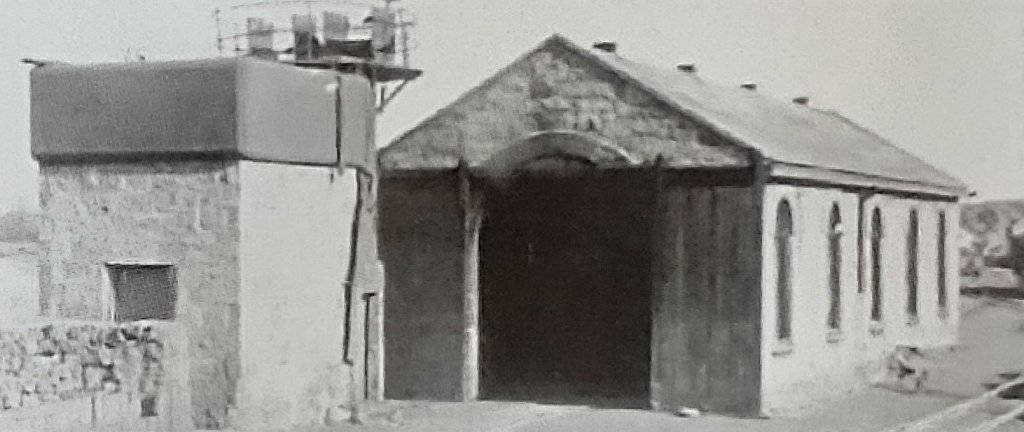
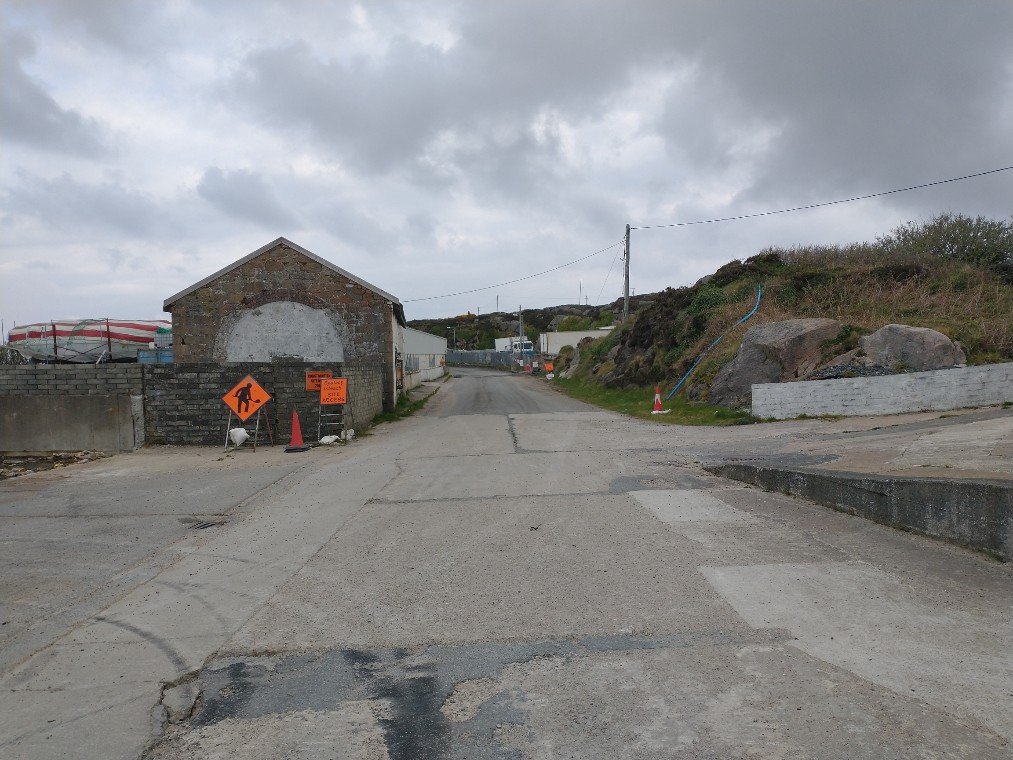
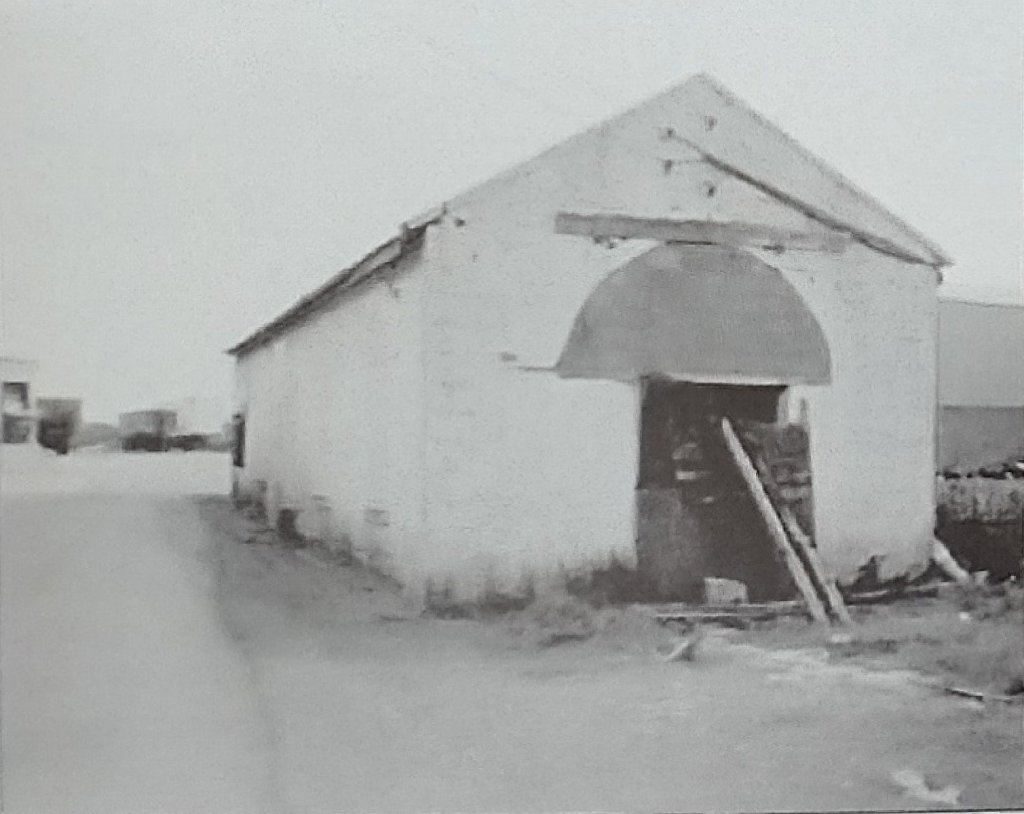
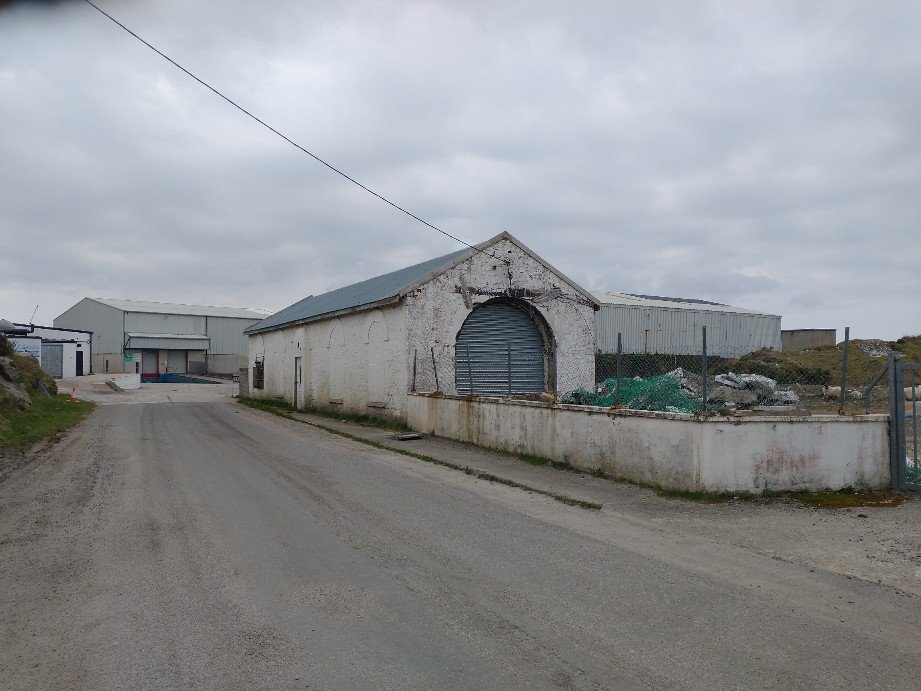
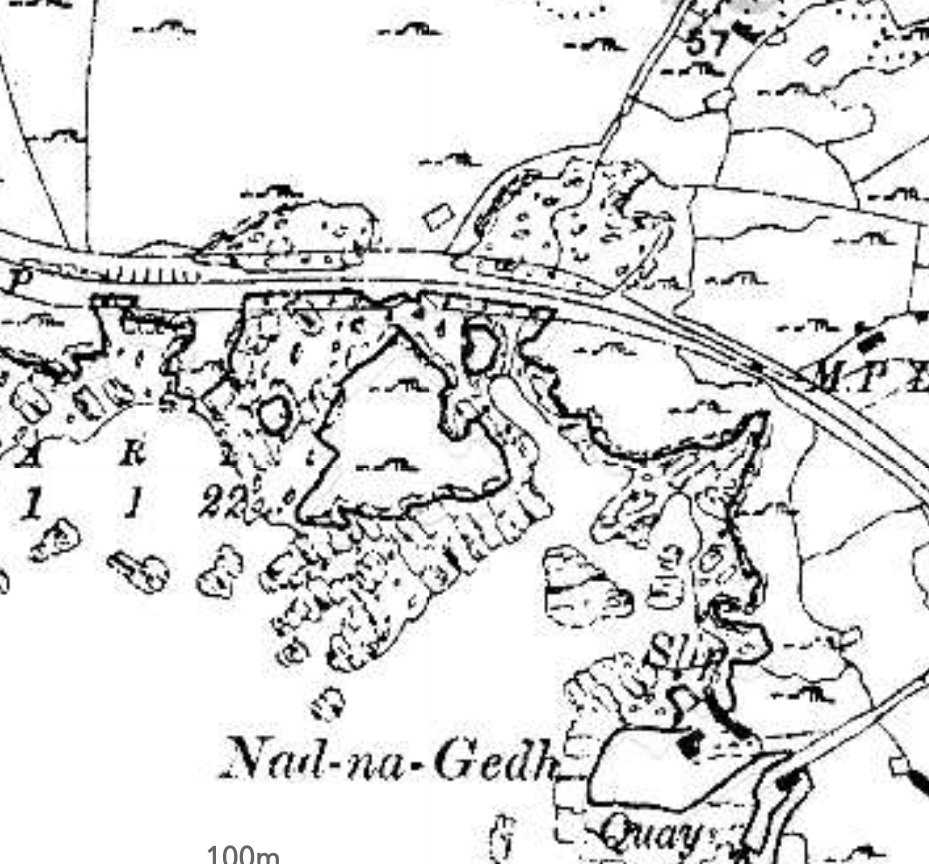
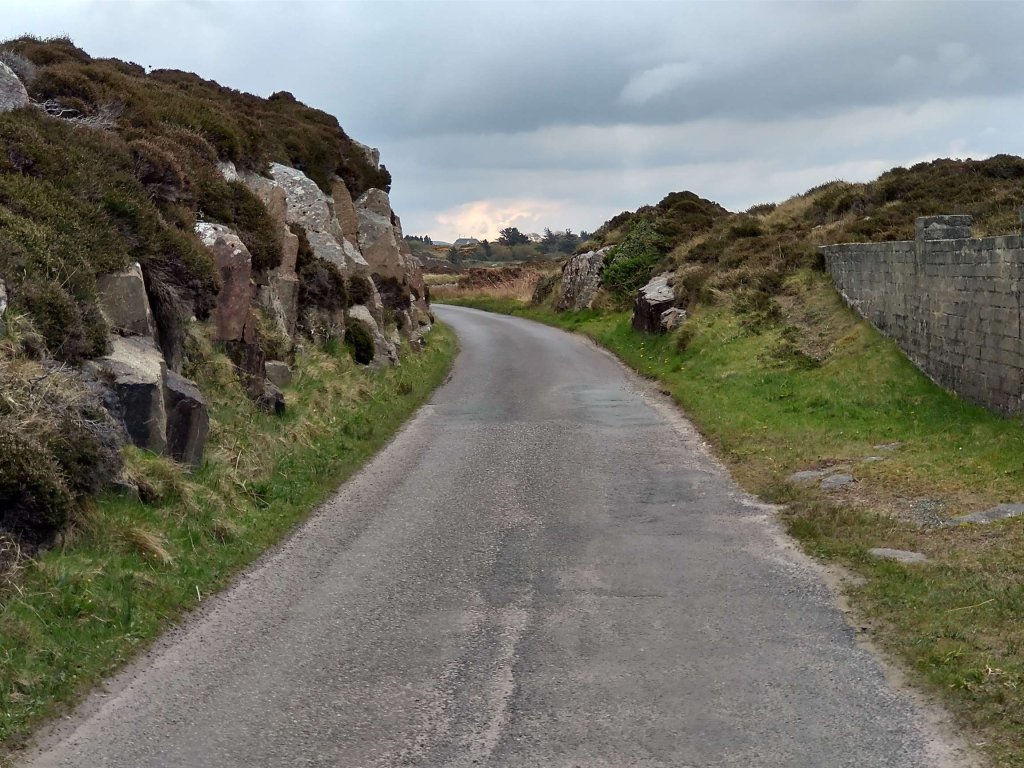
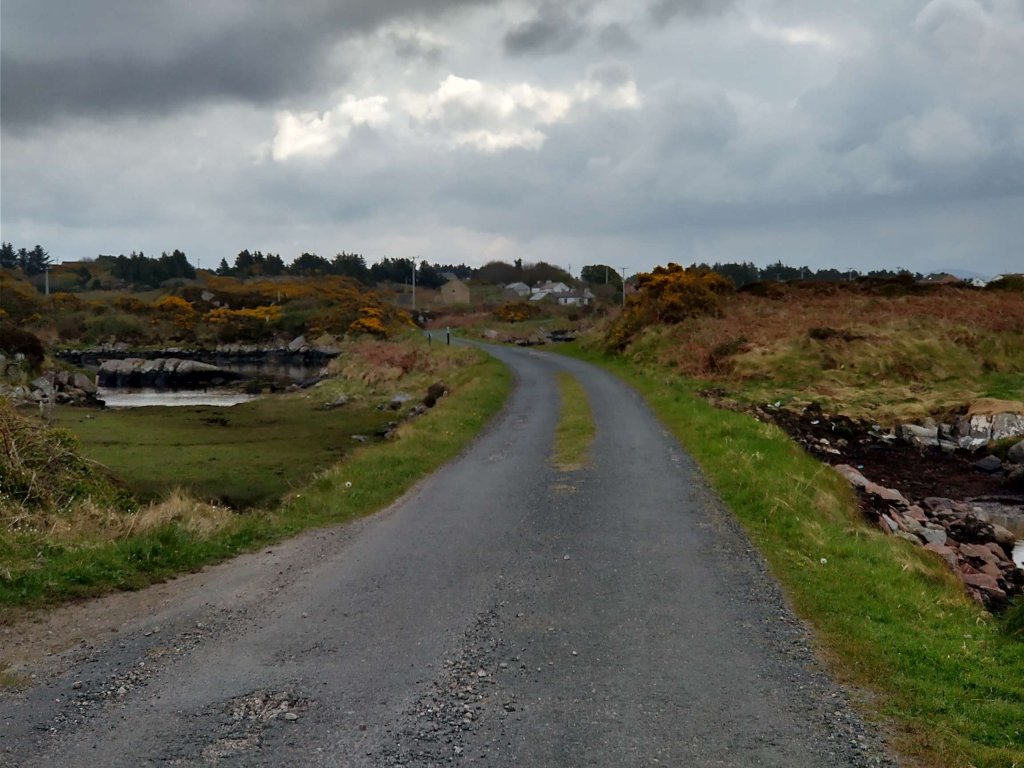
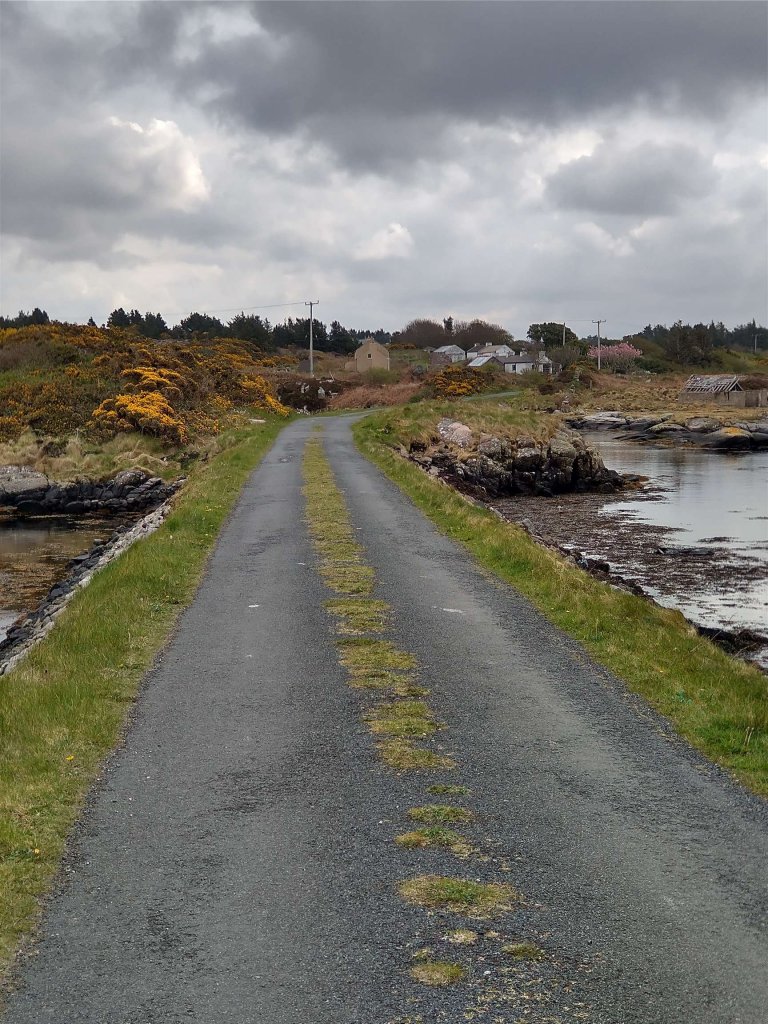
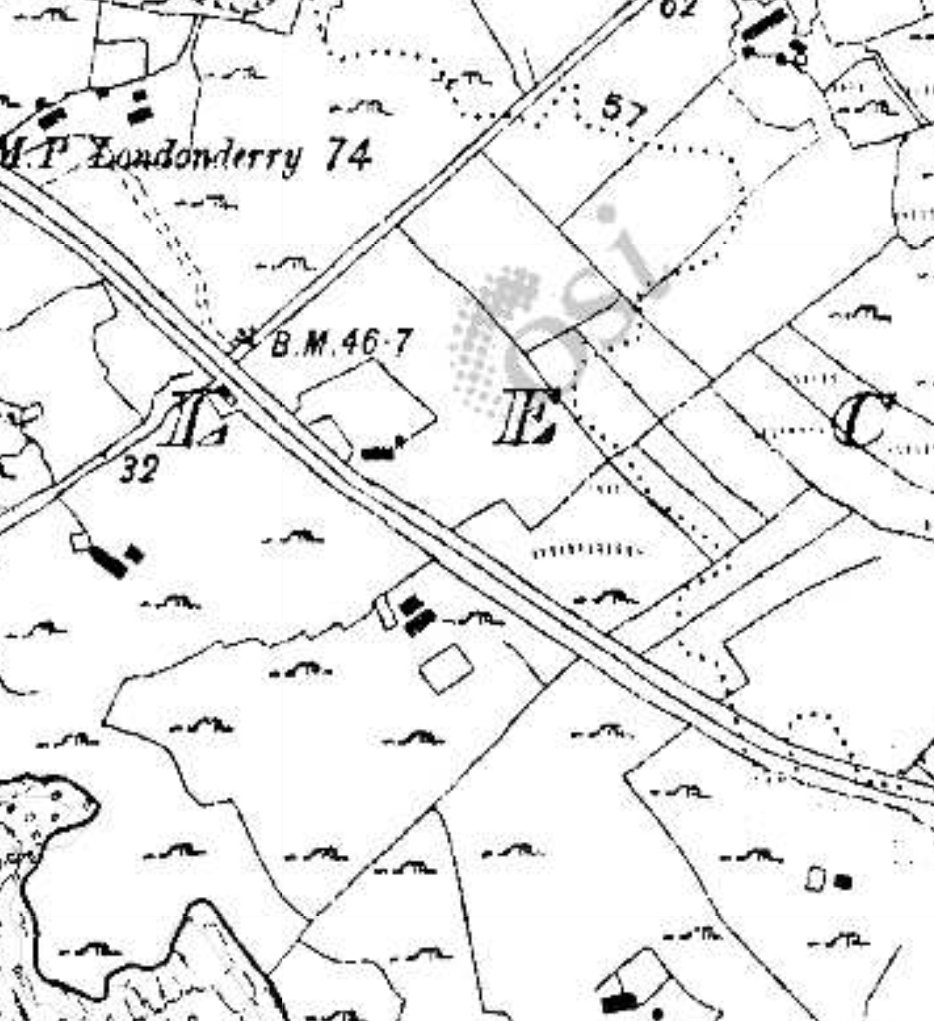
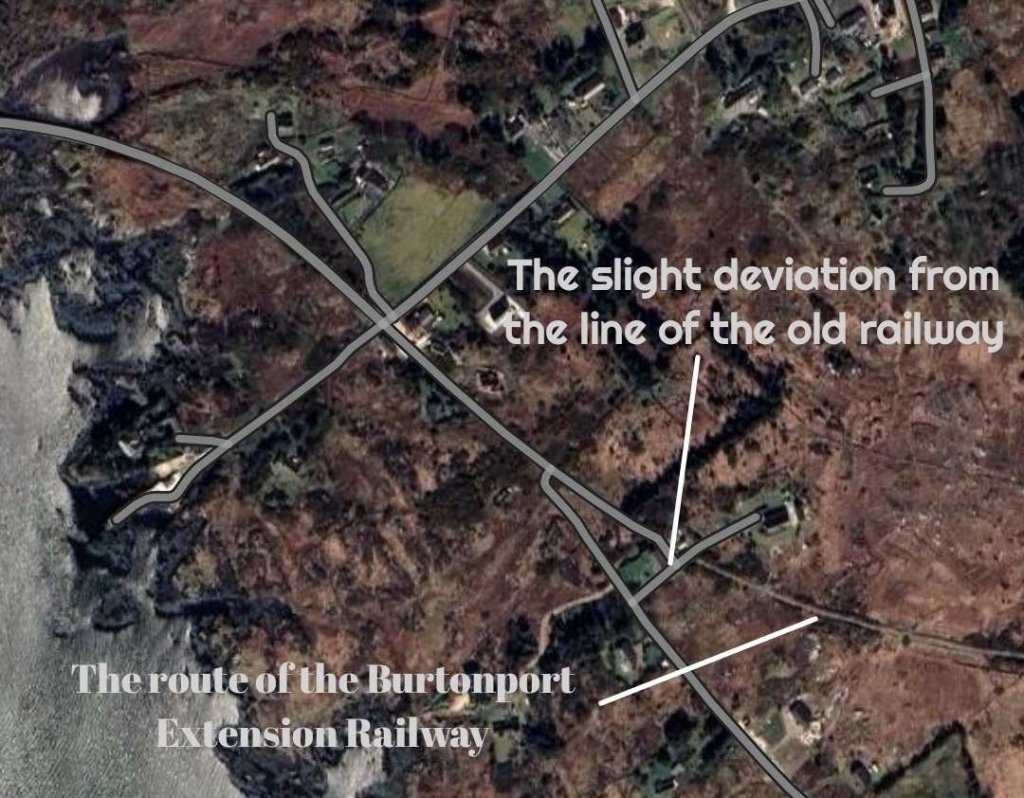
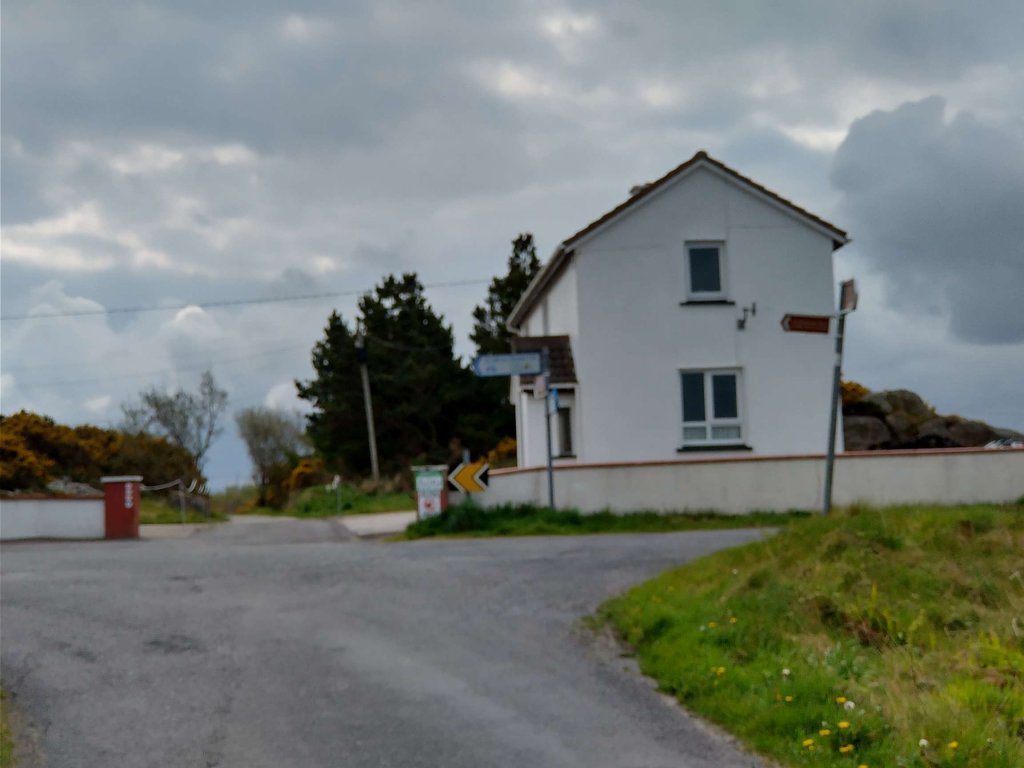
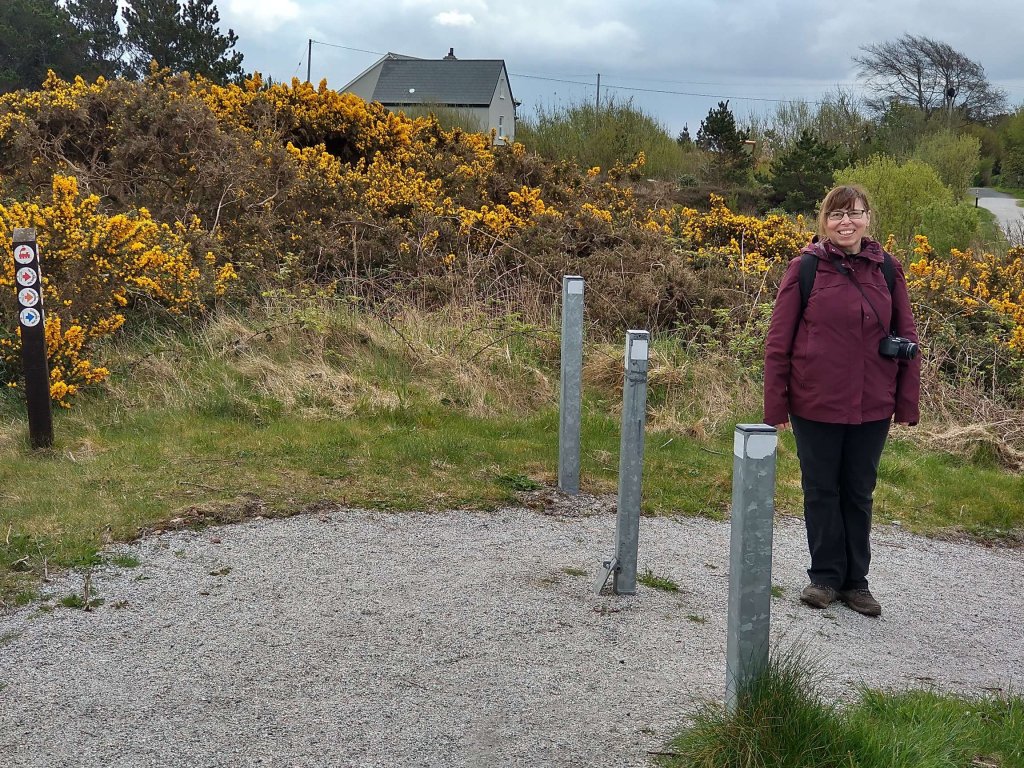
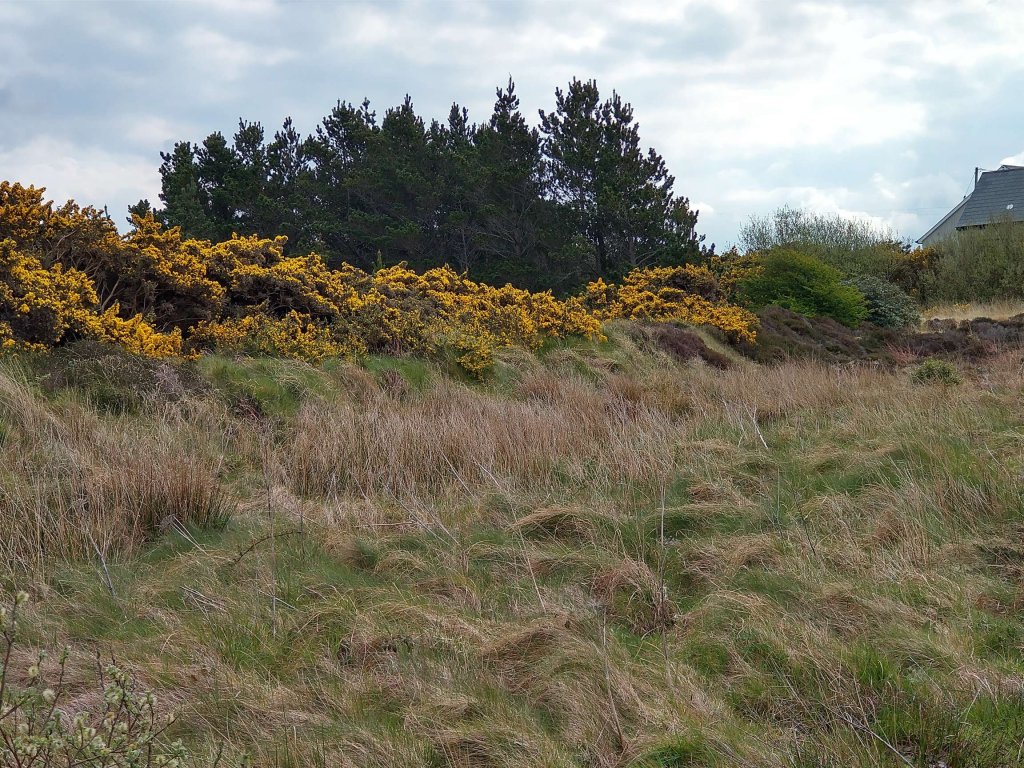
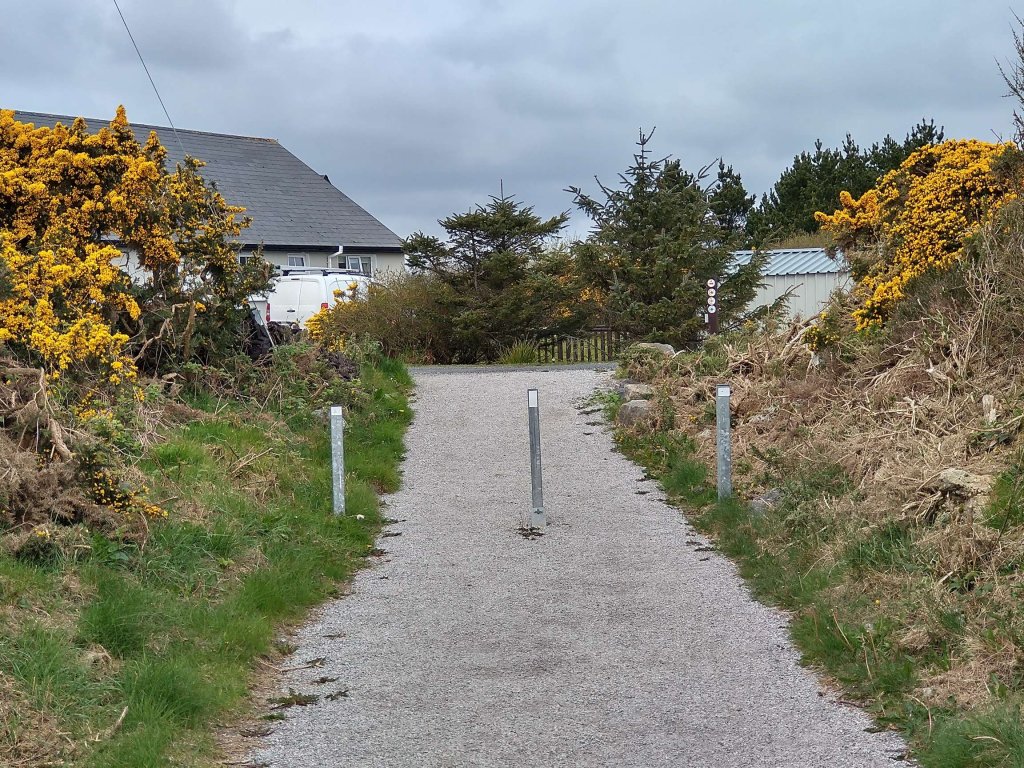
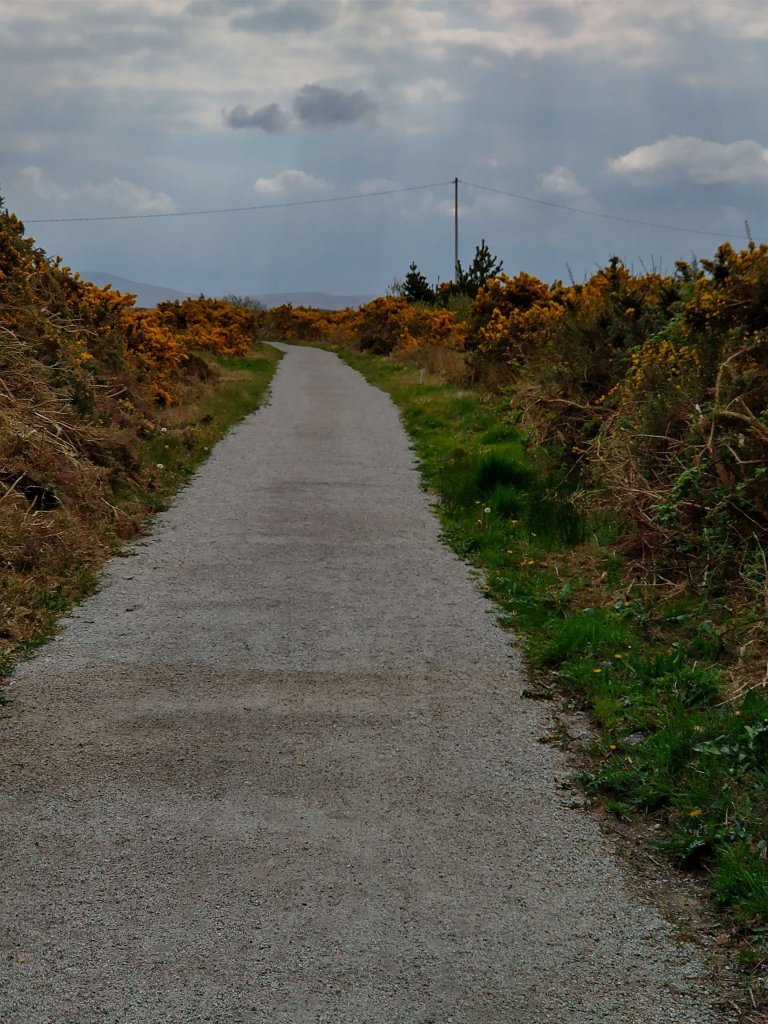
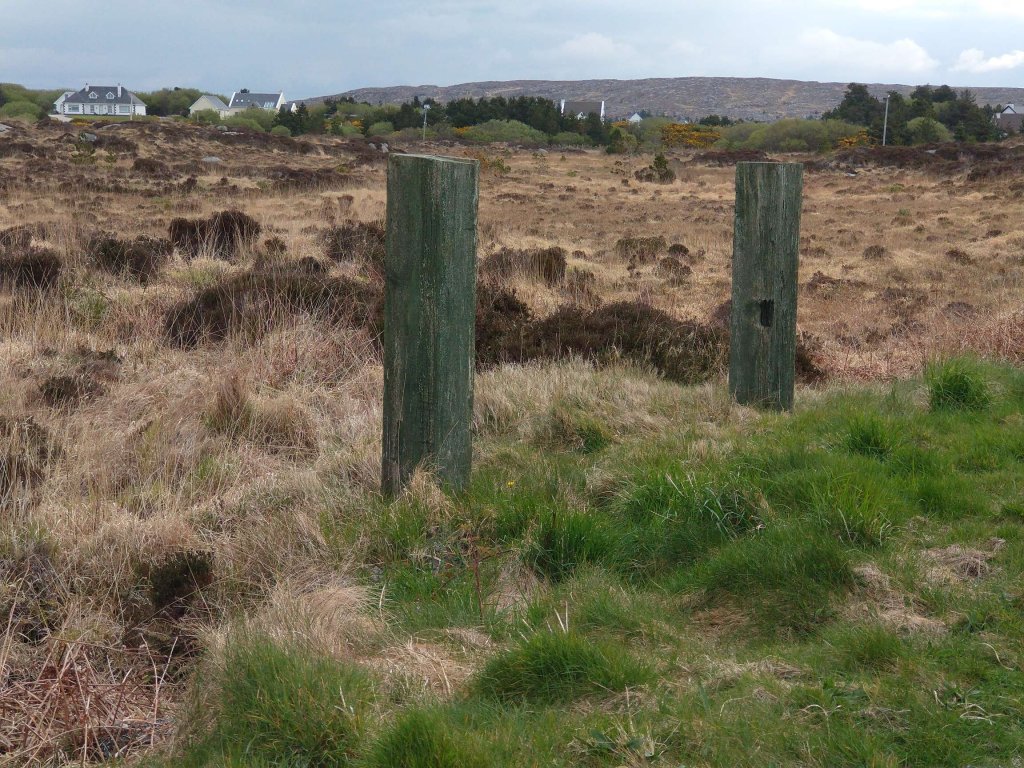
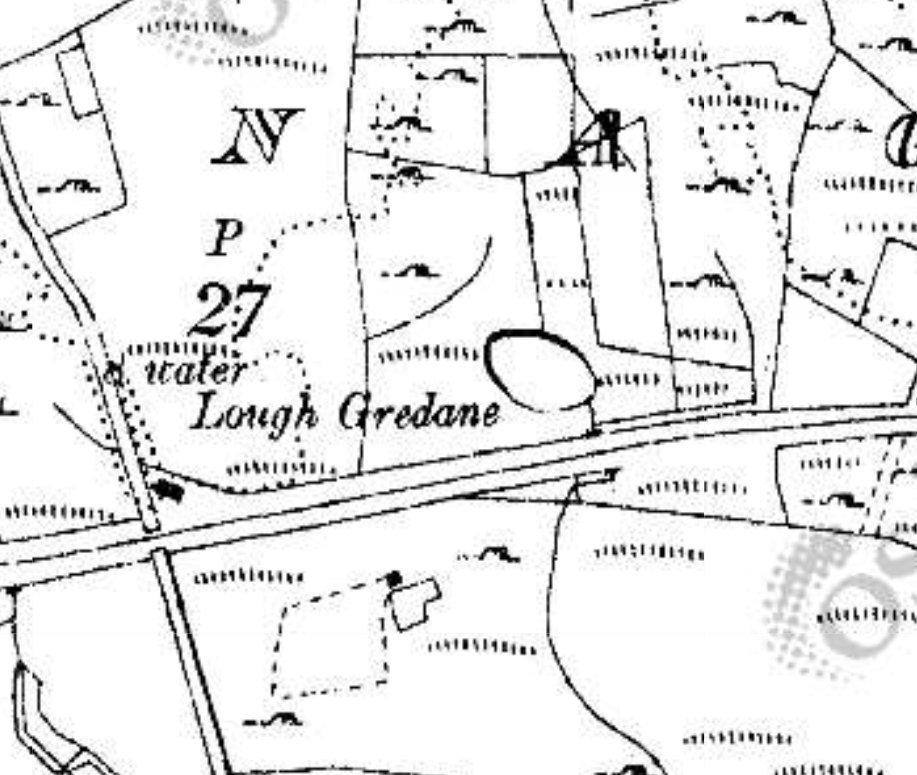
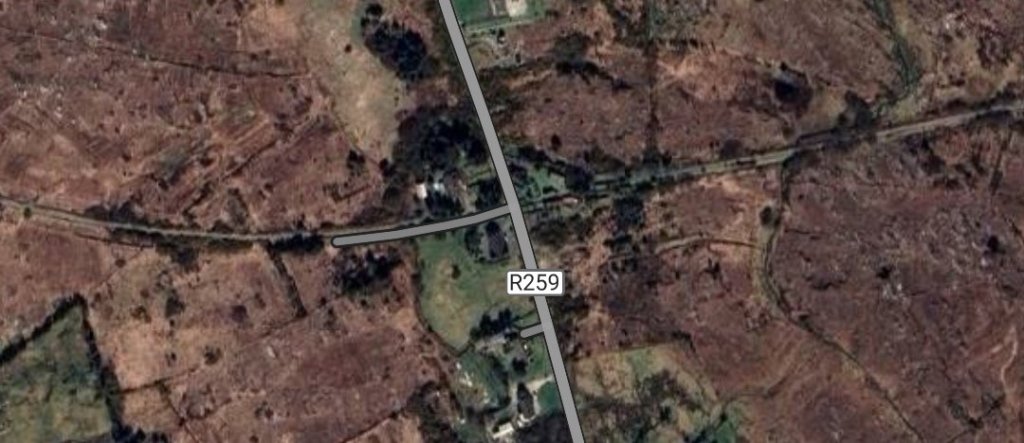
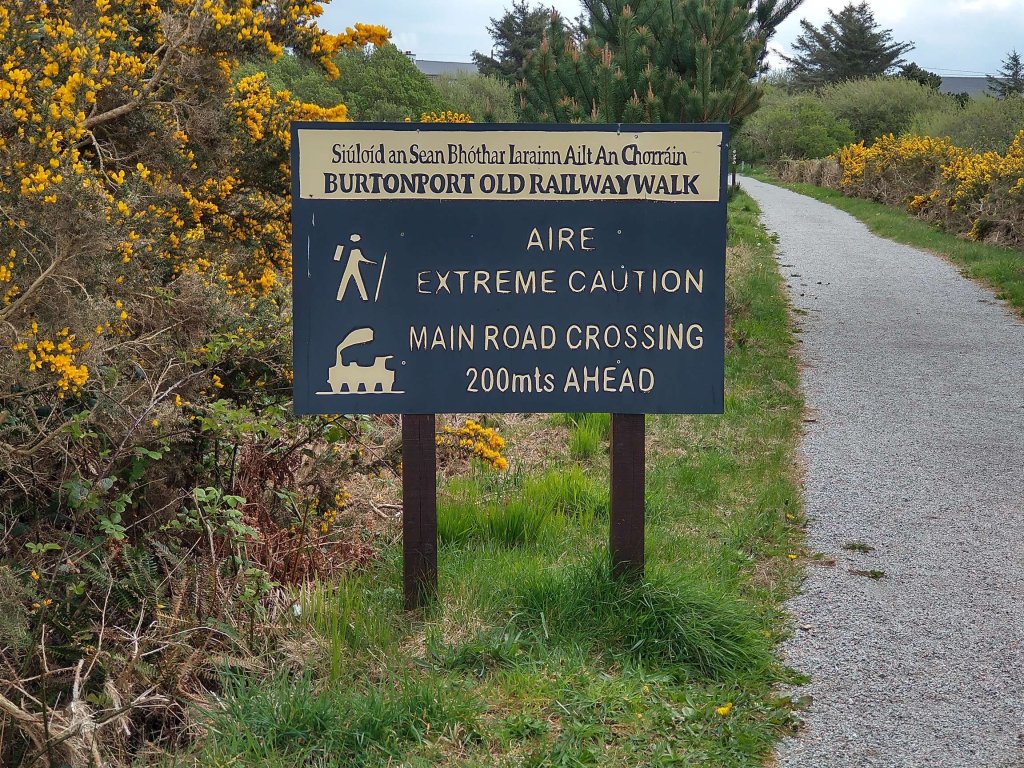
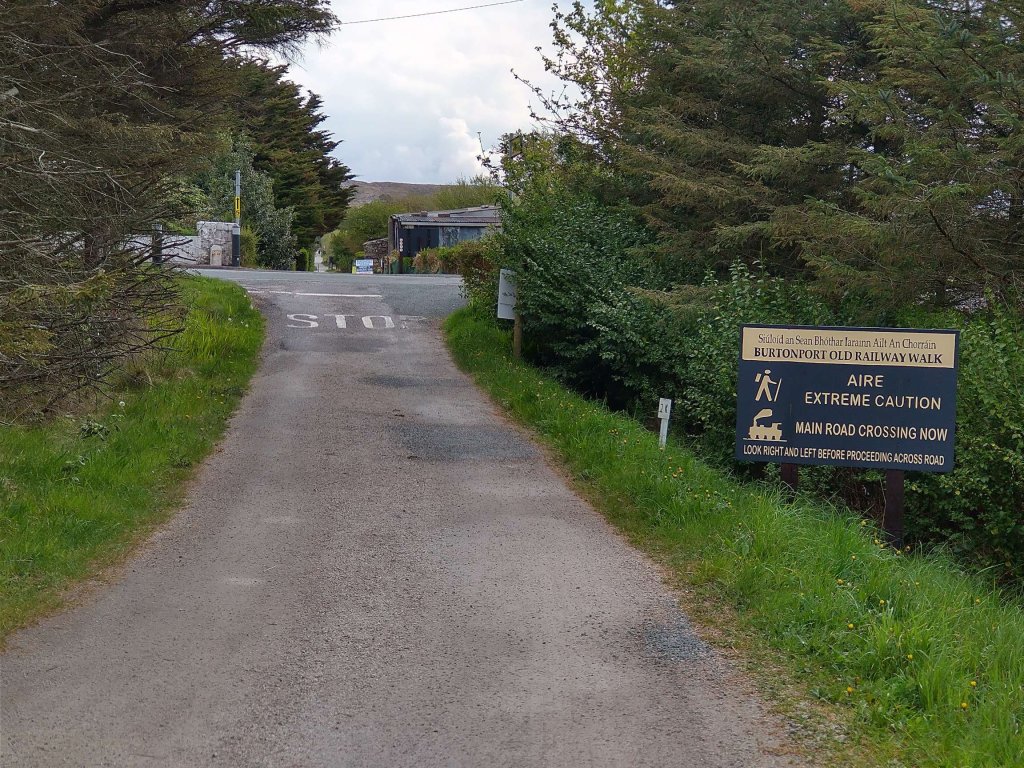
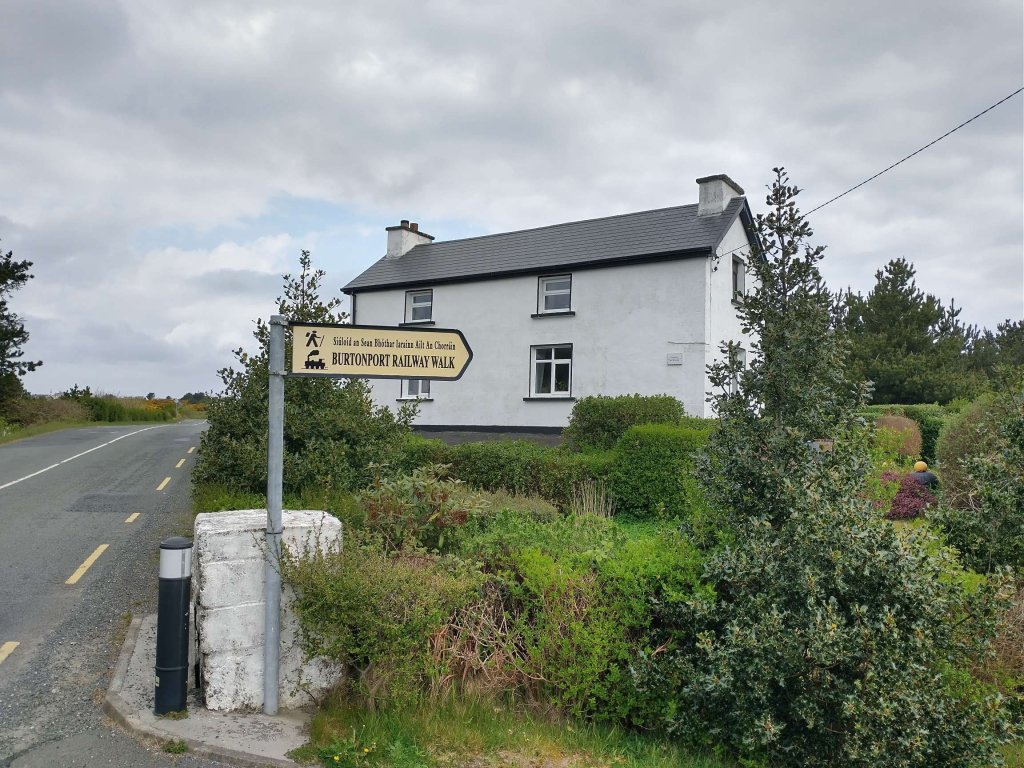
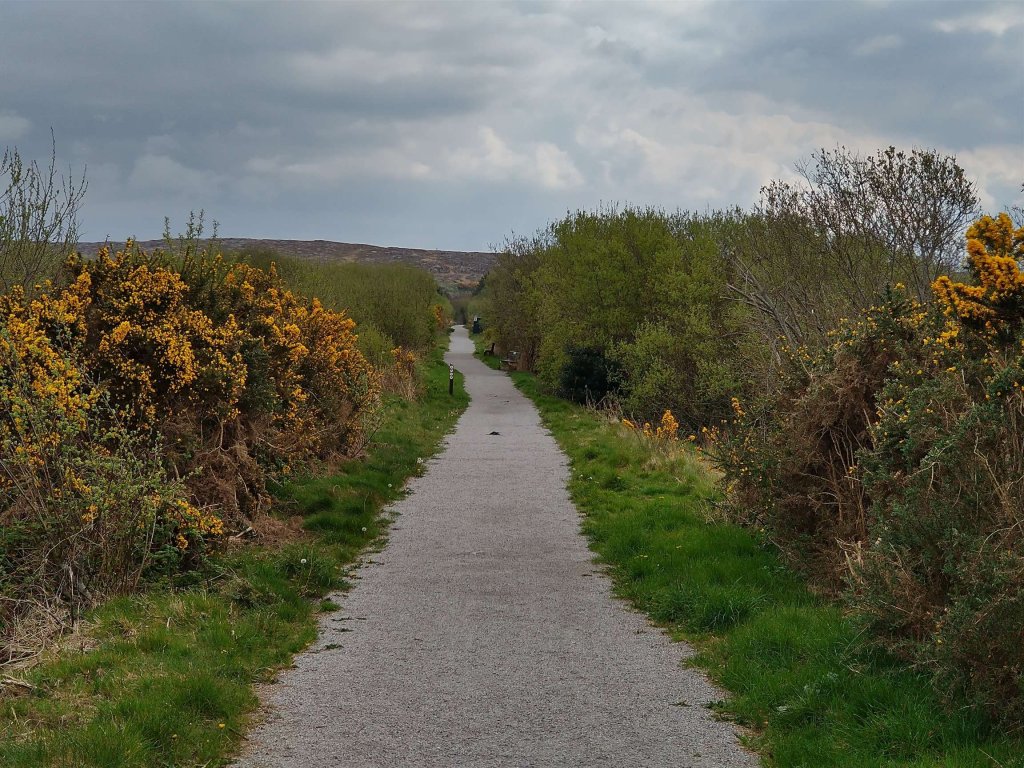
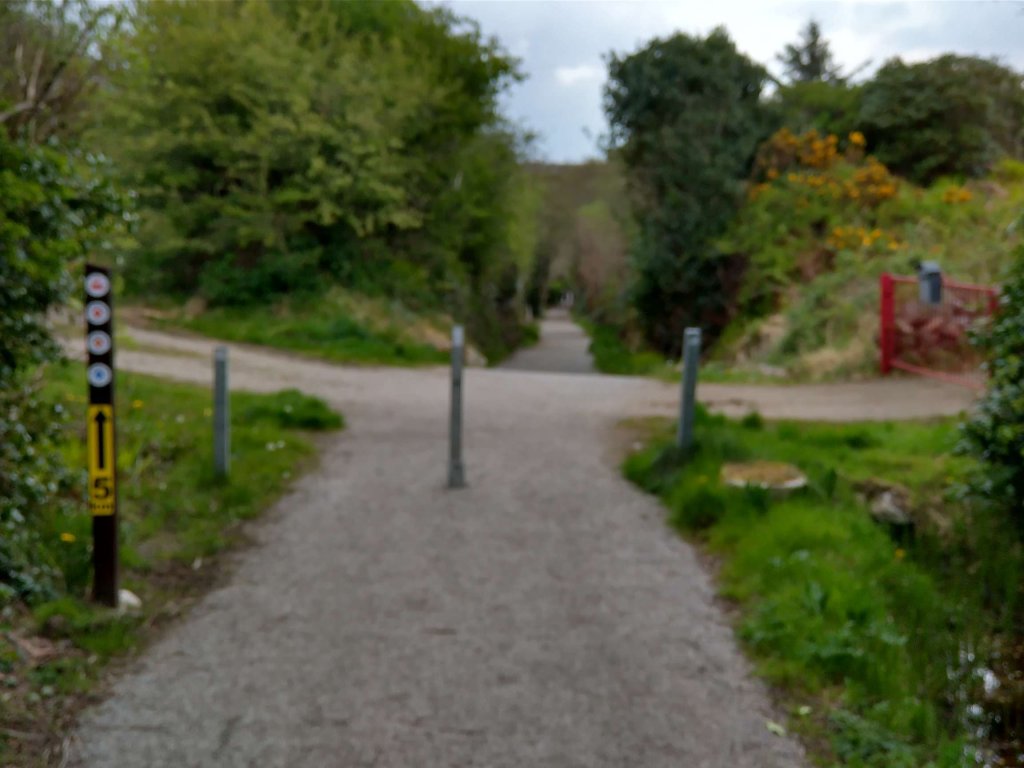
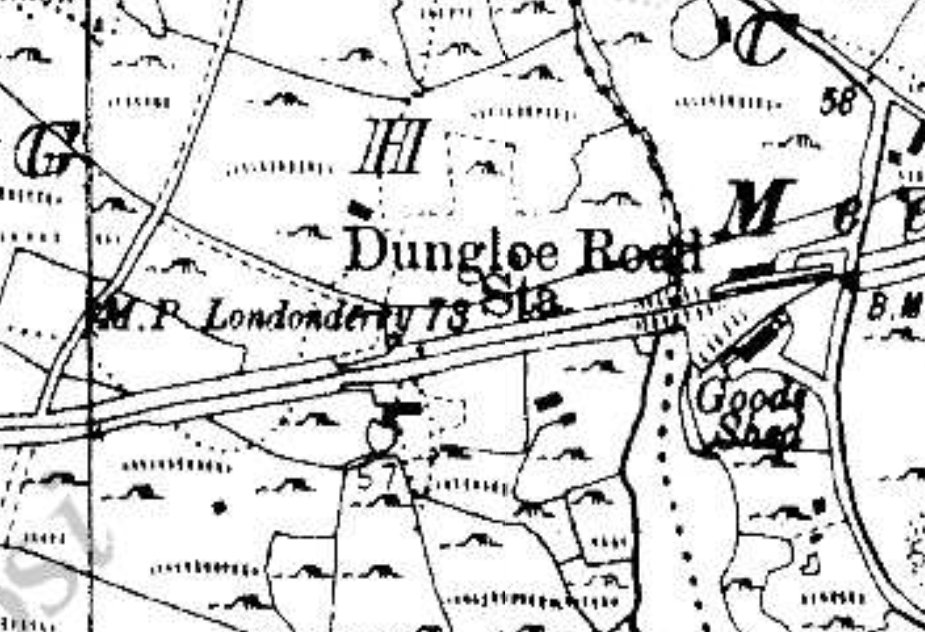
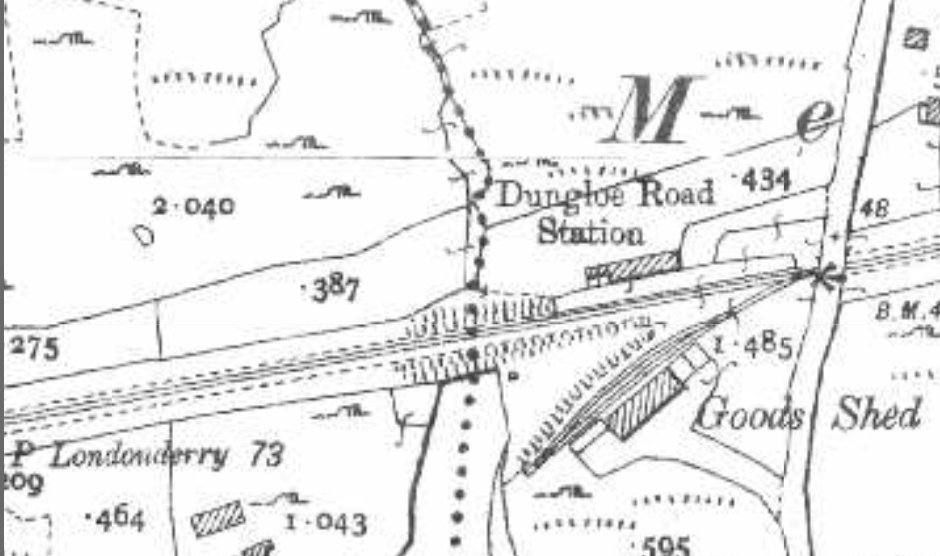
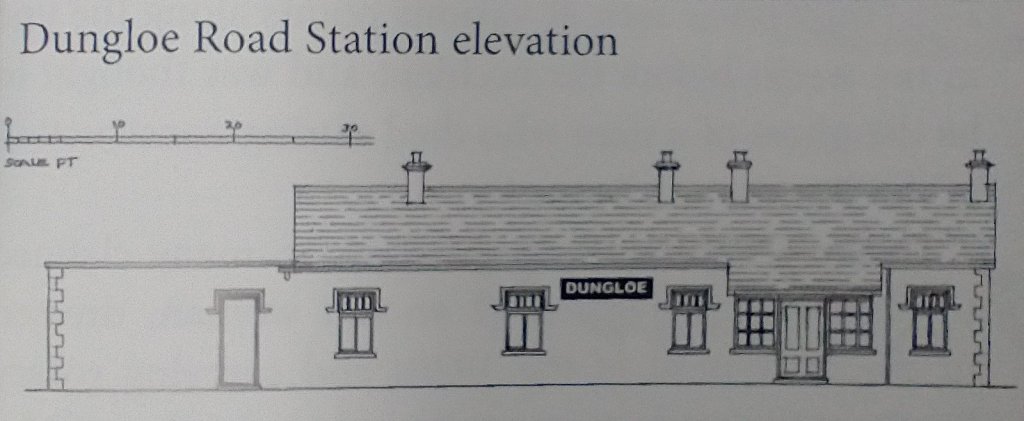
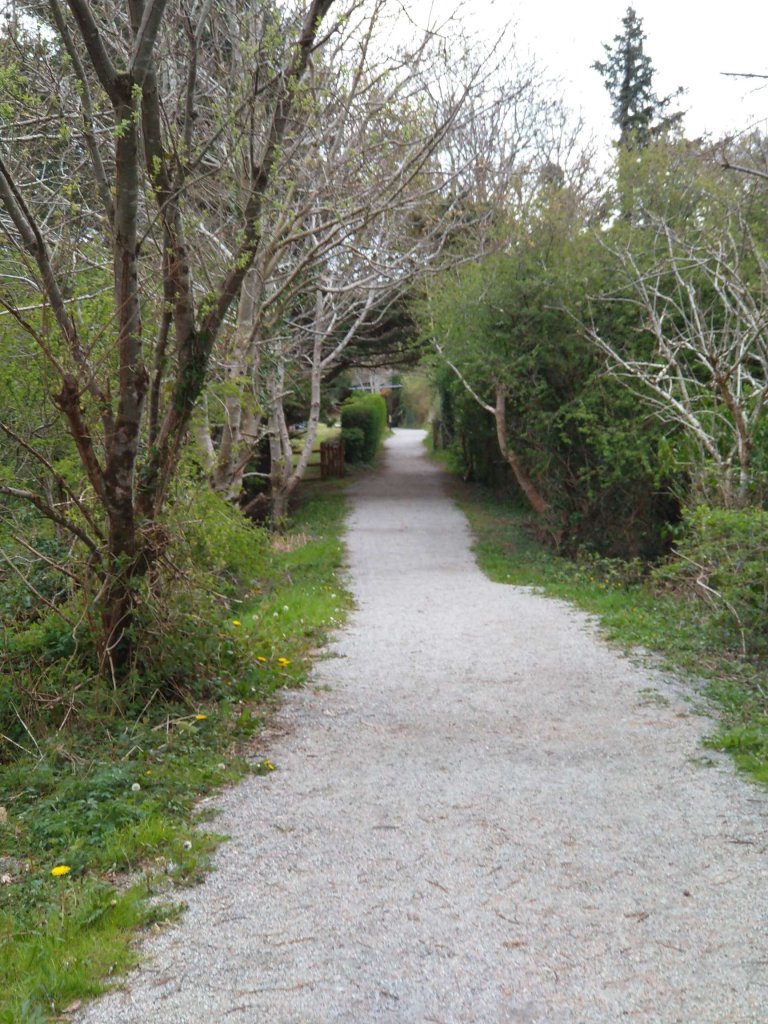
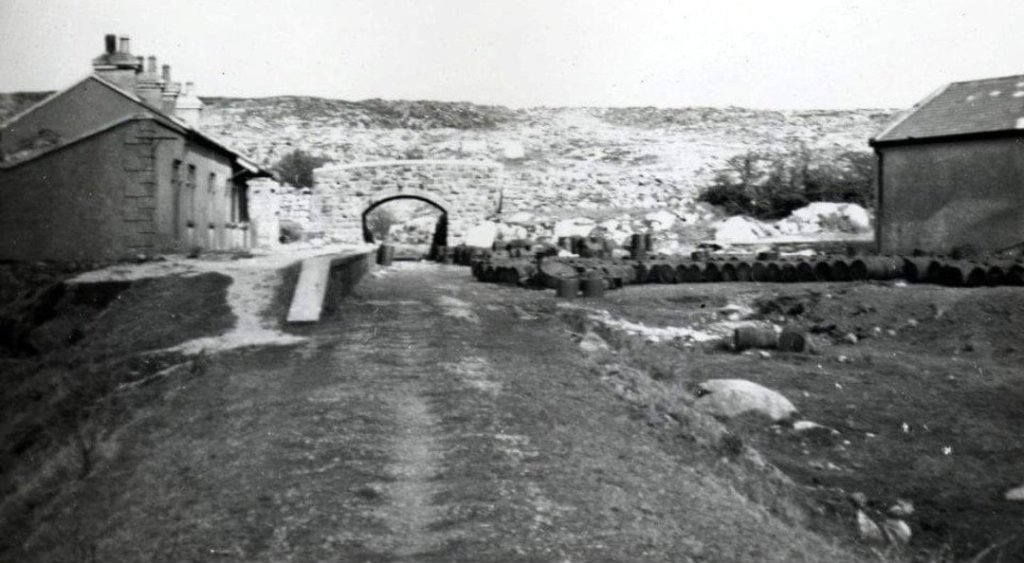
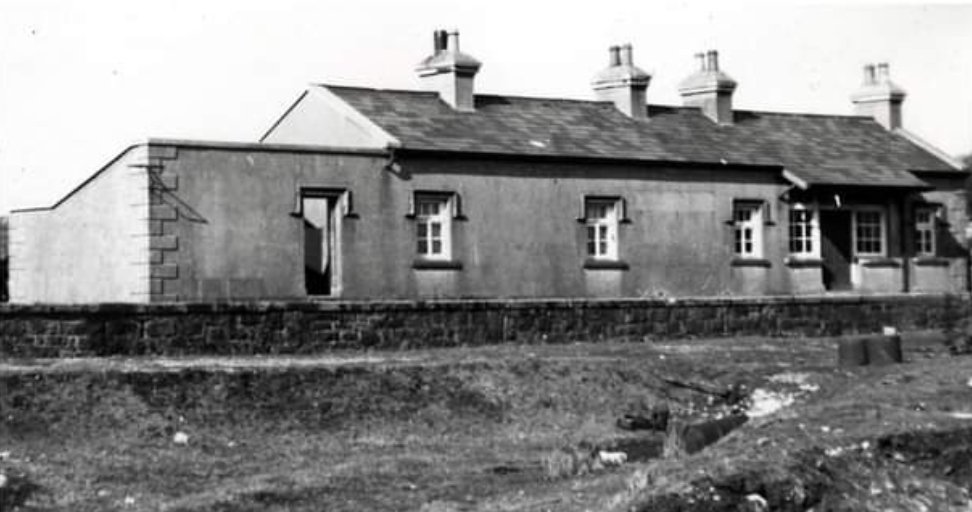
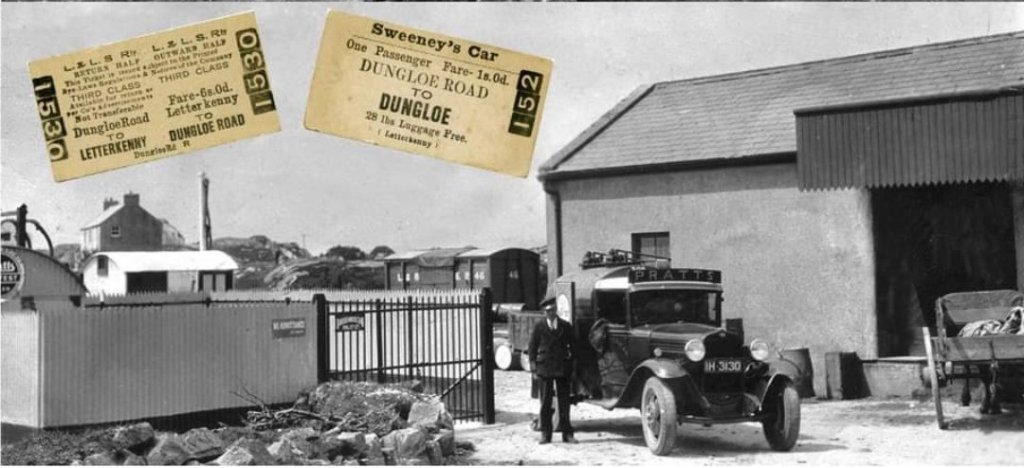
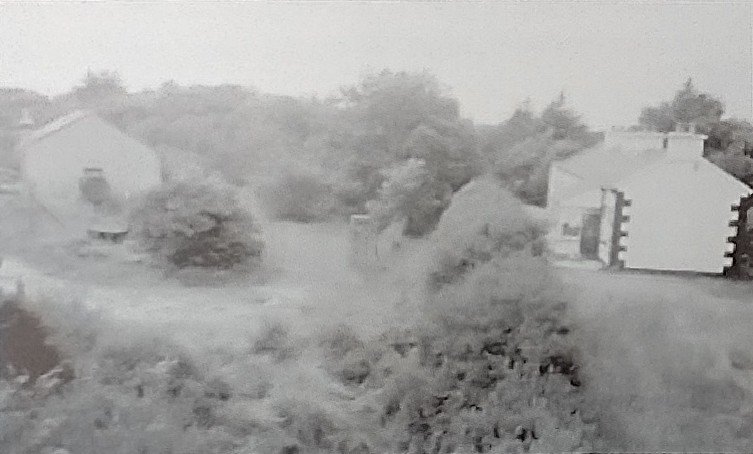
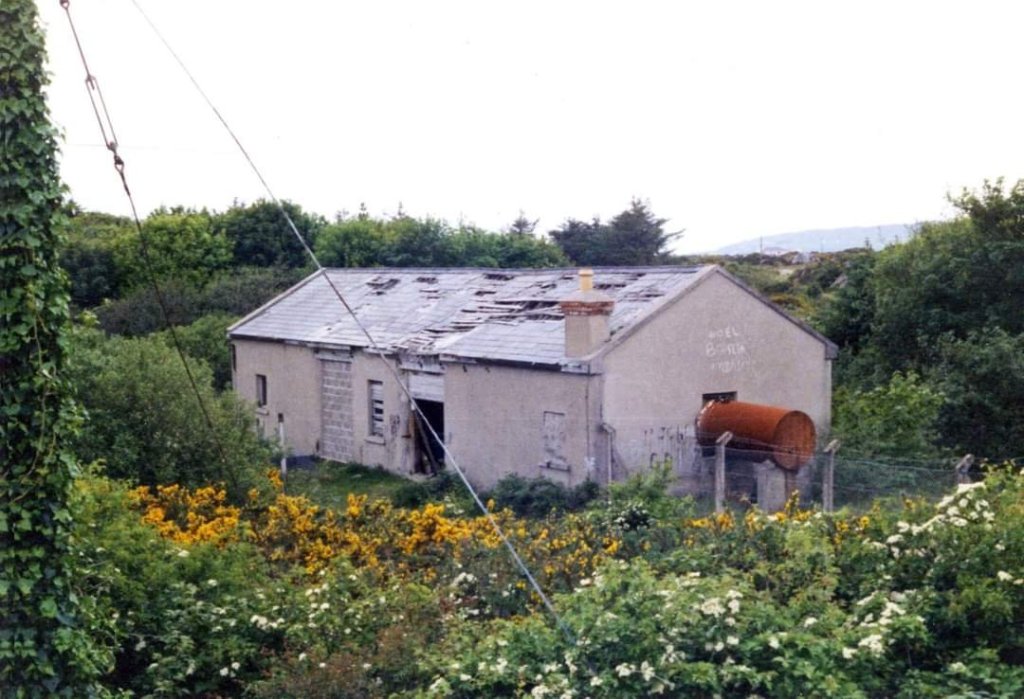
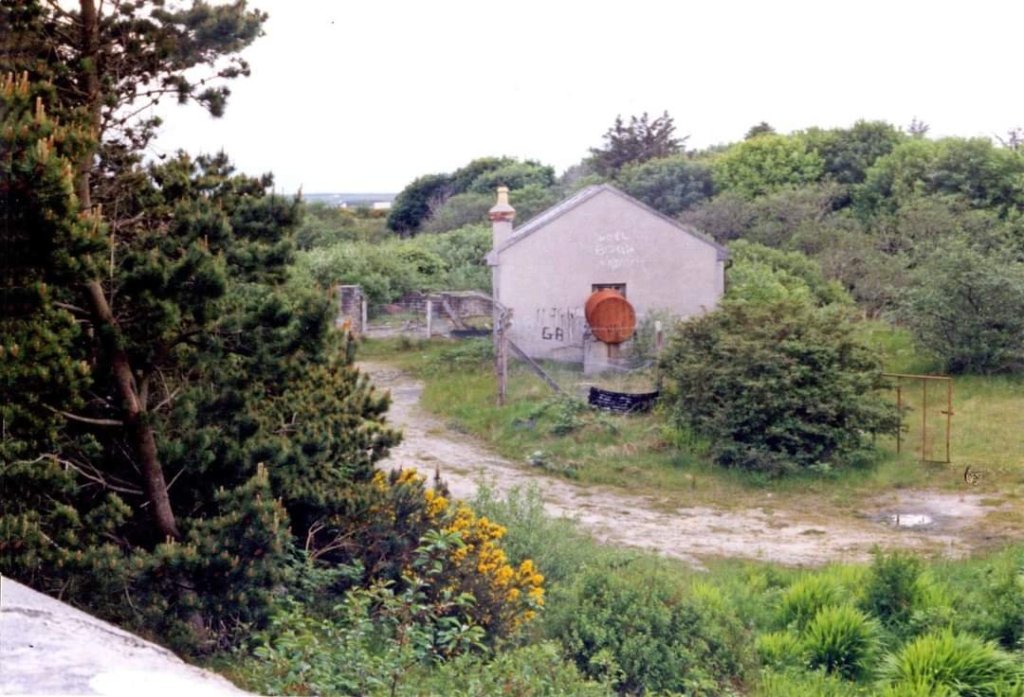
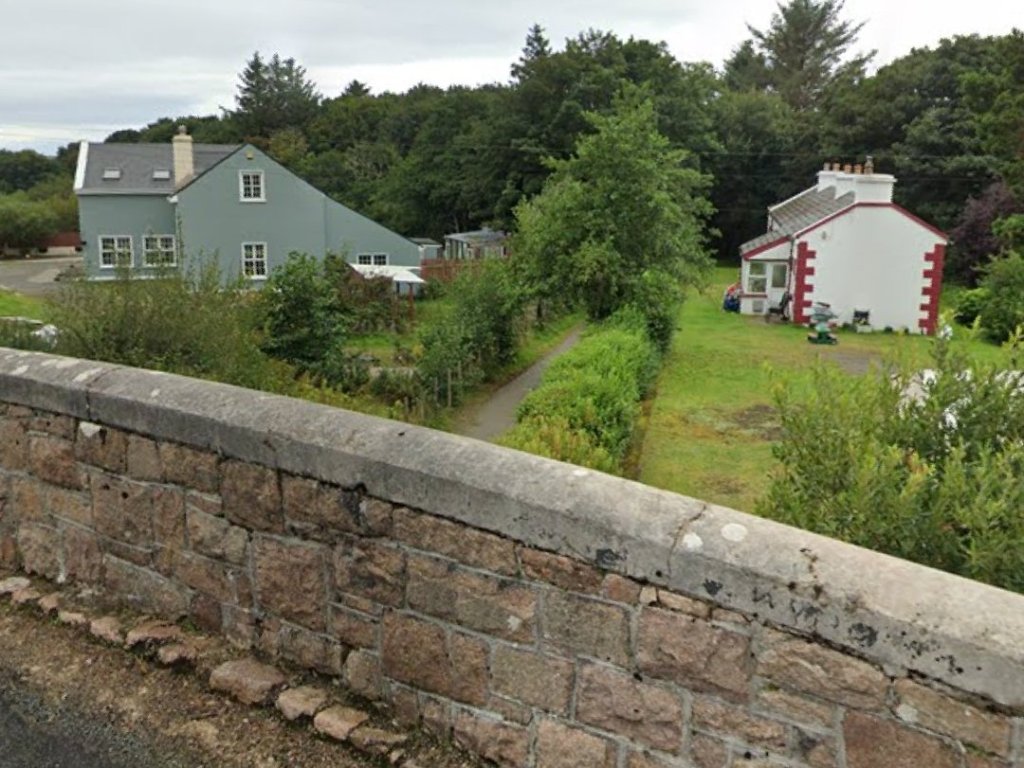
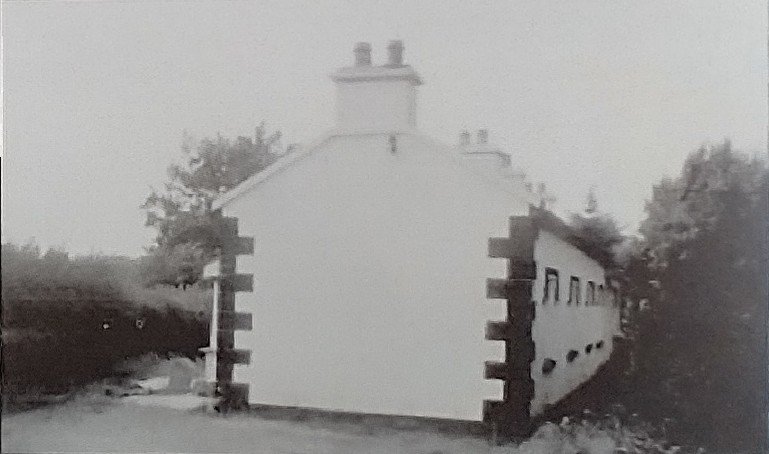


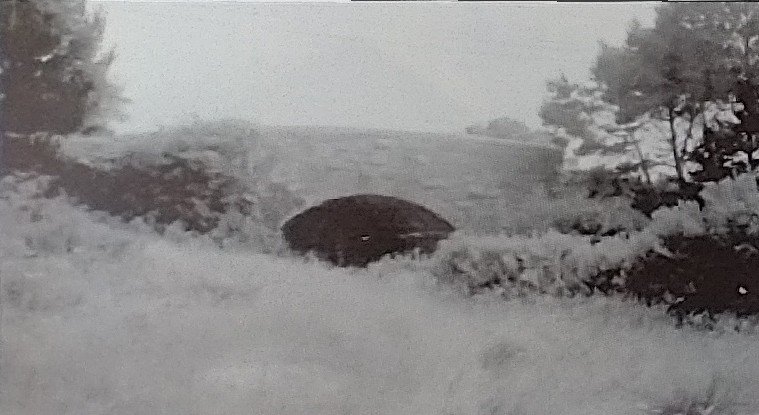
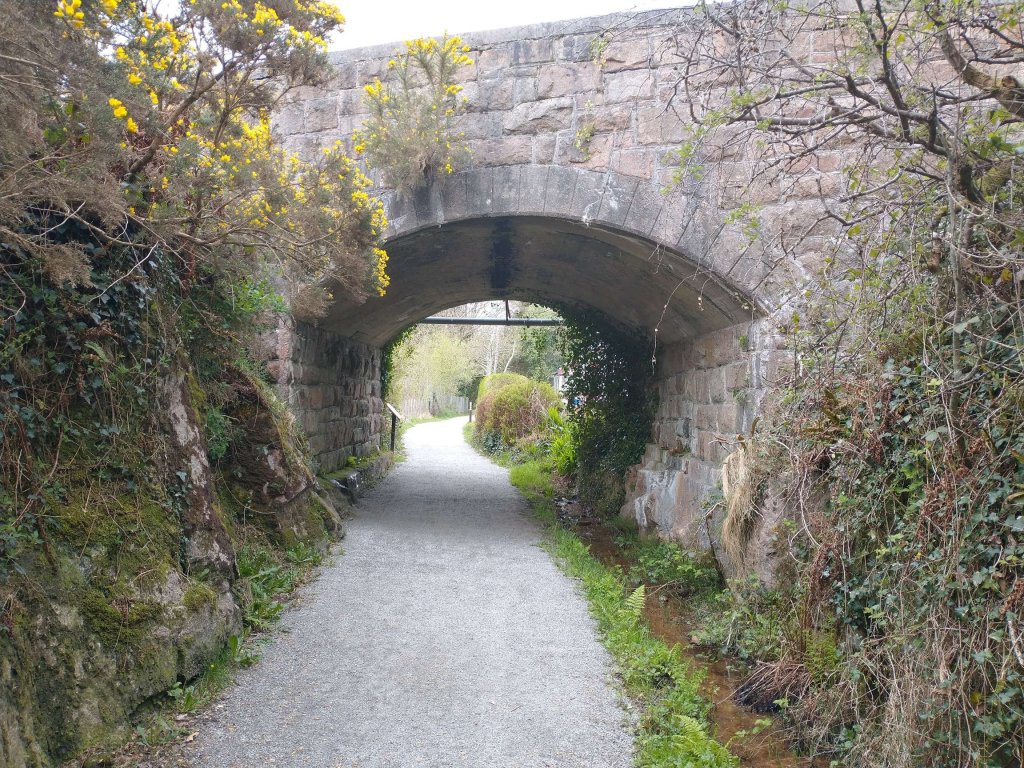
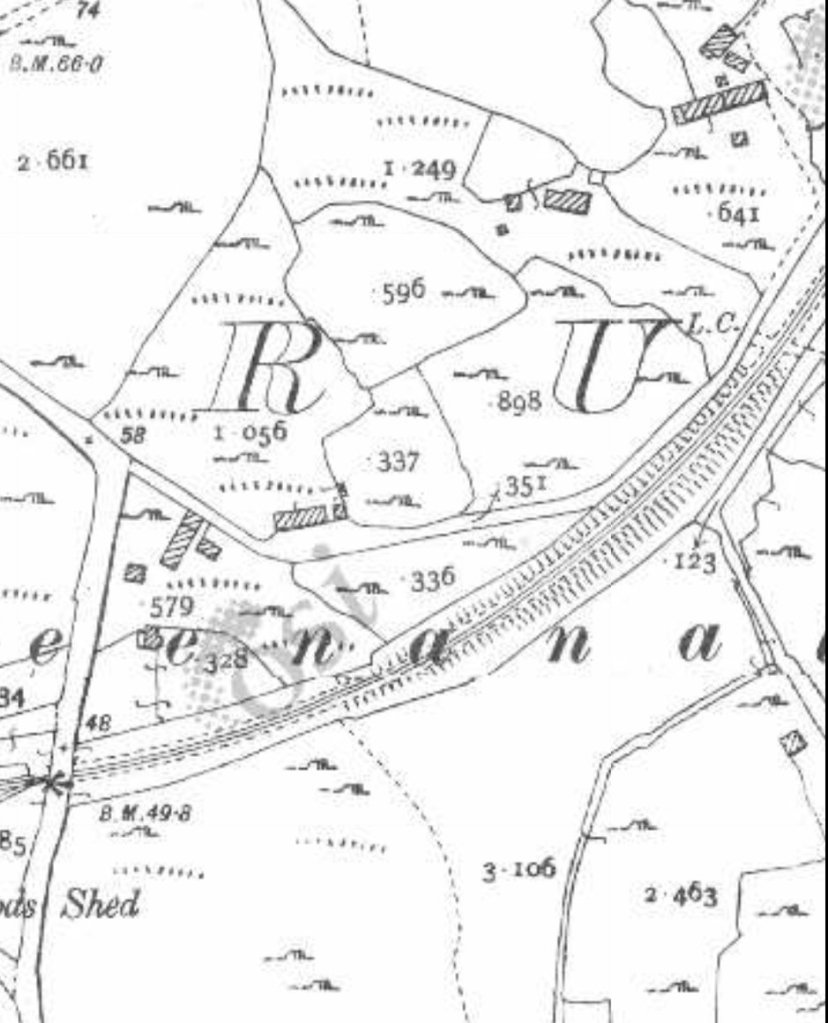
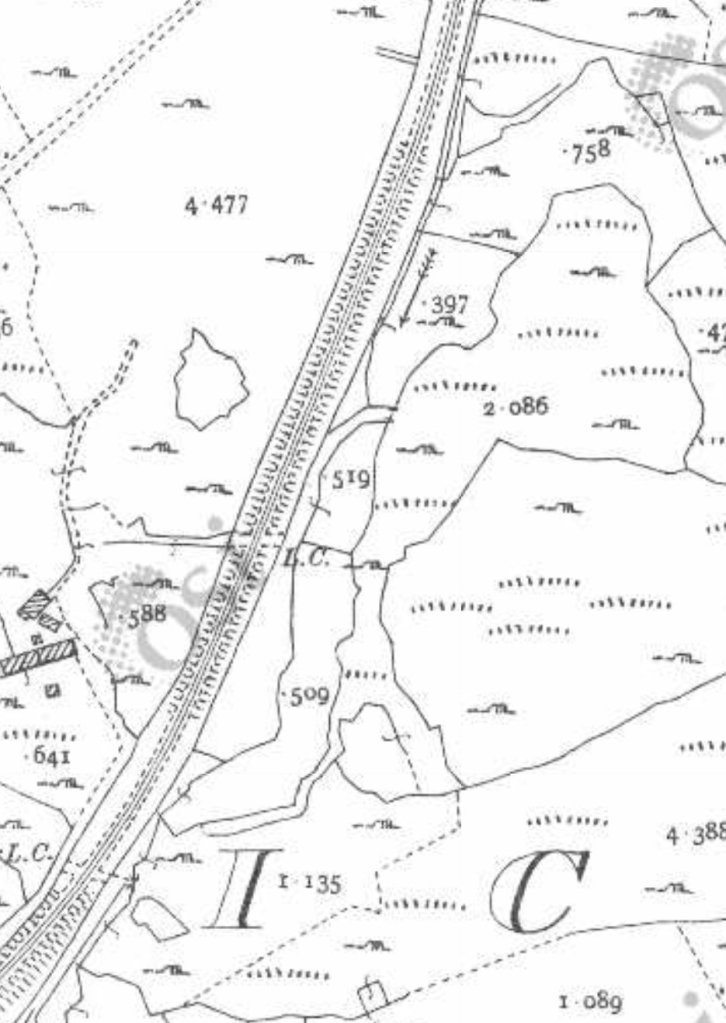
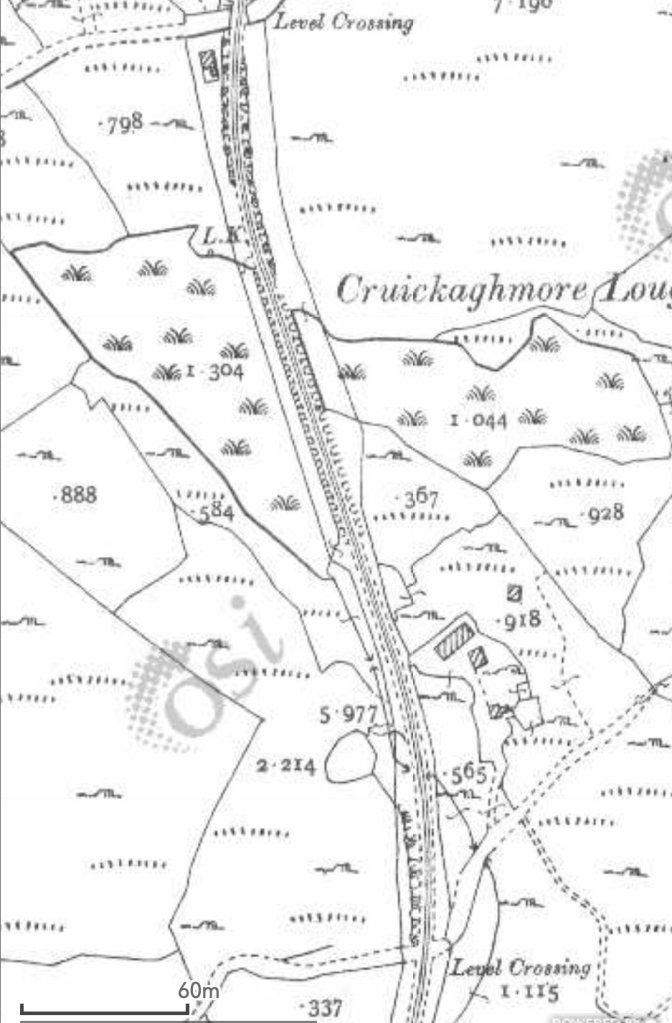

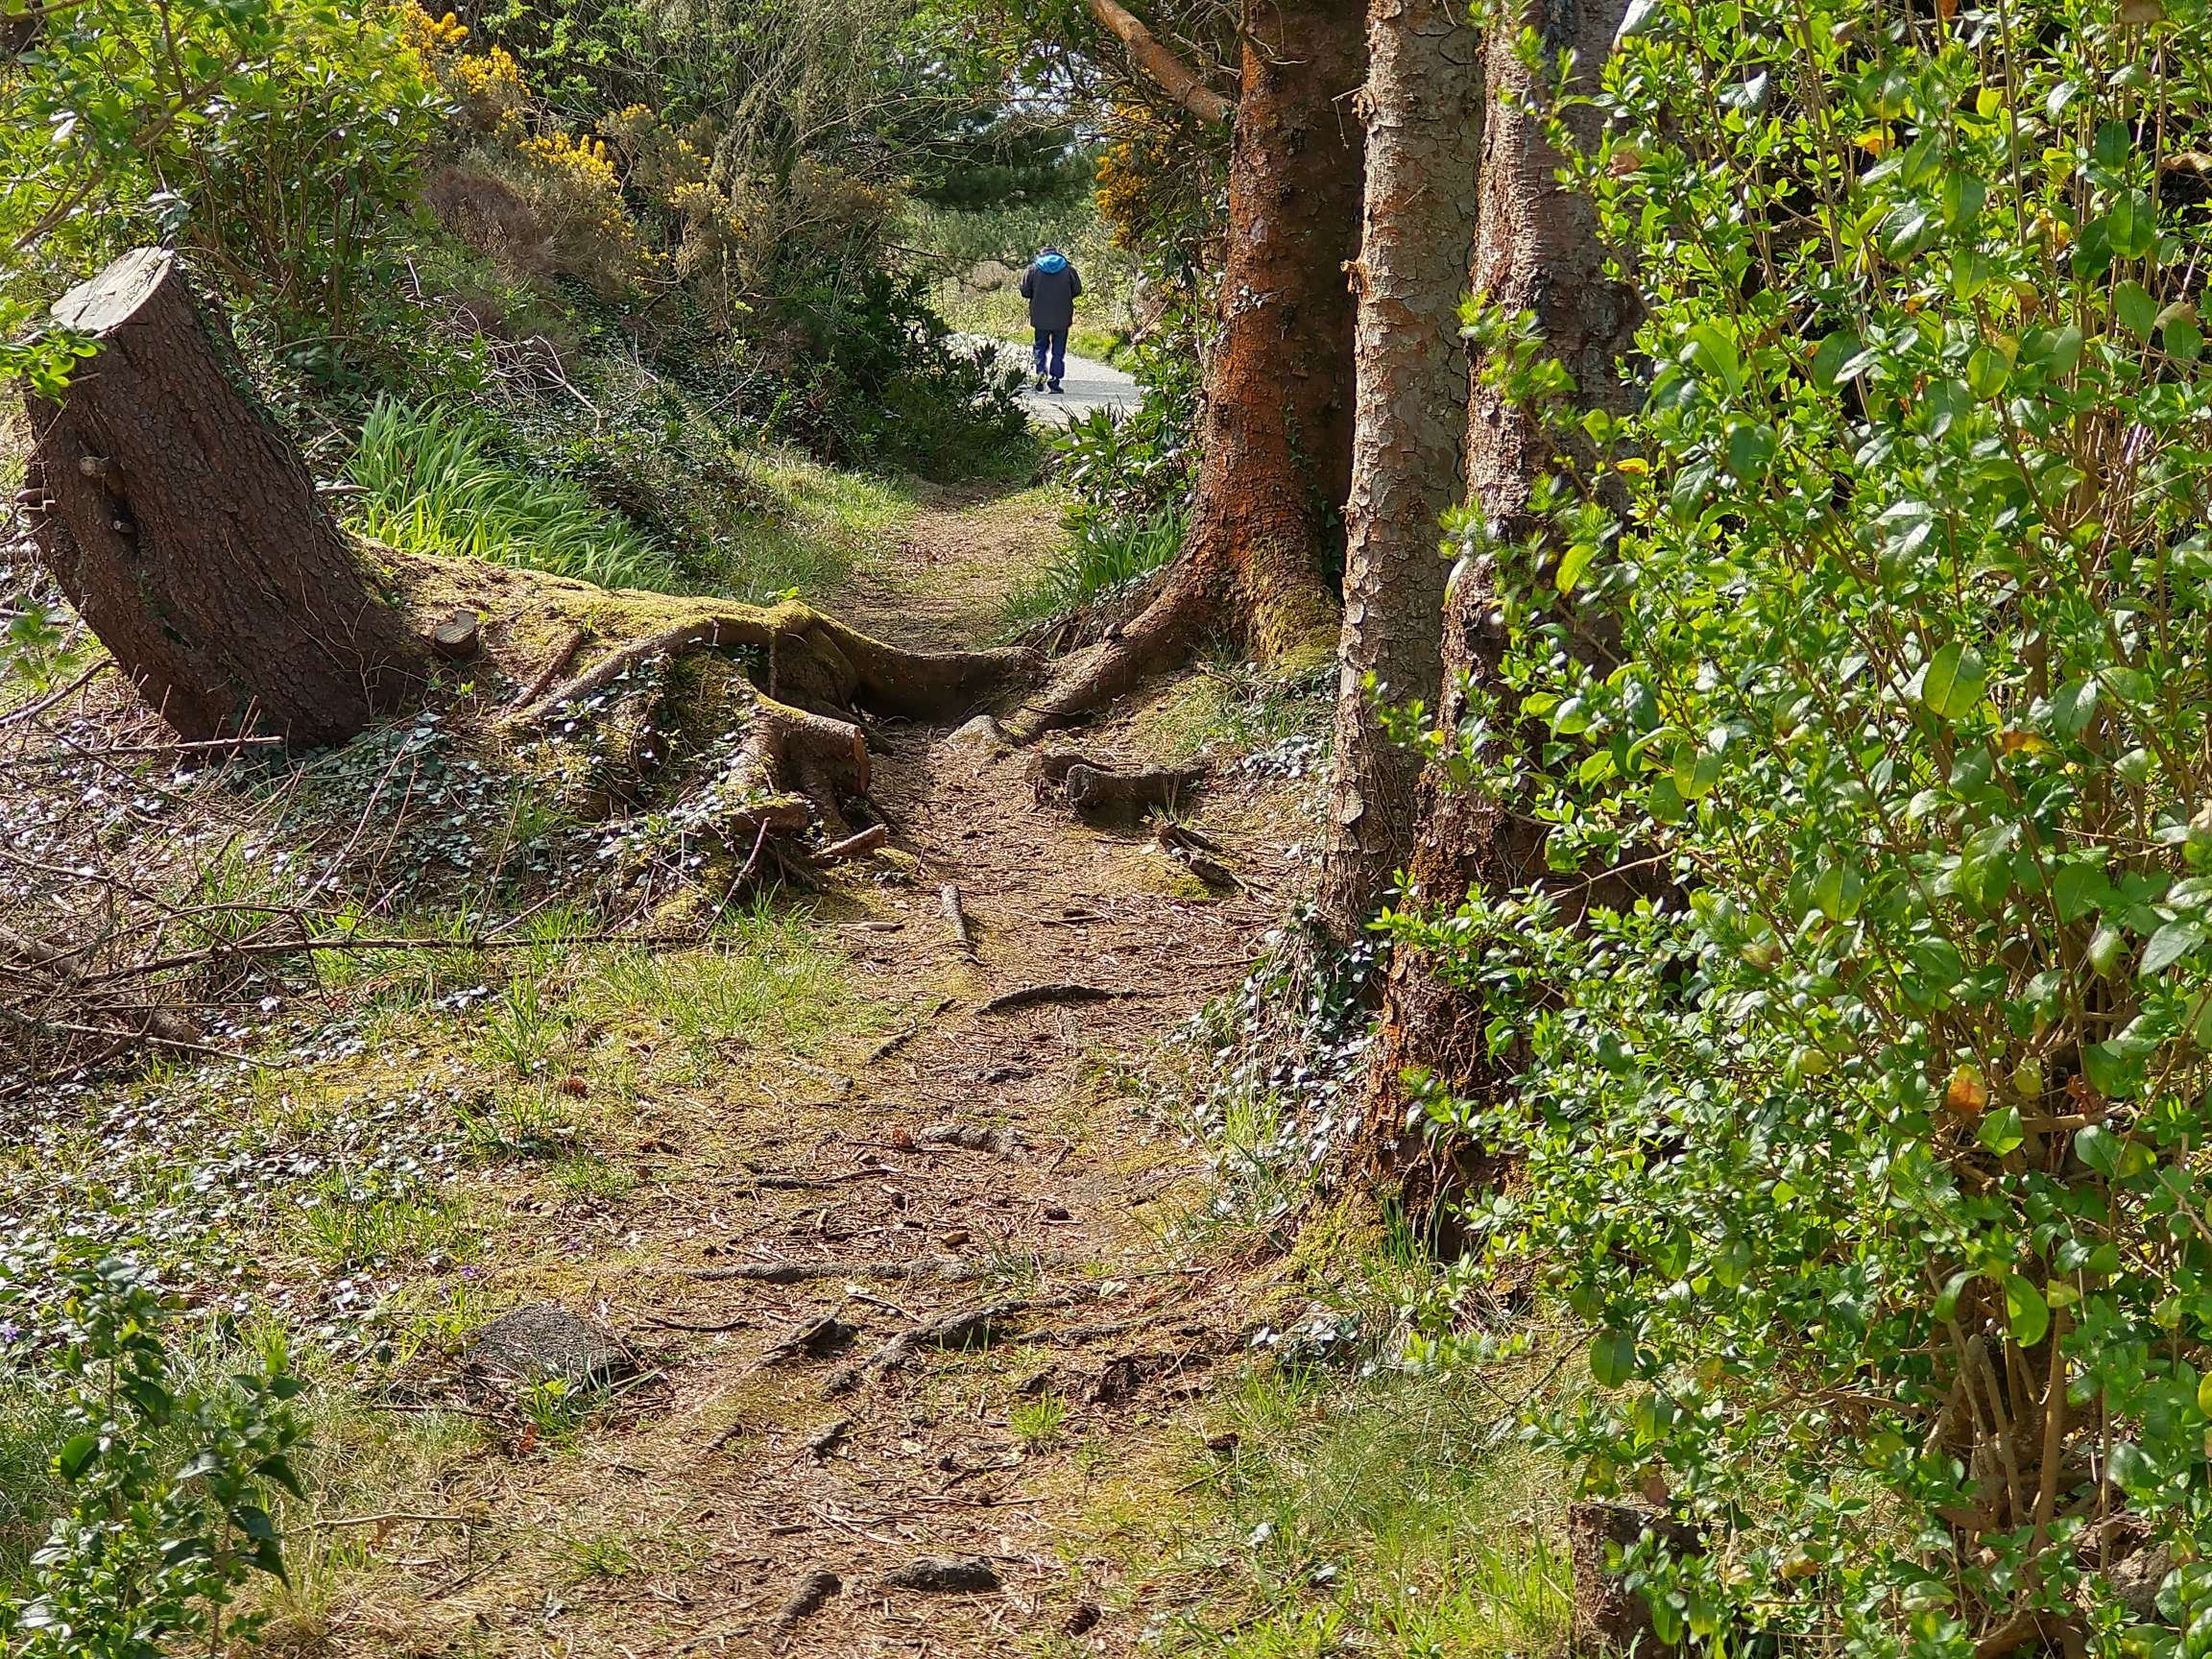
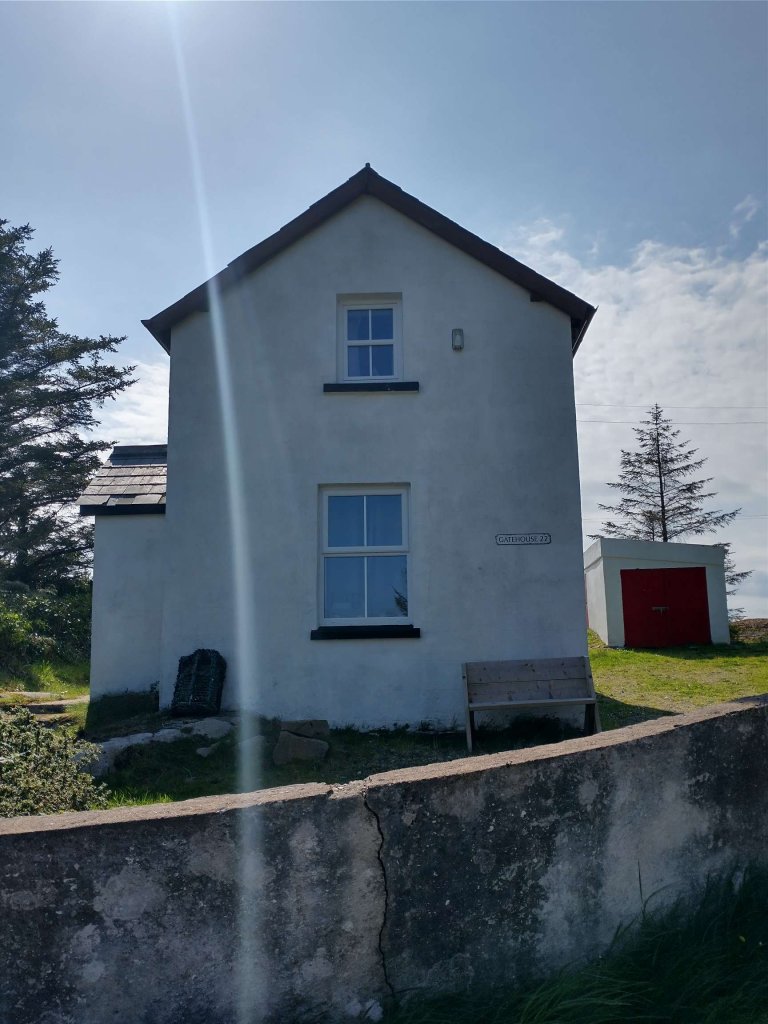

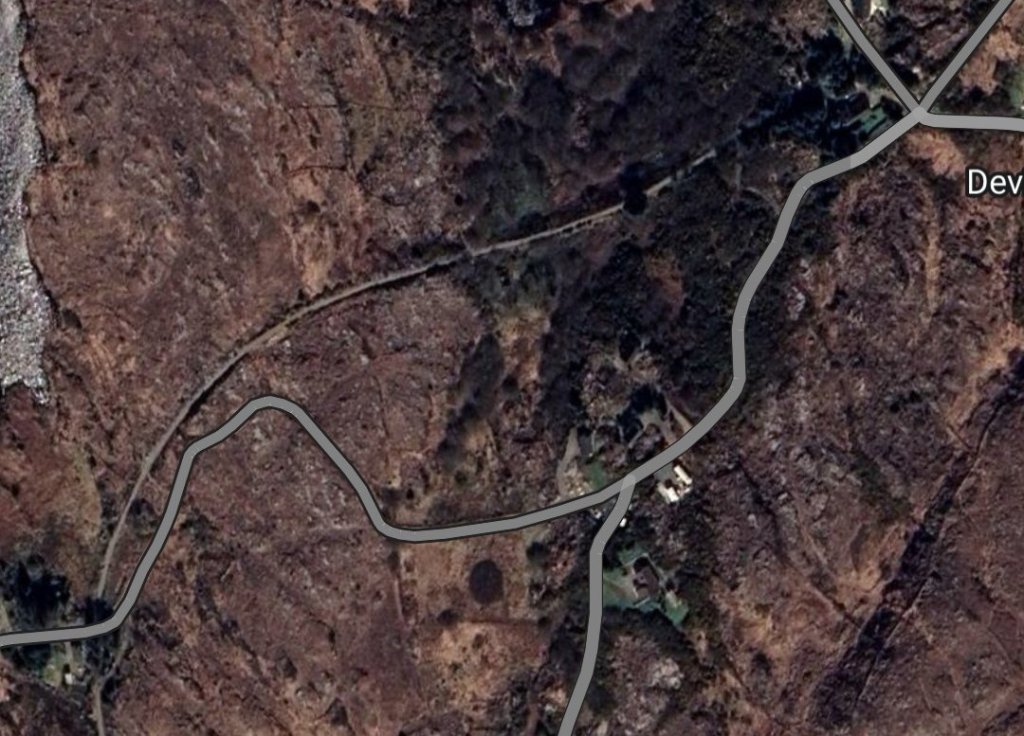
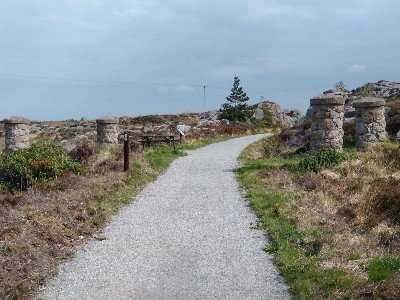
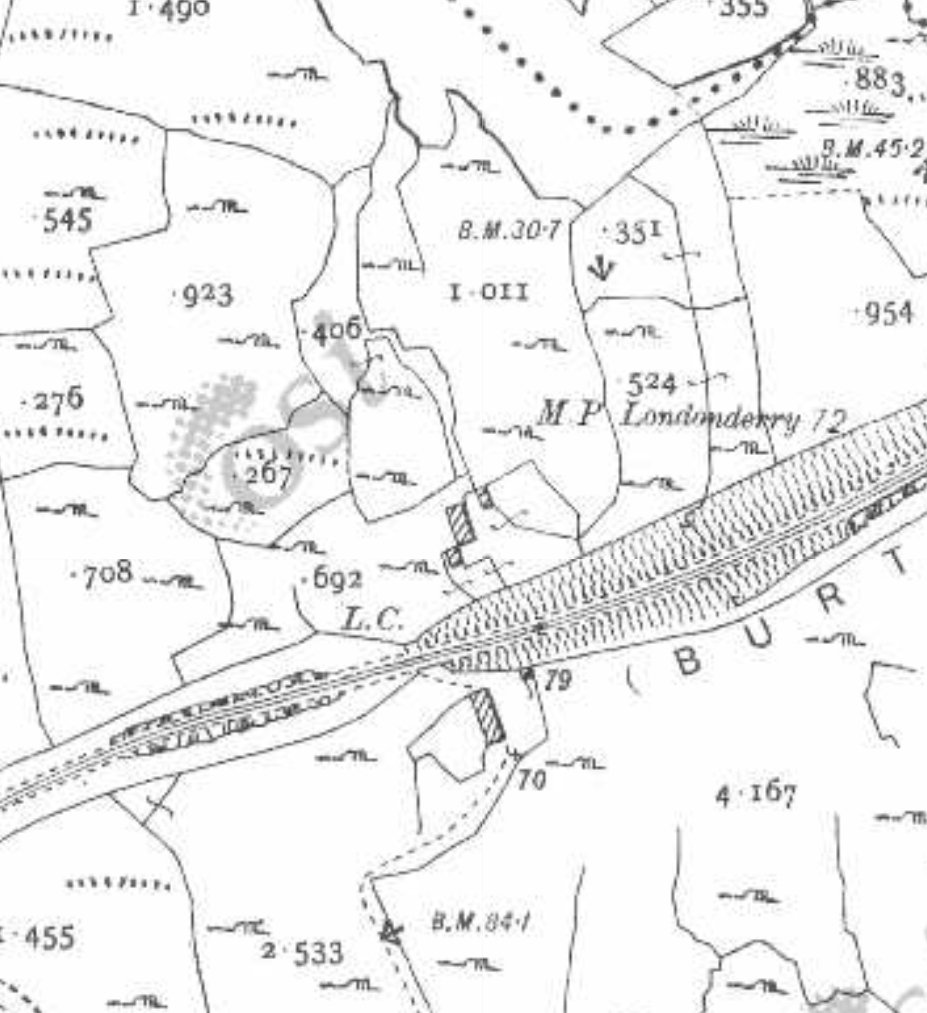
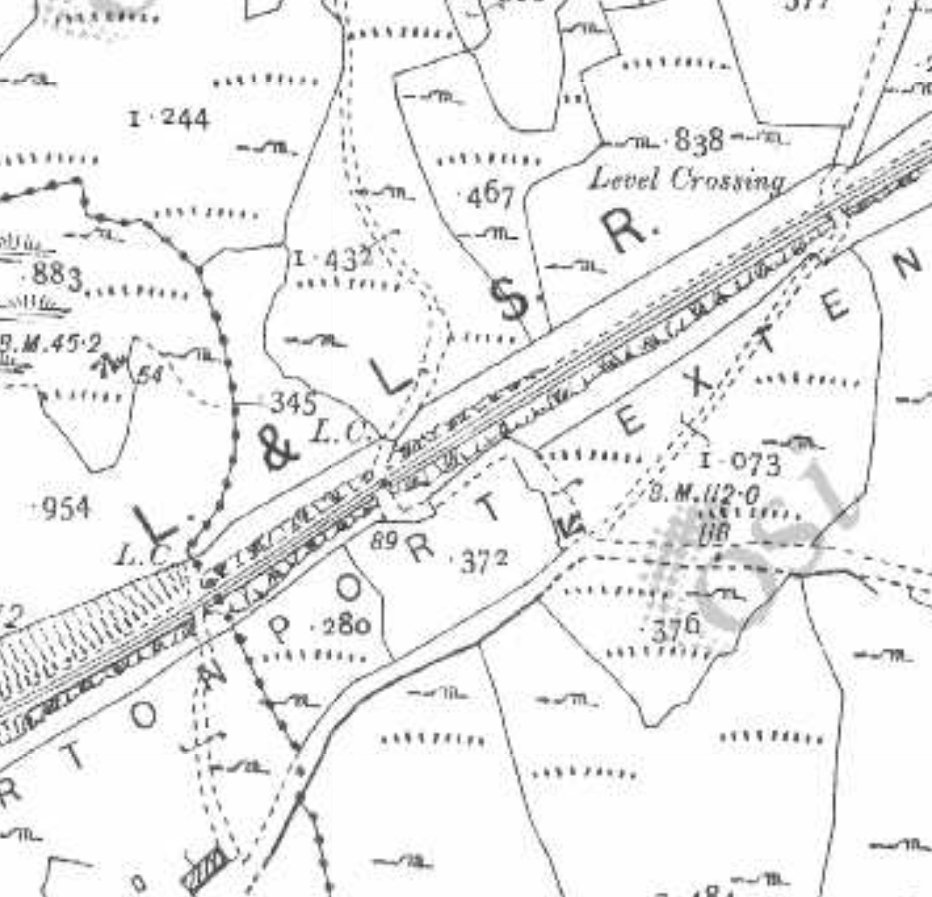
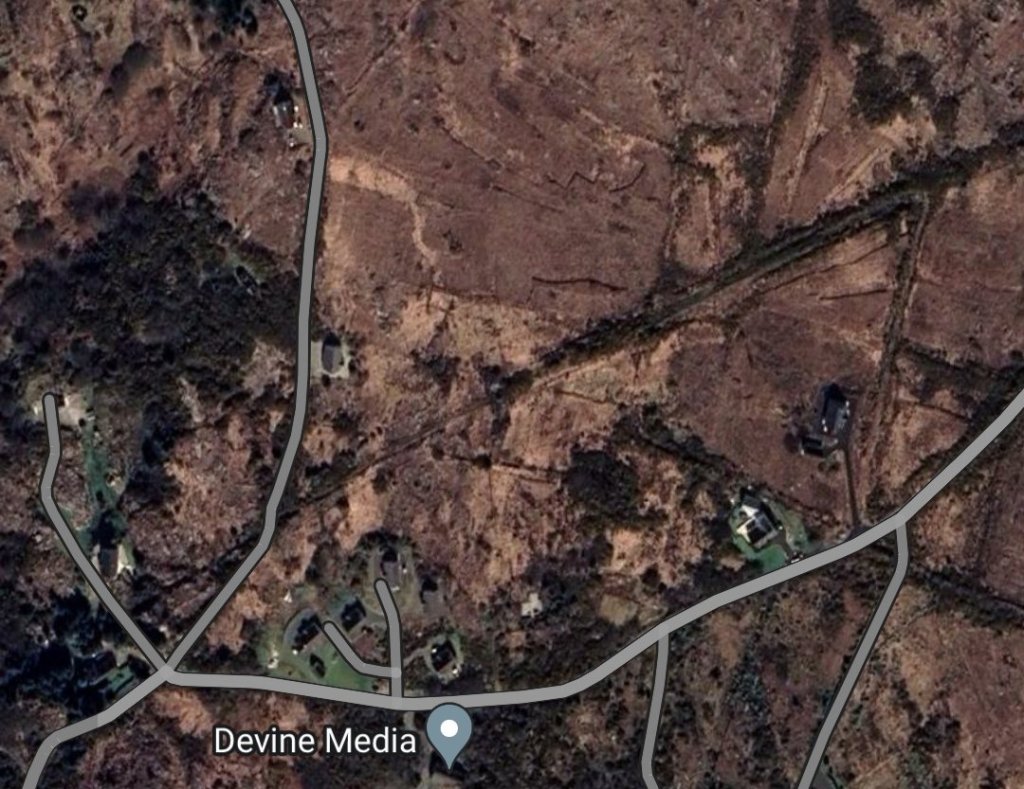

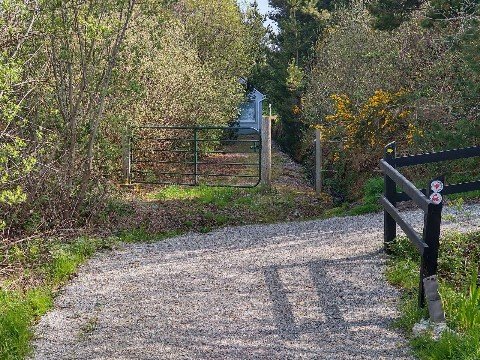
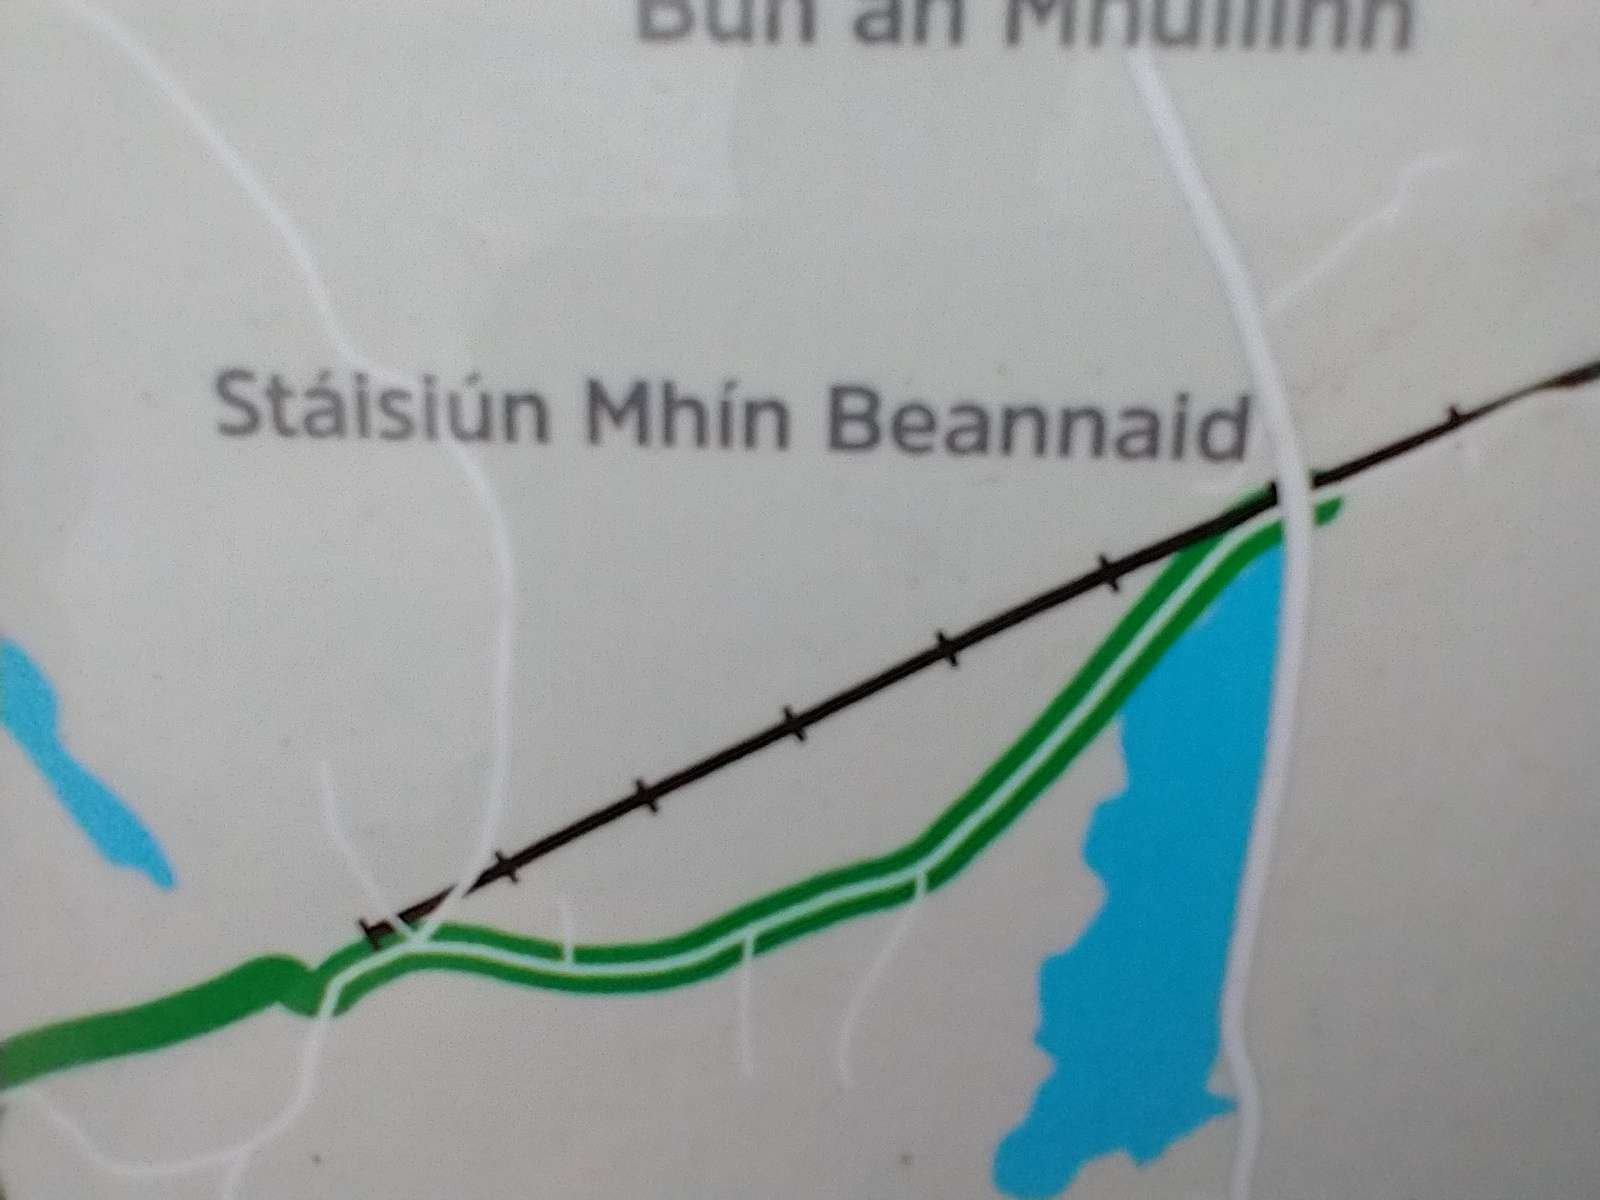
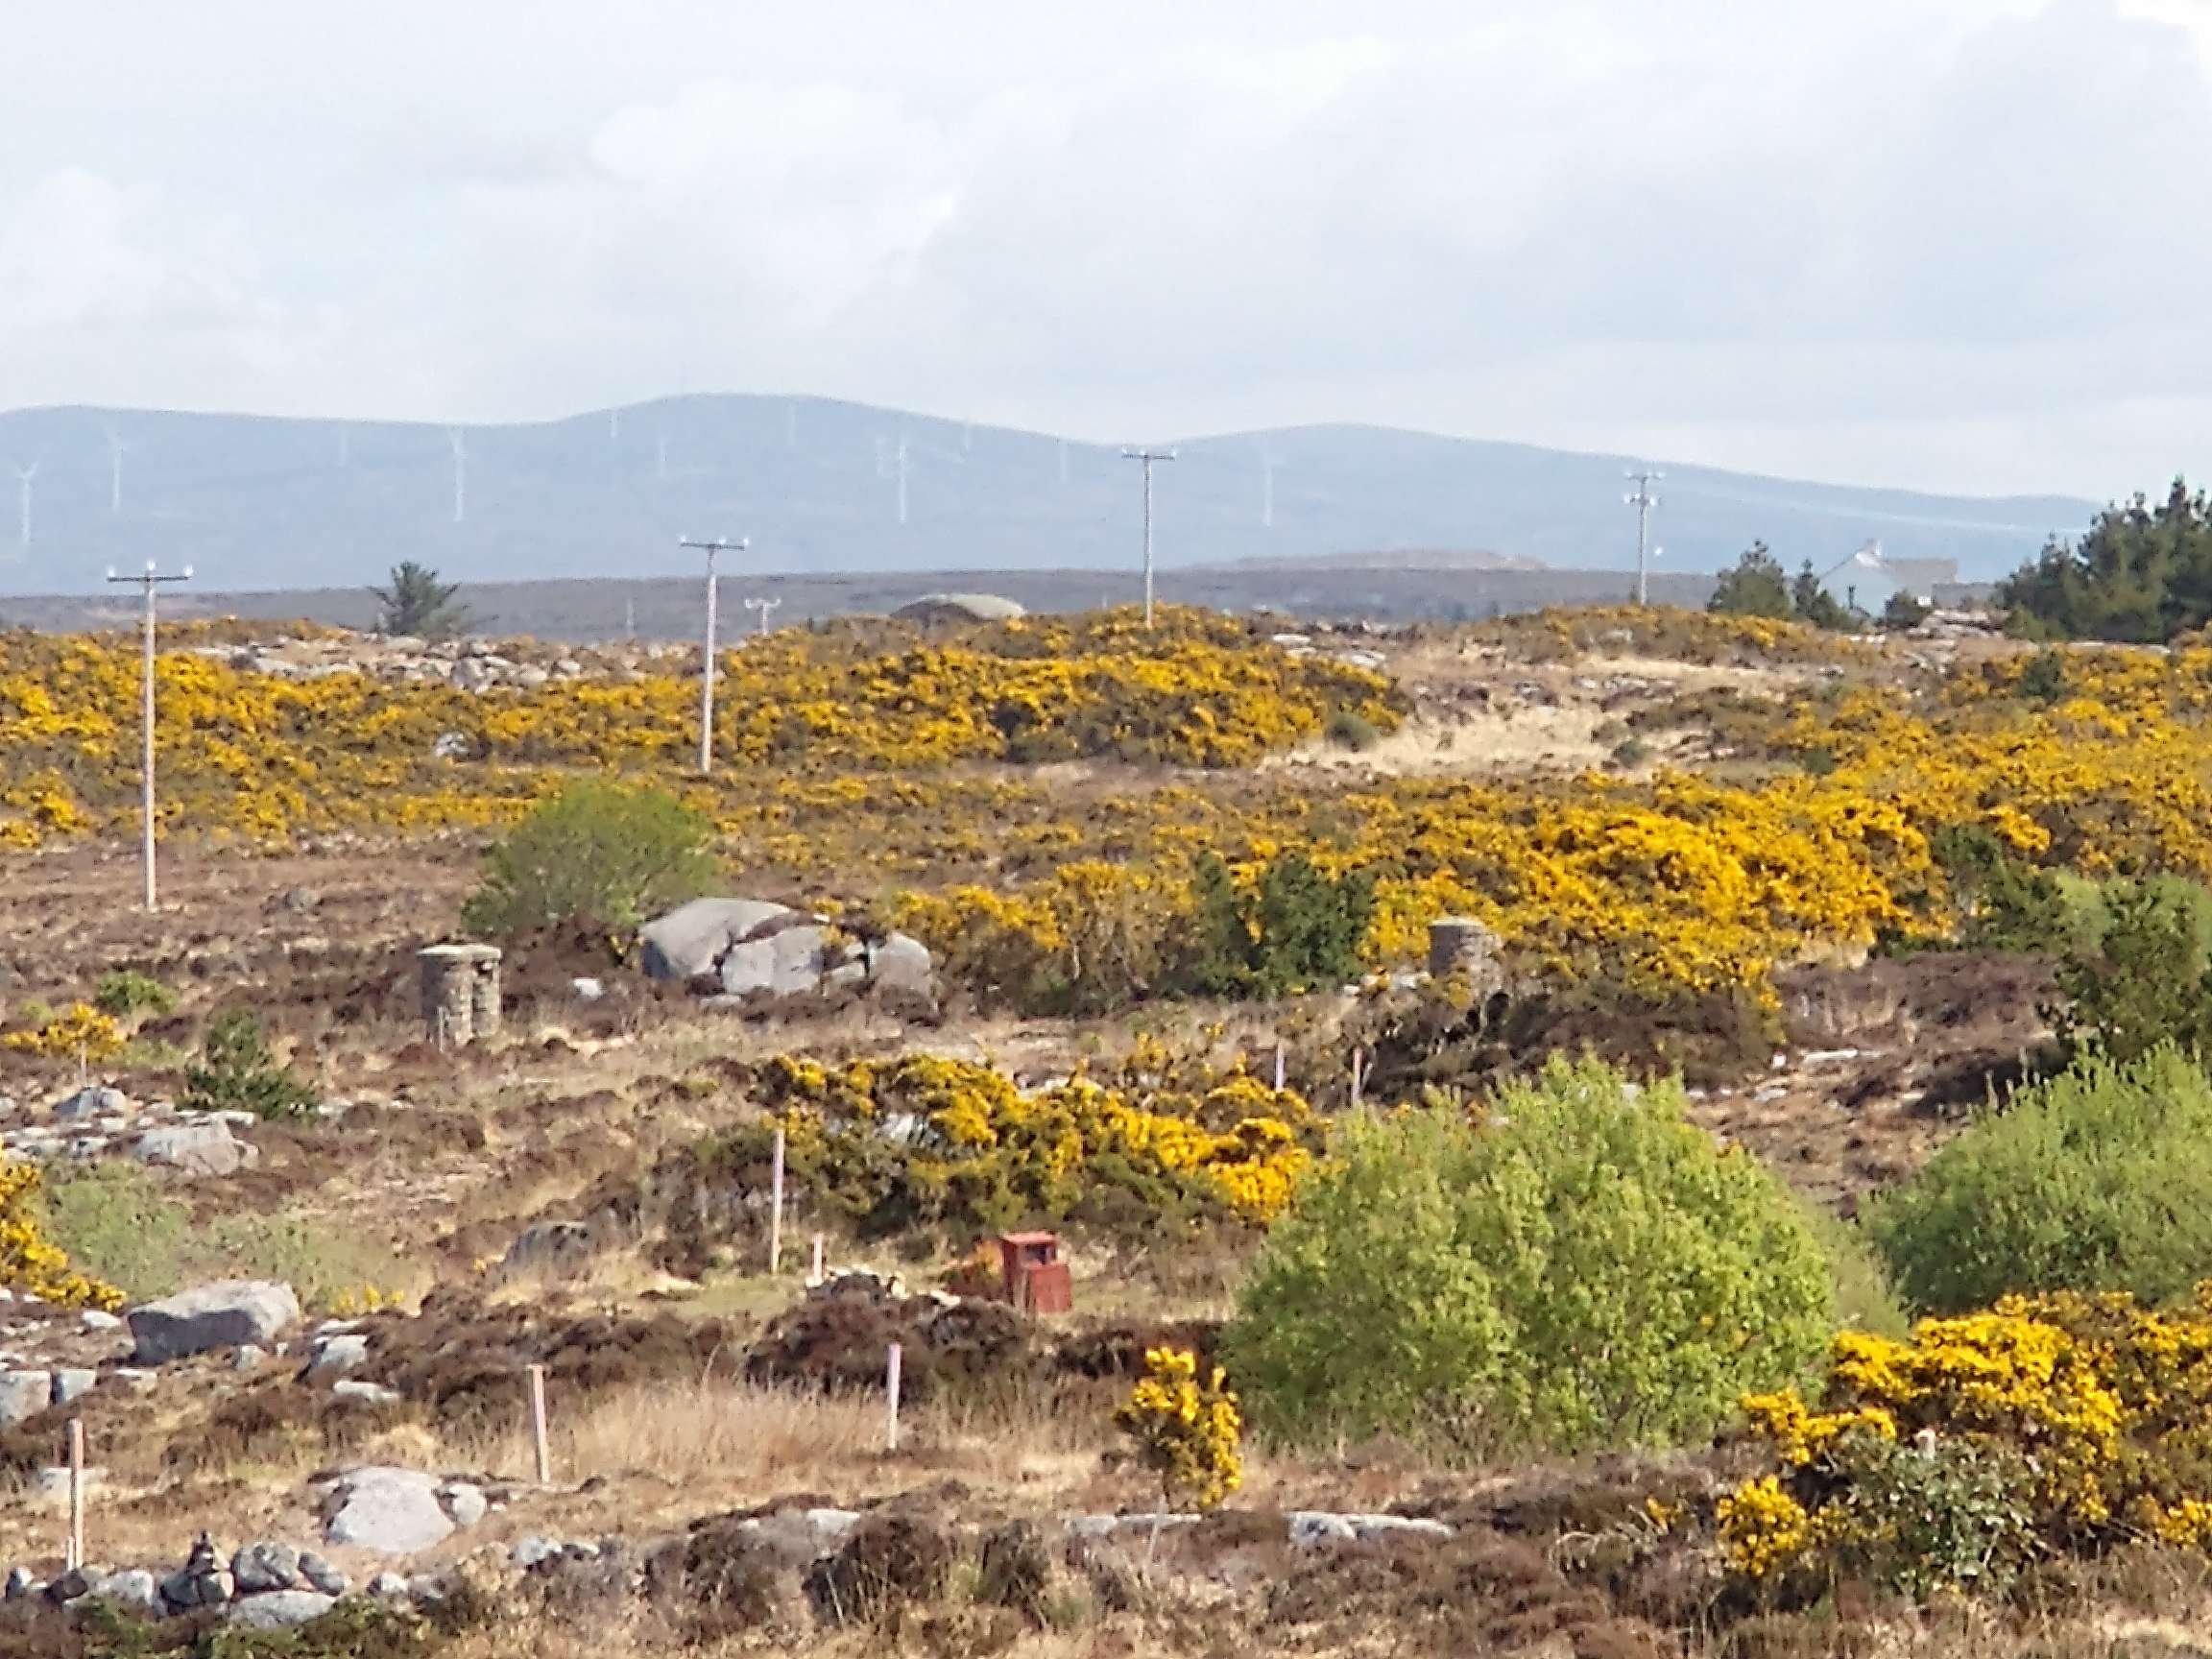
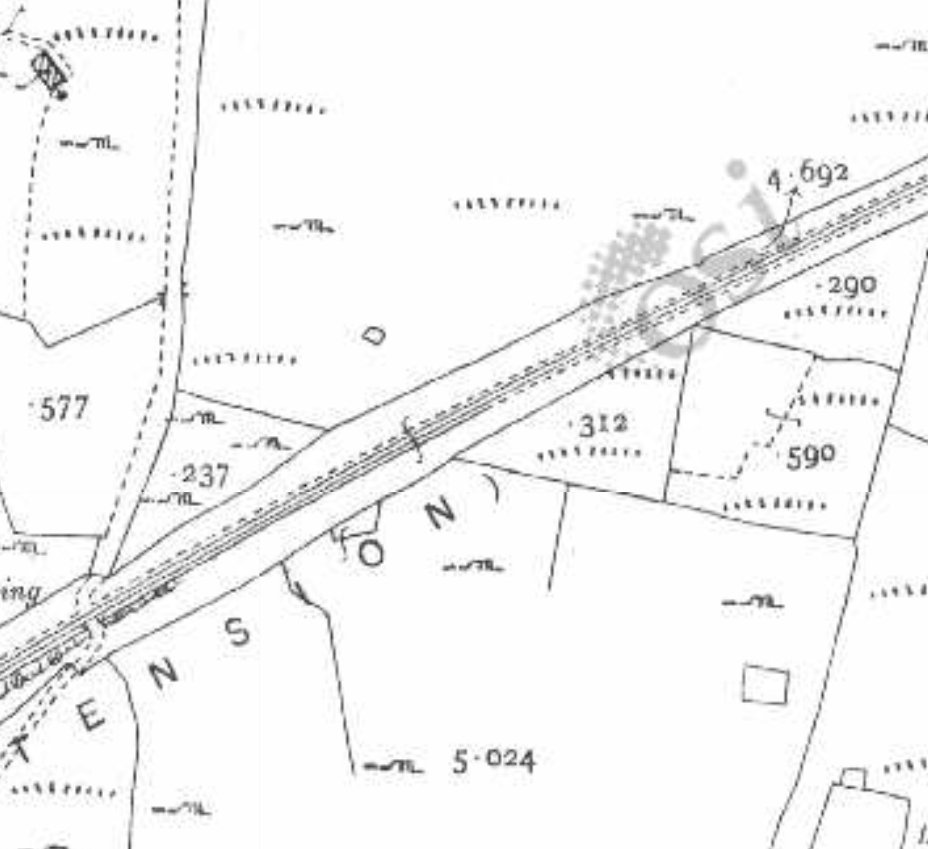
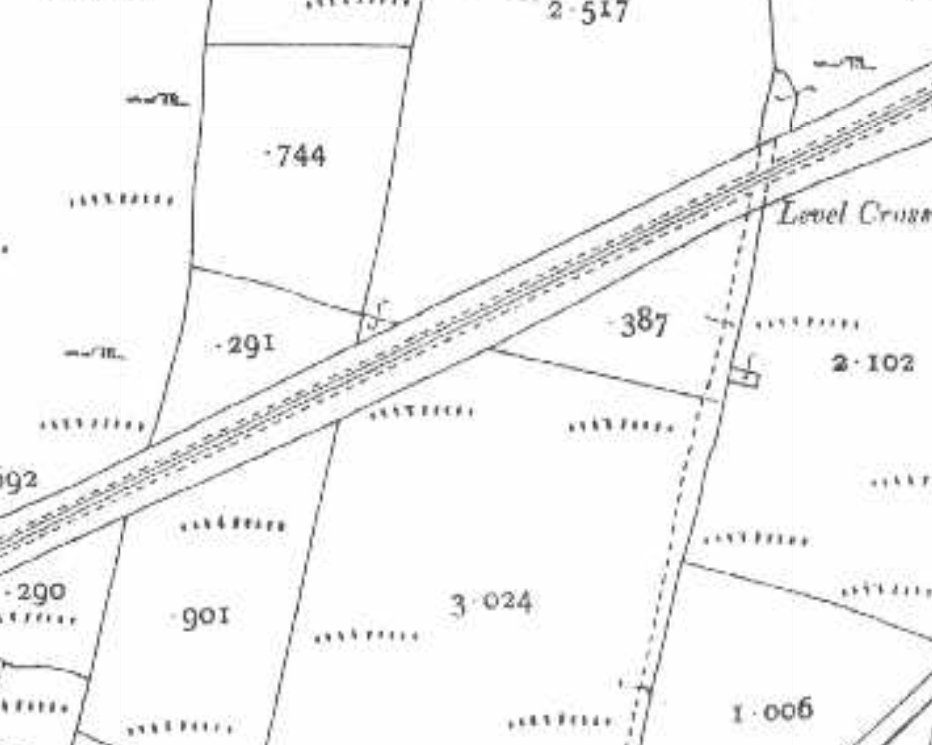
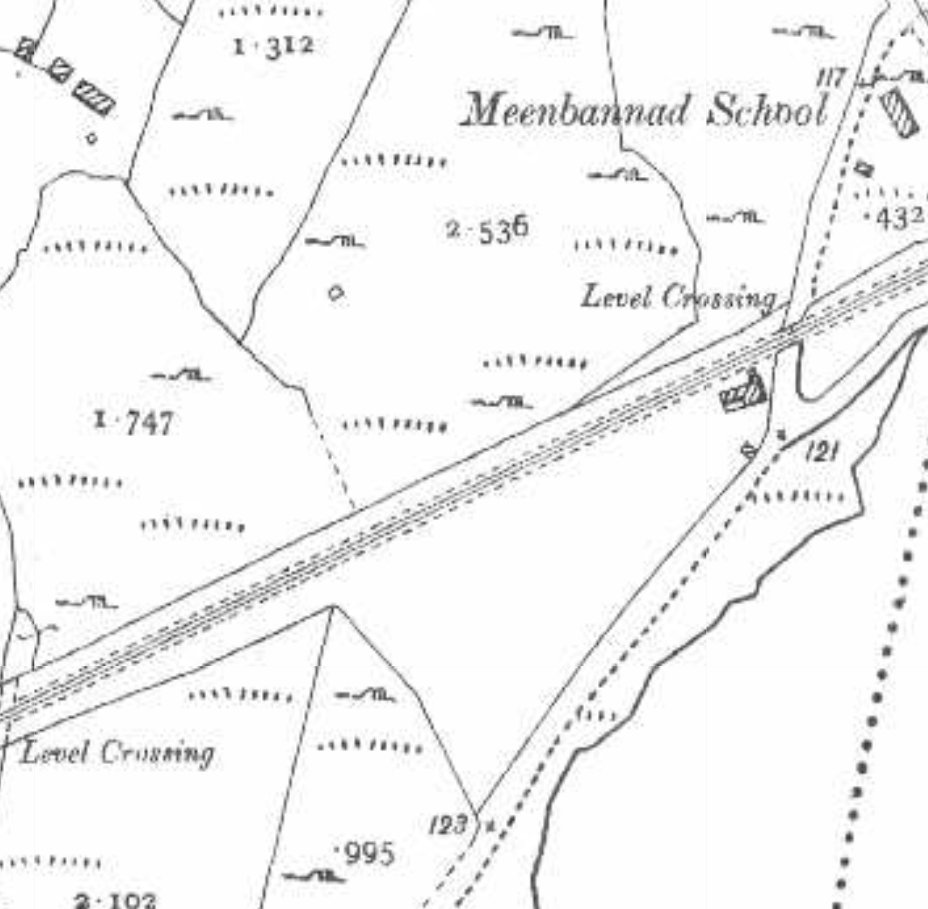
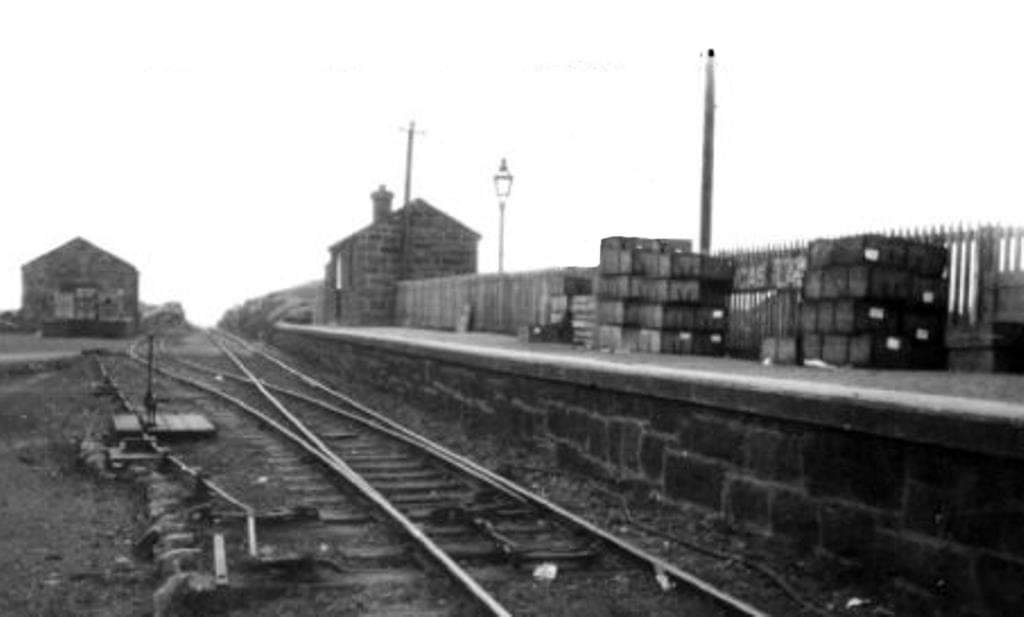
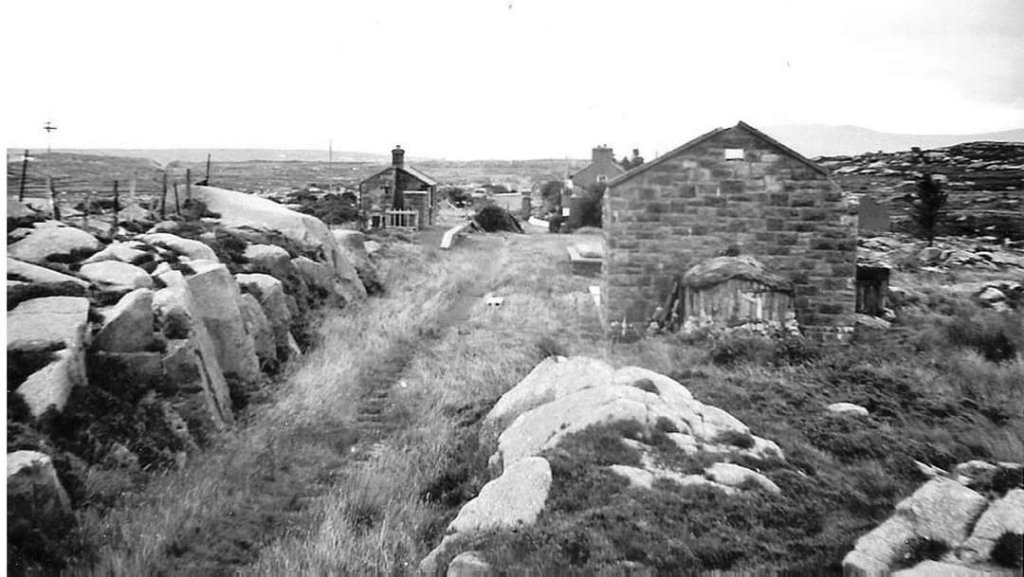
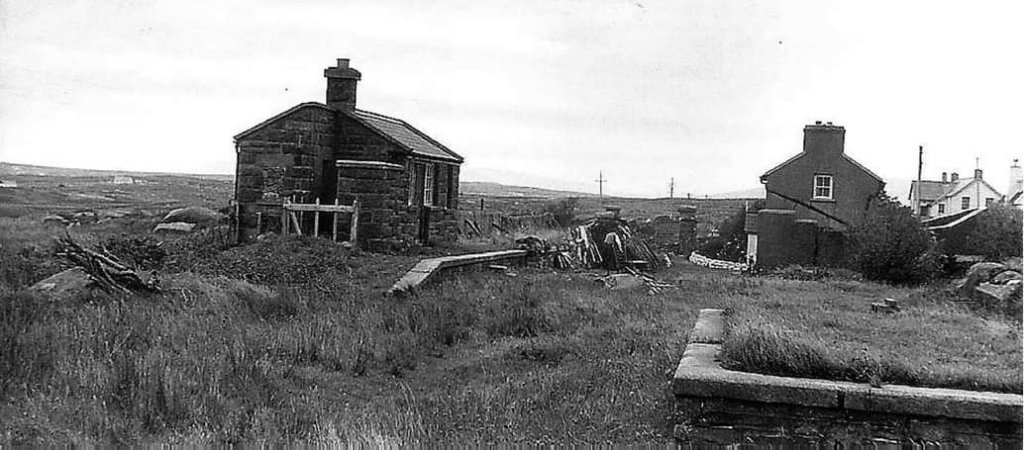


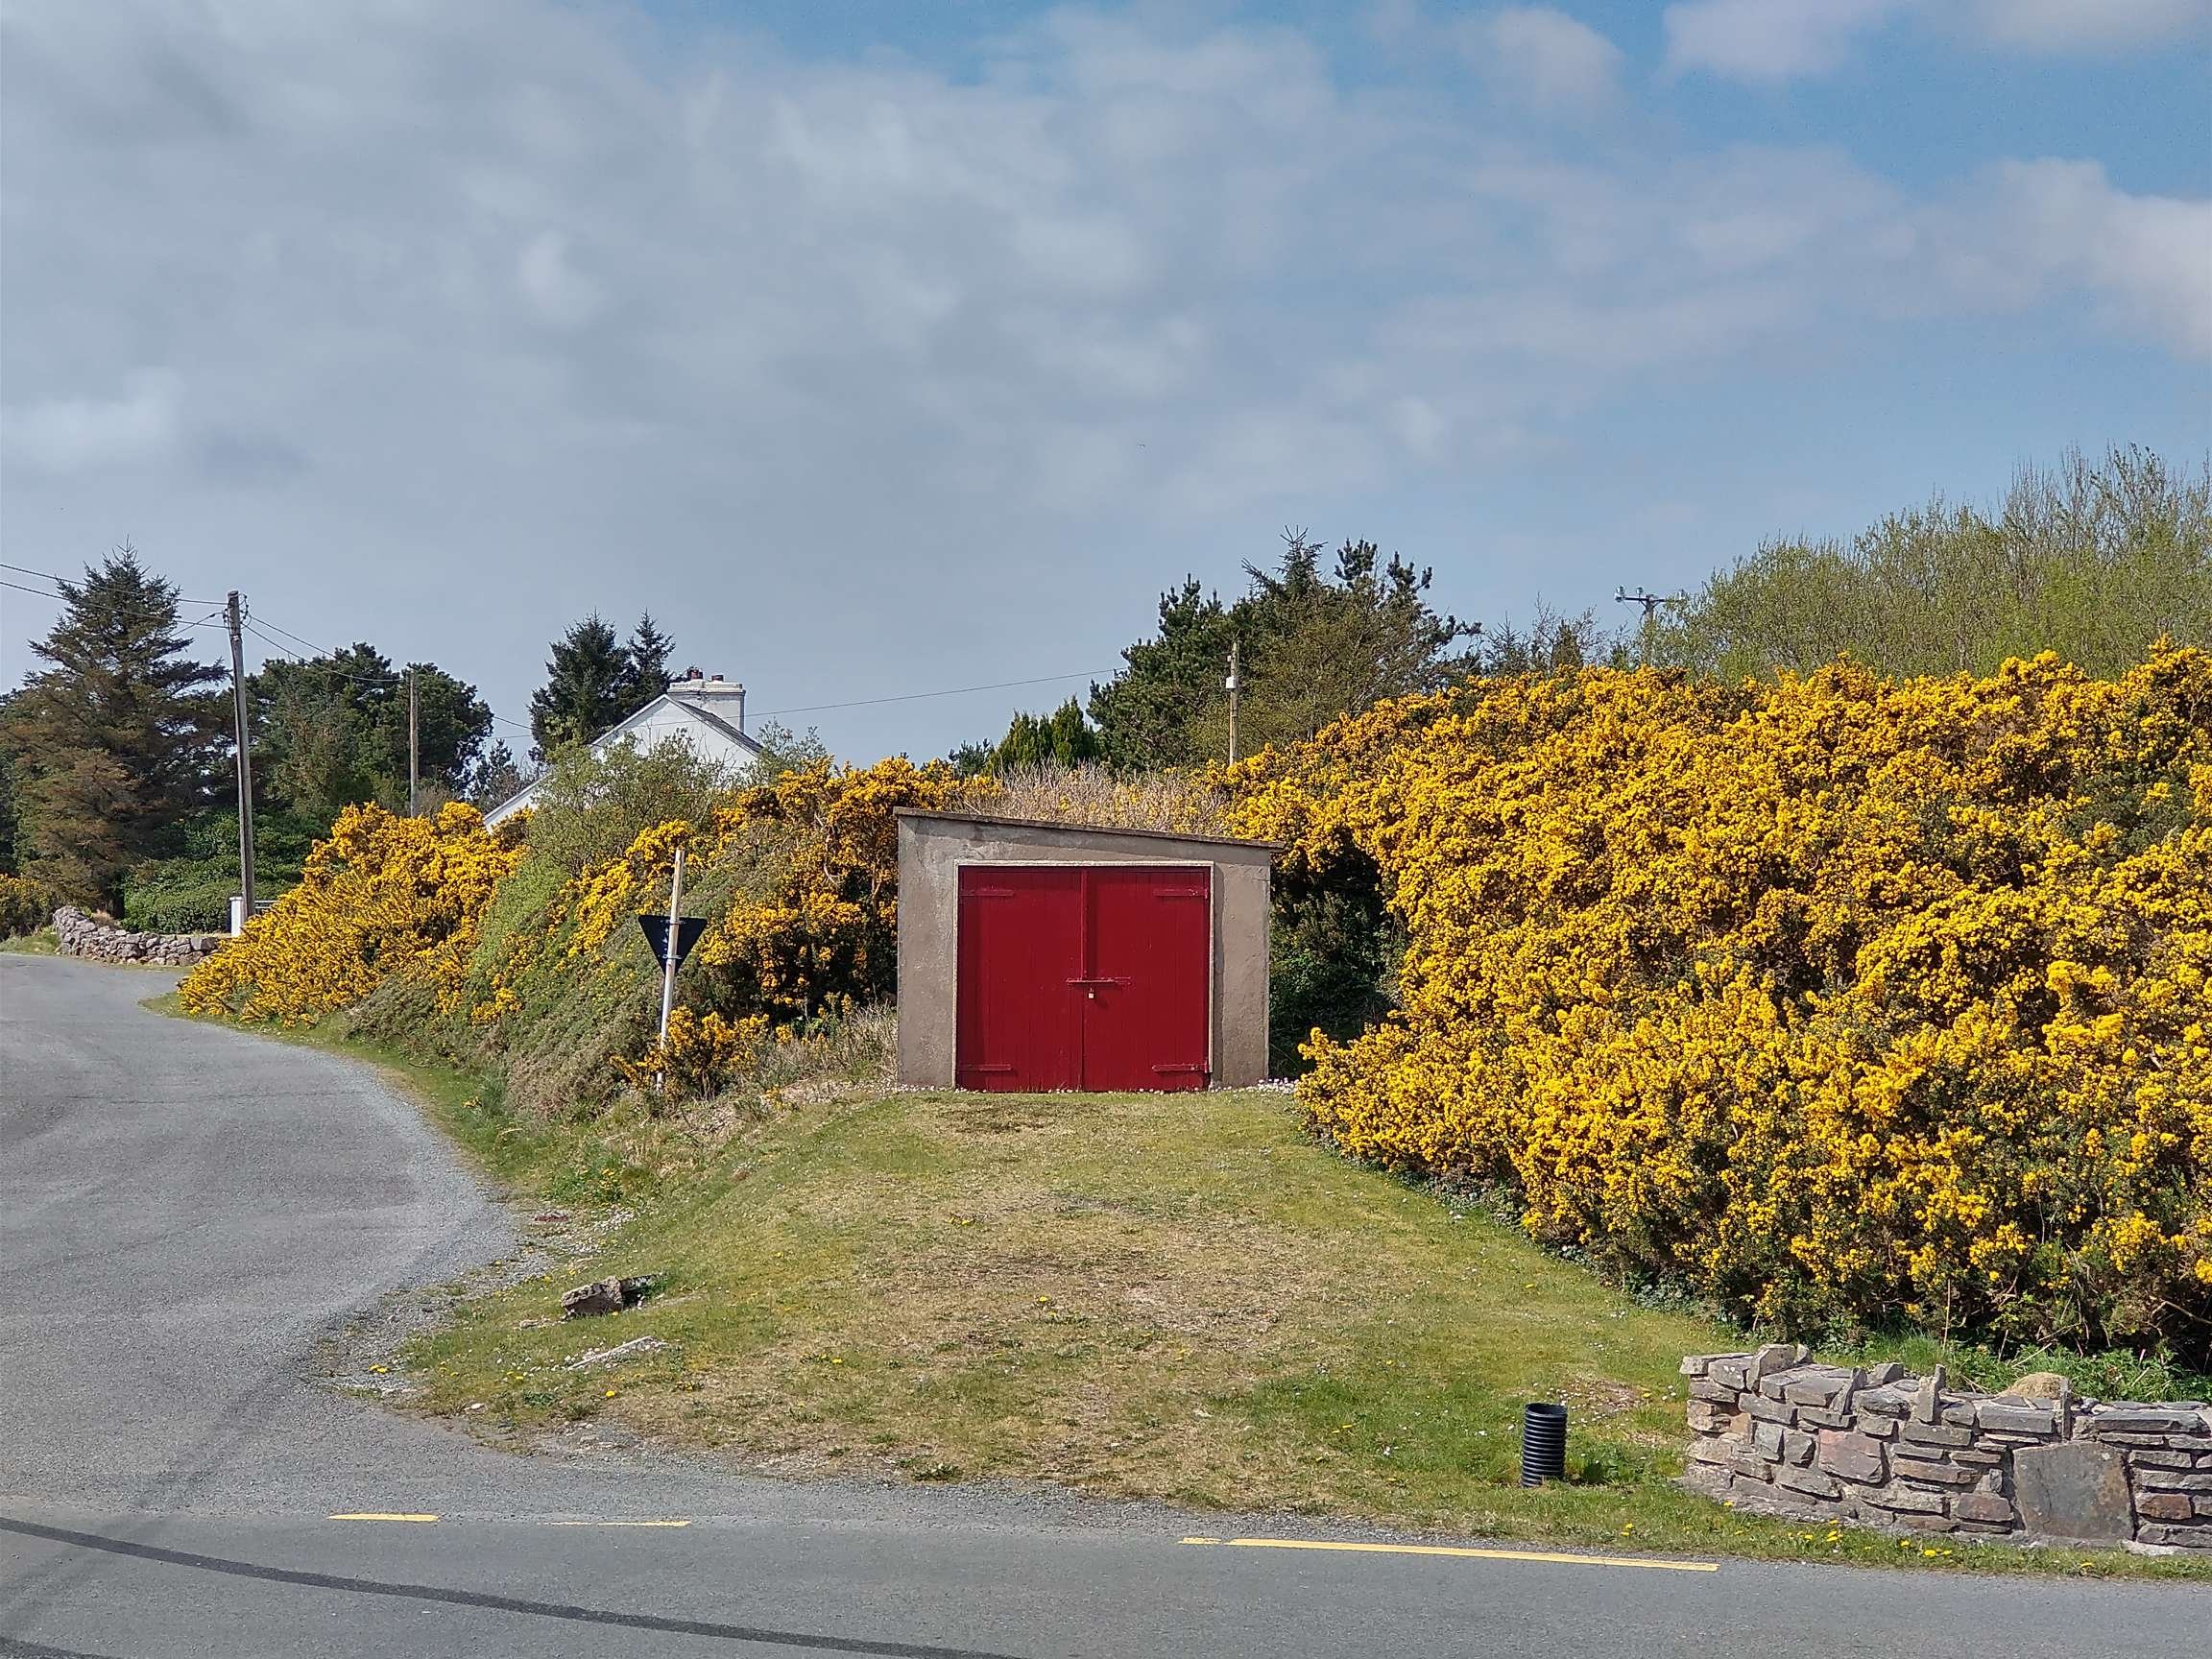
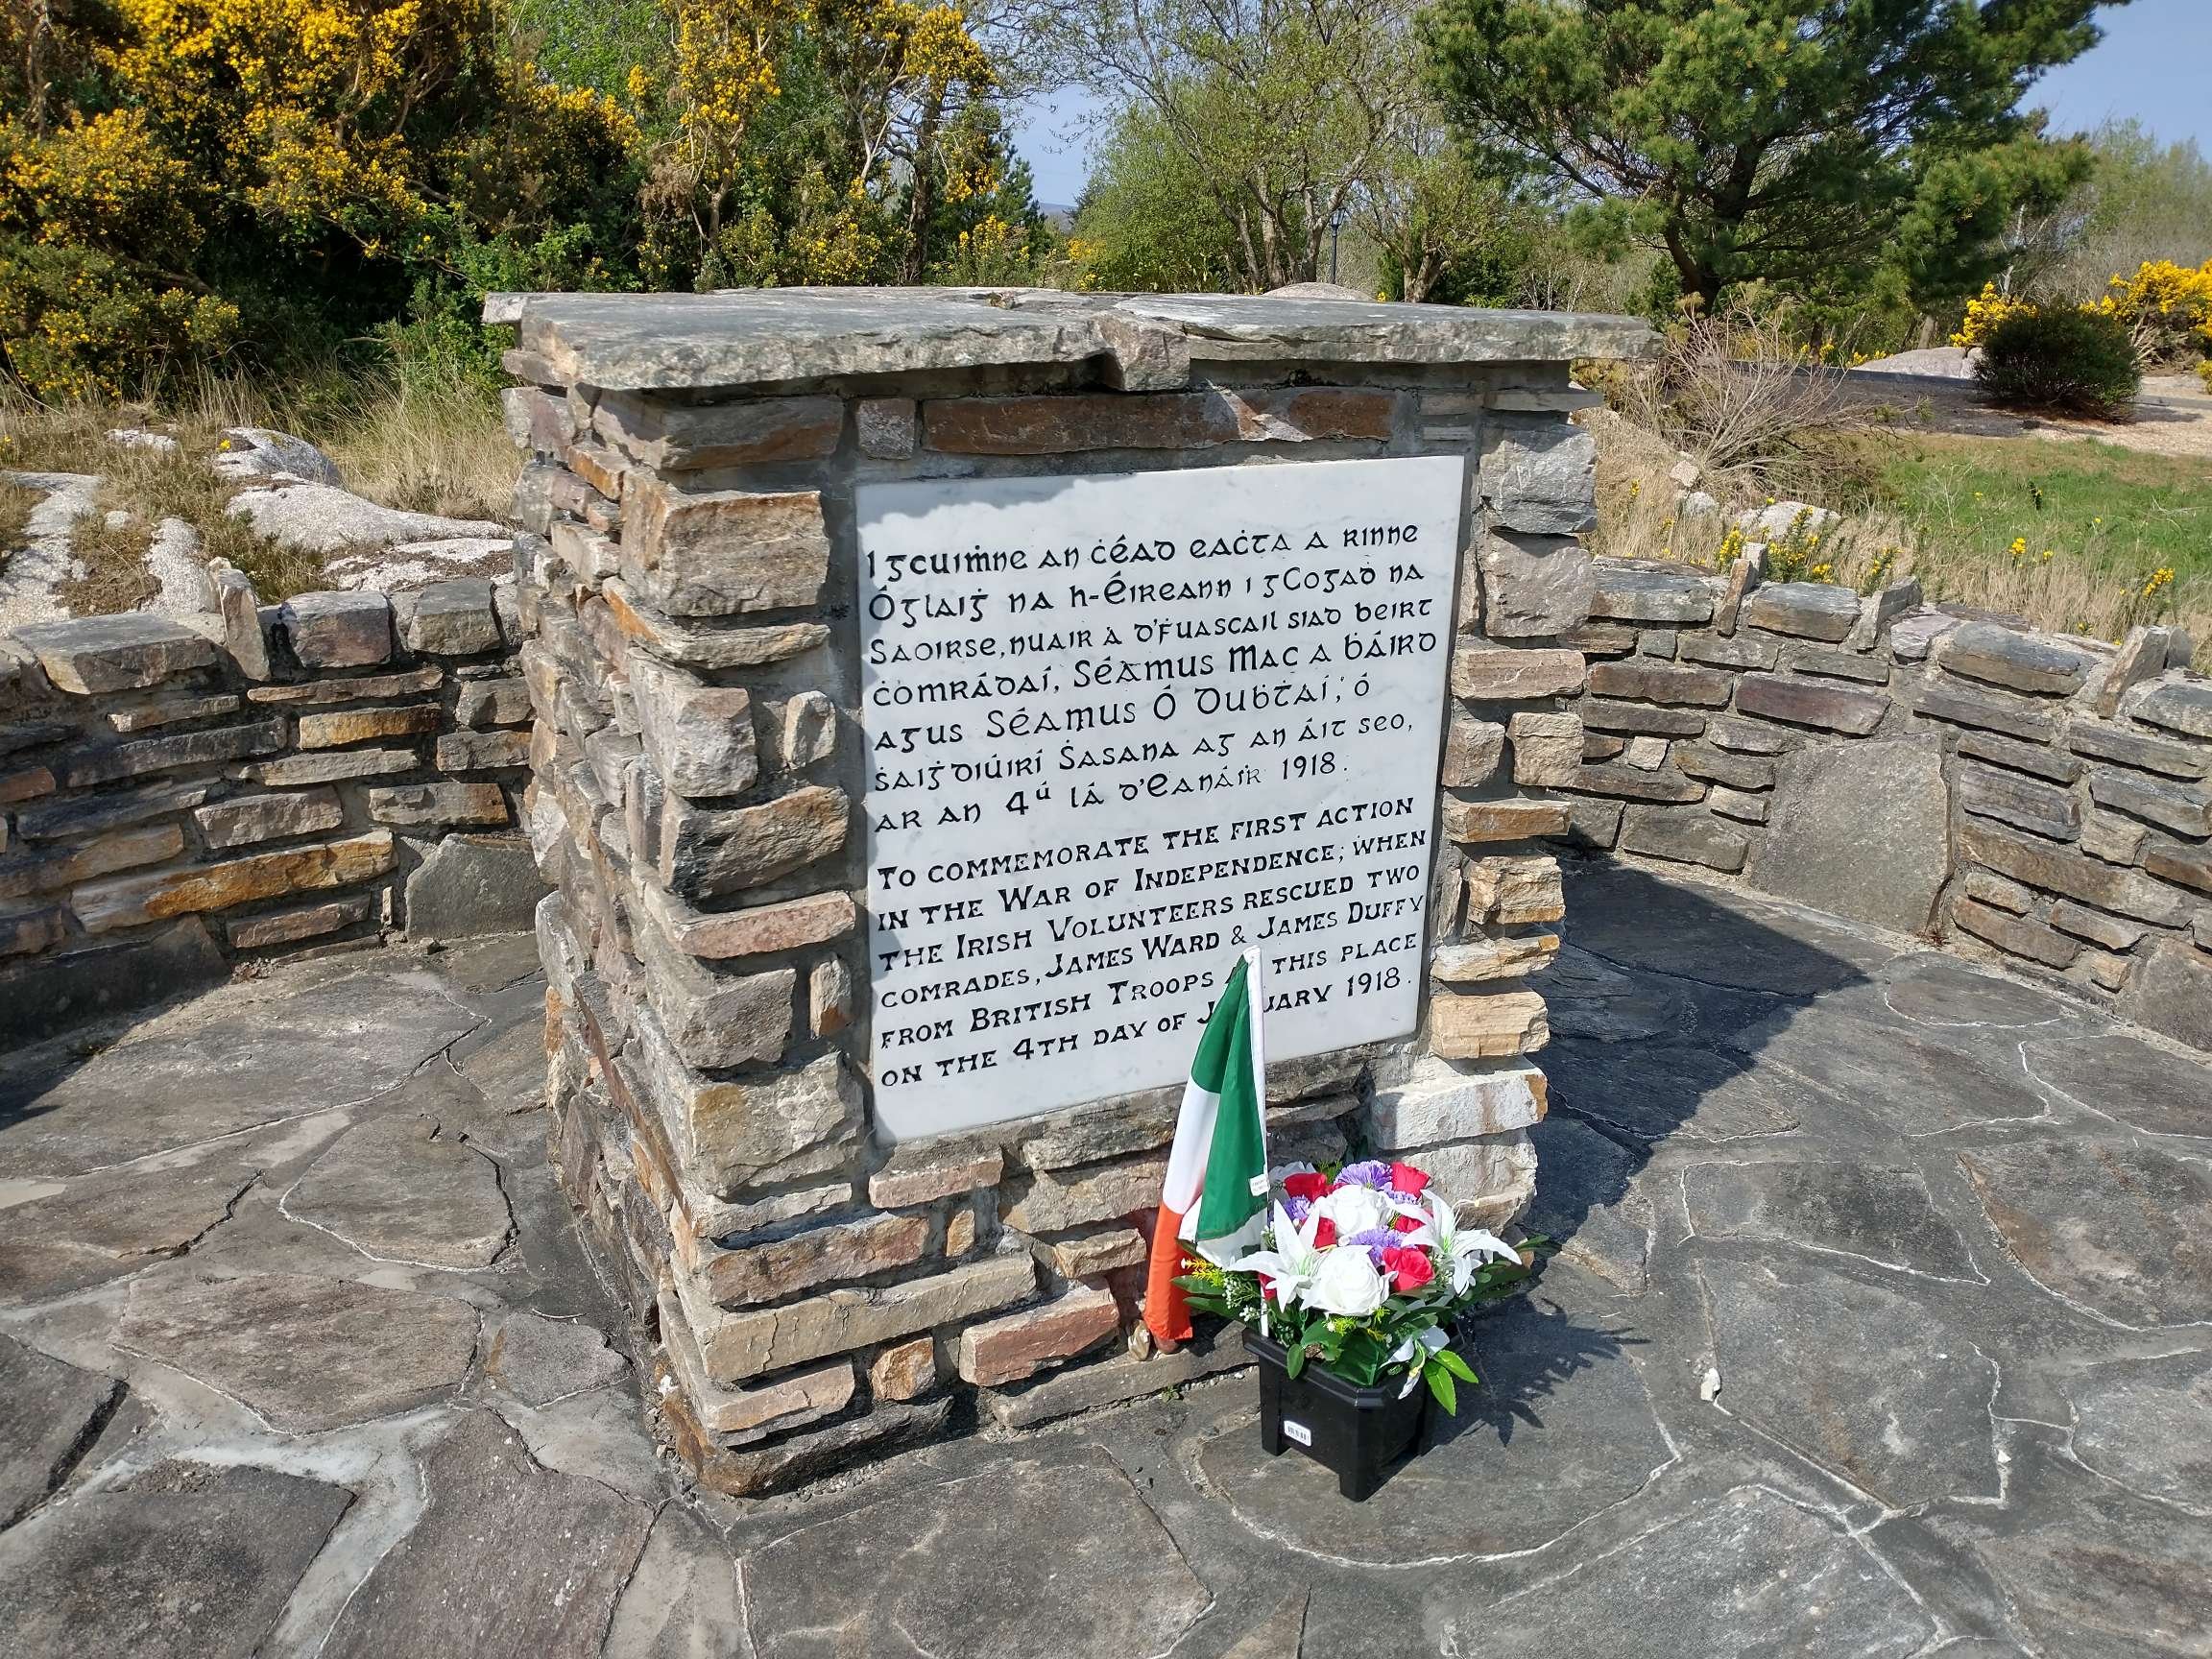

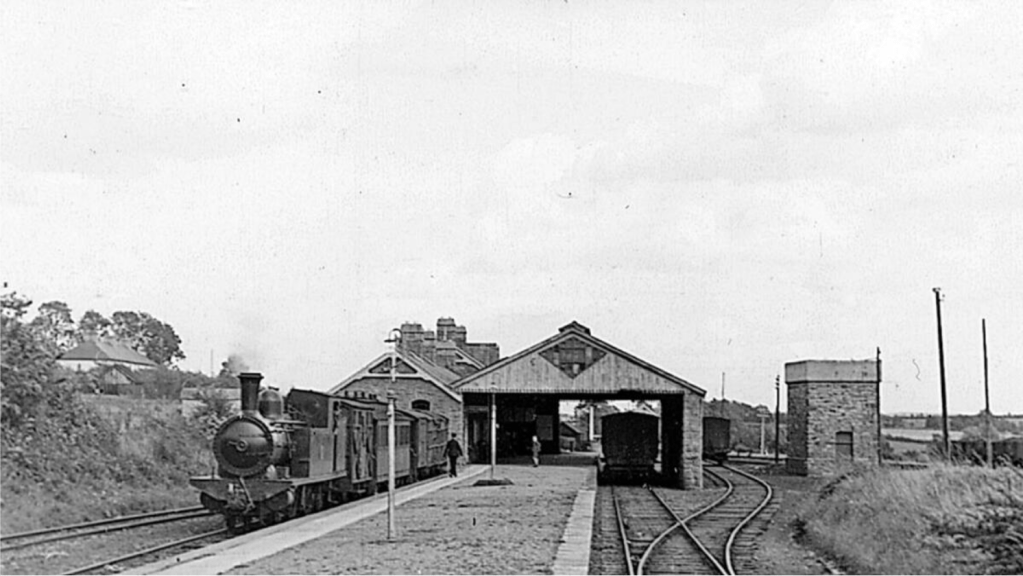
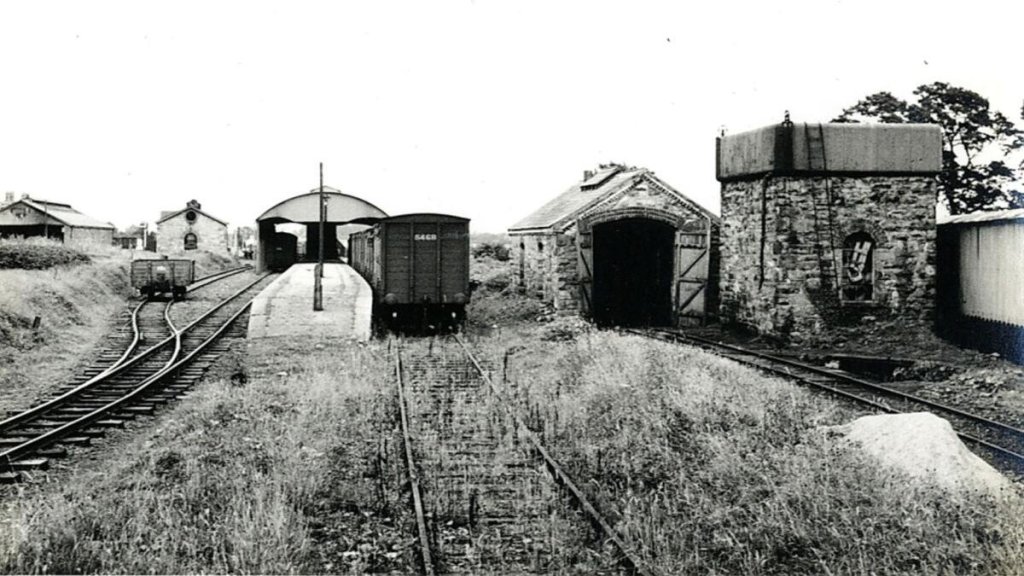
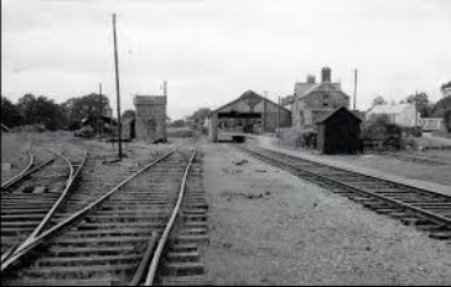
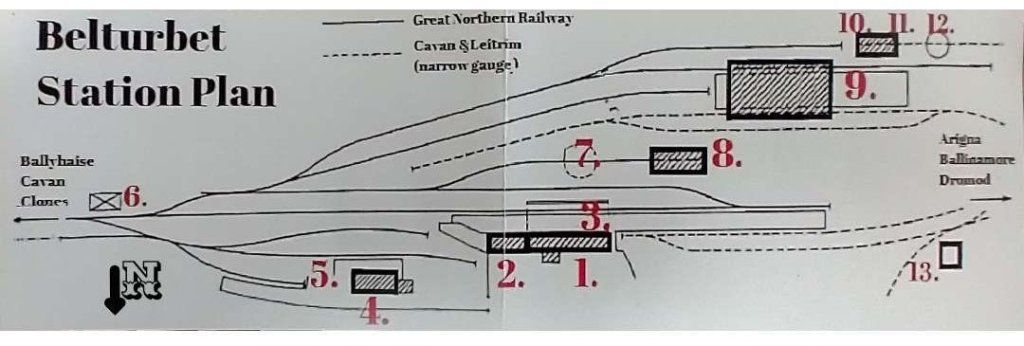
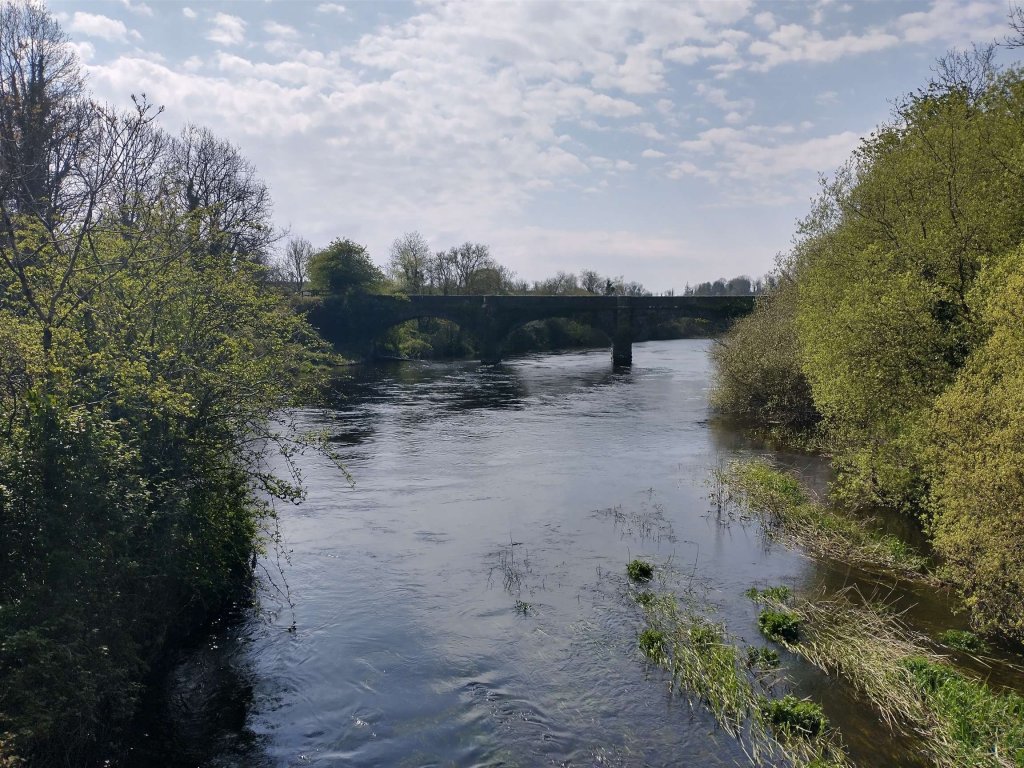
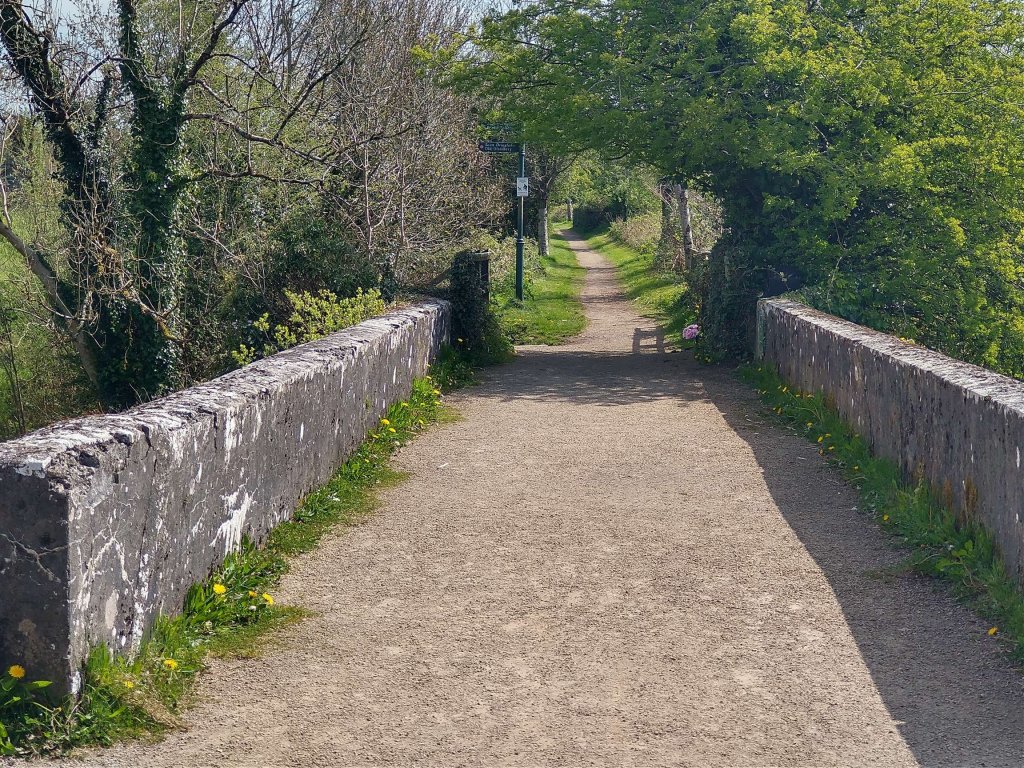

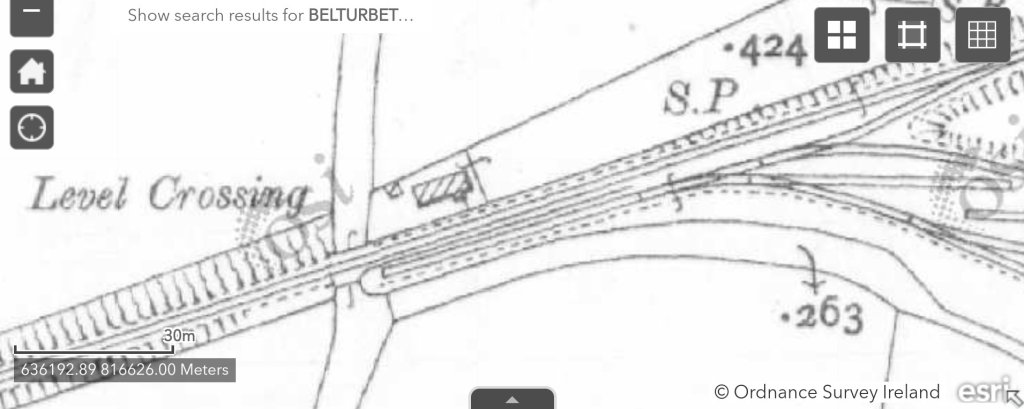
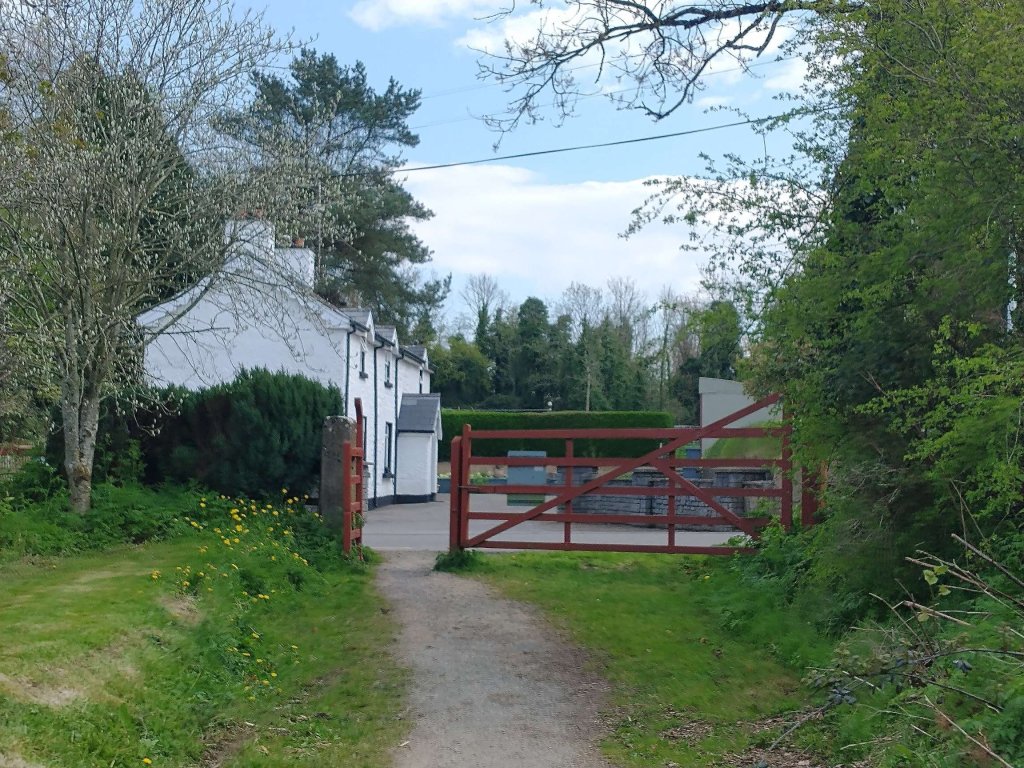
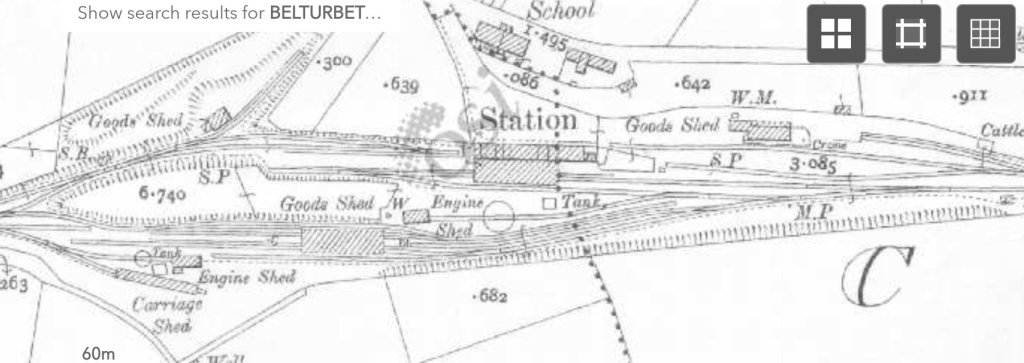
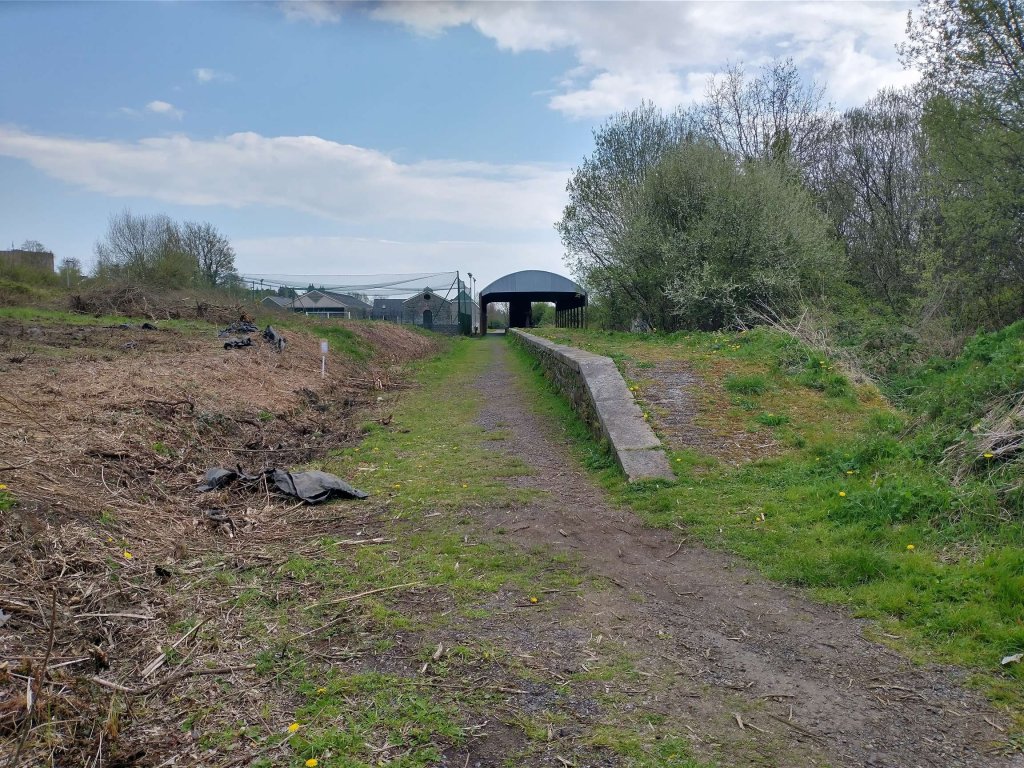
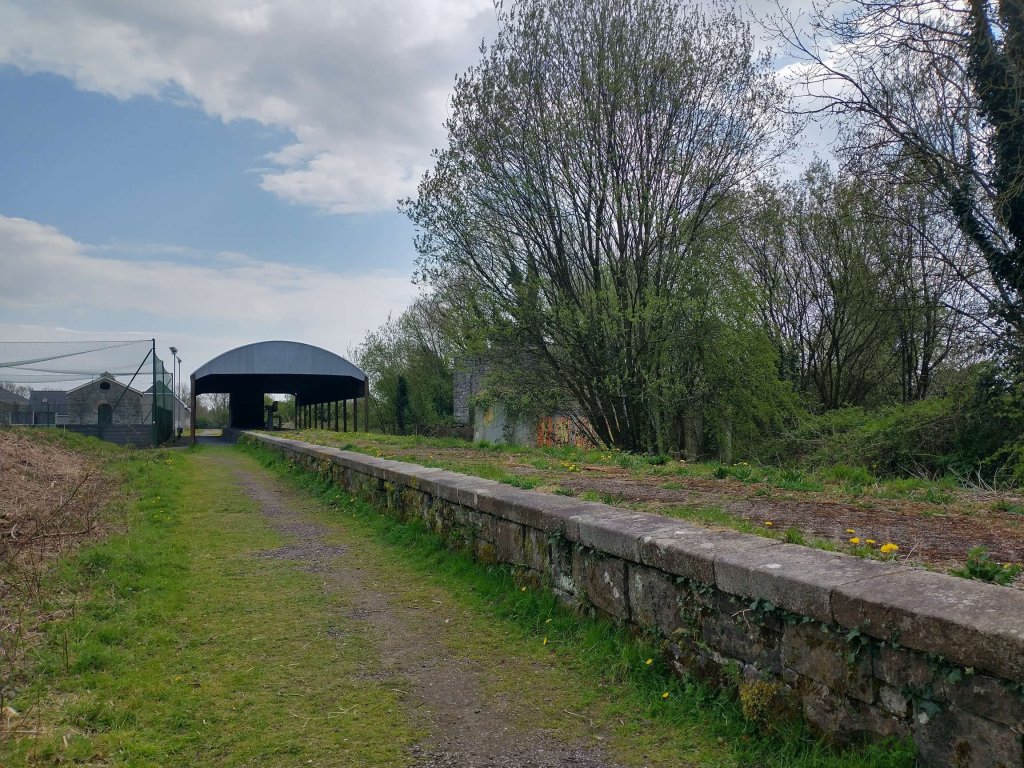
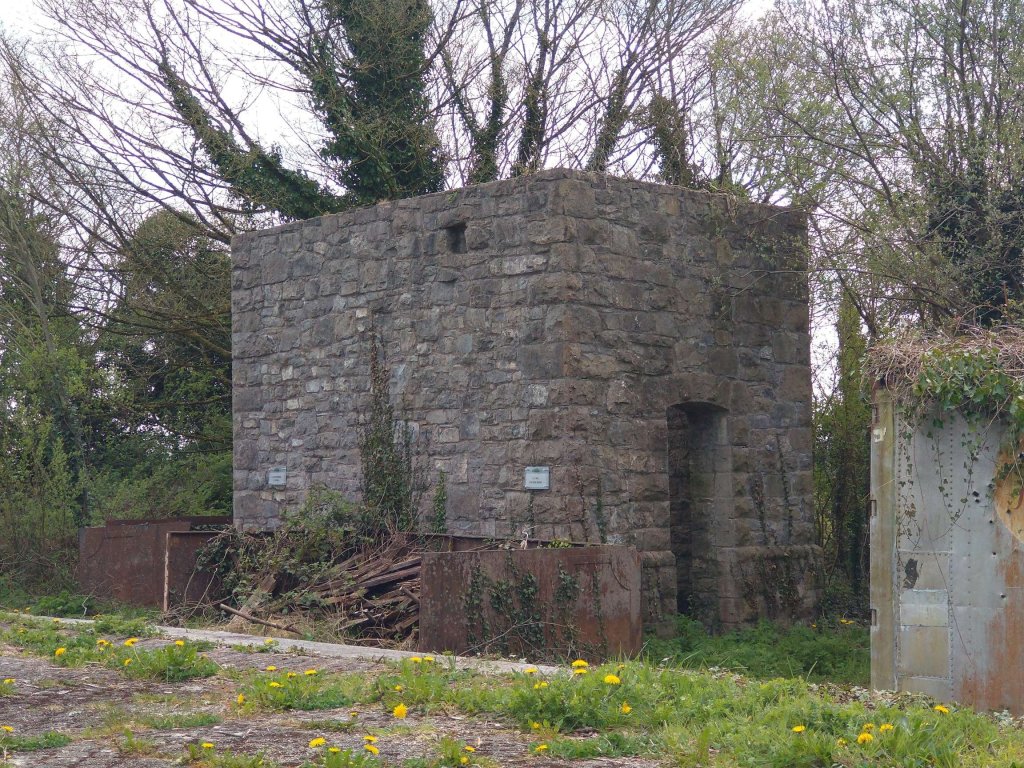
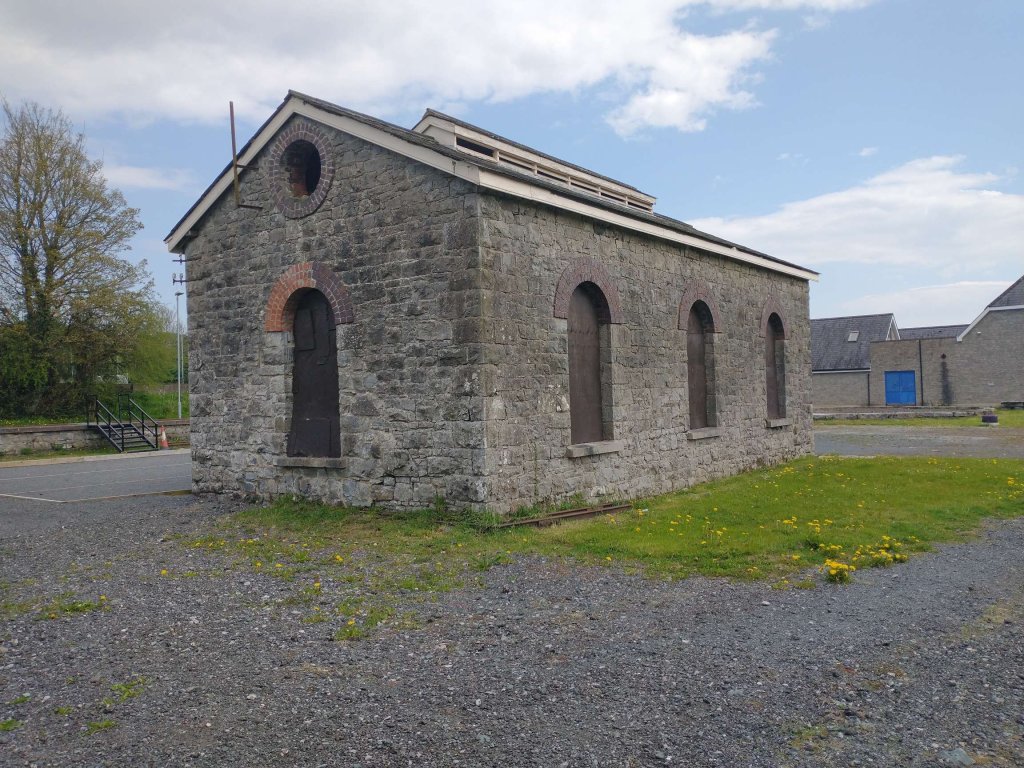
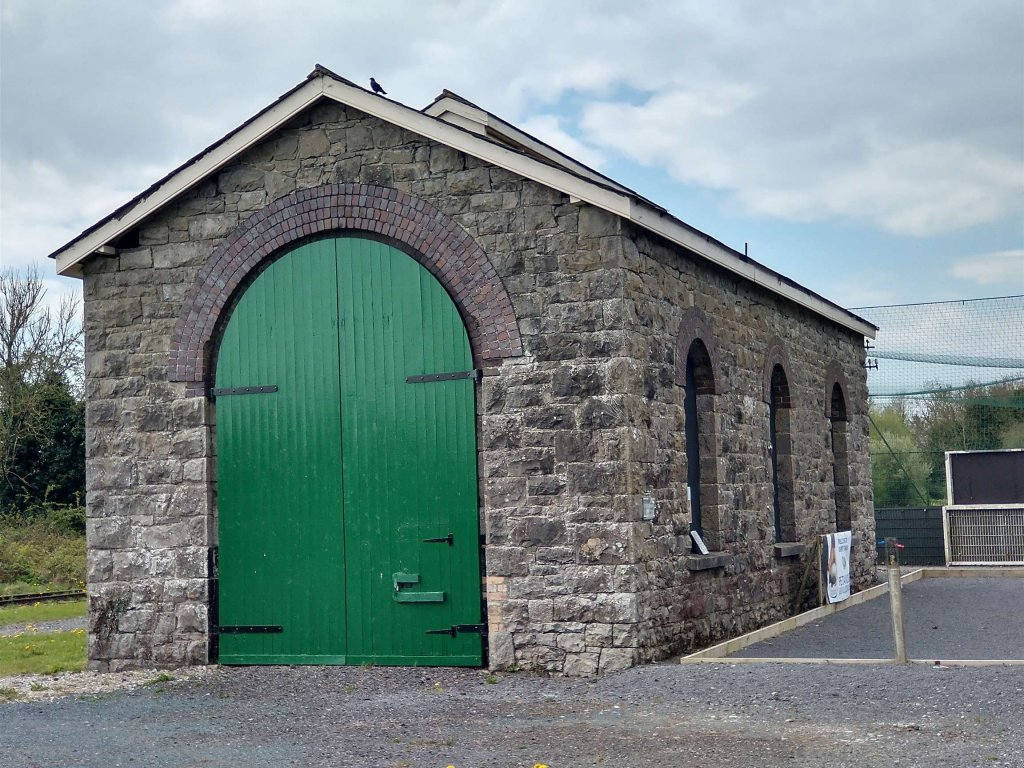
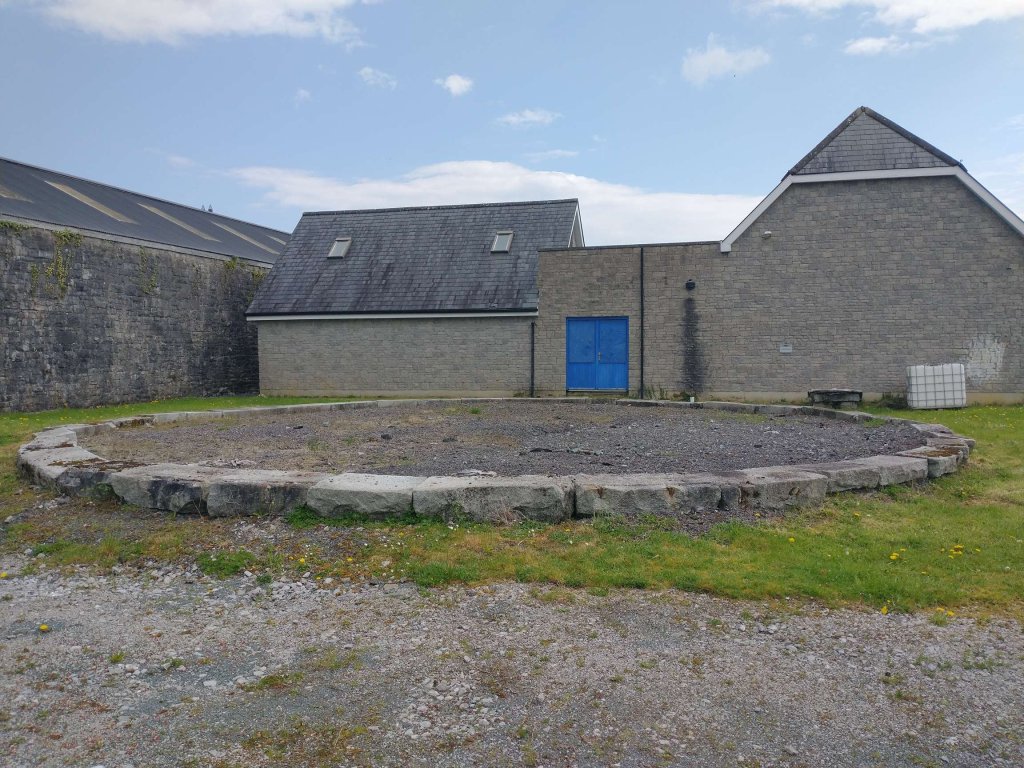
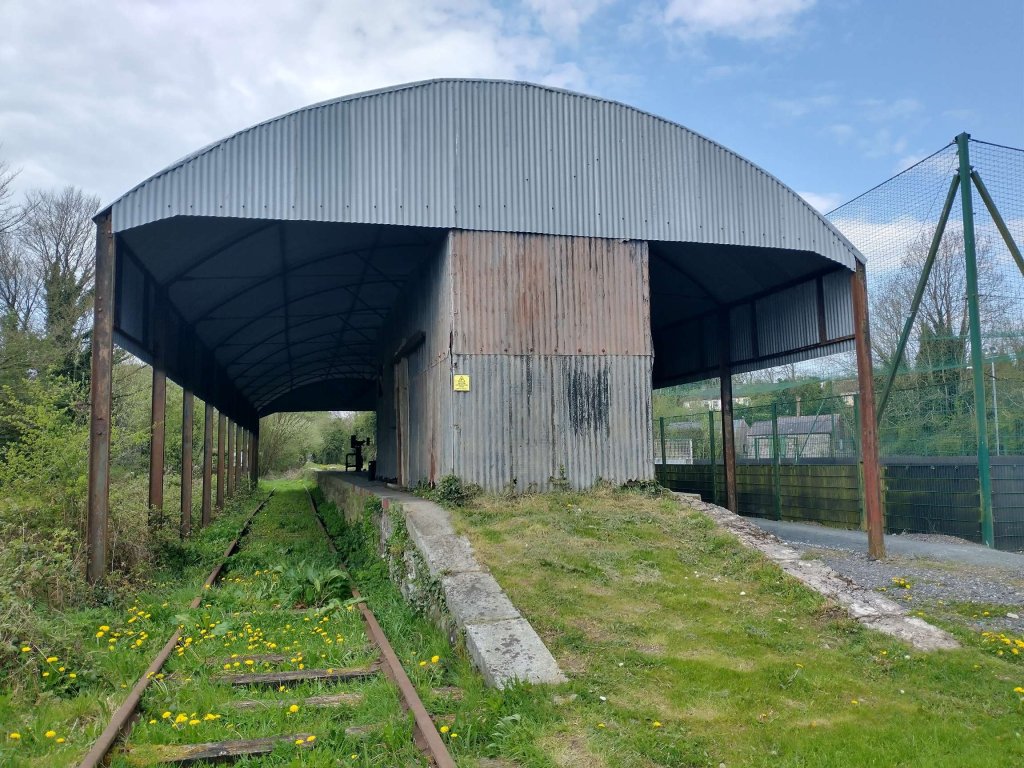
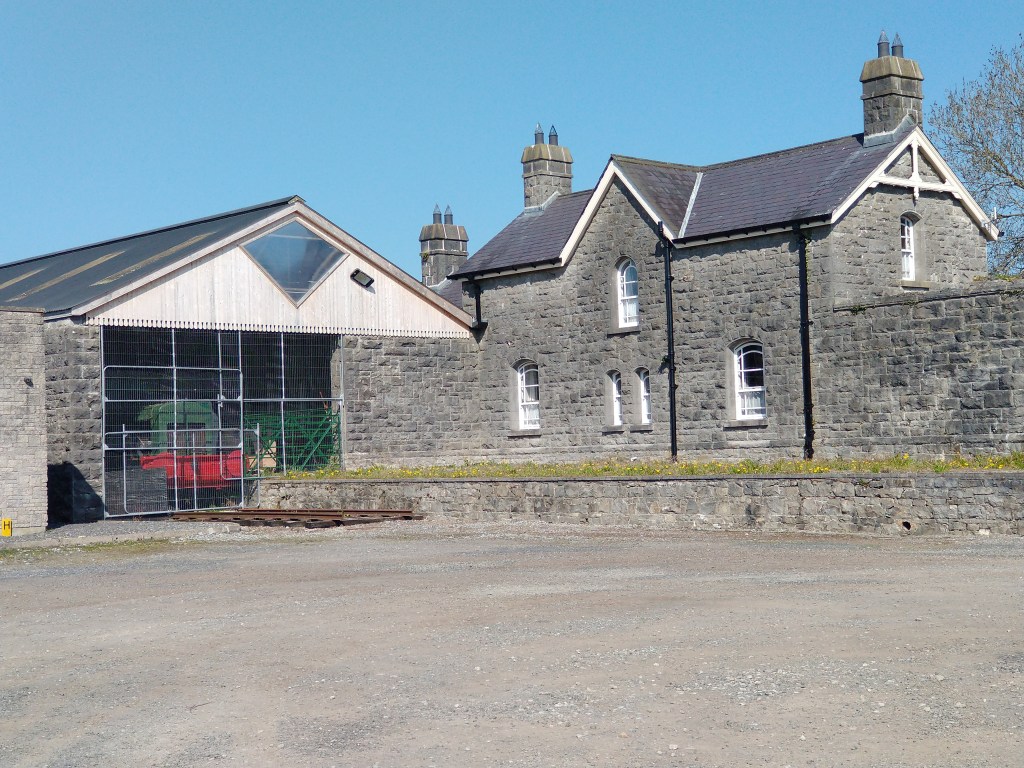
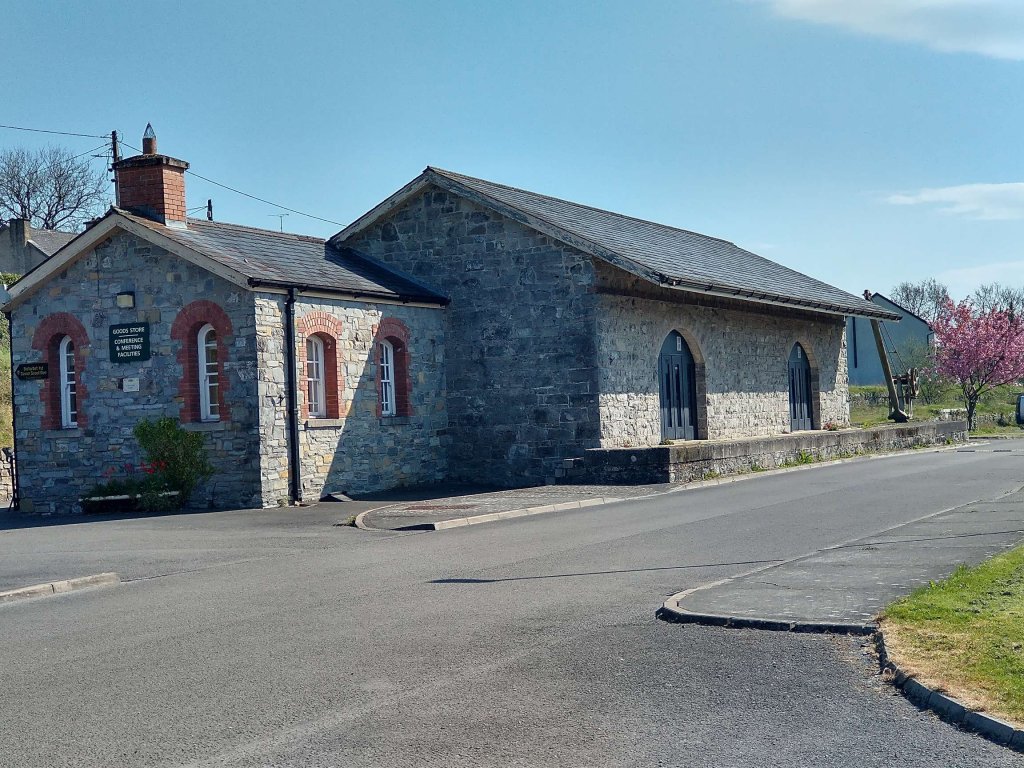
