Category Archives: Great Western Railway

The Railways of Telford – the Wellington to Severn Junction Railway (W&SJR) – Part 2 – Horsehay to Lightmoor Junction

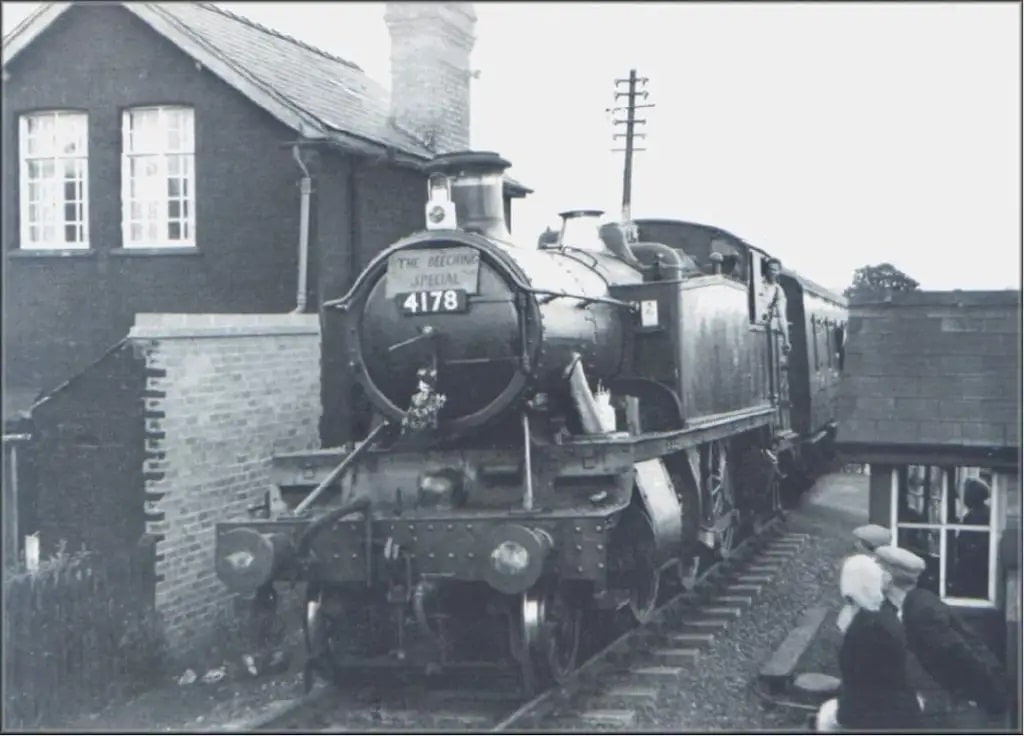
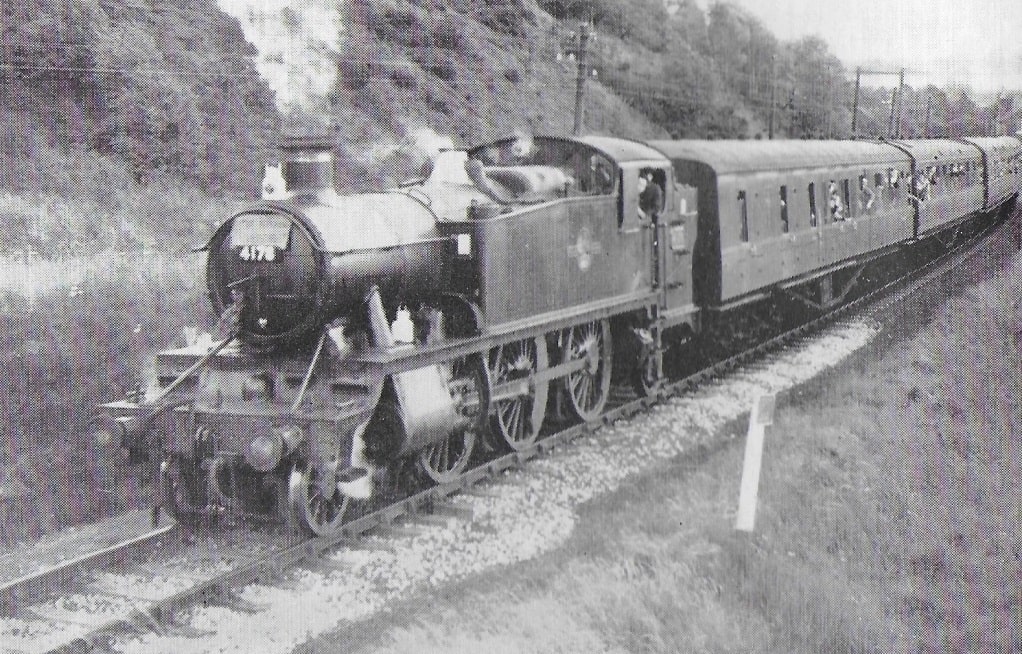
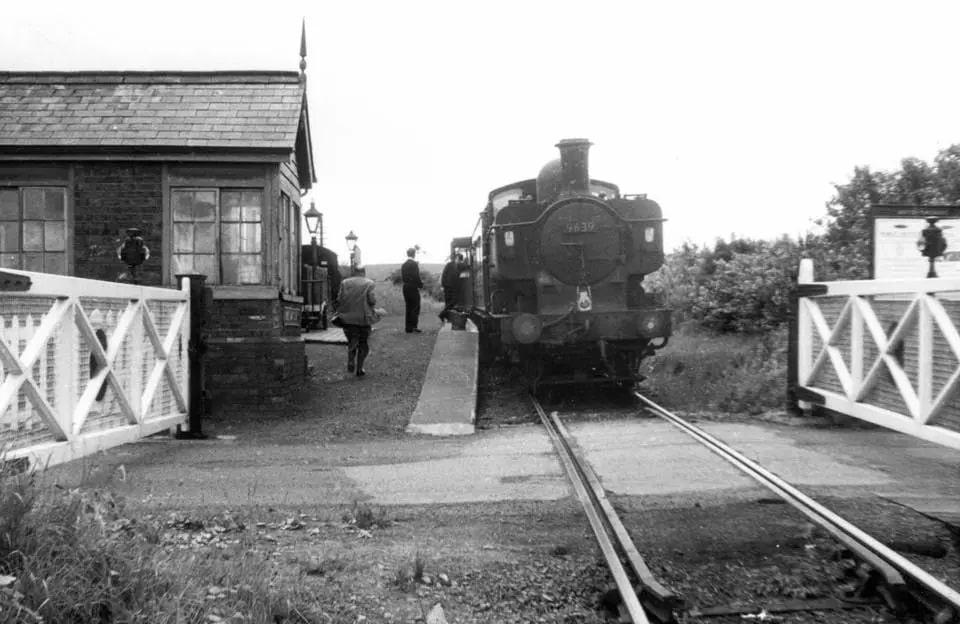
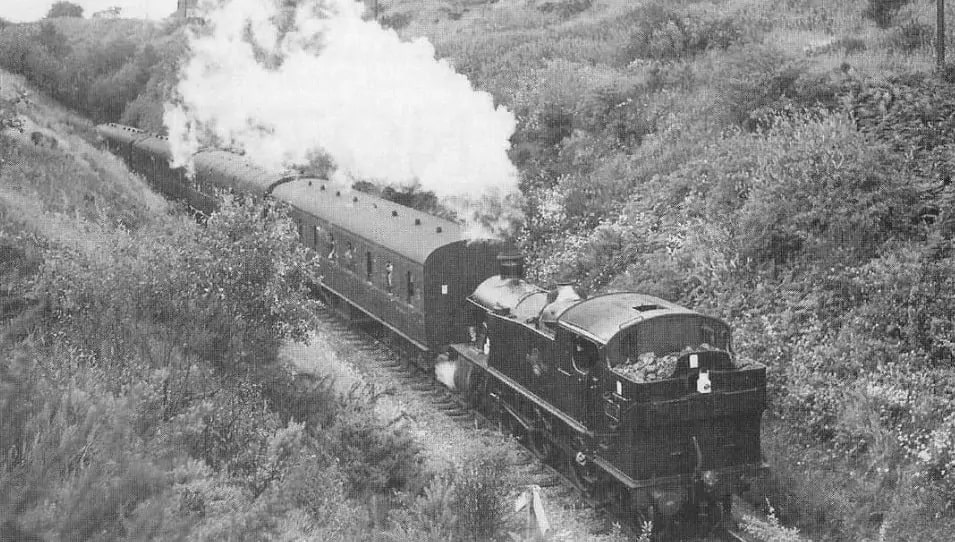
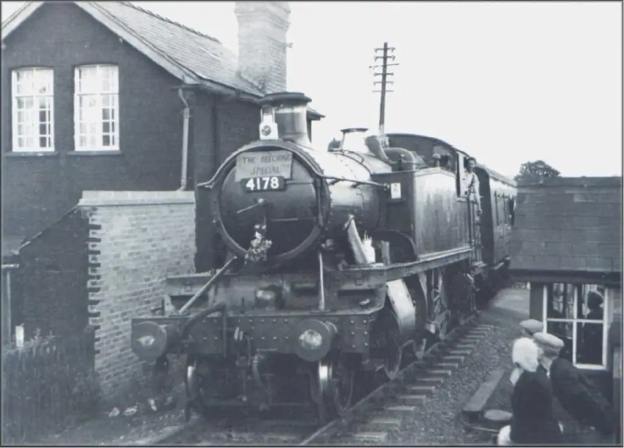
The featured image shows large Prairie Class 2-6-2T No. 4178 on the final passenger service along the W&SJR on 21st June 1962 heading North across Holly Road into Doseley Halt. This picture was shared by Marcus Keane on the Telford Memories Facebook Group on 29th April 2014.

Introduction – An introduction to the W&SJR was provided in the first article about the line:

https://wordpress.com/post/rogerfarnworth.com/34425

Lightmoor Press have produced an excellent book about the line from Wellington through Much Wenlock to Craven Arms, “The Wellington, Much Wenlock and Craven Arms Railway.” The author is Adrian Knowles. [1]

Before continuing our journey along the line, we note that it was built between 1857 and 1861 and in the section we are looking at, passed through the following stations: Horsehay and Dawley, Doseley Halt, and Lightmoor Platform (Lightmoor Station or Halt).

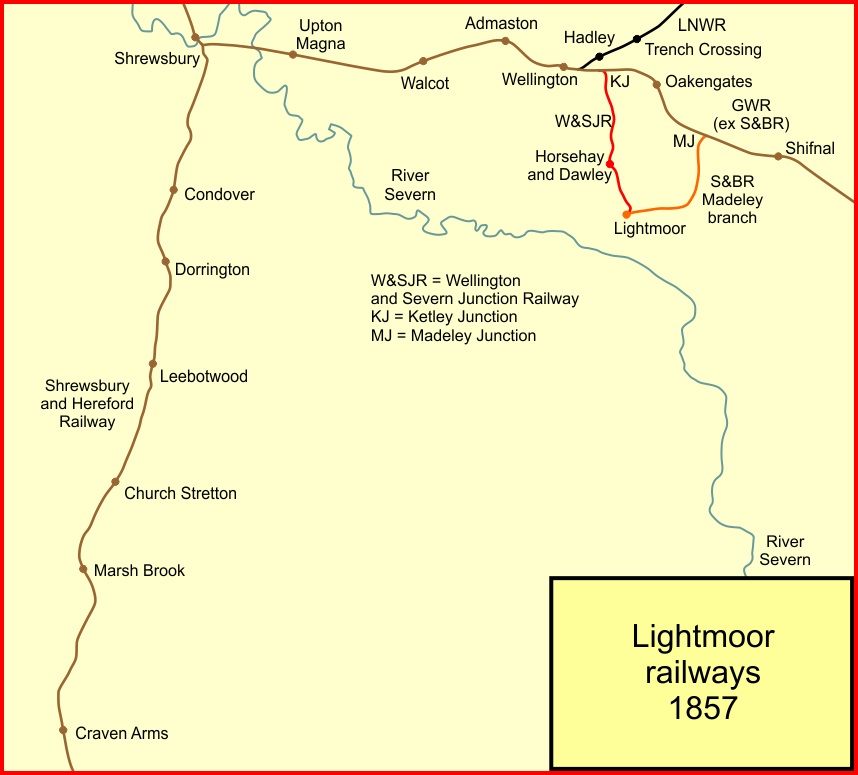
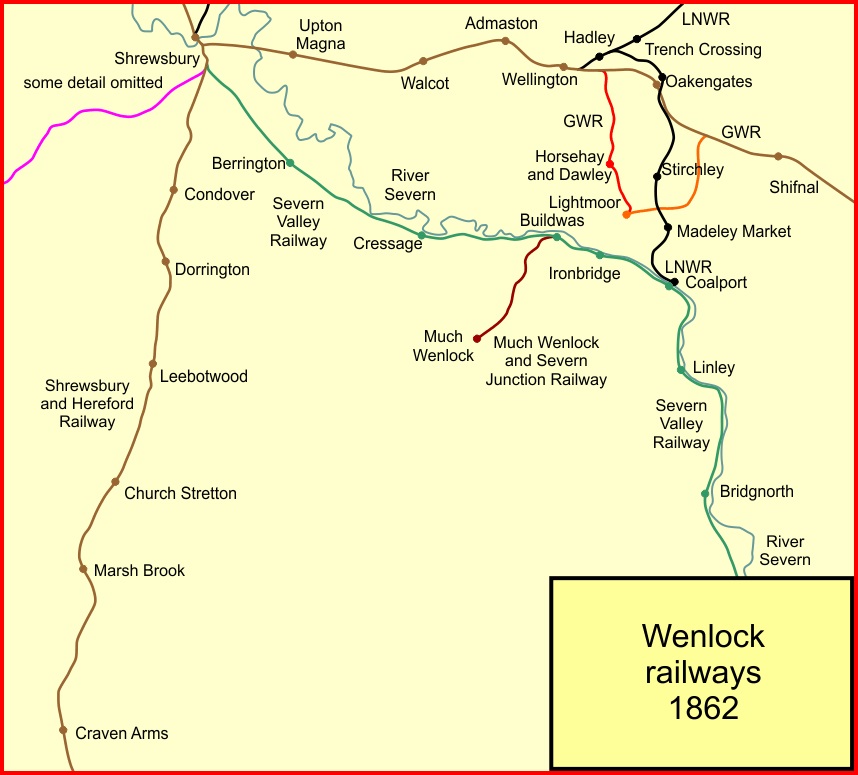
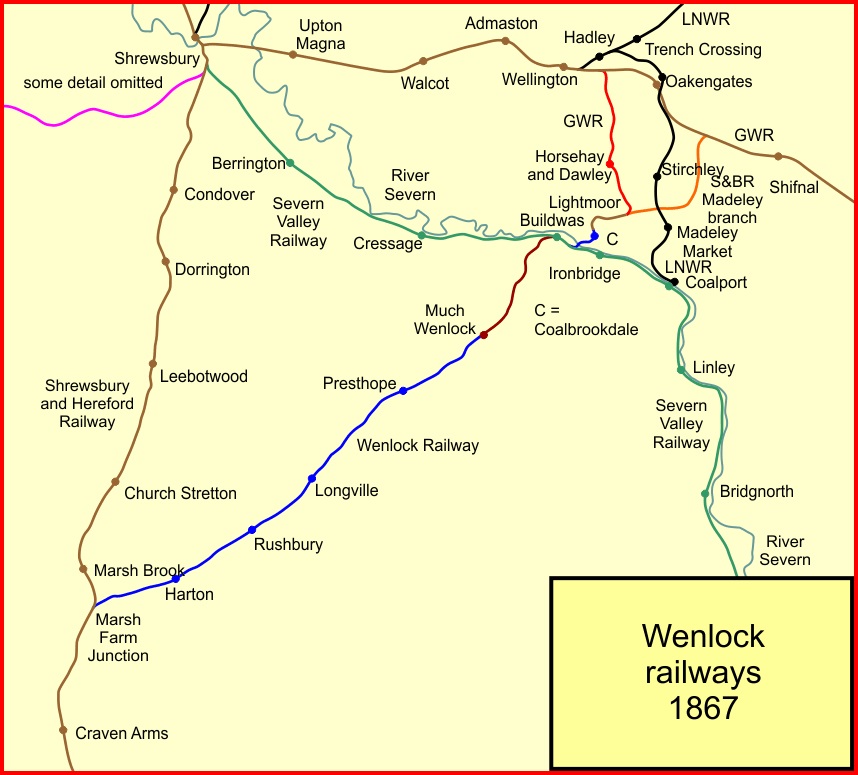
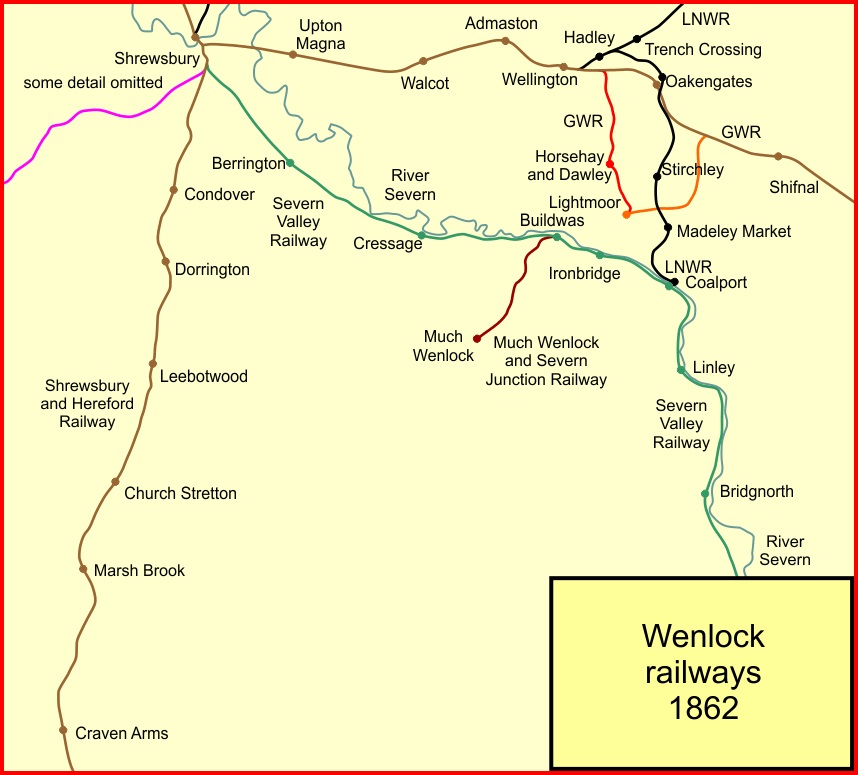
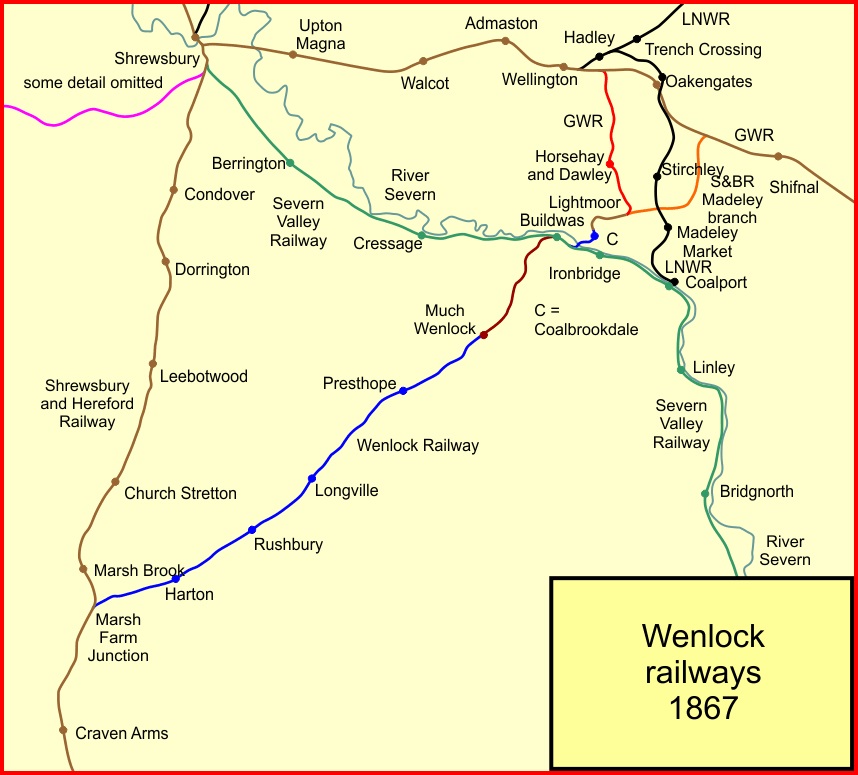
For completeness, the images below show the developing standard-gauge rail network around the River Severn. By 1857 the W&SJR linked Ketley Junction to Lightmoor. It was a little longer before the line made a connection with the Severn Valley Railway and eventually the route through to Craven Arms opened.

Ketley Junction to Lightmoor was open by 1857. [2]
The Severn Valley line was open by the time covered by this map. [2]
The complete route of the Wellington, Much Wenlock & Craven Arms Railway was in use by 1867. [2]
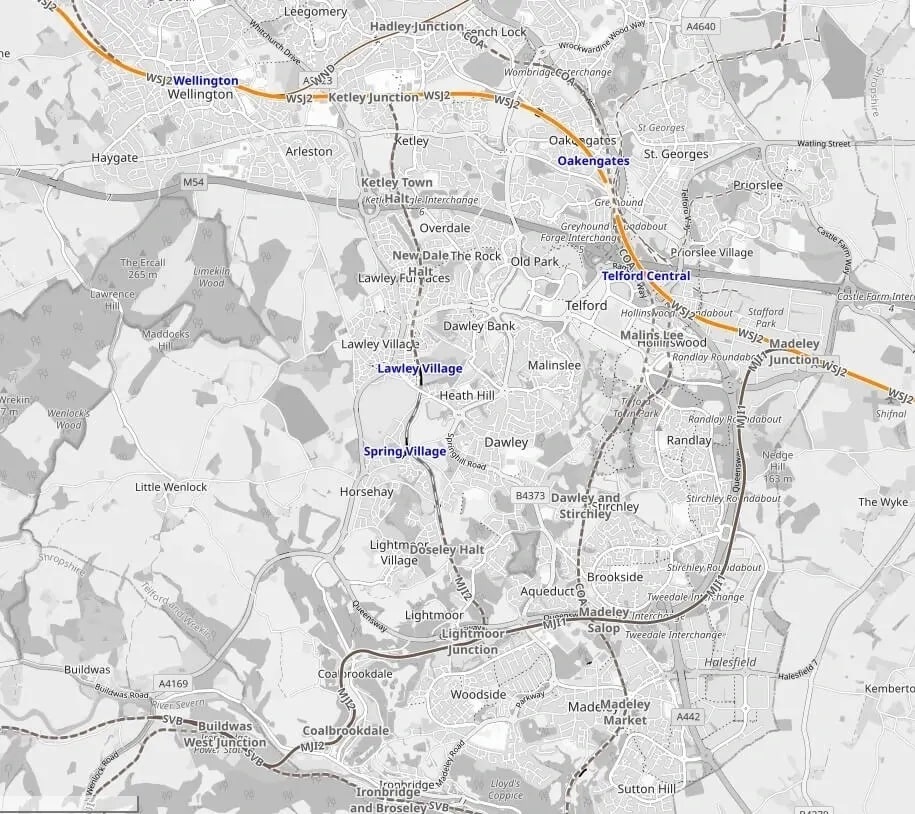
The railways in the area around what was the Wellington & Severn Junction Railway (W&SJR) as shown on the OpeRailwayMap. OpenRailwayMap (previously called “Bahnkarte”) is a detailed online map of the world’s railway infrastructure, built on OpenStreetMap data. It has been available since mid-2013 at OpenRailwayMap.org [17]

It is worth noting as a significant aside, that there was a very significant network of plateways/tramroads in the immediate area of the line. These were essentially a private system belonging to the Coalbrookdale Company. The network from 1881 onwards is discussed in an earlier article about the East Staffordshire Tramways Owned by the Coalbrookdale Company:

https://wordpress.com/post/rogerfarnworth.com/32514

Searching on line, I found the following image which shows two forms of horsepower at work in the Horsehay Works in the early part of the 20th century. It also illustrates three different trams/waggons in use before the site was converted to standard-gauge!

Tramways/plateways at Horsehay Works in the early part of the 20th century. Shared on the Telford Memories Facebook Group by Lin Keska on 23rd February 2017, courtesy of the Ironbridge Gorge Museum Trust Archives. [20]

It is also worth noting the 21st century plans of Telford Steam Railway to extend its preservation line to Ironbridge Power Station at Buildwas. Their plans and progress can be followed here. They have called their plans ‘Steaming to Ironbridge‘.

In essence this will be a phased process and one which will have been significantly affected by the Covid19 pandemic. The first phase was to reach Doseley Halt through renewing exiting sub-standard trackwork. The next step will be to receive planning permission for a new bridge to cross the A4169 and to construct the line to Lightmoor. It will require two level crossings as well as the bridge. The bridge deck has already been supplied by Network Rail and is stored at Horsehay Yard.

Telford Steam Railway already leases the signal box at Lightmoor Junction from the rail authorities for future use, when operating the extended railway.

The main goal of ‘Steaming to Ironbridge’ is to create a Park and Ride steam service to serve the Ironbridge Gorge.

The Route – Horsehay & Dawley Railway Station to Buildwas

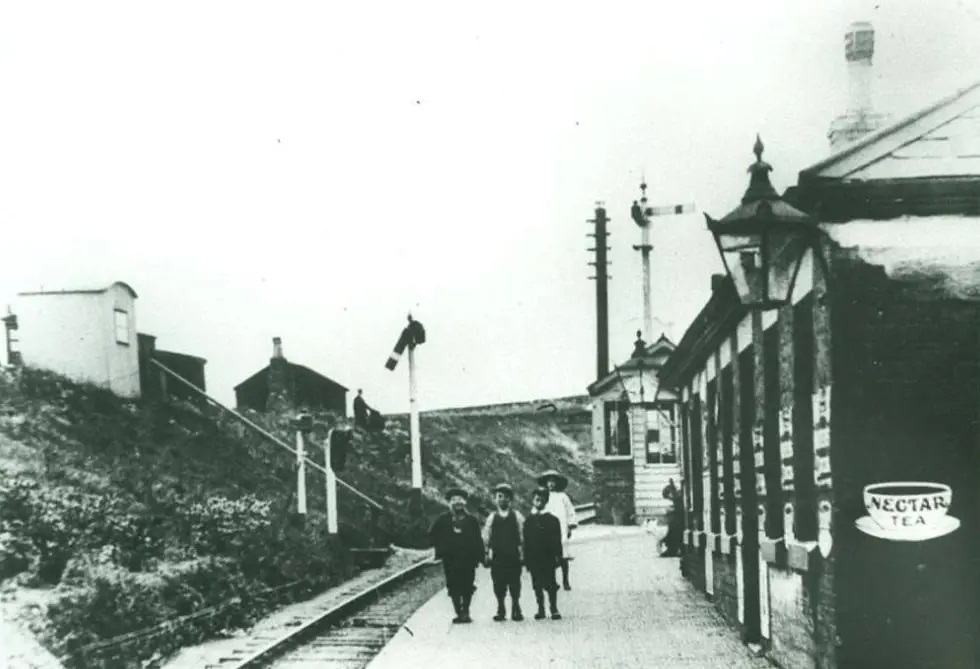
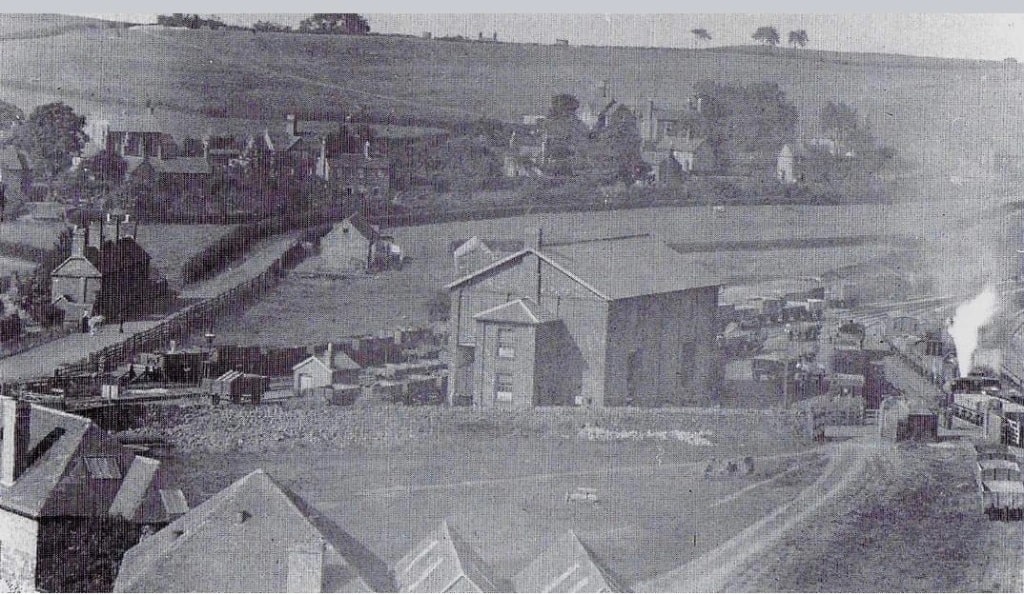
A very early photograph taken at Horsehay & Dawley Station. The landscape is apparently treeless and the various huts alongside the higher level goods yard and the steps linking the station with the yard can easily be seen. The image was shared by Marcus Keane on the Telford Memories Facebook Group on 20th January 2014. [23]
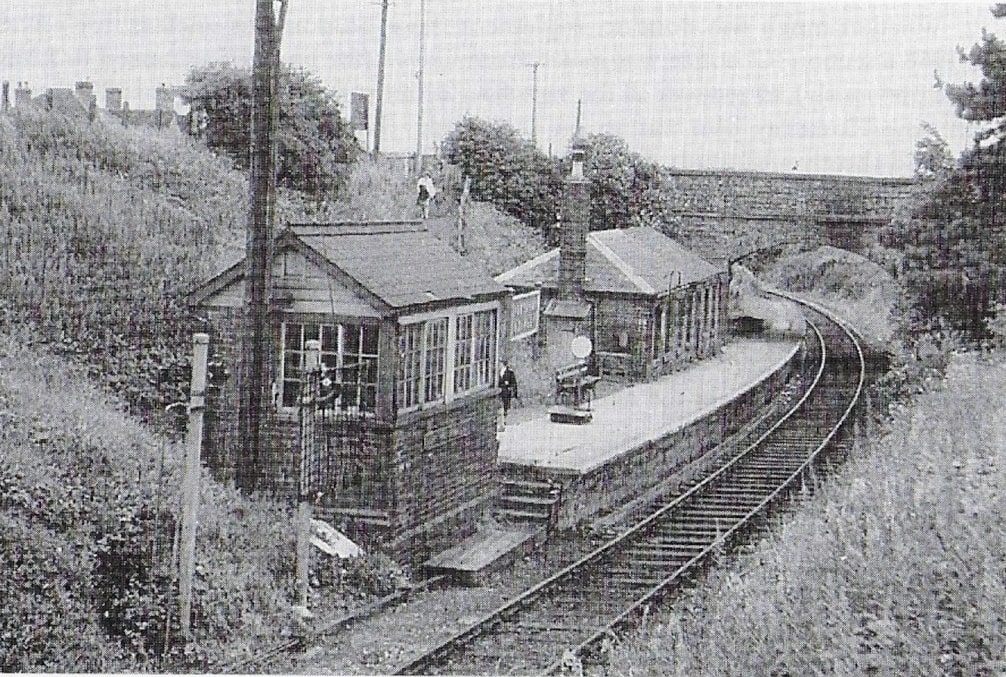
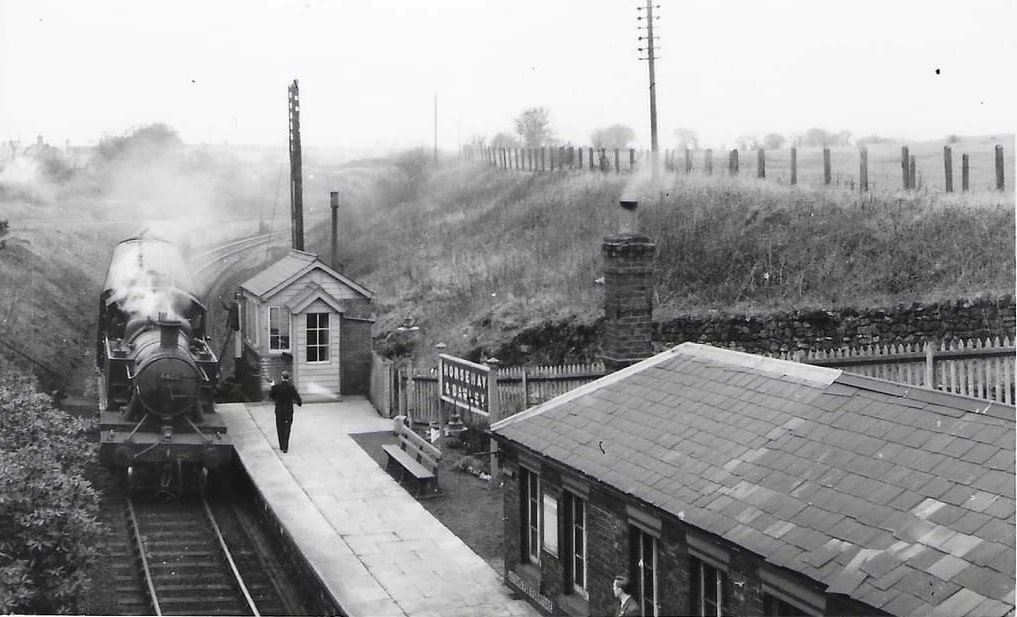
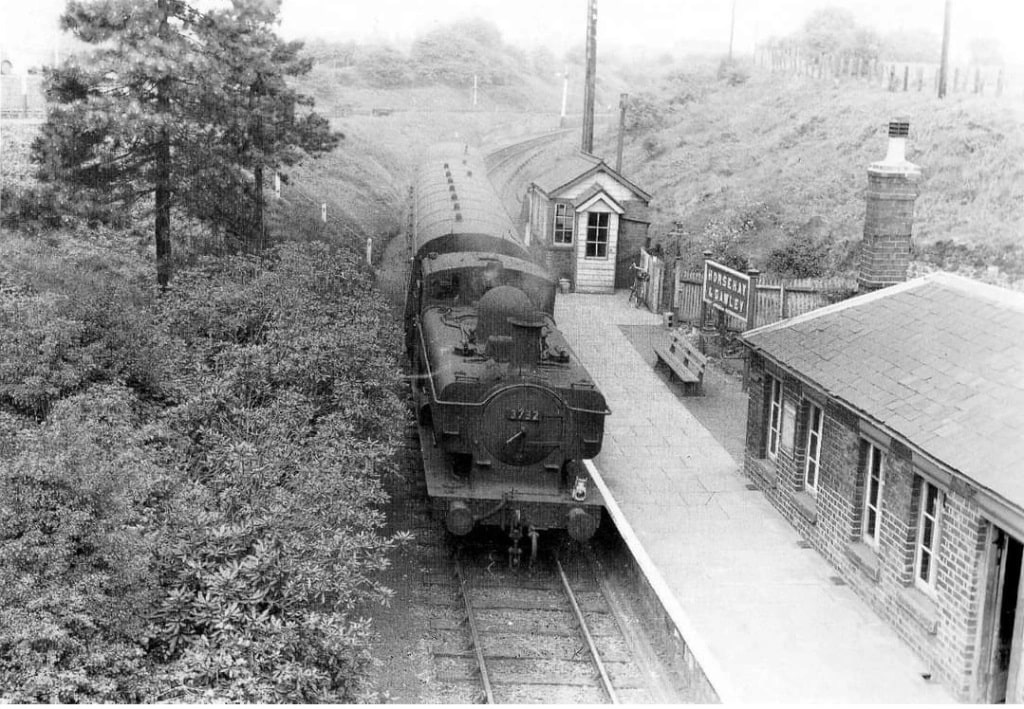
Horsehay & Dawley Station on the W&SJR looking South towards Doseley in the middle of the 20th century. The station appears to have been well kept. All the buildings were demolished after the closure of the line and Telford Steam Railway has built a replacement platform building. The access footpath visible above the roof of the signal box is still in use. This photograph was shared on the Telford Memories Facebook Group on 5th November 2018 by Metsa Vaim EdOrg. [21]
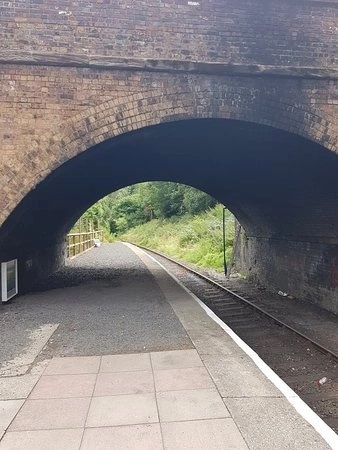
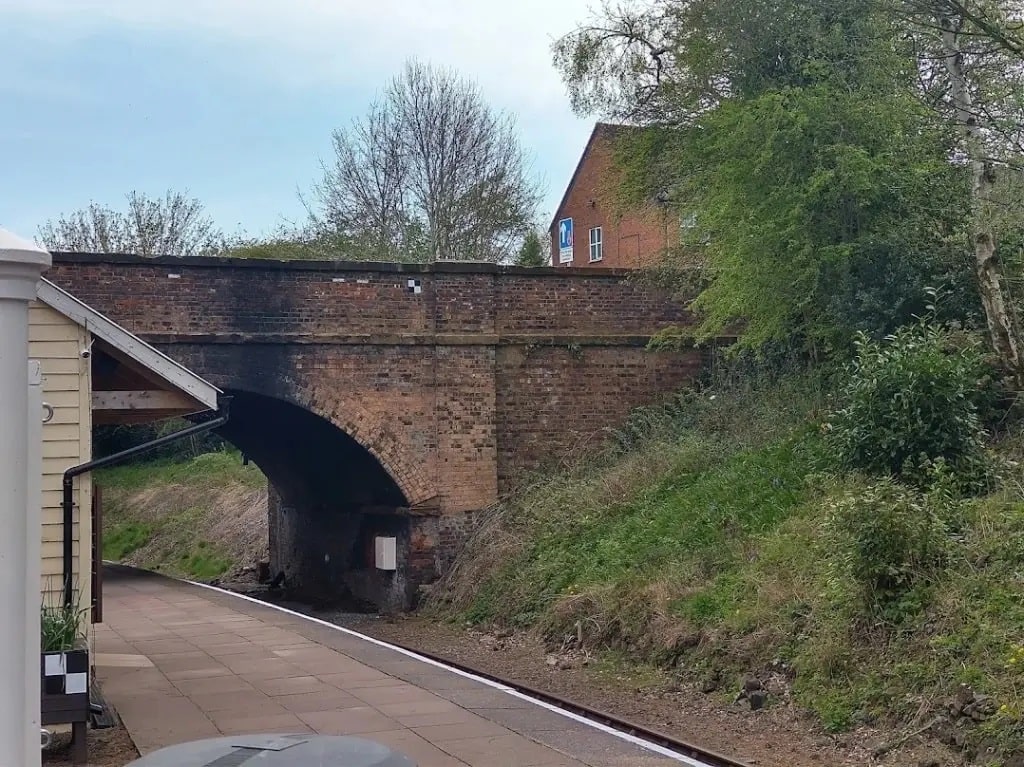
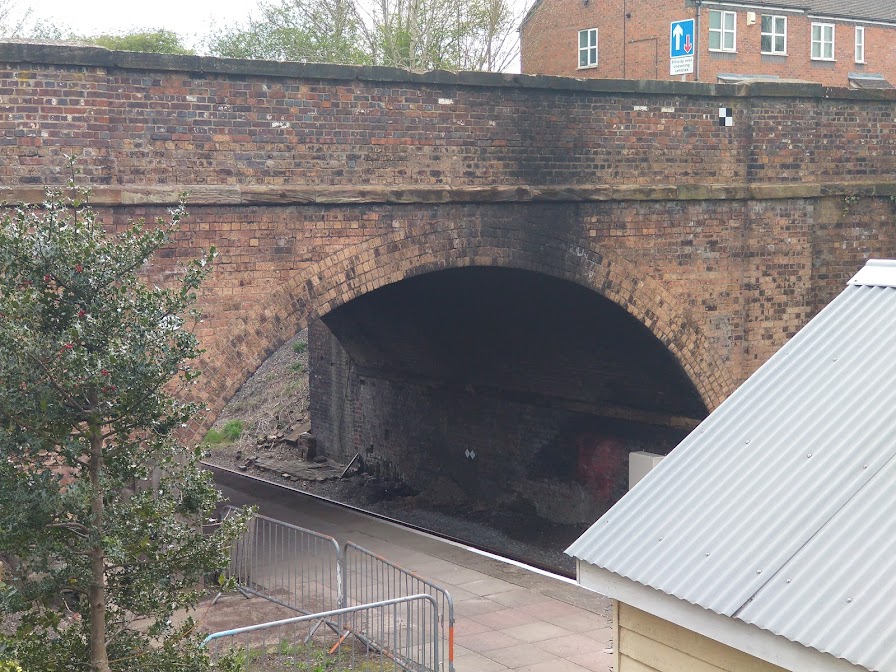
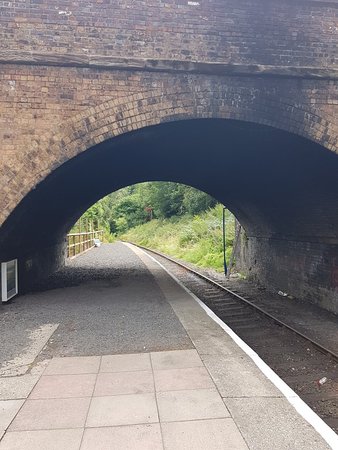
Looking South towards Doseley from the platform at Horsehay & Dawley Railway Station under the road bridge which carries Station Road/Bridge Road. This image is a 21st century photograph embedded from the Trip Advisor website, the photographer is not recorded on that website. [18]
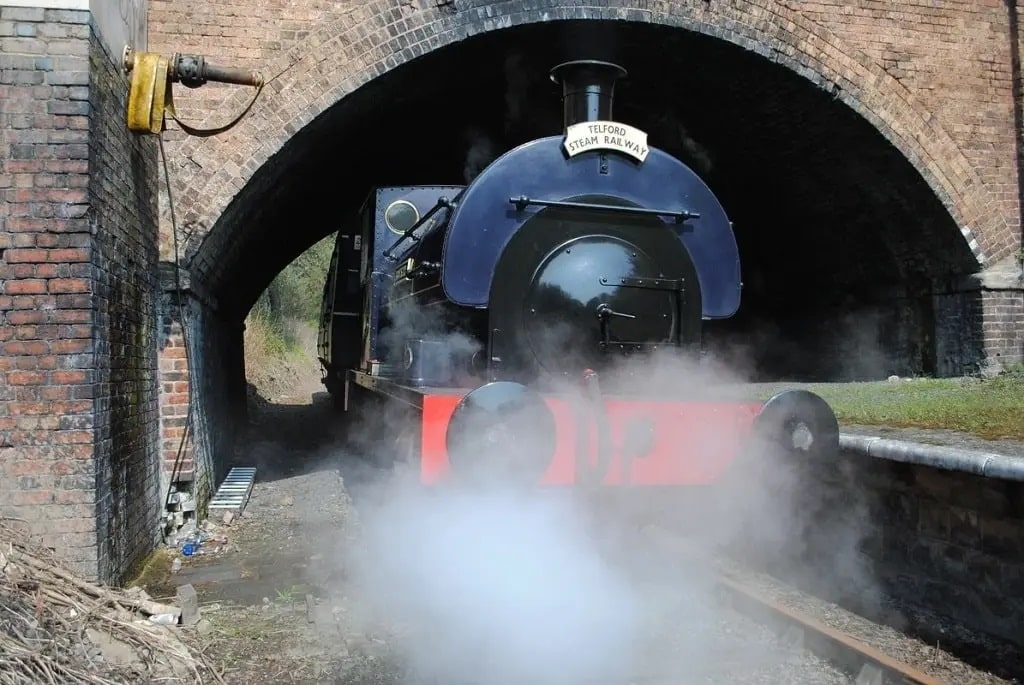
Looking North through Station Road Bridge. Peckett No. 1722 ‘Rocket’ sits alongside the station platform in 2014, (c) Copyright WaltTFB, authorised for reuse under a Creative Commons Licence (CC BY 3.0). [27]
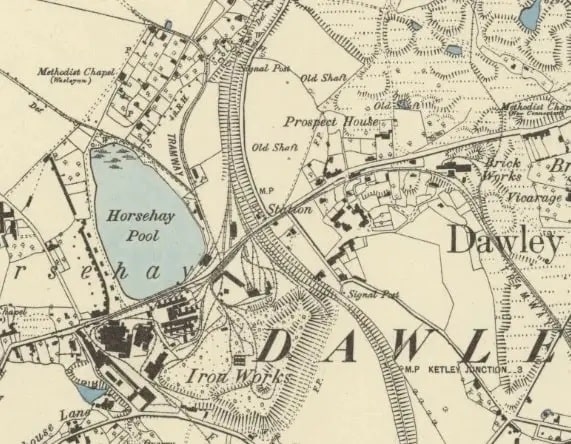
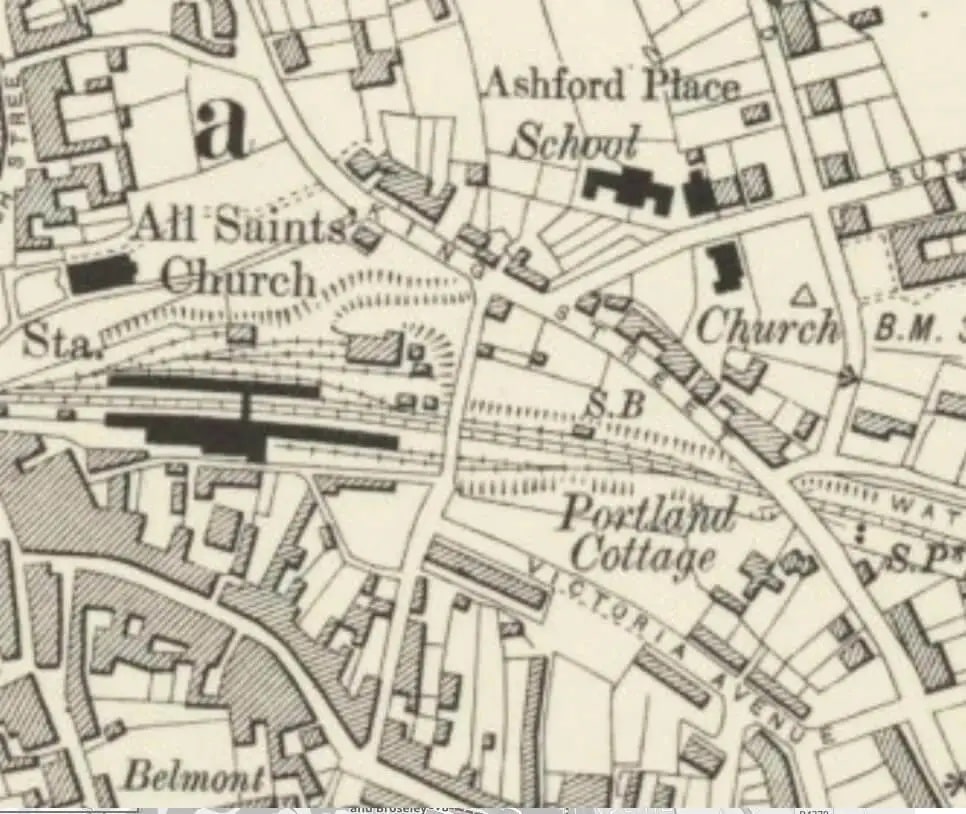
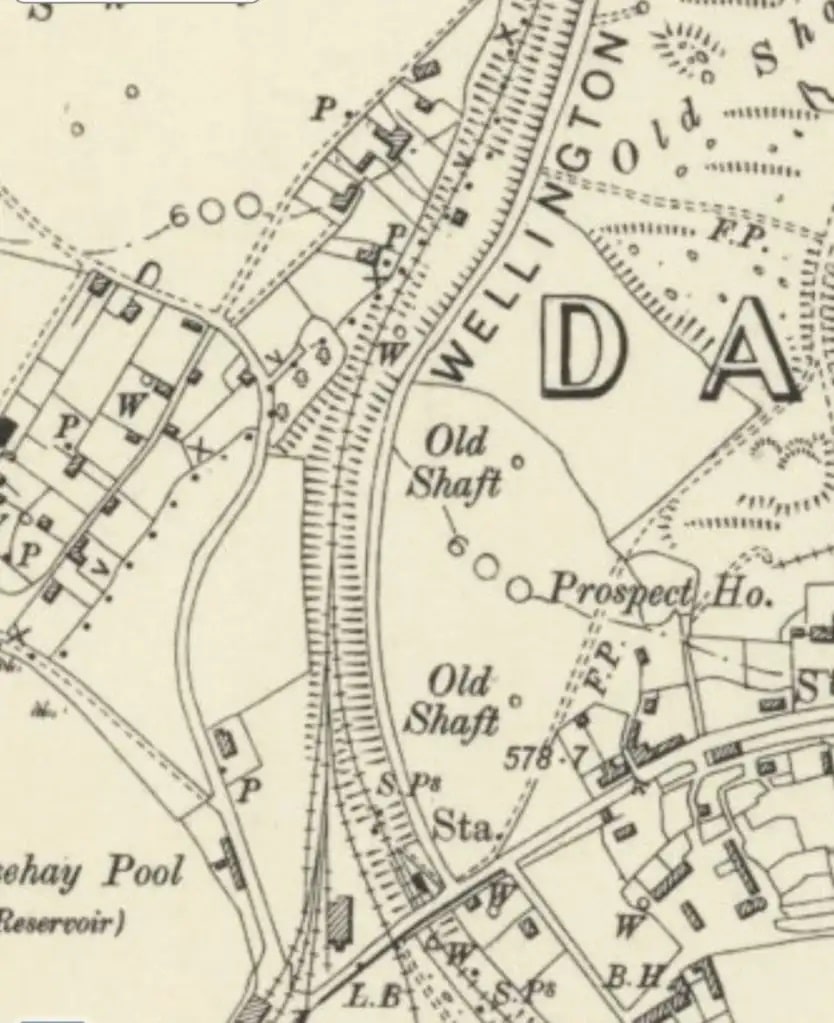
An extract from the 1881/82 6″ OS Mapping. [19]
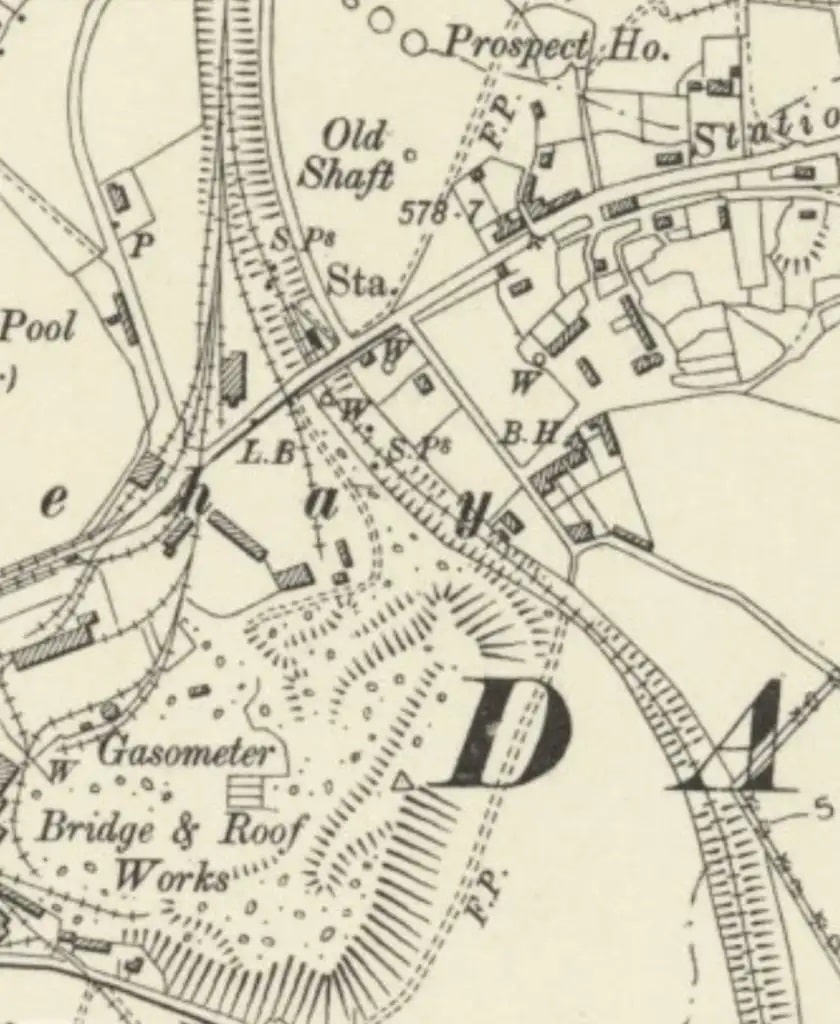
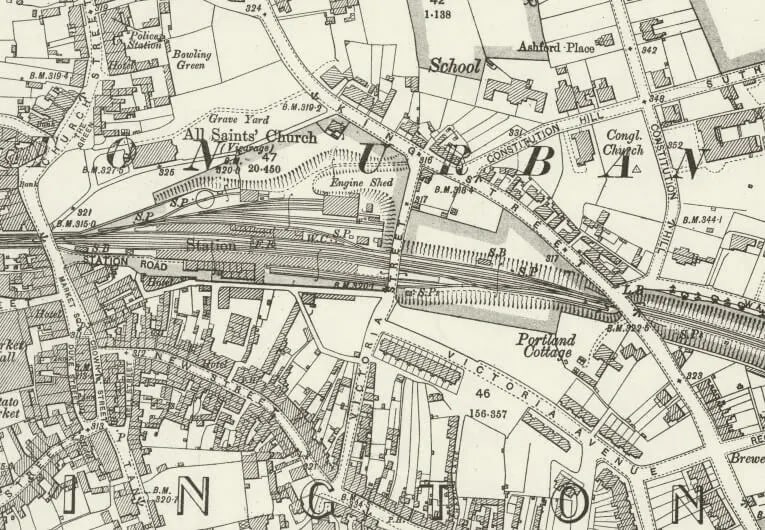
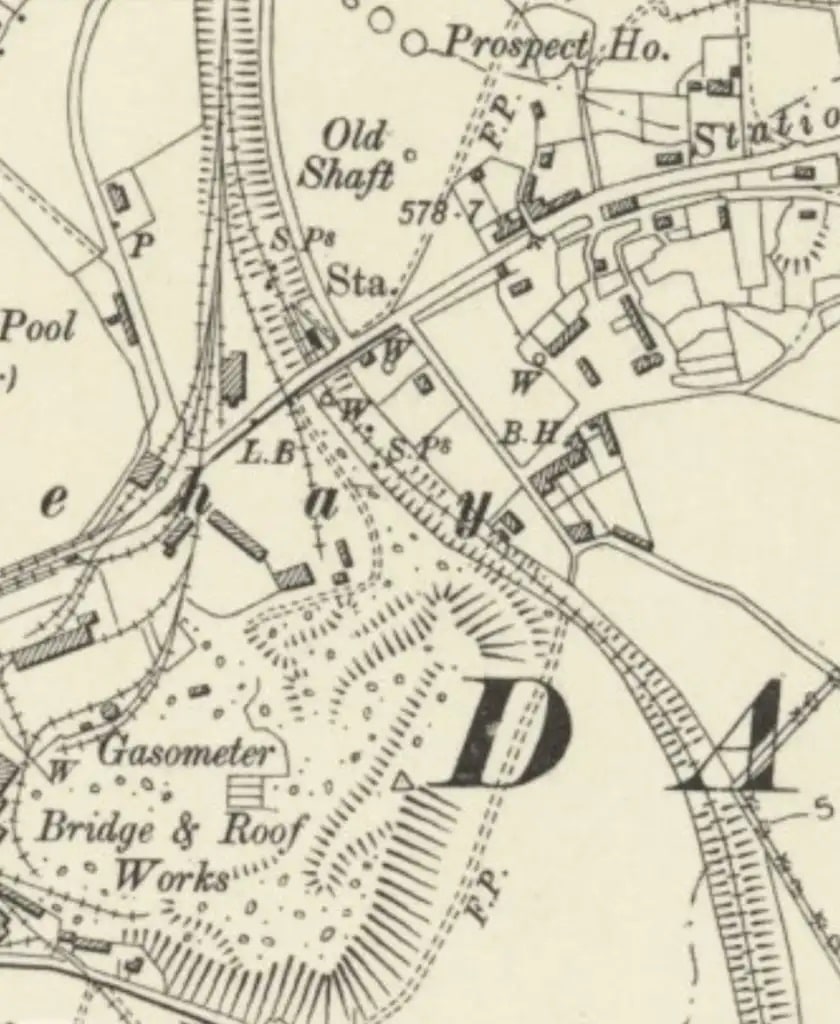
An extract from the 6″ 1901/02 OS Map. Horsehay & Dawley Railway Station still sits on the North side of Station Road/Bridge Road. As we have already noted in the last post about this line, there was a significant transshipment shed which is now known as the ‘Old Loco Shed’. This is the building shown on the map just to the left of the ‘h’. Goods from what was once a very significant network of tramways were transferred to standard-gauge wagons for distribution to the wider world. More information about the Coalbrookdale Company’s network of tramways can be found here. These two map extracts illustrate the changes going on at the end of the 19th century as Horsehay Works moved from being primarily served by plateways to having an internal network of standard-gauge lines. [14]
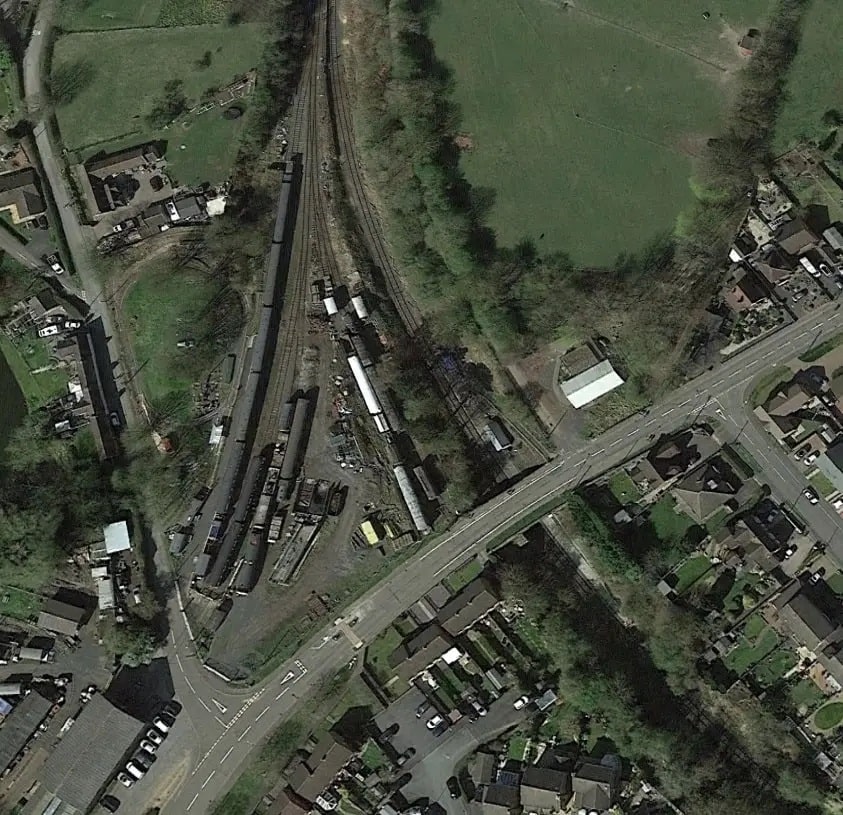
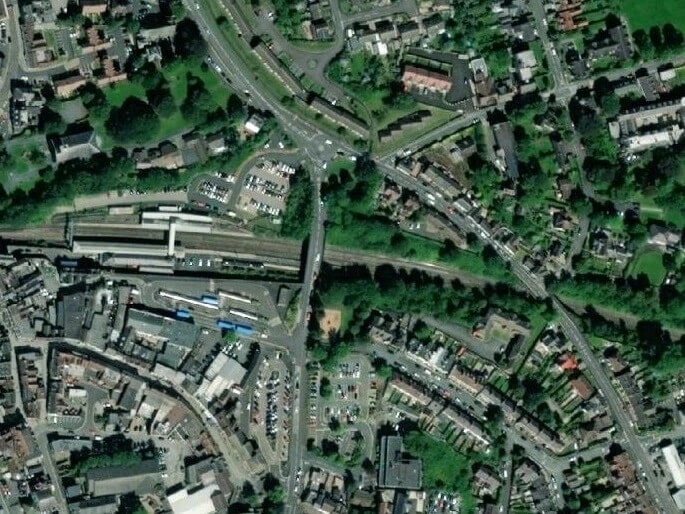
The area immediately around Horsehay and Dawley Railway Station is it appears on satellite images in 2021. [Google Earth, 4th April 2021]
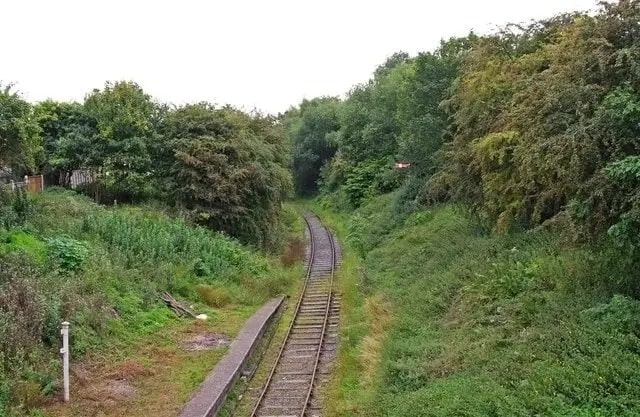
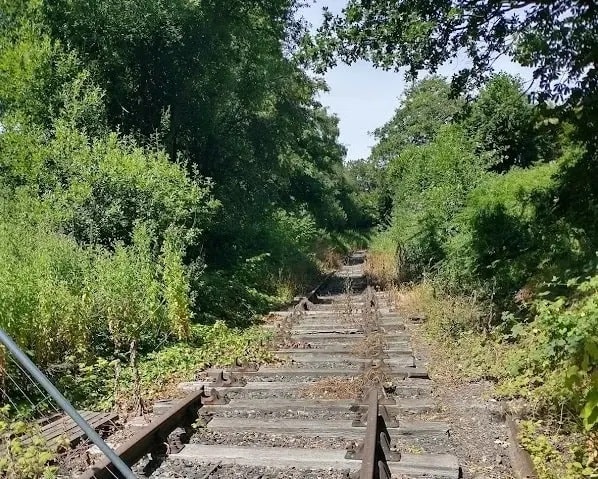
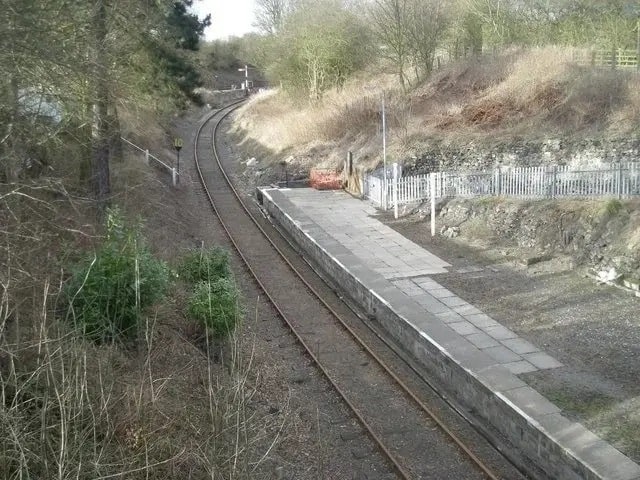
The line to Doseley Halt and Lightmoor as it leaves Horsehay & Dawley Station. looking Southeast from Station Road Bridge. The line in this direction is already constructed for much of the way to Doseley Halt, as it was required for works trains to remove spoil from the northern extension to Lawley Common which we saw in the first article about the W&SJR. However, in the direction to Doseley Halt, the track it is not yet up to the standard required to run passenger services. Going beyond the halt to Lightmoor, requires legal powers to cross a public road, and of course the money to finance the extension, © Copyright P.L. Chadwick and licensed for reuse under a Creative Commons Licence (CC BY_SA 2.0). [24]
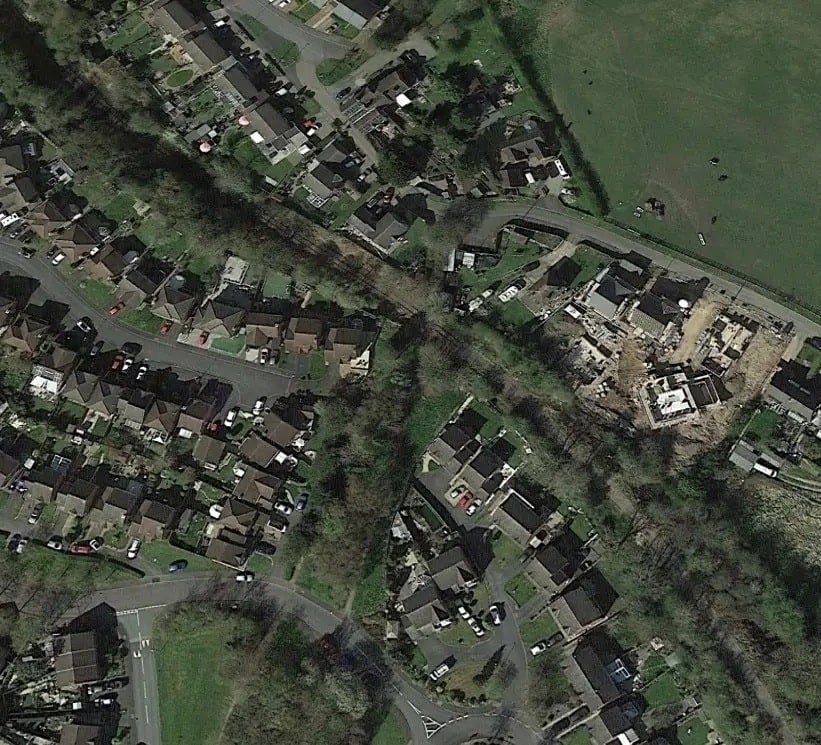
The line Southeast of Horsehay and Dawley Station as it appears on Google Earth. A larger scale image of the track at this location appears in an image further below. [Google Earth, 4th April 2021]
After curving round to the Southeast the line swings back closer to a South-southeast direction. [Google Earth, 4th April 2021]
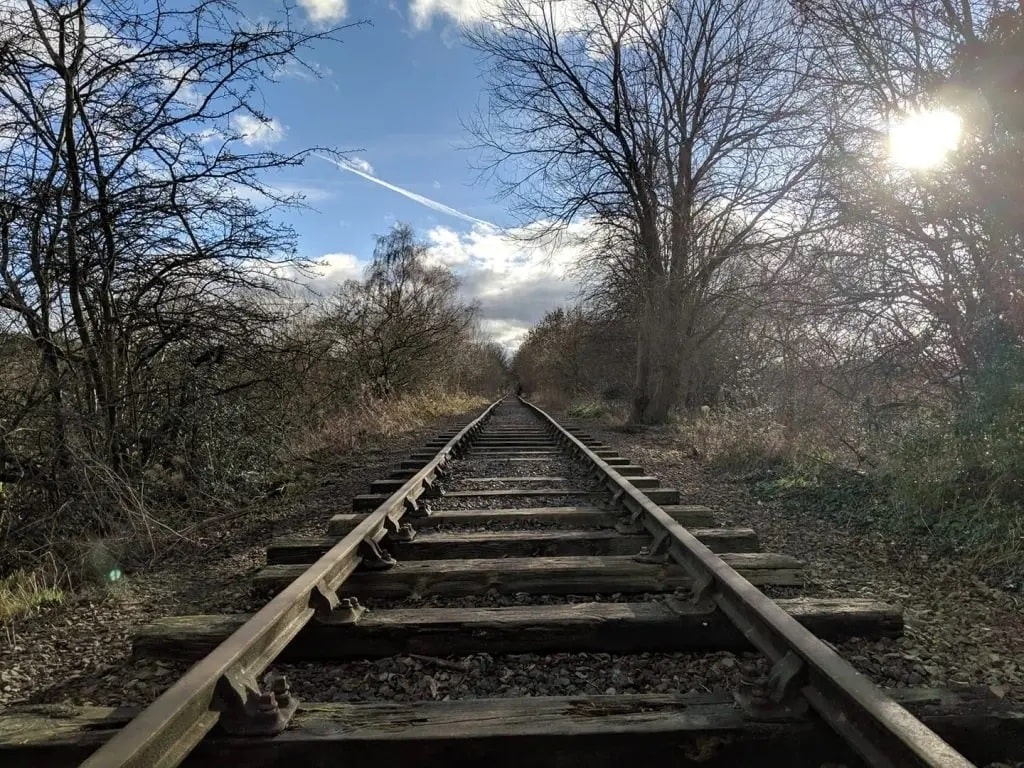
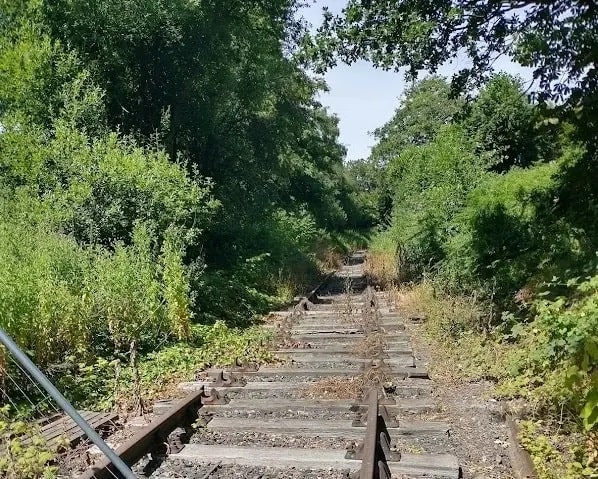
Shared by Rob Turner on the Telford Memories Facebook Group on 14th January 2019. In July 2022, Rob Turner says, ‘This 9photograph) was taken just past the curve onto long straight towards Doseley during an authorized track walk while I was a volunteer at the TSR. The track you see here has now been lifted with hopes to start relaying it to a passenger carrying standard soon.’ (c) Rob Turner. [22]

The line currently has been taken back to a point between the two curves South of Horsehay & Dawley Station. Work on the extension has, as of mid-July 2022, still to start.

Looking Northwest from the footpath which crosses the old railway. Horsehay & Dawley Station is around the curve ahead. [My photograph, 11th July 2022]
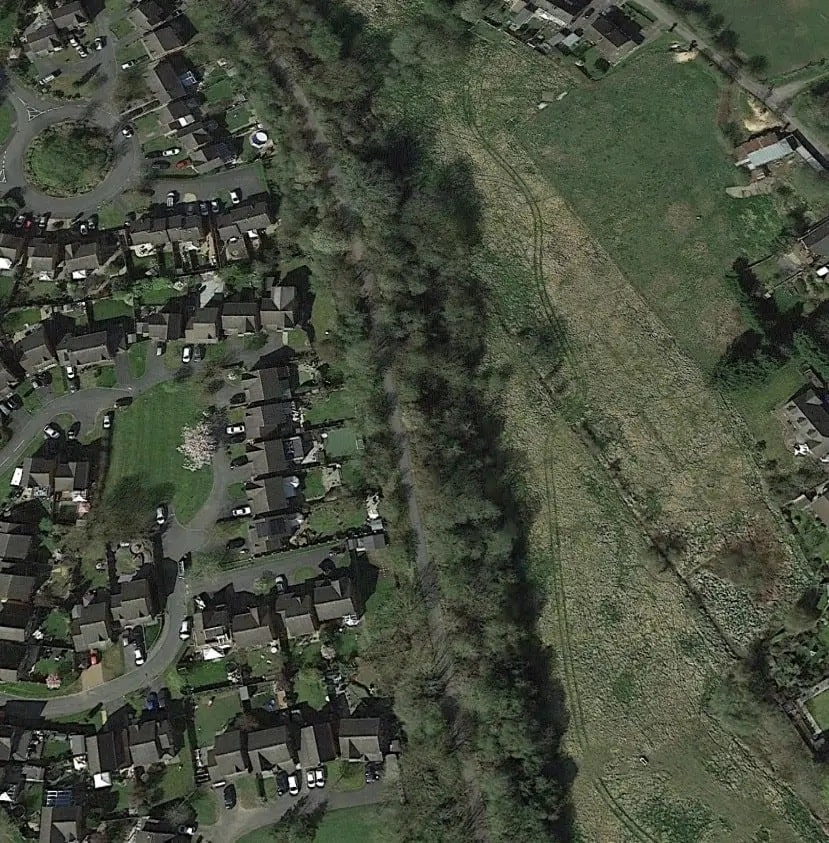
A larger scale view of the current extent of the preservation line’s rails. [Google Earth, 4th April 2021]
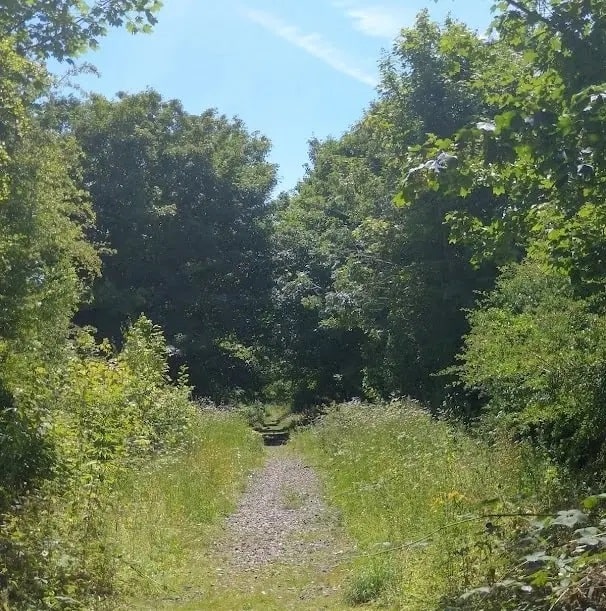
The track-formation Southeast of the public footpath shown above. [My photograph, 11th July 2022]
The curve continues. [My photograph, 11th July 2022.
This photo is taken at roughly the same location as the January 2019 image above. [My photograph, 11th July 2022]
The 1901/2 6″ OS Map again. The long straight crossed Doseley Railway Bridge. [14]
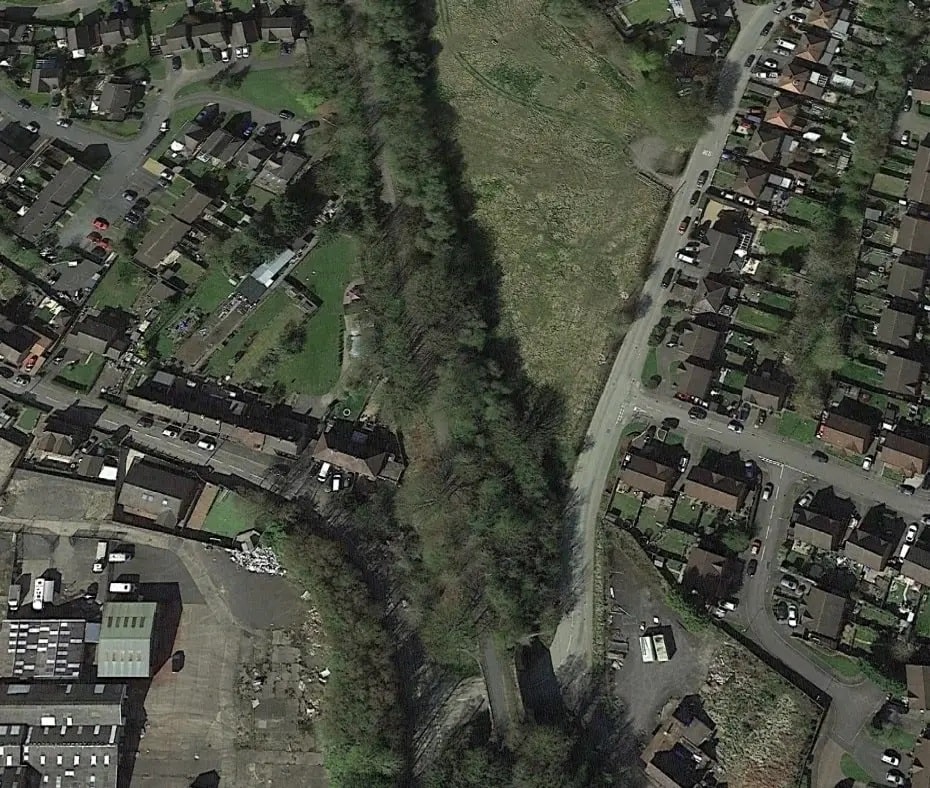
The length to Doseley Bridge as seen on the Google Earth satellite imagery. [Google Earth, 4th April 2021]
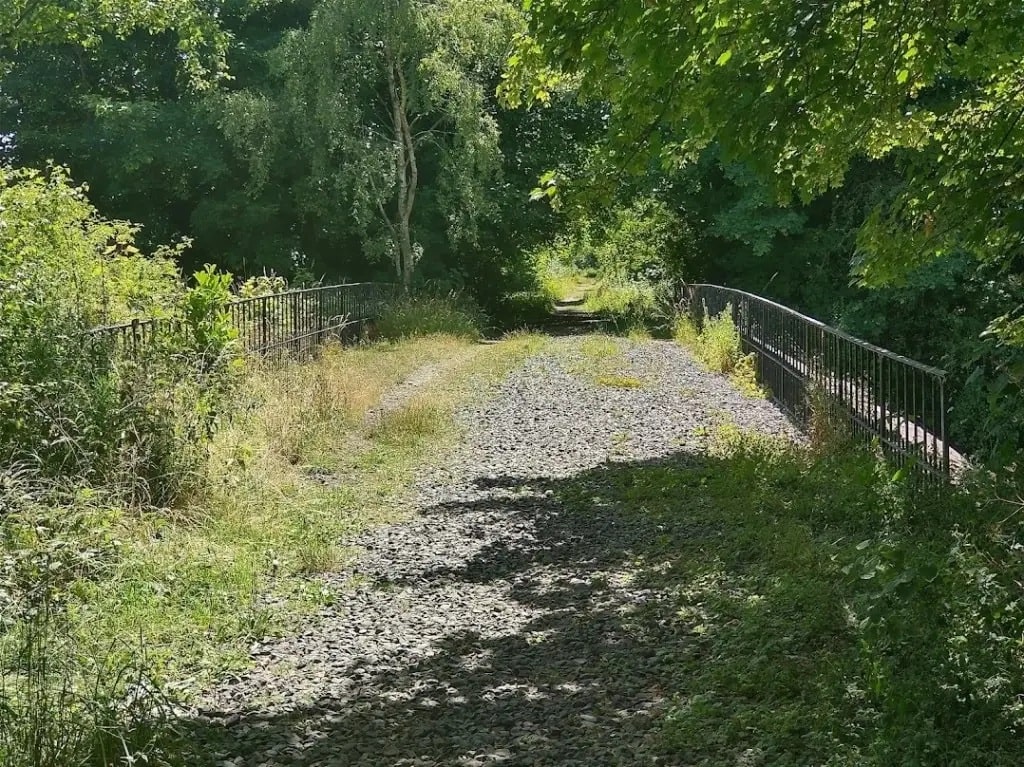
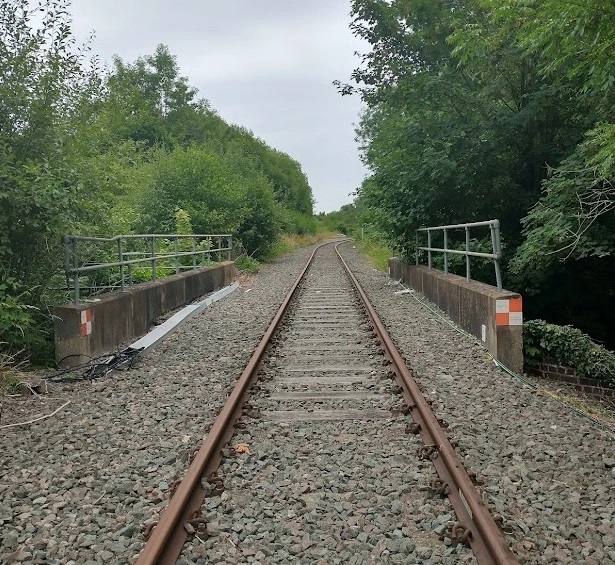
Metal parapet rails at Doseley Bridge, seen from the North. [My photograph, 11th July 2022]
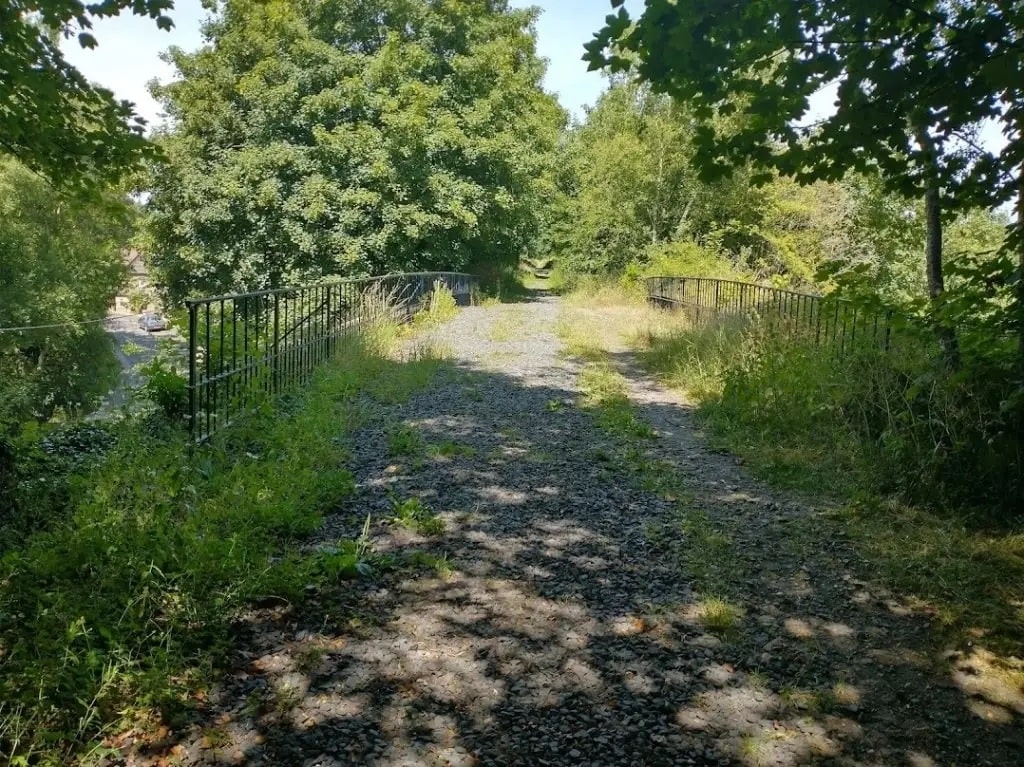
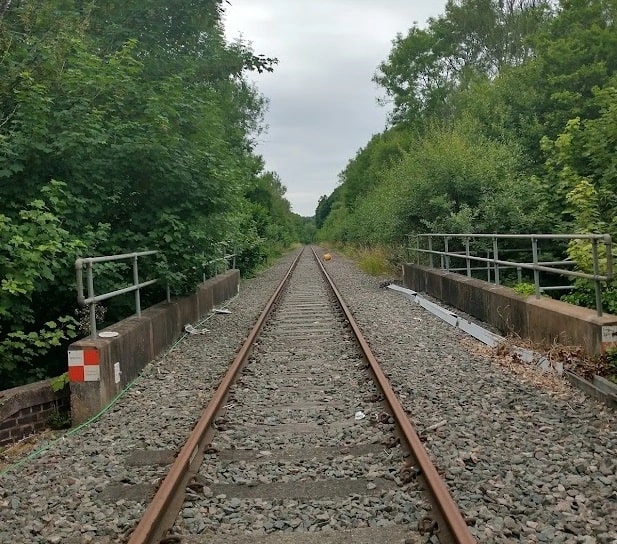
This view of the parapet railings is taken from the South, [My photograph, 11th July 2022]
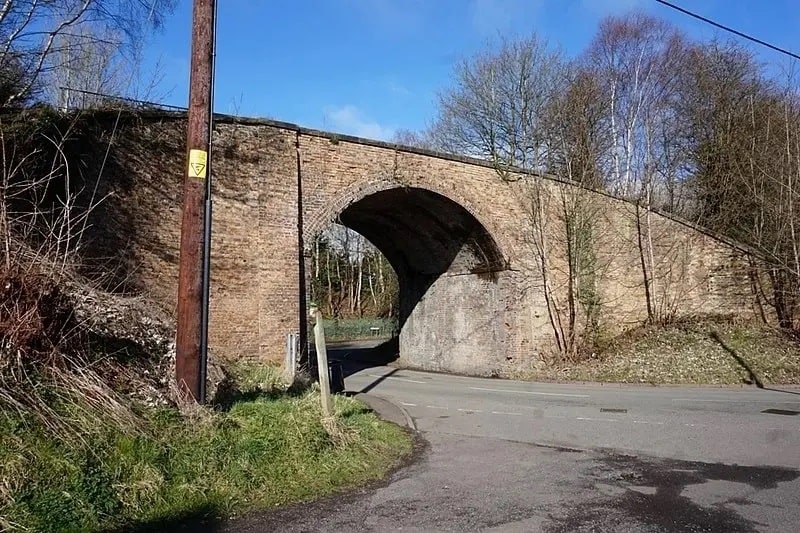
Doseley Bridge taken from the South East on 31st March 2016 by Ian S. Reuse is permitted under a Creative Commons Licence (CC BY-SA 2.0). [26]
Doseley Railway Bridge from the North East. [My photograph, 6th July 2022]
Doseley Railway Bridge taken from the South West in 2016. The photographer comments: “Leaving St Lukes Road in Doseley, the minor road heads for Dawley under a bridge that currently marks the southern end of the Telford Steam Railway Trust’s line and operations. It was built around 1858, and originally served a track from Ketley down to Lightmoor as part of the Wellington & Severn Junction Railway. Grade II listed.” © Copyright Richard Law and licensed for reuse under a Creative Commons Licence (CC BY-SA 2.0). [28]
The same view on 6th July 2022. [My photograph]
The line continues in a South-southeast direction after crossing Doseley Bridge. [Google Earth, 4th April 2021]
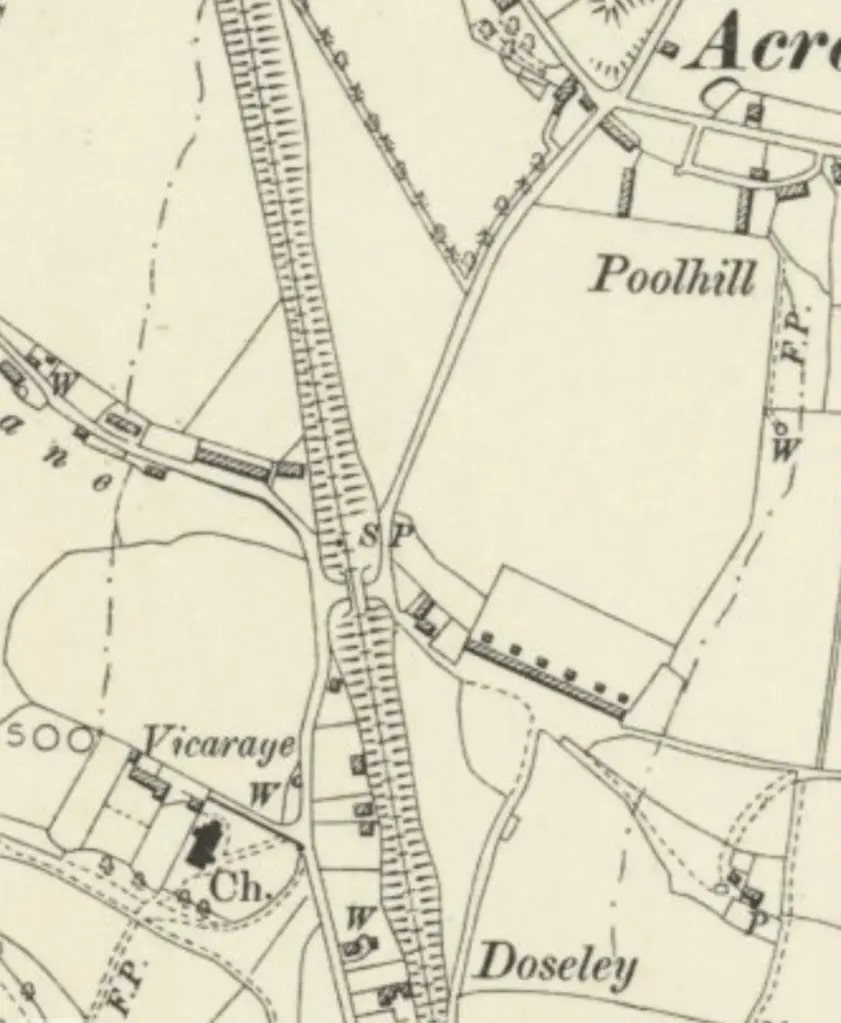
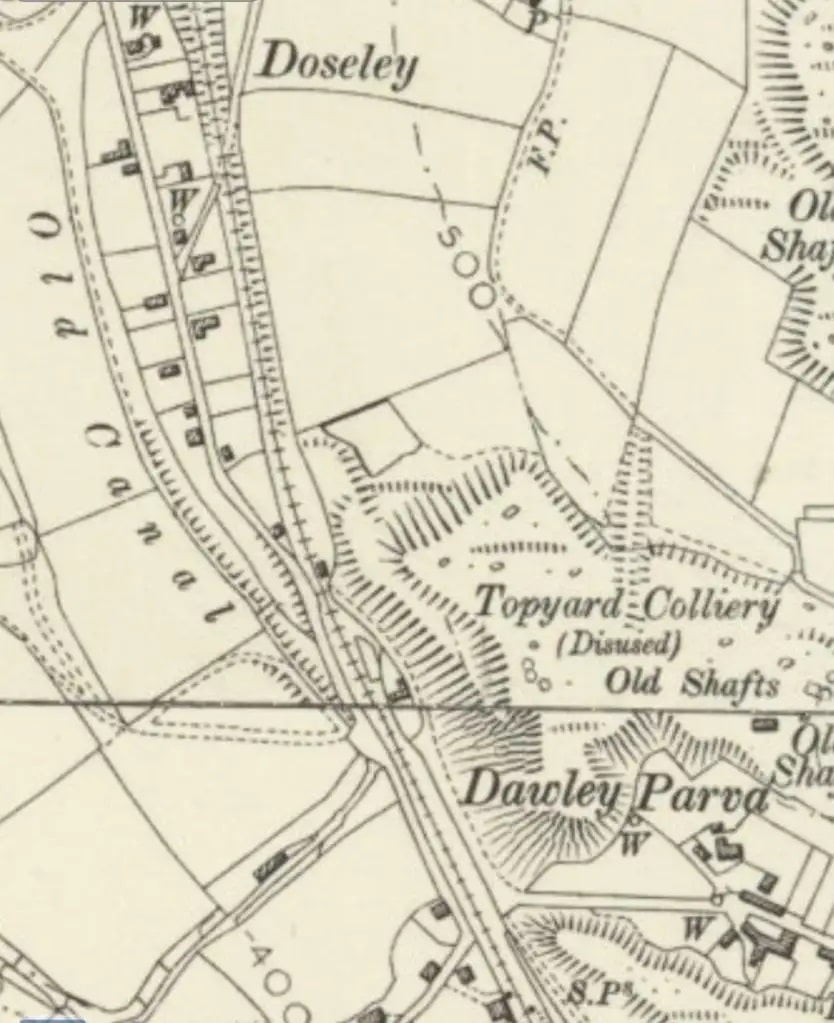
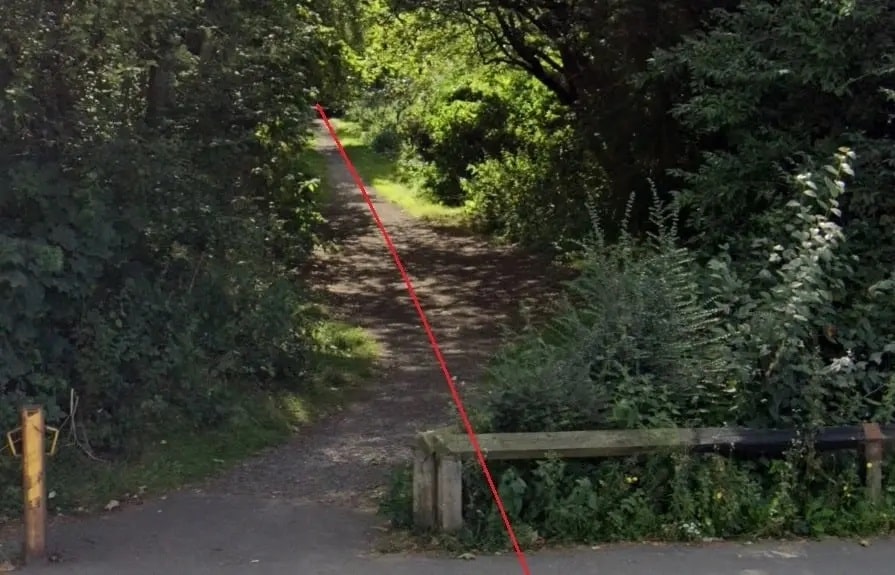
Another extract from the 1901/2 6″ OS Map. The join between two OS 6″ Map sheets is at almost the same location as Doseley Halt. At the Halt, level-crossing gates protected the line from traffic on a three-way road-junction. Note the lane which crosses the line at an oblique angle towards the top of this extract. The lane is still in use as a footpath. [14][15]
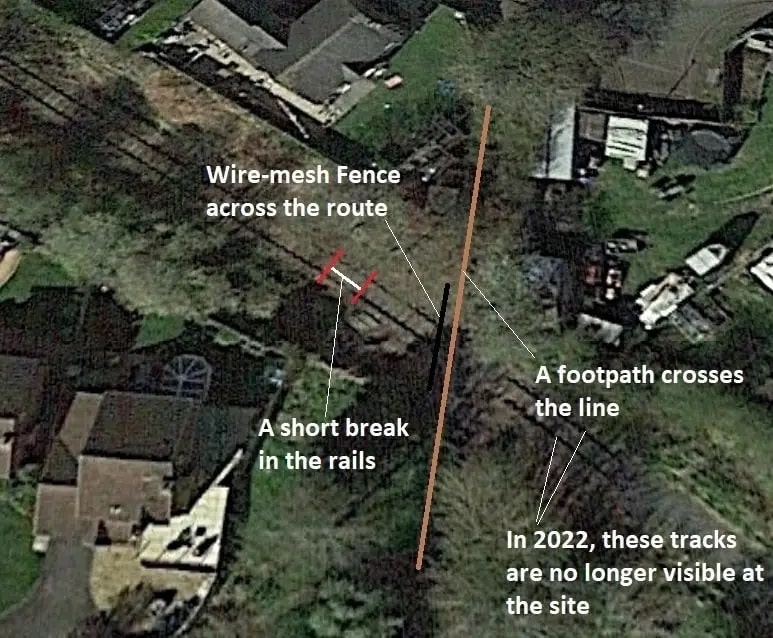
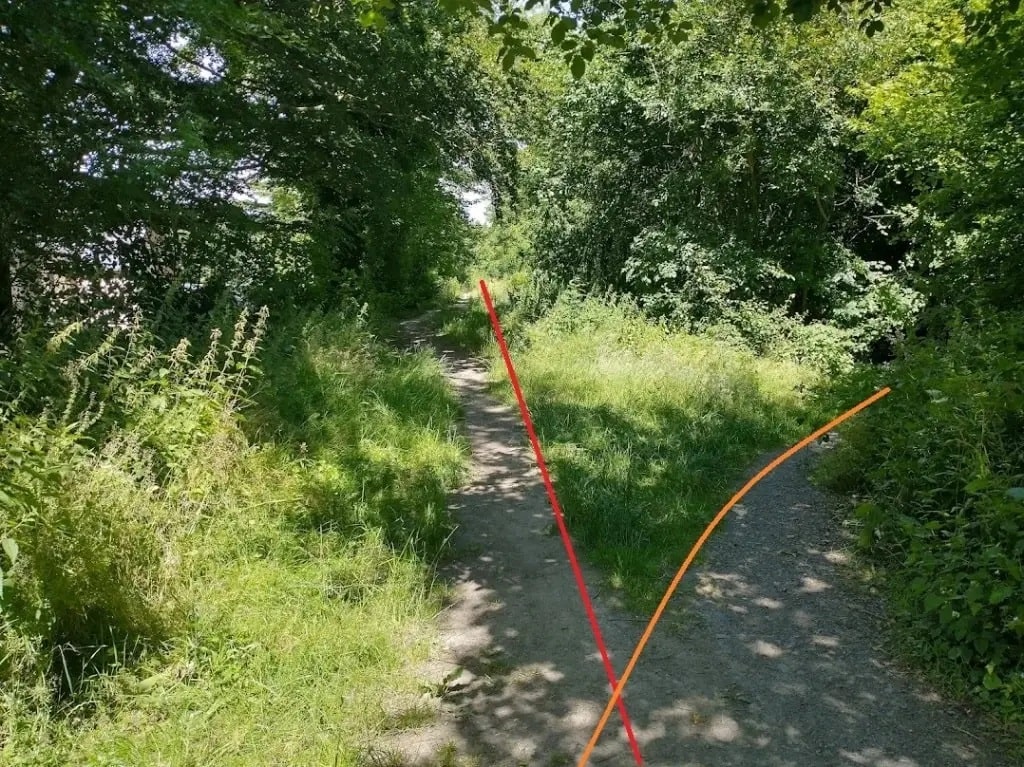
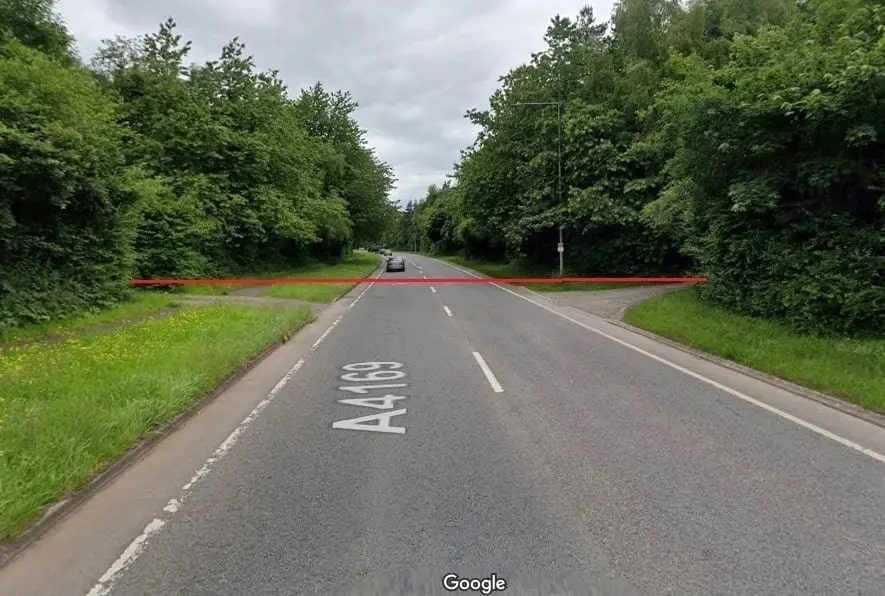
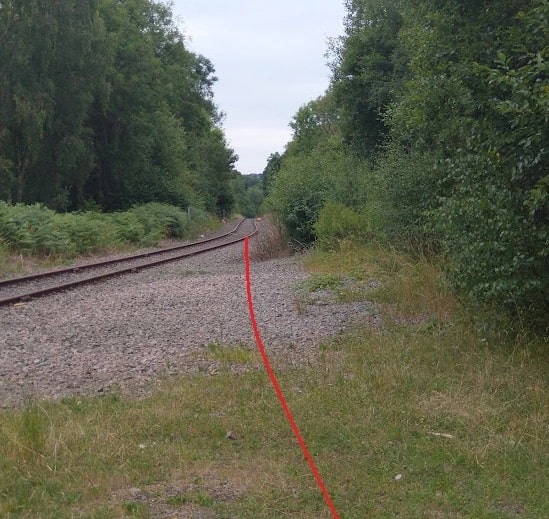
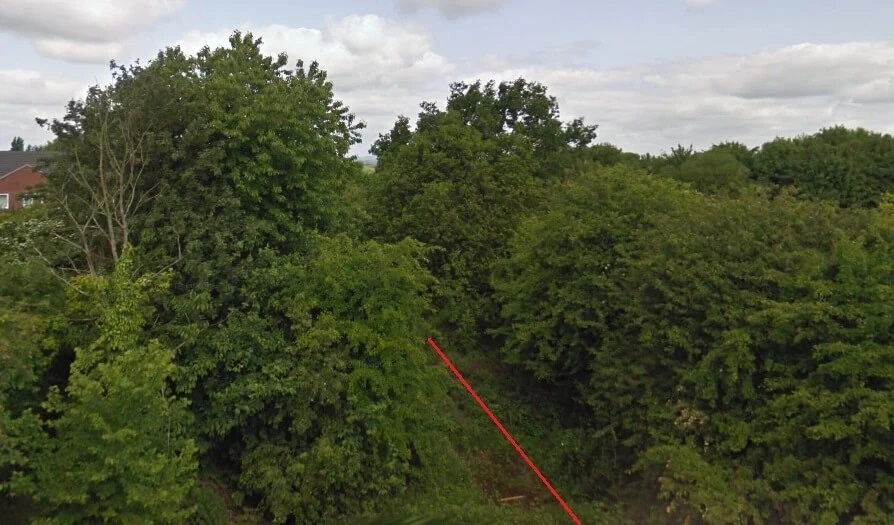
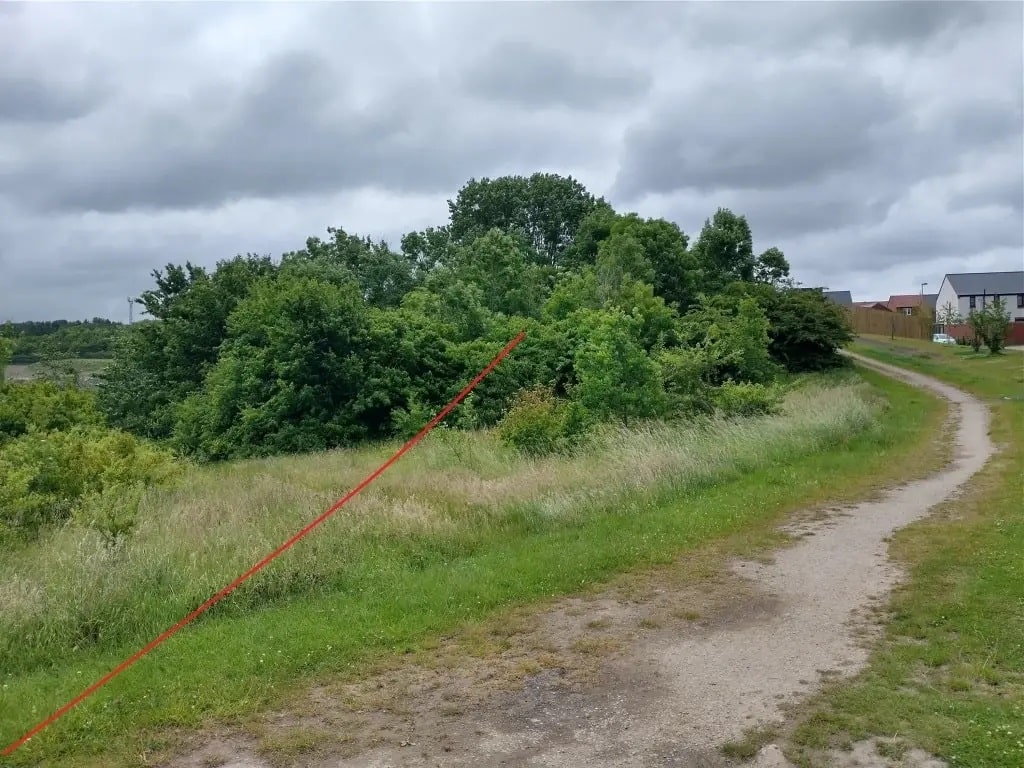
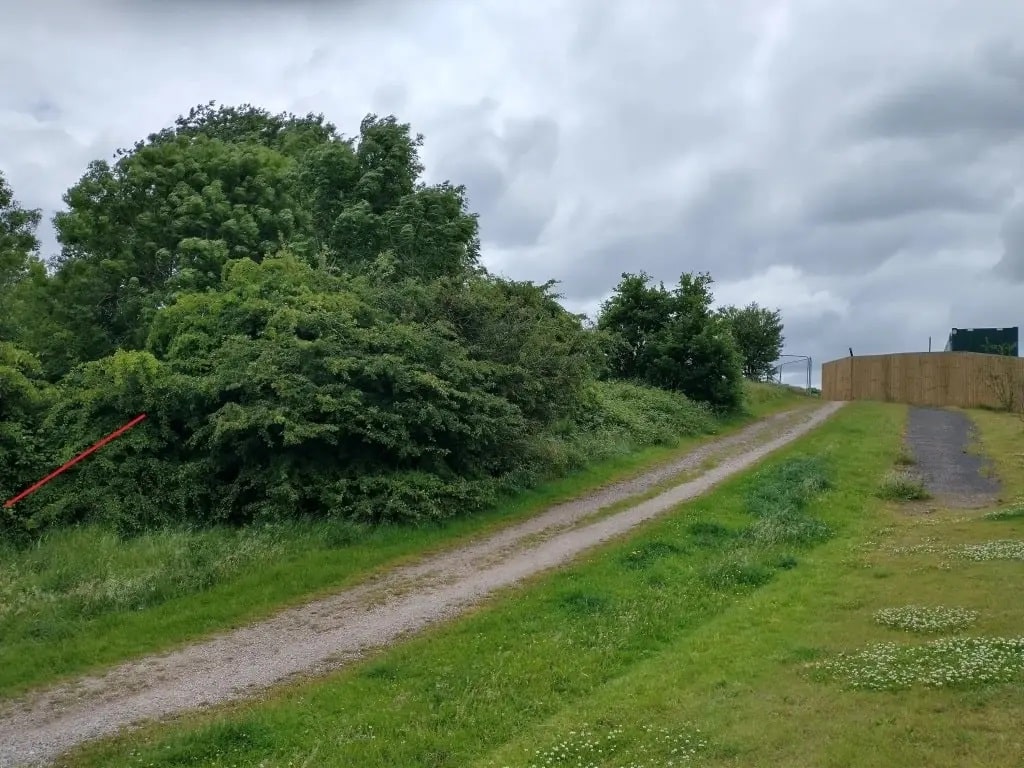
Looking North-northwest at the point where the lane shown on the map extract above crossed the ole railway. The railway route is illustrated by the red line, the footpath, by the ochre line. [My photograph, 11th July 2022]
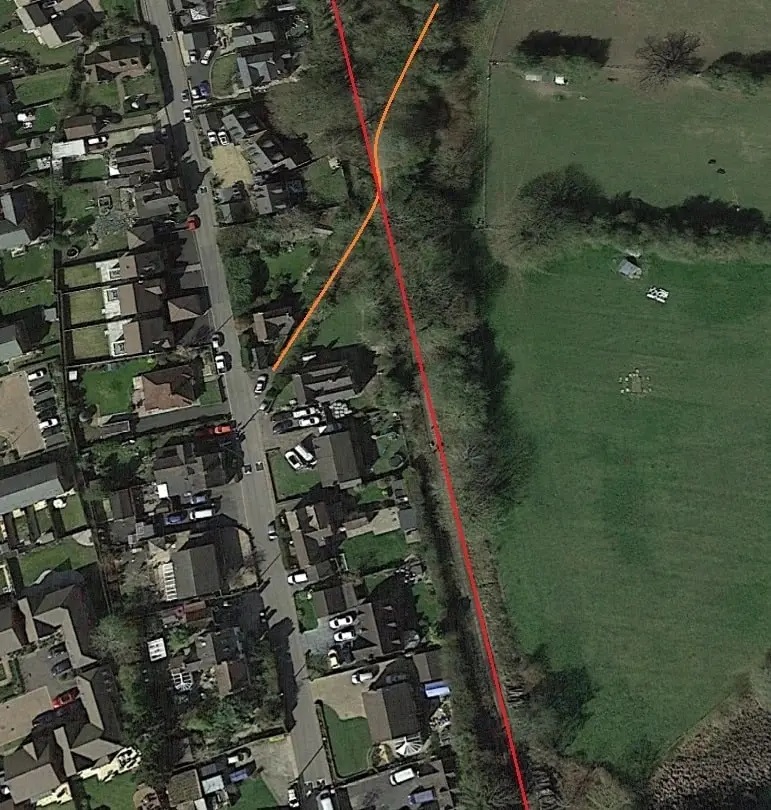
The location mentioned above, shown this time on the next satellite image from 21st century following the line to the South. [Google Earth]
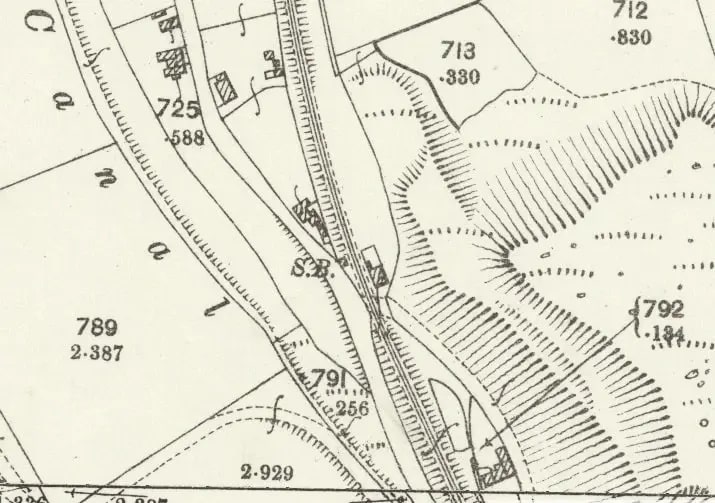
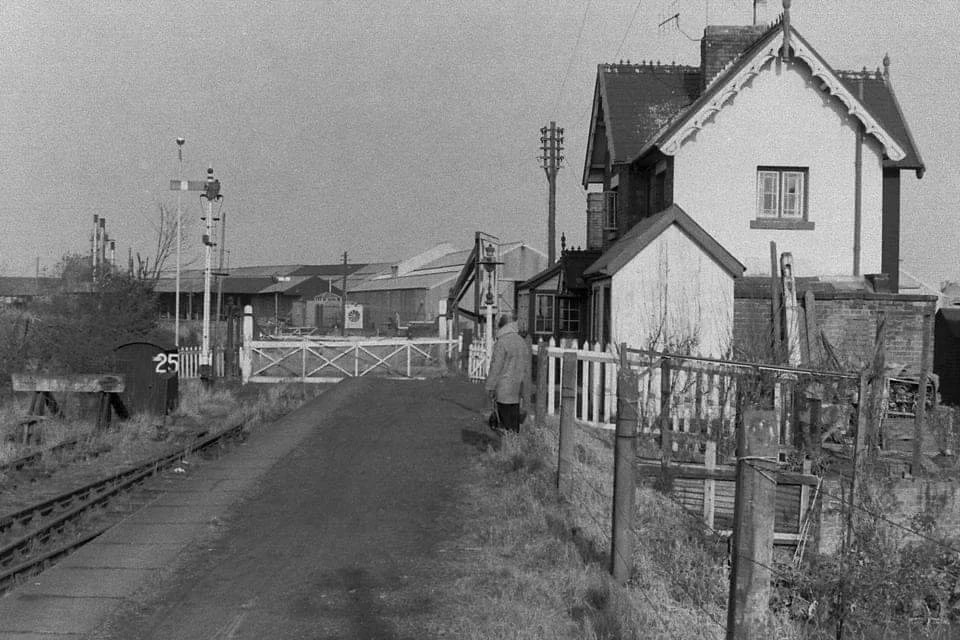
This 25″ OS Map of 1902 shows the location of the level crossing. A Signal Box (S.B.) is clearly marked on th West side of the line. The crossing-keepers cottage is the building to the East of the line and immediately adjacent to the level-crossing. Doseley Halt was placed here in the mid-1930s. [25]
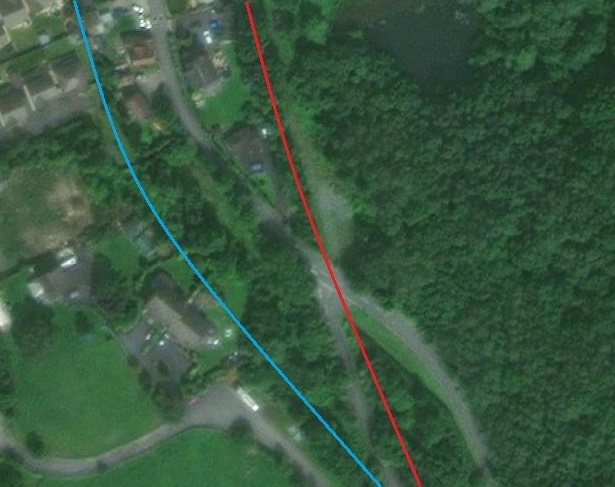
The same area on the satellite imagery provided by the NLS in the 21st Century. The blue line approximates to the centre-line of the Canal, the red line to the old railway route. The different roads are visible among the trees. [25]
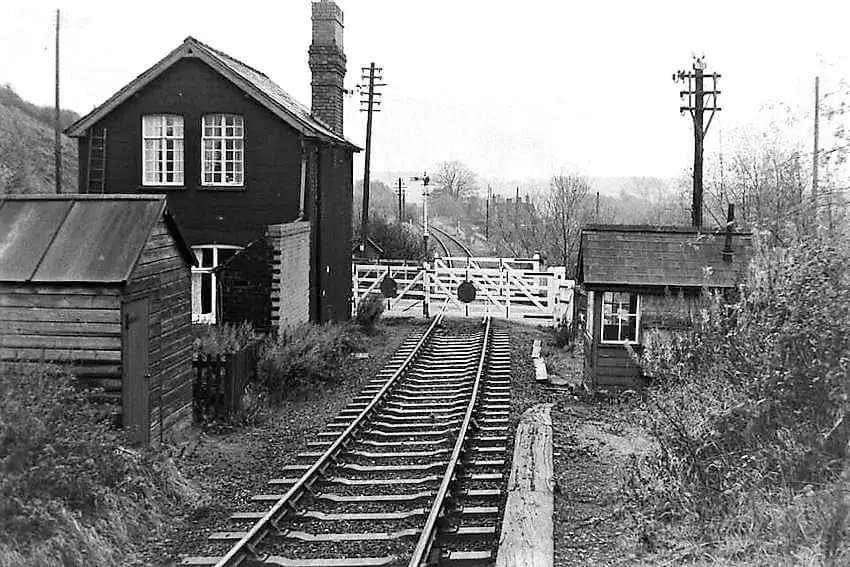
Doseley Halt viewed from Holly Road verge next to the crossing gates. The signal box is off-picture to the left and the crossing-keeper’s cottage is off-picture to the right. This is an old postcard view embedded from the Dawley History website. [29]
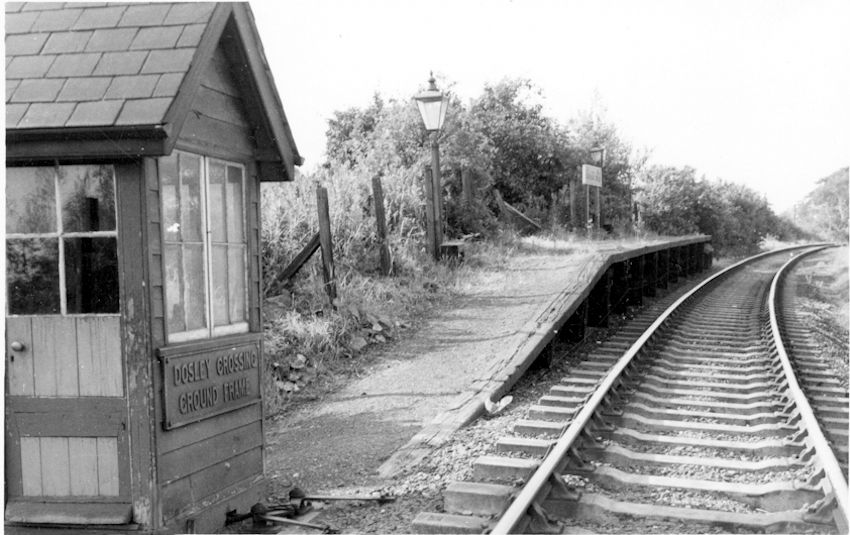
The ‘signal box’ at Doseley Halt was actually a ground frame for the level-crossing. This view is also taken looking North-northwest. [29]
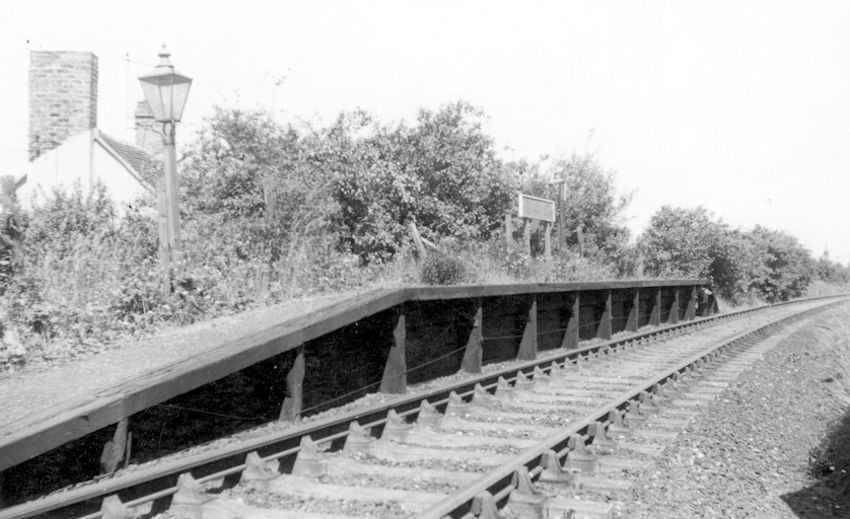
At one time Doseley Halt boasted its own waiting shelter. This view looks South-southeast and shows all the major features of the site. The loco entering crossing onto the site appears to be a 2MT British Railways locomotive. [29]
Doseley Halt and Holly Road Level Crossing with the gates closed protecting the line. This picture was shared by Paul Wheeler on the Telford Memories Facebook Group 20th June 2018. [12]
Large Prairie Class 2-6-2T No. 4178 on the final passenger service along the W&SJR on 21st June 1962 heading North across Holly Road into Doseley Halt. This picture was shared by Marcus Keane on the Telford Memories Facebook Group on 29th April 2014. [13]
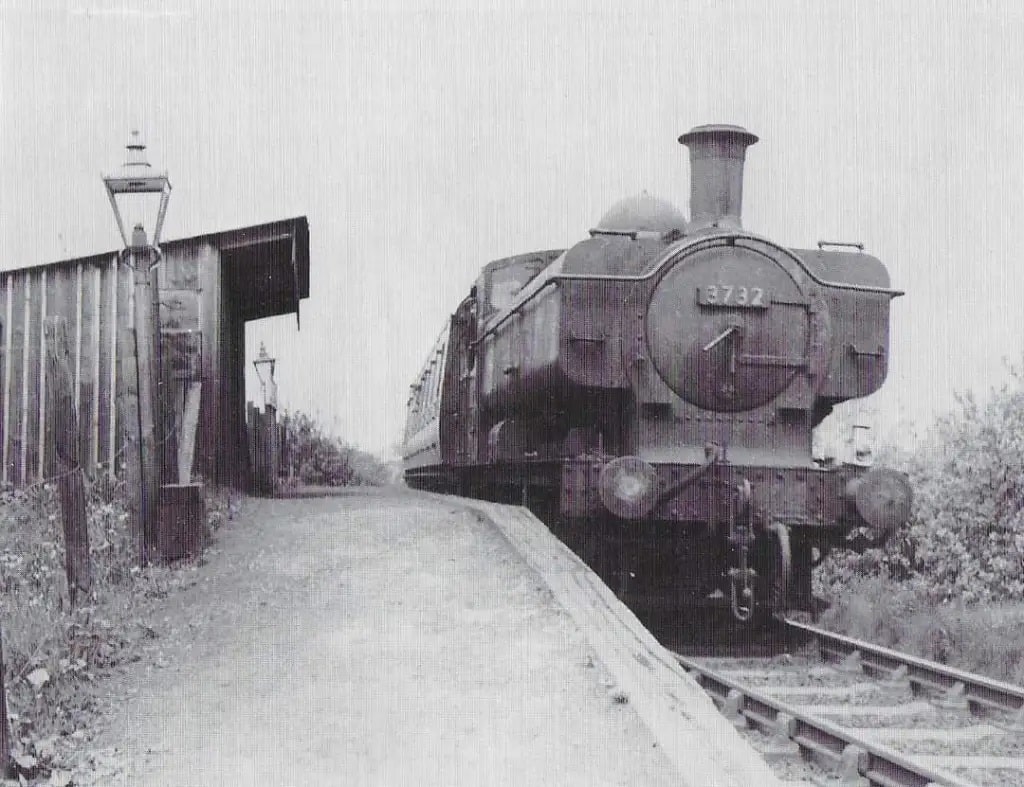
GWR Pannier Tank No. 3732 standing at Doseley Halt on a Southbound service. The Halt was originally opened to address competition from Midland Red buses. This picture was shared on the Telford Memories Facebook Group by Metsa Vaim EdOrg on 27th February 2020, (c) G.F. Bannister. [14]

Searching online I have located 4 images of Doseley Halt which are copyright protected by Lens of Sutton. Two of which are included in the book about the line by Knowles. [1: p166] … Lens of Sutton’s reference numbers for these images are:

57060 GWR Doseley Halt General view, circa 1960s, showing the single platform and level crossing.
57071 GWR Doseley Halt General view, circa 1960s, showing the single platform and level crossing.
57072 GWR Doseley Halt General view, circa 1960s, showing the single platform and ground frame.
57180 GWR Doseley Halt General view showing the single platform, circa 1960s.

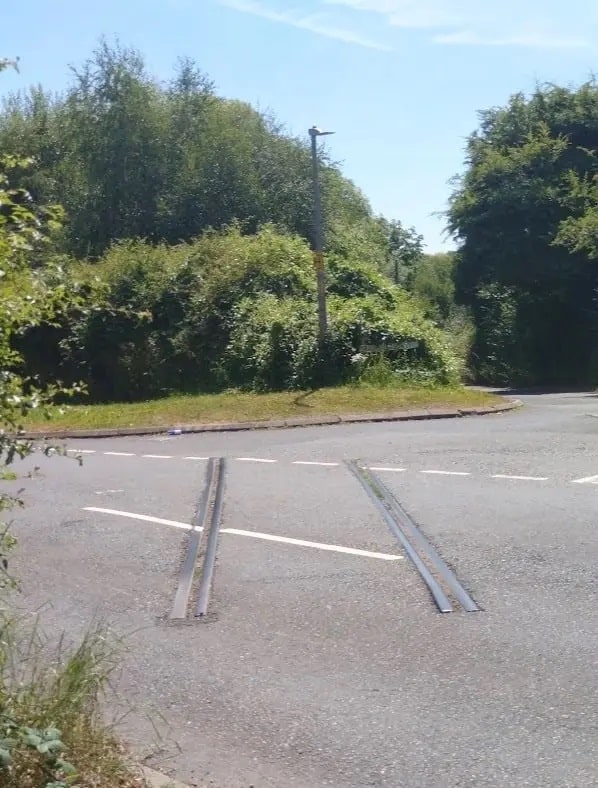
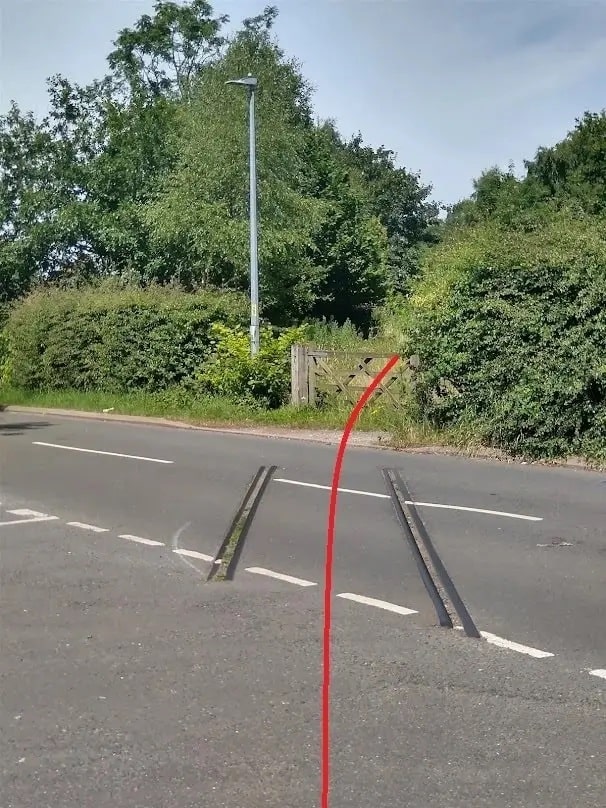
On 11th July 2022, I walked down the line from the end of the preservation section , over Doseley Bridge and down to a point about 200 metres South of what was Doseley Halt and the level-crossing on Holly Road. I was delighted to find one small remnant of the railway at the level-crossing in the tarmac of Holly Road.

A length of the old rails remains within the carriageway of Holly Road. The view ahead is impeded by vegetation and the route of the line cannot be followed immediately. [My photograph, 11th July 2022]
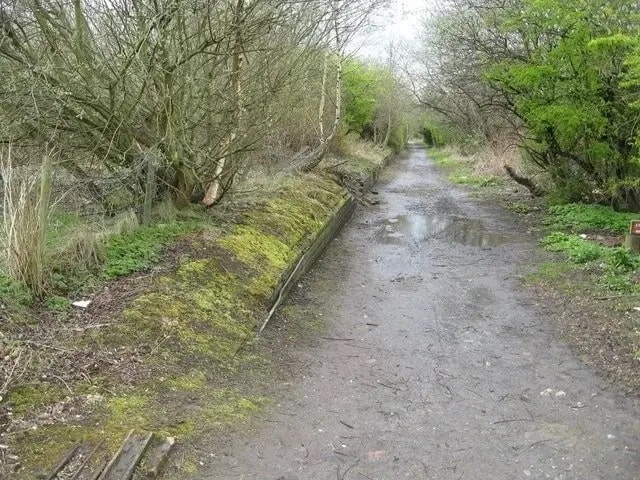
Looking back to the North, the line curves very gently through the station site. [My photograph, 11th July 2022]

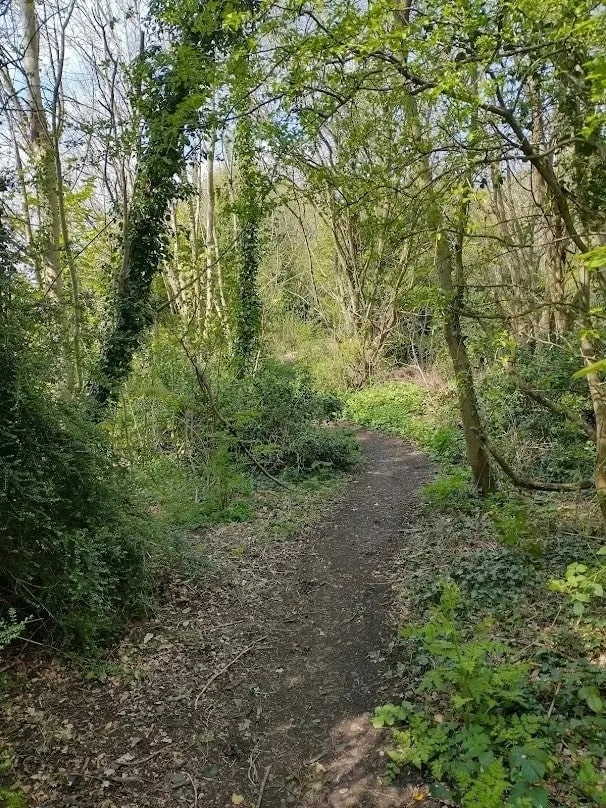
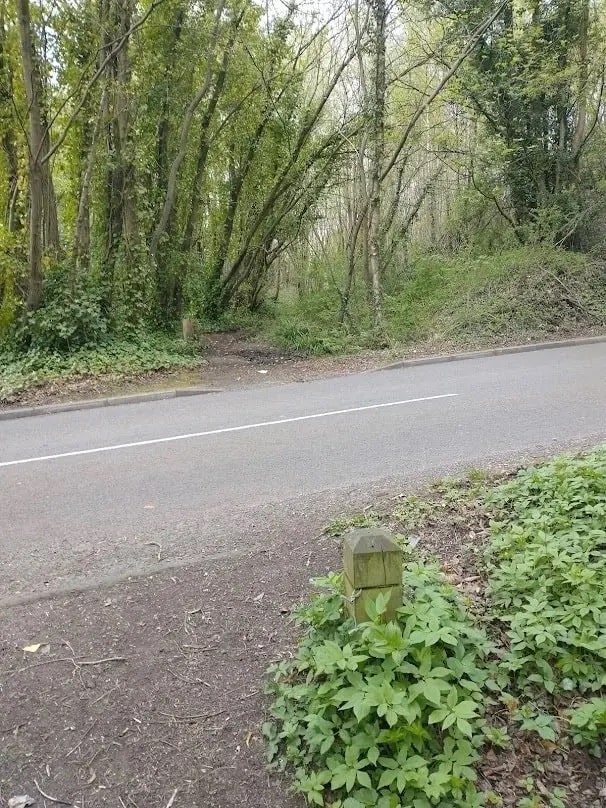
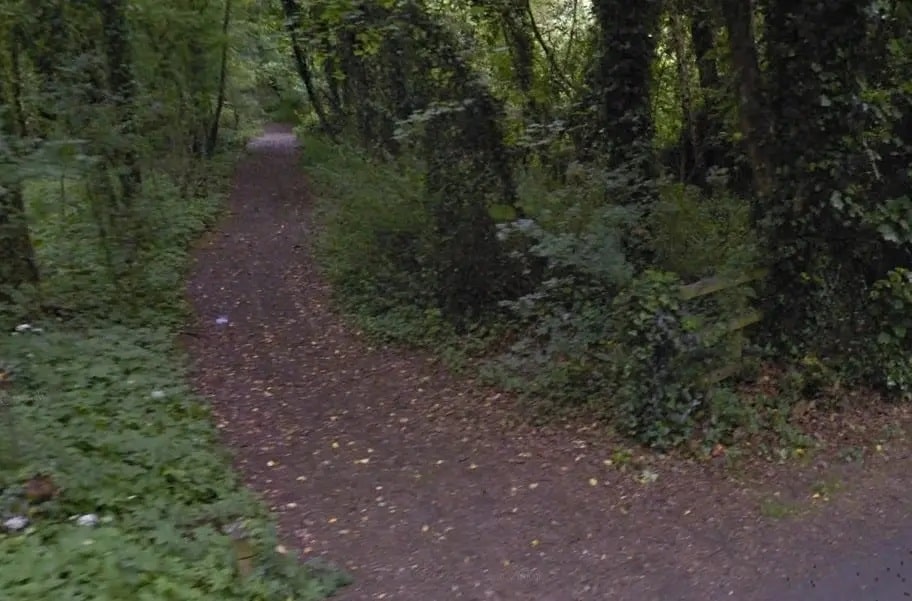
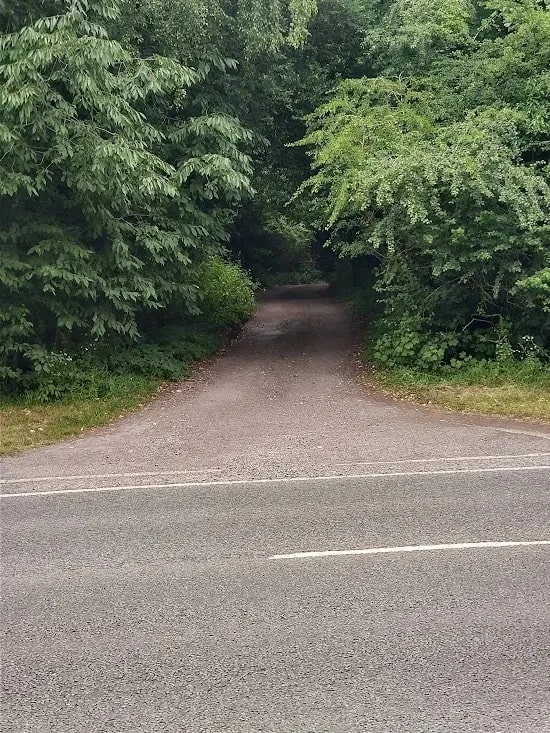
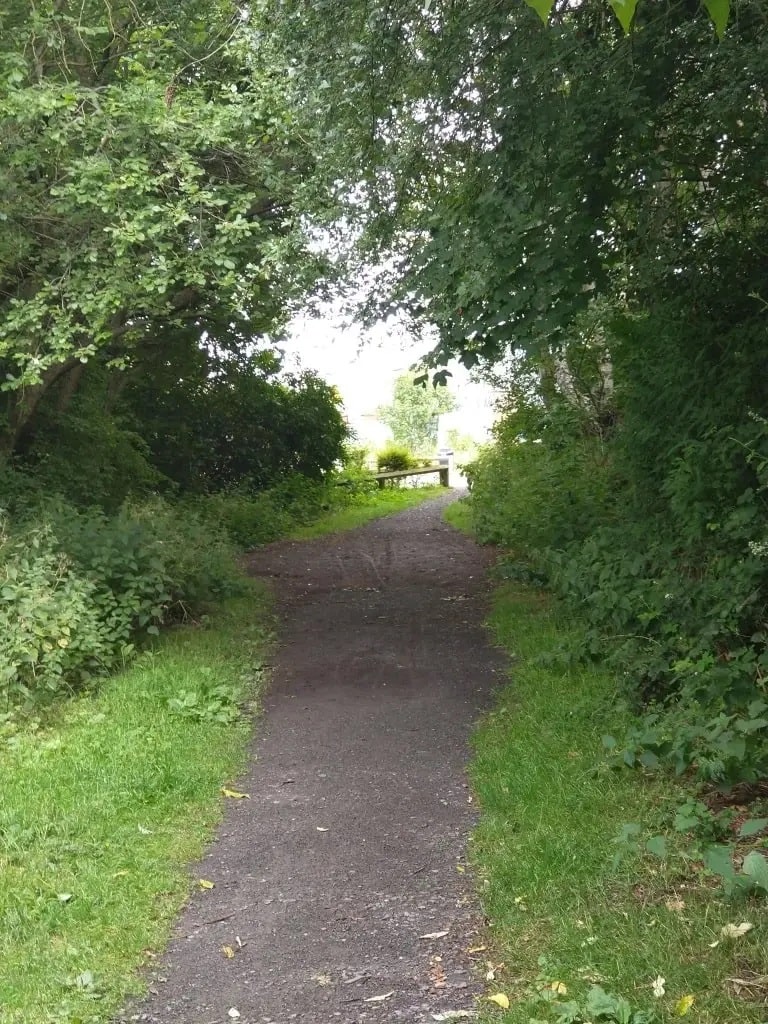
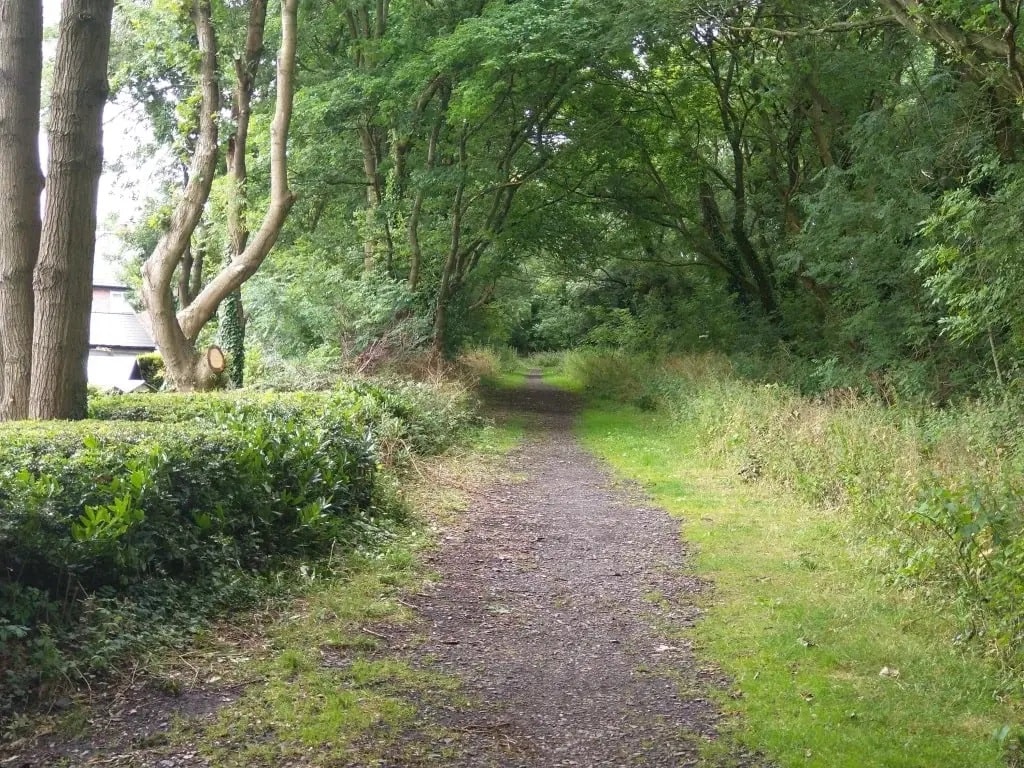
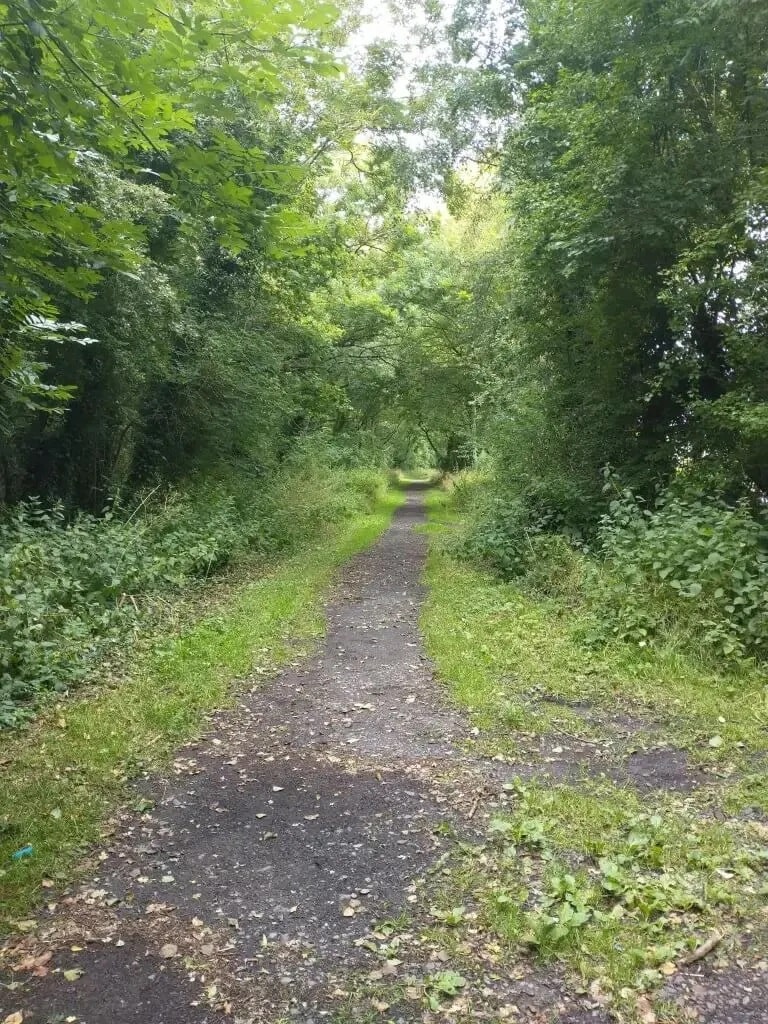
For perhaps 150 to 200 metres, the line South threads a narrow space between Holly Road and Gravel Leasowes. It initially at on a low embankment, but very soon, as the lane levels rise, the route is in cutting. Following Gravel Leasowes, I was able to find a footpath connection between the two roads at the point that Gravel Leasowes turned away from the line. That point is at the very top of the first map extract below.

This was the point at which my wander on 11th July 2022 ceased as I recognised the location from an earlier walk on 21st April 2022.

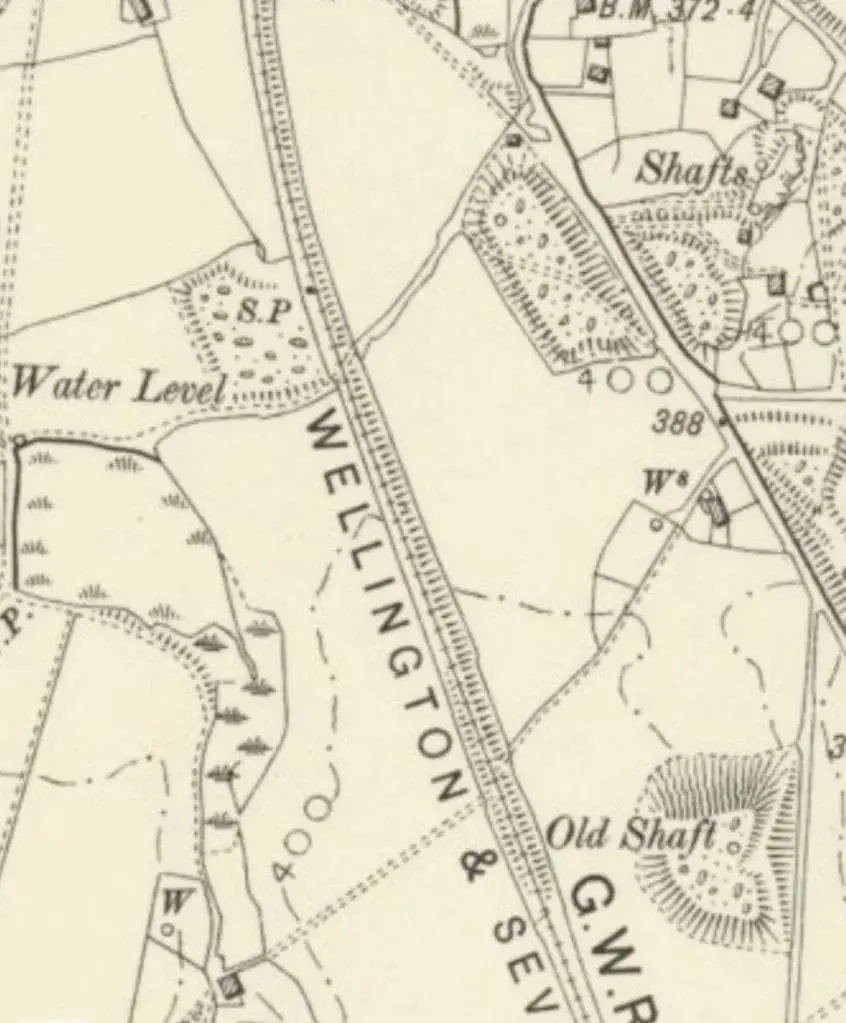
Another extract from the 6″ OS Map of 1901/2 which is centred on the level-crossing at Lightmoor Road. [15]
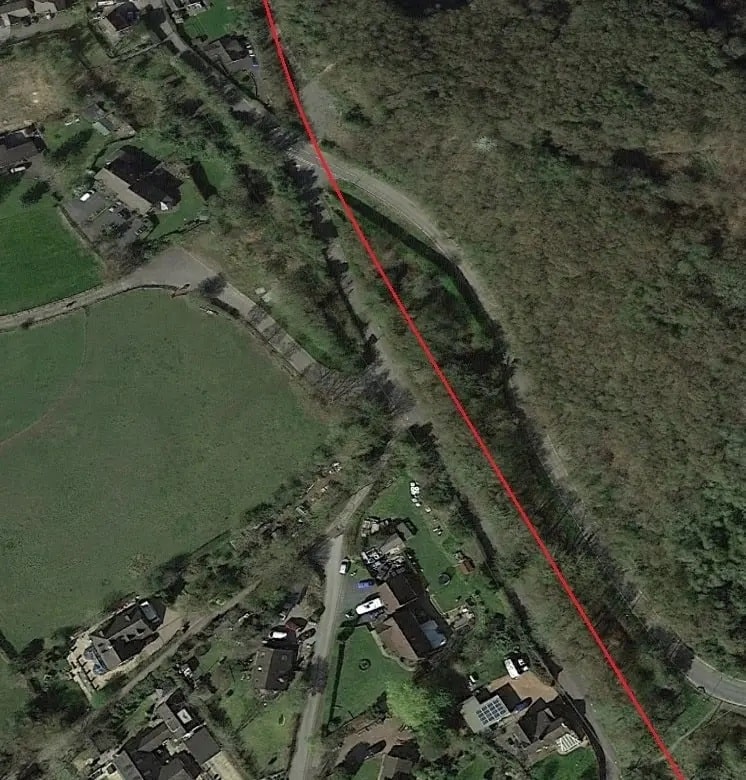
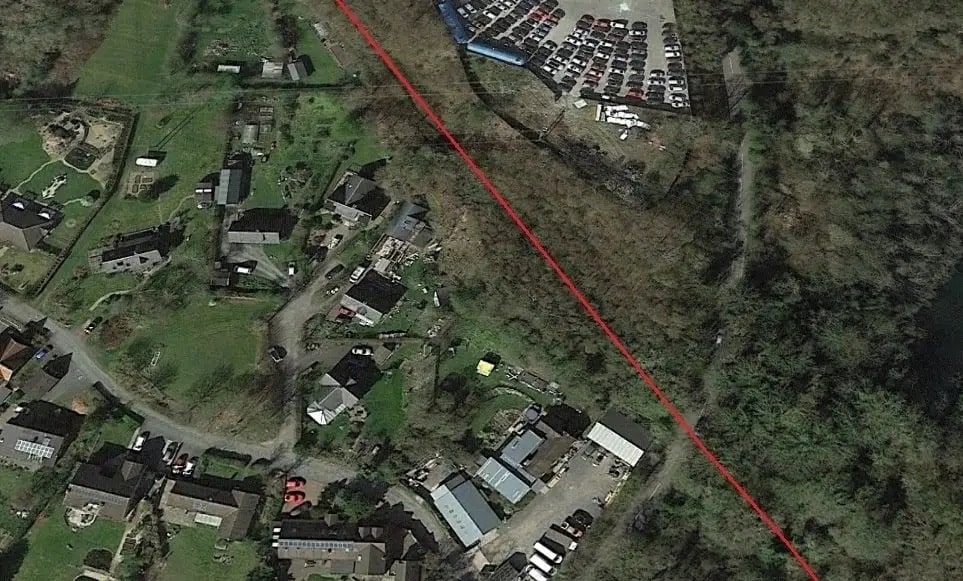
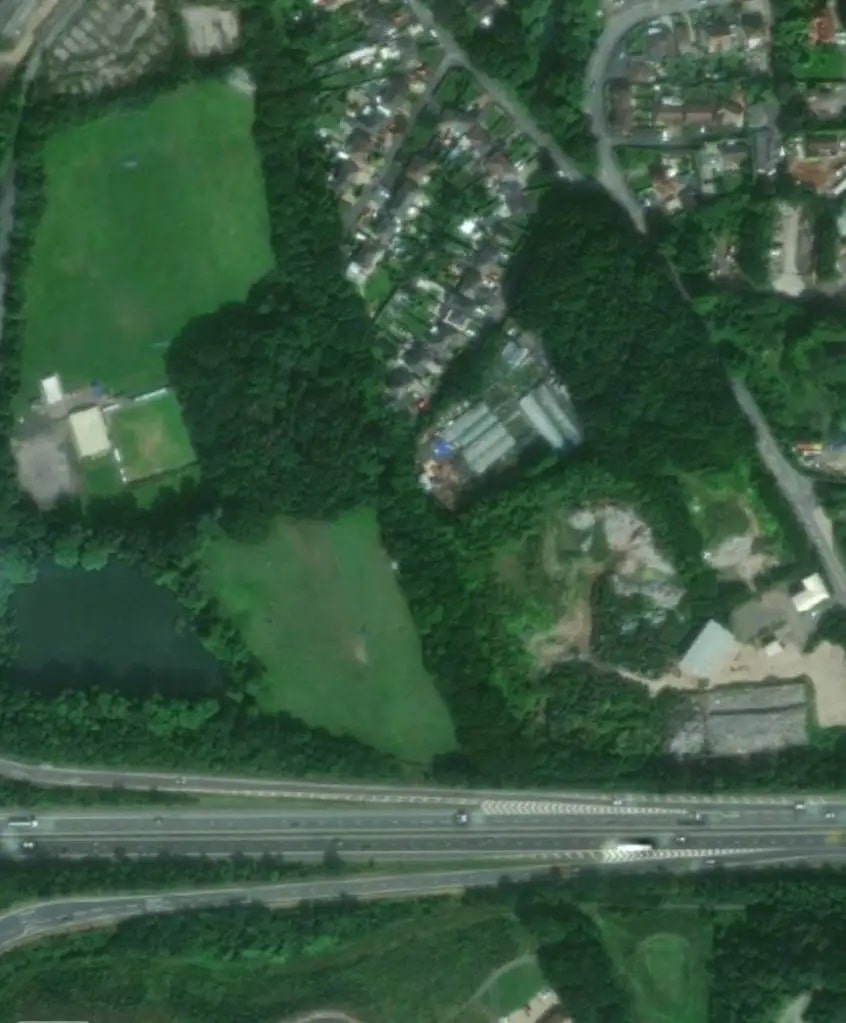
The next length of the line from the level-crossing at Holly Road as it appears on modern satellite imagery. Holly Road is to the East of the Line, Gravel Leasowes to the West. The short footpath mentioned in the text can be seen in the bottom right of this image. [Google Earth, 4th April 2021]
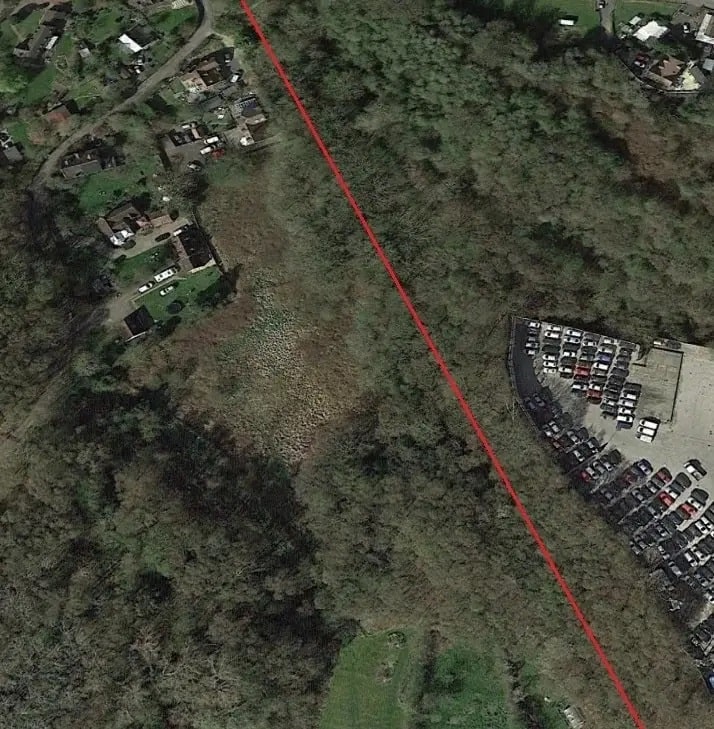
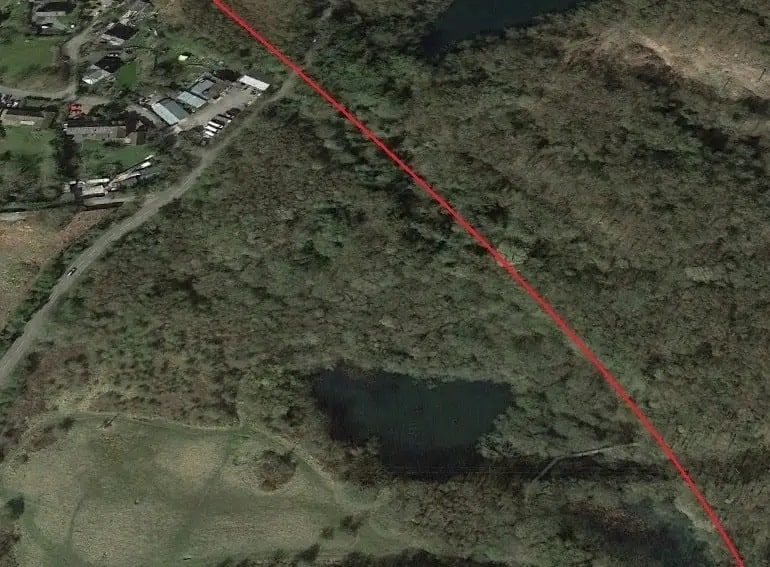
The approximate line of the old railway is shown again by the red-line on this satellite image. [Google Earth, 4th April 2021]
Large Prairie No. 4178 again, this time on the climb towards Doseley Halt from Lightmoor. The gradient along this length was approximately 1 in 40. The image was shared by Metsa Vaim EdOrg on the Telford Memories Facebook Group on 8th October 2019. [40]
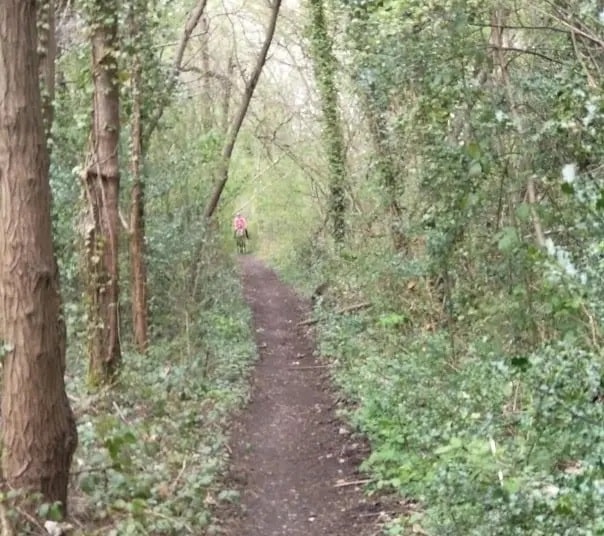
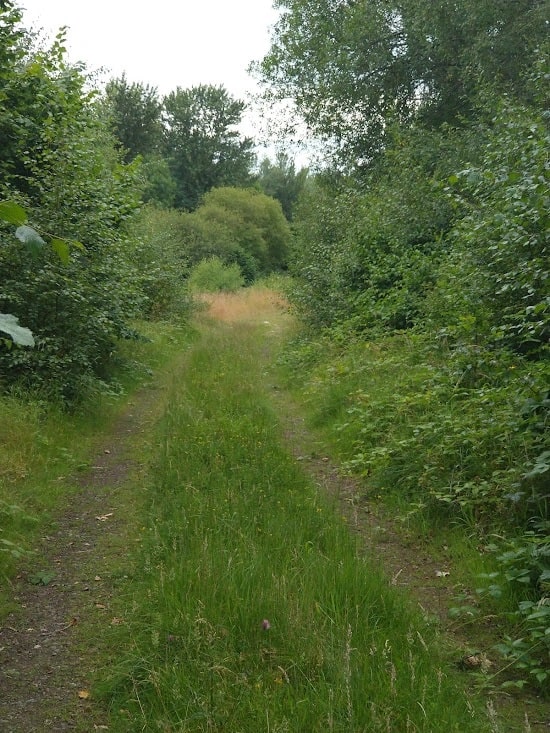
Looking back to the North at the point where embankment turns to cutting. [My photograph, 21st April 2022]
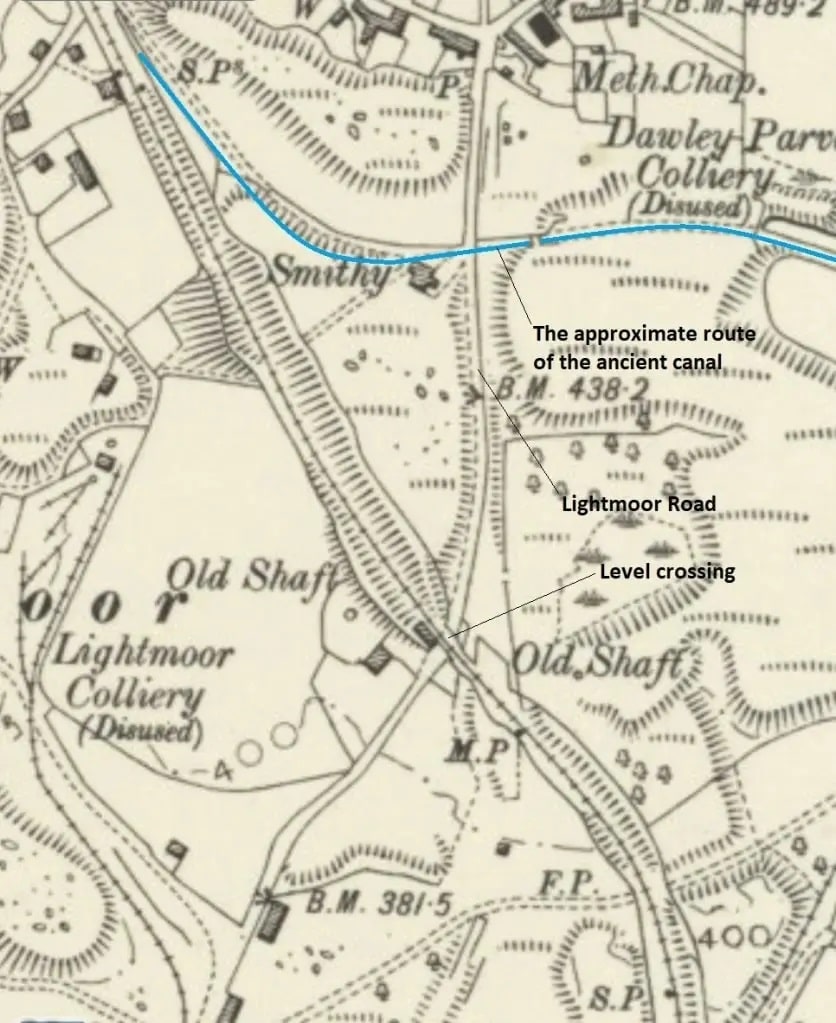
The Lightmoor Road Level-crossing appears on this next satellite image. There was at one time a tramroad on the East side of Lightmoor Road which linked The Lightmoor Ironworks with Dawley Parva Colliery and the old canal which were both to the North of the W&SJR. That tramway appears on the extract from the 6″ OS Map of 1881/82 below. [Google Earth, 4th April 2021]
Looking North once agin not long before the location of the Lightmoor Road Level-crossing is encountered. [My photograph, 21st April 2022]
Looking North across Lightmoor Road at the location of the level-crossing. [My photograph, 21st April 2022]
Looking ahead down the line to the Southeast at Lightmoor Road Level-crossing. [Google Streetview, May 2019]
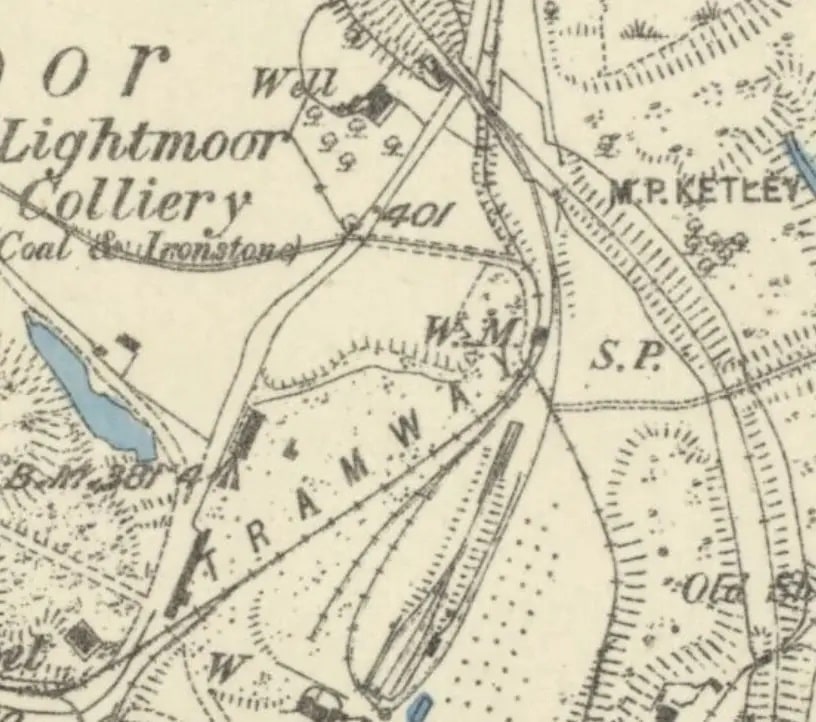
An extract from the 6″ OS Map of 1881/82 shows Lightmoor Road running from the centre-top of the image to the Bottom-left. A tramroad runs on the East side of the road and crosses under the railway. It has a branch to Lightmoor Colliery and continues to serve Lightmoor Ironworks which were still operational in 1881. Interestingly, a short standard-gauge branch is shown leaving the W&SJR just to the Southeast of the point that it crossed Lightmoor Road. That short branch served Lightmoor Ironworks which are just off the bottom edge of the extract. The branch had been lifted by the time of the 1901/2 survey. [30]

Lightmoor Colliery

Lightmoor Colliery appears on the Hudson Institute of Mineralogy Mindat.org register as owned by the Coalbrookdale Company and as being active between 1855 and 1885. [33] It should, incidentally, not be confused with the colliery of the same name in the Forest of Dean!

Lightmoor Iron Works

The information about the Lightmoor Iron Works is distilled from the Discovering Shropshire’s History website. [34] Little is known about the the Iron Works, but there were a number of structures (which appear on the 1901 Ordnance Survey extract above) to the east of the location of the furnaces. These were thought to initially be part of the industrial complex of the ironworks, later converted to domestic use. ln 1984 the lronbridge Gorge Museum Archaeology Unit excavated parts of the Lightmoor Ironworks site in advance of its destruction by the Ironbridge By Pass. Trenches were dug to examine the wall footings of that group of buildings to the east of the furnaces. These buildings had been constructed directly onto coarse pit waste, and stood until recently. The area was badly disturbed after their destruction, which obliterated all traces of floor levels. Nothing was found which would have enabled the different usages thought to have applied to be confirmed.

After the level-crossing at Lightmoor Road, the line began to swing round to the South. [Google Earth, 4th April 2021]
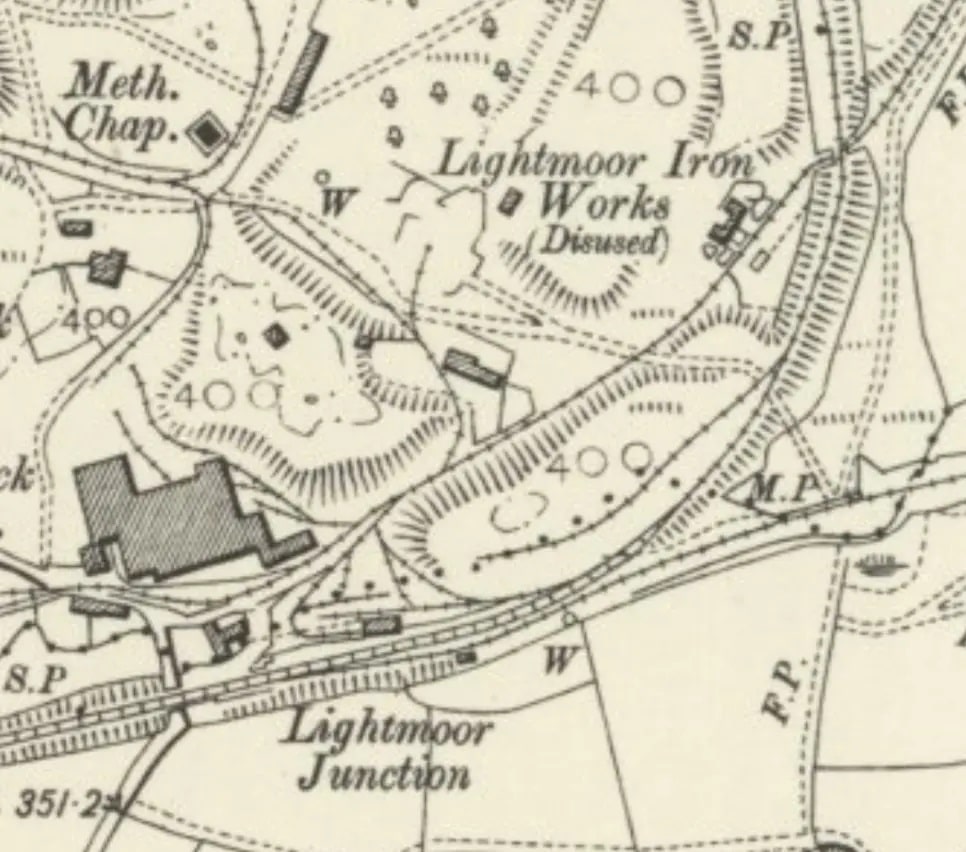
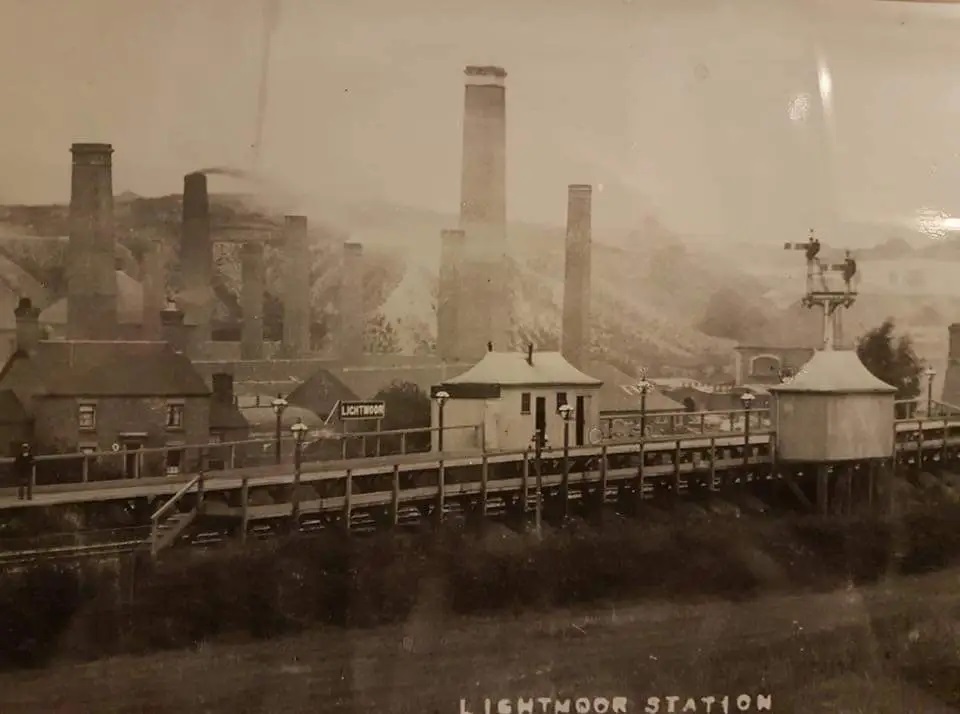
There was a significant network of tramroads in the immediate vicinity of Lightmoor Junction. This 6″ Map extract from 1901/02 shows the situation at the turn of the 20th century. There was a goods transshipment facility at the Junction which connected the Coalbrookdale Co. Tramroads to the wider world! The large factory complex to the North of the Junction is the Lightmoor Brick and Tile Works. [15]

Lightmoor Brick & Tile Works

The information about the Lightmoor Brick & Tile Works below comes from the Discovering Shropshire’s History website. [35] Lightmoor Brickworks was first mentioned in 1779, when it was owned by John Davies … Its initial base of production was bricks, made by the semi-dry process. This was followed by other basic wares of the early 19th century, including flooring bricks, draining pipes, chimney pots, and lightweight roofing tile During the 1860s the diversity of products began to escalate. The next decade heralded a phase of moulded decorative terracotta… Which continued until the turn of the century, and the works turned back to brick manufactures. From the 1900s to the closure of the Coalbrookdale Co in 1933, Lightmoor Brickworks supplied them with all the firebrick shapes for their solid fuel appliances. In the fifty years from 1933 to the late 1980s Lightmoor continued to survive on brick manufacture.

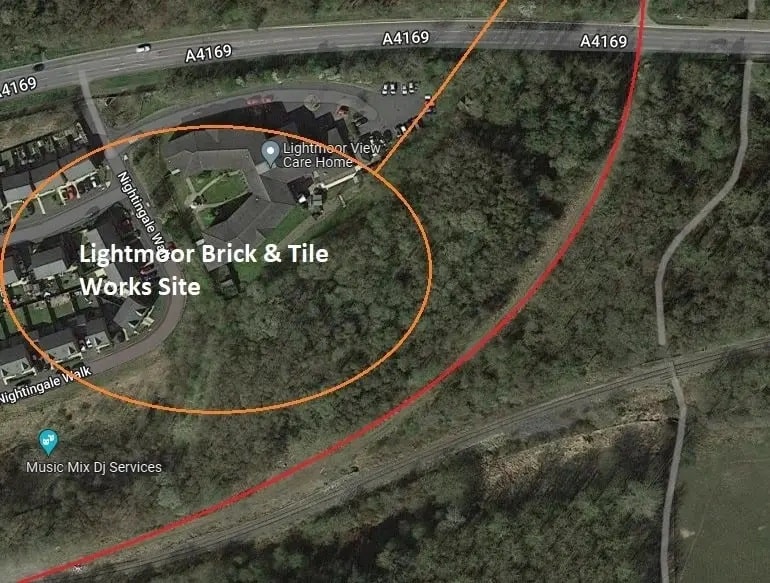
The site of the Brick and Tile Works is now a housing estate on the South side of the A4169 (Queensway) as shown on one of the satellite images below.

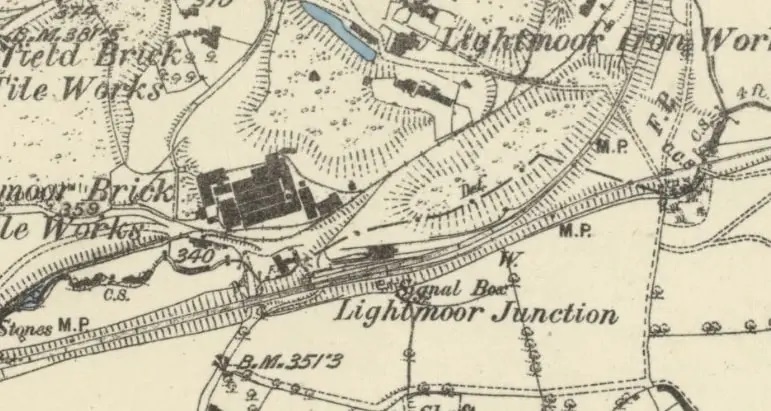
This earlier 6″ Map extract from 1881/2 is probably a little clearer than the 1901/2 extract above. [30]
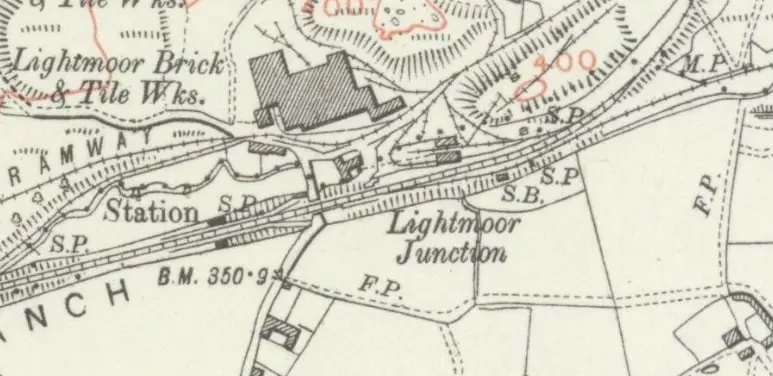
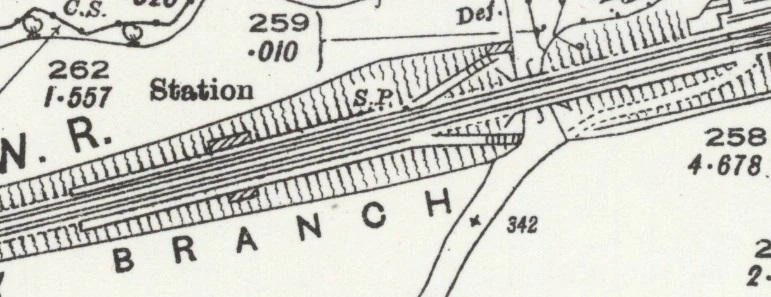
This extract from the 6″ Map series on 1925 which was published in 1928 clearly shows the location of the Railway Station. [31]
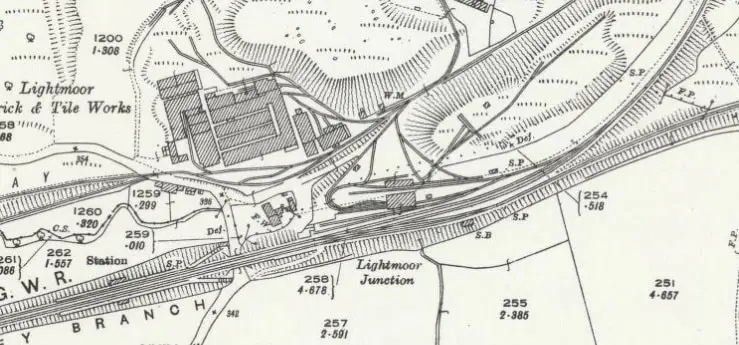
Greater clarity is provided by the 25″ Map Series from Ordnance Survey. This extract is from the 25″ 1925 edition which was published in 1927. The double track provision from the junction towards the West is clear. The station (above the word ‘Branch’) and Signal Box on the south side of the line opposite the goods yard can easily be picked out. [32]
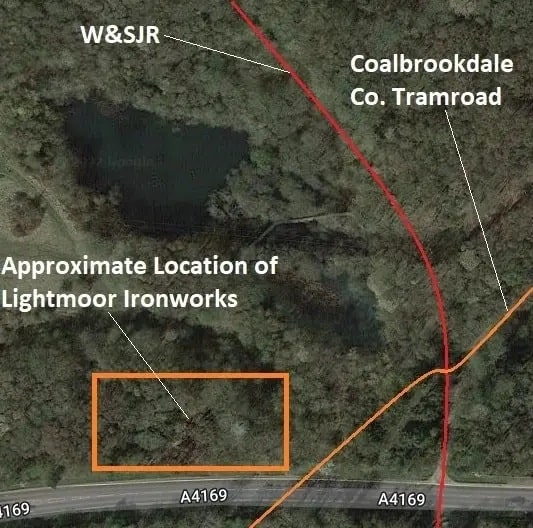
This satellite image shows the relative locations of the W&SJR, the old Coalbrookdale Co. Tramroad and the Lightmoor Ironworks as well as the modern A4169. Telford Steam Rail;way will, if their planned extension is to be built, need to cross this road on a bridge. [Google Earth, 4th April 2021]
The old railway now turned relatively sharply to the Southwest and was joined by what was once the Shrewsbury & Birmingham Railway Madeley Branch. That line remained open throughout the 20th century as was used to supply coal to Ironbridge Power Station. It closed, eventually, in around 2015 with the closure of the power station. [Google Earth, 4th April 2021]
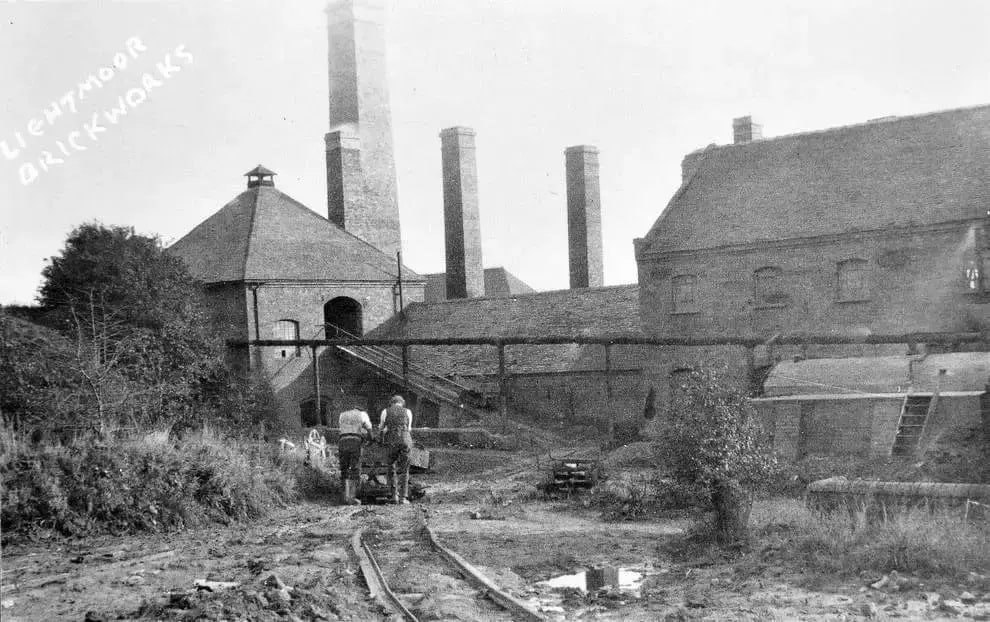
This picture shows part of Lightmoor Brick and Tile Works in around 1910. As we have noted the Works sat on the North side of the W&SJR very close to Lightmoor Station. There is a works tramroad evident in the image. The picture was shared on the Telford Memories Facebook Group by Paul Mower on 2nd April 2018. [41]
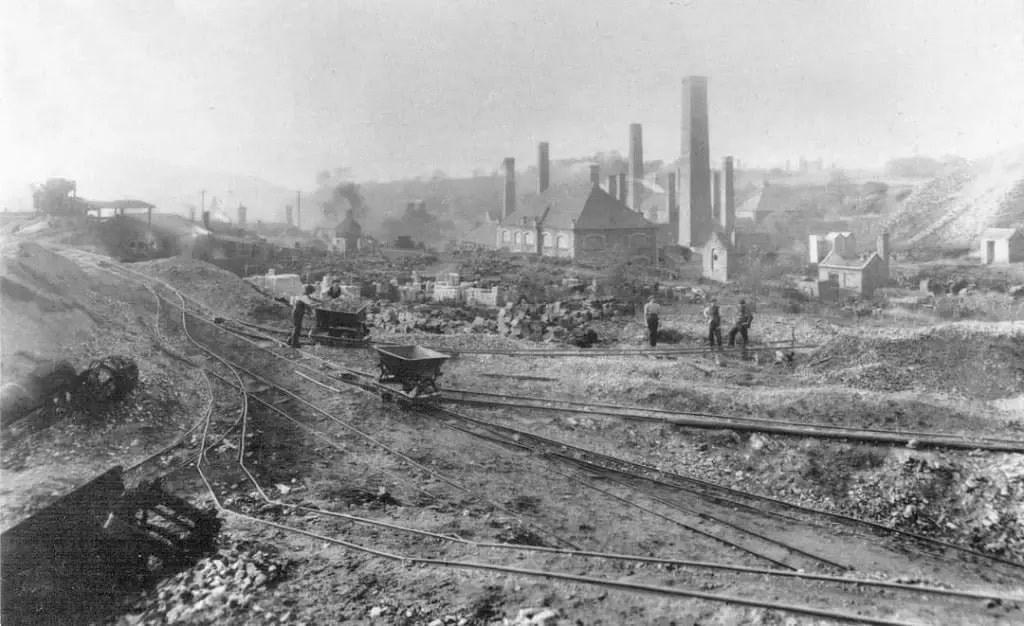
This image also shows the Brick and Tile Works and gives a much better indication of the preponderance of tramroad rails around the site. It was shared by Thomas Cooper on 17th March 2017 on the Telford Memories Facebook Group. [42]
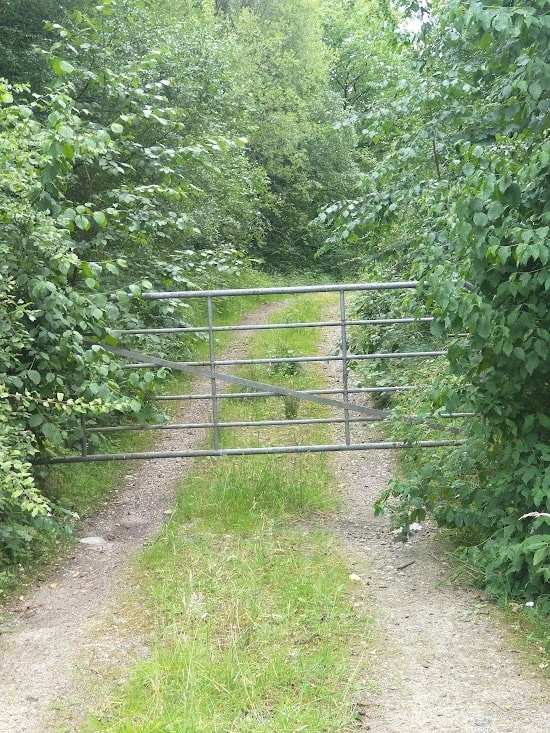
Looking East along Queensway (A4169). The red line shows the route f the old railway which, South of the road follows a gated track. [Google Streetview, June 2022]
The location of Lightmoor Junction. The line entering from the left is the old Madeley branch of the Shrewsbury & Birmingham Railway which continued in use as a goods line until 2015 or thereabouts. The Junction is shown on OS Map extracts and satellite images above. [My photograph, 12th July 2022]
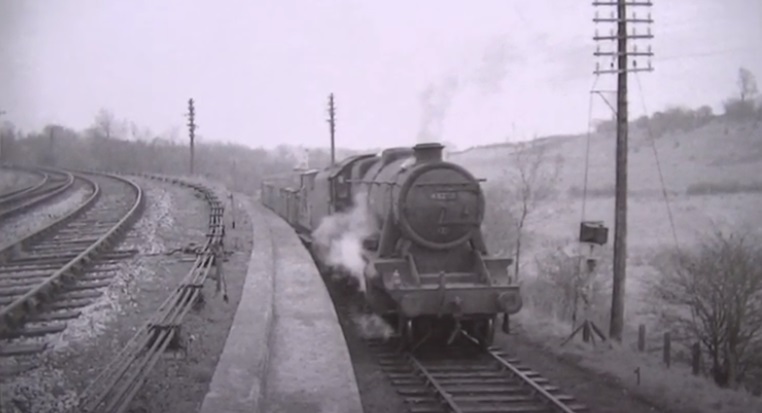
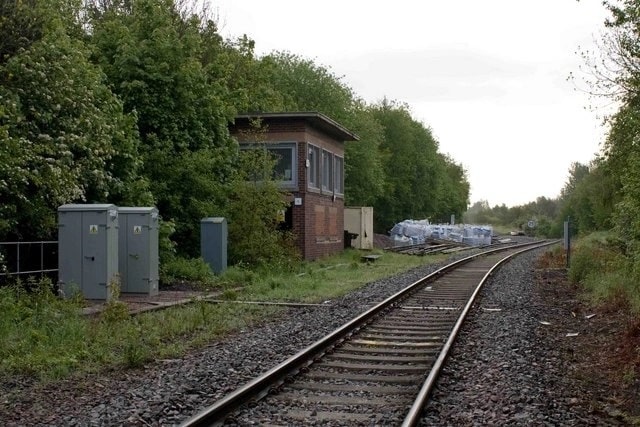
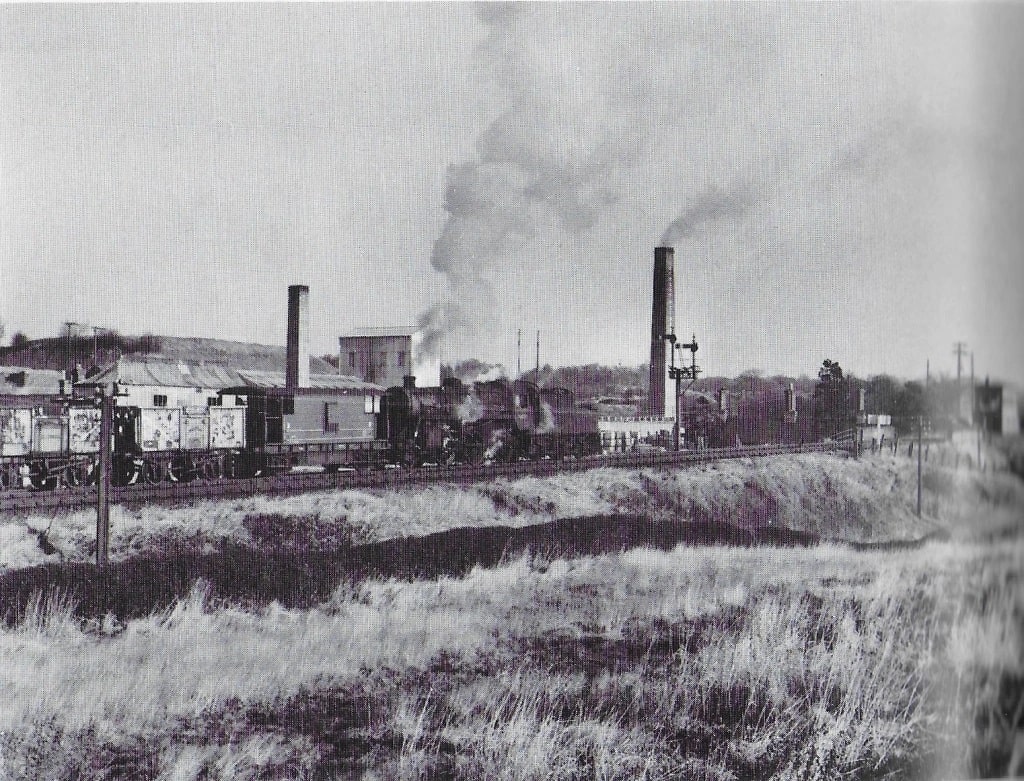
The junction at Lightmoor brought together the Madeley Branch, on which we see a coal train serving Ironbridge Power Station, and the W&SJR. The lvel difference which can be seen on this photograph is marked and can be explained by the 1:40 gradient falling from Doseley Halt to Lightmoor Junction. [4]
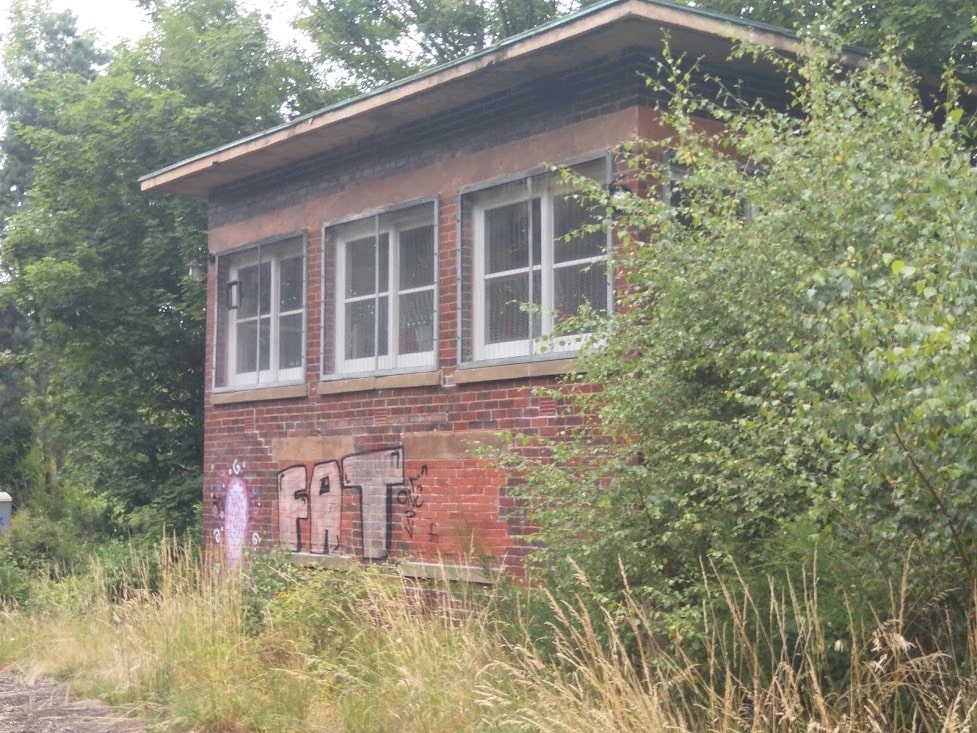
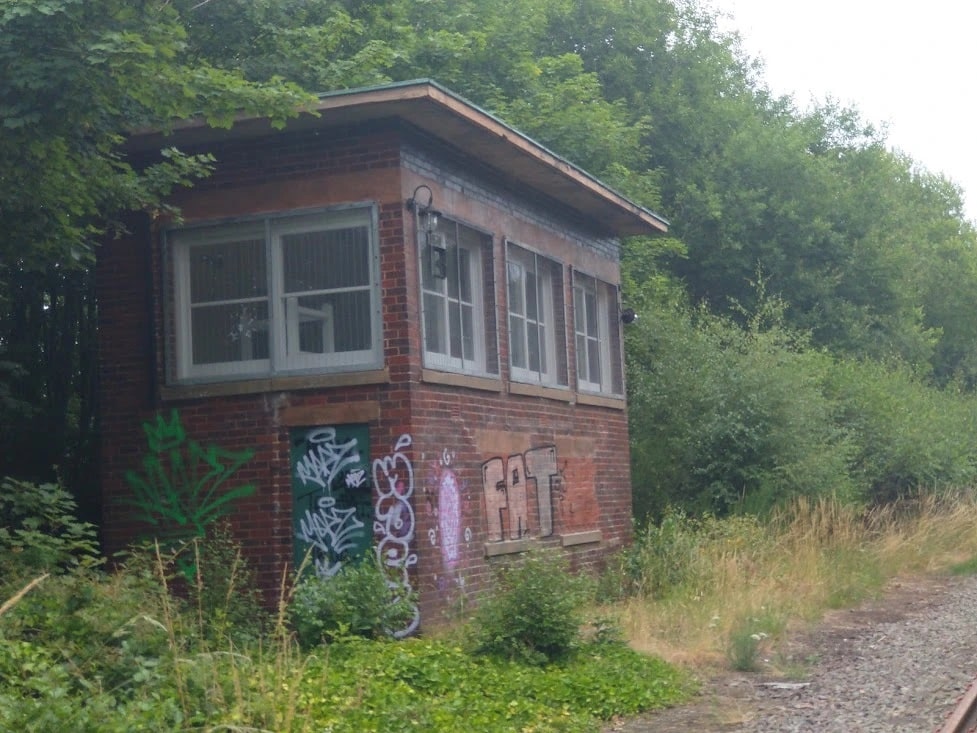
The modern signal box which replaced that shown on the OS Map extracts above. The photo looks Northwest. [My photo, 12th July 2022]
The signal box again, this time looking Northeast. [My photo, 12th July 2022]

It appears that the signal box shown on the OS Map extracts above was positioned to control both the goods yard and the junction. Once the goods yard was closed, the replacement box could be positioned to have the best visibility along running lines. Ultimately it only controlled the change between the single track Madeley branch and the double track line through Coalbrookdale. When the line through Coalbrookdale was singled in 2006, the signal box became surplus to requirements. It is now leased from the railway authorities by the Telford Steam Railway, evidence of their serious intent to extend their line through this location. [37]

My pictures above show a significant amount of graffiti on the signal box. This has appeared since refurbishment after vandalism in 2008. When that refurbishment was completed the box was as shown below.

The line is currently mothballed keeping alive hopes that it might one day be reopened.

Lightmoor Junction signal box on 17th May 2009. the photographer wrote in 2009: “Lightmoor Junction The left fork here has been taken up. Further north, along its line, is the Horsehay Steam Trust. The right fork leads to Madeley Junction, a real junction this time, on the Wolverhampton to Shrewsbury line. Only goods trains; long lines of coal trucks heading to & from the Ironbridge Gorge Power Station; pass along this line now.” (c) Mike White, authorised for reuse under a Creative Commons Licence CC BY-SA 2.0 [3]

Wikipedia tells us that the line to Wellington via Ketley was only finally fully closed in 1981, although passenger services halted much earlier. “Lightmoor Junction Signal Box was retained to control the connection between the double-track section towards Ironbridge Power Station and the single-track section towards Madeley Junction. The signal box closed on 23 October 2006, when the line towards Ironbridge Power Station was singled, with new signalling controlled from Madeley Junction Signal Box [36] (since 2011 transferred to West Midlands Signalling Centre).” [38]

Knowles tells us that from 1875 the junction was controlled by a timber McKenzie & Holland signal box on the south side of the line, but this was replaced in 1951 with a new box on the north side. This was a modern design, classified by the Signalling Record Society as ‘Type 15’, which was the Western Region’s first attempt at a ‘modern image’ box. Similar in some ways to the ARP wartime signal boxes, this had an overhanging flat roof in an ineffective attempt to keep the sun off the large windows. The design was current between 1949 and 1954, although relatively few were built.” [1: p166]

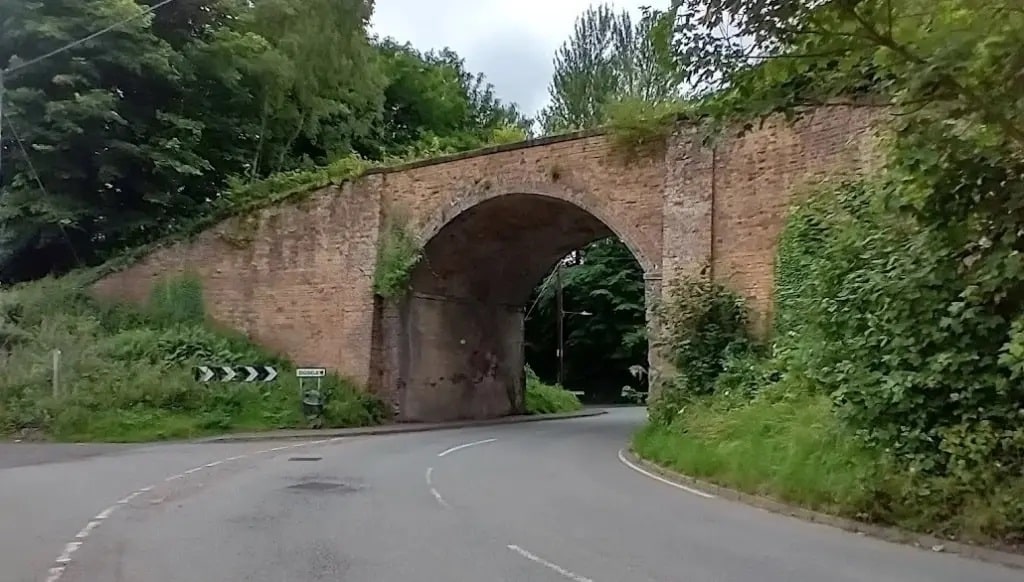
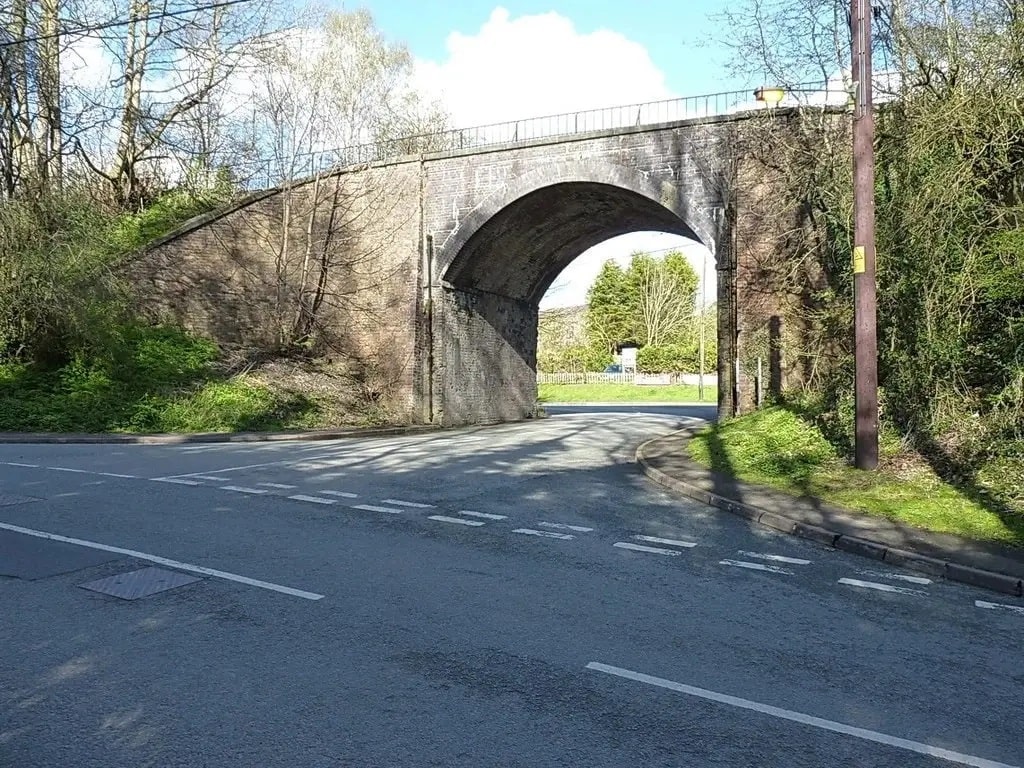
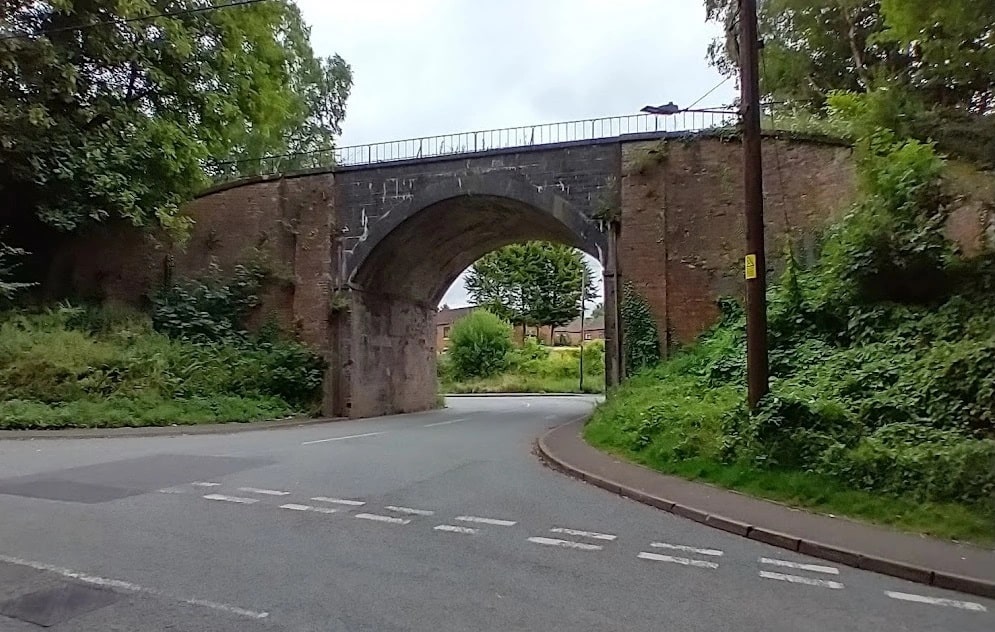
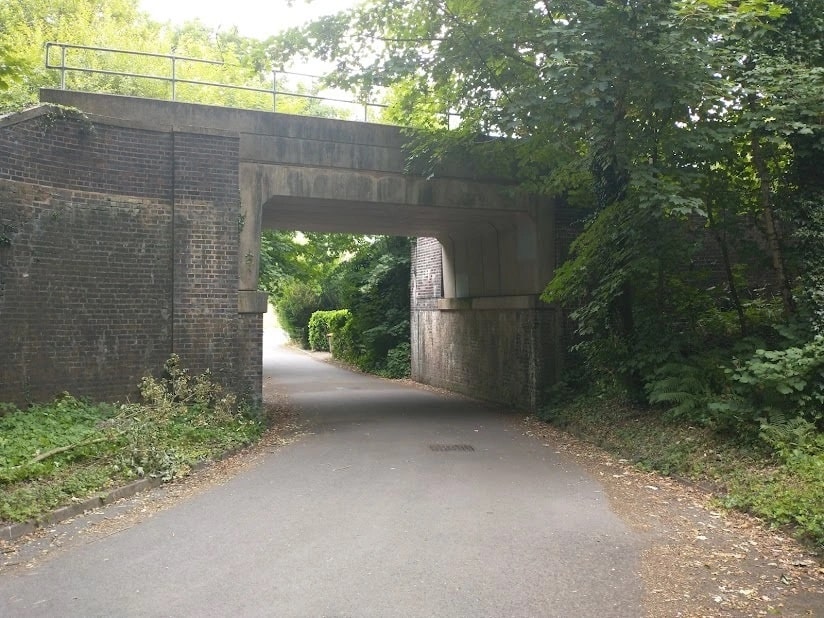
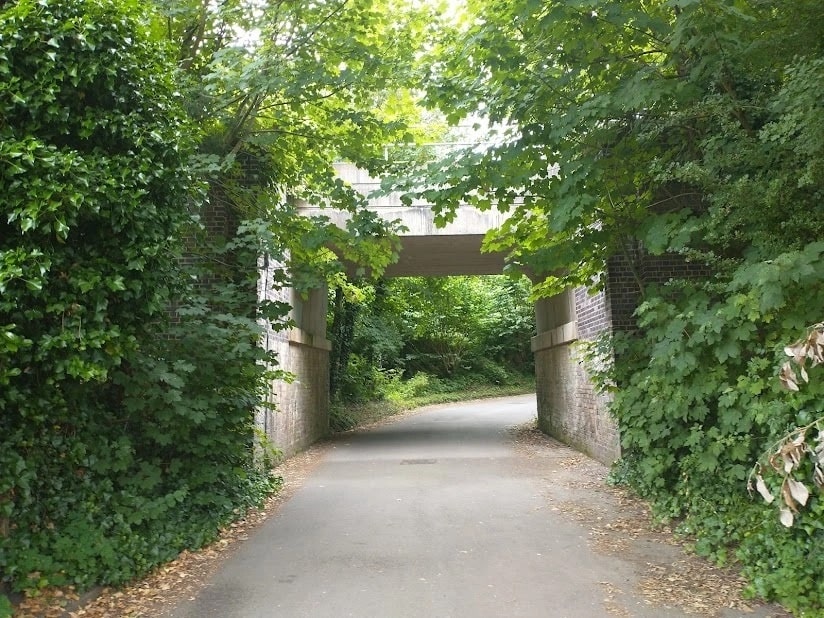
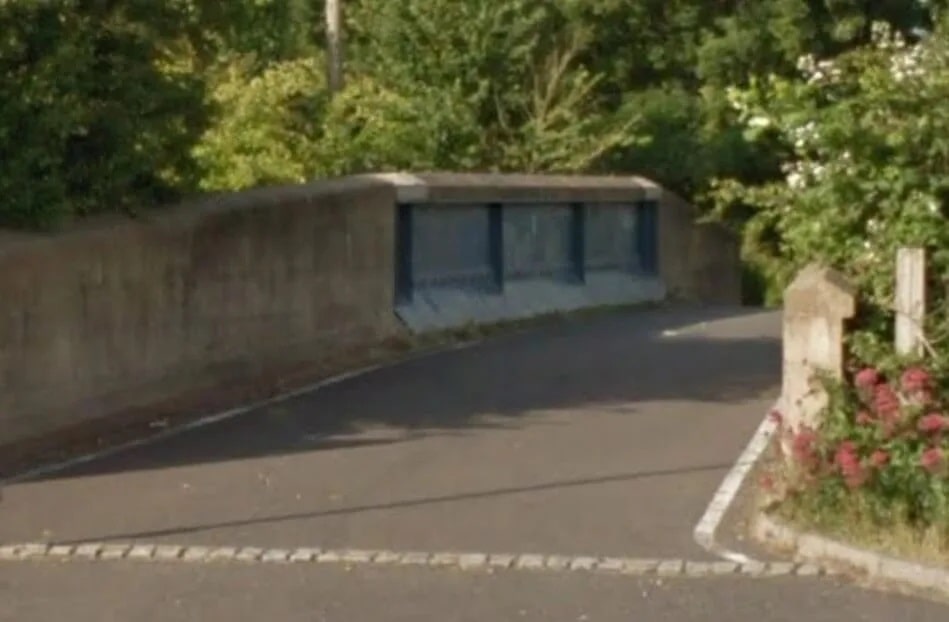
Immediately West of the Signal Box above, the line crossed a single lane road. Pictures at the location are shown below. Sadly, to date, I have not been able to find out full details of the original bridge. As can be seen from the pictures a modern bridge now sits on the older abutments which used to support a double-track structure.

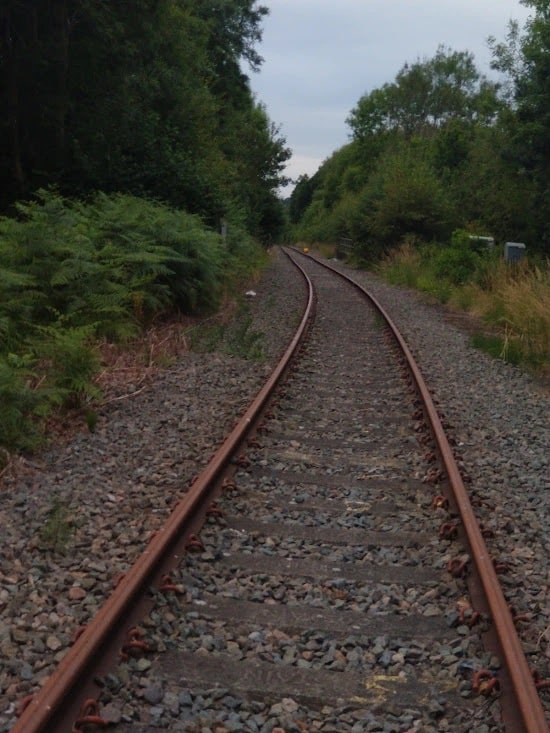
The location of the under-bridge taken at track level looking East towards what was Lightmoor Junction. Its location is marked by the deviation in the track alignment. [My photograph, 12th July 2022]
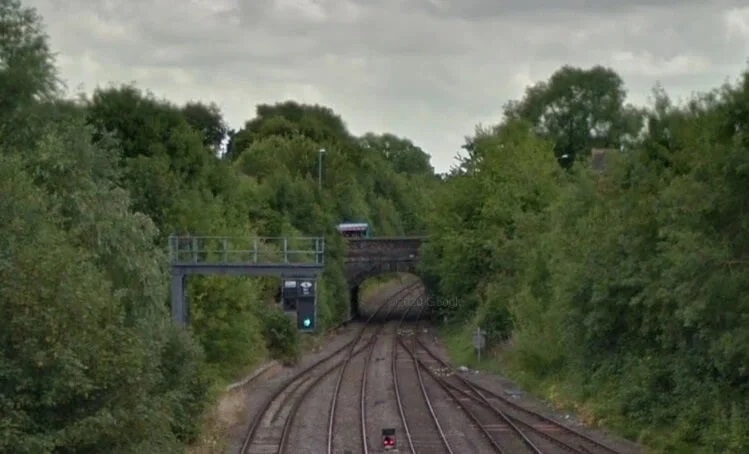
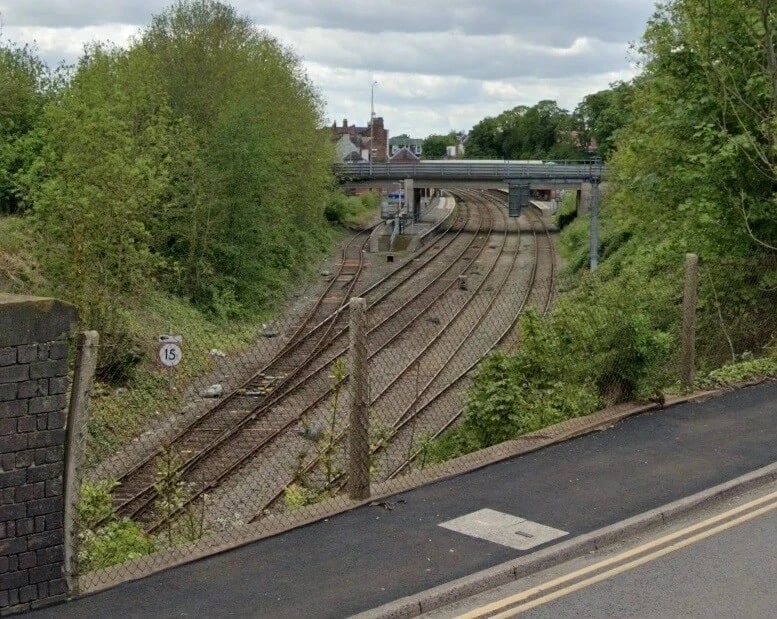
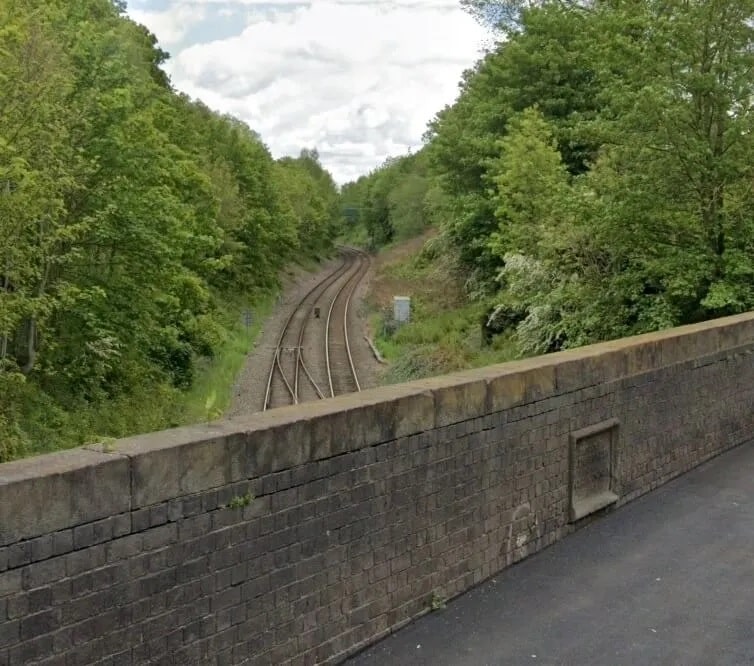
The view West across the road-under-bridge and through the old Station towards Coalbrookdale. [My photograph, 12th July 2022]
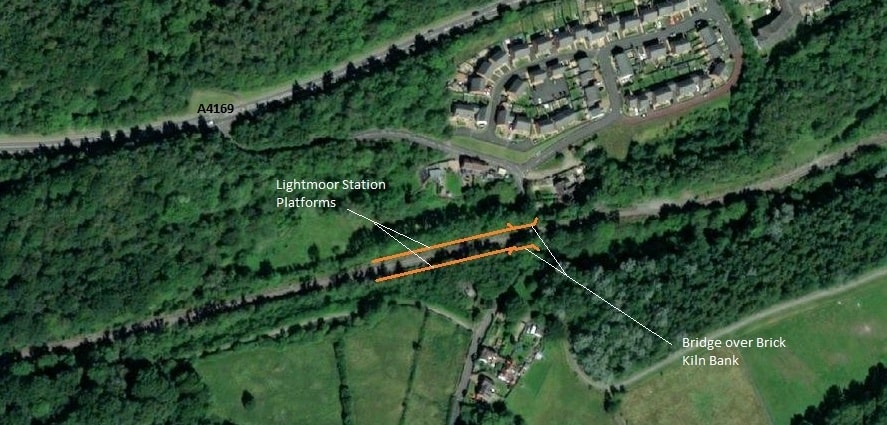
The view from the South through the railway bridge which spans Brick Kiln Bank. [My photograph, 12th July 2022]
The view from the North through the railway bridge spanning Brick Kiln Bank. [My photograph, 12th July 2022]

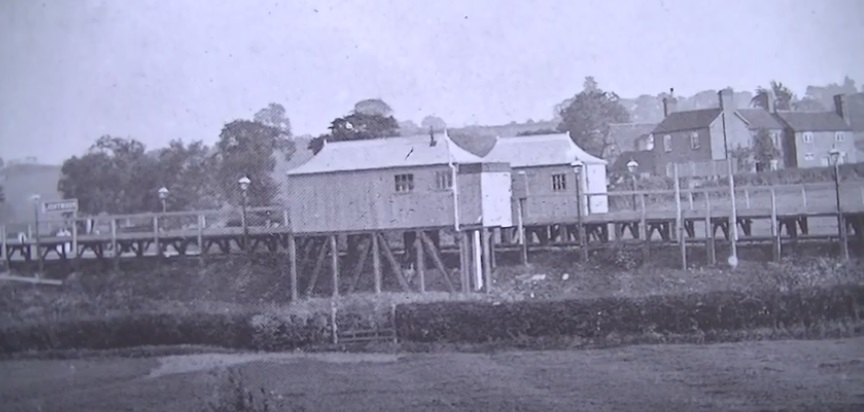
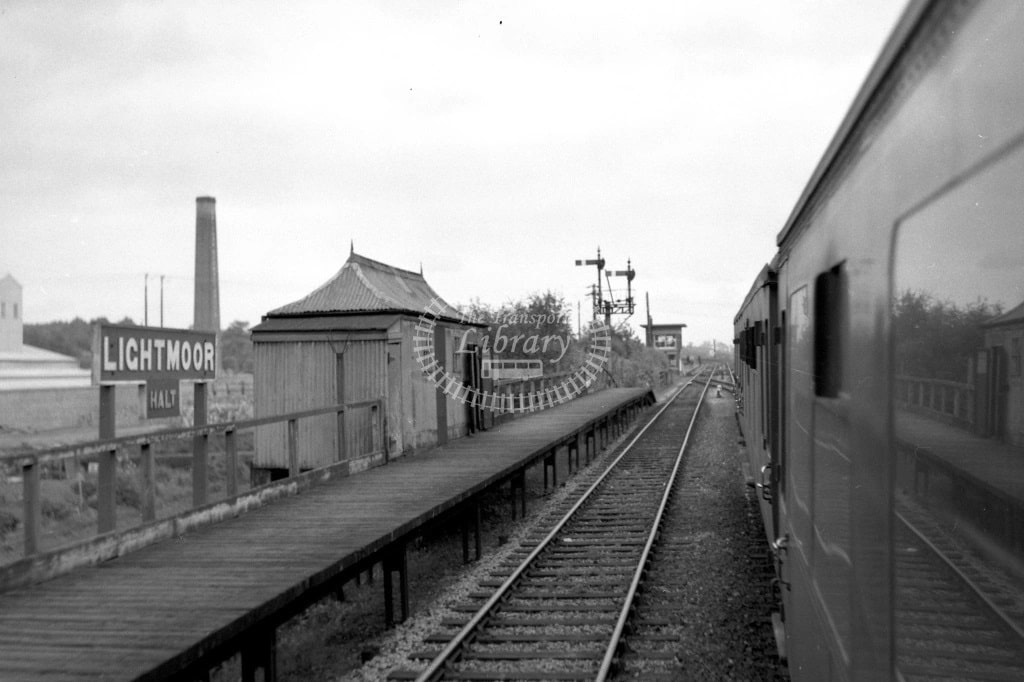
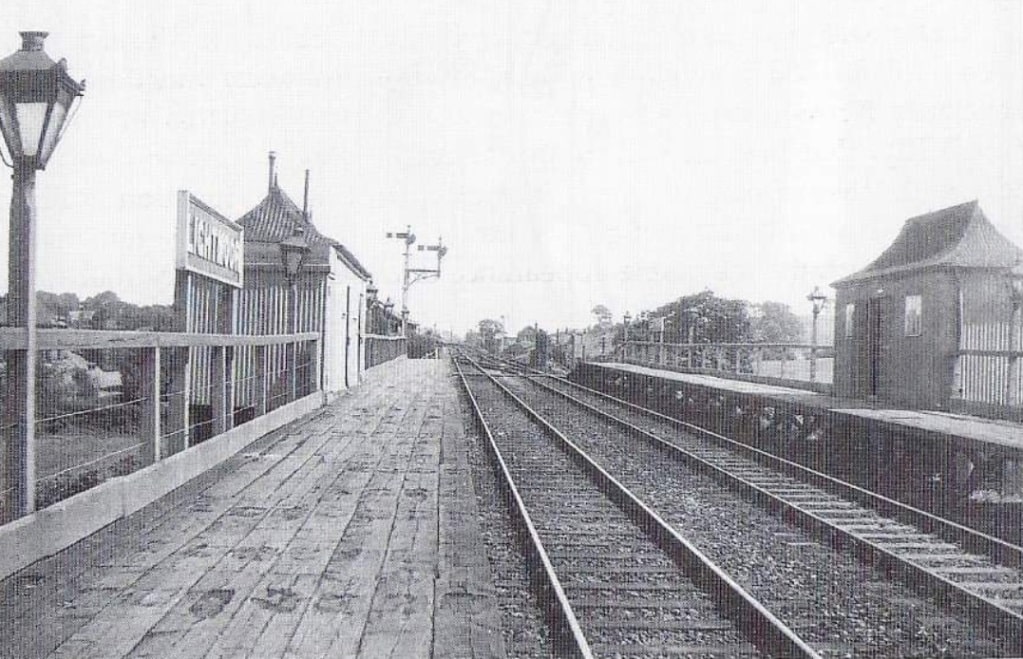
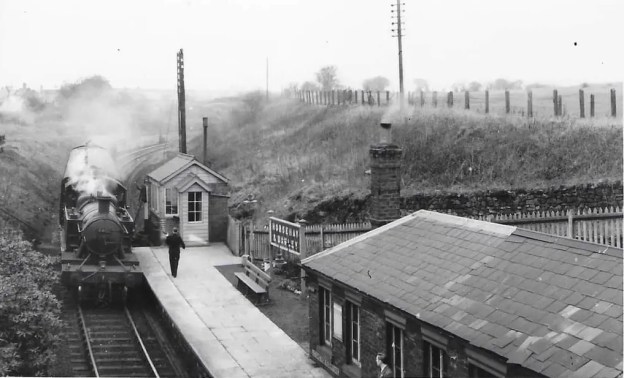
The road bridge was immediately followed by Lightmoor Station (or Lightmoor Platform (its earlier name)) which is shown below. The station was opened in 1907 and closed in 1962. It was of timber construction with a GWR Pagoda style waiting shelter on each platform. A search online led to a video about the Madeley branch on YouTube which included this image of the station. … [5]

This photograph from the 1920s shows Lightmoor Station, also known as Lightmoor Platform or Lightmoor Halt. [4] A very similar photograph can be seen on PicClick as well. [8]
This image is embedded from the Transport Treasury Website. It shows a view from a train looking East through Lightmoor Halt on 23rd May 1960. The modern signal box can be seen in the middle distance. The photographer was James Harrold [7]
Another view, this time facing East, was shared by Metsa Vaim EdOrg on the Telford Memories Facebook Group on 3rd November 2018. It was part of a short pamphlet found in an Oxfam Shop. [9]

The next two pictures are separated by 67 years, the first was taken in 1900, the second in 1967. …

This and the next picture were taken from approximately the same location on the South side of the line and focus on the site of Lightmoor Station. This image is from 1900. (c) The Ironbridge Gorge Museum Trust and included here by kind permission of the Archivist. [39]
This image is dated 1967. Both were shared on the Telford Memories Facebook Group by Metsa Vaim EdOrg on 28th February 2020, (c) G.F. Bannister. [39]
The immediate site of the Station as shown on the 25 ” OS Map of the mid-1920s. Pedestrian access to the station was via ramps and steps from Brick Kiln Bank. I was unable to find these on my short visit on 12th July 2022. [16]
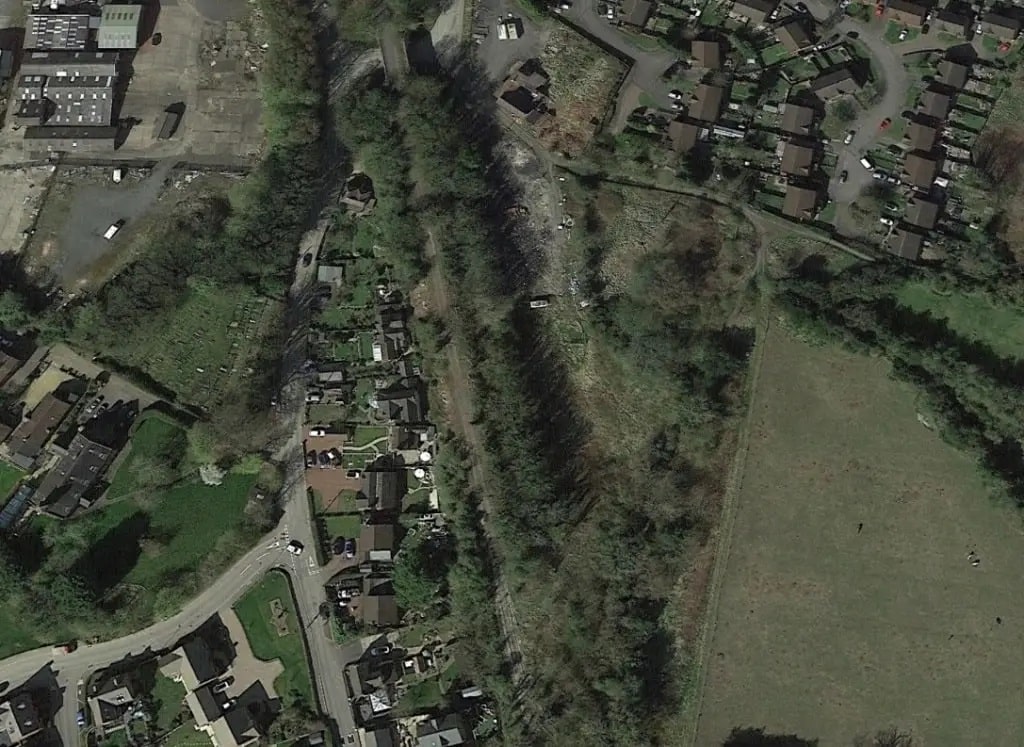
The location of Lightmoor Station shown on the modern satellite images provided by the National Library of Scotland. [6]
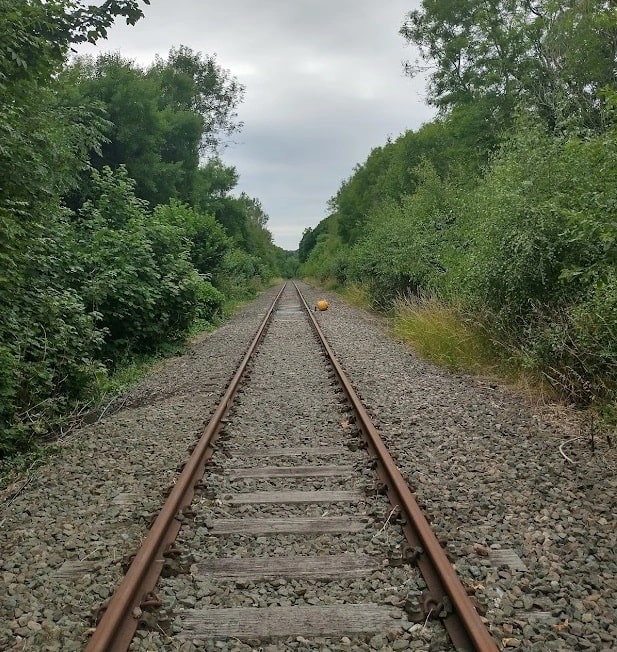
The view looking West through the site of the Station towards Coalbrookdale which will make up the third part of this story! [My photograph, 12th July 2022]

References

  1. Adrian Knowles; The Wellington, Much Wenlock and Craven Arms Railway; Lightmoor Press, Lydney, Gloucestershire, 2022.
  2. https://hyperleap.com/topic/Wellington_and_Severn_Junction_Railway, accessed on 26th June 2022.
  3. https://upload.wikimedia.org/wikipedia/commons/7/75/Lightmoor_Junction_-geograph.org.uk-_1306889.jpg, accessed on 13th July 2022.
  4. https://www.youtube.com/watch?v=E8Ln_xKS1rs, accessed on 13th July 2022.
  5. M.E. Quick; Railway passenger stations in England, Scotland and Wales – a chronology; The Railway and Canal Historical Society, Richmond, 2022, p 264.
  6. https://maps.nls.uk/geo/explore/#zoom=17&lat=52.64265&lon=-2.47528&layers=168&b=1, accessed on 13th July 2022.
  7. https://thetransportlibrary.co.uk/index.php?route=product/product&product_id=166517&search=Welshpool+Light+Railway&page=3, accessed on 13th July 2022.
  8. https://picclick.co.uk/Lightmoor-Railway-Station-Photo-Coalbrookdale-to-Horsehay-and-251656443717.html, accessed on 13th July 2022.
  9. https://www.facebook.com/photo/?fbid=118347129158964&set=pcb.2472367969447858, accessed on 13th July 2022.
  10. https://books.google.co.uk/books?id=DZk5DAAAQBAJ&pg=PT186&lpg=PT186&dq=Lightmoor+Platform&source=bl&ots=Kf07E0ImOy&sig=ACfU3U1kF9SCtBCtIdHL41HUHUyTvPQG1w&hl=en&sa=X&ved=2ahUKEwi0vfSThfb4AhUSTMAKHSlnD48Q6AF6BAgcEAM#v=onepage&q=Lightmoor%20Platform&f=false, accessed on 13th July 2022.
  11. David Clarke; The Railways of Telford; Crowood Press, Marlborough, Wiltshire.
  12. https://www.facebook.com/photo/?fbid=2082077232116276&set=gm.2202364713114853, accessed on 13th July 2022.
  13. https://www.facebook.com/photo/?fbid=4209532492131&set=gm.768508263167179, accessed on 13th July 2022.
  14. https://www.facebook.com/photo/?fbid=253268022333540&set=gm.3775370475814261, accessed on 13th July 2022.
  15. https://maps.nls.uk/view/101594479, accessed on 30th June 2022.
  16. https://maps.nls.uk/view/121150832, accessed on 13th July 2022.
  17. https://www.openrailwaymap.org, accessed on 7th July 2022.
  18. https://media-cdn.tripadvisor.com/media/photo-s/13/d0/4d/11/20180722-121709-largejpg.jpg, accessed on 8th July 2022.
  19. https://maps.nls.uk/view/101594458, accessed on 8th July 2022.
  20. https://www.facebook.com/photo/?fbid=1404924826218617&set=pcb.1546650862019578, accessed on 8th July 2022.
  21. https://www.facebook.com/photo/?fbid=119428015717542&set=pcb.2476630165688305, accessed on 8th July 2022.
  22. https://www.facebook.com/photo/?fbid=10219269211828042&set=gm.2617110968306890, accessed on 8th July 2022.
  23. https://www.facebook.com/photo/?fbid=3854962388100&set=gm.715668985117774, accessed on 8th July 2022.
  24. https://www.geograph.org.uk/photo/2055534, accessed on 8th July 2022.
  25. https://maps.nls.uk/geo/explore/#zoom=18&lat=52.65277&lon=-2.47592&layers=168&b=1, accessed on 9th July 2022.
  26. https://commons.m.wikimedia.org/wiki/File:Railway_bridge_over_Doseley_Road.jpg, accessed on 9th July 2022.
  27. https://en.m.wikipedia.org/wiki/Telford_Steam_Railway#/media/File%3APeckett_no_1722.JPG, accessed on 9th July 2022.
  28. https://www.geograph.org.uk/photo/4921288, accessed on 10th July 2022.
  29. http://dawleyhistory.com/Postcards/Doseley.html, accessed on 11th July 2022.
  30. https://maps.nls.uk/view/101594482, accessed on 12th July 2022.
  31. https://maps.nls.uk/view/101594476, accessed on 12th July 2022.
  32. https://maps.nls.uk/view/121150832, accessed on 12th July 2022.
  33. http://search.shropshirehistory.org.uk/collections/getrecord/CCS_MSA23530, accessed on 19th April 2022.
  34. https://zh.mindat.org/loc-379098.html, accessed on 19th April 2022.
  35. http://search.shropshirehistory.org.uk/collections/getrecord/CCS_MSA3858, accessed on 19th April 2022.
  36. http://news.bbc.co.uk/1/hi/england/shropshire/4806558.stm, accessed on 12th July 2022.
  37. Allen Jackson, A Contemporary Perspective on GWR Signalling: Semaphore Swansong; Marlborough, Wiltshire: The Crowood Press, 2015.
  38. https://en.wikipedia.org/wiki/Lightmoor_Junction, accessed on 12th July 2022.
  39. https://www.facebook.com/photo/?fbid=253945282265814&set=pcb.3778964578788184, accessed on 13th July 2022.
  40. https://www.facebook.com/photo/?fbid=205899673737042&set=pcb.3296383353712978, accessed on 13th July 2022.
  41. https://www.facebook.com/photo/?fbid=1001865753312225&set=pcb.2086719181346074, accessed on 13th July 2022.
  42. https://www.facebook.com/photo?fbid=271605153296996&set=gm.1584784474872883, accessed on 13th July 2022.

The Railways of Telford – the Wellington to Severn Junction Railway (W&SJR) – Part 1 – Wellington to Horsehay

The featured image shows a 1950 service to Much Wenlock and Craven Arms entering Horsehay and Dawley Railway Station. Details of the photograph are given towards the end of this article.

“The Wellington and Severn Junction Railway … was built between 1857 [and] 1861 and formed part of the Wellington to Craven Arms Railway. For much of its working life, it was operated by the Great Western Railway and subsequently the Western Region of British Railways.” [1]

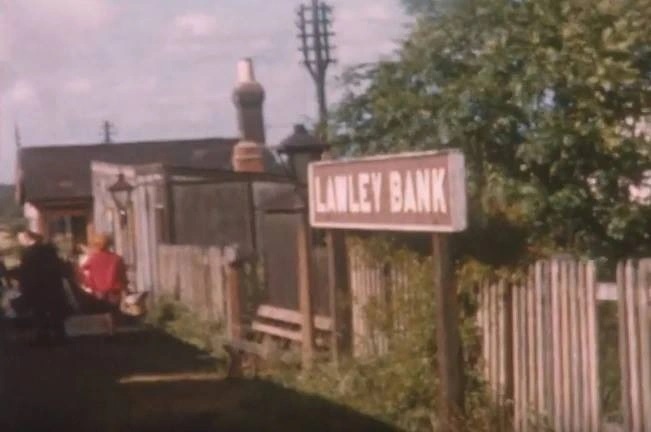
Wikipedia tells us that “Its route included the following stations: – Wellington, Ketley, Horsehay and Dawley, Doseley Halt, Lightmoor Platform and Coalbrookdale.” [1] That list on Wikipedia is not exhaustive: Ketley Town Halt was opened by the GWR in March 1936 a little to the South of the Sinclair Iron Foundry; [17] New Dale Halt opened in 1934 to serve Newdale; [18] Lawley Bank Station was set in a relatively rural area; [19] Green Bank Halt (close to Jigger’s Bank, between the bridge over Jigger’s Bank and that over Cherry Tree Hill) opened in 1934 and closed in 1962. [16]

The necessary Act of Parliament, the Wellington and Severn Junction Railway Act, was promulgated in 1853. [3]

The images below show the developing standard-gauge rail network around the River Severn. By 1957 the W&SJR linked Ketley Junction to Lightmoor. It was a little longer before the line made a connection with the Severn Valley Railway and eventually the route through to Craven Arms opened.

Ketley Junction to Lightmoor was open by 1857. [4]
The Severn Valley line was open by the time covered by this map. [4]
The complete route of the Wellington, Much Wenlock & Craven Arms Railway was in use by 1867. [4]
The railways in the area around what was the Wellington & Severn Junction Railway (W&SJR) as shown on the OpeRailwayMap. OpenRailwayMap (previously called “Bahnkarte”) is a detailed online map of the world’s railway infrastructure, built on OpenStreetMap data. It has been available since mid-2013 at OpenRailwayMap.org [40]

Adrian Knowles [2] tells us that it was always intended that there would be a standard-gauge railway serving “the western side of the coalfield – particularly the ironworks at Ketley and Horsehay – and indeed the main Coalbrookdale Company works following the cutback of the original Shrewsbury & Birmingham (S&B) scheme to Lightmoor in 1851.” [2: p19]

In 1851/52, Dickson & Co. built a short line from Waterloo sidings on the Shrewsbury & Birmingham Railway close to Wellington to the Ironworks at Ketley. The Coalbrookdale Co. became major backers of an initiative to extend that short line down into the Severn Gorge.

Knowles tells us that “the route was surveyed during 1852 by John Barber of Wellington and initial plans were drawn up by John Mackenzie.” [2: p19]

In an effort to keep the LNWR out of the area around Coalbrookdale the S&B board granted running rights over their line between Wellington and Ketley and part-funded the parliamentary process required to allow the line to progress.

The Act received Royal Assent on 20th August 1853, the same day as the Severn Valley Railway Act. [2: p20] It “dictated that the S&B, LNWR and SUR should allow free passage to all traffic to and from the W&SJR and that the W&SJR should reciprocate in accommodating traffic from those companies.” [2: p20]

Knowles tells us that the estimated cost of the new railway was £60,000. The share uptake was slow but enough was raised to make headway on purchase of land. Nothing was spent on construction until all the land had been acquired. By mid-1855 funds were still inadequate to allow a start on construction along the full length of the line. The board decided to start work on the heaviest engineering works, which began on 25th August 1855. [2: p20] A start was made on the length of the line between Ketley Junction and Horsehay which included Horsehay Tunnel.

By 1st May 1857 the line between Ketley Junction, including Heath Hill Tunnel, was ready to open for goods and mineral traffic. [2: p22-23] It is interesting that because the branch “was being used largely to serve Horsehay Works, and the GWR was withholding any revenue payments pending a formalised working agreement which would set the amount, the Coalbrookdale Company sympathised with W&SJR shareholders who were receiving no returns on their money. The Coalbrookdale Company therefore agreed to pay a five per cent annual dividend while negotiations with the GWR over operating the line continued. The first such payment was made to shareholders on 1st July 1958.” [2: p24]

Steady progress was being made on the remainder of the line to Lightmoor. “During the winter of 1857-8, £5,732 was spent on the work, all subscribed by the Coalbrookdale Company which by this time had a 75% stake in the W&SJR.” [2: p24]

Knowles goes on to mention arrangements made at Lightmoor to cope temporarily with the unfinished connection to the GWR (Shrewsbury & Birmingham) Madeley Branch. “All trains passing from the W&SJR to the GWR and vice versa had to reverse at Lightmoor.” [2: p 24]

Passenger services between Wellington, Lightmoor and Shifnal eventually started operating on 2nd May 1859.

Soon after the opening of the W&SJR proposals were developed by the Wenlock Railway to pass through Coalbrookdale and Brosley and led to a significant enhancement in the value of the W&SJR as it would become part of a through route. [2: p25]

“Almost as soon as the Wenlock Railway Bill received Royal Assent in July 1861 the GWR, now eager not only to have control of the railways to Coalbrookdale, but also to ensure that a line was actually built, offered to assume responsibility for construction of the Lightmoor-Coalbrookdale section. With the blessing of the Wenlock Railway the GWR gained powers for this by including the line in their next ‘omnibus’ Bill later in 1861.” [2: p26]

It seems reasonable to include the line through Coalbrookdale in our review of the W&SJR. It was about 1.5 miles in length and gave the GWR direct access to Coalbrookdale. It included the cutting of a ledge from the steep hillside and a 26-arch brick viaduct which carried the line through the Coalbrookdale Company’s works and over Upper Furnace Pool. Knowles says that the biggest obstacle was “‘New Pool’ at the head of Coalbrookdale. There was no alternative but to drain the pool temporarily and build a massive retaining wall to hold back the water, after which the new track-bed was laid on the strip of reclaimed land.” [2: p65]

The line from Lightmoor Junction onwards was double-track and generally fell at 1:50 towards the River Severn.

The Route

Wellington Railway Station was the junction station for the Coalbrookdale line (W&SjR). The bay platform on the South side of the station site was shared with the Coalport branch passenger services – the 6″ OS Survey of 1881/82, published in 1888. [5]
Approximately the same area as it appears on the 25″ OS Map of 1901, published in 1902. The station is on a relatively confined site and little has changed in the twenty years between 1881 and 1901. [6]
The same area in the 21st century as shown on the ESRI World Mapping provided by the National Library of Scotland. The station layout is much rationalised. The Goods yard is a casualty of progress and development! A single bay platform line remains. [7]
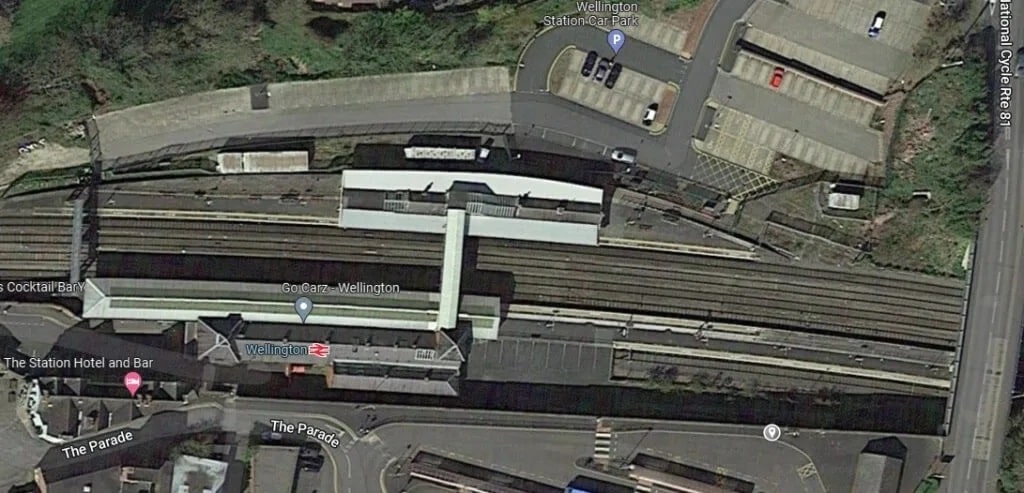
The immediate station area as it appears on Google Maps in 2022. The bay platform can more easily be seen on this image. Platform 3, the bay platform, is now out of regular use following the withdrawal of the Wellington to Walsall local service and its subsequent replacement with through Shrewsbury to Birmingham New Street local services. Traces of another defunct platform face (the outer side of the old up island platform) can be seen from the car park behind platform 1. [Google Maps][13]
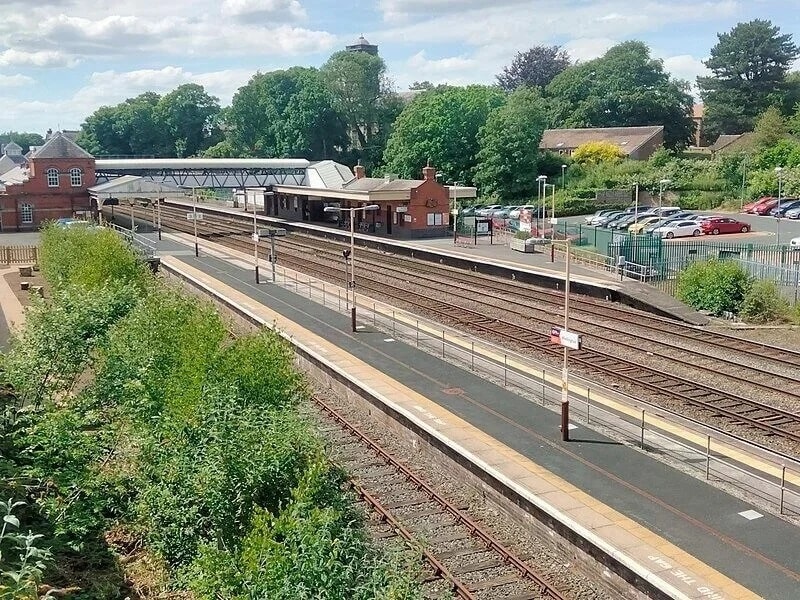
Wellington Railway Station in June 2022, (c) Kylxa, authorised for reuse under a Creative Commons Licence (CC BY-SA 4.0) [13]
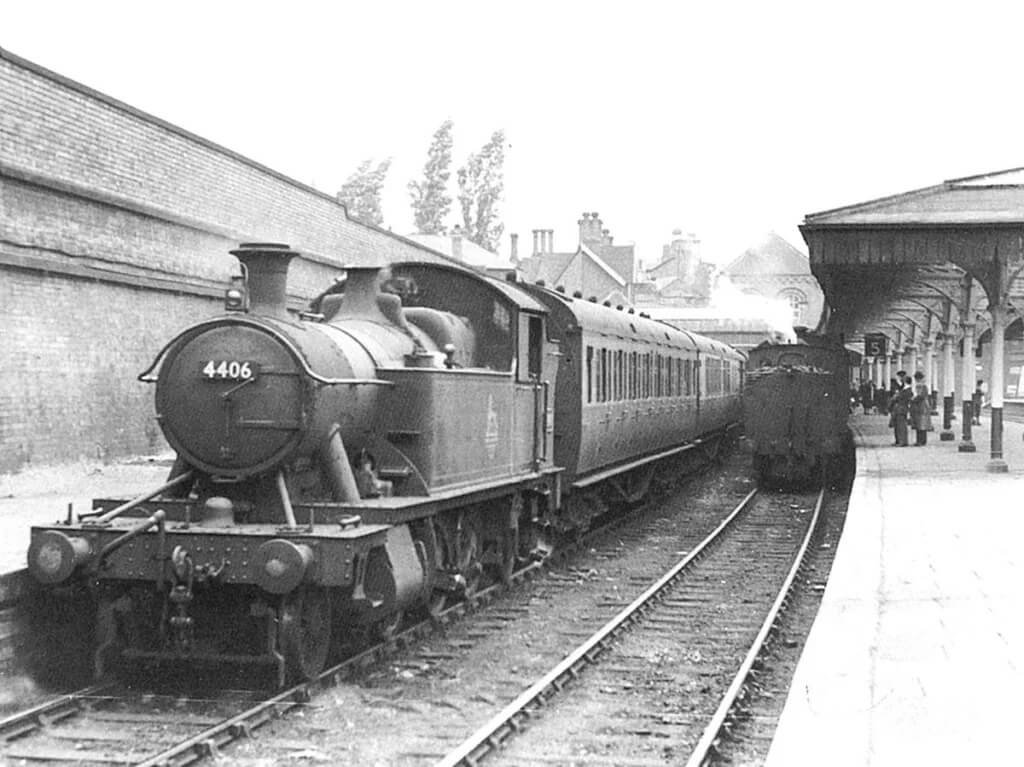
The bay platforms at Wellington Railway Station in July 1950. Small Prairie No. 4406 is about to work the 4.30pm to Much Wenlock running down the W&SJR. The loco to its right is LNWR 0-6-2 No. 58904 with the 3.53 to Coalport (east) using the LNWR Coalport Branch. [14]
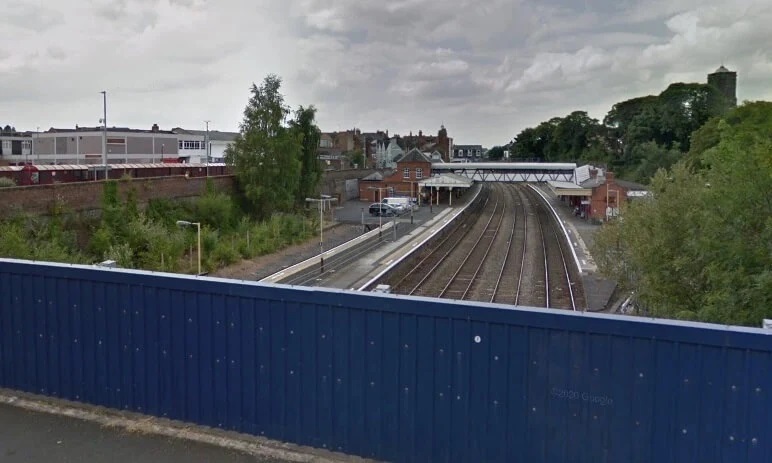
Wellington Railway Station in July 2018, looking West from the overbridge. [Google Streetview, July 2018]
Looking East from the same overbridge in July 2018. The arched-bridge ahead is King Street Bridge. [Google Streetview, July 2018]
The view West, back towards Wellington Railway Station from King Street Bridge. [Google Streetview, May 2021]
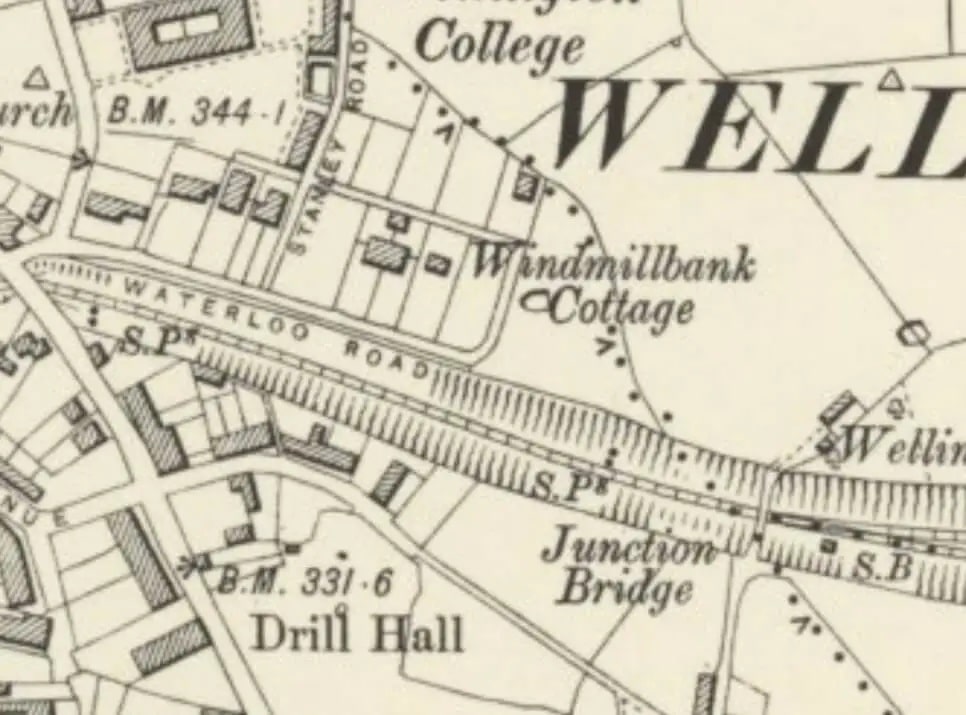
The view East from King Street Bridge. The bridge in the distance is Junction Bridge and it marks the Western extent of Wellington Junction. In the 2st century that bridge carries Mill Lane. [Google Streetview, May 2021]
The length of the line between King Street Bridge and Wellington Junction on the 6″ 1881/82 OS Map. [5]
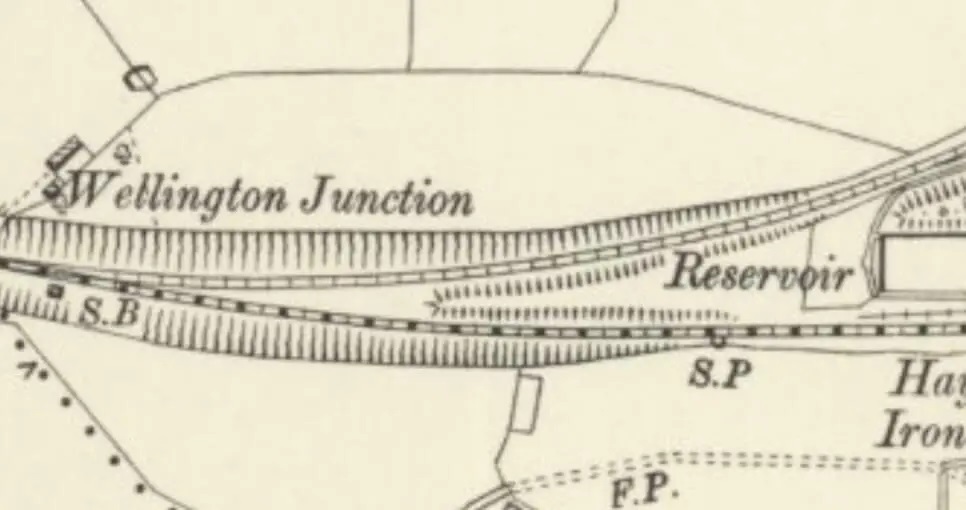
Wellington Junction in 1881/82 on the 6″ OS Map. [5]
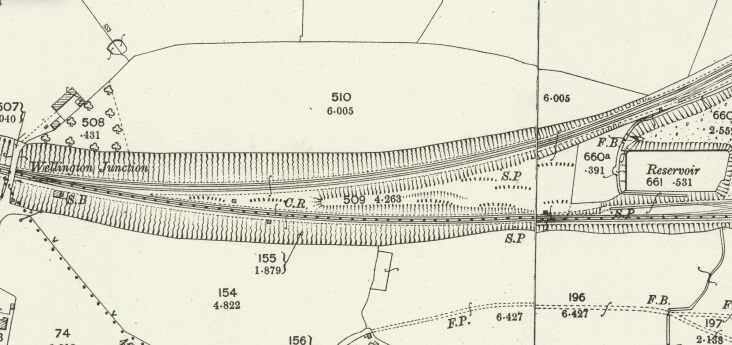
Wellington Junction in 1901 on the 25″ OS Map [8]
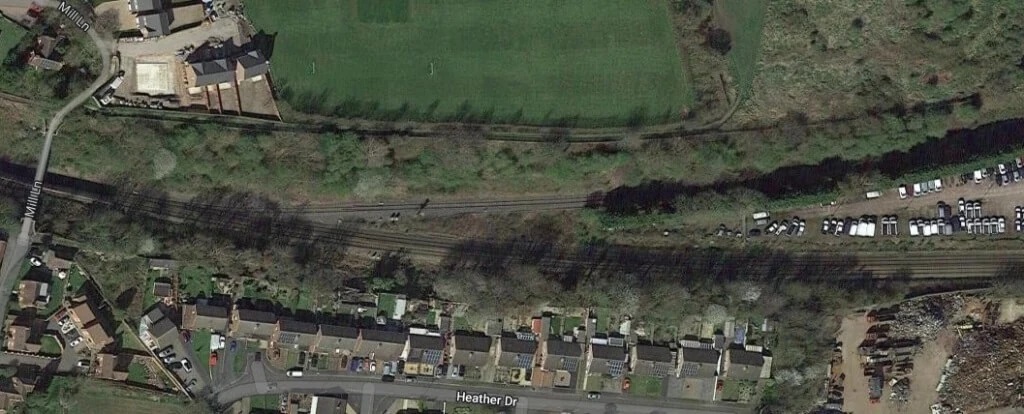
The same area in the 21st century [Google Maps]
The view East from Mill Lane Bridge in 2011. The railway junction has been rationalised with only a single line following the old LNWR Shropshire Union Railway Line. The old Shrewsbury and Birmingham Line (GWR) remains as a double-track mainline. [Google Streetview, March 2011]
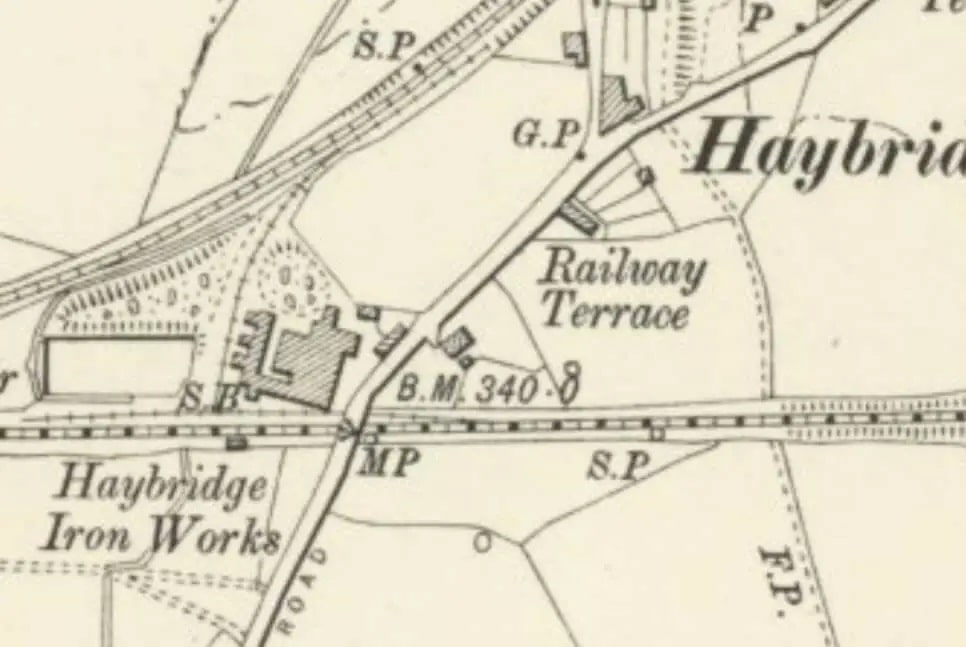
The line passed to the South of Haybridge Iron Works, 1881/82 on the 6″ OS Map. [5]
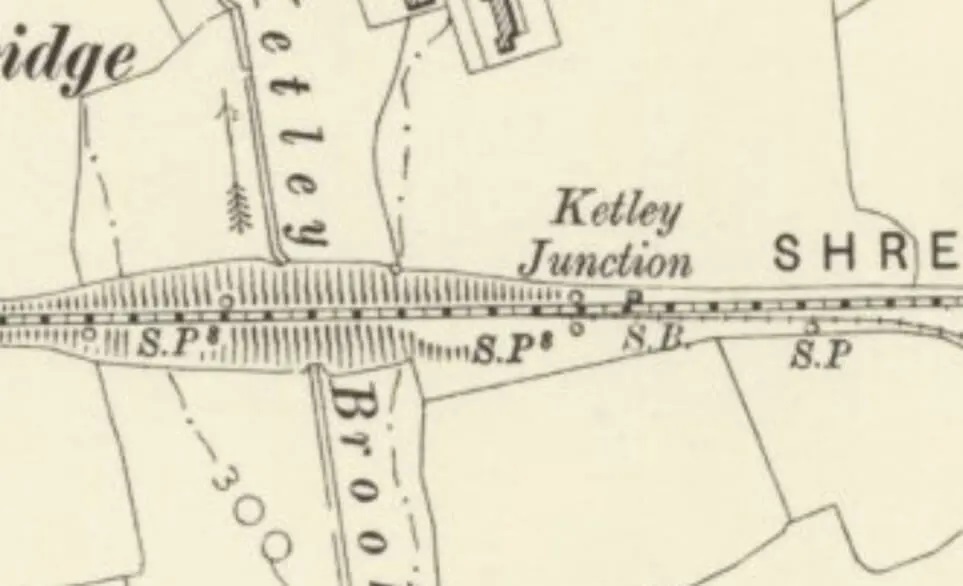
Ketley Junction followed after the mainline crossed Ketley Brook, 1881/82 on the 6″ OS Map. [5]
Trains for the W&SJR left the mainline and followed the single line round to the South before entering Ketley Station, 1881/82 on the 6″ OS Map. [5]
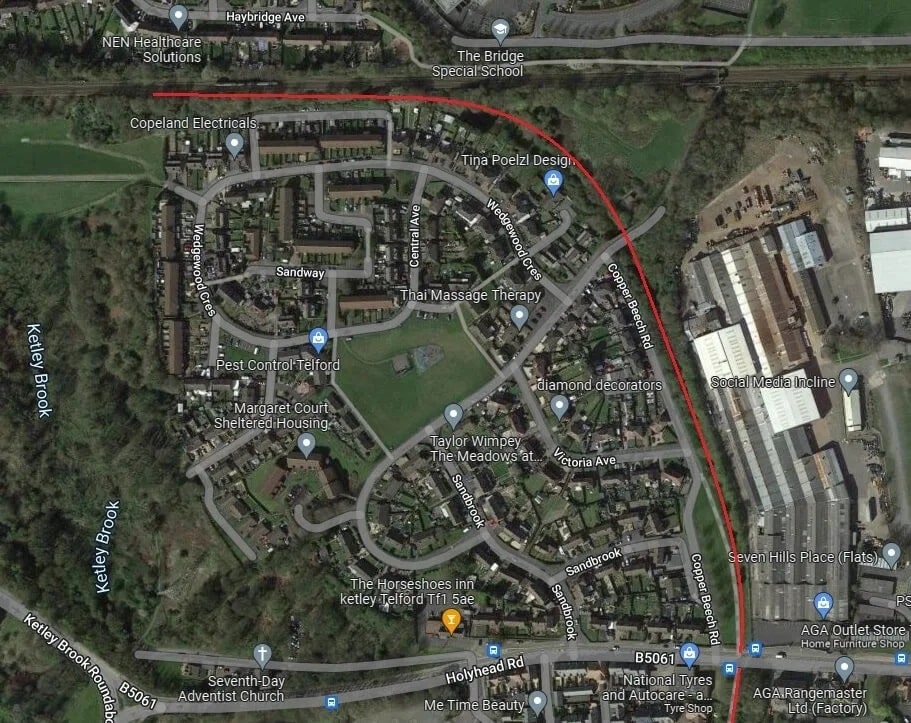
As we are now on the W&SJR route, the line of the railway is shown approximately on this modern satellite image. Ketley Station was just to the South of what was once the A5 but is now the B5061, Holyhead Road. The line can be seen on the OS Map above passing under an accommodation bridge on the curve round towards Ketley Station. That bridge remains in the 21st century carrying an extension to Copper Beech Road. [Google Maps, 2022]
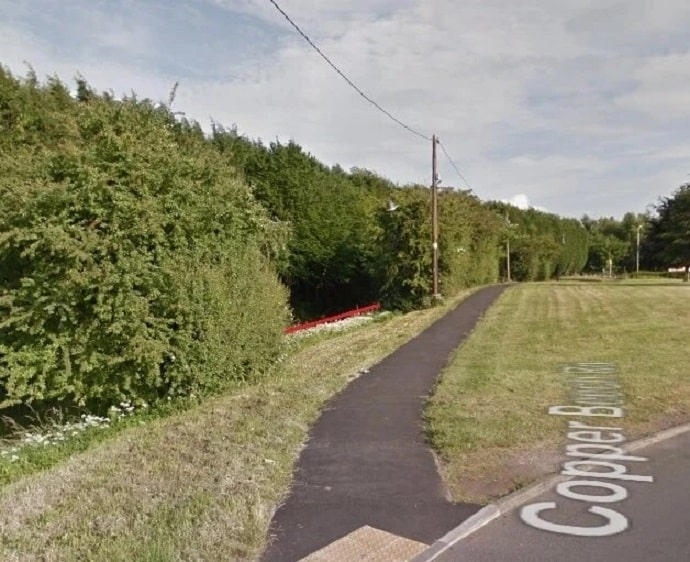
The refurbished accommodation bridge seen from Copper Beech Road. [Google Streetview, June 2015]
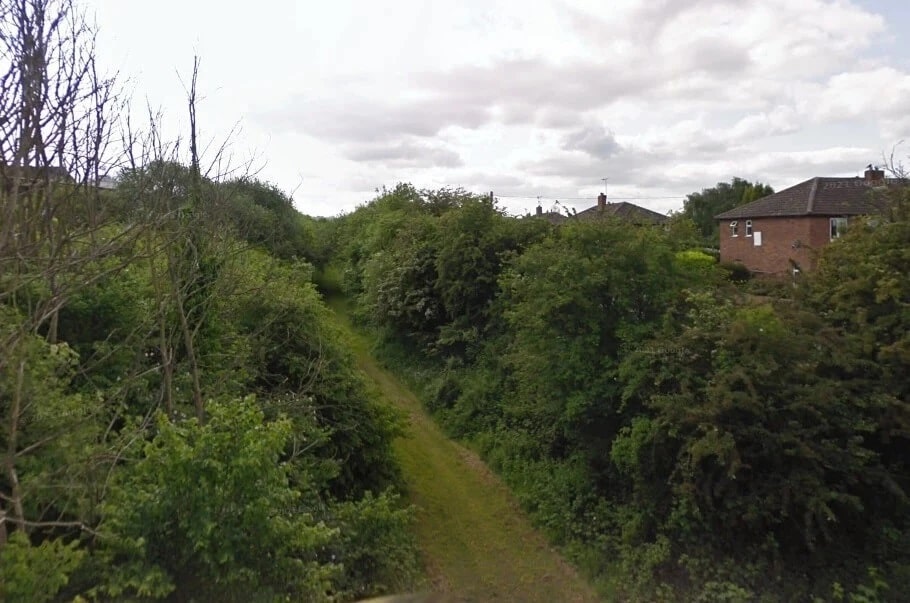
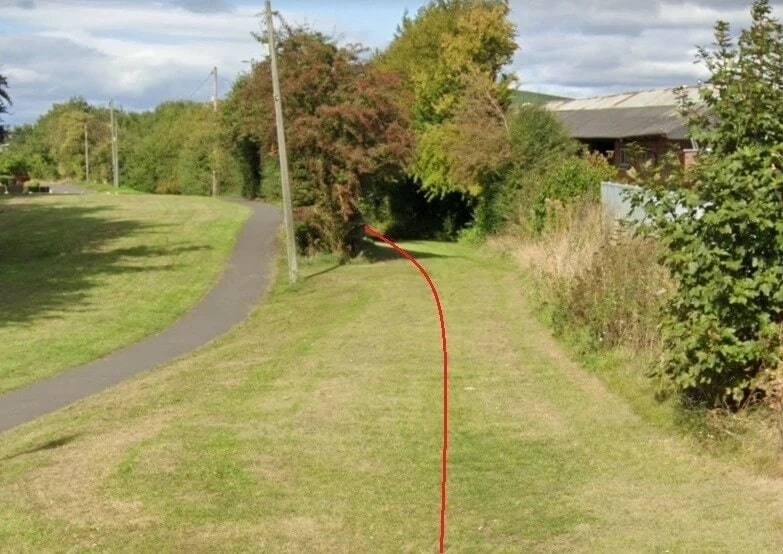
The view Northwest from the accommodation bridge. A red line shows the route of the railway. [Google Streetview, May 2011]
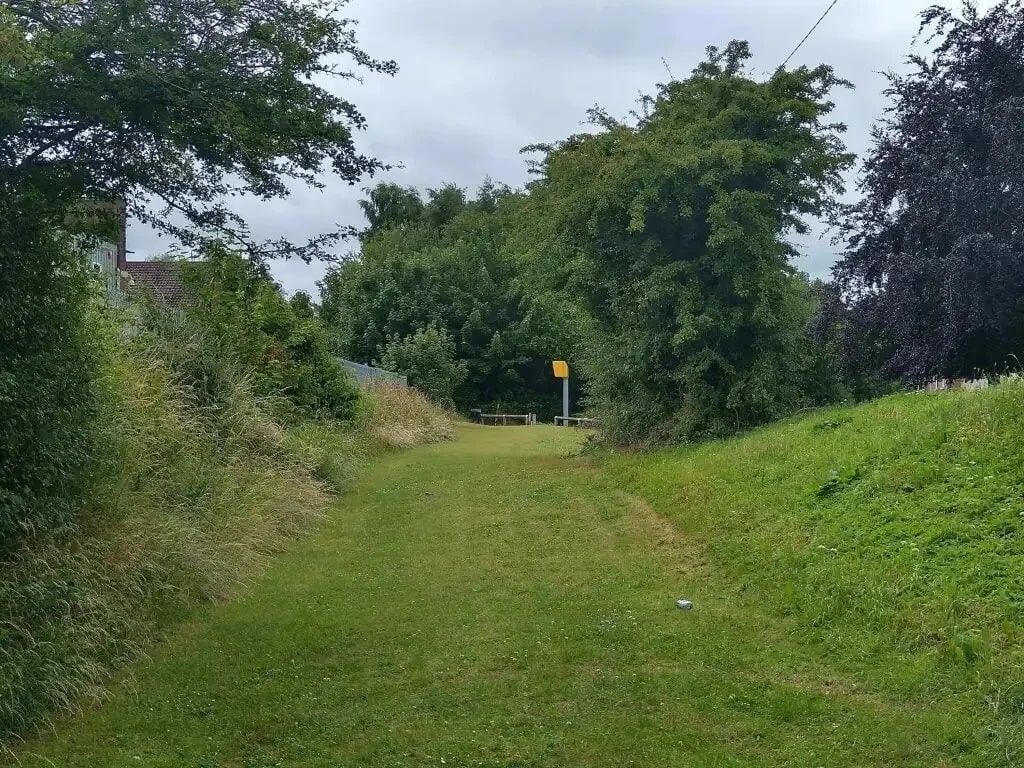
The view Southeast from the accommodation bridge. The route of the line is much more easily picked out than on the photograph above! However, by 2022 the grass route close to the accomodation bridge had become overgrown. A narrow footpath leads down the embankment on the East side of the bridge to track level. [Google Streetview, May 2011]
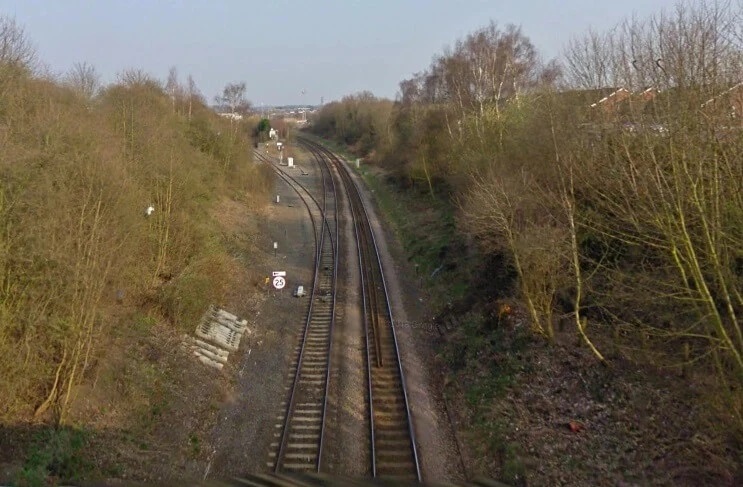
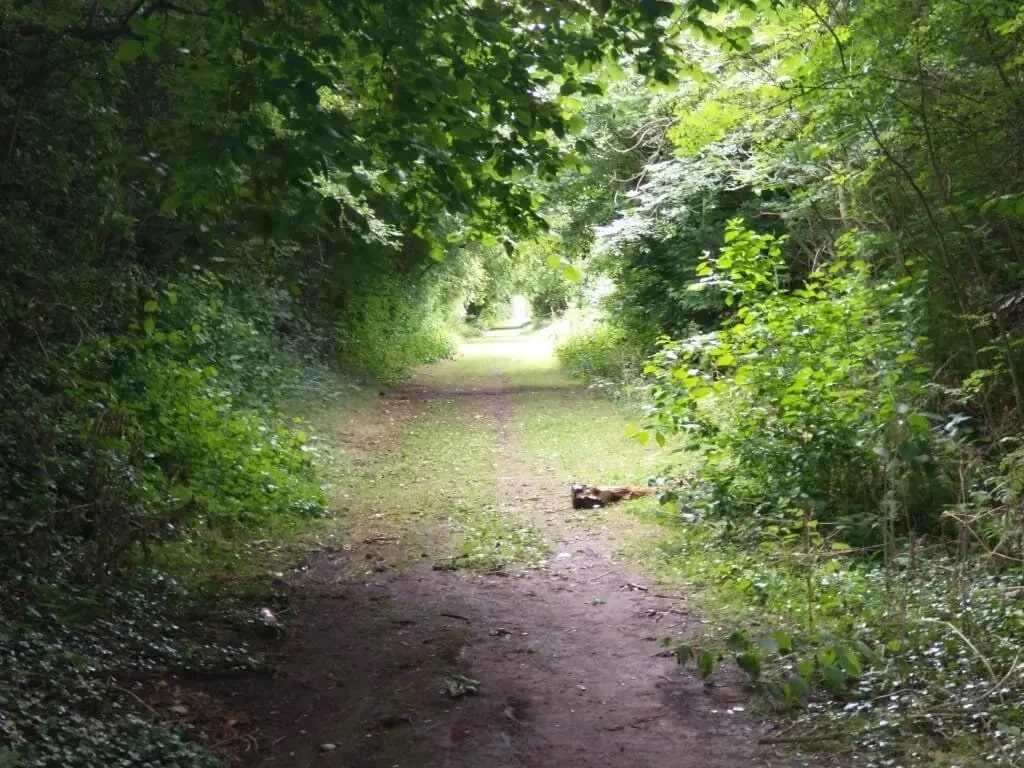
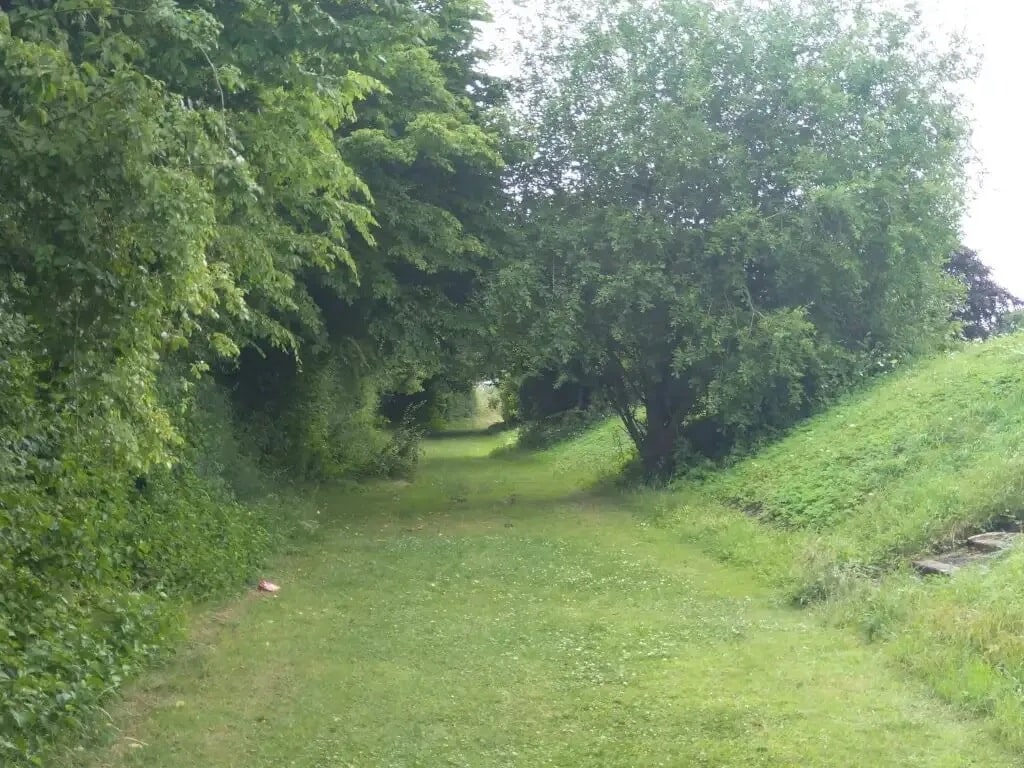
The track-bed of the W&SJR about 100 metres South of the accommodation bridge above. [My photograph, 2nd July 2022]
A short distance further south a stepped path from Copper Beech Road leads down to the old track bed which is maintained as a Greenway. [My photograph, 2nd July 2022]
Just a little further to the South, this image shows the old railway line in cutting alongside a footpath which leads off Copper Beech Road to the old level-crossing at what was once A5. [Google Streetview, June 2015]
The route of the railway approaching the old A5. [My photograph, 2nd July 2022]
The view North from Station Road, Ketley looking back along the route of the railway which was in cutting to a point relatively close to the road. [Google Streetview, September 2021]
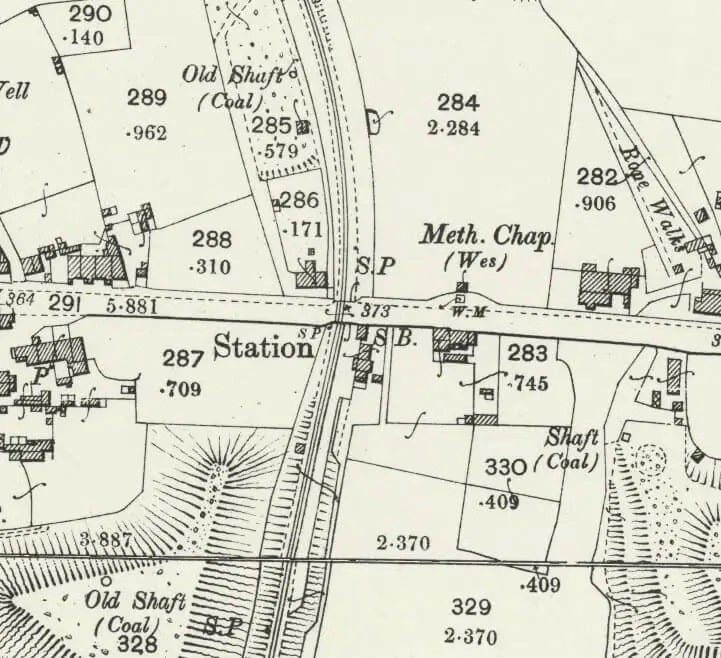
The Ketley Station site in 1901 as shown on the 25″ OS Map. [11]
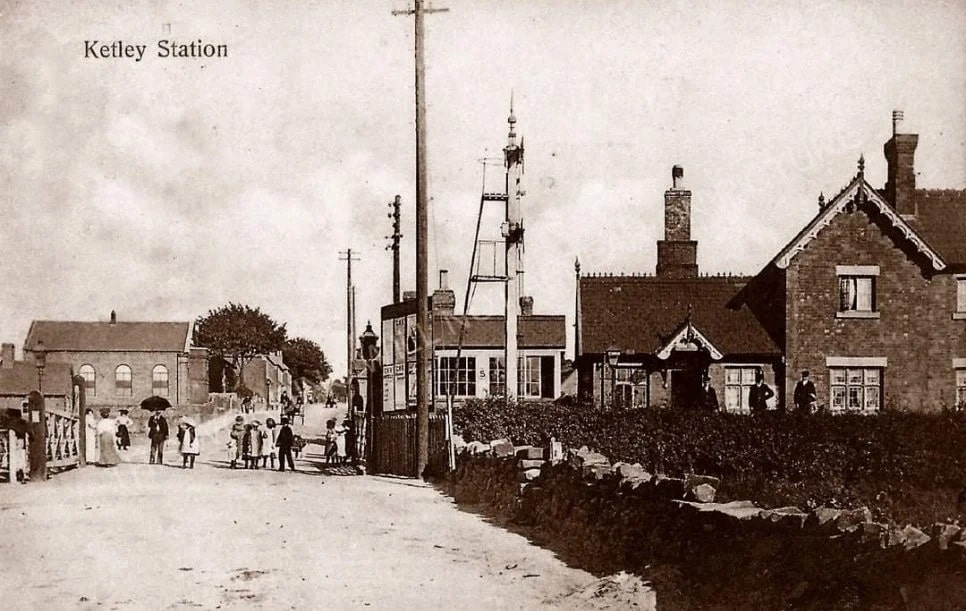
Postcard view of Ketley Railway Station from the West. The Methodist Chapel is visible in the distance on the left. Shared on the Telford Memories Facebook Group by Marcus Keane. [21]
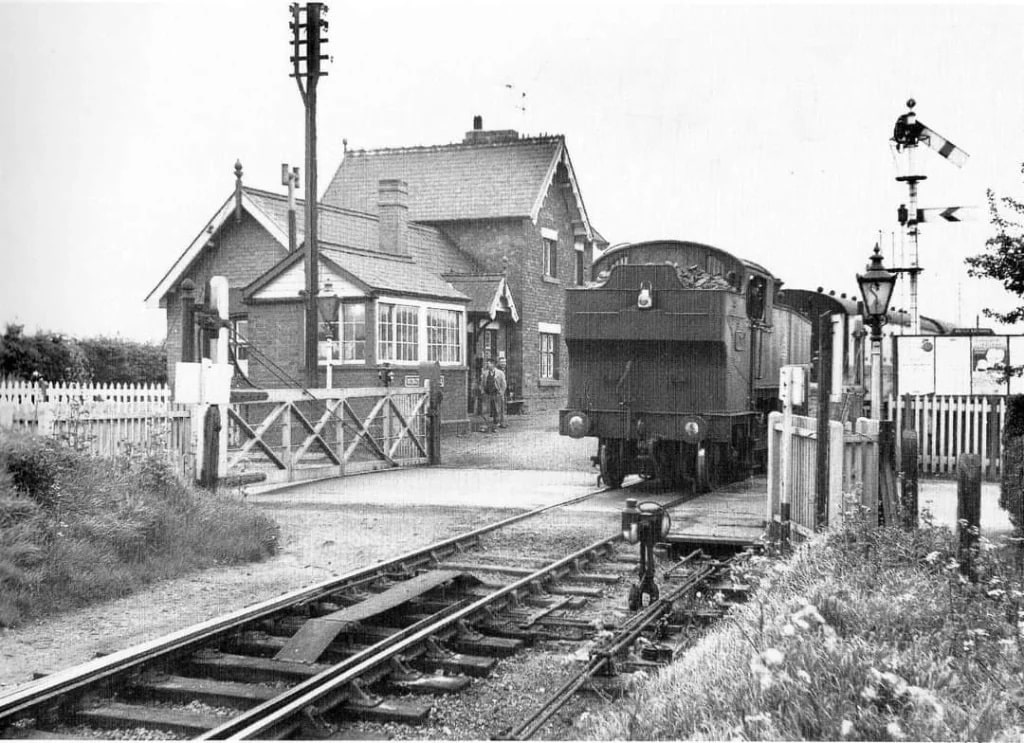
Ketley Station viewed from the Northwest in May 1957. Shared on the Telford Memories Facebook Group by Metsa Vaim EdOrg. [22]
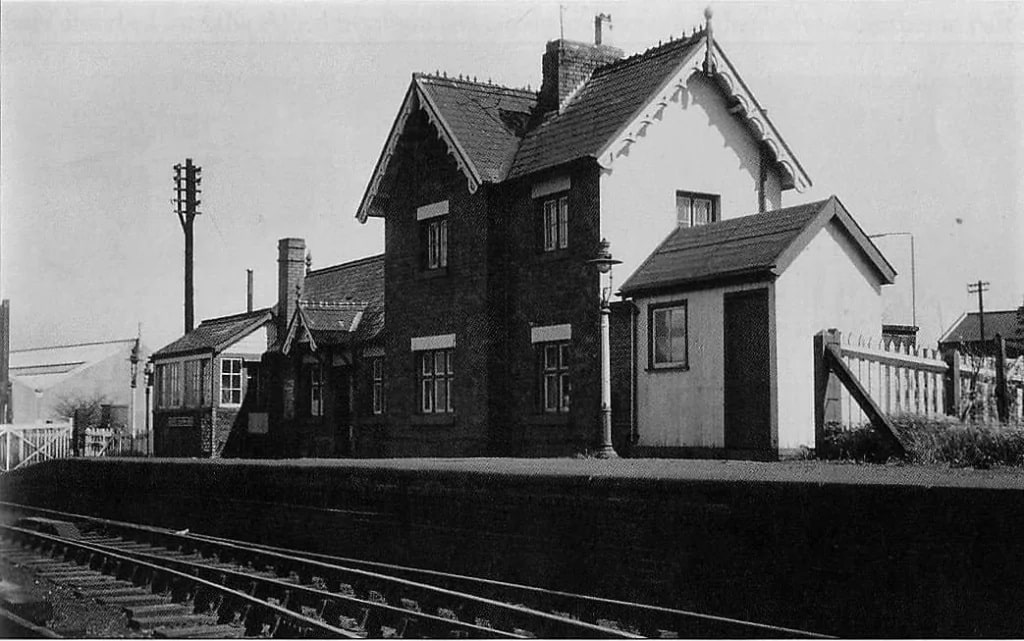
Ketley Station from the Southwest. Shared on the Telford Memories Facebook Group by Peter Wheeler. [23]
A view from the South along the platform at Ketley Station with crossing gates closed to allow traffic through on the A5 on 18th February 1967. Shared on the Telford Memories Facebook Group by Carol Anne Huselbee. [24]
The view South through Ketley Railway Station site from Station Road in September 2021. The redline gives the approximate alignment of the railway. [Google Streetview]
The remains of Ketley station platform and trackbed, looking due south toward Horsehay in May 2008. The photographer comments that the trackbed is now a public footpath and the picture is taken from the former site of a level crossing across what in railway days was the A5 trunk road, © Copyright Peter Whatley and licensed for reuse under this Creative Commons Licence (CC BY-SA 2.0). [12]
Looking back North from the location of Ketley Station towards what was once the level crossing. [My photograph, 2nd July 2022]
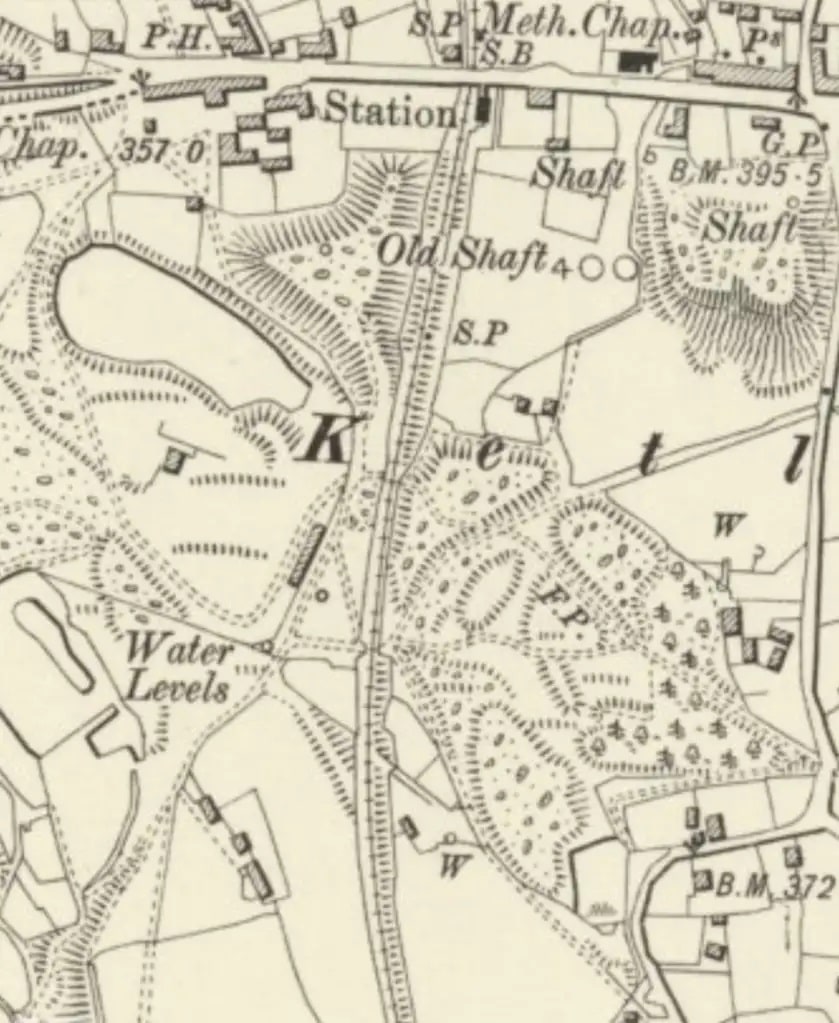
The 6″ OS Map 1881/82 survey as published in 1888, shows Ketley Station and the line continuing to the South. [5]
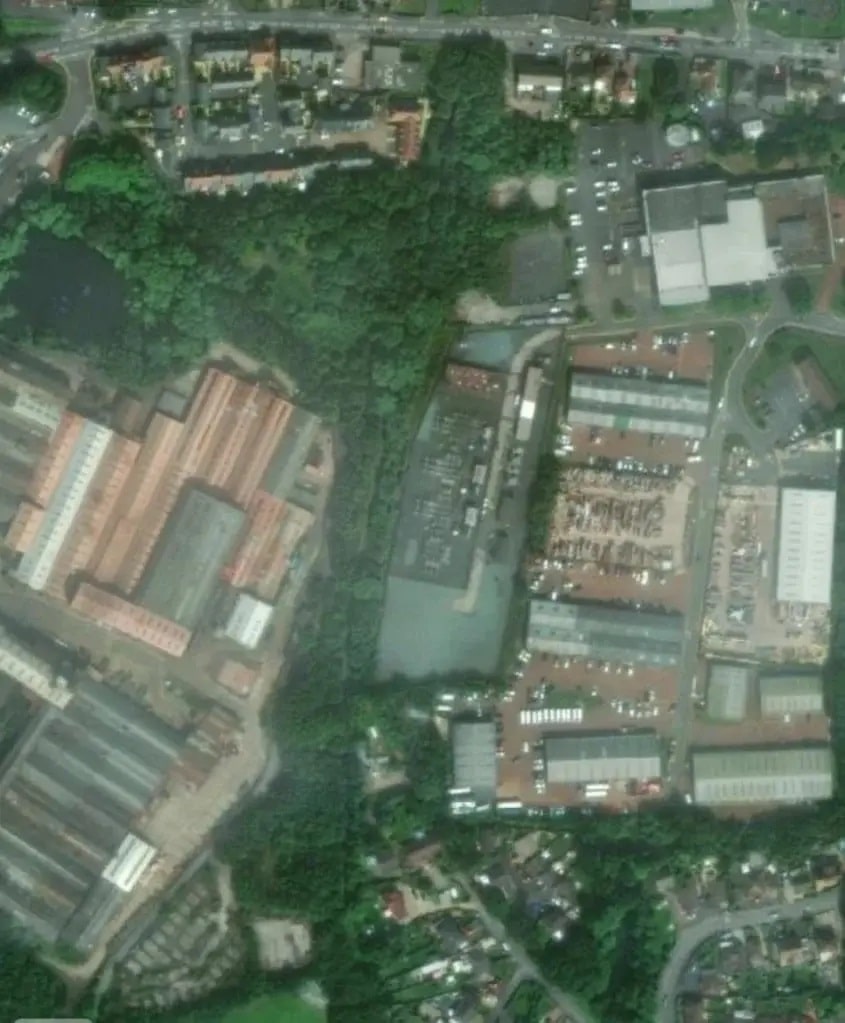
Approximately the same area on the modern satellite images provided by the National Library of Scotland. There is no need to highlight the route with a red line as the route is tree-lined and runs down the centre of the image. [27]
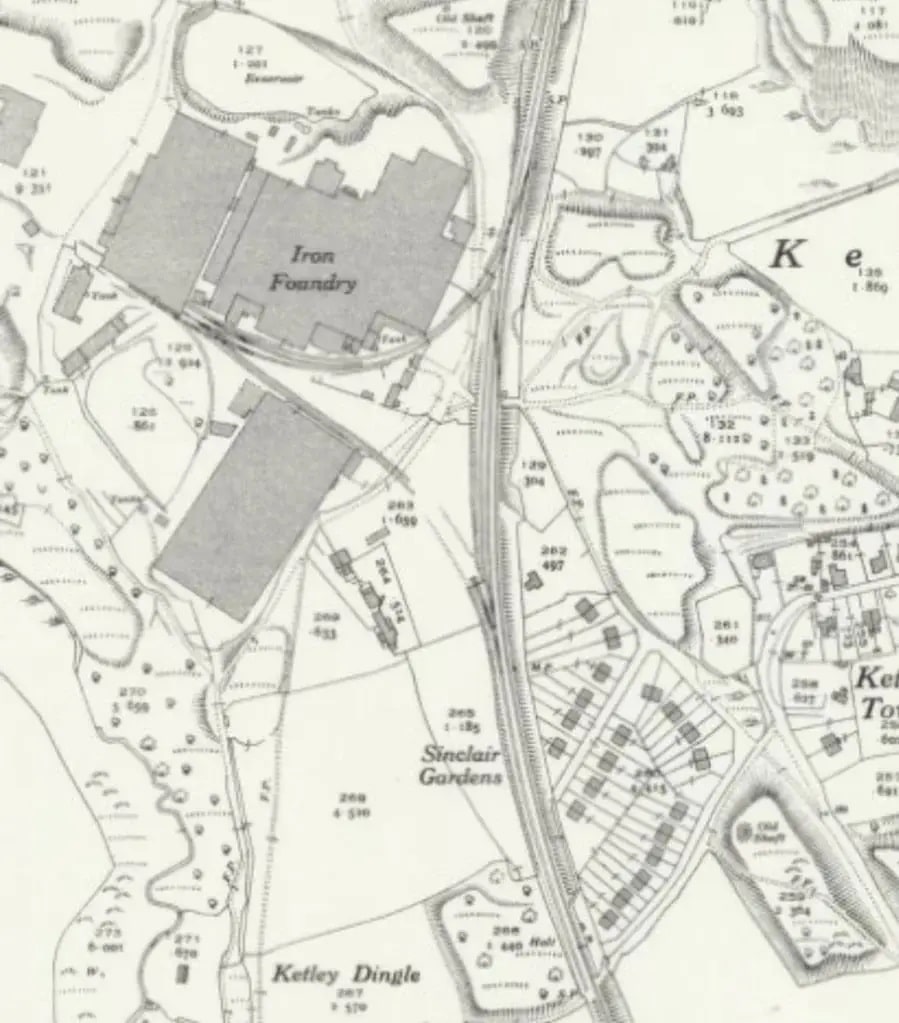
The 25″ OS Map as revised in 1937 shows private sidings to the Iron Foundry and Ketley Town Halt which can be seen to the South of Sinclair Gardens. [25]
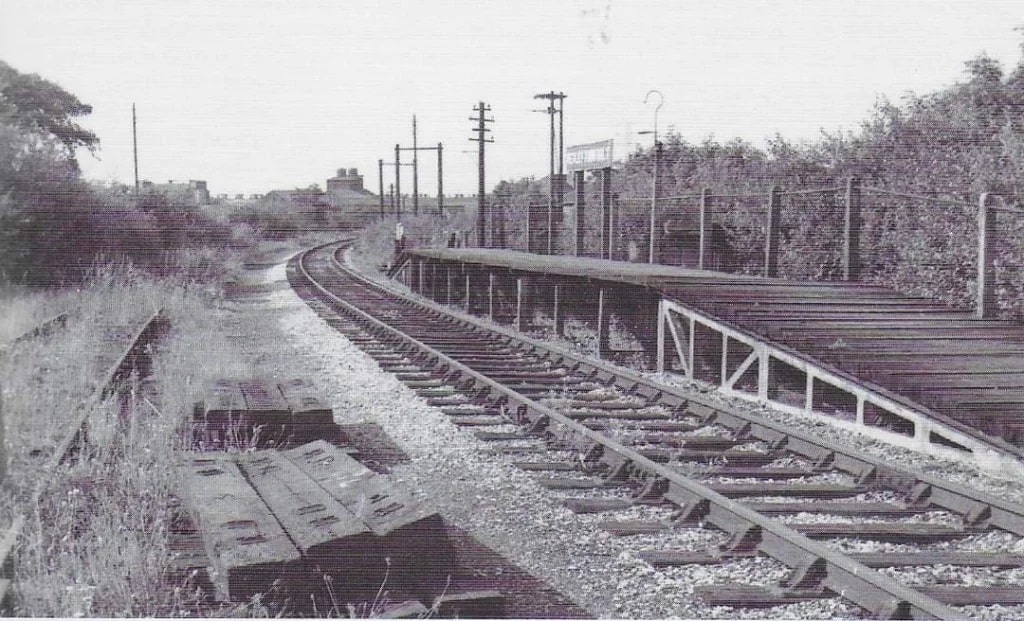
Ketley Town Halt in 1936. Shared on the Telford Memories Facebook Group by Metsa Vaim EdOrg. [26]
Looking South through the location of Ketley Town Halt. [My photograph, 2nd July 2022]
Looking North through the location of Ketley Town Halt. [My photograph, 2nd July 2022]
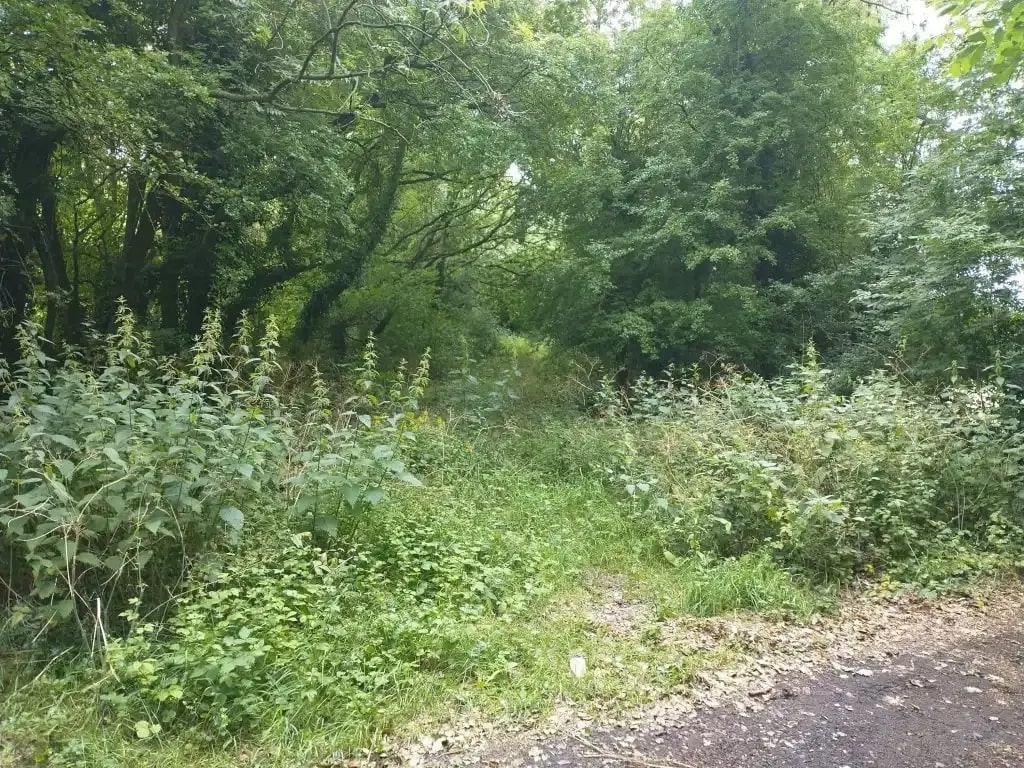
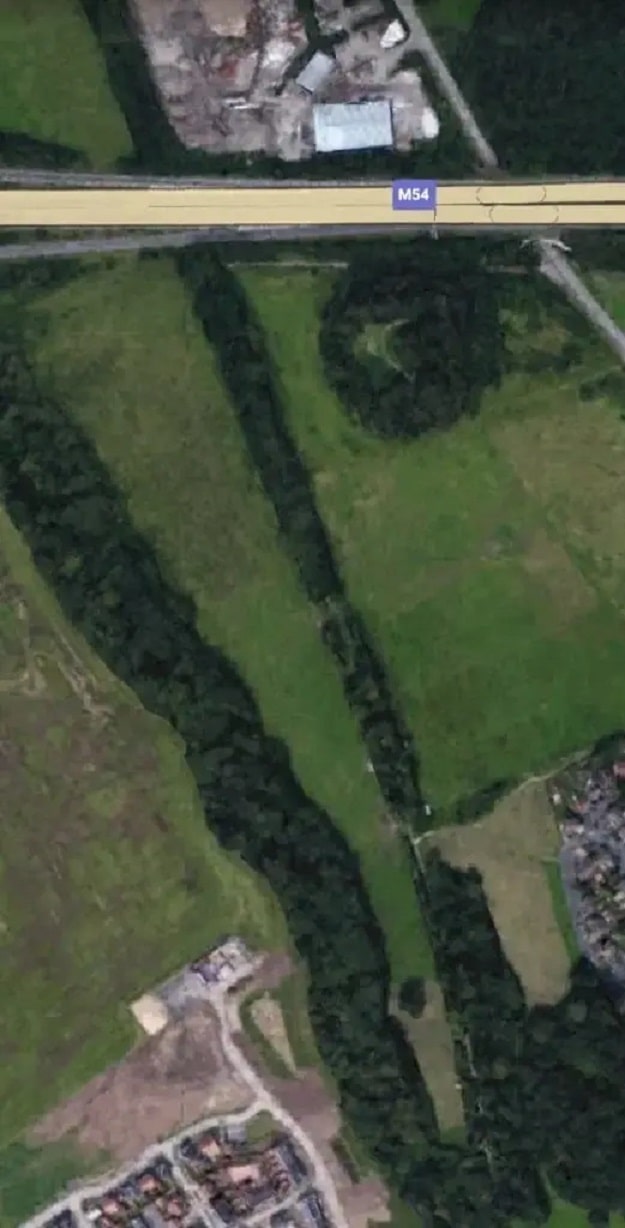
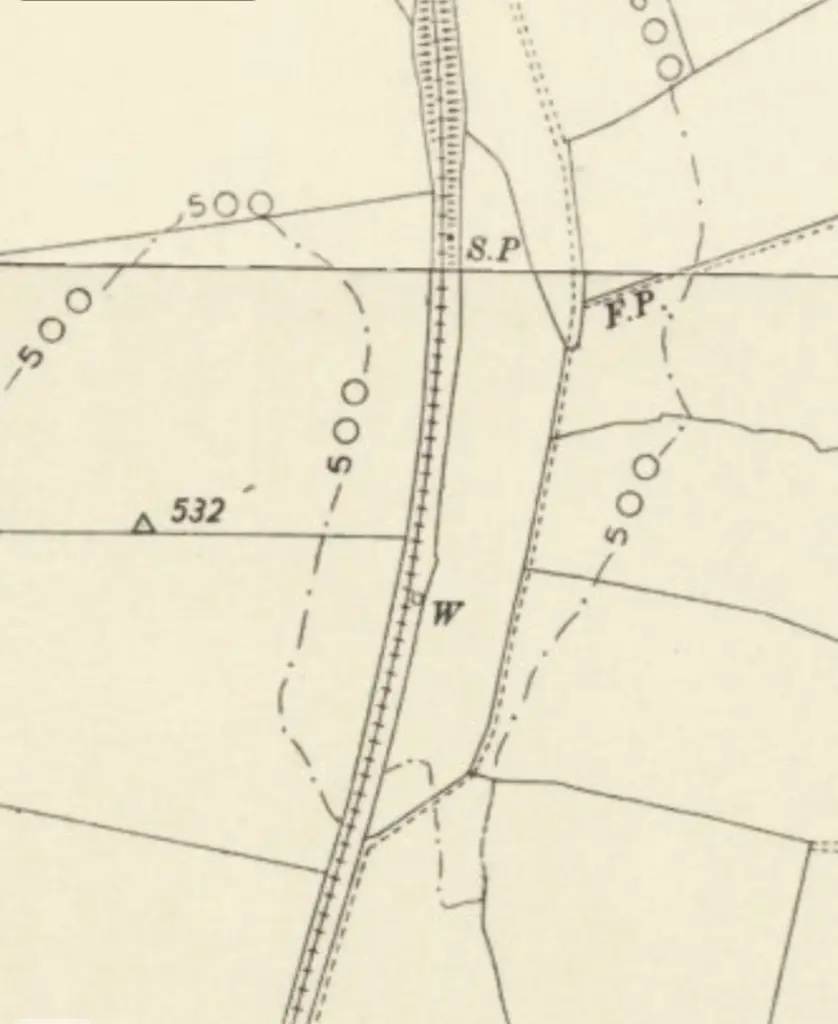
The 6″ OS Map shows the line continuing to the South. Ketley Town Halt was at the point where the signal post is shown on this extract. The modern M54 is shown on the satellite image below, it crosses the line travelling East-West at approximately the ‘GT’ of ‘ WELLINGTON’. [5]
The route of the old line continues to be delineated by woodland as it approaches and crosses the M54. [28]
The footpath following the W&SJR diverts away from the line South of the location of the Halt. This view looks South down the alignment of the W&SJR towards the modern M54. [My photograph, 2nd July 2022]

The M54 forms a significant barrier if one intends to follow the line. Walking North to South, the route requires one to head Northeast from the old railway along Sinclair Gardens passed Littlefords Garden Centre to Waterloo Road and then turn South to pass under the M54. Just beyond the motorway a footpath leaves Waterloo Road heading West to meet the route of the old railway again.

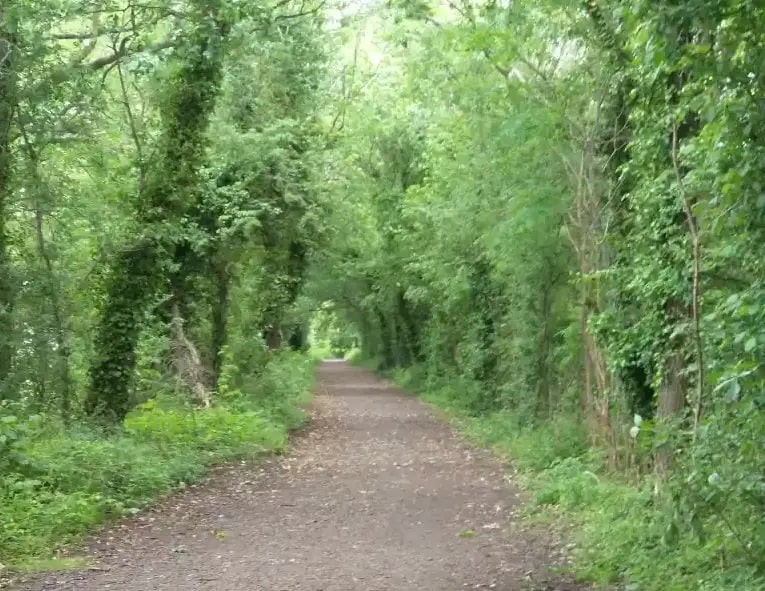
South of the motorway, there is no need again to highlight the line of the old railway as once again trees line the route. [Google Earth]
The line of the W&SJR regained. [My photograph, 9th June 2022]
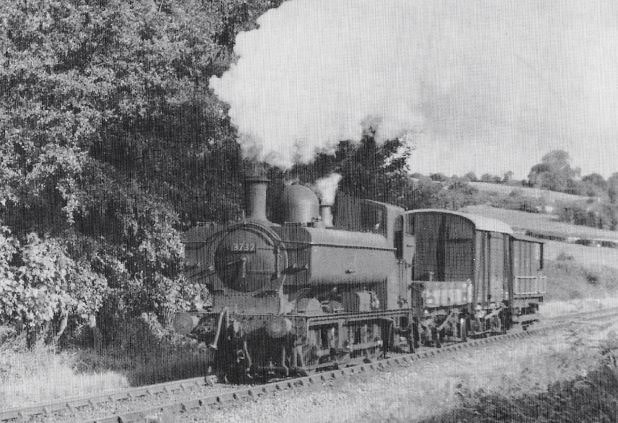
Pannier Tank no. 3732 in charge of a short pick-up goods service between Ketley and Lawley Bank in 1953. This photograph was shared by Metsa Vaim EdOrg on the Telford Memories Facebook Group in March 2020. [37]
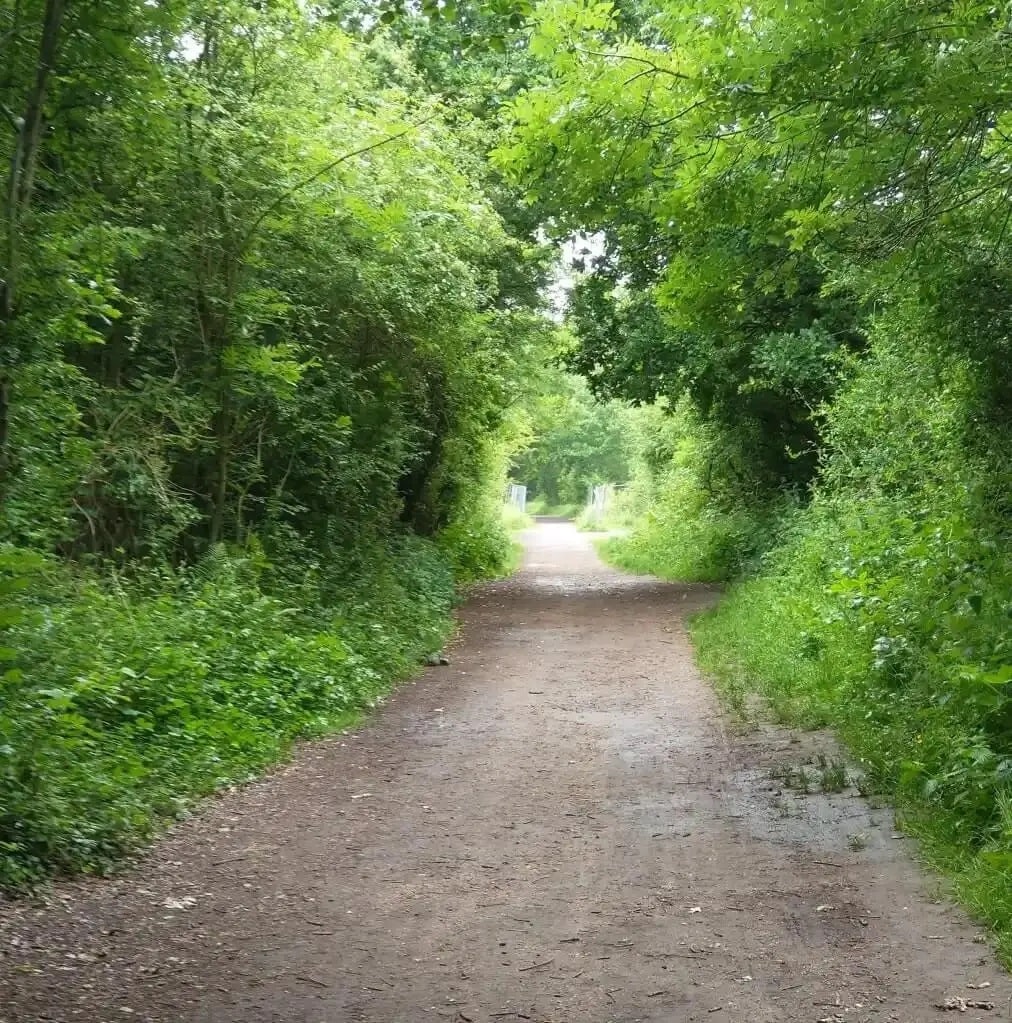
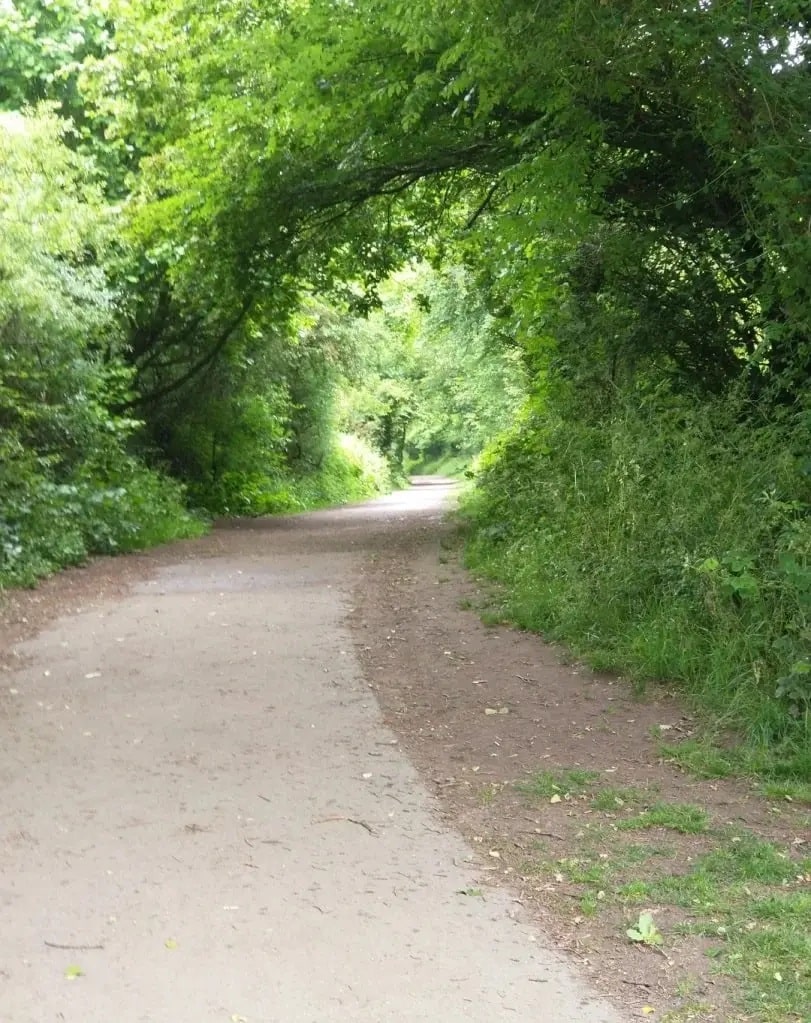
Further South, close to the location of New Dale Halt. [My photograph, 9th June 2022]
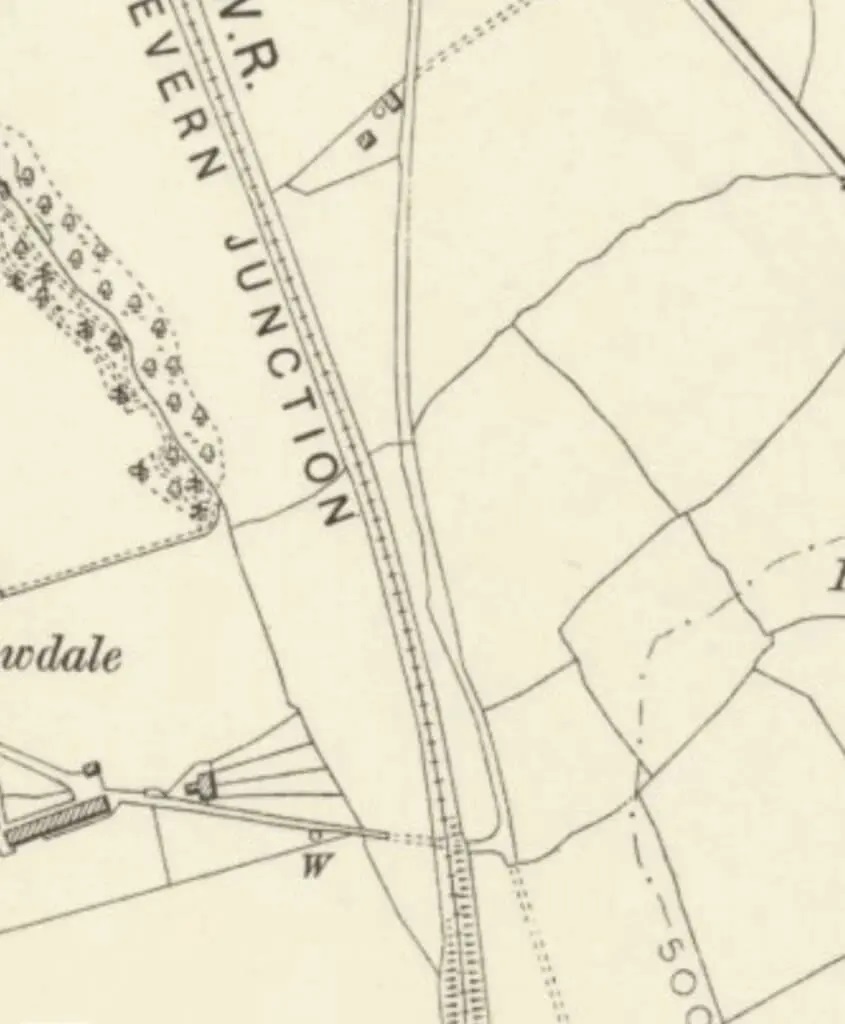
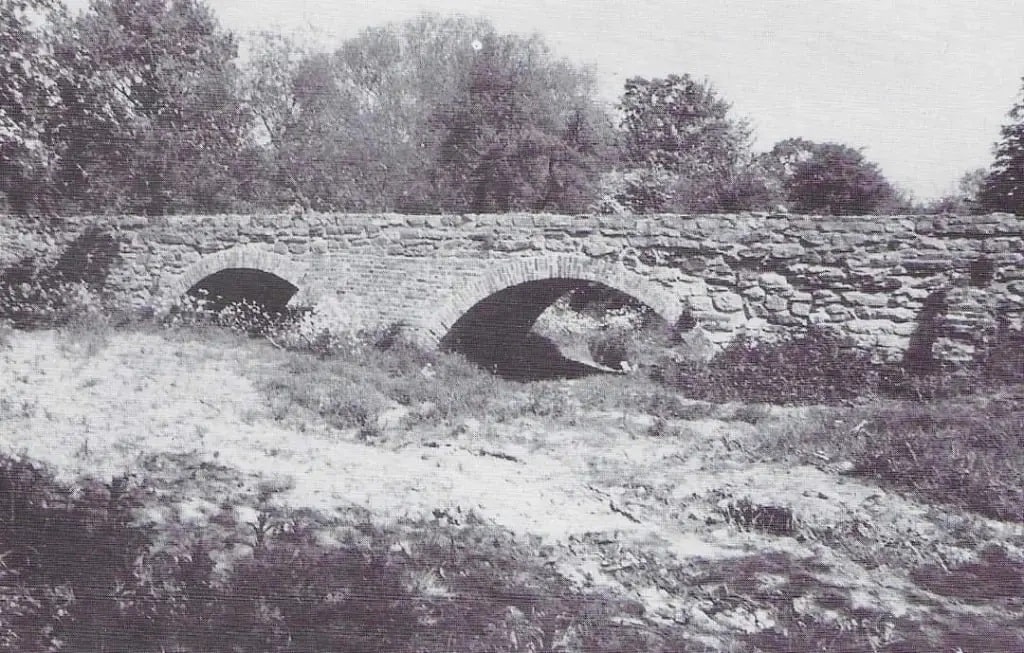
The W&SJR continues South passed Newdale. A small settlement that has now disappeared. The road shown crossing the line at that point is also the line of an old tramway. Just to the West of the line is an old two arch tramway bridge crossing Ketley Dingle. (Details of the bridge can be found here.) [5]
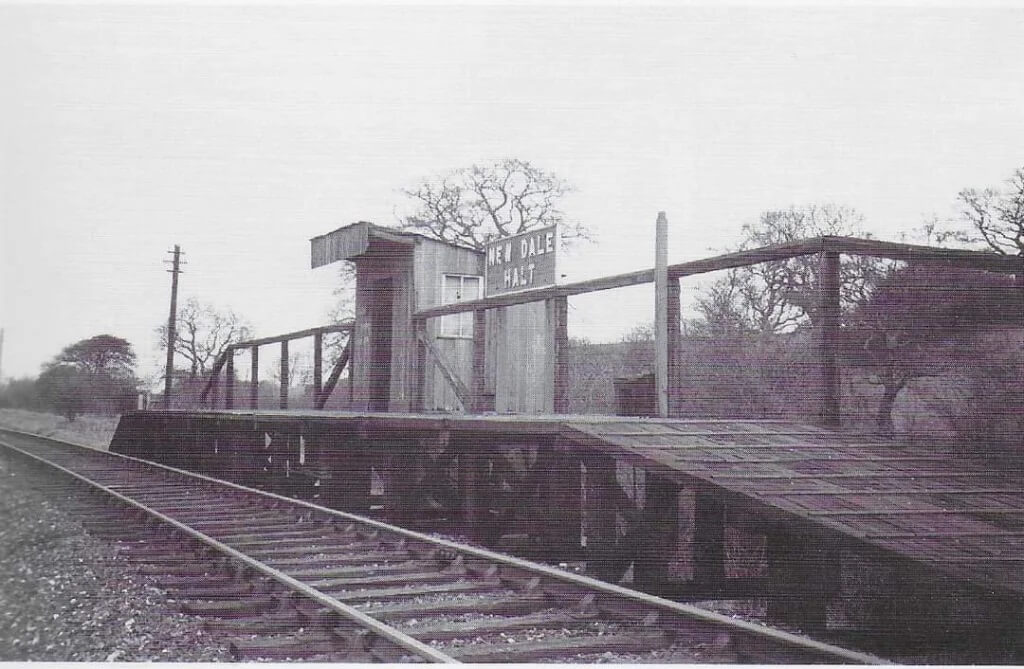
New Dale Halt in the 1930s. Shared by Metsa Vaim EdOrg on the Telford Memories Facebook Group. The halt served the hamlet of Newdale and was located a little to the North of the point where the old tramway route crossed the W&SJR. [26]
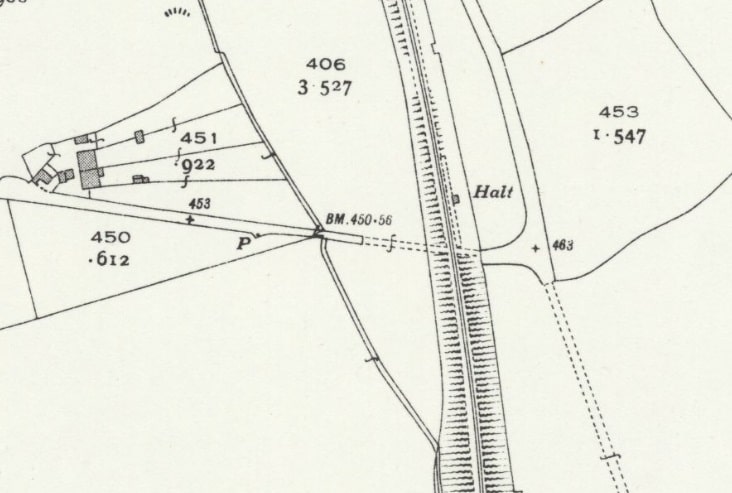
New Dale Halt is shown on the 25″ OS Map as revised in 1937. [25]
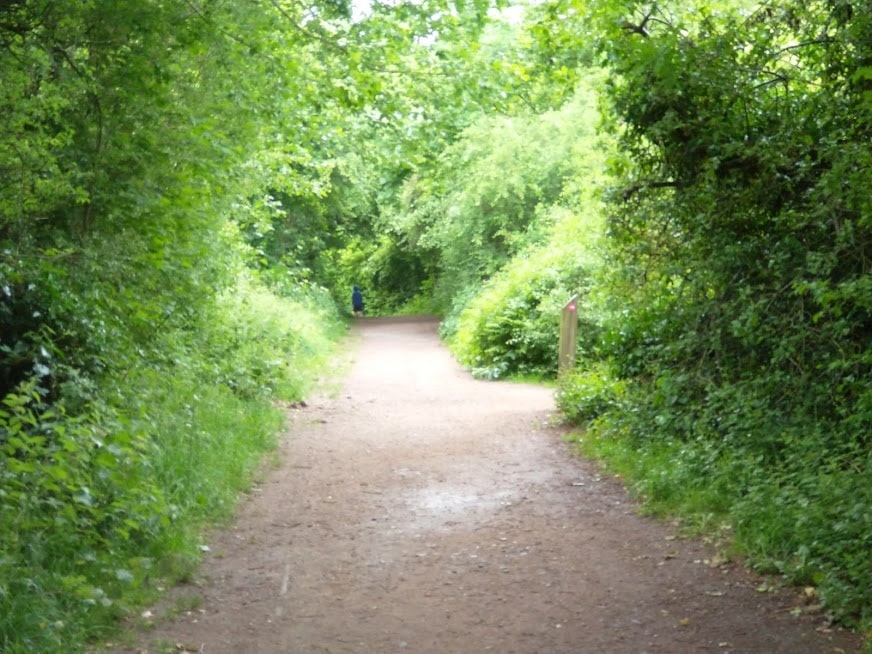
Just beyond the location of the Halt, the way-marker post marks the location of the path down to the tramway bridge and therefore the point where the W&SJR crossed the older tramway. [My photograph, 9th June 2022]
Newdale Tramway Bridge in the middle of the 20th century, shared on the Telford Memories Facebook Group by Metsa Vaim EdOrg. [29]
South of Newdale, this is the next length of the line on the 6″ OS Map of 1881/82. We are now on the next map sheet (No. 101594458). [9]
Looking back to the North along the W&SJR towards Newdale. [My photograph, 9th June 2022]
Looking forward to the South along the line of the W&SJR. Its approximate line is highlighted by the red line. [My photograph, 9th June 2022]
Looking ahead, once again with the approximate line of the W&SJR highlighted. [My photograph, 9th June 2022]
Looking back to the North over open ground with the route of the old line highlighted. [My photograph, 9th June 2022]
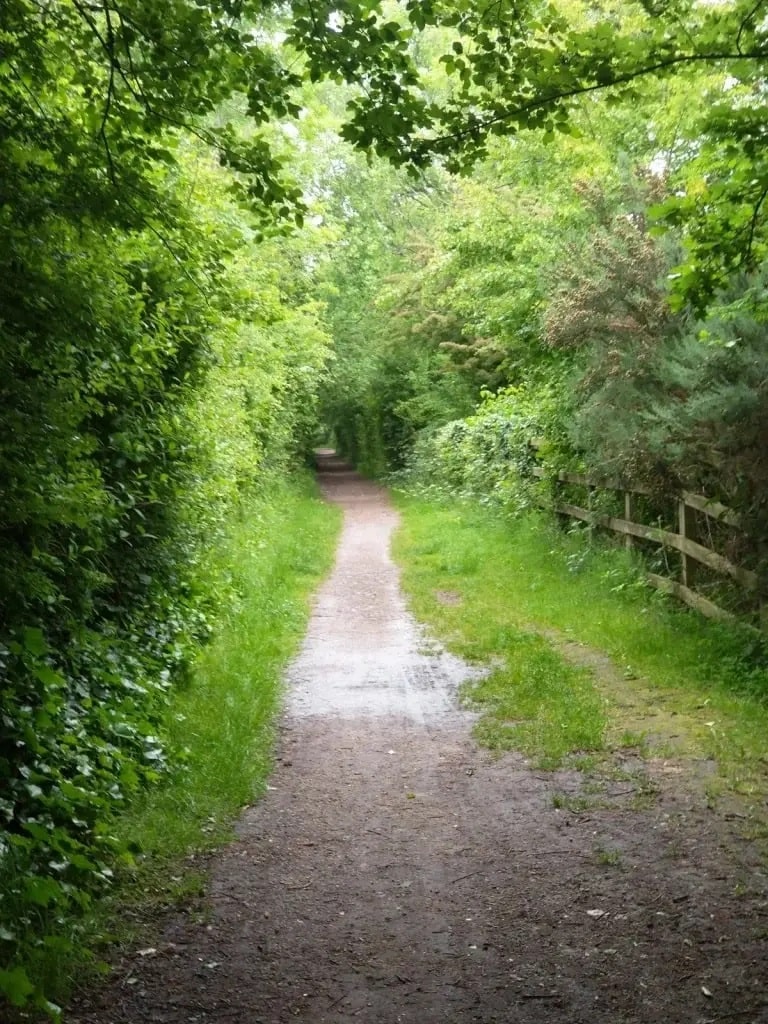
Facing South once again, a footpath follows the old line. [My photograph, 9th June 2022]
And again, looking South. [My photograph, 9th June 2022]
Much of the landscape has changed dramatically over the years. Much of the development in the area has occurred since the millennium. We are approaching the location of what was once Lawley Bank Railway Station. [My photograph, 9th June 2022]

South of New Dale Halt, the next station was ‘Lawley Bank’. Major development has taken place in recent years. New housing and a shopping area have replaced open fields. The site of the station is covered by new development.

The satellite image from the National Library of Scotland of the northern approach to of what was Lawley Bank Station. The approximate line of the W&SJR is shown by the red line. [31]
Modern housing dominates the route of the old line.[My photograph, 13th June 2022]
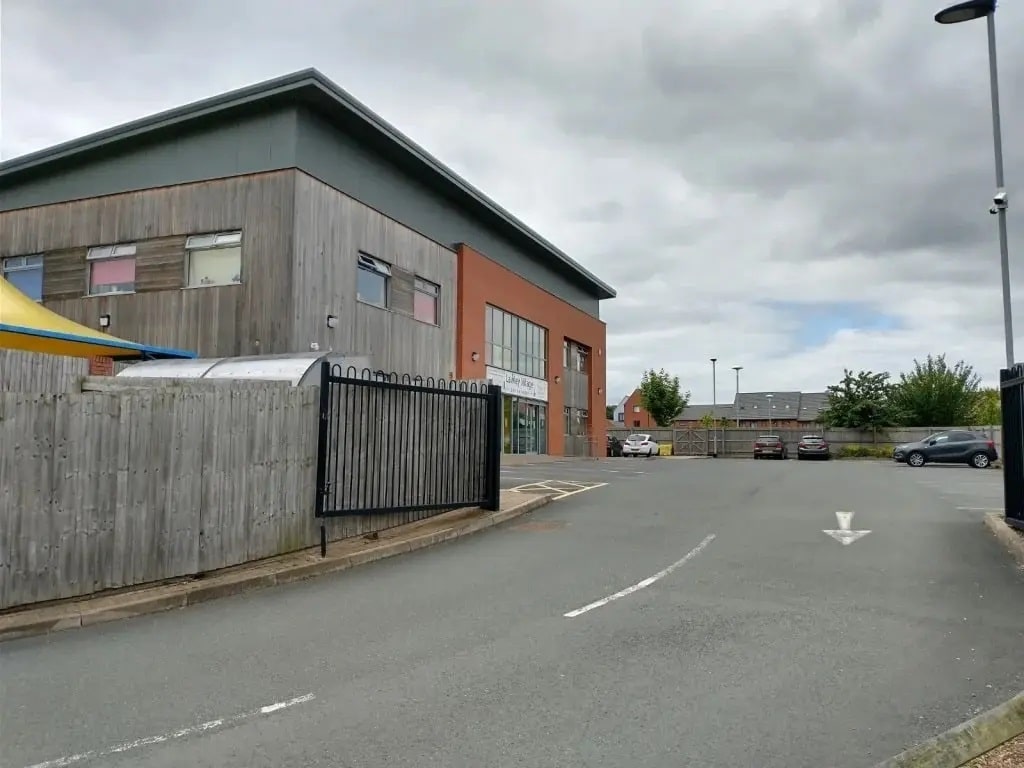
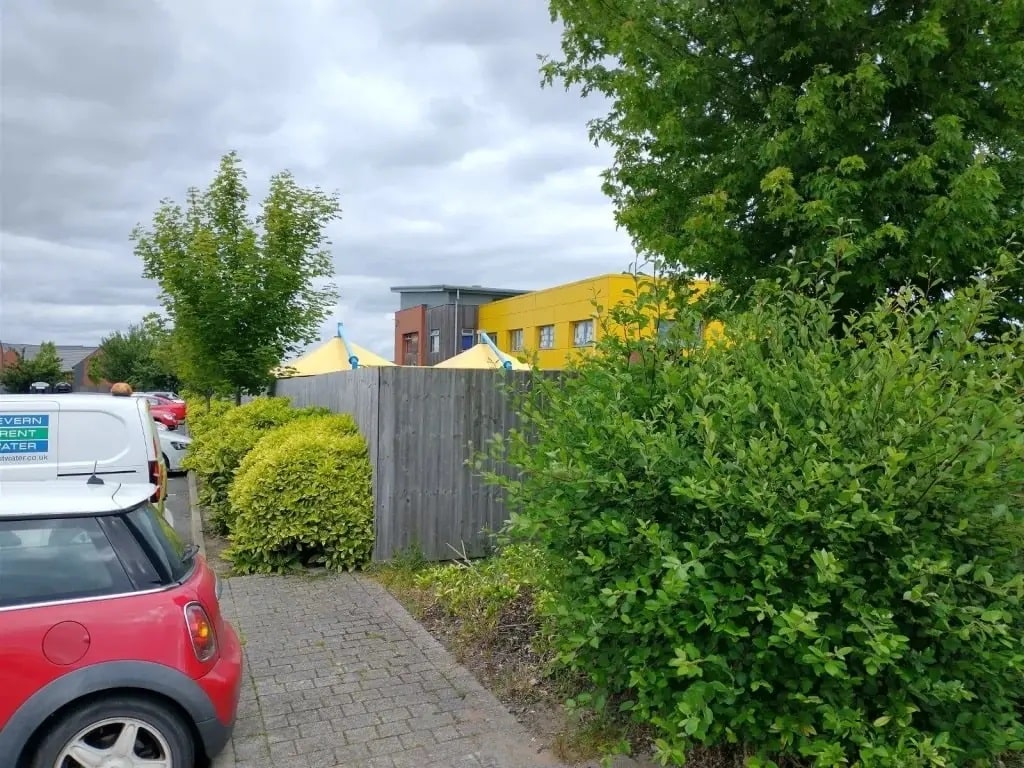
Lawley Village Day Nursery straddles the line of the old railway. [My photograph, 13th June 2022]
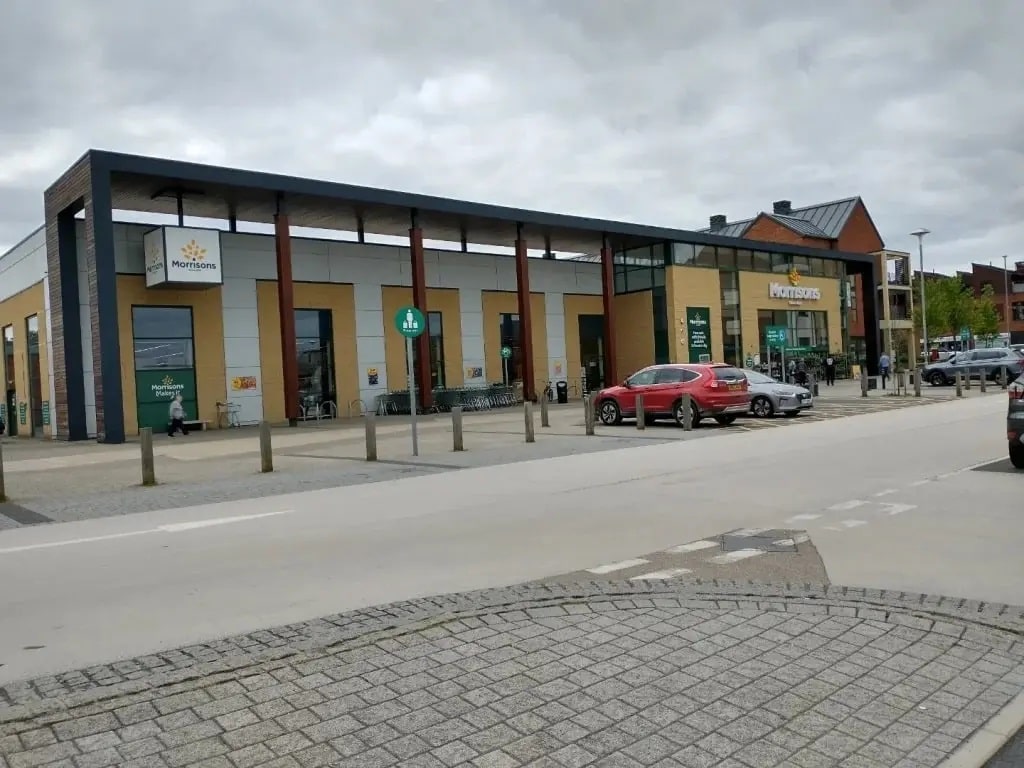
Looking back to the North along the line of the old railway from the car park of Morrison’s Supermarket. [My photograph, 13th June 2022]
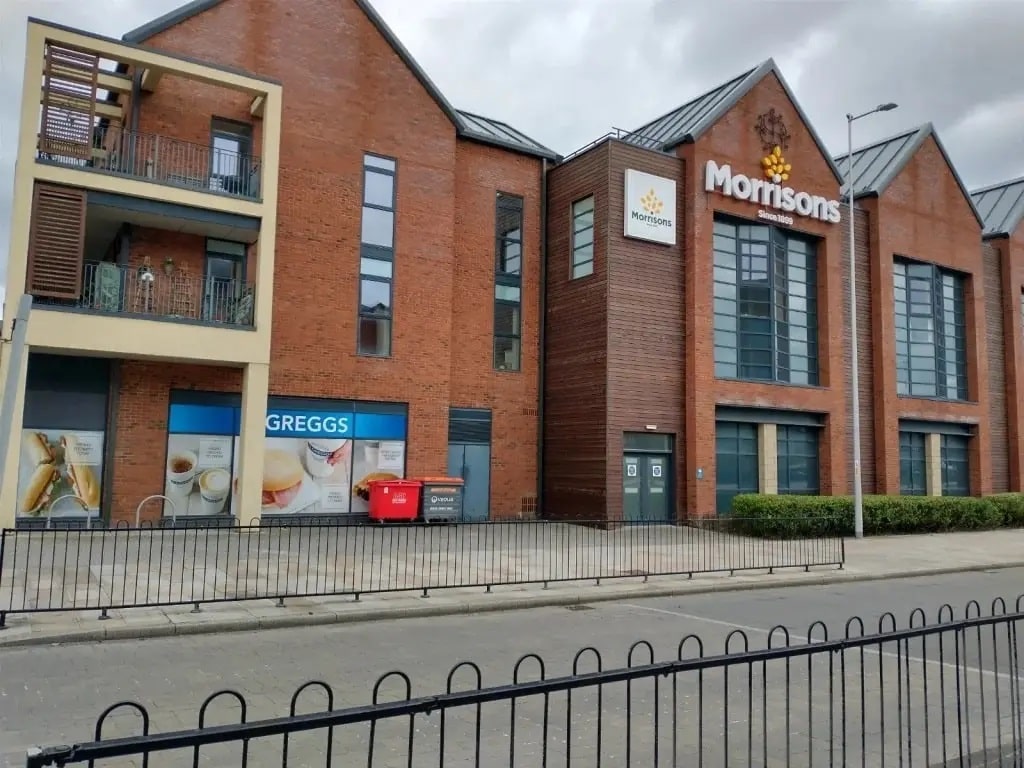
Morrison’s Supermarket also straddles the line of the old railway. [My photograph, 13th June 2022]
The South side of Morrison’s Supermarket, the old line ran to the left hand side of this picture. [My photograph, 13th June 2022]

At the time that the 1881/82 maps were drawn, this was a relatively rural area. The 6″ 1881/82 survey is immediately below. It shows very little detail close to the railway station. The later 1901 6″ survey follows below and appears to show the remnants of a tramway running on the West side of the W&SJR. This would need further investigation, particularly since it does not appear on the 1881/82 survey.

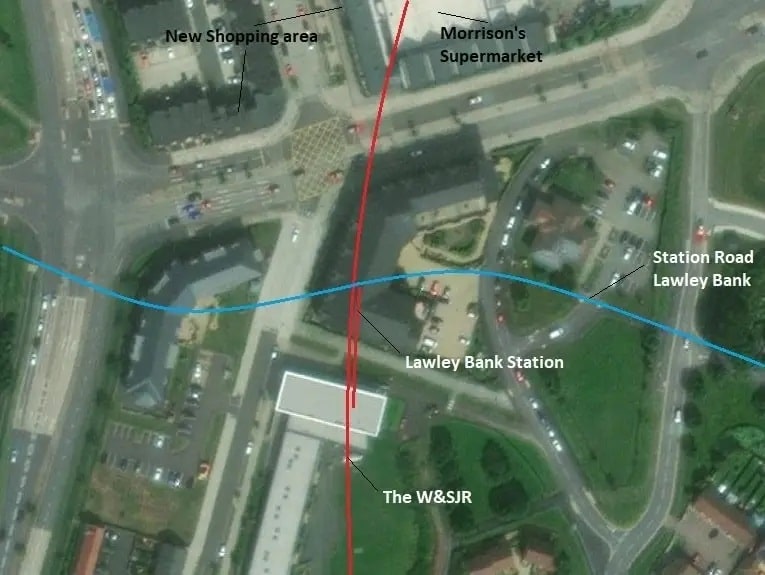
The satellite image which follows the two 6″ maps shows the position of the station overlaid on the modern satellite image of the location provided by the National Library of Scotland.

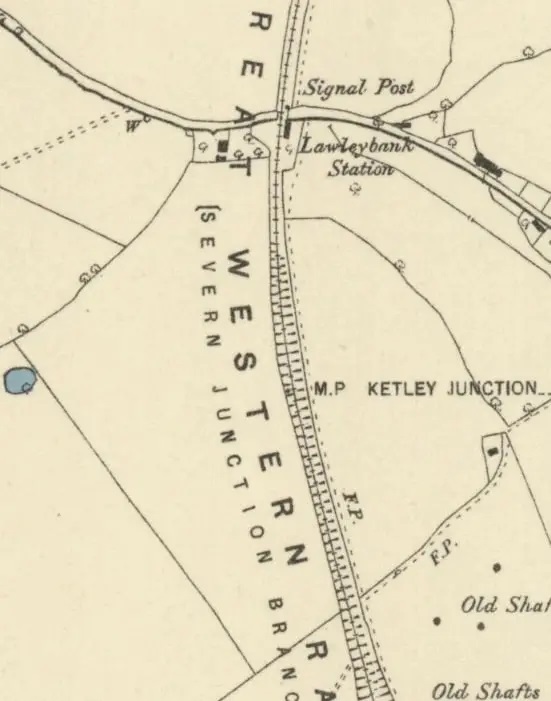
Lawley Bank Station on the 6″ OS Map of 1881/82. Again, the surroundings either side of the line were, at that time, essentially rural. [9]
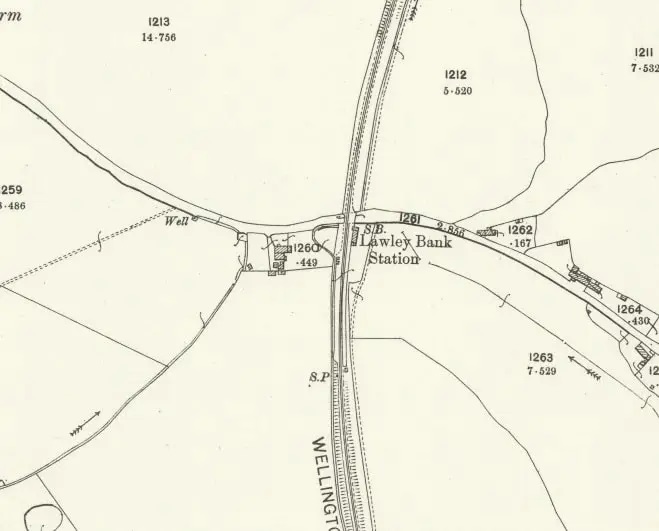
The 25″ OS Map from 1901 showing the location directly around Lawley Bank Station. An interesting feature is the shepherd’s crook to the West of the line which is very suggestive of a tramway. It may not be a tramway, but it certainly will warrant further investigation. It is worth noting that it does not appear on the 1881/82 6″ Survey and that it is not marked on this extract as a tramway. [30]
The area around the site of Lawley Bank Station has been radically altered by new development. [30]
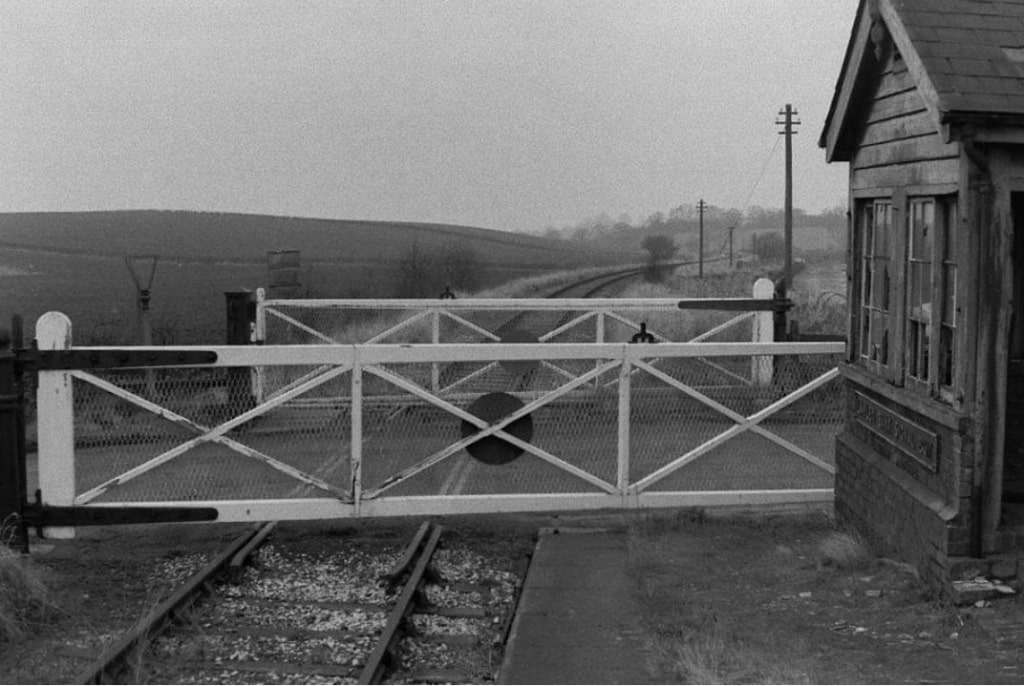
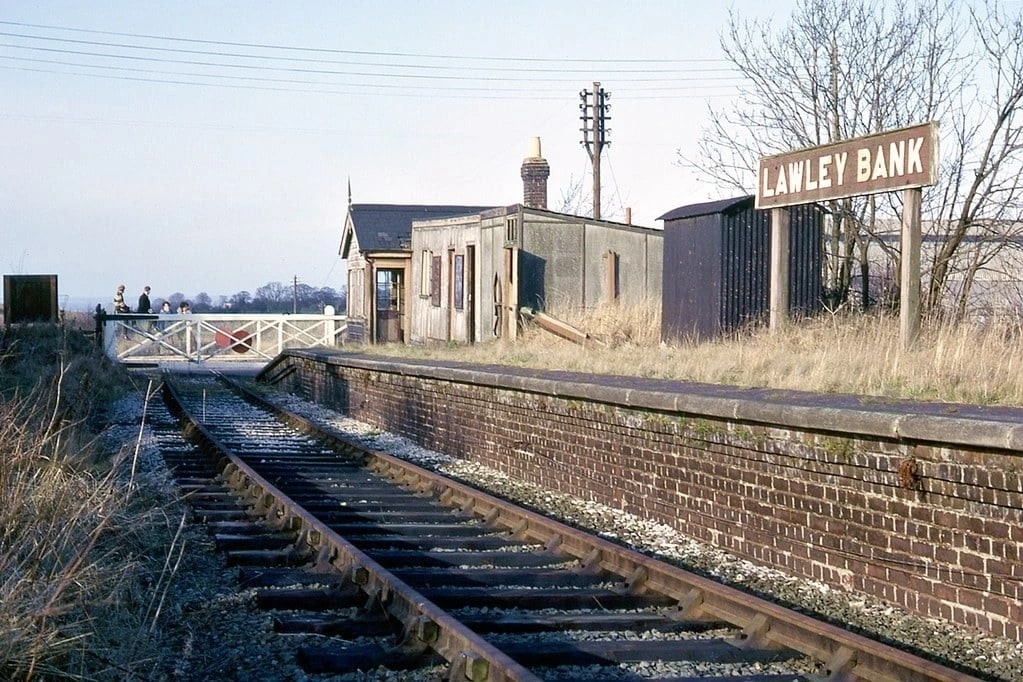
Looking North through the crossing gates at Lawley Bank Station on 18th February 1967. The rural nature of the surrounding landscape is evident. This image was shared on the Telford Memories Facebook Group by Carole Anne Huselbee in September 2014. [36]
Lawley Bank Station in 1962 taken from a train standing at the platform. This image was shared by Stuart Geoffrey Davis on the Memories of Shropshire Facebook Group in September 2018, (c) Stuart Geoffrey Davis. [33]
Lawley Bank Station again, taken from a Southwesterly direction, a wider angle taken from track level, shared by Metsa Vaim EdOrg on the Telford Memories Facebook Group on 22nd February 2021. [34]
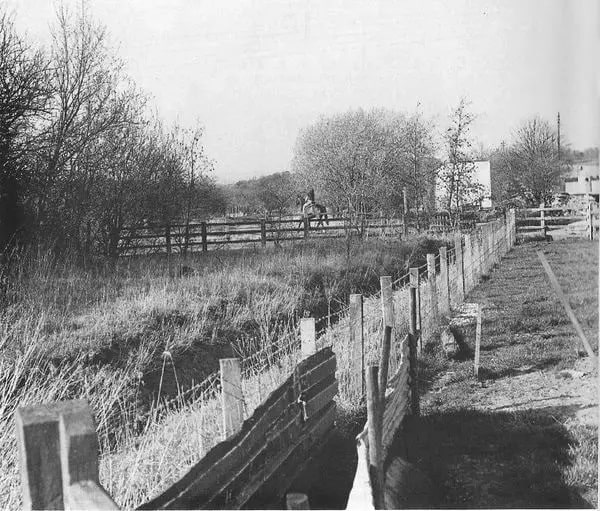
The location of Lawley Bank Station in 1987. This view looks North across Station Road. It was shared by Metsa Vaim EdOrg on the Telford Memories Facebook Group in November 2020. Metsa comments: “The railway route has more or less vanished in 1987. Probably the last time I walked the line with my mum’s dog. The stream is now a trickle, that once flowed faster and deeper from Horsehay Common. Gone are the Hares, Curlews, Green Plover, Grey Partridge, Skylarks and Snipe from the fields either side of the track. Gone are the fruit trees, especially a large pear tree that was hidden behind some Silver Birches, a field away from our house. Gone are the dragonflies that patrolled through the Horsehair Ferns either side of the track-bed.” [35]
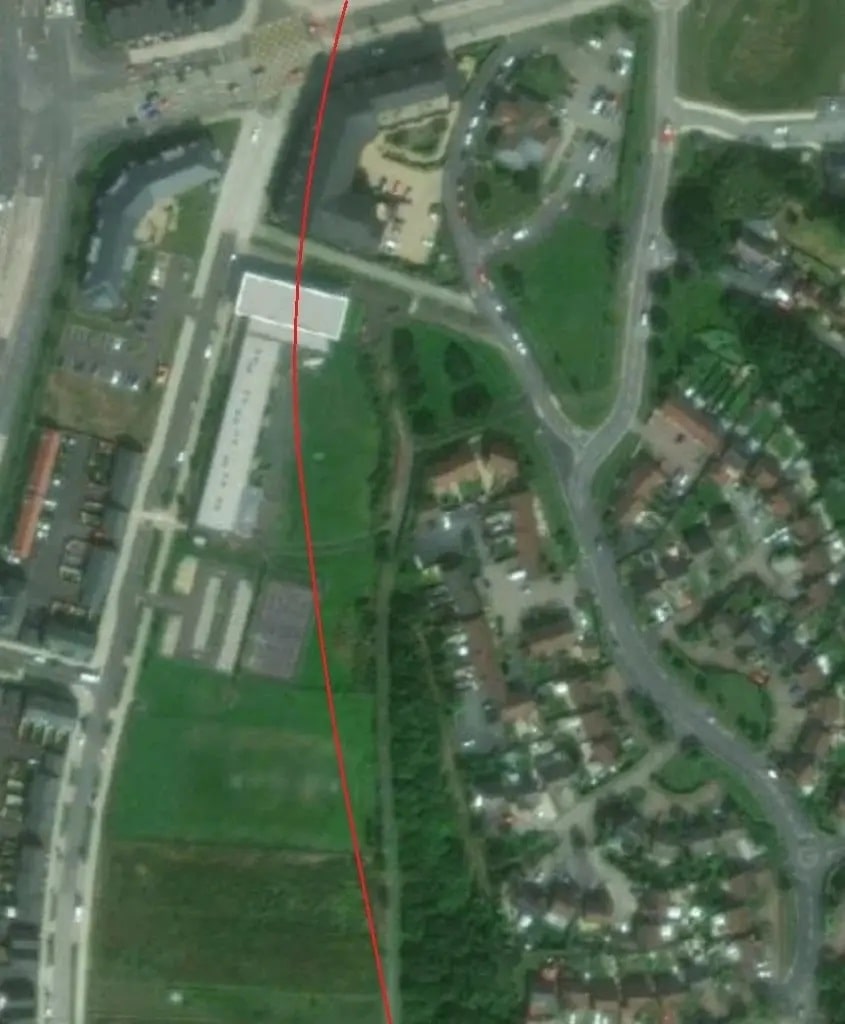
The approximate line of the railway South of Lawley Bank Station is shown on this NLS satellite image. The rectangular white building straddling the old line in both these last two images is Lawley Village Primary Academy. [32]
Standing in front of Morrison’s Supermarket on the North side of West Centre Way looking South along what was the route of the old railway. [My photograph, 13th June 2022]
Lawley Village Primary Academy sits over the line of the old railway. This photograph looks along the side of the building parallel to the line of the railway, North, towards the location of the erstwhile Lawley Bank Station. [My photograph, 13th June 2022]
Turning through close to 180°, this photograph looks along the side of the school again but this time to the South. At this point, the old railway route runs at the back of the school building. [My photograph, 13th June 2022]
Looking South across the level crossing at Lawley Bank Station with a service for Wellington at the station platform. This image was shared by Lin Keska on the Telford Memories Facebook Group on 12th February 2017. [42]
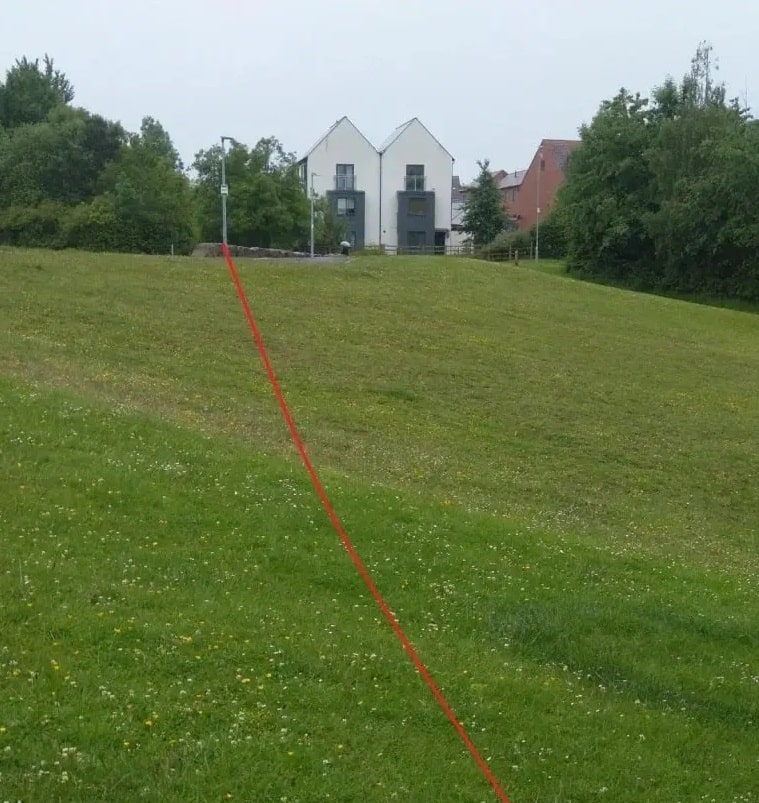
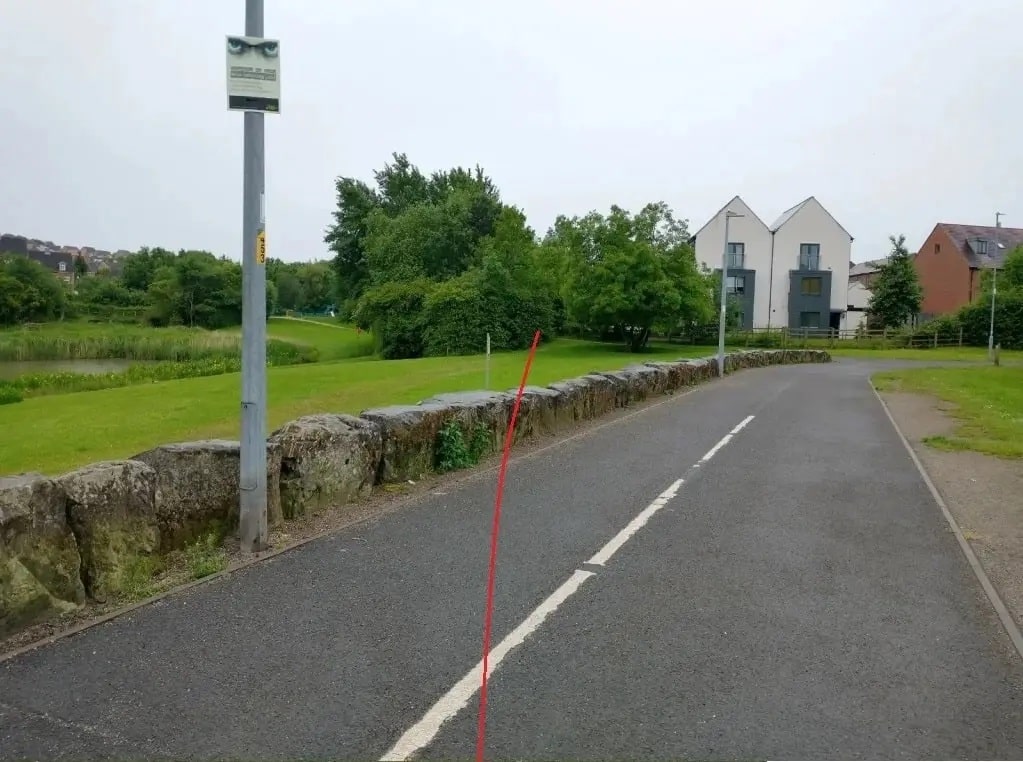
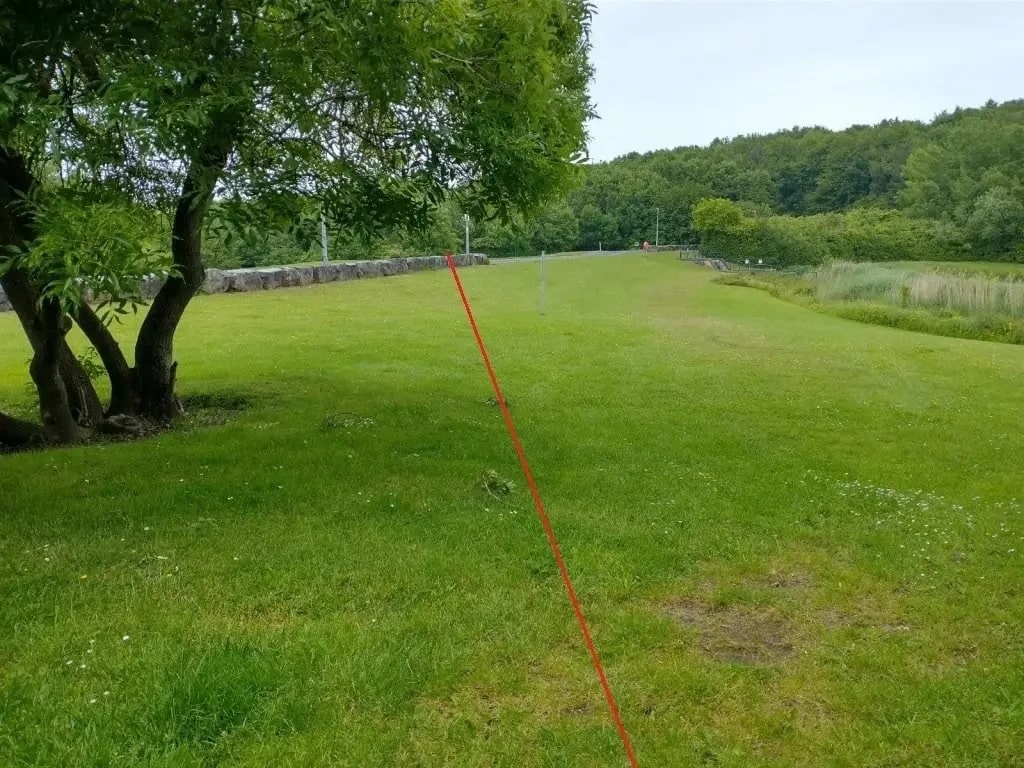
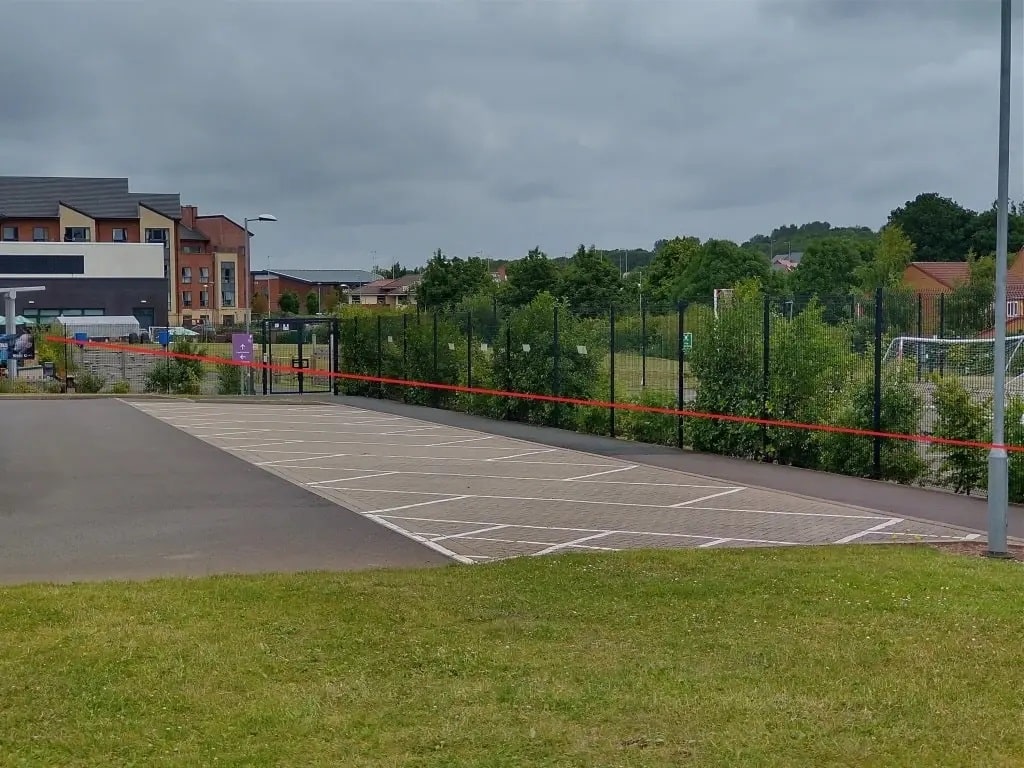
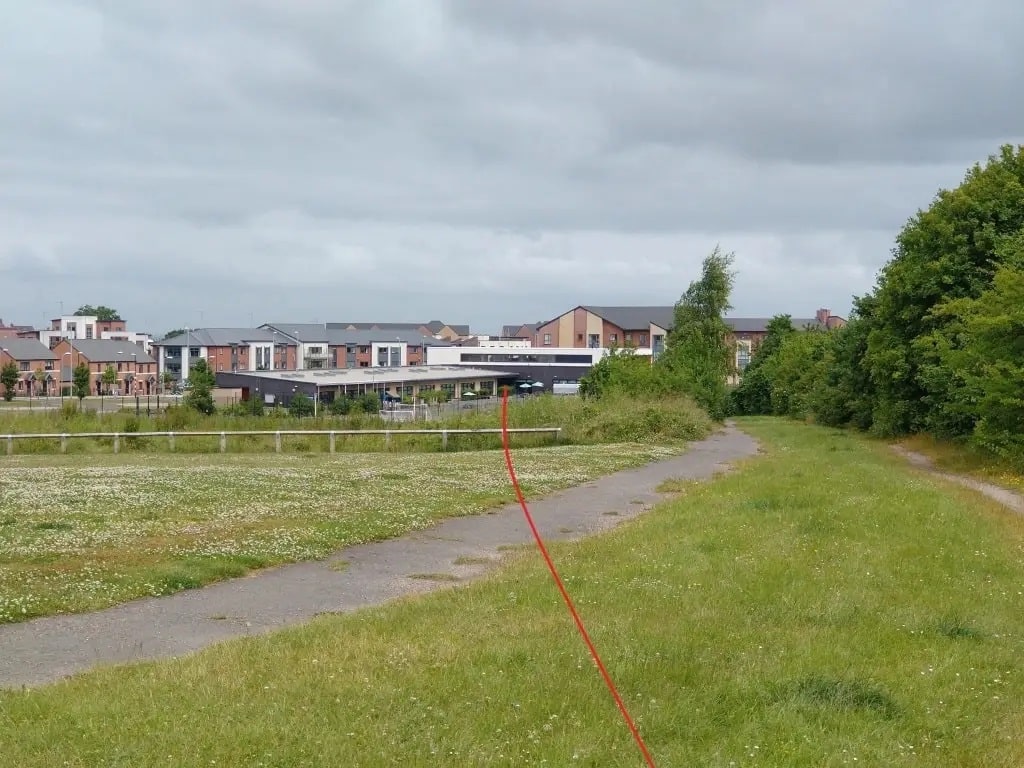
Looking North from the area of the School car park. Morrison’s Supermarket can be seen in the distance. The School is the white and grey building on the left of the image. The approximate line of the old railway is marked by the red line imposed on the photograph. [My photograph, 13th June 2022]
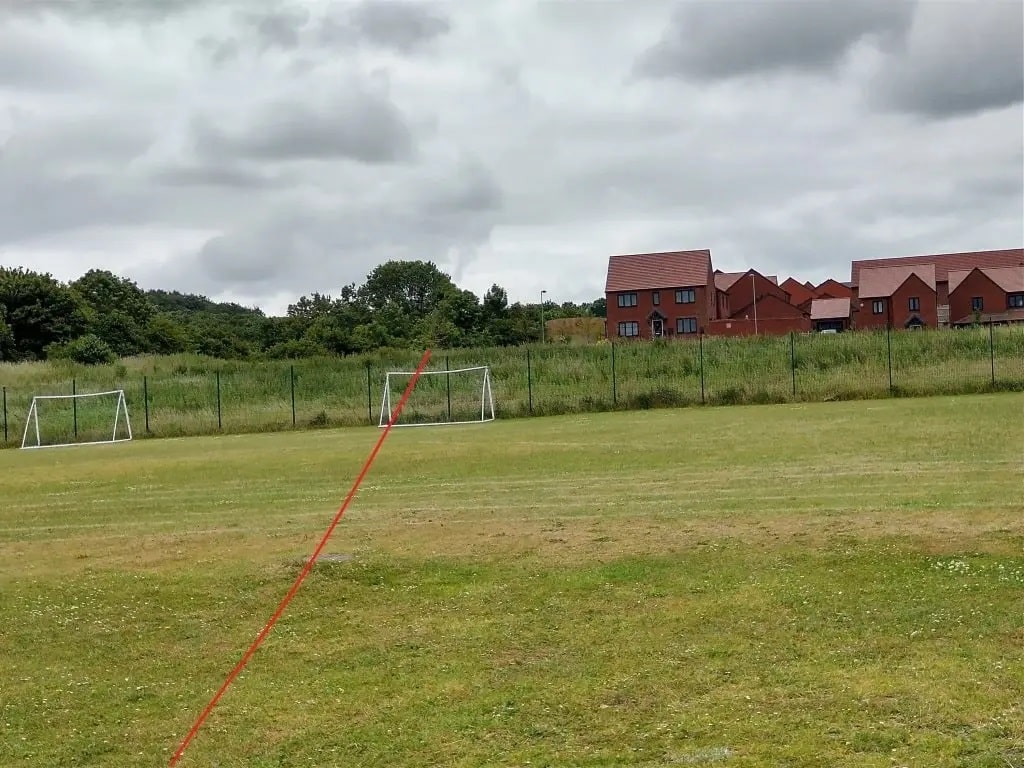
Looking South from the fence-line at the edge of the School carpark. The red line approximates to the line of the old railway. [My photograph, 13th June 2022]
Looking back to the North from adjacent to the housing in the [picture immediately above. Lawley Village Primary Academy is in the centre of the image and the approximate line of the railway is, again, shown as a red line. [My photograph, 13th June 2022]
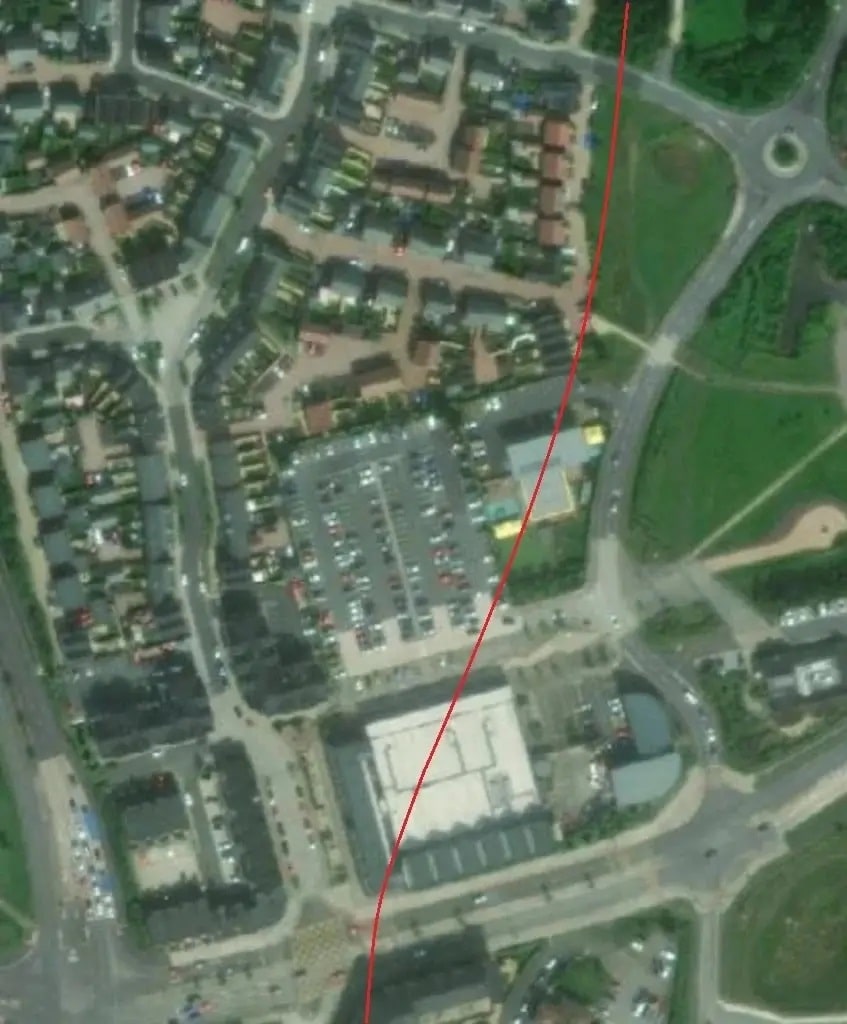
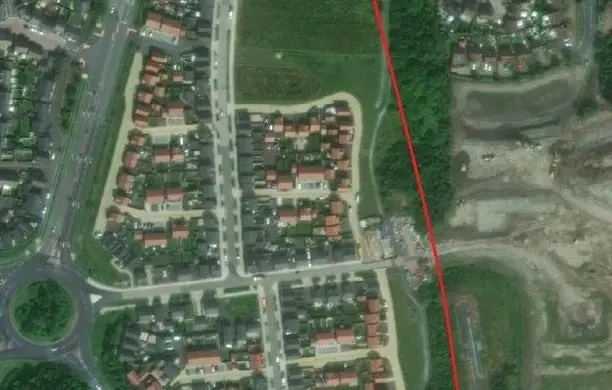
This satellite image provided by the NLS (National Library of Scotland) had been edited to show the line of the railway as a red line. At the bottom edge of the image on the East side of the redline the current extent of the preservation line ‘Telford Steam Railway can be seen. [38]
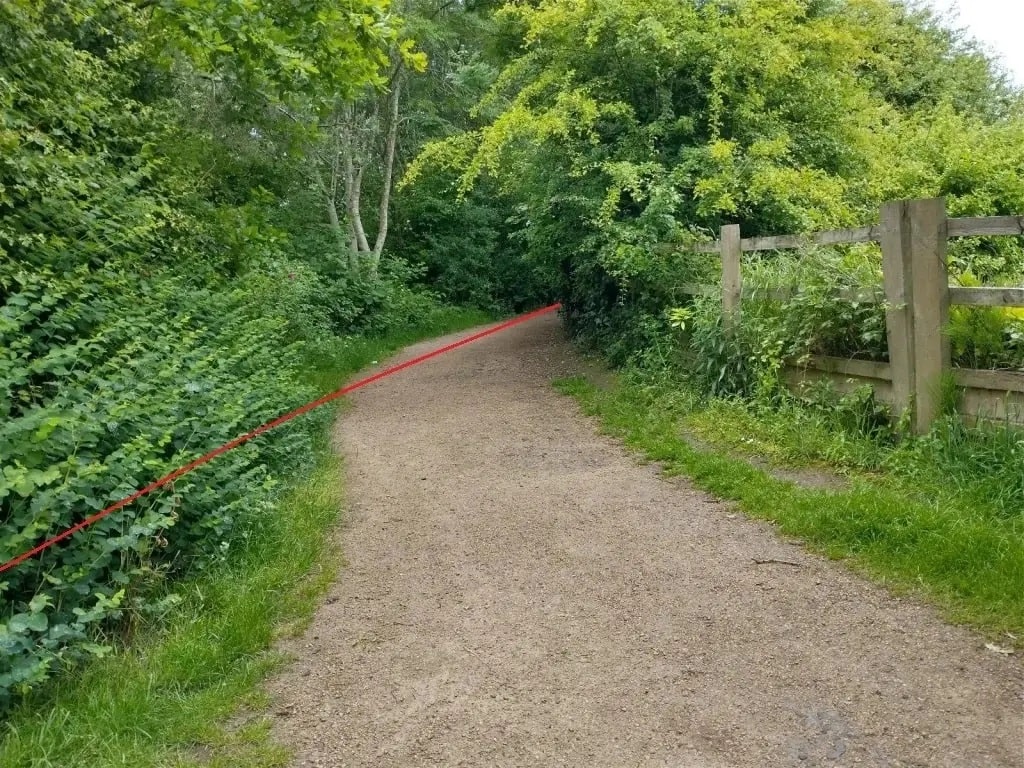
Looking South from the location of the photograph above, the old line entered a cutting. The tree growth is in that cutting. [My photograph, 13th June 2022]
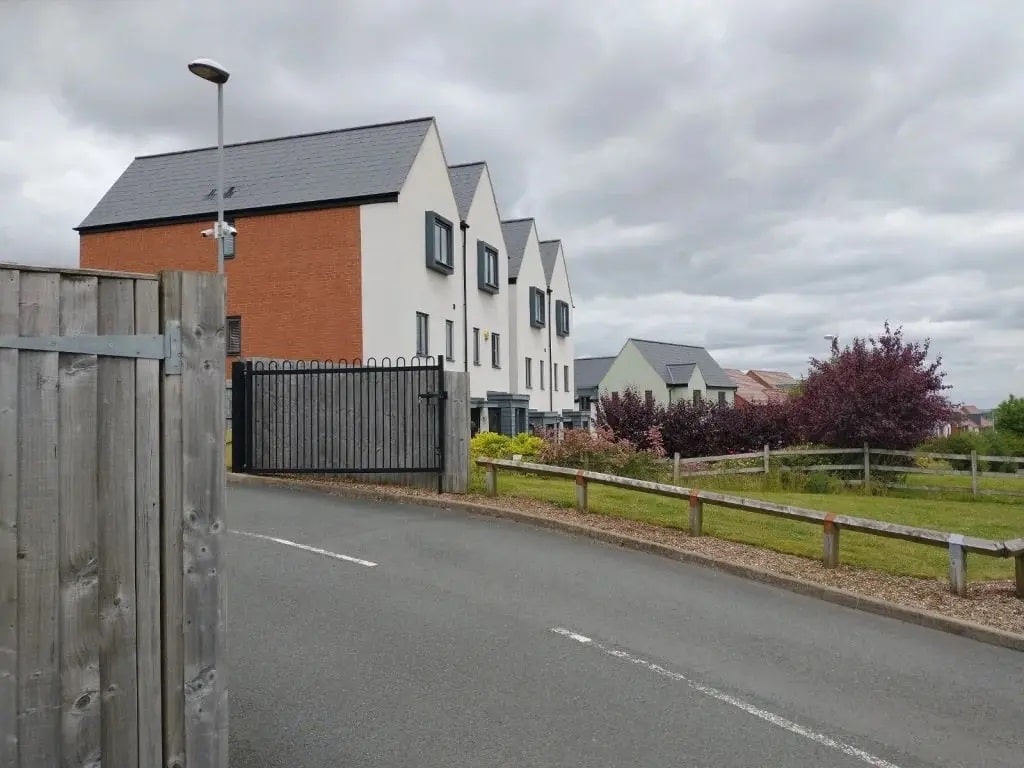
The surrounding land is rising and the cutting is deeper as the line heads South, the red line at the left of this image shows its route. A contractors compound is just evident on the right skyline in this picture. [My photograph, 13th June 2022]
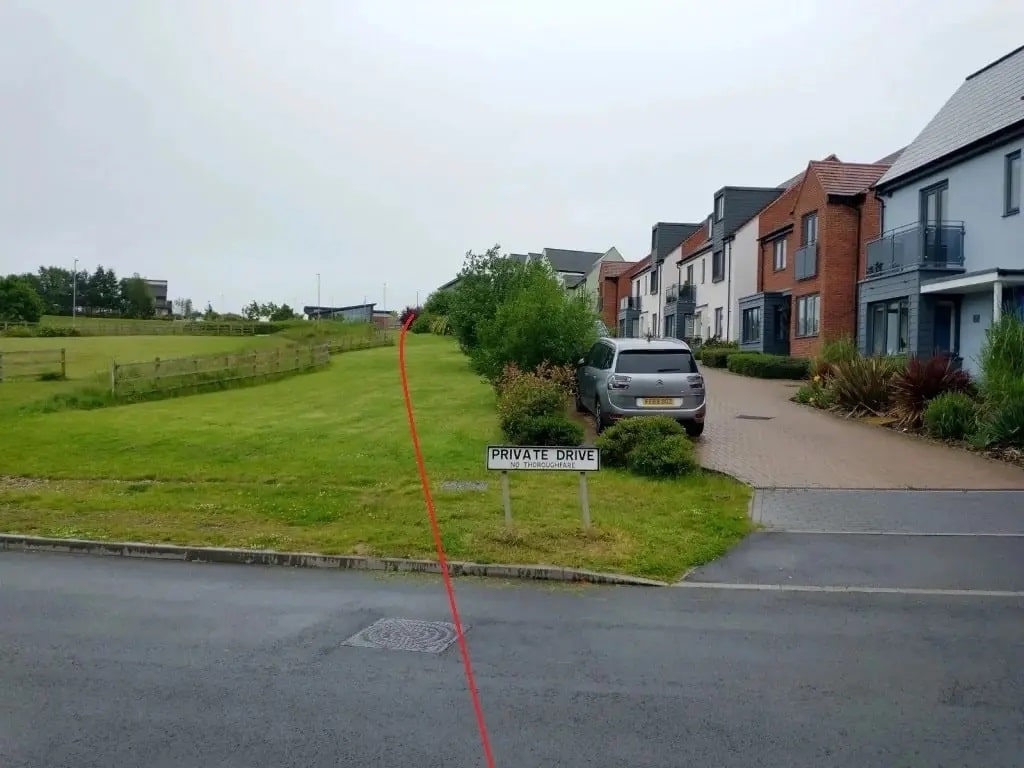
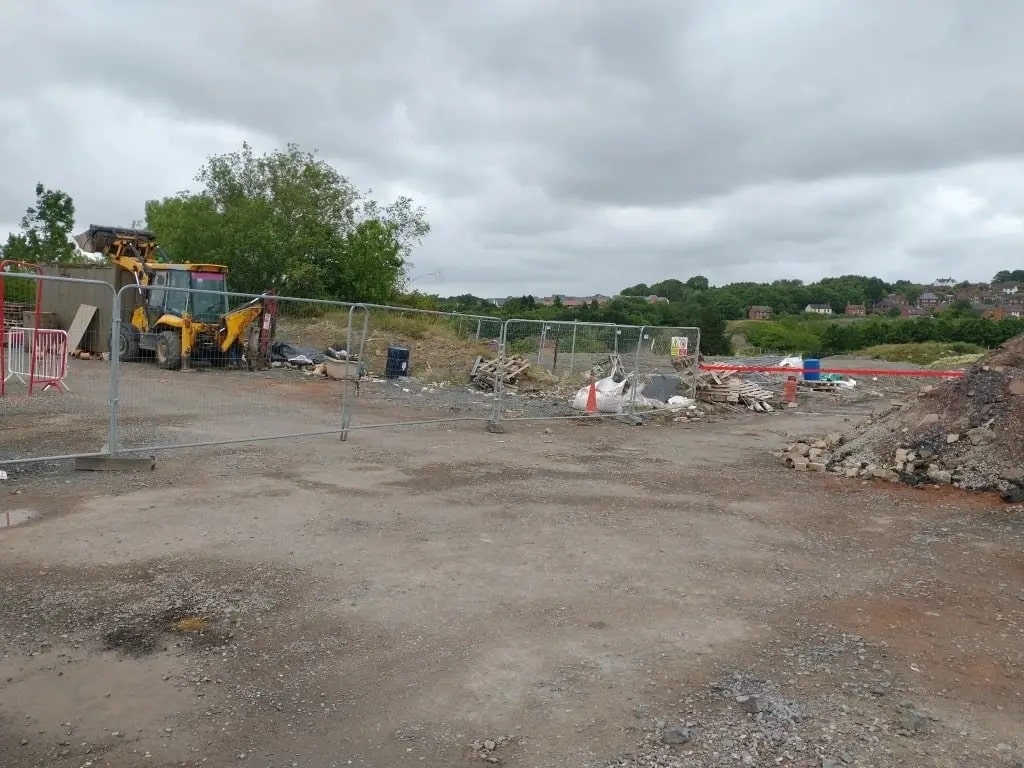
This image shows a view from the estate road looking East towards what was the route of the railway. The red line to the right side of this image provides an indication of the railway alignment, which was East of the fenced compound. [My photograph, 13th June 2022]
Around 100 metres to the South the new Lawley Station on the Telford Steam Railway’s preservation line. A typical GWR ‘pagoda’ platform shelter has been erected on the relatively new platform. [My photograph, 13th June 2022]
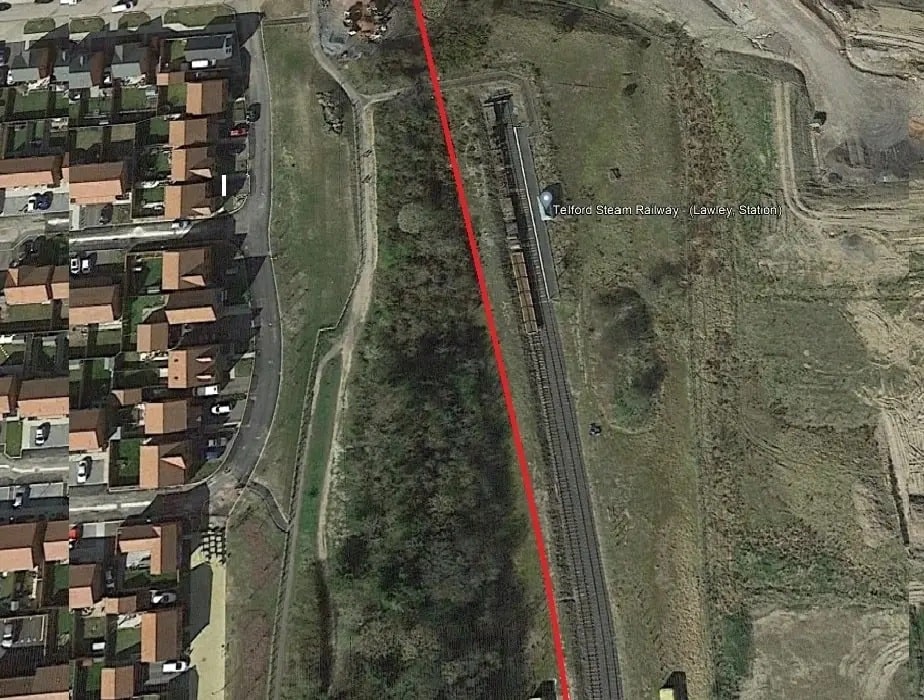
This Google Earth Satellite image shows the old railway alignment just a few metres to the West of the alignment of the preservation line and its Lawley Station. Railway rolling-stock can be seen stored on one of the two tracks at the station. [Google Earth]
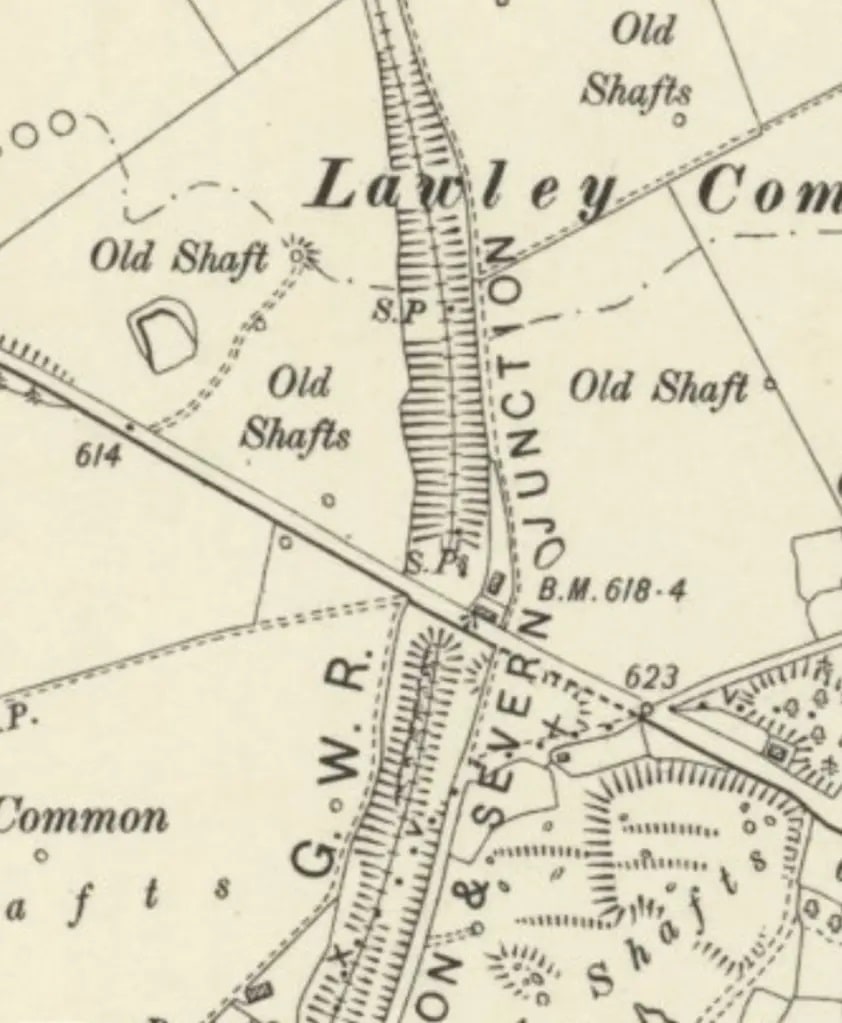
Heath Hill Tunnel is the next location to note. This is the 1881/82 6″ OS Map. It passes under the line of Dawley Road. [9]
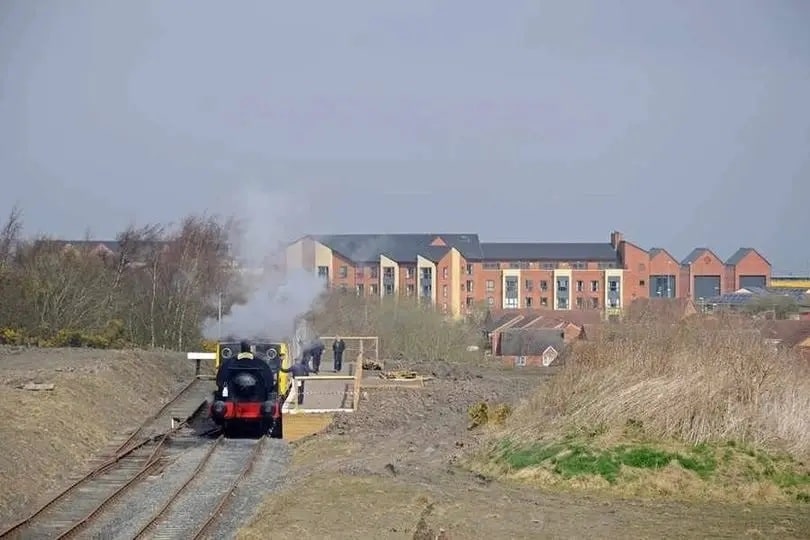
An photograph of Lawley Station while it was being built. The pagoda platform building has still to be constructed. This image was shared on the Telford Memories Facebook Group by Marcus Keane. There appears to be significant foreshortening which has the effect of bringing buildings to the North much closer to the station. This suggests that the picture was probably taken from close to the northern portal of Heath Hill Tunnel. More about Telford Steam Railway can be found on their website. [39]
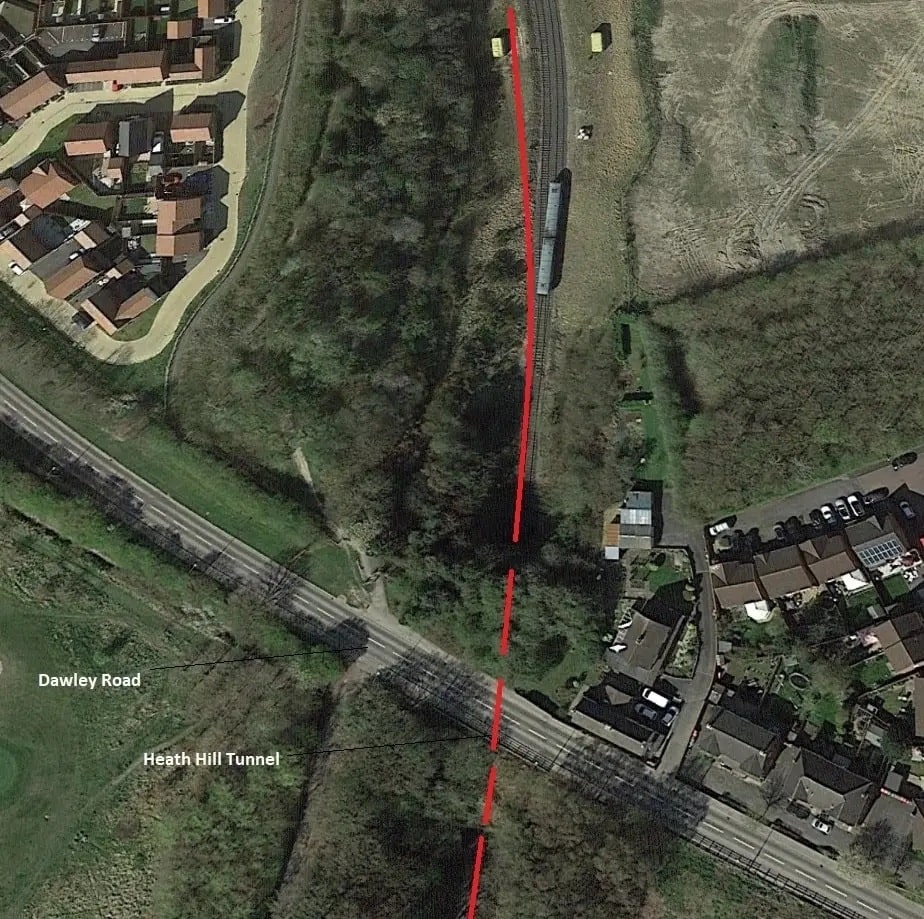
Google Earth shows a DMU either setting off from or arriving at Lawley Station. [Google Earth]
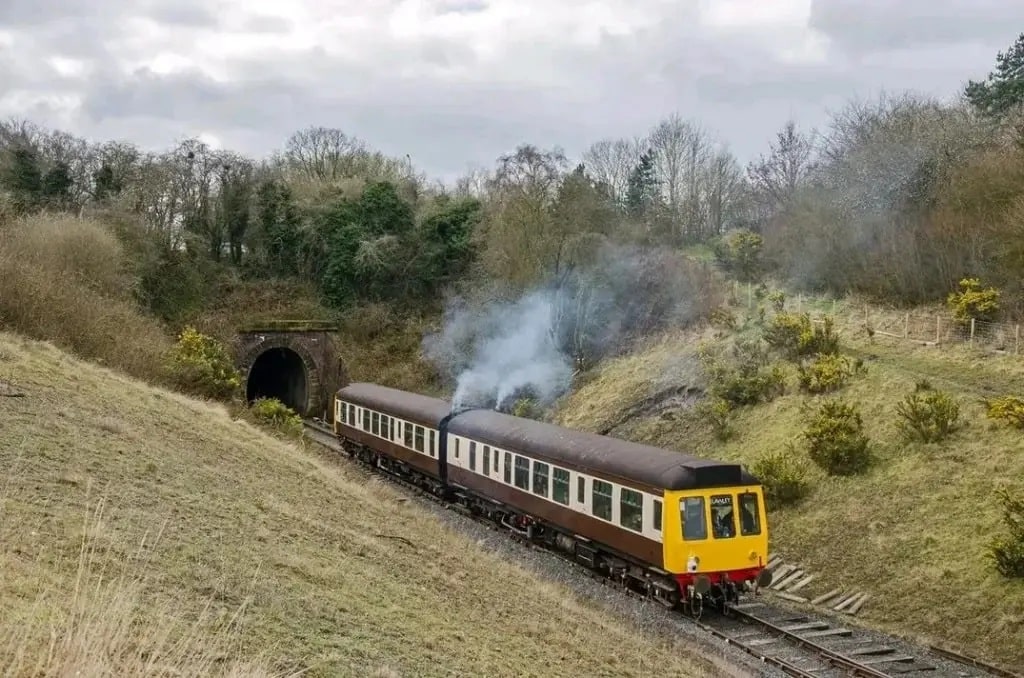
Class 108 DMU North of Heath Hill Tunnel on Telford Steam Railway. [46]
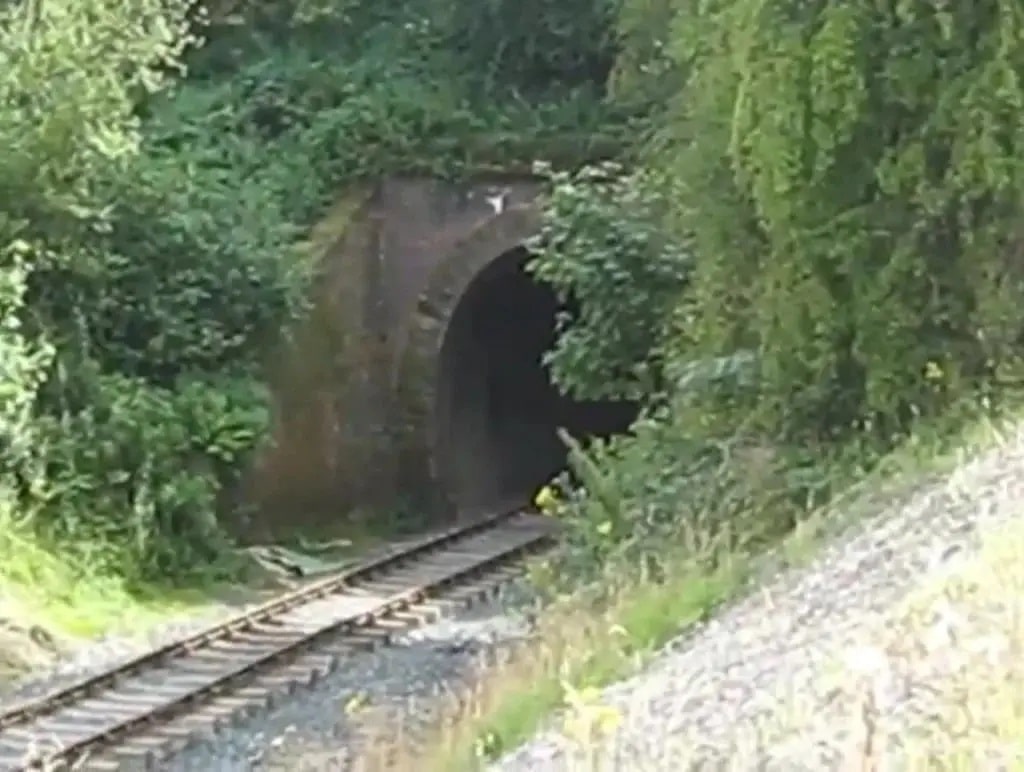
The northern portal of Heath Hill Tunnel as it appears in a video on YouTube. [44]
Looking North from the northern portal of Heath Hill Tunnel on 5th September 2010. The new line and Lawley Station are not yet open, © Copyright L.S. Wilson and licensed for reuse under a Creative Commons Licence (CC BY-SA 2.0). [43]
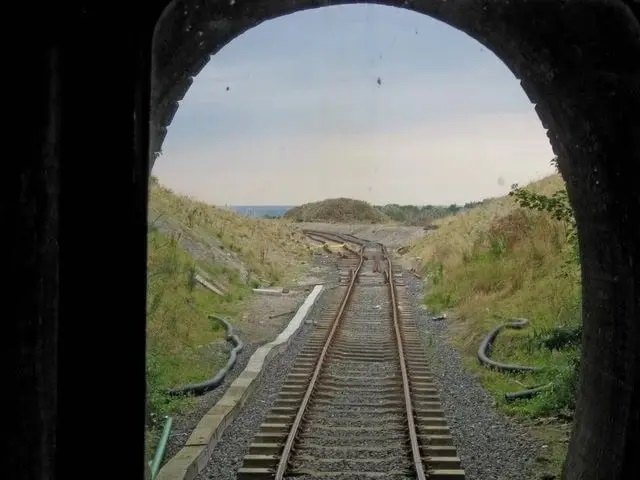
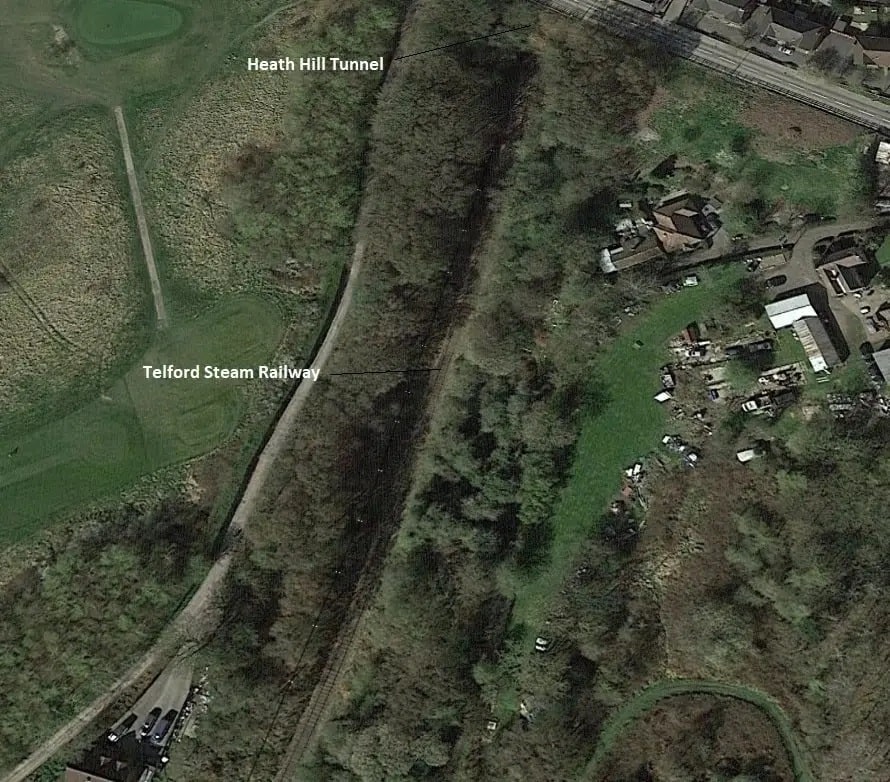
South of Heath Hill Tunnel, the modern preservation line of Telford Steam Railway follows the route of the W&SJR. As it leaves the tunnel it is in relatively deep cutting. [Google Earth]
A relatively grainy photograph of the Southern portal of Heath Hill tunnel after clearance work was completed by Telford Steam Railway, taken on 5th September 2010, © Copyright L.S. Wilson and licensed for reuse under a Creative Commons Licence (CC BY-SA 2.0).. [41]
The cutting between Heath Hill Tunnel and Horsehay & Dawley Station. Shared on the Telford Memories Facebook Group by Metsa Vaim EdOrg.  [20]
The 6″ OS Map from 1881/82 shows the tightly curved approach to Horsehay & Dawley Station from the North. [9]
The 1881/82 OS Map gives some sense of the industrial lines associated with the Horsehay Works. More details can be found in an article about the Coalbrookdale Tramroads. Both the old goods shed and the Coalbrookdale Company’s transshipment shed appear on this map extract. Both are on the North side of Station Road. The transshipment shed is the more westerly of the two. It is known locally as the ‘Old Loco Shed’. [9]
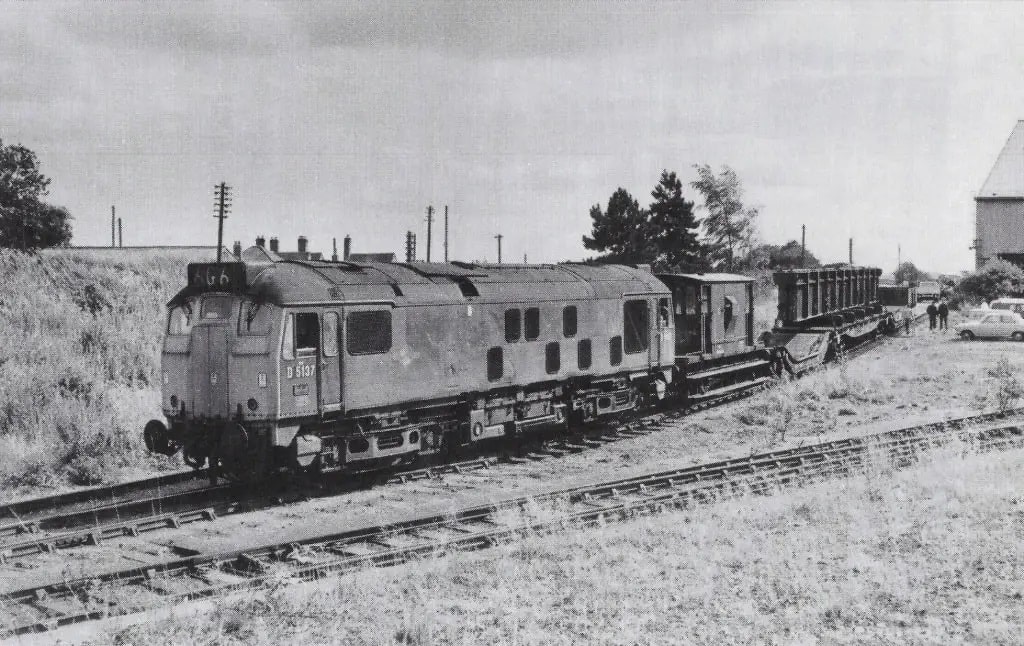
Shared on the Telford Memories Facebook Group by Metsa Vaim EdOrg, who comments: “The station yard, Horsehay in 1971. Now the site of Horsehay Steam Trust, this was the site we played, or trespassed on in the sixties. Above the loco is the roof of the Cub/Scout Hut on Fence Road, and further to the right was the derelict rolling stock and the large two storey building that we played football in. On the first floor avoiding the holes in the floor. Horsehay Works is also to the right. The picture shows a ‘Horsehay Special’ load on its way to Scotland via Lightmoor and Madeley Junctions,” © G.F. Bannister. [54]
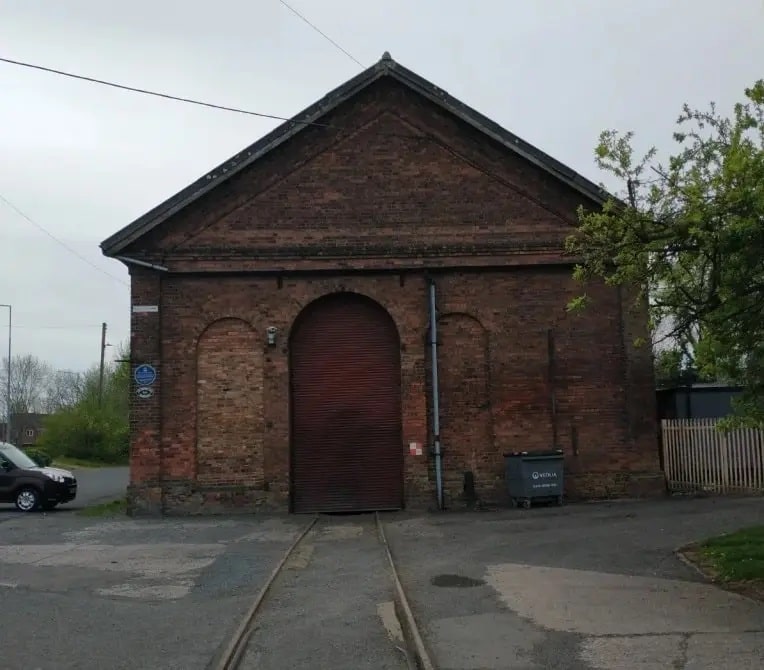
The Old Loco Shed. [My photograph, 20th April 2022]
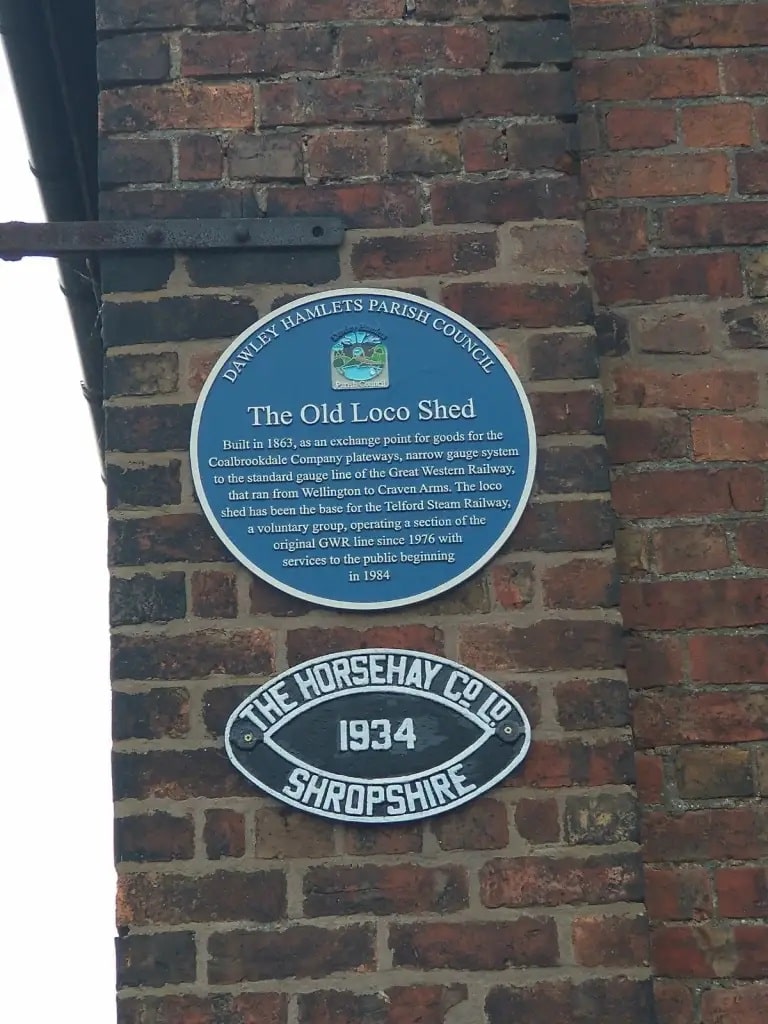
Dawley Hamlets Parish Council erected this blue plaque on ‘The Old Loco Shed’. It reads ‘Built in 1863, as an exchange point for good for the Coalbrookdale Company plateways, narrow gauge system to the standard gauge line of the Great Western Railway, that ran from Wellington to Craven Arms. The loco shed has been the base for the Telford Steam Railway, a voluntary group, operating a section of the GWR line since 1976 with services to the public beginning in 1984. [My photograph, 20th April 2022]
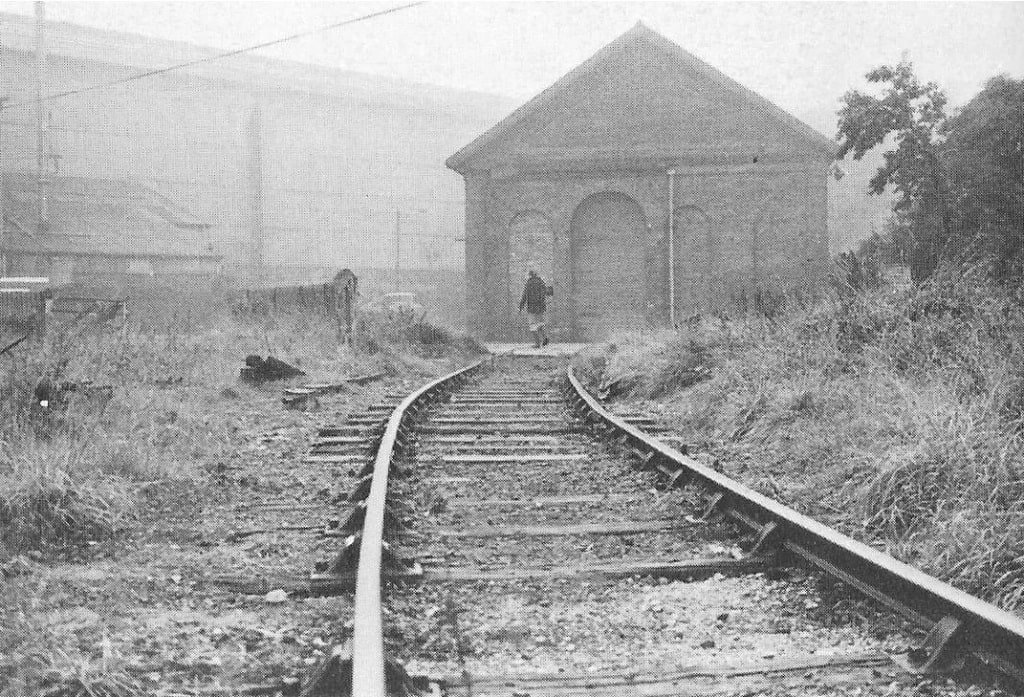
The Old Loco Shed. The base of the Telford (Horsehay) Steam Trust. The picture was taken in 1978. Shared by Metsa Vaim EdOrg on the Telford Memories Facebook Group on 10th May 2021. Metsa writes:
“The Horsehay locomotive shed has the Adamson-Butterley engineering works in the background.
The number of times I walked my mother’s dog down these tracks – probably trespassing at some time. The other shed is to the left out of shot – I think. In the late sixties and seventies this line to Lawley Bank was alive to the birdsong of warblers, linnets, yellowhammers and the like. [47]
Horsehay & Dawley Good Shed, now demolished. The lines to the left head for the ‘Old Loco Shed’ which was the transshipemtn shed for the Coalbrookdale Company, and towards the main Horsehay Works. This image was shared by Lin Keska and Tom Cooper on the Telford memories Facebook Group on 13th February 2017. [48]
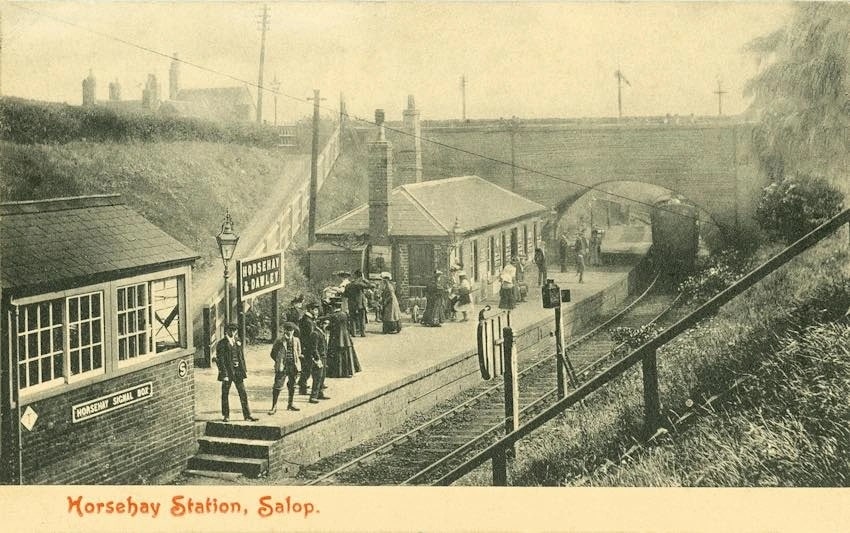
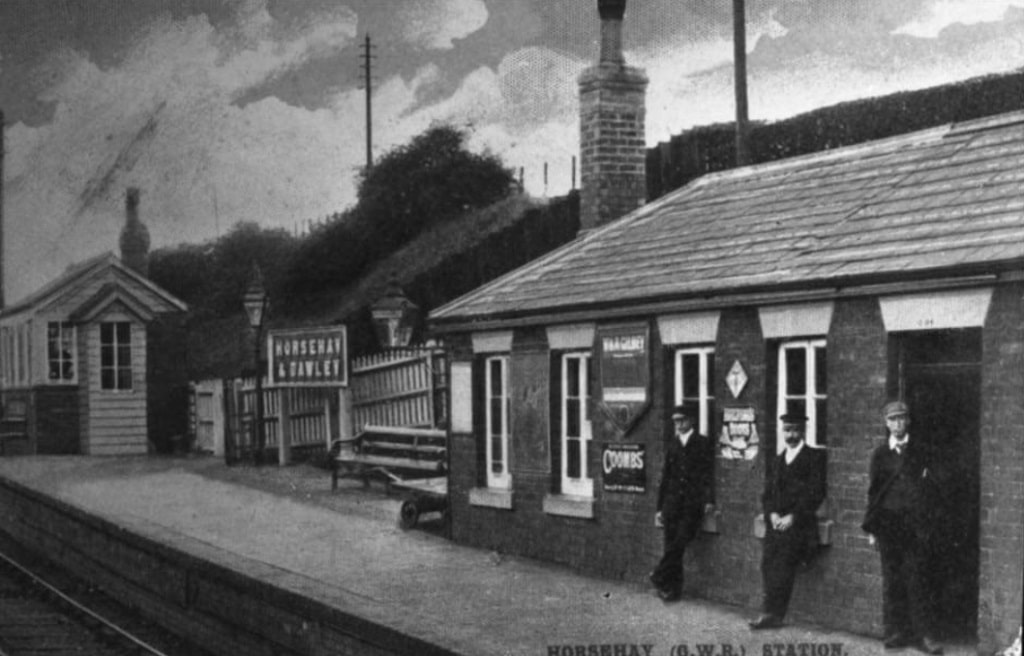
The Horsehay and Dawley Station looking South towards the road over-bridge early in the 20th century. This image was shared by Lin Keska and Tom Cooper on the Telford memories Facebook Group on 13th February 2017. {53]
Horsehay & Dawley Railway Station in the early 20th century, shared on the Telford Memories Facebook Group by Metsa Vaim EdOrg on 12th December 2020. [49]
Horsehay and Dawley railway Station in 1950. The photograph was taken from the over-bridge looking to the Northwest. Shared by Metsa Vaim EdOrg on the Telford Memories Facebook Group on 7th July 2022. [50]
Horsehay and Dawley station on 5th May 1957. Shared by Metsa Vaim EdOrg on the Telford memories Facebook Group on 25th July 2021. Metsa writes: “When the trains were no more, the perfect walk with the dog. From Lawley Bank, under the tunnel, past the smouldering coal seams under the heather, past numerous singing warblers, past the back of Kevin Rollins’s house to the Horsehay station. Through the goods yard, around the pool, up unto Horsehay Common, across to New Works wood. Down to the Forge pools, along the path to the Newdale packhorse bridge. Along the track back to Lawley station and back alongside the stream that emanated on Horsehay Common. Good job the Steam Trust now operates otherwise they probably would have concreted over/filled in the Heath Hill Tunnel by now. I will always treasure those walks with my mothers collie in the late 60’s and early seventies,” © G.F. Bannister. [51]
Horsehay & Dawley station. The signal in the middle distance marks the junction of the spur into Spring Village station and the yard, which is to the left. Refurbishment is incomplete. The station sign board still has to be fixed to its supporting uprights. The station building still have to be built. [45]
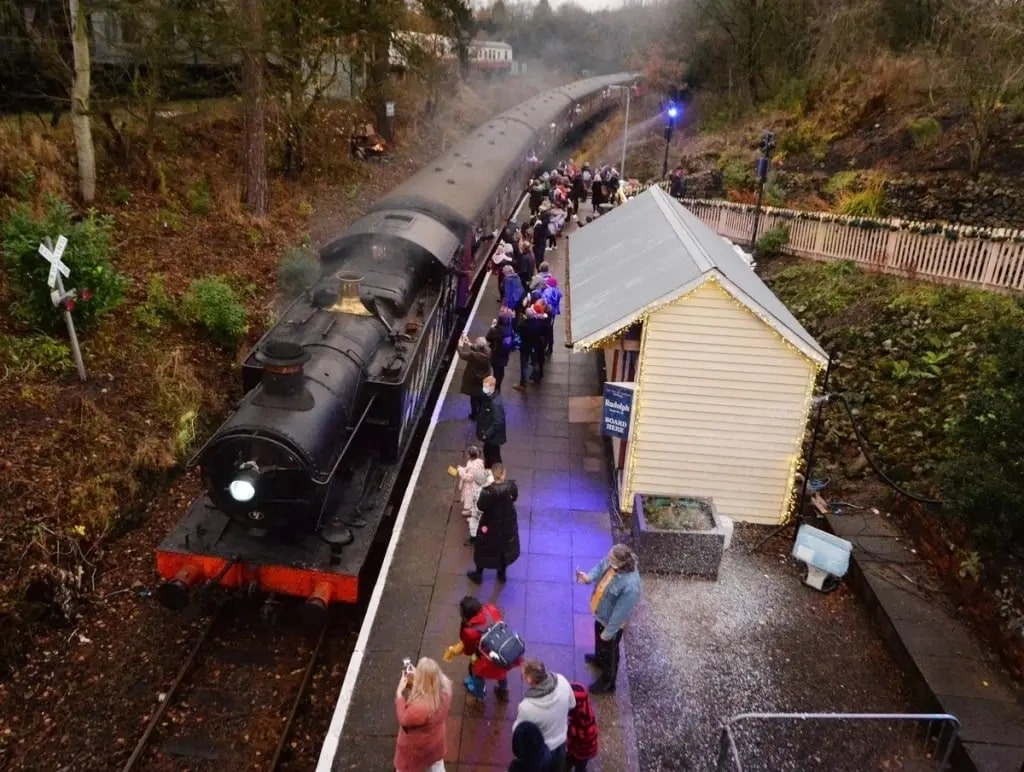
Horsehay & Dawley Railway Station with the now very popular Polar Express which the preservation company puts on in the Winter each year, and has done so since 2016, embedded from an article on the Shropshire Star’s website. The station is in its finished form with the new platform building. [55]
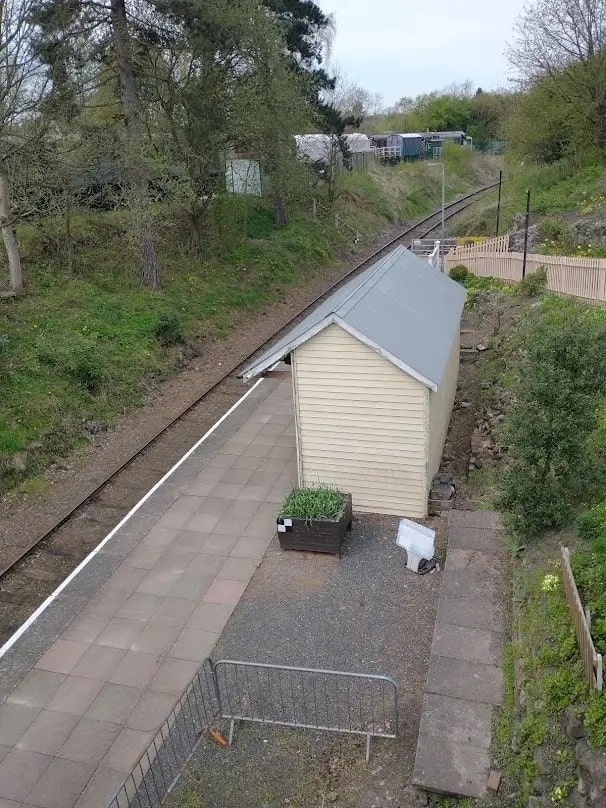
The view from the station access path, looking to the South and the road bridge at Horsehay and Dawley Station. [My photograph, 20th April 2022]
A view of the road bridge from behind the station building at Horsehay and Dawley Station. [My photograph, 20th April 2022]
The view North from the road bridge with the station building in the foreground and the Telford Steam Railway Yard (the old Goods yard) in the background. [My photograph, 20th April 2022]
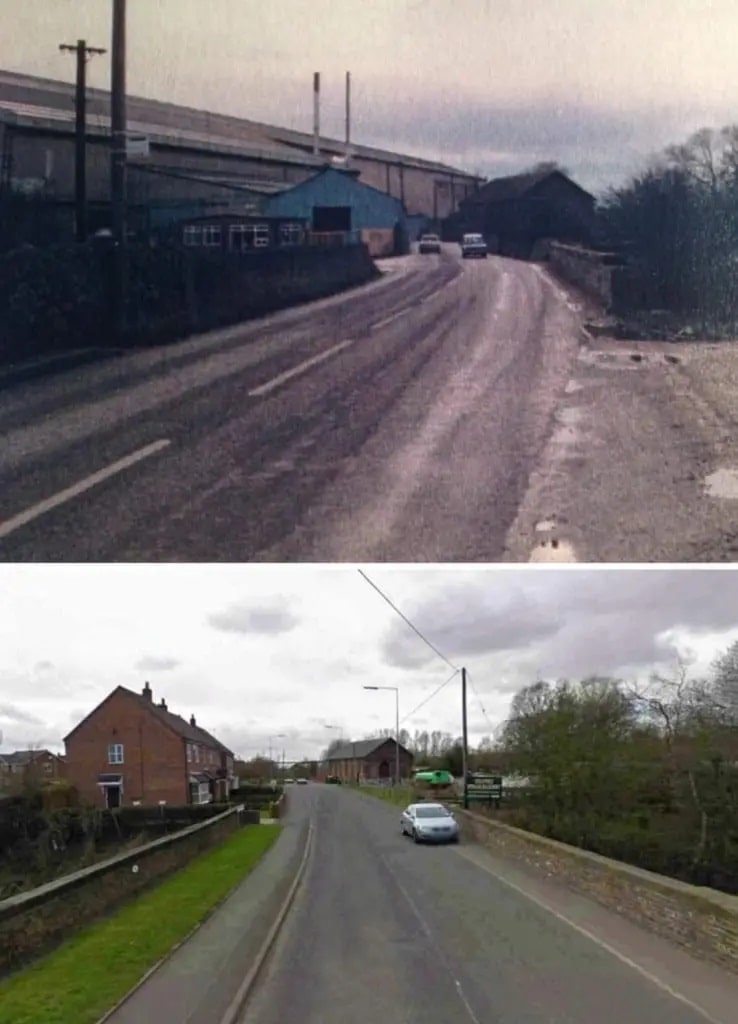
These two pictures are a ‘then & now’ study. They are both taken looking West across the road bridge across the W&SJR at Horsehay. The first picture shows the old works which were Adamson Alliance Works before becoming home to AB Cranes. The second is after the demolition of the main factory buildings. These two pictures were shared on the Telford Memories Facebook Group by Andy Rose on 21st December 2021. [52]

References

  1. https://en.m.wikipedia.org/wiki/Wellington_and_Severn_Junction_Railway, a ceased on 26th June 2022.
  2. Adrian Knowles; The Wellington, Much Wenlock and Craven Arms Railway; Lightmoor Press, Lydney, Gloucestershire, 2022.
  3. https://vlex.co.uk/vid/wellington-and-severn-junction-808032237, accessed on 26th June 2022.
  4. https://hyperleap.com/topic/Wellington_and_Severn_Junction_Railway, accessed on 26th June 2022.
  5. https://maps.nls.uk/view/101594296, accessed on 29th June 2022.
  6. https://maps.nls.uk/geo/explore/#zoom=17&lat=52.70121&lon=-2.51629&layers=168&b=1, accessed on 30th June 2022.
  7. https://maps.nls.uk/geo/explore/#zoom=17&lat=52.70121&lon=-2.51629&layers=6&b=1, accessed on 30th June 2022.
  8. https://maps.nls.uk/geo/explore/#zoom=17&lat=52.70036&lon=-2.50296&layers=168&b=1, accessed on 30th June 2022.
  9. https://maps.nls.uk/view/101594458, accessed on 30th June 2022.
  10. https://maps.nls.uk/view/101594482, accessed on 30th June 2022.
  11. https://maps.nls.uk/geo/explore/#zoom=18&lat=52.69612&lon=-2.48378&layers=168&b=1, accessed on 30th June 2022.
  12. https://www.geograph.org.uk/photo/804810, accessed on 30th June 2022.
  13. https://en.m.wikipedia.org/wiki/Wellington_railway_station_(Shropshire), accessed on 30th June 2022.
  14. https://www.shropshirestar.com/news/features/2020/06/01/new-queens-stay-in-deepest-south-shropshire, accessed on 30th June 2022.
  15. https://maps.nls.uk/geo/explore/#zoom=16.560351011060174&lat=52.64292&lon=-2.48610&layers=168&b=1, accessed on 1st July 2022.
  16. https://www.wikiwand.com/en/Green_Bank_Halt_railway_station, accessed on 1st July 2022.
  17. https://www.wikiwand.com/en/Ketley_Town_Halt_railway_station, accessed on 1st July 2022.
  18. https://en.m.wikipedia.org/wiki/New_Dale_Halt_railway_station, accessed on 1st July 2022.
  19. https://en.m.wikipedia.org/wiki/Lawley_Bank_railway_station, accessed on 1st July 2022.
  20. https://www.facebook.com/groups/674238619260811/permalink/5358295114188448, accessed on 1st July 2022.
  21. https://m.facebook.com/groups/674238619260811/permalink/2905700199447964, accessed on 1st July 2022.
  22. https://m.facebook.com/groups/674238619260811/permalink/6120237234660895, accessed on 2nd July 2022.
  23. https://m.facebook.com/groups/674238619260811/permalink/1658359617515368, accessed on 2nd July 2022.
  24. https://m.facebook.com/groups/674238619260811/permalink/846348998716438, accessed on 2nd July 2022.
  25. https://maps.nls.uk/view/121150310, accessed on 2nd July 2022.
  26. https://m.facebook.com/groups/674238619260811/permalink/3024958504188799, accessed on 2nd July 2022.
  27. https://maps.nls.uk/geo/explore/#zoom=16.478660506218784&lat=52.69402&lon=-2.48370&layers=6&b=1, accessed on 2nd July 2022.
  28. https://maps.nls.uk/geo/explore/#zoom=17&lat=52.69048&lon=-2.48447&layers=168&b=1, accessed on 2nd July 2022.
  29. https://m.facebook.com/groups/674238619260811/permalink/3023720624312587, accessed on 3rd July 2022.
  30. https://maps.nls.uk/geo/explore/#zoom=17&lat=52.67576&lon=-2.48151&layers=168&b=1, accessed on 5th July 2022.
  31. https://maps.nls.uk/geo/explore/#zoom=17&lat=52.67816&lon=-2.48176&layers=168&b=1, accessed on 5th July 2022.
  32. https://maps.nls.uk/geo/explore/#zoom=17&lat=52.67474&lon=-2.48158&layers=168&b=1, accessed on 5th July 2022.
  33. https://www.facebook.com/photo/?fbid=2208000166151460&set=pcb.1648058645323490, accessed on 6th July 2022.
  34. https://www.facebook.com/photo/?fbid=492524151741258&set=pcb.5358300260854600, accessed on 6th July 2022.
  35. https://www.facebook.com/photo/?fbid=431533454506995&set=gm.4918250424859588, accessed on 3rd July 2022.
  36. https://www.facebook.com/photo/?fbid=350926448418731&set=gm.846919291992742, accessed on 6th July 2022.
  37. https://www.facebook.com/photo/?fbid=255763268750682&set=gm.3788716084479700, accessed on 3rd July 2022.
  38. https://maps.nls.uk/geo/explore/#zoom=17&lat=52.67249&lon=-2.48130&layers=168&b=1, accessed on 7th July 2022.
  39. https://www.facebook.com/photo/?fbid=10201031066934406&set=gm.1060353237316012&cft[0]=AZV_yliKbIqlO8QzxgHLhCOGNDzl2q0JXz5sxj3DqnQvD0DDaeoXaxNVv24KosDWAQnnbtiDfyZQc7ou1TSNLtuS1FE-av5agWpNMlHyZuJmcYpbHRH7WTRyA0vgoRPmmhQdfbqbQrowrwZIZcePiFpL&tn=EH-R, accessed on 7th July 2022.
  40. https://www.openrailwaymap.org, accessed on 7th July 2022.
  41. https://www.geograph.org.uk/photo/2055888, accessed on 7th July 2022.
  42. https://www.facebook.com/photo/?fbid=1394210450623388&set=pcb.1533300770021254, accessed on 7th July 2022.
  43. https://www.geograph.org.uk/photo/2055924, accessed on 7th July 2022.
  44. https://youtu.be/TFCnvUg91hc, accessed on 7th July 2022.
  45. https://upload.wikimedia.org/wikipedia/commons/8/85/Horsehay_%26_Dawley_station_on_the_Telford_Steam_Railway.jpg, accessed on 7th July 2022.
  46. https://www.facebook.com/455639901281038/posts/pfbid0zgjgUvUWoXJz5CUVxNaLCT9JU3uaadGceZ6CYWGLwJ3kjQKMthg3XmH9MsyUYKMwl/?app=fbl, accessed on 7th July 2022.
  47. https://www.facebook.com/photo/?fbid=536113694048970&set=gm.5750220041662618, accessed on 7th July 2022.
  48. https://www.facebook.com/photo/?fbid=1394447547266345&set=pcb.1533901016627896, accessed on 7th July 2022.
  49. https://www.facebook.com/photo/?fbid=451145022545838&set=pcb.5046193635398599, accessed on 7th July 2022.
  50. https://www.facebook.com/photo?fbid=792862381707432&set=gm.7989826267701973, accessed on 7th July 2022.
  51. https://www.facebook.com/photo/?fbid=580770409583298&set=gm.6120294991321786, accessed on 7th July 2022.
  52. https://www.facebook.com/photo?fbid=3069342153301946&set=gm.6951096261574984, accessed on 7th July 2022.
  53. https://www.facebook.com/photo/?fbid=1394447307266369&set=pcb.1533901016627896, accessed on 7th July 2022.
  54. https://www.facebook.com/photo/?fbid=253270635666612&set=gm.3775392372478738, accessed on 7th July 2022.
  55. https://www.shropshirestar.com/news/local-hubs/telford/2021/12/16/telford-steam-railways-polar-express-experience-brings-christmas-magic-to-telford, accessed on 7th July 2022.