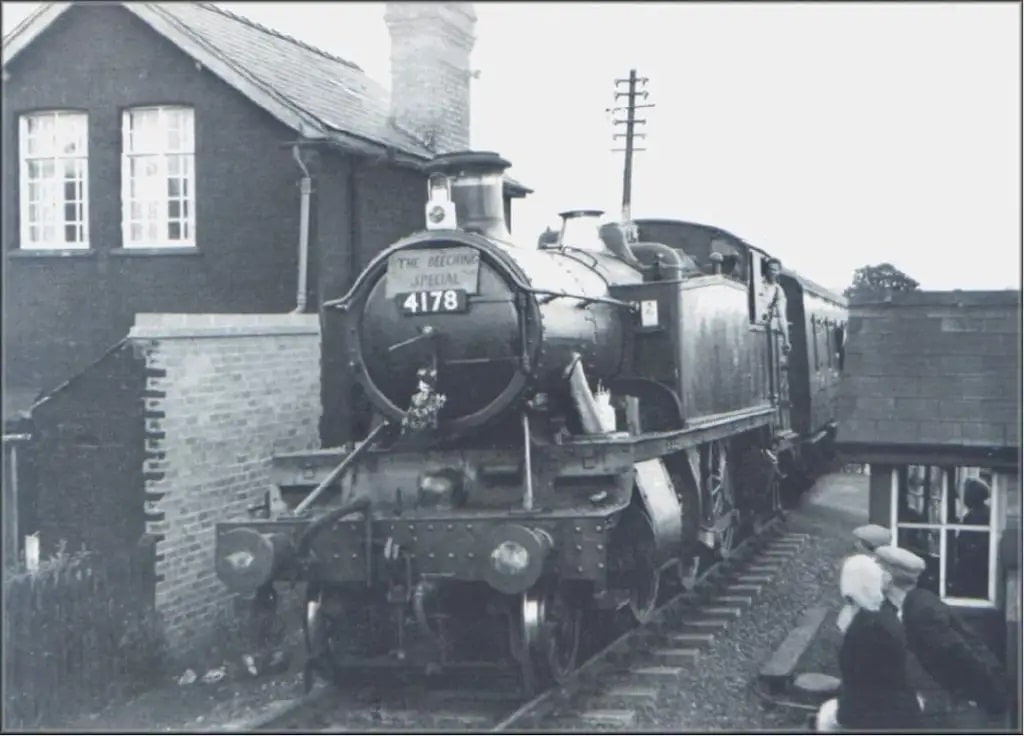
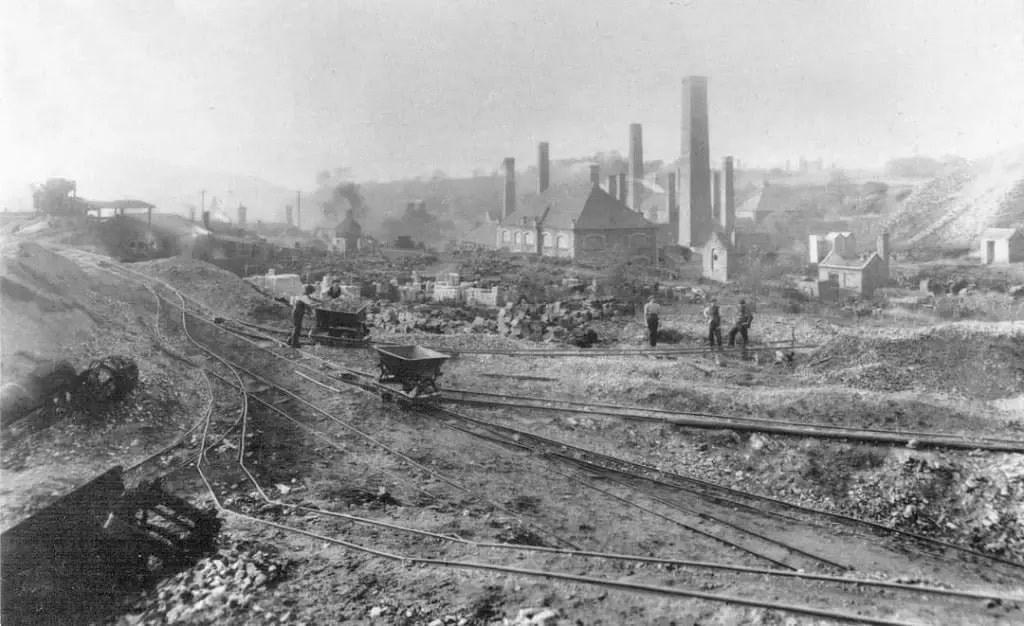
The featured image shows large Prairie Class 2-6-2T No. 4178 on the final passenger service along the W&SJR on 21st June 1962 heading North across Holly Road into Doseley Halt. This picture was shared by Marcus Keane on the Telford Memories Facebook Group on 29th April 2014.
Introduction – An introduction to the W&SJR was provided in the first article about the line:
Lightmoor Press have produced an excellent book about the line from Wellington through Much Wenlock to Craven Arms, “The Wellington, Much Wenlock and Craven Arms Railway.” The author is Adrian Knowles. [1]
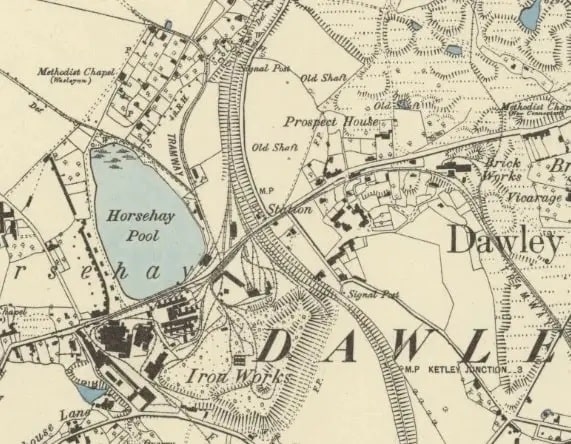
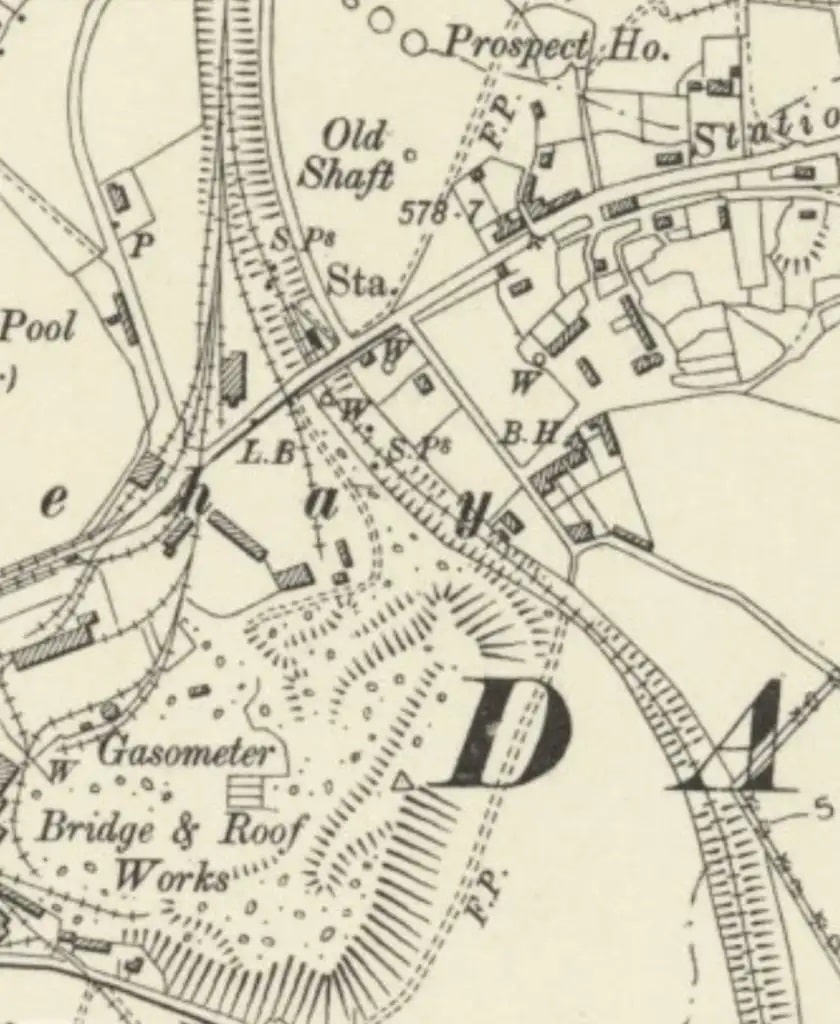
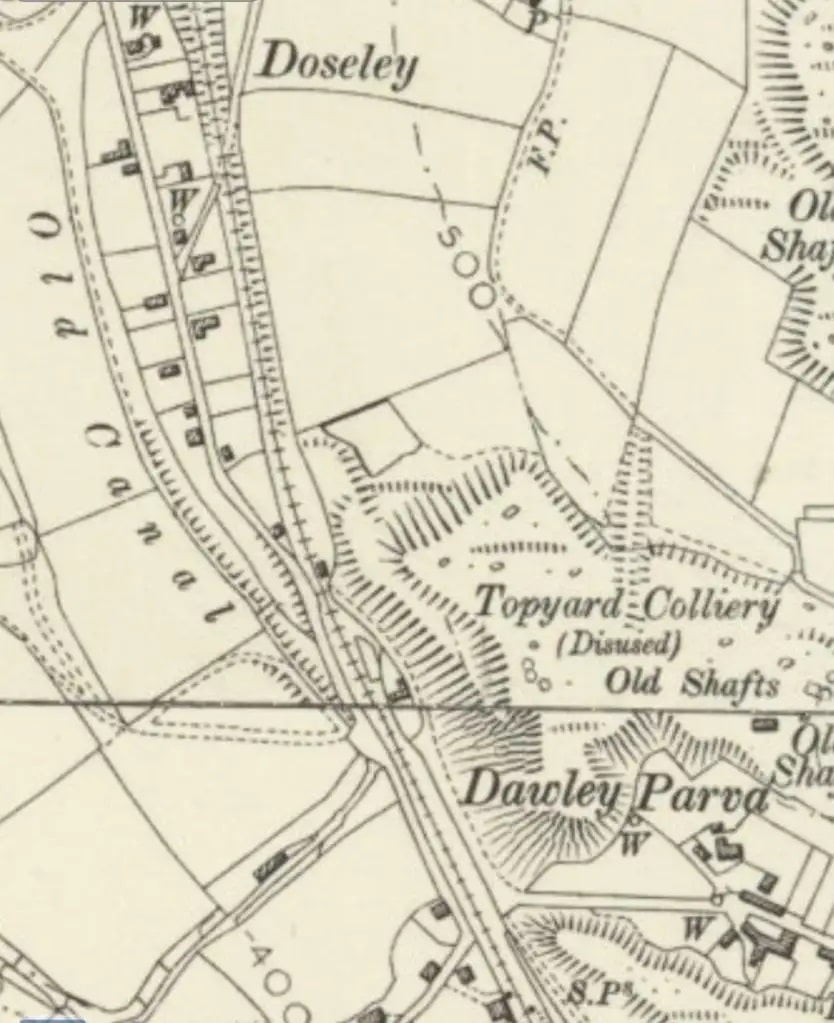
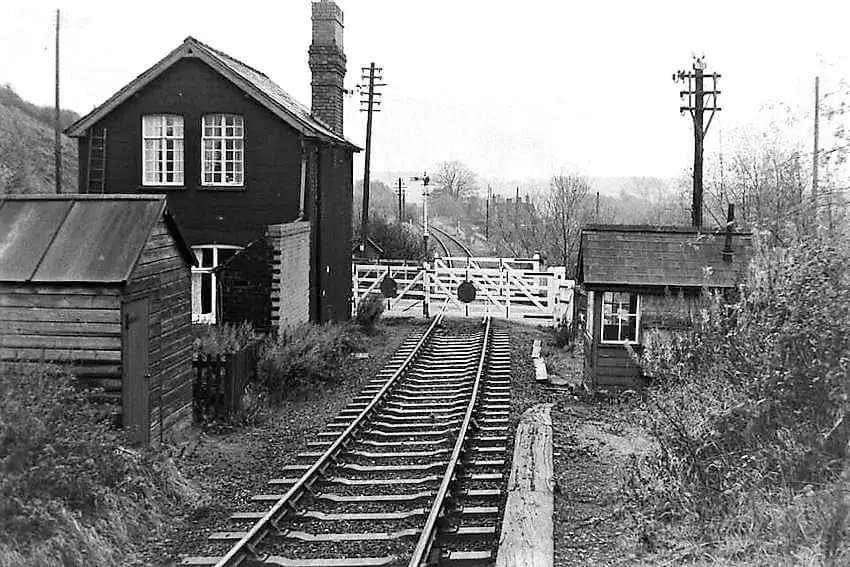
Before continuing our journey along the line, we note that it was built between 1857 and 1861 and in the section we are looking at, passed through the following stations: Horsehay and Dawley, Doseley Halt, and Lightmoor Platform (Lightmoor Station or Halt).
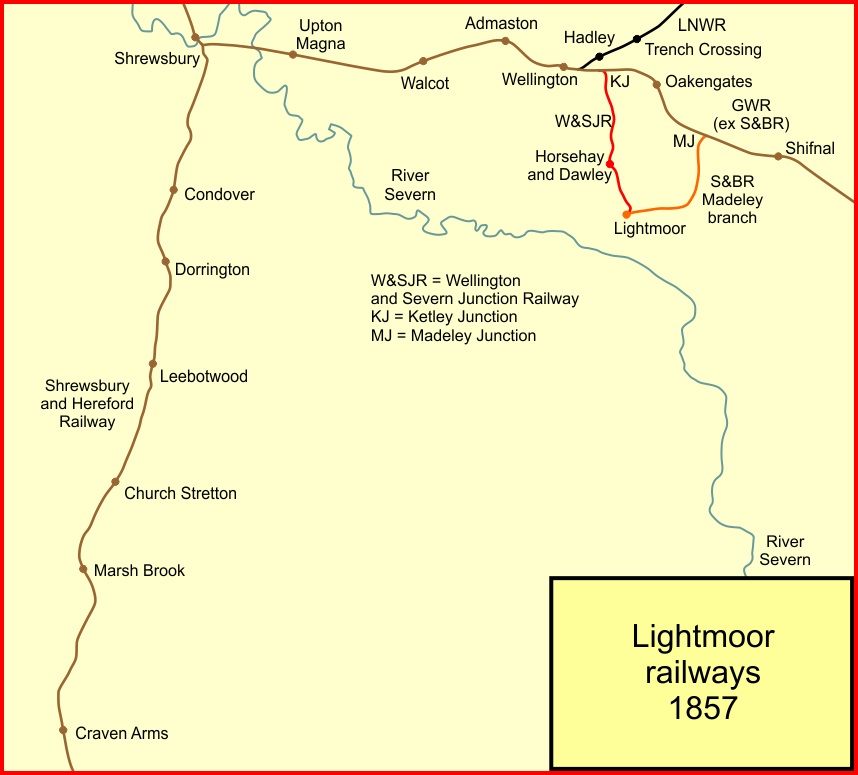
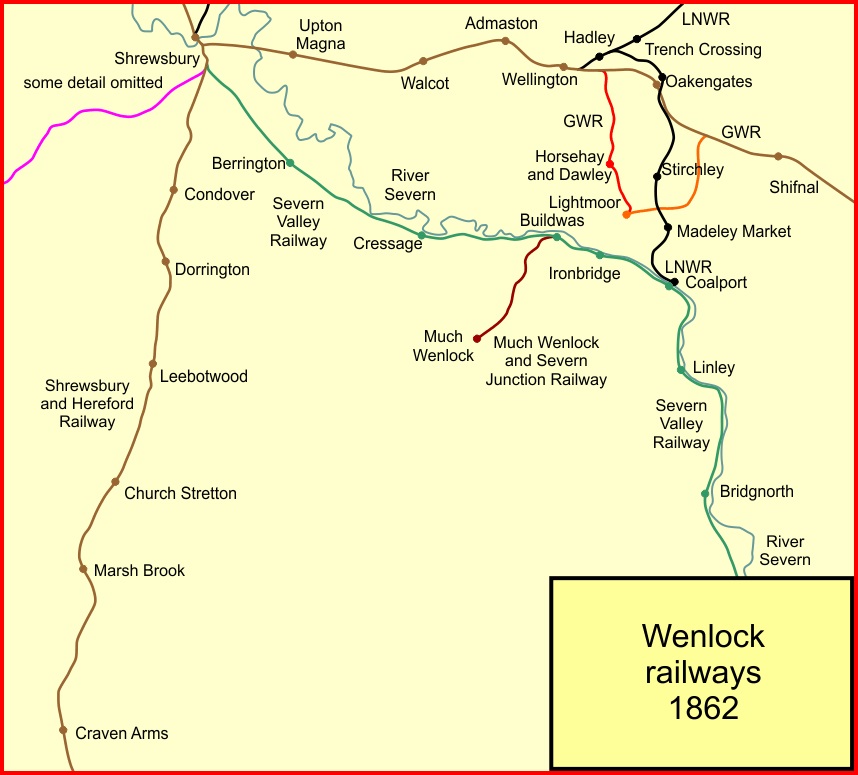
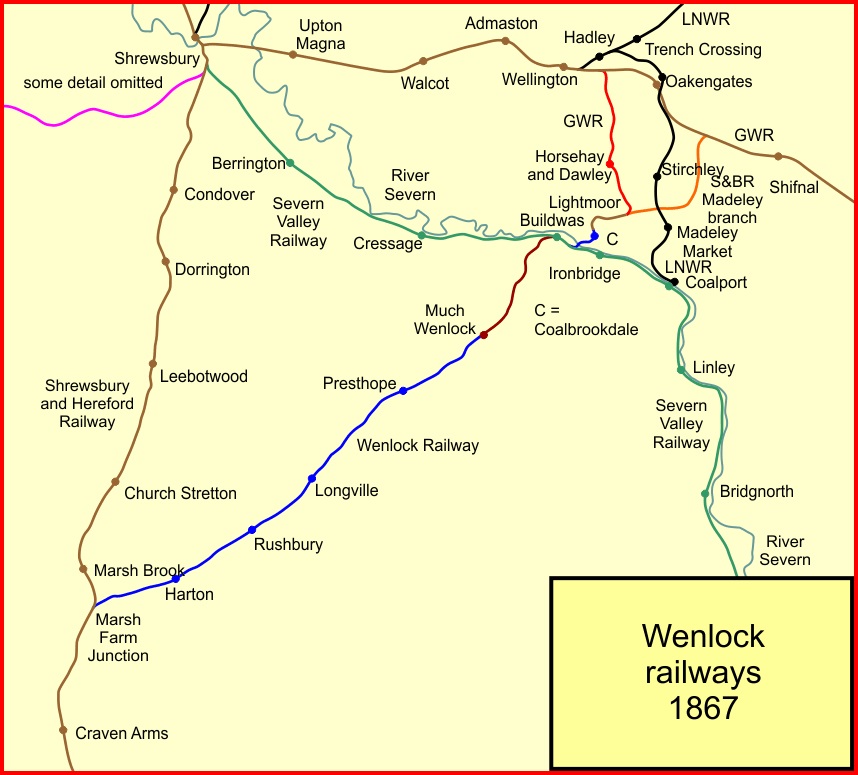
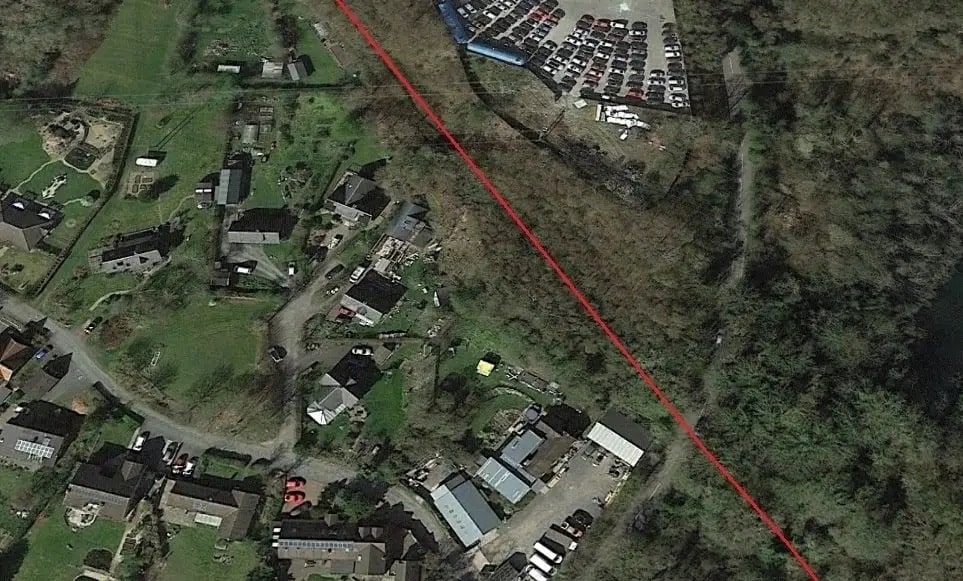
For completeness, the images below show the developing standard-gauge rail network around the River Severn. By 1857 the W&SJR linked Ketley Junction to Lightmoor. It was a little longer before the line made a connection with the Severn Valley Railway and eventually the route through to Craven Arms opened.
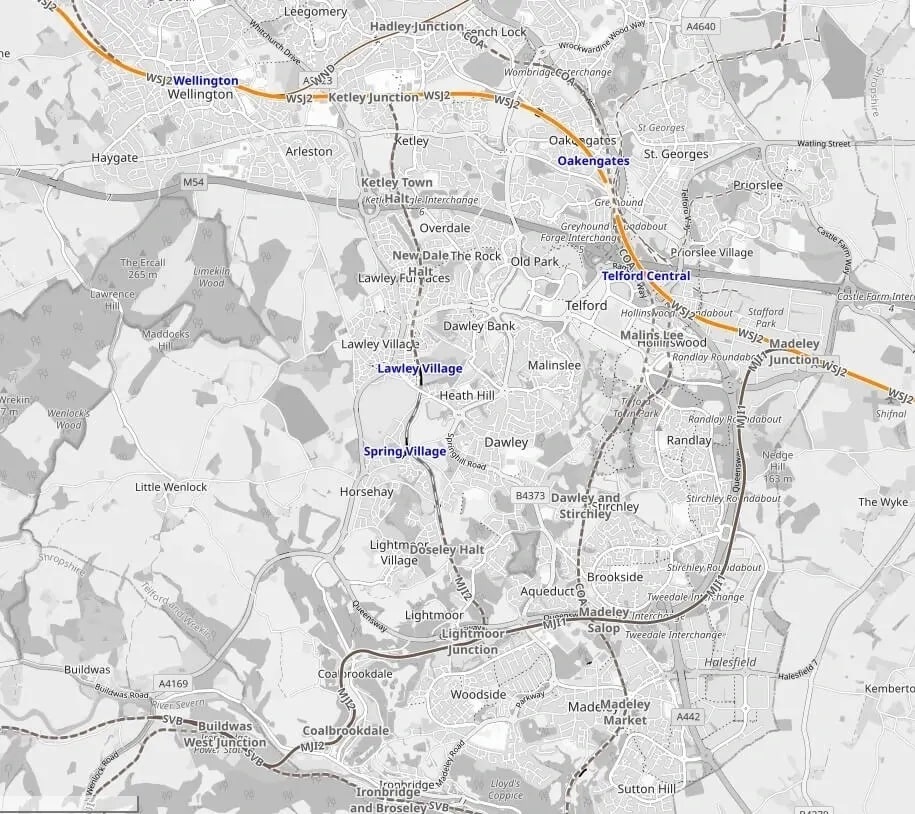
Ketley Junction to Lightmoor was open by 1857. [2]The Severn Valley line was open by the time covered by this map. [2]The complete route of the Wellington, Much Wenlock & Craven Arms Railway was in use by 1867. [2]The railways in the area around what was the Wellington & Severn Junction Railway (W&SJR) as shown on the OpeRailwayMap. OpenRailwayMap (previously called “Bahnkarte”) is a detailed online map of the world’s railway infrastructure, built on OpenStreetMap data. It has been available since mid-2013 at OpenRailwayMap.org [17]
It is worth noting as a significant aside, that there was a very significant network of plateways/tramroads in the immediate area of the line. These were essentially a private system belonging to the Coalbrookdale Company. The network from 1881 onwards is discussed in an earlier article about the East Staffordshire Tramways Owned by the Coalbrookdale Company:
Searching on line, I found the following image which shows two forms of horsepower at work in the Horsehay Works in the early part of the 20th century. It also illustrates three different trams/waggons in use before the site was converted to standard-gauge!
Tramways/plateways at Horsehay Works in the early part of the 20th century. Shared on the Telford Memories Facebook Group by Lin Keska on 23rd February 2017, courtesy of the Ironbridge Gorge Museum Trust Archives. [20]
It is also worth noting the 21st century plans of Telford Steam Railway to extend its preservation line to Ironbridge Power Station at Buildwas. Their plans and progress can be followed here. They have called their plans ‘Steaming to Ironbridge‘.
In essence this will be a phased process and one which will have been significantly affected by the Covid19 pandemic. The first phase was to reach Doseley Halt through renewing exiting sub-standard trackwork. The next step will be to receive planning permission for a new bridge to cross the A4169 and to construct the line to Lightmoor. It will require two level crossings as well as the bridge. The bridge deck has already been supplied by Network Rail and is stored at Horsehay Yard.
Telford Steam Railway already leases the signal box at Lightmoor Junction from the rail authorities for future use, when operating the extended railway.
The main goal of ‘Steaming to Ironbridge’ is to create a Park and Ride steam service to serve the Ironbridge Gorge.
The Route– Horsehay & Dawley Railway Station to Buildwas
The line currently has been taken back to a point between the two curves South of Horsehay & Dawley Station. Work on the extension has, as of mid-July 2022, still to start.
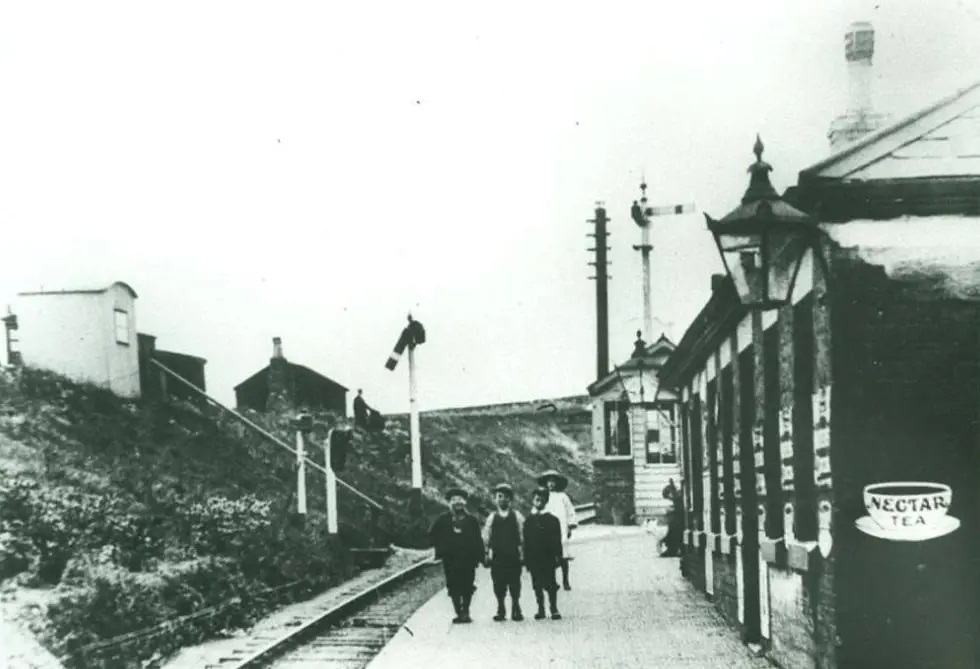
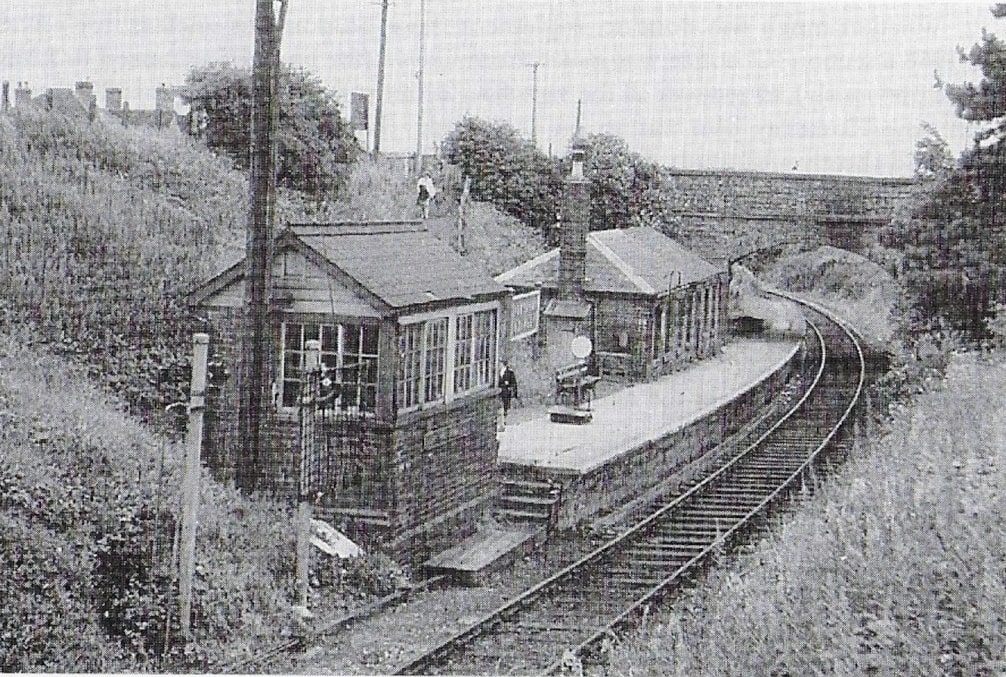
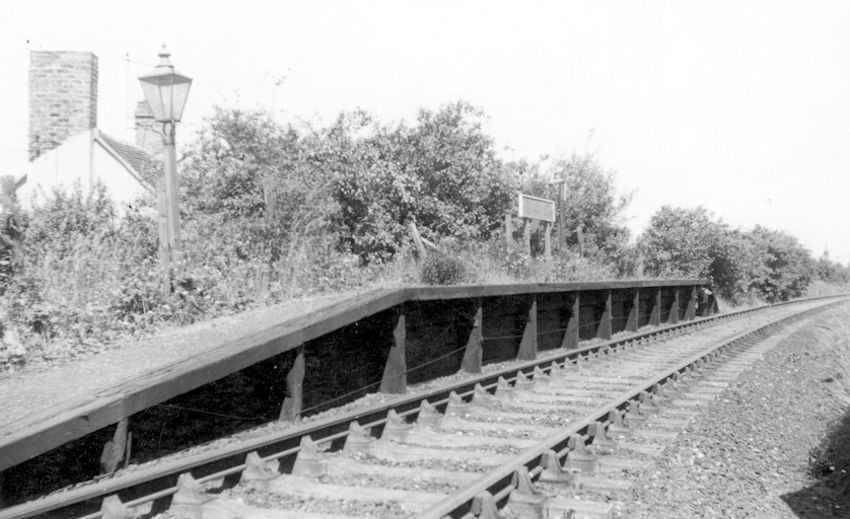
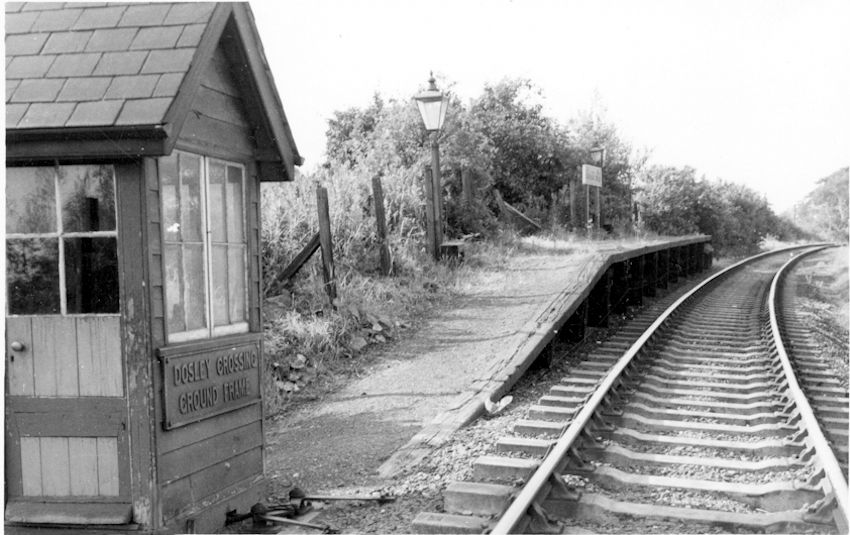
Searching online I have located 4 images of Doseley Halt which are copyright protected by Lens of Sutton. Two of which are included in the book about the line by Knowles. [1: p166] … Lens of Sutton’s reference numbers for these images are:
57060 GWR Doseley Halt General view, circa 1960s, showing the single platform and level crossing. 57071 GWR Doseley Halt General view, circa 1960s, showing the single platform and level crossing. 57072 GWR Doseley Halt General view, circa 1960s, showing the single platform and ground frame. 57180 GWR Doseley Halt General view showing the single platform, circa 1960s.
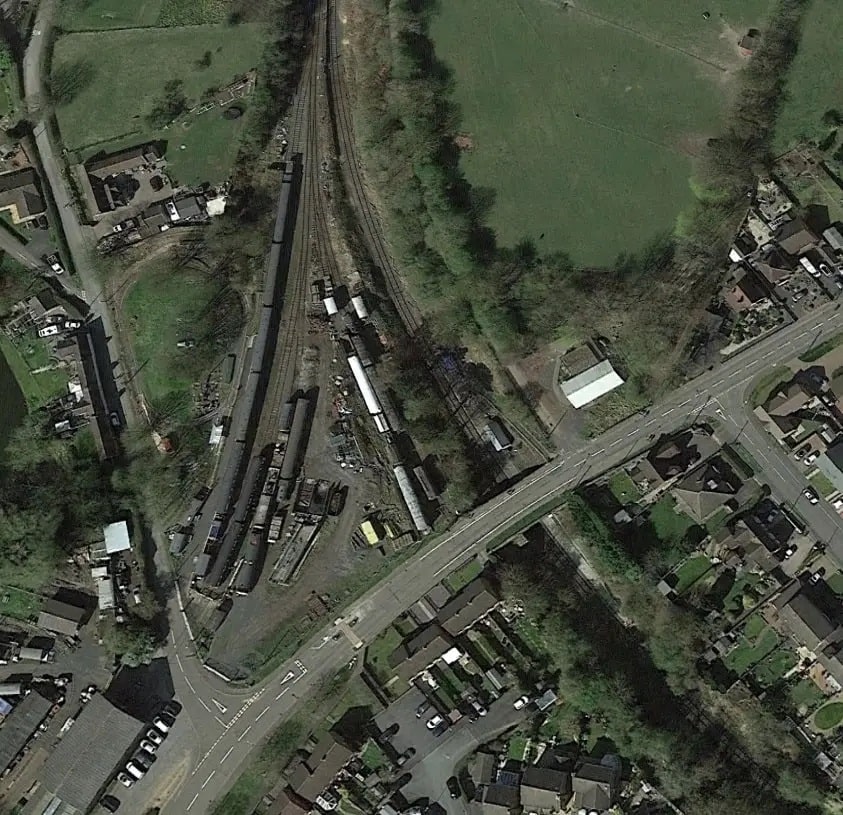
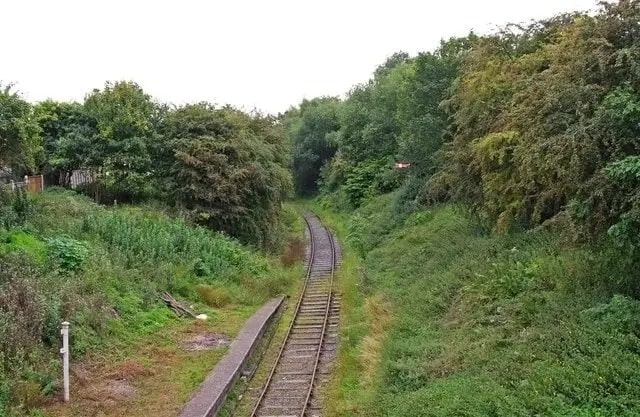
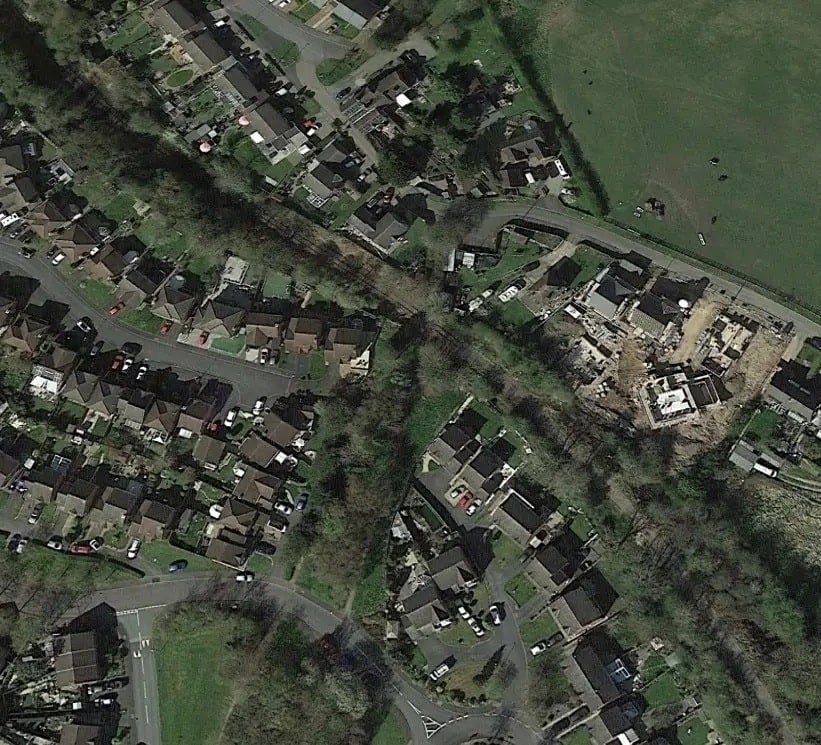
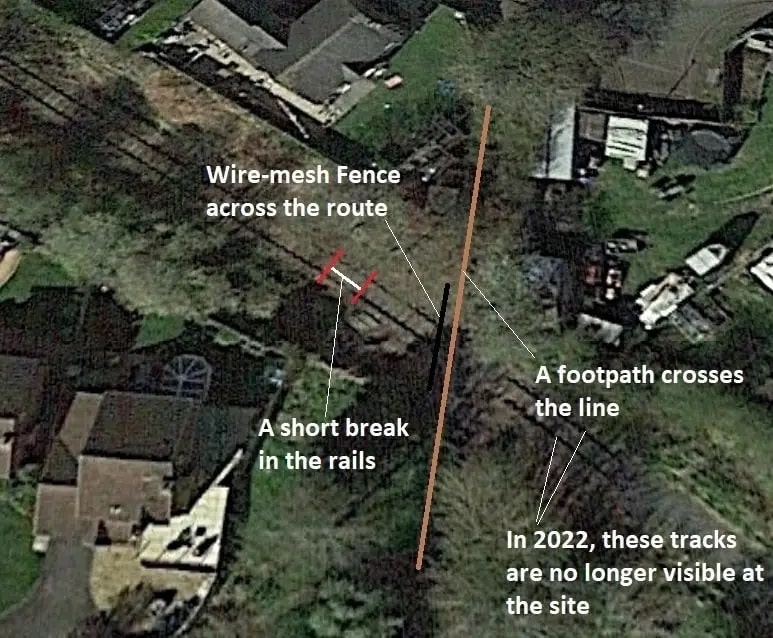
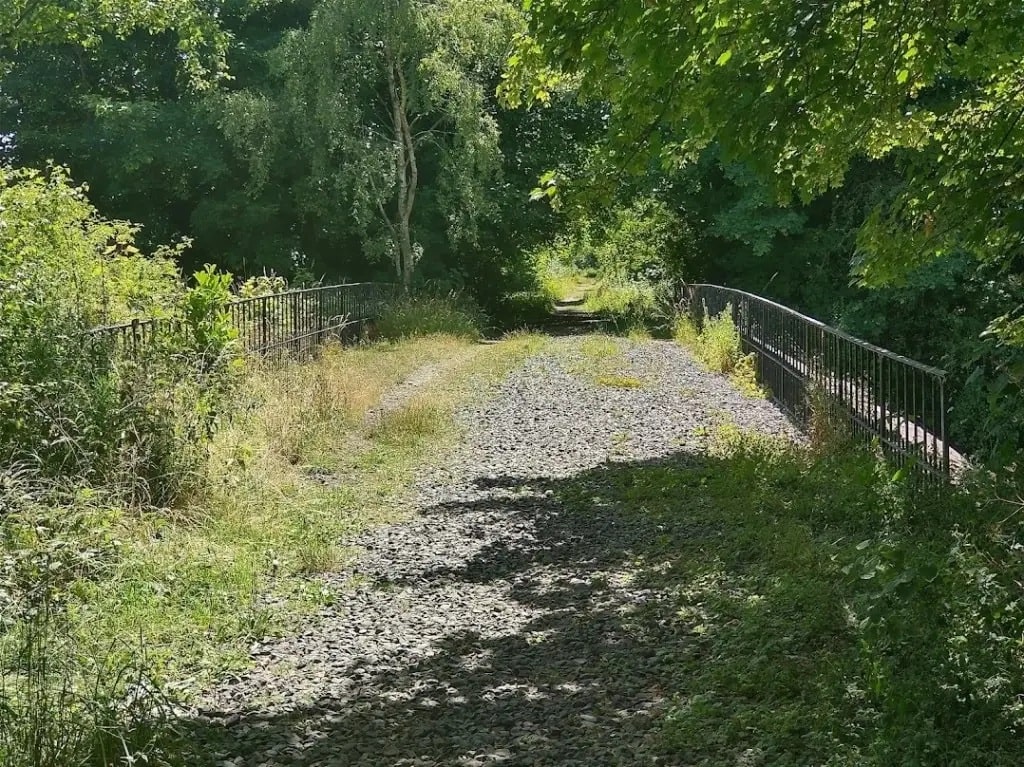
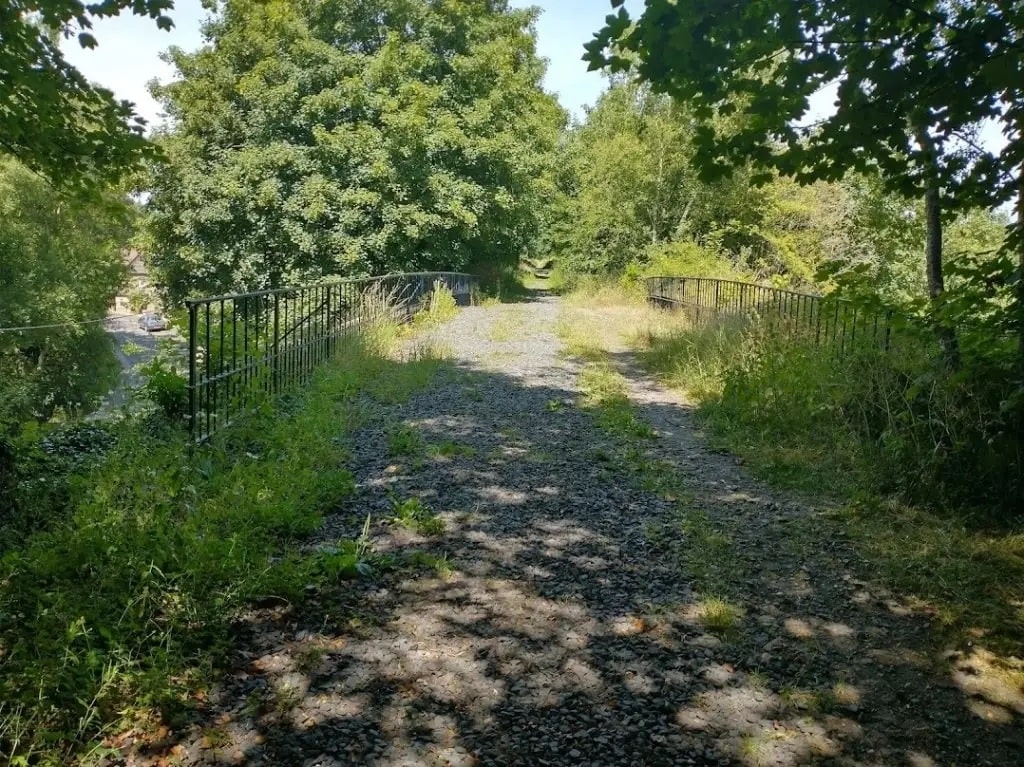
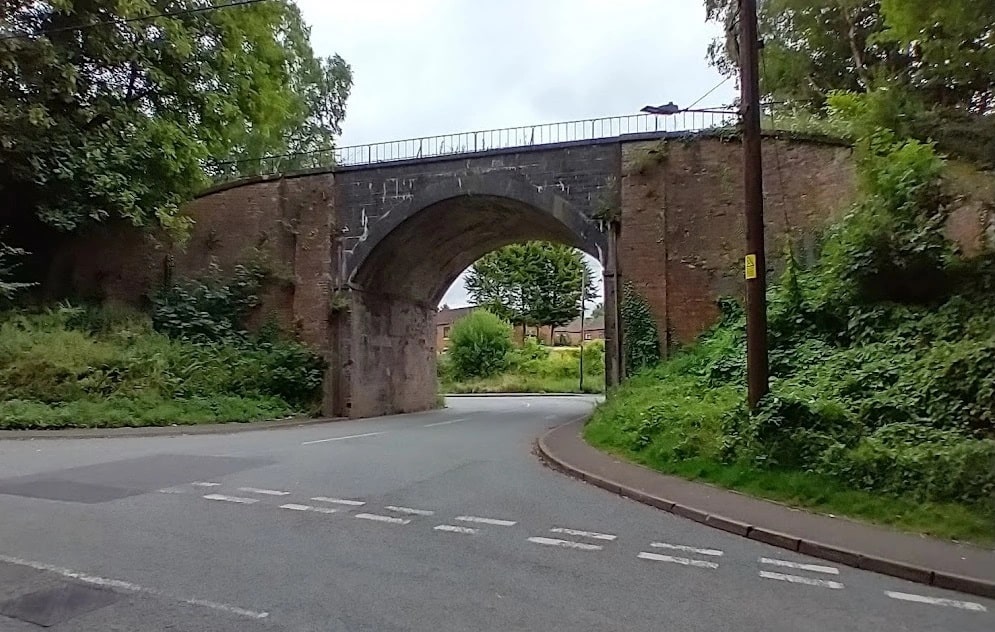
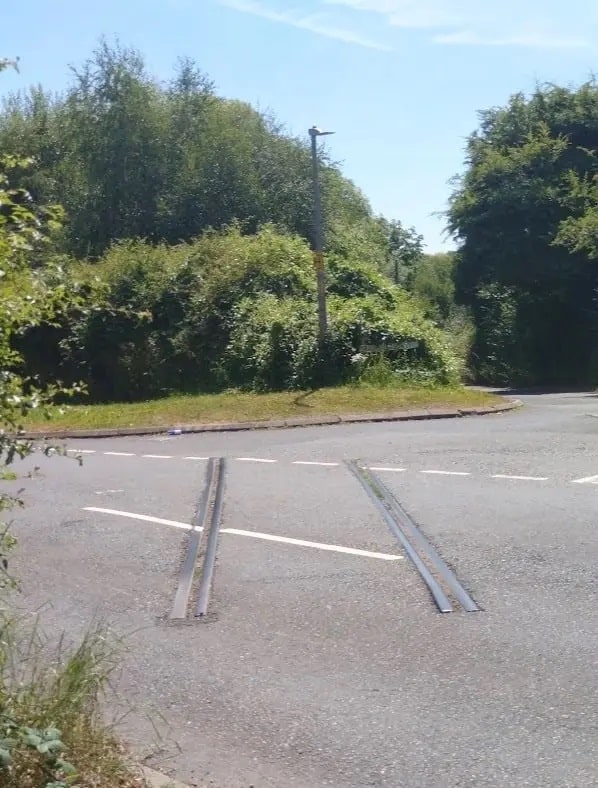
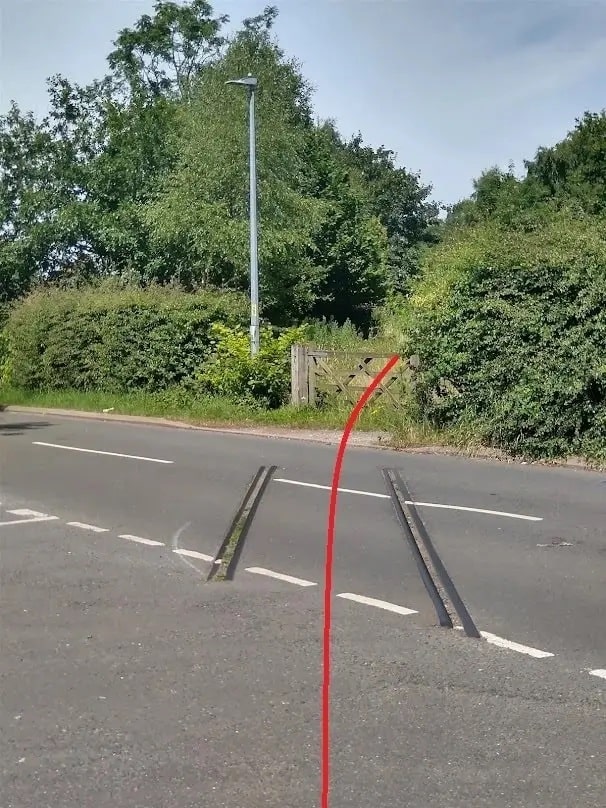
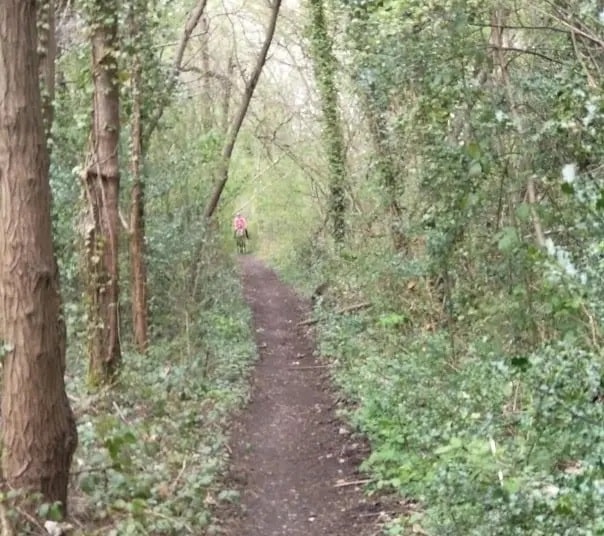
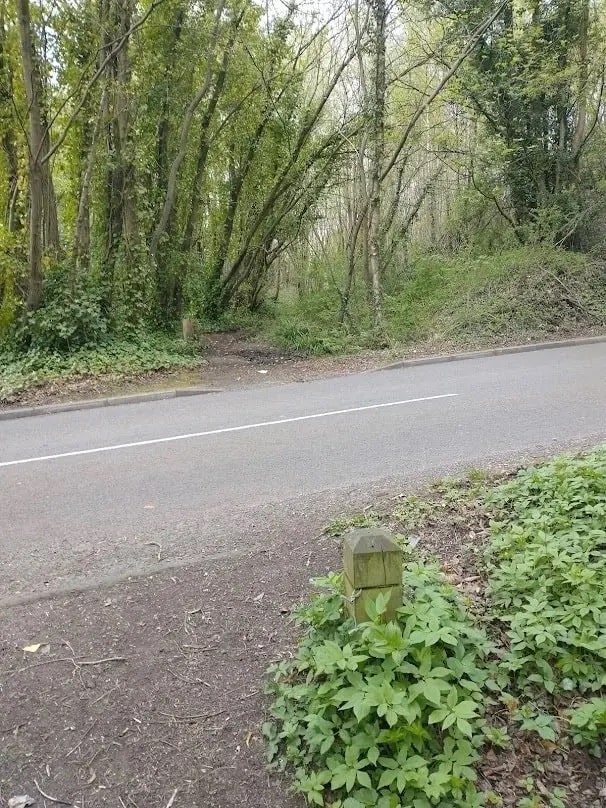
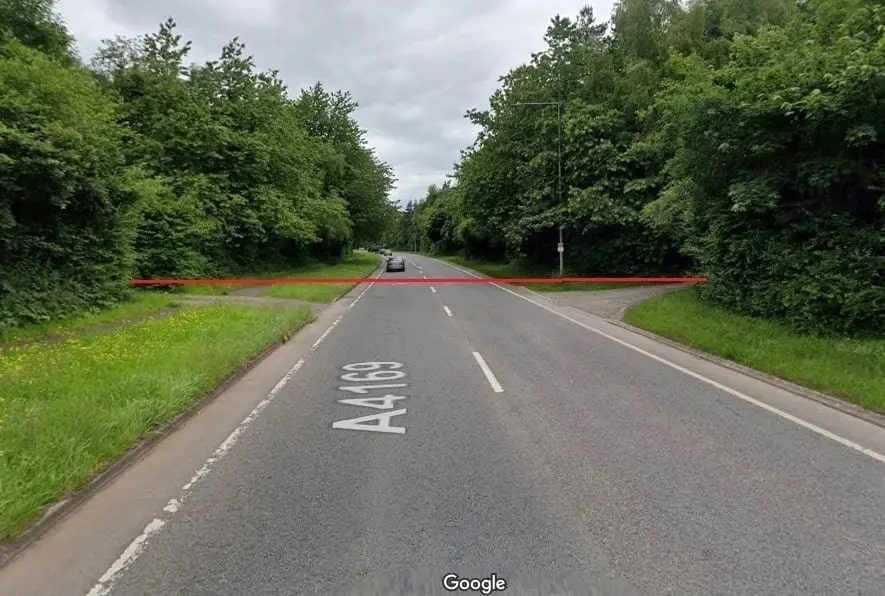
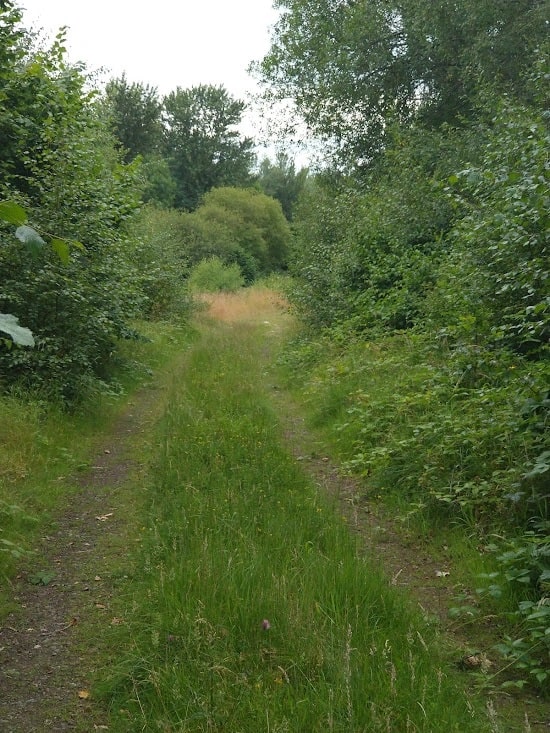
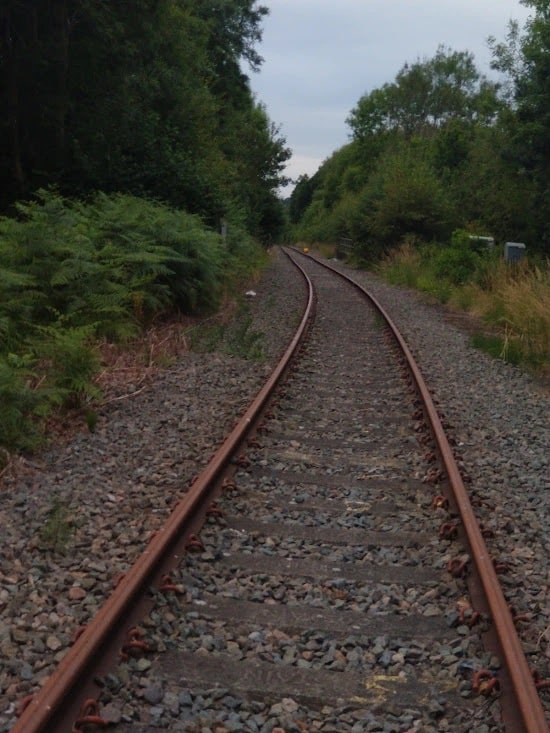
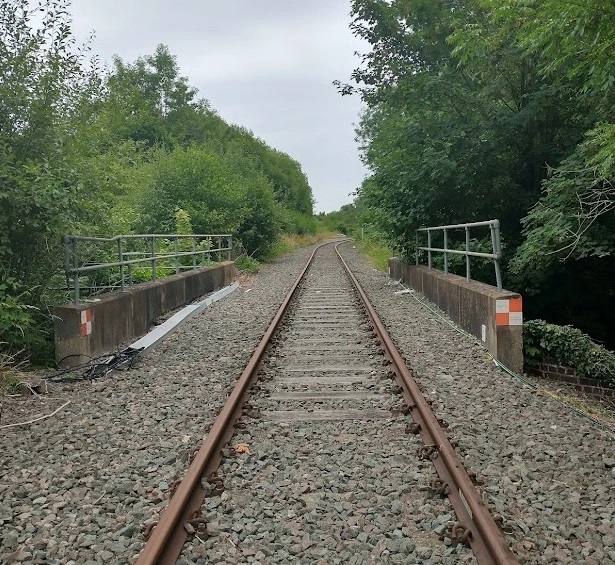
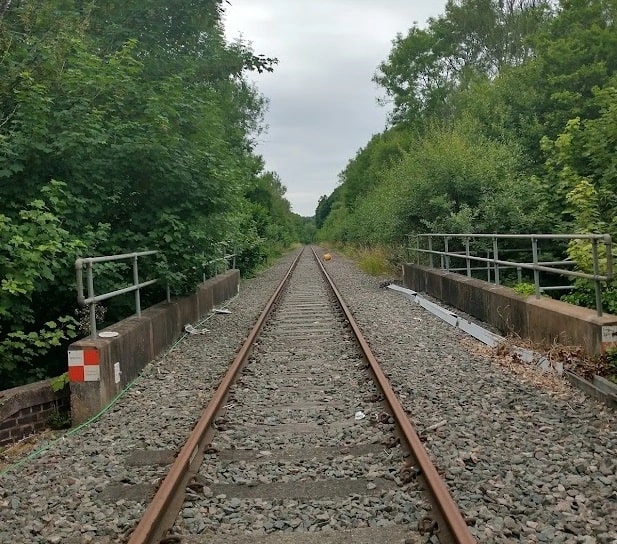
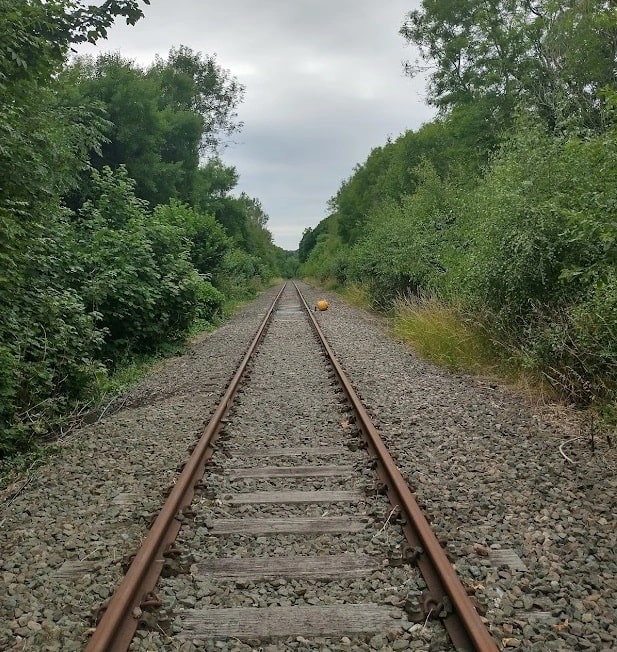
On 11th July 2022, I walked down the line from the end of the preservation section , over Doseley Bridge and down to a point about 200 metres South of what was Doseley Halt and the level-crossing on Holly Road. I was delighted to find one small remnant of the railway at the level-crossing in the tarmac of Holly Road.
A length of the old rails remains within the carriageway of Holly Road. The view ahead is impeded by vegetation and the route of the line cannot be followed immediately. [My photograph, 11th July 2022]Looking back to the North, the line curves very gently through the station site. [My photograph, 11th July 2022]
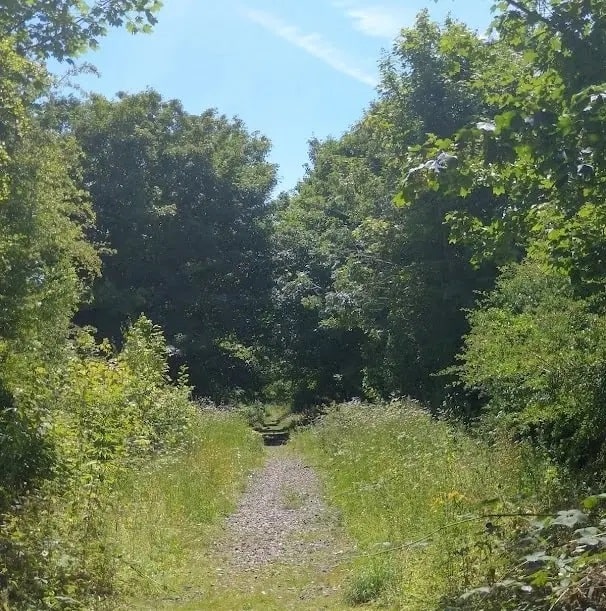
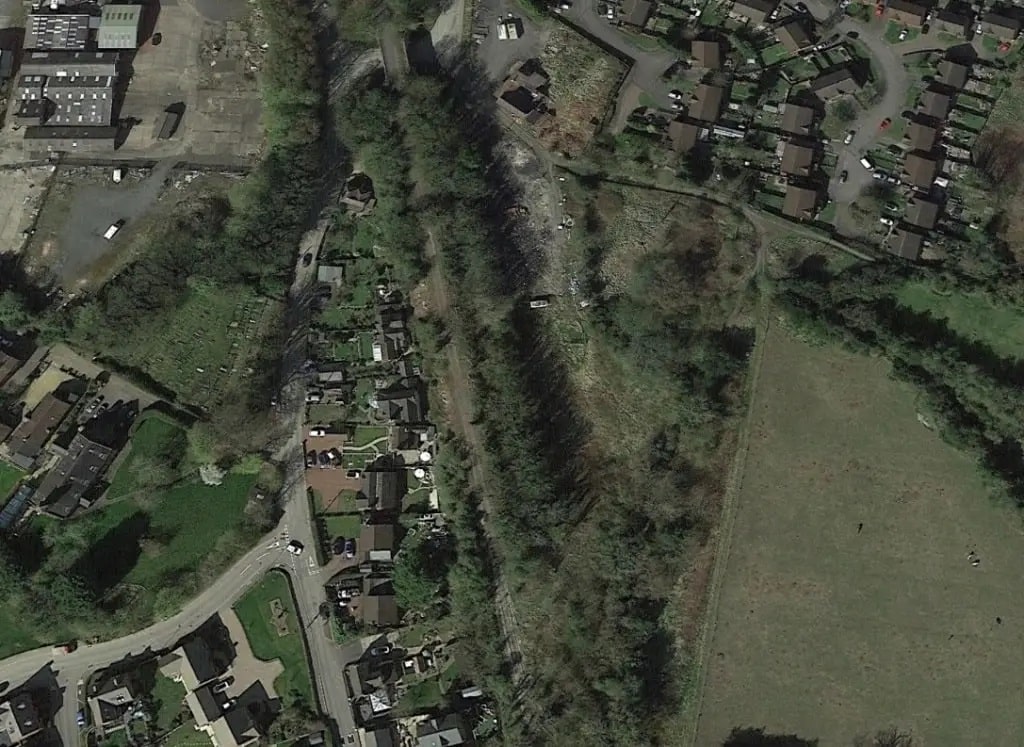
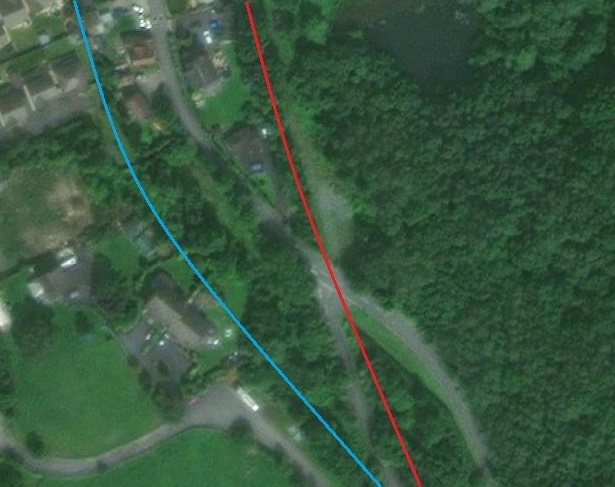
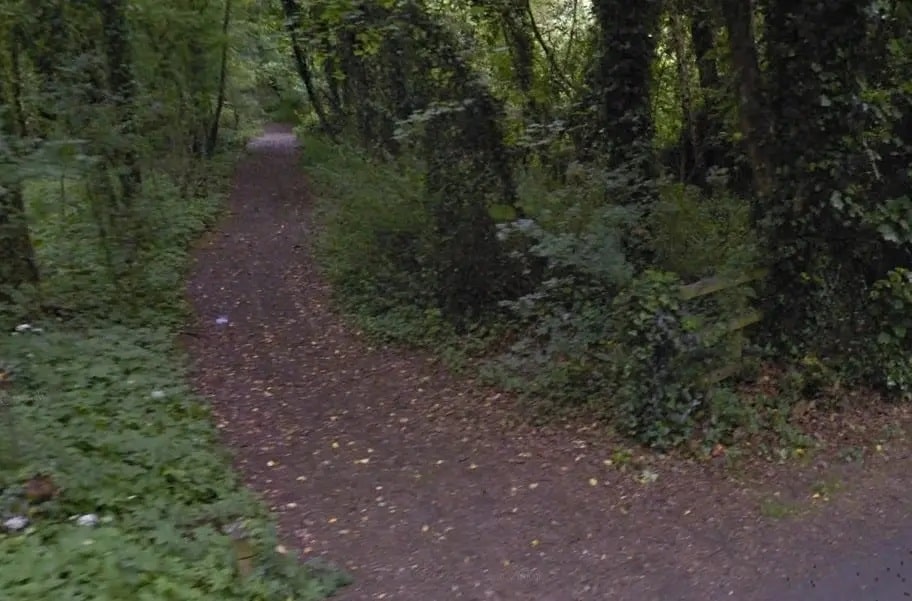
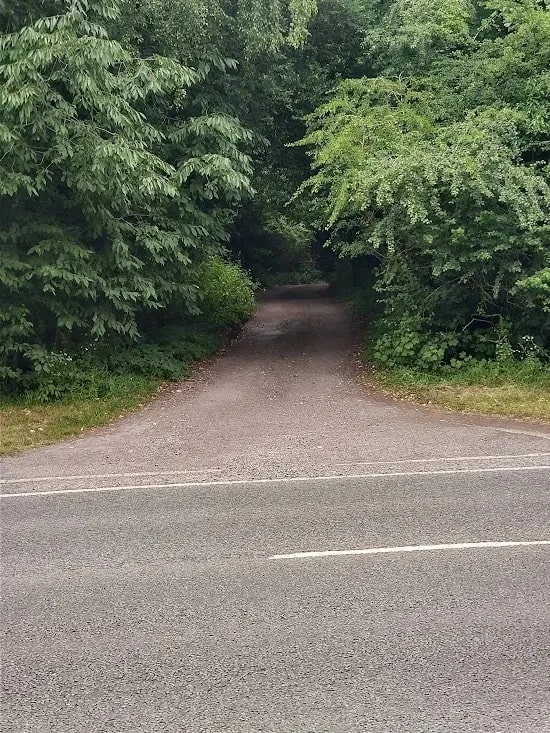
For perhaps 150 to 200 metres, the line South threads a narrow space between Holly Road and Gravel Leasowes. It initially at on a low embankment, but very soon, as the lane levels rise, the route is in cutting. Following Gravel Leasowes, I was able to find a footpath connection between the two roads at the point that Gravel Leasowes turned away from the line. That point is at the very top of the first map extract below.
This was the point at which my wander on 11th July 2022 ceased as I recognised the location from an earlier walk on 21st April 2022.
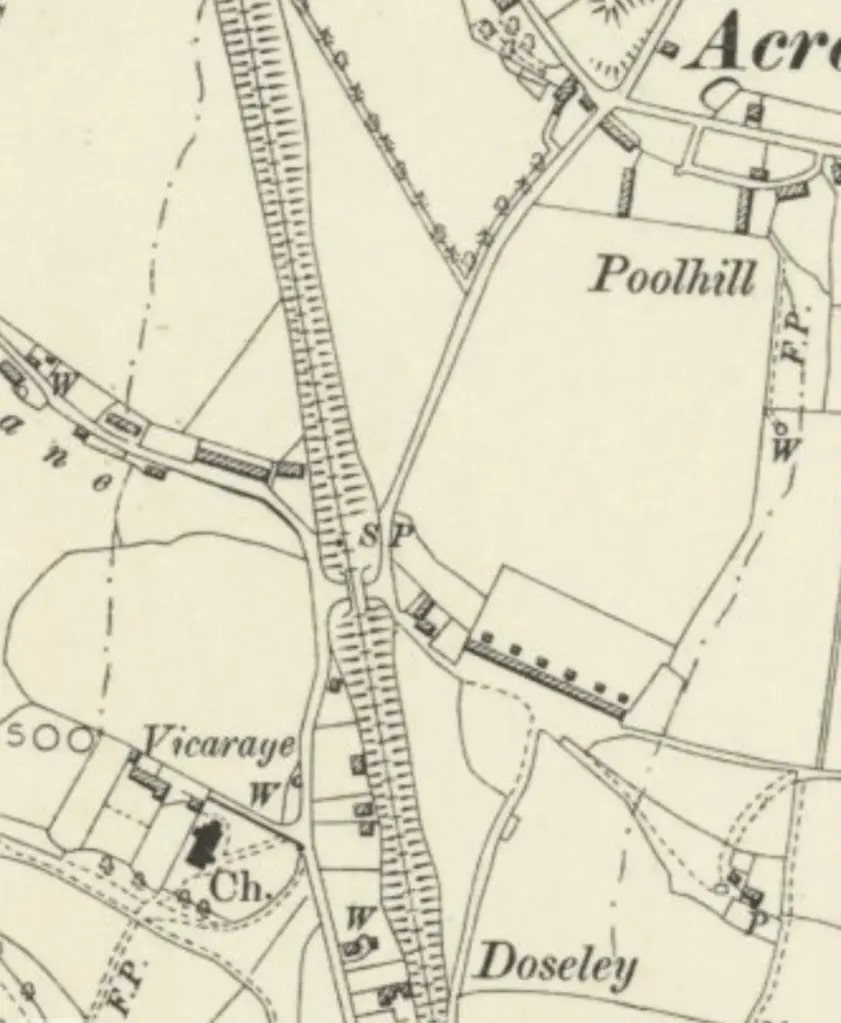
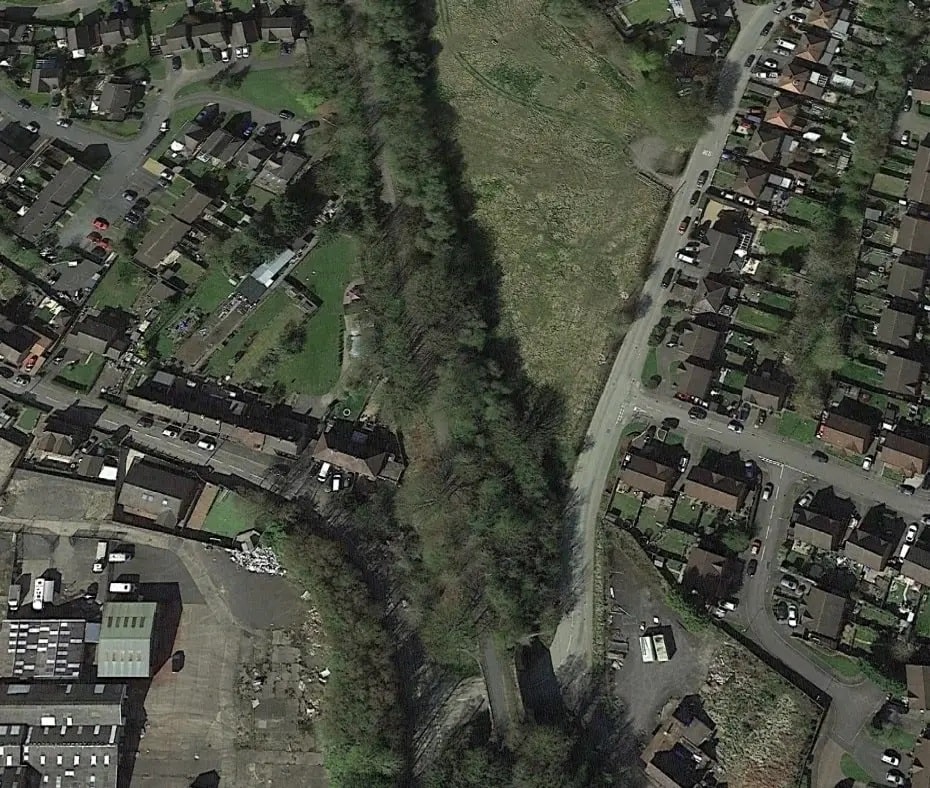
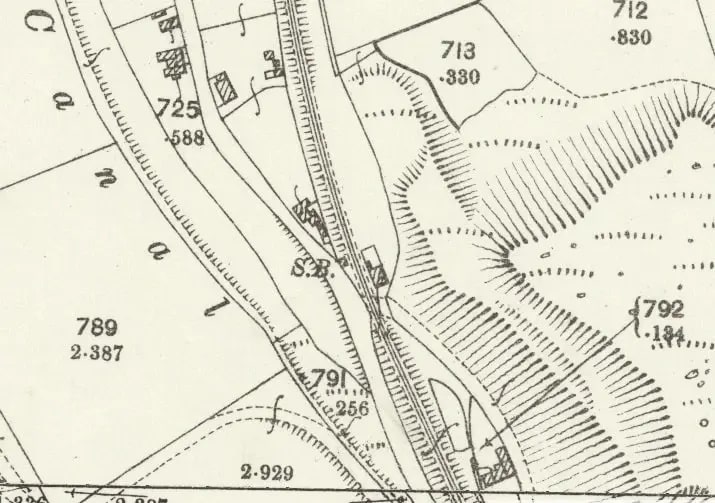
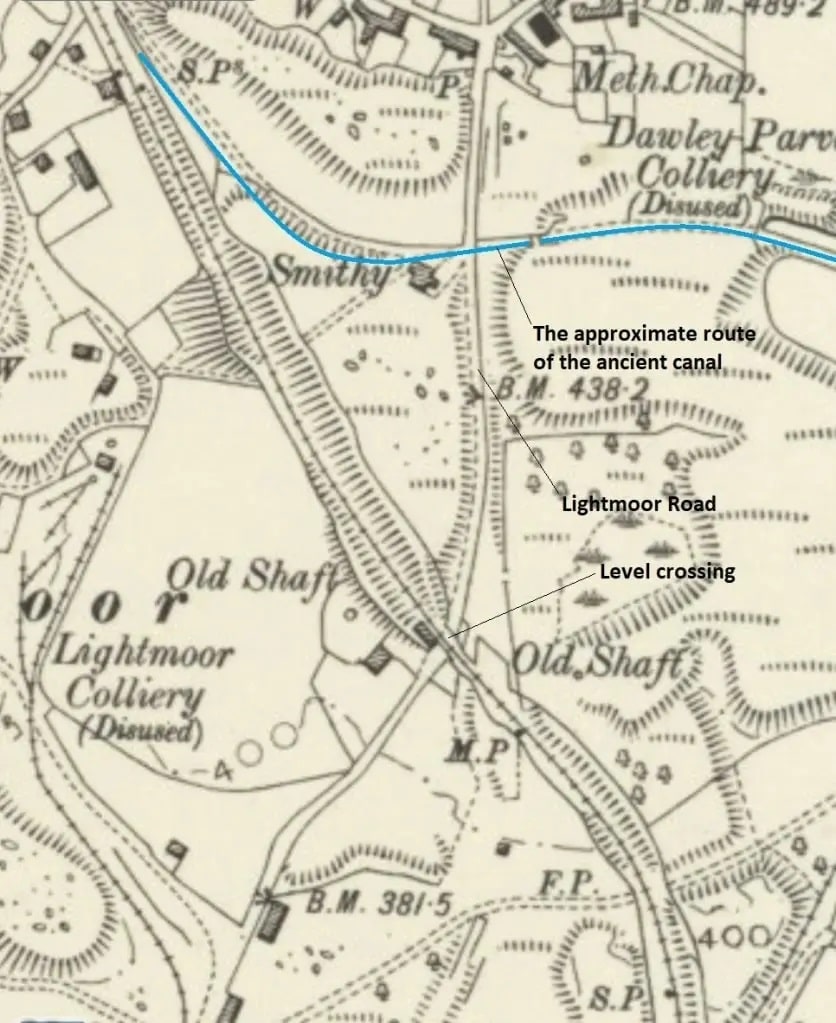
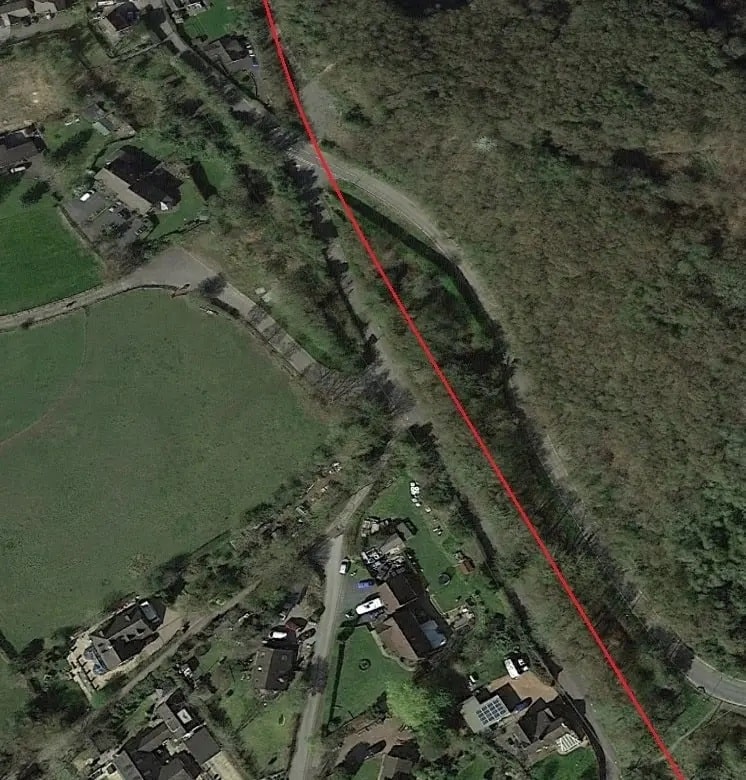
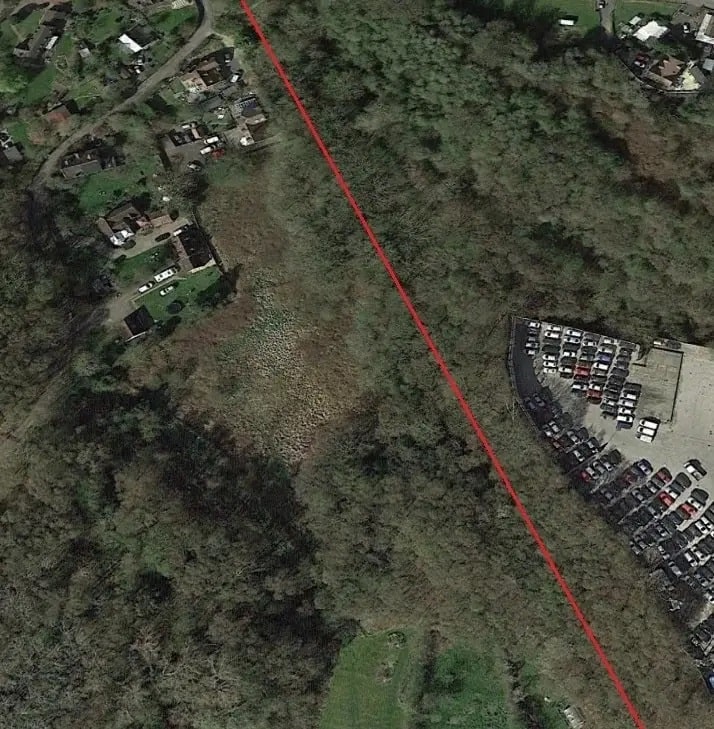
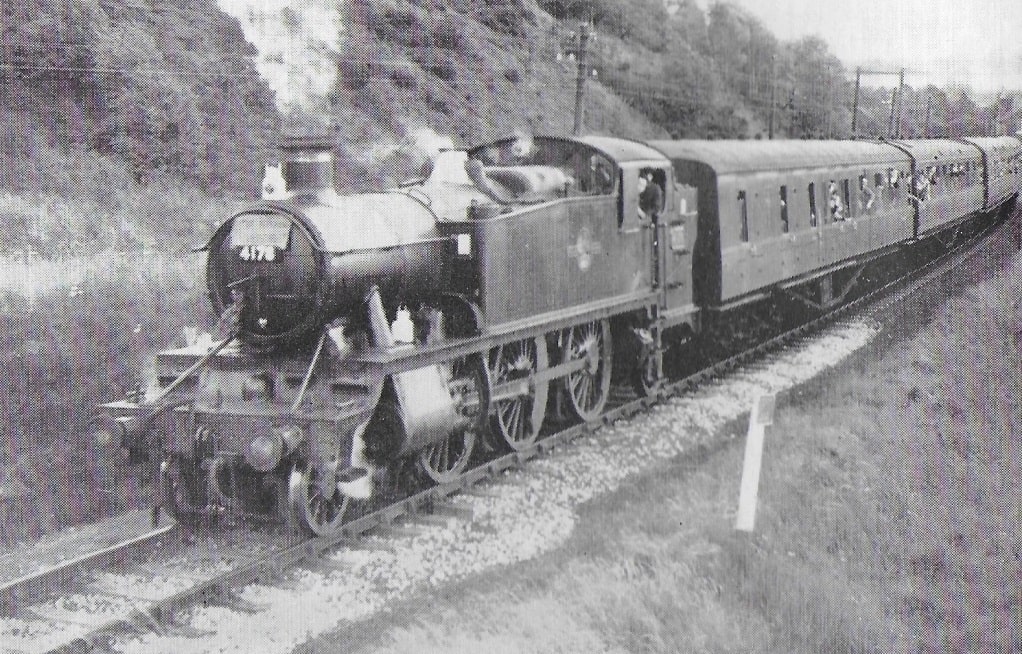
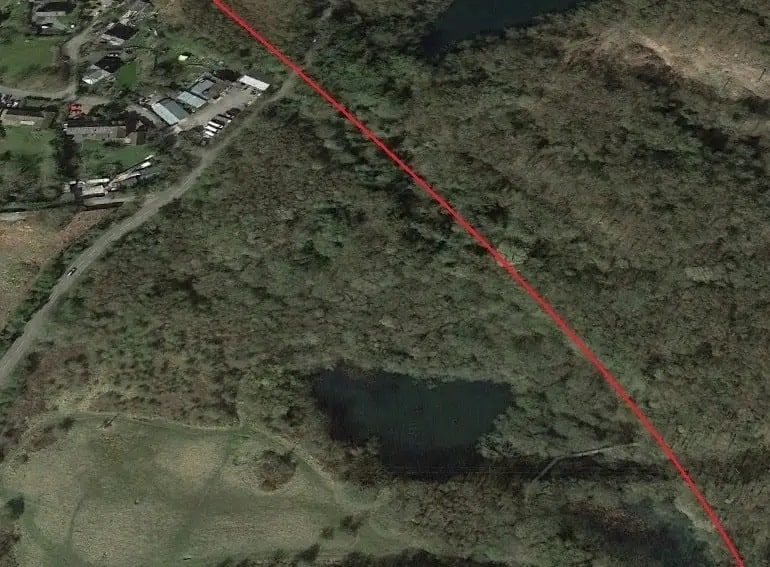
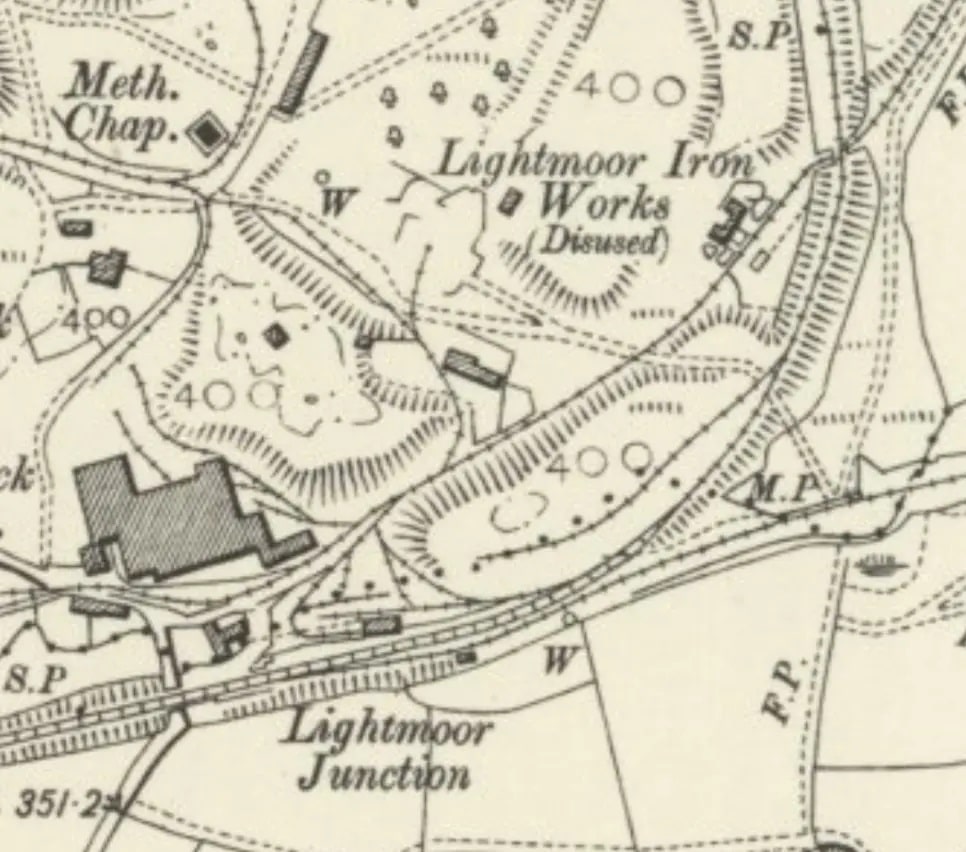
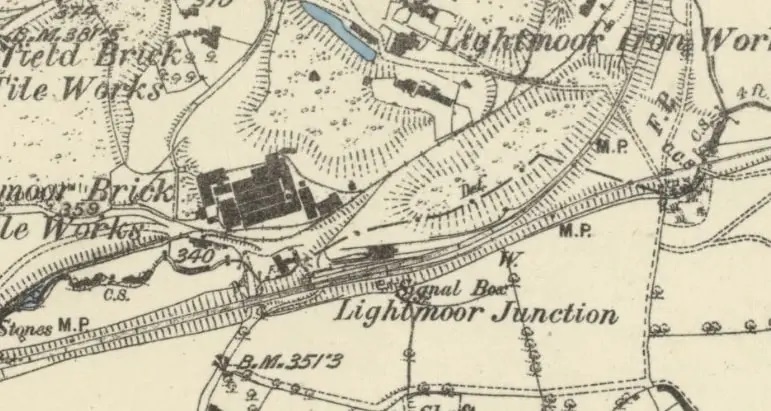
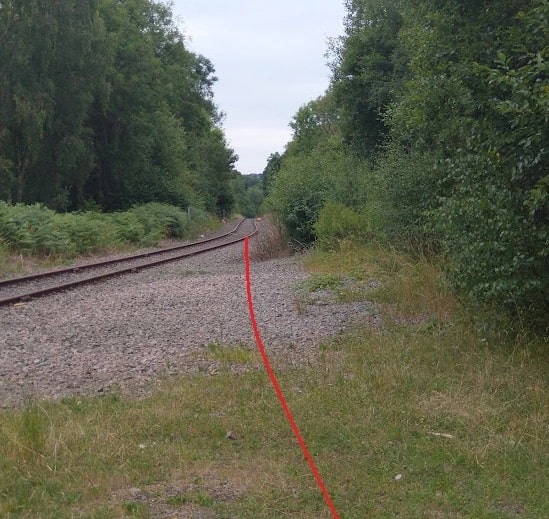
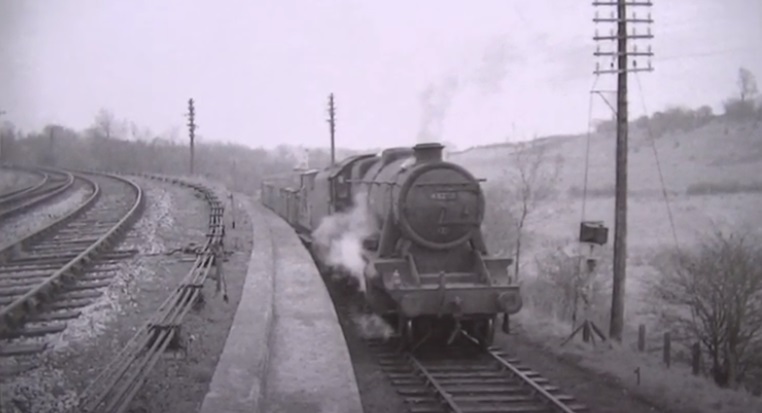
Another extract from the 6″ OS Map of 1901/2 which is centred on the level-crossing at Lightmoor Road. [15]The next length of the line from the level-crossing at Holly Road as it appears on modern satellite imagery. Holly Road is to the East of the Line, Gravel Leasowes to the West. The short footpath mentioned in the text can be seen in the bottom right of this image. [Google Earth, 4th April 2021]The approximate line of the old railway is shown again by the red-line on this satellite image. [Google Earth, 4th April 2021]Large Prairie No. 4178 again, this time on the climb towards Doseley Halt from Lightmoor. The gradient along this length was approximately 1 in 40. The image was shared by Metsa Vaim EdOrg on the Telford Memories Facebook Group on 8th October 2019. [40]Looking back to the North at the point where embankment turns to cutting. [My photograph, 21st April 2022]The Lightmoor Road Level-crossing appears on this next satellite image. There was at one time a tramroad on the East side of Lightmoor Road which linked The Lightmoor Ironworks with Dawley Parva Colliery and the old canal which were both to the North of the W&SJR. That tramway appears on the extract from the 6″ OS Map of 1881/82 below. [Google Earth, 4th April 2021]Looking North once agin not long before the location of the Lightmoor Road Level-crossing is encountered. [My photograph, 21st April 2022]Looking North across Lightmoor Road at the location of the level-crossing. [My photograph, 21st April 2022]Looking ahead down the line to the Southeast at Lightmoor Road Level-crossing. [Google Streetview, May 2019]An extract from the 6″ OS Map of 1881/82 shows Lightmoor Road running from the centre-top of the image to the Bottom-left. A tramroad runs on the East side of the road and crosses under the railway. It has a branch to Lightmoor Colliery and continues to serve Lightmoor Ironworks which were still operational in 1881. Interestingly, a short standard-gauge branch is shown leaving the W&SJR just to the Southeast of the point that it crossed Lightmoor Road. That short branch served Lightmoor Ironworks which are just off the bottom edge of the extract. The branch had been lifted by the time of the 1901/2 survey. [30]
Lightmoor Colliery
Lightmoor Colliery appears on the Hudson Institute of Mineralogy Mindat.org register as owned by the Coalbrookdale Company and as being active between 1855 and 1885. [33] It should, incidentally, not be confused with the colliery of the same name in the Forest of Dean!
Lightmoor Iron Works
The information about the Lightmoor Iron Worksis distilled from the Discovering Shropshire’s History website. [34] Little is known about the the Iron Works, but there were a number of structures (which appear on the 1901 Ordnance Survey extract above) to the east of the location of the furnaces. These were thought to initially be part of the industrial complex of the ironworks, later converted to domestic use. ln 1984 the lronbridge Gorge Museum Archaeology Unit excavated parts of the Lightmoor Ironworks site in advance of its destruction by the Ironbridge By Pass. Trenches were dug to examine the wall footings of that group of buildings to the east of the furnaces. These buildings had been constructed directly onto coarse pit waste, and stood until recently. The area was badly disturbed after their destruction, which obliterated all traces of floor levels. Nothing was found which would have enabled the different usages thought to have applied to be confirmed.
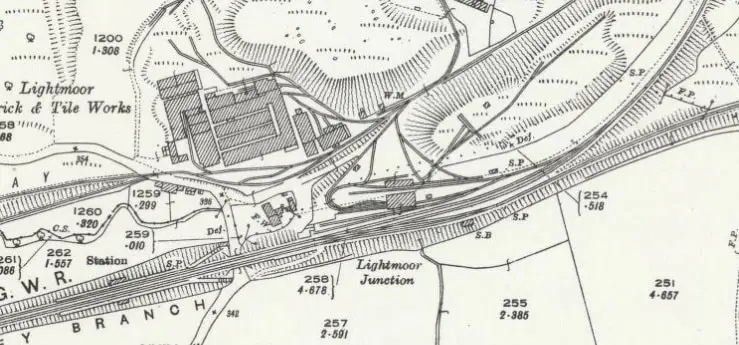
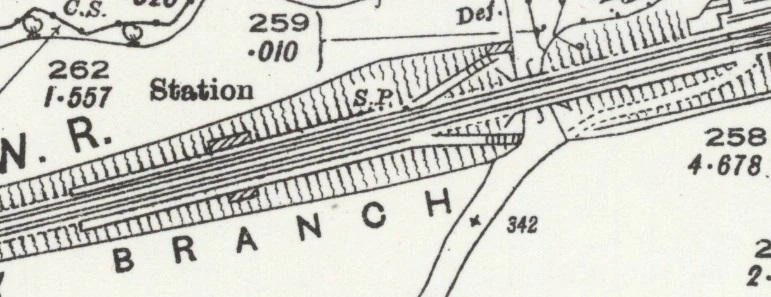
After the level-crossing at Lightmoor Road, the line began to swing round to the South. [Google Earth, 4th April 2021]There was a significant network of tramroads in the immediate vicinity of Lightmoor Junction. This 6″ Map extract from 1901/02 shows the situation at the turn of the 20th century. There was a goods transshipment facility at the Junction which connected the Coalbrookdale Co. Tramroads to the wider world! The large factory complex to the North of the Junction is the Lightmoor Brick and Tile Works. [15]
Lightmoor Brick & Tile Works
The information about the Lightmoor Brick & Tile Works below comes from the Discovering Shropshire’s History website. [35] Lightmoor Brickworks was first mentioned in 1779, when it was owned by John Davies … Its initial base of production was bricks, made by the semi-dry process. This was followed by other basic wares of the early 19th century, including flooring bricks, draining pipes, chimney pots, and lightweight roofing tile During the 1860s the diversity of products began to escalate. The next decade heralded a phase of moulded decorative terracotta… Which continued until the turn of the century, and the works turned back to brick manufactures. From the 1900s to the closure of the Coalbrookdale Co in 1933, Lightmoor Brickworks supplied them with all the firebrick shapes for their solid fuel appliances. In the fifty years from 1933 to the late 1980s Lightmoor continued to survive on brick manufacture.
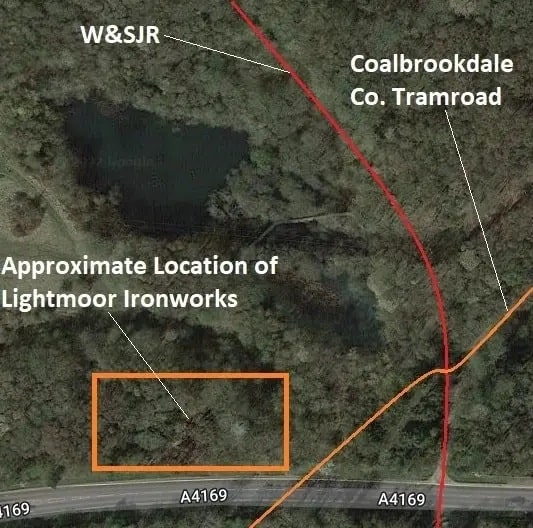
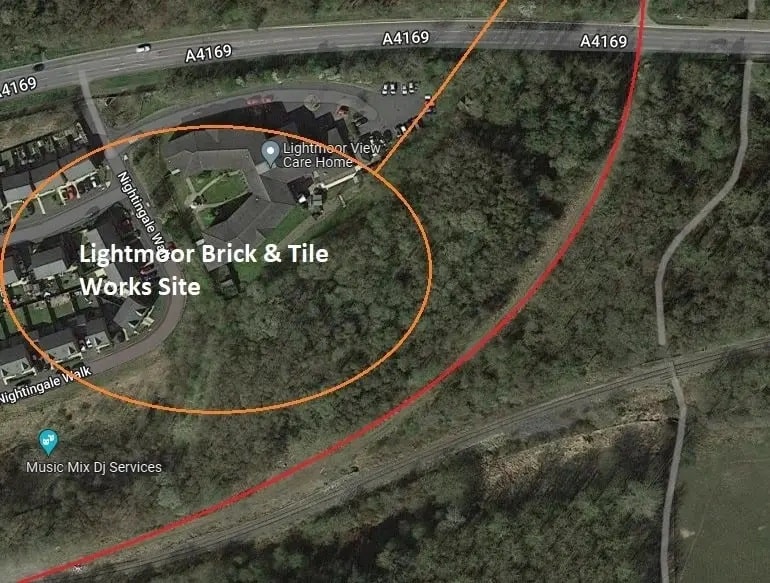
The site of the Brick and Tile Works is now a housing estate on the South side of the A4169 (Queensway) as shown on one of the satellite images below.
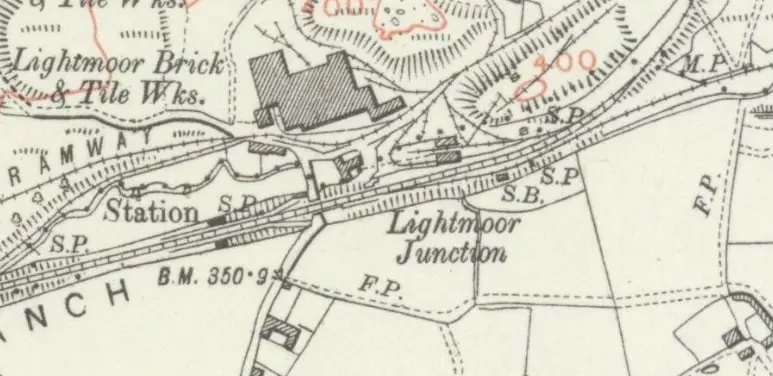
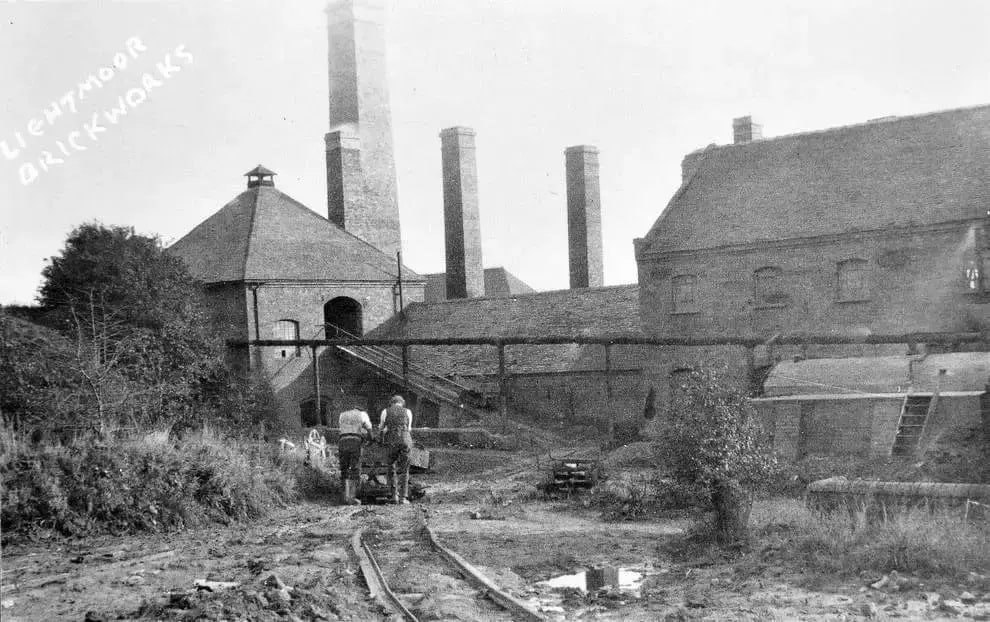
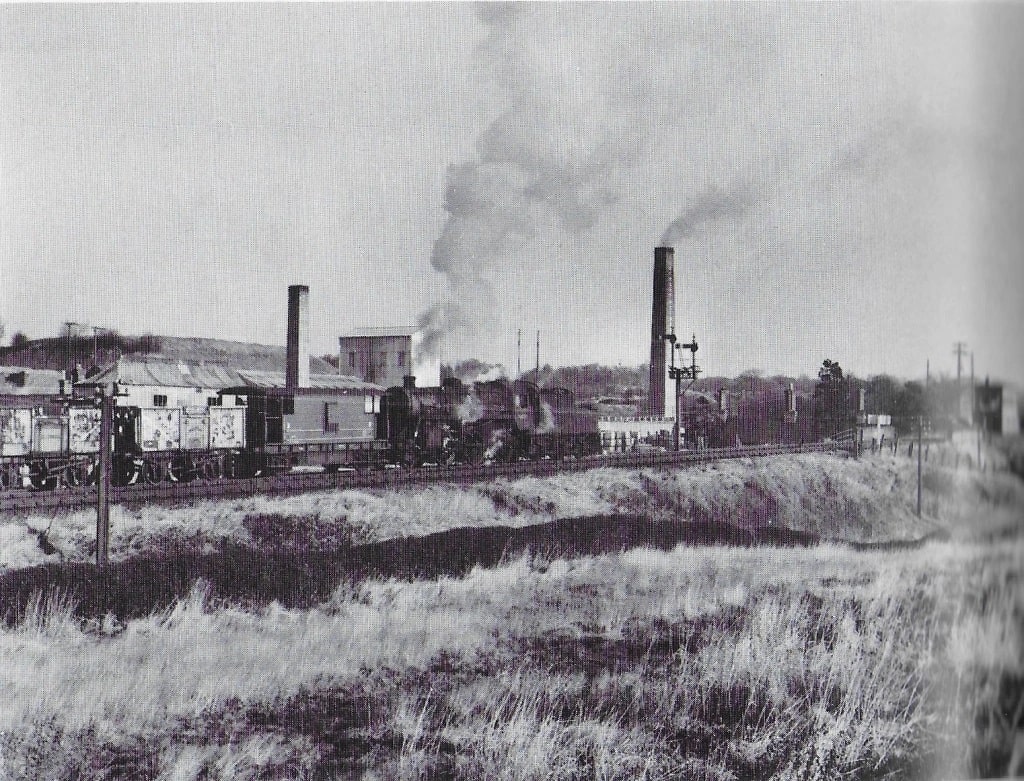
This earlier 6″ Map extract from 1881/2 is probably a little clearer than the 1901/2 extract above. [30]This extract from the 6″ Map series on 1925 which was published in 1928 clearly shows the location of the Railway Station. [31]Greater clarity is provided by the 25″ Map Series from Ordnance Survey. This extract is from the 25″ 1925 edition which was published in 1927. The double track provision from the junction towards the West is clear. The station (above the word ‘Branch’) and Signal Box on the south side of the line opposite the goods yard can easily be picked out. [32]This satellite image shows the relative locations of the W&SJR, the old Coalbrookdale Co. Tramroad and the Lightmoor Ironworks as well as the modern A4169. Telford Steam Rail;way will, if their planned extension is to be built, need to cross this road on a bridge. [Google Earth, 4th April 2021]The old railway now turned relatively sharply to the Southwest and was joined by what was once the Shrewsbury & Birmingham Railway Madeley Branch. That line remained open throughout the 20th century as was used to supply coal to Ironbridge Power Station. It closed, eventually, in around 2015 with the closure of the power station. [Google Earth, 4th April 2021]This picture shows part of Lightmoor Brick and Tile Works in around 1910. As we have noted the Works sat on the North side of the W&SJR very close to Lightmoor Station. There is a works tramroad evident in the image. The picture was shared on the Telford Memories Facebook Group by Paul Mower on 2nd April 2018. [41]This image also shows the Brick and Tile Works and gives a much better indication of the preponderance of tramroad rails around the site. It was shared by Thomas Cooper on 17th March 2017 on the Telford Memories Facebook Group. [42]Looking East along Queensway (A4169). The red line shows the route f the old railway which, South of the road follows a gated track. [Google Streetview, June 2022]Looking North across the A4169, from the Northwest the W&SJR curves round onto the line of this access road. [My photo, 12th July 2022]Looking South across the A4169 – this track follows what was the route of the W&SJR. [My photo, 12th July 2022]We follow the curve of the track on the line of the old W&SJR [My photograph, 12th July 2022]The location of Lightmoor Junction. The line entering from the left is the old Madeley branch of the Shrewsbury & Birmingham Railway which continued in use as a goods line until 2015 or thereabouts. The Junction is shown on OS Map extracts and satellite images above. [My photograph, 12th July 2022]The junction at Lightmoor brought together the Madeley Branch, on which we see a coal train serving Ironbridge Power Station, and the W&SJR. The lvel difference which can be seen on this photograph is marked and can be explained by the 1:40 gradient falling from Doseley Halt to Lightmoor Junction. [4]The view East along the line towards Coalbrookdale. [My photo, 12th July 2022]The modern signal box which replaced that shown on the OS Map extracts above. The photo looks Northwest. [My photo, 12th July 2022]The signal box again, this time looking Northeast. [My photo, 12th July 2022]
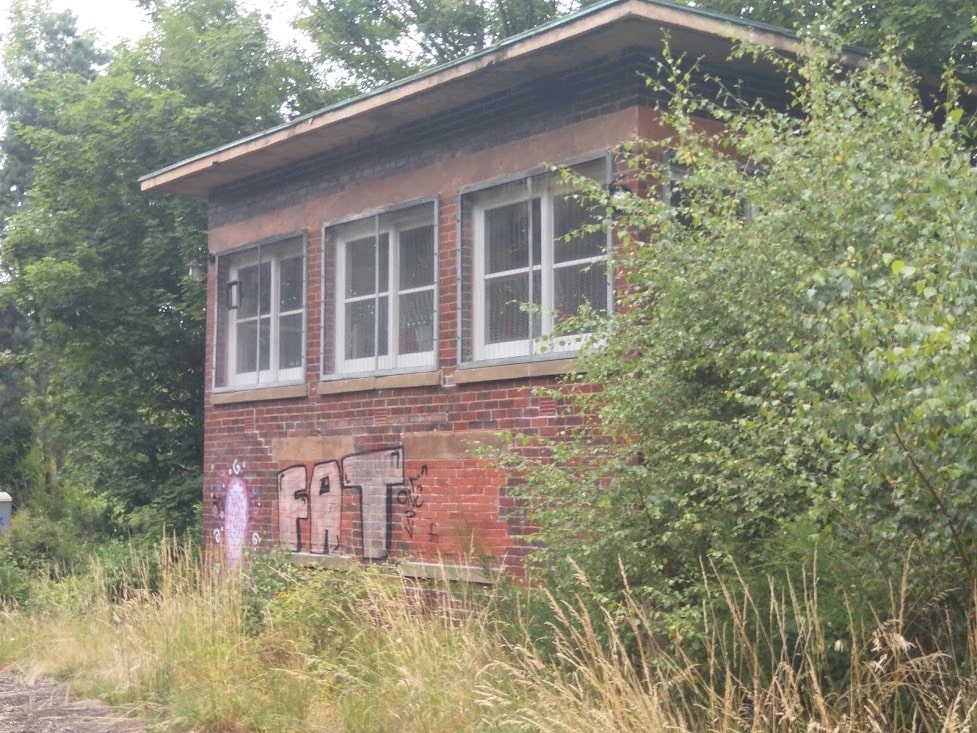
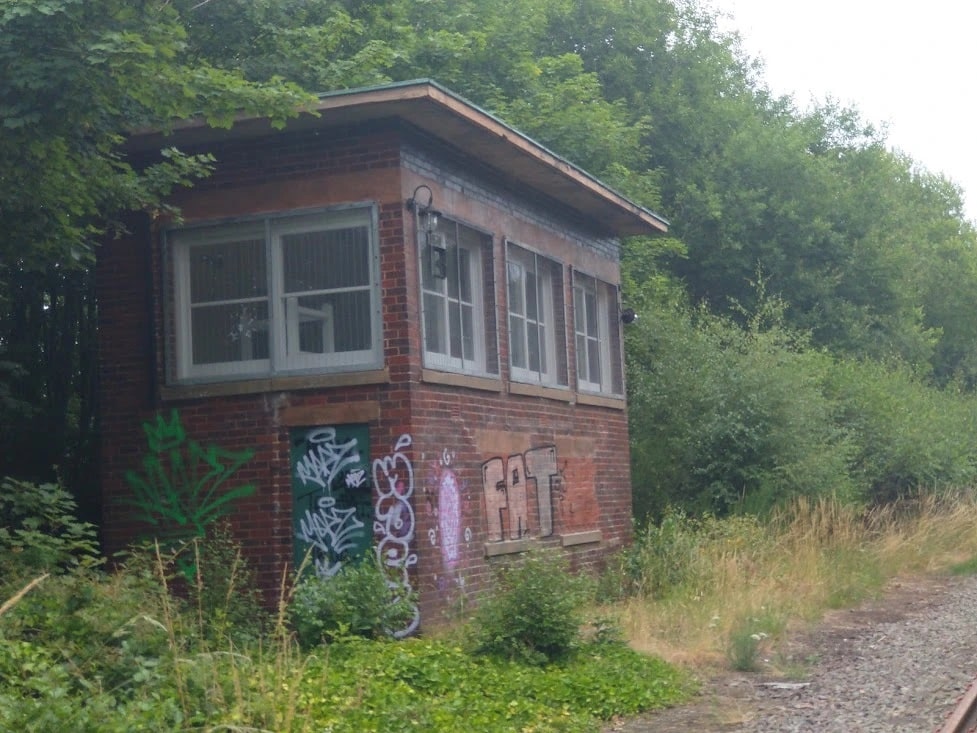
It appears that the signal box shown on the OS Map extracts above was positioned to control both the goods yard and the junction. Once the goods yard was closed, the replacement box could be positioned to have the best visibility along running lines. Ultimately it only controlled the change between the single track Madeley branch and the double track line through Coalbrookdale. When the line through Coalbrookdale was singled in 2006, the signal box became surplus to requirements. It is now leased from the railway authorities by the Telford Steam Railway, evidence of their serious intent to extend their line through this location. [37]
My pictures above show a significant amount of graffiti on the signal box. This has appeared since refurbishment after vandalism in 2008. When that refurbishment was completed the box was as shown below.
The line is currently mothballed keeping alive hopes that it might one day be reopened.
Lightmoor Junction signal box on 17th May 2009. the photographer wrote in 2009: “Lightmoor Junction The left fork here has been taken up. Further north, along its line, is the Horsehay Steam Trust. The right fork leads to Madeley Junction, a real junction this time, on the Wolverhampton to Shrewsbury line. Only goods trains; long lines of coal trucks heading to & from the Ironbridge Gorge Power Station; pass along this line now.” (c) Mike White, authorised for reuse under a Creative Commons Licence CC BY-SA 2.0 [3]
Wikipedia tells us that the line to Wellington via Ketley was only finally fully closed in 1981, although passenger services halted much earlier. “Lightmoor Junction Signal Box was retained to control the connection between the double-track section towards Ironbridge Power Station and the single-track section towards Madeley Junction. The signal box closed on 23 October 2006, when the line towards Ironbridge Power Station was singled, with new signalling controlled from Madeley Junction Signal Box [36] (since 2011 transferred to West Midlands Signalling Centre).” [38]
Knowles tells us that from 1875 the junction was controlled by a timber McKenzie & Holland signal box on the south side of the line, but this was replaced in 1951 with a new box on the north side. This was a modern design, classified by the Signalling Record Society as ‘Type 15’, which was the Western Region’s first attempt at a ‘modern image’ box. Similar in some ways to the ARP wartime signal boxes, this had an overhanging flat roof in an ineffective attempt to keep the sun off the large windows. The design was current between 1949 and 1954, although relatively few were built.” [1: p166]
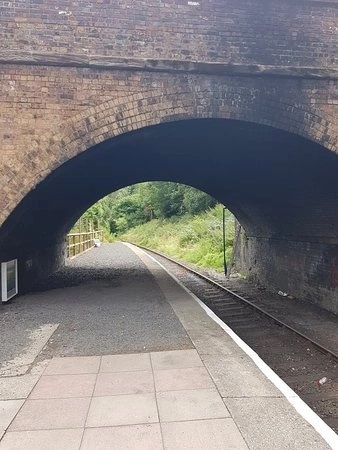
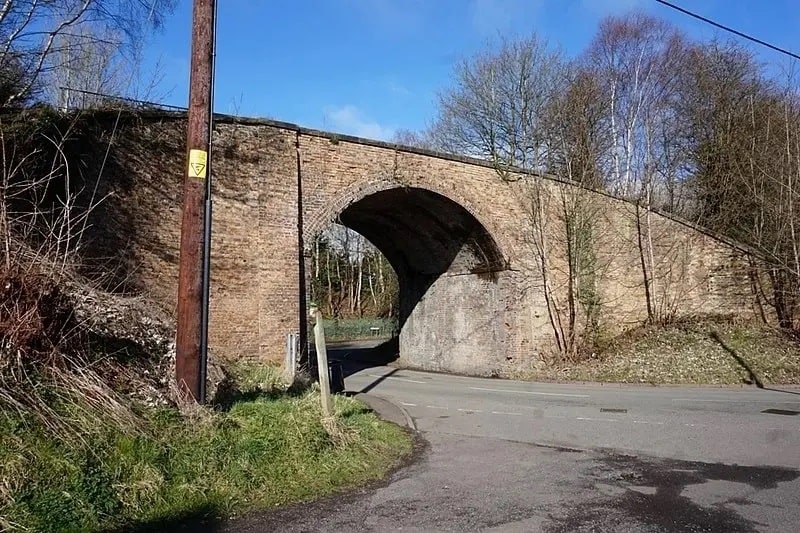
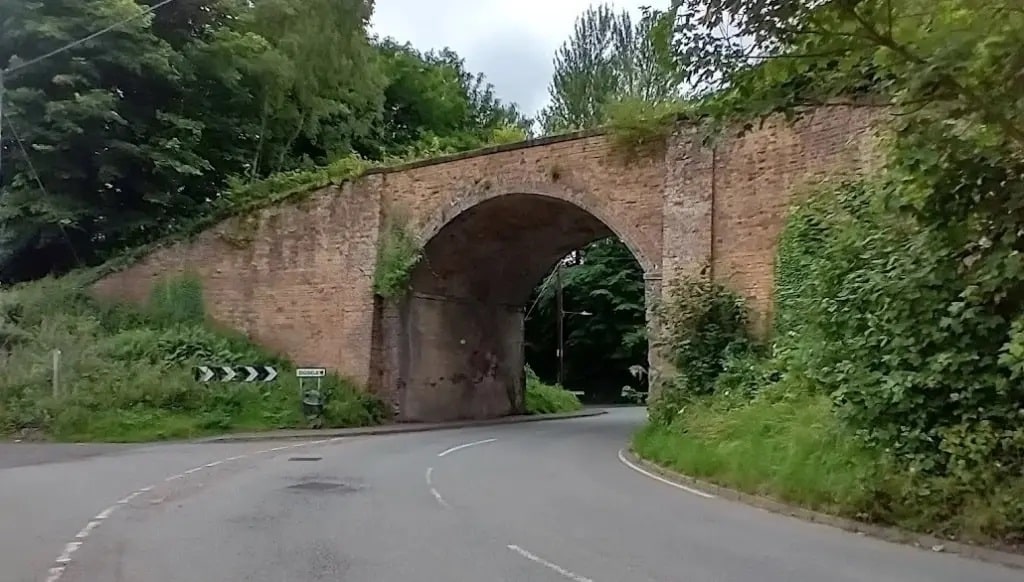
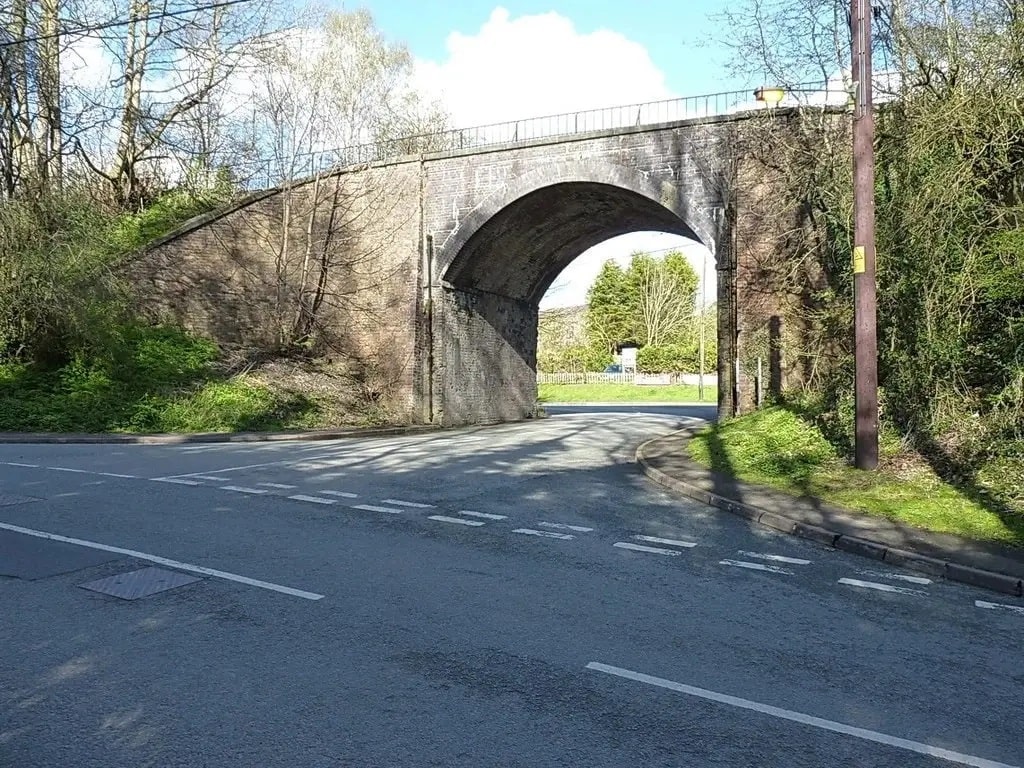
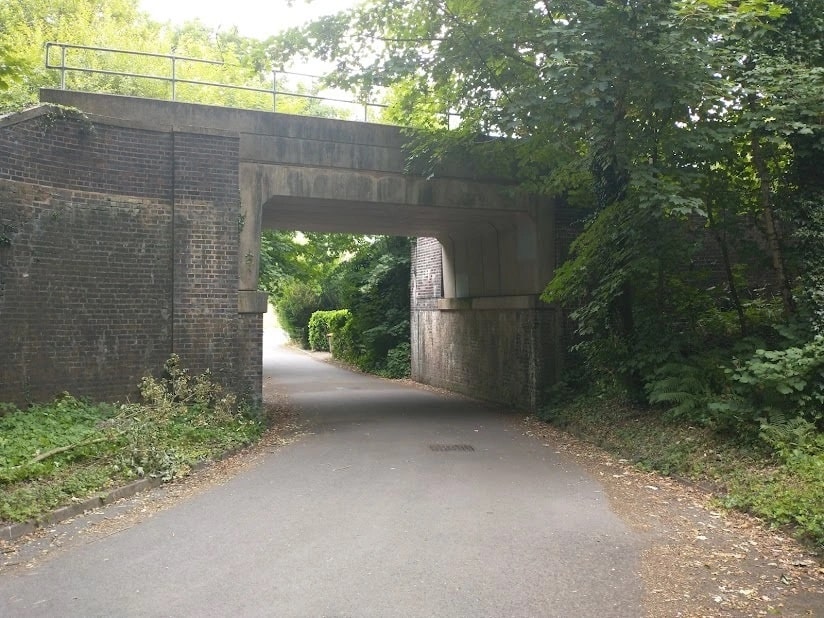
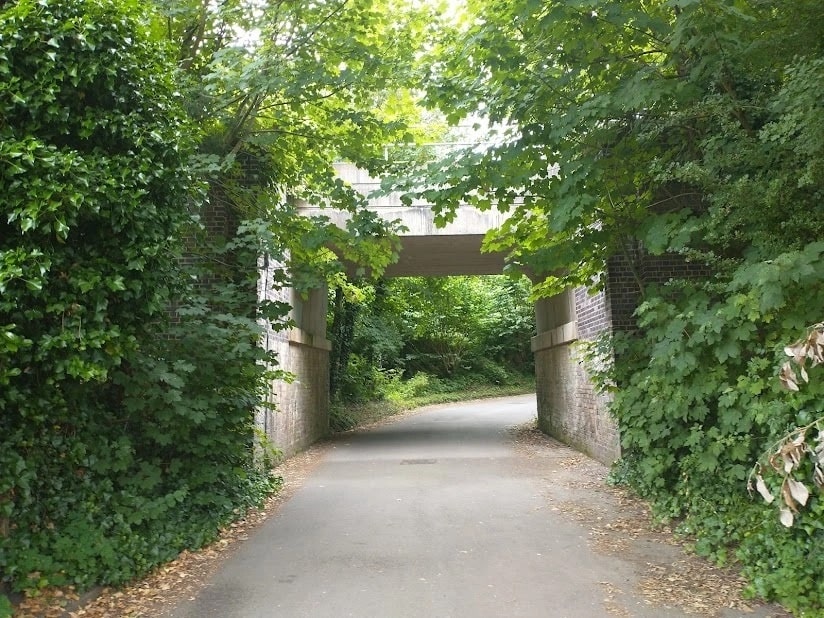
Immediately West of the Signal Box above, the line crossed a single lane road. Pictures at the location are shown below. Sadly, to date, I have not been able to find out full details of the original bridge. As can be seen from the pictures a modern bridge now sits on the older abutments which used to support a double-track structure.
The location of the under-bridge taken at track level looking East towards what was Lightmoor Junction. Its location is marked by the deviation in the track alignment. [My photograph, 12th July 2022]The view West across the road-under-bridge and through the old Station towards Coalbrookdale. [My photograph, 12th July 2022]The view from the South through the railway bridge which spans Brick Kiln Bank. [My photograph, 12th July 2022]The view from the North through the railway bridge spanning Brick Kiln Bank. [My photograph, 12th July 2022]
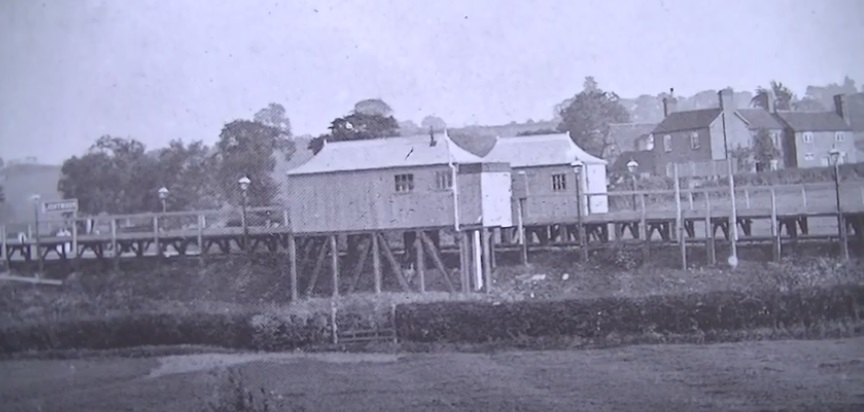
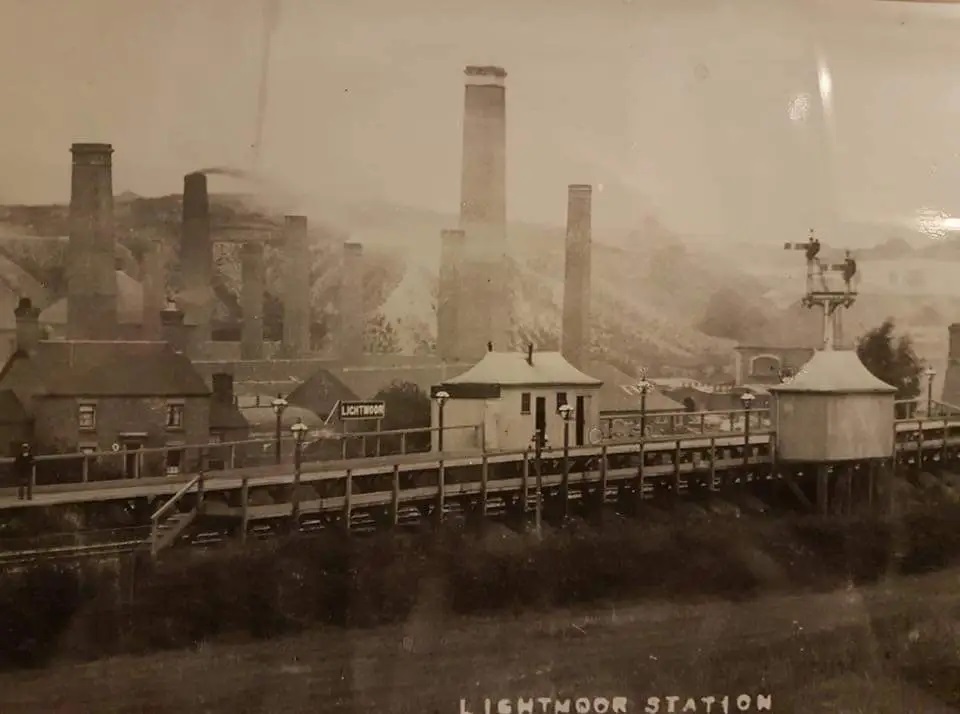
The road bridge was immediately followed by Lightmoor Station (or Lightmoor Platform (its earlier name)) which is shown below. The station was opened in 1907 and closed in 1962. It was of timber construction with a GWR Pagoda style waiting shelter on each platform. A search online led to a video about the Madeley branch on YouTube which included this image of the station. … [5]
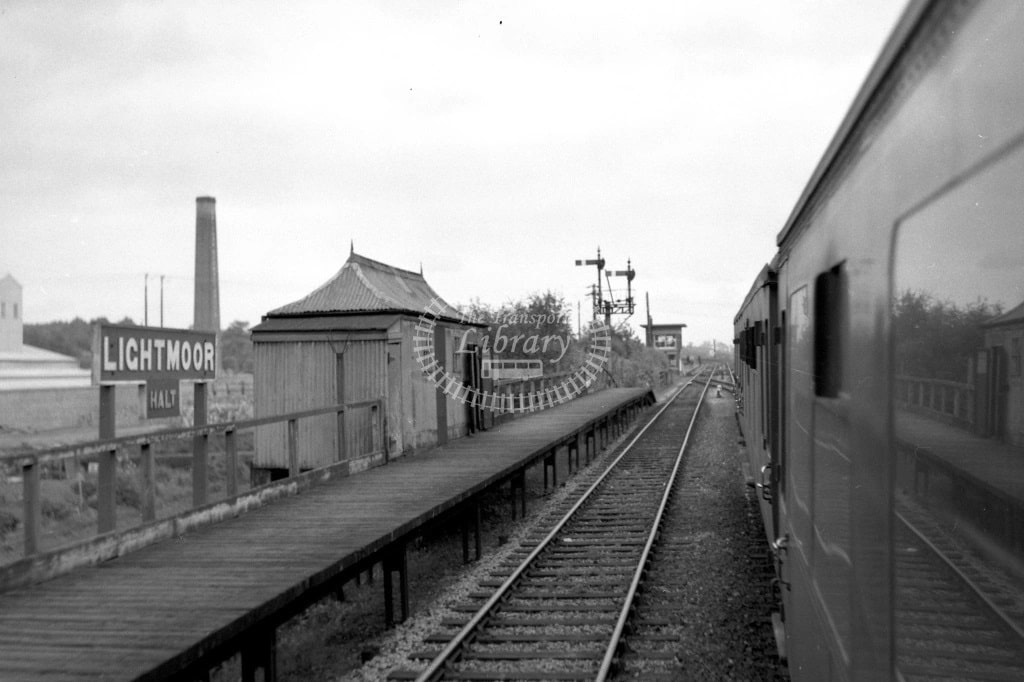
This photograph from the 1920s shows Lightmoor Station, also known as Lightmoor Platform or Lightmoor Halt. [4] A very similar photograph can be seen on PicClick as well. [8]This image is embedded from the Transport Treasury Website. It shows a view from a train looking East through Lightmoor Halt on 23rd May 1960. The modern signal box can be seen in the middle distance. The photographer was James Harrold [7]Another view, this time facing East, was shared by Metsa Vaim EdOrg on the Telford Memories Facebook Group on 3rd November 2018. It was part of a short pamphlet found in an Oxfam Shop. [9]
The next two pictures are separated by 67 years, the first was taken in 1900, the second in 1967. …
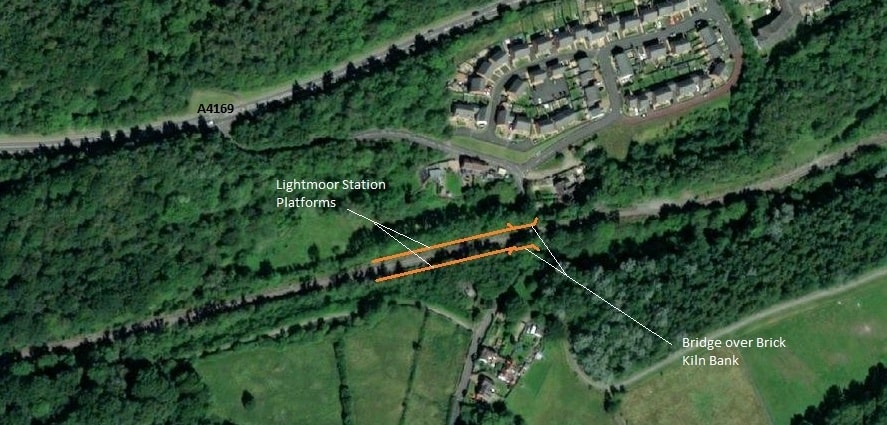
This and the next picture were taken from approximately the same location on the South side of the line and focus on the site of Lightmoor Station. This image is from 1900. (c) The Ironbridge Gorge Museum Trust and included here by kind permission of the Archivist. [39]This image is dated 1967. Both were shared on the Telford Memories Facebook Group by Metsa Vaim EdOrg on 28th February 2020, (c) G.F. Bannister. [39]The immediate site of the Station as shown on the 25 ” OS Map of the mid-1920s. Pedestrian access to the station was via ramps and steps from Brick Kiln Bank. I was unable to find these on my short visit on 12th July 2022. [16]The location of Lightmoor Station shown on the modern satellite images provided by the National Library of Scotland. [6]The view looking West through the site of the Station towards Coalbrookdale which will make up the third part of this story! [My photograph, 12th July 2022]
References
Adrian Knowles; The Wellington, Much Wenlock and Craven Arms Railway; Lightmoor Press, Lydney, Gloucestershire, 2022.
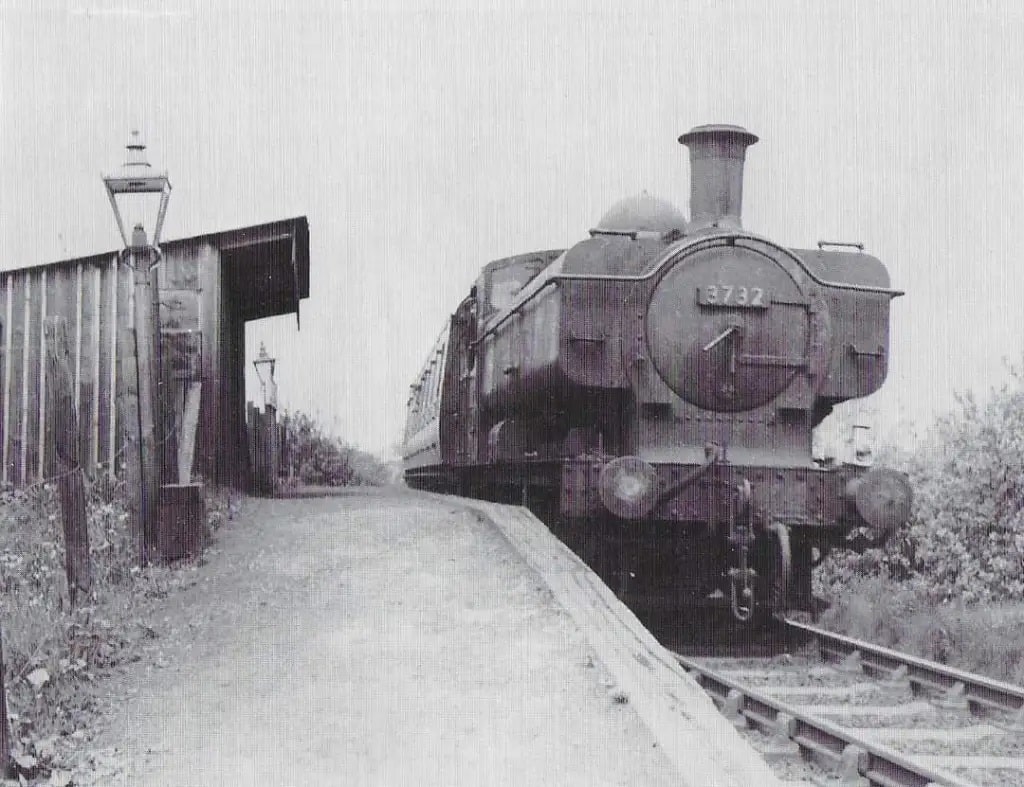
Absolutely fascinating, no doubt helped by the fact that I spent my childhood in what is now part of Telford. The picture of the GWR Pannier Tank No. 3732 reminded me that as children we always called them ‘match box engines’.


Pingback: The Railways of Telford – the Wellington to Severn Junction Railway (W&SJR) – Part 3 – Lightmoor Junction to Buildwas | Roger Farnworth
Absolutely fascinating, no doubt helped by the fact that I spent my childhood in what is now part of Telford. The picture of the GWR Pannier Tank No. 3732 reminded me that as children we always called them ‘match box engines’.
Hi Robert, where were you living as a child?
Pingback: The Railways of East Shropshire (and Telford) – the Much Wenlock and Severn Junction Railway, Buildwas to Much Wenlock. | Roger Farnworth
Pingback: The Wenlock Branch from Much Wenlock to Presthope | Roger Farnworth
Pingback: The Wenlock Branch from Presthope to Longville | Roger Farnworth
Pingback: The Wenlock Branch from Longville-in-the-Dale to Marsh Farm Junction and Craven Arms | Roger Farnworth
Pingback: The Wenlock Branch from Harton Road Station to Marsh Farm Junction and Craven Arms | Roger Farnworth