Following on from a couple of articles about the Tanat Valley Light Railway written some years back, I was reading some older rather tatty magazines and found an article entitled “Rails up the Tanat Valley” in an issue of the Ian Allan publication ‘Railway World‘ – the June 1990 edition. [1]
The Tanat Valley Railway and associated lines. [1: p365]
In his article, Colin Ganley recounted the rise and decline of the minor lines running west from Oswestry, the last remnant of which by 1990 had been ‘mothballed’.
Colin Ganley wrote: “In October 1988, the last train ran between Gobowen and Biodwell Quarry in Shropshire. For some years the line had carried only stone trains, bringing out ballast to the requirements of the Area Engineer. The trains, normally Class 31-hauled, traversed the remains of five different branch lines, which in their heyday provided Oswestry and the eastern end of the Tanat Valley with a fascinating and complicated array of lines to serve local industry. With the decision to cease using ballast from Blodwell, traffic on the line came to an end, marking the final cessation of all rail services connected with the delightful one-time Tanat Valley Light Railway.” [1: p364]
He continued: “For the present, this surviving section is in suspended animation. As there is a possibility that the stone traffic may restart in the future, the railway is being left in place. Traffic will resume if BR returns to this source of ballast. If not, eventually a decision will be made to lift the track and dispose of the land: unless the Cambrian Railways Society, based at Oswestry, is in a position to take an active interest in its future.” [1: p364]
Parts of the derelict line at Nant Mawr which were once the western end of the Old Potts Railway are now owned by ‘The Tanat Valley Light Railway’ which is a modern charity that aims to preserve and restore this line.
“The original Tanat Valley Light Railway was the first cross border light railway crossing from England into Wales, meandering up the fantastic Tanat Valley from Llynclys Junction to Llangynog and providing links to Llanymynech and Llanfyllin via its other branches.” [2] It was opened in 1904, mainly as a direct result of the 1896 Light Railways Act, but, says Ganley, “before taking up its story it would be useful to look at its associated lines and also earlier schemes to provide the picturesque village of Llangynog with railway transport. At the height of railway mania in 1845, the Shrewsbury, Oswestry and Chester Junction Railway obtained powers to build a line from Shrewsbury to Chester with a branch from Gobowen to Llanymynech. All that was built of the branch was the 2.25 miles from Gobowen to Oswestry, which opened on 23rd December 1848. In 1854 this line became part of the Great Western Railway.” [1: p364]
He continues: “The second portion of line to be constructed was the Oswestry & Newtown Railway, which was incorporated in 1855. to link these two towns. The section between Oswestry and Pool Quay opened on 1st May 1860 with the remainder to Newtown opening on 14th August. … The company, which was to be the foundation of the later Cambrian Railways, opened a 1.25-mile freight-only branch from Llynclys Junction, some 3.5 miles south of Oswestry, to Porthywaen. This branch served important quarries, some of which are still operating today, and became the railhead for the industries of the Upper Tanat Valley, Shortly after the Porthywaen branch was opened, a mineral line was built from it to serve some collieries at Trefonen. These collieries however were not very successful and this line was abandoned as early as 1881.” [1: p364]
“In the meantime there had been several proposals to build a line up the Tanat Valley. One such proposal envisaged a great trunk line from Worcester to Porth Dinllaen, near Nefyn on the Caenarvonshire coast, with the object of providing an alternative route for Irish Mail traffic. In 1860, a similar proposal was put forward as the West Midlands, Shrewsbury & Coast of Wales Railway which planned a railway from Shrewsbury to Portmadoc via Llanymynech, Llangynog and Bala. This route would have included a 1.5-mile tunnel under the Berwyn Mountains between Llangynog and Bala.” [1: p364]
“However, the project had trouble raising support and money. … Proposals for a similar route were resurrected in 1862 as the Shrewsbury & North Wales Railway. Powers were obtained by 1865 to build a line from Abbey Foregate, Shrewsbury, to Llanymynech but before this section was completed the company had merged with another scheme to provide a railway from Stoke-on-Trent to Shrewsbury. The combined efforts brought forth the grand title of the Potteries, Shrewsbury & North Wales Railway (or POTTS for short) and extended the original plans to include an extension from Llanymynech to Nantmawr over which passenger trains were to run as far as Llanyblodwell (later renamed Blodwell Junction). The financial troubles of the POTTS and its rebirth as the renowned Shropshire & Montgomeryshire Light Railway [3] are outside the scope of this article, but the result was the working of the Llanymynech to Nant Mawr section by the Cambrian Railways from 1881. At this time goods traffic only was operated, the passenger service between and Llanymynech and Lianyblodwell having ceased in 1880.” [1: p364-365]
“The Light Railways Act of 1896 made possible the construction of railways to remote agricultural areas that hitherto had had difficulties in raising capital and several places along the Welsh border benefited from such schemes, one being the Tanat Valley. The Act saw the birth of two schemes to provide, at last, rail transport to the Upper Tanat Valley and the industries of Llangynog. The unsuccessful proposal was for a 2ft 6in gauge railway from the Llanfyllin terminus of the Cambrian branch from Llanymynech.” [1: p365]
“This plan, the Llanfyllin & Llangynog Light Railway, was to cross sparsely populated country between Llanfyllin and Penybontfawr and would not have benefited the lower part of the Tanat Valley. It nevertheless could have been a fascinating line had it been constructed, though the change of gauge at Llanfyllin would have proved a disadvantage.” [1: p365]
“The scheme that was selected by the Light Railway Commissioners was for a standard gauge line from the Cambrian’s Porthywaen mineral branch straight up the valley Liangynog. The plan also envisaged using a short section of the Nantmawr branch. The Tanat Valley Light Railway received its Light Railway Order in 1898 and was constructed by J. Strachan of Cardiff who employed about 125 men on the work. The total cost of the line proved to be about £92,000 which was around £20,000 more than the company had hoped for. This shortfall, not helped by a delay in construction, meant that the Tanat Valley Co was impoverished from the outset and had to approach the Treasury for more grant aid. During construction in 1903 some directors found that the contractor was giving a ‘free’ train service over the partially finished railway but as the contractor was allowed to finish the job it can be assumed that any quarrel was rectified.” [1: p365] For the earlier articles about this line, please follow these two links:
Colin Ganley continues: the Tanat Valley Light Railway “opened on 5th January 1904 to both passengers and freight and was worked by the Cambrian from the start. It became wholly part of the Cambrian in 1921, passing to the Great Western Railway and then to the Western Region of British Rail. The length of the linc from Llynclys Junction to Llangynog was some 15 miles 71 chains and included 11 stations or halts, one of which was former POTTS station of Llanyblodwell which was renamed Blodwell Junction. The stations were of typical light railway pattern with rather mean corrugated iron clad buildings and, except for Liangedwyn and Llanrhaiadr Mochnant, had only one platform. Original plans for some stations did consider refreshment rooms in effort to build up tourism but the company’s lack of capital put an end to such plans.” [1: p365-366]
“With the opening of the Tanat Valley line, passenger services were restored between Llanymynech and Blodwel Junction as this had been a condition of securing support from potential opponents during the planning stages. The opening of the Tanat Valley line also restimulated the slate quarries at Llangynog which had all but closed by 1900. Slate quarrying continued intermittently until 1939 but lead mining, which had effectively ceased in 1877, was never to resume on any commercial scale. The railway also assured the development of granite quarrying at Llangynog, the Berwyn Granite Co. providing much traffic until World War 2. The quarry survived into the mid 1950s but at the end offered virtually no traffic to the railway.” [1: p366] Berwyn Granite Quarries Ltd. remains an active company with headquarters in Wellington, Shropshire. [4]
Colin Ganley continues: “Initially the passenger service consisted of four trains each weekday with an extra trip on Wednesdays. Many trains were mixed and the journey to Oswestry took no less than 75min on some trains. Two trains a day carried a through coach to Llanymynech, detached at Blodwell Junction, but this practice ceased in 1915 and was replaced by a connecting service. The Blodwell Junction to Llanymynech service ceased completely as from 1st January 1917, having been hardly ever used and only operated to fulfil an agreement. Freight traffic over this section ceased in 1925, the Nantmawr traffic then being worked via Porthywaen, and most of it was lifted between 1936 and 1938.” [1: p366]
By 1923, “the number of passengers being carried was half the level of 1913 and continued to decline during the GWR years. By 1925 services, which normally consisted of two four-wheeled carriages, were reduced to three trains each way, though certain extras ran on Wednesdays and Saturdays. In 1929, the GWR introduced a rival bus service which was taken over by Crosville in 1933. The bus served the centres of villages far better than the train as certain stations. Llanrhajadr Mochnant in particular, were badly situated. This, coupled with the elongated journey times caused by the adherence to light railway practices, reduced traffic even further.” [1: p366-367]
“During World War 2 the passenger service was reduced to two trains each way, by now composed of a single Cambrian brake third. After the war, despite petrol rationing, few people were making the delightful trip up the Tanat Valley by rail. Goods traffic was also on the wane and on 15th January 1951 passenger services ceased because of a grave coal shortage, never to return. Official closure took place on 1st July 1952 and at the same time freight traffic was also withdrawn between Llanrhaiadr Mochnant and Llangynog. The track on this section remained in situ for several years, not being lifted until 1958. Freight traffic to Llanrhaiadr Mochnant ceased abruptly on 5th December 1960 after the river bridge near Pentrefelin was badly damaged by flooding,” [1: p367]
“Services on neighbouring lines were savaged in the mid-1960s. All passenger traffic between Welshpool and Whitchurch and also over the Llanfyllin branch were withdrawn on 18th January 1965, leaving Oswestry with the Gobowen diesel shuttle service, which ceased in November the following year. By 1967, just the single track South of Oswestry to Porthywaen and Nantmawr was left, along with the line from Gobowen. Reduction in traffic over the ensuing years left just the Blodwell Quarry service. All the sidings at Oswestry and Porthywaen disappeared. The section west of Blodwell Junction had been lifted by 1965 and though the Nantmawr branch has not seen a train for 20 years the track is still in-situ, although with sturdy trees growing between the sleepers.” [1: p367]
“No account of the Tanat Valley would be complete without a brief mention of its quaint motive power. From the outset, the Cambrian normally provided three Sharp Stewart 2-4-0Ts, Nos 57, 58 & 59 of 1866 vintage. They became GWR Nos. 1192, 1196 and 1197 respectively, and although No 1192 was withdrawn in 1929 after being sent to Devon, Nos 1196 & 1197, both in a rebuilt state, survived at Oswestry until 1948.” [1: p367]
Sharp, Stewart and Co. “was a steam locomotive manufacturer, originally based in Manchester, England. The company was established in 1843 following the dissolution of Sharp, Roberts & Co.. In 1888, it relocated to Glasgow, Scotland, where it later amalgamated with two other Glasgow-based locomotive manufacturers to form the North British Locomotive Company.” [5]
Ganley tells us that the two surviving Sharp Stewart locomotives were “assisted by No. 1308 Lady Margaret, an Andrew Barclay 2-4-0T built in 1902 for the Liskeard and Looe Railway and taken over by the GWR in 1909. This locomotive also did yeoman service in the Tanat Valley until it too was withdrawn in 1948.” [1: p367]
“Other locomotives were seen up the Tanat Valley at various times, including old Cambrian Sharp Stewart 0-6-0s dating from 1875 and the odd Dean Goods. In the latter years passenger traffic was the preserve of ‘5800’ class 0-4-2 tanks, numbers 5808 & 5812 being particular regulars. Goods traffic that remained was normally entrusted by the early 1950s to the Ivatt Class 2 2-6-0s.” [1: p367]
“Various types of diesels handled the surviving quarry services, including Classes 25, 31 and 37. A Class 31 had the privilege to be the last railway locomotive to operate a commercial train (so far) in this region of complex and fascinating railway history. It remains to be seen whether the Cambrian Railways Society will be able to continue the railway traditions of the area if they can successfully launch a private steam service from their Oswestry base.” [1: p367]
Ganley was writing in 1990, things have moved on over the past 36 years. Cambrian Heritage Railways, in the 2020s, operate a service on selected days from their Oswestry Station to Weston Wharf, featuring steam, vintage diesel and diesel multiple units. The 1.75-mile scenic route leads to Weston Wharf with its period station with a café, picnic area, and railway artifact displays. Cambrian Heritage Railways also operate the ‘Llynclys Railway Centre’ which is open on select dates – at Llynlcys South Station. [6][7]
References
Colin Ganley; Rails up the Tanat Valley; in Railway World; Ian Allan, June 1990, p364-367.
I spent 3 weeks in Uganda in February 2026. This short article picks up on local news reports about developments relating to railways in East Africa early in 2026. …. This article follows on from one published early in December 2025 which can be found here. [3]
The featured image above shows one of the Standard Gauge Railway (SGR) locomotives and its passenger train on the existing network in Kenya. [13]
Uganda
EOI – Uganda – Consultancy Services for the Development/Preparation of the Railway Transport Master Plan – EAC – Railway Rehabilitation Support Project
On 16th February 2026, the African Development Bank Group reported [1] that, the Government of Uganda had received financing from the African Development Fund (ADF) towards the cost of the EAC-Railway Rehabilitation Support Project (Refurbishment of Kampala-Malaba MGR), and intends to apply part of the agreed amount for this Grant to payments under the contract for Consultancy Services for the Development/Preparation of the Railway Transport Master Plan for the Uganda Railwaiys Corporation.
The overall objective of the assignment is for the Consultant to formulate a comprehensive railway transport master plan for the railway subsector in Uganda, including an international/multimodal transport strategy for Uganda 2026-2040.
Government Pushes to Secure 13 trillion UgX loan for Eastern SGR Line
NilePost reported on 19th February 2026 [2] that Uganda is fast-tracking final financing for the Malaba–Kampala Standard Gauge Railway, with talks underway with the Islamic Development Bank to unlock 13 trillion UgX. The project promises faster, cheaper cargo transport and stronger regional trade links!
High Level Discussions with the Islamic Development Bank
High-level discussions with the Islamic Development Bank (IsDB) are seen as a critical step toward ‘financial closure’, which would trigger full-scale construction of the 273-kilometre Eastern Route.
The Minister of State for Works and Transport, Musa Ecweru, hosted an IsDB Appraisal Mission led by Dr. Issahaq Umar Iddrisu, Regional Hub Manager.
Discussions focused on integrating the SGR into a broader 3.9 trillion UgX ($800 million) Country Engagement Framework being finalised by IsDB with Uganda for 2025–2027.
‘This railway is transformative for Uganda and the wider region… time is of the essence; we should close financing early and proceed without delay’, Ecweru told the delegation.
The SGR is a strategic effort to replace Uganda’s century-old Metre Gauge Railway (MGR). Between 2015 and 2023, Uganda partnered with China Harbour Engineering Company (CHEC), but Chinese lenders withdrew due to concerns over connectivity with Kenya’s SGR.
In October 2024, Uganda signed an Engineering, Procurement, and Construction (EPC) contract with Turkish firm Yapı Merkezi, drawing on the company’s experience with Tanzania’s SGR.
Subsequently, Uganda sought diversified financing from European export credit agencies and Islamic finance institutions, including IsDB, to fill the multibillion-euro funding gap.
The railway is designed for electric traction, supporting speeds of up to 120 km/h for passengers and 100 km/h for freight. It will carry up to 25 million tonnes of cargo annually, with 40% of the contract value reserved for Ugandan firms.
Currently, transporting a 40-foot container from Mombasa to Kampala costs about 14.6 million UgX ($3,500) by road. Once operational, the SGR is expected to reduce this to 6.3 million UgX ($1,500) while cutting transit times from several days to under 24 hours. Each train will be able to carry 216 containers—the equivalent of 200 trucks—significantly lowering road maintenance costs and carbon emissions.
Over 60 percent of the railway’s right-of-way has been acquired, with nearly 150 kilometres of land secured across Tororo, Butaleja, Namutumba, Luuka, Iganga, Mayuge, Jinja, and Buikwe districts.
Current efforts focus on the densely populated corridors of Mukono, Wakiso, and Kampala. The government has already invested more than 328 billion UgX in compensation and early works to mitigate risks associated with the project for international lenders.
The Malaba–Kampala line is a cornerstone of the Northern Corridor Integration Projects, linking Uganda to Kenya’s SGR and connecting the Great Lakes region—including Rwanda, South Sudan, and the DRC—to the Indian Ocean.
Bilateral talks with Kenya aim to ensure interoperability between Uganda’s European-standard line and Kenya’s Chinese-built tracks, supporting seamless “port-to-door” rail service. Although a change of traction will be required between diesel and electric systems at the international border
Under a ‘Limited Notice to Proceed’, Yapı Merkezi is already setting up sleeper factories and construction camps along the route, preparing for full-scale construction once financing is finalised.
On 20th February 2026, NTV Uganda reported that the Islamic Development Bank had agreed to inject 410 million euros into the Standard Gauge Railway project for the line from Malaba at the Uganda–Kenya border to Kampala. According to the Ministry of Works and Transport, the funding will cover 272 kilometres of the main Standard Gauge Railway corridor, as well as an additional 232 kilometres of lines linking key industrial hubs across the country. [10]
Uganda Railways Corporation Strategic Plan 2025/26 to 2029/30
Uganda Railways produced their strategic plan for the period to 2029/30 in September 2025. [4]
This somewhat out-of-focus plan shows the current metre-gauge network in Uganda. Only the black-dotted length is at present functional. The red-dotted lengths are in various states of disrepair. [4: p11]Table 1 – Tabulated details of lengths of the railway lines in Uganda. [4: p11]
The Strategic Plan says: “Even with the ongoing efforts to rehabilitate the MGR, much of the railway network remains un-operational, with the few operational sections in poor condition characterised by low handling capacity, limited speeds amid occasional temporary speed restrictions, and low reliability and safety. This has resulted in an over-reliance on road transport in transporting cargo even when rail would be most suited. The impact is the increased costs of transportation that continues to impact productivity, competitiveness and economic growth of Uganda.” [4]
An example of the current condition of the rail infrastructure is the state (in February 2026) of the line close to Pakwach in the North of Uganda.
Pakwach is on the West bank of the Albert (White) Nile. At its immediate location, a loop in the river means that it flows almost West to East with Pakwach on its North side. At Pakwach, there is a significant bridge over the Albert Nile. The two pictures below show the bridge and can be found on Google Maps (February 2026).
The Pakwach Bridge, built in 1965 and commissioned in 1969, is a crucial, aging structure crossing the Albert Nile to connect Uganda’s West Nile region, South Sudan, and Congo. Currently experiencing structural cracks and flooding issues, it is being redesigned by China Communications Construction Company to support modern, heavy, multi-modal transport. The replacement structure will be designed to accommodate both road and rail (metre-gauge and standard-gauge), pedestrian walkways and will also be able to accommodate the largest shipping that might use the Albert Nile. The project aims to facilitate the revival of the Pakwach Riverport (which became ineffective due to the poor headroom of the current bridge), and support regional trade. The bridge condition is very poor and at risk of collapse. Temporary measures are currently being considered to sustain vehicular and pedestrian traffic in the period before the new bridge is designed, built and opened. [6][7]
In early February 2026, as part of a visit to the Murchison Falls National Park we travelled alongside remnants of the old railway to the East of Pakwach on the East bank of the Albert Nile.
Pakwach is at the extreme left of this extract from Google Maps satellite imagery. The old railway crossed the Albert Nile on the bridge at the left of the image and curved around to the East. For the first few hundred yards it ran on the North side of the Arua/Gulu Road. [Google Maps, February 2026]
The railway heading for Gulu runs alongside the Gulu/Arua Road on the East bank of the Albert Nile. The pictures immediately below show remnants of the line which once sat on a low embankment between the road and the river. ….
Like elsewhere in Uganda, the metre-gauge line sat on steel sleepers to avoid the risk of termite damage to wooden sleepers. This and other images show that sections of the embankment have been washed away. [My photograph, February 2026]Another length of the line where the river has washed away a section of the railway embankment when in spare. [My photograph, February 2026]After running alongside the Arua/Gulu Road for a short distance, the old railway drifted away from the road to the North. Its line can just be made out on this satellite image. [Google Maps, February 2026]The line turned further towards North-northeast. Its route can again be picked out starting in the bottom left of this satellite image and running diagonally up the West side of the oil company site on the right of the image. The route of the old railway leaves the image centre-top. An access road to some safari lodges runs immediately to the West of the industrial site and can be seen crossing the line of the old railway, then running alongside it for a short distance before heading away to the North. [Google Maps, February 2026]The murram road mentioned above turns once again to run parallel to the old railway which itself runs Northeast along the boundary of the petrochemical site. [Google Maps, February 2026]We drove along the Bwana Tembo Road after leaving the Gulu/Arua Road and crossed the line a few times at the ‘m’ in ‘Tembo’ on the satellite image. The remains of the old railway continue alongside the road (to its Southeast). [Google Maps, February 2026]We crossed the line at this point (the ‘m’ in ‘Tembo’) three times, the only photograph I have is from before dawn facing South en-route to an early morning safari. [My photograph, February 2026]In amongst the undergrowth, the metre-gauge track can be made out. This location is perhaps one hundred metres to the Northeast of the road junction, taken looking South-southwest from our safari vehicle on our last day near Murchison Falls. [My photograph, February 2026]Further Northeast the old line can be seen swinging away to the East before turning to the North. [Google Maps, February 2026]The flat formation of the old railway can be seen here as it gradually begins to converge with the road. This photograph was taken facing East from the window of the safari vehicle. [My photograph, February 2026]The road and old railway gradually converge as we travel North across this next satellite image. At the flag marking Tangi Safari Lodge, the two are once again immediately adjacent to each other. [Google Maps, February 2026]Closer still to the road, this view looks East again. [My photograph, February 2026]And closer still! [My photograph, February 2026]This next slide shows the route of the old line turning through 180° to run away to the South. Its curved can be seen to the South of the flag of the MCC Student Centre. [Google Maps, February 2026]A final photograph of the line, once again very close to the murram road. [My photograph, February 2026]
Hopefully, these few photographs, together with the images from Google Maps have given some impression of the condition of the metre-gauge line close to Pakwach in the 21st century.
Everything that I have seen of the metre-gauge (with the exception of the line between Torroro and Kampala) is reflected in these most recent pictures.
The Strategic Plan itemises the rolling stock that it owns – a total of 1,420 wagons of different types including flatbeds, tanks, covered wagons among others, and spread across the entire network (including Kenya and Tanzania). However, it says, the URC still faces a big challenge of availability of rolling stock throughout the year with wagon and locomotives availability standing at 40% (505 fit wagons) and 46.5% respectively in the 2023/24 year. “Of the fit wagons, only 35% were flat beds yet they have a higher demand. Table 2 below shows the state of the Corporation’s wagons, plant & machinery as at the end of December 2024.” [4: p12]
Table 2 – Status of URC Wagons, Plant & Machinery as at December 2024 – The table shows that the URC is operating below average in terms of operating stock. Therefore, there is a need to improve rolling stock availability through timely maintenance as well and improvement of facilities at the different maintenance workshops. [4: p12]
The reality is that URC has missed its freight targets by a significant margin over recent years as Table 3 shows.
URC’s performance against targets since 2020. [4: p14]
Table 3 shows that during the period July 2020 – December 2024, the URC network carried a total of 1,150,844 MT against a target of 2,175,170 MT, that is 53%. Of this, 77% were imports while 23% were exports.
Passenger Services
Passenger services were reintroduced under a pilot project in December 2015 as a response to the increasing traffic congestion in Kampala City due to absence of organized public transport. Currently, the passenger train plies four trips daily between Kampala and Namanve. There was a hiatus of around 12 months in the provision of this service while the metre-gauge line between Kampala and Mukono was refurbished, with services restarting in May 2024. “The 30-minute journey has various halts in Nakawa, at Spedag, Kireka, and Namboole, finally terminating at Namanve with an average ridership of 4000 commuters per day.” [4: p15]
Logistics, Warehousing & Terminals
The URC operates three fully licensed, one-stop centres for warehousing, customs clearance, and UNBS checks: Mukono Inland Container Depot, PortBell and Jinja Piers (with the capacity to handle consolidation and
deconsolidation of cargo). Warehousing includes Gulu Logistics Hub, Mukono ICD,
Kampala Good shed, Mbale Good Shed, and Tororo Good Shed. [4: p16]
Challenges
The URC honestly reports a number of challenges which must be addressed in coming years [4: p34-36]
An outdated and inadequate policy, legal and regulatory framework, especially with standards in railway and inland water transport. Particularly, harmonisation of railway policies across the East African region.
Dilapidation of railway transport infrastructure and other assets. The larger portion of the existing MGR network remains in a poor state due to ageing of equipment, dilapidation of the network and out of date technology. In addition, the URC’s regional assets including upcountry stations, staff quarters, offices are in a poor state, poorly managed and left to the oversight of unknown occupants.
An increasing potential demand for passenger services in the Greater Kampala Metropolitan Area. The need for additional passenger stock in good serviceable condition. The need for new feasible passenger routes.
Limited integration with other modes of transport (road, water, air). The need for railway stations to become intermodal hubs is expressed in the strategic plan, but this would require new or replacement stations to be built and there to be a much more structured approach to other transport (boda-boda, matatu and long-distance buses) and a significant improvement in the rail network.
Very limited funding being made available for the URC Strategic Plan priorities. The previous plan set funding targets but only 9% of planned expenditure actually occurred! A serous increase in stakeholder funding is a paramount need for the URC’s future.
The human resource capacity is limited – at the end of March 2025 the URC had only been able to fill about 56% of its agreed staff structure.
Weak data management and reporting frameworks. A lack of a robust monitoring and evaluation system. It is, however, difficult to perceive what could usefully be measured that would produce a meaningful positive impact.
Massive encroachment onto URC land and vandalism of railway materials and property. In some regions of the country, encroachers have secured illegal land titles to URC land and illegal developments have taken place. The URC needs to complete a full survey of its property and must implement a land management strategy.
Public attitude to the railway is poor, many are unaware of its value, advertising of plans and services is poor, and big battles remain to be fought with those who have encroached on its assets
The situation is dire, the future of the metre-gauge seems to be uncertain and bleak!
The strategic plan sets, what must seem to all involved to be, and unobtainable goal: “A developed, adequate, safe, reliable and efficient multi–modal transport system in Uganda.” [4: p38] The fact that the overall goal is unrealistic means it is difficult to give a great deal of credence to any of the intentions which develop from it.
A more effective goal which did not aim at an unobtainable outcome might produce definite steps forward for the existing rail transport network.
Major societal change would be needed to create any form of intermodal transport system. Road transport is in the hands of a myriad of private business concerns all with their own interests and this appears to be very unlikely to change, especially not within the 5 year time frame of the plan.
Perhaps a more focussed and implementable plan is needed. Perhaps limited to improvements in the maintenance of the rail network itself. Perhaps focussing on passenger capacity on the one route currently available with a demonstrable improvement in commuting time on both road and rail as a result of an improved rail service. Perhaps setting realistic goals for the recovery of illegally occupied land over lengths of the metre-gauge line with a significant possibility of being brought back into effective use.
Recent and Upcoming Railway Tenders
UgandaTenders.com lists tendering opportunities for Railway activity in Uganda. These included:
Supply & Commissioning of Ten (10) New Diesel Electric Locomotives and Training of Maintenance & Operation Personnel – the East Africa Community Railway Rehabilitation Support Project (19th December 2025);
Rehabilitation of Malaba-jinja and Port Bell-kampala-kyengera Railway Line Sections Including Support Infrastructure (19th January 2026);
Drainage Improvement works on Kampala – Mukono Railway Line Section (5th March 2026);
Permanent way (Railway line works)(12th March 2026);
Consultancy Services to Develop the National Railway Transport Policy in Uganda – EAC-Railway Rehabilitation Support Project (12th March 2026); and
Consultancy Services for the Development/Preparation of the Railway Transport Master Plan – EAC-Railway Rehabilitation Support Project (12th March 2026).
Kenya
Kenya Railways Blog
In January 2026, the Kenya Railways Blog carried two articles:
A.Statement on Upcoming Railway Developments under the Nairobi Commuter Rail Service to Support AFCON 2027
Following a successful bid to co-host the Africa Cup of Nations (AFCON) in 2027 alongside Uganda and Tanzania, the Government of Kenya is making preparations to host a successful tournament.
In Kenya, the games will be hosted at Nyayo National Stadium, Talanta Sports City Stadium and Moi International Sports Centre, Kasarani. Nyayo National Stadium is designated as a training centre during the tournament because of its central position.
One of the key initiatives being undertaken includes provision of an effective transport solution that will ensure easy access to and from the venues of the soccer event.
With this in mind, the Government intends to construct a railway station adjacent to Nyayo National Stadium and a railway spur line from the Nairobi Central station through Nyayo National Stadium area, Kibera to Talanta Sports City Stadium Stadium.
Kenya Railways is in the process of evicting any illegal occupiers of its land as it prepares for the construction of the line. All illegal structures and property found on the land within the corridor will be removed without further notice, at the cost of the individual or concern that built a structure or placed property on the land.
B. Successful Testride Signals Readiness of Uplands–Longonot–Kijabe MGR corridor
On 23rd January 2026 it reported that on 19th January 2026 that a successful test ride on the Uplands–Longonot–Kijabe Metre Gauge Railway (MGR) line had taken place, signalling renewed readiness to restore services along the critical corridor.
The exercise confirmed the safety, integrity and operational soundness of the restored infrastructure after months of intensive rehabilitation necessitated by severe washaways caused by unprecedented rains in 2024. Works carried out included embankment stabilisation, bridge strengthening, drainage reconstruction and track realignment to improve the corridor’s resilience to extreme weather conditions.
The Uplands–Longonot–Kijabe MGR line forms a key link within the MGR network, supporting passenger movement from Nairobi to Kisumu and freight movement from the Port of Mombasa to Kenya’s hinterland and regional markets across East and Central Africa. Its restoration reinforces Kenya Railways broader strategy of maintaining an integrated, resilient, and efficient rail system.
As the Corporation prepares for the progressive resumption of services along the corridor, the test ride marks not only a technical achievement, but a renewed commitment to reliability, safety and national development.
Kenya Railways Begins Preparations for Naivasha-Kisumu-Malaba SGR Phases 2b and 2c
In an article dated 20th February 2026, Capital FM (Nairobi) reported that Kenya Railways has commenced preparations for the construction of the Naivasha-Kisumu-Malaba Standard Gauge Railway (SGR) Phases 2B and 2C.
The railway operator, in partnership with the National Land Commission (NLC), has deployed survey teams to the proposed Kisumu Terminus site, marking the boundaries for Phase 2B.
In a statement, Kenya Railways said the exercise involves identifying project boundaries, confirming affected land parcels, and measuring land sizes to facilitate the gazettement process.
The survey teams are using Global Navigation Satellite System (GNSS) technology, a modern satellite-based system, to ensure precise and reliable measurements.
The preparatory work marks a key milestone in the expansion of Kenya’s SGR network, which aims to enhance regional connectivity and boost trade along the Nairobi-Kisumu-Malaba corridor. [11]
An SGR locomotive and passenger train on the existing network. [12]
View of Chinese-built Mombasa-Nairobi Standard Gauge Railway (SGR) in Kenya
In a short publicity article dated 21st February 2026, the Chinese newsagency Xinhua uses pictures to describe travel on the SGR in Kenya on 17th February 2026. It can be found here … [13]
“Stretching 472 km from the port city of Mombasa to the capital Nairobi in Kenya, the Chinese-built Mombasa-Nairobi Standard Gauge Railway (SGR) was launched on 31st May 2017. It is the first new railway built in Kenya since independence and a flagship project of China-Kenya cooperation under the Belt and Road Initiative.” [13]
A snapshot of current and planned tenders for railway work.
Consultancy Services For Design Review And Construction Supervision For The Proposed Construction Of Nairobi Railway City Central Station, Public Realm And Other Associated Infrastructure Works (15th January 2026);
Consultancy Services For Design Review And Construction Supervision For The Proposed Standard Gauge Railway From Naivasha \U2013 Kisumu (Phase 2B) (15th January 2026);
Proposed Construction Of Limuru Railway Station And Associated Facilities (23rd January 2026); and
Supply And Delivery Of Rail Fittings And Fasteners For Standard Gauge Railway (SGR) (20th February 2026).
Kenya 2026 Budget Policy Prioritises Rail And Logistics Modernisation
Phillippa Dean of Railways Africa reports [15]that:
Kenya’s 2026 Budget Policy Statement sets out a programme of infrastructure and policy interventions aimed at accelerating economic transformation, lowering the cost of doing business and improving the movement of people and goods. Transport and logistics feature prominently, with rail identified as a key enabler of national competitiveness and regional connectivity.
The Government confirms that it has completed construction of the Miritini MGR Station at the Mombasa Terminus, including a new metre gauge railway link and a railway bridge across the Makupa Causeway. The works are intended to provide seamless first- and last-mile connectivity for Standard Gauge Railway passengers.
As part of efforts to strengthen the transport policy framework, the Government has developed the National E-Mobility Policy to guide the transition to clean and sustainable transport technologies, the National Road Safety Action Plan 2024 to 2025, and the National Logistics and Freight Strategy for horticulture exports.
A comprehensive ten-year infrastructure programme is planned to address existing gaps. This includes dualling 2,500 kilometres of priority highways, surfacing an additional 28,000 kilometres of roads and expanding strategic transport corridors through Public Private Partnerships. Rail development forms part of this wider transport and logistics modernisation agenda.
The extension of the Standard Gauge Railway from Naivasha to Kisumu and onward to Malaba has begun, marking a step towards enhanced regional connectivity. The statement also identifies modernisation of the railway system as a priority within the broader transport and logistics investment framework.
Performance data included in the statement show that the services sector recorded growth of 4.8 percent in the first quarter, 5.5 percent in the second quarter and 5.4 percent in the third quarter of 2025. Within this, the transportation and storage sub-sector expanded by 3.7 percent, 5.4 percent and 5.2 percent respectively, across the same quarters. Growth in the sub-sector was supported by increased activity in road, water and air transport, as well as railway operations.
Transport and logistics investments also extend to the modernisation of Jomo Kenyatta International Airport, the building of a new international airport, development at the Ports of Mombasa and Lamu and reforms aimed at restoring the operational and financial stability of Kenya Airways. Additional priorities include completing port berths, establishing logistics hubs and enhancing maritime safety through programmes such as Vijana Baharia.
The statement highlights the scale of public sector exposure within the rail sector. The cumulative on-lent loan portfolio stands at KSh 1,051.1 billion, of which Kenya Railways Corporation accounts for KSh 547.4 billion, representing 52 percent of the total. This concentration reflects a significant exposure within a single entity.
Overall, the Budget Policy Statement frames the modernisation and expansion of transport and logistics infrastructure, including rail, as essential to connecting markets, reducing the cost of doing business and reinforcing Kenya’s position as an aviation and commercial hub for East and Central Africa. [15]
Freight Trains Poised for Return as Kenya Railways Clears Key Rift Valley Corridor
An article carried by Dawan Africa on 19th January 2026 reported that: [16]
After months of silence on the tracks, freight trains are edging closer to a comeback along the vital Uplands–Kijabe–Longonot railway corridor, offering fresh hope to traders and businesses that rely on rail transport across the region.
Kenya Railways has announced that after heavy rain disruption in April 2024 halted services, the vital Uplands–Kijabe–Longonot railway is ready for freight trains, promising lower costs and stronger regional trade links once slope protection works are finalised. [16]
Kenya Railways Corporation has confirmed that rehabilitation works on the route, which was severely damaged by heavy rains in April 2024, have been fully completed. The disruption forced a suspension of freight services, cutting off a key link in the transport chain between the coast, western Kenya and neighbouring countries.
In a statement issued on Monday, the corporation said the line has undergone successful test runs, clearing it for safe operations.
Engineers are now finalising slope protection works, a precautionary measure aimed at reinforcing the corridor and preventing future damage, especially during periods of heavy rainfall.
“Rehabilitation works on the Uplands–Kijabe–Longonot railway corridor are now 100% complete, with successful test rides conducted to confirm the safety and operational readiness of the line,” Kenya Railways said. “The only remaining activity is slope protection works, which are being finalised to enhance long-term stability and safety.”
While no specific date has been given for the resumption of freight services, the corporation said preparations are already underway. Once operational, the corridor is expected to play a critical role in easing the movement of goods from the Port of Mombasa to Nyanza and Western Kenya, while also strengthening regional trade links with Uganda, Rwanda, the Democratic Republic of Congo and South Sudan.
The announcement signals renewed momentum in Kenya Railways’ broader recovery efforts following weather-related disruptions. It also comes just weeks after the corporation reinstated the Kisumu Safari Train, which had been grounded for nearly a year.
That service was revived in December to meet increased festive season travel demand to the lakeside city, offering passengers a safer and more affordable alternative during one of the busiest periods of the year. Kenya Railways said the move helped ease pressure caused by last-minute bookings and limited transport options.
With freight trains now set to follow suit, the reopening of the Kijabe corridor is expected to reduce pressure on roads, cut transport costs and restore confidence in rail as a dependable backbone for trade and travel across the region. [16]
A Formal Start to Construction of the SGR Extension
Baringo News reports that on 19th March 2026, President William Ruto is scheduled to launch the extension of the Standard Gauge Railway (SGR) from Suswa to Western Kenya, culminating at the Kenya–Uganda border. [17]
Barrow-in-Furness Railway Station is shown in the featured image above and repeated in the first image below. It featured a large, distinct covered roof over the platforms, as seen in this vintage postcard view from the south. The prominent locomotive is one of the Furness Railway K2 Class locomotive, often referred to as “Larger Seagulls”. [4]
Barrow was featured in The Railway Magazine in March 1959. [1] The rebuilding of the old Central Station at Barrow-in-Furness which was virtually destroyed (please see the images below) in the air-raids of 1941 was completed in the late 1950s. The replacement buildings marked another link broken with Barrow’s past. Originally known as Barrow Central Station and the headquarters of the Furness Railway, it was, by the end of the rebuilding renamed Barrow-in-Furness. Early in the 20th century, the borough boasted ten stations. It had grown from a hamlet of a few farms with a population of around 100 to “a seething steel-town of 60,000 in under forty years.” [1: p149]
The most significant factor in the dramatic increase in population was apparently “the progress in railway development in the 1830s. The two dukes had toyed with the possibility of a mineral line for some years, but it was not until George Stephenson’s plan for the Caledonian, West Cumberland & Furness Railway was made known in 1837 that serious attention was given to the idea. Though this scheme for crossing the Duddon Estuary and Morecambe Bay came to nothing, a survey for embanking and reclaiming land and for a mineral line in Furness was carried out in 1841 by James Walker at the request of the Earl of Burlington (later seventh Duke of Devonshire).” [1: p149]
The coming of the railway made the exploitation of vast iron ore deposits feasible. Large ironworks, steelmaking, and shipbuilding industries developed, attracting thousands of workers and causing rapid population growth, urbanization, and infrastructural development. Barrow village had been shipping iron ore for many years and was chosen as a suitable port for iron ore from Lindal-in-Furness and slate quarries at Kirkby-in-Furness.
Google Maps satellite imagery shows the relative location of Kirkby-, Lindal-, and Barrow-in-Furness. [Google Maps, 21st December 2025]
The person directly responsible for the organisation of the Bill and for the affairs of the new Furness Railway Company was Benjamin Currey, Clerk of the House of Lords and Agent of the Devonshire Estates. He visited Furness frequently at this period and was able to influence the local population in favour of the railway. [1: p149-151]
It appears that a strong influence on the development of railways in the area was the purchase of Roa Island by J. A. Smith, who, in conjunction with the Preston & Wyre Railway at Fleetwood, planned to build a pier to accommodate a ferry service between Furness and Fleetwood.
Roa Island lies just over half a mile (1 km) south of the village of Rampside at the southernmost point of the Furness Peninsula in Cumbria. [2]
Roa Island in the 21st Century. This view looks North towards the village of Rampside. [3]Roa Island sits to the South of the Furness Peninsula and North of Piel Island and Piel Castle. [Google Maps, December 2025]
Smith’s plans meant that the Furness Railway Company needed to provide a connecting line to the pier. Two trips between Fleetwood and Roa Island were made daily from 24th August 1846.
A superb diagrammatic map of the railway system around Barrow-in-Furness giving details of the network in 1959 with dates on railways previously proposed but not built and others which had already been removed. The present main line from Ulverston enters the sketch map in the top right. The line to Whitehaven leaves the map centre-top. [1: p150]The wider Furness Railway network and its connections to other companies’ railways in the pre-grouping era. [1: p151]
Initially the Furness Railway Company built a single line North from the pier on Roa Island. The competing needs of mineral and passenger traffic could not be accommodated. The solution was the doubling of the track running North-South between Millwood Junction and Roose Junction. Timetables were published in Bradshaw but Smith’s ferry was not ready in time for the new season. Unsurprisingly, relationships between Smith and the Furness Railway Company were strained!
Indeed, the relationship continued to be difficult, seemingly with Smith seeking to persuade the Furness Railway to purchase his interest in the pier. Eventually, after significant damage occurred to the pier in a storm on 27th December 1852. The Furness Railway saw an opportunity to deal with the problem and bought out Smith’s interests in the pier and in any of Smith’s schemes to access mineral reserves in Furness. Apparently the buy out cost £15,000. However Smith’s pier continued in use until the opening of Ramsden Dock Station in 1881. The pier “was rebuilt in 1867-8 to accommodate the Midland Railway boat trains (which began in 1867) and survived until 1891, when it was finally demolished.” [1: p152]
Andrews continues: “During the early years Barrow grew slowly, as railway workshops were built and its pier gradually enlarged, and it was not until 1859 that the stage was set for the boom that hit this village in the 1860s. In 1846 a young man named James Ramsden, from Wolverton Works, had been appointed Locomotive Superintendent of the Furness, and from the outset had shown considerable promise as an administrator. He was appointed Secretary and Superintendent of the Line in 1850.” [1: p152]
Continuing developments saw the line to Kirkby-in-Furness extended in 1848 to Broughton and the Whitehaven & Furness Junction Railway opened to Whitehaven in 1850. The line to Dalton was continued to Ulverston by 1854 and the Ulverston & Lancaster Railway opened through to Carnforth by 1857. In Barrow, the first blast furnaces opened in 1859.
“With the local production of iron and the establishment of through rail communication, Ramsden was able to put into operation his plan for a new Barrow – a model industrial town and port. The first stage was the construction of a dock between Barrow Island and the mainland, when it would be possible to build up passenger and freight steamer services with Belfast and the Isle of Man. Stage two was the development of an industrial estate on Barrow Island and on the mainland shore, with a residential area inland.” [1: p152]
1863 saw an Act obtained for the construction of the Devonshire and Buccleuch Docks. The Devonshire Dock was opened in September 1867. During that year: Barrow became a County Borough; a ferry service from Piel Pier to the Isle of Man commenced; the Belfast ferry service opened (in the Autumn); and the population of Barrow exceeded 11,000; and the Barrow Haematite Iron & Steel Company paid a 30% divided to shareholders.
“Negotiations with the Midland Railway led to the Furness & Midland Joint line scheme of 1863 which included the moving of the Midland steamer services from Morecambe to Piel Pier.” [1: p153]
It seems that the “Midland Railway was anxious that a communication should be provided for affording better access to the Lakes in connection with the Yorkshire districts.” [8]
Andrews tells us that, “During the 1860s, the Furness Railway … absorbed its neighbours one by one. The Ulverston & Lancaster, which had been heavily subsidised by the Furness during its construction, was bought in 1862 and … the Whitehaven & Furness Junction Railway was taken over in 1866.” [1: p154]
There were plans for the construction of a viaduct to span the Duddon Estuary which would have been part of a new line running North along the coast from a point near to the Iron Works and Steel Works at Hindpool. The scheme failed to gain parliamentary approval because it constricted access to the small port at Borwick Rails.
After a depression in the late 1860s, a return to prosperity in 1870 brought with it a fresh wave of development plans. These included:
Moving the ferry/steamer service from Piel Pier to a new Dock Station.
Two loop lines intended to relieve congestion on the mainline, one the Gleaston loop between Lindal and Salt-house, and the other the Barrow loop from Salthouse to Ormsgill. Later the Gleaston scheme was abbreviated to a single line branch to Stank Mines (opened in 1873. The Barrow loop was slowed by the depression of the late 1870s and was not opened until 1882;
Completion of the docks, which ultimately proved to be somewhat over scale. However the deep water berth at Ramsden Dock was a great improvement over Piel Pier.
High capital expenditure in the 1870s meant that resources for railway development were limited in the 1880s. In the 1890s, exhaustion of local iron ore stocks and the lower cost of imported iron ore saw local freight traffic decline rapidly. In 1893, the Midland Railway gave three years’ notice to the Furness Railway as it had developed its own harbour at Heysham. Some services remained at Barrow until the first world war. Services declined further after the railway grouping, iron ore traffic dwindled away, leaving only that between Hodbarrow and the iron works/docks.
A century of gradual decline brought changes to the rail network. The original line entered Barrow “at Millwood Junction, where the Kirkby and Dalton branches joined, and then ran down the narrow valley to the ruins of Furness Abbey, where a station and hotel were completed in 1847. This became an important interchange station when the lines through to Carnforth and Whitehaven were open, and although a curve was opened between the two branches on 1st August 1858, most trains continued to reverse at Furness Abbey until 1873 when Dalton took over the exchange traffic; the now-unused bays at Dalton were for the Barrow branch trains. Furness Abbey was still used for dividing boat trains into portions for the dock and Barrow until 1904, and the down loop used for this existed until the 1930s. An up bay at Furness Abbey was used in the 1880s for a service from and to Coniston, but this was discontinued in 1891. The first part of the original Kirkby branch from Millwood to Park Junction (renamed Goldmire in 1882) fell rapidly into disuse after this as Whitehaven-Barrow traffic used the Park loop after 1882. Millwood Junction was finally removed in 1898.” [1: p155]
In 1959, Roose had “a reasonable passenger traffic from the surrounding housing estates. The main road originally crossed the line on the level and it was at these gates that trains first stopped by signal in the 1850s. The old junction with the Piel line was where the bridge carrying the main road now stands (which was completed with the [station present in 1959] in 1875).” [1: p156]
“The Piel line curved away to the left, following the shore for about a mile before entering a cutting to reach Rampside Station.” [1: p156]
The three map extracts below show the line as it appeared on 25″ OS mapping of 1889, published in 1890. The chord running South towards Rampside Station had, by this time, already been removed. …
The next sequence of satellite images shows the line to Rampside Station and Roa Island superimposed on modern satellite imagery. The main line can be seen curving away to the West after passing South through Roose Railway Station. …
This sequence of three satellite image extracts from Railmaponline.com show the line serving Piel Pier. Rampside Station was closed to the Concle Inn at the top of the third of the images. [10]
The two map extracts below show Rampside Station and Roa Island as they appear on the 25″ OS mapping of 1889, published in 1890.
Rampside Railway Station was a single platform station opened on 24th August 1846 as Concle Station, [14: p37] it was renamed Rampside in 1869. The station remained operational until 1936 when it closed along with the line and the following station at Piel, which had been reachable via the Roa Island Causeway. The station building and entire branch line had been demolished by the 1980s. [15]
Roa Island in 1889. The Pier Hotel has the benchmark on its West side. [13]This view faces South on Roa Island, the Pier Hotel is now a private dwelling, Piel Station was to its West side (on the right of the Hotel in this image). [Google Streetview, October 2024]
Returning to the main line: South and West of Roose Railway Station the main line curves round towards what was Salthouse Junction.
Only the main line remains to the East of Salthouse Junction. To the West, a single line leaves the main line at Salthouse Junction on the South side of the main line, heading West alongside Cavendish Dock.
Andrews tells us that a significant embankment was built from Salthouse Junction to Barrow Island. A line was laid along this which separated the Ramsden and Buccleuch Docks, running to the South of what was the old line to Strand Station. After the building of the embankment, land to its North was reclaimed and the old Strand Station was closed together with the line which approached it on a rather tortuous/sinuous route. Parts of the embankment for this old line were still visible in the late 1950s.
Andrews tells us that “The original Barrow Station, a wooden structure with one platform, rapidly became inadequate to deal with the expanding traffic of the town and was converted into an engine shed in 1862.” [1: p156] Apparently, in the late 1950s, it was still in use “as a carpenters’ shed and offices, although the lines leading to it were closed in January 1871. … The main line was taken round the outside of the works [shown below] to reach the newer Strand Station in 1862. This, [in the late 1950s,] the Railway Institute, had to be enlarged again in 1873 and the old carriage shed … converted into an arrival station. However, hardly had these alterations been completed in the Strand, than the intention to build a large new station in the centre of the new town.” [1: p156]
This extract from the 1911 Ordnance Survey shows the railway works and sidings. [11]This image is an extract from Railmaponline.com’s satellite imagery showing the same area as the map extract above. So much railway infrastructure has been lost. [10]
The line from St. Luke’s Junction through Barrow Central Station was not opened until 1882. Andrews continues: “by which time it had been put on a through route to the North by the completion of the Park loop line. A curve between Oaklea and Goldmire Junctions allowed the station to be approached from Carnforth in both directions. This curve [shown dashed in the adjacent image] was closed in 1904.” [1: p156]
Andrew’s describes Central Station as having “a large, all-over roof covering Platforms 1 and 2. No. 3, the other side of the island platform, was uncovered and was used by the local service to Piel which ran from 1881 to 1936. These trains approached the Piel line by a curve from Salthouse Junction built in 1873; the line from Roose Junction to Parrock Hall was closed in 1881, after the boat trains were diverted to Ramsden Dock.” [1: p156]
Central Station appears top-centre on the extract from the sketch map of Barrow’s railways below. We will return to look at this later in this article
Andrews continued: “From 1881, the boat trains left the main line at Salthouse Junction and proceeded down the embankment to Loco Junction, where the curve from St. Lukes Junction, on the Central line, came in on the up side, and where the line to the Barrow goods yard and old Strand Station curved away. The passageway between the Ramsden and Buccleuch Docks was crossed by a swing bridge, replaced by the present lift bridge in 1907.” [1: p156-157]
And again: “Shipyard Junction was reached in a cutting and the line to the Naval construction works curved off to the right. A station, Island Road, was built in 1899 for workmen’s trains and these have used the platforms ever since. The line is now used for out-of-gauge loads to Vickers Works, near Island Road Station, and normal freight traffic is worked over Devonshire Bridge from the goods yard.” [1: p157]
Andrews continued: “Reaching the shore, the line to the docks branched off at Dockyard Junction and the passenger line curved away to the left to reach Ramsden Dock Station, which consisted of a long covered platform and a short bay. A goods shed separated the platform from the quayside and at low tide passengers embarked through a tunnel under the lines. The station was completed in 1885. Regular steamboat traffic to the Isle of Man, Belfast and Fleetwood ceased at the outbreak of the first world war, but excursion boats were run from the station, mainly to Blackpool, until 1936. The station was pulled down in 1938.” [1: p157]
Although the docks, seen on satellite imagery, seem substantially as shown on the drawing in Andrews’ article, closer inspection will reveal substantial changes. [Google Maps, February 2026]
Before looking at the rail infrastructure of the 21st century it is right to at least try to show what existed in around 1910 and which has since been substantially lost.
It is difficult to give an effective account of the complexity of the railway infrastructure around the docks at the turn of the 20th century, although the sketch map from 1959 is particularly helpful for understanding the mid-20th century situation. The following extracts from the 25″ Ordnance Survey from around 1910 may do more to obfuscate than to illustrate!
The Buccleuch Bridge of 1907 is shown in this extract. [20]
The location of the 1907 lift bridge as it appears in the 21st century. [Google Maps, February 2026]
As we have noted, the lift bridge mentioned by Andrews in 1959, is long gone, as is all of the network to the West of the bridge. That network was substantial. … A line ran from the bridge Southwest before curving round to the Southeast to head into Ramsden Dock Station.
Ramsden Dock railway station (also known as Barrow Island and officially as Barrow Ramsden Dock) was the terminus of the Furness Railway’s Ramsden Dock Branch. [26]
The station operated between 1881 and 1915. Located at the southern tip of Barrow Island alongside Ramsden Dock it primarily served the adjacent Walney Channel passenger ferry terminal. It was accessible by Ramsden Dock Road and the Barrow-in-Furness Tramway. [26]
The station building was demolished in the 1940s, while the rail line leading to it was completely removed in the 1990s. No evidence of either remain and a windfarm operations centre has been built on the site. [26]
Running parallel to the line through Ramsden Dock Station were lines which served the various sidings in the docks. These lines can be seen in the extract above entering at the third-point along the top from the left of the image, and appear on the extract below, running diagonally across the image from the top-left corner.
A tree of sidings curved off the feeder line and ran East-West. The lines leaving the bottom of the extract at the third-point from the right enter the last extract from the quarter-point from the left. [20]Anchor Basin and the Anchor Line Sheds circa 1910. [20]South of the extract above, the extract shows the Dock Basin which had a lock gate to open water at its Southwest end with Cattle Sheds to its Southeast. [20]A grain store sat to the Southeast of Anchor Basin and a lock linked it with the Dock Basin in the last extract. The Northeast end of the Cattle Sheds can be seen at the bottom of this extract. [20]Approximately the same area as covered by the four map extracts above, as it appears in the 21st century! [Google Maps, February 2026]Lines ran between the Southeast dock wall of Ramsden Dock and the shore. [20]At the Southeast corner of Ramsden Dock, one line remained close to the shore with another turning North to run between Ramsden Dock and Cavendish Dock. The line along the Southeast side of Cavendish Dock and close to the shore led across to the Piel Branch curving round to the North to make a junction with the Branch. [20]The line heading North linked back to the line that ran along the Northwest edge of Cavendish Dock and crossed the Buccleuch Bridge. [20]This length of line is part of the remnants of what was on an extensive rail system. [20]Approximately the same area as covered by the four map extracts above in the 21st century! [Google Maps, February 2026]
Much more has changed since 1959. The significant network of dock railways has been replaced by a single line running down the East side of Ramsden Dock.
Associated British Ports’ “Port of Barrow plays a key role in serving the offshore energy industry in the region described as Britain’s “energy coast”. The port has 15ha of secure open storage and is the site of BAE Systems’ submarine design and manufacturing facility. … The Port of Barrow … handles over 100,000 tonnes of cargo each year, comprising an array of different products including limestone, sand, aggregates, granite and woodpulp. Heavy lift projects are also routinely and efficiently carried out to support the offshore energy sector.” [19]
To the Northwest of the dock lines we have been looking at, were the Naval Engineering Works and Shipbuilding Yard. These were served from the Southeast by a line heading West-northwest from Shipyard Junction which ran round the Southern side of the stadium and then in the surface of Island Road.
The road layout in the area of the Steelworks and to their immediate South has changed significantly. The image immediately below looks North-northwest along the line of the old and new Ironworks Road which now accommodates Northbound traffic on the A590.
Looking at the lines further to the North, Andrews said in 1959 that, “The economy drive which closed the Piel branch in 1936 also abolished the junction into the goods lines at Ormsgill north of the Central Station, and now trains from the north of the iron works have to work round through Loco Junction and Barrow yard.” [1: p157]
Ormsgill Junction is at the bottom-left of this sketch map. Lines to Hawcoat Quarry and Roanhead Iron Mines were similarly closed by the late-1950s. [1: p150]
But to complete our look at the central area of Barrow, we follow the line up through Barrow Central Station to the North.
Barrow Central Station after the turn of the 29th century. [21]The site of the station as it appears on the ESRI satellite imagery supplied by the National Library of Scotland. [21]Barrow Central Station seen from the South on the Station Approach in the 21st century. [Google Streetview, August 2018]Barrow Central Station seen from Abbey Road Bridge looking Northwest. [Google Streetview, May 2022]
Andrews said in 1959: “The buildings at the new Barrow in Furness Station have been constructed on the site of the old, and are mainly steel framed. A considerable amount of glass has been introduced in the infilling panels forming windows to both the road and platform elevations. Multi-coloured rustic bricks have been used, with slate window sills and fascia over the high-level windows of the front entrance. The platform awnings are of light steel decking, with continuous roof glazing in line with the face of the external wall adjacent to No. 1 platform. The flooring of the booking hall and cafeteria-waiting rooms is laid in precast tiles, and polished hardwood has been used extensively as a decorative wall lining in the cafeterias, and for the framing to the ticket windows and internal window frames. The walls of the booking hall are finished in glazed tiles to the top of door height, with a glossy finish above, and re-erected on the south wall is the Furness Railway 1914-18 war memorial, Loudspeakers have been installed through out the station, and the open platform lighting is fluorescent, incorporating the station name within the light fitting.” [1: p200]
Looking North from the end of the station platform towards what was the location of the carriage sheds. [Google Streetview & Vextrix Surveys, November 2021]Carriage Sheds to the Northwest of Barrow Central Station in the early 20th century. Note the single industrial siding serving British Griffin Chilled Iron Works. [21]A similar area in the 21st century! [21]By the early 1930s, the provision for local industry close to the carriage sidings had increased significantly! This extract comes from the 25″ Ordnance Survey of 1931, published in 1933. [35]The lines passed under Devonshire Road. [23]The same location in the 21st century. [23]This photograph was taken in the late 1950s from a point somewhere Southeast of Devonshire Road. The carriage sheds are on the right of the photograph. There are two tracks on the left of the main line which served industrial premises. The Ordnance Survey shows the first of these sidings serving British Griffin Chilled Ironworks. This image was shared by Ralph Sheppard on the Barrow-in-Furness in Old Photos Facebook Group on 29th December 2019. [34]Looking Southeast from Devonshire Road towards the maintenance facilities and the station beyond. [Google Streetview, November 2024]Looking Northwest from Devonshire Road. [Google Streetview, November 2024]Continuing Northwest, the lines passed under Walney Road. [23]The same location in the 21st century. [23]Looking Southeast from the A590, Walney Road, along the line of the railway towards Barrow Railway Station. [Google Streetview, November 2024]
We finish our survey of Barrow’s Railways at this northern point. Towards the end of his 1959 article, Andrews commented about the first half of the 20th century: “The last fifty years have shown a steady decline in Barrow’s railway system, the inevitable result of the failure of James Ramsden’s vision to become reality. Although the iron ore brought a temporary and easy prosperity, the geographical situation was a permanent setback to the port. The industrial centres of Lancashire and Yorkshire were just too far away and the Furness main line was not built for real speed. Moreover, the Furness Railway Company just failed to establish sufficient variety of local industry to keep the port busy with local trade and the town came in the end to rely almost entirely on the shipbuilding industry. Since the last war, however, there have been signs of a reversal in this downward trend; sidings are being laid in to serve new factories at Salthouse and Sandscale, and Barrow is to become a divisional centre in the L.M.R. de-centralisation scheme. It is hoped that some of the prosperity of the old days is on the way back.” [1: p157]
From 1959 to 2026, Barrow-in-Furness transitioned from a traditional heavy industrial town into a specialized hub for nuclear submarine construction and offshore energy. While iron and steel industries closed by 1988, the BAE Systems shipyard became the town’s primary economic driver, cementing its role in national defense.
British Cellophane (1959) and Kimberly Clark (1967) established manufacturing plants in Barrow and the 1980s saw the development of gas terminals for the Morecambe Bay gas field.
The vast majority of the industrial railway heritage has disappeared. The town is left with its mainline service which serves the Cumbrian Coast and connects the town to the wider UK, and a branch line which runs down to the ABP port facilities.
References
M. J. Andrews; The Railways of Barrow; in The Railway Magazine, Tothill Press, London, March 1959, p149-157 & 200.
This is the third article following the Strathspey Line. The first can be found here. [3] The second can be found here. [4]
The featured image above is a Manson O class 4-4-0 locomotive. When the GNSR Directors requested larger engines to handle increasing passenger traffic loads, and Manson designed his Class O (LNER D42) locomotives to meet this need. Initially allocated to main line passenger duties between Aberdeen and Elgin, as later 4-4-0s (e.g..the D40s) were introduced, they were displaced to secondary duties. By the time of the Grouping (1923), they could be found across the GNSR system, including at Boat of Garten working the Speyside Line. [32]
We start this next leg of the journey at Ballindalloch Railway Station.
Ballindalloch Railway Station as it appears on the 25″ Ordnance Survey of 1902, published in 1905. [5]The location of Ballindalloch Railway Station as it appears on the satellite imagery provided by railmaponline.com. [6]
The scenery undergoes a change beyond Ballindalloch, and the woods that have so far characterised the journey give place to the wilder moorland country of upper Strathspey. [2: p6]
Just to the West of Ballindalloch Railway Station the line bridged the Burn of Ayeon. [7]The same location in the 21st century with the line of the old railway superimposed on modern satellite imagery. [6]The warehousing on the above satellite image seen from the road, the old railway was beyond these buildings. [Google Streetview, September 2025]As the line curved towards the South following the course of the River Spey, a cattle-creep allowed access from the fields to the river bank. [8]The same location in the 21st century. [6]Near Church Yard Pool on the River Spey, two Futher small burns were bridged by the railway just prior to meeting the river. The first encountered is Achvochkie Burn, the next was Faeshellach Burn. [9]The same location in the 21st century. [6]As the line headed Southwest two further burns were crossed, the first is shown here, Caechan Ruadh. [9]Approximately the same area in the 21st century as that in the Ordnance Survey extract above. [6]The second and more substantial burn is the Burn of Advie. [9]Approximately the same area in the 21st century as that in the Ordnance Survey extract above. [6]Advie Railway Station at the turn of the 20th century. [10]Approximately the same area in the 21st century as that in the Ordnance Survey extract above. This is the location of Advie station as shown on the railmaponline.com satellite imagery. [6]
Photographs of Advie Station when the line was operating and after the track had been lifted can be found here. [15]
The original Advie station, opened on 1st July 1863 as a simple halt at the north end of the road from Mains of Advie, was short-lived and relocated westward, with the replacement Advie station opening on 1st September 1868 to better accommodate growing needs. This second station featured a single platform on the south side of the line, initially short but later extended, along with a timber waiting room building, a goods yard accessed from the west including a siding, and facilities supporting local freight such as agricultural produce and goods from nearby Tormore Distillery. Today, remnants of the station, including the platform and a former railway building, survive as part of the disused line now incorporated into the Strathspey Way long-distance footpath. [11]
Looking East from the bridge at the East end of the Advie station site. [Google Streetview, September 2025]The view West from the bridge in 2009. By 2025 vegetation had grown so that this view was impossible. [Google Streetview, March 2009]The view East through the station from the West end of the platform. [Google Streetview, August 2011]
The line curved round to the South following the river.
Burn of Duiar was bridged close to the Bridge of Duiar. [12]The same location in the 21st century. [6]The view from the Bridge of Duiar towards the route of the old railway line. [Google Streetview, September 2026]
“Six miles separate the non-crossing stations of Advie and Cromdale, but when the line was opened this section was broken by a rather isolated station at Dalvey (spelled Dalvie in the very early timetables). Closed in 1868, the buildings and platform have long since been dismantled, but the site of the station, some three miles from Advie, can still be identified.” [2: p6]
“At Cromdale, a branch serves a distillery more than a mile south-east of the station.” [2: p6]We will follow the line of this branch before returning to the Strathspey Line Southwest of Cromdale Station.
Cromdale village sat on the East side of the Branch. The main road through the village bridged the branch line. [14]The same location in the 21st century. [6]The view North from the A95 towards Cromdale Station Yard along the line of the old branch line.Looking South from the A95 along the line of the old railway towards Balmenach Distillery. [Google Streetview, September 2025]The line followed the Balmenach Road towards the distillery. Looking South the line was on the left of the road. [Google Streetview, September 2025]The terminus of the branch at Balmenach- Glenlivet Distillery, South of Cromdale. [15]The same location in the 21st century. [6]The view back to the North from the Distillery entrance along the shallow embankment which used to carry the branch line. [Google Streetview, September 2025]Turning through 180°, the line continued on a slight embankment into the distillery site [Google Streetview, September 2025]A final view from the end of the branch looking back along the embankment which carried the line North away from the distillery. [Google Streetview, April 2022]
Beyond Cromdale, “The train crosses the boundary between Morayshire and Inverness-shire beyond Cromdale, and reaches Grantown-on-Spey, 24.25 miles from Craigellachie.” [2: p6]
Continuing Southwest on the Strathspey Line. ….
We pass under the road bridge and head Southwest along the Strathspey Line. Seen here from the road bridge. [Google Streetview, September 2025]
The line curved round to the South and began to run alongside the Spey once again. …..
An access road from the Mains of Cromdale bridged the line and ran South alongside it. Just to The North of the bridge the line was joined by a short siding which served old gravel pits. This is the 25″Ordnance Survey from the turn of the 20th century again. [18]The same length of the old railway as it appears on the satellite imagery from railmaponline.com. [6]The line bridged two small tributary burns of the Allt Choire Odhair. [19]The same location in the 21st century. [6]It then bridged the Allt Choire Odhair itself. [19]The same length of line shown on 21st century satellite imagery. [6]
Across the River Spey from Speybridge the railway ran into Grantown Railway Station. …
More photographs of the station can be found here. [29]
“Founded in 1776, Grantown-on-Spey is laid out on a spacious and regular plan on the western (Morayshire) side of the Spey. In addition to its importance as a local business centre, it enjoys considerable favour as a holiday resort. The station on the Strathspey line (now designated Grantown-on-Spey East, to distinguish it from the former Highland Railway station) is on the opposite side of the river, in a rather isolated position, more than a mile from the town, and is in Inverness-shire. The layout and the buildings are similar to those at the other crossing stations.” [2: p6]
Three images follow below, of the site of Grantown East Railway Station as it appears in the 21st century. …
The three images above show the Grantown Railway Station site as it appears in the 21st century. [Google Streetview, September 2025]Looking back along the line of the railway from the West end of the station site. [Google Streetview, September 2025]Looking West along the route of the old line from the same location as the last image. [Google Streetview, September 2025]As it left the station heading West it bridged the old road from Speybridge to the Southwest. [22]The same location in the 21st century. [6]Looking West-northwest along the line of the old railway. The Speyside Way rejoins the line of the old railway just a few hundred metres ahead. The view looking back towards Grantown Railway Station from this point is obscured by vegetation. [Google Streetview, May 2025]
“Between Grantown and Nethy Bridge, the railway reaches its summit, 702 ft. above sea-level, the highest on the former Great North of Scotland Railway. The gradual ascent from Craigellachie (270 ft. above sea-level) is in complete contrast to the steep fall into Strathspey from Dufftown, and involves no gradient steeper than 1 in 75, and that for short distances only. The summit is in open moorland country, and snow fences protect the railway from drifts during winter blizzards.” [2: p6 & 8]
A short distance along the line it spanned three streams in short succession.
The length of line referred to above. The most northerly stream is Auchernack Burn. The other two are not named on the OS mapping. [23]The area is heavily wooded so little is visible other than the tree canopy on satellite imagery. The railmaponline.com mapping shows the lines of the streams in the 21st century most clearly.
The line was then bridged by an access road. …
A farm access road bridged the line. [24]The same location on railmaponline.com mapping. [6]The access Road to Balliefurth Farm also bridged the line. [27]The same access road in the 21st century. [6]The bridge over Allt Mor. [20]The same location in the 21st century. [Google Maps, February 2026]Another farm access crossed the line South of Allt Mor. [25]The same location in the 21st century. [Google Maps, February 2026]Nethy Bridge Railway Station at the turn of the 20th century. [26]The location of the Nethy Bridge Railway Station in the 21st century. [6]The platform at Nethy Bridge Railway Station, seen in the snow, from the Speyside Way. [Google Streetview, March 2023]Nethy Bridge Railway Station, seen in the snow, from the Speyside Way. [Google Streetview, March 2023]
A series of photographs of Nethy Bridge Railway Station can be found here. [30]
“Originally named Abernethy when it opened on the Strathspey Railway, the station was renamed Nethy Bridge on 1st November 1867 to avoid confusion with another Abernethy station near Perth, after which misdirected goods deliveries occurred.” [31]
“Construction of the station was straightforward, reflecting its rural setting in the sparsely populated Abernethy area, with a basic single-platform layout designed for modest traffic volumes. Key engineering features included a substantial rail bridge spanning the River Nethy immediately adjacent to the station, whose stone supports remain visible today as remnants of the original infrastructure.” [31]
“The name change for the station prompted a corresponding renaming of the nearby village from Abernethy—known in Scottish Gaelic as Obar Neithich—to Nethy Bridge, reflecting the influence of the expanding rail network on local identity; however, Abernethy remains in common local use for the broader parish area.” [31]
“In the station’s early years through the late 19th century, operations focused on fundamental passenger and goods handling along the single-track Strathspey Railway, which connected remote Highland settlements to broader networks at Craigellachie and later Boat of Garten. The station primarily accommodated local residents traveling for work, markets, and social purposes, while also supporting the nascent tourism to Speyside’s scenic landscapes and sporting estates, with basic platforms and a modest goods shed facilitating timber, agricultural produce, and visitor luggage.” [31]
“Safety measures were implemented from the outset on this lightly trafficked branch line, including a signal box to control train movements and manned level crossing gates at the nearby road intersection, essential for managing single-line working and preventing collisions in the rural setting.” [31]
Looking back into Nethy Bridge Station site along the line of the old railway from what was a level-crossing. [Google Streetview, May 2025]Turning through 180° and looking ahead along the line of the old railway. [Google Streetview, May 2025]
Immediately after crossing the road at the South end of the station site, the railway bridged the River Nethy. The railway then turned “sharply westward, and crosses the Spey for the third time on a girder bridge of five spans supported on masonry piers. It then curves back towards the south, and runs beside the main line of the former Highland Railway to Boat of Garten, 33.5 miles from Craigellachie. Throughout the final stages of the journey, the Cairngorms rise boldly on the eastern horizon, their dark outlines relieved by the snow which frequently lingers in the corries until midsummer.” [2: p8-9]
“The southbound platform at Boat of Garten Station is an island, the outer face of which is used by the Strathspey trains. The layout includes a run-round loop, and sidings for the exchange of traffic. The only physical connection between the two railways formerly was at the south end of the station, but [in the 1950s] an improved junction, allowing trains to run direct between Strathspey line and the Highland line platforms, [was] provided at the north end.” [2: p9]
Services on the Strathspey Line
H.A. Vallance describes services on the line: “The early train services on the Strathspey line call for little comment. The trains stopped at all stations, and were characterised by their leisurely progress. There were three trains in each direction in summer, and two in winter, but with the gradual improvement of services on the Great North after the early 1880s, the number of services was increased, and there was some improvement in speed. At least three trains were run throughout the year, and in summer there were additional trains, some of which worked only between Craigellachie and Ballindalloch. The services suffered some reduction during the first world war from which they never fully recovered. In [the period before Vallance was writing] there [were] three trains in each direction, and the journey time for the 33.5 miles between Craigellachie and Boat of Garten [was] about 1.25 hour.” [2: p9]
“In the early years of the [20th] century, the GNSR introduced a summer programme of long-distance half-day excursions by special trains from Aberdeen on Wednesdays and Saturdays. The first of these trips to the Speyside line was on 17th June 1905, and the fare for the return journey to Boat of Garten (101.25 miles each way) was 2s. 6d. The train ran non-stop between Aberdeen and Craigellachie (68 miles) in 85 min., and reached Boat of Garten in 2.25 hours.” [2: p9]
During the summer of 1906, the journey “was extended for 17 miles over the Highland Railway, from Boat of Garten to Kingussie, but this innovation lasted for one season only. By 1909, the non-stop run had been shortened to 64 miles by the addition of a stop at Dufftown. The GNSR. had no restaurant cars, but lunches provided by the Palace Hotel, Aberdeen, owned by the railway company, were served on the outward journey in saloon carriages fitted with tables. Teas were served on the return journey.” [2: p51]
“After being withdrawn during the first world war, these excursions were re-introduced by the London & North Eastern Railway, but at increased fares. The catering arrangements were improved by the provision of a fully-equipped restaurant car, and the trains also ran on Sundays, thus becoming the first Sunday services on the Strathspey line. The trains were again withdrawn on the outbreak of the second world war, and [were not] restored.” [2: p5]
“The sharp curves on the lines between Keith and Elgin are said to have led the GNSR to use locomotives with a leading bogie at an early date. For many years after its opening in 1863, the Strathspey line was worked by some of the first 4-4-0s built for the company. ” [2: p51]
“Successive locomotive superintendents perpetuated the 4-4-0 wheel arrangement for general mixed-traffic duties, and, as the older locomotives were withdrawn from service, several of these types appeared on the Boat of Garten trains. Six-coupled engines were unknown on the line until after grouping, when 4-6-0s from the former Great Eastern Railway were sent to North-East Scotland, and were used on the Strathspey excursion trains. In [the 1950s], British Railways standard 2-6-0s … worked the passenger services, and class “K” 2-6-0s [worked] goods trains.” [2: p51]
“On 3rd November 1958, the services on the Strathspey line were re-organised by the introduction of one of the new diesel railbuses. … These vehicles, which [had] seats for 56 passengers, and a top speed of 55 m.p.h., [were] designed for use on routes on which traffic [was] light. The railbus [made] three journeys in each direction daily on the Strathspey line, and the only remaining steam-hauled passenger service [was] the late evening train from Craigellachie, on Saturdays only, which convey[ed] a through coach from Aberdeen.” [2: p51]
“Advantage [was] taken of the ease with which a diesel unit can be reversed to extend the railbus journeys over the main line between Craigellachie and Elgin. The introduction of through services between Strathspey and Elgin was among the suggestions made in an article on the possibilities of light diesel units in the North of Scotland, which appeared in The Railway Magazine for January, 1956. Two journeys in each direction also [were] extended between Boat of Garten and Aviemore. distance from Aviemore to Elgin via Craigellachie is 51 miles, and the railbus [was] thus covering a daily mileage of almost 300, or 1,800 miles a week.” [2: p51]
A significant series of photographs at locations along the line can be seen here. [42]
References
The Railway Magazine Volume 105 No. 693, Tothill Press, London, January 1959.
H.A. Vallance; The Strathspey Line; in The Railway Magazine Volume 105 No. 693, Tothill Press, London, January 1959, p3-9 & 51.
We start this next leg of the journey in Dufftown at the Railway Station which is the terminus of the Keith & Dufftown Railway.
Dufftown Railway Station at the turn of the 29th century. [3]
Beyond Dufftown we continue a descent at 1 in 78 and 1 in 80 through the Fiddich Gorge. “The engineering works on this section include two masonry bridges over the Fiddich, a deep rock cutting at Corbie’s Craig, and a diversion of the river to enable an embankment to be formed on what had been the bed of the stream. The line emerges from the gorge at Craigellachie, a short distance from the confluence of the Fiddich and the Spey.” [1: p5-6]
A short distance North of Dufftown Railway Station, the line bridged an access road. [4]The A941 runs alongside the route of the old railway (shown orange on this extract from the satellite imagery provided by railmaponline.com). The house which appears top left matches that which appears in the same location on the map extract. Duff Town is a new access road. The original road under the line turned East close to the house. [5]The next location along the line was a bridge carrying an access road to Balvenie House. [6]The same location in the 21st century. [5]The line bridged the next minor road which crossed the line to the North of Balvenie House. [6]The same location in the 21st century. [5]The next structure was a bridge over the River Fiddich which the line has been following since Dufftown. [7]The same location in the 21st century. [5]Construction of the line required the diversion of a short length of the River Fiddich. [7]The same location in the 21st century. [5]
The railway continues its sinuous way down the valley of the River Fiddich before reaching Popine Mills. …
An excellent photograph of steam at Craigellachie can be found here. [23]
Craigellachie Junction Railway Station was opened as Strathspey Junction on 1st July 1863 by the Great North of Scotland Railway. It was renamed Craigellachie on 1st June 1864. There was a large goods yard to the west. The station closed to passengers on 6th May 1968 and to goods traffic on 4th November 1968. [13]
This was a three platform station and junction, with two platforms on the route between Elgin East and Keith via Dufftown and one platform on the Strathspey route to Boat of Garten. Almost immediately after leaving the station, trains for Elgin crossed the Craigellachie Bridge to reach Dandaleith.
The erstwhile railway bridge over the River Spey. It should not be confused with Thomas Telford’s road bridge further to the West of this location. This railway bridge carried the line to Elgin. [14]The same location in the 21st century as shown on the ESRI satellite imagery supplied by the National Library of Scotland (NLS). [14]
The main station building at Craigellachie Junction Railway Station was a long single-storey building situated on the platform between the Elgin line and the Boat of Garten line. There was a smaller waiting room structure on the platform that served Dufftown trains from Elgin. There was a goods yard on the West side of the station site. A turntable sat at the Southwest corner of the site.
The station had three signal boxes, all opened in 1900. The South box, “located on the east side at the south end of the station at the junction between the Boat of Garten and Elgin East routes and the turn out for the goods yard. This box above the west bank of the River Fiddich with a large stone base. The line crossed over the Fiddich just to the south by a girder bridge.” [17]
The other two signal boxes, the West box and the North box were at the North end of the two platforms.
Vallance wrote of Craigellachie Station: “Craigellachie Station … has three, platform faces, of which two serve the Elgin line, and the third the Boat of Garten trains. Sidings and a run-round loop for locomotives adjoin the third platform.” [1: p6]
In a relatively deep cuttings, the Speyside Line curved away from Craigellachie Station to the West and then Southwest. [18]The same location in the 21st century. The Speyside Way follows the old railway formation. [Google Maps, January 2026]Looking back into the station site from the modern A95 bridge. The Goods Shed once sat to the right of this image. [Google Streetview, June 2025]Looking forward along the Speyside Way (which follows the old railway route) from the A95 overbridge. [Google Streetview, June 2025]
Vallance continues: “The Strathspey line reaches the right bank of the Spey a short distance beyond the station, and a glimpse is caught of Telford’s graceful iron bridge. with embattled towers, erected in 1815 to carry the Elgin road over the river. The train then passes through a short tunnel (65 yd. long), the only one on the line, and one of the very few on the former Great North of Scotland Railway.” [1: p6]
Vallance continues: “A run of 4.75 miles beside the wooded banks of the river takes the train past the crossing station of Aberlour to the single-platform halt of Dailuaine.” [1: p6]
The line spans a tributary of the River Spey – the Burn of Allachoy. [28]The same location in the 21st century. [14]Looking North from the A95 towards the River Spey, which can just be seen in the photograph, from adjacent to the Bridge of Allachoy. The track running parallel to the road and crossing the field access is the formation of the old railway and now The Speyside Way. [Google Streetview, June 2025]Aberlour Railway Station and Goods Yard at the turn of the 20th century. The village’s full name is Charlestown of Aberlour. [29]The same area in the 21st century. [14]
The village was founded by Charles Grant of Elchies in 1812 – with the name of Charlestown of Aberlour after his son Charles. It is commonly referred to simply as Aberlour. [30] The railway Station closed to passengers in 1965 and to freight in 1971. The station building is now the Speyside Way Visitor Centre and Cafe. [31]
Looking Northeast through Aberlour Railway Station from the footbridge carrying a public right of way over the line at the Southwest end of the station site. When opened, Aberlour was a single platform station. The goods yard was to the Northeast of the station, accessed from the North. The loop, signal box and second platform were added in 1910. The signal box sat at the Northeast end of the additional platform, directly opposite the Goods shed. The station closed to passengers in 1965. The signal box closed 3 years later, when the Aberlour became the terminus of the linefrom Dufftown. The station closed to freight in 1971. [31]The original station building at Aberlour Railway Station, seen from the East. [Google Streetview, June 2025]Aberlour Railway Station building, seen from the South. The running lines were beyond the building and would have been visible to the left of the building. [Google Streetview, June 2025]Only a short distance to the Southwest of the station the line bridged the Burn of Aberlour which spilled into the River Spey a short distance to the Northwest of the line. [32]
The next significant location on the line was some distance further to the Southwest bridging another stream close to Dailuaine Halt.
The Dailuaine-Glenlivet Distillery was South of this location. The railway bridge over the tributary of the Spey is shown here on an extract from the 25″ Ordnance Survey revision of 1903, published 1905. The distillery remains active and is owned by Diageo in the 21st century. [24]The location of Dailuaine Halt. The halt opened in November 1933 and closed to both passengers and goods on 18th October 1965. [25]This extract from the railmaponline.com satellite imagery shows the site of the Dailuaine Distillery. The Speyside line runs across the top-left corner of this extract. The thinner orange line is the short branch which served the distillery. [14]A dedicated Barclay locomotive served the branch. [26]
More photographs of the Dailuaine Distillery branch and its locomotive can be found here. [27]
On its way West the line passed under the access road to Carron House. [33]The same location in the 21st century. [14]
A short distance to the West. The industrial line formed a junction with the main line before the line crossed the River Spey and entered Carron Railway Station. in so doing, the line left “Banffshire, and [crossed] to the Morayshire side of the Spey on [the Bridge of Carron] with a central iron span of 150 ft., flanked on each side by a single masonry arch, which also [carried] a public road.” [1: p6]
Before reaching the Bridge Of Carron the line bridged a minor road which continued alongside the line and crossed the Bridge of Carron alongside the railway. [33]The same location shown on railmaponline.com,’s satellite imagery. [14]Seen from the South, this is the location where the line bridged the road. [Google Streetview, September 2025]Railway and Road crossed the Bridge of Carron over the River Spey on the same structure. [34]The Bridge of Carron as shown on the satellite imagery from railmaponline.com. [14]The Bridge of Carron seen from the Southeast. Trains crossed the bridge to the left of the road. The Speyside Way now uses the railway route over the bridge. [Google Streetview, September 2025]
The Bridge of Carron was built for the Strathspey Railway in 1863, to a design by Alexander Gibb, an engineer for the Great North of Scotland Railway. It was fabricated by the iron founders William McKinnon and Co. It originally carried both the railway and a roadway. [35]
Once over the Bridge of Carron the goods yard of the railway station opened out alongside the road with a Saw Mill and timber yard immediately next to the road. The railway curved gently through the Station.
An August 1978 view of the station after closure can be found here, [38] and another view, here. [39]
Vallance continues: “Carron Station … has a crossing loop, and its solidly-constructed stone buildings are typical of those provided by the G.N.S.R. at many other roadside stations. The large whisky distilleries at Carron and at Knockando, 2.5 miles further on, bring a considerable amount of traffic to the railway.” [1: p6]
Imperial Distillery which was immediately to the South of the Station, was built by Thomas Mackenzie in 1897. In 1925, Imperial joined The Distillers Company, in 1989, it was sold to Allied Distillers. The distillery was demolished in 2013 and a new distillery, Dalmunach, established on the site in 2015. [40]
At Millhaugh the line bridged the Ballintomb Burn. [42]The same location on mapping provided by railmsponline.com. Satellite imagery shows very little of interest at this location as the area is heavily wooded. [14]Another burn is bridged just a short distance to the West. [43]The same location on railmaponline.com’s mapping. Tree cover means that it is impossible to see features below the canopy on the satellite imagery. [14]
The line continues on the North bank of the Spey running by Knockando distillery.
Vallance writing in 1959, says that, “When the railway was opened, there was no station between Carron and Blacksboat, a distance of 4.75 miles, but on 1st September 1869, a platform, at which certain trains called by request, was opened at Knockando, 1.25 miles from Carron. This platform (now known as Knockando House Halt) ranks as an unadvertised private station for the Knockando estate. On 1st July 1899, a public station was brought into use at a distillery siding, 1.25 miles south of the private platform. Known at first as Dalbeallie, the name of this station became Knockando on 1st May 1905.” [1: p6]
More about the Tamdhu Distillery and its whisky can be found here. [47]
As trains left the station travelling West they crossed the Knockando Burn and ran to the South of the Tamdhu Distillery. The distillery was rail served from sidings alongside the Speyside Line.
The Tamdhu Distillery – a set of three sidings ran parallel to the main line with further sidings on the West side of the distillery. [48]
Beyond the Tamdhu Distillery, the Speyside Line curved round to the South following the river bank and crossed the burn shown on the map extract below. Vallance, writing about this location, says: “About three-quarters of a mile beyond Knockando, the railway crosses the Allt Arder, a tributary of the Spey, on a masonry bridge of three spans, one of 50 ft. and two of 40 ft. Difficulty was experienced in obtaining sound foundations for the piers of this structure, and after loose boulders and shingle had been excavated to a depth of 16 ft., piles had to be driven for a further 15ft.” [1: p6]
Blacksboat Railway Station opened on 1st July 1863. It had a rectangular-shaped building and a wooden goods shed. The station closed to both passengers and goods traffic on 18th October 1965. [52] It had a single platform on the West side of the line and a small Goods Yard to the South. The station building is well-preserved.bdetsils of the building can be found here. [53]
Looking South, this is the station building in the 21st century. [53]Close to the Mill of Pit-chroy the line bridged Allt a’ Gheallaidh (Burn of the Promise). [54]The satellite imagery from railmaponline.com shows very little as the tree canopy hides the topography. The mapping shows that the original road alignment has been changed significantly in the area close to the Allt a’ Gheallaidh. Following the line of the road on Google Streetview it is not possible to identify the location of the stream. [14]The next significant structure on the 25″ Ordnance Survey from the turn of the 20th century is this bridge over the line. It gave access to Dalnapot (just off the bottom of this map extract. [55]A wider area is shown on this extract from the satellite imagery from railmaponline.com. [14]O er this length of the line the road runs at the top of the cutting which carried the old railway. At the location of the bridge shown on the OS Map extract above it is just possible to make out the parapet wall of the bridge in this modern view. [Google Streetview, September 2025]
The access road to Dalnapot ran down the far side of the cutting from the bridge. That lane has been abandoned in favour of a more direct route between the B9102 and Dalnapot Futher South along the line of the old railway.
Looking Southeast from the B9102 into the access road to Dalnapot the old railway crosses the access road at level just a short distance down the access road. [Google Streetview, September 2025]
Vallance continues his narrative: “Beyond the single-platform station of Blacksboat, the train returns to the Banffshire side of the Spey on a lattice girder bridge of 198 ft. span, and reaches Ballindalloch Station, 12.25 miles from Craigellachie. In less than a mile, however, the county boundary crosses to the eastern side of the river, and Morayshire is re-entered.” [1: p6]
Ballindalloch Viaduct crosses the Spey at Ballindaloch, linking the parishes of Inveravon in Banffshire and Knockando in Moray. It is a wrought iron lattice girder bridge, with a single-span of 195 feet (59 metres), supported by rubble abutments, and with plate girder spans at either end giving an overall length of around 250 feet (75 metres). The viaduct was designated a Category A listed building in 1987, and was a scheduled monument until 2006. It is open to pedestrians and cyclists, forming a part of the Speyside Way. [57]
Immediately after crossing the River Spey over Ballindalloch Viaduct, trains entered Ballindalloch Railway Station which was situated on a relatively tightly curved length of the Strathspey Line.
Ballindalloch Railway Station opened on 1st July 1863 by the Great North of Scotland Railway. To the north was Cragganmore distillery, which had opened because it was close to the railway. There were two goods sheds: a two-storey goods shed that connected with the distillery and the other was in the middle of the large goods yard which was to the east of the station site. The two-storey goods shed was used to store whisky from the distillery. The station closed to both passengers and goods traffic on 18th October 1965. [60]
References
The Railway Magazine Volume 105 No. 693, Tothill Press, London, January 1959.
H.A. Vallance; The Strathspey Line; in The Railway Magazine Volume 105 No. 693, Tothill Press, London, January 1959, p3-9.
The original source for this image has not been recorded. It was shared on the BR: Disused Railway Stations: Britain and Ireland Facebook Group by Mark Davidson on 26th December 2025, https://www.facebook.com/share/p/1D2Xsot4Un, accessed on 27th January 2026.
The January issue of The Railway Magazine usually focussed on Scotland. The January 1959 edition was no exception. [1] Included in the Magazine were articles by:
H.A. Vallance about The Strathspey Line.
J.W. Grant about Scottish 0-4-4 Tank Engines.
G.H. Robin about The Lanarkshire & Dunbartonshire Railway.
M.D. Grenville about Scottish Railways in 1859.
This article picks up on the article by H.A. Vallance, and begins a journey along the Strathspey line which ran down the valley of the River Spey from Keith towards Abernethy. Initially the line ran Southwest along Strathisla before crossing the watershed to Strathspey.
At much the same time (November 1860) as the Highland Railway promoted its scheme from Forrest to Grantown-on-Spey and on across the Grampians by the Druimuachdar Pass into Strathtay, the Great North of Scotland Railway subscribed £100,000 to a nominally independent scheme was promoted by the Keith & Dufftown Railway. In addition to its subscription, the Great North of Scotland Railway undertook to work the railway.
Vallance tells us that from Dufftown, “the Strathspey Railway was to run north-westwards for nearly four miles to Craigellachie, and thence in a south-westerly direction, through Strathspey, for some 28 miles to Abernethy. Connection with the Inverness & Perth Junction Railway (IPJR) was to be provided by a short branch south of Grantown. The railway was authorised on 17th May 1861 (five days before the IPJR), and the construction of the main line went ahead with all possible speed, but the works on the branch at Grantown were not undertaken.” [1: p4]
The railway between Dufftown and Abernethy opened on 1st July 1863. Two months later, on 9th September, the last section of the IPJR was opened. The lack of a physical link between the two lines meant that the Strathspey line suffered financially. Vallance says that powers for the link were obtained on 5th July 1865, “when the Strathspey Company was authorised to extend its railway from Abernethy to a junction with the line to Perth some two miles north of Boat of Garten. Earlier in the year, the IPJR and its associated companies had been amalgamated, and in June had assumed the title of the Highland Railway.” [1: p5]
The Strathspey trains were extended from Abernethy to Boat of Garten on 1st August 1866, but a dispute with the Highland Railway soon arose with the Highland Railway over costs associated with the junction signal box meant a temporary closure of the link until the dispute could be settled. The link reopened 1st June 1868 on the basis that a separate track would provided for the Strathspey, from the original junction as far as the Station at Boat of Gareth where a physical connection would occur.
The Strathspey line also formed a junction at Craigellachie with the Morayshire Railway which gave a cess Loosiemouth via Elgin. The short connection between the Morayshire Railway and the Strathspey line was opened on 1st July 1863. Vallance notes that once the working agreement with the Great North came into force, “the Morayshire Railway virtually lost its separate identity. The Great North thus secured complete control of a route from Keith to Elgin, but many years were to elapse before through trains between Aberdeen and Inverness ran via Craigellachie.” [1: p5]
An extract from a drawing in H.A. Vallance’s article which shows the length of the Strathspey line from Keith through Dufftown and Craigellachie to Boat of Garten. Great North of Scotland lines are shown solid black, those of the Highland Railway are shown dashed. [1: p4]
On 30th July 1866, “the Great North obtained powers to absorb the Keith & Dufftown and the Strathspey Railways, and the fusion became effective two days later. At the same time, the Morayshire Company was authorised to amalgamate with the Great North as soon as mutually acceptable terms had been agreed; but so involved were its finances that it was not possible to reach an agreement until 1880.” [1: p5]
Keith to Dufftown
This length of the line has become the preservation line, the Keith and Dufftown Railway. Their website is on this link. [41]
In the 21st century, “only a single platform remains in full-time use at Keith Railway Station, though the Dufftown branch platform (numbered 1) is available if required for turning back trains from the Aberdeen direction. … The bays have been filled in, having been abandoned and tracks lifted in the early 1970s after the closure of the Moray Coast Line (for which the station was a terminus). A signal box (which retains the name Keith Junction) remains at the eastern end to control a passing loop on the single track main line beyond the station, the now little-used goods yard (formerly used by trains accessing the nearby Chivas Regal whisky plant) and the stub of the Dufftown branch.” [6]
Further information about Keith Railway Station can be found here. [7]
Vallance describes a journey along the line in 1959. Starting from Keith Station (Junction), “the Craigellachie line ascends Strath Isla for some eight miles, past the single-platform station of Keith Town, Auchindachy, and Drummuir.” [1: p5]
The line continues from Keith Town Station, Southwest towards Auchindachy.
Just to the Southwest of Keith Town Station the line passed under two bridges. The first carries Bridge Street which became the A96. The second [11]Approximately the same area in the 21st century as seen on Railmaponline.com’s satellite imagery. [9]The bridge carrying the A96 over the line as seen from the next bridge down the line. [Google Streetview, October 2014]The bridge carrying Old Town over the line to the Southwest of the A96, seen from the South on Old Town. [Google Streetview, October 2014]
Strathisla Mill sat on the banks of the Isla.
Strathisla Mill on the banks of the River Isla was passed just before the line bridged the river. [12]The same location in the 21st century. The older mill buildings are now part of the Strathisla Distillery complex. [Google Maps, January 2026]The bridge over the River Isla to the South of the mill buildings. [12]The same bridge over the River Isla, in the 21st century. [Google Maps, January 2026]The next bridge along the line. [13]The same location in the 21st century. [Google Maps, January 2026]The same bridge seen from the Southeast. [Google Streetview, October 2014]The same bridge seen from the North. [Google Streetview, October 2014]
Further Southwest another overbridge links the Douglasbrae Lime Kilns to the road network. The main road here is now the B9014.
The next overbridge carried the access road to Douglasbrae Lime Kilns over the River and the railway. [13]The same location in the 21st century. I am not quite sure what I think about the two different names given to the site of what we’re on e the Douglasbrae Lime Kilns – Strathisla Pet Crematorium sounds so much better than Douglasbrae Knackery! [Google Maps, January 2026]Looking back to the Northeast from the bridge carrying the access road. [Google Streetview, October 2014]The bridge carrying the access road, seen from the Southwest on the B9104. [Google Streetview, June 2023]The view Southwest along the line from the access road bridge. [Google Streetview, October 2014]
The line continues Southwest towards Bridge of Maisley.
At Bridge of Maisley the line passed under what is now the B9104, close to a junction with a minor road which first served Maisley Lime Works, before running West on the North side of the River Isla. The railway then bridges the river, crossing from the North bank to the South bank. [13]The same location in the 21st century, the three bridges are still evident. [Google Maps, January, 2026.The bridge which carries the B9014 across the railway, seen from the road to the Northeast of the line. [Google Streetview, June 2023]The view back to the Northeast along the railway. [Google Streetview, June 2023]The view ahead to the Southwest along the line. [Google Streetview, June 2023]The railway bridge over the Isla is hidden by vegetation from the B9014. This is the view from the North on the minor road mentioned above. [Google Streetview, March 2022]The railway remains on the South side of the river for a very short distance before crossing back to the other bank, travelling in a southerly direction. [13]The same location in the 21st century. [Google Maps, January 2026]
A short distance to the South, the line approaches Auchindachy Station.
Auchindachy Station as shown on the 1868 25″ Ordnance Survey, published in 1869. [15]The location of Auchindachy Station as shown on the ESRI satellite imagery provided by the National Library of Scotland (NLS). [16]
Auchindachy Railway Station had two platforms set on a gentle curve. Photographs of the station can be found here. [17]
Turning to look to the Southwest. In 2022, the view along the line was completely obscure by tree growth. The photograph below was taken earlier in the 21st century.
Looking Southwest along the line from the bridge carrying the B9014 over the line. [Google Streetview, August 2011]A short distance further Southwest the railway bridges the River Isla again. [20]The same location in the 21st century. [Google Streetview, January 2026]
In short shift trains heading South entered Drummuir Railway Station. …
Drummuir Railway Station at around the turn of the 20th century. [23]The same location in the 21st century. [Google Streetview, January 2026]
Drummuir station was first opened in 1862 by the Keith and Dufftown Railway. The station was closed to passengers by British Railways in May 1968, but the line remained open for freight and special excursions for some time. It was reopened as a preserved station in 2003 by the Keith and Dufftown Railway Association.
Further pictures of Drummuir Railway Station can be found here. [26]
Immediately Southwest of the site of Drummuir Station the line passes under a road bridge and crosses the Burn of Drumhendry. This is the location at the turn of the 20th century. [27]The same location in the 21st century. [Google Maps, January 2026]Looking back to the Northeast through Drummuir Railway Station. [Google Streetview, September 2011]Looking Southwest from the road bridge, the view ahead is obstructed by foliage but it is possible to seethe Burn of Drumhendry after it has passed under the railway. [Google Streetview, September 2011]The bridge over the Burn of Drumhendry seen from a point to the Northwest of the bridge over the railway. [Google Streetview, September 2011]The next structure along the line, again at the turn of the 20th century. [27]The same location in the 21st century. The railway can just be made out but the route of the road is less easy to pick out so its centre-line is highlighted by the blue line. [Google Maps, January 2026]At the same location, the bridge parapet and the view back along the line towards Drummuir. [Google Streetview, May 2022]At the same location, the other bridge parapet and the view ahead along the line. [Google Streetview, May 2022]
“About a mile beyond Drummuir is Loch Park, a narrow sheet of water lying in a wooded gorge. The railway skirts its southern shore on a narrow ledge at the foot of the precipitous hillside.” [1: p5]
Just before passing the dam at the East end of the Loch the line passes under the road which runs across the West end of Loch Park.
Just before the line passes Loch Park it is bridged once again. [27]The same structure in the 21st century. [Google Maps, January 2026]The tidy looking structure seen from the road to the East. [Google Streetview, May 2022]Looking East back along the line from the bridge. [Google Streetview, May 2022]Looking West along the line from the bridge towards Loch Park. Note the well-kept permanent way but between the railway and the road. [Google Streetview, May 2022]A view from the West looking past the platelayer’s hut towards the road bridge. [Google Streetview, May 2022]This modern satellite image shows the railway running alongside Loch Park. Its route appears as a dark line in the trees immediately adjacent to the Southeast shore of the Loch. [Google Maps, January 2026]A very similar area as it appears on the 25″ 2nd Edition OS Map from the turn of the 20th century. [28]
“From the summit at the western end of Loch Park, the line descends at 1 in 60 into the valley of the River Fiddich, which is crossed on a masonry bridge shortly before Dufftown is reached. ” [1: p5]
The next structure to the Southwest appears on the map extract below. …..
The line passes under what will be the B9014. [29]The same location with the B9104 crossing the line in the 21st century. [Google Maps, January 2026]The bridge seen from the Northeast. [Google Streetview, May 2022]Looking Northeast along the line from the B9014 bridge. [Google Streetview, May 2022]Looking Southwest from the same bridge. [Google Streetview, May 2022]
The next map extract shows the junction close to the Parkmore Distillery, where a branch serving Parkmore Lime Works and Glendullan and Mortlach distilleries left the main line. …
The line to Dufftown continued to the West on the South side of the Parkmore Distillery, while the short branch ran south to serve local industry. At the turn of the 20th century, the Parkmore Limekilns had their own short siding. [30]Approximately the same area in the 21st century. [Google Maps, January 2026]The railway bridge over the B9104, seen from the North. [Google Streetview, May 2022]A view from the South on the B9104. The railway bridge carrying the line over the B9104 is on the left. The access road from rail level down to the road network is on the right. The branch line ran through the area which, in the 21st century, is wooded at the right side of the image. [Google Streetview, March 2022]Glendullan Distillery had its own short siding with the line running towards Mortlach Distillery. [31]Glendullan Distillery is owned by Diageo in the 21st century. The alignment of the old railway siding and branch are shown by the orange lines superimposed on the Google Maps satellite imagery. [9]The line curves round the East side of Dufftown. [32]The route of the line as it appears on the railmaponline.com satellite imagery. [9]The bridge carrying the A941 over the route of the old branch to Mortlach Distillery and over Dullan Water – the Bridge of Crachie. [Google Streetview, June 2023]A closer view of the bridge over rail and river. [32]
The branch only ran a short distance beyond the Bridge of Crachie to serve Mortlach Distillery
The short branch terminated at Mortlach Distillery. [33]A similar area in the 21st century with the railway route superimposed again. [9]
Returning to the main line we see it bridging the River Fiddich. …
The main line bridges the River Fiddich and begins to curve round to the Northwest. [34]The route of the line is again superimposed on the modern satellite imagery. [9]The view looking East from Castle Road (B975) towards the bridge over the River Fiddich. [Google Streetview, September 2025]As the line approached Dufftown Station it passed Glenfiddich Distillery. [35]The Glenfiddich Distillery in the 21st century with the original railways shown as orange lines superimposed on the satellite imagery from railmaponline.com. [9]Looking North alongside Glenfiddich Distillery from Castle Road (B975), the line can be seen in a shallow cutting on its approach to Dufftown Railway Station. A DMU can be made out in the middle left of the photograph. [Google Streetview, September 2025]
A remarkable number of distillery buildings survive in the 21st century in the immediate vicinity of Dufftown. The most famous of these is the Glenfiddich Distillery which continues to produce a significant volume of Whisky. [37]
Parkmore Distillery buildings are no longer used for producing Whisky. They were operational from 1894 but mostly silent from 1931, closing officially in 1988; its well-preserved buildings are now used by Edrington Group for whisky warehousing, with its rare existing whisky valued by collectors and its grounds sometimes hosting whisky experiences. [38]
Glendullan Distillery is a significant but often behind-the-scenes producer of single malt Scotch whisky, primarily for Diageo’s blends like Johnnie Walker, though it also contributes to The Singleton range. Founded in 1897, it operates a larger, modern facility built next to the original, which now serves as storage and workshops after its closure in 1985. [39]
And Mortlach also remains active. It was founded in 1823 and is now owned by Diageo. Its Whisky is a key component in several Johnnie Walker bottlings,and Diageo also markets four Mortlach single malts. [40]
Balvenie Distillery, owned by William Grant & Sons Ltd., sits to the Northeast of the Glenfiddich Distillery on the East side of Dufftown Station. Grant left his employment at Mortlach Distillery to set up his own company in 1886 when the foundations of the new distillery were laid. The distillery remains active. “David Stewart MBE, Balvenie’s Malt Master, is one of the industry’s most experienced experts and began working with William Grant & Sons in 1962. He was the first to create the process that would later be known as wood finishing, whereby whiskies are matured in one type of cask, such as ex-Bourbon barrels, then transferred into a second cask type (such as ex Sherry, Port or Rum), resulting in a greater depth and complexity of the final flavour of the whisky. He received his MBE from Queen Elizabeth II on the 5th of July, 2016, for his services to the Scotch Whisky Industry.” [42]
Kininvie Distillery is a Speyside single malt Scotch whisky distillery in Dufftown, owned by William Grant & Sons, built in 1990 primarily to supply their popular blends like Grant’s and Monkey Shoulder, though it now releases its own single malts, often using shared facilities (mash/fermentation) with its sister distillery, The Balvenie. [43]
Dufftoen Railway Station at the turn of the 20th century. [36]Dufftown Railway Station in the 21st century. It is now the terminus of the preservation line. [9]
Dufftown Railway Station “first opened on 21st February 1862 by the Keith and Dufftown Railway. There was a goods yard to the southwest, which is used for stock storage nowadays. The station closed on 6th May 1968 to passengers. The line for westbound trains was lifted shortly after. Goods traffic ceased around 1991. In 2003, the Keith and Dufftown Association reopened the station and the line as a preserved railway and set up their headquarters at the station.” [44]
Some images of Dufftown Station can be found here [45] and here. [47]
We complete this leg of the journey standing on the platform of the preservation railway at Dufftown Railway Station. The next leg of the journey will take us over the watershed into Strathspey.
References
The Railway Magazine Volume 105 No. 693, Tothill Press, London, January 1959.
H.A. Vallance; The Strathspey Line; in The Railway Magazine Volume 105 No. 693, Tothill Press, London, January 1959, p3-9.
A. Uganda to begin construction of its Standard Gauge railway network in April 2026.
In August 2025, Rogers Atukunda wrote of the construction of Uganda’s Standard Gauge railway network commencing in April 2026. His article can be found here. [1]
B. Uganda is to use electric traction for the Kampala to Malaba Standard Gauge Railway Line.
Uganda has recently confirmed that its Standard Gauge line from Malaba/Tororo to Kampala will operate with electric traction to European standards rather than diesel traction to Chinese standards.
The planned regional standard-gauge network includes two lines separating inside the Eastern border of Uganda at Tororo. These then diverge further in the West (at Bihanga) and in the North (at Gulu). The total route length will be 1,724 kilometres subject to change due to design modifications and additional sidings and/or branch lines. [3]
Kabona Esiara of ‘The East African‘ explained in November 2025 that this required detailed negotiations between the railway authorities in Kenya and Uganda. These negotiations commenced in mid-November 2025. [2]
Uganda and Kenya were working on a raft of technical and policy measures to facilitate a seamless SGR system between the two countries as they work in the next few years on parallel finishing of their SGR lines.
Kenya says it will start constructing the Naivasha-Kisumu-Malaba line early in 2026 while construction of Uganda’s Kampala-Malaba should commence in the second quarter of 2026.
C. A series of mis-steps in the development of railways in Kenya and Uganda.
Mary Serumaga, in 2018, said that “the building of standard gauge (SGR) railways in both Uganda and Kenya and the predictable sagas that have ensued are reminiscent of the controversies surrounding the building of the Uganda and Rhodesian Railways in the late 19th and early 20th centuries. Both present a framework within which it is possible finally to understand the limited achievements in development in all sectors (and frankly, underdevelopment in many) and regression in Uganda’s primary education, copper mining and agricultural sectors. Both SGR projects are tainted with suspicion of shady procurement which, if taken together with the track records of the implementers, points to corruption. It would be irresponsible to say otherwise.” [4]
“The route, design, level of service and all other decisions of the Uganda Railway of 1990 were dictated by potential profits for foreign investors (both public and private) and their local agents, and not by notions of public service and the common good of those who would bear the ultimate cost. Return on investment is not a bad thing but the Imperial government also claimed to be acting in the interests of the indigenous populations. … The difference now is that there is no pretence about whether the railways are serving the interests of the general population. The different financial implications presented by the procurement process itself, the selection of routes and the relative cost of engineering in the different terrains, plus the cost of compensating displaced landowners, provide scope for long-running, energy-depleting corruption scandals. From the outset, there has been a lack of confidence that procurement processes for the necessary services would prioritise the interests of the public over the interests of the contractor and would actively exclude the personal interests of the public servants commissioning the works. This is what is triggering the anxiety surrounding the SGRs.” [4]
“Moreover, the choice over whether to upgrade the old railway or to start afresh was not adequately debated publicly. Ditto the options on financing. For the Kenyan SGR, the most costly of the potential routes were reportedly selectively chosen. Several cheaper routes on land allegedly already in possession of the government are said to have been rejected. … There are also questions surrounding passenger service. Do the railways only serve trade or are passengers entitled to this alternative to dangerous road transport?” [4]
“Uganda owns one half of the old East African Railway. Together with the Kenyan leg, it was put under a 25-year management contract. The new owners renamed their new toy Rift Valley Railways (RVR). In 2017, after only twelve years, the governments cancelled the contracts in a move the RVR called an illegal takeover. On the Ugandan end, there were allegations of asset-stripping by previous European concessionaires as well as unpaid concession fees and massive salary arrears caused by RVR. If RVR were to successfully sue the government for cancellation of the contract, their compensation would be the first budget overrun. … The government of Uganda then signed a Memorandum of Understanding in 2014 with the China Civil Engineering Construction Corporation (CCECC), which had submitted a study. It abandoned those negotiations in favour of a second Chinese entity, the China Harbour Engineering Company. In justifying its action, the government questioned the quality of the CCECC’s study, which it said was cut and pasted from pre-existing feasibility studies (something that could have been avoided by following proper procurement procedures). CCECC insists it was a pre-feasibility study requiring less detail than a full-blown feasibility study. Whatever the case, if CCECC had followed through with its suit for US$8 million in compensation, which would have been another massive blow to the budget at inception. Whatever compensation they have agreed to has not been made public but as matters stand, the budget for the eastern leg of the SGR has gone up from CCECC’s proposed US$4.2 billion to CHEC’s US$6.7 billion.” [4]
The remainder of Mary Serumaga’s article which looks back at colonial construction work and draws parallels with 21st century procurement and construction in East Africa can be found here. [4]
D. President Yoweri Museveni’s State of the Nation Address in June 2025.
In June 2025, President Museveni highlighted significant rail developments, advancing the Standard Gauge Railway (SGR) project to link with Kenya and the region, aiming to cut costs and boost trade, while discussing financing for the $2.8 billion Kampala-Malaba SGR and emphasizing participation in the development of the new rail infrastructure. In essence, the 2025 address signalled a push for comprehensive road and railway modernization and expansion, leveraging oil revenues and debt financing to build a robust network for economic transformation. [5] Museveni said, “we are soon finalizing the construction of the 1,443km East African Crude Oil Pipeline (EACOP) from Buliisa to Tanga in Tanzania. The construction of the SGR, which I launched last year, is soon starting,” [5] and “the NRM Government has prioritized infrastructure development especially roads, railways and electricity.” [5] In addition, the government will be focusing on revitalizing metre-gauge lines (like Tororo-Gulu, Kampala-Malaba).
E. Kenya – Additional Madaraka Express Trains for the Christmas period.
Kenya Railways announces additional Madaraka Express trains from 8th December 2025, to 5th January 2026, to meet increased festive season demand. The Nairobi-Mombasa train departs Nairobi at 9:40 AM, arriving in Mombasa at 3:35 PM, while the Mombasa-Nairobi train leaves at 4:30 PM, reaching Nairobi at 10:55 pm. [6]
“The railway operator said the move comes in response to increased demand during the holiday period, when thousands of Kenyans and tourists journey along the scenic Nairobi-Mombasa route. … ‘We are committed to providing a safe and convenient travel experience, and the additional services will help ease congestion while maintaining punctuality’ reads the notice dated 2nd December.” [7]

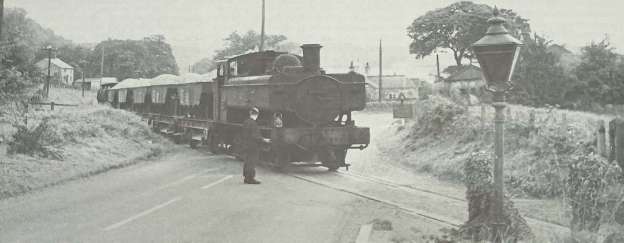
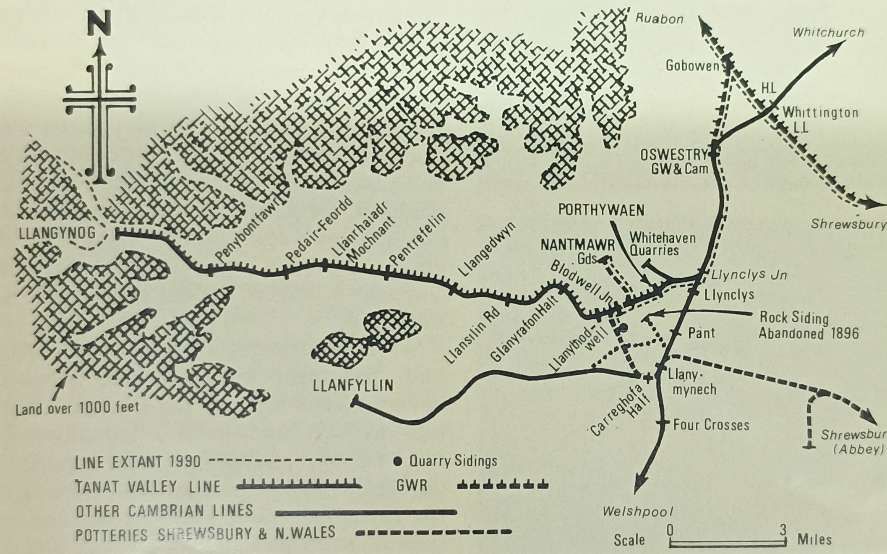
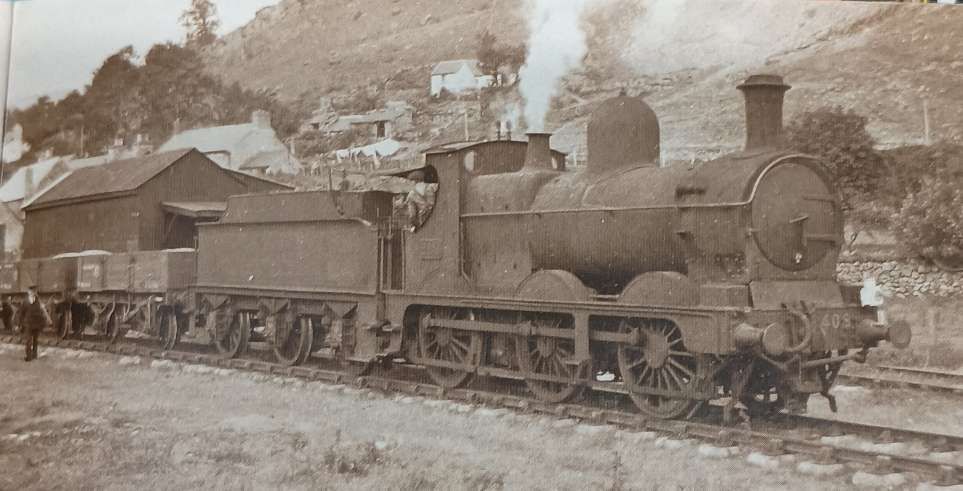
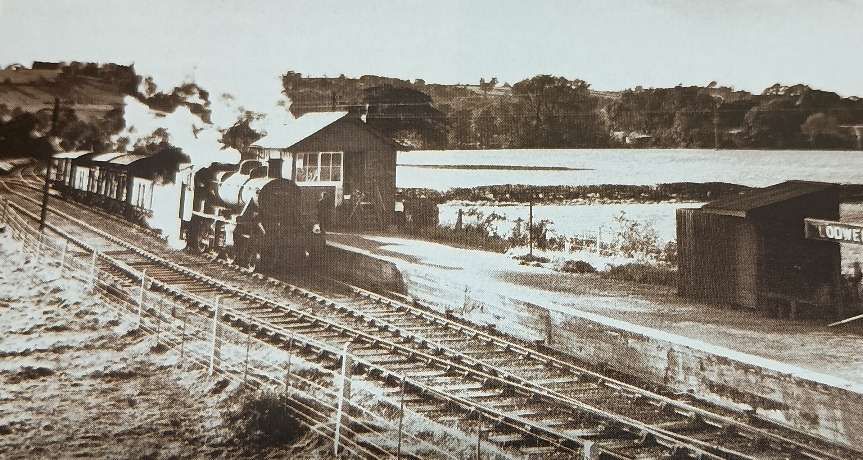
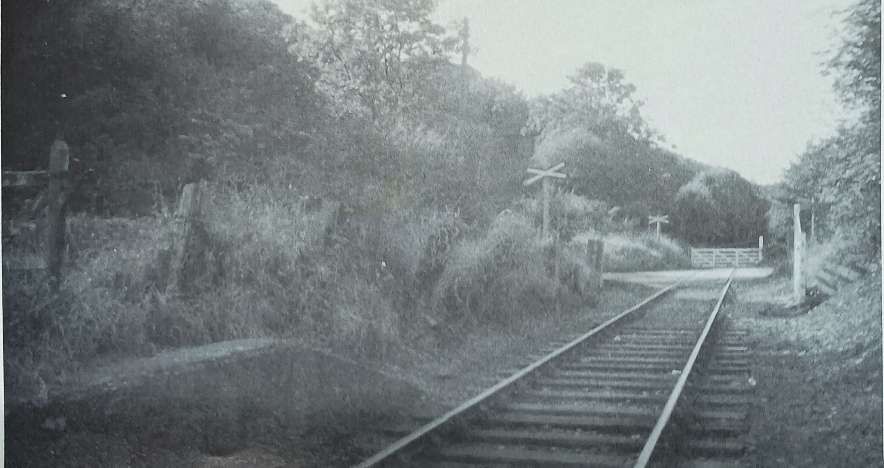
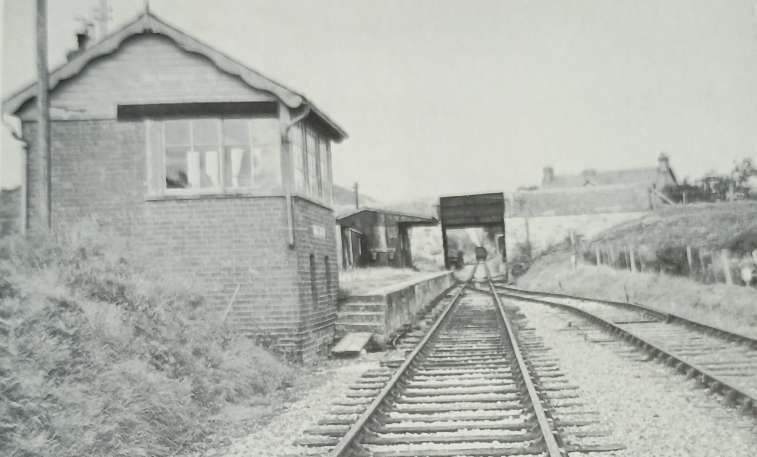
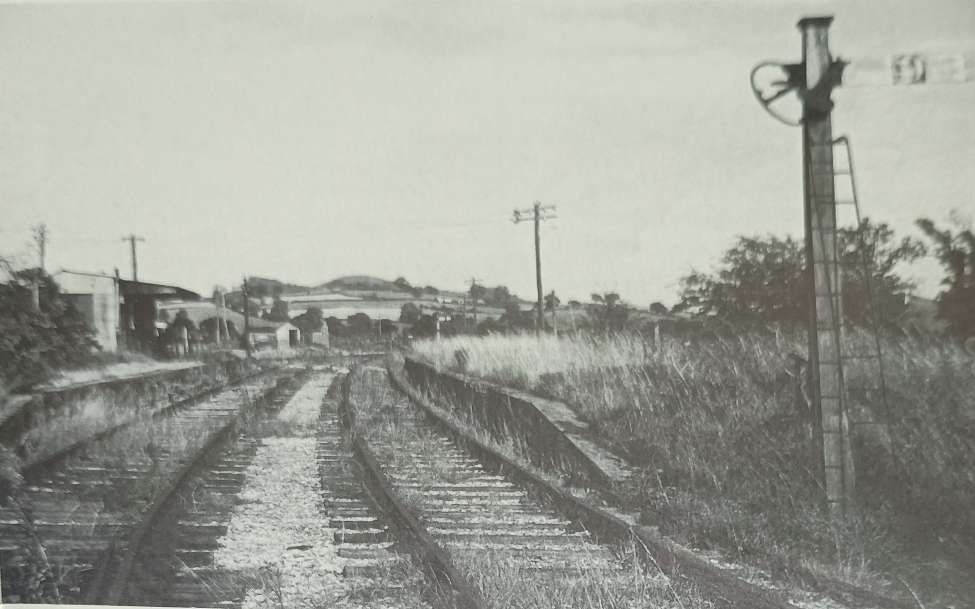
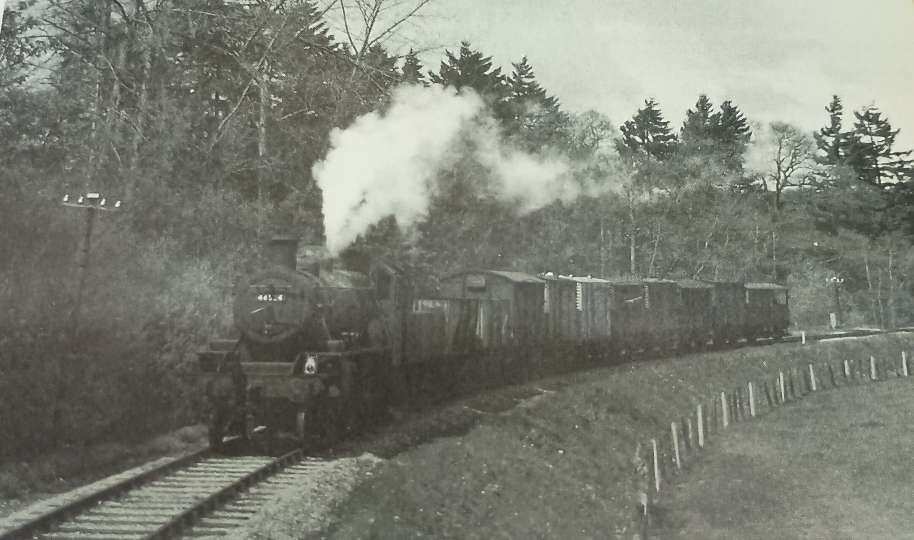
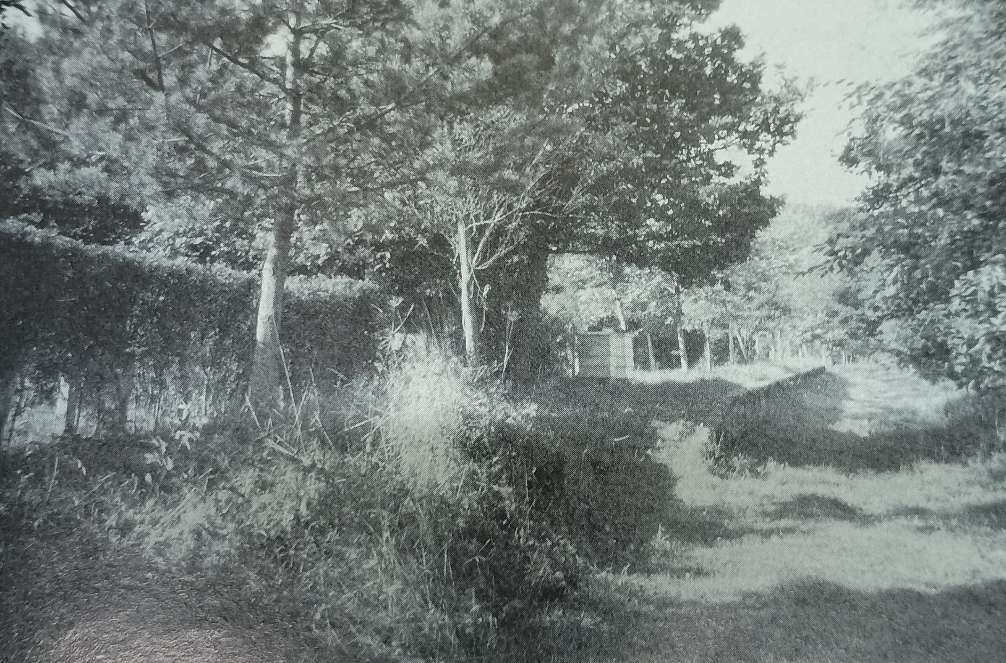
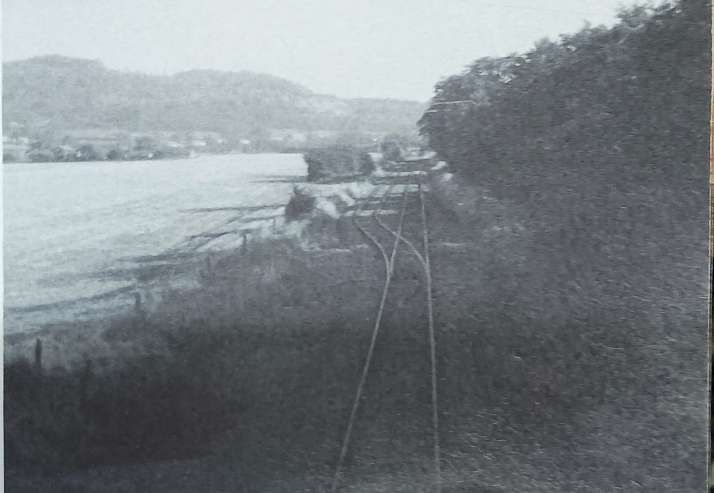
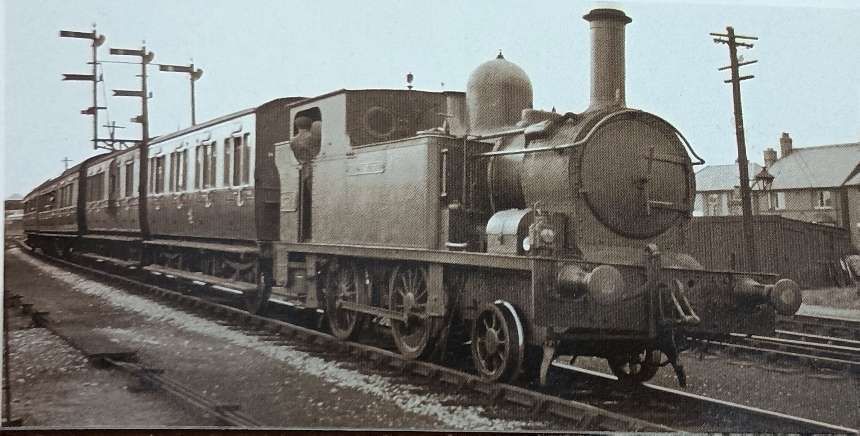
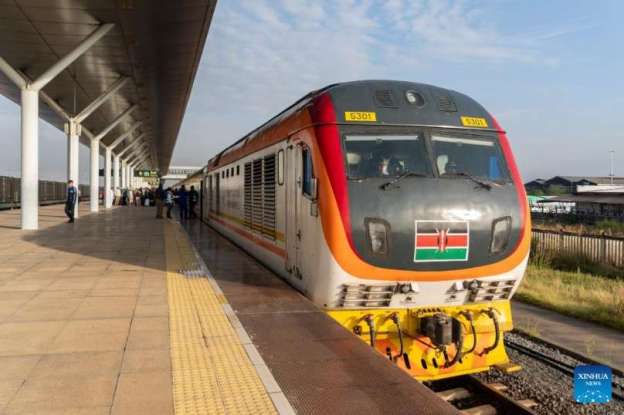
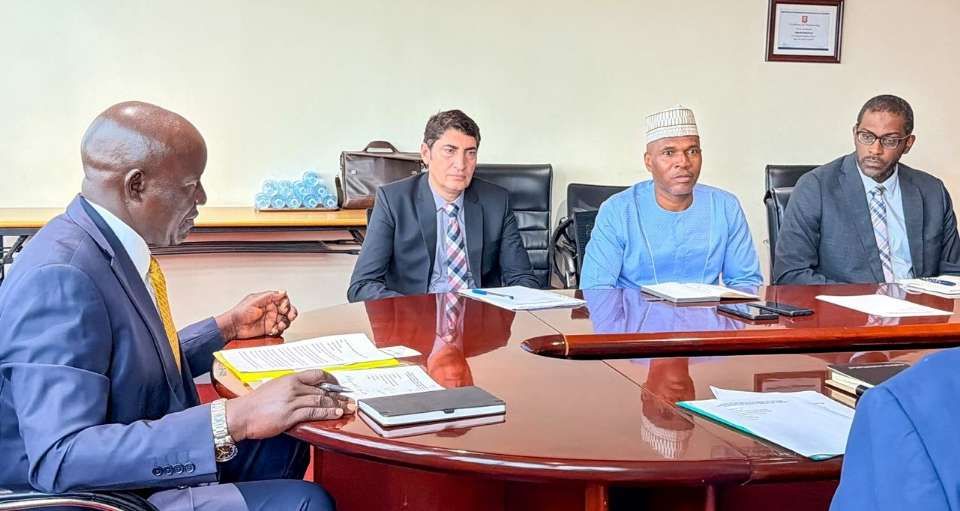

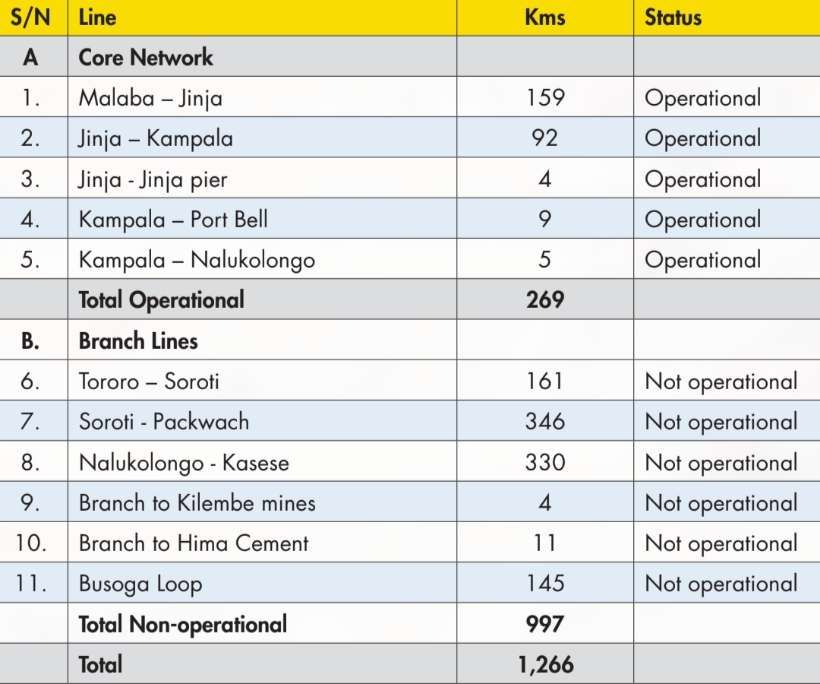
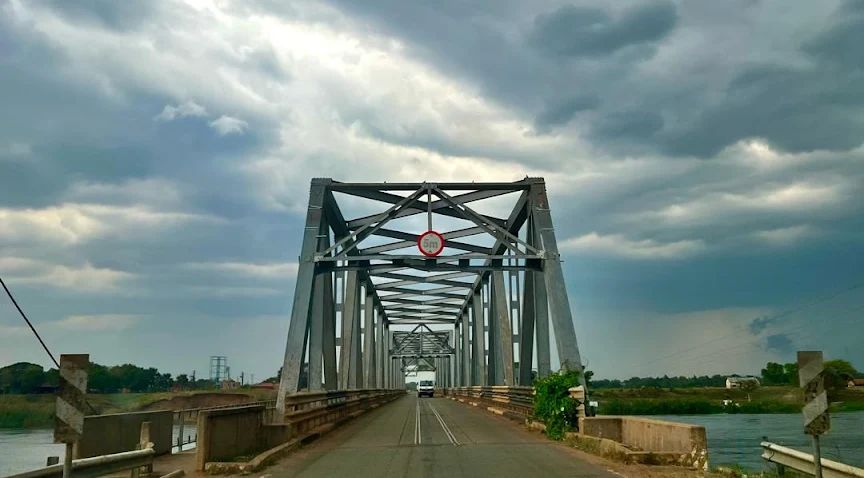

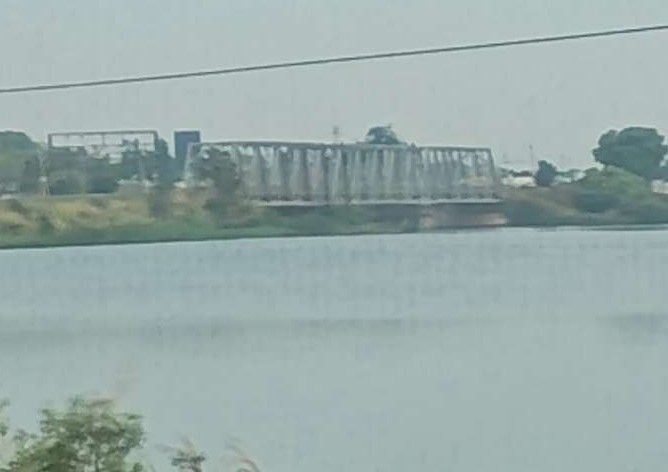
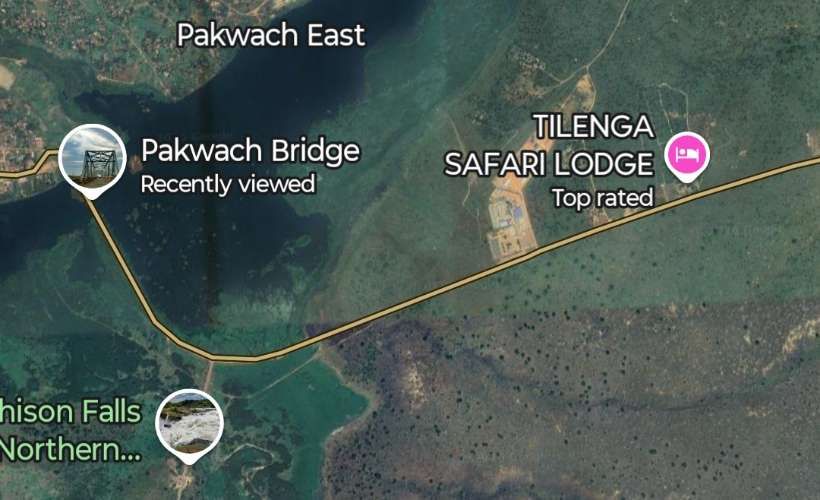
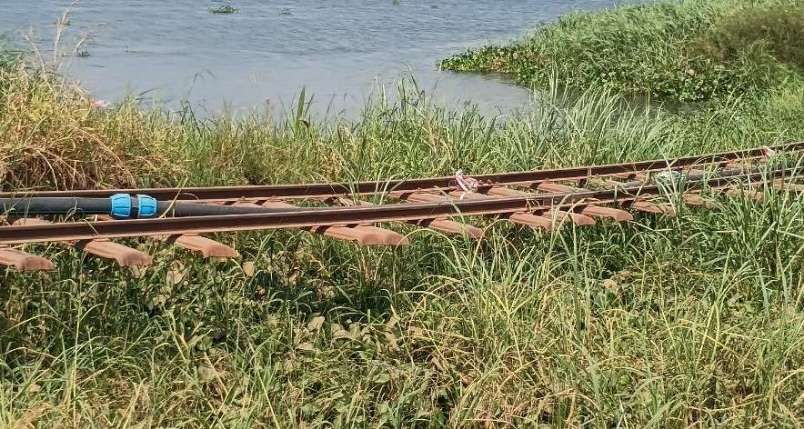

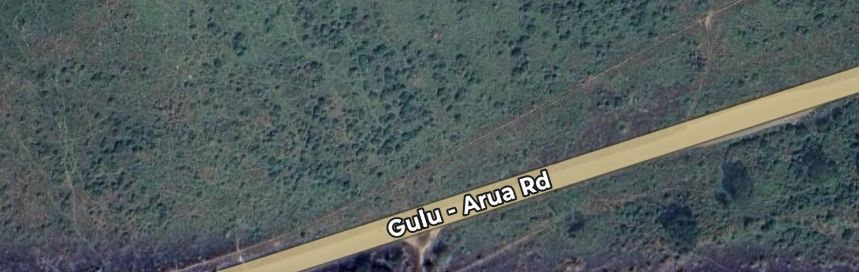
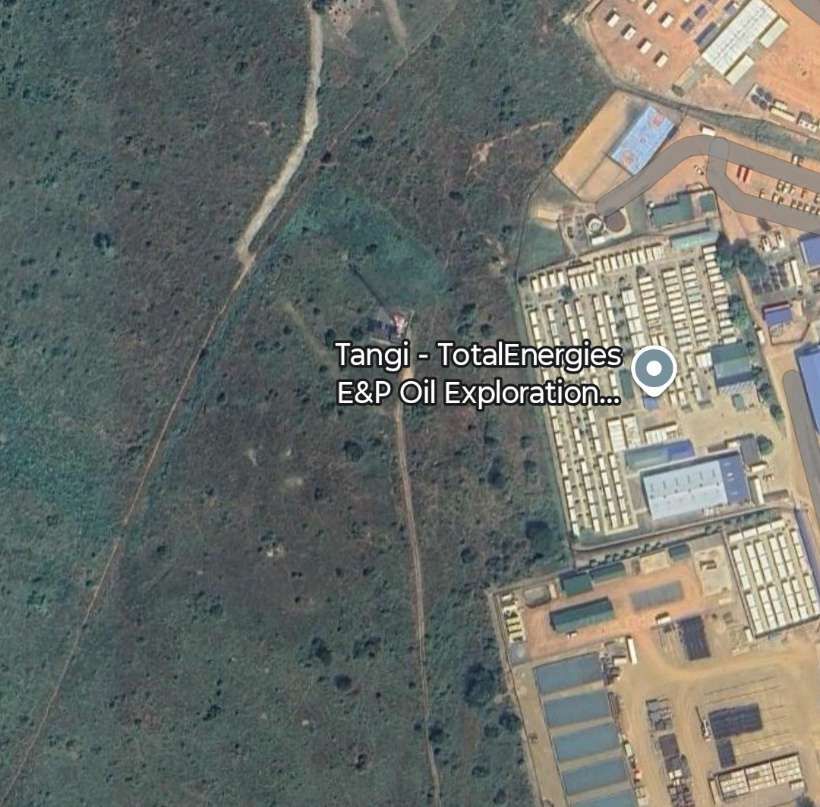
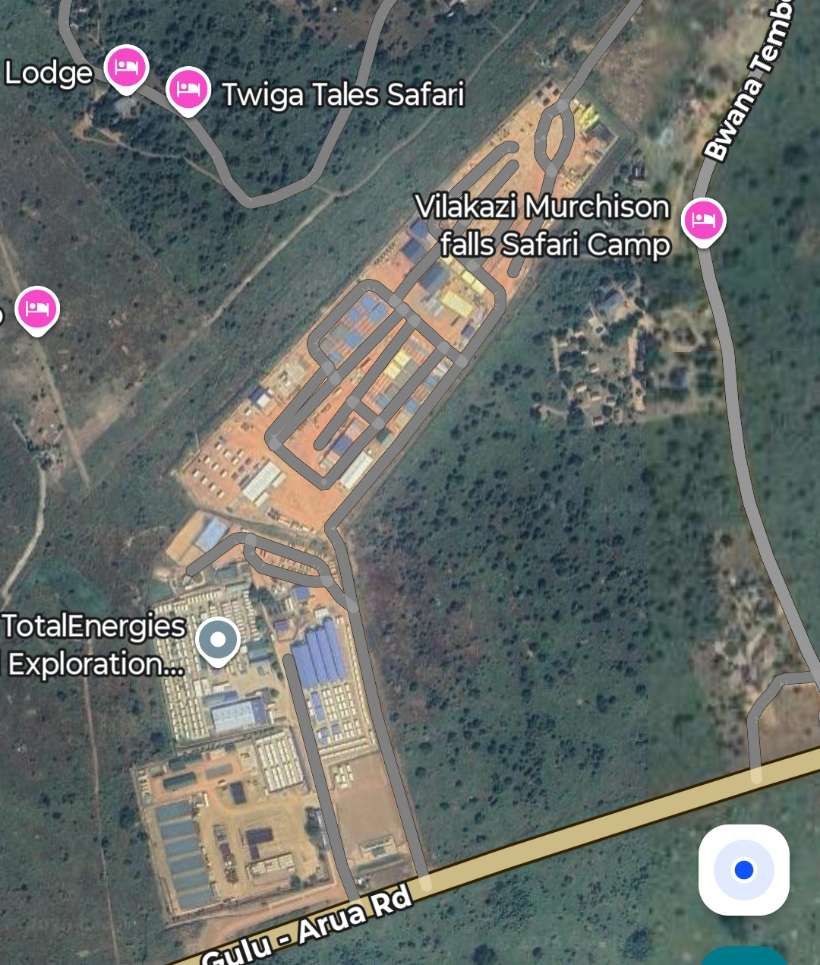
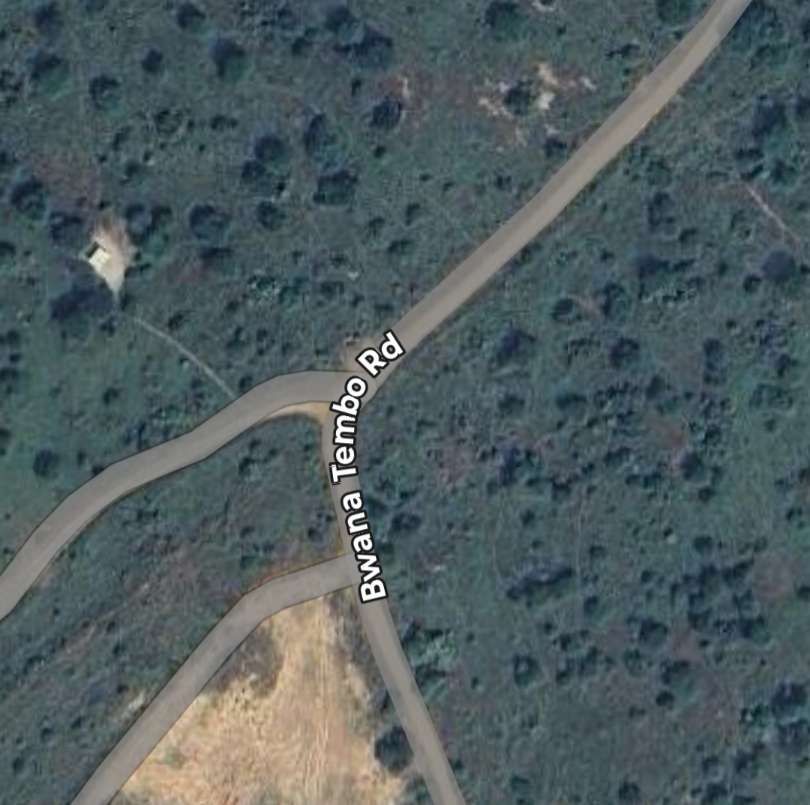
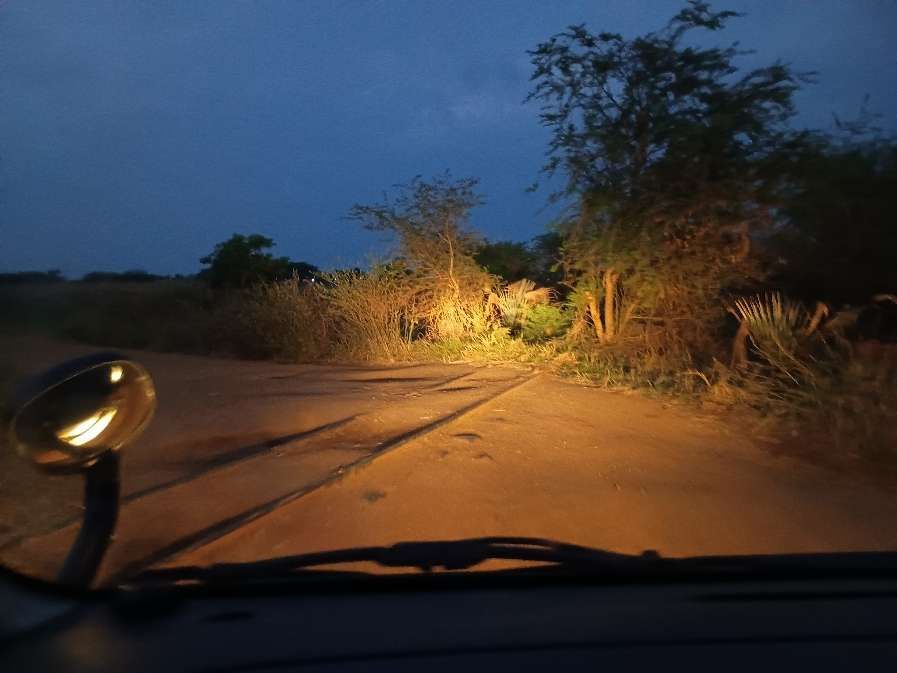
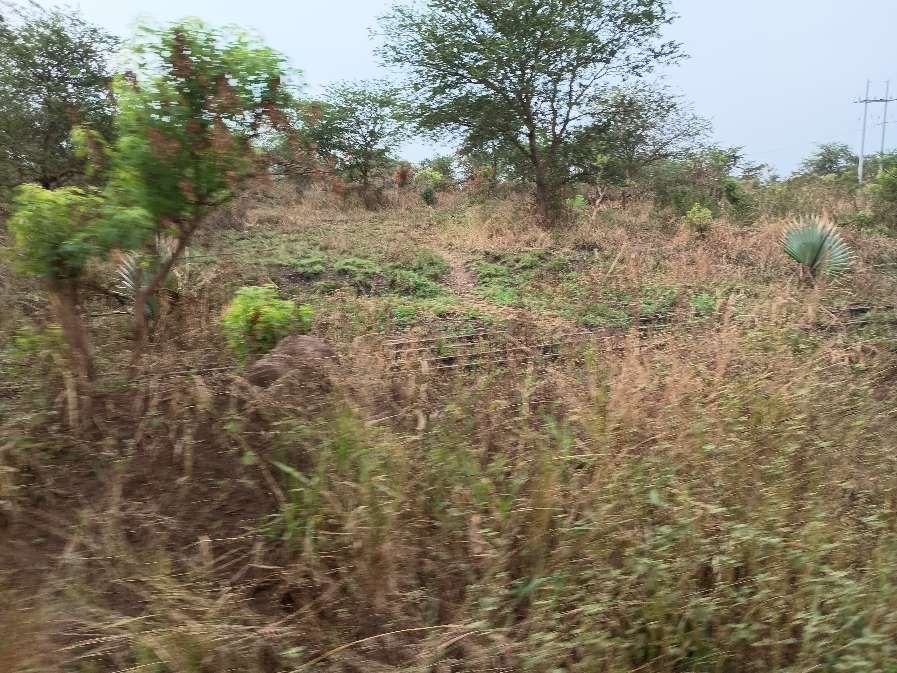
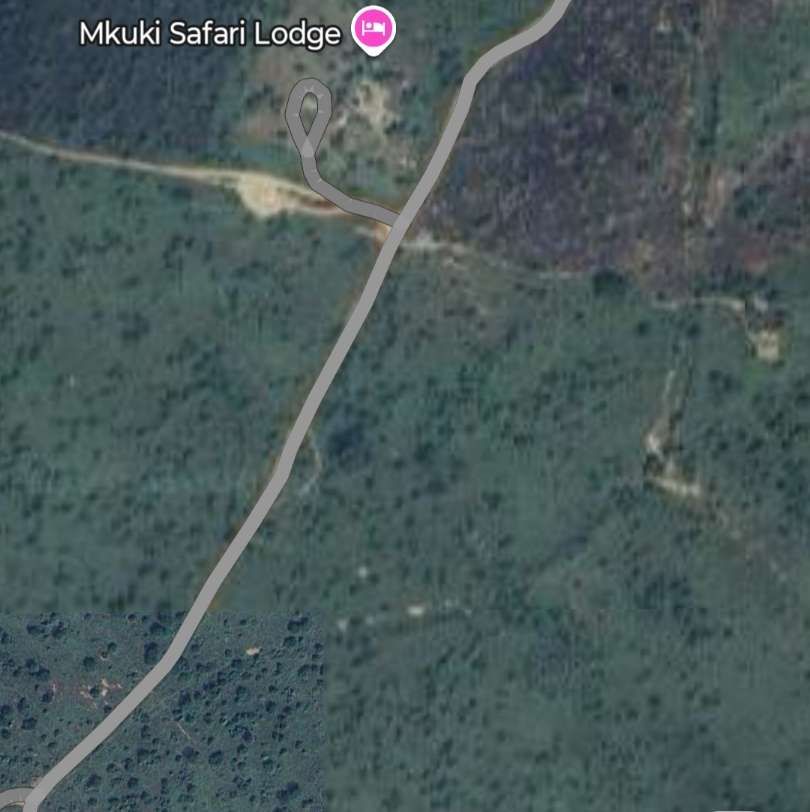
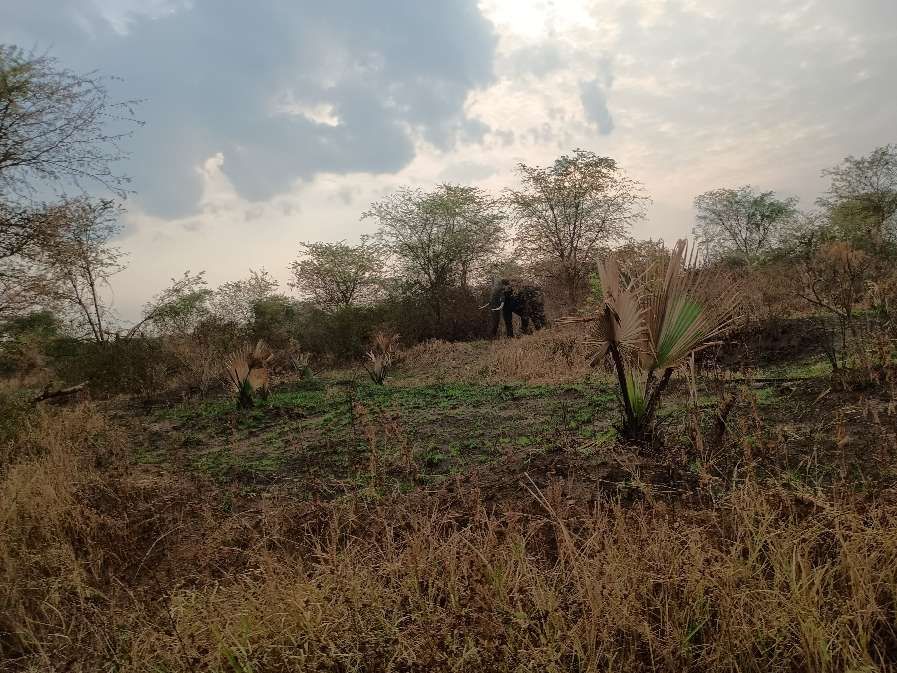
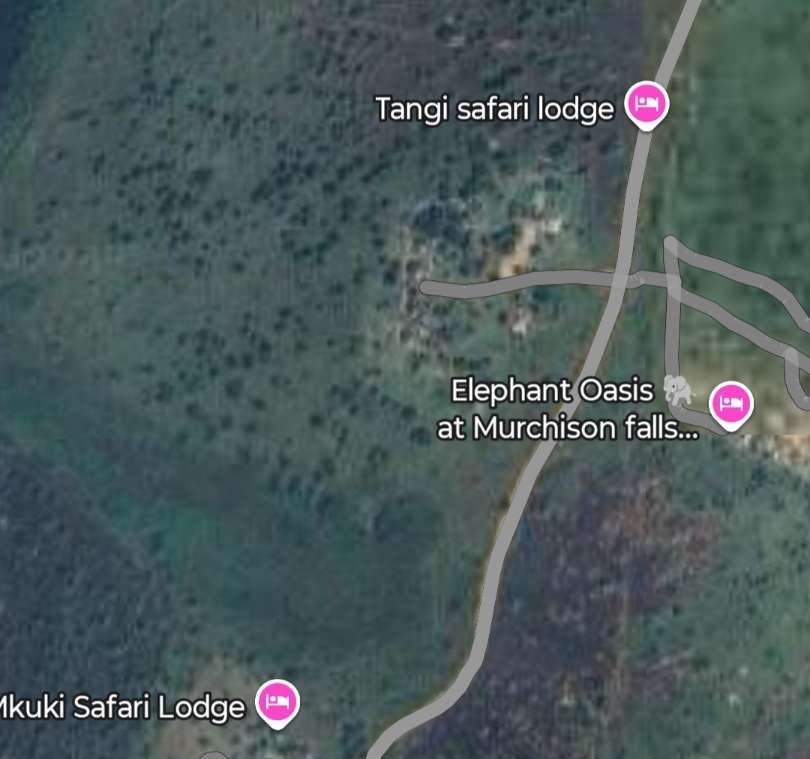
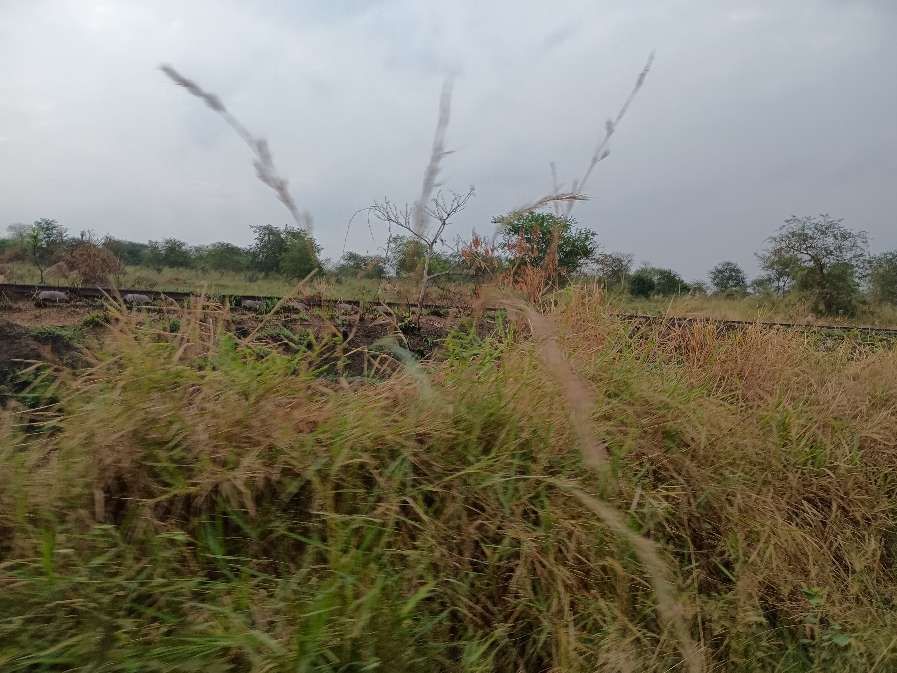
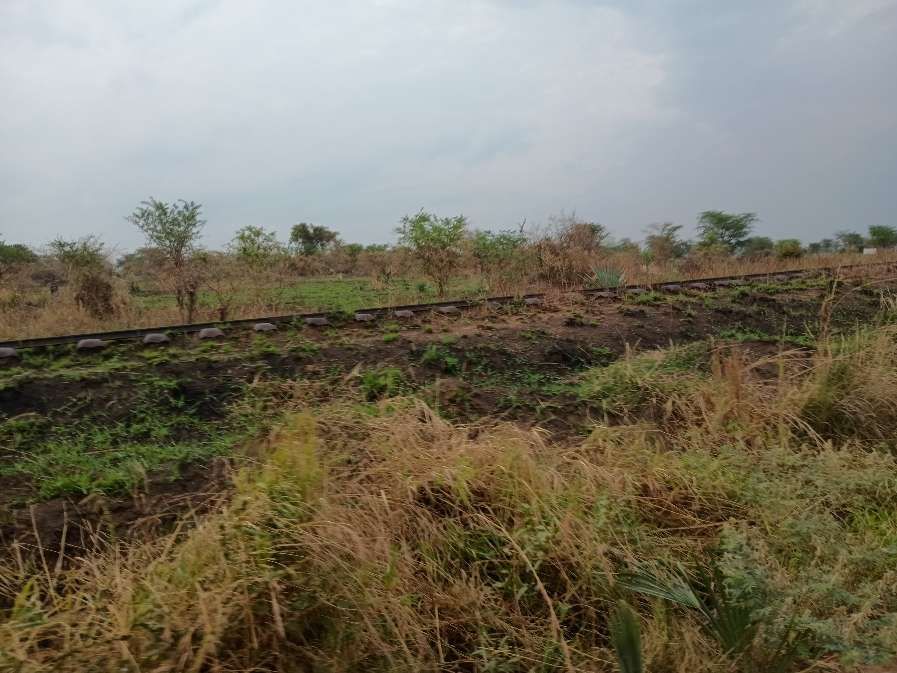
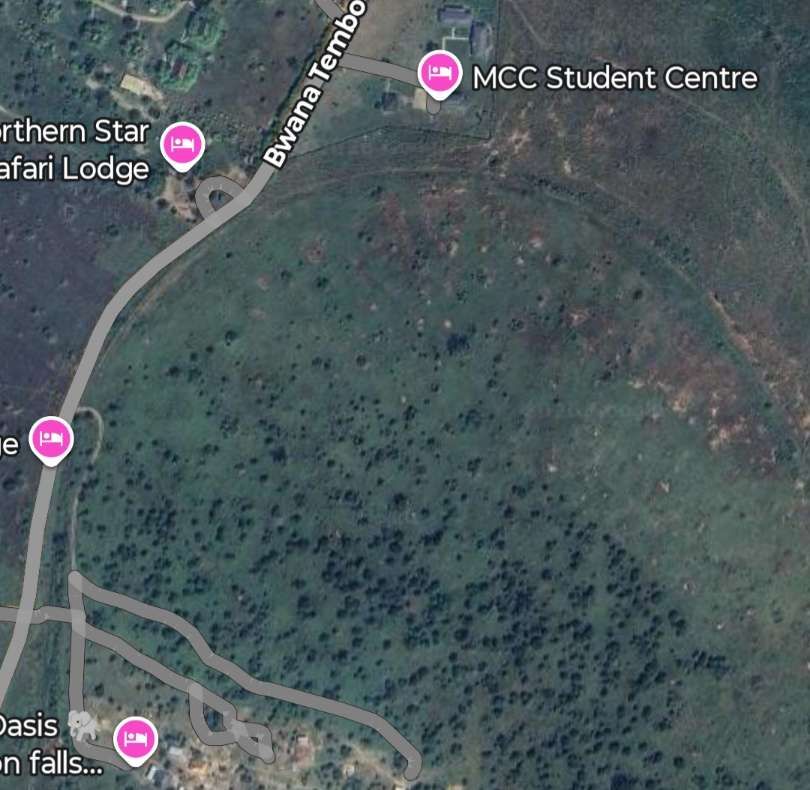
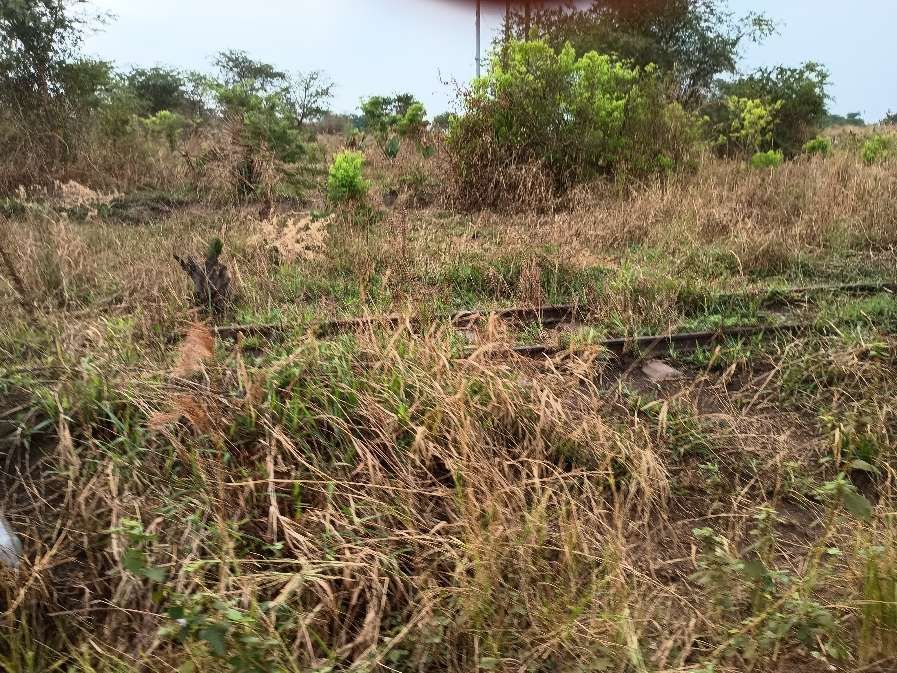
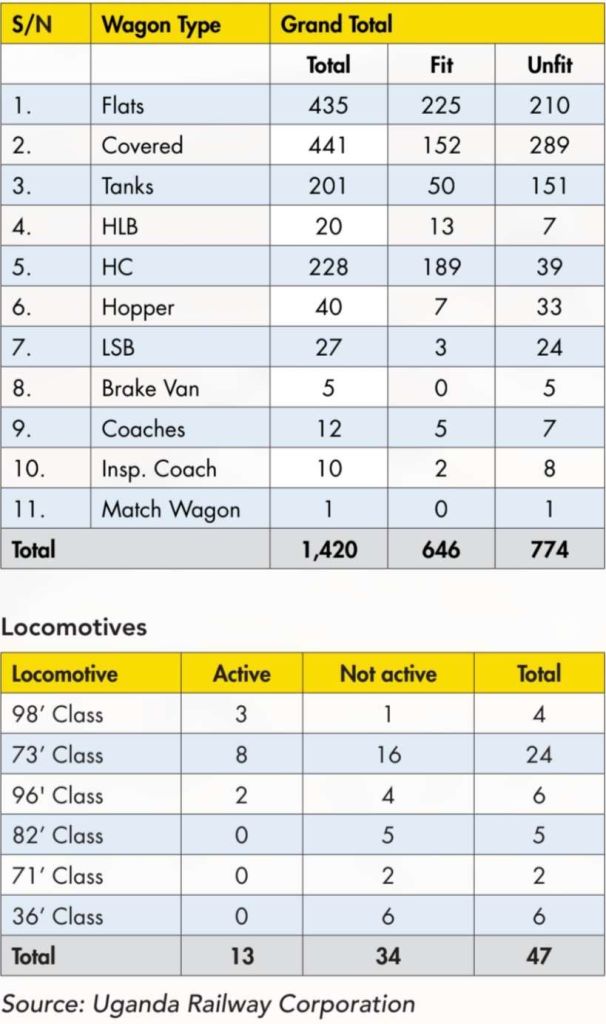
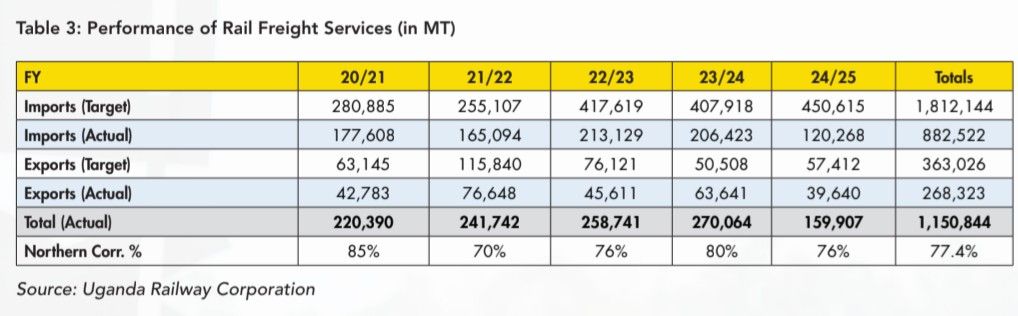
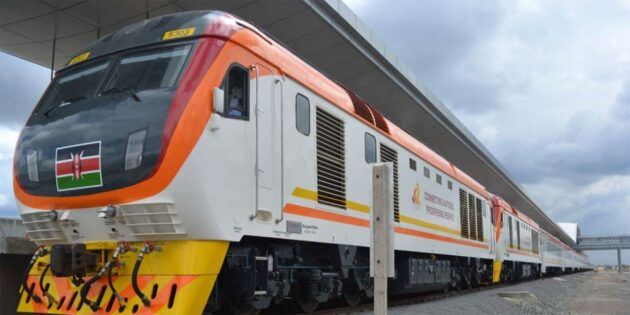
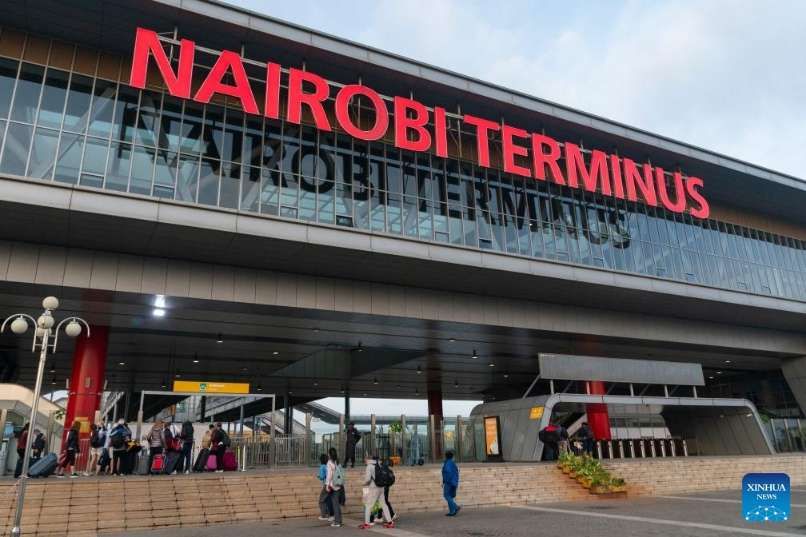
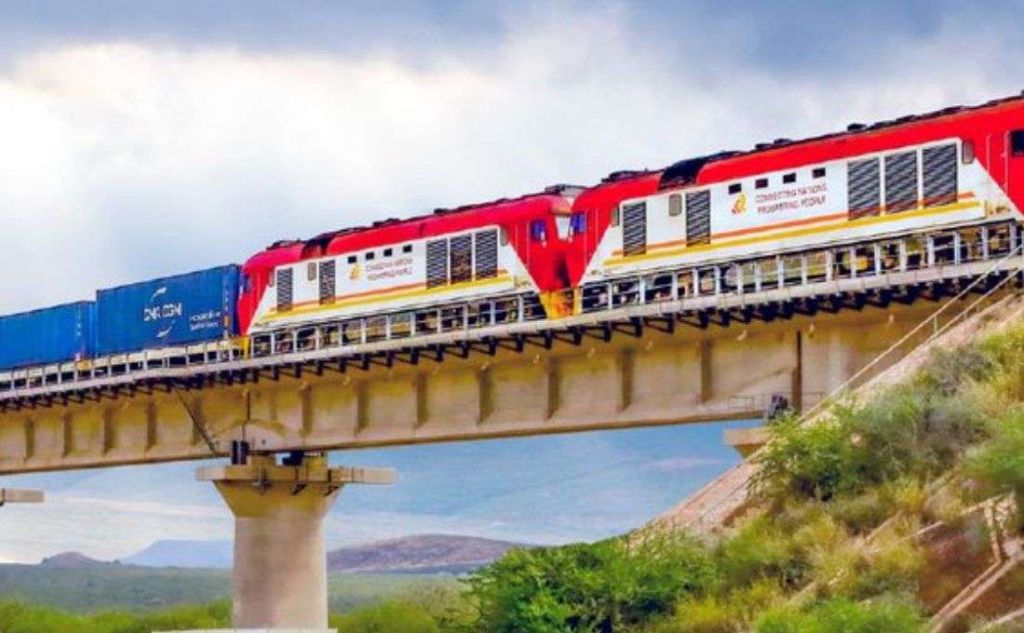
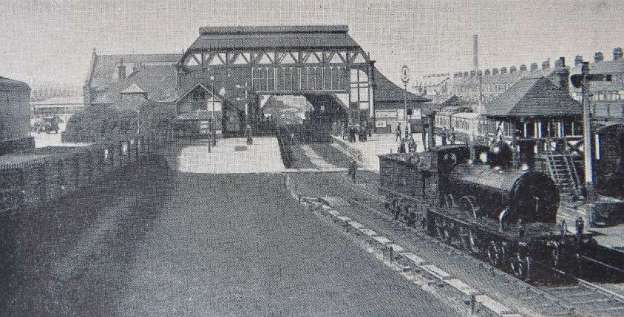
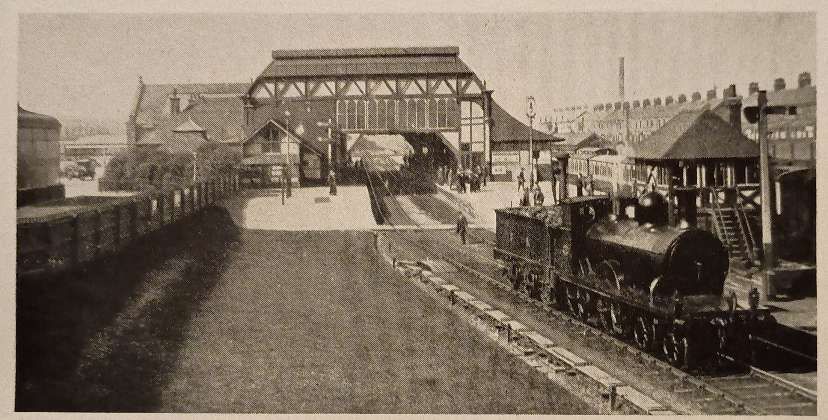
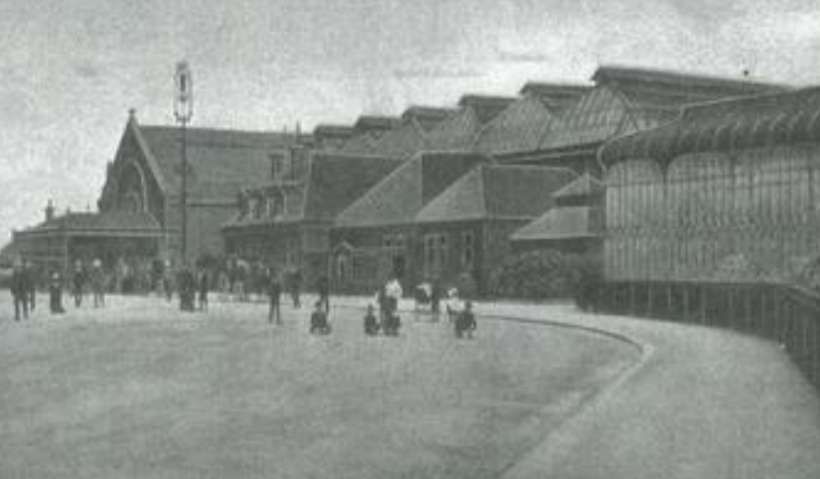
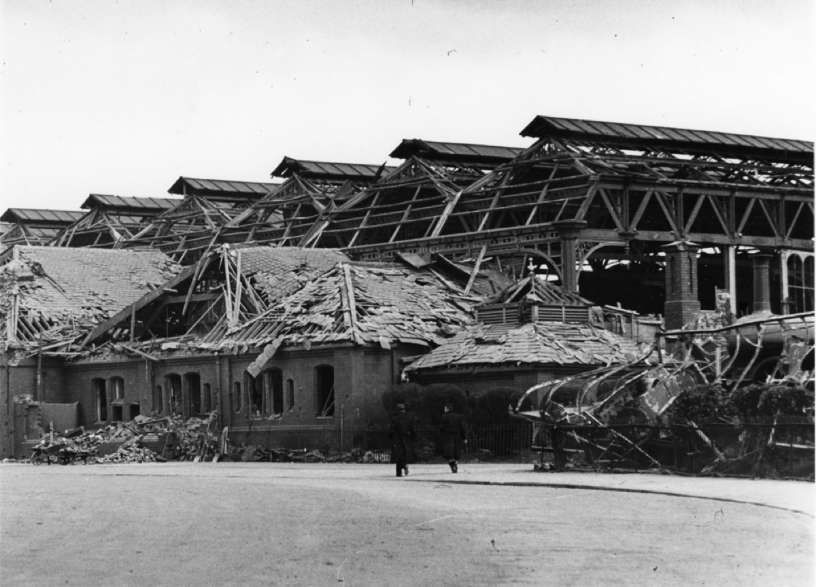
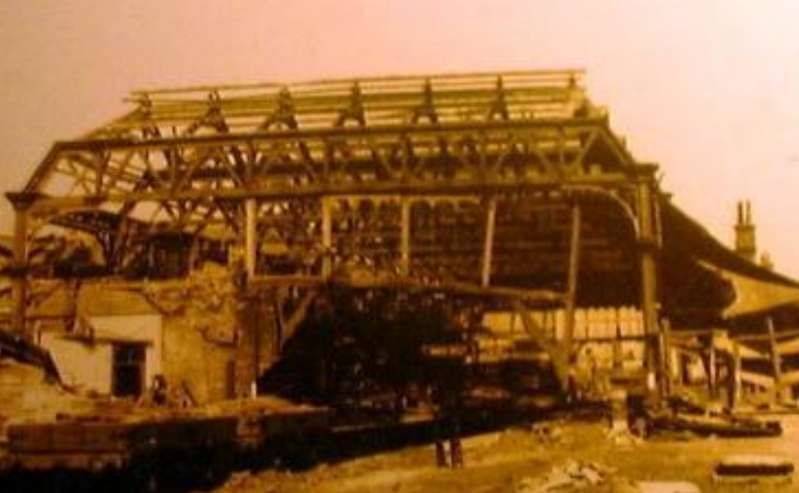
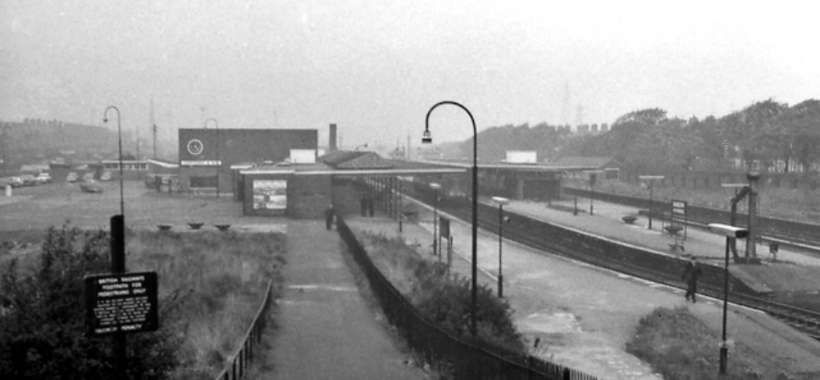
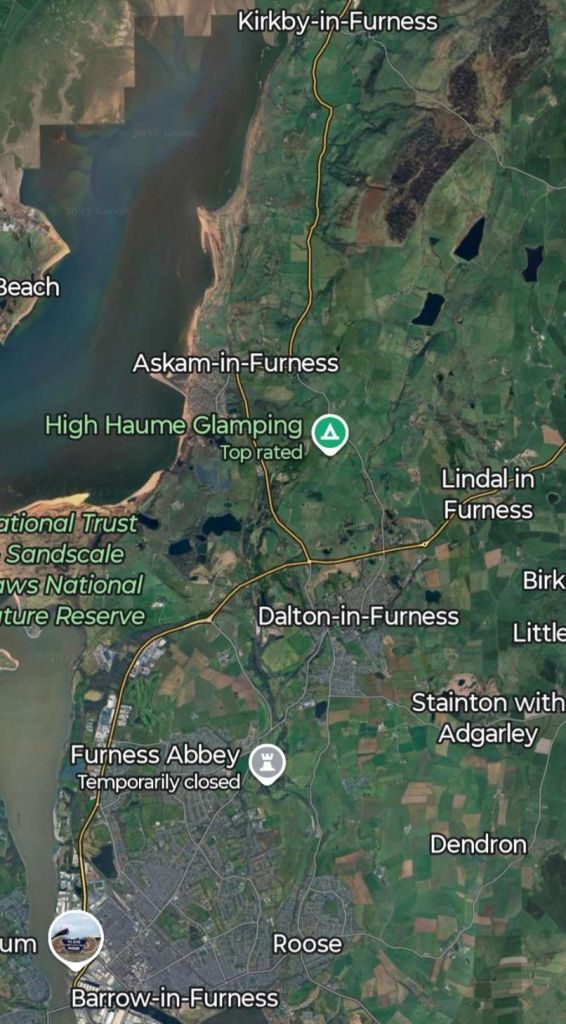
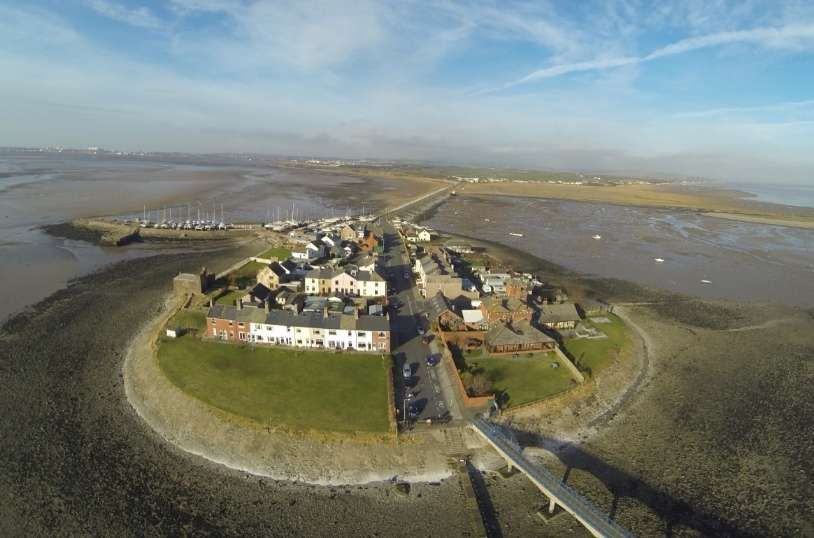
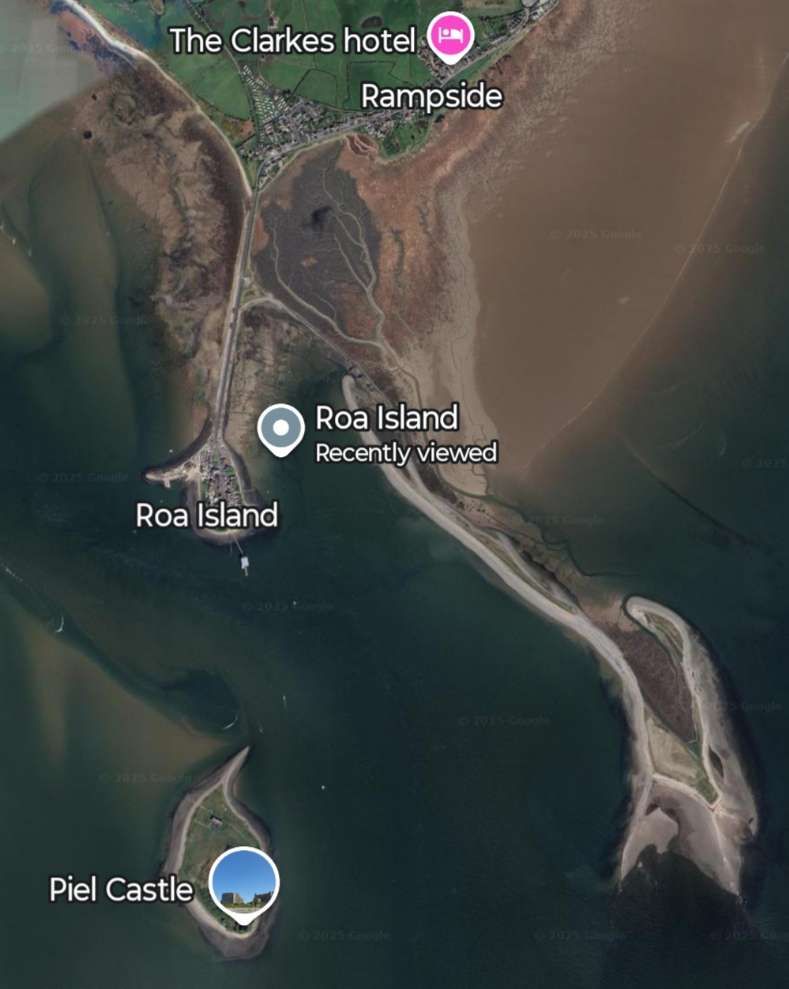
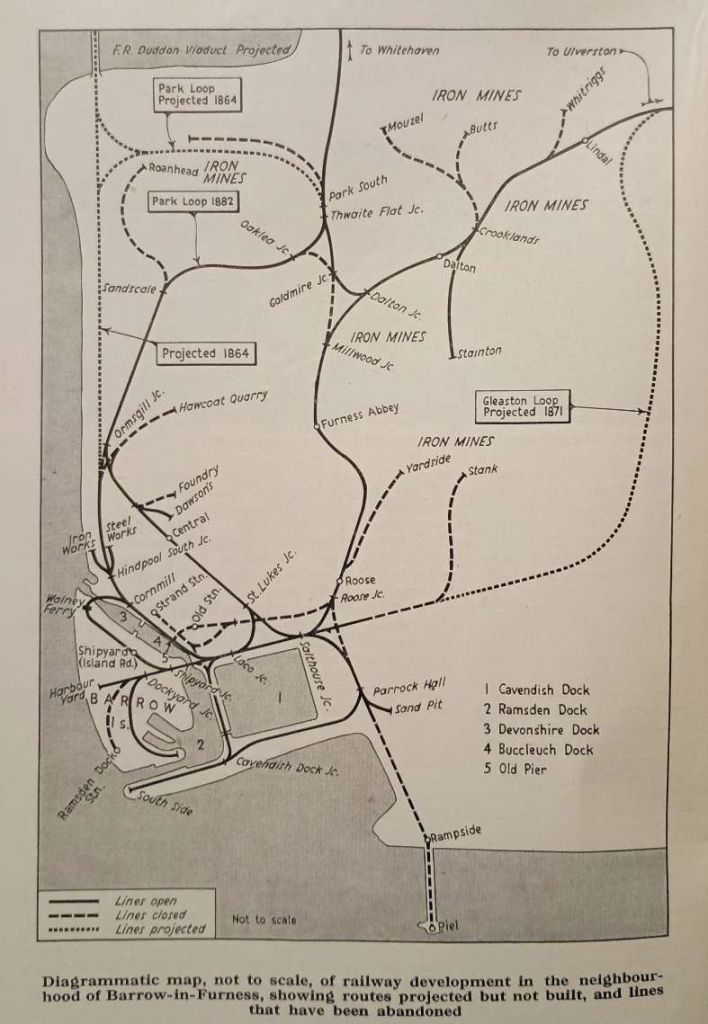
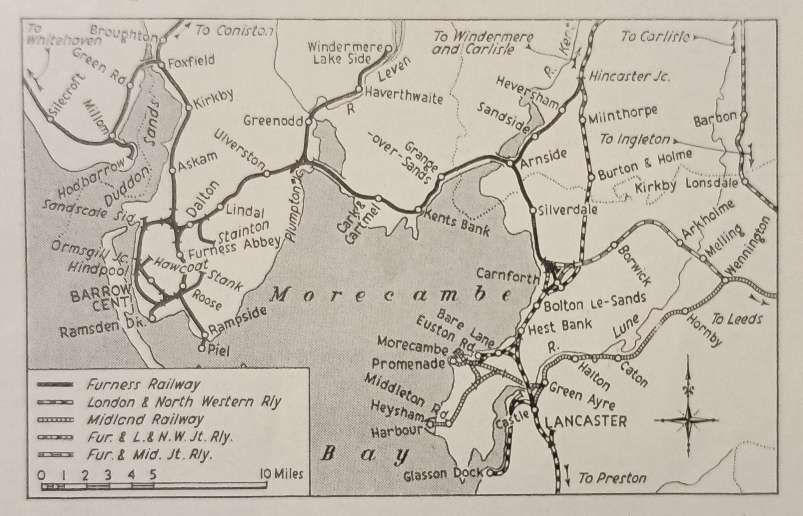
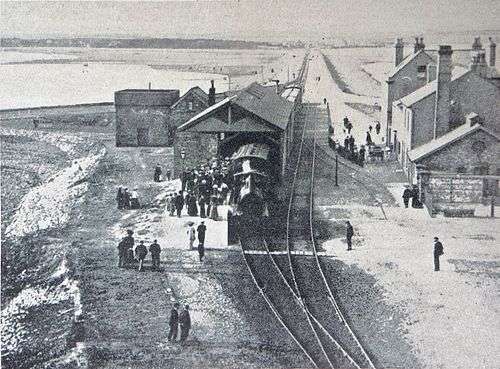
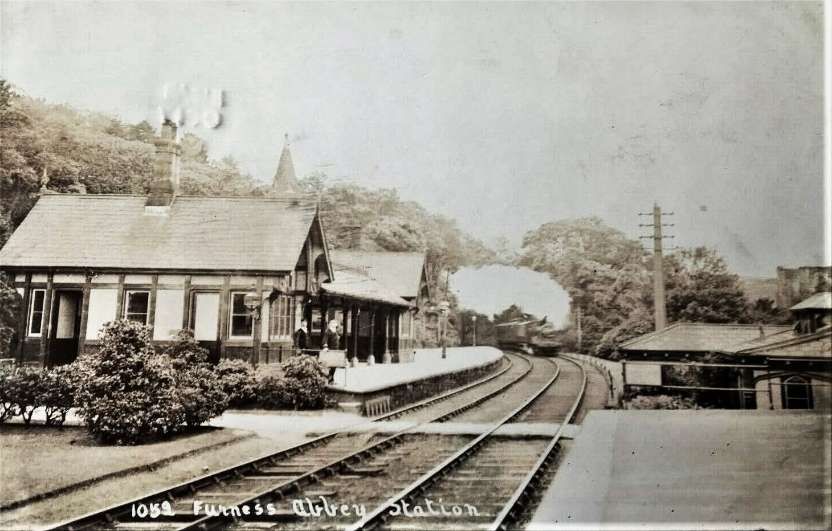
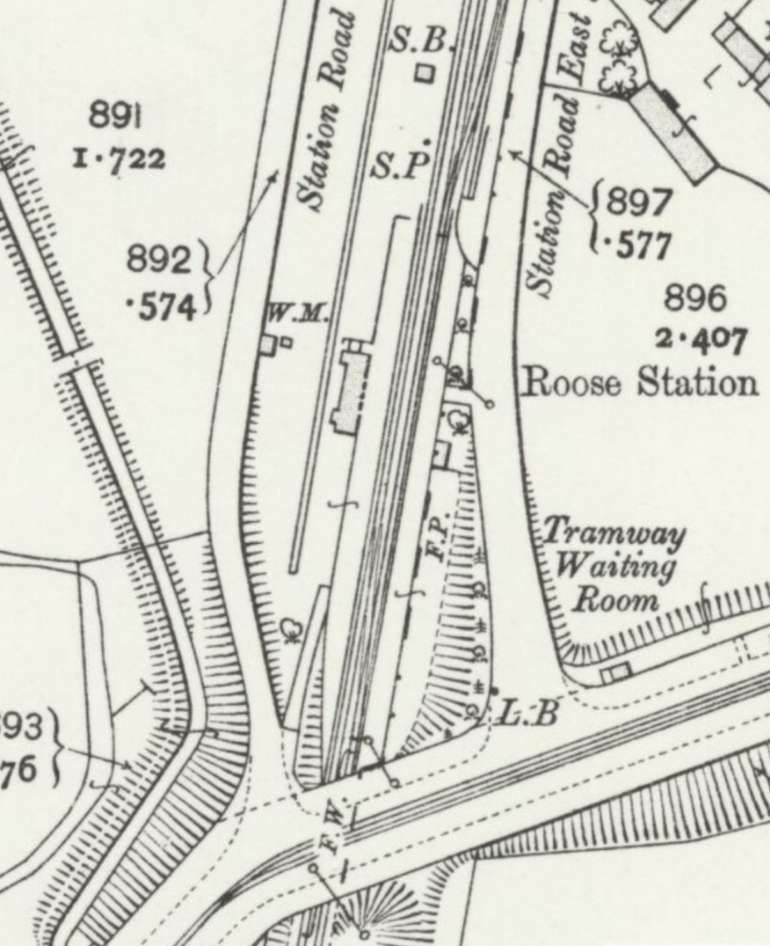
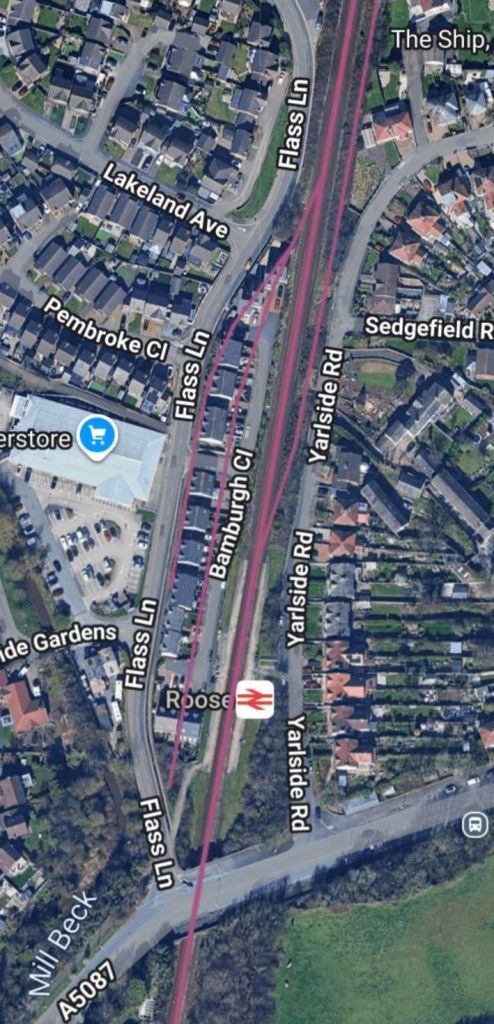


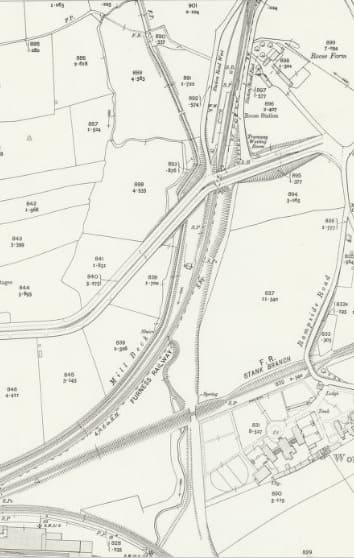
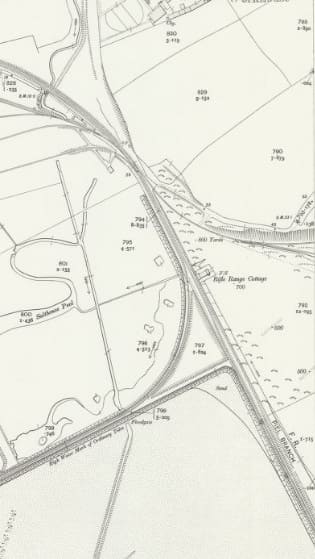
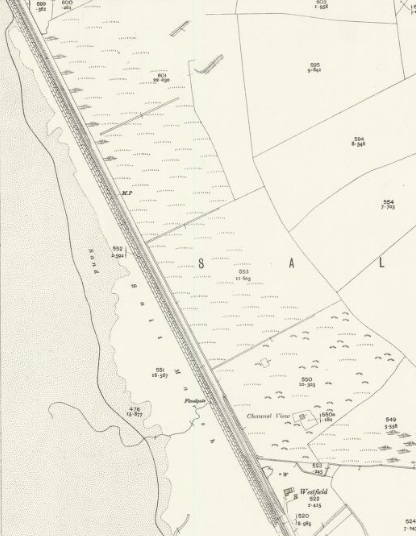
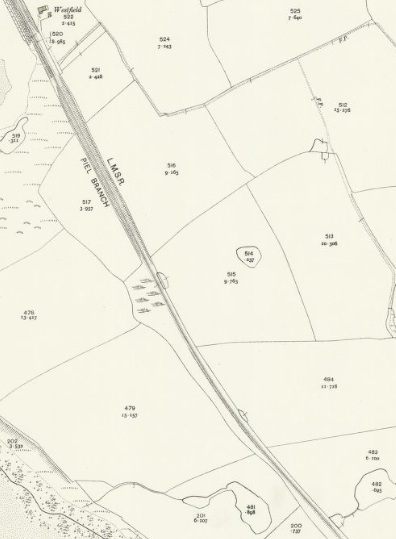
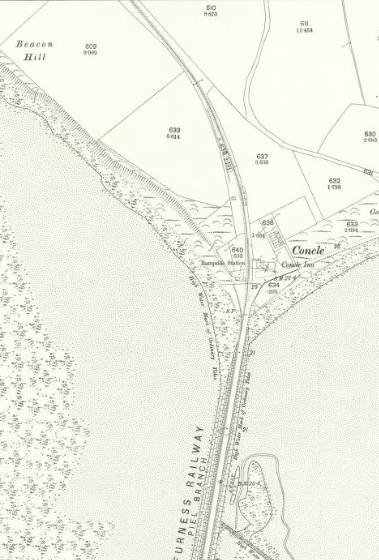
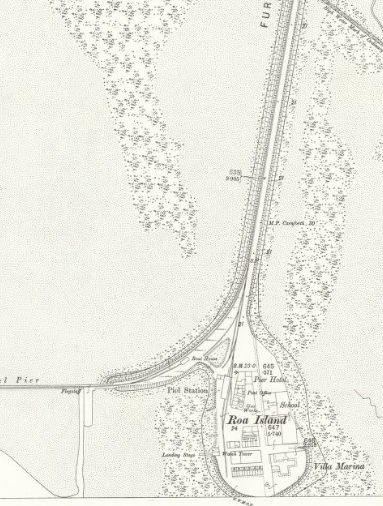
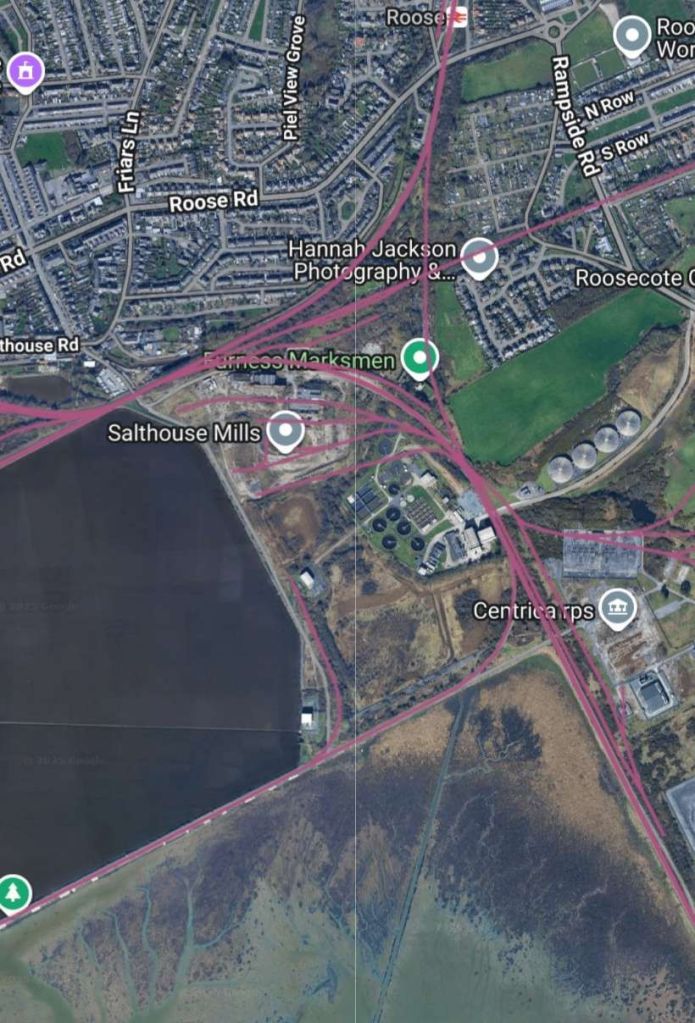

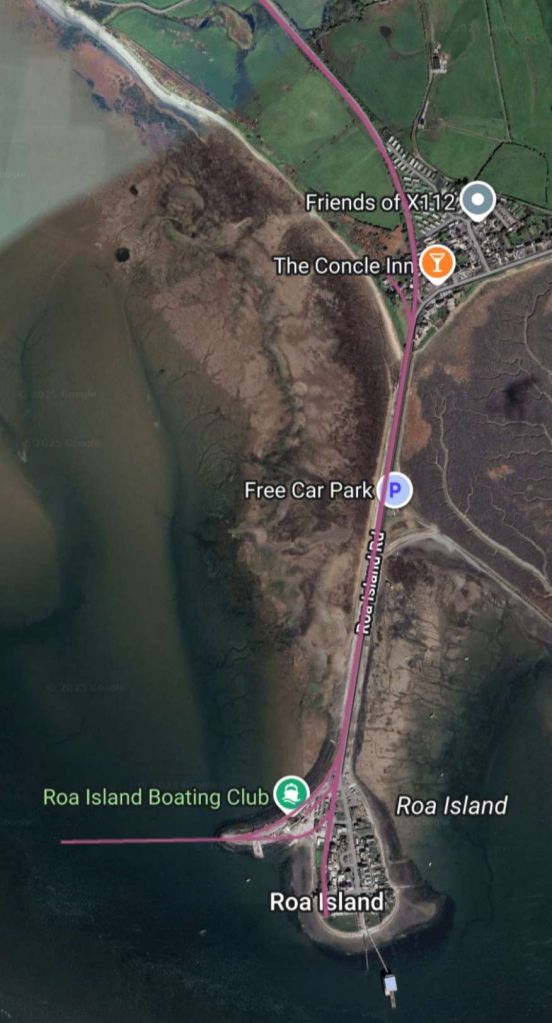
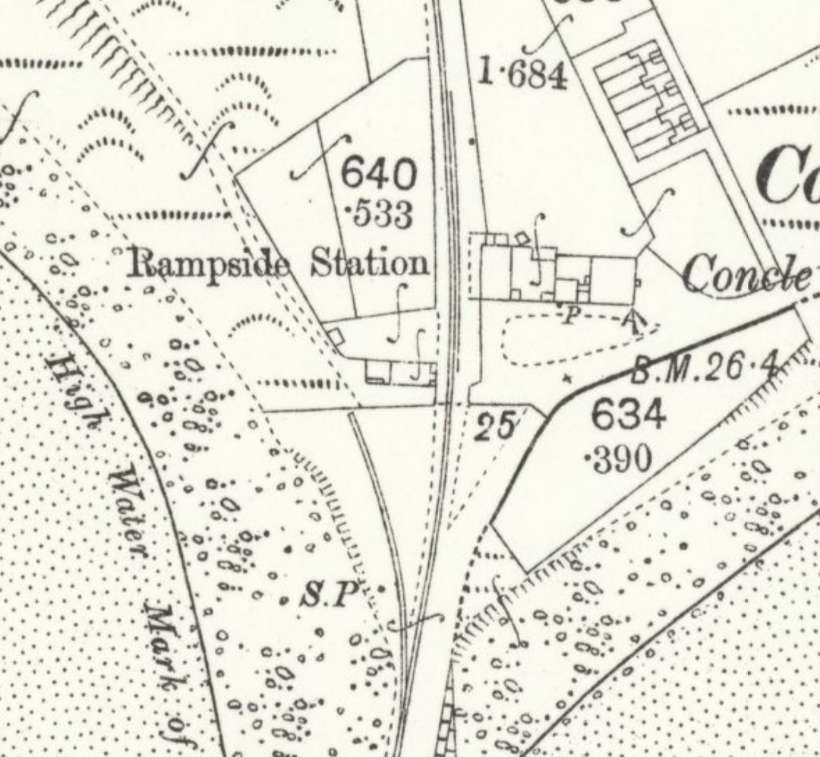
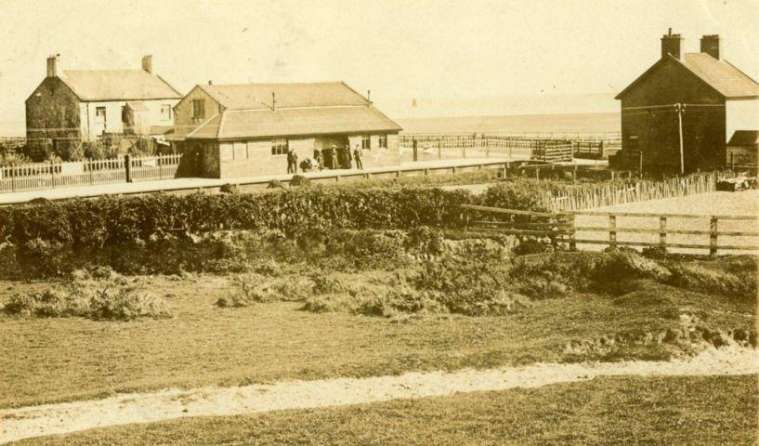
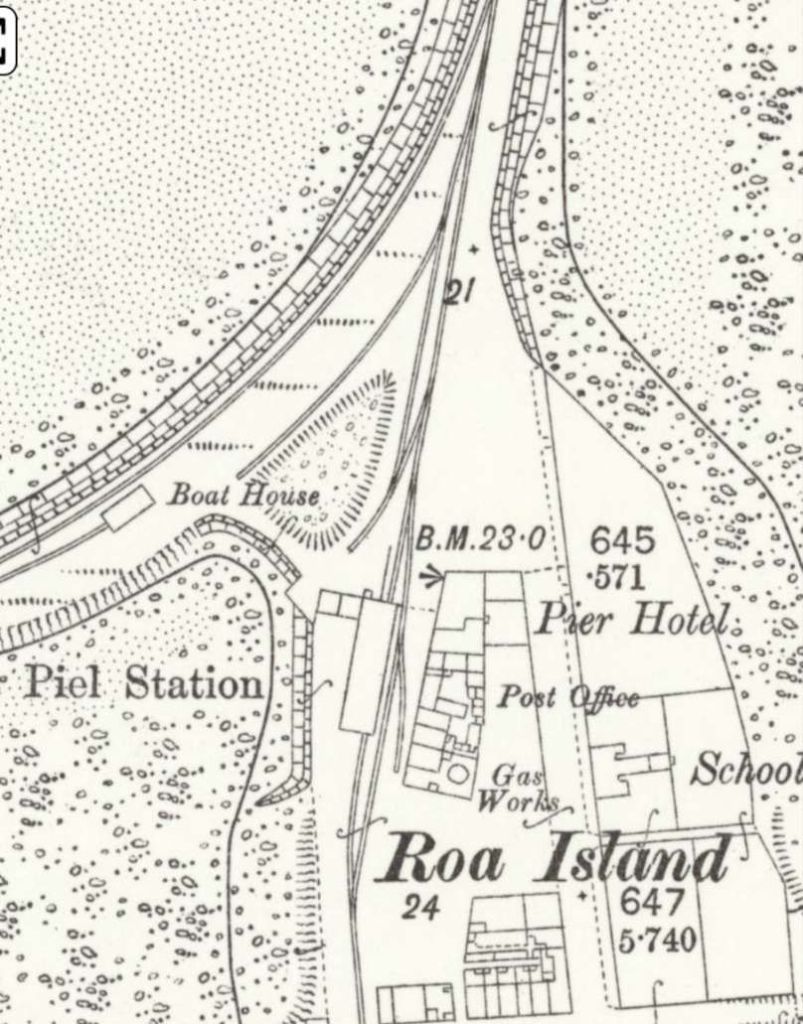
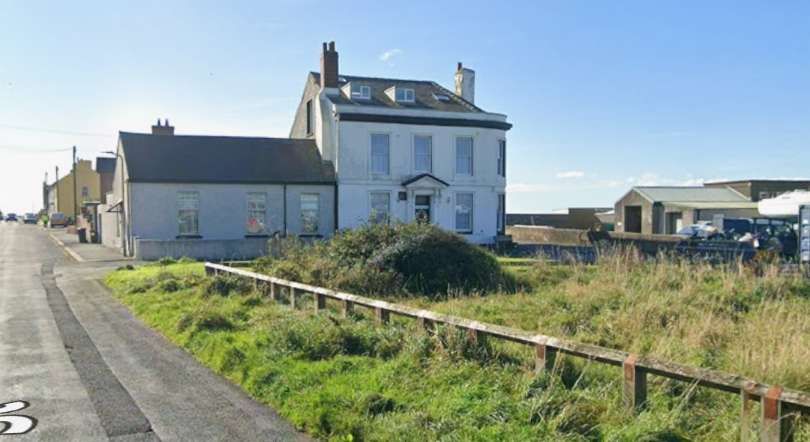
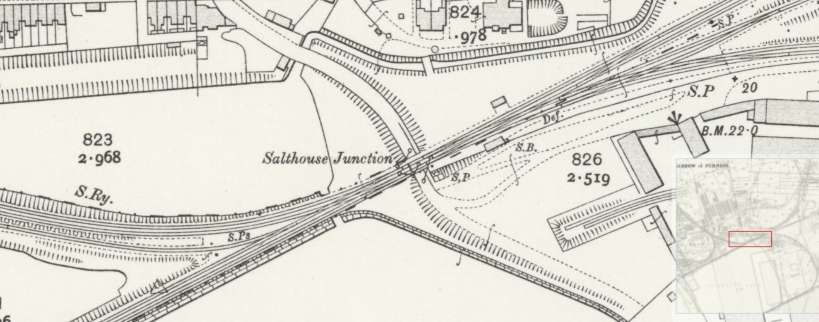
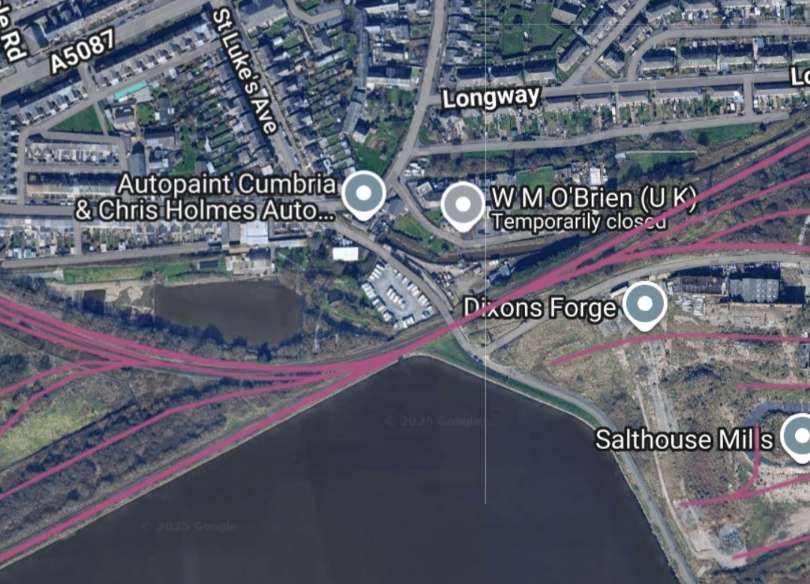
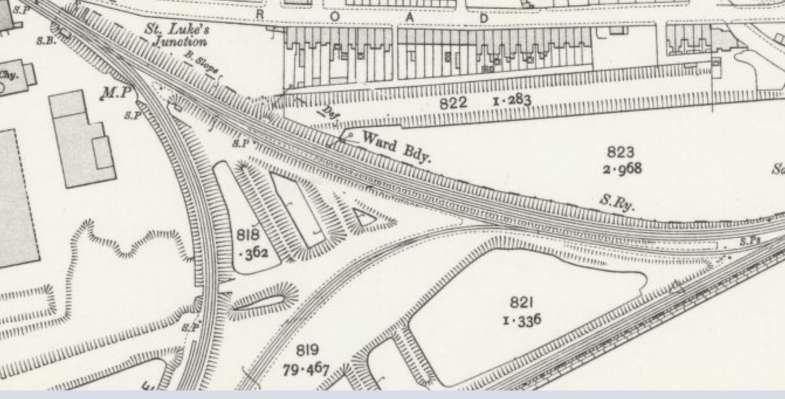
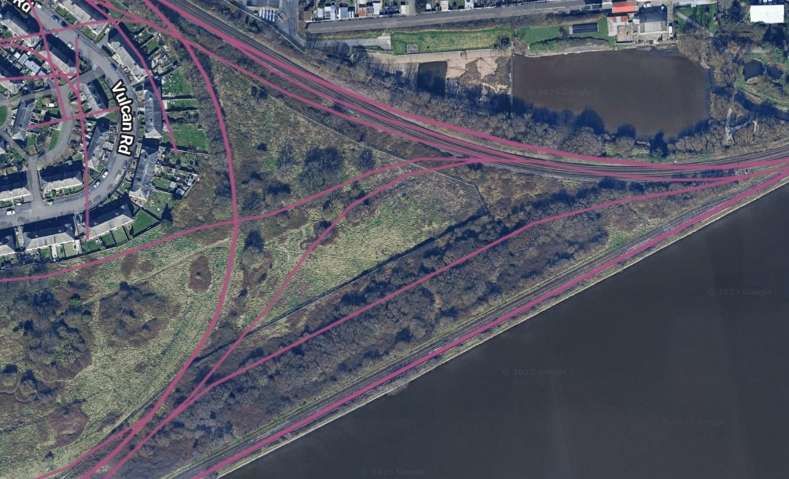
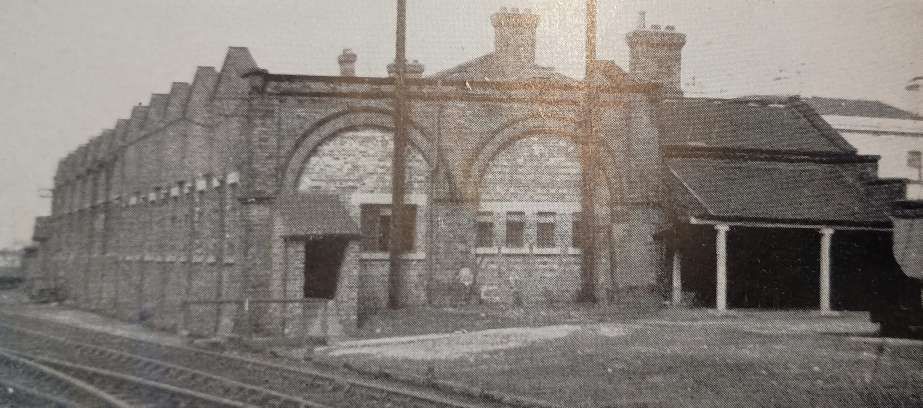
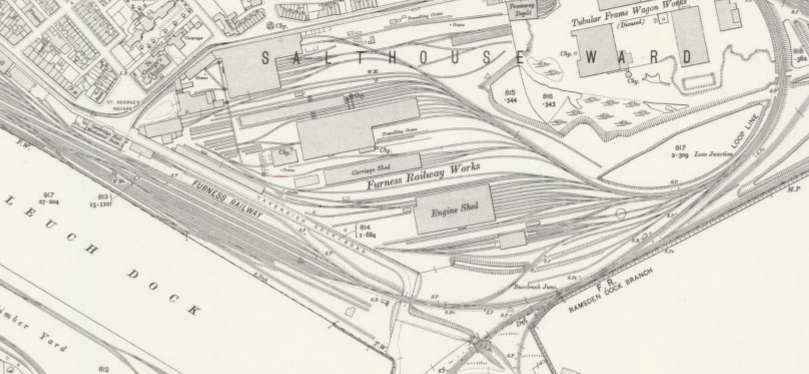

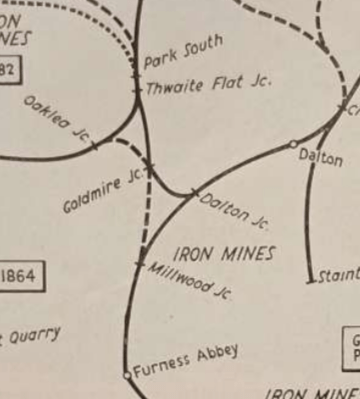
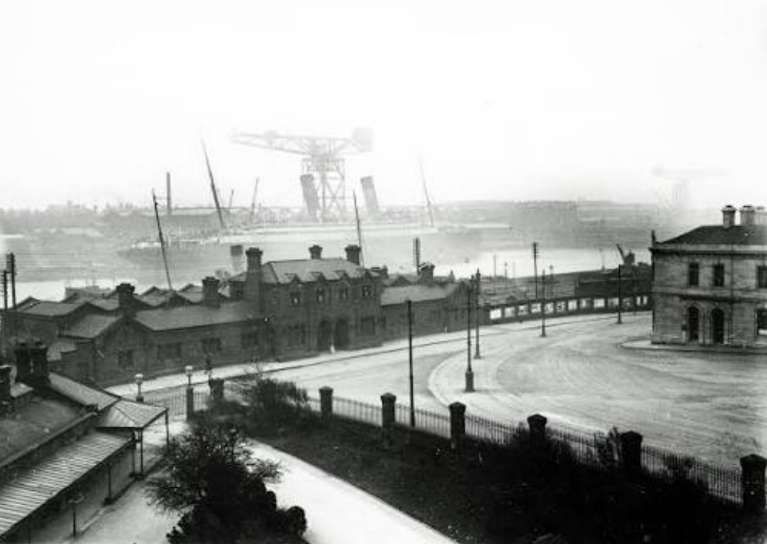
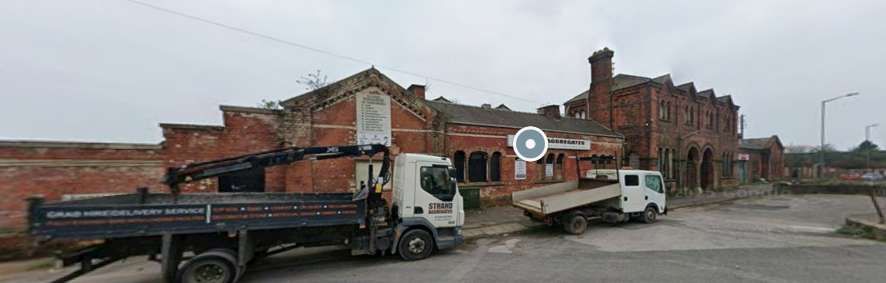
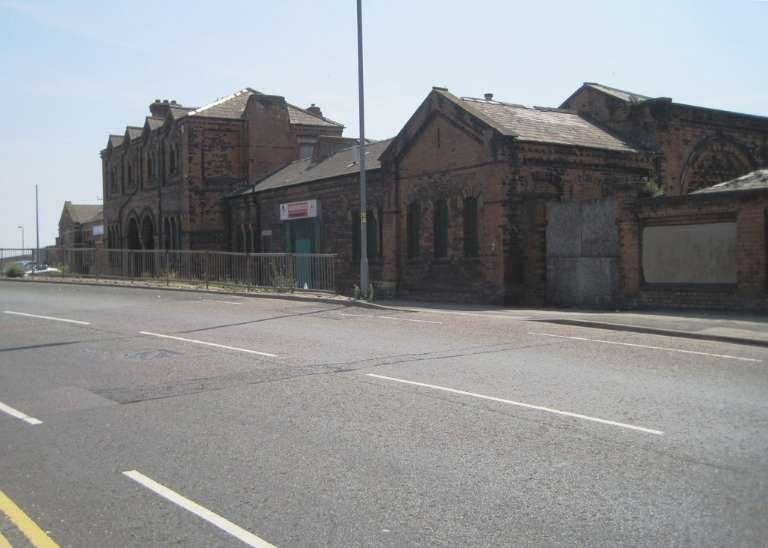

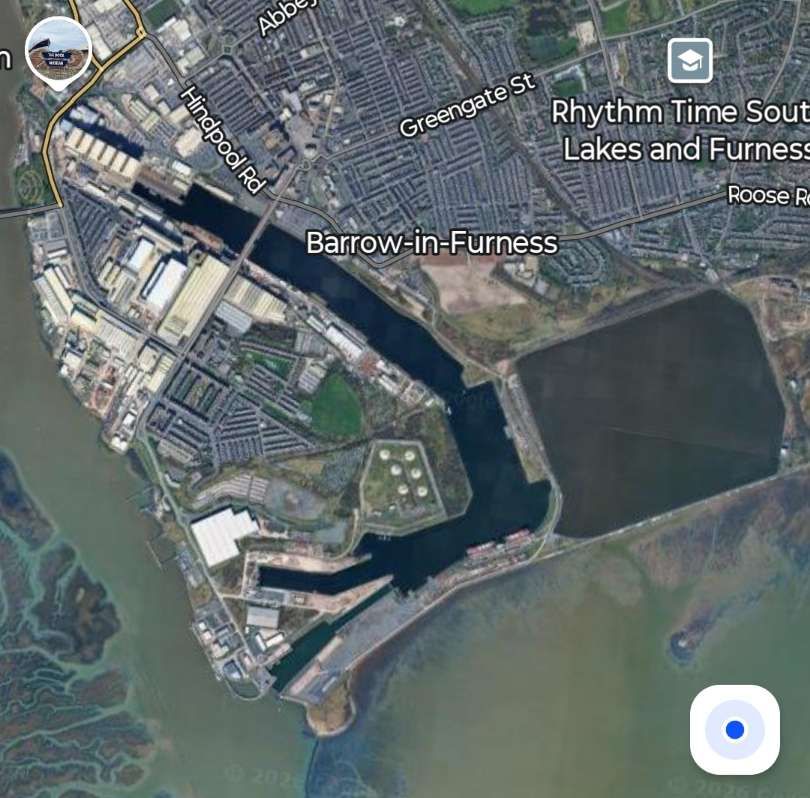
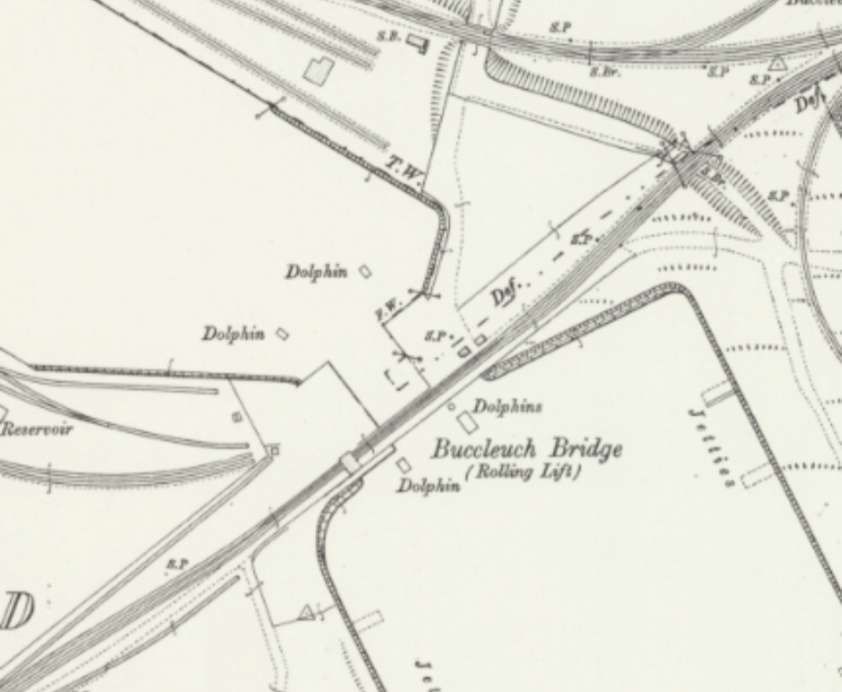
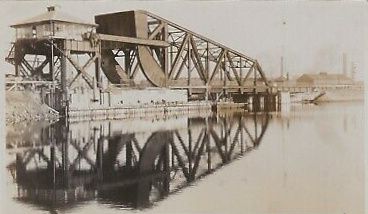
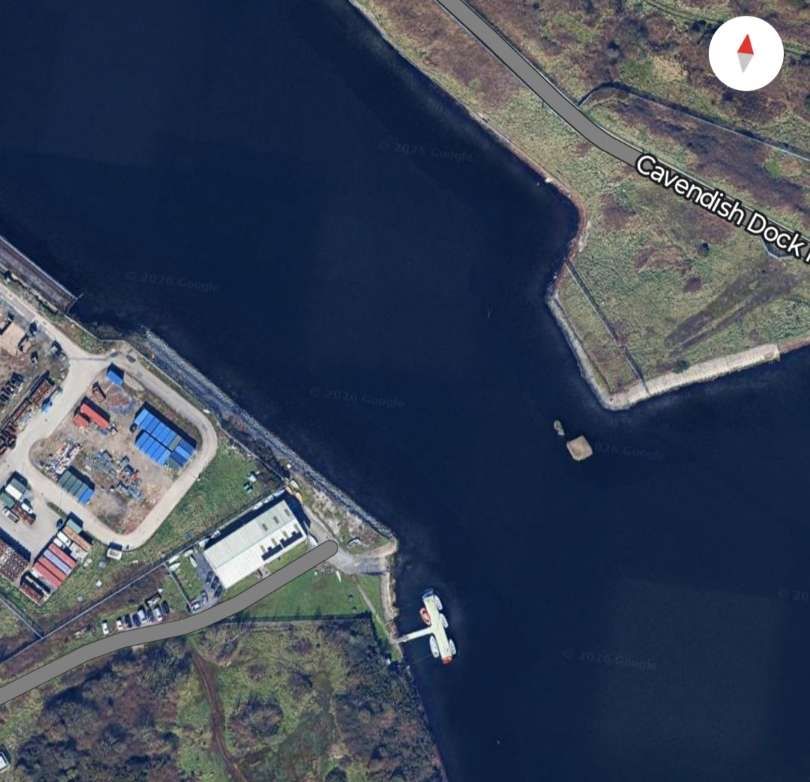
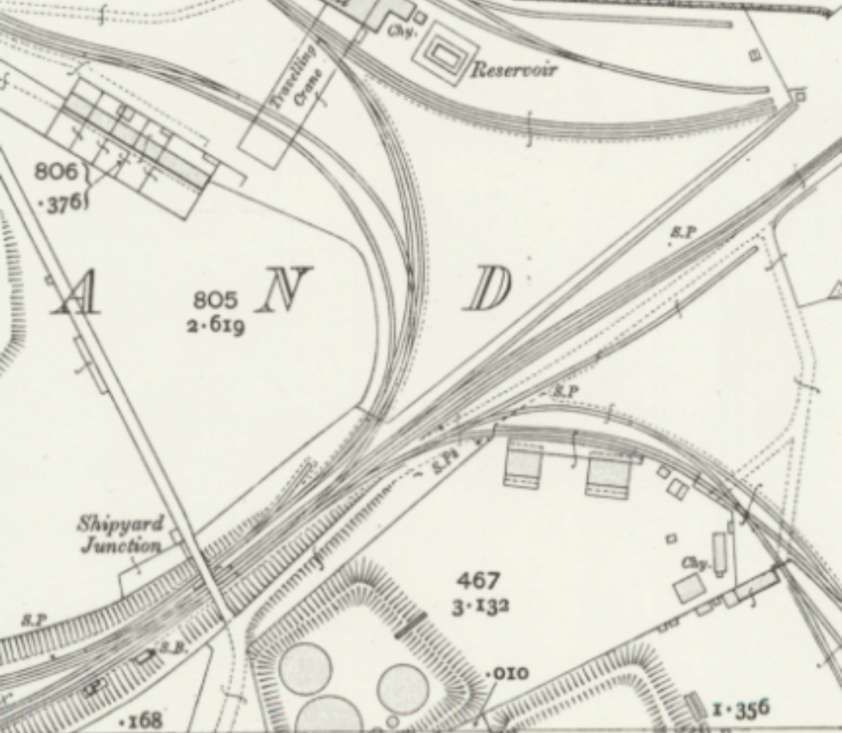
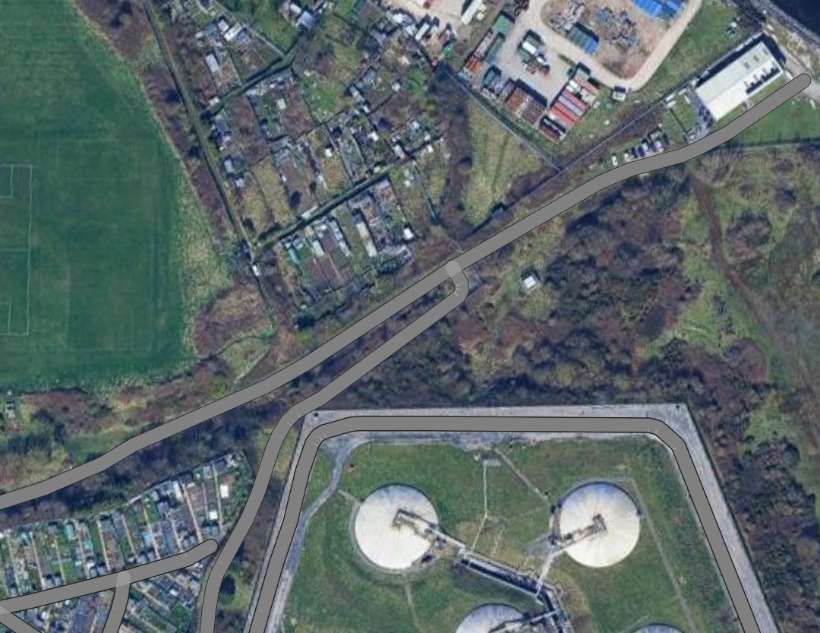
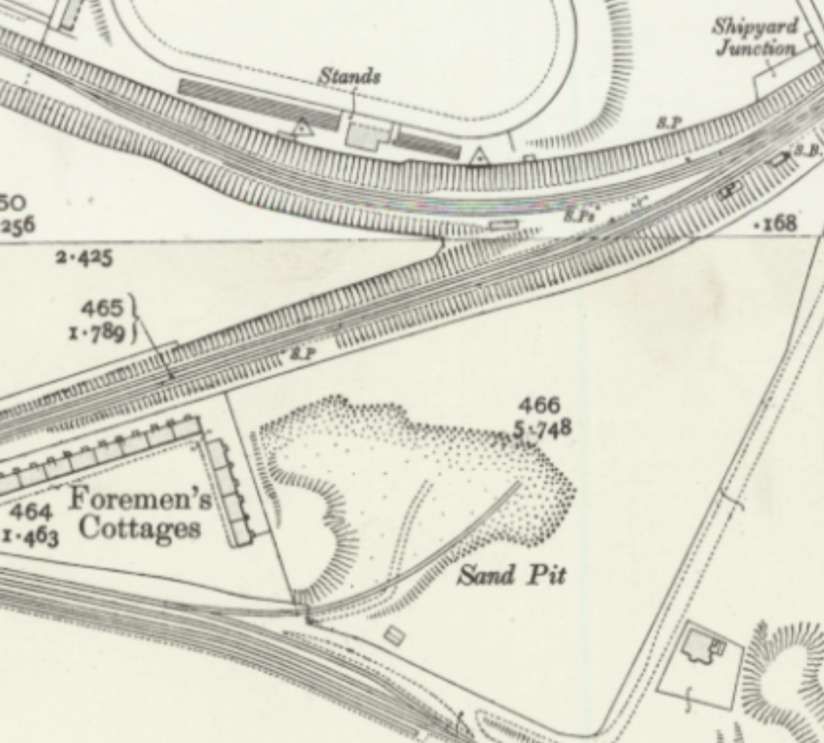
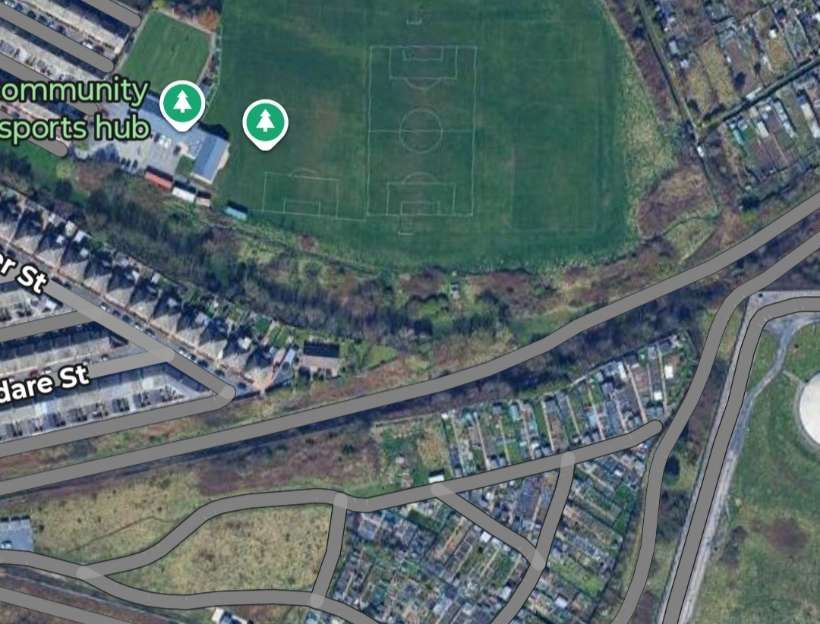
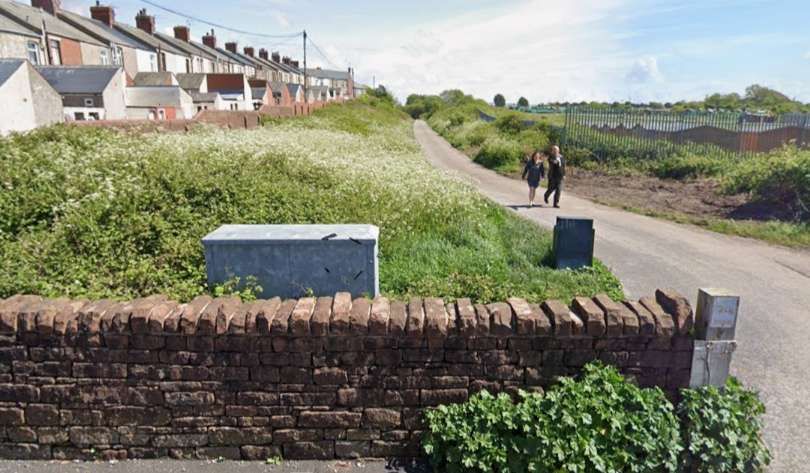

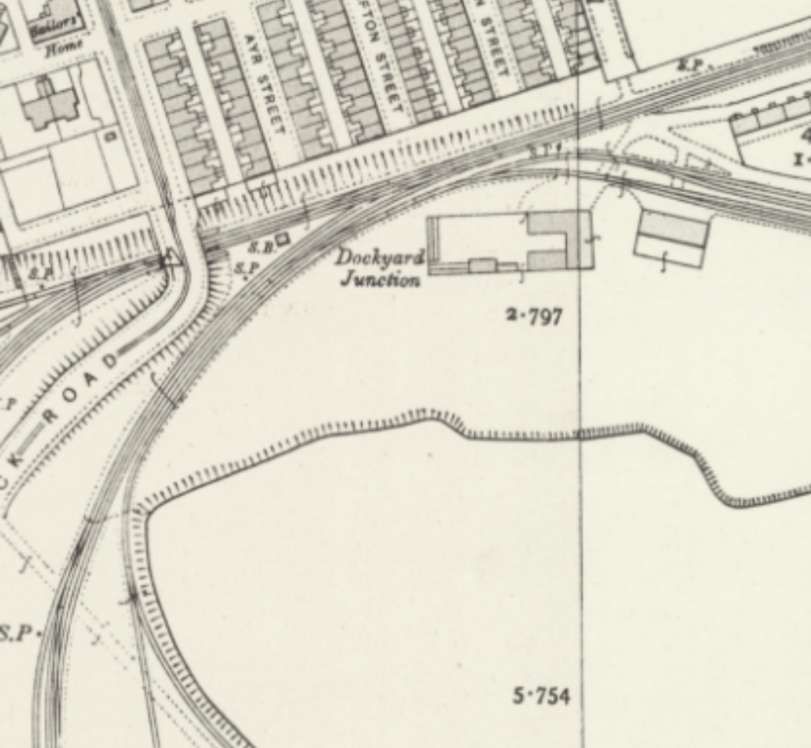
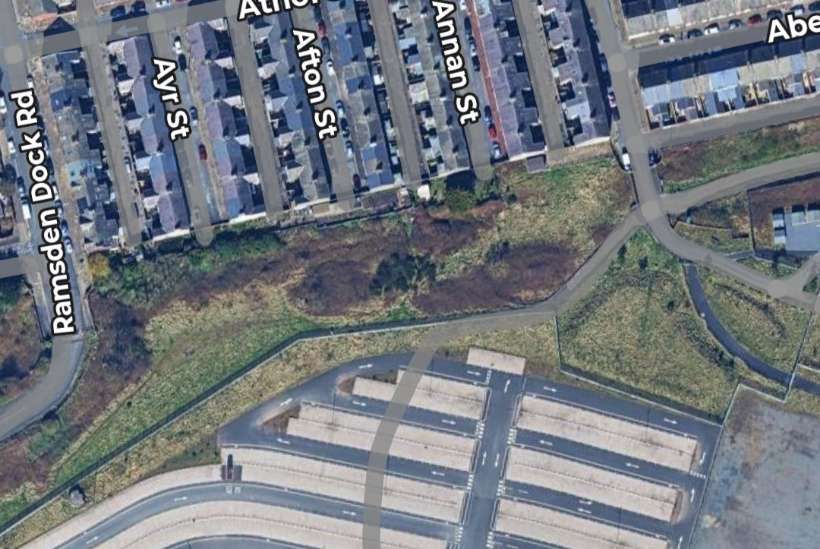
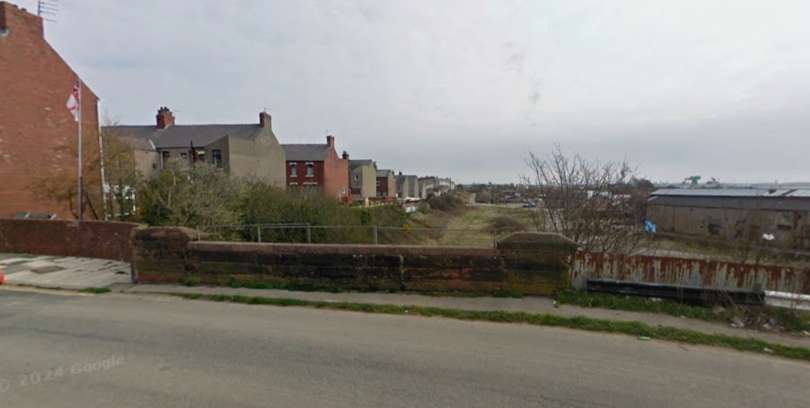
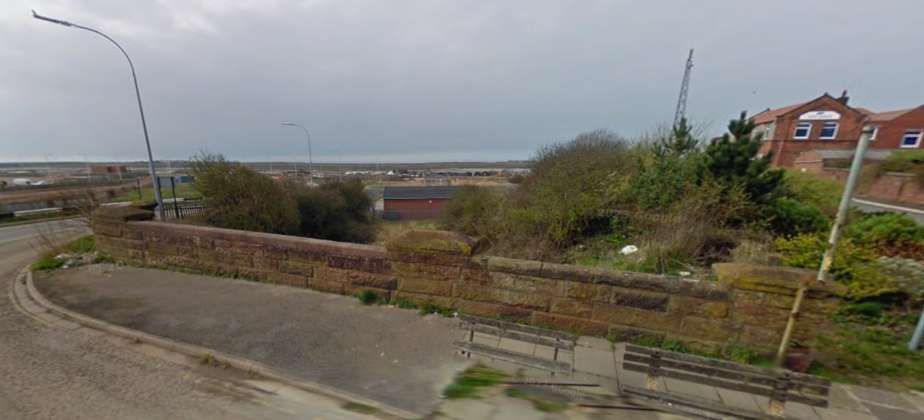

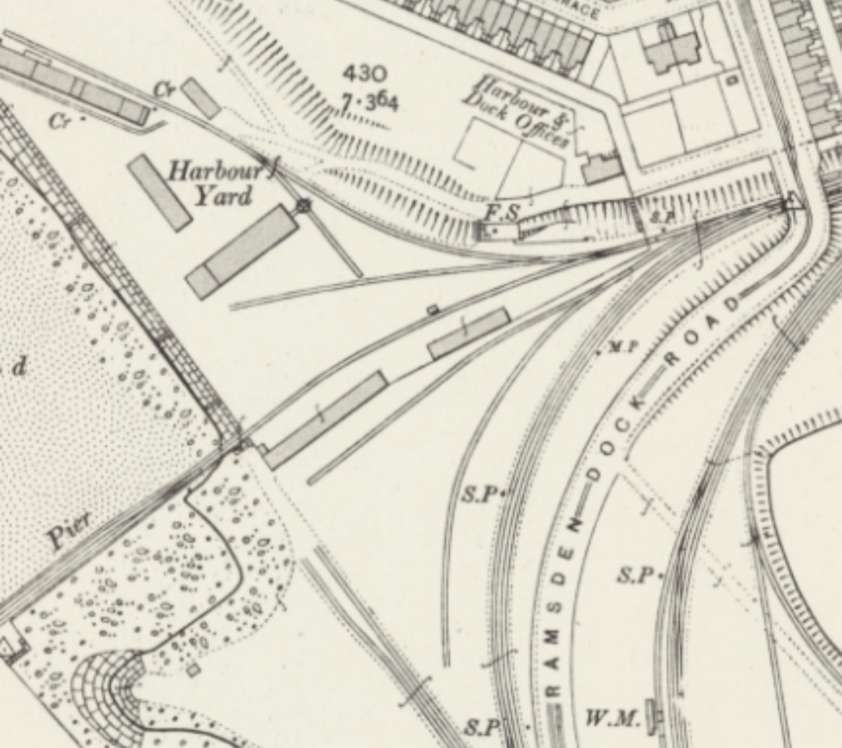
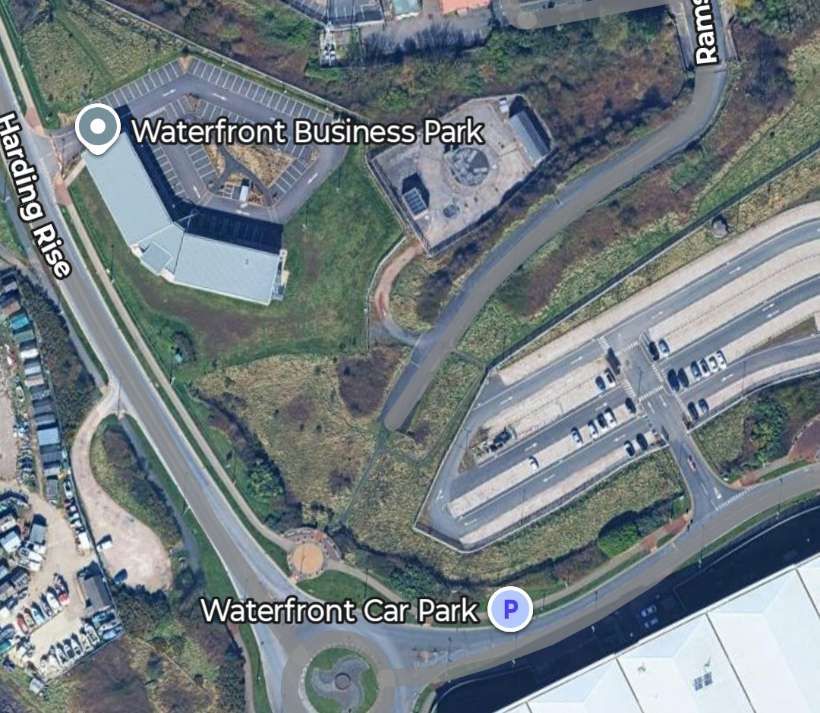
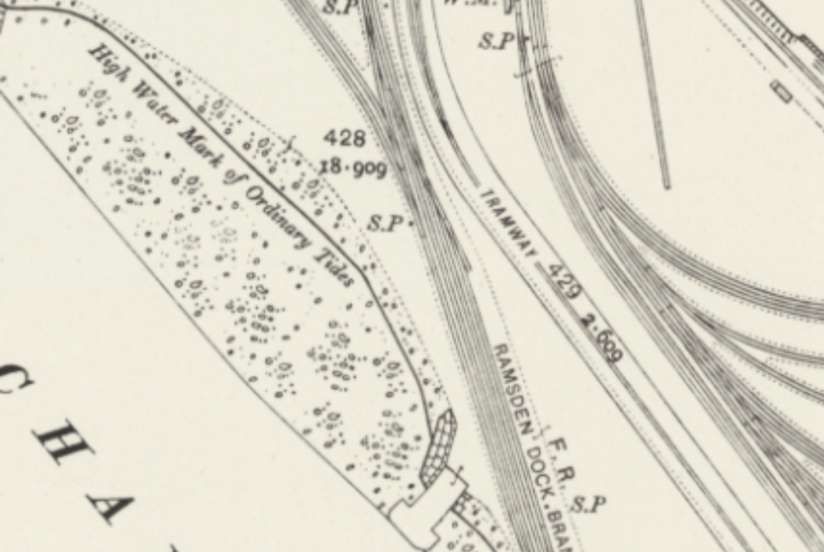
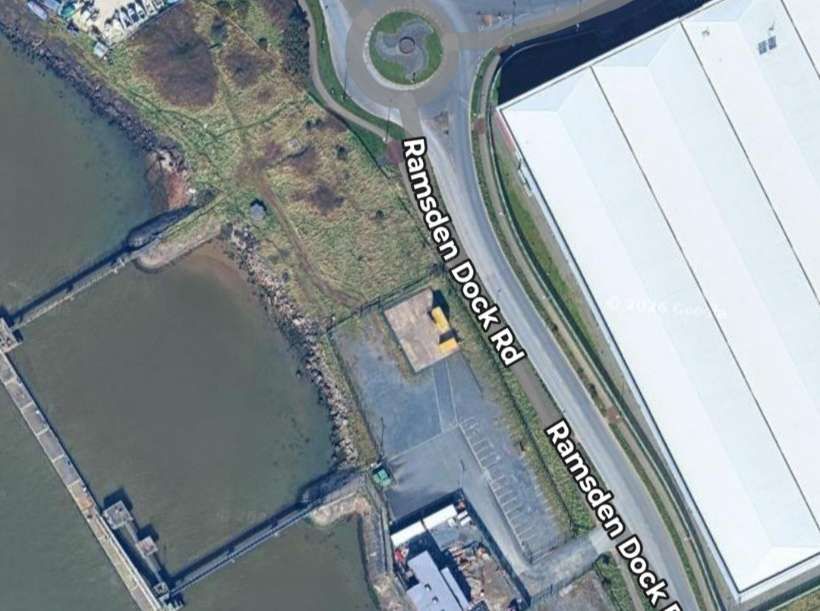
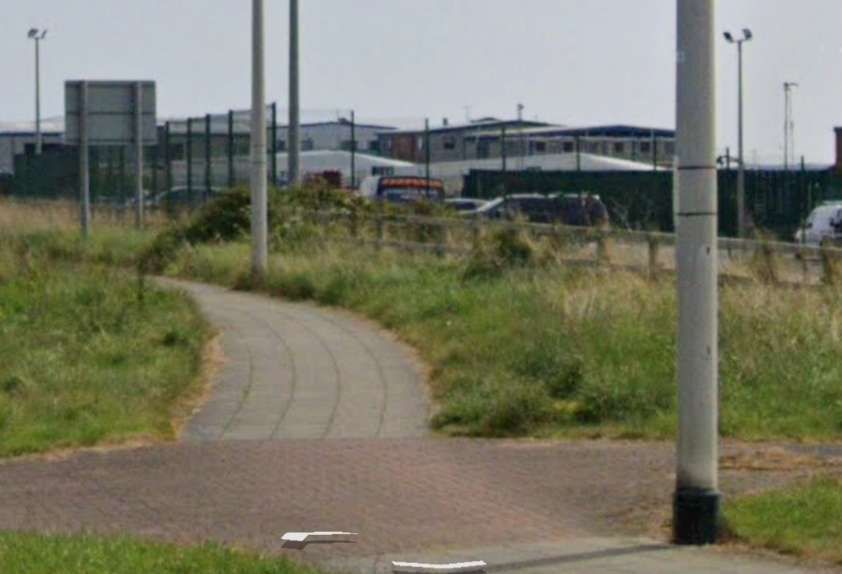
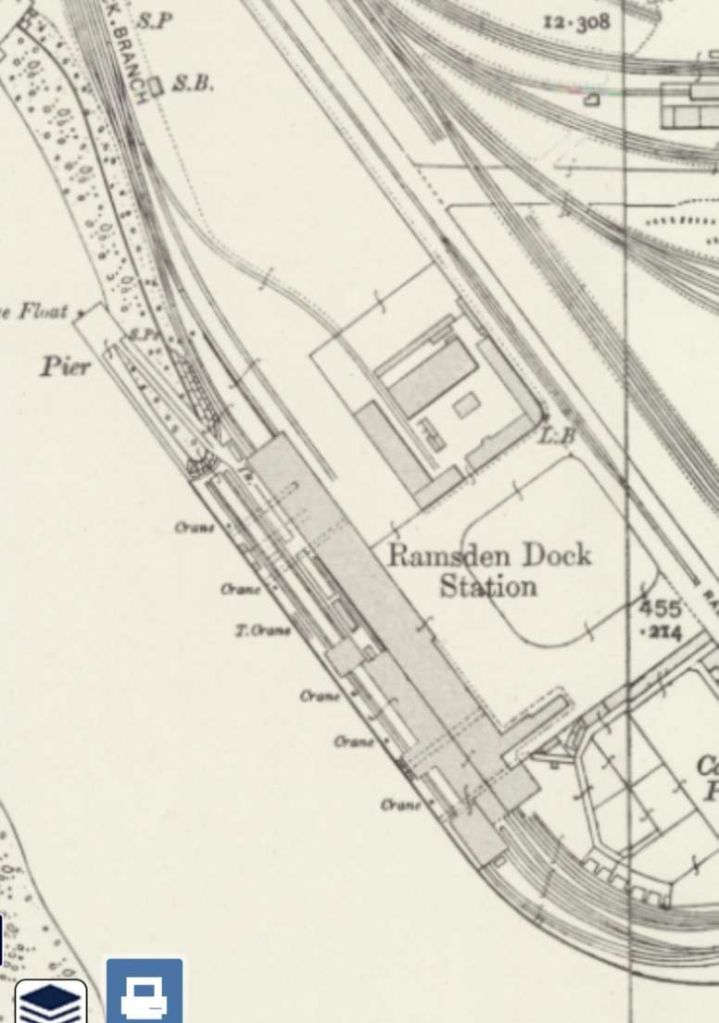
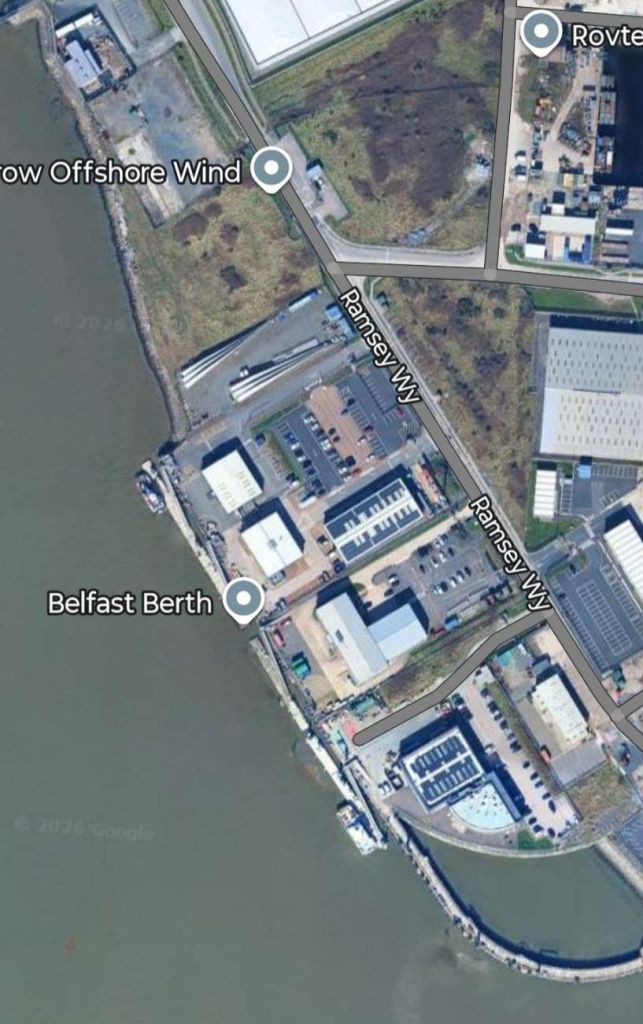
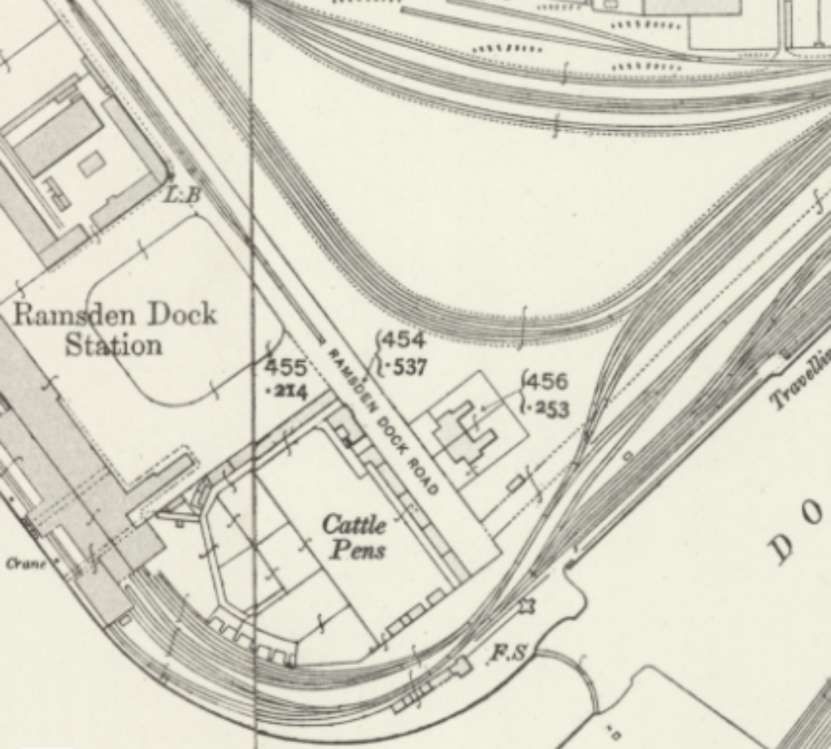
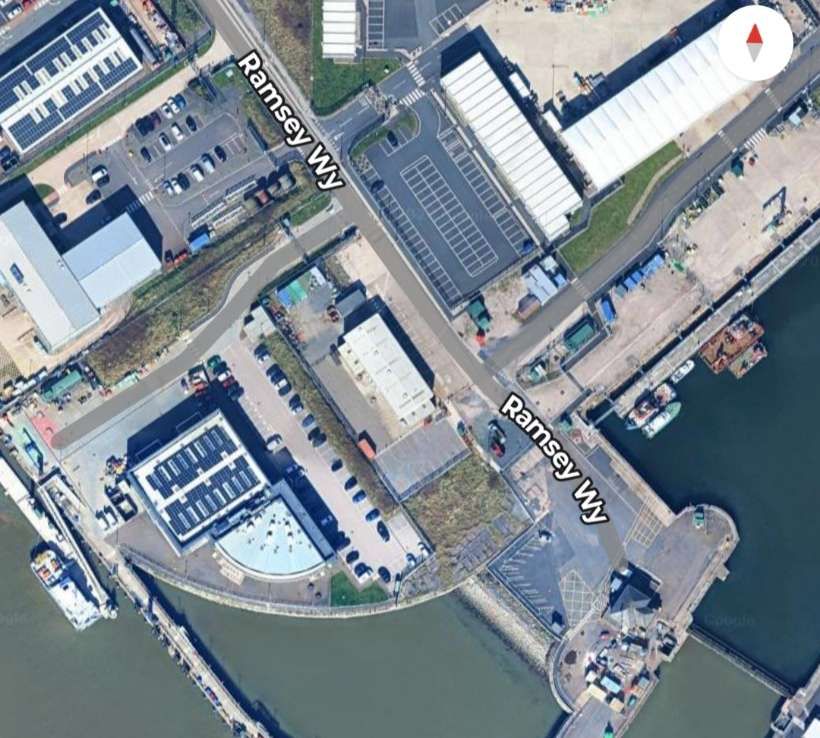
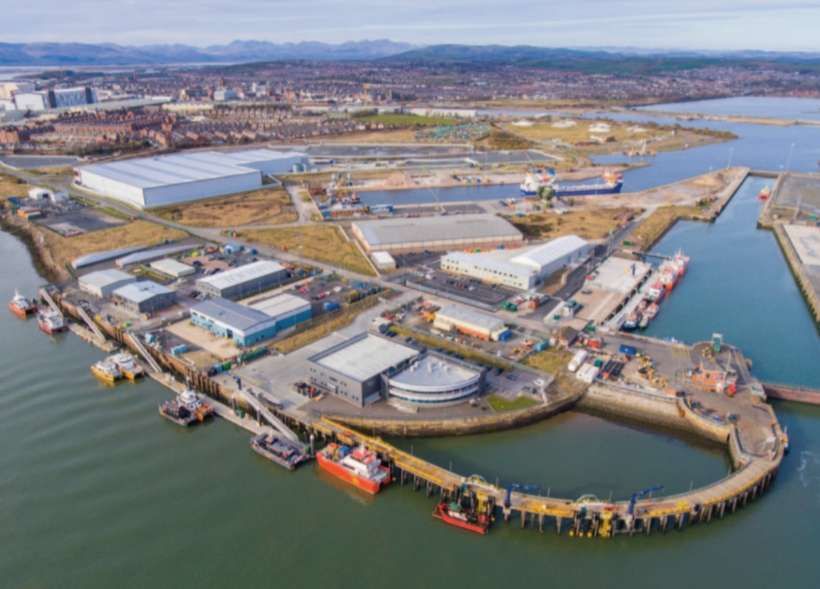
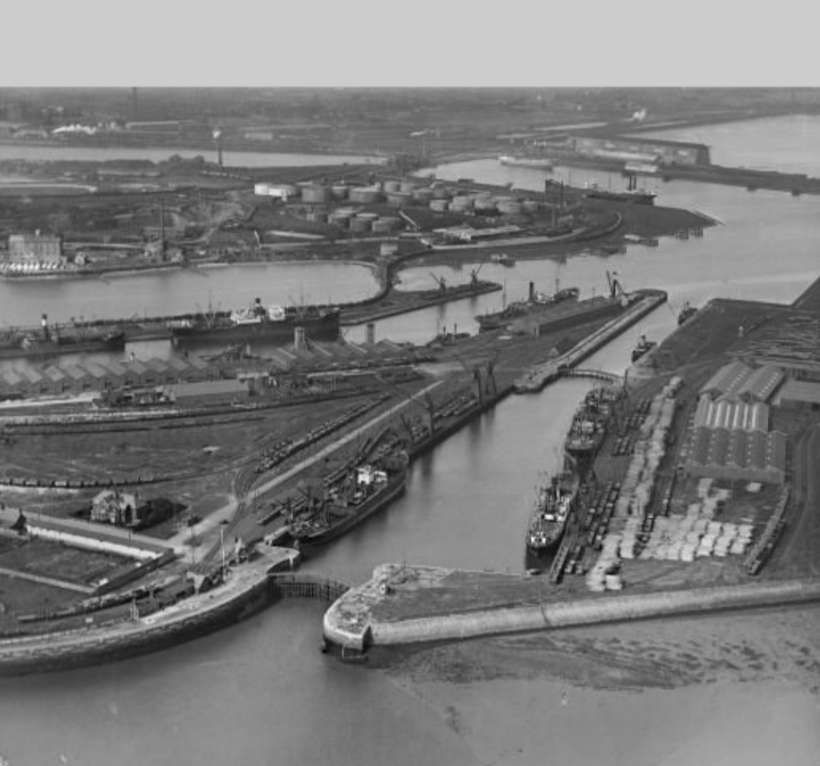

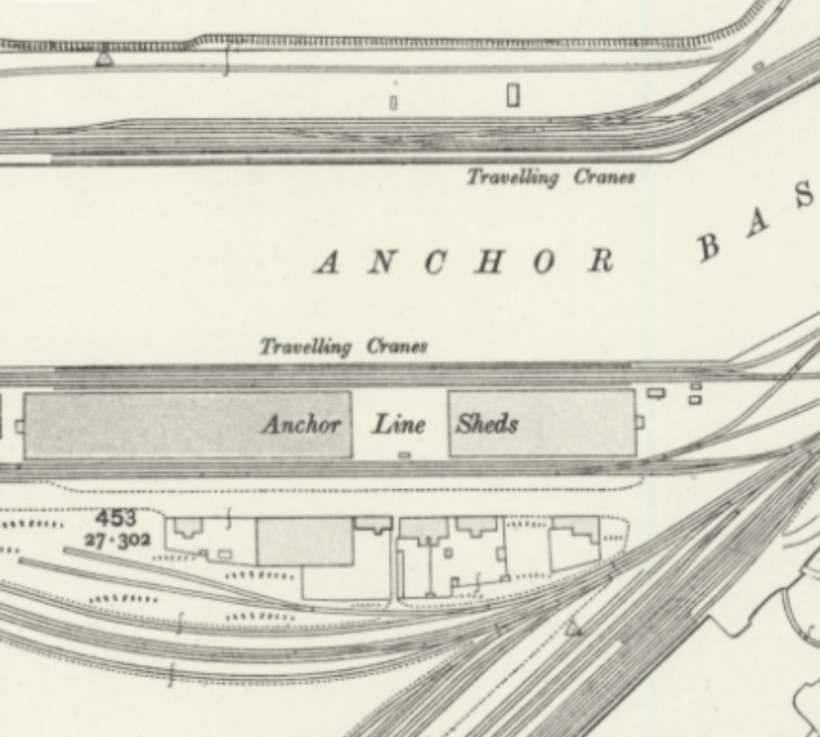
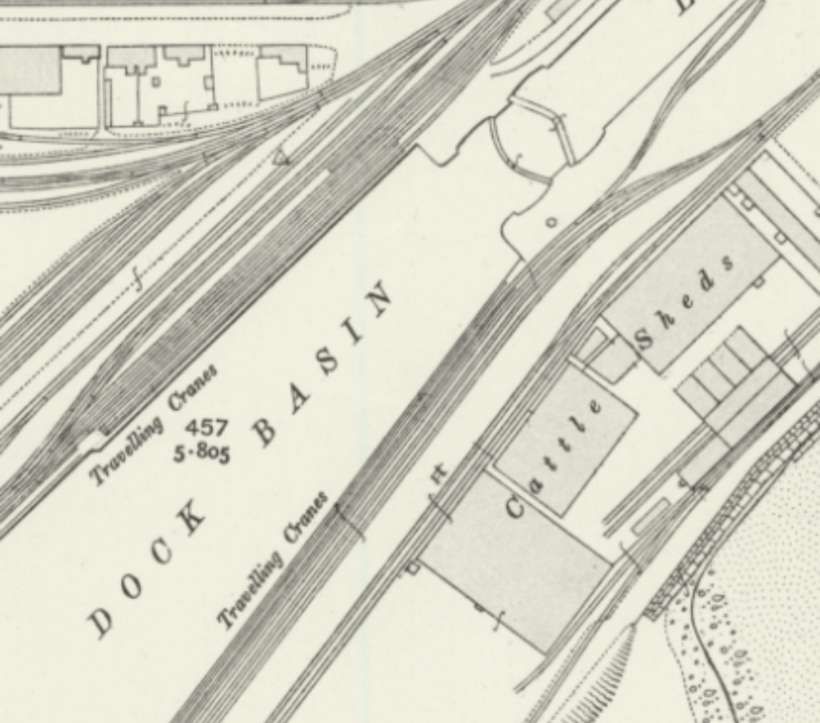
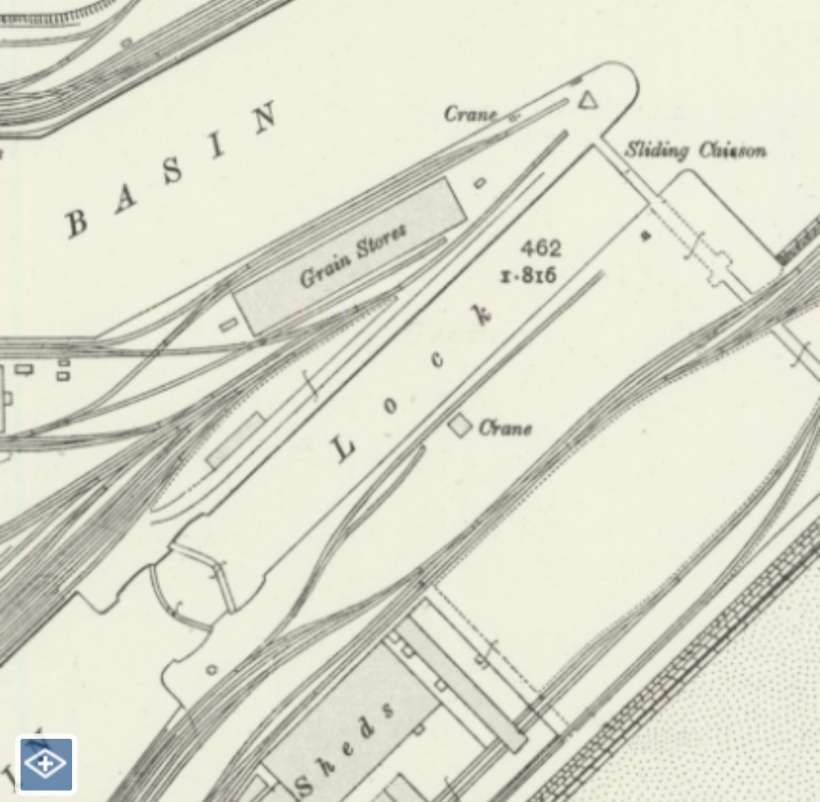
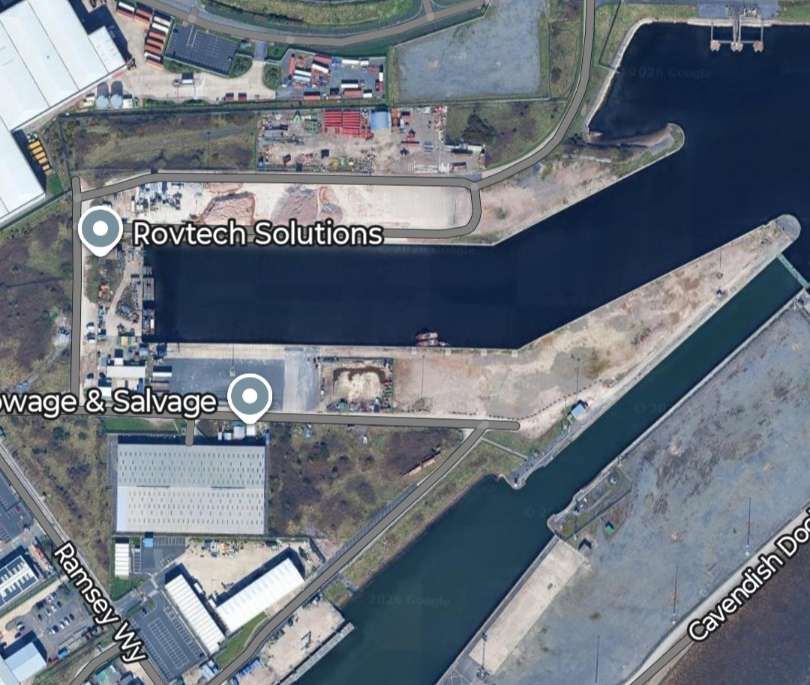
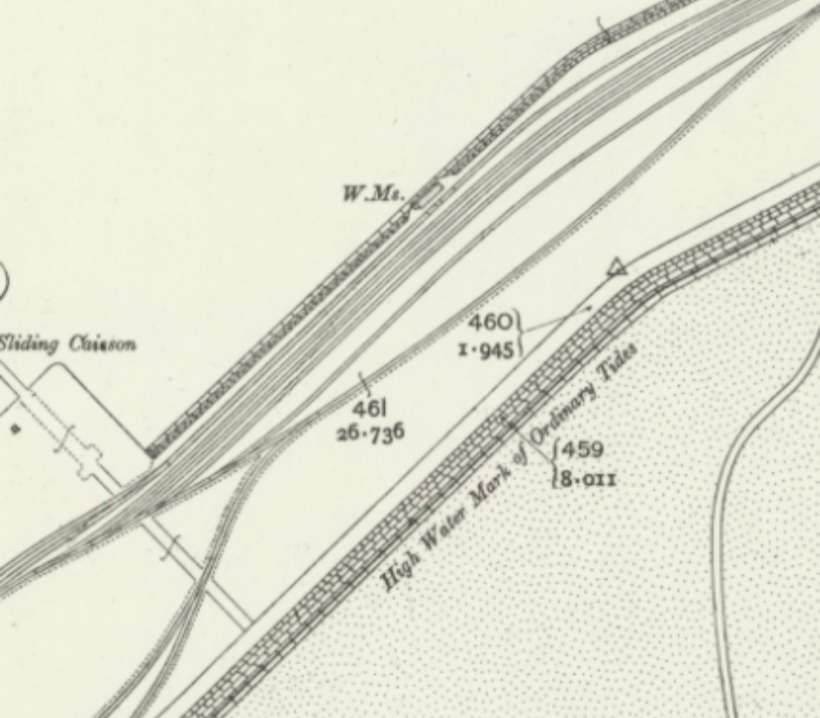
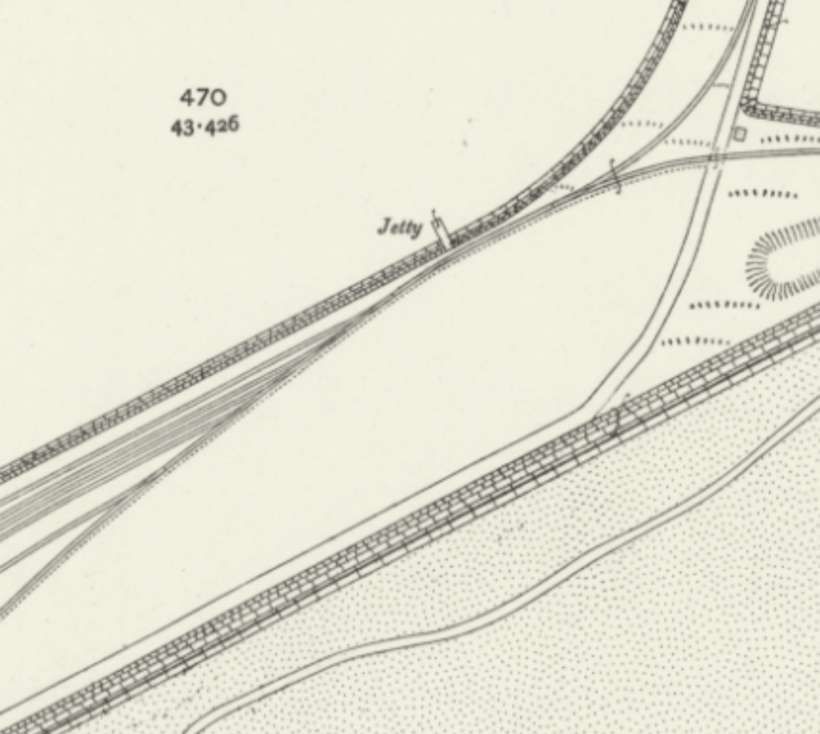
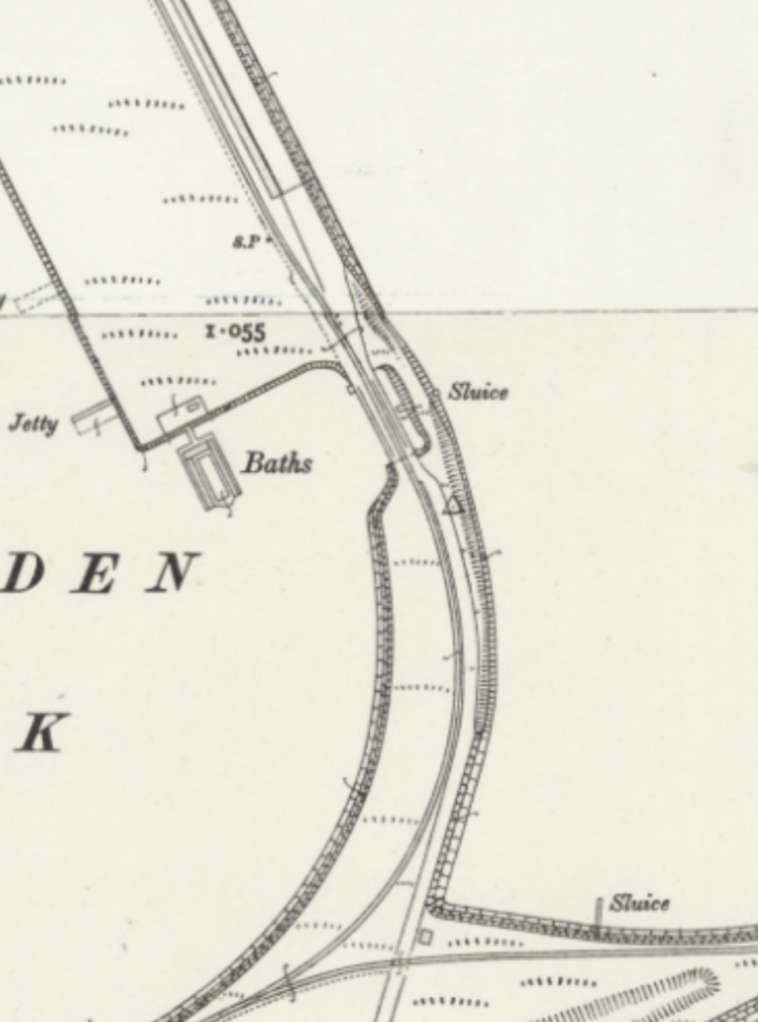
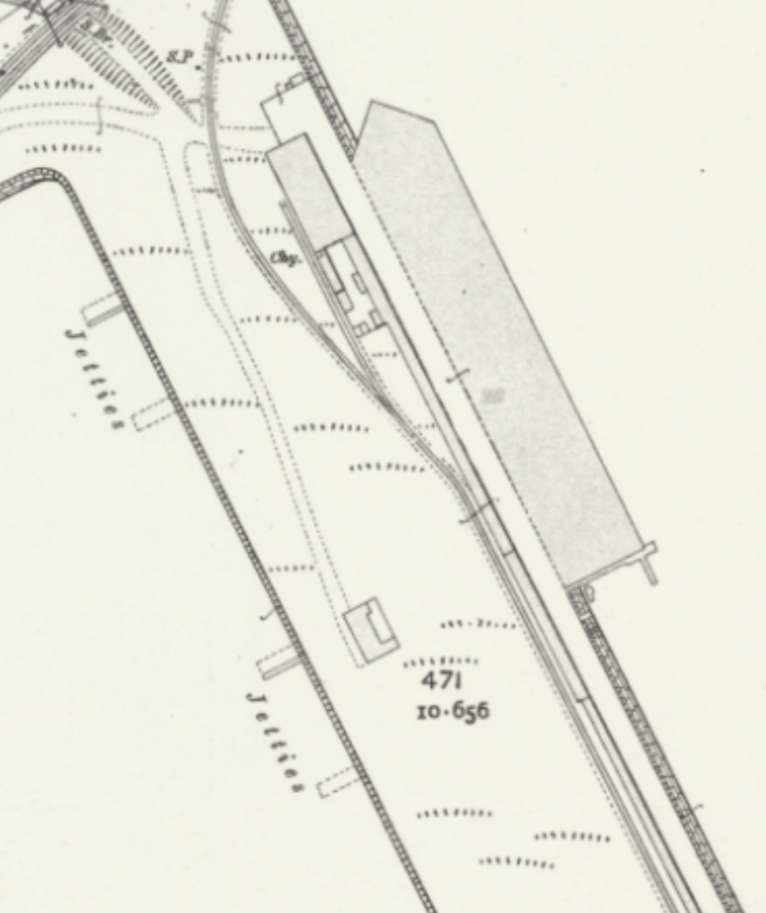
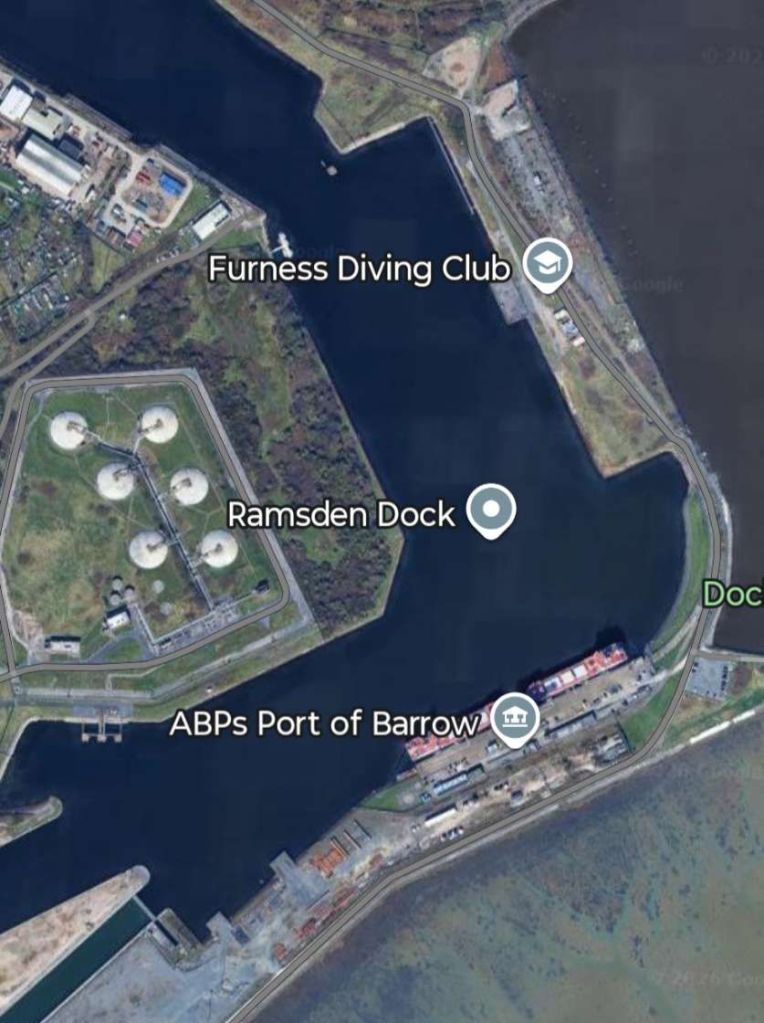
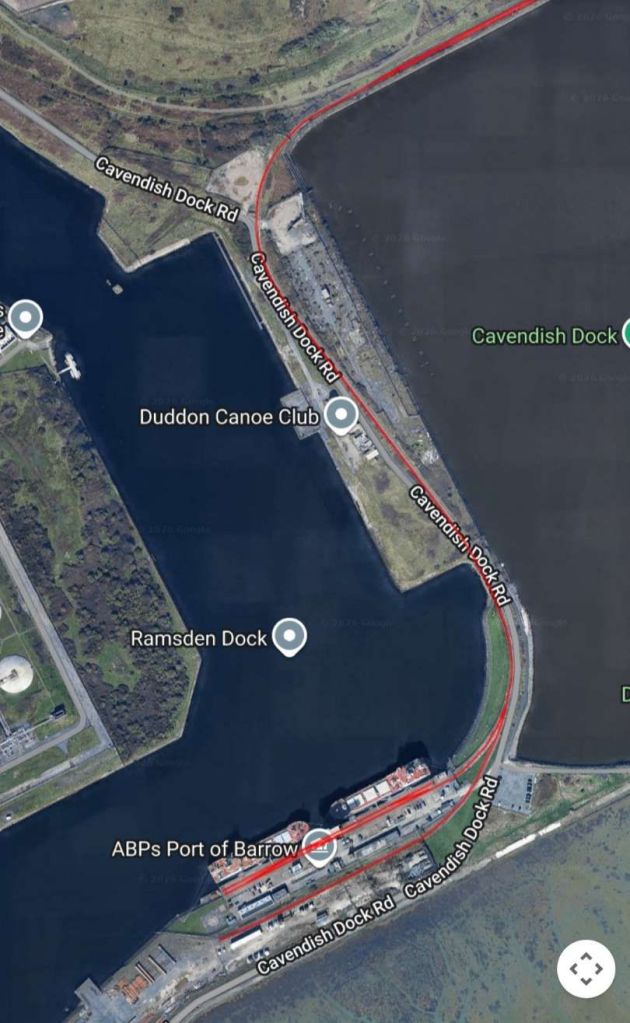
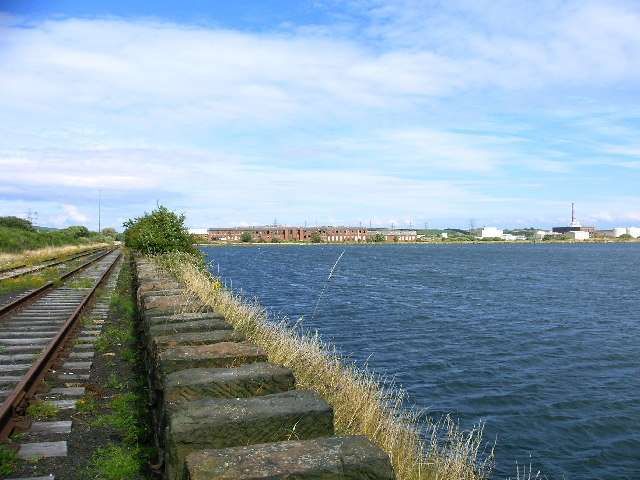
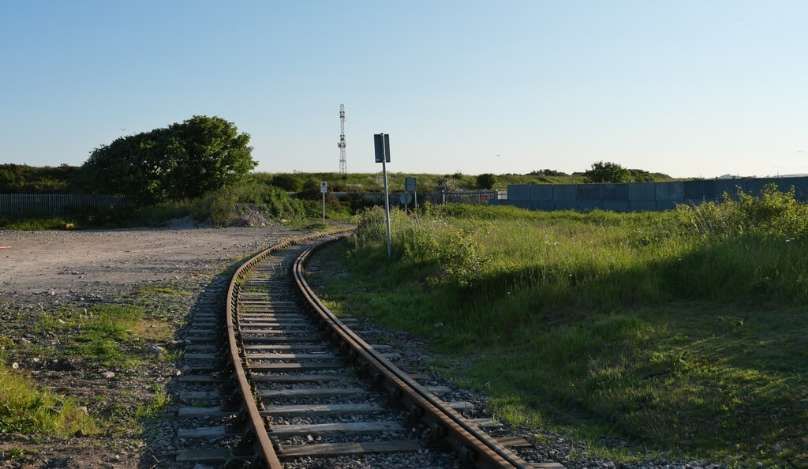
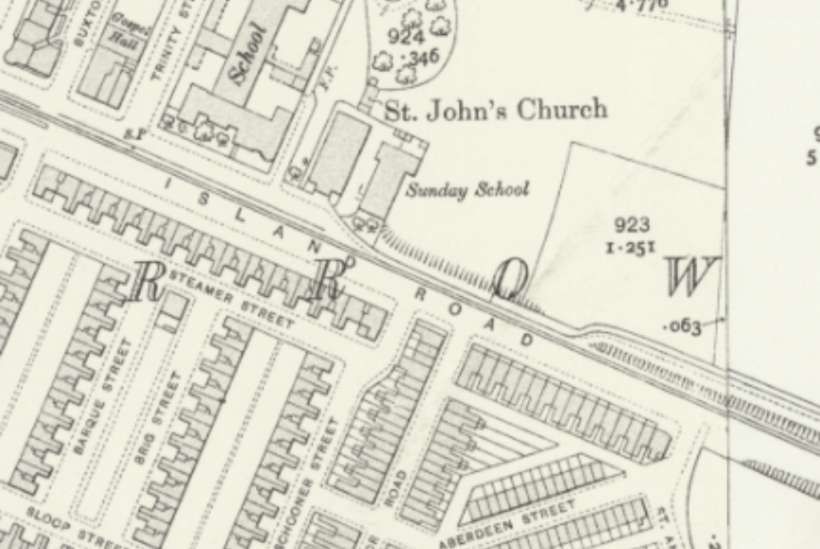
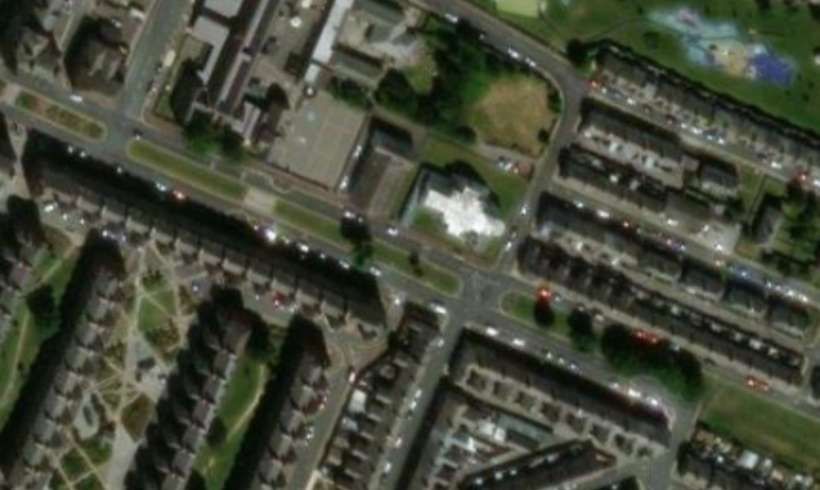
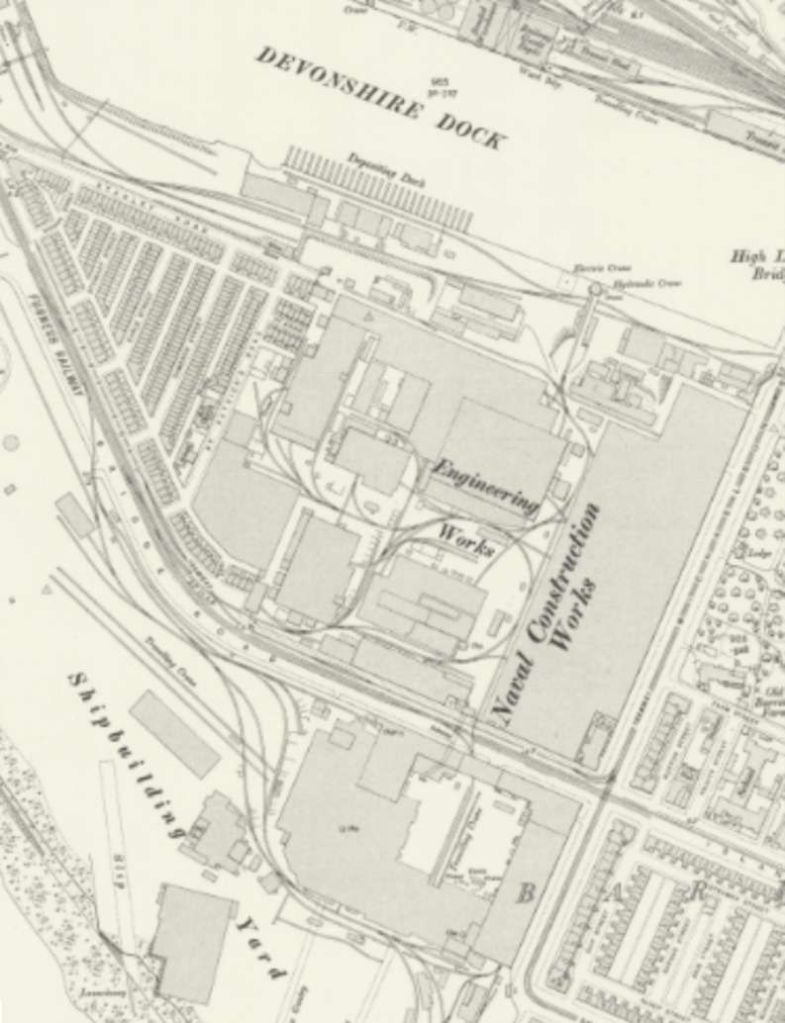
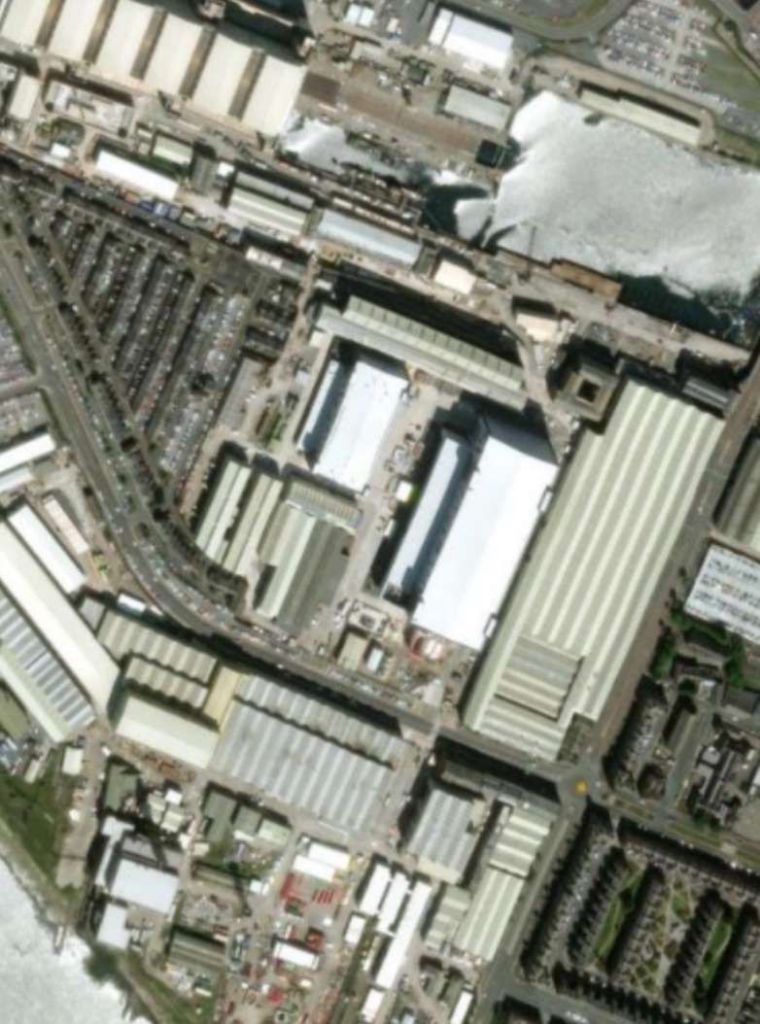

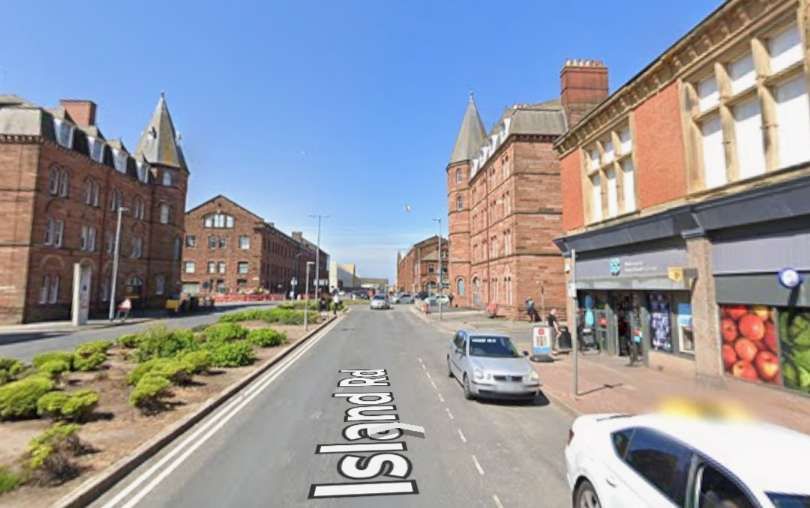
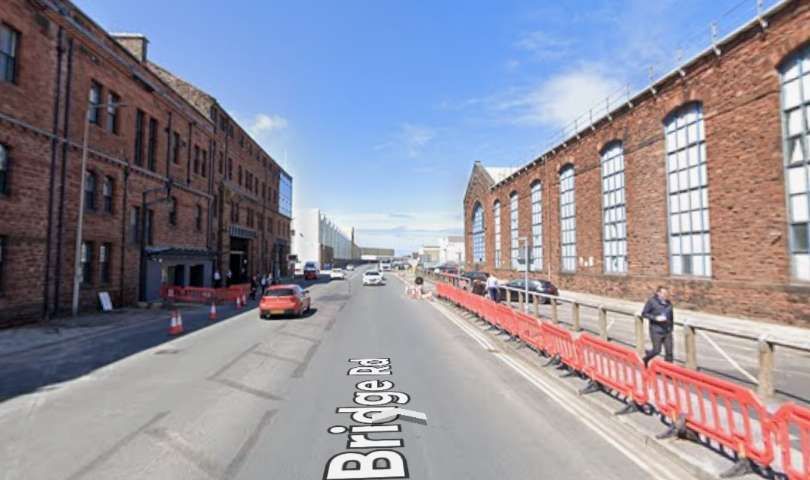

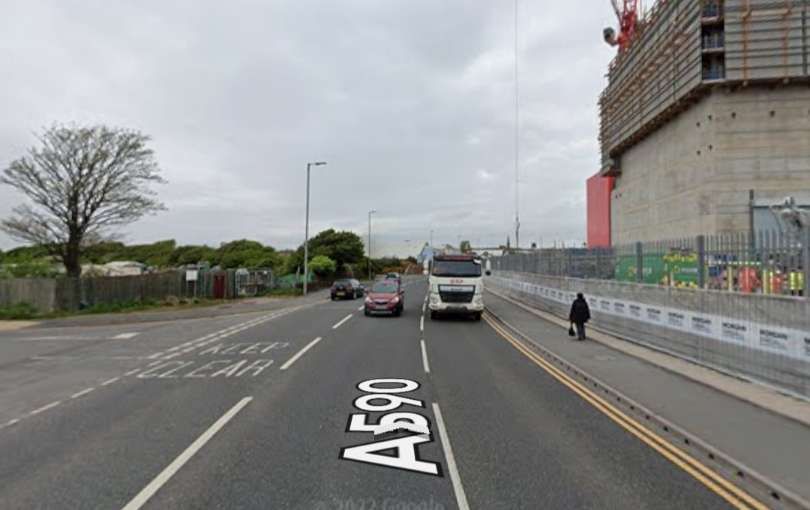
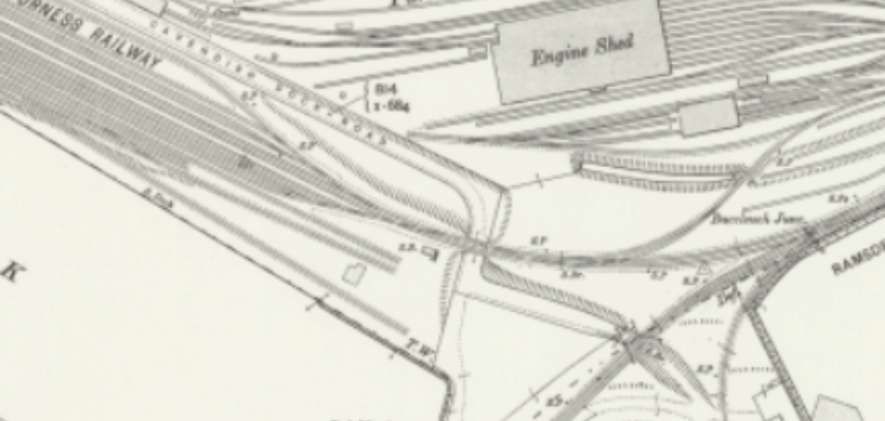
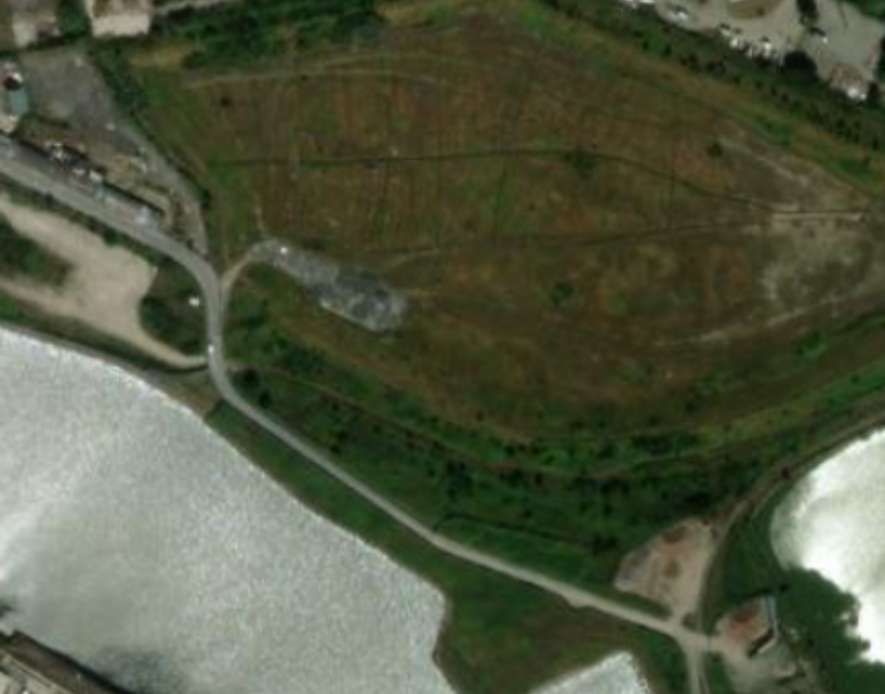
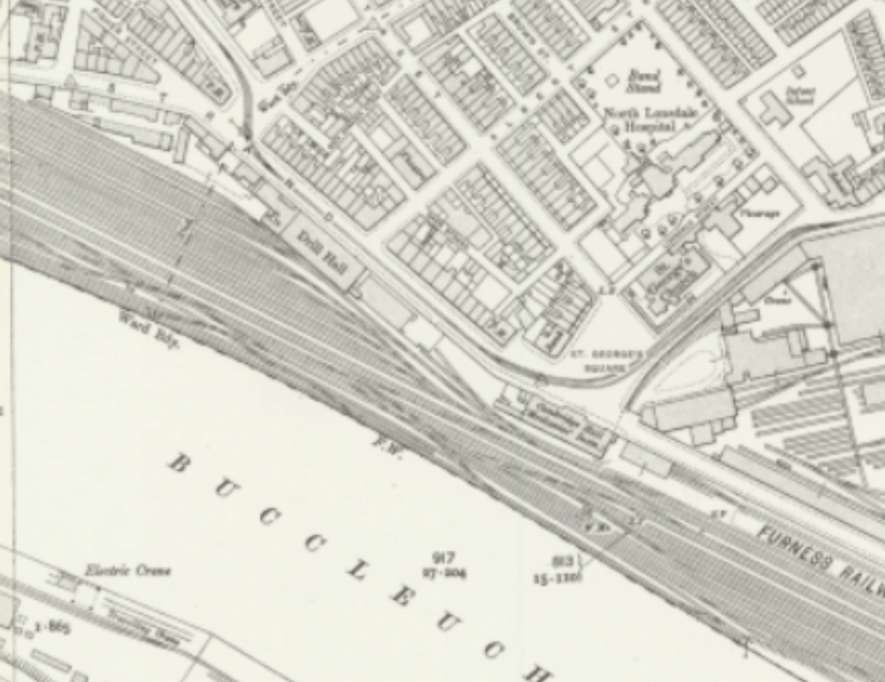
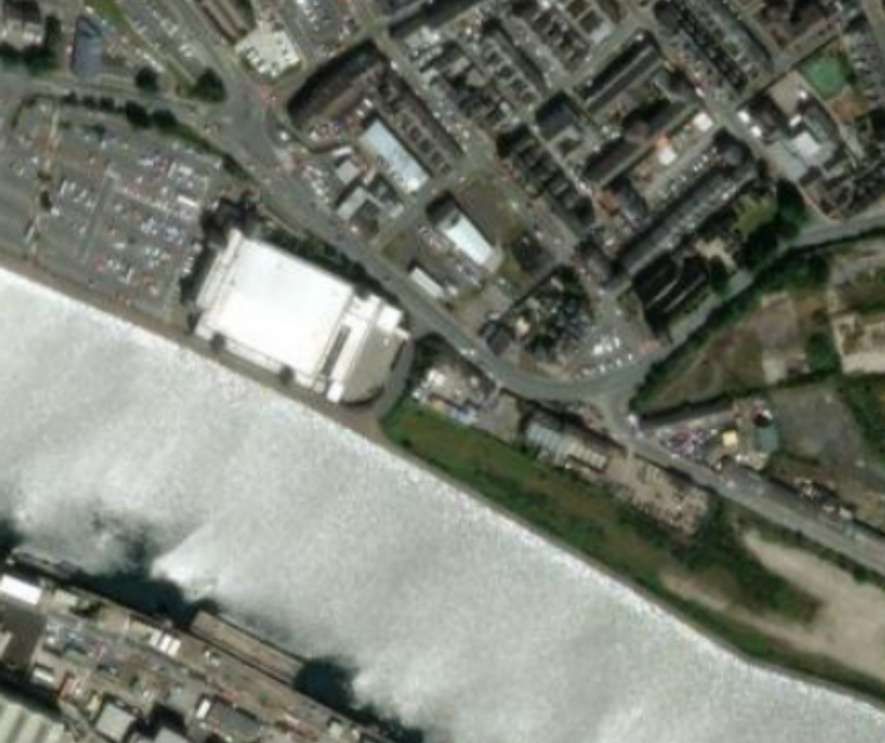
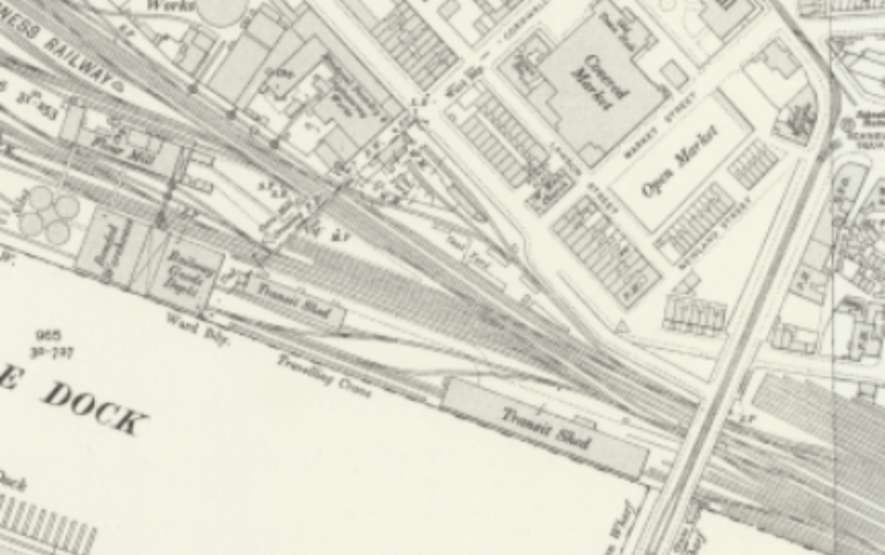
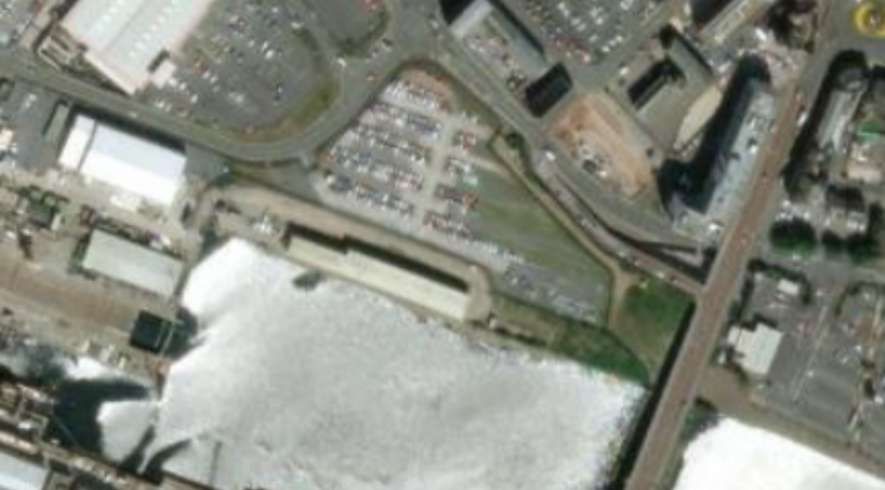
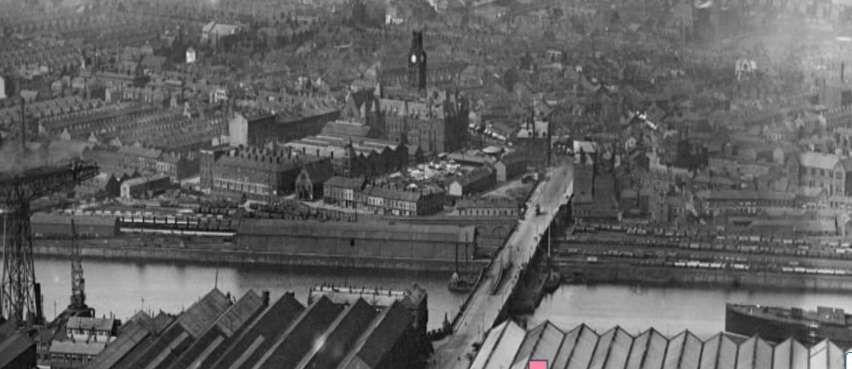
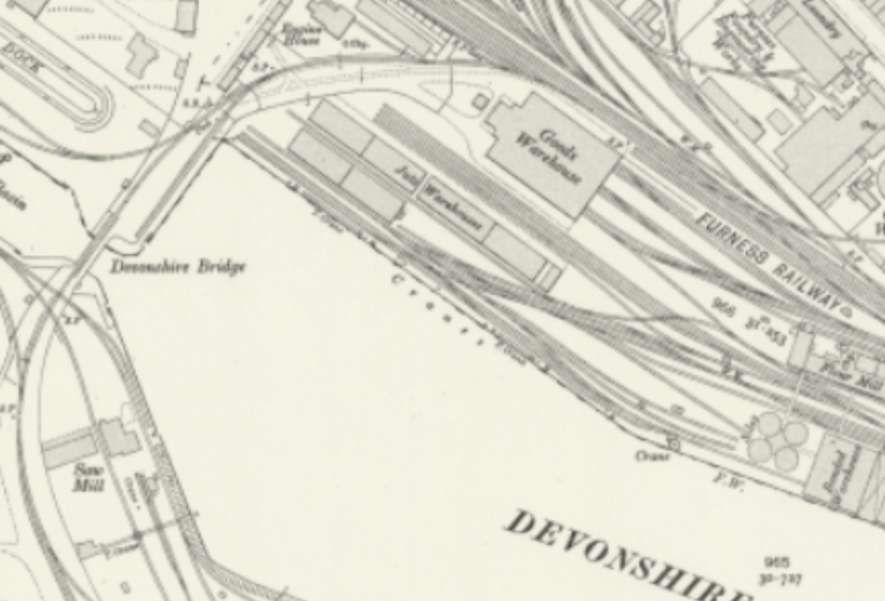
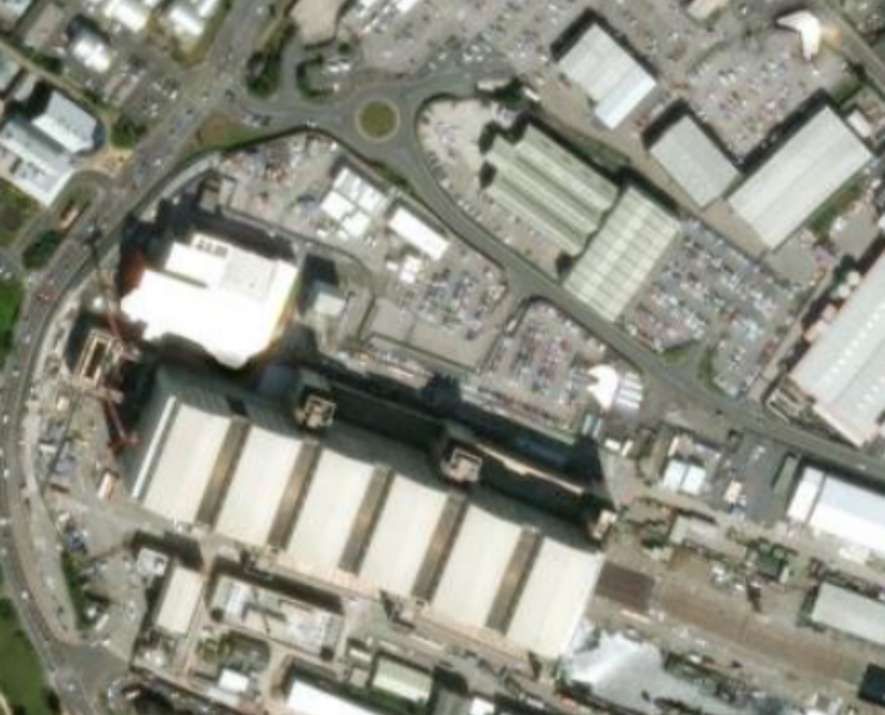
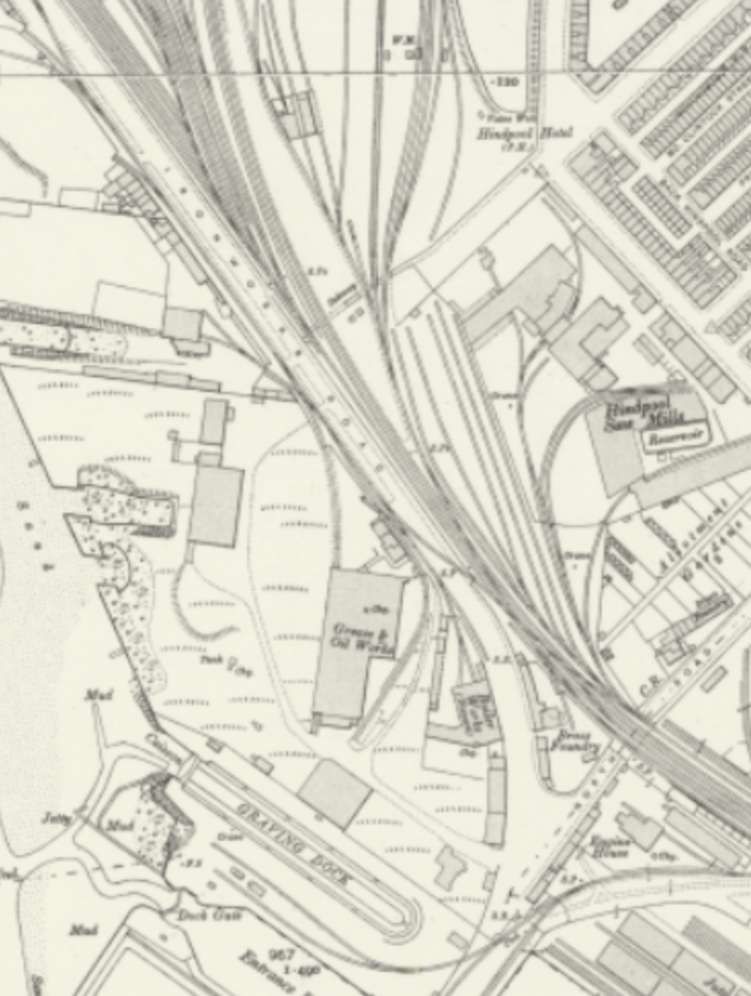
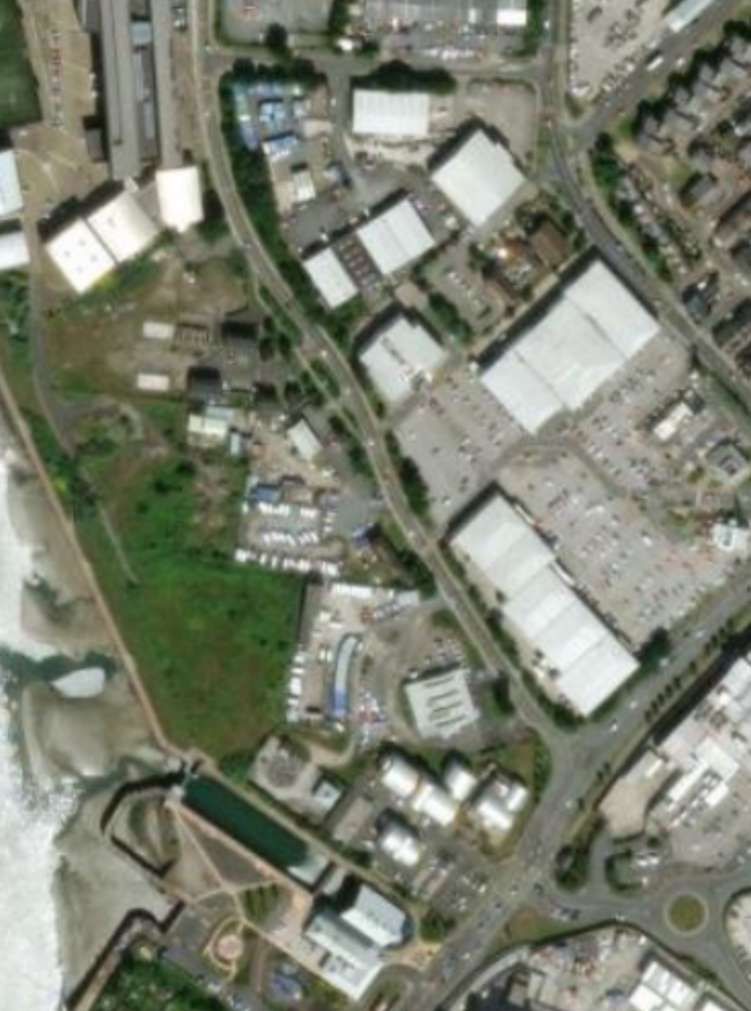
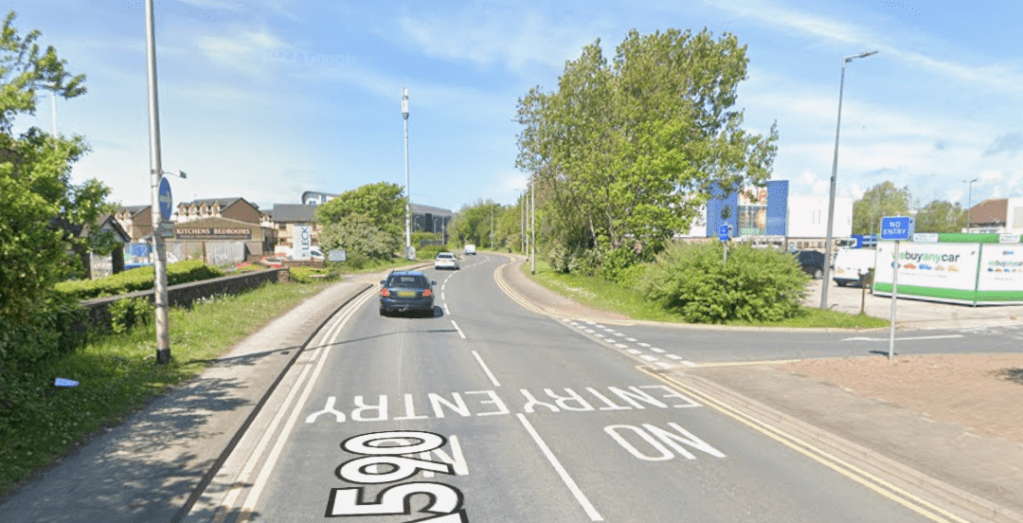
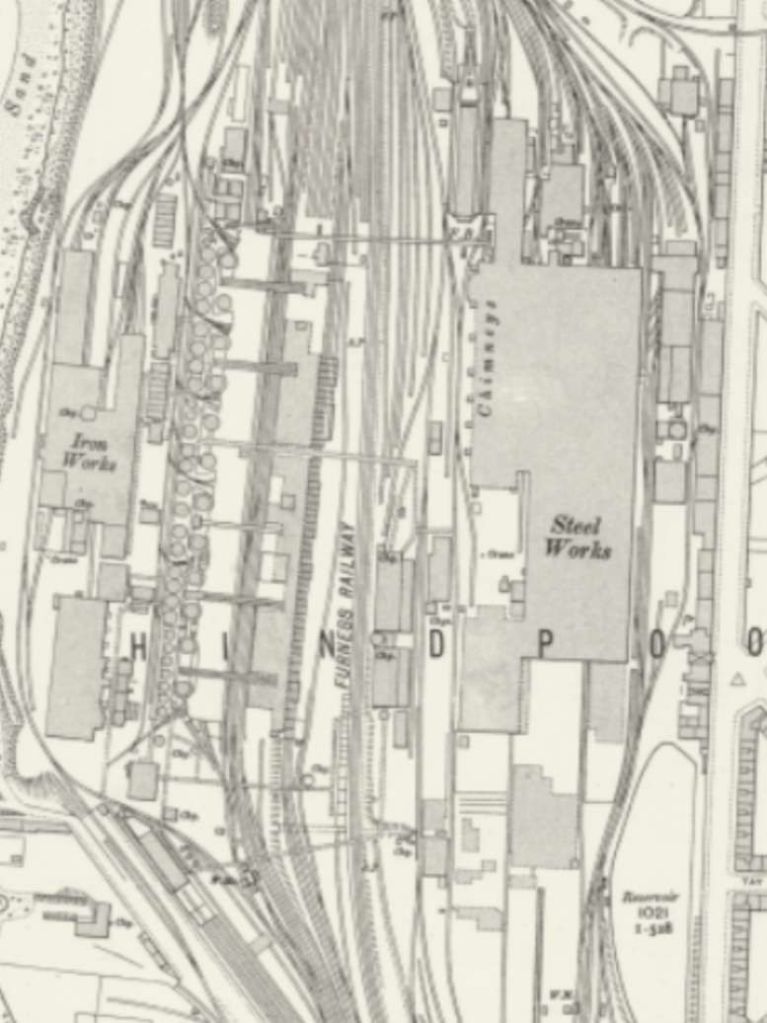
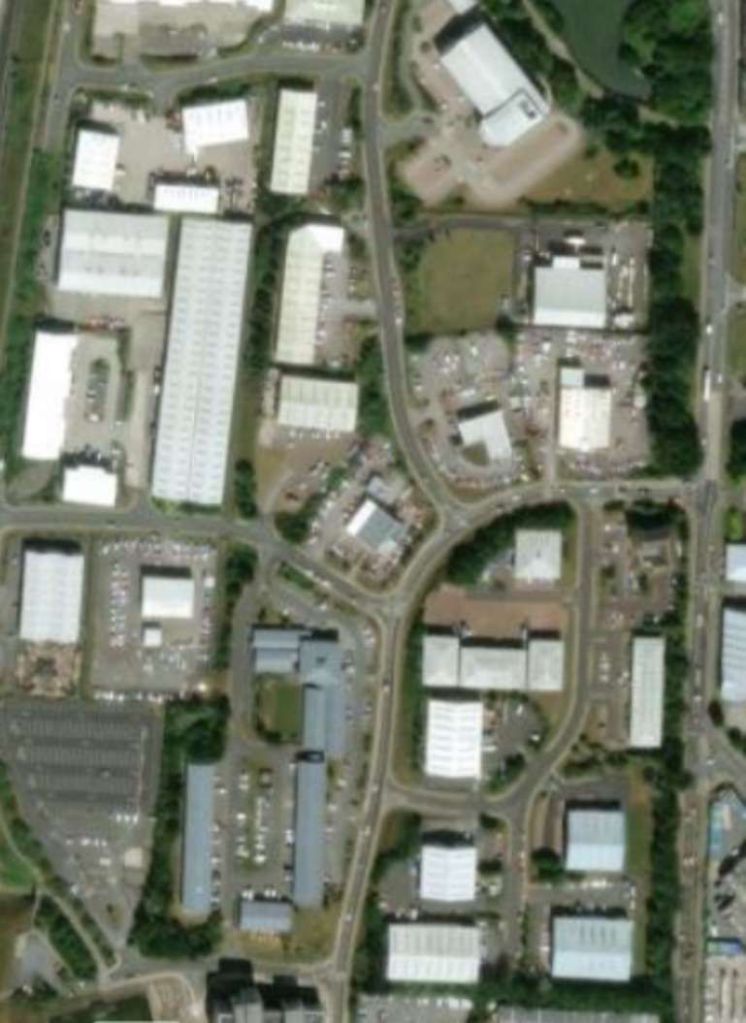
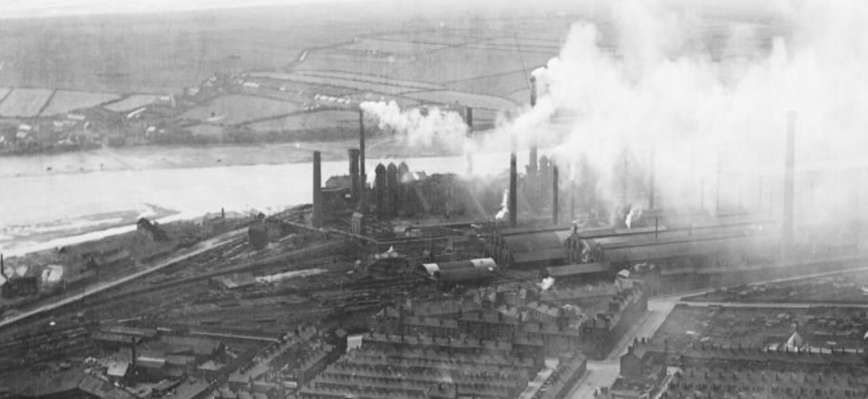
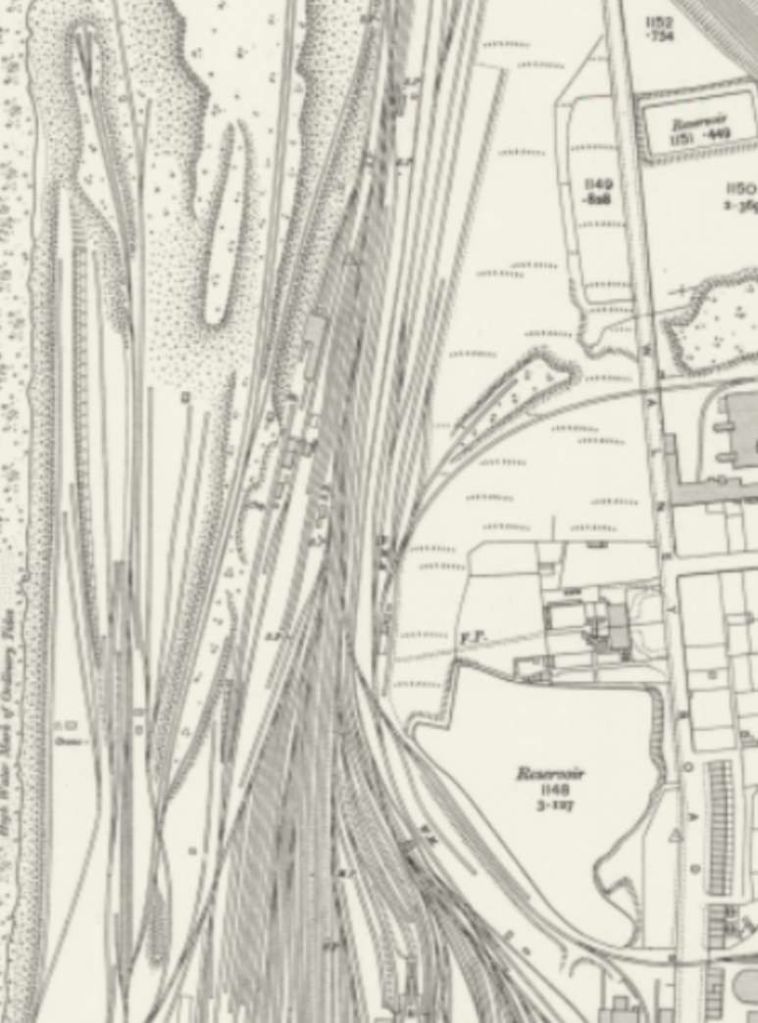

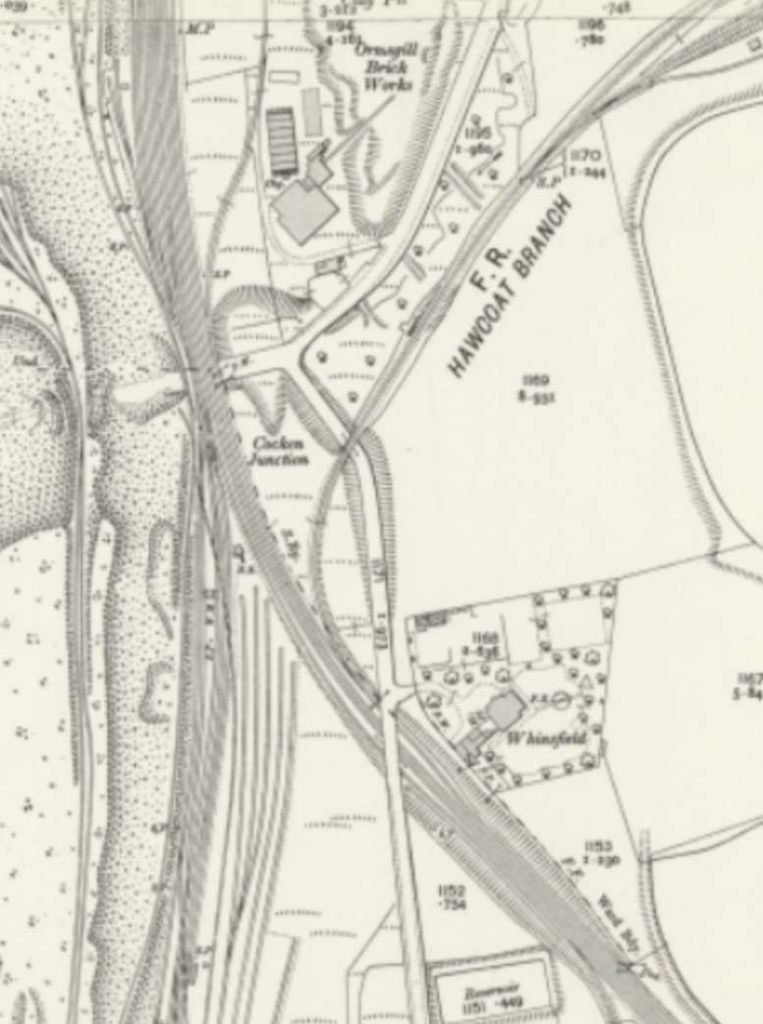
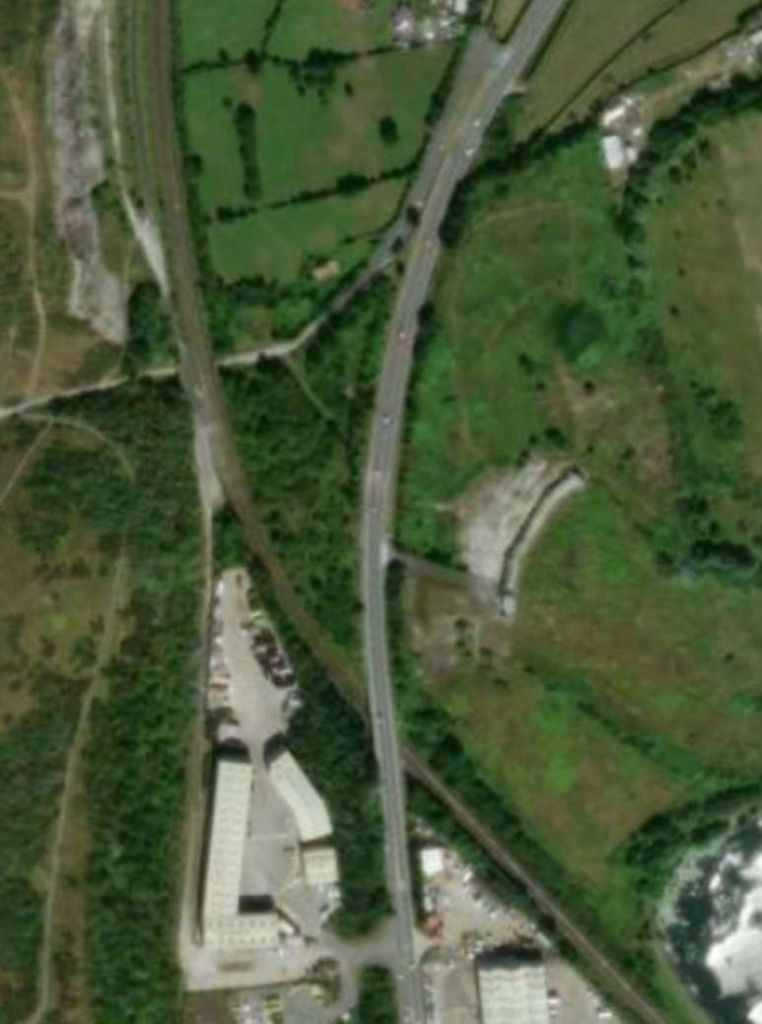
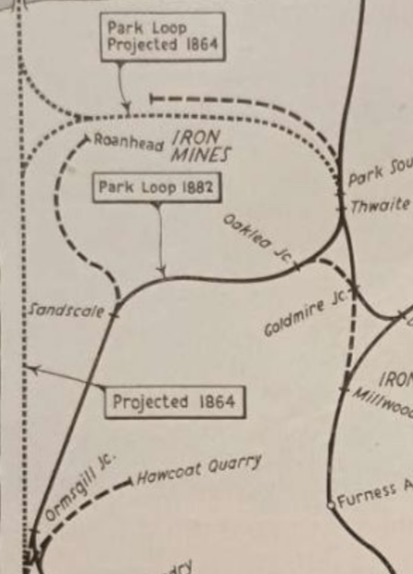
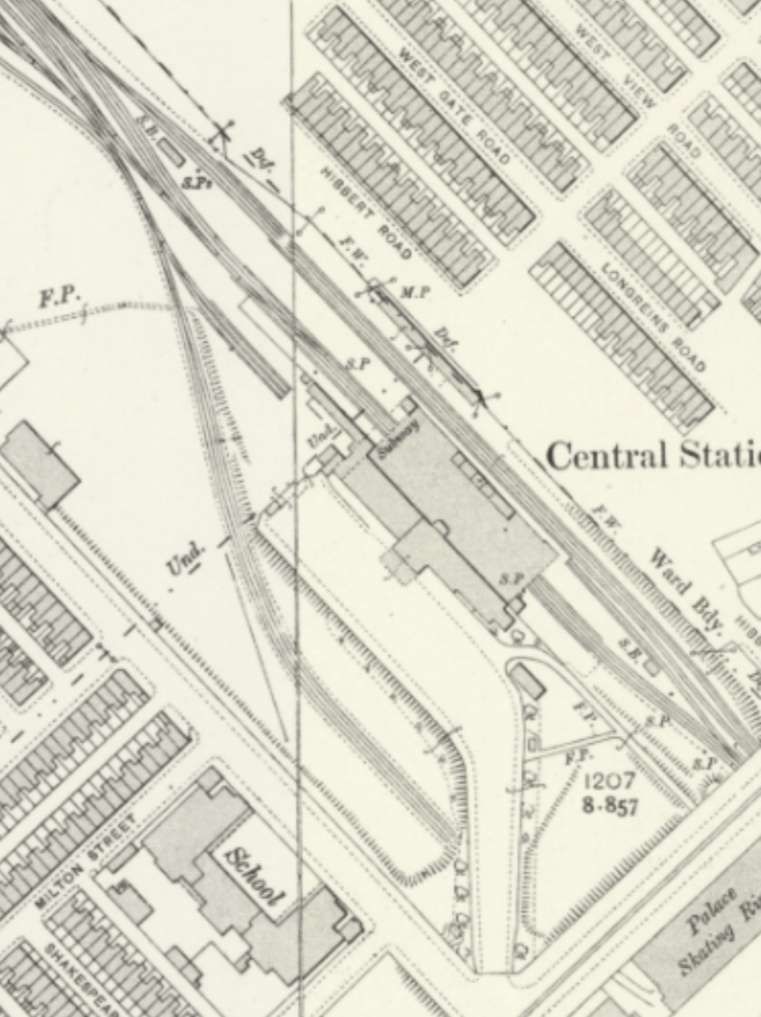
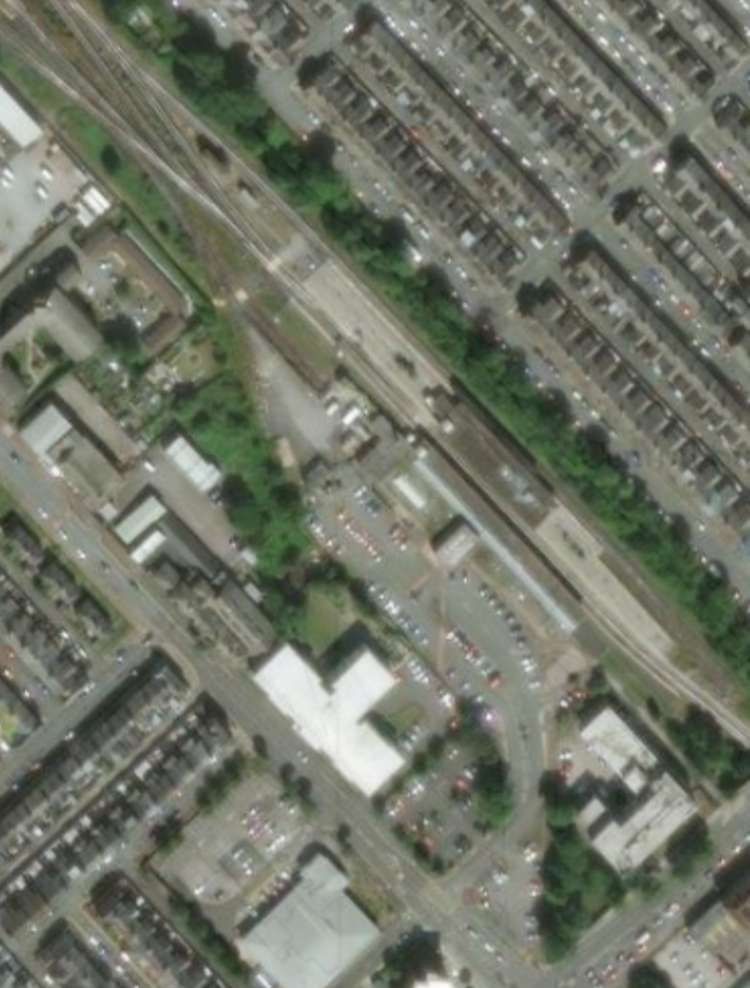
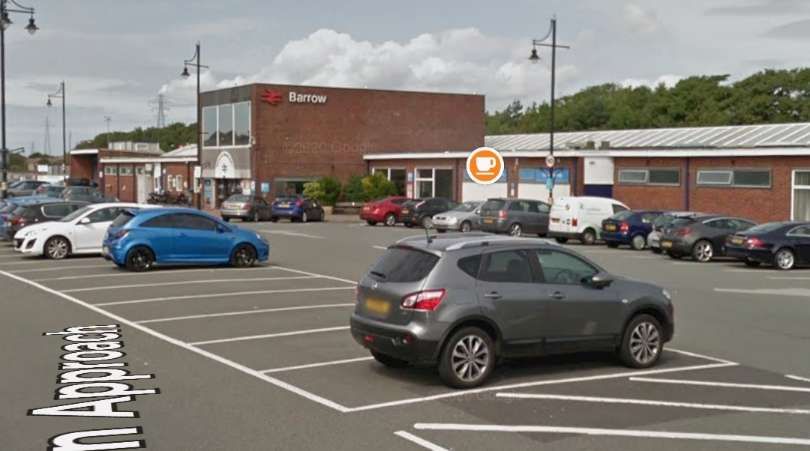
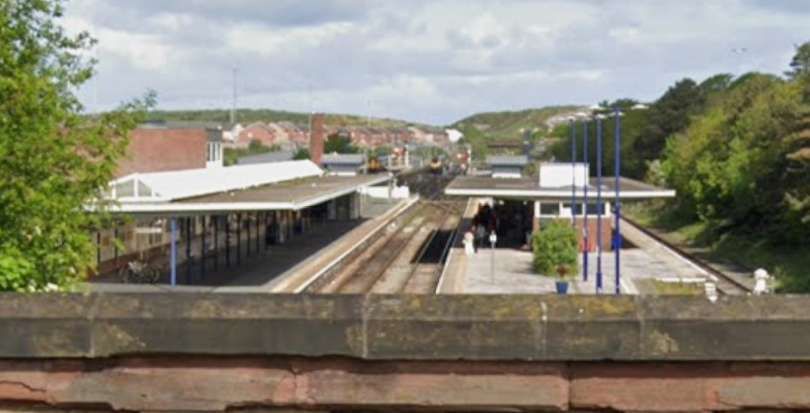

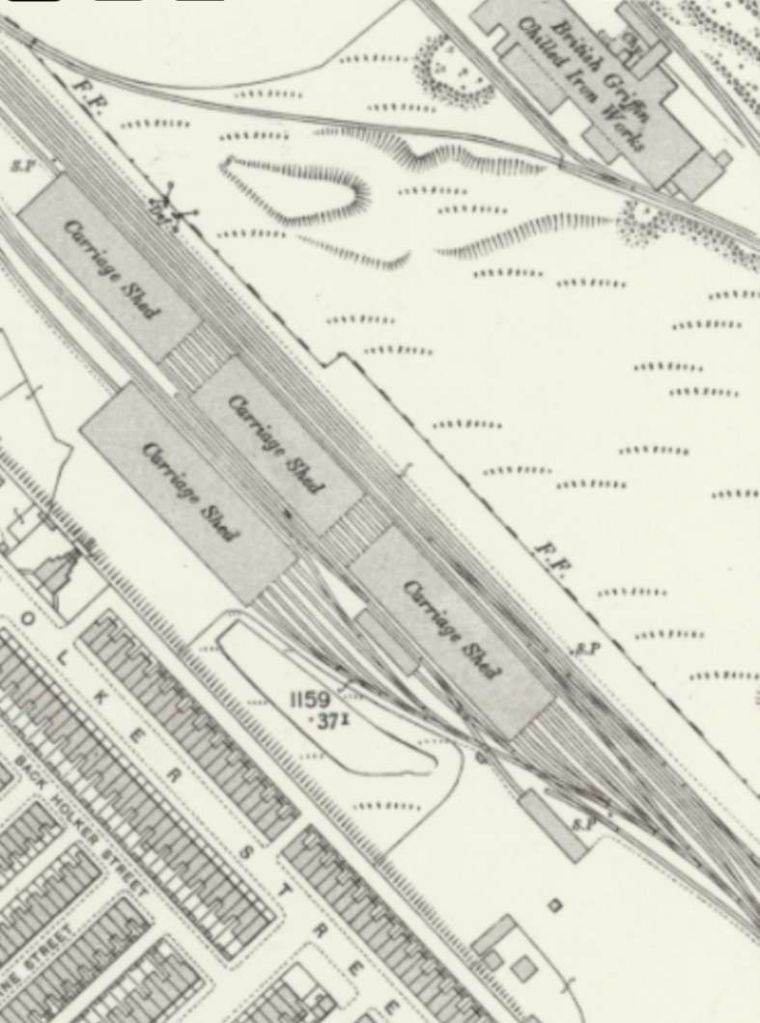
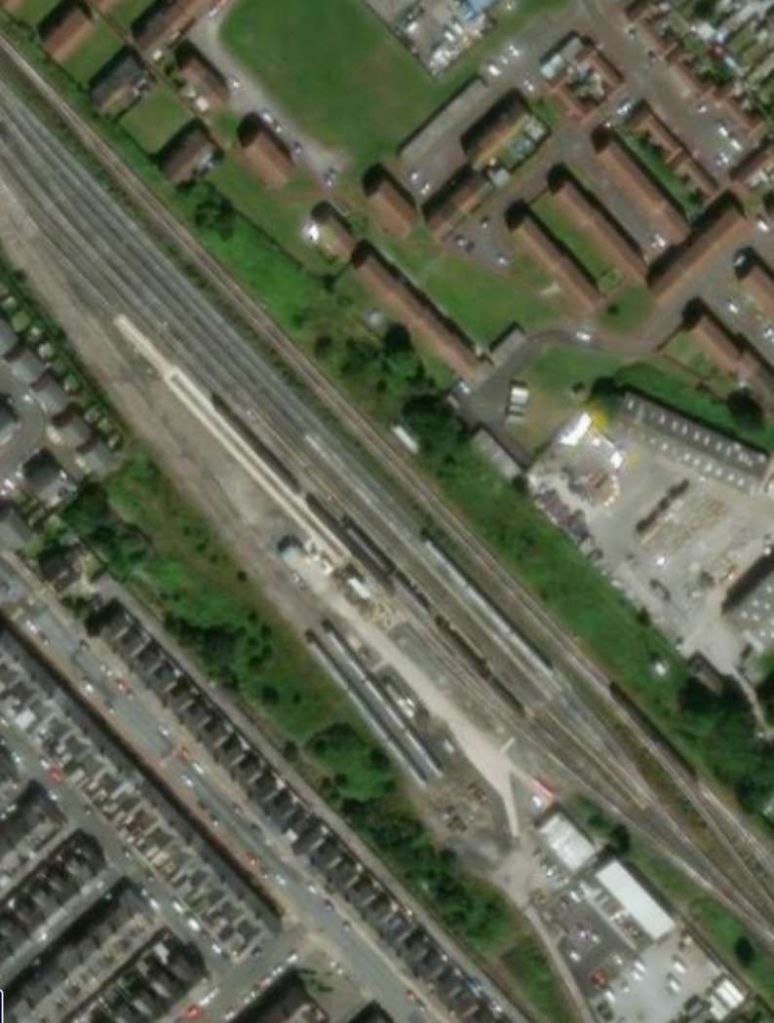
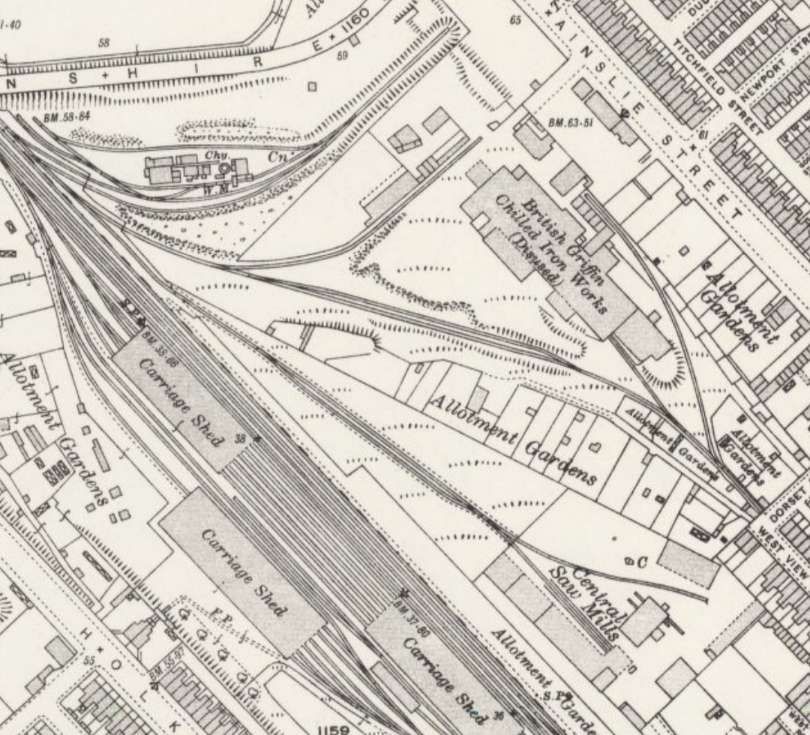
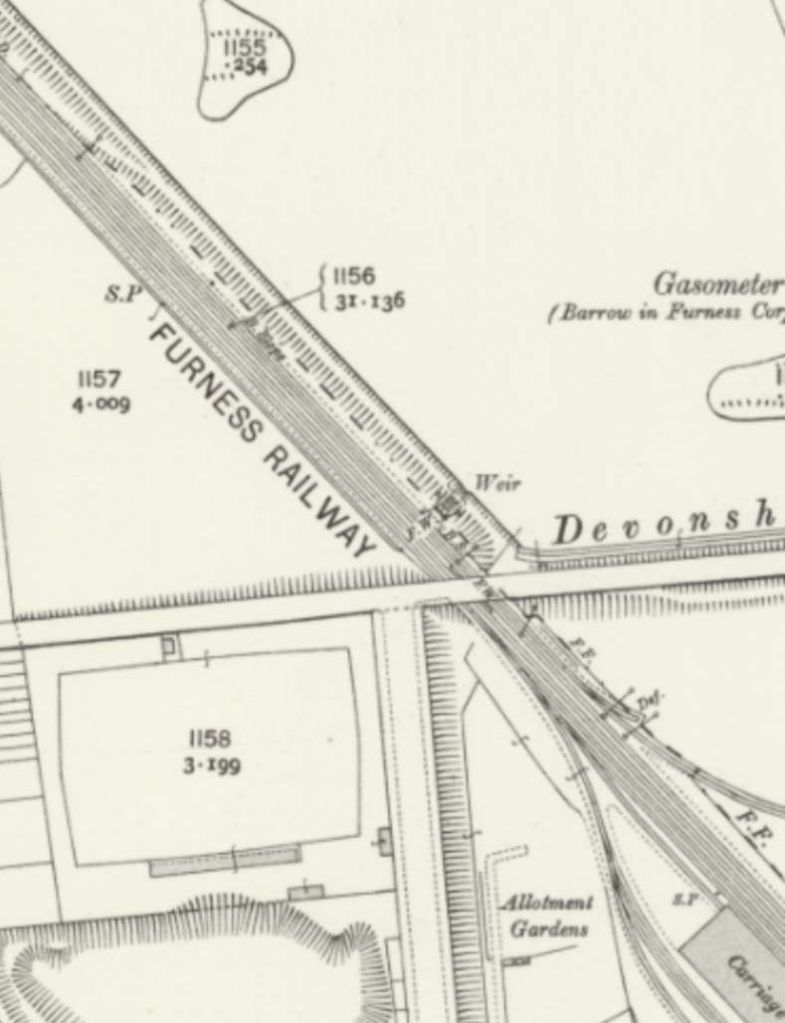
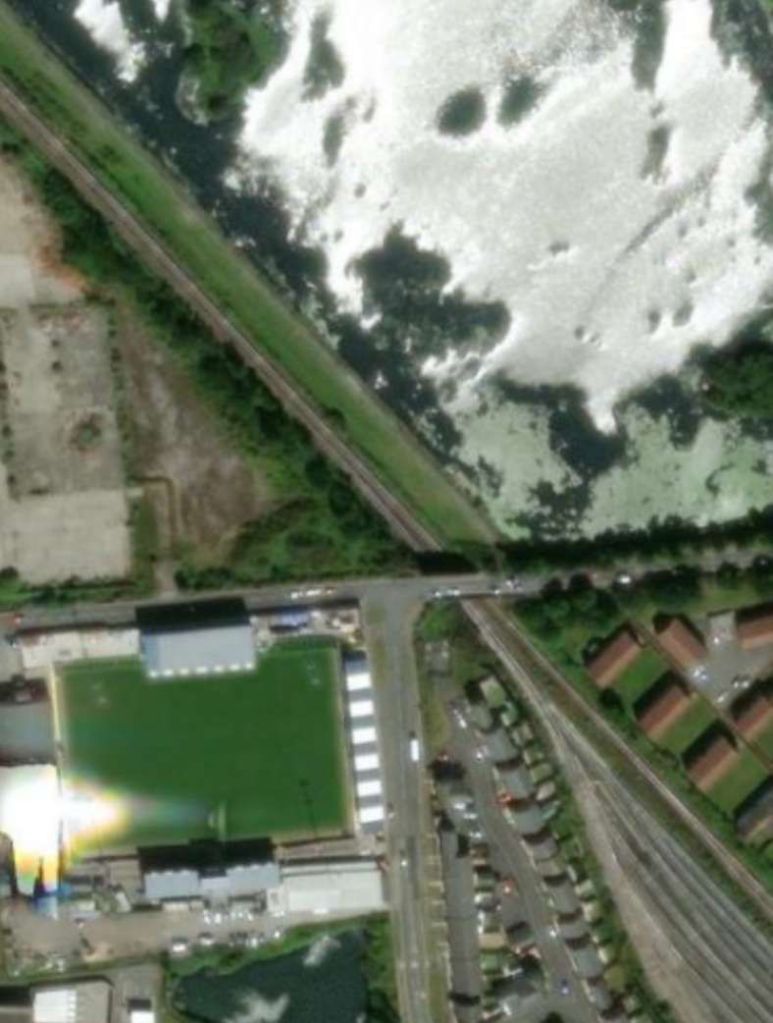
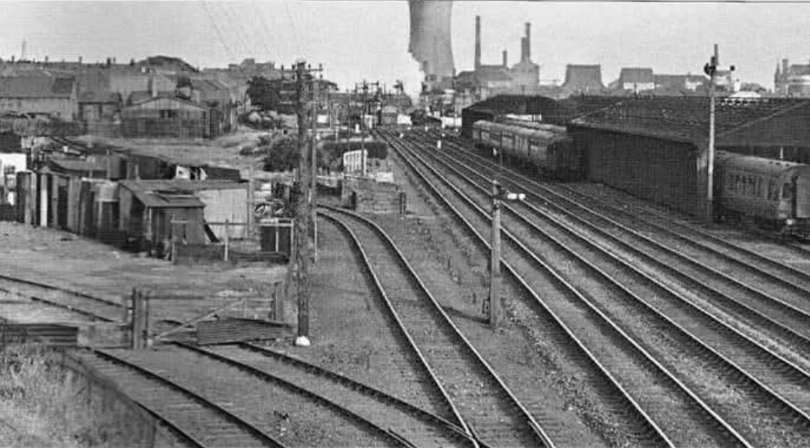
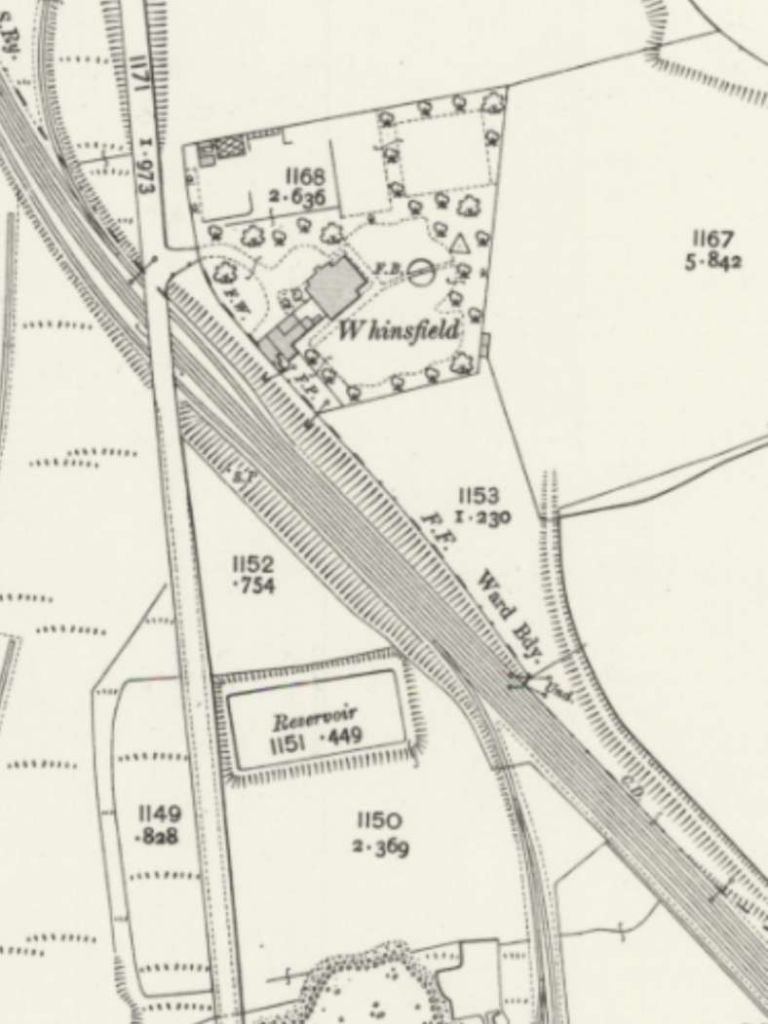

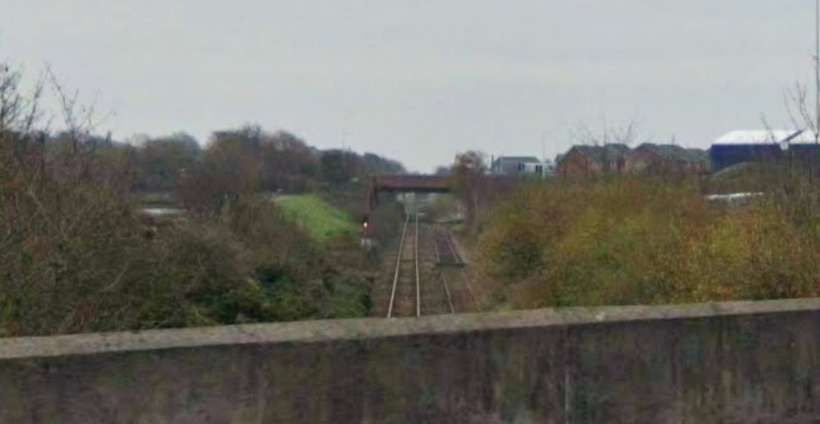
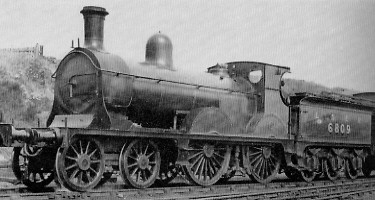
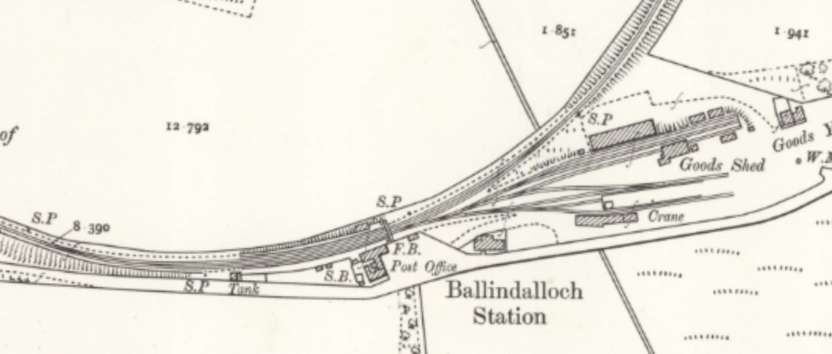
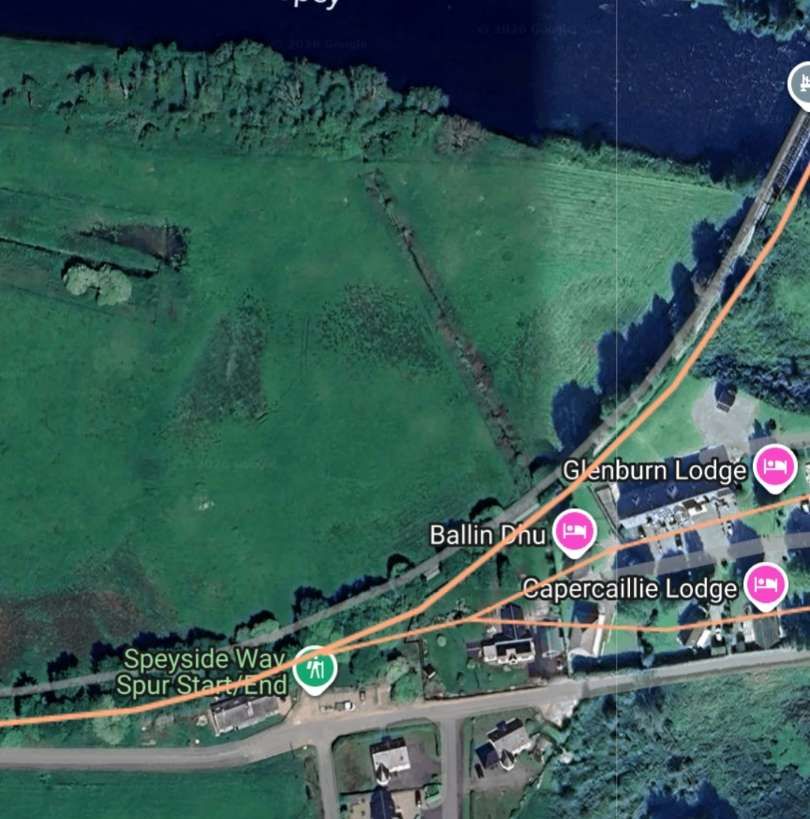
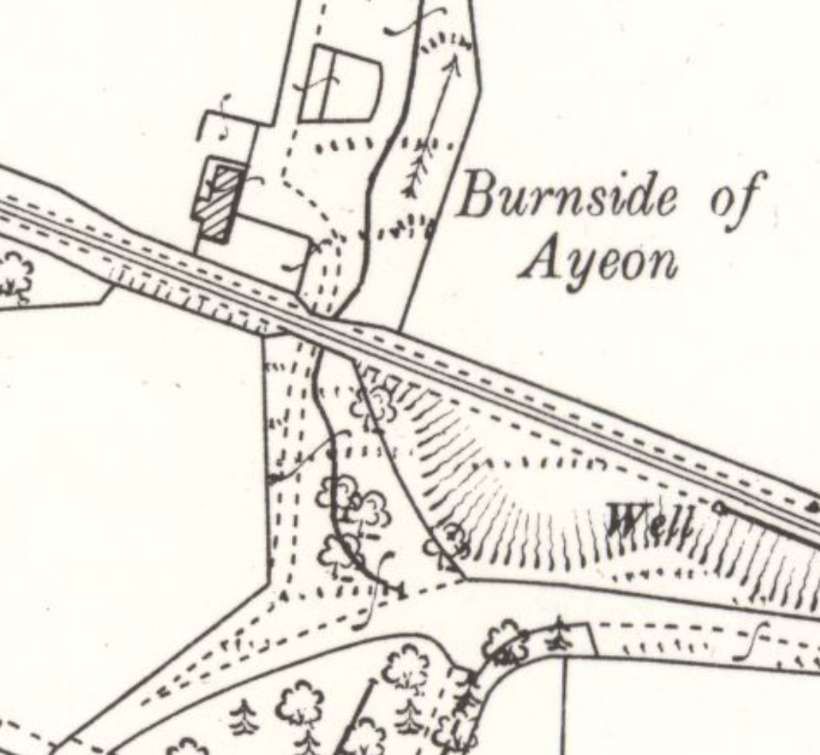

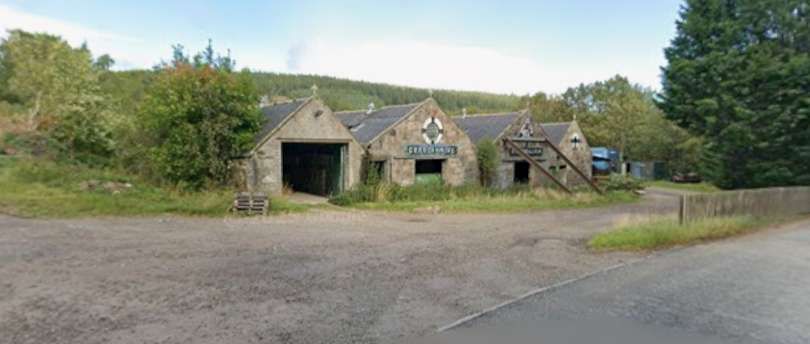
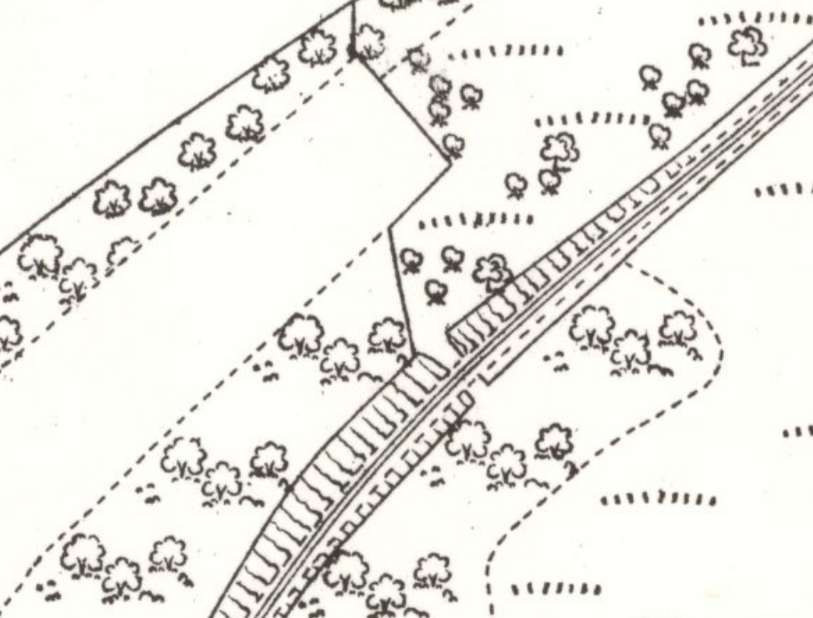
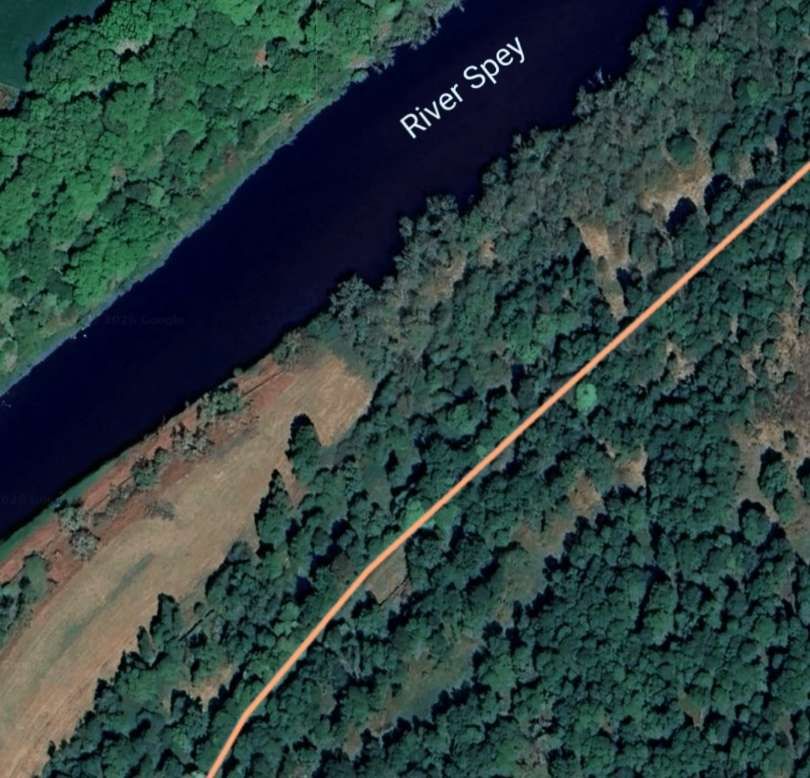
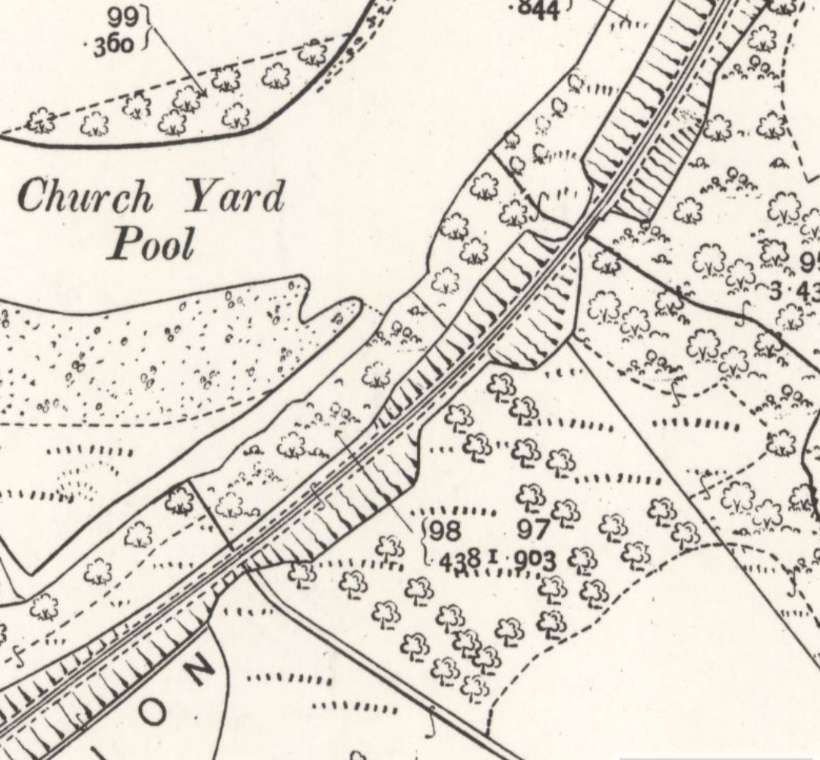
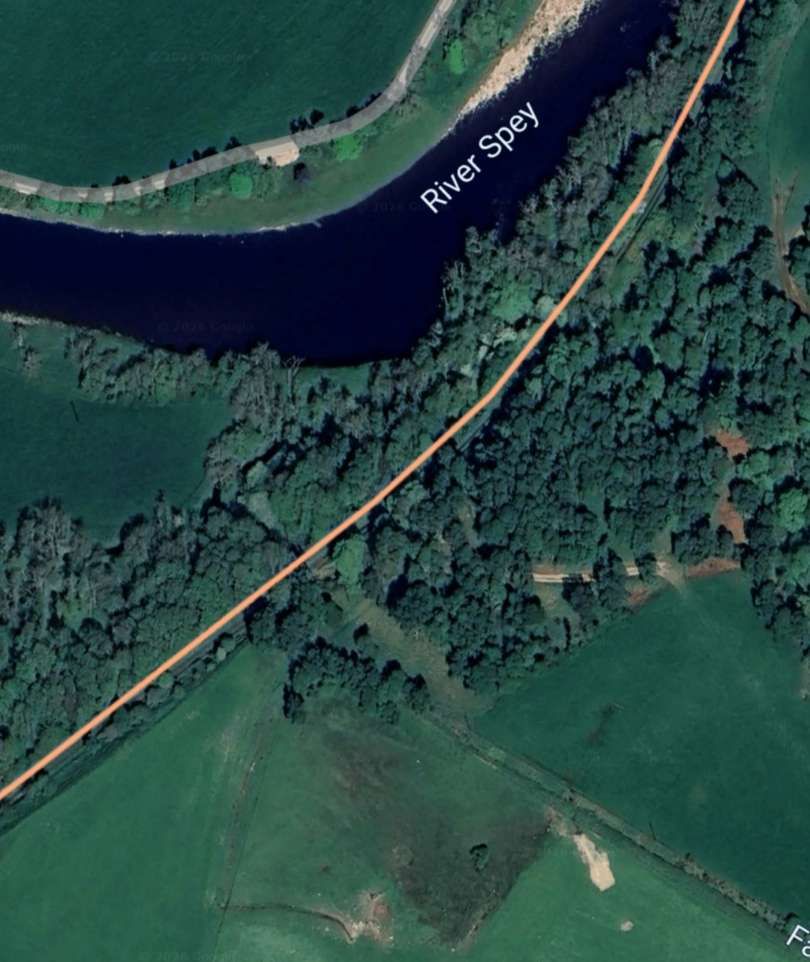
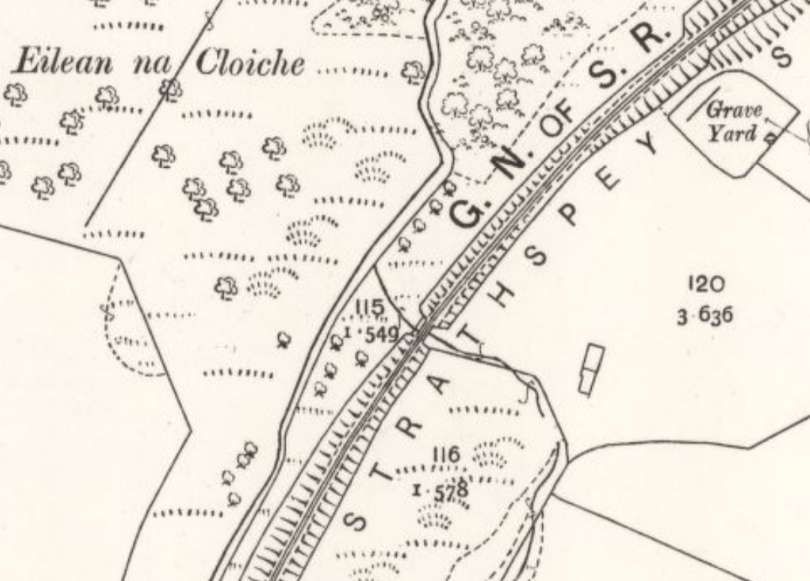
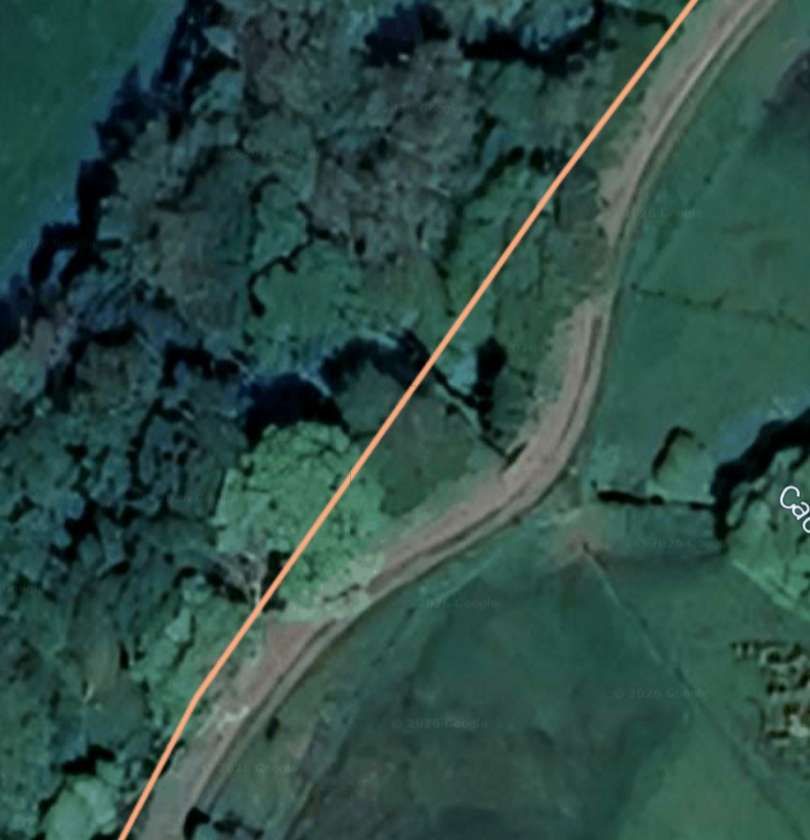
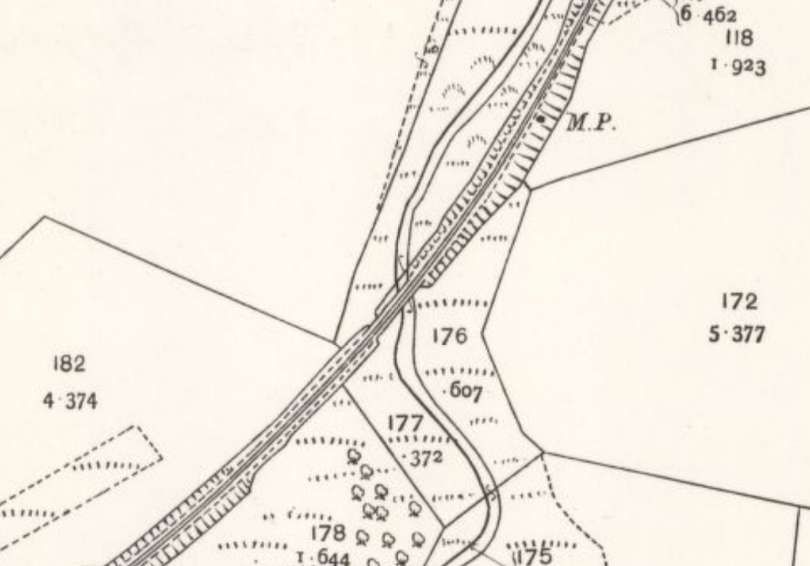
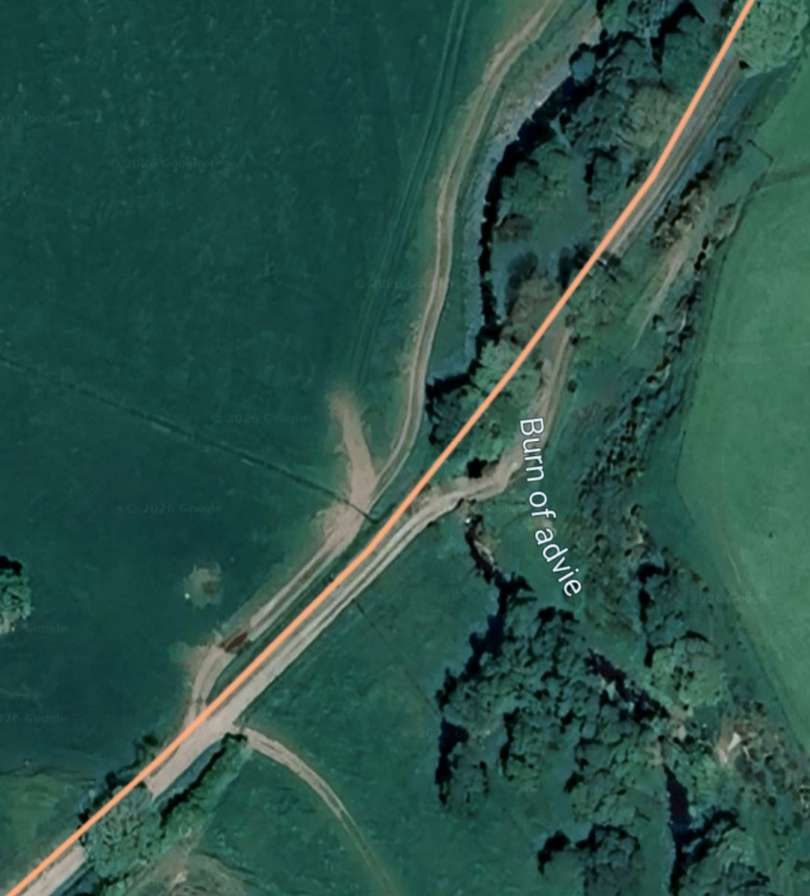
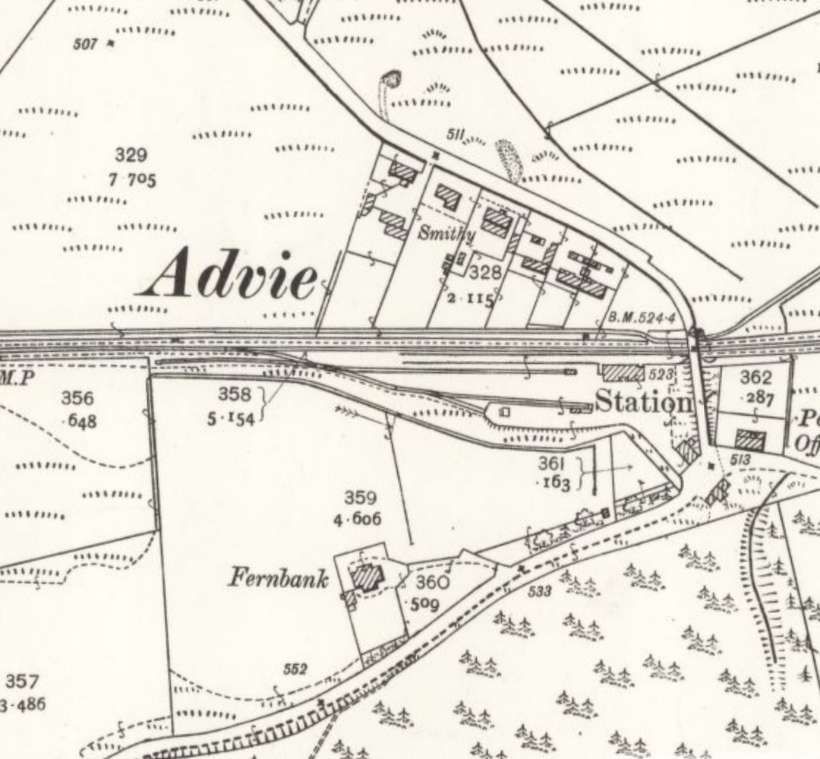
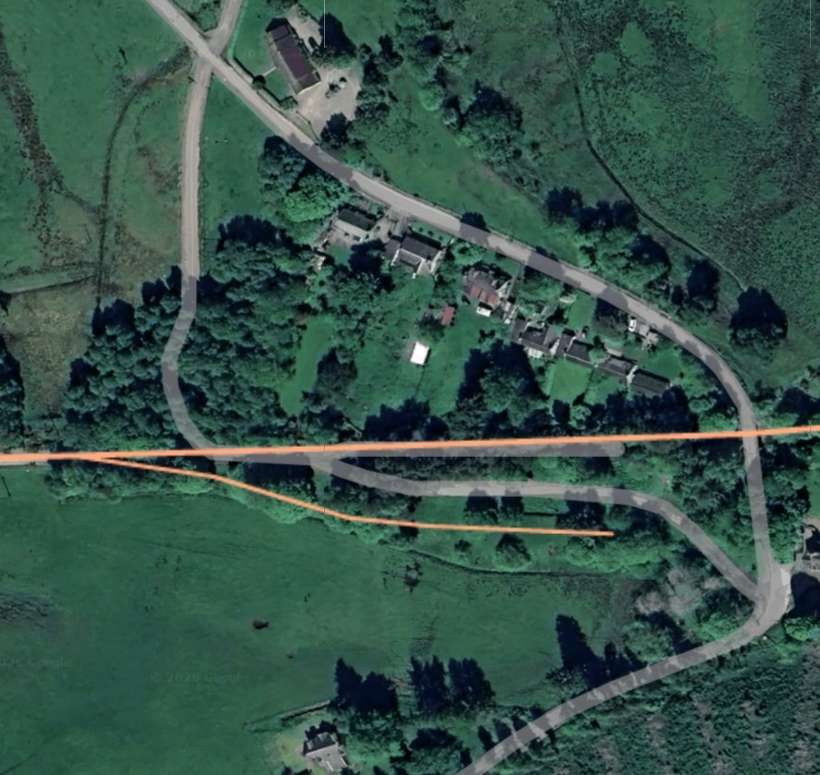
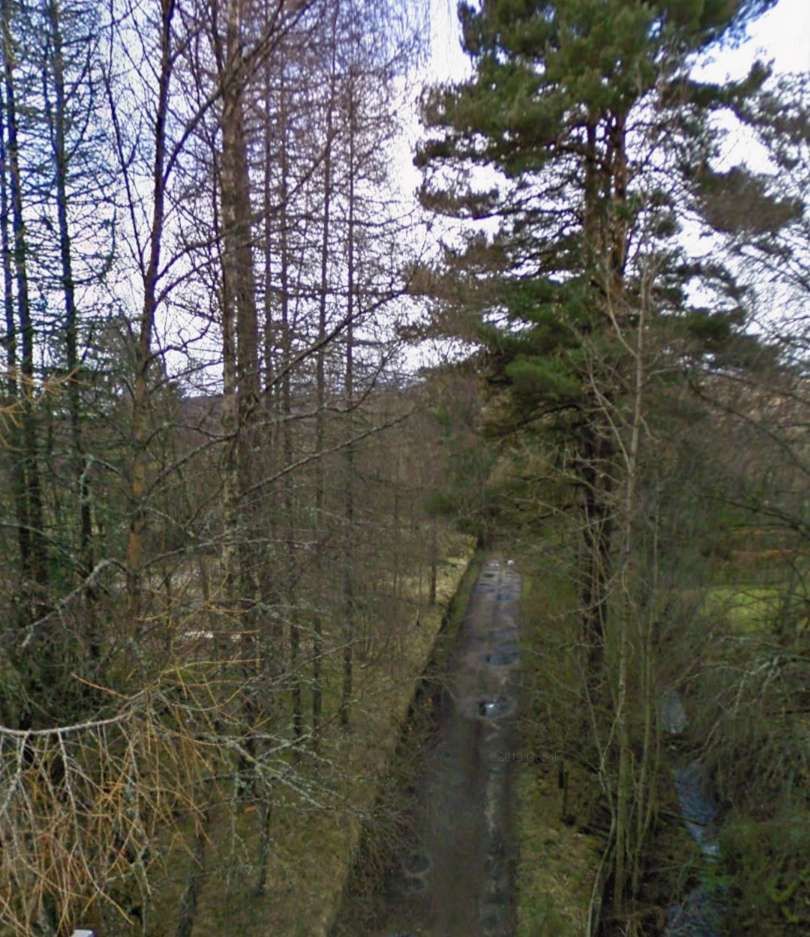
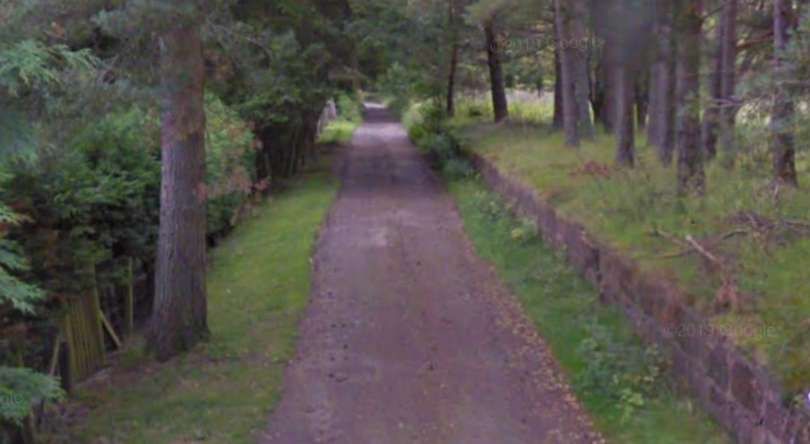
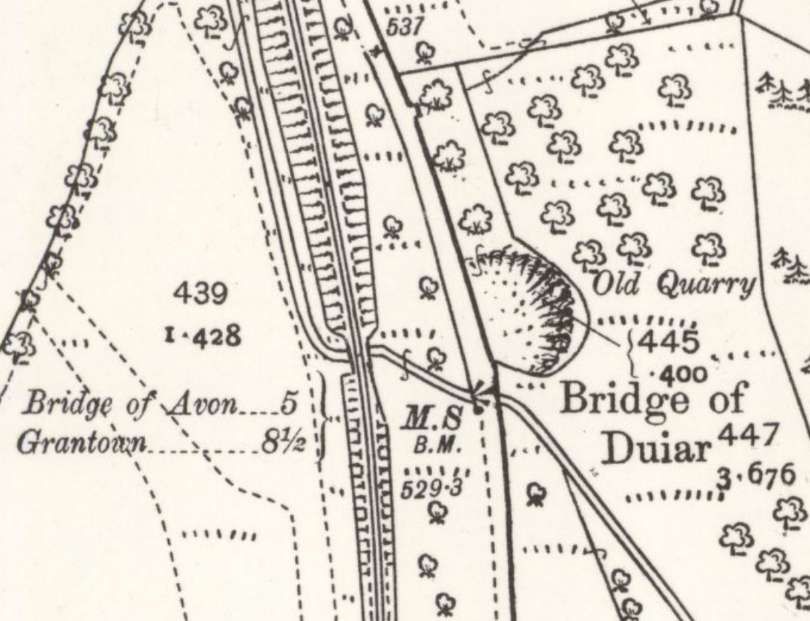


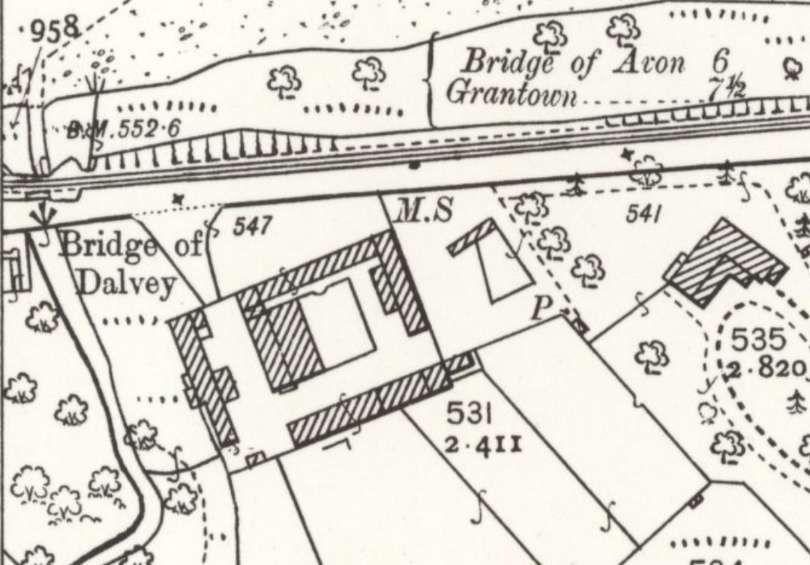
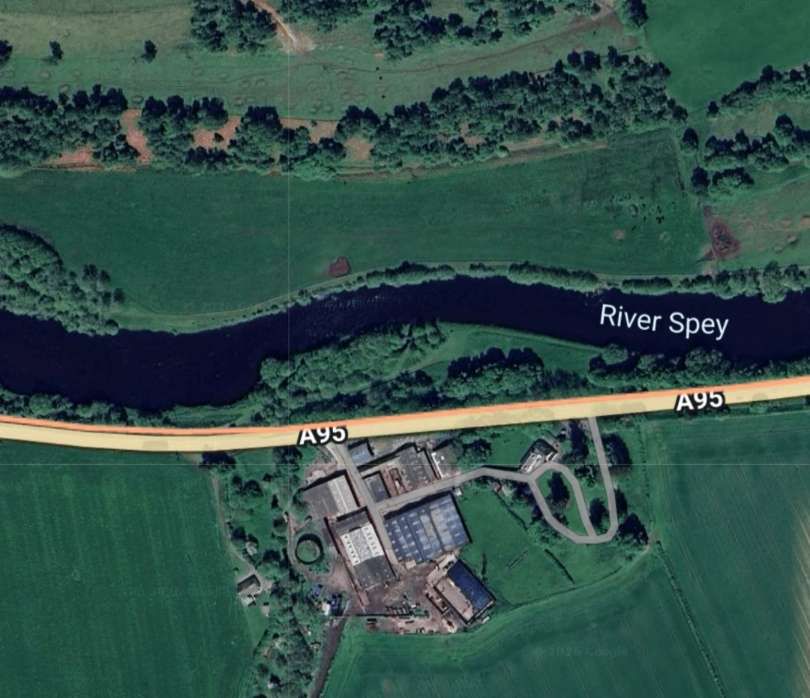

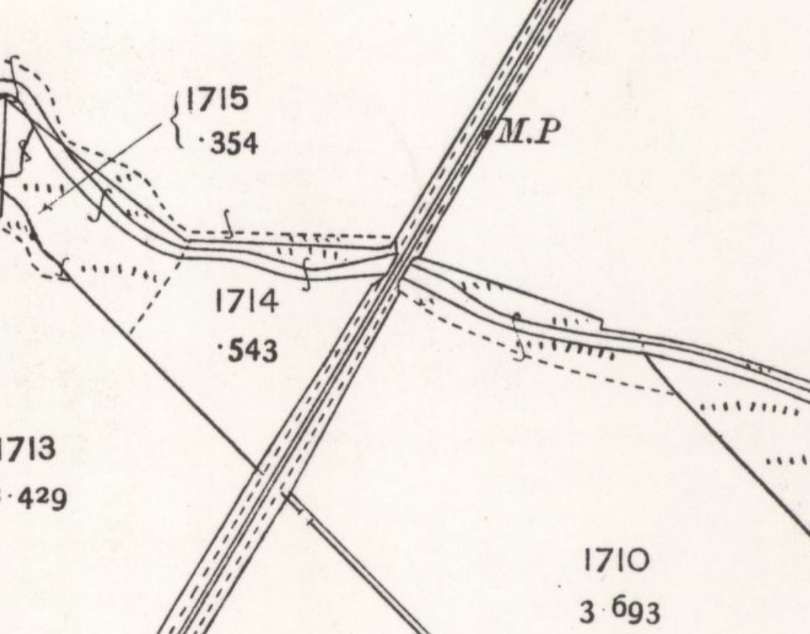
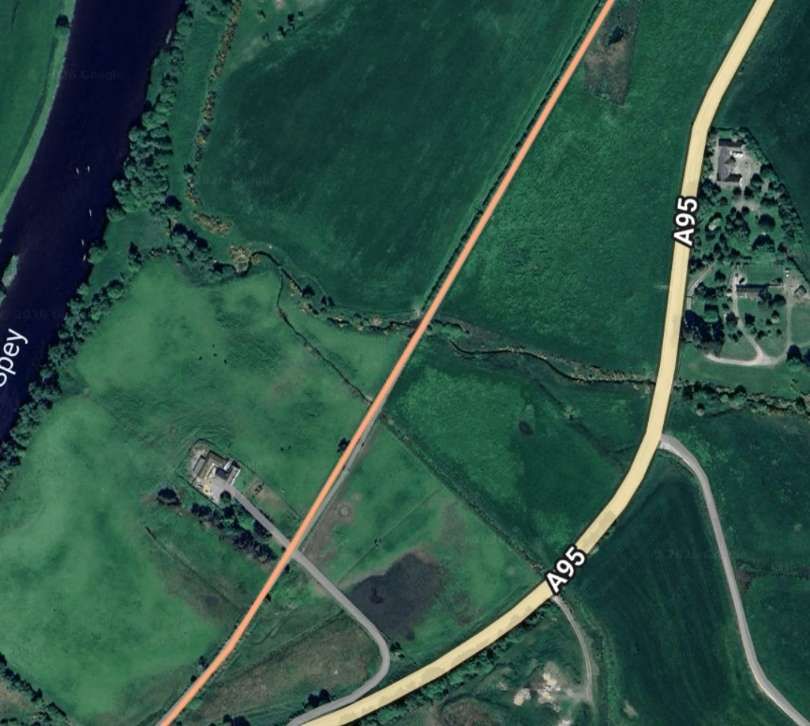
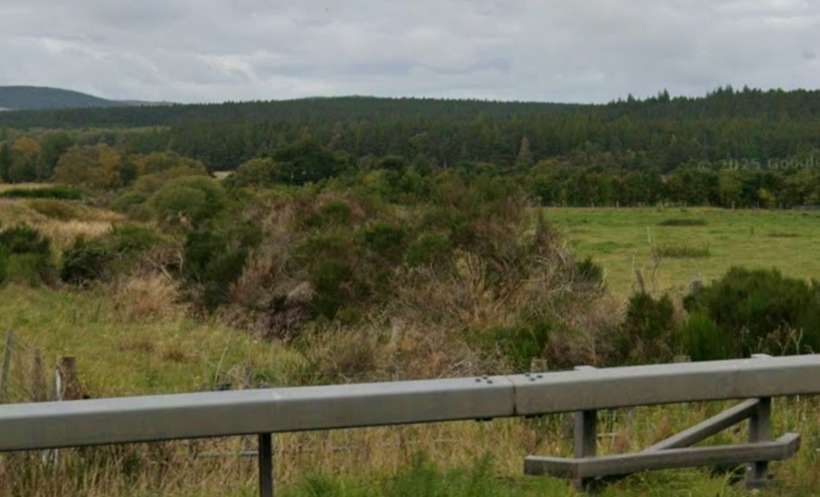
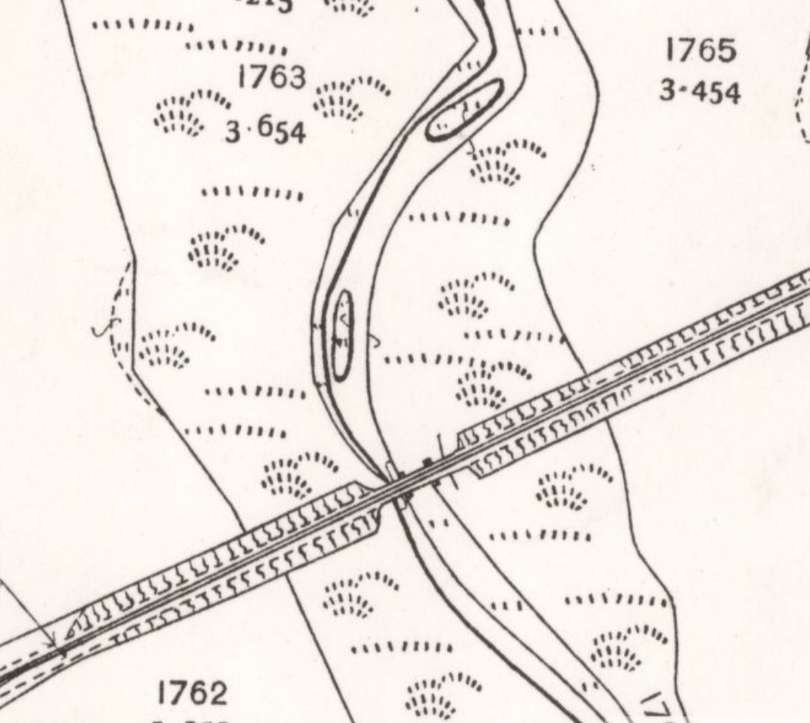
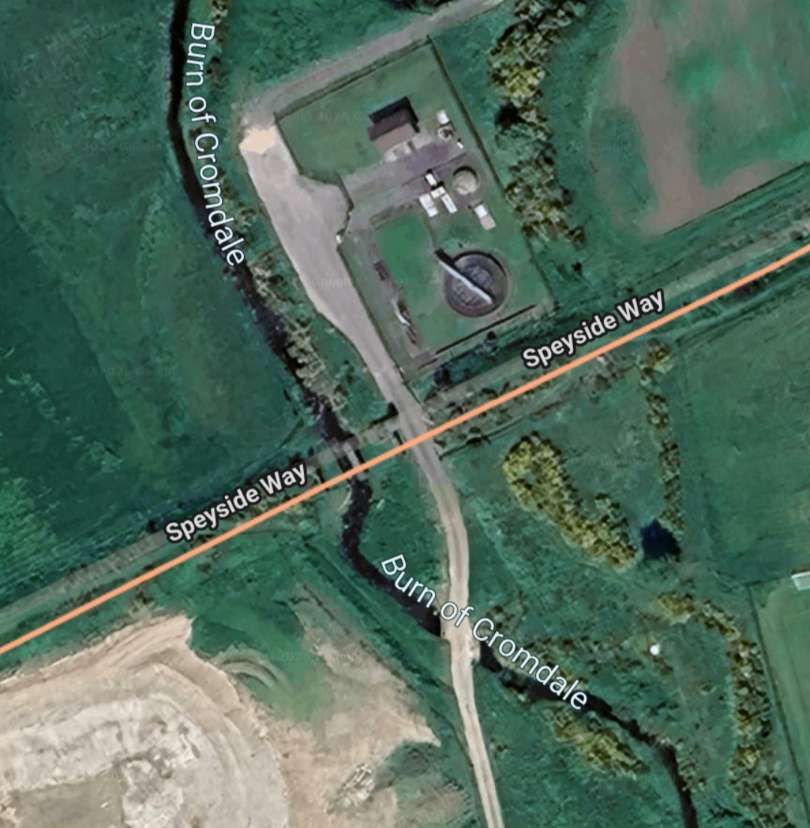
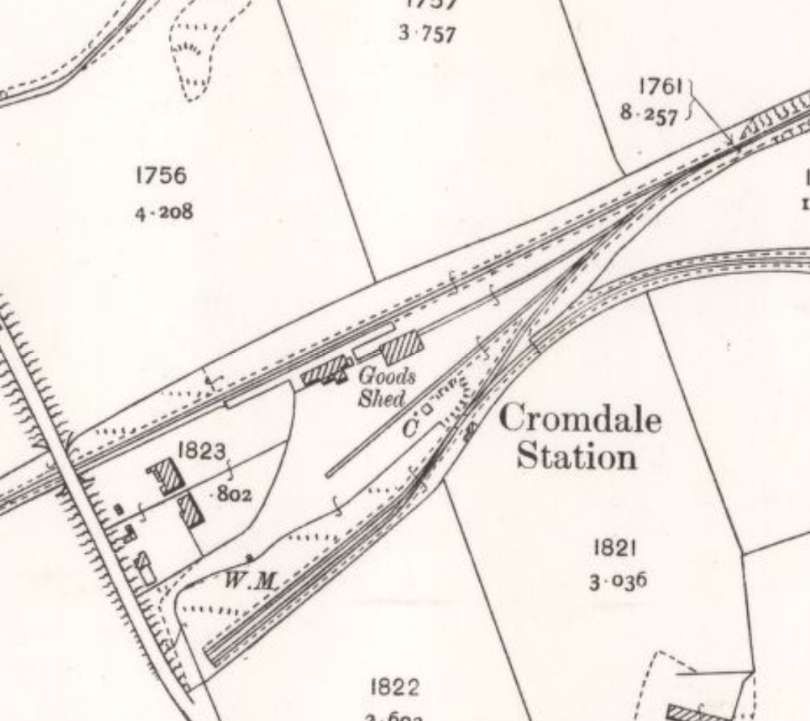
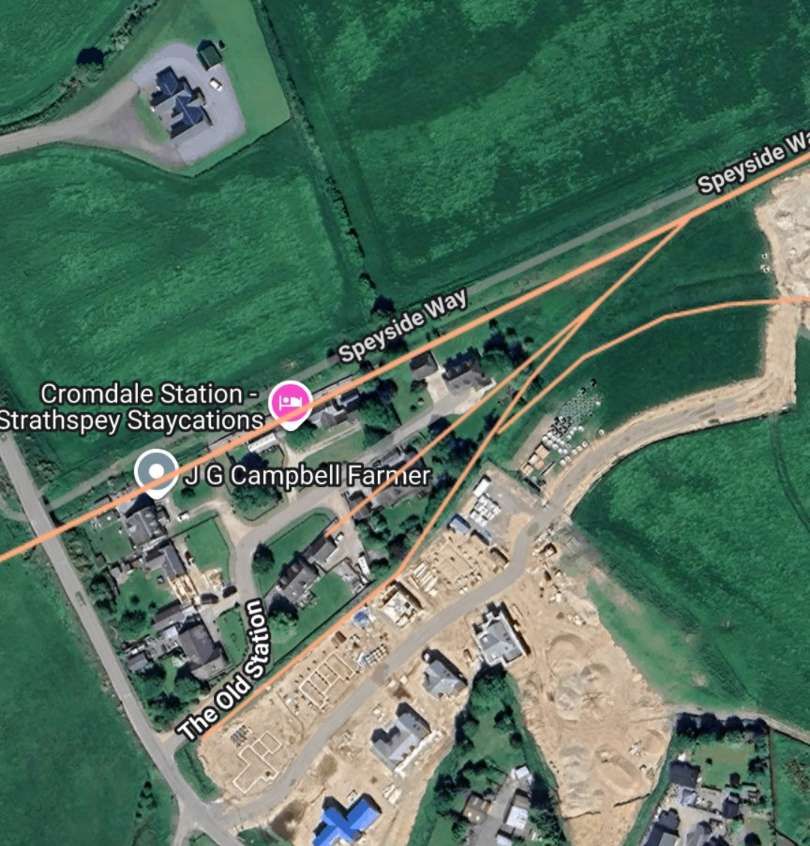
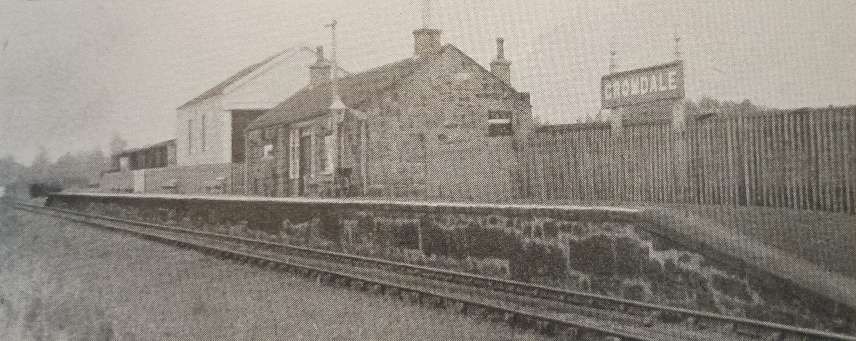
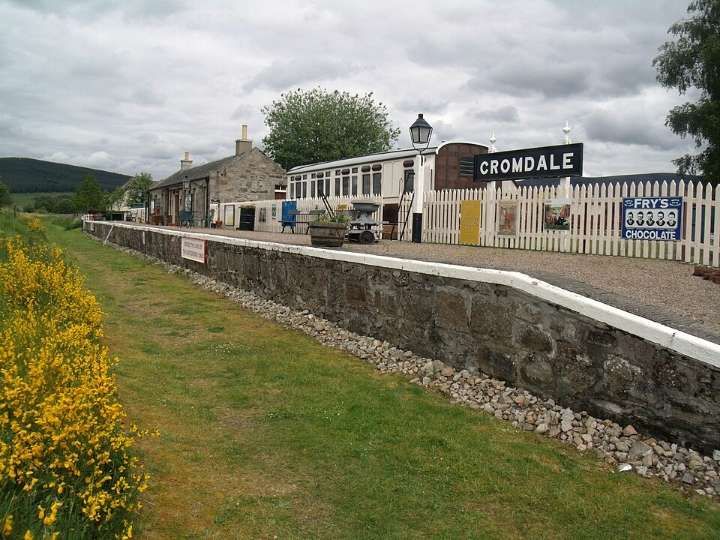
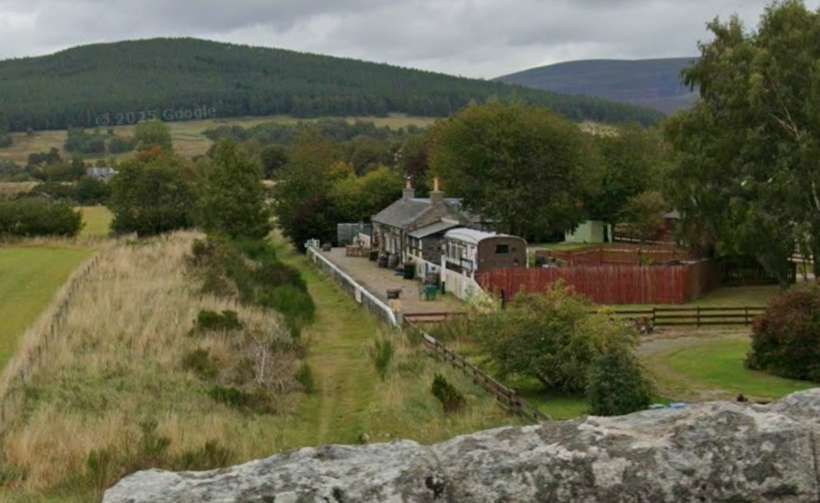
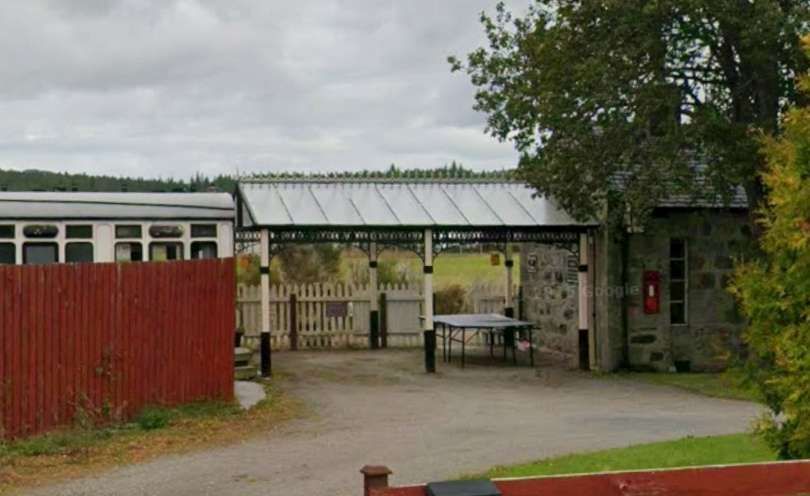
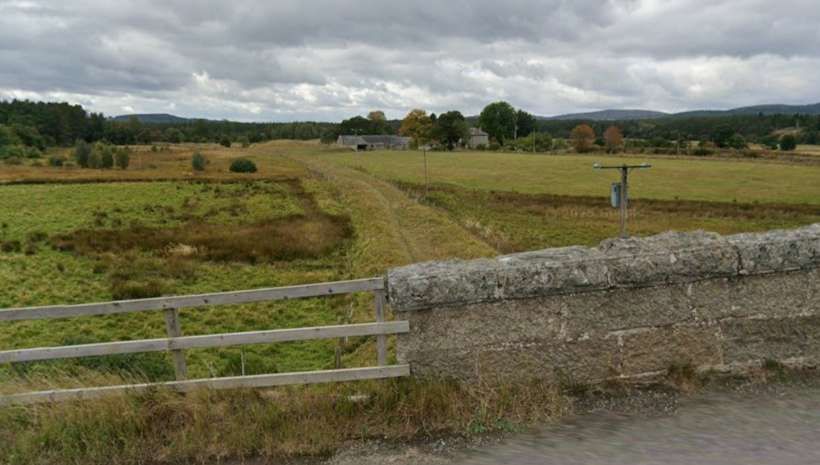
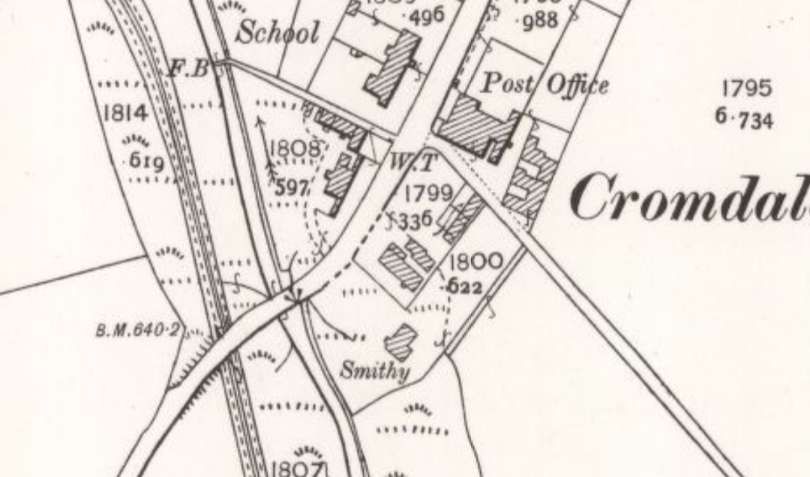
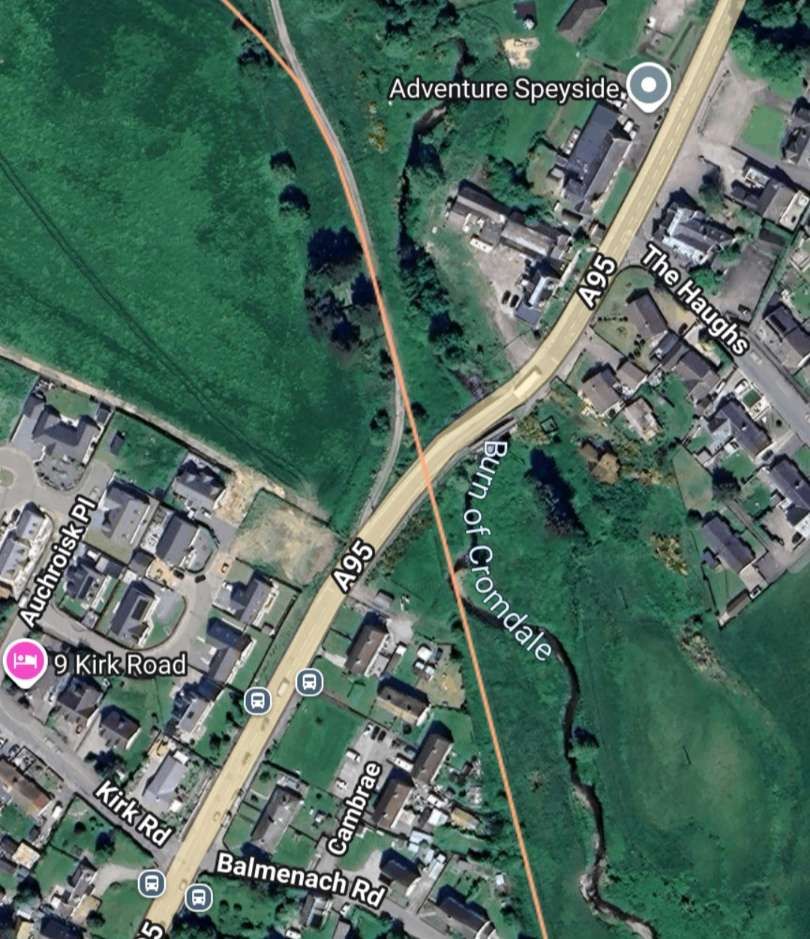
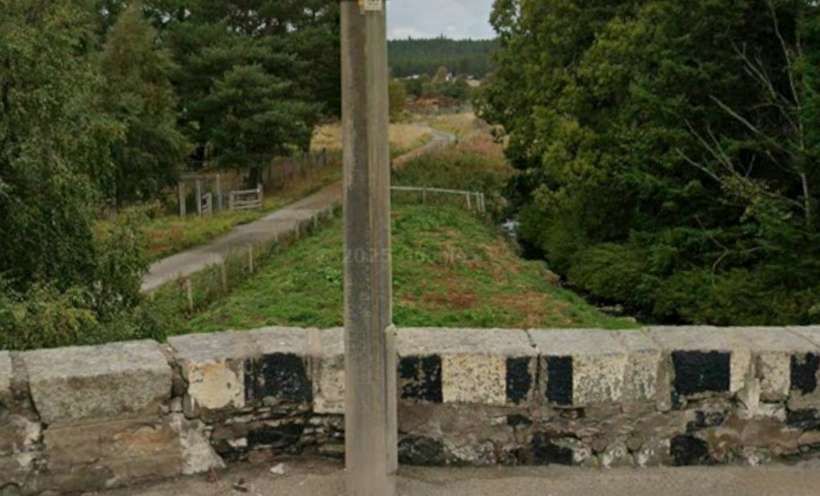
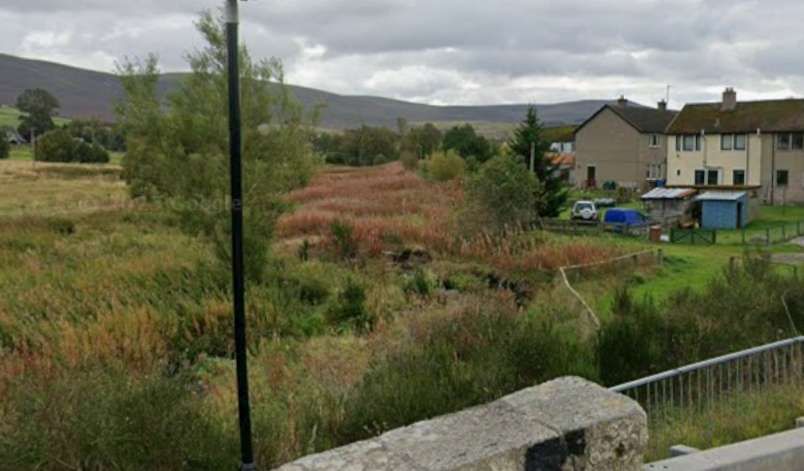
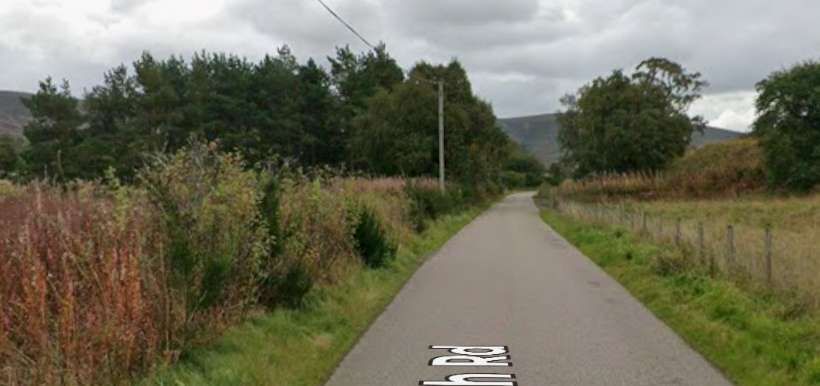
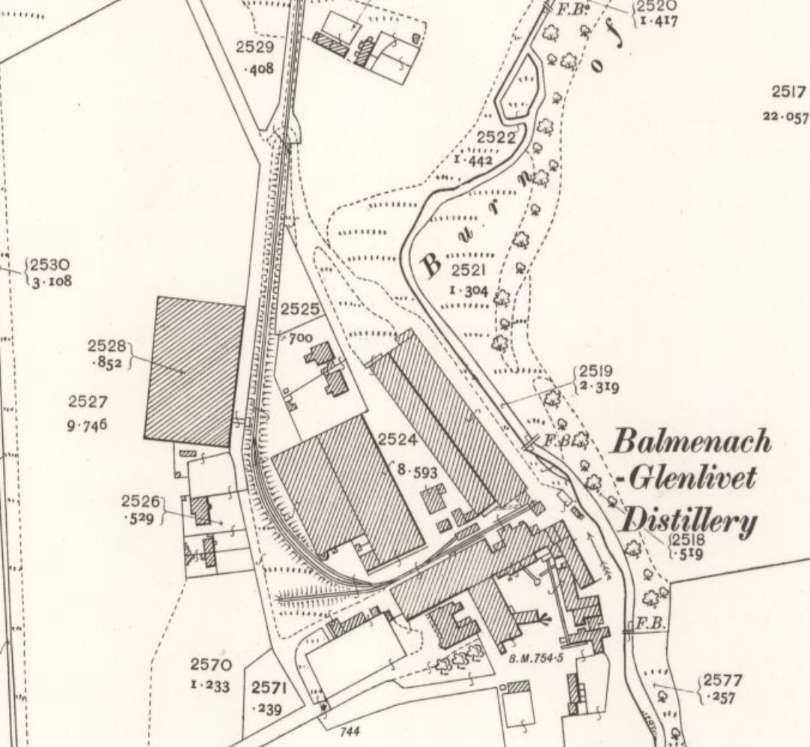

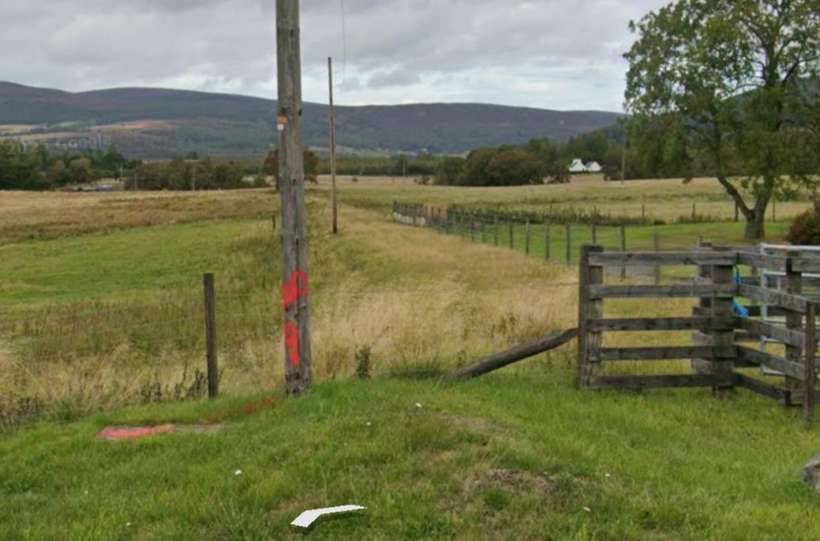
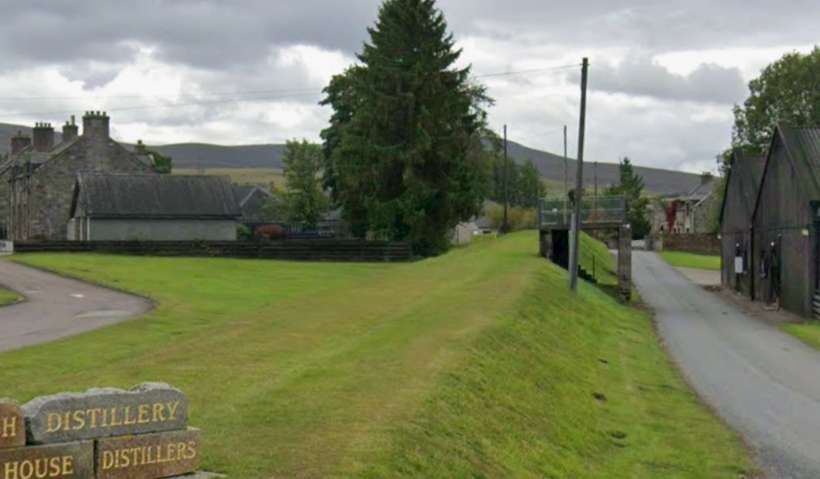
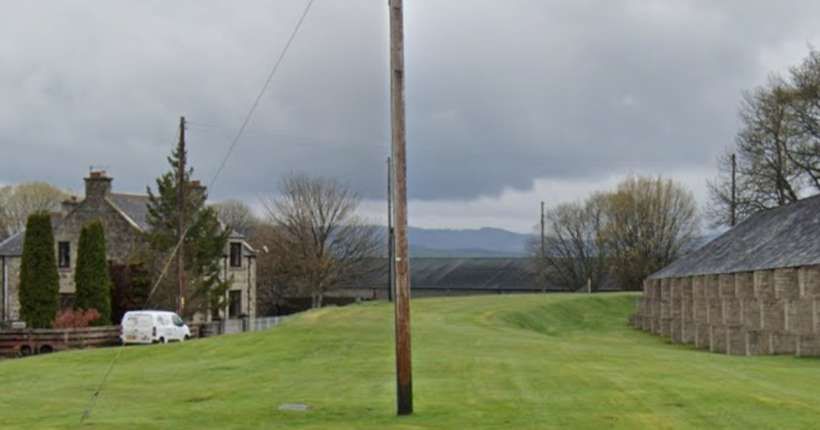
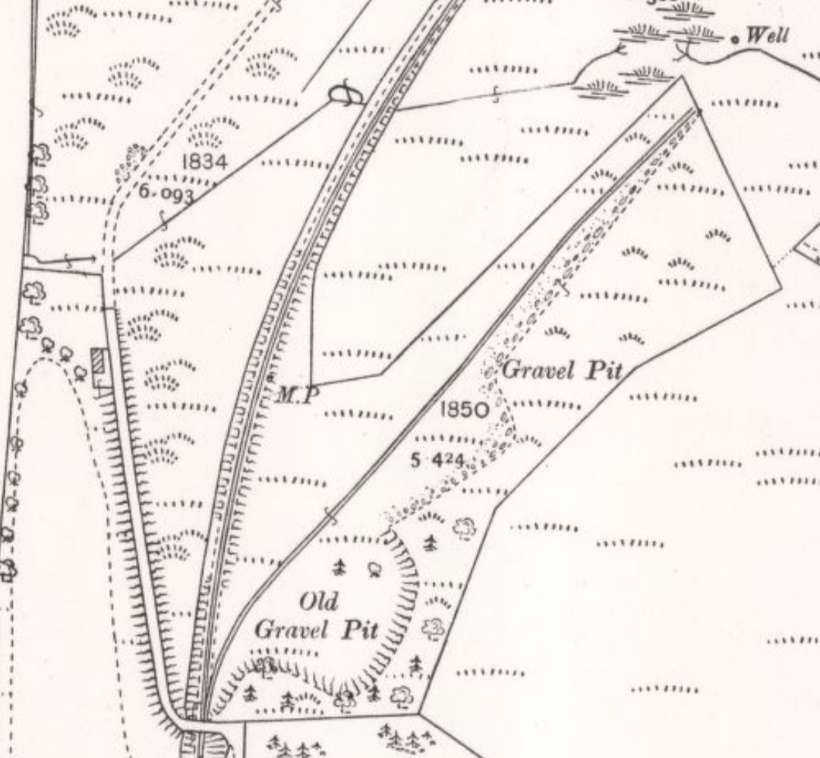
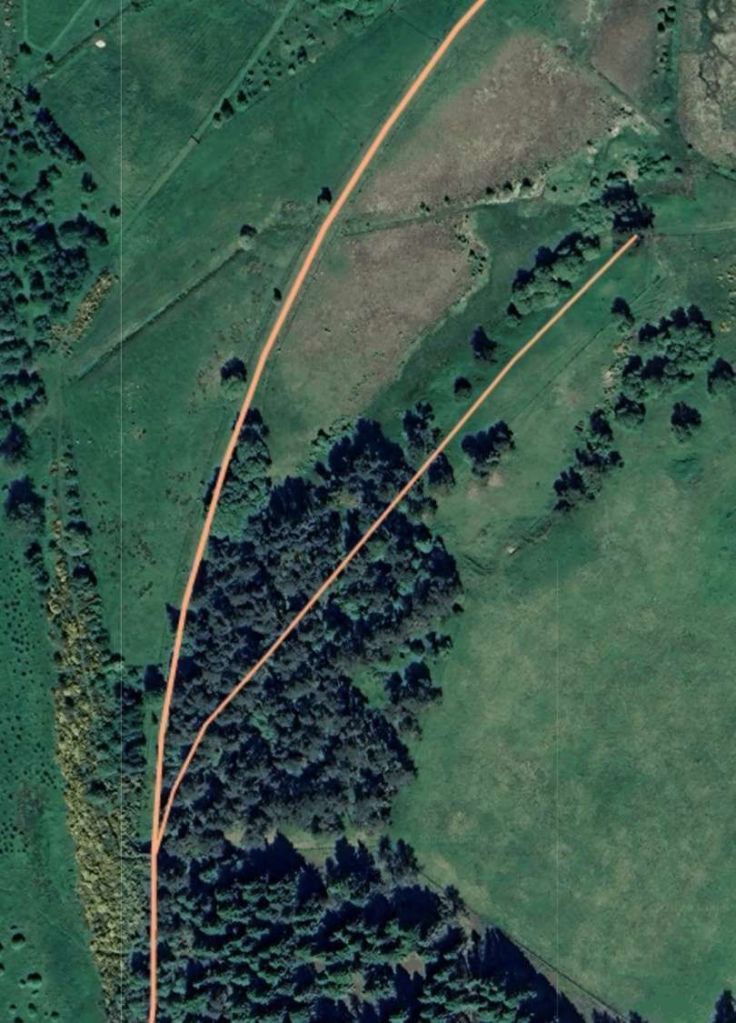
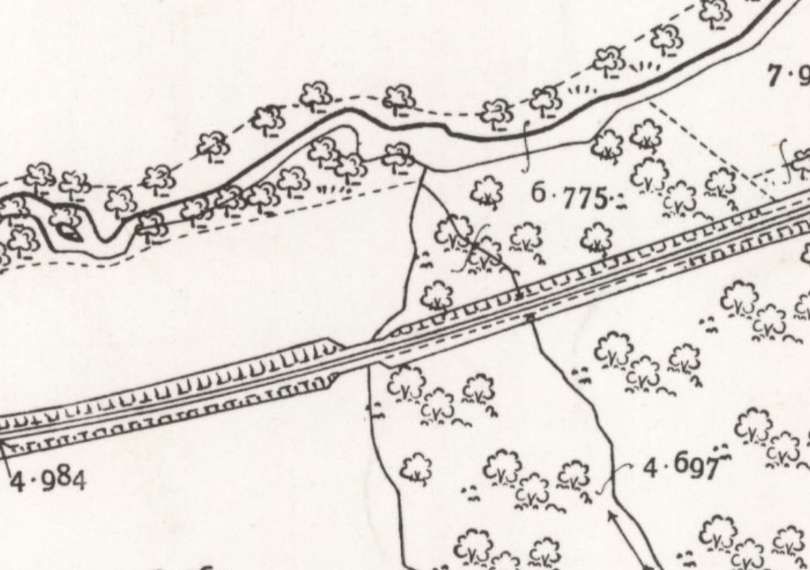

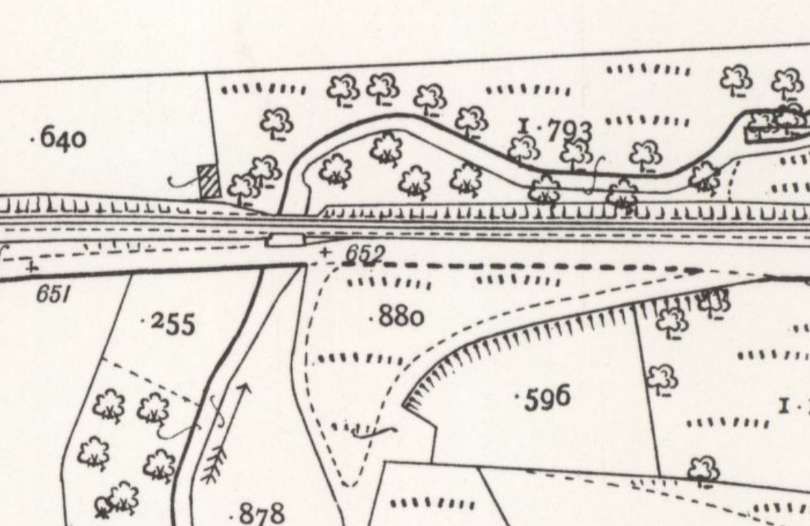
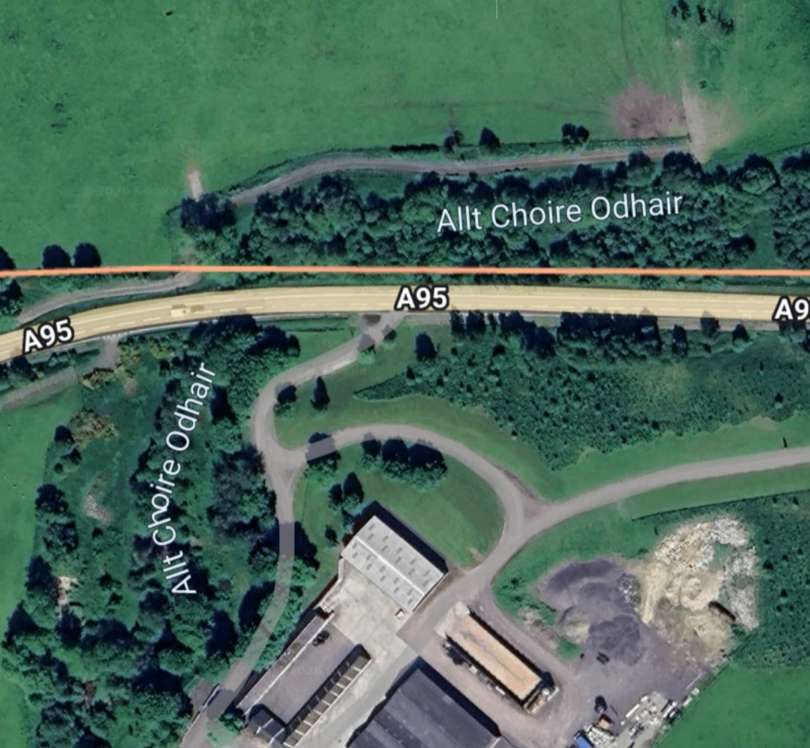
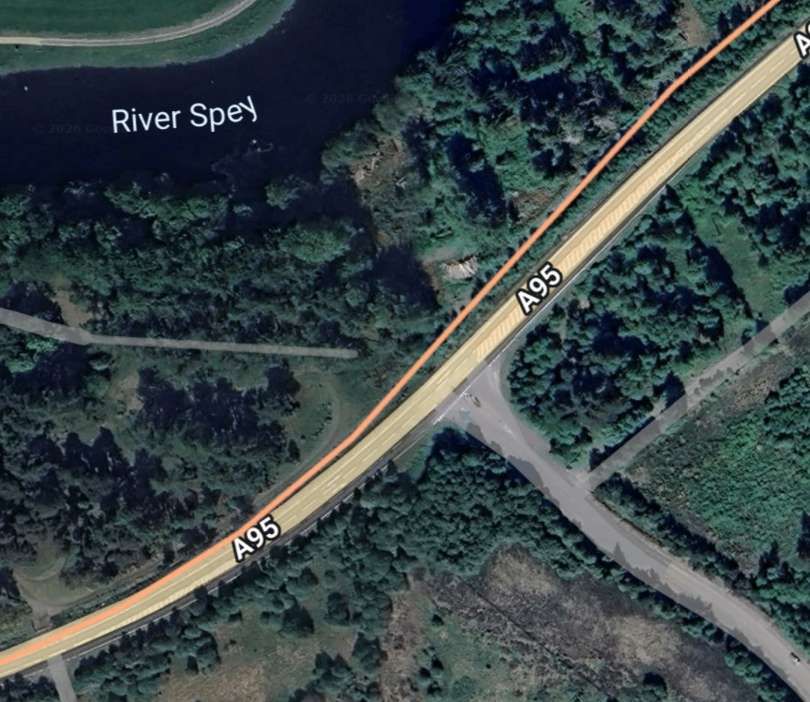
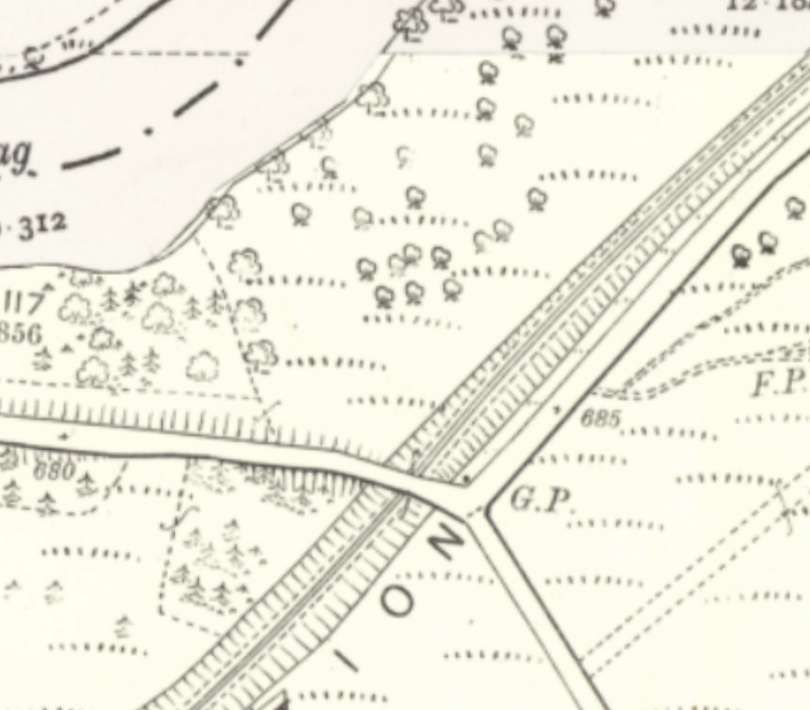
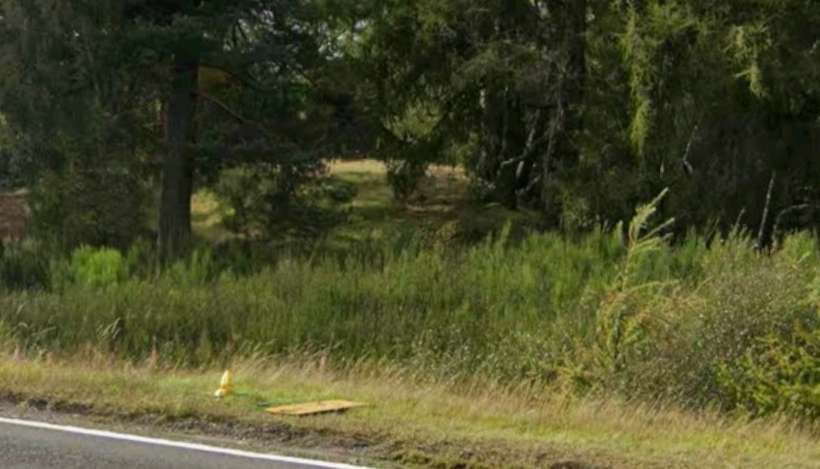
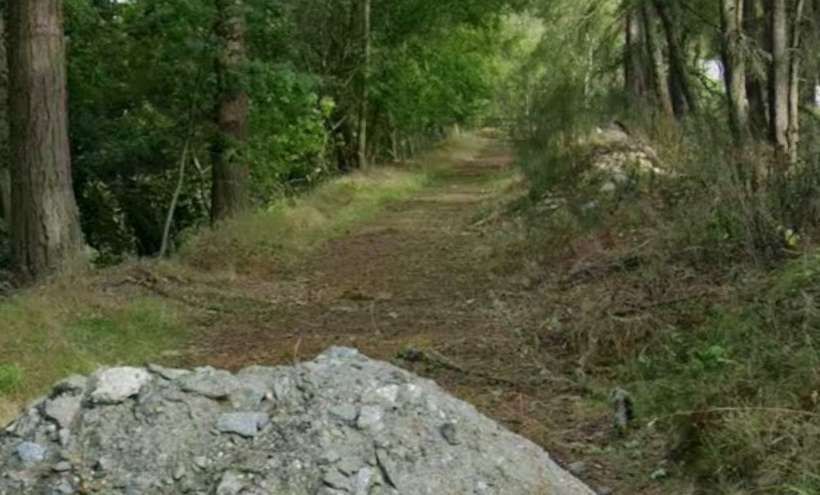
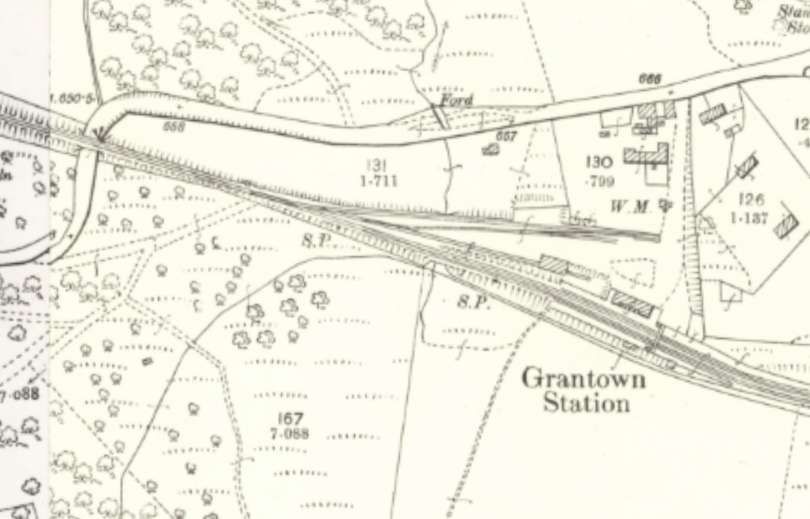
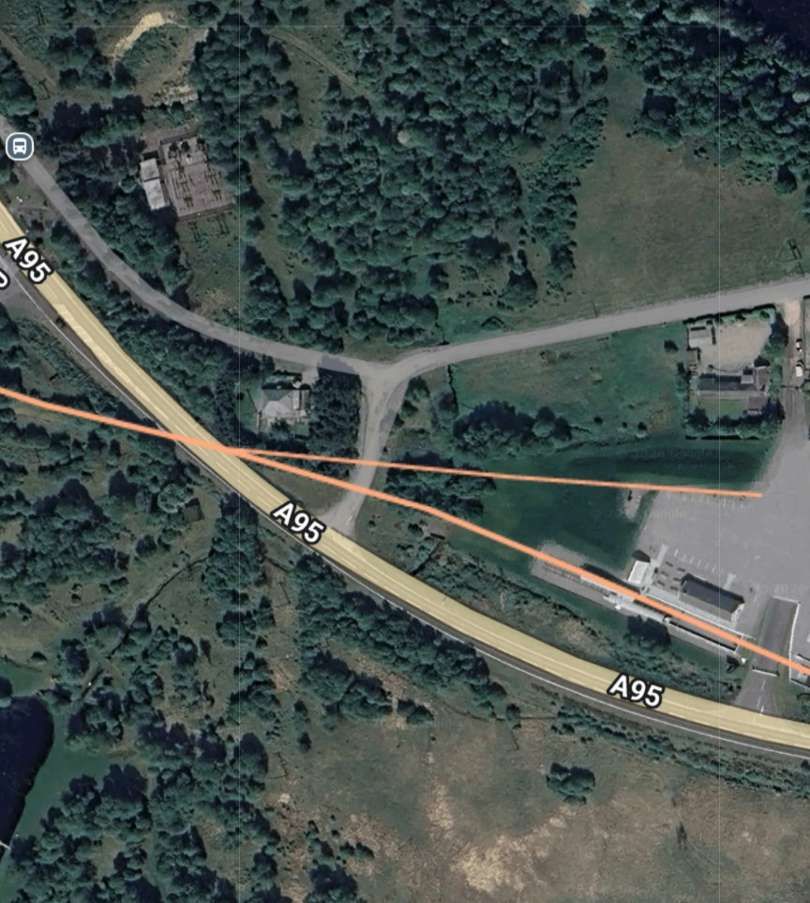
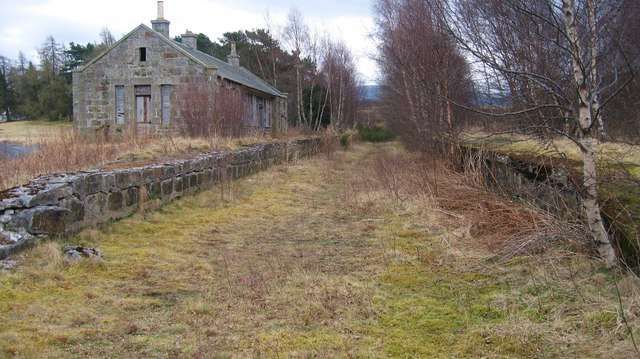
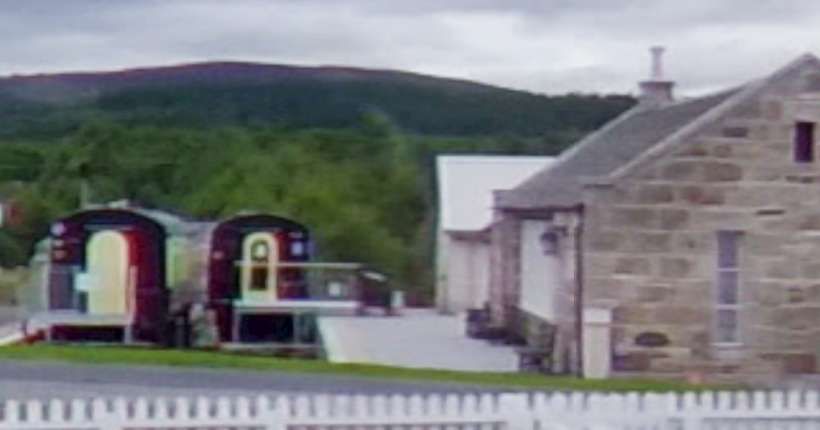
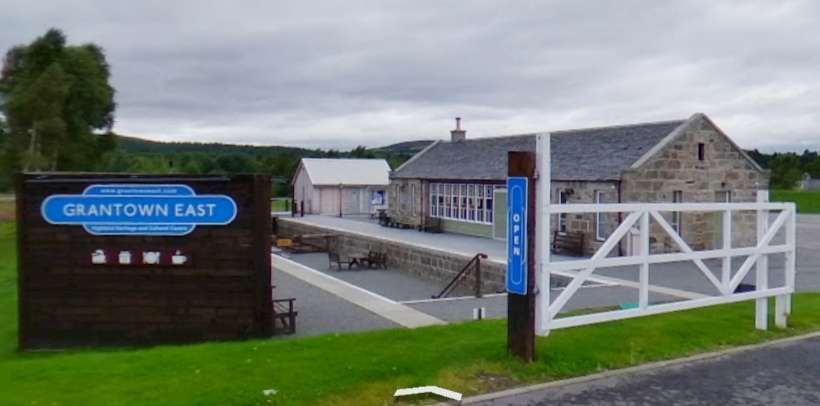
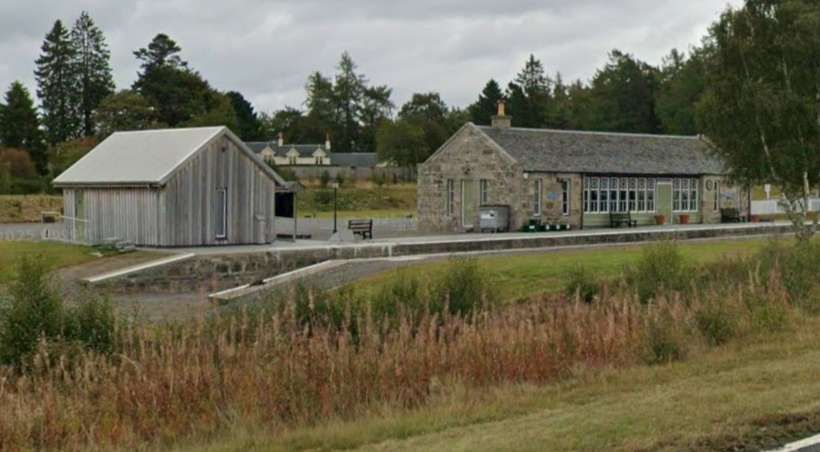
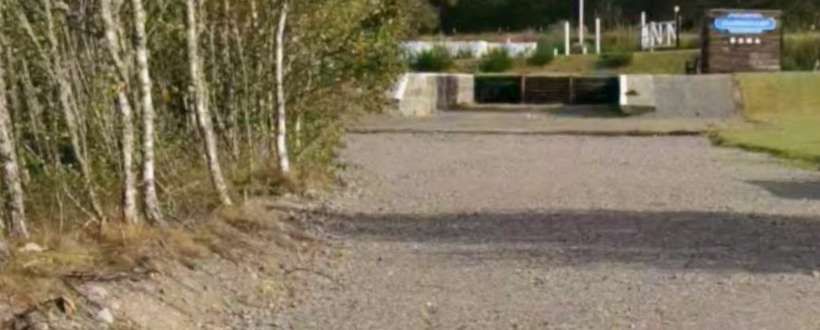
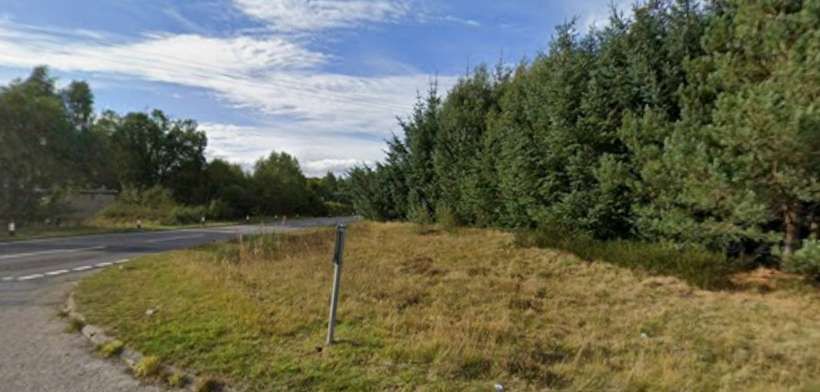
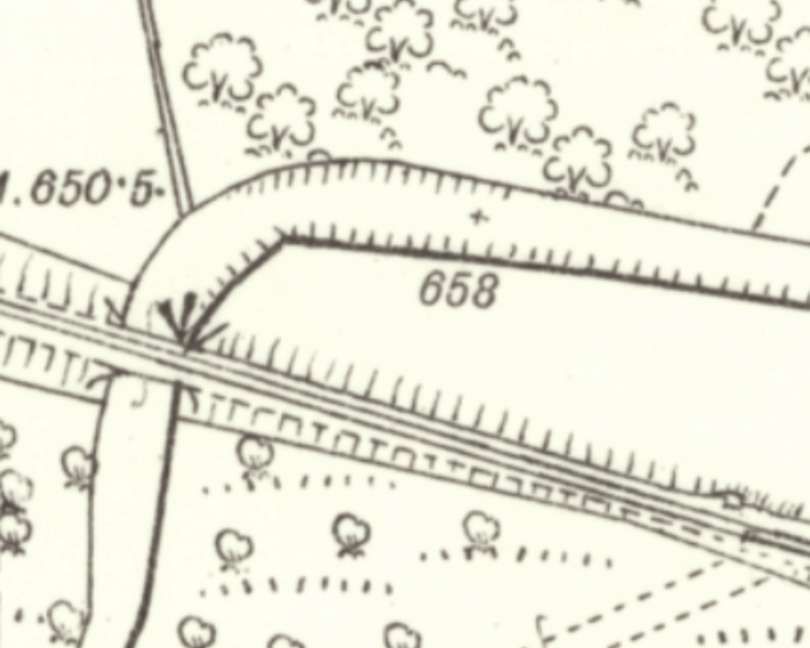
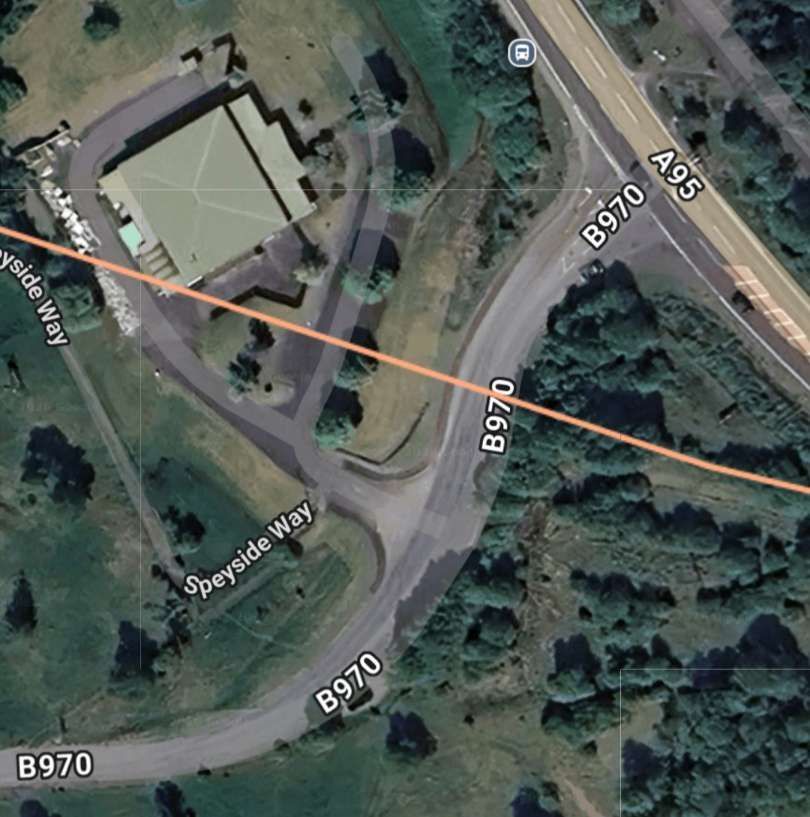
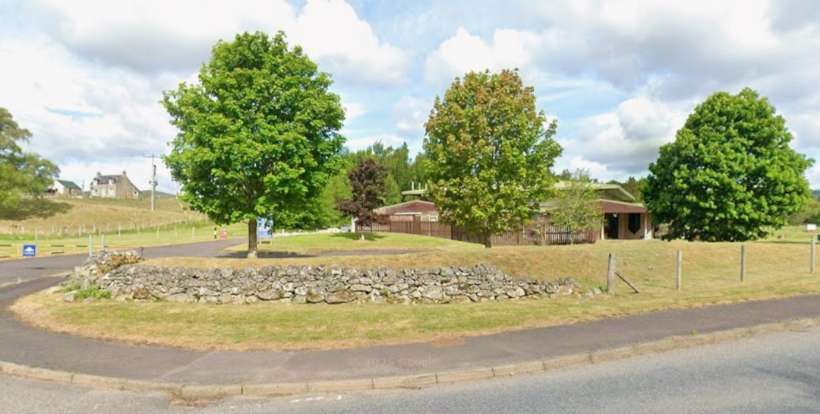
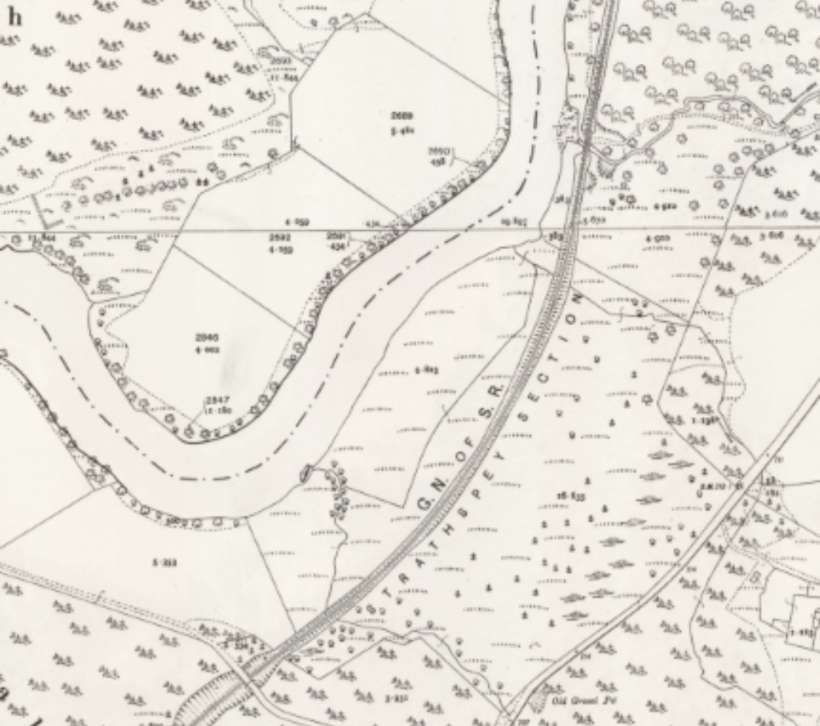

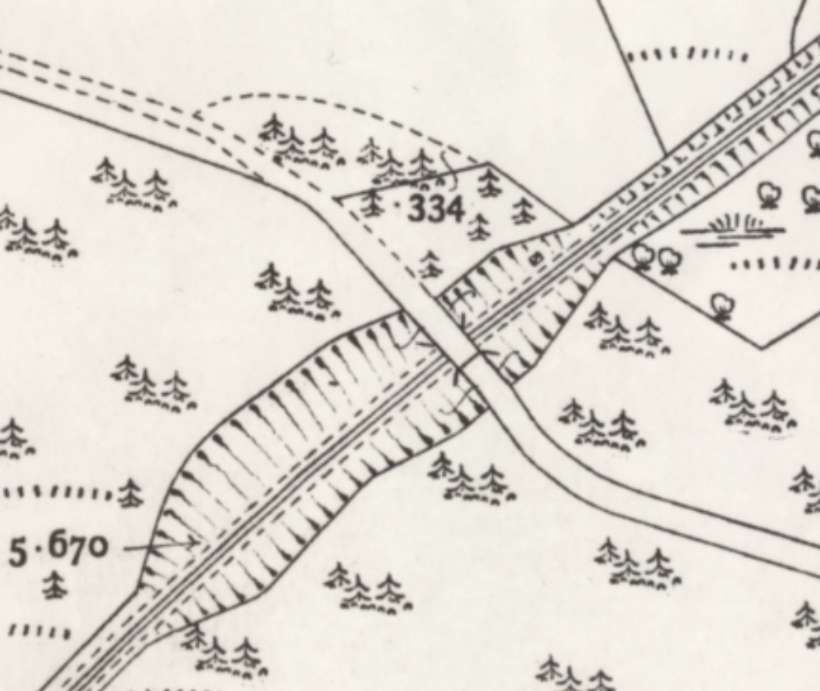
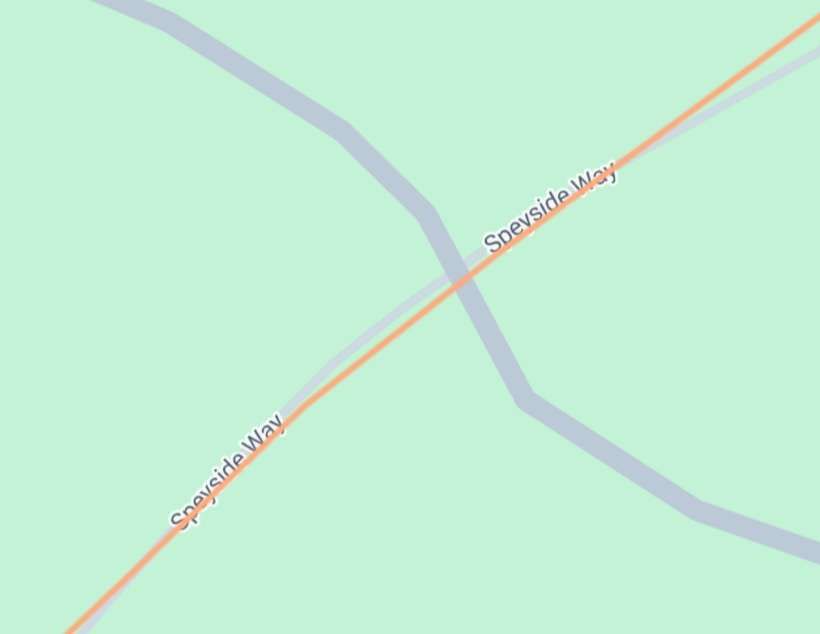
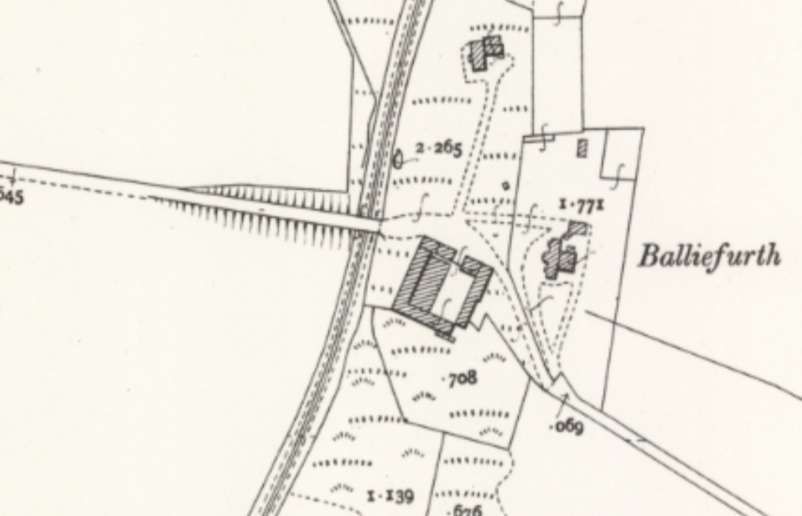

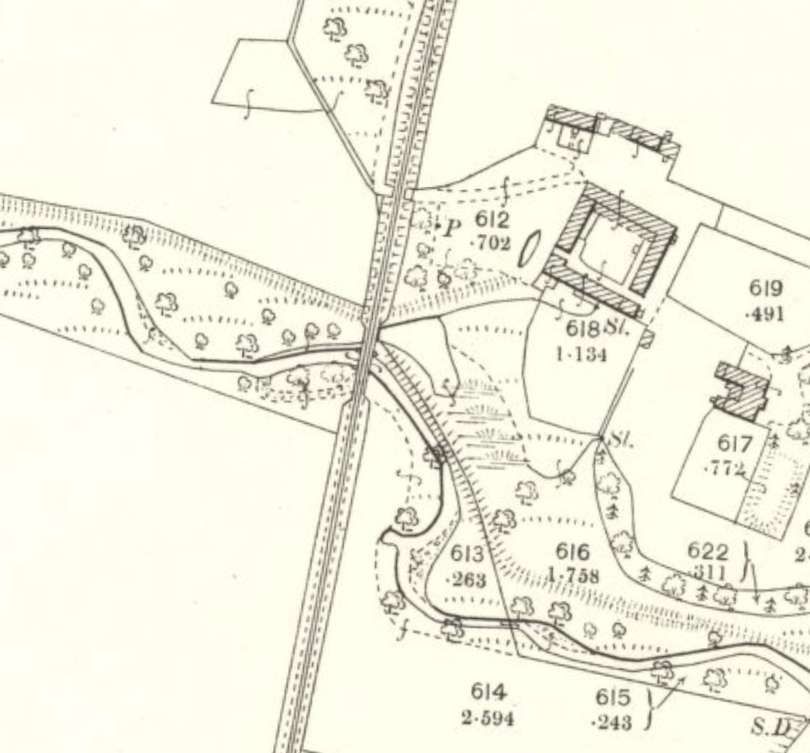
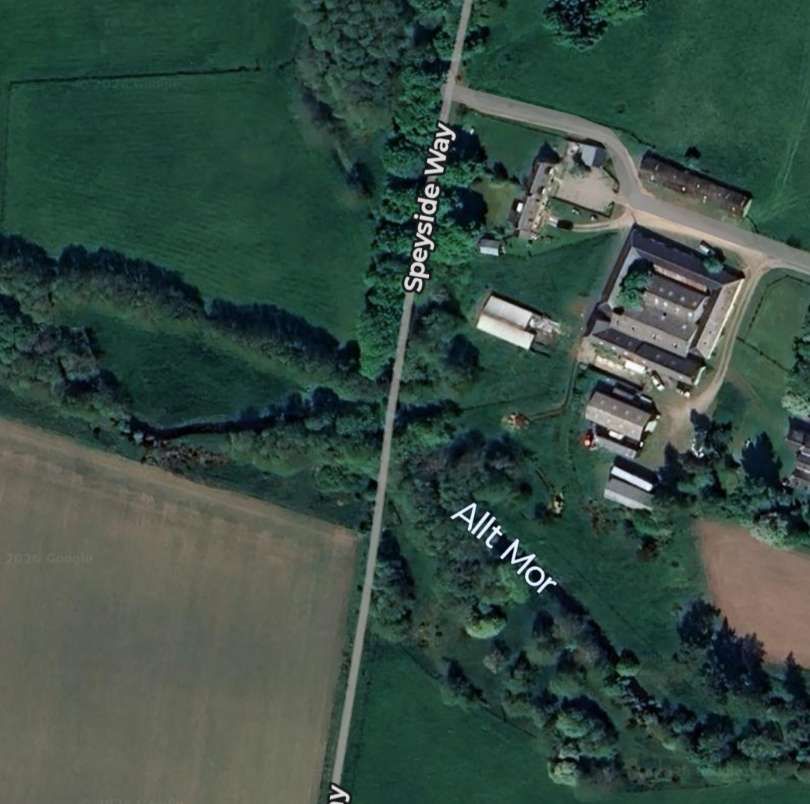
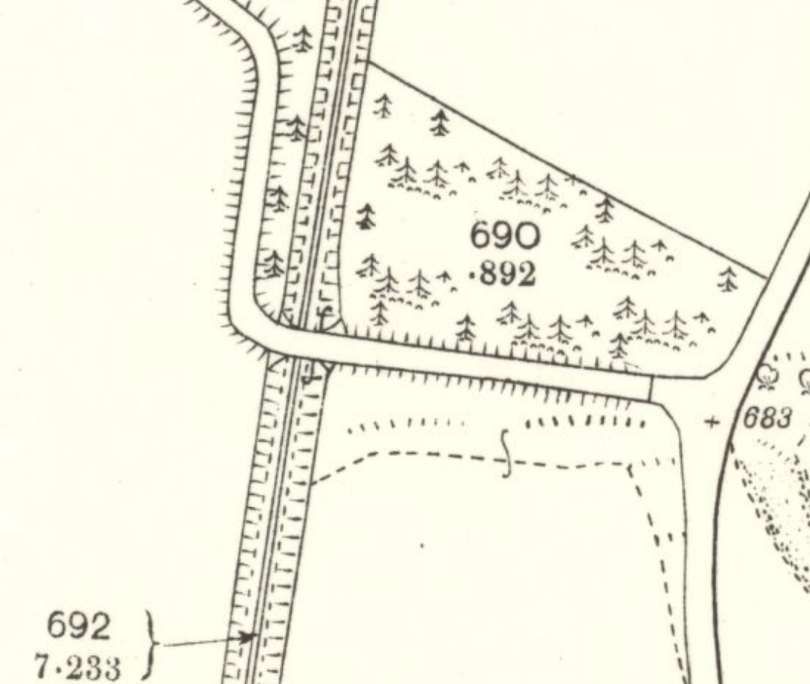
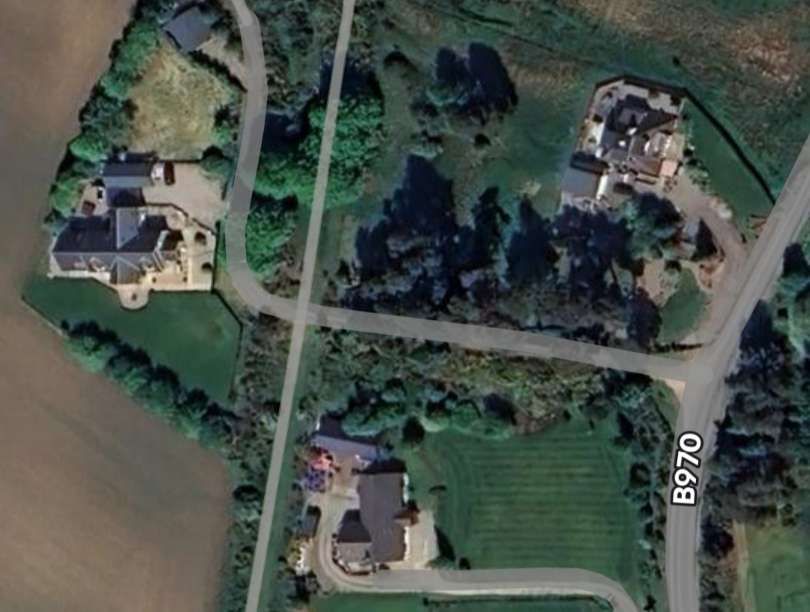
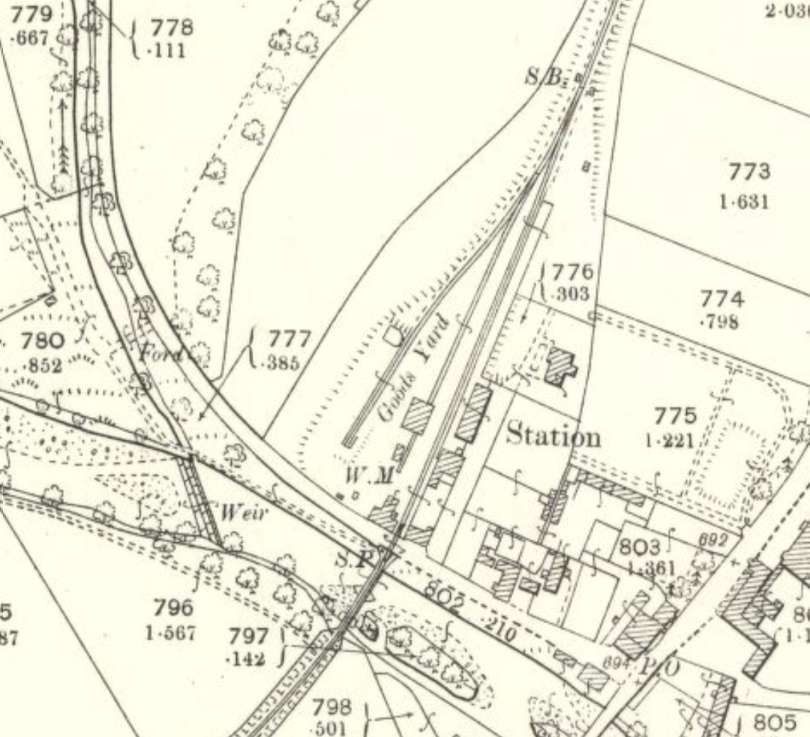
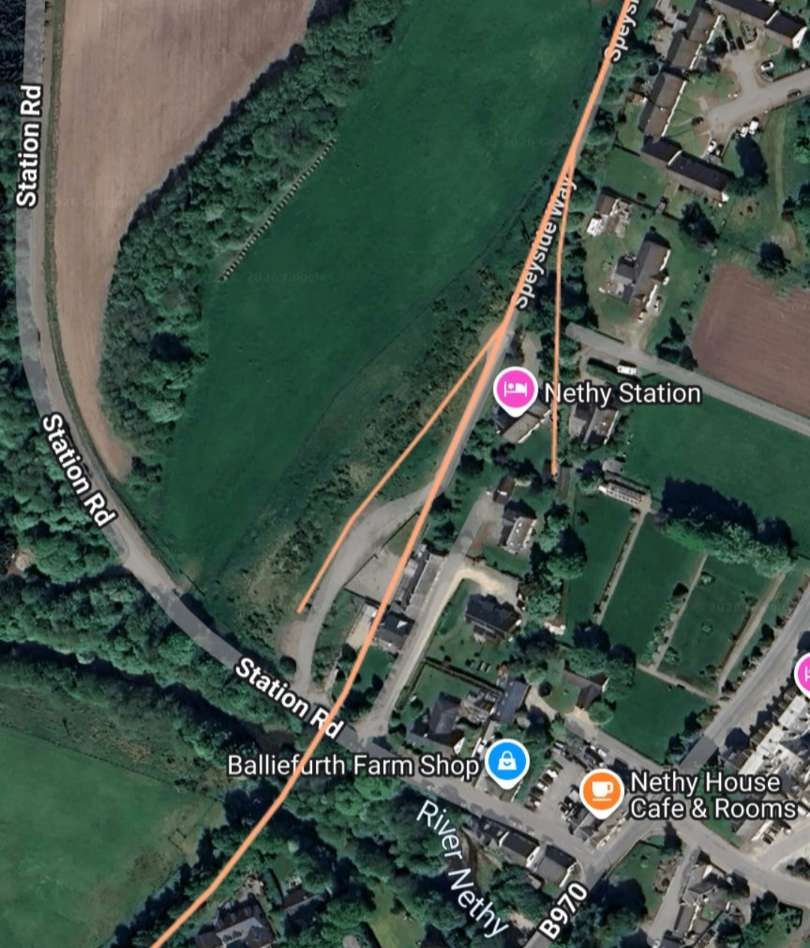
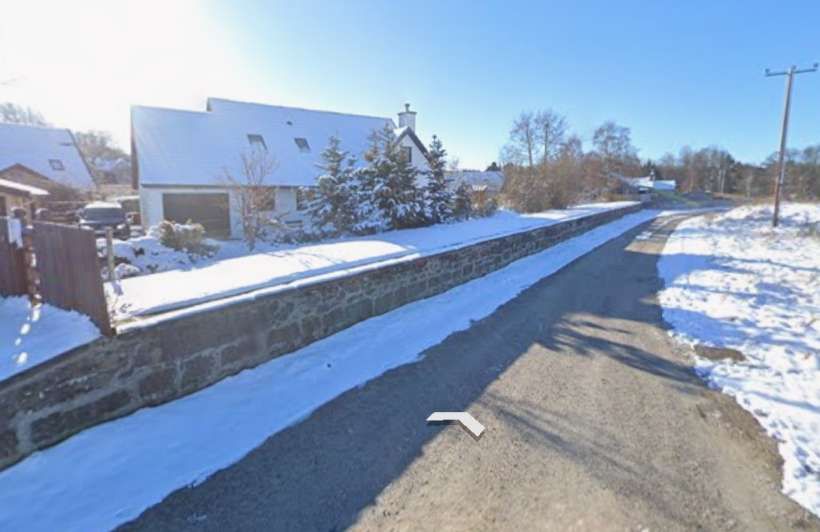
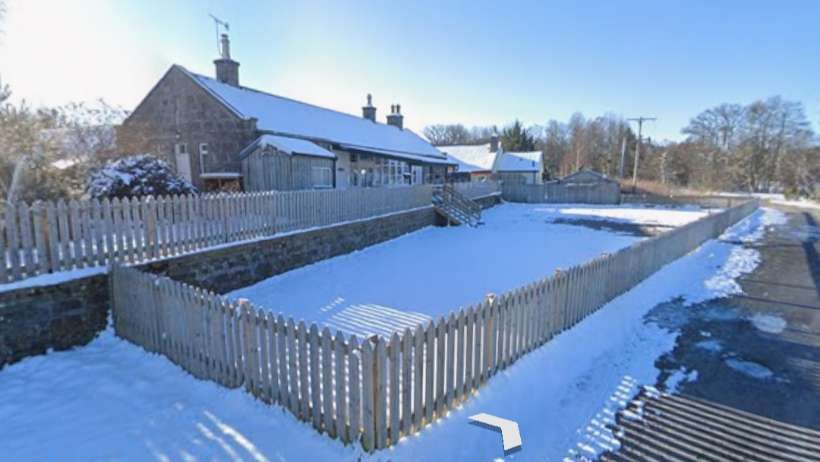
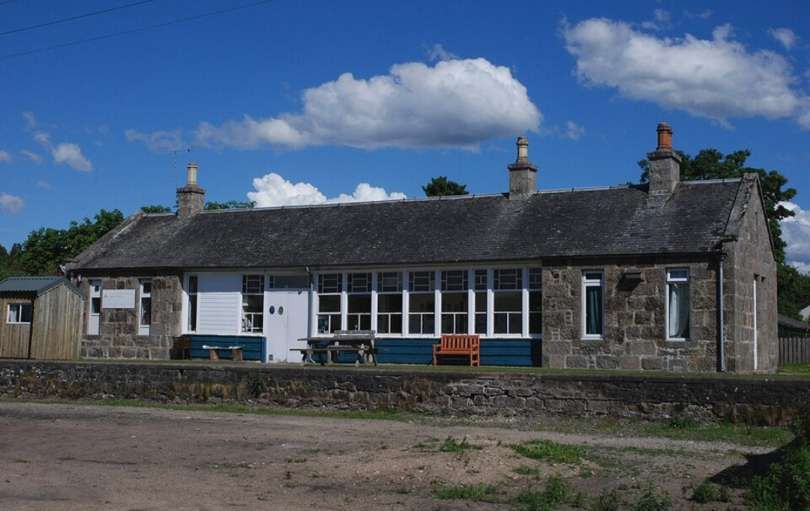
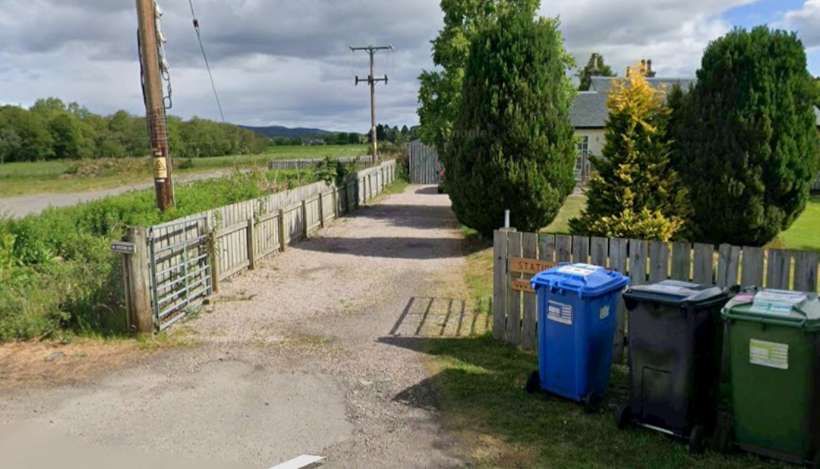

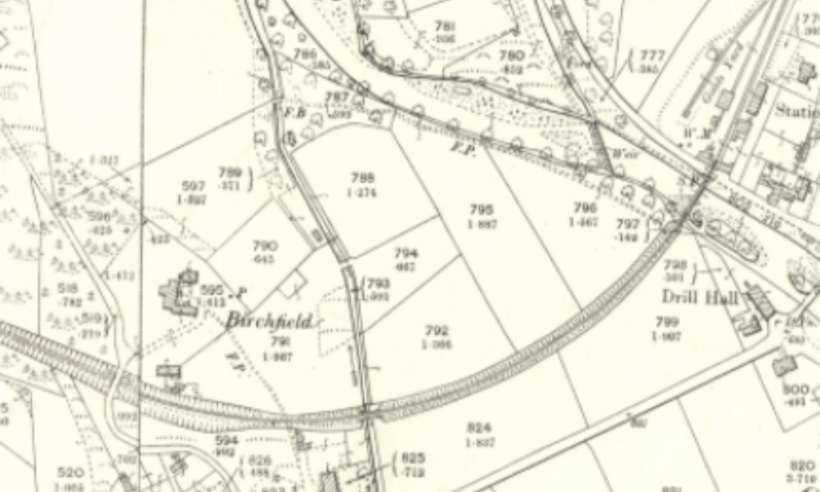

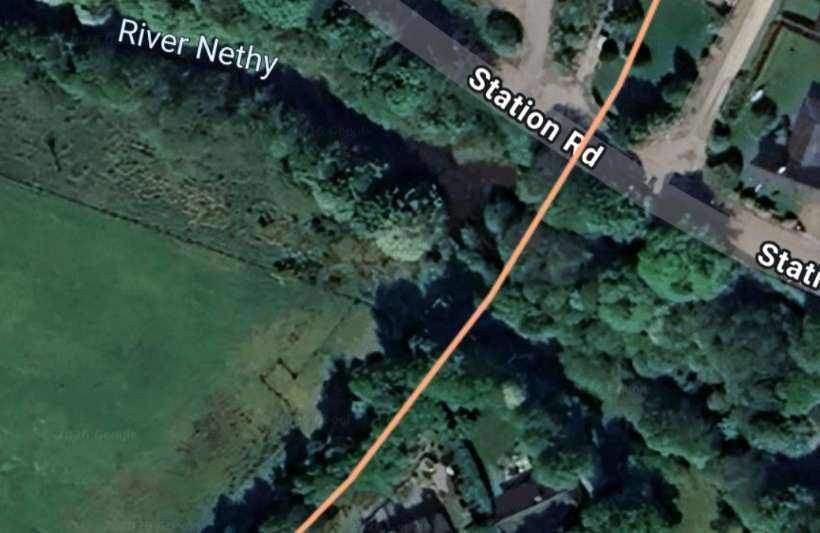
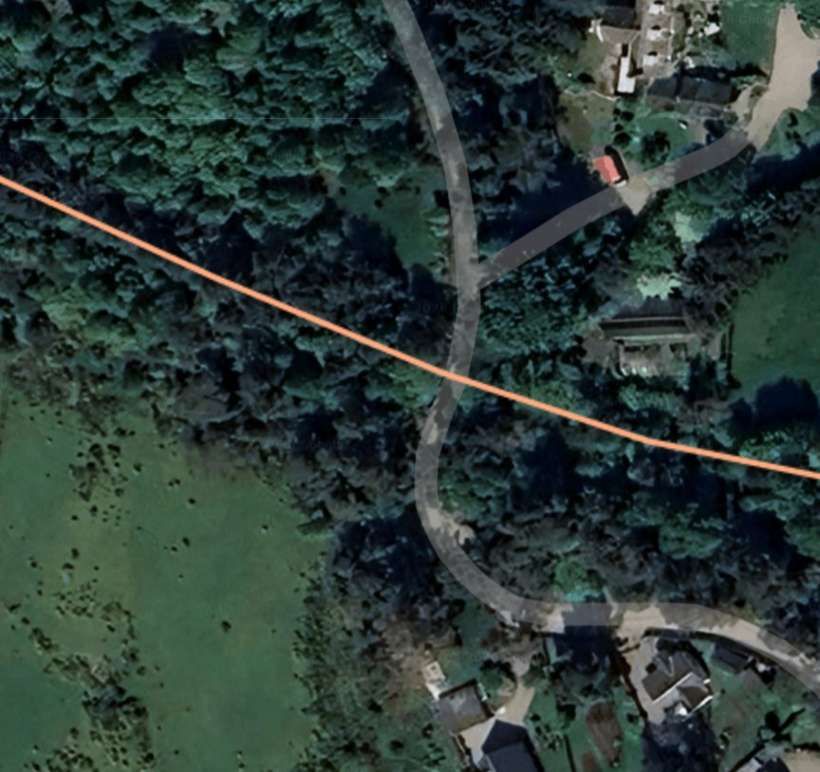
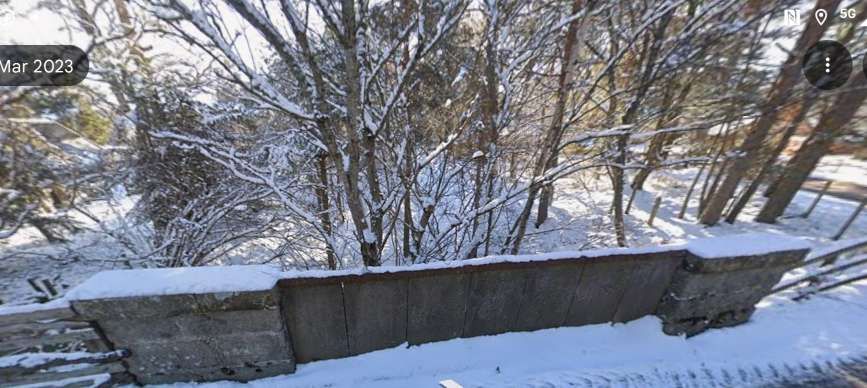

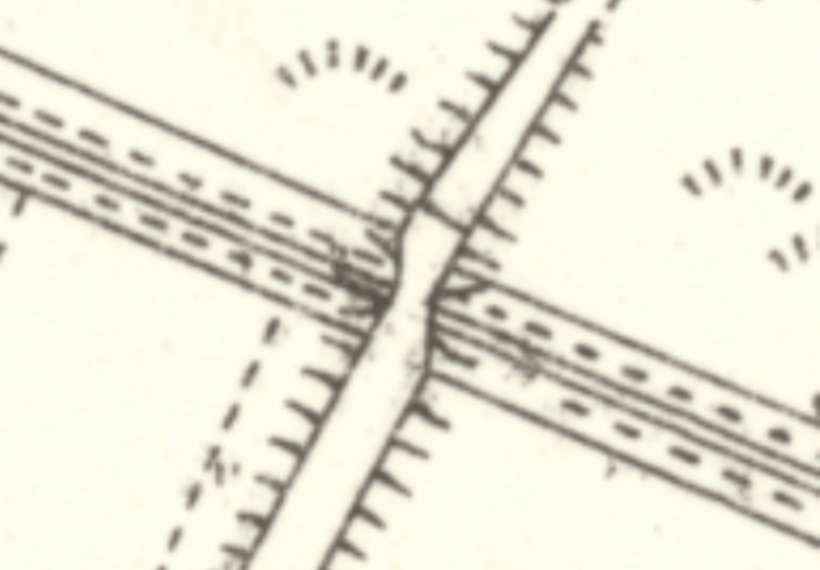
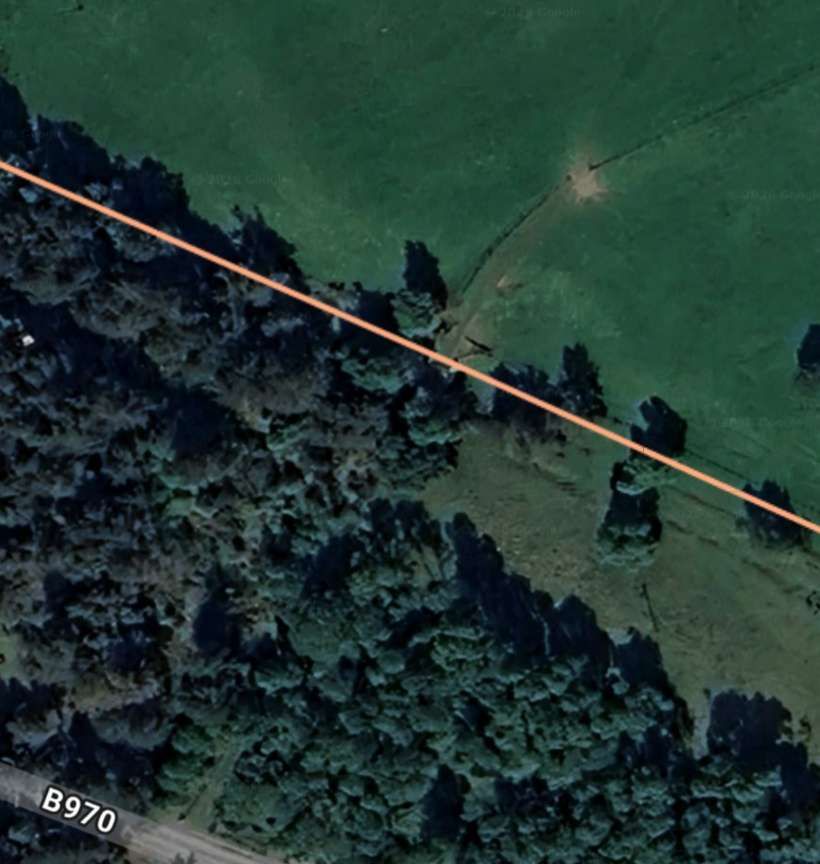
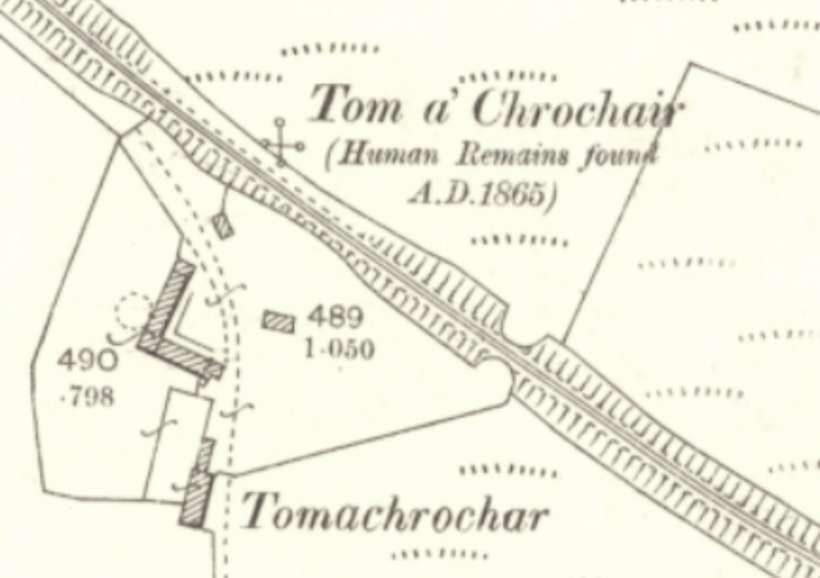
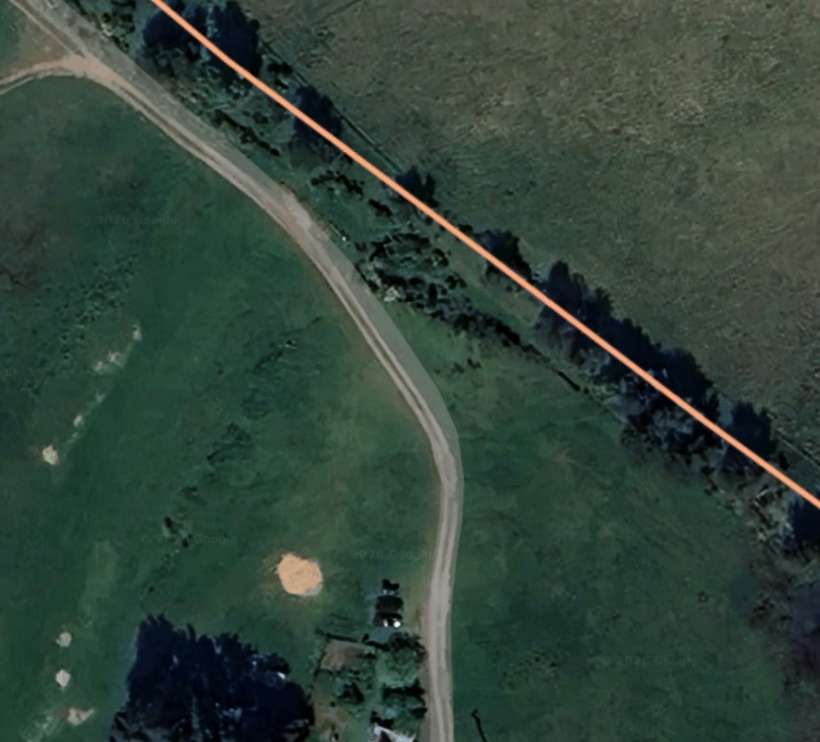
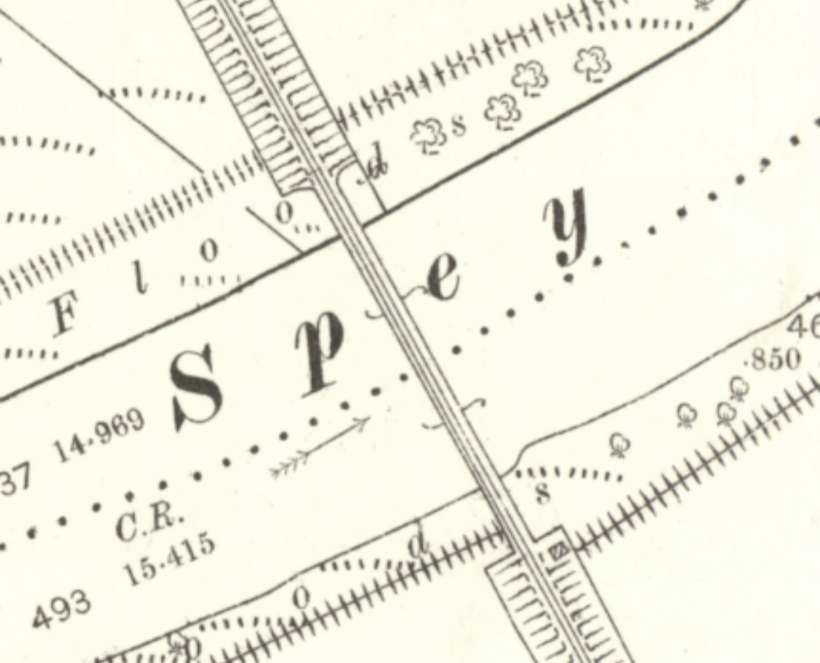
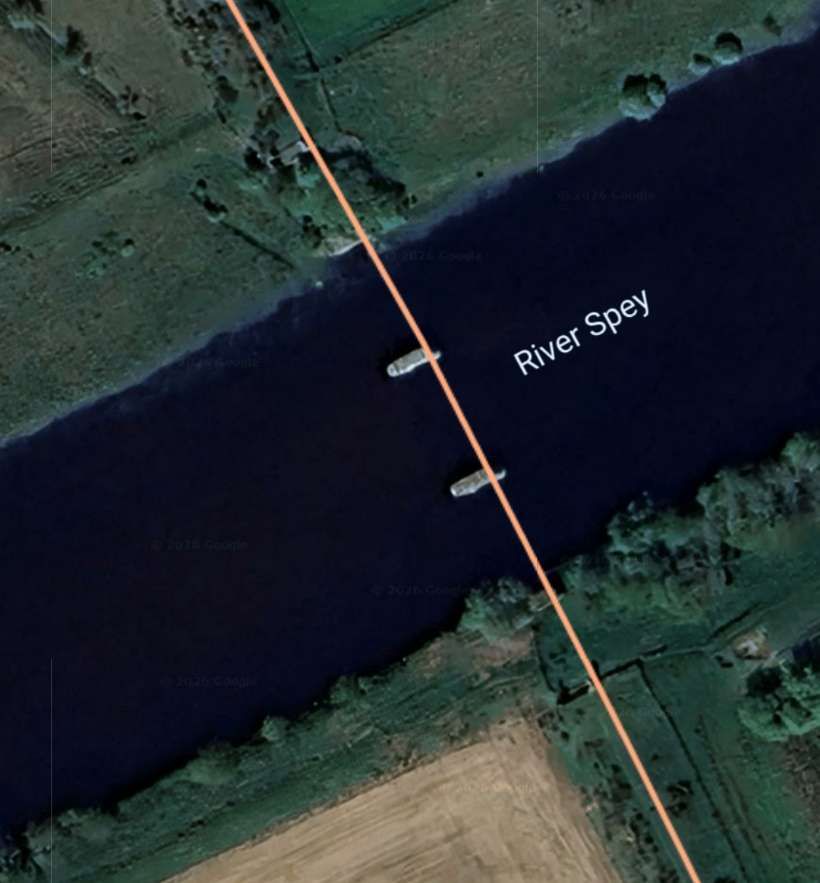
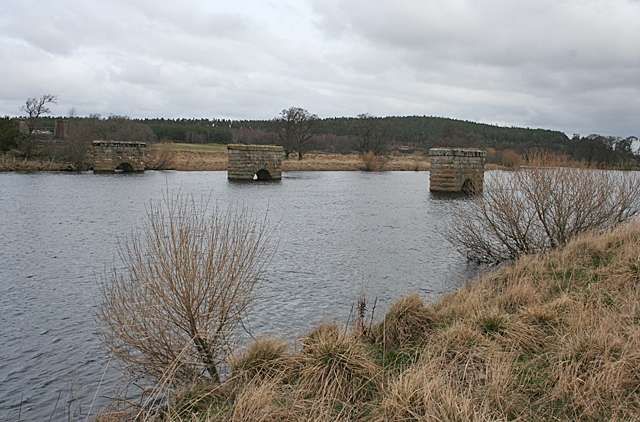
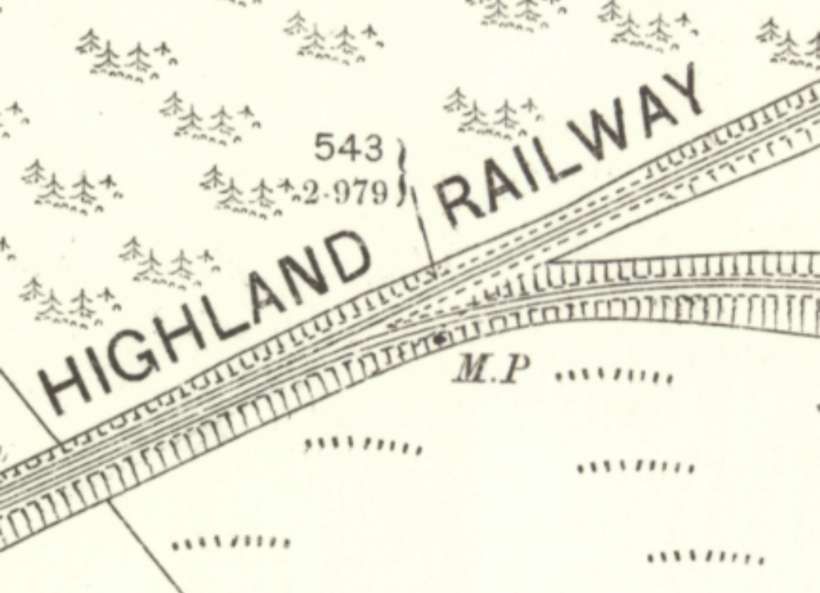
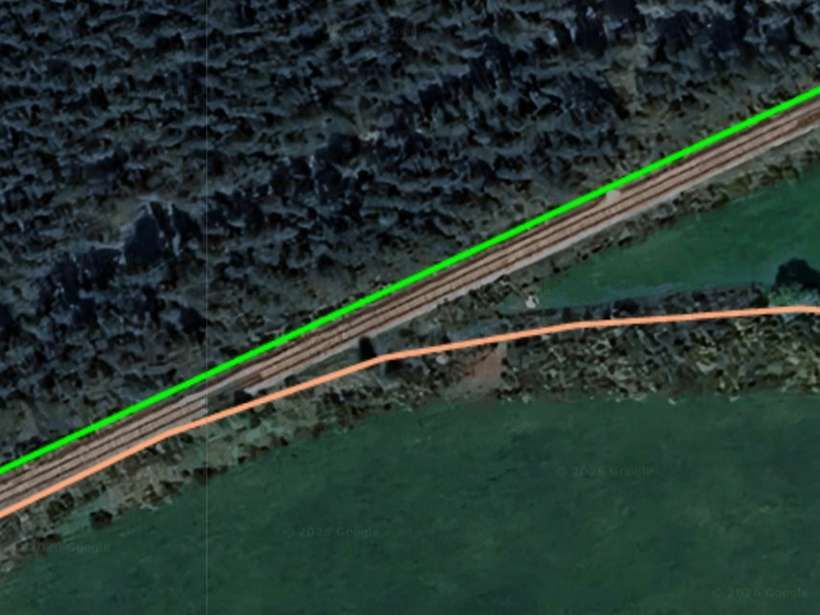
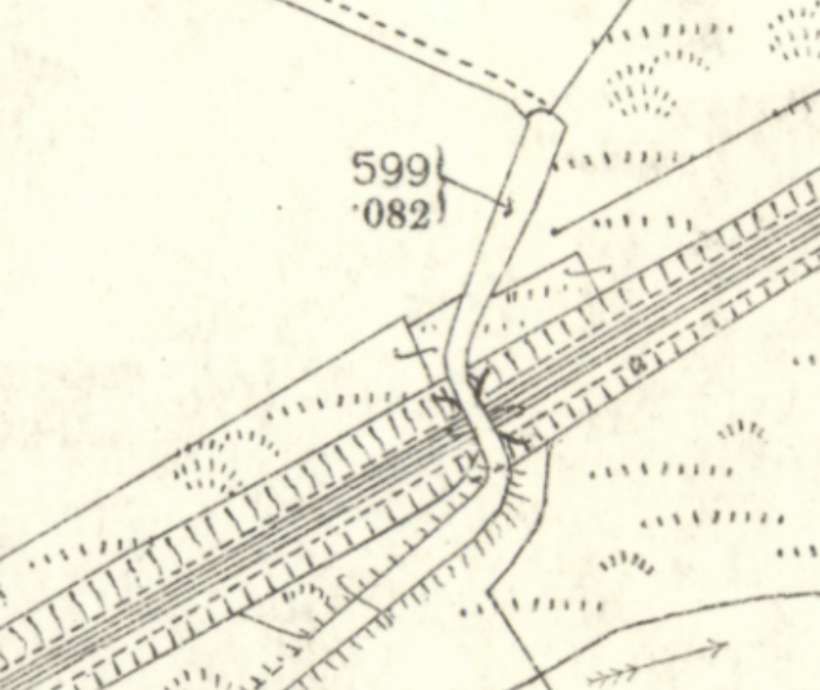
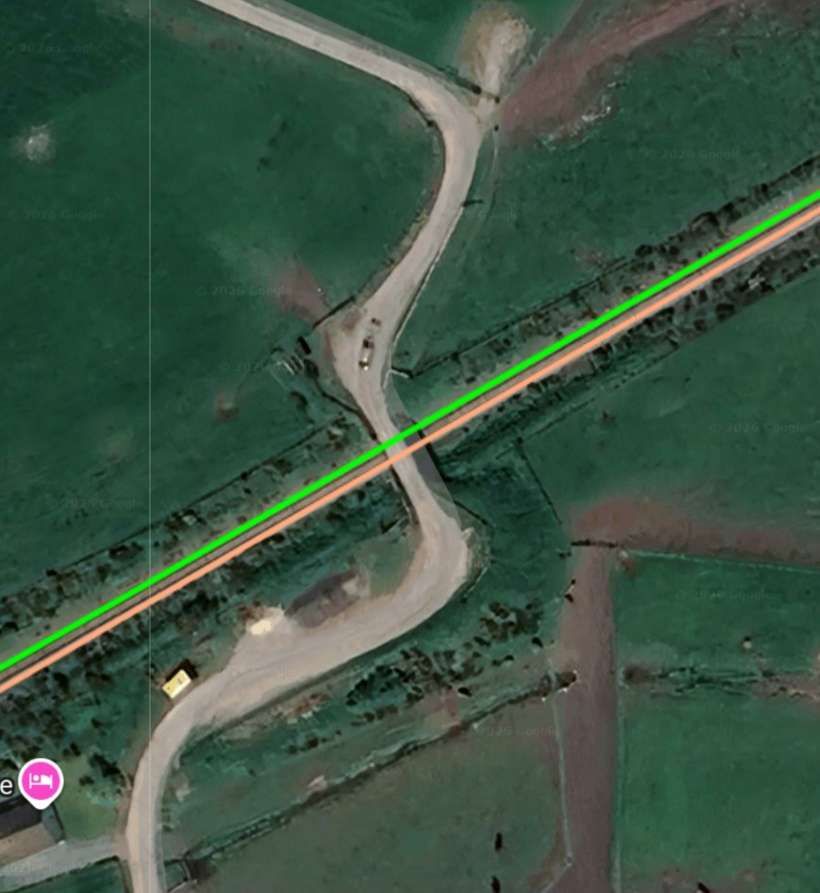
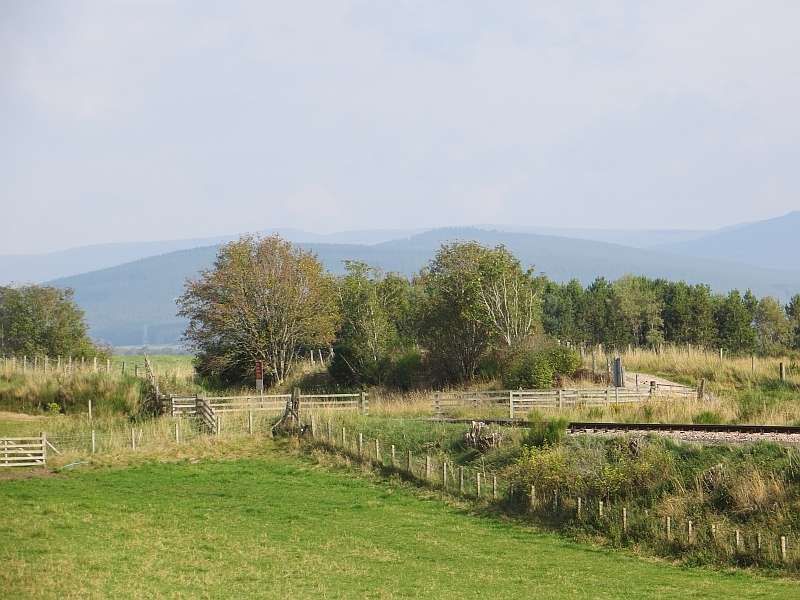
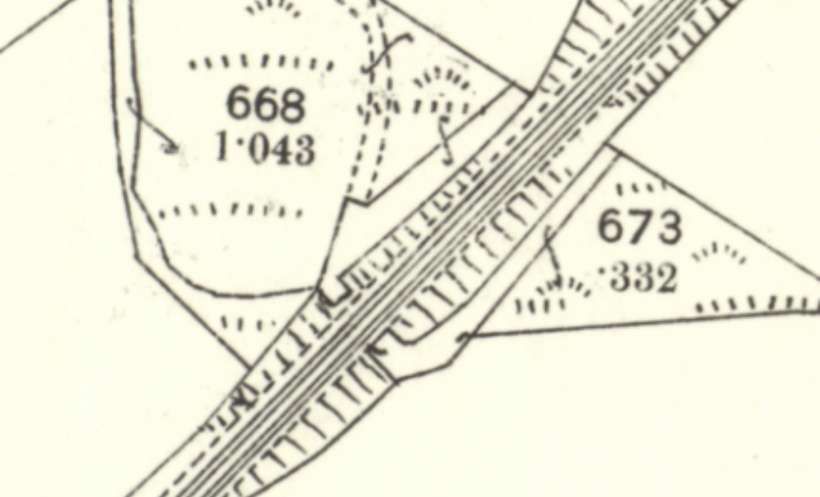
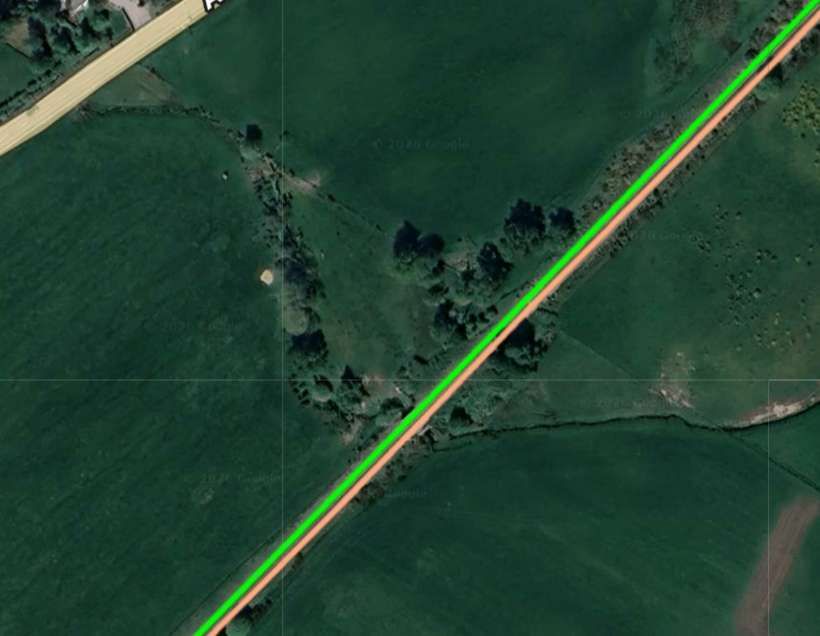
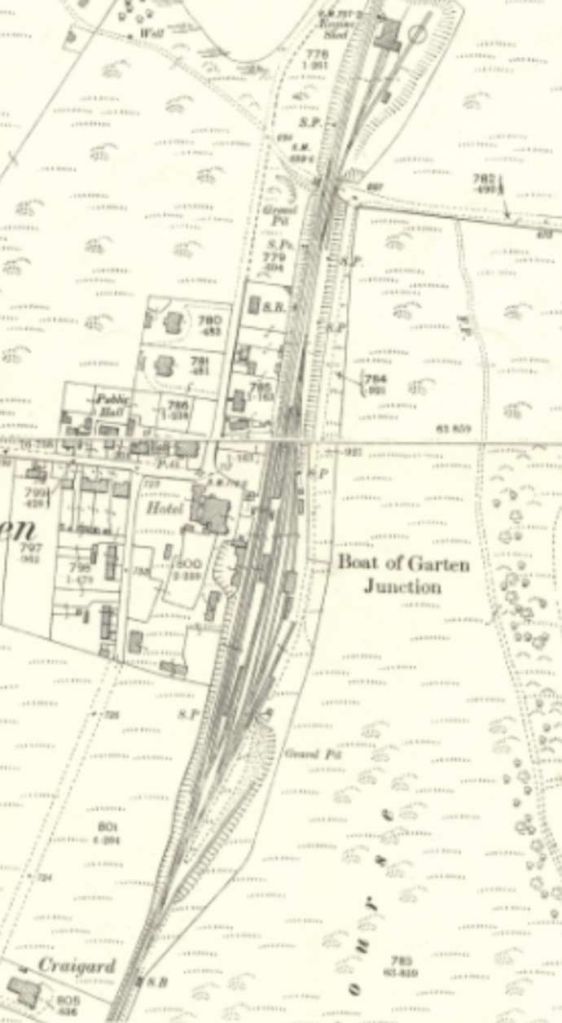
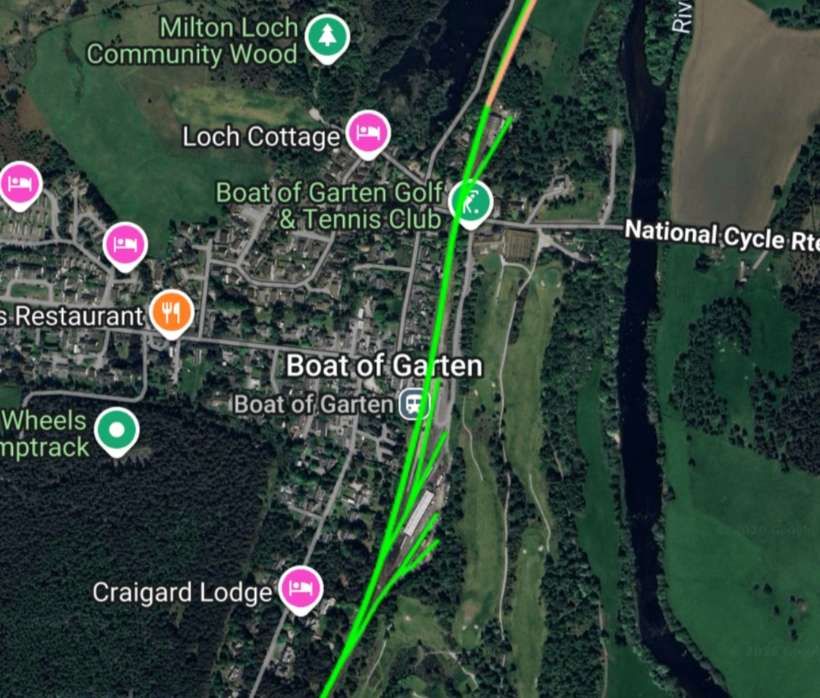
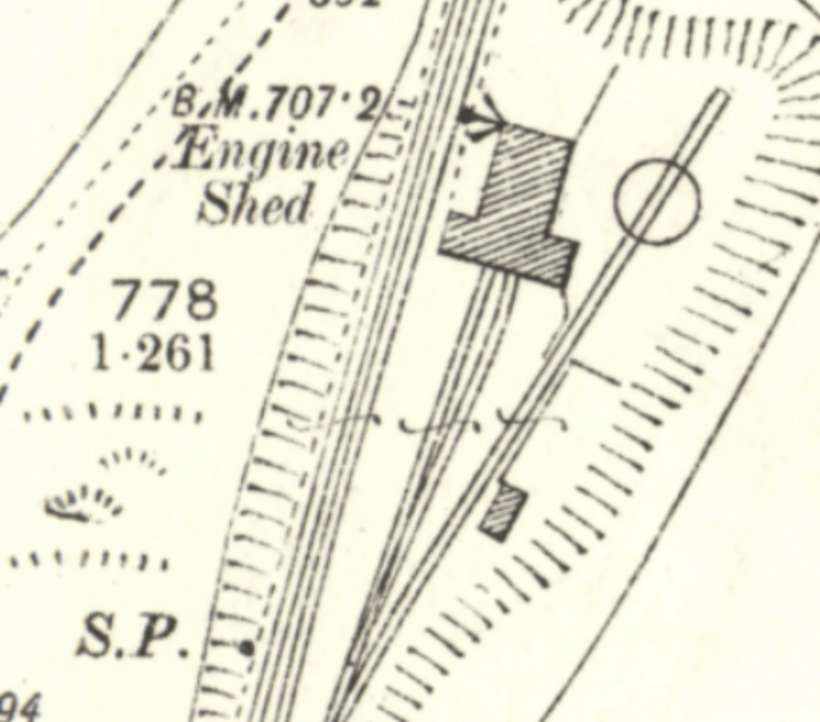

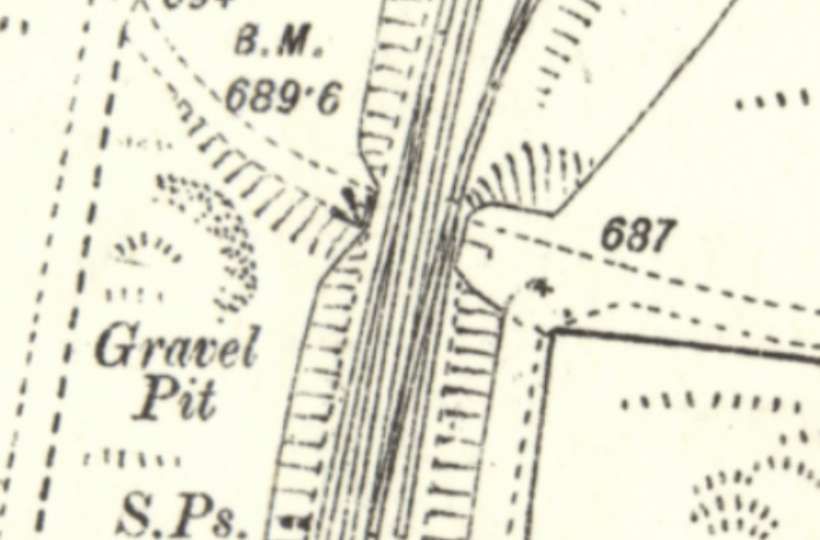
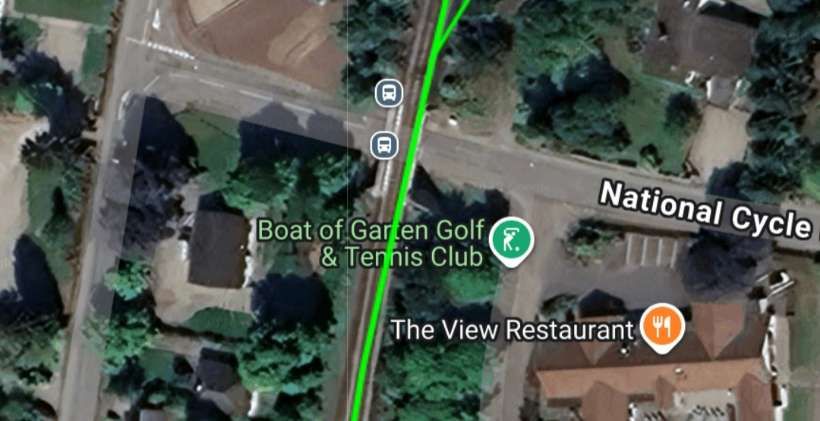
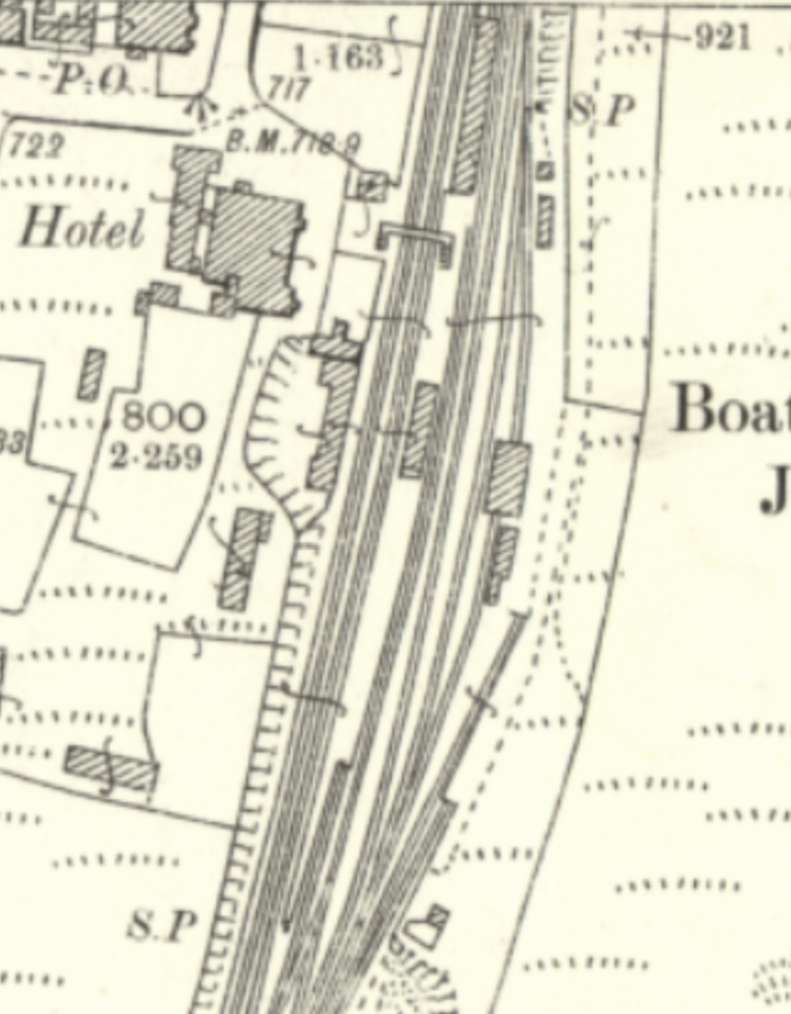
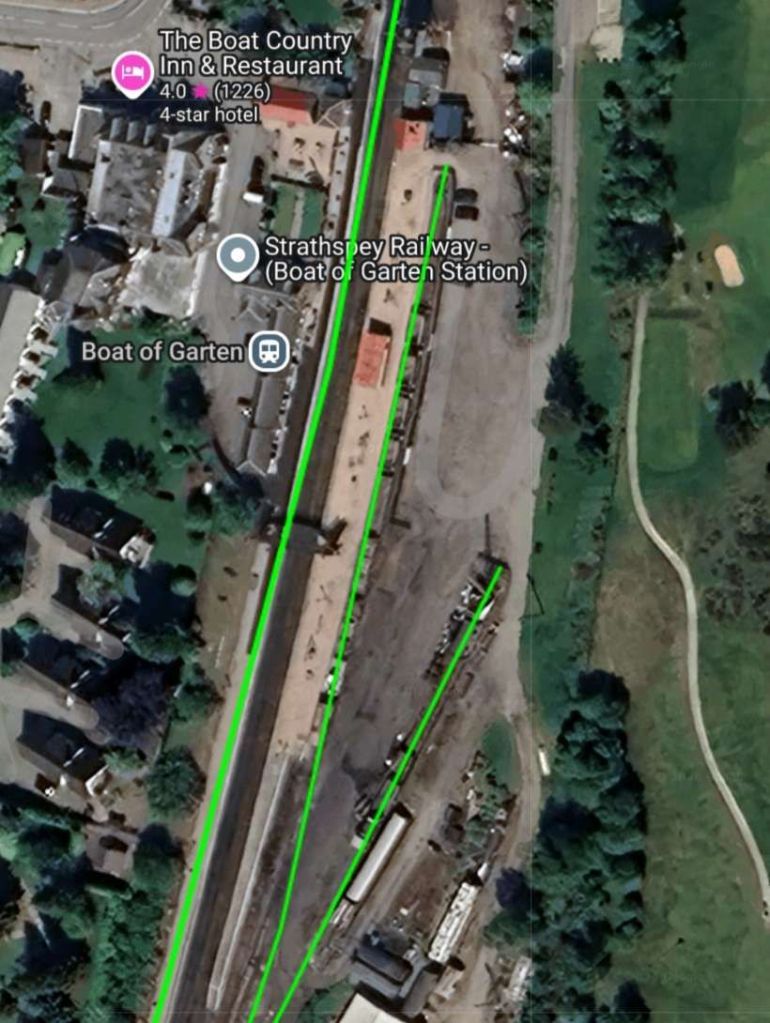
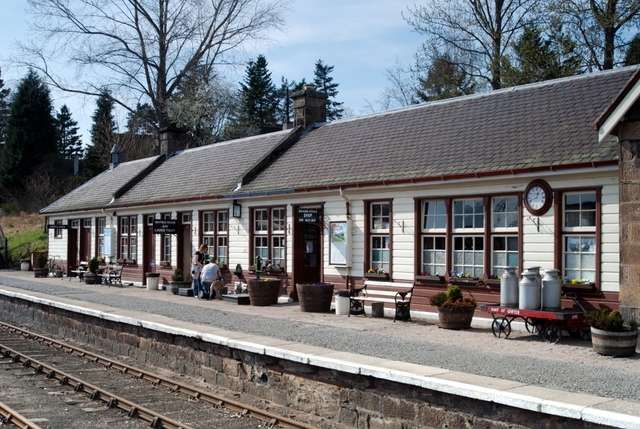
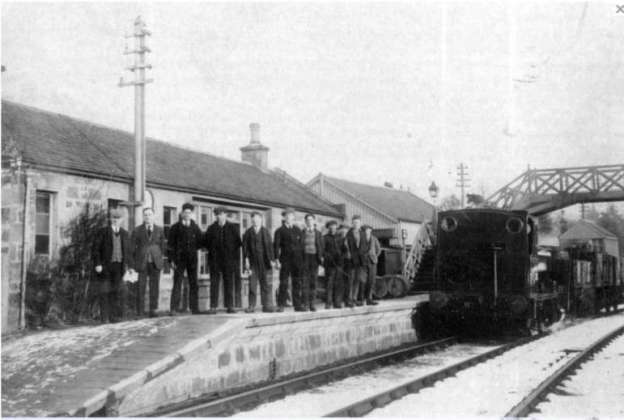
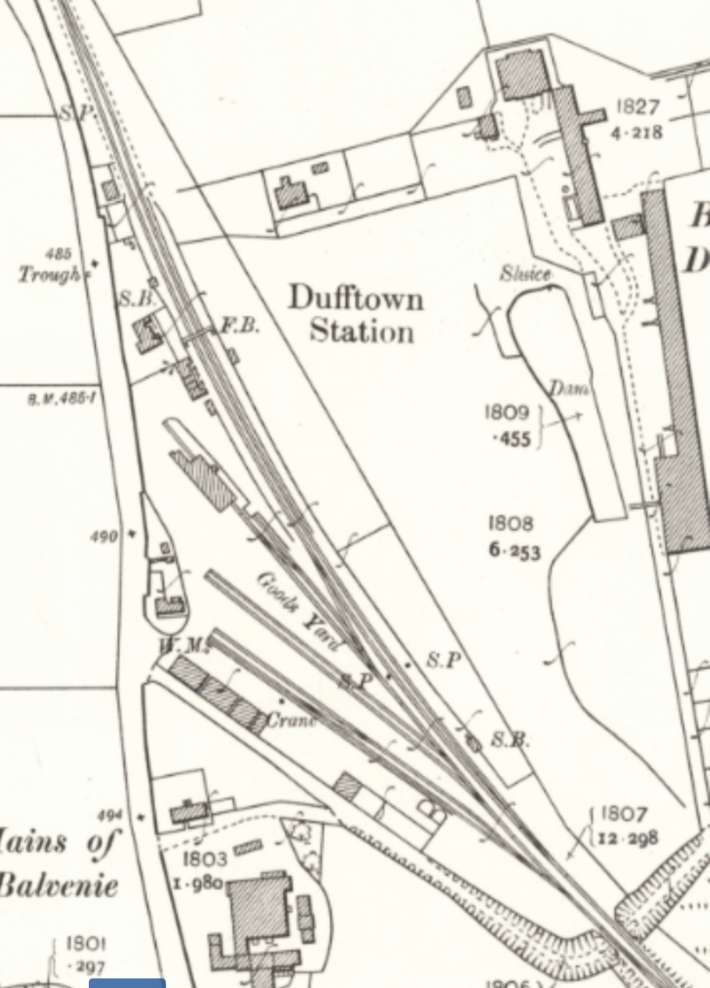
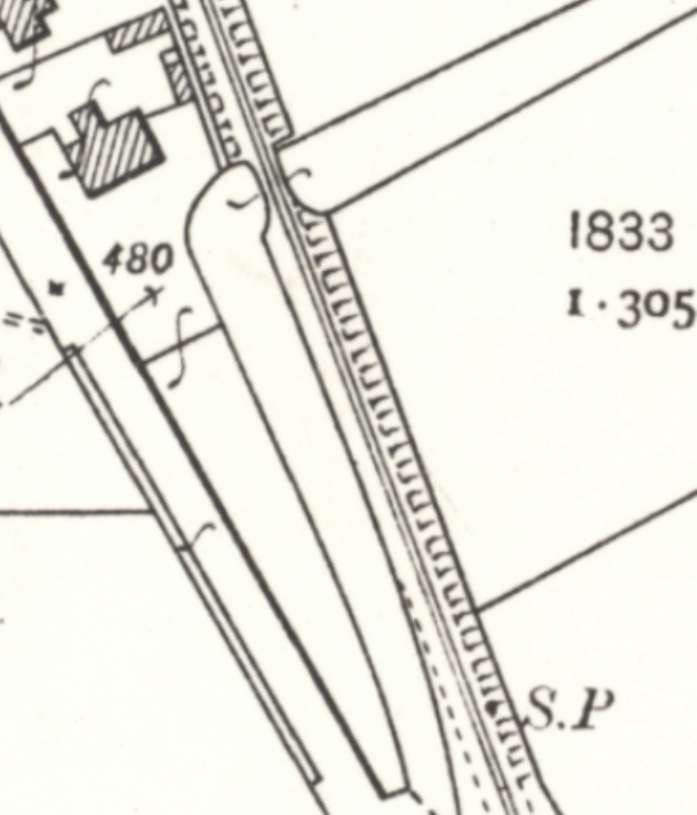
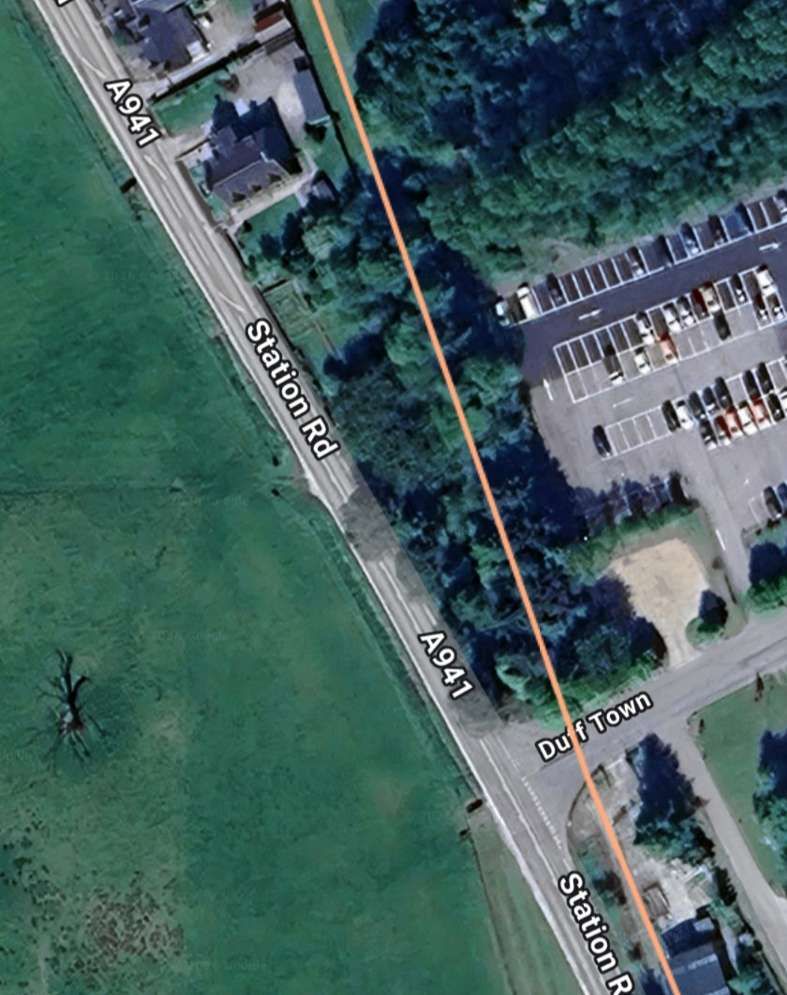
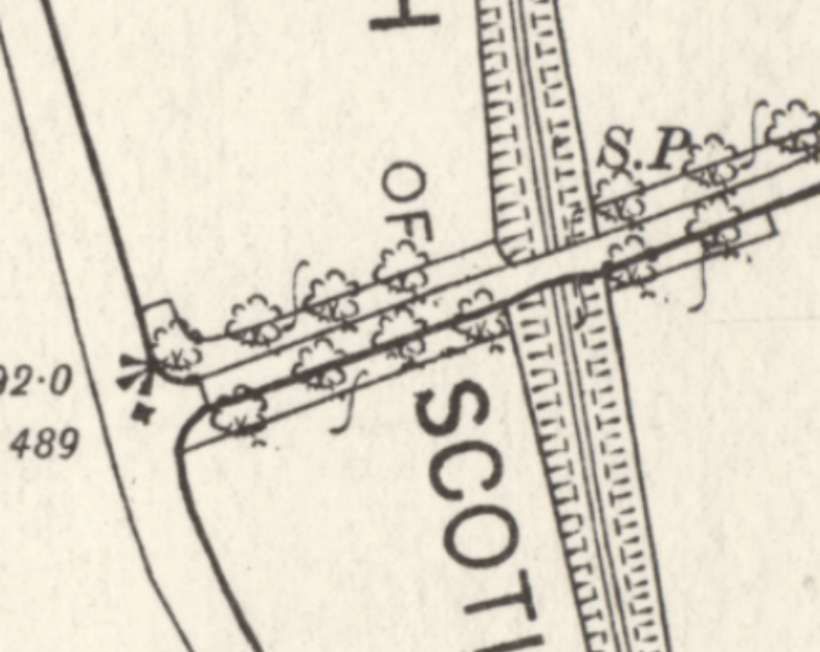
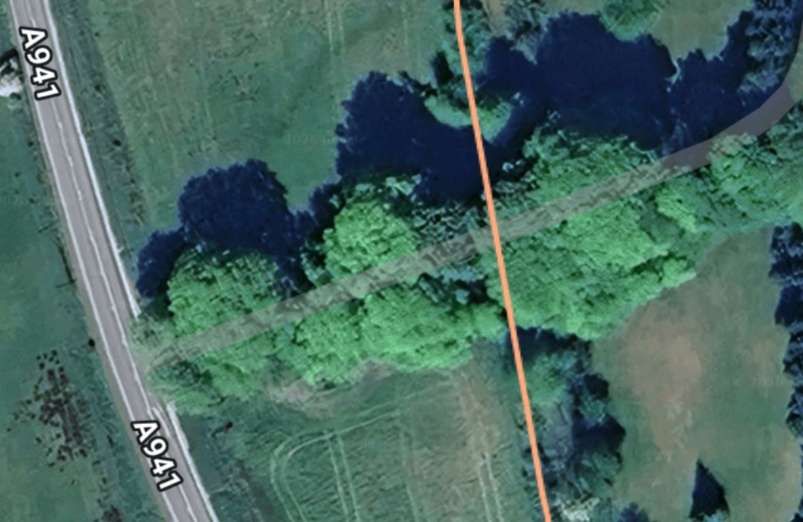

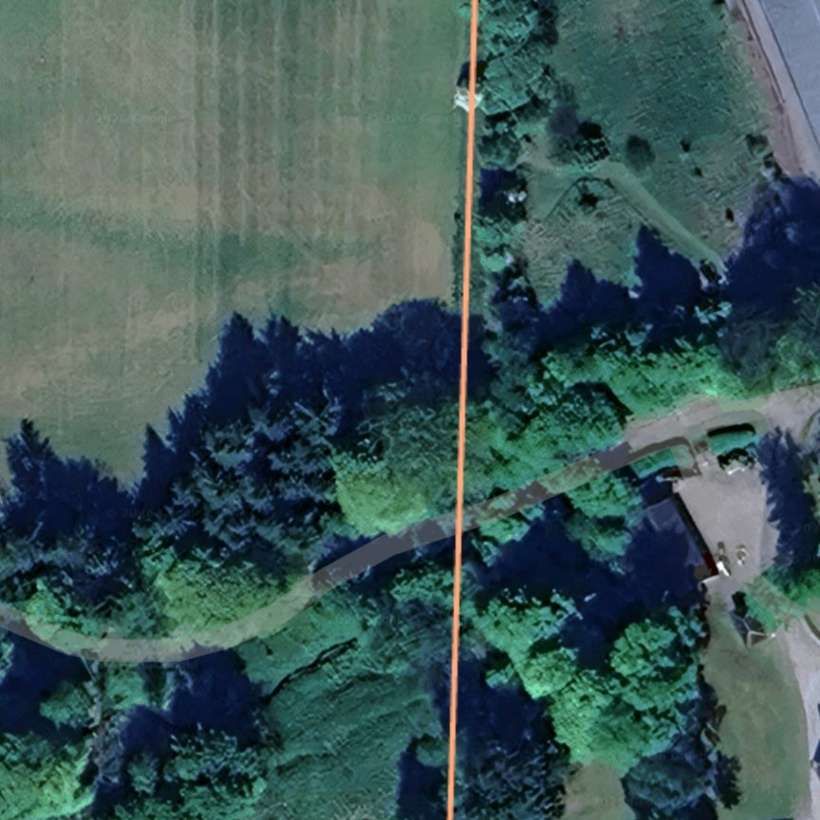
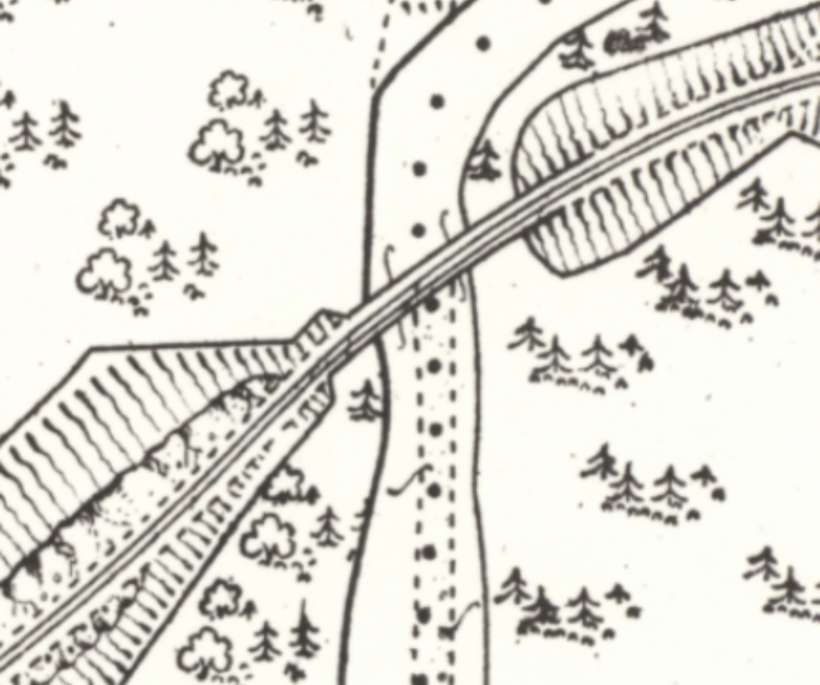
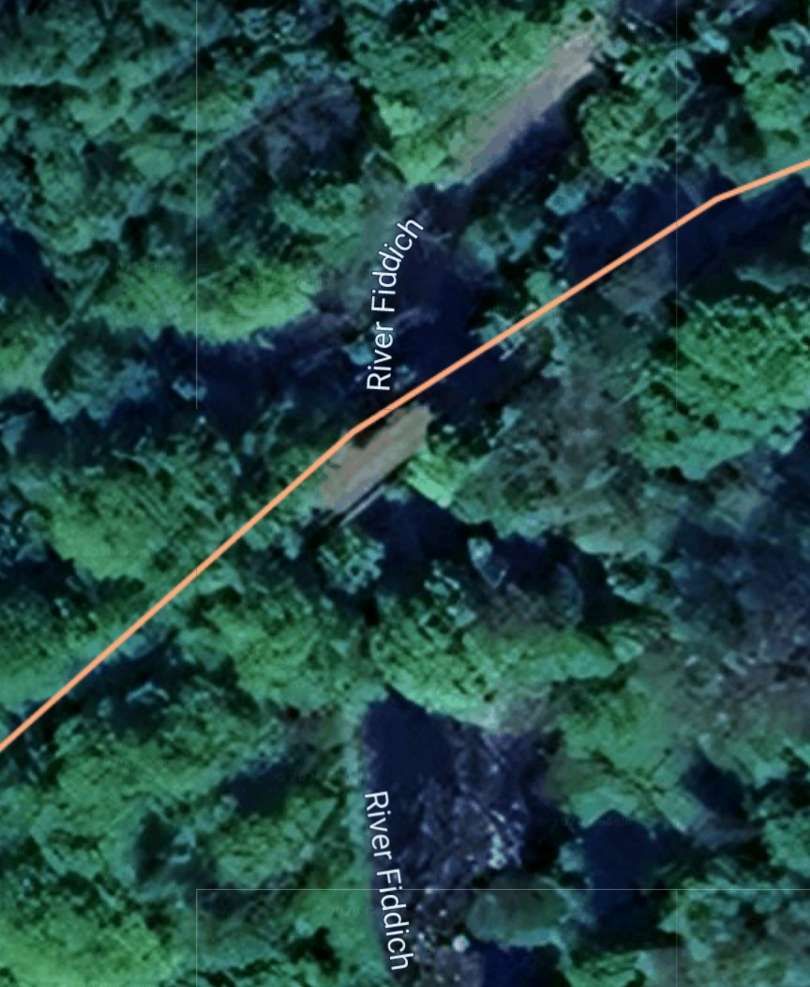
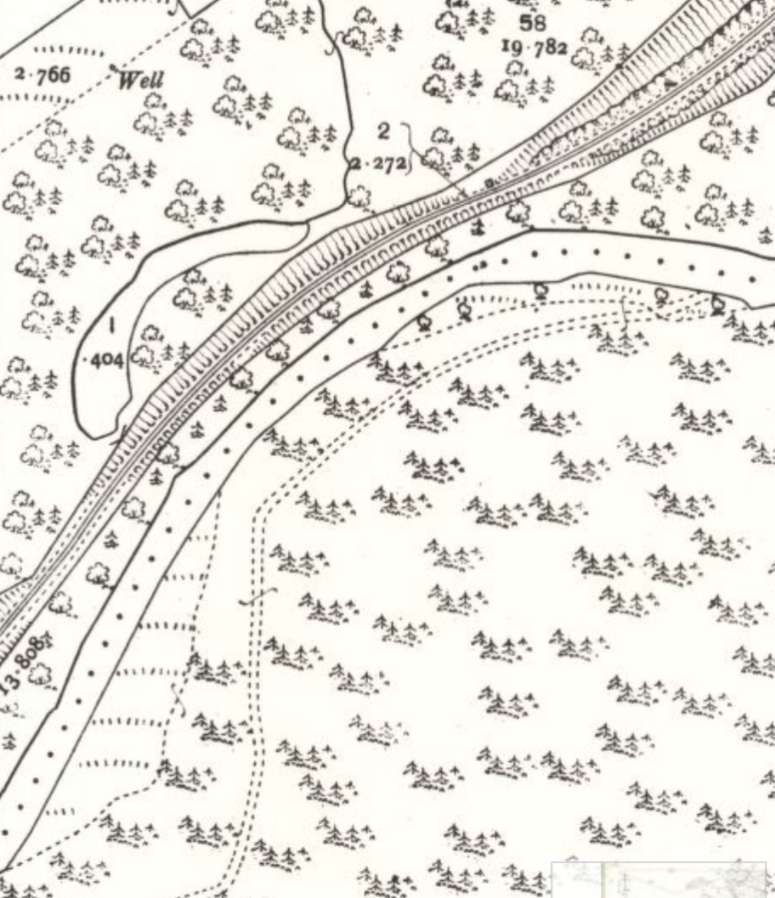
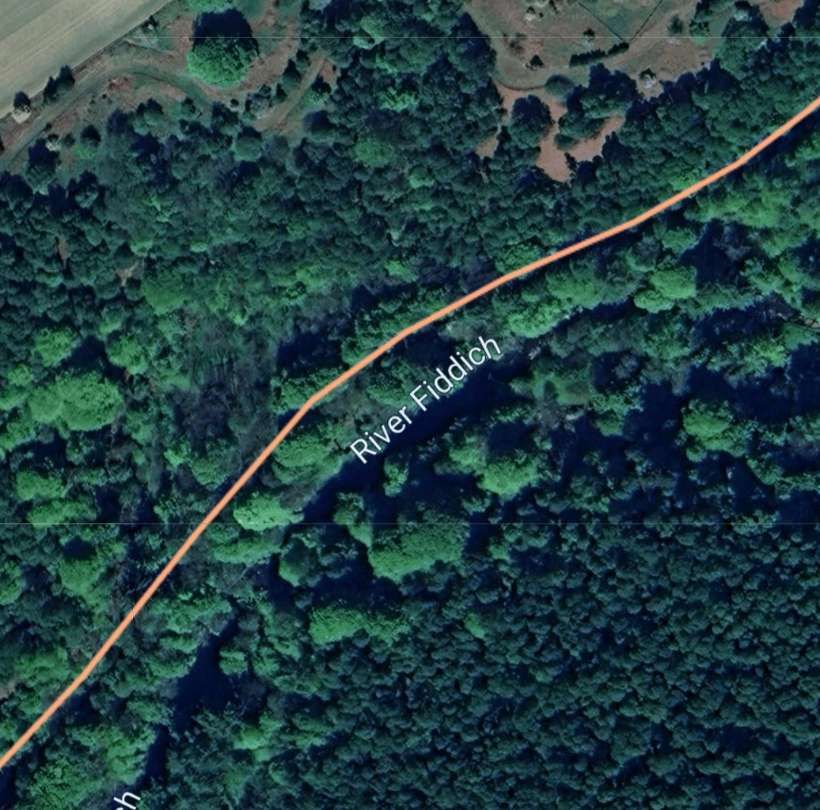

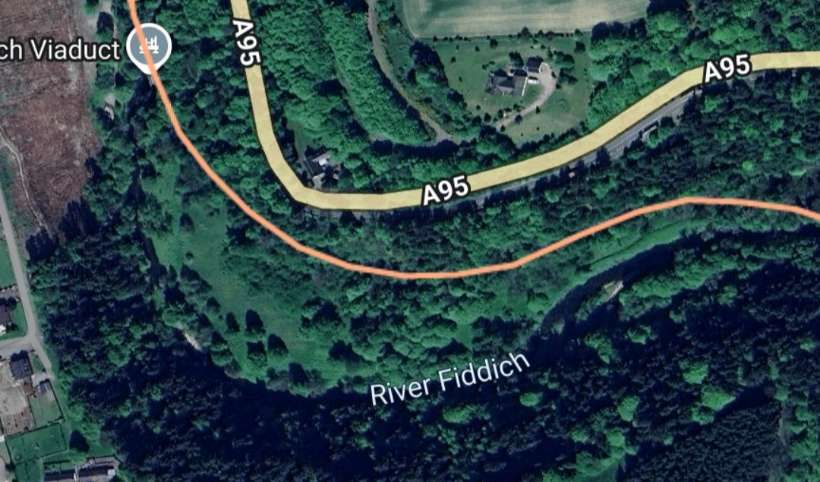
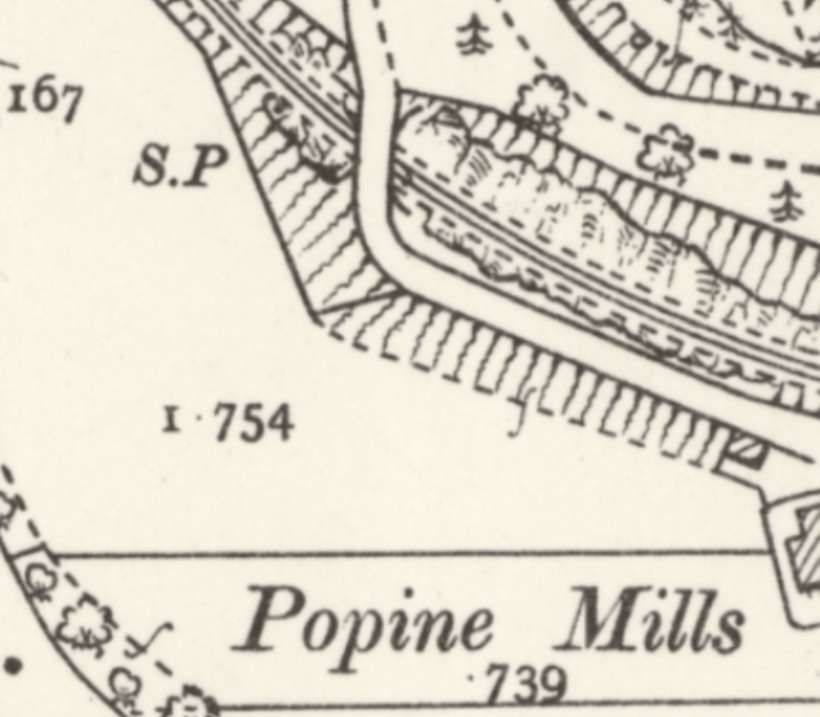
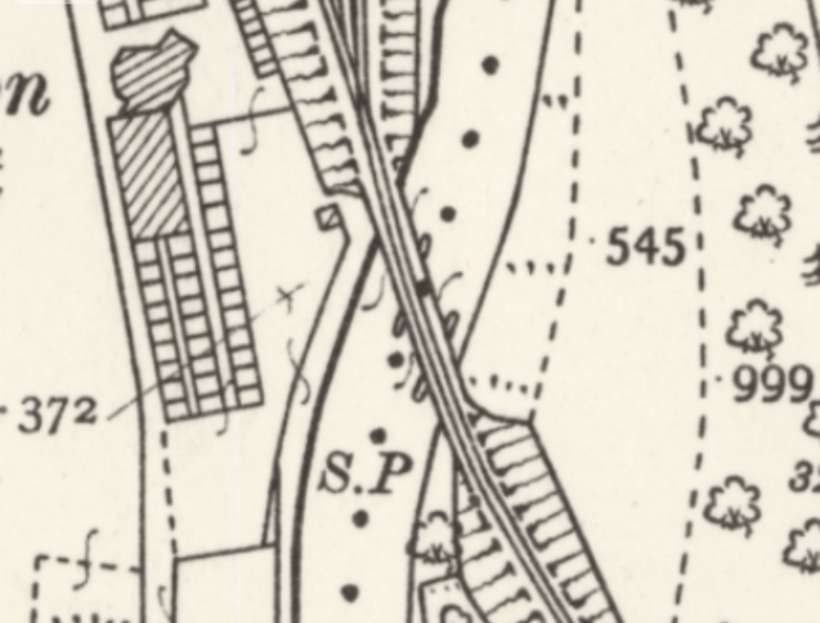
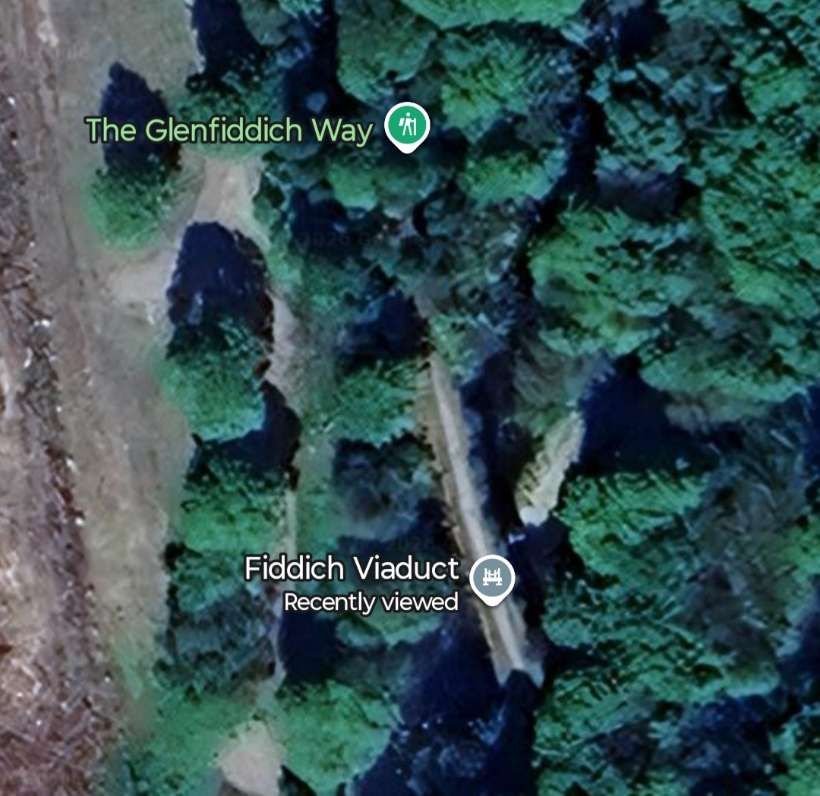
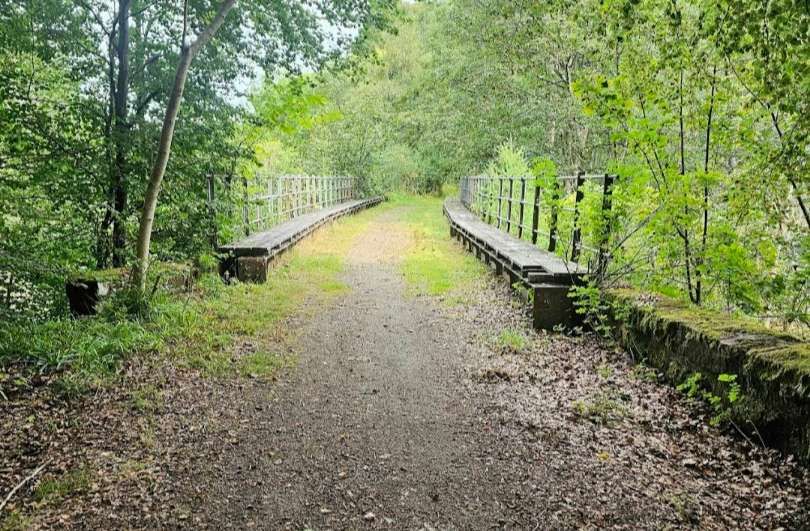
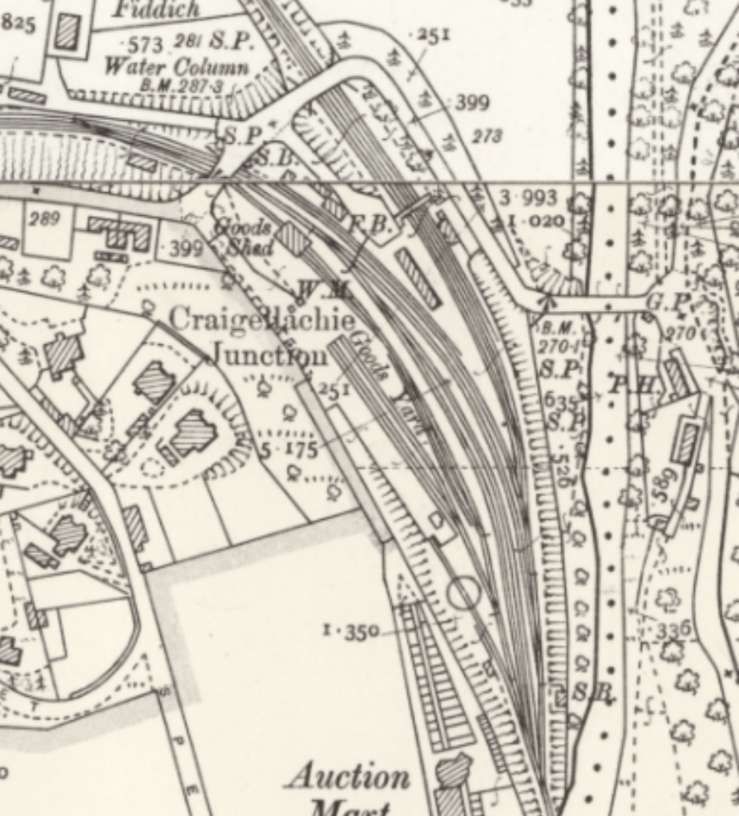
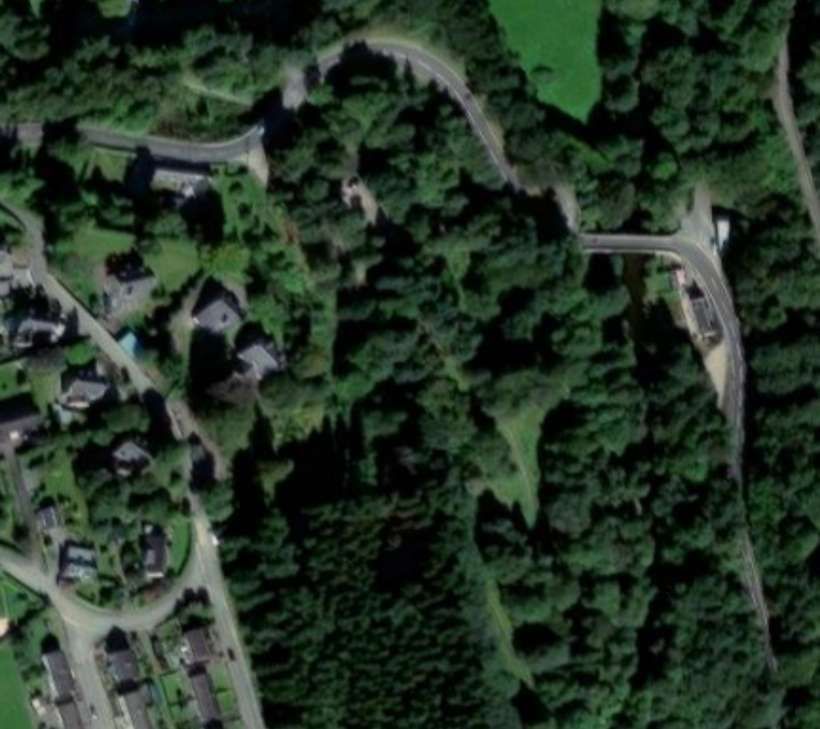
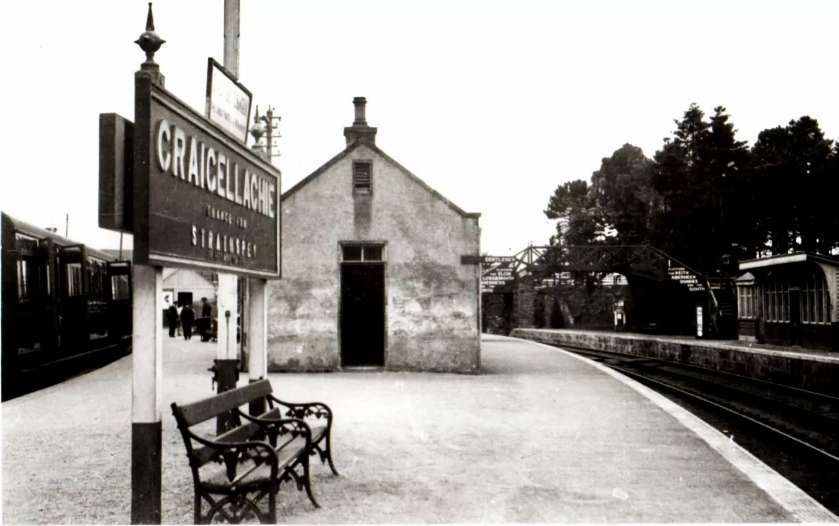
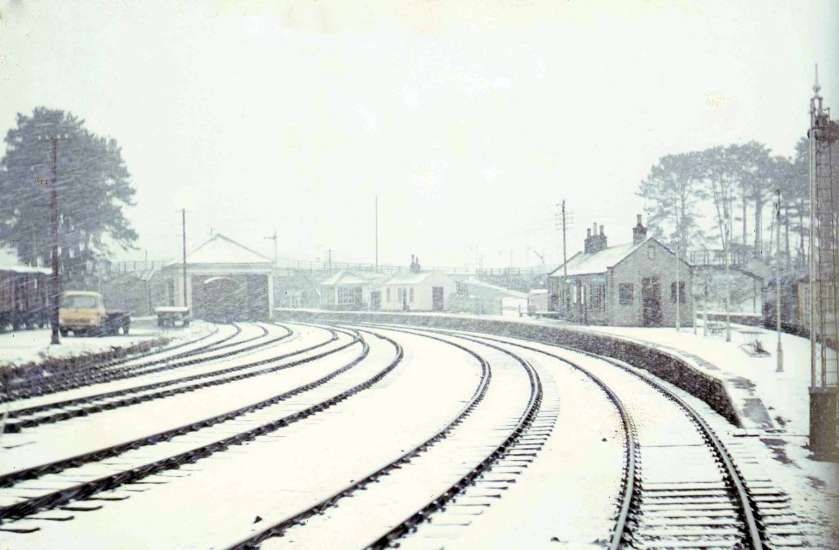

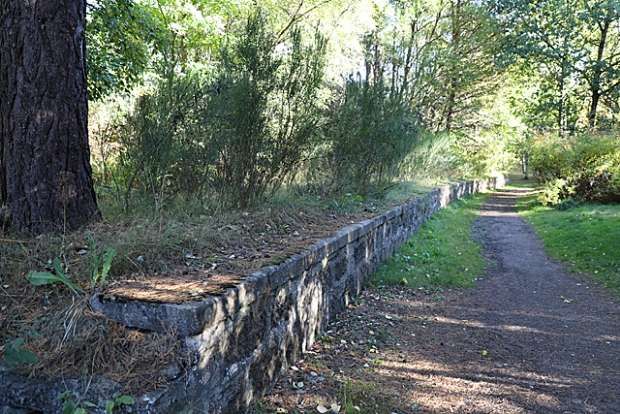
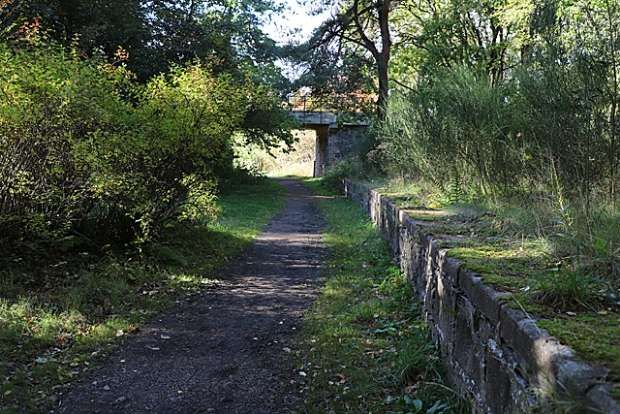
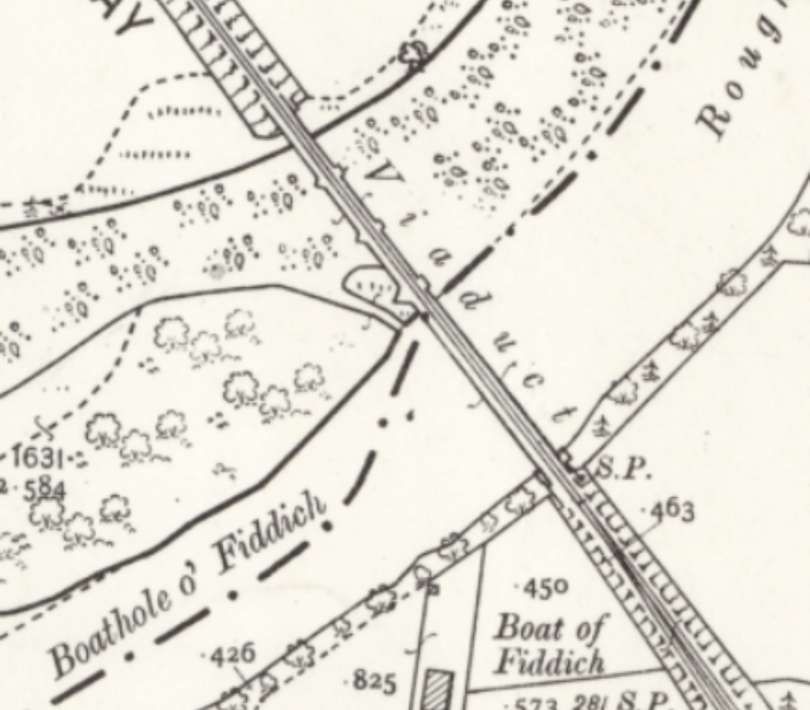


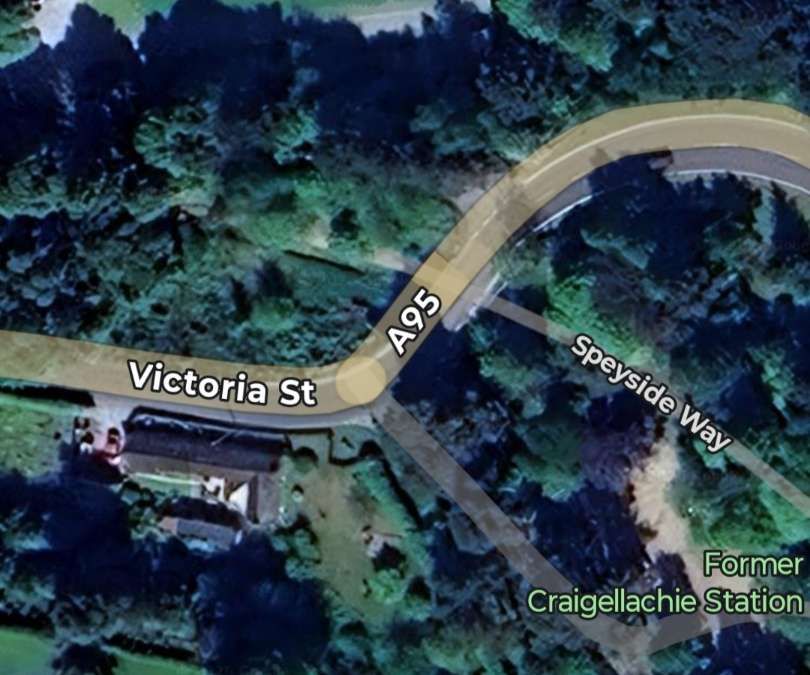
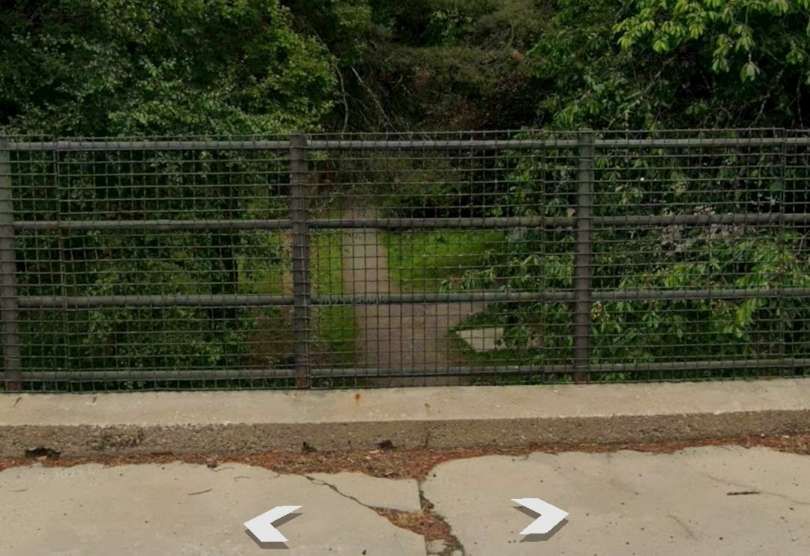
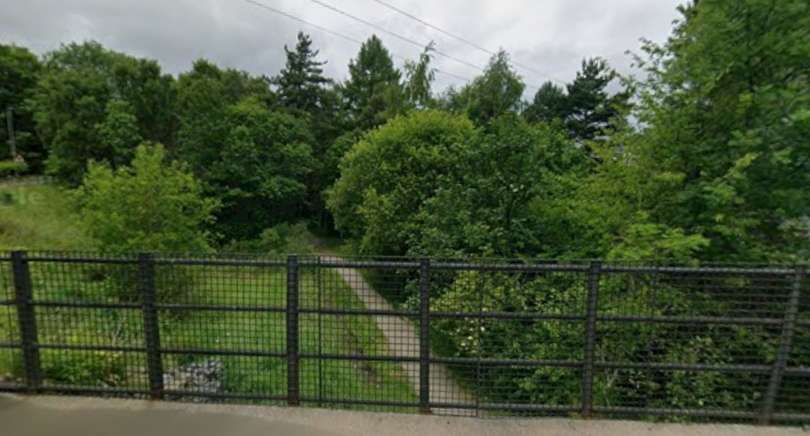
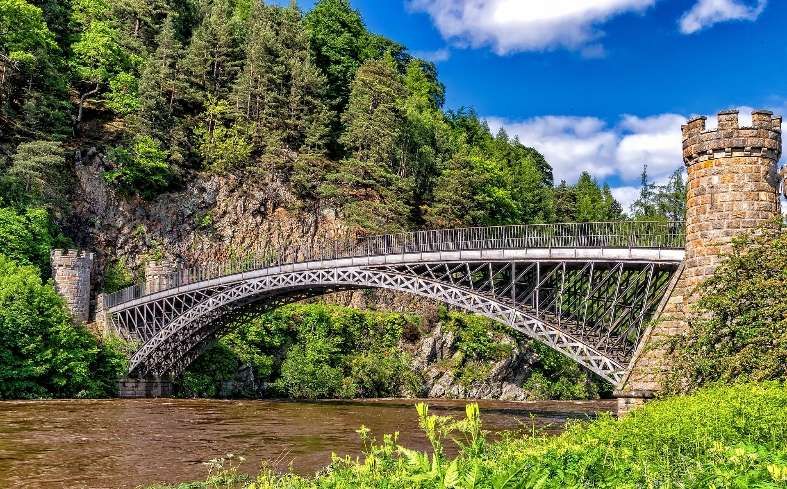
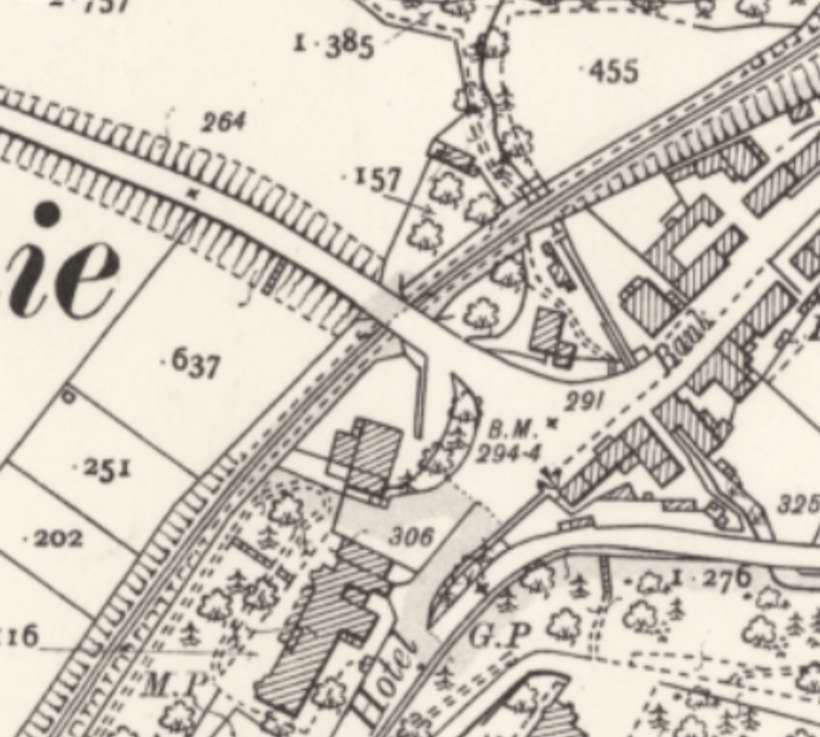
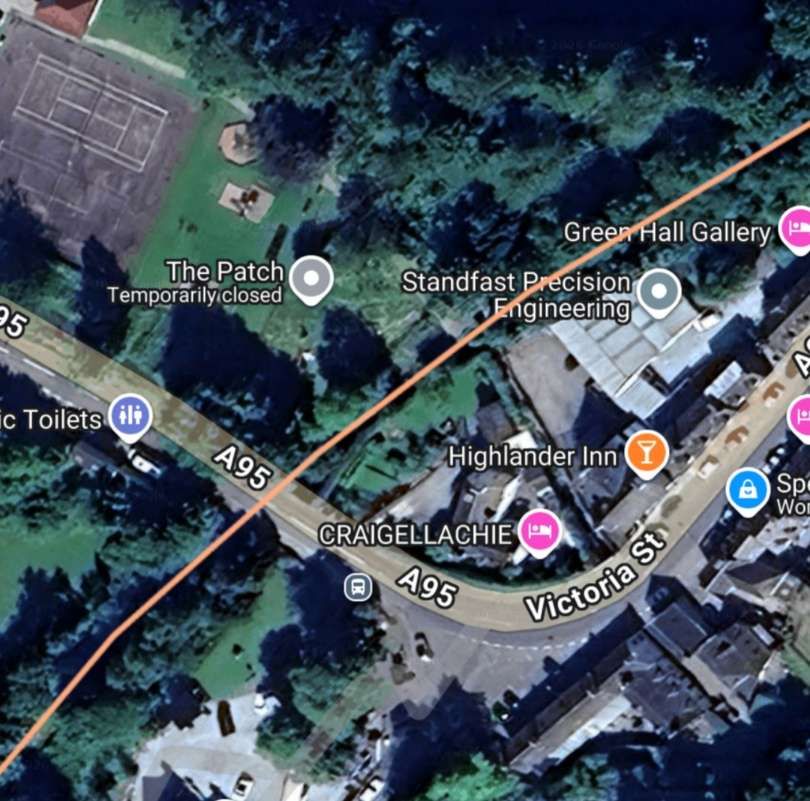
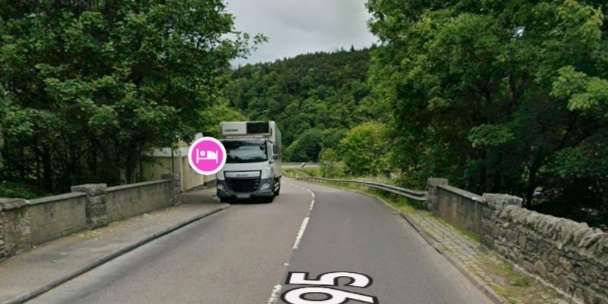
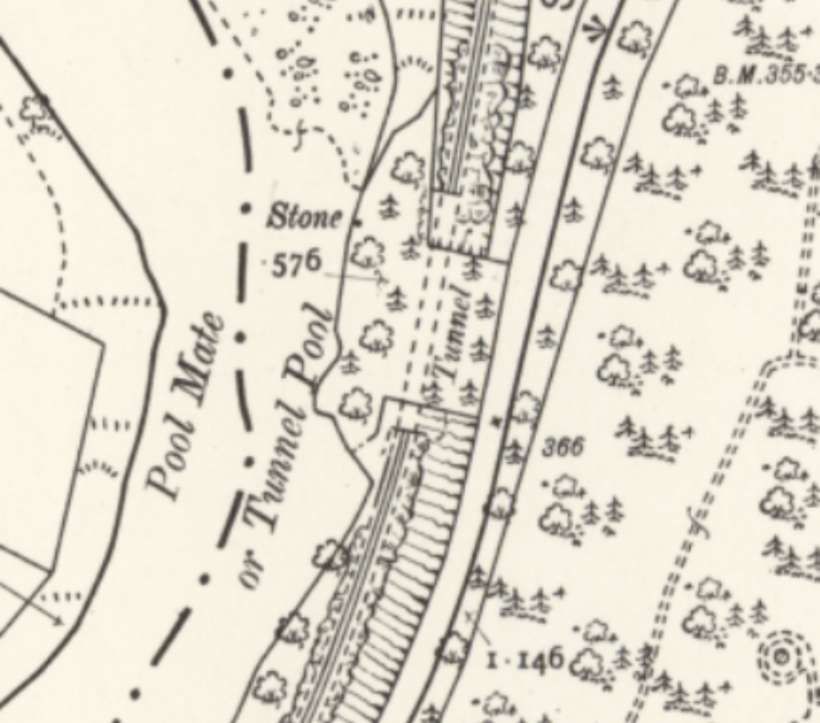
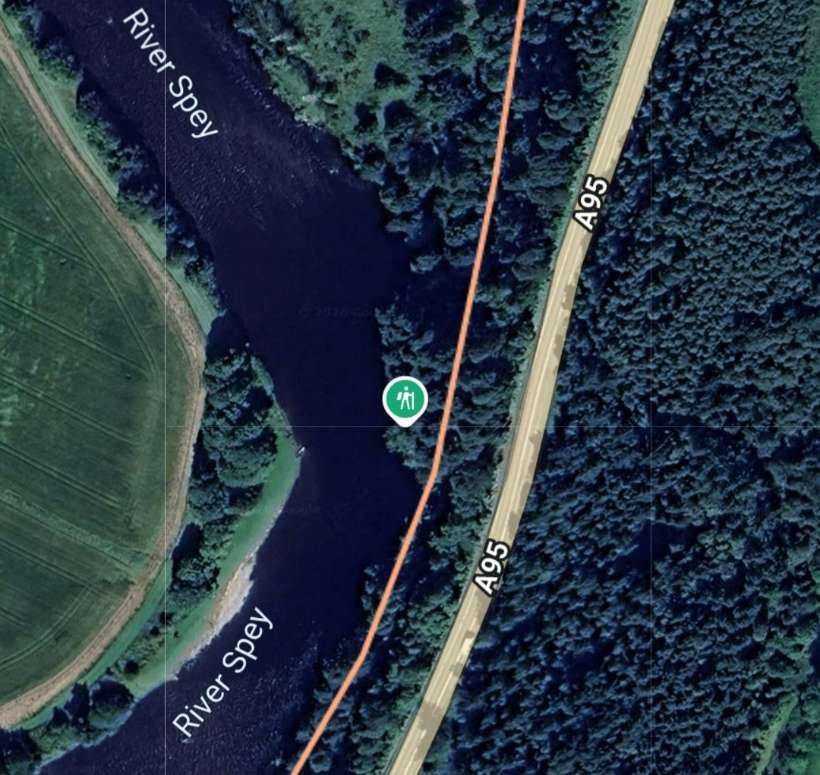
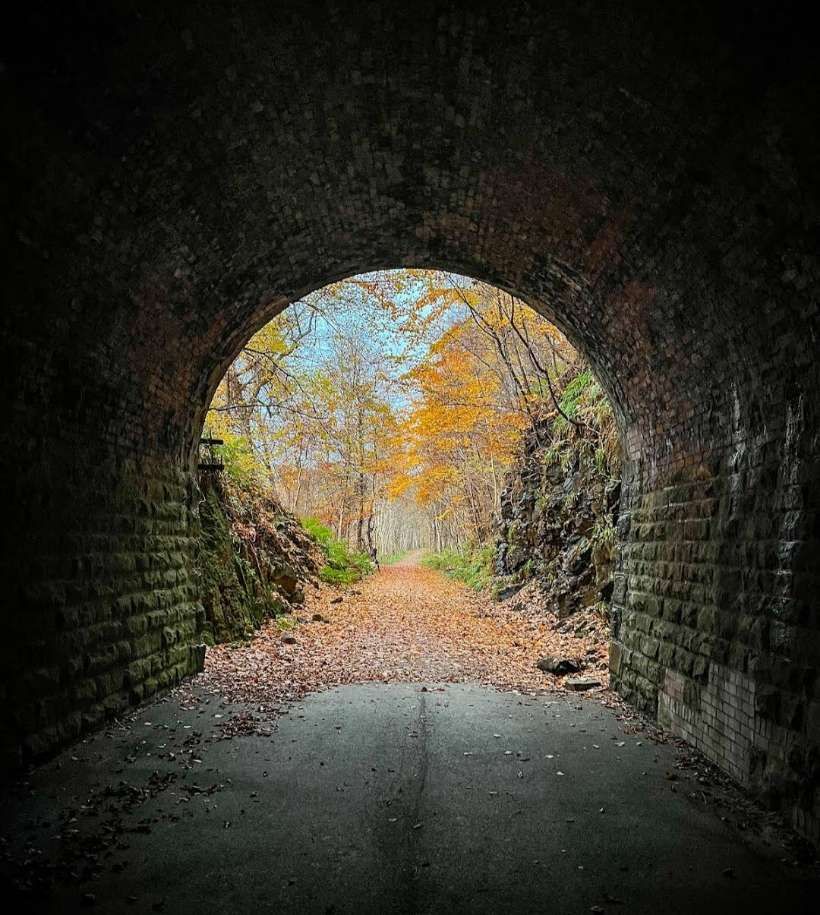
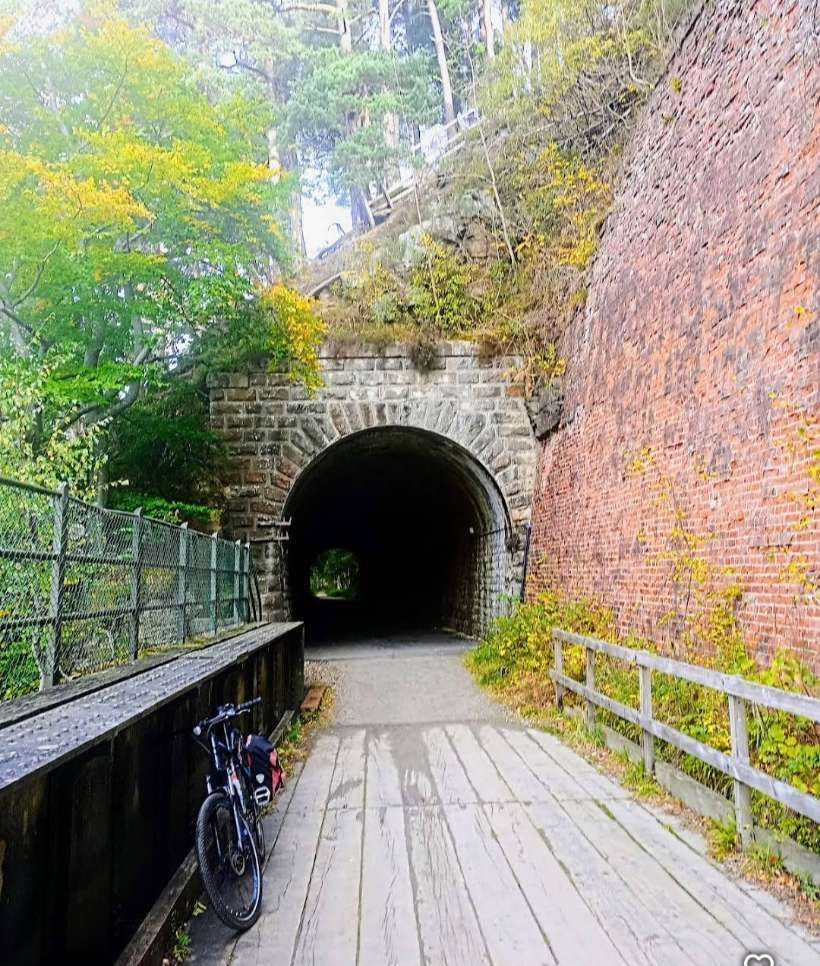
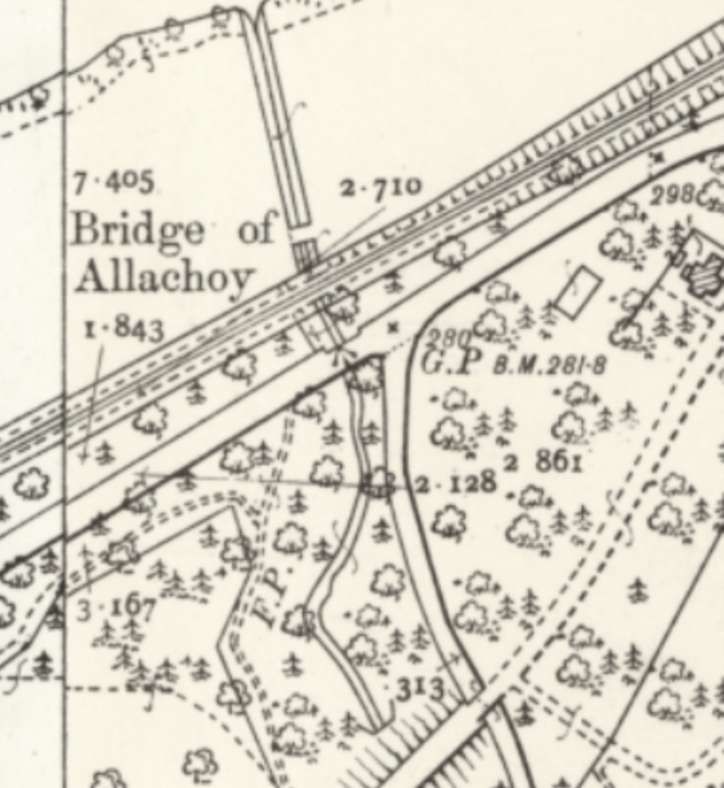
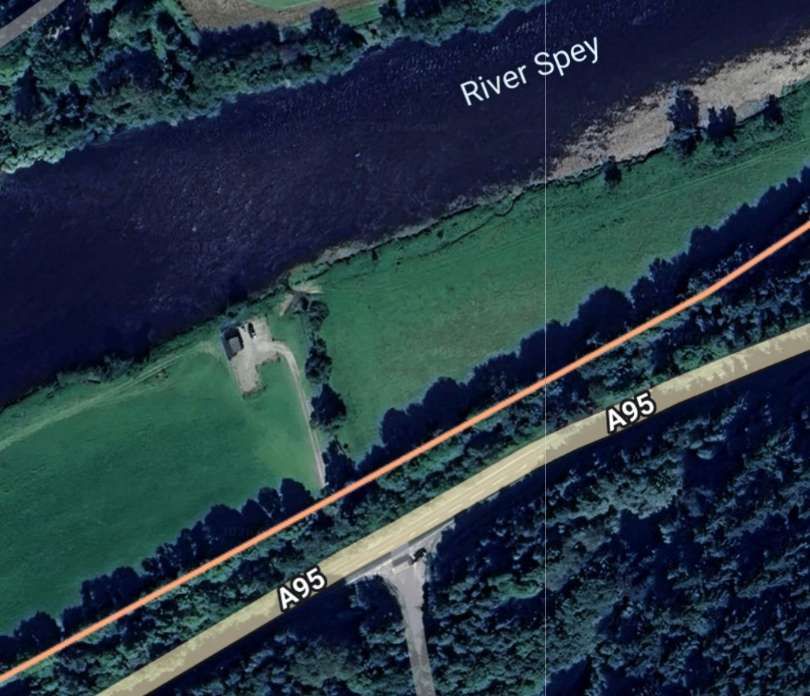
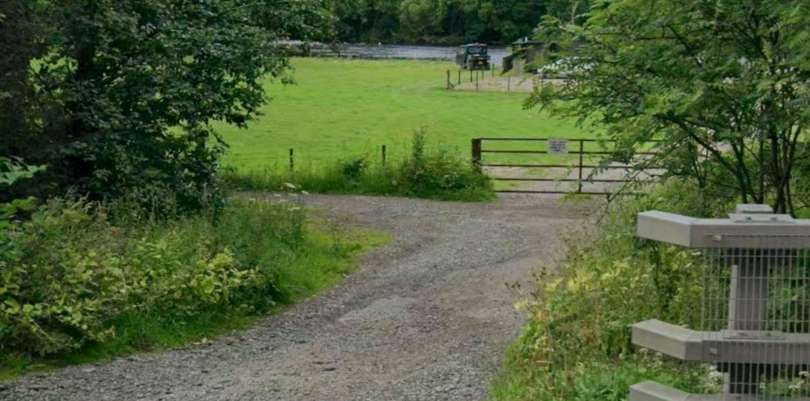
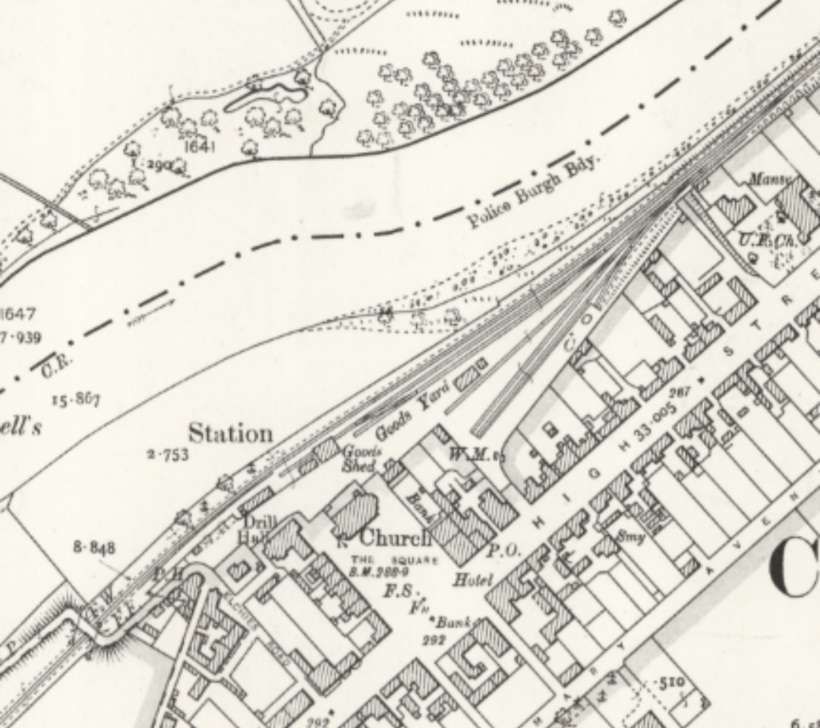
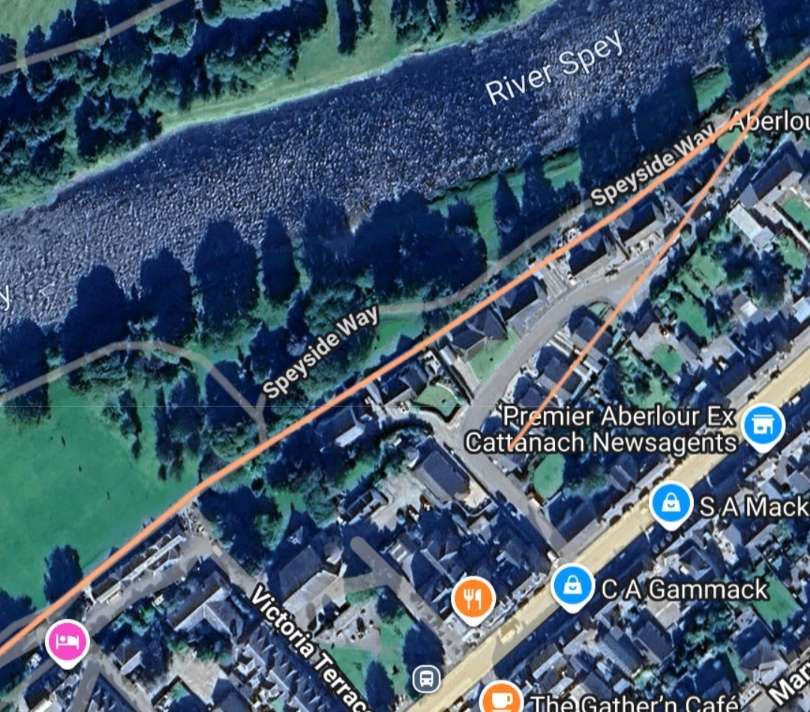
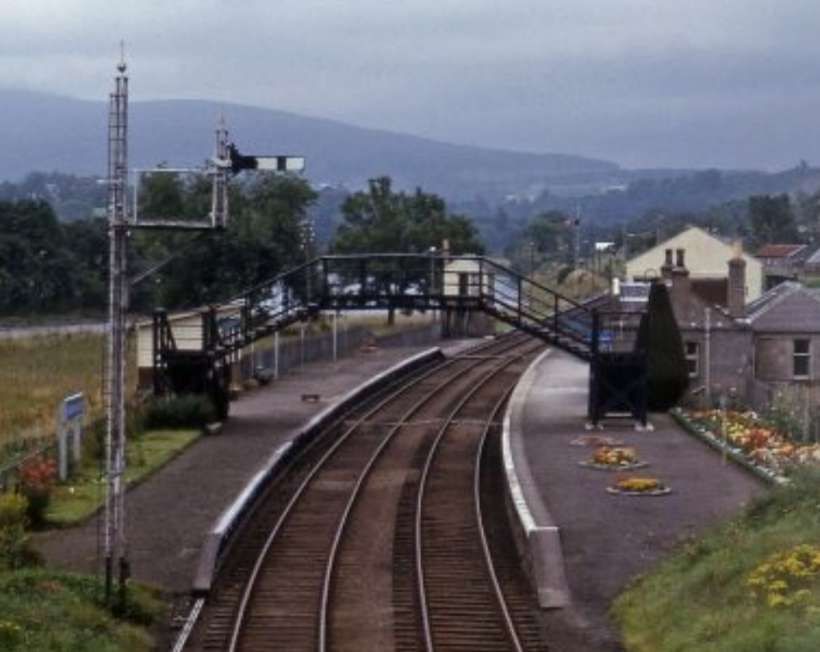
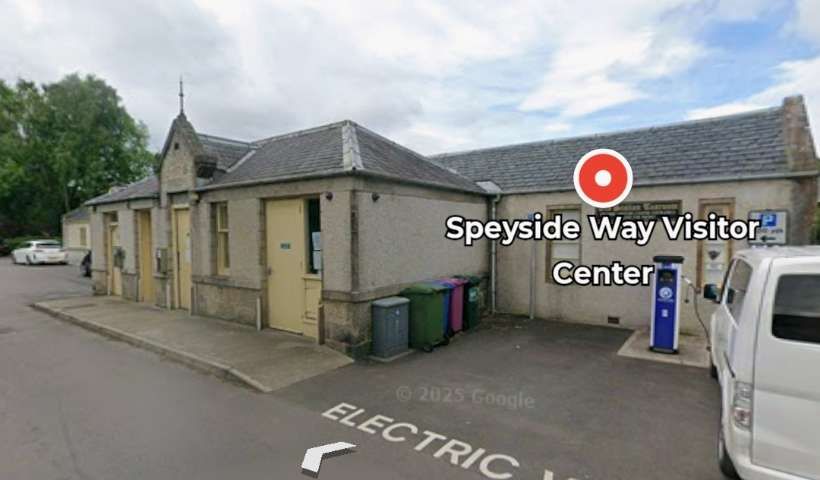
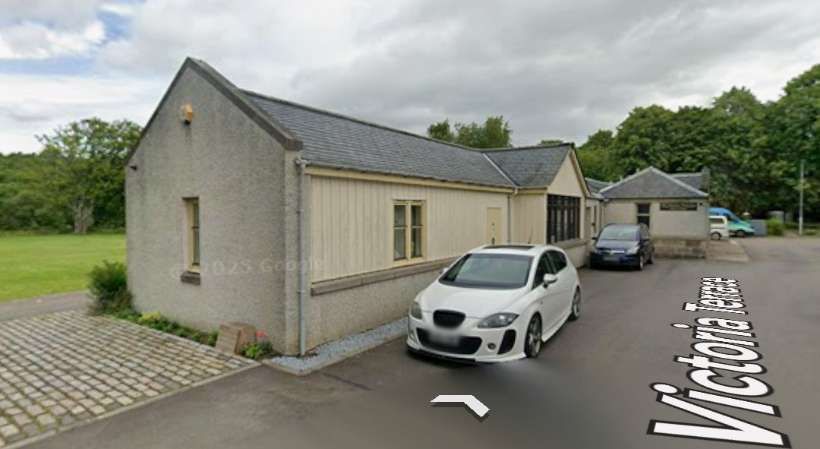
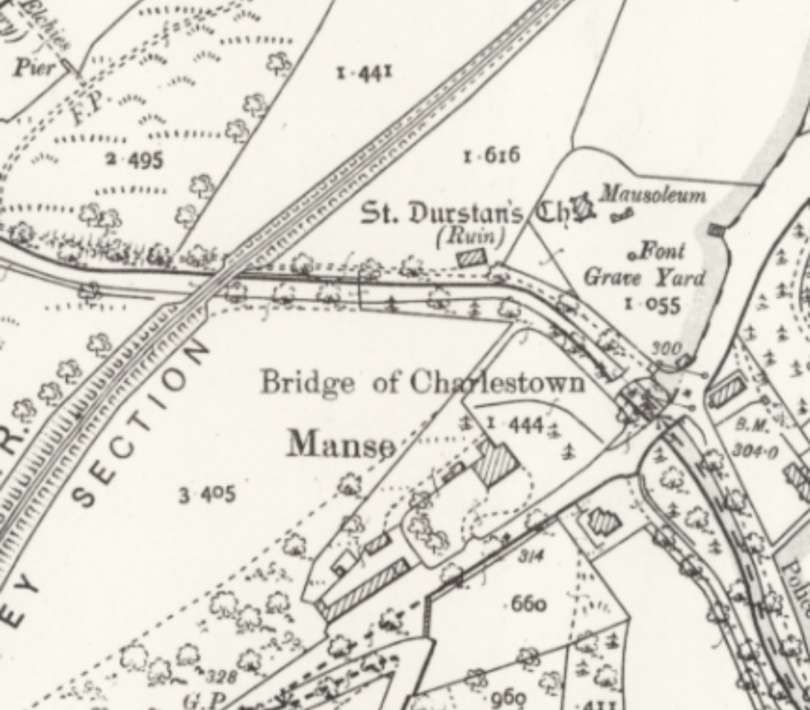
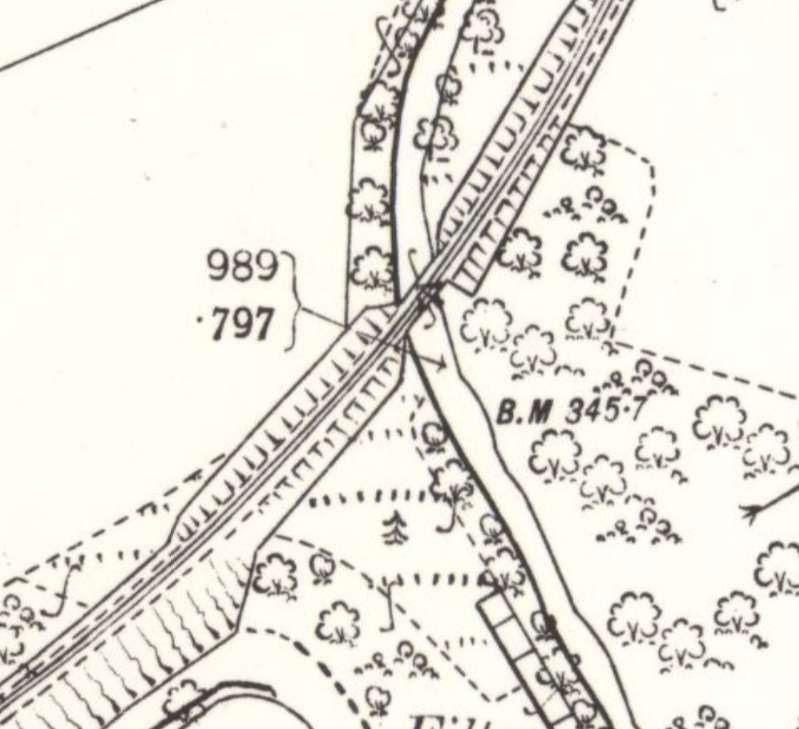
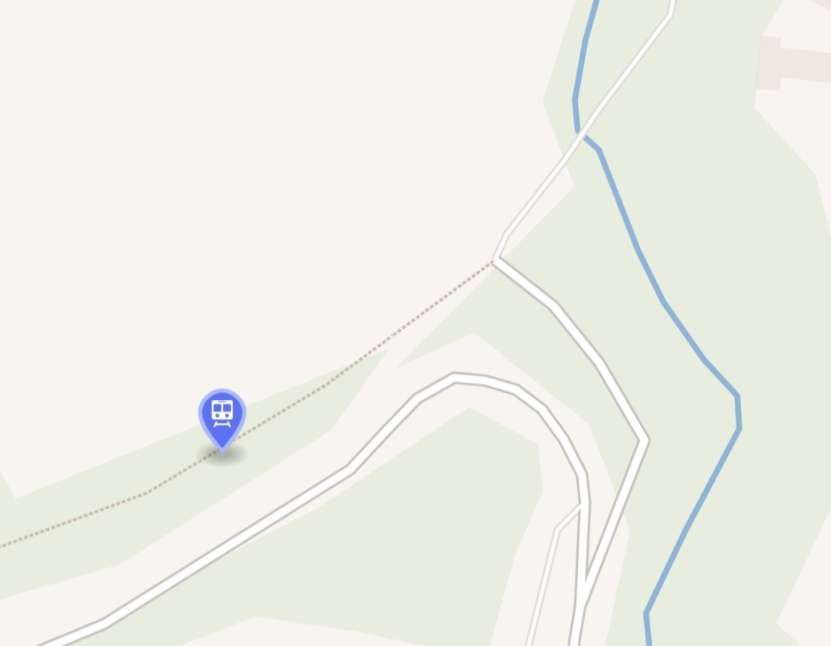
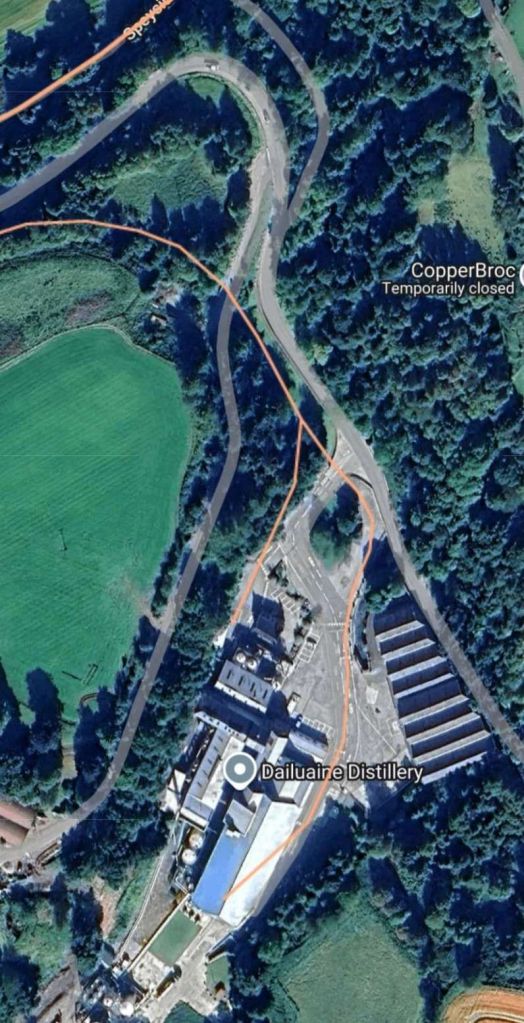
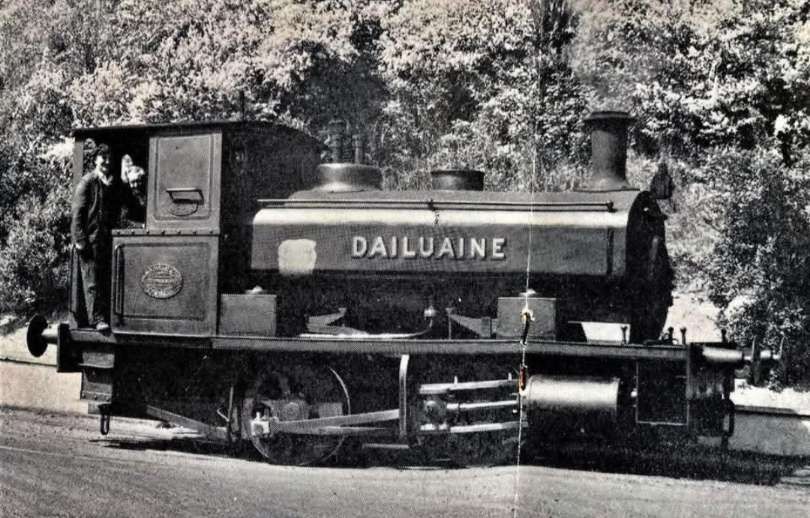
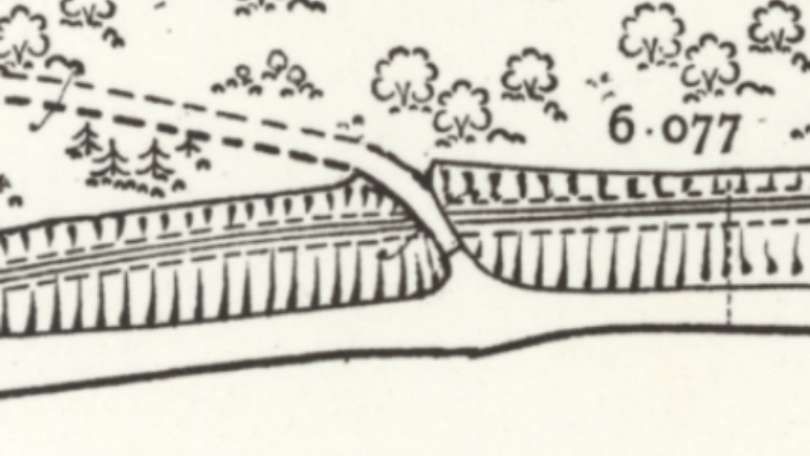
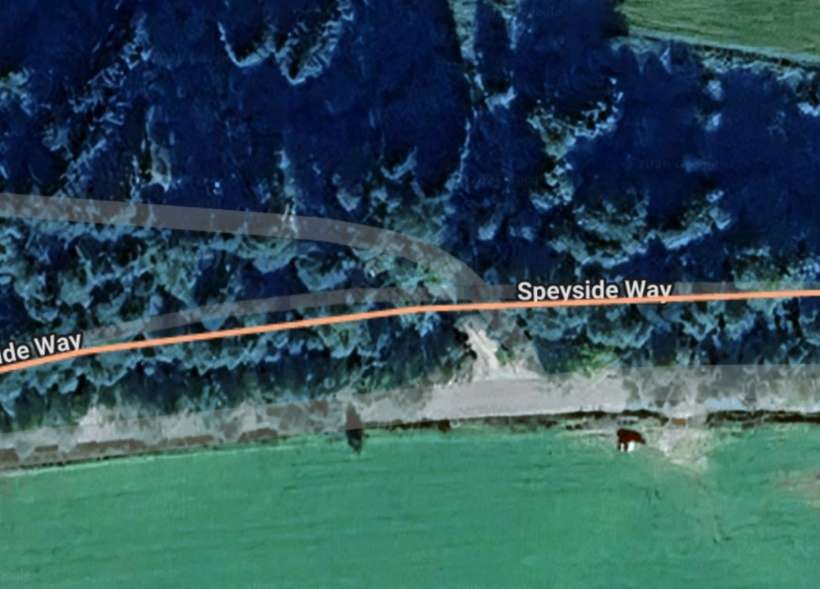
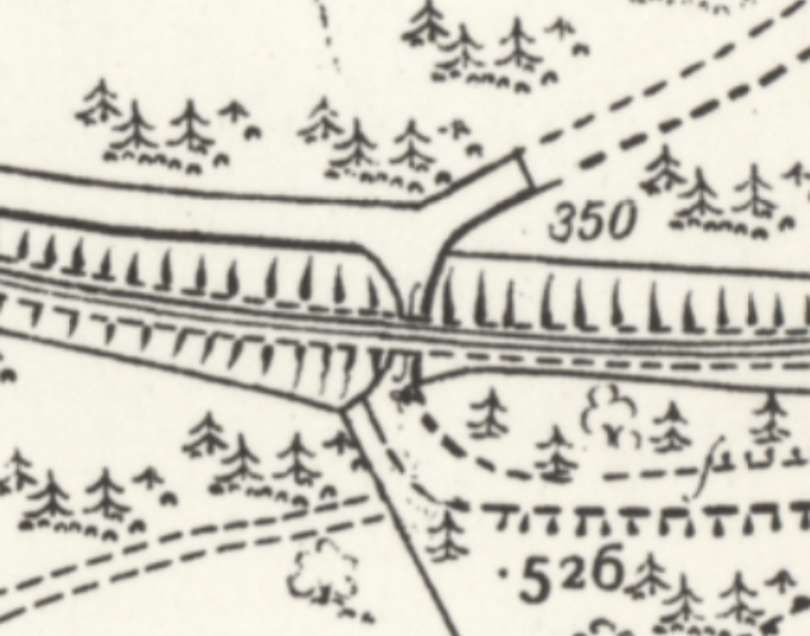
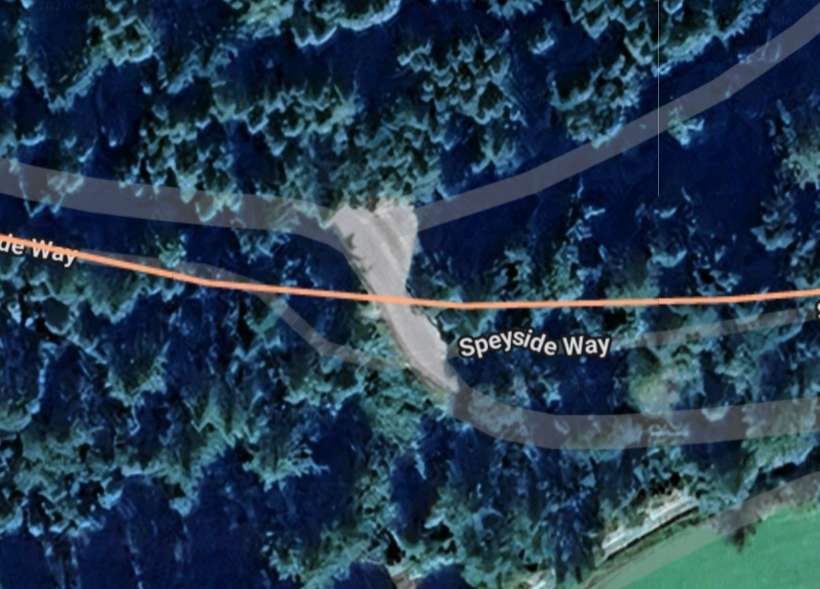
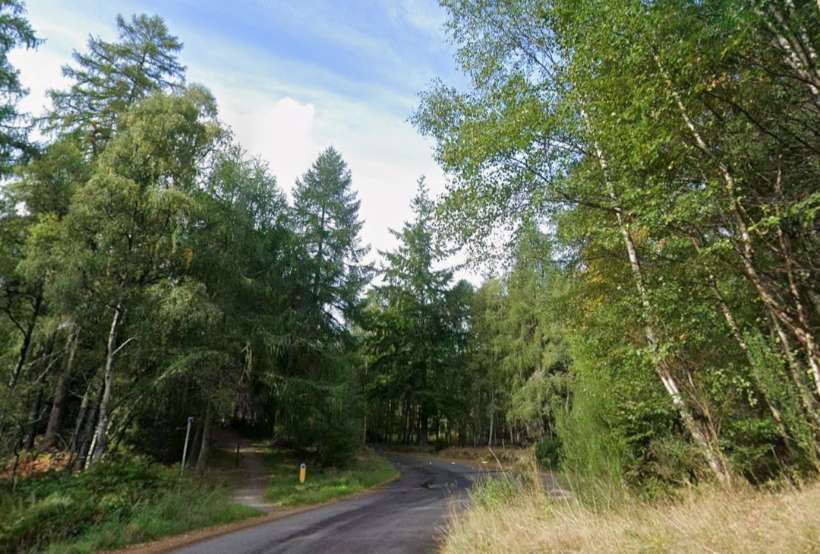
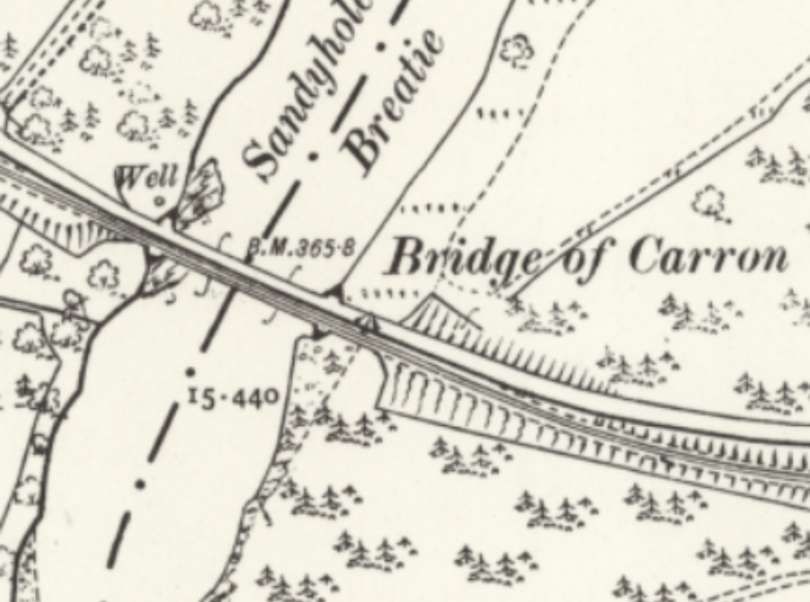
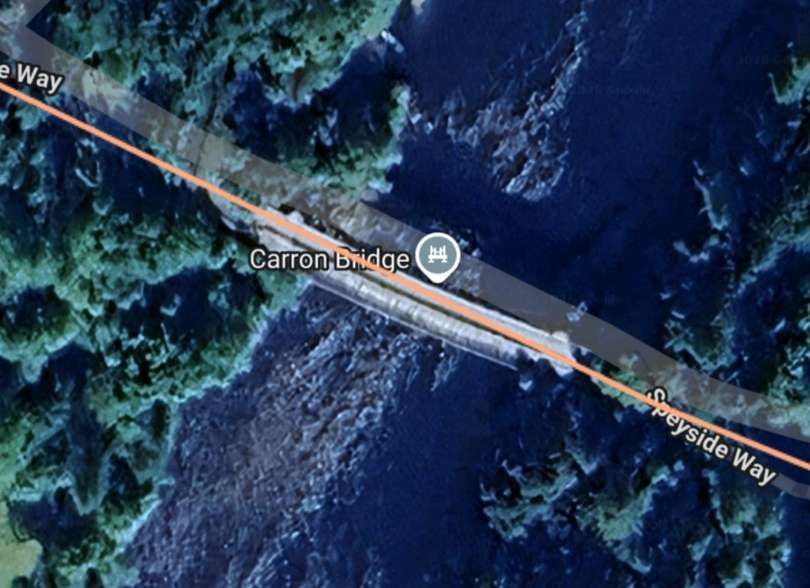
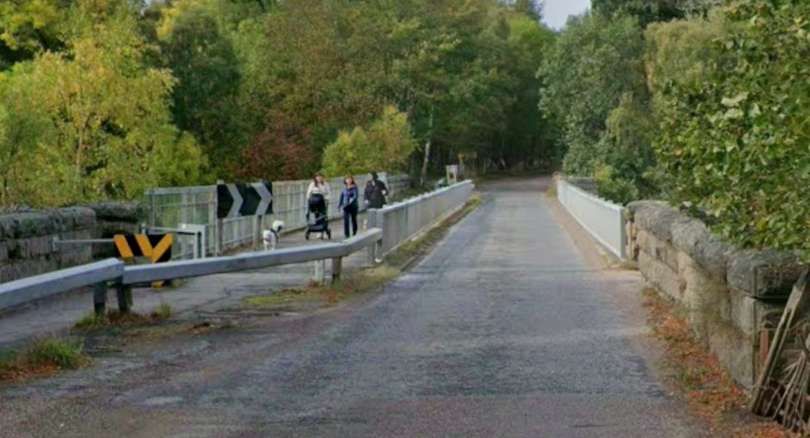
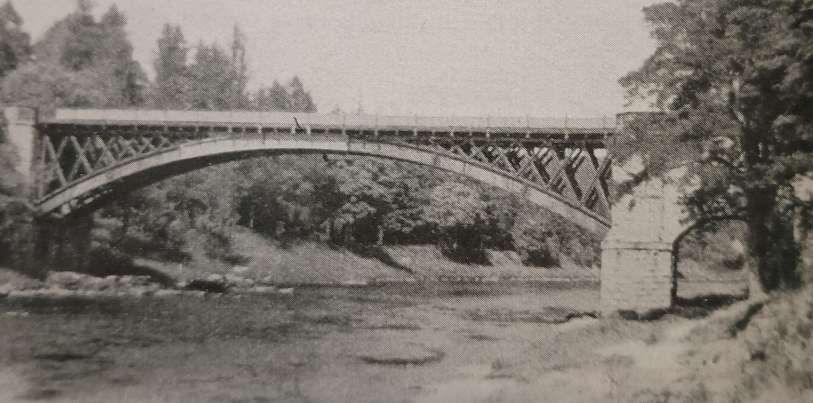
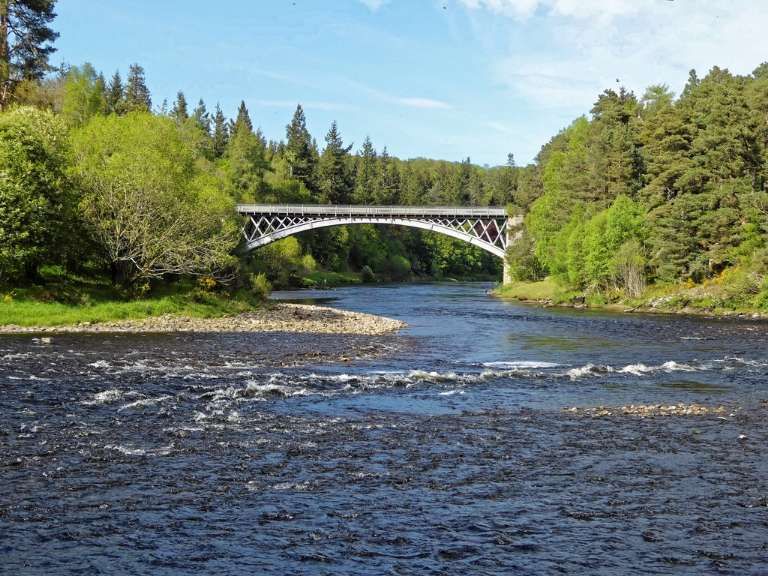
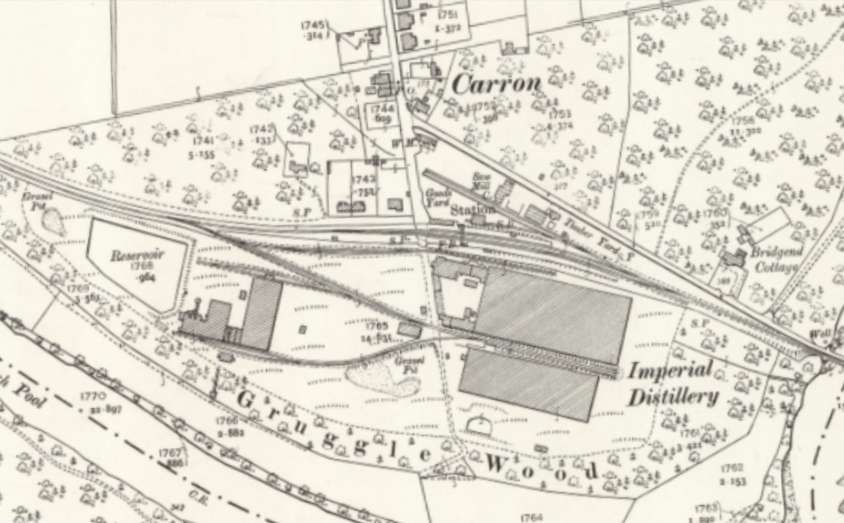
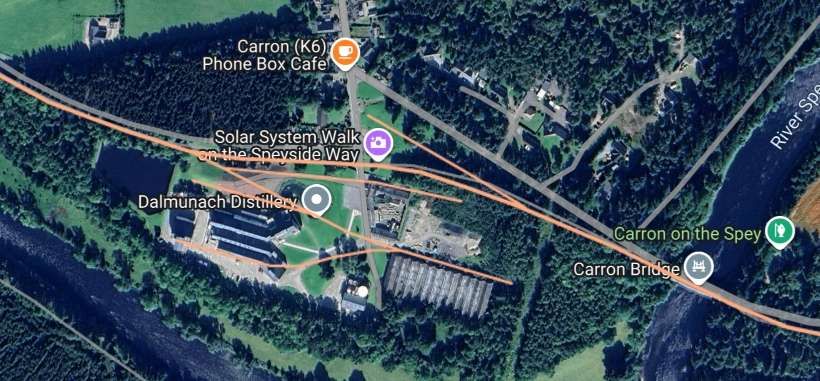
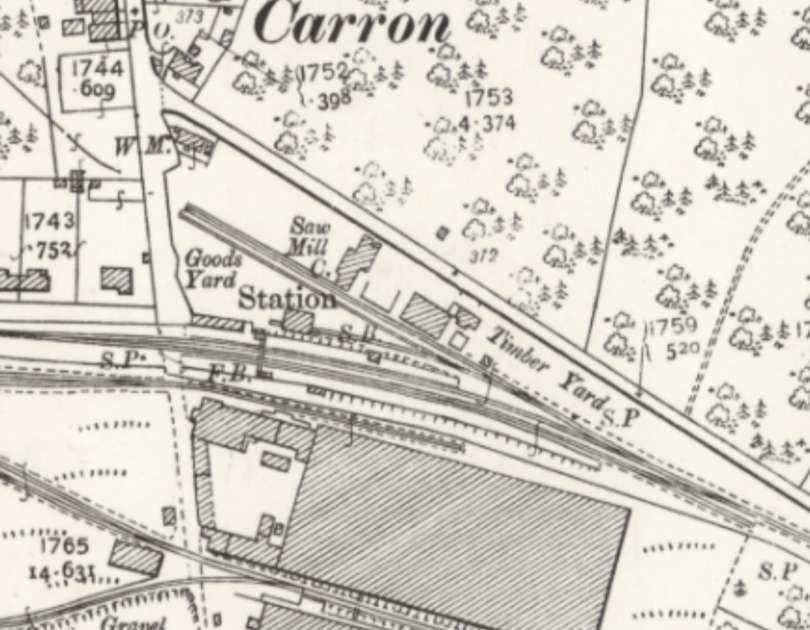

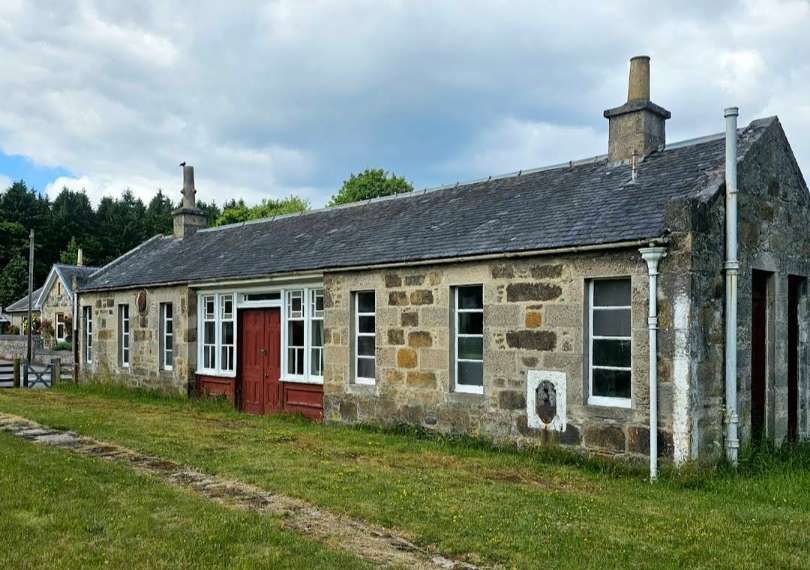
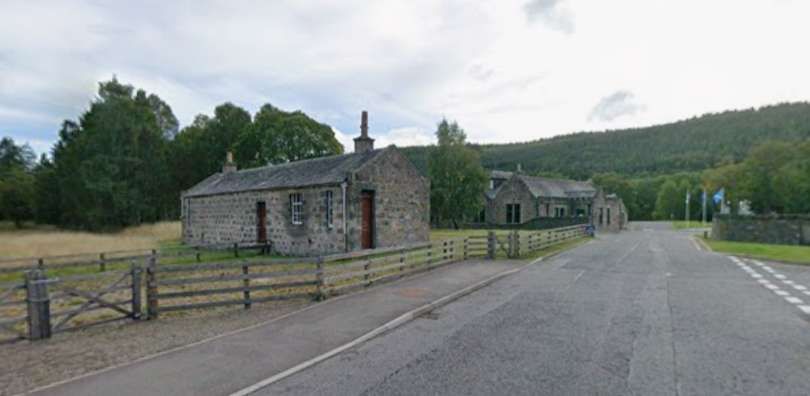
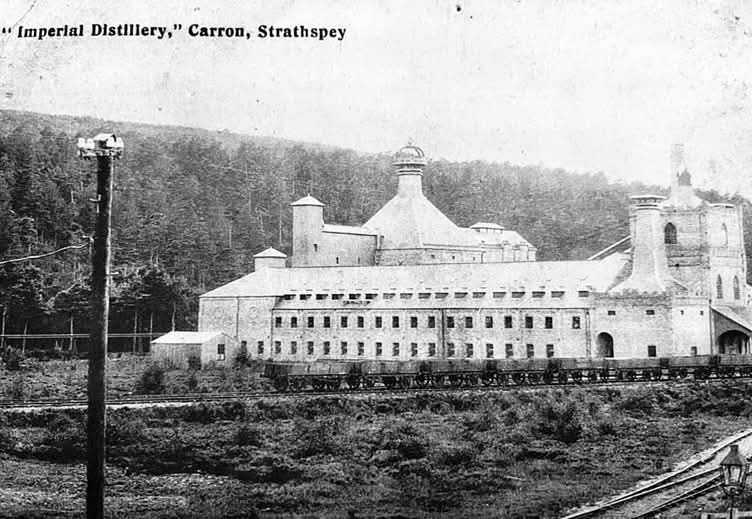
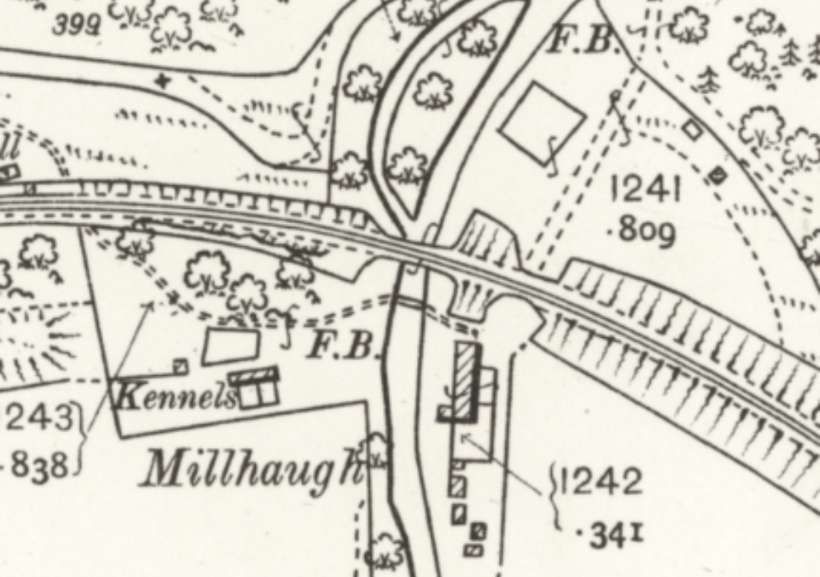
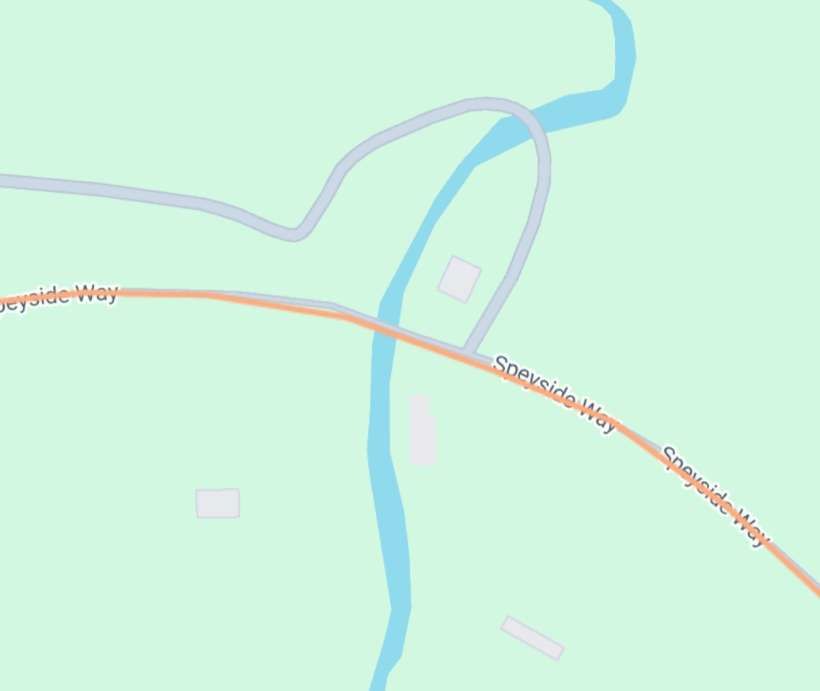
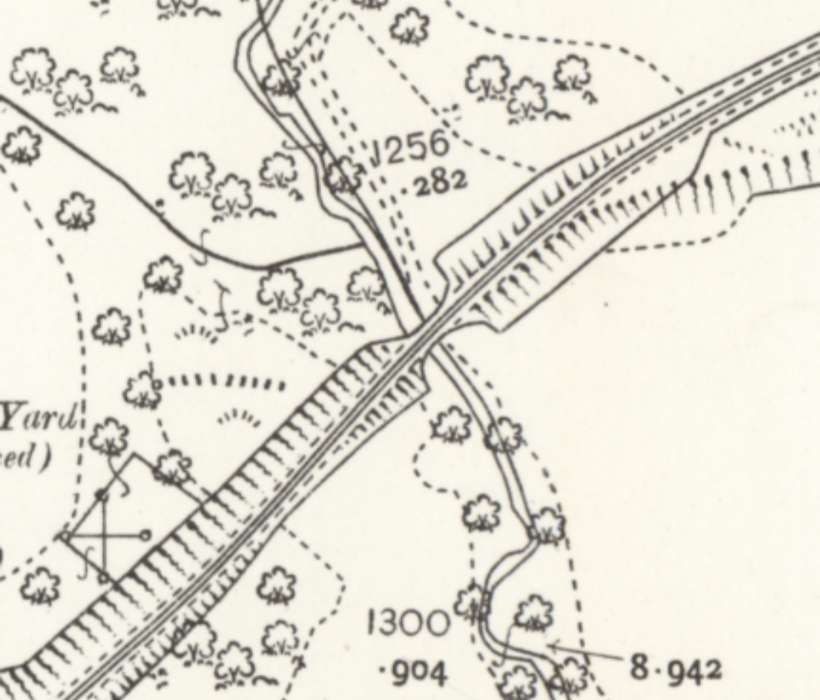
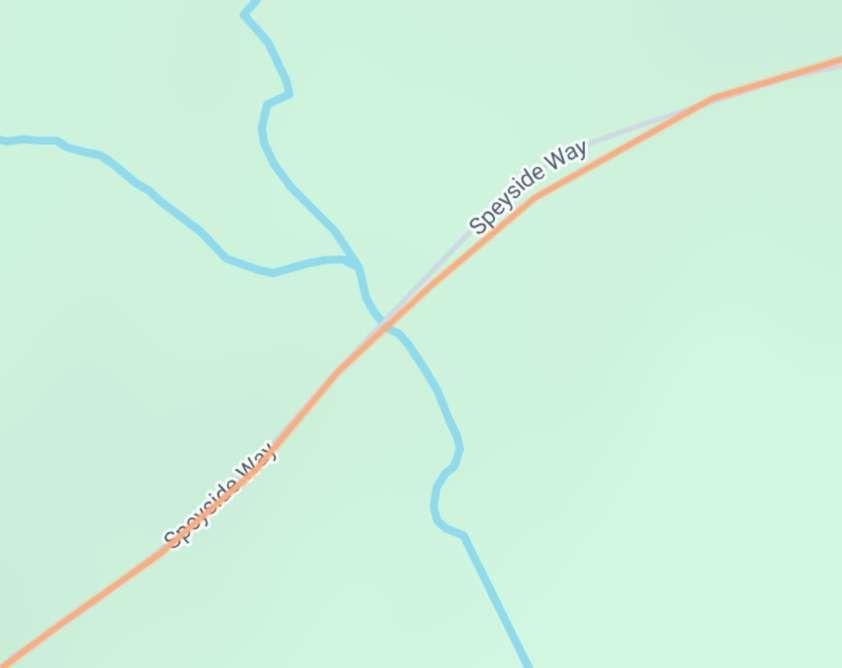
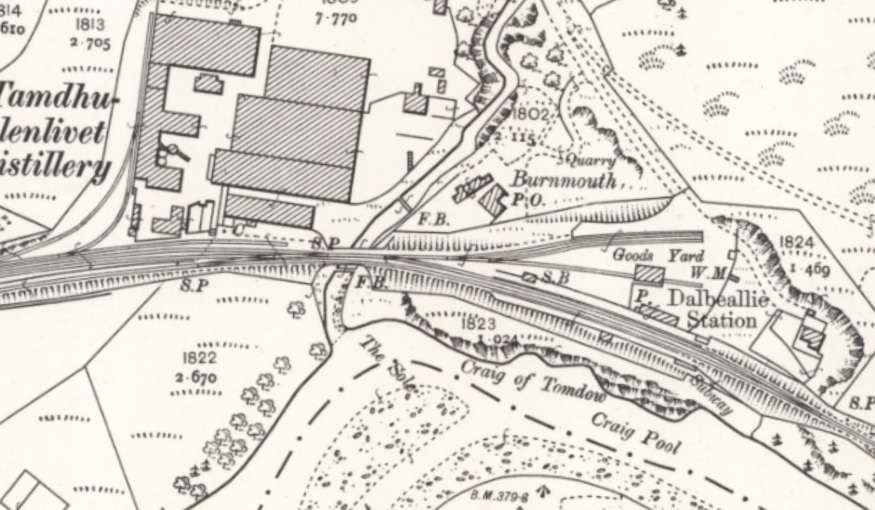
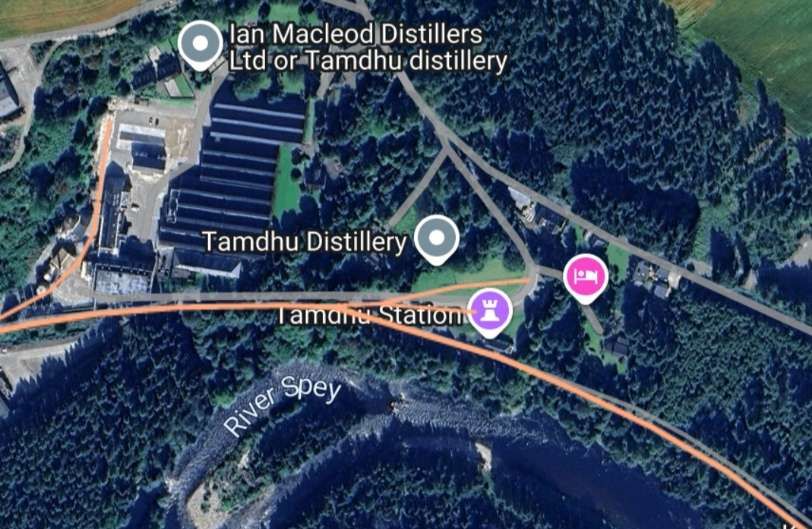

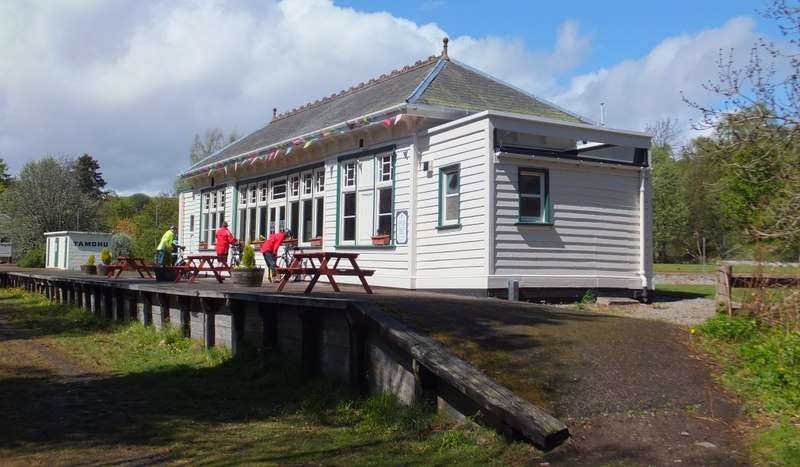
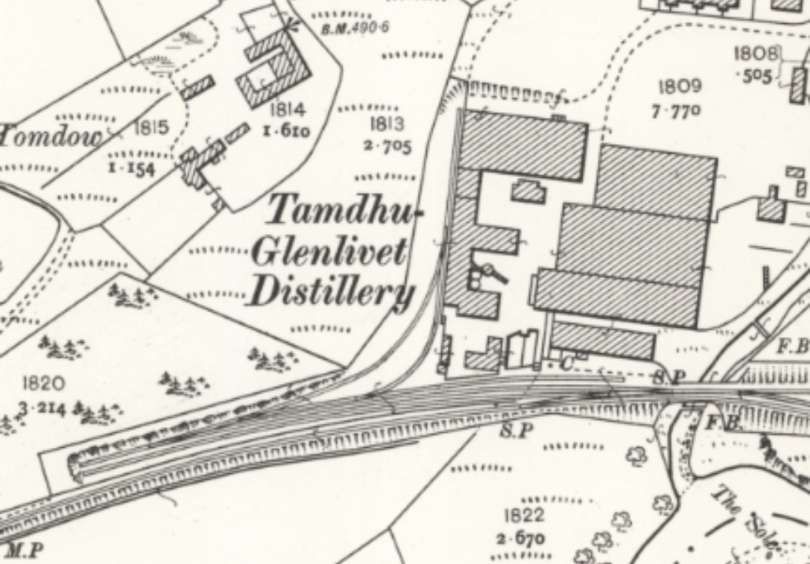

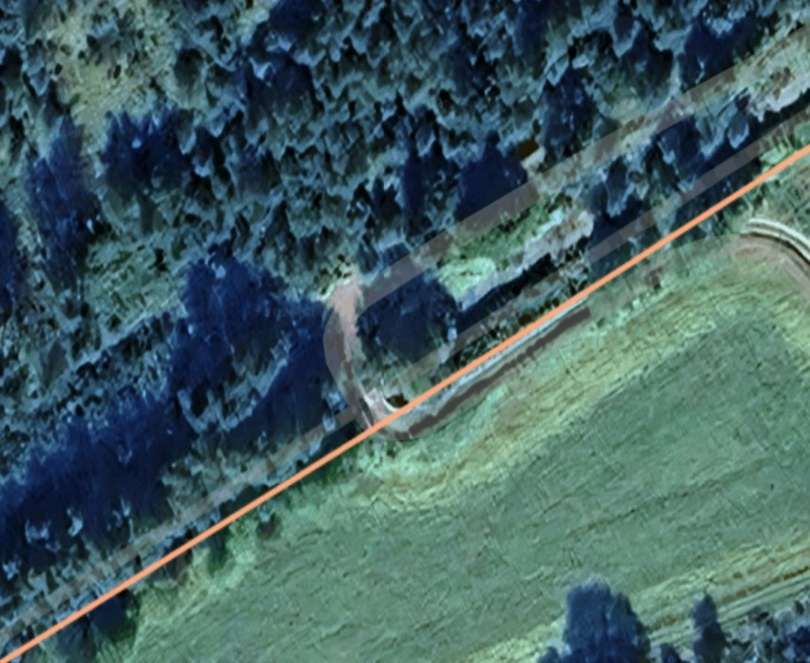
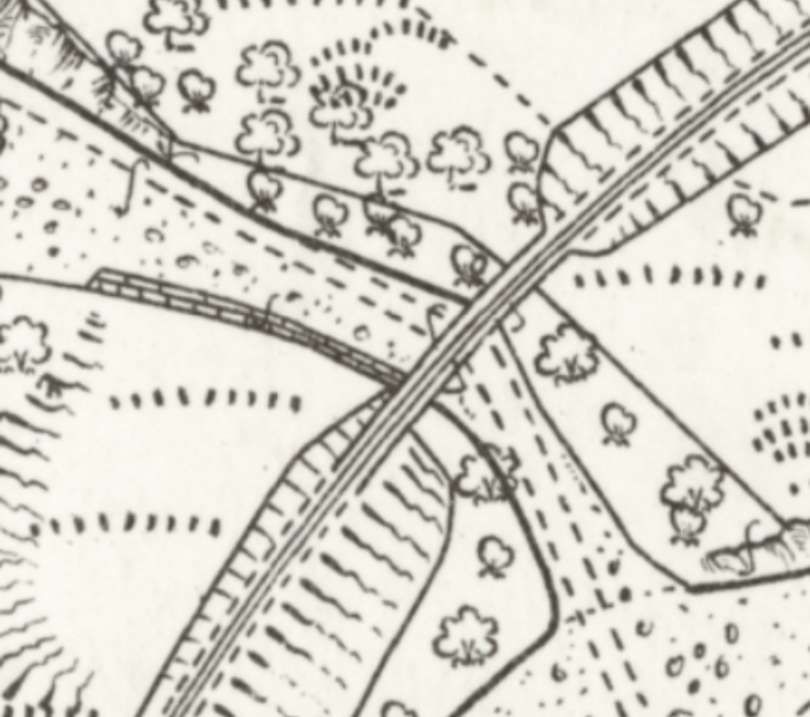

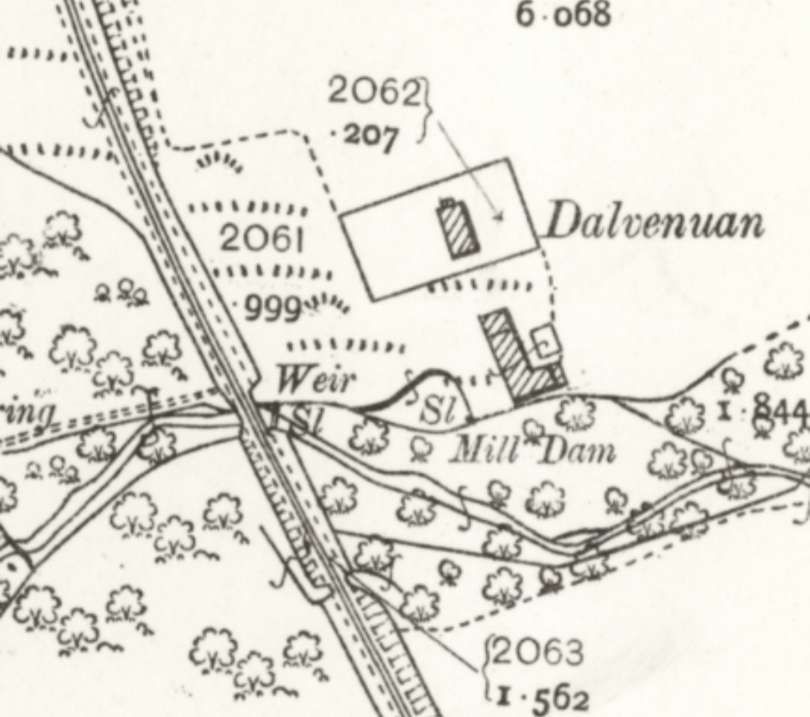
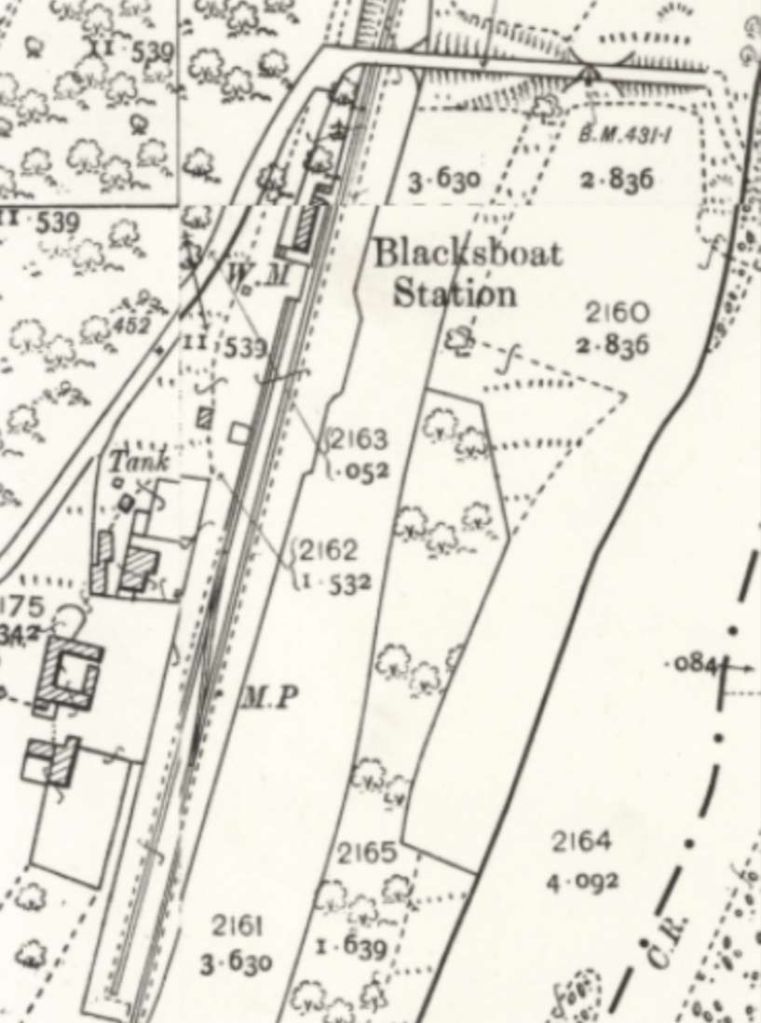
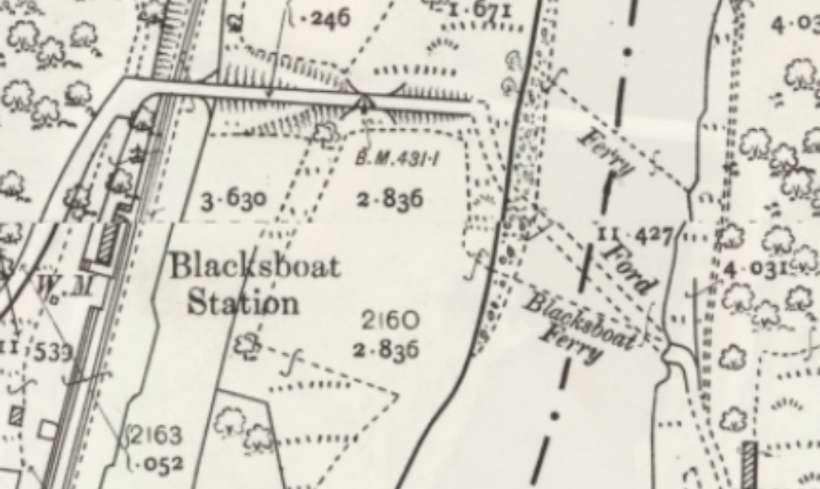
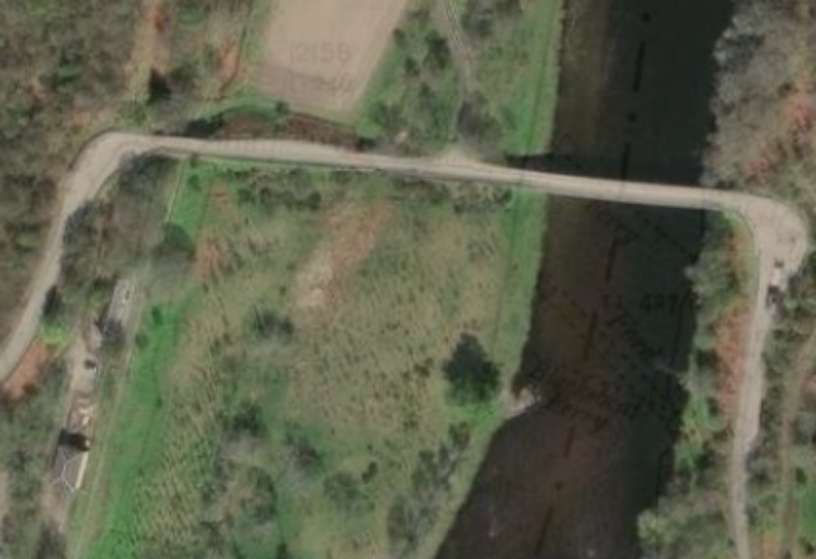
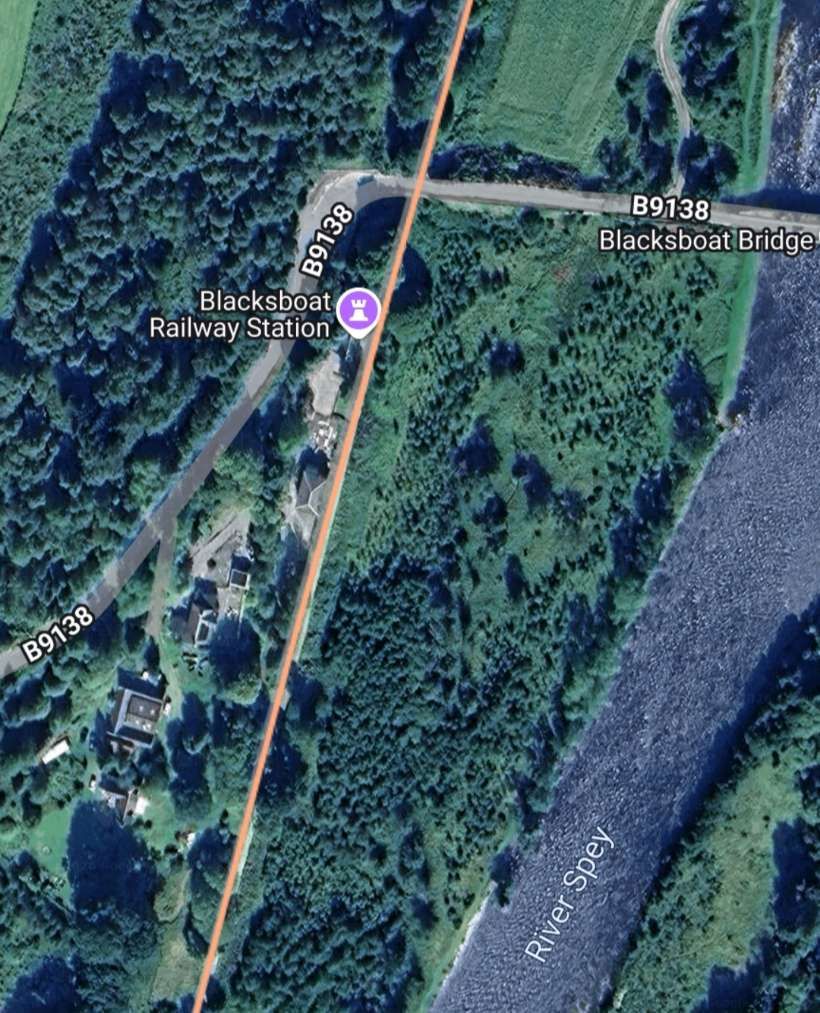
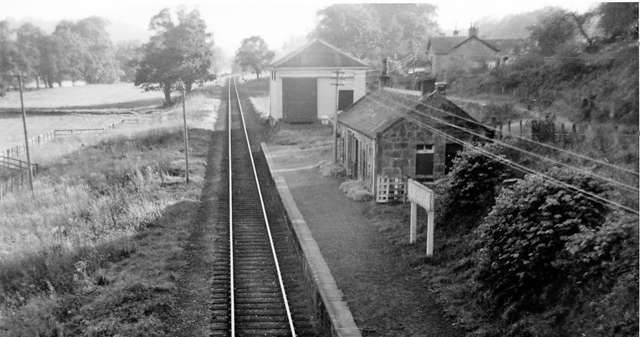
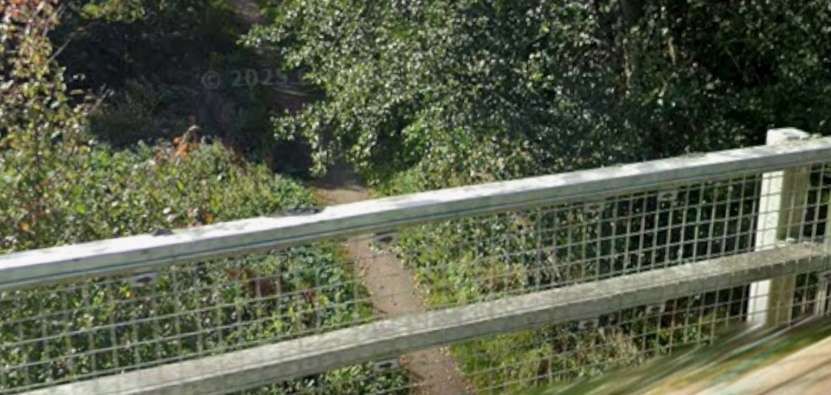
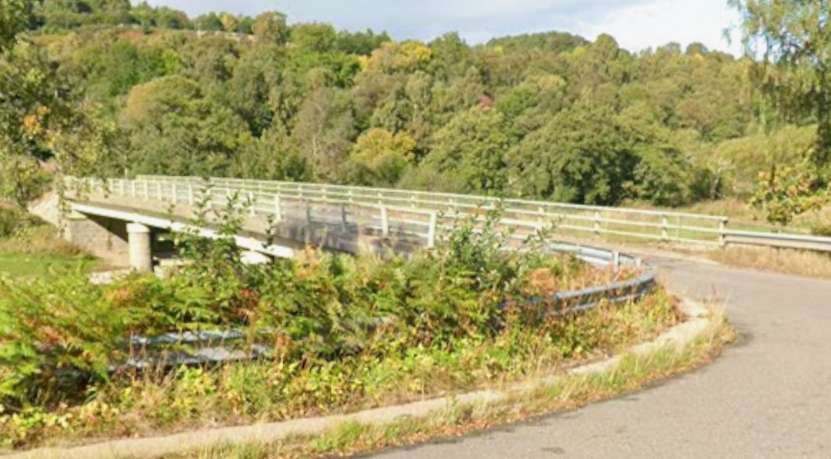
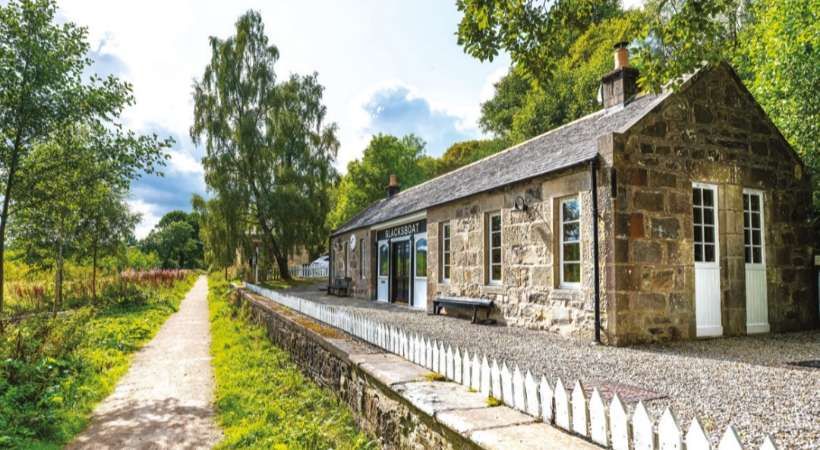

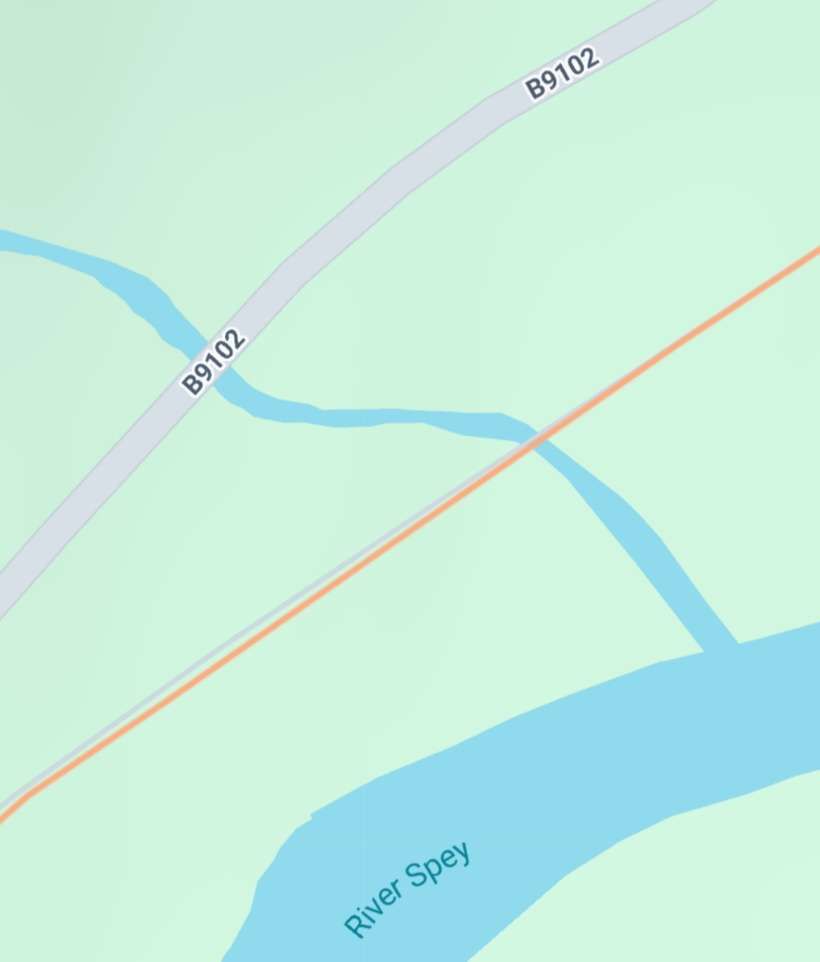
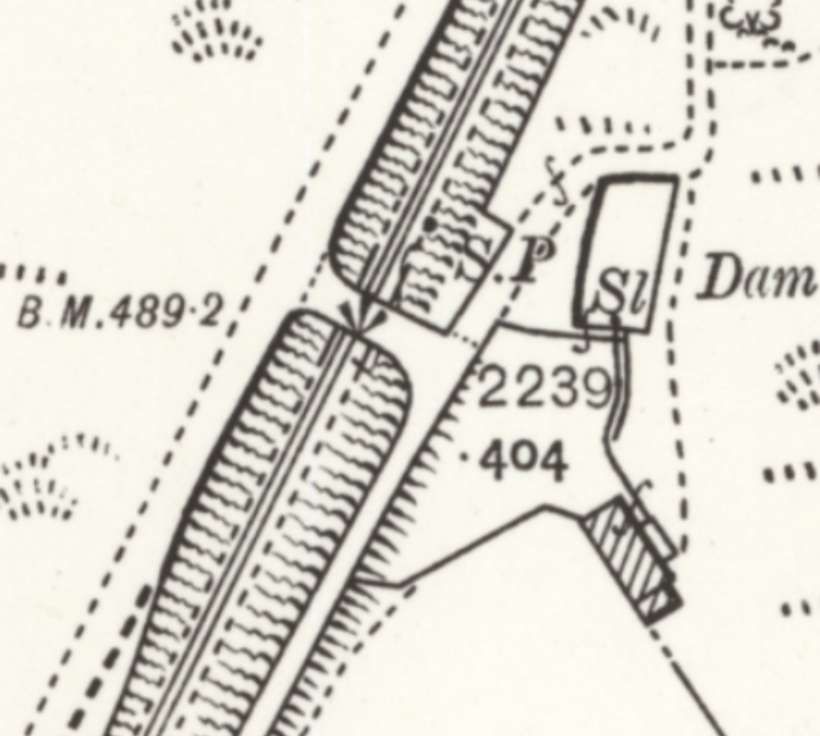
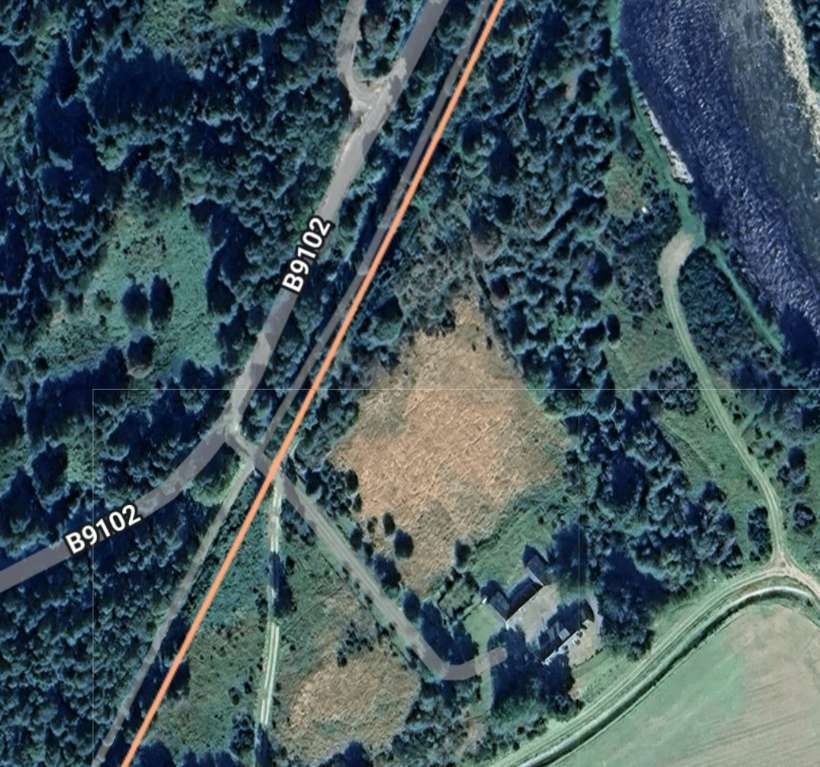
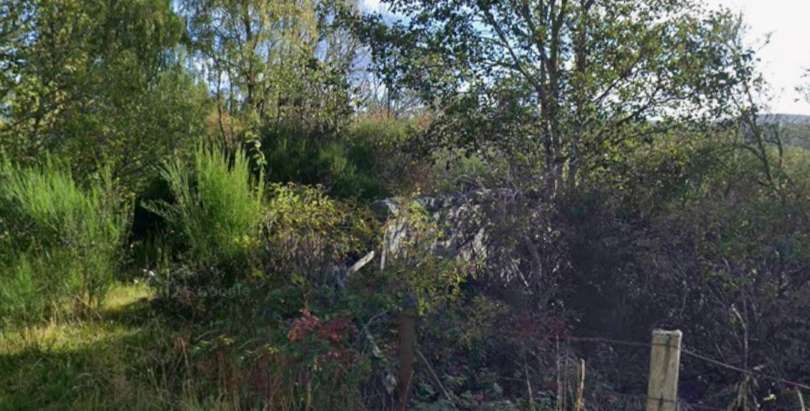
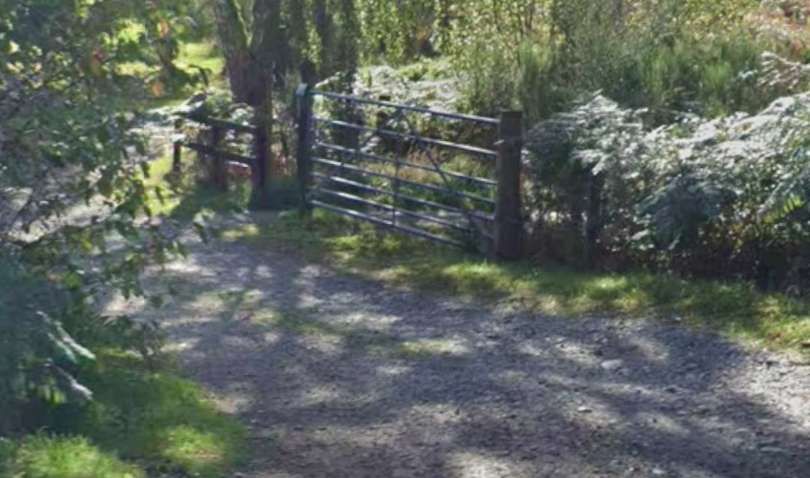
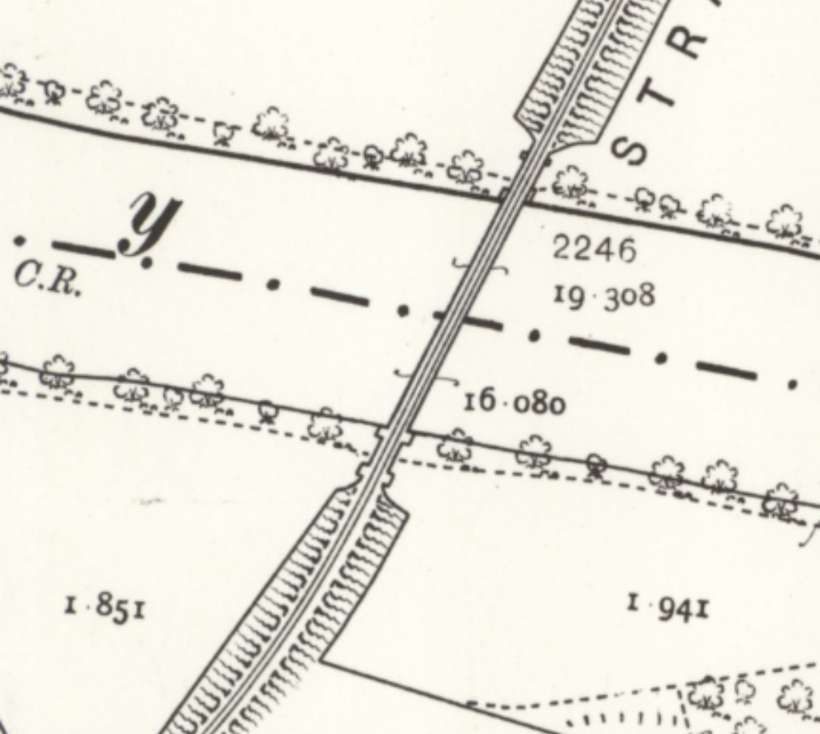
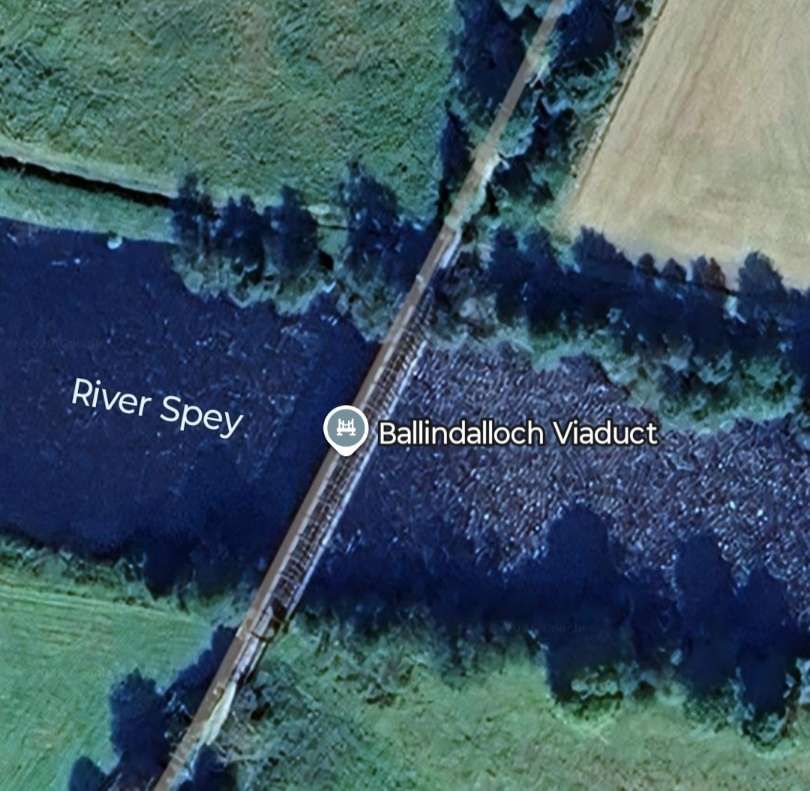
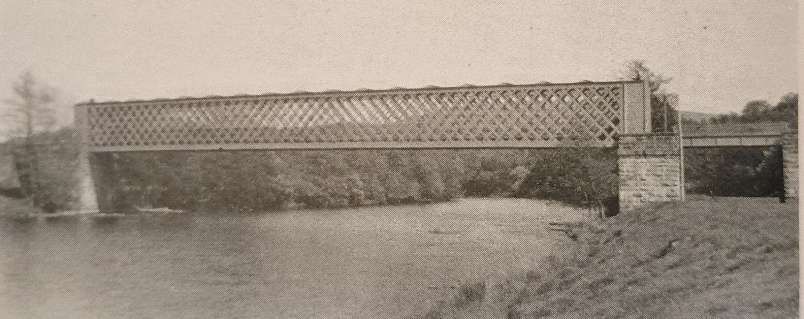
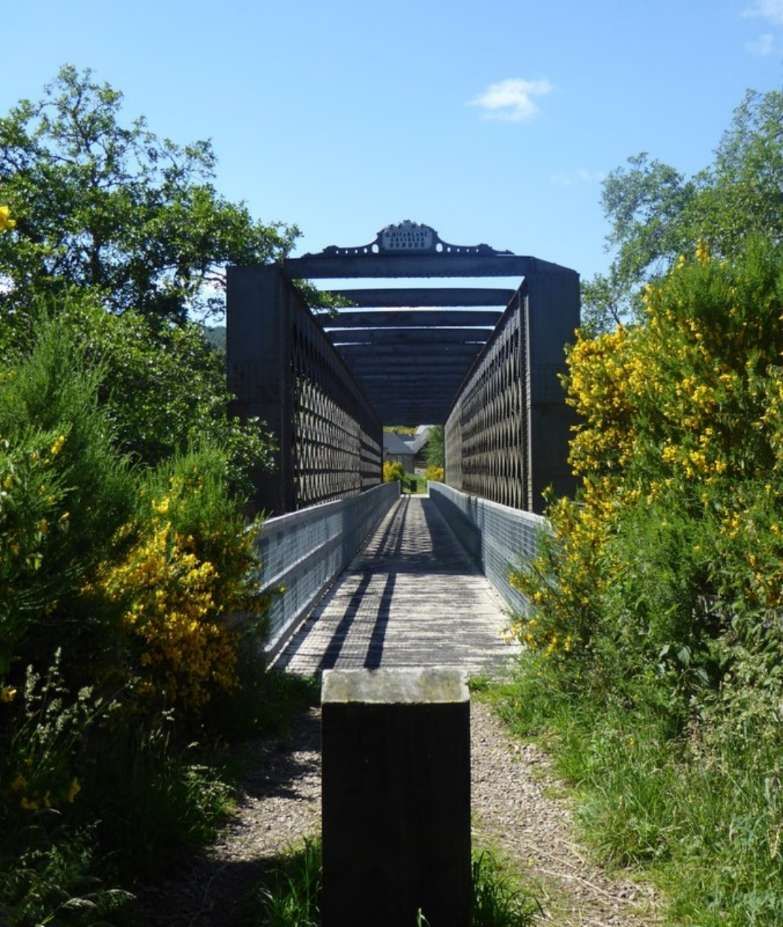
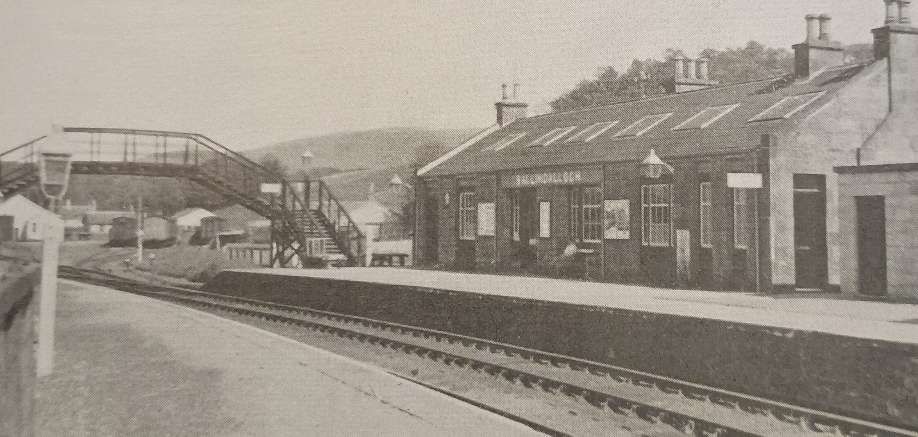
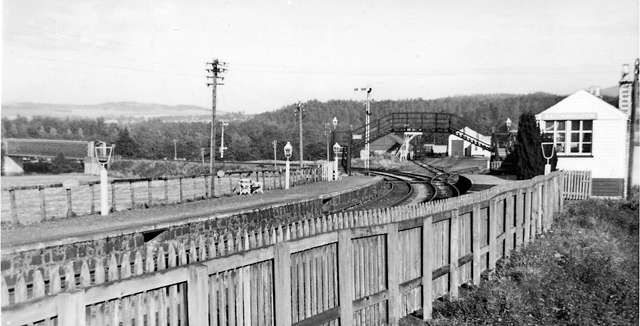
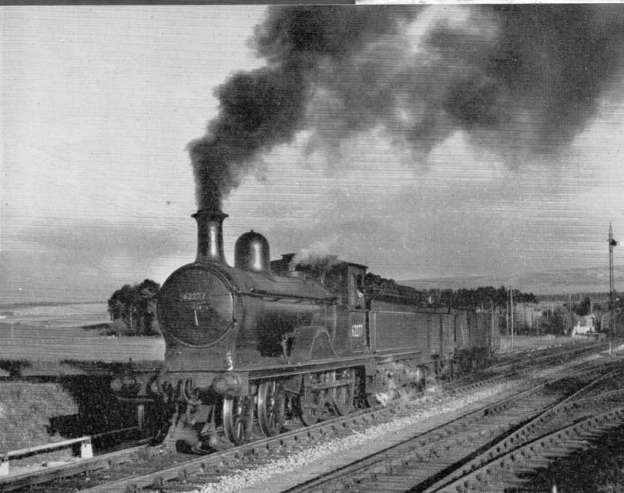
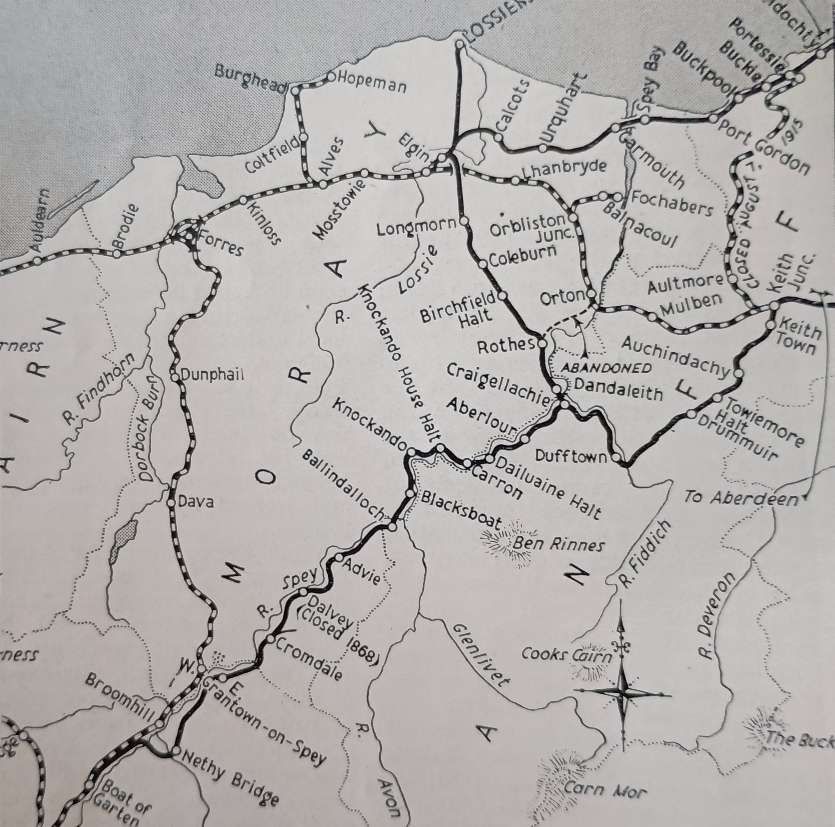
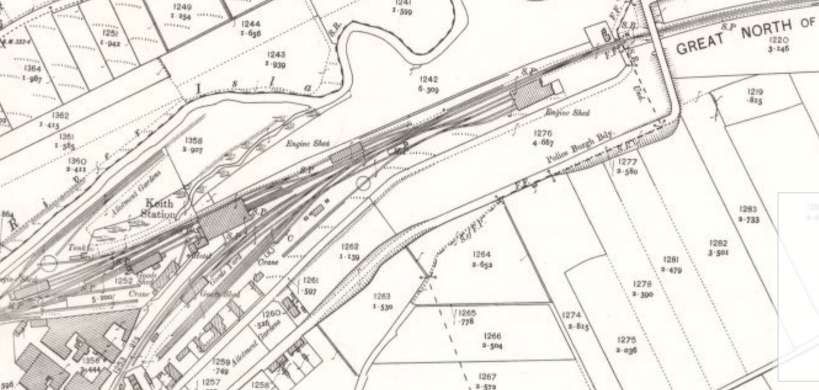
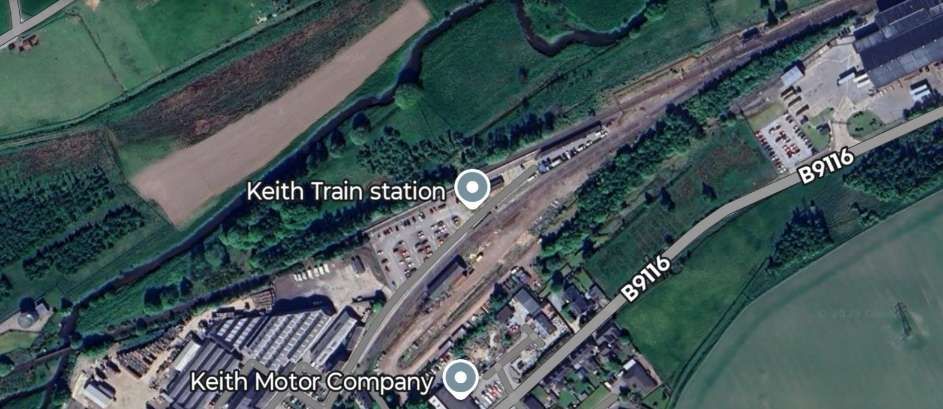
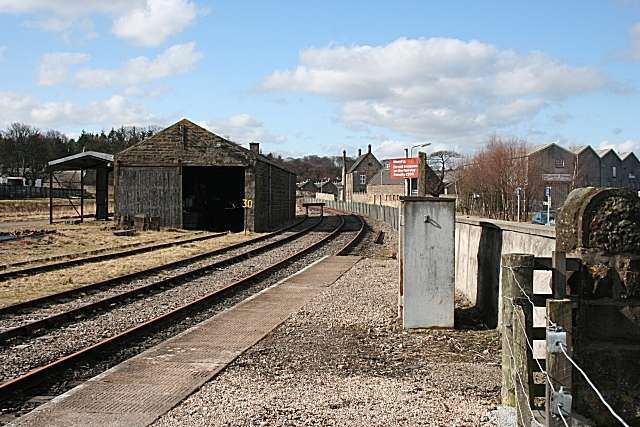
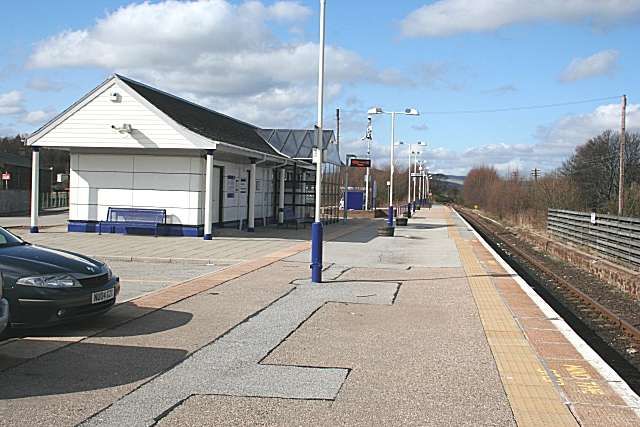
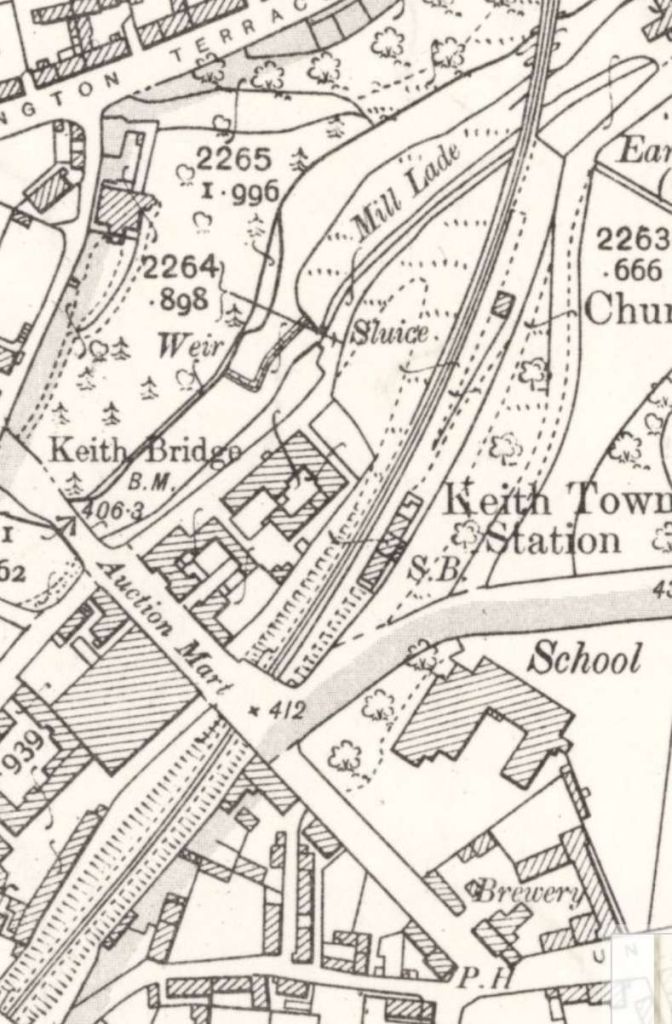
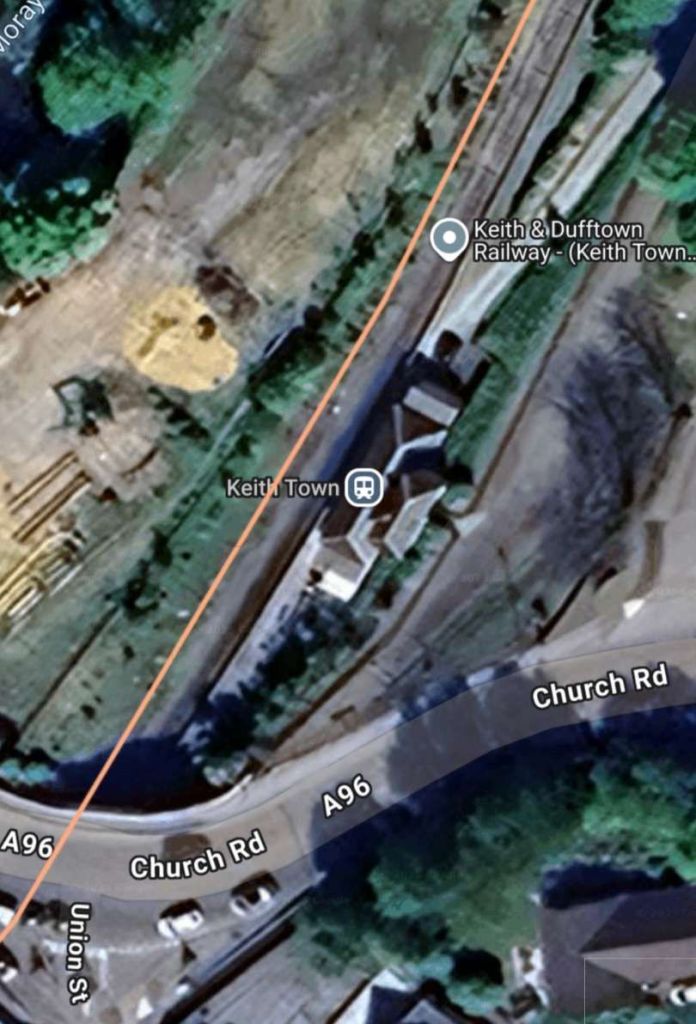
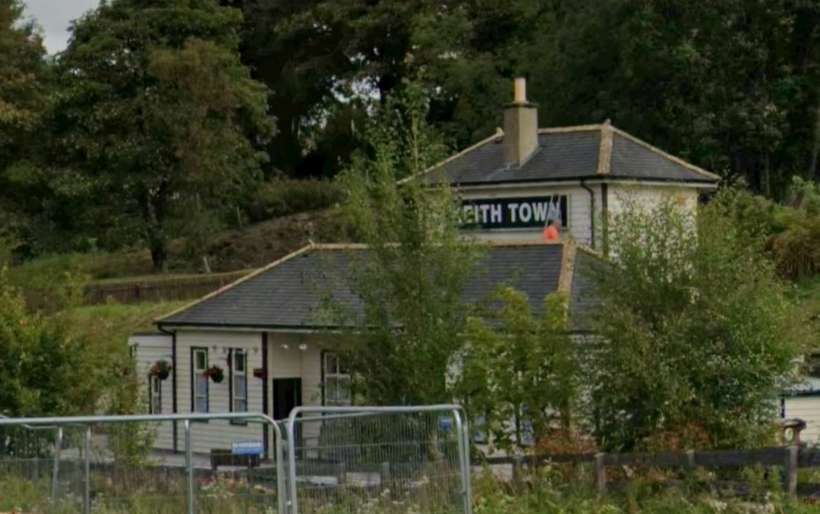
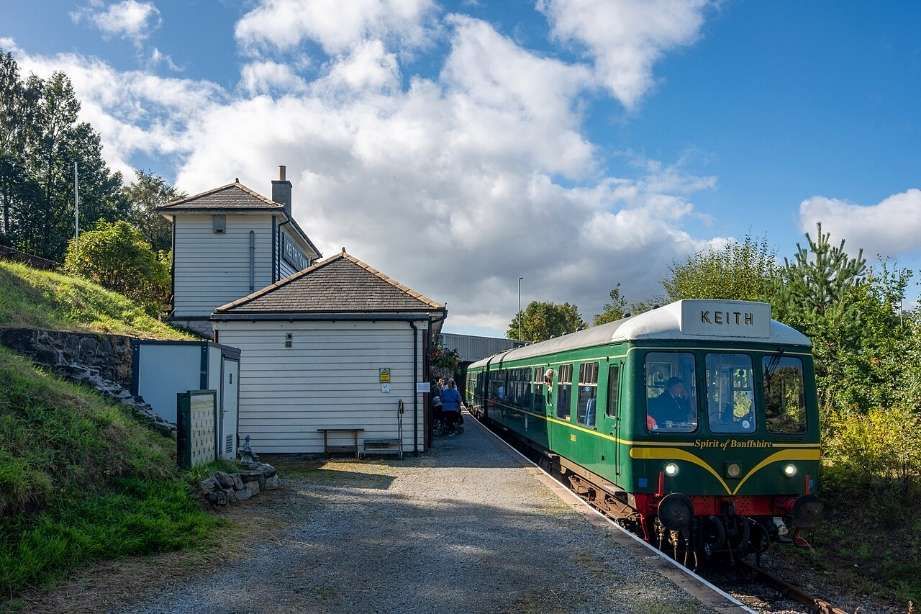

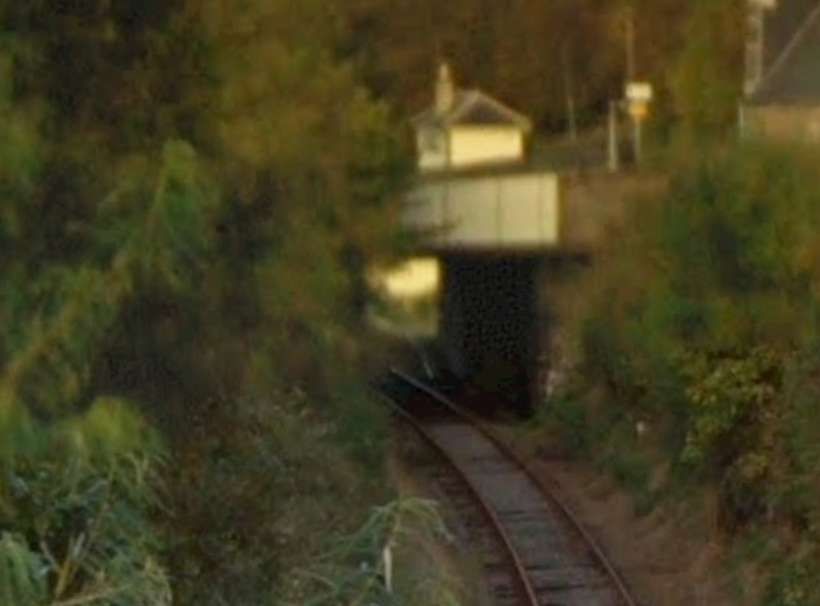
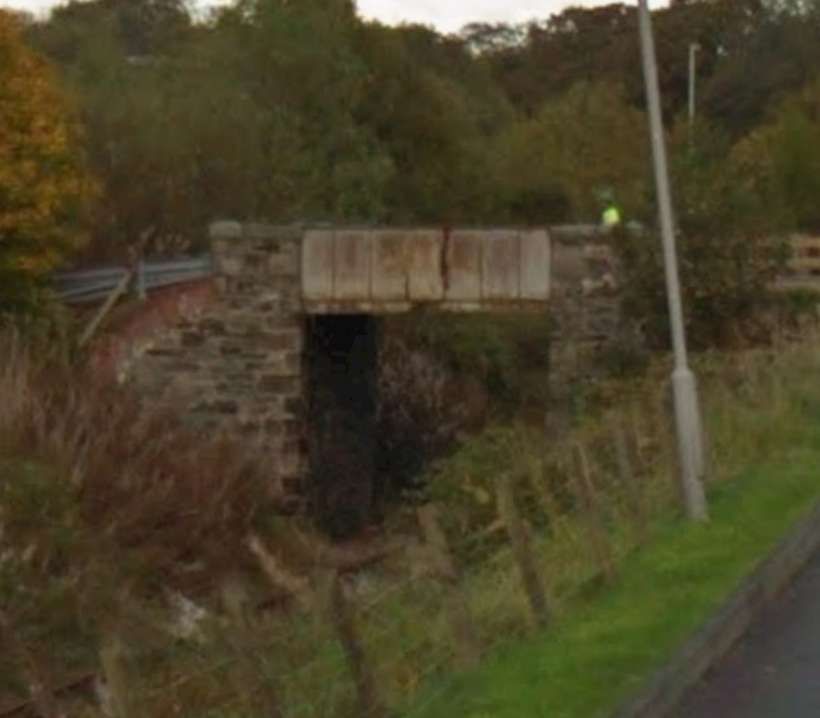
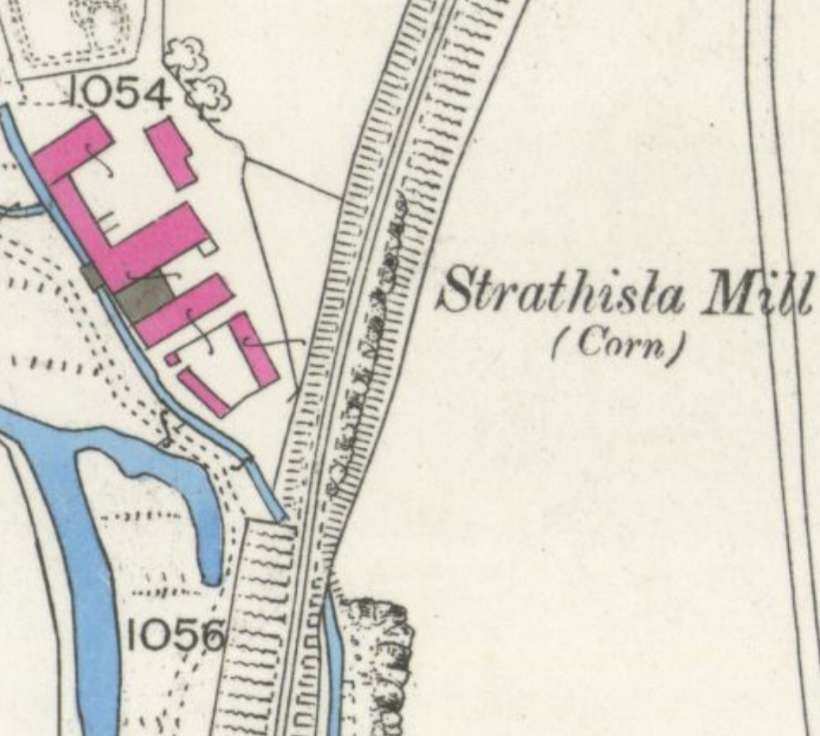
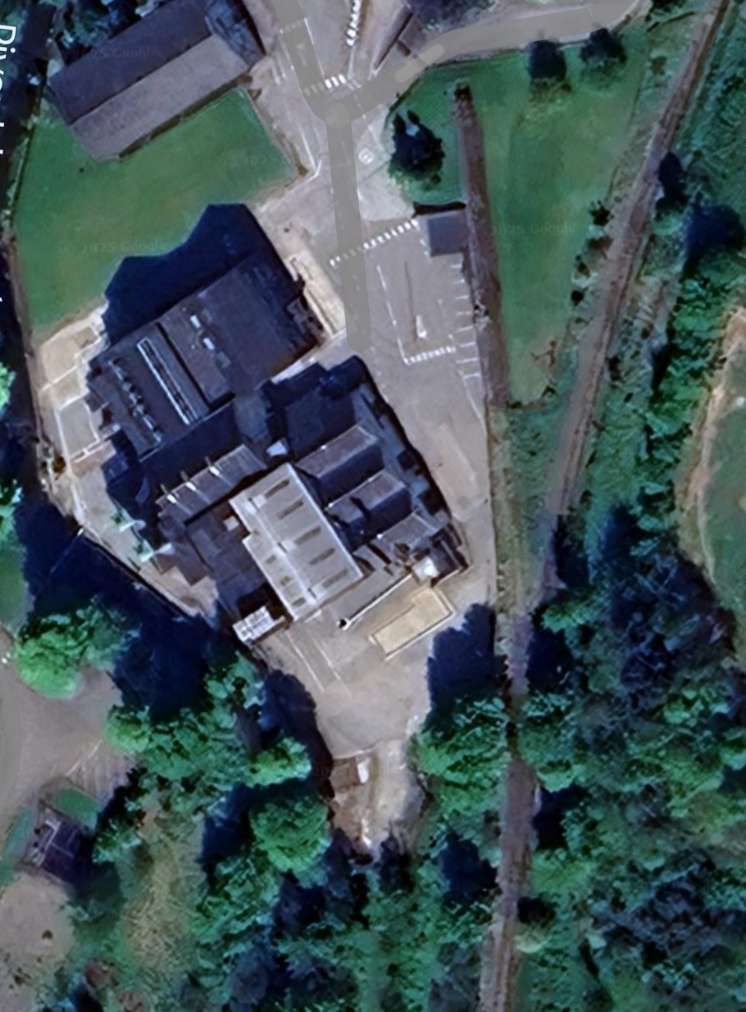
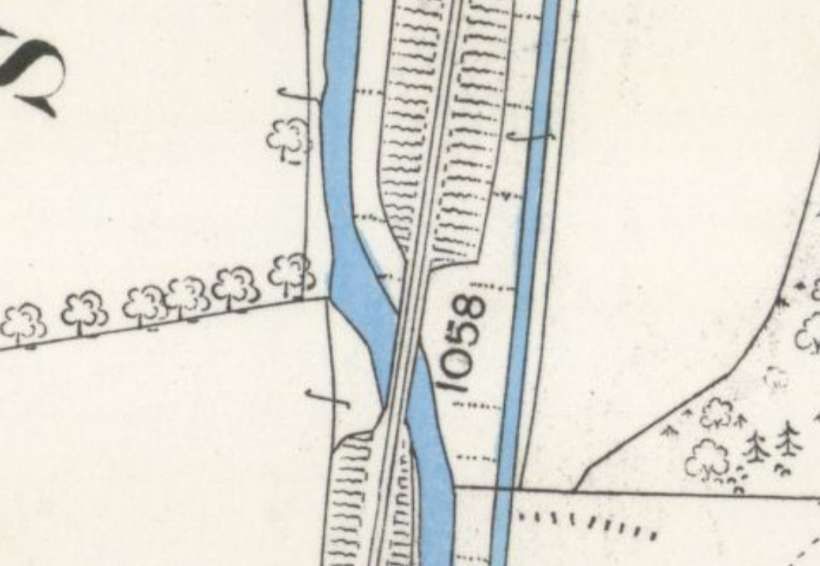
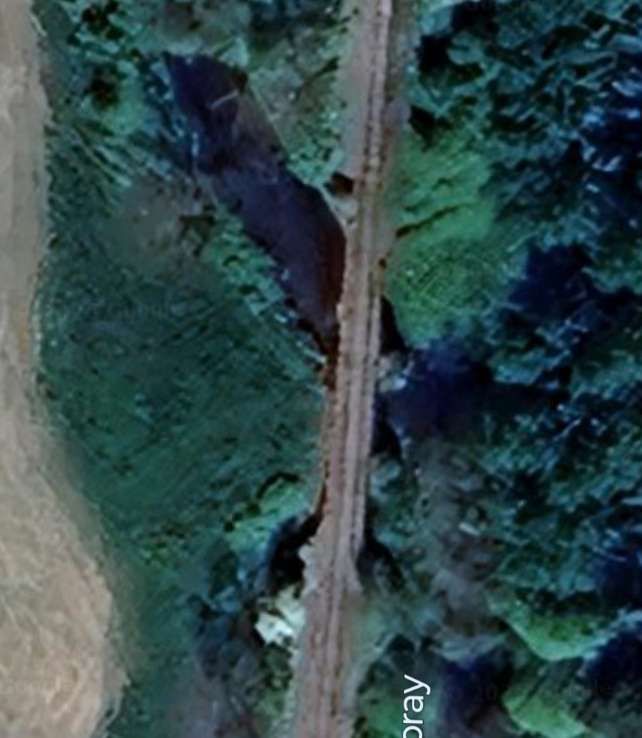
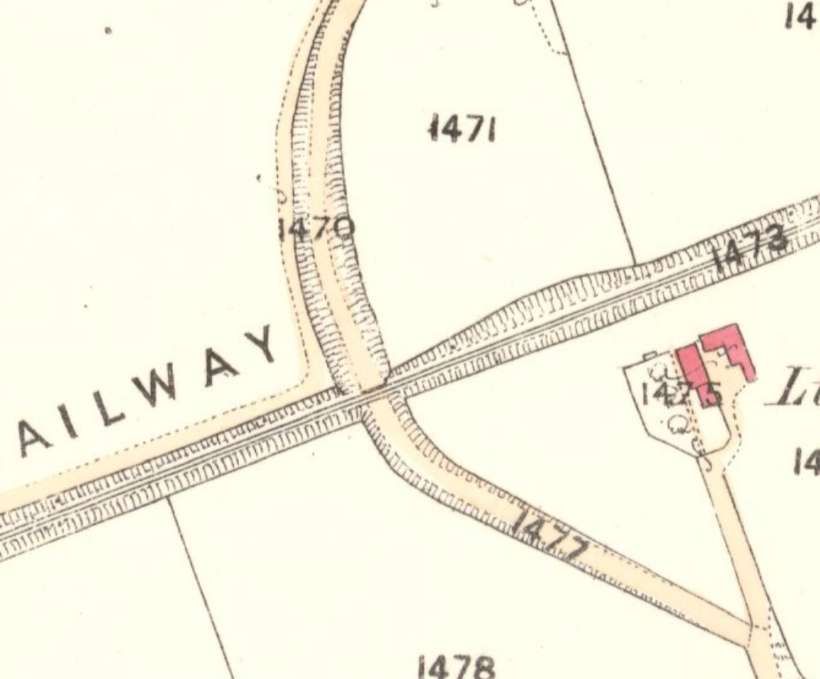
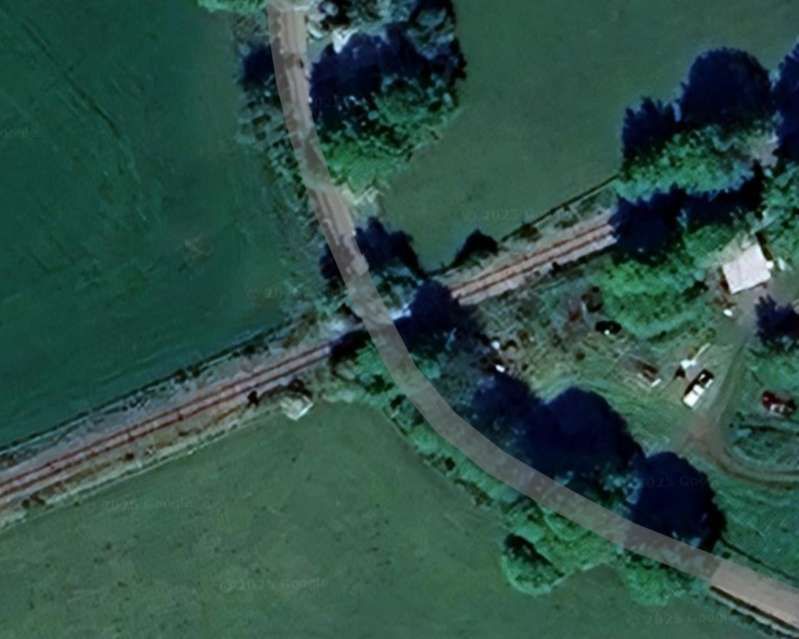
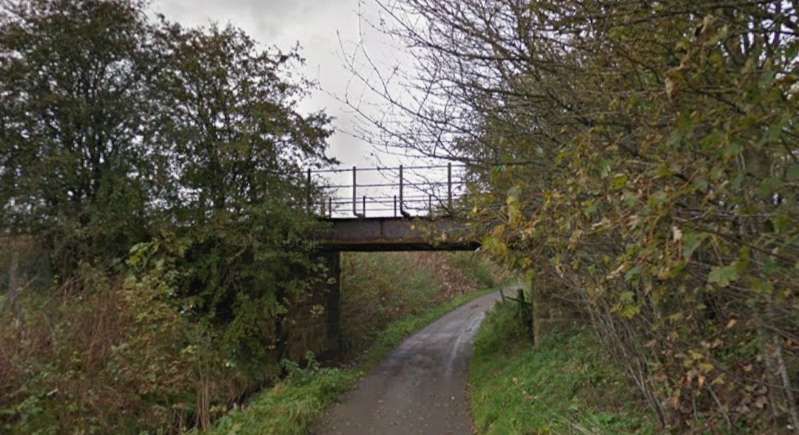
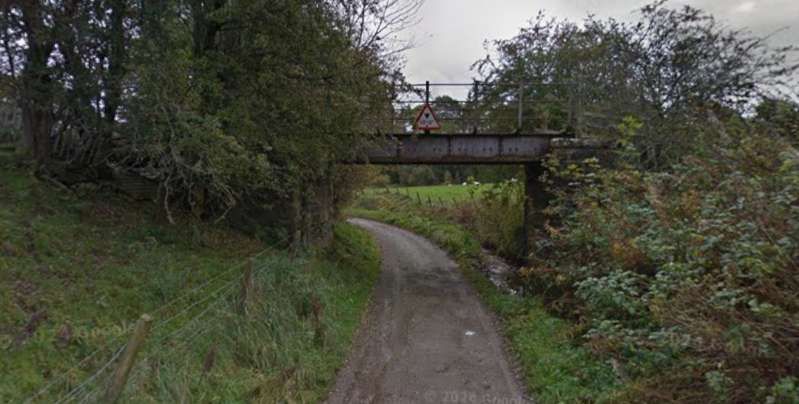

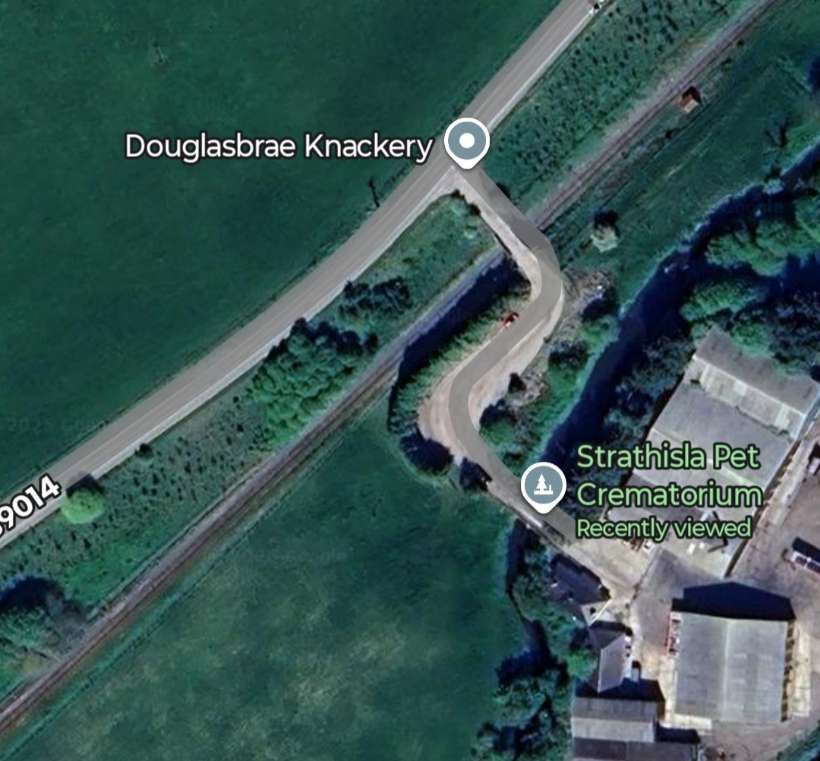
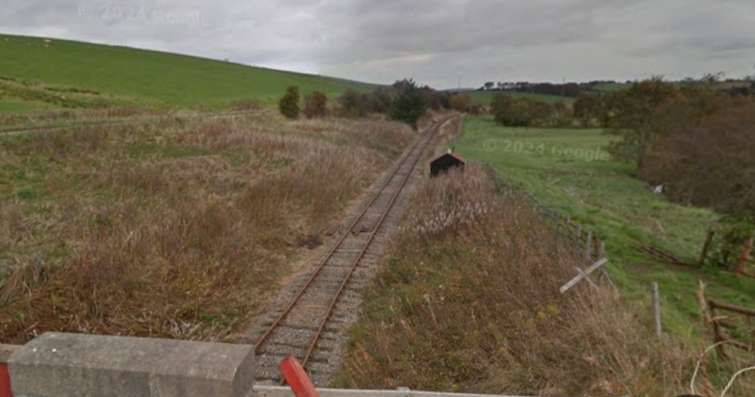
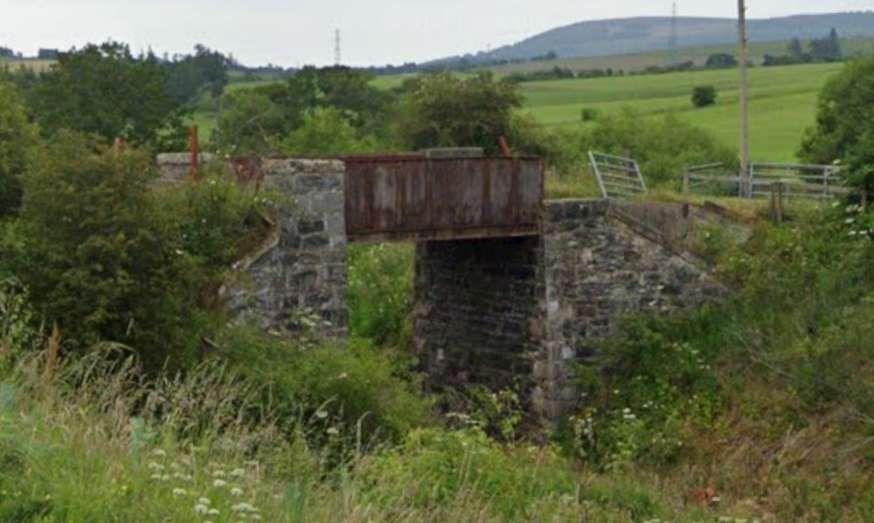
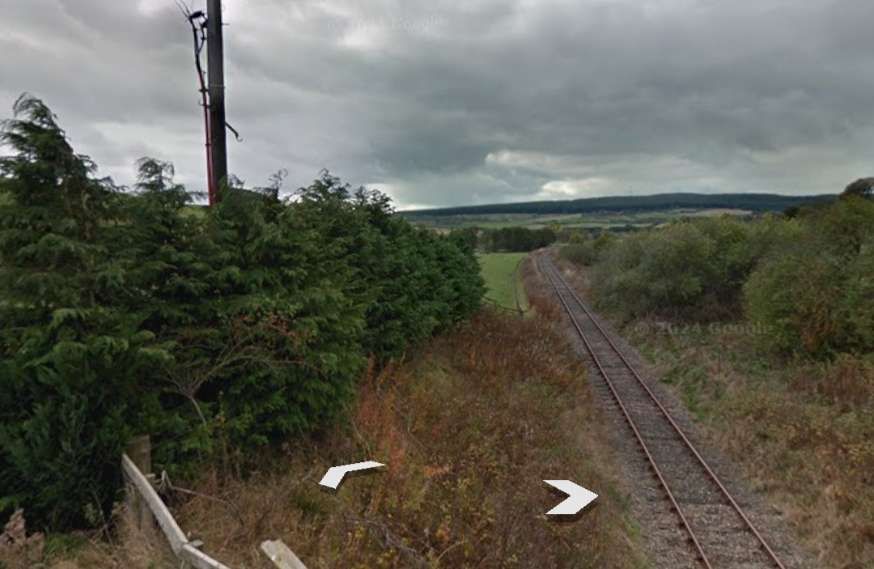
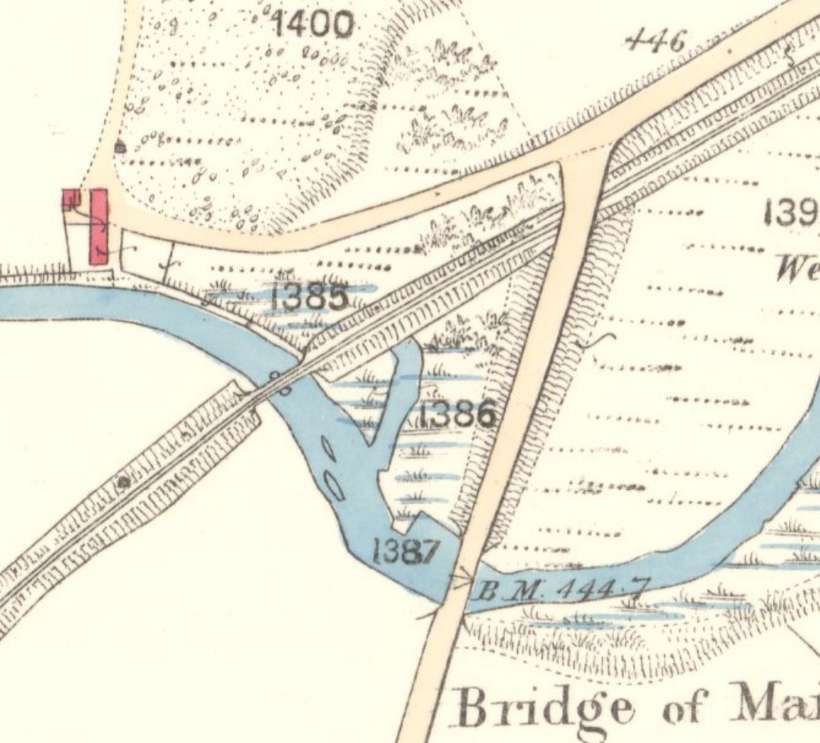
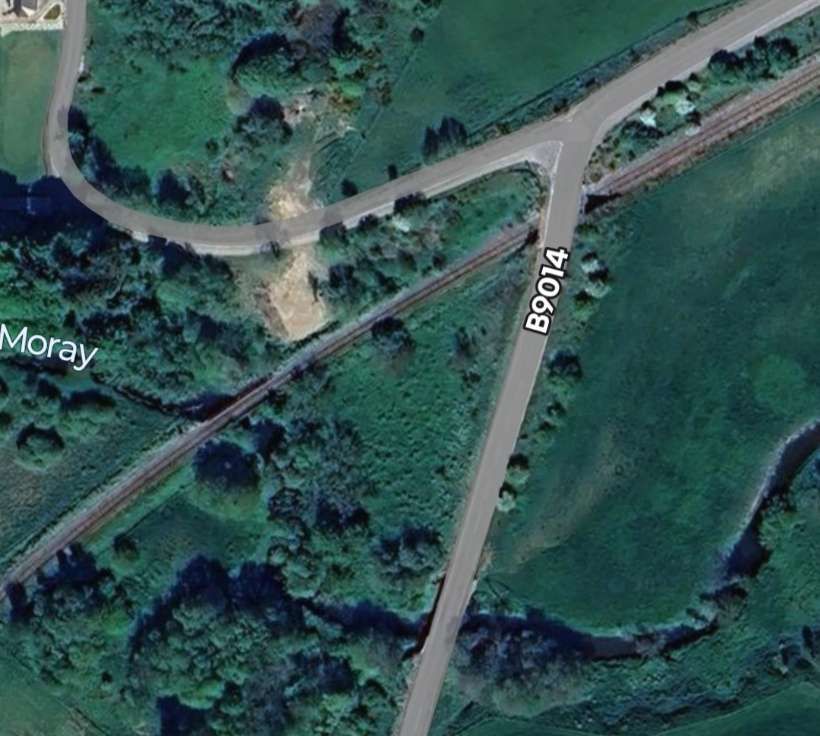

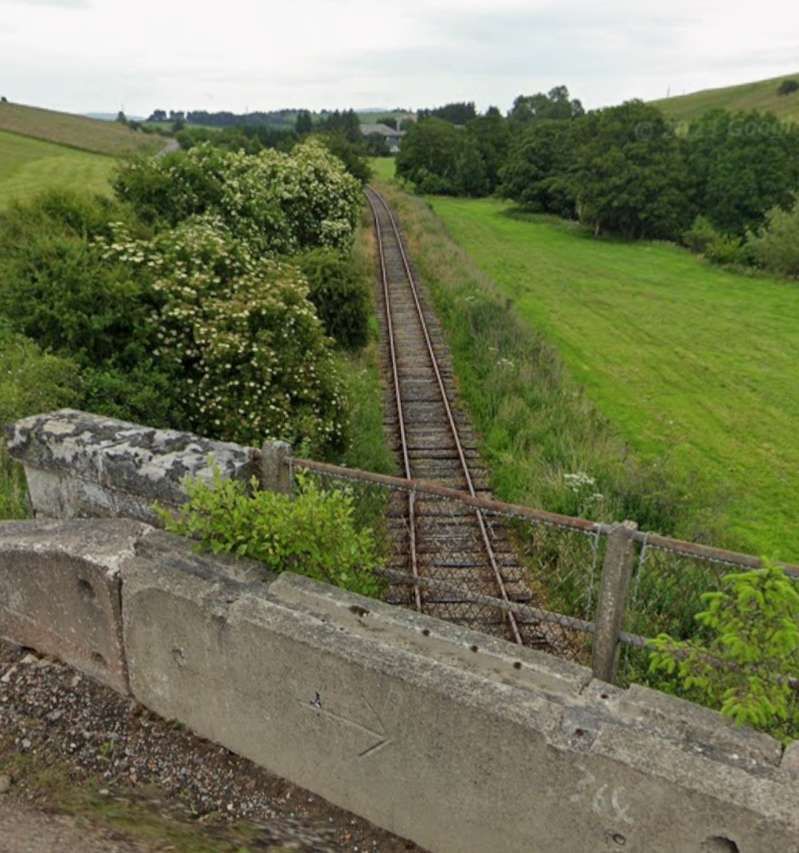
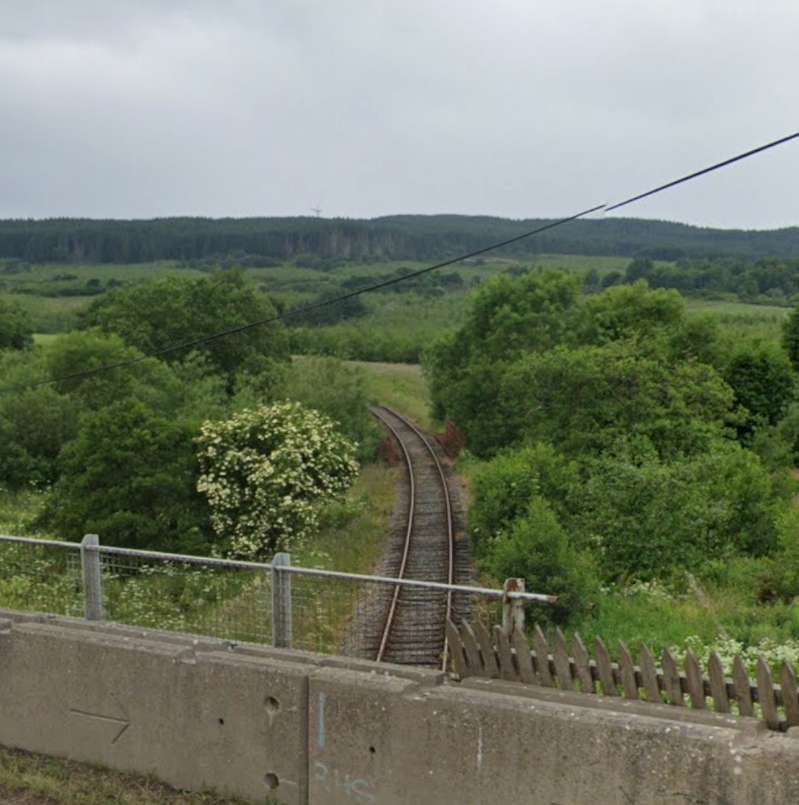
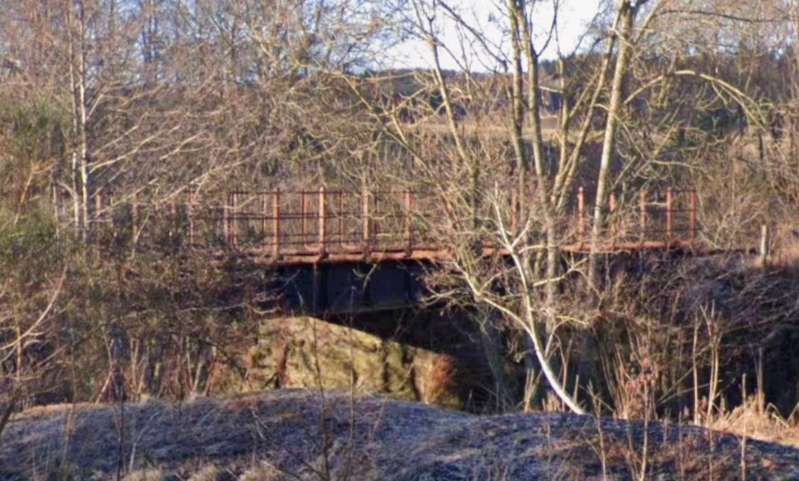
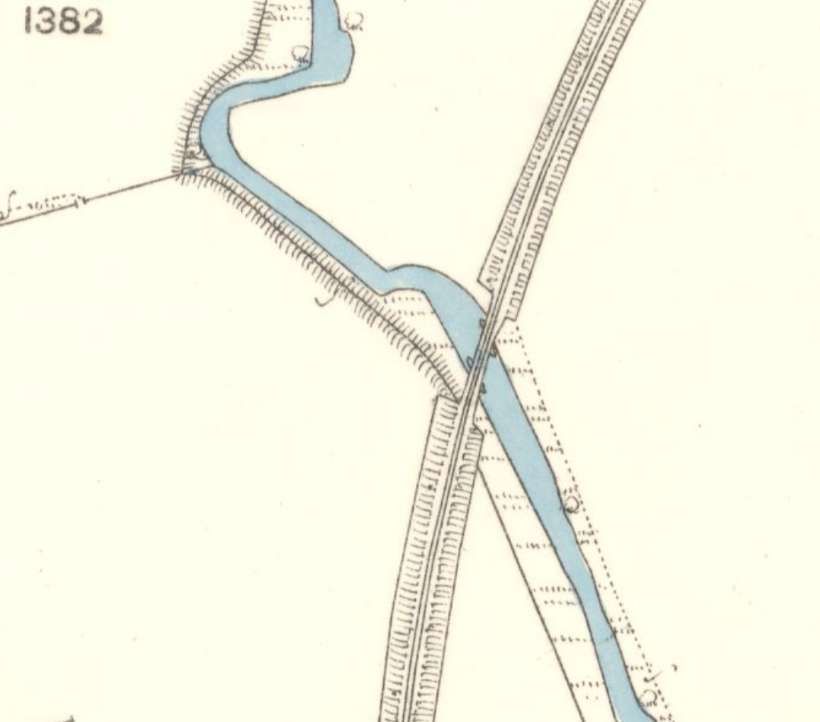
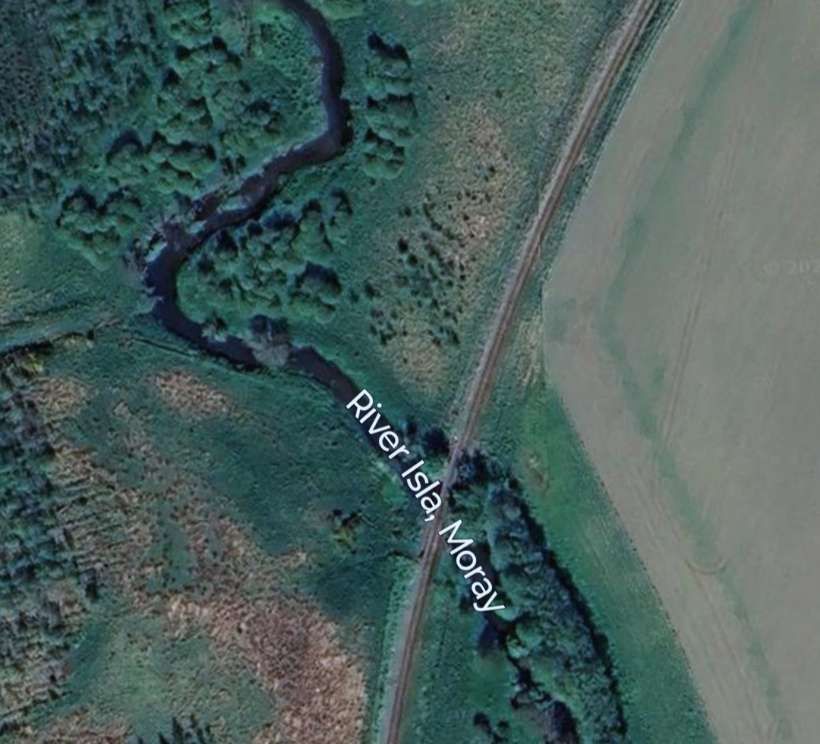
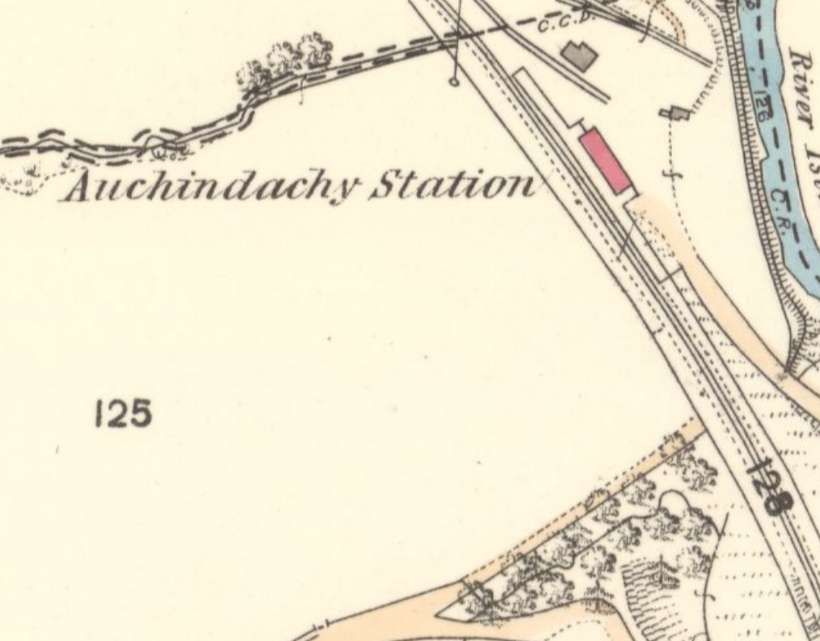
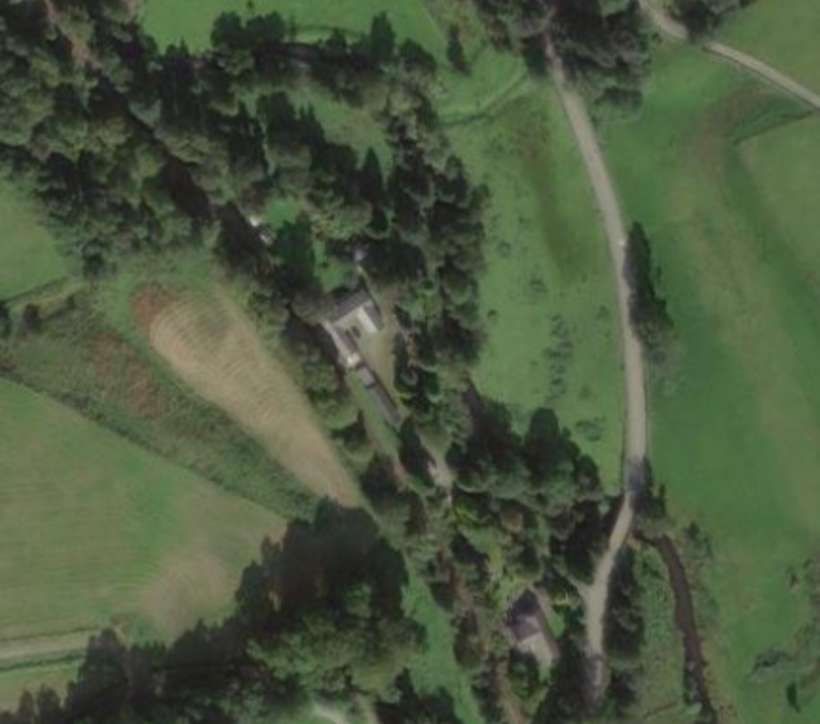
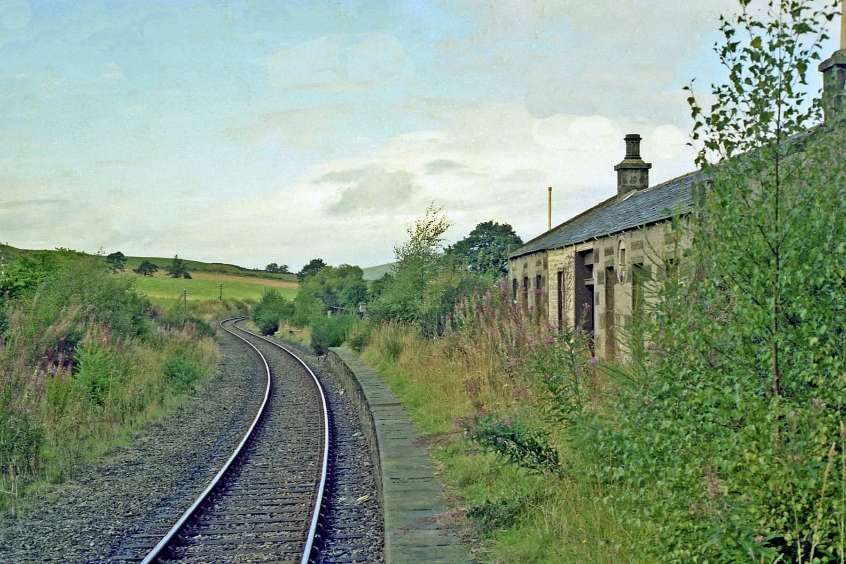

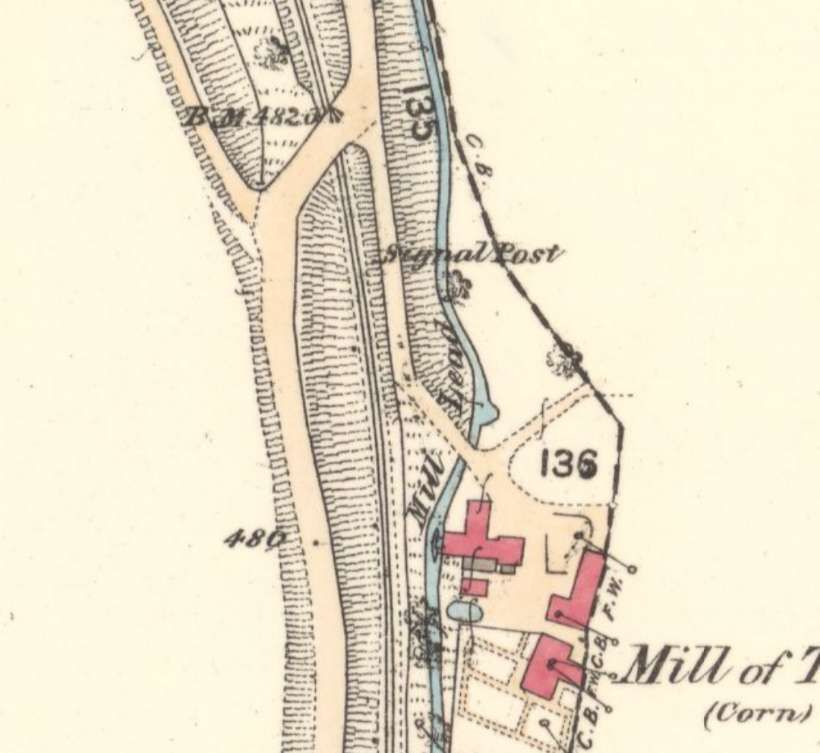
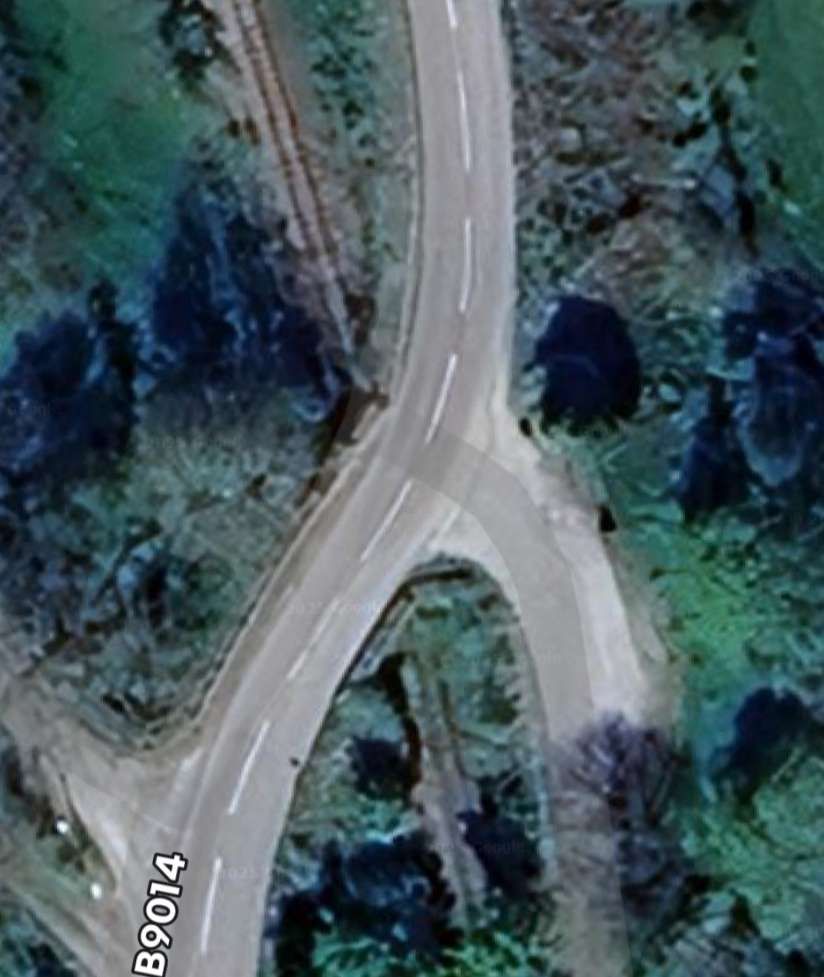
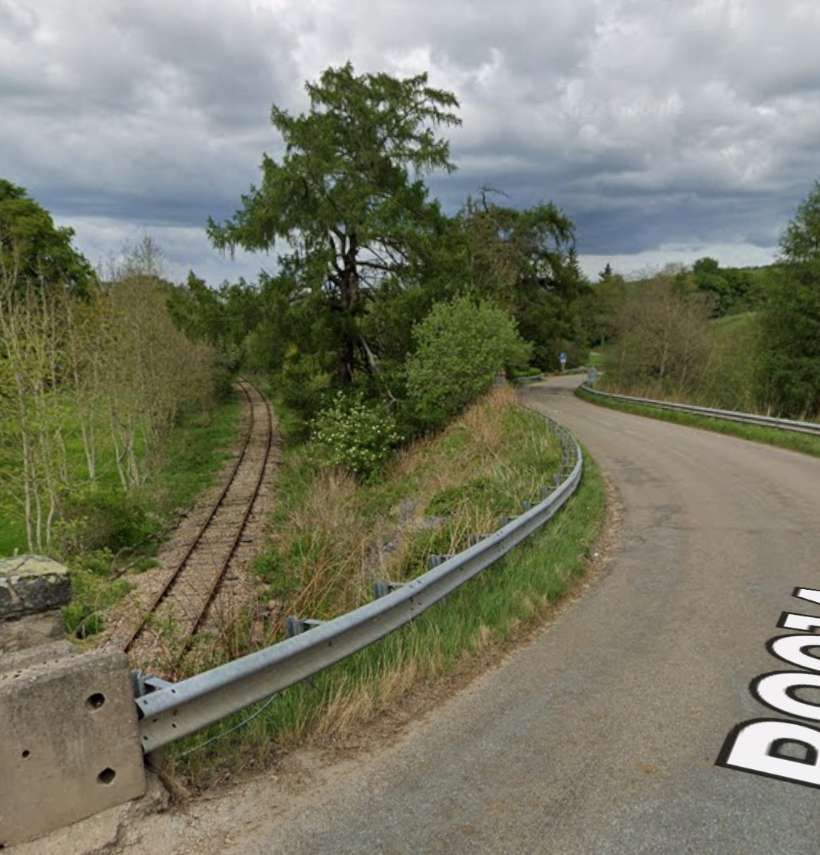
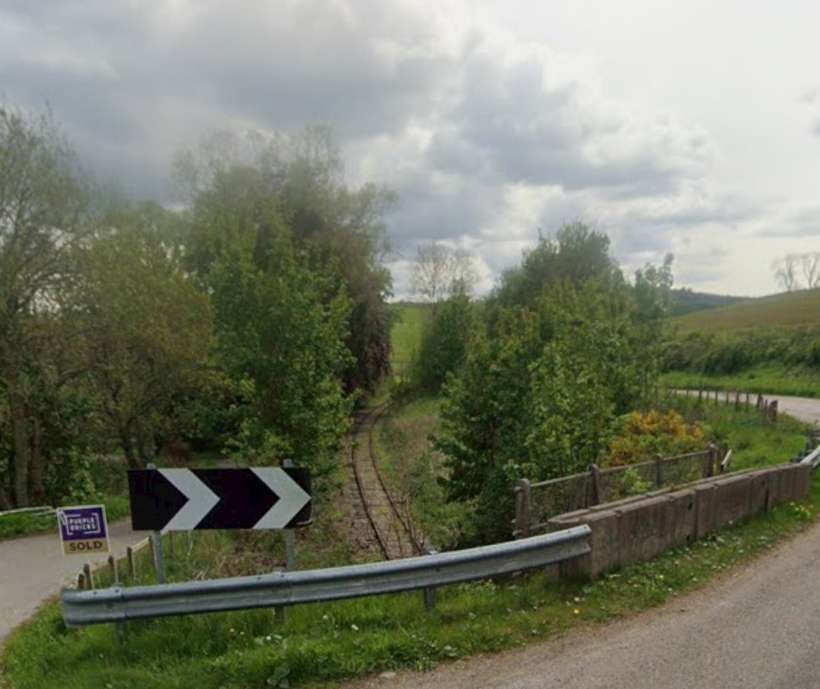
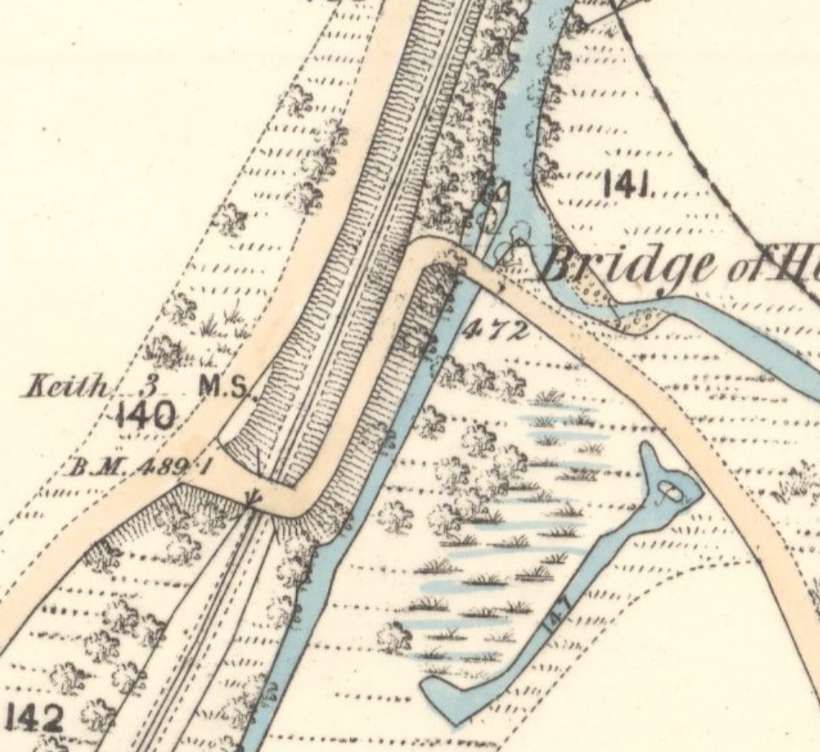
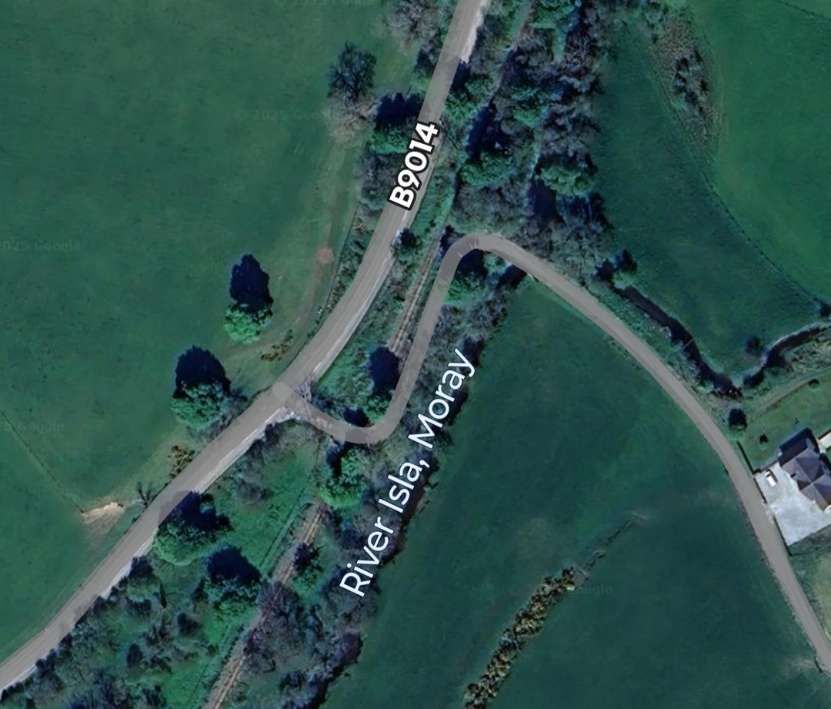
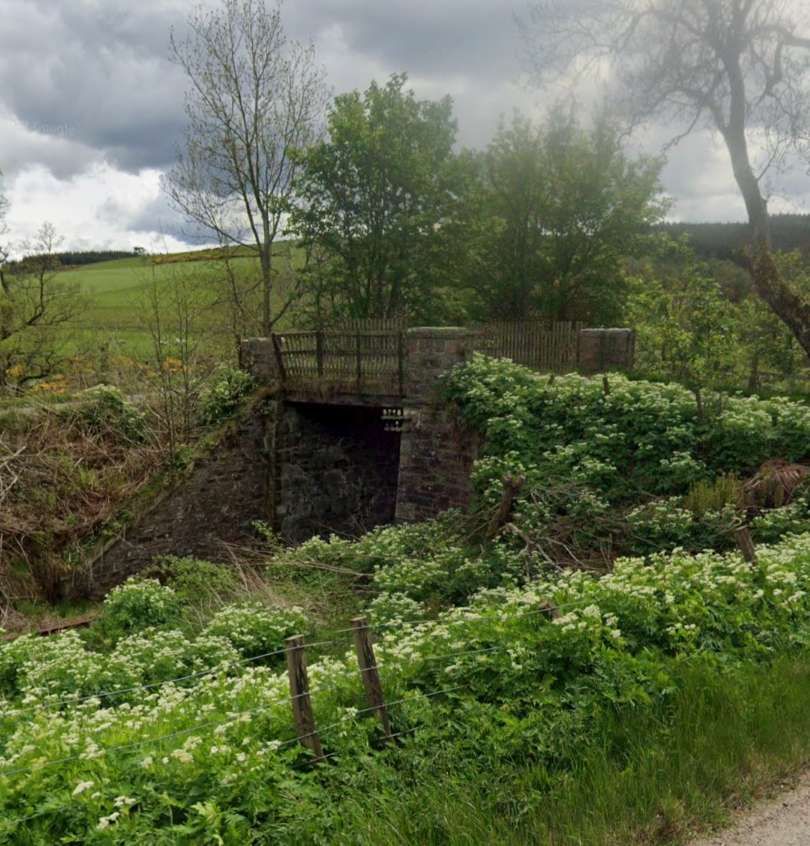
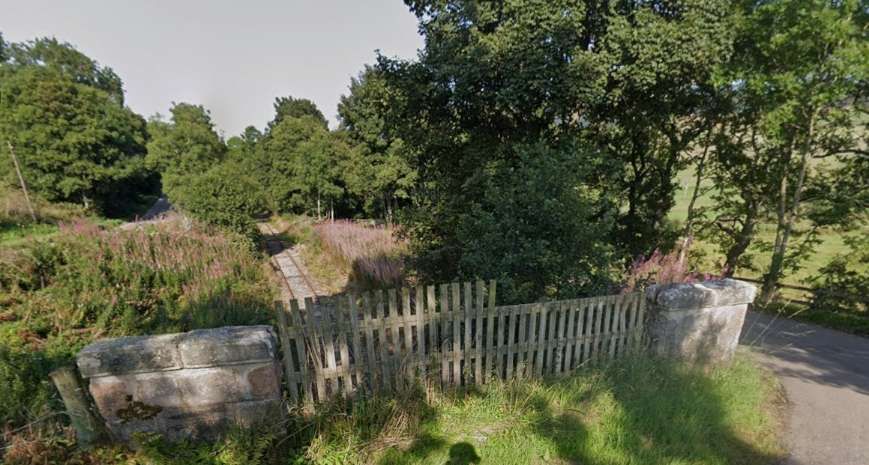
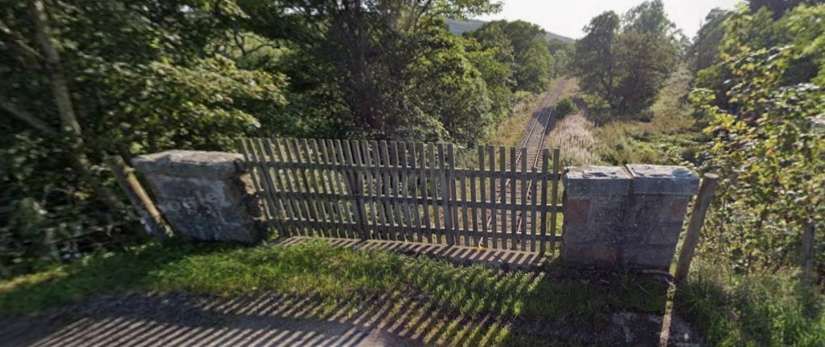

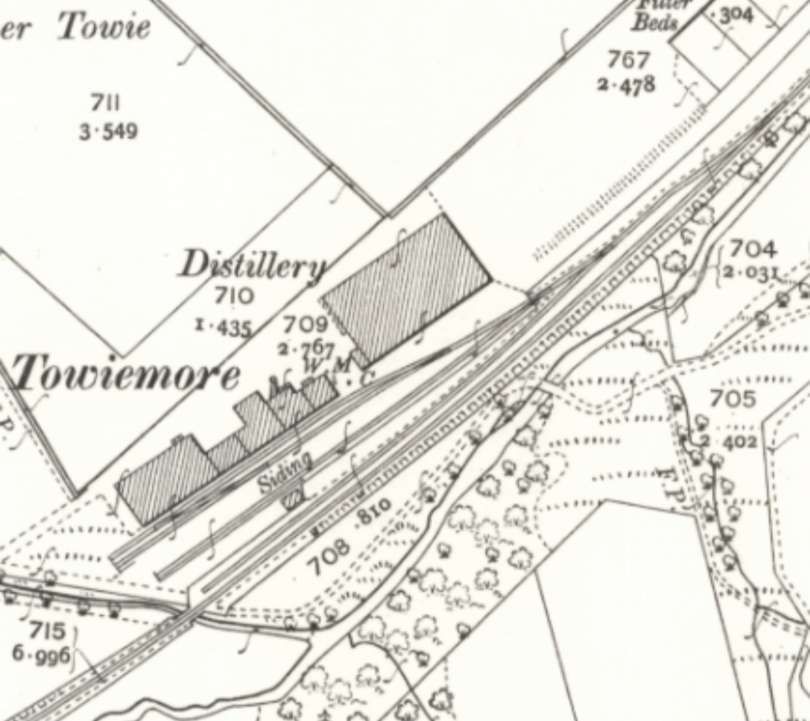
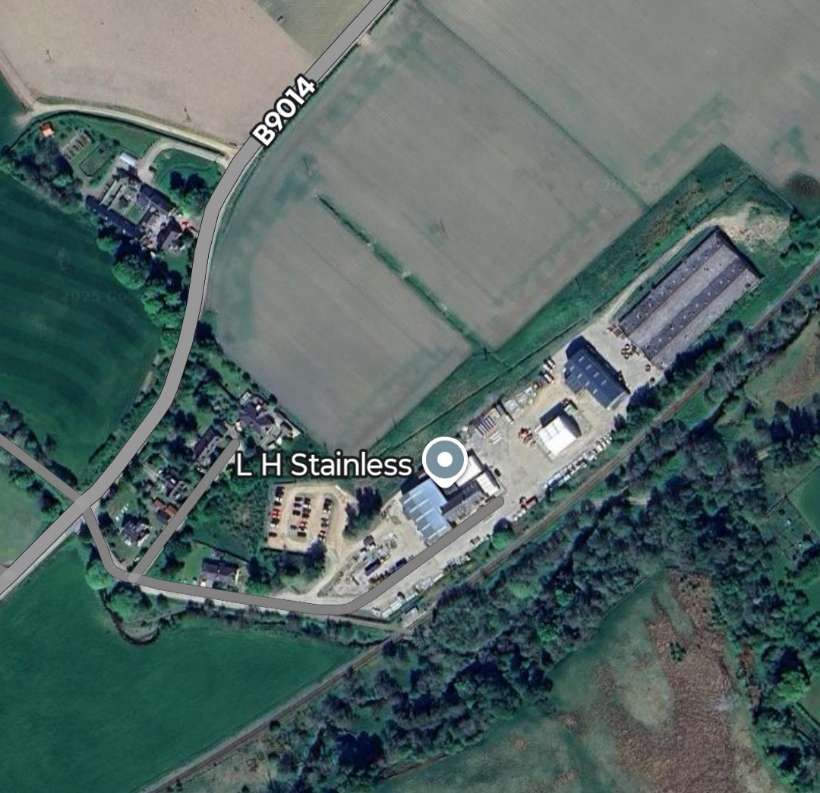
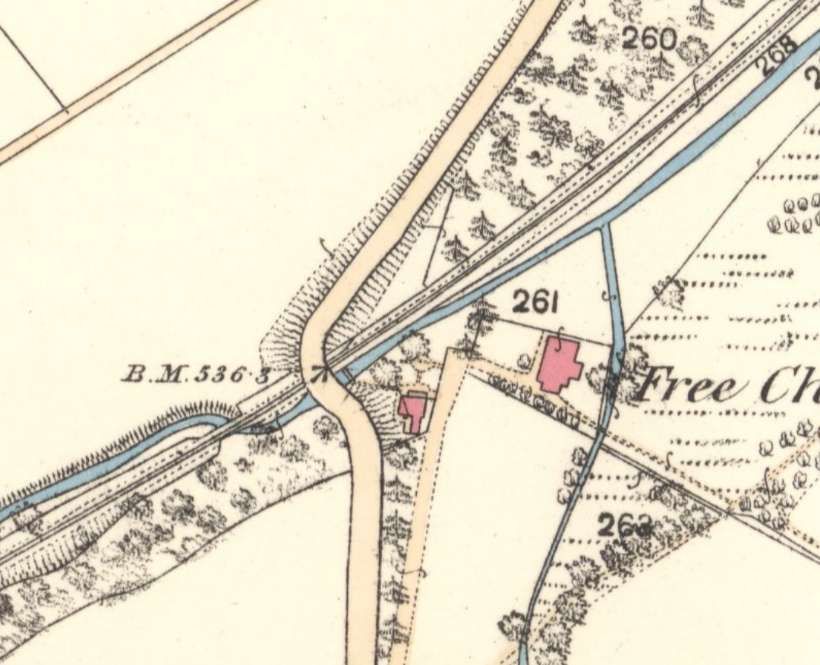
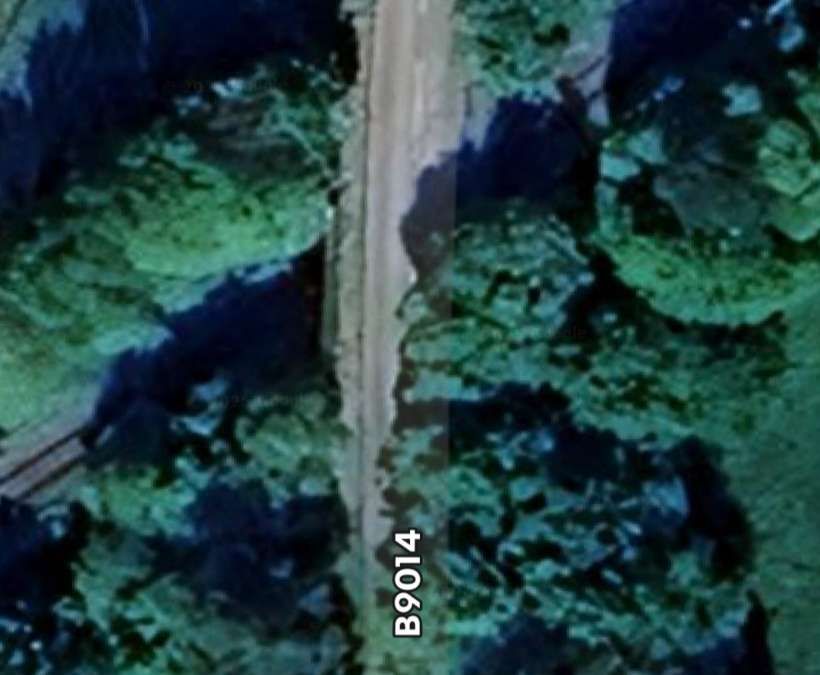
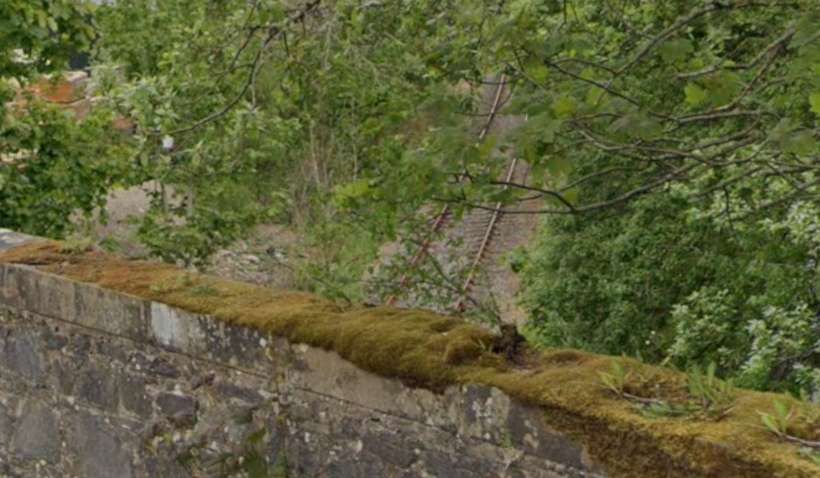
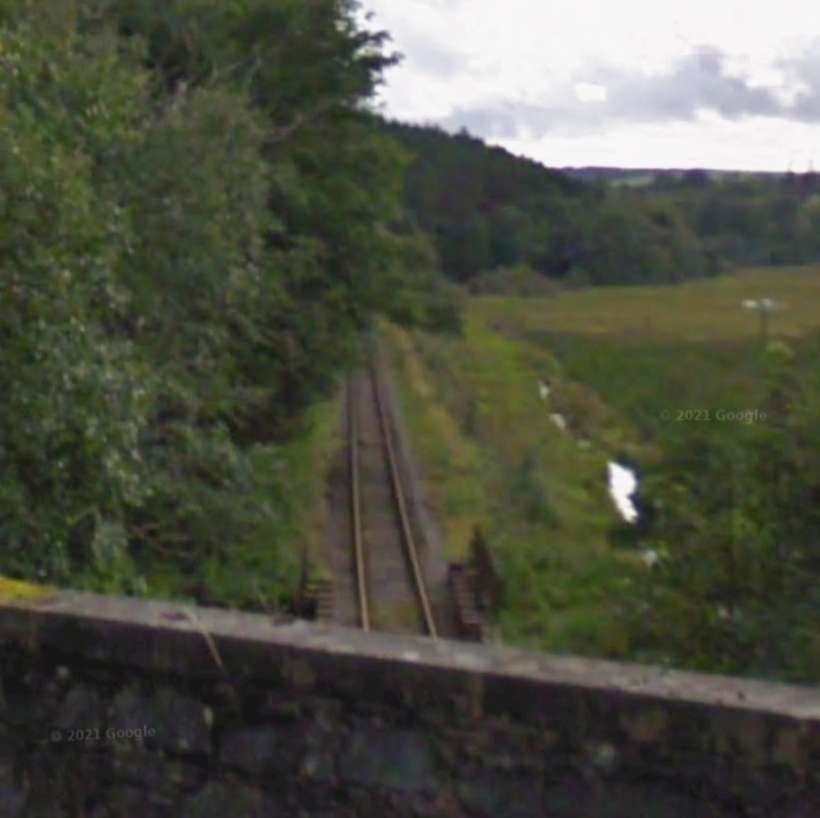
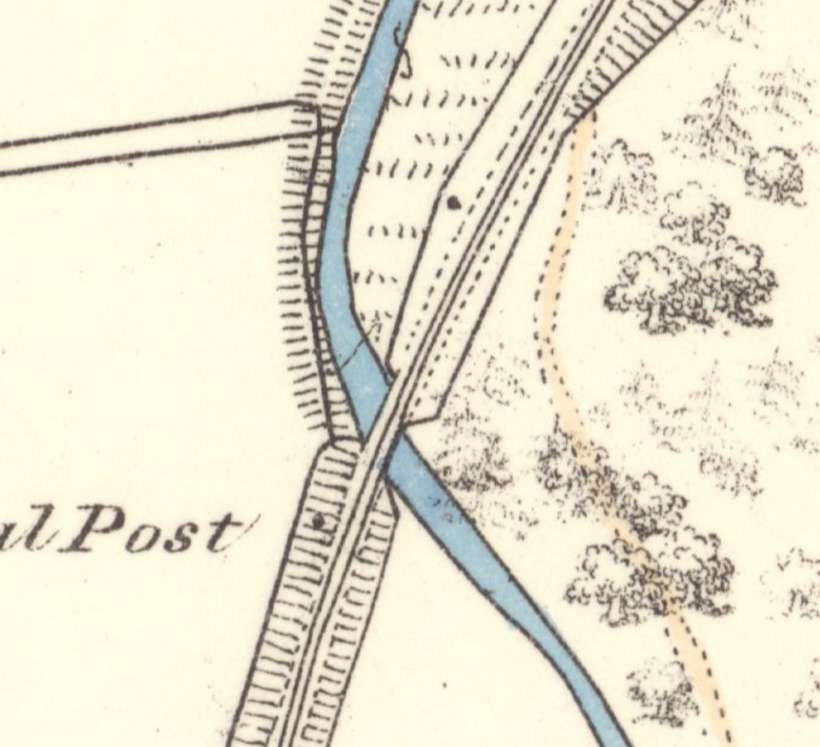
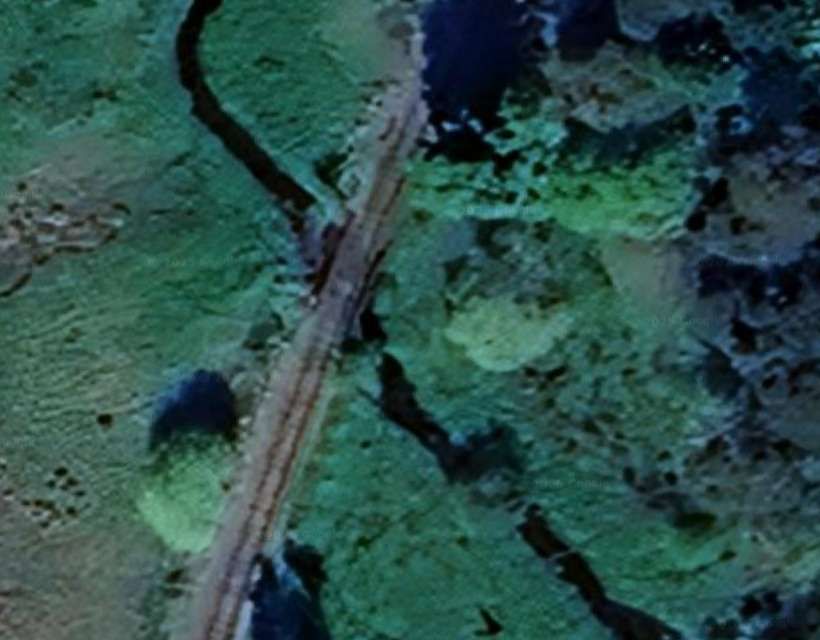
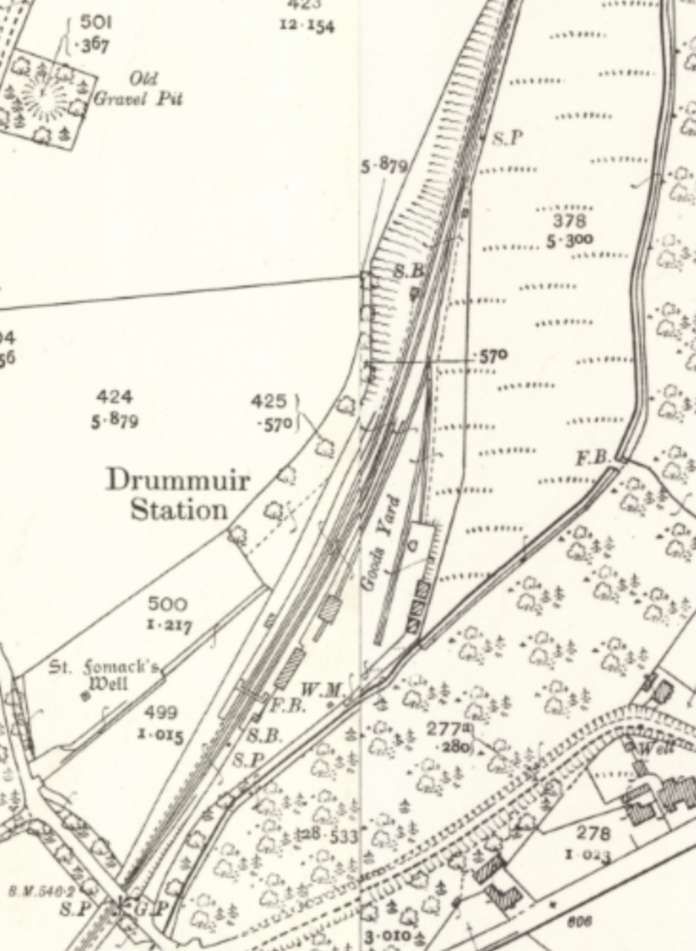
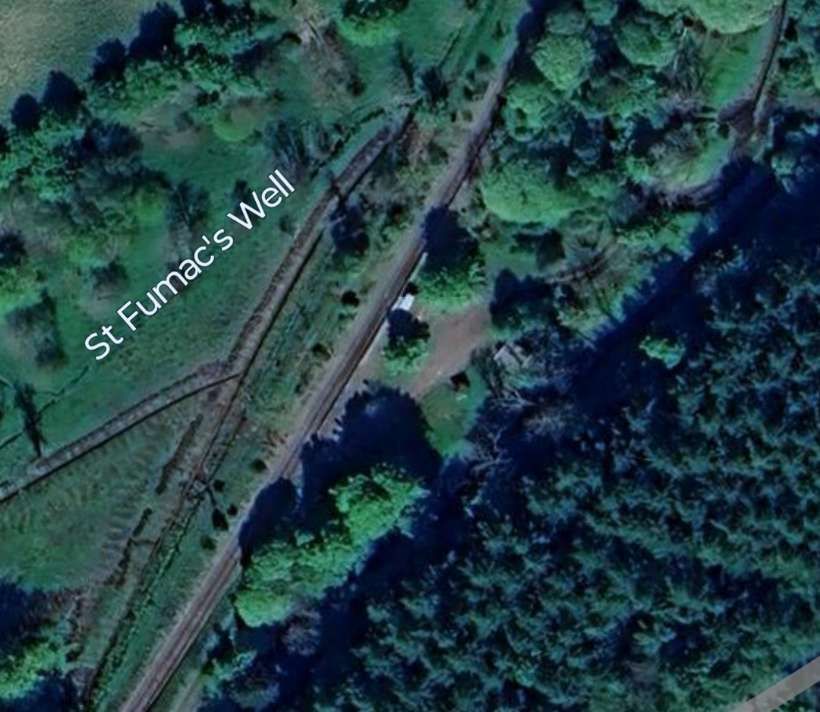
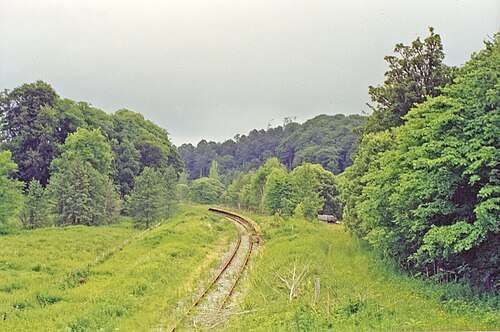
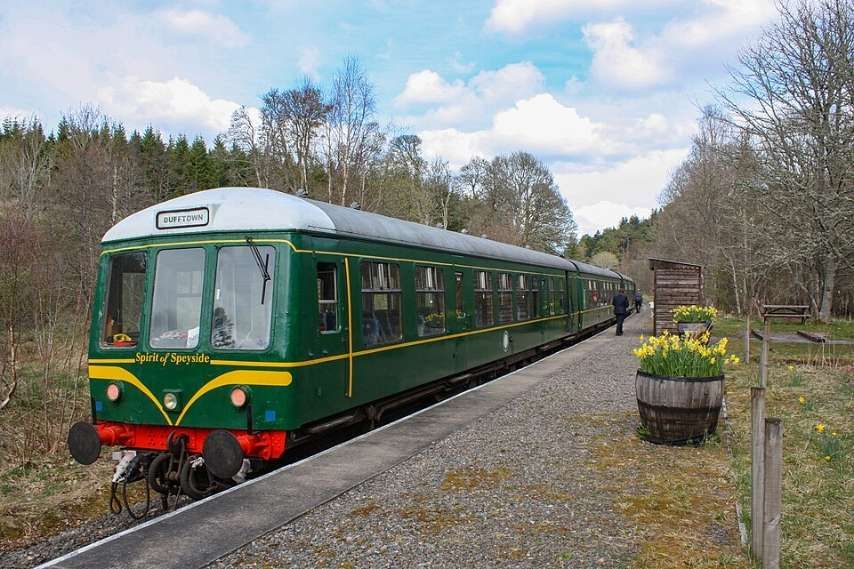
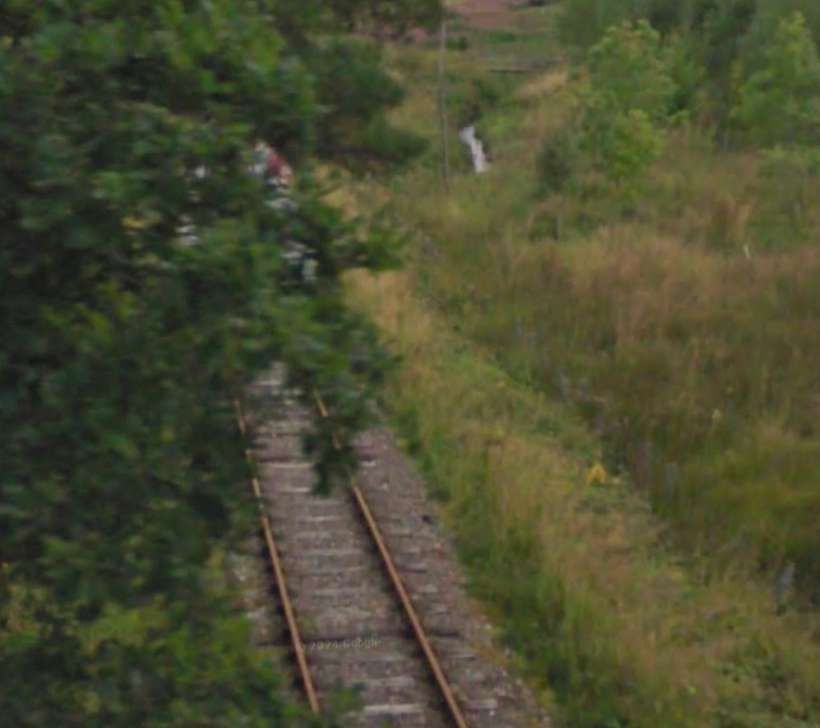


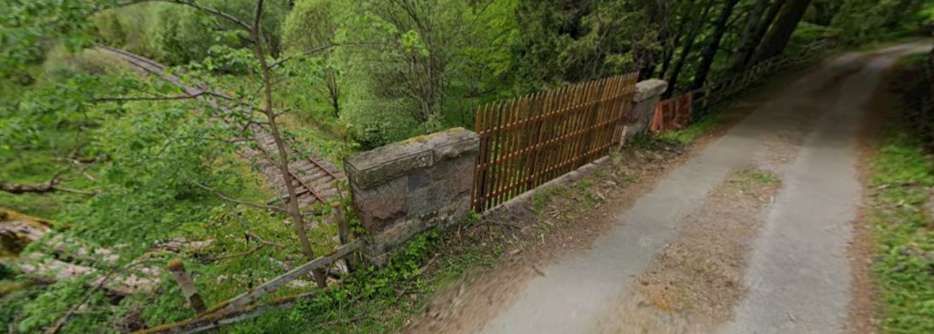
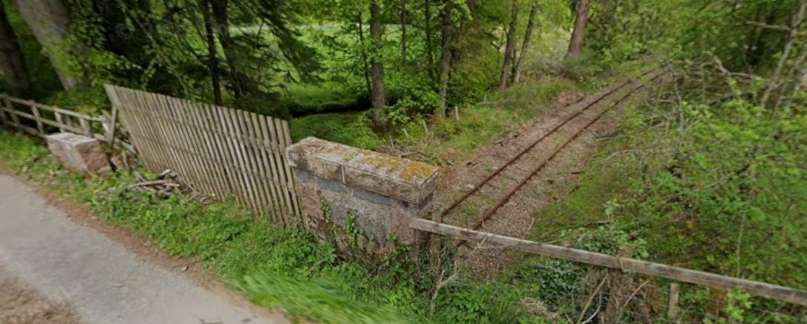
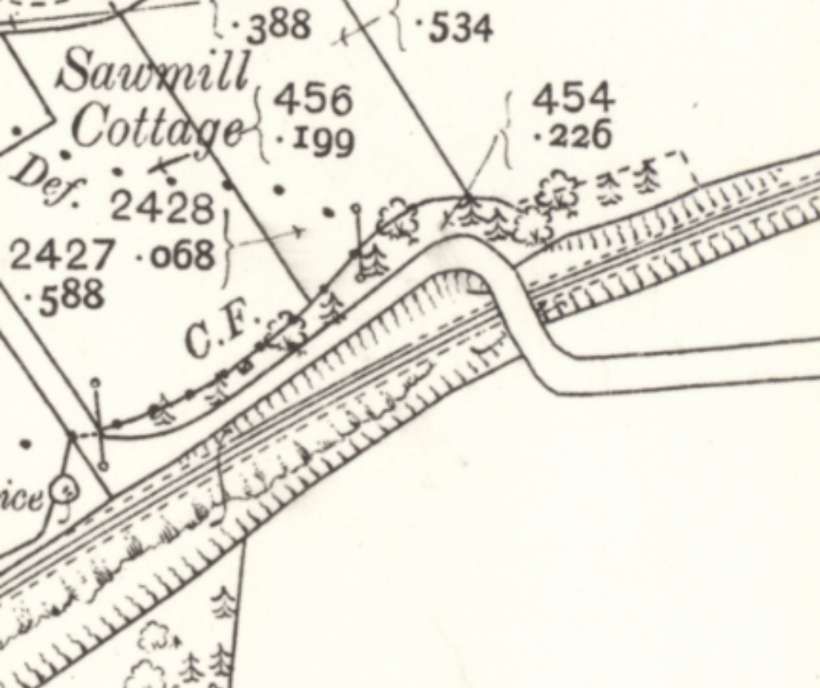
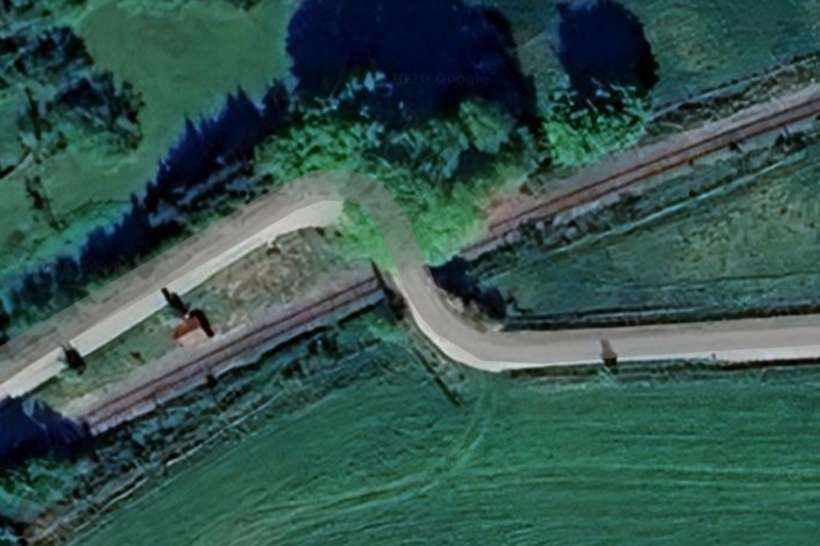
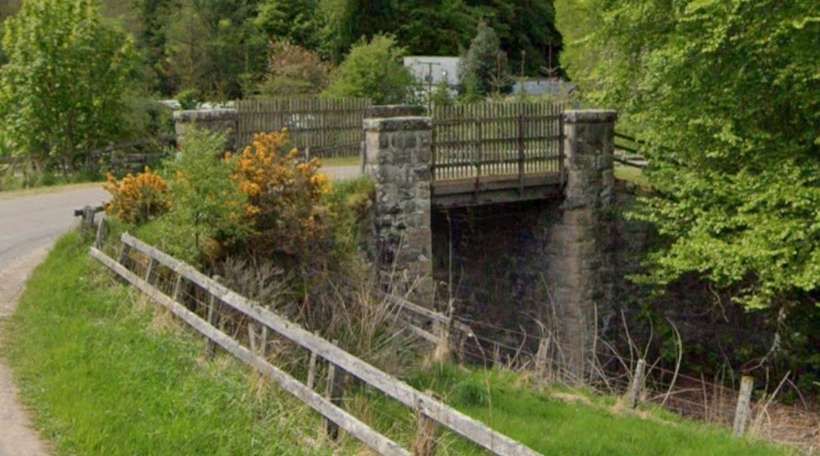
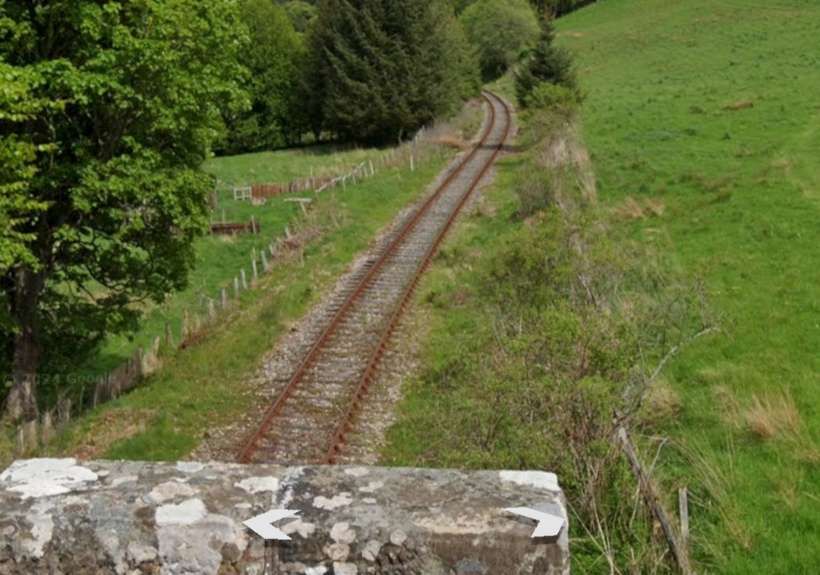
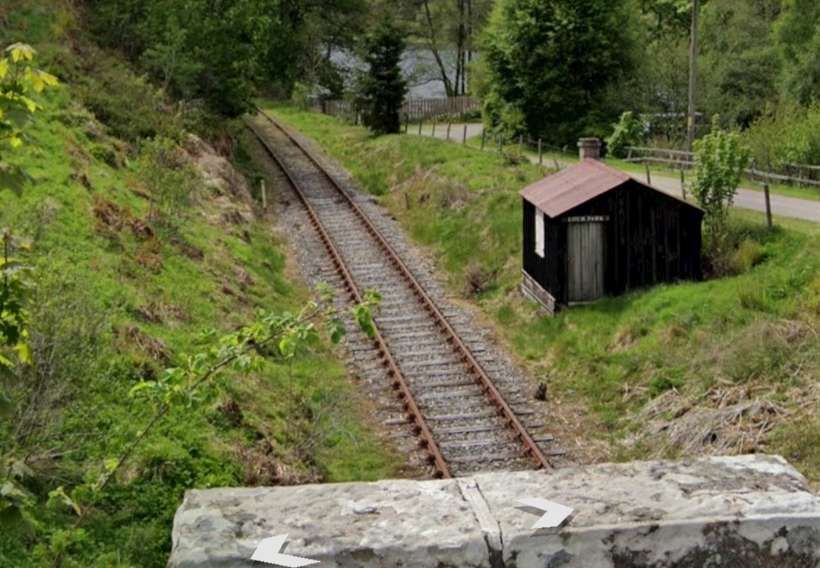
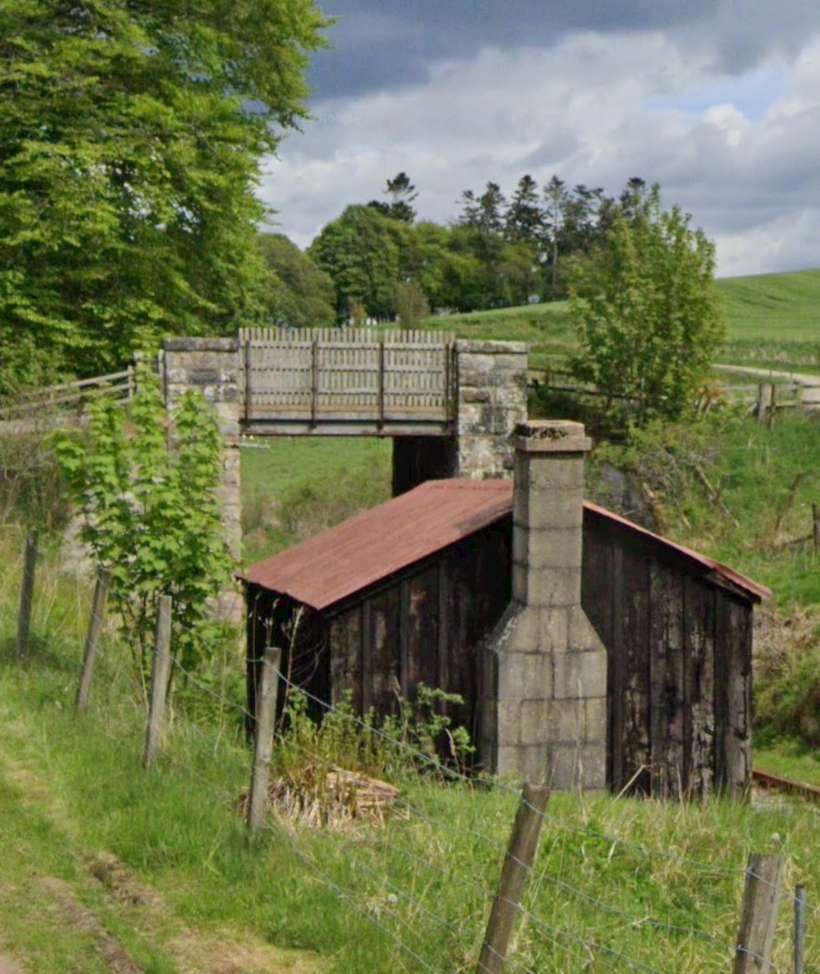
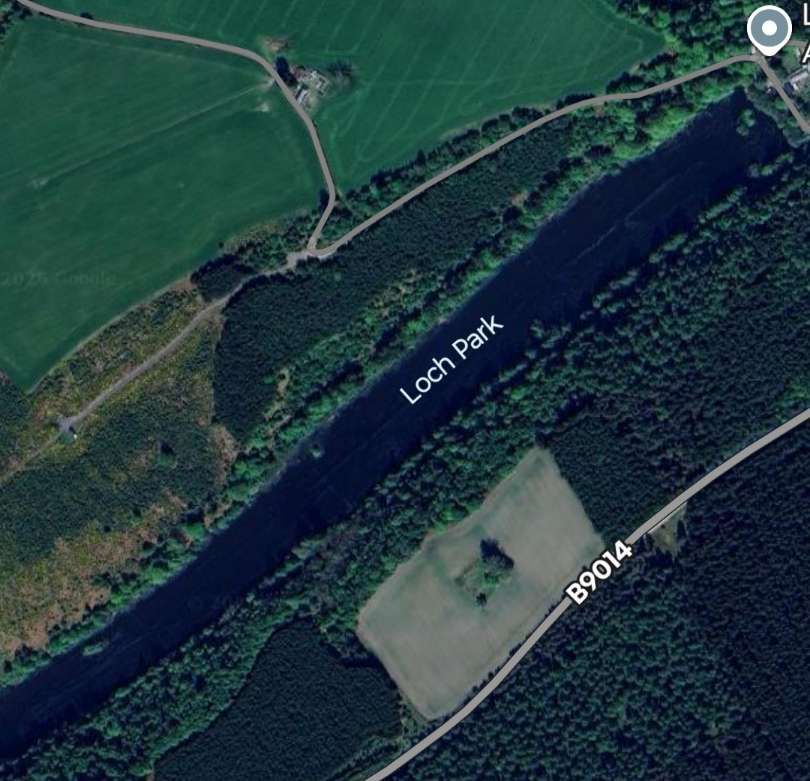
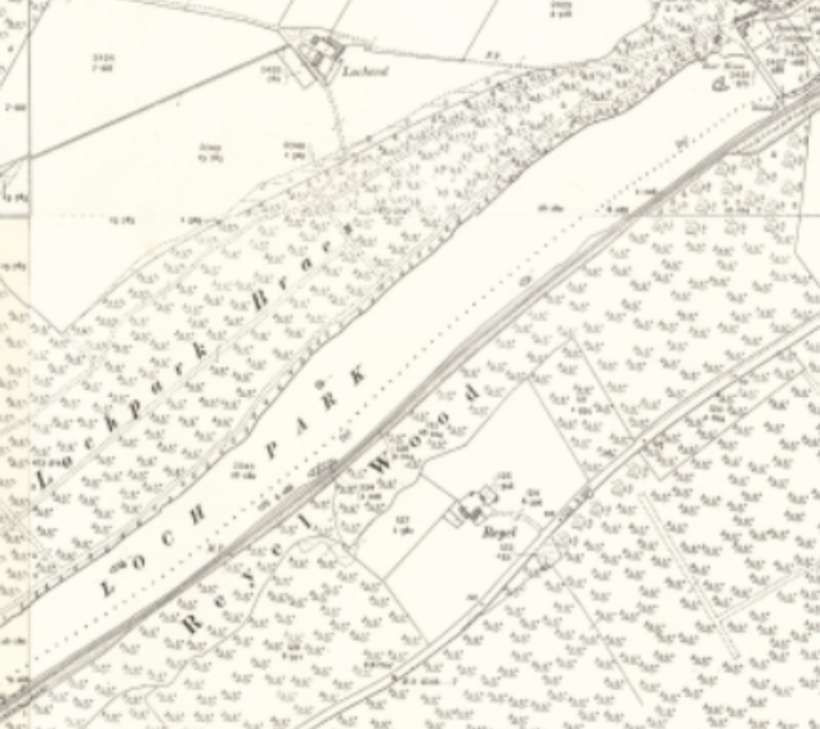
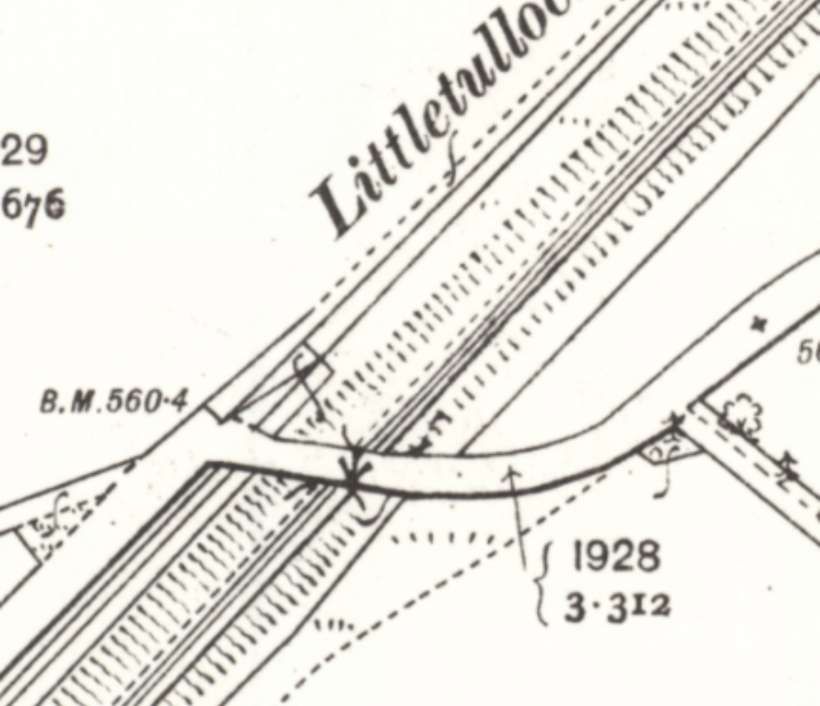
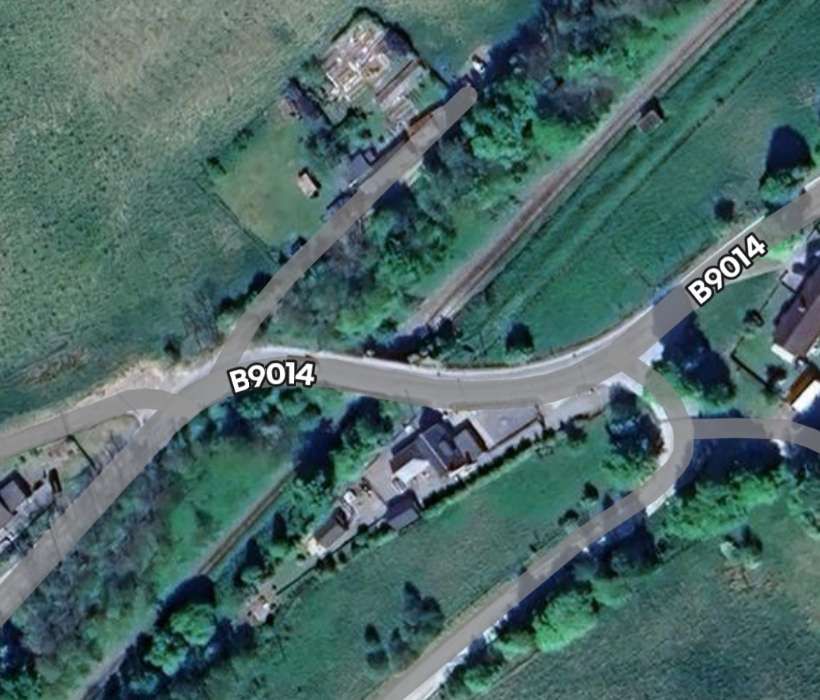
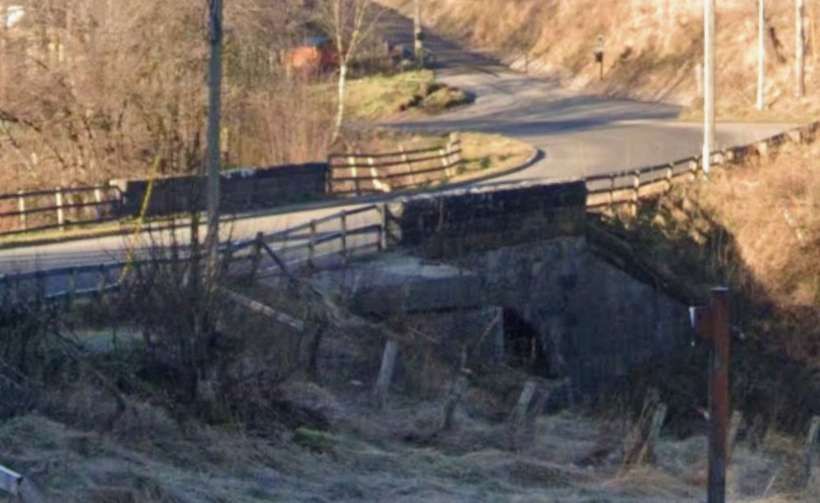
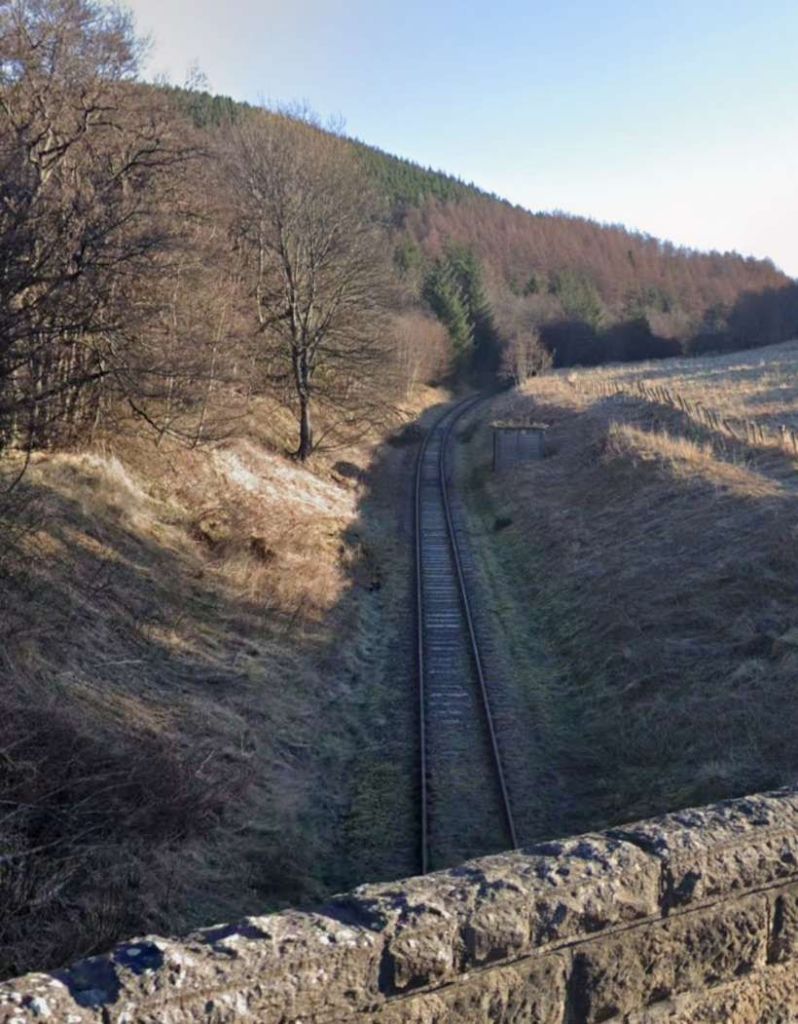
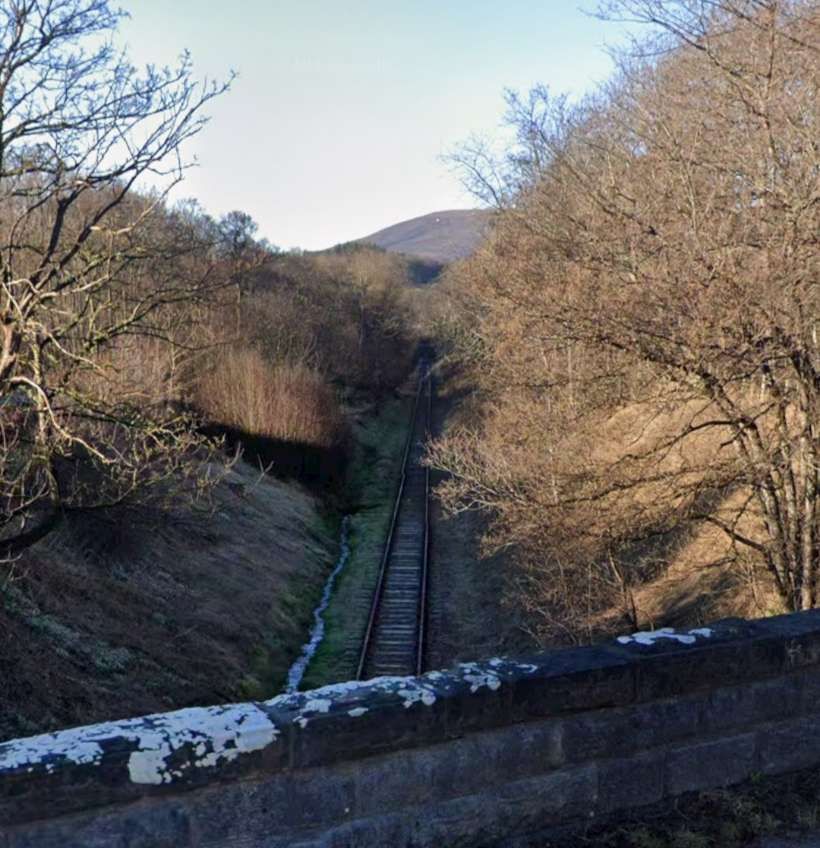
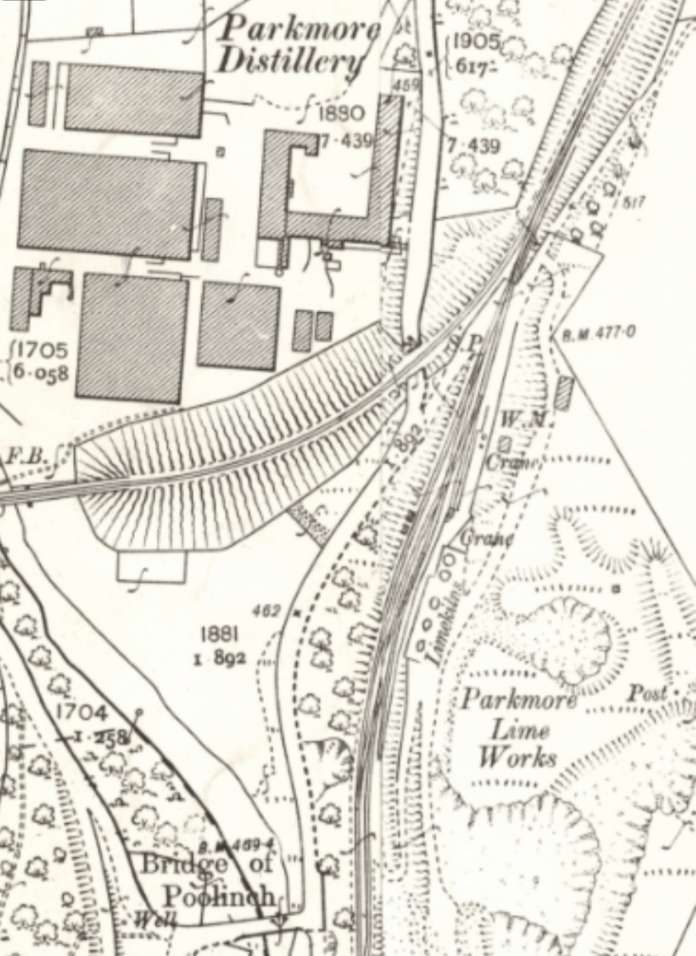
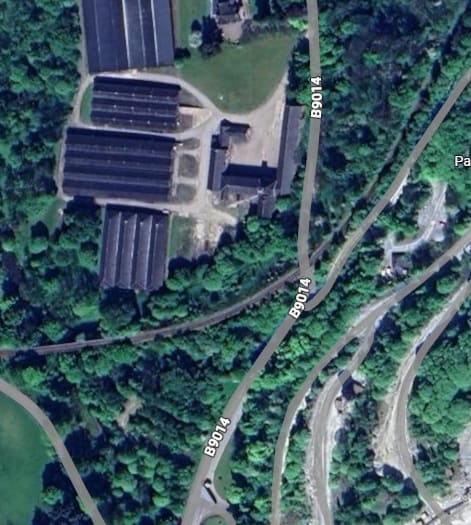
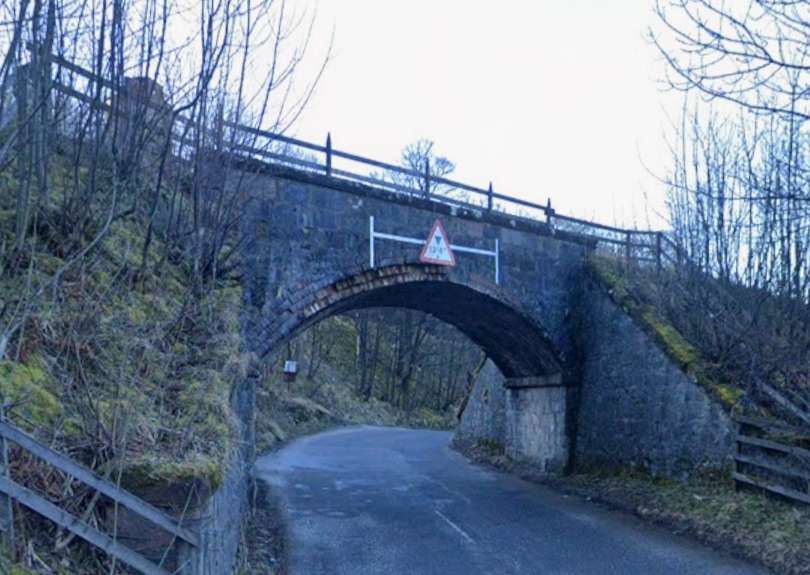
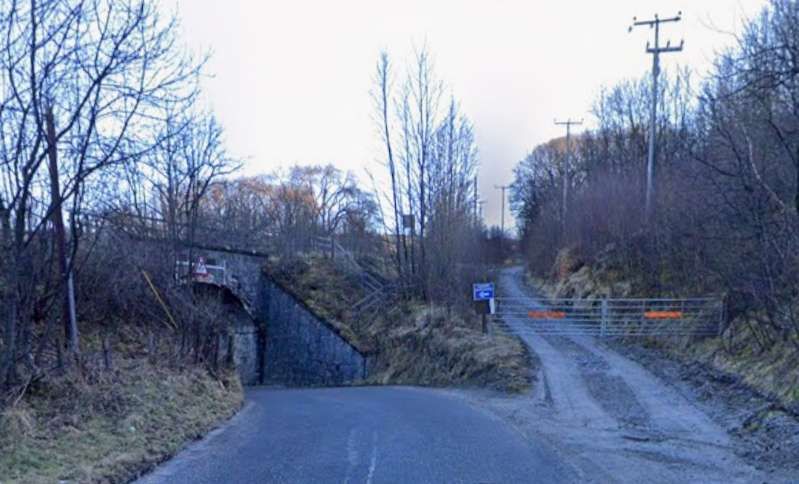
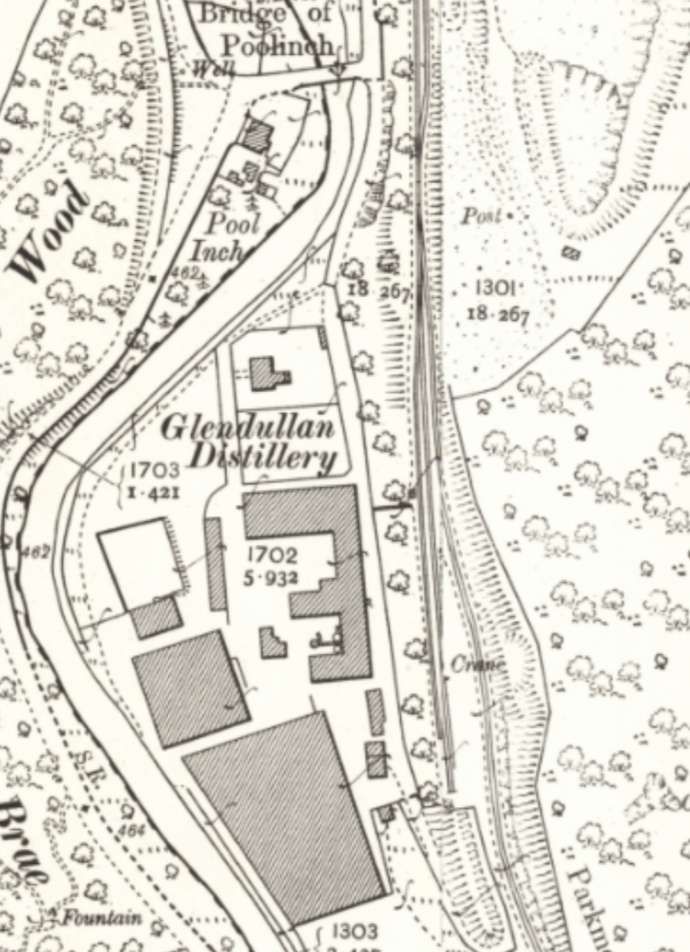

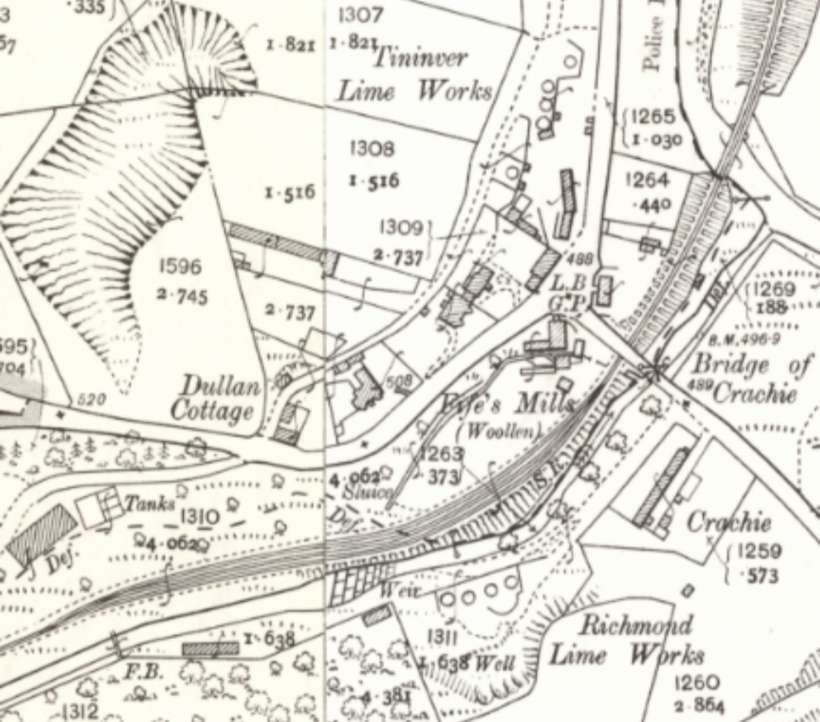
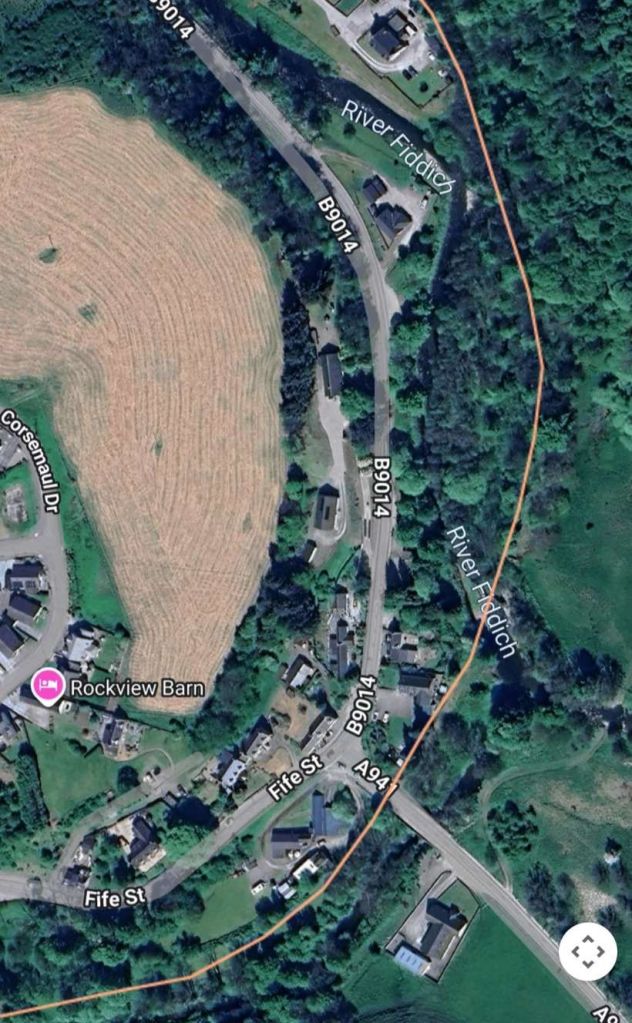
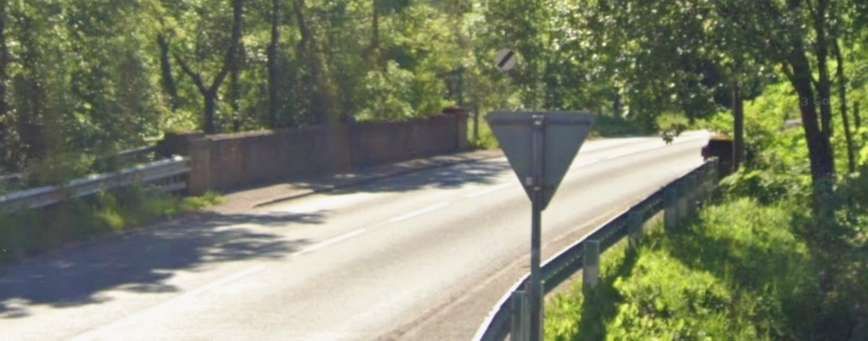
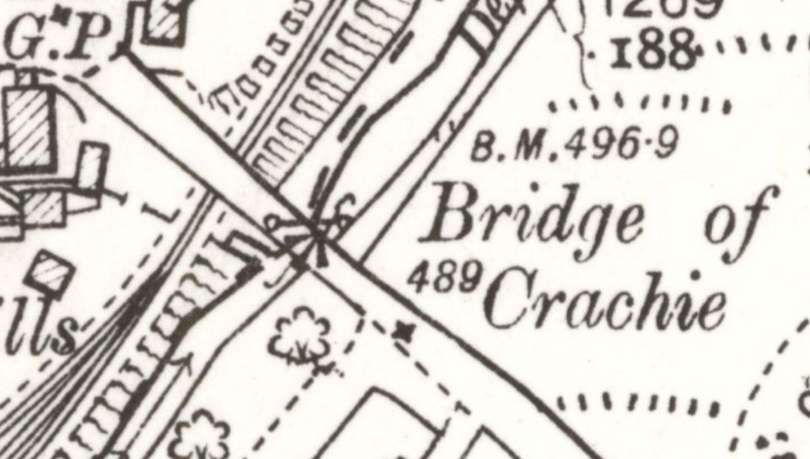
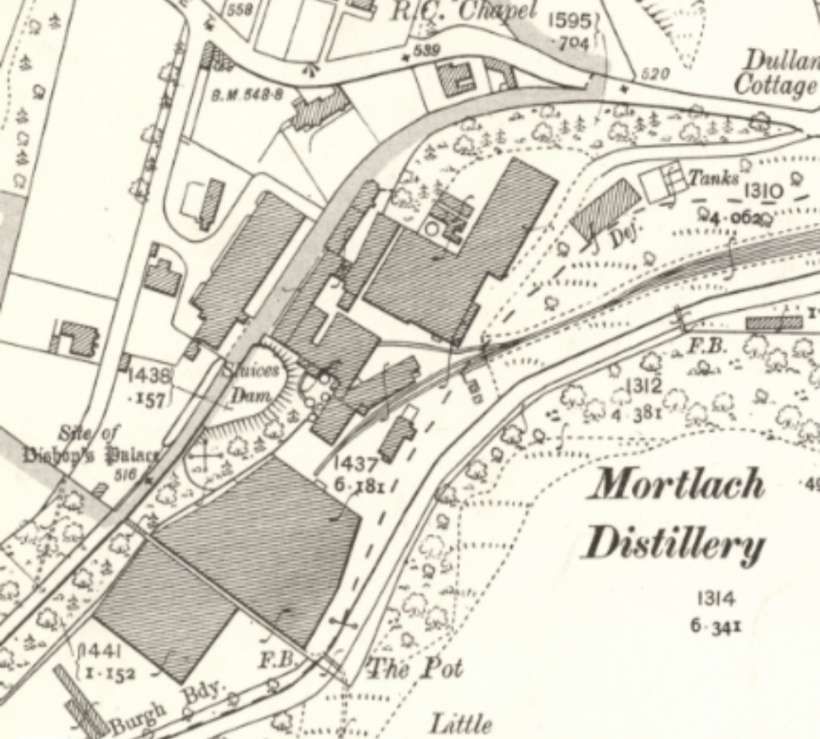

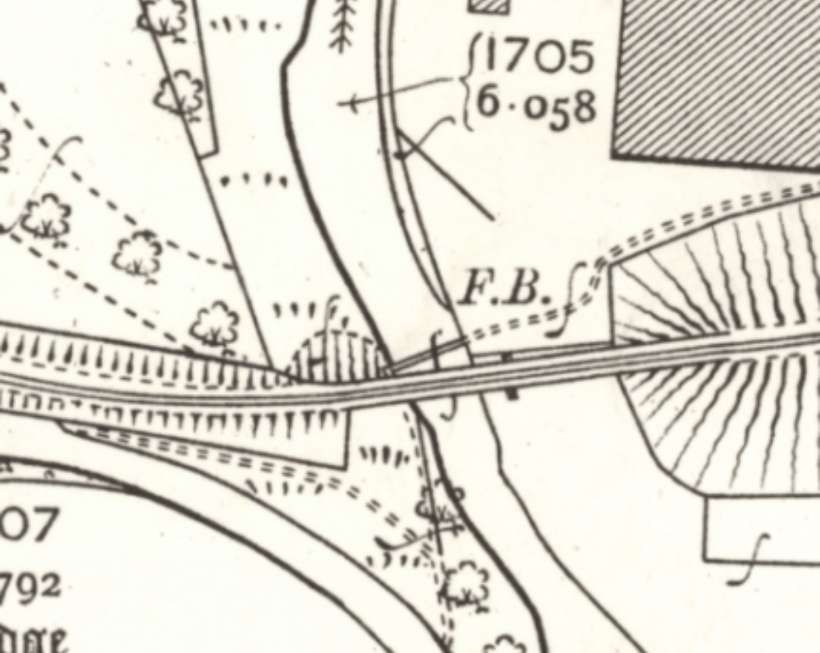
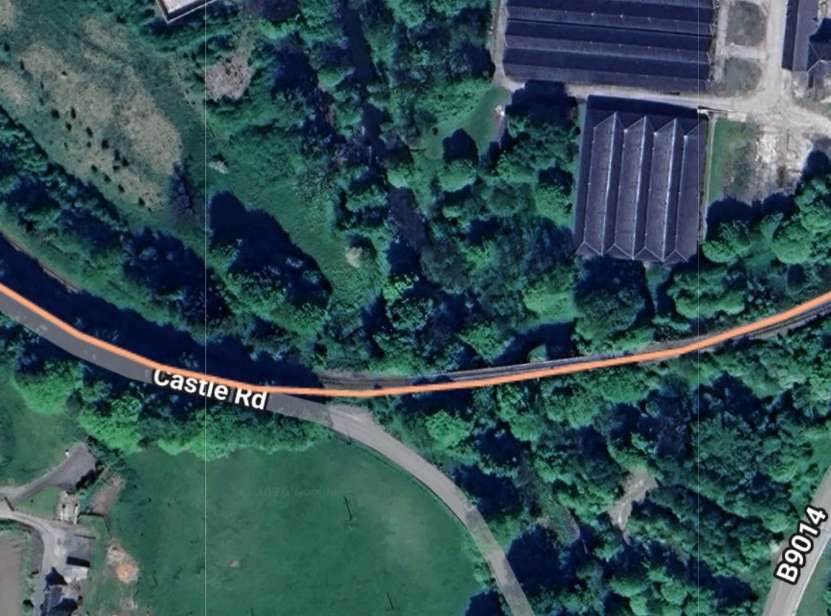
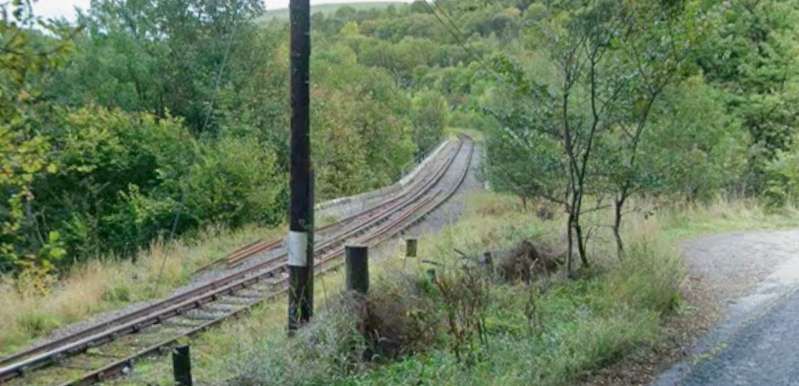

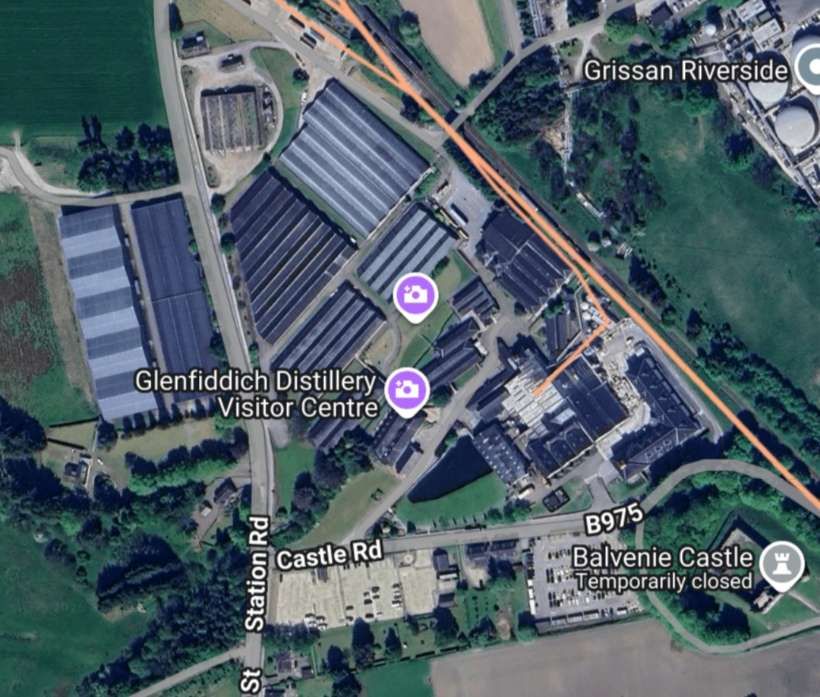
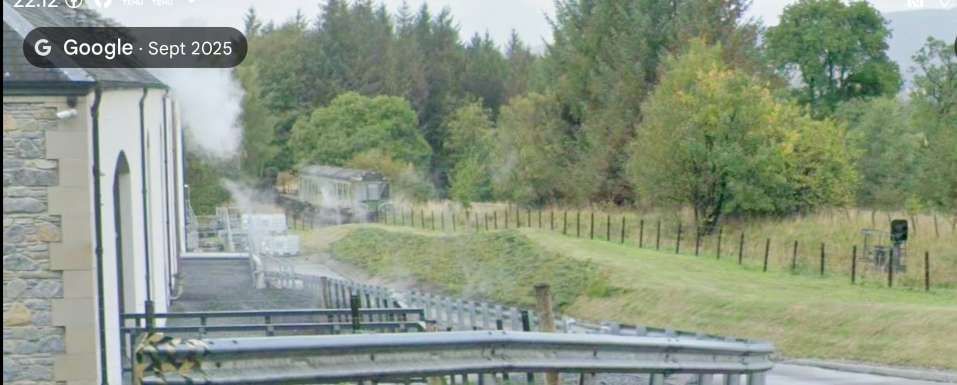
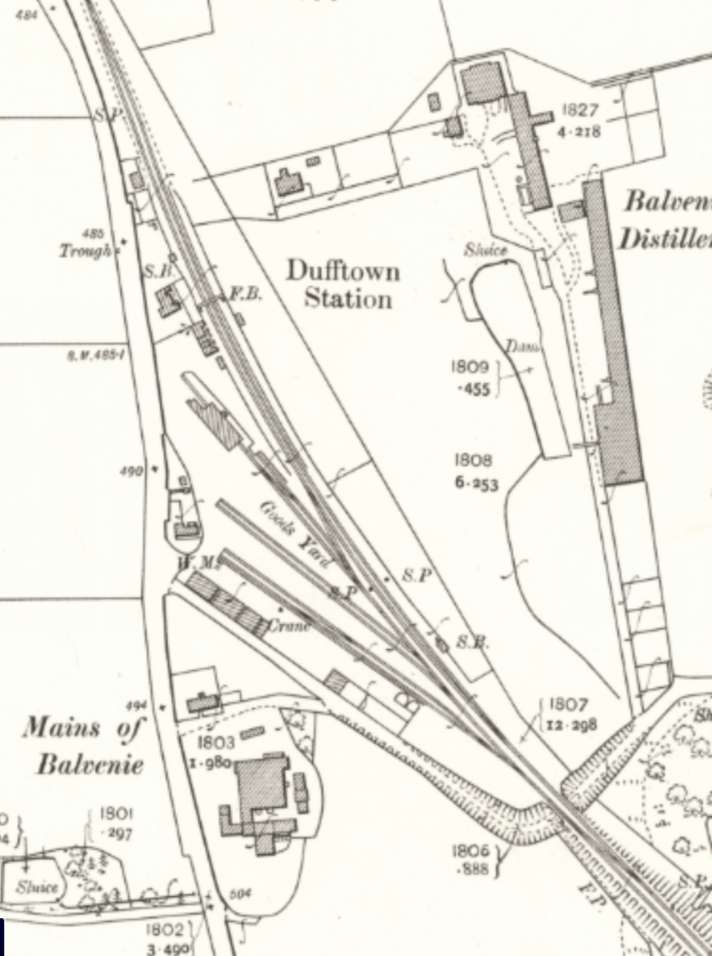
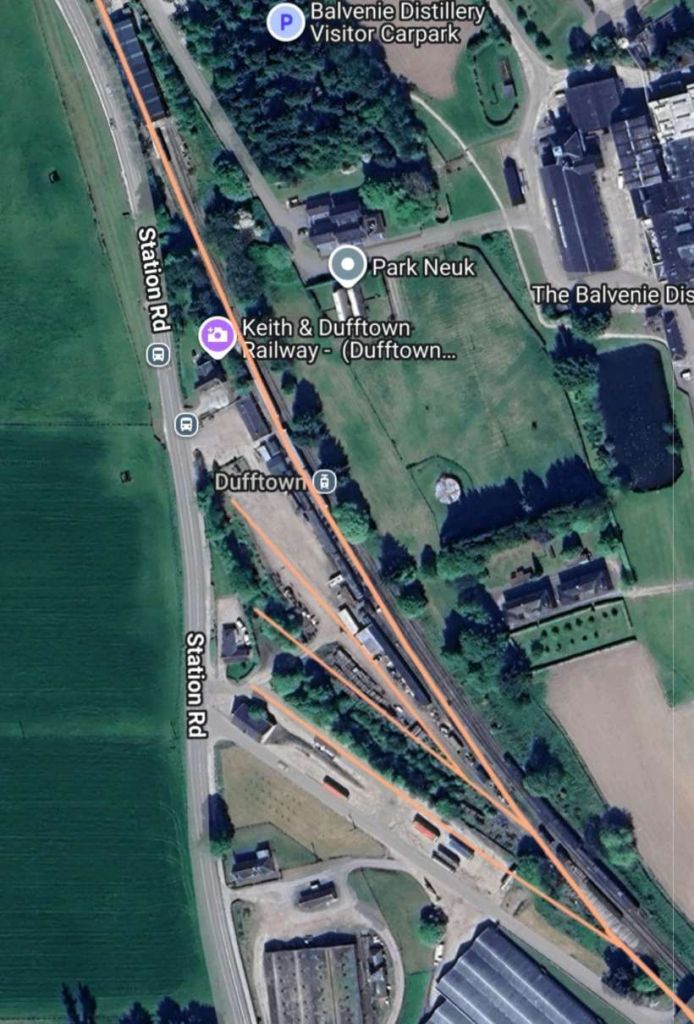
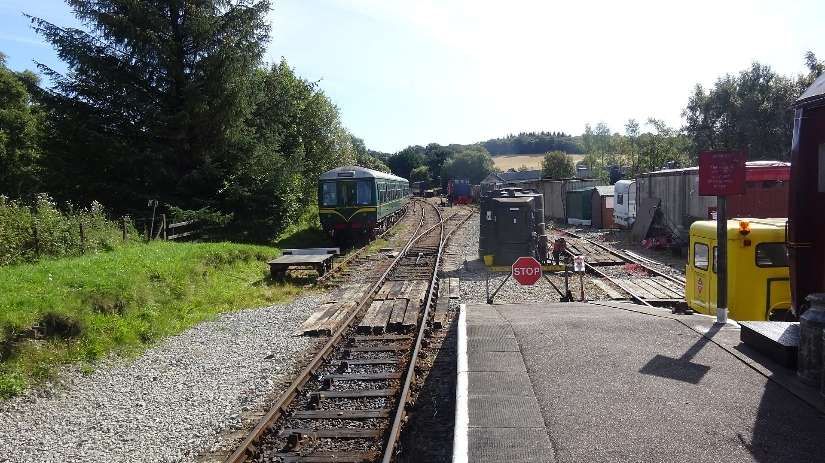

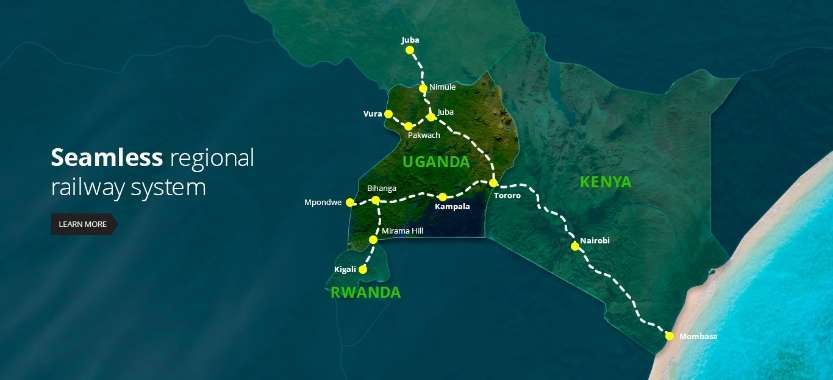
