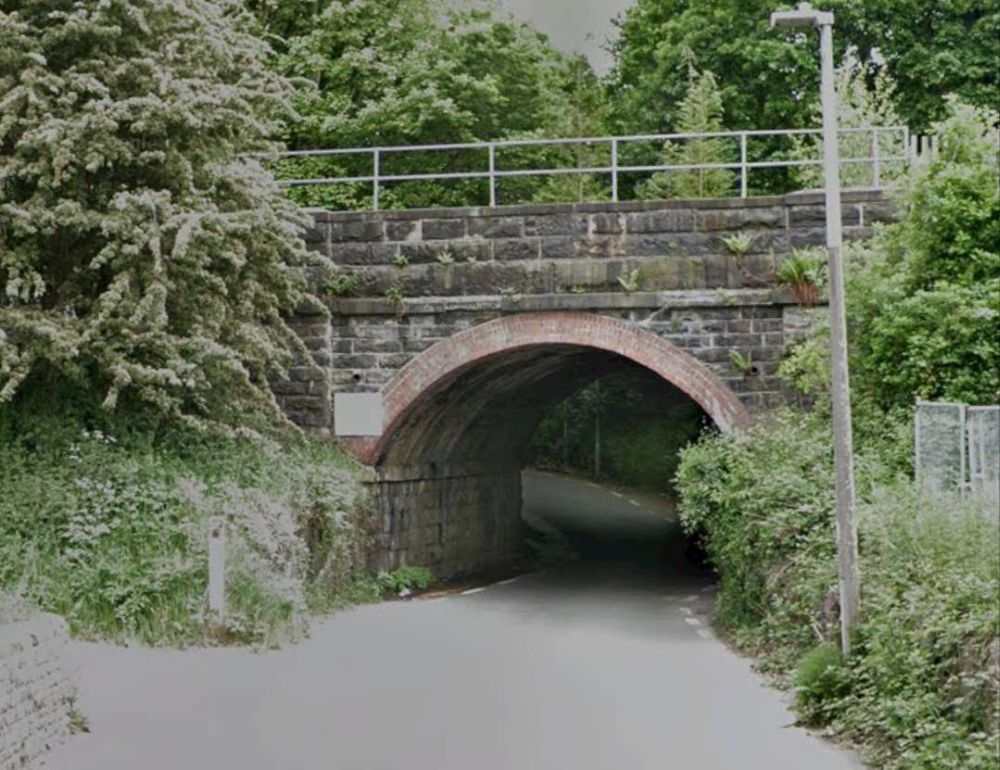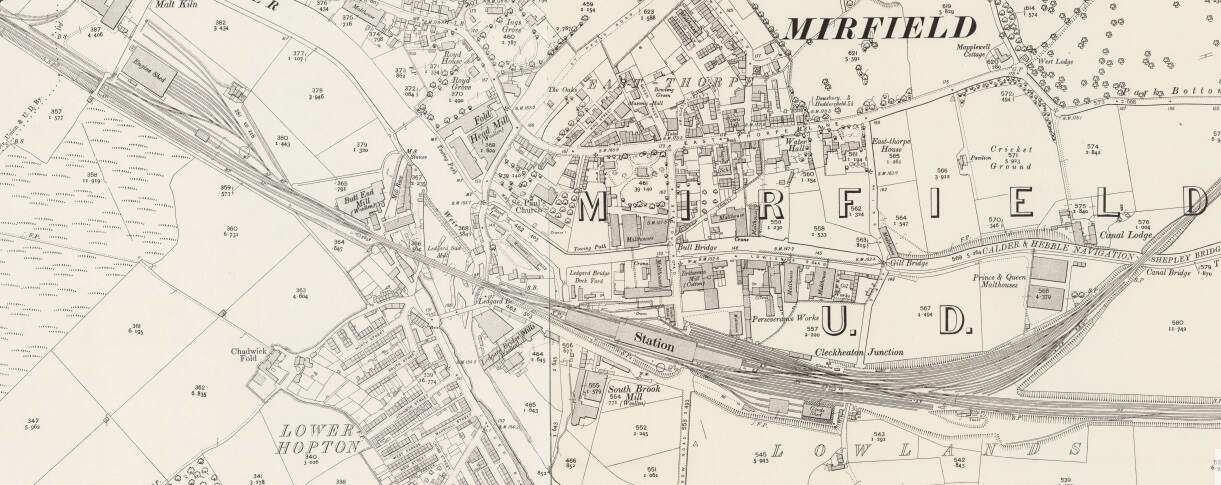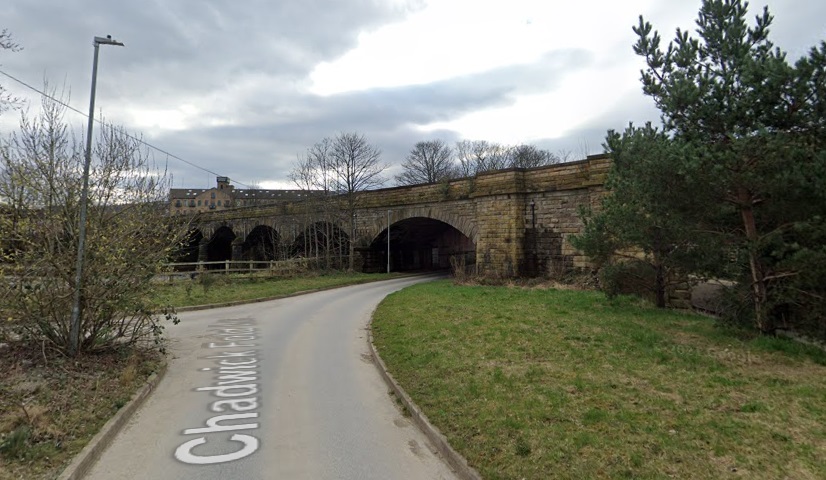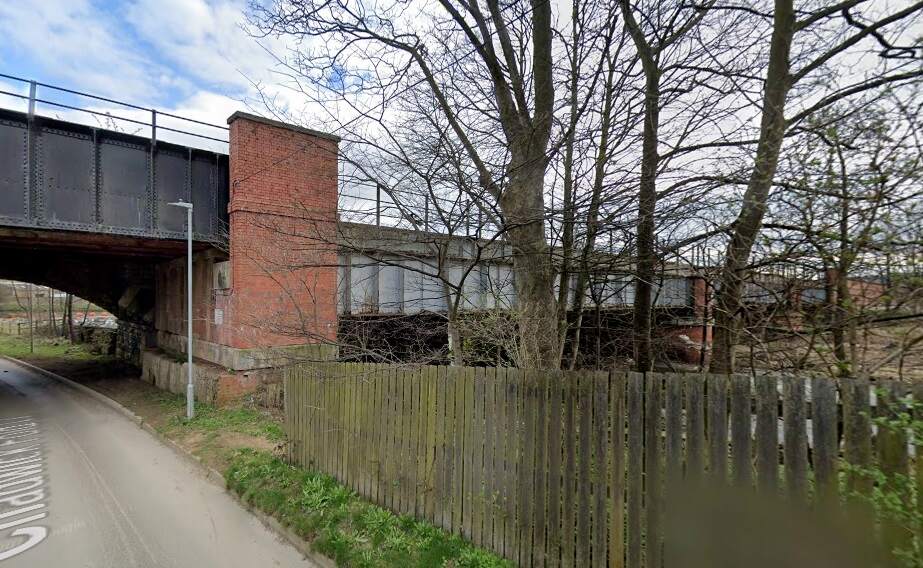
Tag Archives: history

The Border Counties Railway – Part 2 – Chollerton to Redesmouth Junction

This is the second article in a series about the Border Counties Railway. The first can be found here. [3]

An online acquaintance pointed me to a film made in the mid-1980s, ‘Slow Train to Riccarton’ which records something of the lives of people associated with this railway line:

https://youtu.be/cUOVM8ENOIg?si=f4sjHHSNsjn6qYm2 [2]

The film shows different lengths of the line and records a number of people speaking about their life on and around the line.

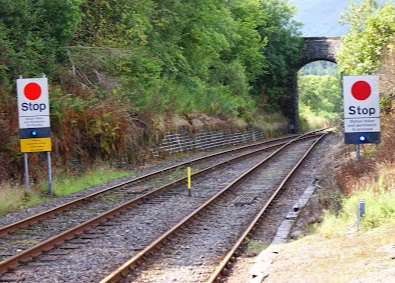
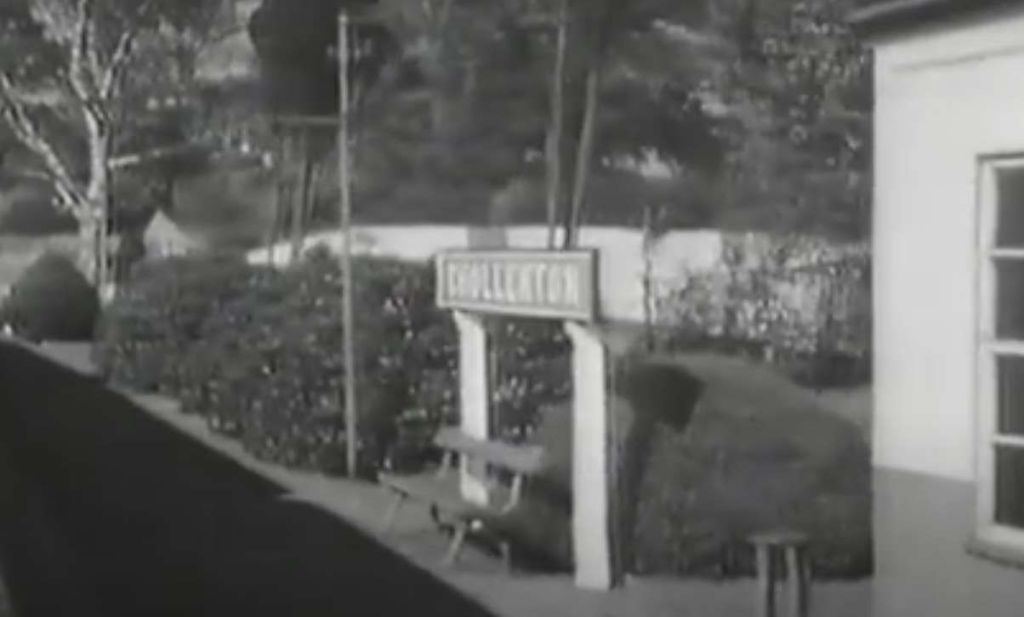
This first image is a still from the film which denotes where we are starting this next length of the journey along the line. A few more ‘stills’ will help to locate us as we travel along the line.

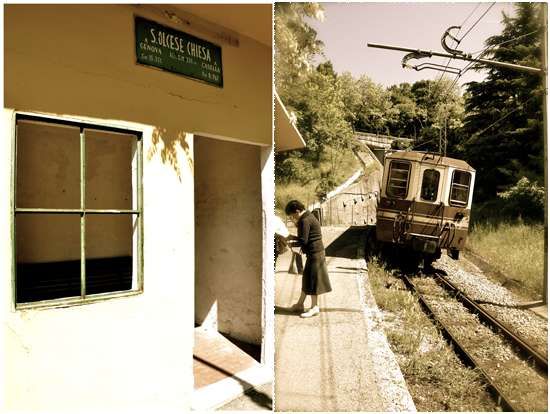
Chollerton Railway Station name-board. [2]
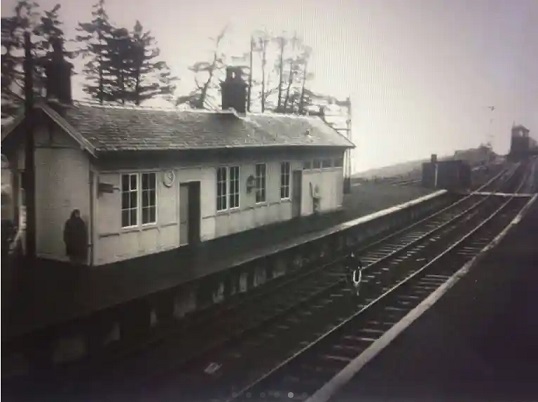
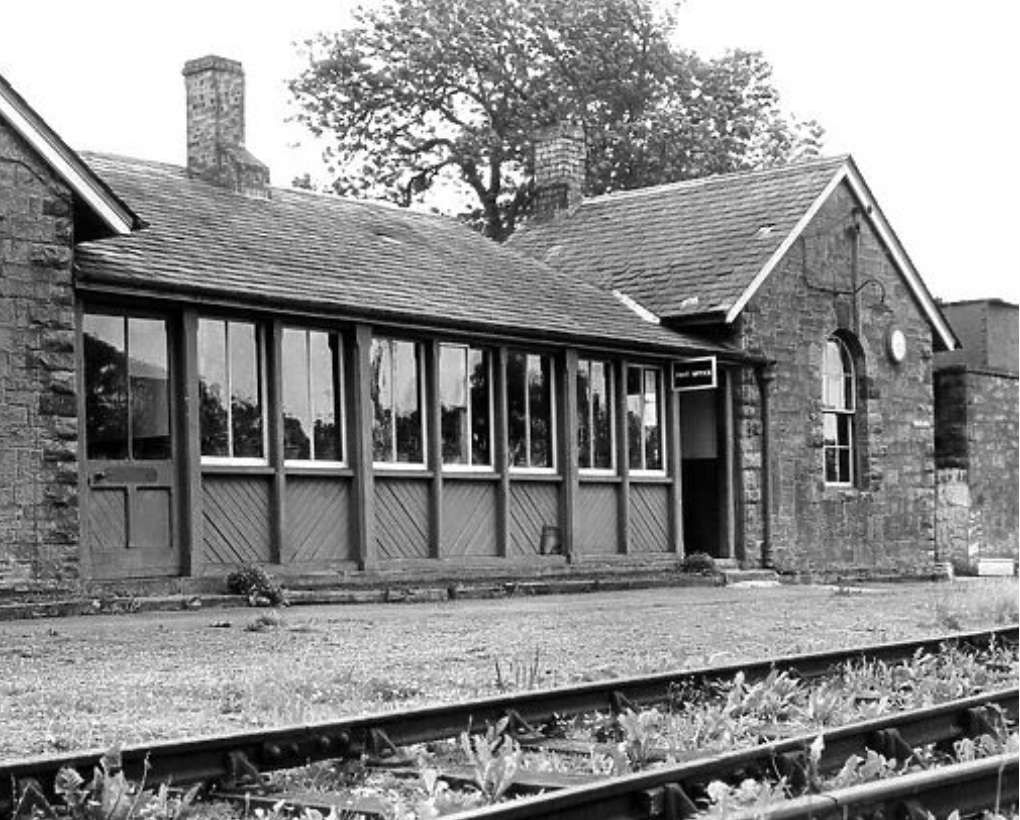
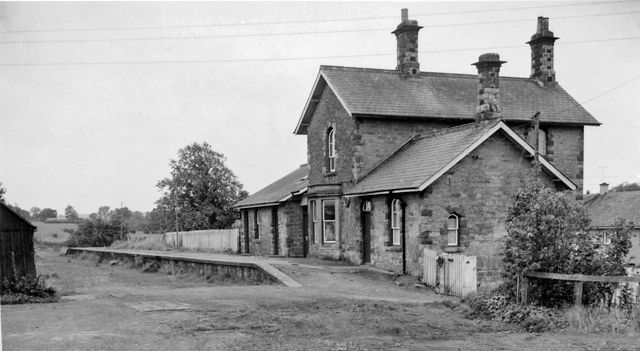
Chollerton Station Waiting Room on 25th August 1959. By then, the railway lines at Chollerton were becoming overgrown with weeds and grass. What was once the station waiting room was now the village Post Office. Media ID 21635767 © Mirrorpix [1]
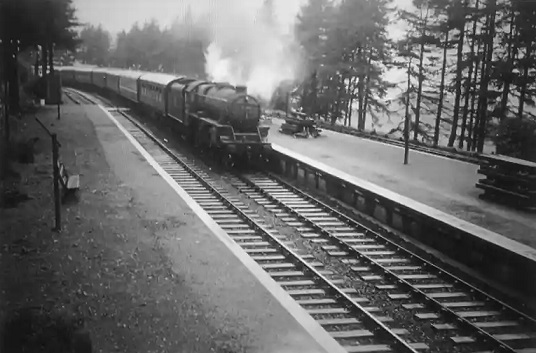
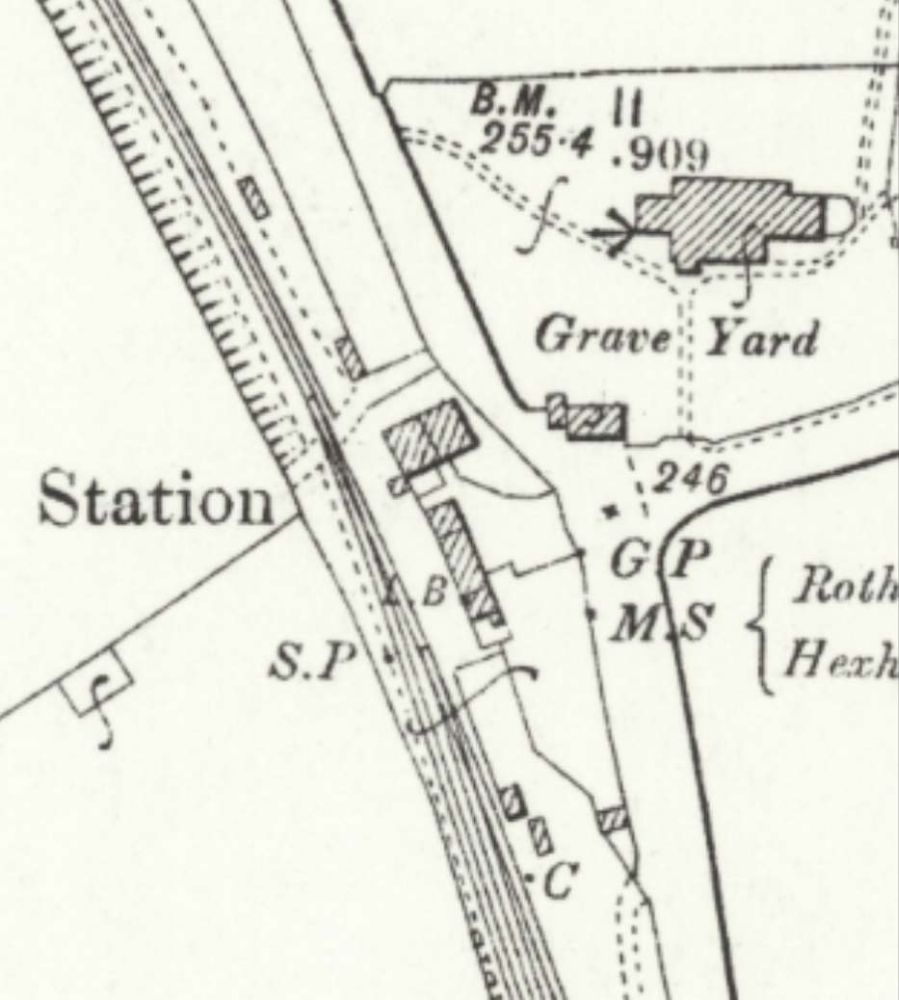
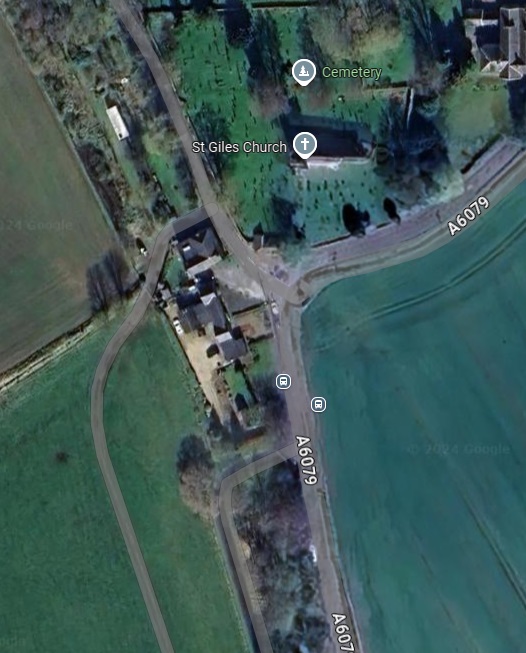
Chollerton Railway Station and St. Giles’ Church. [5]
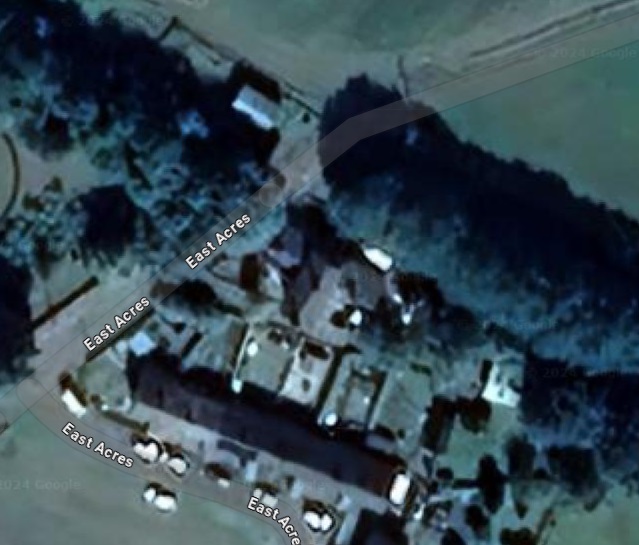
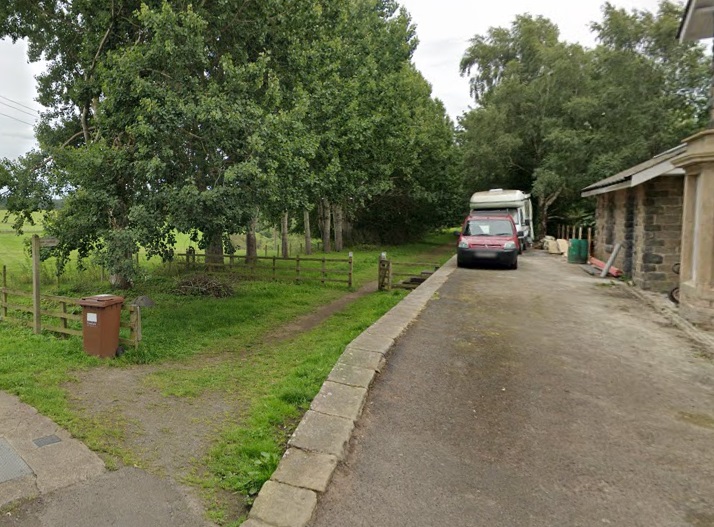
The same area in the 21st century. [Google Maps, October 2024]
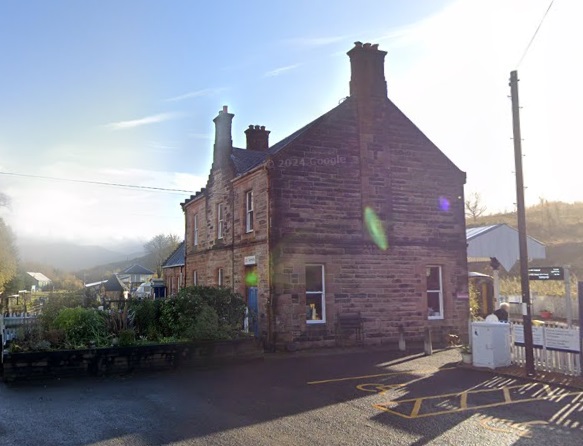
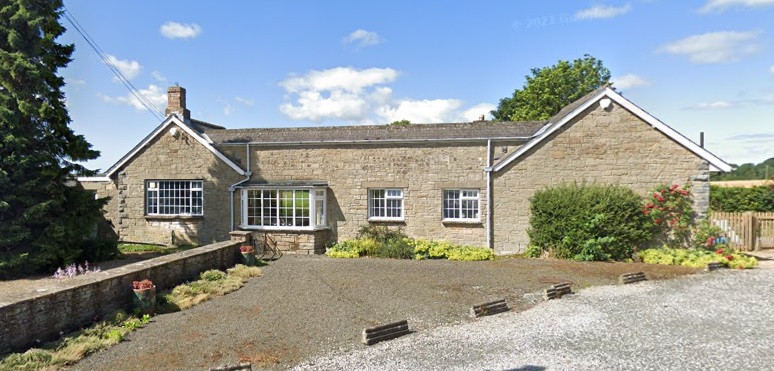
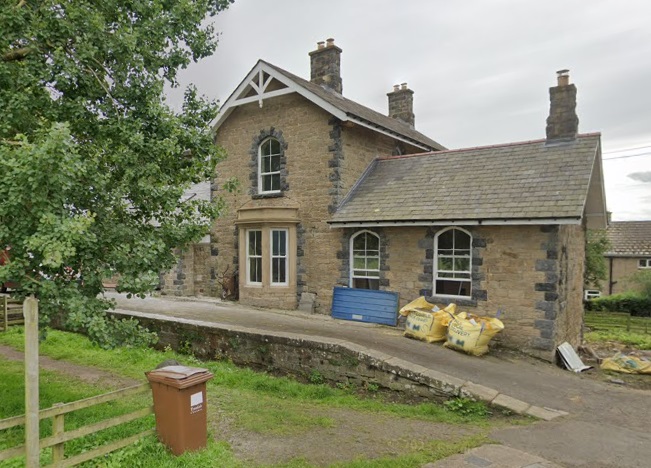
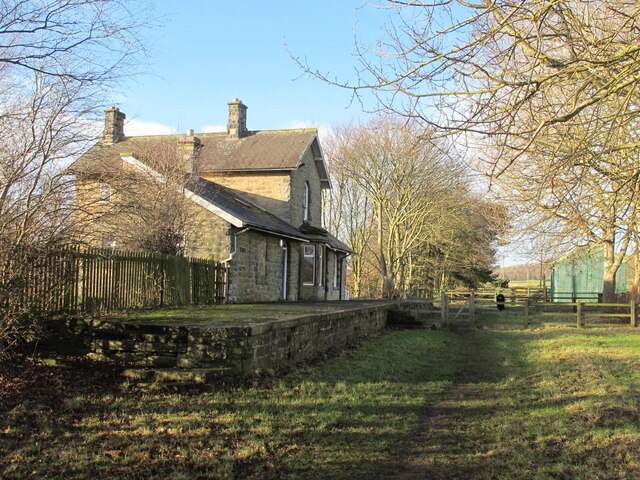
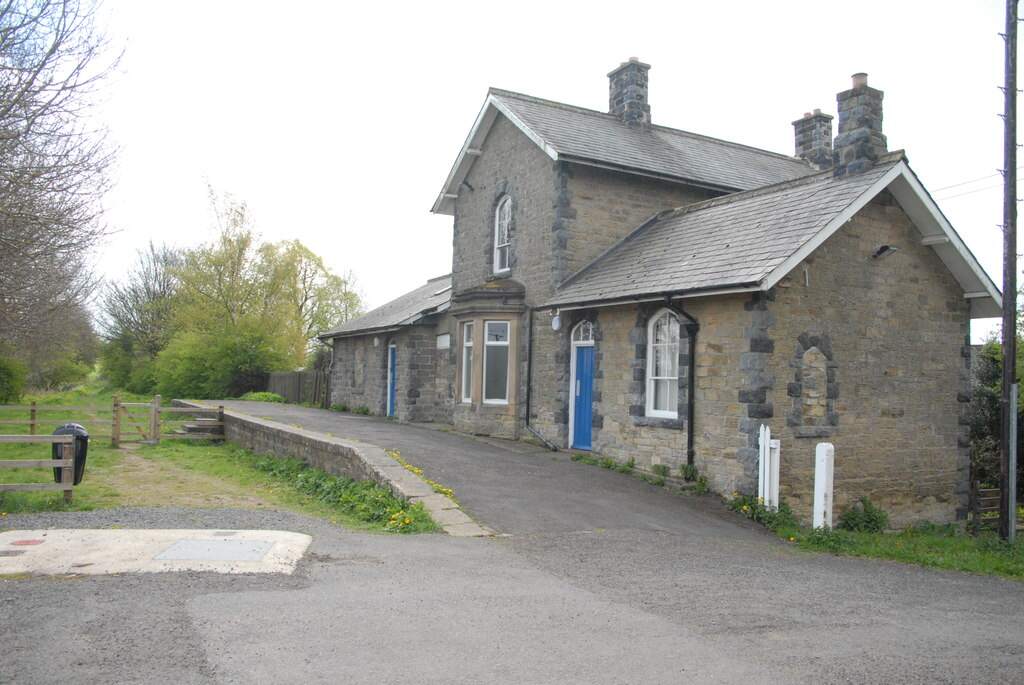
Chollerton Railway Station building in the 21st century, now a private dwelling. [Google Streetview, July 2021]

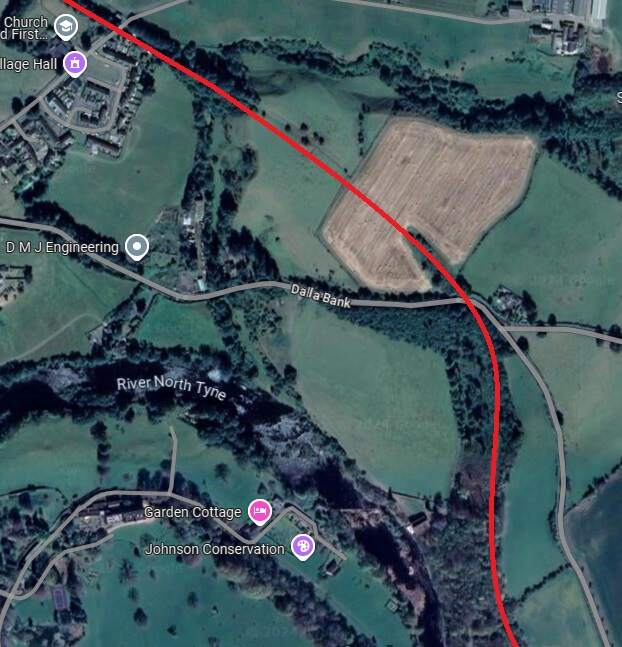
The line travelled on, Northwest from Chollerton, much of the time in deep cutting as far as Dallabank Wood, by which time it was running on a northerly course. Soon after the wood, the line turned towards the Northwest, passed under the local road (Dalla Bank), crossed a short but high embankment under which Barrasford Burn was culverted, and entered Barrasford Railway Station.

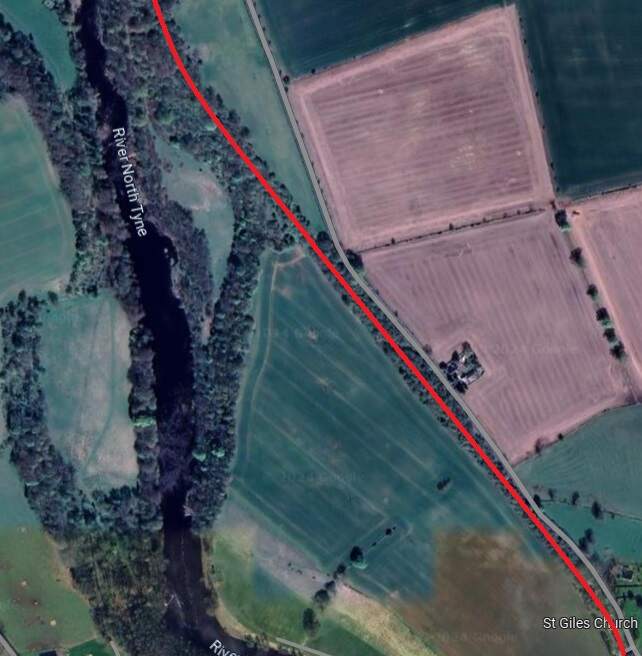
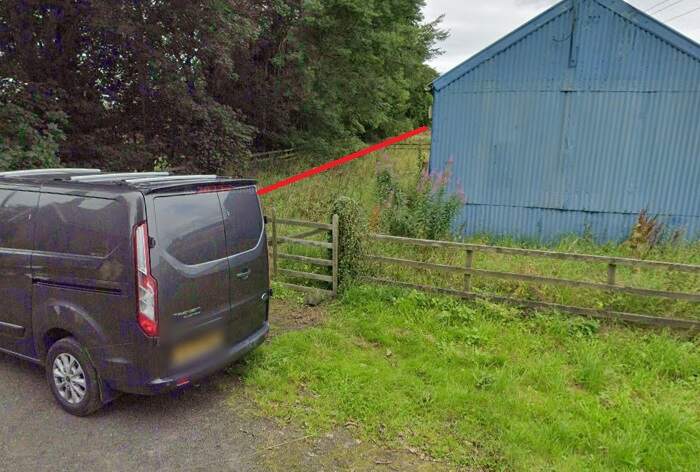
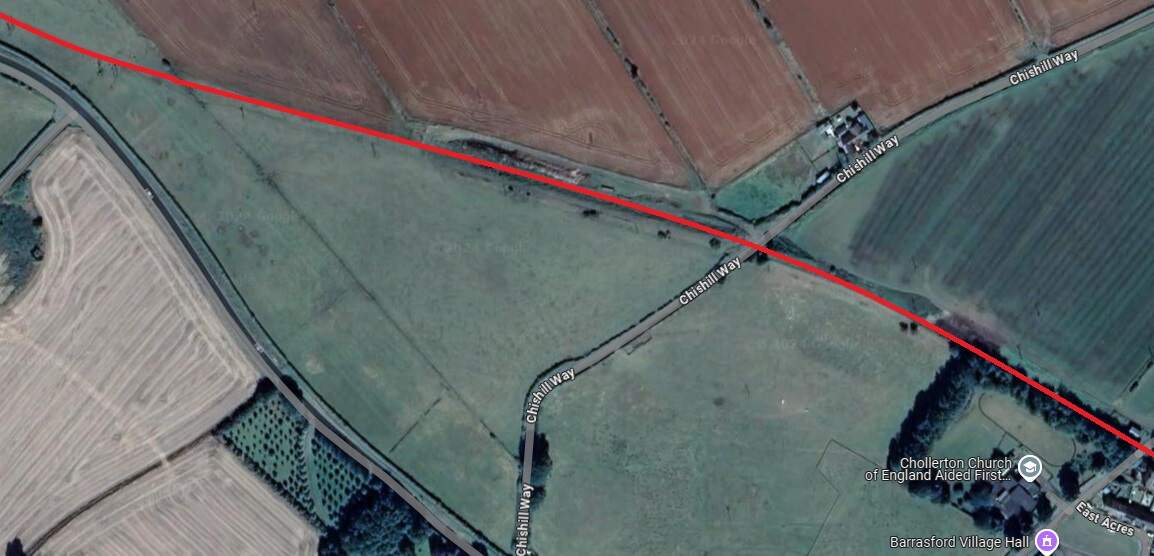
The red line shows the route of the old railway immdiately to the North of Chollerton Railway Station. [Google Maps, October 2024]
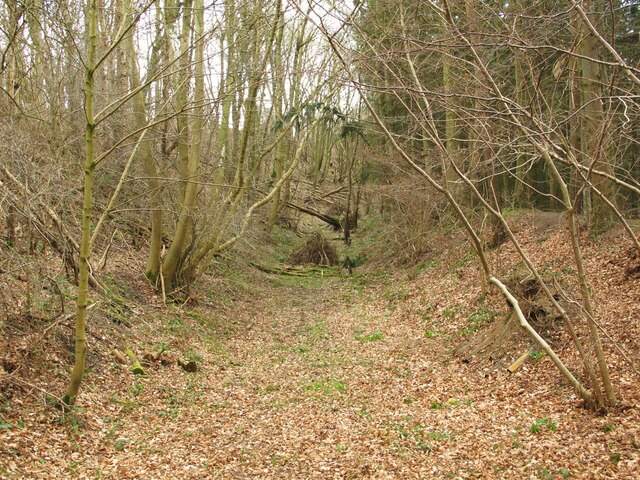
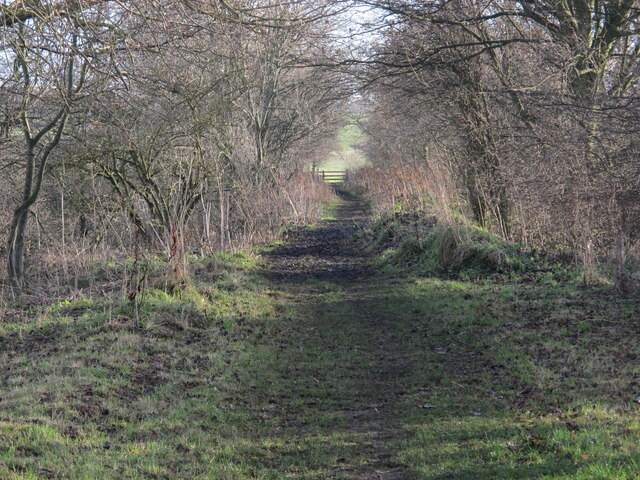
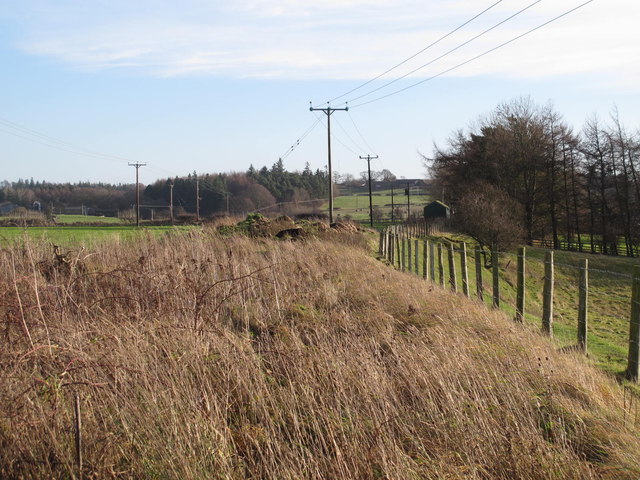
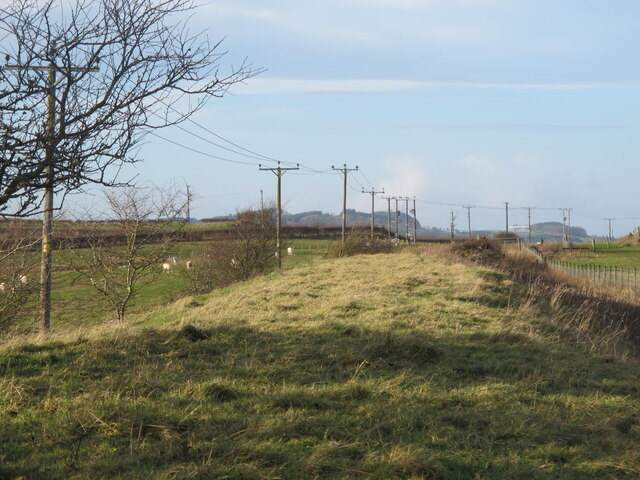
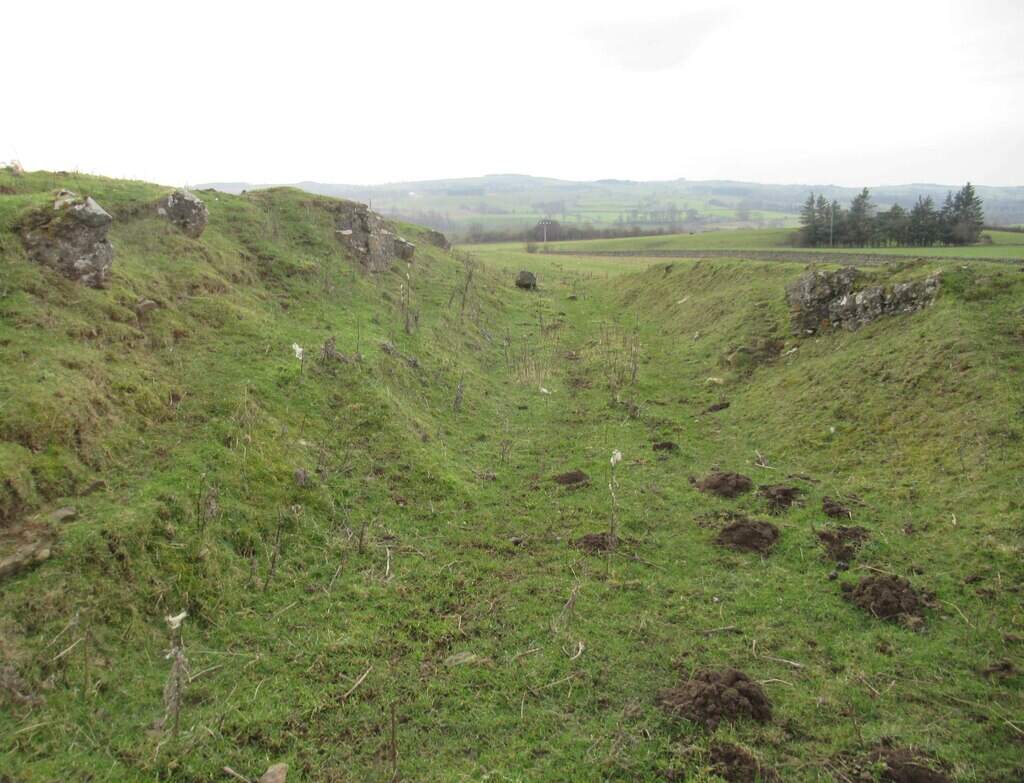
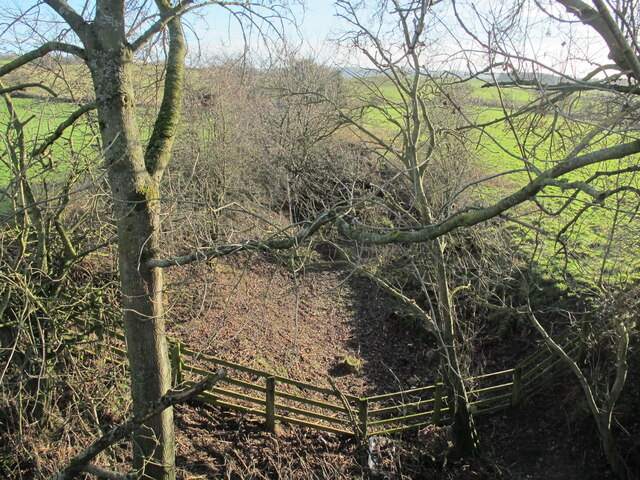
The cutting South of Dalla Bank, Facing towards Chollerton in 2013, (c) Mike Quinn and licensed for reuse under a Creative Commons Licence (CC BY-SA 2.0). [15]
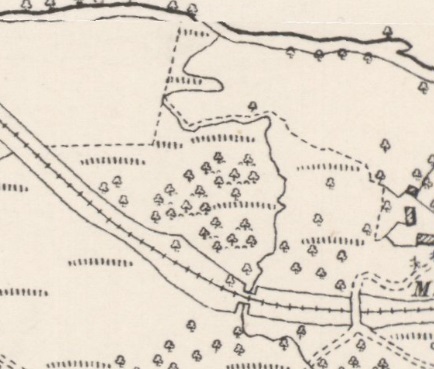
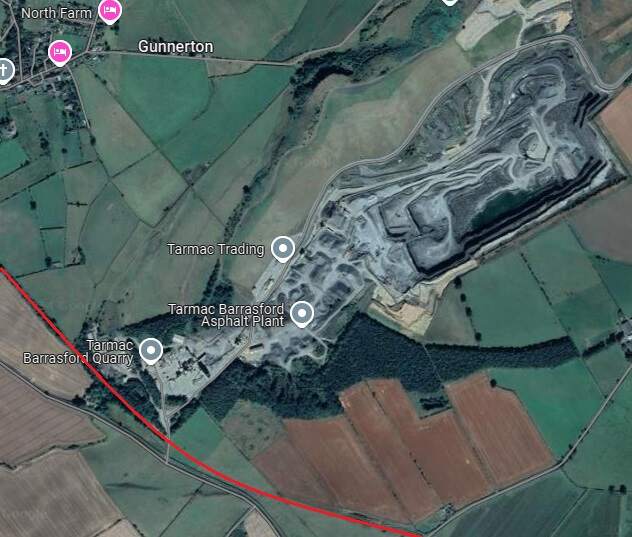
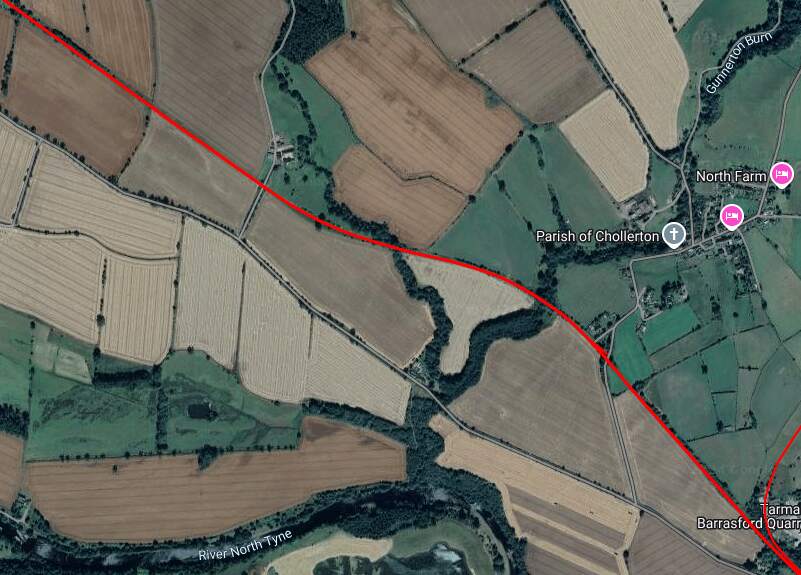
The line continued on as marked by the red line under Dalla Bank and on to Barrasford Station which was located at the top left of this extract from Google’s satellite imagery. [Google Maps, October 2024]
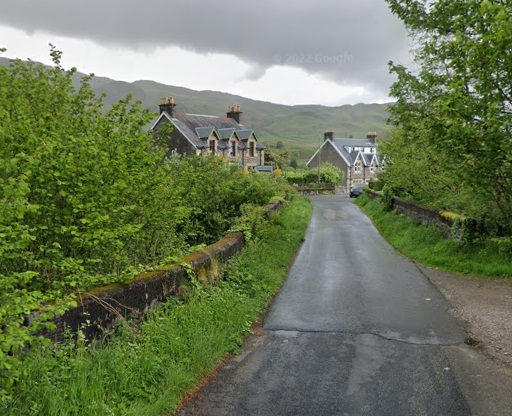
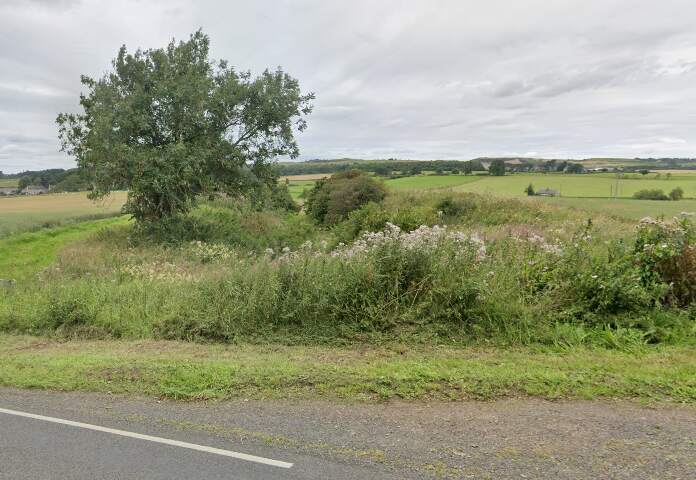
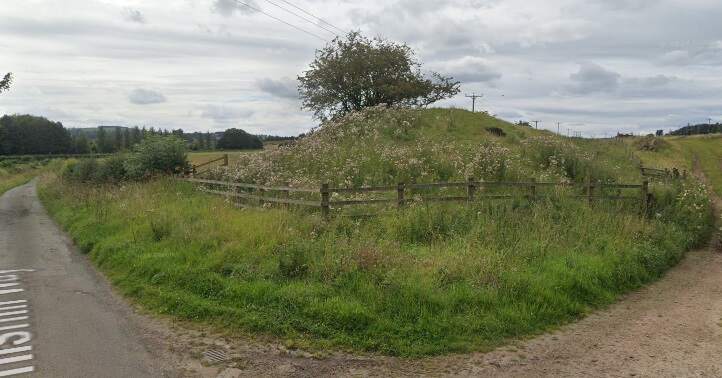
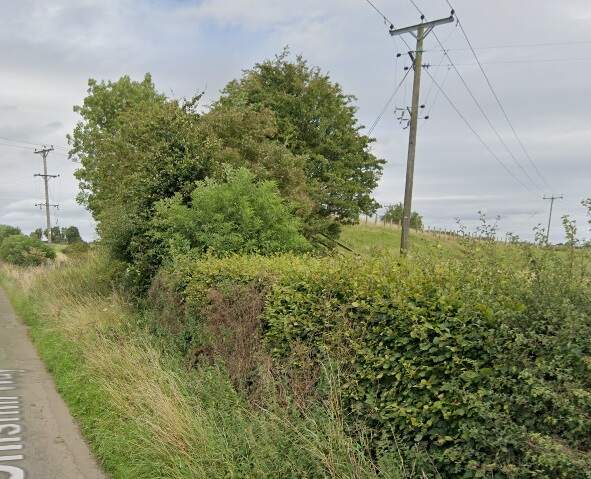
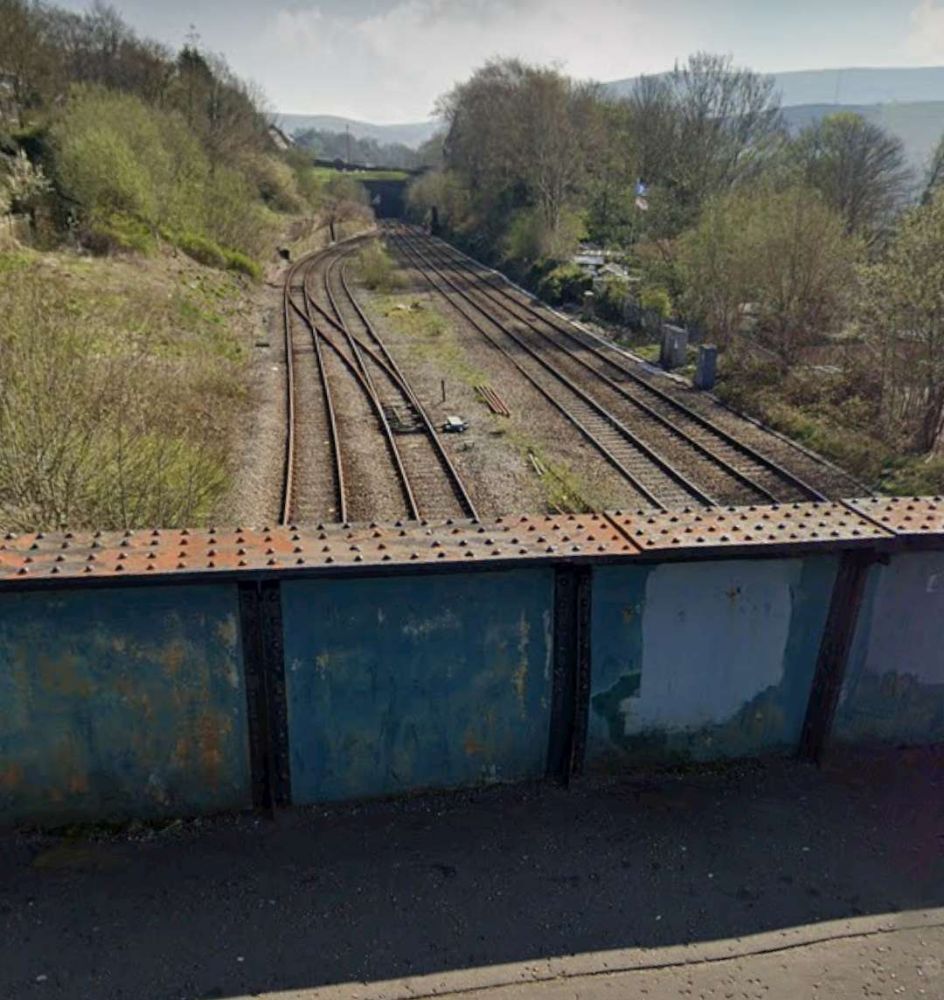
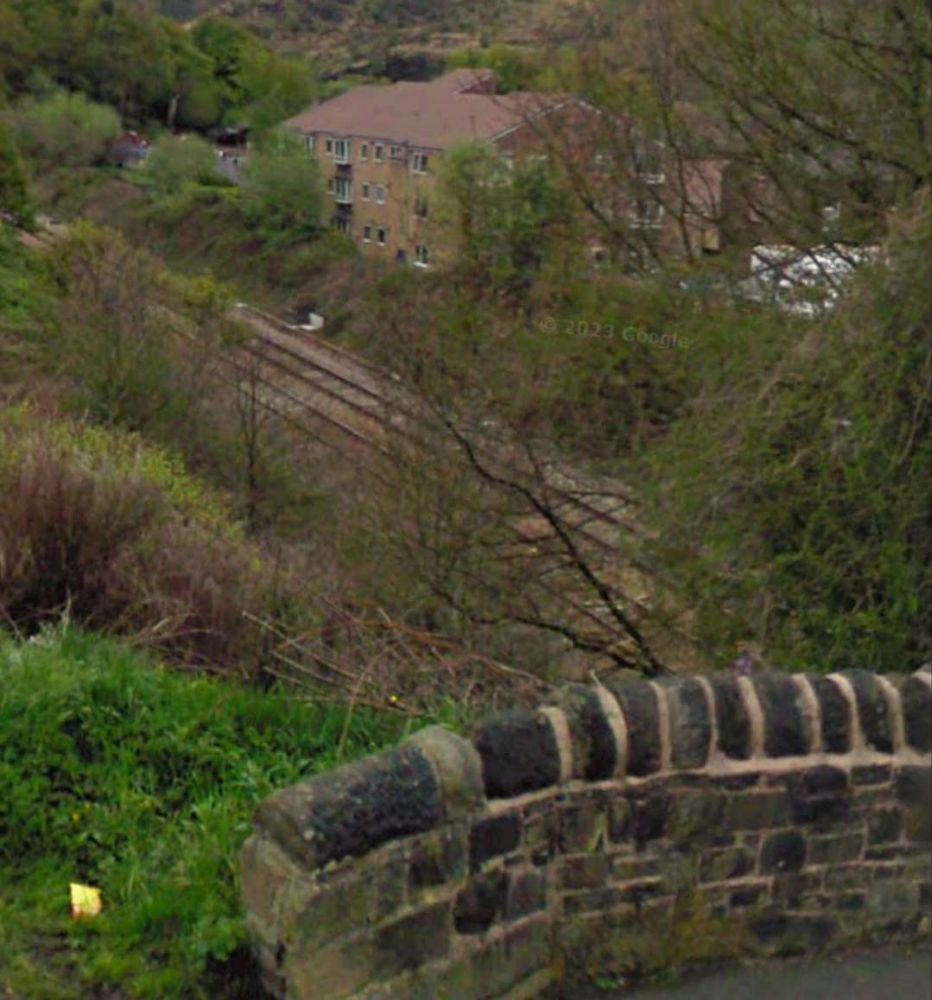
The view along the old railway line North-northwest from Dalla Bank. [Google Streetview, August 2023]
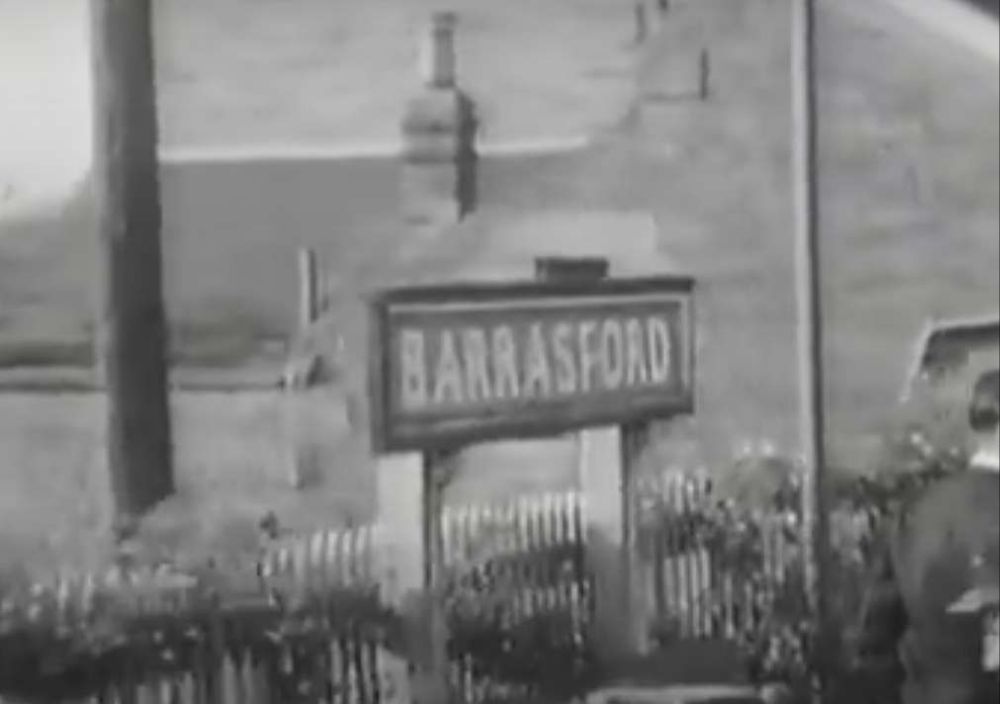
Barrasford Railway Station name-board. [2]

Barrasford Railway Station opened on 1st December 1859 by the North British Railway. The station was situated on a lane to Catheugh, around “200 yards northeast of the centre of Barrasford village. A siding adjoined the line opposite the platform and there was a further loop to the northwest. Both of these were controlled by a signal box, which was at the northwest end of the platform. The station was host to a camping coach from 1936 to 1939.” [4]

Barrasford station was closed to passengers on 15th October 1956 but remained open for goods traffic until 1st September 1958, although it was downgraded towards an unstaffed public siding.” [4]

The trackbed of the old railway looking back to the Southeast close to Barrasford Railway Station in December 2013, (c) Mike Quinn and licensed for reuse under a Creative Commons Licence (CC BY-SA 2.0). [11]
Barrasford Railway Station in 1962, 4 years after the final closure of the line, © Ben Brooksbank and authorised for reuse under a Creative Commons Licence (CC BY-SA 2.0). [4]
Barrasford Railway Station building in the 21st century – in private hands. [Google Streetview, August 2023]
Barrasford Railway Station was just a few hundred yards to the Northeast of the village of Barrasford. [6]
The same location in the 21stcentury. [Google Maps, October 2024]
The former Barrasford Station building seen from the East in 2013, (c) Mike Quinn and licensed for reuse under a Creative Commons Licence (CC BY-SA 2.0). [10]
Barrasford Railway Station in 2010, (c) Steve Wright and licensed for reuse under a Creative Commons Licence (CC BY-SA 2.0) [12]
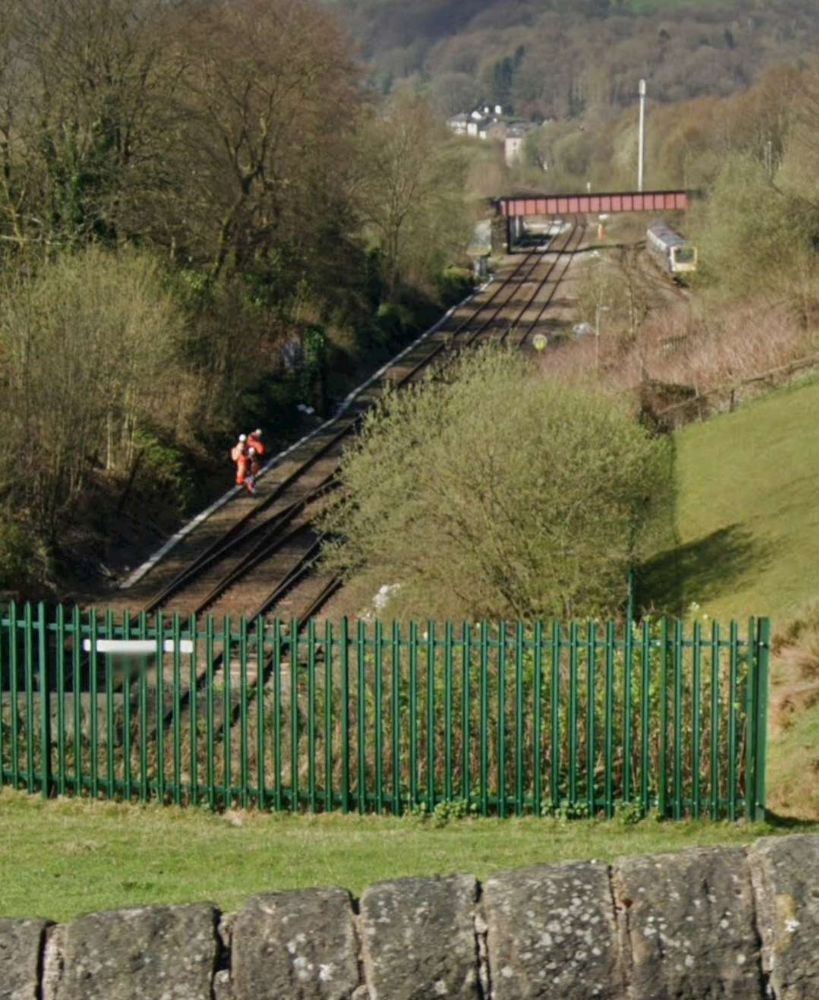
Looking back Southeast towards Chollerton. A footpath follows the line of the old railway. [Google Streetview, August 2023]
The line ahead to the Northwest is marked by the red line. [Google Streetview, August 2023]

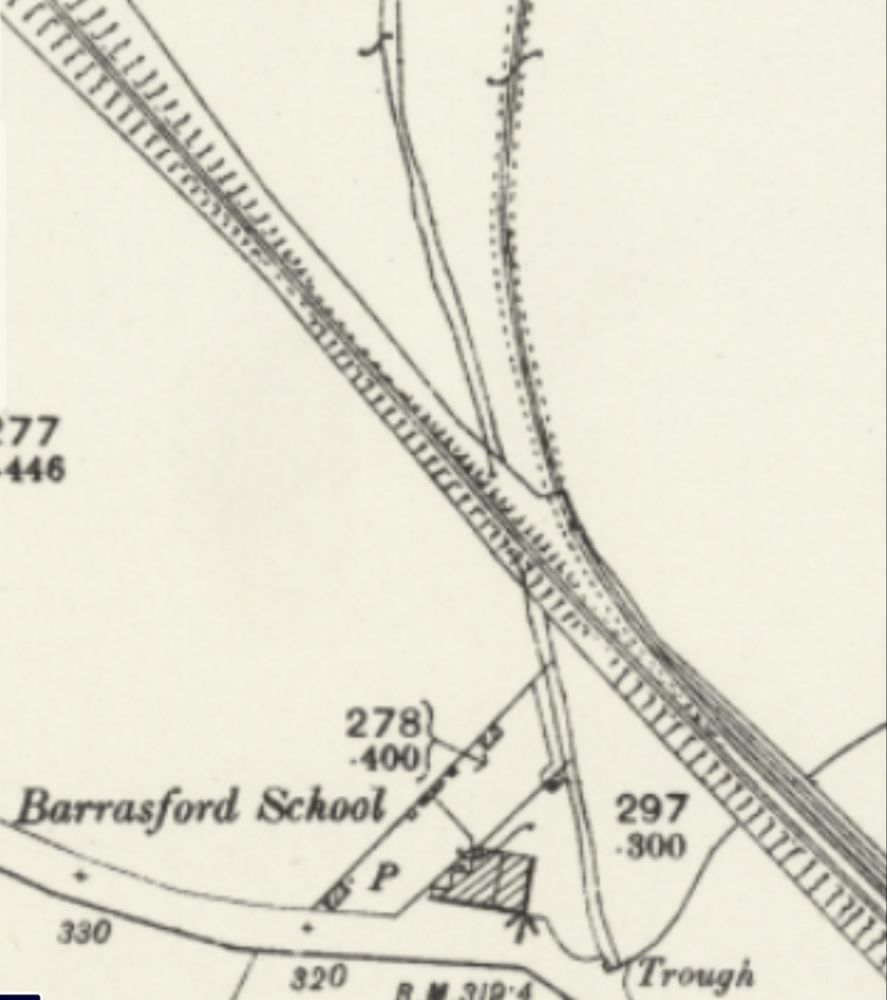
A short distance Northwest of Barrasford Railway Station, was Barrasford Quarry which was provided with its own siding.

The line Northwest of Barrasford Railway Station. [Google Maps, October 2024]
The track bed of the old railway a little to the Northwest of Barrasford Railway Station, looking back along the line towards the station in December 2013, (c) Mike Quinn and licensed for reuse under a Creative Commons Licence (CC BY-SA 2.0). [12]
Looking back towards Barrasford Station from Chishill Way. The line was carried at high level over the road. Only the embankments remain. [Google Streetview, August 2023]
A wintertime view along the old railway to the West from the East side of Chishill Way, in December 2013, (c) Mike Quinn and licensed for reuse under a Creative Commons Licence (CC BY-SA 2.0). [13]
Looking West from Chishill Way. The railway embankment is to the right of the trees. [Google Streetview, August 2023]
The track bed further West from Chswell Way, in December 2013, (c) Mike Quinn and licensed for reuse under a Creative Commons Licence (CC BY-SA 2.0). [14]
Barrasford Quarry Sidings and Tramway. [7]
Tarmac’s quarry at Barrasford is a much larger affair in the 21st century. [Google Maps, October 2024]
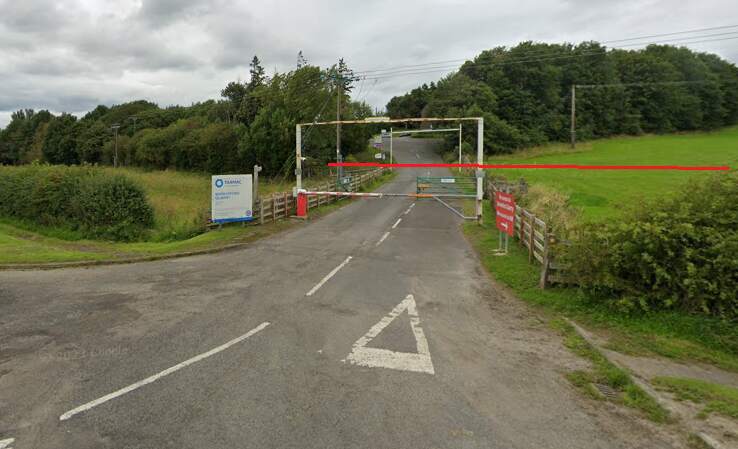
The entrance to Barrasford Quarry. The red line indicates the approximate route of the old railway which is treelined to the West of the quarry road and through open fields to the East of the quarry road. The siding was on the North side of the line. [Google Streetview, August 2023]
Just to the Northwest of Barrasford Quarry Siding was a branch line to Camp Hill, Gunnerton Quarry.This branhc was about 2 miles in length and is recorded on some maps as an old Waggonway. [8]
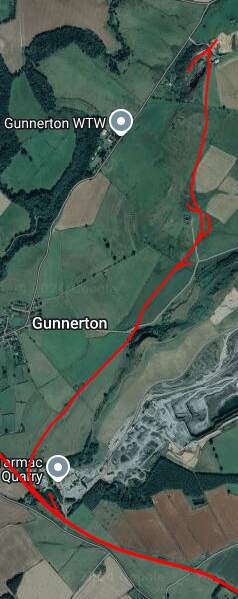
The same location in the 21st century with the old railways superimposed. [Google Maps, October 2024]

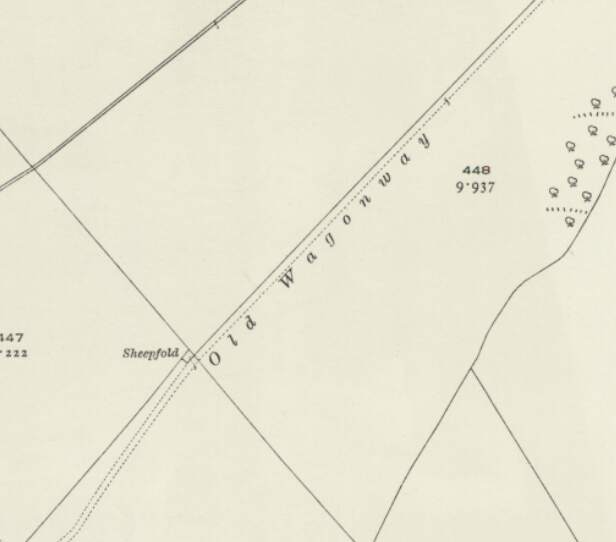
The Camp Hill Branch as shown on satellite imagery from Railmaponline.com. The branch was a short industrial line serving a relatively small quarry to the North of Barrasford Quarry. It appears to have been disused by 1920 as one of the local OS Map sheets across which the line travels shows the line lifted by that time and referred to as an ‘Old Waggonway”. The line is present on map sheets surveyed in 1895.

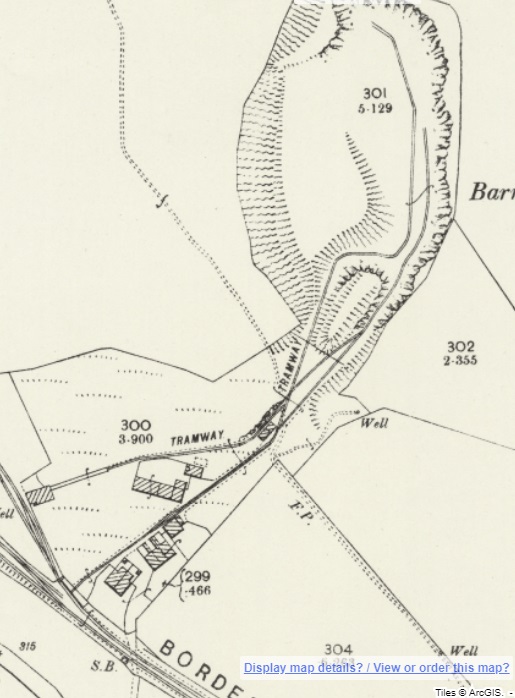
A short section of the Camp Hill Branch Line as shown on the 1920 25″ Ordnance Survey which was published in 1922. [18]
The view South along the line of the Clay Hill Branch towards the Border Counties Railway in February 2023, © Les Hull and licensed for reuse under a Creative Commons Licence (CC BY-SA 2.0). [30]
The Border Counties Railway to the Northwest of the junction with the Camp Hill Branch. [17]
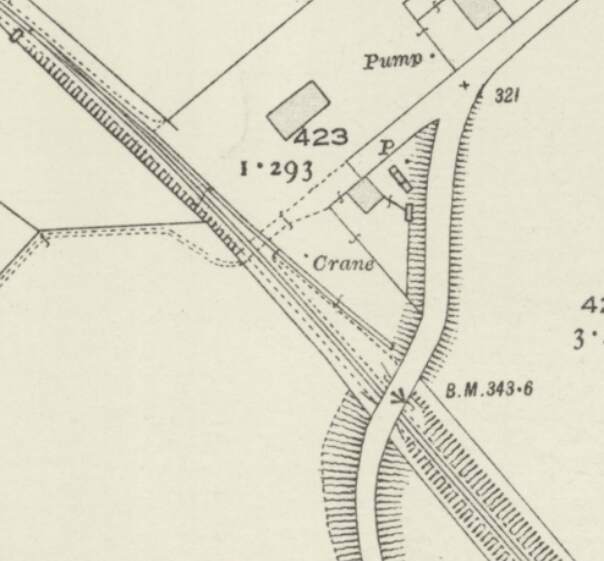
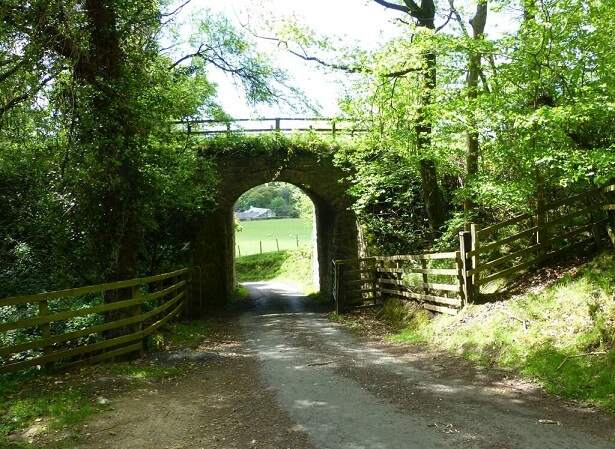
The road overbridge on the road South from Gunnerton as shown in the Google Streetview image below. There was an adjacent siding with a crane at this location in 1920. This is an extract from the 1920 25″ Ordnance Survey. [19]
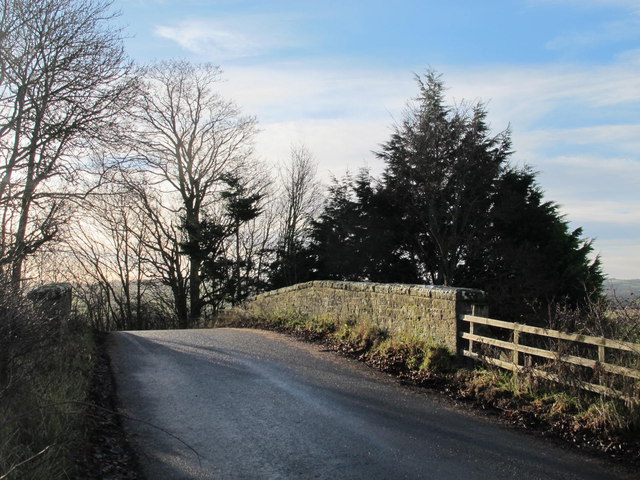
Looking to the Southwest along the road South from Gunnerton at the point where it bridged the Border Counties Railway in December 2013, (c) Mike Quinn and licensed for reuse under a Creative Commons Licence (CC BY-SA 2.0). [16]
The view Southeast from the bridge in the image above in December 2013, (c) Mike Quinn and licensed for reuse under a Creative Commons Licence (CC BY-SA 2.0). [22]

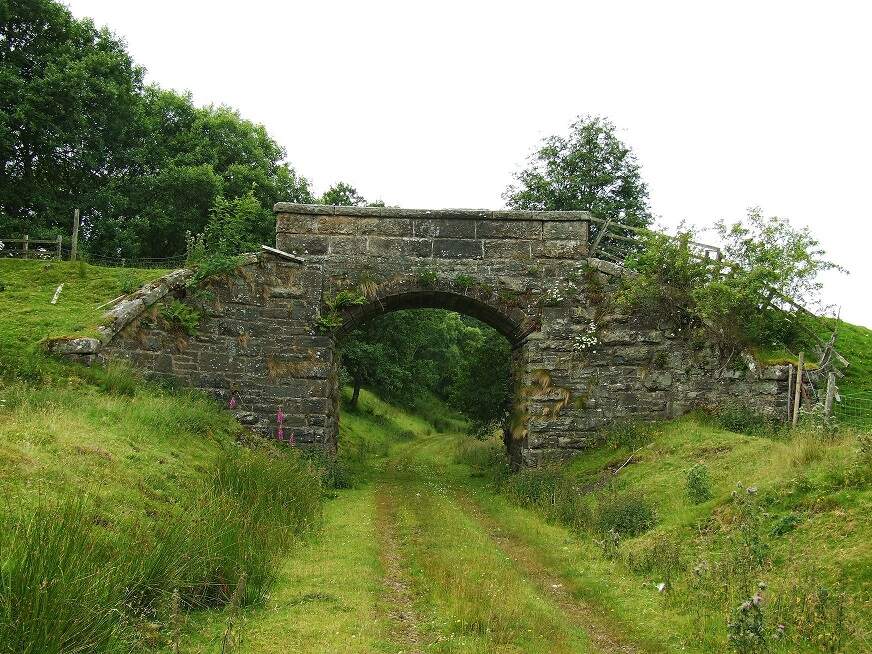
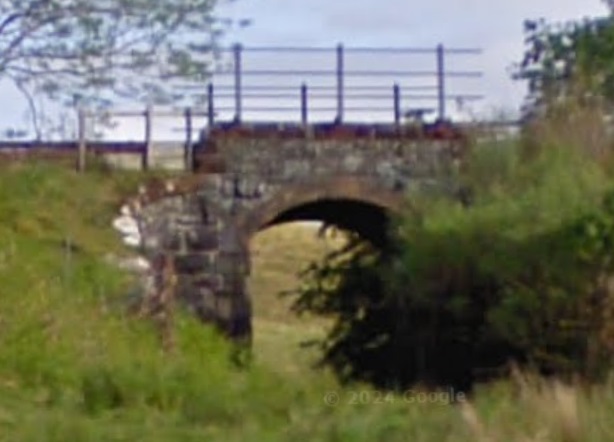
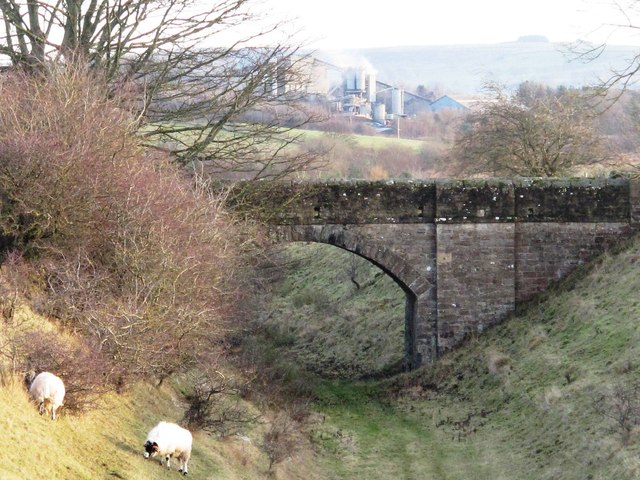
A little further to the Northwest, the access road to Short Moor crossed the old railway. Just before that lane there was another stone bridge which gave access between fields either side of the line.

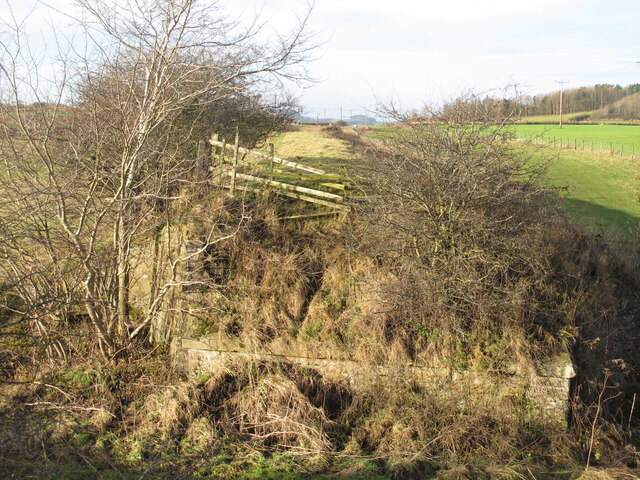
Stone bridge Southwest of the Short Moor access road in December 2013, (c) Mike Quinn and licensed for reuse under a Creative Commons Licence (CC BY-SA 2.0). [28]
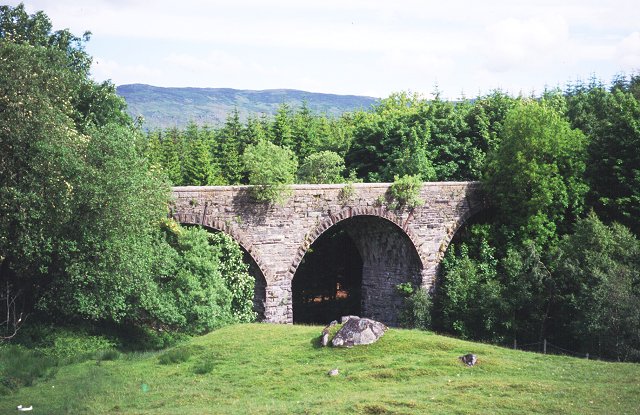
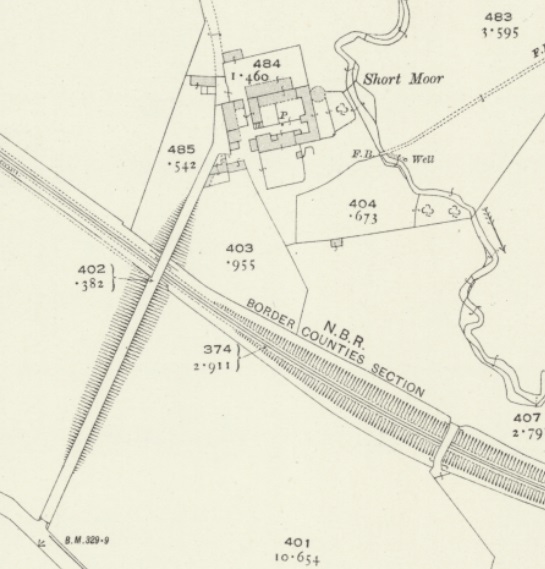
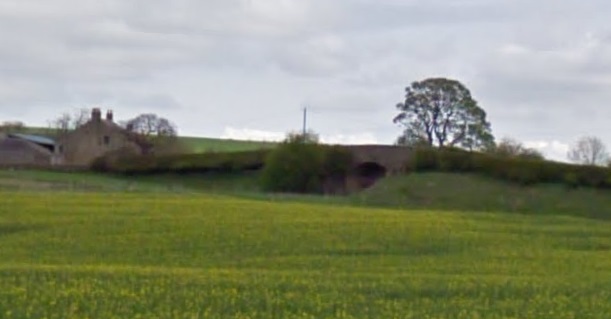
Two bridges crossed the line close to Short Moor. [29]

A distant view from the Southwest of the bridge carrying the access road to South Moor which is on the left of this image. The stone-arched bridge is just to the right of centre. [Google Streetview, April 2011]

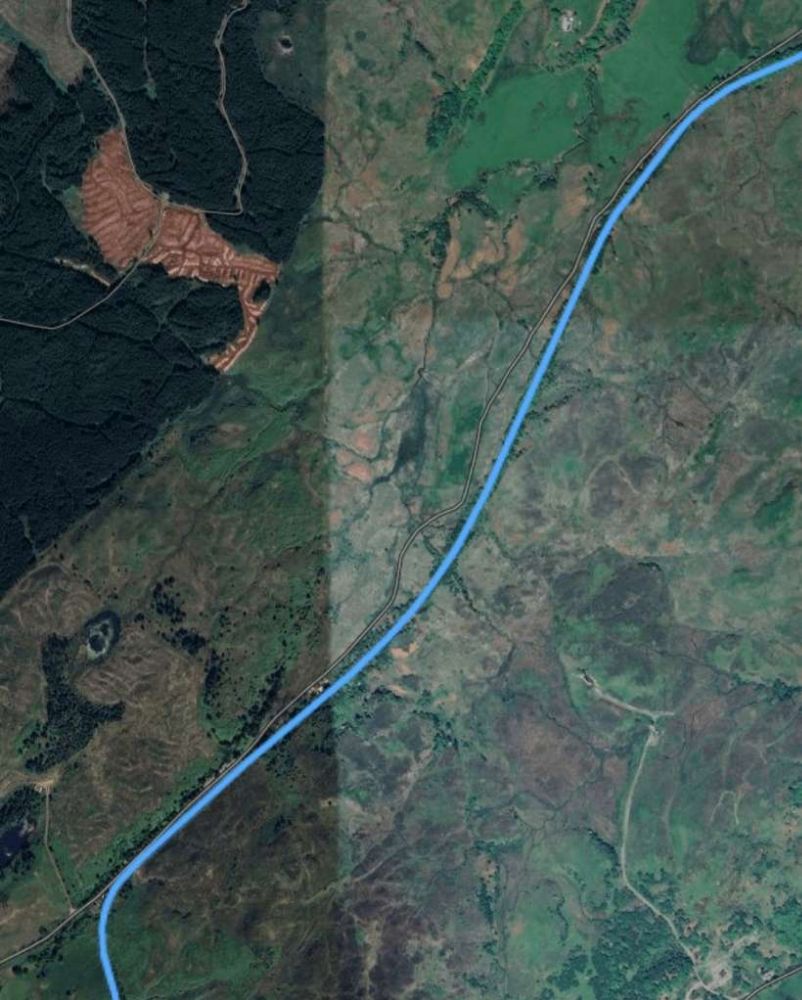
Further to the Northwest, the line as shown on the railmaponline.com satellite imagery. {17}
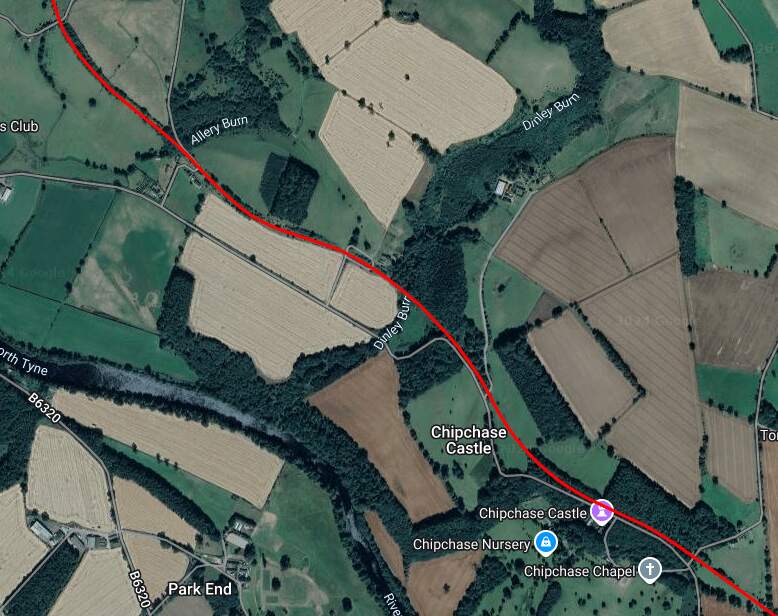
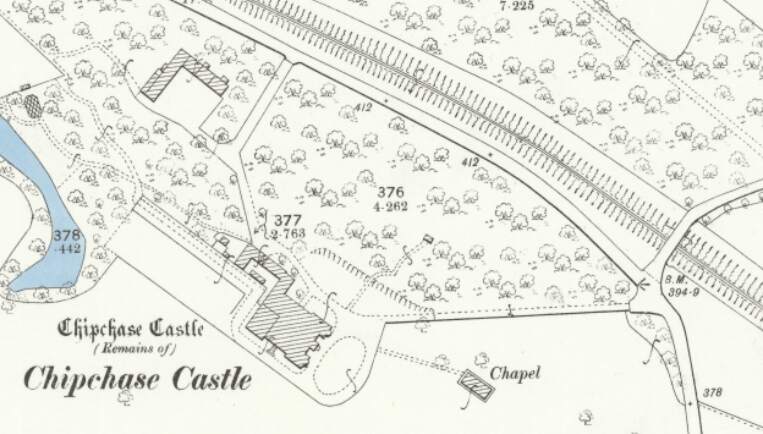
The line ran on to the Northwest and this is the next significant point on the old railway. Close to Chipchase Castle the line was bridged by a minor road. [20]
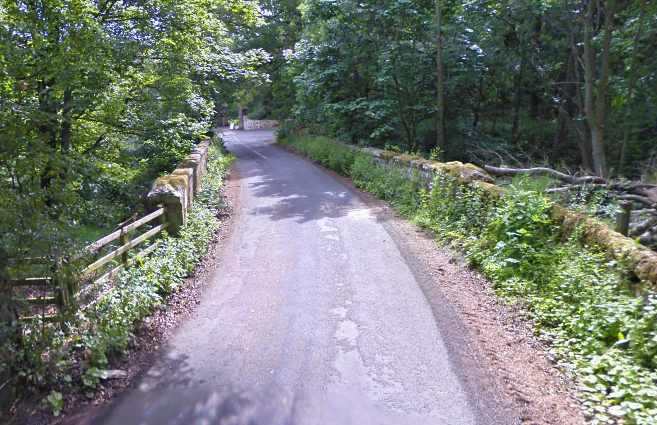
The view across the old railway bridge from the Northeast. [Google Streetview, June 2009]
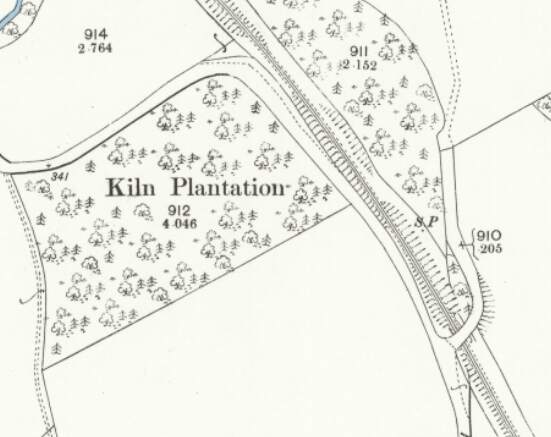
This next roadoverbridge carries an access road over the Border Counties Railway close to Kiln Plantation shortly before the highway turns away from the railway to the West along the North side of the plantation. [21]
The view from the South of the road bridge in the map extract above. [Google Streetview, April 2011]
The same structure in a photograph taken by Paul Hill and shared by him on the Border Counties Railway Facebook Group on 17th August 2020. [23]

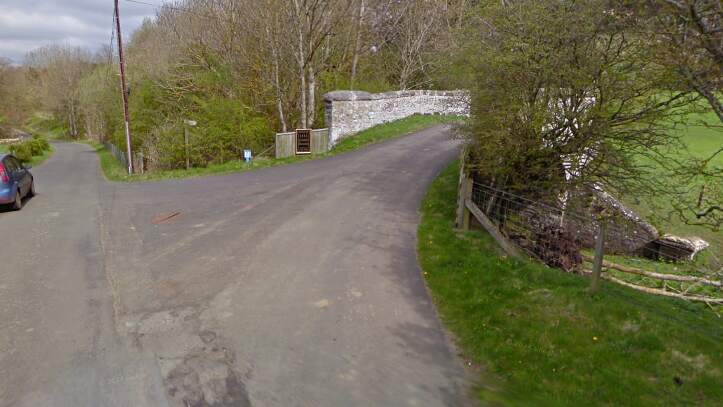
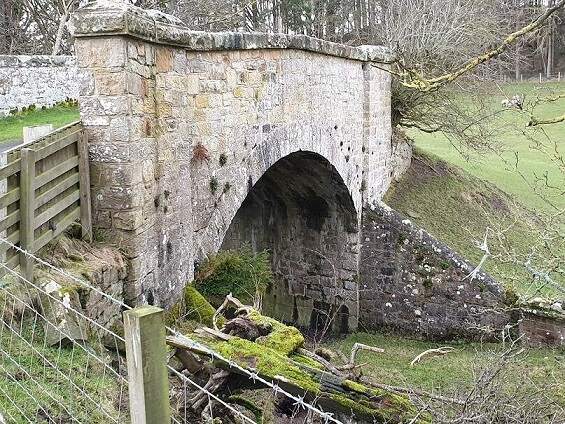
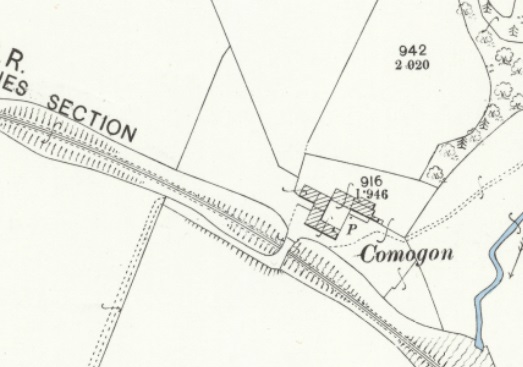
A short distance to the Northwest another access road runs off the highway and crosses the Border Counties Railway.

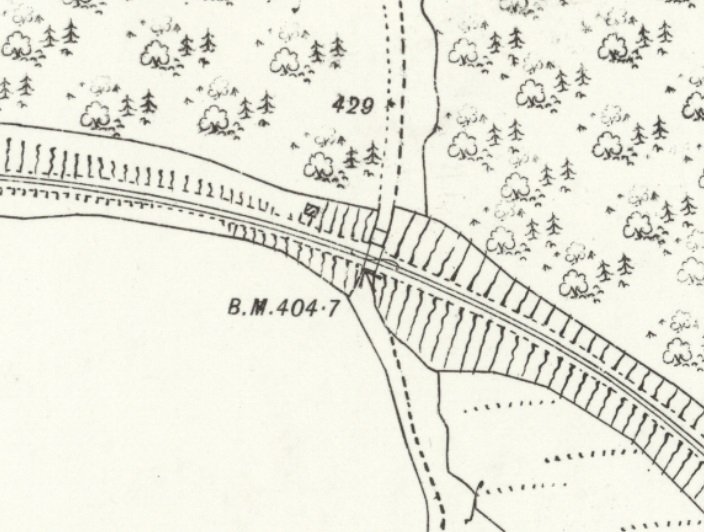
This map estract shows the lane leading to Comogon in 1920, which was carried over the old railway by means of a private access bridge. [24]
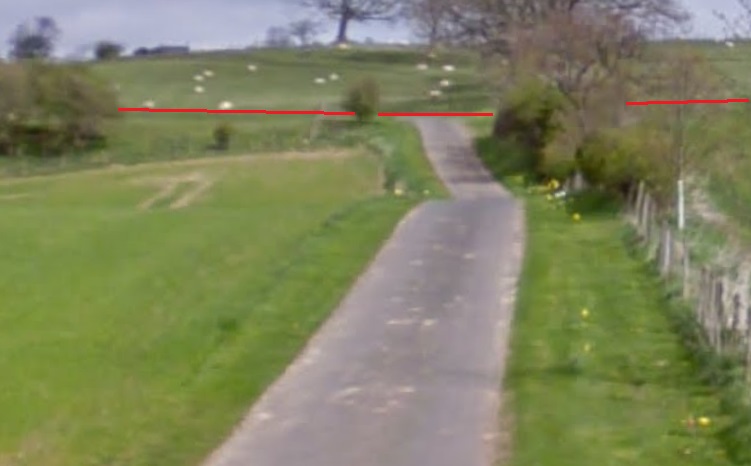
The access road is private and this is the closest view of the old line at this location that is possible. The red lines show its route which was in a slight cutting to the right of the access road and a slight embankment to the left of the road. [Google Streetview, April 2011]
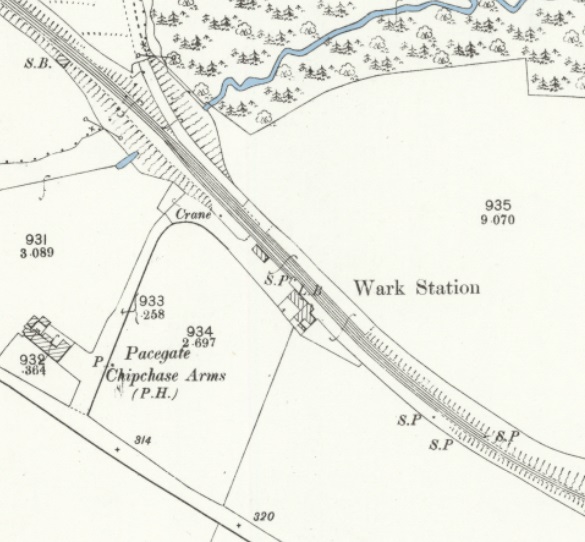
Wark Railway Station as shown on the 25″ Ordnance Survey of 1895. [25]
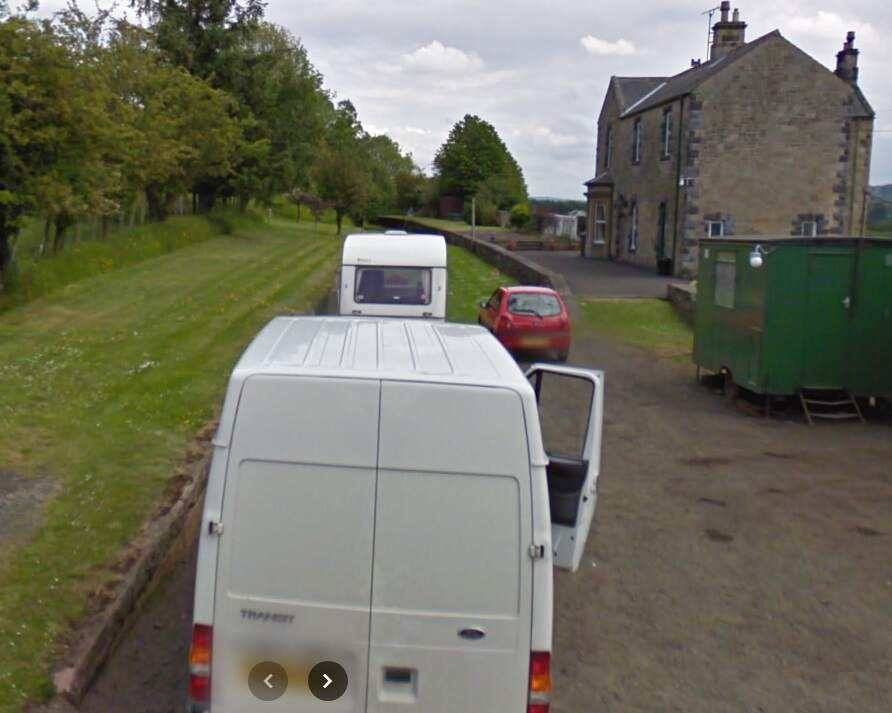
The view Southeast along the Border Counties Railway through Wark Railway Station. [Google Streetview, June 2009]
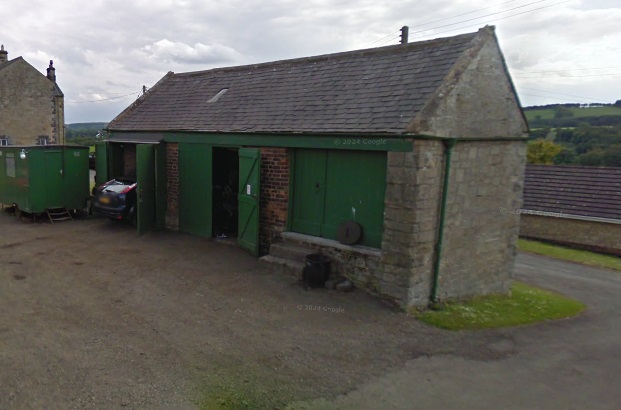
The Goods Shed at Wark Railway Station. [Google Streetview, June 2009]
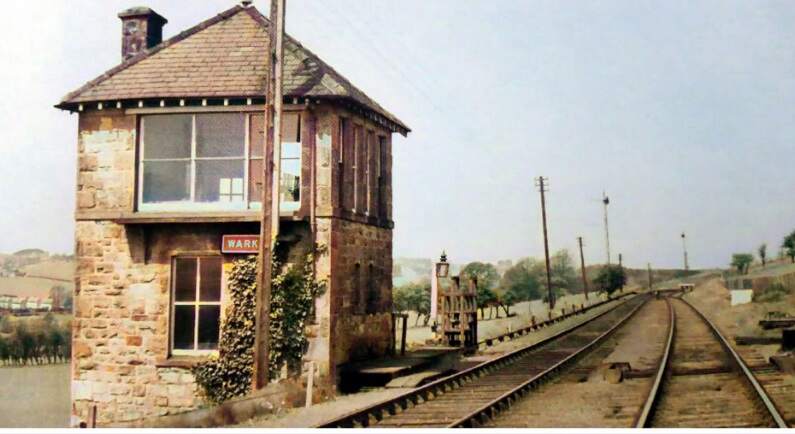
Wark Signal Box when still in use. It sat just Northwest of the station platforms. This image was shared by Ian Farnfield on the Border Counties Railway Facebook Group on 6th April 2022. The provenance of this image is not known. [26]
Wark Signal Box in the 21st century. This image was taken by Ian Farnfield and shared by him on the Border Counties Railway Facebook Group on 6th April 2022. [26]

A short distance Northwest from Wark Railway Station the Border Counties Railway passed under another minor road.

This next extract from the 1895 25″ Ordnance Survey shows that bridge mentioned above crossing the old railway. [27]
The bridge mentioned above. [Google Streetview, July 2023]

From this point, the line turns to a more northerly direction as this next extract from the railmaponline.com satellite imagery shows. An accommodation track and Blind Burn next passed under the line of the railway. The image below shows the location.

The view Northeast along Piper Gate towards what was a bridge carrying the Border Counties Railway over the Burn and road. [Google Streetview, Aril 2011]

Northwest of Piper Gate a private access road follows the track bed to a private dwelling. Further North another access track passed underneath the line (shown in the first map extract below)

The access road to what is now R.D. Archer & Son. [31]
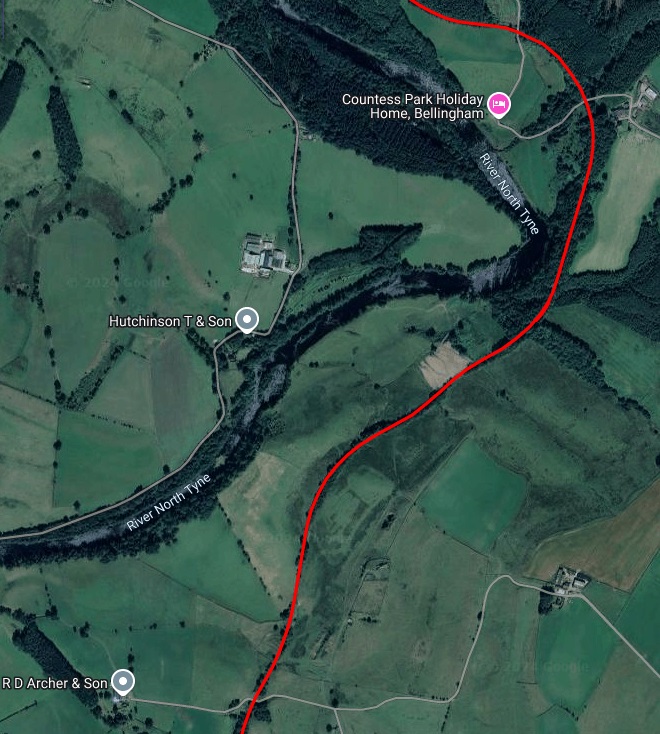
Over the next length of the line it ran quite close to the River North Tyne swinging to the East and then relatively sharply to the West Much of this length of the line was on embankment and a series of cattle-creeps were needed for access between farm fields. [17]
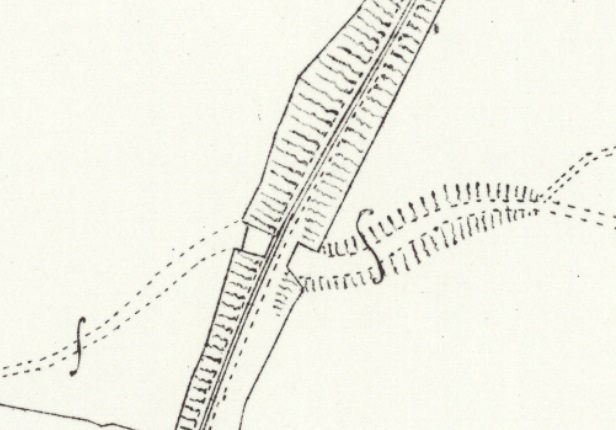
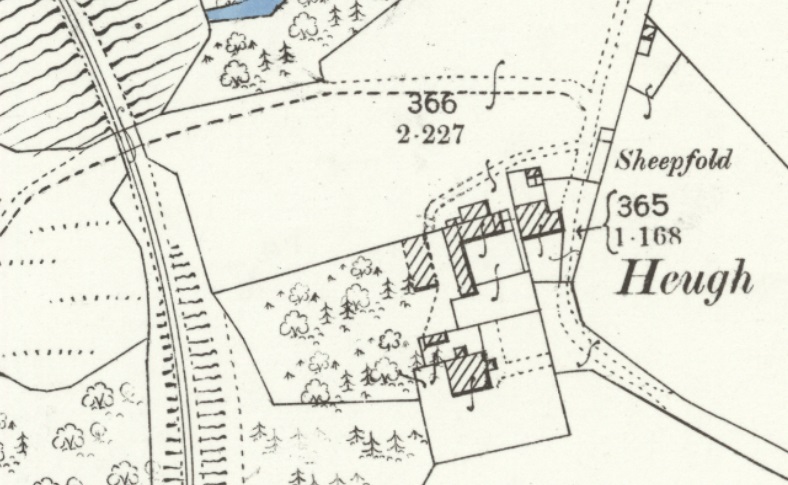
Close to Heugh, the line bridged a track which led West towards Countess Park at the river’s edge. [32]
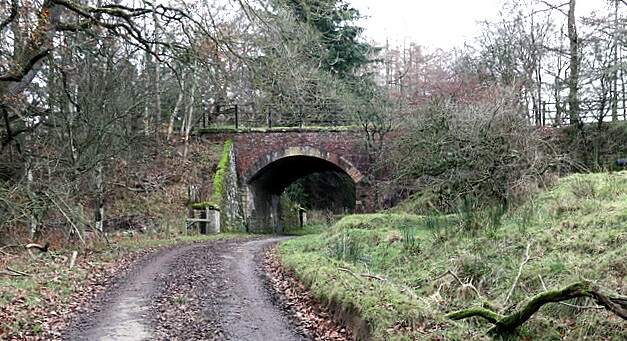
The bridge adjacent to Heugh seen from the West in November 2020, © Andrew Curtis and licensed for reuse under a Creative Commons Licence (CC BY-SA 2.0). [35]
A second access road to Countess Park ran North-South and was also bridged by the old railway. [33]
The bridge shown on the map extract immediately above, seen from the North in May 2019, © Russel Wills and licensed for reuse under a Creative Commons Licence (CC BY-SA 2.0). [34]

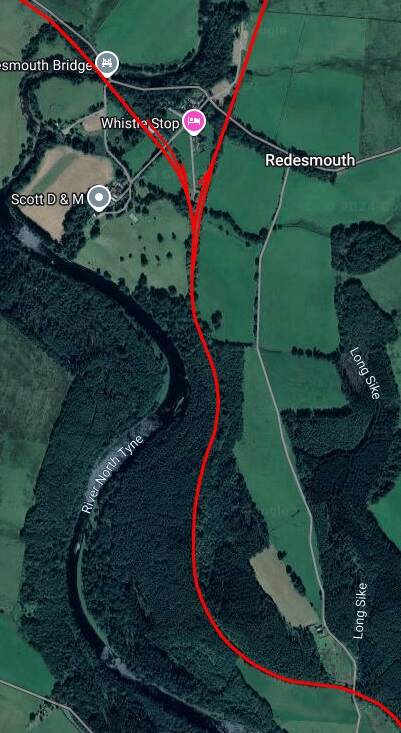
Continuing North from Countess Park alongside the River North Tyne, the Border Counties Railway reaches Redesmouth Railway Station which was a junction station.

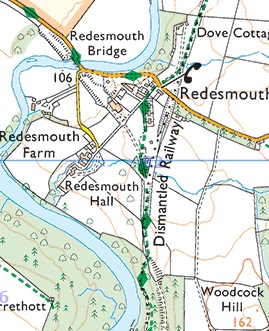
Redesmouth as shown on the OS Explorer Map Sheet. The dismantled railways can easily be seen. The Border Counties Railway bears Northwest from the Station and crosses the River North Tyne.

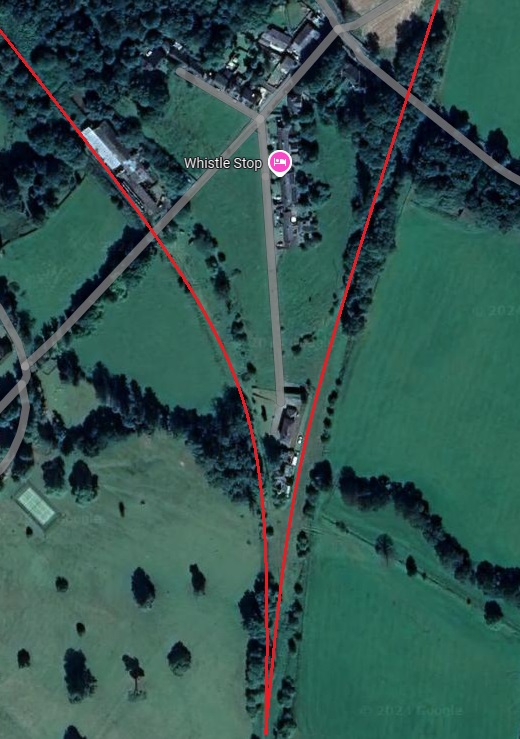
The two images immediately above focus on the railway infrastructure at Redesmouth which spreads over quite a large site surrounding the hamlet of Redesmouth. [Google Maps, October, 2024] [36]

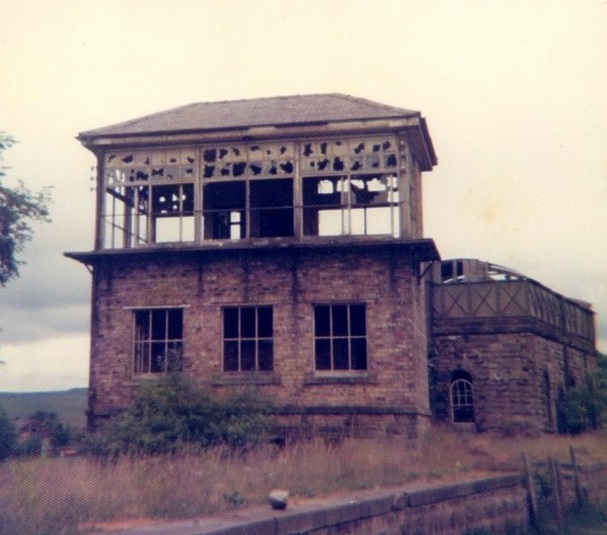
The Signal Box and Waiting Room/Water Tower at Redesmouth Junction. [39]
The Signal Box and Water Tank (with waiting room beneath) at Redesmouth Station, seen from the South in May 1975 after closure and before renovation as a private home, © pt and licensed for reuse under a Creative Commons Licence (CC BY-SA 2.0). [37]
The renovated signal box and waiting room at Redesmouth as seen in May 2007, © Les Hull and licensed for reuse under a Creative Commons Licence (CC BY-SA 2.0). [38]
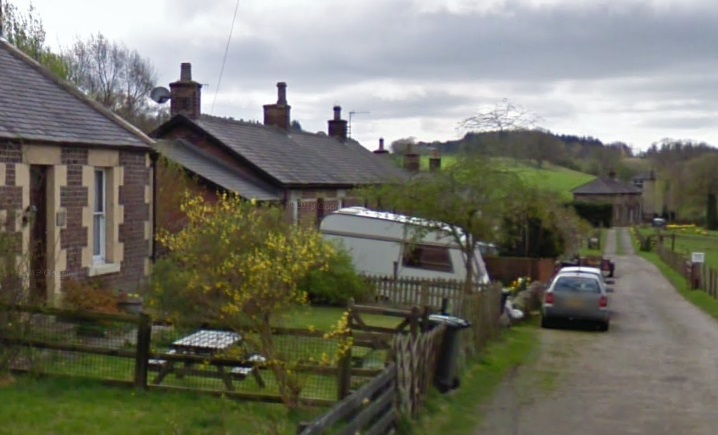
Redesmouth Railway Station seen from the North. The waiting room and signal box can be seen on the right of this image. [Google Streetview, April 2011]
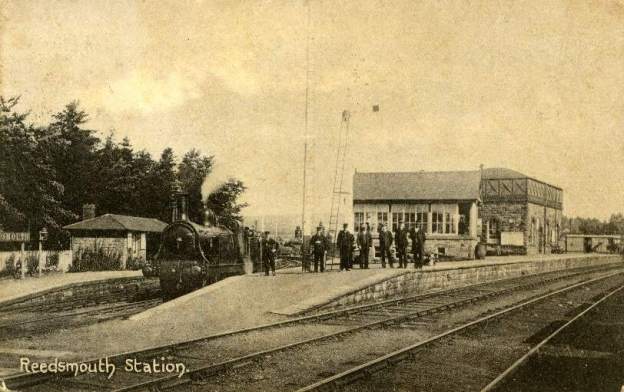
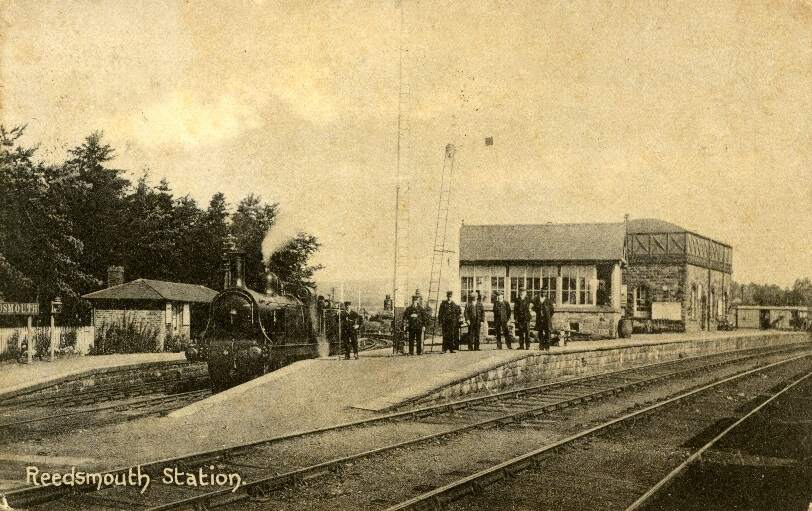
A postcard image of Redesmouth Station in the very early years of its existence before the Signal Cabin was rebuilt to give a better view of the lines approaching the station. This image was shared on The Whistle Stop Facebook Page on 9th July 2017, (c) Public Domain. [40]

We finish this segment of our journey on the Border Counties Railway here at Redesmouth.

References

  1. https://shop.memorylane.co.uk/mirror/0300to0399-00399/railway-lines-chollerton-rapidly-overgrown-weeds-21635767.html
  2. https://youtu.be/cUOVM8ENOIg?si=f4sjHHSNsjn6qYm2, accessed on 24th September 2024.
  3. https://rogerfarnworth.com/2024/09/16/the-border-counties-railway-part-1-hexham-to-chollerton
  4. https://en.m.wikipedia.org/wiki/Barrasford_railway_station, accessed on 4th October 2024.
  5. https://maps.nls.uk/geo/explore/#zoom=17.6&lat=55.04171&lon=-2.11022&layers=168&b=ESRIWorld&o=100, accessed on 4th October 2024.
  6. https://maps.nls.uk/geo/explore/#zoom=17.3&lat=55.05695&lon=-2.12850&layers=168&b=ESRIWorld&o=100, accessed on 4th October 2024.
  7. https://maps.nls.uk/geo/explore/#zoom=17.3&lat=55.06153&lon=-2.14428&layers=168&b=ESRIWorld&o=100, accessed on 4th October 2024.
  8. https://maps.nls.uk/geo/explore/#zoom=17.1&lat=55.06274&lon=-2.14638&layers=168&b=ESRIWorld&o=100, accessed on 4th October 2024.
  9. https://www.geograph.org.uk/photo/2270834, accessed on 21st October 2024
  10. https://www.geograph.org.uk/photo/3788974, accessed on 21st October 2024.
  11. https://www.geograph.org.uk/photo/3788972, accessed on 21st October 2024.
  12. https://www.geograph.org.uk/photo/3788954, accessed on 21st October 2024,
  13. https://www.geograph.org.uk/photo/3788955, accessed on 22nd October 2024.
  14. https://www.geograph.org.uk/photo/3788956, accessed on 22nd October 2024.
  15. https://www.geograph.org.uk/photo/3579114, accessed on 22nd October 2024.
  16. https://www.geograph.org.uk/photo/3800747, accessed on 22nd October 2024.
  17. https://railmaponline.com/UKIEMap.php, accessed on 22nd October 2024.
  18. https://maps.nls.uk/geo/explore/#zoom=17.3&lat=55.06702&lon=-2.14178&layers=168&b=ESRIWorld&o=100, accessed on 22nd October 2024.
  19. https://maps.nls.uk/geo/explore/#zoom=18.3&lat=55.06677&lon=-2.15418&layers=168&b=ESRIWorld&o=100, accessed on 22nd October 2024.
  20. https://maps.nls.uk/geo/explore/#zoom=17.3&lat=55.07628&lon=-2.18538&layers=168&b=ESRIWorld&o=100, accessed on 22nd October 2024.
  21. https://maps.nls.uk/geo/explore/#zoom=17.3&lat=55.08081&lon=-2.19234&layers=168&b=ESRIWorld&o=100, accessed on 22nd October 2024.
  22. https://www.geograph.org.uk/photo/3785588, accessed on 22nd October 2024.
  23. https://www.facebook.com/photo/?fbid=176492280689846&set=pcb.2762530180657885, accessed on 22nd October 2024.
  24. https://maps.nls.uk/geo/explore/#zoom=17.3&lat=55.08364&lon=-2.19673&layers=168&b=ESRIWorld&o=100, accessed on 22nd October 2024.
  25. https://maps.nls.uk/geo/explore/#zoom=17.3&lat=55.08580&lon=-2.20367&layers=168&b=ESRIWorld&o=100, accessed on 22nd October 2024.
  26. https://www.facebook.com/photo/?fbid=10166275293725524&set=gm.4430757023690820&idorvanity=1005511202882103, accessed on 22nd October 2024.
  27. https://maps.nls.uk/geo/explore/#zoom=18.3&lat=55.08941&lon=-2.21047&layers=168&b=ESRIWorld&o=100, accessed on 22nd October 2024.
  28. https://www.geograph.org.uk/photo/3801813, accessed on 22nd October 2024.
  29. https://maps.nls.uk/geo/explore/#zoom=17.3&lat=55.07066&lon=-2.16799&layers=168&b=ESRIWorld&o=100, accessed on 22nd October 2024.
  30. https://www.geograph.org.uk/photo/7404692, accessed on 22nd October 2024.
  31. https://maps.nls.uk/geo/explore/#zoom=18.3&lat=55.10369&lon=-2.21770&layers=168&b=ESRIWorld&o=100, accessed on 22nd October 2024.
  32. https://maps.nls.uk/geo/explore/#zoom=18.3&lat=55.11812&lon=-2.20251&layers=168&b=ESRIWorld&o=100, accessed on 22nd October 2024.
  33. https://maps.nls.uk/geo/explore/#zoom=18.3&lat=55.12010&lon=-2.20643&layers=168&b=ESRIWorld&o=100, accessed on 22nd October 2024.
  34. https://www.geograph.org.uk/photo/6160483, accessed on 22nd October 2024.
  35. https://www.geograph.org.uk/photo/6691232, accessed on 22nd October 2024.
  36. https://maps.nls.uk/geo/explore/#zoom=16.4&lat=55.13241&lon=-2.21384&layers=168&b=ESRIWorld&o=100, accessed on 22nd October 2024.
  37. https://www.geograph.org.uk/photo/697704, accessed on 22nd October 2024.
  38. https://www.geograph.org.uk/photo/1699167, accessed on 22nd October 2024.
  39. https://maps.nls.uk/geo/explore/#zoom=18.4&lat=55.13217&lon=-2.21256&layers=168&b=ESRIWorld&o=100, accessed on 22nd October 2024.
  40. https://www.facebook.com/photo?fbid=1871550826442636&set=pcb.1871554073108978&locale=en_GB, accessed on 23rd October 2024.

The Manchester and Leeds Railway – The Railway Magazine, December 1905 – Part 2

This is the second part of a short series about the Manchester and Leeds Railway. The first part can be found here. [66]

We re-commence our journey at Sowerby Bridge Railway Station. ….

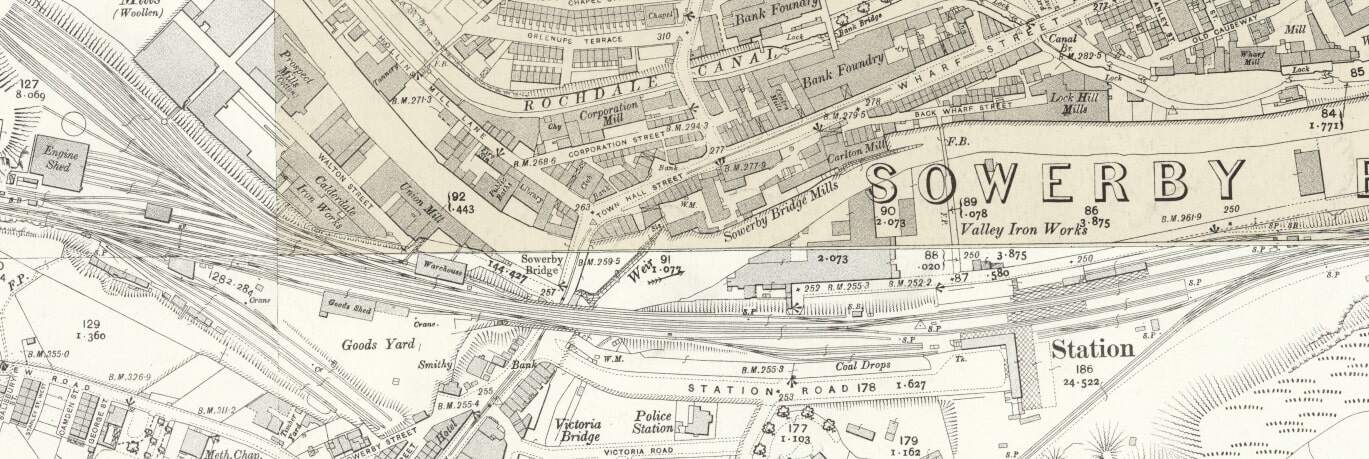
Sowerby Bridge Railway Station – note the Ripponden Branch emerging from a tunnel and joining the Manchester and Leeds Railway at the East end of the Station. [15]
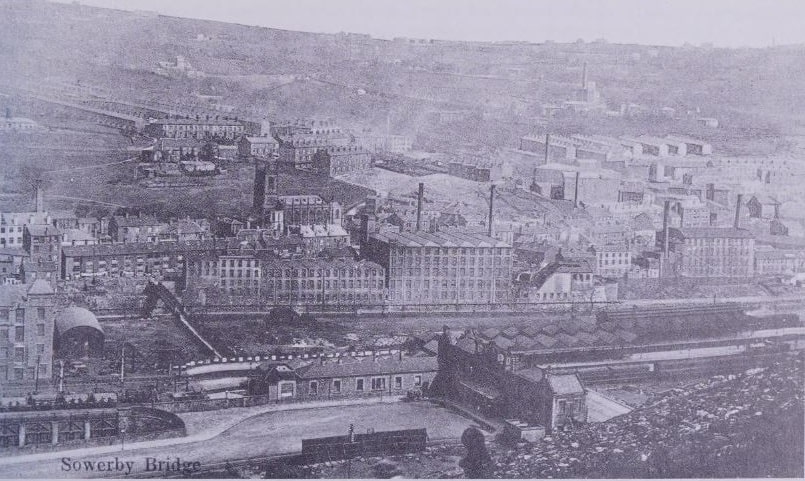
An early postcard image of Sowerby Bridge with the railway station in the foreground, © Public Domain. [23]
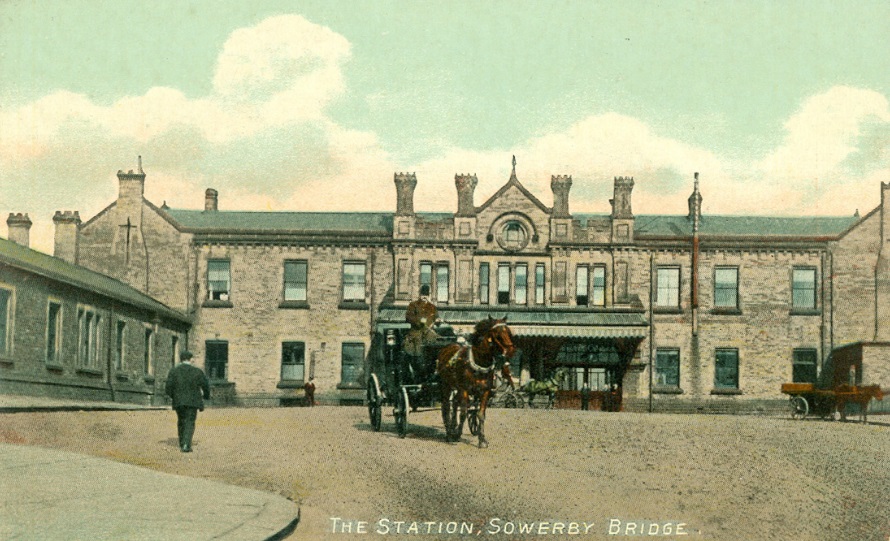
A colourised postcard view of the Station Forecourt at Sowerby Bridge around the turn of the 20th century. [60]
The main station building in Sowerby Bridge was demolished but the single storey building to the left of the postcard image above survives as can be seen in this image from 2016. [Google Streetview, 2016]
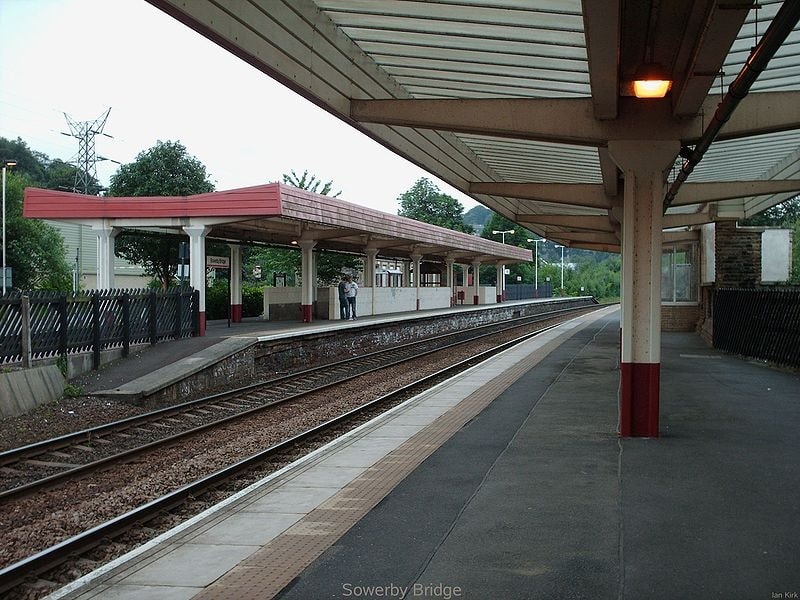
Sowerby Bridge Railway Station in 2006, (c) Ian Kirk and authorised for reuse under a Creative Commons Licence (CC BY 2.5). [24]
The area shown on this extract from Google Maps satellite imagery is a slightly enlarged area compared to the OS map extract above. It shows the area immediately around the railway station. [Google Maps, October 2024]

More images of Sowerby Bridge Railway Station can be found here [67] and here. [68]

Just beyond the eastern station limits Fall Lane bridges the line – two views from the bridge follow.

To the East of Sowerby Bridge the line crosses the River Calder again.

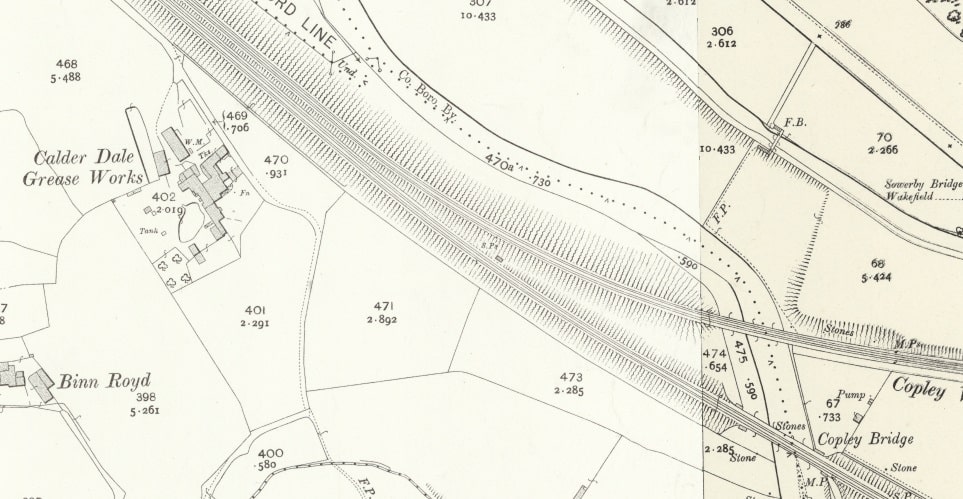
Another extract from the 25″ Ordnance Survey of 1905, published in 1907 shows Calder Dale Grease Works, Copley Bridge and Copley Viaduct. The Sowerby Bridge, Halifax and Bradford line leaves the main line at this point. [25]
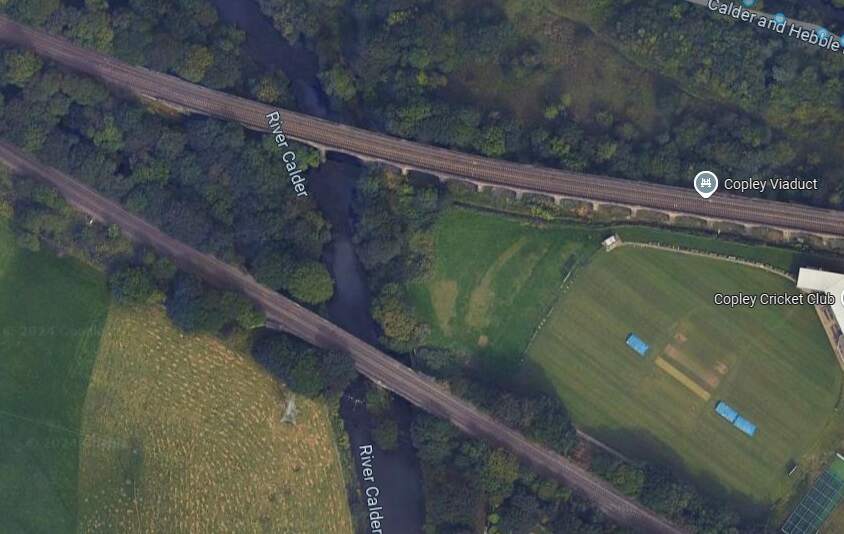
The bridge and Viaduct as they appear on Google Maps satellite imagery in 2024. [Google Maps, October 2024]

An image of Copley Viaduct can be seen here. Just beneath the viaduct, at the left of the linked photograph, a train is crossing Copley Bridge on the line we are following. [61]

The Manchester and Leeds Railway then crosses the Calder once again and enters Greetland Station. The second arm of the Sowerby Bridge, Halifax and Bradford line joins the mainline just before (to the Northwest of) Greetland Station.

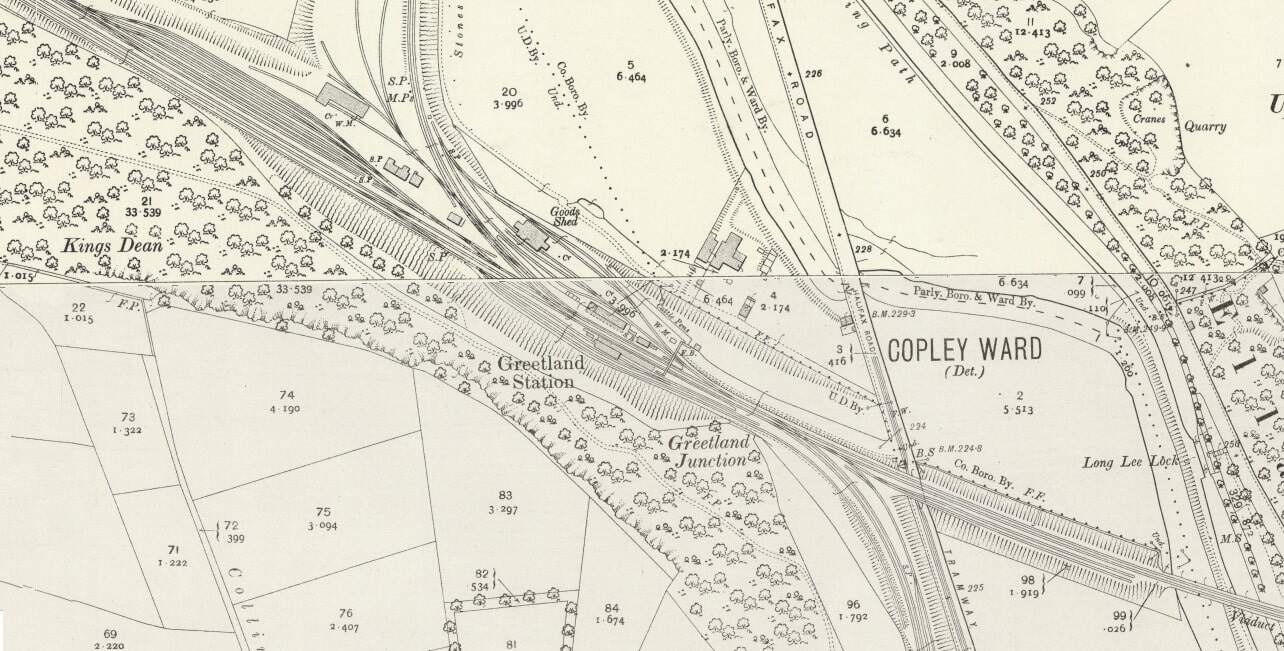
Greetland Station shown on the 25″ Ordnance Survey of 1905. Top-left the second arm of the triangular junction with the Sowerby Bridge, Halifax and Bradford line can be seen joining the Manchester and Leeds Railway. Bottom-right, the Stainland Branch leaves the main line just before the main line bridges the River Calder once again. [26]
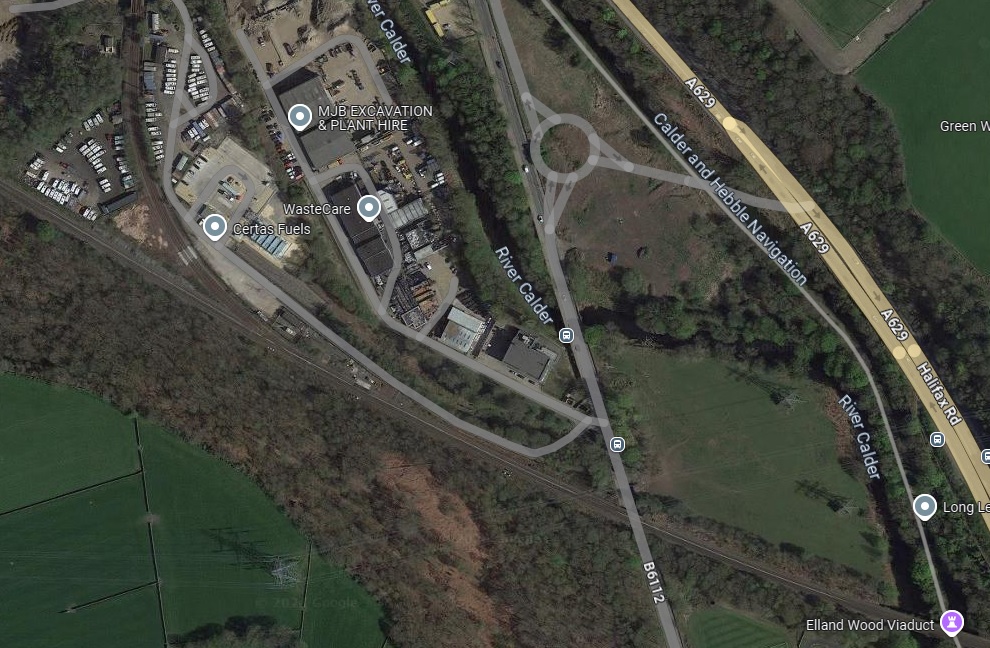
The same location in the 21st century. Greetland Station is long gone and the branch South (the Stainland Branch has also been lifted. [Google Maps, October 2024]
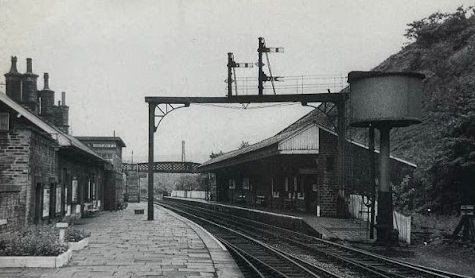
Greetland Railway Station in 1962, just before closure. The camera is positioned at the Northwest end of the station. [28]

Greetland Railway Station “was originally opened as North Dean in July 1844. It was subsequently changed to North Dean and Greetland and then to Greetland in 1897. Situated near the junction of the main Calder Valley line and the steeply-graded branch towards Halifax (which opened at the same time as the station), it also served as the junction station for the Stainland Branch from its opening in 1875 until 1929. It was closed to passenger traffic on 8th September 1962.” [27]

Looking West from the A629, Halifax Road which sits over the line adjacent to the West Portal of Elland Tunnel. [Google Streetview, July 2024]

Rake says that the line then approaches “Elland Tunnel, 424 yards, in length, and, after leaving Elland Station, pass[es] through a deep cutting, from which a large quantity of stone for the building of the bridges was obtained.” [1: p471]

Rake says that this is the Eastern Portal of Elland Tunnel. Looking at the 25″ OS mapping it appears to be the Western Portal as Elland Station sits immediately to the East of the Eastern Portal. [1: p471]
Elland Tunnel and Elland Railway Station as they appear on the 1905 25″ Ordnance Survey. The Calder & Hebble Navigation and the River Calder also feature on the map extract. [29]
Elland Railway Station in 1964, seen from above the East Portal of Elland Tunnel, © Glock Wild & S. Chapman Collection. [30]

To the East of Elland Railway Station the railway is carried above the River Calder, passing Calder Fire Clay Works. Further East again, “the railway is carried across a steep and rugged acclivity, rising almost perpendicularly from the river. …  The viaduct consists of six arches of 45ft span each, and leads directly to Brighouse, originally the nearest station to Bradford.” [1: 472]

The view from the South of the bridge which carries the railway over Park Road (A6025), Elland. Elland Station stood above this location and to the left. [Google Streetview, July 2024]

From Elland, the line runs on through Brighouse

Brighouse Station and Goods Yard as shown on the 25″ Ordnance Survey of 1905. [31]
The view West from Gooder Lane Bridge towards Cliff Road Bridge Elland. [Google Streetview, May 2023]
The view East across Brighouse Railway Station from Gooder Lane. [Google Streetview, May 2023]
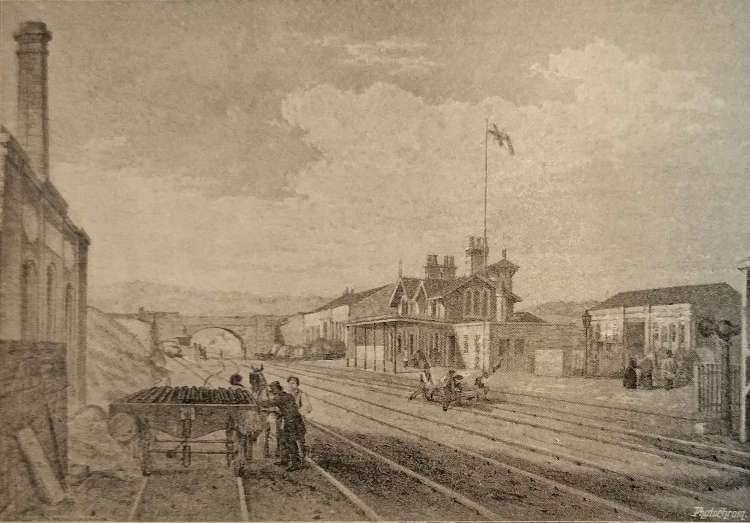
Brighouse Railway Station (originally called ‘Brighouse for Bradford’). [1: p472]
B1 61034 Chiru at Brighouse
Embedded link to Flickr. The image shows B1 No. 61034 Chiru at Brighouse Station on 2nd April 1964.
The locomotive is arriving at the station from the East with a local passenger train. The locomotive had only recently been transferred to Wakefield from Ardseley. It was withdrawn at the end of 1964. The photograph looks Southeast through the station. [32]
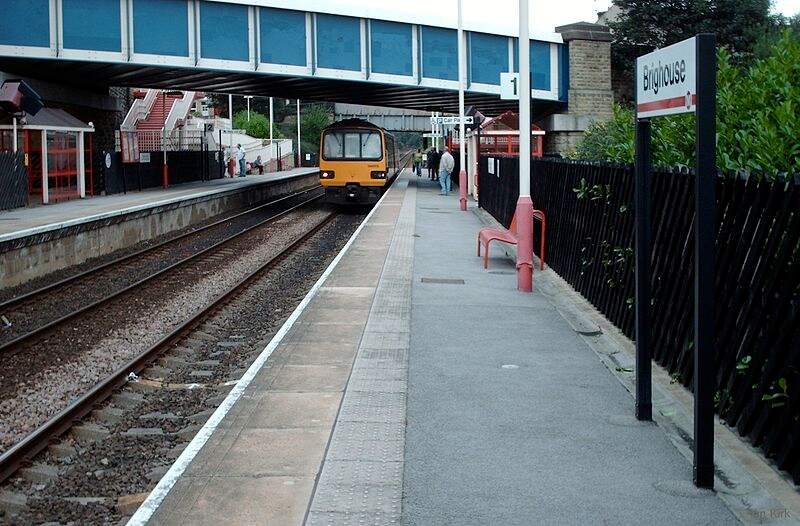
A much later photograph of Brighouse Railway Station (2006) which looks Northwest through the station from platform 1, (c) Ian Kirk and authorised for reuse under a Creative Commons Licence (CC BY 2.5). [33]

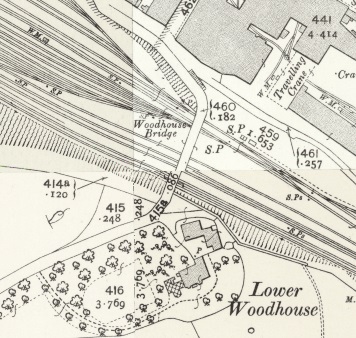
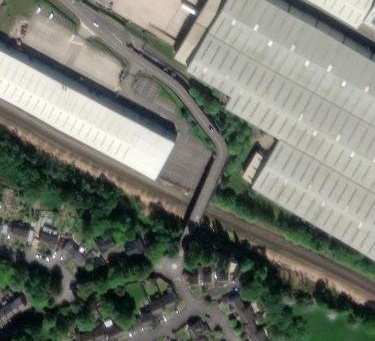
To the East of the passenger facilities at Brighouse there were a significant array of sidings. The first length of these can be seen on the OS Map above. Around 75% of the way along these sidings Woodhouse Bridge spanned the lines. Much of the area has been redeveloped by modern industry. The next four images relate to that bridge.

Leaving Brighouse Station, the railway is joined, from the North, by the Bailiff Bridge Branch (long gone in the 21st century).

Immediately to the East of Brighouse Station Goods Yards, the Bailiff Bridge Branch joined the Manchester and Leeds Railway. [62]
Approximately the same area in the 21st century as shown on the OS map extract above. The line of the old Bailiff Bridge Branch is superimposed on the satellite image. [Google Maps, October 2024]

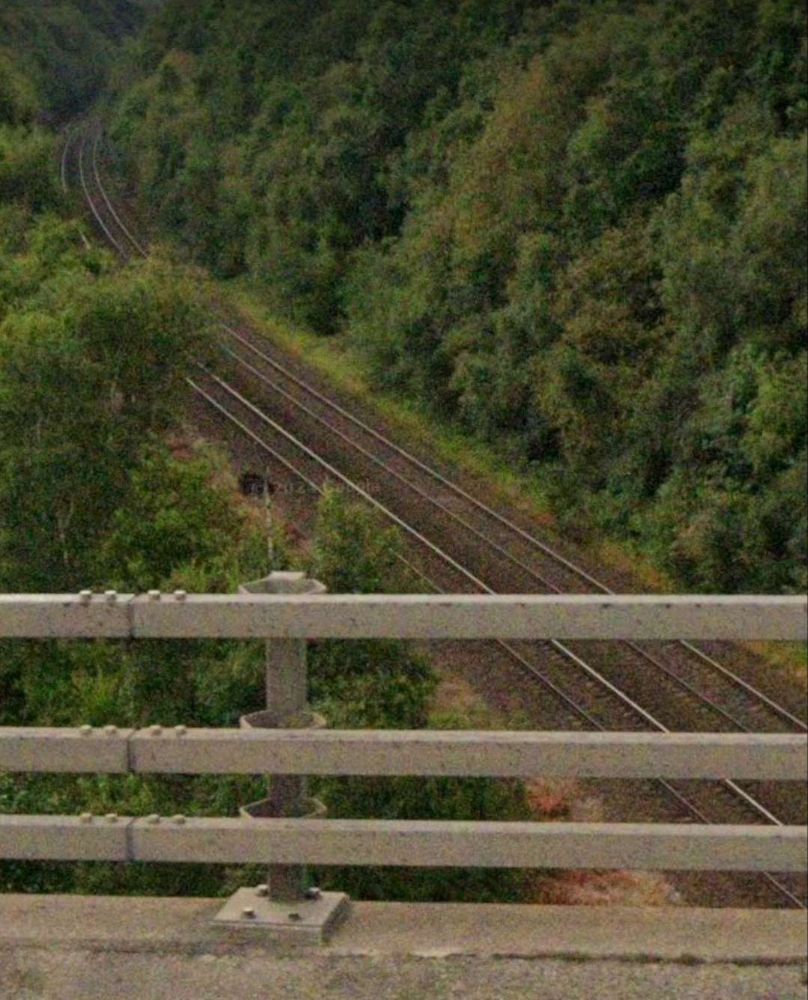
A little further to the East, in the 21st century, the line passes under the M62 and enters a deep cutting before, at Bradley Wood Junction, the Bradley Wood Branch leaves the line to the South (still present in the 21st century).

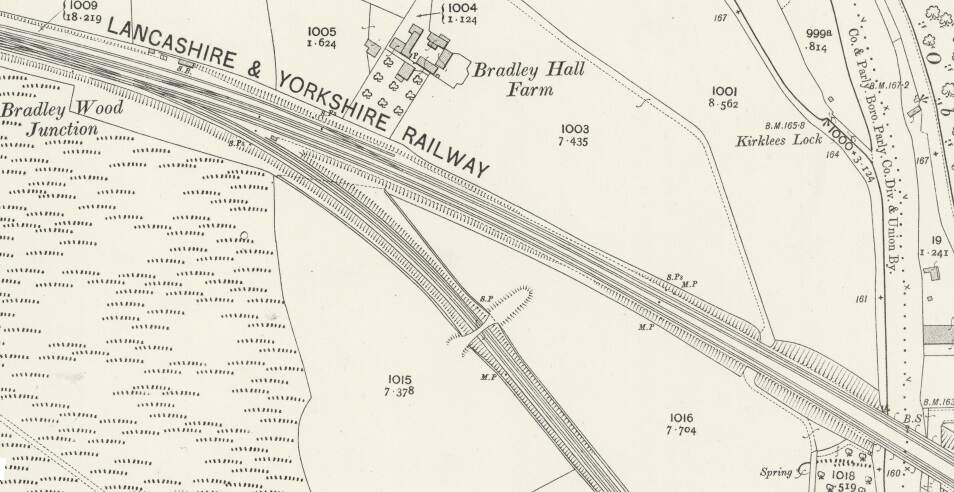
Bradley Wood Junction as shown on the 25″ Ordnance Survey of 1905. [70]
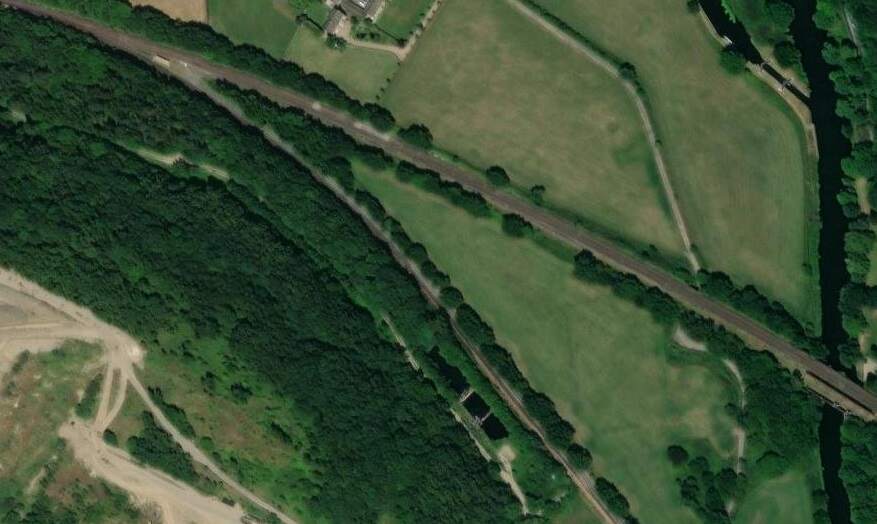
Much the same area in the 21st century. [70]

Beyond [Bradley Wood Junction] the Calder is crossed by a viaduct of two arches of 76 ft. span each. this is succeeded by an embankment, along which the line continues down the valley. [It] again cross[es] the Calder by a viaduct similar to that just referred to.” [1: p472] The line was widened to the South side to create a four-track main line and single span girder bridges were positioned alongside the original structures.

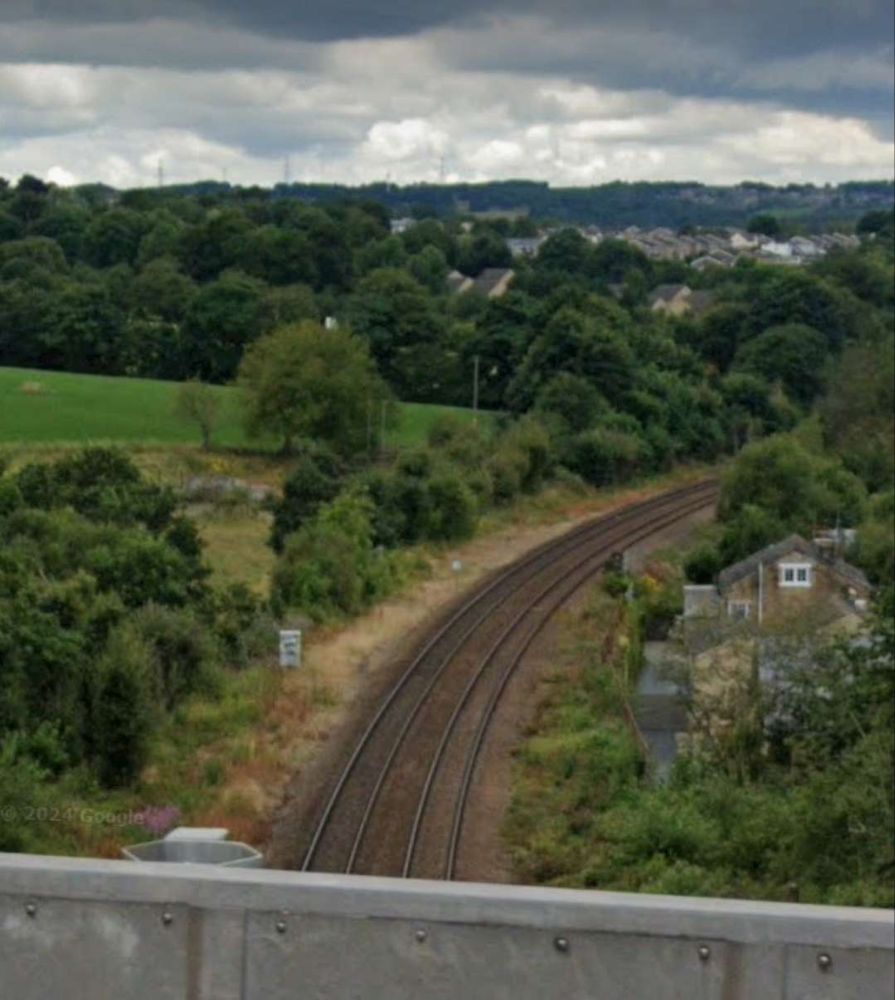
At the first crossing of the River Calder mentioned immediately above, the original two arches of the stone viaduct can be seen beyond the more modern girder bridge in this photograph, (c) Uy Hoang. [Google Streetview, September 2022]
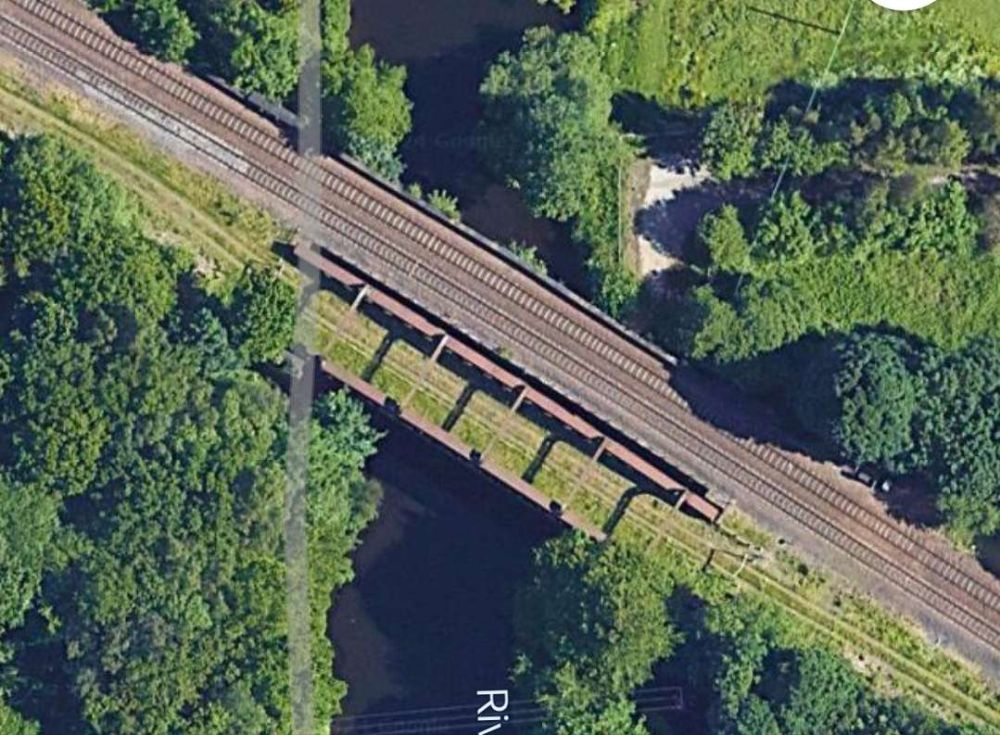
The same bridges as they appear on Google Maps satellite imagery in 2024. [Google Maps, October 2024]

In between the two bridges across the River Calder, was Cooper Bridge Station.

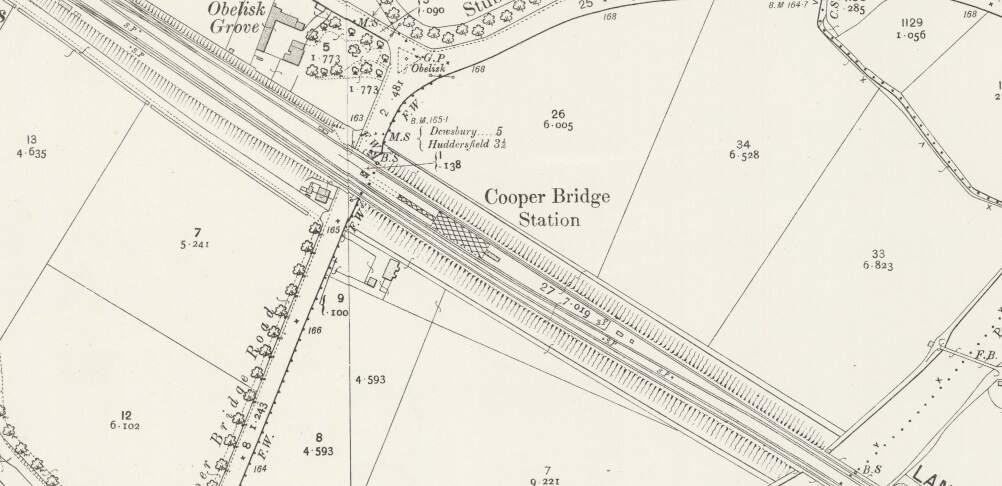
Cooper Bridge Station as it appears on the 1905 25″ Ordnance Survey. [34]
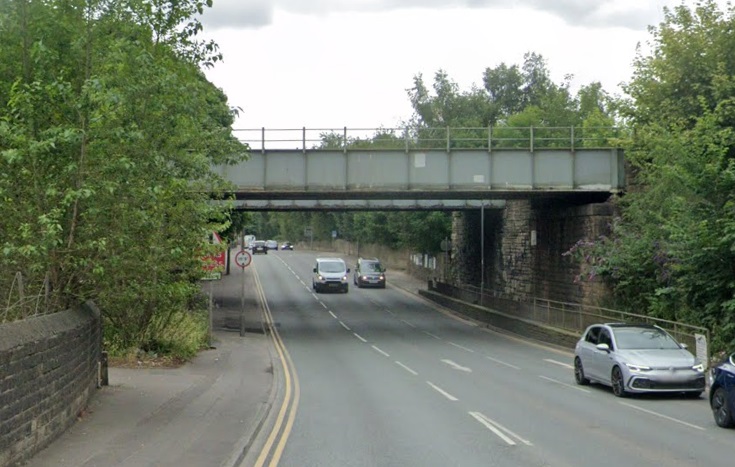
The Station at Cooper Bridge is long gone in the 2st century, but the bridges remain. The station sat over the road at this location with platform buildings between the rails of the left edge of this image. This photograph is taken from the North on Cooper Bridge Road. [Google Streetview, July 2024]
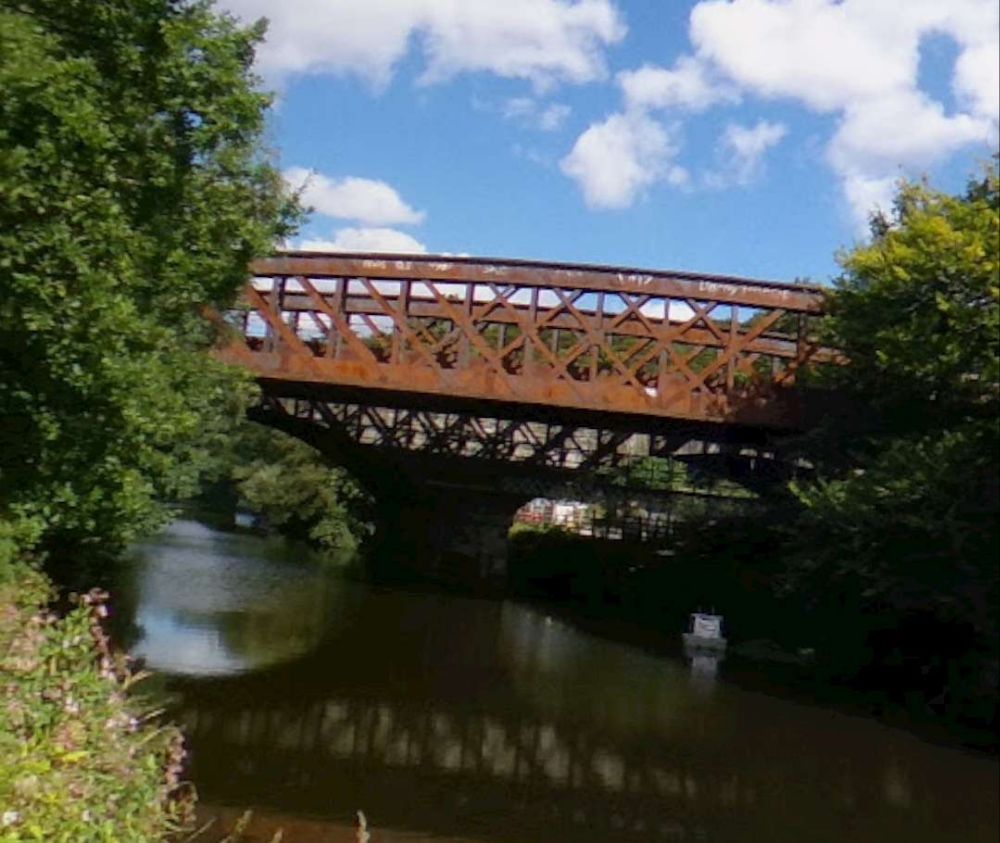
The second of the two crossings of the River Calder mentioned above. This photograph, taken from the Southwest, shows the girder bridge with the stone-arched 2-span bridge beyond, (c) Uy Hoang. [Google Streetview, September 2022]
This view from the North East and from under an adjacent footbridge shows the stone-arched 2-span structure, (c) Uy Hoang. [Google Streetview, September 2022]

Rake’s journey along the line seems not to focus so closely on the remaining length of the line. Various features and a number of stations seem to have been missed (particularly Cooper Bridge, Mirfield, Ravensthorpe, Thornhill, Horbury & Ossett). It also seems to suggest that the line goes through Dewsbury Station. Rather than rely on Rake’s commentary about the line, from this point on we will provide our own notes on the route.

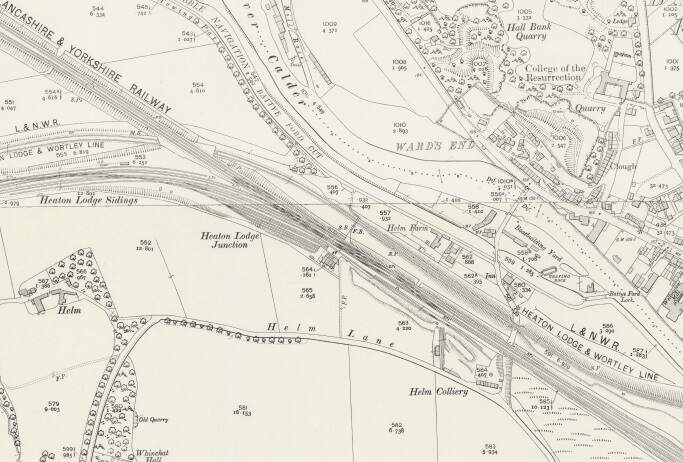
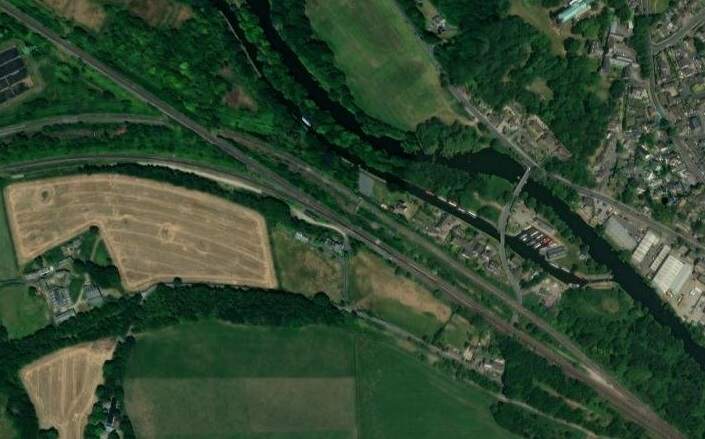
At Heaton Lodge Junction, the LNWR Huddersfield & Manchester line joined the Manchester & Leeds line with the LNWR Heaton & Wortley line passing beneath. The Manchester & Leeds line ran on towards Mirfield Station passing the large engine shed before entering the station over a long viaduct which once again crossed the River Calder.

Heaton Lodge Junction as it appeared in 1905 on the 25″ Ordnance Survey. [71]
The same junction as it appears on the ESRI satellite imagery which is provided by the National Library of Scotland (NLS). [71]
The bridge carrying the Manchester and Leeds Railway over Wood Lane which can be made out to the right of the map extract and satellite images above. [Google Streetview, May 2023]
Mirfield Station and Engine Shed.
The view from the North of the viaduct carrying the line over the River Calder to the West of Mirfield Station. [Google Streetview, March 2021]
The same viaduct viewed from the Southwest. The original stone-arched viaduct was widened by metal spans on brick abutments and piers. [Google Streetview, March 2021]
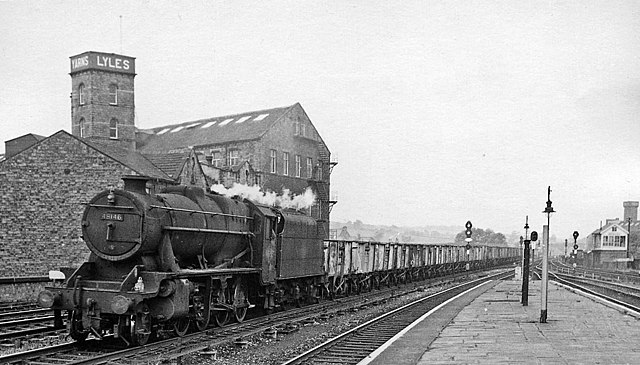
Eastbound empties passing Mirfield Station behind BR 8F 2-8-0 Locomotive No. 48146. The photograph looks West from the central island platform and shows some of the Speed Signals – unusual in Britain – installed in 1932 on the exceptionally busy section of this dual trunk route between Heaton Lodge Junction and Thornhill Junction, which remained until 1969-70, (c) Ben Brooksbank and licenced for reuse under a Creative Commons Licence (CC BY-SA 2.0). [35]
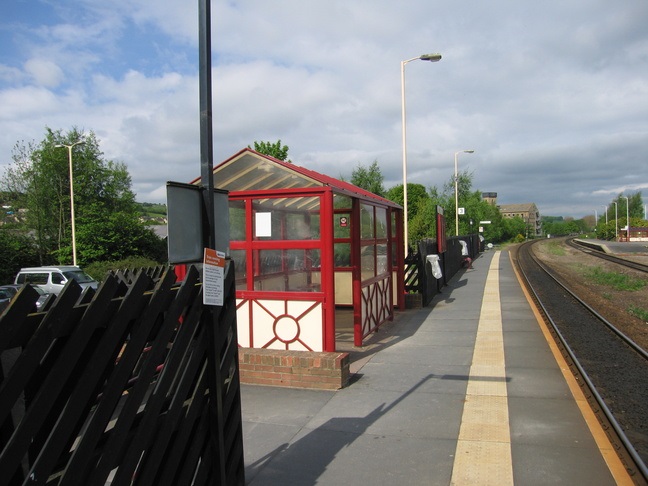
Mirfield Railway Station in 2010 taken looking West from Platform three which was a later addition to the station and sits alongside what was the up slow line. The original island platform can be see to the right of this image, © Alexandra Lanes, Public Domain. [36]

Just to the East of Mirfield Station was Cleckheaton Junction and then Wheatley’s Bridge over the River Calder. A bridge then carries Sand Lane over the railway.

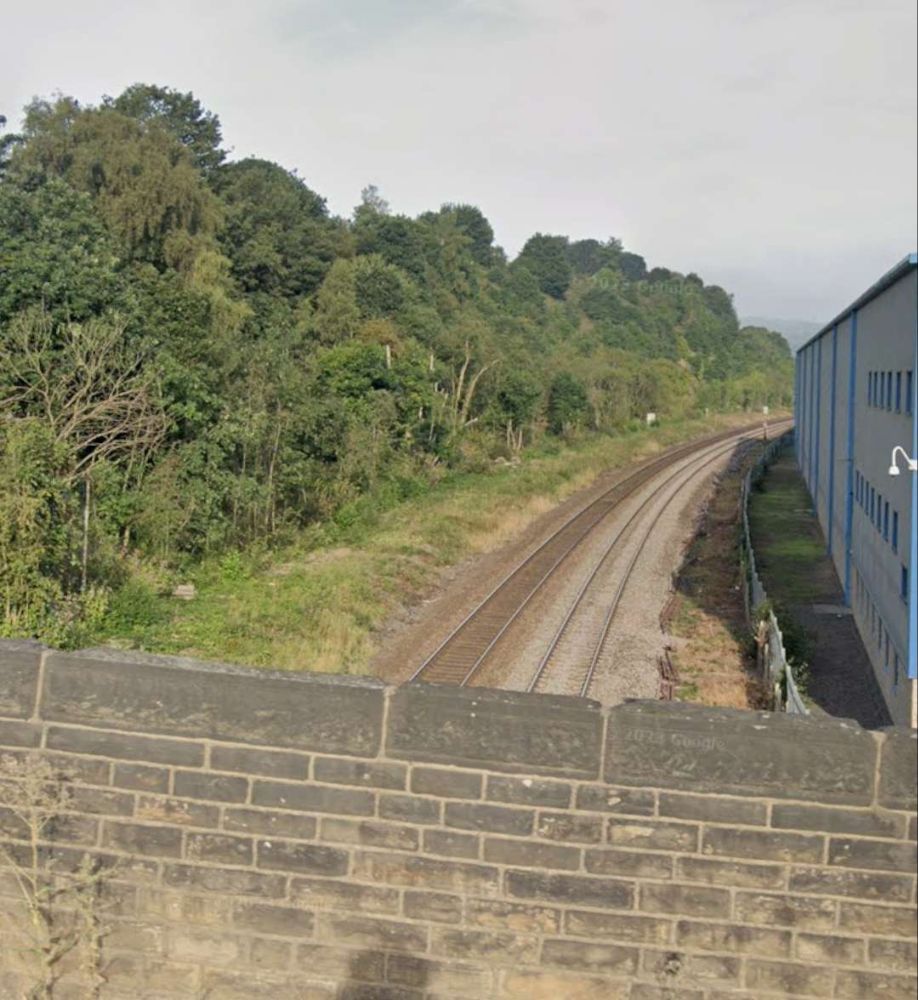
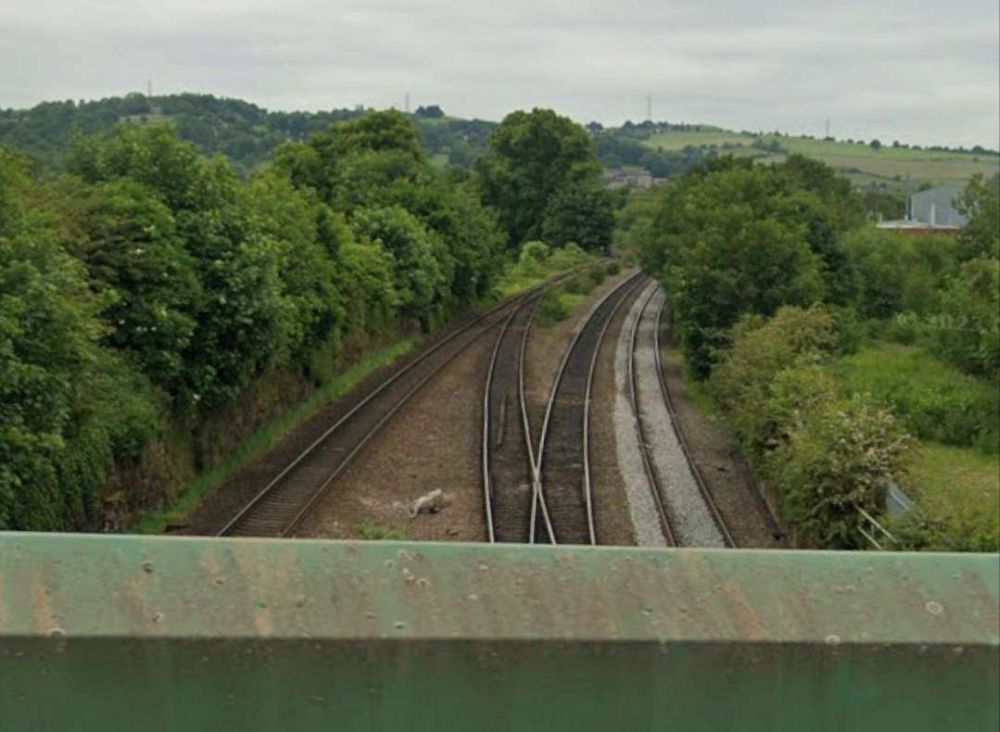
Looking West from Sands Lane Bridge back towards Mirfield. [Google Streetview, May 2023]
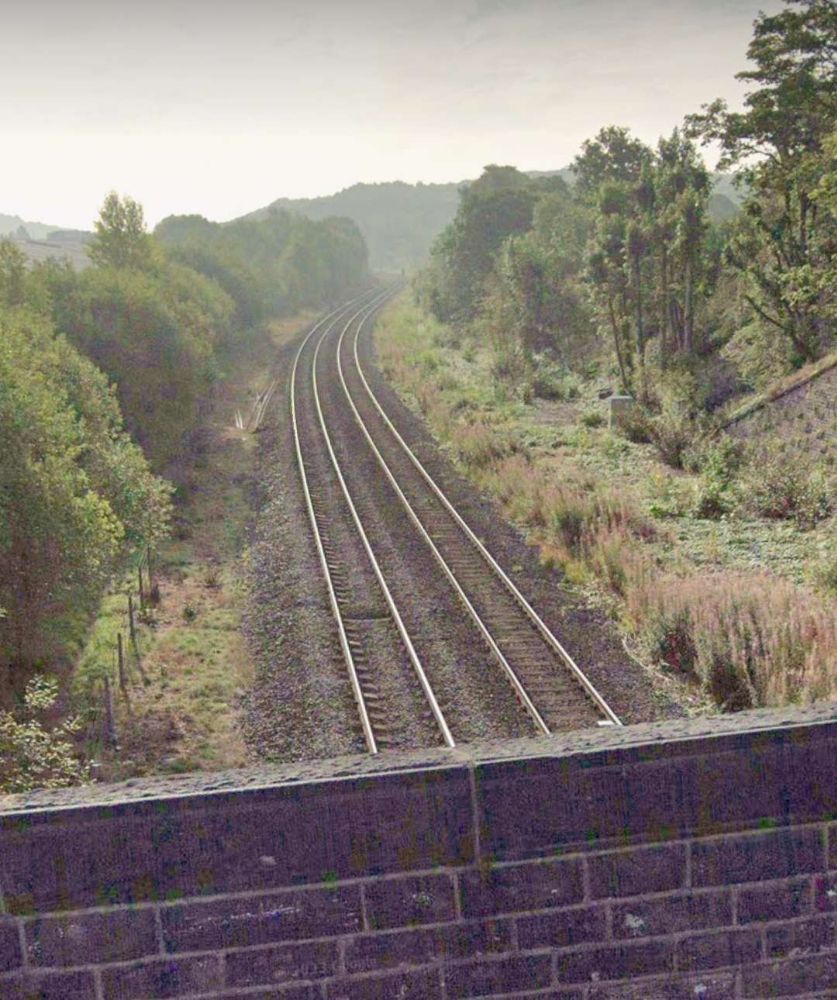
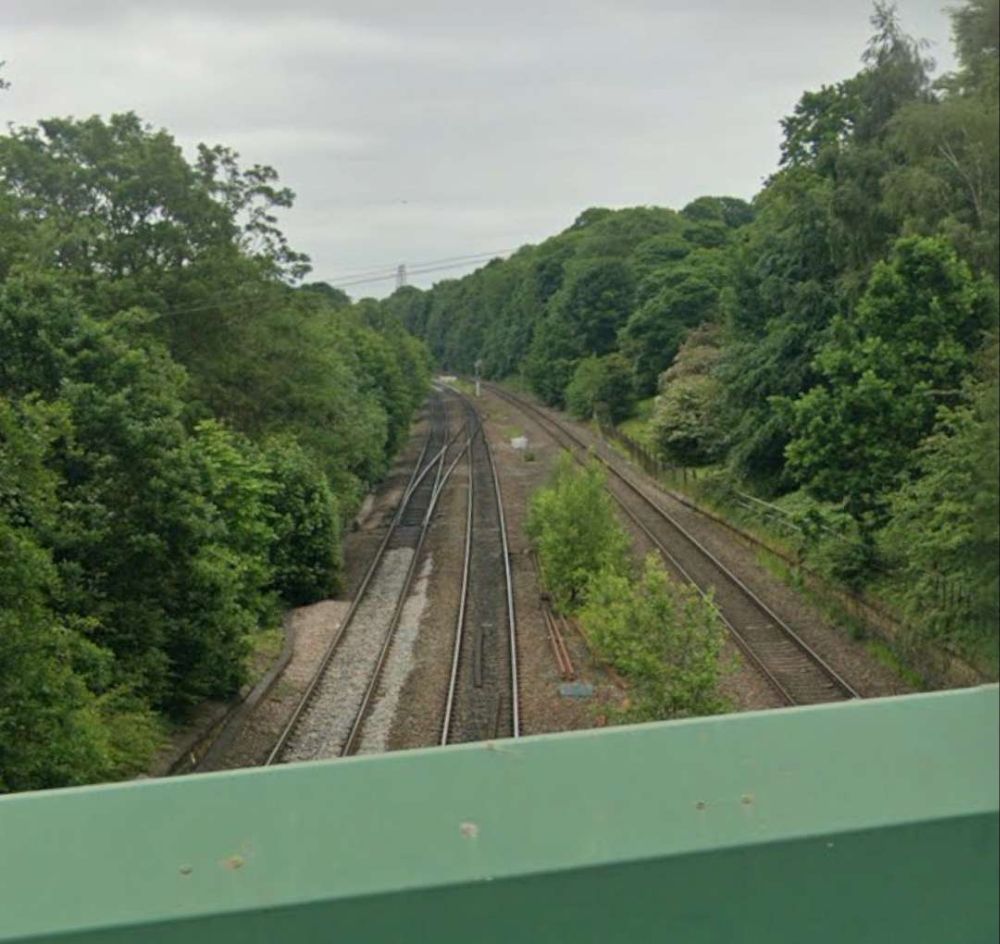
Looking East from Sands Lane Bridge. [Google Streetview, May 2023]

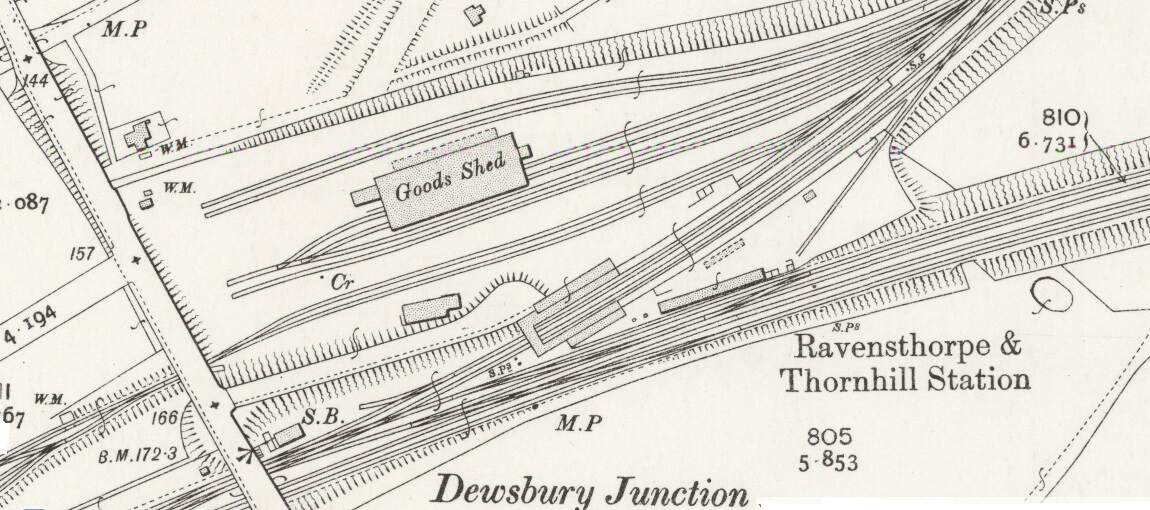
Soon after this the line encountered Dewsbury Junction which hosted Ravensthorpe (Ravensthorpe and Thornhill) Station.

Dewsbury Junction and Ravensthorpe Station. [39]
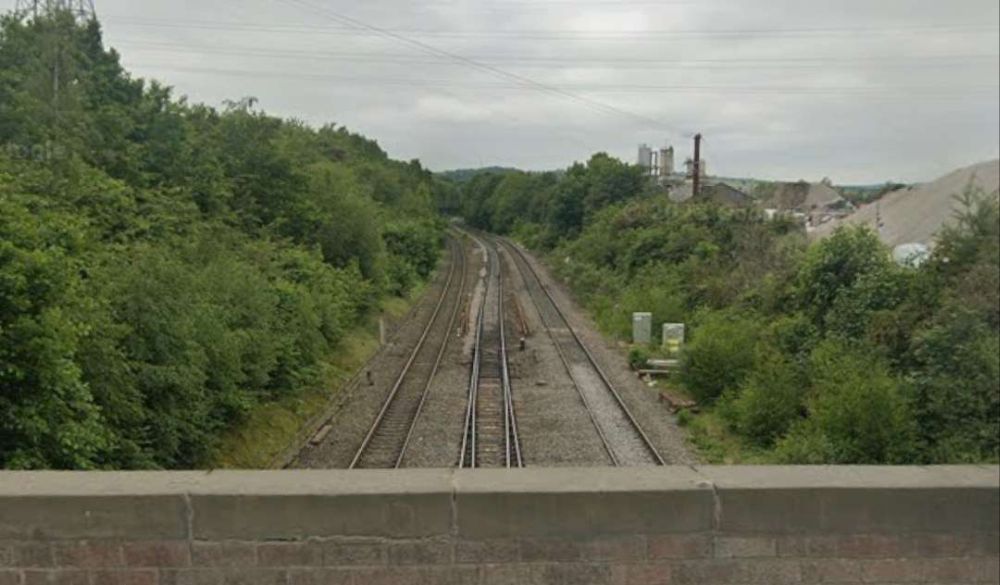
Looking West from Calder Road towards Mirfield. [Google Streetview, May 2023]
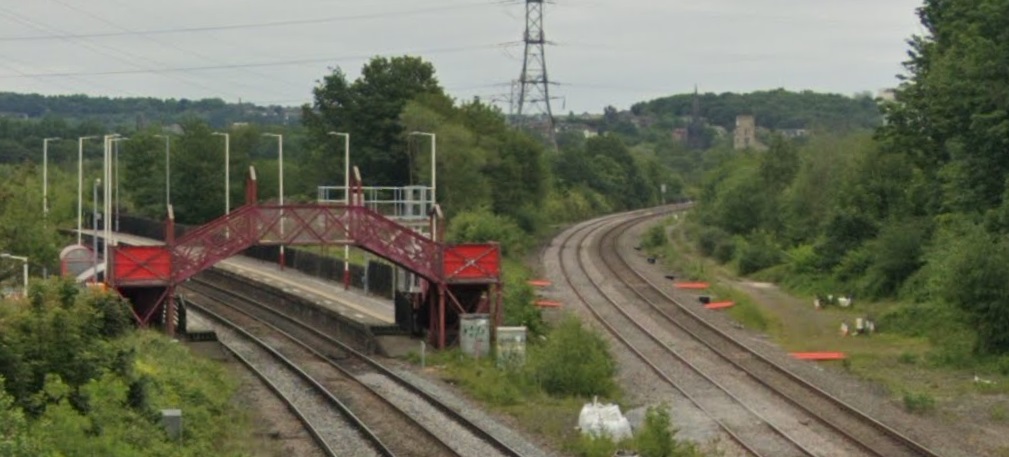
The view East from Calder Road showing Ravensthorpe Station with the Manchester & Leeds line heading away to the right of the picture. [Google Streetview, May 2023]

Thornhill Railway Station was a short distance further East just beyond the junction where the Ravensthorpe Branch met the main line at Thornfield Junction.

Thornfield Junction, Goods Yard and Station as shown on the 25″ Ordnance Survey of 1905. [40]
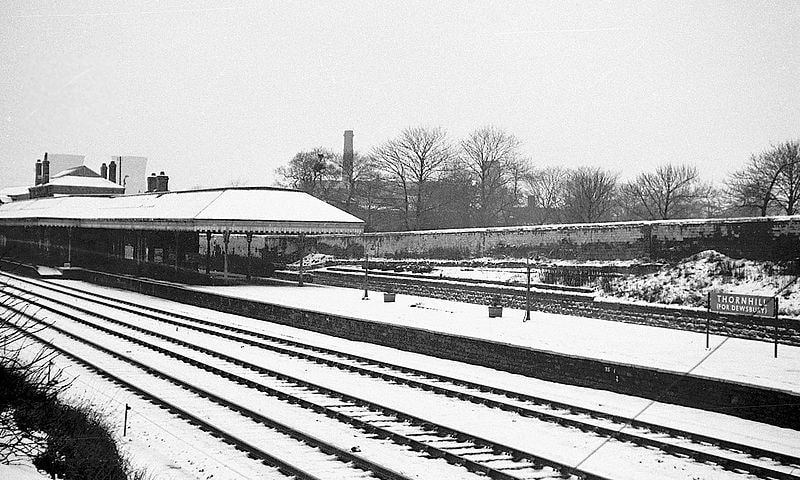
Thornhill Station opened with the Manchester & Leeds Railway and only closed on the last day of 1961, a short time before Beeching’s closure of of Dewsbury Central. [37]
The same station looking East towards Wakefield, Normanton etc. In the background is the bridge of the ex-Midland branch from Royston to Dewsbury (Savile Town), closed 18/12/50, (c) Ben Brooksbank and licenced for reuse under a Creative Commons Licence (CC BY-SA 2.0). [38]
The view West from Station Road in the 21st century, through what was Thornhill Railway Station. {Google Streetview, March 2023]
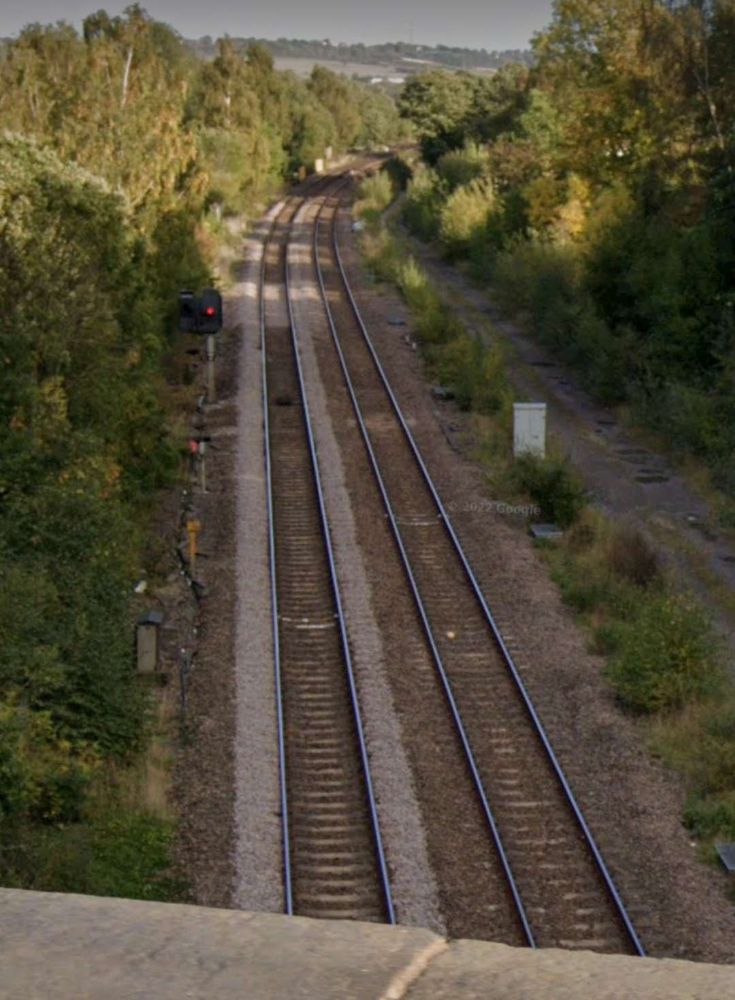
The view East from Station Road in the 21st century. The bridge ahead carries Headfield Road over the railway. [Google Streetview, March 2023]
The view West from Headfield Road Bridge towards the site of the erstwhile Thornhill Railway Station and Station Road. [Google Streetview, October 2022]
The view East from Headfield Road Bridge. [Google Streetview, October 2022]

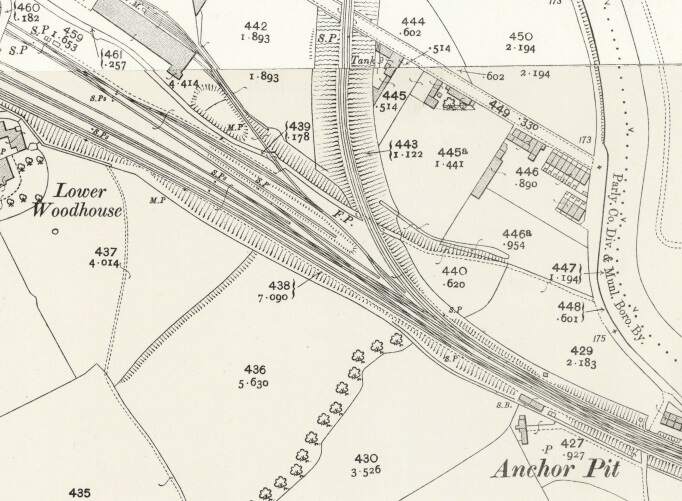
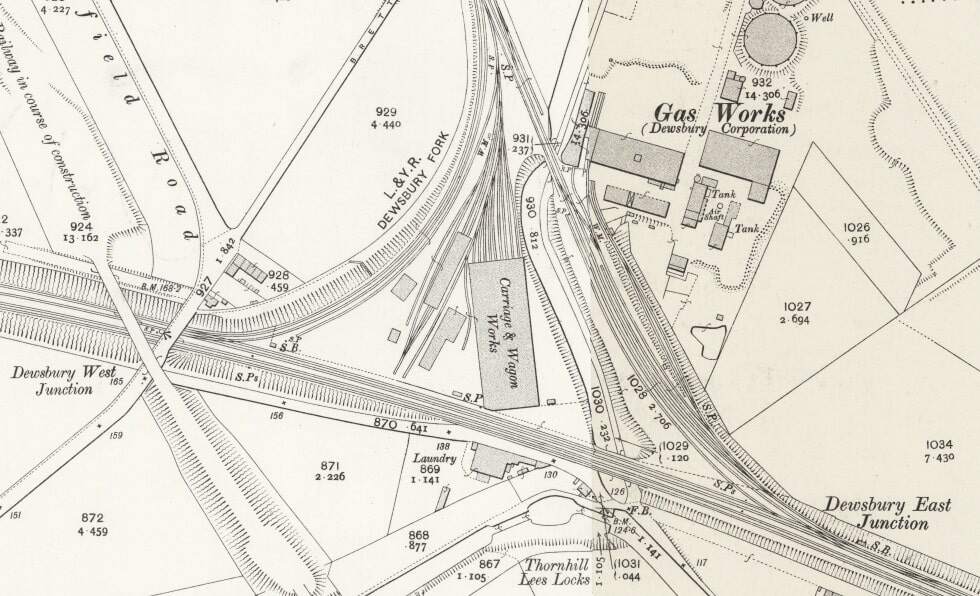
East of Thornhill Station were Dewsbury West and Dewsbury East junctions which together with Headfield Junction formed a triangular access to Didsbury Market Place Station. This was a busy location which sat close to Dewsbury Gas Works, Thornhill Carriage and Wagon Works and Thornhill Lees Canal Locks and a canal branch.  Just off the North of the map extract below was a further junction giving access to the GNR’s Headfield Junction Branch, before the line crossed the River Calder and entered Dewsbury Market Place Station and Yard and terminated there.

This extract from the 25″ Ordnance Survey of 1905 shows the triangular junction which provided access to Dewsbury Market Place Station and a series of Goods Yards and Sheds. Headfield Road is on the left side of this image. [41]
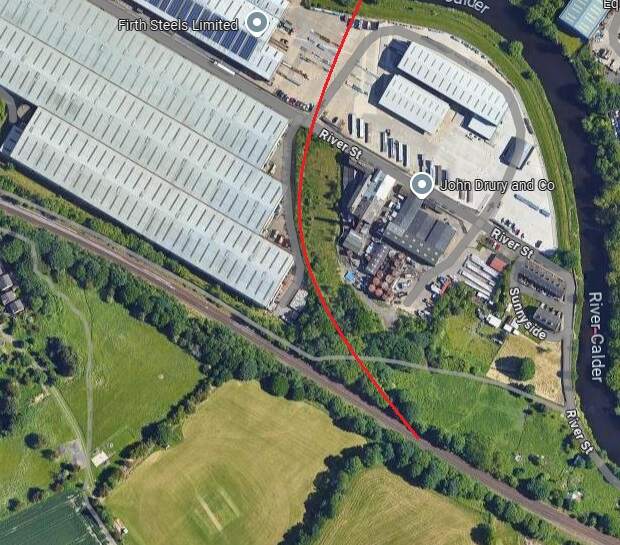
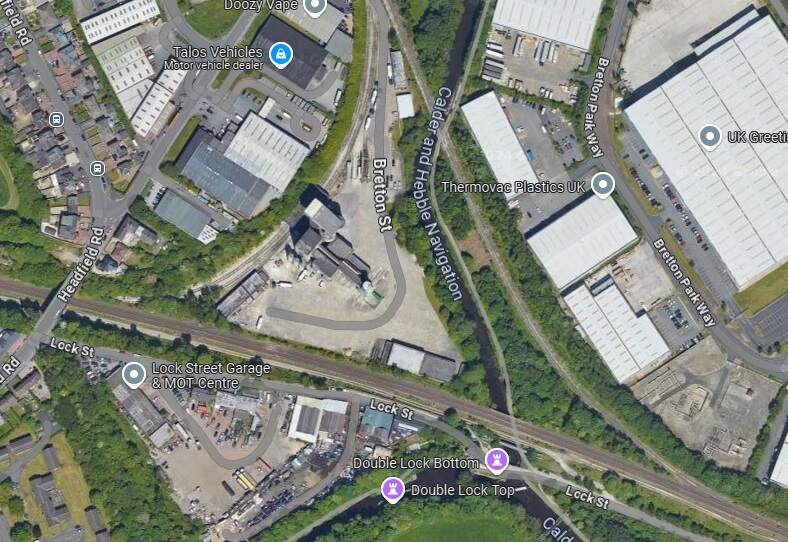
A similar area in the 2st century as it appears on Google Maps satellite imagery. [Google Maps, October 2024]

Dewsbury was very well provided for by both passenger and freight facilities. In its railway heyday the Midland Railway, the London & North Western Railway, the Lancashire & Yorkshire Railway and the Great Northern Railway all had access to the town. A computer drawn map showing the different lines can be found here. [42]

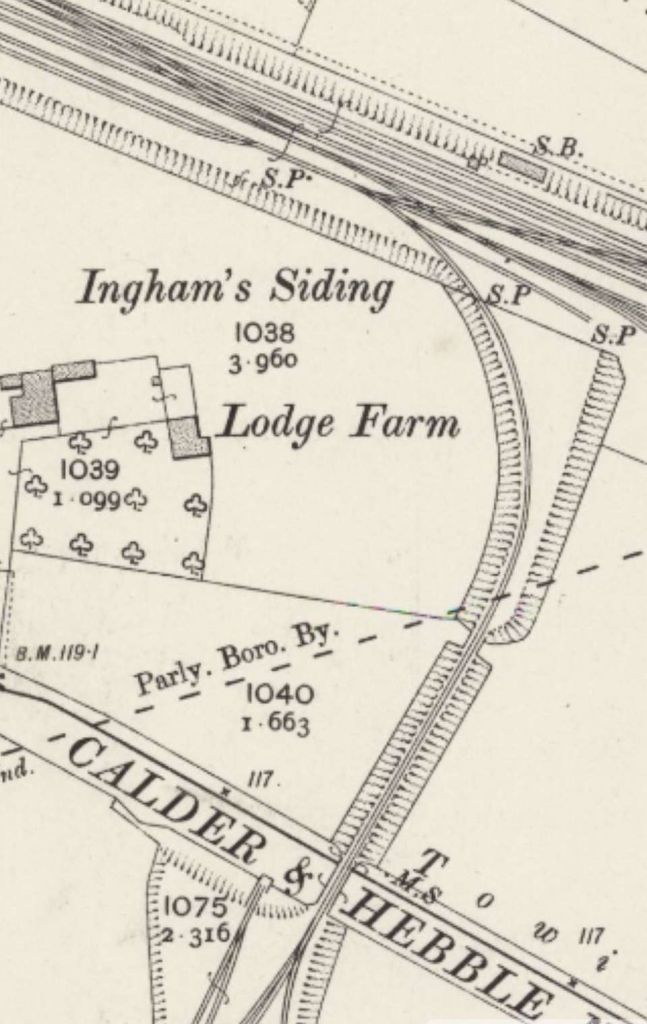
Continuing along the line towards Wakefield and Normanton, the next feature of note is the junction for Combs Colliery’s Mineral Railway at Ingham’s Sidings. Nothing remains of this short branch line.

Ingham’s Siding ran South, crossing the Calder & Hebble Navigation to reach Comb’s Colliery. [43]

Further East the line continues in a straight line East-southeast to cross the River Calder once again. It then passes the Calder Vale and Healey Low Mills at Healey and runs Southeast to Horbury and Ossett Station.

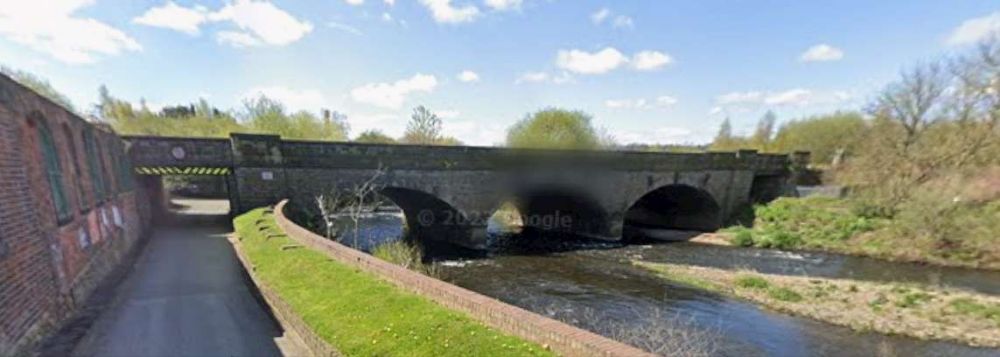
The bridge over the River Calder adjacent to Calder Vale and Healey Low Mills. [Google Streetview, April 2023]
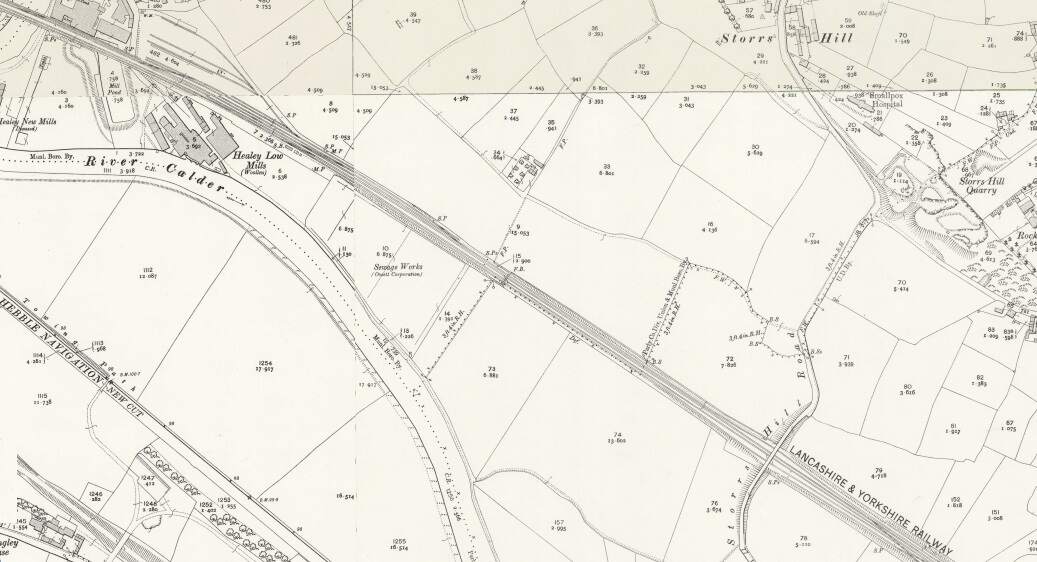
The bridge over the River Calder at Calder Vale and Healey Low Mills is in the top-left of this map extract from the 1905 25″ Ordnance Survey. This area was chosen by British Rail in the 1960s for a large marshalling yard. [46]
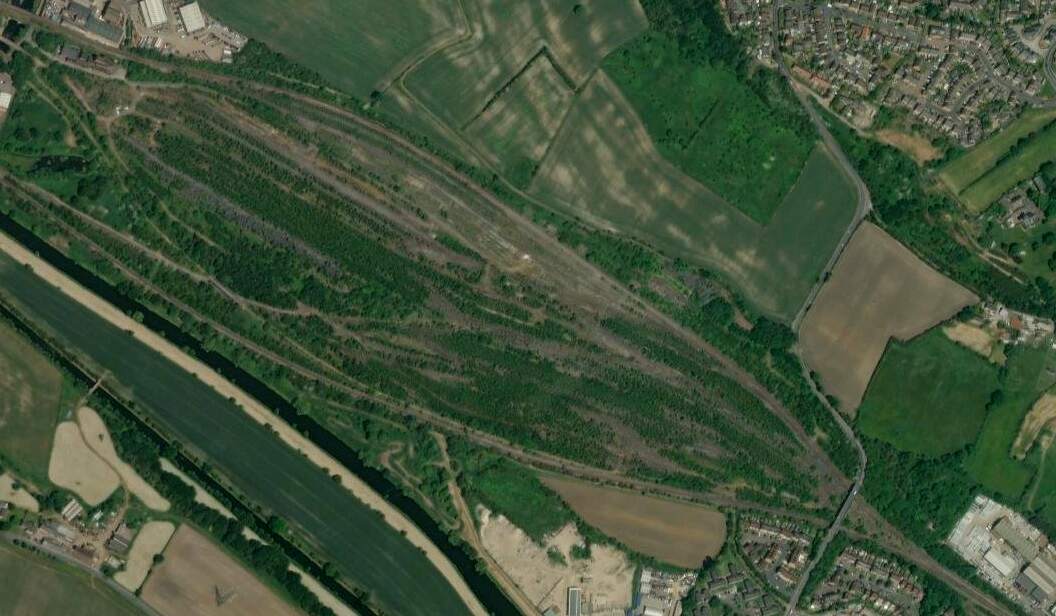
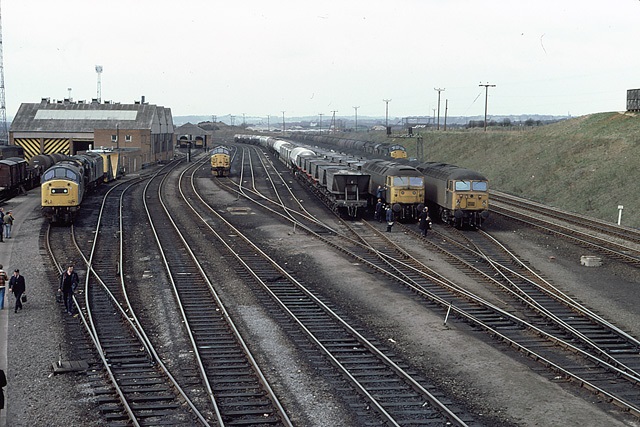
British Railways developed a large marshalling yard in the 1960s at Healey Mills. The yard was opened in 1963 and replaced several smaller yards in the area. It was part of the British Transport Commission’s Modernisation plan, and so was equipped with a hump to enable the efficient shunting and re-ordering of goods wagons. The yard lost its main reason for existence through the 1970s and 1980s when more trains on the British Rail system became block trains where their wagons required less, or more commonly, no shunting. Facilities at the site were progressively run down until it closed completely in 2012. [46][47]
Healey Mills Marshalling Yard in April 1982, (c) Martin Addison and licensed for reuse under a Creative Commons Licence (CC BY-SA 2.0). [48]
Looking Northwest from Storrs Hill Road Bridge in the 21st century. [Google Streetview, March 2023]
Looking Southeast from Storrs Hill Road Bridge in the 21st century through the throat of the old marshalling yard. [Google Streetview, March 2023]
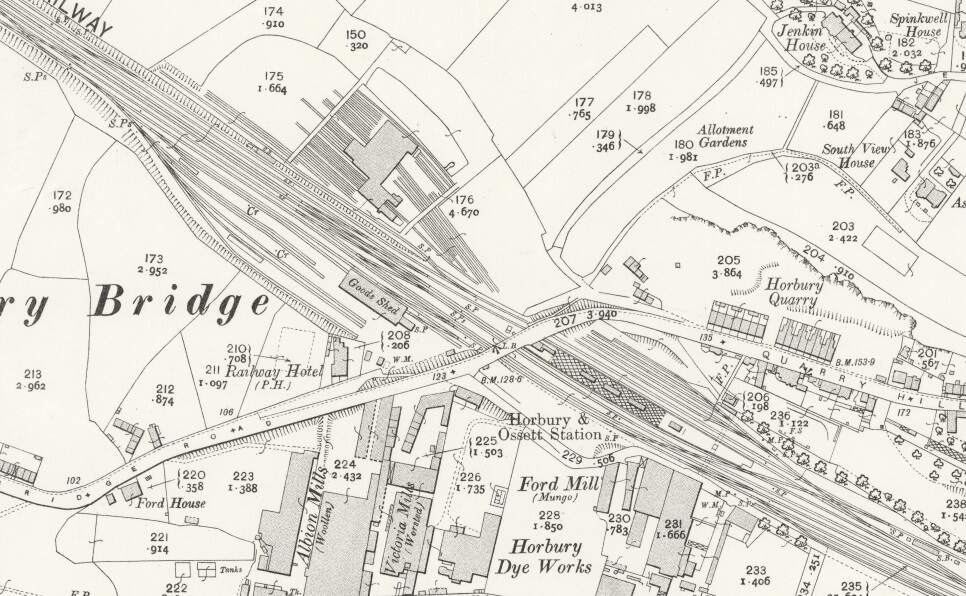
Horbury & Ossett Railway Station. [44]
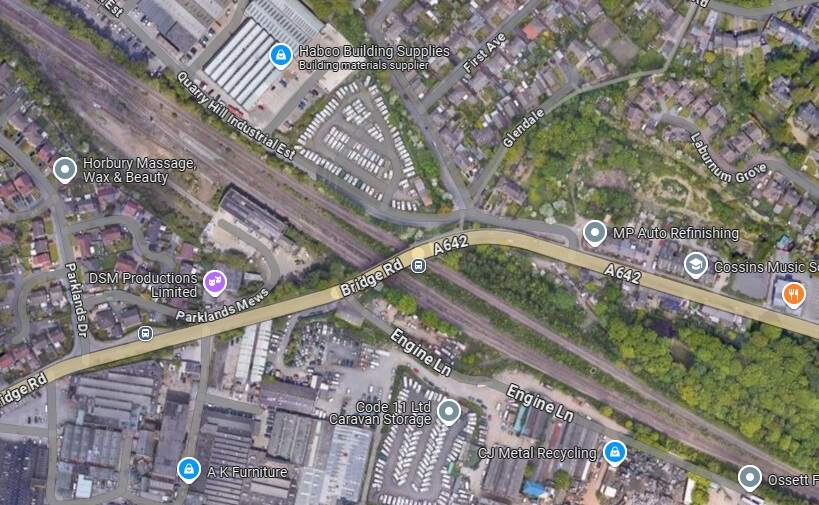
The site of Horbury & Ossett Railway Station in the 21st century. [Google Maps, October 2024]
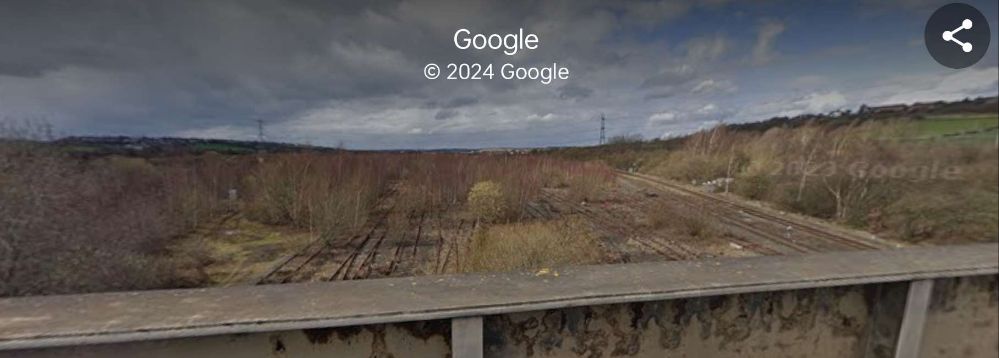
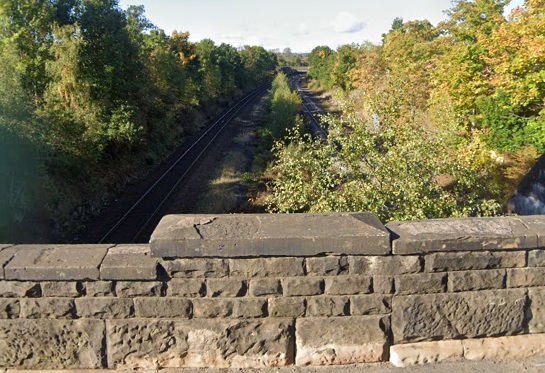
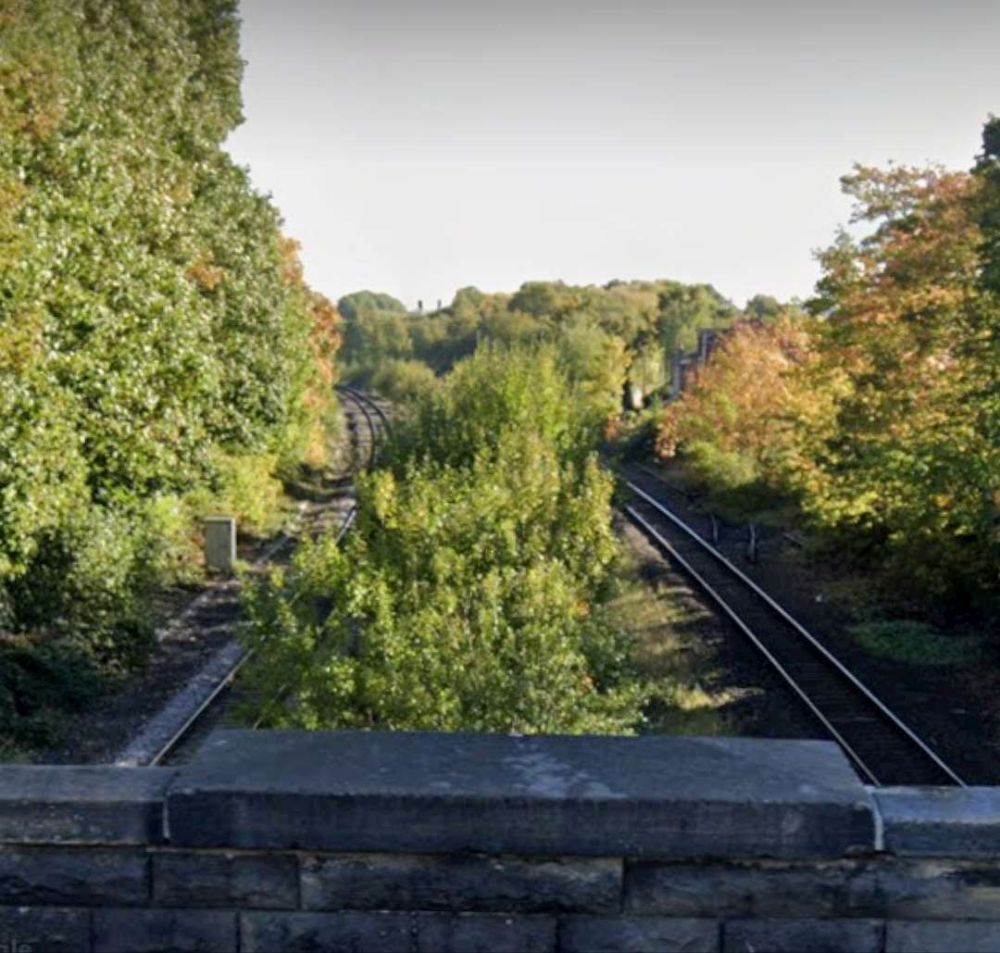
Looking Northwest from Bridge Road, A642 towards Storrs Road Bridge. Horbury and Ossett Railway Station goods facilities were on the left. [Google Streetview, July 2024]
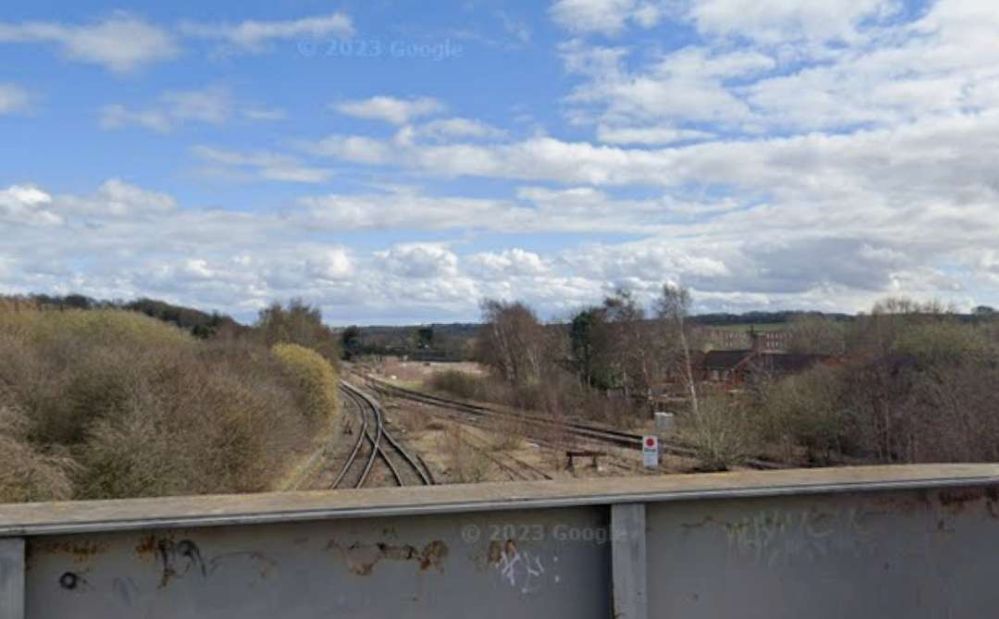
looking Southeast from Bridge Road. the passenger facilities were on the Southeast side of Bridge Road with the platform sat between the running lines. [Google Streetview, July 2024]

Horbury and Ossett railway station formerly served the town of Horbury. … The station was opened with the inauguration of the line in 1840, on the west of the Horbury Bridge Road, to the south-west of the town. Later a new, more substantial structure was built just to the east. … British Railways developed a large marshalling yard in the 1960s at Healey Mills immediately to the west of the original station. … [The station] closed in 1970. Almost all that remains is the old subway which ran under the tracks. Ossett is now the largest town in Yorkshire without a railway station. Proposals to open a new one are periodically canvassed, perhaps on part of the Healey Mills site.” [45]

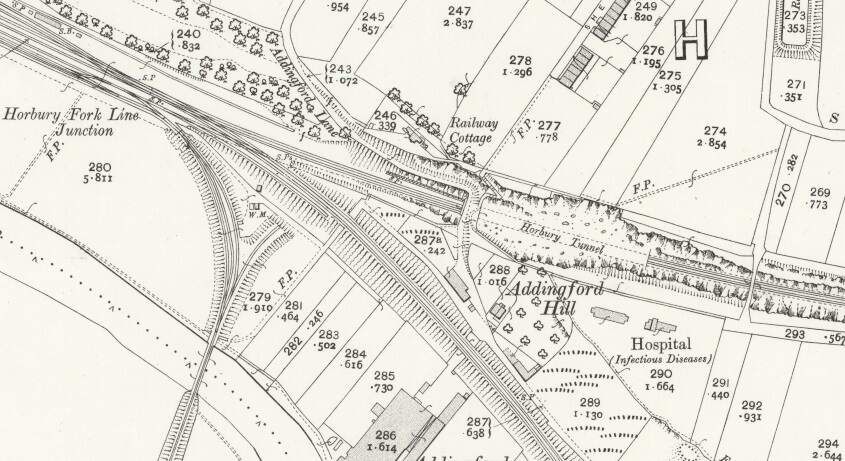
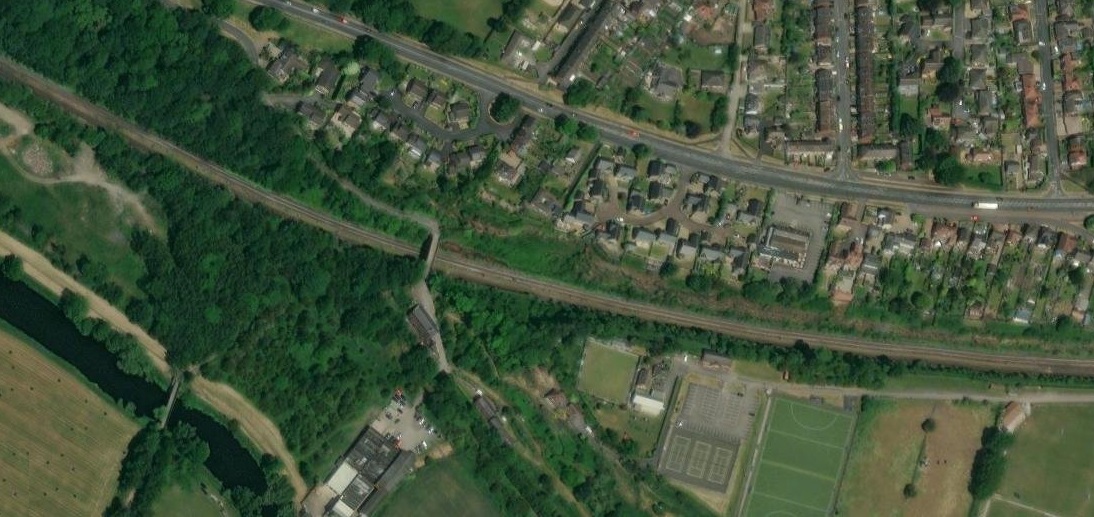
A little further East is Horbury Fork Line Junction where a mineral railway runs South to Harley Bank Colliery and the Horbury & Crigglestone Loop leaves the Manchester to Leeds line.

Horbury Fork Line Junction on the 1905 25″ordnance Survey. The junction sat just to the West of Horbury Tunnel. That tunnel has since been removed. [49]
The same location in the 21st century. The tunnel sat to on the East side of the present footbridge which is just to the left of the centre of this image. This image is an extract from the NLS’ ESRI satellite imagery. [49]

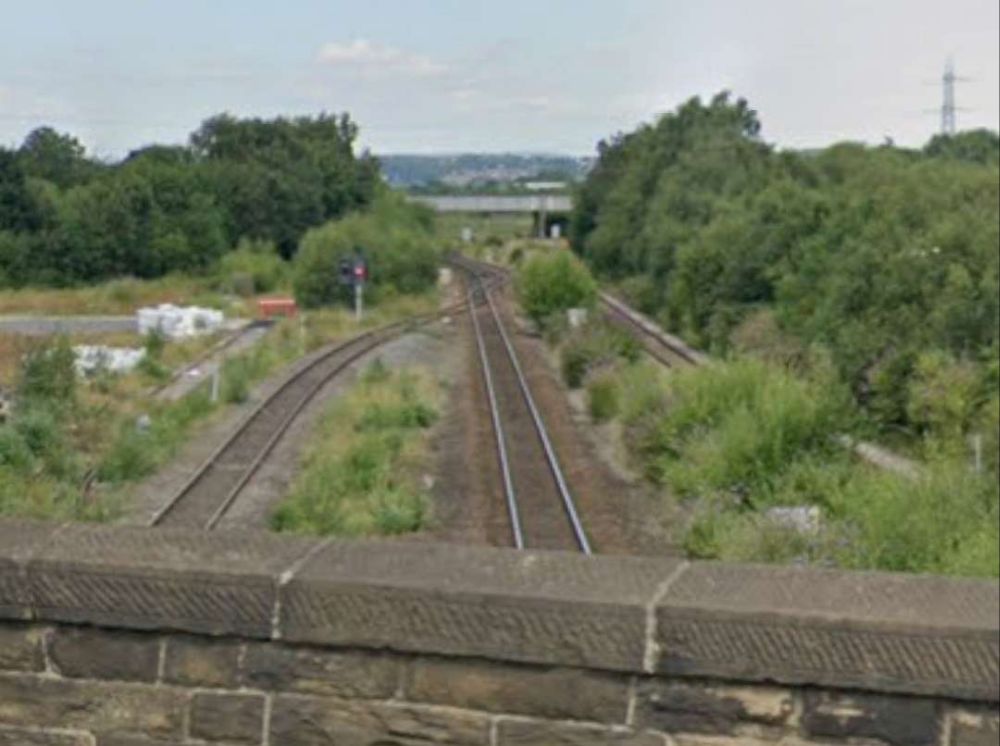
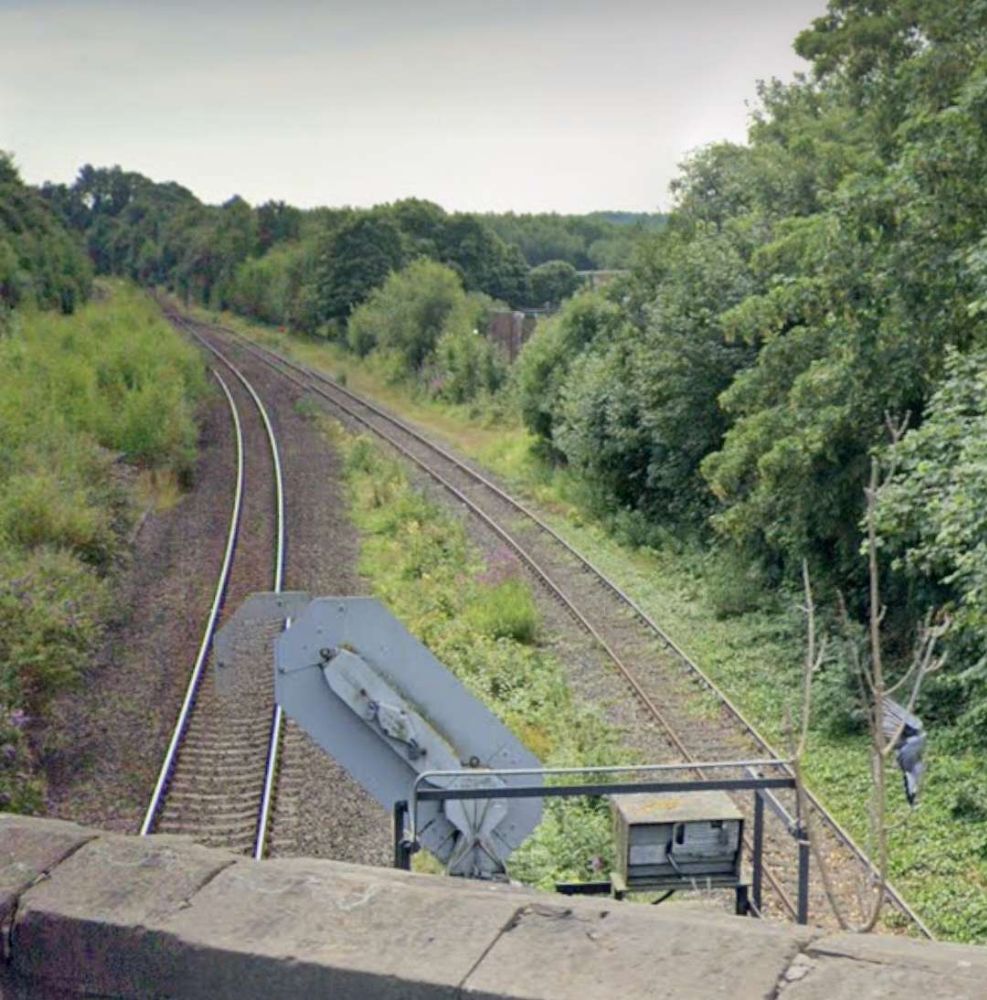
These next few photographs show views of the line from a series of three overbridges to the East of Horbury Fork Line Junction.

The view West from Southfield Lane Bridge. [Google Streetview, October 2022]
The view East from Southfield Lane Bridge. [Google Streetview, October 2022]
The view West from Dudfleet Lane Bridge towards Southfield Lane Bridge. [Google Streetview, October 2022]
The view East from Dudfleet Lane Bridge towards Millfield Road Bridge. [Google Streetview, October 2022]
The view West from Millfield Road Bridge towards Dudfleet Lane Bridge. [Google Streetview, October 2022]
The view East from Millfield Road Bridge. [Google Streetview, October 2022]

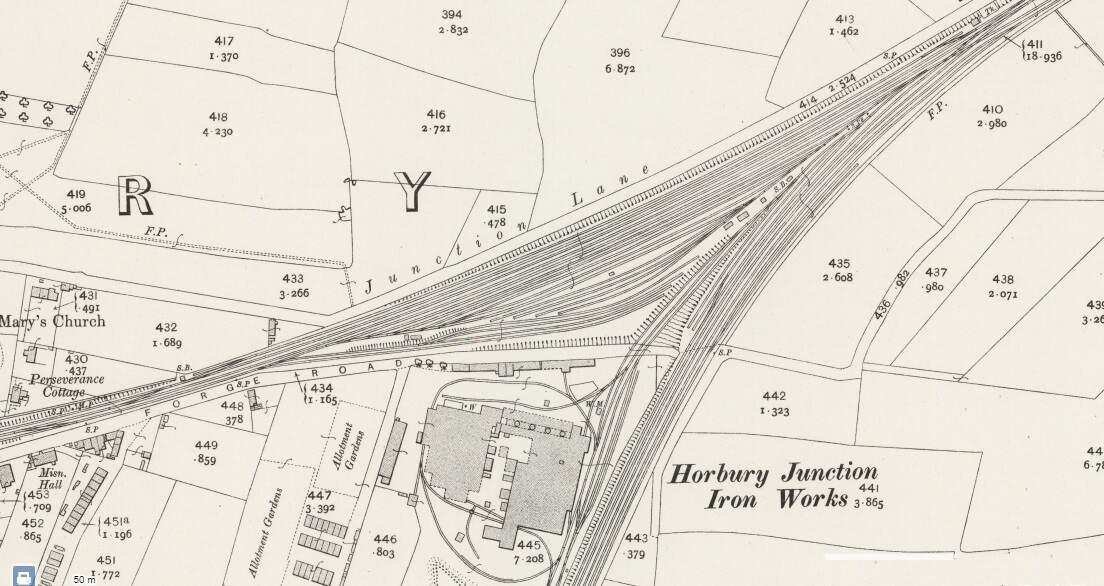
The next significant location on the line is Horbury Junction.

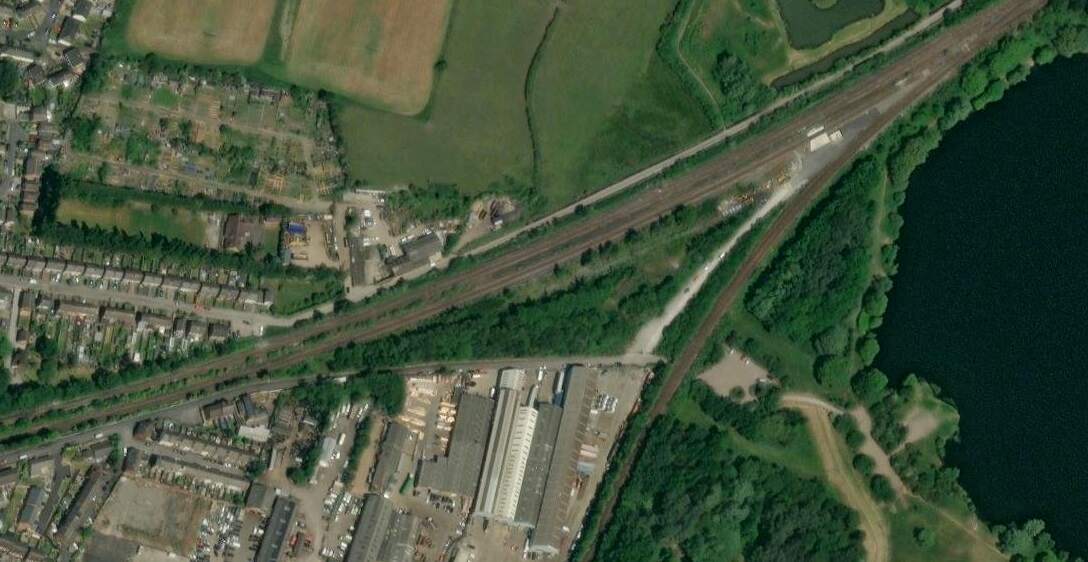
Horbury Junction on the 1905 25″ordnance Survey. Horbury Junction Ironworks sat in-between the Manchester and Leeds Railway and the. There was a Wagon Works just off the South edge of this image. The line heading South from Horbury Junction was the L&YR line to Flockton Junction and beyond. [50]
The same location in the 21st century as shown on the ESRI satellite imagery provided by the NLS.. [50]

Industrialisation in the immediate area of Horbury Junction began “in the early 1870s with the construction of Millfield Mill, followed by the Horbury Ironworks Co. In 1873, Charles Roberts bought a site for a new factory at Horbury Junction and moved his wagon building business from Ings Road, Wakefield to Horbury Junction. Before that, the area of Horbury Junction was a quiet backwater with a corn mill and a ford across the Calder for farm traffic.” In reality, a beautiful pastoral area of countryside was changed forever with the coming of the Railway, Millfield Mill, the Wagon Works and the Ironworks.” [51]

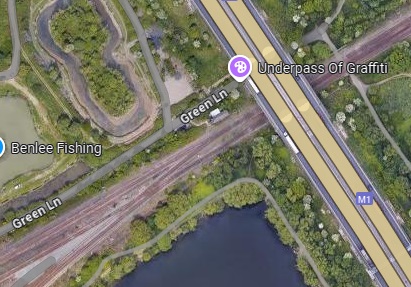
In the 21st century, just beyond Horbury Junction, the line is crossed by the M1.

In the 21st century, just beyond Horbury Junction (on the left of this extract from Google Maps), the line is crossed by the M1. [Google Maps, October 2024.

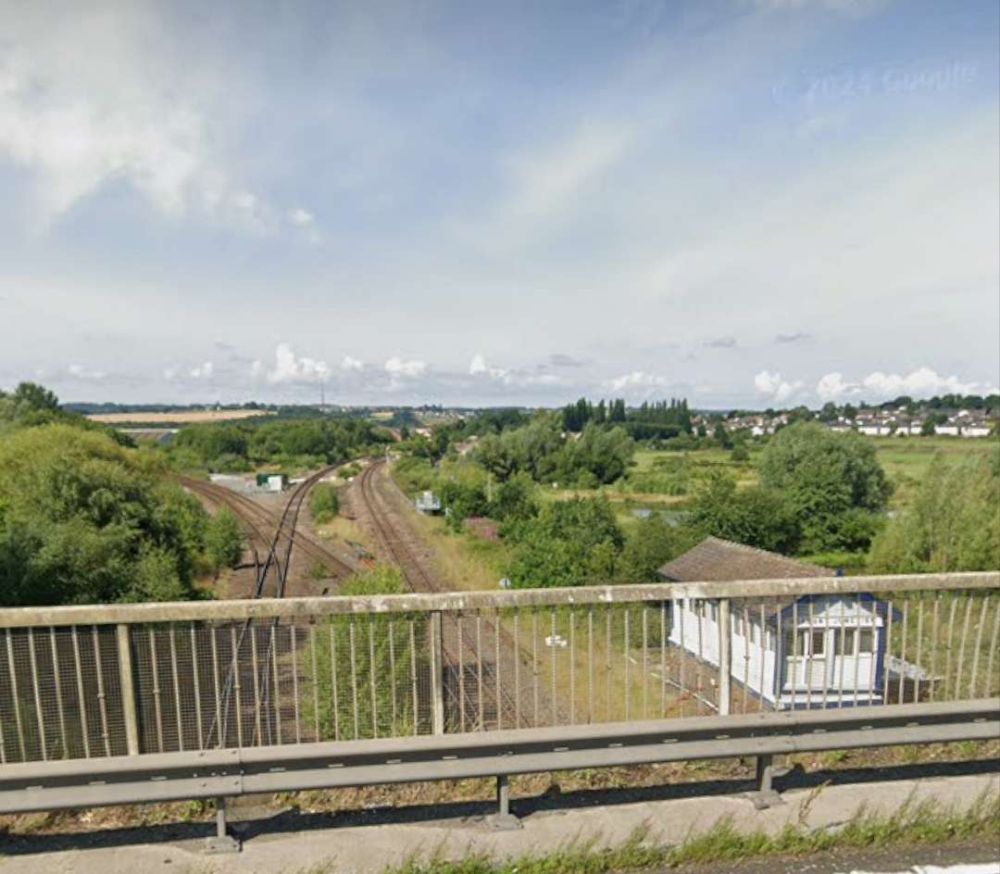
Horbury Junction seen, looking Southwest from the M1. [Google Streetview, July 2024]
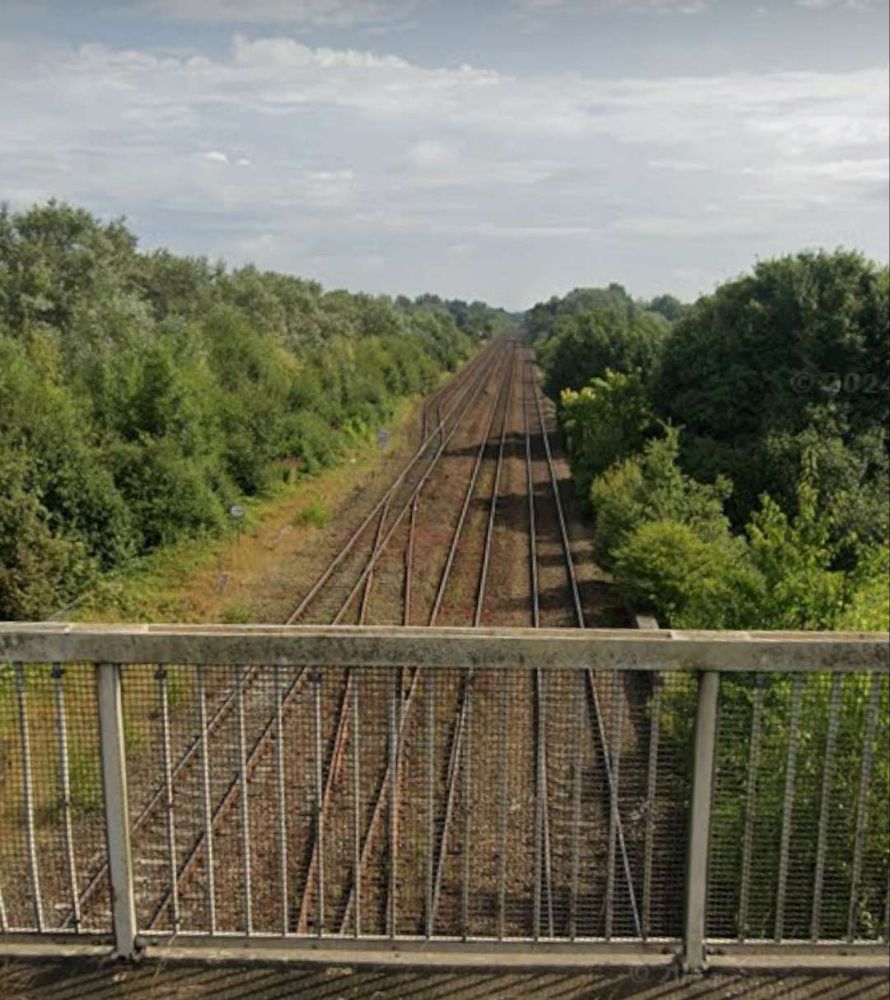
Looking Northeast from the M1. [Google Streetview, August 2024]
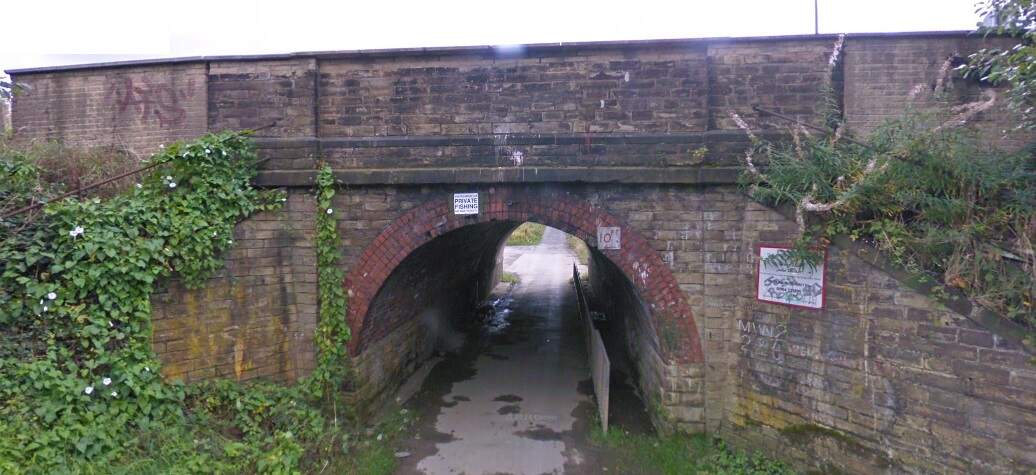
Green Lane Underpass seen from the North. This underpass sits just to the East of the modern M1. [Google Streetview, October 2008]

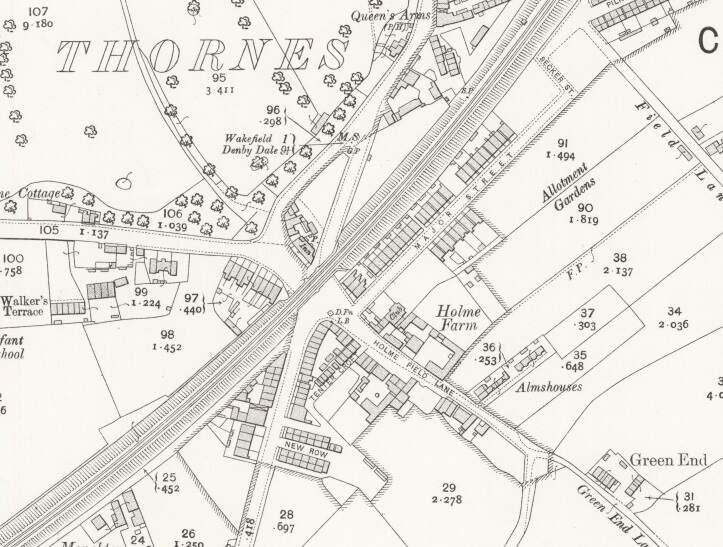
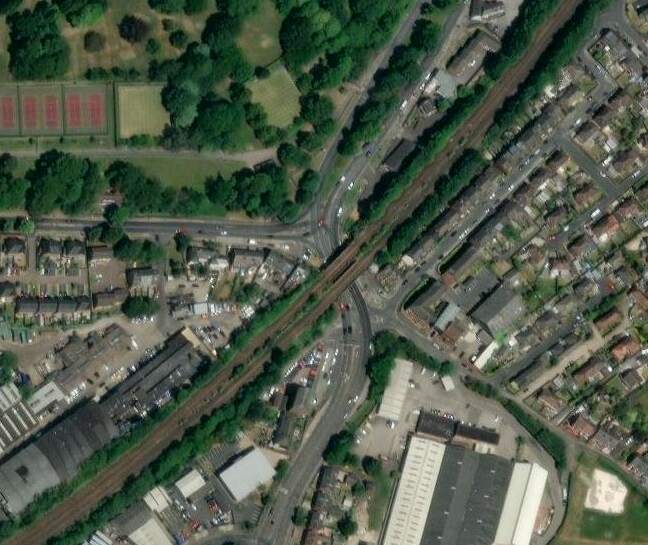
Following the line on to the Northeast, it next passes through Thornes.

The railway bridge at the centre of Thornes in 1905. [52]
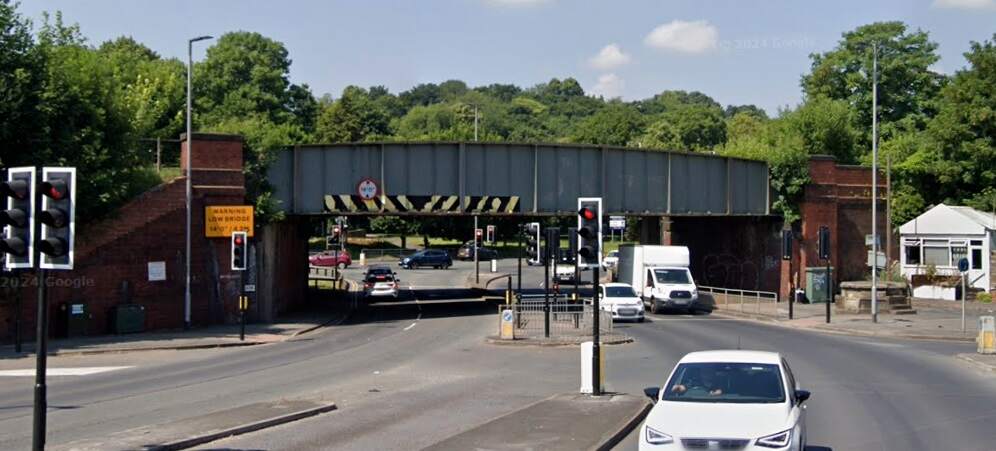
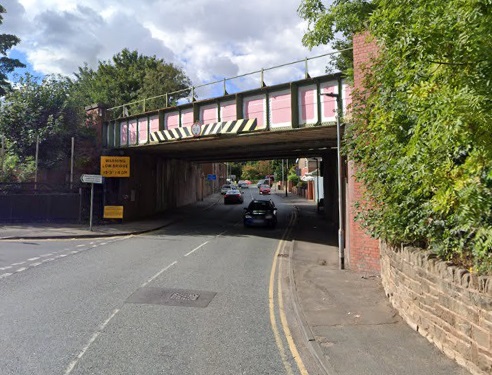
The same location in the 21st century. The now quadruple line is carried by two separate bridges. [52]
Thorne Bridge seen from the South in June 2024. [Google Streetview, June 2024]

Northeast of Thornes, the Manchester and Leeds Railway ran at high level into Kirkgate Joint Station in Wakefield.

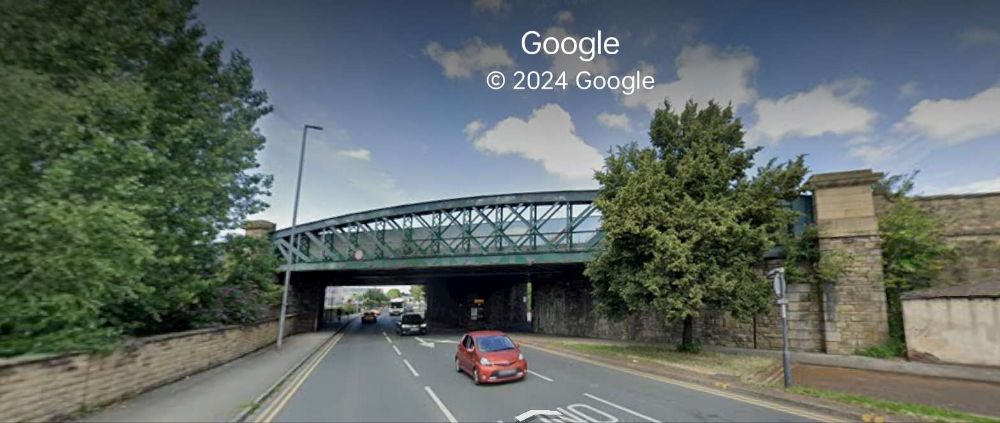
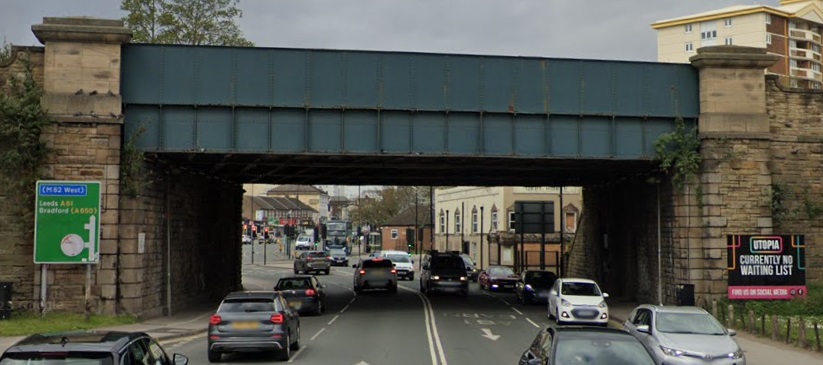
The bridge carrying the line over Kirkgate. [All three images from Google Streetview April 2023]
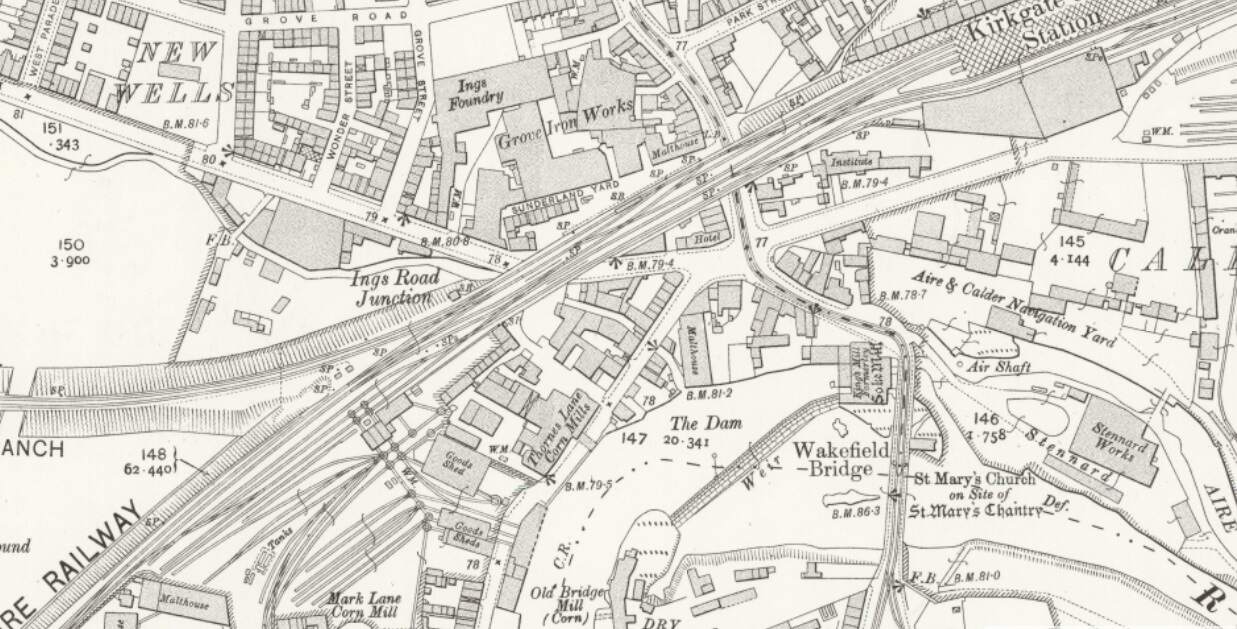
The Manchester and Leeds Railway enters this extract from the 1905 25″ Ordnance Survey bottom-left, To the North of it id the GNR Ings Road Branch. To the South of it is a Goods Yard with access to Wakefield’s Malthouses and Mark Lane Corn Mill. [53]
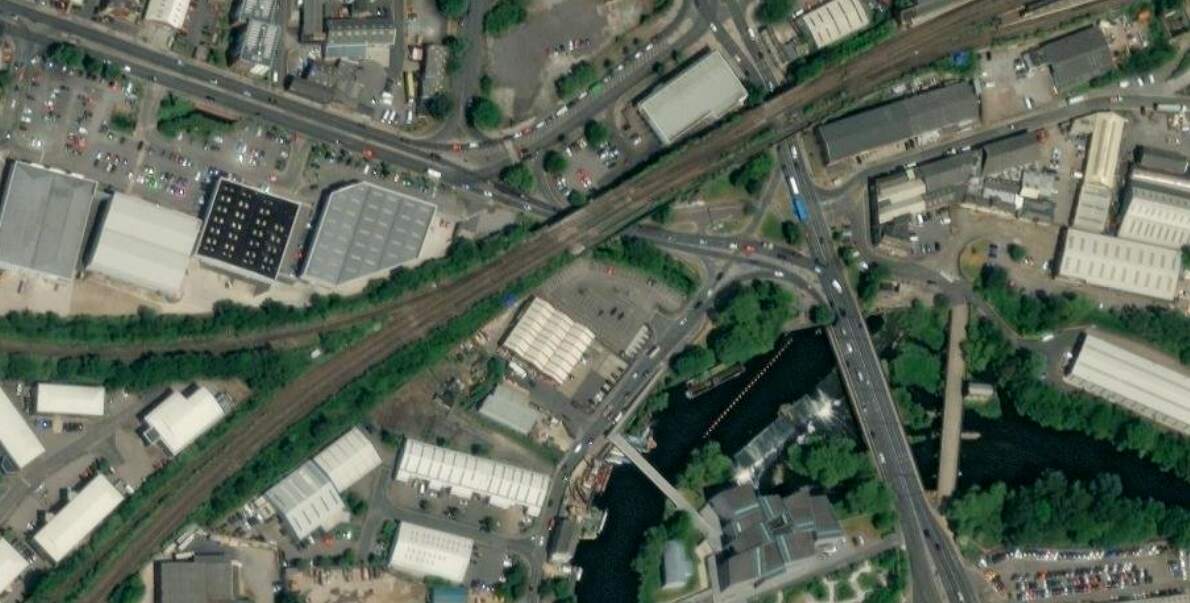
The same area in the 21st century. The rail lines remain approximately as on the map extract above. Wakefield Kirkgate Station (top-right) is somewhat reduced in size. Much of the built environment is different to that shown on the map above. This image is another extract from the ESRI satellite imagery. [53]

Wikipedia tells us that once it was opened by the Manchester and Leeds Railway in 1840, Kirkgate station was “the only station in Wakefield until Westgate was opened in 1867. The railway station building dates from 1854. … Some demolition work took place in 1972, removing buildings on the island platform and the roof with its original ironwork canopy which covered the whole station. A wall remains as evidence of these buildings. After this, Kirkgate was listed in 1979.” [72]

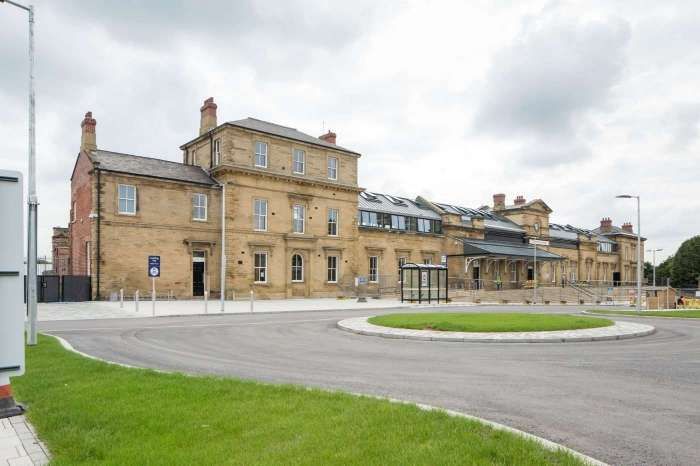
Kirkgate Station was refurbished in two phases between 2013 and 2015. [72]

The view westward on 29th July 1966, through Kirkgate Station towards Mirfield, The locomotive is LMS Fairburn class 4MT 2-6-4T No. 42196 (built 3/48, withdrawn 5/67), © Ben Brooksbank and licensed for reuse under a Creative Commons Licence (CC BY-SA 2.0). [74]

A series of modern images of Kirkgate Station are shared below

The images of Kirkgate Station above are:

  1. The support wall to the overall roof which was retained in the 1972 reordering and which has been refurbished in the 21st century, © Rept0n1x and licenced for reuse under a Creative Commons Licence (CC BY-SA 3.0). [72]
  2. The modern road approach to the station buildings, © Alan Murray-Rust and licensed for reuse under a Creative Commons Licence (CC BY-SA 2.0). [72]
  3. A Pacer DMU at Wakefield Kirkgate platform one in May 2006, (c) Ian Kirk and licenced for reuse under a Creative Commons Licence, (CC-By 2.5). [72]
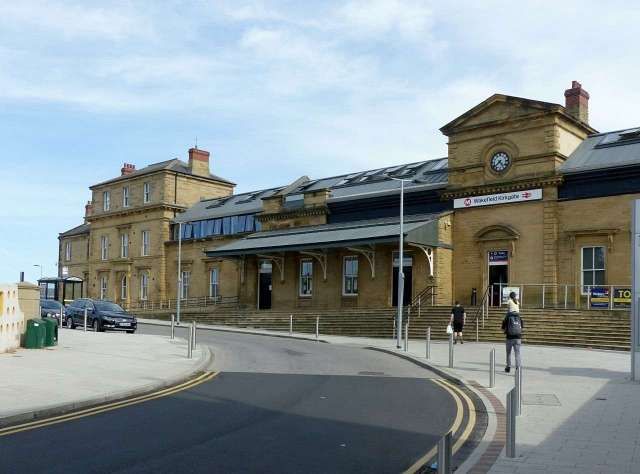
  4. The recently refurbished front façade of Kirkgate Railway Station, © Groundwork Landscape Architects. [73]
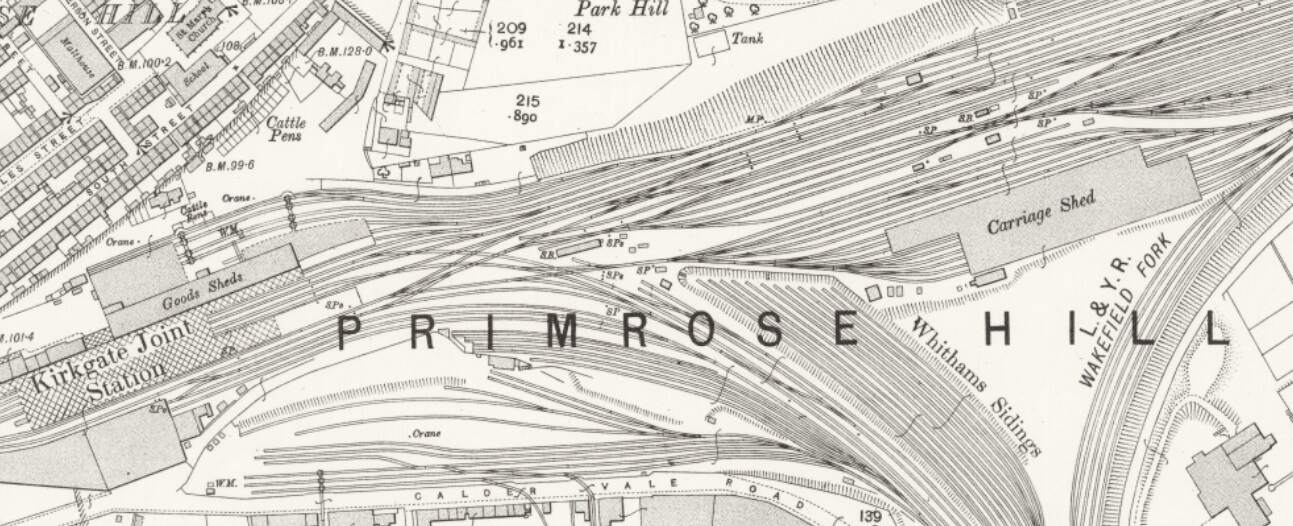
East of Kirkgate Joint Station in 1905. The landscape in Primrose Hill is dominated by the railway. The line exiting to the South of this extract is the L&YR Oakenshaw Branch which crosses the River Calder and runs past the station’s Engine Sheds. [54]
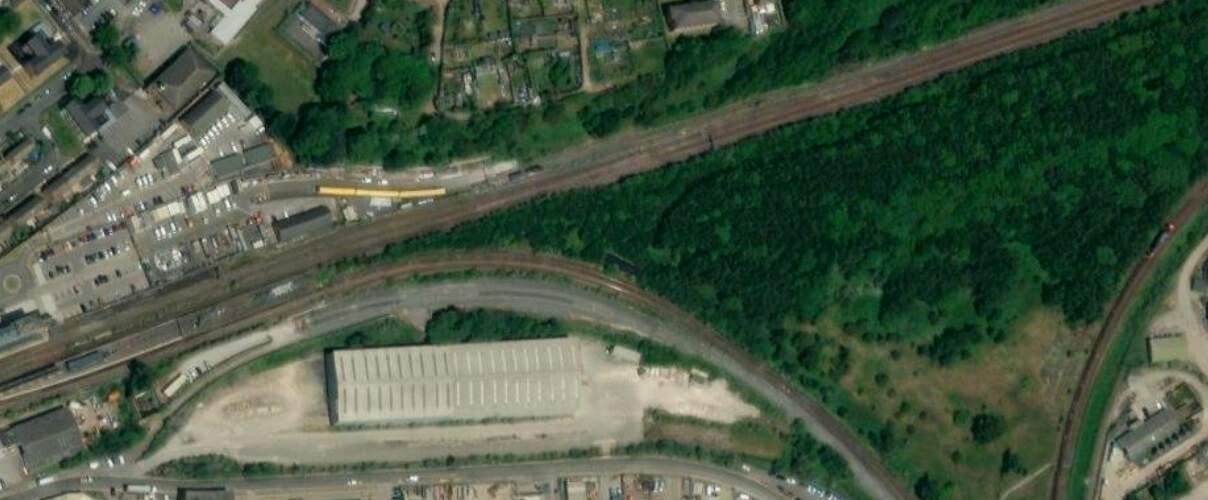
the same area in the 21st century, much of the railway infrastructure has disappeared and is beginning to be taken over by nature. [54]

Just to the East of Wakefield Kirkgate Station were Park Hill Colliery Sidings.

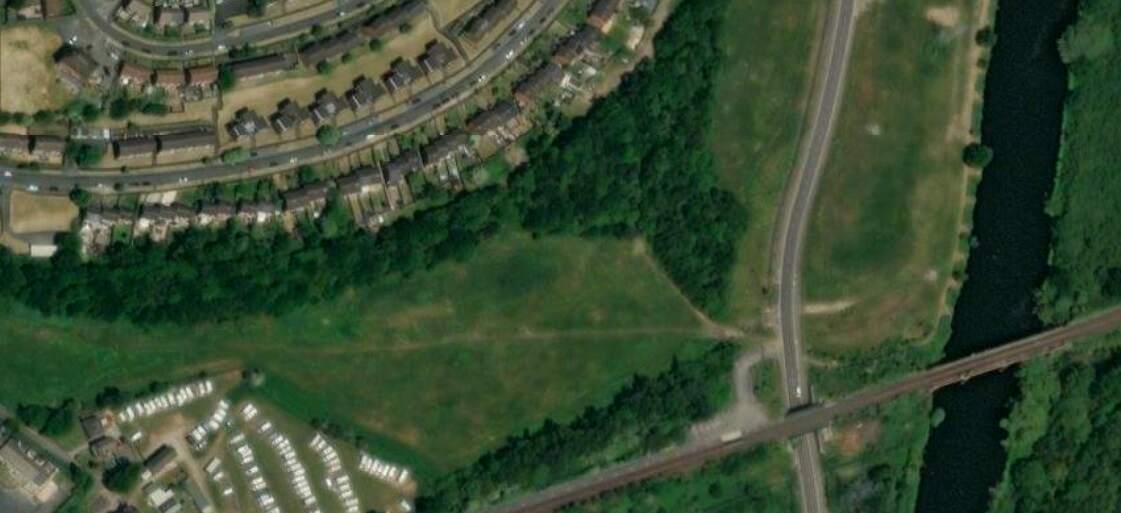
Much the same area in the 21st century. The Midland’s lines South of Goosehill have gone, the footbridge remains but the large area of sidings to the Northeast of the Junction have also gone. [56]
Park Hill Colliery Sidings and the River Calder in 1913. [55]
The same location in the 21st century. [55]

And beyond those sidings a further crossing of the River Calder.

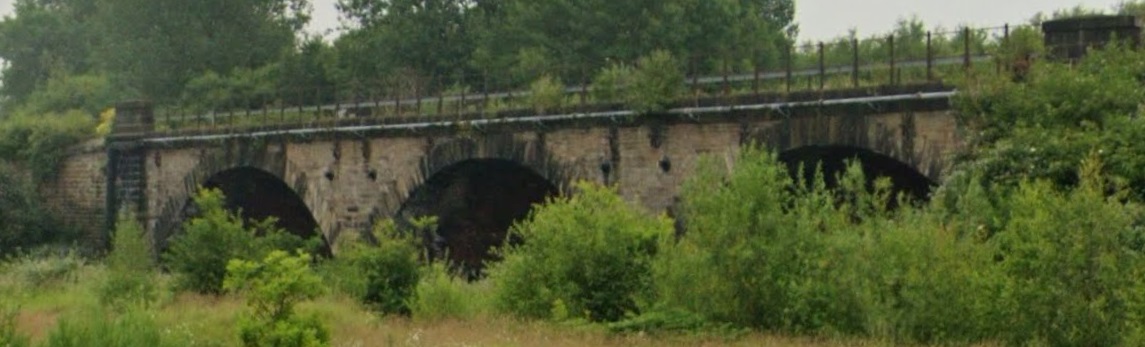
The three arched stone viaduct across the River Calder. This photograph is taken from Neil Fox Way and looks Southeast towards the bridge. [Google Streetview, June 2024]

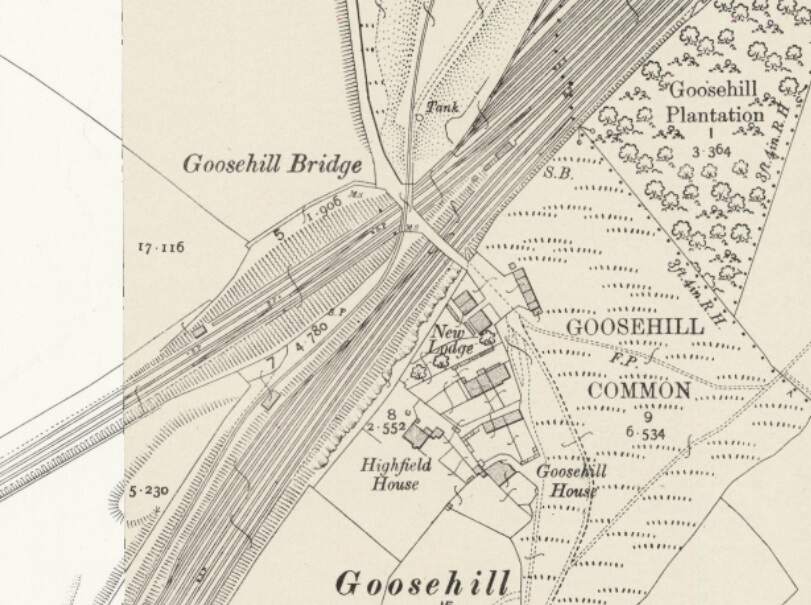
Just a short distance further along the line, at Goosehill, the Manchester and Leeds Railway (by 1905, The Lancashire and Yorkshire Railway) joined the North Midland Railway (by 1905, The Midland Railway)

Goosehill Bridge and Junction witht he Midland Railway entering from the bottom of the extract and the Manchester 7 Leeds entering from the bottom-left. [56]
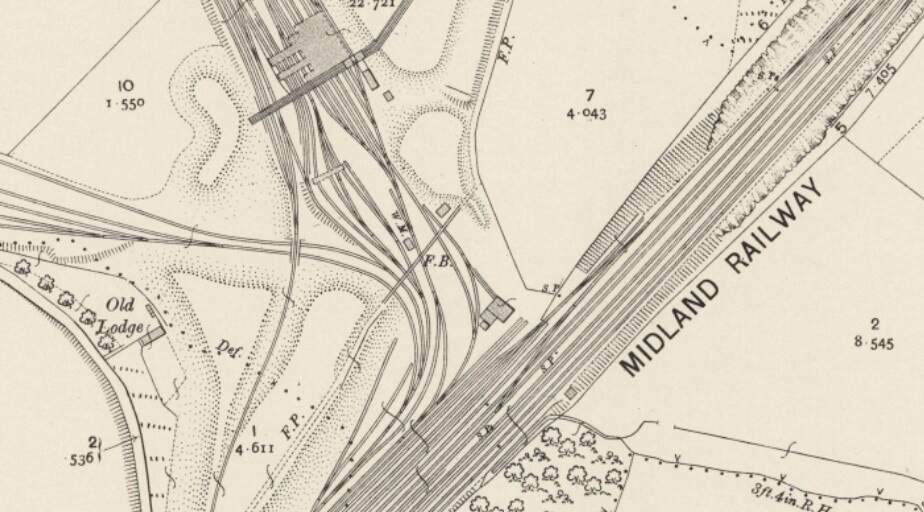
Immediately to the Northeast of the last extract from the 1905 25″ Ordnance Survey, the Midland’s lines can be seen heading Northeast with branches off to the North and West. The branch heading away to the West is the St. John’s Colliery line running to wharves at Stanley Ferry. That to the North runs through the screens and serves St. John’s Colliery itself. [57]
The same area in the 21st century. The roadway crossing the railway and heading off the satellite image to the West runs to a large opencast site. [57]
Looking Southwest from the bridge carrying the access road to the opencast site. [Google Streetview, May 2023]
Looking Northeast from the bridge carrying the access road to the opencast site. [Google Streetview, May 2023]
Looking Southwest from the Newlands Lane Bridge. [Google Streetview, May 2023]
Looking Northeast from Newlands Lane Bridge. [Google Streetview, May 2023]

From this point on the traffic from the Manchester and Leeds Railway ran on North Midland (later Midland) Railway metals, via Normanton Railway Station and then passing Silkstone and West Riding Collieries, and on towards Leeds, approaching Leeds from the Southeast. Normanton Station appears on the map extract below.

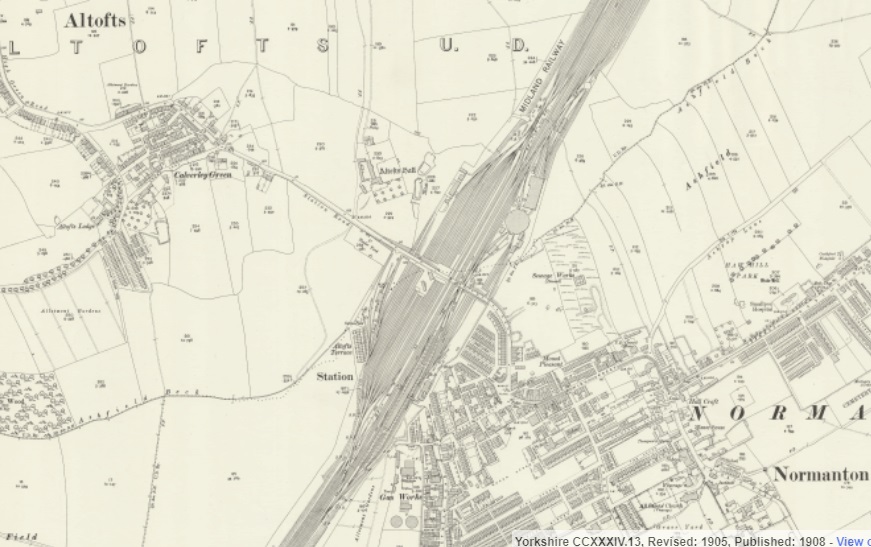
An smaller scale extract from the 25″ Ordnance Survey of 1905 which shows Normanton and its railway station. St. John’s Colliery and Gooshill Junction are just of the extract on the bottom left. [58]
Looking Southwest from Altofts Road Bridge through the site of Normanton Railway Station. [Google Streetview, April 2023]

Rake’s last words on a journey along the railway are these: “Just previous to reaching Wakefield, the railway is carried over a viaduct of 16 arches, and, quitting that station it enters a deep cutting, and crosses the Vale of Calder for the last time, a little to the east of Kirkthorpe. Here was the most important diversion of the Calder, by which the cost of building two bridges was saved. … The line terminated by a junction with the North Midland Railway, a mile to the north of which point was situated the Normanton Station, where the York and North Midland, and by its means, the Leeds and Selby and Hull and Selby Railways united with the former lines. The remainder of the journey to Leeds, 9 miles, was traversed on the North Midland Railway.” [1: p472]

Rake goes on to talk about the gradients of the railway which “were considered somewhat severe. Starting from Manchester, the line ascends to Rochdale, 10 miles, over a series of inclinations averaging about 1 in 155; from Rochdale to the summit level, 6½ miles, the ascent is 1 in 300; the total rise from Manchester being 351 ft. From the summit level plane, which extends for 1 mile 55 chains, to Wakefield, a distance of 30 miles, the line descends for the first six miles on a gradient of 1 in 182, after which it is continued by easy grades of an average inclination of 1 in 350. Below Wakefield a comparatively level course is maintained to the junction with the North Midland Railway, the total fall from the summit being 440 ft. The curves were laid out so as not to be of a less radius than 60 chains. The gauge adopted on the Manchester and Leeds Railway was 4 ft. 9 in., to allow a in. play on each side for the wheels. … The rails were of the single parallel form, in 15 ft. lengths, with 3 ft. bearings, and were set in chairs, to which they were secured by a ball and key, as on the North Midland Railway. The balls, (3/4  in. diameter), were of cast iron, and fitted into a socket formed in one side of the stem of the rail; the key, which was of wrought iron, was 8 in. long (and 5/8 in. wide at one end, from which it tapered to 3/8 in. at the other end). … Stone blocks were used where they could be obtained from the cuttings, and were placed diagonally, but sleepers of kyanised larch were used on the embankments, the ballasting being of burnt and broken stone.” [1: p472-473]

It is interesting to note that the tramway/tramroad practice of using stone blocks as sleepers was in use when this railway was first built!

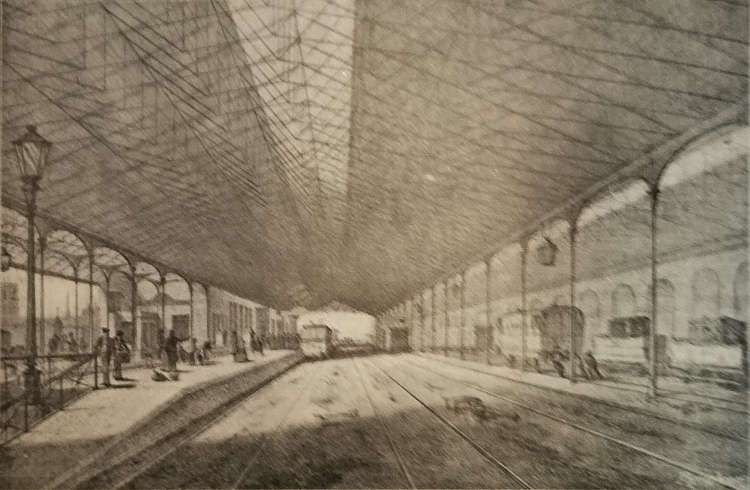
Rake continues: “The Manchester terminal station was located between Lees Street and St. George’s Road, and was entirely elevated on arches. The passenger shed was covered with a wooden roof, in two spans, and the whole length of the station was 528 ft. The passenger platform was approached by a flight of 45 steps from the booking-office on the ground floor. [1: p473]

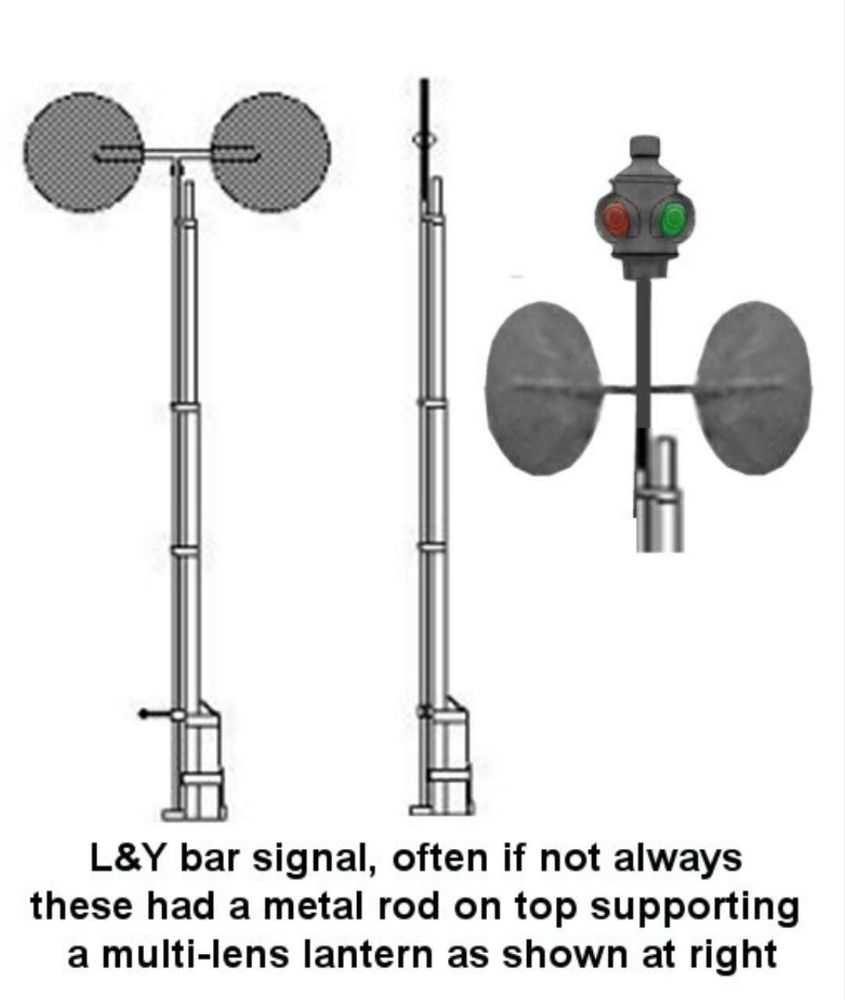
Early signals on the Manchester and Leeds.Railway which became part of the Lancashire & Yorkshire Railway network. [64]

The signals were of the horizontal double disc or spectacle form which, when revolved to the extent of a half circle, caused both discs to be invisible to the driver and indicated all right, the lamp above showing, when illuminated, green; the colour shown by the lamp when both discs were crosswise to the line being red.” [1: p473]

Rolling Stock

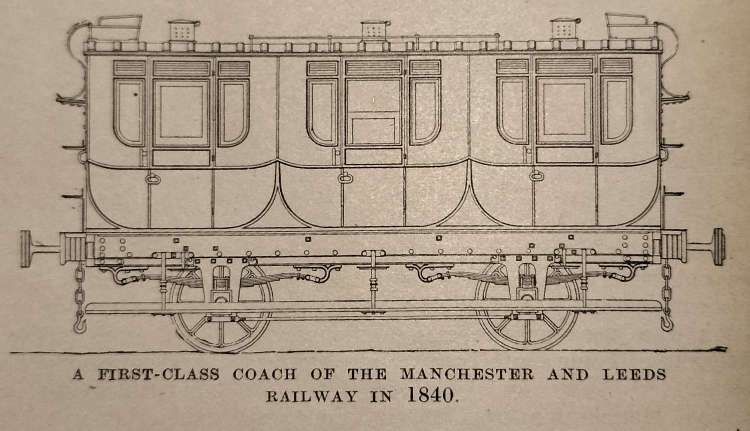
The carriages consisted of three classes, The first class, in three compartments, upholstered, and fitted with sash windows painted blue; second-class, in three compartments, but open at the sides and furnished with wooden sliding shutters painted yellow; and carriages termed  ‘mixed’, in which the middle compartment was for first-class, and each of the ends was for second-class passengers. There was also a carriage of novel construction, built according to the plan of the chairman of the company and used at the opening of the line. The under-framing was of the usual construction, but the body was unique. The floor was considerably wider than ordinary, and the sides curved outwards until they joined a semicircular roof, the greater part of which was fitted with wire gauze to give air, but capable of being instantaneously covered with waterproof material, by the action of an inside handle, so that sun and rain could be shaded out at pleasure. The sides were fitted throughout with plate glass, and ranges of seats occupied the floor, having passages on either side. Tents were also contrived in the sides which closed at will by spring action. The effect of the interior was said to resemble the interior of a conservatory! These carriages were in each case mounted on four wheels, with a perforated footboard of iron running the whole length of the body, in substitution for the lower tier of steps in use on other railways at the time.” [1: p473-474]

I have produced Rake’s description of this ‘unusual carriage’ as I have found it impossible to imagine what it looked like from Rake’s word-picture.

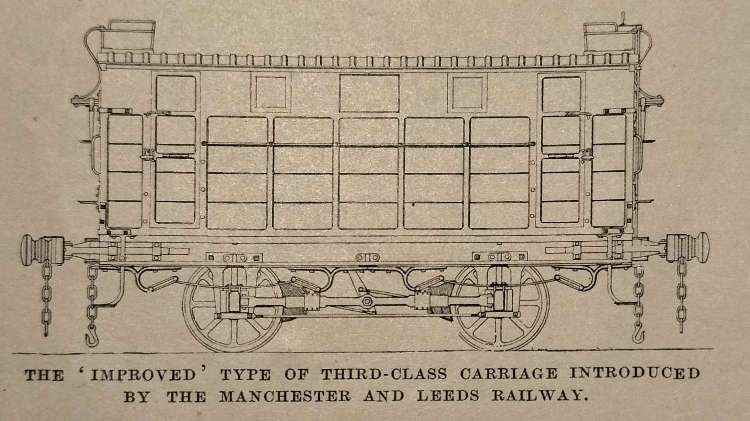
At the end of 1840, “an improved form of third-class carriage was constructed, in which each wheel was braked; the brake levers were attached to the axle-boxes and, consequently, when applied by the guard. who sat on the roof, did not bring the body of the carriage down on to the springs, The buffing springs were placed in front of the headstocks, and a flat iron bar attached to the buffer worked in brackets on the sole bar. The doors were fitted with latches on the outside, which were fastened by the guard when the passengers were inside.” [1: p474]

An improved third class carriage. Looking back from a 21st century perspective, these carriages seem to be not much better than the wagons used to carry livestock. This is borne out by Rake’s notes below. It was, however, a significant improvement on the open wagons, having a roof, glass windows and brakes. Contrary to what Rake appears to say below, Wells suggests that these covered third class wagons did have seating. [1: p474][75: p85]

The windows and the doors being fixed, no passenger could open the door until the guard had released the catch. Roof lamps were not provided in these coaches, which were painted green. … The third-class carriages. or rather, wagons, were provided with four entrances, to correspond with the “pens” into which they were sub-divided by means of a wooden bar down the centre, crossed by another bar intersecting the former at right angles in the middle of its length. There were no seats, and the number of passengers for which standing room could be found was limited solely to the to the bulk Stanhope or ‘Stan’ups’, as they were derisively termed. The contrivance of pens was said to be due to a determination to prevent respectably dressed individuals from availing themselves of the cheaper mode of conveyance, in which there was little to distinguish them, it was complained, ‘from the arrangements for the conveyance of brute beasts which perish’. The company’s servants were strictly enjoined “not to porter for wagon passengers‘!” [1: p474]

Rake’s illustration of an early Manchester and Leeds Railway first class coach. [1: p474]

Further details of Rolling Stock on the Railway can be found in Jeffrey Wells book about the line. [75: p81-85]

Locomotives

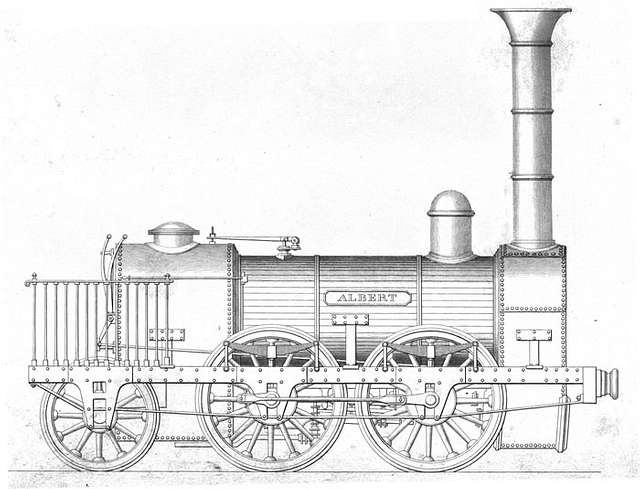
Rake tells us that the locomotives were all mounted on 6 wheels and purchased from Sharp, Roberts & Co., Robert Stephenson & Co., and Taylor & Co. They all had 14 in. diameter, 18 in. stroke cylinders and 5 ft. 6 in. diameter driving wheels. Jeffrey Wells provides a more comprehensive, tabulated, list of those early locomotives. [75: p79-80]

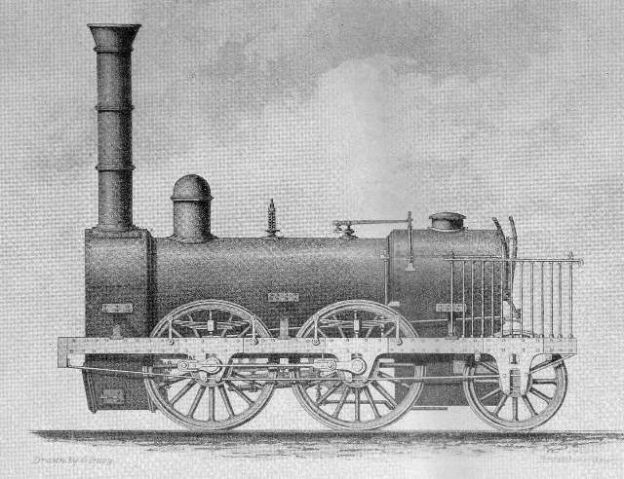
A typical 0-4-2 Locomotive of 1839/1840. [76]
An early (1834) R. Stephenson & Co. 0-4-2 locomotive of very similar design to those supplied to the Manchester and Leeds Railway 9c0 Public Domain. [77]

The first three 0-4-2s were made by Robert Stephenson & Co., and that company supplied plans and specifications for its locomotives which meant that The Manchester and Leeds Railway could have the same design manufactured by other firms of the Company’s choice. The first 12 locomotives built for the Manchester and Leeds in 1839 were all to Stephenson’s 0-4-2 design. Wells tells us that of these locomotives, the first three (Nos. 1 -3) were called Stanley, Kenyon and Stephenson and were built by R. Stephenson & Co. They were supplied to the Railway in April and May 1839. [75: p79]

The next three locomotives (Nos. 4-6) were supplied by Sharp Bros., Manchester. Lancashire and Junction were supplied in May 1839 and York in July 1839. Nos. 7, 9 and 10, named respectively, Rochdale (16th July), Bradford (6th September) and Hull (7th September)came from Naysmith & Co., Patricroft. Nos. 8, 11, 12 (Leeds, Scarborough and Harrogate) were supplied by Shepherd & Todd by September 1839. [75: p79]

Wells comments that No. 1, ‘Stanley’ “was named after Lord Stanley, Chairman of the House of Commons Committee who supported the Manchester and Leeds Railway Bill in 1836. … Other Stephenson designs followed: 19 engines, numbered 15 to 40, of the 2-2-2 wheel arrangement were delivered between October 1840 and April 1842. These were recommended by Stephenson to work the eastern section of the line, between Sowerby Bridge and Wakefield, thus gradually removing the [Manchester and Leeds Railway’s] reliance on North Midland Railway motive power which had at first prevailed from late in 1840.” [75: p80]

R. Stephenson patented 2-2-2 locomotive No. 123 ‘Harvey Combe’ built 1835, from Simm’s ‘Public Works of Great Britain’, 1838. This locomotive is of a very similar design to those supplied by various manufacturers to the Manchester and Leeds Railway in 1840-1842. These were given the Nos. 15-40 and were supplied by Charles Tayleur & Co., Rothwell & Co., Laird Kitson & Co., Sharp Bros., Naysmith & Co., and W. Fairburn & Co., (c) C. F. Cheffins, Public Domain. [78]

He continues: “Once again several manufacturers were involved in the supply of these locomotives. Goods engines were represented by a further batch of 0-4-2s; 13 were delivered (Nos 33 to 46) between April 1841 and June 1843, the three manufacturers involved being R. Stephenson & Co., Haigh Foundry, Wigan, and William Fairbairn & Co. of Manchester. … Three standard Bury-type 0-4-0s were the last engines to be delivered (Nos 47 to 49) the first two bearing the names West Riding Union and Cleckheaton respectively. All three were completed between November 1845 and January 1846 by the firm of Edward Bury of Liverpool.”

And finally. …

Rake concludes his article, the first to two about the line in The Railway Magazine (I currently only have access to this first article) with two short paragraphs. The first reflects on policing: “There were no police on the railway, the whole of the platelayers being constituted as constables on the completion of the first section of the line; and, we are afterwards told, that ‘the vigilance resulting from the pride these men take, in being thus placed in authority, had been found to supersede the necessity of any more expensive system of surveillance.'” [1: p474]

The second notes that: “The directors [were] very anxious to complete the railway as far as Rochdale, at the earliest possible time, and on the 4th July, 1839, it was opened through that town to Littleborough, a distance of about 14 miles, the event ‘exciting a most extraordinary degree of local interest and wonder’ we are told.” [1: p474]

References

  1. Herbert Rake; The Manchester and Leeds Railway: The Origin of the Lancashire and Yorkshire Railway; in The Railway Magazine, London, December 1905, p468-474
  2. https://www.geograph.org.uk/photo/820318, accessed on 23rd September 2024.
  3. https://premierconstructionnews.com/2016/04/14/summit-tunnel, accessed on 23rd September 2024.
  4. https://en.m.wikipedia.org/wiki/Summit_Tunnel, accessed on 23rd September 2024.
  5. https://commons.m.wikimedia.org/wiki/File:Gauxholme_Bridge,_Todmorden.jpg, accessed on 23rd September 2024.
  6. https://www.yorkshirepost.co.uk/news/opinion/columnists/trans-pennine-rail-in-the-age-of-victoria-1807452, accessed on 23rd September 2024.
  7. https://www.geograph.org.uk/photo/504379, accessed on 23rd September 2024.
  8. https://maps.nls.uk/geo/explore/#zoom=17.9&lat=53.71428&lon=-2.09924&layers=168&b=ESRIWorld&o=100, accessed on 23rd September 2024.
  9. https://maps.nls.uk/geo/explore/#zoom=18.9&lat=53.70635&lon=-2.10701&layers=168&b=ESRIWorld&o=100, accessed on 23rd September 2024.
  10. https://maps.nls.uk/geo/explore/#zoom=16.9&lat=53.71706&lon=-2.09298&layers=168&b=ESRIWorld&o=100, accessed on 23rd September 2024.
  11. https://maps.nls.uk/geo/explore/#zoom=17.1&lat=53.73968&lon=-2.03054&layers=168&b=ESRIWorld&o=100, accessed on 23rd September 2024.
  12. https://maps.nls.uk/geo/explore/#zoom=16.5&lat=53.73833&lon=-2.00992&layers=168&b=ESRIWorld&o=100, accessed on 23rd September 2024.
  13. https://maps.nls.uk/geo/explore/#zoom=16.1&lat=53.73044&lon=-1.98307&layers=168&b=ESRIWorld&o=100, accessed on 23rd September 2024.
  14. https://maps.nls.uk/geo/explore/#zoom=16.1&lat=53.72280&lon=-1.94806&layers=168&b=ESRIWorld&o=100, accessed on 23rd September 2024.
  15. https://maps.nls.uk/geo/explore/#zoom=16.8&lat=53.70808&lon=-1.91151&layers=168&b=ESRIWorld&o=100, accessed on 23rd September 2024
  16. https://commons.wikimedia.org/wiki/File:Mytholmroyd_3.jpg, accessed on 24th September 2024.
  17. https://en.wikipedia.org/wiki/Luddendenfoot_railway_station, accessed on 24th September 2024.
  18. https://www.geograph.org.uk/photo/4500324, accessed on 24th September 2024.
  19. https://en.wikipedia.org/wiki/Mytholmroyd_railway_station#/media/File:Mytholmroyd_railway_station,_November_2020.jpg, accessed on 24th September 2024.
  20. https://commons.wikimedia.org/wiki/File:Todmorden_station_p2.jpg, accessed on 24th September 2024.
  21. https://maps.nls.uk/geo/explore/#zoom=17.0&lat=53.61032&lon=-2.15338&layers=168&b=ESRIWorld&o=100, accessed on 24th September 2024.
  22. https://www.geograph.org.uk/photo/2160438, accessed on 24th September 2024.
  23. http://www.halifaxpeople.com/Sowerby-Bridge-Train-Station.html#google_vignette, accessed on 24th September 2024.
  24. https://commons.wikimedia.org/wiki/File:Sowerby_Bridge_stn.jpg, accessed on 24th September 2024.
  25. https://maps.nls.uk/geo/explore/#zoom=17.0&lat=53.70193&lon=-1.88141&layers=168&b=ESRIWorld&o=100, accessed on 24th September 2024.
  26. https://maps.nls.uk/geo/explore/#zoom=17.0&lat=53.69406&lon=-1.85773&layers=168&b=ESRIWorld&o=100, accessed on 24th September 2024.
  27. https://en.wikipedia.org/wiki/Greetland_railway_station, accessed on 24th September 2024.
  28. http://www.halifaxpeople.com/Historic-West-Vale.html, accessed on 24th September 2024.
  29. https://maps.nls.uk/geo/explore/#zoom=17.0&lat=53.69065&lon=-1.84016&layers=168&b=ESRIWorld&o=100, accessed on 24th September 2024.
  30. http://www.halifaxpeople.com/Historic-Elland.html, accessed on 24th September 2024.
  31. https://maps.nls.uk/geo/explore/#zoom=17.0&lat=53.69860&lon=-1.77905&layers=168&b=ESRIWorld&o=100, accessed on 24th September 2024.
  32. https://www.flickr.com/photos/tcs-pics/6805337658, accessed on 24th September 2024.
  33. https://commons.wikimedia.org/wiki/File:Brighouse_station.jpg, accessed on 24th September 2024.
  34. https://maps.nls.uk/geo/explore/#zoom=17.0&lat=53.68478&lon=-1.72933&layers=168&b=ESRIWorld&o=100, accessed on 24th September 2024.
  35. https://www.geograph.org.uk/photo/2151166, accessed on 24th September 2024.
  36. https://www.chiark.greenend.org.uk/~owend/interests/rail/stnpages/mirfield.html, accessed on 20th May 2010.
  37. https://en.wikipedia.org/wiki/Thornhill_railway_station, accessed on 24th September 2024.
  38. https://www.geograph.org.uk/photo/2146249, accessed on 24th September 2024.
  39. https://maps.nls.uk/geo/explore/#zoom=17.0&lat=53.67578&lon=-1.65453&layers=168&b=ESRIWorld&o=100, accessed on 24th September 2024.
  40. https://maps.nls.uk/geo/explore/#zoom=17.0&lat=53.67662&lon=-1.63870&layers=168&b=ESRIWorld&o=100, accessed on 24th September 2024.
  41. https://maps.nls.uk/geo/explore/#zoom=17.0&lat=53.67609&lon=-1.62408&layers=168&b=ESRIWorld&o=100, accessed on 24th September 2024.
  42. http://lostrailwayswestyorkshire.co.uk/Dewsbury.htm, accessed on 26th September 2024.
  43. https://maps.nls.uk/geo/explore/#zoom=17.0&lat=53.67145&lon=-1.61316&layers=168&b=ESRIWorld&o=100, accessed on 27th September 2024.
  44. https://maps.nls.uk/geo/explore/#zoom=17.0&lat=53.65930&lon=-1.56897&layers=168&b=ESRIWorld&o=100, accessed on 27th September 2024.
  45. https://en.wikipedia.org/wiki/Horbury_and_Ossett_railway_station, accessed on 27th September 2024.
  46. https://maps.nls.uk/geo/explore/#zoom=16.0&lat=53.66442&lon=-1.58084&layers=168&b=ESRIWorld&o=0, accessed on 27th September 2024.
  47. https://en.wikipedia.org/wiki/Healey_Mills_Marshalling_Yard, accessed onn 27th September 2024.
  48. https://www.geograph.org.uk/photo/864329, accessed on 27th September 2024.
  49. https://maps.nls.uk/geo/explore/#zoom=17.0&lat=53.65617&lon=-1.55890&layers=168&b=ESRIWorld&o=100, accessed on 27th September 2024.
  50. https://maps.nls.uk/geo/explore/#zoom=17.0&lat=53.65728&lon=-1.53700&layers=168&b=ESRIWorld&o=100, accessed on 30th September 2024.
  51. https://www.horburyhistory.org/Horbury-Junction/, accessed on 30th September 2024.
  52. https://maps.nls.uk/geo/explore/#zoom=17.0&lat=53.66955&lon=-1.50480&layers=168&b=ESRIWorld&o=100, accessed on 30th September 2024.
  53. https://maps.nls.uk/geo/explore/#zoom=17.4&lat=53.67749&lon=-1.49163&layers=168&b=ESRIWorld&o=100, accessed on 30th September 2024.
  54. https://maps.nls.uk/geo/explore/#zoom=17.4&lat=53.67943&lon=-1.48383&layers=168&b=ESRIWorld&o=100, accessed on 30th September 2024.
  55. https://maps.nls.uk/geo/explore/#zoom=17.4&lat=53.68334&lon=-1.47138&layers=168&b=ESRIWorld&o=100, accessed on 30th September 2024.
  56. https://maps.nls.uk/geo/explore/#zoom=17.4&lat=53.69000&lon=-1.43723&layers=168&b=ESRIWorld&o=100, accessed on 2nd October 2024.
  57. https://maps.nls.uk/geo/explore/#zoom=17.4&lat=53.69243&lon=-1.43590&layers=168&b=ESRIWorld&o=100, accessed on 2nd October 2024.
  58. https://maps.nls.uk/geo/explore/#zoom=15.4&lat=53.70320&lon=-1.42452&layers=168&b=ESRIWorld&o=100, accessed on 2nd October 2024.
  59. Embedded link: https://www.flickr.com/photos/neil_harvey_railway_photos/7834033734, accessed on 3rd October 2024.
  60. https://www.invaluable.com/auction-lot/two-albums-containing-300-cards-incl-yorkshire-ox-166-c-6fd4b7e9e0, accessed on 3rd October 2024.
  61. https://www.blipfoto.com/entry/3134415230512138681, accessed on 3rd October 2024.
  62. https://maps.nls.uk/geo/explore/#zoom=17.0&lat=53.69371&lon=-1.76350&layers=168&b=ESRIWorld&o=100, accessed on 3rd October 2024.
  63. https://maps.nls.uk/geo/explore/#zoom=15.0&lat=53.72852&lon=-2.05697&layers=168&b=ESRIWorld&o=100, accessed on 3rd October 2024.
  64. https://igg.org.uk/rail/3-sigs/sigs-1.htm, accessed on 5th October 2024.
  65. https://commons.wikimedia.org/wiki/File:L%26MR_engine_%27Victoria%27.jpg, accessed on 6th October 2024.
  66. https://rogerfarnworth.com/2024/10/06/the-manchester-and-leeds-railway-the-railway-magazine-december-1905-part-1/
  67. http://www.halifaxpeople.com/Sowerby-Bridge-Train-Station.html, accessed on 6th October 2024.
  68. http://www.calderdalecompanion.co.uk/ph796.html, accessed on 6th October 2024.
  69. https://maps.nls.uk/geo/explore/#zoom=17.0&lat=53.69483&lon=-1.76821&layers=168&b=ESRIWorld&o=100, accessed on 7th October 2024.
  70. https://maps.nls.uk/geo/explore/#zoom=17.0&lat=53.68967&lon=-1.74458&layers=168&b=ESRIWorld&o=100, accessed on 7th October 2024.
  71. https://maps.nls.uk/geo/explore/#zoom=16.0&lat=53.68030&lon=-1.71952&layers=168&b=ESRIWorld&o=100, accessed on 7th October 2024.
  72. https://en.m.wikipedia.org/wiki/Wakefield_Kirkgate_railway_station, accessed on 7th October 2024.
  73. https://groundworklandscapearchitects.org.uk/regions/yorkshire-and-the-humber/kirkgate-station, accessed on 7th October 2024.
  74. https://www.geograph.org.uk/photo/2043843, accessed on 8th October 2024.
  75. Jeffrey Wells; The Eleven Towns Railway: The Story of the Manchester and Leeds Main Line; Railway & Canal Historical Society, Keighley, West Yorkshire, 2000.
  76. https://picryl.com/topics/period+drawings+of+early+steam+locomotives, accessed on 9th October 2024.
  77. https://en.m.wikipedia.org/wiki/0-4-2#/media/File%3AStephenson_0-4-2.jpg, accessed on 9th October 2024.
  78. https://commons.wikimedia.org/wiki/File:Stephenson_Patentee_type_2-2-2_locomotive_no_123_%E2%80%9CHarvey_Combe%E2%80%9D_built_1835,_from_Simm%E2%80%99s_%E2%80%9CPublic_Works_of_Great_Britain%E2%80%9D_1838,_newly_engraved_%2B_reprinted_1927_%E2%80%93_No_caption,_black_and_white.jpg, accessed on 9th October 2024

The Manchester and Leeds Railway – The Railway Magazine, December 1905 – Part 1

An article in the Railway Magazine in December 1905 prompted a look at the Manchester and Leeds Railway. For a number of years my parents lived in sheltered housing in Mirfield which is on the line. Looking at the line as it appeared in 1905 and again in the 21st century seemed a worthwhile exercise! Part 1 of this short series provides a short history of the line and takes us from Manchester to Sowerby Bridge.

The featured image at the head of this article shows the Manchester & Leeds Railway locomotive ‘Victoria’, in about 1878-80. This locomotive was designed by Edward Bury and built at his works in Liverpool. It was one of a batch of 0-4-0 engines ordered in 1845, and later converted to an 0-4-2 wheel arrangement (c) Public Domain. [65]

In his first article in 1905, about the Manchester and Leeds Railway which was accompanied by a series of engravings included here, Herbert Rake wrote that on 11th September 1830 a committee tasked with improving communications between Leeds and Manchester, emboldened by the success of the Liverpool and Manchester Railway, decided to hold a meeting to form a new railway company.

On 18th October 1930, the decision was taken. A board of directors was appointed, a survey was authorised and work was undertaken to prepare for an application to Parliament. It was based on a junction with the Liverpool and Manchester Railway at Oldfield Lane, Salford and at St. George’s Road, Manchester.

The route from Manchester to Sowerby Bridge was easily agreed, that from Sowerby Bridge to Leeds was more difficult to agree. The Bill prepared for Parliament focused on the Manchester to Sowerby Bridge length of the planned line and was presented on 10th March 1831. Opposition from the Rochdale Canal Company and others and then the dissolution of Parliament halted the progress of the Bill.

Resubmission was agreed on 8th June 1830 but once again failed in its progress through Parliament. In the end, the project was revised, the company was reorganised, and the capital fixed at £800,000 in £100 shares in a meeting in October 1935.

Rake tells us that this “new project abandoned the Salford junction line, but embraced a deviated extension beyond Sowerby Bridge, along the lower portion of the Vale of Calder, past Dewsbury and Wakefield, to Normanton, thence to Leeds, in conjunction with the North Midland Railway. … [The line was] intended to form a central portion of a great main line running east and west between Liverpool and Hull.” [1: p469-470]

The prospectus noted a few important facts, particularly:

  • The population density with three miles either side of the proposed line was 1,847 persons per square mile. The average for England was 260 persons per square mile.
  • Within 10 miles of the line there were 29 market towns, twelve with a population greater than 20,000.
  • Within 20 miles of the line there were 48 market towns with more than 10,000 inhabitants.

Rake tells us that “The Act of Incorporation received the Royal Assent on the 4th July 1836, and authorised a joint stock capital to be raised of £1,000,000, with an additional amount by loan of £433,000.” [1: p470]

Construction commenced on 18th August 1837. On 14th February 1838 it was decided to apply to Parliament for an Act authorising branch lines to Oldham and Halifax.

Victoria Station, Manchester, was first known as Hunt’s Bank Station. [1: p468]
Part of the original station at Manchester Victoria, as it appeared in 1989. In around 1860, the single storey station building was extended by the addition of a second floor. The Lancashire and Yorkshire Railway sensitively incorporated the original building into the new 1904 facade of Victoria station, © Whatlep and authorised for reuse under a Creative Commons Licence (CC BY-SA 2.0). [2]

Late in 1838, “a modification of the original plan for effecting a junction of the Manchester and Leeds Railway with the Liverpool and Manchester Railway was proposed, by an extension of both to a joint terminus within 500 yards of the Manchester Exchange. … The Act of Parliament for this and other purposes received the Royal Assent on the 31st July 1839, authorising the sum of £866,000 to be raised for the purpose of constructing the Oldham and Halifax branches, for making a diversion in the railway at Kirkthorpe, for enlarging the station in Lees Street, and for constructing the line to join the Liverpool and Manchester extension.” [1: p470]

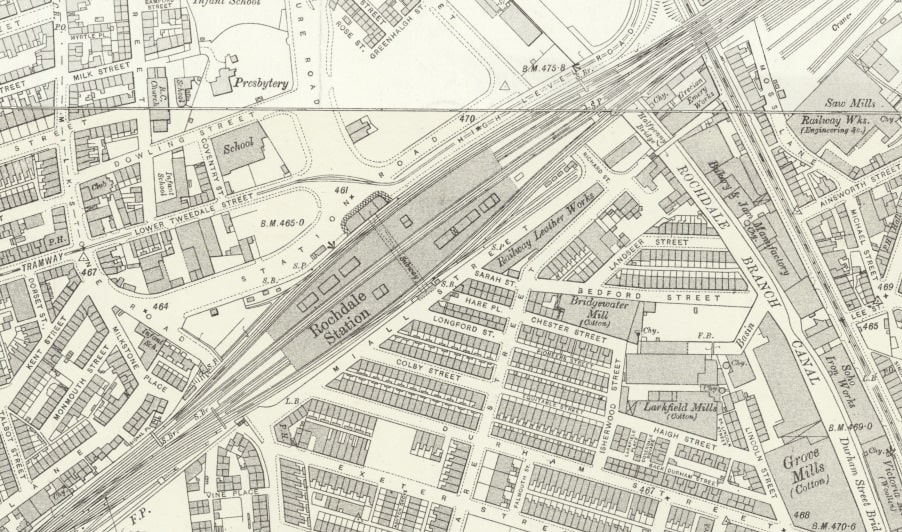
Rochdale railway Station as shown on the 25″ Ordnance Survey 0f 1908, published in 1910. [21]
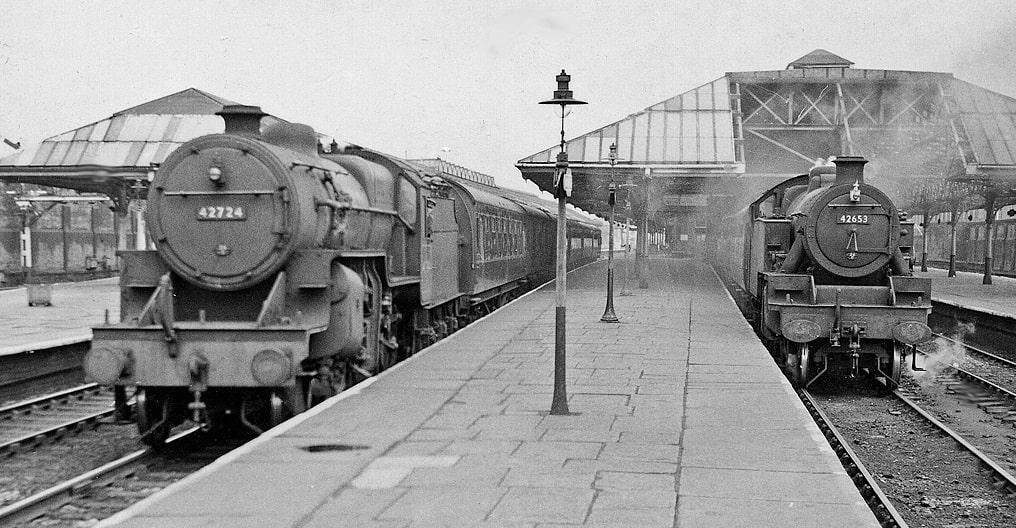
View NE from south end of Rochdale Station. On the left, Hughes/Fowler 5P 4F 2-6-0 No. 42724 on the 11.58am Wakefield to Manchester; on the right, Stanier 4MT 2-6-4T No. 42653 on a local to Bolton, © Ben Brooksbank and licenced for reuse under a Creative Commons Licence (CC BY-SA 2.0). [22]

Rake explains that the railway ran through Miles Platting where the Ashton and Stalybridge branch diverges. At Middleton the Oldham branch connected to the main line. Mill Hills embankment (maximum height 75 feet) carries the line towards Blue Pits Station where the Heywood line joins the main line. The line runs on through Rochdale, Littleborough and Todmorden Vale before running in cutting (maximum depth 100 feet) to Summit Tunnel.

During construction, “Six contracts were awarded between the Manchester terminus and the Summit Tunnel and were progressing satisfactorily by August 1838.” [6]

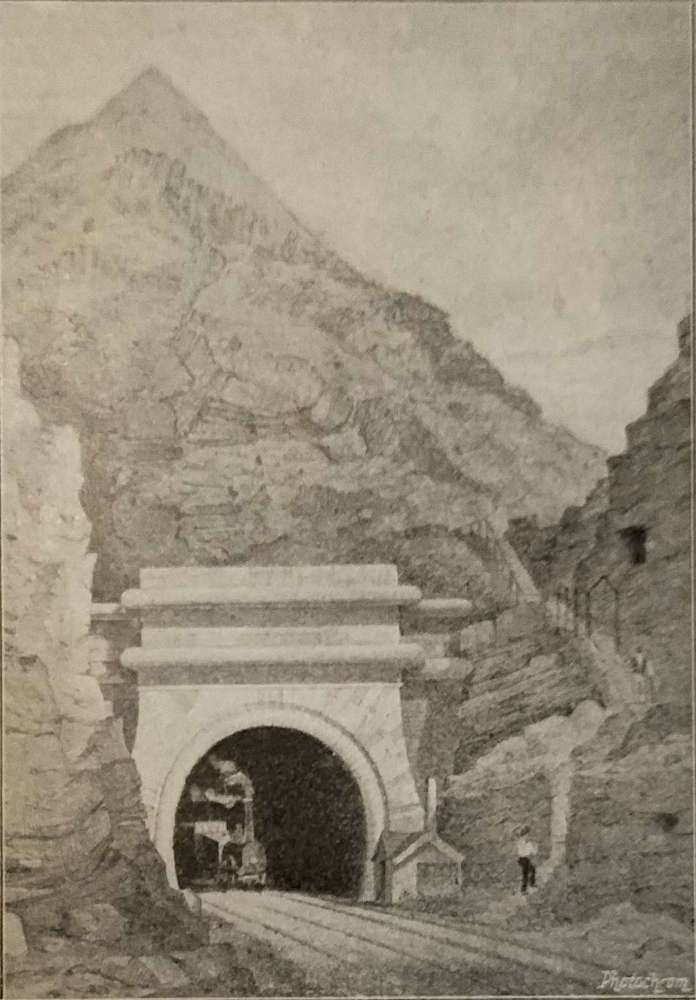
The West Portal of Summit Tunnel is approached from Manchester through a deep cutting. [1: p469]
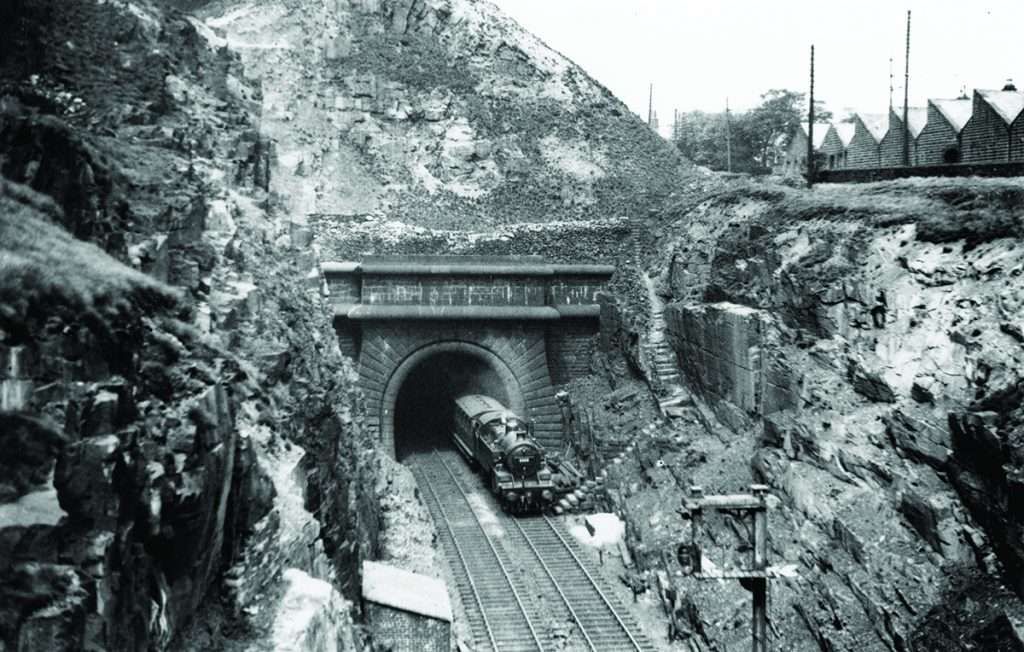
The same portal of Summit Tunnel in 20th century steam days. [3]

When built, Summit Tunnel was the longest in the world. It opened on 1st March 1841 by Sir John F. Sigismund-Smith.

The tunnel is just over 1.6 miles (2.6 km) long and carries two standard-gauge tracks in a single horseshoe-shaped tube, approximately 24 feet (7.2 m) wide and 22 feet (6.6 m) high. Summit Tunnel was designed by Thomas Longridge Gooch, assisted by Barnard Dickinson. Progress on its construction was slower than anticipated, largely because excavation was more difficult than anticipated. … It … cost £251,000 and 41 workers had died.” [4]

Rake noted that the tunnel is “14 shafts were necessary, and the strata of rock shale and clay was of so treacherous a character that the brick lining of the roof, which is semi circular, consists in places of no less than 10 concentric rings.” [1: p471] He also comments that: the tunnel entrance is if an imposing Moorish design; 1,000 men were employed with work continuing day and night.

Beyond the tunnel, the railway “entered a cutting in silt, which required piling to secure a foundation. Continuing onwards, we pass through the Winterbut Lee Tunnel, 420 yds. in length, and across a viaduct of 18 arches, one of which is of 60 ft. span we then proceed over the Rochdale Canal, on a cast iron skew bridge 102 ft. in span, at a height of 40 ft. above the surface of the water.” [1: p471]

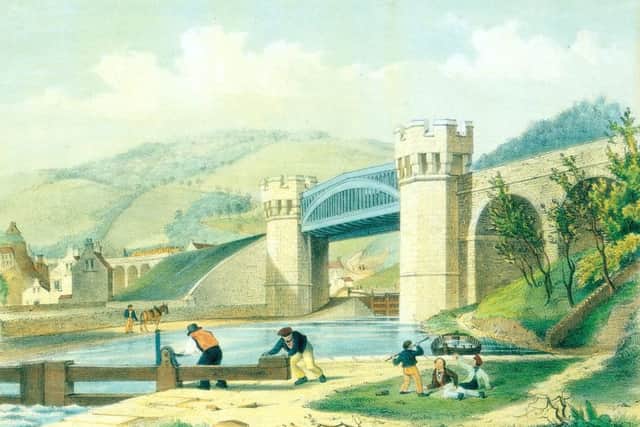
A colourised engraving of the bridge over the Rochdale Canal by A.F. Tait. [6]
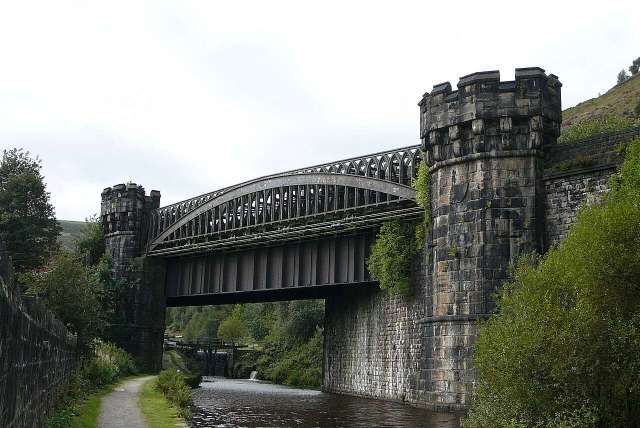
The Manchester and Leeds Railway’s castellated bridge over the Rochdale Canal to the South of Todmorden on 16th September 2007, © Tim Green and authorised for reuse under a Creative Commons Licence (CC BY 2.0 Generic). [5]
The railway bridge illustrated above as it appears on the 25″ Ordnance Survey of 1905, published in 1907. [9]

Tenders for work on the eastern section were advertised in 1838. … Contractors then worked fastidiously under the threat of heavy penalties should they over-run the set time limits. They were also forbidden to work on Sundays.” [6]

At Todmorden, “the railway is carried over almost the entire breadth of the valley by a noble viaduct of nine arches, seven of which are each of 60 ft. span, and two of 30 ft., at a height of 54 ft. above the level of the turnpike road.” [1: p471]

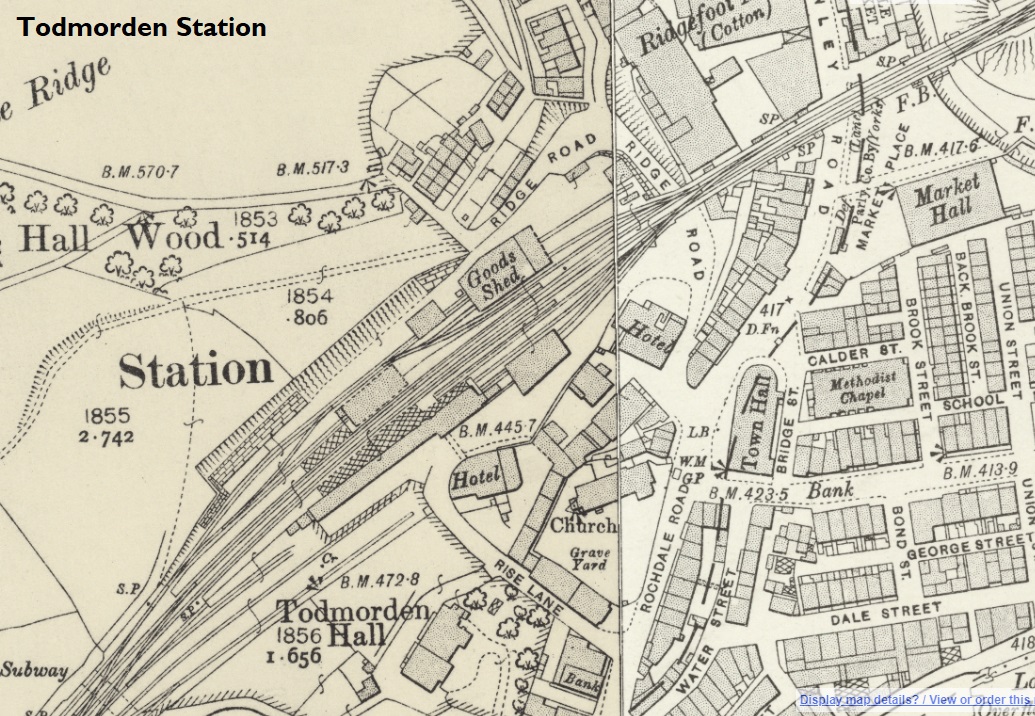
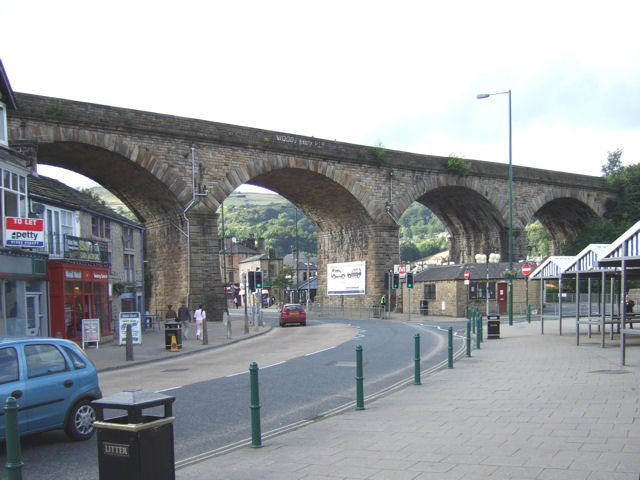
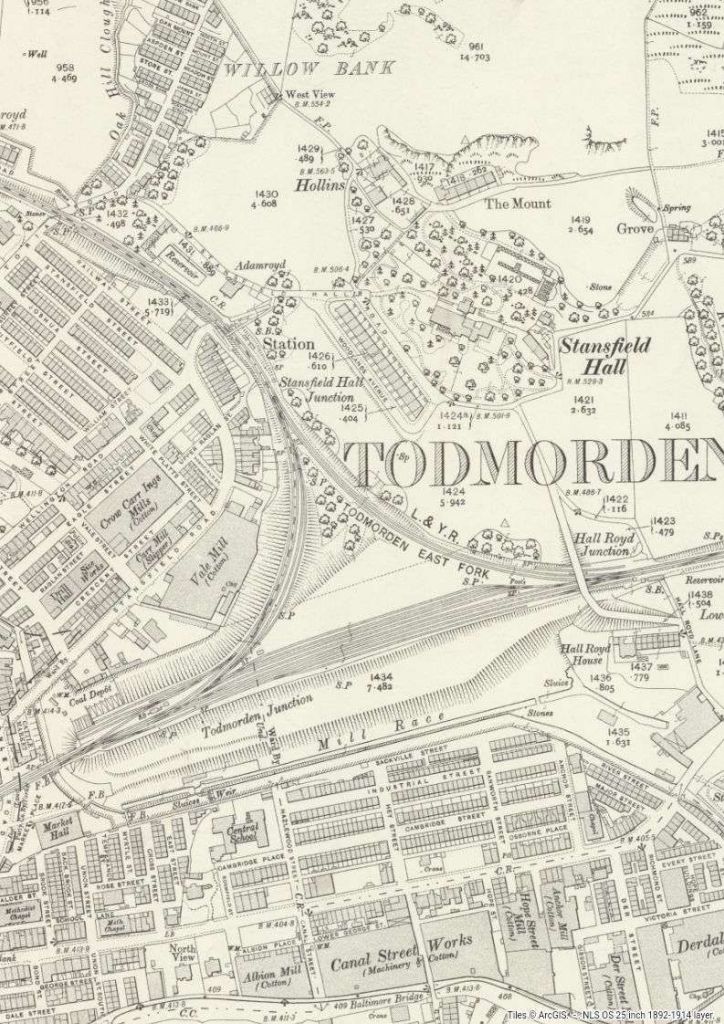
Todmorden Railway Station on the 25″ Ordnance Survey of 1905, published in 1907. The viaduct which spans Burnley Road to the East of the Railway Station appears top left on this map extract and below on a more modern photograph. [8]
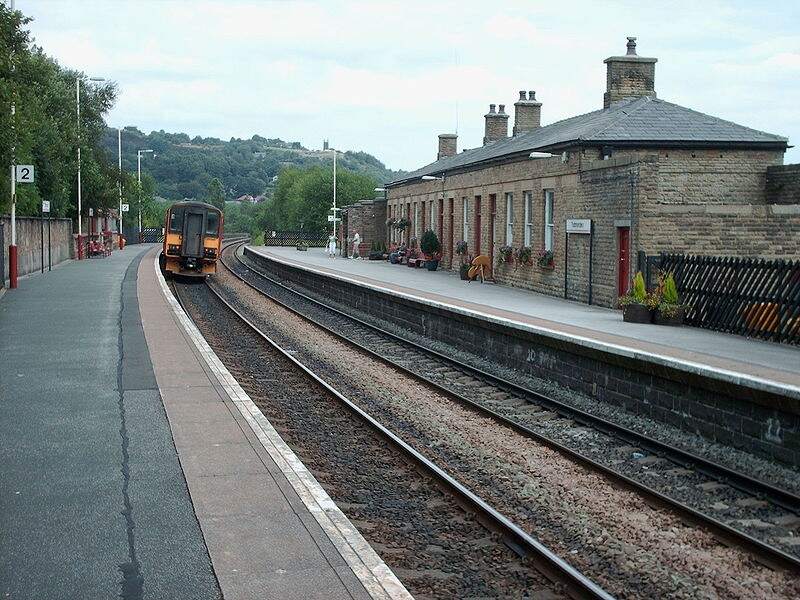
Todmorden Railway Station, seen from Platform 2, in the 21st century, © Ian Kirk and licenced for reuse under a Creative Commons Licence (CC-BY 2.5). [20]
Todmorden – Railway Viaduct over Burnley Road: The railway viaduct reaching the station is a prominent feature and is here seen crossing Burnley Road with the bus station on one side of it and the local market on the other, © David Ward and licensed for reuse under a Creative Commons Licence (CC BY-SA 2.0). [7]
The junction with the Burnley Branch on the 25″ Ordnance Survey of 1905, published in 1907. [10]
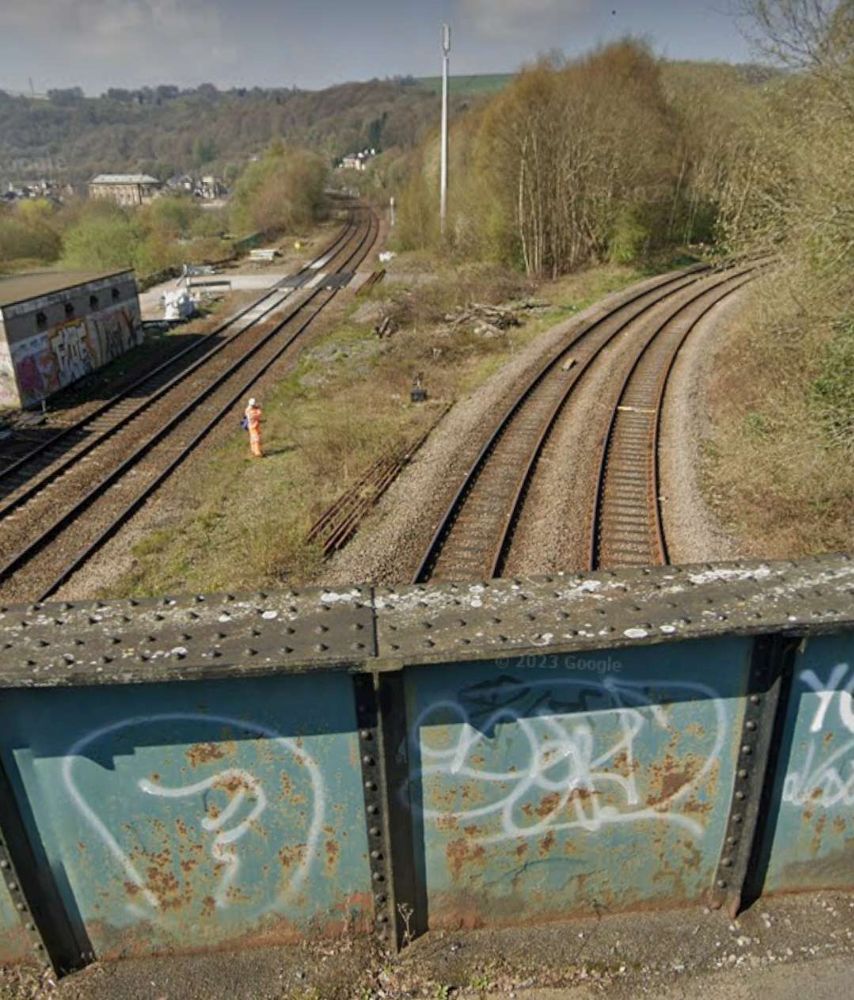
Looking West from Hallroyd Road Bridge in 2023. Hallroyd Road Bridge overlooks Hall Road Junction close to the right side of the map extract above. [Google Streetview, April 2023]
Looking East from Hallroyd Road Bridge. [Google Streetview, April 2023]

Quitting Todmorden, where the Burnley branch diverges, the line enters Yorkshire, passes through Millwood Tunnel (225 yards), Castle Hill Tunnel (193 yards), and Horsefall Tunnel (424 yards) and then arrives at Eastwood Station. Some distance further on is Charlestown. Afterwards the railway “crosses river, road, and canal, by a skew bridge of three arches, the canal being separately spanned by an iron bridge.” [1: p471]

Looking back West from Cross Stone Road across the western portal of Millwood Tunnel. [Google Streetview, April 2023]
Looking East from the corner of Phoenix Street and Broadstone Street, above the eastern portal of Millwood Tunnel. [Google Streetview, April 2023]

These next few images give a flavour of the line as it travels towards Hebden Bridge.

Lobb Mill Viaduct sits alongside the A646, Halifax Road between Castle Hill Tunnel and Horsefall Tunnel. [Google Streetview, June 2023]
Looking Southwest along the line towards Todmorden from E. Lee Lane. [Google Streetview, April 2023]
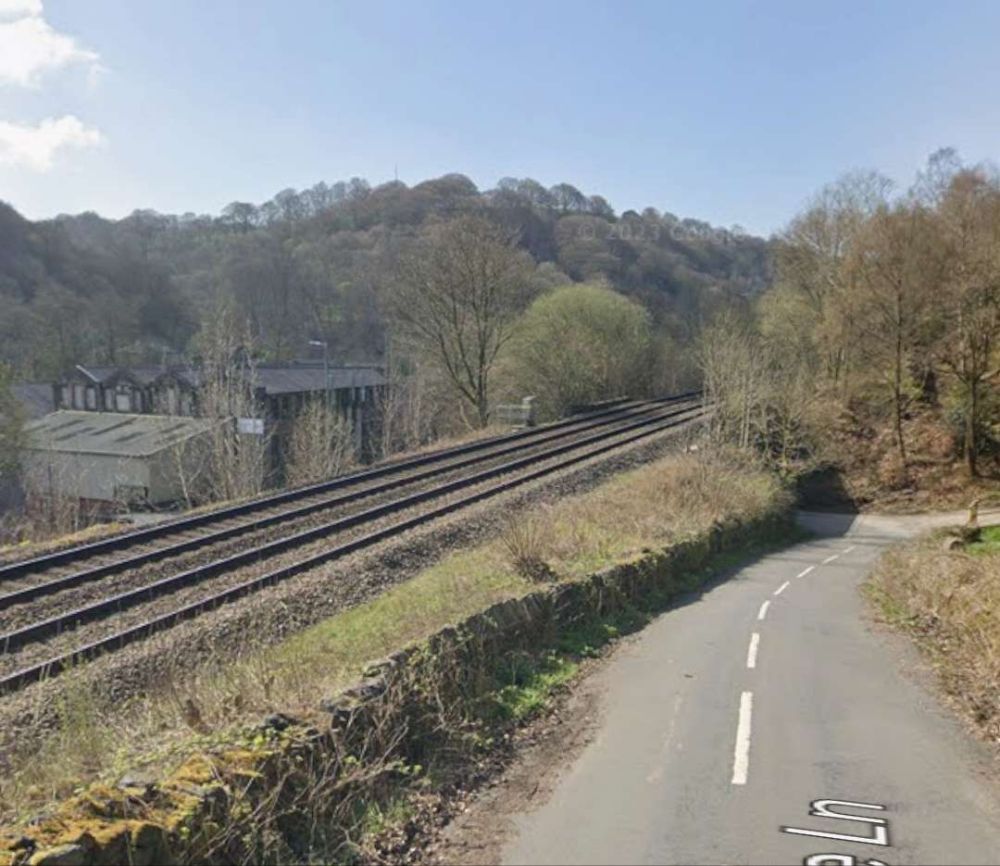
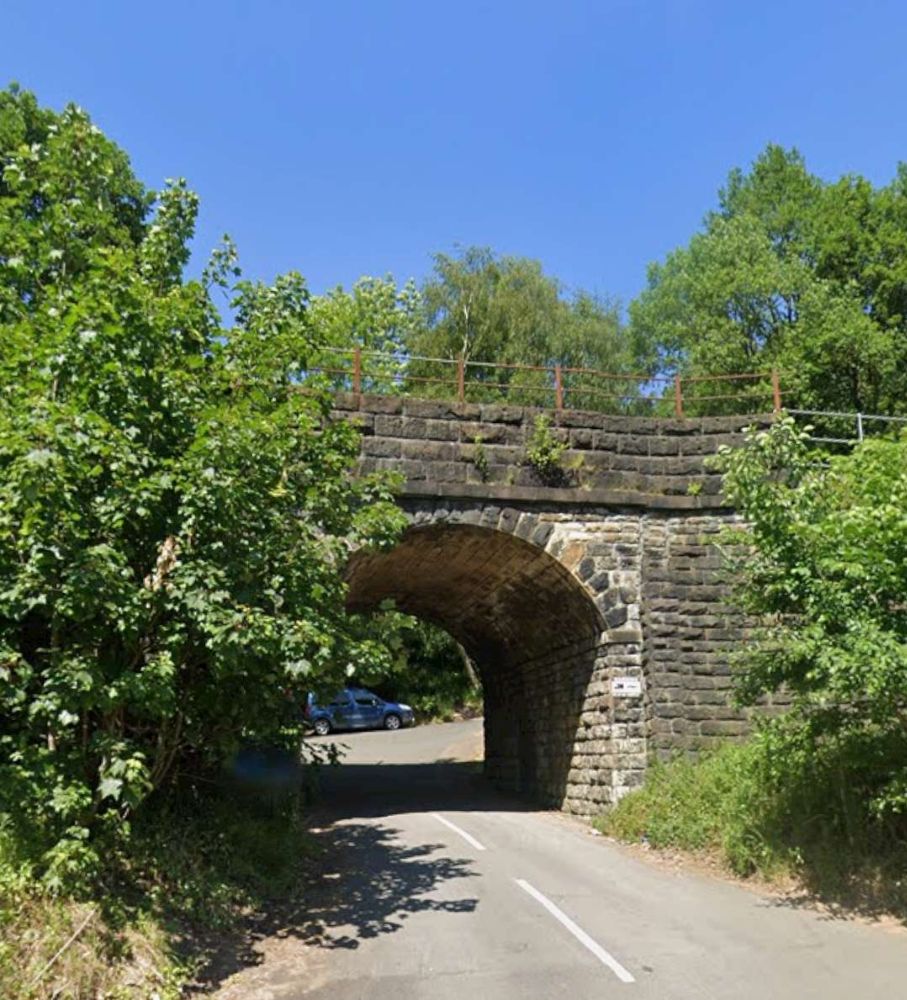
A little to the Northeast, Duke Street passes under the railway. This view looks West from Halifax Road [Google Streetview, June 2023]
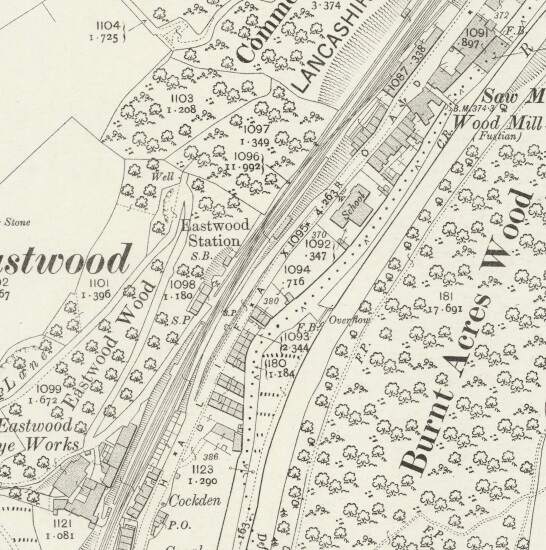
Eastwood Railway Station as it appears on the 1905 25″ Ordnance Survey. [63]
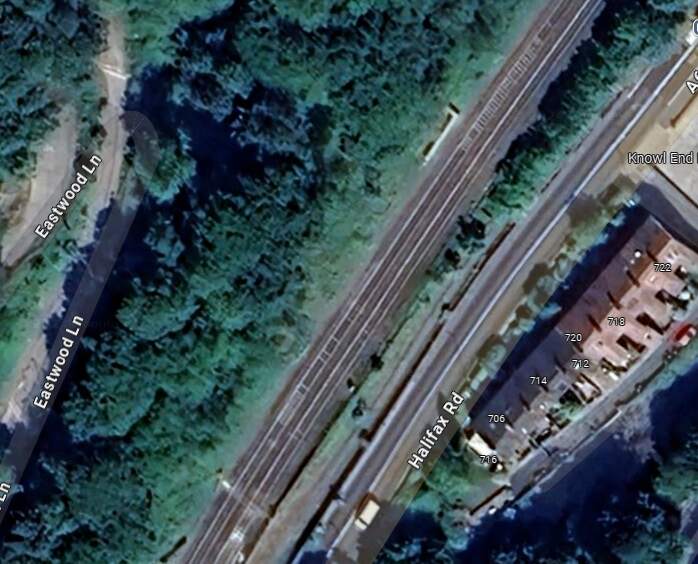
Thye approximate location of Eastwood Station as it appears on Google Maps satellite imagery in 2024. [Google Maps, October 2024]
A little further Northeast, this is the view Northwest along Jumble Hole Road under the railway. [Google Streetview, June 2011]
The view Northwest from he A646, Halifax Road along the Pennine Way Footpath which passes under the railway at this location. [Google Streetview, June 2023]
Again, looking Northwest from Halifax Road along Stony Lane which runs under the railway. [Google Streetview, June 2023]
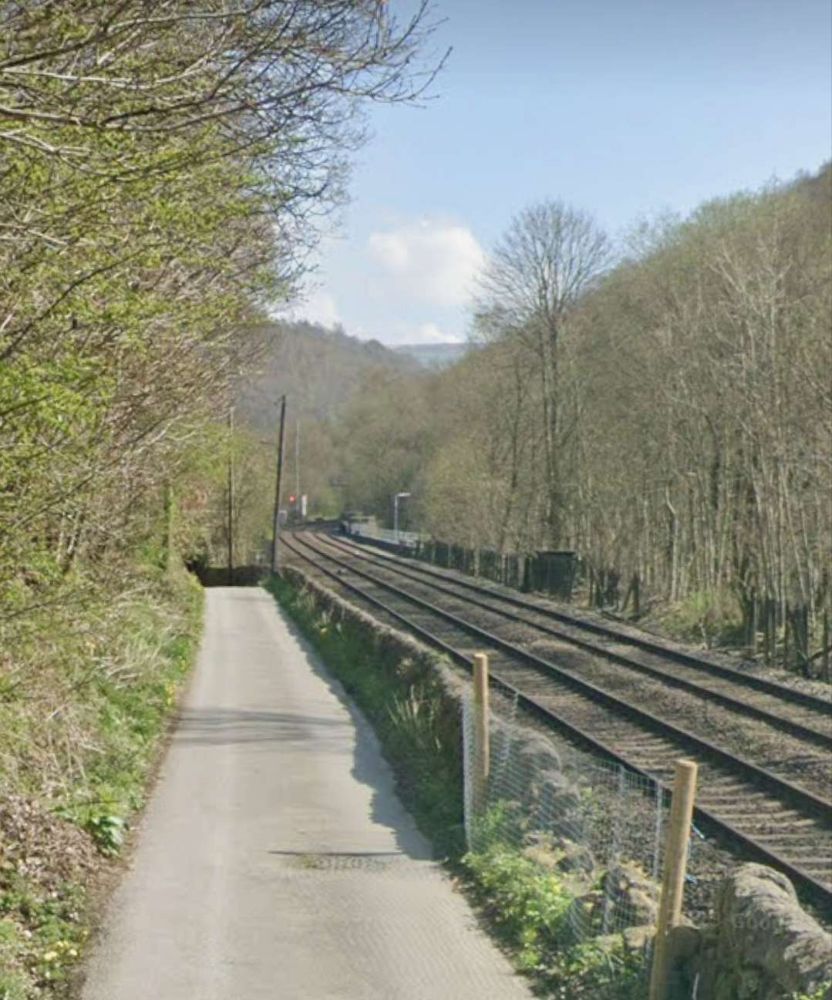
The view Southwest along Oakville Road which runs next to the railway. [Google Streetview, April 2023]
The view Northeast from the same location on Oakville Road. [Google Streetview, April 2023]

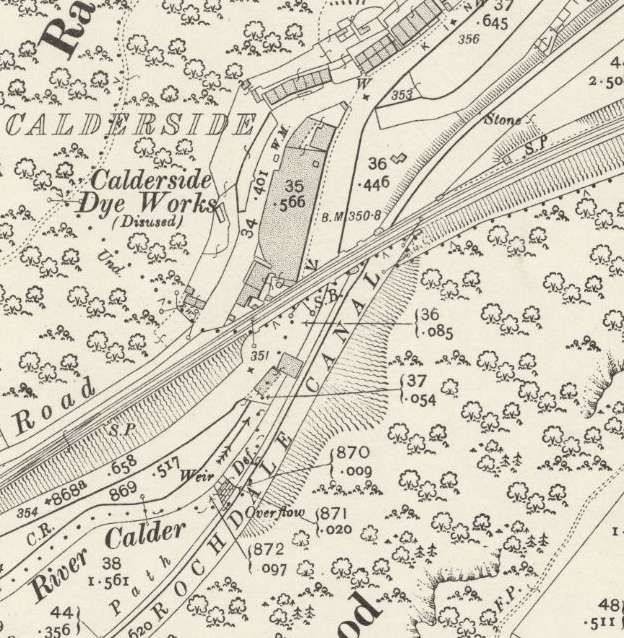
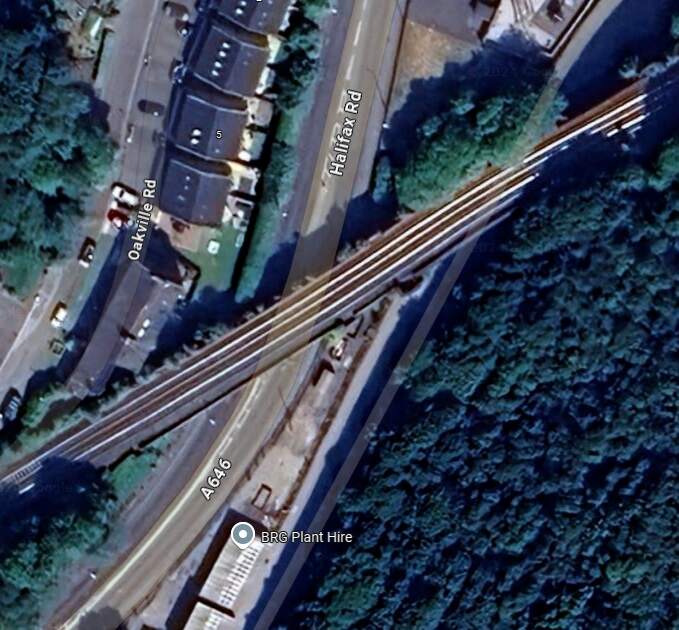
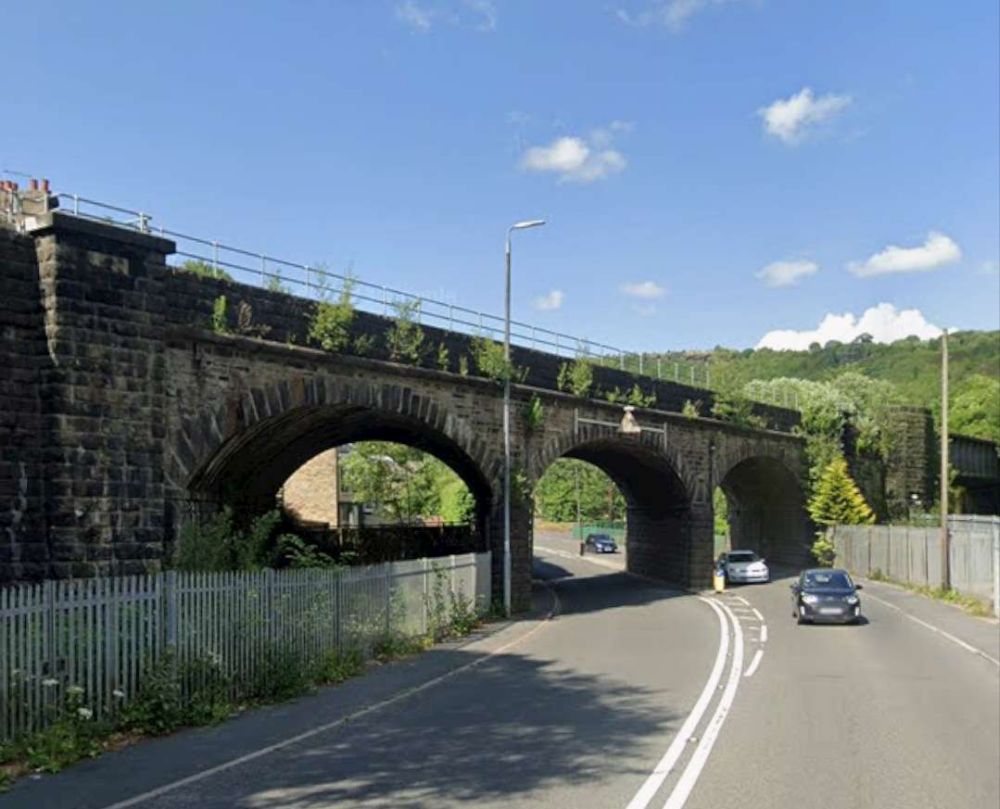
A short distance Northeast, the railway “crosses river, road, and canal, by a skew bridge of three arches, the canal being separately spanned by an iron bridge.” [1: p471] The location is shown on the 25″ Ordnance Survey of 1905 below.

The bridge mentioned above, as it appears on the 25″ Ordnance Survey of 1905. [11]
The same location shown on Google Maps satellite imagery in 2024. [Google Maps, October 2024]
Looking Northeast along Halifax Road, the three arches of the viaduct are easily visible. Beyond it there is a girder bridge which Rake does not mention. [Google Streetview, June 2023]

A little further East Stubbing Brink crosses the railway.

Looking West along the railway from Stubbing Brink Bridge. [Google Streetview, April 2023]
The view East along the line from Stubbing Brink. [Google Streetview, April 2023]

The line next passes through a short short tunnel (Weasel Hall Tunnel (124 yards)) and arrives at Hebden Bridge Station.

Looking West-northwest from Shelf Road Bridge, it is just possible to make out the mouth of Weasel Hall Tunnel. [Google Streetview, April 2023]
The view East-southeast from Shelf Road Bridge towards Hebden Bridge Railway Station. [Google Streetview, April 2023]
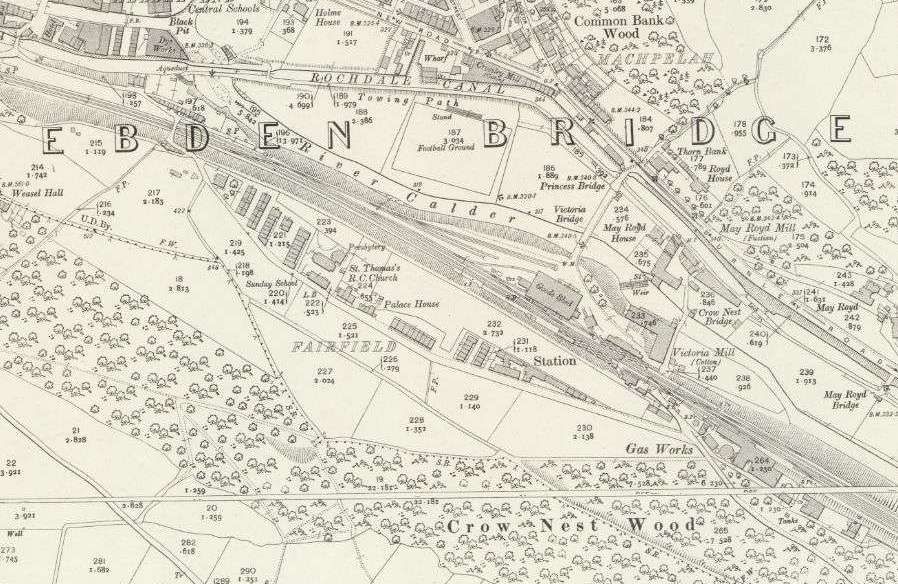
This next extract from the 25″ Ordnance Survey shows Hebden Bridge Station. [12]
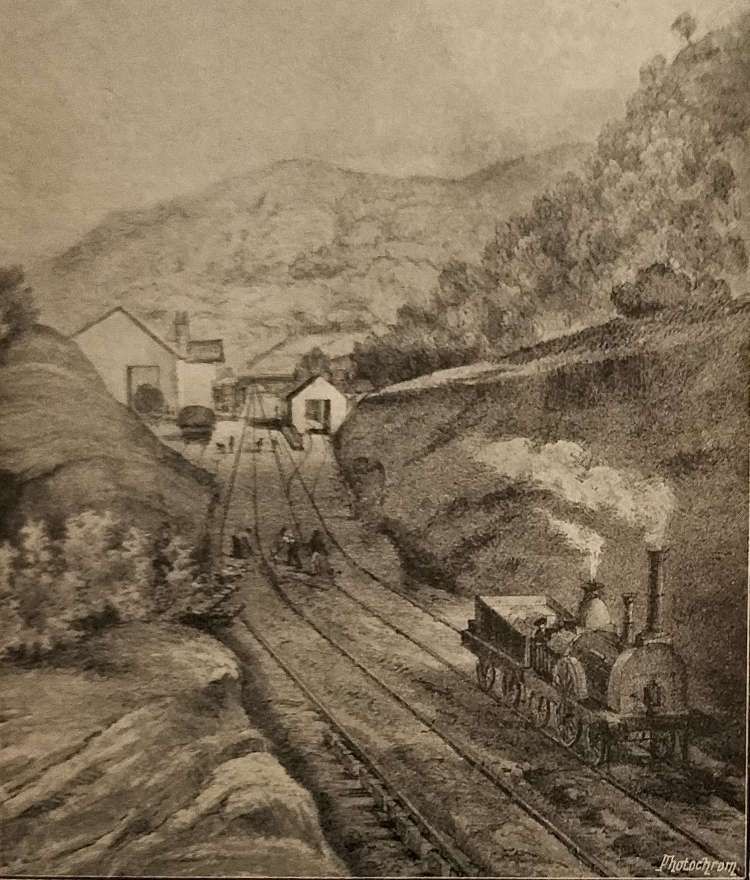
Platelayers at work at Hebden Bridge Station in 1840. [1: p470]
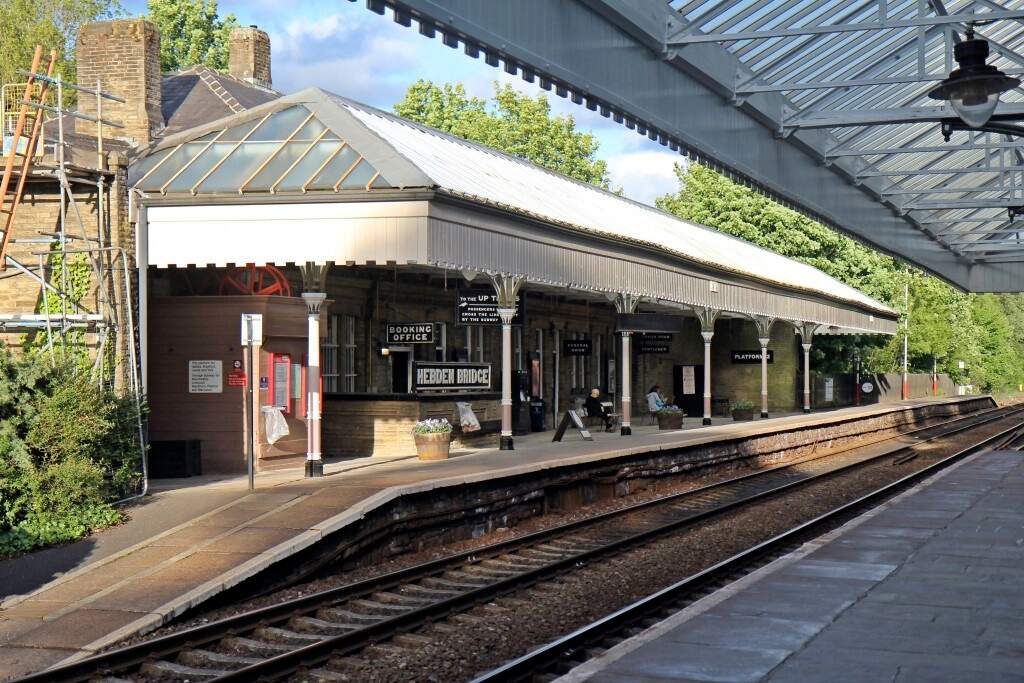
Hebden Bridge Railway Station (Platform 2) in the 21st century, © El Pollock and licenced for reuse under a Creative Commons Licence (CC BY-SA 2.0). [18]

After Hebden Bridge Station, the line proceeds along the South bank of the River Calder, through two small stations (Mytholmroyd and Luddenden Foot) and by a number of riverside mills.

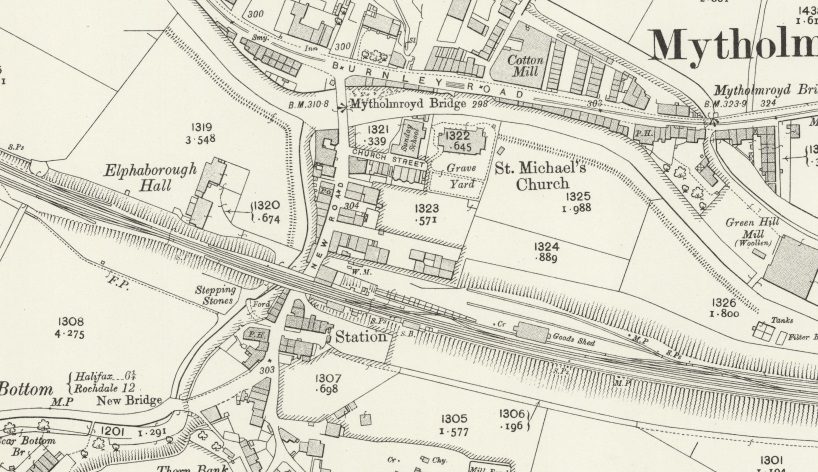
Mytholmroyd Railway Station as it appeared on the 1905 25″ Ordnance Survey. The Station is still open in the 21st century. [13]
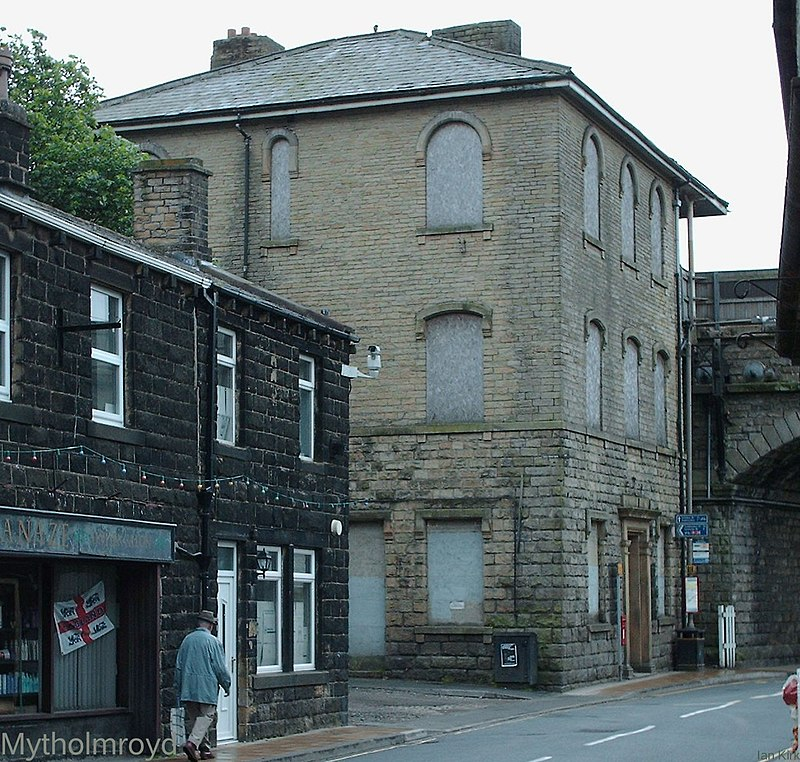
The original station building at Mytholmroyd, seen from the North in 2006, with the line crossing New Road at high level, © Ian Kirk and licenced for reuse under a Creative Commons Licence (CC By 2.5) . The building has since been renovated. [16]
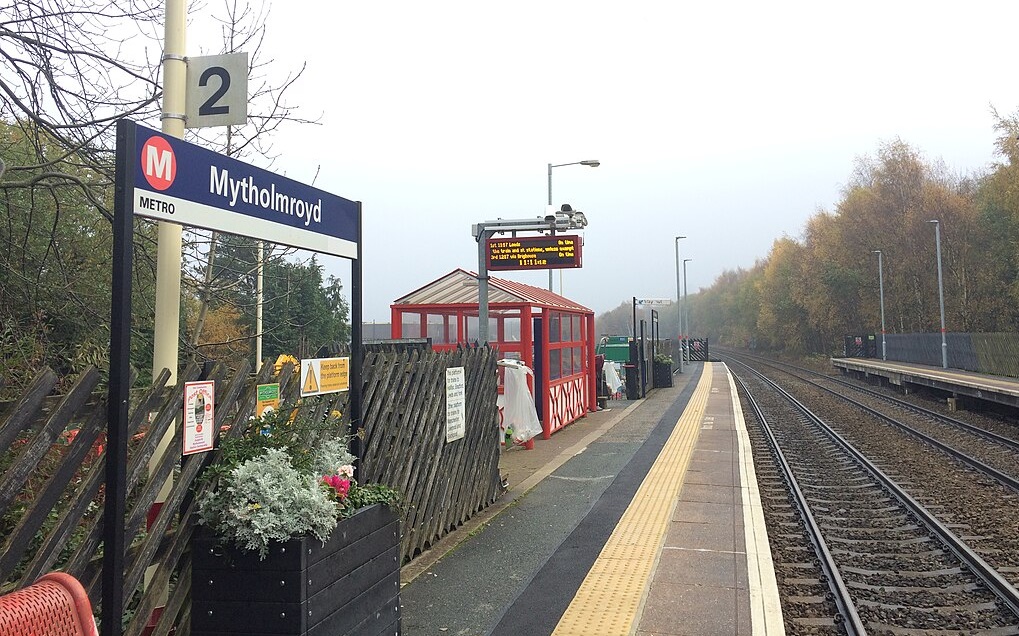
Mytholmroyd Railway Station in the 21st century, © Rcsprinter123 and licenced for reuse under a Creative Commons Licence (CC BY 3.0,). [19]

East along the line towards Luddendenfoot, Brearley Lane bridges the line.

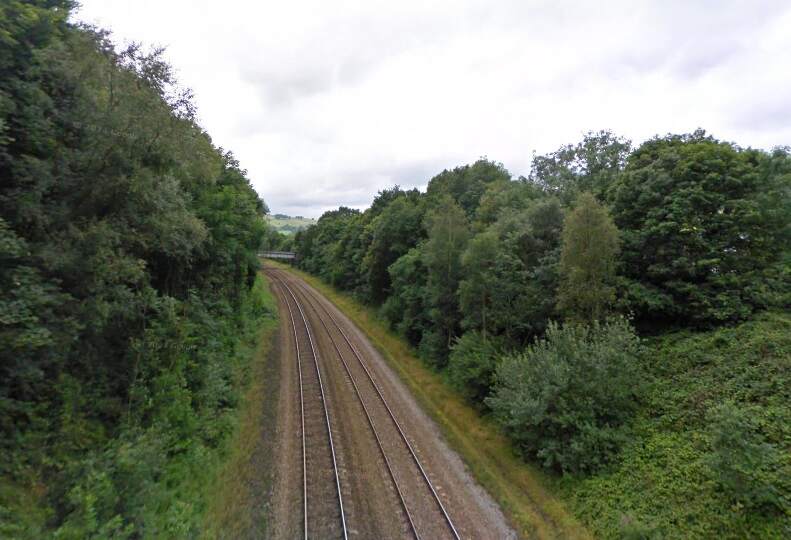
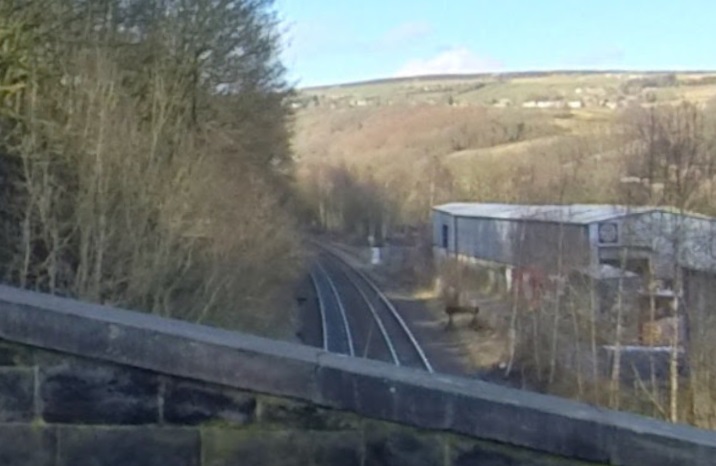
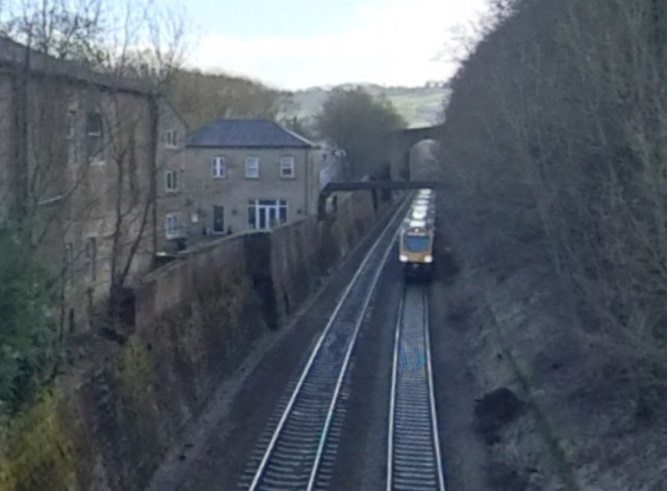
Looking West from Brearley Lane Bridge towards Mytholmroyd Station. [Google Streetview, July 2009]
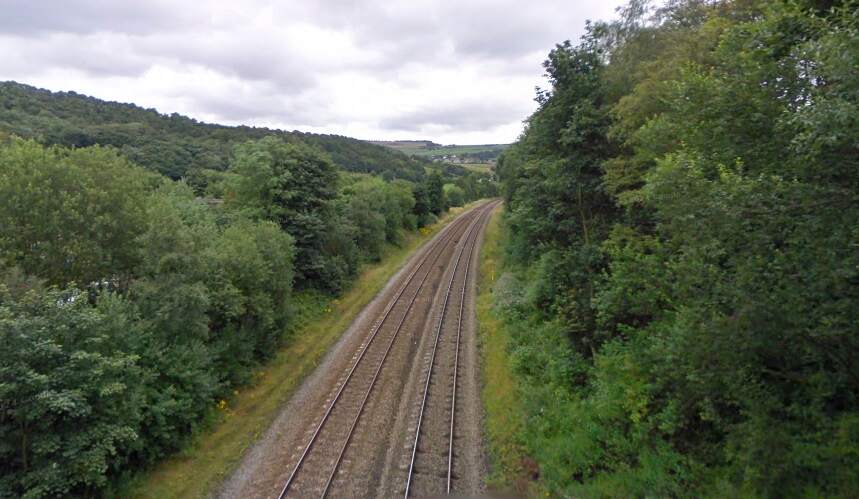
Ahead to the East, the line curves round towards the location of Luddendenfoot Railway Station. [Google Streetview, July 2009]
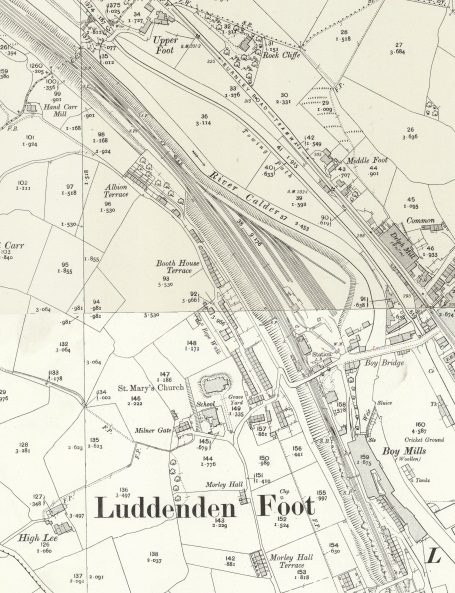
Luddenden Foot Railway Station. The station closed on 10th September 1962. The site has been developed since 2007 and the northern half is now occupied by the Station Industrial Park, which is accessible via Old Station Road. Two gate pillars from the original station flank the entrance to the road. [14][17]
The location of the erstwhile Luddendenfoot Railway Station as seen from Willow Bank, (c) Matt Thornton. [Google Streetview, February 2021]
Looking Southeast from Willow Bank. The arch bridge visible ahead carries Jerry Fields Road over the line, (c) Matt Thornton. [Google Streetview, February 2021]

To the Southeast, Ellen Holme Road passes under the line.

Ellen Holme Road passess under the railway to the Southeast of the old Luddendenfoot Railway Station. [Google Streetview, June 2023]

Passing other mills and traversing a deep cutting the line enters Sowerby Tunnel, (645 yards) and reaches Sowerby Bridge Station.

Class 101 At Sowerby Bridge Tunnel.
This image is embedded her from Flickr. It shows a Class 101 DMU entering Sowerby Bridge Tunnel from the East while working 2M14 10:31hrs York to Southport service on 8th May 1987, (c) Neil Harvey 156. [59]
Sowerby Bridge Railway Station – note the Ripponden Branch emerging from a tunnel and joining the Manchester and Leeds Railway at the East end of the Station. [15]
An early postcard image of Sowerby Bridge with the railway station in the foreground, © Public Domain. [23]
A colourised postcard view of the Station Forecourt at Sowerby Bridge around the turn of the 20th century. [60]
Sowerby Bridge Railway Station in 2006, (c) Ian Kirk and authorised for reuse under a Creative Commons icence (CC BY 2.5). [24]

We complete this first part of the journey along the Manchester and Leeds Railway here at Sowerby Bridge Railway Station.

References

NB: These references relate to all the articles about the Manchester and Leeds Railway.

  1. Herbert Rake; The Manchester and Leeds Railway: The Origin of the Lancashire and Yorkshire Railway; in The Railway Magazine, London, December 1905, p468-474
  2. https://www.geograph.org.uk/photo/820318, accessed on 23rd September 2024.
  3. https://premierconstructionnews.com/2016/04/14/summit-tunnel, accessed on 23rd September 2024.
  4. https://en.m.wikipedia.org/wiki/Summit_Tunnel, accessed on 23rd September 2024.
  5. https://commons.m.wikimedia.org/wiki/File:Gauxholme_Bridge,_Todmorden.jpg, accessed on 23rd September 2024.
  6. https://www.yorkshirepost.co.uk/news/opinion/columnists/trans-pennine-rail-in-the-age-of-victoria-1807452, accessed on 23rd September 2024.
  7. https://www.geograph.org.uk/photo/504379, accessed on 23rd September 2024.
  8. https://maps.nls.uk/geo/explore/#zoom=17.9&lat=53.71428&lon=-2.09924&layers=168&b=ESRIWorld&o=100, accessed on 23rd September 2024.
  9. https://maps.nls.uk/geo/explore/#zoom=18.9&lat=53.70635&lon=-2.10701&layers=168&b=ESRIWorld&o=100, accessed on 23rd September 2024.
  10. https://maps.nls.uk/geo/explore/#zoom=16.9&lat=53.71706&lon=-2.09298&layers=168&b=ESRIWorld&o=100, accessed on 23rd September 2024.
  11. https://maps.nls.uk/geo/explore/#zoom=17.1&lat=53.73968&lon=-2.03054&layers=168&b=ESRIWorld&o=100, accessed on 23rd September 2024.
  12. https://maps.nls.uk/geo/explore/#zoom=16.5&lat=53.73833&lon=-2.00992&layers=168&b=ESRIWorld&o=100, accessed on 23rd September 2024.
  13. https://maps.nls.uk/geo/explore/#zoom=16.1&lat=53.73044&lon=-1.98307&layers=168&b=ESRIWorld&o=100, accessed on 23rd September 2024.
  14. https://maps.nls.uk/geo/explore/#zoom=16.1&lat=53.72280&lon=-1.94806&layers=168&b=ESRIWorld&o=100, accessed on 23rd September 2024.
  15. https://maps.nls.uk/geo/explore/#zoom=16.8&lat=53.70808&lon=-1.91151&layers=168&b=ESRIWorld&o=100, accessed on 23rd September 2024
  16. https://commons.wikimedia.org/wiki/File:Mytholmroyd_3.jpg, accessed on 24th September 2024.
  17. https://en.wikipedia.org/wiki/Luddendenfoot_railway_station, accessed on 24th September 2024.
  18. https://www.geograph.org.uk/photo/4500324, accessed on 24th September 2024.
  19. https://en.wikipedia.org/wiki/Mytholmroyd_railway_station#/media/File:Mytholmroyd_railway_station,_November_2020.jpg, accessed on 24th September 2024.
  20. https://commons.wikimedia.org/wiki/File:Todmorden_station_p2.jpg, accessed on 24th September 2024.
  21. https://maps.nls.uk/geo/explore/#zoom=17.0&lat=53.61032&lon=-2.15338&layers=168&b=ESRIWorld&o=100, accessed on 24th September 2024.
  22. https://www.geograph.org.uk/photo/2160438, accessed on 24th September 2024.
  23. http://www.halifaxpeople.com/Sowerby-Bridge-Train-Station.html#google_vignette, accessed on 24th September 2024.
  24. https://commons.wikimedia.org/wiki/File:Sowerby_Bridge_stn.jpg, accessed on 24th September 2024.
  25. https://maps.nls.uk/geo/explore/#zoom=17.0&lat=53.70193&lon=-1.88141&layers=168&b=ESRIWorld&o=100, accessed on 24th September 2024.
  26. https://maps.nls.uk/geo/explore/#zoom=17.0&lat=53.69406&lon=-1.85773&layers=168&b=ESRIWorld&o=100, accessed on 24th September 2024.
  27. https://en.wikipedia.org/wiki/Greetland_railway_station, accessed on 24th September 2024.
  28. http://www.halifaxpeople.com/Historic-West-Vale.html, accessed on 24th September 2024.
  29. https://maps.nls.uk/geo/explore/#zoom=17.0&lat=53.69065&lon=-1.84016&layers=168&b=ESRIWorld&o=100, accessed on 24th September 2024.
  30. http://www.halifaxpeople.com/Historic-Elland.html, accessed on 24th September 2024.
  31. https://maps.nls.uk/geo/explore/#zoom=17.0&lat=53.69860&lon=-1.77905&layers=168&b=ESRIWorld&o=100, accessed on 24th September 2024.
  32. https://www.flickr.com/photos/tcs-pics/6805337658, accessed on 24th September 2024.
  33. https://commons.wikimedia.org/wiki/File:Brighouse_station.jpg, accessed on 24th September 2024.
  34. https://maps.nls.uk/geo/explore/#zoom=17.0&lat=53.68478&lon=-1.72933&layers=168&b=ESRIWorld&o=100, accessed on 24th September 2024.
  35. https://www.geograph.org.uk/photo/2151166, accessed on 24th September 2024.
  36. https://www.chiark.greenend.org.uk/~owend/interests/rail/stnpages/mirfield.html, accessed on 20th May 2010.
  37. https://en.wikipedia.org/wiki/Thornhill_railway_station, accessed on 24th September 2024.
  38. https://www.geograph.org.uk/photo/2146249, accessed on 24th September 2024.
  39. https://maps.nls.uk/geo/explore/#zoom=17.0&lat=53.67578&lon=-1.65453&layers=168&b=ESRIWorld&o=100, accessed on 24th September 2024.
  40. https://maps.nls.uk/geo/explore/#zoom=17.0&lat=53.67662&lon=-1.63870&layers=168&b=ESRIWorld&o=100, accessed on 24th September 2024.
  41. https://maps.nls.uk/geo/explore/#zoom=17.0&lat=53.67609&lon=-1.62408&layers=168&b=ESRIWorld&o=100, accessed on 24th September 2024.
  42. http://lostrailwayswestyorkshire.co.uk/Dewsbury.htm, accessed on 26th September 2024.
  43. https://maps.nls.uk/geo/explore/#zoom=17.0&lat=53.67145&lon=-1.61316&layers=168&b=ESRIWorld&o=100, accessed on 27th September 2024.
  44. https://maps.nls.uk/geo/explore/#zoom=17.0&lat=53.65930&lon=-1.56897&layers=168&b=ESRIWorld&o=100, accessed on 27th September 2024.
  45. https://en.wikipedia.org/wiki/Horbury_and_Ossett_railway_station, accessed on 27th September 2024.
  46. https://maps.nls.uk/geo/explore/#zoom=16.0&lat=53.66442&lon=-1.58084&layers=168&b=ESRIWorld&o=0, accessed on 27th September 2024.
  47. https://en.wikipedia.org/wiki/Healey_Mills_Marshalling_Yard, accessed onn 27th September 2024.
  48. https://www.geograph.org.uk/photo/864329, accessed on 27th September 2024.
  49. https://maps.nls.uk/geo/explore/#zoom=17.0&lat=53.65617&lon=-1.55890&layers=168&b=ESRIWorld&o=100, accessed on 27th September 2024.
  50. https://maps.nls.uk/geo/explore/#zoom=17.0&lat=53.65728&lon=-1.53700&layers=168&b=ESRIWorld&o=100, accessed on 30th September 2024.
  51. https://www.horburyhistory.org/Horbury-Junction/, accessed on 30th September 2024.
  52. https://maps.nls.uk/geo/explore/#zoom=17.0&lat=53.66955&lon=-1.50480&layers=168&b=ESRIWorld&o=100, accessed on 30th September 2024.
  53. https://maps.nls.uk/geo/explore/#zoom=17.4&lat=53.67749&lon=-1.49163&layers=168&b=ESRIWorld&o=100, accessed on 30th September 2024.
  54. https://maps.nls.uk/geo/explore/#zoom=17.4&lat=53.67943&lon=-1.48383&layers=168&b=ESRIWorld&o=100, accessed on 30th September 2024.
  55. https://maps.nls.uk/geo/explore/#zoom=17.4&lat=53.68334&lon=-1.47138&layers=168&b=ESRIWorld&o=100, accessed on 30th September 2024.
  56. https://maps.nls.uk/geo/explore/#zoom=17.4&lat=53.69000&lon=-1.43723&layers=168&b=ESRIWorld&o=100, accessed on 2nd October 2024.
  57. https://maps.nls.uk/geo/explore/#zoom=17.4&lat=53.69243&lon=-1.43590&layers=168&b=ESRIWorld&o=100, accessed on 2nd October 2024.
  58. https://maps.nls.uk/geo/explore/#zoom=15.4&lat=53.70320&lon=-1.42452&layers=168&b=ESRIWorld&o=100, accessed on 2nd October 2024.
  59. Embedded link: https://www.flickr.com/photos/neil_harvey_railway_photos/7834033734, accessed on 3rd October 2024.
  60. https://www.invaluable.com/auction-lot/two-albums-containing-300-cards-incl-yorkshire-ox-166-c-6fd4b7e9e0, accessed on 3rd October 2024.
  61. https://www.blipfoto.com/entry/3134415230512138681, accessed on 3rd October 2024.
  62. https://maps.nls.uk/geo/explore/#zoom=17.0&lat=53.69371&lon=-1.76350&layers=168&b=ESRIWorld&o=100, accessed on 3rd October 2024.
  63. https://maps.nls.uk/geo/explore/#zoom=15.0&lat=53.72852&lon=-2.05697&layers=168&b=ESRIWorld&o=100, accessed on 3rd October 2024.
  64. https://igg.org.uk/rail/3-sigs/sigs-1.htm, accessed on 5th October 2024.
  65. https://commons.wikimedia.org/wiki/File:L%26MR_engine_%27Victoria%27.jpg, accessed on 6th October 2024.

Light Railways in the UK – the early years after the 1896 Act – The Railway Magazine, August 1905. …

A note in the August 1905 edition of The Railway Magazine mentions a 1904 report from the Light Railway Commissioners and comments from the Board of Trade in 1905. [1: p170]

The Regulation of Railways Act 1868 permitted the construction of light railways subject to ‘…such conditions and regulations as the Board of Trade may from time to time impose or make’; for such railways it specified a maximum permitted axle weight and stated that ‘…the regulations respecting the speed of trains shall not authorize a speed exceeding at any time twenty-five miles an hour’. [2]

The Light Railways Act 1896 did not specify any exceptions or limitations that should apply to light railways; it did not even attempt to define a ‘light railway’. However, it gave powers to a panel of three Light Railway Commissioners to include ‘provisions for the safety of the public… as they think necessary for the proper construction and working of the railway’ in any light railway order (LRO) granted under the act. These could limit vehicle axle weights and speeds: the maximum speed of 25 miles per hour (mph) often associated with the Light Railways Act 1896 is not specified in the act but was a product of the earlier Regulation of Railways Act 1868. … However, limits were particularly needed when lightly laid track and relatively modest bridges were used in order to keep costs down.” [2]

Sir Francis Hopwood’s report to the Board of Trade on the proceedings of the Light Railways Commission during 1902, indicated “a growing tendency to embark on private and municipal light railway schemes all over the country. Thirty-one fresh orders, of which only two for steam traction, were submitted, eighteen being confirmed, making a total of thirty-five for the year. No order was rejected. Since 1896, 420 applications [had] been made, more than half being confirmed. They represented 3,900 miles of line, with a capital expenditure of £30,371,193. The total mileage sanctioned during 1902 amount[ed] to 1,500 miles, with a capital expenditure of £10,148,900, or over a third of the aggregate for five years.” [10]

The short report in the August 1905 Railway Magazine highlighted the “number of applications made to the Commissioners in each year since the commencement of the Act, the number of orders made by the Commissioners, and the number confirmed by the Board of Trade, with mileage and estimates.” [1: p170]

Applications for Light Railway Orders (*From 278 applications. + From 237 Orders submitted). [1: p170]

Railways built under the Light Railways Act 1896 struggled financially and by the 1920s the use of road transport had put paid to the majority. Some survived thanks to clever management and tight financial control.

The Light Railways Act was repealed in 1993 for England and Wales by the Transport and Works Act 1992 and no new light railway orders were allowed to be issued for Scotland after 2007. … Until the Transport and Works Act 1992 introduced transport works orders, heritage railways in the UK were operated under light railway orders.” [2]

Among many others, Light Railways which were built under the Act include these examples:

Welshpool and Llanfair Light Railway, opened in 1903, closed in 1956, reconstructed and reopened between 1963 and 1981 on the entire route except Welshpool town section. Articles about this line can be found here, here and here.  [3]

Tanat Valley Light Railway, articles about the line can be found here and here. [4]

Shropshire & Montgomery Light Railway, five articles about this line and its rolling stock can be found here, here, here, here and here. [5]

Kelvedon & Tollesbury Light Railway, an article about this line can be found here. [6]

Campbeltown and Machrihanish Light Railway is referred to in this article. [7]

Bere Alston and Calstock Light Railway, the East Cornwall Mineral Railway and this line are covered in three articles which can be found here, here and here. [8]

Ashover Light Railway, is covered in three articles which can be found here, here and here. [9]

A parallel act governed light railways built in Ireland.

References

  1. The Railway Magazine, London, August 1905.
  2. https://en.m.wikipedia.org/wiki/Light_Railways_Act_1896, accessed on 14th August 2024.
  3. https://rogerfarnworth.com/2022/07/24/the-welshpool-llanfair-light-railway/ and https://rogerfarnworth.com/2022/09/23/the-welshpool-llanfair-light-railway-an-addendum/.
  4. https://rogerfarnworth.com/2019/09/18/the-tanat-valley-light-railway-and-the-nantmawr-branch-part-1/ and https://rogerfarnworth.com/2020/03/17/the-tanat-valley-light-railway-and-the-nantmawr-branch-part-2/.
  5. https://rogerfarnworth.com/2019/05/18/the-shropshire-and-montgomeryshire-light-railway-and-the-nesscliffe-mod-training-area-and-depot-part-1/ and https://rogerfarnworth.com/2019/07/21/gazelle/ and https://rogerfarnworth.com/2019/07/27/gazelles-trailers/ and https://rogerfarnworth.com/2019/08/02/ford-railmotors-on-colonel-stephens-lines-in-general-and-on-the-smlr/ and https://rogerfarnworth.com/2019/08/12/the-shropshire-and-montgomeryshire-light-railway-and-the-nesscliffe-mod-training-area-and-depot-part-2/.
  6. https://rogerfarnworth.com/2019/01/29/the-kelvedon-and-tollesbury-light-railway/
  7. https://rogerfarnworth.com/2024/08/08/water-troughs-major-works-campbeltown-machrihanish-light-railway-welsh-highland-railway-and-other-snippets-from-the-railway-magazine-january-1934/.
  8. https://rogerfarnworth.com/2019/03/26/the-east-cornwall-mineral-railway-part-1/ and https://rogerfarnworth.com/2019/03/28/the-east-cornwall-mineral-railway-part-2/ and https://rogerfarnworth.com/2019/04/02/the-bere-alston-to-callington-branch/.
  9. https://rogerfarnworth.com/2019/01/15/the-ashover-light-railway-part-1/; and https://rogerfarnworth.com/2019/01/19/the-ashover-light-railway-part-2/ ; and https://rogerfarnworth.com/2019/01/19/the-ashover-light-railway-part-3/
  10. The Railway Magazine, London, July 1903.

Welshpool and Llanfair Light Railway again – The Railway Magazine, July 1903. ……

I was reading (in August 2024) the July 1903 Railway Magazine and came across an article about the Welshpool & Llanfair Light Railway. [1: p64-68] The article marked the opening of the line at the beginning of April 1903.

After the first railway entered Welshpool on 10th June 1862 – the Oswestry (by 1903, the Cambrian) Railway – a series of three different schemes were proposed to connect Welshpool and Llanfair Caereinion. The first scheme was put forward in 1864, the second in 1875, the third in 1887. None of these schemes came to fruition. However, “in 1896 a ray of light (the Light Railways Act) illumined the gloomy darkness of uncertainty and failure. Before the measure had received the Royal assent, Dr. C. E. Humphreys (Llanfair) had launched a scheme for connecting Llanfair with the Cambrian Railways, by means of a line through the Meifod Valley and Four Crosses. This was not allowed to pass unchallenged. Immediately Welshpool … entered the lists with a Bill for a 2ft. 6in. gauge light railway, to run from Welshpool to Llanfair. If Llanfair was to have a railway (which was of all things most desirable) that railway, said they, must run from Welshpool. … A spirited war of routes resulted, terminated by the Light Railways Commissioners giving the award to Welshpool for a 2ft. 6in. gauge railway from Welshpool to Llanfair.” [1: p64]

The successful company “was liberally supported by Welshpool, the Montgomery County Council, Forden District Council, and Llanfyllin Rural District Council.” [1: p64]. The Treasury granted a gift of £17,500 – one-third of the estimated cost. The new railway was planned as a single line, 2ft, 6in. gauge running from the road outside Welshpool Railway Station, along “the Lledan Gorge, over the Pass at Glyn Golfa to Castle Caereinion, through the Banwy Valley to Llanfair. An agreement was entered into with the Cambrian Railways to work and maintain the line; the construction of the line [was] … under the supervision of the Cambrian Railway’s Engineer, Mr. A.J. Collin: Mr. Strachan (Cardiff) being the contractor. On 30th May 1901, … Viscount Clive the son of the Earl and Countess Powys … cut the first sod for the new line. In February [1903] the line was completed; and passed by Major Druitt, of the Board of Trade.” [1: p64-65]

On 4th April 1903, the first passenger train navigated the new line. The Railway Magazine described the route: “The new railway [cut] through the town of Welshpool, over the brook and canal, and burrow[ed] its way up the Golfa Pass.” [1: p66]

The length of the line through the town of Welshpool has already been covered. For the relevant articles, please check these two links …

Those articles cover the length of the line abandoned when Welshpool undertook highway improvements, the run from Welshpool Railway Station as far as Raven Square, now a roundabout.

The roundabout at Raven Square appears top-right. The abandoned length of line heads off to the Northeast. The preservation line has a new station to the Southwest of the roundabout, approximately on the site of the passing loop shown here. 1:2500 Ordnance Survey SJ2007-SJ2107 – AA Revised: 1966, Published: 1967. [4]
A sketch map of the Welshpool & Llanfair Railway. [1: p64]

The preservation line occupies the trackbed of the line from Raven Square to Llanfair. It runs immediately alongside the A458 on the North side of Nant-y-caws Brook.

A first length of the line to the West of Raven Square. This extract, and the following map extracts, is from the OS Landranger map series as held by Streetmap.co.uk. [5]
The same length of the line as it appears on railmaponline.com’s satellite imagery. [6]
This extract from the OS War Office, England and Wales One-Inch Popular, GSGS 3907 – 1933-43, Sheet 60 – Shrewsbury & Welshpool was printed in 1943 on a base map dated around 1916. It shows the location of the halt at Raven Square (immediately above the ‘309’) and shows the line continuing Northeast towards the centre of Welshpool. [18]
Looking Southwest along the A458. The road and railway are separated by no more than a hedge or fence. [Google Streetview, May 2024]
Ungated crossing adjacent to the A458 at the junction with the lane which appears bottom-left in the map extract and satellite image above. [Google Streetview, May 2024]

The Railway Magazine continues: In the Golfa Pass, “by means of a series of curves of small radii and steep inclines, the great natural beauty of the surrounding country has been retained. Rising 300ft, in the first two miles it reache[d] Golfa … with its lung-filling expanse of common – its garden of fern, gorse, and broom –  where at 1,000ft above the sea level is presented a glorious panorama of typical Welsh pastoral scenery – the ideal of the pedestrian, artist, and rambler.” [1: p66]

The line then moves away from the A458 to enable it to best find its way up the valley at a reasonable grade. In doing so it follows the contours and passes through a series of tight curves. [5]
The same length of the line on satellite imagery. [6]
In Sylfaen Dingle, to the West of Barn Farm, it returns to run very close to the A458. [5]
Once again, this satellite image covers the same length of the line as the map extract above. [6]
The level crossing at Cwm Ln from the Northeast. [Google Streetview, May 2024]

The Railway Magazine continues to describe the route ahead, the line “threads the beautiful Pass of Sylvaen; there, far to westward, is spread the famous vale of Caerinion, where, silhouetted against the misty horizon, Cader Idris and The Arrans lend an air of magnificent solemnity to an impressive scene.” [1: p66]

The railway remains close to the road as far as Sylfaen Halt after which it turns away to the South. [5]
A similar length of the line on railmaponline.com’s satellite imagery. [6]
Farm/forest access road crossing just to the East of Sylfaen Halt. [Google Streetview, May 2024]
Sylfaen Halt seen from the A458. The photo is taken from the East. [Google Streetview, May 2024]
Gradients are shallower here, witnessed by the broadening of the contours. the line crosses Coppice Lane and passes to the North of the Sewage Works. [5]
A very similar length of the line as it appears on railmaponline com’s satellite imagery. [6]

Castle Caereinion is South of the line down Coppice Lane from the level crossing which can be seen in the bottom-left of the image above.

Coppice Lane level crossing seen from the South. [Google Streetview, May 2024]

Again, the article in The Railway Magazine continues: the village of Castle Caereinion is about 0.5 mile from the station bearing its name. The line passed the site of the Castle of Caereinion and ran on through Cyfronydd and along the banks of the Afon Banwy, also known as the Afon Einion. It crossed the Bryn-Elen Viaduct, “a very substantial piece of engineering. The rails [were] then carried across the dingle which [ran]up to Cwmbaw by a stone bridge of six arches, at a considerable height above the bottom of the ravine. Half a mile further on is the Banwy Viaduct.” [1: 67]

After another tight curve the line enters Castle Caereinion Station. It is here that some of the services from Llanfair on the preservation line terminate. The loco runs round its train and then shepherds its carriages back to Llanfair Caereinion. Immediately at the edge of the station site the line crosses the B4385 and turns sharply to the Northwest. [5]
Once again, a similar area to that covered by the OS map extract above. Along this length of the line trains for Llanfair first encounter Castle Caereinion Station, then cross the B4385 and, as they turn northward they again cross the B4385. [6]
Castle Caereinion Railway Station as seen from the first level-crossing with the B4385, looking East. [Google Streetview, May 2024]
The first rail-crossing on the B4385 seen from the South. Castle Caereinion Station is of the picture to the right. [Google Streetview, May 2024]
The vIew West along the line from the same level-crossing with the B4385. [Google Streetview, May 2024]
The second, more westerly, level-crossing over the B4385. [Google Streetview, May 2024]
The view back towards Welshpool. [Google Streetview, May 2024]
The line ahead towards Llanfair. [Google Streetview, May 2024]
The line runs Northwest towards Cyfronwydd Bridge and Cyfronydd Station from the crossing on the B4385. [5]
Railmaponline.com covers the same length of the railway. [6]

The line continues down through Cyfronydd Railway Station, over Bryn-Elen Viaduct to the banks of the Afon Banwy.

Just beyond Cyfronydd Station, the track crossed a minor road and ran out over Bryn-Elen Viaduct and then reaches the South bank of the Afon Banwy (Afon Einion). [5]
The same length of the line, through Cyfronydd Station and out onto Bryn-Elen Viaduct. [6]
Looking East through Cyfronydd Railway Station. [Google Streetview, April 2024]
The level-crossing on with the minor road at the West end of the Cyfronydd Station site, seen from the Northeast. [Google Streetview, April 2024]
The line West towards Llanfair Caereinion. [Google Streetview, April 2024]
The building of Bryn-Elen Viaduct. [7]
The Earl crossing Bryn-Elen Viaduct in the year 2000, © Keith Halton. This image was shared on the Welshpool and Llanfair Light Railway Facebook Page on 9th May 2020. [9]
One of a series of postcards produced in a set by Dalkeith, “On the Bryn-Elen Viaduct in GWR days.” [8]

After running for a while on the South bank of the Afon Banwy (Afon Einion) the line crosses the river on a three-span girder bridge, Banwy Viaduct. It turns West once again and enters Heniarth Railway Station. Opened as Heniarth Gate on 6th April 1903 the station was renamed ‘Heniarth’ on 1st February 1913. [16]

The railway crosses the Afon Banwy (Afon Einion)  on the Banwy Viaduct, just short of Heniarth Station. [5]
Close to the same length of line as shown by railmaponline.com. [6]
The approach from the East to the Banwy Viaduct, © John Firth and licensed for reuse under a Creative Commons Licence, (CC BY-SA 2.0). [13]
A mixed train crosses the Banwy Viaduct. [1: p66]
Another from the series of postcards produced in a set by Dalkeith, “Crossing the Afon Banwy, 1903.” [8]
‘The Earl’ heads a special enthusiasts’ train across the River Banwy bridge on the way back to Llanfair Caereinion in June 1968.
On 13th December 1964, the western masonry pier supporting the steel girder bridge was seriously damaged by flood waters and the bridge dislodged. During the spring and early summer of 1965 the 16th Railway Regiment of the Royal Engineers replaced the damaged masonry pier with a fabricated steel one and repositioned the span. Train services between Llanfair Caereinion to Castle Caereinion resumed on 14th August 1965. The steel pier is clearly evident in the photo. It has since been replaced by a masonry one, but more substantial than the one damaged in 1964, © Martin Tester and licensed for reuse under a Creative Commons Licence, (CC BY-SA 2.0). [11]
On the line between Heniarth Station and the Banwy Bridge. A view from the first coach behind ‘The Earl’, facing Southeast, © Martin Tester and licensed for reuse under a Creative Commons Licence, (CC BY-SA 2.0). [10]
Heniarth Gate Railway Station seen from the Banwy Viaduct, Llanfair Caereinion is away to the left, © John Firth and licensed for reuse under a Creative Commons Licence (CC BY-SA 2.0). [15]

Heniarth “is the centre for Meifod District. A short distance further on is the picturesque Melin [Dol-rhyd-y-defaid] where the rails are carried between the mill race and the River Banwy, by means of a substantial stone embankment.” [1: p67]

The railway is now on the North bank of the river. After leaving Heniarth Station it is met once again by the A458. Both railway and road pass a mill which, along with the mill race, separates the two. [5]
Almost the same length of line as shown on the map extract above. [6]
The line continues to follow the river bank into Llanfair Caereinion and it’s terminus adjacent to the river. [5]
The last of this series of extracts from the railmaponline.com satellite imagery bring us to the location of the terminus at Llanfair Caereinion. [6]
‘The Earl’ heads its train on the run-in to Llanfair Caereinion in April 1968. It is just passing the outer home signal about 100 metres from the station, © Martin Tester and licensed for reuse under a Creative Commons Licence, (CC BY-SA 2.0). [12]
‘The Earl’ at the water tank near Llanfair Caereinion Station – 1969. At the time this was the only watering facility on the railway. ‘Earl’ is seen heading a special train run by the Liverpool University Public Transport Society, © Alan Murray-Rust and licensed for reuse under a Creative Commons Licence, (CC BY-SA 2.0). [14]
This extract from the OS map SJ10 (33/10)-A
(Revised: 1900 to 1949), originally published: 1952, shows the railway approaching Llanfair Caereinion. Earlier mapping from 1901 does not show the line. The faded appearance of this extract matches the full map sheet provided by the NLS. [20]
The station at Llanfair Caereinion, a postcard view looking Northeast from the platform, © Public Domain. [19]
Llanfair Caereinion Railway Station in 1963. The original passenger service was withdrawn in 1931 in favour of a bus service. Lorries also began to poach traffic from the railway but the coal-powered trains came into their own again during the petrol scarcity of the Second World War, when Britain had to increase domestic food production. Local farms needed more feed for livestock but there was nowhere to store it at the terminus here. The solution was to place the bodies of two Victorian carriages (standard gauge) on the disused passenger platform. One is visible in this photograph, © Peter Clark. The photo comes from the history points.org website (https://historypoints.org/index.php?page=llanfair-caereinion-railway-station) and is included here by kind permission of the site owner.. [21]
The station buildings at Llanfair Caereinion looking Southwest towards the buffers from the rear veranda of one of the carriages on 1st June 2011, © John Firth and licensed for reuse under a Creative Commons Licence, (CC BY-SA 2.0). [22]

The Railway Magazine commented on the importance of this new railway: “This railway opens up and connects to an established system of railways, an area of over 100 square miles of Welsh scenery of great natural beauty-possessing abundance of excellent fishing and many other attractions. … Llanfair, a typical little Welsh town, is now within easy access, and the greatest obstacle to its success as a health resort has been removed. In the year 1824 (Montgomeryshire Collections) the medicinal properties of the springs of Llanfair, were discovered by one ‘Madock’, sulphur being present in one; another, close by, had chalybeat properties; while a third was saline. Pumps and other appliances were erected for the convenience of those who would make use of the springs, and the value of the waters becoming more widely known, the place was largely visited by invalids. The waters are still in good repute, and now that the difficulties consequent upon bad roads are removed, it is believed that they will become as popular as the waters of Llandrindod and Llanwrtyd in South Wales.” [1: p67]

The track is of a small gauge – 2ft 6in. The Railway Magazine described the rails as being “of the Vignoles section, flat bottomed, 421bs. per yard. The small radii of the curves, with their steep gradients, have necessitated a general use of check rails, sole-plates, and cross-stays to ensure a safe and substantial track.” [1: p67]

Although the railway gauge is only 2ft 6in “care in designing the rolling stock has prevented this line being catalogued under the title of ‘Toy Railways’, as will be apparent from the photographs. The responsibility of designing and providing the whole of the rolling stock devolved upon Mr. Herbert Jones, the Locomotive Superintendent of the Cambrian Railways, and is of a substantial and commodious character. The coaches, very roomy and comfortable vehicles – bogie type being built after the style of the one-storey electric car, are provided with first, third, and smoking compartments, divided by sliding doors; adjustable platforms, also, at the ends provide a convenient means of communication.” [1: p68]

The railway was initially worked by the Cambrian Railways, for 60 per cent. of the earnings. [1: p68]

Original Locomotives

The railway originally operated with two locomotives, No. 1, ‘The Earl’ and No. 2, ‘The Countess’.

‘The Earl’ at Raven Square Station taking on water in 2015, © Rwendland and licenced for use under a Creative Commons Licence, (CC BY-SA 4.0). [18]
The manufacturer’s photograph of The Countess. [1: p68]

As The Railway Magazine says: the engines were “two in number, named respectively ‘The Earl’ and ‘The Countess’, [they were] six-wheeled coupled, side tanks, with outside cylinders, built by Messrs. Beyer, Peacock and Co. Weight in working order, 194 tons; cylinders, 11in. diameter by 16in. stroke; diameter of cast-steel wheels, 2ft. 9in.; wheel base, 10ft.; steel boiler, 7ft long, 3ft. 5.5in. diameter; 119 copper tubes, 1.75in. diameter.” [1: p68]

With Walschaerts valve gear and a maximum boiler pressure of 150 lbf/in2 (1.03 MPa), they yielded a tractive effort of 8,175 lbf (36.36 kN). [17]

The Earl and The Countess ran the line from 1903 until closure of the railway in 1956. The engines were overhauled at Oswestry Works and were sent there on closure of the railway. [17]

By 1959, negotiations had begun with British Railways and the Welshpool and Llanfair Light Railway Preservation Company had leased the line from British Railways by the end of 1962. On 28 July 1961, The Earl returned after storage and overhaul at Oswestry Works, with Countess following not long after. They have continued to work on the line ever since. [17]

During their lifetime the locos have had many modifications, particularly after the takeover by the Great Western. During this period they were fitted with a larger cab, handles on the smokebox door, rather than the original wheel, a larger dome, a much larger and more sophisticated safety valve and two different funnels. They were painted in Great Western green. … When taken over by British Railways, their shunting bells and chopper couplings were removed, and were repainted black. … From 1997 to 2001, the locomotives were fully overhauled at Llanfair, which included the fitting of new boilers and cylinders. They are currently the same design as the BR era, but have worn different liveries in preservation. [17]

Original Rolling Stock

The Railway Magazine said: “The stock is painted in the Cambrian colours coaches, bronze, green and white; engines, black, picked out with red and yellow.” [1: p68]

3rd class bogie coach. [1: p67]

Carriage details were: “Length over headstocks, 35ft.; centres of bogies, 24ft.; width outside, 6ft. 6in.; wheel base of bogies, 4ft.; size of journals, 6in. by 3in. diameter; centres of journals, 4ft. The body [was] built of oak and mahogany, the steel underframes [were] fitted with the automatic vacuum brake, and a hand brake [was] placed on each carriage. Weight of carriage, 94 tons.” [1: p68]

Cattle Wagon. [1: p67]

The whole of the stock was fitted with central ‘buffer couplings’ and safety chains.” [1: p68]

Goods Brake Van [1: p67]

Sadly, the coaches purchased for the opening of the line did not survive into preservation. When passenger services were suspended in 1931 the coaches were sent to Swindon for ‘storage’ but never re-entered traffic and were broken up in 1936. That would have been the end of the story but for a desire by the preserved Welshpool & Llanfair Light Railway to reverse history and through the generosity of donors a complete new rake was built by the Ffestiniog Railway at their Boston Lodge works. [23]

References

  1. Welshpool & Llanfair Light Railway; in The Railway Magazine, London, July 1903, p64-68.
  2. https://rogerfarnworth.com/2022/07/24/the-welshpool-llanfair-light-railway/
  3. https://rogerfarnworth.com/2022/09/23/the-welshpool-llanfair-light-railway-an-addendum/
  4. https://maps.nls.uk/view/188900409, accessed on 18th August 2024.
  5. https://www.streetmap.co.uk/map?x=314500&y=307500&z=120&sv=Welshpool&st=3&tl=Map+of+Welshpool+and+Llanfair+Railway,+Powys&searchp=ids&mapp=map, accessed on 18th August 2024.
  6. https://railmaponline.com/UKIEMap.php, accessed on 19th August 2024.
  7. https://wllr.org.uk/our-railway/our-history, accessed on 21st August 2024.
  8. https://www.ebay.co.uk/itm/204467180155?mkcid=16&mkevt=1&mkrid=711-127632-2357-0&ssspo=tL4T-ZhGQ3-&sssrc=4429486&ssuid=afQhrar7TGK&var=&widget_ver=artemis&media=COPY, accessed on 21st August 2024.
  9. https://www.facebook.com/109476715927837/posts/pfbid0ENUcCSDiS5cYXkJut2j291owAcq3GZAJK7xmfZ25MjnkZJLhzaNgKexKV7fzbg8Jl/?app=fbl, 21st August 2024.
  10. https://www.geograph.org.uk/photo/7681103, accessed on 25th August 2024.
  11. https://www.geograph.org.uk/photo/7681029, accessed on 25th August 2024.
  12. https://www.geograph.org.uk/photo/6788156, accessed on 25th August 2024.
  13. https://www.geograph.org.uk/photo/1559805, accessed on 25th August 2024.
  14. https://www.geograph.org.uk/photo/6957406, accessed on 25th August 2024.
  15. https://www.geograph.org.uk/photo/5542428, accessed on 25th August 2024.
  16. https://en.m.wikipedia.org/wiki/Heniarth_railway_station, accessed on 26th August 2024.
  17. https://en.m.wikipedia.org/wiki/Welshpool_and_Llanfair_Light_Railway_No.1_The_Earl_and_No.2_Countess, accessed on 28th August 2024.
  18. https://maps.nls.uk/view/239291707, accessed on 29th August 2024.
  19. https://www.redbubble.com/i/poster/Welshpool-and-Llanfair-Light-Railway-by-Yampimon/9375190.LVTDI, accessed on 29th August 2024.
  20. https://maps.nls.uk/view/196757669, accessed on 29th August 2024.
  21. https://historypoints.org/index.php?page=llanfair-caereinion-railway-station, accessed on 29th August 2024.
  22. https://www.geograph.org.uk/photo/2437193, accessed on 129th August 2024.
  23. https://www.accucraft.uk.com/products/welshpool-llanfair-pickering-coaches, accessed on 17th September 2024.

‘Demountable Flats’ – The Railway Magazine – February 1922 – and developing methods of reducing freight handling costs in the 20th century. …

The Railway Magazine of February 1922 introduced its readers to the advantages of ‘demountable flats’. ‘Demountable flats’ significantly improved the loading and unloading of consignments of goods on railways and road motor vehicles. ‘Demountable flats’ made it possible to transfer a load from one to the other or vice versa in a few minutes. The result was a significant “saving in time and labour. … The system, which [was] capable of considerable extension, [was] finding favour on several railways. It [had] recently been adopted by the London and South Western Railway with great advantage and two illustrations [were] reproduced [in their article] showing the arrangements employed.” [1: p137-138]

Demountable flat in position on stand-dray, London & South Western Railway. [1: p137]

The old method of collecting goods was to despatch a pair-horse van with two men at 9 a.m. each day to pick up a load. The horses and men were compulsorily kept idle while the goods were loaded piecemeal, the van eventually returning to the goods yard with its load and frequently being unable to perform more than one return journey in the day. Under the new arrangement a motor lorry leaves the depôt at 9 a.m. with an empty demountable flat to pick up a load. Upon arrival the flat is pushed or lifted off the chassis and a loaded one transferred thereto by similar means. The lorry is able to return with this load at 10 a.m., the load being then transferred to the stand-dray, after which the motor sets out again on another trip at about 10.15 a.m., carrying an empty flat as before.” [1: p138]

Two men transferring a load of 50 barrels of apples (weight: 4 tons), London & South Western Railway. [1: p138]

Horses are harnessed to the stand-dray to which the first load was, as stated, transferred, and haul it to the goods siding ready to load it on to a wagon of the goods train. By this means loads collected late in the afternoon can be delivered at far distant points early the following day per goods train. Also six return journeys can be accomplished in a day, whereas previously this might necessitate the employment of twelve men and six pairs of horses. The inward traffic or goods delivery is conducted on the same lines and with the same saving of time and labour. The wheels of the demountable flats illustrated are fitted with self-aligning ball bearings, which considerably facilitate the ease of handling of the flats, especially in their loaded condition.” [1: p138]

These revised methods of working were relatively novel in 1922. As can be seen in the text above,, working patterns were changing and manual labour was becoming less important as more mechanised operations were undertaken. No doubt, the reduced number of men required for these operations eventually saw redundancies.

The larger the unit loads the greater the reduction in handling time for a given quantity of cargo. To make economic sense any container system has to be widely adopted, prior to the 1930s this meant that the majority of containers used were for bulk flows of minerals.” [4]

The presence of an article focussing on the use of ‘demountable flats’ in The Railway Magazine might suggest that they were a relatively early form of ‘unit load’ used on the railways. Their use was certainly a development in a flow of innovation in the movement of goods across different modes of transport. They were, though, effectively, but loosely, a form of ‘containerisation’. And containers had, by 1922, been around for some time, “various kinds were in regular use on the canals from the 1780s and wooden containers were adopted by the Liverpool & Manchester line in the 1830s for both coal and general goods.” [4]

The Liverpool & Manchester Railway built open frame ‘skeliton (sic) wagons’ to carry rectangular bottom-door coal containers already in use of the canals but used their standard flat wagons to carry Pickfords general goods containers.” [4]

Although some of the mineral ‘containers’ “travelled on specially built wagons a lot were carried in three and four plank standard open wagons.” [4]

In 1841 Brunel introduced iron mineral boxes/containers in South Wales to protect friable coal. Cranes then lifted these containers into the holds of ships at Swansea docks. They were then emptied using bottom doors. 8ft long by 4.5ft wide, these containers were carried four to a wagon. [4]

During the pre-grouping era, containers were also used for passenger luggage where that luggage needed to be loaded onto boats travelling to the continent. Certainly, both the Great Eastern Railway and the South East & Chatham Railway provided this service. [4]

By about 1900 road furniture vans were fitted with removable wheels so they could be moved on standard railway wagons, these evolved into covered furniture containers by the time of the First World War. Building on the work done by the pre grouping (pre 1923) companies railway container designs were standardised during the later 1920’s. The new RCH approved standard containers were based on the existing designs of the time. This move was mainly lead by the LMS who began promoting containers in 1928 in order to counter the competition from road haulage companies for door-to-door services.” [4]

By the 1930s, furniture and some high value items were being carried in containers. In the late 1930s almost all meat transportation by rail was undertaken using dedicated containers.

British railways built many thousands of containers, mainly to the standard pre-war ‘van’ type designs. Up to the 1960’s it was usual to send containers through the system as single loads, hauled in standard mixed goods trains but under British Railways all-container ‘liner’ services began to emerge in the late 1950s.” [4]

The breweries used tank wagons of both the fixed and ‘demountable’ kind for beer and spirits. “Guinness developed a steel tank in the 1940s that could be carried in ordinary open wagons but demountable beer tanks were in effect containers and ran on purpose built chassis. Bass built up quite a fleet of these tanks, some of which were later used for other work, one example being the movement of glue to chipboard factories. This latter traffic was carried throughout the 1950s and 60s but … transferred to road in the 1970s. There were a few demountable tanks carried in pairs on a single wagon, Scottish and Newcastle had two of these and Truman’s had one (which could carry either two tanks or a single tank mounted … centrally).” [2]

‘Conflats’ were developed, in the era before nationalisation of the railways. ‘Conflat’ was the telegraphic code within the GWR’s “coding of railway wagons for a container wagon. Unlike normal wagon loads, containers were only listed to carry furniture or goods (unless they were refrigerated containers, which carried frozen products kept cold by ice) which needed to be placed on a specialist flatbed wagon which had train braking capability due to the fragile nature of the products carried.” [3]

These “wagons were removed from service (as were the containers themselves) when more modern containers came into use.” [3]

Two Conflats at Ruddington in 2008, © Thomas H-Taylor at English Wikipedia and licensed for reuse under a Creative Commons Licence, (CC BY-SA 3.0). [3]

British Railways used several standard types of wagon. The Conflat A, which could carry one type ‘B’, or two type ‘A’, containers, was the most common. It was regularly used to carry AF (frozen food) containers: while the Conflat L, which could carry three smaller containers for bulk powders, was also produced in large numbers. … The Conflat B wagon could carry 2 AFP (frozen food) containers. These were slightly wider than the standard AF containers, and were designed to carry loads on pallets.” [3]

Innovation continued through the 1950s, 1960s and 1970s, but this discussion has taken us quite a distance from the ‘demountable flats’ of the 1920s and their dramatic impact on goods handling.

References

  1. The Railway Magazine, February 1922, p137-138.
  2. https://www.igg.org.uk/gansg/7-fops/fo-grain.htm, accessed on 3rd September 2024.
  3. https://en.m.wikipedia.org/wiki/Conflat, accessed on 3rd September 2024.
  4. https://igg.org.uk/rail/5-unit/unitload1.htm, accessed on 16th September 2024.

Railway Statistics – The Railway Magazine, July 1903 and a brief look at modern figures. …

J. Holt Schooling produced a series of articles in The Railway Magazine after the turn of the 20th century. I came across the third of these in the July 1903 edition of the magazine. [1: p20-28] Elsewhere in the same magazine, there was a short note which highlighted the total net receipts of all Britain’s railways companies with the figures tabulated. [9: p59]

Headline figures for Britain’s railway companies for 1901 and 1902. [9: p59]

The figures show a small but significant increase between 1901 and 1902.

Holt Schooling’s article looked at some detailed statistics relating to British railways, with some comparisons made with statistics relating to the railways of the USA. …

Accidents

Holt Schooling highlighted the decrease in the chance of death or injury to railway passengers over the period from 1877 to 1901. Accidental deaths fluctuated over the period, injuries fell significantly in absolute terms (4,330 injured between 1877 and 1881 and 2,988 in 1897 to 1901)  during the same period, the number of passengers carried rose significantly (2.9 billion to 5.5 billion). In relative terms, the number of deaths and injuries improved dramatically. The proportion killed, reducing from 1 in 17.9 million to 1 in 75.6 million, and the proportion injured refusing from 1 in 700 thousand to 1 in 1.2 million.

Passenger accident statistics on British railways. [1: p20]

Comparable figures in the USA show that the chance of death or injury while travelling by rail in the USA is very much higher, close to eight times higher.

Passenger accident statistics on railways in the USA. [1: p20]

Holt Schooling notes that “This result, unfavourable to the United States, is partly qualified by the fact that American railway journeys are of greater duration than English railway journeys, American passengers thus being exposed to risk of accident for a longer time than the British pas- senger, and also the American returns do not explicitly state whether or not the accidents to passengers are ‘from causes beyond their own control’ – a condition that applies to the foregoing accident facts for British railways.” [1: p21]

Holt Schooling produced a 10 year summary of the causes of accidents. …

Causes of accidents in the British Isles during the ten years 1802-1901. [1: p21]

He notes that, “collisions account[ed] for 60% of all train accidents that happened, and that only two other causes of accidents had any material degree of frequency.” [1: p21] These were defects in the permanent way and trains entering stations at too great a speed.

Rates of Dividend on Ordinary Stock

In 1901, over £454 million was invested in railway companies ordinary stock. Schooling focuses on Ordinary Stock because it is the largest of the stocks under which railway capital is grouped. He explains that Guaranteed and Preference Stock amounted to more than £425 million, and Loans and Debenture Stock, just over £316 million.

Rates of Dividend Paid in 1901. [1: p22]

31% of Ordinary Stock paid a dividend between 2 and 3%. Interestingly, nearly 20% of the stock paid a dividend from 5 to 6%. [1: p22]

Working Expenditure

Railway costs per 1000 train-miles all rose between 1900 and 1901, with the exception of the cost of compensation which marginally decreased.

Railway Expenditure 1900/1901. [1: p22]

In absolute terms, the pattern is similar. Railway costs rose by just over £2.7 million between 1900 and 1901.

Railway Expenditure 1900/1901. [1: p23]

That increase in costs was only partially matched by a £1.5 million increase in gross receipts.

Train Mileage

Holt Schooling compared British and American figures for the year 1900 which was the latest year he had figures for. …

USA passenger train miles were 363.5 million, goods train miles were 492.6 million. A total of 856.1 million miles. The figures for the UK were respectively, 220 million, 180 million and a total of 400 million miles.

It is worth noting that freight mileage in the USA was considerably higher than passenger mileage. In the UK passenger mileage exceeded freight mileage. Train mileage in total in the USA was more than double that in the UK.

It is interesting, however, to consider the intensity of use of lines in the USA and the UK. This provides a very different picture. …

Train mileage per mile open for traffic. [1: p24]

Holt Schooling comments that on “average, each mile of American railroad is passed over by a train 4,400 times in the year, or twelve times per day. But each mile of British railroad is passed over by a train 18,300 times in the year, or fifty times per day. This is a striking fact, and it is another of those fundamental differences between the railway systems of the two countries …  Our railways are used more than four times as often as the American lines are used, and this fact necessarily carries with it many other important differences between the two railway systems and the methods by which they are worked.” [1: p24]

Classes of Passengers

Three different classes were used on Britain’s railways. Holt Schooling tabulates the figures for each class in 1901.

Patronage of British railways passenger trains by class in 1901. [1: p24]

Holt Schooling notes “the overwhelming preponderance of the third-class passenger … 91.2 per hundred. The [highest] proportion of third-class passengers [was] in Scotland; and the lowest proportion of third class passengers [was] in Ireland, 81.4 per 100.” [1: p24-25] It is worth reminding ourselves that the whole of Ireland, at this time, was still considered to be part of the UK.

Holt Schooling goes on to note that the highest proportion of second- and first-class passengers in the UK was in Ireland and then comments that these figures suggest that Irish travellers do not feel the need for thrift in the way others in the UK do. He seems to suggest that his figures show that Ireland was not as poverty-stricken as was currently being made out in 1903.

It seems to me that this is only one way of interpreting the figures. Surely it is, at least, just as possible that these figures suggest that relative poverty was greater in Ireland given that a lower proportion of people were able to afford to travel third-class. It is also possible to infer from the figures that there was a greater disparity between rich and poor in Ireland than in the rest of the UK.

Receipts from Passenger and Goods Traffic

Gross receipts of British railway companies in 1901 were £106.5 million of which over £99.5 million were traffic receipts (passenger and goods combined). Holt Schooling notes that “Goods Traffic yielded more than one-half of this amount namely, £53 million, and passenger traffic, £46.5 million.” [1: p25-26] He goes on to state that over the 10 years (1892-1901), passengers receipts had increased in relation to goods receipts as shown in the table below.

Traffic Receipts of the Railways of Britain. [1: p26]

Overall receipts had increased year on year from £78.6 million in 1892 to £99.6 million in 1901. Despite the slight discrepancy in figures between Holt Schooling’s narrative and the table above, it is clear that the relative proportion of income changed over the 10 year period from 45% passenger/55% goods, to 47% passenger/43% goods.

Holt Schooling looks behind these overall figures and notes that close to 77% of passenger receipts came from third-class passengers! The figures were: 76.8% third-class; 10.7% second-class; 12.5% first-class.

Comparison of some Individual Railway Companies

Holt Schooling provides some details of individual railway company receipts/expenditure in 1901. [1: p26]

The lowest percentage of expenditure to receipts that he quotes is for the Furness Railway, 51%, closely followed by the Great North of Scotland Railway (52%), the North British Railway (53%), the Caledonian Railway (56%), the Great Northern Railway of Ireland (56%), the Taff Vale Railway (58%), Midland Great Western Railway of Ireland (59%) and the Glasgow and South Western Railway (61%).

The average of all British railways was 63%, a figure which also applied to the GWR, the L&Y and the LNWR. Those with higher percentage of expenditure included: the Great Southern & Western Railway of Ireland, the London & South Western Railway and the Midland Railway (64%), the North Eastern Railway (65%), the Great Eastern Railway (66%), the Great Northern Railway (67%) and the Great Central Railway (70%)

Holt Schooling suggests that these figures are counterintuitive. Rather than the larger companies being the most efficient, it seems that it was the smaller companies for whom this was true. There also appears to be a Northwest/Southeast divide with the least efficient companies being to the South and East of the country, while the more efficient were in the North and West, including Ireland!)

Holt Schooling also looks at receipts per train mile in pence/mile. …

Railway company receipts per train-mile. [1: p27]

Holt Schooling comments: “Here, again, are very large differences. The Taff Vale Railway received nearly 7s. per train-mile run from passenger and goods traffic, while the Great North of Scotland Railway received little more than 4s., the mean result for all railways in the United Kingdom being almost exactly 5s. per train-mile run. There are many important railways in the above list whose receipts per train-mile run are appreciably below the average, although upon general considerations, one would expect them to be above rather than below the average.” [1: p27]

Delayed Arrival of Trains

The most recent figures available to Holt Schooling, issues by the Board of Trade, related to some companies’ long-distance train arrivals in London in the 3 month period, June-August 1895. …

Punctuality of Railway Companies’ Trains at London termini in June to August 1895. [1: p27]

Figures for trains originating more than 50 miles from London may well feel comparable for the first four companies in the table above. Given the greater distances travelled by trains in the GWR, it is to be expected that a smaller percentage would have arrived within 5 minutes of the scheduled time than other companies in the list.

Rail Usage, January to March 2024 and earlier.

How do the statistics from 1903 compare with modern figures? The Office of Rail and Road produces quarterly statistics about rail usage. At the time of writing, the latest statistics cover the period from January to March 2024. [2]

The ORR report is dated 13th June 2024.

A total of 1,610 million journeys (1.61 billion) were made by rail passengers in Great Britain in the latest year (1 April 2023 to 31 March 2024). This is a 16% increase on the 1,380 million journeys (1.38 billion) in the previous year (1 April 2022 to 31 March 2023). There were 405 million journeys in the latest quarter (1 January to 31 March 2024). This is a 13% increase on the 359 million journeys made in the same quarter in the previous year (1 January to 31 March 2023).” [2]

Total passenger revenue was £10.3 billion in the latest year. This is a 13% increase on the £9.1 billion in the previous year (when adjusted for inflation). In the latest quarter, total passenger revenue in Great Britain was £2.6 billion. This is 13% more than the £2.3 billion generated in the same quarter in the previous year (when adjusted for inflation).” [2]

Included within the ORR report was a graph showing passenger numbers since 1946.

Passenger numbers on British railways since 1946 [2]

In 1946, passenger numbers were 1,270 million. A nadir was reached in 1982, just 630 million passengers. The peak since then was reached at the end of the 2010s, 1,740 million. At the turn of the 20th century Holt Schooling reported annual passenger numbers as 1,712 million, almost the same as the figure for 2019/20. The effect of the pandemic was marked. In 2020/21, passenger numbers fell to 388 million, recovering to 990 million in 2021/22, 1,380 million in 2022/23 and 1,610 million in 2023/24.

Before 1946, figures were interrupted by the two world wars. It is possible, however, to produce a similar graph to that above covering the period prior to 1946. The ORR has done so and an extract from another of their regular reports is below.

Passenger numbers on British railways from 1872 to 1947 and beyond. [8]

Peak patronage of the country’s railways occurred in 1920 when the railways carried 2,186 million passengers.

Passenger train kilometres: distances are recorded in kilometres in 2024. Between January and March 2024, “there were 126 million passenger train kilometres travelled, … an 8% increase on the 117 million recorded in the same quarter in the previous year. However, this is 93% relative to the 136 million in the same quarter five years previously (January to March 2019).” [2] These figures record full train movements.

Passenger vehicle kilometres: “include both the distance covered by locomotives and the carriages they transport. In the latest quarter (January to March 2024), there were 764 million passenger vehicle kilometres operated. This is a 6% increase on the 722 million kilometres in the same quarter in the previous year. However, this is still slightly below prepandemic levels, at 96% relative to the 800 million five years ago (January to March 2019).” [2]

The ORR report summary says that the key results of their statistical work are:

  • A total of 1.61 billion journeys were made by rail passengers in Great Britain in the latest year (1 April 2023 to 31 March 2024). This is a 16% increase on the 1.38 billion journeys in the previous year (1 April 2022 to 31 March 2023).
  • There were 405 million journeys in the latest quarter (1 January to 31 March 2024). This is a 13% increase on the 359 million journeys made in the same quarter in the previous year (1 January to 31 March 2023).
  • Total passenger revenue was £10.3 billion in the latest year. This is a 13% increase on the £9.1 billion in the previous year (when adjusted for inflation).
  • A total of 60.1 billion passenger kilometres were travelled in the latest year. This is a 13% increase on the 53.0 billion passenger kilometres travelled in the previous year.

Rail Accidents to 2024

Annual rail safety statistics on mainline rail, London Underground, and other non-mainline networks (trams, metros, other light rail, minor and heritage railways) are provided by the ORR, “reporting on fatalities and injuries to passengers, members of the public and workforce in Great Britain. It also covers train accidents and (annual and quarterly) number of signals passed at danger (SPADs). These incidents are reported to the Office of Rail and Road under the Reporting of Injuries, Diseases and Dangerous Occurrences Regulation (RIDDOR).” [4]

The ORR reports on rail safety at the end of September each year, at the time of writing the latest report was published on 28th September 2023. [5]

There were eight non-workforce fatalities (passenger or public) in the latest year (April 2022 to March 2023), a decrease from 11 in the previous year. These included five fatalities which occurred in mainline stations and at the platform-train interface, two passenger fatalities at stations on the London Underground and one fatality from a collision between a member of the public and a tram.” [5] The 8 fatalities in the year are lower than those reported by Holt Schooling. The total number of passenger fatalities in the years 1887 to 1901 was 520 people. The average number of fatalities per annum during that time was close to 35. But the network in the 21st century is much smaller.

As of August 2024, the UK’s National Rail network is 10,072 miles (16,209 km) in Great Britain and 189 route miles (303 route km) in Northern Ireland. This network includes 20,000 miles of track, 30,000 bridges, tunnels, and viaducts, and around 2,500 stations.” [6]

By 1914, “the country had 23,000 miles of rail track and 4,000 stations, according to industry body Rail Delivery Group.” [7] Assuming the parameters are consistent, this means that the network in 2024 is less than 45% of that serving the country in 1914. If the network were of a similar size to that in 1914, the 8 fatalities in 2022/23 would equate to nearer to 15 fatalities after the turn of the 20th century. It is reasonable to think that, at least as far as fatalities are concerned, the modern rail network is safer than that operating in the early 20th century.

Conclusions

The statistics quoted and reviewed by Holt Schooling, provide an insight into the activities of railway companies at the turn of the 20th century. Passenger numbers were to increase further over the years and hit a peak in 1920 but then dropped to a low point in 1982 before recovering strongly. Only to see a drastic temporary reduction as a result of the pandemic.

Both passenger numbers and accidents are reported differently in the 21st century. However, as much as it is possible to compare figures from times more than a century apart, and as limited as this analysis has been, we can tentatively say that modern railways are comparably well patronised and safer than they were early in the 20th century.

References

  1. J. Holt. Schooling; Lessons from Railway Statistics; The Railway Magazine, London, July 1903, p20-28.
  2. https://acrobat.adobe.com/id/urn:aaid:sc:EU:57cdd71b-c52f-4e61-904f-41747a63401c, accessed on 17th August 2024.
  3. https://dataportal.orr.gov.uk/statistics/usage/passenger-rail-usage, accessed on 17th August 2024.
  4. https://dataportal.orr.gov.uk/statistics/health-and-safety/rail-safety, accessed on 17th August 2024.
  5. https://acrobat.adobe.com/id/urn:aaid:sc:EU:c4f6f4fb-bdf4-451b-8449-54a9c3535b95, accessed on 17th August 2024.
  6. https://www.networkrail.co.uk/who-we-are/about-us, accessed on 17th August 2024.
  7. https://www.networkrail.co.uk/stories/wwi-and-the-railway, accessed on 17th August 2024.
  8. https://acrobat.adobe.com/id/urn:aaid:sc:EU:4dbd5c90-5246-4d60-b948-9530c728c4ec, accessed on 17th August 2024.
  9. The Railway Magazine, London, July 1903, p59.

New Zealand Railways – The Railway Magazine, November 1899.

New Zealand’s main towns and cities. [40]

The November 1899 issue of The Railway Magazine carried the first of a short series of articles about the railways of New Zealand. As you will discover if you choose to read on, the author does not hold back on offering his personal opinions about the state of the railways and choices made by the government of the day for the country’s railways.

It is a pity that I do not have access to the subsequent article(s) about New Zealand’s Railways nor to any debate that the article may have provoked.

It might be interesting to hear some present day reflections on the comments the author makes!

The article is also of interest for an introduction to the rather unusual decisions taken by the Southland government about its first railway.

Rous-Marten begins: “When railway construction first began in New Zealand, that ‘Britain of the South’ was a sort of Heptarchy – an association of seven Provinces’, subsequently nine, with a ‘General’ or Federal Government at the capital, Wellington. And three of these Provinces separately entered upon railway making, each on its own account.” [1: p465]

He continues: “There was a special reason in every instance for the embarkation on this enterprise. In Southland the local capital, Invercargill, was separated from the port by about fifteen miles of swamps, and from its goldfields by a stretch of country over which road-making was difficult on account of the numerous boggy streams which had to be crossed. In Otago – more accurately Otakou … – the capital, Dunedin was approachable from the port only by a difficult channel, or a still more difficult land-track. In Canterbury  the chief town, Christchurch, was separated from the port (Lyttelton) by a high – almost mountainous – range of hills. And so connection by rail was sought as the most efficient and, in the end, the cheapest, means of communication. … Unfortunately, each of those semi-independent Governments adopted a different gauge.” [1: p465]

Rous-Marten says that “Southland chose the British standard gauge, 4 ft. 8.5 in.; Otago preferred the 3 ft. 6 in. gauge; Canterbury – wisest of all selected the ‘Irish’ gauge of – 5 ft. 3 in.” There is a glimpse in this sentence of Rous-Marten’s own position which quickly becomes clear as the article unfolds. [1: p465]

He goes on to say that “still more unfortunately, when, the Provincial Governments were abo- lished, and when a general system of railways was adopted, the 3 ft. 6 in. gauge was chosen for the whole colony as the most economical – a grievous and, I fear, irreparable blunder.” [1: p465]

Otago Province

The first Otago railway, was from Dunedin to Port Chalmers. Once built, it “was worked by Double-Fairlie engines without any very serious difficulty being experienced from initiation to completion.” [1: p465]

Rous-Marten says that this Double-Fairlie Engine was  a Class K, New Zealand Railways. [1: p466] The Double-Fairlie locos were, in fact, Class E locomotives. The Class K locomotives were built by Rogers in the USA and were 2-4-2 tender locomotives.
Otago Province was a significant province of New Zealand until the abolition of provincial government in 1876. The capital of the province was Dunedin. Southland Province split from Otago in 1861, but became part of the province again in 1870. [36]
Otago, in the 21st century, is a southeastern region on New Zealand’s South Island. Its terrain encompasses snow-capped mountains, glacial lakes and a rugged peninsula sheltering sandy beaches and wildlife like penguins. Queenstown, a lakeside resort town framed by the dramatic Southern Alps, is famous for adventure sports like bungee jumping and paragliding. Outside Queenstown are dozens of wineries. It has an area of approximately 32,000 square kilometres (12,000 sq mi), making it the country’s second largest local government region. Its population was 254,600 in June 2023. [37]

Canterbury Province

Canterbury (Māori: Waitaha) is a region of New Zealand, located in the central-eastern South Island. The region covers an area of 44,503.88 square kilometres (17,183.04 sq mi), making it the largest region in the country by area. It is home to a population of 666,300 (June 2023). [38]

Canterbury region. [38]

Rous-Marten’s article continues: “The Canterbury railway from Lyttelton to Christchurch had one solitary work of large magnitude, a tunnel through the dividing range. … The length of the ‘Moorhouse Tunnel’ is almost exactly the same as that … of the Box Tunnel of the Great Western Railway … a mile and seventy chains. … Originally, the Canterbury line was equipped with six six-wheeled tank locomotives, all built by the Avondale Company, Bristol. Of these, four had 5ft. 6in. driving and trailing wheels, coupled and inside cylinders 15 x 22; two had leading and driving wheels coupled 5 ft. in diameter, and cylinders 14 x 22.” [1: p466]

Wikipedia tells us that later the tunnel appears to have become known as the Lyttelton Tunnel. It opened on 9th December 1867. “The line and the tunnel were constructed to accommodate 5 ft 3 in (1,600 mm) rolling stock at the behest of contractors Holmes & Richardson of Melbourne, as this was the gauge they were already working with in Victoria. The line remained this way until, following the abolition of provincial government in New Zealand and the establishment of a new uniform national track gauge, the line was converted to 3 ft 6 in (1,067 mm) by April 1876.” [2]

This indicates that for the first 8 years and 4 months of its existence the line was of 5ft 3in gauge. Those first locomotives will have been of that gauge. During that time, all the railways built in  Canterbury Province were of the same gauge.

Wikipedia [4] also tells us that the “Canterbury Provincial Railways operated ten steam locomotives of varying types, not divided into separate classes. They were all tank locomotives based on contemporary British practice and were built by the Avonside Engine Company, except for No. 9 by Neilson and Company. Nos. 1-4 had a 2-4-0T wheel arrangement: No. 1, named Pilgrim,[3: p12] was built for the Melbourne and Essendon Railway Company of Melbourne, Australia in 1862 but was quickly on-sold unused to Holmes and Company, who were building the Ferrymead line (in New Zealand. The line was closed after the Moorhouse/Lyttleton Tunnel opened). [3: p11] It entered revenue service when the line opened.” [4]

The remainder of the first six locomotives, No. 2 (arrived April 1864), No. 3 (arrived March 1867), No. 4 (arrived May 1868), [3: p12] Nos. 5 and 6 also arrived in May 1868. The first four were 2-4-0T locos, Nos 5 & 6 were 0-4-2T and were somewhat smaller. [3: p13]

The Province purchased three more 0-4-2T locomotives, ordered independently, No. 7 entered service in August 1872, No.8 in March 1874 and No. 10 in June 1874.[3: p12] No. 9 was a diminutive 0-4-0T ordered after No. 8 but entered service before it, in January 1874, shunting on Lyttelton wharf. [4][3: p14]

Only No. 1 was withdrawn while in Canterbury Provincial Railways’ service, in 1876.[3: p12] When the conversion of the Canterbury lines to narrow gauge was completed, its frame and the other nine locomotives were sold to the South Australian Railways. [3: p12] Despite the ship carrying the locomotives and rolling stock, the ‘Hydrabad’, being shipwrecked near Foxton on the North Island’s west coast on its journey to Australia, the locomotives and rolling stock ultimately were safely delivered to South Australia and with considerable modification seven of them remained in service until the 1920s.” [5: p9-11]

Rous-Marten was unable to find illustrations of these locomotives. Modern technology makes it easier to search for available to sources. One of the 2-4-0T locomotives Nos 1-4 appears in the image below.

One of four 5ft 3in gauge 2-4-0T locomotives ( Nos 1-4) operating on the railways of Canterbury Province prior to 1876 and the gauge change. [6: p1]

Rous-Marten described these locomotives as “very excellent engines … [that]  had large brass-covered domes (with safety-valves) over their fire-boxes.” [1: p466]

A.A. Cross, in his MA thesis, says that the “broad-gauge Canterbury Railways are considered unanimously by New Zealand historians as the origins of the modern-day railway network in New Zealand. Built by the Canterbury Provincial Government in 1863 to relieve transport issues between Christchurch and Lyttelton, the broad-gauge railway later expanded to reach Amberley in the north and Rakaia in the south, opening up the Canterbury Plains and stimulating trade and immigration.” [6: p2]

Brought under the control of the Public Works Department in 1876 along with several narrow-gauge lines built by the Provincial Government, the broad-gauge was converted to the New Zealand standard narrow-gauge in 1878 and the locomotives and rolling-stock were sold to the South Australian Railways.” [6: p2]

Since the majority of the locomotives from Canterbury Province continued to serve on South Australian railways until the 1920 they were clearly very suited to the roles that they fulfilled in Australia.

Rous-Marten notes that, while these locomotives were serving in New Zealand, he had “timed [them] at 56 to 60 miles an hour on favourable gradients. As a rule the gradients were very easy, and the permanent way was good, the whole line being laid with 75 lb. rails.”

Southland Province

The Southland Province was a province of New Zealand from March 1861, when it split from Otago Province, until 1870, when it rejoined Otago.” [39]

Southland Province. [39]

Rous-Marten turns to the story of the railways in Southland Province: “In the first place, to save time and expense, it was rashly decided to employ timber for the permanent way, that is to say for the rails as well as for the sleepers. Square baulks of timber were pinned longitudinally on transverse sleepers, while the engines and rolling stock were constructed on the ‘Davies’ system. That is to say, instead of the wheels having the usual flanges – which would soon have cut up the wooden road they were broad in the tread and flangeless, while smaller wheels set at an angle of 45 degrees against the inside face of the rails kept the main wheels in position. It was an ingenious idea, but proved in practice a complete failure. The wooden rails speedily perished. The locomotives, four-wheeled ‘single-wheelers’, with outside cylinders, were quite unable to obtain sufficient adhesion on the slippery surface of the timber in wet or frosty weather, especially up grades of 1 in 79 and 1 in 90.” [1: p466-467]

‘Crampton’ type locomotive “Oreti” departing Invercargill Railway Station on the “Great Northern Railway” to Makarewa in 1864. The sleepers – and the rails – are wooden. (From a painting by W.W. Stewart) [7]

More detail about the wooden railed railway in Southland Province can be found here. The experiment lasted about three years from 1864 to 1867. [7]

It seems that James M. Davies proposed this solution to the transportation dilemma besetting Invercargill in 1863, or thereabouts. Apparently,  Davies had recently been instrumental in planning and building the Geelong-Ballarat Railway in southeastern Australia, and had designed a steam locomotive that was then manufactured in 1861 by Hunt & Opie’s Victoria Foundry in Australia. [8]

The ‘Lady Barkly’ was shipped by Davies to Invercargill and over four hours had it steaming along the town’s jetty on timber baulks laid for the demonstration. An enthusiastic public response resulted from the demonstration of which the Southland Times reported: “Crowds of spectators passed the afternoon at the Jetty in riding delightedly in the locomotive. … The motion was found pleasant and quite free from that oscillation and concussion, which distinguish traveling on iron rails with the usual engine.” [8]

Two photographs of a replica version of ‘Lady Barkly’, © Weston Langford and reproduced here under a Creative Commons Licence (CC BY-SA 4.0). [11][12]

The ‘powers that be’ were persuaded to construct a railway following Davies’ principles.

Rous-Marten continues his article by recounting a tale from his own experience of an occasion when “all the passengers of whom [he] was one, were politely asked to leave the carriage and help to push the carriage and engine to the summit of the bank. This, [he says] we did with colonial cheerfulness, and on resuming our seats the guard promptly collected 2s. 6d. apiece from us as our fares! At this time Mr. W. Conyers MICE, who subsequently was Chief Commissioner of the South Island Railways of New Zealand, was in charge of the locomotive department of the Southland line, and he conceived the idea of converting a stationary sawmill-engine into a coupled locomotive, in the hope of tiding over the difficulty until more suitable engines and permanent way could be provided.” [1: p467]

Rous-Marten expresses regret that he did not take a photograph of what he calls “this ingenious but amazing nondescript.” [1: p467] He is sure that a written description is inadequate to convey its astonishing appearance. Even so he attempts to provide details of the locomotive, which had “a pair of horizontal cylinders along the boiler, which drove a ‘dummy’ crankshaft, whence an oblique coupling-rod drove one pair of 3 ft. wheels, these being coupled to a pair of 3 ft. trailing wheels, while a third pair of 3 ft. wheels led the way, I convey all the idea I can of an engine which probably stands alone in locomotive history. I have actually travelled at 20 miles an hour with this marvellous locomotive, with the flangeless wheels and the little slanting guide-wheels, yet without disaster. True we went off the rails once when I was there; but the only damage was the smashing of a basket full of eggs, which a farmer’s wife was carrying to market. But ere long the unnatural strains to which the working parts of the engine were subjected brought her to grief, and soon the entire experiment of the railway was abandoned as a hopeless failure. Its fate was shared by the Province, which became bankrupt, and had the balliffs in its Government offices. Ultimately an arrangement was effected, and the railway was relaid with the usual permanent way, including iron rails of 72 lbs. to the yard, and was opened for a distance of 35 miles, viz., from Bluff Harbour to Invercargill and Winton.” [1: p467]

The replacement railway, completed in 1867,  was built to standard gauge and three small six-wheeled tank engines were purchased. Of these three locomotives, one (a 2-4-0T) was supplied by Avonside and two (0-4-2Ts) by Hudswell Clarke. I have been unable to find photographs of these locomotives.

Rous-Marten says that “with the smaller engines I several times recorded 45 miles an hour, and once 50; with the larger engine in several instances 55 miles an hour.” [1: p468]

Gauge Standardisation

In 1870, Southland rejoined the larger Otago Province. [9] “On 22 February 1871,Winton History Website says, “a railway line from Invercargill was opened to Winton, built to the international standard gauge of 1,435mm. This was the furthest extent of Southland’s standard gauge network, and the next section to Caroline was built to New Zealand’s national gauge, 3 ft 6 in (1,067 mm) narrow gauge railway. This extension opened on 20 October 1875, ending Winton’s 4.5 years as a railway terminus, and two months later, the line back to Invercargill was converted to 1,067mm gauge. This line grew to be the Kingston Branch.” [10]

By 1875, both Southland and Canterbury Province’s railways were converted to what the New Zealand government had decided would be the national gauge, 3ft 6in.. Rous-Marten says that this move was “very much to the annoyance and regret of the local population, who regarded the narrower gauge and smaller engines with unconcealed contempt and derision.” [1: p468] Given Rous-Marten’s already established negative views on the narrow -gauge, it is impossible to determine whether he is forcefully expressing his own views, or speaking for the wider population.

Rous-Marten comments that “after having, for a time, three different gauges in operation, and in Canterbury a mixed gauge of three rails, [New Zealand] ultimately arrived at uniformity by the process of ‘levelling down’ to the narrowest gauge of all, and the one least suitable for permanent operation. This decision was largely governed by the political influence which subsequently operated so seriously for evil in the career of the New Zealand railways. It was believed that by using the narrower gauge construction would be cheaper, and so that the millions borrowed for railway construction could be spread over a larger area than if the wider gauge were employed, and that thus a larger number of voters would be interested in supporting the scheme. And so it proved. But the results are nevertheless regrettable.” [1: p468]

I suspect that there may be, at least, some who would want to challenge Rous-Marten’s strongly expressed views. …

Moreover, says Rous-Marten, “the further mistake was committed of laying down 40lb. iron rails, which almost immediately proved unable to carry even the moderate amount of traffic anticipated, and had to be replaced with 53 lb. steel rails. However, it was but natural that errors should be committed in the starting of a large enterprise by a small community, the total population of the colony at the inception of railways being under a quarter of a million, scattered over an area more than 1,000 miles in length, and about 200 miles in breadth, divided midway by 20 miles of stormy sea, the dreaded Cook Strait. Probably New Zealand made no more blunders than did the Mother Country, if all the respective circumstances be taken into due consideration. And at the present date [1899] the colony possesses a fairly good and efficient railway system extending over more than 2,000 miles.” [1: p468]

Developments

Rous-Marten notes that by 1899, New Zealand was still waiting for the completion of a main trunk railway system. But his further assertions move beyond just reporting circumstances. … “Vast sums [had] been frittered away on small local and branch lines which [did] not pay interest on cost – some not even their bare working expenses – while main lines have been left unfinished. Indeed, in one case the first length of 84 miles of main trunk line from the capital (Wellington) northward was left to be made by a private company, which [had] since been harassed and persecuted by the Government with the object of forcing it to sell the line to the State at a price much below its just value, while it [had] been the favourite target of the small district governing bodies in respect of local taxation.” [1: p468-469]

The line in question, that from Wellington to Manuwatu, ran/runs North from Wellington, through Palmerston where it divided/divided with one arm serving Palmerston and the other, Napier. In 1899, there was also a project underway to take the line to Auckland in the North. That project was being worked from Auckland and from the South with some distance yet to go before the two projects met. Rous-Marten writes of likely long delays before the link could be completed, “as the route of the connecting link [had] been for years – and still [was] a subject of hot and embittered political strife.” [1: p469]

It seems that Rous-Marten was right about timescales, NZ History tells that in the end, “after more than two decades of surveys, engineering challenges and sheer hard work, the main trunk’s first through train left Wellington on the night of 7th August 1908. This ‘Parliament Special’ carried politicians and other dignitaries to Auckland to meet the United States Navy’s visiting Great White Fleet, which arrived in port on the 9th. The train needed 20½ hours, and several changes of locomotive, to complete the trip. In the middle section it crawled over a temporary, unballasted track that the Public Works Department had rushed through in the nick of time.” [13]

In 1899, in the South Island, things appear to have been somewhat better. Rous-Marten tells us that the main trunk line started from “Bluff Harbour, in the extreme south, and [continued] unbrokenly through Invercargill, Dunedin, Oamaru, and Timaru to Christchurch, a distance of nearly 400 miles. … It [had] been extended northward for 70 miles, and there [ended at] … Culverden station, and many miles [had] to be traversed before the [then] southern termination [was] reached of the short line which ultimately [would] continue the Southern Main Trunk to the pretty little port of Picton, in Queen Charlotte Sound.” [1: p469]

From Picton it was then a journey of about 50 miles by boat to reach Wellington and the North Island.

Wikipedia tells us that construction of the Southern Main Trunk “was completed all the way  from Picton to Invercargill in 1945.” [14] It seems then that Rous-Marten somewhat misjudged how close to completion the Southern Main Trunk was.

In the 21st century, there is an 11 hour train, thrice a week, between Auckland and Wellington. [15] From Wellington you catch a ferry to Picton. There you can board the Coastal Pacific to Christchurch. [16] The Southerner, that went to Invercargill, stopped operating in 2002. [17] The journey from Auckland to Christchurch takes around 22 hours in total, provided, that is, connections can be made. Allowing a minimum of two days for the journey would be advisable.

Engineering and Structures

Rous-Marten turns to the engineering work on the New Zealand railway system. In 1899 the heaviest engineering on the system [was] the Moorhouse/Lyttelton Tunnel.

The Lyttelton Tunnel, opened on 9th December 1867. [19]
The Lyttelton Tunnel (Heathcote Portal) © Matthew25187 and licenced for reuse under a Creative Commons Licence (CC BY 3.0). [18]

In addition to that tunnel, Rous-Marten says that in 1899 there was no lack of important construction achievements. “Abounding as New Zealand does in huge rivers fed from the snowy Southern Alps, which in their turn bring about the condensation of the vast volumes of aqueous vapour raised from the Tasman Sea by the hot N.W. winds, bridges of large magnitude are necessarily numerous. Longest of all these is that over the Rakaia River in the South Island, which is more than a mile and a quarter in length. Ordinarily it spans a wide desert of rough, pebbly shingle, which has several comparatively small streams meandering through it. But during several weeks in each year that entire mile-and-a-quarter of width is a tremendous foaming torrent.” [1: p469-470]

The combined Rakaia road and rail bridge built in 1873. It was replaced by separate road and rail bridges in 1939. [20]

The Rangitata and Waitaki Rivers are no less formidable.

Building of the Rangitata River Railway Bridge. [21]
The Rangitata River Railway Bridge. [22]
The old Waitaki River Bridge was dual purpose road/rail. This picture was shared on the Oamaru TODAY Facebook Page on 3rd May 2023. [23]

The bridging of South Canterbury’s wide, braided rivers made travel easier and faster. Initially the bridges carried both rail and vehicular traffic. [24]

It was these early bridges that Rous-Marten was referring to in his article when he said that these rivers were “all crossed … by really fine bridges, which resist the worst assaults of the snow-fed torrents let loose against them from the mountains but the first spring rains.” [1: p470] All these structures have now been replaced by separate road and railway bridges.

Rous-Marten also points to two “specially interesting works. … Both … on the Wellington and Manawatu line, and [both] within twenty miles of Wellington. The trestle viaduct span[ned] a deep, dry ravine. The lattice girder-bridge crosse[d] an arm of the sea known as the Porirua Harbour. Both [were] highly creditable works.” [1: p470]

A wooden trestle bridge, 150 ft high,  over a ravine about 16 miles from Wellington on the Wellington and Manawatu Railway. [1: p467]
The bridge carrying the Wellington and Manawatu Railway across a branch of the Porirua Harbour. [1: p468]

It is not clear why Rous-Marten chose to illustrate the two bridges above. There were many structures on the Wellington and Manawatu Railway which he could have chosen, including:

  • Belmont viaduct: A 38 metre-high, 102 metre-long wooden viaduct that crossed a gully in Paparangi. Built in 1885, it was the largest wooden viaduct in New Zealand at the time. It was replaced by a steel viaduct in 1903, but was demolished in 1951 due to safety concerns. This may well be the wooden trestle bridge shown above.  [25]
  • Tunnels: A series of tunnels along the Paekākāriki escarpment. [26]
  • Bridges: Major bridges over the Pāuatahanui inlet and the Waikanae, Ōtaki, and Manawatū rivers. [26]
  • Makurerua Swamp: A raised embankment across the Makurerua Swamp in Horowhenua. [26]

Rous-Marten refers to “other important bridges … over the Clutha, Waimakariri, Wanganui, Manawatu, Waikato, and many more large rivers, the Clutha and Whanganui bridges being particularly fine.” [1: p470]

The Balclutha Railway Bridge spanning the Clutha River © Public Domain. [27]
Railway bridge over the Whanganui River at Aramoho © William James Harding (1826-1899): Negatives of Wanganui district. Ref: 1/1-000099-G. Alexander Turnbull Library, Wellington, New Zealand. (records/23210560). [28]

Rous-Marten continues: “Perhaps the engineering feat which has attracted most interest in connection with the New Zealand railways is the means by which the Rimutaka range of mountains, about thirty-five miles from Wellington, has been surmounted by the railway that runs from the capital northward. Starting trom Wellington the line winds round the edge of the bay and then goes by very slight gradients up the valley of the Hutt River to a point about twenty miles from the city. Here it begins its climb up the mountain, which is effected by a series of severe gradients, chiefly I in 35 and 1 in 40, with some 40 curves of only five chains radius!” [1: p470]

A single boiler Fairlie locomotive (R Class), New Zealand Railways. [1: p466]

For this heavy work, single-boiler Fairlie engines as shown immediately above were usually used. Rous-Marten says that in 1899 these locos were being replaced “by a more powerful class designed and constructed in New Zealand.” [1: p470]

He goes on to talk about the line again: “At the summit, a tunnel, not quite half a mile long, is passed through, and then the descent is begun. But the conditions are totally changed. … While the ascent of 1,200 ft. from the southward takes 15 miles of line, being … on gradients not steeper than I in 35, the descent northward is made in less than 3 miles, the gradient being continuously 1 in 15, while there are 39 curves of 5 chain radius. Thus in the total distance of 18 miles traversed in the ascent and descent of the Rimutaka, no fewer than 79 5-chain curves have to be rounded. The gradient of 1 in 15 is dealt with on the Fell system, the ordinary vertical locomotive being supplemented with an interior one actuating horizontal wheels which are forcibly pressed against a raised middle (third) rail. This constitutes a powerful climbing apparatus, and a no less powerful brake in the descent.” [1: p470-471]

The slow climb up the Rimutaka Incline. This image shows four locomotives at work on the incline which used the Fell System. This image is held in the New Zealand Archives [31] and is used here under a Creative Commons Licence (CC BY-SA 2.0). [30]

The Rimutaka Summit Station, Tunnel and Incline were built in the 1870s. It was intended that the work should be completed between “12th July 1874 and 22nd July 1876.” [29]

Once the station yard had been levelled, work started on the tunnel itself, it took 17 months longer than intended at the start of the contract. [29]

The Rimutaka Summit Tunnel at the top of the 1 in 15 incline. The Fell system third rail sits in between the running rails. [1: p470]

The Fell System was invented by English engineer John Barraclough Fell (1815-1902). It was the first third-rail system for railways that were too steep for adhesion on the two running rails alone. 

A diagram of original style of Fell incline permanent way, illustrating the method of elevating and supporting centre-rail, and bracing against the predominant direction of traction and braking forces, © Hugh McCracken. [32]

The Fell System was used on several railways in addition to the Rimutaka Incline including:

  • The Rewanui Incline: on the West Coast of New Zealand, the Fell system was used for braking descending trains. [32]
  • The Roa Incline: also on the West Coast of New Zealand. [32]
  • The Cantagalo Railway in Brazil: the Estrada de Ferro Cantagalo. [32]
  • The Mont Cenis Pass Railway on the border between France and Italy was 77 km (48 mi) long and ran from 1868 until superseded by a tunnel under the pass in 1871. [33]

The Fell system was developed in the 1860s and was soon superseded by various types of rack railway for new lines, but some Fell systems remained in use into the 1960s. The Snaefell Mountain Railway still uses the Fell system for (emergency) braking, but not for traction.” [33]

Rous-Marten mentions one incident associated with the Rimutaka Incline which resulted in the construction of a “massive, high timber fence” [1: p471] as a wind break.

The wind break protected the line against “the devastating force of the furious gales which sweep down the ravines on the northern side of the Rimutaka range. That the precaution is not supererogatory was disastrously proved by the most serious and fatal railway accident which had ever occurred in New Zealand up to the current year. A mixed train of passenger coaches and goods wagons was struck ‘broadside on’ by a terrific blast of wind when on this incline, with the result that the whole train was blown sideways off the rails and flung down the precipice beneath, the vehicles hanging like a string of huge beads to the engine, which, by the grip of its Fell machinery on the middle rail, still sturdily maintained its place on the metals.” [1: 471]

An artist’s impression of the scene of the accident on 11th September 1880 on the Rimutaka Incline. Four children were killed and 13 adults injured when two rail carriages were blown off the tracks by severe winds on a notoriously exposed part of the Rimutaka Incline. This was the first major loss of life on New Zealand’s railways; only five rail accidents have claimed more lives in this country’s history. [34]

In summary, “the Rimutaka Incline was a 3-mile-long (4.8 km), 3 ft 6 in (1,067 mm) gauge railway line on an average grade of 1-in-15 using the Fell system between Summit and Cross Creek stations on the Wairarapa side of the original Wairarapa Line in the Wairarapa district of New Zealand. … The incline formation is now part of the Remutaka Rail Trail.” [30]

Rous-Marten continues: “A few years [after the incident on the Rimutaka Incline], trains were thrice blown off the rails while crossing the Wairarapa Plain, … and similar wind-breaks had to be erected there also, the particular spot being opposite to a deep gully in the mountain range, which acted as a funnel for the wind and concentrated its full force on one special spot on the plain.” [1: p471]

He also notes a further problem with the “formidable Rimutaka Range, … the tendency to vast landslips, a whole mountain-side sometimes slid “down bodily when once its base [had] been disturbed. And the tremendous floods to which New Zealand rivers are liable constitute[d] another trouble, often a very costly one – in the way of slips and wash-outs.” [1: p472]

Rous-Marten also notes that “it has often been doubted whether [the] … crossing of the Rimutaka might not have been avoided by a detour through more level country.” He comments that in 1899, “the feasibleness of constructing a new line to avoid the obstacle [was] under careful consideration.” [1: p472]

In the end a new, longer tunnel was built through the Rimutaka Mountains at a lower level. That lower tunnel is now known as the Remutaka Tunnel (‘Rimutaka’, before 2017). It “was opened to traffic on 3rd November 1955, is 8.93 kilometres (5.55 mi) long. It was the longest tunnel in New Zealand, superseding the Otira Tunnel in the South Island until the completion of the Kaimai Tunnel, 9.03 kilometres (5.61 mi), near Tauranga in 1978. Remutaka remains the longest tunnel in New Zealand with scheduled passenger trains.” [35]

Rous-Marten also points out another “formidable and troublesome work, … the rounding of the Waitati Cliffs, about 15 miles north of Dunedin, in the South Island. … In order to round a precipitous cape standing between two deep bays of the sea it was necessary to ascend by grades of 1 in 50 to a point where the cliff had to be rounded by a ledge or shelf being cut out of the solid rock at a height of some 400 ft. perpendicular above the sea. At one point, indeed, a ‘fault’ ran inward under the line, and was crossed by girders, so that, standing on the foot-plate and looking down on the landward side of the engine, one could gaze straight down into the boiling sea some 400 ft. below. For some years the trains passed this awe-inspiring place without accident.” [1: p472]

Rous-Marten says that he had been “on the engine foot-plate when [rounding] the point at 25 or 30 miles an hour. But the dangerous character of the place, not only below, but from rock-falls above, forced itself more and more upon the public mind; indeed, many people were afraid to travel by so apparently perilous a route, and preferred to go by sea. So first the speed there was rigorously kept down to 10 miles an hour, and in the end a tunnel was cut through the point, so as to avoid the worst ‘bit’.” [1: p472]

Rous-Marten wants also to tell us about the main trunk line from Christchurch to Dunedin, connects two cities which are about 230 miles apart and which in 1899 had populations of about 70,000 each, was, South from Christchurch, ” [1: p472]

He continues: “From Oamaru onward to Dunedin the line is an almost uninterrupted alternation of rises and falls on steep gradients, often I in 50 and I in 60, a descent of several miles at the sharper rate, after Deborah Bay tunnel (0.75 mile long), bringing the train down to the final level run of 7 miles along the shore of the picturesque harbour to the … southern city of Dunedin.” [1: p472]

At least one further article by Rous-Marten, in a later issue if The Railway Magazine was planned. Unfortunately, I do not yet have access to a copy. Rous-Marten promised that he would continues to describe some interesting railway routes as well as look in detail at the motive power in use in 1899 on New Zealand Railways. ….

References

  1. Charles Rous-Marten; New Zealand Railways; in The Railway Magazine, London, November 1899, p465-472.
  2. https://en.m.wikipedia.org/wiki/Lyttelton_Line, accessed on 14th September 2024.
  3. A.N. Palmer & W.W. Stewart; Cavalcade of New Zealand Locomotives. Wellington, 1965.
  4. https://en.m.wikipedia.org/wiki/Canterbury_Provincial_Railways#:~:text=The%20Canterbury%20Provincial%20Railways%20was,was%20the%20designer%20and%20overseer, accessed on 14th September 2024.
  5. T A. McGavin; Steam Locomotives of New Zealand, Part One: 1863 to 1900; New Zealand Railway and Locomotive Society, Wellington, 1987.
  6. Alastair Adrian Cross; MA Thesis:University of Canterbury 2017 Canterbury Railways: Full Steam Ahead The Provincial Railways of Canterbury, 1863-76; University of Canterbury, Christchurch, 2017, via https://acrobat.adobe.com/id/urn:aaid:sc:EU:b3566635-51f2-4d92-9d6e-601fd55e06e3, accessed on 14th September 2024.
  7. https://the-lothians.blogspot.com/2013/06/the-saga-of-southlands-wooden-railway.html?m=1, accessed on 14th September 2024.
  8. https://transportationhistory.org/2018/08/08/she-was-a-trailblazer-in-new-zealand, accessed on 14th September 2024.
  9. https://nzhistory.govt.nz/page/opening-railway-invercargill-bluff, accessed on 15th September 2024.
  10. https://www.winton.co.nz/history, accessed on 15th September 2024.
  11. https://westonlangford.com/images/photo/131752, accessed on 15th September 2024.
  12. https://westonlangford.com/images/photo/131749, accessed on 15th September 2024.
  13. https://nzhistory.govt.nz/culture/main-trunk-line/rise-and-fall, accessed on 15th September 2024.
  14. https://en.m.wikipedia.org/wiki/South_Island_Main_Trunk_Railway#:~:text=Construction%20of%20a%20line%20running,North%20Line%20south%20of%20Picton.l, accessed on 15th September 2024.
  15. https://en.m.wikipedia.org/wiki/Northern_Explorer, accessed on 15th September 2024.
  16. https://en.m.wikipedia.org/wiki/Coastal_Pacific, accessed on 15th September 2024.
  17. https://en.wikipedia.org/wiki/Southerner_(New_Zealand_train), accessed on 15th September 2024.
  18. https://commons.m.wikimedia.org/wiki/File:Lyttelton_rail_tunnel_01.jpg, accessed on 15th September 2024.
  19. https://www.peelingbackhistory.co.nz/the-lyttelton-moorhouse-railway-tunnel-opened-9th-december-1867, accessed on 15th September 2024.
  20. https://christchurchcitylibraries.com/heritage/photos/disc11/IMG0014.asp, accessed on 15th September 2024.
  21. https://natlib.govt.nz/records/23168823, accessed on 15th September 2024.
  22. https://antiqueprintmaproom.com/product/bridge-over-the-rangitata-new-zealand-l-r, accessed on 15th September 2024.
  23. https://www.facebook.com/100076512201176/posts/pfbid02V3tgRyLsH14mBpiiTtrW1a3PXsZuGcKmVucQNUbG4vapuEhqum6T6ieQ7KaunmUYl/?app=fbl, accessed on 15th September 2024.
  24. https://teara.govt.nz/en/photograph/11394/waitaki-river-bridge, accessed on 15th September 2024.
  25. https://nzhistory.govt.nz/media/photo/belmont-railway-viaduct, accessed on 15th September 2024.
  26. https://nzhistory.govt.nz/page/manawatu-rail-link-opened, accessed on 15th September 2024.
  27. https://collections.tepapa.govt.nz/object/19702, accessed on 15th September 2024.
  28. https://natlib.govt.nz/records/23210560, accessed on 15th September 2024.
  29. https://en.m.wikipedia.org/wiki/Summit_railway_station,_Wellington_Region, accessed on 16th September 2024.
  30. https://en.m.wikipedia.org/wiki/Rimutaka_Incline, accessed on 16th September 2024.
  31. https://www.flickr.com/people/35759981@N08, accessed on 16th September 2024.
  32. https://www.rimutaka-incline-railway.org.nz/history/fell-centre-rail-system, accessed on 16th September 2024.
  33. https://en.m.wikipedia.org/wiki/Fell_mountain_railway_system, accessed on 16th September 2024.
  34. https://nzhistory.govt.nz/page/rail-tragedy-rimutaka, accessed on 16th September 2025.
  35. https://en.m.wikipedia.org/wiki/Remutaka_Tunnel, accessed on 16th September 2024.
  36. https://en.m.wikipedia.org/wiki/Otago_Province, accessed on 16th September 2024.
  37. https://en.m.wikipedia.org/wiki/Otago, accessed on 16th September 2024.
  38. https://en.m.wikipedia.org/wiki/Canterbury_Region, accessed on 16th September 2024.
  39. https://en.m.wikipedia.org/wiki/Southland_Province, accessed on 16th September 2024.
  40. https://www.britannica.com/place/New-Zealand, accessed on 16th September 2024.

Horwich Locomotive Works again. …..

Railway World magazine in early 1965 carried a two part article about Horwich Locomotive Works.

I always take note of articles about the Works when I find them as my paternal grandfather worked there in the early years of the 20th century, before the great depression when eventually he moved his family to Stapleford in the Derby/Nottingham area and where he took a job at the Loco Works in Derby as a blacksmith.

An article about the Works 18″ internal railway can be found here. [7]

The two-part article in Railway World was written by John Marshall and carried in the January and February copies of the magazine. This present article is substantively based on John Marshall’s work and sections of this article in “italics” come directly from Marshall’s article of 1965. [1]

Horwich Locomotive Works, © Public Domain. [4]

On 6th May 1964, Stanier 2-8-0 No. 48756 left Horwich works after a general overhaul, since when, the great works of the former Lancashire & Yorkshire Railway has been occupied entirely with rolling stock and road vehicles. The history of Horwich works goes back to 1884. When the main locomotive works of the L&YR opened under Sir John Hawkshaw in 1846, was on a very cramped and inconvenient site at Miles Platting, Manchester, almost surrounded by slums in the town.” [1: p22]

On 27th April 1873, “a serious fire caused considerable damage to the workshops but the pressure of work was such that the shops had to be rebuilt. It was during this period that ten Ramsbottom Newton class 2-4-0 engines were bought from the L.N.W.R. Repairs to locomotives were also carried out at the old East Lancashire Railway shops at Bury and smaller repairs were undertaken at several locomotive sheds, and it was therefore difficult to achieve any standardisation of work.” [1: p22]

During the 1870s, the L&YR was in a bad shape. “Train services were slow and unpunctual, and stations, carriages, services, goods and locomotive depots alike were some of the worst in the country. … The wretchedness of the railway was a popular theme upon which both counties of the roses were absolutely unanimous. By the early ‘eighties all this was being changed and it was now the turn of the locomotive works. Expansion at Miles Platting was not possible; a quarter of the machinery and other equipment there was out of date and ill-fitted to cope with work on the larger locomotives of W. Barton Wright. The obvious solution was to build a new works on a different site.” [1: p22]

After retiring because of ill health as Locomotive Superintendent of the LNWR in 1871, John Ramsbottom returned to railway work in 1883 and “became connected with the L&YR as a consulting engineer. At the L&YR directors’ meeting on 19th March 1884, he stated that locomotives could no longer be repaired satisfactorily at Miles Platting works and that it was essential to find a new site for the works. He recommended that in selecting a site the principal considerations should be the price of labour, a good supply of cheap water, cheap coal and a fairly central situation to avoid long runs by light engines. Various sites were suggested and Ramsbottom and Barton Wright were instructed to examine them and report back to the next meeting. Wright was also asked to ascertain the rates of wages in locomotive workshops in different parts of the country.” [1: p23]

Ex-L&YR 0-6-0ST numbered No. 11305 in BR days, shunting at Horwich Locomotive Works, © C.T. Gifford. [1: p22]

At the next board meeting on 21st May 1884 it was noted that an estate in Horwich was about to be auctioned. The board authorised a maximum spend of £65,000. The purchase was secured for £36,000.

The site “was centrally situated and within easy reach of Bolton and Manchester. On 14th February 1870, a branch railway had been opened into the town from Blackrod, on the Bolton to Preston line. Horwich, at the foot of Rivington Pike at the western extremity of the Pennines, had a population of 3,761 in 1881.” [1: p23]

On 26th September 1884, Ramsbottom submitted drawings showing ground levels and locations for various buildings/workshops. The question of a curved connection from the Bolton direction was raised. “Plans were prepared and the ‘Fork Line’ was authorised by Parliament on 16th July 1885.” [1: p23]

Horwich Railway Station was close to the centre of Norwich and only a short distance from the proposed location of the Loco Works. The 25″ Ordnance Survey from the turn of the 20th century. [2]

Work on the site required the legal closure or diversion of several footpaths. The Thirlmere Aqueduct, planned by Manchester Corporation,  had to be diverted at L&YR expense.

Ramsbottom’s plans of the locomotive and wagon works and offices “showed that the locomotive works would occupy nearly 20 acres and accommodate 112 engines; the wagon works would have occupied about 14 acres, for 1,008 wagons, but they were not in fact built. In January 1885 Wright’s detailed elevation of the office building was approved; this included a clock tower which was later omitted.” [1: p23]

Contractors began work on 9th March 1885; “a siding was constructed to bring materials onto the site and a powerful crane and locomotive were soon at work. By August the excavations for the foundations of the erecting shop were almost complete. The next stage involved the removal of a hill on “old Hart’s Farm” containing some 450,000 tons of earth. To carry out this job in one year meant the removal of 1,500 tons daily, and a force of 350 men and boys, two steam navvies, five locomotives and 130 tipping wagons were employed continuously; work continued at night under electric light. … The erecting shop … [was] a vast building 1,520ft long (well over a quarter of a mile) and 118ft wide with three bays running the whole length, the two outer ones being wider than the centre.” [1: p23-24]

A careful review of the equipment at the Miles Platting and Bury works was undertaken showing that only around 50% was suitable for the new works.

In September 1885, the disposal of surplus land to the northeast of the works began, “Some plots were … reserved, including sites for a hotel and a a bowling green but the rest was … sold for building. … Victoria Road and several streets leading from it were laid out by the company; the names chosen for the various streets … [included] Ramsbottom, Hawkshaw, Fairburn, Stephenson, Webb, Gooch, Brunel, Smeaton, Brindley, Telford, Armstrong and Siemens. … A letter was received the Bishop of Salford offering, one penny a square yard for a plot of land for a church, but the Company had already requested fourpence a square yard for a Wesleyan Chapel site.” [1: p24]

Work on the office block, the boiler shop, the smithy, forge and foundry, a large store shed and a large water tank. The new gasworks was erected at this time. … Work on the Horwich fork line began on 21st September! it was opened for goods traffic on 20th June 1887, and for passengers on 1st July with an improved service between Horwich and Bolton and Manchester.” [1: p24]

This extract from the 25″ Ordnance Survey from the turn of the 20th century shows the Horwich branch with both curves in place from the mainline and with the connection into the loco works evident as well. [2]

On W. Barton Wright’s retirement in October 1887, in his place came J.A.F. Aspinall from Inchicore in Ireland to become Chief Mechanical Engineer. At the time of his appointment Aspinall was only 35 years of age.

He persuaded the Company to introduce a premium apprentice scheme and to fund a Mechanics Institute at Horwich. He also urged the immediate purchase of locomotives as prices at the time were relatively low. Based on his assessment of average mileage per locomotive in various railway companies he demonstrated that the L&YR needed a stock of 1,114 locomotives against an existing complement of 963. The shortage of engines was resulting in over use, engines becoming neglected and breakdowns being too frequent.

As an emergency measure, “Aspinall ordered 30 6ft 4-4-0s of Barton Wright’s design, but with Joy’s valve gear, from Beyer Peacock and from the same firm he ordered two small locomotives, at £250 each, for the 18in gauge internal railway system at the works. A third, ordered in 1887, cost £300. Aspinall quickly showed his concern for the well-being of the workers at Horwich. He was dissatisfied with the way the houses were being built and arranged for better supervision of the work. He also arranged for a local doctor to attend to accidents in the works until a permanent arrangement could be made.” [1: p24]

Wren, one of the 18″ gauge locomotives at work at Horwich Loco Works, © Public Domain. [4]

As construction work on the fitting, painting  and erecting shops was nearing completion it was possible to “take in the first six locomotives for repair. They included the Barton Wright 4-4-0 No. 865 Prince of Wales, built by Dübs in 1885 and named in honour of a royal visit to Preston.” [1: p24]

A postcard view of the erecting shop in 1890, included here under a Creative Commons Licence (Attribution-Noncommercial-Share Alike 3.0). [6]
A high level view of the erecting shop at Horwich Locomotive Works. This photograph was taken in 1957, © Public Domain. [4]

The large office block, 323ft long and 58ft wide was brought into use on 19th February 1887 Beyer Peacock supplied two 18in gauge locos by 7th April and they were set to work in the erecting shop.

The foundry was completed next and work began here on 12th April. “The first castings were small engraved iron paper weights which were presented to the L&YR directors as a memento of the occasion. With the opening of the foundry Henry Albert Hoy, at that time manager at Miles Platting, was appointed works manager at Horwich and on Aspinall’s recommendation his salary was increased from £225 to £300, to become £400 in two years.” [1: p25]

Aspinall submitted further plans to the directors meeting on 27th September 1887, for a “further nine shops at an estimated cost of £26,738. For the whole of the work to be transferred from Miles Platting at an early date, it was necessary to start the brass foundry and copper shop at once and to cover in the space between the foundry and the forge to form the steel foundry. Of the shops proposed, the board sanctioned the erection of the tin and copper-smiths shop, the brass foundry, telegraph shop, steel foundry and an extension of the foundry for rail chairs.” [1: p25]

By the end of 1887, Miles Platting workshops were closed, “a few months later the shops at Bury were also closed, and all locomotive repair work was transferred to Horwich. The Miles Platting shops were converted into carriage sheds and the Bury shops used for stores.” [1: p25]

Horwich Locomotive Works as shown on the 25″ Ordnance Survey from the turn of the 20th century. [2]

In January 1888, “work was started on the first order for new locomotives. This consisted of 10 2-4-2 tank engines of Aspinall’s design, the famous “radials”; the first one No. 1008, left the works on 20th February 1889, the second following in about three weeks. Because the steel foundry was not ready, the wheels and tyres were obtained from Germany, but the other parts of the engines were built entirely at Horwich. The tenth was completed during the following August.” [1: p25]

Work began on the first of the numerous Aspinall 0-6-0s in January 1889. The first order was for 10 engines, the first being completed in September and the last on 27th March 1890. Marshall’s article lists “the building dates of … all batches of locomotives built at Horwich until locomotive work ceased. Between 1891 and 1900 Aspinall rebuilt 230 of Barton Wright’s 4ft 6in 0-6-0s into saddle tanks for shunting. This released an equal number of serviceable tenders, hence the large number of locomotives built without tenders during this period.” [1: p25]

A table showing the building dates of all the batches of locomotives built at Horwich. The table was provided by John Marshall in his article in Railway World. [1: p26]

The Mechanics Institute building was opened  in December 1888. Courses in electricity, mechanics, mathematics and machine drawing were introduced. There was a staff of 5 teachers with 90 students per week. “Fees were nominal, but if a student attended less than 21 classes in each subject, the charge was doubled.” [1: p26] The Institute was extended by the addition of a public hall to seat 900 people, a library, reading rooms and class rooms which were opened in October 1895.

By 1892 “the works were in full operation and by this time Horwich had become a fair-sized town, the census of 1891 recorded a population of 12,850, and this continued to grow. Social and recreational amenities were provided by the company including a large dining hall with accommodation for 1,100 men, and a large recreation ground laid out with two bowling greens, tennis courts, a cricket ground and a children’s playground. … A cottage hospital was built and accidents could thus be attended to promptly. To serve the new population the company had about 70 shops erected along Chorley New Road. On 13th April 1900, the Bolton Corporation electric tram service was extended to Horwich and on 19th May a route was opened via Victoria Road and through the main street of the old town, but this was closed in December 1907. There is no doubt that the trams were the cause of the later reduction in the train service to Horwich from Bolton.” [1: p26]

Marshall described the Works soon after they opened: … “The main entrance in Chorley New Road is attractively laid out with gardens and lawns, and beyond, at right angles to the road and the rest of the works, stands the office block. A wide corridor runs down the centre giving access to various offices including the drawing office. This is a long room occupying much of the north-west side of the building. Connected to the office at the far end and conveniently accessible by road and rail is the general store, 198ft long and 111ft wide, arranged on two storeys with a gallery round the four sides leaving the centre open to the roof.” [1: p62]

Marshall goes on to write about the 18in gauge internal railway which linked the stores with every part of the works, the length of track amounting to 74 miles. Eight 0-4-0 steam locomotives worked the system; Robin, Wren and Dot built in 1887, by Beyer Peacock and the others built at Horwich: Fly and Wasp in 1891, Midget and Mouse in 1899 and Bee in 1901. They had no works numbers and do not figure in the tabulated list of new engines above.. They had wheels of 16 in dia. and cylinders 5in dia. by 6in stroke.

He then returns to his description of the Works: … “The boiler shop is 439ft long and 111ft wide and its three bays are traversed by 12 ton and 20 ton capacity overhead cranes. For tapping stay holes Aspinall designed a multiple stay-tapping machine worked by ropes and pulleys. Boilers are rivetted up at the end of the shop in two Tweddle rivetting towers designed by Fielding and Platt. The whole of the machinery and equipment is arranged so that the progress of the work from the entry of the plates to completion proceeds step by step through the shop with no doubling-back or crossing to other machines. From the boiler shop we enter the boiler shop smithy, the same width and 120ft long. This is equipped with fires and hydraulic flanging presses for flanging firebox backs, tube plates, throat plates, ashpans and other pressings. The presses and rivetting towers use water at a pressure of 1,500 lb/sq in.” [1: p62]

Marshall’s narrative goes on to the next section of the building, the forge. It was the same width and 452ft long, and contained a series of Siemens regenerative furnaces for reheating. Among the machines were a 35 ton duplex hammer, one 8 ton and two 5 ton hammers. Beyond the forge, in the same row of buildings, was the steel foundry, 150ft long and 135ft wide, the iron foundry 212ft long and 111ft wide and the chair and plate foundry 124ft long and 128ft wide.

In 1899 two 2 ton Tropenas Converters were installed in the steel foundry which [was] fitted also with Siemens Martin regenerative melting furnaces and facilities for annealing steel castings. The iron foundry and the steel foundry form[ed] a continuous building in three bays traversed from end to end by overhead 12 ton electric cranes. The ground on the north side of the iron and chair and plate foundries [was] at a higher level and from here the melting furnaces and cupolas [were] charged. In the iron foundry [were] produced railway castings of every type.” [1: p62] 

The next row of buildings were narrower, only 47ft wide; “first [was] the tinsmith’s shop, 92ft long, next the motor shop, 153ft long, where electric motors and other equipment [were] maintained; the coppersmith’s shop, 89ft long and the brass foundry, 164ft long. … The central power station, next in the line, produce[d] electricity for the entire works and [was] 32ft long. The adjoining boiler house contain[ed] a battery of Lancashire Boilers, some fitted with underfeed mechanical stokers and Green’s Economisers, and others with forced draught grates for burning inferior fuel. In the fettling shop castings from the foundries [were] dressed. The carriage & wagon wheel shop, 200ft long, [was] equipped with lathes for turning and boring wheels, and presses for pressing tyres on to wheels for forcing wheels on to axles.” [1: p62]The middle row of buildings has a uniform width of 111ft. Opposite the stores is the paint shop, 234ft long, uniformly lit without glare by a north light type roof and maintained at an even temperature of 55 to 60 deg. F. by hot water

Plan of Horwich Locomotive Works in 1961. [5]

The middle row of buildings was uniformly 111ft wide: “Opposite the stores [was] the paint shop, 234ft long, uniformly lit without glare by a north light type roof and maintained at an even temperature of 55 to 60 deg. F. by hot water pipes laid along the engine pits. The shop accommodate[d] about 20 engines on six rows of pits 2ft deep, and include[d] a store from which all colours, oils, varnish and other materials [were] issued and a plant for mixing paints. It was the custom to spend about three weeks painting a new L&YR engine. After the filling and priming operations three coats of paint were applied followed by three coats of varnish.” [1: p62-63]

The testing shop occupied the next 27ft of the building. It was “equipped with a vertical 100 ton Buckton hydraulic testing machine using water at a pressure of 1,000 lb/sq in. Also working at the same pressure [was] a 100 ton horizontal chain testing machine. There [were] machines for preparing test specimens, a steam hammer and appliances for testing oil and springs. The chain smithy occupie[d] the last 28 ft of the building, and beyond it [was] a chain annealing furnace, Between this and the next shop, the yard [was] spanned by a large gantry used for handling boilers and other heavy items. … The millwright’s shop, 143ft long, maintain[ed] the various types of machines used on the railway. Adjoining this [was] the pattern makers’ and joiners’ shop, 164ft long, fully equipped with woodworking machinery and for saw maintenance.” [1: p63]

The fitting and machine shop sat at the centre of the Works. It was 508ft long. “Four 5 ton electric jib cranes travel[led] along the centre of the two outer bays and serve[d] the machines on each side. The end of the building [was] occupied by the points & crossings shop, 72ft long, and signal shop, 128ft long. … Some 150yd beyond the signal shop [was] the bolt shop, 60ft long, and the smithy, 212ft long. Among the equipment here [were] 11 double and 27 single hearths, steam hammers and drop stamps.” [1: p63]

The fourth row of buildings beg[an] with the engine shed, alongside the paint shop. The heavy machine shop, 360ft long and 48ft wide contain[ed] machines for straightening frame plates, and slotting, radial arm drilling machines and the means for making built-up crank axles. Beyond [was] the spring smithy, 153ft long, where spring plates [were] made. … Finally there [was] the enormous erecting shop … with room for 90 engines and 30 tenders. Access [was] by the ends and by two traversers 32ft wide. The shop [was] divided into five sections each equipped with four 40 ton capacity overhead travelling cranes, two on each side. The total area of the works [was] 81 acres of which the area covered by workshops [was] 17 acres.” [1: p63]

Aspinall was appointed General Manager of the L&YR in June 1899, by then, 677 locomotives had been built at Horwich. He was succeeded by H. A. Hoy, under whom a further 220 locos were built. Hoy was succeeded by George Hughes in 1904. Hughes was an internal appointment and he remained at Horwich until he retired in 1925. “The 1,000th locomotive to be built at Horwich. No. 15, one of the Hughes 0-4-0 Railmotor locomotives, Works No. 983, appeared in March 1907. … During the 1914-18 war Horwich works was engaged in manufacturing military equipment of all types. On 1st January 1922, the L&YR was amalgamated with the LNWR. and George Hughes became CME of the combined company. When the LMS was formed a year later, Hughes was appointed CME of the entire system. … For the next three years [Horwich] this became the CME’s headquarters for the whole of the LMS.” [1: p63]

Change occurred after Hughes retired in 1925. The LMS began centralising activities. “The telegraph shop, signal shop, points & crossings shop, forge, and steel foundry were closed and the work transferred elsewhere. The spring smithy was transferred to the general smithy and the original building became a tube and bar store. In about 1927, the high level boiler house was closed down. During the great depression in 1931, locomotive building was suspended after completion of a batch of 15 standard 0-6-0 tanks on 15th October and locomotive work was confined to repairs. From 1932, after the closure of Newton Heath carriage works, the electric multiple-unit trains on the Liverpool-Southport-Crossens and Manchester-Bury-Holcombe Brook services were taken to Horwich for repair, and occupied the north western end of the erecting shop, this section becoming known as the car shop.” [1: p63-64]


Part of the Works was used between 1939 & 1945 for the manufacture of armoured fighting vehicles and shells. “From May to November 1943, 33 American 2-8-0 engines passed through the erecting shop for some 30 modifications, chiefly the fitting of a Gresham & Craven combination injector and graduable steam brake valve, the overhaul of part of the motion and the fitting of hand brake gear to the tender. … In June 1943 locomotive building was resumed with a batch of Stanier 2-8-0s and tenders.” [1: p64]

The last steam locomotive to be built at Horwich was B.R. Standard Class 4 2-6-0 No. 76099 which left the works on 27th November 1957. On 20th August 1958 work began on a series of 350 h.p. 0-6-0 diesel shunting locomotives. The last of these, No. D4157, was completed on 28th December 1962.” [1: p64]

Marshall tells us that, “after the war a mechanised foundry was built in the shop which was originally the forge. The casting of chairs was transferred to the new foundry. A typical year’s work during this period included 20 new locomotives, 350 heavy repairs and 240 light repairs to locomotives, and repairs to 200 boilers and 90 electric vehicles, and the general production work of castings, etc. With the closure of Gorton works in 1963 the manufacture of points and crossings began again at Horwich. During 1963 the number of locomotives for repair declined and the erecting shop was invaded by wagons, many of them the result of the running down of Earlestown works, and the last locomotives entered the shop in April 1964.” [1: p64-65]

Altogether, some 50,000 locomotives [were] repaired in 76 years, an average of over 680 a year.” [1: p65]

Marshall concludes his articles by noting that Horwich Works were a place of training and development for a number of significant people in the history of railways in the UK: Sir Nigel Gresley, R.E.L. Maunsell, George Hughes and Sir Henry Fowler, and others of significance to railway history around the world, for instance J.P. Crouch, who became CME of the Argentine Central and Rupert Fawker, CME of the Sudanese Railways.

The Works were also an important place of employment for generations of people in Horwich. Inevitably, economic conditions varied over the years, families had to travel around the country to find other work when redundancies occurred.

My paternal grandfather and grandmother found alternative work and a new home in the Midlands. I guess that there were many like them, both in the 1930s and in subsequent generations right through to the eventual closure of the Works for whom redundancy brought family trauma, a loss of dignity and a sense of hopelessness. People who felt trapped in their circumstances, swept along by a tide of events over which they had little or no control. People who had to find a new route through life for themselves and their families and who showed the same courage and commitment in their own circumstances as those who were prime movers in the development of Horwich Locomotive works in the late 19th century.

An aerial view of Horwich Locomotive Works, seen from the Southeast. [4]
A closer aerial view of Horwich Locomotive Works, seen from the Northwest. [4]

Of additional interest relating to Horwich Locomotive Works is a short note in The Railway Magazine of September 1909 entitled “The Lancashire & Yorkshire Locomotive Stud.” …

The usual summer convention of the Institution of Mechanical Engineers which this year was held at Liverpool, after a long interval, will be remembered as a railway convention, particularly as a Lancashire and Yorkshire Railway one. Firstly, because Mr. J. A. F. Aspinall, the chairman of the meeting and president of the Institution, is the General Manager of the Lancashire and Yorkshire Railway; secondly, because the principal paper was contributed by Mr. Geo. Hughes, the Chief Mechanical Engineer of the Lancashire and Yorkshire Railway; and lastly, because of the visit paid to the Horwich Works.” [8]

Mr. George Hughes’ paper was entitled “Locomotives Designed and Built at Horwich, with some Results.” In it he stated that formerly there were in service on the Lancashire and Yorkshire Railway 29 types of passenger engines and 26 types of goods engines, the total stock being 353 passenger and 647 goods engines. There are now 1517 locomotives, of which 1,052 have been built at Horwich. About 1,100 are in steam daily. Mr. Aspinall, while chief mechanical engineer, had adopted the policy of reducing the number of types, introduced standardization, and, wherever possible, interchangeability. The number of types had now been considerably reduced. Experience with the Druitt-Halpin thermal storage tank had shown that where stopping places were frequent on rising gradients it led to distinct economy, the saving varying from 4 to 12 per cent. Experiments were now being carried out with a super-heater, the results of which would be communicated at a later date. The average life of boilers on the Lancashire and Yorkshire Railway for the three years ended December, 1908, was 14 years, representing an average mileage of 356,268. Copper fire-boxes ran from 150,000 to 275,000 miles, while over a period of 20 years it was found that the life of cylinders varied from 8 to 14 years. With the more severe modern conditions of service the solid type crank axle had been supplanted by the built-up pattern.” [8]

References

  1. John Marshall; Horwich Works – Parts 1 & 2; in Railway World, Ian Allan, January & February 1965.
  2. https://maps.nls.uk/geo/explore/#zoom=13.8&lat=53.59816&lon=-2.55472&layers=168&b=1&o=100, accessed on 7th July 2024.
  3. https://www.rivington-chase-horwich.co.uk/how-the-loco-works-transformed-a-town/#iLightbox[gallery1389]/0, accessed on 8th July 2024.
  4. https://www.theboltonnews.co.uk/news/17827041.loco-works-changed-horwich-sleepy-village-hive-industry/, accessed on 8th July 2024.
  5. https://www.ebay.co.uk/itm/134401504434?itmmeta=01J29FXDQ4GPYP215PRE0N39F4&hash=item1f4af434b2:g:UKsAAOSwDIhjuAQY&itmprp=enc%3AAQAJAAAA8FNo54t30Rd%2Btl1m%2ByAZZMpwRDAWscjnkRK6bHYqjrGvBGpfK9mly9U26cLrMARZPwDUAlA2UBgFUI%2Fc5asa02lj56eVZljw6L%2BcfSgmgab44UPVMvJ6wCrLdS4ANswjHHQLO8vfXMdOJlAbyisr8iBf%2FaDEk4tCxjLV0gRvRfAeRwrIDuoY5arXElpgW2%2BowLdJUPl168gsvIYII9wbeGjs%2BZOajGmYYkeHKD%2FxI%2FYv%2BfHSXv7xE4yFJIbDvegrL%2BgwtMsoe7zpnH%2BTB4idm2%2Fv1Exm2qalkdgLsN%2FW9k6BzP6rBmq34I1fykfcehmWMA%3D%3D%7Ctkp%3ABk9SR57c9a-SZA, accessed on 8th July 2024.
  6. https://archive.org/details/HorwichLocoWorksErectingShopsC1890, accessed on 8th July 2024.
  7. https://rogerfarnworth.com/2019/12/12/horwich-loco-works-18-gauge-railway-part-1
  8. The Lancashire and Yorkshire Locomotive Stud; in The Railway Magazine, September 1909, p256.

The Lough Swilly Railway continued. … Letterkenny to Derry – Part 2

This is the second post in a series about the L&LSR line from Letterkenny to Derry, the first can be found on this link:

The Lough Swilly Railway continued. … Letterkenny to Derry – Part 1

The last article left us at Newtowncunningham Railway Station. We continue from that location in this article.

Newtoncunningham to Tooban Junction Station

Newtowncunningham Railway Station as shown on the OSi 25″ survey. [3]
Newtowncunningham Railway Station as shown on railmaponline.com’s satellite imagery. Comparison with the map extract above shows that the bridge at the northern end of the station site has been removed and the road realigned, and the Goods Shed has been removed. Not seen easily on this satellite image is the Water Tower which remains in place. [2]
A plan of Newtowncunningham Railway Station provided by Dave Bell and Steve Flanders in their book: The Londonderry and Lough Swilly Railway: A Visitor’s Guide, and used by kind permission of Steve Flanders and the Donegal Railway Heritage Museum. [4: p39]
A series of three photographs taken at Newtowncunningham Railway Station provided by Dave Bell and Steve Flanders in their book: The Londonderry and Lough Swilly Railway: A Visitor’s Guide, and used by kind permission of Steve Flanders and the Donegal Railway Heritage Museum. The first shows the Station in 1953 and looks towards Derry, © H.C. Casserley. The second shows Locomotive No. 15 shunting the yard, © R.M. Casserley. The third, looks towards Derry and shows the water tower and signal box, H.C. Casserley. [4: p39]
Newtowncunningham Railway Station in 1937, looking towards Letterkenny, © H.C. Casserley, provided by Dave Bell and Steve Flanders in their book: The Londonderry and Lough Swilly Railway: A Visitor’s Guide, and used by kind permission of Steve Flanders and the Donegal Railway Heritage Museum. [4: p38]
The Station Approach, now in private hands, at Newtowncunningham Railway Station in the 1980s, provided by Dave Bell and Steve Flanders in their book: The Londonderry and Lough Swilly Railway: A Visitor’s Guide, and used by kind permission of Steve Flanders and the Donegal Railway Heritage Museum. [4: p38]
This image was shared on the Londonderry & Lough Swilly Railway Facebook Group by Willie Rodgers on 19th November 2021. [5]
Newtoncunnigham Railway Station House as seen from the highway. The building is now in private hands. [My photograph, 9th May 2024]
The road outside Moyle National School in the 21st century. Much of the embankment in the immediate vicinity of the road has been removed, the old bridge has gone and the road has been realigned. [Google Streetview, July 2021]

This next series of five extracts from the 25″ OSI survey show the Lough Swilly Railway heading North away from Newtowncunningham Railway Station.

The series of five map extracts above show the Lough Swilly Railway to the North of Newtoncunningham and parallel to Back Shore  Road. [3]
This extract from railmaponline.com’s satellite imagery shows the railway heading North from Newtowncunningham Station, alongside Back Shore Road, and covers the same length of the line as shown in the five map extracts above. [2]
A track can be seen on the satellite image above crossing the line of the old railway as it curved round toward Moneygreggan. This photograph shows that lane. The photograph is taken from Back Shore Road running parallel to the line of the railway at this point. The track at this point was probably provided after the closure of the railway. It gives access to what was the old line of the road prior to the construction of the railway. With the construction of the railway the road was diverted to cross the railway further to the North. [Google Streetview, July 2021]
This enlarged extract from the OSi 25″ survey shows the changes made at the location of the photograph immediately above. [3]
This extract from the railmaponline.com satellite imagery shows the same location as the map extract immediately above. [2]

The next three images show the bridge in Moneygreggan which carried Back Shore Road over the line just to the North of the location above.

The road bridge constructed to carry Back Shore Road over the Lough Swilly Railway north of Newtoncunningham. [My photograph, 9th May 2024]
The view South across the bridge parapet in the direction of  Newtown Cunningham Station. [My photograph, 9th May 2024]
The view North across the parapet of the same bridge. [My photograph, 9th May 2024]
The next location worth noting along the line is a bridge over another minor road which headed West from Back Shore Road [3]
The same location, this time on the satellite imagery from railmaponline.com. [2]
The lane and the embankment are shrouded by trees. The line crossed the lane very close to its junction with Back Shore Road. [Google Streetview, July 2021]
The next crossing of the line was for what was once a through route of sorts but which now is really no more than a farm access track. On the OSi 26″ survey this appears to have crossed the old railway by means of an over bridge. [3]
Railmaponline.com’s satellite imagery shows the rail route in the 21st century shrouded in trees. [2]
This image looks West along the access road in 2011. Hidden in the trees over the line of the Lough Swilly Railway there are some masonry remains which might be parapet walls for a bridge. Either side of the track the undergrowth and tree cover is dense.[Google Streetview, August 2011]

A series of three further extracts from the 25″ OSi survey show the next length of the Lough Swilly Railway as it turned to the East.

This section of the line ran North from the access road noted above. Back Shore Road crosses the old railway at a level-crossing at the top of this map extract. The stream that has followed the road North emptied into the Lough by means of a stone arch under the of railway. A photograph taken by Willie Rodgers of the stone-arched bridge carrying the old railway over the stream can be seen below. [3]
Then curving round to the Northeast, the line crossed a long embankment over part of Lough Swilly. Open water was to the Northwest of the line, a lagoon and saltmarsh prone to flooding was to the Southeast of the line. [3]
This extract from the 25″ OSi survey shows the line leaving the  embankment and curing further round to the East. [3]
The same length of the Lough Swilly Railway as shown in the three map extracts immediately above, as it appears on railmaponline.com’s satellite imagery. What was saltmarsh to the Southeast of the line has been reclaimed and is now in use as arable land. [2]
Looking Southwest along the line of the embankment in the 21st century. Back Shore Road ends today in a small unmetalled carpark and a gate into the farmland visible to the top-right of this photograph. [My photograph, 9th May 2024]
The small unmetalled carpark at the end of Back Shore Road. The route of the old railway is marked by the orange line heading out onto the embankment. [Google Streetview, July 2021]
The stone-arched bridge at the Southwest end of the embankment which carries the route of the L&LSR over the drainage stream which empties into the Lough at this point. This image was shared on the Londonderry & Lough Swilly Railway Facebook Group by Willie Rodgers on 19th November 2021. [5]
Looking Northeast along the line of the Lough Swilly Railway from a point 100 metres out along the embankment form the carpark noted above. [My photograph, 9th May 2024]

An aerial image taken by Michael Roulston in February 2021 looking Southwest along the embankment and showing the curve of the old line on its Southwestern approach can be seen by following this link: https://maps.app.goo.gl/vEEn4ViuBhW5QiTD6

A photograph taken by David Hughes in July 2020 from a point about halfway along the embankment can be found on this link: https://maps.app.goo.gl/zb85mGUaBZRqafHa6

A similar photograph taken by David Hughes on the same day shows the view along the embankment from the location of the sluice gates. The railway began to curve away from the line of the embankment at this point. The photograph can be found on this link: https://maps.app.goo.gl/o6TbpWy19muqJypu8

This enlarged extract from the 25″ OSI shows the old railway curving away from the straight line of the embankment. [3]
The railway curved away from the straight line of the embankment. [Google Maps, May 2024]
This view looks South from just to the North of the Northeast end of the embankment. The L&LSR can be seen curving away to the East and crossing the access road to the location of the photographer via a stone-arched bridge. [Google Streetview, September 2010]
A better image of the bridge seen above, also taken from the North. This image was shared on the Londonderry & Lough Swilly Railway Facebook Group by Willie Rodgers on 19th November 2021. [5]
The same bridge, seen this time from the South. This image was shared on the Londonderry & Lough Swilly Railway Facebook Group by Willie Rodgers on 19th November 2021. [5]
The same structure seen from further to the South along the lane. The tree line to the right of the bridge marks the line of the Lough Swilly Railway. [Google Streetview, September 2010]
The next significant location was a little further to the East where another minor road crossed the lien fo teh railway on a bridge. This enlarged extract from the 25″ OSi survey shows the location. [3]
This enlaregd extract from the railmaponline.com satellite imagery shows the same location in the 21st century. [2]
This view from the South shows the bridge parapets in place in the 21st century. The L&LSR cutting has been infilled and returned to arable use. [Google Streetview, July 2021]

The next three extracts from the 25″ OSI survey show the line turning first to the Northeast and after a short distance reaching Carrowen Railway Station.

These three extracts from the 25″ OSI surveytake us as far as Carrowen Station. [3]
This extract from railmaponline.com’s satellite imagery covers the same length of line as appears in the three map extracts immediately above. [2]
When the L&LSR was in use it was bridged by a minor road which linked roads to the North and South of the line and provided access to the complex of buildings shown on this enlarged extract from the 25″OSi survey. [3]
A wider view of the same location in the 21st century as provided by railmaponline.com’s satellite imagery. Both the road and the old railway have been ploughed back into the landscape. [2]
Approaching Carrowen Railway Station, the line was carried over a road close to Carrowen School. [3]
Railmaponline.com’s satellite imagery shows the same area as covered by the map extract above. [2]
Trees appear to form an arch over the narrow road at the point where the L&LSR was carried by a bridge across the road close to the site of what was Carrowen School. [Google Streetview, July 2021]
An enlarged view of Carrowen Railway Station as shown on the 25″ OSi survey. [3]
The Station site as shown on an enlarged extract from railmaponline’s satellite imagery. The old station househas been extended out across the line of the railway. [2]
Carrowen Station Hose and platform viewed from the West. The building was not of the same design of other larger station houses that we have encountered in our journey along the line of the L&LSR. This photograph was shared on the Londonderry & Lough Swilly Railway Facebook Group by Conor Harkin on 27th April 2022 courtesy of Fahan Inch & Burt Parish. [6]
The modern private dwelling on the site of Carrowen Station House includes the original station house It is seen here viewed from the village road to the East of the L&LSR. The photograph looks along the old station approach. The extension to the right of the building sits over the formation of the old railway. [Google Streetview, July 2021]
This next extract from the 25″ OSi survey shows the old railway heading North-northeast away from Carrowen Railway Station and bridging a local road. [3]
The same length of the line as it appears on modern satellite imagery. The rail-over-road bridge was sited at the top-right of the image. The bridge has gone a a minor realignment of the road carriageway has taken place. [2]
Looking Northwest through the location of the bridge. The bridge and the line’s embankments have been removed. The orange line indicates the approximate line of the L&LSR. [Google Streetview, July 2021]
Continuing North-northeast, the L&LSR ran through two level crossing close to Drumgowan. [3]
the location of each of the crossings can easily be picked out on the modern satellite imagery of railmaponline.com. [2]
This photograph taken from the closest metalled road shows the first crossing encountered. It was about 50 t0 100 metres down the lane at the centre of the image. The approximate line of the L&LSR is shown as an orange line beyond the trees. [Google Streetview, July 2021]
From a very similar location to the last photograph but this time looking North-northeast. The line of the L&LSR crossed the field to the right of the photograph and ran through the trees which appear left of centre towards the top on the image. The track on the left of the image meets the line o0f the old railway at the first of the trees and then runs along what would have been the formation of the old railway to the coast of Lough Swilly, this can be seen on the next satellite image below. [Google Streetview, July 2021]

The next three extracts from the 25″ OSi survey show the L&LSR curving round to the East to run along the side of Lough Swilly. The earthworks of the earlier line from Derry to Farland Point can be seen to the North of the line.

The station at Farland Point opened on 12th December 1864 when the Londonderry and Lough Swilly Railway built its line from Londonderry Middle Quay railway station to a terminus at Farland Point. The L&LSR owned ferries which operated from Farland Pier. [7]

The L&LSR curved round to the East to run along the side of the Lough. Close to the flood gates earthworks from an abandoned line serving Garland pier would have been visible from trains running between Letterkenny and Derry. [3]

.

The original L&LSR line terminated at Farland Point. When the line was extended through Letterkenny and beyond the short stub to Farland Point was removed leaving only the earthworks. [3]
The line continued East alongside the sound on the South side of Inch Island which has been cut by an embankment causeway. [3]
This extract from railmaponline.com’s satellite imagery shows the same length of the L&LSR as covered by the three map extracts above. The embankment visible in the map extracts above still exists in the 21st century. Farland Pier is to the West of the embankment. [2]
Looking East along what was the line of the old railway round the curve shown on the left of the railmaponloine.com image above. [Google Streetview, September 2009]
Looking back Southwest along the curve of the old railway shown on the left of the railmaponline.com image above. [Google Streetview, September 2009]
Looking East along the line of the L&LSR which ran along the embankment beyond the gate ahead. [Google Streetview, September 2009]
Looking back through the gate from the line of the old railway towards Drumgowan (c) Roy Smyth. [Google Streetview, January 2023]
The remains of Farland Pier as they appear on Google Maps. [Google Maps, 23rd May 2024]
Looking West towards Farland Pier with Inch Castle beyond., © Oliver Dixon and shared on Geograph by him on 12th July 2013. This image is licenced for reuse under a creative commons licence (CC BY-SA 2.0). [8]

John McCarton comments on the Londonderry & Lough Swilly Railway Facebook Group: “The Londonderry and Lough Swilly Railway Company opened a railway service from Derry to Farland Point (Inch Level Wildlife Reserve today) in December 1861. From Farland Point, a paddle steamer service took train passengers across Lough Swilly, to Ramelton or Letterkenny. Paddle steamers were chartered in from existing Lough Foyle and Clyde companies to inaugurate this new service. In September 1864, the line was extended from Tooban Junction to Buncrana, with a spur to Fahan, extending Into sidings at the pier for the transportation of goods and passengers to and from the paddle steamers. The ferry service moved to Fahan in 1866, which then became the hub for the L&LSR’s passenger and freight services, to Ramelton, Rathmullan and Portsalon.” [8]

These two extracts from the OSi 25″ survey show the L&LSR running along the South side of what became Inch Wildfowl Reserve. [3]
This railmaponline.com satellite image covers the same length of the old railway as the two map extracts immediately above. [2]
Looking East along the line of the old railway about 200 metres further along the embankment, (c) Roy Smyth. [Google Streetview, January 2023]
Looking East-northeast along the line of the old railway as it curves with the embankment towards the Northeast, (c) Roy Smyth. [Google Streetview, January 2023]
Looking Northeast at a point close to the right side of the railmaponline.com satellite image above, (c) Roy Smyth. [Google Streetview, January 2023]

The next few map extracts follow the old railway heading Northeast towards Tooban Junction Station. …

These three extracts form the OSi 25″ survey show the remaining length of the embankments alongside Lough Swilly as the line heads Northeast towards Tooban Junction. After turning to the Northeast the line can be seen running on a secondary embankment to the East of that facing the sea. [3]
This extract from the railmaponline.com satellite imagery shows the length of the L&LSR covered by the three map extracts above. [2]
Looking back to the Southwest along the L&LSR formation from the Inch Wildfowl Reserve car park. The railway ran along a low embankment to the East of the main embankment and to the East of the modern walkway. [Google Streetview, September 2010]
Looking Northeast along the L&LSR formation from the Inch Wildfowl Reserve car park. The line ran, approximately, along the tree line close to the centre of this photograph. [Google Streetview, September 2010]
Looking Northeast along the L&LSR formation again. (The line ran to the right of the path ahead.)
As is evident in these last few images, the old railway was protected from the worst of the weather over Lough Swilly by a high embankment. We are closing in on the curve taking the line into Tooban Junction Station, (c) Roy Smyth. [Google Streetview, January 2023]

Inch Wildfowl Reserve

The story of the Wildfowl Reserve is told on its website: [9]

Inch Lough is a brackish lagoon cut out from Lough Swilly by embankments, and penned between Inch Island and extensive flat agricultural polders (slobs) on the mainland of County Donegal by a third long embankment.

Historically there was a large area of Lough Swilly between Inch Island and Burt, which lies at the foot of Grianan Mountain (the site of the famous Iron Age hillfort, Grianán of Aileach).  In 1836 it was proposed to claim this shallow expanse of tidal estuarine mud from the lough.  Work started around 1840 and was complete by 1859.

The first stage was the construction of the Tready Embankment across the centre of the area, from Tooban Junction near Burfoot in the east, to Farland Point in the west.  It would also serve as the route of the Londonderry and Lough Swilly Railway – a narrow-gauge line connecting Carndonagh and Derry in the north-east, with Letterkenny and Burtonport in the far west.  The line operated between 1863 and 1953.

North of Tooban was a point where the mainland was close to Inch Island, and where a causeway, the Inch Embankment, was built to link the island to the mainland.

The third stage was to construct a parallel embankment in the west, between Farland Point and the island, the Farland Embankment, or as it is now generally called, the Farland Bank.

So between these three embankments and Inch Island there was a section of water cut off from Lough Swilly, and also from the mud flats to be drained. This area would be kept as a holding tank, to receive the waters drained from the south and keep out the tidal extremes of Lough Swilly.  Thus Inch Lough was created, and over the years has become steadily less salty.

South of the Tready Embankment, between it and Grianan Mountain, all that area of Lough Swilly now isolated from the tidal waters could be drained through a complicated system of large and small drains, to create agricultural land.  This huge expanse of flat polderland is locally known as The Slobs, or more formally as Inch Level.  The drainage was not initially very successful.  Until the late 1950s the patchwork of small fields were very marshy, and included some areas of unambiguous marshland.

At that time, industrialist Daniel McDonald, started to buy up the small properties and by 1961 had amalgamated all into Grianán Estate, the largest arable farm in Ireland at around 1200ha.  The fields could then be enlarged and the drainage system re-vitalised.

There have been a few changes of hands since then.  Most notably, a consortium of businessmen bought the estate in 1980 and announced plans to drain the northern half of the lake.  A local campaign was immediately launched to resist this – mainly defending Inch Island’s status as an island, but concerned also about the threat to wildlife from the loss of half of the lake.  The consortium claimed that the scheme proved to be technically unviable, and whether or not that was the real reason, or they were overwhelmed by the strength of the opposition, they abandoned the scheme and sold up in 1989.

An Grianan Farm is now in the hands of Donegal Creameries plc., and managed as an organic dairy farm.  Parts of it are leased to local farmers.  In 2002 the National Parks and Wildlife Service took on a thirty year lease of Inch lough and its surrounding wet grasslands.  Since then, NPWS along with various stakeholders have developed the site, with ongoing work in conservation management, community involvement, and development of visitor infrastructure.  The aim now is to sustainably develop Inch Wildfowl Reserve for the future, integrating conservation with community and farming, whilst allowing limited access for the public.” [9]

This extract from the 25″ OSi survey covers the next length of the line. Included in this extract is Tooban Junction and its station and the start of the branch to Cardonagh. [3]
An enlarged extract focussing on Tooban Junction. The L&LSR line to Derry is the more northerly of the two line leaving the right of this image. The other line is a long storage line or headshunt. [3]
This extract from the railmaponline.com satellite imagery covers the same length of the L&LSR as shown in the map extracts immediately above. It centres on the location of Tooban Junction Station. [2]
Facing Northeast along the L&LSR formation again. This time on the curve round to the location of Tooban Junction Station, (c) Roy Smyth. [Google Streetview, January 2023]
Facing East along the line of the old L&LSR through the location of Tooban Junction Station from the modern footbridge over the drainage channel. Note the signal post with two arms which stands on the station site, This is a reconstruction by Buncrana sculptor John McCarron as part of the Ghosts of Tooban Junction project, (c) Roy Smyth. [Google Streetview, January 2023]
Tooban Junction Station seen from the West. This image was shared by Donegal Railway Heritage Museum in their Facebook Page on 6th February 2020, (c) Edward Patterson
Looking West at Tooban Junction on 20th April 1953. The line to Letterkenny is to the left of the water tower, that to Cardonagh is to the right. This photograph was shared on the Fahan Inch & Burt Parish Facebook Group on 6th September 2015. [16]

The ‘Disused Stations’ website has a series of pages focussing on Tooban Junction Station. [10][11][12][13] These pages include a history of the station and a number of photographs of the station from various sources. Click here to visit the first of these pages.

Ernie’s Archive includes a number of photos of the station. [14] Click here to access these images.

Wikipedia notes that “the station opened on 9th September 1864 when the Londonderry and Lough Swilly Railway built their line from Londonderry Middle Quay to Farland Point. It closed for passengers on 23th October 1935. Freight services continued until 10th August 1953.” [17]

We take a break at Tooban Station and await the next train!

References

  1. https://en.m.wikipedia.org/wiki/Londonderry_and_Lough_Swilly_Railway, accessed on 30th April 2024.
  2. https://railmaponline.com/UKIEMap.php, accessed on 1st May 2024.
  3. https://osi.maps.arcgis.com/apps/webappviewer/index.html?id=bc56a1cf08844a2aa2609aa92e89497e, accessed on 5th May 2024.
  4. Dave Bell and Steve Flanders; The Londonderry and Lough Swilly Railway: A Visitor’s Guide; County Donegal Railway Restoration Society.
  5. https://www.facebook.com/groups/788818974978955, accessed on 18th May 2024.
  6. https://www.facebook.com/photo?fbid=1713862078953969&set=gm.1295963820931132&idorvanity=788818974978955, accessed on 22nd May 2024.
  7. https://en.m.wikipedia.org/wiki/Farland_Point_railway_station, accessed on 23rd May 2024.
  8. https://www.facebook.com/share/p/Piq7PPiWx22ujqFV/, accessed on 23rd May 2024.
  9. https://www.inchwildfowlreserve.ie/history, accessed on 23rd May 2024.
  10. http://disused-stations.org.uk/t/tooban_junction/index1.shtml, accessed on 27th May 2024.
  11. http://disused-stations.org.uk/t/tooban_junction/index.shtml, accessed on 27th May 2024.
  12. http://www.disused-stations.org.uk/t/tooban_junction/index2.shtml, accessed on 27th May 2024.
  13. http://www.disused-stations.org.uk/t/tooban_junction/index3.shtml, accessed on 27th May 2024.
  14. https://www.flickr.com/search/?text=tooban+junction, accessed on 27th May 2024.
  15. https://www.facebook.com/photo/?fbid=2645067492196142&set=a.1224552917580947, accessed on 27th May 2024.
  16. https://www.facebook.com/fahaninchburt/photos/a.648557531950952/648562385283800/?type=3, accessed on 27th May 2024.
  17. https://en.wikipedia.org/wiki/Tooban_Junction_railway_station, accessed on 27th May 2024. However, note comments made in response to this article by Martin Baumann: “The Derry to Buncrana line saw passenger services on bank holidays after regular services had ceased. The last day this happened was 6th September 1948. … Freight traffic ceased on 8th August 1953, not the 10th but it was possible to travel on freight services as the Swilly had no Goods Brake Vans so a Passenger Brake with some seats was always in the formation.”