The January issue of The Railway Magazine usually focussed on Scotland. The January 1959 edition was no exception. [1] Included in the Magazine were articles by:
H.A. Vallance about The Strathspey Line.
J.W. Grant about Scottish 0-4-4 Tank Engines.
G.H. Robin about The Lanarkshire & Dunbartonshire Railway.
M.D. Grenville about Scottish Railways in 1859.
This article picks up on the article by H.A. Vallance, and begins a journey along the Strathspey line which ran down the valley of the River Spey from Keith towards Abernethy. Initially the line ran Southwest along Strathisla before crossing the watershed to Strathspey.
At much the same time (November 1860) as the Highland Railway promoted its scheme from Forrest to Grantown-on-Spey and on across the Grampians by the Druimuachdar Pass into Strathtay, the Great North of Scotland Railway subscribed £100,000 to a nominally independent scheme was promoted by the Keith & Dufftown Railway. In addition to its subscription, the Great North of Scotland Railway undertook to work the railway.
Vallance tells us that from Dufftown, “the Strathspey Railway was to run north-westwards for nearly four miles to Craigellachie, and thence in a south-westerly direction, through Strathspey, for some 28 miles to Abernethy. Connection with the Inverness & Perth Junction Railway (IPJR) was to be provided by a short branch south of Grantown. The railway was authorised on 17th May 1861 (five days before the IPJR), and the construction of the main line went ahead with all possible speed, but the works on the branch at Grantown were not undertaken.” [1: p4]
The railway between Dufftown and Abernethy opened on 1st July 1863. Two months later, on 9th September, the last section of the IPJR was opened. The lack of a physical link between the two lines meant that the Strathspey line suffered financially. Vallance says that powers for the link were obtained on 5th July 1865, “when the Strathspey Company was authorised to extend its railway from Abernethy to a junction with the line to Perth some two miles north of Boat of Garten. Earlier in the year, the IPJR and its associated companies had been amalgamated, and in June had assumed the title of the Highland Railway.” [1: p5]
The Strathspey trains were extended from Abernethy to Boat of Garten on 1st August 1866, but a dispute with the Highland Railway soon arose with the Highland Railway over costs associated with the junction signal box meant a temporary closure of the link until the dispute could be settled. The link reopened 1st June 1868 on the basis that a separate track would provided for the Strathspey, from the original junction as far as the Station at Boat of Gareth where a physical connection would occur.
The Strathspey line also formed a junction at Craigellachie with the Morayshire Railway which gave a cess Loosiemouth via Elgin. The short connection between the Morayshire Railway and the Strathspey line was opened on 1st July 1863. Vallance notes that once the working agreement with the Great North came into force, “the Morayshire Railway virtually lost its separate identity. The Great North thus secured complete control of a route from Keith to Elgin, but many years were to elapse before through trains between Aberdeen and Inverness ran via Craigellachie.” [1: p5]
An extract from a drawing in H.A. Vallance’s article which shows the length of the Strathspey line from Keith through Dufftown and Craigellachie to Boat of Garten. Great North of Scotland lines are shown solid black, those of the Highland Railway are shown dashed. [1: p4]
On 30th July 1866, “the Great North obtained powers to absorb the Keith & Dufftown and the Strathspey Railways, and the fusion became effective two days later. At the same time, the Morayshire Company was authorised to amalgamate with the Great North as soon as mutually acceptable terms had been agreed; but so involved were its finances that it was not possible to reach an agreement until 1880.” [1: p5]
Keith to Dufftown
This length of the line has become the preservation line, the Keith and Dufftown Railway. Their website is on this link. [41]
In the 21st century, “only a single platform remains in full-time use at Keith Railway Station, though the Dufftown branch platform (numbered 1) is available if required for turning back trains from the Aberdeen direction. … The bays have been filled in, having been abandoned and tracks lifted in the early 1970s after the closure of the Moray Coast Line (for which the station was a terminus). A signal box (which retains the name Keith Junction) remains at the eastern end to control a passing loop on the single track main line beyond the station, the now little-used goods yard (formerly used by trains accessing the nearby Chivas Regal whisky plant) and the stub of the Dufftown branch.” [6]
Further information about Keith Railway Station can be found here. [7]
Vallance describes a journey along the line in 1959. Starting from Keith Station (Junction), “the Craigellachie line ascends Strath Isla for some eight miles, past the single-platform station of Keith Town, Auchindachy, and Drummuir.” [1: p5]
The line continues from Keith Town Station, Southwest towards Auchindachy.
Just to the Southwest of Keith Town Station the line passed under two bridges. The first carries Bridge Street which became the A96. The second [11]Approximately the same area in the 21st century as seen on Railmaponline.com’s satellite imagery. [9]The bridge carrying the A96 over the line as seen from the next bridge down the line. [Google Streetview, October 2014]The bridge carrying Old Town over the line to the Southwest of the A96, seen from the South on Old Town. [Google Streetview, October 2014]
Strathisla Mill sat on the banks of the Isla.
Strathisla Mill on the banks of the River Isla was passed just before the line bridged the river. [12]The same location in the 21st century. The older mill buildings are now part of the Strathisla Distillery complex. [Google Maps, January 2026]The bridge over the River Isla to the South of the mill buildings. [12]The same bridge over the River Isla, in the 21st century. [Google Maps, January 2026]The next bridge along the line. [13]The same location in the 21st century. [Google Maps, January 2026]The same bridge seen from the Southeast. [Google Streetview, October 2014]The same bridge seen from the North. [Google Streetview, October 2014]
Further Southwest another overbridge links the Douglasbrae Lime Kilns to the road network. The main road here is now the B9014.
The next overbridge carried the access road to Douglasbrae Lime Kilns over the River and the railway. [13]The same location in the 21st century. I am not quite sure what I think about the two different names given to the site of what we’re on e the Douglasbrae Lime Kilns – Strathisla Pet Crematorium sounds so much better than Douglasbrae Knackery! [Google Maps, January 2026]Looking back to the Northeast from the bridge carrying the access road. [Google Streetview, October 2014]The bridge carrying the access road, seen from the Southwest on the B9104. [Google Streetview, June 2023]The view Southwest along the line from the access road bridge. [Google Streetview, October 2014]
The line continues Southwest towards Bridge of Maisley.
At Bridge of Maisley the line passed under what is now the B9104, close to a junction with a minor road which first served Maisley Lime Works, before running West on the North side of the River Isla. The railway then bridges the river, crossing from the North bank to the South bank. [13]The same location in the 21st century, the three bridges are still evident. [Google Maps, January, 2026.The bridge which carries the B9014 across the railway, seen from the road to the Northeast of the line. [Google Streetview, June 2023]The view back to the Northeast along the railway. [Google Streetview, June 2023]The view ahead to the Southwest along the line. [Google Streetview, June 2023]The railway bridge over the Isla is hidden by vegetation from the B9014. This is the view from the North on the minor road mentioned above. [Google Streetview, March 2022]The railway remains on the South side of the river for a very short distance before crossing back to the other bank, travelling in a southerly direction. [13]The same location in the 21st century. [Google Maps, January 2026]
A short distance to the South, the line approaches Auchindachy Station.
Auchindachy Station as shown on the 1868 25″ Ordnance Survey, published in 1869. [15]The location of Auchindachy Station as shown on the ESRI satellite imagery provided by the National Library of Scotland (NLS). [16]
Auchindachy Railway Station had two platforms set on a gentle curve. Photographs of the station can be found here. [17]
Turning to look to the Southwest. In 2022, the view along the line was completely obscure by tree growth. The photograph below was taken earlier in the 21st century.
Looking Southwest along the line from the bridge carrying the B9014 over the line. [Google Streetview, August 2011]A short distance further Southwest the railway bridges the River Isla again. [20]The same location in the 21st century. [Google Streetview, January 2026]
In short shift trains heading South entered Drummuir Railway Station. …
Drummuir Railway Station at around the turn of the 20th century. [23]The same location in the 21st century. [Google Streetview, January 2026]
Drummuir station was first opened in 1862 by the Keith and Dufftown Railway. The station was closed to passengers by British Railways in May 1968, but the line remained open for freight and special excursions for some time. It was reopened as a preserved station in 2003 by the Keith and Dufftown Railway Association.
Further pictures of Drummuir Railway Station can be found here. [26]
Immediately Southwest of the site of Drummuir Station the line passes under a road bridge and crosses the Burn of Drumhendry. This is the location at the turn of the 20th century. [27]The same location in the 21st century. [Google Maps, January 2026]Looking back to the Northeast through Drummuir Railway Station. [Google Streetview, September 2011]Looking Southwest from the road bridge, the view ahead is obstructed by foliage but it is possible to seethe Burn of Drumhendry after it has passed under the railway. [Google Streetview, September 2011]The bridge over the Burn of Drumhendry seen from a point to the Northwest of the bridge over the railway. [Google Streetview, September 2011]The next structure along the line, again at the turn of the 20th century. [27]The same location in the 21st century. The railway can just be made out but the route of the road is less easy to pick out so its centre-line is highlighted by the blue line. [Google Maps, January 2026]At the same location, the bridge parapet and the view back along the line towards Drummuir. [Google Streetview, May 2022]At the same location, the other bridge parapet and the view ahead along the line. [Google Streetview, May 2022]
“About a mile beyond Drummuir is Loch Park, a narrow sheet of water lying in a wooded gorge. The railway skirts its southern shore on a narrow ledge at the foot of the precipitous hillside.” [1: p5]
Just before passing the dam at the East end of the Loch the line passes under the road which runs across the West end of Loch Park.
Just before the line passes Loch Park it is bridged once again. [27]The same structure in the 21st century. [Google Maps, January 2026]The tidy looking structure seen from the road to the East. [Google Streetview, May 2022]Looking East back along the line from the bridge. [Google Streetview, May 2022]Looking West along the line from the bridge towards Loch Park. Note the well-kept permanent way but between the railway and the road. [Google Streetview, May 2022]A view from the West looking past the platelayer’s hut towards the road bridge. [Google Streetview, May 2022]This modern satellite image shows the railway running alongside Loch Park. Its route appears as a dark line in the trees immediately adjacent to the Southeast shore of the Loch. [Google Maps, January 2026]A very similar area as it appears on the 25″ 2nd Edition OS Map from the turn of the 20th century. [28]
“From the summit at the western end of Loch Park, the line descends at 1 in 60 into the valley of the River Fiddich, which is crossed on a masonry bridge shortly before Dufftown is reached. ” [1: p5]
The next structure to the Southwest appears on the map extract below. …..
The line passes under what will be the B9014. [29]The same location with the B9104 crossing the line in the 21st century. [Google Maps, January 2026]The bridge seen from the Northeast. [Google Streetview, May 2022]Looking Northeast along the line from the B9014 bridge. [Google Streetview, May 2022]Looking Southwest from the same bridge. [Google Streetview, May 2022]
The next map extract shows the junction close to the Parkmore Distillery, where a branch serving Parkmore Lime Works and Glendullan and Mortlach distilleries left the main line. …
The line to Dufftown continued to the West on the South side of the Parkmore Distillery, while the short branch ran south to serve local industry. At the turn of the 20th century, the Parkmore Limekilns had their own short siding. [30]Approximately the same area in the 21st century. [Google Maps, January 2026]The railway bridge over the B9104, seen from the North. [Google Streetview, May 2022]A view from the South on the B9104. The railway bridge carrying the line over the B9104 is on the left. The access road from rail level down to the road network is on the right. The branch line ran through the area which, in the 21st century, is wooded at the right side of the image. [Google Streetview, March 2022]Glendullan Distillery had its own short siding with the line running towards Mortlach Distillery. [31]Glendullan Distillery is owned by Diageo in the 21st century. The alignment of the old railway siding and branch are shown by the orange lines superimposed on the Google Maps satellite imagery. [9]The line curves round the East side of Dufftown. [32]The route of the line as it appears on the railmaponline.com satellite imagery. [9]The bridge carrying the A941 over the route of the old branch to Mortlach Distillery and over Dullan Water – the Bridge of Crachie. [Google Streetview, June 2023]A closer view of the bridge over rail and river. [32]
The branch only ran a short distance beyond the Bridge of Crachie to serve Mortlach Distillery
The short branch terminated at Mortlach Distillery. [33]A similar area in the 21st century with the railway route superimposed again. [9]
Returning to the main line we see it bridging the River Fiddich. …
The main line bridges the River Fiddich and begins to curve round to the Northwest. [34]The route of the line is again superimposed on the modern satellite imagery. [9]The view looking East from Castle Road (B975) towards the bridge over the River Fiddich. [Google Streetview, September 2025]As the line approached Dufftown Station it passed Glenfiddich Distillery. [35]The Glenfiddich Distillery in the 21st century with the original railways shown as orange lines superimposed on the satellite imagery from railmaponline.com. [9]Looking North alongside Glenfiddich Distillery from Castle Road (B975), the line can be seen in a shallow cutting on its approach to Dufftown Railway Station. A DMU can be made out in the middle left of the photograph. [Google Streetview, September 2025]
A remarkable number of distillery buildings survive in the 21st century in the immediate vicinity of Dufftown. The most famous of these is the Glenfiddich Distillery which continues to produce a significant volume of Whisky. [37]
Parkmore Distillery buildings are no longer used for producing Whisky. They were operational from 1894 but mostly silent from 1931, closing officially in 1988; its well-preserved buildings are now used by Edrington Group for whisky warehousing, with its rare existing whisky valued by collectors and its grounds sometimes hosting whisky experiences. [38]
Glendullan Distillery is a significant but often behind-the-scenes producer of single malt Scotch whisky, primarily for Diageo’s blends like Johnnie Walker, though it also contributes to The Singleton range. Founded in 1897, it operates a larger, modern facility built next to the original, which now serves as storage and workshops after its closure in 1985. [39]
And Mortlach also remains active. It was founded in 1823 and is now owned by Diageo. Its Whisky is a key component in several Johnnie Walker bottlings,and Diageo also markets four Mortlach single malts. [40]
Balvenie Distillery, owned by William Grant & Sons Ltd., sits to the Northeast of the Glenfiddich Distillery on the East side of Dufftown Station. Grant left his employment at Mortlach Distillery to set up his own company in 1886 when the foundations of the new distillery were laid. The distillery remains active. “David Stewart MBE, Balvenie’s Malt Master, is one of the industry’s most experienced experts and began working with William Grant & Sons in 1962. He was the first to create the process that would later be known as wood finishing, whereby whiskies are matured in one type of cask, such as ex-Bourbon barrels, then transferred into a second cask type (such as ex Sherry, Port or Rum), resulting in a greater depth and complexity of the final flavour of the whisky. He received his MBE from Queen Elizabeth II on the 5th of July, 2016, for his services to the Scotch Whisky Industry.” [42]
Kininvie Distillery is a Speyside single malt Scotch whisky distillery in Dufftown, owned by William Grant & Sons, built in 1990 primarily to supply their popular blends like Grant’s and Monkey Shoulder, though it now releases its own single malts, often using shared facilities (mash/fermentation) with its sister distillery, The Balvenie. [43]
Dufftoen Railway Station at the turn of the 20th century. [36]Dufftown Railway Station in the 21st century. It is now the terminus of the preservation line. [9]
Dufftown Railway Station “first opened on 21st February 1862 by the Keith and Dufftown Railway. There was a goods yard to the southwest, which is used for stock storage nowadays. The station closed on 6th May 1968 to passengers. The line for westbound trains was lifted shortly after. Goods traffic ceased around 1991. In 2003, the Keith and Dufftown Association reopened the station and the line as a preserved railway and set up their headquarters at the station.” [44]
Some images of Dufftown Station can be found here [45] and here. [47]
We complete this leg of the journey standing on the platform of the preservation railway at Dufftown Railway Station. The next leg of the journey will take us over the watershed into Strathspey.
References
The Railway Magazine Volume 105 No. 693, Tothill Press, London, January 1959.
H.A. Vallance; The Strathspey Line; in The Railway Magazine Volume 105 No. 693, Tothill Press, London, January 1959, p3-9.
The featured image at the head of this article (above) is Highland Railway No. 79, ‘Atholl’, a 4-4-0 Clyde Bogie, built Jun 1886. Renumbered 79A in Mar 1917. Only one of this class survived into LMS days No. 14278. It originally carried the name ‘Fife’ and was ‘Hughland Railway No. 82. Renamed ‘Durn’ in 1900, a name it retained until 1916, it was renumbered 82A in March 1917. It continued in service until being withdrawn in April 1930. [30][31]
Trains Illustrated No. 18 which was published in 1976 focussed on The Highland Railway. [1] The introductory article, ‘Highland Retrospect’, was written by Paul Drew. [1: p4-11]
The Highland Railway (HR) Company was based in Inverness. It was formed by merger, absorbing over 249 miles (401 km) of line. It continued to expand, reaching Wick and Thurso in the north and Kyle of Lochalsh in the west, eventually serving the counties of Caithness, Sutherland, Ross & Cromarty, Inverness, Perth, Nairn, Moray and Banff. Southwards, it connected with the Caledonian Railway at Stanley Junction, north of Perth, and eastward with the Great North of Scotland Railway at Boat of Garten, Elgin, Keith and Portessie. [6][7][17: p29]
The direct route to Perth eliminated the need for a change of trains at Aberdeen (and for some time a half mile journey between two railway stations). “It gave a route virtually under one ownership between Inverness and Perth. The greatest benefit lay, however, in the shortening of the journey. Previously the distance by rail from Perth to Inverness had been 198 miles; it now became 144. This represented a saving of about 24 hours in travelling time, and a corresponding reduction in fares.” [17: p27]
Earlier articles about the Highland Railway network can be found here, [15] here, [3] and here. [16] In this article:
we follow the line from Forres via Dava to Perth
We follow the line from Forres via Dava to Perth.
We look at the Highland Railway’s locomotive superintendents and at least some of its locomotives.
The First Direct Line Between Inverness and Perth (via Forres) – the Dava Line
H. A. Vallance tells us that “The proposed new railway through the Central Highlands left the Inverness & Aberdeen Junction Railway at Forres, 24 miles East of Inverness, and turning sharply to the south, rose steeply for several miles to cross the hills separating the valley of the Findhorn from Strathspey. Beyond the summit at Dava, 1,052 ft above sea level, the approximate course of [a] route surveyed … in 1845 was joined, and the line proceeded by way of Grantown and the west bank of the Spey to Kingussie. There followed a long, steep climb up the northern slopes of the Grampians to the head of the Druimuachdar Pass, and a corresponding descent to Blair Atholl and the Pass of Killiecrankie. Crossing the Tay near Dalguise, the line reached Dunkeld, where it made an end-on junction with the Perth & Dunkeld Railway.” [17: p24]
The enabling Act of Parliament was passed in July 1861 and authorised the Inverness & Perth Junction Railway to take control of the Perth & Dunkeld Railway. That amalgamation took place in February 1864.
Work on the line commenced in October 1861. The first 13 miles (Dunkeld-Pitlochry) opened at the beginning of June 1863. The length from Forrest to Aviemore opened in early August of the same year. The last length (Aviemore-Pitlochry) was completed in September, just a month or so later. Vallance notes: “The chief engineering works on the line were the seven-span masonry viaduct over the Divie, near Dunphail, 477 ft long and 105 ft high; the girder bridge across the Tay, near Dalguise, 515 ft long and 67 ft high; and the ten-span masonry viaduct, 54 ft high, over a deep ravine in the Pass of Killiecrankie. Smaller masonry bridges were required to carry the railway over the Bran, north of Dunkeld, and the Garry, at Struan. The latter was remarkable in that its main span crossed not only the river, but also the stone bridge carrying the Rannoch Road over the Garry at the same point. At Blair Atholl the Tilt was crossed by a single-span lattice-girder bridge. … Only two short tunnels were found necessary-one in the Pass of Killiecrankie (128 yd long), and the other north of Dunkeld (350 yd long). South of Dunkeld there was a third tunnel (310 yd long), but this had, of course, been constructed by the Perth & Dunkeld Railway. (These, incidentally, were the only three tunnels on the Highland Railway.)” [17: p25]
“Some time elapsed before all the stations were ready to be opened, a few of the smaller ones being left until communication between Forres and Perth had been established. Thus accommodation was not provided at Dava until 1864, and Killiecrankie and Dalnaspidal until 1865.” [17: p25]
We have already looked at the line from Keith to Inverness. The original station at Forres was not suited to becoming a significant junction station. Valance provides a sketch of the revisions at Forres. …
A sketch of the new Station and railway junction at Forres. A double junction was provided with the line from Inverness to Keith, so that trains could be run in each direction without reversing. To give each train platform accommodation, the new station was triangular in form and built to the south of the existing one. A new line was provided for the trains from east to west, leaving the original route as an auxiliary loop for goods trains and light engines. The old station building became the stationmaster’s residence. [17: p26-27]The junction at Forres as it appeared on the 25″ Ordnance Survey of 1868, published in 1870. The original alignment of the Inverness &Aberdeen Junction Railway runs diagonally across the top of the map extract. The old station was in the top right quadrant. The new triangular junction and accompanying station/platforms is at the centre of the image. [18]The same area in the 21st century as depicted on the ESRI satellite imagery from the NLS. [19]
Before following the route below, you may well enjoy watching a video about The Dava Way. … [28]
South of Forres, the line ran close to the Dallas Dhu Distillery which had its own sidings, before climbing to Dunphail Railway Station.
A short distance Southeast of Dunphail Railway Station, the line crossed the Divide Viaduct (over the river of the same name). The viaduct still stands in the 21st Century and carries the Cava Way footpath.
Some distance further South the line reached Dava Railway Station. … The NLS records of the 35″Ordnance Survey do not cover the line heading South, so we now use the 6″ Ordnance Survey. …
Dava Station, as recorded on the 6″ Ordnance Survey from the turn of the 20th century. [25]The same location in the 21st century, as recorded on the ESRI satellite imagery provided by the NLS. [25]
Wikipedia tells us that, “At 985 feet above sea-level, Dava was the third highest station on the Highland Railway network. The summit that followed south of the station (Dava Summit) reached 1,052 feet. … The station was located in sparsely populated moorland, along a dirt track near the junction of the A939 and A940 (OS Grid Reference NJ008389). The purpose of a station at this location was to provide a passing loop with water columns (15 miles from Forres and 16 miles to the first junction at Boat of Garten), although the station did provide some facilities for the area, such as a post office. … The surrounding area is wild moorland (The Dava Muir).” [26]
Goods services at Dava were first to end; the date of closure was 27th January 1964. A passenger service continued until 18th October 1965, when the station closed completely. The station building, stationmaster’s house, and platforms still remain. The stationmaster’s house is a private residence.
South of Dava the line ran almost due South and continues to provide the formation for the Dava Way [43] which reaches a summit between the locations of Dava Railway Station and Castle Grant Platform.
The 6″ Ordnance Survey shows the old military road and the railway line in close order. [45]Railmaponline.com shows the route of the old railway in green approaching Dava Way Summit. This is also the long distance footpath known as the Dava Way. [42]The route of the old railway runs alongside the A939 over Dava Summit an area of open moorland. In this South facing view, the fenceline beyond the Scots Pine marks the route [Google Streetview, June 2023]The route of the railway and that of the Old Military road sit side-by-side. [44]Further South the line of the old railway is very close to the modern road. [42]Looking Southeast from the A939, The fence line marks the line of the old railway. [Google Streetview, June 2023]
The line snaked back and forth following the contours as it travelled South.
The adjacent map shows two bridges close together and both associated with the Castle Grant Estate. The first we encounter travelling South along the line is a bridge carrying an estate road over the old railway. A picture of that bridge can be seen here. [50]
The adjacent map shows two bridges close together and both associated with the Castle Grant Estate. The first we encounter travelling South along the line is a bridge carrying an estate road over the old railway. A picture of that bridge can be seen here. [50] The second bridge is shown below.The old railway bridged the Old Military Road on its way down towards Grantown-on-Spey. [46]This extract from railmaponline.com shows the same area in the 21st century. [42]The bridge which carried the old railway over the Military Road remains in place carrying the Dava Way over the A939. This is the view looking South along the line of the old Military Road (A939). [Google Streetview, June 2023]The same bridge seen looking North. The building adjacent to the railway combined as a station building and a lodge for the Castle Grant estate. There was a platform on the East side of the line included at the railway’s expense as a private platform for the estate.At Lynmacgregor the railway bridged a minor road connecting the small hamlet to the Old Military Road. [48]
The same location is shown here on railmaponline.com’s satellite imagery. A length of embankment has been removed to allow a better alignment of the access road to Lynmacgregor. [42]
Close to what is now Grantown-on-Spey Caravan Park the railway crossed another minor road by means of a stone arch.
The area to the East of this bridge is now a Caravan Park. [47]The same location in the 21st century. [42]The view of the West face of the stone-arched bridge. [Google Streetview, August 2021]Grantown West Railway Station sat to the Southwest of the village. This was one of two stations serving the town. Grantown East Railway Station on the Great North of Scotland Railway (Strathspey Section) was on the South side of the River Spey at Speybridge. [49]
Photographs of the Station while in use can be found here [52] and here. [53]
This extract from the Ordnance Survey 1 inch to 1 mile 3rd Edition (surveyed between 1866 to 1870; revised: 1906; and published: 1908) shows the relative positions of the town/village and its two stations. [54]
This extract from railmaponline.com’s satellite imagery shows the location of Grantown West Railway Station in the 21st century with the line of the old railway superimposed. The village/town of Grantown is to the Northeast of this location. The station site is now an industrial estate. [42]
Looking South-southwest through the industrial estate which sits on the site of Grantown West Railway Station. [Google Streetview, August 2021]Looking North-northeast through the industrial estate which sits on the site of the old station. [Google Streetview, August 2021]
The Strathspey Steam Railway has an ambition to extend its line to the site of the old station. [55]
South of Grantown-on-Spey West Railway Station the line continued on embankment before crossing a minor road and stream as shown on the map extract below.
This extract from the OS 6″ mapping shows the location of the bridge mentioned above and shown in the photograph below. [56]The structure shown on the map extract above, seen from the East. A single span crosses both the road and the watercourse. [Google Streetview, August 2021]The line continued in a South-southwest direction. Its route is easy to make out on modern satellite imagery. [Google Maps, June 2025]The modern A95 crosses the line of the old railway which can be seen curving round towards the Southwest. [Goole Maps, June 2025]
This extract from the 6″ Ordnance Survey mapping which was surveyed in 1868 and published in 1873 shows the esrtwhile bridge which carried the railway over what was to become the A95. As can be seen above, the closure of the line permitted the road alignment to be considerably improved. [57]
A short distance further Southwest, the old line crossed the River Dulnain close to its confluence with the River Spey as this next extract from the 6″ Survey mapping surveyed between 1867 and 1871 and published in 1873/75 shows. [58]
The line continued on through Broomhill Station before it was met by the Great North of Scotland (Strathspey Section) line which had just bridged the River Spey. [59]
Broomhill Railway Station or Broomhill for Nethy Bridge Railway Station [60: p46] is a reconstructed railway station on the former Highland Railway main line [61] which was originally built to serve the small villages of Nethy Bridge and Dulnain Bridge in Strathspey. It is at present the eastern terminus of the heritage railway, the Strathspey Steam Railway. [55][62]
Boat of Garten railway station was a significant junction on the Highland Railway, and is now the headquarters of the Strathspey Railway. The station served as a link between the Highland Railway’s main line (Perth to Forres) and the Great North of Scotland Railway’s branch to Craigellachie. Today, the Strathspey Railway operates heritage steam trains between Aviemore, Boat of Garten, and Broomhill, using part of the original Highland Railway line.
In the 21st century, Aviemore Railway Station is owned by Network Rail and managed by ScotRail, is on the Highland Main Line, 83 miles 31 chains (134.2 kilometres) from Perth, between Kingussie and Carrbridge, and is also the southern terminus of the Strathspey preserved railway. [68]
The modern main line to the North of Aviemore, the later Highland Railway main line, will be covered in Part 3 of this series of articles.
South of Aviemore, the Highland line continued more than 83 miles South to Perth.
The line follows the River Spey southwards, passing to the East of Loch Alvie, through Kincraig Railway Station and then passing to the West of Loch Insh and through Kingussie Railway Station.
Southwest of Kingussie the railway continues to follow the River Spey. It bridges the Spey southwest of Newtonmore Railway Station and just to the East of Spey (Road) Bridge and then continues climbing alongside first the Spey and then a tributary, the River Truim, towards Dalwhinnie Distillery.
Beyond the confluence of the Spey and the Truim the railway runs Southwest up Glen Truim towards Dalwhinnie Distillery. Just a short distance Northeast of the Dalwhinnie Distillery the Truim splits into two. Google Maps records the name of the two arms being the River Truim. Both arms of the Truim pass under the railway.
It is worth noting before we travel on towards Perth that one of the most significant improvements to the journey to Perth “came with the doubling of sections of line, designed by the engineer Alexander Newlands, beginning with Blair Atholl to Dalnacardoch (8.25 miles (13.28 km)) in 1900, extended to Druimuachdar (8.5 miles (13.7 km)) in 1901 and Dalwhinnie (5.5 miles (8.9 km)) in 1909. [83] In the 1960s, many sections of the line were converted from double track to single track. In 1976, 23 miles (37 km) from Blair Atholl to Dalwhinnie was redoubled. [84][85] In March 2019 Network Rail completed a programme of works to increase capacity on the line and support the introduction of InterCity 125 sets on ScotRail services, with passing loops and platforms extended.” [82][86]
A few kilometres South of Dalwhinnie, the railway crosses a minor road just to the West of its junction with the A9,then crosses a small tributary of the River Truim, before it crosses the River Truim again.
Looking South from the minor road crossing. [Google Streetview, 2024]The bridge over the River Truim. [87]The same location in the 21st century. The unfenced road shown on the map extract is now the A9 trunk road [87]The same bridge, seen from the A9. [Google Streetview, 2023]
Continuing southwards the line crosses the River Truim again. …
The next bridge over the river. [88]The same location in the 21st century. [88]The best view of the bridge from the A9. [Google Streetview, 2024]
The line crosses the watershed and begins the drop down towards Perth.
The next bridge crosses the first of a series of streams which form the headwaters of the River Garry. [89]The same location in the 21st century. [89]The bridge on the map and satellite image above. [Google Streetview, 2024]
Over the next kilometre a number of such streams are crossed and the line passes through the location of Dalnaspidal Railway Station which closed in 1965.
Killiecrankie Railway Station in the years before closure. [110]
To the Southwest of Killiecrankie Railway Station the line passed through the Pass of Killiecrankie. First there was a short tunnel, then a viaduct over a tributary of the Tummel.
The tunnel can be seen to the top-left of this extract from the 6″ Ordnance Survey. The viaduct is towards the centre of the image. [103]The viaduct can easily be seen on this extract from the ESRI Satellite imagery from the NLS. [103]The East tunnel mouth sits immediately above the Northwest end of the viaduct. [111]The Viaduct sits alongside the River Garry. A plaque sits beneath the viaduct which reads: The National Trust for Scotland: Railway Viaduct – This 510′ long-viaduct, which was designed for the Inverness and Perth Junction (The Highland Railway from 1865) by Joseph Mitchell was completed in 2864;at a cost of £5,730. The ten masonry arches are each 35′ span and the extreme height to the parapet wall is 54′. [111]
The railway has followed the River Garry over some distance. The confluence of the River Garry with the River Tummel is just a short distance South of the Pass of Killiecrankie. From that point the railway follows the River Tummel through Pitlochry.
To the Southeast of Pitlochry the main line of the Highland Railway is met by the Aberfeldy branch which has just crossed the River Tummel. The Aberfeldy branch ran along the South side of the River Tay from Aberfeldy to close the confluence of the Tummel and the Tay. It bridged the Tay and soon also bridged the Tummel as shown in the OS extract below.
The River Tummel joins the River Tay a short distance South of Balliinluig Junction and the railway continues down the valley of the Tay, through what was Guay Railway Station and bridging the River Tay a little further South.
Images of Dalguise Railway Station can be seen here, [121] here [122] and here. [123]
Beyond Dalguise, a tunnel opposite Dunkeld House across the Tay, a bridge over the River Braan, a significant embankment and a length of cutting bring the line to a point across the Tay from Inverness. The line continues through the railway station at Birnam which serves Dunkeld and Little Dunkeld.
Opposite Dunkeld House and on the South side of the Tay, the line passes through a short tunnel and over the River Braan. [109]The same location on the 21st century ESRI satellite imagery from the NLS. The bridge is easier to make out than the tunnel to its West.[109]
Historic Environment Scotland describes Inver Viaduct, the bridge over the River Braan, as being a “large single segmental arch, flanked by crenellated refuges [with] large masonry approaches pierced for footpaths, octagonal flanking features.” [124]
Beyond Dunkeld and Birnam Railway Station, the line continues along the South side of the River Tay. Rail and river separate to make room for Murthly Castle. The line, first in tunnel and then skirting the South side of the Murthly estate.
“Murthly Castle has been owned by three families since the original tower house was built in 1450. The Stewarts of Grantully acquired the property in 1615 and the present owner is Thomas Steuart Fothringham, who lives at the property with his family. The castle was developed gradually over a 450-year period, with the latest addition dating from 1893. Consequently, there is a wide range of architectural styles both inside and outside.”[127]
The 6″ Ordnance Survey of 1901 shows the Murthly estate, the River Tay and the railway. The tunnel can be seen bottom-left of this map extract. [128]A similar area in the 21st century. [128]Murthly Village, Station and Asylum in 1901. [129]The same location in the 21st century. The station closed in 1965. [129]Murthly Railway Station close to the turn of the 20th century. [130]Abandoned signal box and level. Rossing at the closed Murthly Railway Station site. [131]The Highland Railway (HR) line met the Caledonian line at Stanley Junction. HR trains covered the remaining miles into Perth on Caledonian metals. [132]The same location in the 21st century. [132]
Stanley railway station was located around half-a-mile Southwest of Stanley Junction Station. It was opened in 1848 by the Scottish Midland Junction Railway which linked Perth and Arbroath. It closed in 1857, when the new station of Stanley Junction was built at the location where the Perth and Dunkeld Railway diverged from the Scottish Midland Junction Railway running between Perth and Arbroath. Stanley Junction Station closed to passengers in 1956 and to goods in 1965. [133][134]
Stanley Junction Railway Station. This image was shared on the Perth & Kinross Archive Facebook Page on 9th November 2022. [135]
Highland Railway trains ran through to Perth on the Caledonian Railway under an arrangement agreed by predecessor companies (the Perth and Dunkeld Railway and the Scottish Midland Junction Railway). The line ran through Stratford and Luncarty stations, before passing through Almond Valley Junction before the final approach to Perth General Railway Station.
Strathord Railway Station. [136]The same location in the 21st century. [136]Luncarty Railway Station and Bridge. [137]The same location in the 21st century. [137]Almond Valley Junction in 1901. Lines from Crieff and Methven met up the valley of the Almond. [138]The branch line’s route is marked by the narrow line of trees curving towards the top-left of this extract from the ESRI satellite imagery from the NLS. [138]The approach to Perth from the North in 1901. [139]The same area in the 21st century. [139]Looking North from the bridge carrying Long Causeway over the railway. Nothing remains of what was once a busy railway scene. [Google Streetview, 2022]Looking South from the same bridge. The bridge in the distance appears on the next map extract and satellite image. [Google Streetview, 2022]The final approach to Perth from the North in 1901. [139]The final bridge over the line before Perth Railway Station appears just below centre in both the map extract above and this satellite image. [139]Looking South into Perth Railway Station from the bridge carrying Glasgow Road over the station approach from the North. [Google Streetview, 2021]Perth Railway Station in 1901, as it appeared on the 6″ Ordnance Survey. [140]Perth Railway Station in the 21st century. [140]
Having travelled to the most southerly point on the Highland Railway’s network and having already noted that a more direct route from Inverness to Perth was to be constructed. We complete this particular article by acknowledging that the rivalry between the Highland Railway and the Great North of Scotland Railway (GNSR) was intense. Various schemes were developed by the GNSR, but none more significant than the GNSR backed abortive scheme of the Strathspey Strathdon & Deeside Junction Railway Co. (SS&DJ) to construct a 30-mile line from Ballater, terminus of the GNSR Deeside branch from Aberdeen, to Nethy Bridge on Speyside, on a GNSR branch from Craigellachie; the GNSR “was then to build its own line from Nethy Bridge directly to Inverness. The terrain was difficult on both sides of Nethy Bridge, especially to the east, where the alignment cut across a northern ridge of the Cairngorms that would have meant a 2000ft summit (compared with Druimuachdar’s 1484ft) or a long tunnel.” [1: p7] It is difficult to determine whether this route was ever a serious proposition, but “one effect of the SS&DJ proposal was to frighten the HR into building the costly Perth-Aviemore cut-off over Slochd so as to cut the Perth-Inverness passenger transit by reducing the distance compared with the route via Forres and Dava.” [1: p7]
However, the end of the 19th century saw the end of the more absurd, wasteful and expensive rivalry between the Highland and the Great North of Scotland Railway.
North and Northwest of Inverness
Drew comments: “True to its purpose of helping in the economic development of the Highlands, the I&AJR (as it was until it became the HR in 1865) started, in the early 1860s, … pushing north from Inverness. Once again local men and women co-operated. By means of working and eventually taking over lengths of line originally built as independent undertakings, the Farther North line of the HR reached Thurso, Britain’s most northerly town and 20 miles from Duncansby Head, in 1874; Penzance had been linked with London some years before, so that the British railway system extended from (near) John o’ Groats to (near) Land’s End in less than 50 years from the opening of the Stockton & Darlington.” [1: p7]
The Farther North Line or the Far North Line
In Drew’s opinion, “The Farther North line is unique in Britain. The distance by rail from Inverness to Wick, its terminus (Thurso being at the end of the branch) is 161 miles, because the line avoids expensive bridges over the sea lochs, serves as many population centres and even isolated estates as possible, and runs inland from Helmsdale roughly in a semicircle through some desolate country to near Wick. The object was partly to serve the population (sometimes by means of lonely roadhead stations) and partly to avoid the cliffs along the coast north of Helmsdale. By bridging the narrower sea lochs and keeping nearer to the coast the distance from Inverness to Wick could have been only a little over 100 miles; but that would have left many places in Ross & Cromarty, Sutherland and Caithness even farther from a railhead than they are. Less than 10 miles of the more direct route along the coast beyond Helmsdale would have been really difficult construction, probably involving some tunnelling under cliffs.” [1: p7]
Drew notes the problems encountered with snow on the Farther North line, particularly the problem of drifting snow on relatively open expanses of moorland and its propensity to collect in narrow railway cuttings. He highlights the resources needed and the logistics involved in clearing lines that were remote from highway links.
He also highlights the sterling efforts of the Highland Railway in maintaining supplies and communication to the Royal Navy in Inverness and at Scapa Flow during the first world war, over a line not built for such traffic flows. “One of the hardest tasks was the working of trains of coal, largely high-quality steam coal for the Fleet from South Wales, to Invergordon and Thurso; well over 200 miles of the journey was over the HR and most of that distance was single track. The HR had of course to borrow engines and wagons from other railways. The difficulties included lack of the running loops needed for such heavy two-way traffic.” [1: p9]
A daily scheduled service ran from Euston to Thurso during both world wars. Officially ‘The Euston to Thurso Naval Special’, this was known colloquially as the Misery Express or more positively, ‘The Jellicoe Express’. “It was named after Admiral Sir John Jellicoe and carried service personnel to and from Naval bases around the country, including Scapa Flow. WW100 Scotland reports that in WW1 it ran 15th February 1917 – 30th April 1919.” [9]
It was estimated to have transported some half a million service personnel during the two wars. (Helmsdale says half a million in each war). It was the longest scheduled rail service ever to run in the UK.
Crewe Station was one of the few scheduled stops on the 717-mile 21h 30m journey. This was a major refreshment stop, where over 300 women volunteers worked around the clock to provide refreshments in a canteen on Platform 6. Helmsdale was another refreshment stop.
From Royal Naval Association: “Although seen as a crucial piece of Naval infrastructure, the train also carried thousands of soldiers and airmen over the years.Travelling on it was usually a nightmare – invariably overcrowded, most passengers were unlikely to get a seat, and only the shortest of them could hope to get any sleep (if they could find an empty wire luggage-rack). In the Great War it left London at 6pm, arriving at Thurso at 3.30pm the following day. The southbound service took an hour longer …”
The Far North/Father North Line will be covered in detail in a future article. The early involvement of the 3rd Duke of Sutherland in the development of the line is covered here. [51]
The Skye Line from Dingwall to Kyle of Lochalsh “was also built to develop rural areas. Whereas the purpose of the Farther North was to help the mainland northerly counties (though the promoters had Orkney traffic via Scrabster in mind), the Skye line was regarded also as a means of helping economically depressed Skye and Lewis and Harris and such others of the Hebrides as sent fish and the products of sheep farming to the south.” [1: p9]
Drew tells us that “the line began as an independent undertaking, the Dingwall & Skye, and was to run for 63 miles across Ross & Cromarty and over the watershed between the Moray Firth and the Atlantic to Kyle of Lochalsh, terminus of the shortest ferry crossing to Skye and a site for berths for seagoing steamers to Lewis and other islands. Construction was delayed by opposition at Strathpeffer, which little spa had to be bypassed by a costly deviation. Consequently the line only reached Strome Ferry, at the head of the sea inlet, Loch Carron, in 1870. This remained the terminus and point of embarkation until 1897, when the Skye line eventually reached the Kyle, which became an admirably designed minor packet port, complete with a hotel.” [1: p9]
Drew explains that the HR absorbed the Dingwall & Skye (D&S) in 1880. “For 10 years from the opening of the railway to Strome Ferry the D&S and later the HR operated the shipping services between Strome Ferry and Skye and the Hebrides. They were eventually taken over by David MacBrayne and [then] … by Caledonian MacBrayne Ltd. … The HR later had high hopes of Strathpeffer; it built a special two-mile branch (now closed) thither from Fodderty Junction and during the season a Strathpeffer Spa express was run non-stop from Aviemore to Dingwall and on to the branch.” [1: p9]
The line to Skye and the Strathpeffer Branch are covered in detail elsewhere. The Strathpeffer Branch is dealt with here. [3] An article about the line to Kyle of Lochalsh will follow in due course.
Locomotives and Rolling Stock
To conclude this article we take a look at the notes Drew provides on the locomotives employed by the HR and further, at its locomotive superintendents: “The Jones Goods, placed in service from 1894, is one of the best-known types of engine of any British railway, famous as the first instance in the UK of the 4-6-0 wheel arrangement. … Experience with the Jones Goods helped their designer David Jones in developing the Castle Class express passenger 4-6-0s, which did not, however, enter service until 1906, after Jones had retired, and details were finalised by his successor Peter Drummond. … Struck by the magnificent work of the Castles on the HR main lines, the French State Railways in 1910 ordered 50 from the North British Locomotive Company. As illustrations show, Jones’s designs, despite the louvred chimneys, were handsome, and most were highly efficient. In view of the many steep gradients it might be asked why Jones did not develop six-coupled engines before. Indeed the HR and its constituents seemed to prefer Alexander Allan single drivers (successful on lines in flat country) long after greater adhesion became necessary.” [1: p11]
“Having developed successful goods and passenger 4-6-0s, the HR went ahead with others. The best was F. G. Smith’s River Class of 1915, which were not allowed to work on the HR after delivery, because of Smith’s failure to consult the civil engineer, and had to be sold to the CR. His successor Cumming was responsible for two fine designs of 4-6-0, the Cumming Goods and the Clans, but there was little opportunity for those engines to show their paces before grouping.” [1: p11]
William Barclay was HR locomotive superintendent from 1855 until 1965. “During Barclay’s incumbency, … various 2-2-2 and 2-4-0 locomotives were built, along with a solitary 0-4-0T. An 0-4-0ST was also inherited from the Findhorn Railway. Many of Barclay’s locomotives would later be rebuilt by Stroudley or Jones – most of the 2-2-2s ended up as 2-4-0s and one became a 2-2-2T, a pair of 2-4-0s became 4-4-0s and the 0-4-0T became an 0-4-2T. Only 4 much rebuilt Barclay locomotives (all 2-4-0s) were still in stock at the time of the Grouping.” [35]
William Stroudley was HR locomotive superintendent from 1865 to 1870. “His main achievement was high standards of maintenance and cleanliness that continued to be achieved long after his departure to the LB&SCR. He did much to rationalise the HR Lochgorm Works at Inverness.” [1: p11]
Stroudley was also responsible for the design of a small HR 0-6-0ST which, with modifications, was to become the well-known Terrier Class A1 of the LB&SCR. The HR 0-6-0STs were the first locomotives to be built at the Highland Railway’s Lochgorm works in Inverness. The design was the only new design of locomotive brought in during William Stroudley’s spell as the company’s locomotive superintendent. Only three of engines were built. [4] All three, built in 1869, 1872 and 1874, “started life with second hand boilers, shortened to suit, with the dome over the firebox. The side tanks had extra capacity in the form of an arched tank placed over the boiler. The cab was typical of Stroudley but there was no coal bunker; it was carried on the right hand side in the space alongside the firebox between the cab and the side tank, both sides having extended lower cab sides meeting the tanks.” [39]
“To the end the three engines showed strong Stroudley features, although they were not entirely identical, the oldest acquiring a larger side tank during rebuilding in 1917 and the rear toolbox was replaced by a small bunker on all three. Typically for HR engines all three were named: No. 56 – Balnain when new, then Dornoch in 1902; No. 57 – Lochgorm; No. 16 – St. Martin’s when new, then Fort George in 1899. … The later names reflect the move of the engines to those branches. Latterly in HR days they were nameless. The LMS correctly placed Nos 56 and 57, by then with duplicate list numbers as 56B and 57A, with similar powered tanks as Nos 16118 and 16119, by which time the former was working the Strathpeffer branch, but the third was numbered 16383 at the end of the other 0-6-0T classes this may have been due to mistaken identity. All three were soon running with LMS numbers, Inverness having applied LMS numbers and livery rather quickly, but they were condemned in 1927-32.” [39]
Until 1869, all locomotives were painted dark green. After that, passenger locomotives were painted yellow ochre , and freight locomotives were painted Scottish green (very dark green). From 1885, all locomotives were painted pea green with red and white trim. From 1903, the green became darker again, and the tenders now bore the inscription “Highland Railway.” [5]
David Jones was Locomotive Superintendent from 1870 to 1896. He “designed several classes of 4-4-0, and was also notable for introducing the 4-6-0 wheel arrangement to the UK. He also produced small numbers of 0-4-4ST, 2-4-0, 2-4-0T and 4-4-0T locomotives. Of 88 engines built to Jones’ design (including 3 built as late as 1917), 74 passed to the LMS in 1923. A small 2-4-0T purchased secondhand from the Duke of Sutherland also made into LMS ownership.” [35]
“Both the Highland Railway and the Glasgow & South Western Railway initially put [4-4-0 locomotives] on the line during 1873, the first in June, the latter in July – however the important distinction was that the former was produced by fitting a bogie to an outside cylinder 2-4-0 locomotive dating from 1858. The need arose from problems encountered on the recently opened (1870) line from Dingwall to Strome Ferry, the long fixed wheelbase of the six-wheelers sent there not taking kindly to the sharp curves. The first convert was No 10, followed by No 7, another 1858 engine, in 1875. The immediate result for the HR was the introduction of a new 4-4-0 type in 1874, the ’60’ class, which however was for main line work, ten being supplied by Dübs, and at the same time the most powerful passenger engines in Britain. For some years the Lechatelier counter pressure brake was fitted, later replaced by vacuum. With these engines came the well known louvred chimney, a feature of David Jones’ Highland engines. Seven more were built by the company at their Lochgorm Works in 1876-88, generally similar apart from boiler dimensions. Eight others, Nos 76-83, dated 1886, were the first products of the Clyde Locomotive Works of Glasgow (soon absorbed by Sharp, Stewart); the first engine of this batch was displayed at the 1886 Edinburgh Exhibition. The type was perpetuated in 1892 when Nos 89-100 were completed, essentially the same class, apart from further boiler enlargement. As main line engines all of these 4-4-0s were named, but confusion arises from numerous changes of names. Several lasted into LMS days, but only one of the Clyde built and six of the 1892 engines were allocated LMS numbers.” [10: p5]
“A smaller wheeled version of these classes for the Strome Ferry line, hence its popular title ‘Skye Bogie’, was only slowly multiplied, one engine in 1882, followed by eight in 1892-1901, the last four appearing after Peter Drummond had succeeded Jones in 1896. With the completion of No 48 in 1901 the use of the “Crewe” pattern of front end frames and cylinders on new building ceased. Unlike the ’60’ class these engines were not named. All passed into LMS stock but one was not given a new number. However one of them was a combination, identified as a ‘Skye Bogie’ because of its smaller coupled wheels, the frames originating from No 70, the 1882 engine, other components being derived from No 67 of the ’60’ class, the assemblage being completed in February 1923 and identified as No 67 Cromartie. Useful in their later days on branch lines it was 1930 before the last was condemned.” [10: p5]
“Despite introducing a large six-coupled goods in 1894 Jones retained the 4-4-0 wheel arrangement for the next express locomotives. Again the new class, ‘119’ or ‘Lochs’, were some of the most powerful passenger engines in the land. Most of the established features of Inverness engines were retained, the louvred chimney, the Stroudley cab but the frames and cylinders were conventional, not of the “Crewe” type. An early form of piston valves were used, not successfully for they were soon replaced by balanced slide valves. All were named after ‘Lochs’ in the Highland area. There were few changes in HR days although No. 130 ran with a feed water heater. Even after displacement as the premier main line engines by Drummond’s 4-6-0 ‘Castle’ class in 1900, the ‘Lochs’ remained almost confined to the HR main line right up to the Grouping. When further engines were urgently required during World War I the need was partly met by obtaining in 1917 three more of the class from North British in Glasgow, time and expenses being saved by using existing patterns and drawings.” [10: p5]
The ‘Lochs’ were Jones’ final design for the Highland Railway. 15 were originally built by Dubs & Co. in July-September 1896. [10: p16] With the 3 built in 1917, this meant that a total of 18 members of this class were built.
“Drummond brought about a complete transformation of Highland engine power, such that it seemed that his brother Dugald, and Eastleigh Works of the London & South Western Railway had taken over, for many of Peter Drummond’s classes corresponded to L&SWR designs. The first of two Drummond 4-4-0 classes appeared in 1898 and were slightly smaller than the ‘Loch’ class, being intended for services from Inverness to Aberdeen and Wick. The eight initial engines were supplied by Dübs in 1898, followed by a further nine built at Inverness in 1899-1901. Three more came from Glasgow in 1906, having tenders with a little more water capacity. Six-wheeled tenders had been supplied with the class but at times a few engines ran with eight-wheeled tenders from other classes. There was an important change from the previous Inverness adherence to Allan’s straight link valve gear to Stephenson link motion. Another change was the introduction of steam reversing gear, although the initial eight had lever reverse until modified. Nos 2 and 13-7 were dual braked and Nos 2 and 7 later ran with Smith’s feed water heaters. Named after Scottish mountains these engines were inevitably known as the ‘Ben’ class. The first engine arrived at Inverness with the name Ben Nevis to the embarrassment of the HR for that mountain is far away in rival North British Railway territory so a hurried change was made to Ben-y-Gloe.” [10: p5]
Highland Railway ‘Ben’ Class Locomotive No. 1, ‘Ben-y-Gloe’ was originally named ‘Ben Nevis’ but hastily changed to be named after a mountain in Highland Railway territory. There were actually two separate ‘Ben’ classes, usually referred to as the ‘Small Bens’ and the ‘Large Bens’: Highland Railway C and U classes. The designer was Peter Drummond, the builders were: Dübs & Co. (8 Small); HR Lochgorm Works (9 Small); and North British Locomotive Co. (3 Small, 6 Large). Serial numbers were: Dübs: 3686–3692 (Small); NBL: 17398–17400 (Small); 18269–18272 (Large); 18803–18804 (Large). Build dates were: 1898–1906 (Small); and 1908–1909 (Large). In total 20 small and 6 large ‘Bens’ were produced. [33]
Rowledge continues: “A further six 4-4-0s engines, intended for Inverness and Wick trains, were provided by North British in 1908-9, using the frames, etc., of the ‘Ben’ class but carrying a larger boiler, becoming the ‘New Ben’ class, using more mountain names. All had steam reversers and three, Nos 60, 61 and 63, were dual braked. Smith’s feed water heaters were fitted in 1914-5, feed water initially being heated by exhaust steam in a heat exchanger placed alongside the smokebox on the right hand side and then further heated by another set of tubes inside the smokebox. The four 1908 engines started with the same size 3,185 gallon tenders as the last three ‘Bens’, but two, Nos 61 and 63 soon received 3,200 gallon double bogie tenders taken from 0-6-0 tender engines, while the final pair had even larger 3,600 gallon bogie tenders.” [10: p5]
“Despite wartime conditions a new design appeared in 1916 after Cumming had replaced Drummond as Locomotive Superintendent, larger and heavier than any previous HR 4-4-0 class. Nos 73 and 74 were the first two-cylinder engines of this wheel arrangement in Britain to have outside cylinders and valve gear. Apart from the rejected ‘River’ class 4-6-0 engines this pair were the first on the HR to have superheaters, Drummond not having taken to this development while at Inverness. Both were built for the ‘Far North’ line but they also saw use between Inverness and Perth.” [10: p5]
From the late 1920s ‘Snaigow‘ and ‘Durn‘ were found mostly working from Aviemore Shed on goods or piloting work, having been replaced on the Far North line by Drummond ‘Castle’ 4-6-0s which were in turn displaced by new LMS ‘Crabs’ and Caledonian ‘Rivers’ sent to the Highland Railway. The arrival of Stanier ‘Black Fives’ sealed their fate and both were withdrawn in the mid-1930s. [10: p25]
“The LMS inherited 78 4-4-0s from the HR – this is the official figure contained in a document at the Public Record Office, Kew – but two others were still extant and are usually included in the initial LMS total. Only 61 were allotted new LMS numbers, the rest being written off during 1923. Despite early withdrawal of pre-1896 examples several of them, Nos 14271/2/5-9/82-5, appeared in the LMS red livery with large numerals on the tender.” [10: p5-7]
“The Highland [4-4-0] engines lasted rather better than those of the G&SWR, twelve passing into British Railways stock.” [10: p7] The last of these was ‘Small Ben’ No. 54398 ‘Ben Alder‘ which was scrapped in the second half of 1952.
Having followed the various 4-4-0 classes employed by the Highland Railway we return to look at David Jones’ other locomotive designs. As we noted above, he “was also notable for introducing the 4-6-0 wheel arrangement to the UK. He also produced small numbers of 0-4-4ST, 2-4-0, 2-4-0T and 4-4-0T locomotives. Of 88 engines built to Jones’ design (including 3 built as late as 1917), 74 passed to the LMS in 1923. A small 2-4-0T purchased secondhand from the Duke of Sutherland also made into LMS ownership.” [35]
David Jones Goods class “was notable as the first class with a 4-6-0 wheel arrangement in the British Isles. Fifteen were built, and one has survived to preservation.” [36]
Jones Goods locomotive, HR No. 103 survived into preservation. It is seen here at the Riverside Museum (replacing the preceding Glasgow Museum of Transport), Partick, Glasgow. [36][37]
Fifteen ‘Jones Goods’ locomotives “were built by Sharp, Stewart and Company and delivered between September and November 1894, numbered 103 to 117. At the time, these were the most powerful main line engines in the country. Originally intended principally as freight engines, they were often called upon for passenger duties during the wide fluctuations of traffic which occurred on the Highland Railway, particularly during the summer season.” [36]
“Although the type was a notable success for Jones, an accident while testing one of the locomotives caused one of his legs to be severely scalded. Although he recovered, he was permanently affected and by the end of December 1896 had retired due to ill-health.” [36]
Peter Drummond was Locomotive Superintendent of the HR from 1896 to 1912. Under Peter Drummond, new 0-4-4T, 0-6-0T, 0-6-4T, 0-6-0, 4-4-0 and 4-6-0 designs emerged. All 72 of his locomotives passed to the LMS. [35] Among those 72 locomotives were the class ’18’ 0-6-0s – these were the only class of 0-6-0 employed by the HR. The class was introduced on the network in 1900. [38: p9]
“Originally intended to be 15 in number the initial order was for only six when placed in 1899, Dübs supplying Nos 134-9. They were followed by Nos 18-21 in 1902, also from Dübs, and finally Nos 36 and 55 (the latter renumbered 37 in 1921) in 1907 from North British. The class replaced an assortment of small and old 2-4-0 locomotives. The 1902 engines had Drummond water tube fireboxes, but otherwise the “Barneys” (just how the class became so named is lost in the mists of the past) were quite conventional. The first six had double bogie tenders, the rest six wheeled, the former being exchanged with six wheeled tenders from the 4-4-0 ‘Ben’ class (LI No 117) in 1902-13.” [38: p9]
“Most of the ’18’ class, as far as is known, were used on goods trains to east and north of Inverness rather than the main line to Perth. Despite not having steam heating pipes there was some use on passenger trains, especially excursions. In LMS ownership the class was numbered 17693-17704. In 1938 Nos – 17693-5/7, 17703 were moved to the Glasgow area to assist with extra traffic to the Glasgow Exhibition, when more engines with vacuum brakes were needed, working from Dawsholm, – Motherwell and Hamilton. One No 17694, was even seen on an excursion train at Edinburgh which also crossed the Forth Bridge to Burntisland. Although returned to Inverness later that year five were again used in Glasgow during 1939, but not for long. A longer stay in that area began at the end of 1946 when the eight survivors moved to Corkerhill, some later being transferred to Ayrshire sheds. Seven passed into British Railways stock, the last being withdrawn in 1952.” [38: p9]
Generally, the HR had little use for shunting tank engines, but “In 1903/04 the Highland Railway built three powerful 0-6-0 tank engines at its Lochgorm works in Inverness. Numbered 22, 23 and 24 they were used for shunting duties. The boilers and wheels were taken from older locomotives that had been scrapped and this led to the engines being referred to as ‘Scrap Tanks‘.” [40] These outside cylinder engines were, “quite unremarkable except that the boilers were recovered from obsolete 2-4-0 locomotives together with re-usable wheels and other parts. The result was a class with rather larger wheels than usual for shunters. Normally there were two working at Inverness with the other at Perth. Once the boilers were no longer listed as a standard type their survival was limited and they were condemned in 1930-2.” [39: p9]
Frederick George Smith was Locomotive Superintendent from 1912 to 1915, his “brief tenure was cut short by a dispute over his sole design, the ‘River’ Class 4-6-0. Six locomotives were built, but they were (wrongly) considered to be too heavy for the Highland Railway, and were sold to the Caledonian Railway without being used.” [35]
Christopher Cumming was Locomotive Superintendent from 1915 to 1922. He designed one class of 4-4-0 and two types of 4-6-0, totalling 18 locomotives, which all passed to the LMS. [35]
The Future
One feature of Drew’s article, written at the end of 1975, was the palpable concern expressed over the security of rail services in the remote areas of Scotland and particularly from the Farther North Line and the Kyle of Lochalsh line. With hindsight, we can say that (although justified in the mid-1970s, with the bias of the time towards road transport) what was feared has not come to pass. [1: p8] Passenger rail services on both these lines (and on the West Highland line) continue, although we should note that Scotland’s Railway receives some of the highest public subsidy anywhere in the UK: two thirds of the costs come from the Scottish Government; and on average, tickets are 20% lower than the rest of the UK. [2]
References
Brian Stephenson (ed.); The Highland Railway; Trains Illustrated No. 18, Ian Allan, Shepperton, London, 1976.
J. W. P. Rowledge; The 4-4-0 Locomotives of the Glasgow & South Western and Highland Railways; in Brian Stephenson (ed.) Locomotives Illustrated No 117, January-February 1998, Ian Allan, Berkhamsted, Herts, 1997.
J. W. P. Rowledge; Scottish 0-6-0 and 2-6-0 Classes of the LMS; in Brian Stephenson (ed.), Locomotives Illustrated No 133, September-October 2000, Ian Allan, Berkhamsted, Herts, 2000.
J. W. P. Rowledge; LMS Scottish Goods Tank Locomotives; in Brian Stephenson (ed.), Locomotives Illustrated No 154, July – September 2004, Ian Allan, Berkhamsted, Herts, 2004.
Mike Bridge, ed.; TRACKatlas of Mainland Britain: A Comprehensive Geographic Atlas Showing the Rail Network of Great Britain (3rd ed.); Platform 5 Publishing Ltd., Sheffield, 2017, p94.
John Thomas & David Turnock; A Regional History of the Railways of Great Britain. Volume 15 North of Scotland; David St John Thomas, Newton Abbott, 1989, p236.
Highland doubling; in The Railway Magazine Issue No. 902, June 1976, p277.
Highland doubling starts; in The Railway Magazine Issue No. 905, September 1976, p476.
The featured image for this article is the only photograph I have been able to find of ‘Skylark’, the locomotive which for a matter of only a few years operated on the Skye Marble Railway. Further notes about the locomotive can be found in this article.This information board across the road from Kilchrist Church, features Skylark at the head of a train of wagons. [5]
Some sources say that in 1904, an aerial ropeway was constructed to transport marble to Broadford Pier from Kilchrist Quarries (alternatively known as Kilbride Quarries or Strath Suardal). The quarries were used to excavate marble. [1][2] Other sources talk of the line being worked first by horses. [14] There was an incline between the upper and lower Quarries at Kilchrist which appears to have been rope-worked. It is most likely, given the length of line from Kilchrist to the quay at Broadford and the relatively shallow gradients, that the line from the marble works down to Broadford was worked by horses, but it is entirely possible that an aerial ropeway was employed. Nothing remains of the line beyond the formation which now carries a footpath once South of Broadford, and, as will be seen below, some rails in the surface of the pier at Broadford.
The main length of the line was converted to a tramway/railway in 1910. It was, in total, over 6 km in length. [4] Some sources quote 3.5km [viz. 2] and probably take that length from the length of the footpath which follows the route of the old railway. The Skye Marble Railway was a 3 ft (914 mm) narrow gauge [5] line which only operated from circa. 1910 to 1912/1913. [6][7]
The Northern half of the Skye Marble Railway as shown on railmaponline.com’s satellite imagery. [8]The Southern half of the Skye Marble Railway as shown on railmaponline.com’s satellite imagery. [8]
It seems appropriate at this point to take a break from our journey along the line to find out as much as possible about the locomotive which was used on the Skye Marble Railway for a short time in the early 20th century. The website of the Industrial Railway Society (IRS) has some more information about this locomotive which the Skye Marble Company knew as ‘Skylark’. … The engine was first known as ‘Bruckless’, the notes which follow come from the IRS archives and were pulled together by D. Cole in 1965, in part from work undertaken by Dr. Iain D. O. Frew: “Delivered to T.S. Dixon in May 1892 through the agency of Josiah Buggins as ‘Bruckless’ for the Donegal-Killybegs contract of the County Donegal Railways, it was sold in 1894 after the completion of the contract and later worked for the Preston Corporation Waterworks Department on the construction of the Spade Mill No.1 Reservoir at Longridge. There it was named ‘Skylark’. Subsequently, in 1907, it went … to the Skye Marble Company and was used firstly by a contractor in building the Company’s railway from Torrin to Broadford, and then, from 1909, to work the railway itself. In 1913, following the failure of the quarries, the line was lifted and the locomotive sold to W.N. Jackson, a Glasgow metal merchant. He in turn sold it to J. Mackay, contractor for the Roundwood Reservoir in County Wicklow. This contract passed to H. & J. Martin Ltd. in 1915, and after its completion in 1925 the locomotive was scrapped.” [15]
D. Cole undertook further research into Hunslett’s records and was able to ascertain that “from July 1897 – the date from which the earliest detailed Hunslet spares records have survived – to March 1905 spares were sent to the Newcastle & Gateshead Waterworks. Delivery was sometimes to Otterburn, and the name of the locomotive was frequently quoted as ‘Bruckless’. No name was quoted by Preston Corporation when ordering spares between March 1907 and March 1910.” [15]
Cole was also able to confirm that:
from November 1910, spares were sent to W.R. Herring with the locomotives name quoted as ‘Dilworth’; [15]
in January 1911 and May 1911, spares were sent to Skye Marble Ltd. but no name was quoted; [15]
in August 1913, spares were ordered for the locomotive named ‘Skylark’ by W.H. Jackson, Glasgow, but sent to Mr. Easter, Skye Marble Cottages, Broadford, Isle of Skye; [15]
from May 1914 to May 1916, spares were sent to John Mackay, Dublin Waterworks, Roundwood, Co. Wicklow; [15] and
the last spares of all were sent out in January 1921 to H. & J. Martin Ltd., Roundwood Reservoir. – K.P.P. [15]
We now continue the journey along the old railway route. …
This view looking South towards the village of Broadford shows the footpath below the road (to the left beyond the dwarf wall) which probably follows the line of the old railway. [Google Streetview, December 2021]
The alignment of the railway which I have proposed here is supported by Railscot. On their page about the railway the alignment is shown adjacent to the shore rather on the higher ground to the West. [7]
The yellow-brick abutment on the Northside of the river is original, the modern footbridge sits on that abutment but is on a different alignment to the old railway. There is no remaining abutment on the South side of the river, so a new smaller abutment was constructed to support the footbridge. A comparison is made and pictures are provided, on this site. [5] The photographs towards the bottom of that webpage give an idea of the alignment of the old railway bridge. Which crossed from the North abutment to a point on the South bank of the River Broadford marked by the young tree in the image below.
The modern footbridge sits on one of the abutments of the old railway bridge beyond the river in this picture. The old railway bridge spanned the river on a line between the North abutment and the young tree, in leaf, at the centre of this image which looks North from the A87. [Google Streetview, May 2022]
From the South bank of the river and running South the line shown on railmaponline.com’s satellite imagery seems to be realistic, following, as it does, a curved route to the East of the location pictured above. …
Crossing the modern A87, the old railway ran Southeast crossing the modern Glen Road (which did not exist at the time the railway was operating) close to Broadford (Church of Scotland) Church and then curved round to the East of Strath Suardal Way (which also did not exist when the railway was working). [8]
The next two images show the formation of the old railway on a low embankment on the East side of Strath Suardal Way.
This photograph was taken at the roundabout looking South-southwest along Strath Suardal Way. The low embankment runs behind the street lighting. [Google Streetview, December 2021]Further along Strath Suardal Way and looking Southwest, the low embankment is again visible blue beyond the street lighting columns. [Google Streetview, December 2021]Towards the end of Strath Suardal Way the line of the old railway turned away to the Southwest. [8]The old Railway’s route runs through the evergreen trees on the left side of this West-southwest facing photograph. [Google Streetview, December 2021]The line then ran over open moorland to the East of the road to Elgol (the modern B8083). [8]Initially the route of the old railway and the modern B8083 converge as they head South-southwest. [8]The footpath access to the line of the old railway can be seen just as the old railway route and the B8083 begin to diverge. [8]The footpath access to the line of the old railway as seen from the B8083. Just beyond the second gate the footpath turns to the right and follows the old railway formation. The first length of the footpath runs through a protected plantation of young trees. [Google Streetview, December 2021]
The four photographs immediately below show the first few hundred metres of the footpath along the old railway – as far as the plantation boundary fence which can be seen beyond the two low gateposts in the fourth photograph.
When marble was discovered near Kilchrist in Strath Suardal on the slopes of Ben Suardal about 3 miles (5 kilometres) Southwest of Broadford, a large factory was built near the quarry for cutting and polishing the quarried blocks. The Marble was formed by the heating of limestone by igneous intrusions in the Tertiary Era. It appears that small scale workings were active as early as the 18th century, developing throughout the 19th century. [14]
“On level ground by the South side of the Broadford to Torrin road are the remains of an industrial complex belonging to the old marble quarries. The remains consist of a ruinous concrete shed/warehouse 60m long, a railway platform, traces of the railway line and sidings, and four brick-built circular bases 2.4m in diameter.” [17]
From adjacent to the lower quarry, with its own branch, spoil heaps and concrete bases, [22] the line continued South but as a rope-worked incline.
Looking South up the incline towards the upper quarry. [My photograph, 5th May 2025]
The view South up the incline to the upper quarry. This image is embedded from here. [19]. Clicking on the image takes you directly to the original image which is one of a series of photographs of the route of the old railway can be found here. [5]
In a rocky cleft immediately to the East of the track to Boreraig, are the remains of two former dynamite stores, one within the other. The older, larger building with walls of rubble construction, envelopes a smaller concrete blockhouse. Close to these are the remains of the ot for the winding wheel for the rope-worked incline.
Also located at the upper quarry (but of which I did not get photographs) are two machinery stands:
2m square with 11 bolts protruding
6.5m by 5.2m with 4 stanchions protruding.
The Demise of the Line
The operation was not a commercial success. The railway line was abandoned by 1914 when the operating company became bankrupt. The line was offered for sale as part of the liquidation of the business. The sale comprised a 9½-in, 4-wheeled locomotive, 500 tons of 35 pounds (16 kg) and 56 pounds (25 kg) flat-bottomed rail and 9,000 6-foot creosoted sleepers. [4][20]
Extracting the marble proved difficult and expensive and quarrying finally ended here in 1939. [21]
“At first glance appearing to be no more than an offshoot of the picturesque and spectacular Callander & Oban Railway, the Killin Railway was a wholly independent company in its own right for the first 37 years of its working life. The Killin Railway Company endured for almost all of its independent years under the patronage of one of Scotland’s wealthiest men. The local people promoted the village railway company in 1881 and the line was run under their management from its official opening on 13th March 1886 until its independence was reluctantly conceded to the LMS from 1st June 1923. In absorbing the Killin Railway Company the LMS accepted some £12,000 of debt accumulated over the years of its independence and paid the remaining shareholders just 8% of the face value of their original investment, in full settlement of the enforced transaction. During the years of independence and before they were absorbed into the LMS, the train services of both the Killin and the adjacent Callander & Oban Companies were worked by the Caledonian Railway Company as integral parts of its system.” [1: p624-625]
Gavin Campbell, the Marquis of Breadalbane & Holland held 438,558 acres of land in his estates in Argyllshire and Perthshire, spread across much of central Scotland. He was the prime mover in the development of the branch line to Killin Village.
Wikipedia tells us that “On 1st June 1870, the Callander and Oban Railway opened the first portion of its line. Shortage of cash meant that the original intention of linking Oban to the railway network was to be deferred for now. The line opened from the former Dunblane, Doune and Callander Railway at Callander to a station named Killin, but it was at Glenoglehead, high above the town and three miles (5 km) distant down a steep and rugged track.” [2][3]
“The difficult local terrain prevented any question of the line to Oban passing through Killin, and local people were for the time being happy enough that they had a railway connection of a sort; indeed tourist trade was brought into the town. The Callander and Oban Railway had in fact been absorbed by the Caledonian Railway but continued to be managed semi-autonomously. The Caledonian was a far larger concern that had money problems, and priorities, elsewhere. Nevertheless, as time went on, extension of the first line to Oban was resumed in stages, and finally completed on 30th June 1880.” [2]
Elton tells us that, “At the time that the story of the village railway began, Killin was a remote rural community that had for many years relied for its prosperity on providing a market place for the produce of the Highland farmers from the surrounding lands. Those farmers were largely tenants of the Marquis and although there is no doubt that he had their well-being in mind as well as that of the villagers of Killin, the commercial possibilities were also under his consideration when he moved the promotion of the village railway and concurrently founded the Loch Tay Steamboat Company. The village of Killin also served as a convenient overnight stop for animal drovers and their herds consisting predominantly of sheep. Situated near the lower, western, end of Loch Tay, a number of ancient overland paths met naturally near the village.” [1: p625-626]
“The traditional commerce of Killin had been seriously eroded when, in 1870, the Callander & Oban Railway had reached the head of Glen Ogle. … The C&O was able to offer to the traditional customers of Killin a more direct access to the great livestock markets of southern Scotland. The station at the head of Glen Ogle, given the name Killin, was the northern terminal of the C&O from 1st June 1870 until August 1873. On that date the line was extended for seventeen miles to a temporary terminal at Tyndrum. From Tyndrum the C&O line eventually reached Oban, being ceremonially opened to that place on 30th June 1880. Prior to that, the Highland Railway Company had built a branch line, from its Perth-Inverness main line at Ballinuig, to Aberfeldy and this line also attracted livestock trade away from Killin. It was at one time believed locally that the branch line would be extended from Aberfeldy to Kenmore and perhaps on to Killin itself but this was never seriously considered by the Highland Company. Nevertheless, as built, the branch line gave better and cheaper access to the immense markets of Perth and Edinburgh and attracted traffic from the C&O terminal at Glenlochhead.” [1: p626]
“The people of Killin petitioned the Callander and Oban company for a branch line, but this was refused, and when the Caledonian Railway itself was persuaded to obtain Parliamentary authority to build the branch, the Bill failed in Parliament.” [2]
Under the leadership of the Marquis of Breadalbane, the people of Killin decided to build a railway themselves. “The first meeting of the local railway took place on 19th August 1882, in Killin. Making a branch to join the Callander and Oban [Railway (C&O)] at its “Killin” station would involve an impossibly steep gradient, but a line was planned to meet the C&O further west and at a lower altitude. Even so, the branch would be four miles (6.4 km) long with a gradient of 1 in 50. It could be built for about £18,000. At the Killin end, the line would be extended to a pier on Loch Tay, serving the steamer excursion traffic on the loch.” [2][4][5]
Elton tells us that before the 19th August 1882 meeting took place, the Marquis of Breadalbane “sought the advice of civil engineer John Strain. In 1877 Strain had successfully undertaken to survey and engineer the last section of the C&O. This 24 miles of railway, from Dalmally to Oban, had presented him with many difficulties. Following Strain’s recommendation Breadalbane explained to the villagers at the meeting that the proposed new line would branch from a junction on the C&O some 2½ miles down the line from the existing Killin station at the head of Glen Ogle. A new station would be placed within the village itself and the line would be extended 1 miles to a station on the shore of Loch Tay. A pier for berthing the steamships plying the loch was to be built with facilities for handling passengers, live-stock and general cargo, adjacent to the Loch Tay station. The Marquis had formed the Loch Tay Steamboat Company, whose steamships and those of succeeding companies would serve on the loch until 1939.”
The ruling gradient of the proposed new line would be a demanding 1 in 50. John Strain had estimated the cost of building the line at £18,000 (£3,428 per mile). Detailed forecasts of the potential traffic indicated that only a modest income could be expected for distribution to shareholders (£365 per annum). The Marquis “invited those attending the meeting to invest in the railway, adding that he would match pound for pound the money raised. … In the three weeks after the initial meeting no more than £370 was subscribed to the funds of the new company. Mr. A. R. Robertson, who had been appointed Company Secretary, estimated that the total potential investment from the area was unlikely to exceed £4,000. This figure assumed the most strenuous of canvassing and included the promise of £1,000 from Sir Donald Currie, a resident of Aberfeldy. Mr. Robertson, as the manager of the Killin branch of the Bank of Scotland, was in a unique position to assess the probable local investment.” [1: 627]
There was a clear local determination to bring the scheme to fruition. In kind commitments were made locally in exchange for shares in the new line. The Marquis “donated all of the required land and sleepers for the track whilst the Caledonian and C&O Companies supplied the rails, all in return for shares in the village company. The C&O Company itself bought 1,200 shares and that encouraged many smaller investors. The Caledonian Railway arranged to work the line for the first three years for 55% of the receipts but stipulated that the annual turnover should not be less than £2,377. There was not one objector to the scheme and the potentially ruinous promotion of a Parliamentary Bill was thus avoided. Instead, only a Board of Trade Certificate for the construction was required and that was received on 8th August 1883. Prior to that the embryonic Killin Railway Company had already sought tenders to construct the line. The board of directors consisting of Lord Breadalbane himself, Charles Stewart, Sir Donald Currie, John Willison and Col. John Sutherland obtained nine quotations in all. These ranged from the highest at £22,442 6s 3d down to one of £13,783 8s Od, quoted by Messrs. Α.& K. MacDonald of Skye. The company secretary, who had no profound knowledge of railways, calculated that if the directors accepted the lowest tender, the total cost of getting the line into full working condition would be £28,552. The total assets available to the company at that point in time, having exhausted all sources and allowing for borrowings of £5,200, had reached an impressive £20,801. John Strain was again consulted and advised that the line could not be built for anything like the price of the lowest tender. Nevertheless, the temptation of saving such capital was too great and the MacDonalds’ tender was accepted by the village board.” [1: p627]
Inevitably, work on the project gradually fell behind and ultimately the MacDonald’s contract had to be terminated. The work was passed to John Best, of Glasgow. “Towards the end of February 1885, Strain reported that 73% of the earthworks and 84% of the culverts, creeps and bridgework had been completed.” [1: p628] The Board of Trade inspection eventually took place in early 1886 and the ceremonial opening took place on 13th March 1886. Public services on the line commenced on 1st April 1886.
The junction station on the C&O was half-a-mile from the nearest road and was far more complex than required. The station was of substantial proportions. “A single and an island platform provided three faces, two of which served the up and down lines of the C&O respectively. The remaining face … was kept exclusively for the use of the village line train. Two sidings and a crossover system were installed on the village line side. A passenger overbridge was built in 1908, while two cottages for station staff and a goods shed completed the facilities. The station complex was controlled by two signal boxes containing a total of 48 levers, 22 in the West box and 26 in the East. The junction station was set on a gradient of 1 in 138, at an elevation of about 800ft above sea level.” [1: p630]
Elton’s date for the construction of the footbridge is called into question by the OS Map extract below which was surveyed in 1899 and shows a foot bridge already in place at that time.
In 1935, the West Signal Box at Killin Junction was closed and the East Signal Box took control of the whole station layout. On Saturday 22nd October 1938, “Lt. Col. Wilson (Ministry of Transport) reported that the West Junction box had been closed and the facing points at the southern end of the main crossing loop were now motor operated by primary battery from the East Junction box, with an auxiliary tablet instrument for the section to Luib provided on the Down platform. To provide connections at the south end of the station Branch platform, a new 9-lever ground frame was provided, electrically controlled from the East Junction box, and which also slotted the running signals which applied to movements into and out of the Branch platform at its south end. Such moves were relatively infrequent, although the Branch Platform line formed a convenient third loop for trains crossing. The platform was mainly used for the shuttle service on the Killin Branch, which was worked by a train staff and one engine in steam. On account of the long and steep downward gradient towards Killin, interlaced lines named “live” and “dead” roads were formerly provided, with facing points at both ends. Ascending trains used the left-hand interlaced line, in which there were self-acting catch points. These “live” and “dead” roads had now been removed. Shunting was prohibited along the branch unless the engine was at the lower end. A similar prohibition applied to the single line towards Luib, where the gradient also fell steeply. The signal arrangements were as on the plan, with three new track circuits, separately indicated in the East Junction box, which had a frame of 28 levers, all in use with correct locking and control.” [66]
More photographs of the station can be found on Ernie’s Railway Archive on Flickr …. here, [10] here, [11] here, [12] here, [13] here, [14] here, [15] here, [16] and here. [17]
In the image above, the Callander and Oban Railway is on the right of the signal box, the Killin Branch is to the left of the box. The line down to Killin was steeply graded (1 in 50) down to the village.
The two lines ran in parallel for a short distance but increasingly at different altitudes. [19]The same are as shown on the 21st century ESRI satellite imagery provided by the NLS. [19]
The branch continued heading Northeast towards Killin, passing to the North of Wester Lix and bridging a minor tributary of the River Dochart.
To the Northeast of the main road the railway remained predominantly on embankment. A cattle creep sat a few hundred metres Northeast of the road bridge. It can be seen in the top right of the last OS Map extract. The next significant structure carried the line over the Allt Lairig Cheile, another tributary of the River Dochart.
This next extract from the 25″ Ordnance Survey of 1899, published in 1900 includes the over the bridge over Allt Lairig Cheile, bottom left, and above it a small infectious diseases hospital. In the top-right corner of this extract was the next significant structure on the branch line which spanned Allt na Lice another tributary of the River Dochart. [23]A very similar area in the 21st century, as it appears on the ESRI satellite imagery from the NLS. [23]
The large building which appears on the satellite image above is Acharn Biomass.
This picture of Acharn Biomass’ site was taken by Coconut Island Drones in November 2024. [24]
Acharn Biomass Plant is an electricity production plant owned by Northern Energy Developments. It has a 5.6 MW capacity. [25]
A short distance Northeast along the line, a pair of sidings were provided at Acharn. This Acharn is not to be confused with a hamlet of the same name on the south shore of Loch Tay towards its East end. That Acharn is a hamlet in the Kenmore parish of the Scottish council area of Perth and Kinross. It is situated on the south shore of Loch Tay close to its eastern end. The hamlet was built in the early 19th century to house workers from the surrounding estates. [27]
This Acharn is adjacent to Acharn Forest. Most of the forest is a mixed conifer plantation with pockets of broad-leaved woodland and open moorland. [28] The sidings at Acharn served the farm and were situated on the north side of the single line, they opened with the Killin Railway in 1886. The sidings ground frame was released by the branch train staff. Owing to the gradient, the sidings were only worked by Down direction trains. They were removed in 1964. Colonel Marindin (Board of Trade – 12th February 1886) noted in his inspection of the Killin Branch, that there were no main line signals at the location of the Sidings. [30]
Elton describes the station at Killin: “three sidings were provided for the expected livestock and freight traffic and we’re controlled by a ground frame. The station buildings were of a simple nature (as they were at Loch Tay) and the station itself was set on a gradient of 1 in 317. Two cottages were provided in the village for railway staff.” [1: p630]
A camping coach was positioned here by the Scottish Region from 1961 to 1963. [64]
Elton continues: “The line extended a further 1.25 miles to a single platform at Loch Tay. A branch a little before Loch Tay station extended on a sharp curve along the pier that served the steamers.” [1: p630]
Again, Elton continues: “At Loch Tay was a small engine shed, with water and fuel facilities for the locomotive working the branch. Considering that one of the objectives in building the line was to recapture the lost livestock traffic, nothing was done to provide learage accommodation for farm animals at either the village or the junction stations. Naturally, this discomfited passengers using the line but in any case the way to the big livestock markets was many miles further over the C&O than from Aberfeldy and the animal traffic was never recovered to any great extent.” [1: p630]
Looking Southwest along pier Road, the railway formation is on the left. [Google Streetview, March 2010]Looking Northeast on Pier Road with the railway formation on the right. [Google Streetview, March 2010]Loch Tay Railway Station as shown on the 1899 25″ Ordnance Survey, published in 1900. This map extract shows the station, the sharply curved line extending out onto Killin Pier, the sawmill/timber yard, and, to the Northeast of the station, the engine shed which was kept open through to the closure of the branch in the 1960s. [59]The same area in the 21st century with the pier line and the station line superimposed as black lines. [59]A very early view over Loch Tay Railway Station, looking towards Killin. Rolling stock sits at the station platform while one of the two ‘Pus’ allocated to the line by the Caledonian Railway shunts Killin Pier, (c) Public Domain. [63]The Station building at Loch Tay (c) Unknown. [60]A low resolution copy of a drawing of Loch Tay Railway Station building, (c) Unknown. [60]This image shows BR 2-6-4T Locomotive No. 80093 in steam at Loch Tay Engine Shed, (c) Unknown. [61]
The Callander Heritage Centre writes of the locomotive above: “In 1885, Caley locomotive designer and engineer, Dugald Drummond, was commissioned to build a special small tank engine which could be used on the Killin branch. After much research into the line, its gradients, curves and so on he decided upon an 0-4-2 saddle tank type locomotive. The design was based on the popular 0-4-0 “Pug” tanks which were widely used for dockside and colliery work. Once the plans were prepared two such locomotives were built at the Caledonian Railways St Rollox locomotive works in Glasgow before being sent up to the branch. … With its tall, straight stovepipe chimney the little engine soon became known as the coffee pot amongst the local villagers who would often gather on the station platforms when the train was due just to marvel at its sheer size and power. It may have only been a small engine by comparison to the larger mainline giants, but to the people of Killin nothing could have beaten their blue pug.” [55]
Elton tells us that the original intention had been for 0-4-0ST locos to provide the motive power but Drummond quickly became convinced that 0-4-0 wheel arrangement would be inadequate. “The heavy grading of the line, together with the severe curve weight distribution essential on the Loch Tay pier, resulted in the two locomotives being given an 0-4-2ST wheel arrangement. The water and fuel capacities on the engines were increased to assist adhesion on the 1 in 50 ruling gradient and they were fitted with a Westinghouse braking system as an additional safety feature. Built at the Caley’s St. Rollox works, the engines carrying the numbers 262 and 263 – were of distinctive appearance and, in their Caley blue livery, became popular with the Killin villagers. They were known as the ‘Killin Pugs’ but were soon found to be unsuitable for working the village line, both being withdrawn from it as early as 1889. They were found work elsewhere on the Caley system, surviving the groupings and remaining in service almost into nationalisation.” [1: p631]
Thanks to Ben Alder for pointing me to The Model Railway News which carried an article about one of these locomotives written by J. N. Maskelyne in its July 1938 edition. The article was a result of a request made to the LMS for design details of the locomotives. The request resulted in delivery of four large blue prints and a copy of the small official weight-diagram, together with a letter in which regret was expressed that no general arrangement drawing of the engine could be found. The prints showed, respectively, the frames, the cab, the smokebox, and the saddle-tank: on carefully scrutinising these prints, Maskelyne concluded that “in all probability, no general arrangement drawing was ever made. [His conclusion was that] except for the items mentioned above, all the details on this engine were standard, or, at least, common to other types of engines and that the order for her construction was accompanied by a set of blue prints, similar to that which I had received, and a ‘Material List’, setting out all the details required, and referring to drawings already issued to the works.” [58: p184]
With the aid of the four blue prints, and a photograph, taken by Mr. J. E. Kite, Maskelyne produced general arrangement drawings for the locomotives.
Front Elevation of Ex-Caledonian LMS 0-4-2ST Locomotive, original number 253, LMS No. 15001. In 1938 the locomotive was stationed at Inverness for shunting duties.In Killin Branch days the locomotive was painted in the standard blue passenger locomotive colours of the Caledonian Railway. In 1938, the locomotive was painted in unlined black with LMS on the saddle tank and number ‘15001’ on the bunker sides. [58]Elevation of the same locomotive. [58: p182]
Maskelyne notes that “the dimensions of this engine [were] very small; her coupled wheels [were] 3 ft. 8 in., and the trailing wheels, which [were] of “disc” type, [were] 3 ft. diameter. The boiler barrel [was] 10 ft. 9 in. long, and ha[d] a mean diameter of 3 ft. 8 in. it contain[ed] 138 tubes of 14 in. diameter, and [was] pitched with its centre-line 5 ft. 41 in. above rail level.” [1: p183]
“The firebox inner shell [was] 3 ft. 6 in. square, and the grate area [was] 10.23 sq. ft. The heating surface of the tubes [was] 632 sq. ft., and that of the firebox [was] 52 sq. ft., making a total of 684 sq. ft. The working pressure [was] 140 lb. per sq. in. The cylinders ha[d] a diameter of 14 in. and a stroke of 20 in., and the tractive force [was] 10,600 lb. The saddle-tank [held] 800 gallons of water, the bunker 2.25 tons of coal. In working order, the weight [was] 31 tons 4 cwt. 2 qr., with 25 tons 17 cwt. available for adhesion, and the engine [would] take a minimum curve of 41 chains radius. The height of the top of the chimney [was] 10 ft. 10½ in. above rail level.” [58: p183-184]
It became necessary, after just a few months of operation to review the basis on which the C&O provided services on the line. It was abundantly clear after that time that the agreed minimum level of receipts (£2,377 per annum) would not be met. “A new working agreement with the Caledonian came into operation on 1st April 1888. The Caley undertook to work the Killin line at cost initially for a period of five years. Additionally, it agreed to contribute £525 pa towards the general running cost of the village line. In practice the Caledonian deducted the operating costs at source and sent the balance on to the Killin company.” [1: p631]
Late in the 1880s, “the ‘Pugs’ were replaced by altogether more powerful tank engines of 0-4-4T wheel configuration, again designed under Dugald Drummond. … Two were allocated for use on the Killin line and locomotives of this type and their subsequent developments provided most of the motive power on the village line until the 1950s.” [1: p631]
In the 1950s, under BR ownership, the Caledonian 0-4-4Ts were replaced by a variety of different locomotives. Ultimately the standard service on the line was provided by standard BR 2-6-4T 4MT locomotives. This was possible because of the earlier closure of the line Northeast of Killin and there being no need to accept the limitations on weight and wheelbase demanded by the Loch Tay pier. Passenger accommodation on train services was provided by a single four compartment brake coach and services often ran as a mixed train with goods wagons attached to the single passenger-carrying vehicle.
The sponsorship of the short Killin Branch by The Marquis of Breadalbane protected the little line from the worst of the political winds affecting the railway world. He became ill while travelling to a Caledonian Railway board meeting. Elton tells us that he “died at the Central Hotel, Glasgow on 19th October 1922, at the age of 71. His nephew, Mr Iain Campbell, who succeeded to the title, was not disposed to regard the Killin village line as anything other than a financial liability. … The death of the Marquis left the management of the village company in the hands of the two remaining local directors, Messrs. Campbell Willison and Alan Cameron. They were fiercely determined to retain control of their line in the face of what they at first believed was a move to absorb the Killin village line by the Caledonian Company. Ultimately, they received the approach from an organisation, quite unknown to them, calling itself the London, Midland & Scottish Railway. They immediately adopted a defensive position, rejecting an offer which accepted all the accumulated debt of the village company and offered £1 in cash for every £100 of Killin Company stock. The audacity of this rejection, from such a minor outpost of its ‘shotgun’ empire, came as something of a surprise to the LMSR authorities. The villagers did not at first comprehend that an Act of Central Government would ultimately give them no choice in the matter. Nevertheless, after some negotiation the offer to the villagers was eventually raised to £8 per £100 of stock as well as taking on the £12,000 of debt. The Killin Railway Company ended as it had begun with a meeting in the Village Hall. This was held on 19th March 1923 and the takeover was enacted on the following 1st July, on which date the Caledonian and C&O Companies also came under the wing of the LMSR.” [1: p632]
Elton continues: “Under the regime of the LMS the Killin branch, as it now became, changed very little. However, in September 1939, immediately after the outbreak of World War II, the line between Killin Village and Loch Tay was closed to both passenger and freight traffic. The Loch Tay pier was dismantled and the remaining steamships were withdrawn at the same time. The line to Loch Tay remained in place as the engine shed and refuelling facility were used until the line closed. The Loch Tay section did enjoy a brief renaissance in 1950. A hydro-electric scheme was installed near to the site of the former Loch Tay station and the branch was heavily engaged in transporting the necessary materials to the development site.”
It is remarkable that the line, taken over a such a high cost by the LMS in 1923, was to provide its service to the village for a further 42 years in the face of improving roads and the rapid development of the motor vehicle. It’s fate was intimately tied to that of the line between Dunblane and Crianlarich Lower Railway Station. The closure of the main line was included in the ‘Beeching Plan’ published on 25th March 1963. Elton tells us that “The freight service between Killin Junction and the village station was withdrawn on 7th November 1964 in anticipation of the closure which was finally scheduled for 1st November 1965. It was perhaps an irony that an ‘Act of God’ preempted the plans of man. On 25th September 1965, an apparently minor rock fall occurred in Glen Ogle, blocking the ex-C&O main line. This resulted in the immediate cessation of all services on the route. On examination of the fall BR engineers found that it was of a much more serious nature than it had at first appeared. The estimated cost of repair was £30,000 and … was not considered a viable proposition.” [1: p632]
The last train on the Killin Branch ran on 27th September 1965. “The locomotive, BR 2-6-4T No.80093, gathered together the varied collection of rolling stock that had accumulated at the lower end of the line over the years. The massive locomotive needed two journeys from the village to Killin Junction to clear the stock, a motley collection consisting of three assorted passenger coaches and thirteen goods wagons. The conditions on the 1 in 50 climb out of the village were wet and greasy. Perhaps the miserable weather reflected the mood of the villagers on that now far-off day when they were deprived of the little railway that their forebears had fought so hard to win and retain over a period of 82 years.” [1: p632]
References
Michael S. Elton; Killin Village Railway; in BackTrack Volume 14 No. 11, November 2000, p624-632.
David Ross; The Caledonian: Scotland’s Imperial Railway: A History; Stenlake Publishing Limited, Catrine, 2014.
John Thomas; The Callander and Oban Railway; David & Charles, Newton Abbot, 1966.
John Thomas and David Turnock; A Regional History of the Railways of Great Britain: Volume 15: North of Scotland; David & Charles (Publishers), Newton Abbot, 1989.
This image was kindly shared with me by Ben Alder on 10th April 2025.
This image was kindly shared with me by Ben Alder on 10th April 2025.
Andrew McRae; British Railways Camping Coach Holidays: A Tour of Britain in the 1950s and 1960s; Scenes from the Past: No. 30 (Part Two), Foxline, 1998.
Stanley Jenkins tells us that “The opening of the Inverness & Rossshire Railway between Inverness and Dingwall on 11th June 1862 brought the benefits of rail transport to a prosperous farming area in Ross & Cromarty. The line was completed throughout to Invergordon on 25th March 1863, while a series of subsequent extensions eventually resulted in the creation of the Highland Railway’s ‘Far North’ line between Inverness and Wick. Inevitably the 161½ mile ‘Far North’ line omitted large numbers of places that would have benefited from direct rail links, and for this reason several branch-line schemes were put into effect during the latter part of the 19th century.” [1: p48]
“The Black Isle peninsula, between the Beauly and Cromarty Firths, became the focal point for two such schemes, only one of which was successful.” [1: p48]
Wikipedia tells us that “The Highland Railway was surprised when in 1889 the Great North of Scotland Railway (GNoSR) proposed the construction of a railway to Fortrose, … The GNoSR operated a network from Aberdeen and the nearest place to Inverness served by it was at Elgin, some distance away. The branch would have been detached from the owning railway, but running through the Black Isle it would have made a junction with the Highland Railway at Muir of Ord. A ferry operation from Fortrose to Ardersier, on the south side of the Moray, was included in the plans. Ardersier was then known as Campbelltown, and a railway branch to it was included. Two other schemes striking into Highland territory were proposed at the same time, elevating Highland Railway discomfort about its competitive position.” [2][3]
“The two companies had been adversaries for some time, and in 1883 and the following years there had been a state of continual warfare over junctions, frontiers and running powers. … The Highland saw at once that if this branch were built, it would be easy for the GNoSR to demand running powers into Inverness to reach its branch, and in that way the rival company would have gained access to the Highland’s stronghold.” [2]
After considerable ‘argument’ between the two companies, the GNoSR and the Highland Railway each submitted Bills to the UK Parliament for a line to Fortrose.
It was the Highland Railway’s scheme which received Parliamentary consent on 4th July 1890. Jenkins tells us that it was for a “16 mile branch line between Muir of Ord, on the ‘Far North’ line, and the fishing port of Rosemarkie. The gentle topography of the Black Isle ensured that the proposed line could be built with relative ease, and on 1st February 1894 a single line was opened as far as Fortrose a distance of 13 miles 45 chains. The final section between Fortrose and Rosemarkie was never built, the terminal station at Fortrose being deemed a suitable railhead for the surrounding district.” [1: p48]
“The Fortrose branch provided useful transport facilities … on the South side of the Black Isle, but it was felt that better facilities were needed on the North side of the peninsula. The 1896 Light Railways Act offered a solution to this local transport problem, and on 1st August 1902 a Light Railway Order was obtained for construction of a 19 mile line between Conon, on the ‘Far North’ line, and Cromarty. Work began at the Cromarty end, but subsequent progress was painfully slow, and extensions of Time Orders were obtained in 1907, and again in 1910. … About six miles of track was actually laid between Cromarty and Newhall, but all work was suspended in 1914 on the outbreak of World War I. At that time, construction work was in hand on a further two miles of line, but little had been done on the remaining eleven miles of line to Conon. The track was lifted around 1915 for use in the war effort, leaving the earthworks and other engineering features of the unfinished light railway in a derelict condition.” [1: p49]
“If the Cromarty & Dingwall Light Railway had been completed it would have had stations at Alcaig Ferry, Culbokie, Drumcudden, and Newhall. Other halts may have been opened once the line was in operation, while there were also suggestions that the route might be extended south-westwards from Cromarty to Rosemarkie and Fortrose, thereby creating a scenic ‘coastal’ route around the Black Isle that would have had considerable potential as a tourist attraction. Unfortunately the changed economic conditions after World War I meant that schemes of this kind were no longer viable, and the Fortrose branch was therefore left in splendid isolation as the only completed railway in the Black Isle area.” [1: p49]
“The Fortrose route was worked as a feeder branch for the ‘Far North’ line, and as such it was moderately-successful. Like other Highland Railway branch lines it was normally worked by small tank locomotives such as the Dübs 4-4-0Ts. Other engines seen on the line were Drummond’s well-known 0-4-4 branch-line tanks.” [1: p49]
The Route from Muir of Ord to Fortrose
The extracts below from the 25″ Ordnance Survey of 1904, published in 1906 cover the site of Muir of Ord Railway Station. [6] Jenkins tells us that “Muir of Ord – the junction station for branch services to Fortrose – was opened on 11th June 1862 when the initial section of the Highland ‘Far North’ line was brought into use between Inverness and Dingwall.” [1: p49]
“The station was orientated from North to South, with its main station building on the down, or northbound side. The track layout was relatively complex, with sidings on both sides of the running line and a lengthy crossing loop.The main goods yard, with accommodation for coal, livestock, furniture, machinery, and general-merchandise traffic, was situated to the south of the platforms on the down side. One of the yard sidings passed through a goods shed, while others were used mainly for coal or other forms of wagon-load traffic. Further sidings were available on the up side, and one of these gave access to a 50ft diameter locomotive turntable.” [1: p49]
Wikipedia tells us that “The station is 13 miles 4 chains (13.05 mi; 21.0 km) from Inverness, between Beauly and Conon Bridge, and is the location of the sole remaining passing loop on the single line between Dingwall and Inverness.” [5]
“The station building and platform canopy were erected in 1894, [5][7] 32 years after the station itself opened. [8] Passenger services on the branch ceased on 1 October 1951, but the branch remained open for freight until 13 June 1960. Muir of Ord station was closed on 13 June 1960 but reopened in 1976, on 4 October.” [5][8]
“After the railway bridge across the River Ness washed away in February 1989, isolating the entire network north of Inverness, Muir of Ord was chosen as the location for a temporary depot, from which the stranded rolling stock could operate the service to the highland communities which depended on the line.” [5][9]
“In November 2015, work commenced on a new A862 road bridge at the northern end of the station.” [5][10]
The project cost £3.7 million and was completed in the Summer of 2017. [11]
This ESRI satellite image supplied by the NLS shows the station site after the reconstruction of the raod bridge. [6]
Wikipedia tells us that “in the 21st century, both station platforms have modern waiting shelters and benches, with step-free access. There is a car park and bike racks adjacent to platform 1, along with a help point near to the entrance from the car park.” [5]
“As there are no facilities to purchase tickets, passengers must buy one in advance, or from the guard on the train.” [5]
“The station has a passing loop 32 chains (700 yd; 640 m) long, flanked by two platforms which can each accommodate a ten-coach train.” [5][12]
“On 11th June 1862 the Inverness and Ross-shire Railway opened their line between Inverness and Dingwall. It included a station at the village of Tarradale but the company decided to name it after the nearby cattle tryst (market), Muir of Ord. Eventually the name Muir of Ord was applied to the surrounding area.” [14]
“On leaving Muir of Ord, branch trains diverged eastwards, and having, executed a full 90 degree turn the route maintained its easterly heading for about two miles.” [1: p49]
A further extract from the 25″ Ordnance Survey of 1904, published in 1906. This extract shows the brach leaving the main line just North of the Station and heading East. [17]The same area as shown on ESRI satellite imagery provided by the NLS, in the 21st century. [17]As the line curved to the East it was crossed at level by a track. [17]
Additional sidings on the north side of the station provided locomotive facilities for the branch engine. The main engine siding gave access to a 50ft turntable, while a ‘kick-back’ spur ran into a single-road engine shed; another siding served as a coaling road. The station building was a typical Highland Railway timber-framed structure which was similar to its counterparts at Hopeman and Burghead, albeit with a second cross-wing at the left-hand end (when viewed from the platform). The resulting building was thus an ‘H-plan’ structure with a central block flanked by two cross-wings.” [1: p51]
In the 21st century, the track has been replaced by a modern estate road – Highfield Circle. The road entering bottom-centre is Fairmuir Road, that leaving top-right is part of Highfiels Curcle. These two roads approximately follow the line of the old railway. [17]A short distance to the East the line was in cutting and bridged by a minor road. [17]ESRI satellite imagery from the NLS shows the realigned road in the 21st century. The approximate line of the old road (blue) and railway (red) have been superimposed on the image. The modern road is named ‘Balvaird Road’. [17]A short distance further East the line was crossed by a farm access raod at a level-crossing. [18]The same location in the 21st century as shown on Google Maps satellite imagery. The lane is now named ‘Hawthorne Road’. [Google Maps, March 2025]Looking North along Hawthorne Road, across the line of the old railway (marked approximately by the red line). Google Streetview, September 2021]Looking West from Hawthorne Road along the line of the old railway towards Muir of Ord. The line of the railway is gated by the single-bar gate and it ran from there towars the distant trees. [Google Streetview, September 2021]A footpath follows the line of the old railway to the East of Hawthorne Road. [Google Streetview, September 2021]
From Hawthorne Road eastwards a public footpath follows the line of the old railway. There is a leaflet of walks for the area around Muir of Ord. One of the four walks included in the leaflet includes a length of the old railway. [19]
For a short length the old railway formation has been ploughed back into farmland. The next image looks back along the line of the old railway from a point further to the East.
After passing under the accommodation bridge, the old line ran east in cutting through what is now Spital Wood. Then, ” curving east-north-eastwards,” Jenkins tells us, “the railway continued to Redcastle (3 miles 58 chains), where the single-platform station was equipped with a full range of accommodation for goods, passengers, and livestock traffic.” [1: p49]
“Beyond [Redcastle], trains climbed towards the 250ft contour, the line’s modest summit of around 260ft above mean sea level being sited near the next station at Allangrange. Situated some 5 miles 39 chains from the junction, Allangrange was another fully-equipped station with provision for a range of goods traffic.” [1: p49]
The line continued in an East-northeast direction towards Allangrange Railway Station. [28]The same area as shown on the 21st century NLS ESRI satellite imagery. [28]Looking Southwest along the old railway towards Redcastle Station from the minor road towards the left of the satellite image above. [Google Streetview, April 2011]Looking Northeast along the old railway towards Fort from the minor road towards the left of the satellite image above. [Google Streetview, April 2011]Looking Southwest along the line of the old railway from the A832. [Google Streetview, March 2023]Looking Northeast along the line of the old railway from the A832. [Google Streetview, July 2008]Again, still heading East-northeast, trains drew closer to Allangrange Railway Station. [29]The same area in the 21st century. [29]
The line curved round from an East-northeast direction to and easterly alignment before entering Allangrange Railway Station.
From the point at which the old line crossed another lane, this is the view back towards Redcastle Station. The tree at the centre of the image on the horizon stand immediately adjacent to the line of the railway. [Little can be seen looking towards Allangrange Railway Station from the minor road as the rail alignment close to the road is overwhelmed by vegetation. [Google Streetview, September 2021]The line curved round to run in an easterly direction through Allangrange Railway Station which had a reasonable sized goods yard to the West of the passenger facilities. [30] The same location in the 21st century. The major road at the West end of the old station site is the modern A9 dual carriageway. [30]This is the view East along the line of the old railway from the A9 dual carriageway. [Google Streetview, March 2023]Noe looking East from the A9 through the trees and through the site of Allangrange Railway Station. [Google Streetview, March 2023]Looking West from the old A9 into Allangrange Station site. [Google Streetview, March 2023]Looking East from the old A9 towards Fortrose. [Google Streetview, March 2023]
Beyond Allangrange Station, and heading east-north-eastwards again, “the single-line railway descended towards Munlochy (8 miles 2 chains) which, like the other intermediate stations on the Fortrose branch, was fully-equipped for all forms of goods traffic.” [1: p49]
Three images of Munlochy Railway Station can be seen online at http://www.ambaile.co.ukhere, [53] here [54] and here. [55] Kind permission has been given to reproduce two of these images in this article.
Munlochy Railway Station looking Northeast. [53]Munlochy Railway Station, looking Southwest along the platform. [54]Looking Northeast through the station site from Cameron Crescent. [Google Streetview, September 2021]Again, looking NorthEast through the station site along Station Court. [Google Streetview, September 2021]Looking back Southwest from Millbank Road (B9161) through the station site. [Google Streetview, March 2023]Looking Northeast along the line of the old railway from Millbank Road (B9161) towards Fortrose. The A842 is just to the left. [Google Streetview, March 2023]
“From Munlochy the route passed over a small underline bridge, and with the A833 (later A832) road maintaining a parallel course to the left, Fortrose trains reached Avoch Station (11 miles 25 chains).” [1: p49]
“From Avoch, the line continued north-eastwards for a further … three miles to its terminus at Fortrose where, some 13 miles 45 chains from Muir of Ord, journeys came to an end in a surprisingly large station.” [1: p49-51]
“Fortrose had just one platform on the up side, with a run-round loop to the north and a four-siding goods yard to the south. One of the goods sidings passed through a goods shed, while another served a loading bank; a spur at the west end of the goods yard formed a short headshunt.” [1: p51]
Fortrose Railway passenger station building had “the booking hall and general waiting-room … in the centre part of the building, while the booking office and toilets were housed in the ends. The timber structure was clad in American-style vertical matchboarding, with thin cover strips affixed at each join to produce a ‘ribbed’ effect.” [1: p52] The centre block was recessed between the cross-wings to create a roofed waiting area at the front of the station.
Additional photographs of the Station can be found on the www.ambaile.co.uk website here, [73] here [74] and here. [75] Kind permission has been given to reproduce these photographs here.
Fortrose Railway Station from the end of the platform in 1912, showing the station building. A branch train is in the platform and a locomotive is on the turntable in the background. [73]Fortrose Railway Station seen from the Northeast (adjacent to the buffers). Llocomotive No. 57594 is described in the notes for the next image. Here it is about to be turned to take its train back to Muir of Ord. [74]Locomotive No. 57594 has just been turned and is being readied to haul the last train from Fortrose. The locomotive is an ex-Caledonian ‘812’ Class 0-6-0, built in August 1900 as CR No. 856, becoming LMS No. 17594 and finally BR No. 57594. It was withdrawn in December 1962. [75]
Decline and Closure
The Fortrose branch was relatively successful. Its passenger services were maintained throughout the LMS era. But the line “became increasingly vulnerable to road competition after World War II, and for this reason its passenger services were withdrawn with effect from 1st October 1951. Goods traffic lingered on for a few more years, but the end came in 1960, with the line being closed to all traffic from 13th June of that year.” [1: p52]
References
Stanley Jenkins; Highland Railway Minor Lines: 2; in Rex Kennedy (ed.); Steam Days; Red Gauntlet Publications, Bournemouth, Dorset, January 2002; p48-57.
The featured image above shows a Caledonian Railway West Coast Dining Train hauled by Caledonian Railway 4–6–0 Locomotive No. 49.
Wikipedia tells us that “The Caledonian Railway (CR) was one of the two biggest of the five major Scottish railway companies prior to the 1923 Grouping. It was formed in 1845 with the objective of forming a link between English railways and Glasgow. It progressively extended its network and reached Edinburgh and Aberdeen, with a dense network of branch lines in the area surrounding Glasgow. It was absorbed* into the London, Midland and Scottish Railway in 1923. Many of its principal routes are still used, and the original main line between Carlisle and Glasgow is in use as part of the West Coast Main Line railway (with a modified entry into Glasgow itself).” [3]
* technically the Caley was not ‘absorbed’ but rather ‘amalgamated’ into the LMS.
Paul Drew says, “A little after eight o’clock on daylight weekday evenings in the years just before World War I, at Carlisle Citadel Station there was performed a colourful ceremony; it was the arrival from Euston of ‘The 2pm’ the West Coast Anglo-Scottish express par excellence and its making over by the London & North Western Railway (LNWR)to the Caledonian Railway (CR), with a change of engine. The occasion was impressive after sunset too, but the gaslight killed the colours of the locomotives and coaching stock; not only LNW and Caledonian were to be seen, but also Midland, North Eastern, Maryport & Carlisle, North British, and Glasgow & South Western. The seven railways and their several liveries made Carlisle Citadel the epitome of pre-1914 variety and splendour on Britain’s railways. The 2pm was sometimes called ‘The Corridor’ because in the 1890s it was the first West Coast train to include corridor stock.” [1: p4]
A Dunalastair II Locomotive, northbound with a mixture of the best Caledonian and West Coast joint stock. [86]
He continues: “In would come the 2pm behind an Experiment or, later, a Claughton 4-6-0 in LNWR blackberry black, austere perhaps, with a black tender devoid of identification for everybody should know an LNW engine. The coaches would be lettered WCJS (West Coast Joint Stock) but they would be the latest achievement of LNW design, specially built for the 2pm. The livery would be LNW-cream above the waistline and, below, that indescribable mixture of dark purple and brown; nearby, just for contrast, there might be some Caledonian main-line stock in cream and purple-lake, ruddier than the LNW lower panelling, and wearing the Caledonian coat of arms. (It was far more eloquent heraldry than the groups of shire and city arms favoured by most other companies, signifying among other things the Kingdom and Royal House of Scotland.) The 2pm consisted of seven, or sometimes up to nine, 12-wheel vehicles, with portions for Glasgow Central and Edinburgh Princes Street, which divided at Symington or Strawfrank Junction, or sometimes Carstairs.” [1: p4]
The Caledonian Railway Coat of Arms. [2]
Drew continues his evocative description of a late afternoon and early evening at Carlisle: “The North Western engine would run off into the yard and then would appear a massive eight-wheel Azure-Blue tender bearing on its side the Caledonian arms flanked by the initials CR. Beyond, there would loom into sight the great bulk of one of the Cardean class of inside-cylinder 4-6-0s, perhaps No 903 Cardean itself, a vision of Azure boiler, splashers and cab sides, purple-lake underframes, and scarlet buffer beam, and one of the most powerful and efficient inside-cylinder 4-6-0s, and indeed of any 4-6-0s, of a British railway.” [1: p4]
The CR was the first major railway to adopt a blue livery for its locomotives. The CR adopted the colour in the very early days of the company. Drew tells us that, “the CR’s ‘Azure Blue’ was achieved by mixing white paint at the company’s St Rollox (Glasgow) works with expensive darker blue, to economise; some CR engines painted in the Perth shops were finished in darker blue without the white admixture. Neither livery and especially the lighter has been surpassed by any of the blues essayed by other railways in the later years of steam.” [1: p4]
Caledonian Railway Class 60 4-6-0 steam locomotive, No 14652, banked by a Caledonian Railway 0-4-4T, No 15163 on the West Coast Main Line in 1935. Travelling into Scotland, the West Coast Main Line faces a formidable climb of ten miles at 1 in 100 from Beattock station to the summit. In steam days nearly all trains were assisted from the rear, as shown in this photograph. The train also appears to consist of ventilated vans and containers for meat traffic. [87]
Drew continues: “Cardean or a sister-engine would be coupled up and, after a blast of the Caley whistle, the miniature foghorn that contrasted so well with the shriller piping of other companies’ locomotives, the express pulled out on its 39.7-mile 44-minute run to Beattock at the foot of the 10-mile Beattock Bank. A stop of only two minutes was allowed at Beattock for buffering up the banking engine and ‘The Corridor’ was off on its next lap to Symington or other point of detachment of the Edinburgh vehicles. Overall timing allowed from Carlisle to Glasgow was 123 minutes, so that the train was due at Central at 22:16, eight hours 16 minutes after leaving Euston, and only one minute after the 84-hour Euston-Glasgow and Kings Cross-Edinburgh timings which the West and East Coast companies had agreed between themselves rather unprogressively after the second series of the so-called Races to the North of 1895.” [1: p4]
Close co-operation between the CR and the LNWR was the order of the day, as was a similar co-operation between The North British Railway and the North Eastern Railway on the east coast of the UK. But Carlisle was the frontier between the two and the Cr was independent of the LNWR in most things.
A general map of the Caledonian Railway network, Public Domain. [4]
In the 1830s and 1840s much thought was given to building a railway from central Scotland to join the growing English railway network. The hilly terrain and sparse population of the Southern Uplands made the choice of route contentious. [5]
Caledonian Railway 4-6-0 steam locomotive No. 910 on a heavy passenger duty! [90]
Drew tells us that “the Caledonian was conceived as a link between England and central Scotland and Glasgow before the most northerly component of the railways – the Lancaster & Carlisle Railway, eventually amalgamated into the LNWR – was projected. Alone of the four Anglo-Scottish trunk routes proposed in the late 1830s, the CR line from the south. from Carlisle via Annandale and Beattock, forking near Symington for Glasgow and Edinburgh, served both cities equally well. The Annandale route was chosen by that great engineer Joseph Locke. after some hesitation, in preference to the route via Dumfries. Nithsdale and Kilmarnock, which was more or less the alignment of the Glasgow & South Western and could not reach Edinburgh except through industrial Lanarkshire or by a detour through difficult terrain south of Glasgow.” [1: p5]
Wikipedia comments that, “the Caledonian Railway succeeded in opening its line by way of a summit at Beattock in 1847 and 1848. It connected Glasgow and Edinburgh with Carlisle, and there was a branch to connect with another railway to Perth. The approaches to Glasgow were over existing mineral lines, but a superior route was later built.” [5] The Carlisle-Glasgow main line was the Caledonian’s first trunk route. The Caledonian Railway Act received the Royal Assent on 31st July 1845, and the first section was opened from Carlisle to Beattock on 10th September 1847. The two cities of Edinburgh and Glasgow were reached by 15th February 1848. Drew tells us that, “the Glasgow terminus, Buchanan Street, was not opened until the following year. The station first used was Port Dundas, approached over the metals of the Glasgow, Garnkirk & Coatbridge [Railway], which the CR absorbed.” [1:p5]
Wikipedia comments: “Glasgow was reached over the Glasgow, Garnkirk and Coatbridge Railway (successor to the Garnkirk and Glasgow Railway), and the Wishaw and Coltness Railway, which the Caledonian had leased from 1st January 1847 and 1st January 1846 respectively. The Glasgow station was [initially] the Townhead terminus of the Glasgow, Garnkirk and Coatbridge Railway.” [3][8]
Wikipedia continues: “During the process of seeking Parliamentary authorisation, the Caledonian observed that the Clydesdale Junction Railway was being promoted. The Caledonian acquired that line during its construction, and it opened in 1849. It gave an alternative and shorter access to another Glasgow passenger terminal, named South Side, and to the Clyde quays at General Terminus (over the connected General Terminus and Glasgow Harbour Railway). The South Side station was already being used by the Glasgow, Barrhead and Neilston Direct Railway, worked by the Caledonian. One day, they hoped, they might extend that line into Ayrshire. Meanwhile, the line was leased (for 999 years) to the Caledonian in 1849.” [3][8][21][24]
“The Caledonian recognised that the Townhead terminus was unsatisfactory and constructed a deviation from Milton Junction to a new Glasgow terminus at Buchanan Street. It opened on 1st November 1849.” [3]
Glasgow Buchanan Street station buildings remained essentially unaltered over the years until their closure to passenger traffic in November 1966 when all remaining services transferred to Queen Street Railway Station.
Drew comments that the other two routes considered for trunk routes between the central belt of Scotland and the English network were one via the East Coast and the other inland from Newcastle via Hexham. He states that, “by the East Coast route of the North British from Berwick-on-Tweed there was no reasonable alternative to passing through Edinburgh (or through hilly country in its southern suburbs) to get to Glasgow. The fourth projected Anglo-Scottish route was from Newcastle to Edinburgh via Hexham and inland from the eventual East Coast main line; only disjointed branch lines, mostly closed, mark part of its course today.” [1: p5]
The Caledonian’s Edinburgh terminus was originally on Lothian Road. It opened in 1848 and had a single platform which served both arrivals and departures, and a two-road goods shed with a single loading platform. During 1865, the Caledonian was considering how to improve it, and considered making arrangements with the North British Railway to use Waverley Station. The local authority was anxious that there should be a single main station in the city. However the North British was hostile in principle, and the idea came to nothing. [7][8]
Major extension was essential, and “on 2nd May 1870 a new temporary station was opened adjacent to, and to the north of Lothian Road; it was named Princes Street. It was a wooden structure; the Caledonian was short of cash at this time and a more imposing terminal was not affordable. The passenger part of the station now had two platforms.” [7]
During 1890 the wooden terminus building at Princes Street was partly dismantled in preparation for improvement, “when on 16th June a fire broke out, substantially destroying much of the buildings. The new, spacious station accommodation was progressively brought into use in 1893 and 1894; it had nine platforms, and had cost over £250,000. Powers were obtained for building an adjacent hotel, but it was not opened, as the Caledonian Hotel, until December 1903.” [7][8]
The Caledonian Railway eventually served nearly all the economically important areas of the Lowlands other than the Fife coalfield. It was an outlet to the rest of the UK for trafic from the Northeast – particularly fish. It was in strident competition in and around Glasgow and throughout the central Lowlands with the NBR and GSWR. In Edinburgh, Perth, Dundee and along the coast to Aberdeen it was striving against the NBR, and at Ardrossan it battled against the GSWR. “It had to fight hard for most of its traffic, which comprised coal and other minerals, livestock, distillers’ grain and other agricultural produce; Glasgow and Edinburgh suburban commuters including train and steamer passengers ‘doon the water’ to and from the Clyde coast and islands; Glasgow-Edinburgh and Glasgow-Dundee inter-city passengers; and a high proportion of the Anglo-Scottish freight and passenger traffic because so much of England – for example, the West Riding and the Midlands could be reached equally well by Carlisle and by Berwick.” [1: p7]
Wikipedia comments that “as 1849 drew to a close, the Caledonian Railway had completed its first task: the railway was open from Glasgow and Edinburgh to Carlisle, with through trains running to and from London. Between Glasgow and Edinburgh a competitive service was run, although the Edinburgh and Glasgow Railway completed the journey faster. Carlisle Citadel station was in use, jointly owned with the London and North Western Railway. Through trains ran to Stirling and Perth over the Scottish Central Railway line from Greenhill.” [5]
The Caledonian’s trunk line progressed North towards Aberdeen from Peth and a branch was provided from Perth to Dundee. “Joseph Locke played the chief part in planning and co-ordinating the construction of a series of independent concerns which, after rather complex amalgamations, in 1866 took Caledonian trains into Aberdeen on CR tracks. Chief among them were the Scottish Central [Railway] and the Scottish North Eastern [Railway]. … The relatively low cost of construction through Strathmore and complications involving the North British [Railway] in Angus … influenced the main route eastwards from Perth via Glamis and Forfar to meet the North British at Kinnibar Junction. … Dundee was a CR terminus for most CR traffic. East of Dundee (and with a separate passenger terminus in that city) was the Dundee & Arbroath Joint line (CR and NBR). CR Aberdeen trains did not run via Dundee, as they do today after closure of the Strathmore line.” [1: p7]
The Caledonian Railway had intended to lease, or absorb, the Scottish Central Railway (SCR), which obtained its act of Parliament on the same day as the Caledonian. The SCR needed a partner railway to get access to Glasgow and Edinburgh, that was provided by the Edinburgh and Glasgow Railway (E&GR). The SCR opened from Greenhill Junction with the E&GR to Perth on 22 May 1848, and the Caledonian opened its branch to reach Greenhill Junction on 7 August 1848. The SCR remained independent for some time, building Perth General station. Because it provided access for a number of railways to Perth, the station was managed by a Joint Committee. The Perth General Station Joint Committee, later the Perth Joint Station Committee, was formed in 1859 to manage Perth railway station, initially consisting of the Scottish Central Railway, North British Railway, Scottish North Eastern Railway, and the Inverness and Perth Junction Railway, later including the Caledonian Railway, North British Railway and Highland Railway. [9][10]
The SCR itself managed to absorb some local railways; the Crieff Junction Railway had opened from Crieff to what later became Gleneagles station in 1856, and it was worked by the SCR and absorbed in 1865. [9]
In 1858 the Dunblane, Doune and Callander Railway was opened in 1858. It achieved considerable significance as the starting point for the Callander and Oban Railway. It was absorbed by the SCR in 1865 immediately before the SCR amalgamated with the Caledonian Railway on 1st August 1865, finally having gained Parliamentary approval to do so. [9]
The Scottish Midland Junction Railway (SMJR) “built a line from Perth to Forfar; at Perth it used the Scottish Central Railway joint station. The main line ran through the fertile area of Strathmore and the SMJR adopted two existing short lines that were on a suitable alignment. They were the Newtyle and Coupar Angus Railway and the Newtyle and Glammiss Railway. Both were unsuccessful adjuncts to the Dundee and Newtyle Railway, built using stone block sleepers and a track gauge of 4 ft 6+1⁄2 in (1,384 mm). The two short lines were modernised and altered to double track using standard gauge. At Forfar the SMJR joined the Arbroath and Forfar Railway, another earlier stone block railway, in this case using the track gauge of 5 ft 6 in (1,676 mm). The SMJR opened in 1848.” [3]
The NBR had, for many years, running powers over the CR, from Kinnaber to Aberdeen but was not competitive in the speed to the journey North until the 1890s, after completion of the Forth Bridge. Drew tells us that “railway strategy in Scotland was utterly changed by the failure of the Caledonian in the 1850s to amalgamate with the poverty-stricken 47-mile Edinburgh & Glasgow Railway. (The CR at that time had financial and administrative troubles of its own, which had led it in 1849 to propose operation of the CR system by the LNWR, which Euston turned down flat.) The CR continued to run its own Glasgow-Edinburgh trains over its own route, which remained circuitous at the western end until Glasgow Central was opened in 1879. The Edinburgh & Glasgow was absorbed into the NBR in 1865.” [1: p7] That take-over secured access for the NBR to Glasgow, the Firth of Clyde and much of the central Lowlands.
Drew comments: “The NBR improved the Glasgow Edinburgh passenger services and developed them as both inter-city and Anglo-Scottish trains. Only later did the CR begin to run rival, and in some ways better, Glasgow-Edinburgh expresses over its slightly shorter though more steeply graded line: it was spared, of course, the Cowlairs incline up from the North British Glasgow Queen Street terminus.” [1: p7]
The Aberdeen Railway was “to run north from Guthrie, a few miles northwest of Arbroath. Joining the Arbroath and Forfar Railway (A&FR) there, it obtained access to both termini of that line. It was authorised to lease the A&FR. The Aberdeen Railway may have underestimated the cost of upgrading the A&FR’s stone block track, and it ran out of money building its own main line; its construction was delayed and it encountered political difficulty in Aberdeen itself. It opened in 1850 to Ferryhill, on the southern margin of the city, extending to Guild Street station in 1854. There were branches to Brechin and Montrose.” [3]
From its inception, the Caledonian Railway saw itself as the creator of an extensive network in Scotland, and “it set about gaining control of as many other Scottish railways as possible. It did so not by purchasing them, but by leasing them. This had the advantage that no payment was required at first, only a periodical payment much later. The Caledonian negotiated with the SCR, the SMJR and the Aberdeen Railway and believed it had captured them, but the SCR had other ideas. Much later the Caledonian found that the periodical lease payments were unaffordable, and it was rescued by the legal opinion that the lease agreements had been ultra vires.” [3]
An important development in the history of Scottish railways was the “completion in 1863 of the Perth to Inverness via Forres route of what became soon afterwards the Highland Railway (HR). It gave much better access from the south to the central and northern Highlands and was just in time to enable the Caledonian to profit [from] the rapid growth of tourism in the Highlands. The CR was the chief source of HR passenger and freight traffic from and to the south. During the grouse-shooting and deer stalking seasons the trains between Euston and HR stations [via] the West Coast route, the CR and Perth included many horses and carriages.” [1: p7] These were only replaced by motor vehicles as the Edwardian era developed. The Caledonian encourged the upper class passtimes. “It was indulgent about attaching and detaching horseboxes, carriage flats and motorcar vans at its own stations … Many of the extra West Coast expresses during the season included such vehicles, which caused relatively minor marshalling problems south of Perth.” [1: p7]
At Perth, “long caravans of miscellaneous vehicles were made up and remarshalled. They included not only West and East Coast Joint Stock but also Midland & North British sleeping cars which ran between St Pancras and Inverness via Carlisle, Edinburgh and Perth.” [1: p7]
The Highland main line was mostly only a single track: there was often a motive-power shortage at peak periods, so that trains were often made over late to the CR at Perth. Northbound LNWR trains were often late at Carlisle, perhaps due to difficulties securing sufficient motive power. The LNWR had frequent recurse to double-heading until more powerful locomotives appeared in the early years of the 20th century. The Caledonian often found itself having to make up for the delayes caused by these other companies.
The Caledonian’s own mountainous route – the line from Dunblane via Callander and Crianlarich to Oban – is covered in a separate article which can be found here. [11] The punctuality record on that line was good, “partly because there was competition with the NBR West Highland line from 1898 onwards for traffic to the Western Isles.” [1: p8]
Drew tells us that, “a service which was more inter-city than its name implied, the ‘Grampian Corridor Express’ of 1905, from Glasgow and Edinburgh to Aberdeen, was selected for the allocation of new trainsets of magnificent 12-wheel vehicles. The Grampian ran from Buchanan Street to Perth, where it combined with an Edinburgh Princes Street portion that ran over part of the NBR Edinburgh-Glasgow main line from near Edinburgh to Larbert.” [1: p8] … He also notes the “CR’s regard for its Glasgow-Edinburgh expresses, for which some of the new coaches were 12-wheel non-bogie coaches with elliptical roofs.” [1: p8]
Drew draws attention to: the expansion of the Caledonian’s Clyde shipping services in the late 19th century, with new branches, stations and piers; and the construction of the Caledonian sub-surface lines under the centre of Glasgow (the Glasgow Central Railway. [1: p8]
The Glasgow Central Railway was built by the Caledonian Railway, running in tunnel east to west through the city centre. “It was opened in stages from 1894 and opened up new journey opportunities for passengers and enabled the Caledonian Railway to access docks and industrial locations on the north bank of the River Clyde. An intensive and popular train service was operated, but the long tunnel sections with frequent steam trains were smoky and heartily disliked.” [12] The CR’s line in the centre of the city “paralleled the North British Railway routes in the area, and after nationalisation of the railways the line declined and was closed in stages from 1959 to 1964.” [12]
Drew, writing in 1975, points forward to possible future uses of the closed tunnels [1: p8] and in 1979, “the central part of the route was reopened as an electrically operated passenger railway, the Argyle Line; this was greatly popular and enhanced connecting routes to west and east made this a valuable link through the city once more. The Argyle Line section is in heavy use today, but the other parts remain closed.” [12]
Wikipedia tells us that the Argyle Line “serves the commercial and shopping districts of Glasgow’s central area, and connects towns from West Dunbartonshire to South Lanarkshire. Named for Glasgow’s Argyle Street, the line uses the earlier cut-and-cover tunnel running beneath that thoroughfare. … The term ‘Argyle Line’ is commonly used to describe:the extensive urban passenger train service that connects the towns and suburbs of North Clyde with Motherwell, Larkhall, and Lanark, to the southeast. Of the 48 stations, 4 are in West Dunbartonshire, 4 in East Dunbartonshire, 17 in Glasgow City, 10 in North Lanarkshire, and 13 in South Lanarkshire; and thecentral portion of railway infrastructure encompassing less than 5 miles (8 km).” [12]
Drew continues: “Associated with the underground lines was the rebuilding and expansion of Glasgow Central passenger station including a low-level station on the CR underground; widening of the bridge over the Clyde to 20 tracks and creation of what for many years was, and in many ways still is, Britain’s most convenient major passenger terminus, in the heart of the city. Electrification and dieselisation have enabled Central to swallow the traffic (admittedly smaller than before as regards the number of trains) previously dealt with at St Enoch Station on closure by British Rail of the former GSWR terminus.” [1: p8]
The Caledonian Railway Bridge crosses the River Clyde at Broomielaw adjacent to Glasgow Central Station. The first structure built between 1876 and 1878 for the Caledonian Railway Company and opened on 1st August 1879, “was engineered by Blyth and Cunningham and built by Sir William Arrol & Co. It consisted of wrought iron lattice girders linked at the top by a light arched lattice girder, and carried on a cast iron arch over twin piers in the river. The piers are formed of cast iron cylinders sunk to bedrock and filled with concrete, and then extended above the river with Dalbeattie granite.” [14]
“The approach span over Clyde Place to the south was 60 feet (18 m) long and over Broomielaw to the north of the river was 90 feet (27 m) long. The navigation spans were 164 feet (50 m), 184 feet (56 m) and 152 feet (46 m) long. The bridge carried four tracks into the new Glasgow Central Station.” [15][18]
The second bridge was built between 1899–1905 during the expansion of Central Station, to a design by D. A. Matheson, chief engineer of the Caledonian Railway. Arrol and Co. was the contractor for this bridge as well. [17] “The foundations for the bridge are rectangular sunk caissons, sunk by the compressed air chamber method used on the Forth Bridge to a depth of up to 48 feet (15 m) below the river bed. The central span is 194 feet (59 m) long with Linville truss girders 15 feet 9 inches (4.80 m) deep. The parapet girders are around 10 feet (3.0 m) deep, and suspended on curved brackets. There are a minimum of eight parallel main girders in the width. The spans are of lengths 160 feet (49 m), 200 feet (61 m) and 178 feet (54 m), and the structure contains 11,000 tonnes (11,000 long tons; 12,000 short tons) of steel. [17] The total length of the bridge between the abutments is 702 feet 6 inches (214.12 m).” [18][19]
“The bridge varies in width from 35 to 62.5 metres (115 to 205 ft) and carries up to ten tracks. [17][18] It leads immediately into Glasgow Central Station on the north bank of the river. At the time of its opening, it was believed to be the widest railway bridge in existence.” [18][19]
A Caledonian Railway coke train, Plean, circa. 1910. [89]
The Caledonian’s goods operations were always commercially enterprising. The CR served all of Sctland’s main coalfields, with the exception of that in Fifeshire, and most of the heavy industry in the Glasgow area. “It was linked directly with the ports of Glasgow and its outposts on the Firth of Clyde with Leith (Edinburgh), Dundee and Aberdeen, and it virtually created Grangemouth. The Caledonian led the way in designing and providing for its customers’ new wagons, including high-capacity vehicles, for a variety of consignments. It was an early operator of fast freight trains. One of its major feats was co-operation with the English lines during World War I in moving vast tonnages of coal for warships in Scapa Flow in the Orkneys. The trains ran mostly from South Wales and the CR accepted them at Carlisle and made them over to the Highland at Perth. HR had the hardest task, of working heavy coal trains over its 300 miles of route from Perth via Inverness to Thurso, for shipment to Scapa.” [1: p9]
Although the CR was formed as an inter-city trunk line it coped manfully with other demands. “Local interests in Lanark promoted a branch line to their town, opening in 1855. Coal owners in South Lanarkshire [22] pressed for a railway connection, and the Lesmahagow Railway was formed by them, opening in 1856. It was later absorbed by the Caledonian, but other lines followed in the sparsely populated but mineral-rich area. As new coal mines opened, so new branches were needed, connecting Coalburn, Stonehouse, Strathaven, Muirkirk and Darvel and many other places, with new lines built right up until 1905. When the coal became exhausted in the second half of the 20th century, the railways were progressively closed; passenger traffic had always been light and it too disappeared. Only the passenger traffic to the Lanark and Larkhall branches remain in operation.” [3][8][21]
“In North Lanarkshire, the North British Railway was a keen competitor, having taken over the Monkland Railways. The area contained the rapidly-growing iron production area surrounding Coatbridge, and servicing that industry with coal and iron ore, and transport to local and more distant metal processing locations, dominated the Caledonian’s activity in the region. The Rutherglen and Coatbridge line, later linking Airdrie, and the Carfin to Midcalder line were routes with significant passenger traffic. Many lines to coal and iron ore pits further east were built, but serving remote areas the lines closed when the mineral extraction ceased.” [3][8][21]
Busby and East Kilbride: After rail connections became established at Barrhead (we noted above that the CR took a 999 year lease on the Glasgow, Barrhead and Neilston Direct Railway, the Glasgow & South Western Railway also built a branch to Barrhead. [26]) various interests in Bushby demanded a railway connection. This was opened by the CR in 1866. It was extended in 1868 to East Kilbride, although at that time the then small village did not generate much business for the railway. [3][8][21]
Branches South of Carstairs: When the main line was built, no branches were provided in the thinly populated terrain of the Southern Uplands. Subsequently, four independent companies made branches themselves, and the Caledonian built two. “The Symington, Biggar and Broughton Railway was opened in 1860, having been taken over by the Caledonian during construction. It was extended to Peebles in 1864.” [3][21]
The independent Dumfries, Lochmaben and Lockerbie Railway was opened in 1863. It “was encouraged by the Caledonian Railway, giving westward access into Dumfriesshire, and worked by it; the Caledonian acquired the line in 1865.” [3]
The Portpatrick Railwayopened “between Castle Douglas and Portpatrick in 1861–62 and the Caledonian Railway worked that railway; it obtained running powers over the G&SWR between Dumfries and Castle Douglas, and at a stroke the Caledonian had penetrated deep into the south-west, and to the ferry service to the north of Ireland, territory that the G&SWR had assumed was its own. The Portpatrick Railway later reformed with the Wigtownshire Railway as the Portpatrick and Wigtownshire Joint Railway; the Caledonian was a one-quarter owner.” [3][27][28]
Wikipedia continues: “The North British Railway opened its branch line to Dolphinton, east of Carstairs, and the Caledonian feared that the next step would be an incursion by the NBR into Caledonian territory, possibly seeking running powers on the main line. To head this off, the Caledonian built its own Dolphinton Branch from Carstairs; it opened in 1867. Dolphinton had a population of 260 and two railways, and traffic was correspondingly meagre, and the line closed in 1945 to passengers and in 1950 to goods.” [3][21]
“The independent Solway Junction Railway was opened in 1869, linking iron mines in Cumberland with the Caledonian Railway at Kirtlebridge, crossing the Solway Firth by a 1,940 yd (1,770 m) viaduct; the company worked the line itself. It considerably shortened the route to the Lanarkshire ironworks, and was heavily used at first, but the traffic was depleted by cheap imported iron ore within a decade. The Scottish part of the line was acquired by the Caledonian Railway in 1873, and the whole line in 1895. Serious ice damage and later heavy maintenance costs made the line seriously unprofitable and it was closed in 1921.” [3][29]
After 1880, the Caledonian’s network continued to expand. Wikipedia tells us that, “The Moffat Railway was opened from Beattock on 2nd April 1883. It was just over 1.5 miles (2.4 km) long. It was worked by the Caledonian and absorbed on 11th November 1889. The Caledonian Railway sought to develop both Moffat and Peebles as watering places, and ran The Tinto Express from both places, combining at Symington, to Edinburgh and Glasgow for several years.” [3][21]
The “Leadhills and Wanlockhead Branch was opened as a light railway from Elvanfoot in 1901–02. With challenging gradients to reach Scotland’s highest village in otherwise remote territory, the line scraped a bare living and closed in 1938.” [3][21]
In 1862, “the Greenock and Wemyss Bay Railway was authorised. It was an independent company intending to provide a fast connection from Rothesay on the Isle of Bute; it opened on 13th May 1865 and in August 1893 it amalgamated with the Caledonian Railway, having been operated by the Caledonian Railway since its opening.” [3][8][30: p78]
Wikipedia tells us that in 1889, the CR “opened an extension line from Greenock to Gourock, more conveniently situated than Greenock; this involved the expensive construction of Newton Street Tunnel, the longest in Scotland.” [3][31]
At this time after feeling frustrated with the performance of independent steamer operators, the CR sought powers to operate the vessels directly; this was refused by Parliament. So the company founded the nominally independent Caledonian Steam Packet Company (CSPC) in 1889. “The CSPC expanded its routes and services considerably; following nationalisation of the railways in 1948 it became owned by British Railways, but was divested in 1968 and later became a constituent of Caledonian MacBrayne (CalMac), which remains in state ownership.” [3][32]
Late in the 19th century, the CR began to focus on the development of suburban lines around Glasgow and Paisley. Wikipedia notes that “The Cathcart District Railway was promoted as an independent concern but heavily supported by the Caledonian. It opened in 1886 from Pollokshields to Mount Florida and Cathcart (the eastern arm of the present-day Cathcart Circle Line) in 1886, and was extended via Shawlands to form a loop in 1894. It was worked by the Caledonian, although the company retained its independence until 1923.” [3]
We have already noted the the Glasgow Central Railway which eventually became The ‘Argyle Line’. [3][25] “The Paisley and Barrhead District Railway was incorporated in 1897 and transferred to the Caledonian in 1902; it [linked] Paisley and Barrhead [to] enable a circular service from Glasgow. The line was substantially ready in 1902 but by now street tramways were electrically operated and eminently successful. It was plain that a passenger service would not be viable against tram competition and the intended passenger service was never started.” [3][30]
North of the River Clyde was both heavily populated and highly industrialised. Initiallt it was the preserve of the North British Railway and its satellites, but its importance encouraged the Caledonian to enter the area. “The Lanarkshire and Dumbartonshire Railway[33] was nominally independent, running from near Maryhill to Dumbarton, opening progressively between 1894 and 1896. In 1896 the Caledonian gained access to Loch Lomond with the opening of the Dumbarton and Balloch Joint Railway (originally built by the Caledonian and Dumbartonshire Junction Railway), built jointly with the NBR.” [3][33][36]
In 1888, the Lanarkshire and Ayrshire Railway opened a 6.5-mile (10.5 km) line “from Giffen on the Glasgow, Barrhead and Kilmarnock Joint Railway to Ardrossan. Its purpose was to shorten the route for Caledonian mineral traffic, and it was worked by the Caledonian. In 1903–04 it was extended eastwards to Cathcart and Newton, enabling the heavy mineral trains to avoid the Joint Line and the congested area around Gushetfaulds from the Lanarkshire coalfields to Ardrossan Harbour.” [3][21][34][35] Today, the only operational sections of the line are those between Newton and Neilston. Now two suburban branch lines (Newton to Glasgow Central via Kirkhill and Neilston to Glasgow Central via the Mount Florida side of the Cathcart Circle). Electrified in the early 1960s, these lines carry frequent suburban passenger trains. [35]
Around Edinburgh, an intersting development was the construction of theGranton Harbour Branch which opened in 1861, funded equally by the harbour authorities and the CR. Granton Harbour was a large industrial harbour built by lighthouse engineer, Robert Stevenson. [37]. In 1864, the Leith North Branch from the Granton line at Pilton to Leith was built, opening to passengers in 1879. [38] When, after 1900, “the port authorities built new modern docks to the east of the former Leith docks, and the Caledonian further extended its Leith line to reach the new facilities: the Leith New Lines opened in 1903. It had been planned to open a passenger service on the line, and passenger stations had been built, but tram competition made it clear that an inner suburban passenger railway was unviable and the passenger service was never inaugurated.” [3]
Wikipedia continues: “The Edinburgh main line passed close to numerous mineral workings, and several short branches and connections were made to collieries, iron workings and shale oil plants. The Wilsontown Branch from Auchengray, opened in 1860 was the most significant, and carried a passenger service.” [3] The Wilsontown Branch was a three and three-quarter mile long railway line that served the village of Wilsontown in Lanarkshire and several collieries, running from a bay platform at Auchengray Railway Station to Wilsontown Railway Station, which was the passenger terminus. [39]
The Wishaw and Coltness Railway, ran for approximately 11 miles from Chapel Colliery, at Newmains in North Lanarkshire … to the Monkland and Kirkintilloch Railway near Whifflet, giving a means of transport for minerals around Newmains to market in Glasgow and Edinburgh. built to 4ft 6 in gauge, it had several branches serving pits and ironworks. [40] The line was leased by the CR and re-gauged. In 1869, the line was extended from near Cleland Ironworks “to Midcalder Junction on the Edinburgh main line, passing through Shotts, Fauldhouse and Midcalder. This line connected to many further mines and industrial sites, and gave the Caledonian a passenger route between Glasgow and Edinburgh that competed with the North British Railway’s route through Falkirk.” [3]
The CR’s main line did not connect with a significant industiral area on the Water of Leith Southwest of Edinburgh. To address this, a branch line from Slateford to Balerno opened on 1st August 1874. [41] “The line was successful in encouraging residential building, especially at Colinton, and also leisure excursions: for a time it was known as ‘the picnic line’, but it too succumbed to more convenient transport facilities by road, and it closed to passengers in 1943.” [3]
Speculative residential development encouraged the construction of the Barnton Branch, Barnton was West of Edinburgh. “The branch line opened on 1st March 1894; the terminus was named Cramond Brig at first. The Caledonian intended to make the line into a loop, returning to the city by way of Corstorphine, but this idea was shelved.” [3][8][21]
The Callander & Oban Line was initially an independent company, it had been promised financial support by the Scottish Central Railway (SCR). The Caledonian absorbed the SCR in 1865 and the directors were dismayed at the level of commitment to a difficult construction scheme barely started. Construction took many years, reaching a station serving Killin in 1870 and Oban in 1880. The line ran on a shoestring – finances were always tight and the line was never profitable although it contributed greatly to the development of the town of Oban. A branch serving Killin was opened in 1886, [42] and another to serve Ballachulish, opened in 1903. [3][43] Articles about the Ballachulish Branch can be found here, [44] here, [45] and here. [46]
The western part of the line from Crianlarich to Oban remains open, connected to the ex-NBR West Highland Line, but the remainder has closed. [3][47][48] An article about the Callander & Oban Railway can be found here. [11]
The Strathearn Lines: “the Perth, Almond Valley and Methven Railway opened in 1858 to connect Methven to the SMJR network; it was extended to Crieff when the Crieff & Methven Railway opened in 1866.” [3][49] It eventually became part of the CR network through acquisitions and mergers.
“The upsurge in tourism in Strathearn encouraged many visitors, who used Crieff as a railhead and continued by road. In 1893 the Crieff and Comrie Railway made a short extension into Strathearn, and this encouraged ideas of completing a link right through to the Callander and Oban line. There were wild dreams of Irish cattle imports coming to Perth markets over the route. This became the Lochearnhead, St Fillans and Comrie Railway; due to serious problems raising capital, it took from 1901 to 1905 to open fully. The through traffic never developed and passenger connections at Balquhidder were poor, discouraging through travel.” [3][51]
The CR wanted the extension to Lochearnhead and the Callander and Oban line. “Moreover, it was concerned that the rival North British Railway would build such a line, abstracting much of its traffic in the area. When the Comrie company opened discussions with the Caledonian about selling their line, they found that the Caledonian was willing. In fact its offer was remarkably generous: they would repay the share capital in full, pay off the mortgage loan, and settle MacKay’s claim. This was put to a Special Shareholders’ Meeting on 9th February 1898. The shareholders agreed and the company was vested in the Caledonian Railway by Act of 1st August 1898.” [50][51]
Locomotives of the Caledonian Railway
The Caledonian Railway Locomotive Works were originally at Greenock but moved to St. Rollox, Glasgow, in 1856. Greenock Works and Shed opened in 1841 adjacent to the Greenock terminus of the Glasgow, Paisley & Greenock Railway (GP&GR). [53] The Caledonian Railway leased to GP&GR line in 1846 and at that time the Greenock Shed and Works wer enlarged to accommodate the CR’s needs. [53] The shed remained in use until 1885 when a railway extension from Greenock to Gourock required its removal and rellocation to Greenock Ladyburn Shed. [54]
“The class number used for Caledonian Railway engines was the stock number of the first member of the class to reach traffic. Hence earlier/lower numbered classes could well have appeared later in time. … Until the appointment of Dugald Drummond, unlike most other British railways, almost all engines had outside cylinders, and the 0-6-0 arrangement was quite rare, goods engines being of type 2-4-0 or 0-4-2. Passenger engines were normally 2-2-2.” [52][55]
Wikipedia tabulates all of the locomotives used by the Caledonian Railway under the names of the railway’s Chief Mechanical Engineers. The tables can be found here. [52]
Lightmoor Press published two excellent books about locomotives of the Caledonian Railway. The first by David Hamilton – Caledonian Railway Locomotives: The Formative Years – in 2019. [63] The second by H. J. C. Cornwell – Caledonian Railway Locomotives: The Classic Years – in 2020. [64]
The following series of images cover a range of examples of the Caledonian Railway’s motive power:
Drew comments that, “all Caledonian locomotives had to work hard. Every route, even Glasgow Central to Edinburgh, had its testing sections, and the Glasgow-Edinburgh expresses stopped relatively frequently to cater for outer-suburban passengers. Apart from the Glasgow-Carlisle main line, most Caledonian express passenger working involved getting away from the numerous stops necessitated by the sparse population. Some of the most exacting work was on the Clyde steamer boat trains, where every second counted in competition with the NBR and GSWR.” [1: p11]
Caledonian Railway Rolling Stock
Carriages: Lightmoor Press has released a book by Mike Williams which covers the passenger rolling-stock of the Caledonian Railway: Mike Williams; Caledonian Railway Carriages; Lightmoor Press, Lydney, 2015. [69] Mike Williams describes the carriages owned and operated by the Caledonian Railway from its opening until the 1923 Grouping, with 250 photographs and over 300 drawings. A well-produced and informative volume commensurate with the usual standard of Lightmoor Press publications.
Lightmoor Press describes the content: “The topics covered include the CR’s reaction to technological developments in railway passenger transport and the increasing attention paid to passenger comfort and convenience. The description of its carriage livery challenges some aspects of ‘received wisdom’ and deals with furnishing and internal décor. General service stock is reviewed to the end of McIntosh’s tenure in 1914, plus the carriages acquired from the West Coast Joint Stock fleet, the Pullman cars and the final designs in the Pickersgill regime. The CR Ambulance Train and other carriages in war-time service are described along with vehicles which were not part of general service stock. Saloons, Invalid carriages, Post Office vehicles, the Prison Van, Inchture horse bus and the Connel Ferry rail motor are all covered, along with some proposed designs that never saw service, including a steam rail motor. Appendices give information about the number of carriages in the fleet, their numbers, carriage orders and building dates and list the available drawings of carriages and components, with their location.” [70]
The Railway Wonders of the World article about the Caledonian Railway includes these paragraphs:
“The passenger work of the Caledonian is of high repute for speed and accommodation. As we have said enough of the West Coast service we will content ourselves here with the Grampian Corridor Express as an example. This train is made up of four varieties of coaches, composite, brake composite, brake third, and third. Each of these is 65 ft long in the body, and 68 ft 6-in over buffers, the width being 9 ft. The under-frames over headstocks are 64 ft 10-in, 44 ft between the bogie centres, and 7 ft 5-in over the sole bars, the wheel base being 56 ft.
In the composite the space between the partitions is 7 ft 4⅝-in in the first class, and 6 ft 4½-in in the third; in the brake composite it is 7 ft in the first class and 6 ft in the third, the brake compartment taking up 12 ft 2¾-in. In the brake third, in which the brake compartment occupies 27 ft 4½-in, it is 6 ft, and in the third it is 6 ft 2⅝-in. The composite seats 30 first-class passengers three aside and 24 third class four aside, the brake composite seats 18 first and 32 third, the brake third seats 40, and the third 72. The composite weighs 38 tons 4 cwt, the brake composite weighs 38 tons 11 cwt, the brake third weighs 35 tons 5 cwt, and the third 36 tons 10 cwt. These details are given to show, among other things, that appearances may be deceptive; in carriages seemingly alike there may be a difference in the knee-space making all the difference in the comfort, though in this case the smallest, 6 ft, is ample for any one of reasonable stature and attitude.
This heavy train – the Grampian – does 30 miles an hour up Dunblane bank, part of which is 1 in 73, for Beattock is not the stiffest gradient on the line, that being the 1 in 40 on the Bonnybridge branch. It is the 10 a.m. out of Buchanan Street and the 9.30 out of Edinburgh joining at Perth, where the restaurant car is put on; and the Glasgow portion weighs over 250 tons. It is not the fastest on the line, that being the 10.5 from Forfar to Perth, 321 miles in 33 minutes, the longest non-stop being the 2.17 a.m. from Carlisle to Perth, 150¾ miles in three hours; but with the exception of the Granite City Express, leaving Glasgow at 5 p.m, it is perhaps the best known.” [73]
Drawings of the Caledonian Railway Coaching Stock can be found on the Caley Coaches Ltd. website. [85] Caley Coaches Ltd. provides drawings and photographs to support its range of kits including for: 57′ Non-corridor coaches; 57′ Semi-corridor coaches; 57′ Corridor coaches; Grampian Stock; 65′ Slip Coaches; Edinburgh & Glasgow Stock; and 4 wheel “Balerno Branch” Coaches.
Wagons and Non-Passenger Coaching Stock: Lightmoor Press has also released a book by Mike Williams which covers the non-passenger rolling-stock of the Caledonian Railway: Mike Williams; Caledonian Railway Wagons and Non-Passenger Caoching Stock; Lightmoor Press, Lydney, 2013. [71]
Mike Williams details the history of the Caledonian Railways wagons from 1847 until the grouping in 1923 when the Company became part of the LMS.
Lightmoor Press says that research for the book is “based on Board minutes and other official sources, whilst over 250 official drawings have been examined. The introduction details the sources of information used and a chapter on the industrial development of Scotland outlines its influence on the size and diversity of the wagon fleet. The types of wagons and numbers in service are tabulated and the financial pressures which hamstrung the modernisation programme begun in the early 1900s are also described. An overview is offered of technical developments, which discusses how two Locomotive Superintendents transformed the wagon fleet. The liveries of wagons and Non-Passenger Coaching Stock are next described, supplemented in each case by the systems used by the Caledonian to allocate running numbers. Photographic evidence and drawings depict a far more complex picture than that presented previously. Eleven chapters then deal with different types of wagons, ranging from those built by the thousand, to small numbers of wagons for special traffic. Building dates are given for each design, whilst design developments are described and supported by photographs and works drawings. Sample running numbers are included for modellers. A further chapter describes the Caledonian’s relationship with the private traders who ran wagons over the system. Appendices list the construction orders undertaken by the company and outside contractors. The surviving works drawings are listed, with their archive references, and the photographs in an official album dating from 1900 are described. A final appendix gives information about drawings for the modeller, supported by specially commissioned drawings of details characteristic of Caledonian wagons. Produced in association with the Caledonian Railway Association.” [72]
These next few images show a few different Caledonian Railway good wagons:
Two Caledonian Railway bogie flat wagons loaded with a large steel column and base, in Glasgow, circa. 1910. [88]
To Conclude …
Paul Drew concludes his article with these words: “The Caledonian achieved its zenith in the years 1900-14. There was no activity in which it did not shine; passenger stations such as Glasgow Central, Edinburgh Princes Street, Stirling, Dundee West. and (with the Great North of Scotland) Aberdeen Joint; hotels; signalling, both semaphore and the pioneer electro-pneumatic installation at Glasgow Central; and Pullman cars, which it ran on the Oban line (as observation cars), the Glasgow-Edinburgh service and elsewhere. … [It] undoubtedly justified its claim to be the premier line of Scotland.” [1: p11]
References
Paul Drew; Caledonian Retrospect; in, Brian Stephenson (ed.), Trains Illustrated No. 14, Ian Allan, Walton-on-Thames, 1975, p4-11.
D. A. Matheson; The New Clyde Bridge of the Caledonian Railway at Glasgow. (Including Appendix and Plates); in The Institution of Civil Engineers, Minutes of the Proceedings, No. 182, (Paper No. 3764) 1910, p4–58; via https://www.icevirtuallibrary.com/doi/10.1680/imotp.1910.16924, accessed on 18th March 2025.
John Thomas revised J. S. Paterson; A Regional History of the Railways of Great Britain: Volume 6, Scotland, the Lowlands and the Borders; David and Charles, Newton Abbot, 1984.
John Thomas; The Callander and Oban Railway; David and Charles, Newton Abbot, 1966
John Thomas and David Turnock; A Regional History of the Railways of Great Britain: Volume 15: North of Scotland; David and Charles, Newton Abbot, 1989.
Charles Rous-Marten; British Locomotives in 1903; in the Bulletin of the International Railway Congress.
R. Essery & D. Jenkinson; An Illustrated History of L.M.S. Locomotives, Volume Three: Absorbed Pre-Group Classes, Northern Division; Oxford Publishing Company, 1986.
David Hamilton; Caledonian Railway Locomotives: The Formative Years; Lightmoor Press Lydney, 2019.
H. J. C. Cornwell; Caledonian Railway Locomotives: The Classic Years; Lightmoor Press, Lydney, 2020.
In July 1923, The Railway Magazine carried an article about the Callander & Oban Railway (C&O) written by G.F. Gairns. [1]
Gairns commented that the C&O constituted the third of the three great mountain lines: the Perth-Inverness line of the Highland Railway; the West Highland Line of the North British Railway; and the Callander & Oban Railway (including the Ballachulish Extension).
The Callander & Oban Railway. [1: p11]
A short series of four articles about the Ballachulish line can be found here, [2] here, [3] here, [4] and here. [5]
The C&O had previously been written about in the Railway Magazine, specifically in the issues of September 1903, August 1904, and August and September 1912. Gairns leaves the detailed history to those previous articles, apart from a brief introduction, and focusses in 1923 on a journey along the line from Stirling to Oban and to Ballachulish.
An excellent presentation of the various scenes which preceded the Callander & Oban Railway can be found in the early pages of John Thomas’, ‘The Callander & Oban Railway‘. [62: p1-26]
Ultimately, an agreement was signed between the Scottish Central Railway (SCR) and the Callander & Oban (C&O) was signed on 17th December 1864 which affirmed that the SCR would subscribe £200,000 to the scheme. “The C&O was to have nine directors, five appointed by the Scottish Central and four by the promoters. The line was to be ‘made, constructed and completed in a good, substantial sufficient and workmanlike manner, and without the adoption of timber bridges and culverts’. … The rails were to weigh 75 lb per yard and were to be laid in 24 ft lengths on larch sleepers placed at an average distance of 3 ft.” [62: p26-27]
As part of the agreement, once at least 20 miles of line directly connected to the Dunblane, Doune & Callander Railway had been constructed and passed by the Board of Trade, the Scottish Central Railway undertook work it in perpetuity, on the basis that it would receive half of the gross revenue.
The Callander & Oban Railway bill was drawn up and presented in Parliament in January 1865. … The bill sought:
“First, a Railway commencing about Five Furlongs South-westwards from the Schoolhouse in the Town of Oban called the Oban Industrial School, and terminating by a Junction with the Dunblane, Doune and Callander Railway, about One and a Half Furlongs Eastward from the Booking Office of the Callander Station of the Railway.
Secondly, a Tramway commencing by a Junction with the Railway above described about One Furlong South-westwards from the said Schoolhouse, and terminating on the Pier on the East Side of the Harbour of Oban about Two Chains Eastward from the South-western end of the said Pier.” [62: p27]
148 railway bills were passed in a two-day session of Parliament on January 1865. These included the C&O and the Dingwall & Skye Railway. Both these schemes had a similar primary purpose – to reach ports on the West Coast of Scotland to give the fishing trade access to markets in the rest of Scotland and further South.
Thomas comments: “The Callander & Oban Railway Act was passed on 8th July 1865. The first sod was not cut for over fourteen months. Five years were to pass before a revenue-earning wheel was to turn on the line (and on only 17½ miles at that), and it would be fifteen years before a train entered Oban. … But even before the Act was passed sweeping changes had transformed the railway political scene. Ten days earlier, on 29th June, the Scottish Central had won permission to take over the Dunblane, Doune & Callander as from 31st July 1865; and the Central had enjoyed its new-found gains for one day. On 1st August 1865 the Central itself had been absorbed by the Caledonian, which acquired all its assets and liabilities including the obligation to finance and operate the Callander & Oban. At the outset the C & O directors found themselves with formidable new masters.” [62: p28]
As much as the Callander & Oban had looked attractive to the Scottish Central. “It was not at all attractive to the Caledonian, whose shareholders, had no stomach for squandering cash among the Perthshire hills. … The 1861 census had shown that Oban and Callander between them possessed fewer than 3,000 inhabitants, and the scattered hamlets between the two could produce barely a thousand more. The certain dividends lying in the coal and iron traffic of the Clyde Valley were infinitely preferable to the nebulous rewards from the fish and sheep of the West Highlands.” [62: p29]
From the beginning there was a faction on that Caledonian board which wished to drop expansion towards Oban at the earliest opportunity, “but the terms of the SCR-Caledonian amalgamation agreement forbade such a course. And there was another reason, if a negative one, why the Caledonian should use caution. The amalgamations of 1865 had given the Edinburgh & Glasgow to the North British, which as the result had now penetrated deep into traditional Caledonian territory – Glasgow and the Clyde coast; and the North British already possessed and exercised running powers into Callander. If the Caledonian abandoned its awkward foster-child on the Callander doorstep, it was reasonable to suppose that the North British would attempt to pick it up.” [62: p29]
The Callander & Oban directors had undertaken to find £400,000 along the route of the railway. This proved to be a monumental task. Their first attempts brought in 201 individual shareholders who subscribed for a total of £56,360 worth of shares! The C&O may well have been stillborn had it not been for the appointment of John Anderson as the Secretary to the C&O.
Given palpable hostility between the directors, Anderson “was left to conduct the line’s affairs single-handed.” [62: p32] Thomas goes on to describe in some detail the different methods he used to achieve progress. The machinations involved need not, however, detain us here
Gairns writes:
“The Callander and Oban Railway Company was constituted in 1865. The Dunblane, Doune and Callander Railway was already in existence, having been opened in 1858. The Callander and Oban line was opened: Callander to Killin Junction, 1870; Killin Junction to Tyndrum, August, 1873; thence to Dalmally, May, 1877; and to Oban, July, 1880. At Balquhidder, at first known as Lochearnhead, the line from Crieff makes connection. This route, with connecting lines, was opened, Perth to Methven, 1838; Methven Junction to Crieff, 1866; Gleneagles (previously Crieff Junction, 1856; Crieff to Comrie, 1893; Comrie to St. Fillans, 1901; St. Fillans to Balquhidder (Lochearnhead), 1905. The Callander and Oban line has always been worked by the Caledonian Company, and is now [1923] included in the London Midland and Scottish Railway.
Dunblane is the ordinary junction for theCallander and Oban line, but trains which are not through to or from Glasgow use Stirling as their southern terminus. In some instances, ordinary Caledonian main line engines work the trains to and from Callander, the special C. and O, engines being attached or detached there, though this is mainly a traffic arrangement, convenient in the case of certain trains. At Dunblane there is an island platform on the down side, thus enabling branch trains to wait on the outer side to make connections. To Doune is double track, and the country mainly pastoral. Thence to Callander is single line, controlled by electric train tablet, as is the whole of the Callander and Oban line. The scenery continues to be of lowland character, though picturesque, but signs of the mountain country beyond show themselves. Between Doune and Callander is an intermediate crossing place – Drumvaich Crossing – to break up the long section of nearly 7 miles between stations. The original line diverged into what is now the goods station at Callander, the present station having been built when the Oban line was made. Callander station is distinctly picturesque, an ornamental clock tower surmounting the footbridge, and the station buildings being neat and attractive, while the platforms are decorated florally. It also has refreshment rooms on the platforms. On the up and down sides there are short bay lines from which locals can start as required. For down trains there is also a ticket platform, half a mile or so short of the station, but this is now used only by a few trains.” [1: p10]
Wikipedia tells us that “closure [for Callander Station] came on 1st November 1965, when the service between Callander and Dunblane ended as part of the Beeching Axe. The section between Callander and Crianlarich (lower) was closed on 27th September that year following a landslide at Glen Ogle.” [8]
This is an embedded link to a Flickr image of Callander Railway Station (seen from the road bridge at the East end of the Station) in 1973, (c) David Christie. [10]A very similar view in the 21st century. [Google Streetview, October 2016]The road bridge at the East end of Callander Raiway Station in 1967 (Ancaster Road Bridge). (c) J.R. Hume, Public Domain [11]Callander Railway Station forecourt in the 1940s, seen from the East. This image was shared on the Callander Heritage Society Facebook Page on 18th December 2023, (c) Public Domain. [12]A similar view in the 21st century. [Google Streetview, October 2016]Lookin West from Callendar Railway Station after the lifting of the rails. The tall signal box allowed for visibility beyond Leny Road Bridge which is just off the scene to the left. This image was shared on the Callendar Heritage Facebook Page on 27th September 2023. [14]
The old railway passed under Leny Road, Callander at the western end of the station site. The first image below shows the alignment of the railway looking Northeast from Leny Road. The pelican crossing marks the location of the old bridge. The second image shows the public footpath which follows the old railway to the South side of Leny Road.
The location of Leny Road Bridge, Google Streetview, July 2023]The location of Leny Road Bridge, Google Streetview, July 2023]
The first length of the railway to the West of Callander is shown on the RailMapOnline.com image below.
The route of the Callander & Oban Railway to the West of Callander as shown on the satellite imagery provided by RailMapOnline.com. Loch Lubnaig is at the top-left of this image. [15]
This embedded image from the Canmore National Record of the Historic Environment looks Northeast along the Callander & Oban railway towards Callander Railway station. The Bowstring Girder Bridge in the foreground is mentioned by Gairns below. The stone-arch bridge in the distance is the bridge that carried Leny Road over the old railway, (c) J.R. Hume. [16]
Gairns mentions the Pass of Leny and the Falls of Leny, below. The falls are shown on the map extract immediately below. The Falls can be seen in the right half of the extract.
The Falls of Leny and the Callander & Oban Railway. Note that the river – Garbh Uisge – is crossed twice by the railway. These bridges were bowstring Girder bridges like that seen above. [17]
This image is embedded from Flickr and shows one of the two girder bridges shown on the map extract above. The photograph was taken shortly before the closure of the line. (c) locoman1966. [18]
Gairns continues:
“Crossing the River Leny [Garbh Uisge] by a bowstring girder bridge, mountain country is entered in the Pass of Leny, and Ben Ledi and Ben Vane on the one side (the former skirted by the line), Ben Each, and, in the distance, Ben Vorlich, on the other, give evidence of the nature of the country traversed. The Falls of Leny can be seen on the right providing the intervening foliage is not too full. St. Bride’s Crossing, at the head of the Pass of Leny, is now only used as a crossing place at periods of special pressure. For nearly two miles the line then proceeds along the western shore, and almost at the water’s edge of Loch Lubnaig ‘the crooked lake’. A short distance beyond St. Bride’s Crossing is Craignacailleach Platform, used by children of railway servants going to school in Callander the 5.40 a.m. from Oban and the 6.45 pm from Callander, daily except Saturdays. At the picturesque little station of Strathyre, both platforms are adorned by ornamental shrubs, and on the up side there is a fountain, rockeries, rustic gate ways, etc.. lending further interest to this pretty station among its beautiful natural surroundings.
Before reaching Strathyre station the River Balvag is crossed. It keeps close company with the railway until near Kingshouse Platform, where a glimpse is had of the hills encircling Loch Val. Kingshouse Platform is used as a halt, trains calling as required, for the convenience of visitors to the Braes o’ Balquhidder.” [1: p10-11]
The adjacent RailMapOnline.com satellite image shows the railway running up the West side of Loch Lubnaig. Strathyre, mentioned by Gairns above, can be seen to the North of the Loch.
This portion of the old railway has been metalled to support its use as National Cycleway No. 7. South of the Loch, there is now a car park close to the upstream of the two bridges noted above.
The old railway formation is now the National Cycle Route No. 7. The blue line marks the route of the railway. The River Garbh Uisge is to the right of this North facing photograph. [Google Streetview, March 2009]Another North facing view, this time alongside Loch Lubnaig. The tarmacked cycle route follows the line of the old railway. [Google Streetview, May 2022]
North of Loch Lubnaig, the old railway ran North through Strathyre, first crossing the river to the East bank and few hundred metres short of the Railway Station.
This extract from the 6″ Ordnance Survey of 1898, published in 1901 [19] shows the small village of Strathyre, its railway station and the bridge over the River Leny [Garbh Uisge].
Looking South from the main platform at Strathyre Railway Station towards Callander in September 1956, (c) T. Morgan and made available for use here under a Creative Commons Licence (CC BY-SA 2.0). [20]Looking back through the station site from a minor road just to the North. [Google Streetview, July 2023]Looking North along the old railway from the same minor. [Google Streetview, July 2023]
North of Strathyre the line continued North-northeast towards Balquhidder.
RailMapOnline.com again – the satelitel image shows the route of the line North from Strathyre through Balquidder. [15]
King’s House Inn on the modern A84 had its own Halt – Kingshouse Platform. This was a request halt serving both King’s House Inn (just to the east of the line) and the road to Balquhidder Glen (to the west). The halt was built at the expense of the King’s House Inn. It was a single platform, on the east side of the line, with a waiting shelter. Both platform and building were built in timber. Traffic handled included passengers, children using the school train and milk churns. As can be seen below, the halt was located south of the road to the glen.
Kingshouse Platform (Halt) as shown on the 6″ Ordnance Survey of 1898, published in 1901. [21]Looking back along the line towards Strathyre from the road up the Glen. [Google Streetview, July 2023]Looking Northeast along the line towards Lochearnhead Railway Station from the road up the Glen. [Google Streetview, July 2023]
A short distance Northeast of Kingshouse Platform was Lochearnhead Railway Station sited some distance South of the community of the same name.
Lochearnhead Railway Station. [22]Lochearnhead Railway Station as it appears on the 25″ Ordnance Survey of 1898, published 1901. [23]The same location in the 21st century, as it appears on the ESRI satellite imagery provided by the NLS. The old railway ran from bottom-left to top-middle of this extract. [24]
The station was renamed Balquhidder Station on 1st July 1904, when the line to Crieff, Gleneagles and Perth was completed. The station then became the junction station. The branch came in from the North, paralleled by the Oban line for some distance, from the head of Loch Earn. Balquhidder station had an island platform on the up side to provide for connecting trains. A new station was built on the branch to serve Lochearnhead village. [25]
Balquhidder Railway Station looking Southwest towards Callander on 27th September 1961. The branch line was off to the left of this image, (c) Ben Brooksbank and authorised for reuse under a Creative Commons Licence (CC BY-SA 2.0). [26]
Gairns continues:
“Leaving Balquhidder the Oban line climbs steeply along the hillside as it finds its way up Glen Ogle, overlooking, in the ascent, the Crieff line as it follows the shores of Loch Earn eastward, and giving views over the waters of the Loch, amidst their mountain setting, which are said to be the finest in the British Isles. … Nearly 8 miles separate Balquhidder and Killin Junction stations, though there is an intermediate crossing – Glenoglehead. This was the site of the original Killin station, before the opening of the Killin Branch Railway. The whole length of ‘gloomy’ Glen Ogle – a wild rocky valley, four miles in length, described as the Khyber Pass of Scotland – is traversed, with its rocky boulder-strewn slopes, the railway being carried in places on brick or masonry viaducts around the face of the rock where the cutting of a ledge was well-nigh impossible. For most of the ascent the view from the train is down almost precipitous slopes, continued upwards on the other side.” [1: p11]
The Oban line runs South to North on this extract from the RailMapOnline.com satellite imagery. The branch turns away to run East along the North side of Loch Earn which just peeps into this satellite image at the bottom-right. [15]Four pictures of Glen Ogle Viaduct. The first was taken from the opposite side of the valley, (c) Euan Reid, Octobr 2024. [Google Maps, November 2024]Summer (c) Craig McArdle. (2023)Autumn (c) Sky T. (2021)Winter (c) Ken Schwart (2022)This next extract from RailMapOnline.com’s satellite imagery shows that to the North of Glen Ogle the old railway turned to the West. The line entering the extract from the top and meeting with the Callander & Oban Railway is the Killin Branch. [15]
Gairns continues:
“At the northern end of the Pass the line curves westward, overlooking the Loch Tay branch which runs from Killin Junction to the little town of Killin, with an extension of about a mile to a pier on Loch Tay to connect with the railway steamers which serve the whole length of the Loch, glimpses of which are had from the Oban train. The branch is on a lower level and its track can be seen for a long distance from the main line. The branch railway is one of very heavy gradients. At Killin Junction it makes connection with the main line which has descended from Glenoglehead to meet it. The station here has the usual island platform on the up side, to accommodate the branch trains clear of the main line.” [1: p11-12]
Looking South towards Lochearnhead, the A85 and the route of the old railway run immediately adjacent to each other alongside Locham Lairig Cheile which is just off the right side of this photograph. [Google Streetview, May 2022]Looking North towards Glenoglehead Crossing at the smae location as the image above. Lochan Lairig Cheile ican be picked out on the left of the image. [Google Streetview, May 2022]
Glenoglehead Crossing permitted two trains on the line to pass each other.
A Google Maps satellite image extract showing the location of Glenoglehead Crossing in the 21st century. It was once known as Killian Railway Station (even though over 3 miles from Killin) and was at that time the northern terminus of the Callander & Oban Railway. [Google Maps, November 2024]
From Glenoglehead the line dropped down to Killin Junction. The two map extracts above come from the same 6″ Ordnance Survey sheet surveyed in 1899 and printed in 1901. [27]
The location of Glenoglehead Railway Station with the original station building in private hands. [Google Streetview, May 2022]The route of the old railway descending from Glenoglehead. [Google Streetview, May 2022]The line ran West on the Southern slopes of Glen Dochart. {Google Streetview, May 2022]An enlarged extract from the 6″ Ordnance Survey of 1899 showing the location of Killin Junction. [27]A similar length of the line on the RailMapOnline.com satellite imagery. [15]Killin Junction Railway Station and Signal Box. This view looks Southwest through the station towards the Signal Box. This image is one of a number which scroll across the screen on [28]Killin Junction Railway Station. This view looks Northeast. The image is one of a number which scroll across the screen on https://railwaycottagekillin.co.uk/history [28]
Just to the Southwest of Killin Junction the line was carried over the Ardchyle Burn on a stone viaduct – Glendhu Viaduct.
Glendu Viaduct carried the old railway over the Ardchyle Burn, (c) Richard Webb and made available for resue under a Creative Commons Licence (CC BY-SA 2.0), [29]
A short distance to the West of the viaduct, a farm acess track was carried over the railway on a stone arched bridge.
Farm access bridge over the old railway. This image was shared on the Re-Appreciate the Callander & Oban Line Facebook Group by John Gray on 6th October 2018. [32]
Along the length of the old railway between Killin Junction and Luib Railway Sation two more structures are worthy of note. First, Ledcharrie Viaduct at around the half-way point between Killin Junction and Luib spans the Ledcharrie Burn. [33] The second is Edravinoch Bridge which was a girder bridge which once spanned the Luib Burn. The aboutments remain but the girders were removed for scrap on closure of the line. [34] Bothe the pictures below were taken by John Gray and shared by him on the Re-Appreciate the Callander & Oban Line Facebook Group on 4th October 2018. John Gray’s photographs are reproduced here with his kind permission.
Ledcharrie Viaduct. [33]Edravinoch Bridge. [34]
The next station on the old railway was Luib Railway Station in Glen Dochart.
River, road and railway in close proximity at Luib Railway Station. The 6″ Ordnance Survey of 1898, published in 1901. [30]The site of Luib Railway station is, in the 21st century, Glen Dochart Holiday Park. [15]
This view looking West from Luib Railway Station is embedded from Ernie’s Railway Archive on Flickr, (c) J.M. Boyce. Note the signal box and the stone water tower base. [31]The old road alignment and under bridge to the West of the Luib Railway Station site. [35]Just to the West of Luib Railway Station the line crossed what became the A85. There is no clear indication on the groud of the location of the bridge as road improvements have swept away the vestiges of the old railway in the immediate vicinity. [Google Maps, November 2024]
Gairns continues:
“Westward past Luib to Crianlarich, Glen Dochart is traversed, with the River Dochart, until it merges into Loch Iubhair, succeeded in turn by Loch Dochart, and the public road, for company close alongside. Here splendid views are hard on both sides, bare mountain slopes being relieved by wooded areas, while rushing burns and streamlets add further interest. On both sides are peaks of considerable height, notably Ben Dheiceach (3,074 ft.) to the North, Ben More (3,843 ft.) immediately ahead, and Stobinian (3,821 ft.) to the South, with many others in the distance.
Crianlarich is important as it provides for interchange traffic with the West Highland line to Fort William and Mallaig, which here crosses. The stations are within a short distance, and there is siding connection for interchange goods traffic. The Callander and Oban station is a neatdouble-platformed station with rather attractive buildings on the down side, Just beyond the station the North British Railway crosses by an overbridge, and Crianlarich Junction is then reached, this controlling the connection with the West Highland line.” [1: p12-13]
Two different railways crossed at Crianlarich. The Callander & Oban Railway ran East-West. The West Highland Line ran North-South. The East-West line and station were opened on 1st August 1873 by the Callander and Oban Railway. This was the first railway station in Crianlarich. The station was originally laid out with two platforms, one on either side of a crossing loop. There were sidings on the south side of the station. After the West Highland Railway opened in 1894, Crianlarich could boast two railway stations. The West Highland Railway crossed over the Callander and Oban Railway by means of a viaduct located a short distance west of the Lower station. The West Highland Railway’s Crianlarich station was (and still is) located a short distance south of this viaduct. [36]The two lines plotted on the modern satellite imagery provided by RailMapOnline.com. The blue line being the Callander and Oban Railway, the red line being the West Highland Line. The link line between the two stations/railways was put in by the West Highland Line and is shown in red. [15]
Crianlarich Junction was situated half a mile west of Crianlarich Lower station. Opened on 20th December 1897, the junction was located at one end of a short link line that ran to Crianlarich station on the West Highland Railway. There were two signal boxes: “Crianlarich Junction East” (32 levers) and “Crianlarich Junction West” (18 levers). Following closure of the line east from Crianlarich Lower, the line between there and Crianlarich Junction was retained as a siding, with the link line becoming the main line for trains to and from Oban. [37]
Crianlarich Lower Railway Station on the Callander and Oban Railway. The picture appears to have been taken in circa. the 1920s. Note that by this time the second platform and the loop had been removed. It is also [possible to see the high level viaduct which carried the West Highland line over the road (A85), the Callander and Oben Railway and the River Fillan. This image was shared by Brian Previtt on the Disused Stations Facebook Group on 25th October 2024, (c) photographer not known, Public Domain. [38]
The line to the West of Crianlarich Junction remains in use in the 21st century.
Gairns continues his description of the line:
“Onwards through Strath Fillan magnificent views are had, and for some miles the West Highland line runs parallel, but on the opposite side of the valley, climbing up the hillside, after crossing the viaduct over the River Fillan until both lines are almost on the same level, with the valley between. Both lines have stations at Tyndrum (a favourite mountain resort), though these are some half-a-mile apart. The Callander and Oban station is a neat tree-shaded [location], with the goods yard at a lower level.” [1: p13]
The Callander & Oban Railway’s Tyndrum Railway Station sat to the South of the Hotel which the West Highland Line’s station to the North. [39]
Wikipedia tells us that Tyndrum Lower Station “opened on 1st August 1873 as a terminal station. This was the first railway station in the village of Tyndrum. Until 1877, it was the western extremity of the Callander and Oban Railway. In 1877, the Callander and Oban Railway was extended from Tyndrum to Dalmally. Concurrently, the station was relocated 301 yards (275 m) west, onto the new through alignment. The new station was on a higher level, as the line had to climb steeply to reach the summit about 0.6 miles (1 km) to the west. The old terminus then became the goods yard. The through station was originally laid out with two platforms, one on each side of a passing loop.” [40]
Tyndrum Lower and Upper Tyndrum Railway Stations can be seen on this extract from RailMapOnline.com’s satellite imagery. The image shows the route(also in blue) of a tramroad which served Tyndrum Lead Mines and Glengarry Lead Smelter (a little to the East of Tyndrum). After the closure of the smelter transfer to wagons of the Callander & Oban Railway took place at Tyndrum Lower Railway Station. [15]Tyndrum Lower Railway Station in 2015 – a single platform Halt. The platform is on the North side of the line. This view looks East toward Crianlarich, (c) Alex17595 and made available under a Creative Commons Licence (CC BY-SA 4.0). [41]Looking West along the line from the access road/carpark at Tyndrum Lower Railway Station. [Google Streetview, April 2011]
Gairns’ description of the line continues:
“Passing Tyndrum station a final view is had of the West Highland line [before] it turns its course northwards, while the Callander and Oban line makes a long sweep southwesterly through Glen Lochy, wild and bare. An intermediate crossing, Glenlochy breaks the 12-mile run from Tyndrum to Dalmally. Approaching the rather pretty station at the latter place, Glen Orchy is joined, fine views being had along it. Dalmally, at the foot of Glen Orchy, has been described as ‘the loveliest spot in all that lovely glen’. A short run of less than 3 miles crossing the Orchy and rounding a bay on Loch Awe, and incidentally giving beautiful views up the Loch, and Loch Awe station is reached, right on the water side, and with a pier alongside for the steamers which ply along the Loch. For four miles or so the line runs high on the base at Ben Cruachan and follows the shores of the Loch through the gloomy Pass of Brander in which the waters of the loch merge into the brawling River Awe most turbulent of Highland salmon streams, Three miles beyond Loch Awe station the Falls of Cruachan Platform is a convenience for visitors to the celebrated Falls, a glimpse of which is had from the train in passing. The crossing place is, however, Awe Crossing, a mile or so beyond. A further run of 41 miles and Taynuilt is reached, beyond which the shores of Loch Etive are followed to Connel Ferry, a run of 64 miles, with one intermediate station – Ach-na-Cloich – and providing lovely views over the loch and the hills and mountains. beyond.” [1: p13]
Glenlochy Crossing, which Gairns describes as “An intermediate crossing, Glenlochy breaks the 12-mile run from Tyndrum to Dalmally.” This image shows what is recorded on the 6″ Ordnance Survey of 1898, published in 1900. [41]The same location as it appears in the 21st century on the ESRI satellite imagery provided by the NLS. The site of Glenlochy Crossing is in the trees close to the centre of this image. which runs diagonally down the centre portion of the imageof this image. The A85 runs to the West of the old railway’s route which runs diagonally down the centre portion of the image. The River Lochy passes immediately to the West of Glenlochy Crossing (left of centre). [41]
Glenlochy Crossing was a passing loop opened in 1882 to increase the capacity of the line. It broke the singl-track section between Tyndrum Lower and Dalmally. The building shown just to the East of the line was similar to that found at other crossings (such as Drumvaich Crossing and Awe Crossing0. It combined a railway cottage with a signal cabin. When first built the loop had two trailing sidings one at each end of the loop. We know that the loop was lifted in 1966 when the building was also demolished. There is still a footbridge across the River Lochy which gave access to the Crossing but that is now locked against public access. [42]
The Callander & Oban Railway closely followed the South bank Of the River Lochy, only turning away to the South to cross Eas a Ghaill (a tributary which approached the River Lochy from the South) by means of Succoth Viaduct.
Succoth Viaduct. This is an embedded link to an image on the GetLostMountaineering.co.uk webpage. The viaduct carries what was the Callander & Oban Railway over Eas a Ghaill. [43]
The line runs almost due West from Succoth Viaduct at a distance from the River Lochy until it reaches Dalmally Railway Station.
Dalmally Railway Station as it appears on the 6″ Ordnance Survey of 1897, published in 1900. [44]Dalmally Railway Station as it appears on the satellite imagery provided by RailMapOnline.com. [15]Looking West through Dalmally Railway Station, this mage was shared by Donald Taggart on Google Maps, (c) Donald Taggart (March 2020)A similar view of the station buildings at Dalmally from Platform No. 2, (c) Anna-Mária Palinčárová. (June 2017), shared by her on Google Maps.
This photograph was taken from the Road overbridge at the West end of Dalmally Railway Station site, (c) inett (November 2017) and shared on Google Maps.
the road overbridge at the West end of Dalmally Station site seen from the ned of Platform No. 1, (c) Marian Kalina (November 2017) and shared on Google Maps.
The Station approach, seen from the West, Dalmally. [Google Streetview, November 2021]The road over the bridge at the West end of Dalmally Railway Station site. [Google Streetview, May 2022]
West of Dalmally the line ran on towards a viaduct which crossed the River Lochy at Drishaig. However, we need to note that the road layout in this immediate area is considerably different to what was present at the turn of the 20th century.
The Southeast approach to the viaduct over the River Orchy as it appears on the 1897 Ordnance Survey, published in 1900. [46]The smae area as it appears on the 21st century RailMapOnline.om satellite imagery with two roads appearing where non were evident at the turn of the 20th century. [15]The view East from the bridge carrying the A819 over the railway. [Google Streetview, November 2021]The view West from the bridge carrying the A819 over the railway. [Google Streetview, November 2021]
Just a short distance to the West, the line crossed the River Orchy at the East end of Loch Awe.
Further West of Dalmally, the line bridged the River Orchy at Drishaig. The mineral Railway which branched off the Callander & Oban Railway at Drishaig served the Ben Chruachan Quarry which was high on the East flank of Ben Chruachan. [45]The same location as it appears in satellite imagery in the 21st century. [15]An aerial image of Lochawe Railway Bridge with the A85 bridge behind. This aerial image was shared on Google Maps in September 2022, (c) Kevin Newton. [Google Maps, November 2024]Lochawe Railway Bridge seen from ground level. This image was shared on Google Mpas in April 2021, (c) Wojciech Suszko. [Google Maps, November 2024]
The Ben Cruachan Quarry Branch was standard-gauge and ran North from Drishaig. It is shown here as it appears on the 6″ Ordnance Survey of 1897, published in 1900. The line North from Drishaig appears on the map extract on the left. [47]
Ben Cruachan Quarry itself, shown on the next 6″ OS Map Sheet. The quarry was on the eastern slopes of Ben Cruachan. The full extent of the quarry’s internal railways is not shown. [48].
Ben Cruachan Quarry was multi-levelled and was accessed by the railway which zig-zagged to gain height. The RailScot website rells us that”The ground frame for this short Ben Cruachan Quarries Branch (Callander and Oban Railway) was released by a tablet from Loch Awe station for the section to Dalmally. The quarry had its own pair of 0-4-0ST locomotives.” [49]
Just a short distance Southwest of Drishaig was the Lochawe Hotel which had its own railway station alongside the Loch.
Lochawe Railway Station and Hotel in 1897 as shown on the 6″ Ordnance Survey sheet of that year. [50]The same location as shown on the satellite imagery of RailMapOnline.com. [15]A postcard view of Lochawe Railway Station and Hotel, (c) Public Do9main. [52]Lochawe Railway Station in 2015. The removed second platform can be seen easily, (c) Tom Parnell and licenced for reuse under a Creative Commons Licence (CC BY-SA 2.0). [51]
The line ran across the North shore of Loch Awe to a Halt named for the Falls of Cruachan – Falls of Churachan Platform.
The Falls of Cruachan Platform as shown on the 6″ Ordnance Survey of 1897. [50]The same location in the 21st century. There is a significant hydro electric scheme at this location which has a visitor centre and its own Railway Station – Falls of Cruachan Railway Station. [15]A train approaching Falls of Cruachan Railway Station from the West in 2024, (c) Alex Morgan. (July 2024)The Falls of Cruachan Railway Station sat immediately above and t the North of the A85, (c) Alex Morgan. (July 2024)
The line continues West/Northwest along the Northside of the River Awe. It crosses the river just North of The Bridge of Awe. Just prior to reaching the Viaduct the line bridged the minor road which served properties on the North side of the River Awe.
The bridge over the minor road mentioned above – seen from the Southwest. [Google Streetview, May 2022]The bridge over the minor road mentioned above – seen from the Northeast. [Google Streetview, May 2022]
A matter of not much more than a couple of hundred metres to the West of the minor road, the line bridges the River Awe.
The Bridge of Awe with the Railway Viaduct just to the North, as they appear on the 6″ Ordnance Survey of 1897, published in 1900. [53]
The same location on RailMapOnline.com’s satellite imagery. [15]An aerial image of the railway viaduct. [54]
The railway viaduct over the River Awe. Network Rail Undertook a £3.5m project to refurbish Awe viaduct in 2024/25. The viaduct is a three-span wrought iron viaduct, completed in 1879. During the 7-month project, engineers replaced the timber deck (which supports the track). They removed the old paint, carry out repairs to the metallic parts of the structure and repainted those parts of the structure to protect against rusting. [54]
Over the river, the line heads for Taynuilt.
The A85 runs directly alongside the line on the approach to Taynuilt. This photograph looks Northwest along the road/railway. [Google Streetview, May 2022]Taynuilt village and Railway Station as they appear on the 6″ Ordnance Survey of 1897. [53]The same length of the line as it is shown on the RailMapOnline.com satellite imagery. [15]
On the way into Taynuilt the line crosses a minor road which serves the East end of the village. That road can be seen at the righthand side of the satellite image and the map extract above.
The minor road bridge seen from the Northwest. [Google Streetview, Novermber 2021]The minor road bridge seen from the Southeast. [Google Streetview, May 2022]
The next bridge spans the railway adjacent to Taynuilt Railway Station it carries the B845.
The view East along the line from the B845 overbridge. [Google Streetview, May 2022]The view West from the B845 into Taynuilt Railway Station. [Google Streetview, May 2022]The view East from Taynuilt Railway Station to the bridge carrying the B845 over the line, (c) Robert Hamilton (October 2017). [Google maps, November 2024]Taynuilt Railwaty Station forecourt. [Google Streetview, November 2021]The view East from the A85 towards Taynuilt Railway Station. [Google Streetview, May 2022]The view West from the A85. [Google Streetview, May 2022]
A little further to the West the railway passes under the A85 again.
The bridge over the railway in 1897. [53]The bridge over the railway in 2024. [53]Looking West along the A85 showing the parapets of the bridge over the Callander & Oban Railway. {Google Streetview, November 2021]
The line now drops down to the shores of Loch Etive and in due course arrives at Auch-na-Cloich.
In 1897, the station at Auch-na-Cloich bore the name ‘Ach-na-Cloich, as the 6″ OS map extract shows. It bore that name right through to closure on 1st November 1965. [55][56]The remaining buildings at Ach-na-Cloich, seen from the public road adjacent to Loch Etive. [Google Streetview, April 2011]
The line continues to hug the shore of Loch Etive passing over the A85 a couple of local roads on its way to Connel Ferry Railway Station.
The next bridge over the A85,seen from the Northwest. [Google Streetview, November 2021]
The next image comes form Gairns’ article in The Railway Magazine and shows a train approaching Connel Ferry from the East.
In its heyday when it served a branch to Ballachulish, Connel Ferry Railway Station had three platforms, a goods yard and a turntable. Later this was reduced to just the single platform, after the branch closed in 1966, [64] as it remains today. [63][65]
As we have already noted, the journey along the branch can be followed by reading articles elsewhere on this blog. We will continue our journey with Gairns along the main line to Oban. ….
Gairns continues
“At Connel Ferry, junction for the Ballachulish line, there is a wide island platform serving the up and down main lines, and a single platform on the up side designed for branch trains, though generally these use the main platform to facilitate passenger and luggage transfer. The station has sidings and [a] goods yard. Its height above the village entails high viaducts both on the Oban line and on the approach to the famous Connel Ferry bridge, crossed by Ballachulish trains. Fine views are had of the bridge from the Oban line as it pursues its course high up on the hillside until it cuts inland to attain the summit of Glencruitten. This is at the top of the 3-mile incline at 1 in 50 by which the line zig-zags down to reach the shore at Oban, giving views now over Oban and the landward hills above it, and then, with final sweep round, over the Kerrera Sound and Kerrera Island, to the mountains of Mull and the Firth of Lorne.
Before reaching the terminus a stop is usually made at Oban ticket platform, adjacent to the goods yard and engine shed. Oban station has picturesque build ings surmounted by a clock tower, and the circulating area is adorned with hanging flower baskets. Refreshment and dining rooms are provided. The three main platforms are partly covered by a glazed all-over roof, though their outer curved portions are open. Alongside are two open arrival platforms permitting cabs, &c., to come directly alongside the trains, The station is immediately alongside the steamer pier and harbour premises, the location being peculiarly convenient to the principal hotels, the sea front, and the Corran Esplanade.
Oban – ‘a little bay’ – so widely favoured as a holiday resort, as a boating and yachting centre, and as headquarters for touring the Highlands and the Hebrides in all directions, has been described as the ‘Charing Cross of the Highlands’. Whether readers will agree with this as a happy choice or not, it certainly justifies it as a great steamer traffic and touring centre. Messrs. David MacBrayne, Ltd., operate steamers between Oban, the Sound of Mull and Tobermory to Castlebay and Lochboisdale (‘Inner Island Service’), Ardrishaig via the Crinan Canal, to Staffa and Iona, to Ballachulish, Kentallen and Fort William, and thence via the Caledonian Canal to Inverness, besides many local trips and excursions.” [1: p13-15]
Connel Ferry is the last station before Oban. The railway line runs behind (South of) Connel and then turns away from the coast and the A85.
The line Southwest of Connel Ferry Railway Station, as shown on railmaponline.com’s satellite imagery. [15]This extract from the 6″ Ordnance Survey of 1897, published in 1900 shows the next bridge on the line where a local road passes under the railway. [66]A similar area in the 21st century. [Google Maps, December 2024]The bridge shown on the Ordnance Survey extract and on the modern satellite image from Googlee Maps. This view looks Northwest along the lane under the bridge from the Southeast. [Google Streetview, November 2021]Looking Southeast along the lane this time. Google Streetview, November 2021]The next length of the line as shown on the 6″ Ordnance Survey of 1897, published in 1900. [66]
Trains encounter a number of accommodation bridges/underpasses which allow field access under the line of the railway. The one shown below, at the highest magnification possible from the public highway, is typical of one type of culvert.
A narrow lane approaches the railway from the Northand an underpass sits to the East of the road where there is a slight gaps in the trees. [Google Maps, December 2024]A typical farm/field access under the railway. [Google Streetview, November 2021]
Just a short distance Southwest is another underpass, this time of stone arch construction.
A further underbridge constructed as a stone arch. [Google Streetview, June 2011]The narrow highway is in the top-left of this staellite image – the stone-arch bridge is just to the right of centre. [Google Maps, December 2024]The next length of the line as shown on railmaponline.com’s satellite imagery. [15]
Another few hundred metres to the Southwest a further underpass is a girder bridge.
The highway and the railway are in close proximity at this location. [Google Maps, December 2024]Looking Southeast under the railway, rather than being a stone arch this underpass is a girder bridge. [Google Streetview, June 2011]
The next underpass is a stone arched structure.
The next underpass is only just visible from the road. [Google Streetview, June 2011]It is located bottom-right of this image. [Google Maps, December 2024]
These two locations appear on the 6″ Ordnance Survey of 1897. …
The next length of the railway as shown on the 6″ Ordnance Survey of 1897, published 1900. [67]These two extracts (this and the one above) from the 6″ Ordnance Survey take us as far along the railway as the last railmaponline.com satellite image above. [68]The railway cottages in the 21st century. [Google Streetview, November 2021]The railway cottages in the 21st century. [Google Maps, December 2024]The next loength of the line as it appears on railmaponline.com’s satellite imagery. The outskirts of Oban can be seem on the left of the image. [15]Two extracts from the 6″ Ordnance Survey take us almost as far at the length of line on the railmaponline.com satellite imagery above. [68]This third extract from the 6″ Ordnance Survey completes the length covered by the railmaponline.com satellite image above and covers the length on the right on the satellite image below. [69]The final length of the line into Oban as shown by railmaponline.com. [15]This extract from the 6″ Ordnance Survey of 1898 covers the length of the line on the bottom half of the satellite image above. [69]Looking South out of Oban along the A816, Soroba Road, The railway crosses the road on a simply supported girder bridge. [Google Streetview, May 2022]This extract from the 6″ Ordnance Survey of 1898 shows the final length of the line and the two stations (passenger and goods) which existed at the turn of the 20th century. [69]The same area as it appears on Google Maps in the 21st century. Glenshellach Terrace marks the north side of what was the Goods Station. [Google Maps, December 2024]
Running into Oban the line is crossed by three road bridges:
For the sake of completeness, we note that Gairns’ narrative returns to Connel Ferry for commentary on the Ballachulish Branch.
“Commencing at Connel Ferry station, the branch train reaches the famous bridge by a viaduct approach over the village of Connel Ferry. The Connel Ferry bridge, claimed to be the Forth Bridge’s ‘biggest British rival’, was opened for traffic on 21st August 1903. The bridge, which is of cantilever type (hence the analogy suggested with the Forth Bridge), has a length of 524 ft. between the two piers, the clear span being 500 ft., and the headway above high-water level, 50 ft. Extreme height from high water to the topmost point of the bridge is 125 ft., while the middle span, carried by the two cantilever spans, has a length of 232 ft. This bridge not only enabled a district hitherto most inconveniently situated in regard to rail traffic to be placed in communication with the Callander and Oban Railway at Connel Ferry, but provided a means of crossing Loch Etive, where previously a very lengthy detour had to be made to get from one side to the other, the only alternative being a very uncertain ferryservice,
The difficulty having been solved from the railway point of view, there still remained the problem of providing for the transit of motor-cars and other road vehicles across the Loch, and for several years after the opening of the bridge the Caledonian Railway Company conveyed private motor-cars across the bridge by placing them on flat trucks and hauling them, passengers included, by road motor vehicles adapted to run on rails across the bridge.
This … was continued for a considerable time, but, several years ago, the Caledonian Railway Company adopted the alternative method of adapting the bridge also for the passage of motor vehicles, cycles, etc., under their own power. There is not, however, sufficient room for a roadway clear of the railway track, so that it is necessary to restrict the passage of road vehicles to periods when no train is signalled. At eachend of the bridge, therefore gates under the control of the bridge keeper, are provided to close the bridge to road traffic when a train is due, and the tablet instruments are controlled by electric circuits in connection with the road gates, to ensure that unless the gates are properly closed, a tablet cannot be used. The roadway over the bridge comes close up to the rails, there being just sufficient room for a vehicle to pass between the rails and the side of bridge, and the bridgekeeper has to see that vehicles from both directions are not allowed on the bridge at the same time. These facilities apply only to private motor-cars and horse-drawn vehicles, and not trade vehicles, of either class. Cyclists and pedestrians also use the bridge. In each case the crossing of the bridge is subject to toll, the men in charge at the Connel Ferry and Benderloch ends acting as toll-keepers. … In August [1922], the bridge was used by 6,009 foot passengers, by 852 motor-cars, and by 290 cycles. [1: p15-16]
Gairns continues:
“Passing North Connel halt, at the North end of the bridge, the line follows the shore to Benderloch station. At Barcaldine Crossing a platform is provided, where trains call as required. So far, the country traversed has been ‘comparatively’ flat and uninteresting, but as it crosses a peninsula to reach the shores of Loch Creran, mountain vistas again open up. Short of Creagan station the line crosses the Narrows to the Loch by a two-span girder bridge with approach viaducts, fine views being had on both sides.
Again crossing a peninsula. Appin is reached, and for the remainder of the journey the line follows closely the shores of Loch Linnhe. As it curves round after leaving Appin station, a good view is had of the ruins of Castle Stalker. Alongside the Loch splendid views are had, and Duror and Kentallen stations are sufficiently picturesque to harmonise with the general character of the scenery. At Ballachulish Ferry station tickets are collected, and the line then curves round to follow the shores of Loch Leven to the terminus at Ballachulish. This is a neat two-platformed station, with dining and refreshment rooms, and the district is impressively mountainous. A short distance from the station is a small harbour, whence a David MacBrayne steamerused to ply three times daily to and from the Kinlochleven wharf of the British Aluminium Company, for goods, passenger and mail traffic. This steamer service has now been withdrawn, a road having been built by German prisoners during the [First World War] and opened for traffic at the end of [1922].” [1: p16]
As noted close to the start of this article, the Ballachulish Branch has been covered extensively in an earlier series of articles which can be found here, [2] here, [3] here, [4] and here. [5]
Gairns goes on to reflect on the use of the Callander and Oban line. He says that its use is “complicated by the fact that its gradients are systematically so severe.” [1: p16] Indeed 1 in 50 gradients occurred:
“several times for considerable distances, curves are numerous, and in several places reduced speed is necessary owing to the danger of tumbling rocks, notably alongside Loch Lubnaig in Glen Ogle and the Pass of Brander, and automatic alarm wires are erected on some stretches, a fall of rock encountering them causing warnings to be given in adjacent signal cabins and watchmen’s huts, and putting the special signals to danger. On the steep grades both goods and passenger trains are operated under special restrictions, stops being made at the summits and brakes tested, or, on goods trains, a proportion pinned down before descending. Mountain mists and fogs, occasional torrential rainstorms or cloudbursts and other ‘episodes’ peculiar to mountain lines, also complicate the working at times. But even in winter there is a steady traffic in meeting the transport needs of the wide areas rendered accessible by this line, of the various townships and villages (many are centres for other places within a considerable radius), country houses, castles and large estates, and in carrying mails, supplying coal and, in due season, conveying cattle and other live stock.
The winter train services are, naturally, much reduced as compared with those of the summer, but even the winter service provides four through trains each way daily, a local each way between Oban and Dalmally, and several additional trains between Callander and Glasgow. Sleeping cars and through carriages are provided between Euston and Oban in winter on Fridays only from London, returning on Mondays. The down vehicles are conveyed on the 8.25 a.m. from Stirling, due in Oban at 12.15 p.m. It is also possible to reach Oban at 4.45 p.m. from London by the 11 p.m. from Euston the night before, and by the 5 a.m. from Eustonat 9.50 p.m., the same night, though not, of course, with through carriages.” [1: p16-17]
Gairns goes on to cover train movements on the line in some detail. While the copious detail he provided need not detain us here, it is worth noting the care with which connections to the various railway branches, steamer and motor-coach services associated with the main line were arranged. There were also a significant number of excursions and tours to suit passenger’s differing budgets.
Gairns’ final paragraph concentrated on the motive power in use on the line in the early 1920s and is worth recording here:
“The locomotives generally employed are the well-known ‘Oban’ 4-6-0s, with 5-ft. coupled wheels, together with Mr. Pickersgill’s new ‘Oban’ class recently introduced, though odd trips are taken by 0-6-0 goods engines, which also render assistance on the steep grades. On the Killin branch and the Ballachulish extension 0-4-4 tank engines of the 4 ft. 6 in. class are used. Between Dunblane and Callander main line 4-4-0 locomotives from Glasgow or Stirling and 0-6-0 goods engines are used, as well as the Oban 4-6-0s on the through trains, a change being sometimes made at Callander. The Callander and Oban line and the Ballachulish extension are controlled by electric train tablet apparatus. Ordinary train staff is used on the Killin branch.” [1: p18]
References
G.F. Gairns; The Callandar and Oban Railway; in The Railway Magazine, London, July 1923, p10-17
John Thomas; The Callander &Oban Railway: The History of the Railways of the Scottish Highlands – Vol. 4; David St. John Thomas Publisher, Nairn, Scotland, 1966, 1990 and 1991.

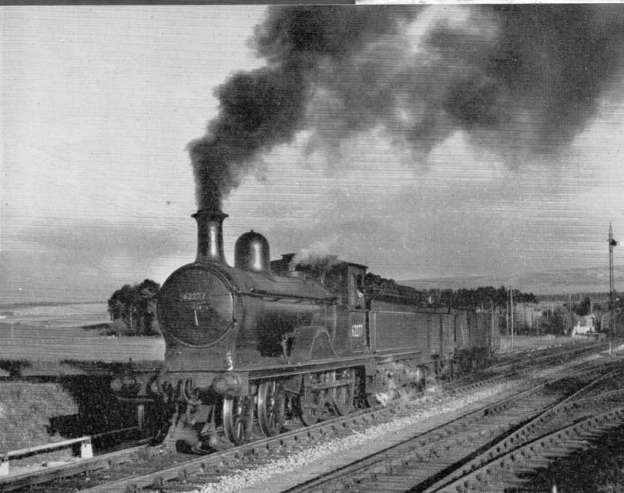
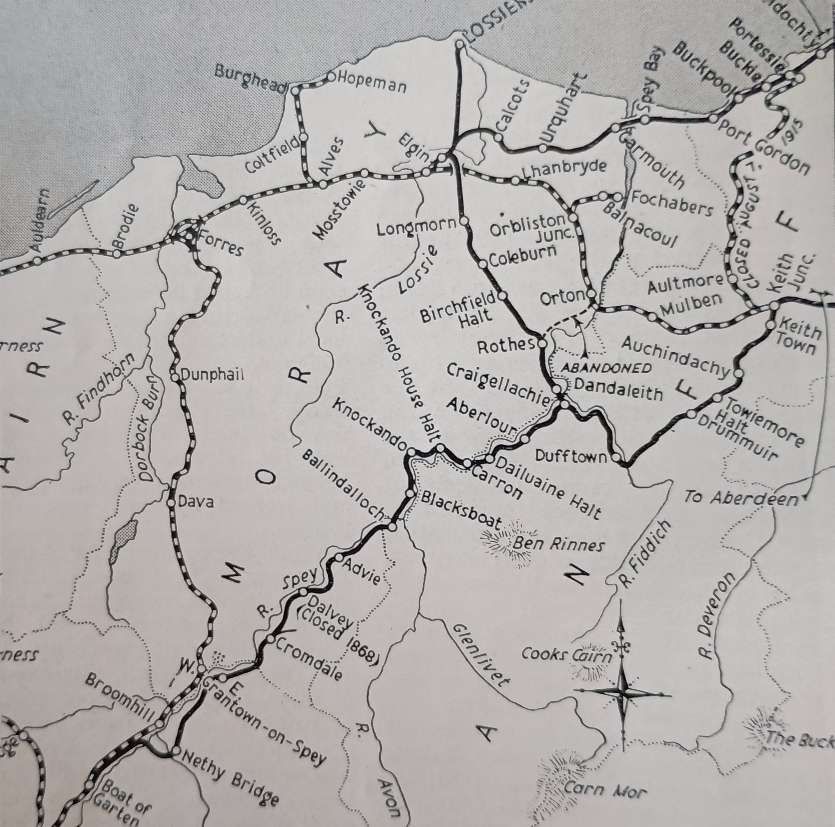
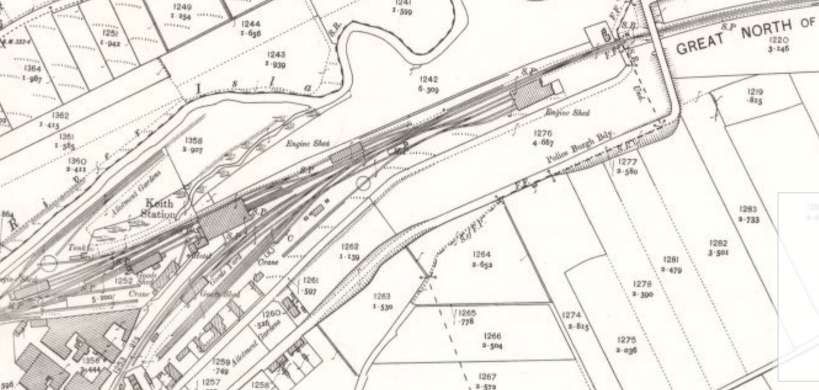
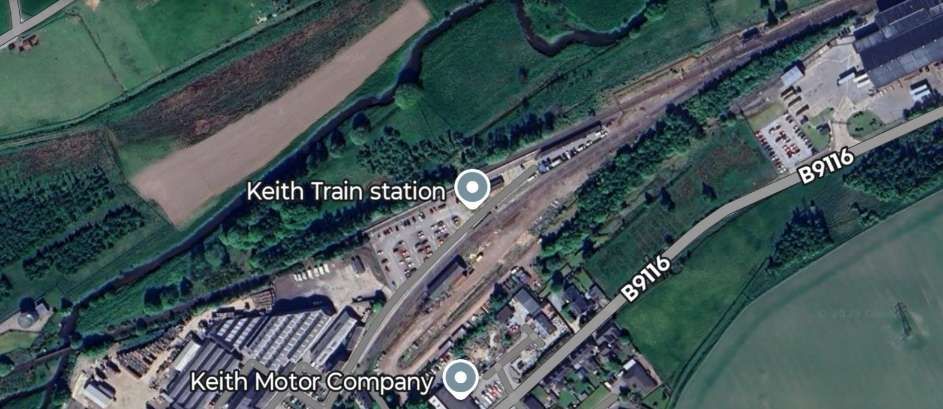
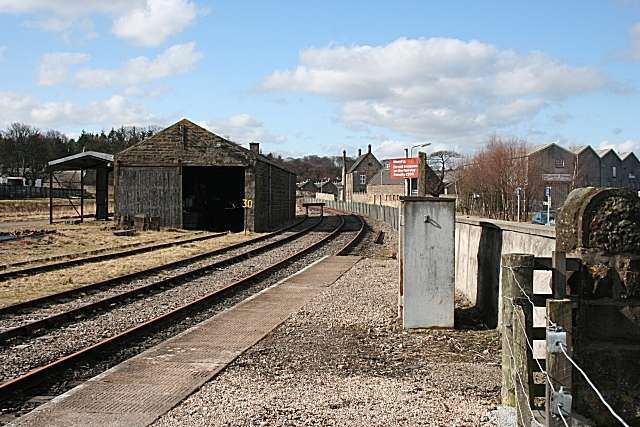
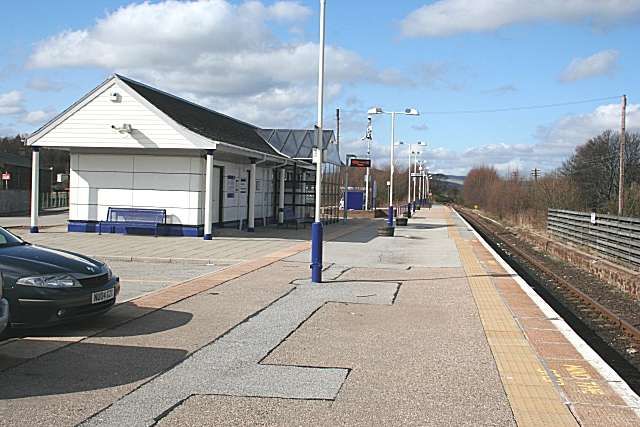
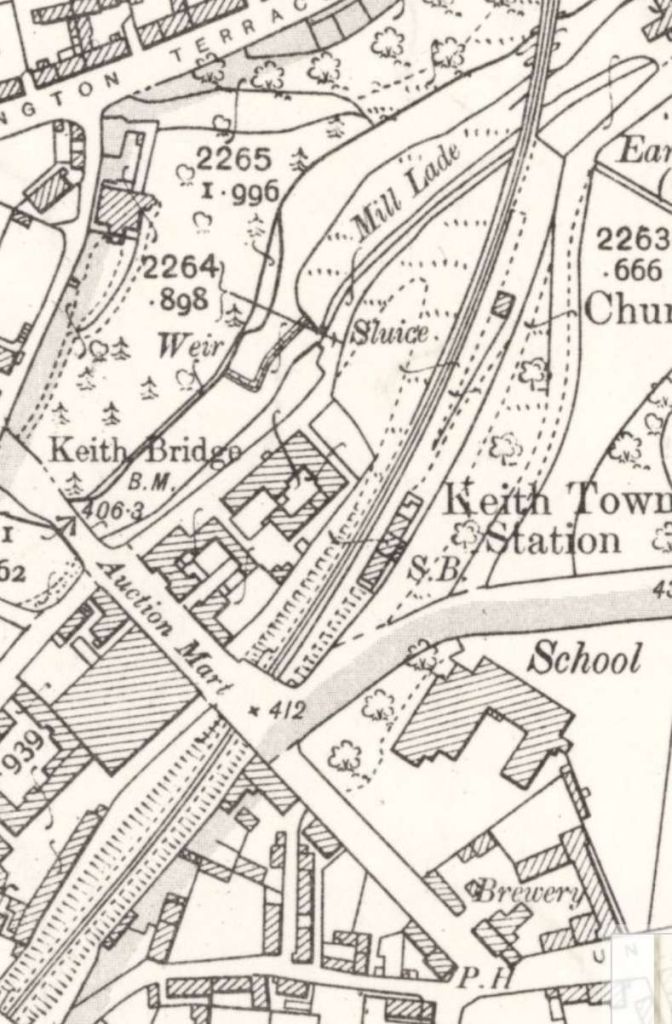
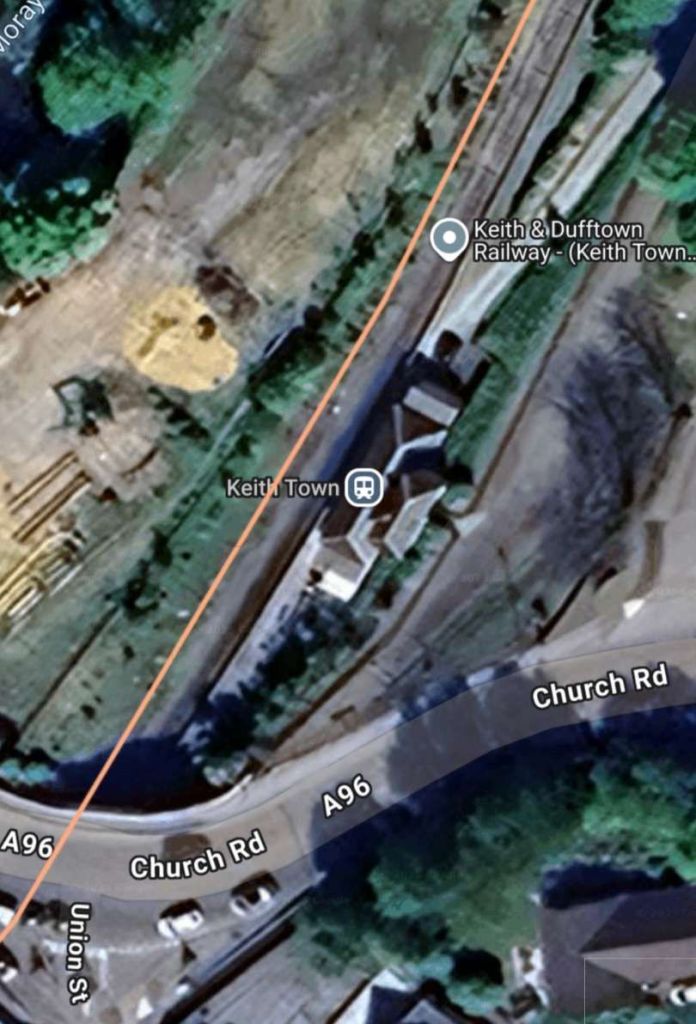
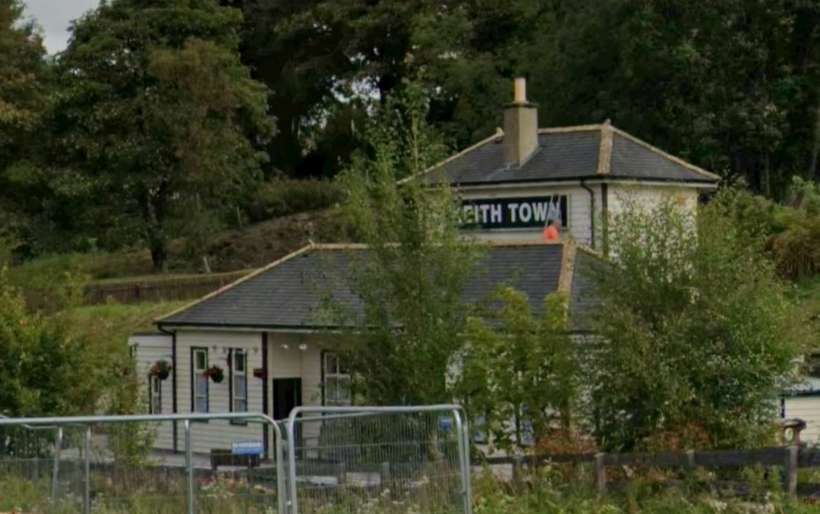
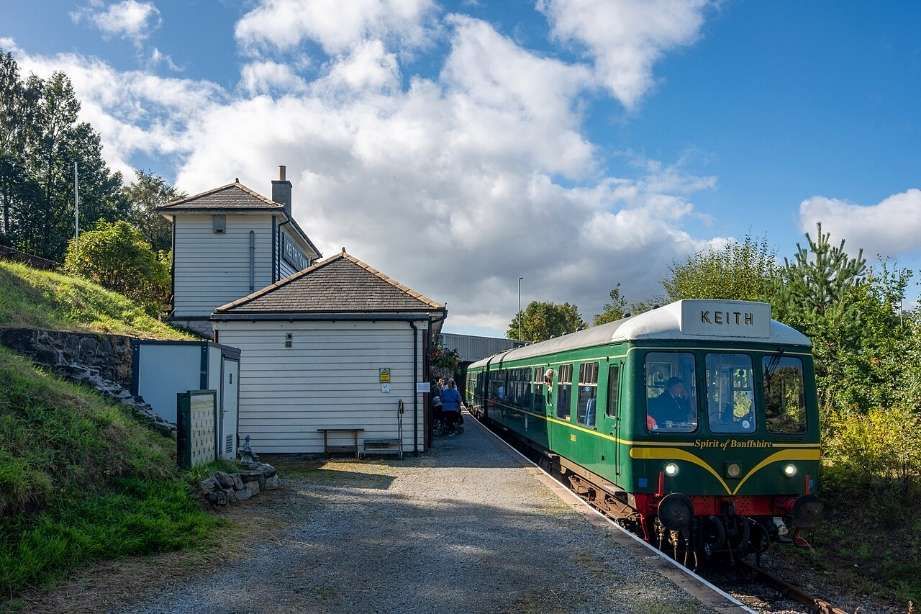

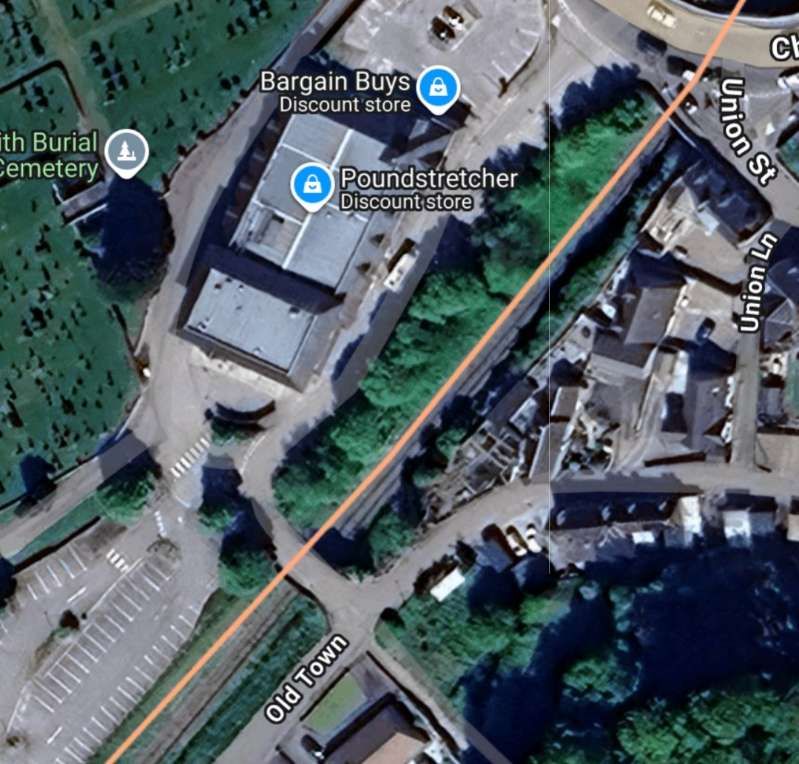
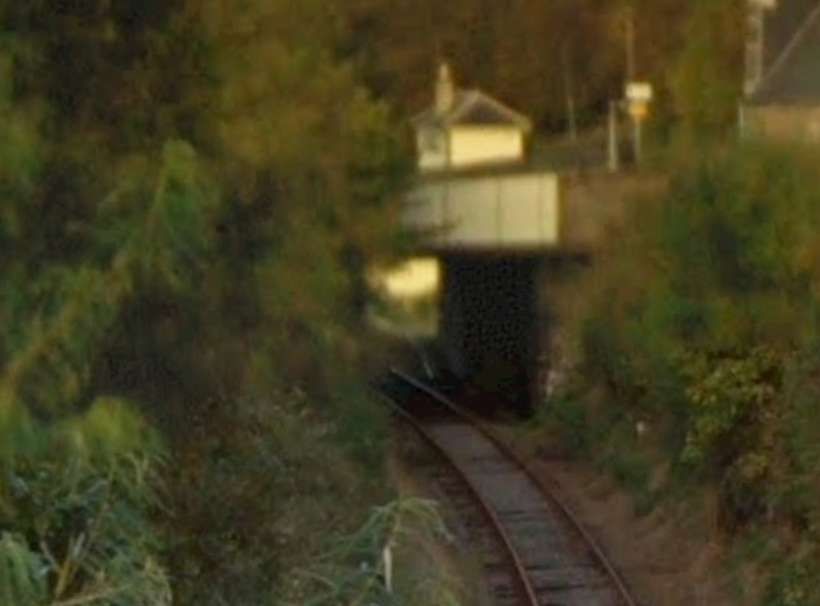
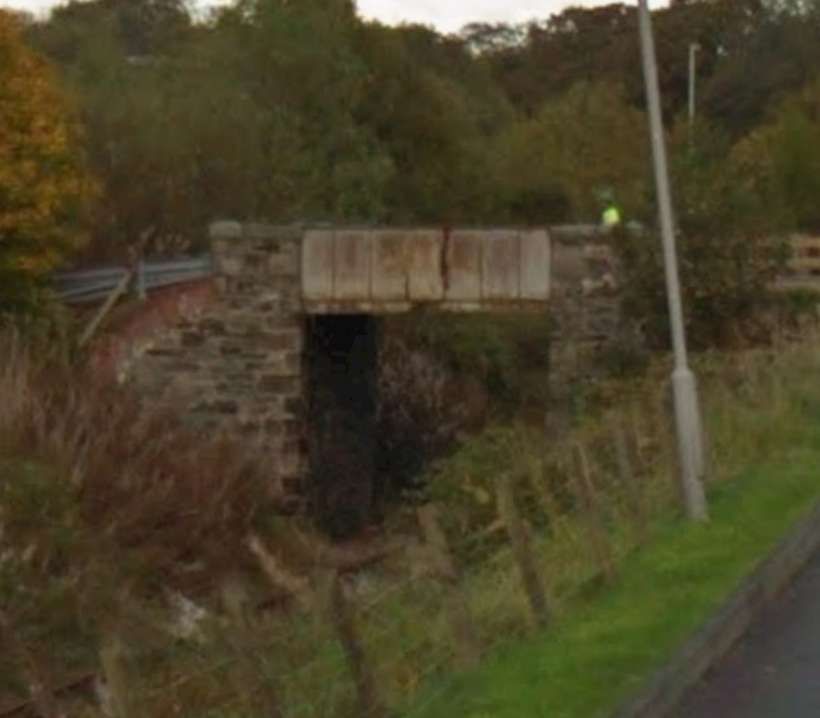
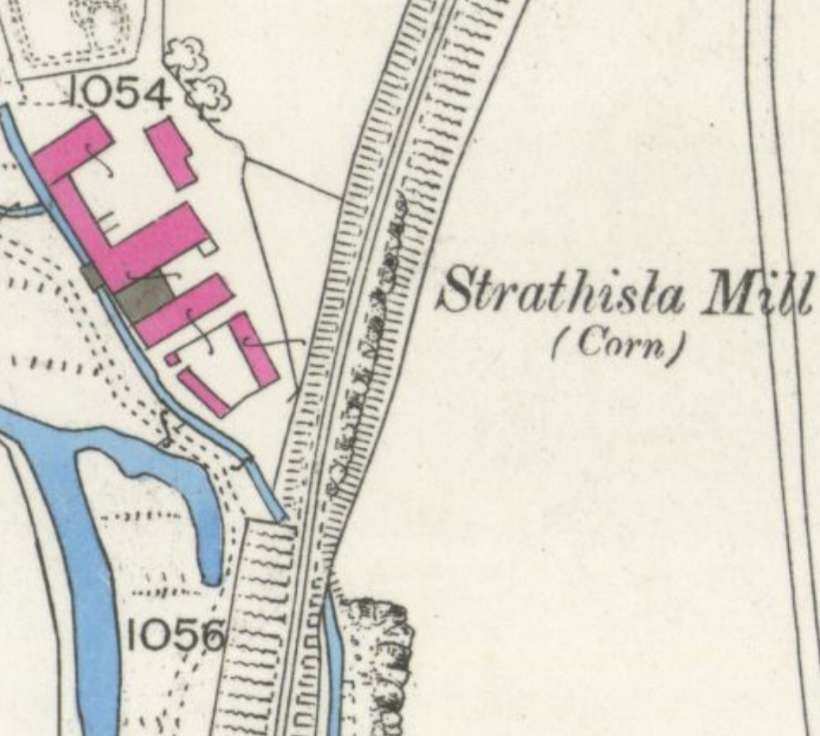
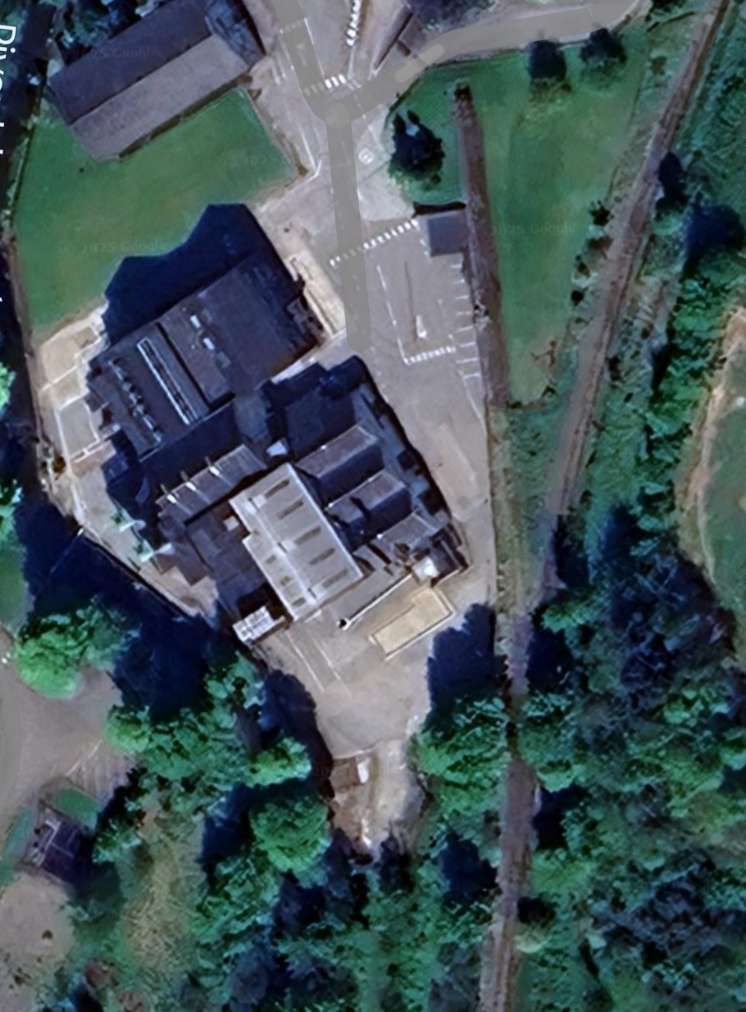
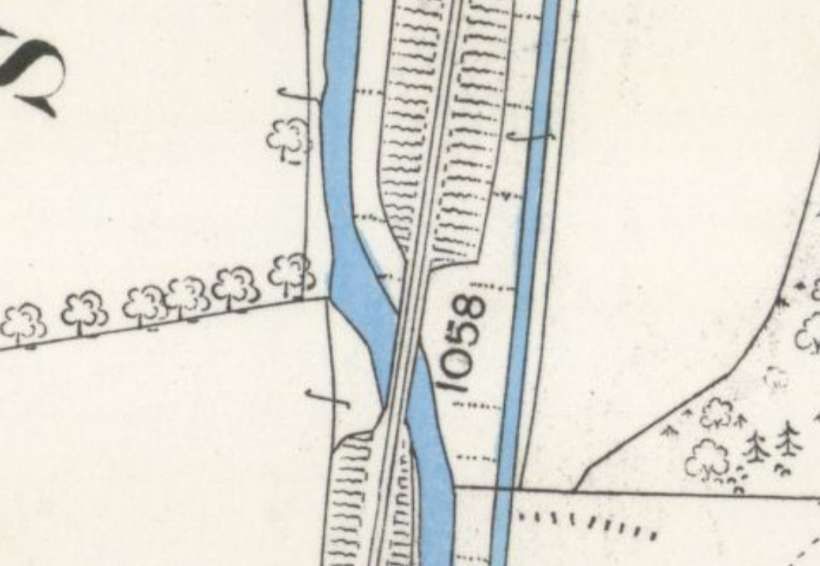
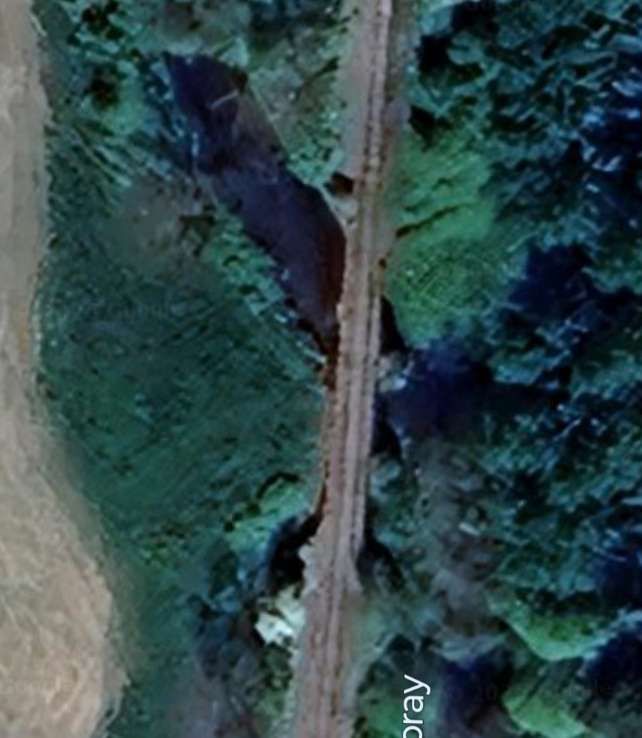
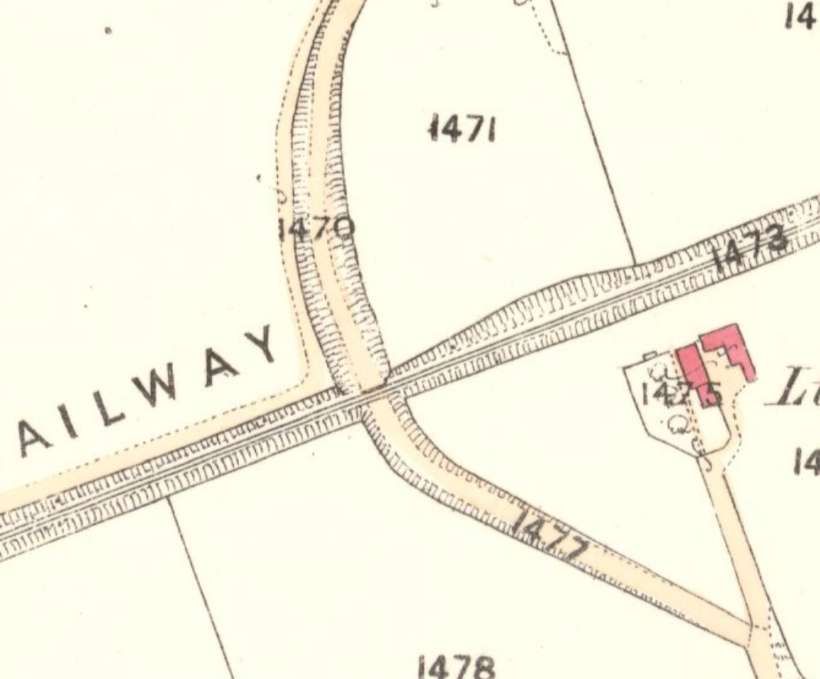
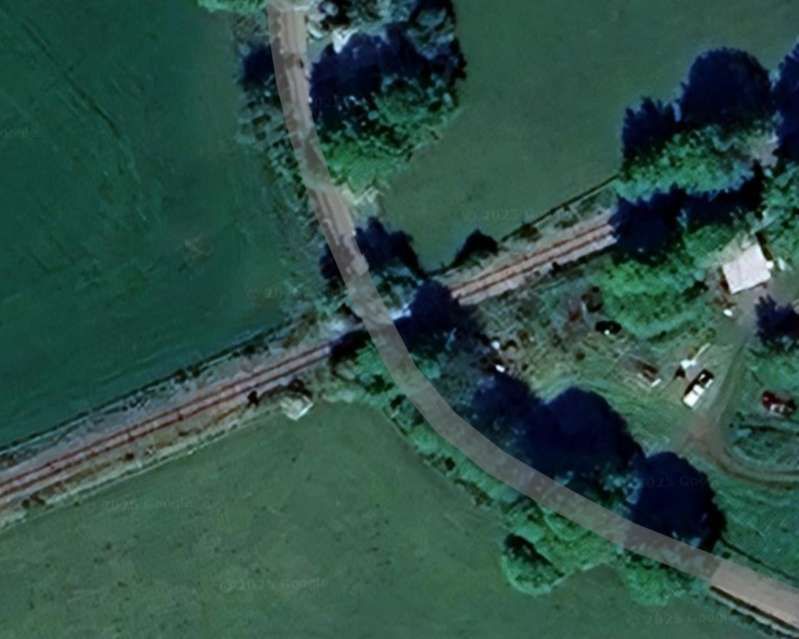
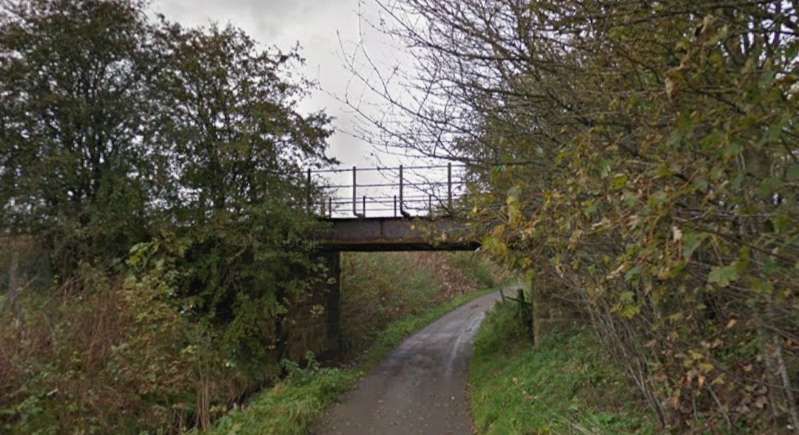
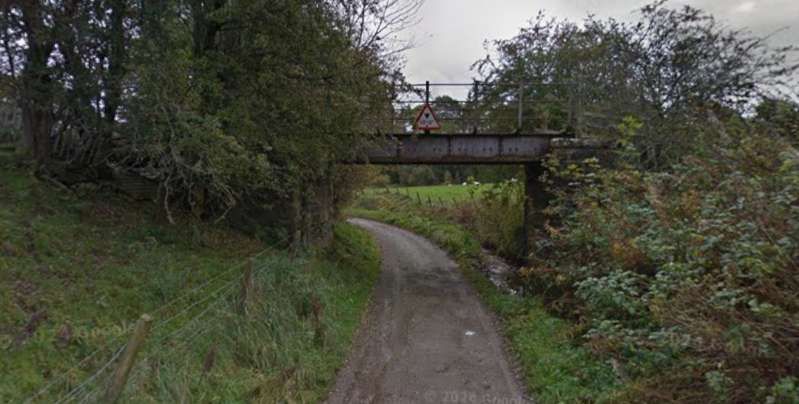

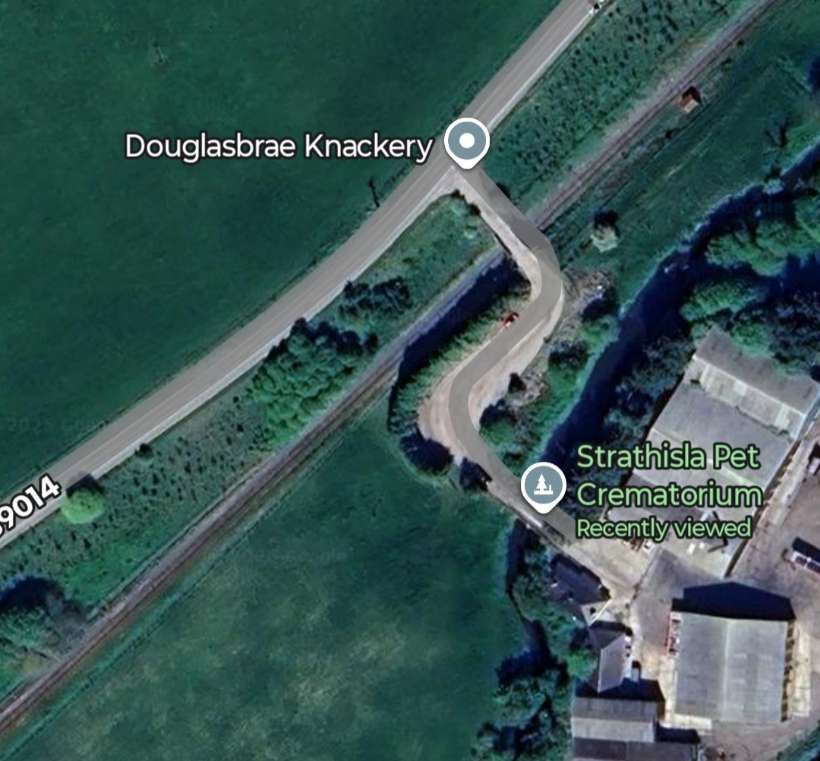
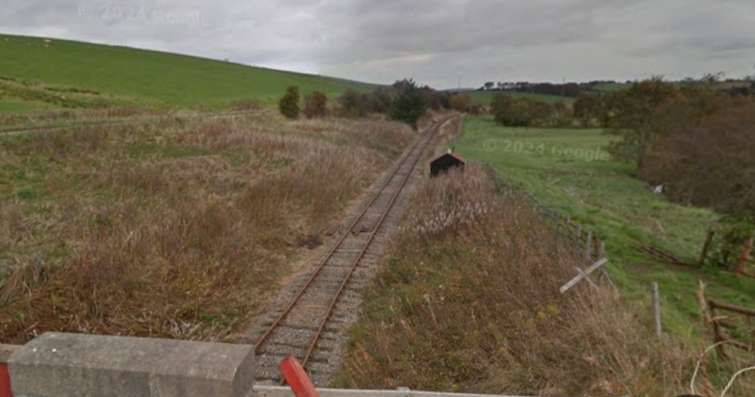
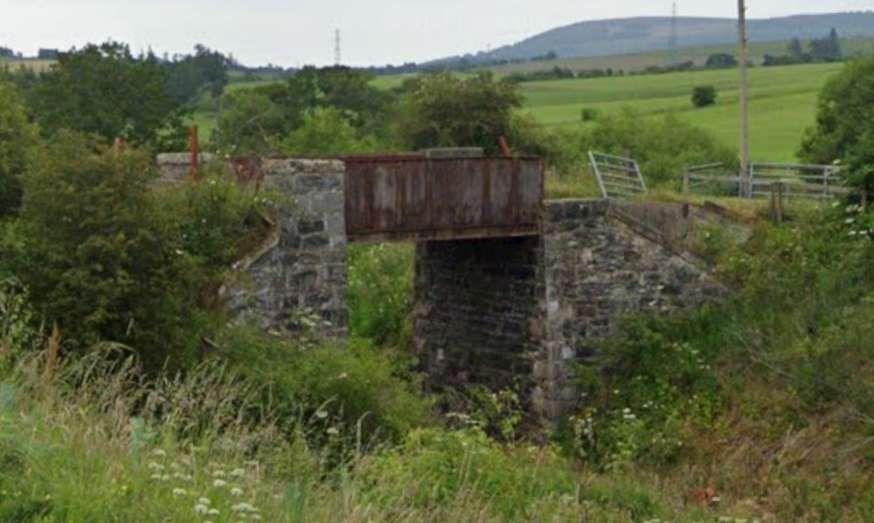
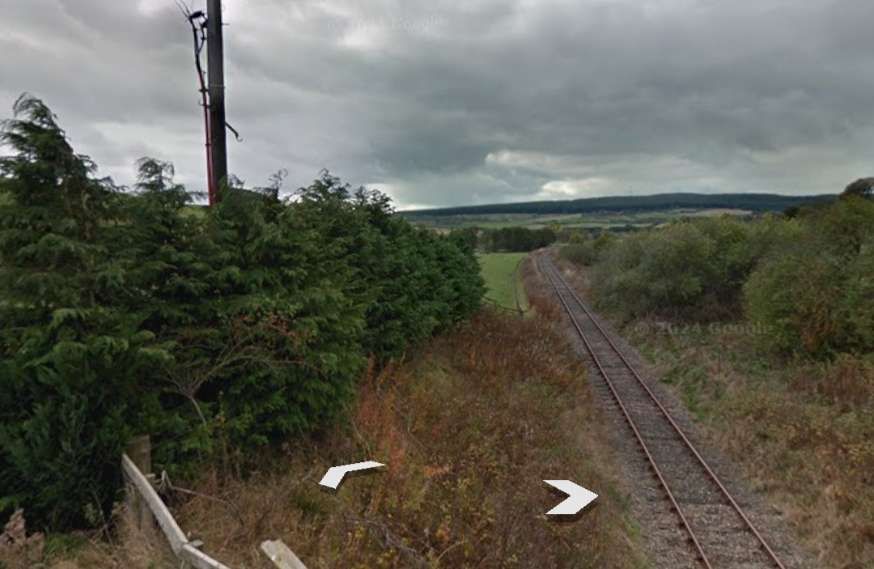
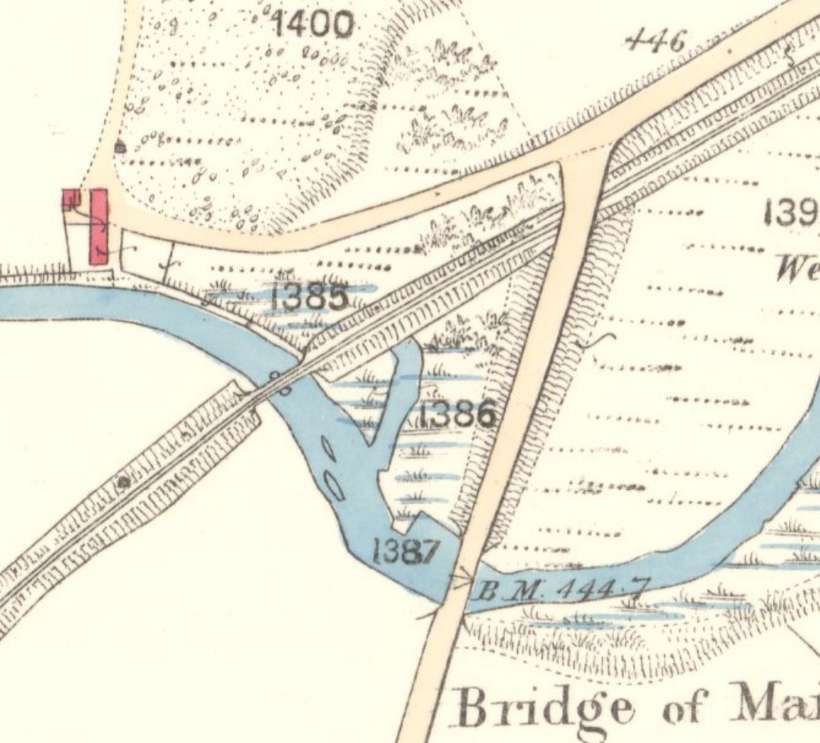
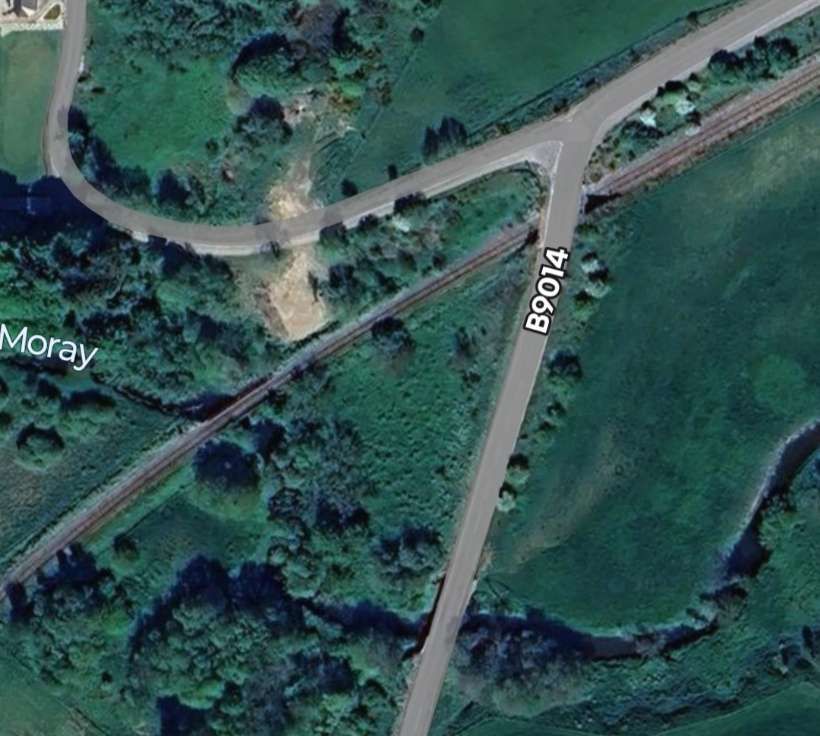

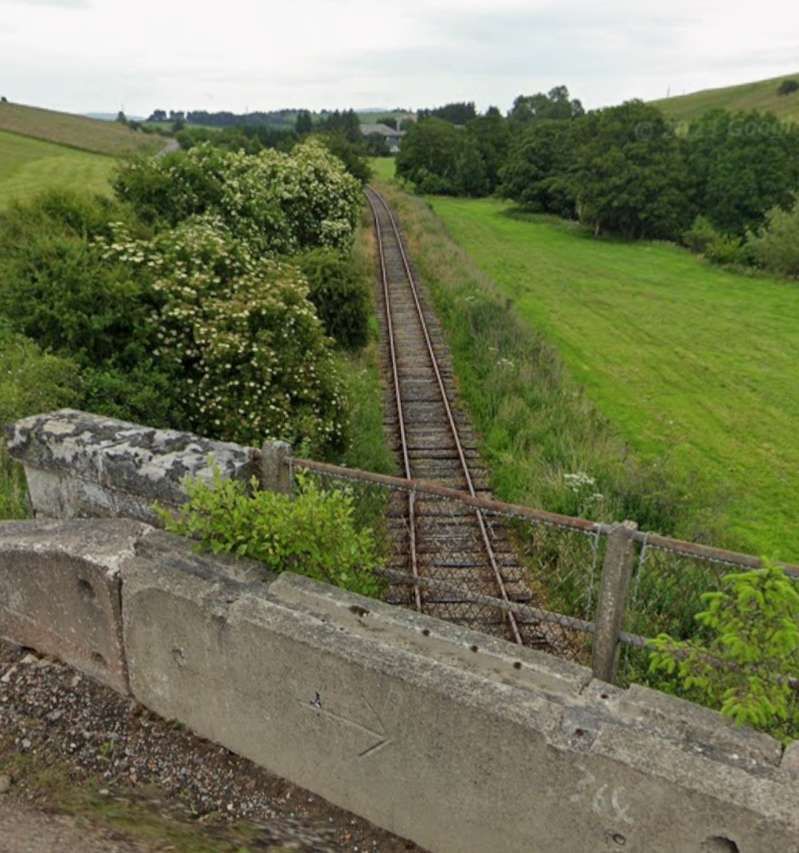
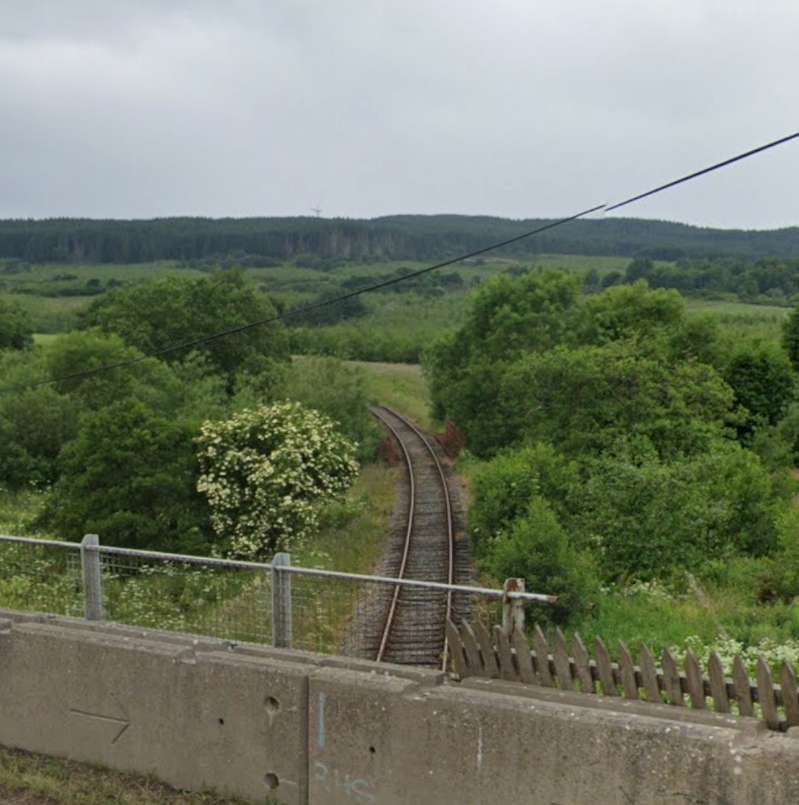
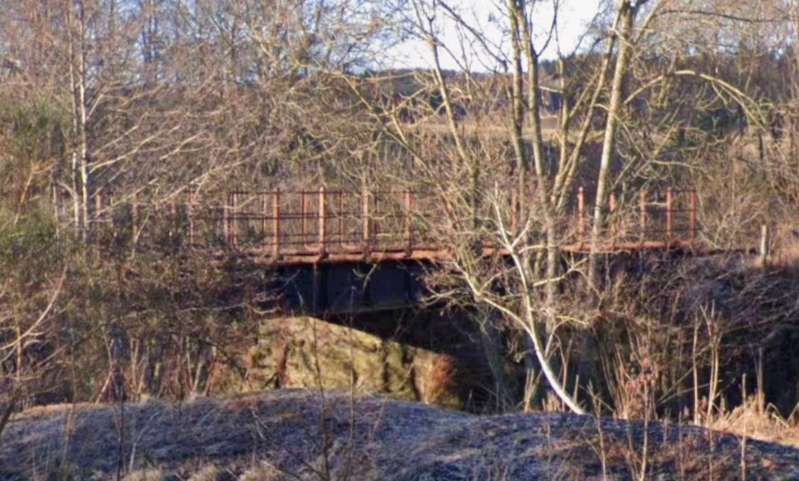
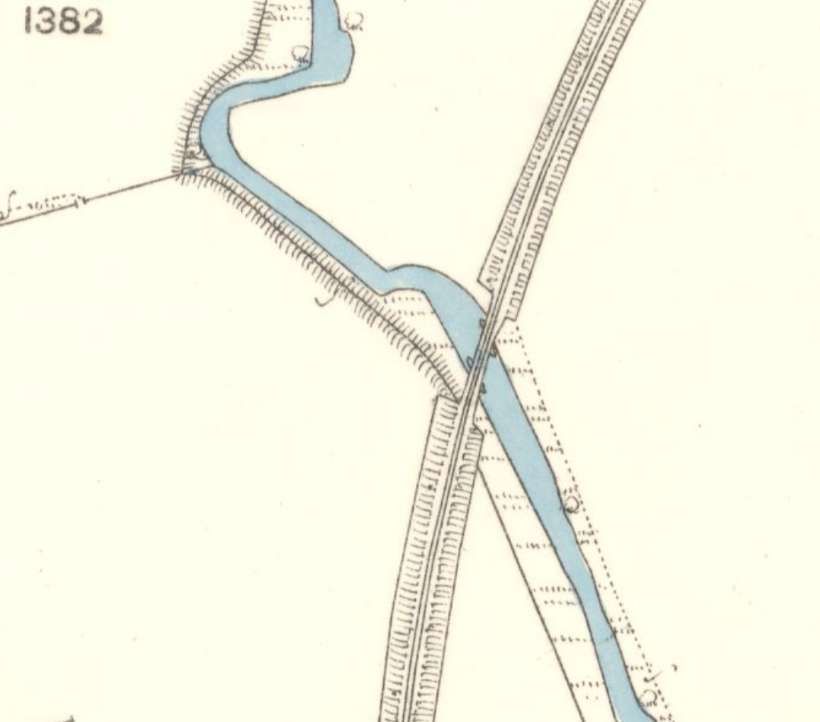
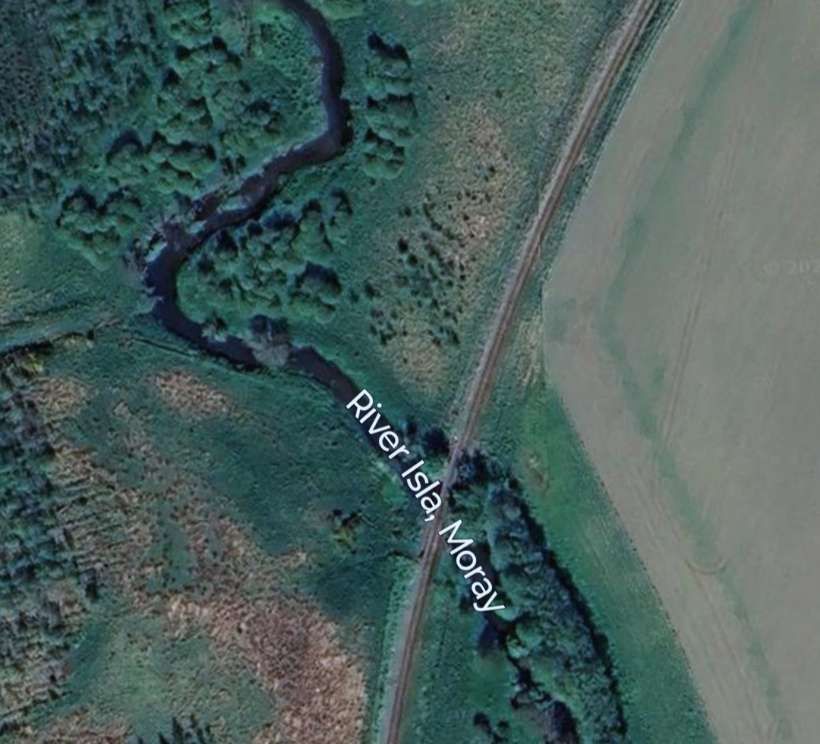
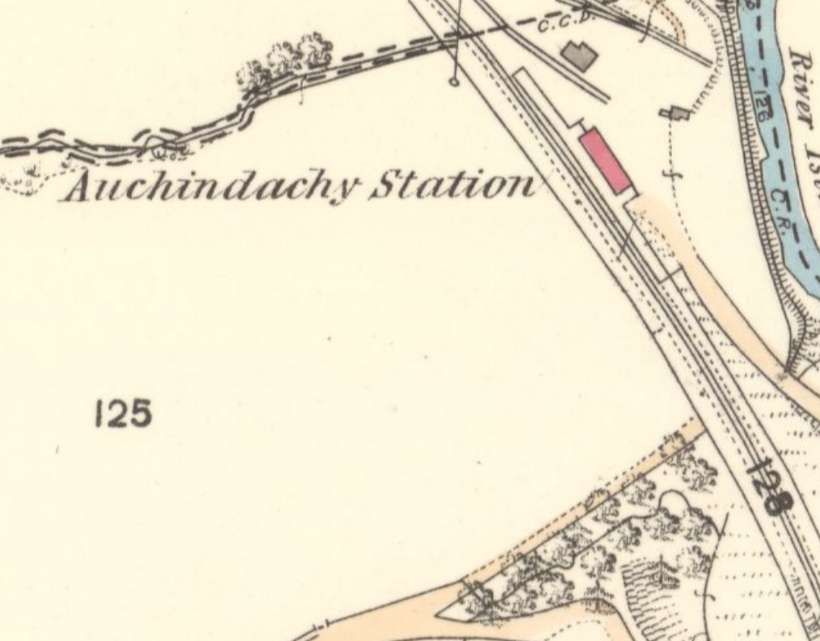
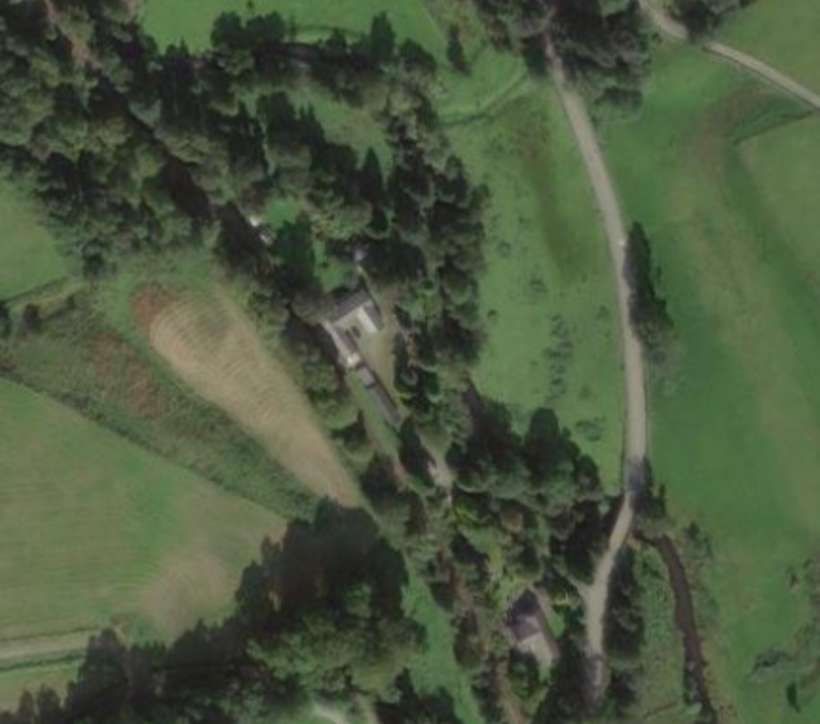
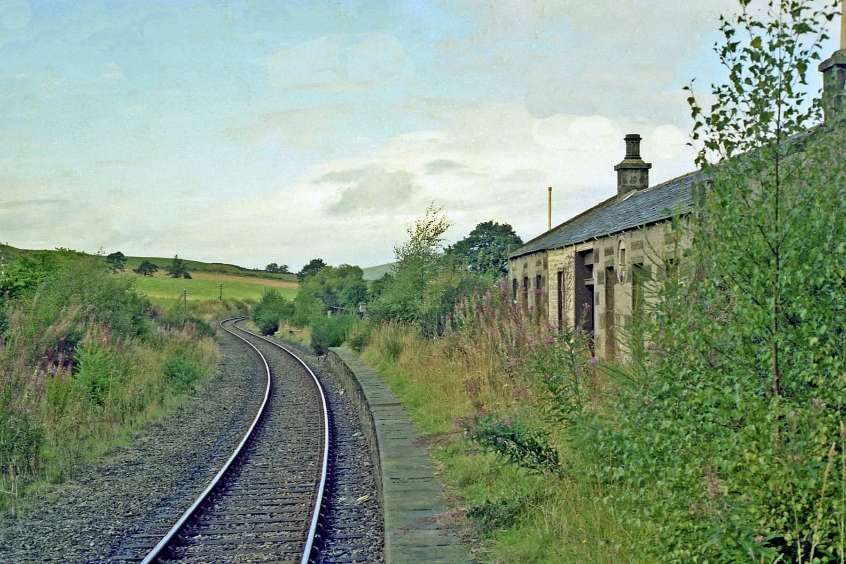

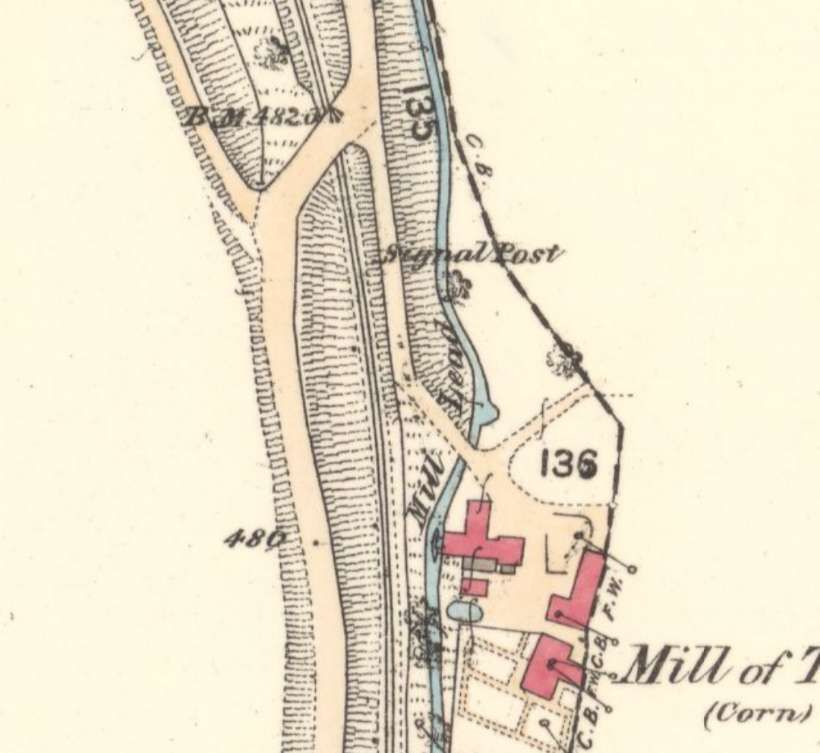
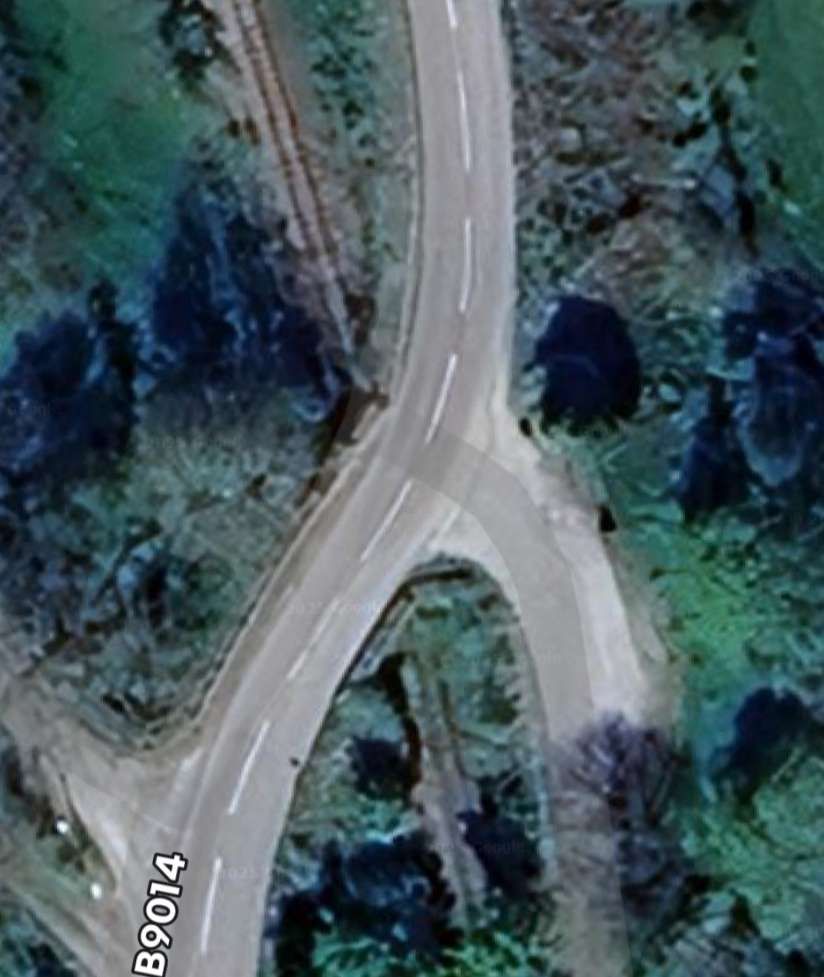
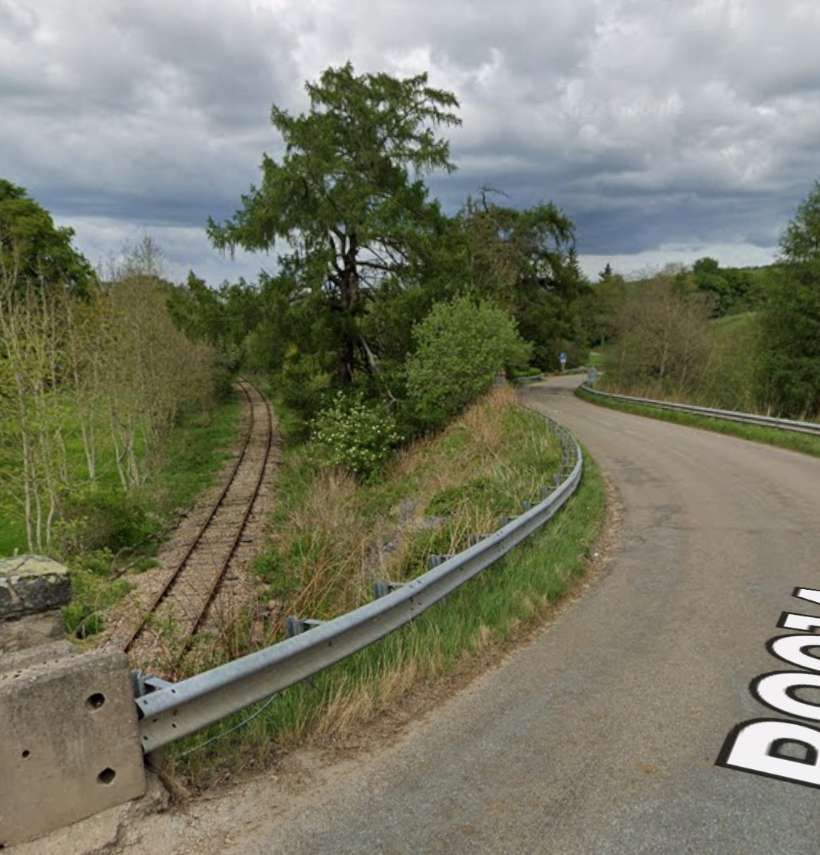
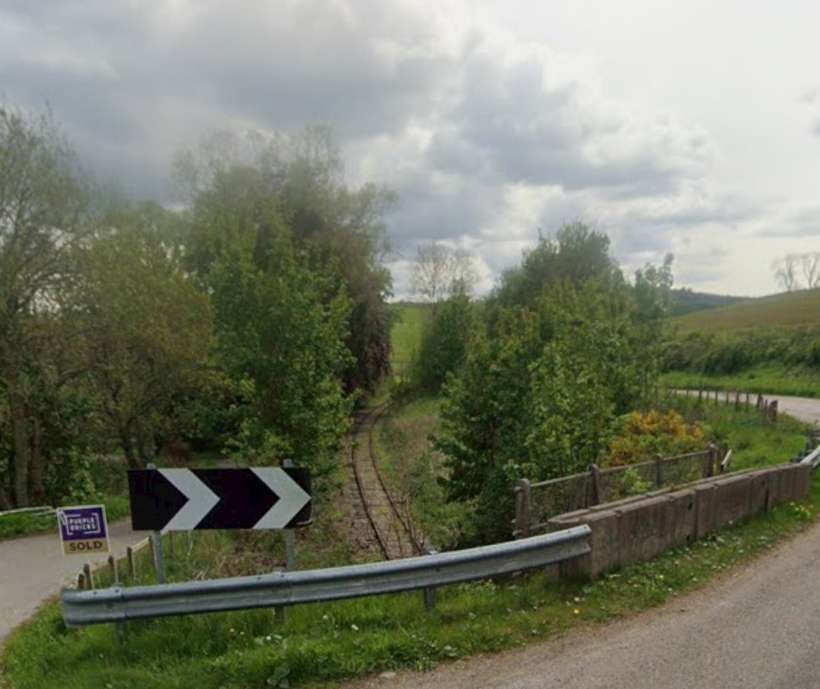
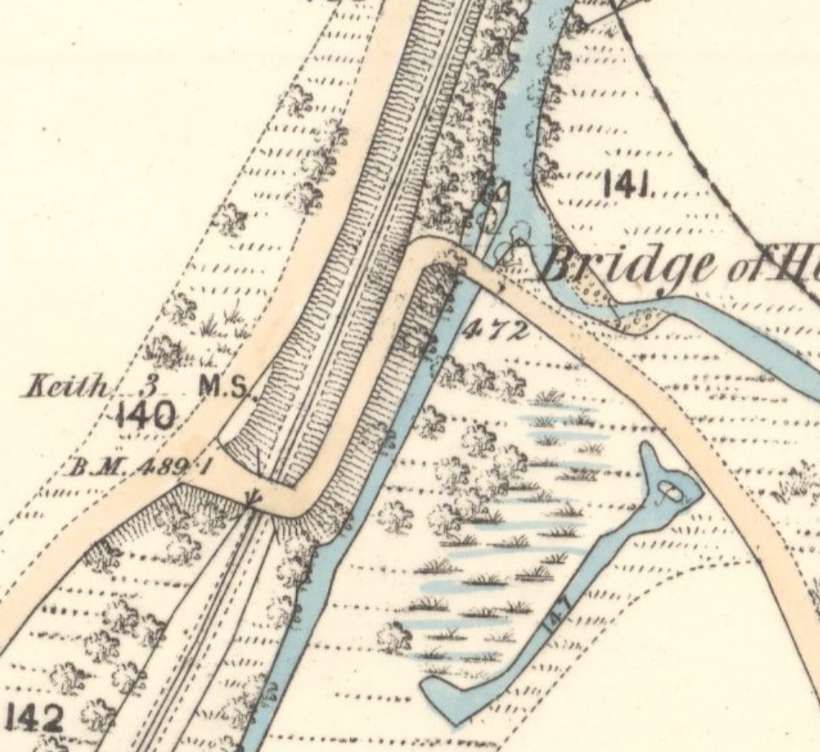
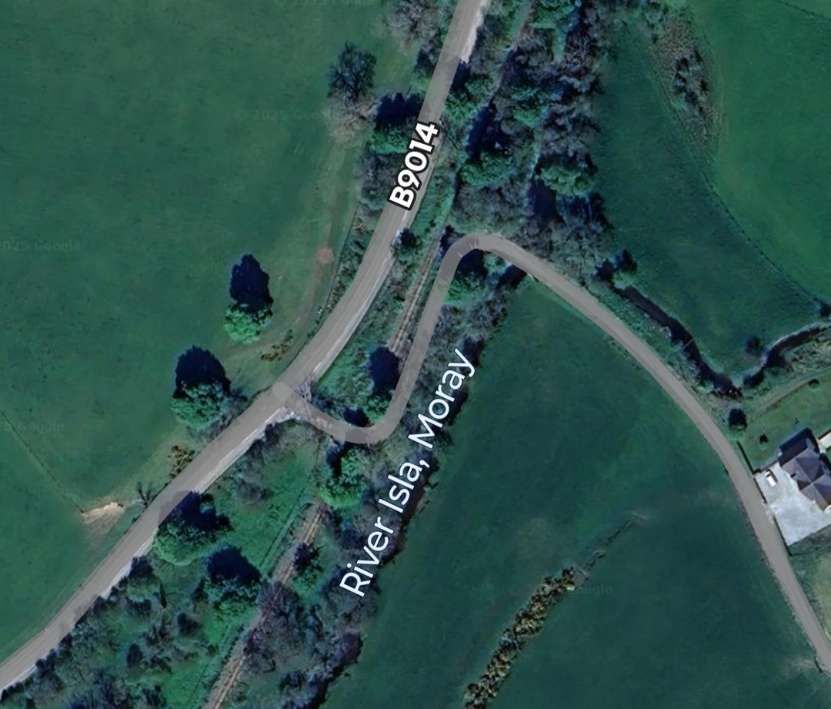
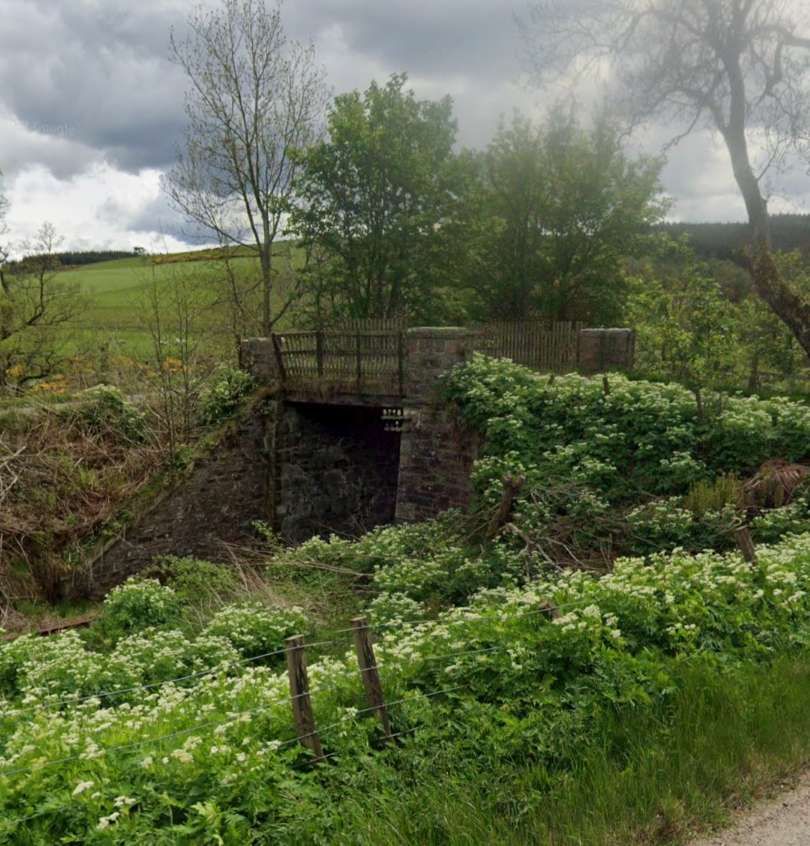
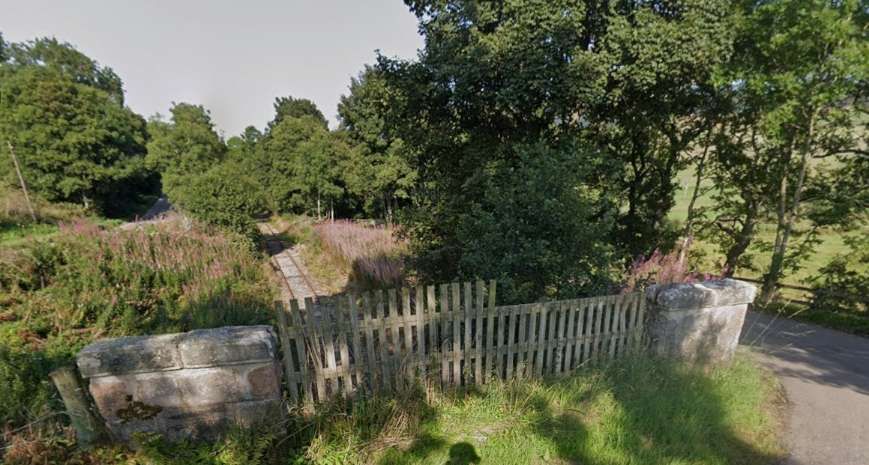
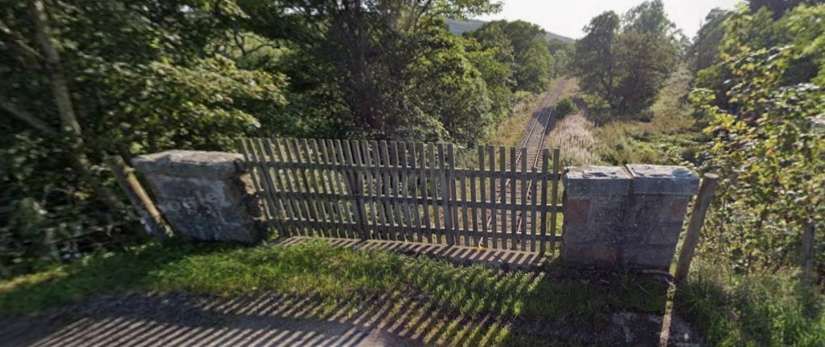

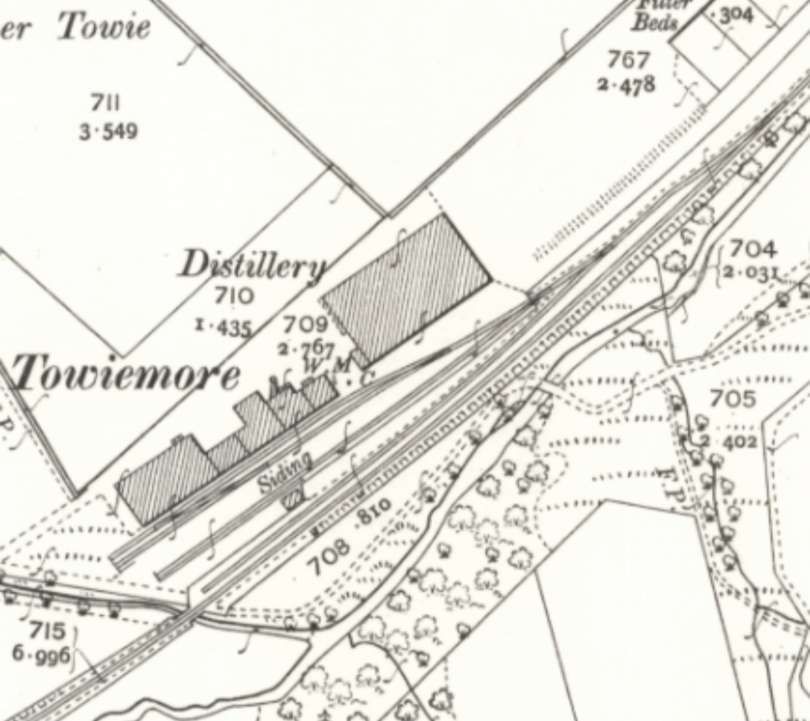
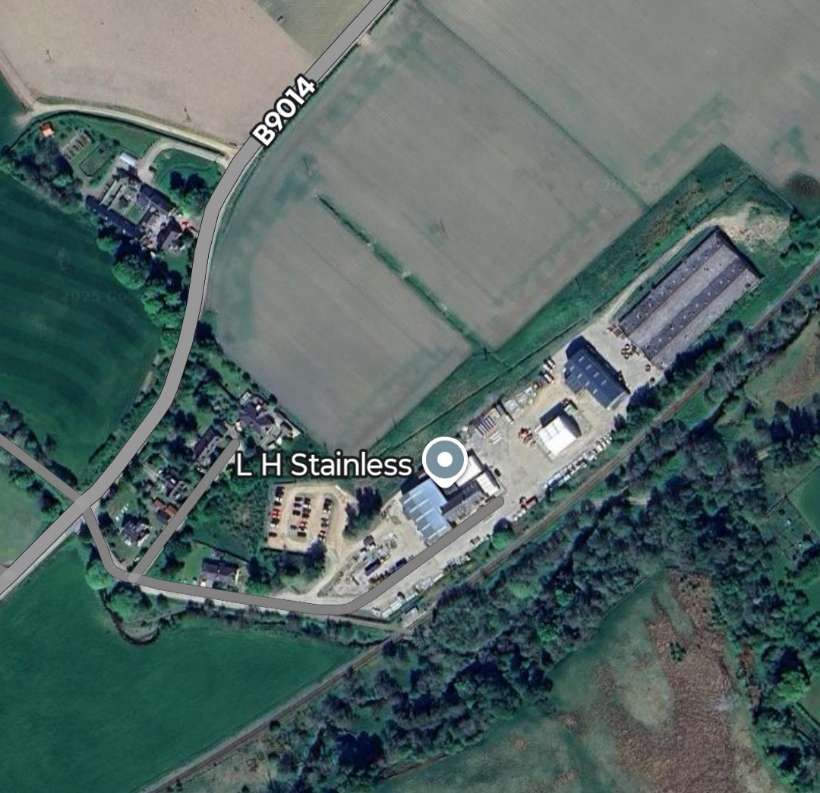
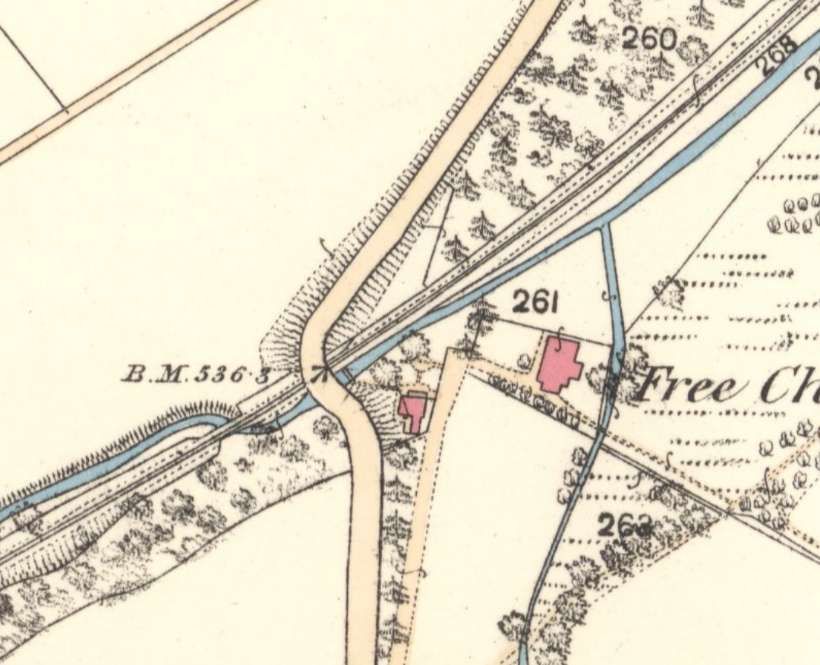
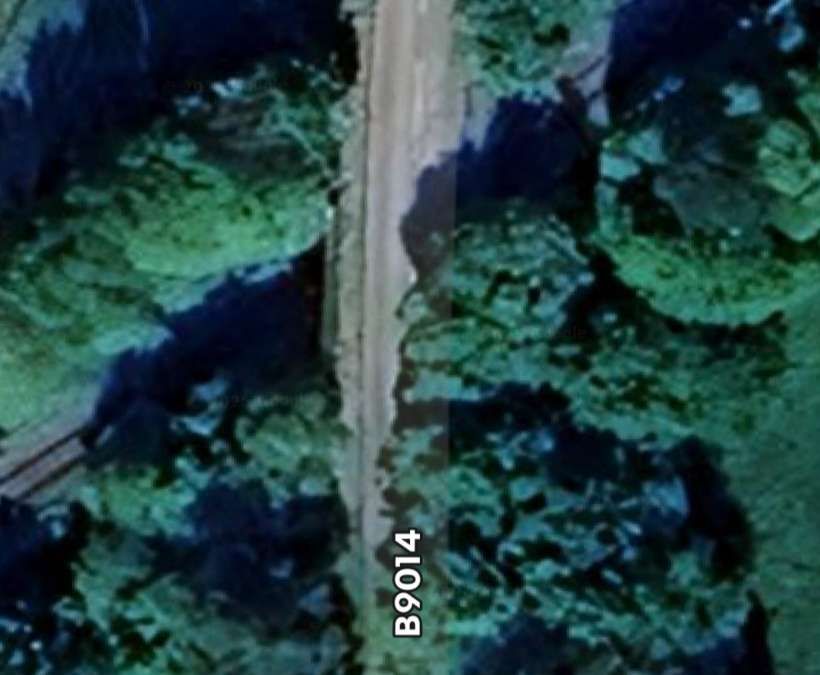
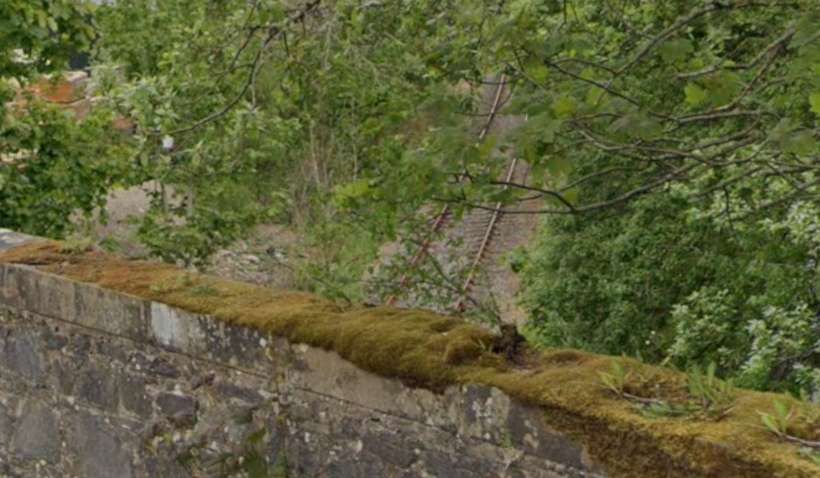
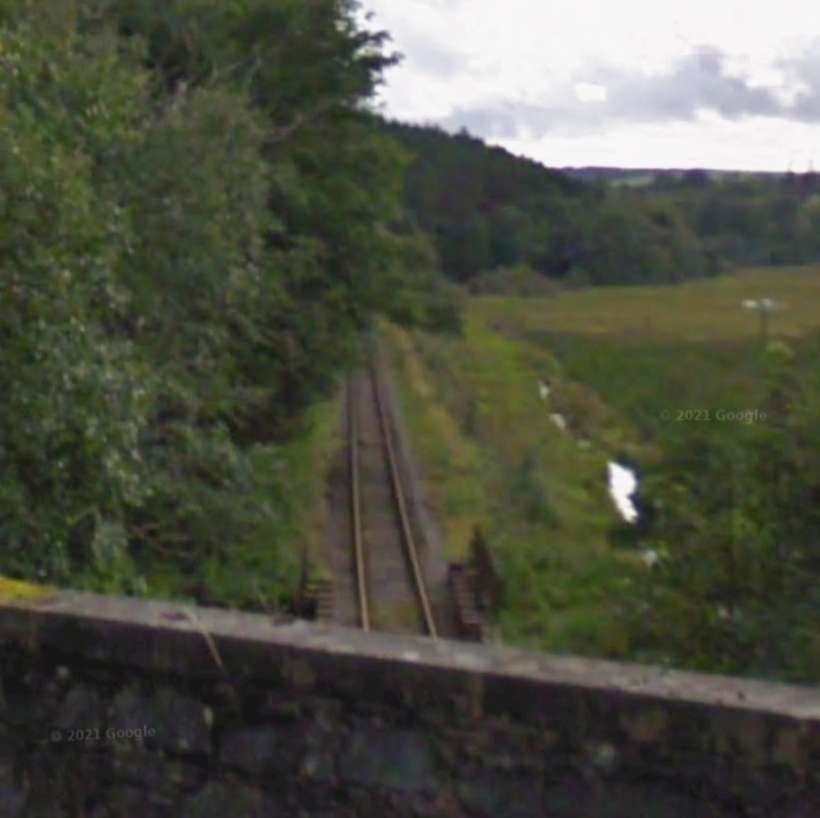
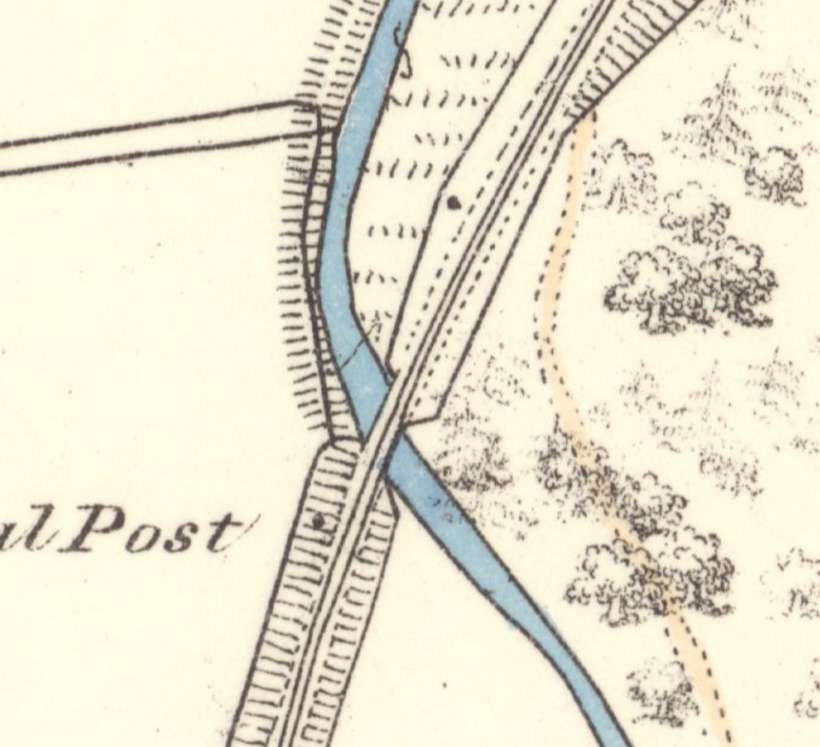
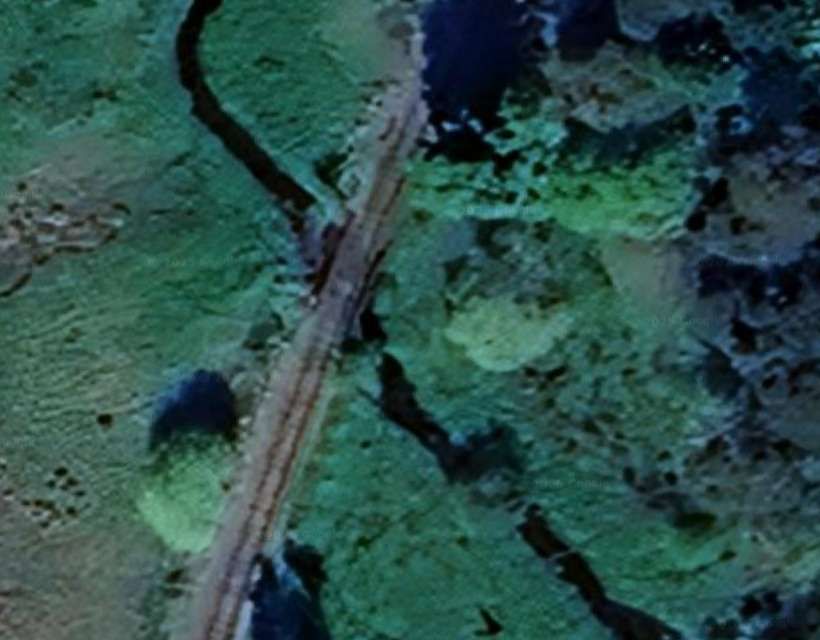
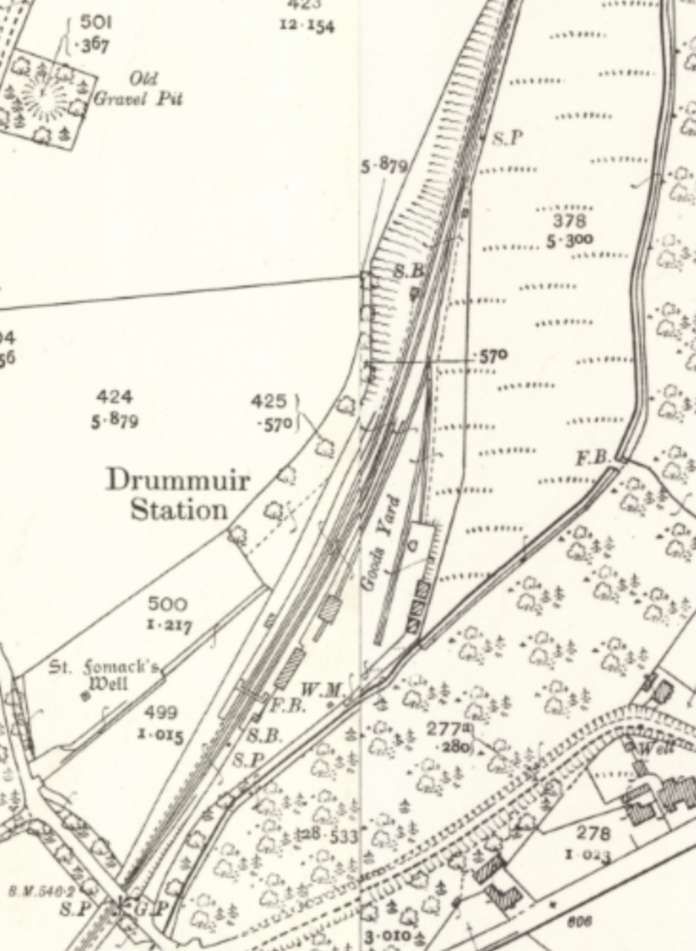
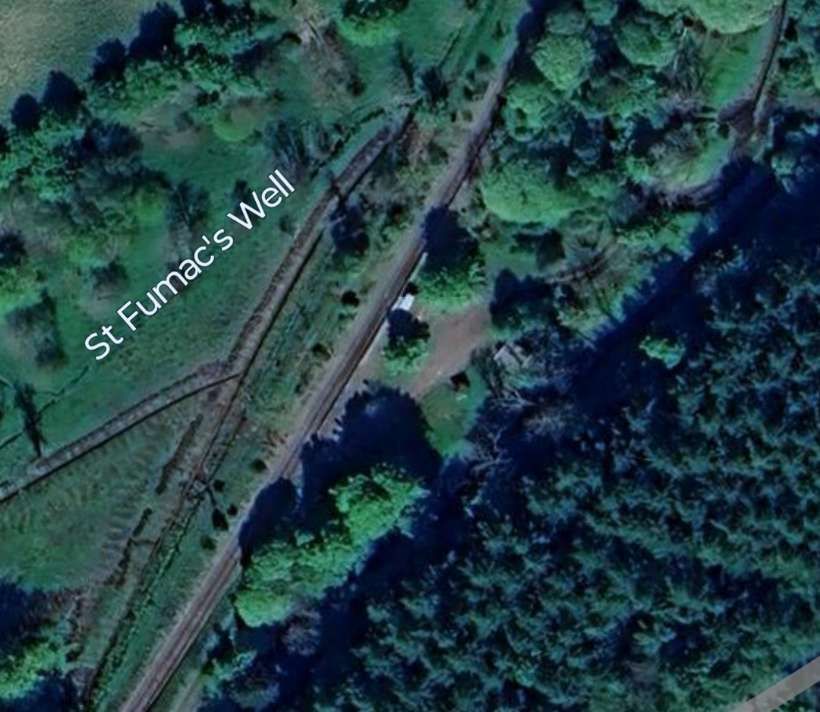
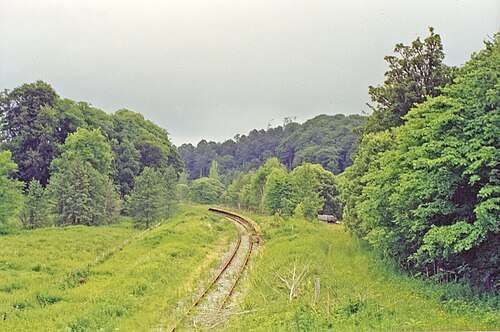
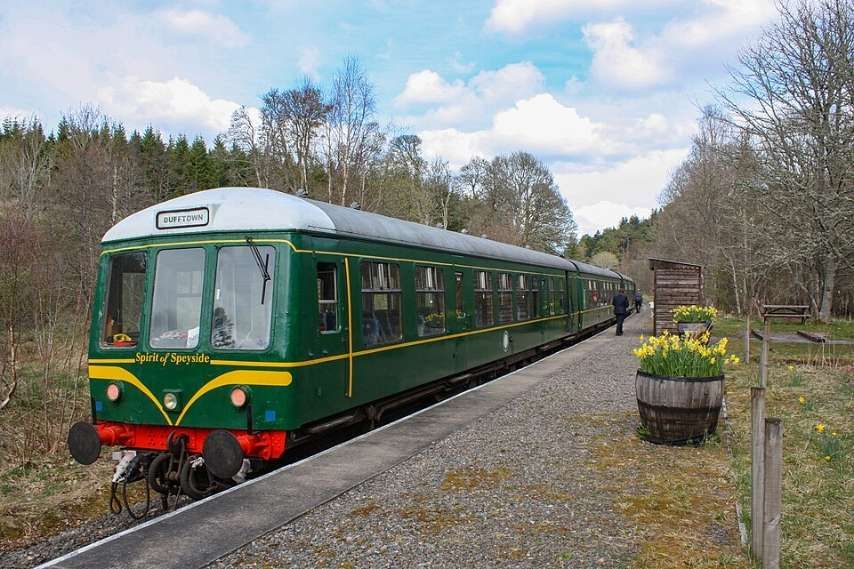
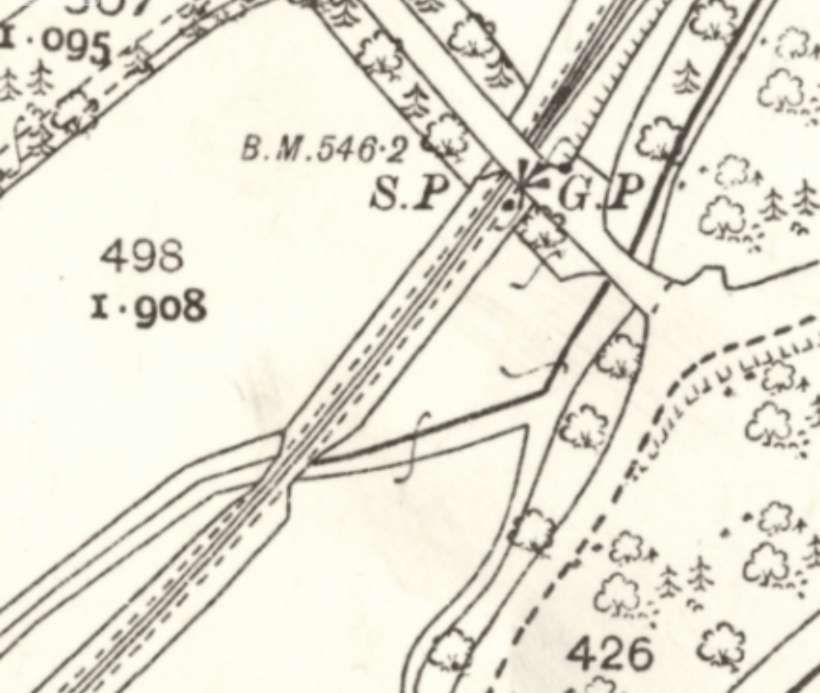
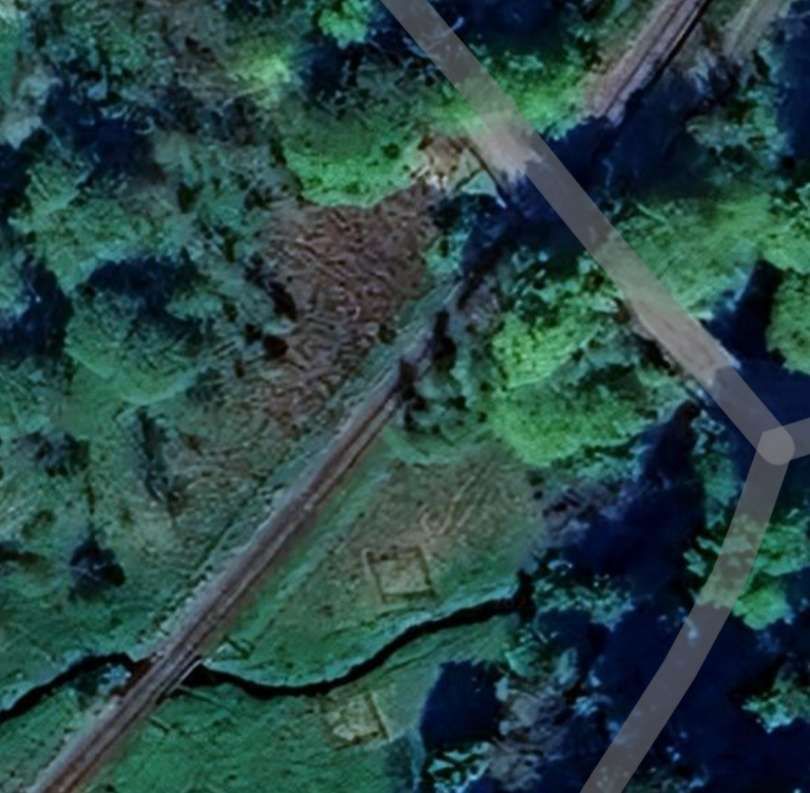
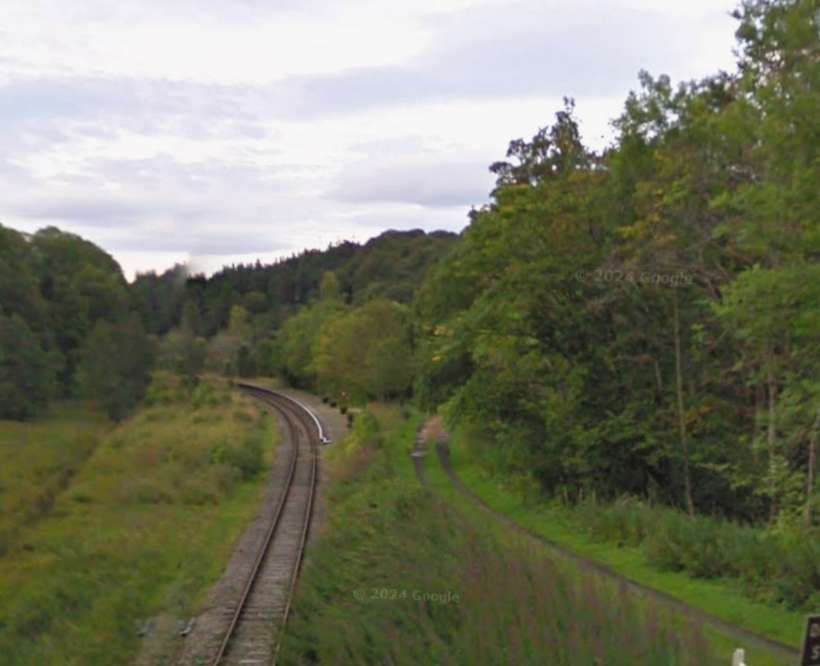
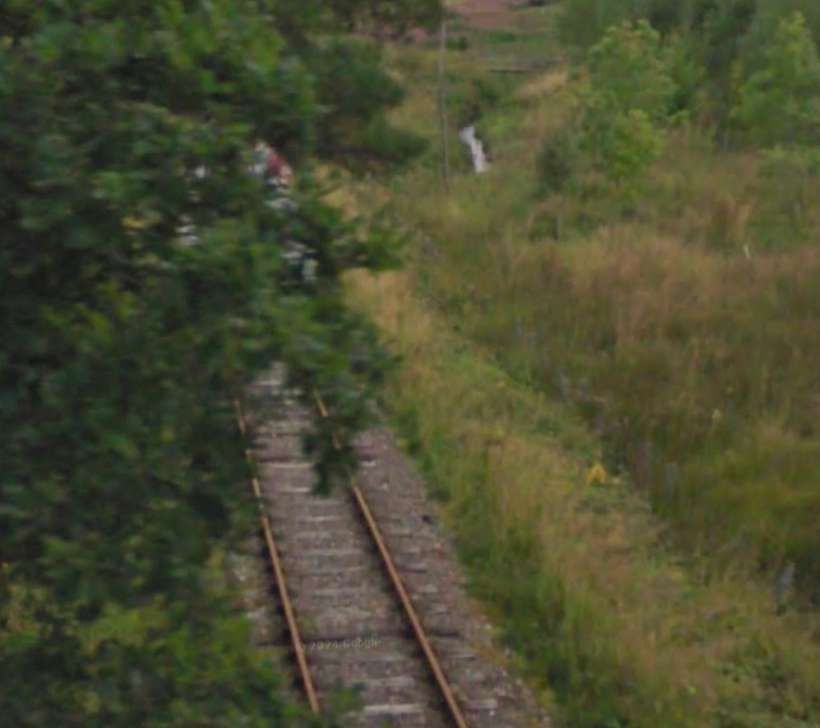


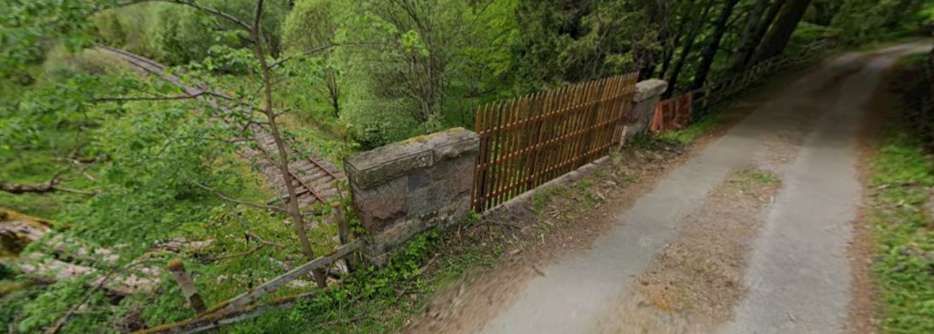
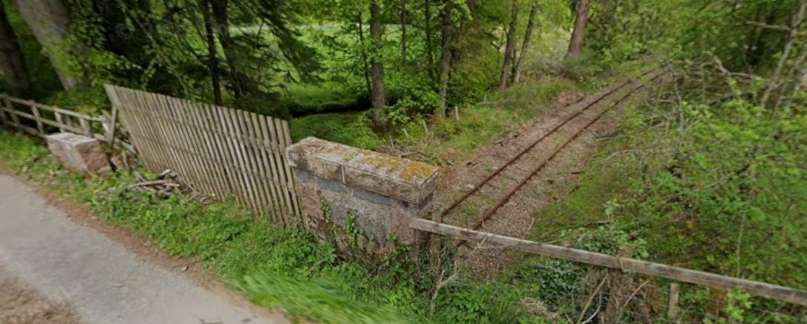
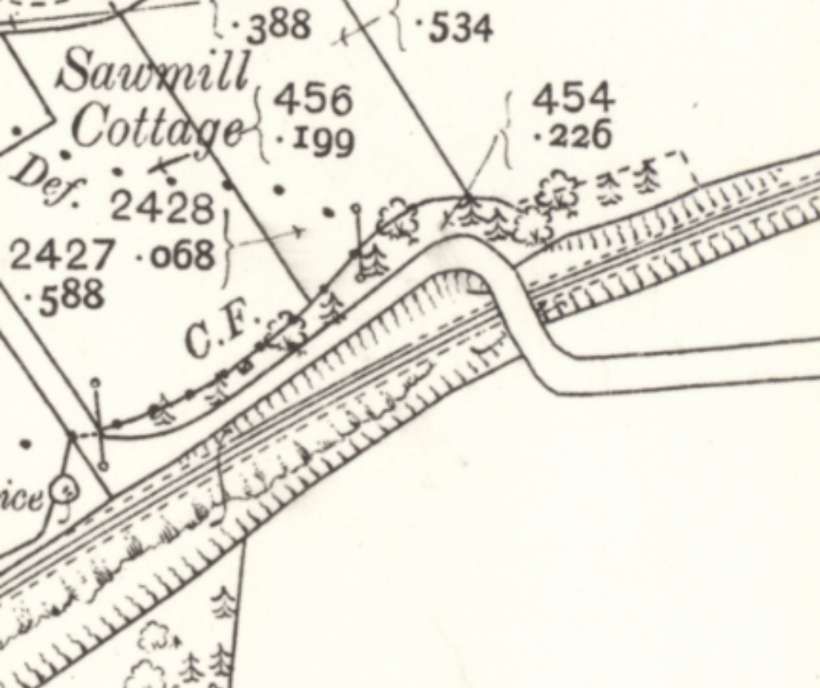
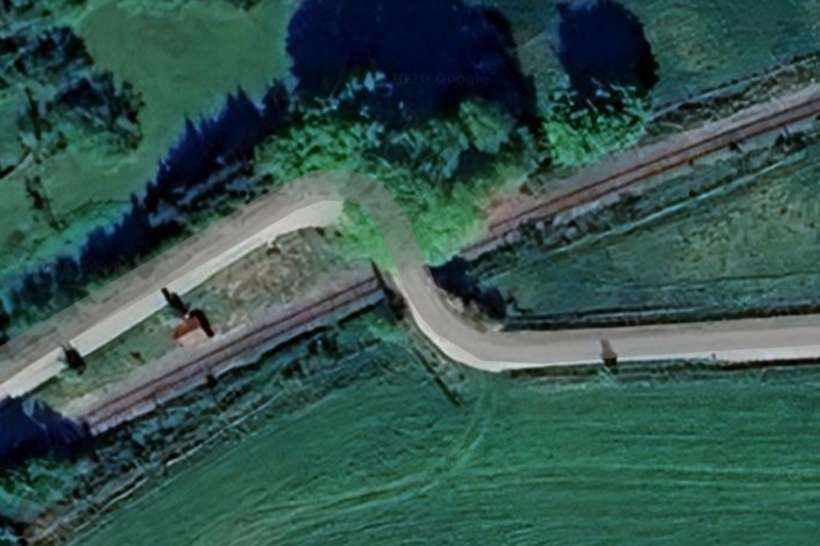
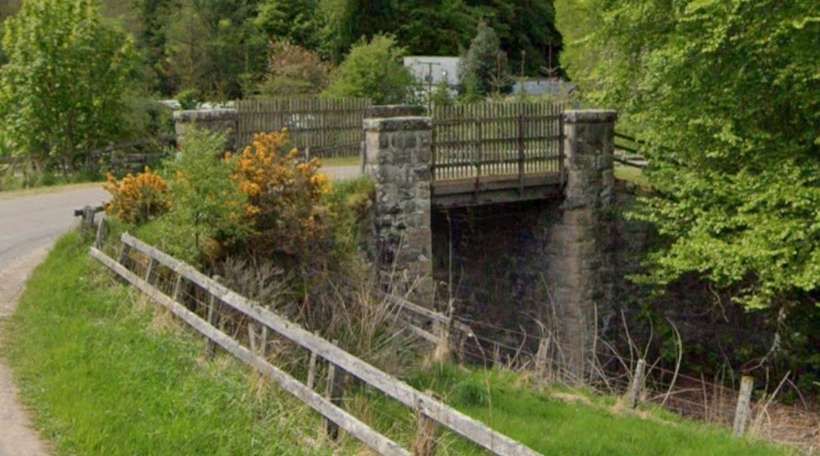
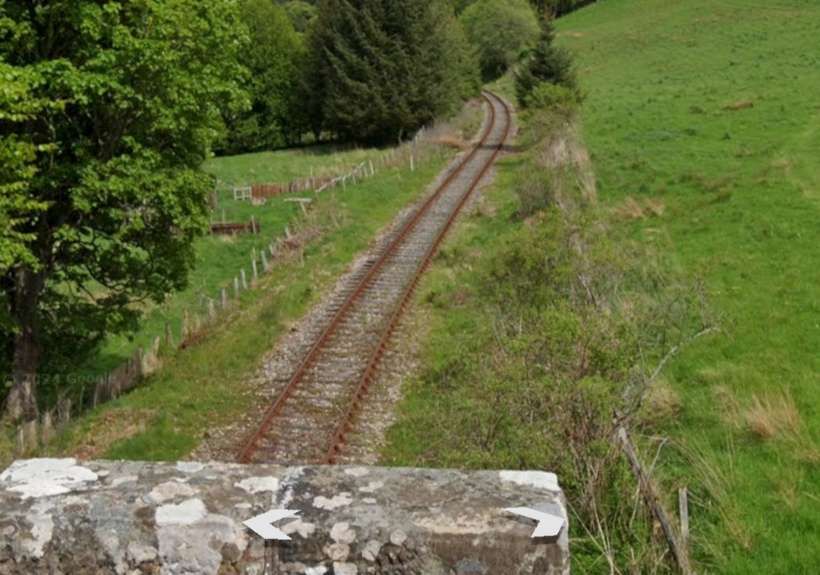
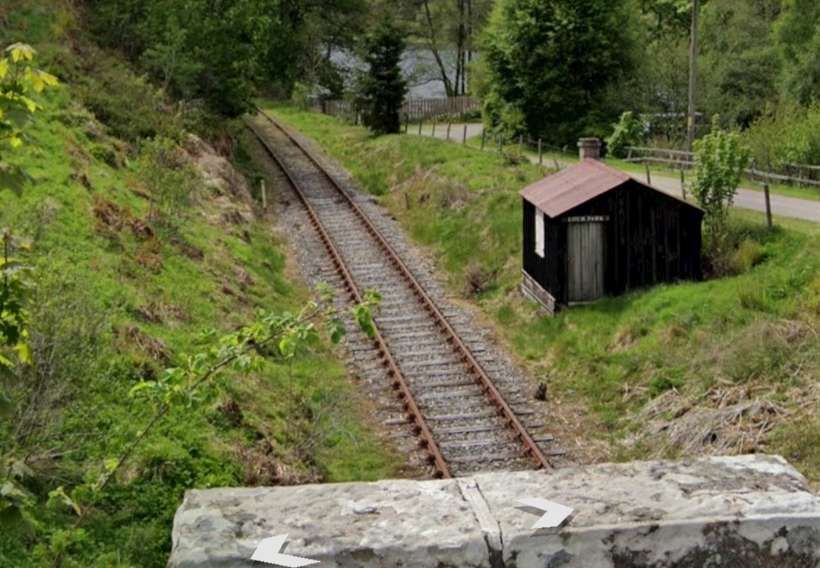
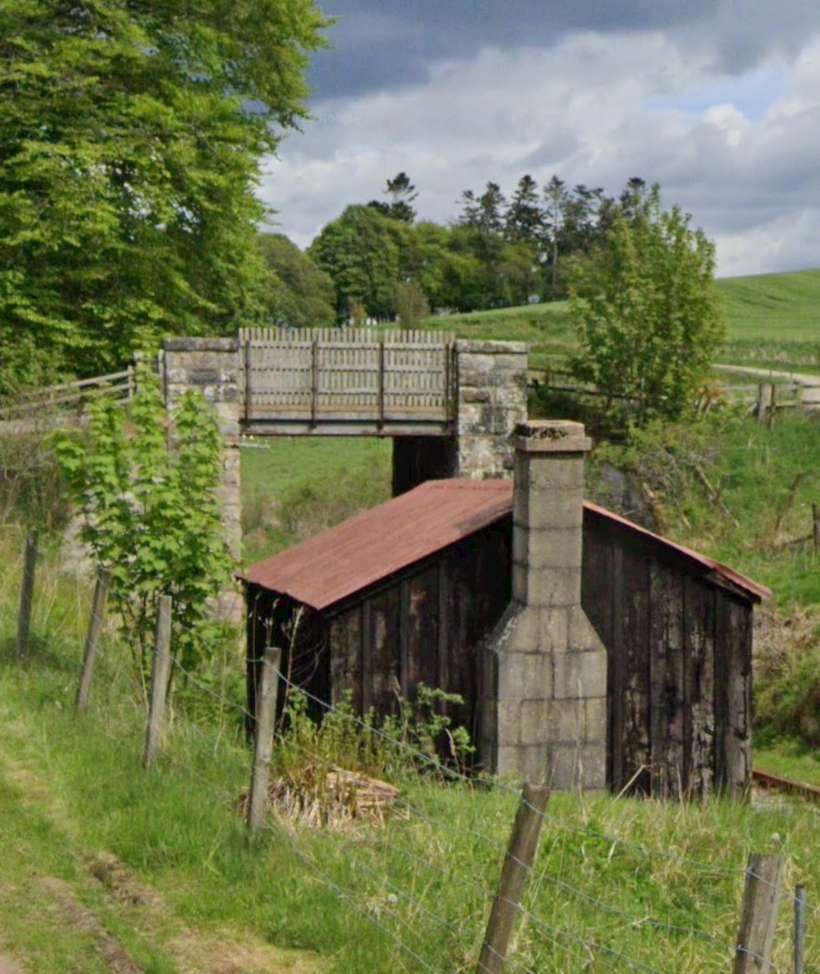
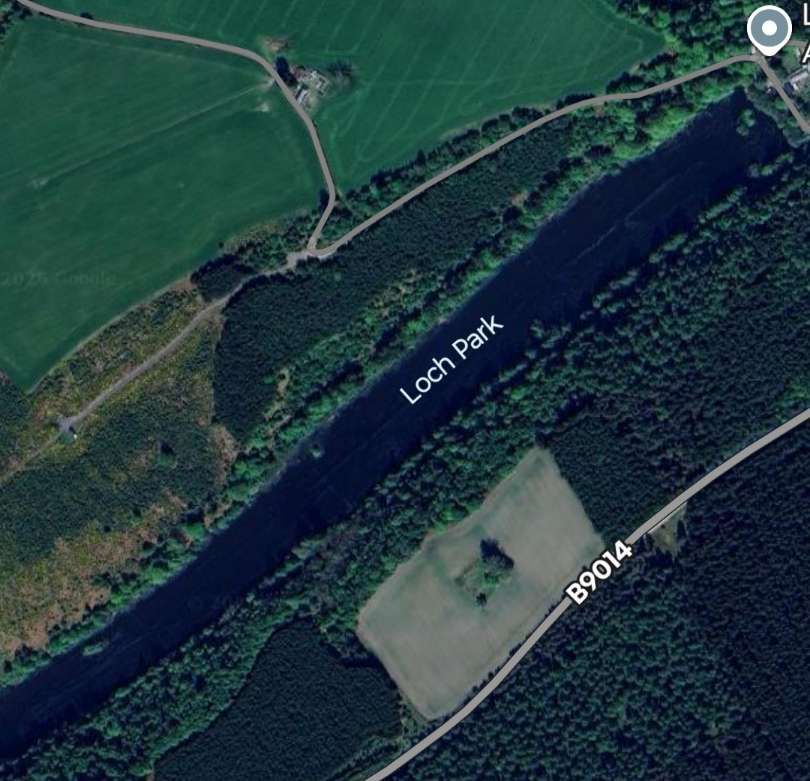
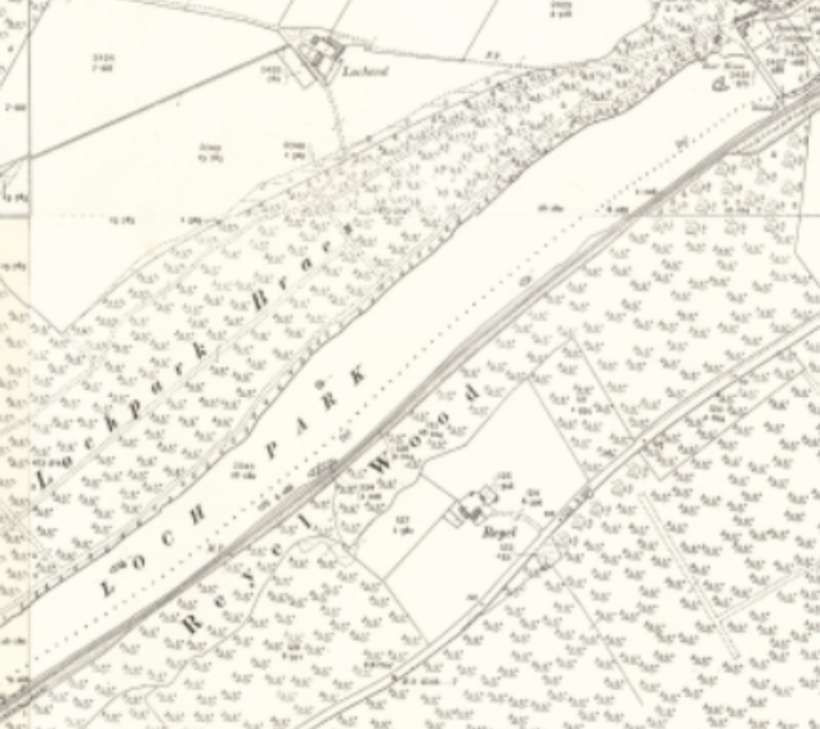
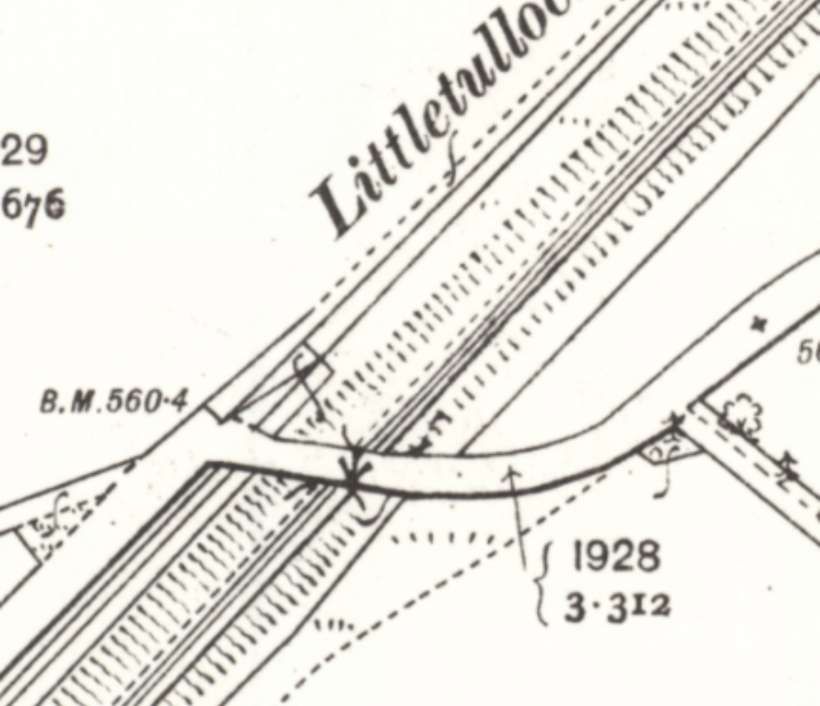
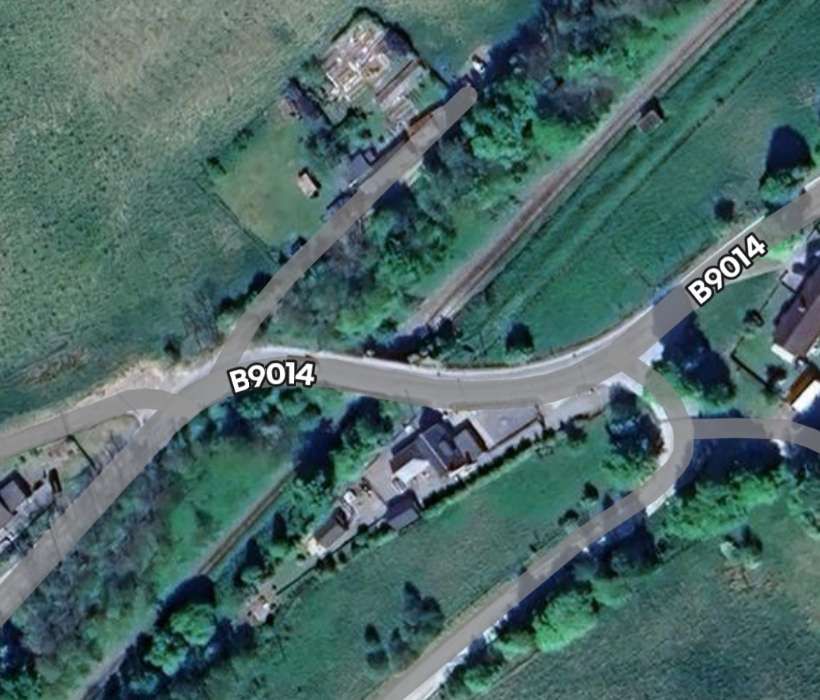
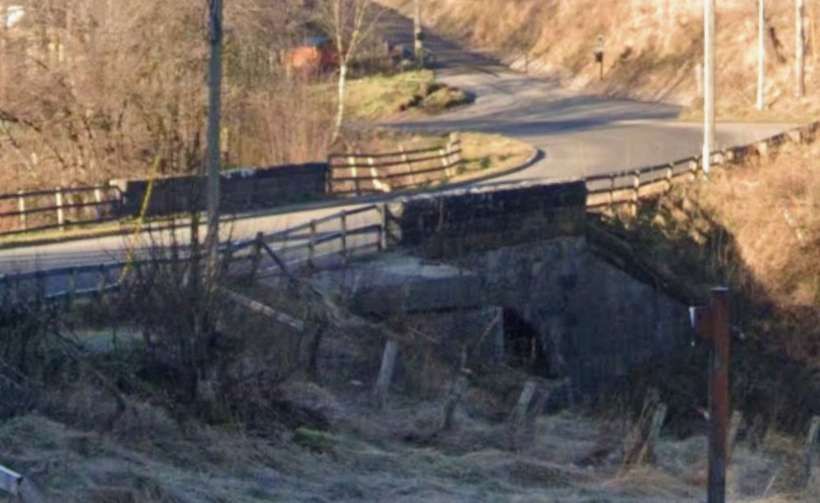
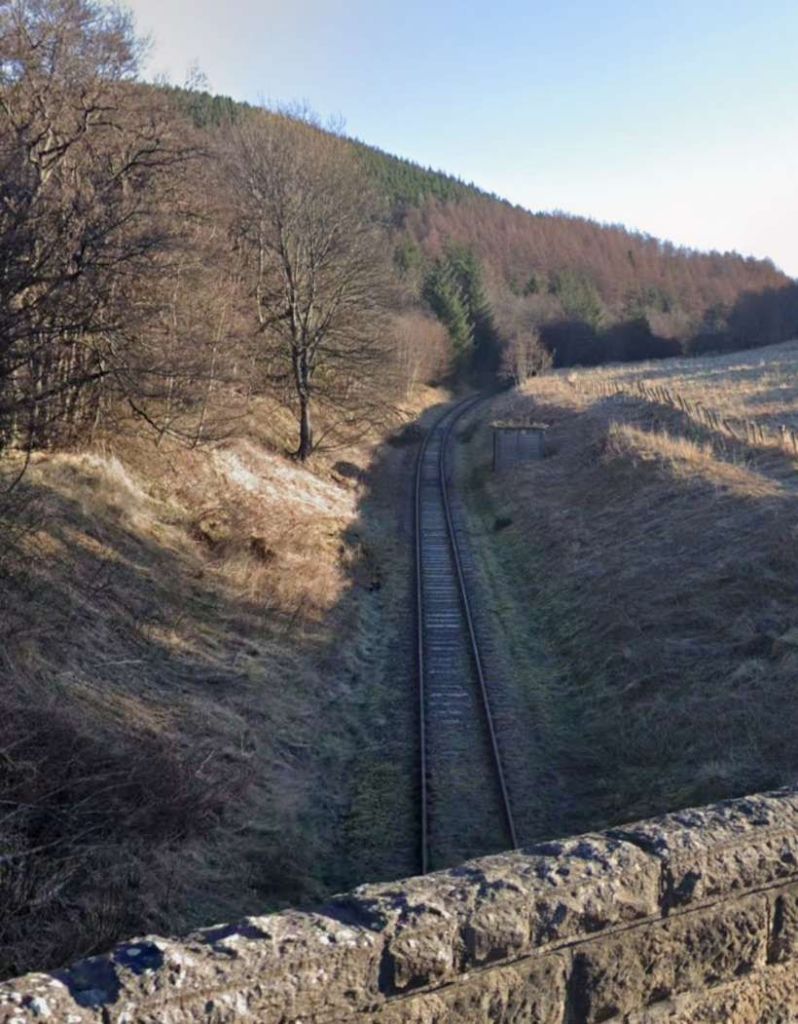
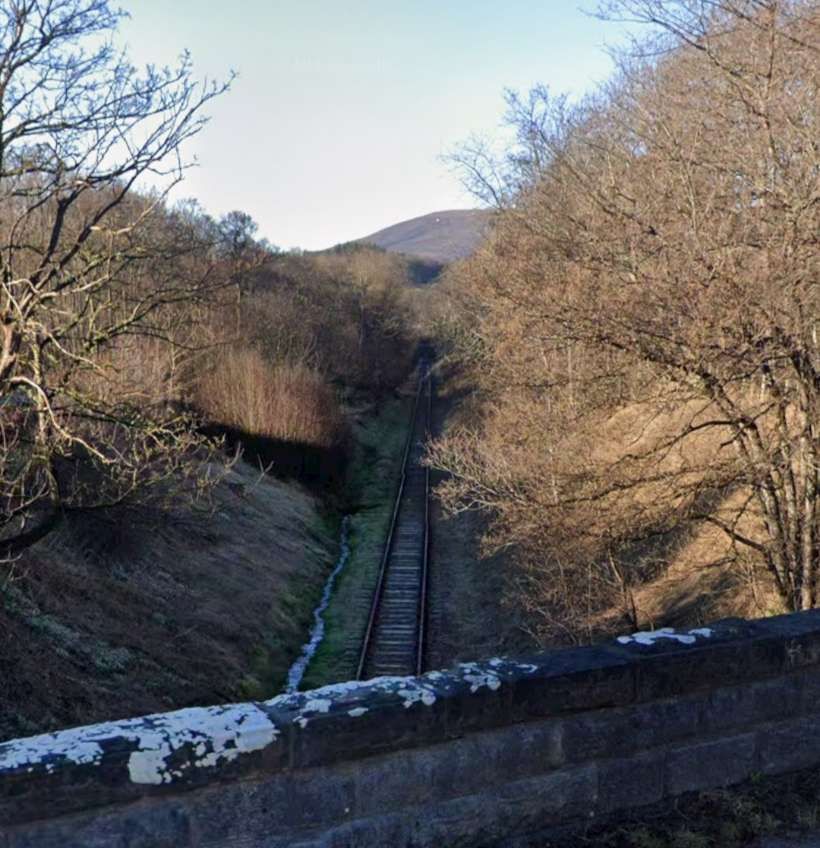
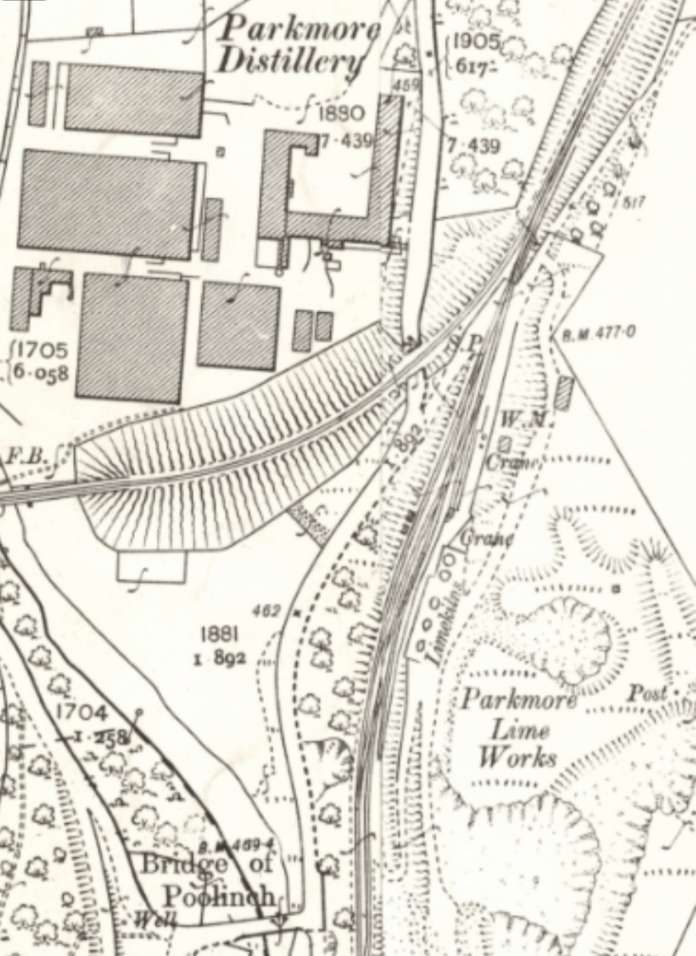
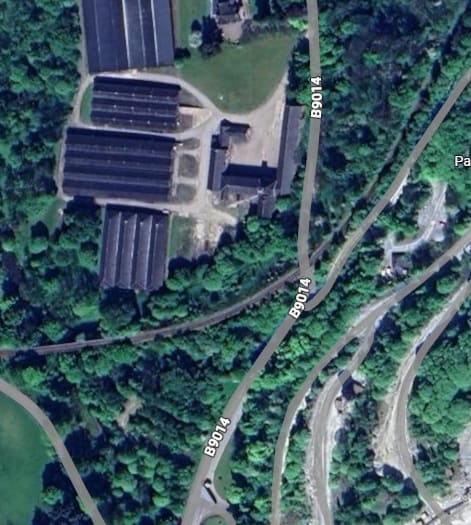
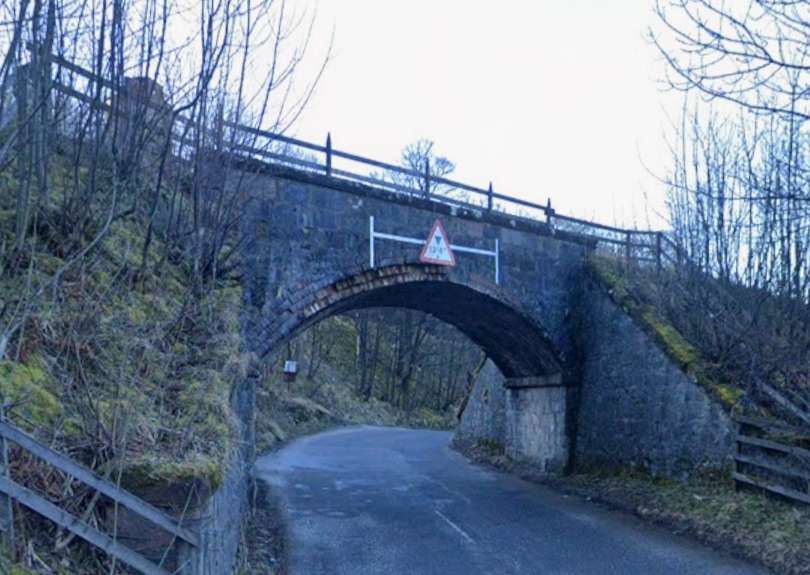
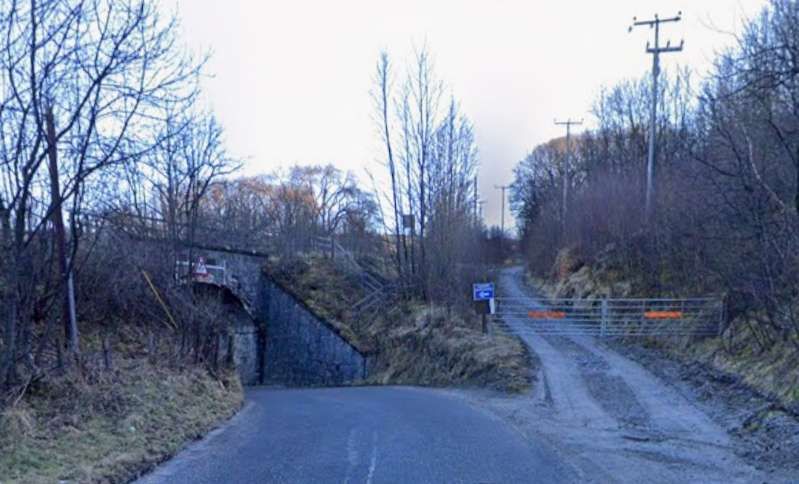
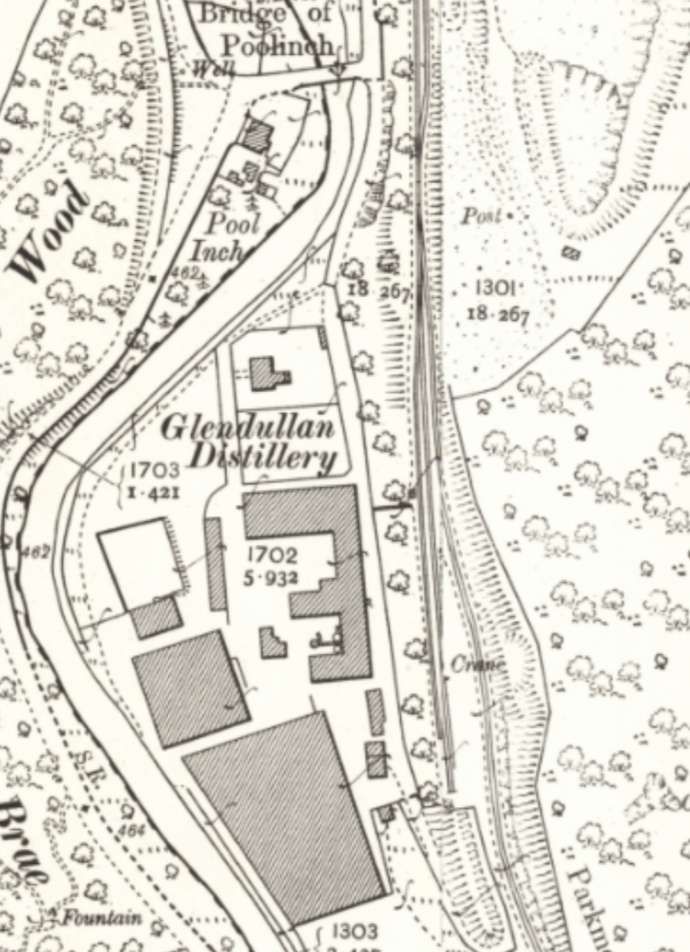

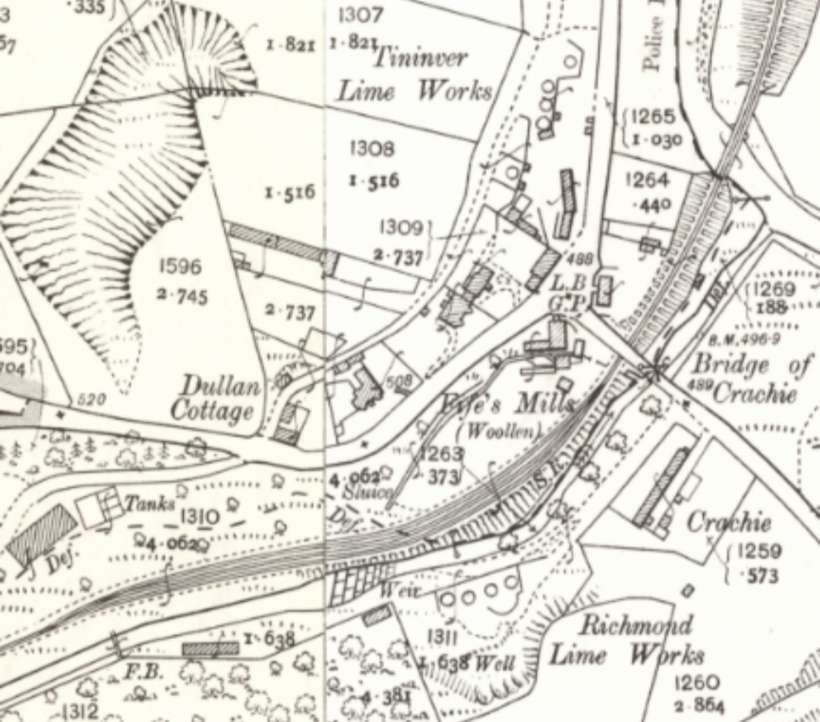
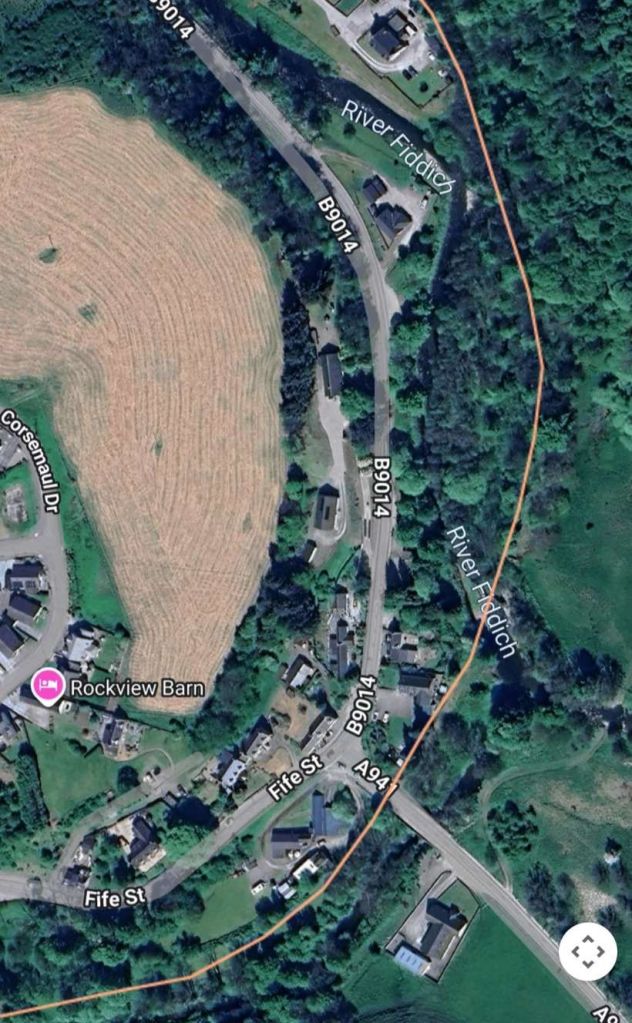
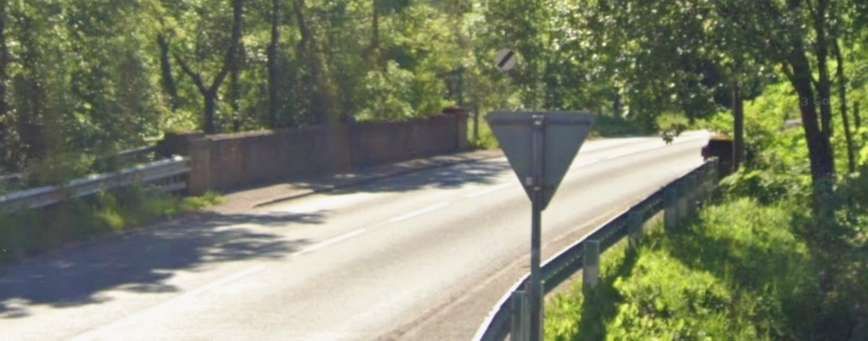
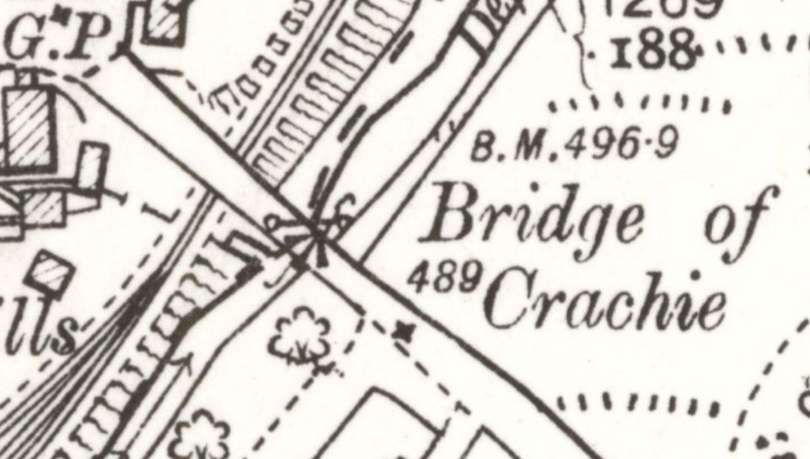
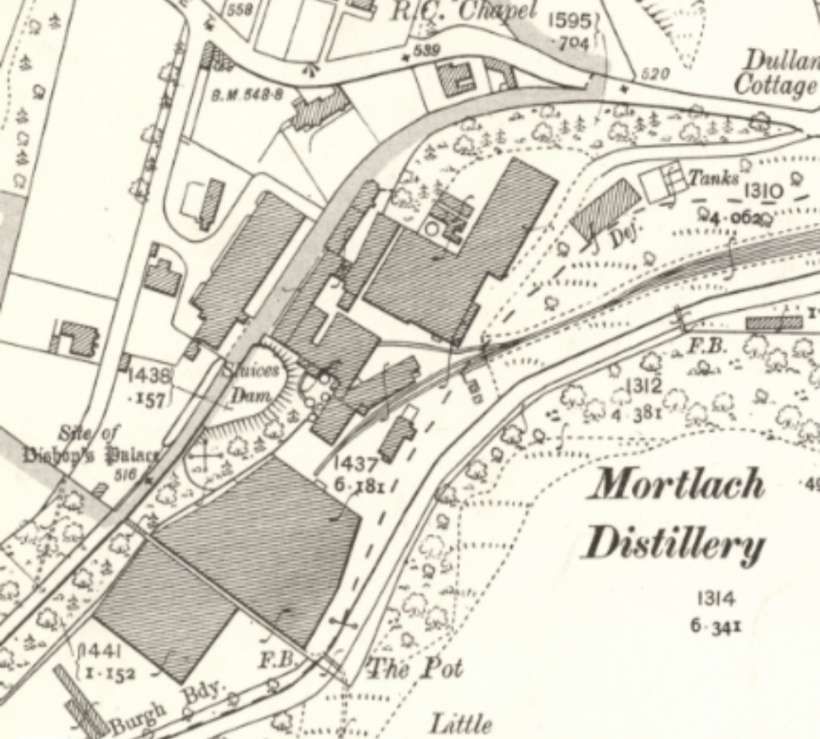

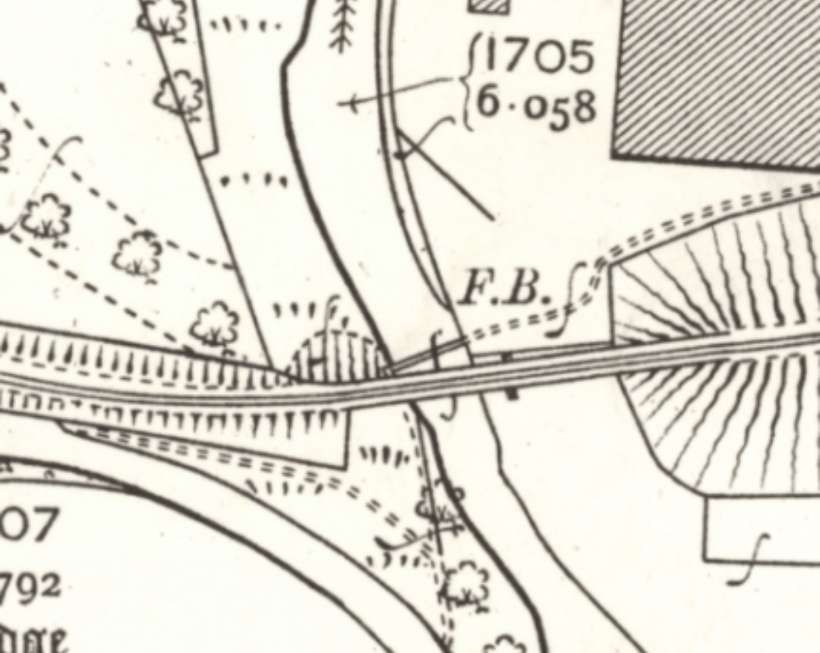
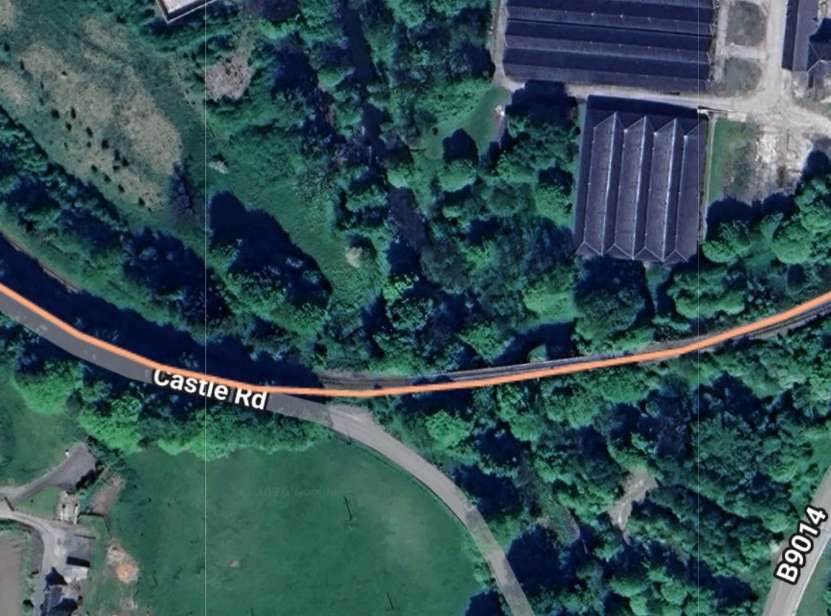
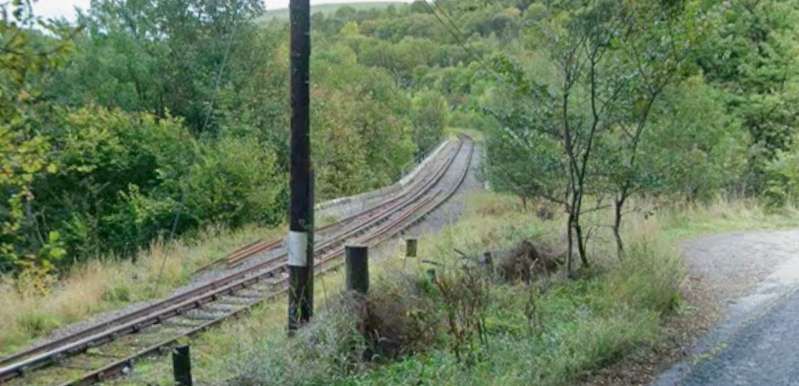

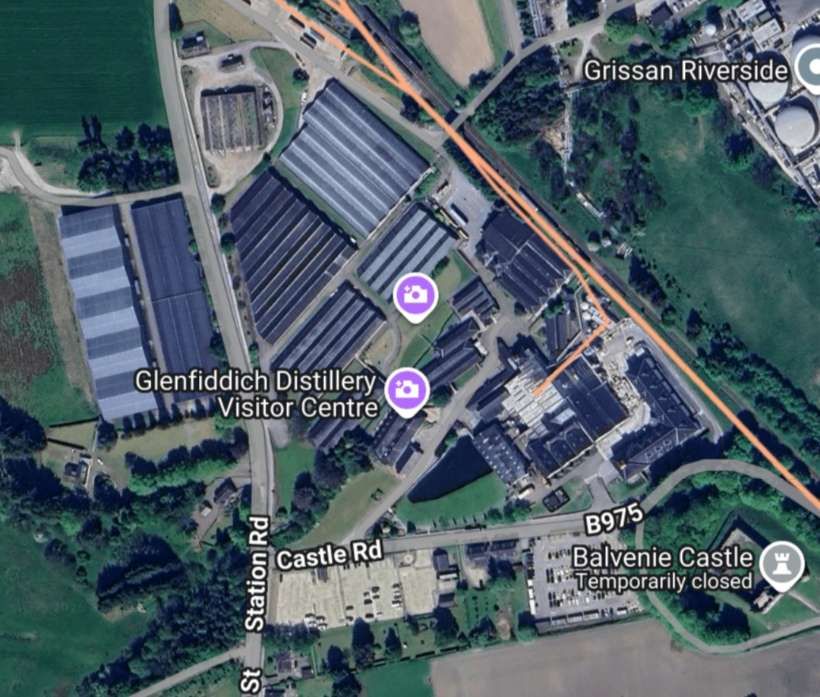
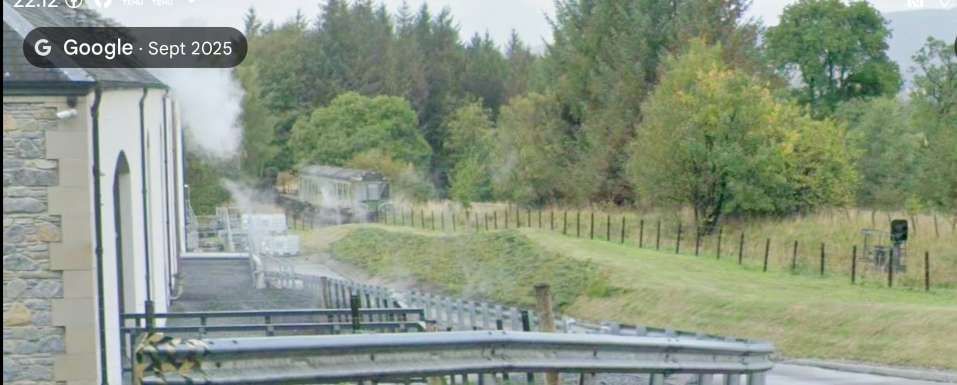
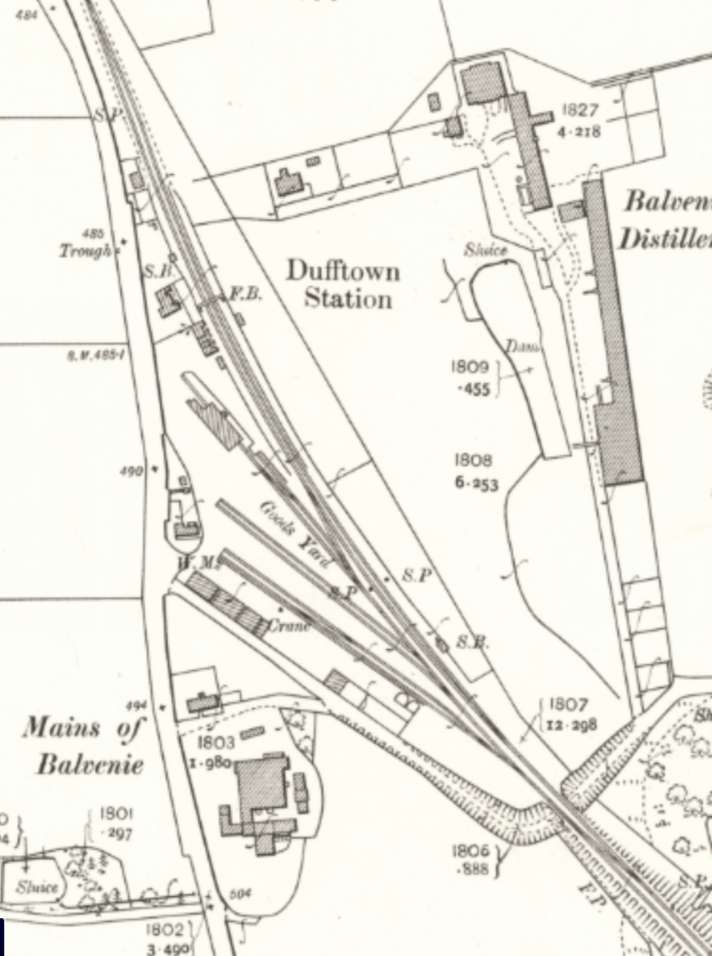
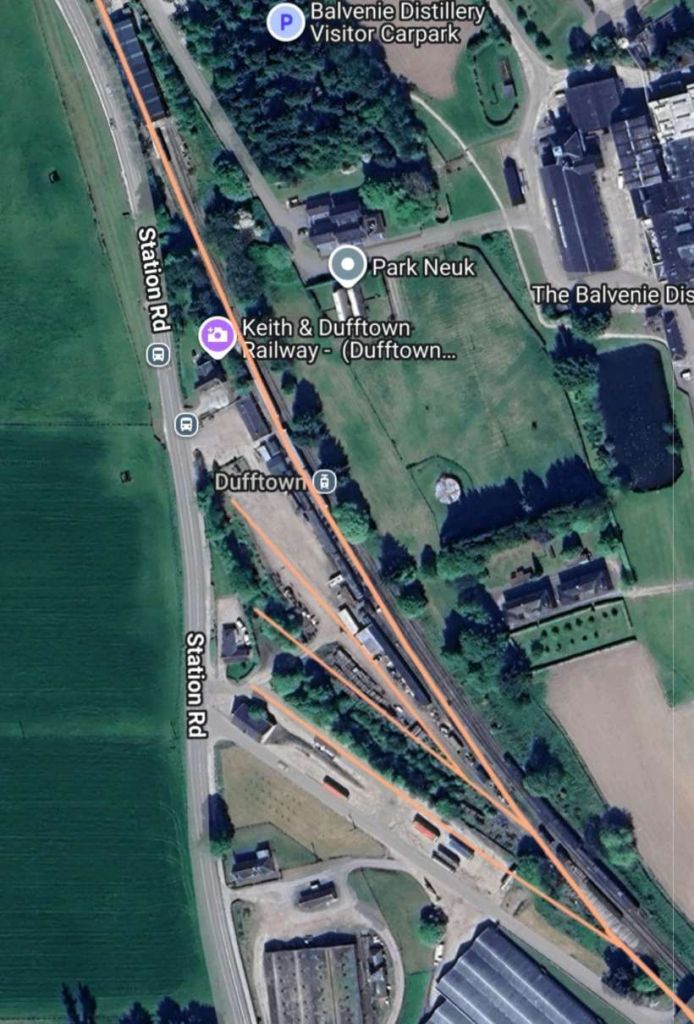
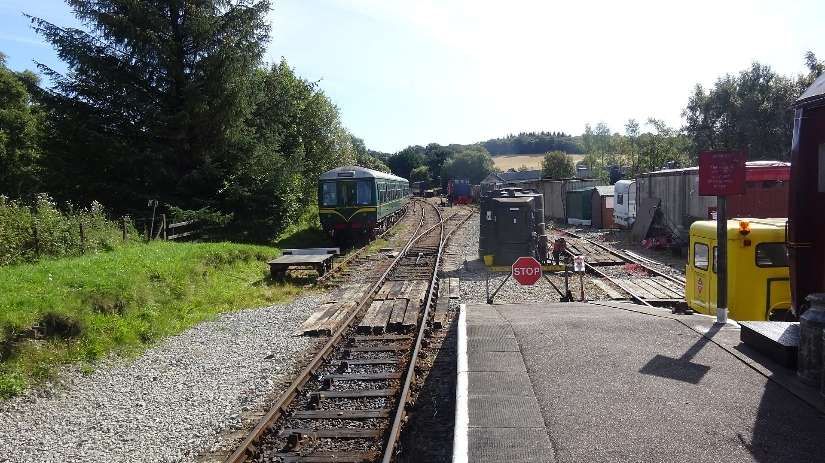
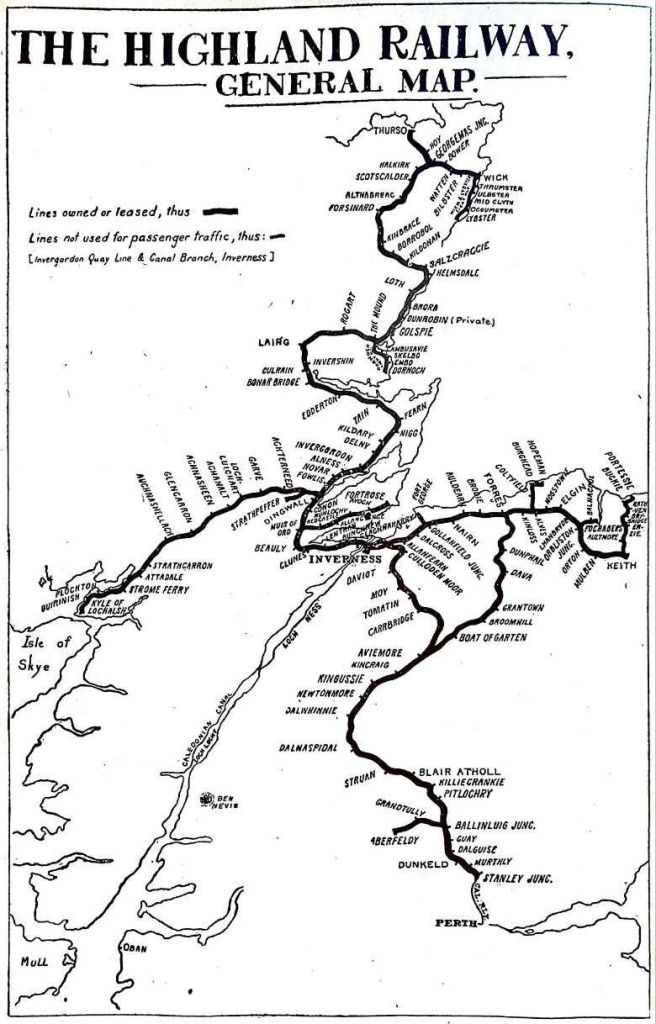

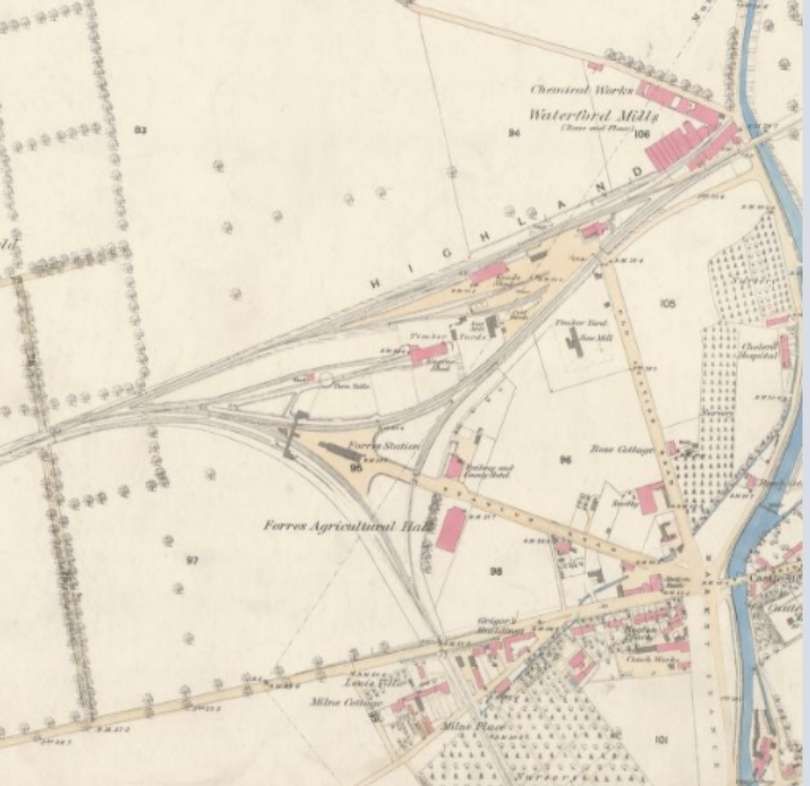
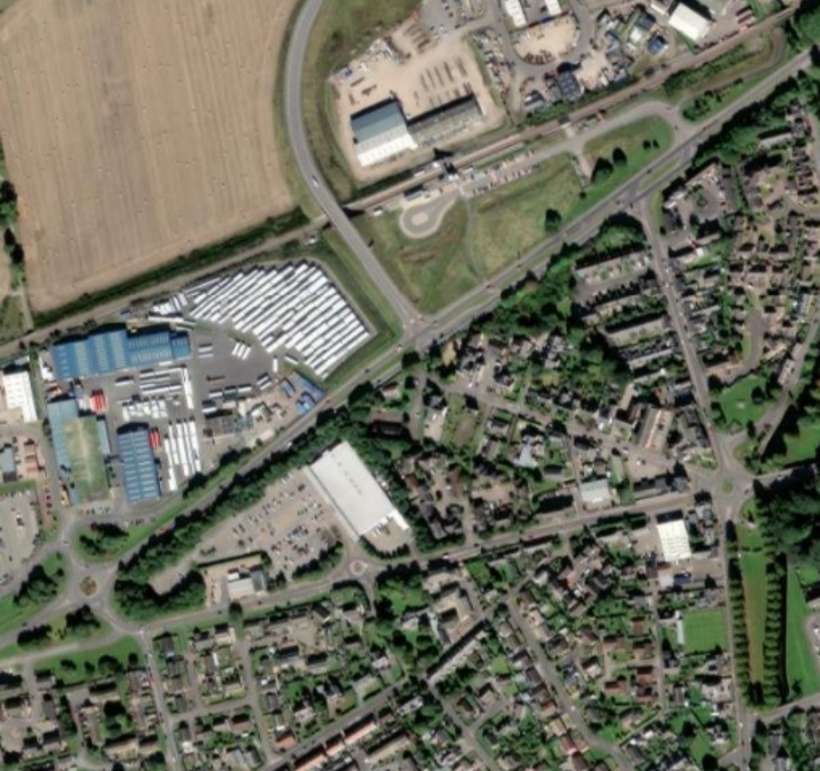
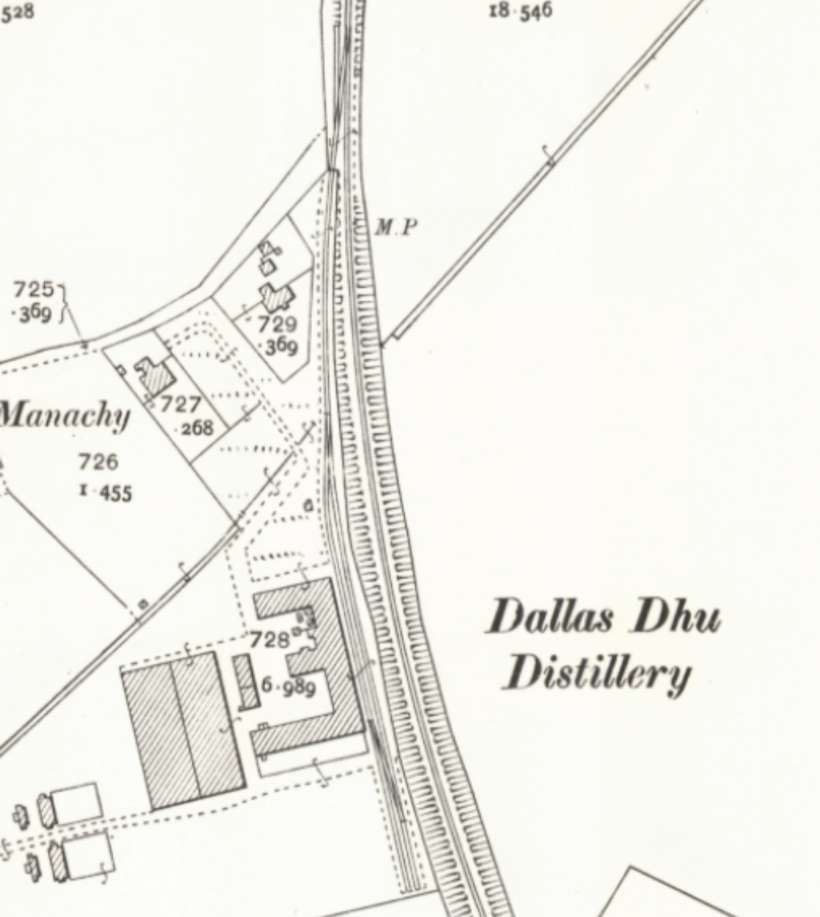
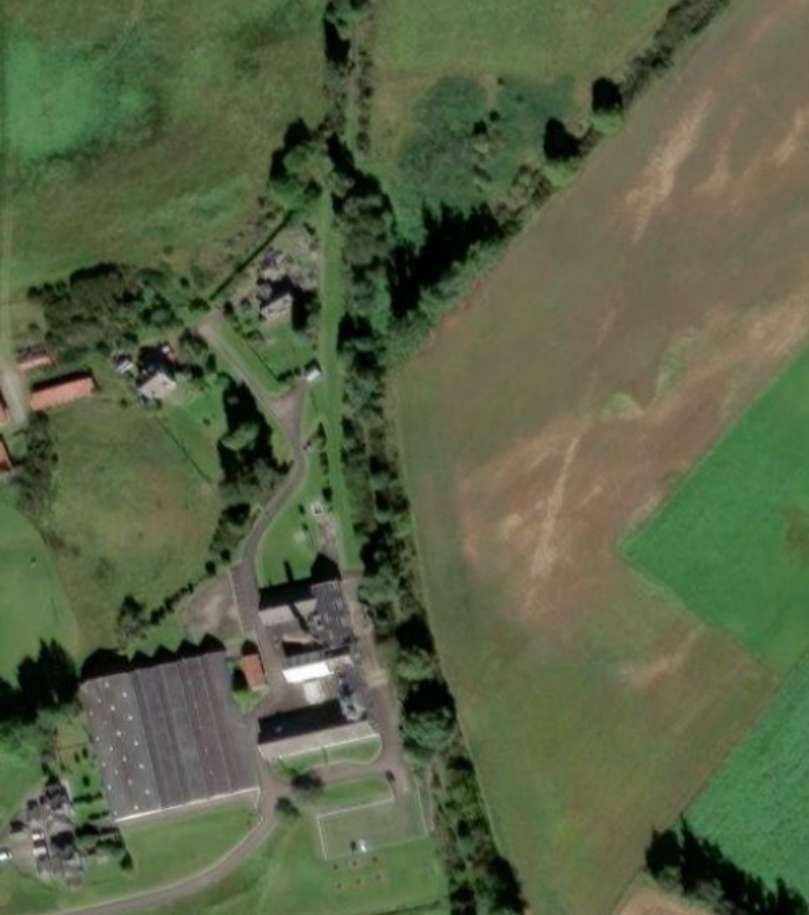
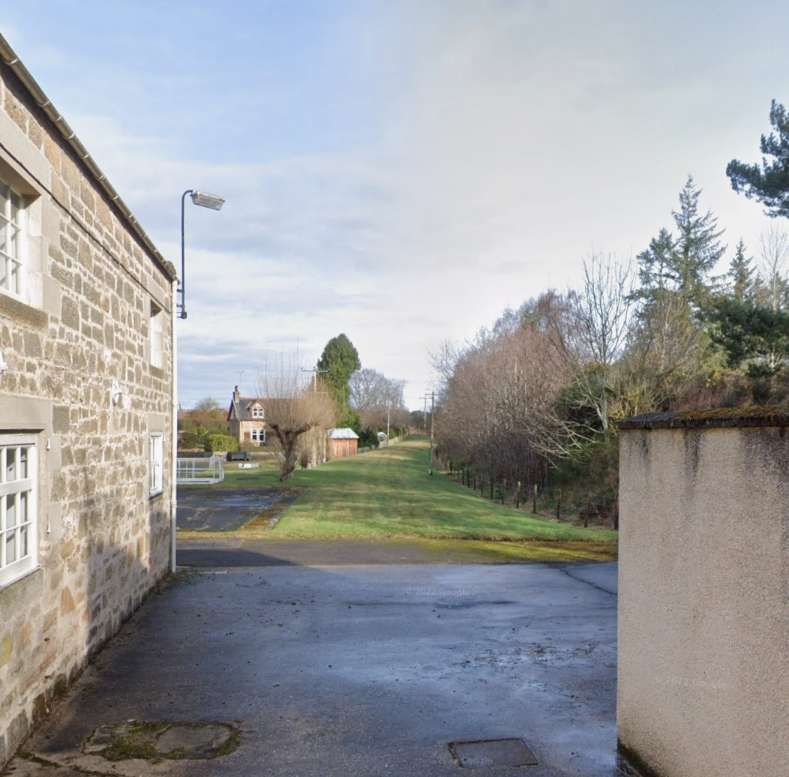
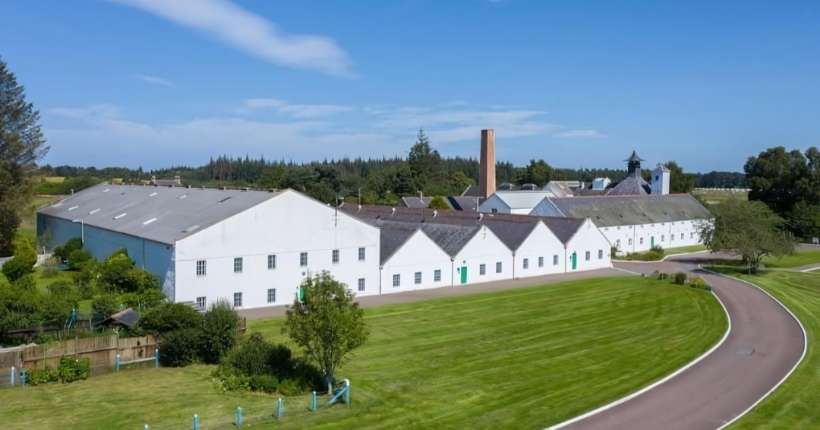
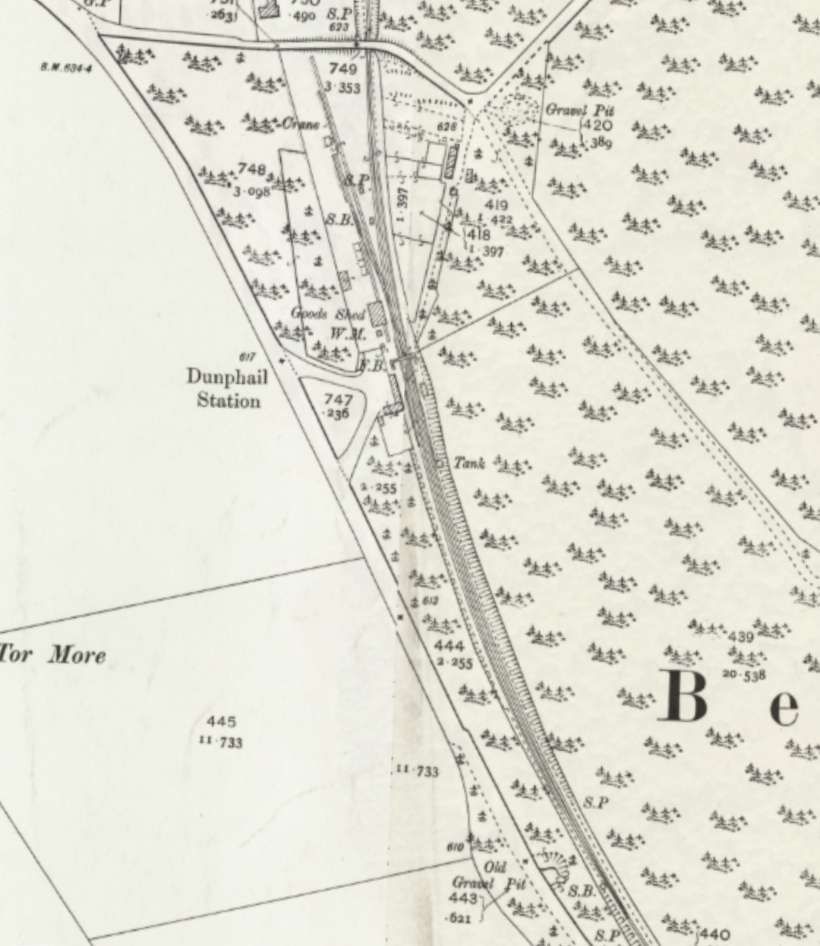

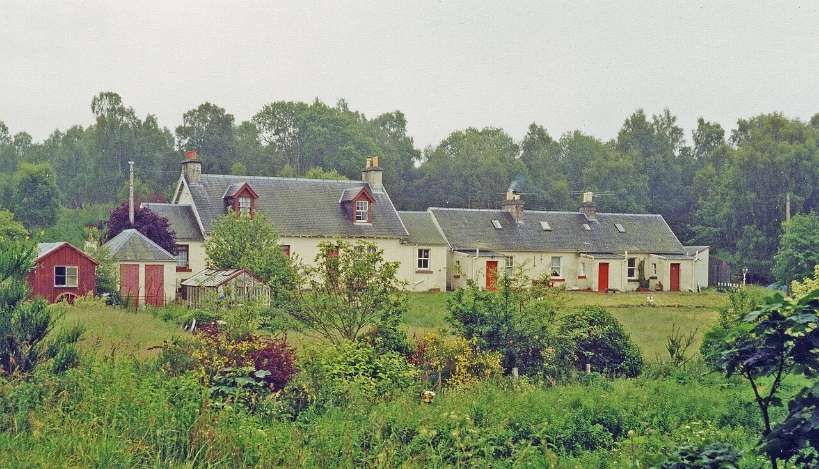
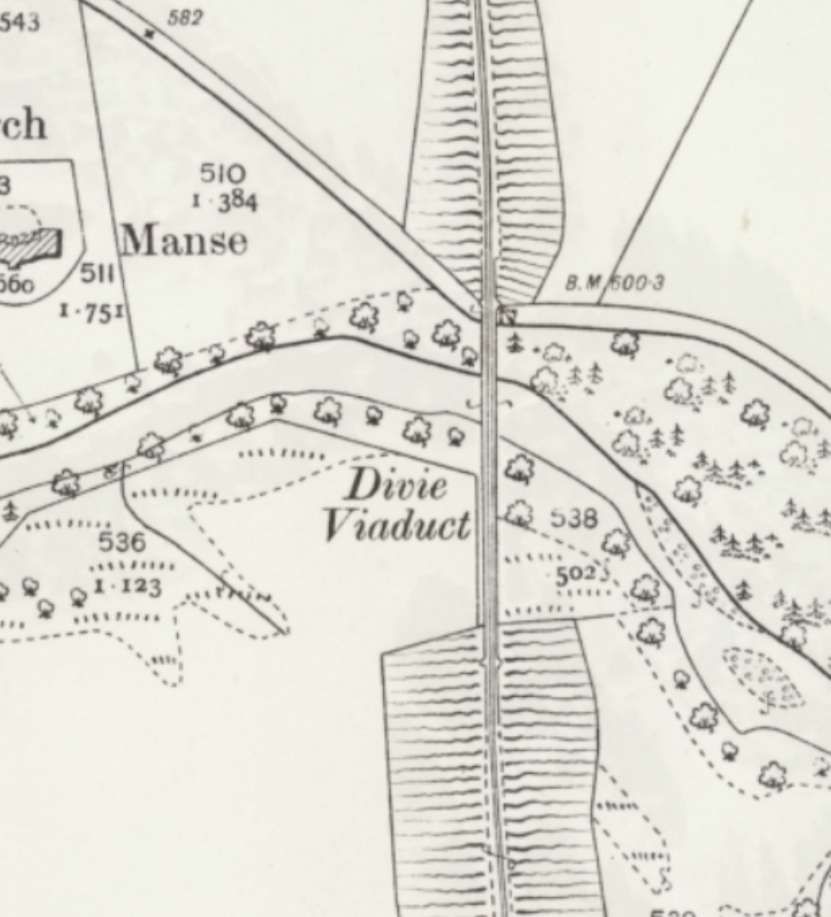
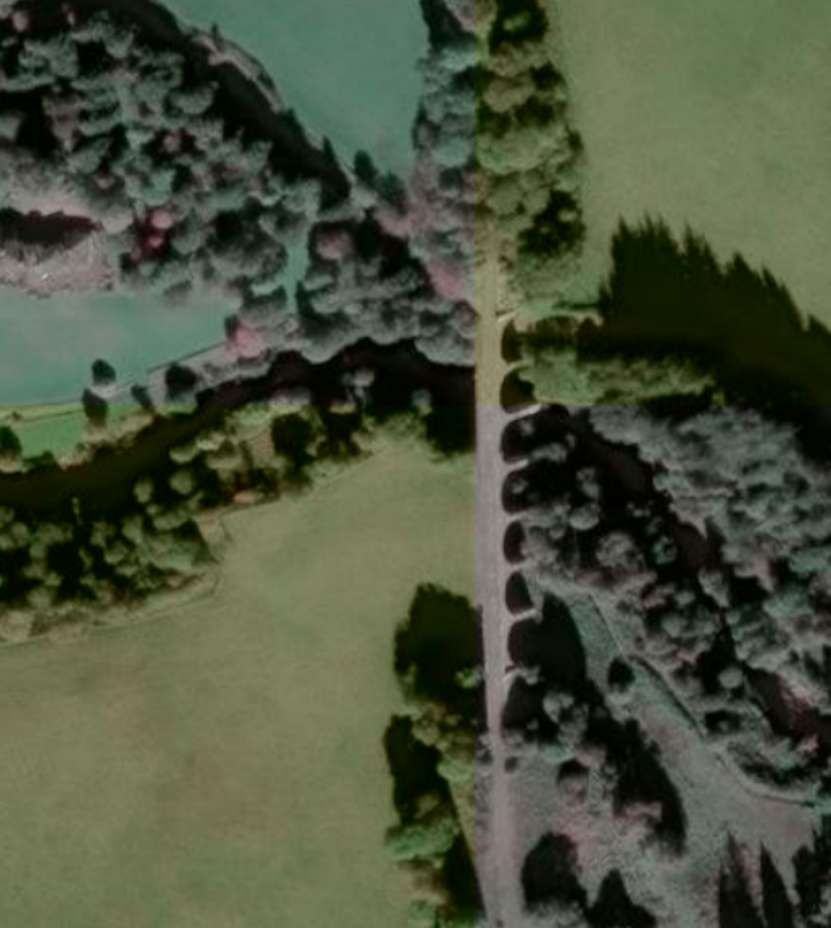
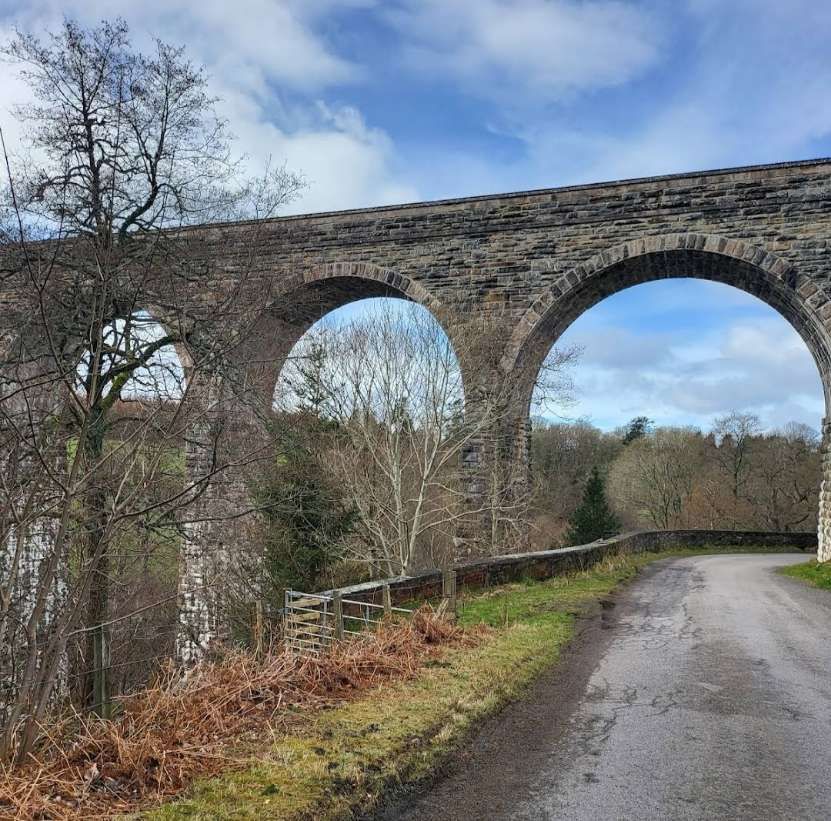
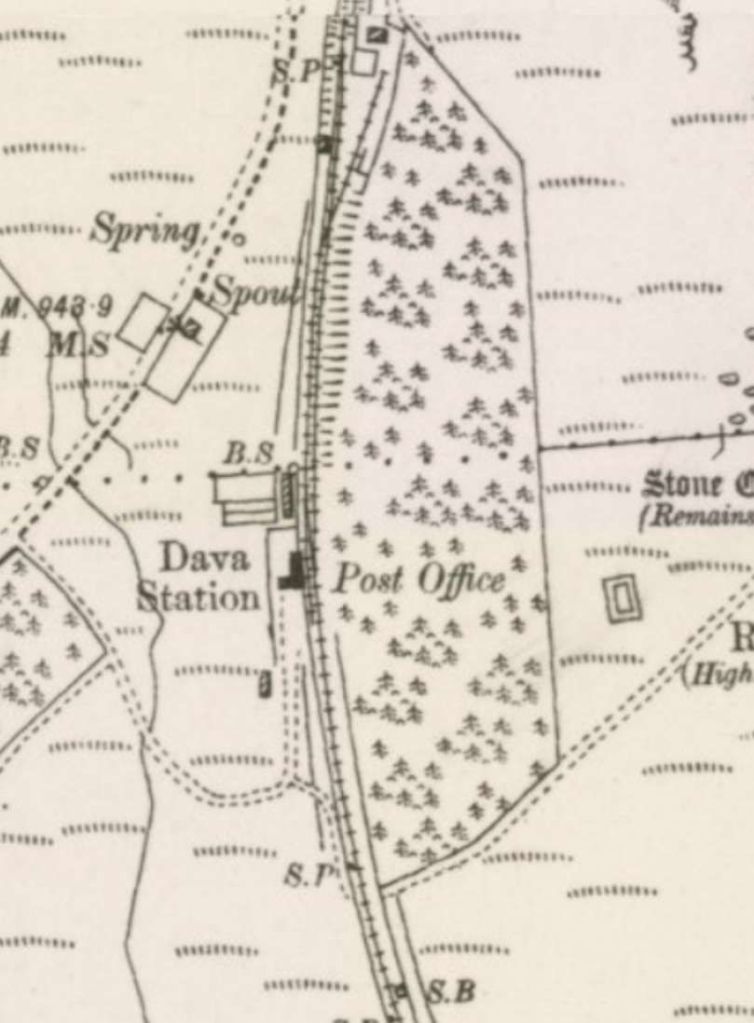
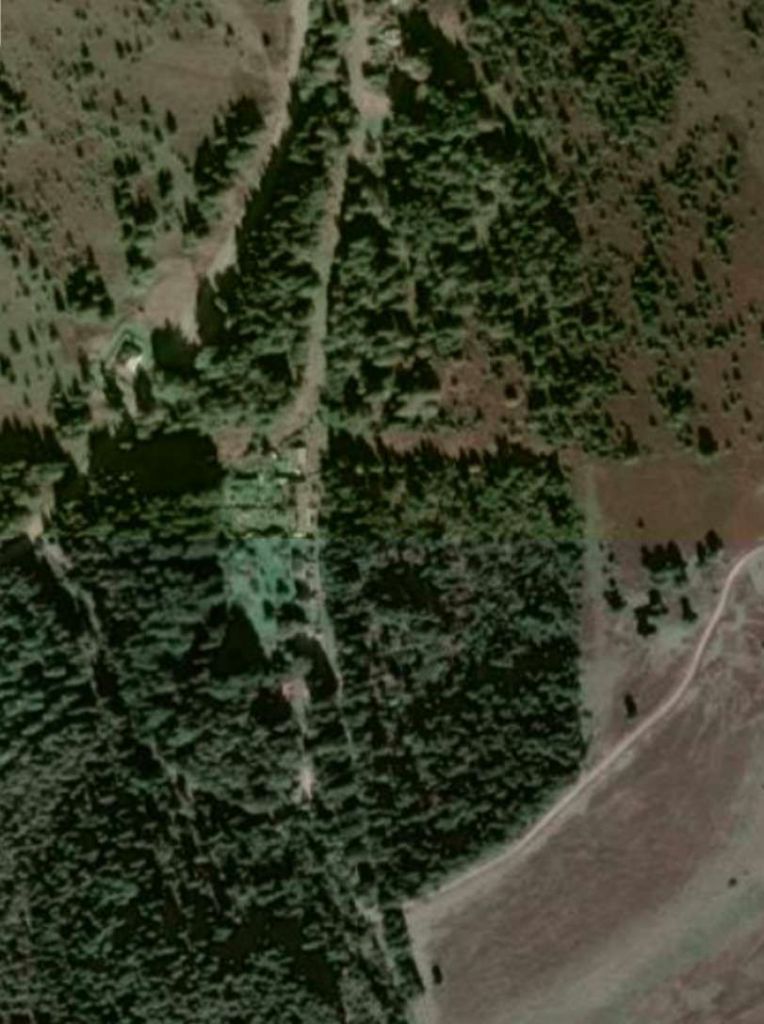

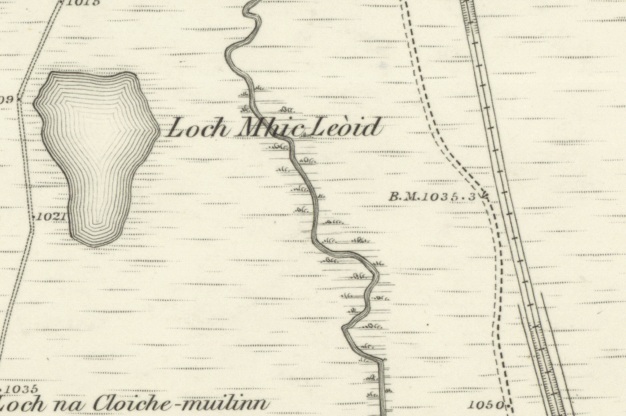
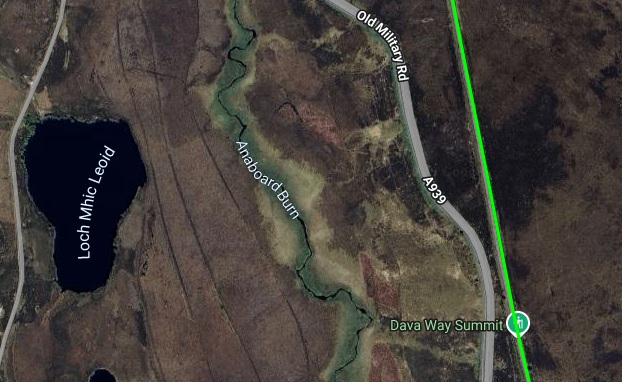
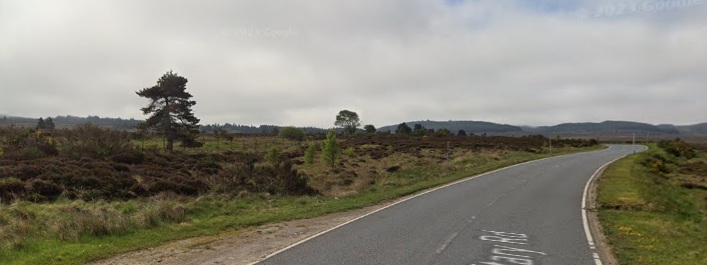
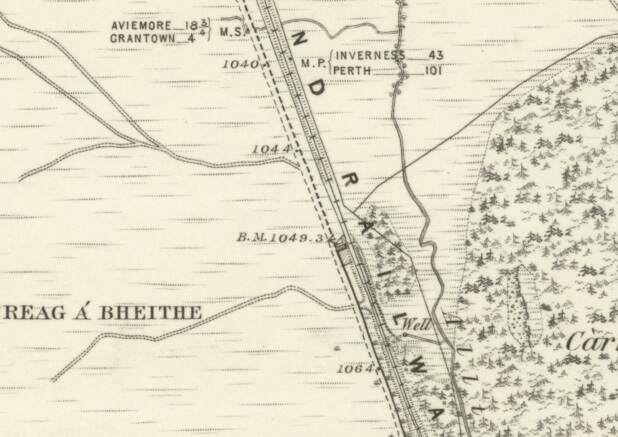
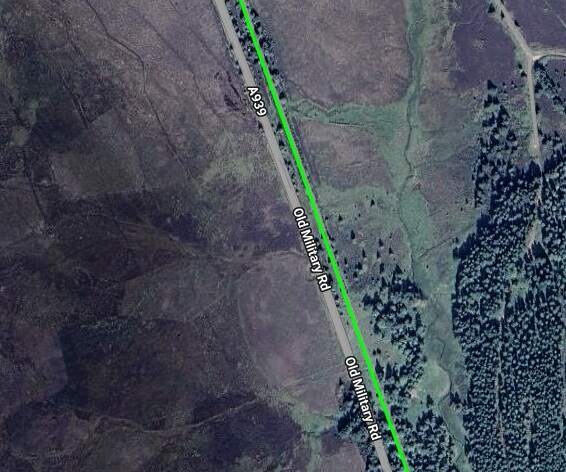
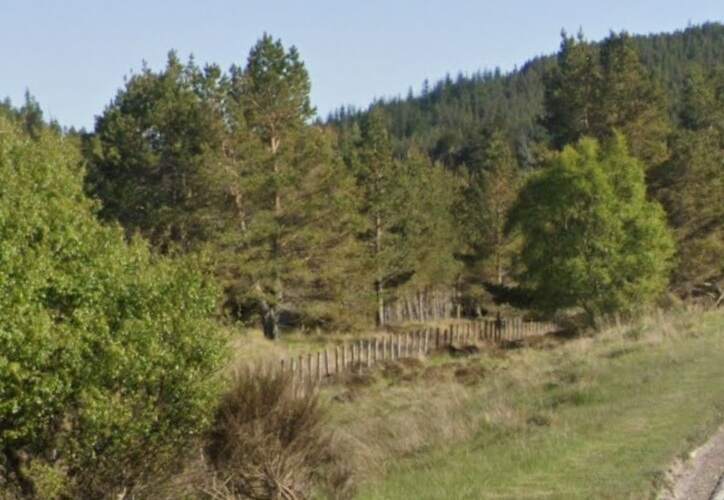
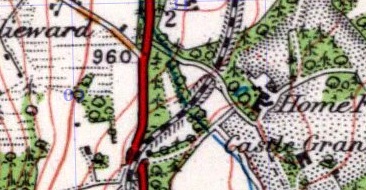
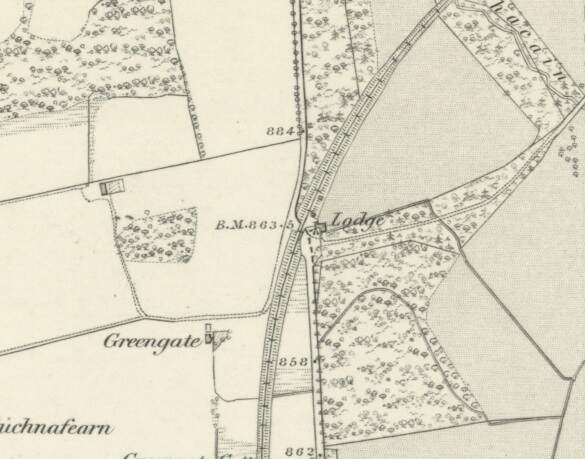

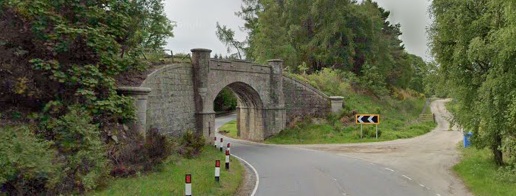
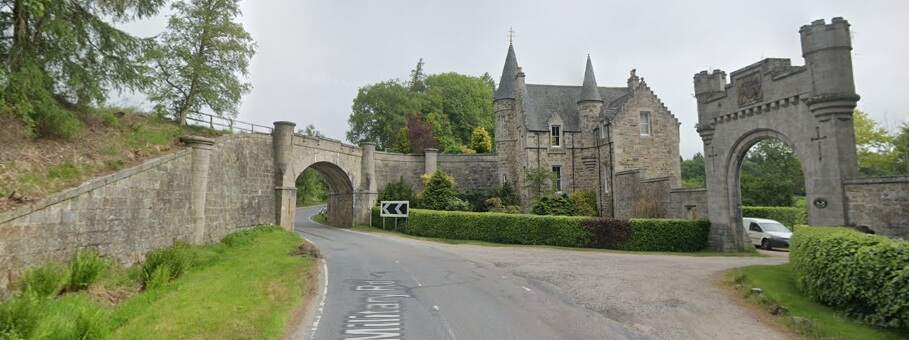
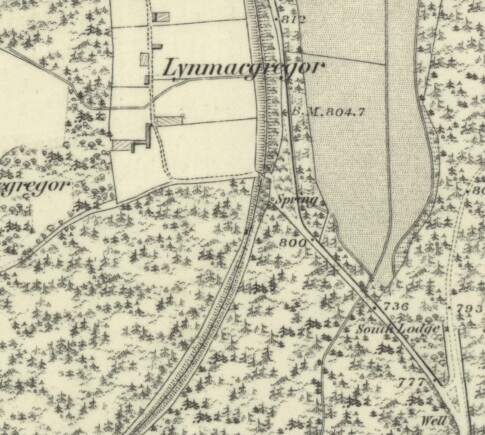
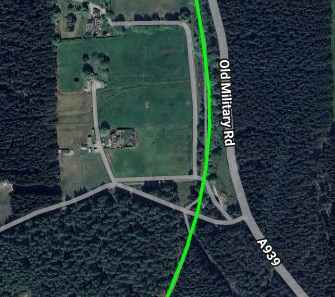
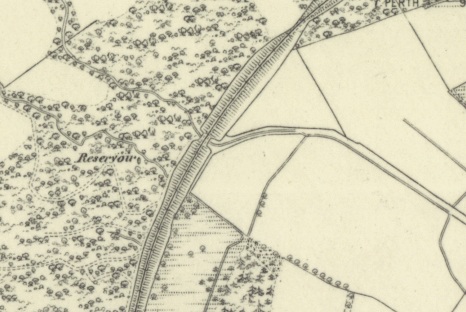
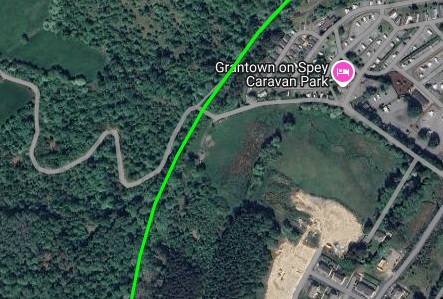
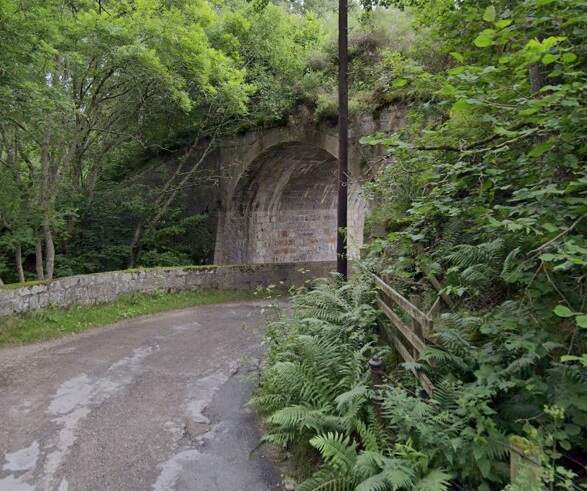
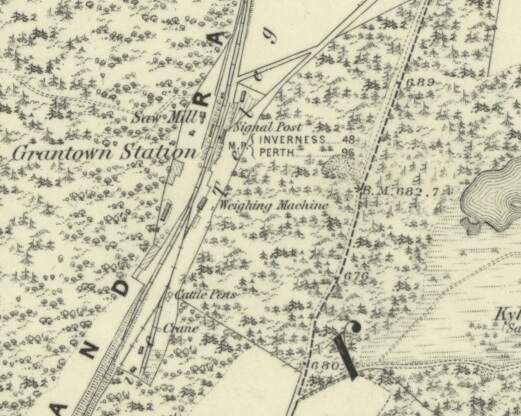
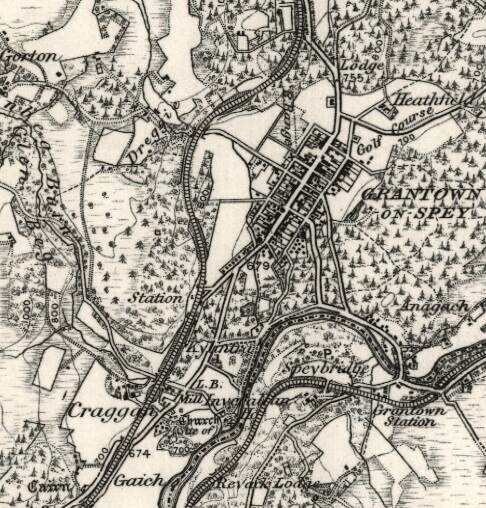
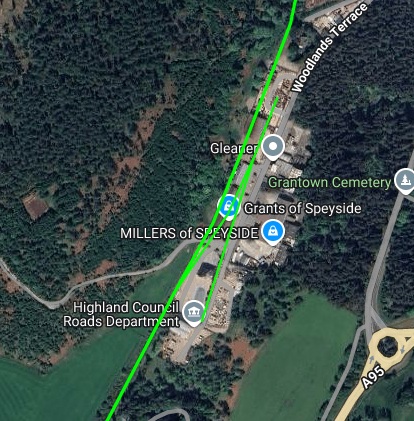
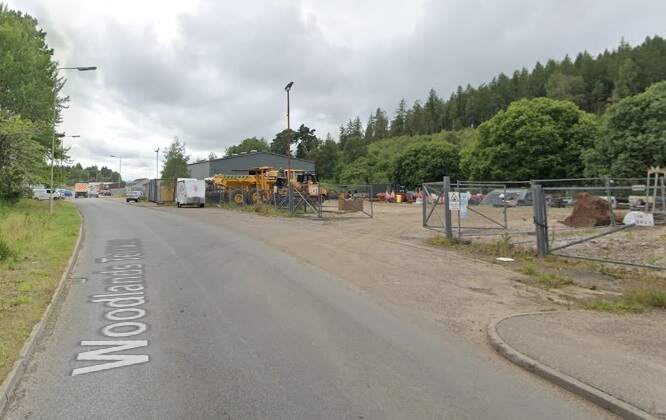
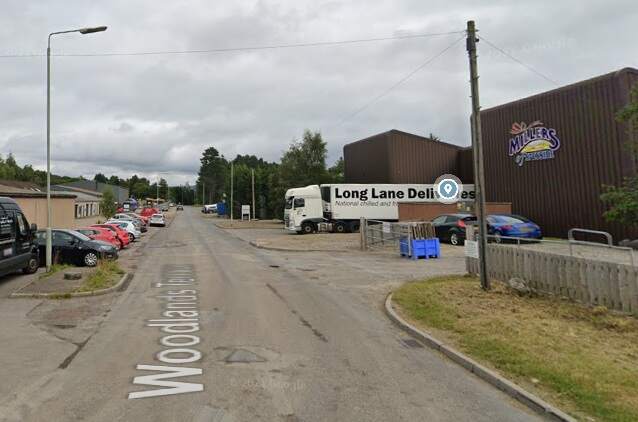
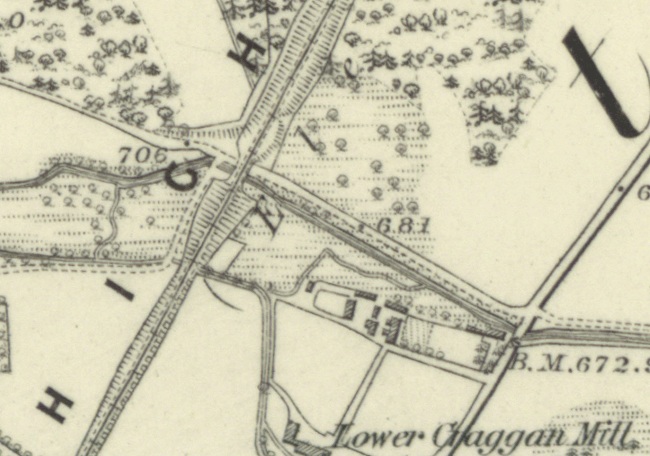
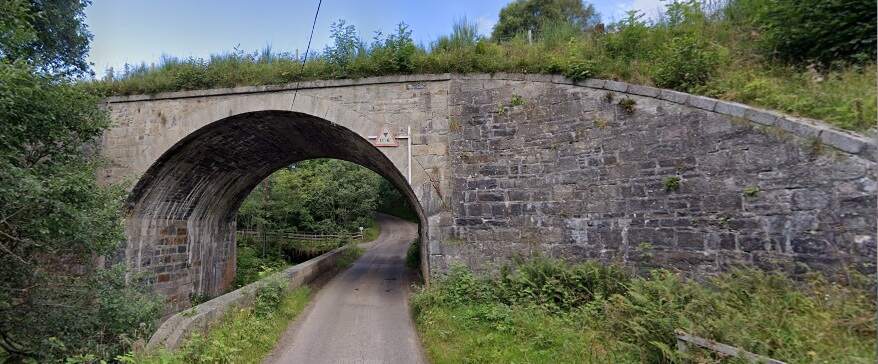
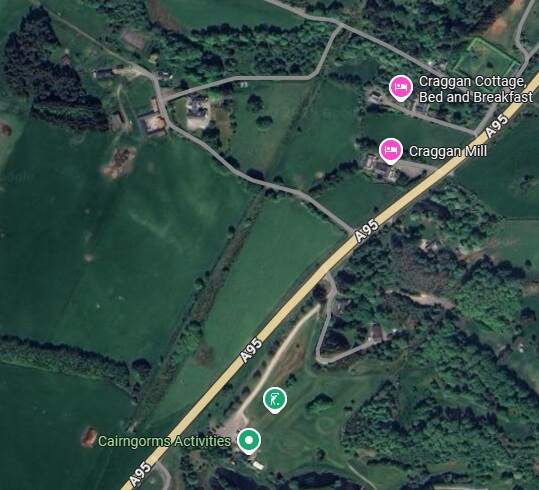
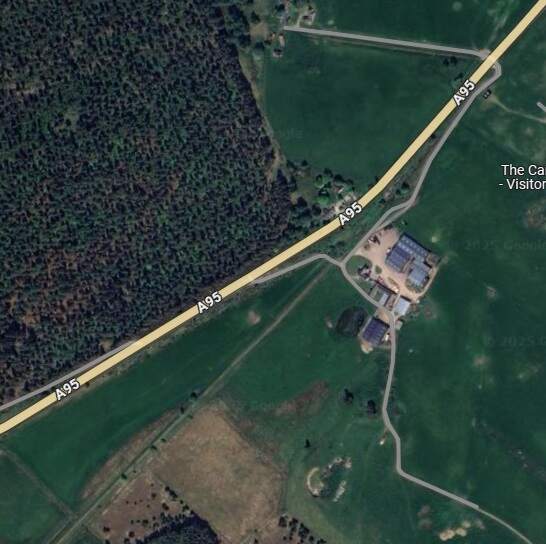
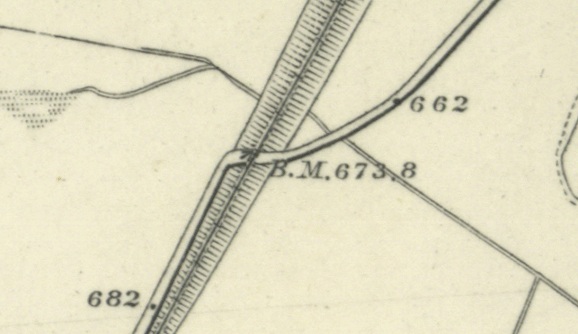
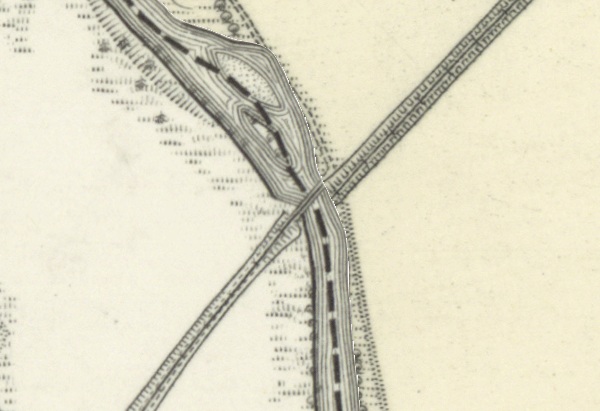
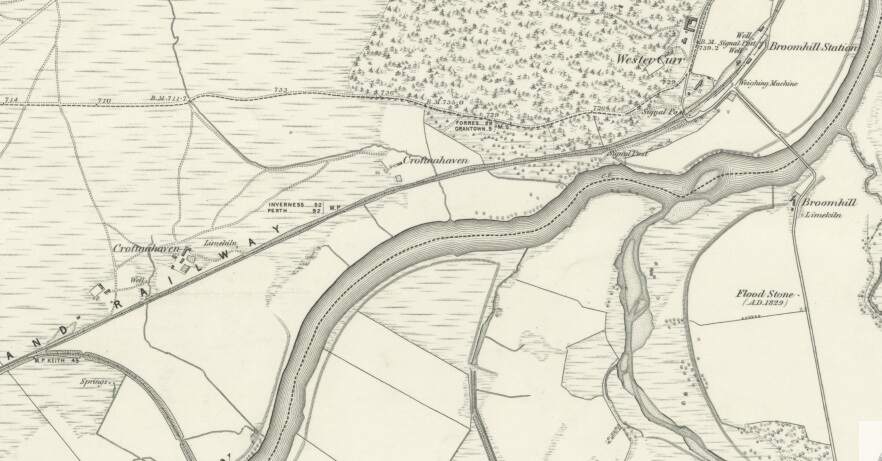
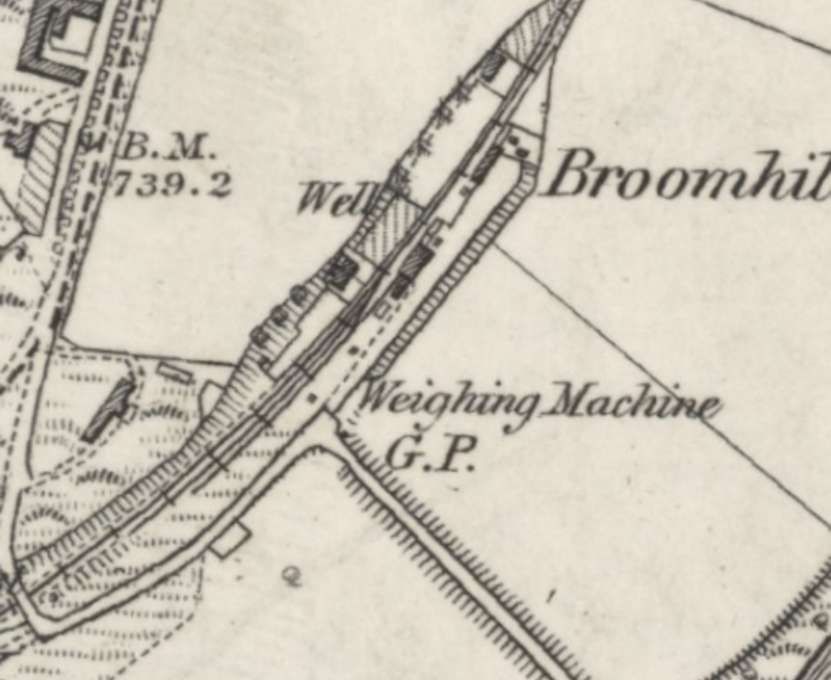
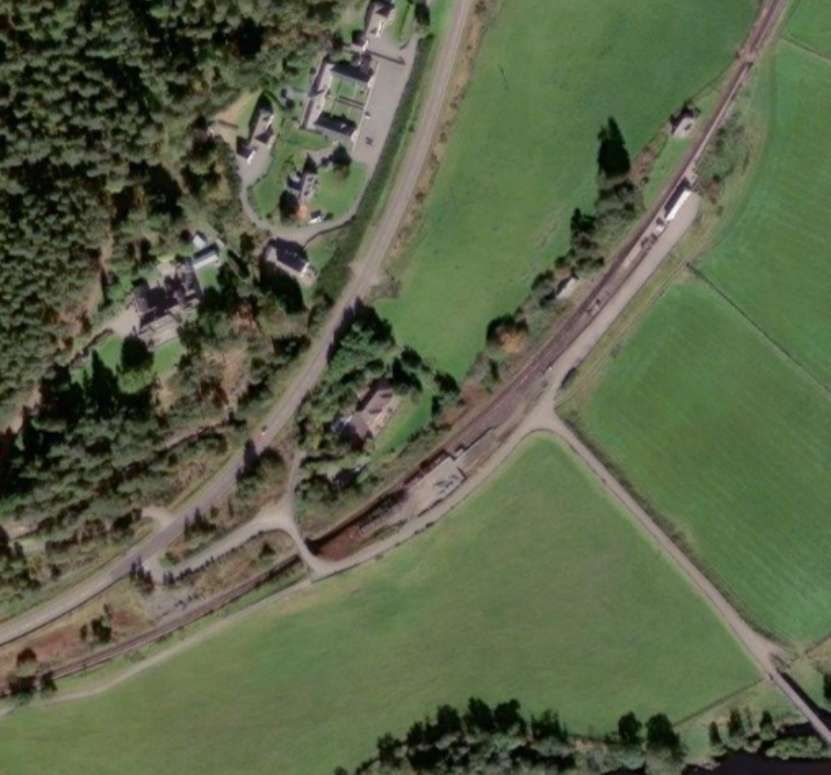
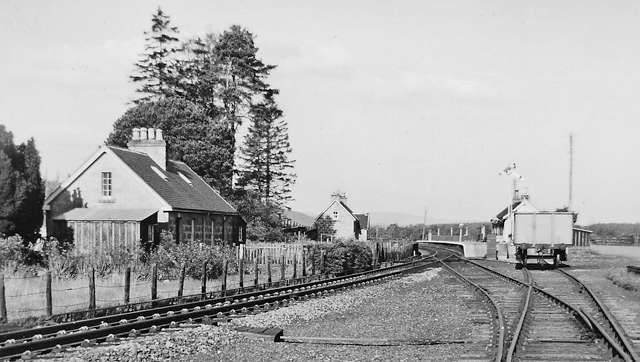
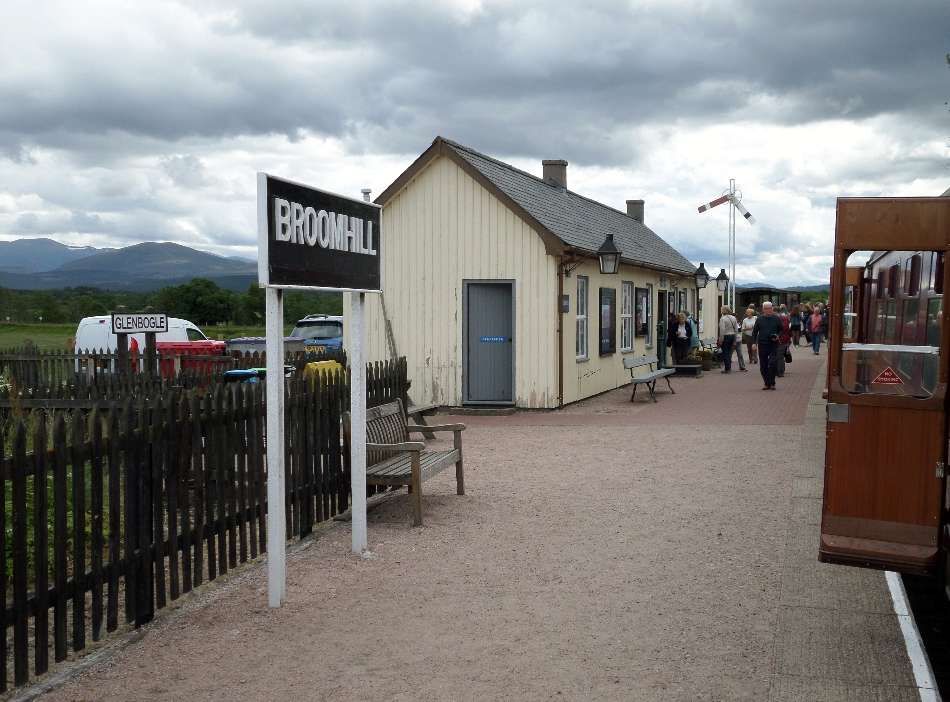
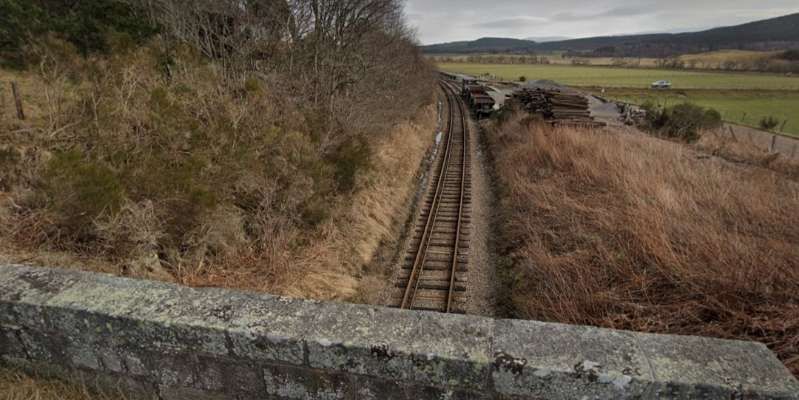
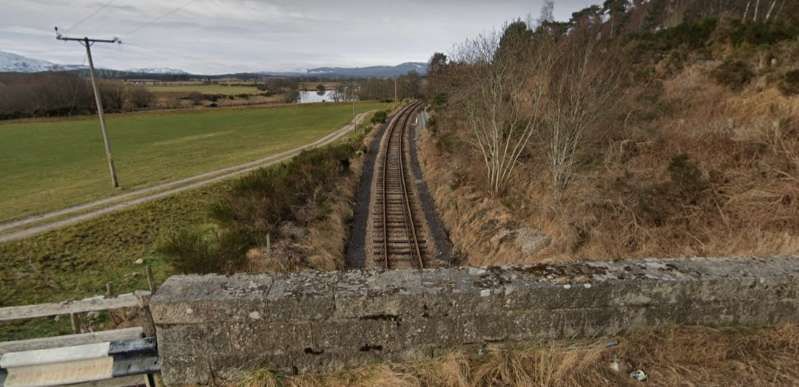
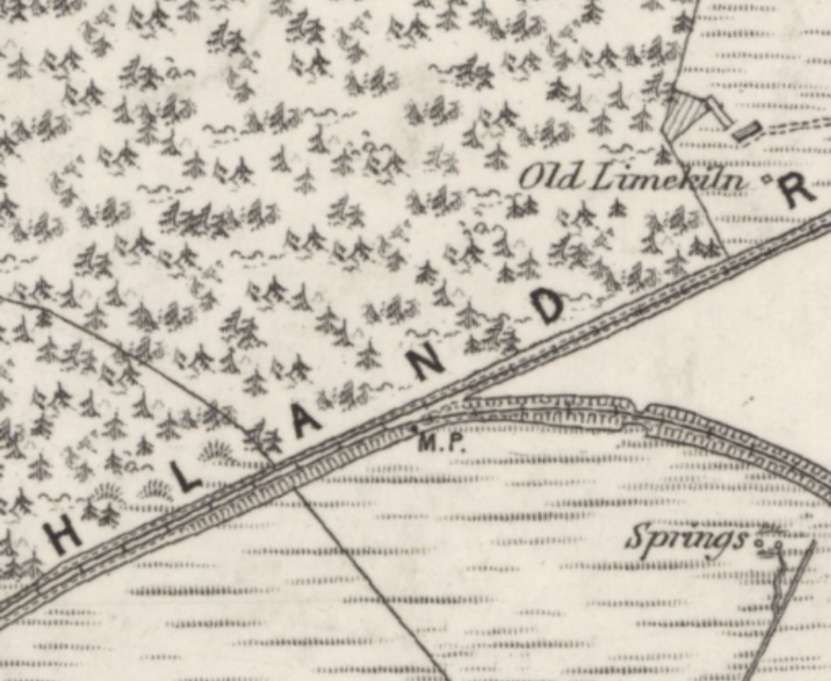
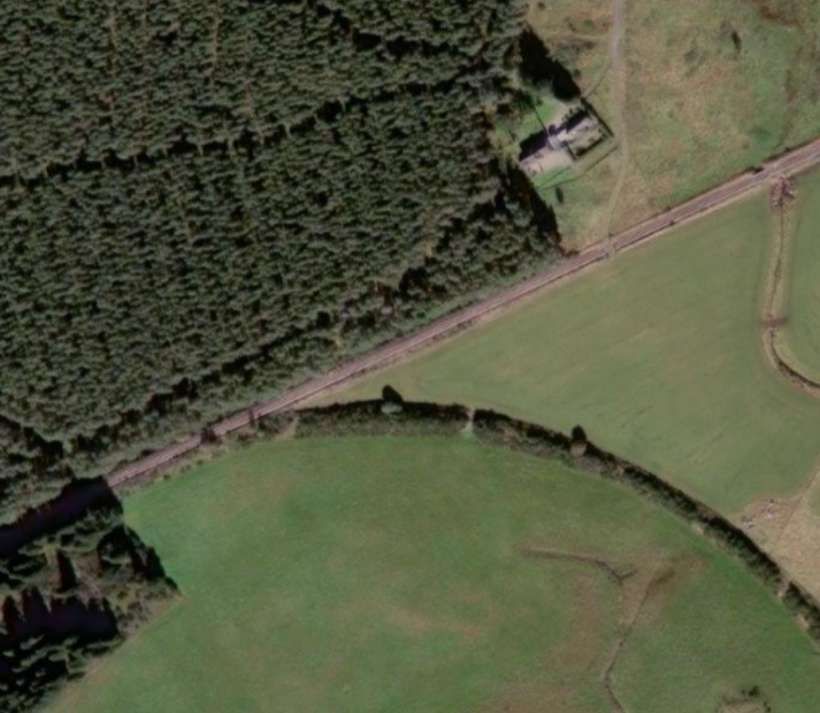
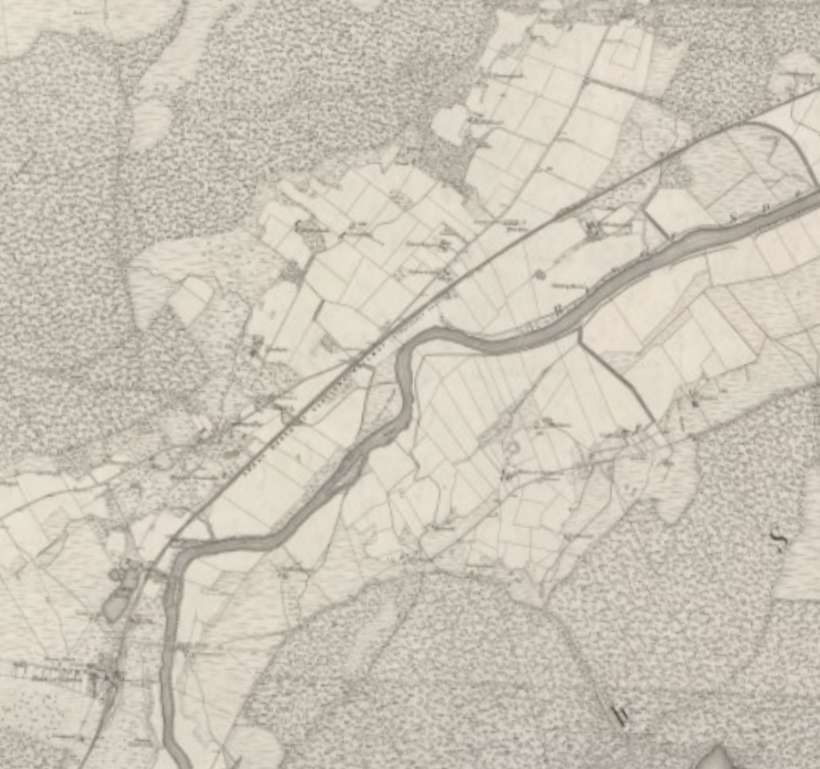
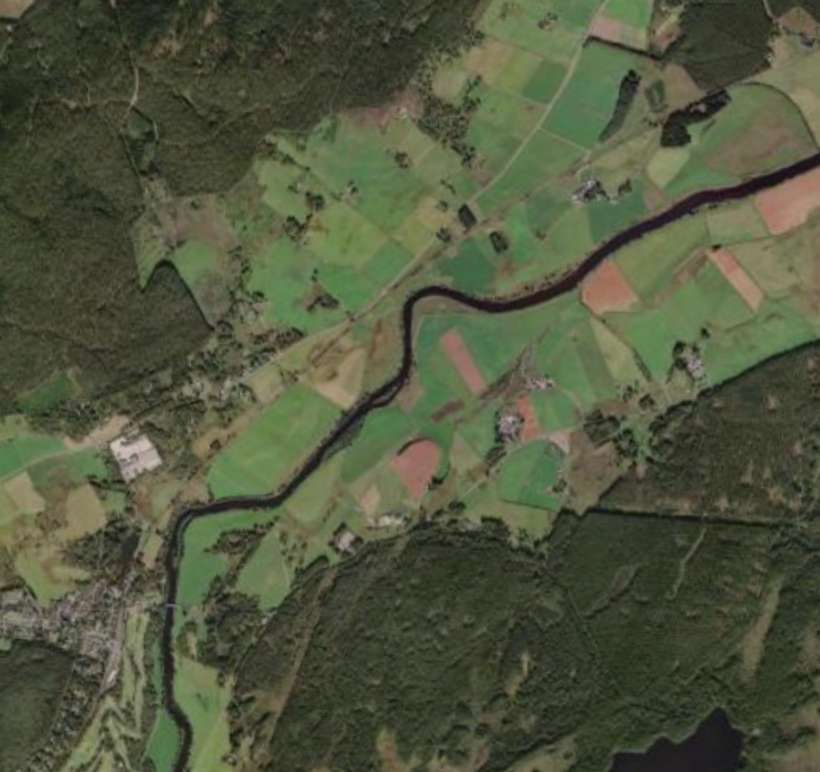
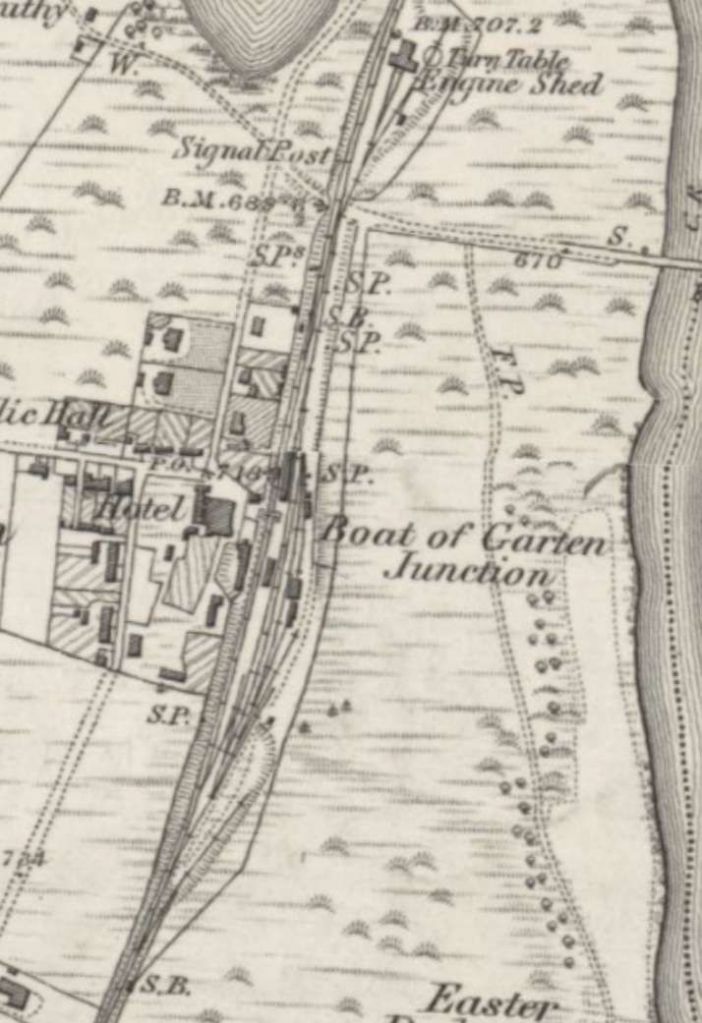
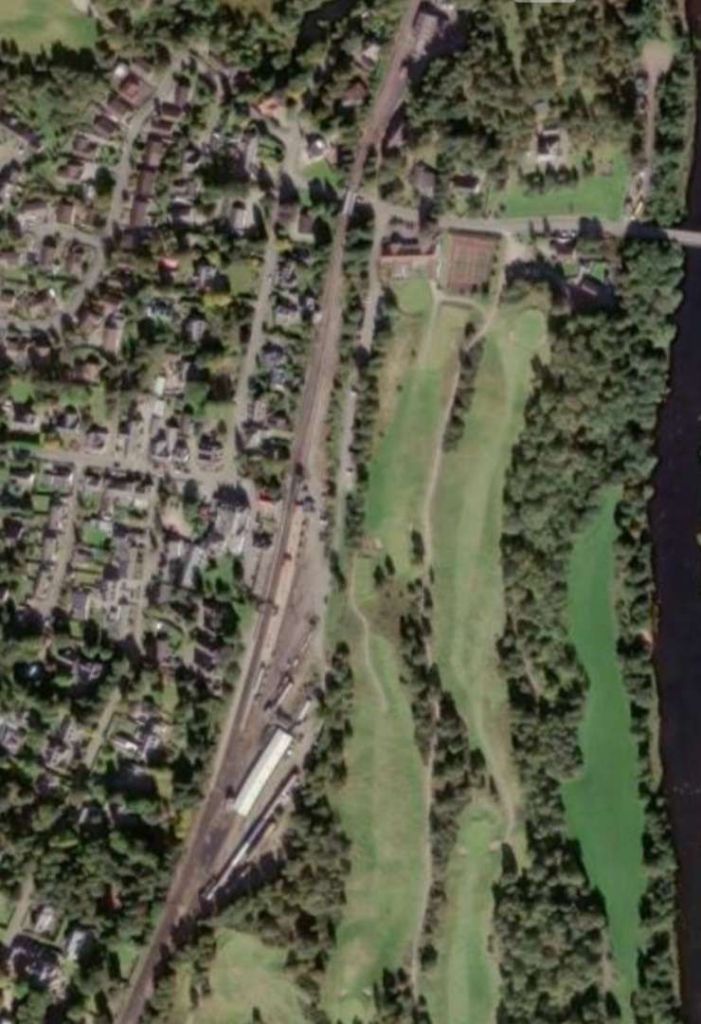
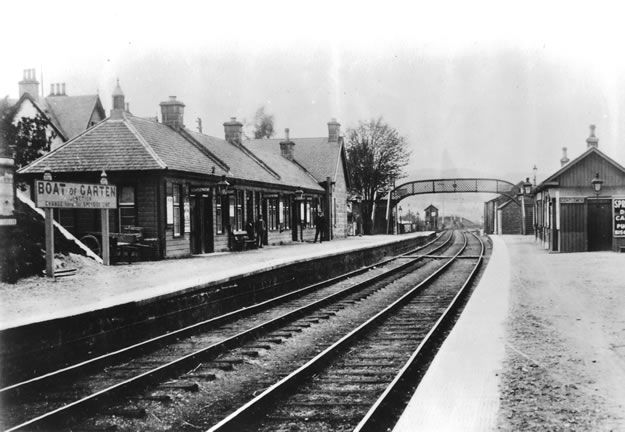

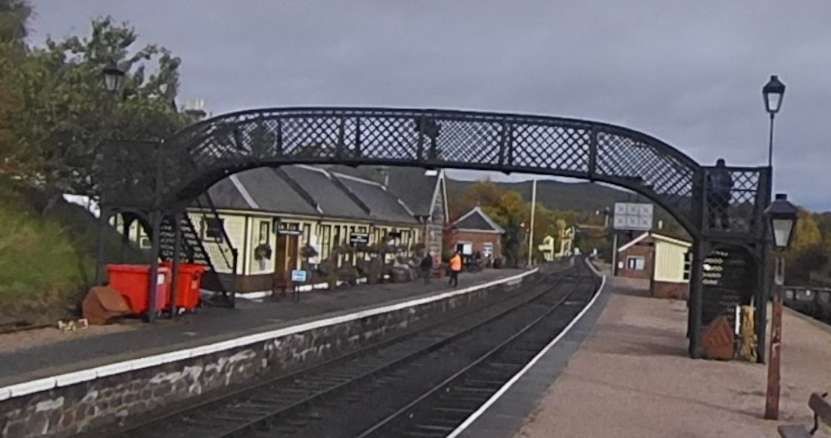
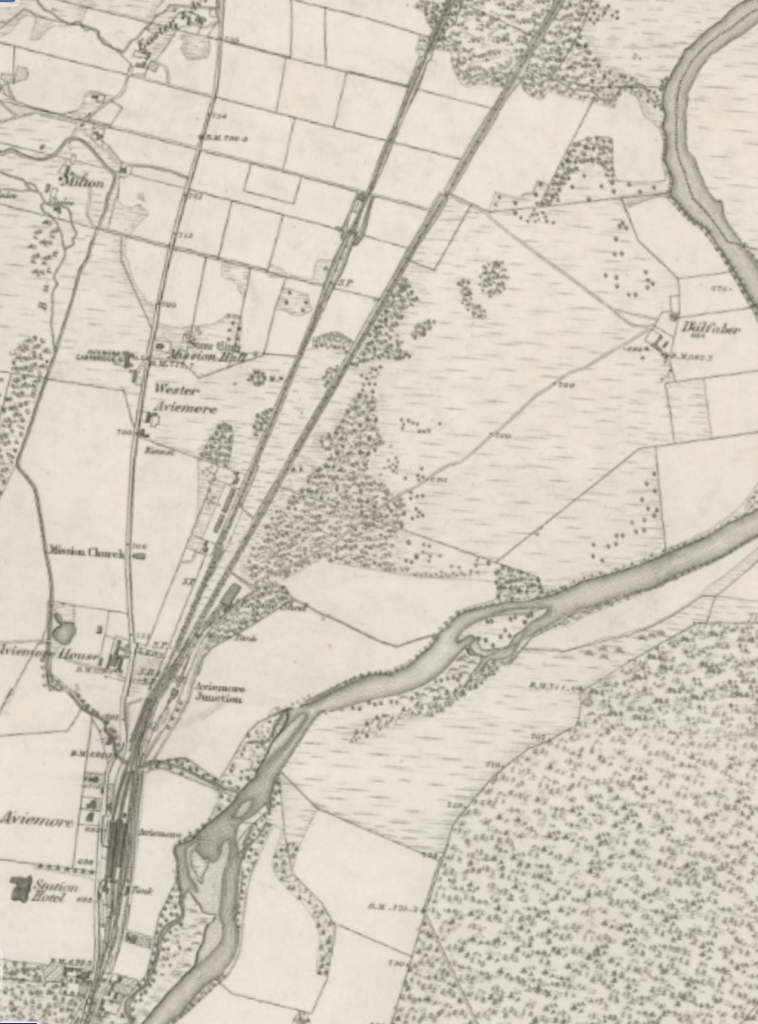
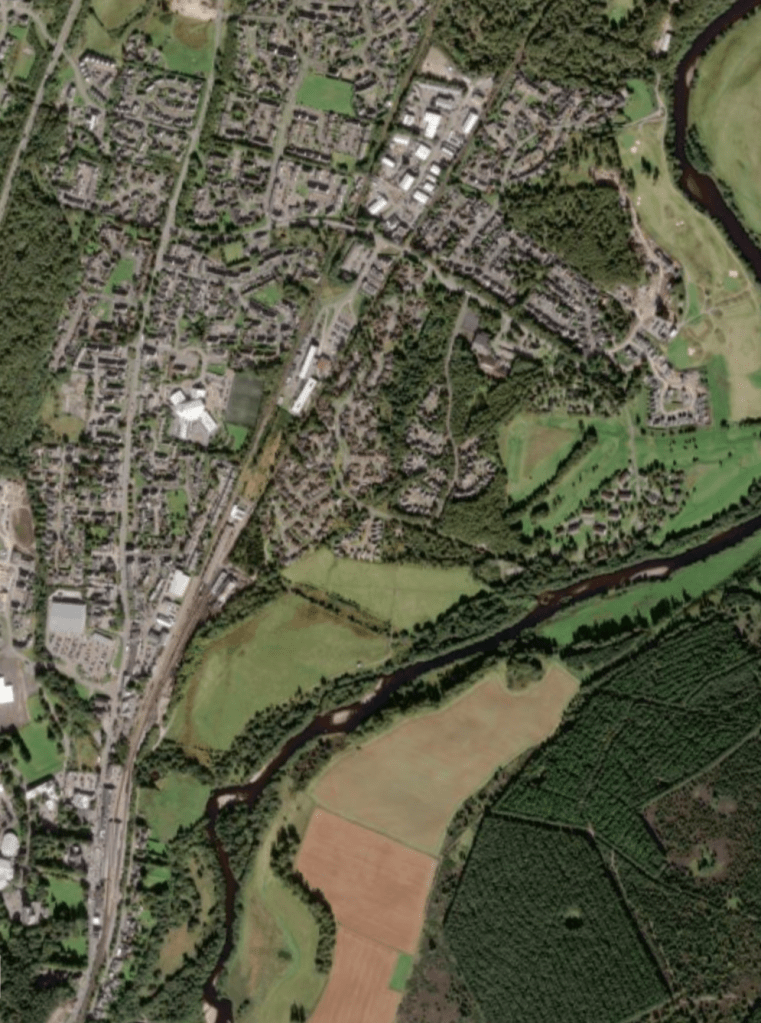
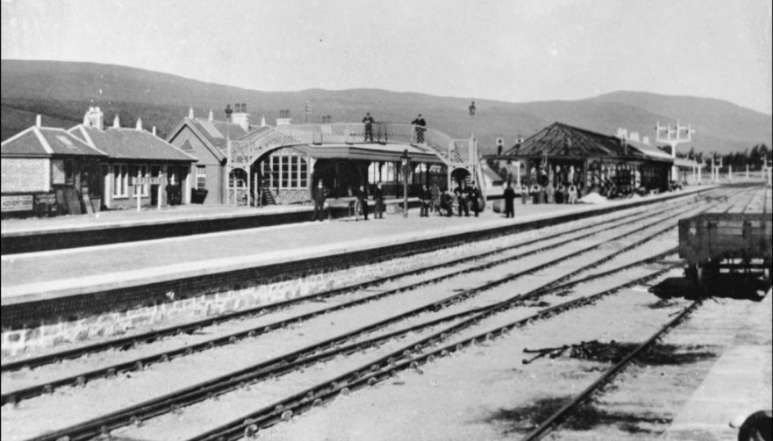
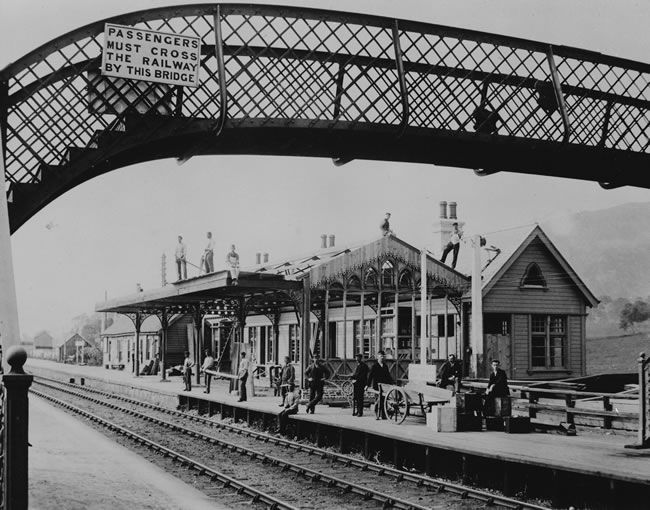
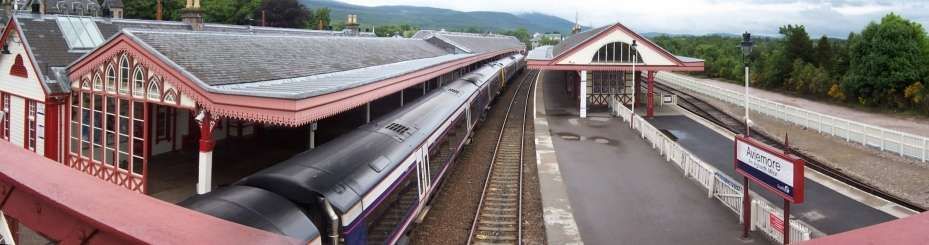
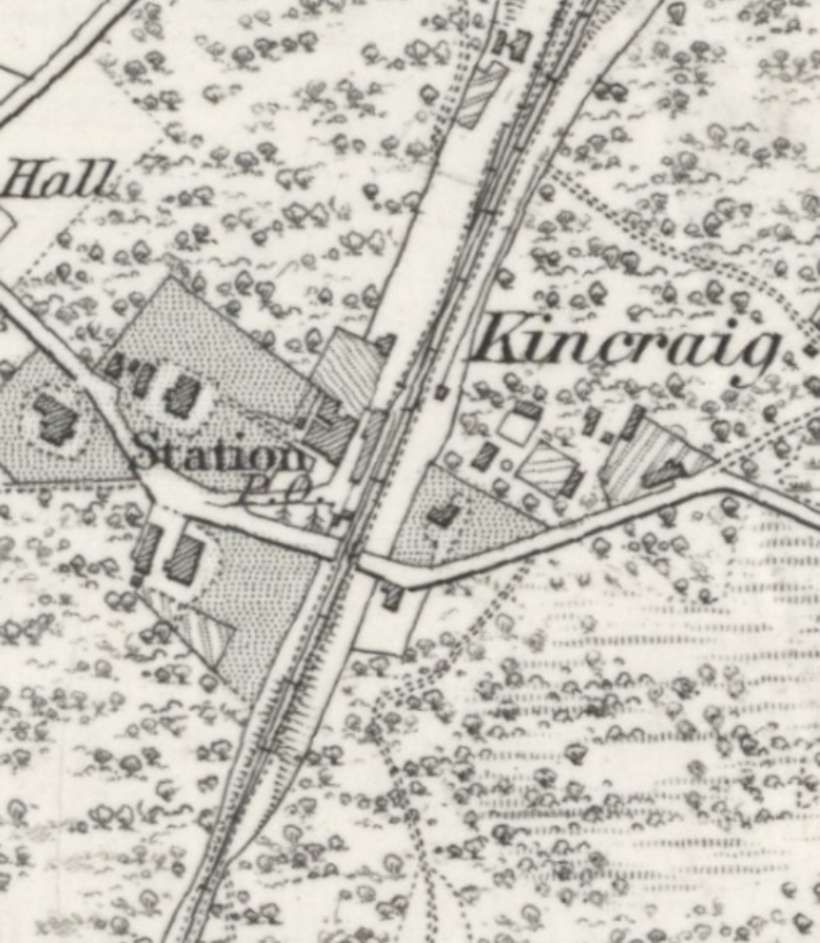
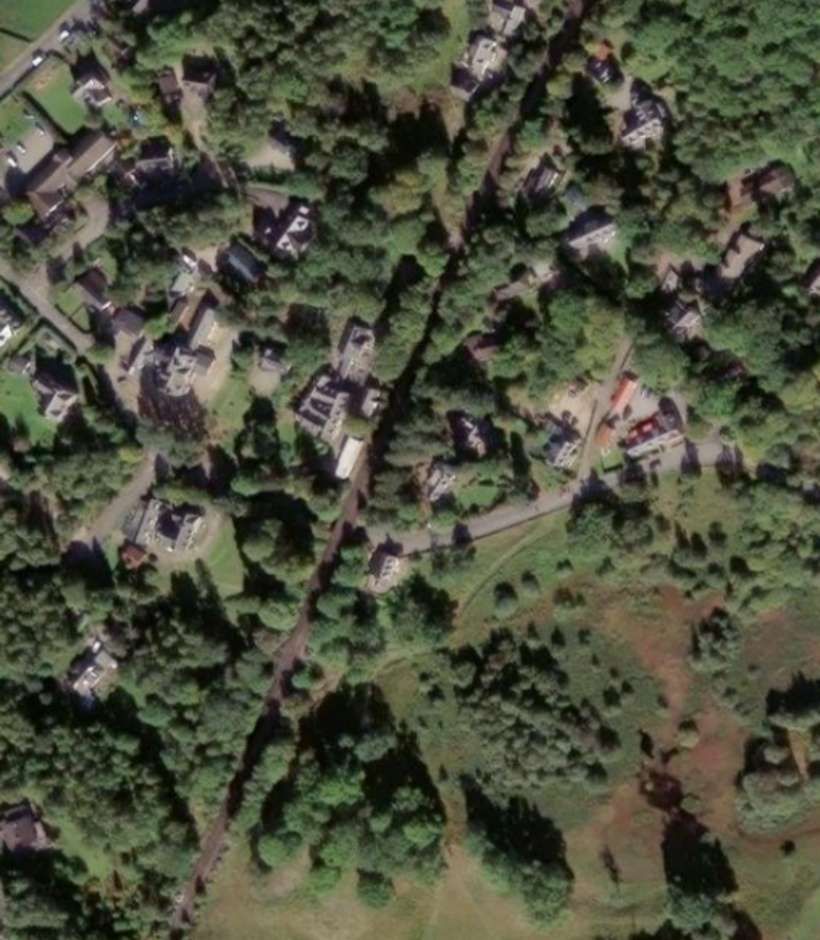
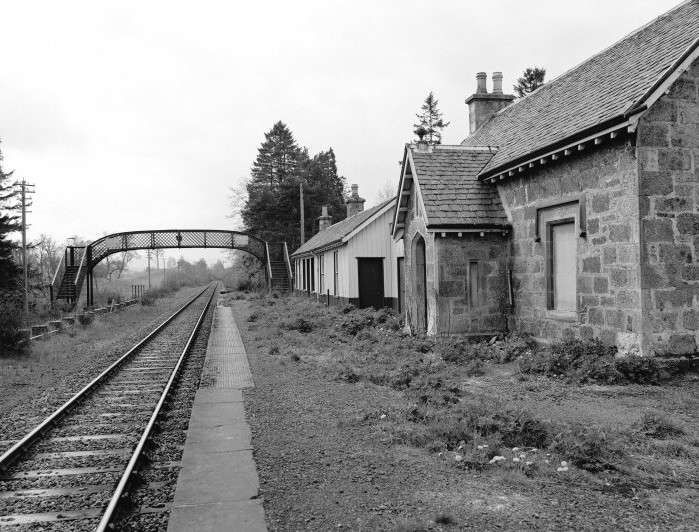
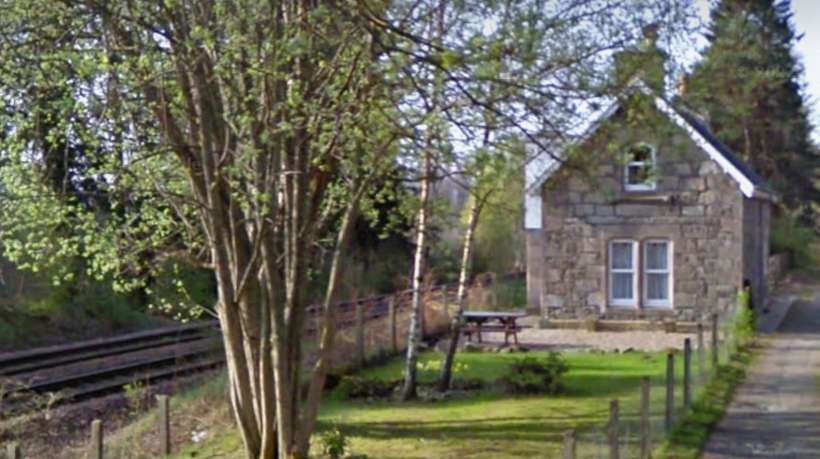
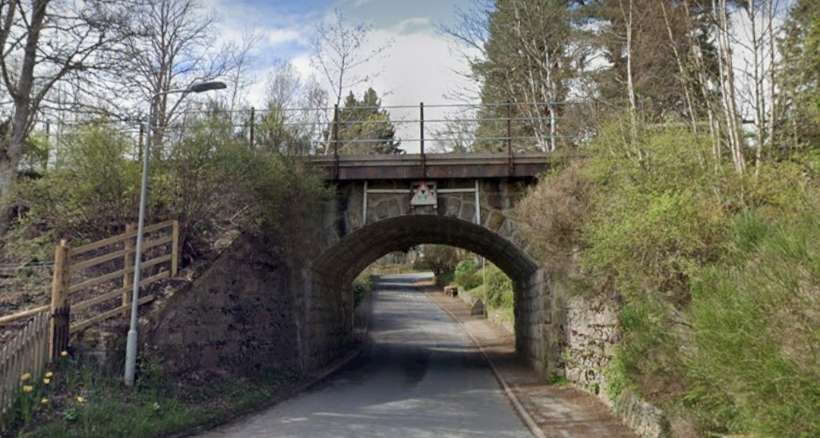
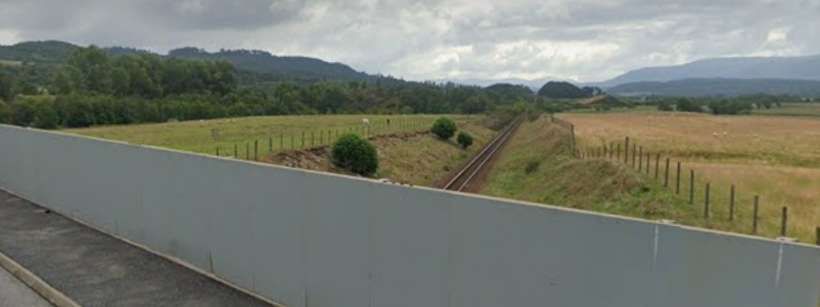
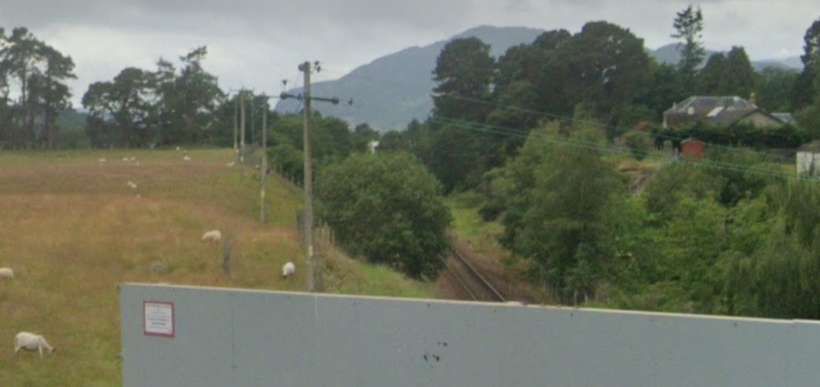
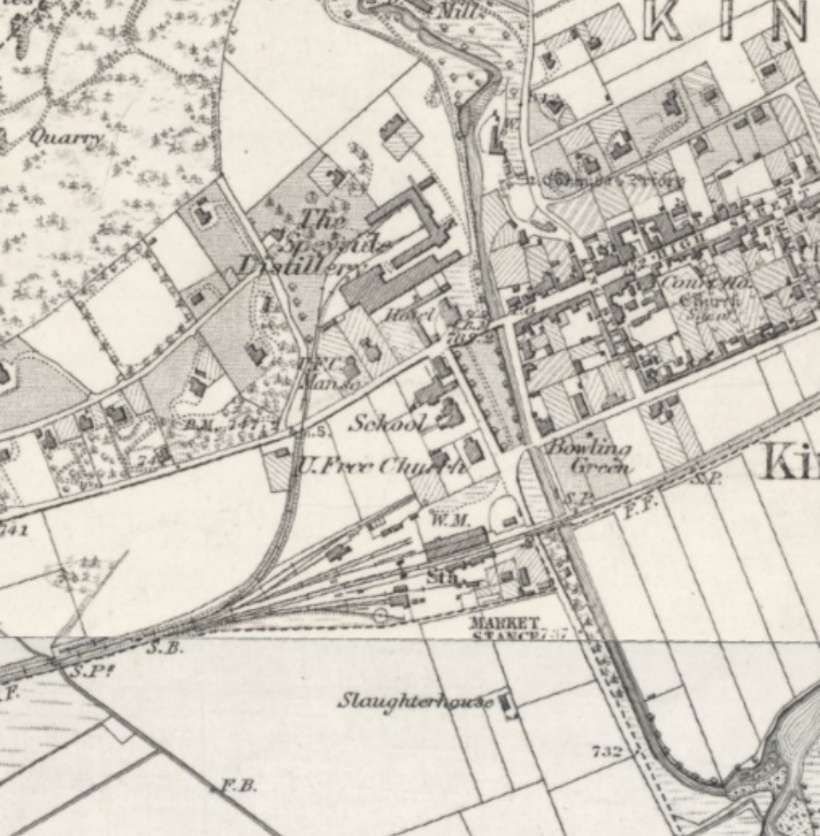
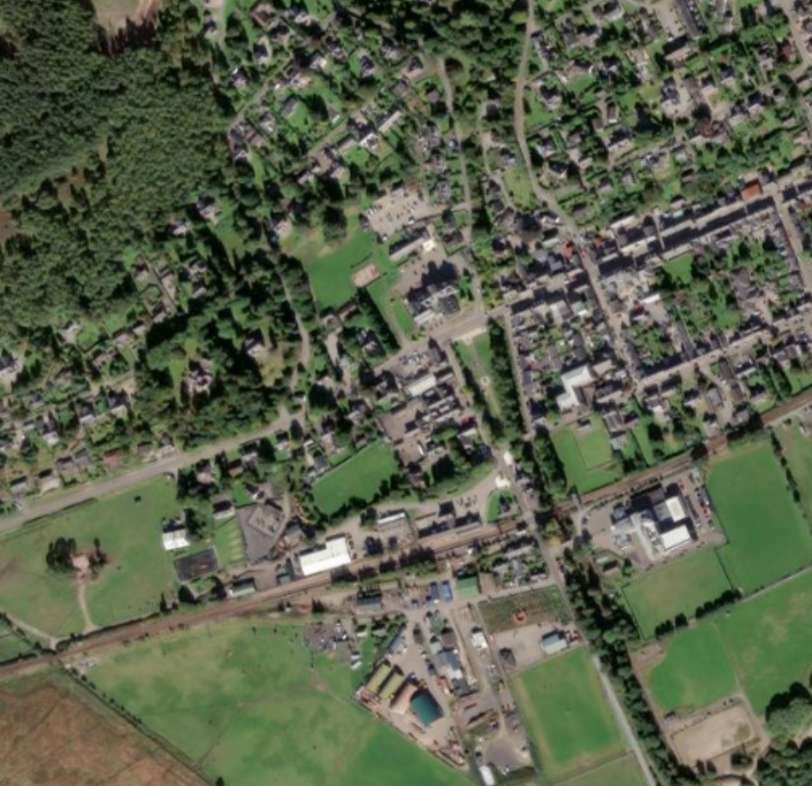

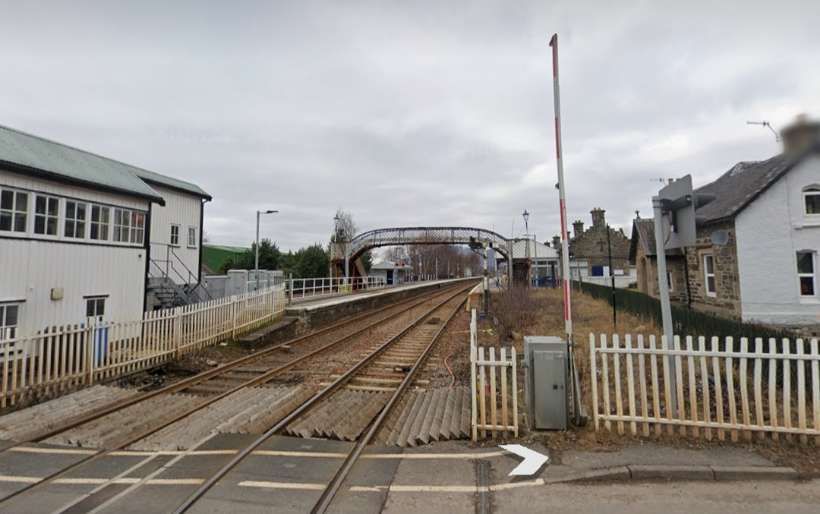
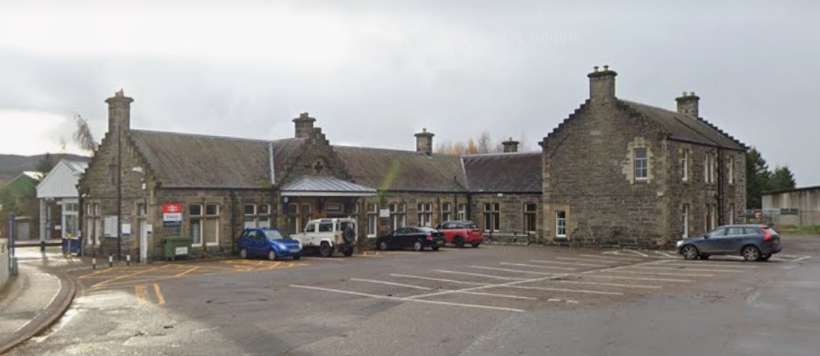
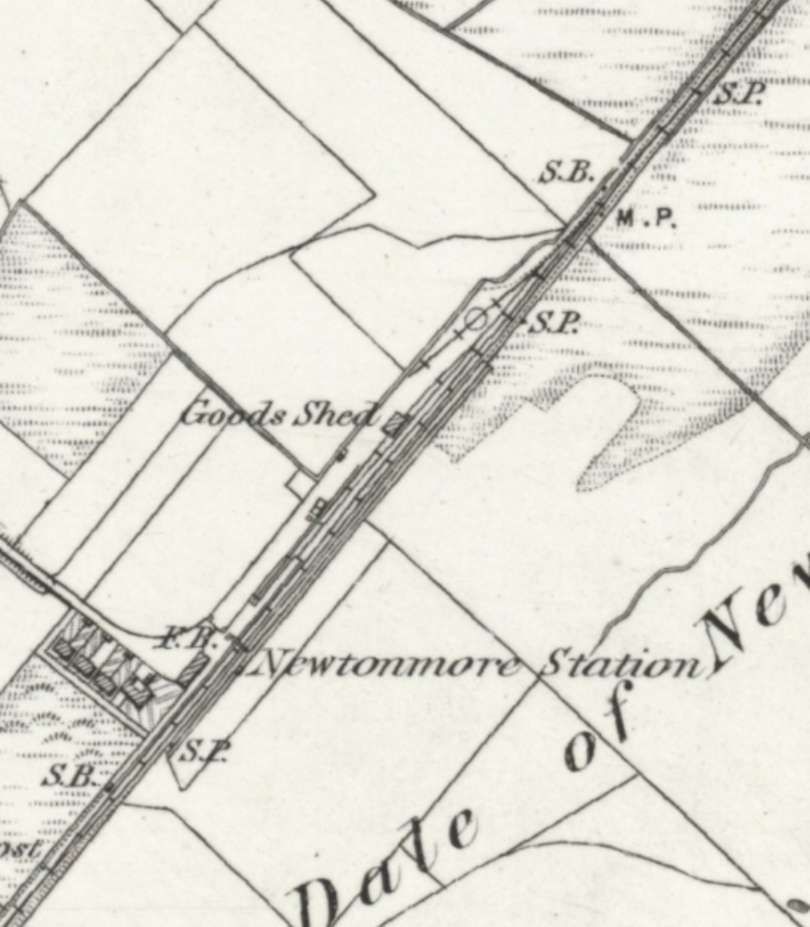

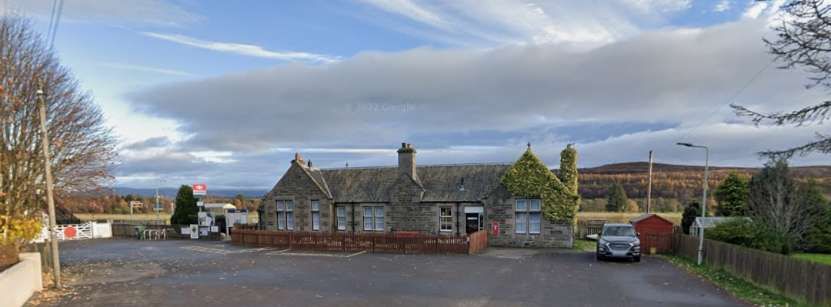
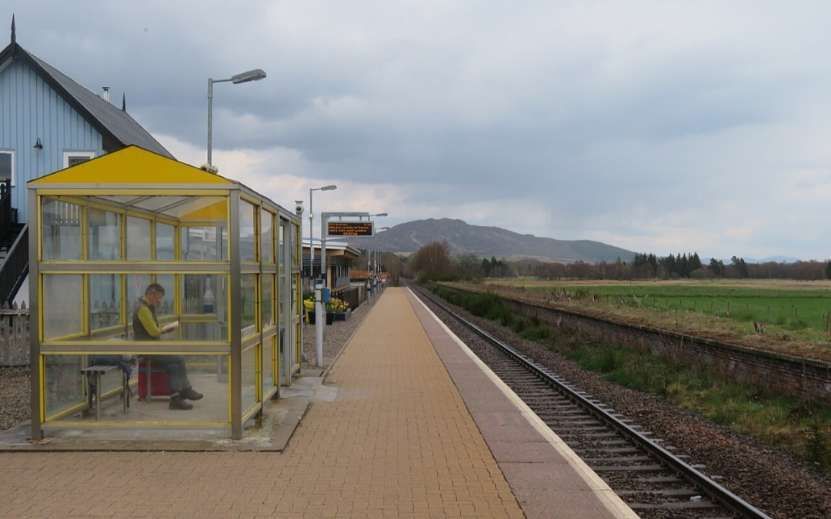

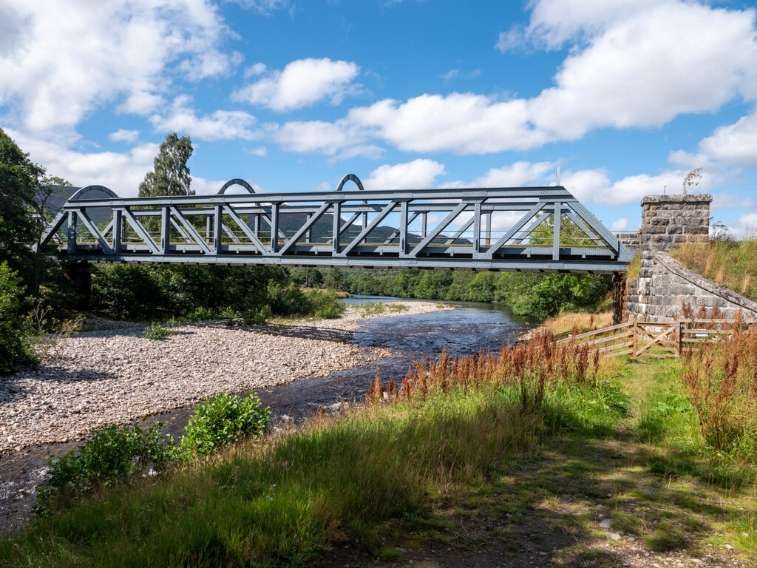
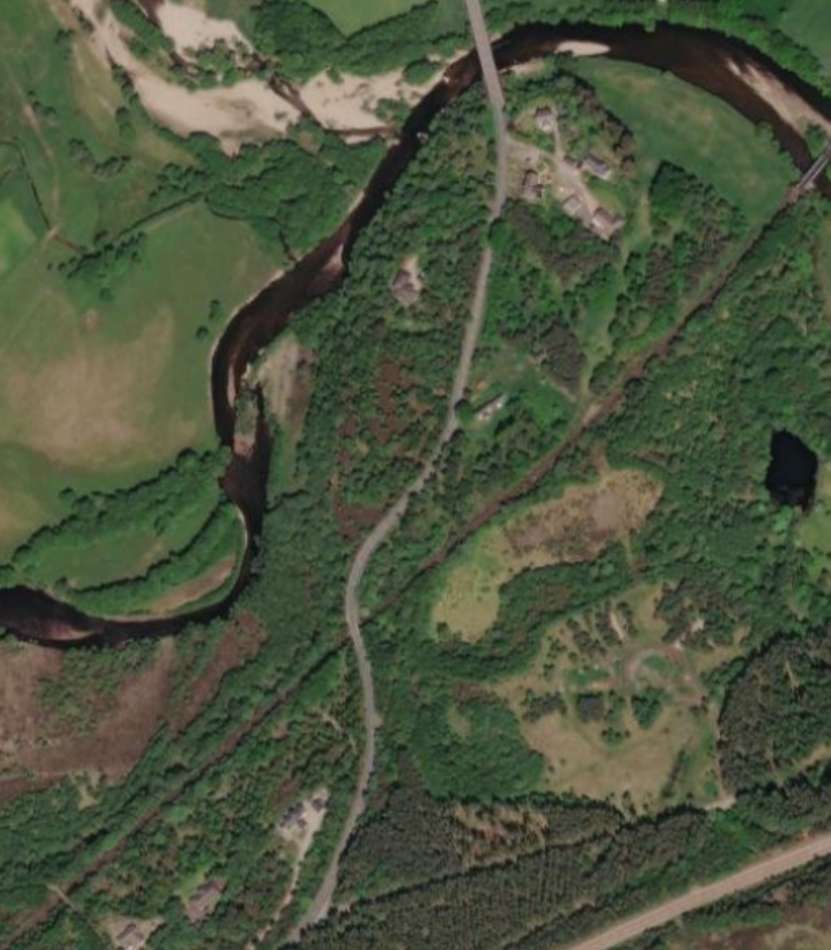
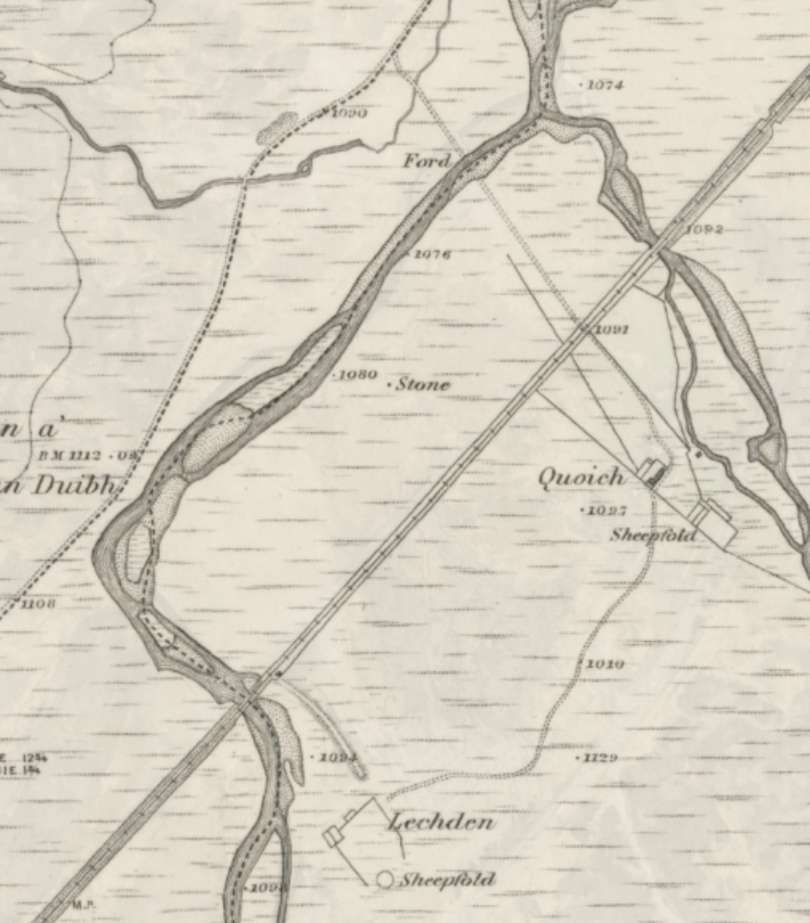
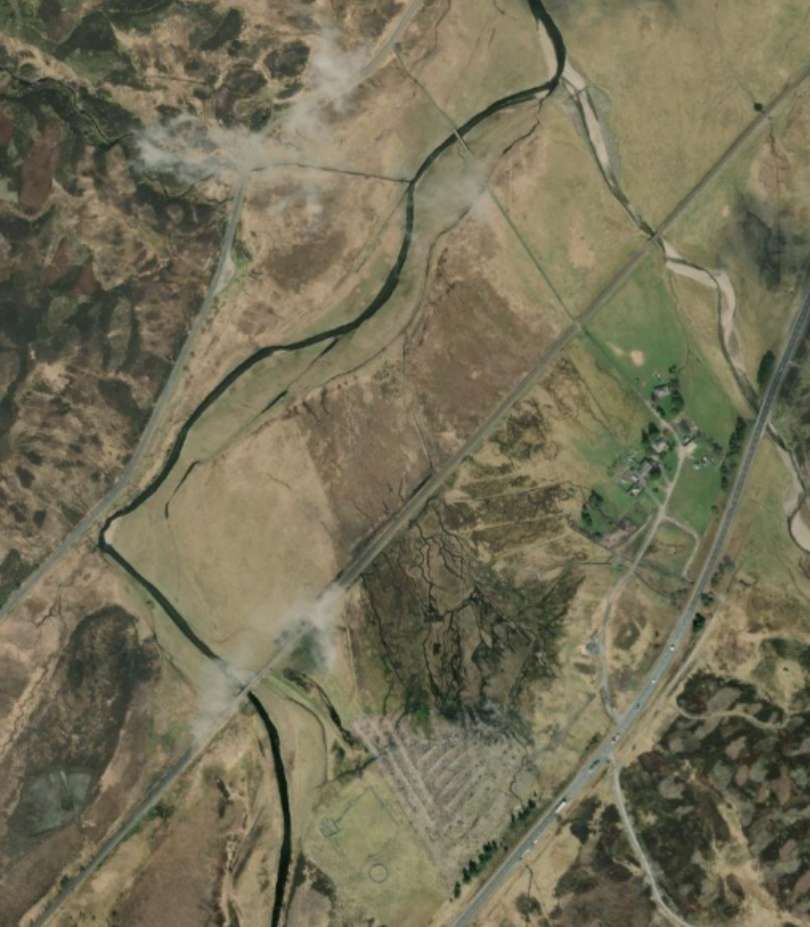
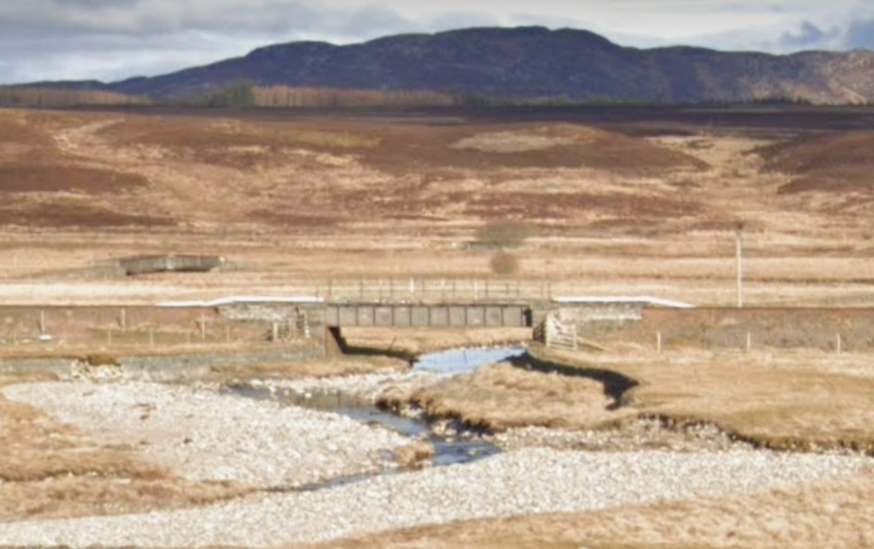
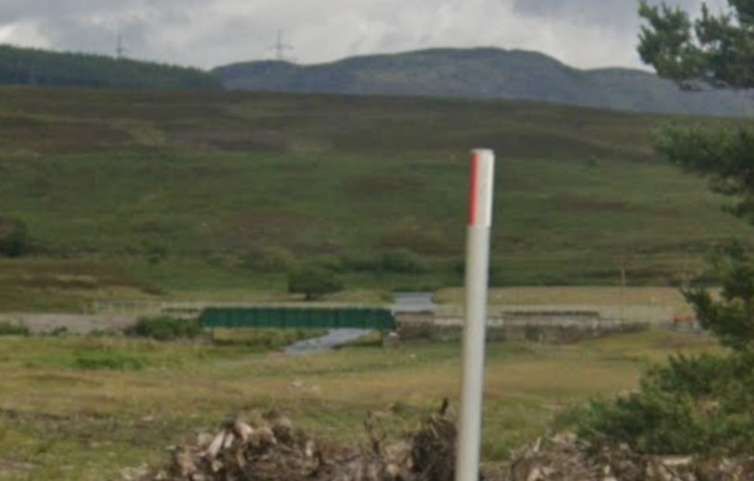
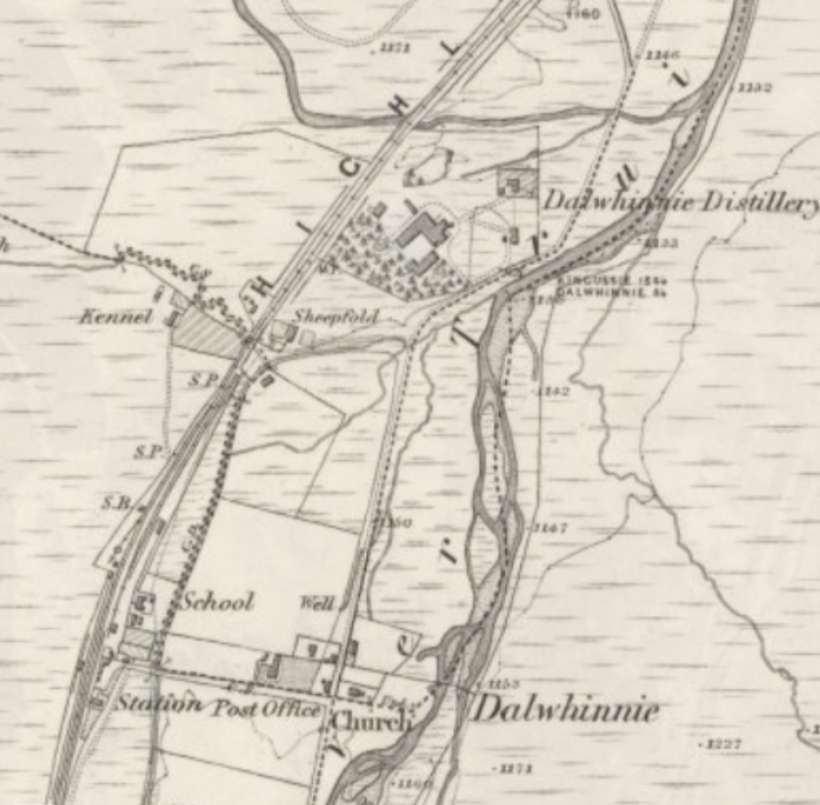
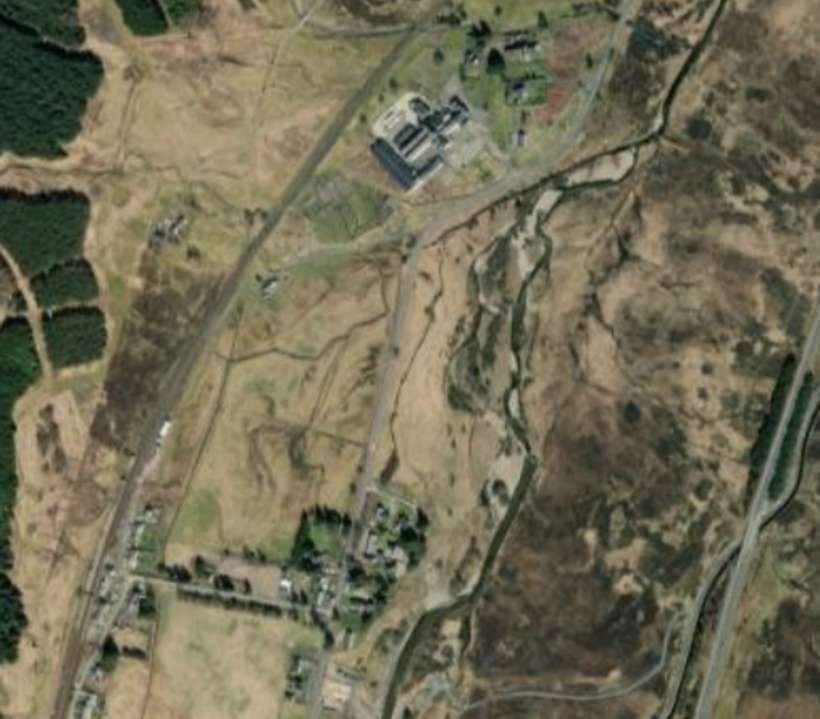
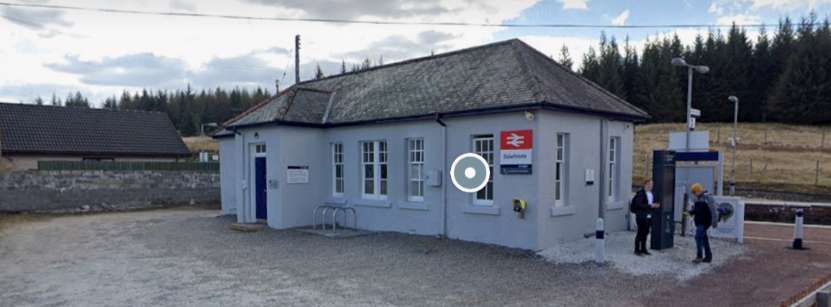
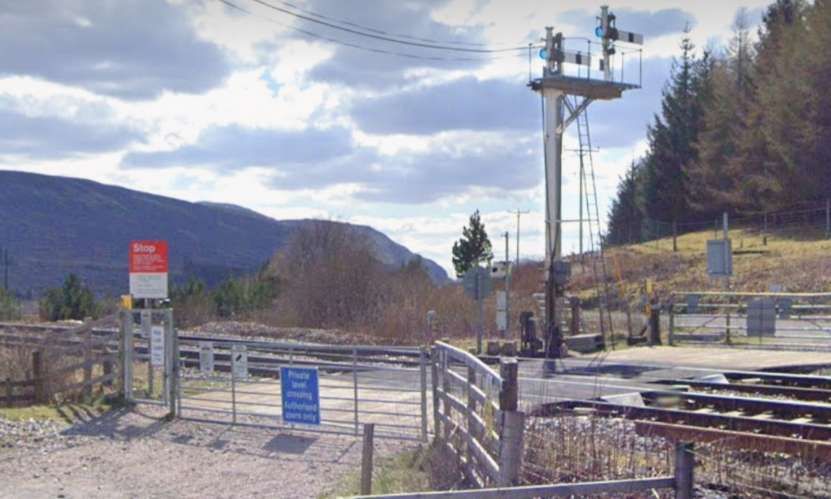
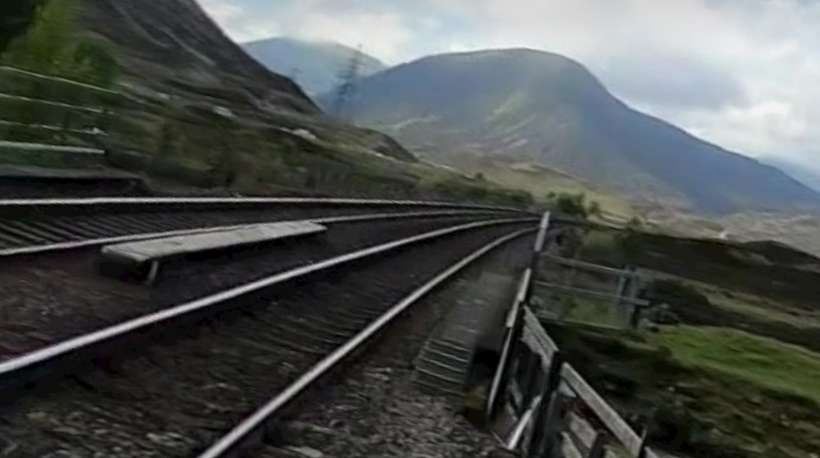
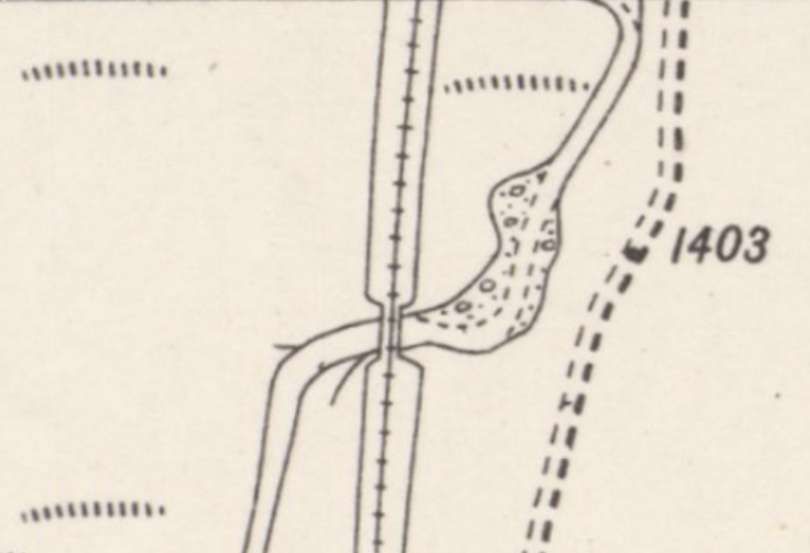
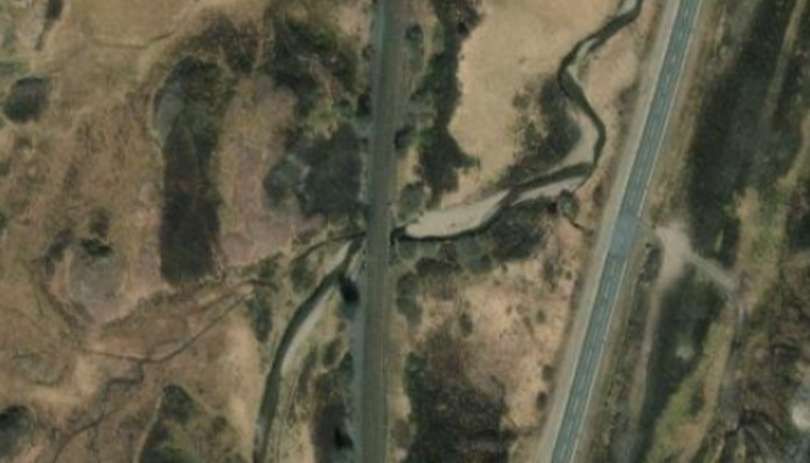

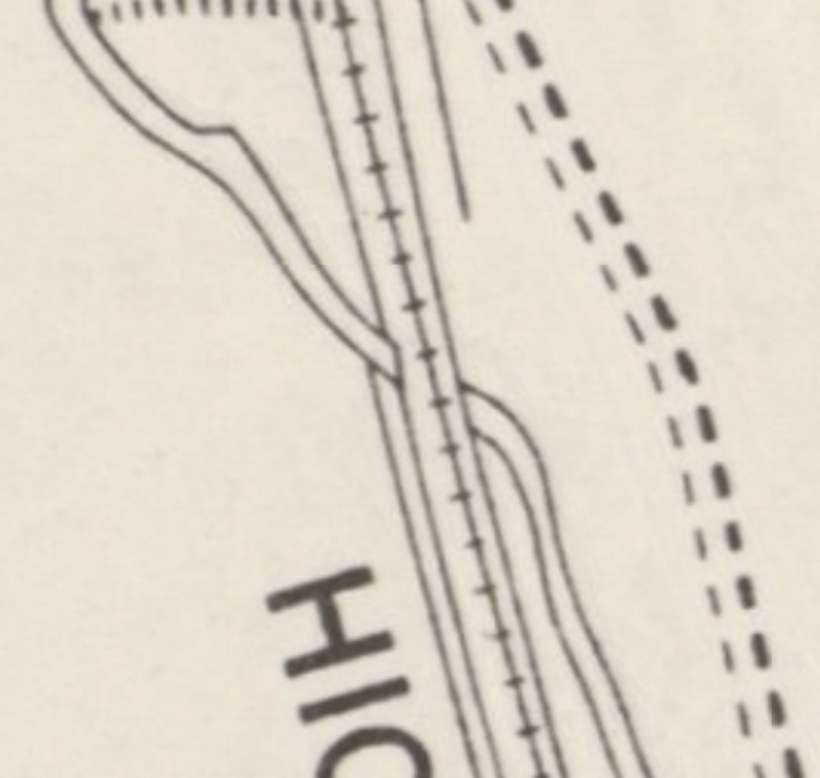
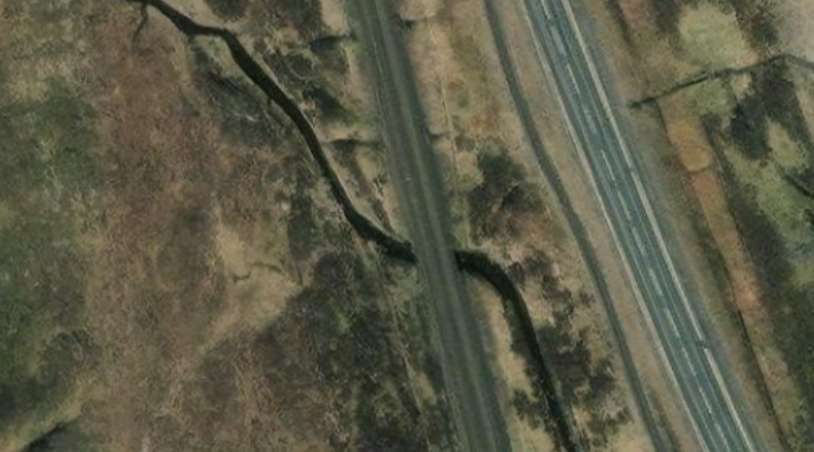
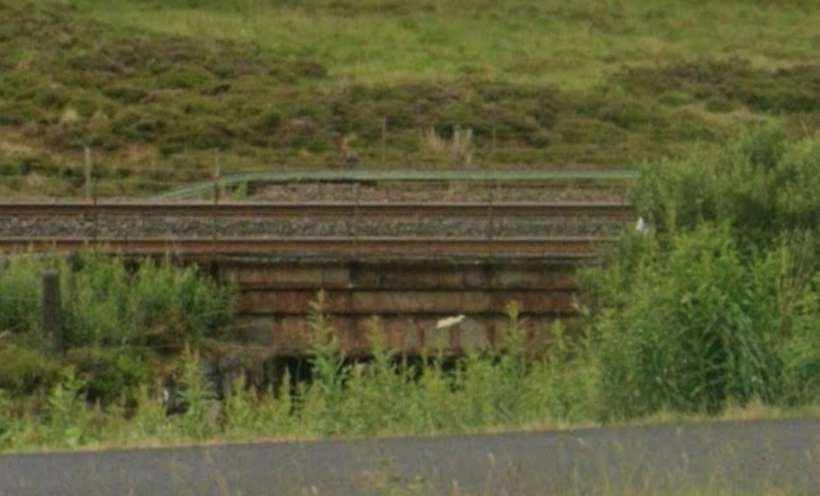
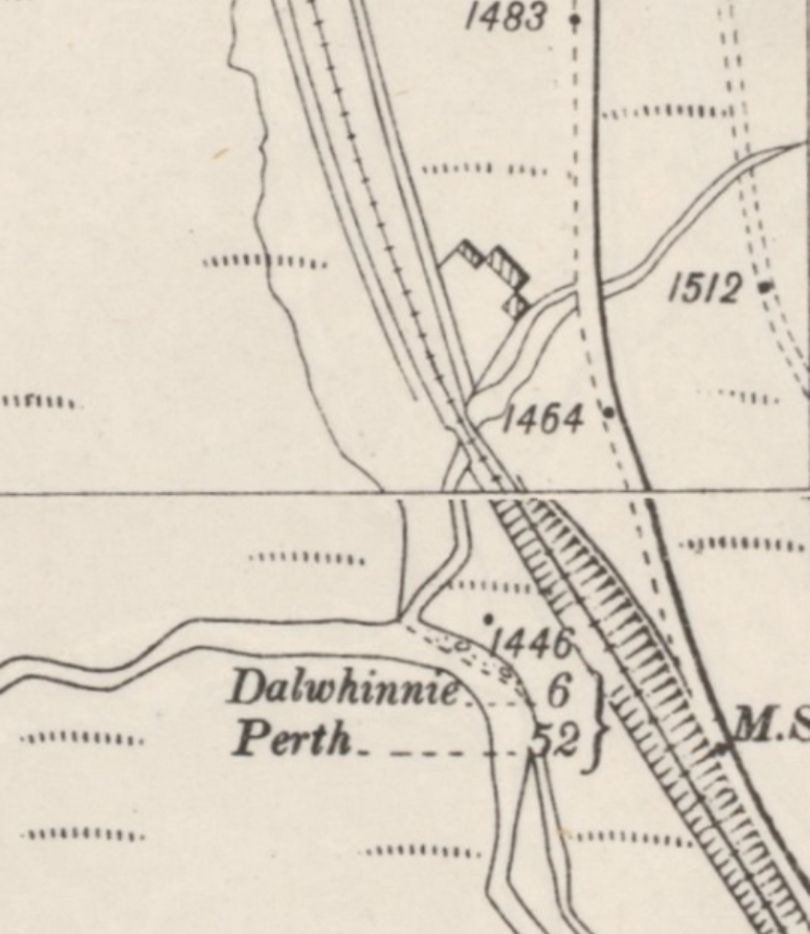
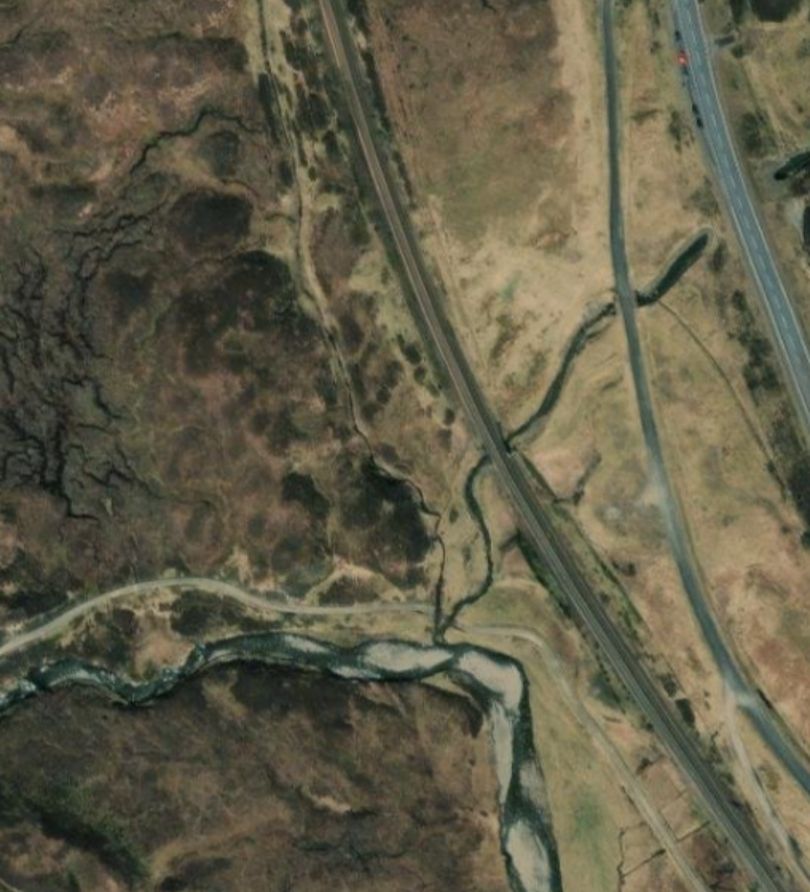
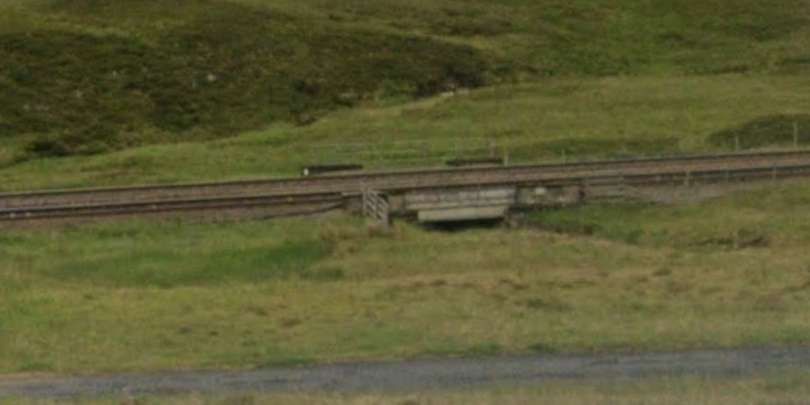
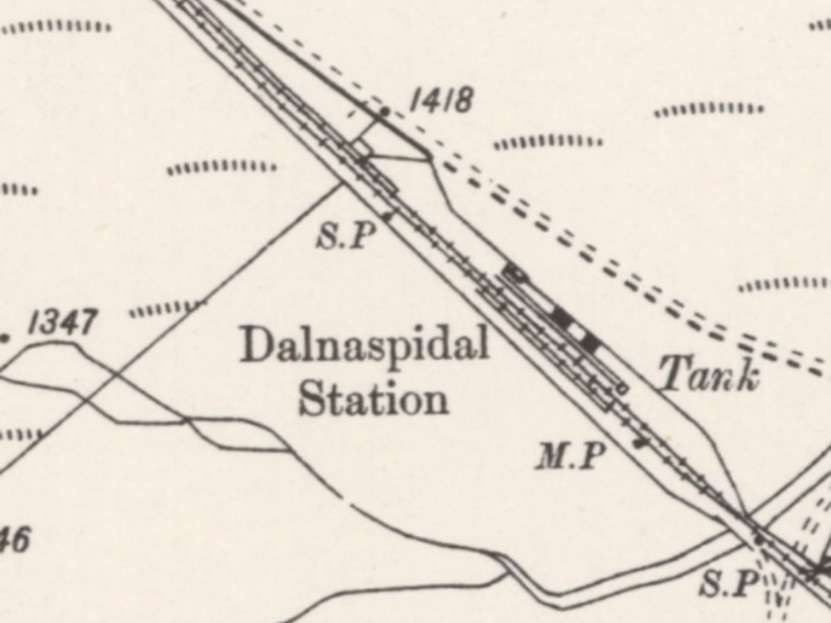


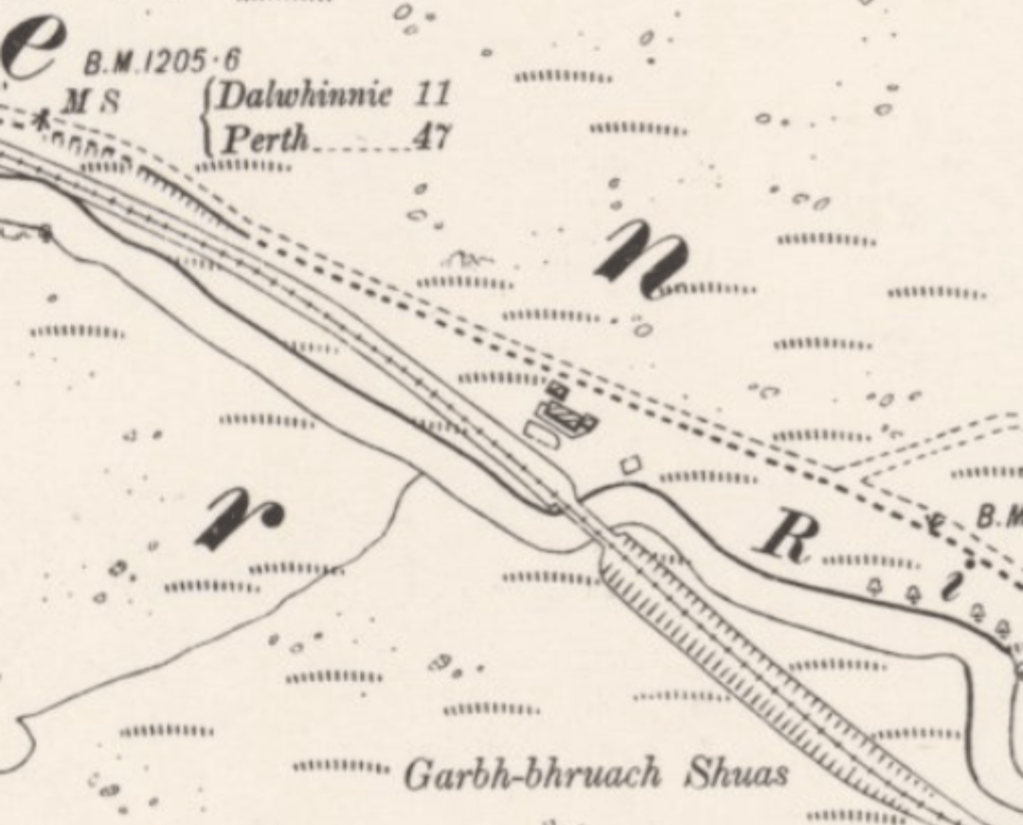
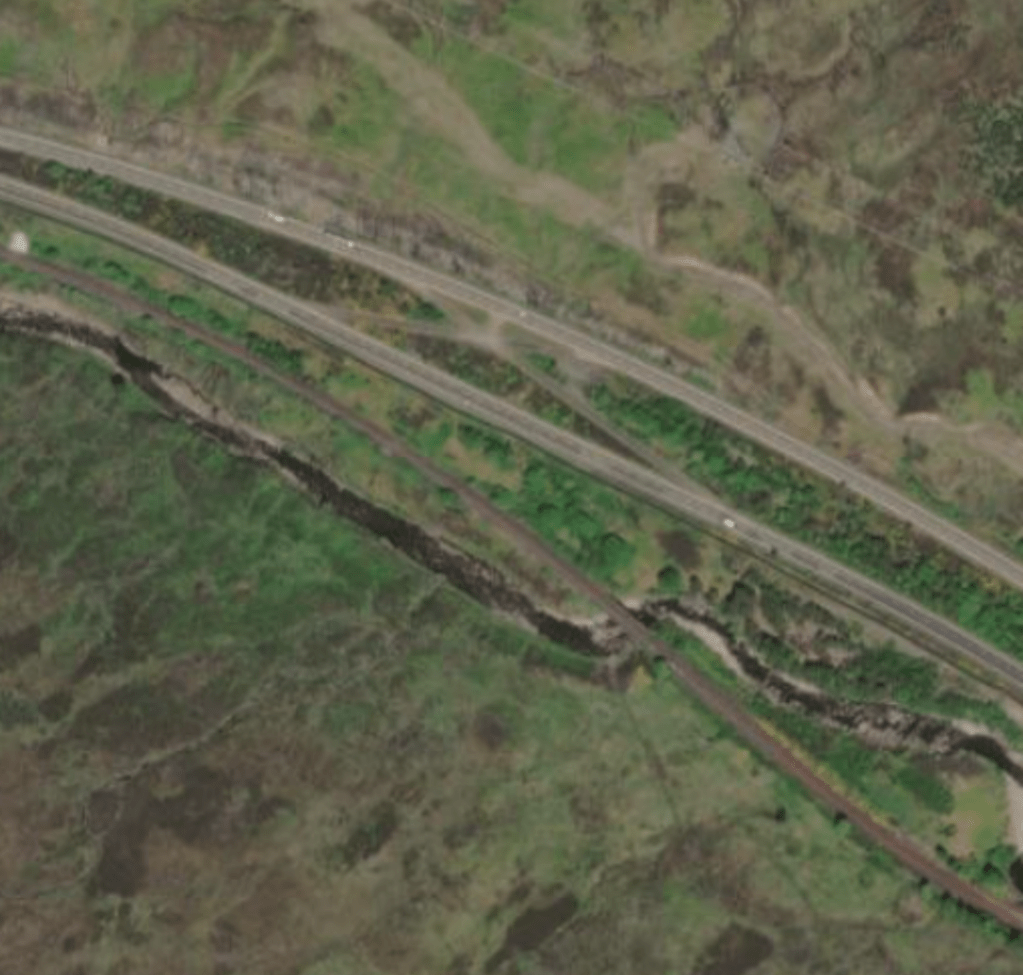

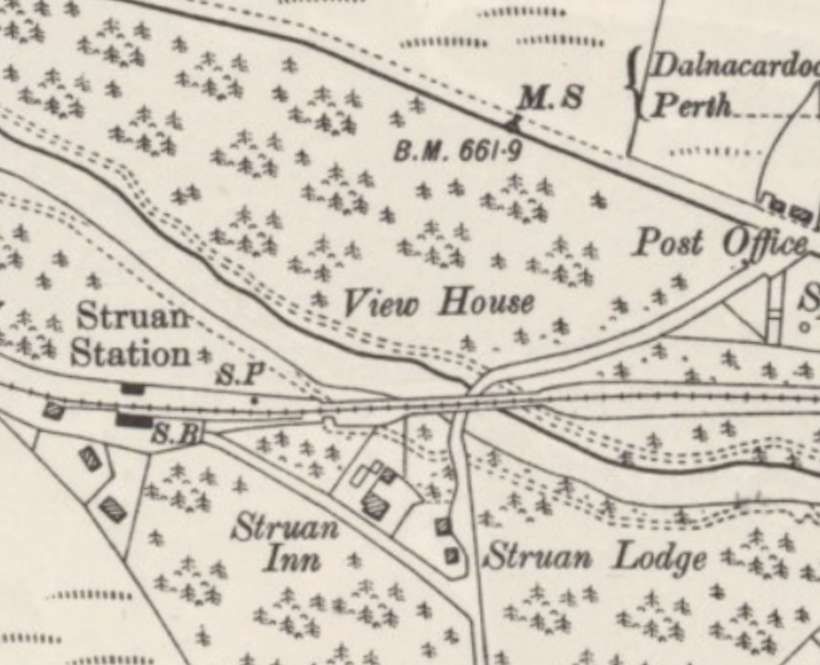

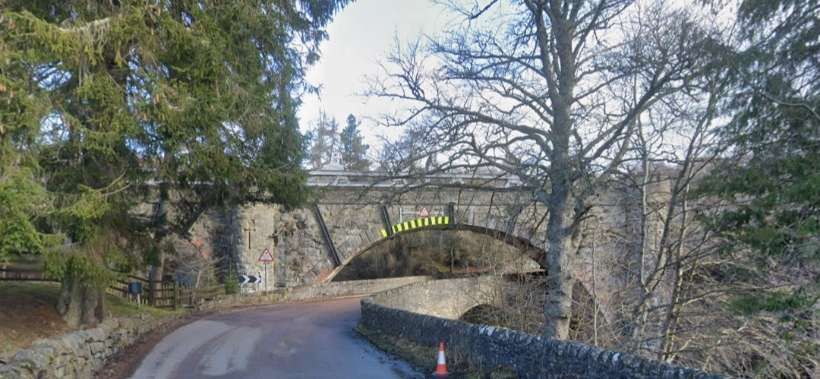
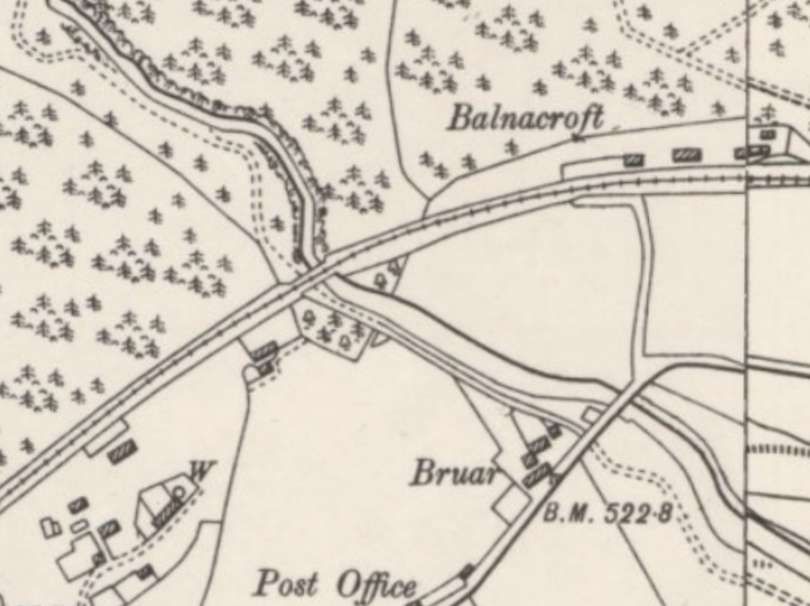


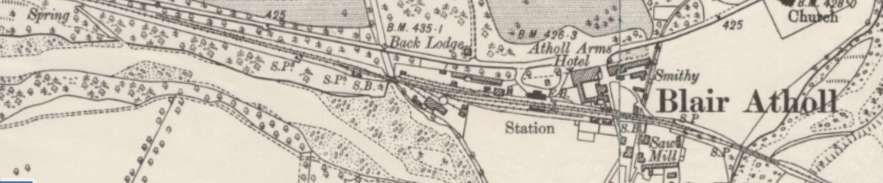
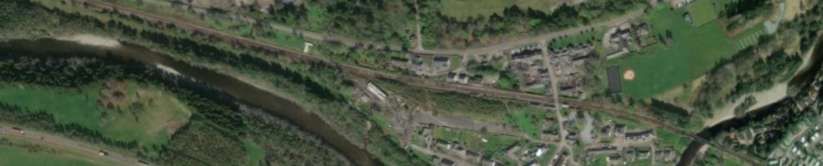
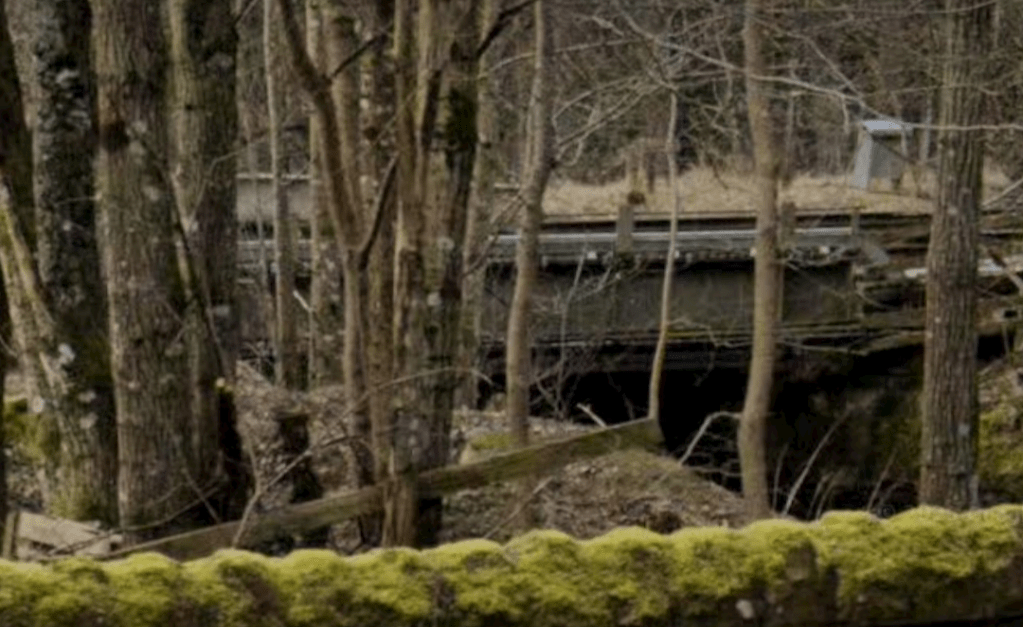
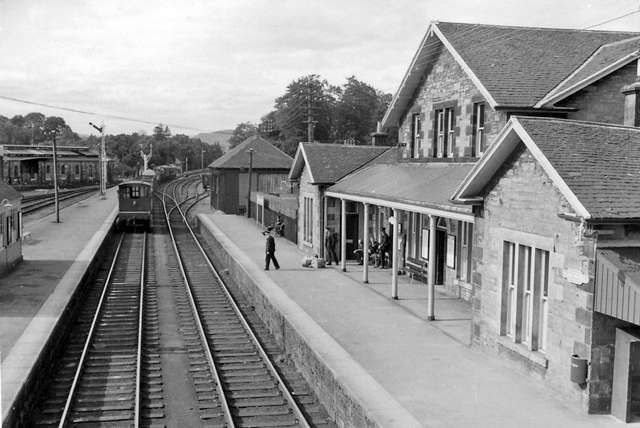
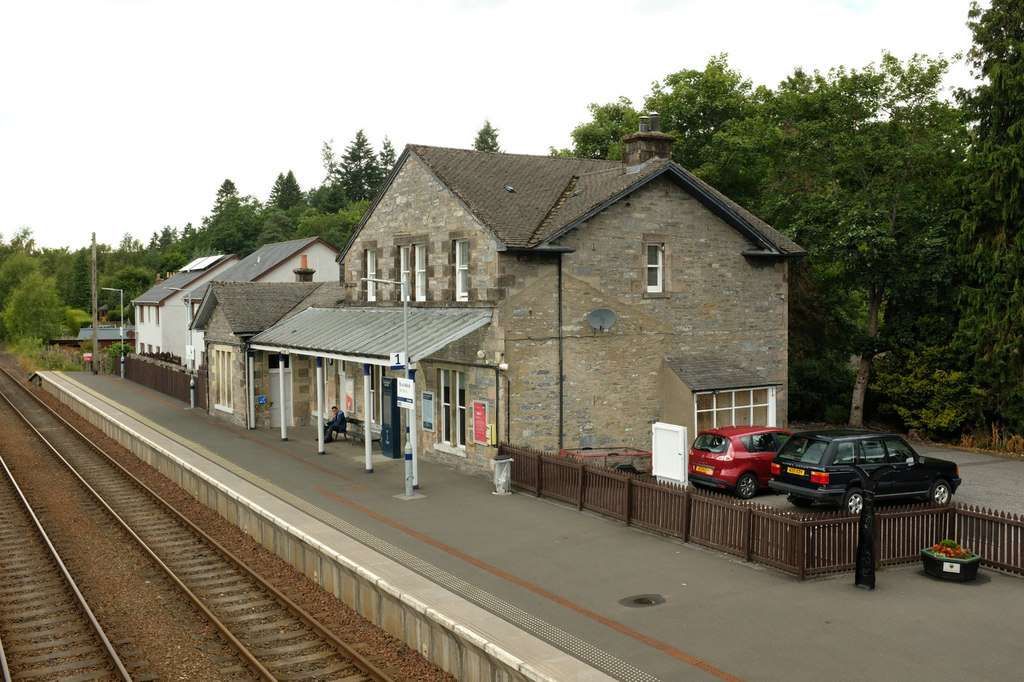
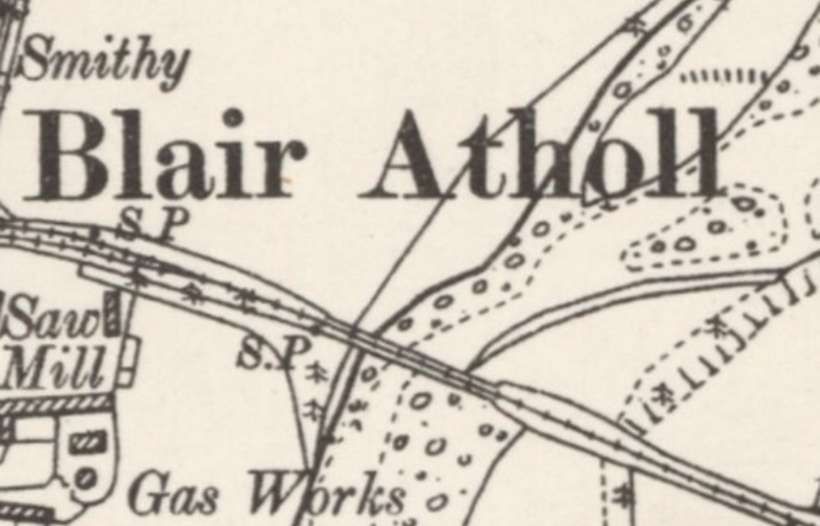

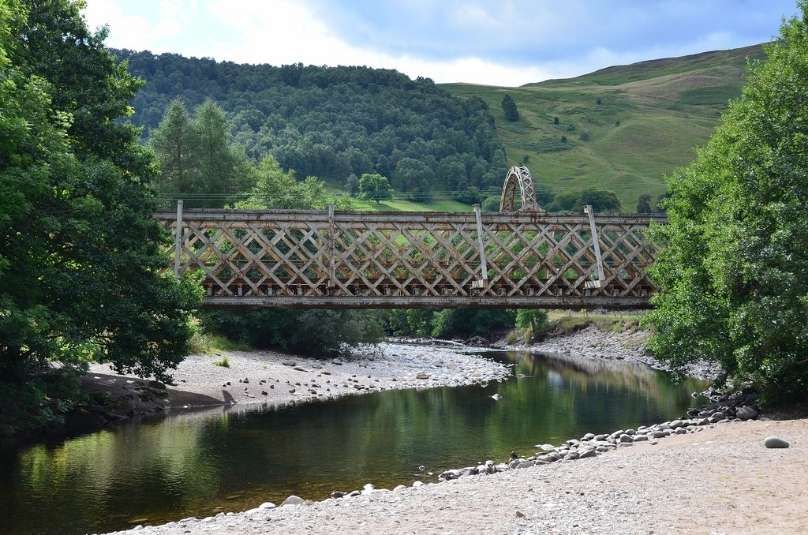
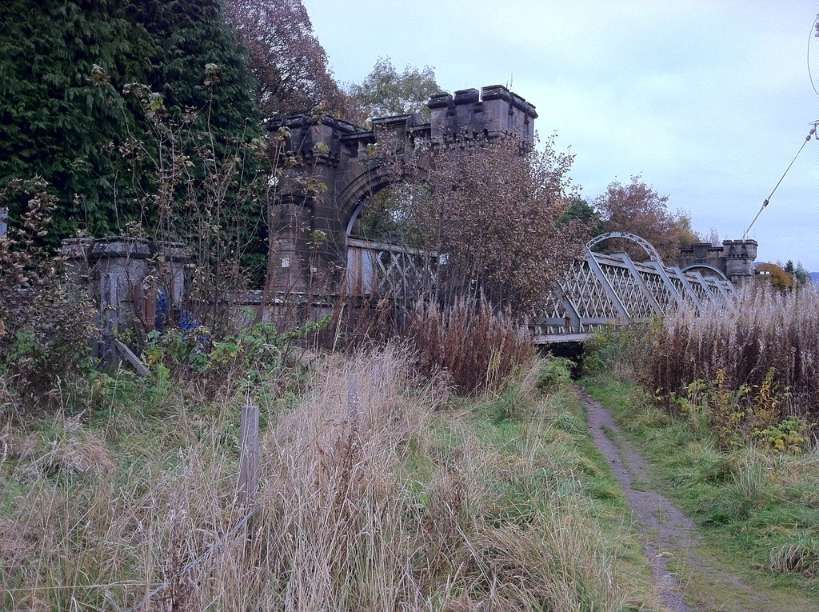

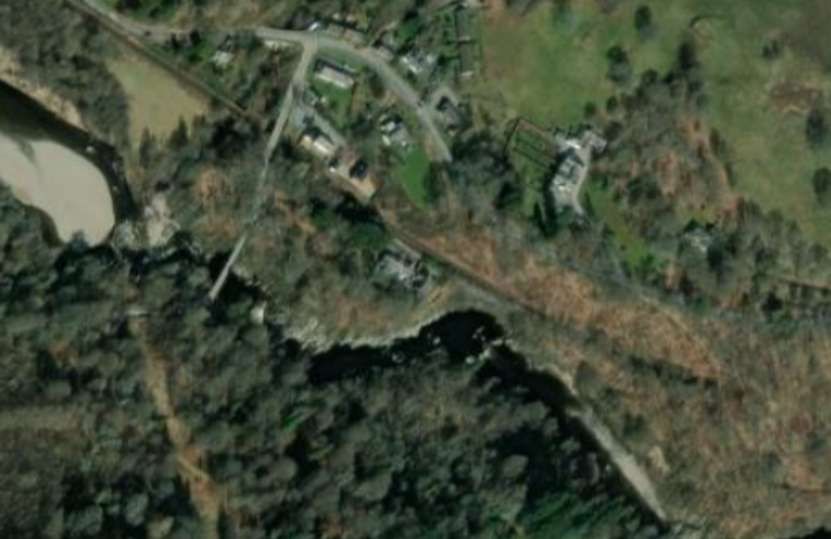
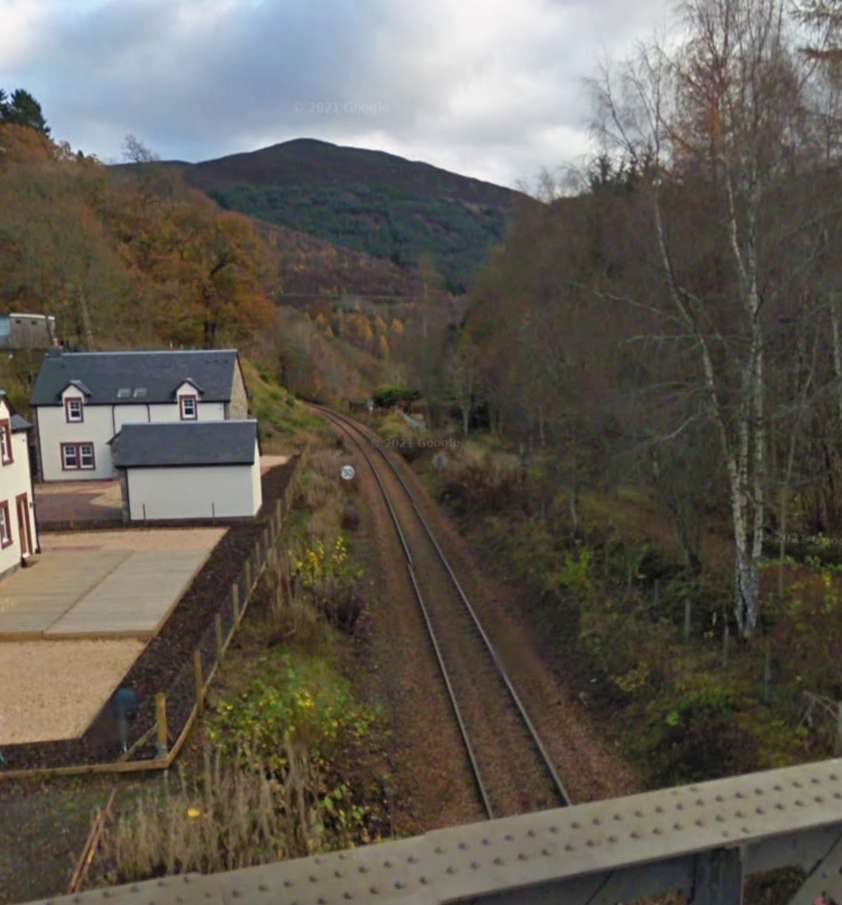
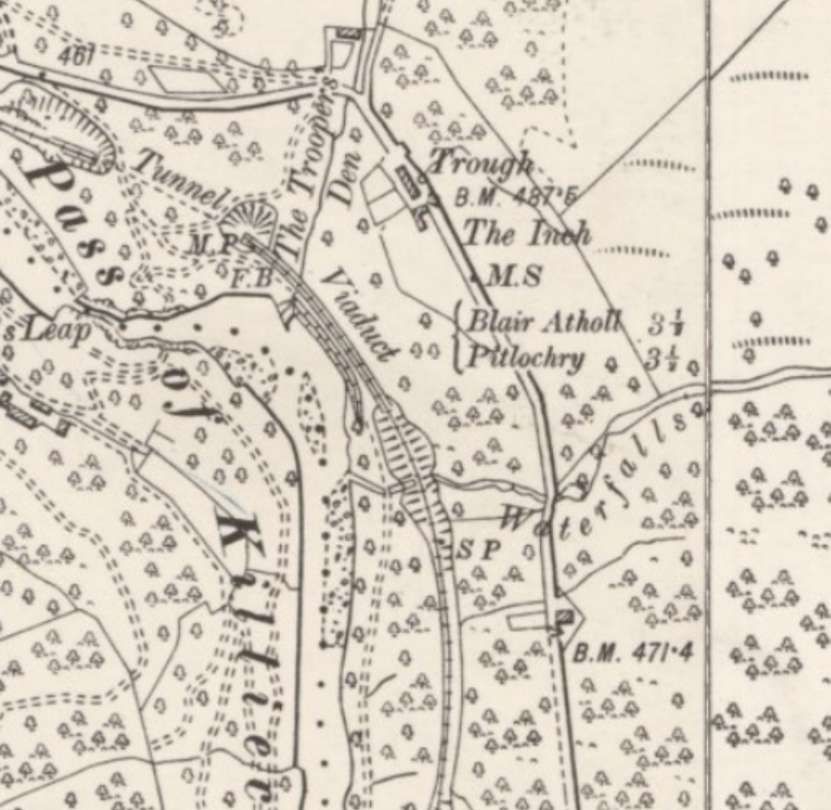
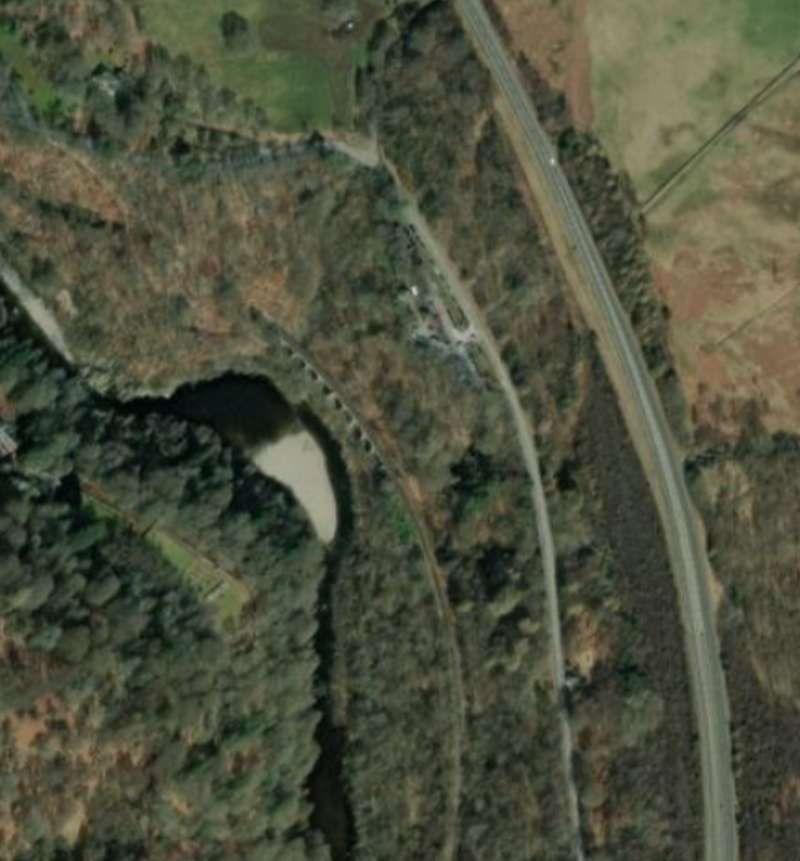
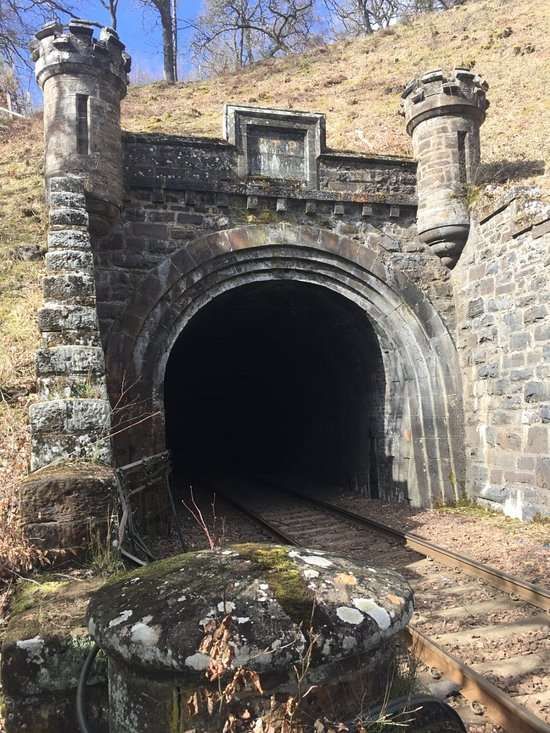
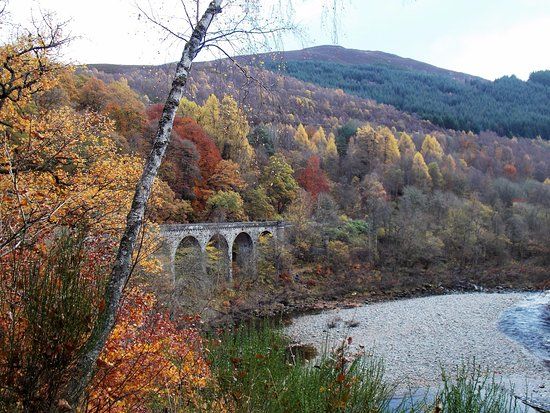
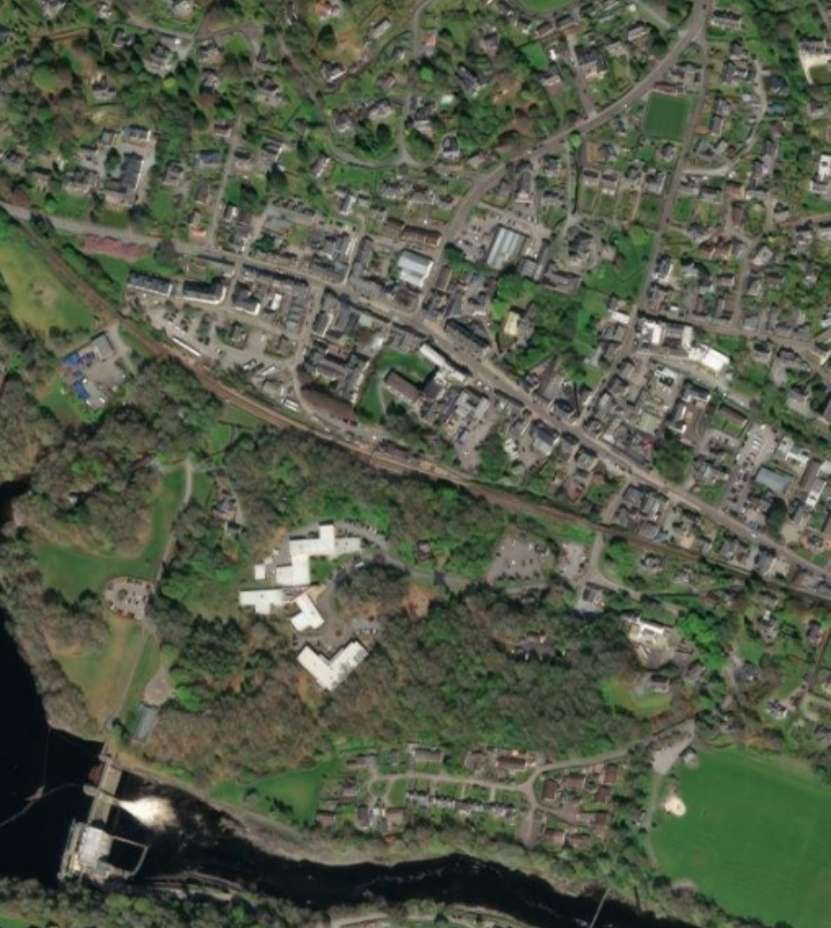
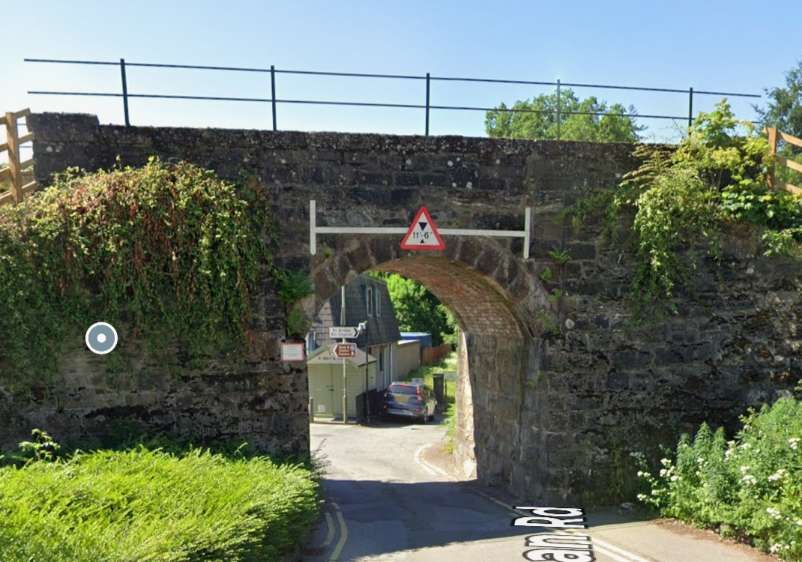
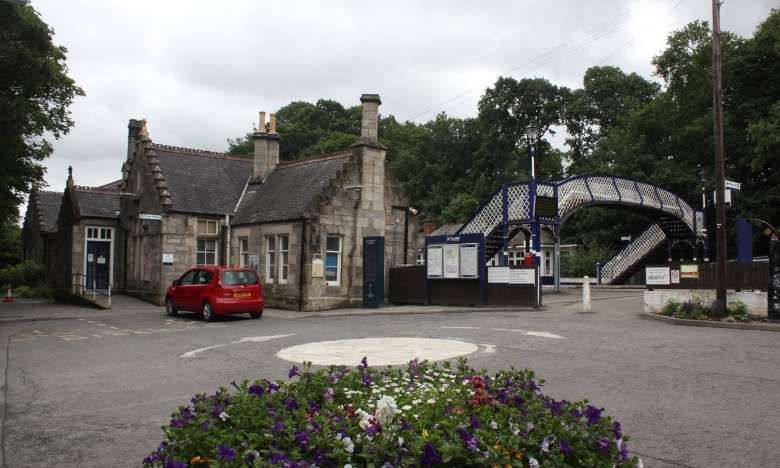
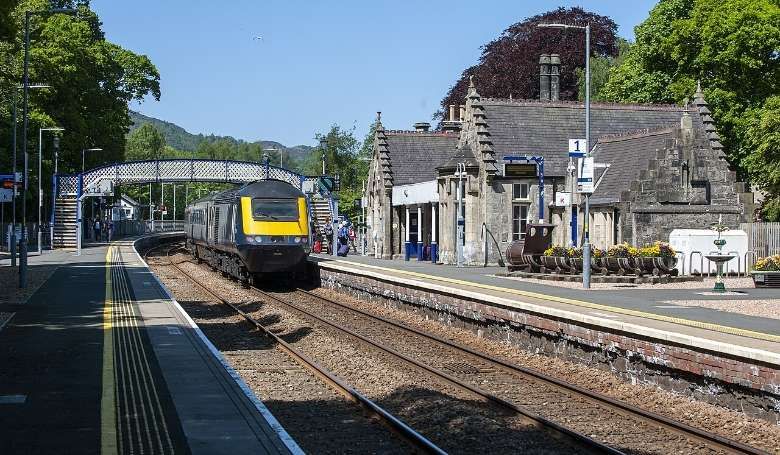
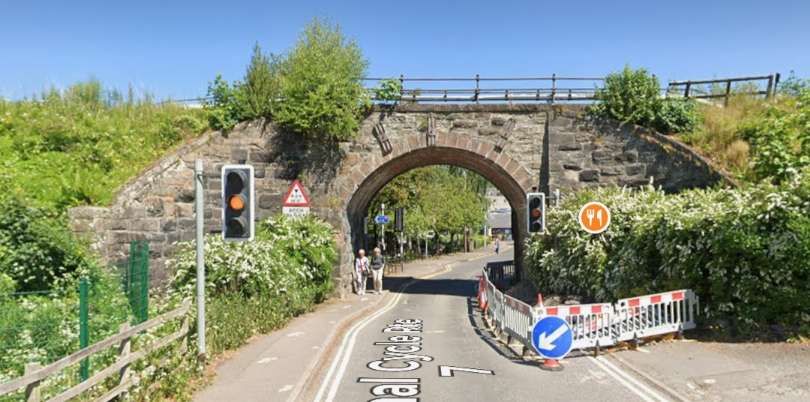

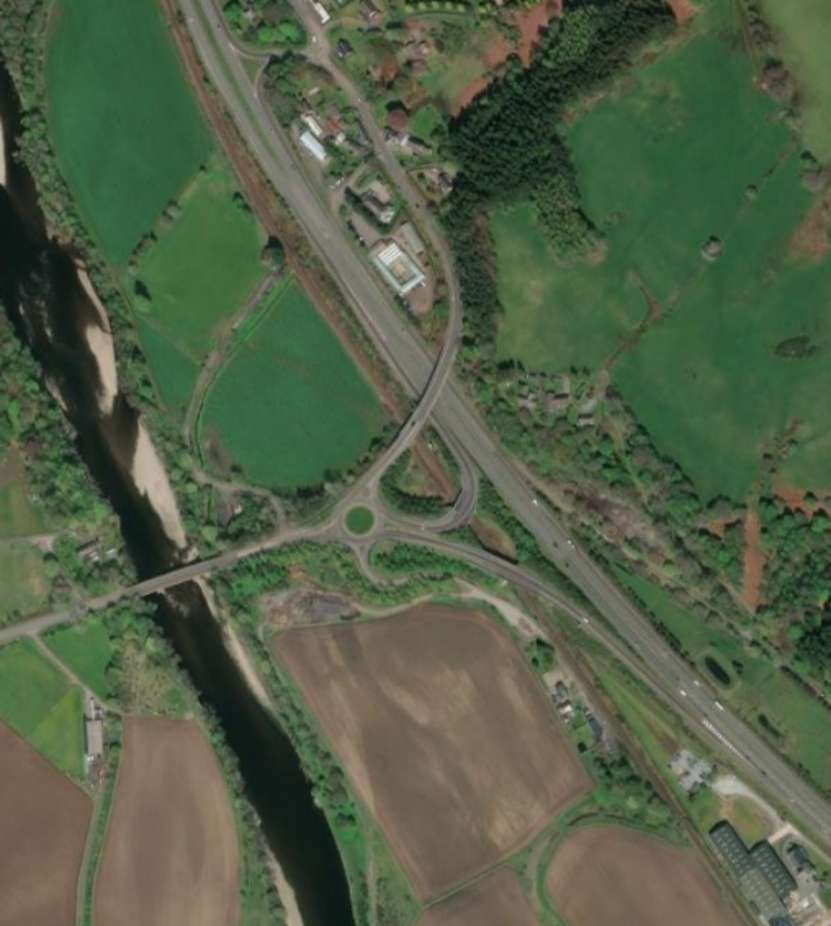


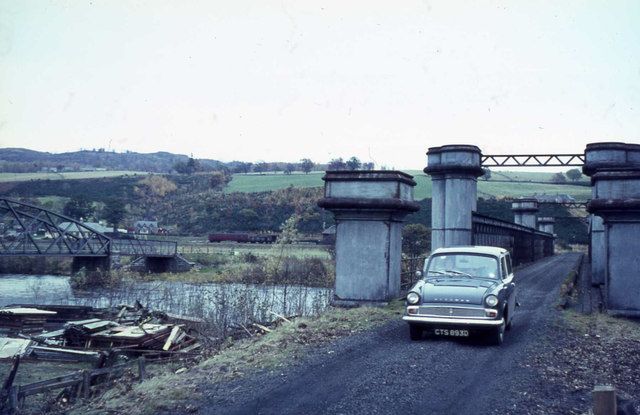

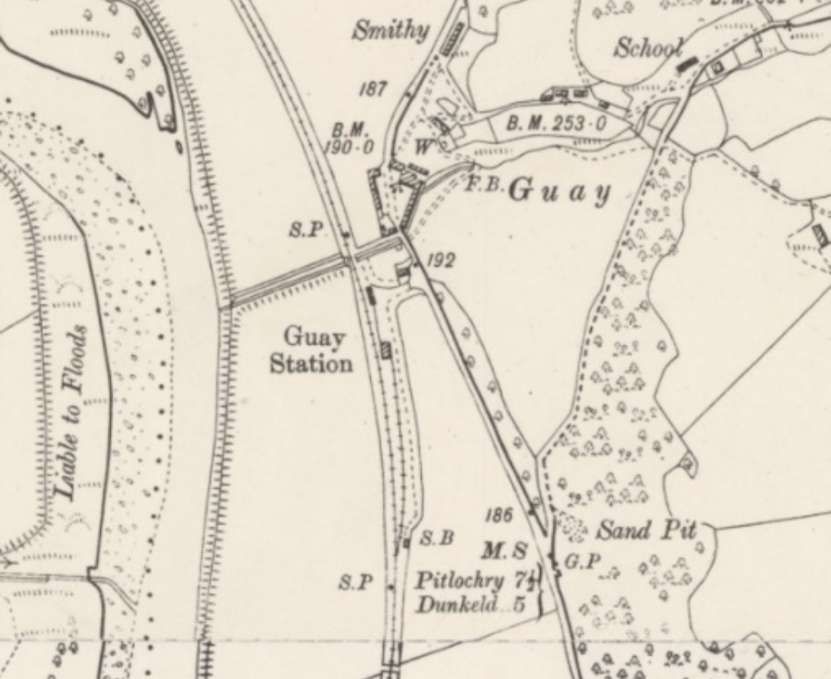

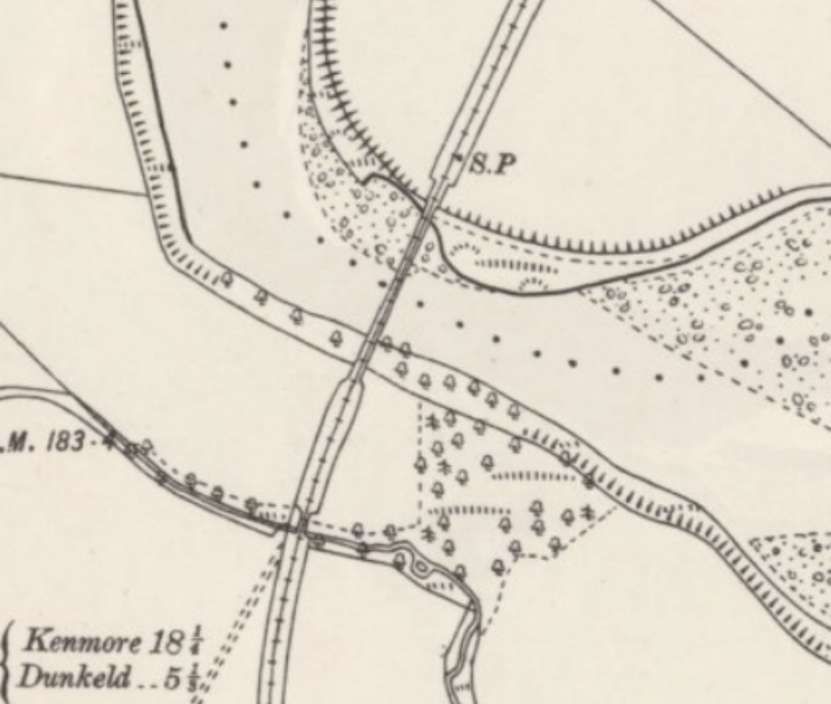
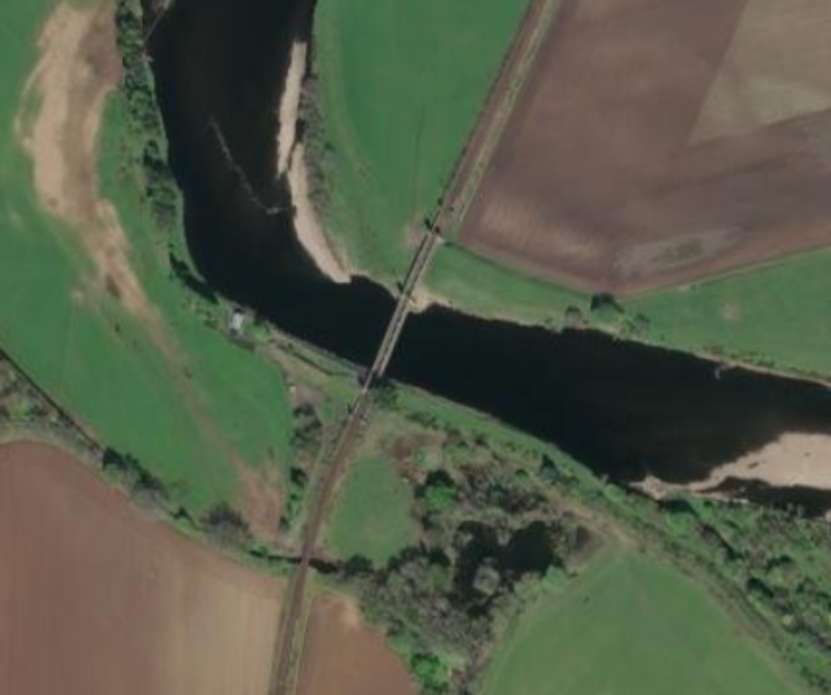
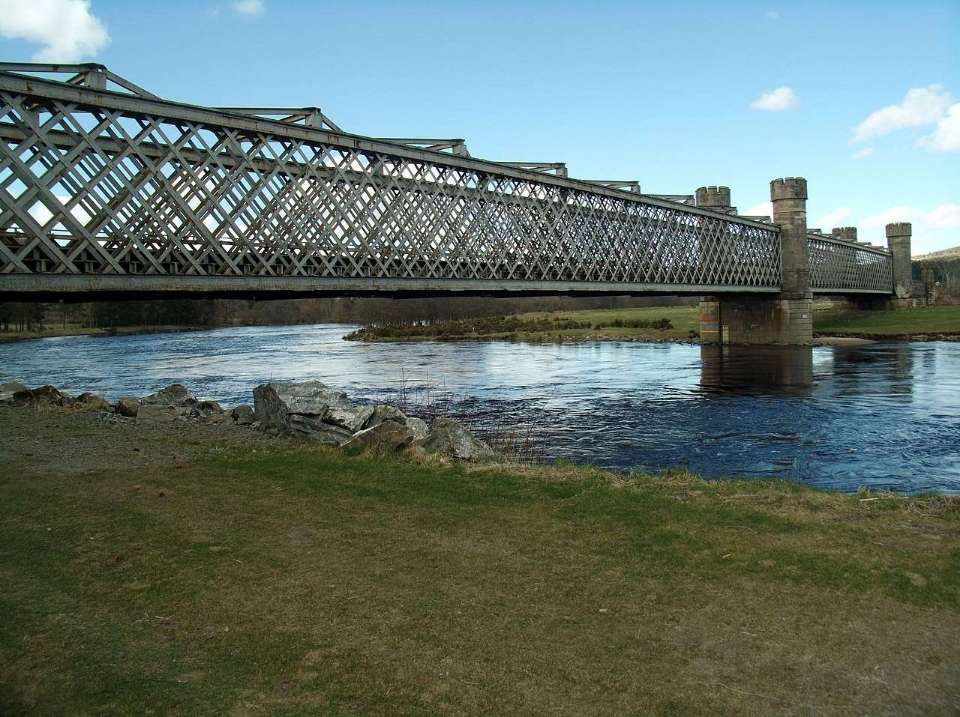
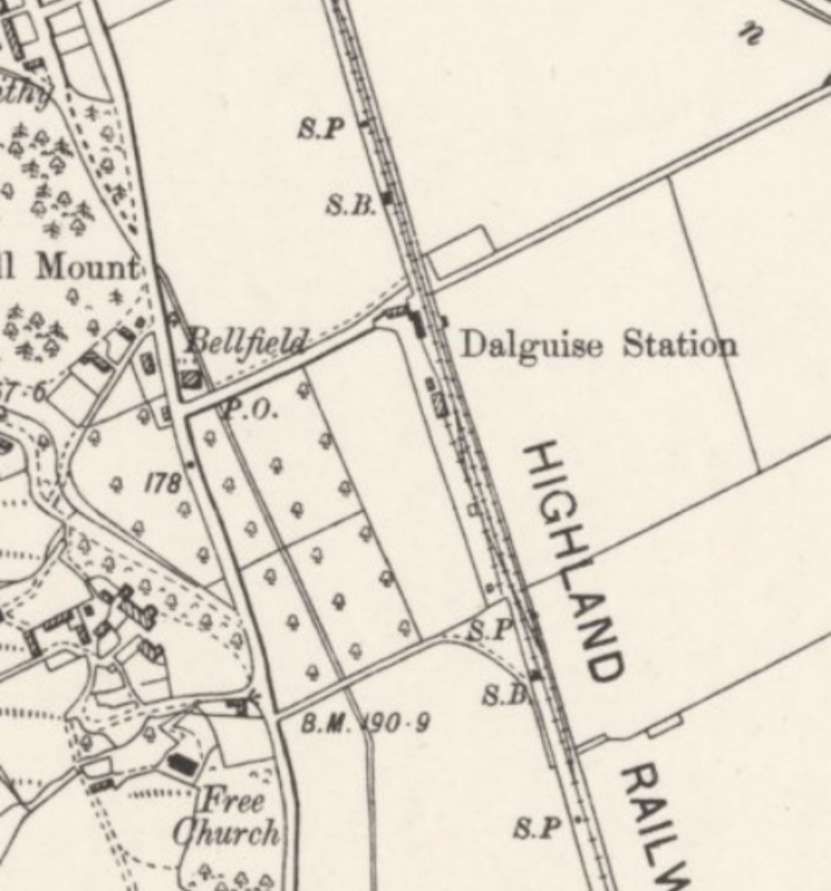
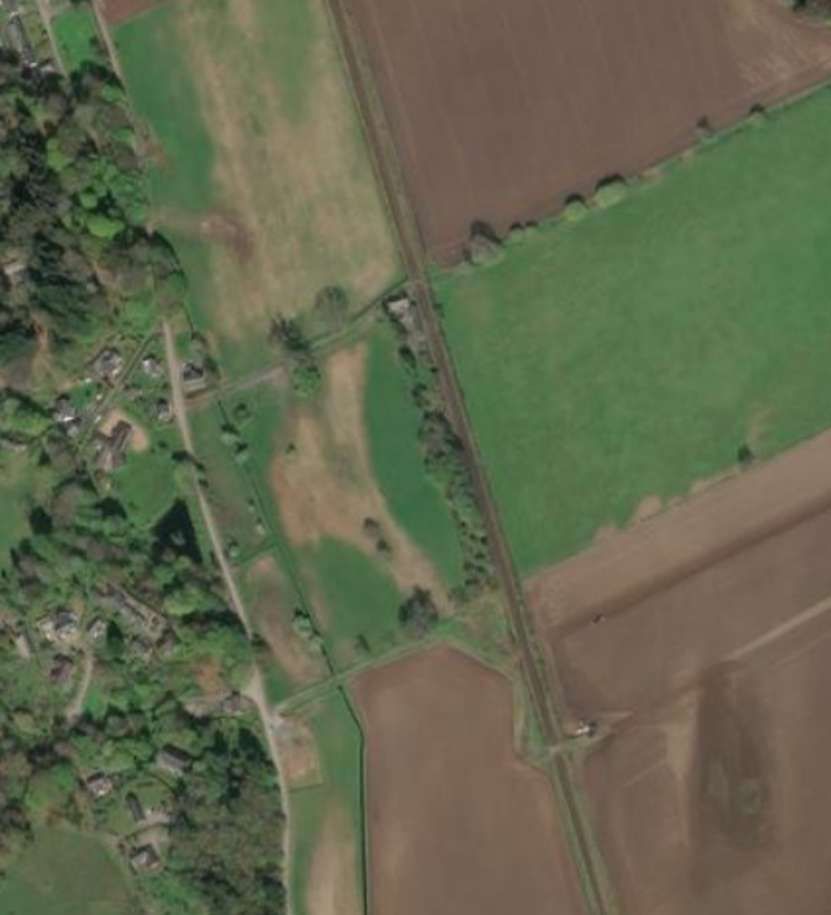
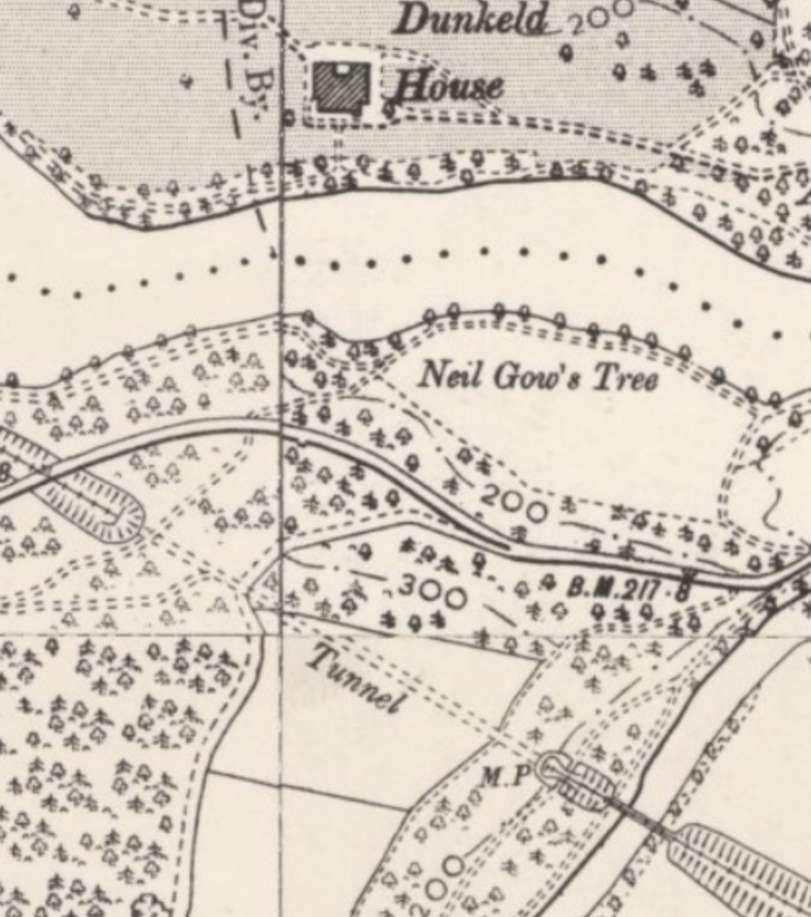
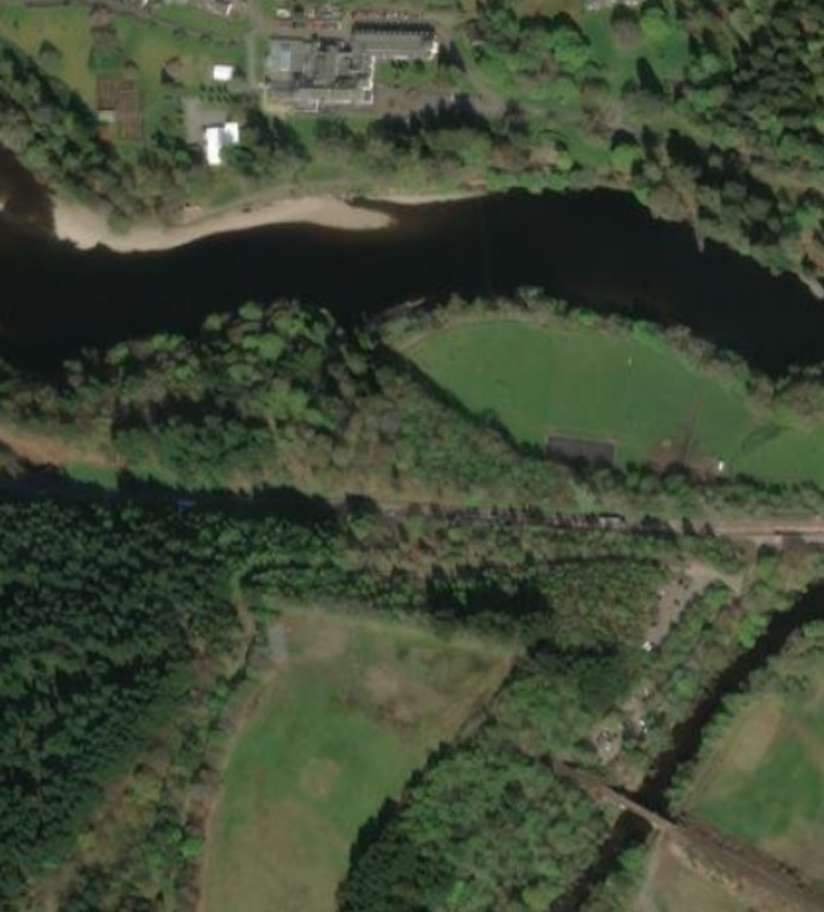
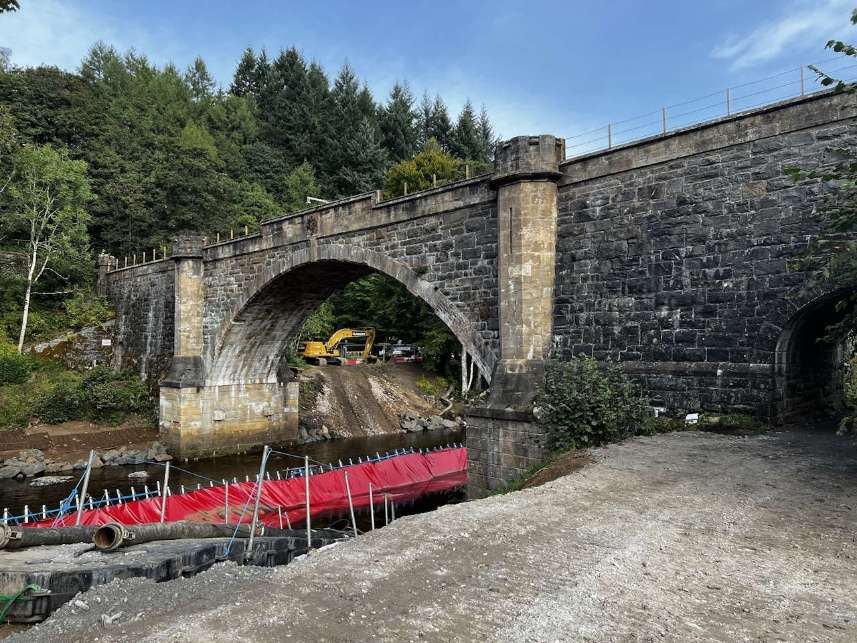
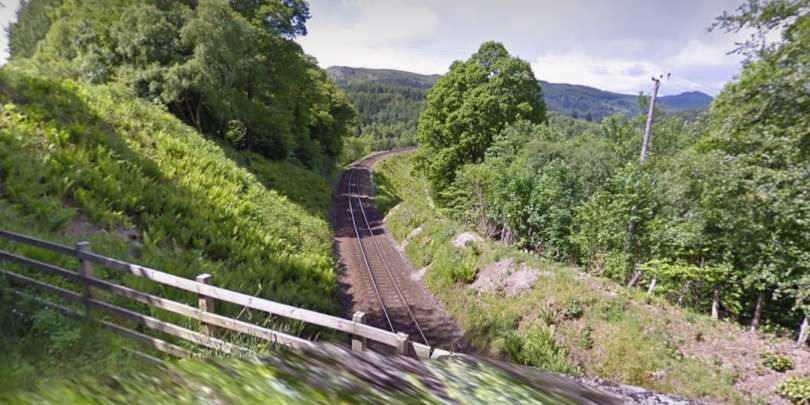
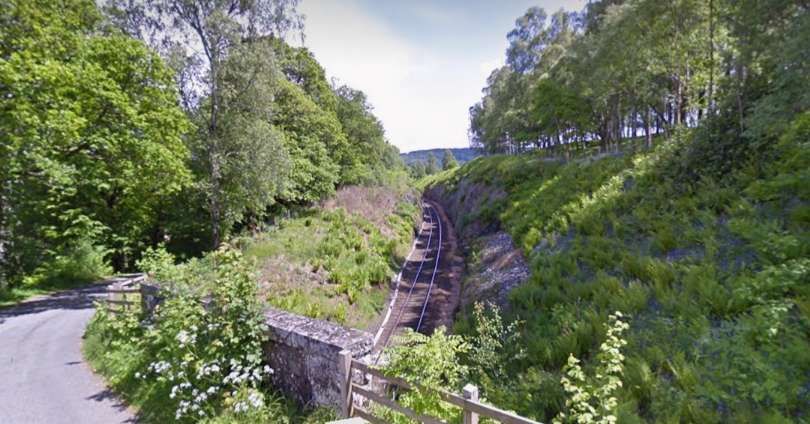
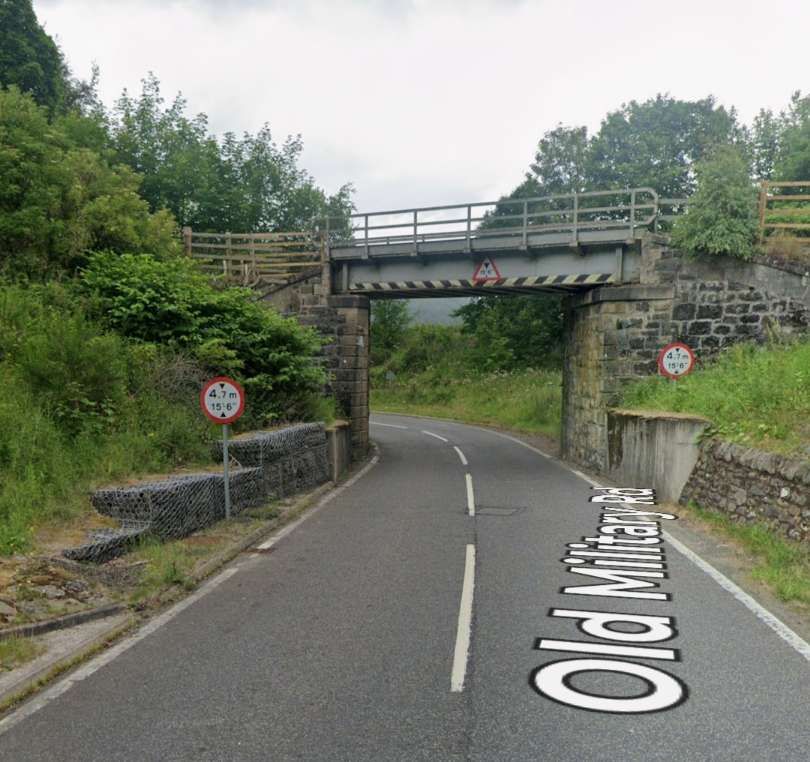
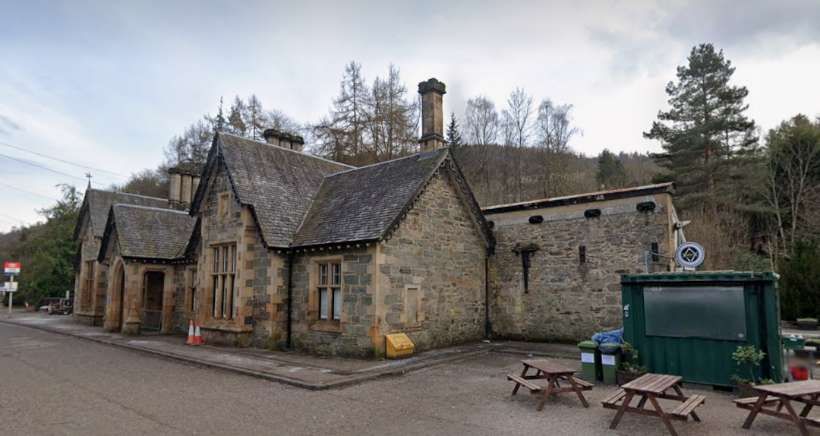
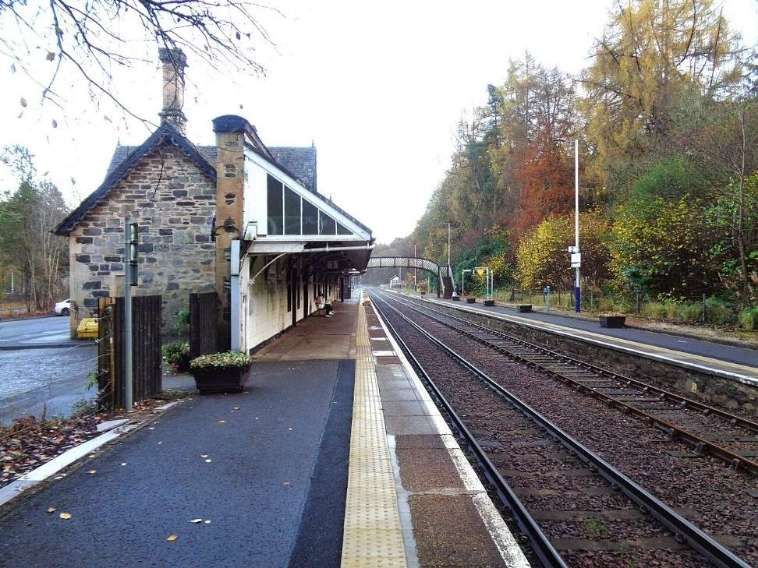
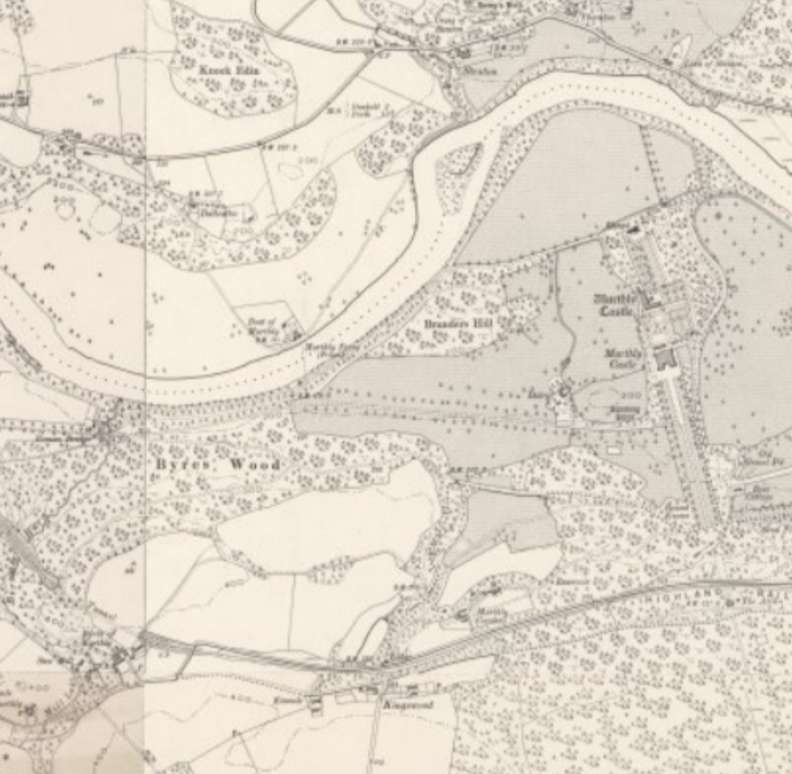
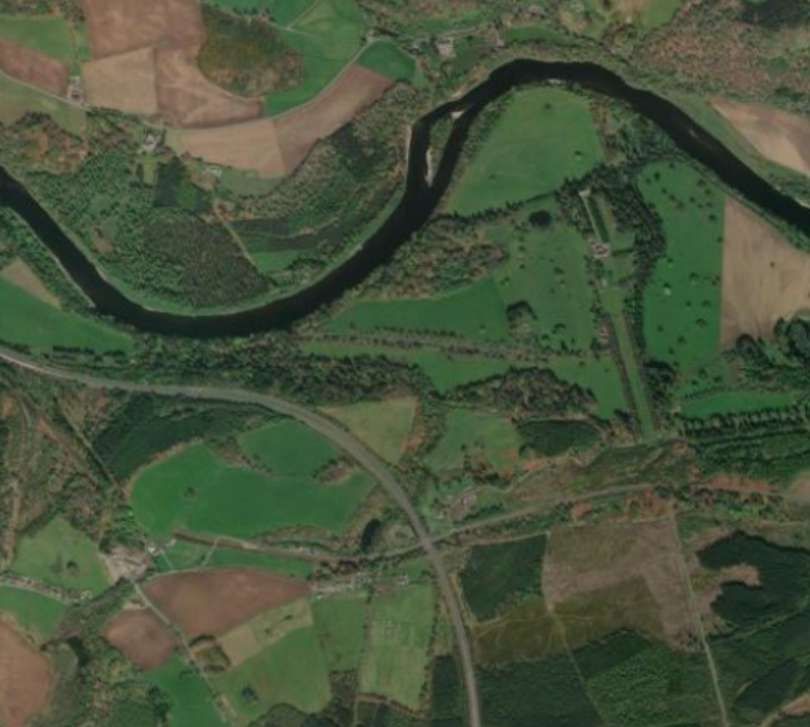
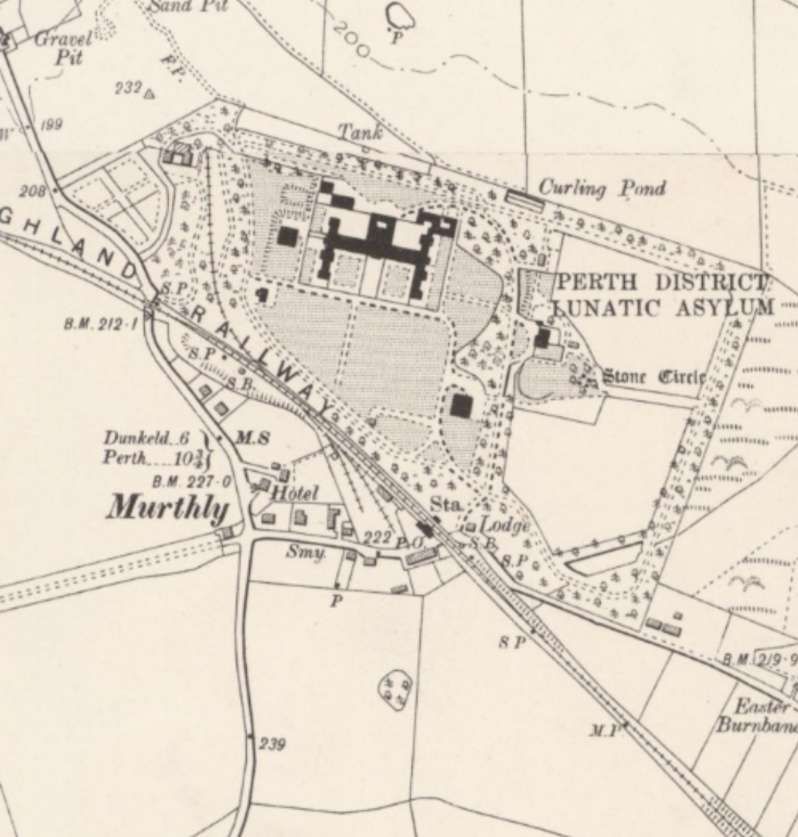
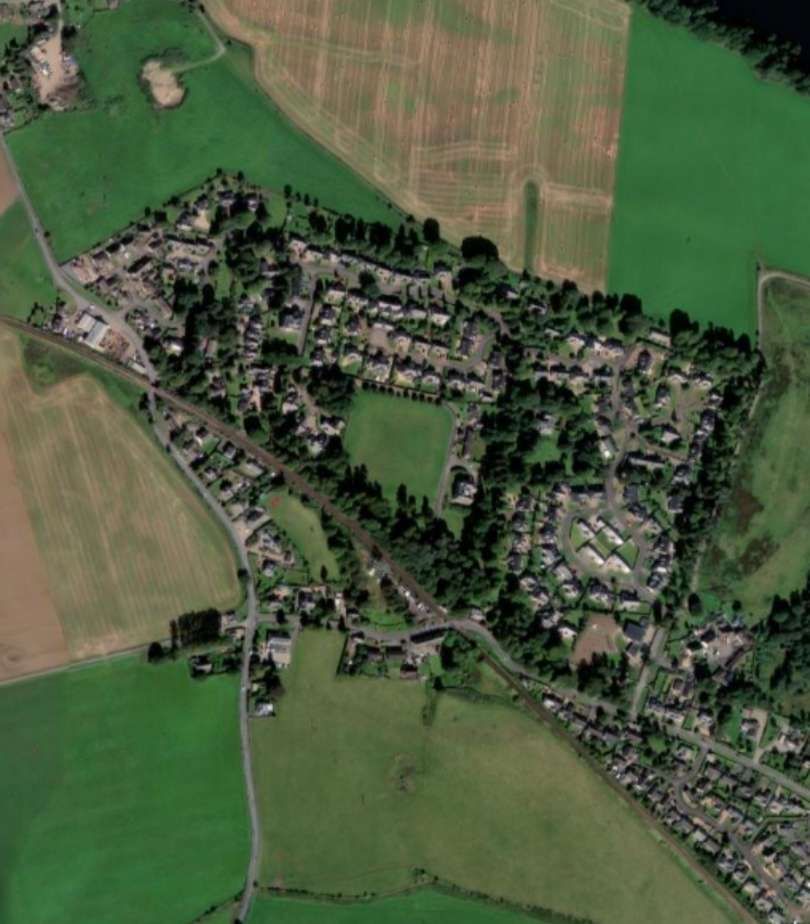
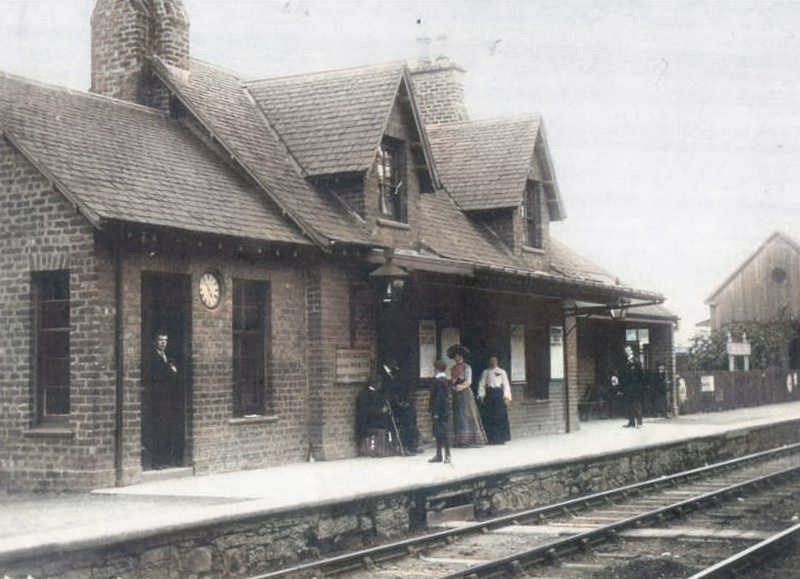
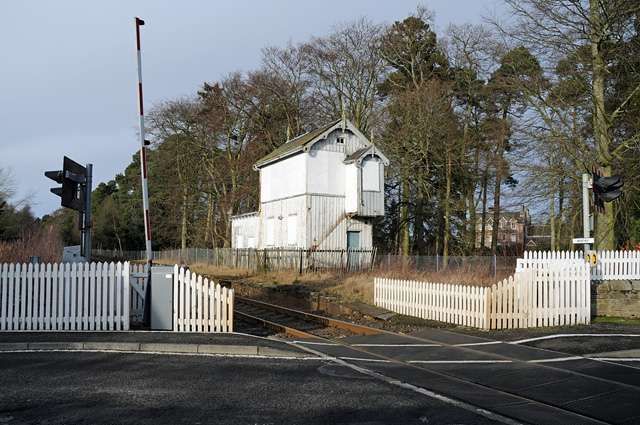
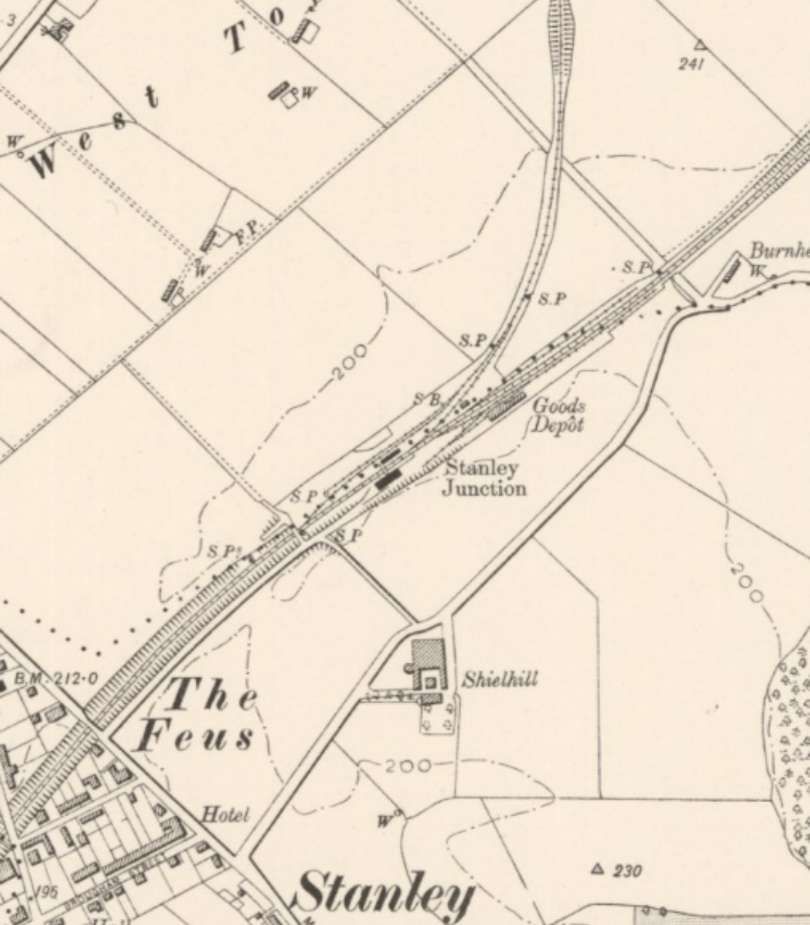
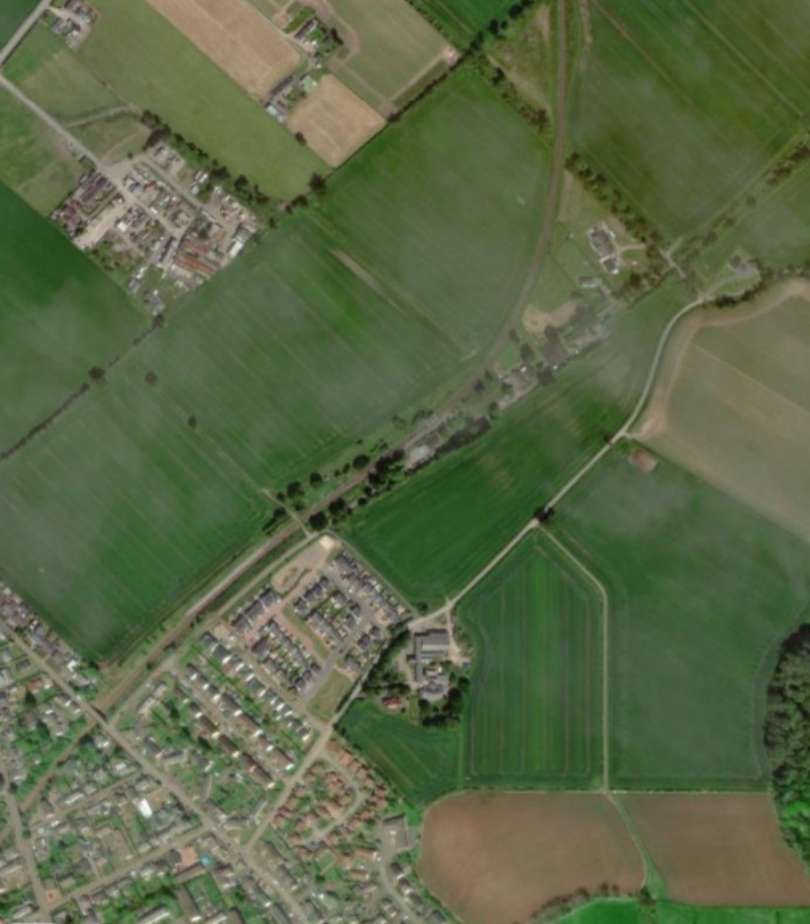
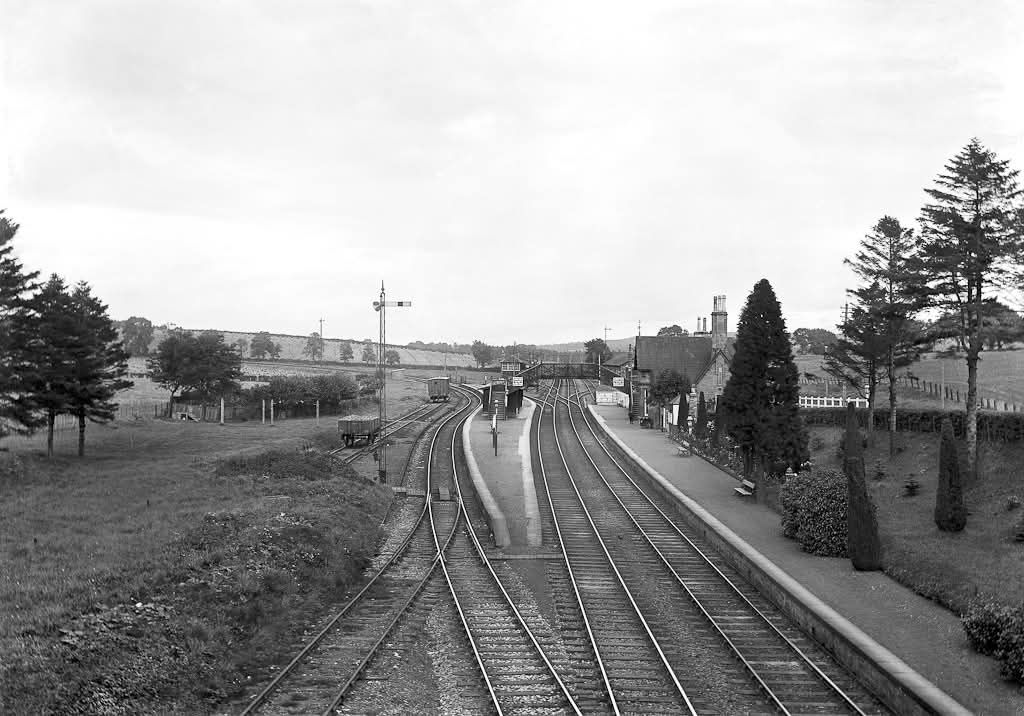
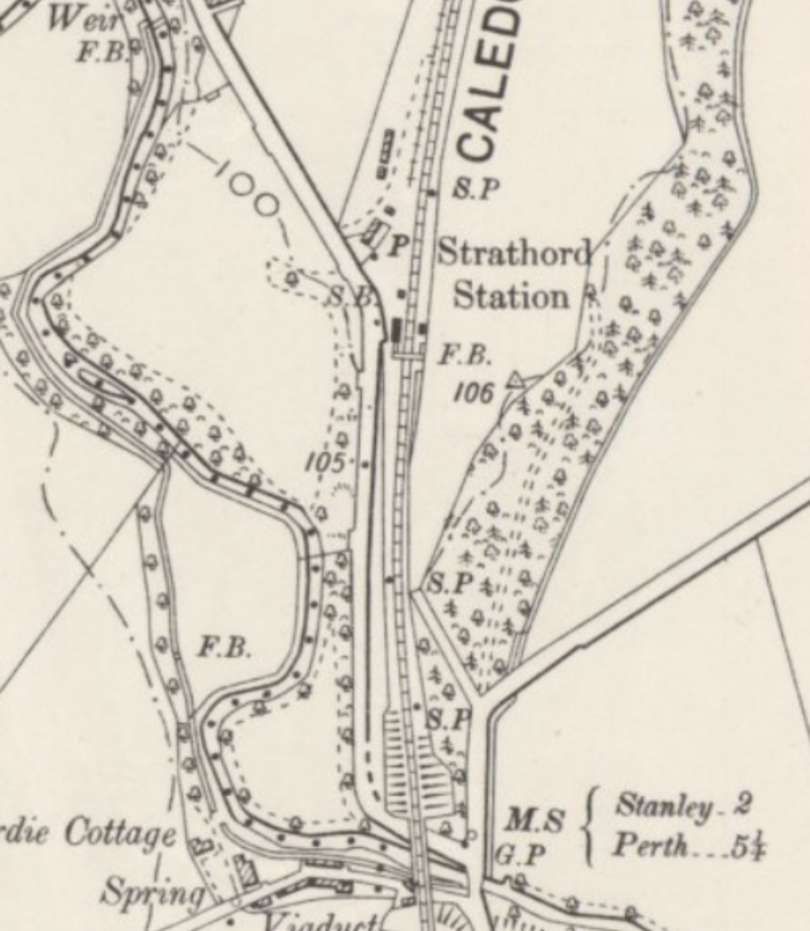
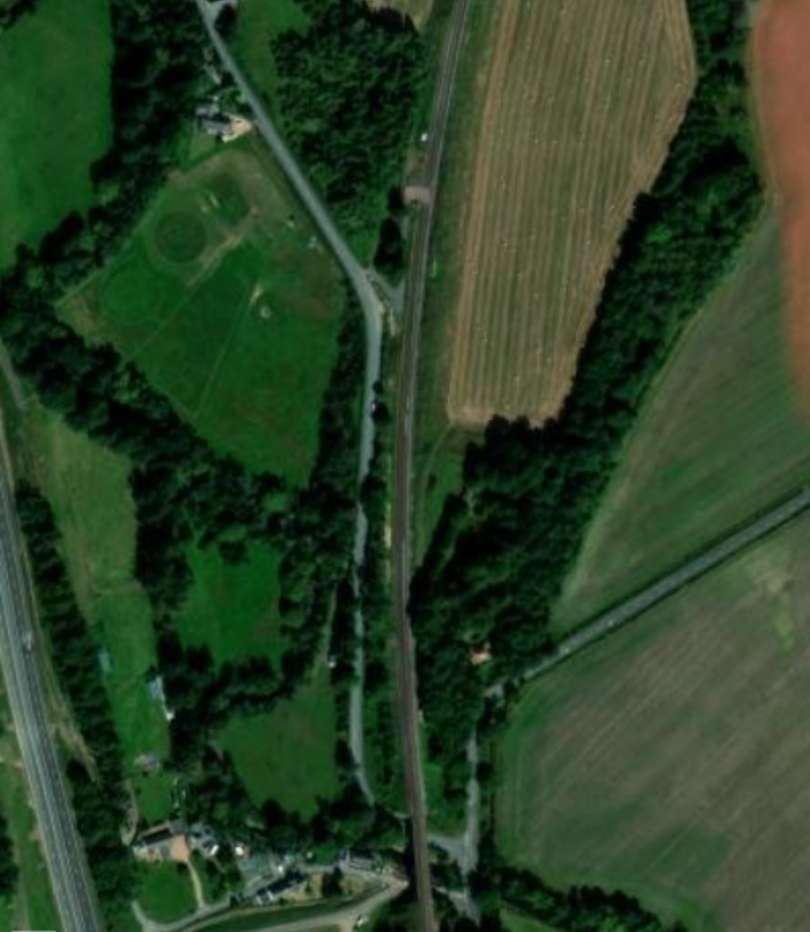
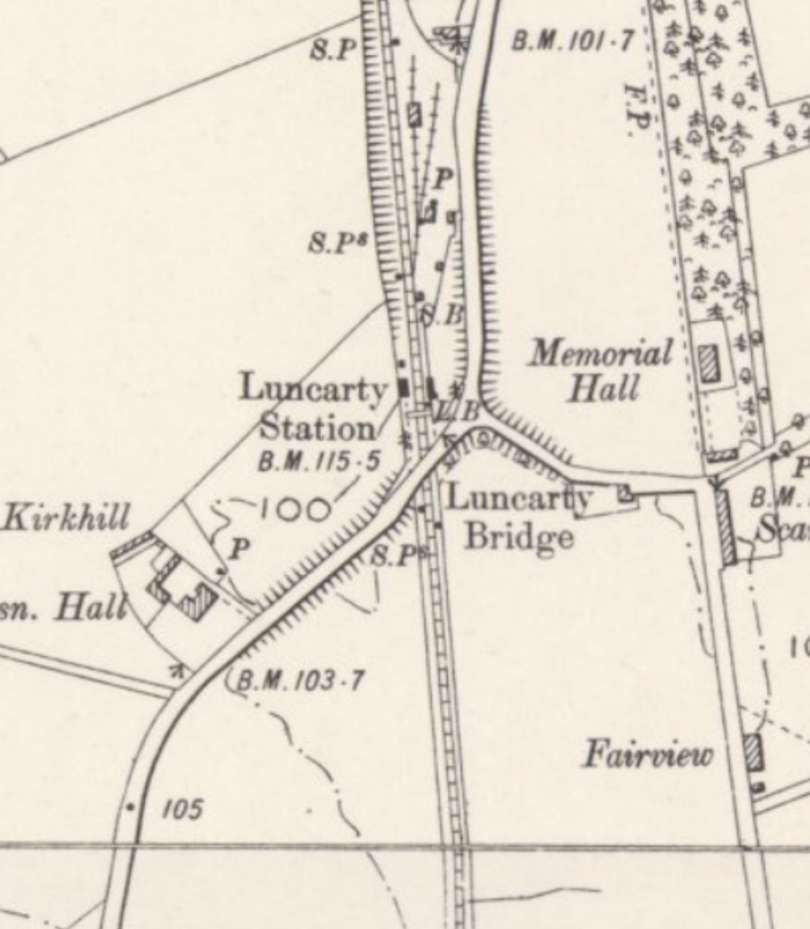
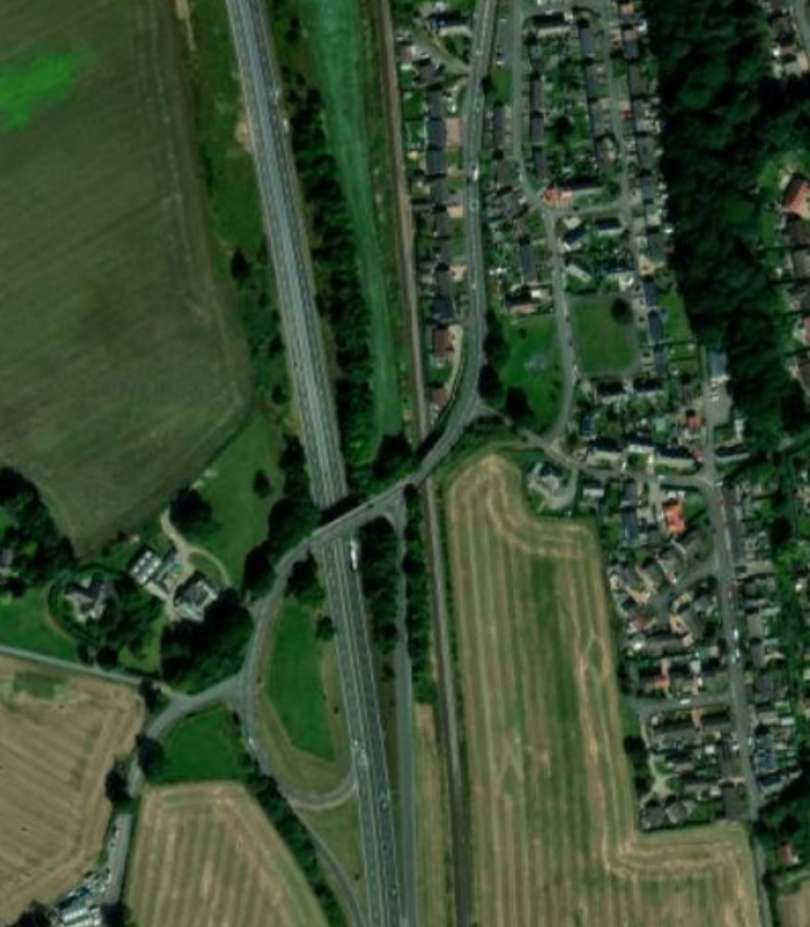
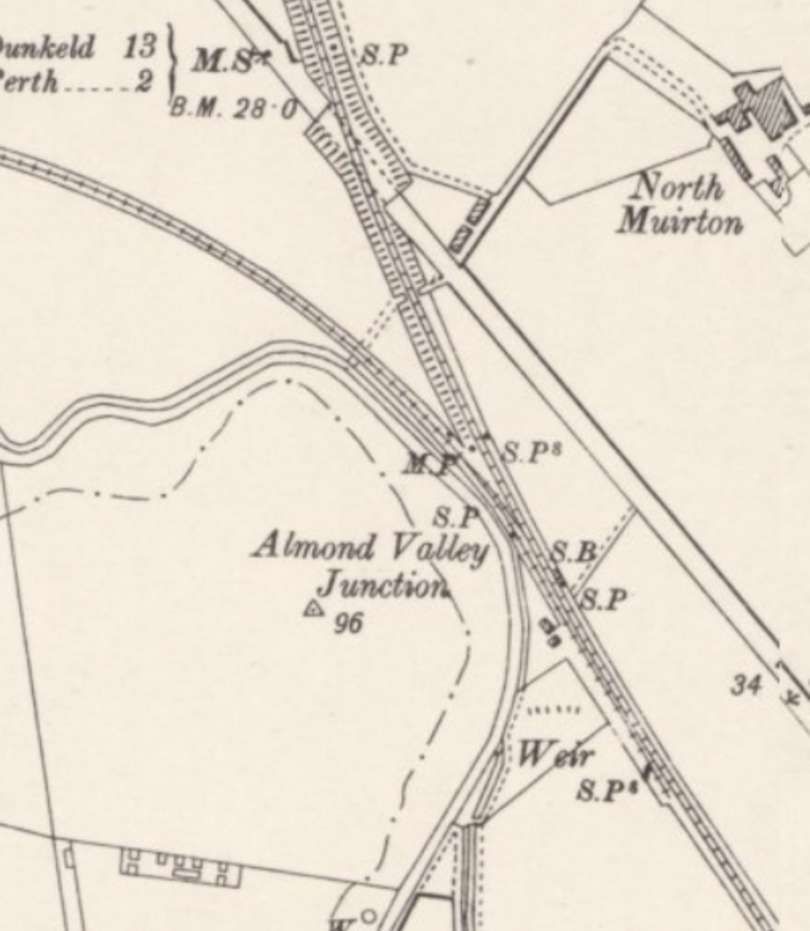
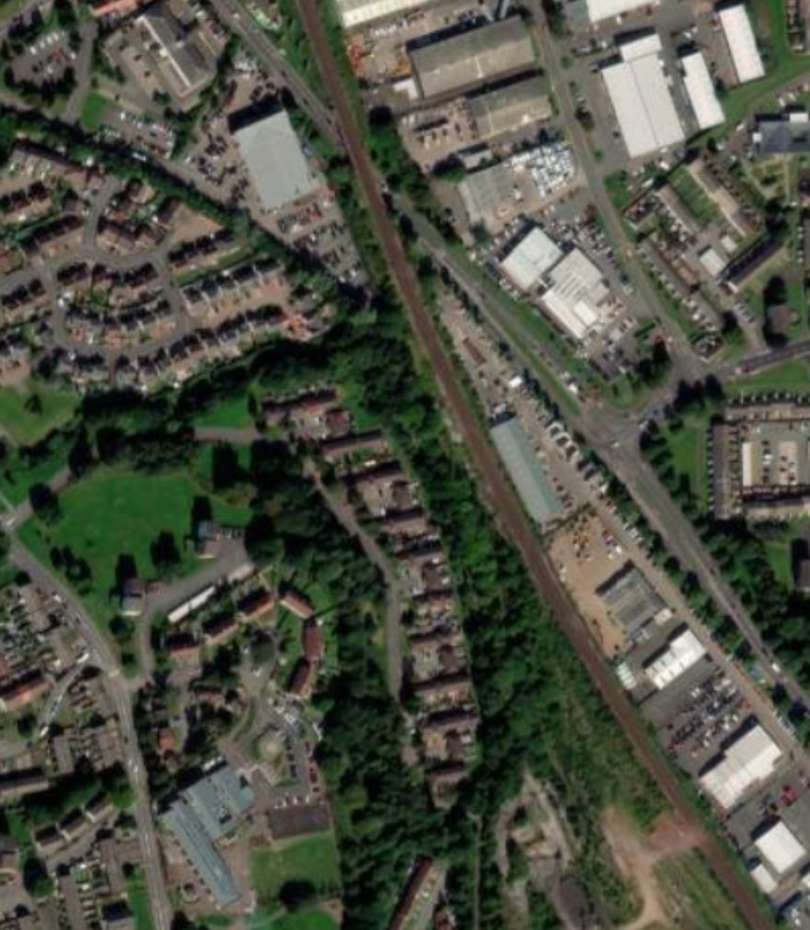
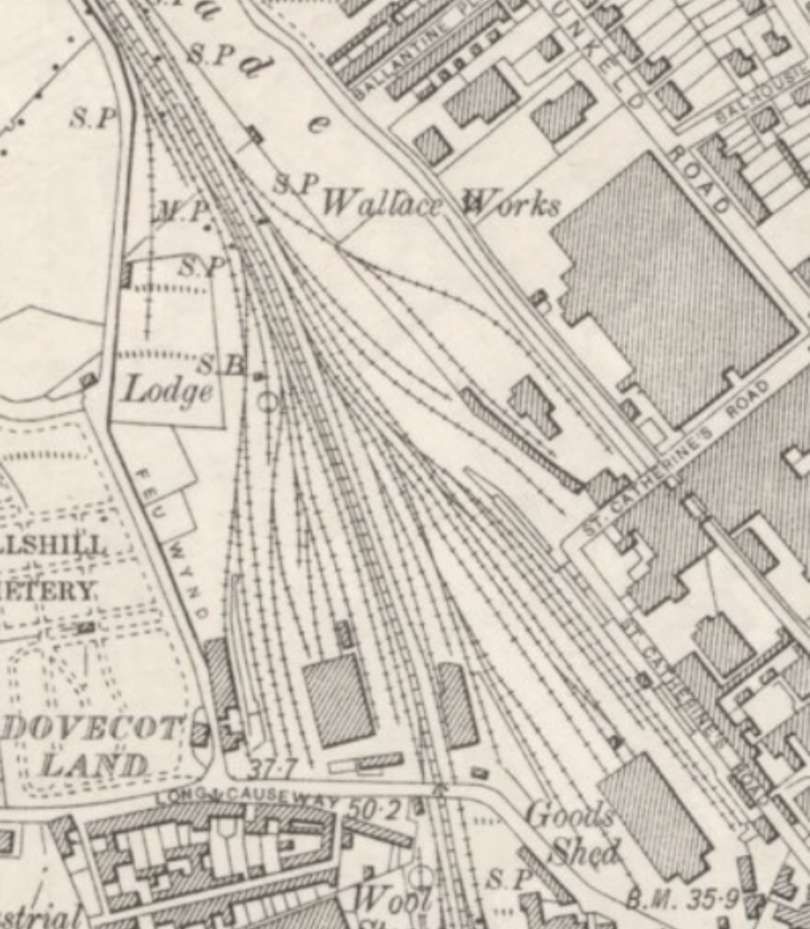
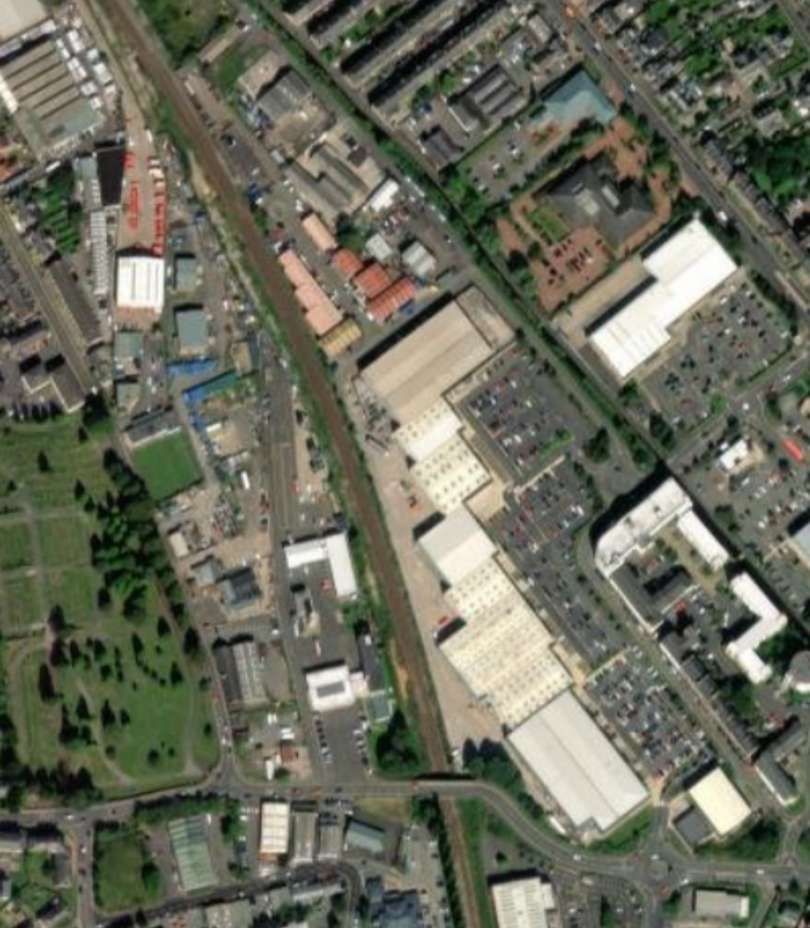
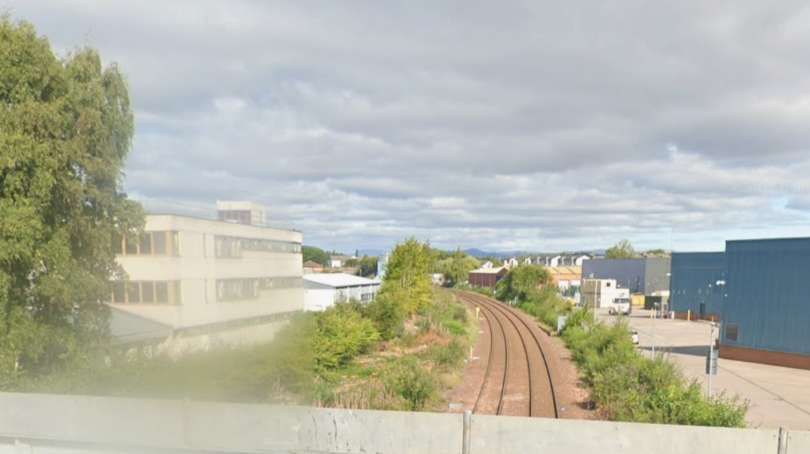
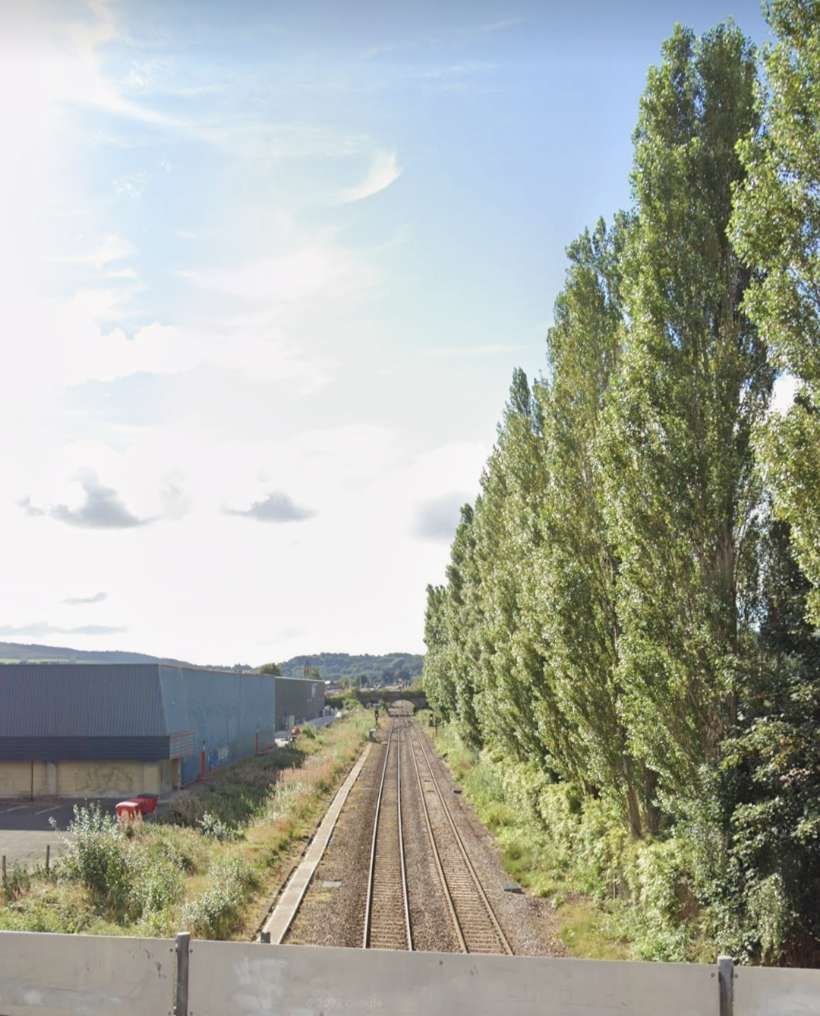
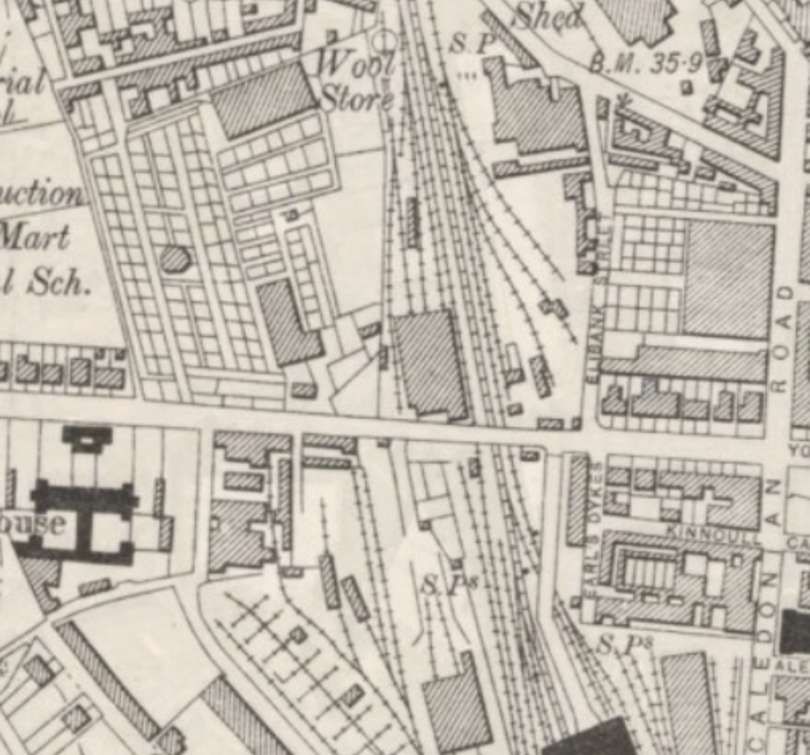

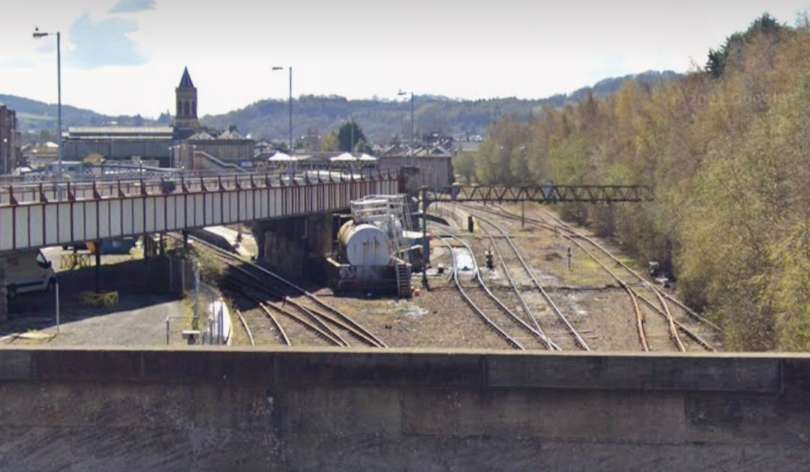
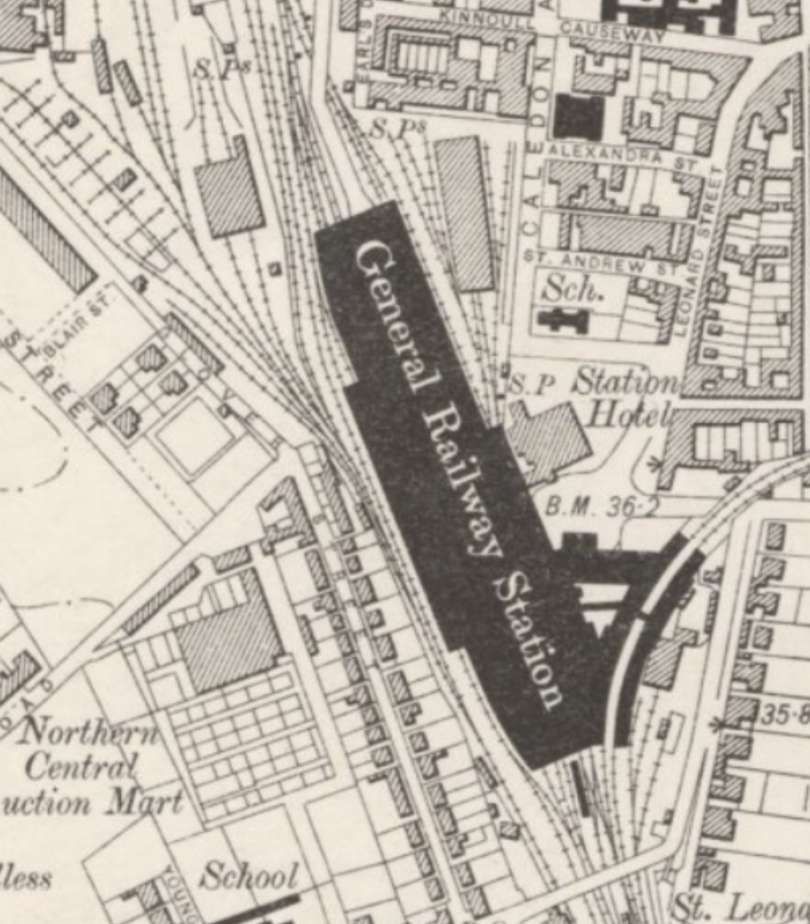
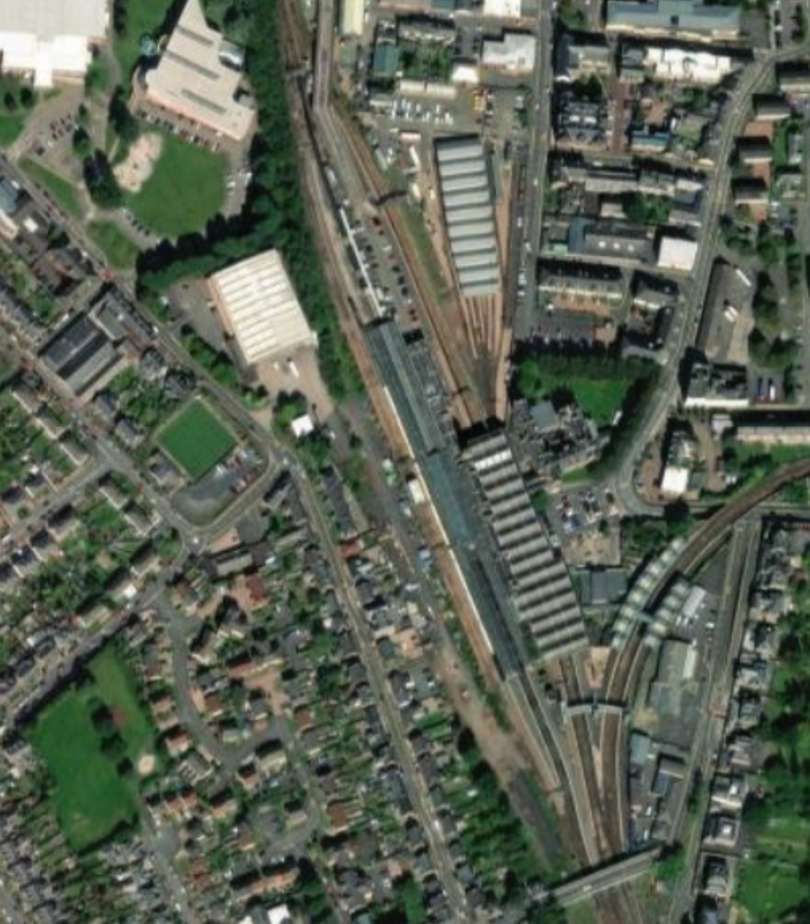
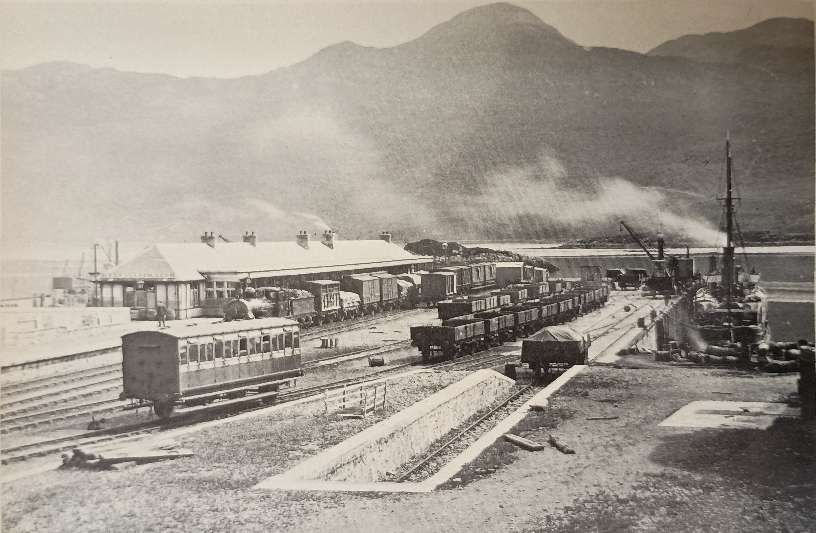
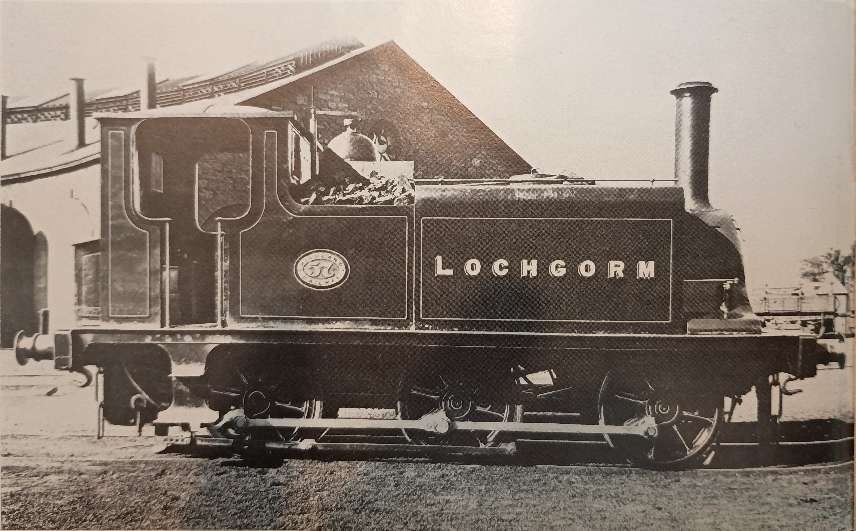
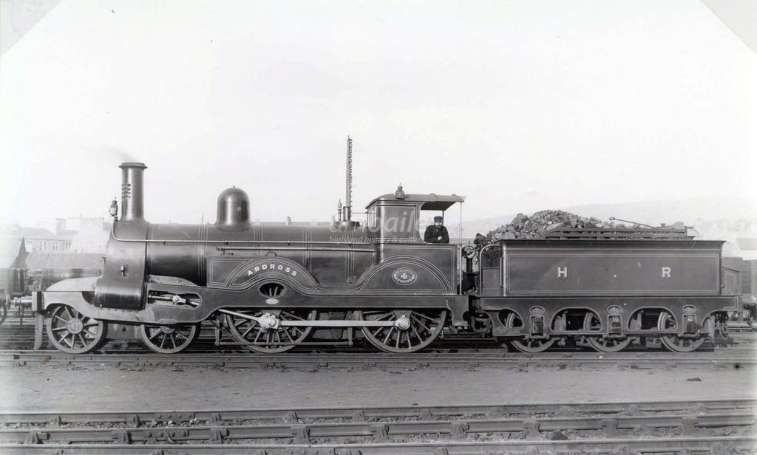
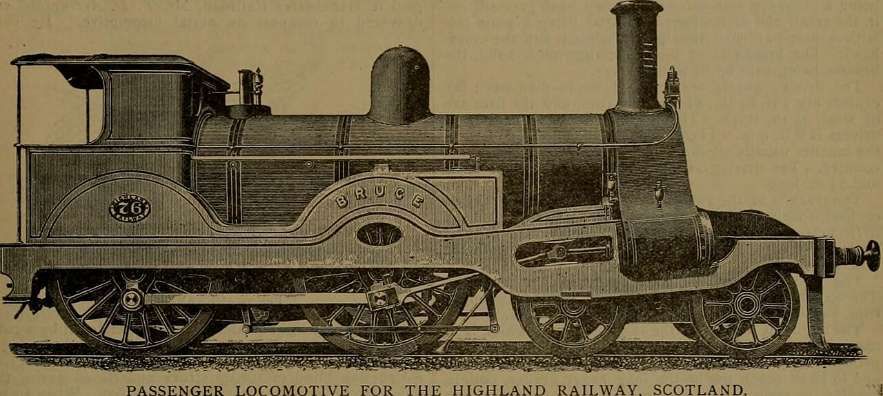
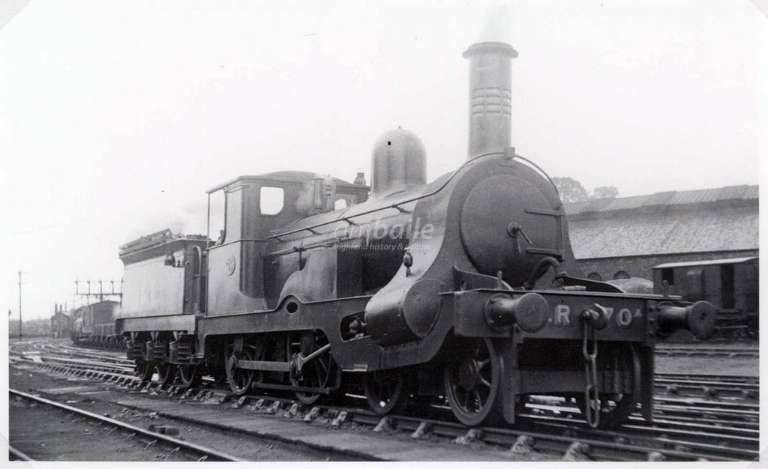

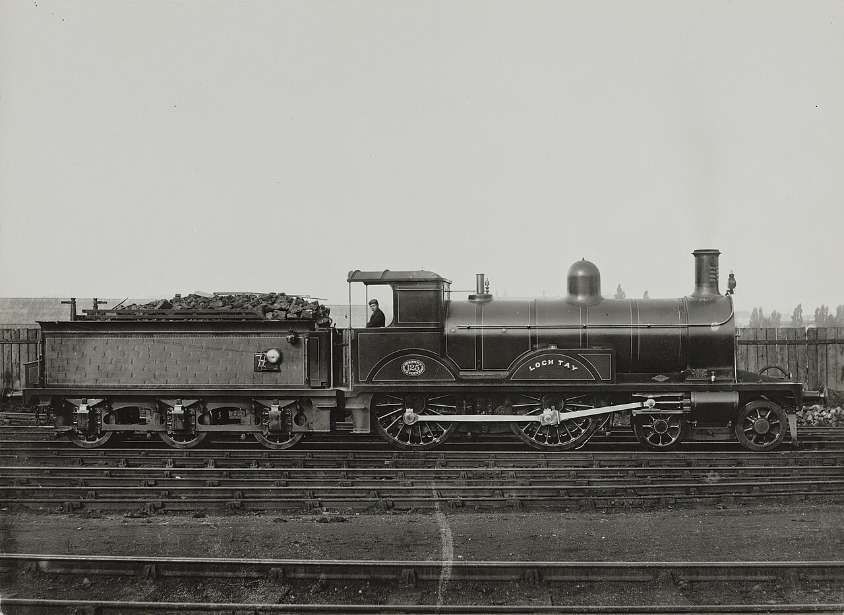
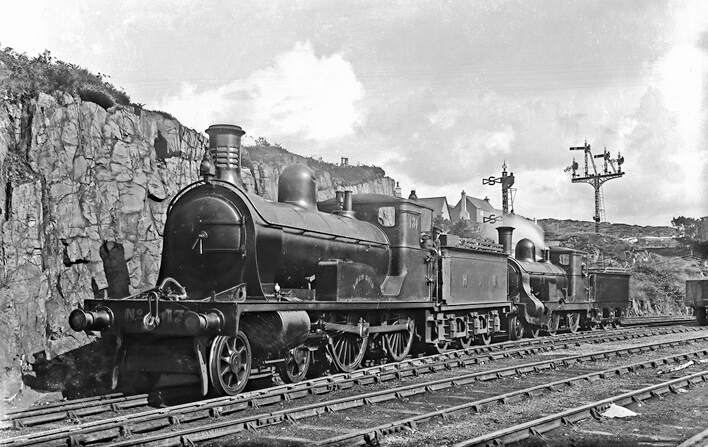

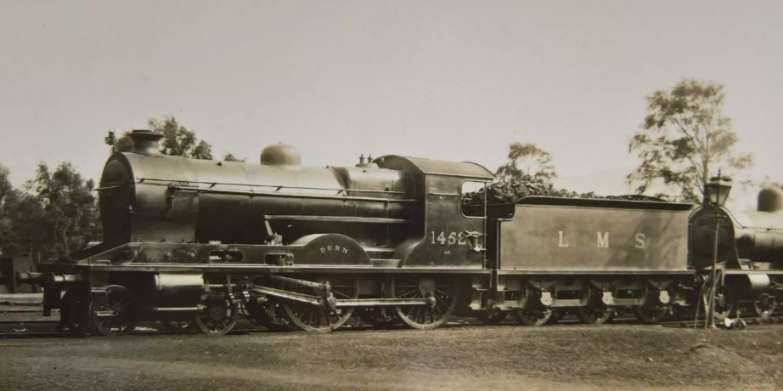
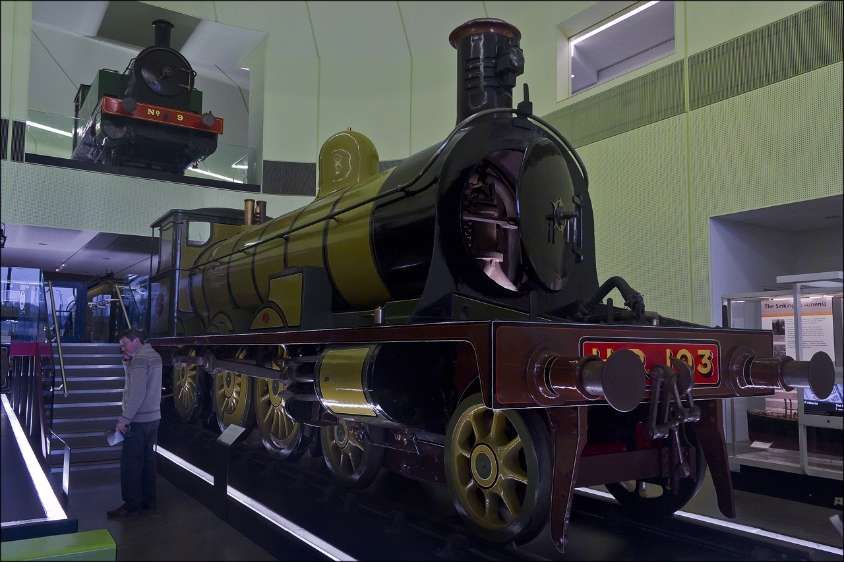
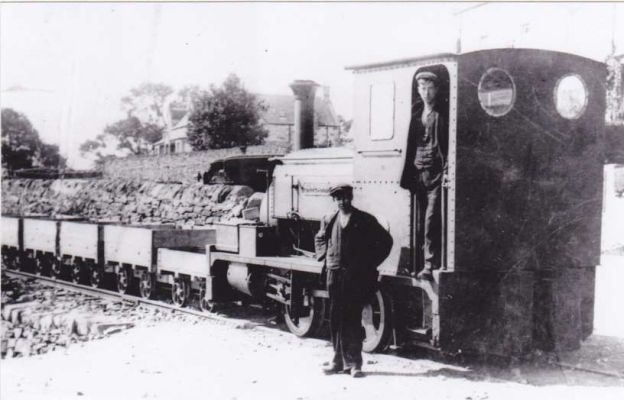
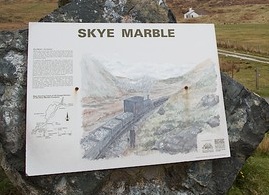
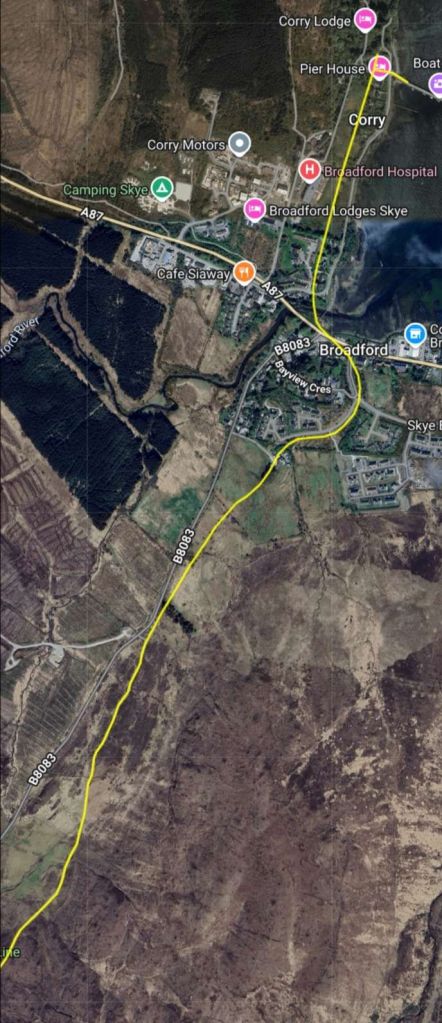
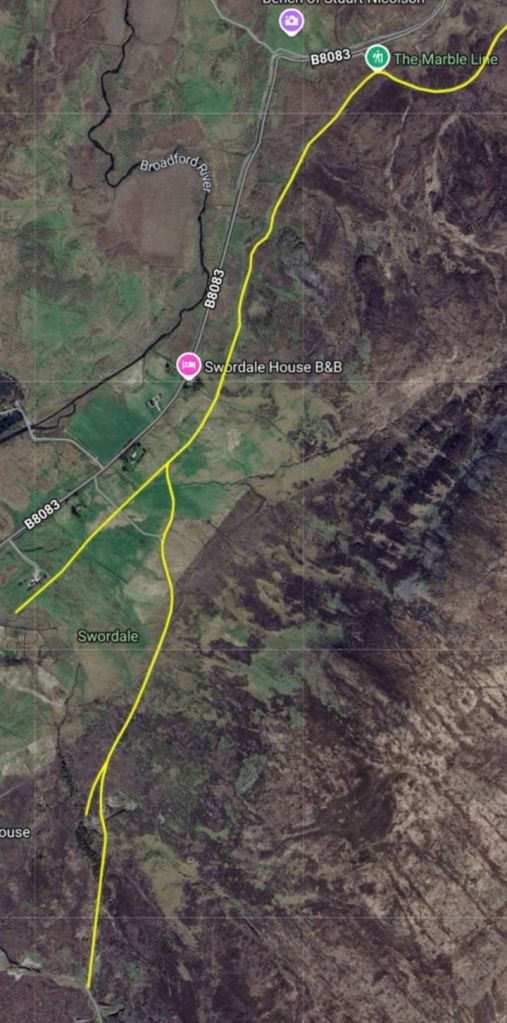
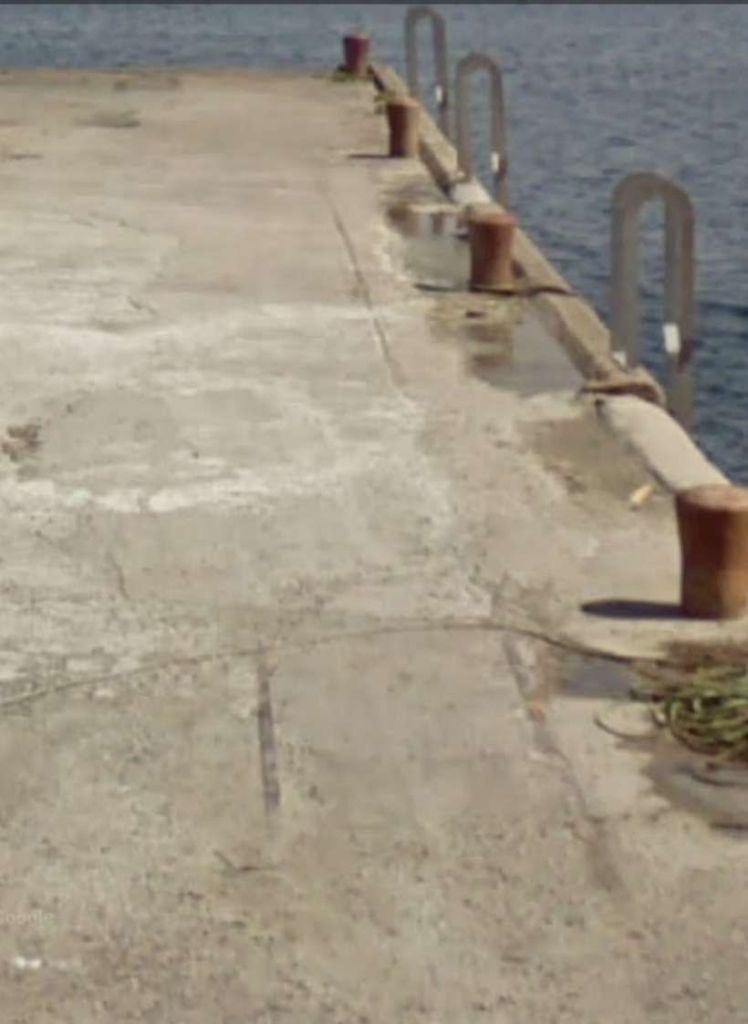
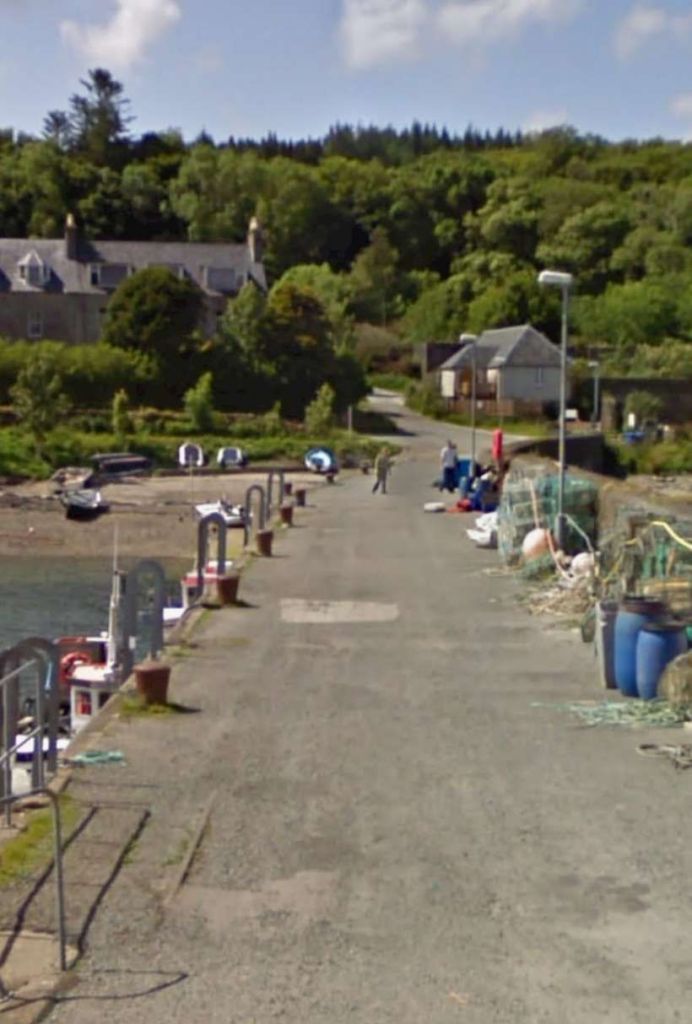
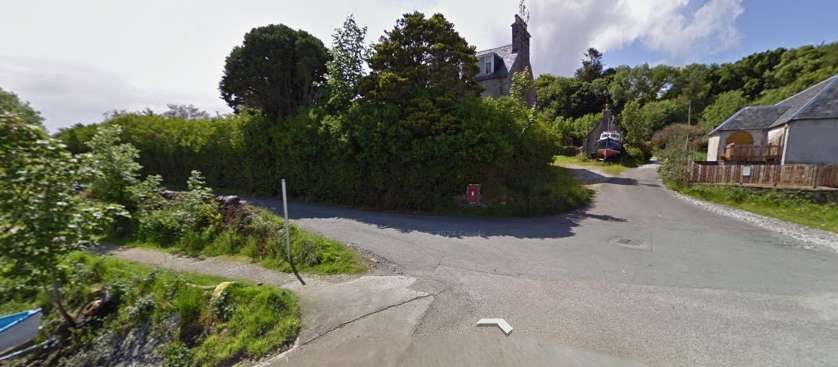
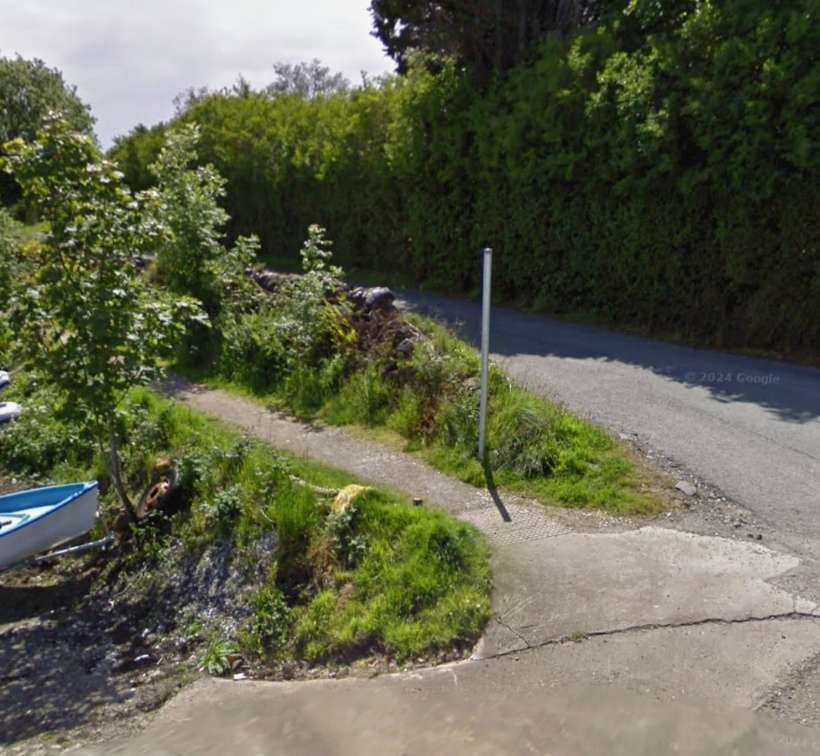
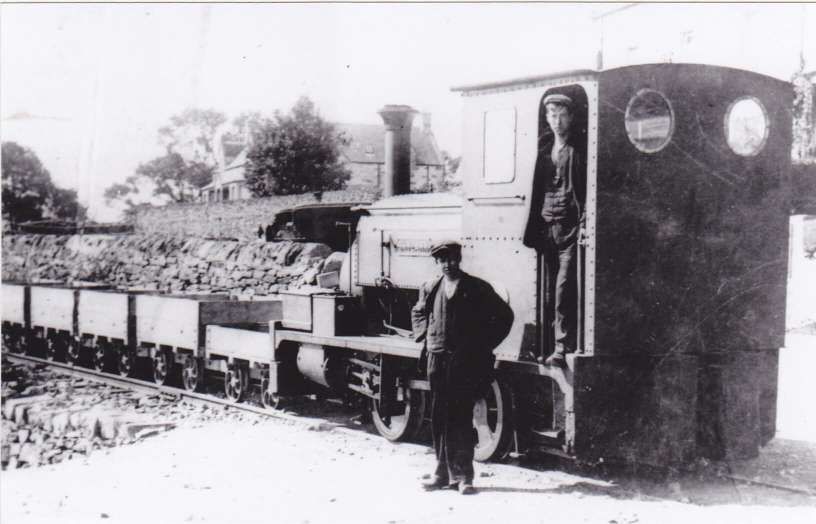
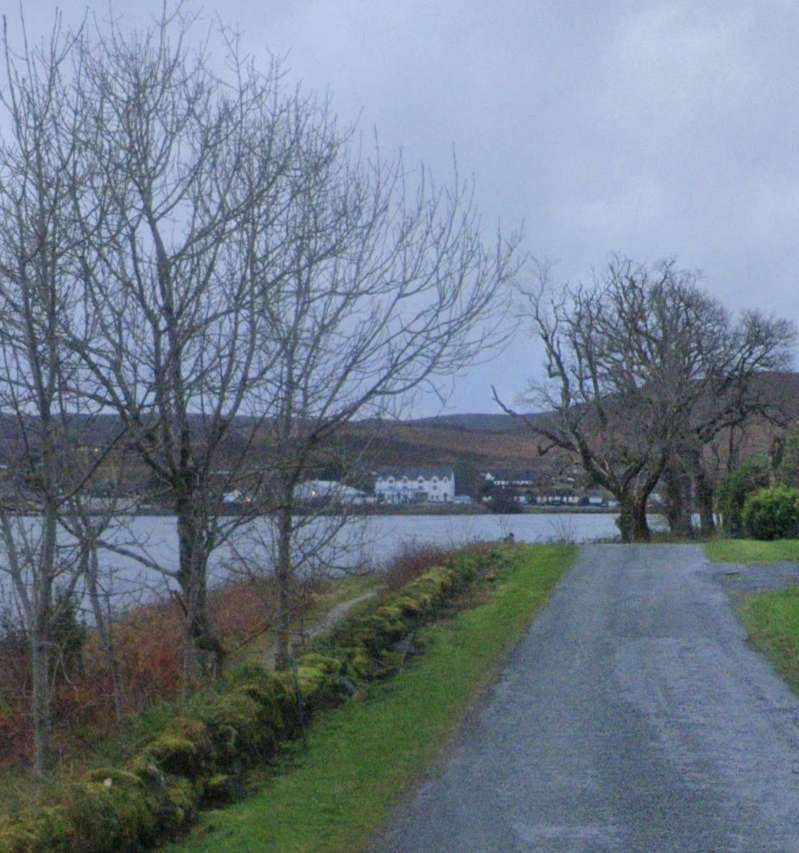
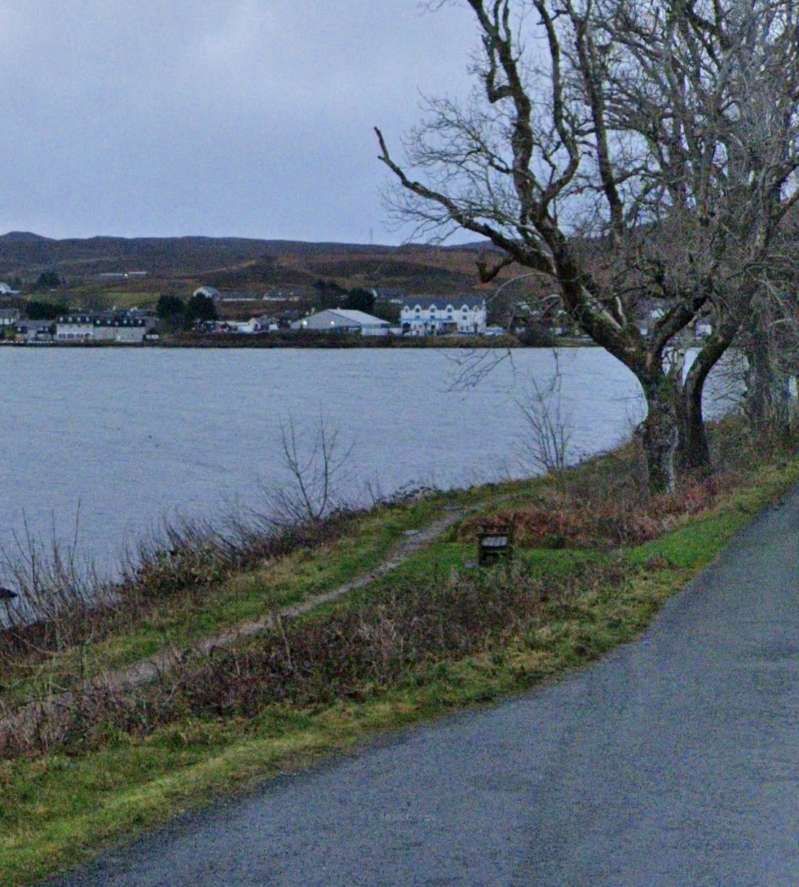
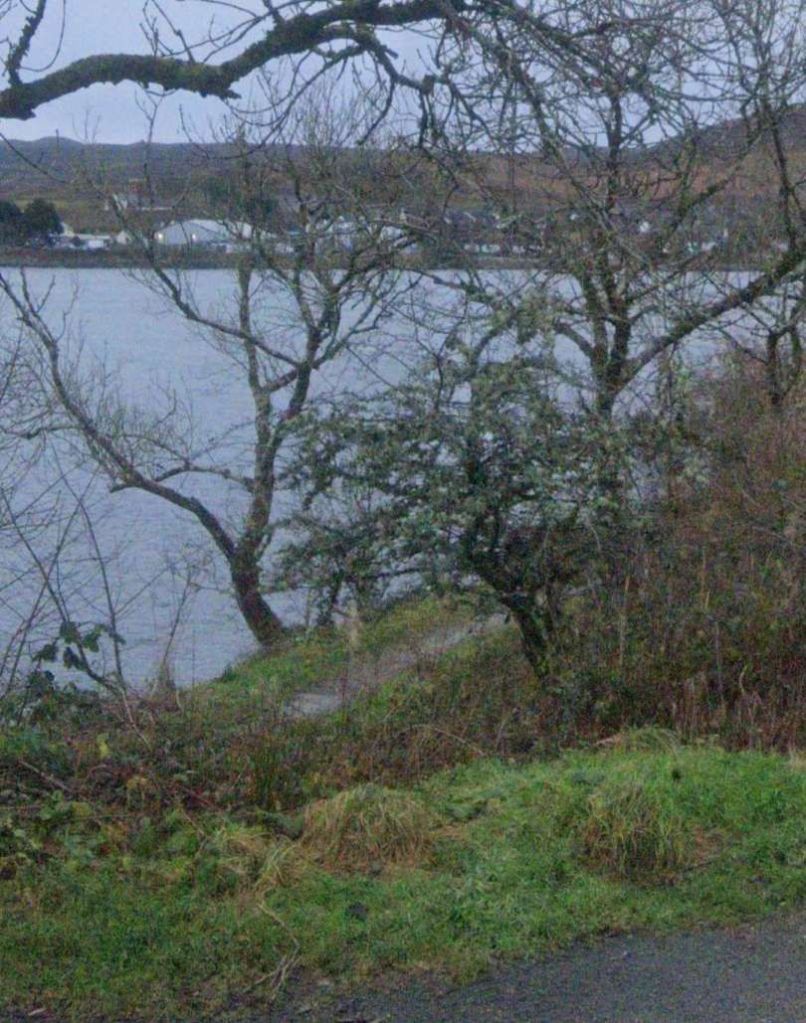
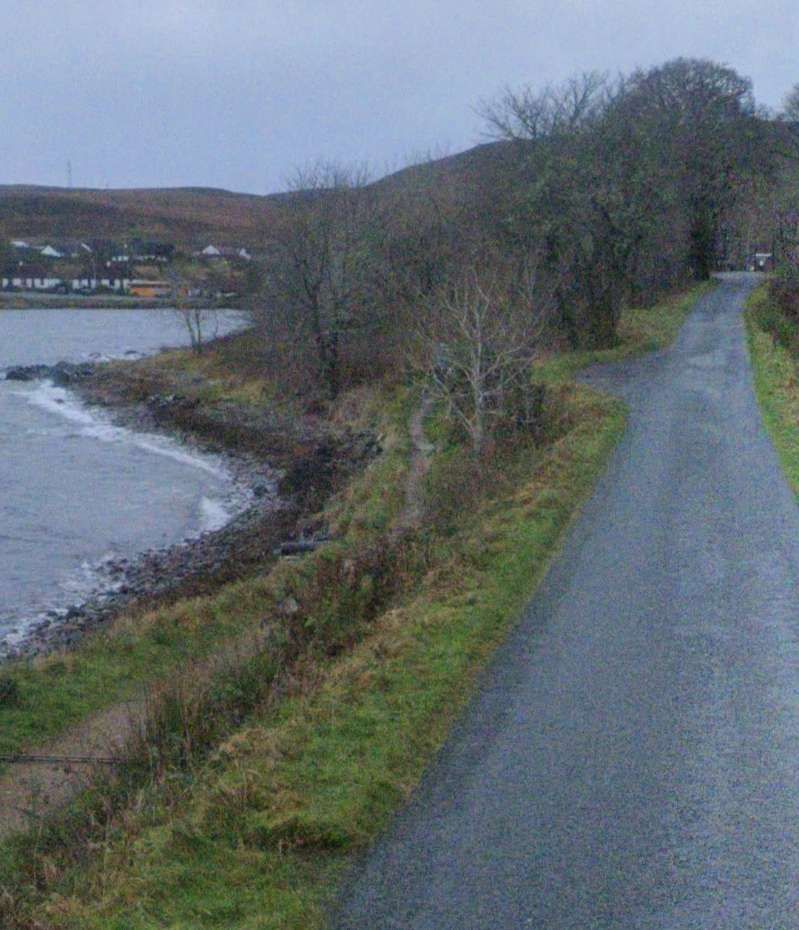
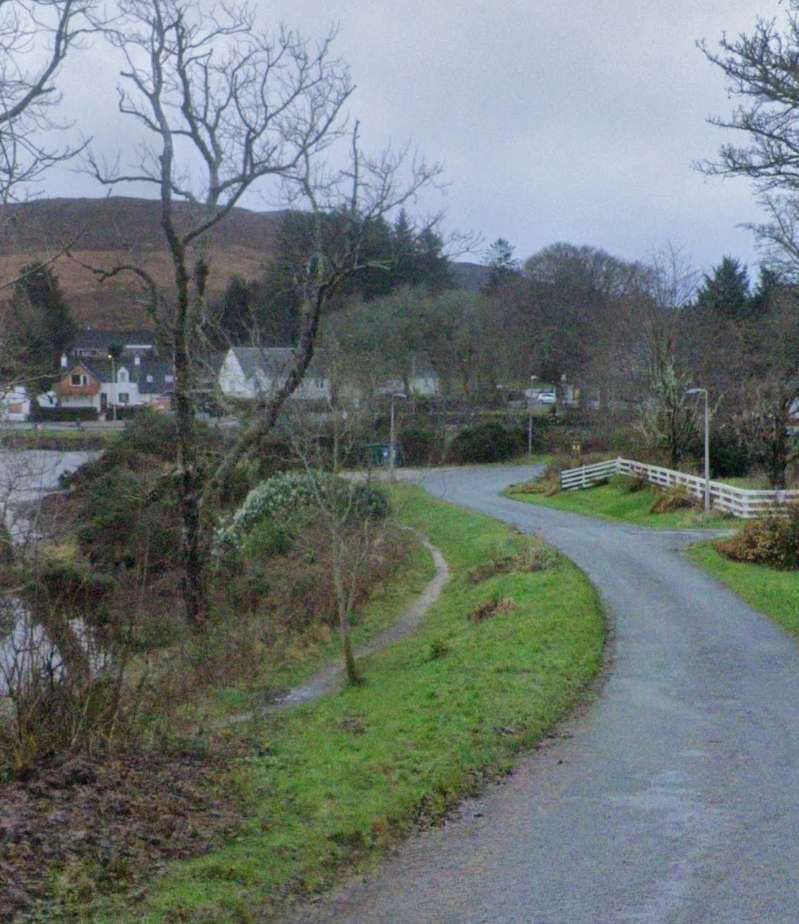
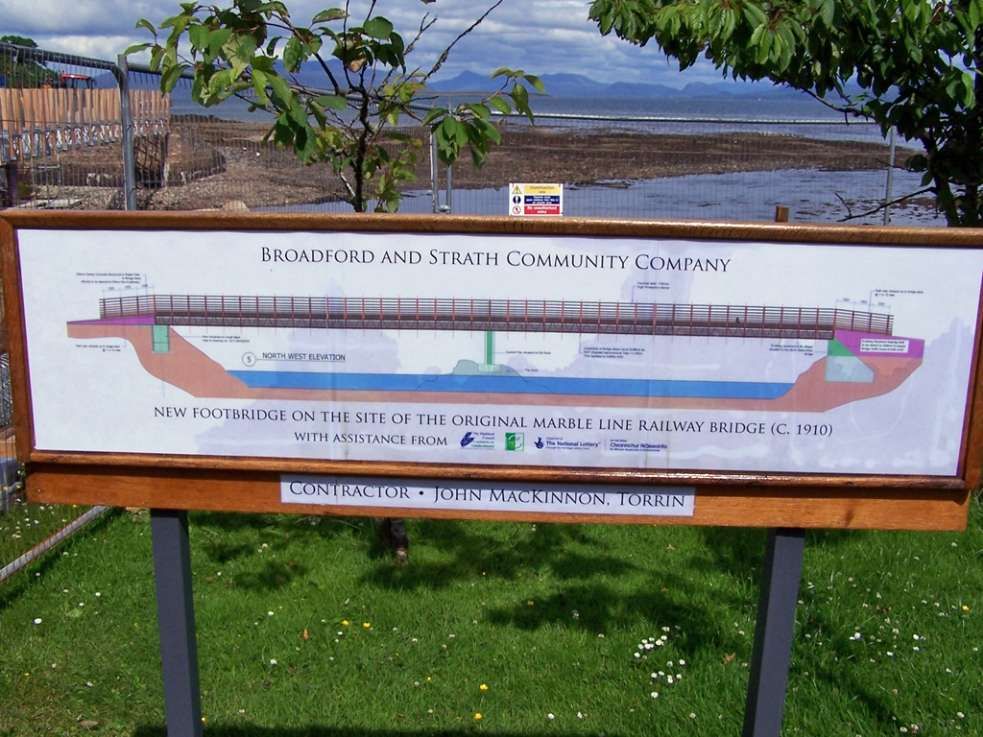
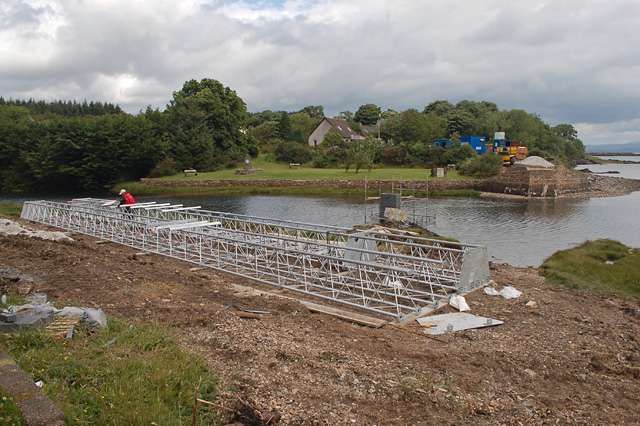
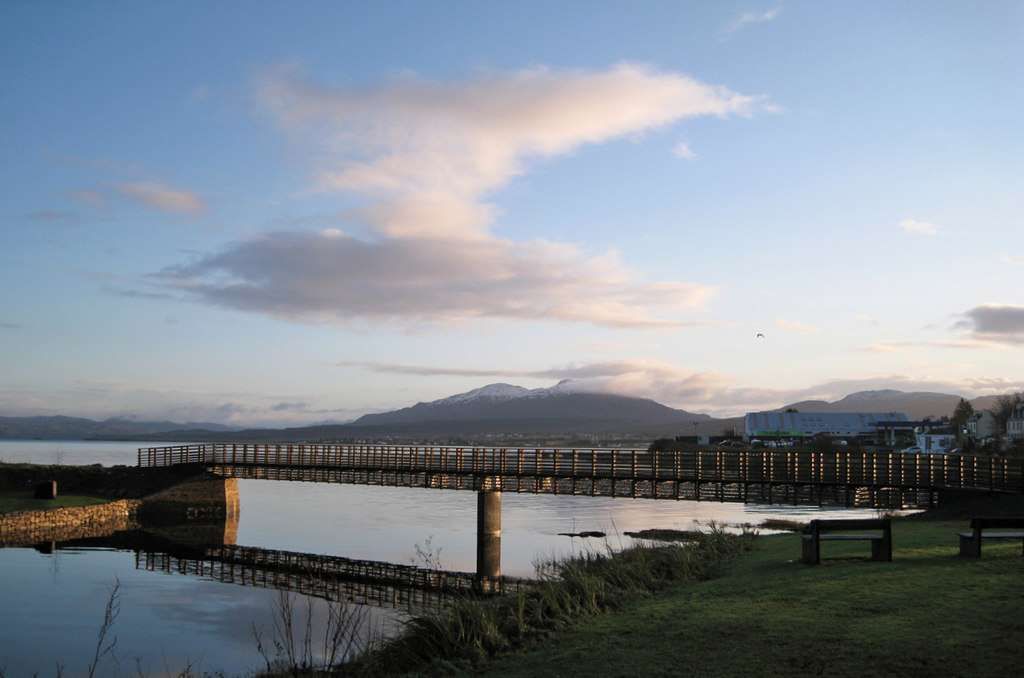
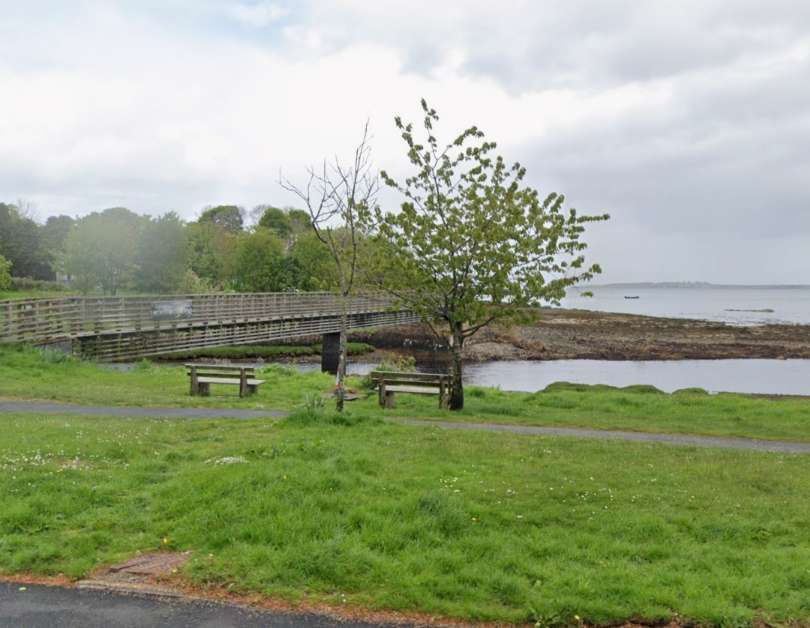
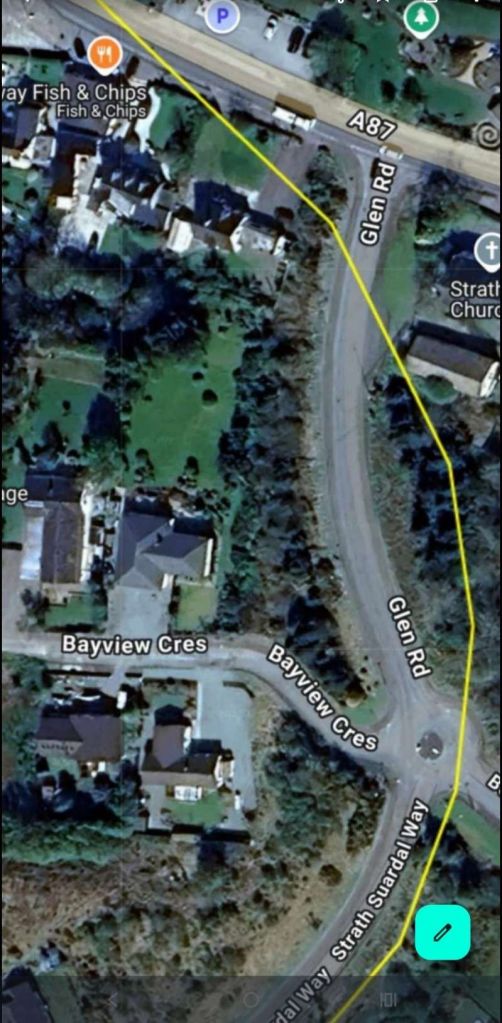
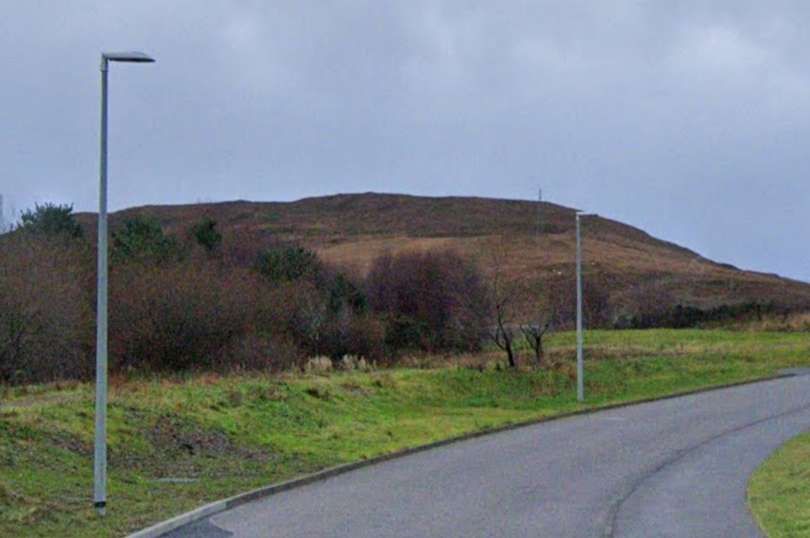
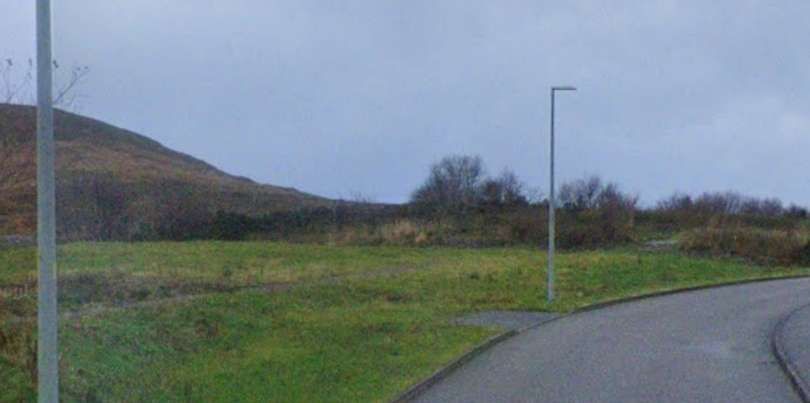
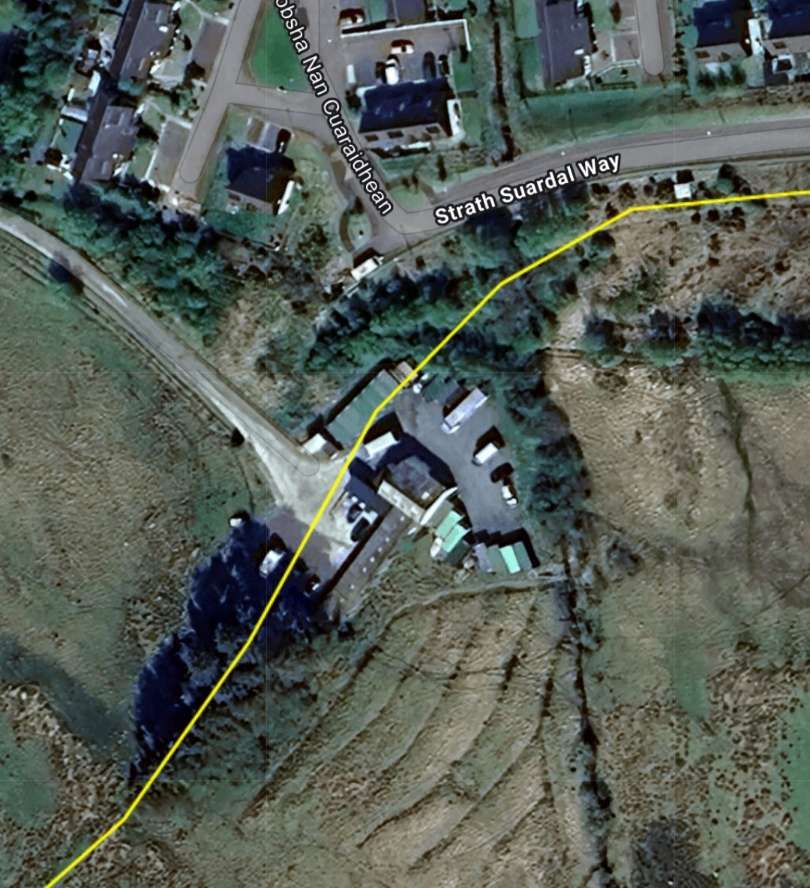
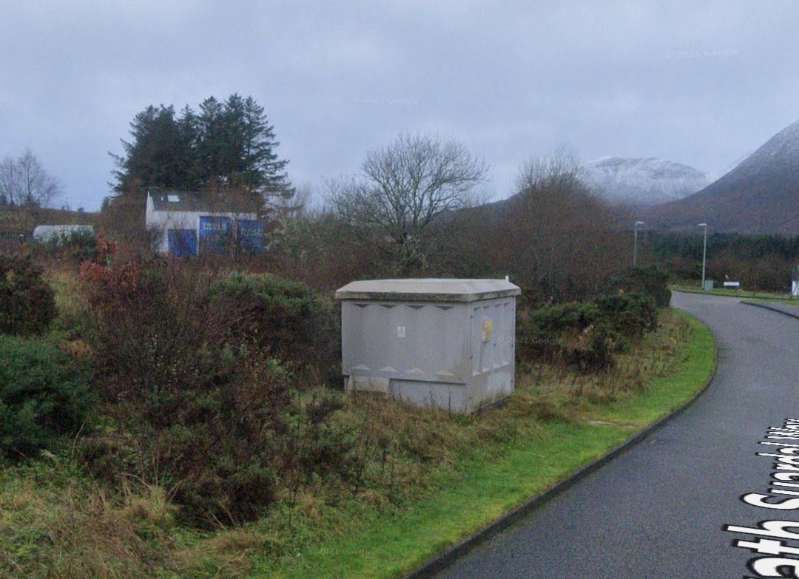
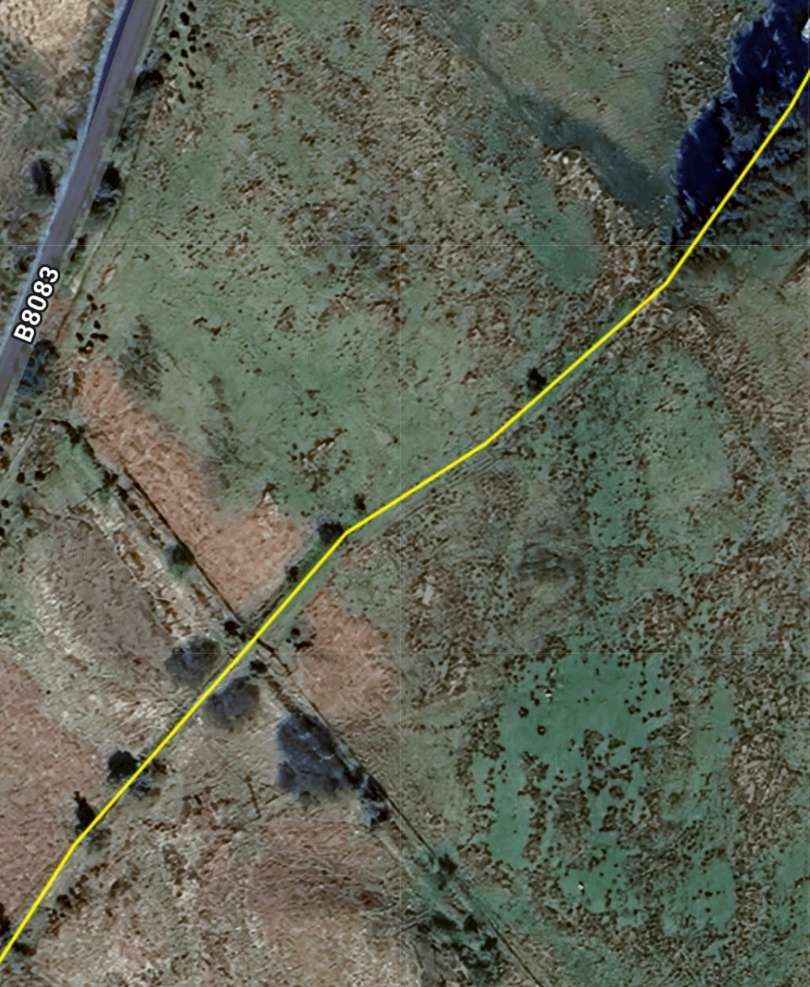

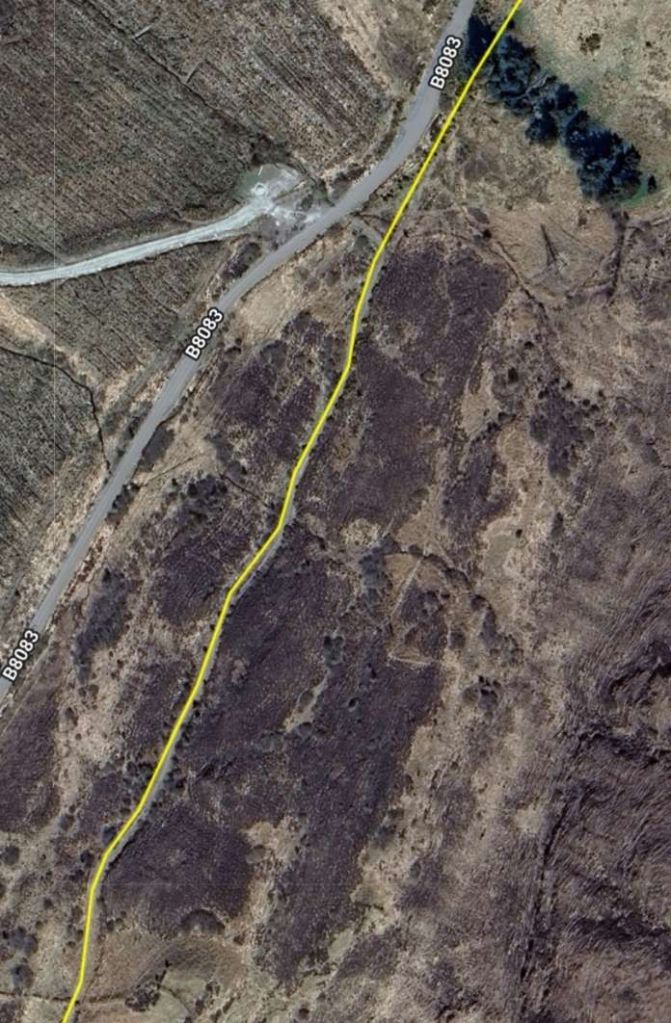
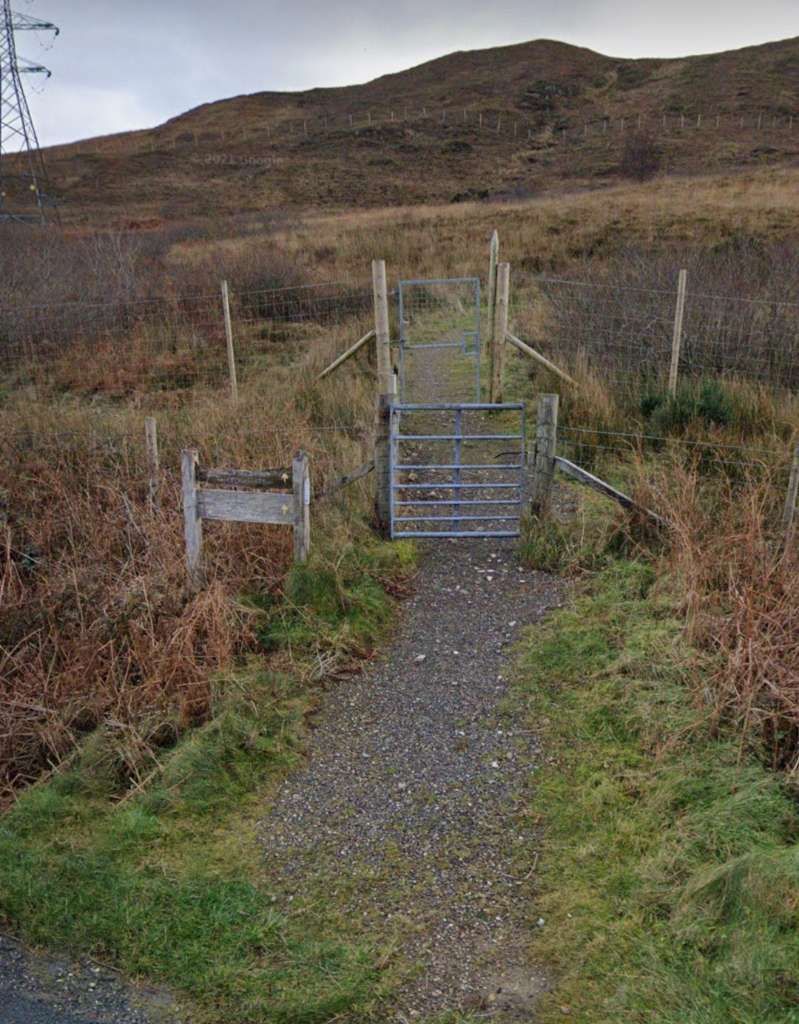
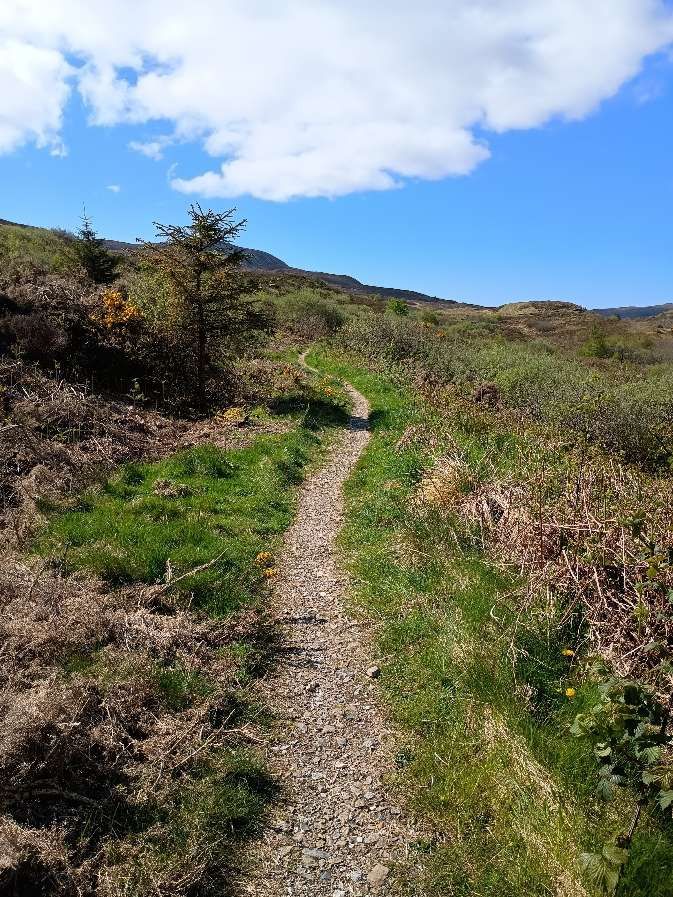
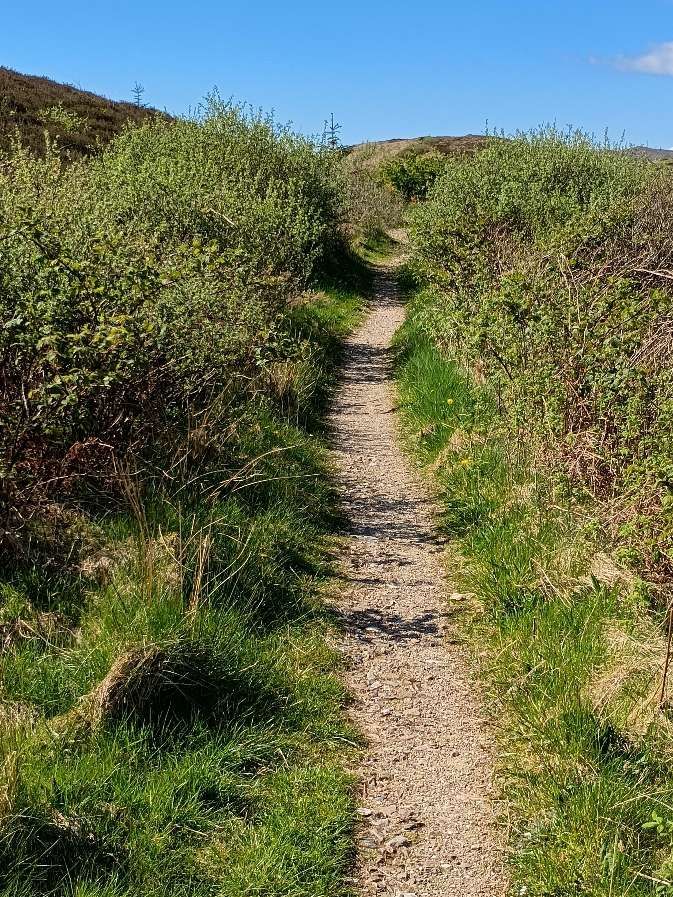
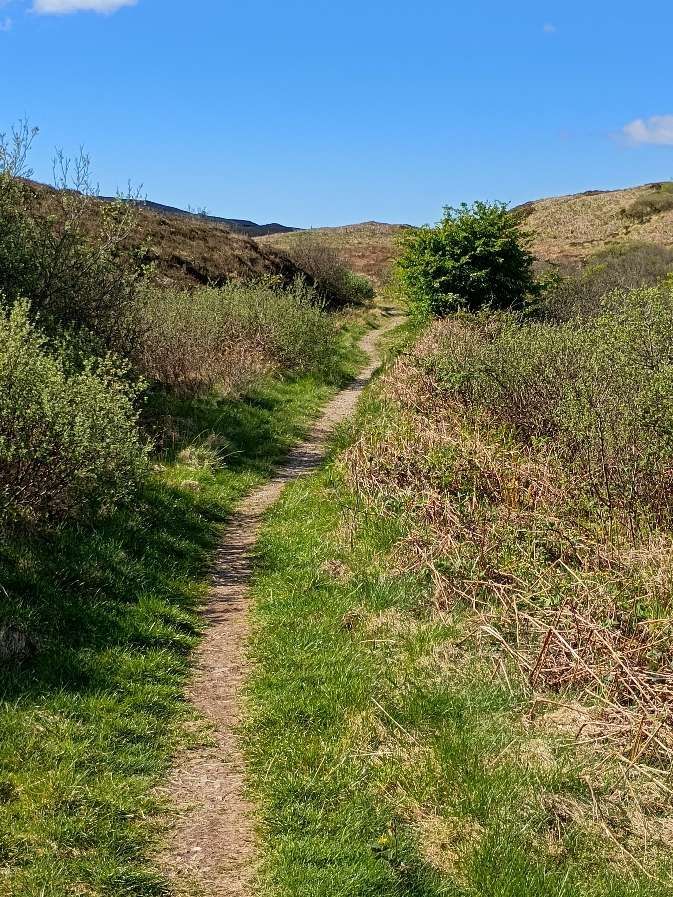
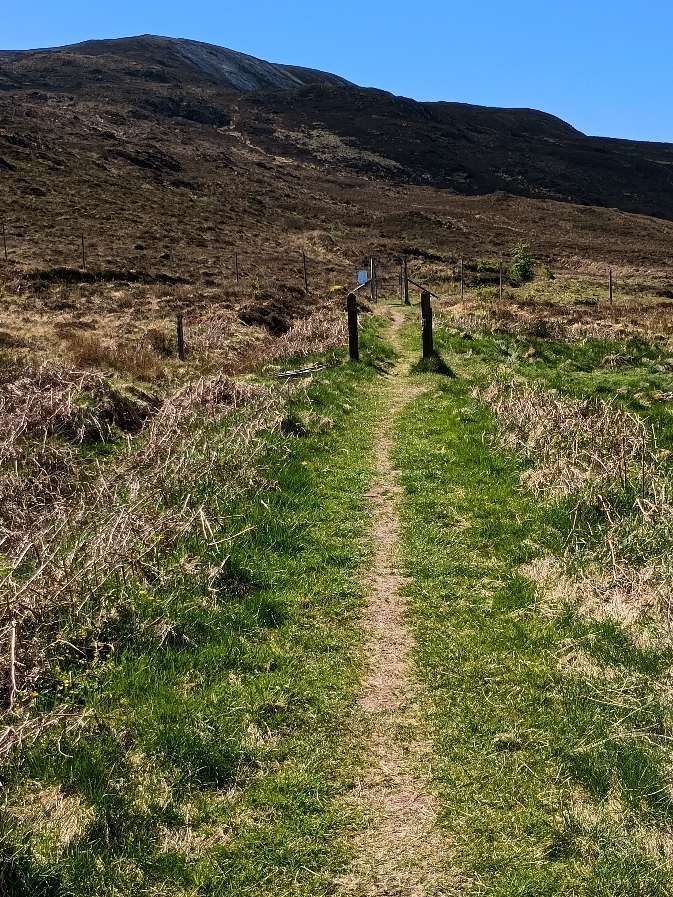
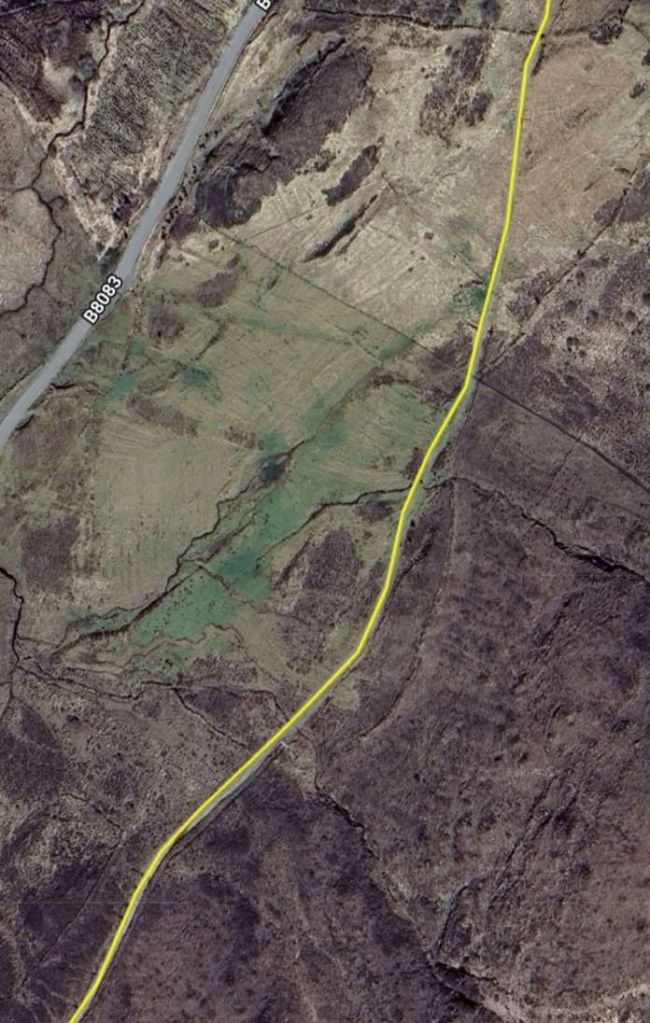
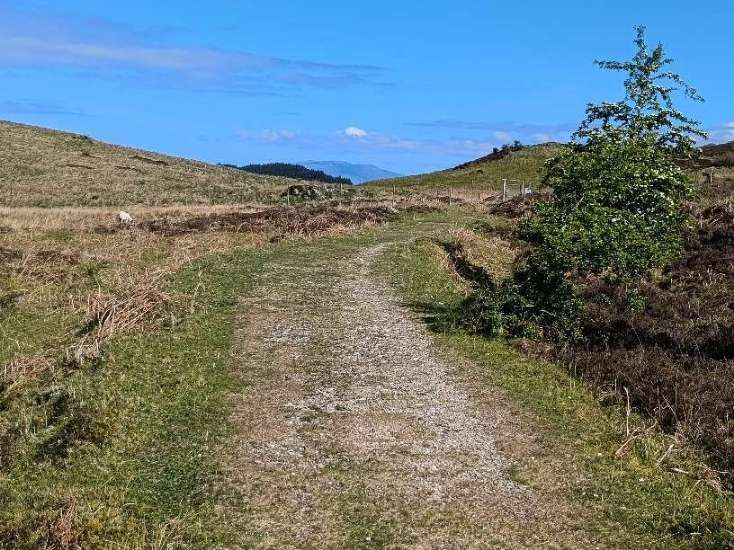
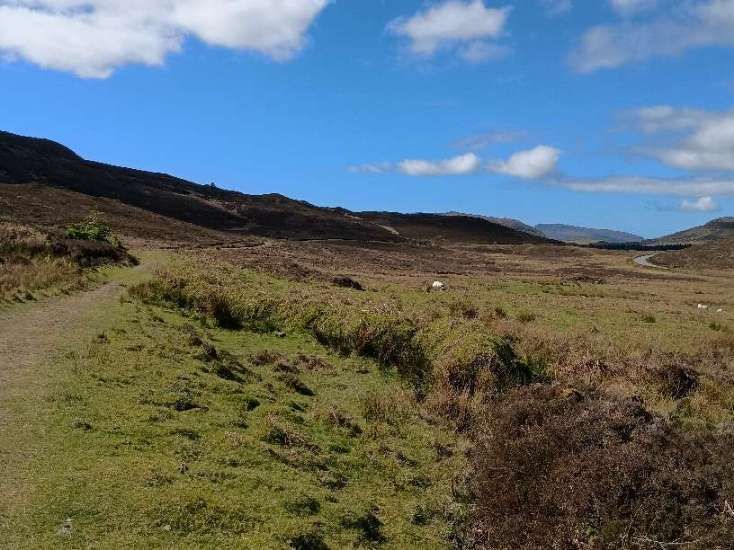
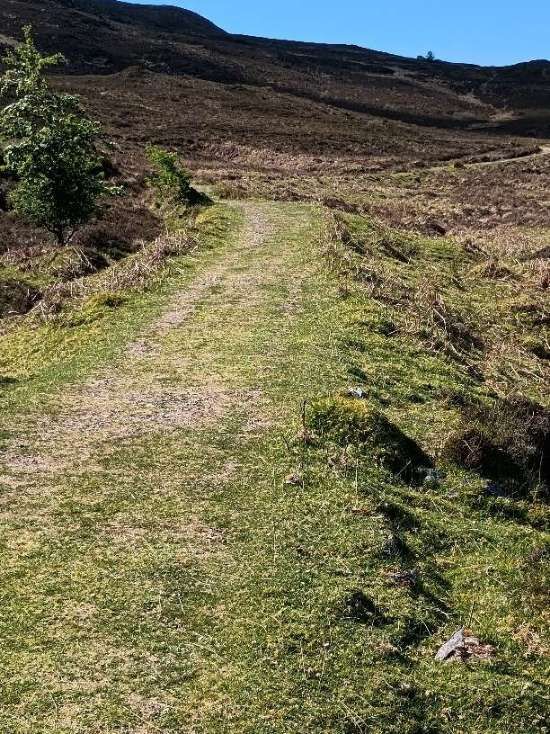
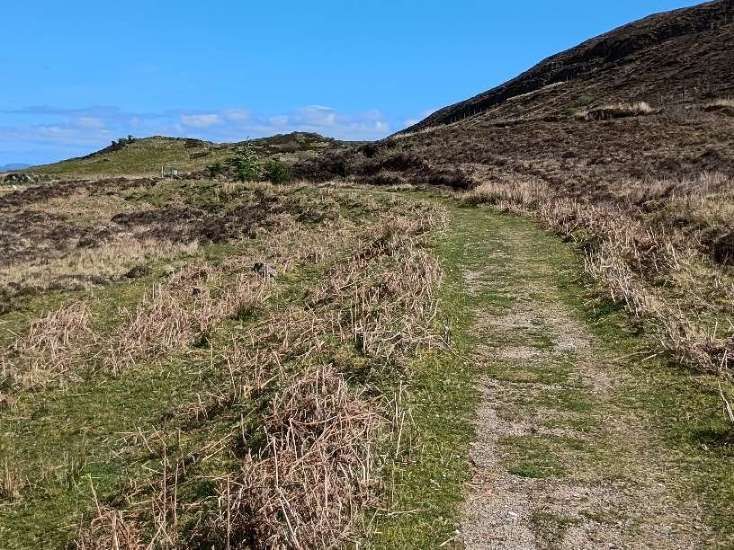
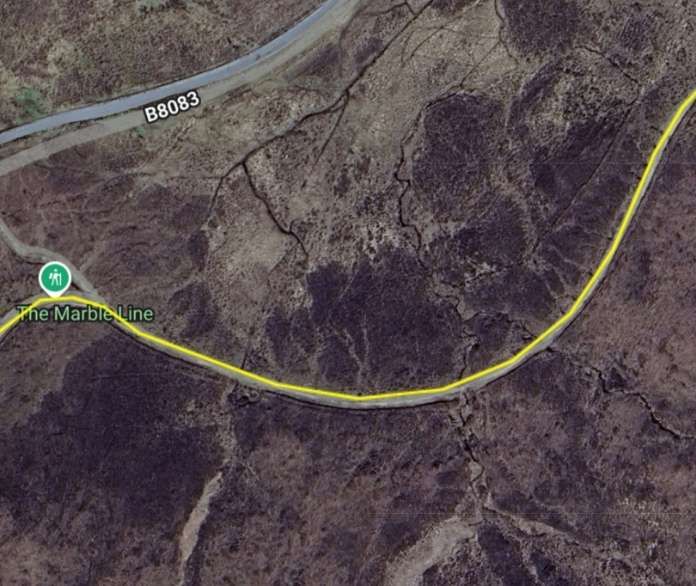
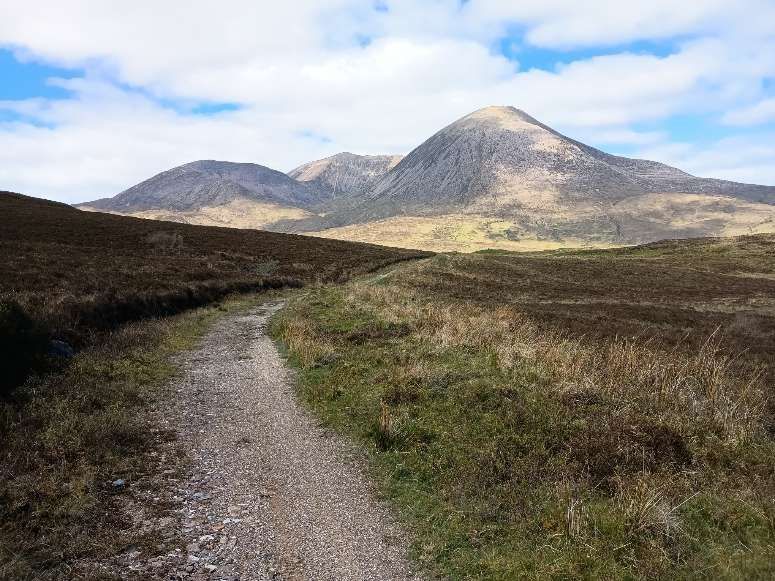
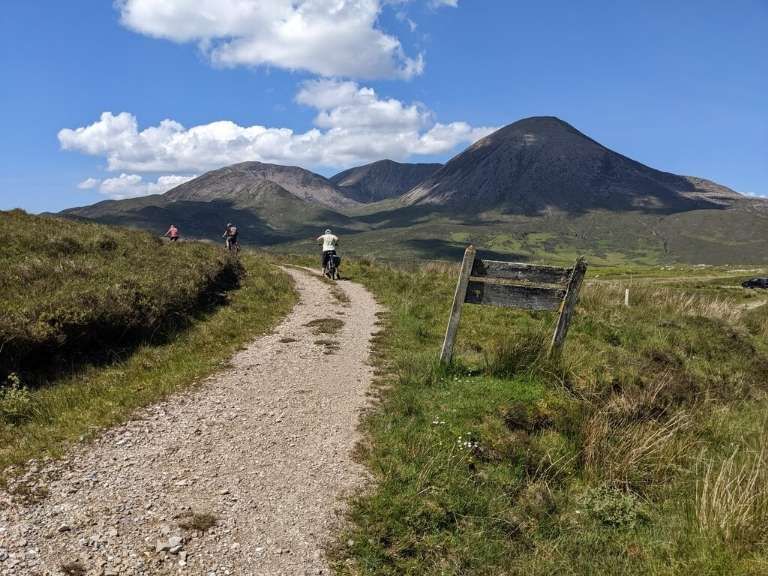
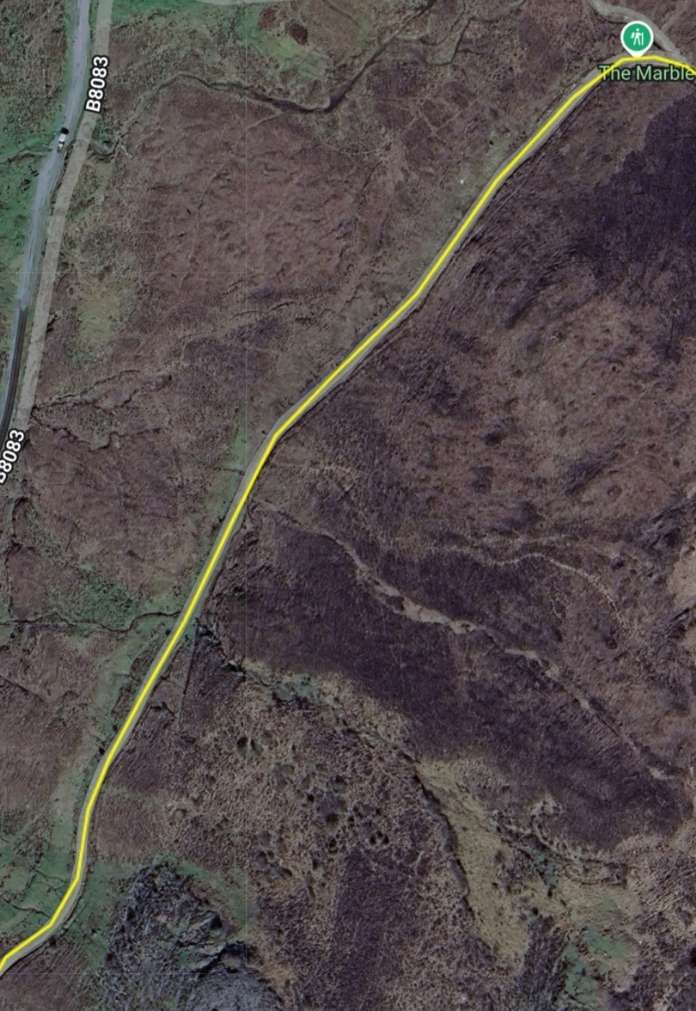
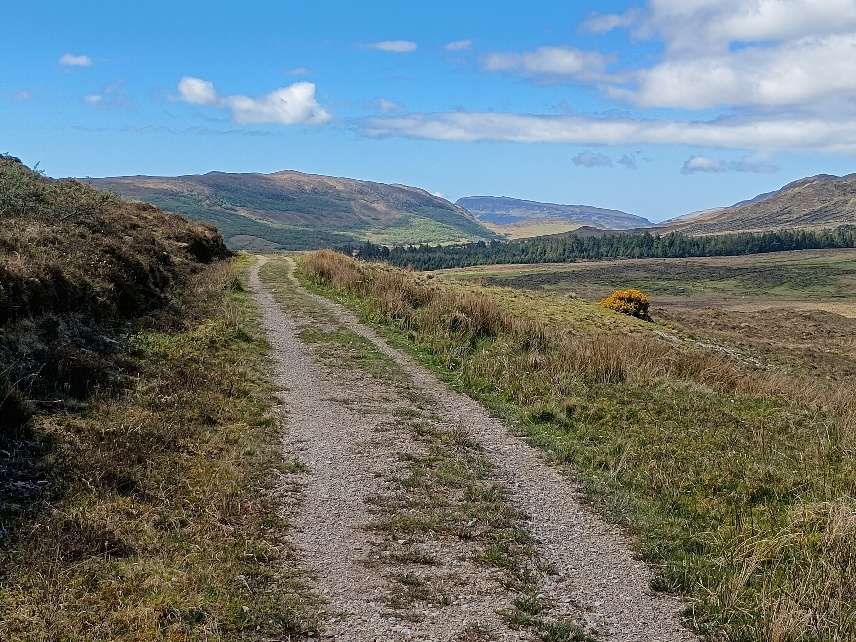
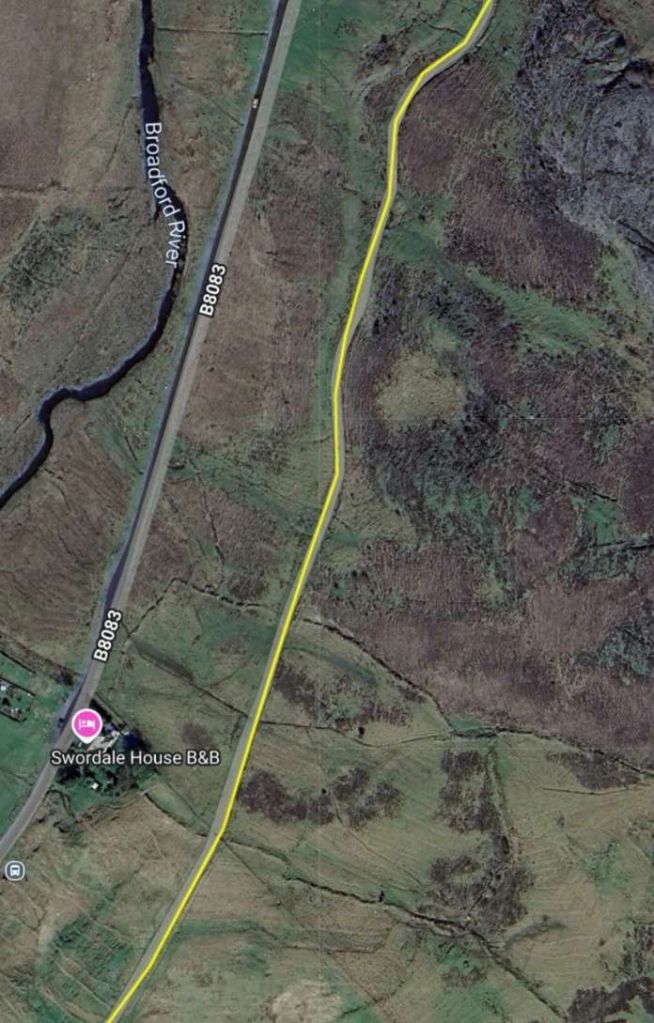
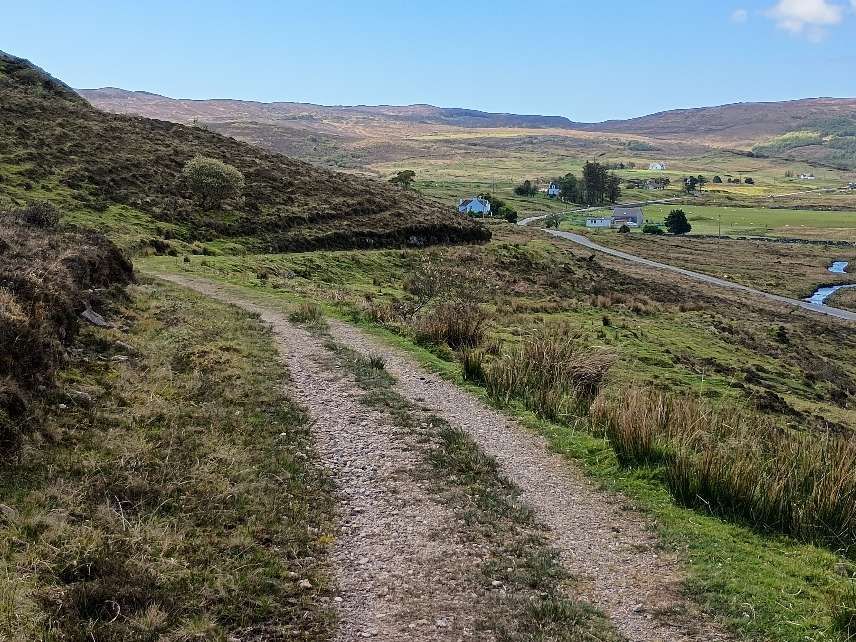
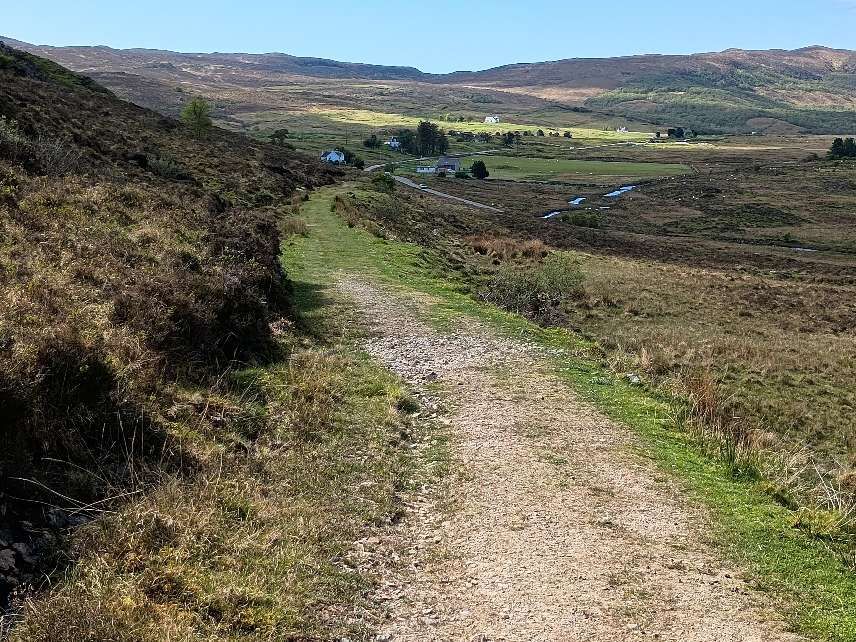
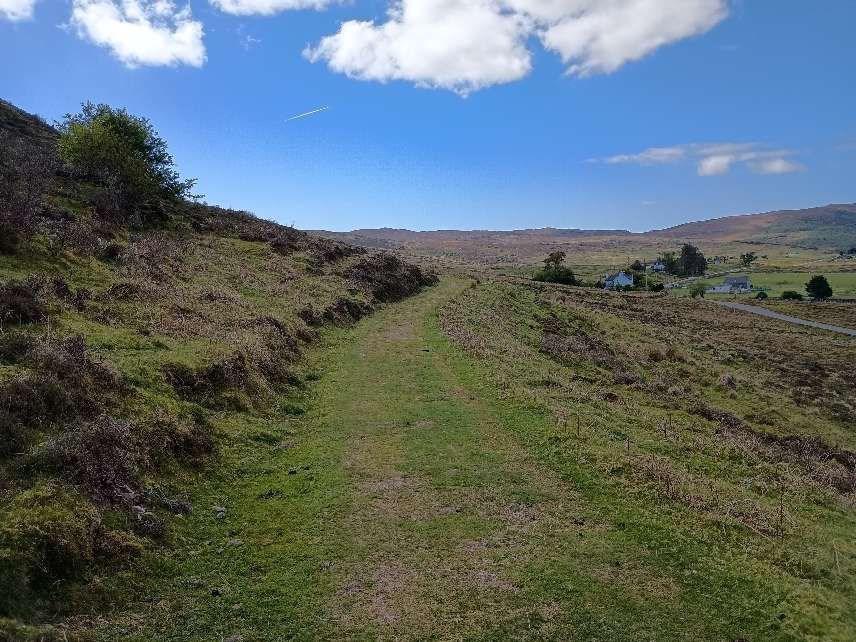
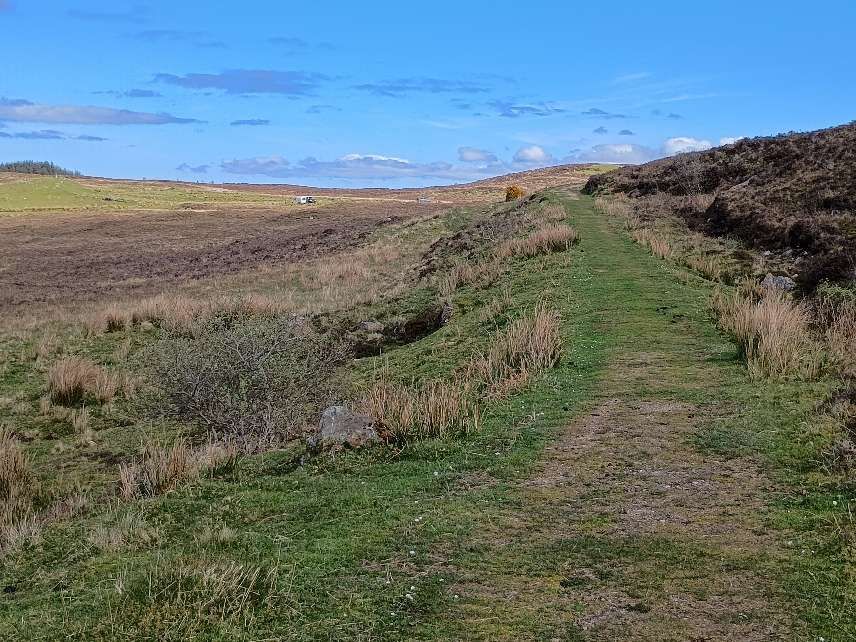
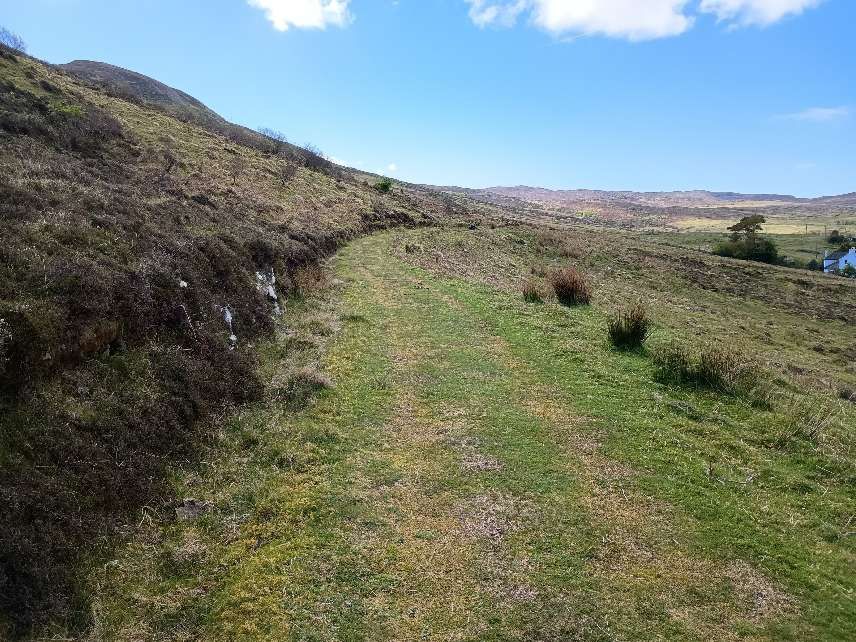


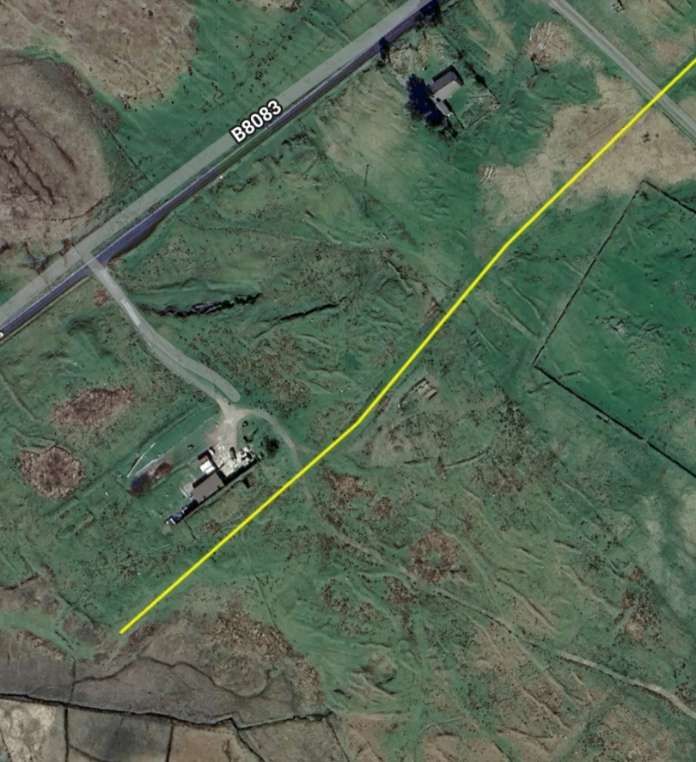
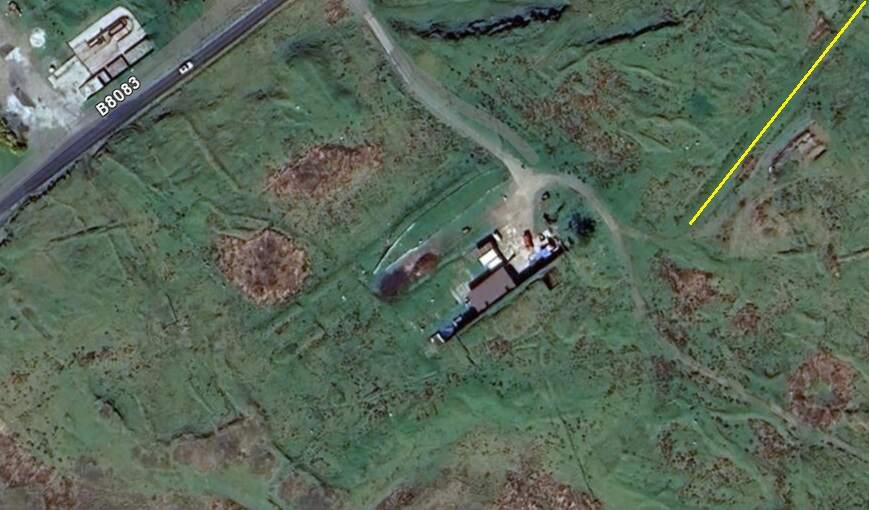
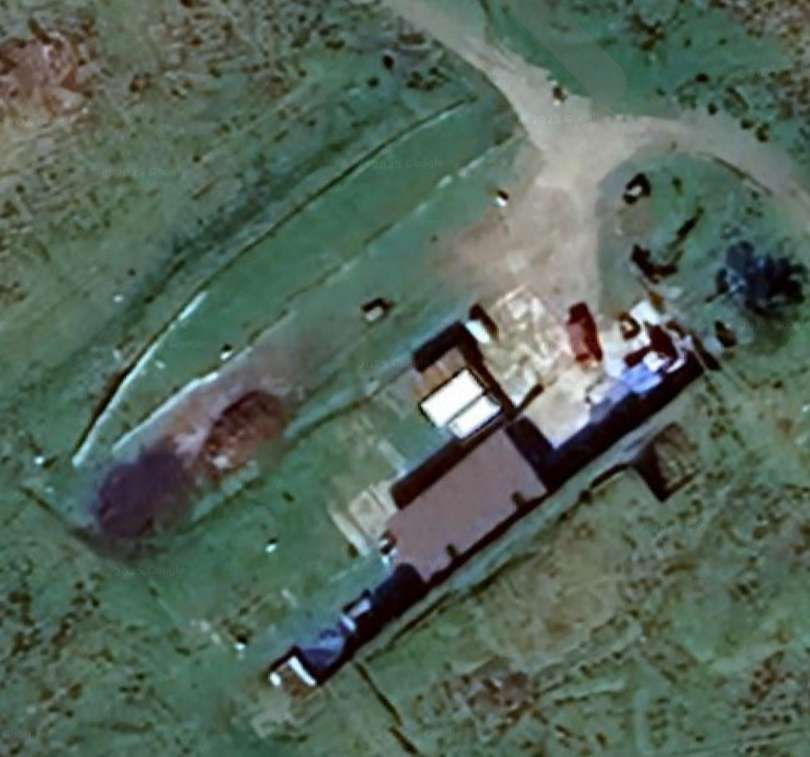
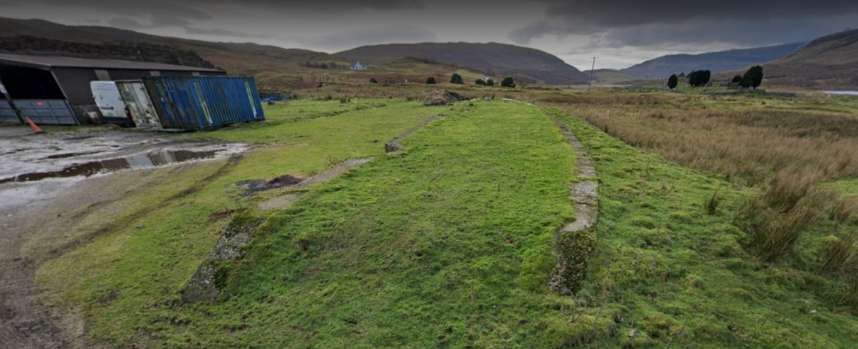
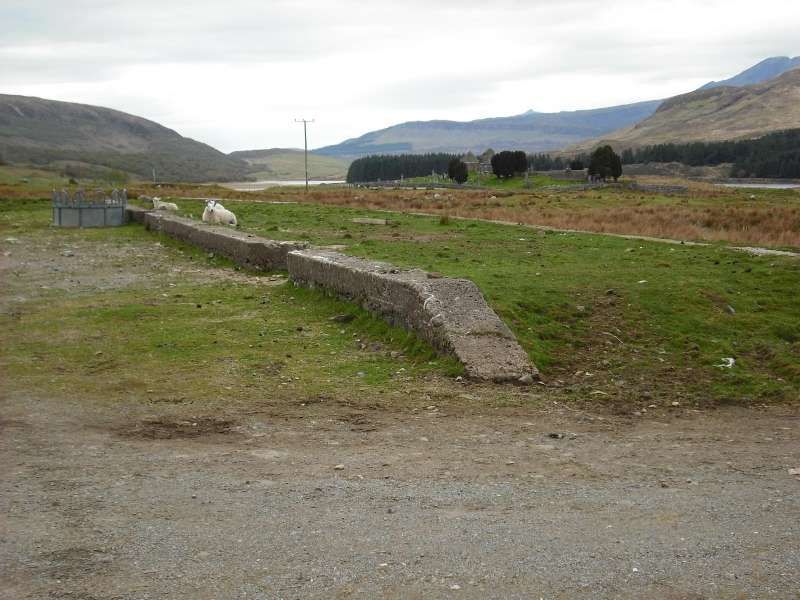
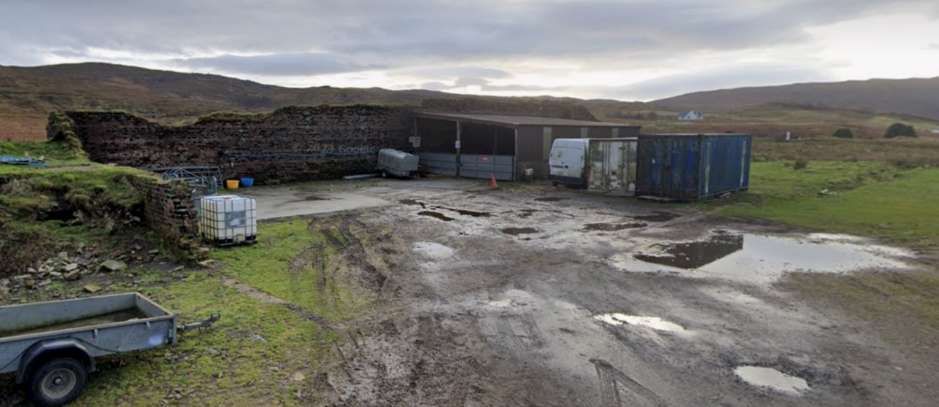
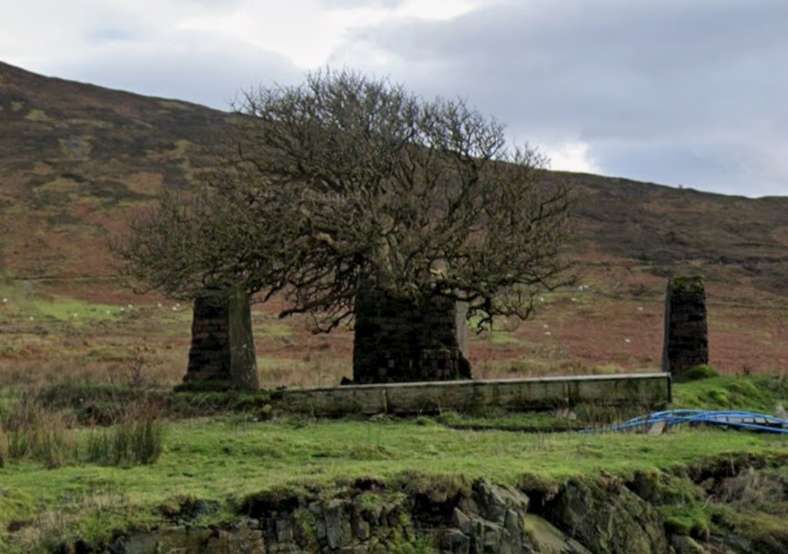
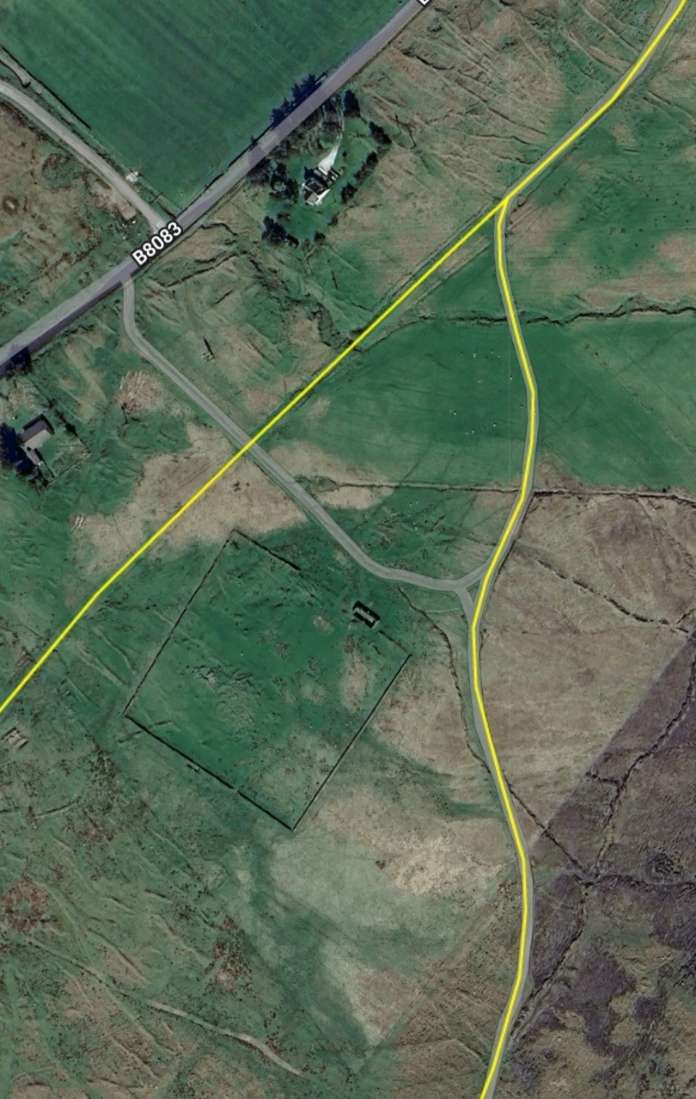
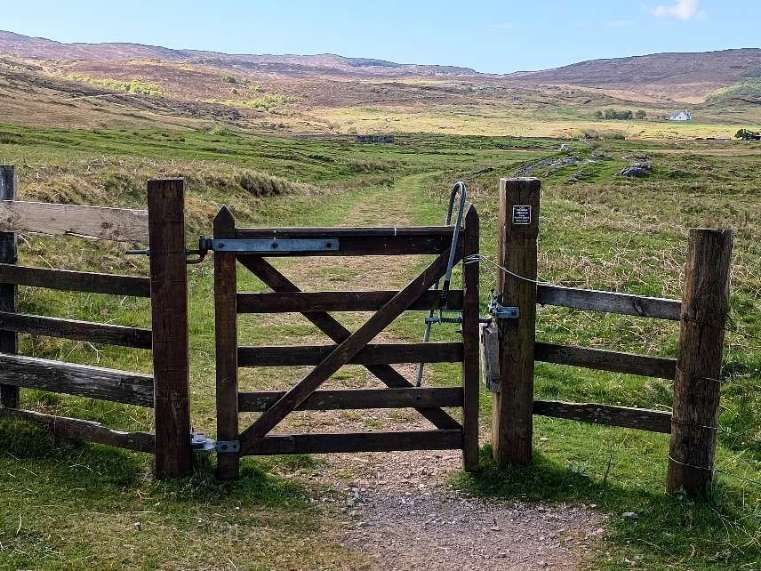
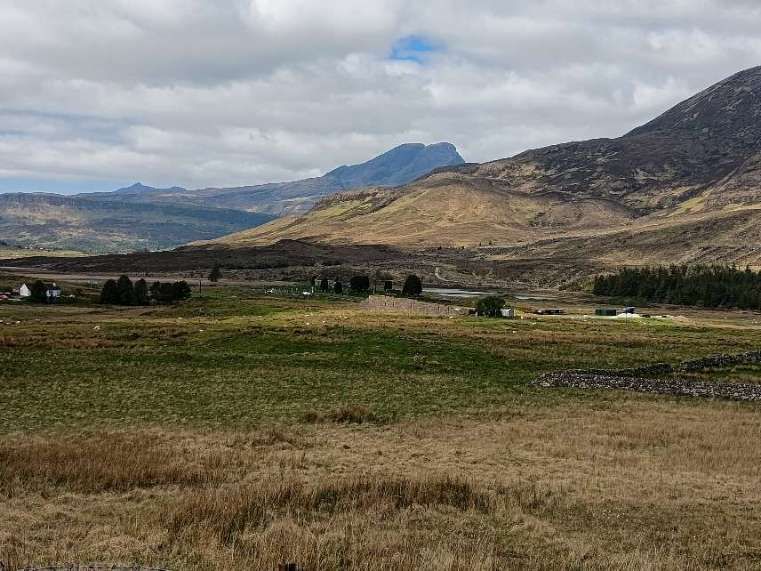
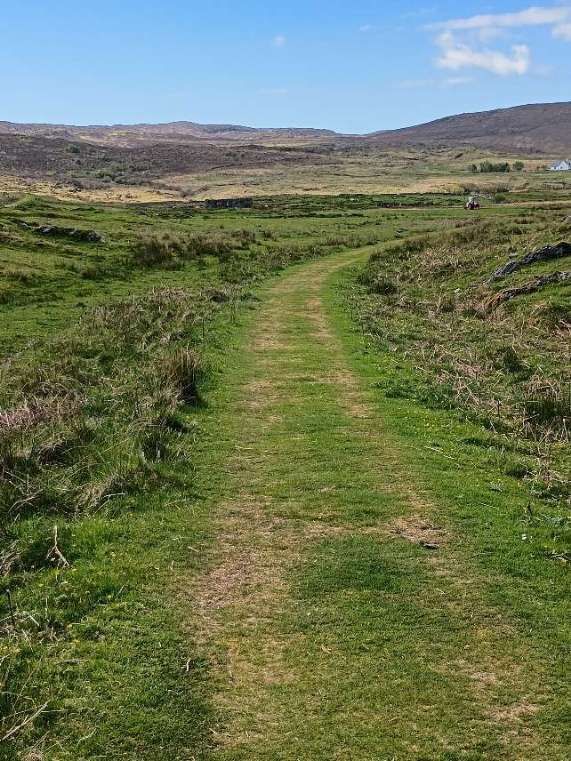
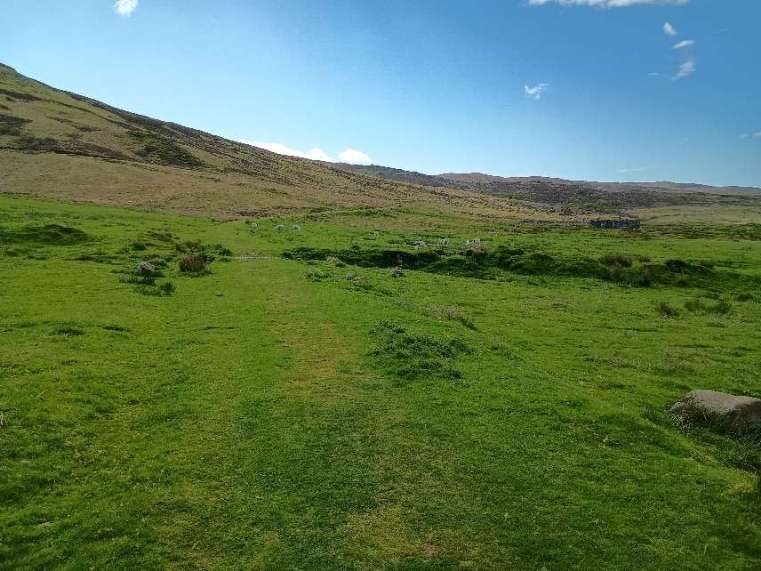
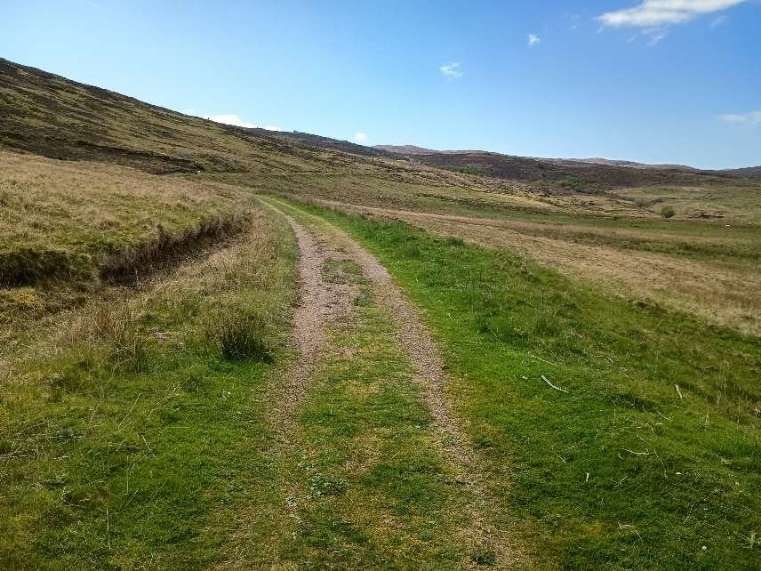
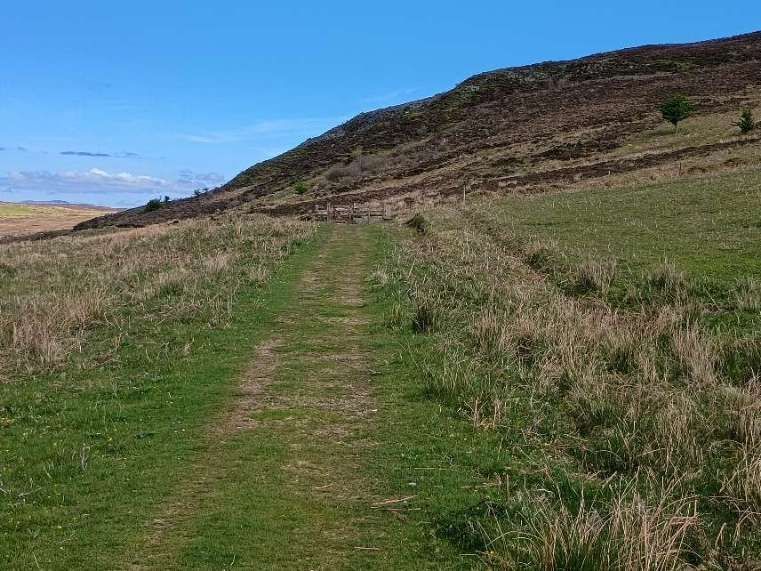
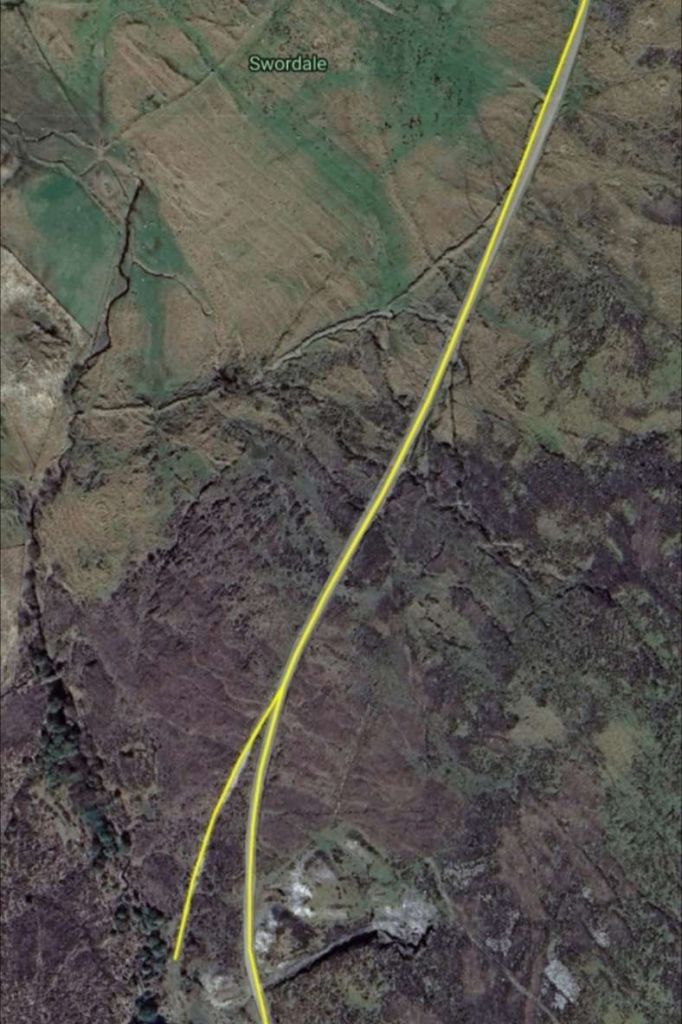
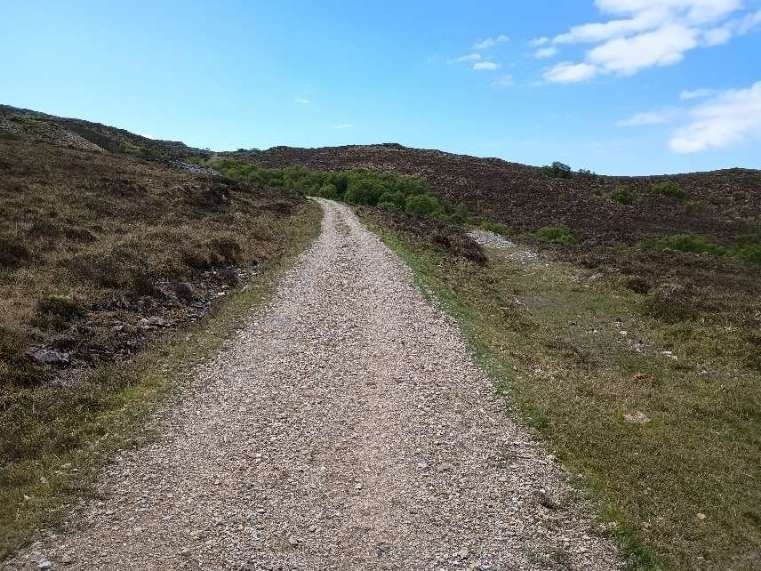
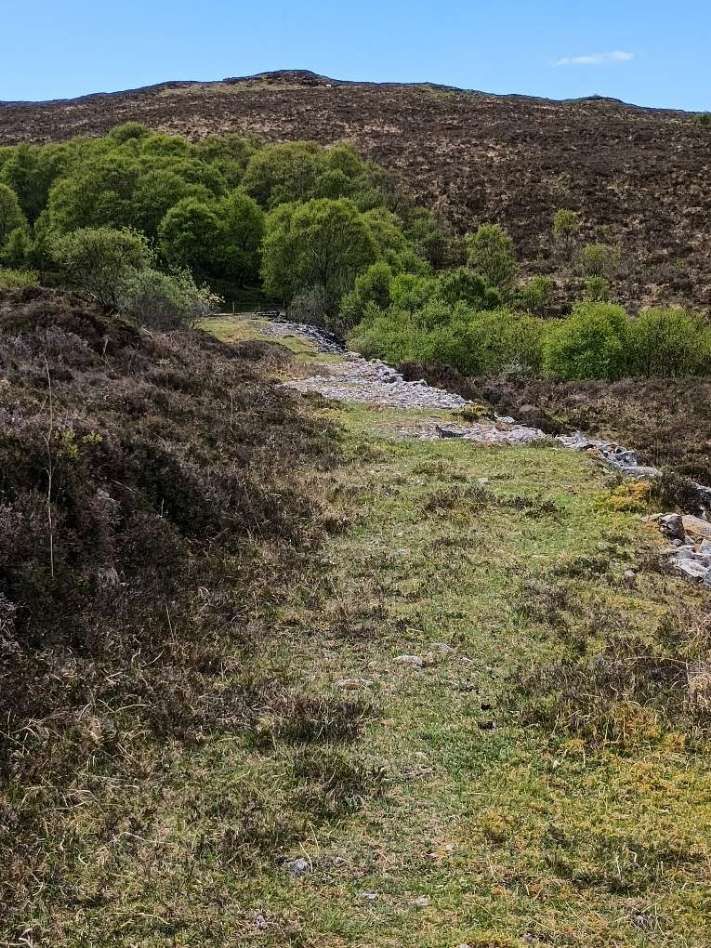
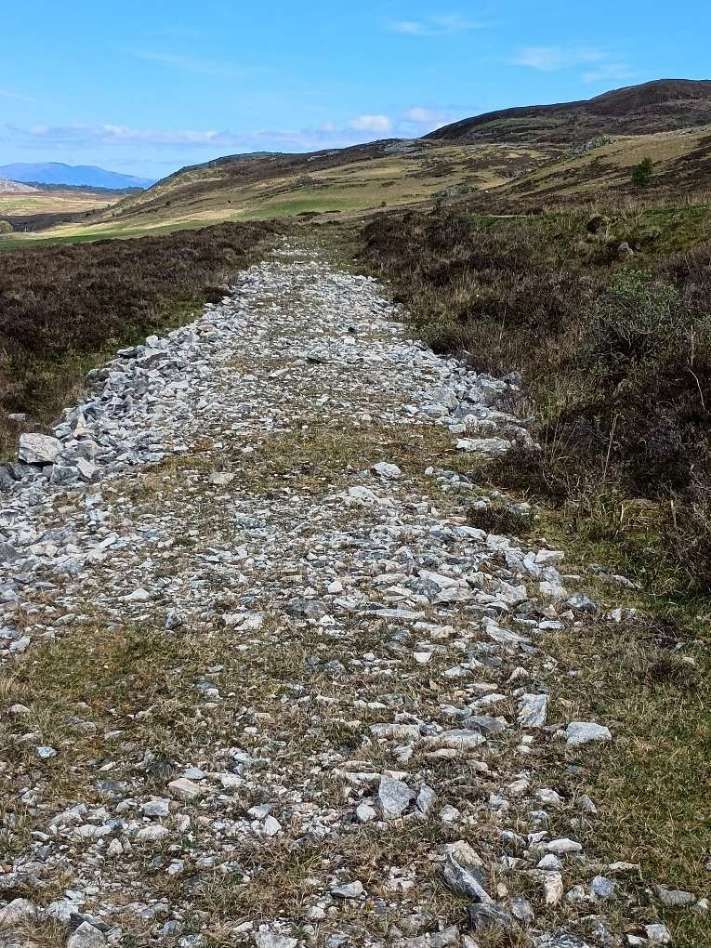
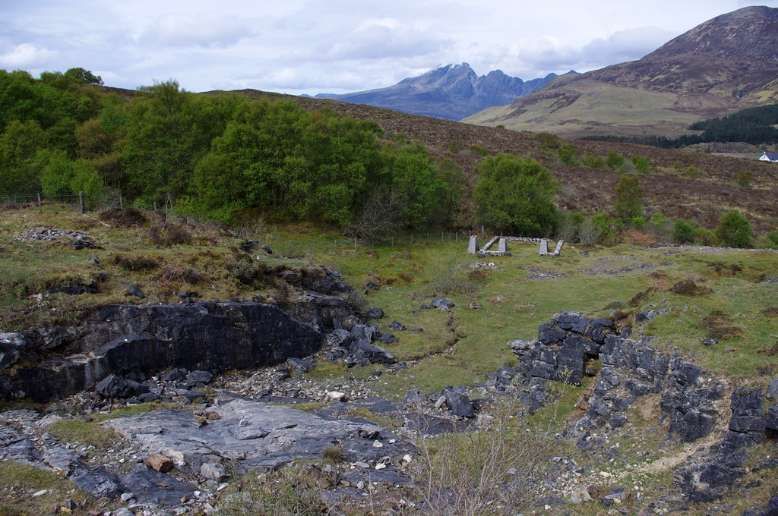
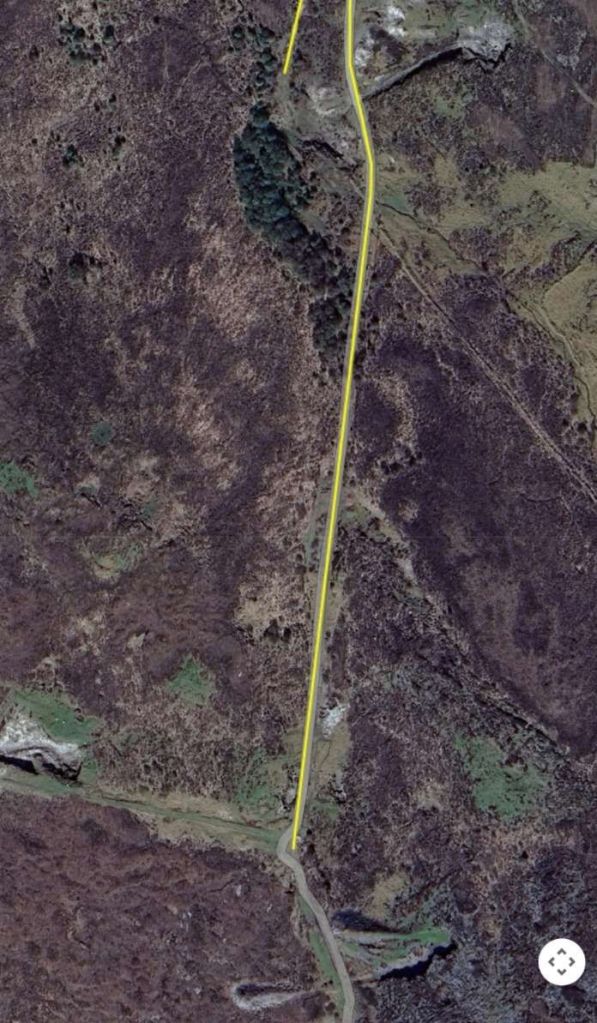
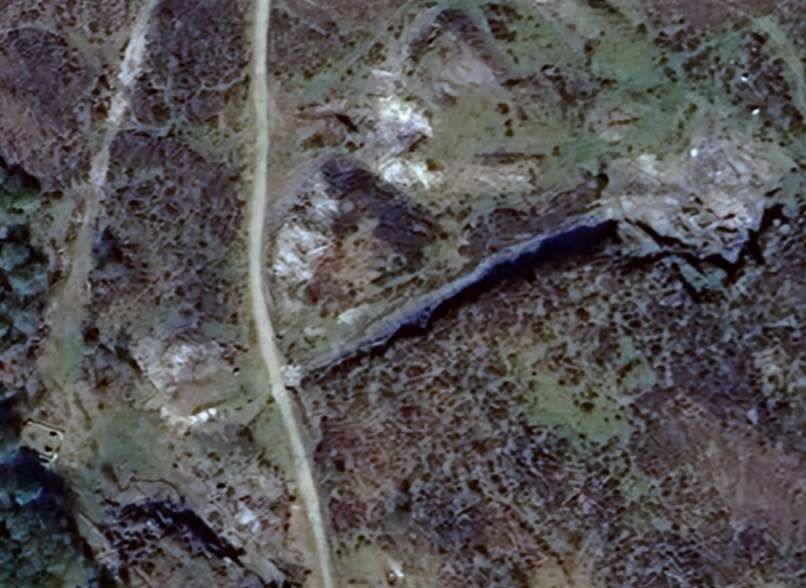
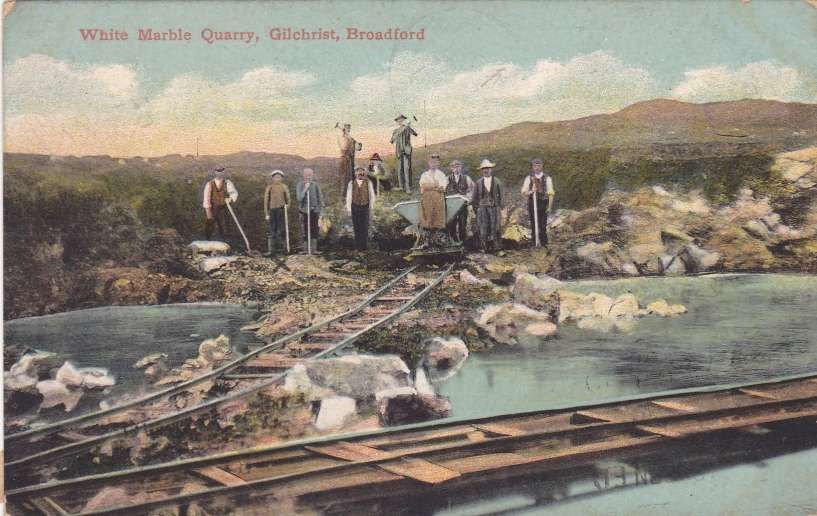
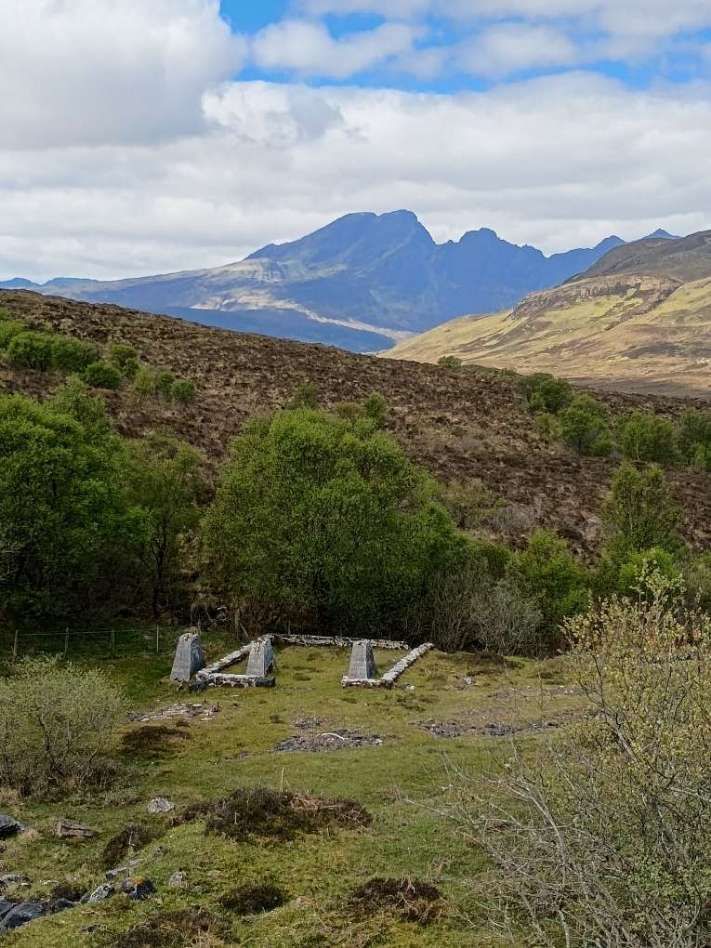

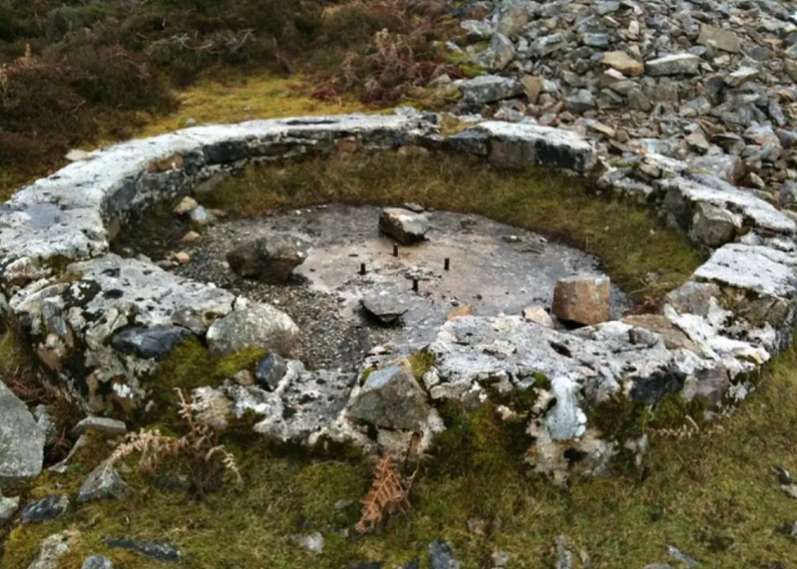
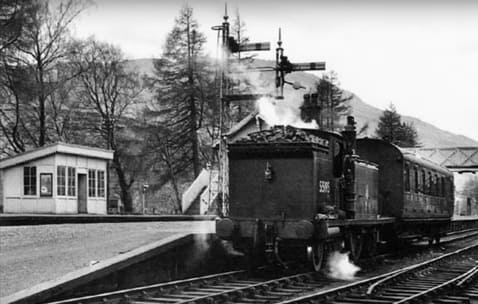
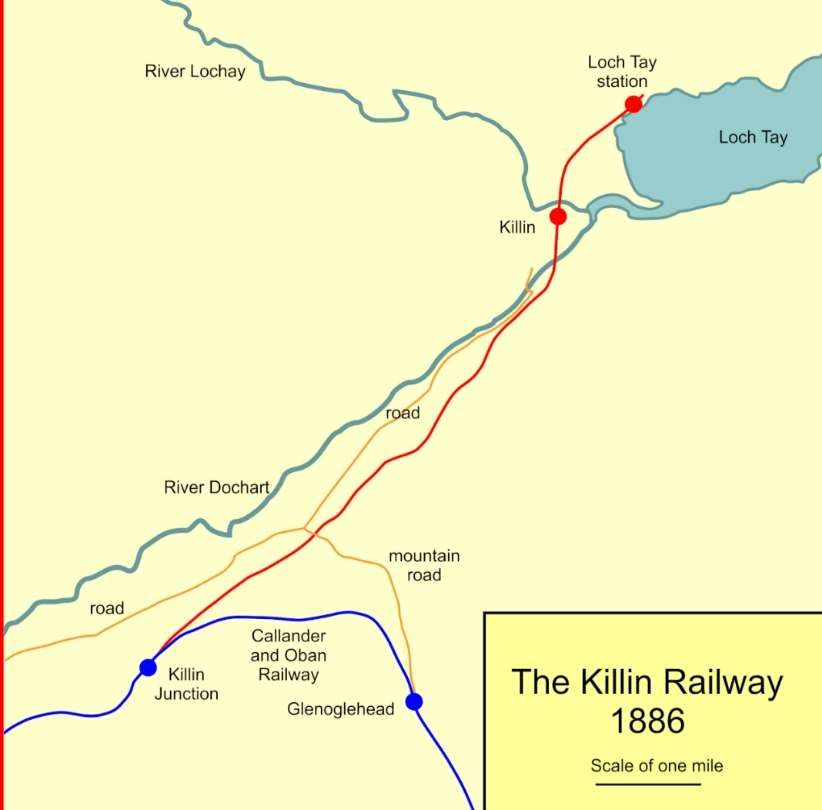
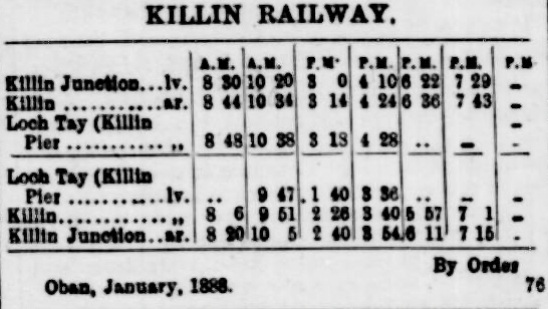
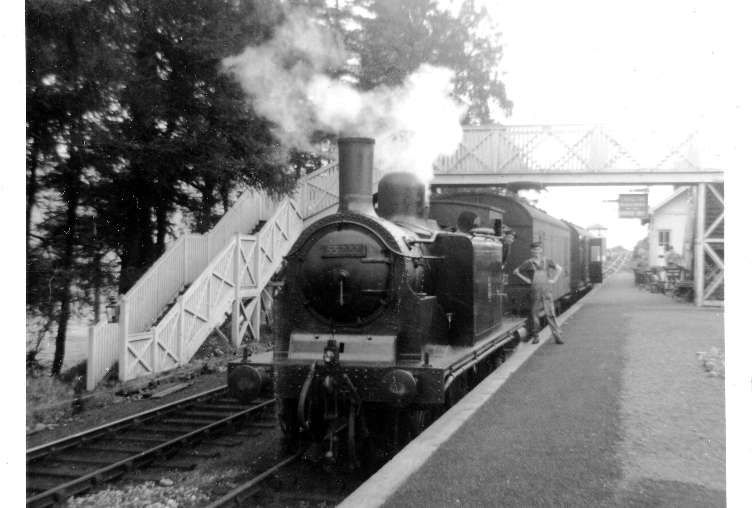
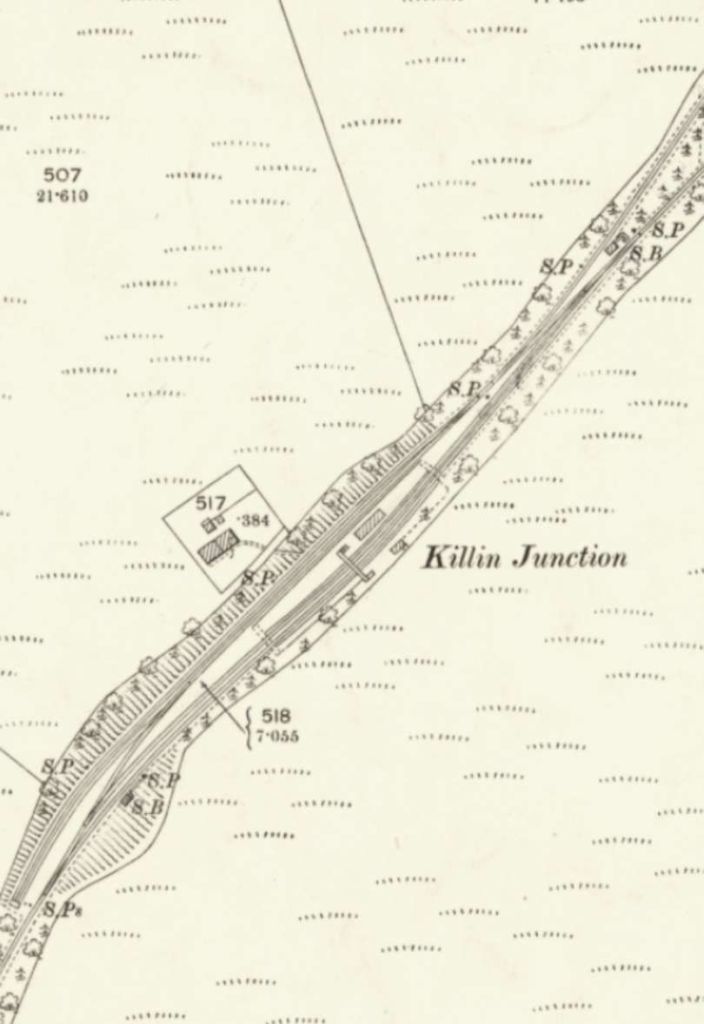
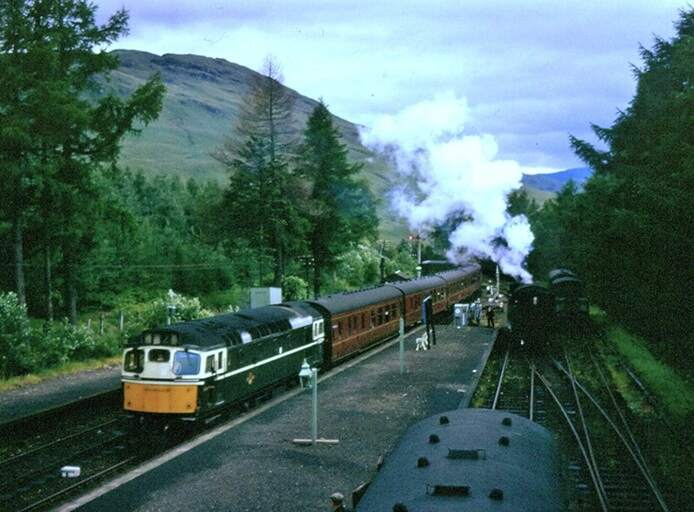
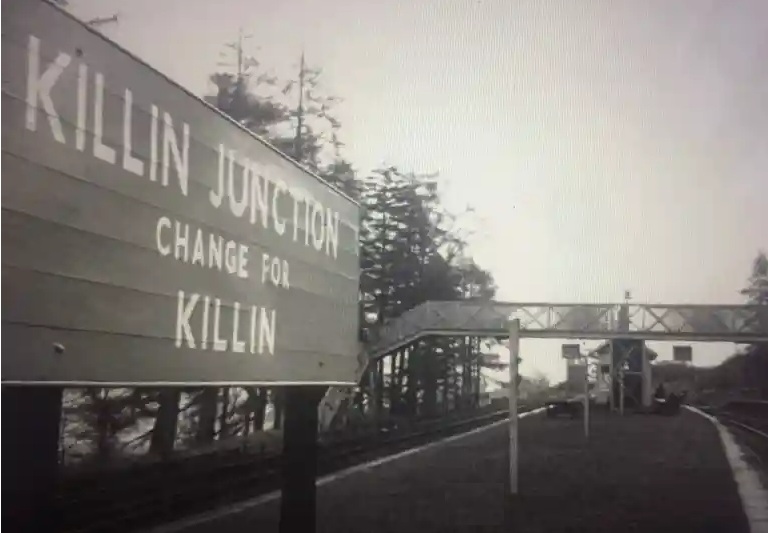
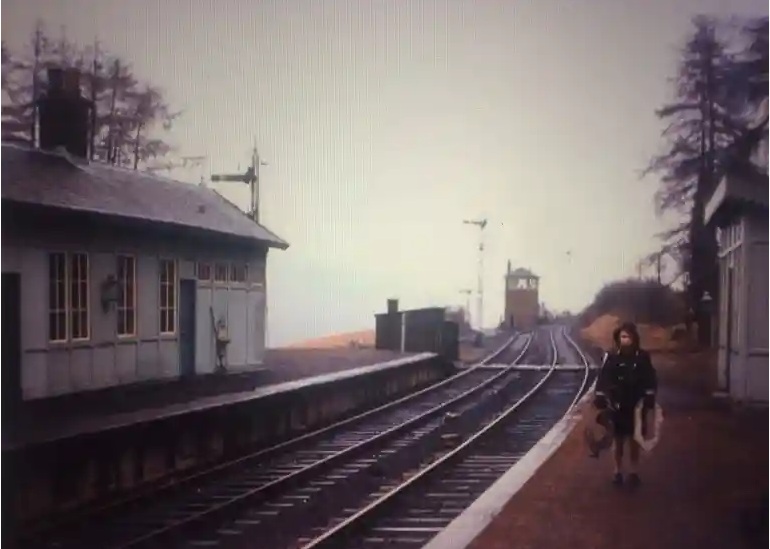
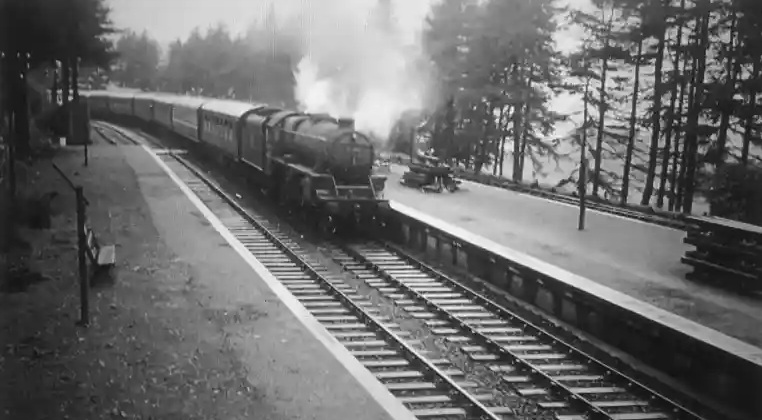
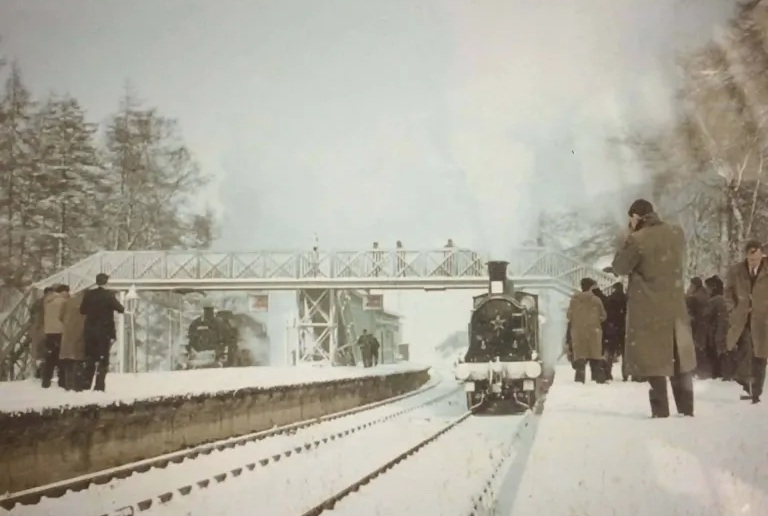
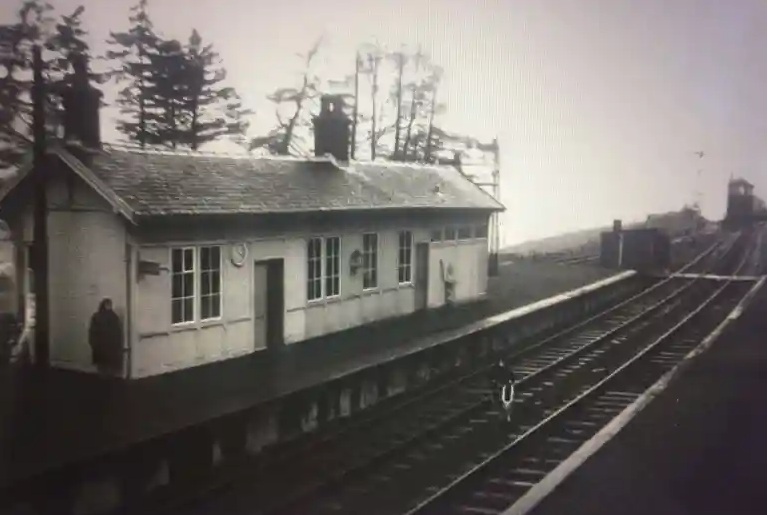
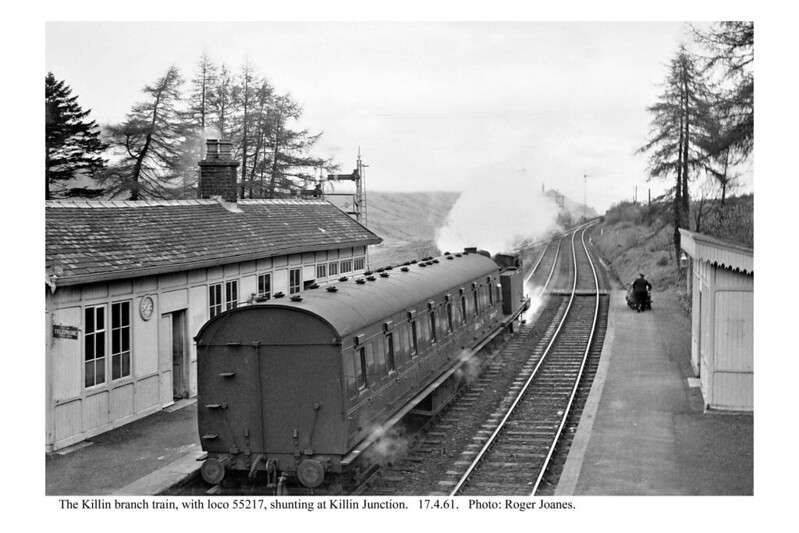
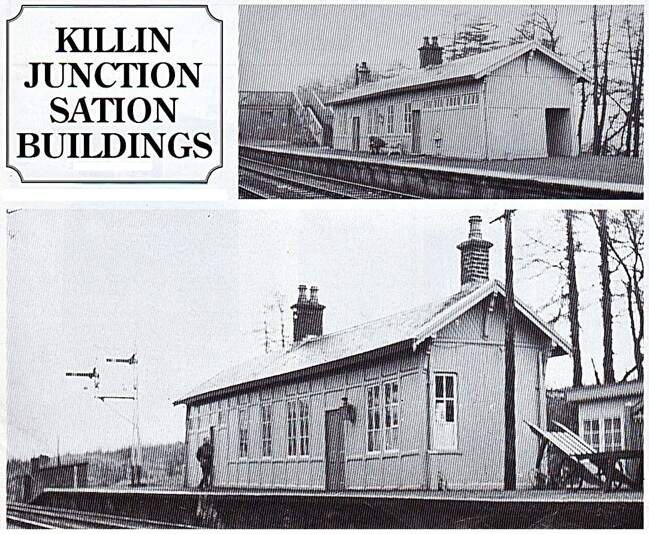
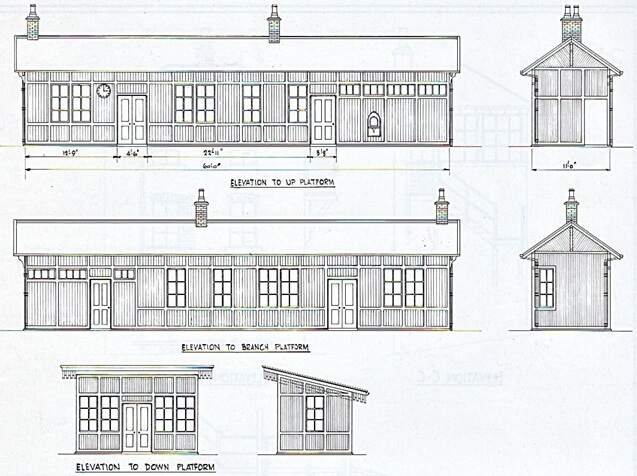

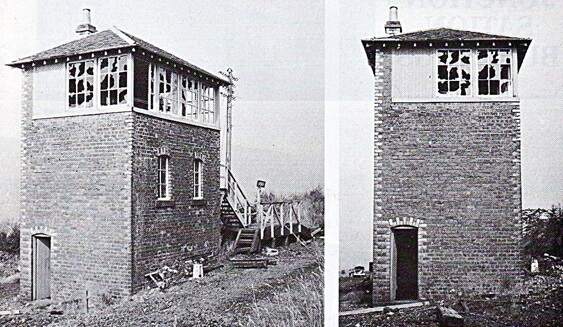
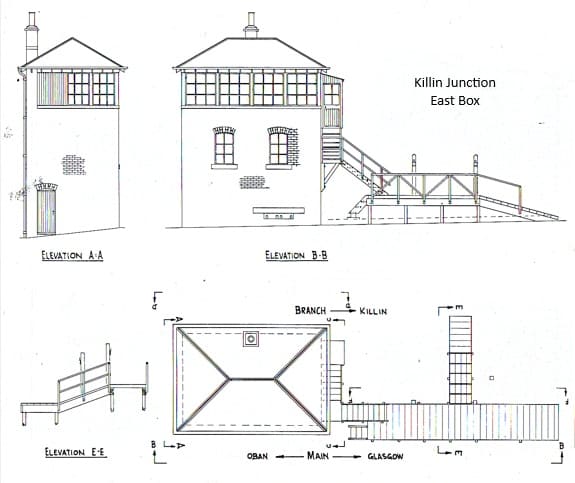
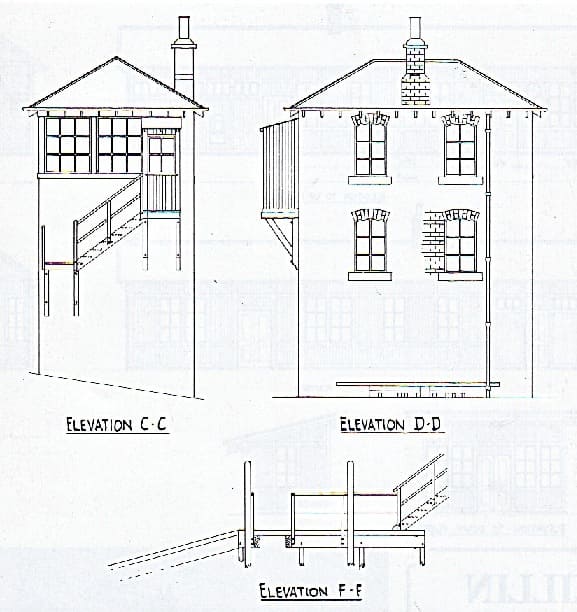
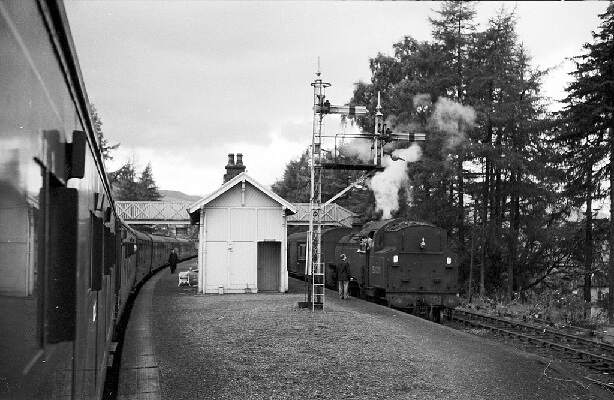
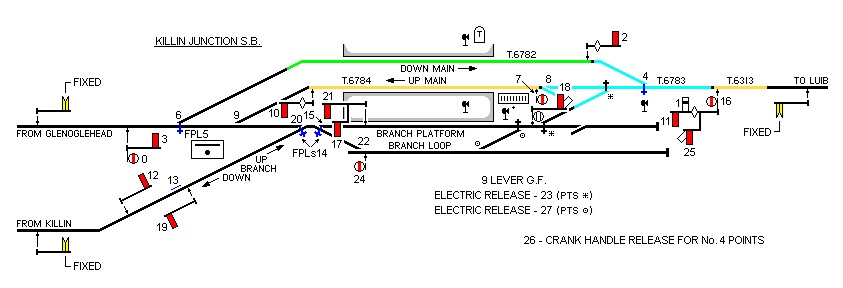
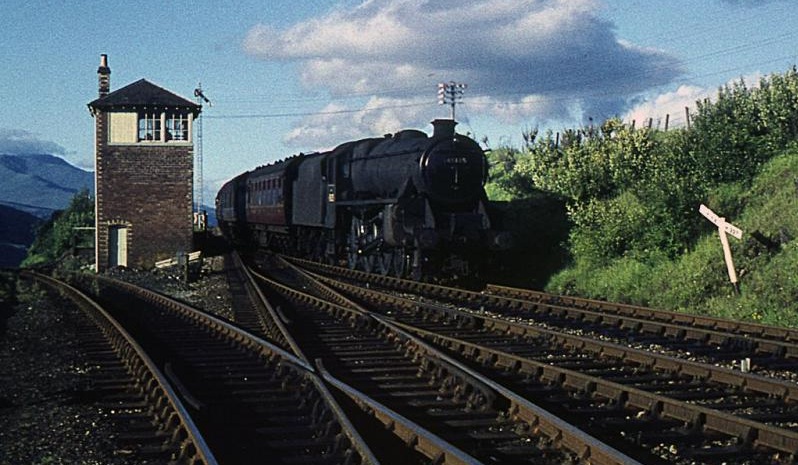
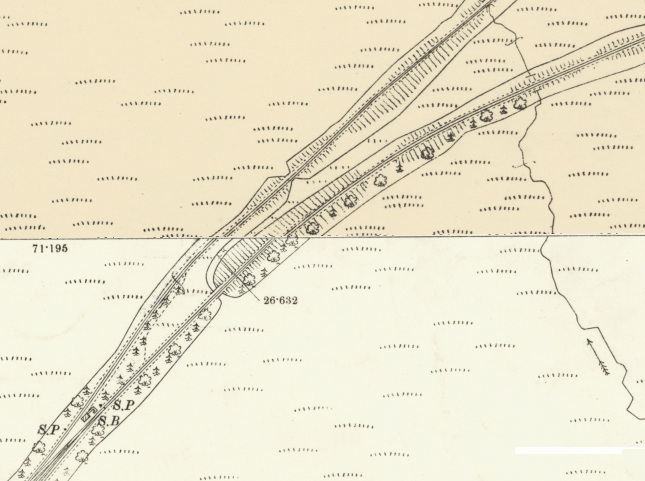
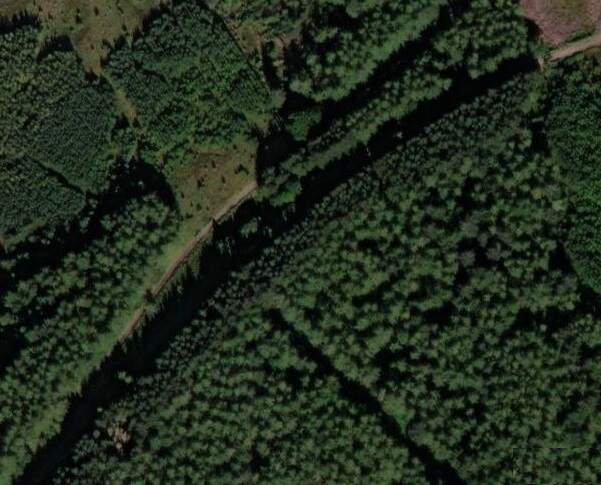
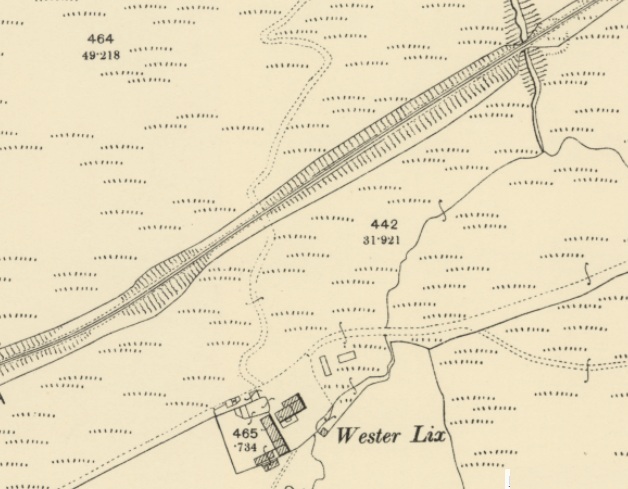
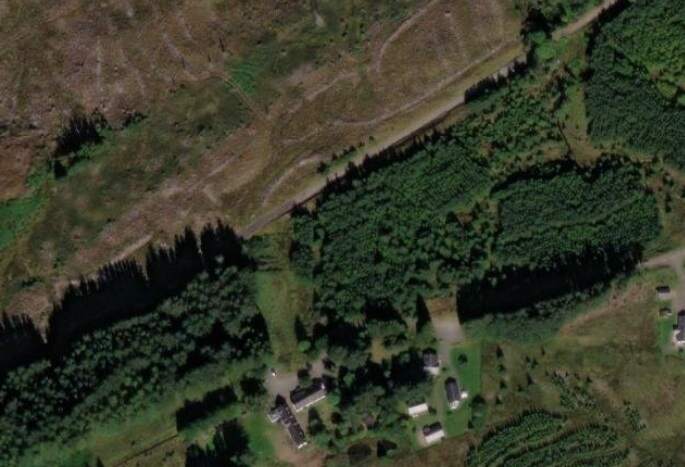
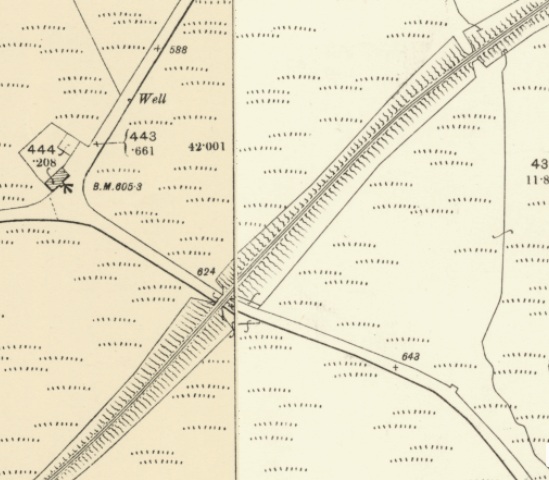

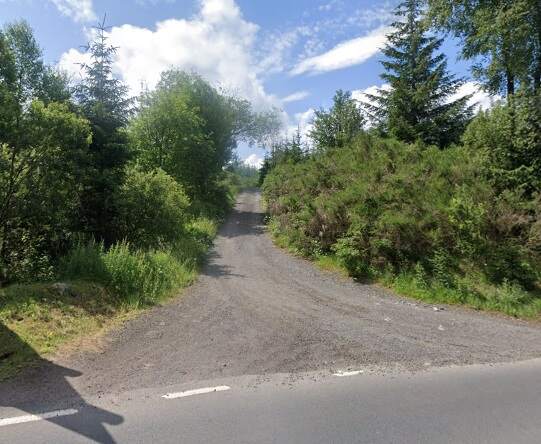


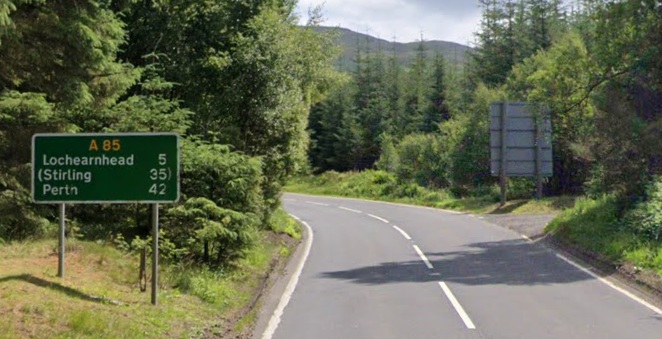
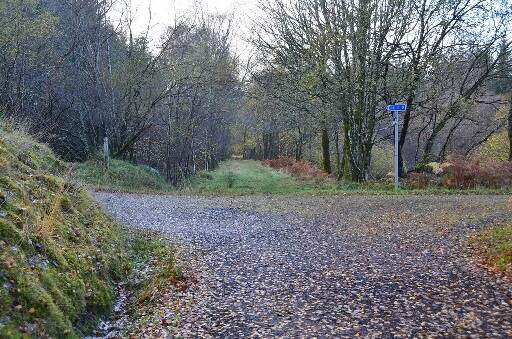
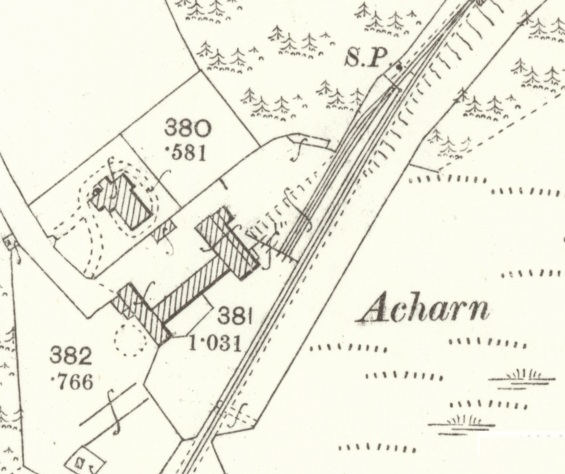
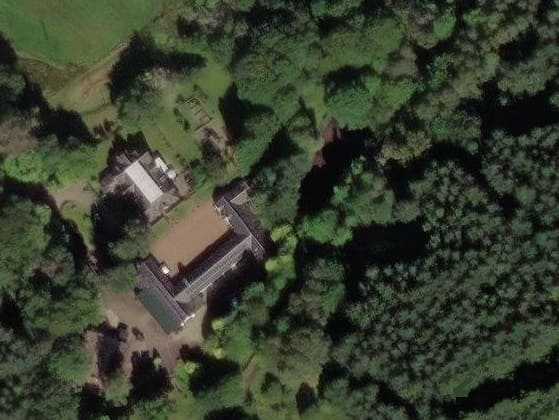
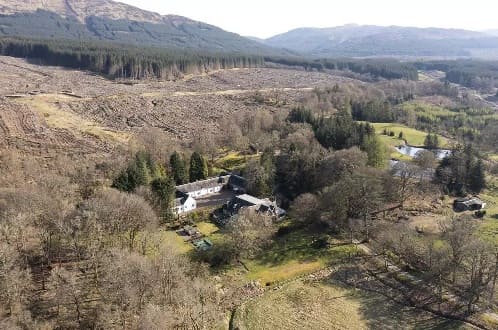
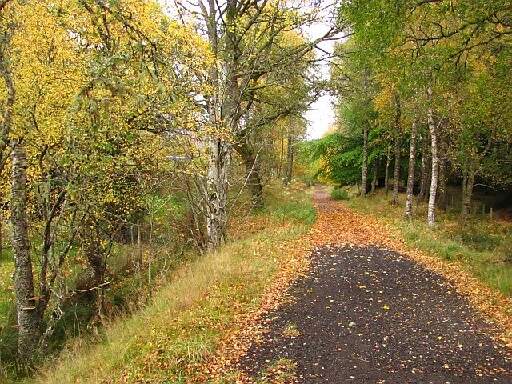
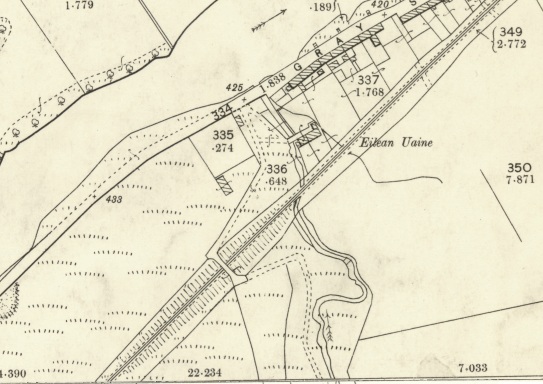
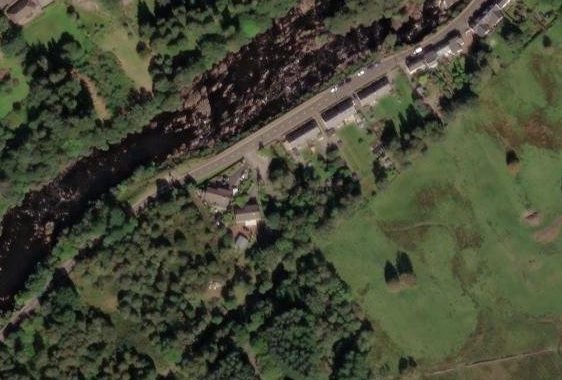

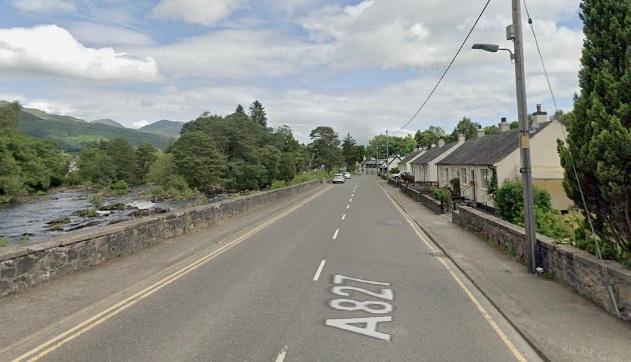
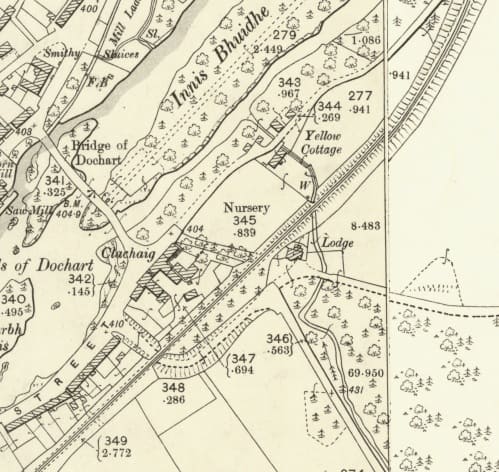
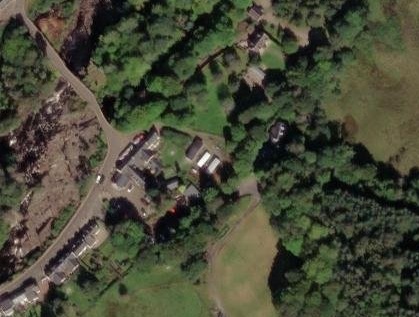
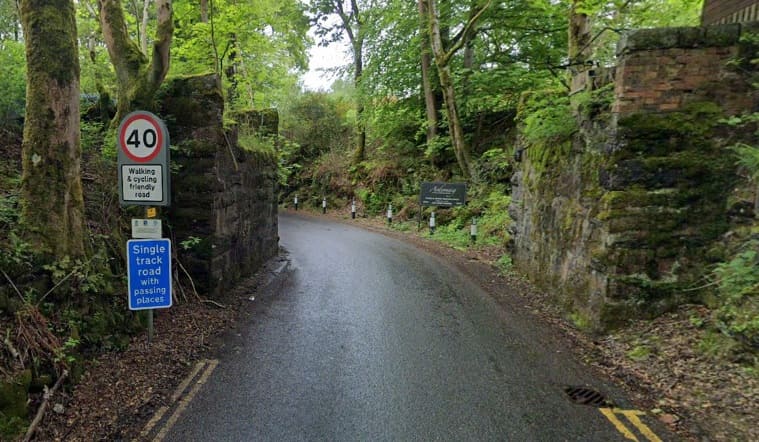
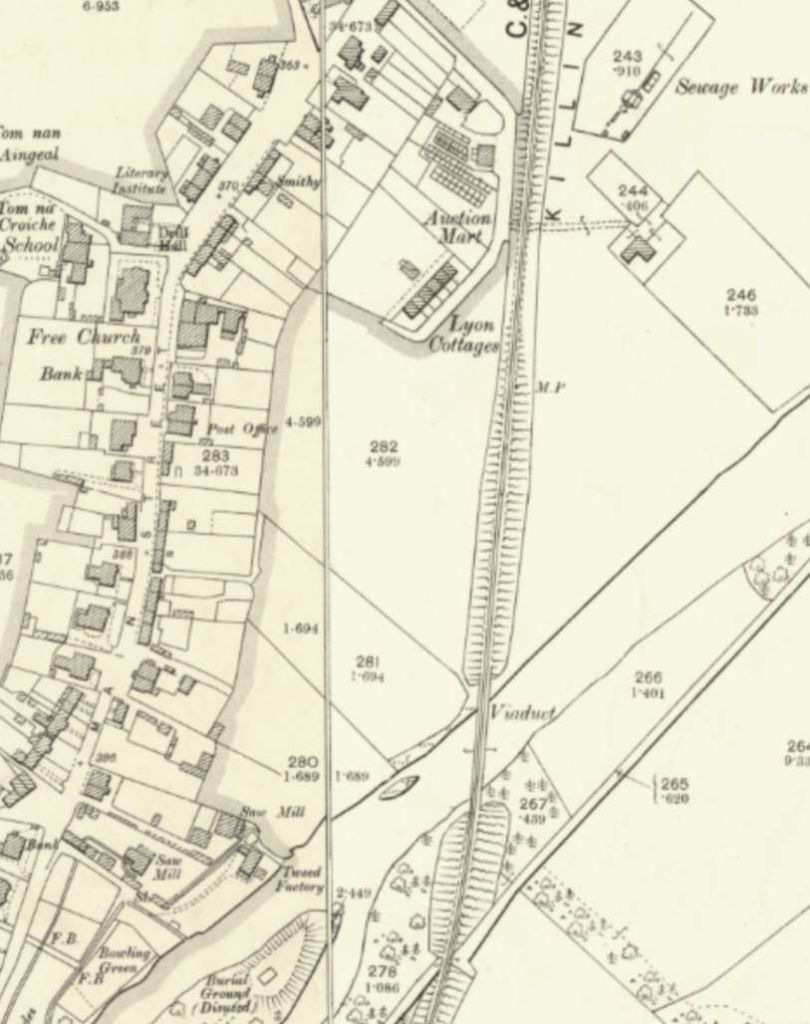
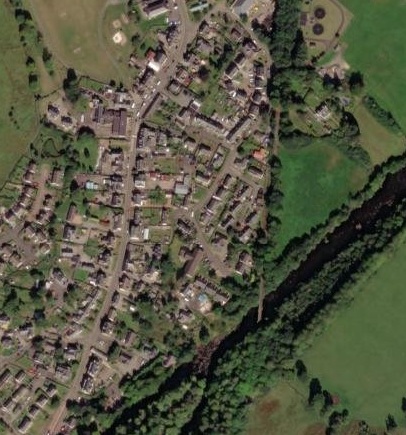

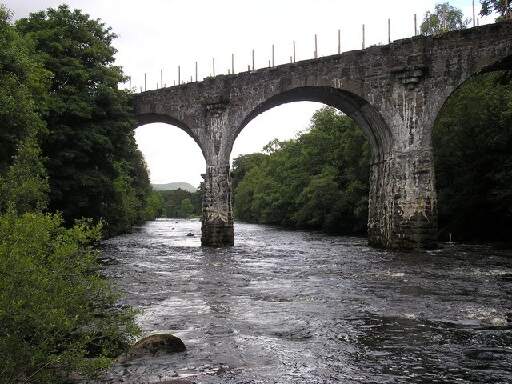
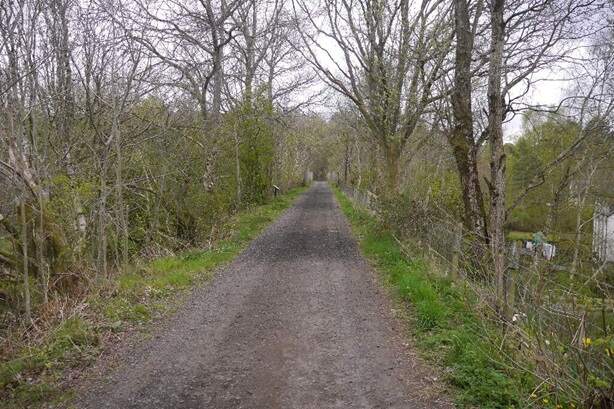
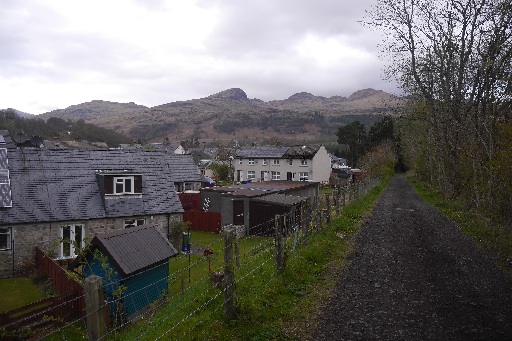
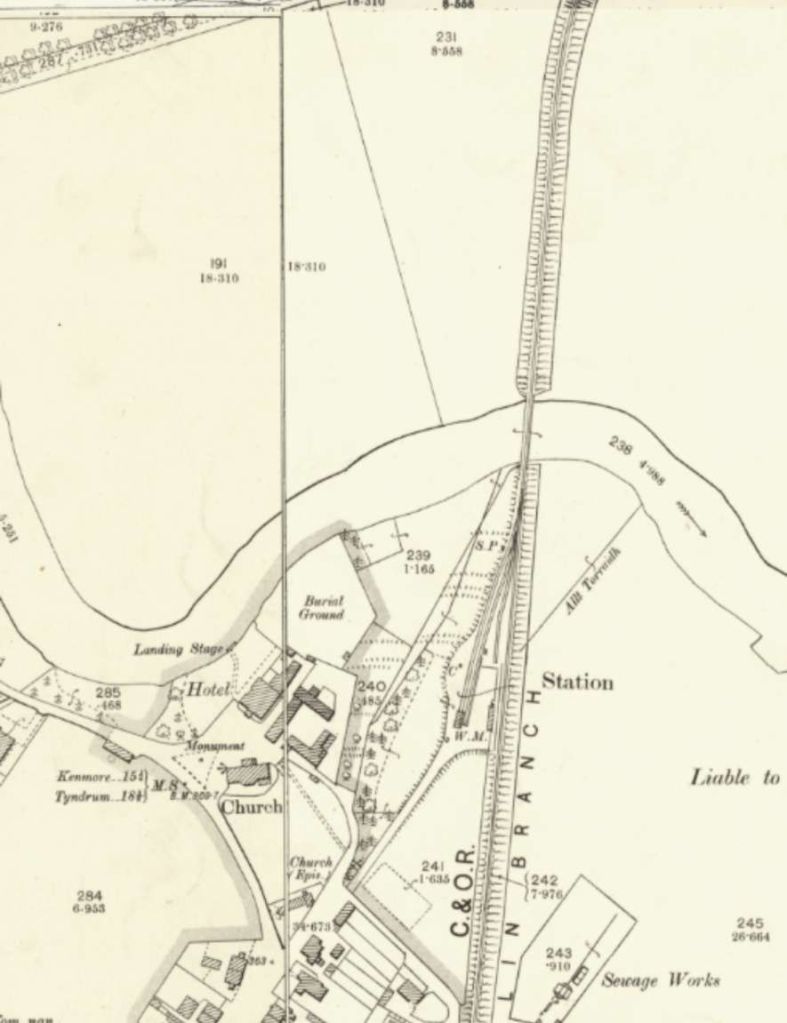
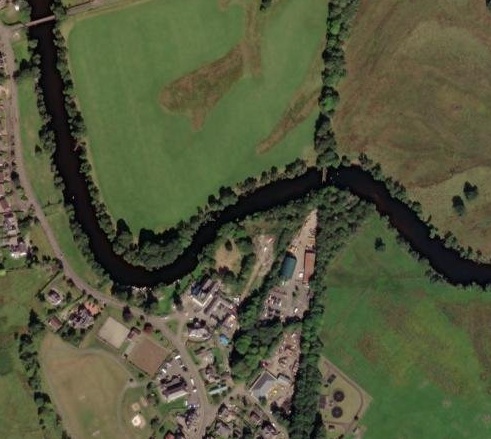
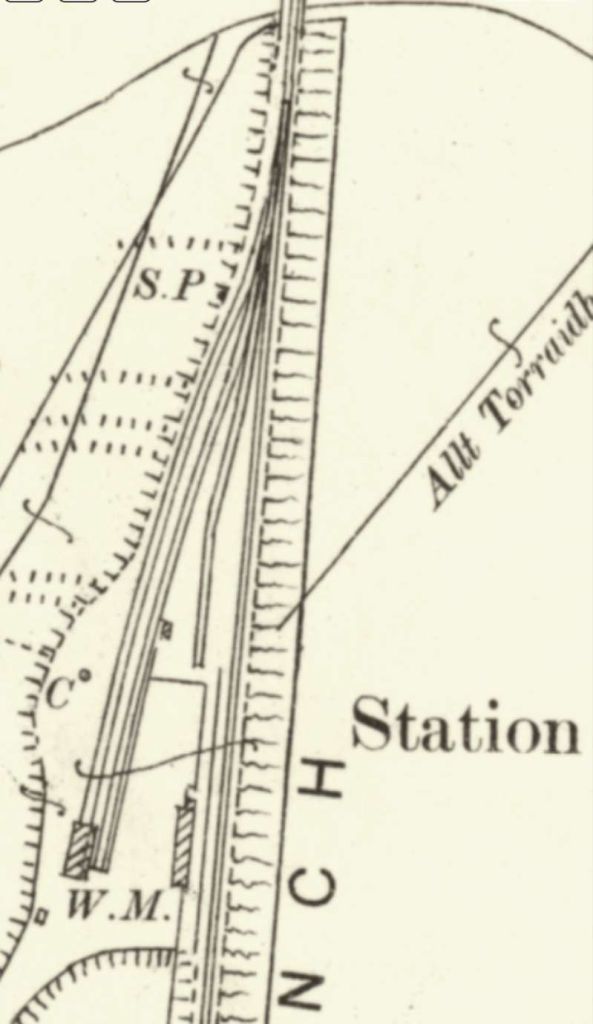
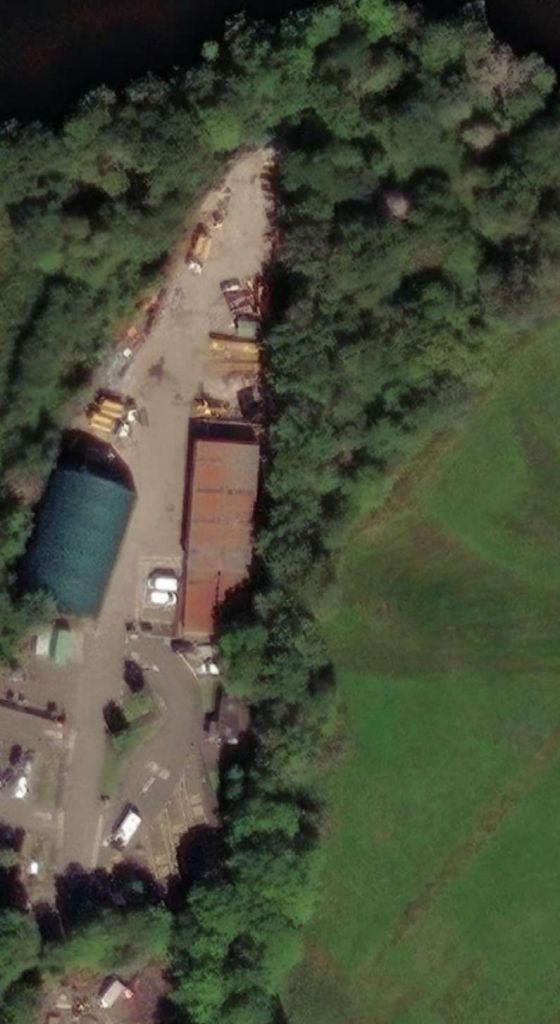
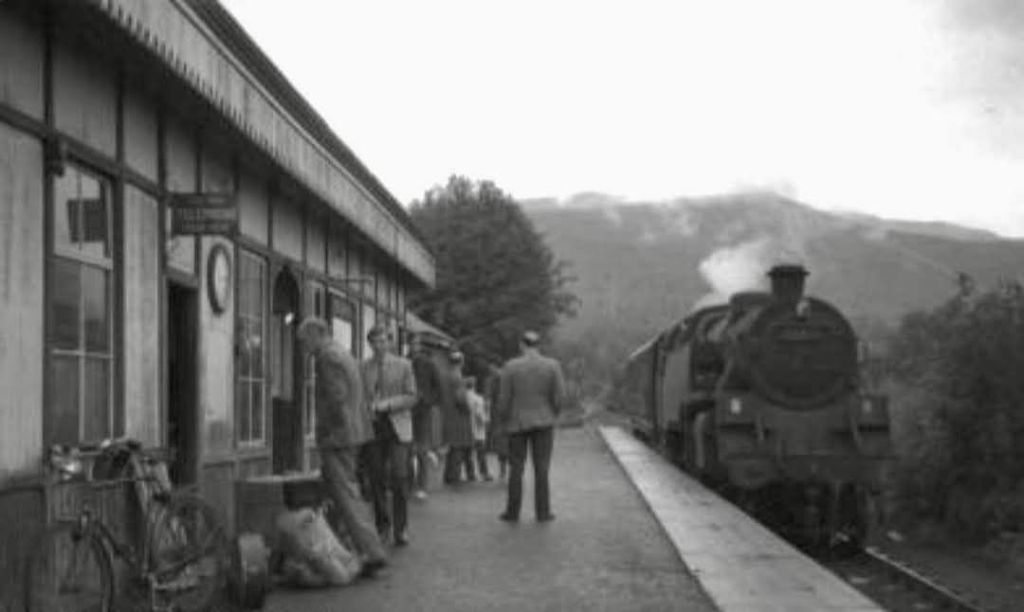
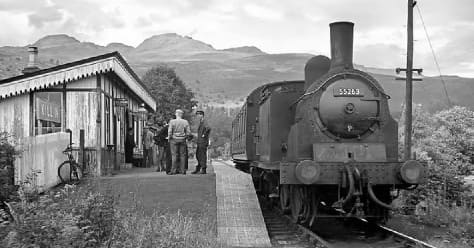
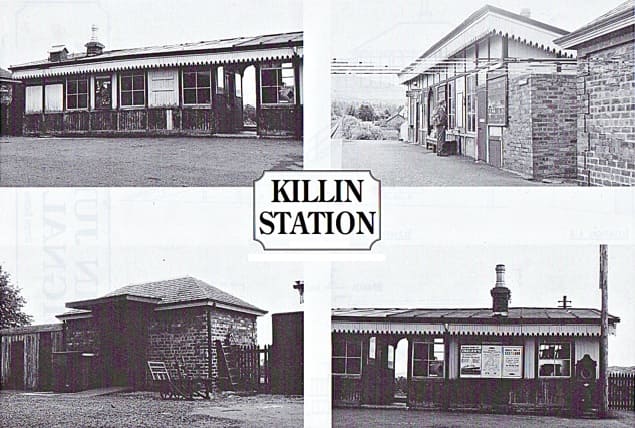
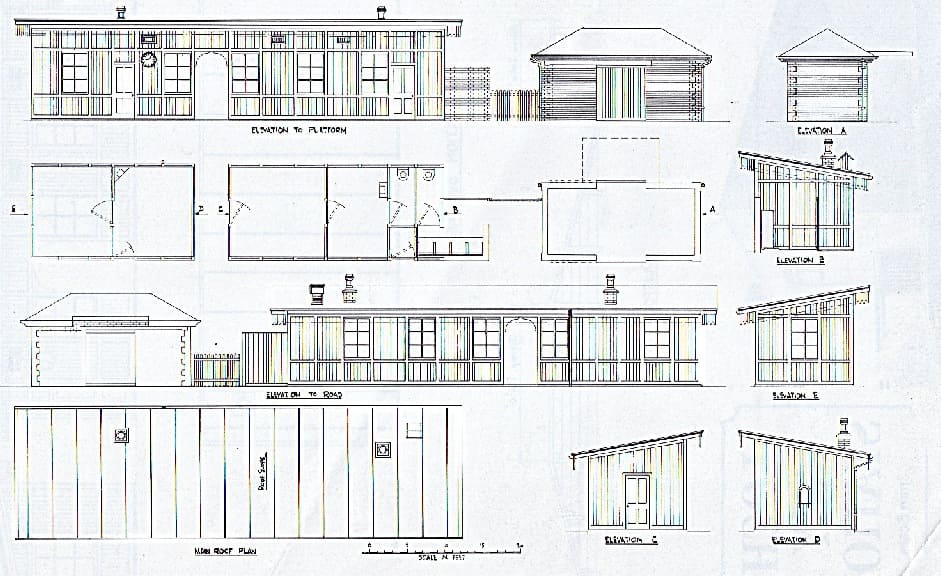
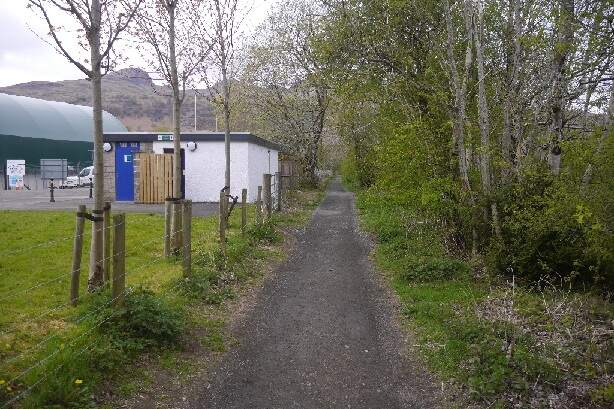

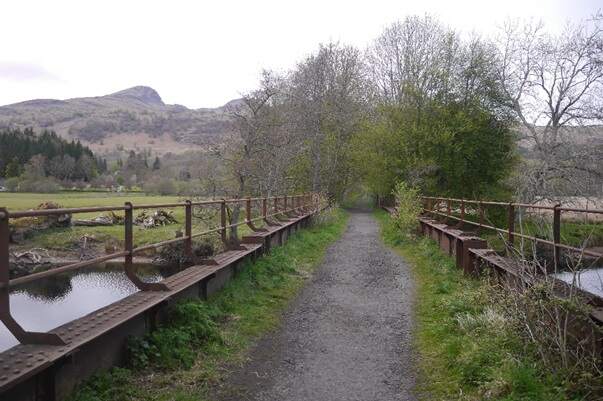
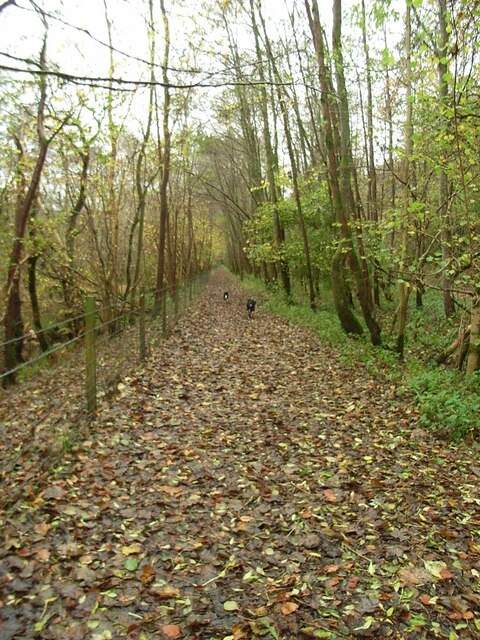
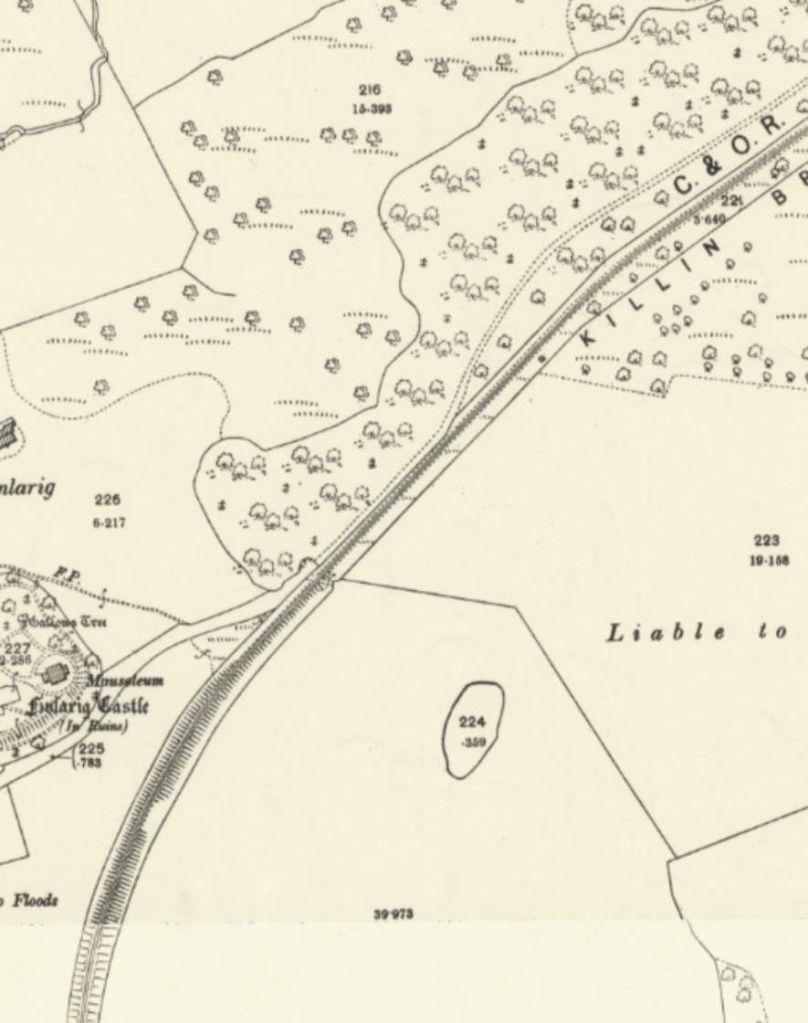
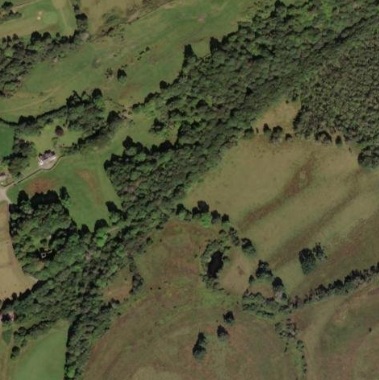
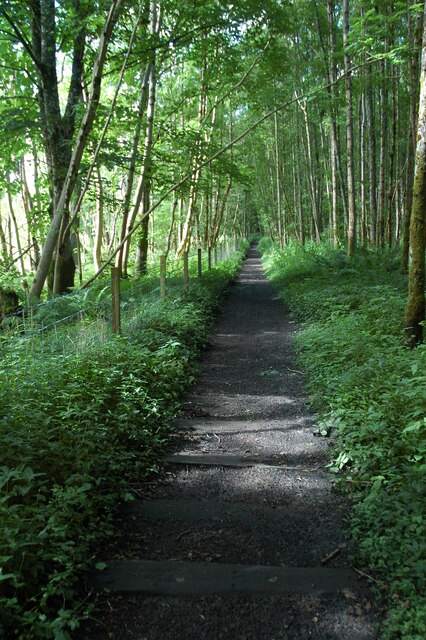

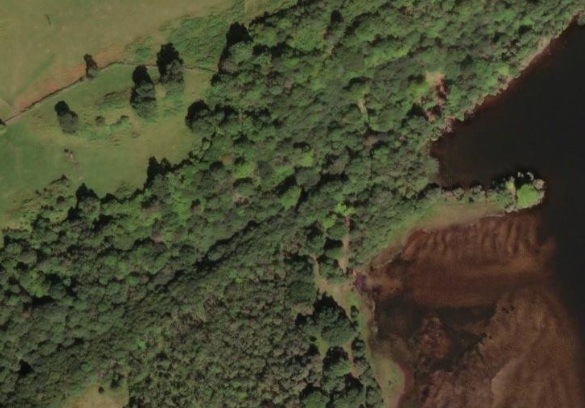
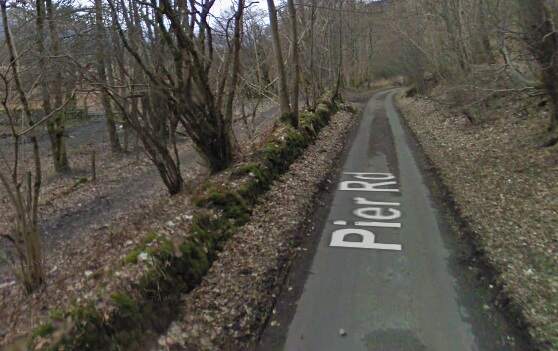
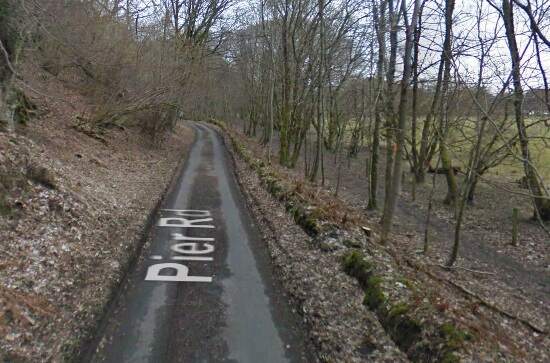
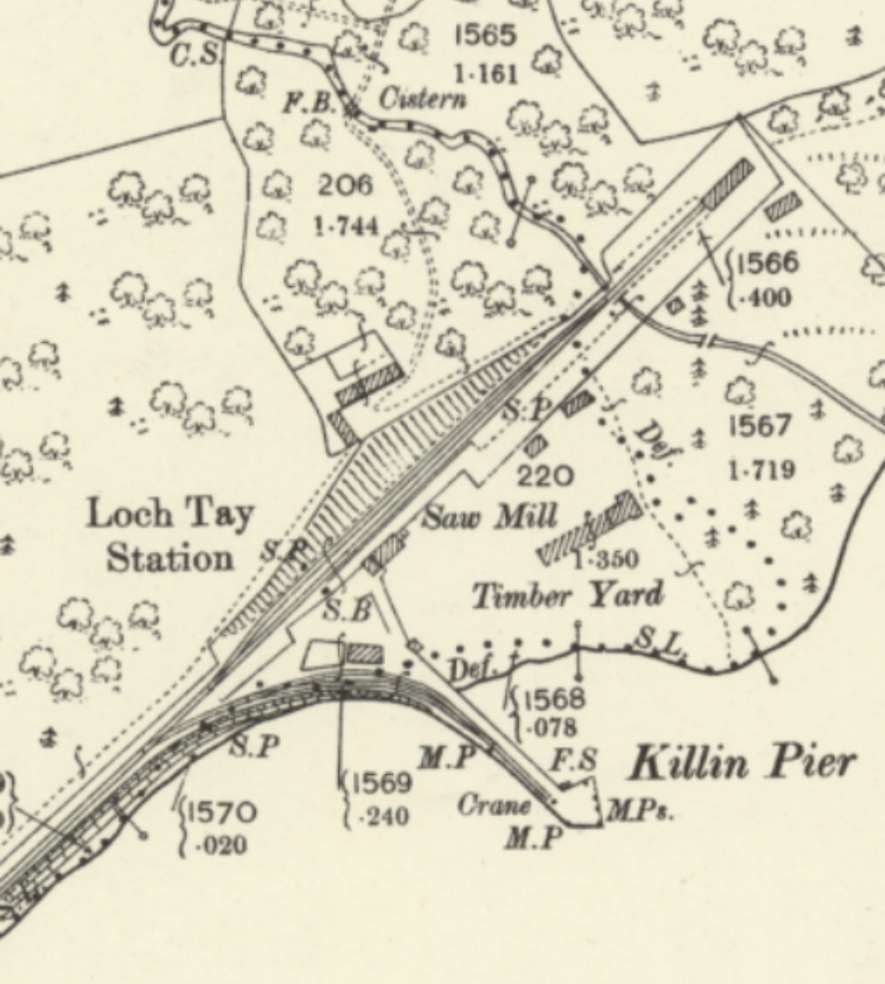
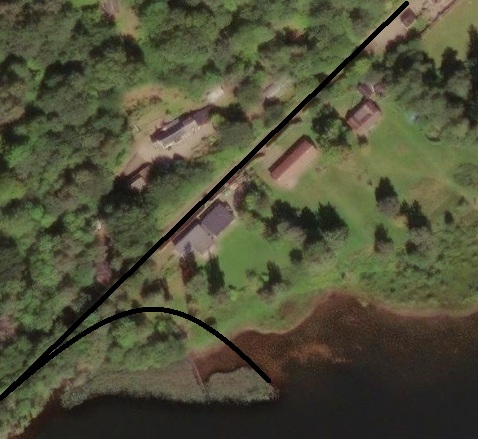
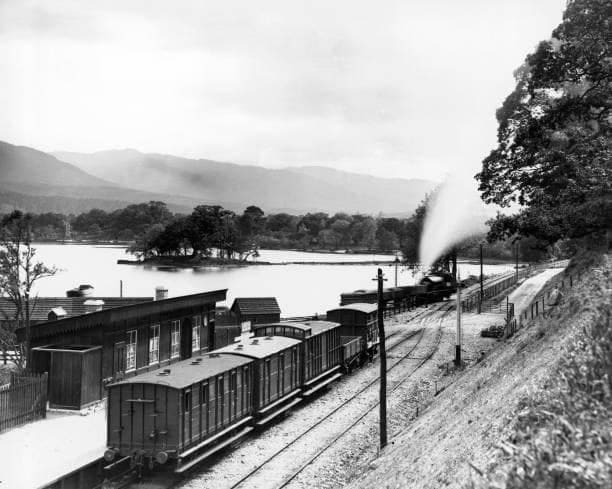
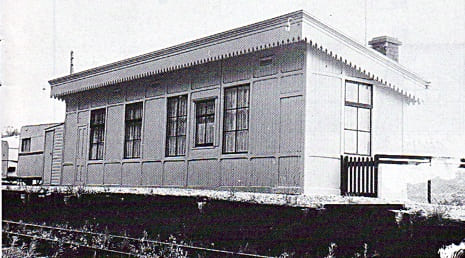
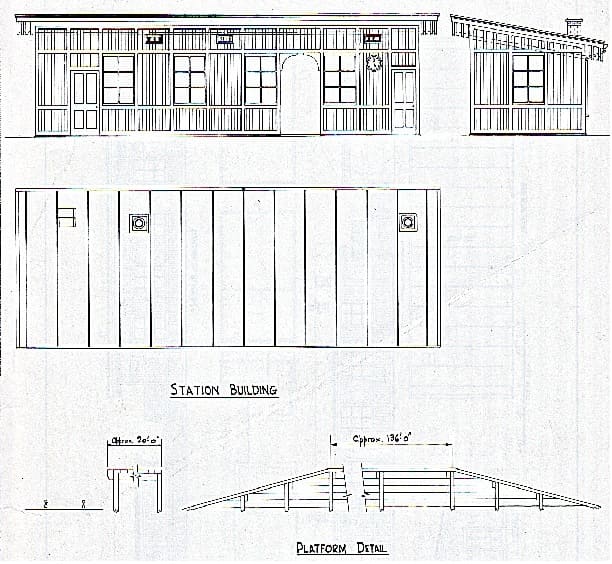
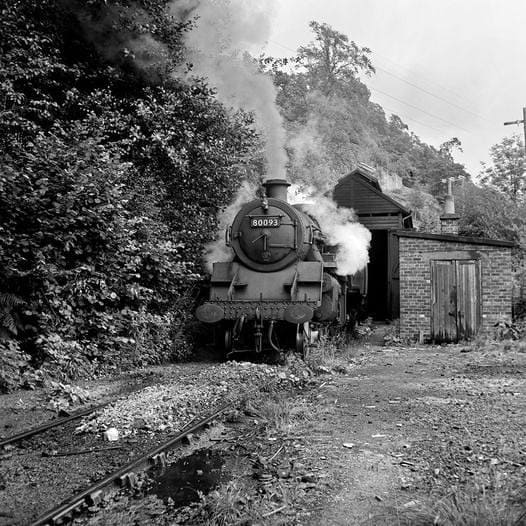
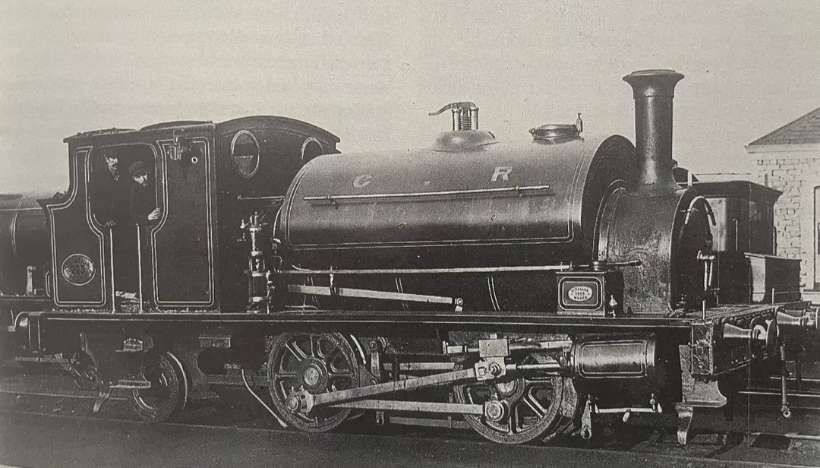
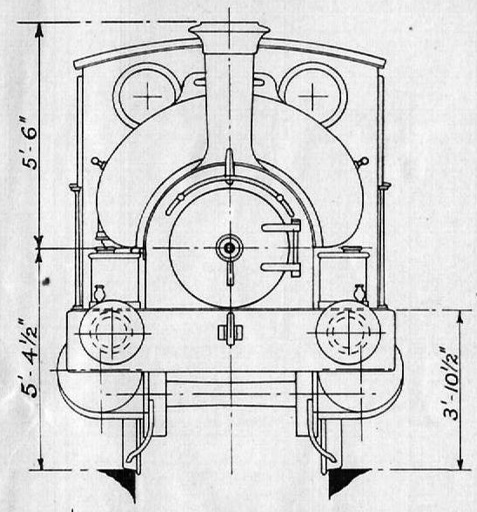
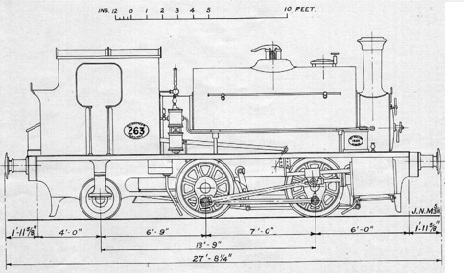
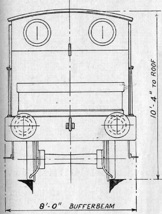
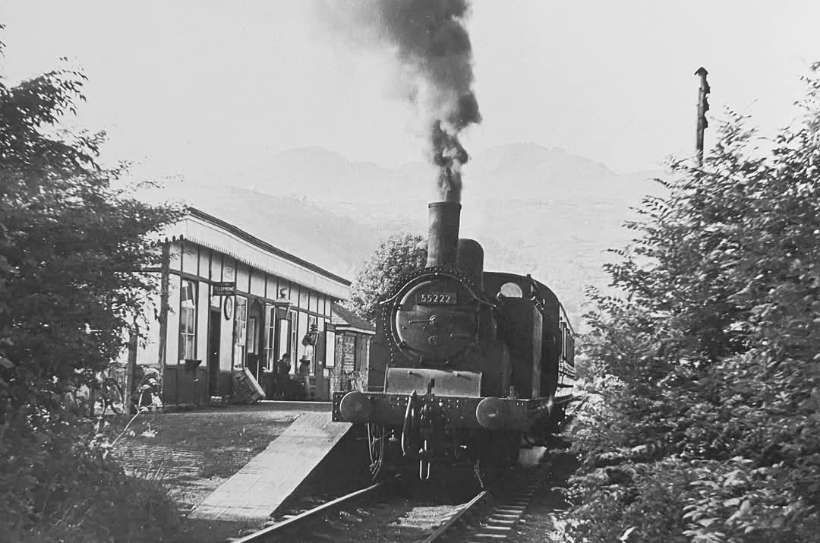
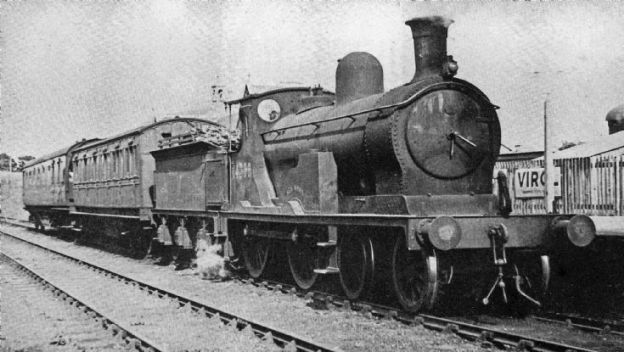
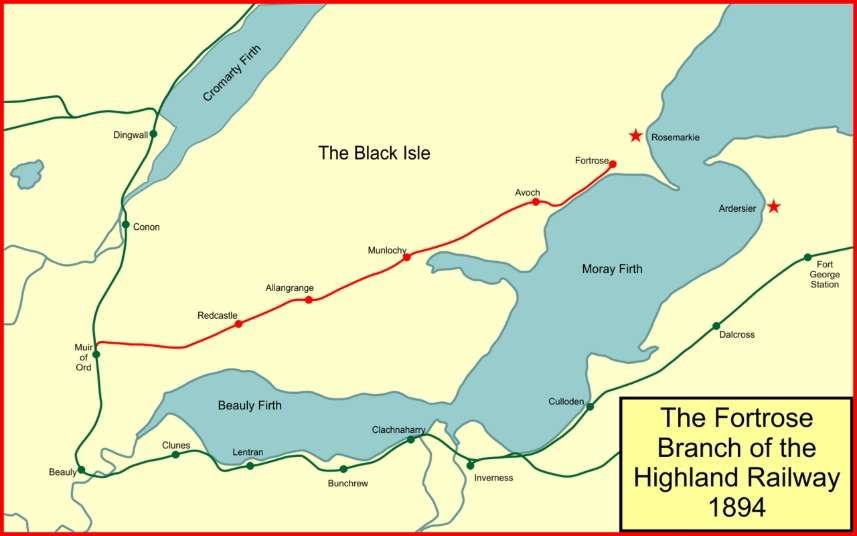
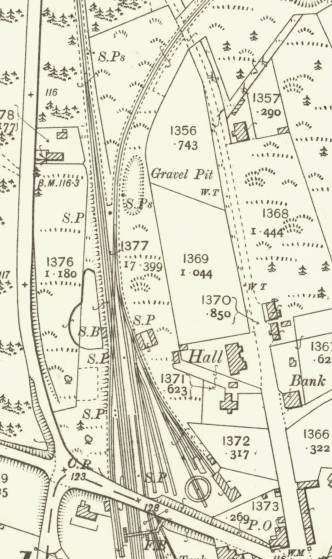
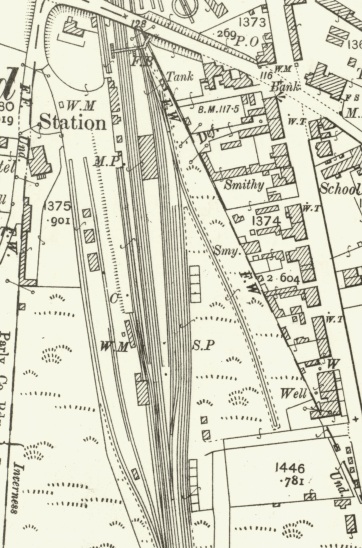
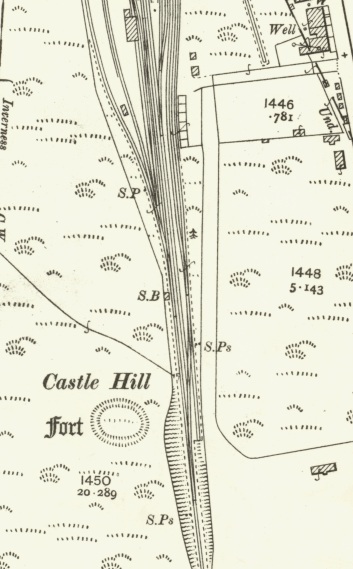
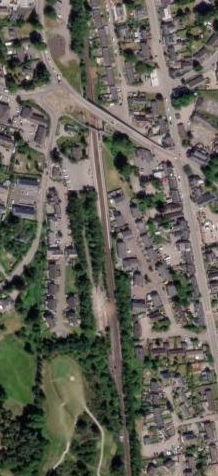
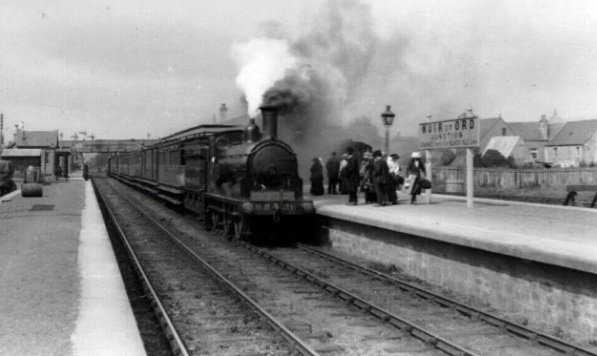
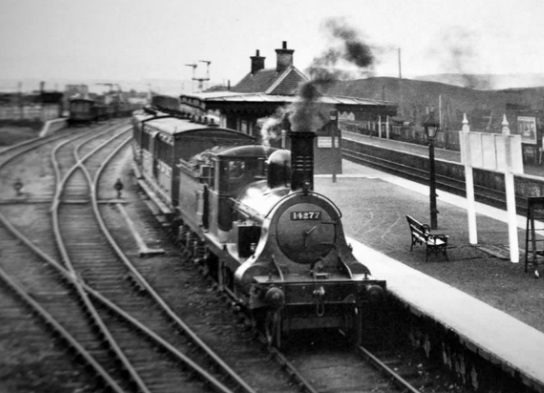
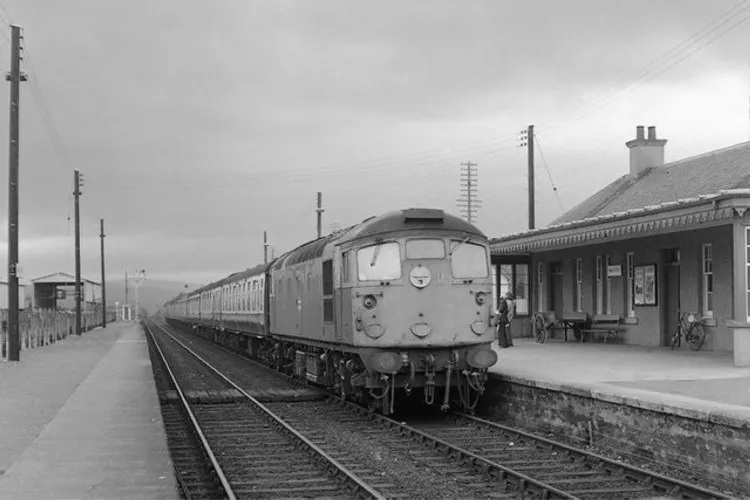
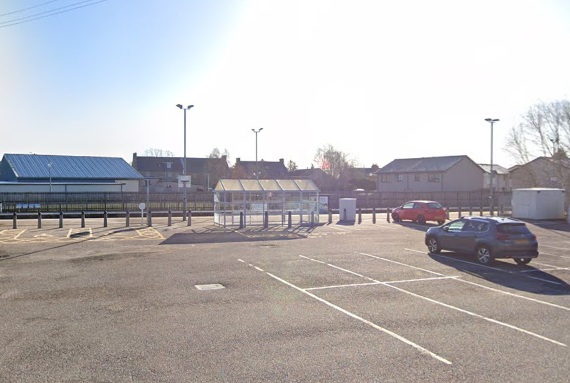
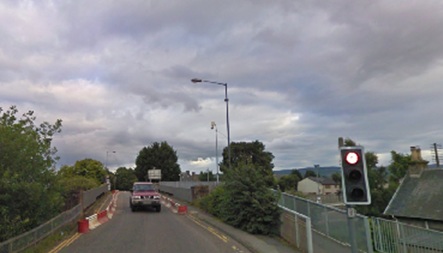
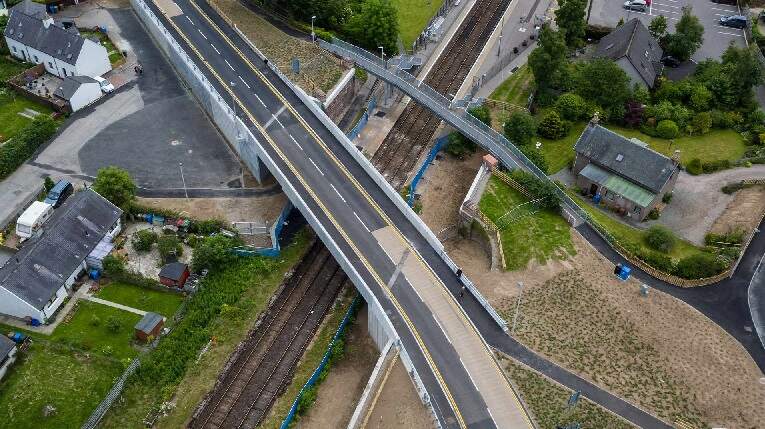
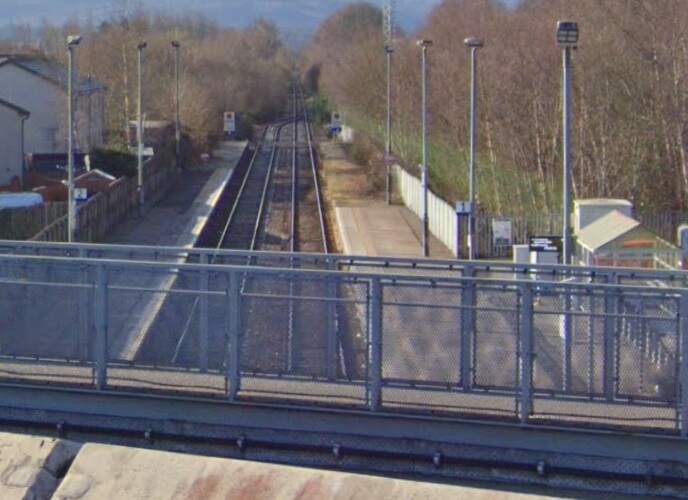
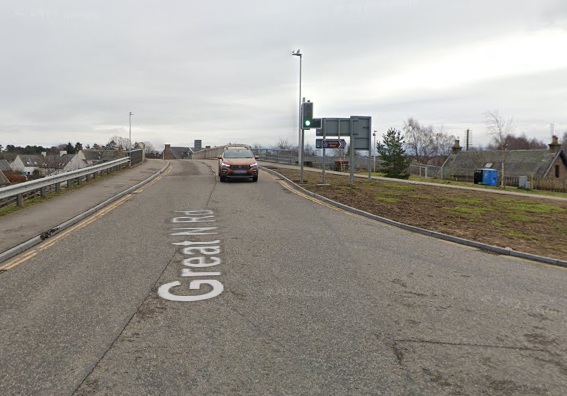
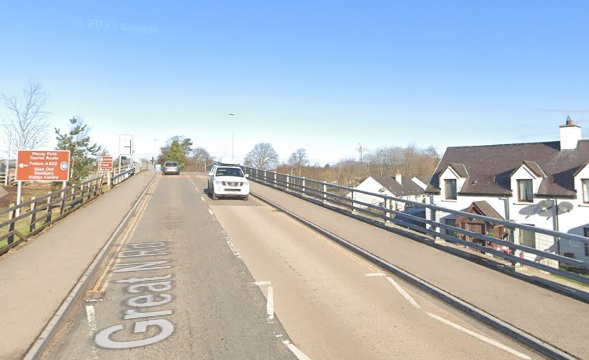
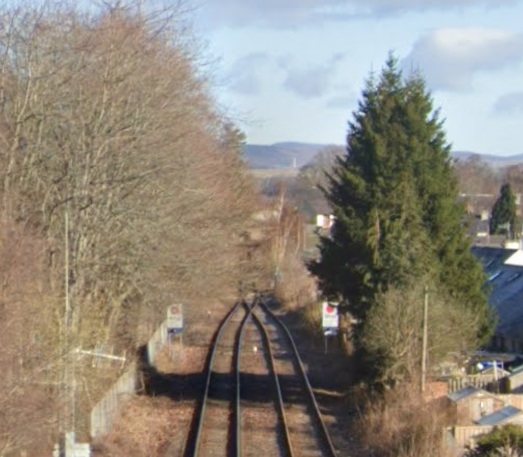
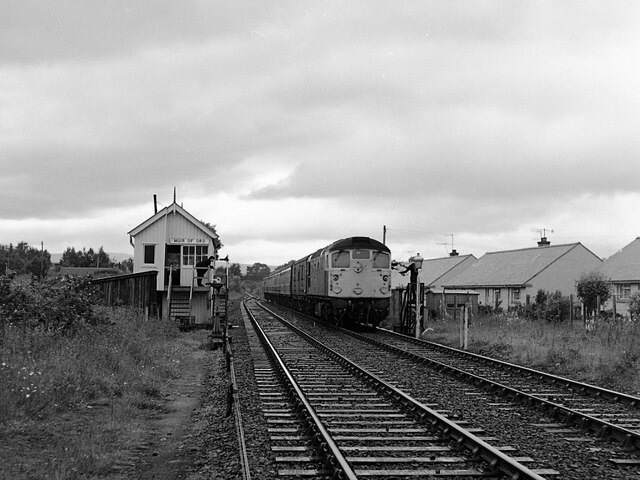
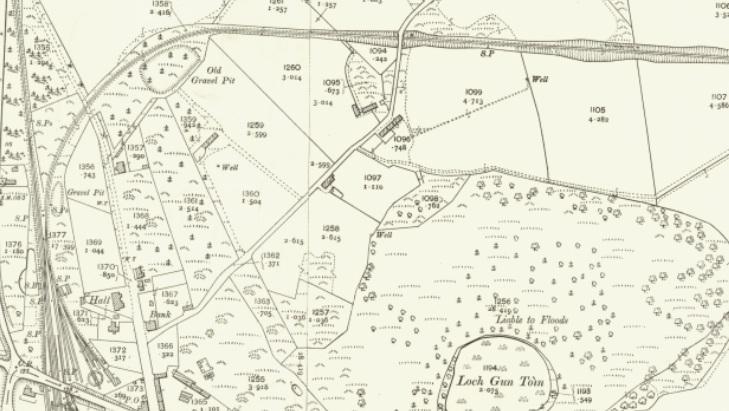
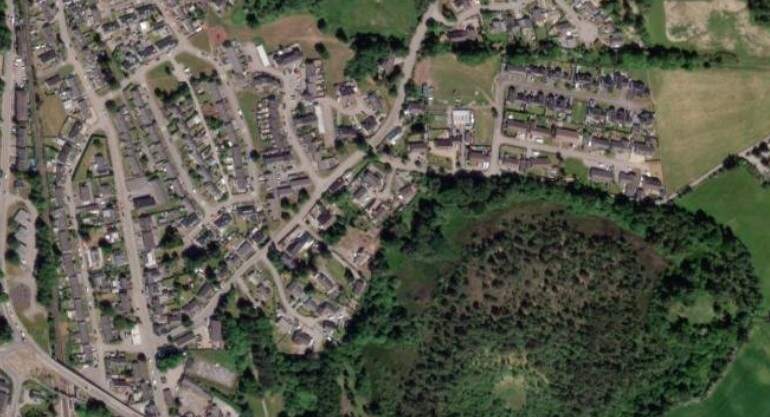
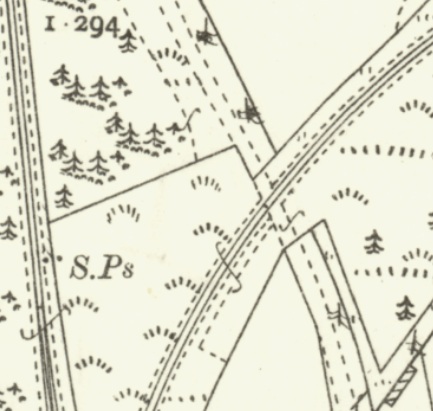
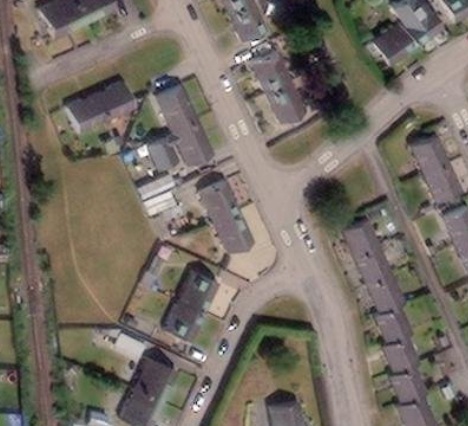
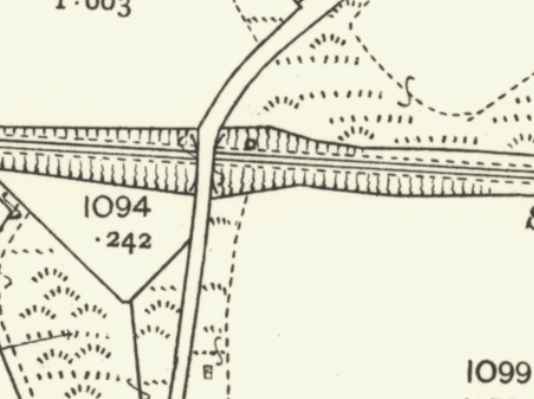
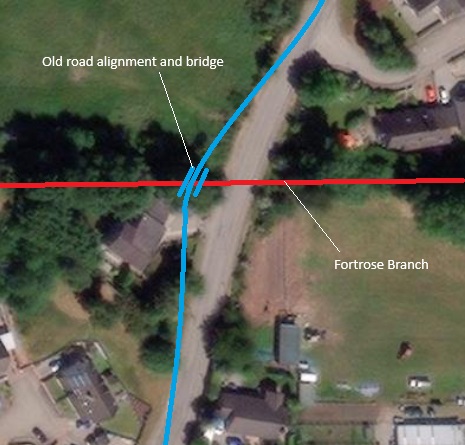
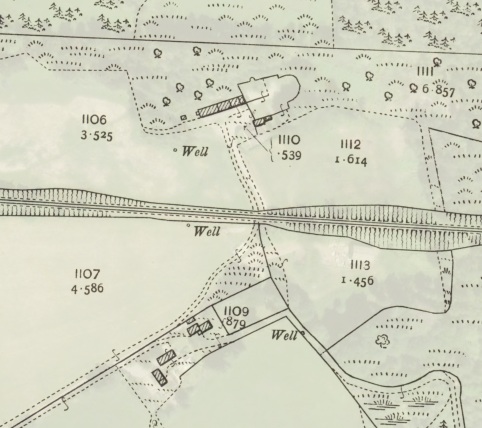
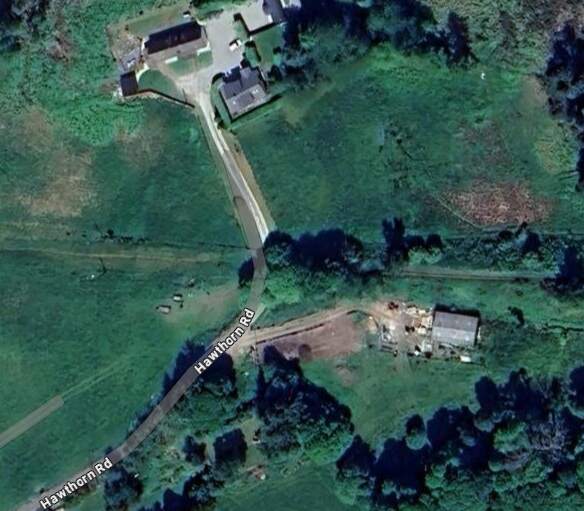
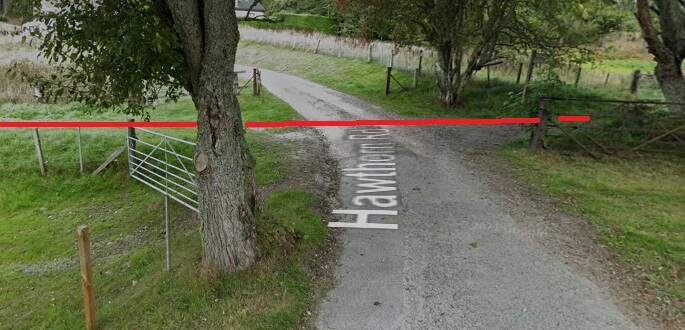
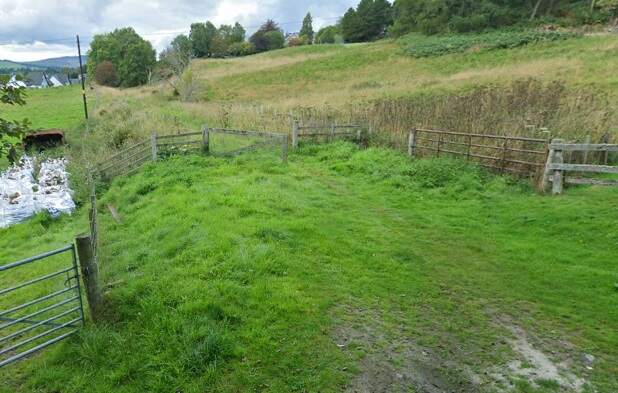
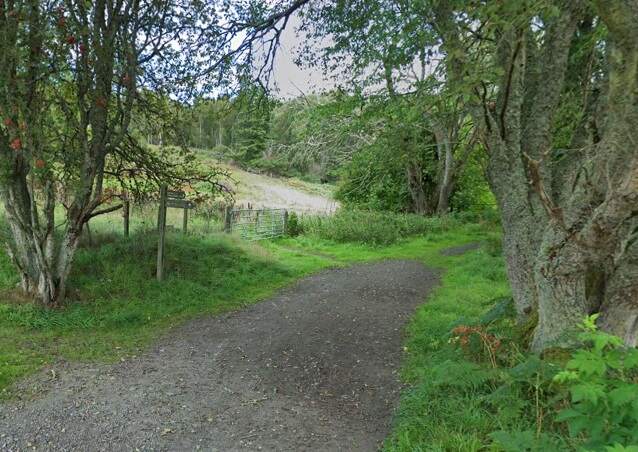
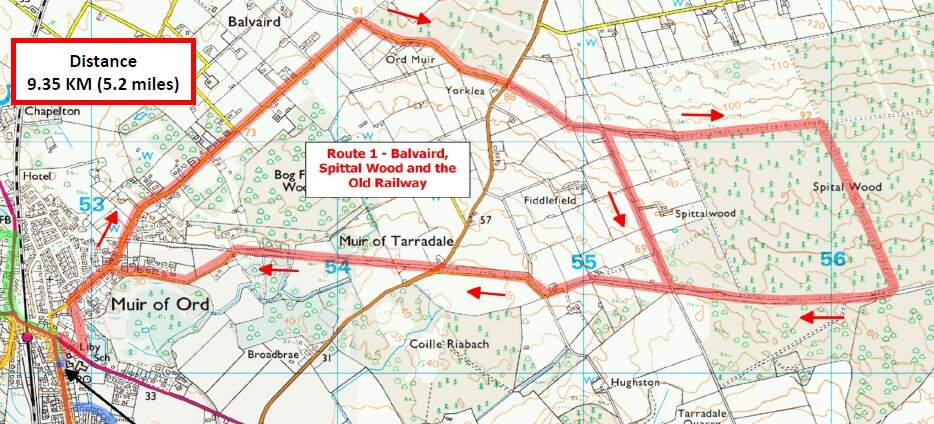
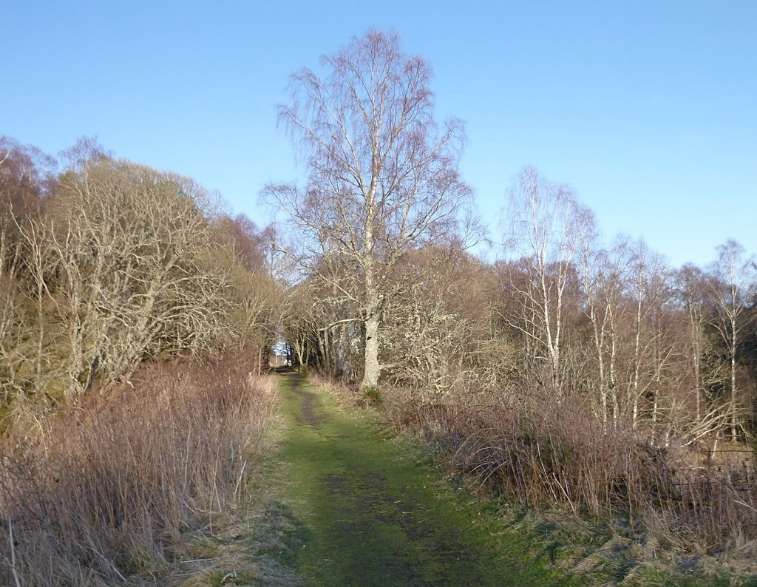
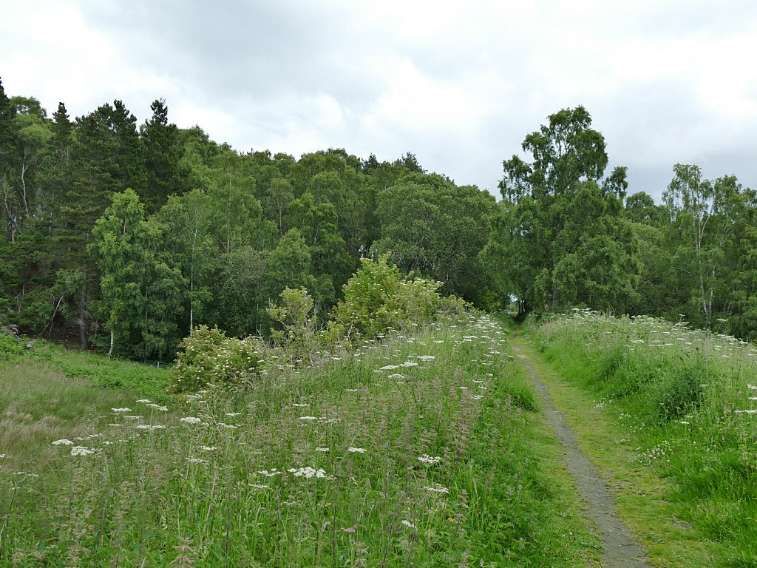
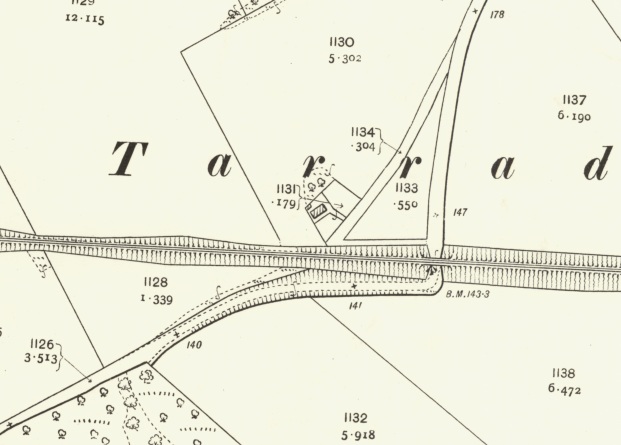
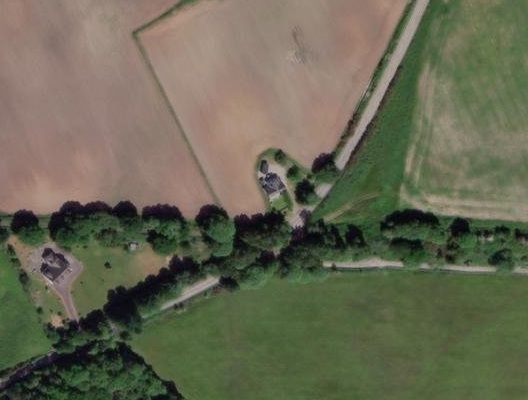
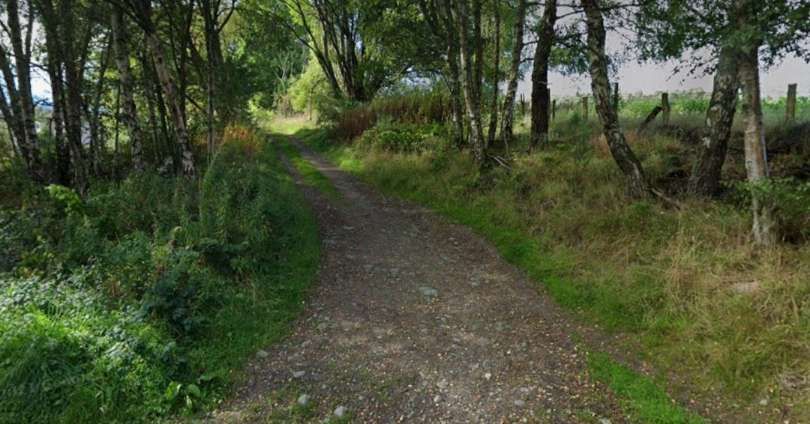
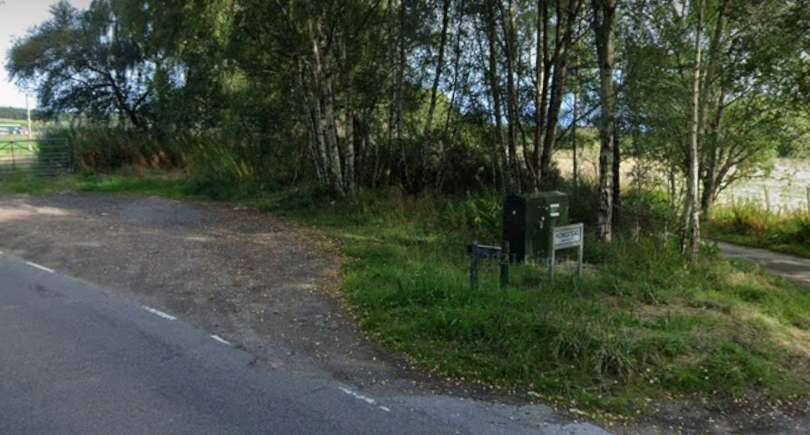
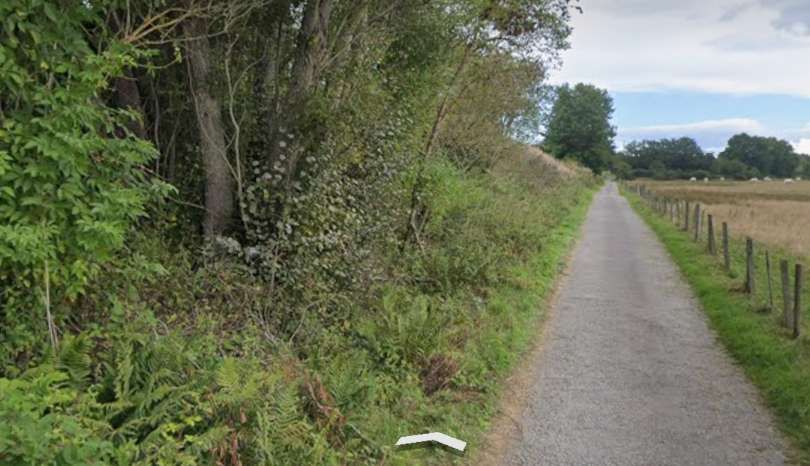
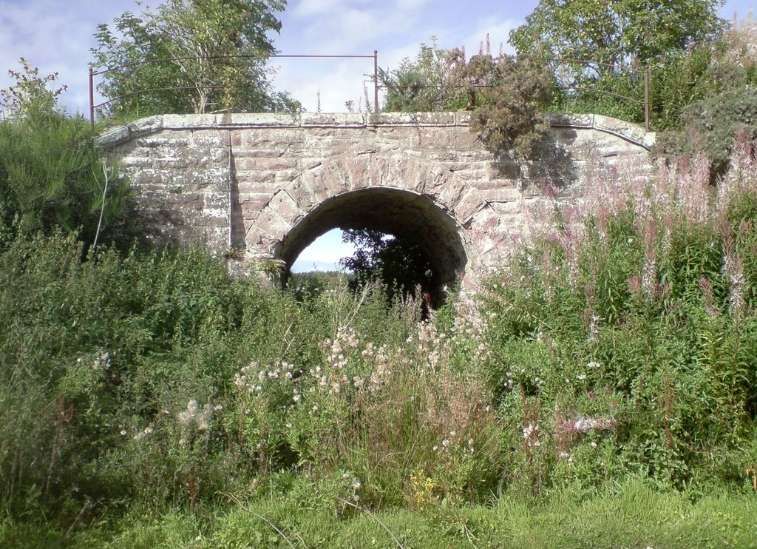
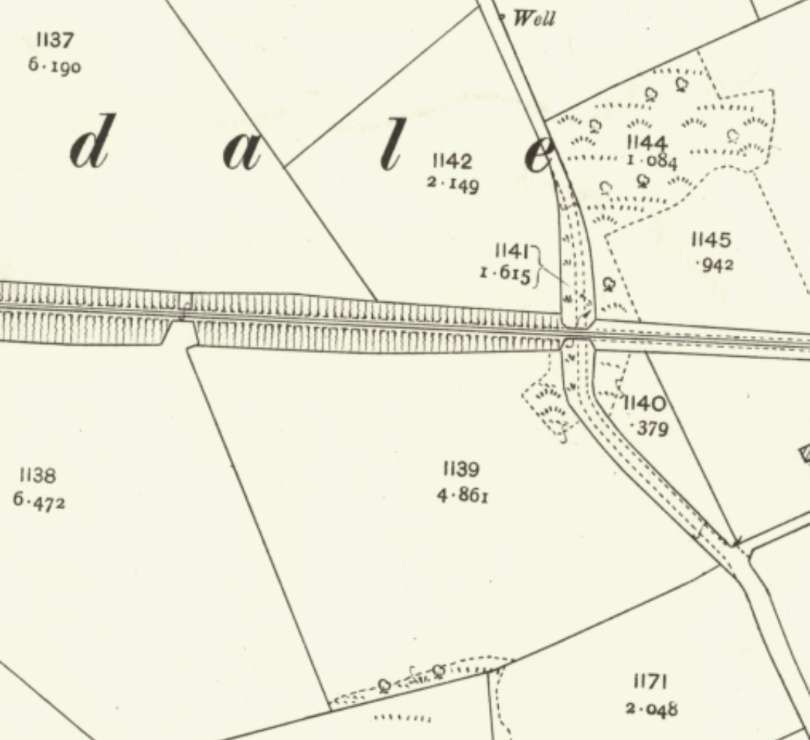
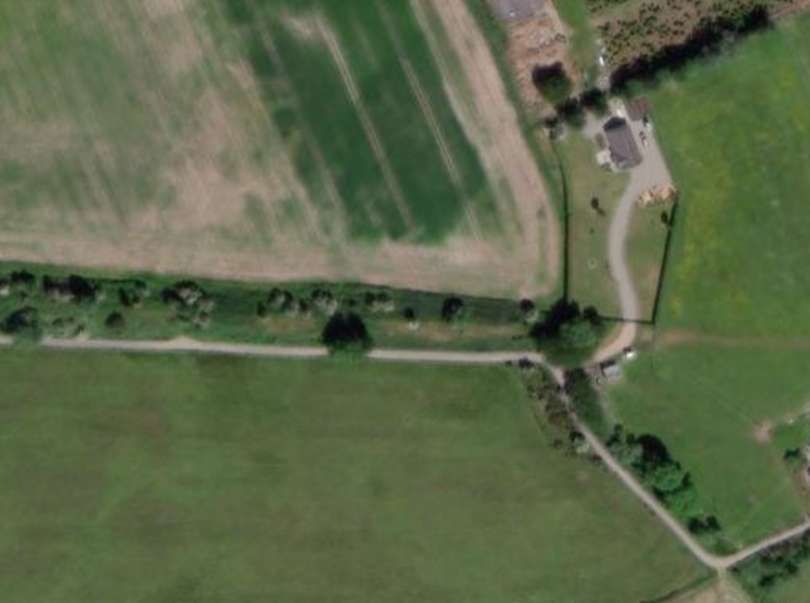

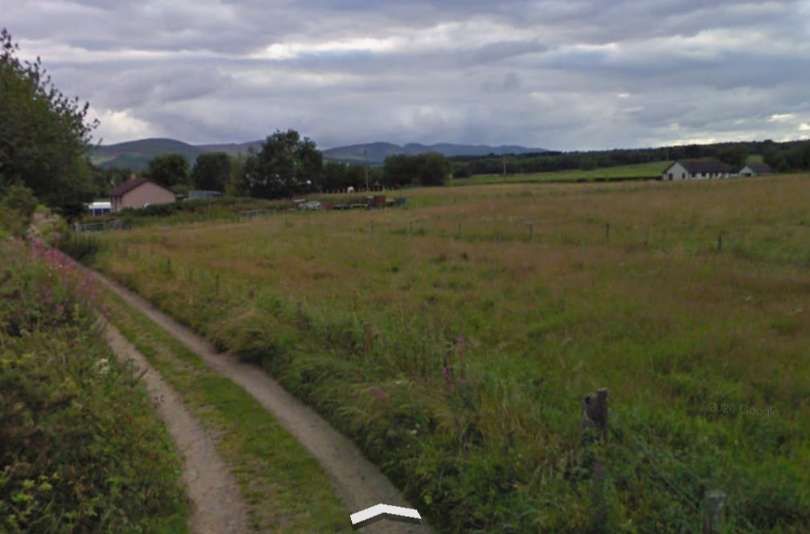

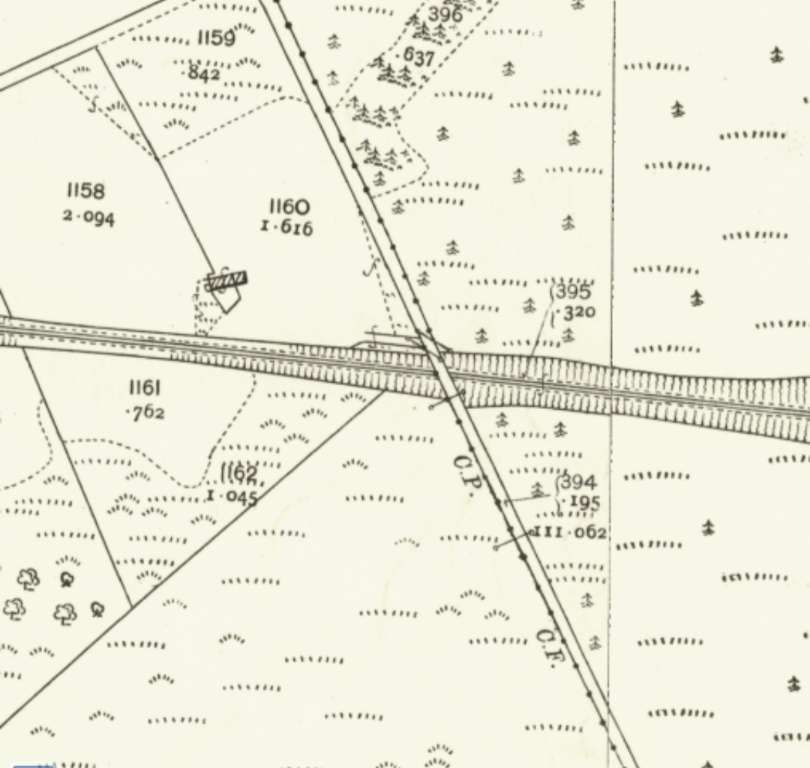
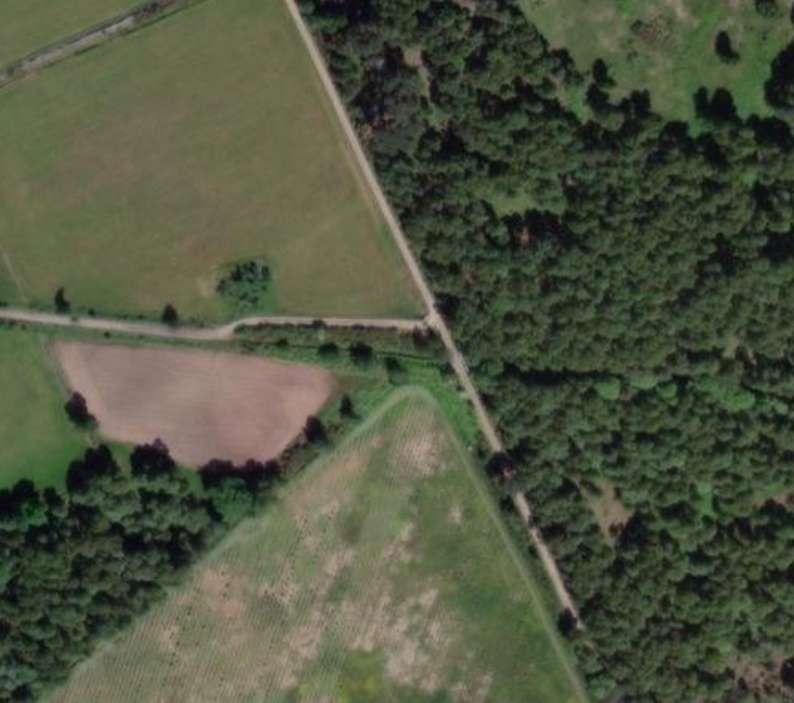
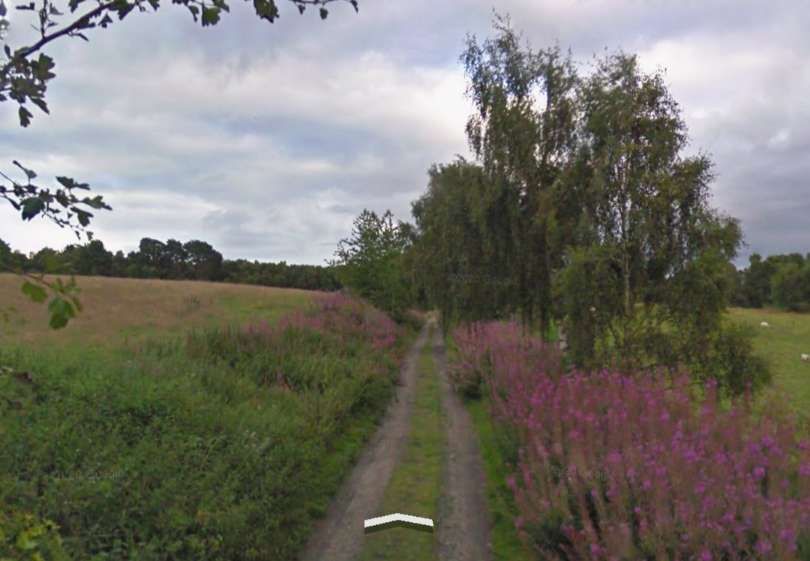
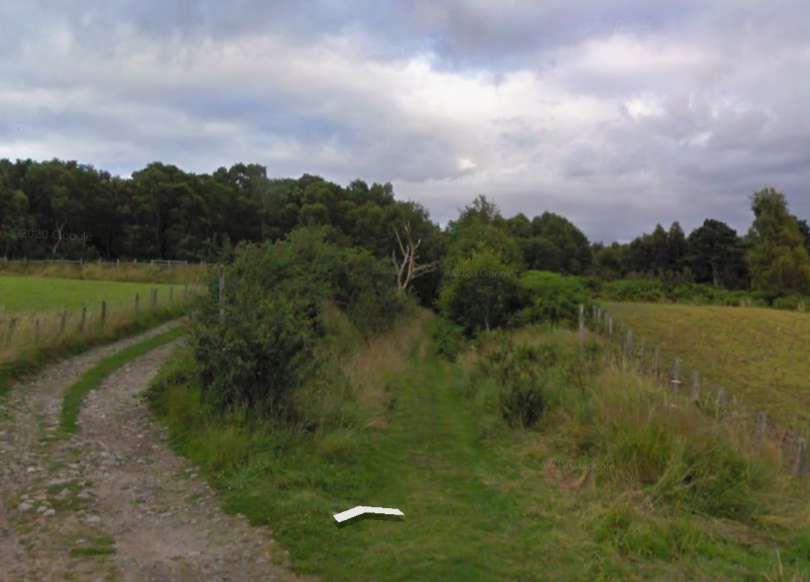
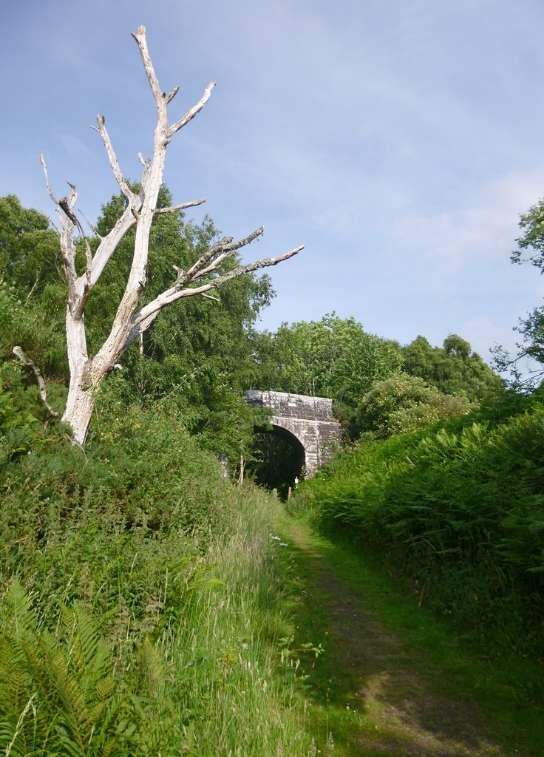
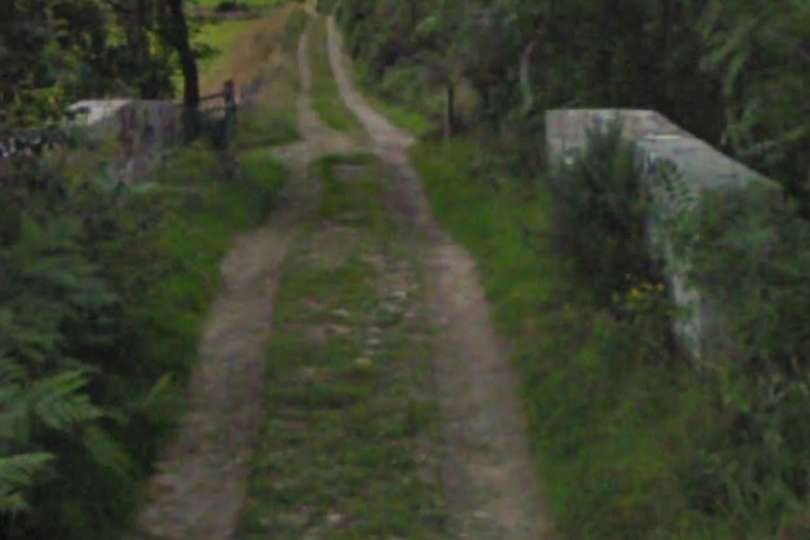
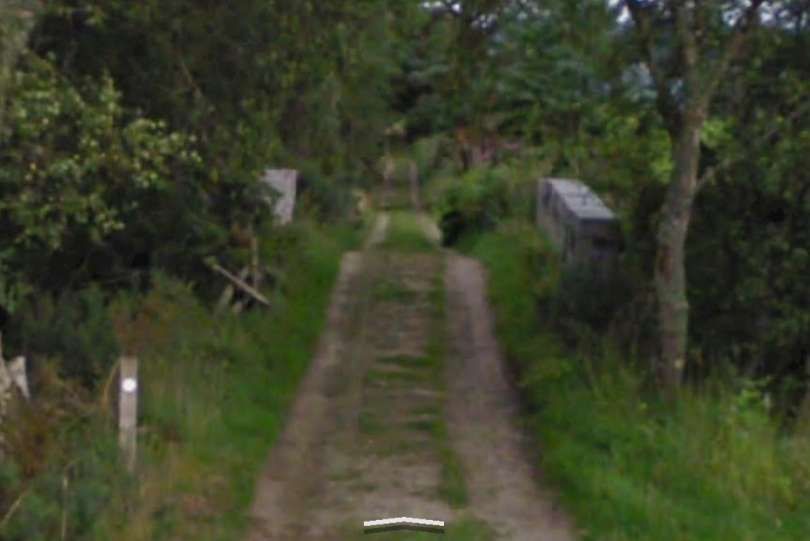
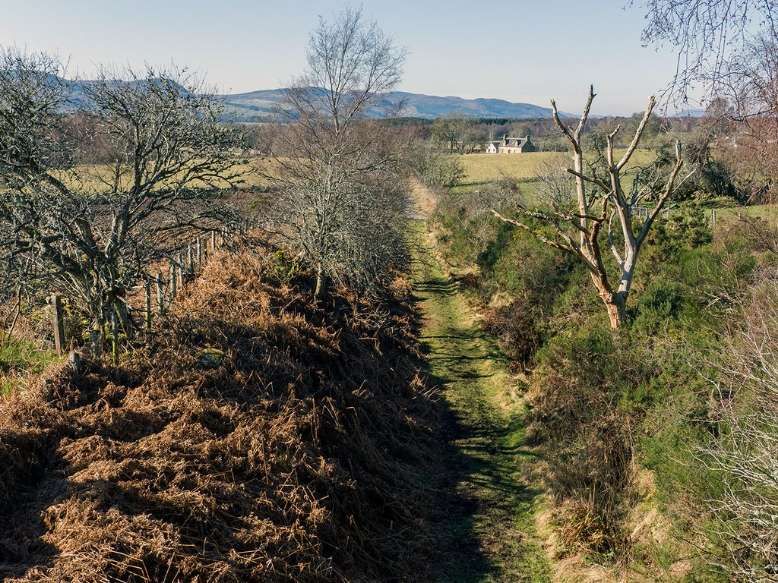
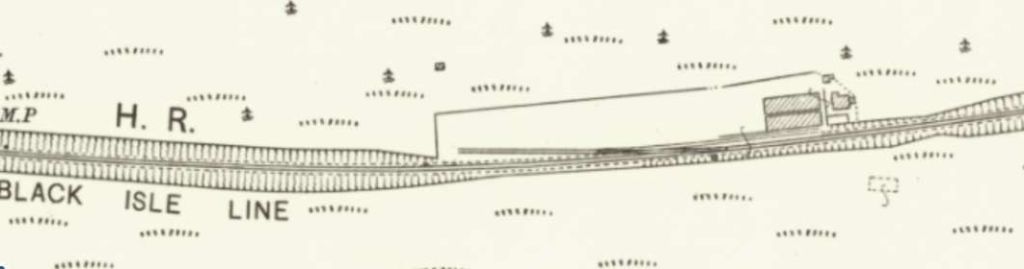
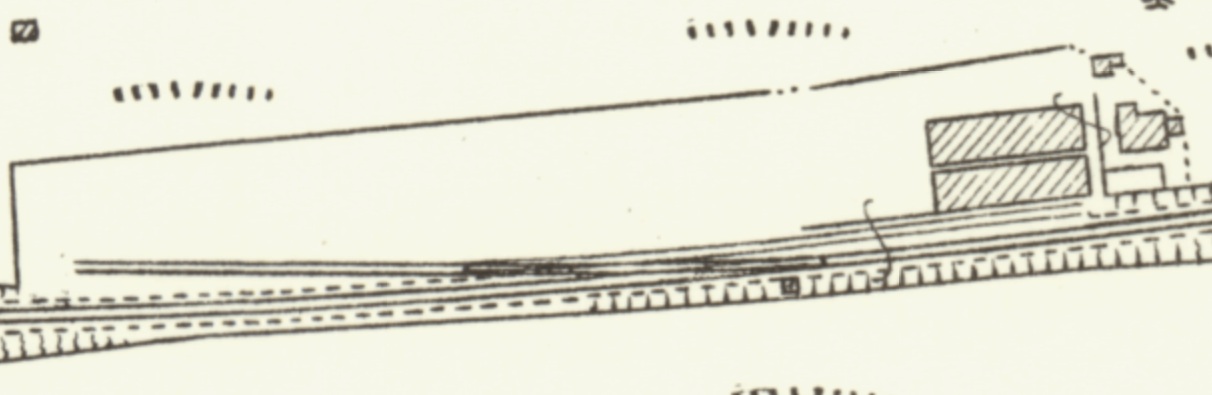
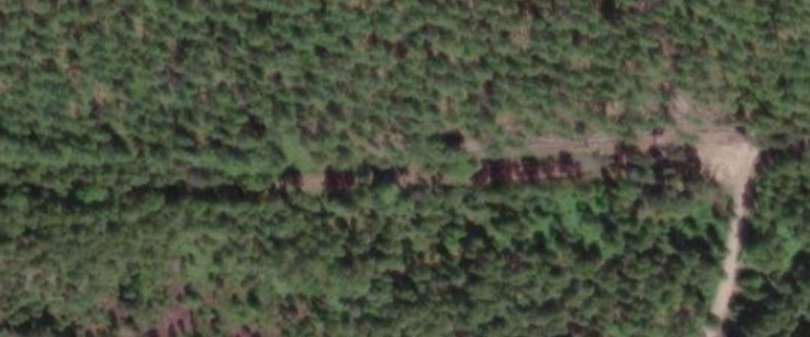
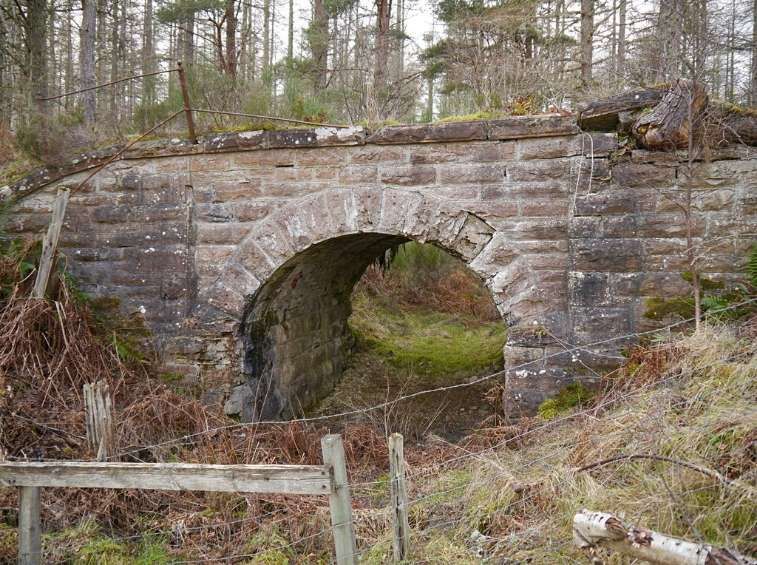

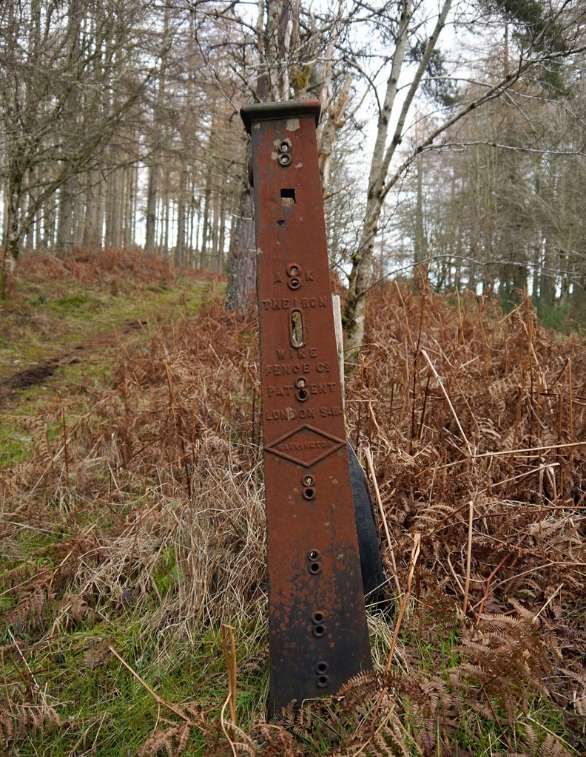
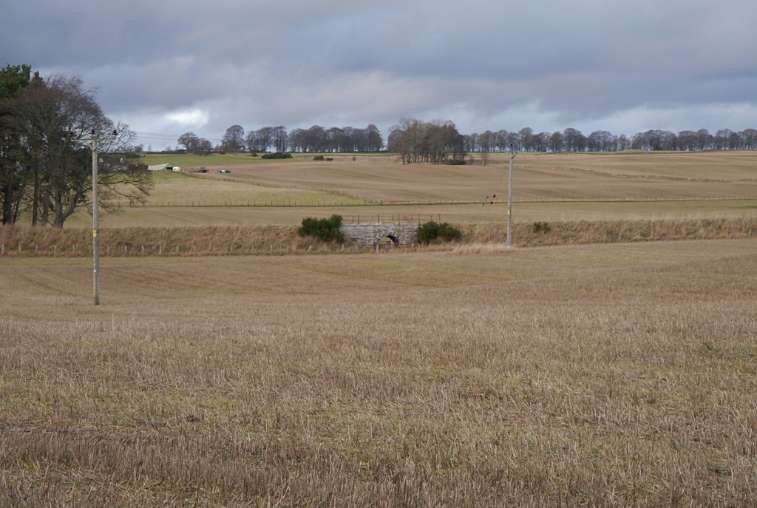
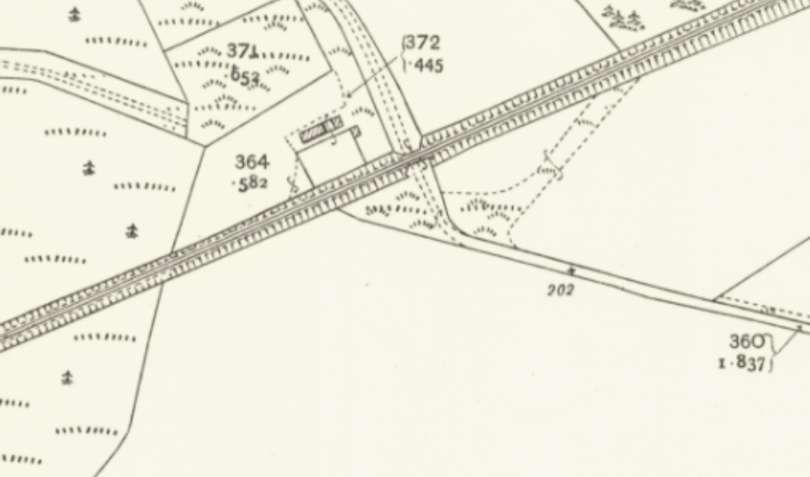
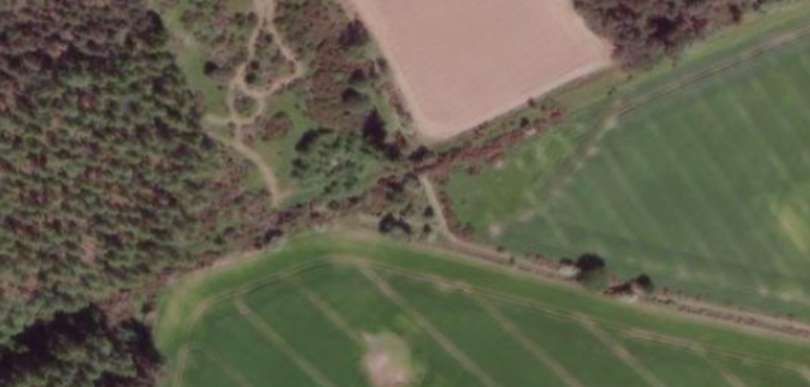
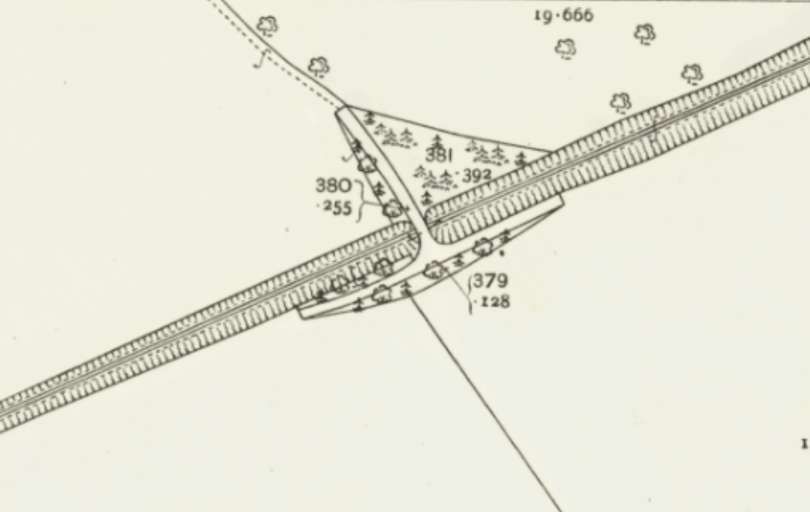
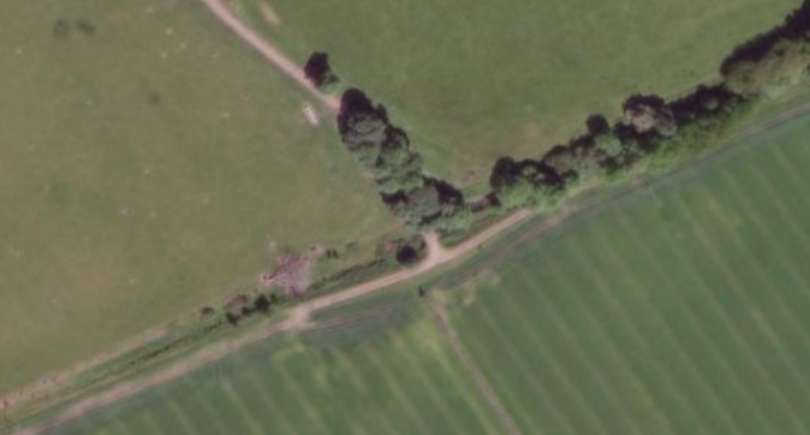
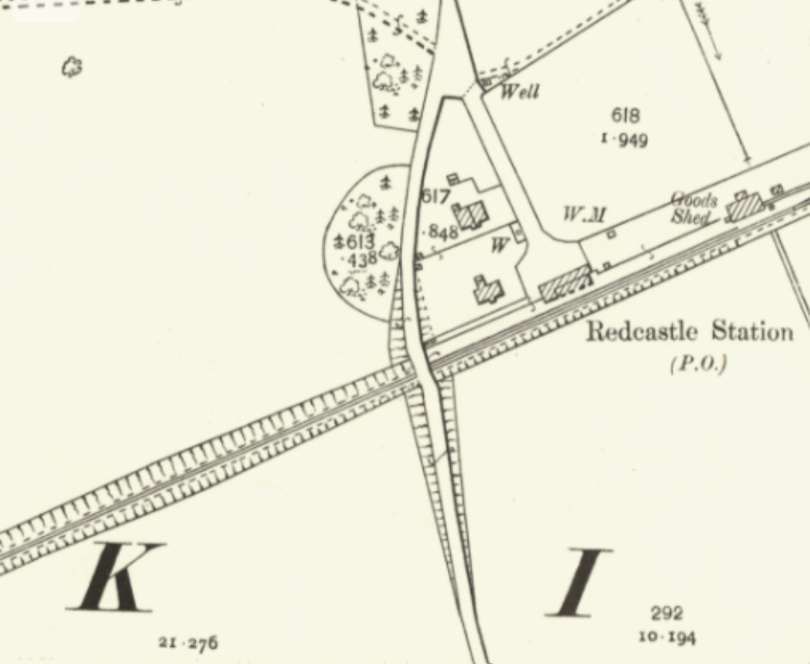
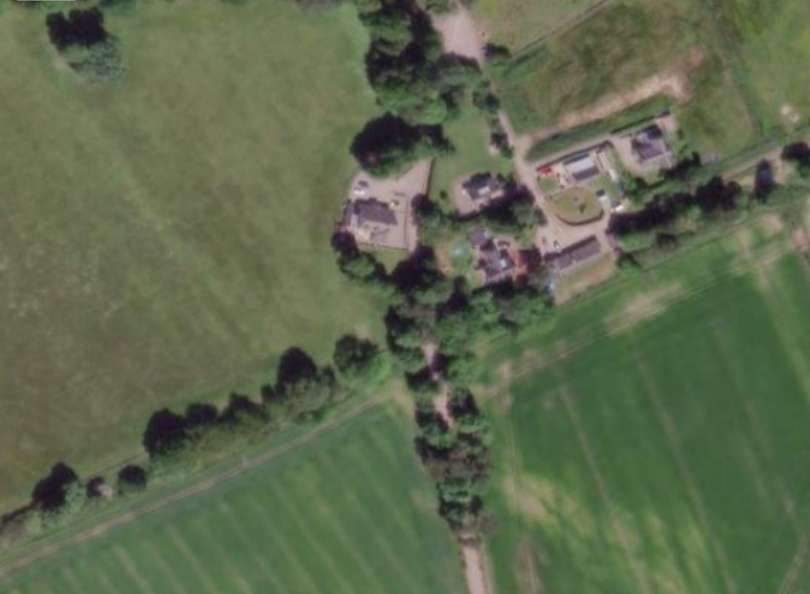
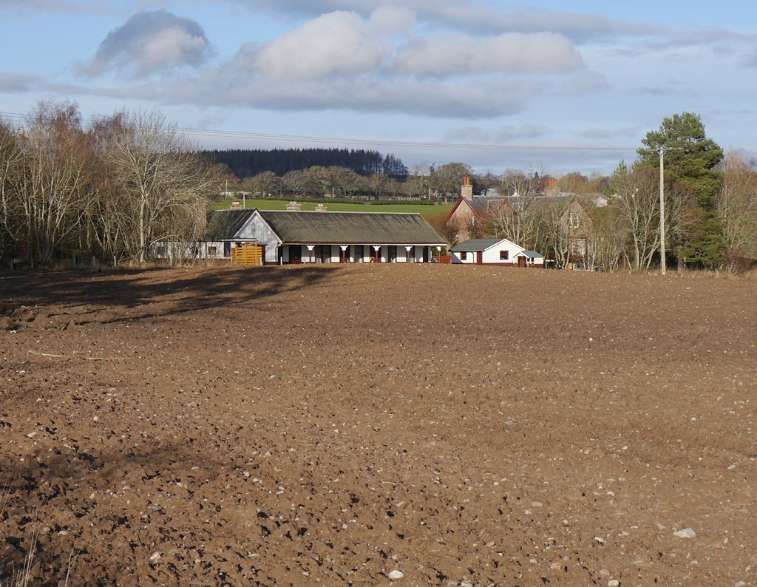
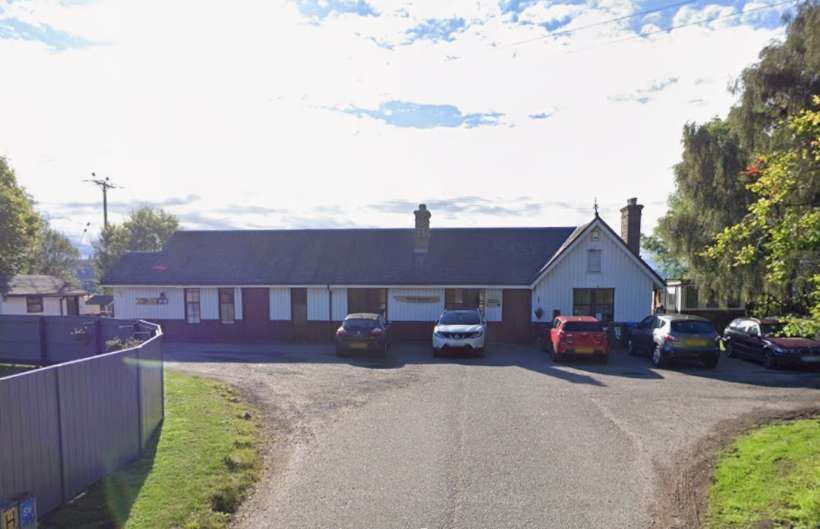
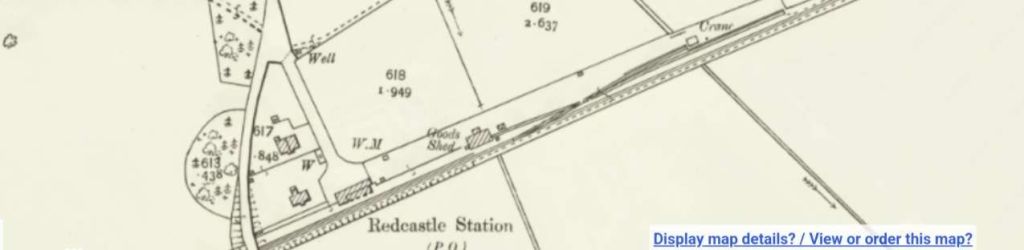
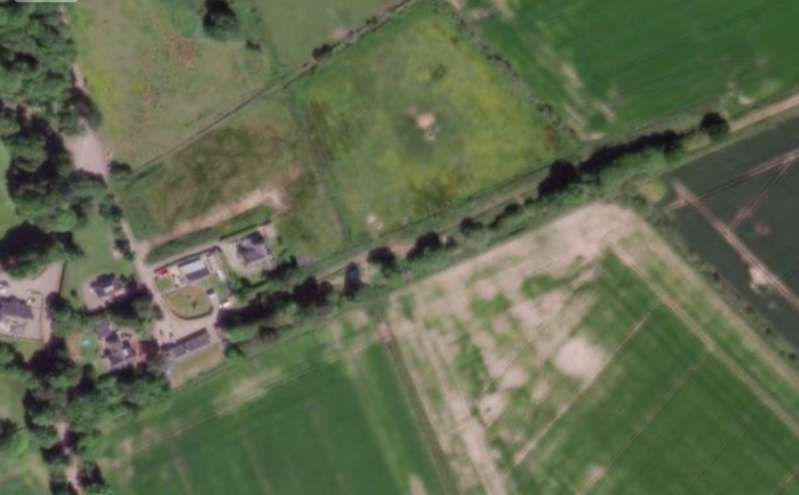
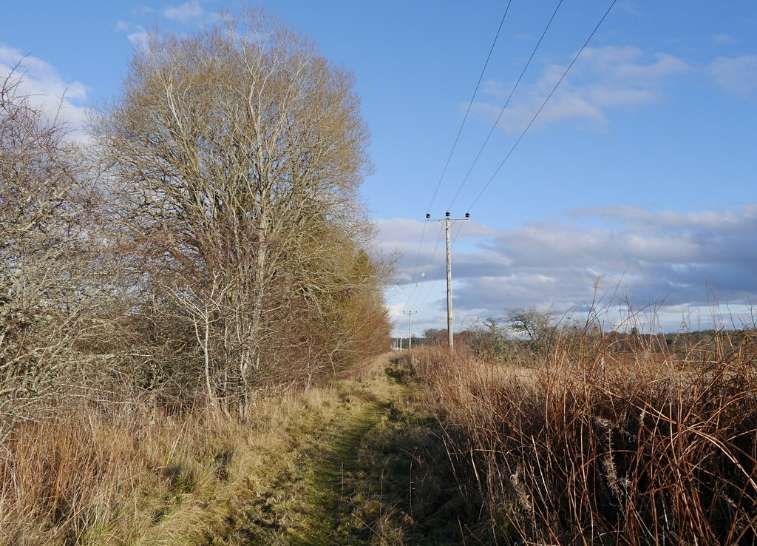
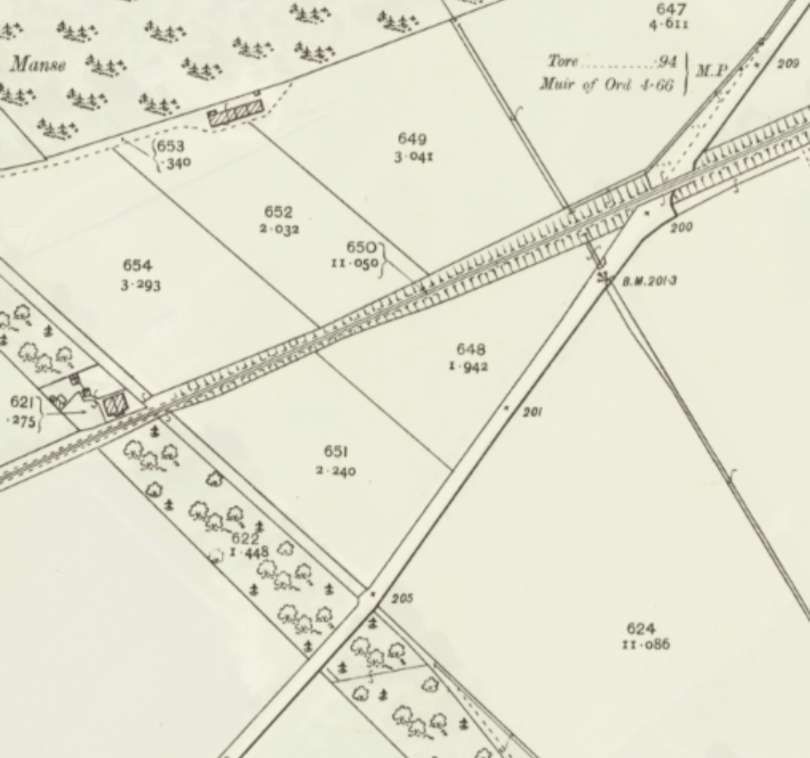
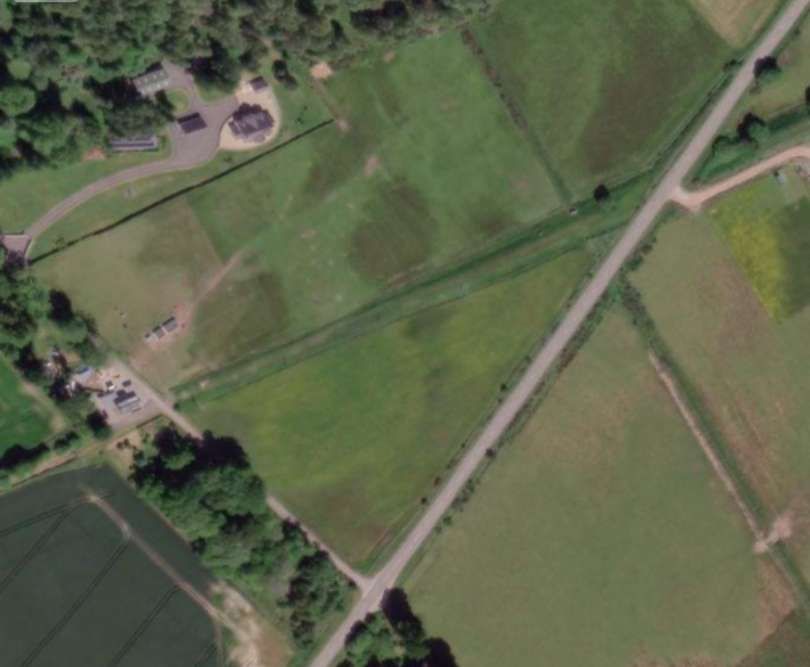
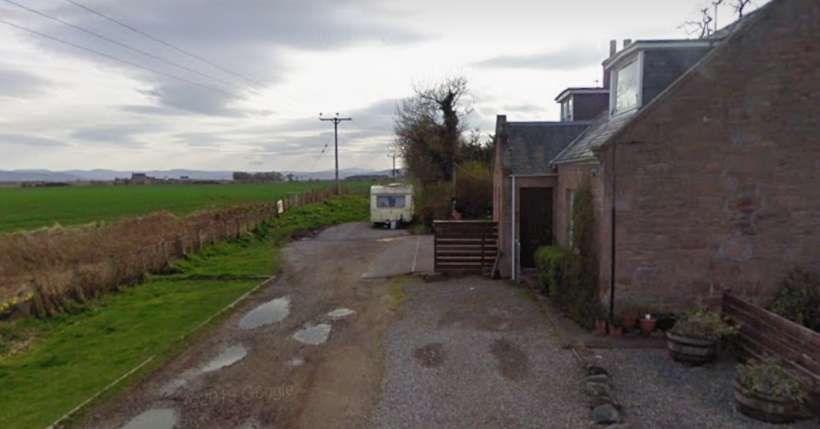
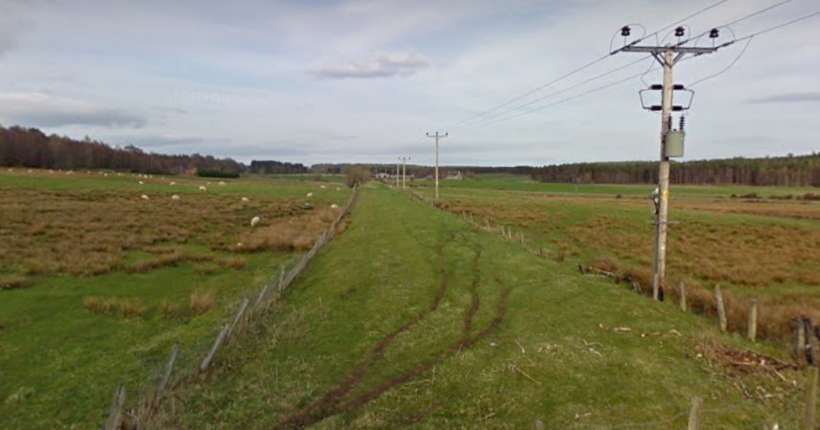
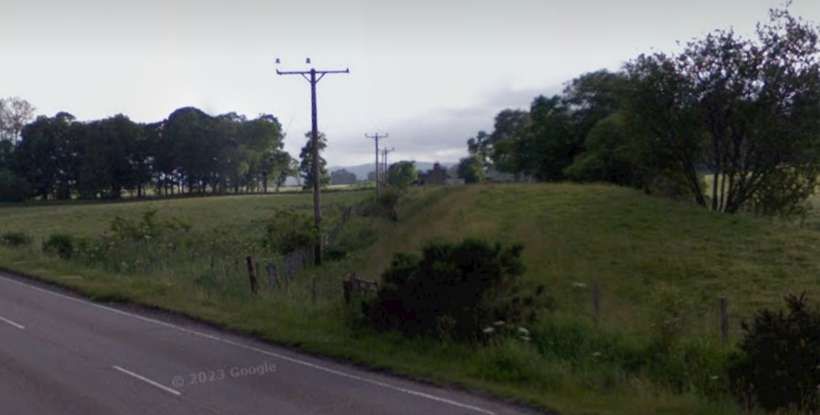
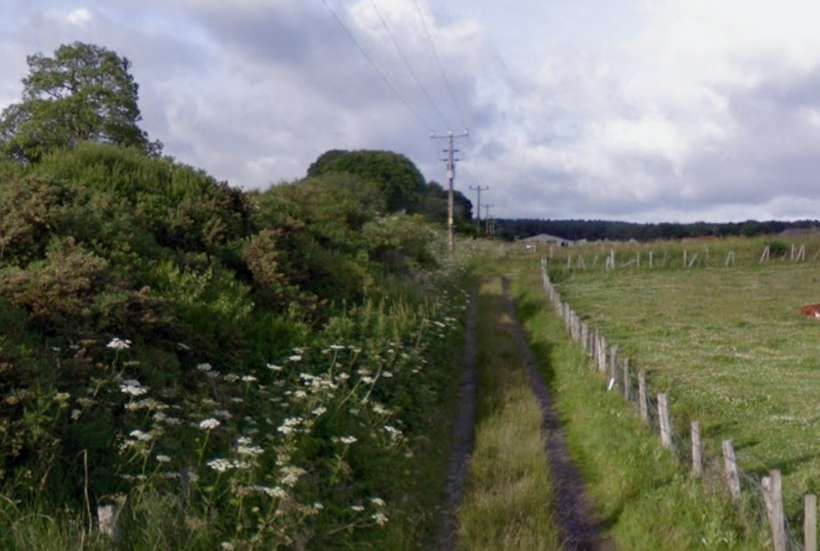
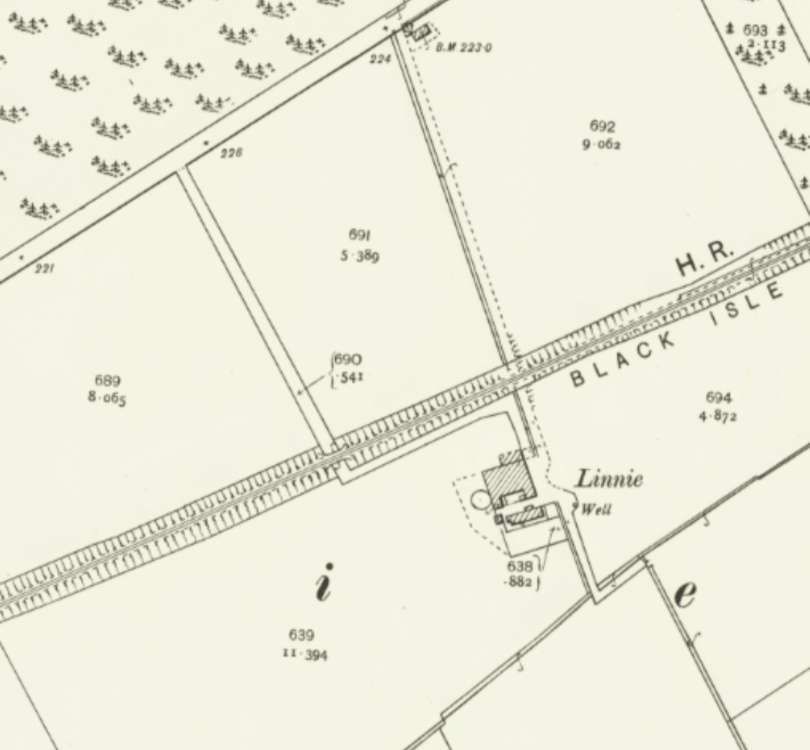
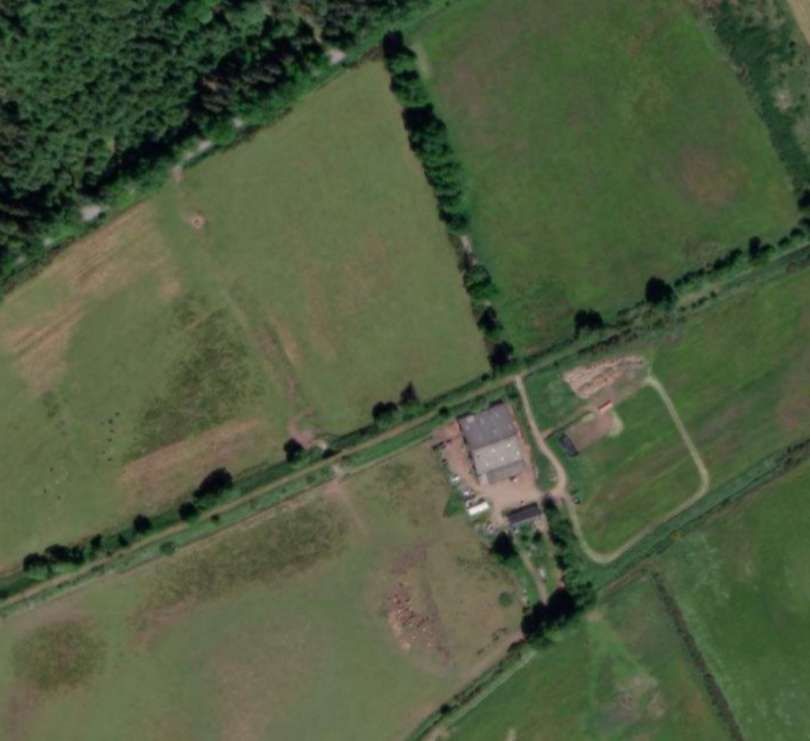
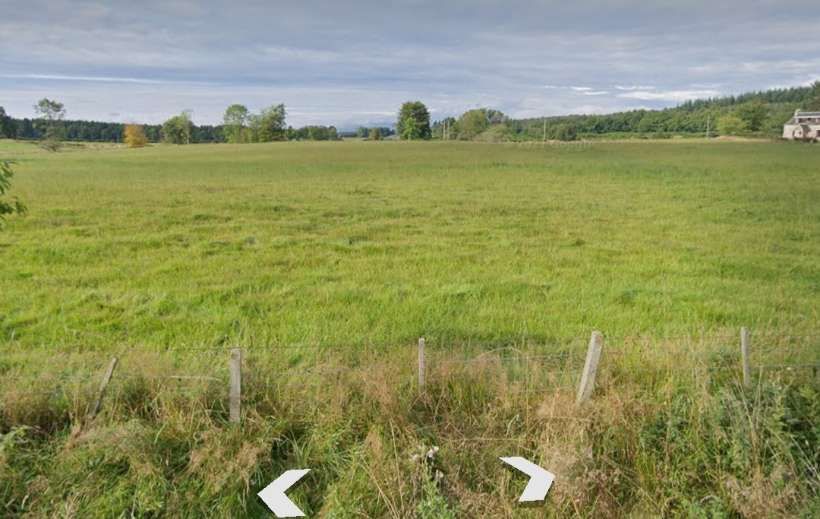


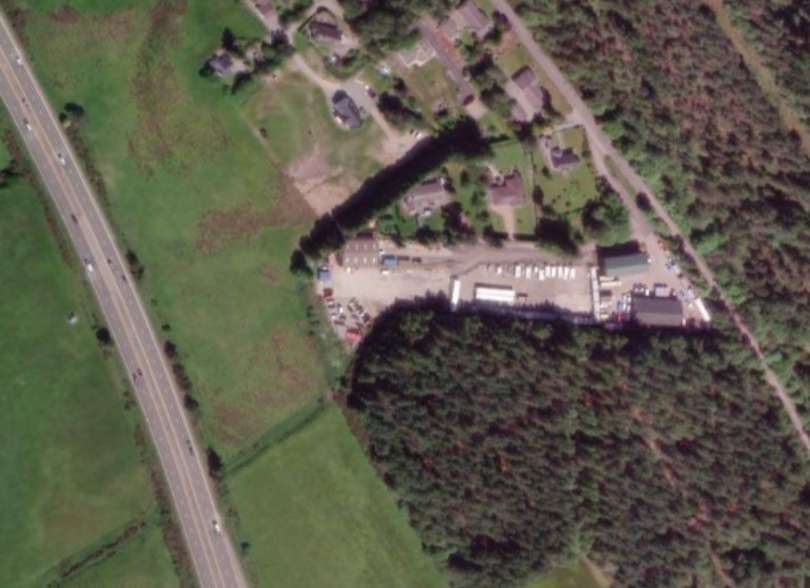
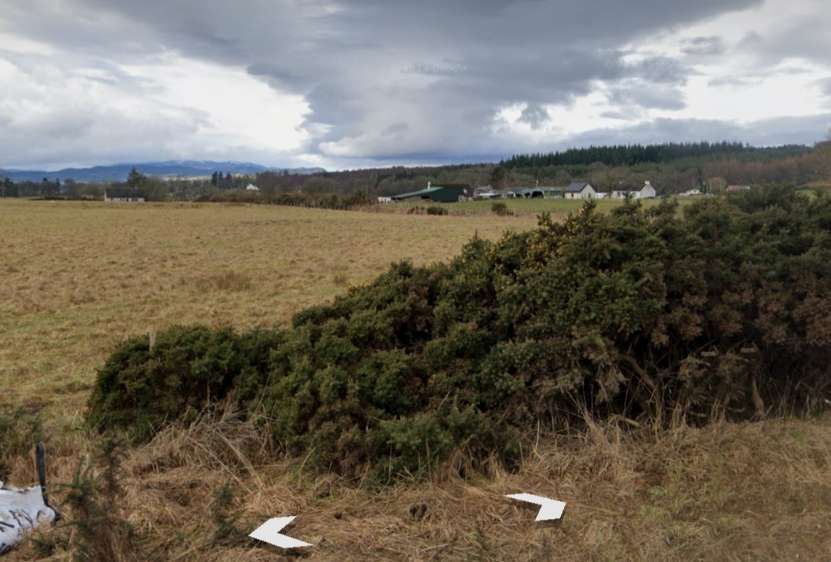
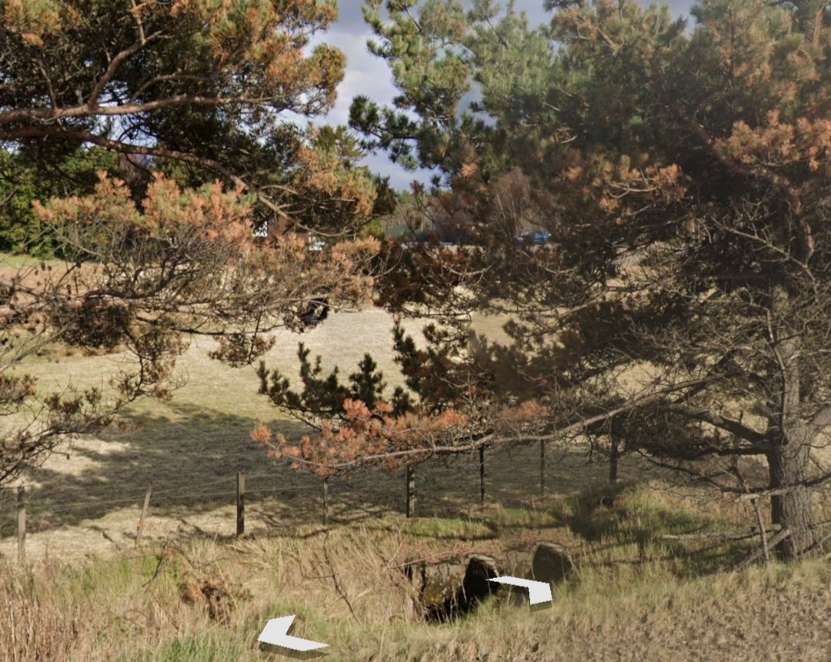
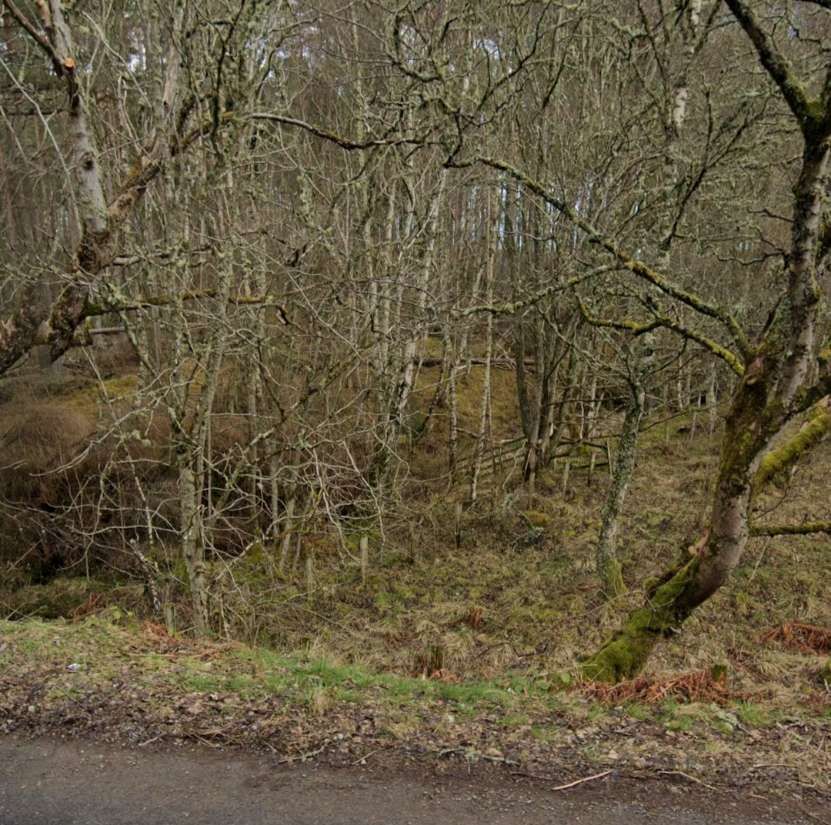

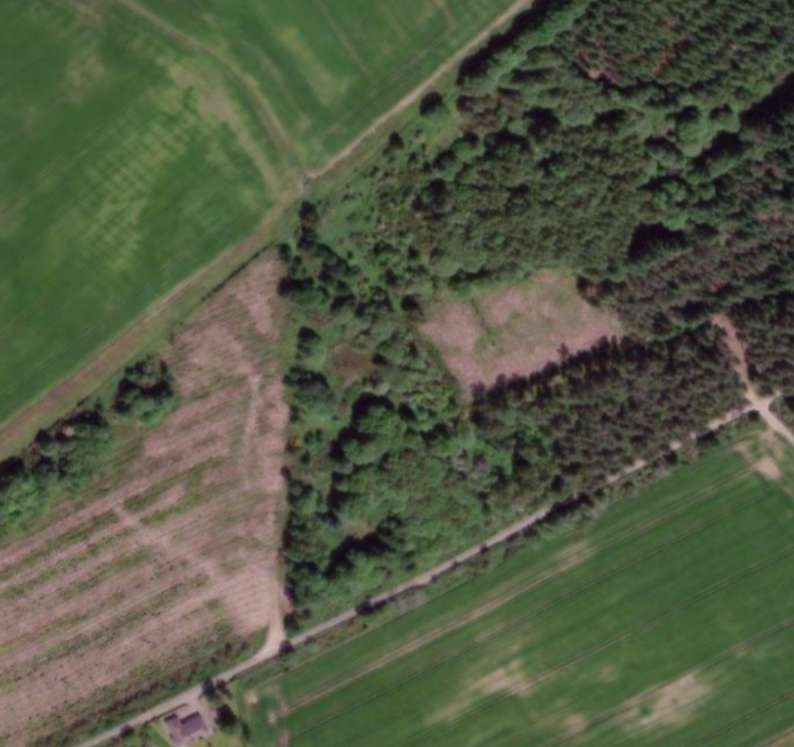
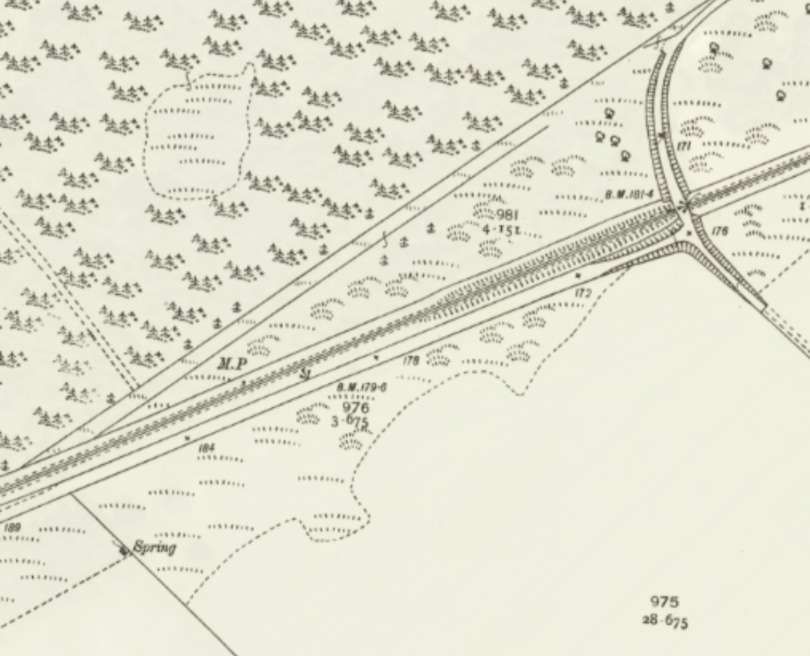
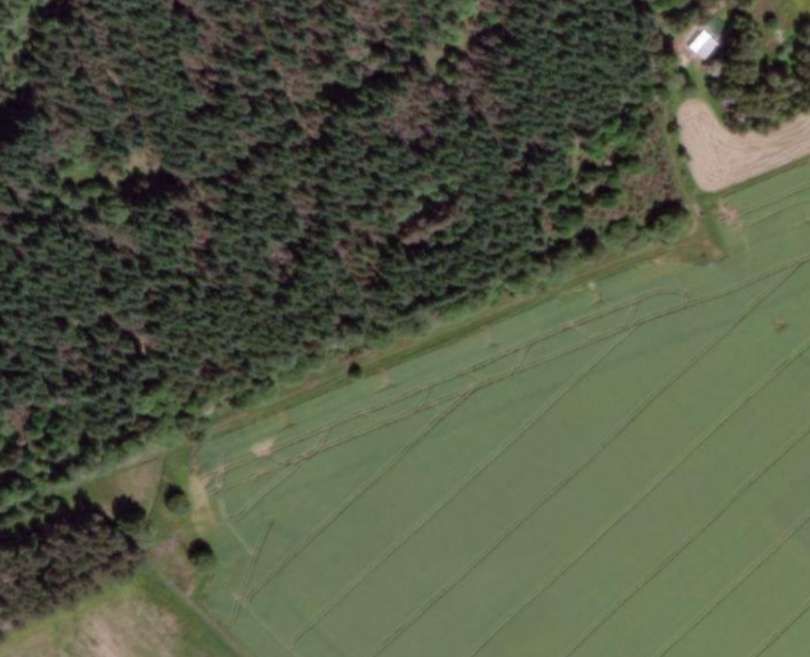
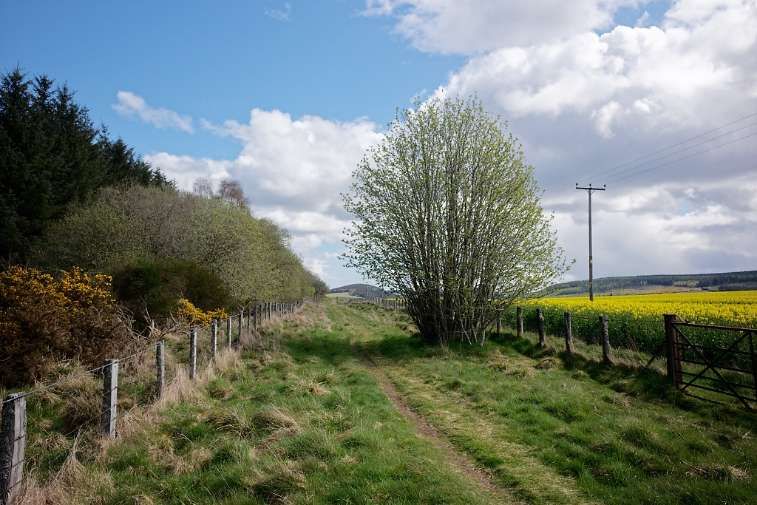
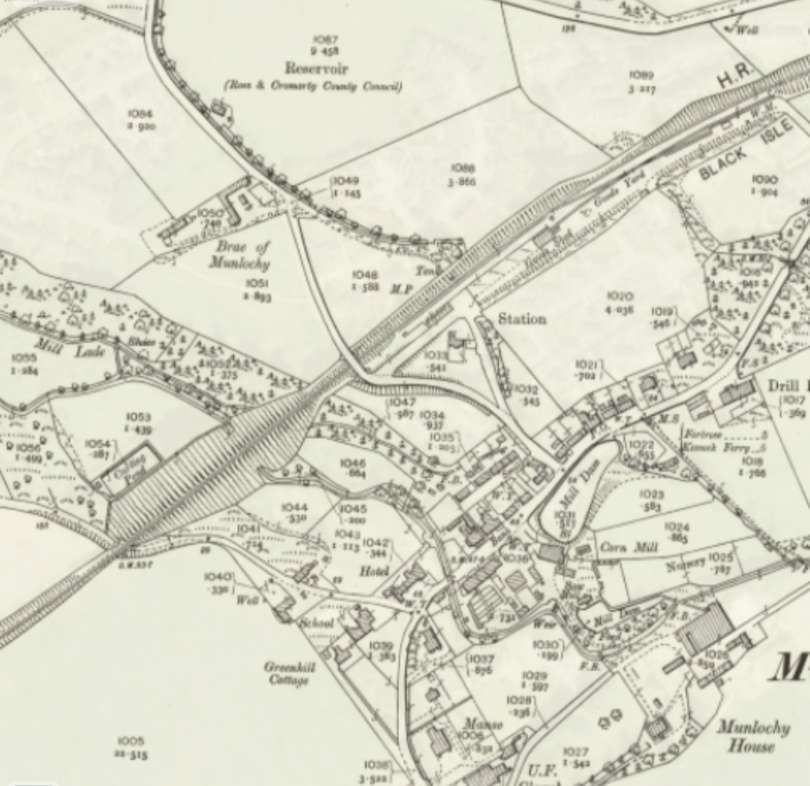
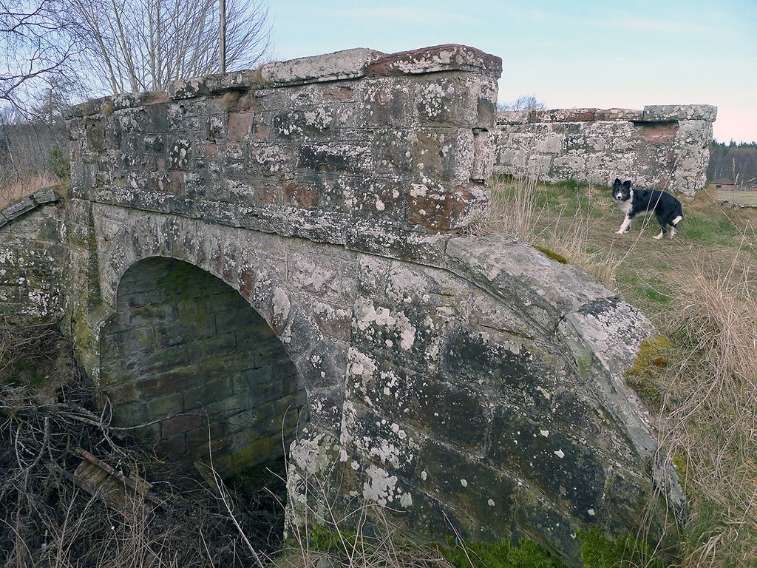
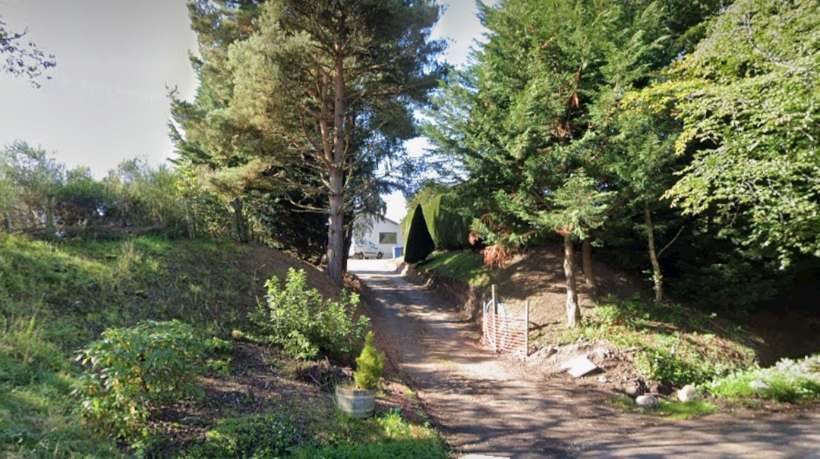
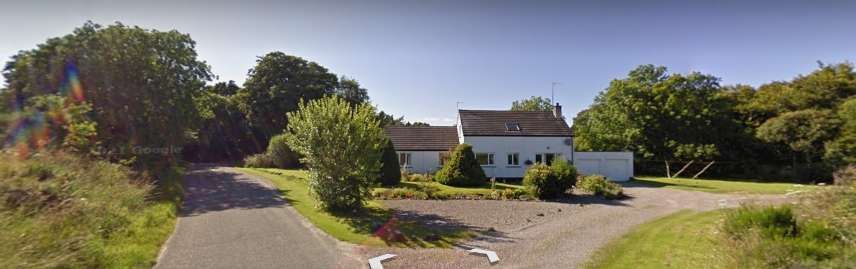
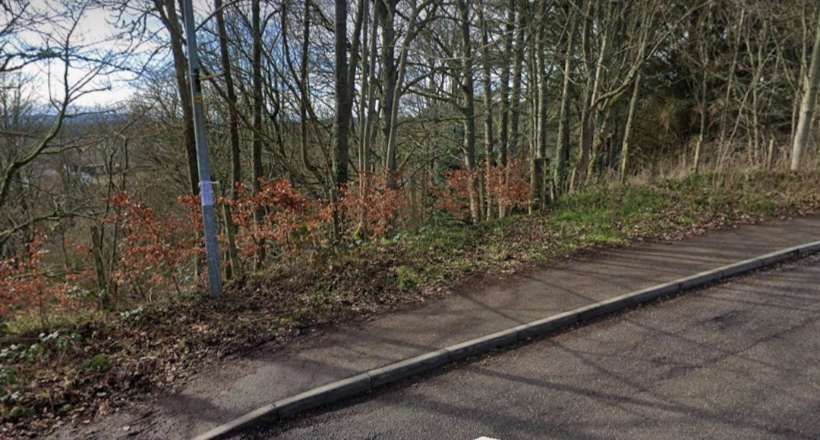
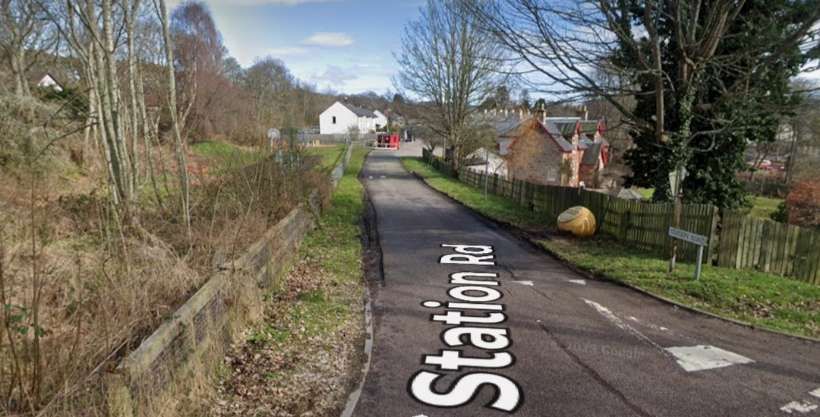
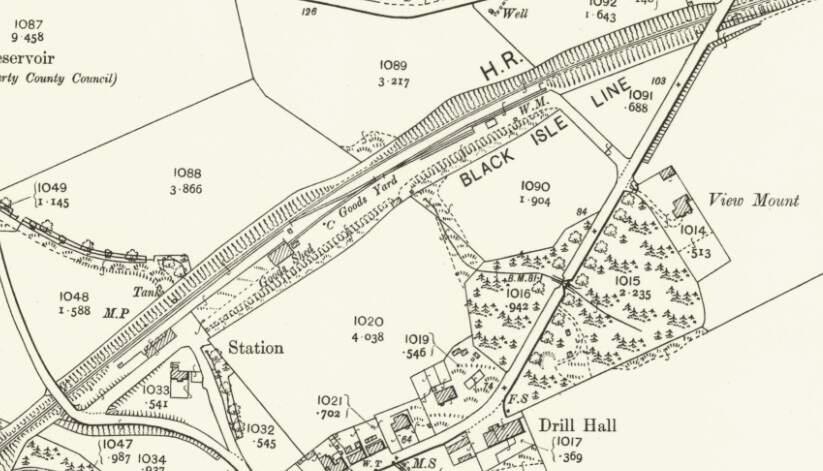
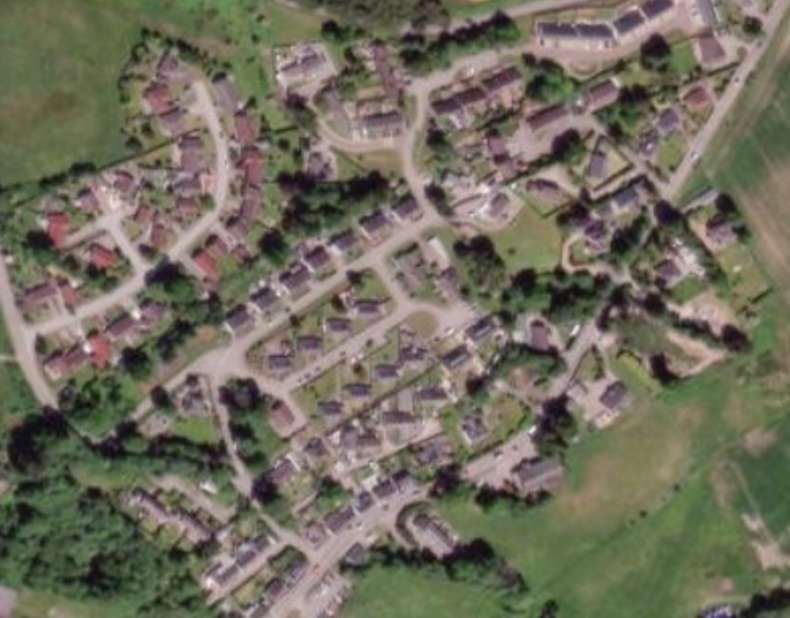
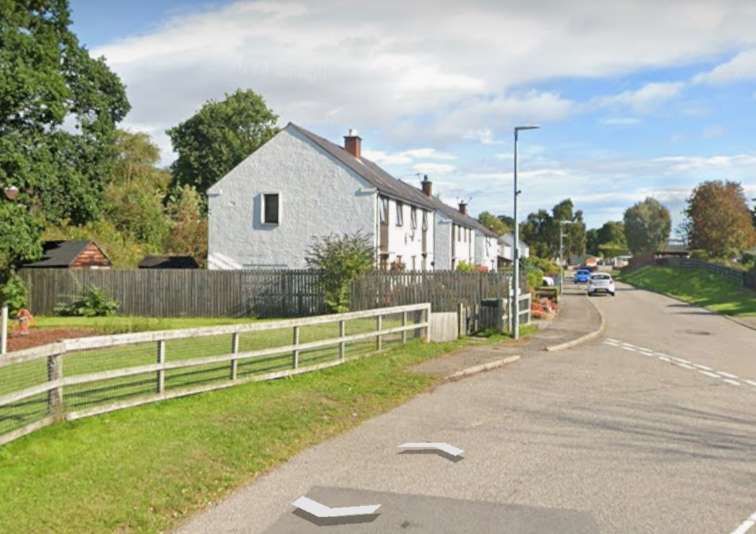
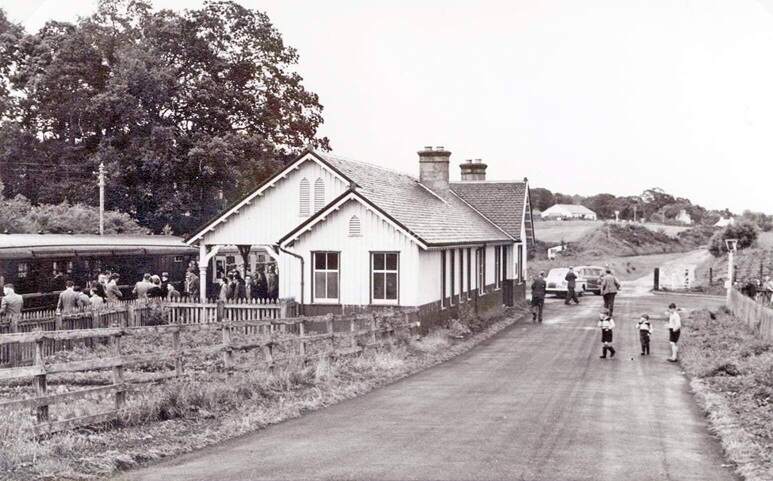
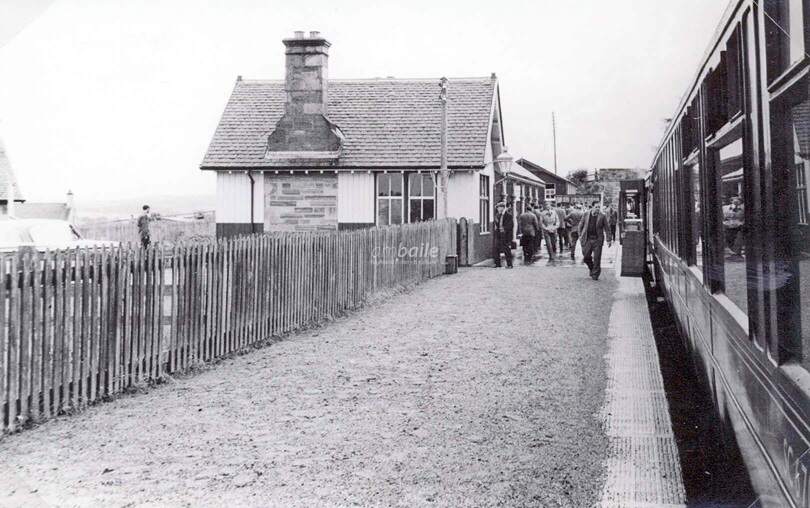
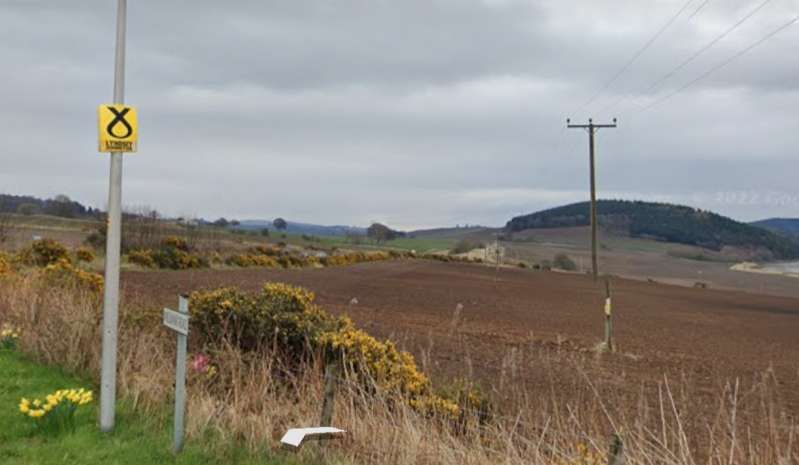
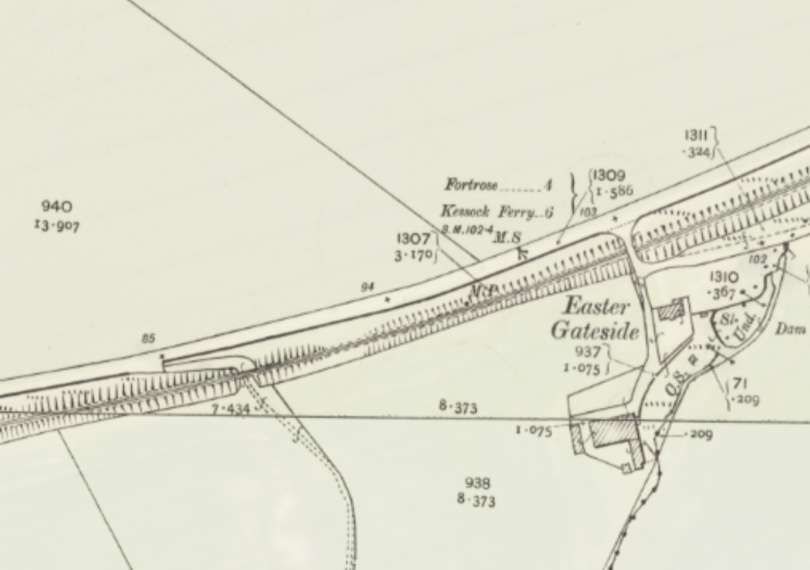
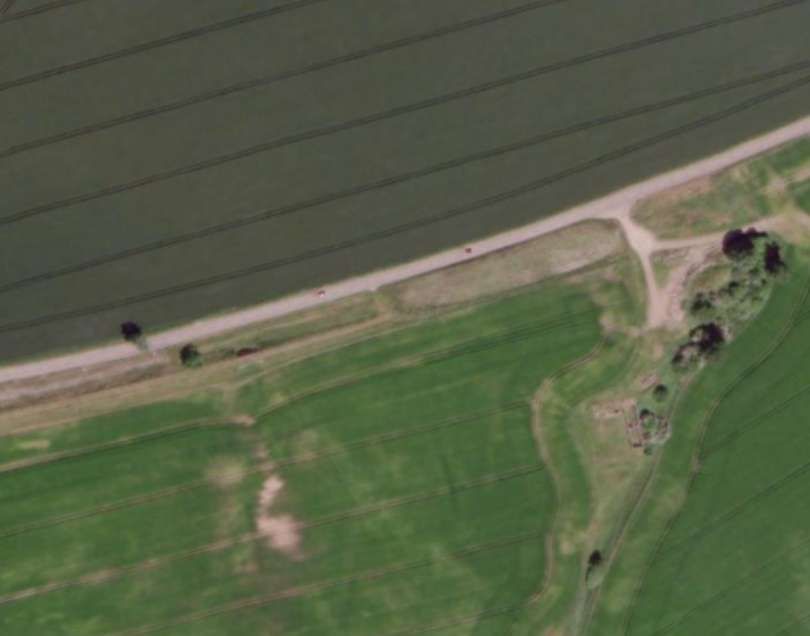
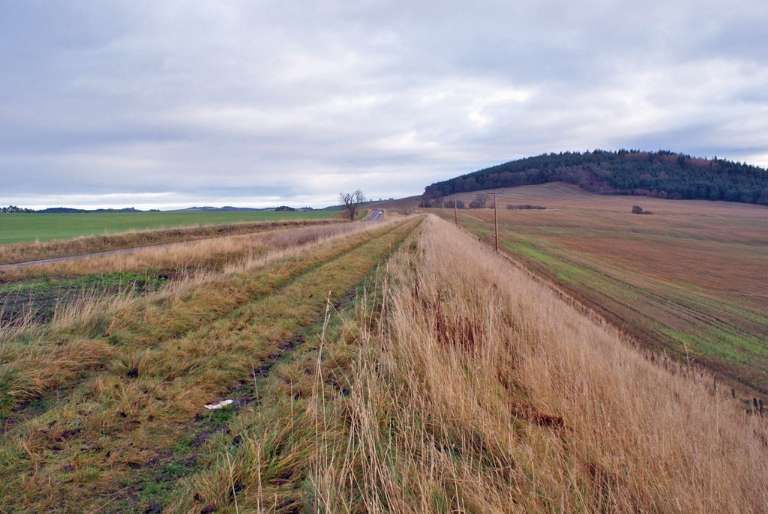
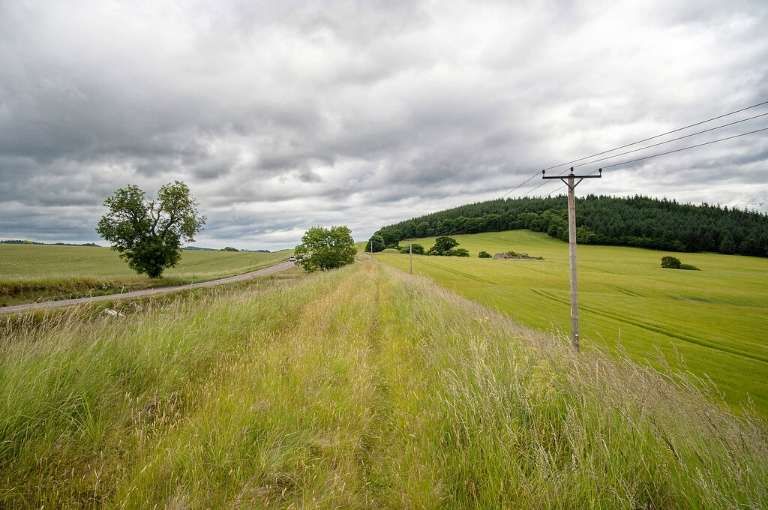
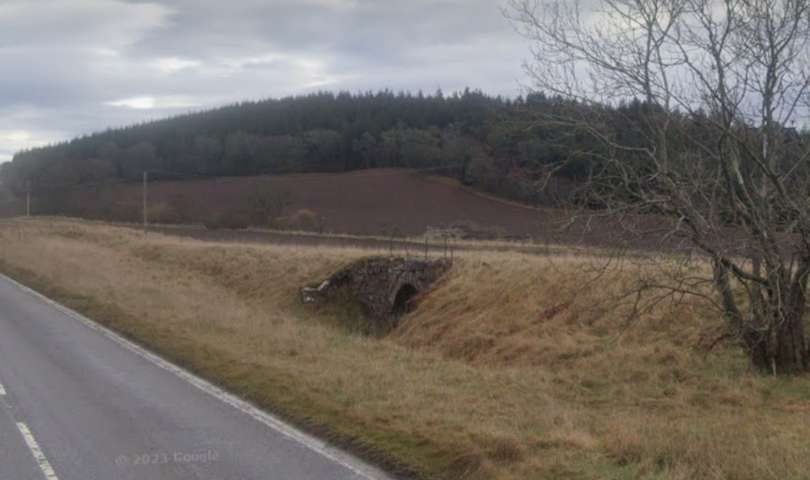
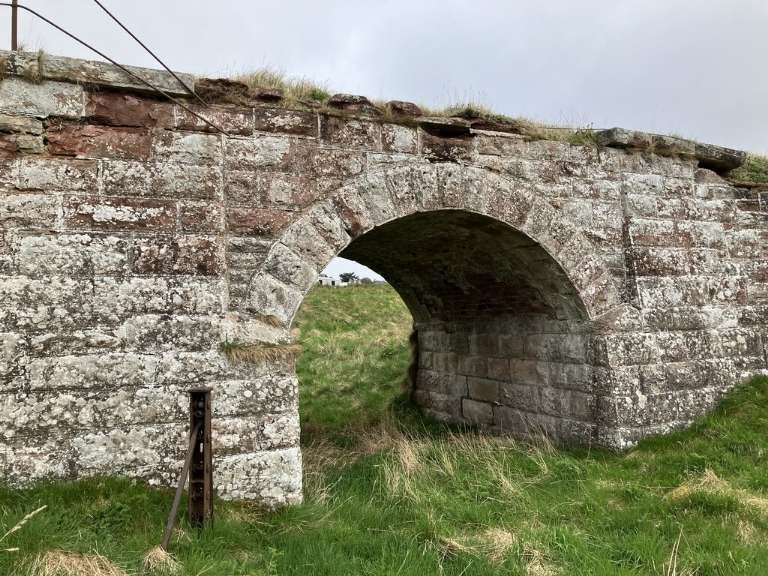
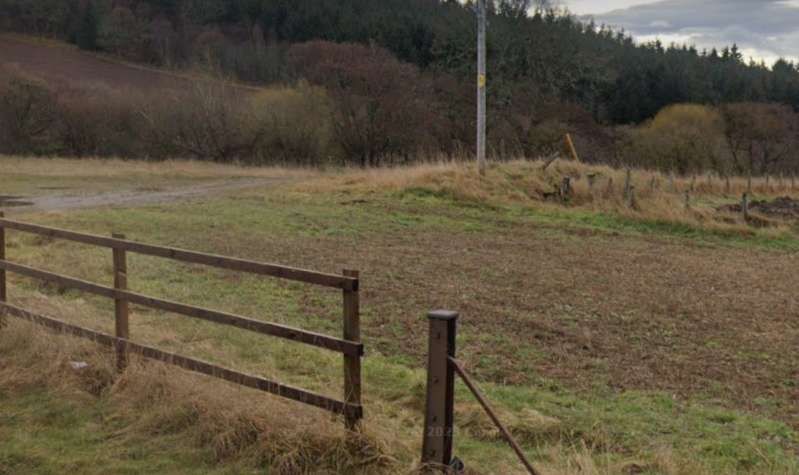

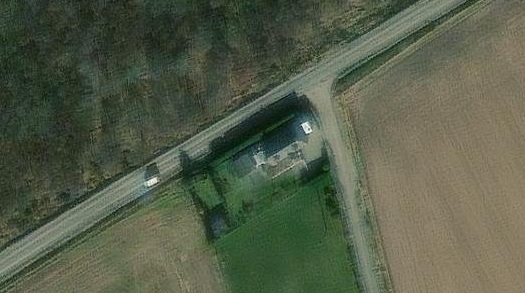
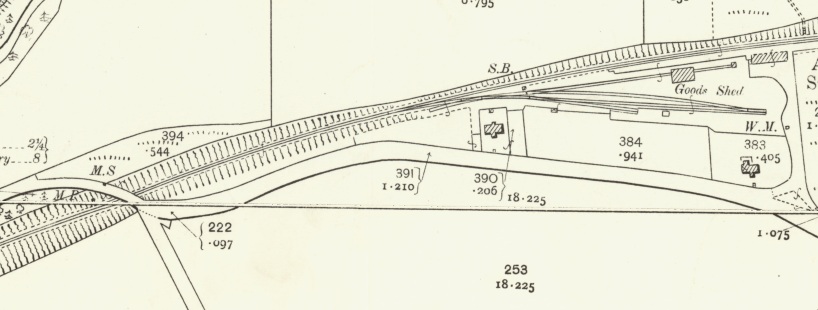
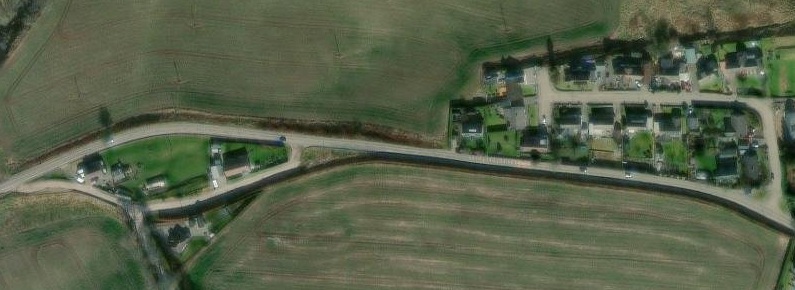
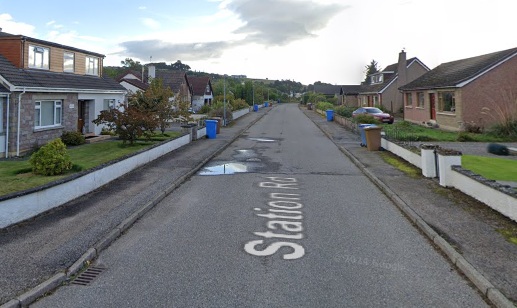
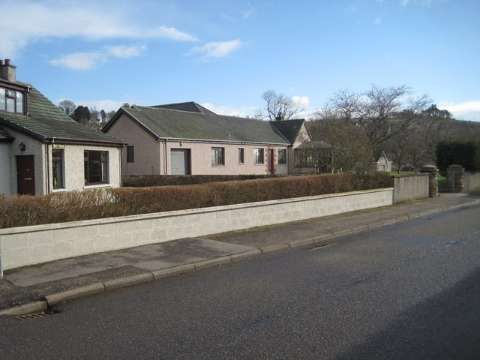
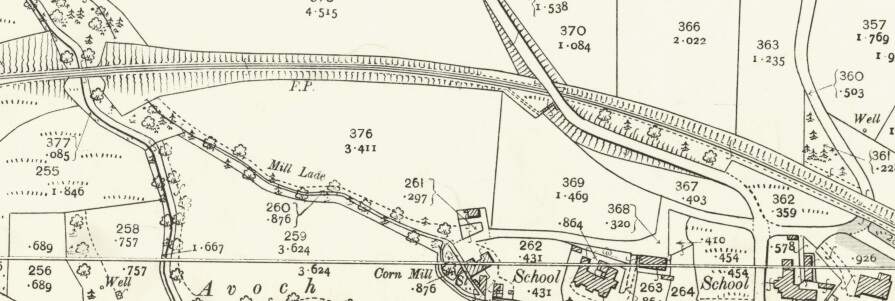
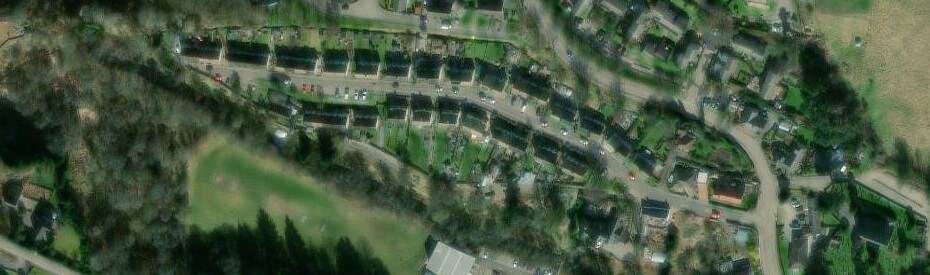
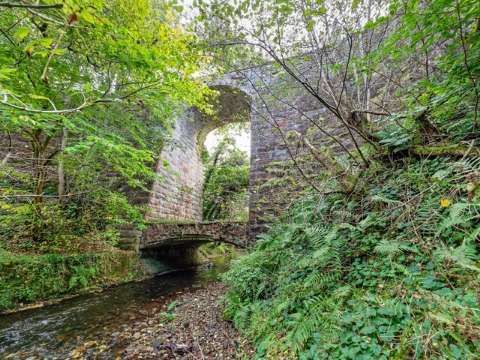
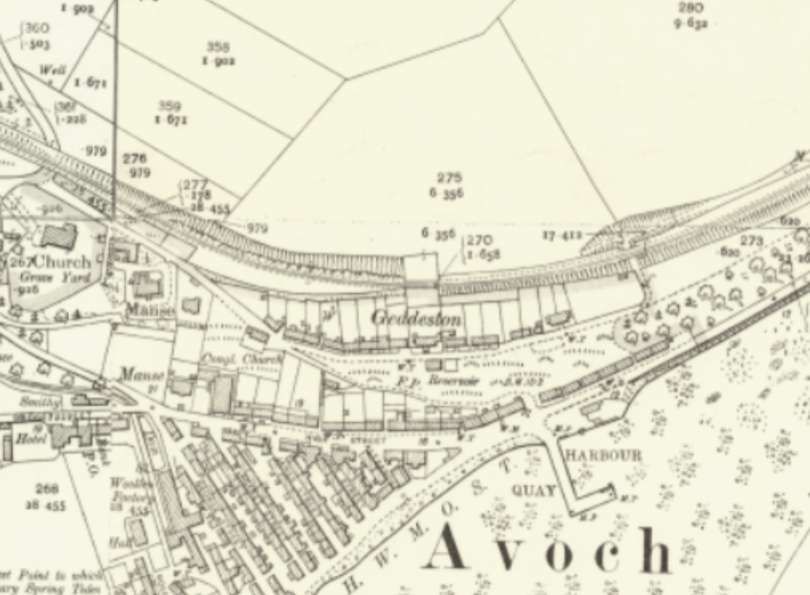

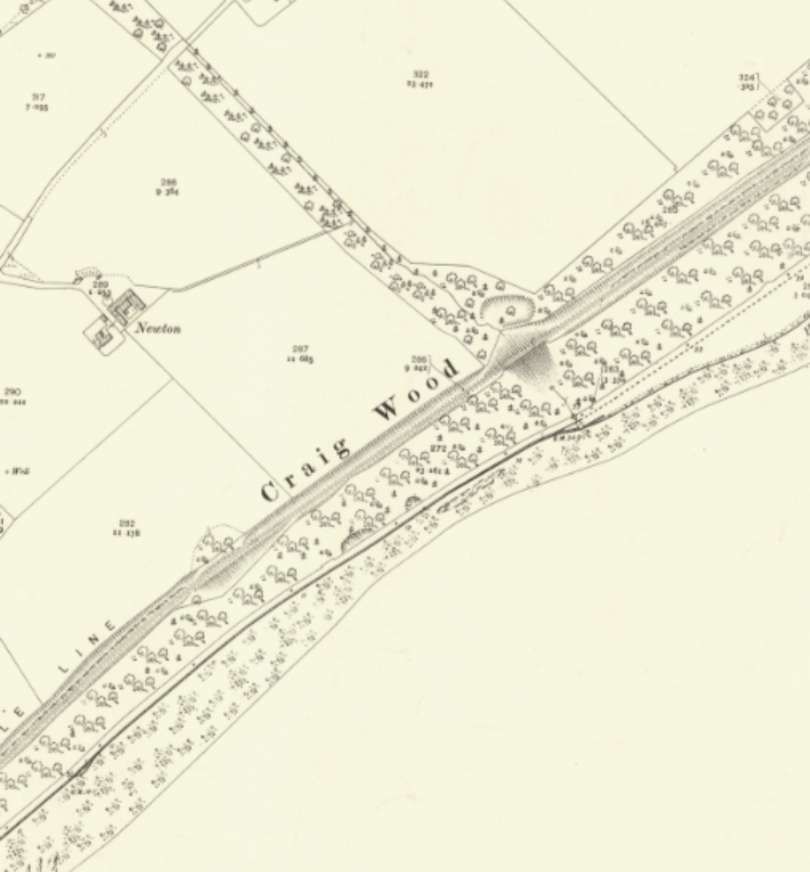
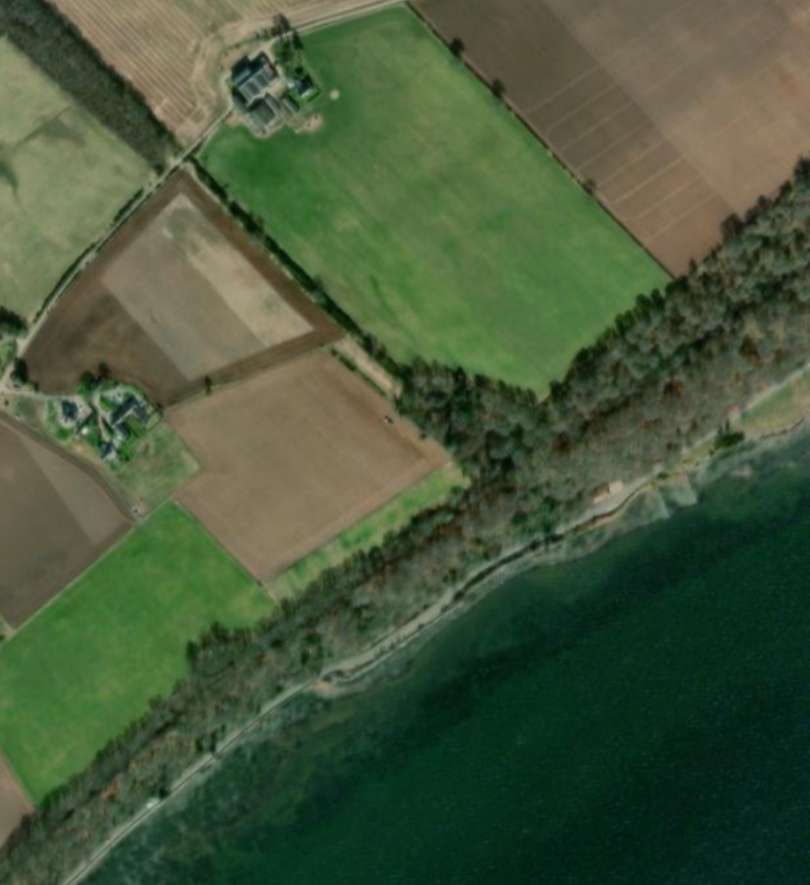
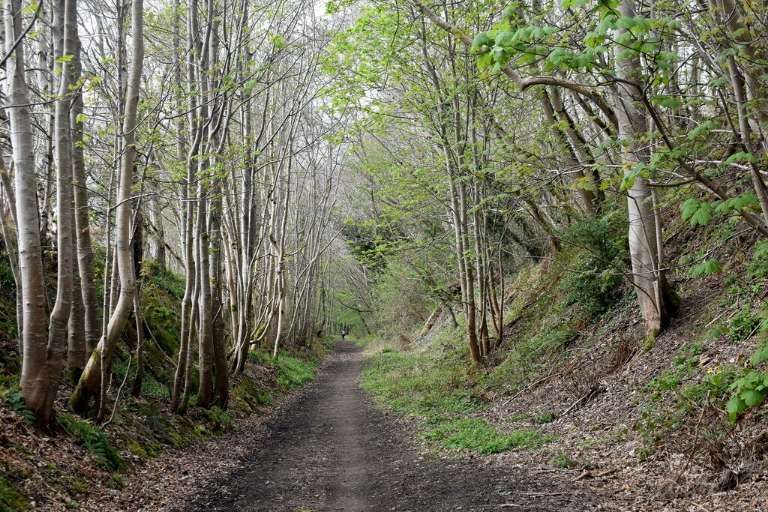
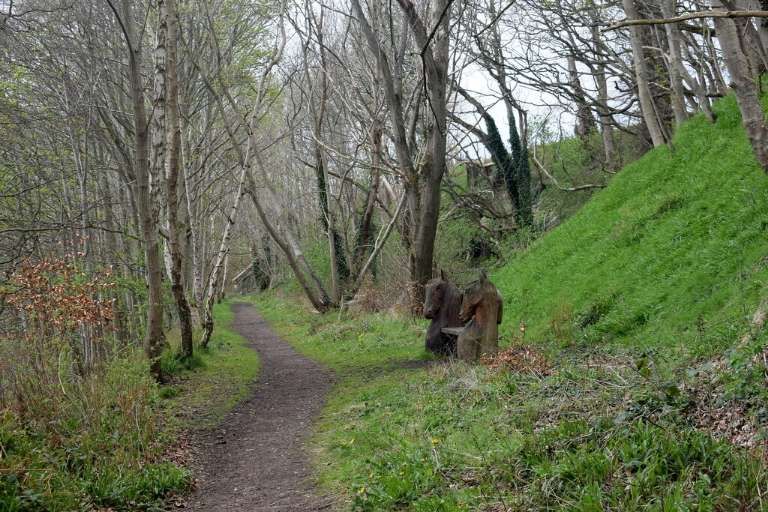

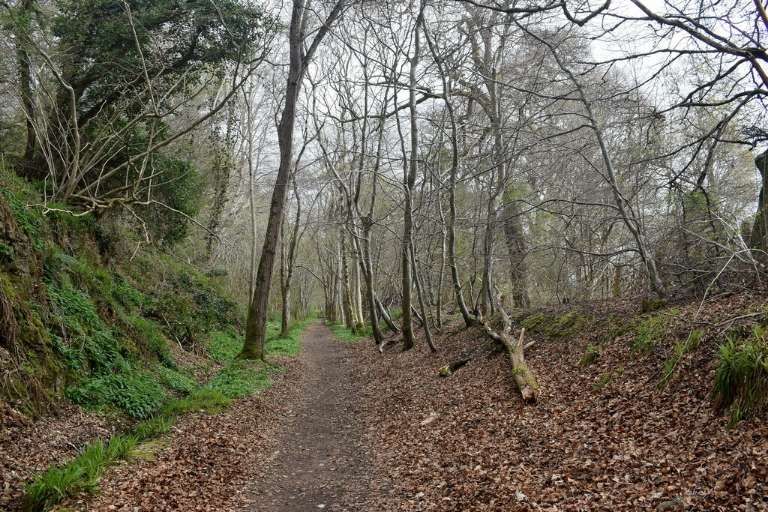
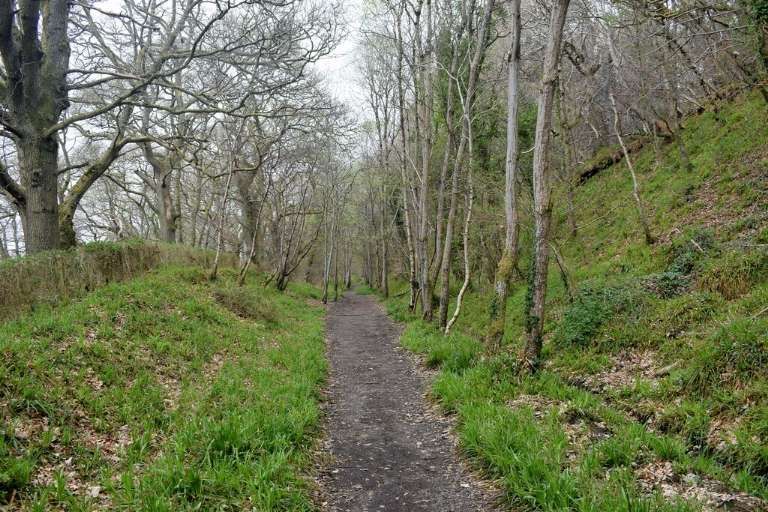
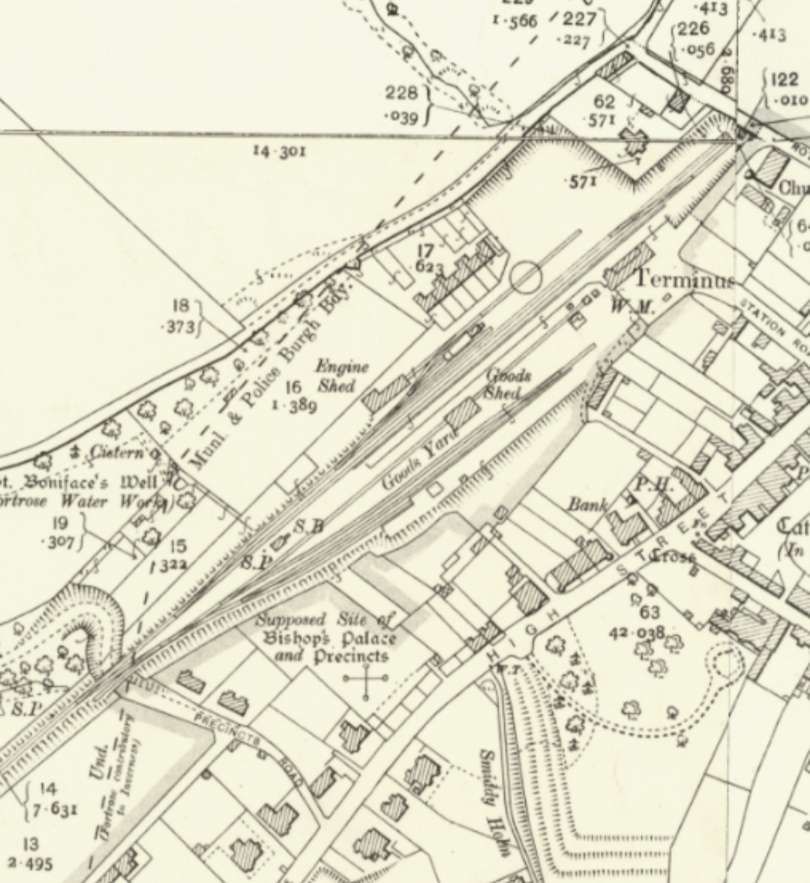
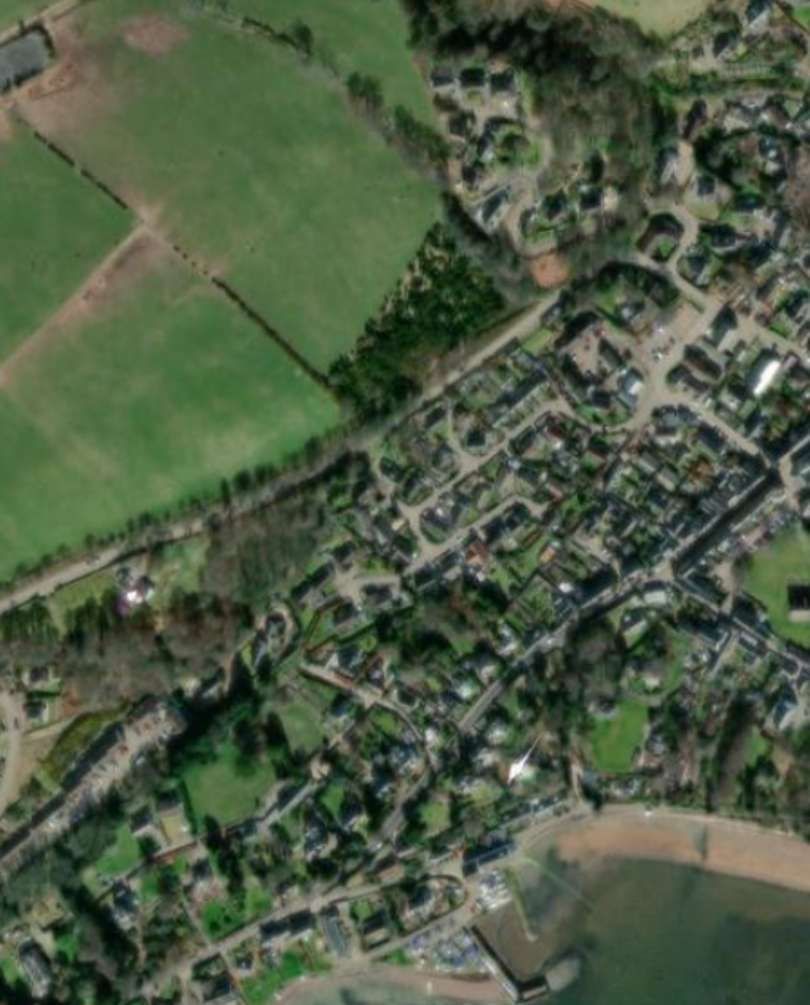
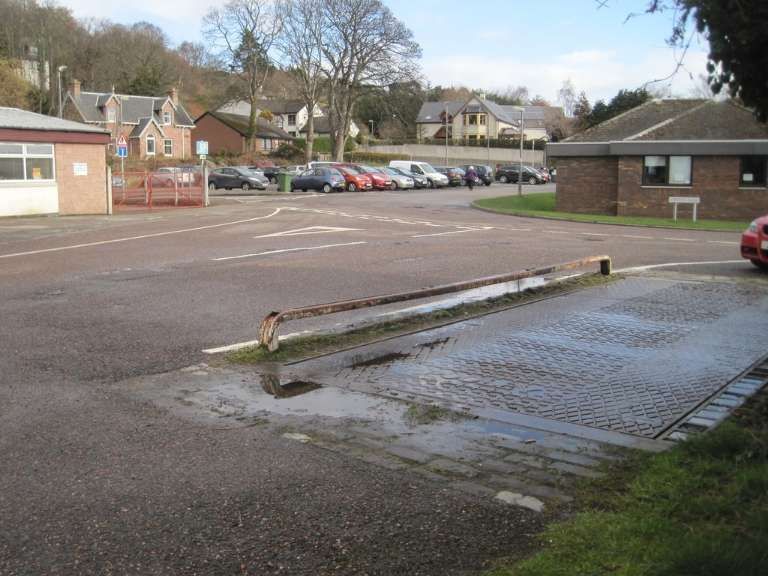
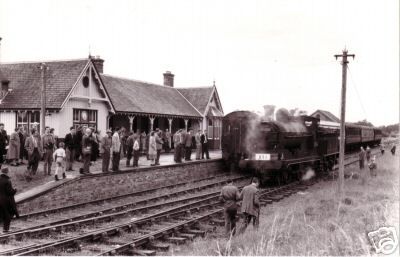
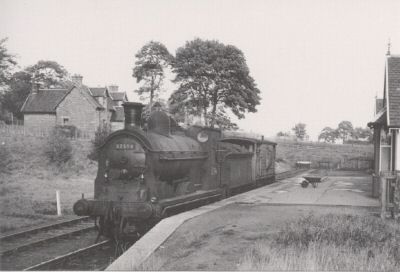

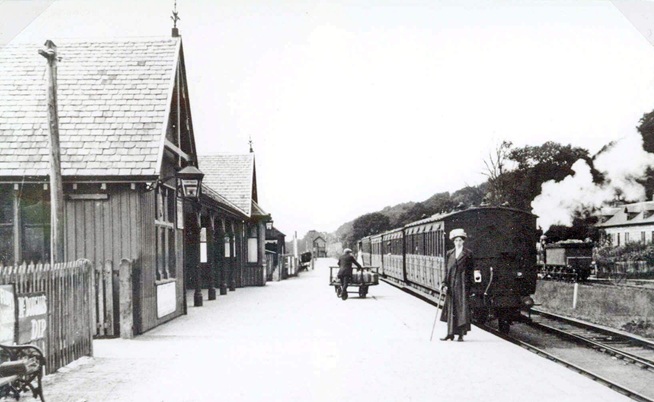
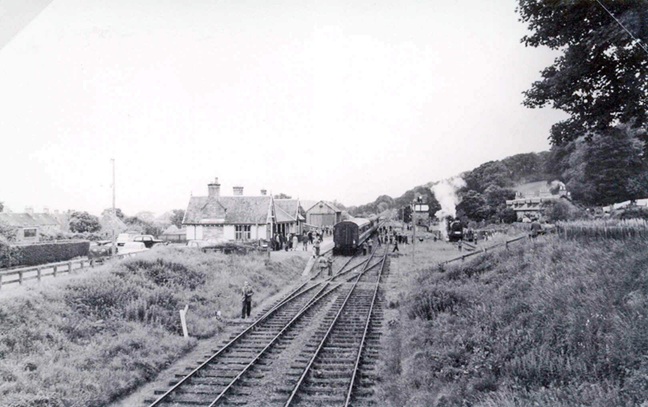
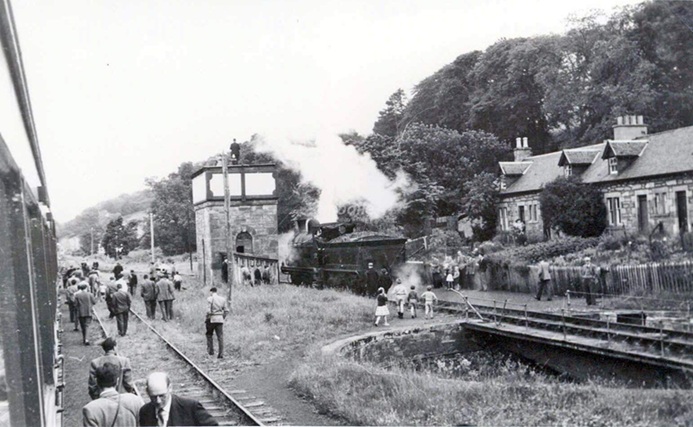
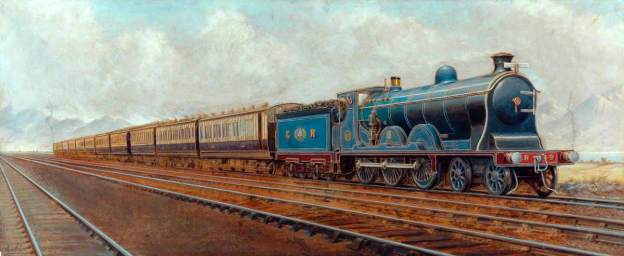
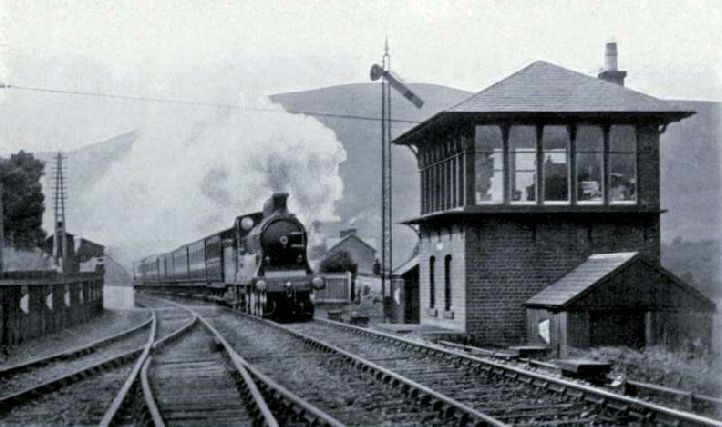

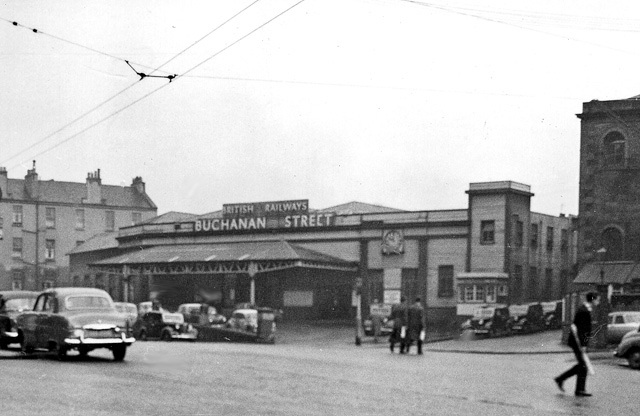
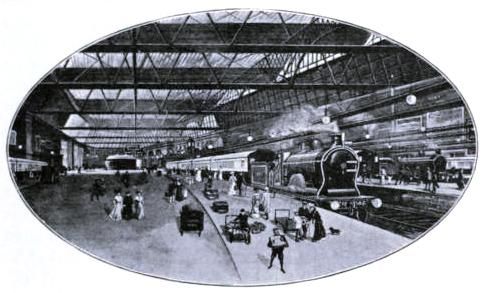
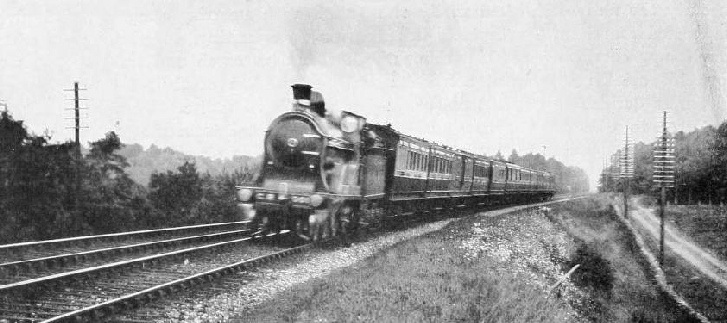

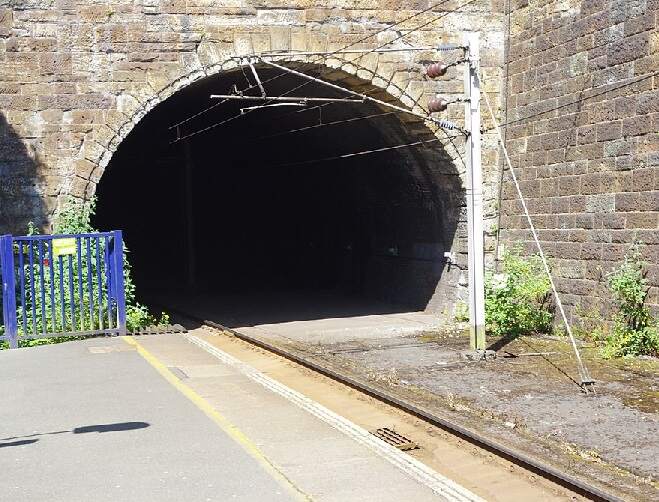
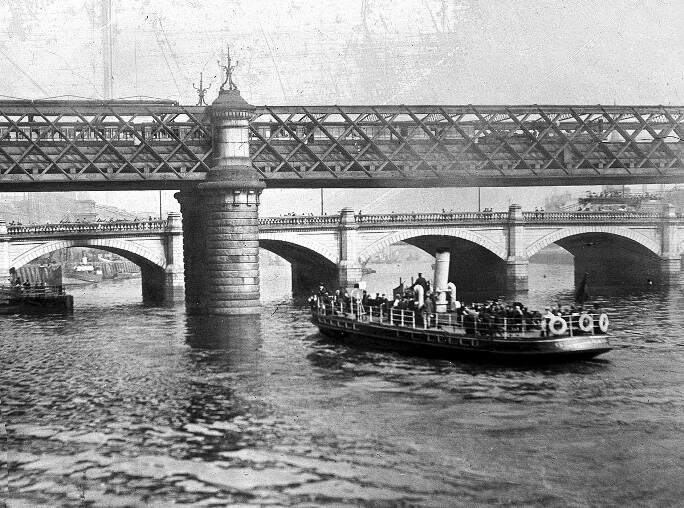
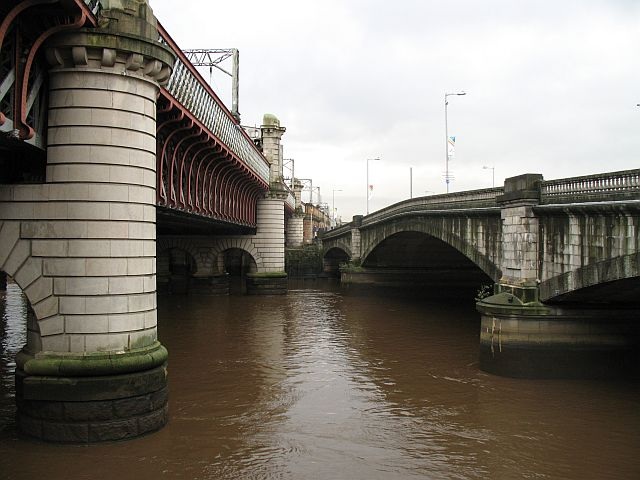
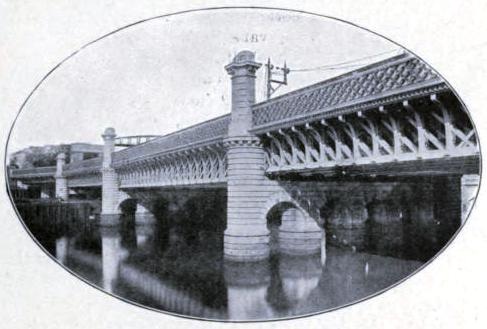
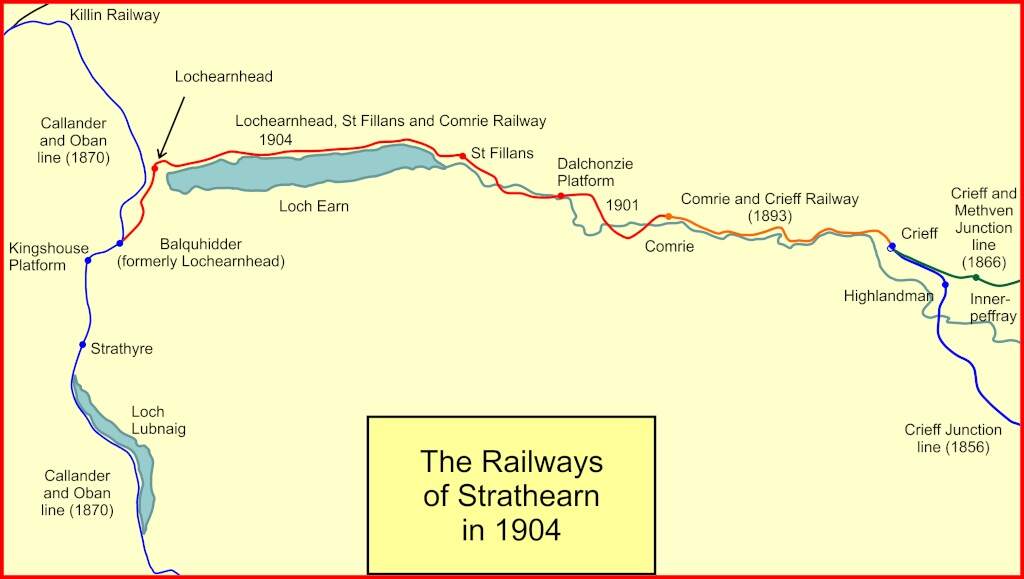
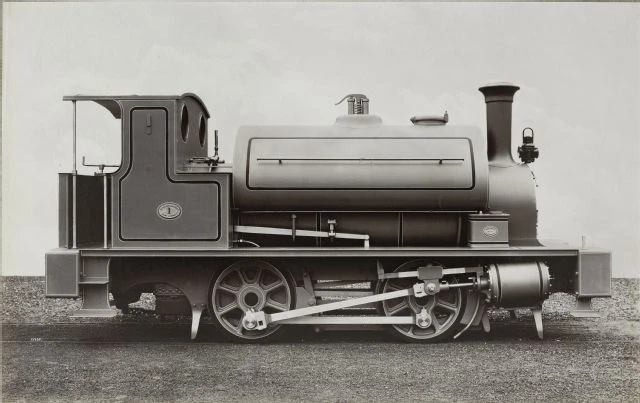
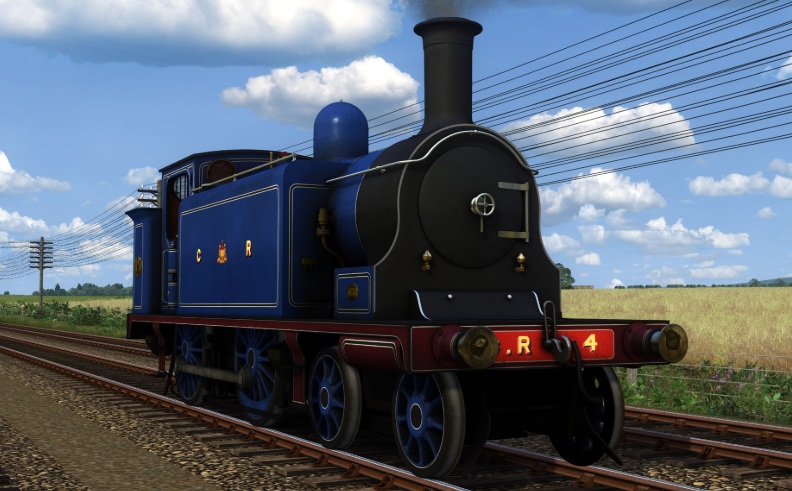
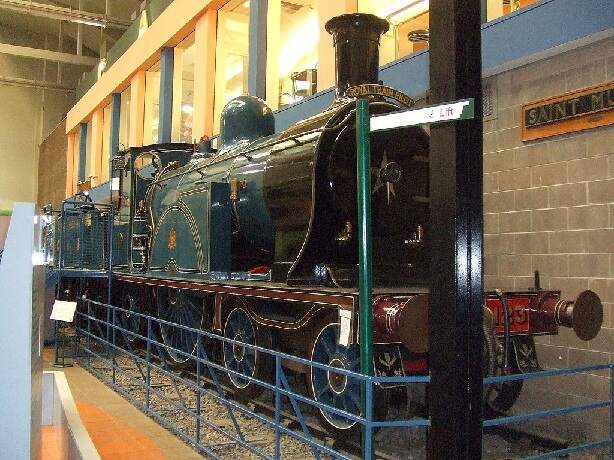
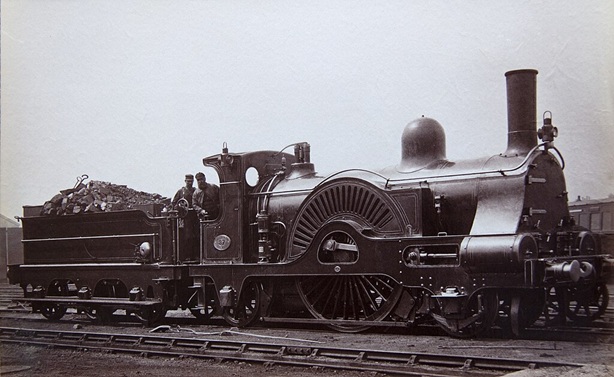
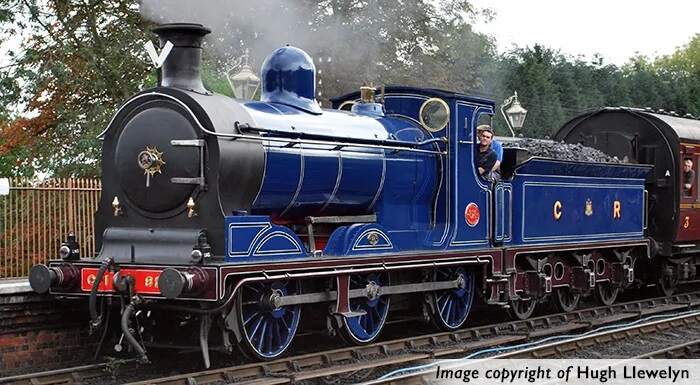
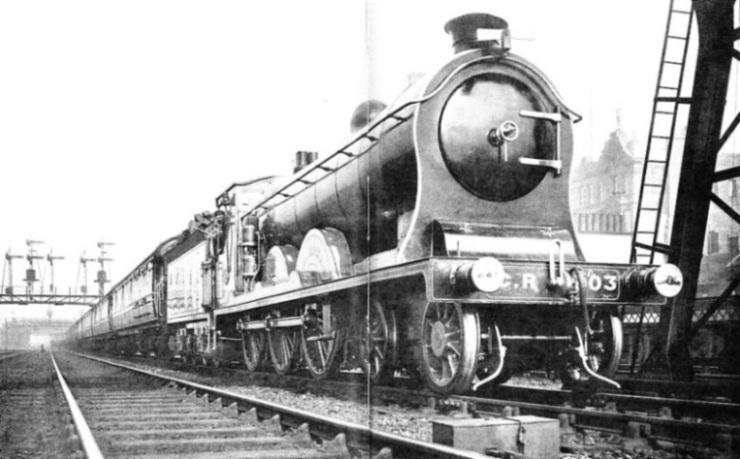
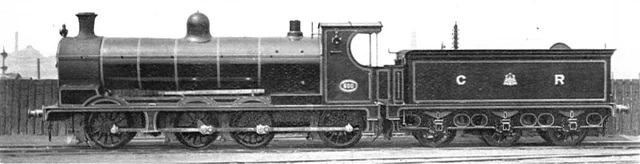
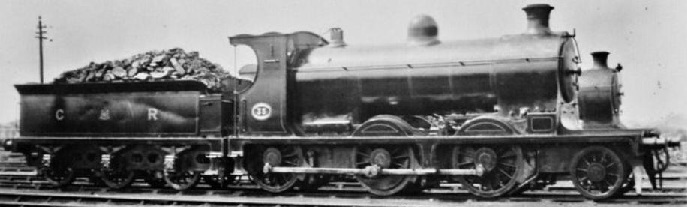

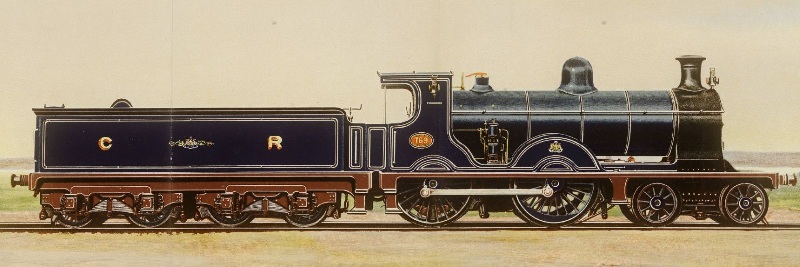
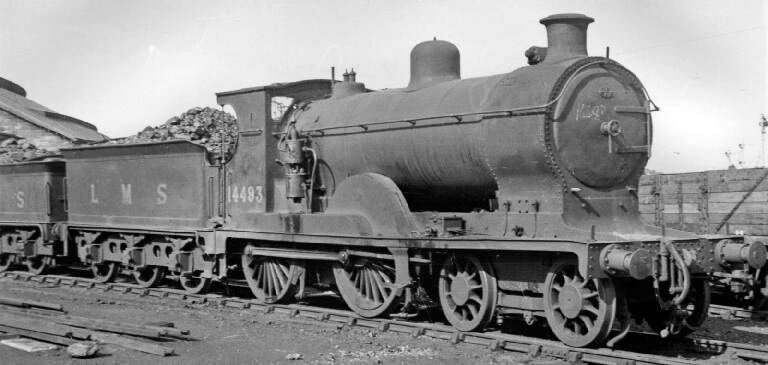
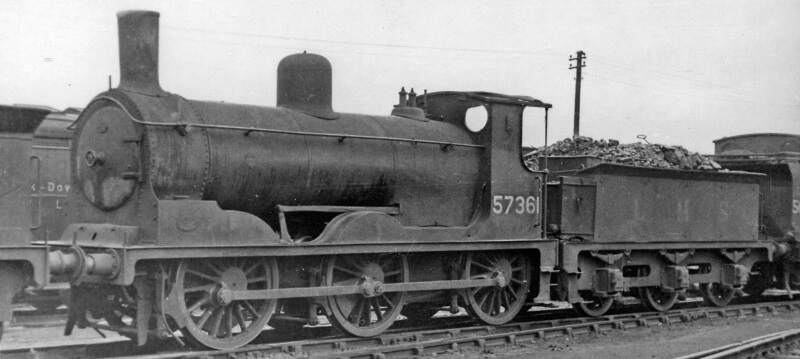
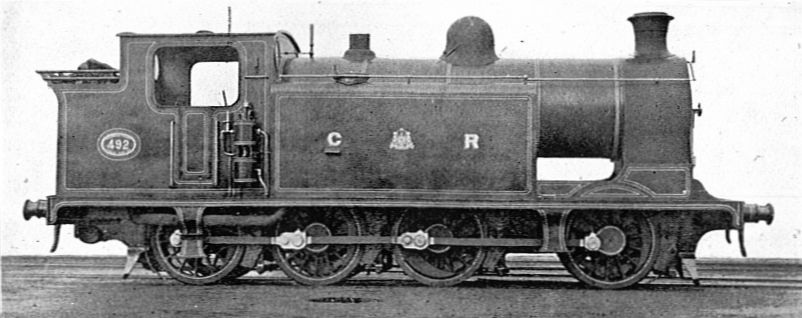

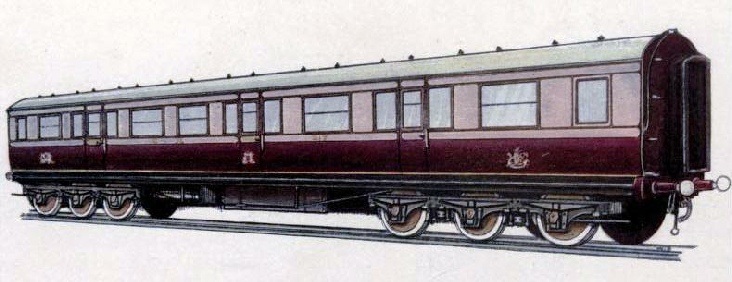

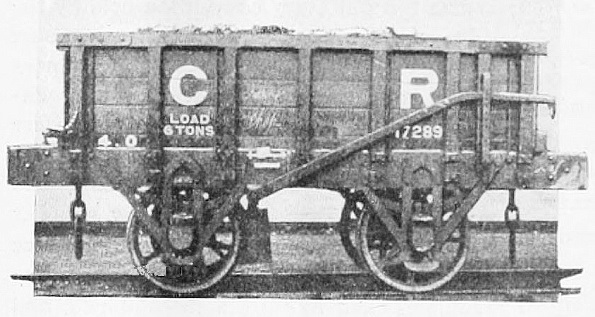
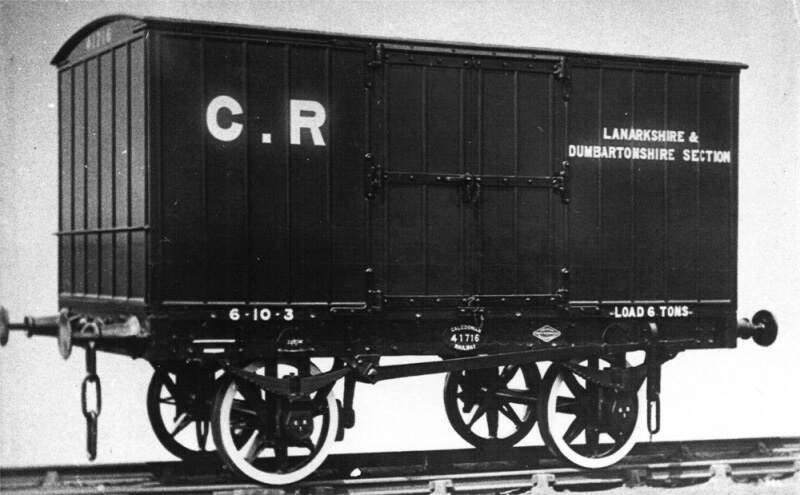
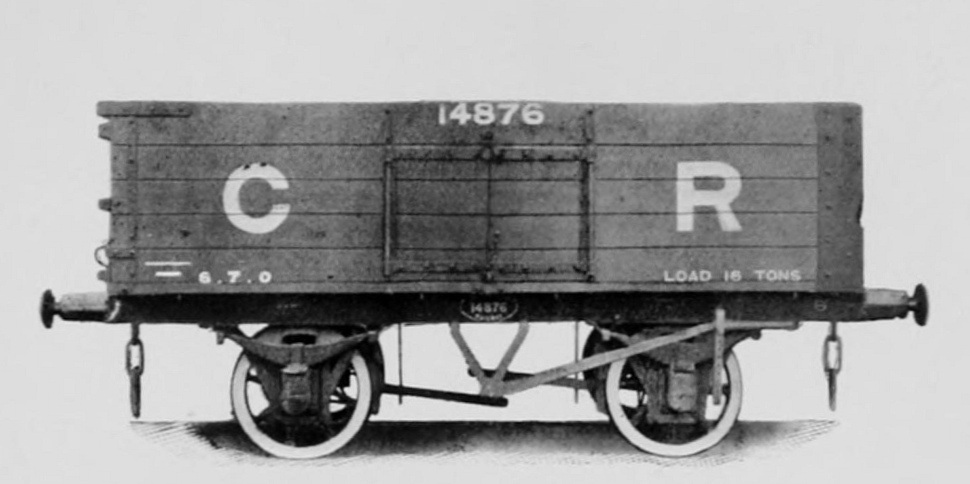
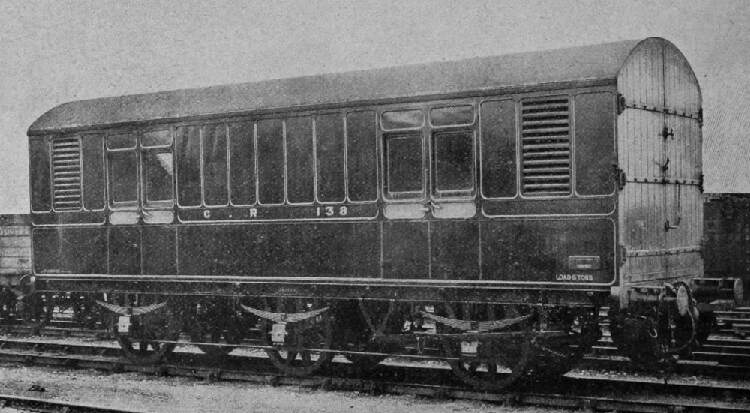
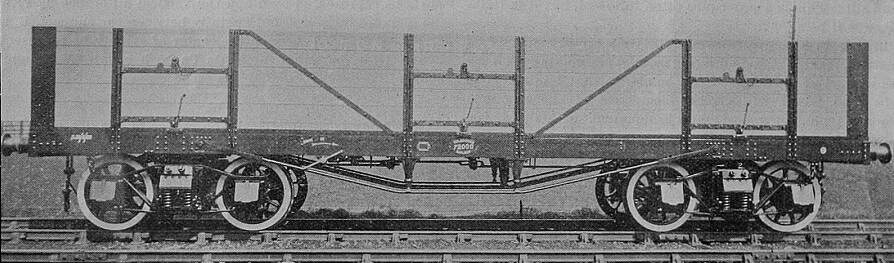
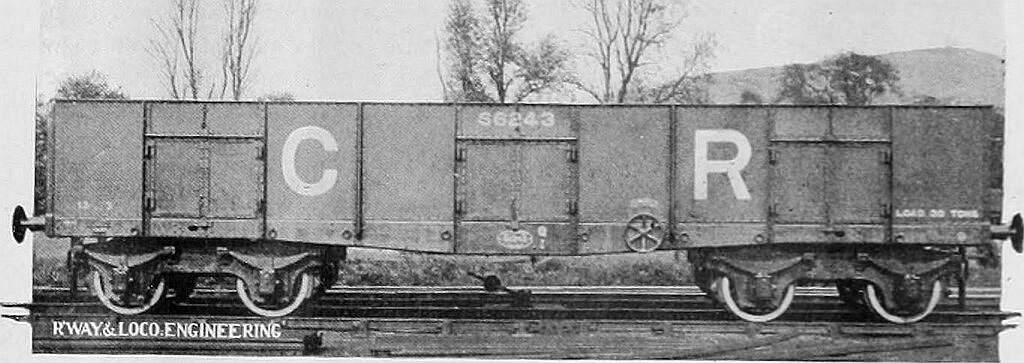
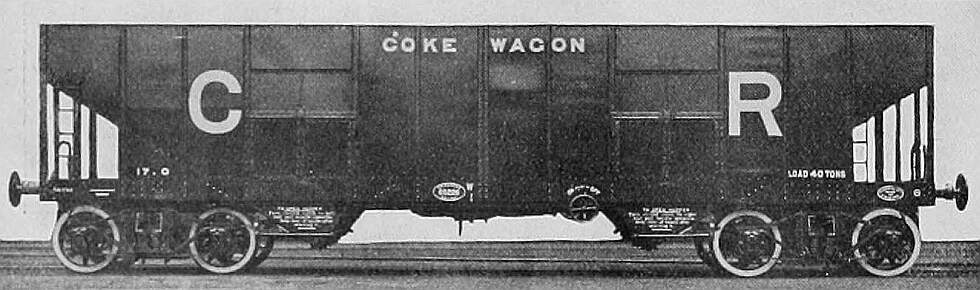
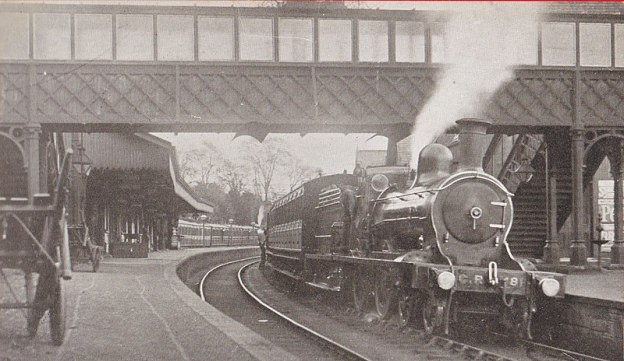
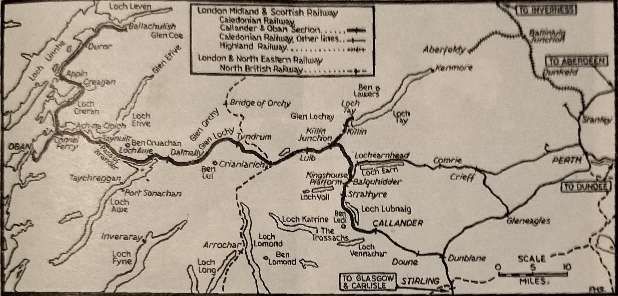
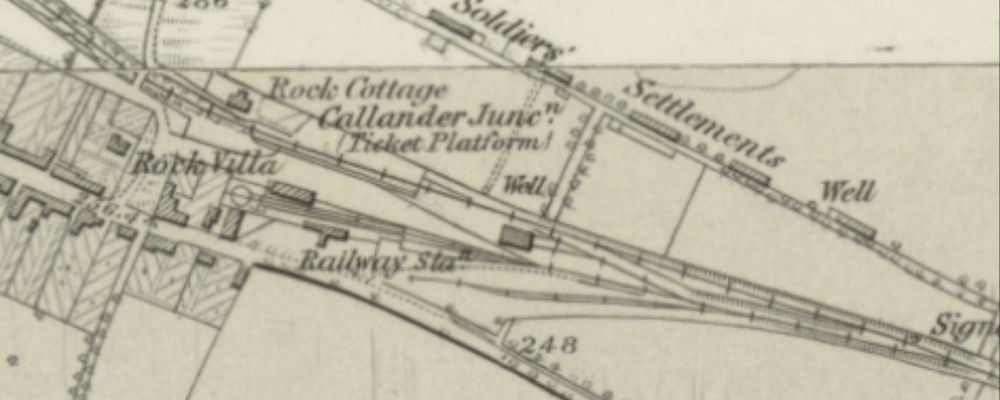
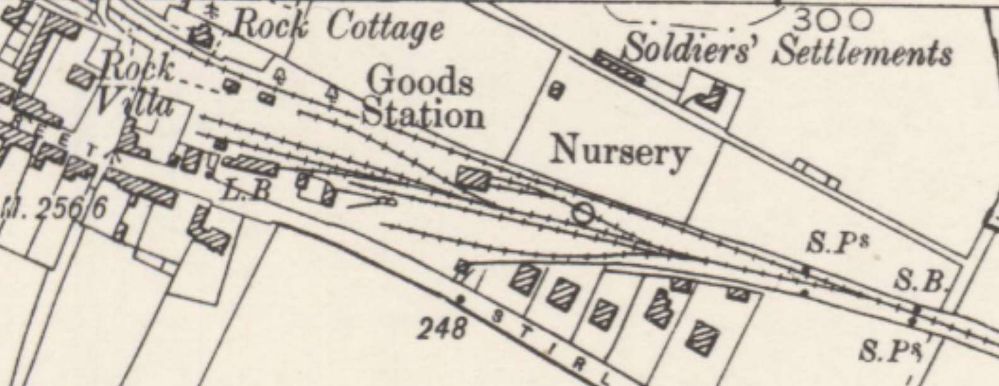
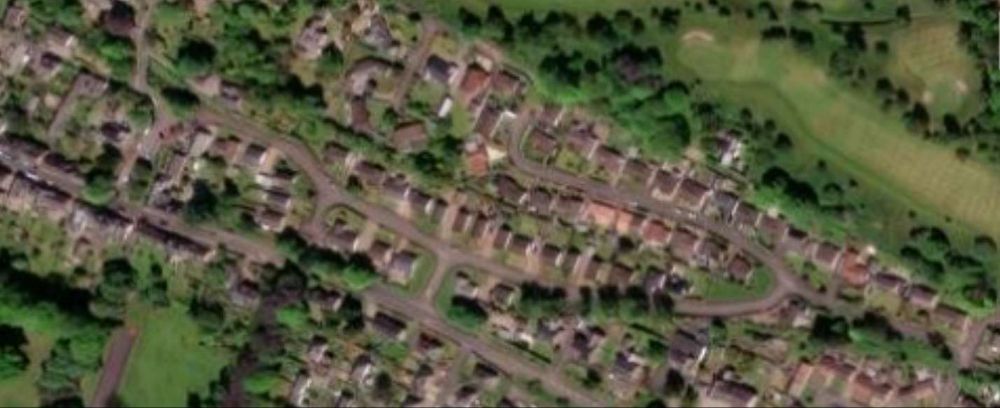
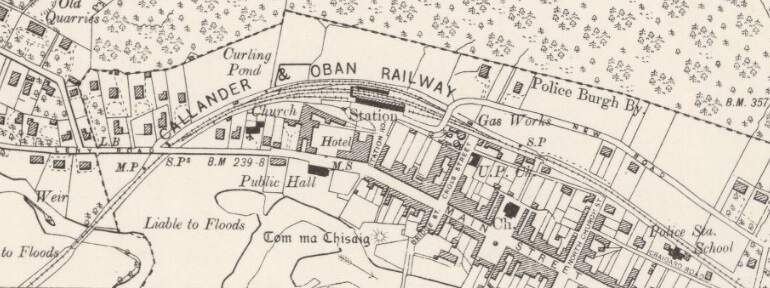
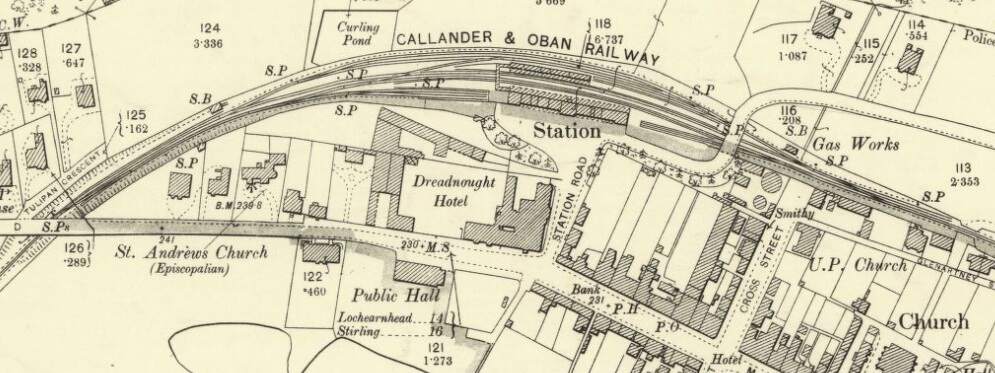
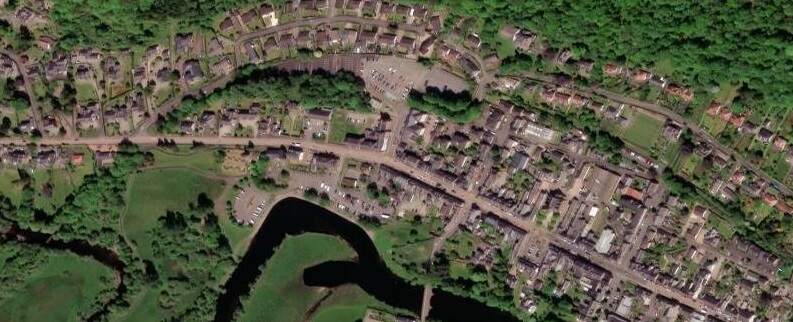
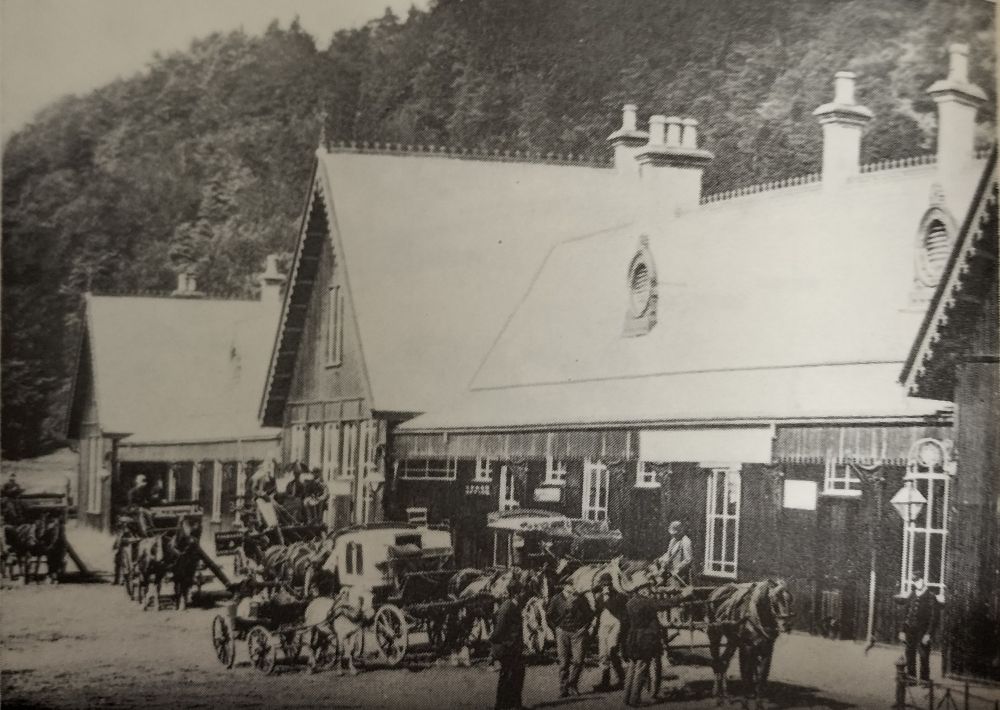
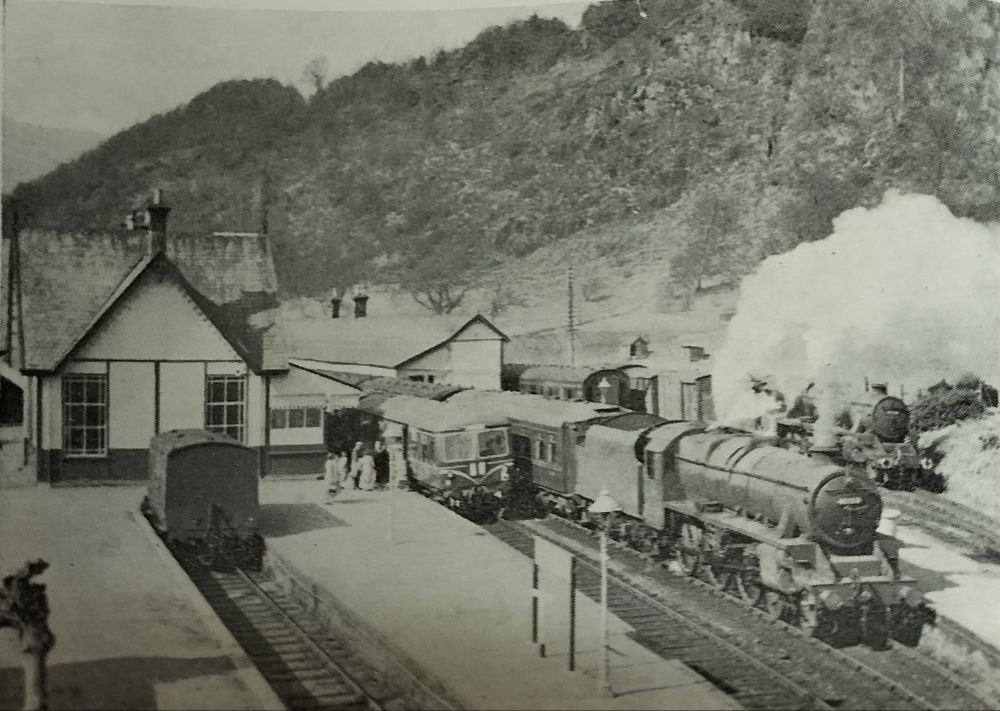

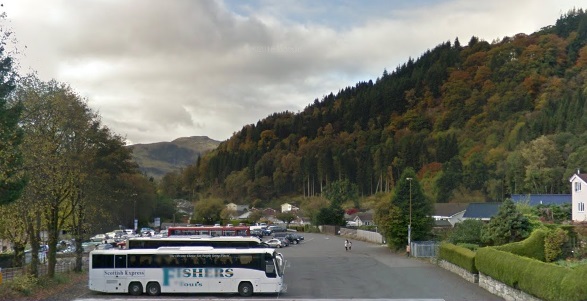
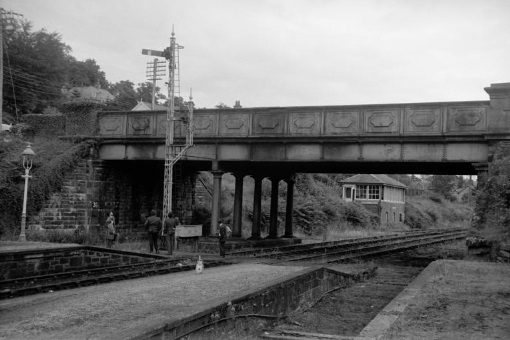
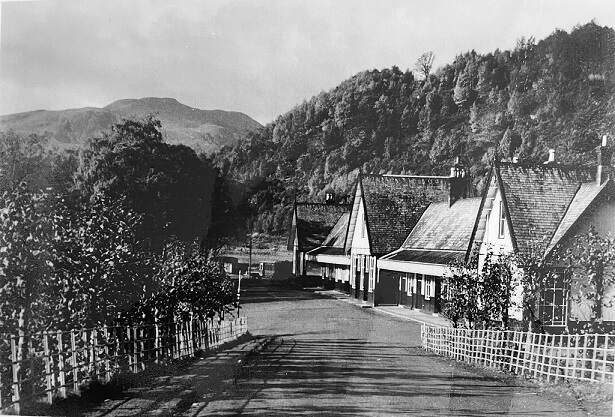
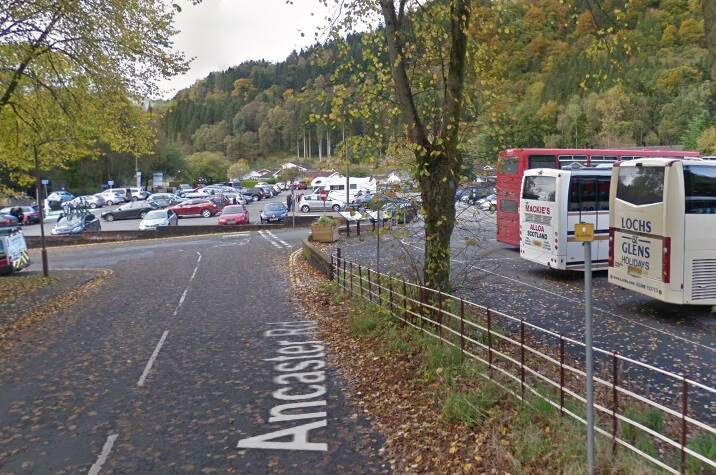
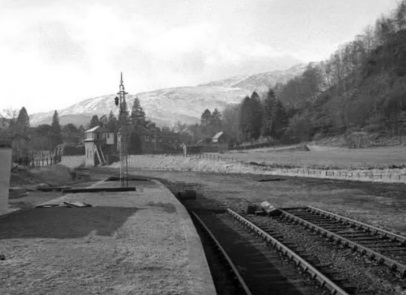
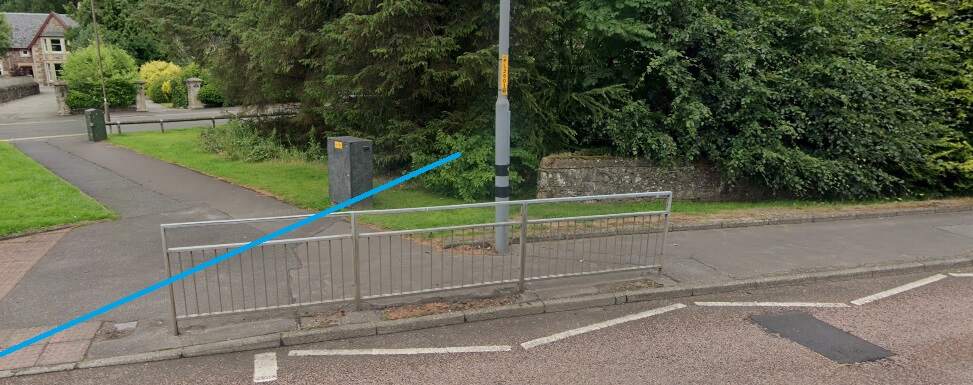
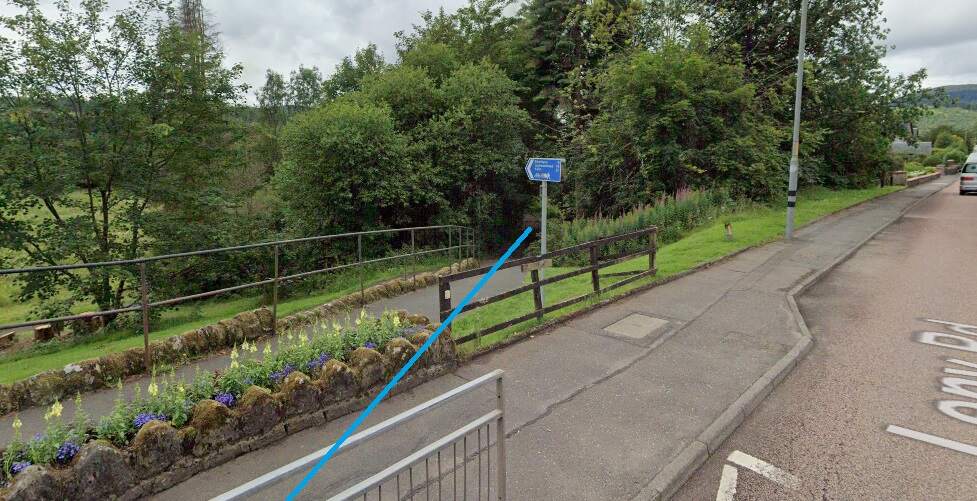


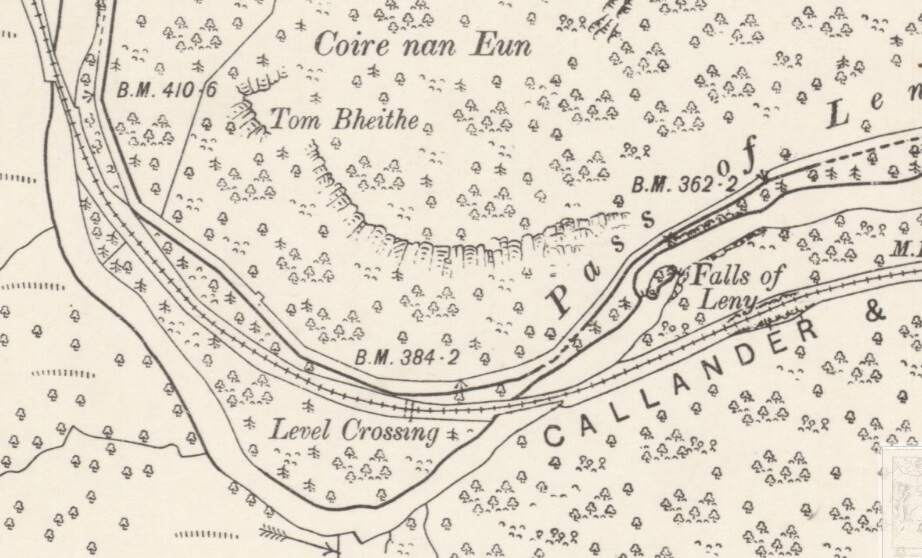

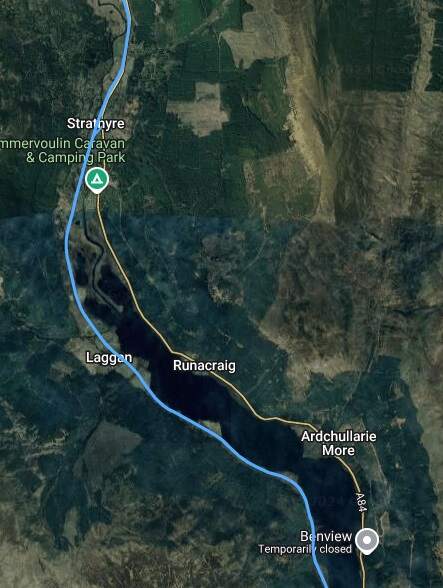
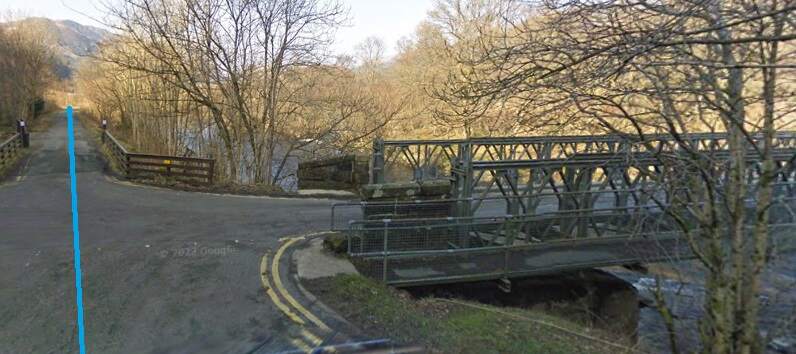
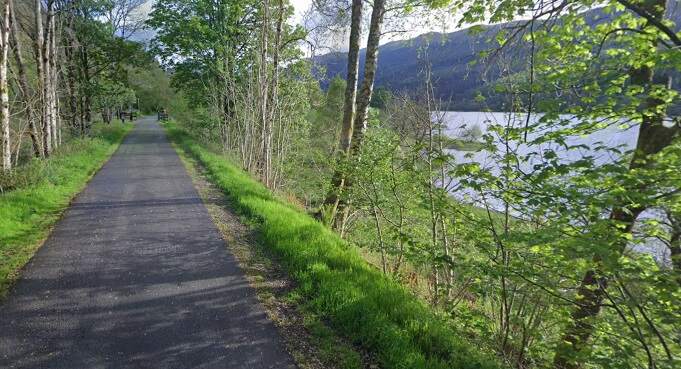
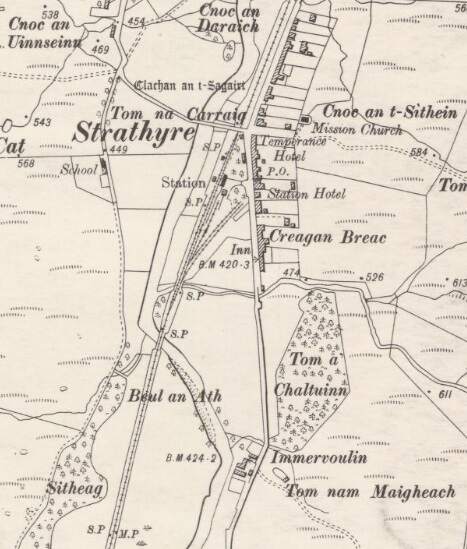
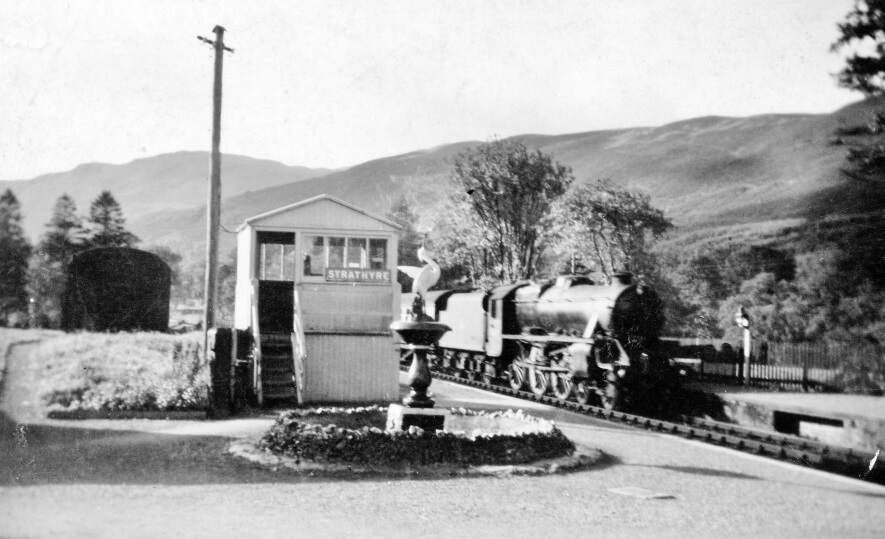

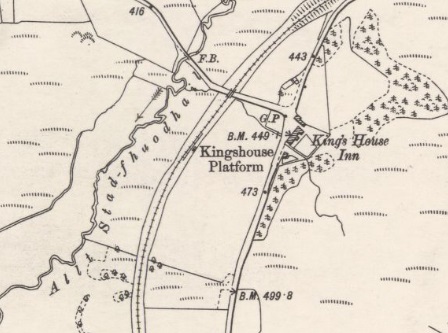
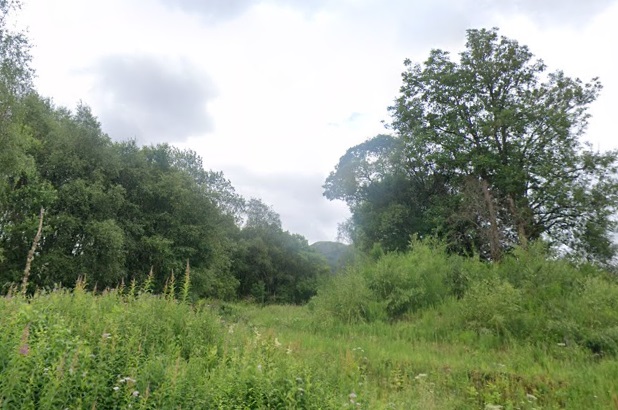
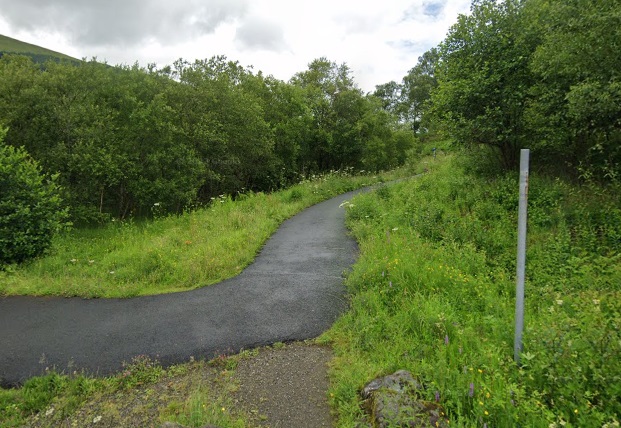
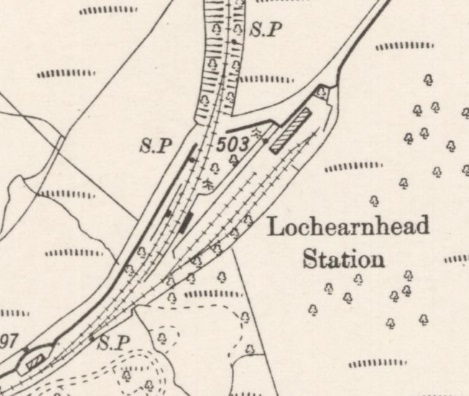
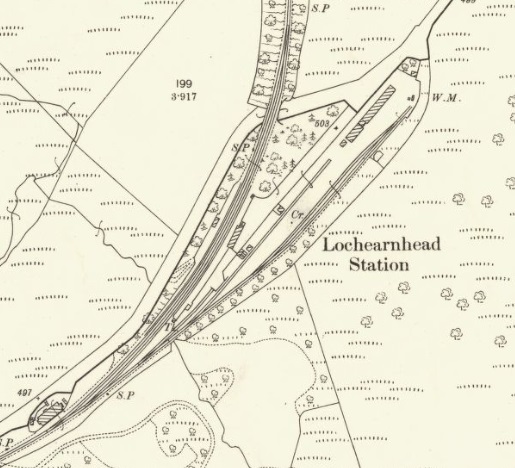
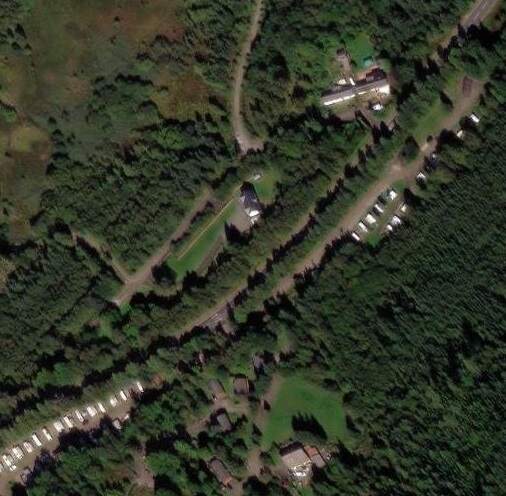
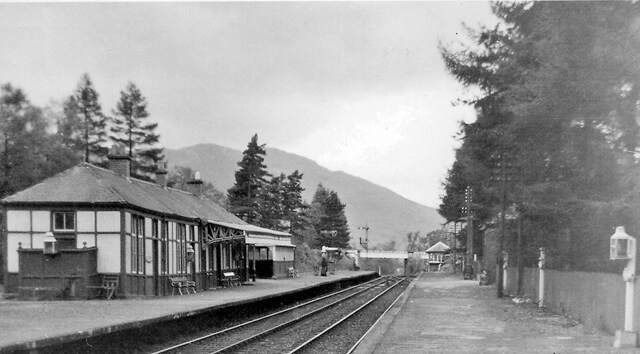
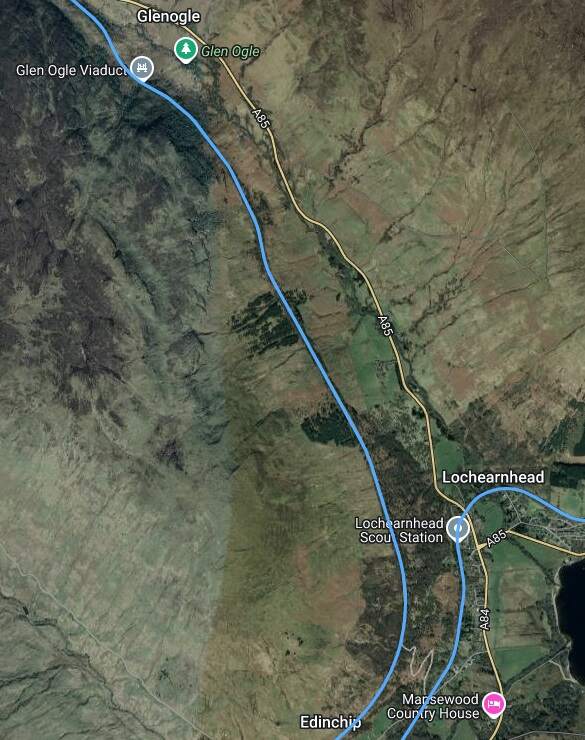

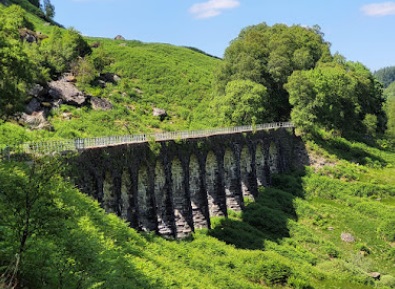
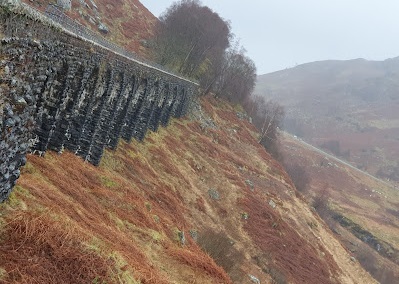
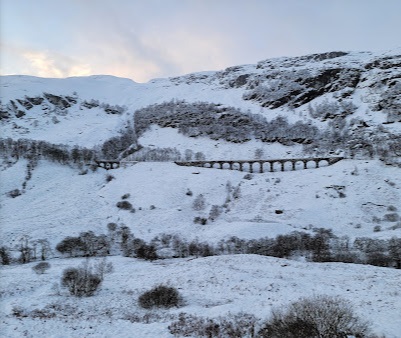
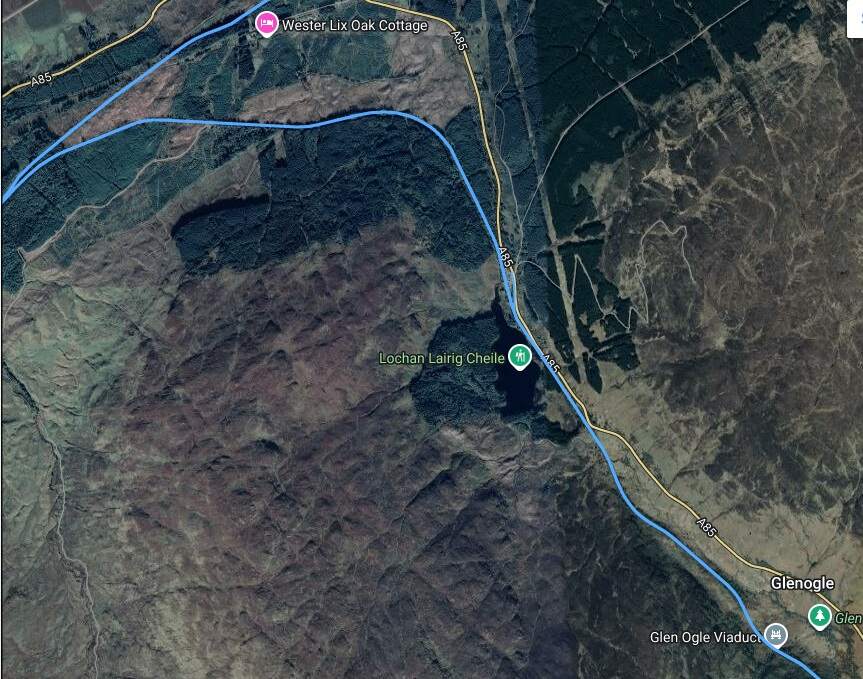
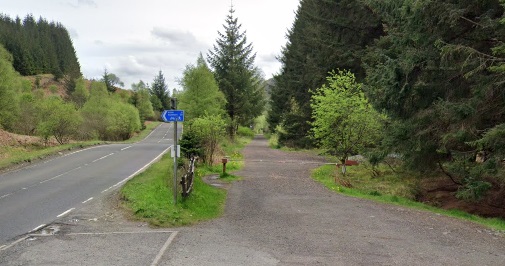
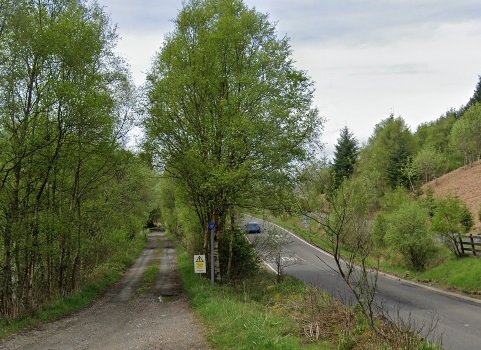
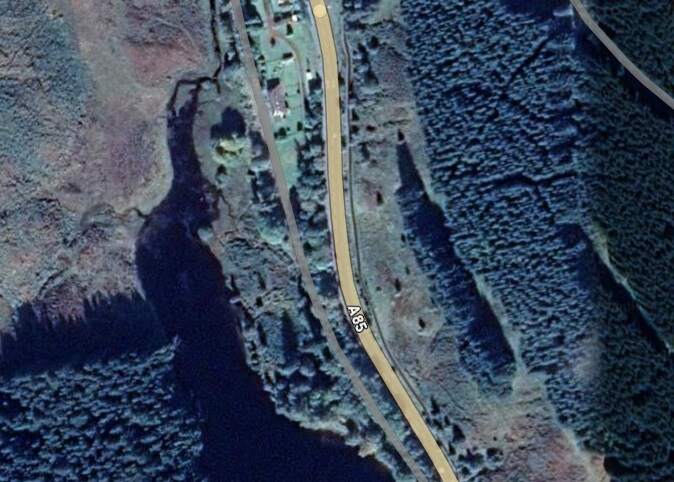
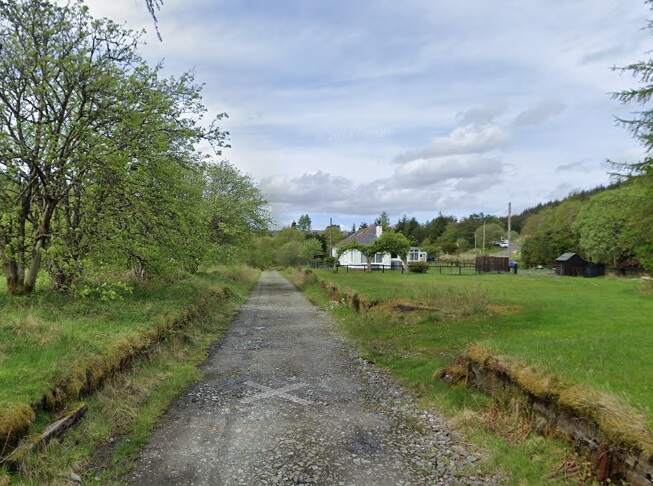
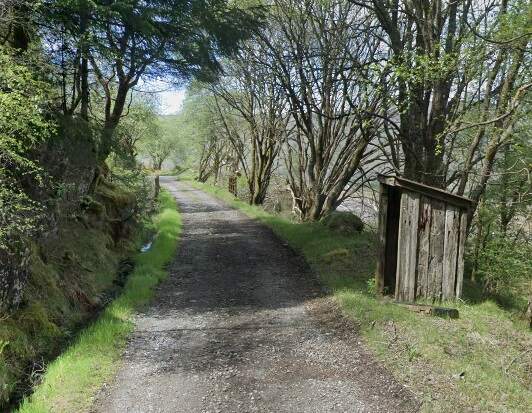
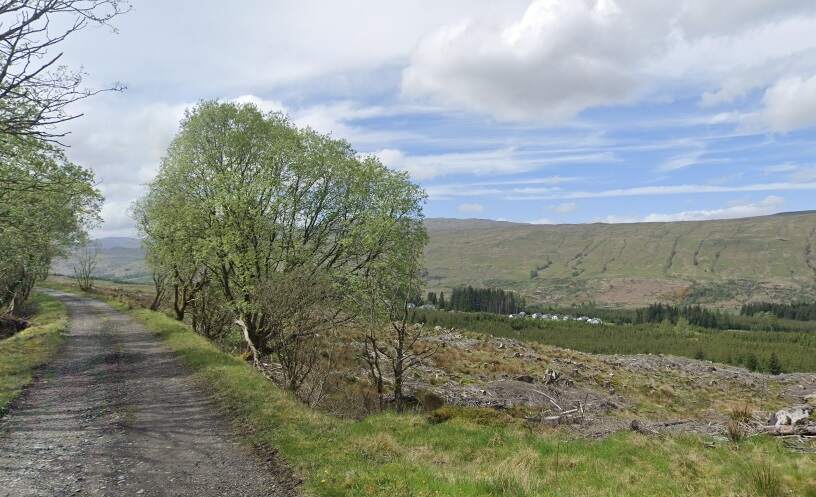
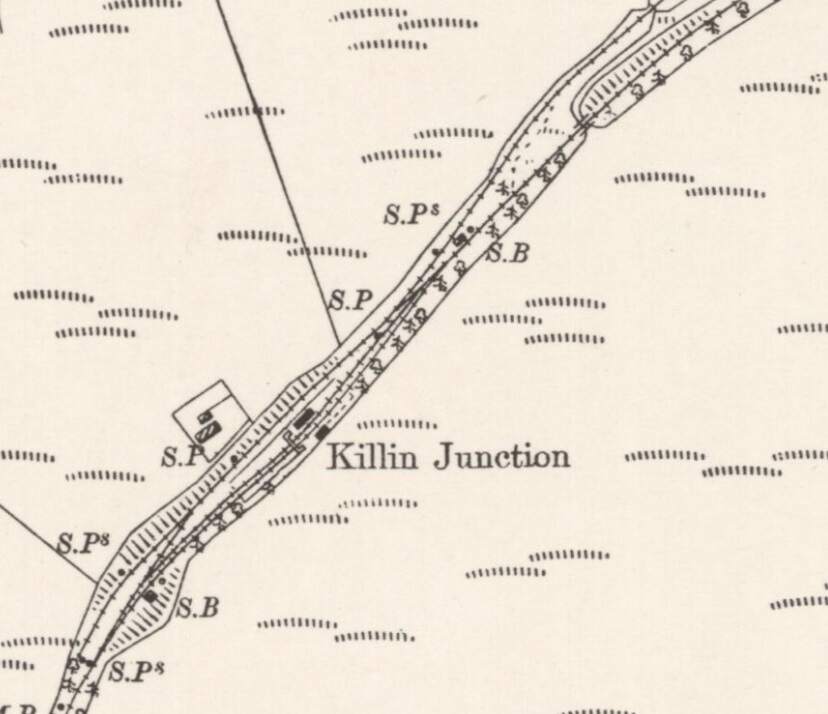
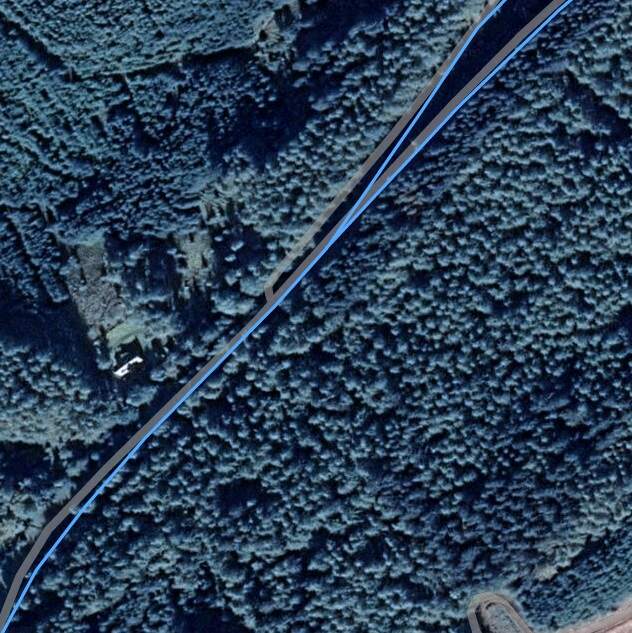
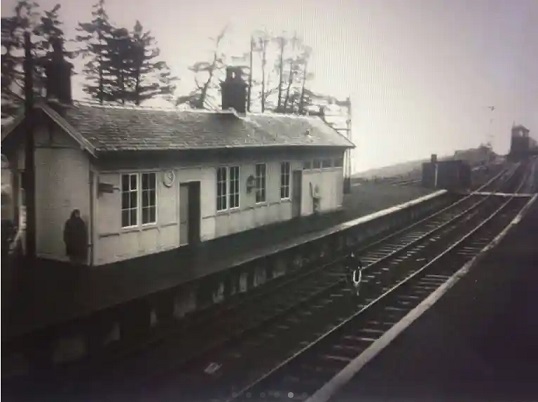
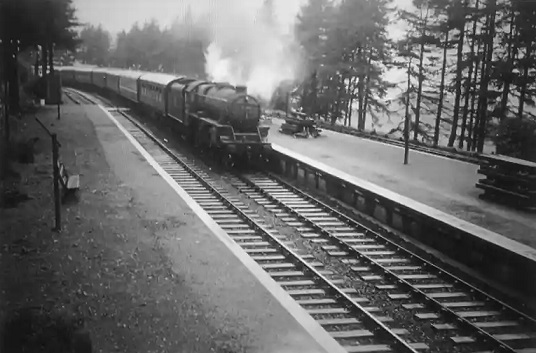
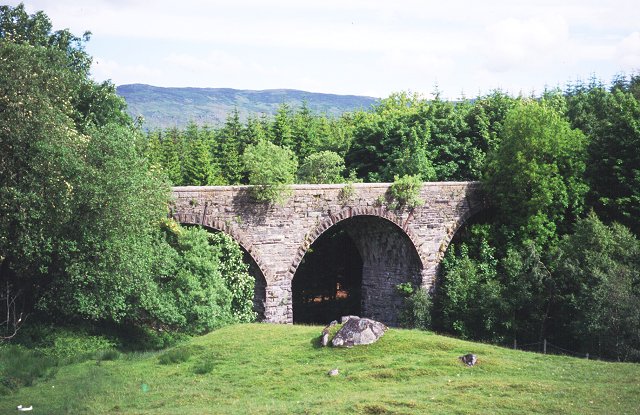
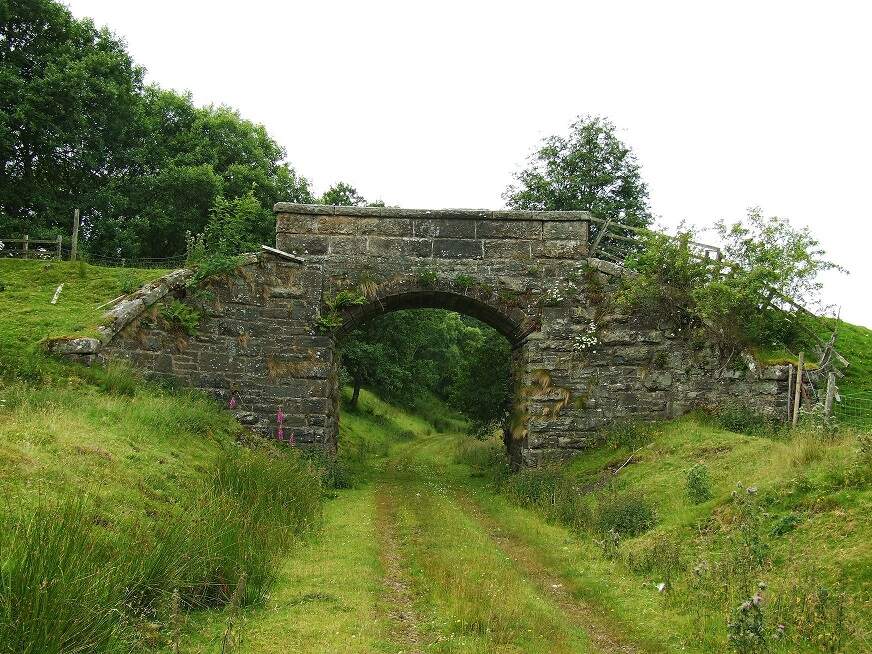
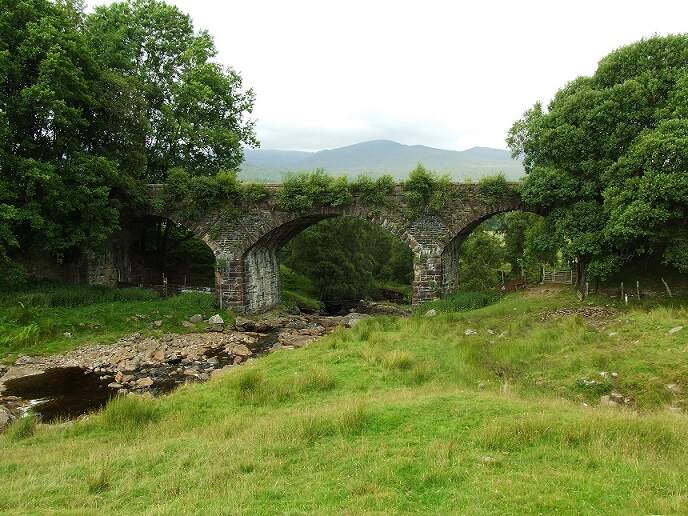
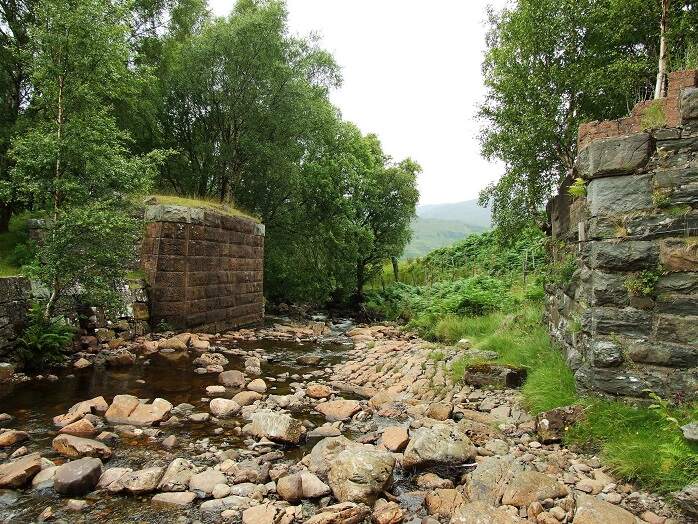
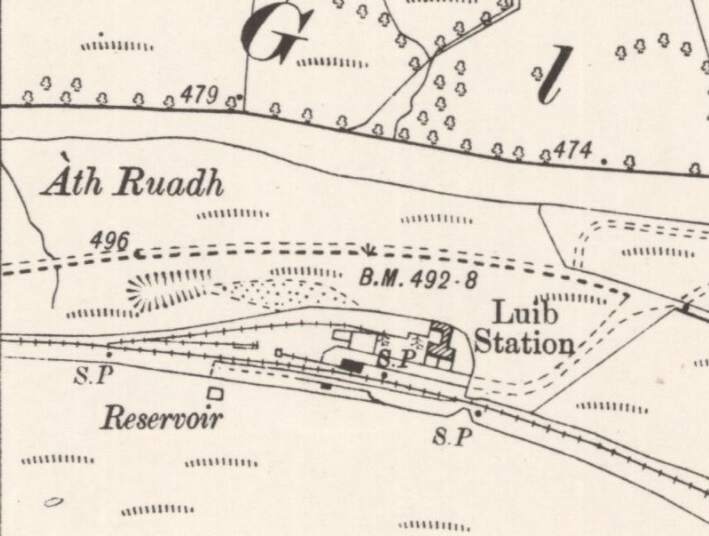
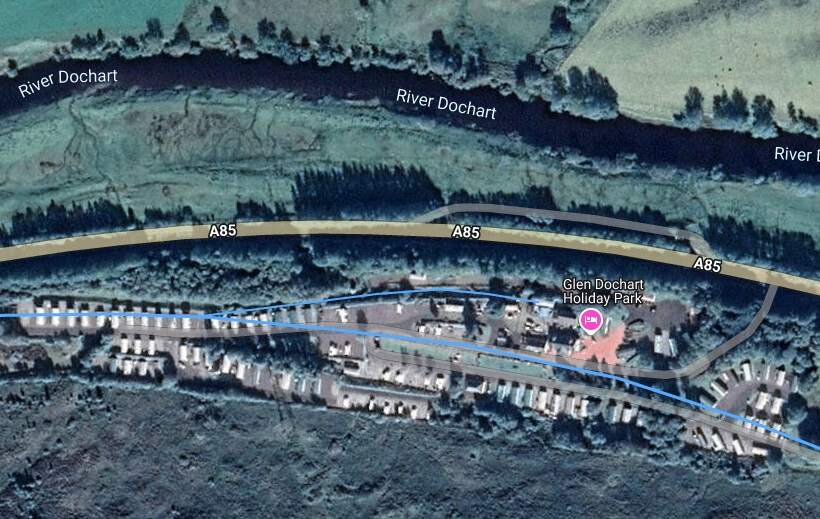
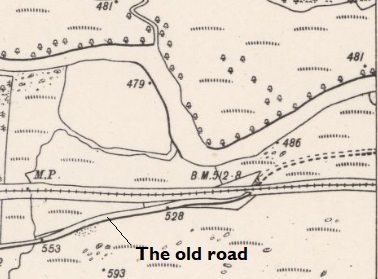
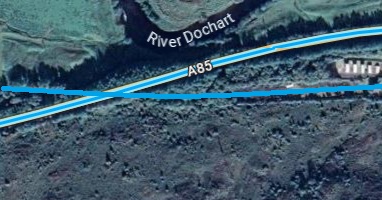
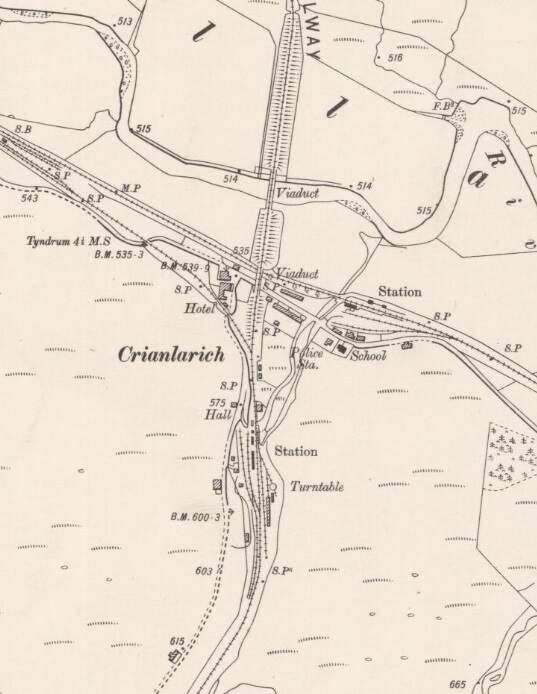
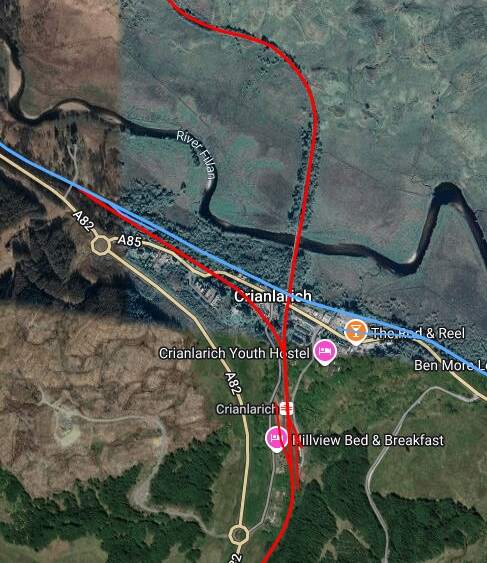
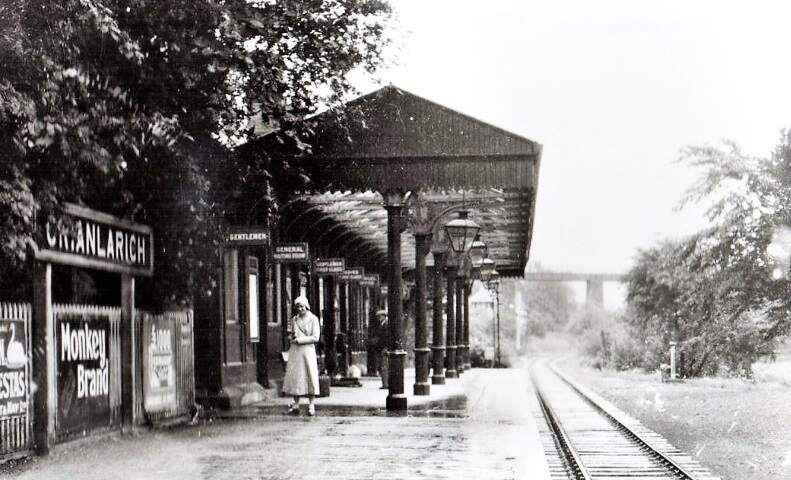
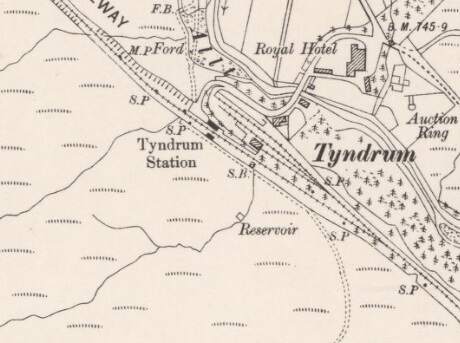
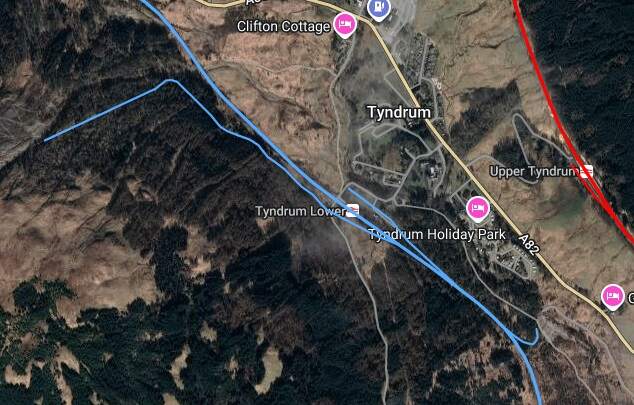
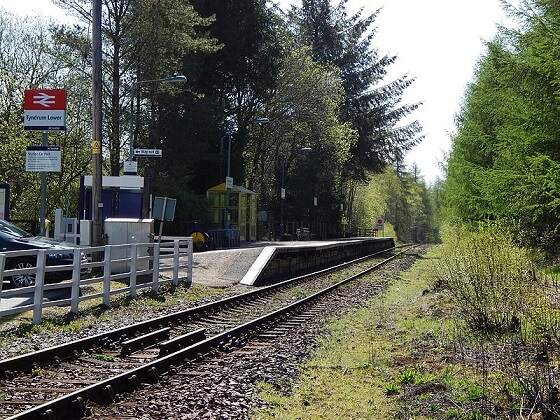
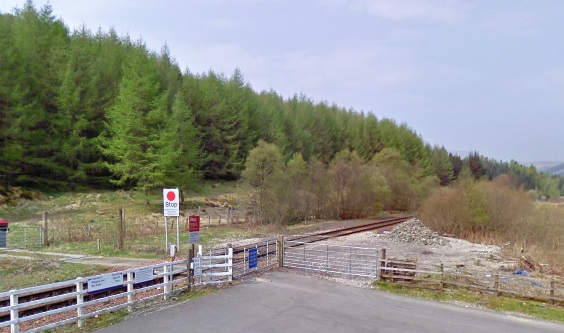
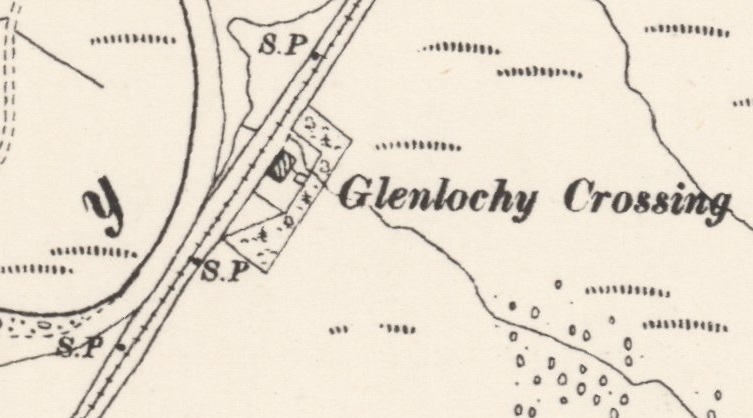
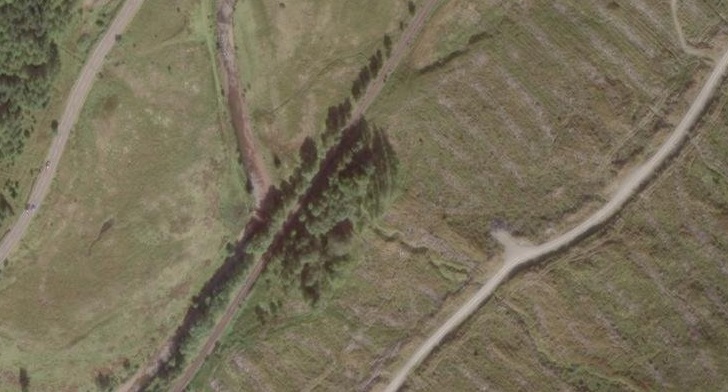

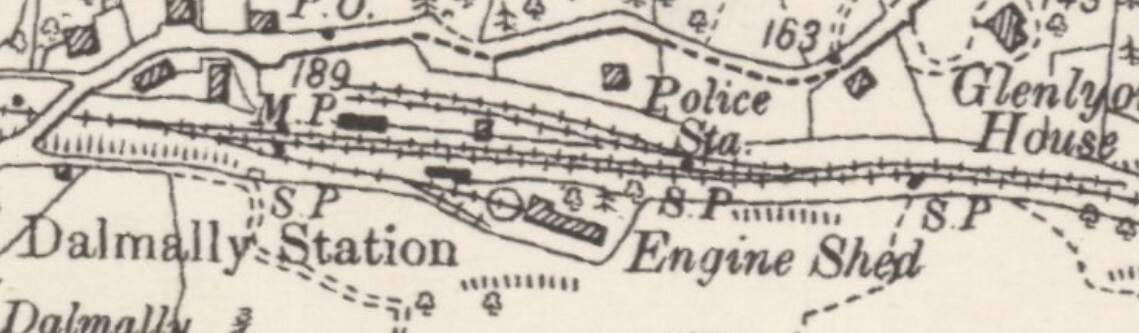
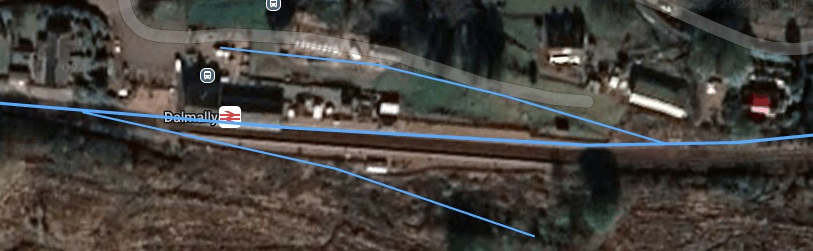
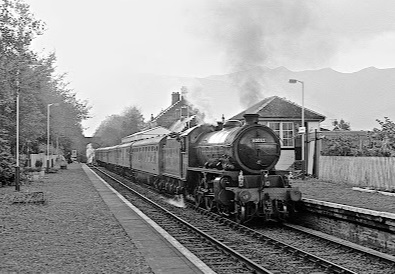
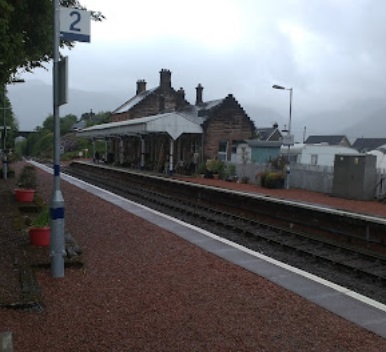
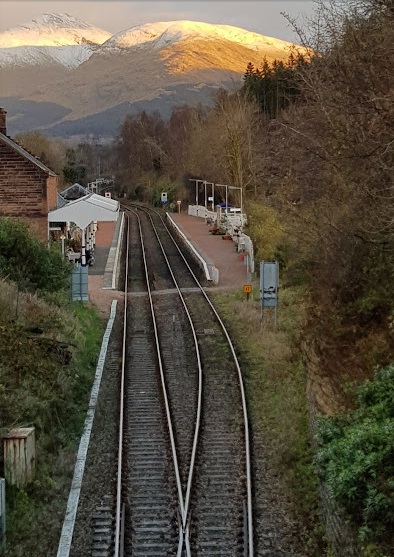

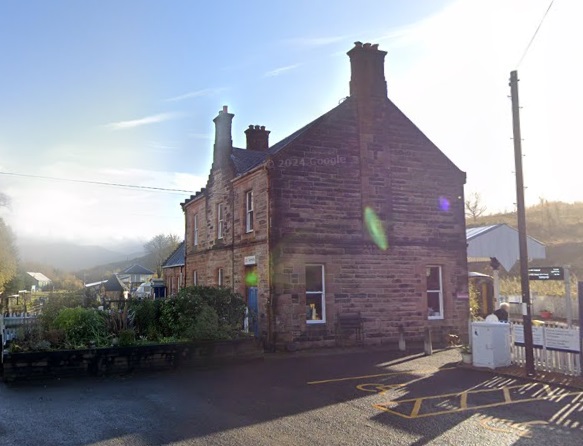
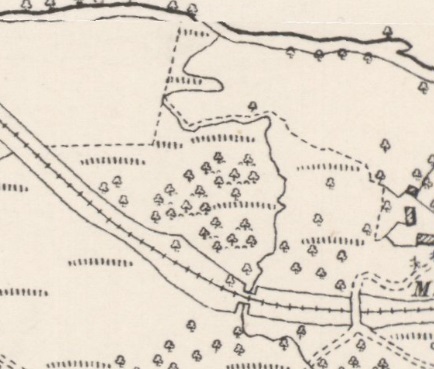
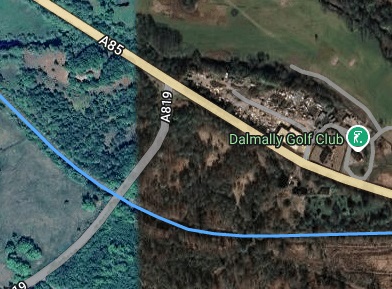
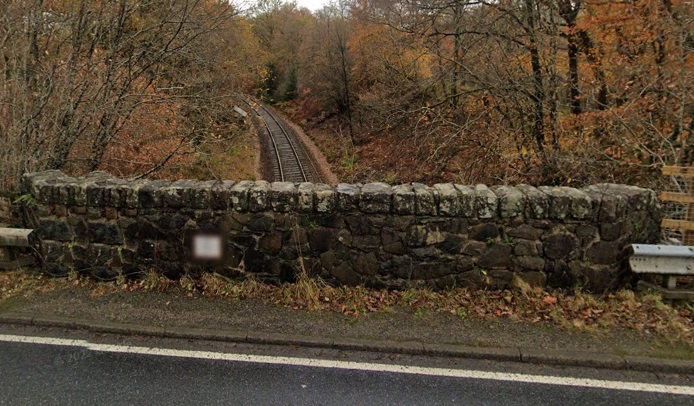

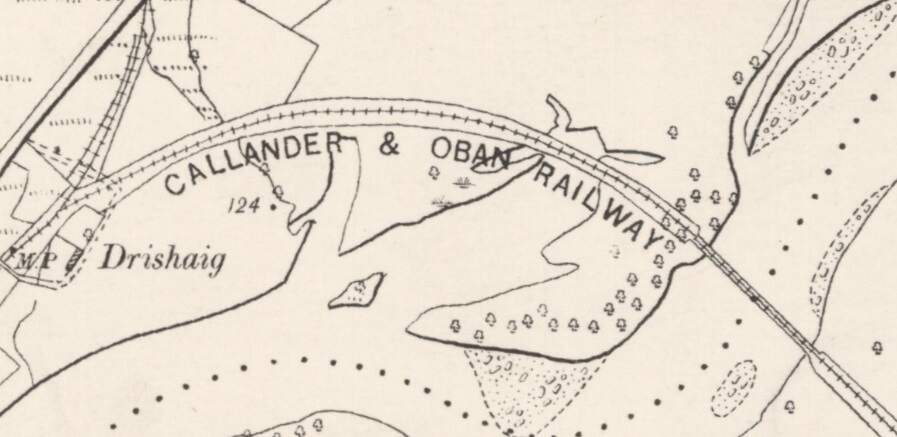
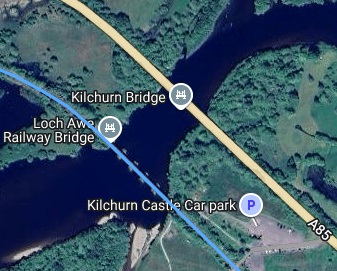
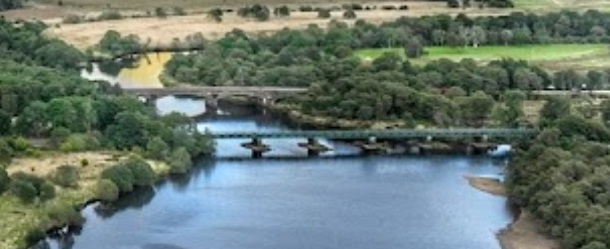
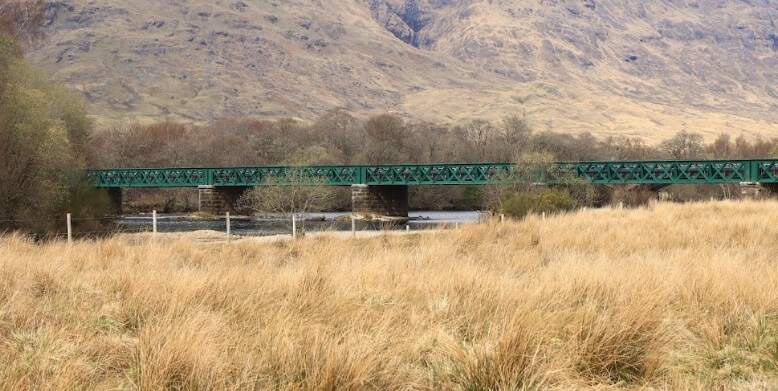
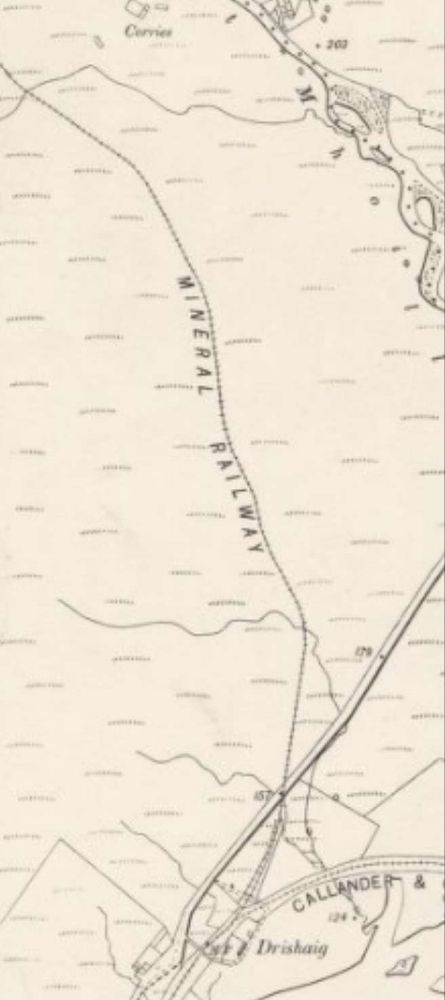
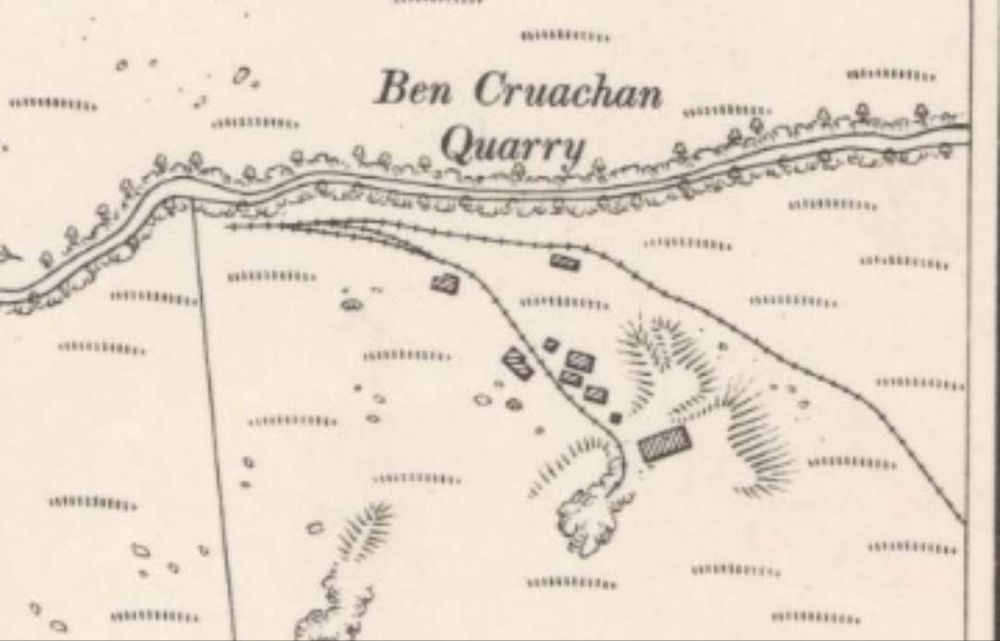
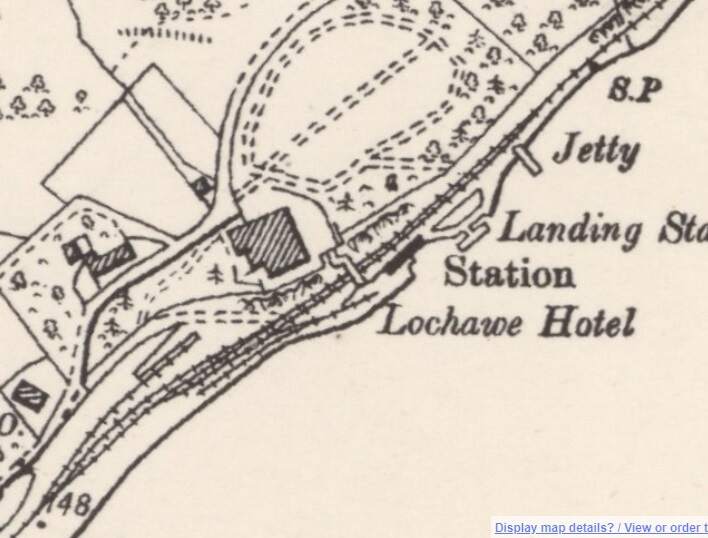
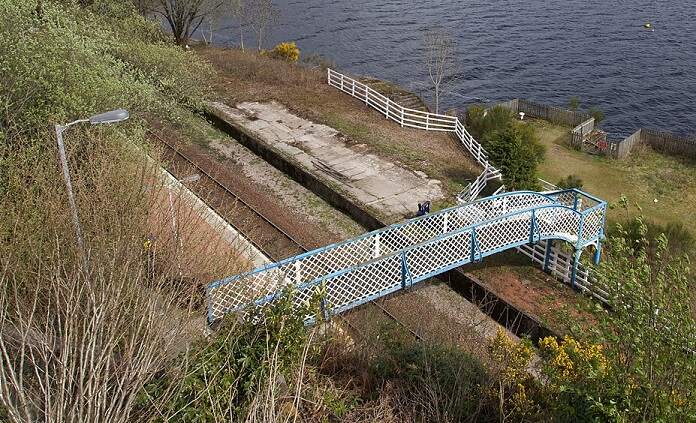
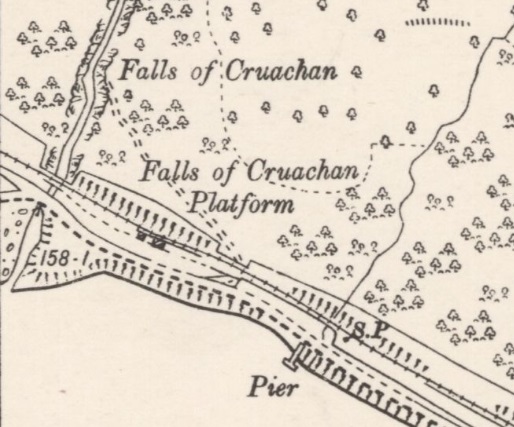
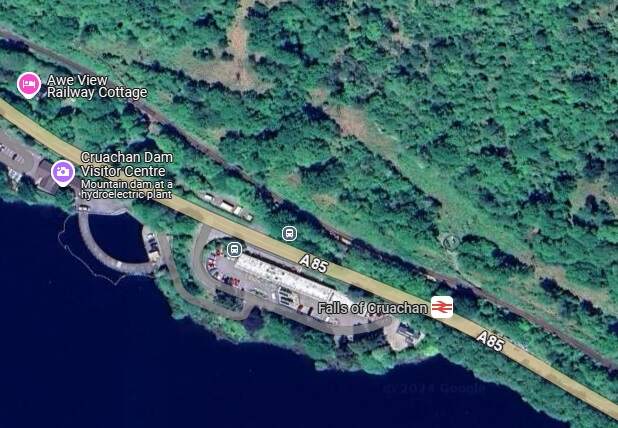
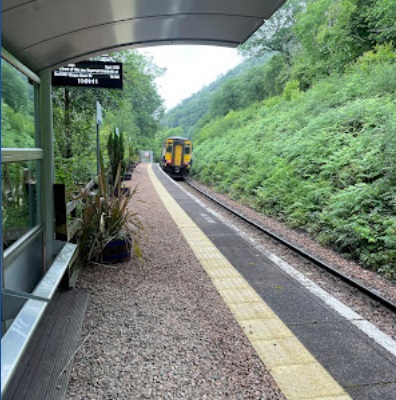
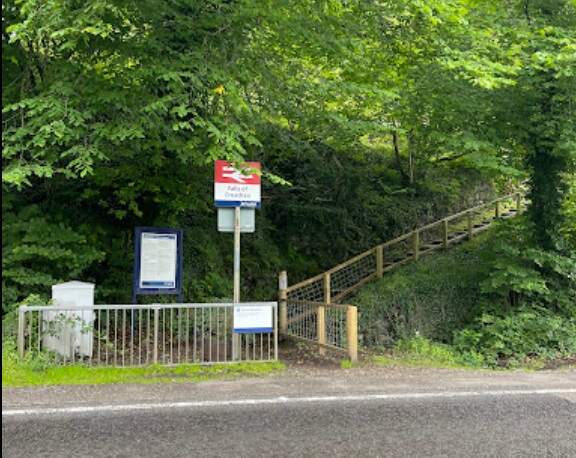
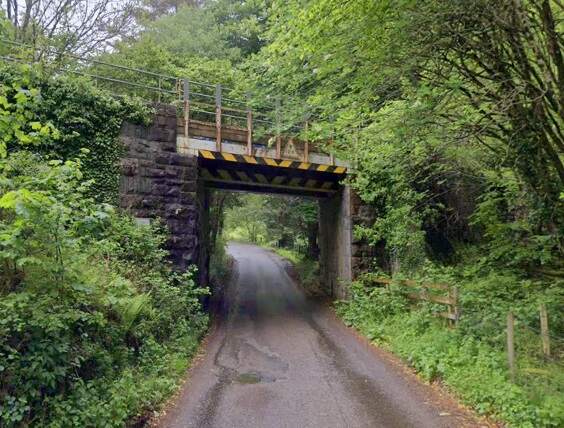
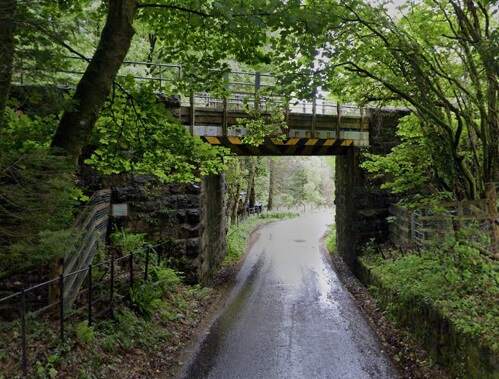
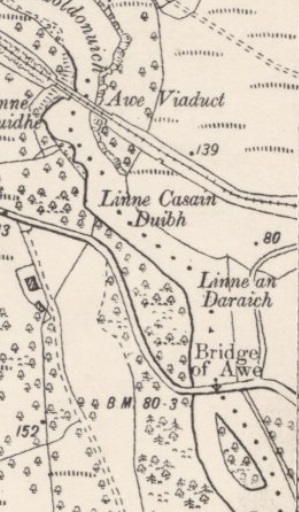
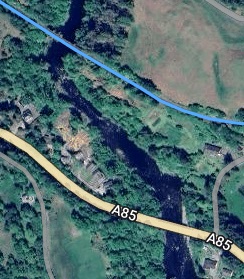
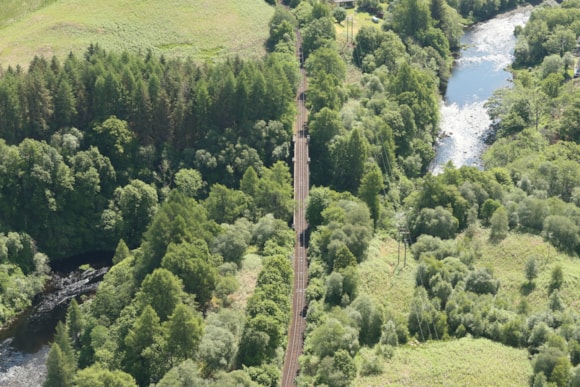
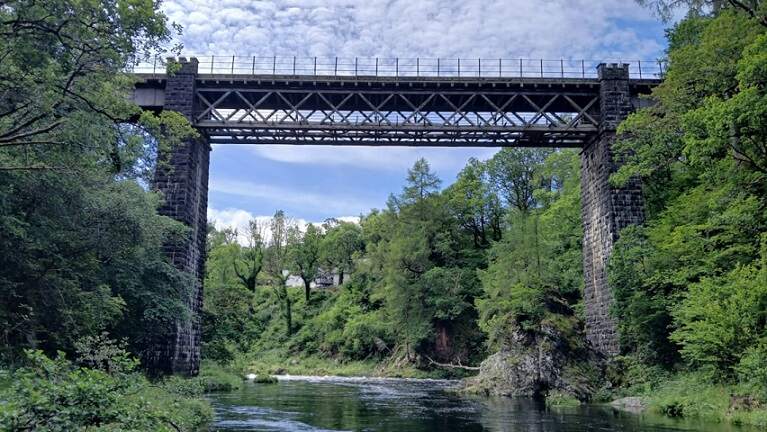
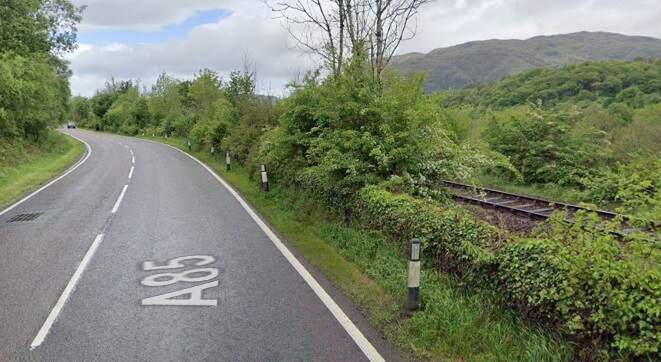
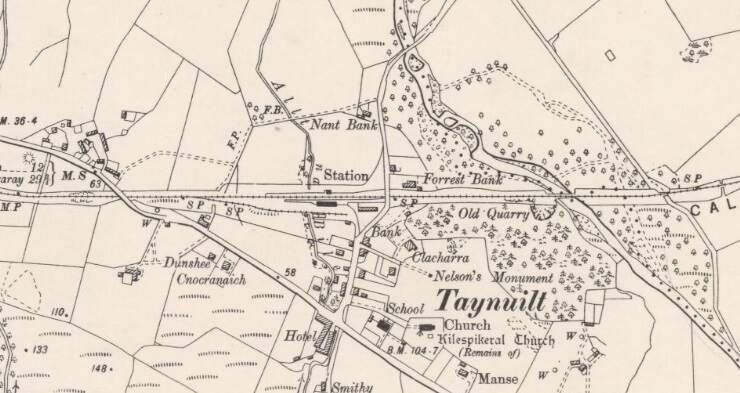
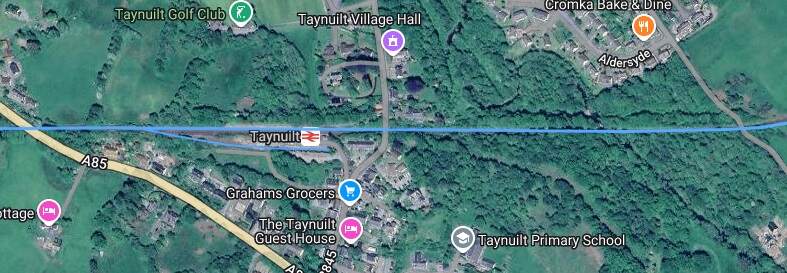
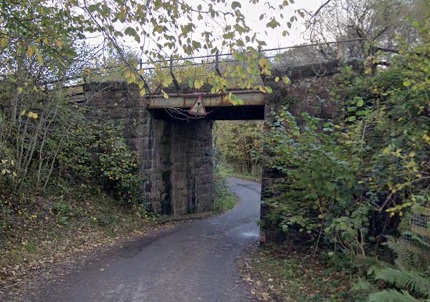
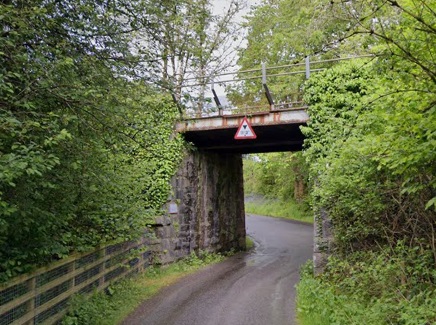
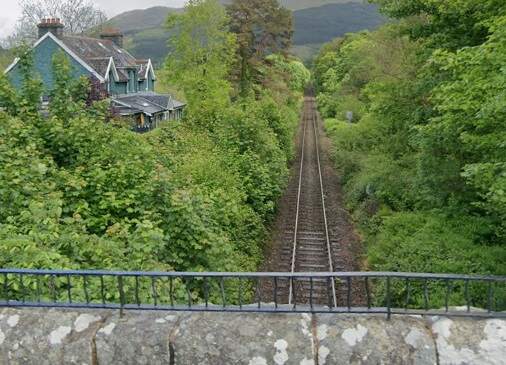

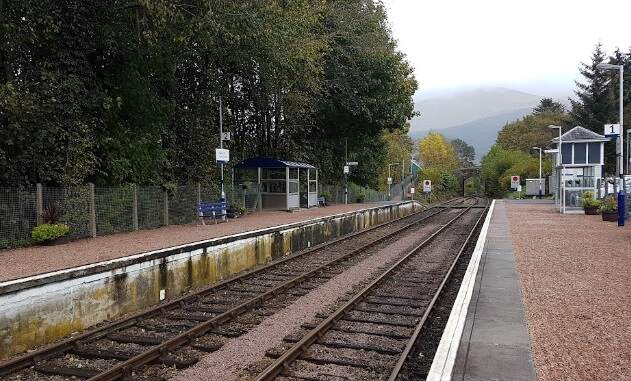
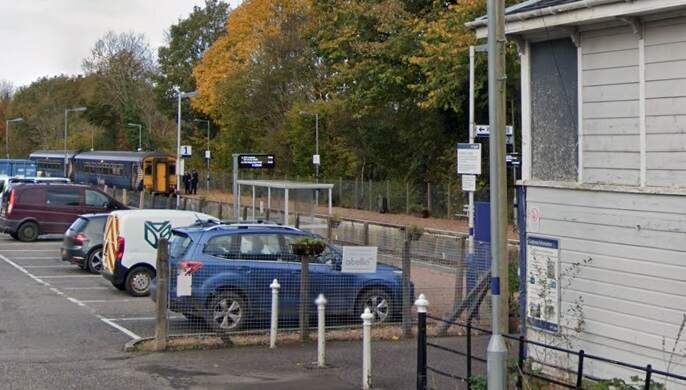
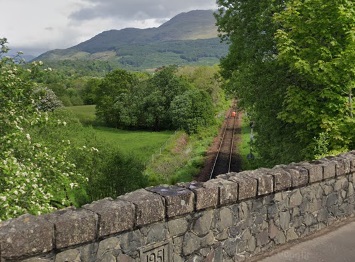
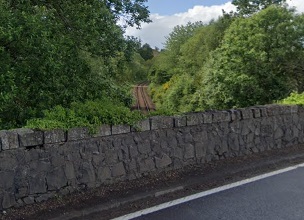
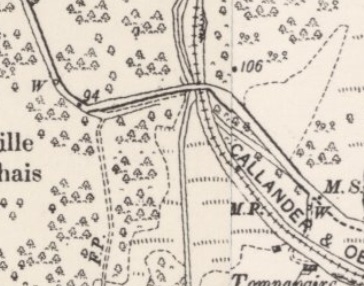
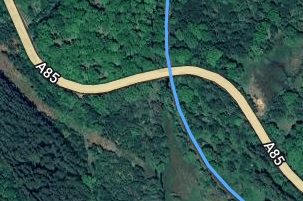
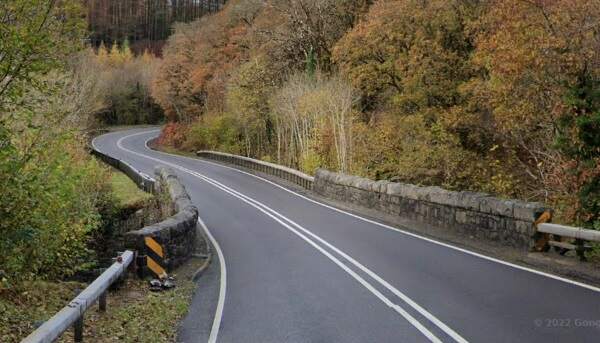
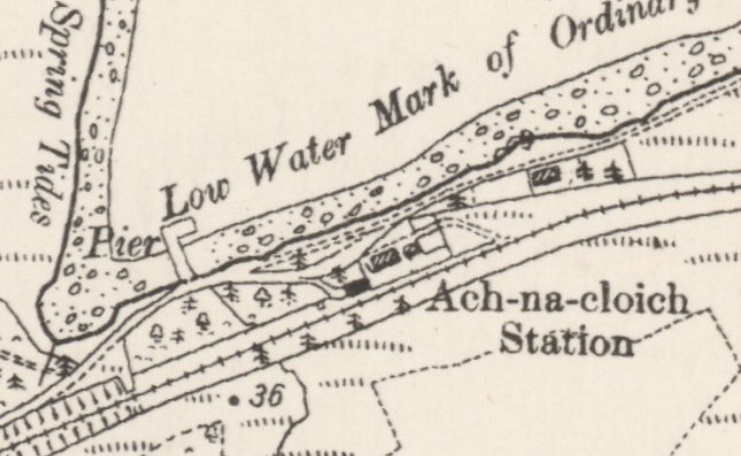

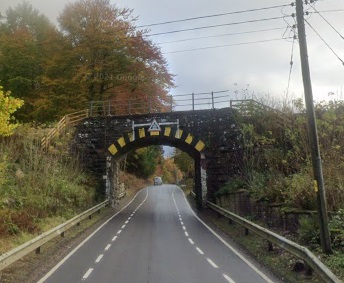
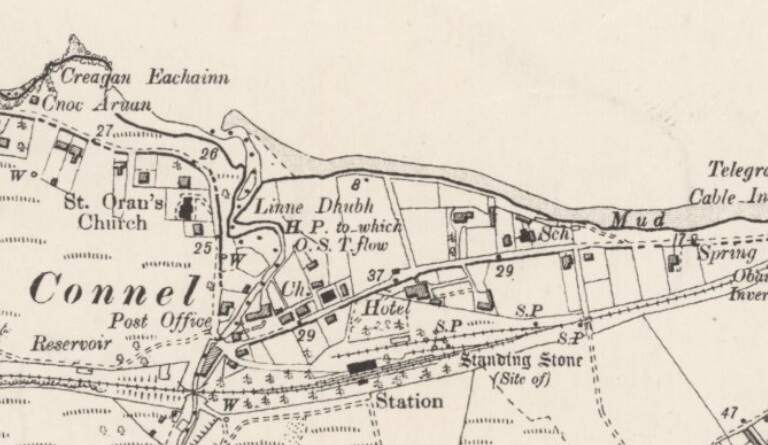
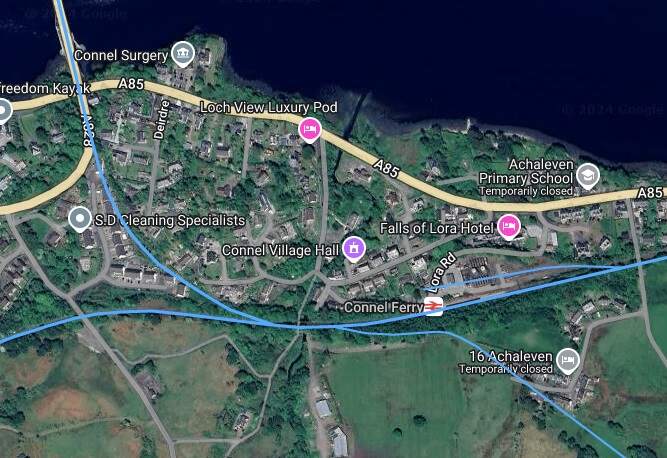

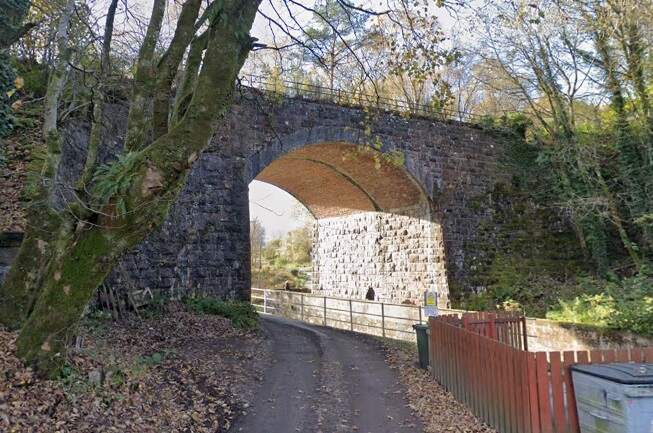
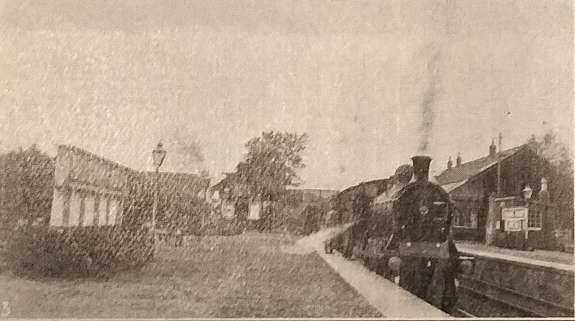


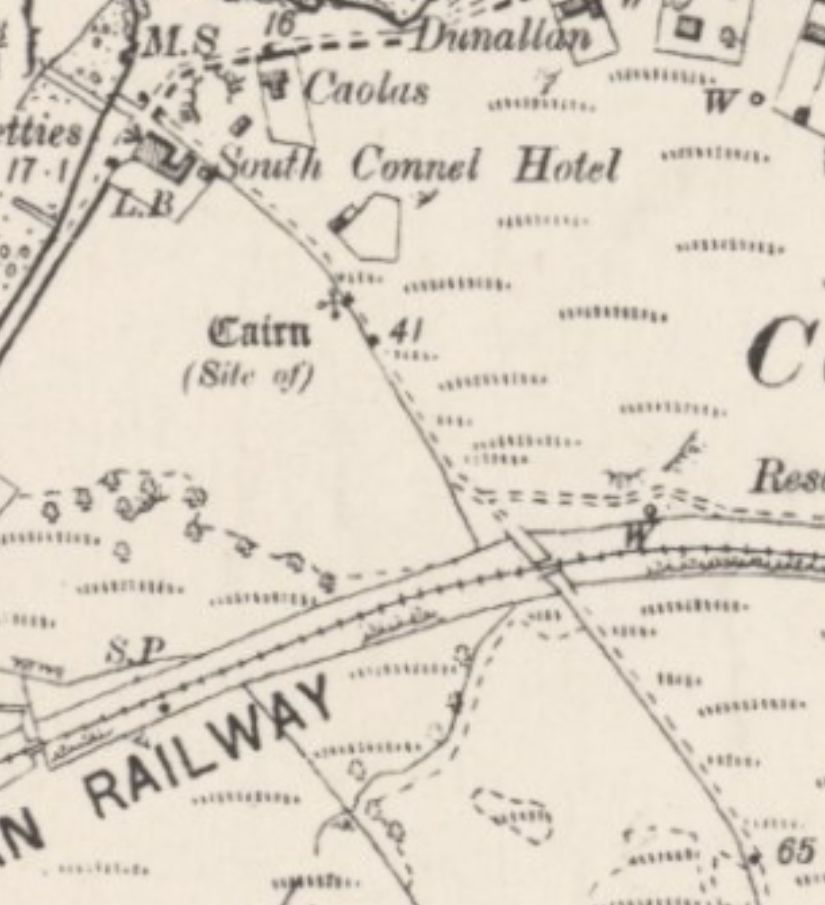

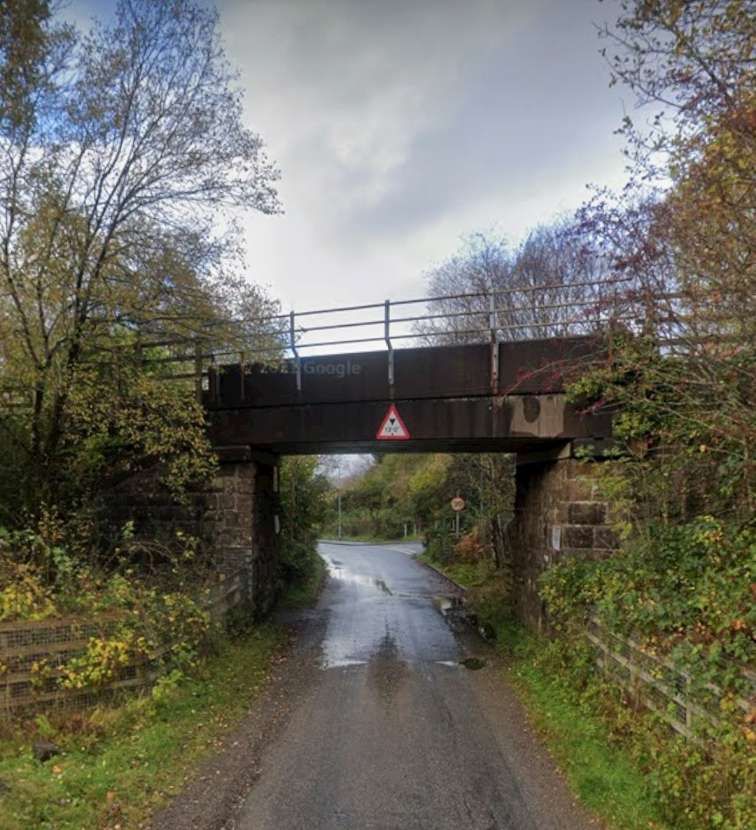
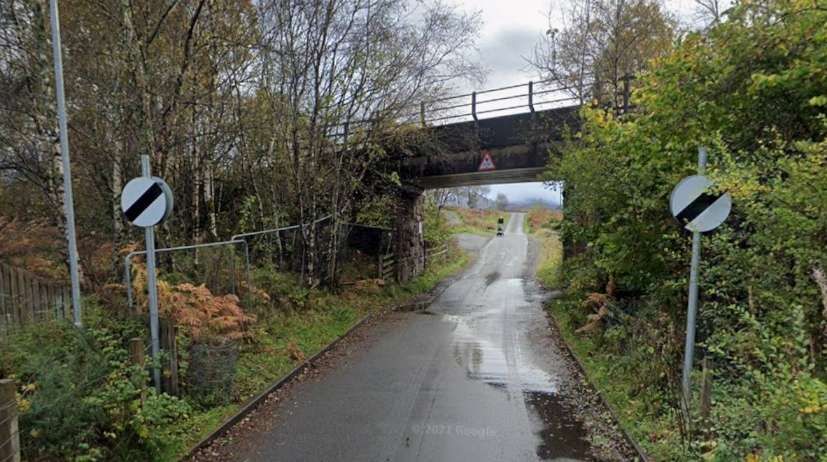
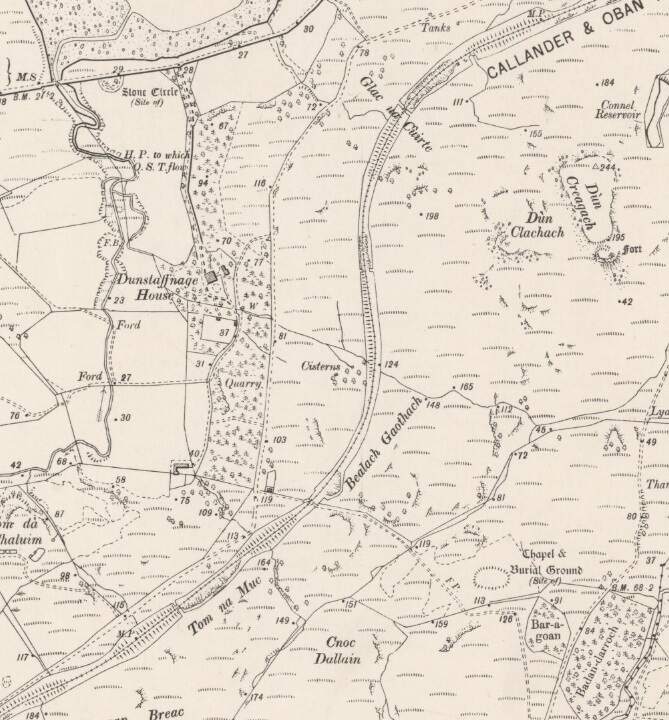
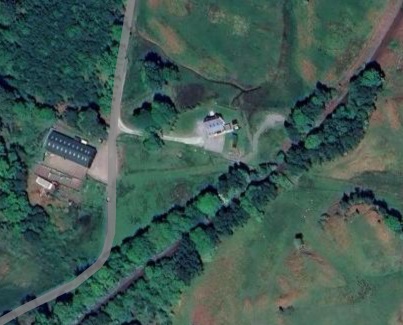
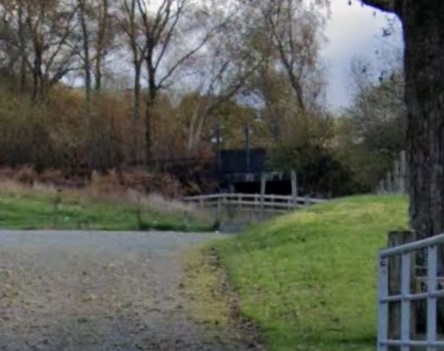
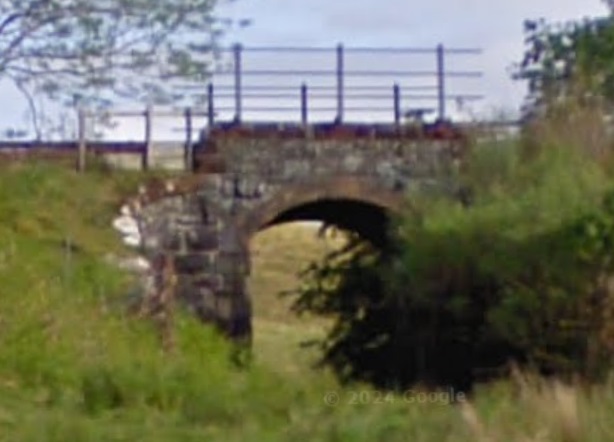
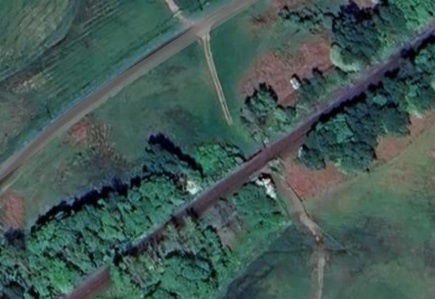
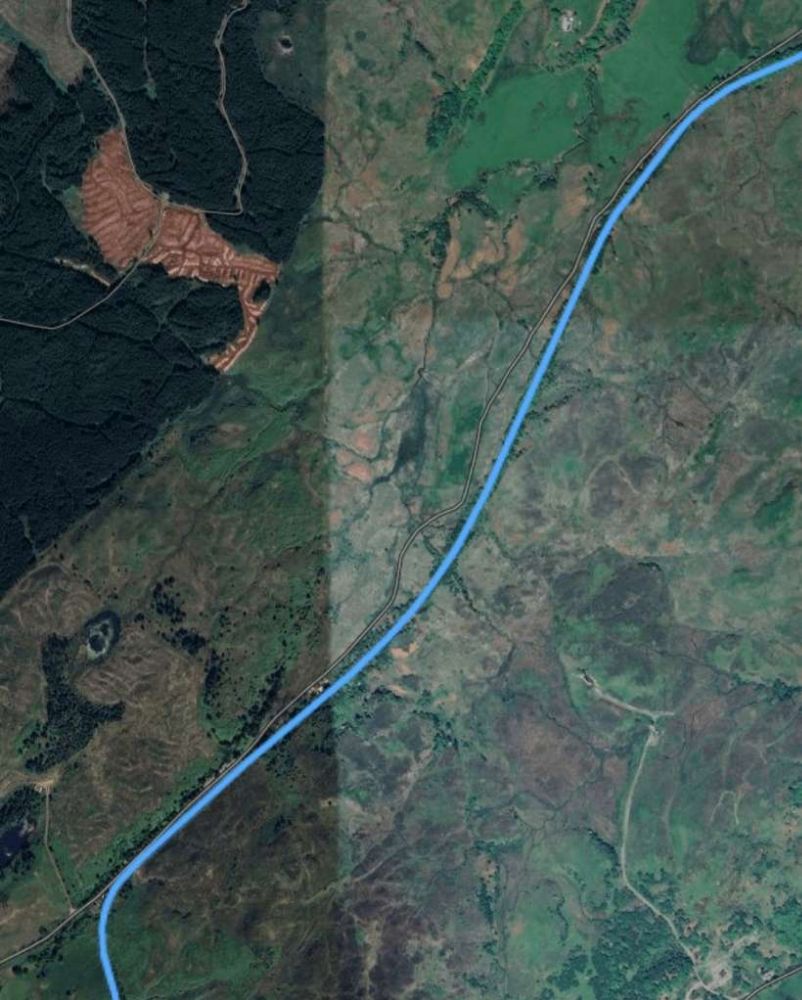

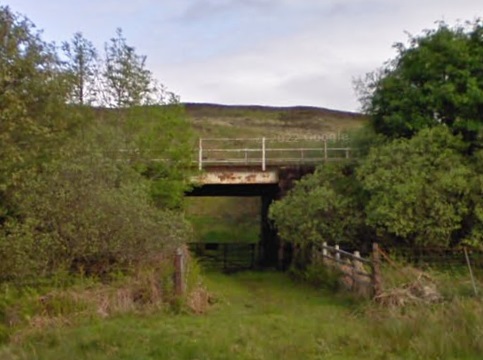
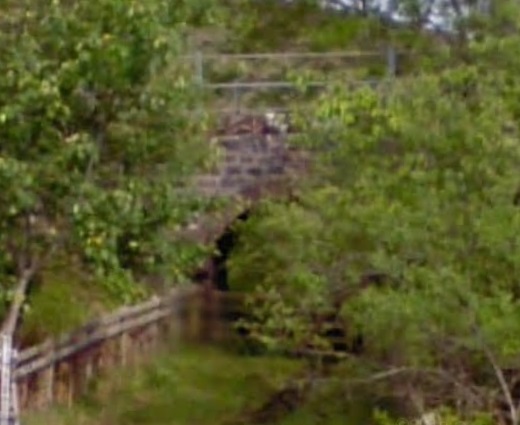
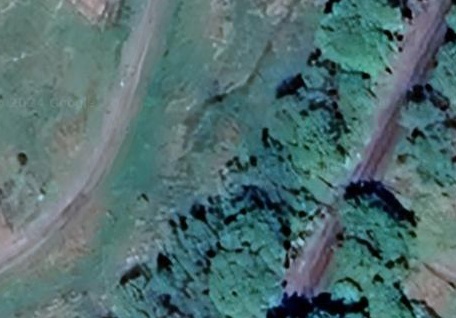

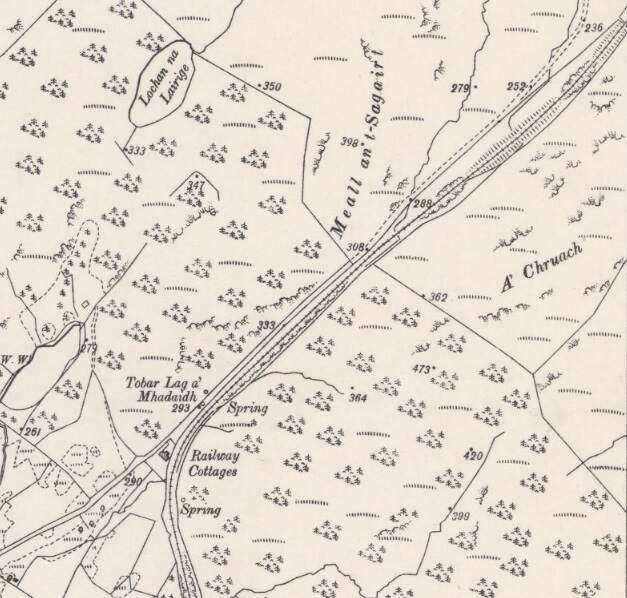
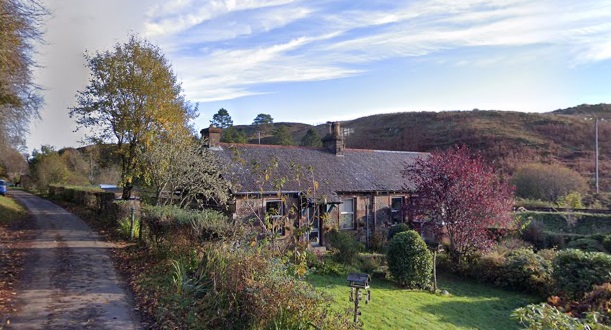


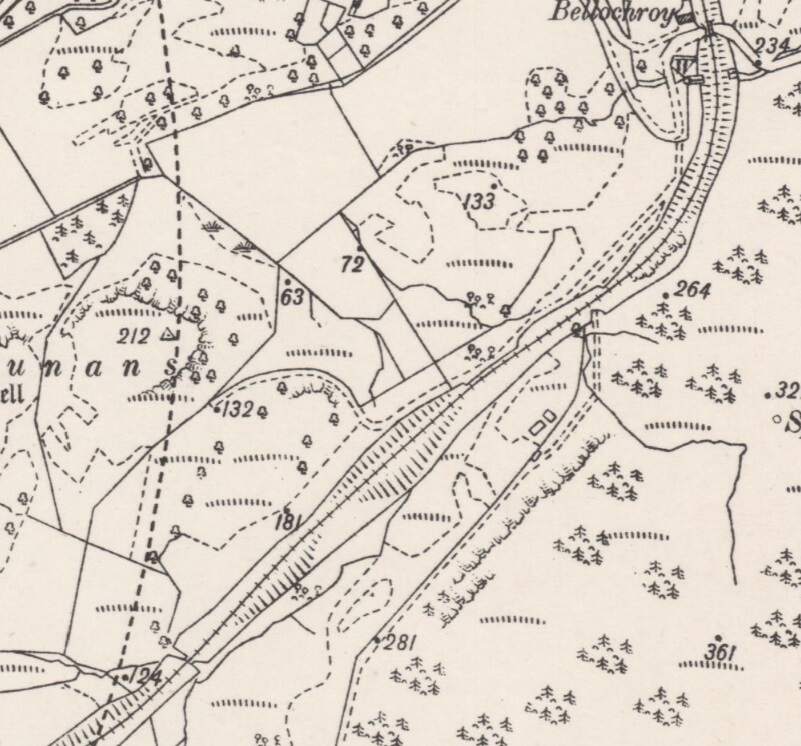
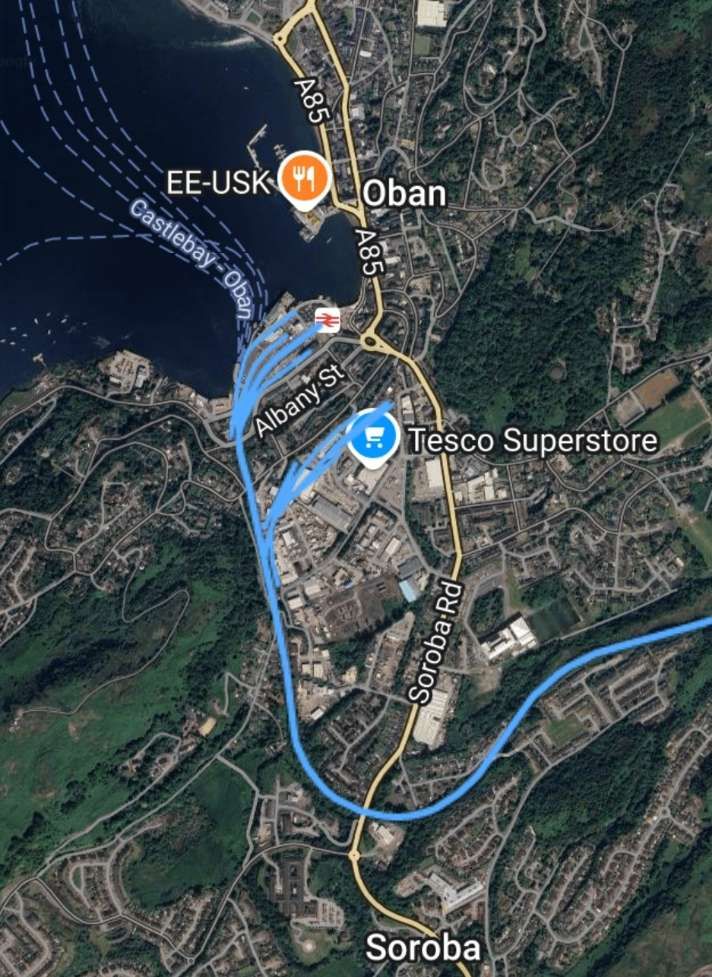
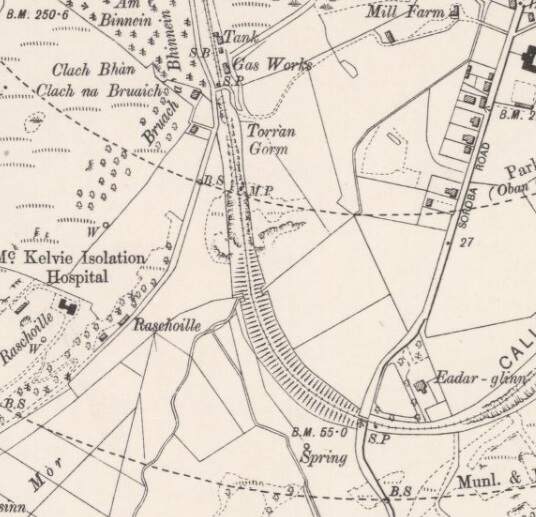
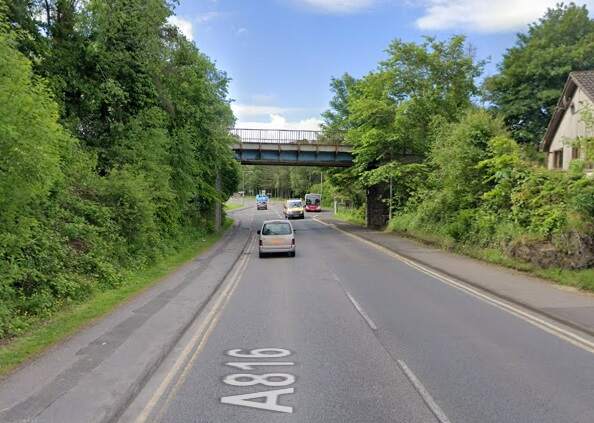
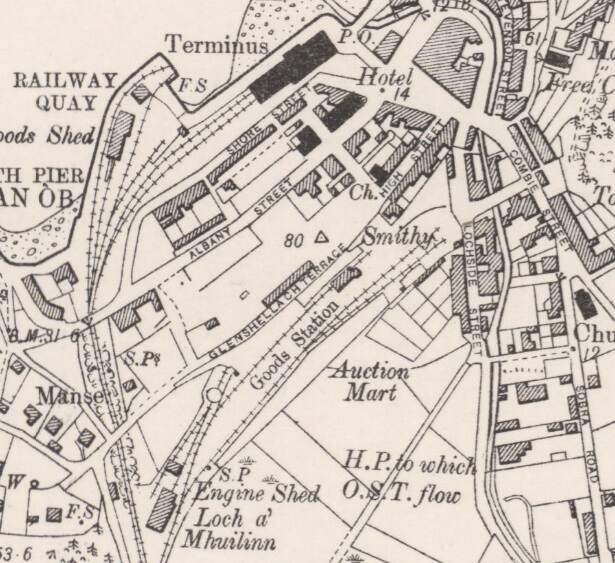
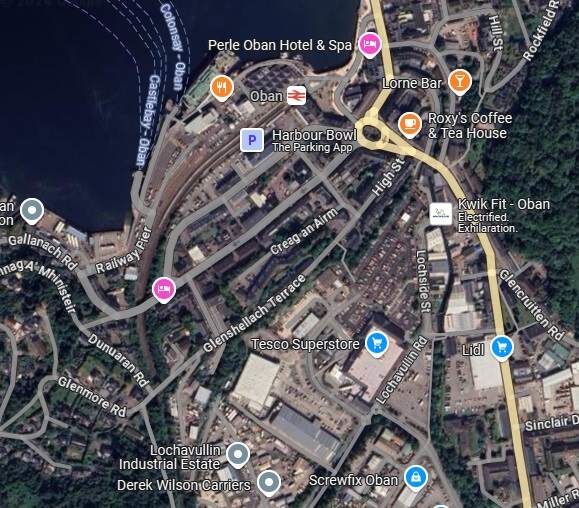
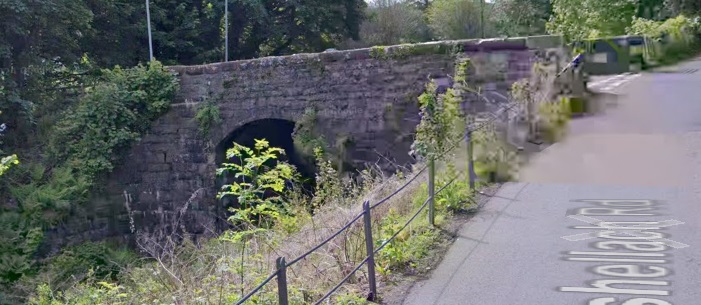
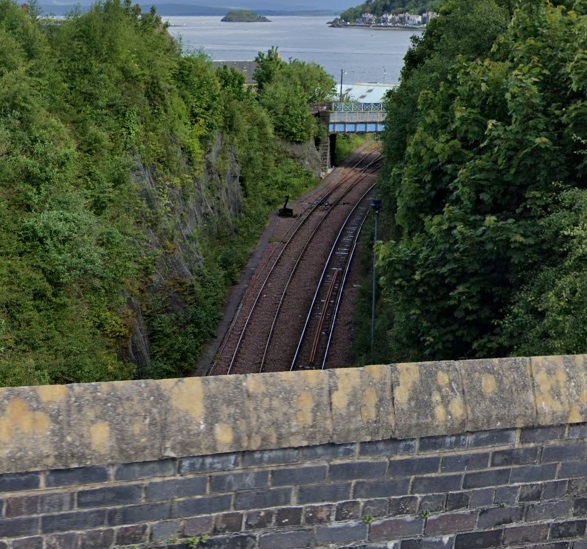
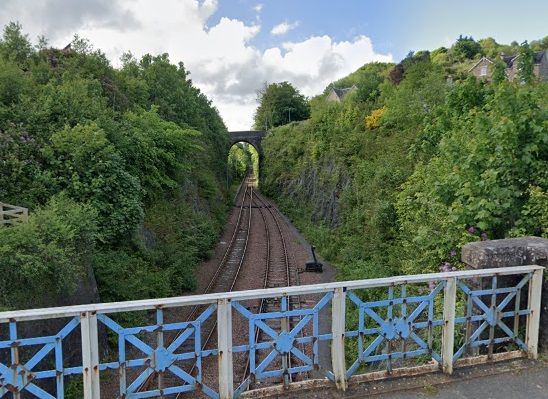
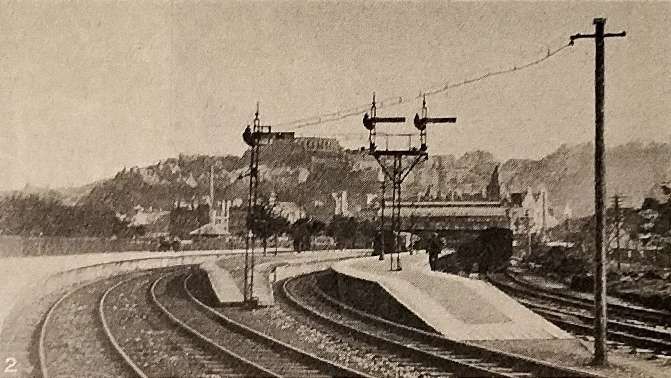
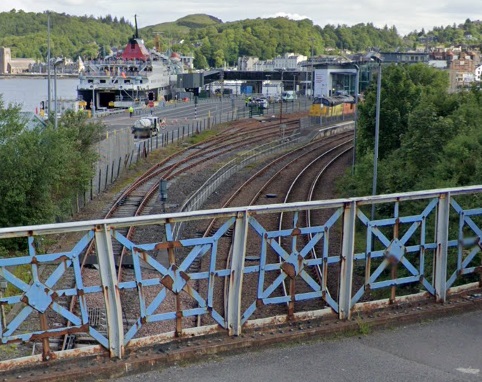
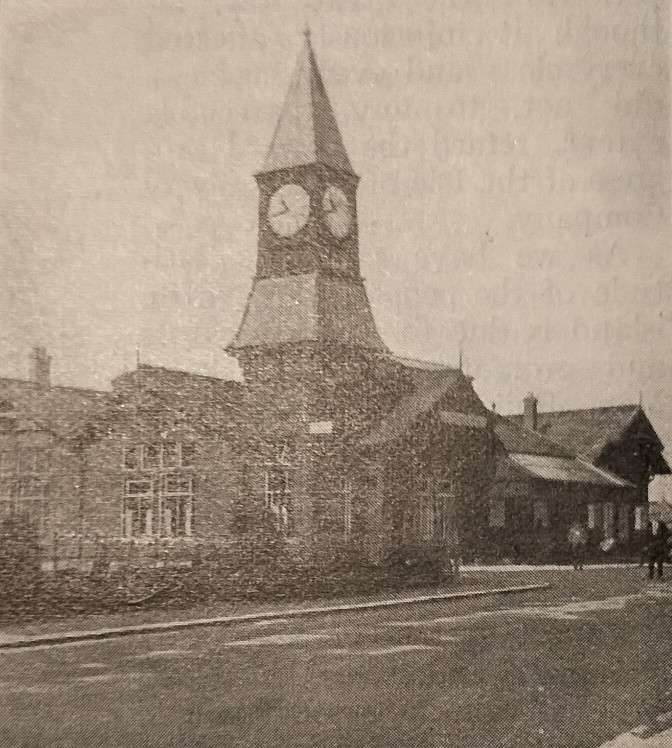
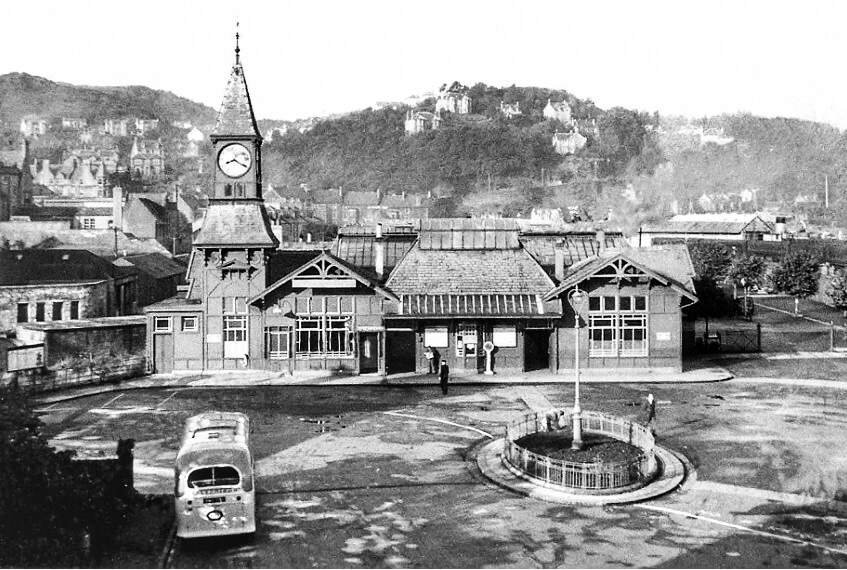
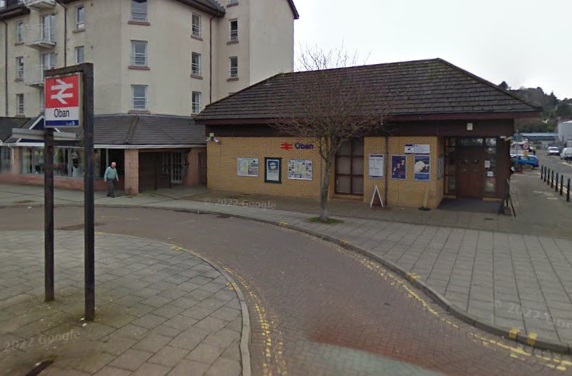
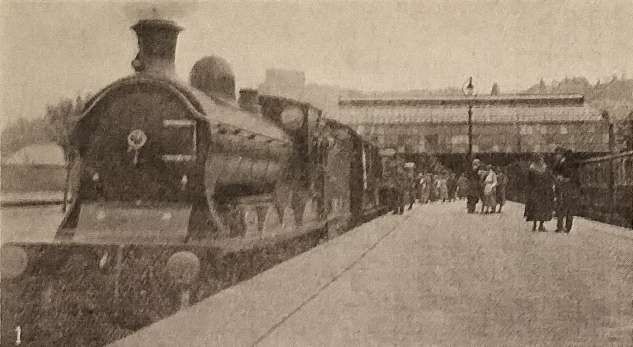
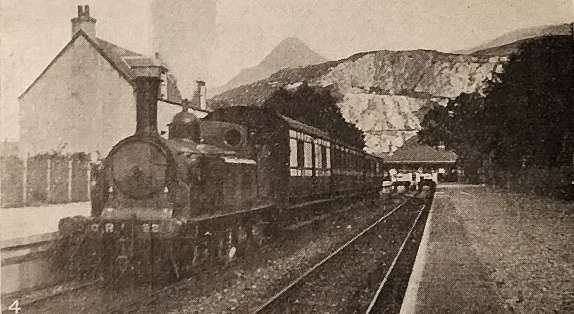

.jpg)
.jpg)
.jpg)