The featured image above is a rather grainy image of steam at Drap-Cantaron Railway Station.
In the first six articles about the line from Cuneo to the sea we covered the length of the line from Cuneo to Breil-sur-Roya and then to Ventimiglia. These articles can be found here, [9] here [10] here, [11] here, [12] here, [13] and here [14]
Woven into the text below are a series of stills from a video of the train journey from Breil-sur-Roya to Nice. The video can be seen here. [4]
This article begins the journey from L’Escarene.
Initially, the line heads Southeast but then gradually turns to the the Southwest through Peille, Peillon and Drap before running into Nice.
The map below shows the two routes which headed from Nice and Ventimiglia North to Cuneo, as they existed prior to the alteration of the border between France and Italy after the Second World War.
The lines Nice to Tende and Ventimiglia to Tende in the period from 1928 to the Second World War, before the annexation, in 1947, of St-Dalmas de Tende and Piene to France. [15]
From l’Escarene to Drap-Cantaron
The line from L’Escarene to Drap/Cantaron. [25]
L’Escarene sits at the head of a long climb from Nice, it was one of the historic staging posts on the old royal road from Nice to Turin. Like Sospel Station, that of l’Escarene has substantial facilities which would allow the reception of military convoys in the event of conflict with neighbouring Italy. [1: p92]
It is only a very short distance to the abutment of the viaduct that carries the line through l’Escarene.
The D2566 passes West-East under the railway and then curves round to join the D2204 and pass North-South under the West end of the railway viaduct. The Anc. Rte de L’Escarène passes through the first arch of the viaduct. The D2204 passes through the second arch of the viaduct. [Google Maps, September 2025]
Setting off from l’Escarene Railway station, this is the first view of the l’Escarene Viaduct from the cab of a Nice-bound train. The viaduct over the Redebraus has eleven 15 metre arches. [4]
Part way across the viaduct the camera in the cab of the Nice-bound service picks up the metal parapet rails of the viaduct and the short tunnel ahead. [4]
The tunnel at the Southeast end of l’Escarene Viaduct is the Tunnel de Brec (382 metres in length. [19]
The Northwest portal of Brec Tunnel seen from alongside the line. [19]
The same crossing on Google’s satellite imagery. [Google Maps, August 2025]
The view Southeast from the mouth of Brec Tunnel. [4]
Turning through 180, provides us this view of the Southeast portal of Brec Tunnel. [19]
A gated crossing over the line a little further to the Southeast. [4]
The view from Rte de Tres, looking back towards l’Escarene Railway Station. [Google Streetview, November 2022] From the same location looking Southeast. Notice the bridge over the line. [Google Streetview, November 2022]
The view of the same bridge from the cab of the Nice-bound train. [4]
The bridge carry Rte de Tres over the line. [Google Maps, August 2025]
Looking Northwest along the line from the bridge carrying Rte de Tres over the line. [Google Streetview, November 2022]
The view Southeast from the same bridge. [Google Streetview, November 2022]
The next overbridge carries Rte de l’Eira over the line. [4]
Looking North from the bridge carrying Rte de l’Eira over the line. [Google Streetview, April 2013]
Looking South from the same bridge. [Google Streetview, April 2013]
Southeast, the line enters Tunnel de Ecluse (136 metres in length). Just before this, there is a footpath access under the embankment. [34]
The underbridge mentioned above, seen from the D21. [Google Streetview, March 2023]
The Northwest portal of Tunnel de Ecluse, seen from the cab of a Nice-bound train. [4]
The same tunnel mouth, seen from the lineside. [34]
The view from the cab of the Nice-bound train at the Southeast portal of Tunnel de Ecluse. [4]
Turning to face Westnorthwest, this is the Southeast portal of the Tunnel de Ecluse. [34]
The next feature on the line is a short tunnel – Tunnel d’Euira (63 metres in length). [32]
Tunnel d’Euira is on the right side of this satellite image. [Google Maps, September 2025]
The North portal of Tunnel d’Euira. [32]
The South portal of Tunnel d’Euira and the galleried retaining structure which carries the line from a point very close to the tunnel portal. [32]
From many an angle, you would be forgiven for thinking that the railway crosses a viaduct. It appears, however, that the structure is a galleried retaining structure which creates a platform for the railway to run on while limiting the wight of the structure on the rock face beneath. [Google Maps, September 2025]
This view of the location from a little further ‘South, shows that the trackbed abuts the rockface on the East side of the line. [32]
Looking East from a short length of the D21, the galleried retaining structure, which is almost a viaduct, can be seen. [Google Streetview, March 2023]
The railway continues on a ‘berm’ built out from the East face of the Paillon valley and high above the D21, until it reaches the Ruisseau d’Euira.
This small extract from Google’s satellite imagery shows Le Paillon, the D21 and the railway in parallel. The railway bridge over the Ruisseau d’Euira is on the right of this image. [Google Maps, September 2025]
The Viaduc d’Euira crosses the valley of the Ruisseau d’Euira. The viaduct has one 30 m arch and two 5 m arches. [31]
The Tunnel de Santa Augusta (754 metres in length) runs under the Ste-Augusta Chapelle. [30]
The South portal of the Tunnel de Santa Augusta. As can be seen the tunnel runs straight between the two portals, allowing the light from the North portal to be seen from outside the South portal. This photograph was taken alongside the track crossing the Viaduc d’Erbossièra. [30]
The Viaduc d’Erbossièra (205 metres in length). [29]
Viaduct de Faquin seen from the West on Chemin de Sainte Lucie in the valley floor. [Google Streetview, January 2011]
The northern mouth of Tunnel de Coletta, seen from a Nice-bound train. [4]
Viaduct de Faquin, seen from the D53 which crossed the line above the tunnel mouth to the South of the viaduct (Tunnel de Coletta). [Google Streetview, April 2023]
Tunnel de Coletta. [23]
Immediately to the South of Tunnel de Coletta the railway enters Peille Railway Station in Grave de Peille.
The approach to Grave Railway Station, seen from the cab of a Southbound service at the mouth of Tunnel de Coletta. [4]
Le Gare de Peille is situated on the East bank of the River Paillon on a pan artificial plateau which was created as part of the construction of the line from Nice to breil-sur-Roya. [26]
Peille Railway Station is located 6 km from the village of the same name, and serves the La Grave district, where the Vicat company operated a quarry and cement factory from 1924. A branch of the TNL tramway network reached this point from Pont-de-Peille. [1: p92]
At the South end of the Station site the line becomes single track once again adjacent to a house built originally for railway staff. [4]
South of Peille Railway Station the line passes this railway-built home, usually these houses were built for railway employees, either at a nearby station or working on track maintenance. [Google Streetview, April 2013]The line continues South towards Tunnel de Nogairet. [Google Streetview, April 2013]
Further South the line passes through Tunnel de Nogairet (32 metres in length). [Google Maps, September 2025]
The North portal of Nogairet Tunnel, seen from the cab of a Nice-bound service. [4]
The view South from the cab of the Nice-bound train at the South portal of Nogairet Tunnel.
Turning through 180°, this is the South portal of the Tunnel de Nogairet as seen from the cab a Breil-sur-Roya-bound train in 1995. [37]
And then a short distance further South trains pass through Tunnel de Bouisses.
Tunnel de Bouisses as it appears on Google’s satellite imagery, (107 metres in length). [Google Maps, September 2025]
The North portal of Tunnel de Bouisses, seen from the cab of a Nice-bound train. [4]
Low sun shines on the cab of the same Nice-bound service as it leaves Tunnel de Bouisses and is about to cross the first of two viaducts with the name ‘Bouisses’ (Viaduc de Bouisses No. 2). [4]
Turning through 180°, this low definition view shows the South portal of Tunnel de Bouisses as seen from the cab of a Breil-sur-Roya-bound train in 1995 which is just about to cross Viaduc de Bouisses No. 2. [37]
Viaduc de Bouisses No. 2 (three 6-metre arches), as it appears on Google’s satellite imagery. [Google Maps, September 2025]
A very short distance South-southwest the line crosses Viaduc de Bouisses No. 1. …
Viaduc de Bouisses No. 1 (six 6-metre arches).[Google Maps, September 2025]
In the light of the low sun this is the view South-southwest across Viaduc de Bouisses No. 1 from the cab of the Nice-bound service. [4]
The two Bouisses viaducts seen from across the valley to the West. No. 1 is on the right, No. 2 is on the left, with the portal of Tunnel de Bouisses visible top-left. [Google Streetview, March 2023]
A little further to the South, after running along a trackbed supported by retaining walls trains travelling towards Nice cross the Viaduct de Adrecia, seen here from the cab of the Nice-bound service. [4]
Viaduc de Adrecia (three 6-metre arches). [Google Maps, September 2025]
Viaduc de Adrecia, seen from the D21. [Google Streetview, April 2023]
The line has curved round to the Southeast before it enters Tunnel de Launa, shown here by the red, blue and green dots. Viaduc de Launa sits immediately to the Southeast of the tunnel. [38]
The Northwest portal of Tunnel de Launa (309 metres in length). [4]
This slightly overexposed image shows the view from the cab of the Nice-bound service as it leaves the Tunnel de Launa. The Viaduc de Launa is just beyond the railway house on the left of the image. [4]
The Southeast portal of Tunnel de Launa with a railway house on the right of the image. The viaduct is immediately behind the camera. Note also the level crossing close to the tunnel mouth. [38]
The view East across the railway on Rte du Vieux Village (D121). [Google Streetview, March 2023]This photograph, taken at the apex of a hairpin bend on Rte du Vieux Village (D121) has the tunnel mouth top-left, the railway house just to the right of centre at the top of the image with the railway in front of it spanning a bridge which carries the road under the railway. [Google Streetview, March 2023]
The bridge carrying the railway over Rte du Vieux Village (D121). [Google Streetview, March 2023]
Viaduc de Launa (100 metres in length – six 12-metre arches over the Galimbert stream) seen from the cab of the Nice-bound train running through the level-crossing. The viaduct was rebuilt during 1992 and 1993 as the first viaduct suffered settlement due to ground movement. [4]
Both this and the next image of the pedestrian crossing at Chemin de Laghet – a couple of hundred metres further along the line toward Nice – are of poor quality because of bright and low sunlight. [4]
Immediately to the West of Peillon-Sainte-Thècle Railway Station, the line crosses Pont de Brauschet (five 9 metre arches), seen here from the South on Avenue de la Gare. [Google Streetview, March 2023]
Pont du Brauschet sits just to the West of Peillon-Sainte-Thècle Railway Station and is marked on this map with a red arrow. It is 70 metres long and is a 5-arch viaduct.
Pont de Brauschet, seen from the cab of a train heading for Nice. [4]
The next structure along the line is Tunnel de Châteauvieux (219 metres in length). This in the East portal of the tunnel. [4]
Tunnel de Châteauvieux is the first of three tunnels which Nice-bound trains now pass through. It is marked by the red, blue and green dots on this image. Immediately to the West of this tunnel are the two side-by-side Viaducs des Mortes. [40]
This is the West portal of Tunnel de Châteauvieux, seen from alongside the line between the tunnel and Viaduc des Mortes. [40]
Just to the West of the Tunnel de Châteauvieux there are 2 viaducts next to each other (Viaducs des Mortes) of which only one is in service; the southern one which gives access to the Tuhet tunnel. The viaduct to the north (which has seven arches) leads to an unfinished tunnel. An accident occurred during the drilling of the original tunnel in 1925. The accident, which caused the death of 3 workers, resulted in the need to drill a new tunnel and, as a result, the construction of another viaduct in 1927 (with five 11 metre arches). The viaducts are named, Viaducs des Mortes, not because of the accident but because the viaducts bridge a footpath which was used to take deceased inhabitants of Borghéas to the cemetery of the neighbouring village of Drap.
The two viaducts mentioned above. [Google Maps, September 2025]
The two viaducts, seen from the North. The green arrow indicates the operational viaduct, the red arrow, the redundant viaduct. [48]
A view of both of the two viaducts and the Tunnel de Tuhet beyond. [46]
The East portal of Tunnel de Tuhet, seen from the cab of a Nice-bound service on the Viaduc des Mortes. [4]
The Tunnel de Tuhet (346 metres long). [46]
The West portal of the Tunnel de Tuhet. [46]
The East portal of Tunnel de la Ribosse. [47]
Tunnel de la Ribosse. [47]
The West portal of Tunnel de la Ribosse. [47]
A short distance further West, the line passes through Fontanil-Drap High School Halt.
Fontanil-Drap High School Halt seen from the Southeast on Route des Croves. [Google Streetview, March 2025]
At the West end of the station/halt, the Route des Croves passes under the line. The low arch bridge seen from the South. [Google Streetview, March 2025]
The same structure seen from the North side of the line. [Google Streetview, March 2025]
The next bridge carries the line over Chemin de de l’Ubac. [Google Streetview, March 2025]
The South side of the same structure. [Google Streetview, March 2025]
A short distance further West the line crosses the D2204, the River Paillon and the D2204B. …
The railway station at Drap also served the village of Cantaron which was on the opposite bank of the River Paillon. This old postcard image was shared by Roland Coccoli on the Comte de Nice et son Histoire Facebook Group on 22nd January 2016. [5]A closer view of the Station at Drap. This postcard image was shared on the Comte de Nice et son Histoire Facebook Group by Charles Louis Fevrier on 5th January 2021. [6]
This length of our journey finishes here at Drap-Cantaron Railway Station.
References
Jose Banaudo, Michel Braun and Gerard de Santos; Les Trains du Col de Tende Volume 1: 1858-1928; FACS Patrimoine Ferroviaire, Les Editions du Cabri, 2018.
Jose Banaudo, Michel Braun and Gerard de Santos; Les Trains du Col de Tende Volume 2: 1929-1974; FACS Patrimoine Ferroviaire, Les Editions du Cabri, 2018.
Jose Banaudo, Michel Braun and Gerard de Santos; Les Trains du Col de Tende Volume 3: 1975-1986; FACS Patrimoine Ferroviaire, Les Editions du Cabri, 2018.
Franco Collida, Max Gallo & Aldo A. Mola; CUNEO-NIZZA History of a Railway; Cassa di Risparmio di Cuneo, Cuneo (CN), July 1982.
Franco Collidà; 1845-1979: the Cuneo-Nice line year by year; in Rassegna – Quarterly magazine of the Cassa di Risparmio di Cuneo; No. 7, September 1979, pp. 12-18.
Stefano Garzaro & Nico Molino; THE TENDA RAILWAY From Cuneo to Nice, the last great Alpine crossing; Editrice di Storia dei Trasporti, Colleferro (RM), EST, July 1982.
SNCF Region de Marseille; Line: Coni – Breil sur Roya – Vintimille. Reconstruction et équipement de la section de ligne située en territoireFrançais; Imprimerie St-Victor, Marseille (F), 1980.
The featured image above is an early view of Thal Railway Station, possibly as early as 1903. [17]
The route of the Khushalgarh-Kohat-Thal Railway. The length from Khushalgarh to Kohat was initially built to the 2ft 6in narrow gauge in 1902 but converted to broad gauge (5ft 6in) at the same time as the River Indus was bridged, reopening in 1908. The line from Kohat to Thal was built to the narrow gauge (2ft 6in) and opened in stages from 1901 to 1903. [5]
Khushalgarh-Kohat-Thal Railway was worked by North Western Railway. [11] It was a military railway which ran close to the border with Afghanistan, linking the border town of Thal with the wider network at Khushalgarh.
By 1881, Khushalgarh had been connected by a short 7 mile (11 kilometre) broad gauge spur to Jand the North Western Railway main line. [1]
A line from Khushalghar to Kohat was first surveyed in April 1899. In 1901, it was decided to that to bridge the Indus would be too expensive. Instead, a ropeway was built over the river and a 2ft 6in (762mm) narrow gauge line was constructed from the right bank of the Indus facing Khushalgarh to Kohat, a distance of about 30 miles (48 kilometres) and opened in May 1902. [1]
The 62 mile (100 kilometre) line from Kohat to Thal ran from Kohat through the Kohat Pass and up the Miranzai Valley to Thal near the Afghan border. It opened in stages from Mar 1901 reaching Thal in Apr 1903. [2]
An intriguing haulage experiment is recorded by Simon Darvill. It took place in March 1902 on the trackbed of the line to Thal. A section of John Fowler [6] portable tramway was laid and a passenger carriage and two wagons were hauled by both a mule and a pair of bullocks. [3] The purpose and outcome of these experiments is not known. [5]
An on-line search of the India Office Records records held at the British Library relating to this line gives several entries, the most relevant being L/MIL/7/14848; “Collection 335/15 Railway construction: Loi Shilman, Kohat-Thal, Thal-Parachinar lines.”; 1908. [5]
The line closed sometime in the 1990s. Steam was still in use in 1989 as photographs here bear witness. [
Locomotives
An excellent discussion about various Bagnall supplied locomotives used on this line can be found in Allan C. Baker’s article in The Narrow Gauge No. 293 of March 2025. [12] Baker’s article is about the deployment of a series of Bagnall 2-4-2T locomotives built between 1901 and 1906 at the Castle Engine Works in Stafford (UK).
An early view of Thal Railway Station. [17]
The Route of the Railway – Jand to Thal
Google Earth/Google Maps allows us to view the line from above, but no Streetview images are available in this part of Pakistan as of September 2025. Ground-level photography is only available at a number of specific locations.
Jand
As we have noted the first stretch of the line was built in 1881, linking Jand to Khushalgarh.
The location of Jand Railway Station. [Google Maps, September 2025]A closer view of the station. [Google Earth, September 2025]Khushalgarh Junction in Jand. The main line heads Southwest, the branch to Kohat heads West through Khushalgarh. [Google Earth, September 2025]
The line used to stop short of the River Indus. It did so from 1881 until the bridge opened in 1908. Khushalgarh could only be accessed by rope-worked boat across the Indus.
The Indus River Crossing
In 1903 an accident closed the ropeway over the Indus River and a boat bridge replaced it. Eventually the decision was made to construct the Khushal Garh Bridge [4] crossing the Indus river and, at the same time, to convert the line to Thal from narrow gauge to broad gauge. The length of the line to Kohat was converted by 1908 but conversion of the line to Thal was never completed.
The bridge is reported to have been constructed by a Mr Robertson and is the shortest bridge over Indus River. [7]
On this bridge the train track and vehicles road for vehicles are constructed together. The upper side is used for trains and lower one for general traffic. [8]
Khushalgarh on the West side of the River Indus. Originally passengers from Jand had to leave the broad-gauge train on the East side of the river and use the ferry to cross to Khushalgarh where onward travel was possible on the narrow-gauge line.
Wikipedia tells us that Kushalgarh is a village in the Kohat District of Khyber Pakhtunkhwa. [14] The modern railway station is some distance from the river.
Khushalgarh Railway Station is about 5 kilometres from the Indus along the line of the present railway and about 2 kilometres by road from the village of Khushalgarh. [Google Maps, September 2025]
The line West from Khushalgarh was initially 2ft 6in narrow-gauge. As noted above work commenced on its construction in 1901, opening as far as Kohat in 1902. The decision not to build a bridge over the river was shortsighted and by 1908 the bridge over the river had been built and the line West of the river was re-gauged, providing a broad-gauge service as far as Kohat.
Kohat Railway Station is now the terminus for passenger services. To the Southwest, there are a number of what appear to be industrial sidings. The line of the 2ft 6in gauge railway to Thal is apparently crossed by the runway of a Pakistan Air Force Base. Following the line of the old railway back from Hangu, it appears that the line runs round the South end of the Airbase runway. Possibly it was diverted when the runway was built.
It is possible to follow the line of the old railway to the terminus at Thal. The following images do this, file sizes have been kept to a minimum which means that image resolution is not great, but the whole route can be followed on Google Maps if a higher resolution is important.
The old railway left Kohat Railway Station at its Southwest end. The route of the railway crosses Bannu Road and turns South to run parallel to Bannu Road and the runway to the West. [Google Maps, September 2025]
Continuing South-southeast the route of the old line reaches the South end of the runway and curves through South to Southwest. [Google Maps, September 2025]
On this next extract from Google’s Satellite imagery the route of the old line can be seen curving round (South of the Green Flag marking Miagan Cricket Ground) towards the Northwest and crossing Kohat City Bypass Road. Google Maps, September 2025]
The route of the old line is visible to the point where it crosses Kohat City Bypass. To the West of the road the route of the old railway heads Northwest gradually separating from the line of the road. {Google Maps, September 2025]
The line of the old railway continues Northwest as the road turns to the North. The old railway formation is under a modern road at this point. [Google Maps, September 2025]
The old railway continued on the same bearing. The Kohat City Bypass crosses the route of the old line as shown here. [Google Maps, September 2025]
The North-northeast trajectory continues – the road following the route of the old line only appears in grey on this extract from Google’s satellite imagery. [Google Maps, September 2025]
The route of the old line continues to be followed by a modern road. [Google Maps, September 2025]
The route of the old line continues to be followed by a modern road. [Google Maps, September 2025]
The route of the old line Appears to sit between Hangu Bypass and a local road. [Google Maps, September 2025]
The route of the old line crosses the Kohat-Hangu Road and turns to shadow it. [Google Maps, September 2025]
The route of the old line follows a modern road. [Google Maps, September 2025]
The route of the old line continues to be followed by modern roads with occasional lengths more like footpaths. [Google Maps, September 2025]
The route of the old line continues to be followed by a modern road. [Google Maps, September 2025]
The route of the old line continues on the North side of the Kohat-Hangu Road. [Google Maps, September 2025]
The route of the old line continues on the North side of the Kohat-Hangu Road. [Google Maps, September 2025]
The route of the old line continues on the North side of the Kohat-Hangu Road on both of these extracts from Google’s satellite imagery. [Google Maps, September 2025]
The route is still on the North side of the Kohat-Hangu Road. [Google Maps, September 2025]
The route remains on the North side of the Kohat-Hangu Road. [Google Maps, September 2025]
The route separates a little from the Kohat-Hangu Road. [Google Maps, September 2025]
But returns relative soon to sit close to the road. [Google Maps, September 2025]
The route continues on the North side of the road. [Google Maps, September 2025]
The route continues on the North side of the road. [Google Maps, September 2025]
A significant change in direction of the road results in the route switching to the South of the road.
For a while the route of the old line runs a number of fields away from the Kohat-Hangu Road.
On both these extracts the route of the old line remains remote from the main road.
A modern access road follows the route of the old line.
The same applies for these next two extracts. [Google Maps, September 2025]
This section of the old line has not been annotated by red lines. It is clear that its route is now used as a highway. [Google Maps, September 2025]A further length of the old line follows a path remote from the modern road and much closer to the Jabi Toi River. The Kohat-Hangu Road takes up closer order with the route of the old railway towards to right of this image. [Google Maps, September 2025]
An enlarged view of the left side of the above image which shows the main road much closer to the line of the old railway. [Google Maps, September 2025]
The alignment of the old railway over this next length i more difficult to determine. It appears to curve around the North side of the swimming pool flagged at the top-right of the image and runs close to the Jawzara Springs. The lengths shown pink are surmised rather than certain. The route of the line is clearer once again towards the bottom of the image where it approaches a bridge over the Kohat Toi River, a tributary of the Jabi Toi River. [Google Maps, September 2025]
The redundant railway bridge over the Kohat Toi River remains standing. It is located just off the bottom-left of the satellite image above. [Google Maps, September 2025]
The bridge above is just off the right side of this satellite image. [Google Maps, September 2025]
The route of the old line continues on the South side of the main road.
The line continues Southwest avoiding the high ground which the road crosses and curves round to meet the Kohat-Hangu Road at the bottom-left of this extract, adjacent to the bus-stop shown bottom-left on the satellite image
The route of the old line runs on The South side of the road before curving West-Northwest and crossing he road.
A relatively tight curve takes the route of the old line back across the modern road. At the centre of this image, Hangu Bypass now follows the route of the old railway.[Google Maps, September 2025]
Hangu Bypass continues to follow the lie of the old railway on the Southeast side of the city and does so until the Bypass meets the Thall-Hangu Road. [Google Maps, September 2025]
A closer view of the road junction shows the route of the old railway running immediately alongside the Thall-Hangu Road. [Google Maps, September 2025]
The route of the old line continues running parallel to the main road. [Google Maps, September 2025]
The two separate somewhat as the route of the old line continues South-southwest and then turns to the Southwest. [Google Maps, September 2025]
The route of the old line continues Southwest. [Google Maps, September 2025]
Further Southwest the route of the old line returns to the shoulder of the modern road.
It runs immediately alongside the road for a short distance, before turning away to the South.
The change od direction can be seen at the bottom-left of the last image and appears more clearly on this extract. Its route is followed by a minor road.
The old line continued Southwest before turning to the West. [Google Maps, September 2025]The old line ran West before turning to the Northwest. [Google Maps, September 2025]Heading Northwest, the line eventually crosses the Thall-Hangu Road. [Google Maps, September 2025]It then turned West to run along the North side of the Thall-Hangu Road, before starting to drift away to the North of the road. [Google Maps, September 2025]The line headed Northwest and then West-northwest. [Google Maps, September 2025]The old railway crossed the river bed at the bottom left of this extract from Google’s satellite imagery, turning first to the Northwest and then generally to the West. [Google Maps, September 2025]
Bottom-right on the image above the old railway bridged a dry river bed on a two-span girder bridge which is still standing in the 21st century. [Google Maps, September 2025]
This next length of the line ran South-southwest before curving a little to the Southwest, and then, as can be seen on the next extract from Google’s satellite imagery, towards the West-southwest to run parallel to the Thall-Hangu Road. [Google Maps, September 2025]
The route of the old line runs on the North side of the Thall-Hangu Road. [Google Maps, September 2025]The route of the old line drifts away from the Thall-Hangu Road. [Google Maps, September 2025]Topography dictated that the line took a circuitous route first turning to the Northeast before swinging round to the Southwest. [Google Maps, September 2025]After a length running Southwest the line turned West. [Google Maps, September 2025]It continued in a westerly direction. [Google Maps, September 2025]Before turning Southwest. [Google Maps, September 2025]After a short deviation to the Northwest the route of the old railway closes towards the Thall-Hangu Road. [Google Maps, September 2025]And runs parallel to it on its North side. [Google Maps, September 2025]The route of the old railway is generally under the alignment a road as marked on Google Maps. [Google Maps, September 2025]Lengths of the old line on the approach to Darsamend are under tarmac with the route marked out by read lines. [Google Maps, September 2025]The route of the old railway runs into Darsamend, running from the top-right corner of this satellite image to the middle left. The formation is under a road for the majority of its length. [Google Maps, September 2025]The route of the old line continues through Darsamend turning to the Southwest. A road follows the formation over the majority of this length. [Google Maps, September 2025]Still in Darsamend, the approximate route of the old railway crosses the Thall-Hangu Road at a shallow angle. [Google Maps, September 2025]The railway bridge still stands (close to the centre of this image with the old railway running Northeast to Southwest and now used as a road. [Google Maps, September 2025]The old railway route can be seen to the South of the Thall-Hangu Road running from the top-right corner of this image, crossing the Thall-Hangu Road close to the bottom-left of the image and running on the North shoulder of the road to the bottom-left corner of the image. [Google Maps, September 2025]The red dashes mark the line of the railway through Mammu and over a dry river bed. The bridge no longer exists and the route of the line through the village has been converted into a road. [Google Maps, September 2025]The route of the old railway runs from the cutting at the top-right of this satellite image,m West along what is now a road before turning South towards the Thall-Hangu Road. It leaves this image just to the North of the Thall-Hangu Road. [Google Maps, September 2025]There is an overlap between the last satellite image and this image the line of the old railway can be followed, first along the grey road on the North side of the Thall-Hangu Road and then as a paler line running through the landscape towards the bottom-left corner of this image. [Google Maps, September 2025]Again the route of the old railway appears as a paler line heading West away from the Thall-Hangu Road on this next satellite image. [Google Maps, September 2025]Heading West from the road at the left of the image above the line then turned to the Southwest and its route again appears relatively clearly running from the top-right to the road at the bottom-left of this satellite image. [Google Maps, September 2025]The route of the old railway is defined by the narrow paler line which runs from the road at the top-right of this satellite image (which is the same as that in the bottom-left of the image above) in a South-southwest direction before curving sinuously toward the Thall-Hangua Road at the bottom left of the image and running South for a short distance to the East of the road. [Google Streetview, September 2025]The exact point at which the railway crossed the line of the road is not obvious, but we can see the line of the railway crossing the land between two arms of the Thall-Hangu Road. It appears as a shallow cutting curving gently towards the Southwest, to the North of a more significant defile. [Google Maps, September 2025]The approach to Thal Railway Station no longer is easy to identify. The last length of the line which can be ascertained easily is this apparently deep cutting. [Google Maps, September 2025]
Thal
The erstwhile railway station at Thal sat on the opposite (East) side of a tributary to the Kurram River looking West across the town/city.
Thal sits on the banks of the Kurram River. The old railway Station sat to the East of a tributary to the River Kurram. [15]
Thal, with the location of the old railway station marked by the red flag (on the right of the satellite image. [Google Maps, September 2025]
Simon Darvill; Industrial Railways and Locomotives of India and South Asia; The Industrial Railway Society, 2013. Available at http://irsshop.co.uk/India.
The North Western Railway (NWR) was a major railway system in British India that served the North-West Frontier region. After the 1947 partition, it was split, with the majority of its lines becoming the foundation for Pakistan Railways and a smaller portion forming the Eastern Punjab Railway in India. The NWR was headquartered in Lahore and extended from Karachi to Delhi and into the frontier regions, a crucial infrastructure for both civilian transport and British strategic planning. See: https://en.m.wikipedia.org/wiki/North_Western_State_Railway, accessed on 20th September 2025.
Allan C. Baker; Bagnall Locomotives for the Indian Strategic Military Railways; in The Narrow Gauge, journal of the Narrow Gauge Railway Society, No.293, March 2025.
The Coleford Branch between Monmouth and Coleford replaced an earlier tramroad. The Monmouth Tramroad, linked Monmouth with Coleford and opened in 1810. It was the first rail transport in the immediate area.
Wikipedia tells us that the “Monmouth Railway Act was a Parliamentary act from 1810 (50 Geo. 3. c. cxxiii) that authorized the construction of a 3 ft 6 in gauge plateway, a type of early tramroad, from mines east of Coleford to May Hill in Monmouth, running through Redbrook. The purpose was to create a toll road for carriers to transport coal and iron ore, but it would not be operated by the company itself. The line opened in stages between 1812 and 1817.” [4]
For just under half a century this was the only ‘railway’ serving Monmouth. This was true for even longer in respect of Coleford.
It is of interest that this line was originally planned to be at the core of a significant network. It had a long tunnel near Newland and is thought to have been the first railway to include a paying passenger service within its Act. [1]
The original tramway bridge (pictured towards the end of this short article) was a low timber girder on stone abutments crossing a minor road serving a couple of farmsteads. This created a large loop up this side valley, which initial plans for the railway involved amputating and replacing with a gently curving viaduct.
Viaducts are expensive, however, and taking a straight course means going a shorter distance and consequently trains would have to climb more steeply. So the viaduct was dropped from the plans and replaced by a huge embankment which made a smaller loop up the side valley. Through this embankment passed the new bridge for the minor road. Although it is a rather large structure (particularly by single arch standards), the top of the arch is still well below the top of the embankment, which carried a minor single track railway. It now carries an overgrown trackbed which is about the same width as the road below. The railway was built to last and, 92 years after the last train to Monmouth from Coleford, the Dog Kennel Bridge remains in excellent condition.
Dog Kennel Bridge, seen from the Northwest on Whitecliff. The featured image at the head of this article is a photograph taken by me on 3rd September 2025. It shows the same structure, seen from the Southeast on the same minor road. The featured image is repeated below. [Google Streetview, March 2025]The featured image for this short article is a photograph of Dog Kennel Bridge as seen from the Southeast. The bridge is unusual, being more like one span of a tall viaduct than a single-span arches bridge. [My photograph, 3rd September 2025]The red dot marks the location of Dog Kennel Bridge. The line of the branch can be made out as two parallel lines of trees which pass to the West of the ‘flag’ marking the position of Whitecliff Ironworks. [Google Maps, September 2025]The extract from the 25″ Ordnance Survey of 1900, published in 1902, shows the location of Dog Kennel Bridge in relation to the small town of Coleford. The bridge is in the extreme bottom-left of the map extract. Coleford’s two adjacent stations feature in the top-right of the map extract. [2]The red dot marks the location of Dog Kennel Bridge. [Google Maps, September 2025]The 25″ Ordnance Survey of 1900, published in 1902, shows the GWR single-track line crossing Dog Kennel Bridge. The earthworks for the older Monmouth Railway are visible running across the map extract on the South side of the GWR line above Whitecliff Villa, passing under the GWR line to head further up the valley before curving tightly over the road. [3]
Dog Kennel Bridge carried the Coleford Railway, which ran from Wyesham Junction, near Monmouth, to Coleford, over a minor road between Whitecliff and High Meadow Farm. Construction of the line began in 1880, the contractors being Reed Bros & Co. of London, and it was opened on 1st September 1883. In common with other underbridges on the line, Dog Kennel Bridge is predominantly of stone, but the arch is made of brick. It has massive stone abutments and wing walls. The smaller stone bridge abutments of the Monmouth Railway, which the Coleford Railway replaced, are still visible about 100 metres up the lane (SO 56321007) where the old tramroad crossed the valley on a much sharper curve. [5]
The abutments of the tramroad bridge remain on either side of Whitecliff. This is how they appear from the Southeast. [Google Streetview, March 2025]The tramroad (Monmouth Railway) bridge abutments seen from the Northwest. [Google Streetview, March 2025]The relative positions of the older tramroad bridge and Dog Kennel Bridge. [Google Earth, September 2025]
The GWR’s Coleford Branch closed by 1st January 1917, most of the track soon being lifted for the war effort. [5]
The featured image above shows an unidentified steam locomotive crossing the highly unusual Viaduc de Bevera. The train is heading toward Sospel.
In the first five articles about the line from Cuneo to the sea we covered the length of the line from Cuneo to Breil-sur-Roya and then to Ventimiglia. These articles can be found here, [9] here [10] here, [11] here, [12] and here [13]
I want to acknowledge that a series of stills from a video of the train journey from Breil-sur-Roya to Nice have been used in this article. The video can be seen here. [4]
This article begins the journey from Breil-sur-Roya to Nice.
South of Breil-sur-Roya a junction allows direct access to Ventimiglia and to Nice. The map below shows the two routes as they existed prior to the alteration of the border between France and Italy after the Second World War.
The lines Nice to Tende and Ventimiglia to Tende in the period from 1928 to the Second World War, before the annexation, in 1947, of St-Dalmas de Tende and Piene to France. [40]
The project was finally agreed by the PLM on 7th January 1907 but various portions of the work would be delayed by disputes relating to the transfer of land. “Acquisitions began in the suburbs of Nice in May 1907, at Saint-Roch … and Roccabiliera, where the PLM had decided to build a vast facility with a goods station, marshalling yard and engine depot to relieve congestion at Nice central station, whose rights of way, enclosed in the urban fabric, could no longer expand. This program for the redesign of Nice’s railway facilities also provided for a 3,610 m connection between the new Saint-Roch station, Riquier station and the port. In the hinterland, events also began to take shape and in December 1908, a section of engineers set up in Fontan and undertook the first work along the Roya the following January.” [1: p90]
Banaudo et al continue: “In 1909, Chief Engineer Paul Séjourné (1851-1939), then fifty-eight years old and already renowned for his original designs for civil engineering structures, took over the direction of the construction department. The line from Nice to the Italian border would give him the opportunity to exercise his talent in the design of structures that were as daring as they were harmoniously integrated into the landscape.” [1: p90]
In this series of articles, we have already seen Séjourné‘s Scarassoui Viaduct spanning La Roya to the North of Breil-sur-Roya.
The line from Breil-sur-Roya to l’Escarene. [
This article follows the line South from Breil-sur-Roya to l’Escarene in two parts. The first from Breil to Sospel and the second from Sospel to l’Escarene.
1. The Line South from Breil-sur Royato Sospel
Banaudo et al tell us that, “In December 1912, tranches 8 and 9 were awarded in turn for a length of 10,500 m from Sospel to Breil to the François Mercier company, of Moulins-sur-Allier. The work included three tunnels with a combined length of 5,307 m, including the Mont Grazian and Caranca structures established at double-track gauge and equipped with defensive devices, as well as seven bridges and viaducts representing twenty-five masonry arches and two metal spans. Among them, the exceptional structure of the Bévéra viaduct. There were also three culverts and three level crossings in this section.” [1: p102-103]
Banaudo et al take up a significant part of Volume 1 of the story of the line with an album of photographs of the construction work on the French side of the border. [2: p152-331] A superb record of the work undertaken.
On the Sospel-Breil section of the line the contract works were gradually completed. By the end of 1921, the Bancao and Caranca tunnels were completed. The Mont Grazian tunnel was finished in 1923. The Bévéra viaduct’s abutments and masonry arch were ready by then and only awaited the delivery of the metalwork of the decking. [1: p141]
The length of the lien from Breil-sur-Roya (top-right) to l’Escarene (bottom-left). [8]
This drawing/map shows the two routes heading South from Breil-sur-Roya. [40]
As with the line immediately to the North of Breil-sur-Roya, the works to the South and Southwest were constructed by the French. Both of the lines heading South from Breil-sur-Roya entered tunnels just a short distance South of Breil.
The first length of the line South of Breil-sur-Roya is common with the line to Ventimiglia. The two lines separate at the Lavina bridge.
A colourised postcard view of Breil-Sur Roya Railway Station looking North through the station site in advance of the official opening in 1928. This colourised image was shared on the Stura-Cuneo Facebook Page on 20th February 2020, (c) Public Domain. [29]Breil-sur-Roya station during its very early operation (1928-35), before electrification, with numerous passenger carriages standing idle. The passenger building is in the background; in the foreground are the buildings on the second platform, the only ones today significantly reduced in height and length, publisher Frédéric Laugier, (c) Public Domain. [30]Breil-sur-Roya Railway Station at the height of its development, with electrification completed (1935), with the passenger building, the large freight yard filled with wagons, and the concrete sheds with arched vaults. Those in the background still exist but are used for non-railway purposes. The Breil Ecomuseum is now located on the north side, half-hidden by the foliage of the tree in the foreground. The photograph was taken from the hillside to the Northwest of the station site and faces Southeast, (c) Public Domain. [30]After the war, the line to Nice was reopened in 1947, but the station, reduced to the simple terminus of a secondary section, was greatly simplified, removing almost all the sidings (the long straight lines of which can still be made out). In the background, the line to Fontan still features the electrification poles (removed from the rest of the station), but it was naturally abandoned and remained there until its reconstruction in the 1970s. In the 21st century, platform 2, which had been removed at the time, has been restored, the buildings on the second platform have been scaled down, and the third platform has been eliminated. The turntable, which still exists, is part of the Ecomusée, publisher Lapie à Saint-Maur, 1955, (c) Public Domain.[31]Breil-sur-Roya Railway Station in 2013, (c) Gilles Tagadaand licenced for reuse under a Creative Commons Licence (CC BY-SA 3.0). [32]The southern end of the railway station site in Breil-sur-Roya. Two lines leave the station heading South-southwest. [Google Maps, August 2025]
The view from the cab of a Nice-bound service waiting to set off from Breil-sur-Roya. [4]
South of the station adjacent parallel bridges cross the Voie de la Première Dfl and Vallon de la Lavina (the Lavina Bridge).
Lavina Bridge seen at rail-level from the cab of the Nice-bound train. [4]
Looking East under the railway bridges (the Lavina Bridge) along Voie de la Première Dfl. [Google Streetview, October 2008]Looking West under the railway bridges (the Lavina Bridge)along Voie de la Première Dfl. [Google Streetview, October 2008]A short distance to the South the two lines can be seen to be separating both geographically and in level. This view looks Northeast with the station off to the left. [Google Streetview, October 2008]The view South from the cab of a Ventimiglia-bound train. Again, the separation in level is quite marked. [55]At the same location, this view looks Southeast. Both lines enter a tunnel just to the South. One tunnel mouth is visible on the left of the image at a lower level. The other tunnel mouth is behind the vegetation on the right of this image. [Google Streetview, October 2008]
The two tunnel mouths seen from the cab of a Nice-bound service. [4]
The two tunnel mouths. On the left, that of Gigne Tunnel, on the right, that of Caranca Tunnel. Left for Ventimiglia, right for Nice! The whole structure is provided with a series of small openings to facilitate the holding of the tunnels in the event of war. [17]
Caranca Tunnel North Portal prior to vegetation growth. The tunnel was built to accommodate double-track to allow for possible future growth in traffic. [20]
The North portal of Caranca Tunnel in the 21st century (915 metres long). [4]
This extract from the OpenStreetMap mapping shows the close correlation of the two different routes over the first fe kilometres. The short red lines are the locations of tunnel mouths. [14]
The route of Caranca Tunnel crosses twice over the Gigne Tunnel which is on the Ventimiglia line. The lines to both Nice and Ventimiglia are shown as dotted lines when in tunnel. [1: p126]
Nice-bound trains exit Caranca Tunnel heading Southeast. This is the view from the cab of a Nice-bound train. [4]
Turning round to face the Tunnel portal, this is the Southeast portal of Caranca Tunnel. [20]
The next tunnel is Tunnel de Bancao (508 metres long). This is the North portal of the tunnel. [4]
The North Portal of Bancao Tunnel is at the higher level. the lower tunnel mouth is that o Sanfurian Tunnel. [19]
The South portal of Bancao Tunnel gives way onto Viaduc Bancao. [19]
The line leaves Bancao Tunnel and immediately crosses Bancao Viaduct. [4]
Bancao Viaduct on the line from Breil-sur-Roya to Ventimiglia is a single span arch close to the D6204 on this extract from OpenStreetMap. The line to the West is the line we are now following from Breil-sur-Roya to Nice which is at a much higher level and its viaduct is a multi-span structure. [15]
Both the Nice line and the Ventimiglia line can be seen in this image. That to Nice is at the higher level. The longer viaduct at the lower level is Viaduc Eboulis. Viaduc Bancao is at the higher level. [18]
An earlier monochrome view of Viaduc Bancao. The viaduct has eight 9 metre arches. [18]
Looking West from the D6204/E74, a small culvert close to the road is dwarfed by the bridge carrying the line to Ventimiglia which in turn is dwarfed by the viaduct carrying the line to Nice. [Google Streetview, April 2008]
Viaduc de Bancao on the Nice to Breil-sur-Roya line appears, in part, at the top of this image.
The two rail lines are still running in parallel, only beginning to separate significantly at the bottom of this extract from Open StreetMap.
The line we are following enters the Mont Grazian Tunnel, bottom right of this OpenStreetMap extract. [16]
Before the Tunnel three structures are crossed – two 10 metre-span arched bridges and then Viaduc d’Arbousset none of the three are marked on this map extract. The Viaduct sits at the point where the line which has been curving round to the South begins to turn to the Southwest, just before entering Mont Grazian Tunnel. [16]
Viaduc d’Arbousset (63 metres long with three 7 metre arches). Ahead the line curves to the right and enters Mont Grazian Tunnel. [4]
The Northeast portal of the Tunnel de Mont Grazian, seen from the cab of a Nice-boud train. [4]
The Mont Grazian Tunnel was built wide enough to accommodate double-track to allow for possible future traffic growth. “It was lined with defensive measures at both ends, a precaution imposed by the major strategic importance of this structure, which connects the Roya and Bévéra valleys.” [1: p94] Details of the defensive measures can be found here. [27]
The Northeast portal of Tunnel de Mont Grazian. This view from above shows the Viaduc d’Arbousset and the high retaining wall on the right of the mouth of the tunnel. [27]
Tunnel de Mont Grazian is 3891 metres in length. [27]
The view Southeast from the cab of the Nice-bound service as it leaves the tunnel mouth. A very short distance beyond the tunnel mouth the line crosses Viaduc de Bassera. [4]
Turning through 180, the Southwest portal of the Tunnel de Mont Grazian. [27]
The Southeast portal of the Mont Grazian Tunnel before the opening of the line in 1928. Viaduc de Bassera is in the foreground. There are detailed differences between the appearance of the tunnel entrance in this view and the photograph of the entrance above. As part of the Maginot strategic defence plan for the SFAM (Alpes Maritimes Fortified Sector) the Southeast portal of Mount Grazian Tunnel had fortified side chambers with loopholes overlooking the tunnel to guard against enemy incursion. More details can be found here. [27]A different postcard view of the Bassera Viaduct and the tunnel mouth of the Mont Grazian Tunnel. [46]
The Bassera Viaduct is curved with seven 12-metre arches and crosses the Basséra River.
A broader view of the Viaduc de Bassera at the time of its construction, (c) Public Domain. [23]
In this image, Viaduc de Bassera is on the right and Viaduc Cai (over the River Bevera) is on the left. [23]
The two bridges as seen on Google Earth. [Google Earth, August 2025]
The original bridge over the Bevera (Pont de Cai) which was built in time for the opening of the line in 1928. More details can be found here. [24]
A very short distance beyond the end of Viaduc de Bassera, the line crosses the River Bevera on another viaduct – Viaduc Cai. [4]
This extract from OpenStreetMap illustrates the proximity of the two viaducts and Mont Grazian Tunnel. [22]
Due to its proximity to the Italian border, this unused tunnel (marked with a red arrow) was built for strategic reasons as part of the Maginot Plan for the defense of the SFAM (Fortified Sector of the Alpes Maritimes). [28]
It was intended to provide an emergency route in the event that the large neighboring Caï viaduct needed to be destroyed, and to store the metal spans of a replacement viaduct. [28]
Halfway along its length, on the left wall, it has an annex gallery (tunnel window – marked by the yellow arrow) which opens onto the western abutment of the Caï viaduct. More information can be found here. [28]
The Bevera River flows West to East (its confluence with La Roya (Roia) is adjacent to the village of Bevera which sits on the North bank of the Bevera River). Once across the Bevera River on the Cai Viaduct, the line heads up a gradient of 17 mm/m to Sospel Railway Station.
The route of the line between Breil-sur-Roya and Sospel was determined by the military. The military authorities dictated that the line should be routed to ensure that it could “be easily intercepted by the artillery of The Barbonnet fort, above Sospel, in the event of an infiltration attempt from the Roya valley.” [1: p92 & 94]
The Cai or Bevera Viaduct “crosses the river at a very acute angle. [This] inspired an original arrangement by Paul Séjourné: the deck, formed of two metal spans of 45.30 m, framed by four masonry arches of 8 m, rests 30 m above the river on a perpendicular arch of 25 m opening and egg-like in shape, resting transversely on the walls of the gorge.” [1: p94]
The line follows the valley side to the South of the Bevera rising, as we have already noted at a gradient of 17 mm/m. It crosses a minor road by means of a level crossing (Route de Suez).
The level crossing at Route de Suez, seen from above. [Google Maps, August 2025]
The level crossing at Route de Suez seen from the cab of a West-bound train. [4]
The next level crossing on the line is immediately at the East end of Sospel Railway Station site. [Google Maps, August 2025
The same crossing seen from the cab of the Westbound train approaching Sospel Railway Station. [4]
The road crossing of the line (seen from the South) is on the left of this image. The track to the right heads back towards the Viaduc de Cai. A small culvert can be seen alongside the road at this location. [Google Streetview, October 2008]The road crossing of the line (also seen from the South) is on the right of the image. The track to the left heads into Sospel Railway Station. [Google Streetview, October 2008]
Further West and fully within what was the station site but which in the 21st century is an open plateau of unused land. [4]
The station passing loop seen at its eastern end from the cab of the Westbound train. [4]
The final approach to Sospel railway Station from the East. [4]
Sospel Railway Station was to be a station “with substantial facilities which would allow the reception of military convoys in the event of conflict with neighboring Italy.” [1: p92] Arriving on Sospel, trains from Breil-sur-Roya pass through a large flat open area which was designed to accommodate the needs of the military.
The town was, in the middle of the 19th century, the second city of the County of Nice. “The location of Sospel … in … a basin where the Bévéra Valley widens, is very unique. From wherever one arrives from France, one must cross a pass: the Braus pass coming from Nice, the Castillon pass towards Menton, the Brouis pass towards Breil and La Roya, and the Turini pass towards La Bollène and La Vésubie. Towards Italy, the Vescavo Pass road connects Piena and Olivetta, while downstream, the Bévéra flows in impassable gorges where one could only venture on foot.” [1: p101-102]
The year 1912 was quite momentous in the history of Sospel not only was construction work getting underway but on 15th April 1912 the Compagnie des Tramways de Nice et du Littoral (TNL) opened its Menton-Sospel tramway. More about the tramway can be found here, [36] here [37] and here. [38]
Closer to the centre of Sospel, this is the terminus of the Menton-Sospel Tramway. [46]
Banaudo et al comment that “The Gianotti company immediately took advantage of this opportunity to transport the tools and equipment from Nice that would be used for the construction of the Braus tunnel. … In the initial stages of the construction, the Gianotti brothers used a network of portable 0.60 m gauge railways, on which Decauville dump trucks pulled by horses ran. Later, one-metre gauge tracks were laid, on which steam locomotives pulled larger capacity trains, consisting of Koppel wagons with a load of 6 m³ or wooden-bodied wagons with a capacity of 3 m³. Several locomotives from the contractor were brought to site via the tramway, coupled to a ‘mortrice electrique’ (an electric tram engine) as a safety measure on the steeply graded tramway.” [1: p102]
“In the early months of 1913, the Mercier company got to work and obtained permission from the TNL company to open a special branch line at each end of the Menton-Sospel tramway line. The construction site’s supplies then provided the tramway with more than half of its freight traffic. In July 1913, two to three round trips ran daily, and in October, Mercier received 745 tons of materials in Sospel. In May 1914, the Gianotti brothers opened their own branch line in the Careï Valley in Menton, but soon, the saturation of the small freight yard and insufficient equipment forced the TNL to limit shipments to five wagons per day.” [1: p103]
2. Sospel to l’Escarene
The journey from Sospel to l’Escarene takes the line through and under the mountains of the Col de Braus.
The line climbs through a series of embankments and cuttings on a gradient of 9.5 mm/m and enters the Tunnel de Braus.It continues to climb within the tunnel to a high point of 420 metres above sea level. Within the tunnel the gradient then changes to a 2 mm/m downward grade towards l’Escarene. The tunnel was double-track both to aid ventilation and to allow for possible expansion of services if demand required it. At the insistence of the military defensive fortifications surrounded the two tunnel mouths. [1: p92]
Of the 12 tranches of contract work on the French side of the international border, two tranches covered the 9.7 km length between Sospel and l’Escarene – lots 6 and 7. The work was awarded in December 1911 and April 1912 to Jean and Antonin Gianotti. Banaudo et al tell us that the work included over 6.4 km of tunnel. “As well as a few secondary structures: three culverts, four level crossings, two underpasses and six overpasses, most of which were built using the new reinforced concrete technique.” [1: p101]
After waiting for a Breil-sur-Roya-bound service to clear the line ahead, we set off in a Westerly direction from the station at Sospel.
A Nice to Breil-sur-Roya service arriving at Sospel. [4]
As the Nice-bound train sets off from Sospel Station it crosses Rte d’Erc at a level-crossing. [4]
Rte d’Erc crosses the railway at the West end of the Sospel Station site. [Google Maps, August 2025]Looking back East towards Sospel Railway Station. [Google streetview, August 2022]A departure for Nice in 1947. The steam locomotive has just crossed the level-crossing over Rte d’Erc. [47]A similar view looking back East towards Sospel Railway Station from close to the level crossing featured above. [44]A view from the railway house which sits beside the level-crossing which shows Sospel Railway Station in very early days! [45]Looking ahead along the railway towards l’Escarene (on the left of this post and image), the town of Sospel is laid out in front of the camera. In the text of this article we mention the use of concrete on the line. Two bridges of reinforced concrete construction can be seen on the left of this image. [46]Looking West towards the bridge carrying Mnt des Capuchins over the railway. The station passing loop ends just to the West of the Rte d’Erc level crossing. [Google Streetview, August 2022]
A closer view of the bridge carrying Mnt des Capuchins. [4]
Rte de la Penetrante passes under the railway. [Google Maps, August 2025]Rte de la Penetrante (D2566A) is crossed by means of a stone arch bridge. This is the North elevation of the structure. [Google Streetview, October 2022]The South elevation of the same structure. [Google Streetview, October 2022]Chemin de la Saint-Roch bridges the line a short distance further West. [Google Maps, August 2025]
The bridge carrying Chemin de la Saint-Roch over the line as seen from the cab of a Nice-bound train. [4]
The overbridge carrying Chemin de la Saint-Roch, seen from the North. [Google Streetview, April 2013]Looking back along the line towards Sospel Railway Station. [39]
The next overbridge carries the D2204 (boulevard de l’Egalite over the line. [4]
Boulevard de l’Egalite (D2204) bridges the line a short distance further West. [Google Maps, August 2025]Looking Souttheast from Boulevard de l’Egalite towards Sospel Railway Station. [Google Streetview, October 2022]Looking Northwest from Boulevard de l’Egalite. [Google Streetview, October 2022]
The next structure visible form the cab of the Nice-bound train is an accommodation bridge which carries a driveway to a larger property running Northeast from La Condamine. [4]
An accommodation bridge carries a driveway from La Condamine over the line. [Google Maps, August 2025]Rte du Moulinet (D2566) passes under the railway. [Google Maps, August 2025]Just a short distance to the Northwest from the bridge above. The bridge over Rte du Moulinet is seen here from the Northeast. [Google Streetview, August 2021]The same structure, seen from the Southwest on the D2566. [Google Streetview, August 2021]
A short distance further West the line crosses Rte Sant-Antoine by means of a level-crossing. [4]
Rte Saint-Antoine crosses the line at level a little further to the West. [Google Maps, August 2025]Looking East from Rte Saint-Antoine towards Sospel. [Google Streetview, October 2008]Looking West from Rte Saint-Antoine. [Google Streetview, October 2008]
The D2566 crosses the line (heading North-northwest) with the line travelling in a southwesterly direction. [4]
Rte de Moulinet (D2566) crosses the line again. [Google Maps, August 2025]Looking Northeast from Rte du Moulinet towards Sospel. [Google Streetview, August 2016]Looking Southeast towards l’Escarene from the same bridge over the line. [Google Streetview, August 2016]
In deep shade, this is the mouth of Tunnel de Braus, seen from the cab of an approaching Nice-bound train.[4]
The same tunnel mouth in better light. [31]
The full length of Tunnel de Braus (5.94 km long), as it appears on OpenStreetMap. [30]The full length of Tunnel de Braus as it is recorded in the French Inventory of Tunnels. The yellow dot marks the approximate location of a significant water flow intersected by the construction work which required significant remedial works before the construction of the tunnel could proceed. More information and drawings can be found here. [31]
As we have already noted, both the tunnel portals were fortified at the insistence of the military. … Completing the tunnels also required significant additional work to deal with a very high level of water ingress during construction.
The Southwest portal of Tunnel de Braus is flanked to the Southeast by a very high retaining wall and to the Northwest by a water channel created for the Ruisseau de Redebraus. [31]
The Tunnel de Braus was built to accommodate a double-track line to allow for possible future growth in traffic.
This extract from Google’s satellite imagery shows the various structures from above – the river bridge is towards the bottom-left of the image with the tunnel mouth in the top-right. [Google Maps, August 2025]
The view from the cab of the Nice-bound train as it leaves the tunnel behind. [4] The first couple of hundred metres beyond the tunnel portal are within a narrow, damp and dark defile.
The bridge over the Ruisseau de Redebraus. [4]
The Nice-bound train approaches the halt at Touët-de-l’Escarène. [4]
Touët-de-l’Escarène Railway Station (Halt). The village is to the North of the Station. [Google Maps, August 2025]
Touët-de-l’Escarène Railway Station. [4]
Three older images of Touët-de-l’Escarène follow. Two while the station was under construction. …
Touët-de-l’Escarène Railway Station, seen from the South and under construction, seen from the Southwest. [49]Touët-de-l’Escarène also under construction, seen from the West. [49]Touët-de-l’Escarène, the completed line, seen heading away towards the Tunnel de Mont Grazian. [49]
The line beyond Touët-de-l’Escarène continues West along the North side of the Ruisseau de Redebraus towards the next tunnel. …
The next tunnel is Tunnel de l’Escarène or Tunnel de Coalongia (527 metres in length). [34]
The East portal of the Tunnel de l’Escarène. [4]
The view from the cab of a Nice-bound train as it leaves l’Escarene Tunnel. The points which provide the passing loop at l’Escarene Railway Station sit just outside the tunnel mouth. [4]
The West portal of the Tunnel de l’Escarène. [34]
Within the tunnel the line has begun to turn towards the South and the relatively tight curve continues until between the platforms at Sospel Station the line is on a North-South axis.
The final approach to l’Escarene Railway Station. [4]
L’Escarene Railway Station. [4]
These two images show the Station site from above. The red ring highlights the location of the station turntable which, in the 21st century, is the location of the town’s fire station. [35]]
L’Escarene sits at the top of a long climb from Nice. We will follow the line through to Nice in the next two articles in this series. (The next article can be found here. [5]) Like Sospel, l’Escarene Railway Station had substantial facilities on a wide open plateau designed to allow the reception of military convoys in the event of conflict with neighboring Italy. [1: p92]
References
Jose Banaudo, Michel Braun and Gerard de Santos; Les Trains du Col de Tende Volume 1: 1858-1928; FACS Patrimoine Ferroviaire, Les Editions du Cabri, 2018.
Jose Banaudo, Michel Braun and Gerard de Santos; Les Trains du Col de Tende Volume 2: 1929-1974; FACS Patrimoine Ferroviaire, Les Editions du Cabri, 2018.
Jose Banaudo, Michel Braun and Gerard de Santos; Les Trains du Col de Tende Volume 3: 1975-1986; FACS Patrimoine Ferroviaire, Les Editions du Cabri, 2018.
Franco Collidà, Max Gallo & Aldo A. Mola; CUNEO-NIZZA History of a Railway; Cassa di Risparmio di Cuneo, Cuneo (CN), July 1982.
Franco Collidà; 1845-1979: the Cuneo-Nice line year by year; in Rassegna – Quarterly magazine of the Cassa di Risparmio di Cuneo; No. 7, September 1979, pp. 12-18.
Stefano Garzaro & Nico Molino; THE TENDA RAILWAY From Cuneo to Nice, the last great Alpine crossing; Editrice di Storia dei Trasporti, Colleferro (RM), EST, July 1982.
SNCF Region de Marseille; Line: Coni – Breil sur Roya – Vintimille. Reconstruction et équipement de la section de ligne située en territoireFrançais; Imprimerie St-Victor, Marseille (F), 1980.
The featured image for this article, above is an FS Series 320 0-6-0 (030 in Italian notation) steam locomotive which was used in the early days of operation on the southern section of the Ventimiglia-Cuneo line, before the North and South sections could be linked. The locomotive depicted is FS3620 and carries a nameplate – ‘Terni’. 201 locomotives of this Class were built between 1904 and 1908. [8]
In the first four articles about the line from Cuneo to the sea we covered the length of the line from Cuneo to Breil-sur-Roya. These articles can be found here, [9] here [10] here, [11] and here. [12]
I also want to acknowledge the assistance given to me by David Sousa of the Rail Relaxation YouTube Channel https://www.youtube.com/@RailRelaxation/featured and https://www.railrelaxation.com and particularly his kind permission given to use still images from rail journeys that he has filmed on the Cuneo-Ventimiglia railway line. [35][55]
South of Breil-sur-Roya a junction allows direct access to Ventimiglia and to Nice. The map below shows the two routes as they existed prior to the alteration of the border between France and Italy after the Second World War.
The lines Nice to Tende and Ventimiglia to Tende in the period from 1928 to the Second World War, before the annexation, in 1947, of St-Dalmas de Tende and Piene to France. [40]
This article follows the line South from Breil-sur-Roya to Ventimiglia in two parts: the first as far as Airole and the second from Airole to Ventimiglia. ….
1. The Line South from Breil-sur Royato Airole
This drawing/map shows the two routes heading South from Breil-sur-Roya. [40]
As with the line immediately to the North of Breil-sur-Roya, the works to the South were constructed by the French. Both of the lines heading South from Breil-sur-Roya entered tunnels just a short distance South of Breil.
Breil-sur-Roya to Piene. [22]A colourised postcard view of Breil-Sur Roya Railway Station looking North through the station site in advance of the official opening in 1928. This colourised image was shared on the Stura-Cuneo Facebook Page on 20th February 2020, (c) Public Domain. [29]Breil-sur-Roya station during its very early operation (1928-35), before electrification, with numerous passenger carriages standing idle. The passenger building is in the background; in the foreground are the buildings on the second platform, the only ones today significantly reduced in height and length, publisher Frédéric Laugier, (c) Public Domain. [30]Breil-sur-Roya Railway Station at the height of its development, with electrification completed (1935), with the passenger building, the large freight yard filled with wagons, and the concrete sheds with arched vaults. Those in the background still exist but are used for non-railway purposes. The Breil Ecomuseum is now located on the north side, half-hidden by the foliage of the tree in the foreground. The photograph was taken from the hillside to the Northwest of the station site and faces Southeast, (c) Public Domain. [30]After the war, the line to Nice was reopened in 1947, but the station, reduced to the simple terminus of a secondary section, was greatly simplified, removing almost all the sidings (the long straight lines of which can still be made out). In the background, the line to Fontan still features the electrification poles (removed from the rest of the station), but it was naturally abandoned and remained there until its reconstruction in the 1970s. In the 21st century, platform 2, which had been removed at the time, has been restored, the buildings on the second platform have been scaled down, and the third platform has been eliminated. The turntable, which still exists, is part of the Ecomusée, publisher Lapie à Saint-Maur, 1955, (c) Public Domain.[31]Breil-sur-Roya Railway Station in 2013, (c) Gilles Tagadaand licenced for reuse under a Creative Commons Licence (CC BY-SA 3.0). [32]The southern end of the railway station site in Breil-sur-Roya. Two lines leave the station heading South-southwest. [Google Maps, August 2025]
South of the station adjacent parallel bridges cross the Voie de la Première Dfl and Vallon de la Lavina (the Lavina Bridge).
Looking East under the railway bridges (the Lavina Bridge) along Voie de la Première Dfl. [Google Streetview, October 2008]Looking West under the railway bridges (the Lavina Bridge)along Voie de la Première Dfl. [Google Streetview, October 2008]This extract from the OpenStreetMap mapping shows the close correlation of the two different routes over the first fe kilometres. The short red lines are the locations of tunnel mouths. [13]A short distance to the South the two lines can be seen to be separating both geographically and in level. This view looks Northeast with the station off to the left. [Google Streetview, October 2008]The view South from the cab of a Ventimiglia-bound train. Again, the separation in level is quite marked. [55]At the same location, this view looks Southeast. Both lines enter a tunnel just to the South. One tunnel mouth is visible on the left of the image at a lower level. The other tunnel mouth is behind the vegetation on the right of this image. [Google Streetview, October 2008]The two tunnel mouths. On the left, that of Gigne Tunnel, on the right, that of Caranca Tunnel. Left for Ventimiglia, right for Nice! [54]
The approach to the junction from Ventimiglia. The line from Nice is at the higher level on the left. [35]
The mouth of Gigne Tunnel (1188 metres in length), seen from the cab of the Ventimiglia-bound service. The tunnel is S-shaped. Trains heading South turn to the East within the tunnel and then, close to the East Portal, begin to turn to the South again. [55][1: p126]
The view North from the North Portal of Gigne Tunnel, seen from the cab of a Northbound train. [35]
The route of this tunnel crosses twice under the Caranca tunnel on the Nice line. [1: p126]
Just beyond the East Portal of Gigne Tunnel the line begins to curve South again. [55]
The East Portal of Gigne Tunnel, seen from the cab of a Northbound train. [35]
The North Portal of Sanfurian Tunnel (260 metres in length) was in deep shade when this image was taken from the cab of a Ventimiglia-bound train. [55]
The view Northwest from the same portal of Sanfurian Tunnel. [35]
The view South from the mouth of Sanfurian Tunnel. Note the high retaining walls to the right of the image. [55]
The South Portal of Sanfurian Tunnel, seen from the North end of Eboulis Viaduct. This viaduct has eight 18 metre stone arches and nine 7 metre stone arches. [35][1: p126]
The view from the North along the Route de Ventimiglia with the railway viaduct alongside the road. [Google Streetview, July 2014]
Eboulis Viaduct facing South. [55]
Eboulis Viaduct looking North, seen from the cab of a Northbound train. [35]
Eboulis Viaduct before the construction of the road between it and the River Roya. The quality of this image is not perfect but it is still possible to make out the South portal of Snfurian Tunnel towards the right of the image. [49]
The view along the E74/D6204 from the South with the viaduct to the left of the road and the river to the right below the road. [Google Streetview, July 2014]
Looking South over Bancao Viaduct. [55]
Looking North along Bancao Viaduct. [35]
Bancao Viaduct on the line from Breil-sur-Roya to Ventimiglia is close to the D6204 on this extract from OpenStreetMap. The line to the West is the line from Breil-sur-Roya to Nice which is at a much higher level. [14]
Looking West from the D6204/E74, a small culvert close to the road is dwarfed by the bridge carrying the line to Ventimiglia which in turn is dwarfed by the viaduct carrying the line to Nice. [Google Streetview, April 2008]
The bridge carrying the line to Ventimiglia is also known as the Bancao Ravine Bridge. [1: p126]
The length of the line South of Bancao Viaduct. The two rail line are still running in parallel, only beginning to separate significantly at the bottom of this extract from Open StreetMap. Cottalorda Tunnel begins towards the bottom of this map extract. [15]
The line can only be seen fleetingly from the road.
It runs in front of the terracotta-coloured building near the centre of this image. Railings at the edge of a retaining wall supporting the line can be seen to the right of the image. [Google Streetview, July 2014]
The North portal of Cottalorda Tunnel (297 metres long). [55]
Turning through 180°, this is the view North at the same location. [35]
Just a glimpse of the tunnel mouth and the associated retaining wall can be seen from the D6204/E74. [Google Streetview, July 2014]
The view South from the southern portal of Cottalorda Tunnel. [55]
The southern portal of Cottalorda Tunnel. [35]
Looking back towards Breil-sur-Roya and the mouth of Cottalorda Tunnel. Note the arcaded retaining wall on the left, typical of the retaining walls on this length of the line. The D6204 runs alongside and below the line to the right. [35]
This next length of the line from the South portal of Cottalorda Tunnel runs immediately adjacent to the E74/D6204. [16]
This smaller image, looks South along the D6204/E74. The railway can be seen adjacent to, but above the road. To the West side of the line, large retaining walls create space for the line on the steeply graded valley side. {Google Streetview, July 2014]
A little further South the Hydroelectric Plant is now visible. [Google Streetview, July 2014]
This View looks North. The building beyond the trees is Breil’s Hydroelectric Power Station (below). [35]
Now just beyond the Power Station , again looking South with a high retaining wall above the railway which sits a few metres above road level on the right. Three arcades carrying the line are followed by the three stone arches of the Riou Viaduct. [Google Streetview, July 2014]
Construction work on the Italian length of the line in the lower Roya (Roia) Valley began in Ventimiglia. Banaudo et al have chosen to follow the line from South to North to reflect the way this section of the line was constructed. We continue to follow the line from North to South.
The length of the line from the border at Piena (Piene) to Airole was completed before the first world war but traffic along this part of the line had to wait for completion of the length of the line in French territory. The Italian authorities decided that services would commence only between Ventimiglia and Airole. That length is covered later in this article.
The international border at the time of construction was just to the North of Piena (Piene). That border line remained the same through the interwar years. Services North from Airole via Piena to Breil-sur-Roya had to wait until 1928 and the opening of the full line.
The Riou Viaduct (three 6.25m masonry arches) was the location of the international boundary. Banaudo et all tell us that the point that the line crossed the boundary is marked by the letters I and F engraved in a stone on the deck of the structure. [1: p125]
The Riou Viaduct straddled the centuries old border between Genoa and Savoy which became the border between Italy and France. This view looking South along the D6204/E74 shows the arcade retaining wall (3 bays) followed by the three-arch viaduct. [Google Streetview, July 2014]This view looks North along the D6204/E74 towards Breil-sur-Roya. The three arches of the Riou Viaduct are on the left of the image. [Google Streetview, July 2014]
Immediately to the South of the Riou Viaduct, Piene (Piena) Station was built as a frontier station below the village of Piena-Alta which, Banaudo et al tell us, was for centuries the outpost of the Genoese republic and the border with the States of Savoy. [1: p125-126]
Close to the road border post at Piena-Bassa, the “Italian administration decided to establish a station intended for police and customs control operations. There were three platform faces, a two-story passenger building and a customs clearance hall of the same size for goods, comprising a warehouse, offices and two apartments on the upper floors. The site was hemmed in by the tunnel to the South, the French border to the North, the mountainside to the West, and the Roya River to the East, necessitating the construction of the station, cantilevered over a masonry gallery supported by seven arches, above the SS 20 roadway.” [1: p126]
This photograph was taken in 1925 facing upstream.. It shows Piene (Piena) Railway Station sitting at high level, above the Ventimiglia road, (Collection of J. L. Taylor) (c) Public Domain. [26]
Also facing up stream, this image shows the structures at this location in 2006, (c) Markus Schweiss and licenced for reuse under a Creative Commons Licence, (CC BY-SA 3.0). [33]
Since the photograph above was taken a netting protection has been applied to the principal buildings at rail level. This photograph taken in 2019 also faces upstream, (c) Eugenio Merzagora/Structurae and made available for reuse under their non-commercial licence. [34]
This view looks South along the D6204/E74. it is taken a couple of hundred metres South of the Riou Viaduct where the road passes what was Piene Railway Station building. The site was tight and in order to accommodate the necessary station buildings, they were built over the road. [Google Streetview, October 2008]
Piene Railway Station (closed) seen from the cab of a Southbound train. [55]
Piene Railway Station (closed) seen from the cab of a Northbound train. [35]
Writing about the length of the line between Ventimiglia and the border at Piena (Piene), Banaudo et al say: “In the lower Roya Valley, the seven tranches of the Ventimiglia – southern border section were successively awarded in 1908, 1910, 1911, 1912, and 1913. Despite the lower altitude, the route was as difficult as on the purely Alpine section of the line, with steep gorges and terrain that offered highly varied resistance to earthworks: unstable marly limestone, very hard black limestone, clayey marl, schist, sandstone, etc. Of the 17,260 m route, nearly half way to be in tunnels, with nineteen structures totaling 8,259 m, fifteen bridges and viaducts representing sixty-four masonry arches, as well as various secondary structures for crossing waterways and rural roads.” [1: p118]
Piene Railway Station to Airole Railway Station. [22]
South of Piene (Piena) a series of structures carry the line over or through the obstacles in its path:
• the Fromentino Tunnel, 645 m long; • a viaduct with three 10 m arches; • the Arme Tunnel, 333 m long; • a viaduct with four 10 m arches; • the Agrie Tunnel, 820 m long; • the Fanghetto tunnel, 419 m long, extended by a gallery (the post-WW2 border was established at the North end of this tunnel); • the Sardinesca Tunnel, 820 m long; • a single span arch bridge over the Tron valley.
These are all illustrated below.
The North Portal of Fromentino Tunnel (645 metres in length) in shade. [55]
The view from the North portal of Fromentino tunnel. [35]
It is just possible to see the tunnel mouth above, when looking up from the road. [Google Streetview, October 2008]
The view South from the D6204/E74 above the South portal of Fromentino Tunnel. Before reaching the Arme Tunnel, the line crosses a 3-viaduct of three 10 m span arches. The stone parapets of the viaduct can be seen below the top rail of the parapet immediately in front of the camera. [Google Streetview, September 2010]
The view South from the cab of a Ventimiglia-bound train at the southern portal of Fromentino Tunnel. The viaduct parapets are in the foreground. [55]
Turning round, this is the view of the South Portal of Fromentino Tunnel. [35]
Looking toward the northern portal of Arme Tunnel (333 metres long) which again is in shade. [55]
A view looking north along the railway from the road immediately above the North portal of Arme Tunnel. The parapets of the viaduct can again be seen between the two tunnel mouths. [Google Streetview, September 2010]
A similar view back towards Breil-sur-Roya from the cab of a Northbound service the mouth of Arme Tunnel. [35]
This next length of the line is heading South-southeast. Arme tunnel is at the top of this extract from OpenStreetMap. The line bridges (on a four-arch viaduct) a tributary of La Roya before being swallowed by Agrie Tunnel.
The view South from the mouth of Arme Tunnel. [55]
Turning through 180°, this is the South portal of the Arme Tunnel. [35]
The railway and the bridge are just visible over the edge of the road, looking East. The bridge is a viaduct of four 10 m spans. [Google Streetview, September 2010]
The northern portal of Agrie Tunnel (820 metres in length). [55]
The view from the cab of a Northbound service leaving Agrie Tunnel. [35]
A better view is obtained from the road above the North portal of Agrie Tunnel. This view shows the viaduct mentioned above. [Google Streetview, September 2010]
This is the view from the cab of a Southbound train at the South portal of Agrie Tunnel. The train is travelling at 68 km/hour and the still image from the video is much less distinct. [55]
A similar view but from the road. A metre high wall separates the road and the railway. [Google Streetview, July 2014]
Turning through 180°, we see the mouth of the Agrie Tunnel from the cab of the Northbound service. [35]
A similar view from the road. It is at this location that we cross into Italy! The border was adjusted as part of reparations after WW2. [Google Streetview, July 2014]
At high speed the video stills are less distinct. This is the northern mouth of the Fanghetto Tunnel which is in shade. This tunnel is 419 metres in length and trains cross the border between France and Italy as they enter it. [55]
A much more distinct view from the road of the mouth of Fanghetto Tunnel. [Google Streetview, July 2014]
Here, we are looking from Italy into France in this view back towards Breil-sur-Roya from the mouth of the Fanghetto Tunnel. [35]
The southern end of the Fanghetto Tunnel is galleried/arcaded with low level arches letting in light before the tunnel mouth is reached. [55]
The arcades close to the southern mouth of Fanghetto Tunnel seen from the East side of the valley. [Google Streetview, July 2021]
The view along the line from the southern portal of Fanghetto Tunnel. [55]
The southern portal of the Fanghetto Tunnel. [35]
With the Southbound train now travelling at 75 km/hr, small structures (like this accommodation bridge) whizz by and, certainly in this direction with the bridge face in shadow, it is impossible to make out any detail.. [55]
The structure is seen in better light, from the cab of the Northbound service. [35]
The northern mouth of Sardinesca Tunnel (820 metres long) again in shadow and indistinct because of the speed of the train. [55]
Looking back towards Breil-sur-Roya from the cab of a Northbound train at the mouth of the Sardinesca Tunnel. [35]
The view South beyond the southern portal of Sardinesca Tunnel. The parapets of a single span arch bridge are visible close to the camera. [55]
Turning through 180° we get a look at a footbridge over the line just outside Sardinesca Tunnel. [35]
The same footbridge seen from the SS20 road. the arch bridge over the Tron, a tributary of the Roya, can be seen on the left of the image. [Google Streetview, August 2021]
An extract from Google’s satellite imagery showing the same location. Note the tunnel mouth and adjacent footbridge in the top-left quadrant of the photograph. [Google Maps, August 2025]
Next comes the Olivetta-San-Michele Station and the San-Michele Tunnel (133 m long).
A very short distance South of the footbridge is Olivetta San Michele Railway Station. [Google Maps, August 2025]
Olivetta San Michele Station, seen from the cab of the Ventimiglia-bound service. [55]
A better railside view of the station building at Olivetta San Michele, this time from the cab of a Northbound train. [35]
The station building seen looking South from the SS20/E74 road. [Google Streetview, August 2021]
The station building seen from the East, (c) Pampuco and licenced for reuse under a Creative Commons Licence (CC BY-SA 4.0). [36]
The view ahead along the line towards Ventimiglia from the cab of the Southbound train as it pulls out of Olivetta San Michele Station. The tunnel ahead is San Michele Tunnel which is 126 metres in length. [55]
A view, looking South from the SS20, of the northern mouth of San Michele Tunnel with an Italian Locomotive heading into the tunnel (I may well need correcting on this) is shown in more detail below… It appears to be a Belgian locomotive (SNCB) No. 7336 with the name, ‘Mexico’. [Google Streetview, August 2021]
This picture it taken just a short distance to the South of the image above. It shows a side-on view of the same locomotive. I would not expect to see this locomotive at this location! [Google Streetview, August 2021]
This is SNCB 7304 – the image is provided by Wikipedia. The family resemblance with 7336 is manifest. The Class 73 locomotives formed the backbone of the SNCB/NMBS shunting locomotive fleet. [20]
Class 73 locomotives were built in three batches: 7301-7335 during 1965–1967, 7336-7375 during 1973-1974 and finally 7373–7395 in 1976–1977. [20]
This is the view North through the station site as seen from the cab of a Northbound service at the North postal of the San Michele Tunnel. [35]
Looking out from the Southeast portal of San Michele Tunnel, the line ahead crosses Roya IV Bridge which is 126 metres in length and then enters Mantici Tunnel which is 604 metres long. [55]
One hundred metres further South and turning through 180°, this is the view across Roya IV Bridge towards the San Michele Tunnel. Note that the road tunnel is just above the railway tunnel, although on a different line. [35]
The view from the road above the Southeast portal of San Michele Tunnel. The mouth of Mantigi Tunnel (604 metres long) can be seen at the end of the railway viaduct. [Google Streetview, August 2021]
A very short distance along the road a somewhat better view of the viaduct. [Google Streetview, August 2021] More views of the viaduct can be seen here, [17] here, [18] and here. [19]
Roya IV Bridge was also known as the San-Michele Viaduct. It was made up of five 15 metre arches. [1: p125]
The Mantigi tunnel has a short section where it is very close the the surface of the ground above, Banaudo et al, tell us that this allowed the provision of a vertical ventilation shaft. [1: p125]
Trains travelling South to Ventimiglia crossed the viaduct and ran on through Mantigi Tunnel. Airole Railway Station was originally on a large plateau beyond the Southeast portal of Mantigi Tunnel.
The original location of Airole Railway Station. The substantial passenger building remains. The walls of one other building can be seen to the Southeast of the passenger facilities. [Google Maps, August 2025]
Banaudo et al tell that “Airole station was located in an olive grove to the North of the village, in the only place where the shallower slope of the left bank of the Roya allowed the construction of a retaining wall to support all the railway infrastructure: the passenger building, three platform tracks and two freight tracks with a goods shed and high platform, as well as a water column for the locomotives.” [1: p121]
The station was built in 1914 and remained operational until, sadly, the station site was abandoned in the 1970s when it was replaced by a single platform halt in the centre of Airole. [25]
At the southern end of Mantigi Tunnel, trains enter a passing loop (Airole Loop), which is all that is left of the original railway station, before entering another tunnel! [55]
Looking back towards Breil-sur-Roya from within the passing loop. Immediately to the North of the loop, Northbound trains plunge into the Mantigi Tunnel. [35]
Looking North from the cab of a Northbound train approaching the old railway station building. It is evident from both these pictures that there were originally sidings at this location – confirmation that the station facilities at Airole were once quite significant. [35]
At the end of the passing loop trains enter Madonna Tunnel (249 metres long). [55]
Looking back towards Breil-sur-Roya from the portal of Madonna Tunnel. The passing loop is still provided at this location as there is no room at the present Airole Railway Station for more than a single track. [35]
Leaving Madonna Tunnel trains immediately pass under a local road bridge which appears as not much more than a silhouette as eyes get used to the light on leaving the tunnel. [55]
Airole Railway Station seen from the cab of a Ventimiglia-bound train passing under the accommodation bridge shown above. [55]
The view West from the bridge which carries Via Giacomo Matteotti over the line. [Google Streetview, August 2021]
Turning to face East, this is the present Airole Railway Station as seen from Via Giacomo Matteotti. [Google Streetview, August 2021]
A Northbound train is stationary at Airole Railway Station. This is the view ahead, West towards Olivette San Michele. The road over bridge sits a few metres closer to the station than the mouth of Madonna Tunnel. [35]
Airole Railway Station seen from the cab of a northbound service entering the station from the East. [35]
A similar view but this time the camera is on Via G. Biancheri which crosses the railway line above the West portal of Airole Tunnel (153 metres in length). [Google Streetview, August 2021]
This extract from Google’s satellite imagery shows the village of Airole which sits over the line. Airole Tunnel curves to the Northeast. Its West Portal is bottom-left in this image, its Northeast portal is top-right. [Google Maps, August 2025]
The view Southwest from the cab of a Ventimiglia-bound train at the Northeast portal of Airole Tunnel. [55]
The Southwest portal of Para Tunnel (754 metres long). [55]
Looking Southwest from Via Luigi Trucchi the Northeast portal of Airole Tunnel can be seen below the village of Airole. [Google Streetview, August 2021]
The view from Via Nazionale of the short bridge (Airole Bridge, one 10 metre arch) which sits to the Southwest of the mouth of Para Tunnel. The stonework of the tunnel portal can be seen above and to the right of the viaduct. Para Tunnel is over 747 metres long. [Google Streetview, August 2021]
This is the view back towards Airole Village and Railway Station from the mouth of Para Tunnel. White fencing sits on top of the parapet walls of Airole Bridge. [35]
Para Tunnel curves round to the Southeast. This is the view from the cab of the Southbound train as it exits Para Tunnel and crosses La Para II viaduct (four 10 metre arches). [55]
The viaduct mentioned above can be glimpsed from Via Natzionale. [Google Streetview, August 2021]
This is the view back into the mouth of Para Tunnel. [35]
The Northwest portal of Pian de Para Tunnel. The tunnel is 184 metres long. [55][1: p125]
A view of the Northwest portal of Pian de Para Tunnel from Via Nazionale. There is a single-span arch bridge carrying the line close to the tunnel mouth. [Google Streetview, August 2021]
The next length of the line as it appears on OpenStreetMap and annotated with the tunnel names. [21]
The Southeast portal of Pian de Para Tunnel seen from the cab of the Northbound train. [35]
Immediately to the Southeast of the tunnel portal Southbound trains cross La ParaI Viaduct. The Viaduct appears to have three 5 metre spans. This image looks Northeast from Via Nazionale. [1: p125]
The Southeast portal of Pian de Para Tunnel can be seen in the top-left of this image, looking North from a point a little further along Via Nazionale. [Google Streetview, August 2021]
The Southbound train is now travelling at over 80 km/hr. This is the portal of the next tunnel on the route – Gambetto Tunnel (173 metres in length. [55] [1: p125]
Turning through 180°, this is the view back towards Airole from the mouth of the Gambetto Tunnel. [35]
Gambetto Tunnel opens out onto the next bridge over La Roya – Roya No. III Bridge. [55] This structure is also known as the Lamberta Viaduct, it is made up of three 14 metre arches and two 10 metre arches. The gallery beyond the bridge is the route of the modern SS20. [1: p125]
Turning through 180°, this is the mouth of the Gambetto Tunnel from the cab of a Northbound service. [35]
With the railway running South-southeast towards Bevera and Ventimiglia, it alternates between tunnels and viaducts switching sides of La Roya (Roia) river. [23]
The Roya No. III bridge is also known as the Lamberta Viaduct. [1: p125]
The Roya No. II bridge is also known as the Colombo Viaduct. [1: p125]
A view of Roya No. III bridge from the bridge carrying Via Nazionale of the Roya to the West of the railway. [Google Streetview, August 2021]
The old road, Via Nazionale passes under the five stone arches of La Roya No. III bridge – three 14 metre arches and two 10 metre arches. The concrete gallery allows light into the tunnel carrying the modern SS20/E74. [Google Streetview, September 2011]
A view of La Roya No. III bridge from the Via Nazionala further to the East along the valley. [Google Streetview, September 2011]
Southbound trains then plunge into Lamberta Tunnel which is 750 metres in length. [55]
Turning through 180°, this is the view across Roya III bridge from the mouth of the Lamberta Tunnel. [35]
Leaving Lamberta Tunnel at its southern end, Southbound trains immediately crossed La Roya again on Roya No. II bridge. [55] The bridge is also known as the Colombo Viaduct. [1: p125]
Turning through 180° we see the Lamberta Tunnel Portal. [35]
Once across La Roya on No. II bridge trains ran on into Colombo Tunnel. [55]
Looking back across La Roya from the mouth of the Colombo Tunnel. [35]
Roia (Roya) No. II Bridge, seen from the viaduct carrying the SS20/E74 across the river. The old road down the valley (Via Nazionale) can be seen crossing the river at a lower level. The northern portal of Colombo Railway Tunnel can be seen on the left of this image. [Google Streetview, August 2021]A similar view, looking West from the Via Nazionale. [Google Streetview, September 2011]The view from the West of Roia No. II bridge, looking East. The tunnel mouth visible in this photograph is the southern portal of the Lamberta Tunnel. [Google Streetview, September 2011]
Looking South across Roia (Roya) No. 1 bridge (also known as the Bocche Viaduct) from the South portal of Colombo Tunnel. [55]
Roia No. I bridge, seen from the West on Via Nazionale. [Google Streetview, September 2011]Roia No. I bridge, seen from the East on Via Nazionale. The tunnel mouth visible on the left of the image is the northern portal of Delle Bocche Tunnel. [Google Streetview, September 2011]
The northern tunnel mouth of Delle Bocche Tunnel. [55]
Looking back from the Delle Bocche tunnel mouth across the Roia No. 1 bridge. [35]
Banaudo et al tell us that the length of the Roia (Roya) Valley that we have just traversed is known as the ‘Bocche’, “the wild gorges of the Roya which for a long time represented an abstacle to communications between the Ligurian lands of the Republic of Genova and the Piedmontese domain of the Kingdom of Sardinia. It was only in 1893that the … road from Ventimiglia to Breil was completed … after lengthy construction work hampered by the difficult terrain and the reluctance of the military authorities. The railway tamed this gorge through an uninterrupted succession of tunnels and viaducts.” [1: p121, 125]
Delle Bocche Tunnel (927 metres long) ends at the top of this OpenStreetMap extract. There is a short bridge which carries a length of the line before Southbound trains enter d’Allaveri Tunnel which, although it appears as one tunnel on the map extract is actually two tunnels with a very short open length in between. The Aqueduct illustrated on the map passes under the railway in that opening in pipes, (Pont sur les conduites forcées de la centrale hydroélectrique de Bevera). The first length of the tunnel is named d’Allaveri Tunnel (69 metres long), the second length is known as Serro Soprano Tunnel (245 metres long).
Once beyond these tunnels, Southbound trains have a clear run down to Bevera Railway Station. [24]
Looking South from the South portal of Delle Bocche Tunnel. [55]
Looking back to the North, this is the South portal of Delle Bocche Tunnel. [35]
A glimpse of the line from a local road (Localita Madonetta) at a point a couple of hundred metres South of the South portal of Dell Bocche Tunnel. The camera is facing Northeast. [Google Streetview, November 2011]
A short distance further South the line bridges a shallow valley and crosses a minor access road. This is the East elevation of the Varese Viaduct (three 8 metre arches) seen from Via Comunale di Varase. [Google Streetview, November 2011][1: p121]The western elevation of the same structure, seen from the Southwest. [Google Streetview, November 2011]
A little further Southwest the line is carried on a low bridge under another minor road. This view looks West from Via Comunale di Varase. [Google Streetview, November 2011]
The same structure seen from the West. [Google Streetview, November 2011]
Continuing South the line is carried alongside the River Roia (Roya) and above Via San Rocco on retaining walls and a series of nine 8 metre arches. The arches comprise one structure known as the Allaveri Viaduct. The North portal of d’Allaveri Tunnel can be glimpsed just to the right of centre in this photograph. [Google Streetview, November 2011]
The North portal of d’Allaveri Tunnel. This and the next tunnel are in the vicinity of the hamlet of Varese and the Bevera Hydroelectric Power Station. [55]
The view North from the cab of a Northbound train at the North portal of d’Allaveri Tunnel. [35]
This extract from Google’s satellite imagery shows the two tunnels at this location and Bevera’s Hydroelectric power plant which is immediately adjacent to the railway. It is the white-roofed building just above the centre of this image.
D’Allaveri Tunnel is the very short tunnel to the North of the Hydroelectric plant (71 metres in length). Serro Soprano Tunnel (244 metres long) extends South from the building to a point near to the bottom of this image.
The grey area at the bottom of the image (surrounding the tunnel mouth) is a series of greenhouses. As shown below.
[Google Streetview, July 2019]
An overexposed photograph showing the view South from the southern portal of d’Allaveri Tunnel. The Aqueduct which carries water under pressure to Bevera’s hydroelectric plant can be seen on the right. The line bridges the penstock on three 5 metre arches before southbound trains enter Serro Soprano Tunnel ahead. [55]
Another over-exposed view, this time facing North at the North portal of Serro Soprano Tunnel. The southern mouth of d’Allaveri Tunnel can be seen ahead.[35]
Looking South towards Bevera at the mouth of Serro Soprano Tunnel. [55]
The South portal of Serro Soprano Tunnel. [35]
An accommodation bridge North of Bevera Railway Station, seen from the cab of the Southbound service. [55]
The accommodation bridge, seen from above. [Google Maps, August 2025]
The same structure seen from the cab of the Northbound train. [35]
As we head South towards Bevera Railway Station, the valley of the Roia widens significantly and we enter the suburbs of Ventimiglia, of which Bevera is one part. Beverea Railway Station was built with a large “classically designed passenger building, two platform faces and and two freight tracks with a goods shed and loading platform.” [1: p121] In the 21st century Bevera is a single platform halt.
A Southbound train approaches Bevera Railway Station. [55]
Bevera Railway Station seen from above. [Google Maps, August 2025]
Bevera Railway Station building and forecourt seen from the Northwest. [Google Streetview, October 2010]Bevera Station building seen from the South adjacent to a low underpass under the railway. [Google Streetview, July 2019]A second underpass just a little further to the South. [Google Streetview, August 2021]
The Northbound service sits at Bevera Railway Station which is a single platform halt. [35]
The Southbound train, stationary at Bevera Railway Station. [55]
Bevera to Ventimiglia. [22]
Looking North into the Bevera Station site
South of Bevera Railway Station the railway bridges the Bevera River (Torrente).
The bridge over the Bevera Torrente. The river is quite a significant tributary to the Roia (Roya). [Google Maps, August 2025]The railway bridge over the Bevera, seen from the main road to the East. The viaduct has four16.35 metre arches and spans the Bevera close to its confluence with the Roia. [Google Streetview, August 2021][1: p119]
The same bridge, seen from the Northwest. [Google Streetview, August 2021]
The view North along the line from the cab of a Northbound train as it crosses the bridge over the Bevera River. [35]
The line runs on to the South on embankment through the suburbs of Ventimiglia.
The bridge over Via Madeira seen from the East. [Google Streetview, August 2021]
The same bridge seen from the West. [Google Streetview, August 2021]
Looking back along the line towards Bevera Railway Station from Pont Bevera (Viadotto Autoporto). [Google Streetview, August 2021]
Facing towards Ventimiglia this image taken from the cab of the Ventimiglia-bound service looks through Pont Bevera (Viadotto Autoporto). [55]
Facing North towards Bevera and looking under Pont Bevera (Viadotto Autoporto). [35]
Looking ahead along the line towards Ventimiglia Railway Station from Pont Bevera (Viadotto Autoporto). [Google Streetview, August 2021]
The North portal of Maneira Tunnel (171 metres in length) is in shadow and difficult to make out from the cab of the ventimiglia-bound train. [55][1: p119]
Turning through 180°, this is the view North from the cab of a Northbound service as it leaves the North portal of Madeira Tunnel. [35]
The view South from the South portal of Maneira Tunnel. [55]
Turning through 180°, this is the South portal seen fr
The line continues on embankment with low height underpasses to provide vehicular access under the line as shown below. [Google Streetview, August 2021]…
In between the second and third underpasses shown above the line passes through d’Isnardi Tunnel (168 metres in length). The North portal is so much in shade that the view from the cab of the Ventimiglia-bound service does not provide any detail. [55] That is the first image below…
The North portal of d’Isnardi Tunnel is so much in shade that no details can be made out from the cab of the Ventimiglia-bound service. [55]
Turning through 180° this is the view North from the North portal of the tunnel. [35]
The view South from the South portal of d’Isnardi Tunnel. [55]
Turning through 180° the South portal is seen from the cab of a Northbound service. [35]
The next few images come from above the level of the line further to the South – the first two from alongside to the West of the line and then from over bridges. ….
The first two of the images above look back along the line and then forward towards Ventimiglia Railway Station from Via Peglia. [Google Streetview, November 2011] The second pair of images look back and forward along the line from the bridge carrying Via Gallardi over the line. [Google Streetview, August 2021] The final par of images look back (across a curve in the line) and then forward along the line from the E80 (close to the toll booths). In the first of this pair of images the bridge carrying Via Gallardi over the line can be seen. [Google Streetview, July 2019]
The next two images show the bridge carrying Via Gallardi over the line. [55][35]…
This next pair of photos show the overbridge which carries the E80. [55][35] …
The next batch of photos continue towards Ventimiglia Railway Station. …
Two further underpasses are shown in the first two images above, the second pair of images are taken from the bridge carrying the SS20 over the line, the first looks back to the West towards the point where the double-track line from Nice begins to run alongside the single-track line from Cuneo. The second looks forward from the same bridge towards Ventimiglia Railway Station. The last two images are underpasses that the 3 lines cross on their way East. [Google Streetview, September 2024]
A cab level view of the diverging tracks seen in the third of the six views in the gallery above. The double-track line heading towards Nice diverges to the left. It is just approximately 6 kilometres to the international border. [35]
The next pair of images show the bridge carrying the SS20 as seen from cabs on services to and from Cuneo. [55][35] The first faces towards Ventimiglia, the second towards Bevera. …
The next three images show the final approach into Ventimiglia Railway Station. [55] …
The middle image above shows a shunter idling in a siding alongside the main running lines – TS D100 Shunter [Vossloh G1000 BB]. The Vossloh G1000 BB is a class of off-centre cab diesel-hydraulic B’B’ 4 axle locomotives built by Vossloh in Kiel since 2002. The class is based upon the standard Vossloh locomotives design, and they are a higher powered development of the Vossloh G800 BB which were produced mainly for the Austrian Federal Railways, with a 1.1 MW (1,500 hp) MTU engine replacing the 0.8 MW (1,100 hp) Caterpillar engine in the G800; as a result the front engine compartment is enlarged, whilst other features: bogie frame and overall dimensions remain the same. [27]
Another view of the TS D100 Shunter [Vossloh G1000 BB], this time from the cab of the Cuneo-bound service. [35]
Looking Northwest from the cab of a Cuneo-bound train about to depart from Ventimiglia Railway Station. [35]
Ventimiglia Railway Station is on a Northwest to Southeast axis. [Google Maps, August 2025]
A postcard view of Ventimiglia taken from the hillside to the Northeast of the Railway Station which features in the foreground of the image. [44]
Banaudo et al write that “the single track of the Col de Tende line runs alongside the Nice double track for a few hundred metres. [Initially] they crossed the Roya River together on a six-span metal viaduct, which was soon replaced by a new structure with eight 17-metre stone arches. Immediately beyond the bridge, the two routes separate and the Cuneo route climbs up the right bank of the river, at a gradient of 13 mm/m, the valley is still relatively wide. A bundle of three service tracks called Scalo Roia is located to the left of the main track. The Isnardi tunnel (168 m long) and Maneira tunnel (171 m long) precede a four-arch viaduct (with 6-metre arches).” [1: p119] This description assumes that the line is followed West out of Ventimiglia Railway Station.
Banaudo et al comment thatwhile construction was just beginning between“Breil and the southern border, the work begun in 1908 by the Italian companies from the coast was nearing completion. While awaiting the connection to France, the FS decided to operate the Ventimiglia-Airole section (11.970 km), which entered service on 16th May 1914. The service was provided by three round trips, including two local passenger trains and one mixed train, which covered the entire route in about thirty minutes uphill and twenty-five minutes downhill. Traction was provided by three-axle 030 locomotives with separate tenders, Group 320 (formerly the 3600 of the Rete Mediterranea), based to the newly created Savona depot.” [1: p142]
In France, WWI caused the cessation of all work on the line and in the aftermath of the conflict, “the resumption of construction proved very difficult. The PLM’s construction department received only meager allocations from the state, with priority funding being allocated to the recovery of the disaster-stricken regions of the northeast.” [1: p138]
On site, the years of inactivity had allowed serious deterioration, particularly of the tunnels on the unopened line. Following a three-day inspection tour of the entire line, the French decided to begin work once again.
The contractors made a significant investment in manpower and materials at the beginning of 1920 but discovered that rather than dealing with the PLM, the works would be directly funded by the government. The government determined that the budget for the work on French soil would be reduced from 104 to 75 million Francs and indicated that the maximum spend in 1920 would be 17 million Francs. This inevitably led to redundancies and to slower progress of the works. [1: p140]
When the authorities indicated in June 1920, that “only 700,000 Francs of credit remained to complete the year, … the elected officials of the Alpes-Maritimes immediately rushed to Paris to meet with representatives of the Ministry and the PLM management. Following discussions, a new budget was allocated by the State for railway construction. The PLM had a budget of 41 million Francs, 25 of which were allocated to the Nice-Cuneo line. Work could [continue], but the engineers and contractors in charge of it would have to take into account the irregular arrival of funds until the end when organizing their work.” [1: p140]
Work on the Nice to Breil-sur-Roya line and the remaining length of the line between Ventimiglia and Breil ran in parallel. The increased budget meant competition to attract staff was strong and people had to be hired from Italy, Spain, Portugal and Morocco. Stonemasons were in particularly short supply. We will probably see more about what this meant for the work when we follow the line from Breil-sur-Roya to Nice.
Banaudo et al note that in the early 1920s the line was opened between Ventimiglia and Airole for passengers and was used also to supply the French construction site on the length of the line between Breil-sur-Roya and Piena (Piene).
“From Breil to the southern border, the [railbed/formation]was passable by 1921 and the final track was immediately laid, while the FS did the same between Airole and Piena on the section removed during the war. On30thJanuary 1922, the Italian and French rails were finally connected on the Riou bridge, and the Borie company obtained from then on the authorization to directly route its materials from Nice to Breil by rail.” [1: p142]
Once the line opened fully between Ventimiglia and Cuneo, the line “retained the Ventimiglia-Airole service created before the war, while on the Cuneo San-Dalmazzo-di-Tenda line, the timetable included three daily three-class buses and a seasonal train running on public holidays from July to September. The 58 km journey took 2 hours 30 minutes in the north-south direction and 2 hours 10 to 15 in the opposite direction. This service included one less return journey than in 1915, because a fast Cuneo Nice bus connection was introduced in 1921 following an agreement between the FS and the Compagnia Generale dei Tramways Piemontesi (CGTP), to avoid the inconvenience of transhipment while waiting for the railway to be fully operational.” [1: p143-146]
In December 1923 it was agreed that on the length of line between the two borders, “all trains … would be hauled by the FS, including maintenance trains; in the event that they had to be exceptionally handled by a French locomotive, the latter would be accompanied by a pilot from the FS. The San-Dalmazzo Piena section would be equipped with Morse-type telegraph devices. The protection signals for Breil station on the Fontan-Saorge and Piène sides would be Italian, but the departure signals for all directions would be the PLM-type. The organization of customs controls between San-Dalmazzo, Fontan-Saorge, Breil and Piena was also [agreed].” [1: p146]
Banaudo et al provide a significant series of photographs of the construction work on the lines between Cuneo, Nice and Ventimiglia which takes up a large proportion of Volume 1 of Les Trains du Col de Tende. The photographs and drawings are predominantly from the French lengths of the line. [1: p152-311] It is a very significant collection of images which stand as a superb tribute to the amazing work of the various contractors employed on the line.
Opening of the line from Cuneo to Ventimiglia to passenger traffic had to wait for the completion of all of the French construction work. “Finally in October 1928 the lines were all completed – the celebrations must have been fantastic events. At last the small towns and villages along the route had access to jobs, schools and universities, cultural activities, hospitals … everything the cities had to offer.” [39]
The next article in this short series will look a the line heading out of Breil-sur-Roya towards Nice. It can be found here. [5]
References
Jose Banaudo, Michel Braun and Gerard de Santos; Les Trains du Col de Tende Volume 1: 1858-1928; FACS Patrimoine Ferroviaire, Les Editions du Cabri, 2018.
Jose Banaudo, Michel Braun and Gerard de Santos; Les Trains du Col de Tende Volume 2: 1929-1974; FACS Patrimoine Ferroviaire, Les Editions du Cabri, 2018.
Jose Banaudo, Michel Braun and Gerard de Santos; Les Trains du Col de Tende Volume 3: 1975-1986; FACS Patrimoine Ferroviaire, Les Editions du Cabri, 2018.
Franco Collidà, Max Gallo & Aldo A. Mola; CUNEO-NIZZA History of a Railway; Cassa di Risparmio di Cuneo, Cuneo (CN), July 1982.
Franco Collidà; 1845-1979: the Cuneo-Nice line year by year; in Rassegna – Quarterly magazine of the Cassa di Risparmio di Cuneo; No. 7, September 1979, pp. 12-18.
Stefano Garzaro & Nico Molino; THE TENDA RAILWAY From Cuneo to Nice, the last great Alpine crossing; Editrice di Storia dei Trasporti, Colleferro (RM), EST, July 1982.
SNCF Region de Marseille; Line: Coni – Breil sur Roya – Vintimille. Reconstruction et équipement de la section de ligne située en territoireFrançais; Imprimerie St-Victor, Marseille (F), 1980.
The featured image above is a poster for the Nice-Cuneo line. It shows Scarassoui Viaduct with a Northbound steam service between the wars (c) Adolphe Crossard. … Public Domain. [49]
In the first three articles about the line from Cuneo to the sea we covered the length of the line from Cuneo to St. Dalmas de Tende. These articles can be found here, [9] here [10] and here. [11]
I also want to acknowledge the assistance given to me by David Sousa of the Rail Relaxation YouTube Channel https://www.youtube.com/@RailRelaxation/featured and https://www.railrelaxation.com and particularly his kind permission given to use still images from rail journeys that he has filmed on the Cuneo Ventimiglia railway line. [35][55]
1. The Line South from St. Dalmas de Tende as far as the French/Italian Border …
St. Dalmas de Tende (San-Dalmazzo-di-Tenda in Italian) was “the last station on Italian territory, before the northern border. This is where the French Forces would install a large-scale border station that will handle customs clearance operations in addition to the French facilities at Breil. In the first phase, a temporary passenger building and a small freight shed were built on the vast embankment created from the spoil from the tunnels upstream of the confluence of the Roya and Biogna rivers. The original layout includes four through tracks, one of which is at the platform, five sidings, three storage tracks, a temporary engine shed, a 9.50 m turntable, and a hydraulic power supply for the locomotives.” [1: p127]
It is here, at St. Dalmas de Tende, that we start this fourth part of our journey from Cuneo to the coast. Before we do set off southwards we note that the Tende to La Brigue “tranche of the work on the line was awarded to the Tuscan contractor Enrico Lévy, and the Briga to St. Dalmas de Tende tranche was executed by the Rosassa company of Alessandria. Work began in 1912 and progressed more quickly than upstream of Tende, thanks to the opening of the construction sites during public holidays and the use of new compressed air drills.” [1: p129]
The line from Tende (Tenda) to San-Dalmazzo-di-Tenda (St. Dalmas de Tende) was opened on 1st June 1915. The three of the four daily services were connected to the Southern arm of the line which by this time had reached Airole, by a coach shuttle. [1: p131]
A temporary station was provided as a terminus of the line from Cuneo. It was sited to the Northeast of the present large station building which was not built until 1928.
A postcard image overlooking the station site at St. Dalmas de Tende prior to the construction of the large station building. This image was shared on the Ferrovia Internazionale Cuneo-Ventimiglia-Nizza Facebook Group by Mauro Tosello on 12th June 2022. [19]The San Dalmazzo di Tenda station before the construction of the current building. [12]St. Dalmas de Tende Railway Station as show on OpenStreetMap. [56]The locomotive Depot at St. Dalmas de Tende. The depot was on the Southeast side of the running lines opposite the railway Station and close to the Biogna River. The road shown on the OpenStreetMap plan of the modern station to the Southeast of the site is the road shown at the top of this plan. This drawing comes from From the December 1929 Technical Magazine of Italiane Ferrovie. It was shared on the Ferrovia Internazionale Cuneo-Ventimiglia-Nizza Facebook Group on 13th February 2024 by Francesco Ciarlini Koerner. [18]The station during construction work. There is scaffolding on the main station building, which appears to have been built in sections with a completed length nearest to the water tower. The engine shed is under construction, centre-right. This image was shared on the Ferrovia Internazionale Cuneo-Ventimiglia-Nizza Facebook Group by Mauro Tosello on 12th June 2022. [20]A postcard view of the Railway Station at St. Dalmas de Tende, taken from the East. The tunnel at the Southwest end of the station site can be seen on the left of the photograph. This image was shared on the Ferrovia internazionale Cuneo-Ventimiglia-Nizza Facebook Group by Luisa Grosso on 1st November 2021. [57]The station forecourt, seen from Avenue Martyrs de la Resistance. [Google Streetview, August 2016]A schematic view of the line South of St. Dalmas de Tende, as far as the French/Italian border. [13]
St. Dalmas de Tende Railway Station seen, looking Northeast, from the cab of a North-bound service. [35]
Looking Southwest from alongside the end of the platform of the modern railway station at St. Dalmas de Tende with the grand edifice of the 1928-built station building fenced off on the right. [55]A little further to the Southwest, the line bridges the Bieugne (Biogna) River over a 15-metre arch bridge and then heads into the Biogna Tunnel. [55]The tunnel mouth is in shadow at the bottom-left of this extract from Google’s satellite imagery. The railway bridge over the River Bieugne is centre-bottom with the road bridge (D91) to the left. [Google Maps, August 2025]The railway tunnel mouth is on the centre- left of this view from the D91 with the rail bridge over the river bottom-left and the road bridge over the river ahead. [Google Streetview, August 2016]Looking Northeast from the D91 through the station area. [Google Streetview, August 2016]The view Northeast from the tunnel mouth of the Biogna Tunnel, the road bridge over the river is on the left, the rail bridge over the river is immediately in front of the camera. This photograph is a still image from a video taken from the cab of a Northbound train. [35]The portal of Biogna Tunnel and the bridges over the Bieugne immediately after Storm Alex in October 2020. This photograph was shared on the Ferrovia Internazionale Cuneo-Ventimiglia-Nizza Facebook Group by Mario Zauli and Olivier Woignier on 3rd October 2020. [17]One final view of St. Dalmas de Tende railway station. This the Direct 18:83 Turin Porta Nuova – Imperia Porto Maurizio, Locomotive D445.1056 heads a train of five coaches passing through St. Dalmas de Tende on 24th April 1994. This image was shared by Andrea Richermo on the Ferrovia Internazionale Cuneo-Ventimiglia-Nizza Facebook Group on 11th April 2020. [21]
From San-Dalmazzo (St. Dalmas), the railway forms two horseshoe loops underground, crossing the Roya three times over a distance of just over a kilometre as the crow flies.
The Biogna Tunnel is the first of these horseshoe tunnels, it is 1154 metres long. We have already seen the approaches to the tunnel from St. Dalmas de Tende Railway Station. The tunnel’s horseshoe shape can be seen on the OpenStreetMap extract below. …
The Biogna Tunnel is horseshoe shaped. [14]
The view Northeast from the southern mouth of Biogna Tunnel. [55]
Turning through 180 degrees this is the mouth of the tunnel, seen from the cab of a Northbound train. [35]
Two viaducts cross the valley off La Roya, San Dalmazzo II Viaduct crosses the River Bieugne (three arches each of 15 metres, then the San Dalmazzo III Viaduct, also three 15 metres arches bridging the Avenue de France (E74/D6204) and then La Roya, before disappearing into the Porcarezzo Tunnel. [15]The two viaducts as they appear on Google Maps satellite imagery. [Google Maps, August 2025]In the foreground is a viaduct over the Biogna Torrent; beyond are a viaduct over the River Roya, and then the entrance to the Porcarezzo Tunnel. This section of line is near San Dalmazzo di Tenda. This image was included in an article about the line in Railway Wonders of the World. All that is left of the building at rail level in the left half of the image is the widened surface of the embankment between the two viaducts. [24]
Looking East across San Dalmazzo II Viaduct which has three arched spans, each of 15-metres and crosses the Bieugne River. [55]
Looking East across San Dalmazzo III Viaduct which spans La Roya. This Viaduct has one opening for the road and a narrower archway for pedestrians and has three further 15-metre spans. The mouth of the Porcarezzo Tunnel is in shade. [55]
The bridge over Avenue de France seen from the North. [Google Streetview, August 2016]
The same bridge seen from the South. In this image both the secondary (narrow) arch and the viaduct over La Roya can be seen. [Google Streetview, August 2025]
San Dalmazzo di Tenda Viaduct III, seen from the South on 23rd October 2020. This image was shared on the Ferrovia Internazionale Cuneo-Ventimiglia-Nizza Facebook Group by Federico Santagati on 23rd October 2020. [22]
Reinforcement/repair works in November 2020 on San Dalmazzo di Tenda Viaducts II and III after the damage from Storm Alex on October 2 – 3, 2020. This image was shared on the Ferrovia Internazionale Cuneo-Ventimiglia-Nizza Facebook Group on 20th November 2020 by Mario Zauli, courtesy of Bernard Woignier. [23]
Looking West across the same viaduct towards the Biogne Tunnel. [35]
The Porcarezzo Tunnel mouth to the East of La Roya. [55]
Looking West from the Porcarezzo Tunnel mouth across the San Dalmazzo III Viaduct. [35]
The Porcarezzo Tunnel turns through 180°, continuing to drop at a gradient of 25mm/m. It is 1249 metres in length. [16]
Southbound trains leave Porcarezzo Tunnel and immediately cross San Dalmazzo di Tenda Viaduct IV. [55]
Turning through 180° we see the Southwest mouth of the Porcarezzo Tunnel which sits above La Roya and is seen here from the cab of a Northbound train on the San Dalmazzo IV Viaduct. [35]
San Dalmazzo di Tenda IV Viaduct as it appears on Google’s satellite imagery. [Google Maps, August 2025.
The approaches to the Porcarezzo Tunnel from the Southwest cross the San Dalmazzo di Tenda IV Viaduct (six 15-metre spans) over La Roya and the E74/D6402. [35]
San Dalmazzo di Tenda IV Viaduct seen from the North. [Google Streetview, August 2016]
San Dalmazzo San Dalmazzo di Tenda IV Viaduct seen from immediately below on the North side. [Google Streetview, July 2014]
San Dalmazzo IV Viaduct di Tenda seen from the South. [Google Streetview, August 2016]
Once Southbound trains had crossed La Roya, it was just a short distance before they entered Gorges Paganini Tunnel. This is the tunnel mouth. [55]
Turning through 180° this is the view from the cab of a Northbound train leaving Gorges Paganin Tunnel (1,702 metres in length). [35]
Gorges Paganin Tunnel runs South-southwest parallel to the valley of La Roya and only a few metres beyond the valleys western face, occasionally running close enough to the valley side for gallery openings to shed light into the tunnel.
Gorges Paganin Tunnel is marked by the dotted line to the West of the river valley. It is over 1700 metres in length with occasional gallery openings in the valley side. [25]
The Gorges Paganin Tunnel is actually considered to be a series of six different tunnels separated by sections of galleries with arched openings into the valley side. These tunnels are: Foce (167m long); Tornau I (270m long); Tornau II (475 m long); Ravallone I (392m long); Ravallone II (91m long; and Balma (337m long). [1: p129]
One of a series of gallery openings in the walls of Gorges Paganin Tunnel, seen from the cab of a Southbound service. [55]
OpenStreetMap shows a short length of line within the Paganin Valley above the Hydroelectric Power Station which is next to the E74/D6204 in the valley of La Roya. [26]
Google’s satellite imagery shows the hydroelectric scheme in the Vallon de Paganin and the power station next to the road and La Roya. The railway line can be seen just to the left of centre. [Google Maps, August 2025]
Banaudo et al tell us that at “the end of the tunnel, the line opens into the Paganin Valley, which marks the northern border between Italy and France. … In this wild and steep site, where a torrent and the penstock of the Paganin Hydroelectric Power Plant tumble, the portals of the last Italian tunnel and the first French tunnel face each other, each guarded by a roadside cottage in the typical style of the FS and PLM.” [1: p129]
Having reached the old French/Italian border we can stop and take stock. We will look at the construction of the line North from the coast once our journey reaches that portion of the line. Suffice to say that by 1915 tracklaying from the coast had reached Airole.
As far as the line heading South from Cuneo is concerned track laying had reached San Dalmazzo di Tenda and the structures and track formation was in place to the Northern French /Italian border.
2. The First World War
In 1915, Italy entered the war on the side of the allies. “Leading up to WWI, Italy had formed an alliance with the Central Powers of the German Empire and the Empire of the Austria-Hungary in the Triple Alliance. Italy should have joined on the side of the Central Powers when war broke out in August 1914 but instead declared neutrality.” [27]
“The Italian government had become convinced that support of the Central Powers would not gain Italy the territories she wanted as they were Austrian possessions – Italy’s old adversary. Instead, over the course of the months that followed, Italy’s leaders considered how to gain the greatest benefit from participation in the war. In 1915, Italy signed the secret Treaty of London and came into the war on the side of the Triple Entente (Britain, France, Russia). By its terms, Italy would receive control over territory on its border with Austria-Hungary stretching from Trentino through the South Tyrol to Trieste as well as other areas.” [27]
“After the war ended, at the Paris Peace Conference that led to the Versailles Treaty, the Italian government struggled against the other Allied leaders, the Big Three (Britain, France and the US), to gain all that they believed had been promised to them. Although Italy did receive control of most of the European requests, they failed to gain their colonial ambitions and felt they did not get what they had been promised. This engendered resentment towards the Allied countries, especially as Italians felt they had paid a high price, in terms of men and money, fighting for the Allies. These resentments helped drive the success of Benito Mussolini and his fascist movement – four years after the war, Mussolini and his blackshirts gained power.” [27]
Ultimately, the war stopped all progress on the line. Banaudo et el tell us that “the work begun thirty-two years earlier by the SFAI, then continued by the RM until nationalization, was thus virtually completed by the FS. The construction of the 80.3 km of line in Italian territory cost nearly 85 million lire compared to the 76 million initially planned, representing an average expenditure of 1,058,500 lire per kilometre.” [1: p135]
In France, the war caused all work to be halted. An attempt was made to continue the work in 1915, but failed because of underground conditions encountered. In 1917, an attempt to continue activity using prisoners of war was unsuccessful.
During the war, Italian authorities lifted track between Piena and Airole in the South for use on the front. Work on the new Cuneo railway station halted.
French and British troops were sent to augment Italian forces on 1917. It seems as though many of these passed through San Dalmazzo di Tenda. Between 19th October and 15th December 1917, “192 military convoys departed from San-Dalmazzo, and the Col de Tende line saw up to twenty movements of all categories on some days.” [1: p136]
After the war, resources were in short supply. In France priority was given to the devastated areas in the Northeast of the country. The PLM received very little support. Contractors found recruitment a problem because of the drastic loss of life among working age men. Banaudo et al tell us that in France “tunnels, abandoned for nearly five years, had suffered serious deformation, particularly in areas with high water infiltration. In Italy, the situation was no better, and construction of the new Cuneo station was suspended, even though an arch of the large viaduct over the Stura River, which was to provide access to it, was already being erected.” [1: p138]
Nevertheless, work did resume, supplies began to head North from Menton on the tramway to Sospel and supplies were arriving from the South via the FS on the Italian side of the border at Airole. Transport via Airole proved better than via the Menton-Sospel tramway and by 1920 the two main contractors on either side of the border (Giianotti and Mercier) ceased to use the Menton-Sosel route. [1: p138]
1920 saw a significant budget reduction for the works in French territory – 104 million Francs to 75 million Francs. Only 17 million Francs were allowed in 1920. “The Mercier company alone was spending 4 to 5 million francs per month on its construction sites.” [1: p140] Layoffs were necessary and work slowed significantly to remain within budget.
“In June 1920, the Inspector General of Public Works announced to companies that only 700,000 francs of credit remained to complete the year, an insignificant sum that forced construction to be suspended immediately, putting hundreds of workers out of work. Elected officials from the Alpes-Maritimes immediately rushed to Paris to meet with representatives of the ministry and the PLM management. After heated discussions, a new budget was allocated by the State for railway construction. The PLM had a credit of 41 million, 25 of which were allocated to the Nice – Cuneo line. Work could resume, but the engineers and contractors in charge of it would have to take into account the irregular arrival of funds until the end when organizing their construction sites.” [1: p140]
2. The Northern French/Italian Border South to Breil-sur-Roya
Two tranches of construction work covered the length of the line from the French/Italian border to Breil-sur-Roya. Banaudo et al tell us that this length of the line “contained the highest density of engineering structures on the French route, and, with a few exceptions, the war had interrupted work there in its early stages.“[1: p142]
A schematic representation of the line between the historic Italian/French Border and Breil-sur-Roya. [13]
The view across the border from the North, a view from the cab of a Southbound service at the mouth of the Gorges Paganin Tunnel. [55]
Looking back North towards the southern portal of the Gorges Paganin Tunnel, a view from the cab of a Northbound train. [35]
Once on the French side of the border the line immediately entered the Frontiere Tunnel. …
The North portal of the Frontiere Tunnel, seen from the cab of a Southbound train. [55]
Looking North across the border from the cab of a Northbound service leaving the mouth of the Frontiere Tunnel [35]
The view from the cab of a southbound train just to the Southwest of the Frontiere Tunnel mouth. [55]
The short open section of track appears on the left of this extract from OpenStreetMap. Tree cover means it is impossible to show the short section of line on and extract from Google’s satellite imagery. [28]
The view from the cab of a Northbound train approaching the mouth of Malaba Tunnel. Ahead is the southern portal of Frontiere Tunnel. A very short length of line runs between Frontiere Tunnel and Malaba Tunnel. [35]
Malaba Tunnel is 389 metres in length. This image shows the view from the cab of a Southbound service as it leaves the tunnel. [55]
Turning through 180 degrees we see the Southwest portal of Malaba Tunnel from the cab of a Northbound train. [35]
This extract from OpenStreetmap shows the next open length of track running from centre-top to bottom-left. We are just entering the first length of another spiral and can see the lower length of track in tunnel under the line and then bridging La Roya. [29]
Google’s satellite imagery shows the same length of railway high above the Scarassoui Viaduct which can be seen bottom-right. [Google Maps, August 2025]
From the cab of the Southbound service, we see the mouth of Scarassoui Tunnel. The Tunnel is 181 metres in length. [55]
Turning through 180°, we look Northeast from the cab of the Northbound train as it leaves the Scarassoui Tunnel. [35]
The spiral in this location consists of a number of tunnels and open lengths of track. The first tunnel encountered travelling South is the Scarassoui Tunnel (top-right) which has a gallery of a series of arches at its southern end. A length of open track leads to Peug Tunnel, Vernardo Tunnel, Caussagne Tunnel and then Berghe Tunnel. [31]
A view North along the valley of La Roya. Top-left in this image, the line from St. Dalmas de Tende enters the image at high level and on a falling grade, through Scarassoui Tunnel. It passes through Peug Tunnel and, after running parallel to the river for a short distance, curves away to the left in tunnel. It appears again beneath Scarassoui Tunnel to cross La Roya before travelling down the East side of the river in a series of tunnels. Source not recorded. [30]
The high level tunnels of Scarassoui (its South portal can be seen at the top of this extract) and Peug. The metal frames over the open lengths of track are part of an avalanche warning system. [30]
Two views looking South inside the gallery at the southern end of Scarassoui Tunnel. [55]
A driver’s eye view of the South end of Scarassoui Tunnel. [35]
The gallery seen from below soon after it was constructed. This image appear in the Railway Wonders of the World article about the line, (c) Public Domain. [24]
Just a short distance further South, we can look over our shoulder to see the modern Scarassoui Viaduct crossing the River Roya some distance below. In a short while we will cross that viaduct. [35]
Turning through 180°, this is the view South towards the North portal of Peug Tunnel which is just 75 metres in length. [55]
The view North from the mouth of the Peug Tunnel. [35]
This Google Earth 3D satellite image gives good idea of how far up the valley side from the river and road the railway is positioned. [Google Earth, August 2025]
The view South from the mouth of Peug Tunnel, seen from the cab of a Southbound train. [55]
The southern portal of the Peug Tunnel seen from the cab of a Northbound service. [35]
A little further South and looking South from the cab of the Southbound service across the Peug Viaduct (50 metres long). [55]
Looking across the valley of La Roya we can see the line heading South . Our train will travel along that length of the line in a short while. [35]
Further South again, a driver’s view from a Southbound service along Capuon Viaduct (45 metres long) towards the North Portal of Verardo Tunnel (53 metres long). [55]
Looking back at the southern mouth of Verardo Tunnel. [35]
The cab of the Southbound train again, looking from the southern end of Verardo Tunnel over Berghe Viaduct (30 metres long) towards the mouth of the Caussagne Tunnel (275 metres long). [55]
Caussagne Tunnel curves West into the valley of the Torrent de la Ceva. The far tunnel mouth faces West-northwest.
The view back towards Vernardo Tunnel over the Berghe Viaduct from the mouth of Berghe Tunnel. [35]
The view from the cab of the Southbound train as it leaves Caussagne Tunnel, heading Northwest up the valley of the Ceva. [55]
Turning through 180°, this is the tunnel portal, seen from the cab of a Northbound train. [35]
The Ceva valley is steep sided and the line sits on a narrow ledge supported above the valley floor by a retaining wall. Before entering the 1881 metre Berghe Tunnel it crosses the Ceva Viaduct (71 metres long).
The view from the cab of a Southbound train crossing Ceva Viaduct before entering the Berghe Tunnel. [55]
This extract from a photograph taken to illustrate the demands placed on cyclists riding up the Ceva Valley shows the retaining structure which holds the railway above the minor road. The tunnel mouth of the Berghe Tunnel can just be made out at the left of this image, (c) Cromagnon. [32]
The Mouth of the Berghe Tunnel, seen from the cab of a Southbound service. The Tunnel curves back to the North and then round to the Southeast. [55]
Turning through 180°, this is the View from the mouth of the Berghe Tunnel, seen from the cab of a Northbound service. [35]
Throughout the spiral the line continues on a falling grade. It opens out, well below the level it enters the spiral, onto the Scarassoui Viaduct.
The view from the mouth of the Berghe e Tunnel across the Scarassoui Viaduct. [55]
Looking back towards the mouth of Berghe Tunnel. [35]
This postcard image shows the Scarassoui Viaduct as built in 1922, (c) Public Domain. [33]The Scarassoui Tunnel, top-left, and the Scarassoui Viaduct, bottom-right. [46]
The French engineer, Paul Séjourné decided to create a significant structure at the location of the Scarassoui Viaduct. Banaudo et al quote Séjourné: “The Scarassoui Viaduct is the first French structure that one will see when coming from Italy. It is like a gateway to France; it must be worthy of it.” [1: p142] Séjourné was of the opinion that: “Of all the structures — I mean all, even the smallest — appearance matters. It is not permissible to make ugly. It is a strange opinion to consider expensive what is beautiful, cheap what is ugly.” [1: p142] The bridge Séjourné designed was a curved viaduct (radius 300 metres) carrying the railway on a falling grade of 21 mm/m. It was 125 m long, spanning both La Roya and the E74/D6204 at a height of 42 m. Banaudo et all, tell us that “two arches of 11 m on the Nice side and a 13 m arch on the Cuneo side give access to a central arch of 48 m decorated with six vaults, according to a design that Séjourné had applied on other works. … The central arch was supported by two massive pilasters with crenellated facings, whose bases were widened to compensate for the misalignment due to the curvature of the deck.” [1: p142]
Sadly this bridge was destroyed by the retreating German forces in 1944 and it was not reconstructed in any form until the 1970s. Details of this bridge and photographs of its condition prior to reconstruction can be found here. [34] The replacement 1970s structure is shown below. …
The modern Scarassoui Viaduct seen from the E74/D6204, looking South. [August 2016]The modern Scarassoui Viaduct seen from the E74/D6204, looking North. [August 2016]One of the regaul=ar service trains posed on the Scarassoui Viaduct in the 21st century. [36]
Scarassoui Viaduct crosses the River Roya close to the top of this image. Trains heading South then pass through a series of short tunnels following the East bank of La Roya. [30]
The northern portal of the Camera Tunnel is in deep shade. [55]
The view back across the Scarassoui Viaduct from the northern portal of the Camara Tunnel. [35]
The view South from the southern portal of Camara Tunnel. [55]
Looking back at the South Portal of the Camara Tunnel. [35]
Just to the South of Camara Tunnel is Camara Viaduct, seen here from the cab of a Northbound train. [35]
While it is not possible to see the line on the West bank of La Roya over this length of the valley from the road, it is possible to glimpse the line on the East side of the valley occasionally. [Google Streetview, August 2016]
The North Portal of Vallera Tunnel No. 1. [55]
The view North from Roches-Rouges Viaduct towards the South Portal of Vallera Tunnel No. 1. [35]
The view South from Roches-Rouges Viaduct towards Vallera Tunnel No. 2. [55]
The North Portal of Vallera Tunnel No. 2. [55]
Looking North from the tunnel mouth above. [35]
Looking South from the southern tunnel mouth of Vallera Tunnel No. 2. [55]
Looking South along Vallera Tunnel No. 2 [55]
Looking back at the South Portal of Vallera Tunnel No. 2. [35]
Looking North from Vallera Viaduct towards Vallera Tunnel No. 2. [35]
The North portal of Torette Tunnel (121 metres long). The village of Fontan can be seen to the right on the valley floor, [55]
The view from the Southern Portal of Torette Tunnel. [55]
The southern mouth of Torette Tunnel seen from the cab of a Northbound train. [35]
The approach to Fontan-Saorge Railway station from the North, seen from high on the valley side to the West of the River Roya. [My photograph, 18th November 2014]
The the track duals to the North of Fontan-Saorge Railway Station. [55]
The D38 (Route de la Gare crosses the River Roya and turns South for quite a length of the road the railway towers over it, held above by a large retaining wall. [Google Streetview, July 2014]Road and railway become much closer in height before the road passes under the railway. [Google Streetview, July 2014]Another image from the cab of the Northbound train. Just before arriving at Fontan-Saorge Railway Station the line bridges Route de la Gare – the road between Fontan and Saorge. [55]After passing under the railway the road continues to climb. [Google Streetview, July 2014]
The final approach to Fontan-Saorge Railway Station. [55]
Fontan-Saorge Railway Station, seen from the cab of a Southbound train. [55]
This extract from Google’s satellite imagery shows the site of the Fontan-Saorge Railway Station which sits between the two villages. It is a large site as it was designed to be a frontier station. The historic border between France and Italy was just a short distance North along the valley of La Roya. [Google Maps, August 2025]
A view of the Fontan-Saorge Railway Station from high on the West flank of the valley of La Roya in 1927/1928. This image illustrates the significant earthworks needed to create a ‘plateau’ for the station (c) Public Domain. [50]
As trains head south from Fontan-Saorge they cross Ambo Viaduct (a short viaduct – just 36 metres in length) before entering Saint-Roch Tunnel . The wall on the left carries the D38 (the road to Saorge). [55]
Ambo Viaduct and the North Portal of Saint-Roch Tunnel, seen from the E74/D6204. [Google Streetview, August 2016]
The road to Saorge climbs above the level of the railway. [Google Streetview, July 2014]
The tunnel carrying the road to Saorge runs just above the railway tunnel. Saint-Roch Railway Tunnel is named for the church close to the road as it enters Saorge. [Google Streetview, July 2014]
This is the view North along the railway towards Fontan-Saorge Railway Station from the mouth of the road tunnel on the D38. The Ambo Viaduct is in the bottom-left of the image, Fontan-Saorge Railway Station is in the top-right. [Google Streetview, July 2014]
Looking back along the line towards Fontan-Saorge Railway Station from the mouth of Saint-Roch Tunnel. The viaduct in the foreground is Ambo Viaduct. [35]
Looking Southwest across the bridge at Saorge from the cab of a Southbound service leaving the mouth of Saint-Roch Tunnel. Tracks cross the bridge 60 metres above the valley floor. [55]
Turning through 180 degrees this is the Southwest portal of the Saint-Roch Tunnel as seen from the cab of a Northbound train. [35]
The bridge at Saorge in the 21st century. It was rebuilt in the 1970s after destruction in 1944. [Google Maps, August 2025]
Early during the construction of the bridge at Saorge. Here we see the formwork for the arch being constructed high above the valley floor, (c) Public Domain. [50]
Work on the bridge at Saorge started “in February 1922 from the Saint-Roch and Nosse tunnels, between which a conveyor cable was stretched for the assembly of the 40 m lowered arch. A suspended footbridge was then launched over the precipice and a 0.60 m track was placed there to supply the materials onto small 500 kg load wagons, maneuvered by gasoline-powered shunters. … The main work of the bridge was completed in March 1923.” [1: p143]
The bridge at Saorge was completed in 1922, it spanned the valley of La Roya at a particularly tight point along the gorge. The village of Saorge can be seen beyond the bridge. This bridge was destroyed by the retreating German troops in 1944. [47]This extract from a postcard image shows the bridge in use in the early 1930s. [51]Looking Southeast from road level, the modern bridge seems to fly between the valley walls! [Google Streetview, August 2016]The same structure seen from the Southeast. [Google Streetview, August 2016]
Looking Northeast over the bridge at Saorge towards the Saint-Roch Tunnel from the mouth of Nosse Tunnel. [35]
Significant savings on construction costs were made (even when the cost of construction of the bridge was included) by following the right bank of La Roya down towards Breil-sur-Roya. [1: p142]
The Northeast portal of Nosse Tunnel (89 metres in length). [55]
The view Southwest from the tunnel mouth of the Nosse Tunnel. [55]
Turning through 180°, looking Northeast into the mouth of Nosse Tunnel. [35]
The open length of the line between Nosse and Four A Platre tunnels. [Google Maps, August 2025]
The North Portal of Four A Platre Tunnel (316 metres long), seen from the cab of a Southbound train. [55]
The view South from the South Portal of Four A Platre Tunnel. [55]
Turning through 180°, this is the South Portal of Four A Platte Tunnel. The village of Saorge can be seen in the sunlight on the right of the image. [35]
The length of line between Four A Platre (Plaster Kiln) Tunnel and Commun Tunnel. [Google Maps, August 2025]
The village of Saorge is a lovely ancient perched village sitting high above La Roya. We have stayed there three times over the years renting the same small apartment each time that we have been there. Most recently, we were there post-Covid and after Storm Alex. That short holiday was in November 2023.
The view from our apartment window – the railway can be seen on the far bank of La Roya, high up the valley side. The visible length of railway is that to the South of Four A Platre Tunnel. [My photograph 11th November 2014]A closer view of the line on the West bank of La Roya, seen from the apartment window. [My photograph, 20th November 2014]An even closer view, also from the apartment. [My photograph, 19th November 2014]Another view, focussing, this time, on the vaulted retaining wall which is typical of a number of retaining walls along the line. [My photograph, 11th November 2014]Saorge village, seen from the road below. [My photograph, 13th November 2014]
The northern mouth of Commun Tunnel (60 metres in length), seen from the cab of the Southbound service. [55]
The view South from the South portal of Commun Tunnel towards Precipus Tunnel over the Petit Malamort Viaduct. [55]
This satellite image shows Petit Malamort Viaduct which cannot easily be seen from the road network. [Google Maps, August 2025]
Turning though 180, just a short distance further along the line, this is the view back towards the South Portal of Commun Tunnel from the Petit Malamort Viaduct (56 metres long). [35]
Petit Malamort Viaduct and the North portal of Precipus Tunnel (623 metres long). [55]
Between Saorge and Breil-sur-Roya construction works were delayed for a time by high pressure water ingress into tunnels. [1: p142]
Looking North across Precipus Viaduct (46 metres long) toward the South Portal of Precipus Tunnel. [35]
The Precipus Viaduct seen, looking West from the D6204 in the valley floor. [Google Streetview, August 2016]
Looking North from the North Portal of Combe Tunnel. [35]
The South Portal of Combe Tunnel. [35] 262
Looking South across a minor road crossing on the North side of Breil-sur-Roya. [55]
Looking back North across the same road crossing to the North of Breil-sur-Roya, seen from the cab of a Northbound train. The D6204 is off to the right of the image, the museum is off to the left of the camera. [35]
Maglia Bridge looking South from the cab of a Southbound train. [55]
Maglia Bridge looking North from the cab of a Northbound service. [35]
Maglia Bridge seen from Route de la Giandola. [Google Streetview, October 2008]
The bridge carrying the Route du Col de Brouis over the railway. [55]
Looking back North from the same bridge over the railway. [Google Streetview, August 2016]
Looking ahead towards Breil-sur-Roya Railway Station from the bridge which carries Route du Col de Brouis over the railway. [Google Streetview, August 2016]
Looking Back North through the same bridge. This is the view from the cab of a Northbound train. [35]
Looking South from the D6204 adjacent to the level crossing at the North end of the station site, along the line towards Breil-sur-Roya Railway Station. Beyond the crossing is the Eco Musee, Breil-sur-Roya, Haut-Pays et Transports, an exhibition of vintage trains, trams & buses. The road on the right is Avenue de l’Authion. [Google Streetview, August 2016]
The same location looking to the North. The D6204 is on the right of the picture. [35]
The Eco Musee at Breil-sur-Roya, seen from the road to its North, Avenue de l’Authion. [Google Streetview, 2009]
The Eco Museum was founded in 1989 to showcase the history and heritage of the Roya valley, it became a museum focused mostly on industrial heritage in 1991. It now houses exhibits of hydropower and transportation. The collection comprises lots of interesting locomotives, railcars, trams, postal vans and other vintage vehicles.
Looking North from adjacent to the end of the platform at Breil-sur-Roya Railway Station. [35]
Looking North at Breil-sur-Roya as a Southbound service arrives at the Station. [35]
Breil-sur-Roya Railway Station facing North. [35]
The approach to Breil-sur-Roya from the South, seen from the cab of a Northbound train. [35]
We finish this fourth length of the journey from Cuneo to the coast of the Mediterranean here at Breil-sur-Roya South of Breil, there are two routes to the coast. One heads to Ventimiglia, the other to Nice. The next article will look at the line heading South towards Ventimiglia.
In Breil, the earthworks for the international station were constructed starting in June 1920. The area was around 1 kilometre in length and 300 metres wide. To build this the, “National Road 204 had to be diverted towards the Roya for about a kilometre, as was the Goulden power plant canal. The natural ground was cleared on the northern side and raised with excavated material from the tunnels on the southern half. At this end of the station, the modest single-arch bridge over the Lavina valley, which provides access to the Nice and Ventimiglia lines, required considerable work. The foundations for the abutment on the Nice side had to be dug into a gypsum bed sloping to a depth of 16 metres (compared to 2.20 metres on the Breil side, where hard rock quickly emerges). and a 15.12 m high reinforced concrete cantilever to the abutment anchored it in the loose fill.” [1: p141]
The next article in this series can be found here. [4]
References
Jose Banaudo, Michel Braun and Gerard de Santos; Les Trains du Col de Tende Volume 1: 1858-1928; FACS Patrimoine Ferroviaire, Les Editions du Cabri, 2018.
Jose Banaudo, Michel Braun and Gerard de Santos; Les Trains du Col de Tende Volume 2: 1929-1974; FACS Patrimoine Ferroviaire, Les Editions du Cabri, 2018.
Jose Banaudo, Michel Braun and Gerard de Santos; Les Trains du Col de Tende Volume 3: 1975-1986; FACS Patrimoine Ferroviaire, Les Editions du Cabri, 2018.
Franco Collidà, Max Gallo & Aldo A. Mola; CUNEO-NIZZA History of a Railway; Cassa di Risparmio di Cuneo, Cuneo (CN), July 1982.
Francohttps://www.geneanet.org/cartes-postales/view/186296#0 Collidà; 1845-1979: the Cuneo-Nice line year by year; in Rassegna – Quarterly magazine of the Cassa di Risparmio di Cuneo; No. 7, September 1979, pp. 12-18.
Stefano Garzaro & Nico Molino; THE TENDA RAILWAY From Cuneo to Nice, the last great Alpine crossing; Editrice di Storia dei Trasporti, Colleferro (RM), EST, July 1982.
SNCF Region de Marseille; Line: Coni – Breil sur Roya – Vintimille. Reconstruction et équipement de la section de ligne située en territoireFrançais; Imprimerie St-Victor, Marseille (F), 1980.
The first decade of the 20th century saw the existing roster of locomotives on the line South of Cuneo supplemented by two additional series :130s (UK, 2-6-0) tender locos of the FS 630 series; and 040T (UK, 0-8-0T) tank locos of the FS 895 series. The featured image for this article is one of the tank locomotives of the FS 895 series. [65]
In the first two articles about the line from Cuneo to the sea we covered the length of the line from Cuneo to Vievola. These articles can be found here [9] and here. [10]
I also want to acknowledge the assistance given to me by David Sousa of the Rail Relaxation YouTube Channel https://www.youtube.com/@RailRelaxation/featured and https://www.railrelaxation.com and particularly his kind permission given to use still images from rail journeys that he has filmed on the Cuneo Ventimiglia railway line. [35][55]
The Line South from Vievola
Our journey South down the line continues from Vievola. …
Vievola Railway Station, seen from a north-bound train in the 21st century. [35]
Vievola Railway Station, seen from slightly further South from the cab of a train heading North through the station back in the 1990s. [8]
A postcard view from 1910 of Vievola Railway Station. The image faces South. [66]
Before we can head South from Vievola on the railway, it needs to have been built! This, it turns out, was dependent on international agreements and their ratification by national parliaments. This process was fraught with difficulty! It would take until 21st March 1906 for agreements to be ratified!
Banaudo et al tell us that over the final decades of the 19th century, the various interests on the French side of the border sought to persuade the French government that the line from Nice to Cuneo was an important investment which should be made. As a result, the French government “invited the PLM company to undertake a route study from Nice to Sospel in circular dated 30th September 1890, renewed on 28th January 1892, given the lack of response from the railway administration. On 12th May, a prefectural decree authorized the company’s engineers to enter properties to conduct the first surveys.” [1: p57]
Banaudo et al continue: “To meet the requirements of the Ministry of War, the route had to include Lucéram. This resulted in a 15 km extension of the direct route between Nice and Sospel. In 1895, the General Staff showed an initial sign of goodwill by agreeing to the study being extended beyond Sospel towards Italy, subject to certain conditions. On 19th April 1898, Gustave Noblemaire (1832-1924), director of the PLM company, submitted a preliminary proposal for a line from Nice to the border via the Paillon de Contes valley, the Nice pass, L’Escarène, the Braus pass, Sospel, Mount Grazian, Breil and the Roya valley. The Lucéram service was included as a branch line from L’Escarène, other solutions were not technically feasible.” [1: p57-59]
The military response arrived on 27th September 1899, when the principle of the branch line was accepted. It was a few months, 10th January 1900, before the military confirmed their requirements, specifically: “commissioning of the Lucéram branch line at the same time as the L’Escarène – Sospel section; construction of the extension beyond Sospel after reinforcing the installations at Fort du Barbonnet and orientation of the tunnel under Mont Grazian so that it could be held under fire from the fort in the event of war; development of mine devices and defensive casemates at the heads of the main tunnels between L’Escarène and the border; and authorization for Italy to begin laying the track from San-Dalmazzo-di-Tenda to Fontan only after the completion of the Nice-Fontan section by France.” [1: p59]
Cross-border discussions took place between the French departmental Bridges and Roads Department and “its counterpart in the civil engineering department of the province of Cuneo to determine the main technical characteristics of the railway line built by the RM between Cuneo and Vievola, in order to adopt equivalent standards for the French section in terms of grades, curves, and gauge.” [1: p59]
Banaudo et al continue: “At the dawn of the 20th century, while the choice of a route from Nice to the Italian border at San-Dalmazzo via the Paillon, Bévéra, and Roya rivers was no longer in doubt in France, the same was not true in Italy. Indeed, although this solution was preferred by Piedmontese business circles, it was opposed by multiple pressure groups weary of twenty years of French policy of opposition and uncertainty. For many localities on the Riviera or in the Ligurian hinterland, as well as for a persistently Francophobic segment of the general staff, the construction of a line entirely within Italian territory appeared to be the best way to avoid diplomatic and strategic complications.” [1: p59]
In Italy, Piedmont and Liguria had differing views about the appropriate railway routes. Piedmont secured a promise, in the Italian parliament, to extend the railway to Tende and a decision to connect it to the coast soon. In Liguria, the desire was to secure a connection to Ventimiglia via either the Roya Valley or the Nervia Valley. Serious consideration was given to a tramway in the Roya Valley, the central section of which would run through French territory but this was rejected by the French military. [14]
A number of alternative schemes were put forward by Italian interests and by the city of Marseille. The city of Turin appointed a commission to look at all the options and after its report “concluded that it preferred the most direct route via the Col de Tende and the Roya, towards Ventimiglia and Nice. Similarly, the French Chamber of Commerce in Milan supported this choice in March 1900, also proposing the construction of a new 47 km line between Mondovi and Santo Stefano Belbo, designed by the engineer Ferdinando Rossi to shorten the journey between Cuneo, Alessandria and Milan.” [1: p60-61]
In 1901, French and Italian diplomats and then the Turin authorities agreed the main principles for an international agreement. On 24th January 1902 the PLM was granted the concession for the railway from Nice to the Italian border via Sospel, Breil-sur-Roya, and Fontan, as well as the beginning of the line from Breil-sur-Roya to Ventimiglia. This was ratified by law on 18th July 1902.
After this a further military inspection led to the strategic Lucéram branch being temporarily left aside with the possibility of a replacement by an electric tramway from Pont-de-Peille to L’Escarène, to be operated by the Compagnie des Tramways de Nice et du Littoral (TNL).
Banaudo et al continue: “On Monday 6th June 1904, delegations from both countries met in Rome to sign the bipartite convention regulating the terms and conditions of operation of the future line and its implementation into international service. … In its broad outline, the agreement provided for the completion of the works within eight years (i.e. by 1912) and the possibility for the Italian railway administration to have its Ventimiglia-Cuneo trains transit French territory, with reciprocal authorization for the French operator to run its own vehicles in Italy on direct Nice-Cuneo trains and to establish a local service between Breil, Fontan and San-Dalmazzo-di-Tenda. … Initially, passenger services on the line would be provided by three direct daily connections Nice-Cuneo and Ventimiglia-Cuneo, and vice versa, offering carriages of all three classes.”
Banaudo et el describe the main points of the convention in respect of the transport of people and goods, particularly for transit between the two borders. “Police and customs controls would be simplified as much as possible for nationals of both countries. Nevertheless travelling between two Italian stations via the international section would require a passenger to have a valid passport. Italian postal vehicles would be permitted to travel duty-free on this section, as would goods and baggage in transit, provided they were placed in sealed vehicles and, for livestock, had undergone a prior health inspection at an Italian station. A special clause authorized the passage of Italian military transports of men, equipment, and animals through French territory, while conversely, the French army would be permitted to transit its consignments from Nice to Breil via Ventimiglia. Article 20 of the convention regulated a legal situation that was probably unique in Europe, that of the Mont Grazian tunnel, whose straight route would pass over a distance of 2,305 metres in Italian subsoil, although its two portals would be in France: ‘It is understood that for the part of the Mont Grazian tunnel located under Italian territory, the Italian government delegates to the French government its rights of control over the railway and its police and judicial rights’. This unusual situation resulted from a modification of the route decided at the request of the General Council of the Alpes-Maritimes. … This more direct route passing under Italian soil was finally preferred to the entirely French route under the Brouis pass, which would have been longer and would have moved the Breil station further from the village.” [1: p62-63]
In Italy, the ratification of the agreements made at the convention took three weeks – it was all done by 28th June 1904. In France thins would be quite different. “On 27th March 1905, as the convention was about to be submitted to a parliamentary vote, the Ministry of War decided to abandon the branch line to Lucéram, which was too costly and difficult to implement. Instead, the nearest stations, L’Escarène and Sospel, would need to be equipped with facilities for the rapid disembarkation of troops and equipment. At L’Escarène in particular, the station would need to be able to accommodate ten twenty-car trains per day and would have to include a military platform opening onto a large open area, an engine shed, and several water columns/supplies. In addition, the road from L’Escarène to Lucéram would need to be improved to facilitate access to the defensive sector of L’Authion.” [1: p63]
Banaudo et al comment: “The French Chamber of Deputies finally ratified the agreement on 3rd July 1905, more than a year after its Italian counterpart, but the Senate would continue to procrastinate until 8th March 1906. The senators demanded financial participation from the Alpes-Maritimes department in the land acquisition costs, and the French Consul in Italy, Henri Bryois, made numerous appearances in Paris to convince them. The day after the Senate’s vote, on 9th March 9, a parade, speeches, and demonstrations of sympathy for France enlivened the streets of Cuneo. … On 20th March, a final law officially ratified the agreement. … The municipality of Nice organized a grand celebration to celebrate the culmination of fifty years of effort. On 21st March 1906, Prime Minister Giolitti and Ambassador Barrère exchanged the documents ratified by the parliaments of both countries. Work could finally begin!” [1: p63]
In Italy, the ratification of the international convention led to the money for the completion of the works being set aside (24 million lire for the length South from Vievola to the then border, and 16 million lire for the length North from Ventimiglia to the southern border). In addition, the decision was taken to build the new station in Cuneo to accommodate the increased traffic that would arise from the new line.
A year later, on 1st July 1905, the Italian state brought all nationally significant rail routes/networks under the direct authority of the Ministry of Public Works (the Ferrovie dello Stato (FS)). This had only a limited impact on the Cuneo-Vievola line. “The 3200, 3800, and 4200 series locomotives of the Rete Mediterranea now formed series 215, 310, and 420 of the [FS}. … At that time, the Torino depot had a complement of 128 locomotives, including 20 from the 215 series and 18 from the 310 series deployed in the line, to which were added ten locos from the 320 series. These were also 030s [in UK annotation, 0-6-0s] with three-axle tenders, initially ordered by the RM as series 3601 to 3700 and gradually delivered by five manufacturers between 1904 and 1908.” [1: p64]
The first decade of the 20th century saw the existing roster of locomotives supplemented by two other series:
130s (UK, 2-6-0) tender locos of the FS 630 series; and
040T (UK, 0-8-0T) tank locos of the FS 895 series.
Locomotive No. 6301was a 2-6-0 (130) locomotive in the FS 630 series. [64]Locomotive No. 8955 was an 0-8-0T (040T) locomotiv3 in the FS 895 series, [65]
In 1906, a subsidised bus service was introduced to complement and replace the various horse-drawn and motor services already in existence on the roads between Vievola, Ventimiglia and Nice. [1: p64][c.f. 14] The connection to Nice was later (in 1912) taken over by the Truchi company of Nice. [1: p64]
Vievola to Tende
Banaudo et al, again:“In August 1907, the first of eleven work packages between Vievola and the [then] border were awarded: package 1 from Vievola to the Gaggeoetlen tunnel, and package 4 of the Cagnolina tunnel to Tenda. In June 1911, it was the turn of package 2, between the Gaggeo and Alimonda tunnels, and the following month, package 3 from Alimonda to Cagnolina. These contracts were signed with the Tuscan companies Sard and Faccanoni and the Ghirardi company, originally from the region of Lake Maggiore. Over 8.2 kilometres, the line crosses Triassic and Permian terrain cut by Jurassic, Cretaceous, and Carboniferous veins. There are ten tunnels covering a distance of 5.90 kilometres, or 72% of the route, as well as seven bridges and viaducts totaling seventeen masonry arches. The section has no level crossings, but seven “caselli” (houses) were built to house the road workers and their families. Some are isolated in the mountains, sometimes between two tunnels, and accessible only by railway.” [1: p64-67]
A schematic representation of the line from Vievola to Tende. [18]
A short video embedded from YouTube, taken at Vievola Railway Station in 2010. [23]Vievola Railway Station is at the centre of this extract from Google’s satellite imagery. The hamlet is Northeast of the Station just beyond the top of the image. Trains for Tende and beyond set off to the Southwest. The railway bridge can be seen at the bottom left of this image. [Google Maps, July 2025]
From Vievola, the line begins its journey down the valley of La Roya by crossing a single-arch bridge over the Dente valley which suffered some disruption resulting from Storm Alex in October 2020.
A closer focus on the bridge spanning the River Dente. This image appears to be taken after the inundation which occurred with Storm Alex in 2020. [Google Maps, July 2025]This pair of images are taken from a report into the majority damage caused by Storm Alex. The image on the left is the condition of the area prior to the storm, that on the right shows the situation after the storm. [15]The bridge that spanned the Dente, in the immediate aftermath of Storm Alex in October 2020. In the view of the engineers checking the line, the bridge was unstable because of erosion. This image was shared on the Ferrovia Internazionale Cuneo-Ventimiglia-Nizza Facebook Group by Osservatorio Ferrovia del Tenda on 3rd Aprilb2924 and credited to Damien Board. [16]The same bridge after further flooding at Easter 2024. This image was shared on the Ferrovia Internazionale Cuneo-Ventimiglia-Nizza Facebook Group by Gianluca Morelli on 4th May 2024. [17]
A short distance South of the bridge over the river, looking North towards Vievola from the cab of a north-bound train. [35]
Taken from a point a little further to the South, this photograph shows the parapets of a bridge over a small stream to the South of the Dente river. This image is also taken from the cab of a north-bound train in the 2020s. [35]
After crossing the 12 metre span bridge the line enters the 1273 metre long Branego horseshoe tunnel.
This photograph looks North from the mouth of the Branego Tunnel towards Vievola Railway Station. It is taken from the cab of the same North-bound train. [35]
The 1273 metre long Branego Tunnel. The bridge in the Dente valley is top-left and the Vievola (Chapel) Viaduct is middle-right in this image. [19]
The tunnel opens onto the right bank of La Roya about 25 metres above the river. The Vievola Viaduct spanned the river on five 15 metre masonry arches. Banaudo et al tell us that, “this structure would later be called the ‘Chapel viaduct’ due to its proximity to the Sanctuary of the Visitation or Madonna of Vievola.” [1: p67]
The East Portal of Branego Tunnel taken from the cab of a train approaching Vievola Railway Station from the South. [35]
The Vievola (Chapel) Viaduct seen from the cab of a train approaching it from Tende. [35]
I believe that the viaduct was fatally damaged by the German forces retreating at the end of WW2. It has been rebuilt in concrete as a 5-span concrete viaduct.
Looking South along the E74/D6204 under the railway viaduct. [Google Streetview, April 2008]Looking North along the E74/D6204 torads the railway viaduct. [Google Streetview, April 2008]The same location on Google satellite imagery shows a denuded valley floor after Storm Alex. [Google Earth 3D, July 2025]
Now on the left bank of La Roya, the line passes through a series of tunnels with very brief open lengths spanning narrow valleys or slight depressions. The first tunnel on the Left bank is shown below. …
After crossing the Chapel Viaduct trains heading for Tende ran straight into Gaggio Tunnel (373 metres long) which curves towards the Southeast. [20]
The Southeast Portal of Gaggio Tunnel seen from the cab of a Northbound train at the mouth of Devenzo Tunnel. The parapets of the 12-metre span arched bridge over the San Pancrazio valley can be seen between the two tunnels. [35]
The Bridge over the Vallon Pancrasio (the San Pancrazio valley) is a 12 metre span arch bridge. [21]The San Pancrazio valley as it appears on Google’s satellite imagery after the damage from Storm Alex. [Google Earth 3D, July 2025]A closer look at the railway bridge spanning the San Pancrazio valley. [Google Earth 3D, July 2025]
The tunnel portals are generally made of local stone as are the arched bridges. The next tunnel is the Devenzo tunnel, shown below. …
The Devenzo Tunnel (732 metres long) extends Southeast from the San Pancrazio valley to the Mezzora Valley which seems little more than an ‘indentation’ in the valley side. A shorter tunnel is beyond the opening (the Mezzora Tunnel – 351 metres long) which opens out onto the Alimonda Valley at the bottom-right of this map extract. [22]
This photograph is another still from a video taken from the cab of a train travelling North from Tende. It shows the short length of open line mentioned above. The parapets are those of the viaduct of two 6 metre arches. [35]
This Google Earth satellite image shows the railway line breaking cover to cross the Alimonda valley near the top of the image. The E74/D6204 is at the bottom-left of the image. [Google Earth, July 2025]The same location as it appears on OpenStreetMap. The bridge over the Alimonda valley is at the top-right of the image and the E74/D6204 is in the bottom-left. [24]
The Southeast portal of the Mezzora Tunnel can be seen in this image taken from the tunnel mouth of the Alimonda Tunnel. It is possible to see along the full length of this tunnel to the short opening mentioned above. In the course of travelling this short length of open line the railway crosses the Alimonda Valley. [35]
The next tunnel, the Alimonda Tunnel begins immediately the Alimonda valley has been crossed. The tunnel is 380 m long.
The Alimonda Tunnel: the bridge over the Alimonda Valley is top-left in this map extract, the bridge over the Scara Valley is bottom-right. [25]The bridge over the Scara Valley is on the right of this map extract. There is very little of the railway open to the elements at this location. [26]
The short length of track and bridge in the Scara Valley between the Alimonda Tunnel and the Frera Tunnel, seen from the cab of a service which has just left the Frera Tunnel heading for Vievola and on to Cuneo. [35]
Before entering the Frera Tunnel, it is worth pulling back a little to see the route of the line ahead. This is the first ‘spiral’ on the line down towards Ventimiglia and Nice. A large section of the spiral is within one tunnel but the engineers made use of the Valley of the Refrei to avoid having to put the entire spiral in tunnel. [36]
The Frera Tunnel (498 m long) runs North-northwest to South-southeast passing over the line ahead which is at a lower level – both are tunneled out of the rock. There is an open length of the line and a bridge at the bottom-right. [27]
The short length of track and the bridge between the Frera and the Rio Freddo tunnels. [35]
After crossing the bridge noted above the line soon disappears into the Rio Freddo Tunnel (376 m long). The bridge is top-left. The tunnel opens out for a short length at the right of this map extract. [28]A short length of line is open to the elements to the North of the valley of the Refrei and between the Rio Freddo and Morga Tunnels. [29]
The short length of line between the Rio Freddo and the Morga Tunnels, seen from the cab of a train just leaving Morga Tunnel. The Rio Freddo tunnel mouth is ahead. Between the two tunnel mouths is the Morga Bridge (two 8-metre arches). [35]
Banaudo et al tell us that “from the exit of the Rio-Freddo tunnel [on the North flank of the Refrei valley], the village of Tenda (Tende) appears below and the railway describes a helical loop which ends at [the lower end of] the Cagnolina tunnel. … This loop loses about sixty metres of altitude in less than 3 km of travel.” [1: p70]
After the very short open length of line to the East of the Rio Freddo Tunnel, another short tunnel ensues – the Morga Tunnel (160 m long). [30]Another short open length of line sits between the Morga and Gerbo Tunnels. [31]
The short open length of track between Morga and Gerbo tunnels, seen from the cab of a Cuneo-bound service and framed by the Southwest mouth of Gerbo Tunnel. [35]
Pulling back a little enables the full length of Gerbo Tunnel (279 m long) to be seen, together with the open length of line and viaduct to the East – Gerbo Viaduct. [32]
The Northeast Portal of Gerbo Tunnel seen from the cab of a Cuneo-bound train in the 2020s. [35]
A short distance further along the line, the Bazara Viaduct (of five 8 m arches) is seen here, with the Gerbo Tunnel beyond – these are seen from the cab of a Cuneo-bound service in the 21st century. [35]
After a short length of line to the Northeast or Gerbo Viaduct the line enter Cagnolina Tunnel and under many tons of rock swings round to travel West while on a downward grade. [33]
Here the Cuneo-bound train is just leaving the South Portal of Cagnolina Tunnel (at the right of the above map extract) and crossing a small bridge close to the tunnel mouth. [35]
Still in tunnel, the line passes under the line we have just travelled before breaking out into the valley of La Roya. It then bridges the river and heads down the the valley side on the left bank of La Roya to Tende Railway Station. [34]
The lower (West) portal of the Cagnolina Tunnel and the bridge over La Roya. Taken from the cab of a train heading North from Tende. The bridge over La Roya has a 12 metre span. [35]
A significant retaining wall to the West of the line, above which runs the E74/D6204. [35]
A short tunnel (Tende Galleria) part way along the length that the E74/D6402 run parallel and in close proximity to each other. The view looks North-northwest along the line. [35]
A train from Cuneo arrives at Tende Railway Station in February 2023. [37]
The Tende Railway Station today has a passenger building and two platform faces. In the past, it had three platform faces and a goods shed of classic Italian design, “the station had a number of goods tracks, two reinforced concrete water tanks supplying two hydraulic cranes, as well as an 8.50 metre turntable which was probably transferred from Vievola when the line was extended.” [1: p70]
Wikipedia tells us that Tende Railway Station “opened on 7th September 1913. [40: p146] … Tende remained the temporary terminus for almost two years, until the opening of the Tende – Briga Marittima – San Dalmazzo di Tende section, which took place on 1st June 1915.” [39][40: p149]
The station and yard were electrified along with the line in 1931. [40: p171-172]
Tende “became isolated from the railway network after the destruction of bridges and tunnels by the retreating Germans between 15th and 26th April 1945.” [39][41: p15] .
“It remained under the jurisdiction of the Italian State Railways (FS) until 15th September 1947 and was passed into the hands of the Société Nationale des Chemins de fer Français (SNCF) the following day, when the upper Roja valley was separated from the province of Cuneo and became French territory by virtue of the peace treaty with France.” [39]
“After thirty-four years of inactivity, it was reopened on 6th October 1979 , the day of the inauguration of the rebuilt Cuneo-Ventimiglia line.” [39][40: p243]
The station yard was originally of a significant size. [42: p81] For the reopening of the Limone-Ventimiglia line to traffic … it was initially planned that the Tende station would be transformed into a stop equipped with only a single track, but it was subsequently decided to build a loop [43: p34] with a useful length of 560 metres and a single track serving the loading platform and the goods warehouse. [43: p29]
The Goods Shed and Passenger building at Tende seen from Avenue du 16 Septembre 1947 and looking Southeast. [Google Streetview, July 2014]
A French and an Italian train pass at Tende in 2022. The train on the right is, I believe, an ALe501 trainset commissioned by Trenitalia in the early 2000s and produced by Alstom Ferroviaria, (c) Tomas Votava. [Google Maps, August 2025]
TER No. 76671 on the Train des Merveilles service from Nice stands at Tende Station, (c) Kenta Yumoto. [Google Maps, August 2025]
We have travelled as far as Tende Railway Station and noted that the line reached the village in 1913 and remained the terminus of the line from Cuneo until 2015. While the line as far as Tende was still under construction, Banaudo et al tells us that there were continued contacts “between the Italian and French authorities to resolve the remaining issues concerning the connection between the two networks in the Roya Valley. On 3rd January 1910, the Ministers of Public Works of both countries … met to discuss the problems of Franco-Italian communications. On 15th May 1910, the Cuneo Chamber of Commerce approached the government to request the acceleration of work between Vievola and Tenda. … During the same period, … efforts were being made to produce [hydroelectric power]. … The first plants were installed in Airole and Bevera in 1906, and later in San-Dalmazzo between 1909 and 1914.” [1: p70-74]
“The Roya hydroelectric power plants were intended to supply the Vallauria Mining Company and its ore processing facilities, public lighting, industries and the tramways of the Ligurian Riviera as far as Savona and Genoa.” [1: p74]
In France, two small power plants were built at the beginning of the century at Pont d’Ambo, downstream from Fontan, and in Breil. Between 1912 and 1914, a larger power plant was built opposite the village of Fontan.
Banaudo et al tell us that “In both France and Italy, the simultaneous construction of the railway and power plants turned the Roya Valley into a huge construction site for a dozen years. The companies had to house, feed, and entertain several hundred workers, most of them from other regions of Italy.” [1: p74]
After the opening of Tende Railway Station in September 1913, “the FS improved the service which had remained unchanged for a quarter of a century. Four Cuneo – Tenda return trips would now run every day, including a mixed goods-passenger one. From July to September, a fifth return trip was added. The 50 km journey took an average of 1 hour 50 minutes.” [1: p75]
Meanwhile, the project to divert the railway line and build a new station on the Altipiano in Cuneo which we noted in the first of these articles, [9] was being developed. Work began in September 1913 [1: p80] but it was to be 7th November 1937 before the new station opened! [44]
“While the line was creeping southwards from Cuneo to Tenda, work had begun in Ventimiglia on the northbound line up the Roya Valley. However, by the outbreak of World War I it had only covered 20 kilometres to Airole. Meanwhile, and again interrupted by the war, another line was being built northeast from Nice to join the Cuneo-Ventimiglia line at Breil sur Roya.” [39] Progress on these two lines is covered in other posts in this series of articles. [45][46][47][48]
From Tende to St. Dalmas de Tende(San Dalmazzo di Tenda)
“In the first half of 1912, calls for tenders were issued for six lots of the section between Tenda, Briga, San-Dalmazzo, and the northern border of the Paganin Valley, followed in April 1913 by the award of the seventh and final lot. Here again, the tunnels, fifteen in number, account for more than two-thirds of the route, or 8,576 metres out of 12,335 metres. There are also seven bridges and viaducts, comprising a total of thirty-five masonry arches, about ten short-span structures, and there were ten roadside houses.” [1: p127]
The length of the line from Tende to San Dalmazzo di Tenda (San Dalmas de Tende). [51]Schematic plan of the line from Tende South to the former Italian border via La Brigue and Saint Dalmas de Tende. [18]Tende Railway Station in the 21st century, seen from the Southeast, from the cab of a northbound train. [35]
Tende Railway Station seen from the cab of a South-bound service. [55]
Leaving Tende Railway Station, the line soon passes onto the curved viaduct spanning the Roya River opposite the village. The viaduct has one 20-metre arch and eleven 15-metre arches.
The southern end of the station site and the viaduct which crosses the valley of La Roya. [53]
A South-bound service crosses Tende Viaduct. This is the view from the cab. [55]
We were in Tende in November 2023 so saw something of the major work being undertaken after Storm Alex hit the area in October 2020 and took these photographs of the viaduct
The northern half of the viaduct. [My photograph, Wednesday 22nd November 2023}The larger viaduct arch span over La Roya. [My photograph, Wednesday 22nd November 2023]The southern length of the viaduct. [My photograph, Wednesday 22nd November 2023]Tende Viaduct seen from the South from the cab of a train heading for Tende Railway Station. [35]
Once across the viaduct, trains heading South ran on through three tunnels on the left bank of La Roya on a falling grade of 25mm/m. These were:
Borgonuovo Tunnel (200 metres long) …
The approach to Borgonuovo Tunnel, seen from the cab of a South-bound train. [55]
Looking North from the mouth of Borgonuovo Tunnel, from the cab of a North-bound train. [35]
The view South from the mouth of Borgonuevo Tunnel., [55]
The southern portal of Borgonuovo Tunnel, seen from the cab of an approaching train. [35]
The view from above the South portal of Borgonuovo Tunnel, (c) Tito Casquinha, June 2019. [Google Maps, August 2025]
The same length of line seen from across the valley. [Google Streetview, October 2008]
Bijorin Tunnel (248 metres long) …
The North portal of the Bijorin Tunnel. [55]
The view from the northern portal of Bijorin Tunnel. [35]
The view South from the mouth of Bijorin Tunnel. Colombera tunnel is just visible ahead. [55]
The length of line between Bijorin and Colombera tunnels, seen from the far side of the valley of La Roya. [Google Streetview, October 2008]
The South portal of Bijorin Tunnel is ahead in this still from a video taken from the cab of a North-bound train. This image also shows avalanche warning wires above the line. [35]
Colombera Tunnel (212 metres long) …
The North portal of Colombera Tunnel. [55]
The view North towards Bijorin Tunnel from the mouth of Colombera Tunnel. [35]
An over exposed view South from the South Portal of Colombera Tunnel. [55]
The South Portal of Colombera Tunnel seen from the cab of a Northbound train. [35]
This OpenStreetMap extract shows the three tunnels named above, and the lengths of open railway line between. [54]
A short distance further South the railway bridges a minor road. These are the bridge parapets seen from the cab of a South-bound train. The minor road is just visible to the left of the image. [55]
The next tunnel is Bosseglia Tunnel. The railway and the main road separate as the line heads into the tunnel which is S-shaped and 1585 metres in length. The southern portal of the tunnel opens out into the Levenza valley, a short distance to the East of La Brigue Railway Station. Banaudo et all refer to the station as Briga-Marittima station, which appears to be the name of the station in Italian. [1: p127]
The Bosselgia Tunnel (which is over 1.5 km long) and the railway station at La Brigue as they appear on OpenStreetMap. [56]
Looking South, this is the northern portal of the Bosseglia Tunnel. [55]
Looking North from the mouth of Bosseglia Tunnel. [35]
Looking West from the southern portal of Bosseglia Tunnel towards La Brigue Railway Station. [55]
Turning through 180 degrees, this is the southern portal of the Bosseglia Tunnel seen from a North-bound train. [35]
La Brigue Railway Station once comprised a passenger building, two platform faces (a third would be built during electrification), three freight tracks with a good shed and a raised platform. The modern station is situated to the East of the old station. [1: p127]
Looking West from the modern La Brigue Station through the site of the original station. [55]
Further through the site of the old railway station and continuing to face West down the Levenza valley. The old goods shed is on the left. [55]
The site of the two La Brigue Railway Stations. The modern station is on the right of this map extract, the old station and goods shed are left of centre. [58]The station at La Brigue is a short distance to the West of the village. [Google Maps, August 2025]
The original station building at La Brigue, seen from the cab of a train heading for Ventimiglia. [55]
The bridge over the D43 and the River Levenza. [59]
The bridge over the D43 and the River Levenza. [55]
The bridge which carries the railway over the D43 and the River Levenza, seen from the East. [Google Streetview, August 2016]
The bridge which carries the railway over the D43 and the River Levenza, seen from the West. [Google Streetview, August 2016]
The view back across the bridge over the River Levenza towards La Brigue Railway Station. The D43 can just be made out to the right of the bridge. [35]
Leaving La Brigue Railway Station the line resumes following a falling grade of 25 mm/m. This continues through the Levenza viaduct, which, as we have seen consists of three 8-metre arches abutting a single span road bridge. Beyond this is the Levenza tunnel (418 m long). …
The Northeastern portal of the Levenza tunnel. [55]
The view back along the line from the Northeast portal of the Levenza tunnel. [35]
This overexposed view looks Southwest from the Southwest tunnel mouth of the Levenza tunnel. [55]
The Southwest portal of the Levenza tunnel seen from the cab of a North-bound service. [35]
Beyond the Levenza Tunnels is and an unnamed viaduct of three 8-metre arches) and the line then enters the Rioro Spiral Tunnel.
The Rioro Tunnel forms a loop which describes a circle of 300-metre radius and accommodates a 30-metre drop.
Banaudo et al tell us that the tunnel “is officially divided into two sections: Rioro I (282 m) and Rioro II (1527 m), connected by an artificial tunnel with a lateral opening closed by a gate. At this opening, a ‘casello’ (a ‘hut’) was built into the mountainside to house a road worker and his family.” [1: p127]
Looking Northeast from the mouth of the Rioro spiral tunnel. [35]
The Northeastern portal of the Rioro sprial tunnel. [55]
The Rioro Spiral Tunnel between La Brigue and St. Dalmas de Tende is 1828 metres in length. [60]
Trains are within the tunnel for some minutes as they cover nearly two kilometres of turning track within the tunnel. This view comes from the cab of a South-bound train. [55]
Facing Southwest along the line at the mouth of the Rioro Spiral Tunnel. The picture is overexposed as the camera is reacting to daylight after running through the tunnel. [55]
The Southwest Portal of the Rioro Spiral Tunnel, seen from the cab of a North-bound train. [35]
The Rioro Spiral Tunnel opens onto the left bank of the Levenza River, just before its confluence with the Roya River.
To the Southwest of the tunnel, the line is carried alongside the River Levenza on a retaining wall. The parapet of this wall, protected by railings, can be seen on the right of this image. [55]
The River Roya is crossed by the San-Dalmazzo I viaduct. Banaudo et al tell us that “the seven 15-metre masonry arches of this structure were widened to carry three tracks to accommodate the approach to the station, built on a vast embankment. An underpass beneath it provides a route for the [E74/D6204].” [1: p127]
The line is retained above the Levenza River and then crosses La Roya on a viaduct of seven 15-metre masonry arches. A short tunnel under the wide embankment to the Southwest of the river allows the D6204 to pass under the railway. [61]
A postcard view of the viaduct and station at the centre of St. Dalmas de Tende. The station building is to the right of this image, the viaduct in the centre. The photograph was taken on the hillside to the North of the village. This image was shared on the Ferrovia internazionale Cuneo-Ventimiglia-Nizza Facebook Group by Luisa Grosso on 1st November 2021. [63]
The bridge over La Roya on the approach to St. Dalmas de Tende. [55]
The bridge over the Avenue de France (the D6204/E74) seen from the North. The road is in tunnel as a large area was dedicated to the station complex at St. Dalmas de Tende as it was originally a border station in Italy. [Google Streetview, August 2016]
The same bridge/tunnel seen from the South on the Avenue de France. [Google Streetview, August 2016]
A long double-track section of the line runs through the station at St. Dalmas de Tende. A small yard remains on the North side of the line entered vis the point seen in this image. [55]
The final approach to St. Dalmas Railway Station from the Northeast. [55]
St. Dalmas de Tende Railway Station seen, looking Southwest, from the cab of a South-bound train. [55]
St. Dalmas de Tende Railway Station as show on OpenStreetMap. [62]A postcard image overlooking the station site at St. Dalmas de Tende prior to the construction of the large station building. [5]The station during construction work. There is scaffolding on the main station building, which appears to have been built in sections with a completed length nearest to the water tower. The engine shed is under construction, centre-right. This image was shared on the Ferrovia Internazionale Cuneo-Ventimiglia-Nizza Facebook Group by Mauro Tosello on 12th June 2022. [6]A postcard view of the Railway Station at St. Dalmas de Tende, taken from the East. The tunnel at the Southwest end of the station site can be seen on the left of the photograph. This image was shared on the Ferrovia internazionale Cuneo-Ventimiglia-Nizza Facebook Group by Luisa Grosso on 1st November 2021. [63]The locomotive Depot at St. Dalmas de Tende. The depot was on the Southeast side of the running lines opposite the railway Station and close to the Biogna River. The road shown on the OpenStreetMap plan of the modern station to the Southeast of the site is the road shown at the top of this plan. This drawing comes from From the December 1929 Technical Magazine of Italiane Ferrovie. It was shared on the Ferrovia Internazionale Cuneo-Ventimiglia-Nizza Facebook Group on 13th February 2024 by Francesco Ciarlini Koerner. [4]
St. Dalmas de Tende Railway Station seen, looking Northeast, from the cab of a North-bound service. [35]
St. Dalmas de Tende (San-Dalmazzo-di-Tenda in Italian) was “the last station on Italian territory, before the northern border. This is where the French Forces would install a large-scale border station that will handle customs clearance operations in addition to the French facilities at Breil. In the first phase, a temporary passenger building and a small freight shed were built on the vast embankment created from the spoil from the tunnels upstream of the confluence of the Roya and Biogna rivers. The original layout includes four through tracks, one of which is at the platform, five sidings, three storage tracks, a temporary engine shed, a 9.50 m turntable, and a hydraulic power supply for the locomotives.” [1: p127]
It is here, at St. Dalmas de Tende, that we finish this third part of our journey from Cuneo to the coast.
Located at the confluence of the Roya River with the side valleys of the Levenza and Biogna, San-Dalmazzo-di-Tende “was built around a former Augustinian convent that became offices of the Vallauria mining company and then a spa. Since the border was established in 1860 a few kilometers downstream in the Paganin Gorges, first a few dozen, then hundreds of workers, employees, and civil servants gradually settled in San-Dalmazzo with their families. Jobs were plentiful, with the development of mining in the neighboring Val d’Inferno, the creation of a sawmill, the construction of dams and hydroelectric power plants, the emergence of tourism, and the permanent presence of a large number of police, customs, and tax guards. This influx … was reinforced during the railway works, which attracted many workers: earthmovers, masons, stonemasons, miners, carpenters, etc. These newcomers, who mostly came from other regions, sometimes far away, slowly integrated into the local population.” [1: p130]
The line to San-Dalmazzo-di-Tende was opened on 1st June 1915. The three of the four daily services were connected to the Southern arm of the line which by this time had reached Airole, by a coach shuttle. [1: p131]
A temporary station was provided as a terminus of the line from Cuneo. It was sited to the Northeast of the present large station building which was not built until 1928.
The next length of the line can be found here. [67]
References
Jose Banaudo, Michel Braun and Gerard de Santos; Les Trains du Col de Tende Volume 1: 1858-1928; FACS Patrimoine Ferroviaire, Les Editions du Cabri, 2018.
Jose Banaudo, Michel Braun and Gerard de Santos; Les Trains du Col de Tende Volume 2: 1929-1974; FACS Patrimoine Ferroviaire, Les Editions du Cabri, 2018.
Jose Banaudo, Michel Braun and Gerard de Santos; Les Trains du Col de Tende Volume 3: 1975-1986; FACS Patrimoine Ferroviaire, Les Editions du Cabri, 2018.
Franco Collidà, Max Gallo & Aldo A. Mola; CUNEO-NIZZA History of a Railway; Cassa di Risparmio di Cuneo, Cuneo (CN), July 1982.
Franco Collidà; 1845-1979: the Cuneo-Nice line year by year; in Rassegna – Quarterly magazine of the Cassa di Risparmio di Cuneo; No. 7, September 1979, pp. 12-18.
Stefano Garzaro & Nico Molino; THE TENDA RAILWAY From Cuneo to Nice, the last great Alpine crossing; Editrice di Storia dei Trasporti, Colleferro (RM), EST, July 1982.
SNCF Region de Marseille; Line: Coni – Breil sur Roya – Vintimille. Reconstruction et équipement de la section de ligne située en territoireFrançais; Imprimerie St-Victor, Marseille (F), 1980.
This image appeared on an Italian Facebook Group but I did not record which one and cannot now find the image or the group, accessed on 1st October 2025.
A proposed tramway that did not get built. … The featured image is a map showing the full length of the proposed line which followed National Route No. 204 in France.
Late in the 19th century before a link from Vievola to the Mediterranean was really on the agenda. Alongside the experimental ‘Train Scotte’, [1: p40][2][3] a “local engineer, M. Chatelanat, proposed building a tramway line between Vievola station … and Ventimiglia. He knew the region well, having just overseen the construction of the rack railway from Monte Carlo to La Turbie. [4] Here is the project he presented in an application filed on 7th February 1899.” … [1: p47]
The submission made by M. Chatelanat began, “The electric tramway for which we are requesting a concession is intended to facilitate the movement of passengers and goods in the Roya Valley through a rapid, convenient, and economical means of communication. Currently, to reach Nice and the other communes of the department, the population of the French part of this valley must either travel more than 60 kilometers along the old Nice-Cuneo road, crossing the foothills of Brouis and Braus, in unsafe conditions due to the steep slopes, the height of the passes, and, in winter, the seasonal inclement weather. Or, since the opening of the national road from Breil to Ventimiglia, travel approximately 30 kilometers and cross two customs lines to join the coastal railway line in Ventimiglia. … Between the coast and Upper Piedmont, especially the province of Cuneo, there is a very intense movement of population every year, but if you want to go by train, you have to make a long detour via Savona, which is long and expensive. The province of Cuneo sends to Nice and the coast some of its products that our region cannot obtain elsewhere. On the other hand, our particular products from the South are in demand and consumed in the upper Po Valley. Facilitating the movement of travelers and this exchange of products between Piedmont and the coast will at the same time allow the French populations of the Roya Valley to come easily and quickly to Nice to stock up and connect with the entire French coast without having to cross the Braus and Brouis passes, such is the goal we are pursuing.” [1: p47]
There were a number of projects of this nature being explored at the time. The tramway between Menton and Sospel is an excellent example. [5][6] Others in the valley of the River Var and in the valley of the River Paillon were also built.
M. Chatelanat continues to explain how up to that time it had not been possible to devise a railway scheme that enable a link between Nice and Cuneo. His proposed tramway was not claimed to be a replacement for the planned railway, but while awaiting the development of the railway scheme, the tramway would “provide great services by greatly reducing the communication difficulties between the two regions. The project [would] not provide the speed of the railway, it [would] require two transshipments at Ventimiglia and Tende. Nevertheless, the transport of goods [would] be significantly more economical and passengers [would] find facilities and comfort there which [would] undoubtedly give the population satisfaction, if not complete, at least acceptable. The electric tramway, executed at a width of 1 metre with gradients of up to 70 mm/m and curves down to 20 metres in radius [could not] be used for the passage of standard-gauge locomotives and wagons, and therefore [could not] be used in the event of war.” [1: p48]
Concern about possible conflict was paramount in the minds of many and projects were vetted and often vetoed by the military. M. Castelanat went on to explain that power for the section of the line would be supplied from a hydraulic plant close to Breil-sur-Roya which could easily be put out of action, and if the overhead cables were also removed no use would be possible. He was sure that no advantage would be gained by a future enemy and that “The tramway must therefore be considered a commercial means of communication with no possibility of use in the event of war.” [1: p49]
Castelanat confirmed that electrical operation would mean no problem would be encountered with gradients up to 7% without the need for any regrading of the highway. He planned stations at Breil, Giandola, Saorge, Fontan, and Berghe. The tramway would use National Road No. 204 without any deviations and would cost around 1,400,000 francs. This tramway would, strictly speaking, be only a section of an international line which would have its origin in Ventimiglia and which would go up the valley of the Roya.
A conference including all the statutory interested parties was arranged for 23rd November 1899. Differing views were expressed about whether the tramway could provide a military advantage to the enemy in the case of war. A few months after the conference, on 2nd May 1900, “Chief Engineer Aubé of the Ponts et Chaussées (Roads and Bridges Department) reached the following conclusions: ‘The establishment of the planned electric tramway has lost much of its appeal since the military authorities ceased, with certain reservations, to oppose the construction of the railway from Nice to Sospel and to the Italian border, near Fontan. This line would, in fact, provide the French population of the Roya Valley with the access to Nice they were willing to seek in an economical manner by means of the tramway connecting them to the international station at Ventimiglia‘.” [1: p50]
The effect of the military’s withdrawal of their opposition to the Nice-Sospel-Fontan line was to render the tramway proposals obsolete. It was 1904 before “an international conference finally approved the construction of the Vievola – Breil – Ventimiglia and Breil – Sospel – Nice railway sections. … [Nevertheless] two tram lines were created[in the area]: one from Menton to Sospel, which operated from 1912 to 1931, [5][6] and a line from Ventimiglia to Bordighera, which operated from 1901 to 1936.” [1: p50]
Instead of the ‘Train Scotte’ and a tramway, from perhaps as early as 1900, but definitely by 1st September 1906, a service connecting with trains was introduced between Vievola station and Ventimiglia. The two images below show the mixture of different vehicles in use. Both focus on the road on the West side of the station building at Vievola.
Banaudo et al provide details of a bus service which started on 1st September 1906. The bus service between Vievola and Ventimiglia provided two buses a day from Vievola to Ventimiglia, the first leaving Vievola at 12:15 and arriving in Ventimiglia at 17:00, the second leaving Vievola at 20:40 and arriving in Ventimiglia at 0:40. The cost of the full journey was 5 lire/person. [1: p52]
The advert in the local paper commented that, “Without making the tedious Bastia-Savona detour, travelers can reach the Nice or western Ligurian coast from Cuneo and nearby towns in just a few hours, take care of their business, and return to their hometowns the same day, if they wish, even finding enough time in Vievola to refuel. Every modern comfort will be available in the station buffet, since, with appropriate consideration, the owner, Mr. Giuseppe Borgogno, has asked the Italian State Railways Administration to expand and repurpose the space for this purpose.” [1: p52]
Banaudo et al share details of services which developed over the next few years with pictures of the various buses in use. [1: p52-56]
Jose Banaudo, Michel Braun and Gerard de Santos; Les Trains du Col de Tende Volume 1: 1858-1928; FACS Patrimoine Ferroviaire, Les Editions du Cabri, 2018.
Société des Chaudières et Voitures à Vapeur système Scotte was a French manufacturer of steam-powered trucks, tractors, and omnibuses in Paris from 1893 to circa. 1914. The company also built the Train Scotte, an early road train for passenger or freight transport. [1]
I first encountered the Train Scotte when reading about the Cuneo-Ventimiglia-Nice international railway line in a book by Jose Banaudo, Michel Braun and Gerard de Santos; Les Trains du Col de Tende Volume 1: 1858-1928. [2] The partial opening of the that railway from Cuneo to Vievola in October 1900 left travellers heading for the Mediterranean in the middle of nowhere!
An experimental steam road train was trialled on the roads from Vievola to Ventimiglia. It was supplied by Société des Chaudières et Voitures à Vapeur système Scotte.
At this time, Vievola was a railway terminal for traffic to and from Piedmont and a hub for road connections onwards to Nice and Liguria. Banaudo et al point us to a magazine published in 1899, which mentions a trial of a steam-powered road vehicle which it was hoped would provide a service to Nice and the coast until such time as a railway was built. [1: p40][37] The service was a trial organised by the House of Ascenso et Cie, and ran from Vievola to Ventimiglia. The journey, lasted a total of six hours, including a 43-kilometre climb. The vehicles used were Scotte trains. The car wagon carried a 27-horsepower engine and seated 16 passengers; it also towed a second 24-seater wagon. [2: p40]
Industrialist Joanny Scotte, [10] originally from Epernay in the Marne department, began his business in the mid-1880s producing steam-powered cars. From 1897, he offered road trains consisting of a tractor or a steam-powered car, pulling one or more trailers designed for the transport of passengers or goods. These vehicles travelled on roads using solid tires. They never really went beyond the experimental stage due to their slowness, the difficulties of driving the vehicles on the narrow roads of the time and the damage caused to the cobbled and cylindered roads. [2: p40] Scotte road train services were reported in the last decade of the 19th century in the Île-de-France region (Fontainebleau, Pont-de-Neuilly, Courbevoie), in the Aube region (Arcis-sur-Aube – Brienne-le-Château), in the Manche region (Pont-l’Abbé-Picauville – Chef-du-Pont), in the Drôme region (Valence – Crest), and for military use. Scotte partnered with the Lyon-based car manufacturers Buire and Audibert-Lavirotte to produce some of its vehicles. [2: p41]
1. A power car (steam omnibus) capable of carrying fourteen passengers and the two engine crew; Weight of the empty car with all equipment: Motor: approximately 3,500 kg; Total length: 5m 20 cm; Width at the waist: 1 m 80 cm; and
The wikipedia webpage relating to the ‘Train Scotte’ provides a series of photographs and drawings of the company’s products, including one advertising poster. All are in the public domain and are shown below:
The tractor was equipped with a vertical Field system boiler, 600 litres of water for which were stored under the passenger seats, and a 14 horsepower, 2-cylinder engine. Coke or coal was its fuel (200 kg for 4 hours of operation). The movement was transmitted to the rear axle by a chain. The trailer was coupled to the tractor by a pivoting front axle. To stop, the steam omnibus had a quick brake operated by a pedal, a screw brake operated by a flywheel and, in an emergency, could work on the gear change. Steering was provided by a steering wheel. [9]
The Train Scotte train ran on wooden spoked wheels with iron tires. The seats were also made of wood, passengers needed to bring a cushion. The machine was quite noisy. It could be heard coming from afar and some houses shook as it passed. Its speed wasn’t very high, 12 to 15 km/h, so there was time to admire the scenery.
When carrying only goods, up to 5 to 6 tons, its speed was reduced to 6 to 7 km/h.
The experiment failed. The attempt to use the ‘Train Scotte’ between Vievola and Ventimiglia was abandoned quite quickly, probably no more than a few weeks after it commenced: driving was difficult, damage to road surfaces occurred, the road gradients were steep. [2: p41]
Elsewhere, experimental journeys had mixed success. Steam road vehicles were slow and they faced serious competition from similar vehicles with internal combustion engines. For a very short time around the turn of the 20th century, these vehicles seemed to have a future but ultimately the experiment failed!
Jose Banaudo, Michel Braun and Gerard de Santos; Les Trains du Col de Tende Volume 1: 1858-1928; FACS Patrimoine Ferroviaire, Les Editions du Cabri, 2018.
What is France Doing: Fully Illustrated Account of Trails Now in Progress; in Commercial Motor; August 1905, p8-15. The report seems to relate, at least in part, to trials in 1897.
Contrary to what one might think, the name Scotte is not of English origin, but entirely French. Mr. Scotte was previously called Mr. Crotte. Tired of the dubious jokes, he had an S added before the C, then removed the R from the patronymic spelling of his name. [9]
In the first article about the line from Cuneo to the sea we covered the length from Cuneo to Vernante. The article can be found here. [9]
The Line South from Vernante to Limone
A schematic drawing showing the main locations on the line from Vernante to Limone. [17]
Banaudo et al write that “It was only in 1886, after the creation of the Rete Mediterranea, that the work on the fourth tranche from Vernante to Limone was awarded. It was 8,831 m long and had a gradient of 203 m, which was to be compensated for by a continuous ramp of up to 26 mm/m. This value would not be exceeded at any other point on the line. On this section, the rail remained constantly on a ledge on the steep slope on the right bank of the Vermenagna, where it was anchored by eleven bridges and viaducts totaling sixty-three masonry arches, as well as nine tunnels with a combined length of 4,416 m, or just over half the route:” [1: p28]
the Tetti-Chiesa tunnel which is 122 m long;
the Elicoidale tunnel (the Vernante Spiral tunnel) is 1,502 m long;
the Rivoira viaduct has fourteen 15 m arches and one 23 m arch;
the Rivoira tunnel is 251 m long;
the Santa Lucia viaduct has three 12 m arches;
a short span masonry arch over a minor road;
the Santa Lucia-Noceto tunnel is 348 m long with two openings;
the Noceto viaduct has six 8 m arches;
the Marino viaduct has two 8 m arches and two 12.50 m arches;
the Marino tunnel is 202 m long;
the Mezzavia viaduct, three 11 m arches;
the Mezzavia tunnel is 444 m long;
the bridge over the Ceresole valley has two 10 m arches;
the Boglia tunnel is 1,086 m long;
the San Bernardo viaduct over the Sottana valley has two 6 m arches and three 10 m arches;
the Cresta-Molino tunnel is 335 m long;
the Boschiera viaduct has twelve 10 m arches;
the Rocciaia tunnel is 126 m long;
the Rocciaia bridge is a single arch;
the first Rocciaia viaduct has four 8 m arches;
the second Rocciaia viaduct has eight 8 m arches.
We start this next length of the journey at Vernante Railway Station and head Southeast.
A plan of Vernante Railway Station. [10]Vernante Railway Station: the route to Limone leaves at the bottom-right of this image. [Google Streetview, July 2025]The view Southeast from the station car park, after demolition of the old goods shed. The main station building features at the centre of the image. [Google Streetview, June 2025]The main station building at Vernante seen from the West. [Google Streetview, June 2025]
Photographs showing the station building and the goods shed prior to its demolition can be seen here. [58] “Inaugurated in 1889, the station served as the terminus for the Cuneo-Ventimiglia line for nearly two years, until it was extended to Limone Piemonte. The passenger building features classic Italian architecture, with two levels. It is square, medium-sized, and well-maintained. Its distinctive feature is the two murals depicting scenes from the Pinocchio fairy tale, adorning its façade. The lower level houses the waiting room and self-service ticket machine, while the upper level is closed.” [58]
A photograph from the cab of a Cuneo-bound train arriving at Vernante. The passenger building is on the left with the goods shed beyond. [8]
The view from Via Frederi Mistral which passes over the tunnel mouth at the Southeast end of Vernante Railway Station. [Google Streetview, June 2025]
The very short tunnel (Tette-Chiesa, 122 metres in length) at the Southeast end of Vernante Railway Station. [Google Maps, July 2025]
The southern portal of the Tette-Chiesa Tunnel seen from a Cuneo-bound train. Immediately beyond the far portal trains would have to stop to manually engage a point for the running line or the train would end up on the safety siding provided for runaways on the steep downward gradient. [8]
The large retaining wall on the left of this image supports the railway as it runs immediately adjacent to the E74/SS20 but at a higher level. [Google Streetview, June 2025]The height of the retaining wall decreases as the E74/SS20 gains height. [Google Streetview, June 2025]
Banaudo et al comment: “Leaving Vernante, the track describes a complete spiral loop at Rivoira, which allows it to rise about fifty metres over a circular length of two kilometres. This loop includes the 1,502 m long ‘Elicoidale’ tunnel, which was completed on 30th December 1889, and the imposing viaduct over the Salet torrent. With its fifteen arches, from the top of which the rail dominates the lower level of the loop by 45 m, this structure can be considered by its proportions as the most imposing of the whole of line. [25] It is built entirely of cut stone, with the exception of the intrados of the arches which are of brick, and its seven central arches are reinforced at their base by a series of arcades forming an additional level, following a technique very popular in the 19th century.” [1: p30] The lower arcades are seen clearly in the 1929 postcard below.
This photograph is taken from the road at the point that the E74/SS20 begins to turn away from the lower railway (which can be glimpsed through the undergrowth) the viaduct high above both the road and the railway comes into view. This view looks North from the E74/SS20. A spiral tunnel allows the railway to gain height at this location. [Google Streetview, June 2025]This satellite image shows the portals of the Spiral tunnel to the East of Vernante. The line leaves Vernante Station and passes through a short tunnel before running alongside the E74 ‘Corso Torino’ to another tunnel mouth to the West of the side road. The line then climbs as it circles under that road twice and reappears high above the first length of line towards the top-left of this image. The height gained then means that the line needs to pass over a high viaduct before once again entering a tunnel (the Rivoira Tunnel) and then, at the bottom-right of the image, crossing another side valley on a bridge. [Google Maps, July 2025]OpenStreetMap shows the same location and illustrates the spiral tunnel quite well. [44]The lower portal of the spiral tunnel with the high viaduct (Rivoira Viaduct) visible to the left. [11]
The portal of the spiral tunnel at the top-left of the satellite image above, seen from a Cuneo,-bound train. Trains heading for Tende and beyond gained height while turning through 360 from the tunnel portal shown in the image immediately above. [8]
The Southeast portal of the short tunnel at the bottom-right of the satellite image above. This is the Rivoira Tunnel. [8]
The Santa Lucia viaduct just to the Southwest of Rivoira Tunnel. [8]
Between the Rivoira Tunnel and the Santa Lucia & Noceto Tunnel, the line crosses a minor road serving a few small hamlets. [Google Streetview,
The Santa Lucia & Noceto Tunnel runs diagonally across this extract from Google’s satellite imagery. [Google Maps, July 2025]
The Southeast Portal of the Santa Lucia & Noceto Tunnel seen from the cab of a Cuneo-bound train. [8]
The Noceto Viaduct to the Southeast of the Santa Lucia & Noceto Tunnel spans a local stream. [8]
This bridge is a short distance further Southeast. [8]
The Marino Viaduct further to the Southeast. All these views look towards Vernante and are taken from the cab o a Cuneo-bound train. [8]
The Southeast portal of the Marino Tunnel. [8]
Another viaduct over a short side valley to the Southeast of the Marino Tunnel, this is known as the Mezzavia Viaduct. [8]
The East portal of the Mezzavia Tunnel. [8]
Immediately to the East of the Mezzavia Tunnel the line bridges a stream before entering the Boglia Tunnel. The bridge spans the Ceresole valley. [8]
The view of the line looking West from Frazione Ceresole, above the West portal of the Boglia Tunnel. [Google Streetview, June 2025]
The Boglia Tunnel carries the line around a significant curve. This is the South-southwest portal of the tunnel from the cab of a train which has recently left Limone. Trains from Cuneo enter the tunnel traveling East and leave in a south-southwesterly direction. Just beyond the South-southwest portal the line bridges another side road serving a number of hamlets. It is the San Bernardo viaduct over the Sottana valley. [8]
The bridge shown in the image immediately above is at the centre of this satellite image. The tunnel to the North-northeast is Boglia Tunnel, that to the South-southwest is Cresta Molino Tunnel. [Google Maps, July 2025]
Looking East along the Sottana Valley, it is difficult to believe that the San Bernardo Viaduct has two 6 m arches and three 10 m arches, it is so well camouflaged by vegetation. [Google Streetview, June 2025]Looking West along the road through the structure, it is possible to see three of the five arches. [Google Streetview, June 2025]
The Cresta Molino Tunnel curves throughout its length (see below). Towards the South portal, it has an open gallery facing out into the valley. [8]
The Cresta Molino Tunnel curves form a South-southwest bearing to just to the East of South along its length. The gallery shown above is at its southern end. [Google Maps, July 2025]
The South portal of the Cresta Molino Tunnel is the South end of the gallery. [8]
After a very short length of track open to the elements, the line enters another short tunnel, the Rocciaia Tunnel. This tunnel is also on a curve with the line leaving the tunnel heading Southeast. [Google Maps, July 2025]
The Southeast portal of the Rocciaia Tunnel. After this tunnel the line crosses a bridge and two viaduct on its way into the station at Limone. [8]
The length of the line from Rocciaia Tunnel to the station throat at Limone is shown on the satellite image below. The parapet railings associated with the Rocciaia Bridge can be seen on the image of the South portal of the tunnel above. There are then two viaducts, as shown on the satellite image below. They cast shadows onto the valley side to the east of the line.
The bridge mentioned above, seen Looking Northwest from the cab of a Cuneo-bound train. [8]The viaduct immediately to the North of Limone Railway Station, also seen looking Northwest. [8]
Limone Piemonte as shown on OpenStreetMap. Note the bridge at the South end of the station site and the tunnel that trains enter soon after crossing that bridge. [18]
The good shed at Limone Station with the passenger facilities beyond. This image is a still from a video taken from a train heading for Breil-sur-Roya. [31]
Limone Railway Station as it appears on Google’s satellite imagery. [Google Maps, July 2025]
Looking North from the end of Via Colonello Domenico Rosetto.The goods shed is close to the centre of this image. [Google Streetview, June 2025]Limone Railway Station building and forecourt. [Google Streetview, June 2025]
A few more photographs of Limone Railway Station can be found here, [22] here, [23] and here. [24]
Express services took 1 hour 30 minutes to travel from Cuneo to Limone, mixed goods and passenger trains were scheduled to take 2 hours. Services from Limone to Cuneo were scheduled for 1 hour 20 minutes and 1 hour 50 minutes respectively [1: p31]
Banaudo et al tell us that a single third class ticket between Cuneo and Limone cost 1.65 lire. The service was deemed to be a local service and as a result the RM allocated older stock to the line, “consisting mainly of single-axle coaches, side door stock, and brake vans acquired from other companies. Traction was provided by 030 [in the UK these would be 0-6-0] locomotives coupled to two- or three-axle tenders, from the RM 3201 to 3550 series (future 215 FS Class),” [1: p31] out-stationed to the Cuneo shed by the Turin Shed. These locos had a range of different manufacturers in Italy, France, Belgium, Great Britain, Austria and Germany. [1: p31]
The construction costs for the length of line from Cuneo to Limone “did not exceed 10 million lire, a remarkable figure given the difficulty of the work and the number of engineering structures completed over nine years: nineteen bridges and viaducts, fourteen tunnels, and a large number of culverts, aqueducts, road overpasses and underpasses, and level crossings. The buildings of the seven stations are of classical design, conforming to the standard plans with hipped roofs used in Italy, as are the twenty-four ‘caselli’, roadside houses, distributed along the line near the level crossings and the main underpasses to house the track maintenance workers and their families. The bridges and viaducts, with the exception of two brick structures, are made of stone masonry with brick arch vaults and metal angle railings. The single track tunnels are lined with brick vaults and dressed stone portals, except where the solidity of the ground allows the exposed natural rock to be preserved.” [1: p32]
Banaudo et al note that “the first years of operation were not easy, … snow and falling rocks sometimes hampered train traffic. On 2nd October 1898, following torrential rains in the high valleys of Piedmont, the Gesso overflowed and the bridge between Boves and Borgo-San-Dalmazzo was destroyed. By December, the installation of a temporary wooden bridge by contractor Salvatore Vignolo of Genova-Sampierdarena allowed service to be restored. A permanent structure would be rebuilt the following year in the form of a single-span 74-metre steel truss bridge.” [1: p32]
Limone to Vievola: Crossing the Col de Tende
The next length/tranche running South from Limone was 10.5 kilometres long and extended the line from Limone to Vievola(in the valley of the River Roya).
Looking into Limone Railway Station from the tunnel mouth South of the Station. A short two-span bridge
At the South end of the Limone Station site the railway bridged Piazza Risorgimento/Viale Valleggia at the East end of Piazza Risorgimento and the River San Giovanni (Valleggia Torrent) on two adjoining bridges. [Google Maps, July 2025]The two bridges carrying the railway over both the road and the river. [Google Streetview, August 2011]
Omitting mention of the section of the bridge over the road, Banaudo et al tell us that, leaving Limone Station, “the line crosses the San Giovanni valley … on a 13-metre masonry single-arch bridge, then enters the 423-metre-long Limone Tunnel which passes under the San Secondo hill. A 26 mm/m gradient leads to the tunnel under the ‘Colle do Tenda’ … where the gradient eases to 2 mm/m as far as the highest point on the line, 1040 [metres above sea level, in the tunnel]. From this point a 14mm/m gradient extends to the South portal of the tunnel … at 990 [metres above sea level]. At the Southern end of the tunnel, … a single-span 19.90 m steel truss bridge crosses the Roya River. … A short 25 mm/m slope then leads to Vievola Station.” [1: p34]
The railway is protected by two galleries at the South end of Limone Tunnel. The first effectively extends Limone Tunnel southwards. This is the South portal seen from a train approaching Limone Railway Station. [8]
Also seen from the South from the cab of the same train, this is the South portal of the Short second gallery. The gallery entrance to the tunnel above can be seen only a very short distance beyond this gallery to the North. [8]
A level-crossing on the line just to the South of the galleries illustrated above and also seen from a Limone-bound train. [8]
The northern approach to the tunnel under the Col de Tende as it appears on Google’s satellite imagery. Sadly, the tunnel mouth, in the top-left quadrant of this image, is in shade. [Google Earth 3D, July 2025]
Open Streetmap shows the line heading South into the tunnel. [32]
This image shows the North Portal of the tunnel under the Col de Tende. It is taken from the cab of a train heading for Breil-sur-Roya in the late 20th century. [31]
Interestingly, the two tunnels on this length of the line are large enough to accommodate two tracks – this facilitates ventilation but also allows room for expansion should traffic levels later require it. [1: p34]
Another schematic drawing which this time shows the main locations on the line from Limone to Vievola. [17]
While all the previous construction tranches ended up in populated locations, Vievola was just a place name in the commune of Tende with a few farms and a chapel dedicated to the Visitation of the Madonna scattered in a small green area at the confluence of the Roya and the Dente rivers. Nowhere was available to house workers on the railway. So before works began at the southern end of the tunnel under the Col de Tende, the contractor had to construct a temporary village.
After initial surveys were completed late in 1889, tunneling under the Col de Tende began at both ends. Banaudo et al explain that the 8.1 kilometre tunnel passed through various different strata: “Jurassic, Triassic and Cretaceous limestone, Permian quartz, Liassic marly schists and Eocene sandstone. The work progressed normally until September 1893, when the works reached a dislocated gneiss bed interspersed with clayey layers made fluid by the infiltration of water from the Roya, whose bed passes three times above the axis of the tunnel. Soon, mud floods invaded the approach tunnel with each attempt to advance over the course of ten months. The working face advanced only a dozen meters, while some forty flows of various materials obstructed the tunnel, sometimes over a length of 40 metres, while the vault suffered as much as 1.7 metres subsidence in places.” [1: p32][33]
The works from the South were suspended in July 1894 about 1.6 km from the tunnel mouth. Attempts were made to divert ground water from the route of the tunnel with little success and a further collapse occurred in October 1894. [33]
Meanwhile, work progressed from the North until at about 2.7 km from the tunnel mouth ground water started entering the tunnel at a rate of 60,000 litres/minute. The bed of the River Royal above the tunnel began to collapse. The contractor admitted defeat and refused to continue work on the line. [1: p34][33]
After a few months delay and with the work now being undertaken by the state a renewed effort was made to take the work-faces forward. The solution was to bore the tunnel using compressed air drills inside a metal shield and with water being removed by a parallel collector channel. It took 470 days to progress the works beyond the difficult strata. Banaudo et al say that once work was 43 metres beyond the critical zone, the contract was handed back to the original contractor on 31st March 1896. The total delay was 34 months at a cost of 300,000 lire! [1: p34][33]
On 15th February 1898 at 1pm, the team working from the North end of the tunnel broke through the remaining rock to meet the team working from the South.Remaining contract works would mean that opening of the line between Limone and Vievola would not take place until 1st October 1900. [33][34: p116][1: p35]
When trains left the confines of the 8 kilometre tunnel their crews were probably grateful for the fresh air. I cannot imagine what it must have been like for the crews of steam engines on the line. Electrification could not come soon enough. “The tunnel was equipped with a two-wire contact line when the electrification of Cuneo Gesso – San Dalmazzo di Tenda line in three-phase alternating current 3.6 kV – 16⅔ Hz took place with electric traction starting from 15th May 1931.” [33][35: p171-172]
South of the tunnel, the railway crosses the River Roya before entering Vievola Railway Station.
This satellite image shows the line leaving the tunnel (at the very top of the image) and crossing La Roya (towards the bottom of the image). [Google Maps, July 2025]
It is not possible to see the tunnel mouth in this panoramic photograph taken from the E74 (D6204), nor is it possible to see the railway bridge over La Roya. The railway can be seen, as can the buildings close to the tunnel mouth on the East side of the line. The railway bridge over the river is behind the trees in blossom one a line from the camera to the red-roofed buildings. [Google Streetview, April 2008]As the E74 (D6204) descends along the valley of the Rya, the railway bridges it, adjacent to a road (off to the right of the picture) which serves Vievola Railway Station. [Google Streetview, October 2008]
The completion of the fifth contract still required the development of Vievola station. It was to be built on a large platform created using spoil from the tunnel works on a vast embankment formed from the tunnel spoil, with an underpass provided for the then SS20 (now E74/D6204) and shown above.
The approach to Vievola Railway Station from the South, as seen from the cab of a Northbound train. [8]
Banaudo et al tell us that, at the station, “The two platform tracks for passenger service were supplemented by two sidings and a dead-end track running alongside the goods shed and the military platform. At the western end of this section, a small wooden shed, an 8.50 m temporary turntable, a water tower, and two hydraulic cranes allowed locomotives to use this temporary terminus as they would at any terminus. In the same area, a wooden buffet building was built, which a shrewd manager, no doubt hoping to take advantage of the cosmopolitan movement of connecting passengers, dubbed a ‘restaurant’ in French.” [1: p40]
Vievola was a railway terminal for traffic to and from Piedmont and a hub for road connections onwards to Nice and Liguria. Banaudo et al point us to a magazine published in 1899, which mentions a trial of a steam-powered road vehicle which it was hoped would provide a service to Nice and the coast until such time as a railway was built. [1: p40][37] The service was a trial organised by the House of Ascenso et Cie, and ran from Vievola to Ventimiglia. The journey, lasted a total of six hours, including a 43-kilometre climb. The vehicles used were Scotte trains. The car wagon carries a 27-horsepower engine and seated 14 passengers; it also towed a second 24-seater wagon. [1: p40][38]
“Due to their slowness, the difficulties of driving cars on the narrow roads of the time and the damage caused to the cobbled and cylindered roads,” [1: p40] the ‘Trains Scotte’ were not a success, they probably did not circulate for more than a few months or weeks. ….
The next length of the line can be found here. [46]
RM 3201-3519 (FS 215)Locomotives
Banaudo et al tell us that throughout the 19th century and on into the 20th century passenger stock and freight wagons were unchanged. Improved 0-6-0 tender locomotives came available as they were delivered by the Breda and Mavag companies, these were more powerful and faster locomotives than the RM Nos. 3201 to 3519 (which became group 215.001 to 215.398 at the FS). They were given RM Nos. 3801-3868 (which became the FS 310 series).
Banaudo et al also comment that “genuine mountain locomotives made occasional appearances: these were 040s [ in UK annotation 0-8-0s] with a three-axle separate tender, series RM 4201 to 4487 (future series 420 FS), built from 1873 to 1905 based on an Austrian model by a dozen Italian, Belgian, German and Austro-Hungarian firms. These machines, reserved primarily for the main lines of the Alps and the Apennines, occasionally intervened on the Col de Tende line, during bridge tests for example. At this time, Cuneo still had no allocation of machines and those going up to Limone and Vievola were attached to the Torino depot and the Moretta shed, on the Cuneo Airasca line.” [1: p41]
An FS Class 420 locomotive. [41]
“In the early 1870s, the SFAI needed a locomotive suitable for heavy work on the most important mountain lines, such as the Giovi railway and the Turin-Modane railway, for which the 0-6-0 locomotives were becoming increasingly inadequate. The Ufficio d’Arte di Torino chose a 0-8-0 locomotive of the Wiener Neustädter Lokomotivfabrik (then known as “Sigl”), very similar to the Südbahn Class 35 a that it already produced.” [41][42: p190][43: p31]]
“The Class 420 was a typical long-boiler, inside-frame 0-8-0 locomotive of the era, that showed its Austrian derivation with its two-shutters smokebox door, and its outside Stephenson valve gear. The locomotives built before 1884 had the distinction of having curved foot plating over the wheels, while later units had straight foot plating and small splashers. Some of the locomotives were given a replacement boiler before 1914, but their performance remained mostly unchanged.” [41][43: p31]
“The first 60 locomotives were built by Sigl (from which they derived the nickname with which they were known for their whole career) for the SFAI. Production continued until 1890, from both foreign (such as Maffei) and Italian firms (such as Ansaldo and Breda), for a total of 189 locomotives; all these were divided in 1885 between the Rete Adriatica and the Rete Mediterranea. Building of further locomotives for the RM resumed in 1897, and continued until 1905, bringing the total of the Class to 293.” [41][42: p190-192]
References
Jose Banaudo, Michel Braun and Gerard de Santos; Les Trains du Col de Tende Volume 1: 1858-1928; FACS Patrimoine Ferroviaire, Les Editions du Cabri, 2018.
Jose Banaudo, Michel Braun and Gerard de Santos; Les Trains du Col de Tende Volume 2: 1929-1974; FACS Patrimoine Ferroviaire, Les Editions du Cabri, 2018.
Jose Banaudo, Michel Braun and Gerard de Santos; Les Trains du Col de Tende Volume 3: 1975-1986; FACS Patrimoine Ferroviaire, Les Editions du Cabri, 2018.
Structures on the french side of the border would, when built, compete with the dimensions of the Rivoira Viaduct. The Eboulis Viaduct is 270 metres long and the bridge at Saorge is 60 metres high. However, the combination of these two dimensions (length and height) makes Rivoira Viaduct the most imposing on the line.
Franco Collidà; 1845-1979: the Cuneo-Nice line year by year; in Rassegna – Quarterly magazine of the Cassa di Risparmio di Cuneo , No. 7, September 1979; p12-18.
Franco Collidà, Max Gallo & Aldo A. Mola; “Cuneo-Nizza: History of a Railway; , Cassa di Risparmio di Cuneo, Cuneo (CN), July 1982.
Industrialist Joanny Scotte, originally from Epernay in the Marne department, began his business in the mid-1880s producing steam-powered cars. From 1897, he offered road trains consisting of a tractor or a steam-powered car, pulling one or more trailers designed for the transport of passengers or goods. These vehicles travelled on roads using solid tyres. They never really went beyond the experimental stage due to their slowness, the difficulties of driving the vehicles on the narrow roads of the time and the damage caused to the cobbled and cylindered roads. [1: p40] Scotte road train services were reported in the last decade of the 19th century in the Île-de-France region (Fontainebleau, Pont-de-Neuilly, Courbevoie), in the Aube region (Arcis-sur-Aube – Brienne-le-Château), in the Manche region (Pont-l’Abbé-Picauville – Chef-du-Pont), in the Drôme region (Valence – Crest), and for military use. Scotte partnered with the Lyon-based car manufacturers Buire and Audibert-Lavirotte to produce some of its vehicles. [1: p41]
Giovanni Cornolò; Locomotive a vapore; in TuttoTreno (in Italian), May 2014.
P. M. Kalla-Bishop; Italian state railways steam locomotives: together with low-voltage direct current and three-phase motive power; Tourret, Abingdon, 1986.

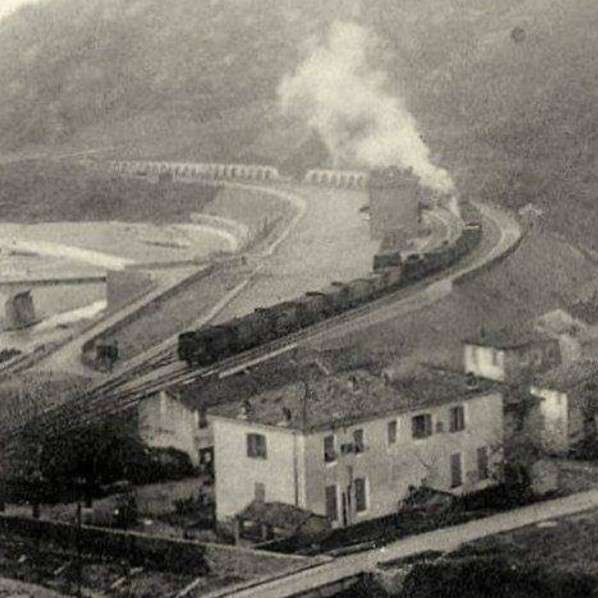
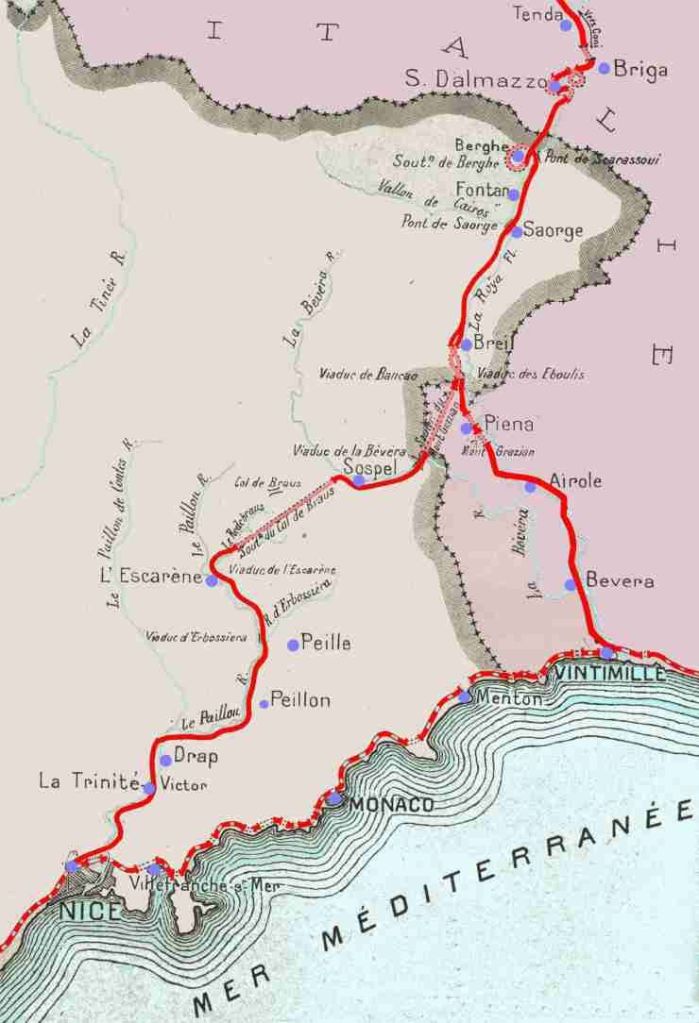
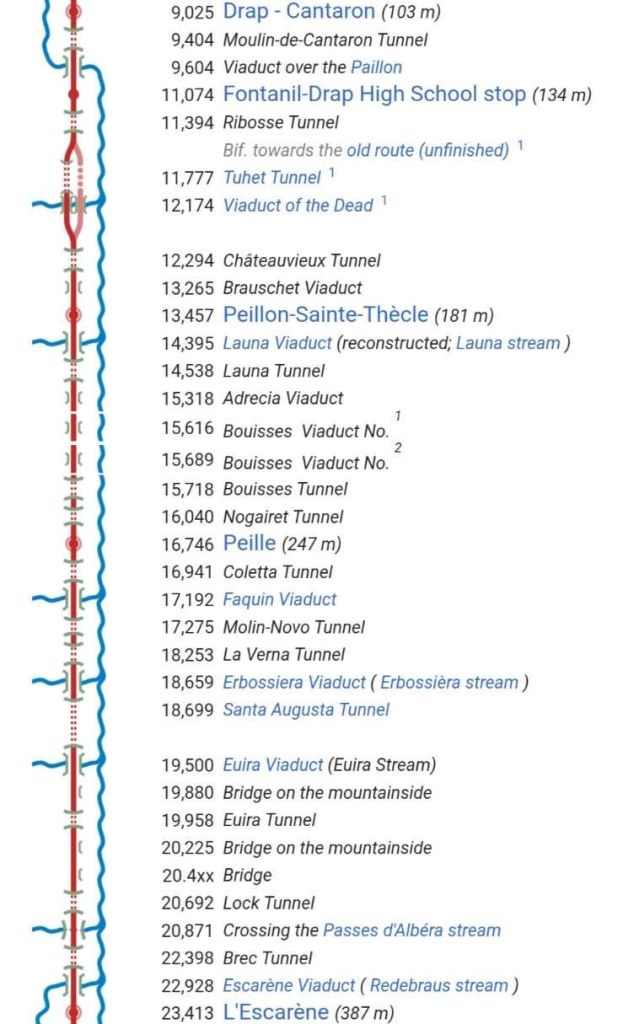
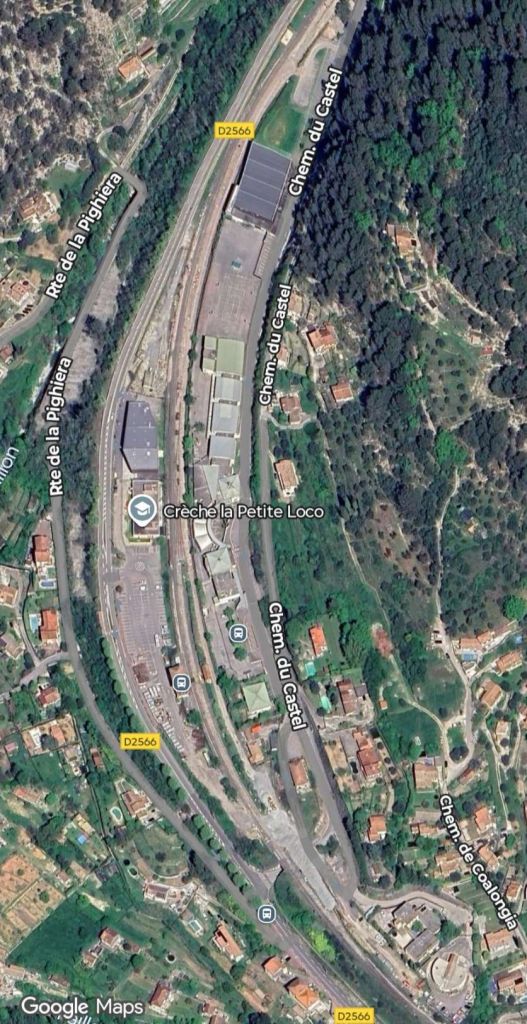
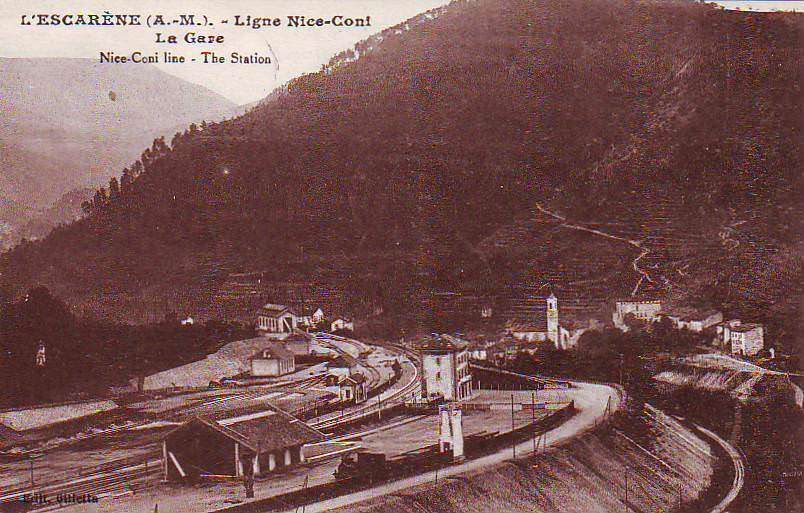
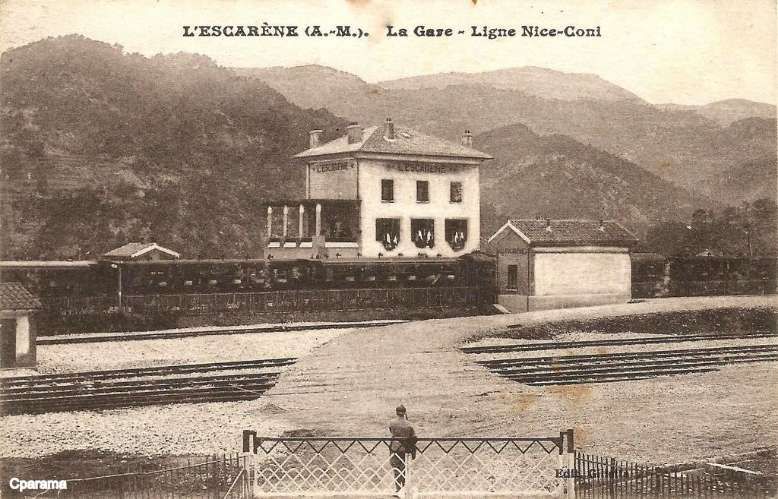
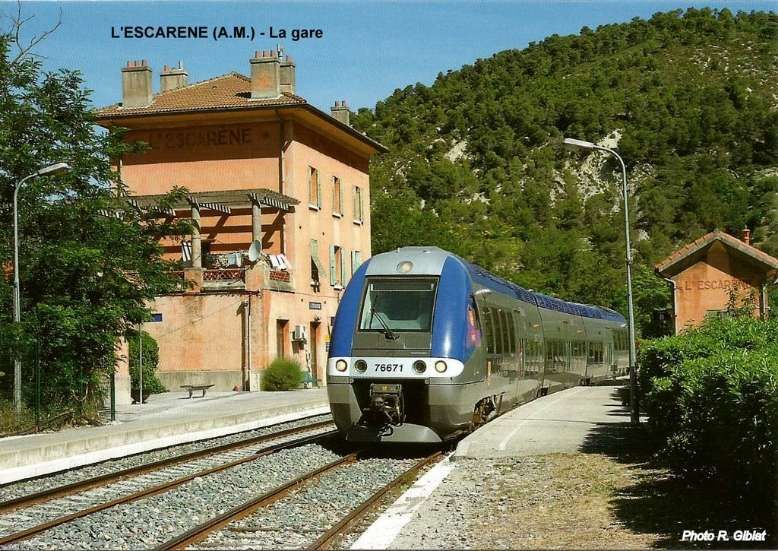
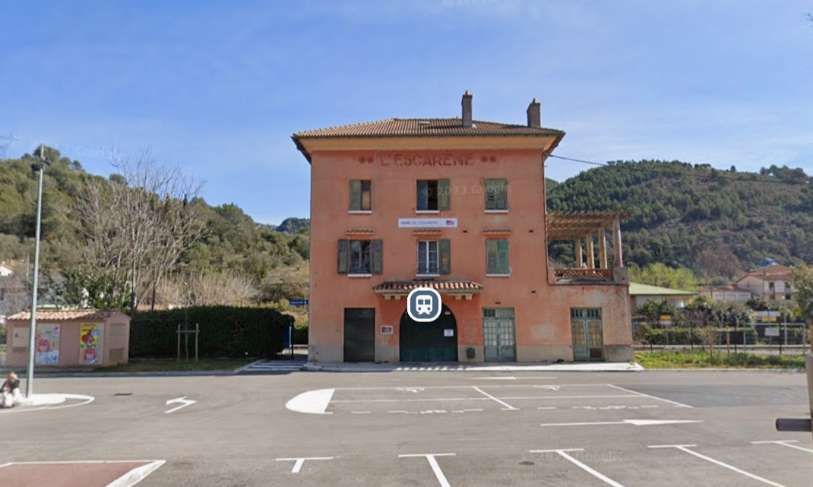
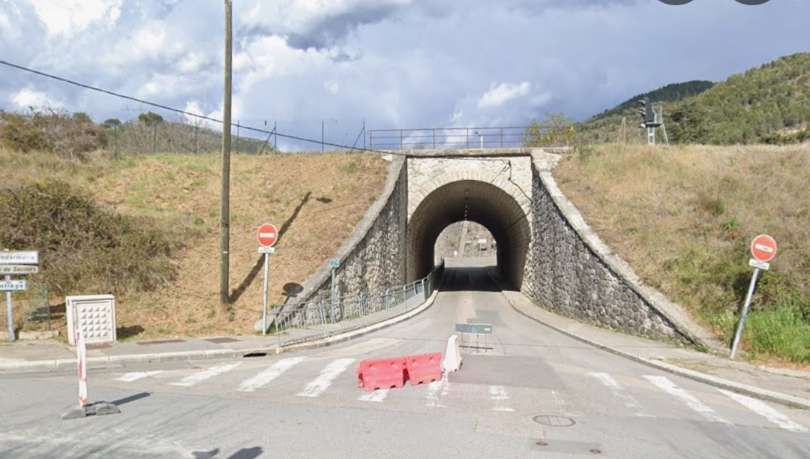
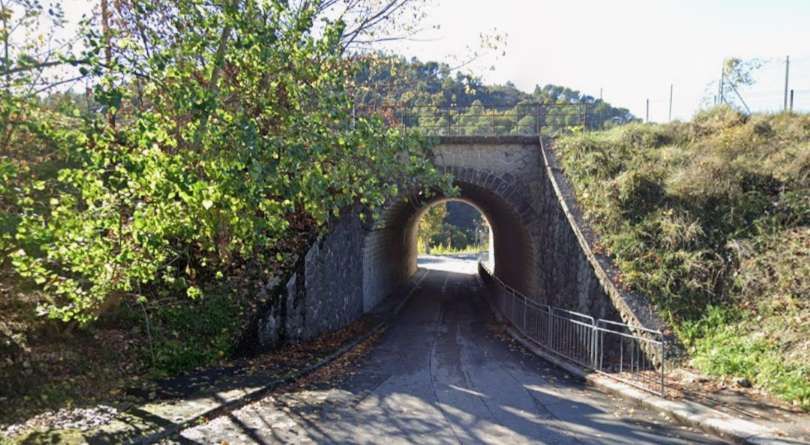
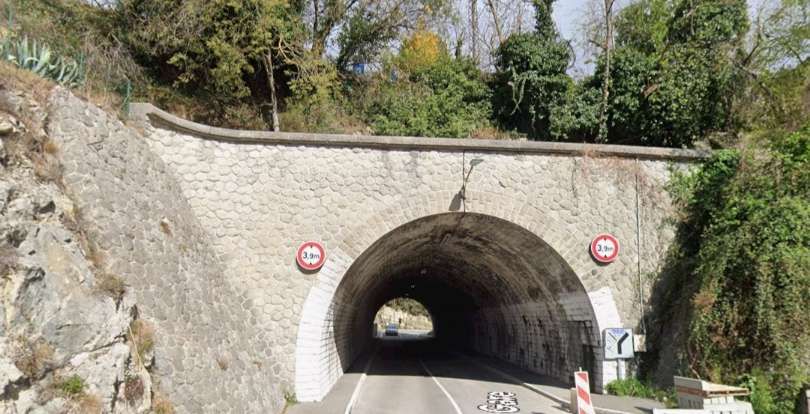
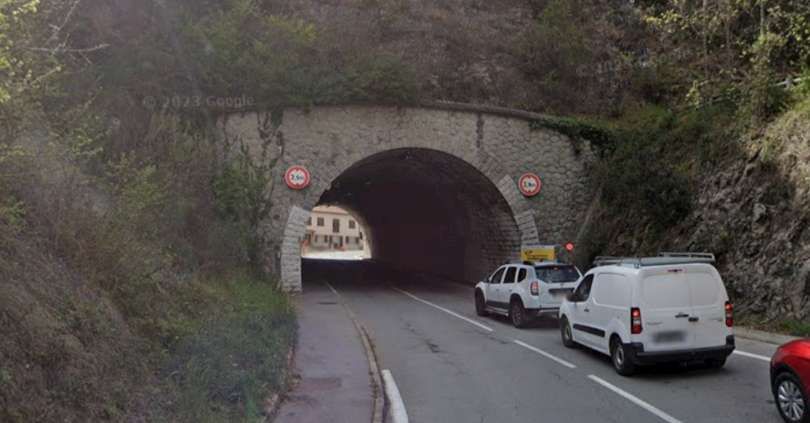
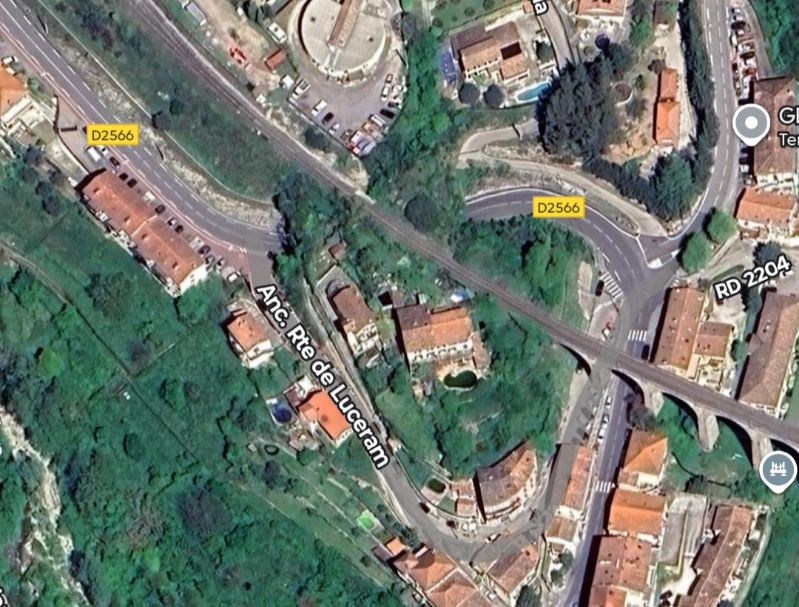
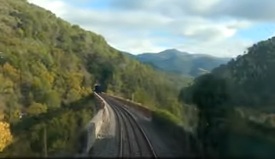

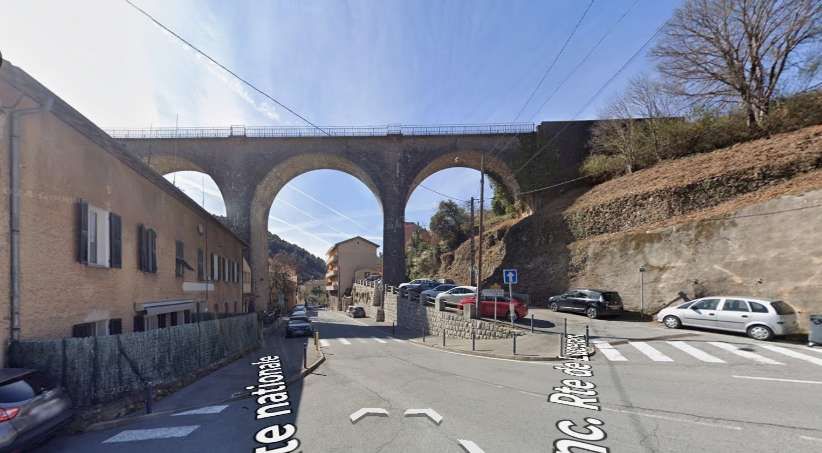
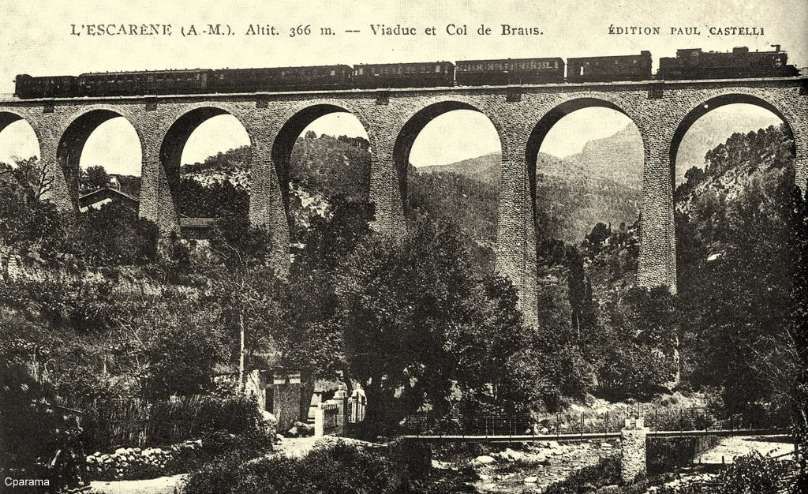
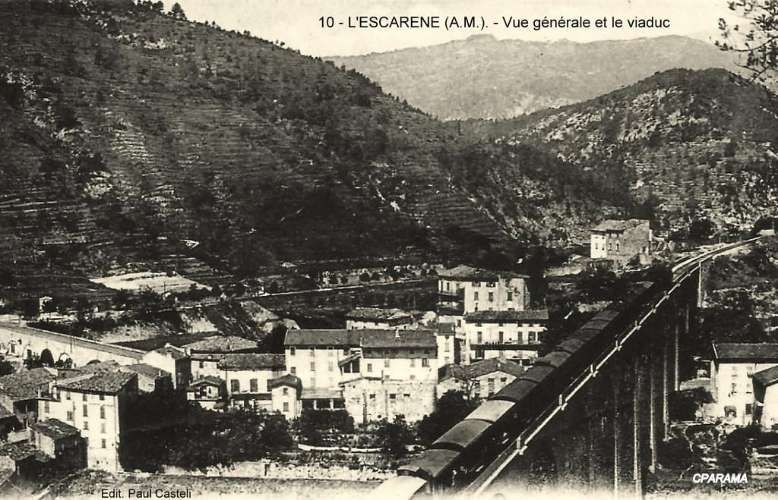

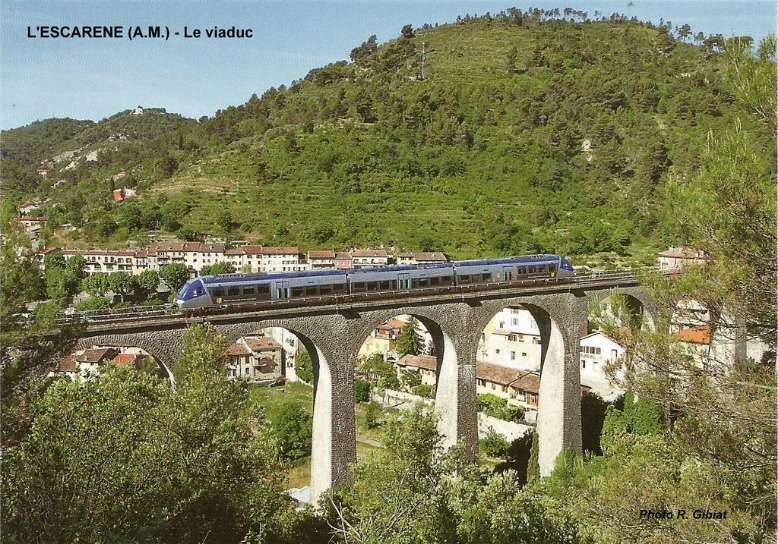
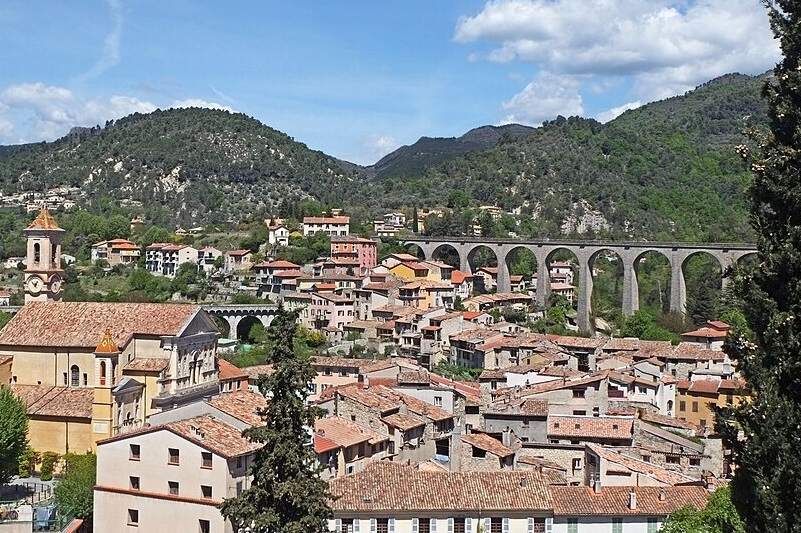
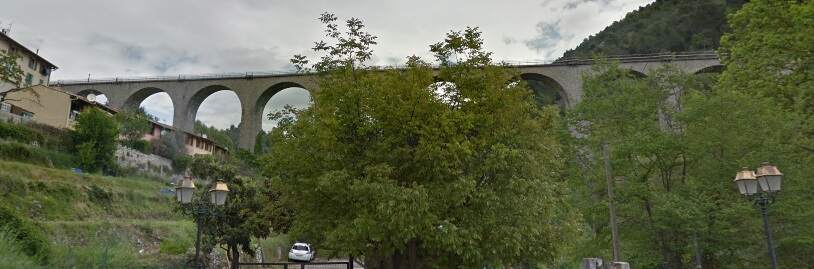
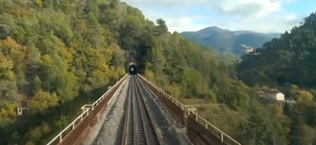
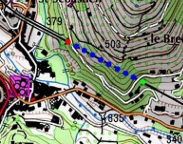
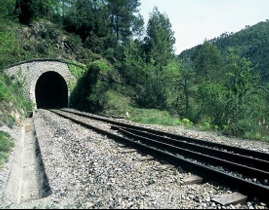
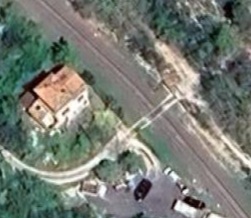
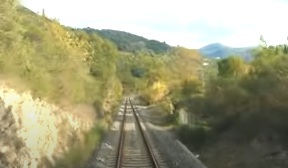
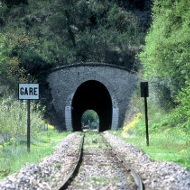
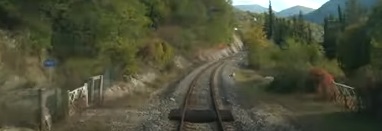
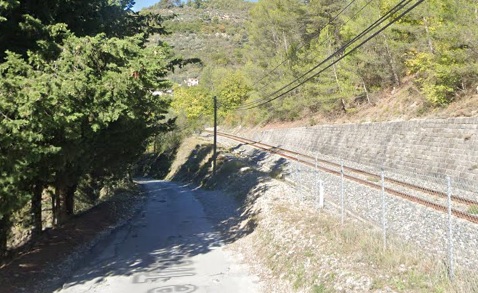

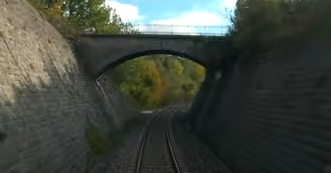

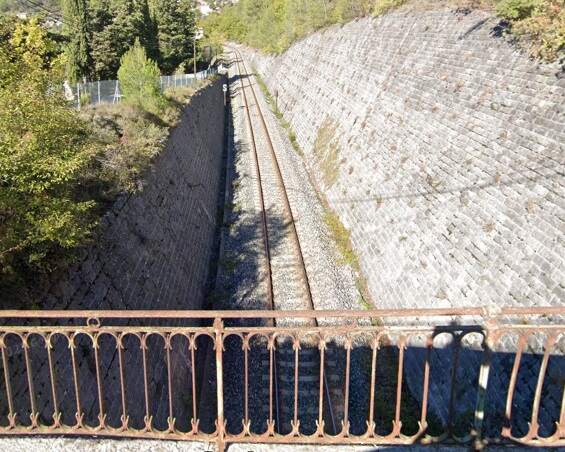
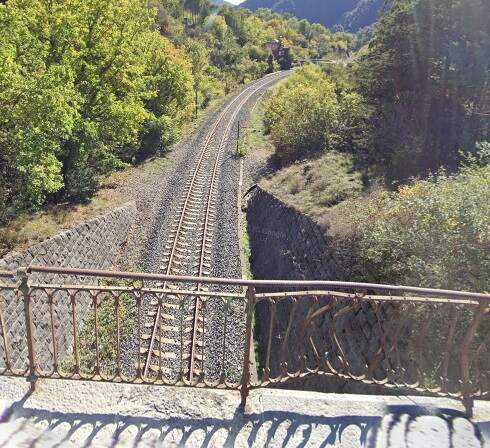
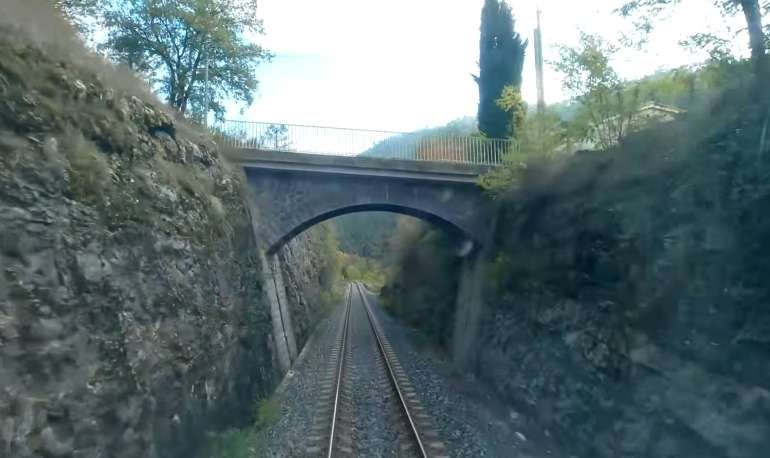
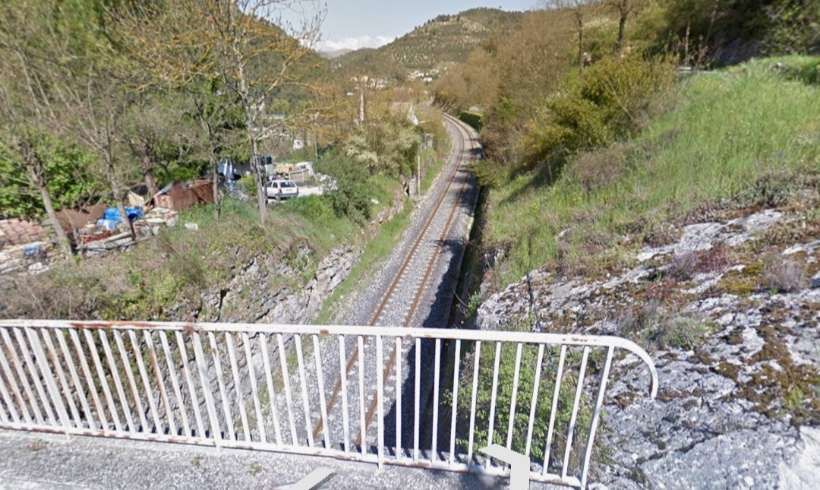
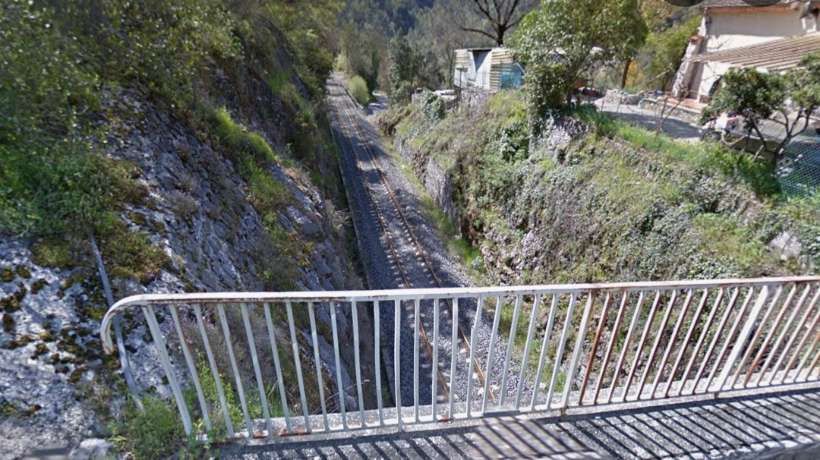
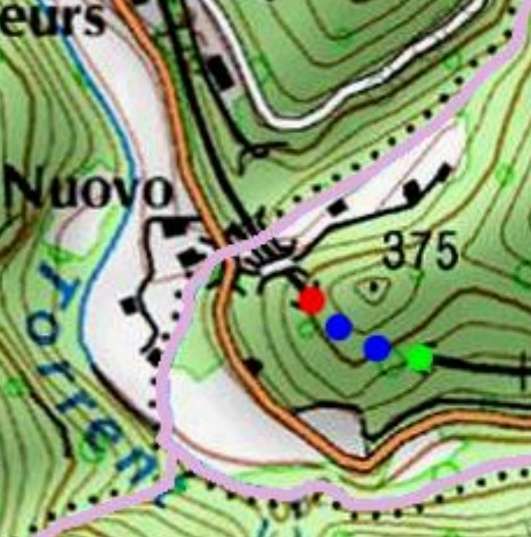
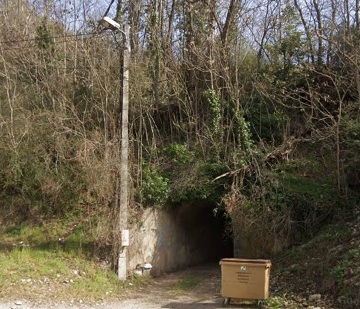
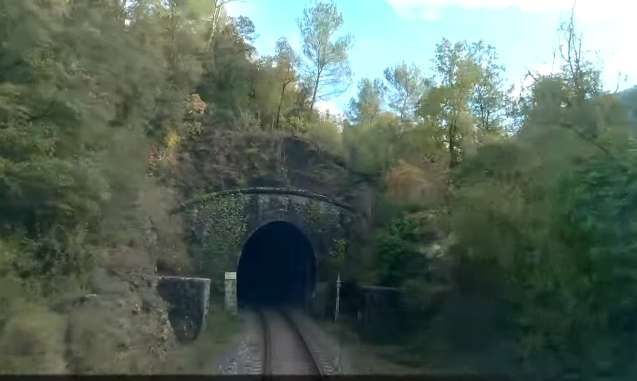
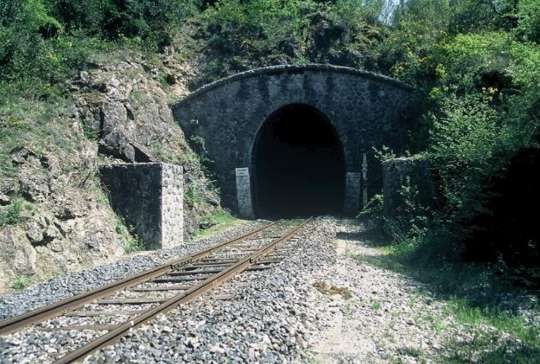
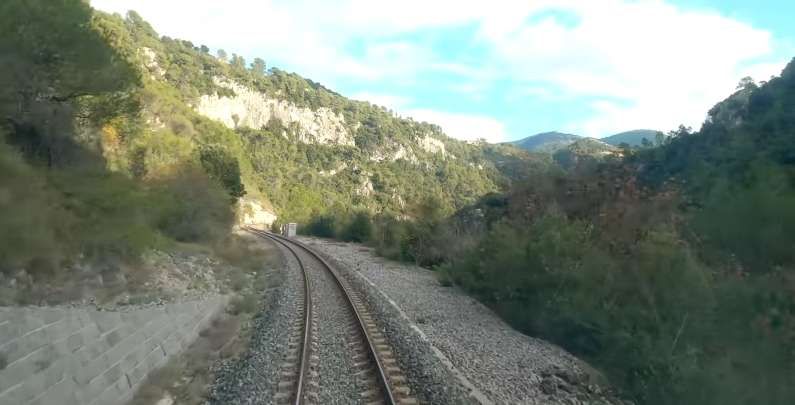
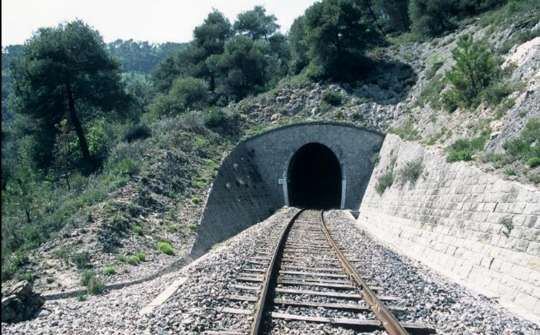
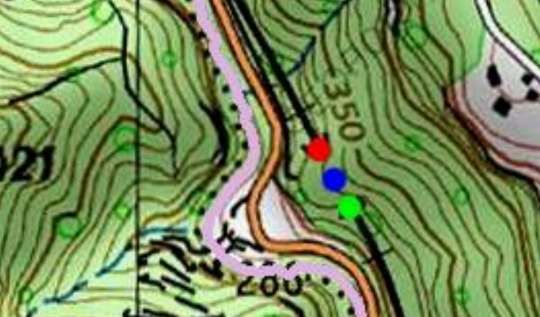
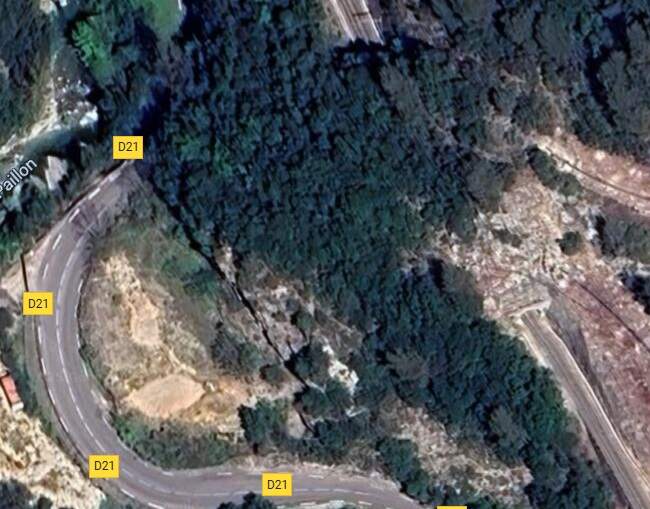
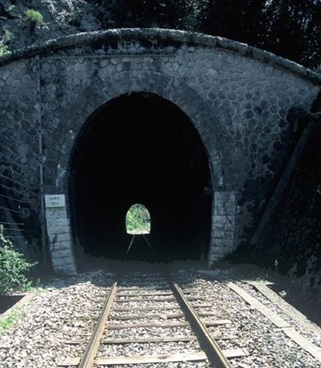
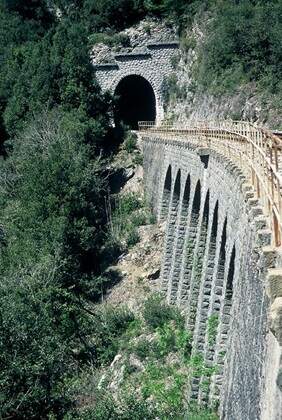
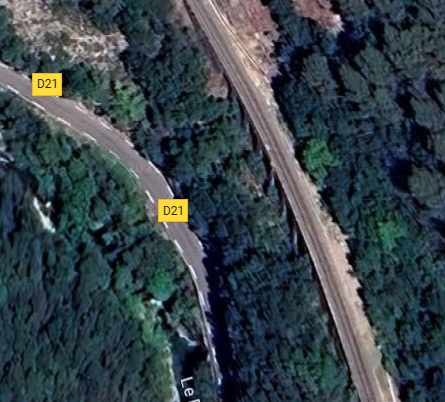
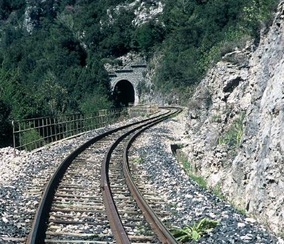
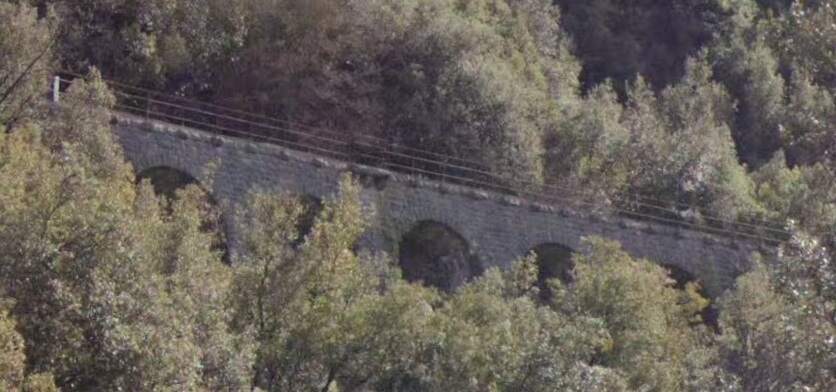
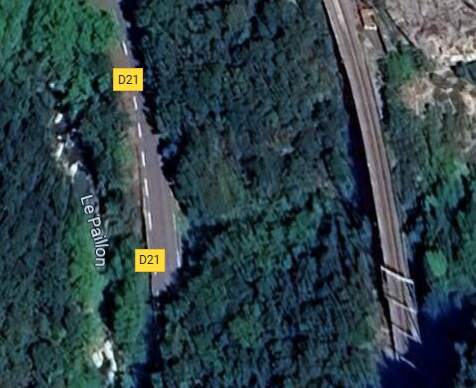
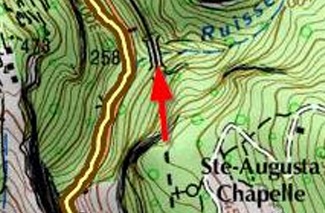
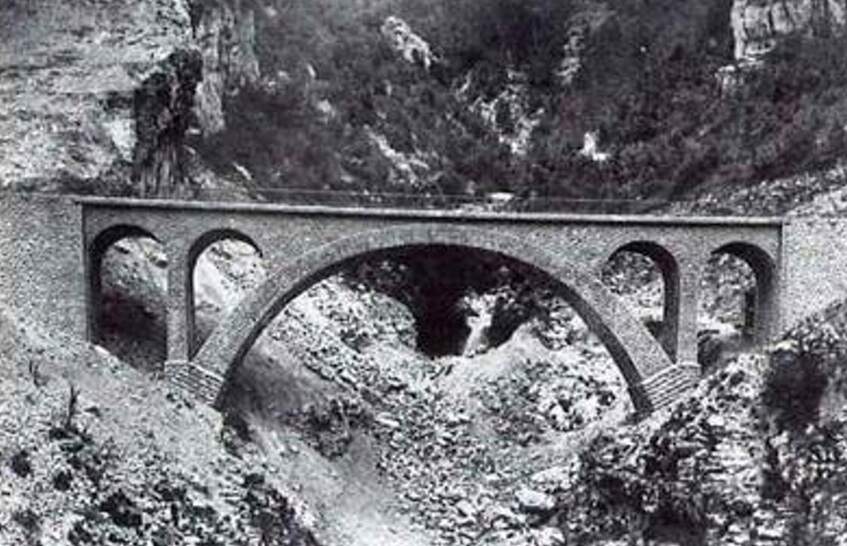

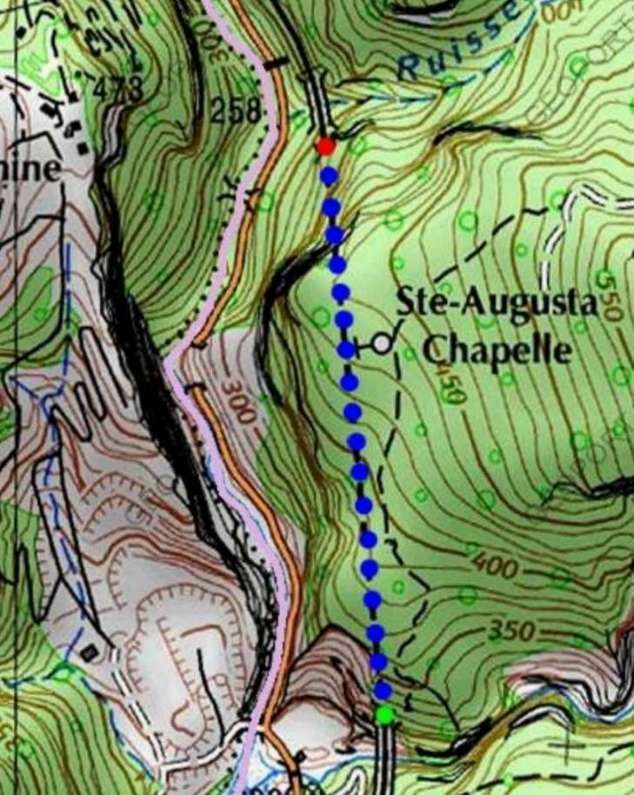
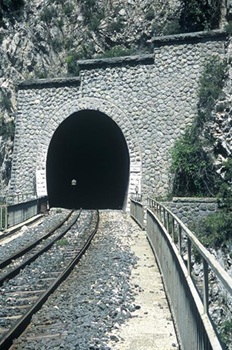

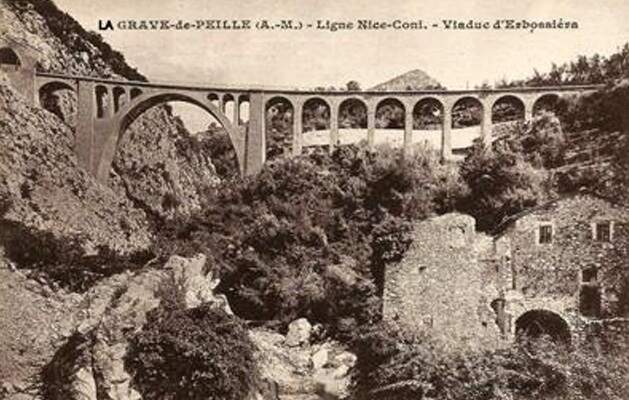
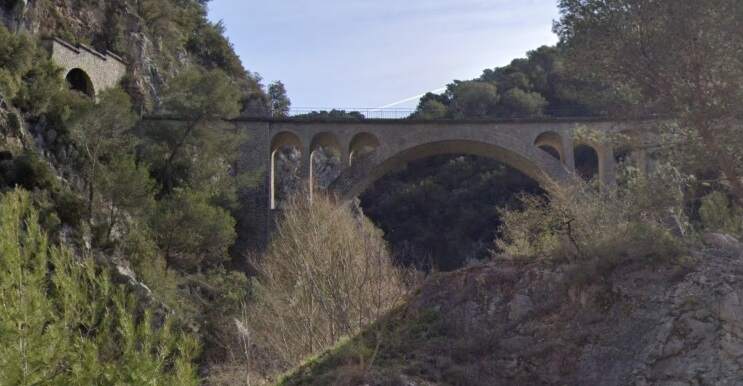
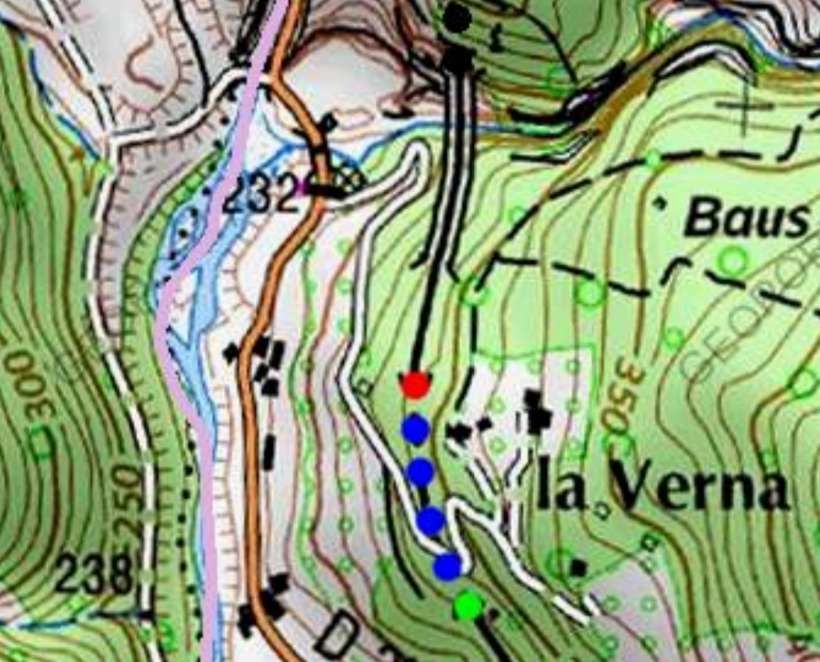
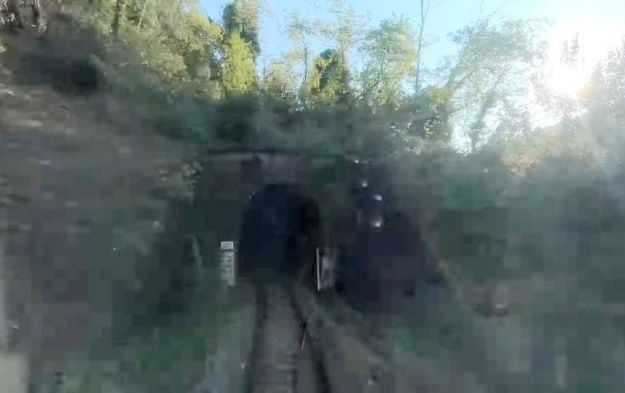
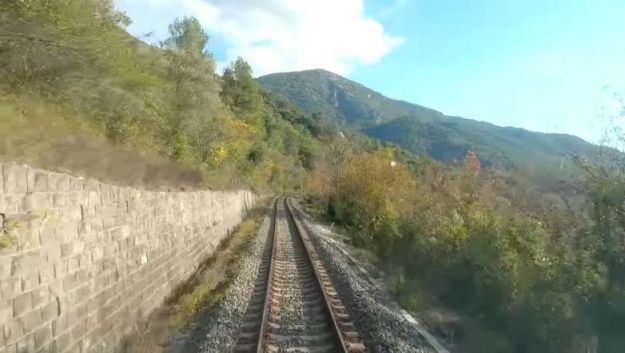
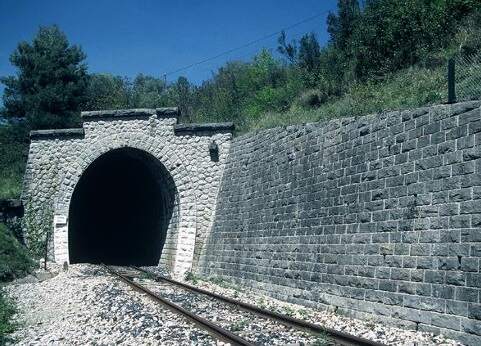
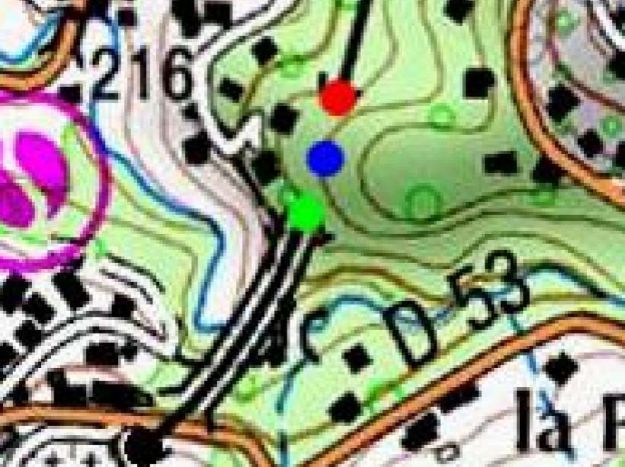
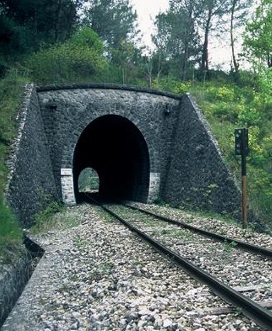
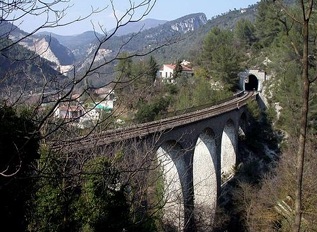
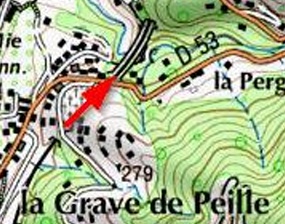
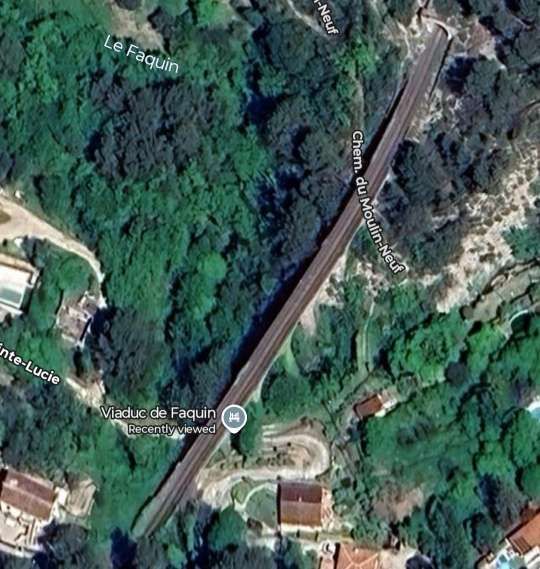
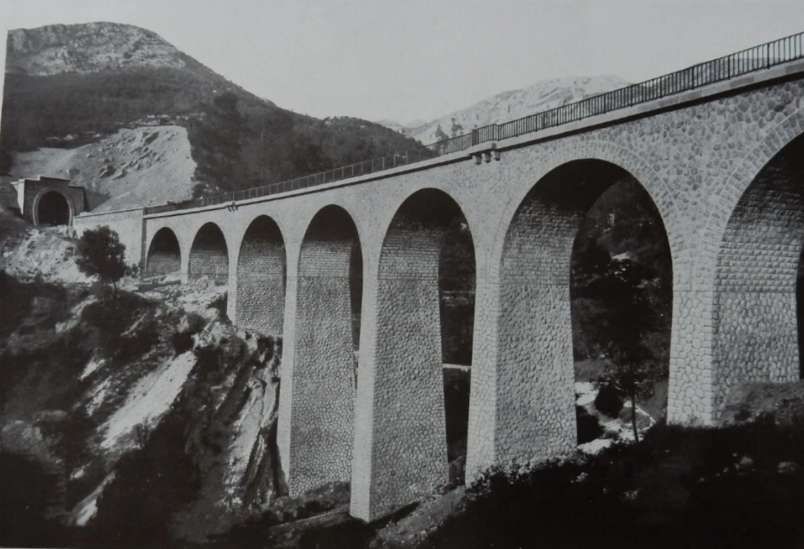
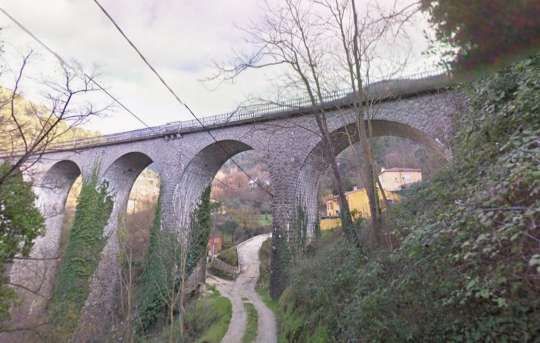
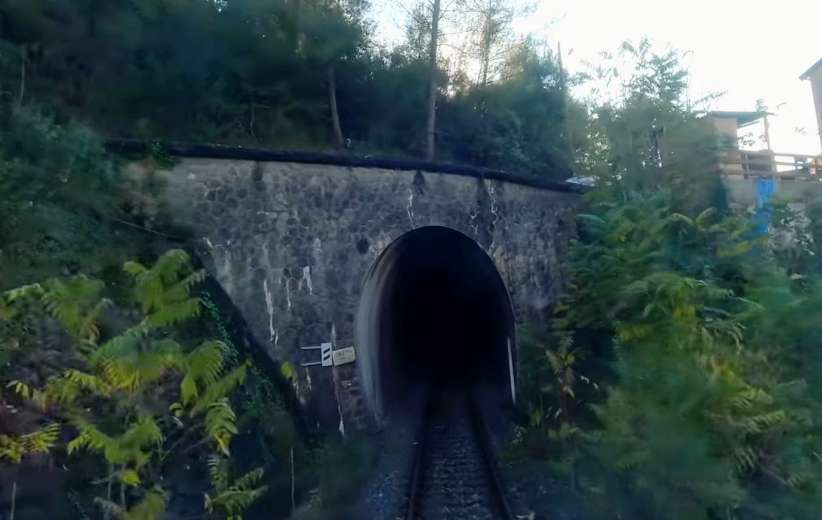
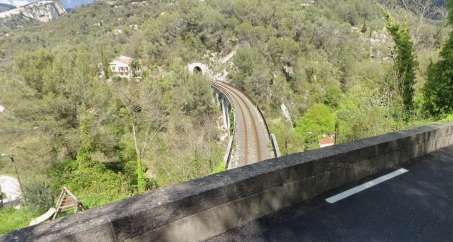
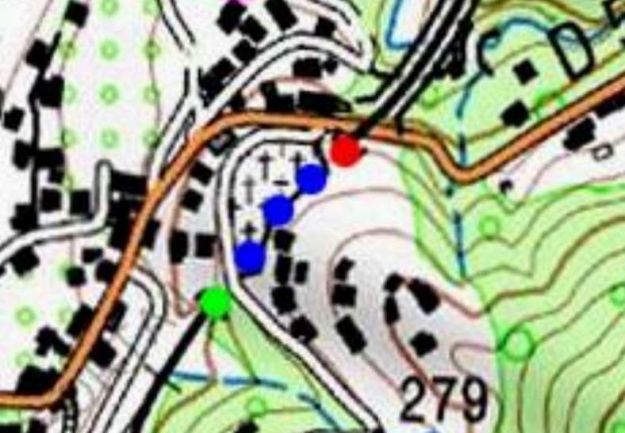


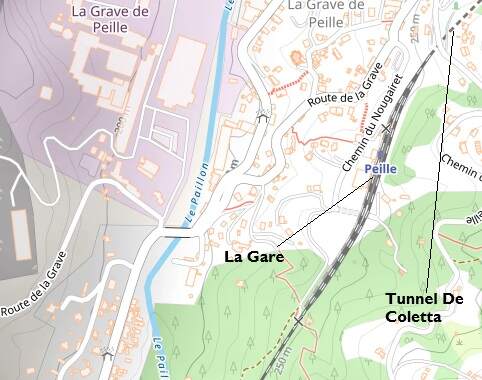
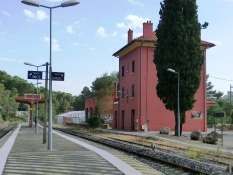
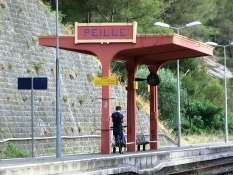
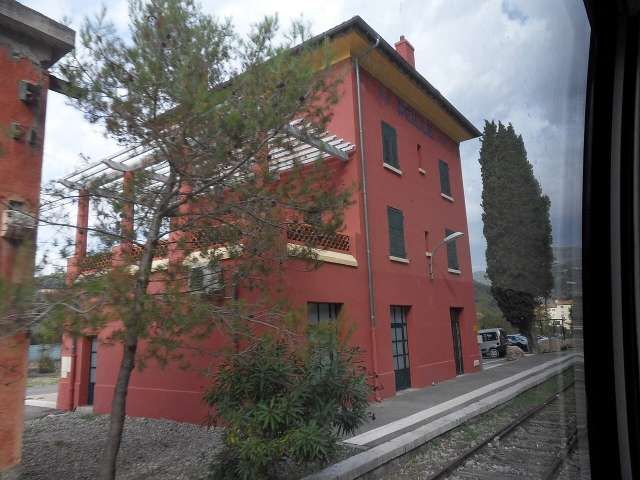
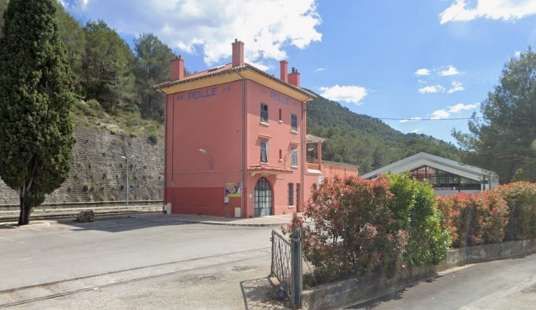
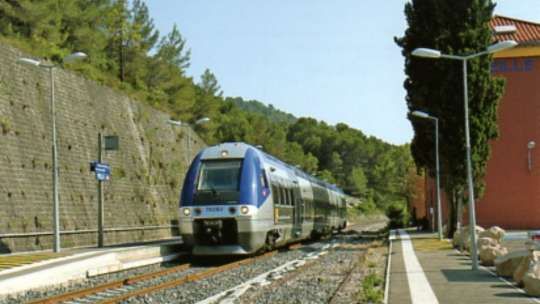
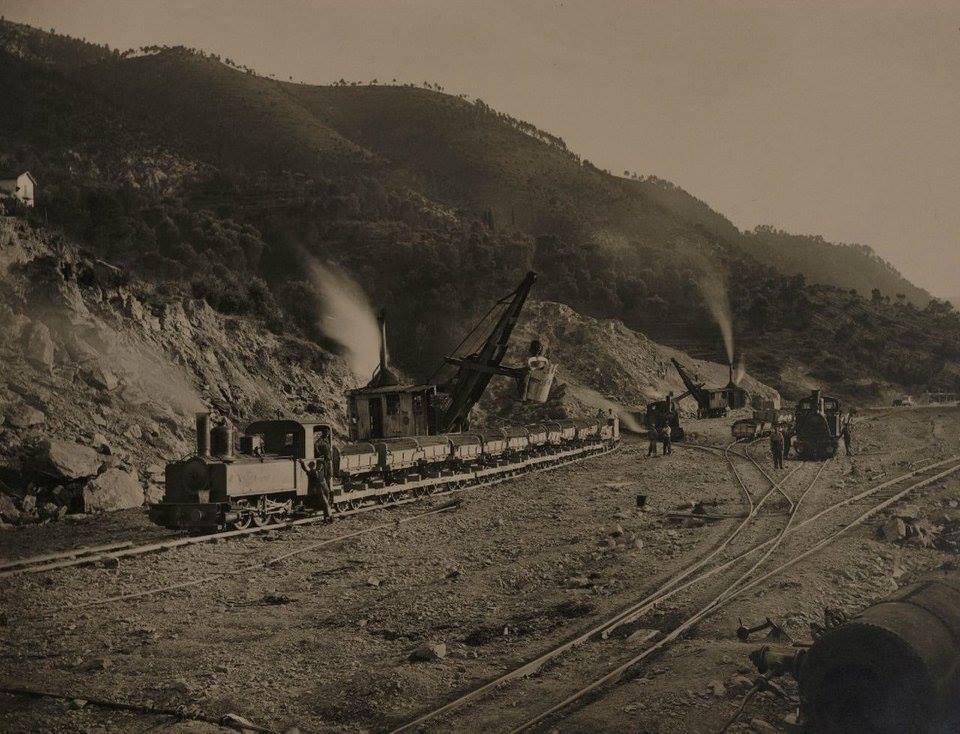
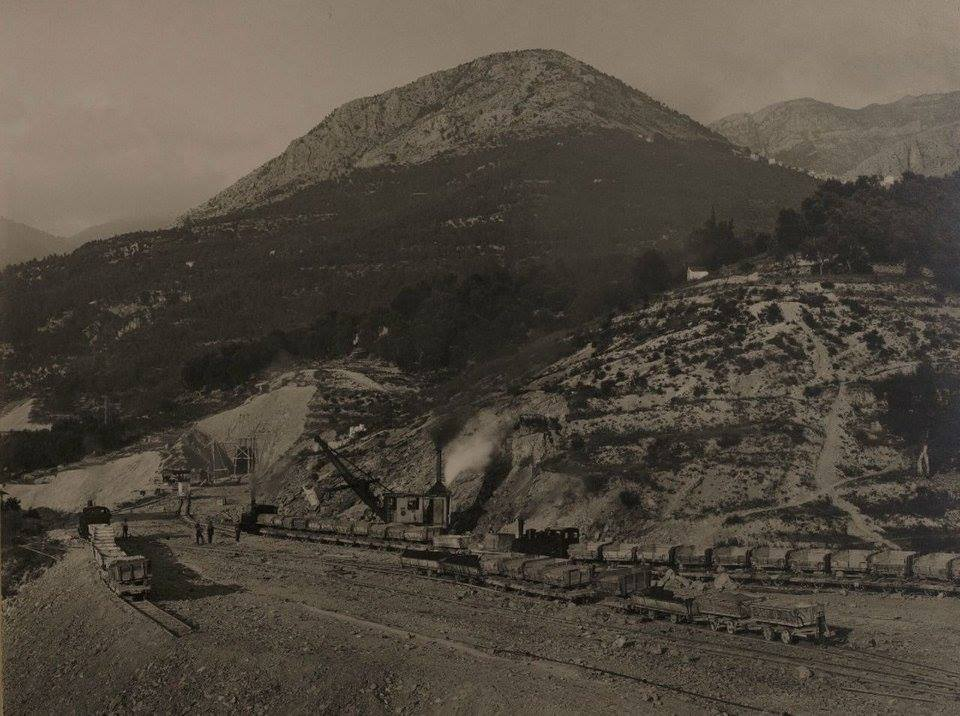

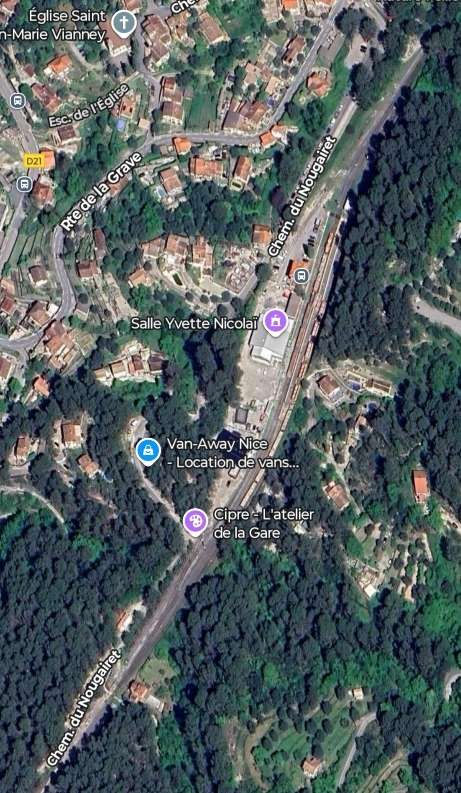
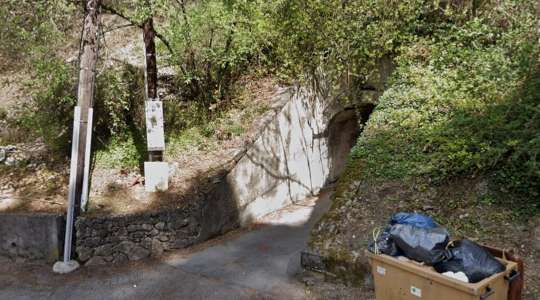
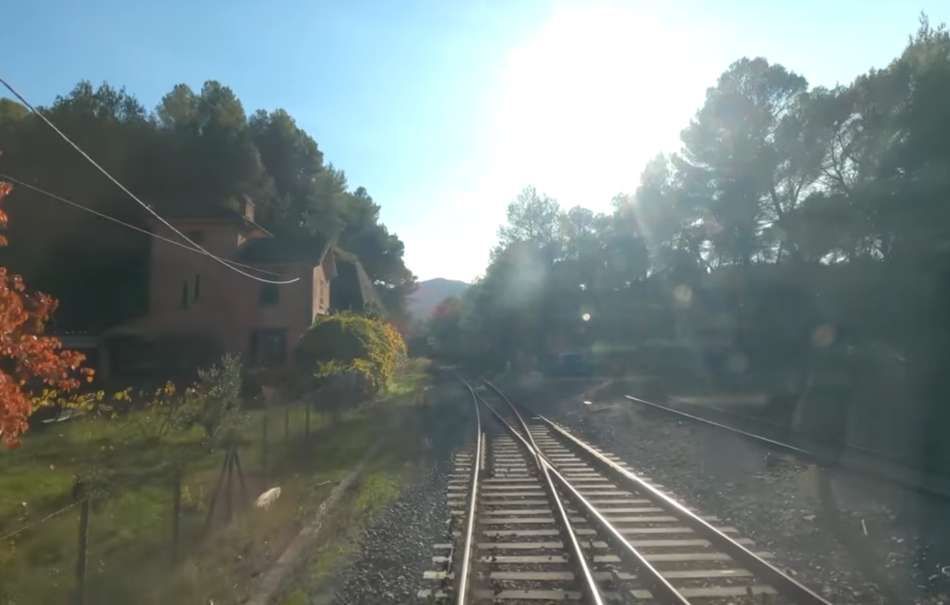
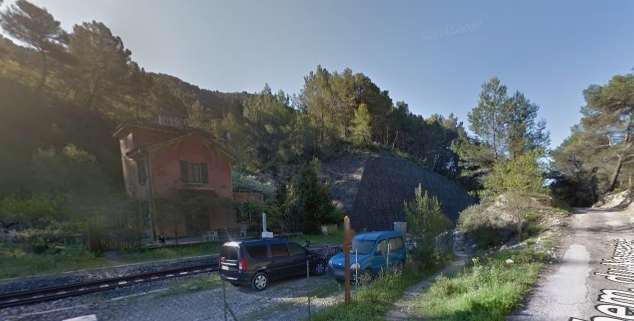
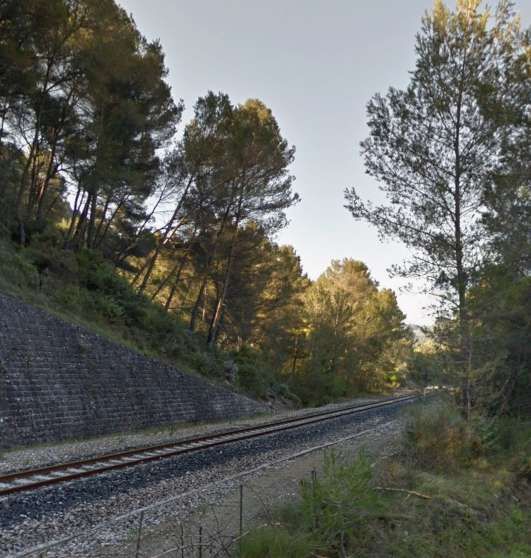
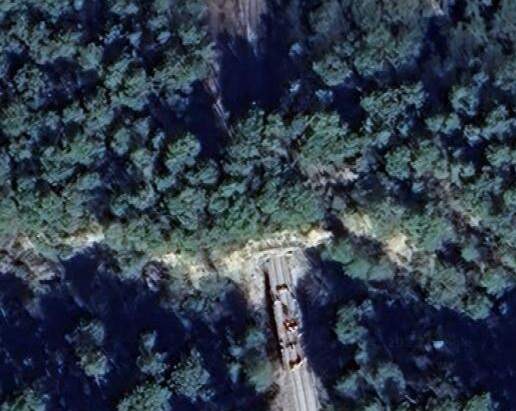
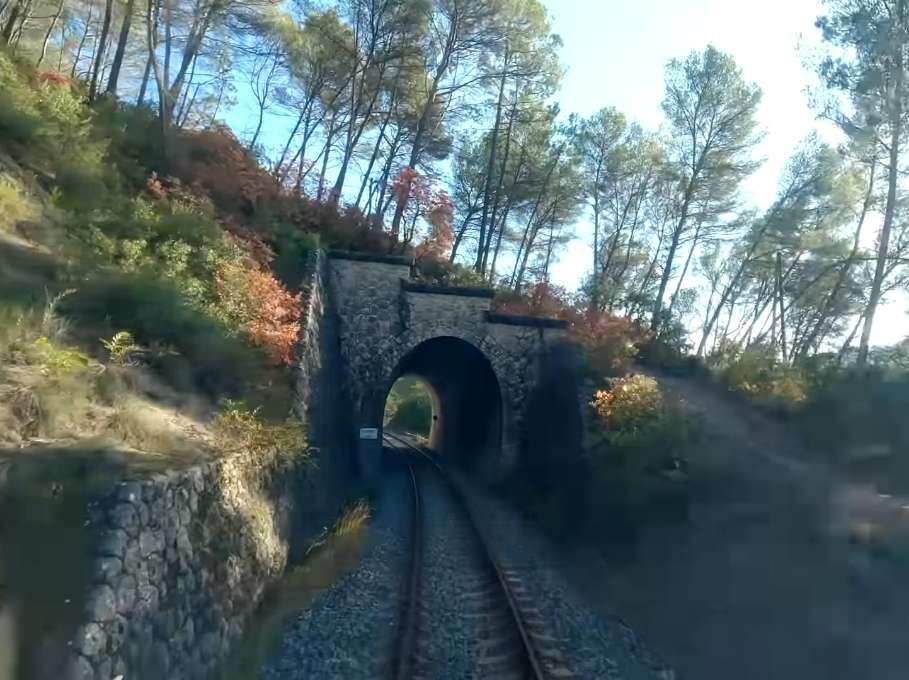
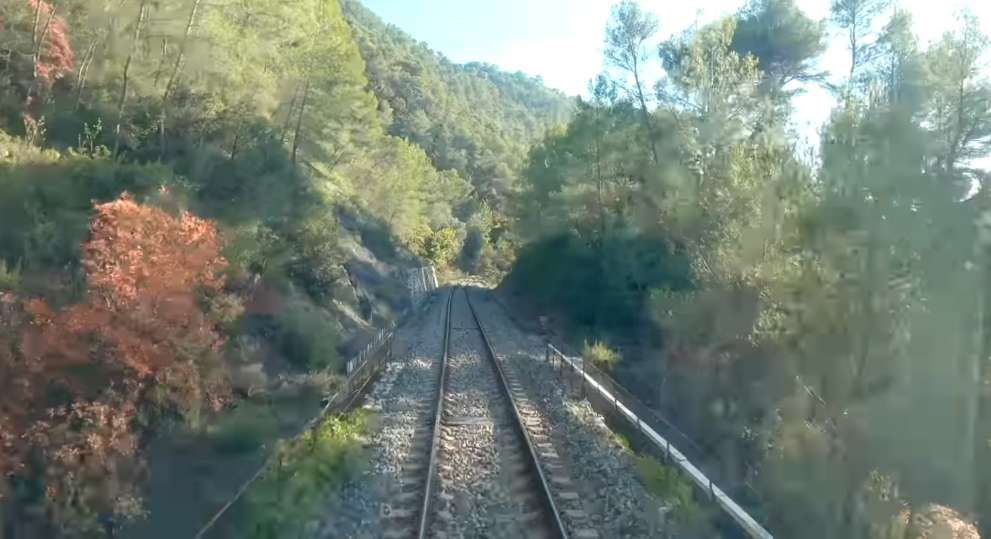
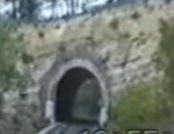
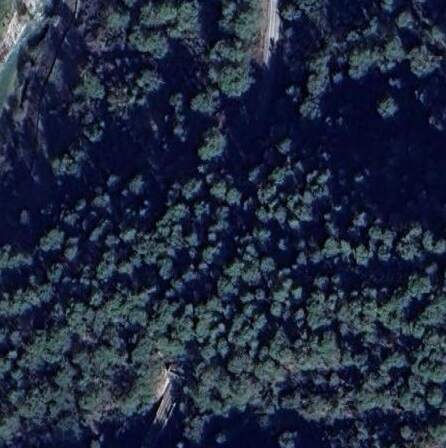

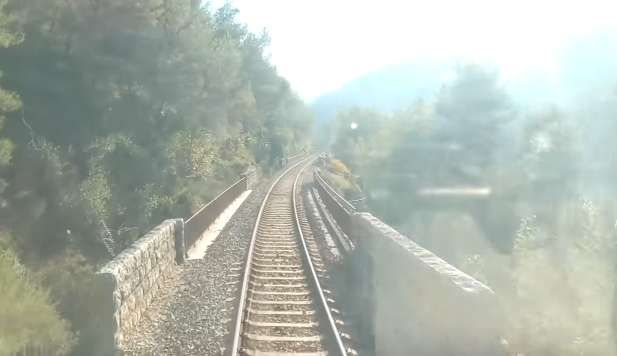
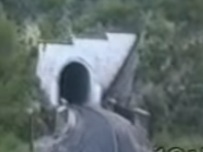

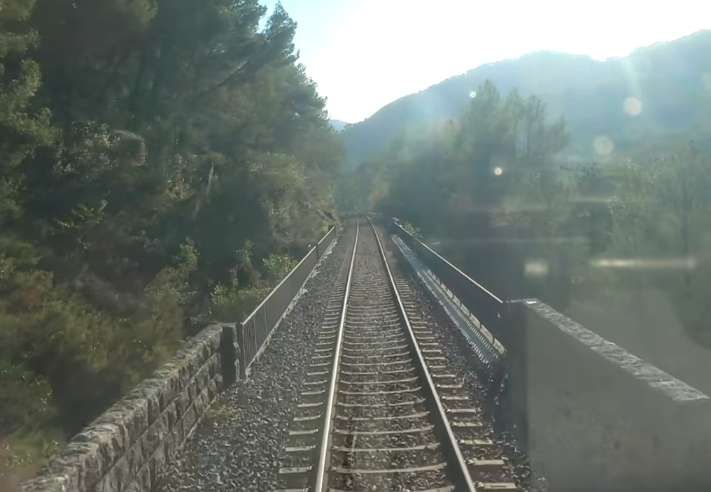
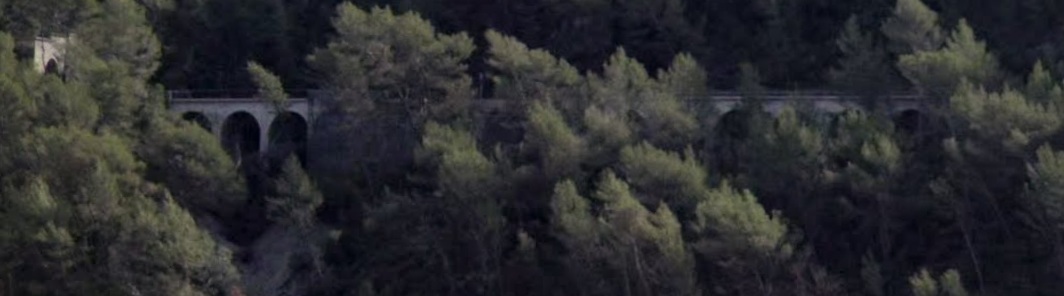
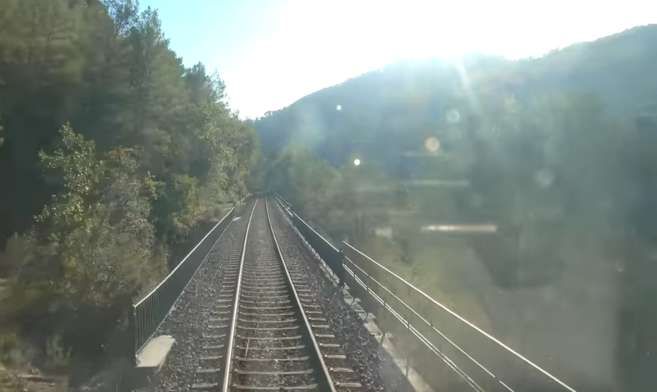
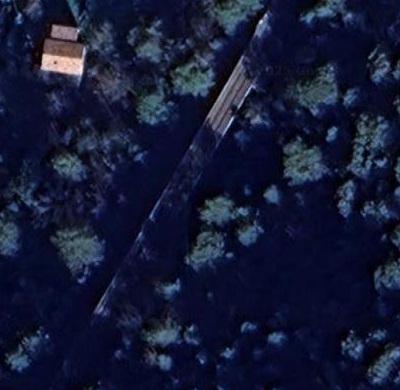
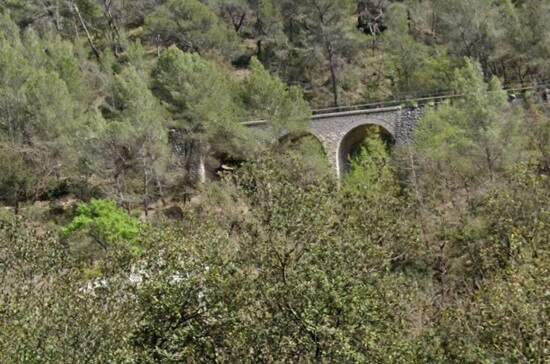
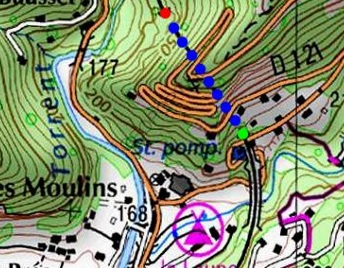
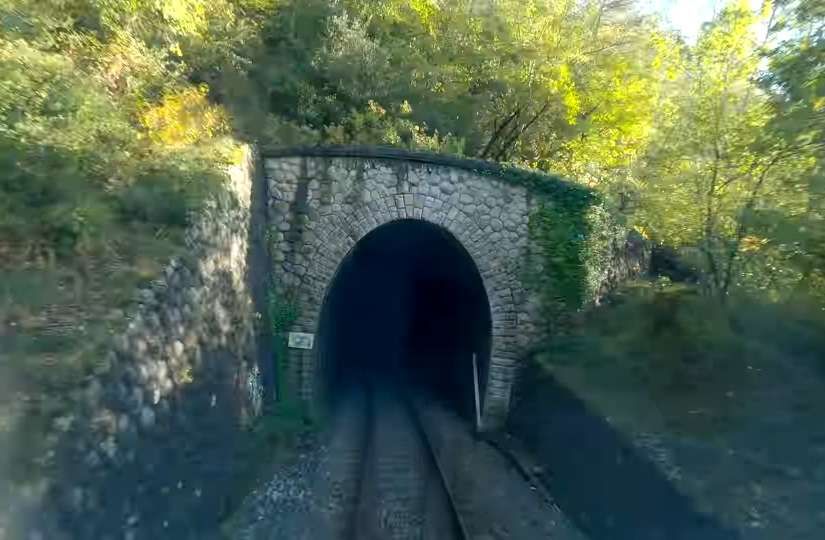
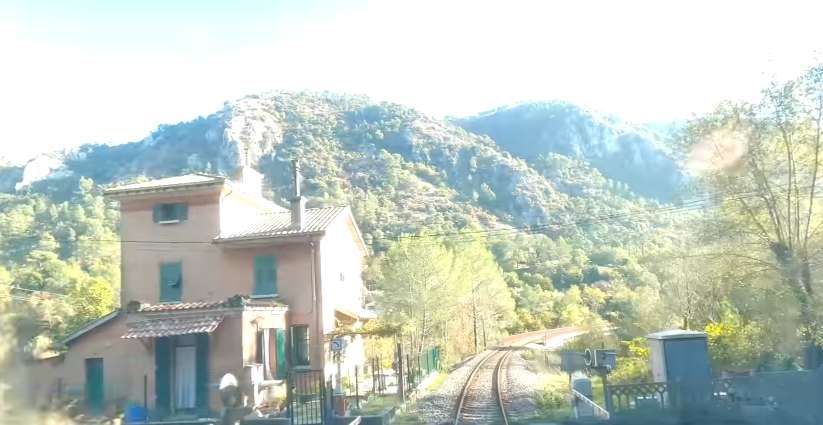

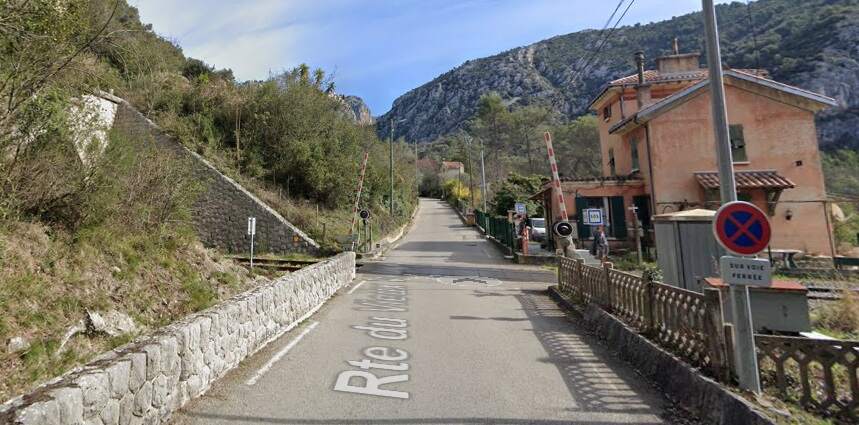


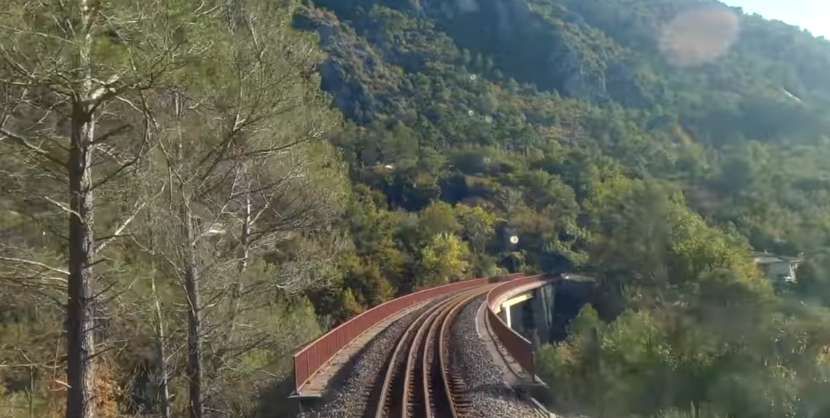
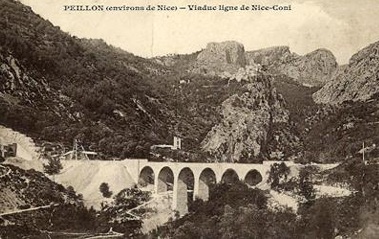
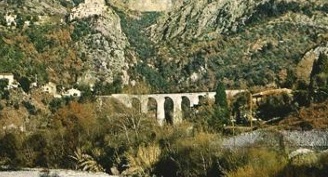
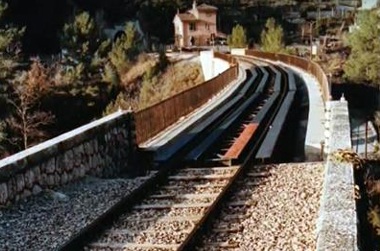
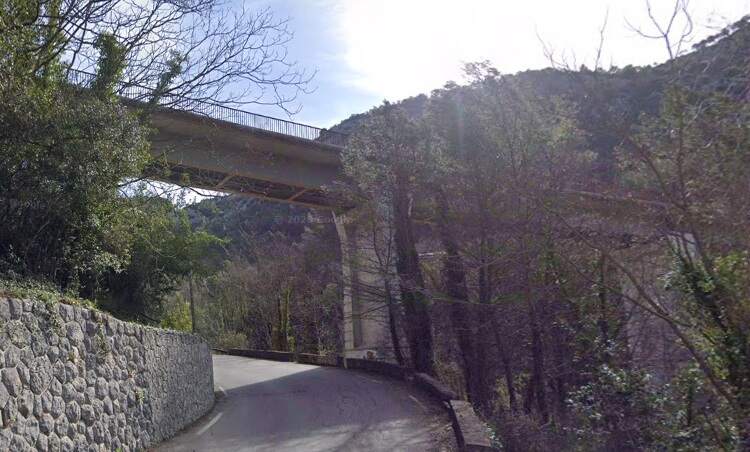
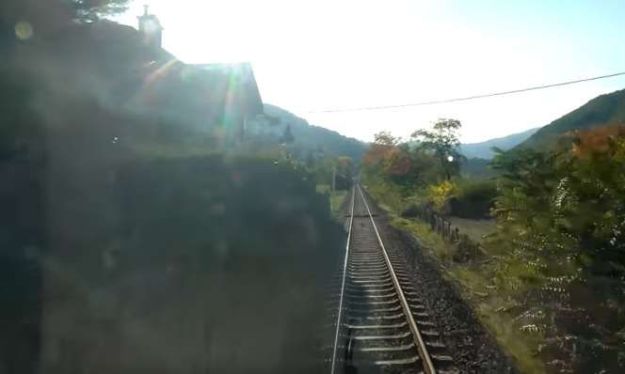
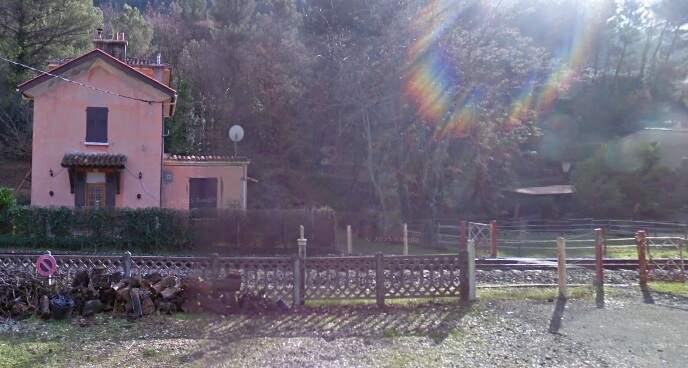
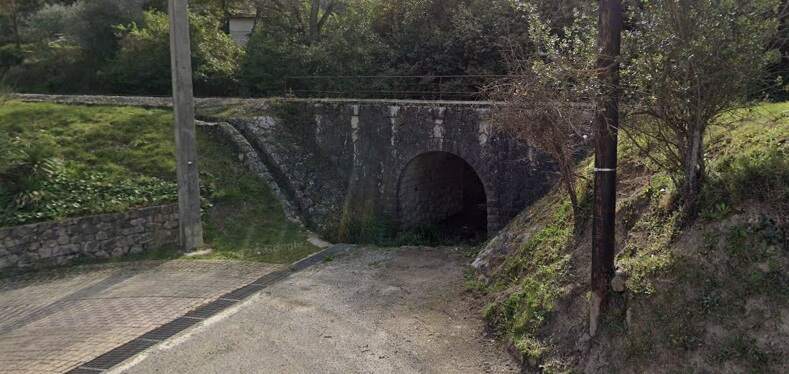
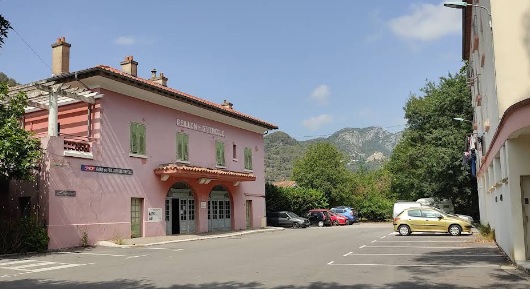
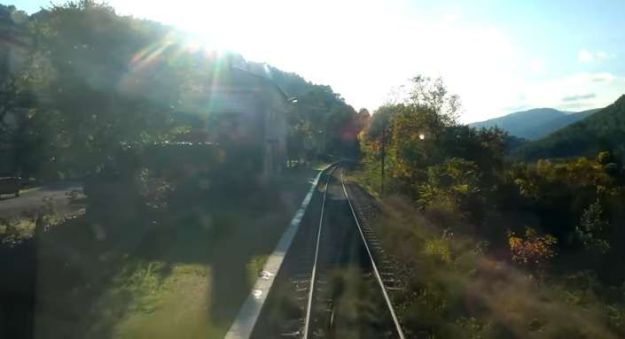
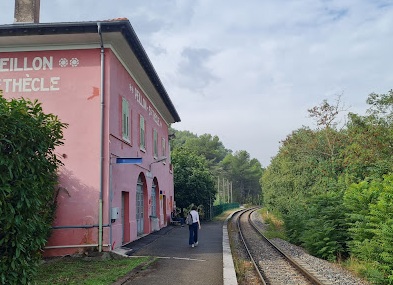
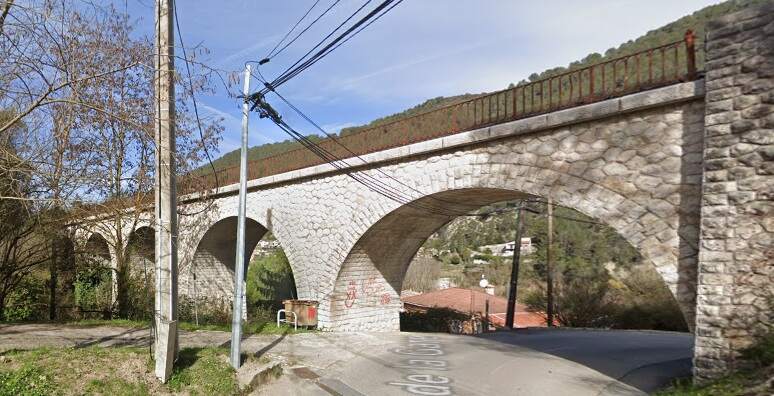
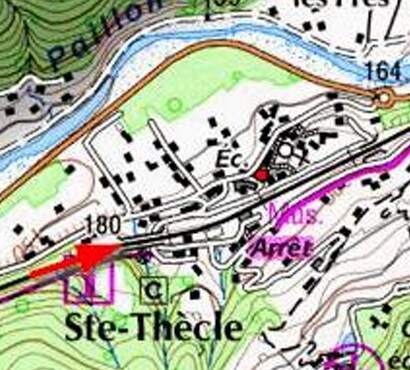
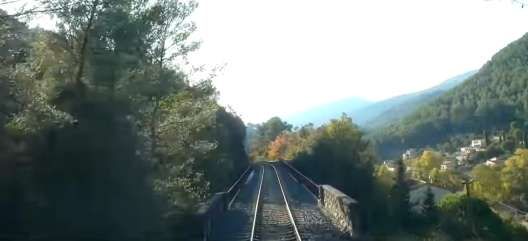
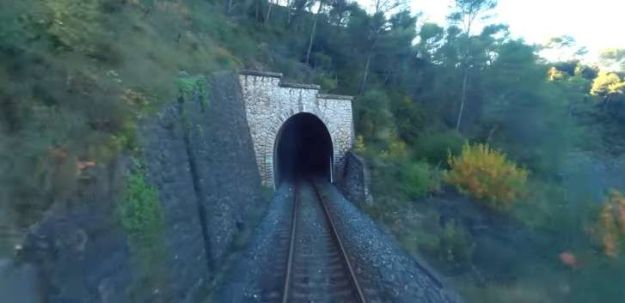
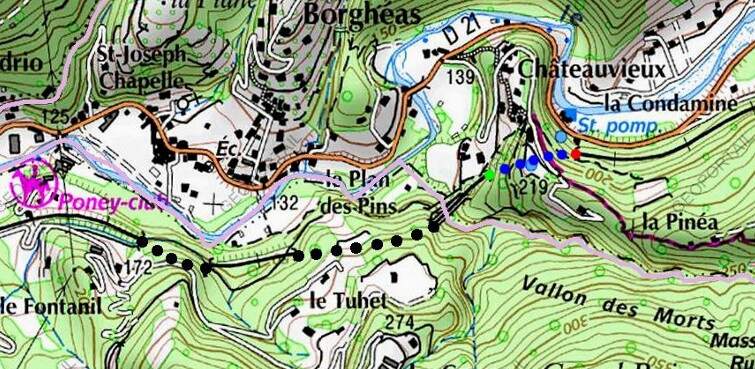
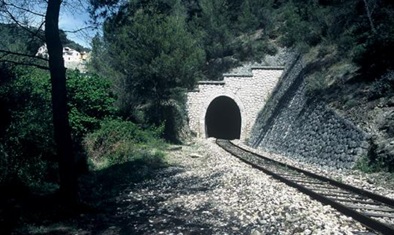
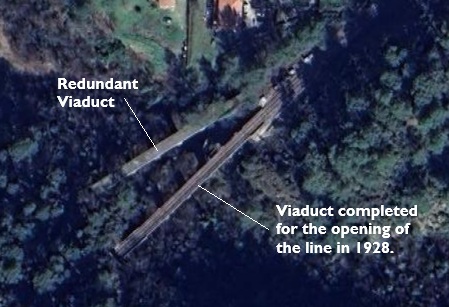
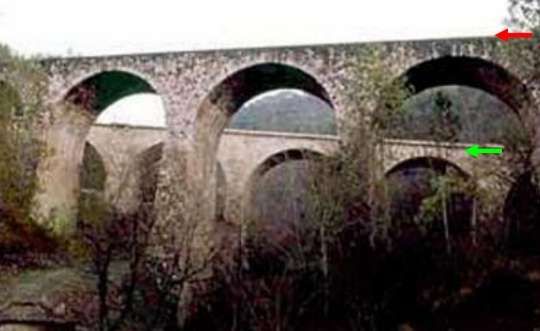
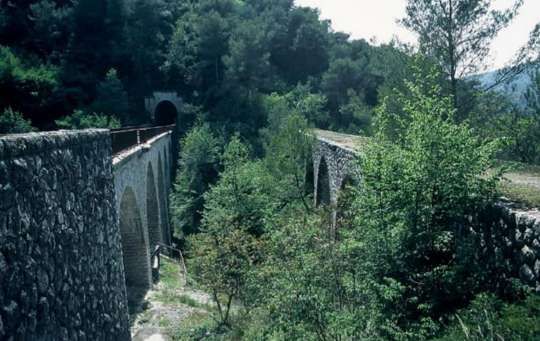
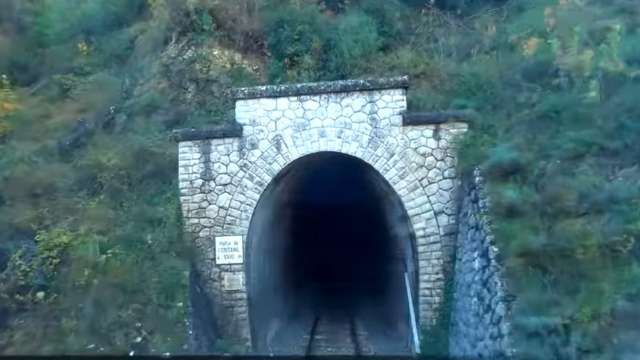
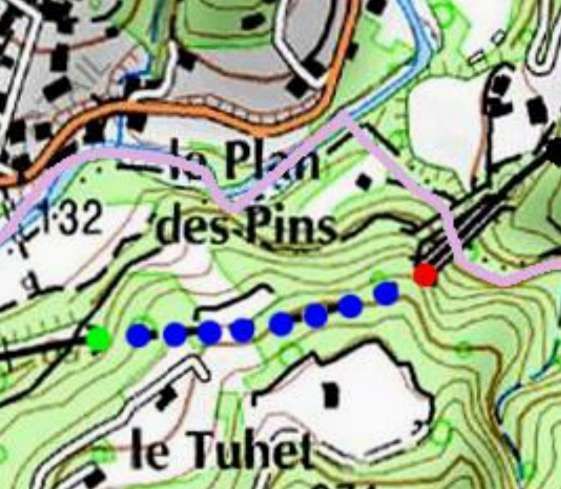
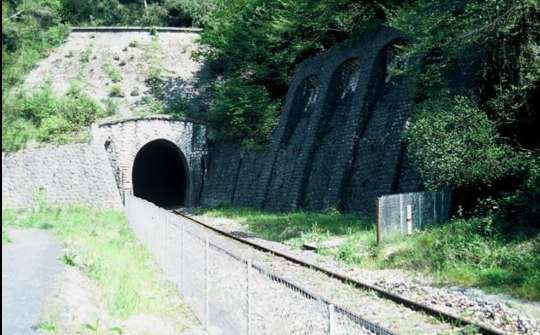
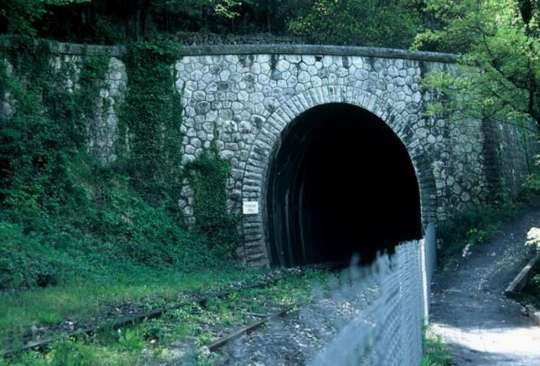
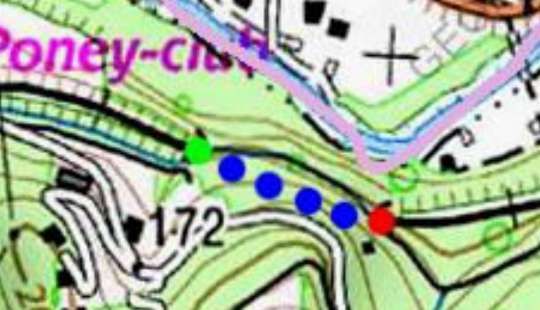
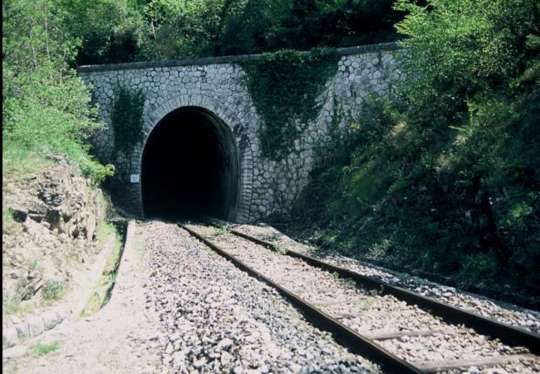
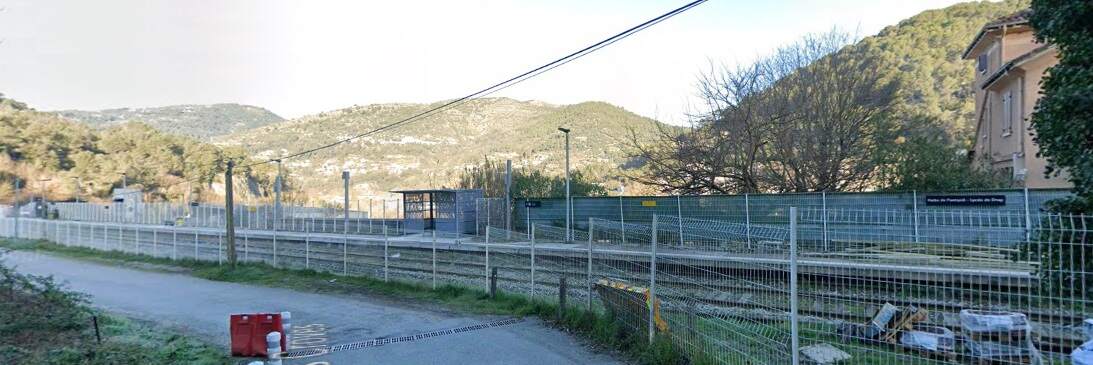
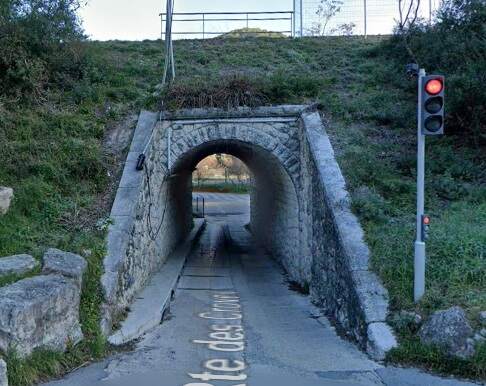
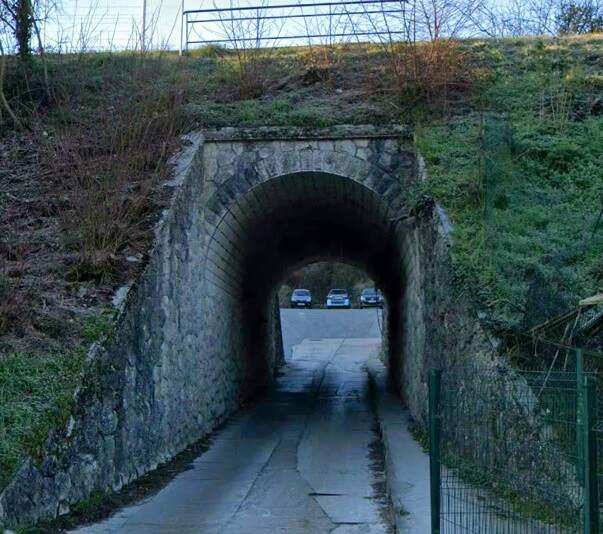
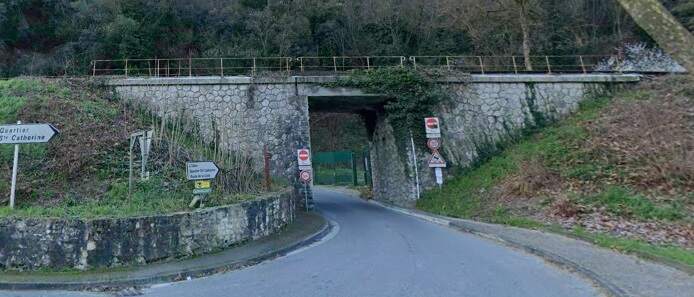
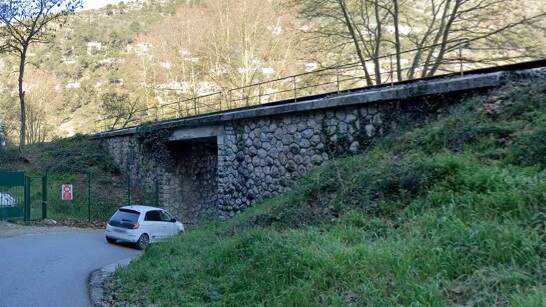

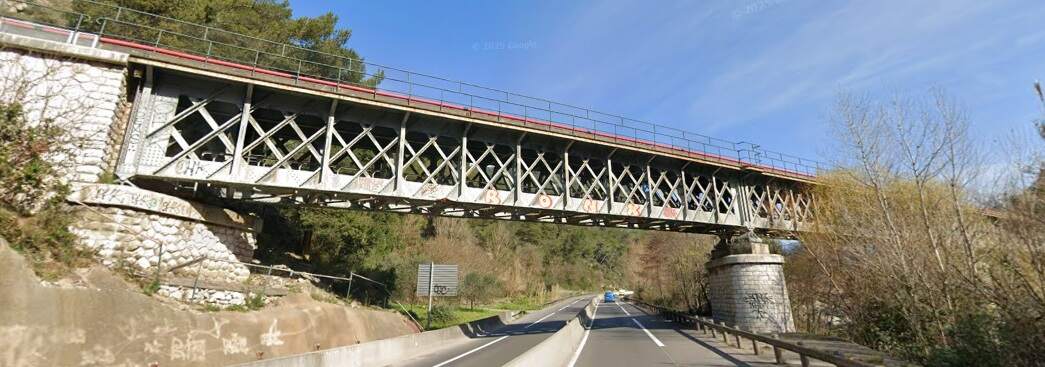
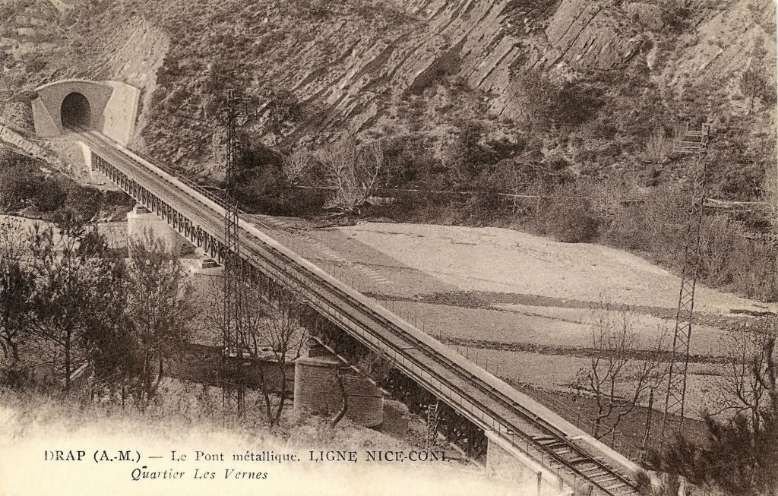
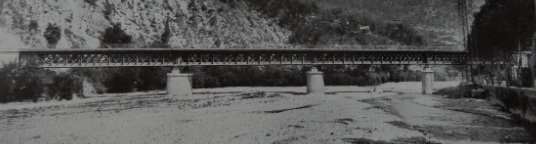
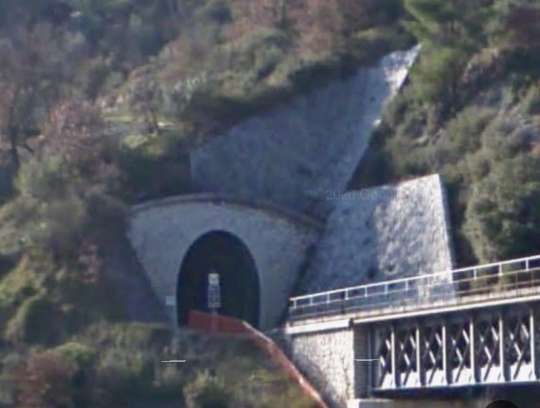

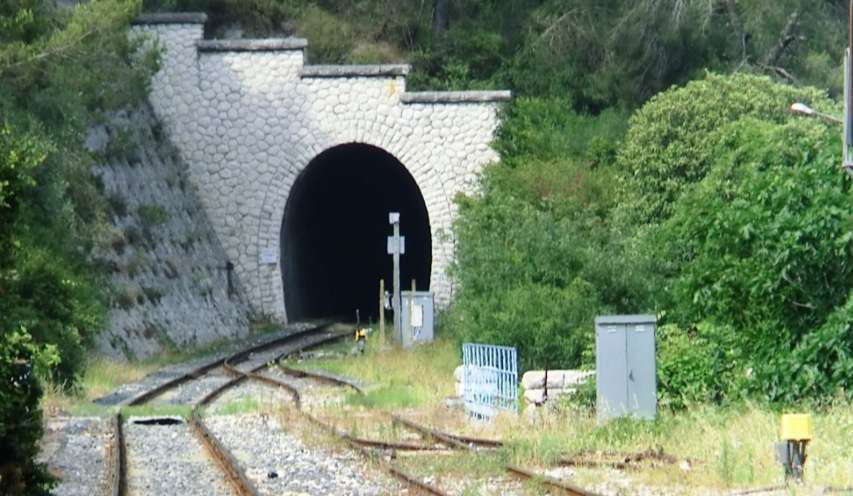
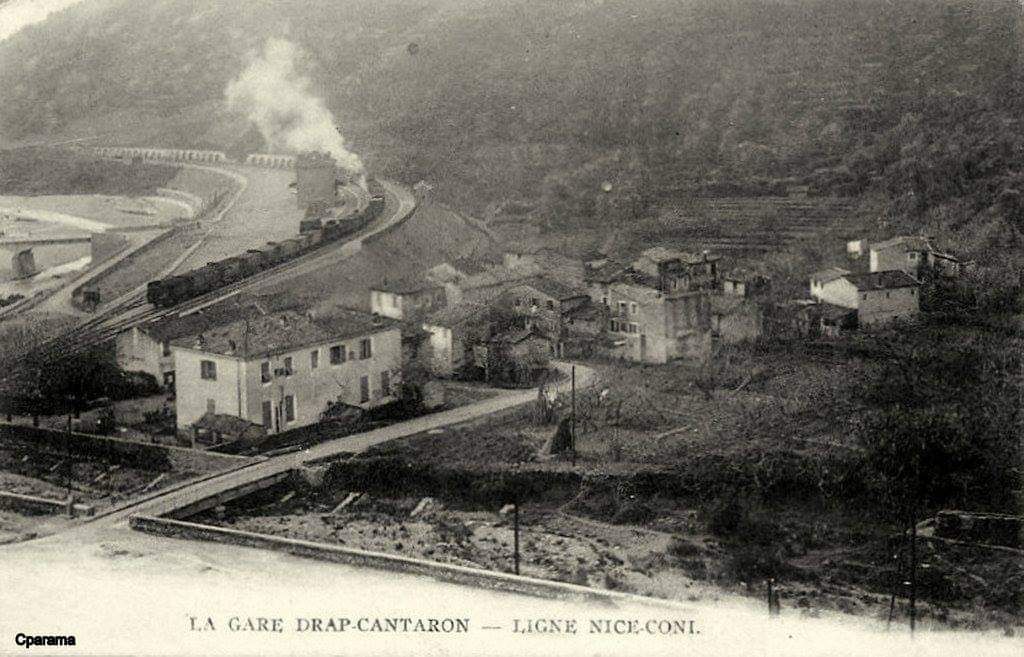
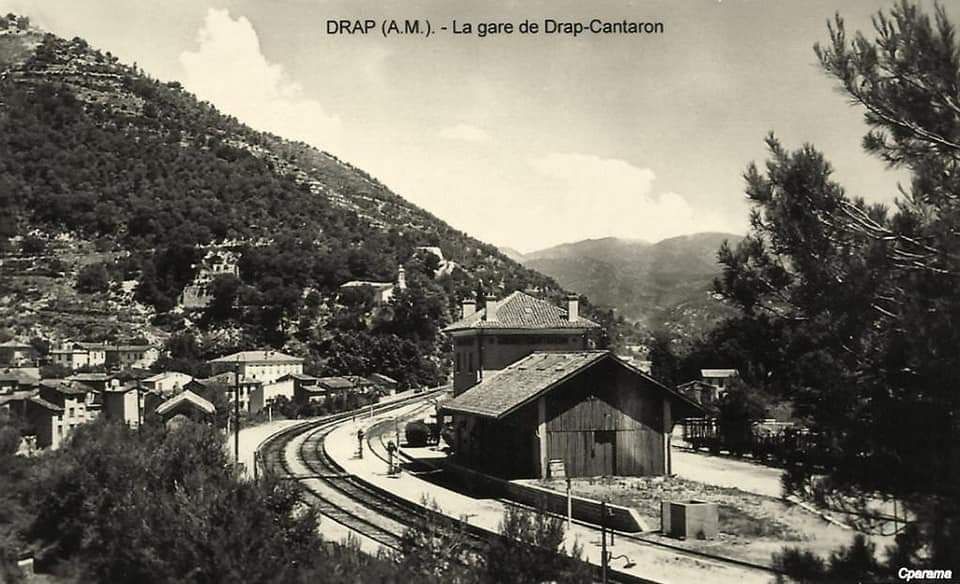

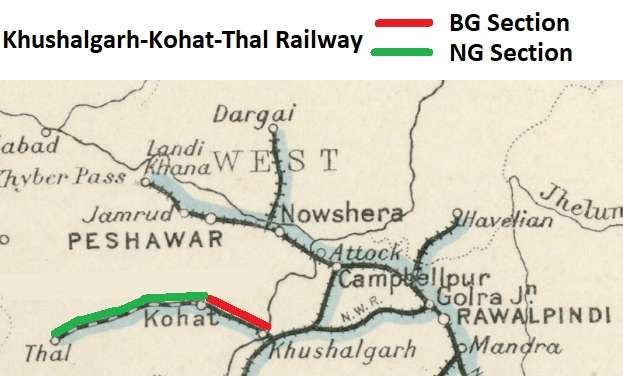
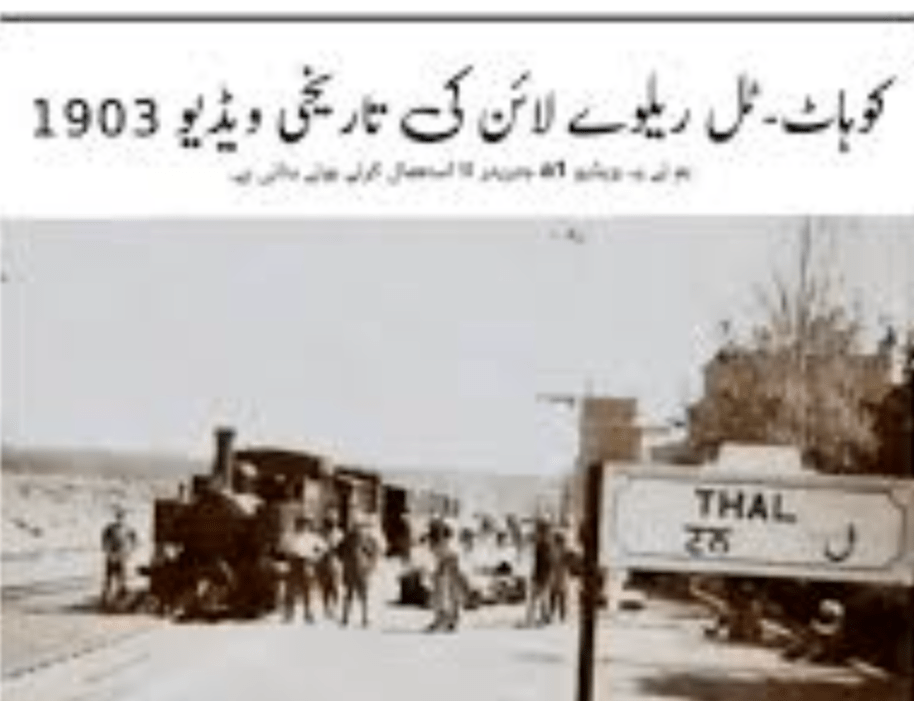
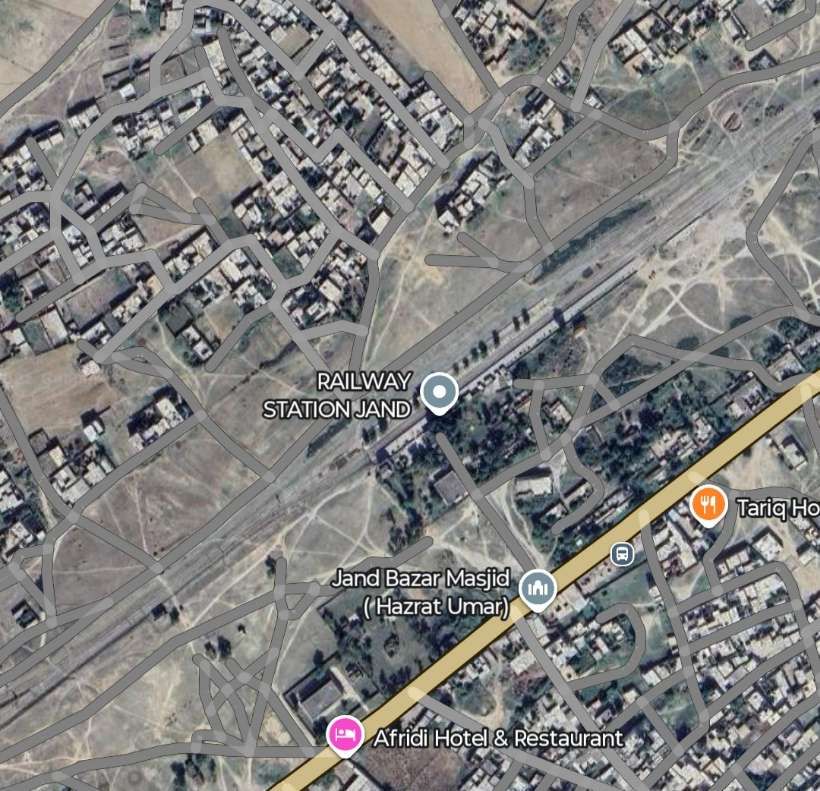
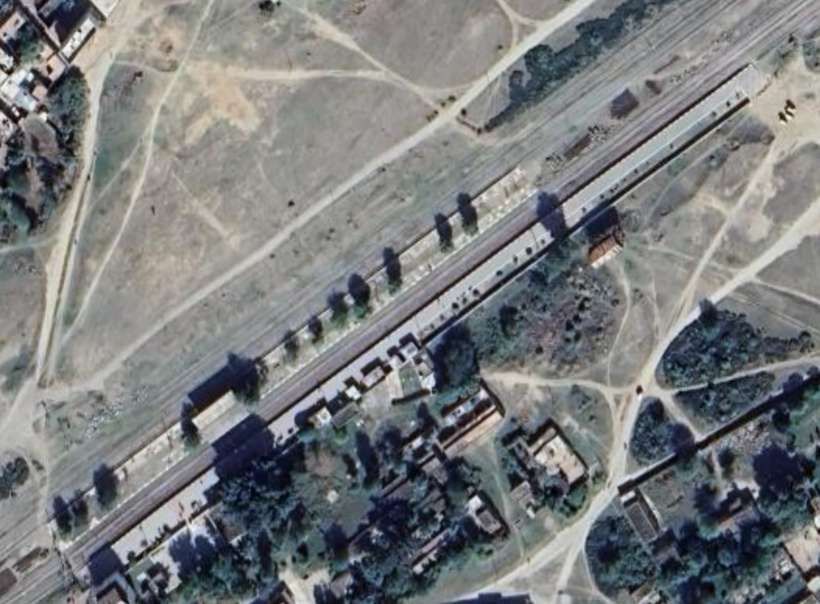
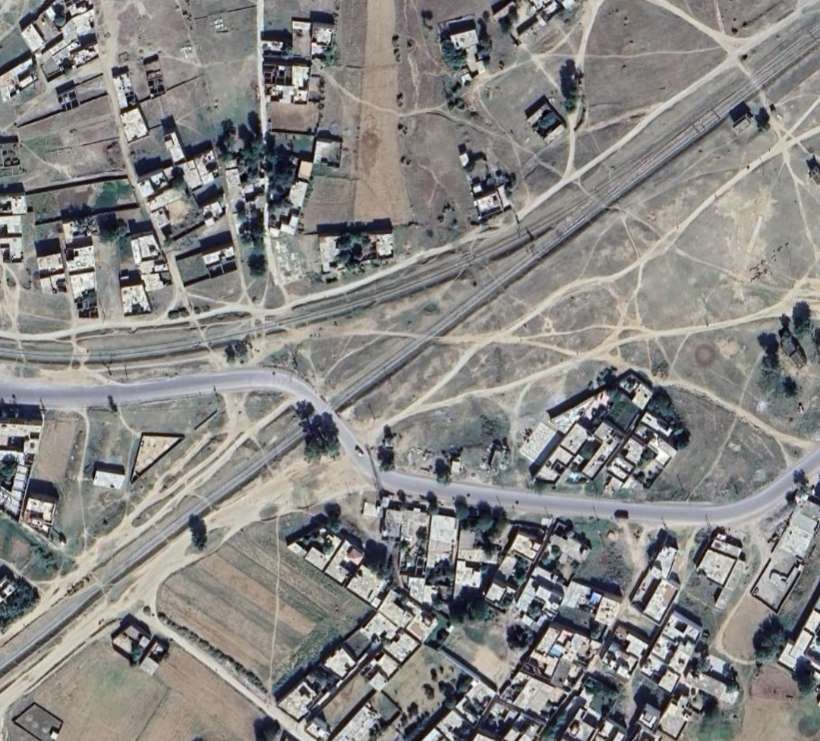
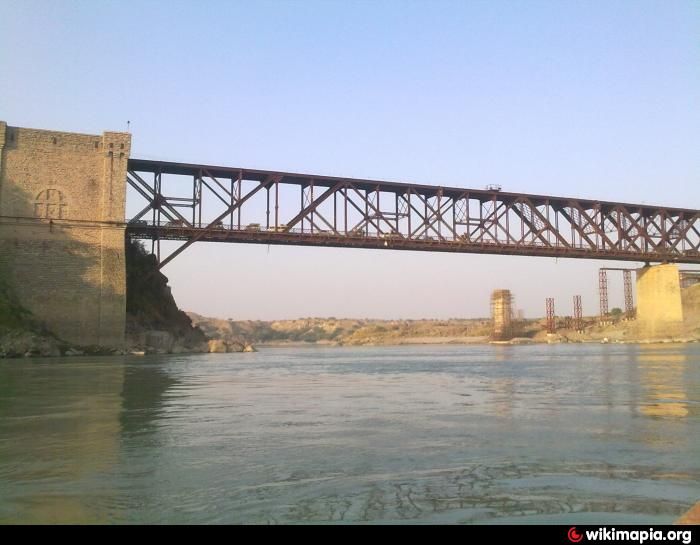
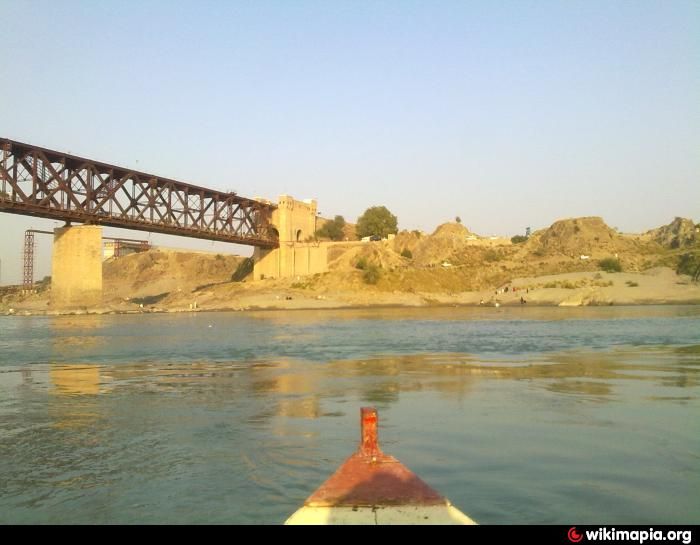
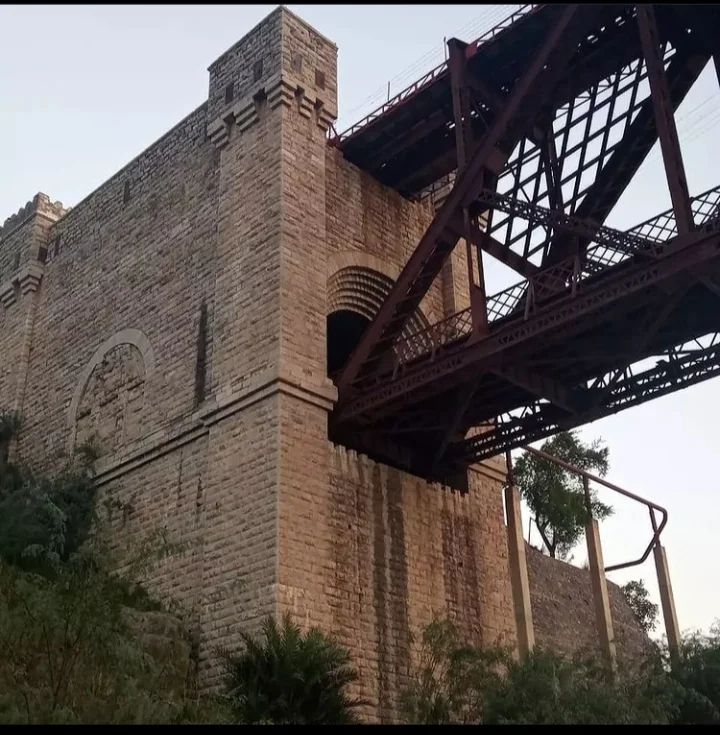
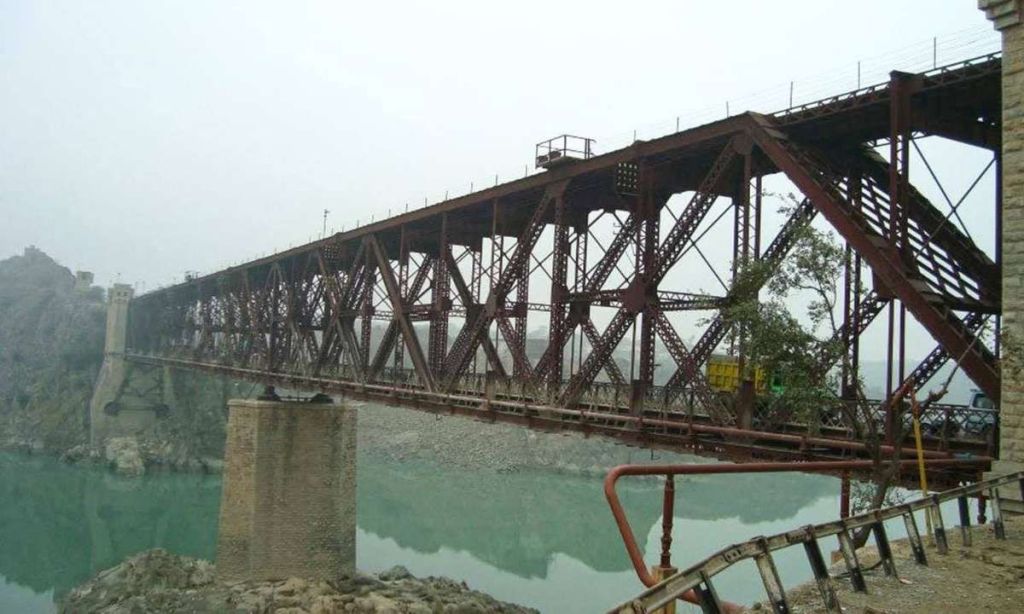

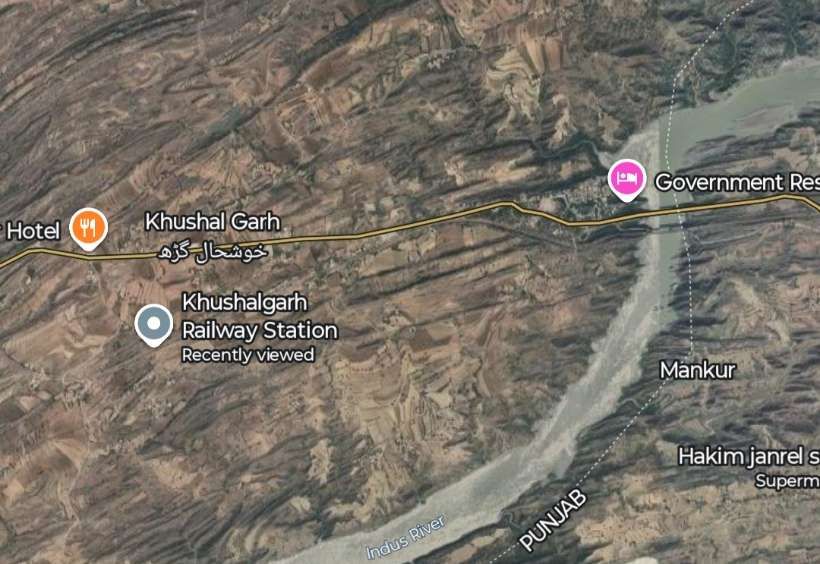

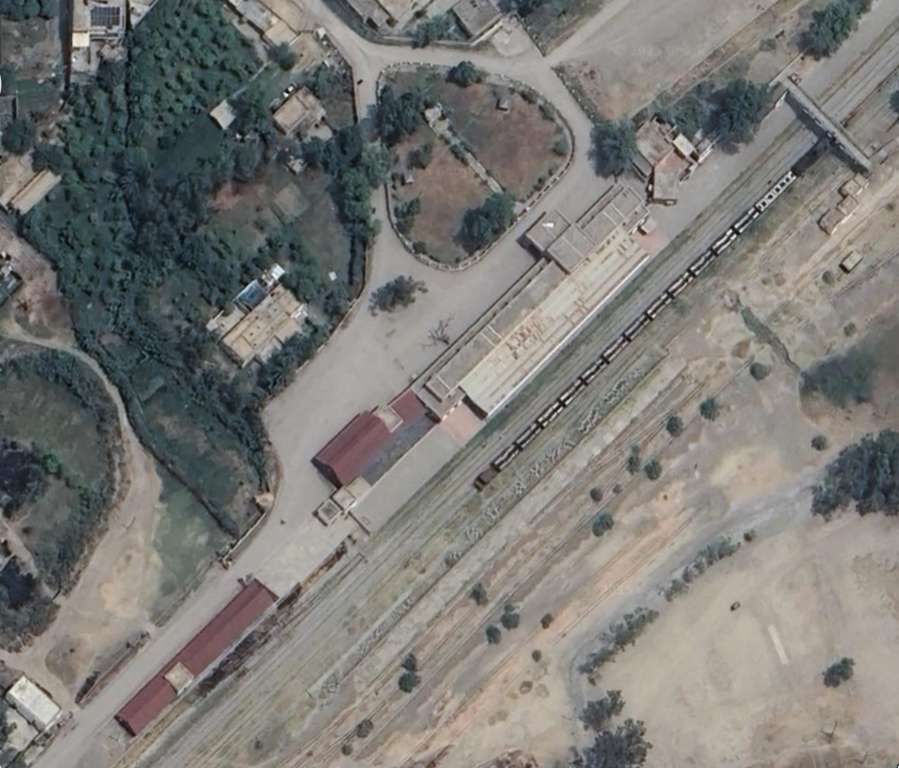
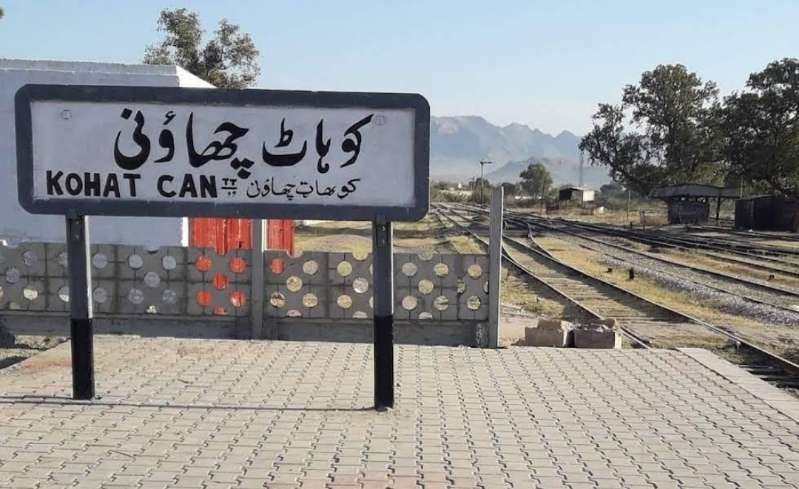
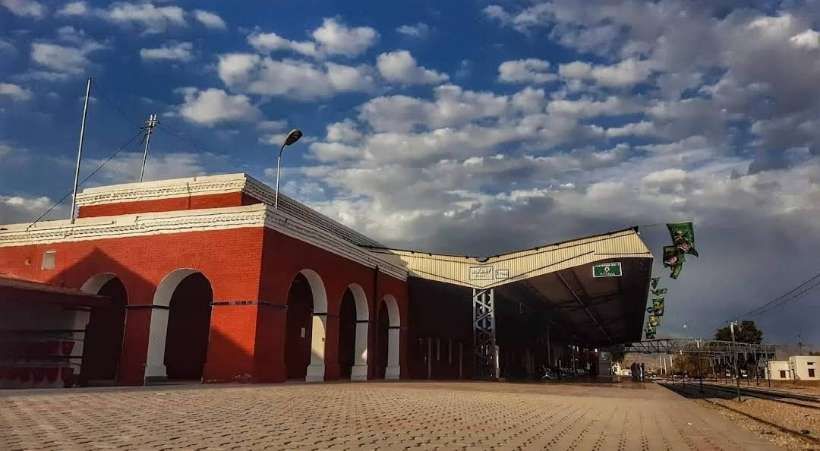
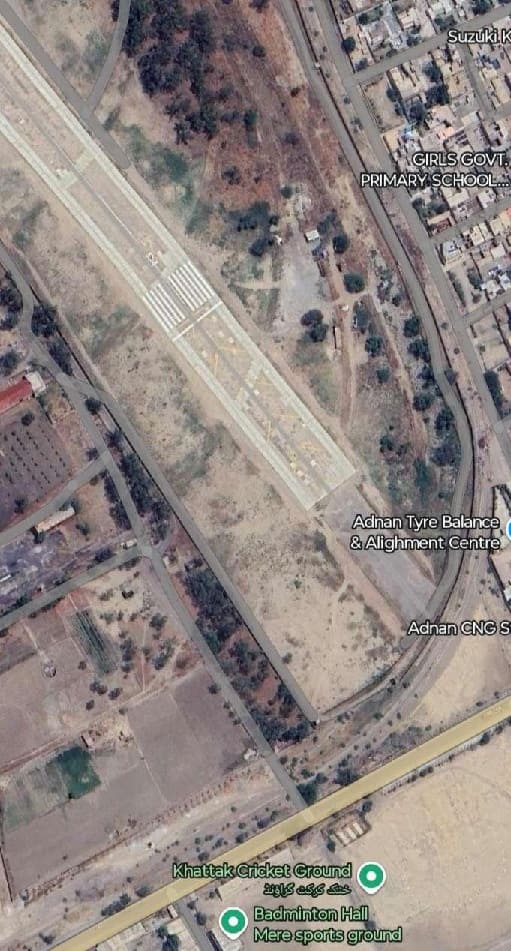
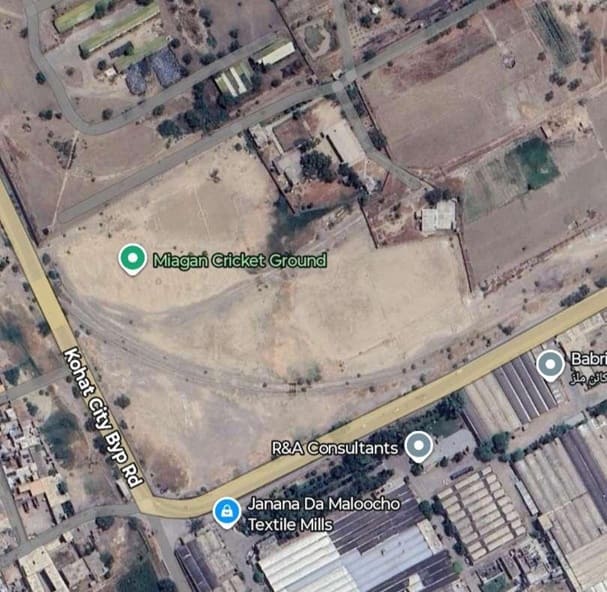
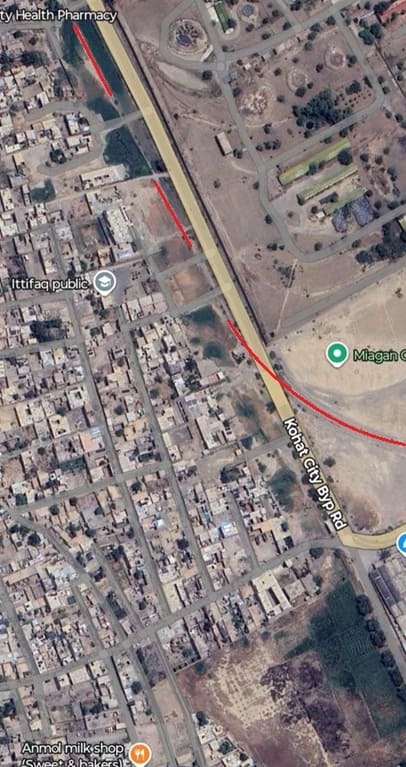
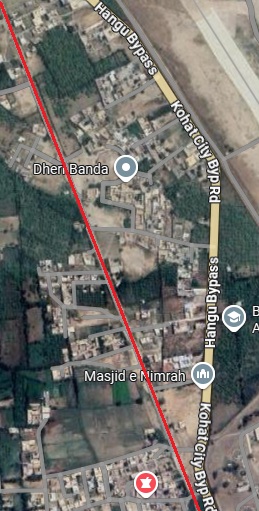
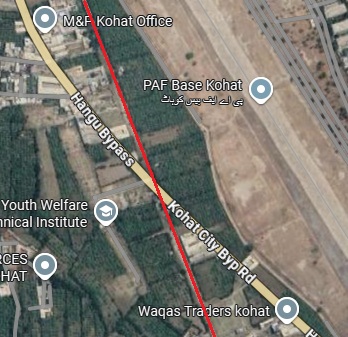
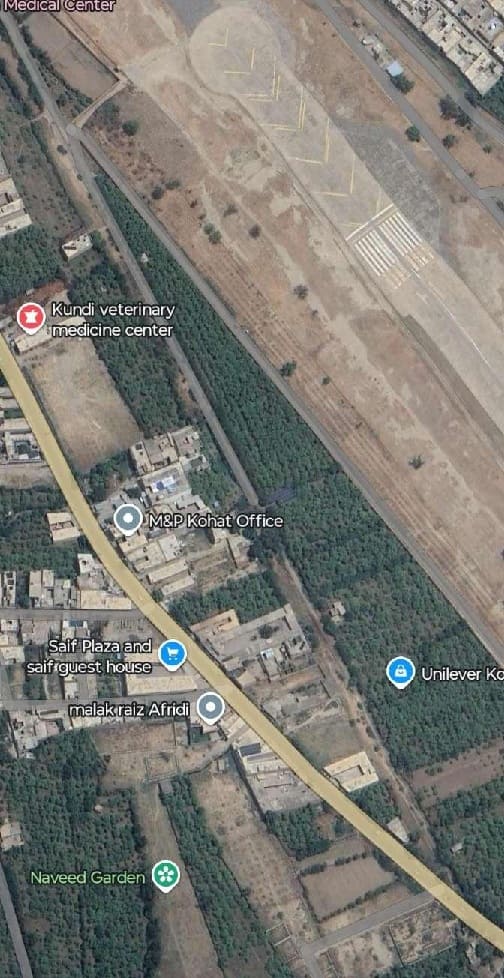
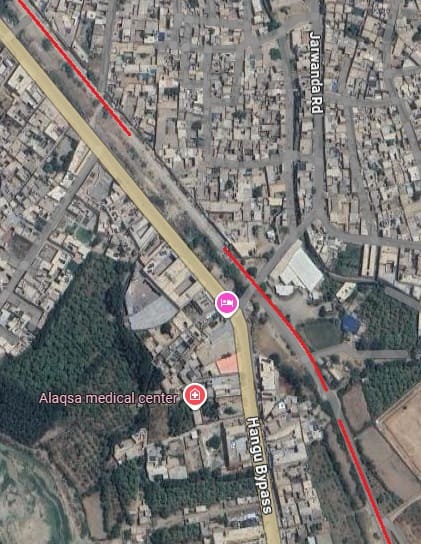
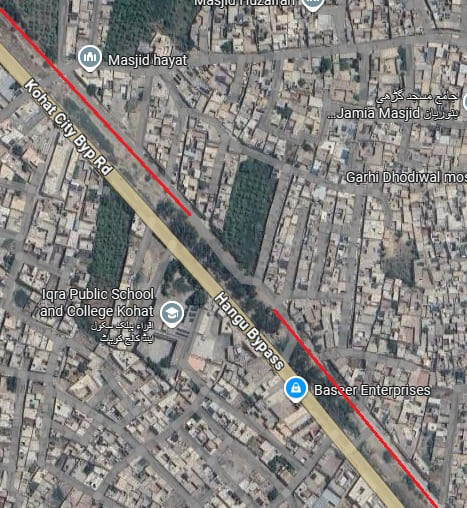
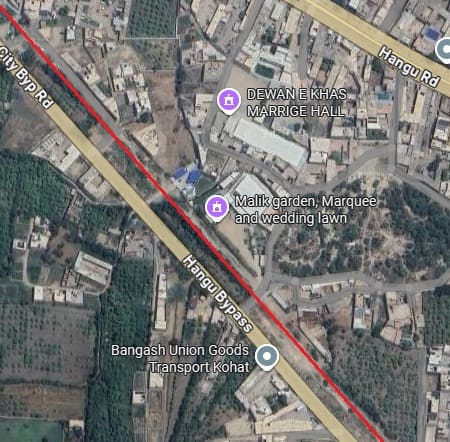
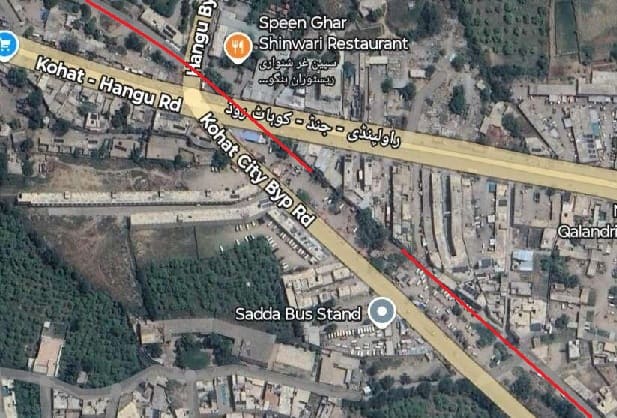
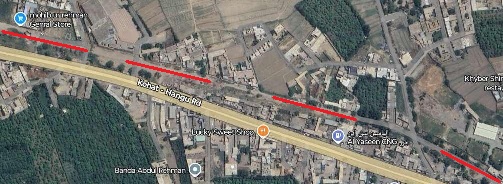
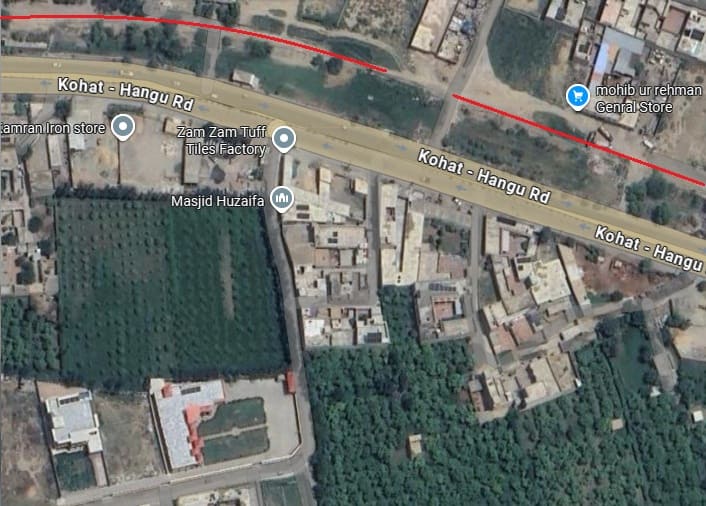
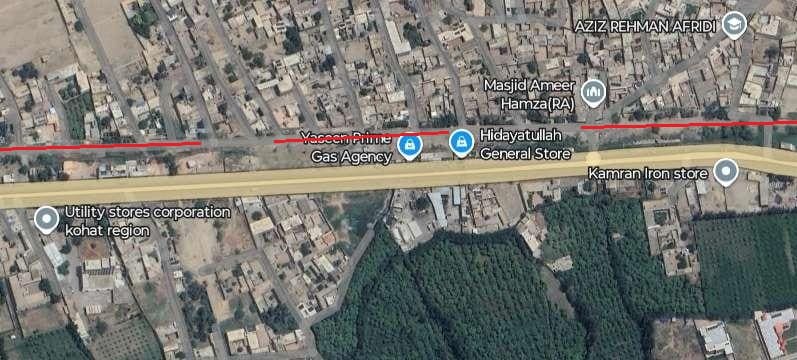
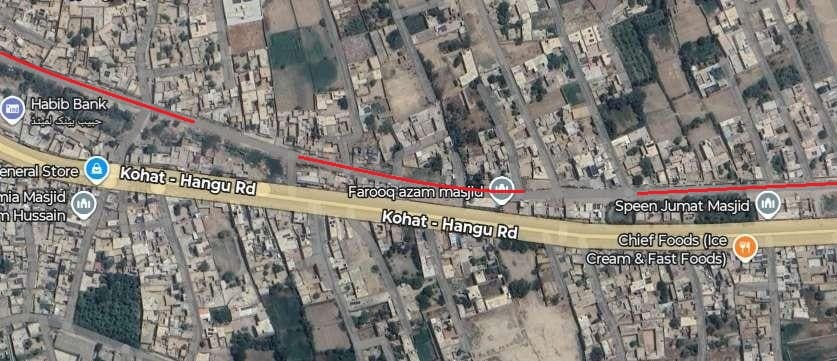
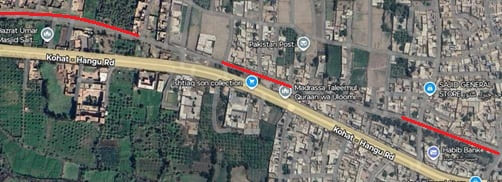
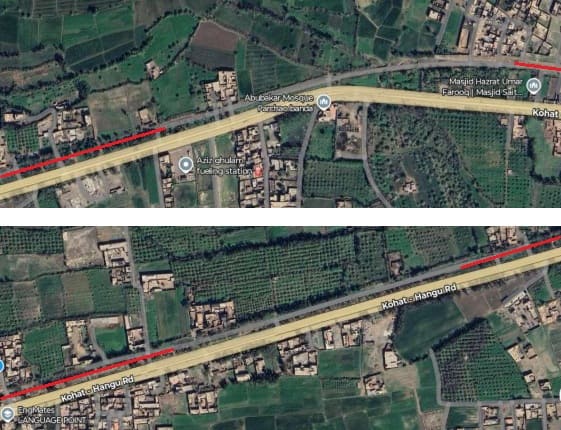
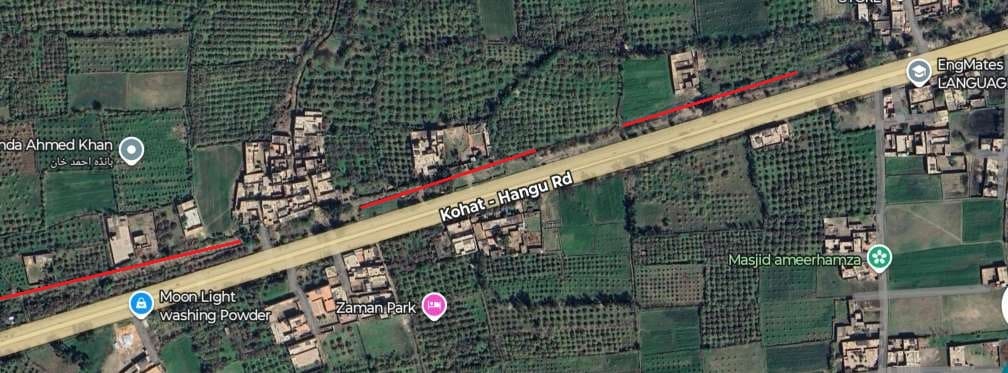

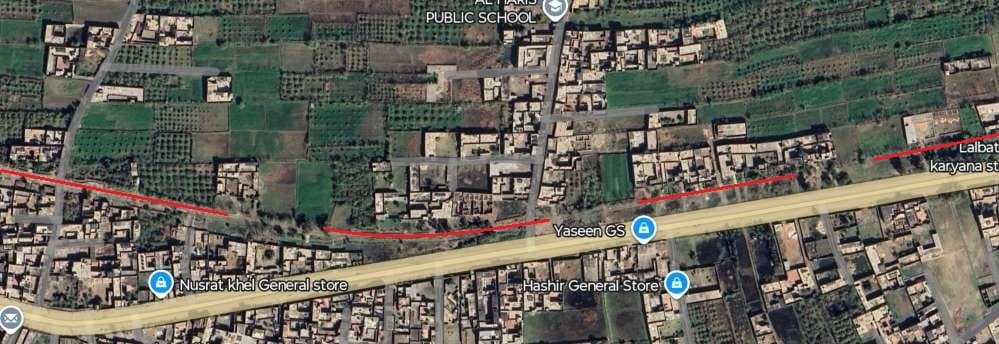
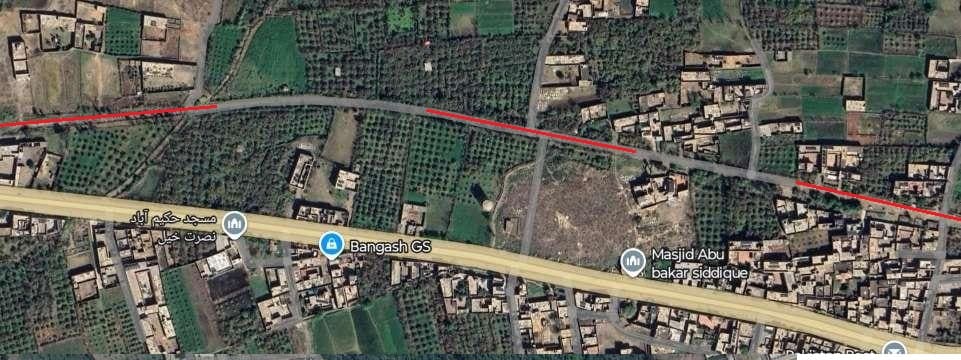
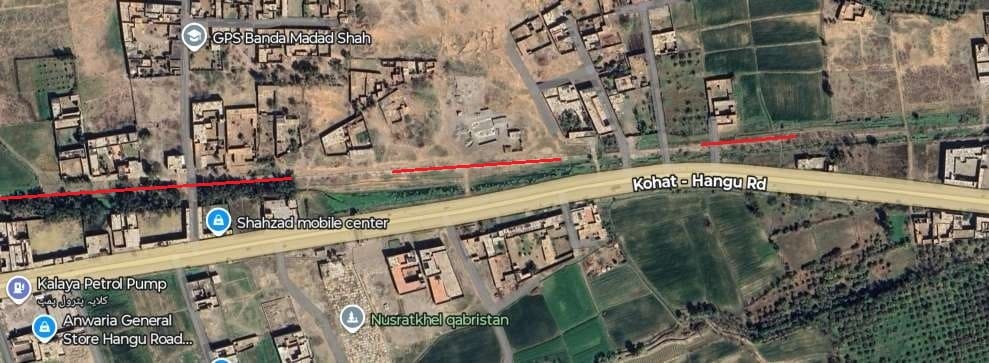
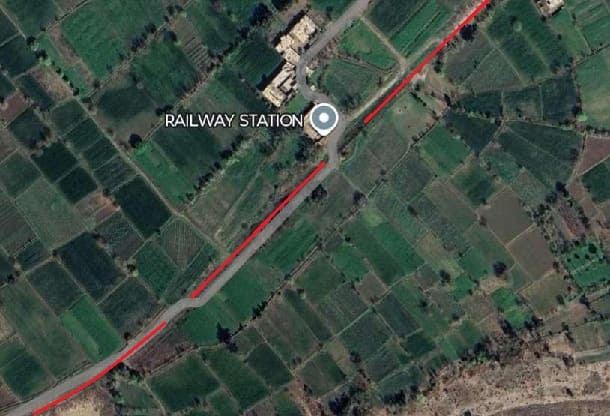
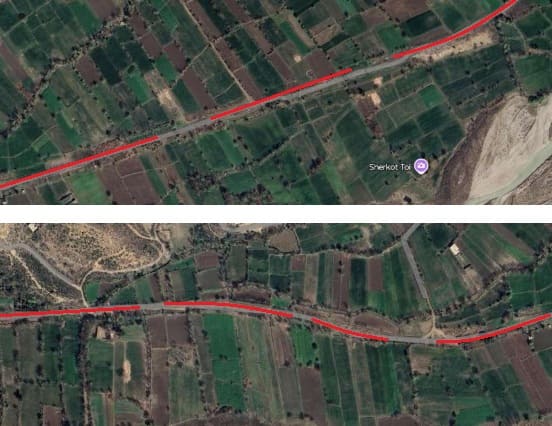
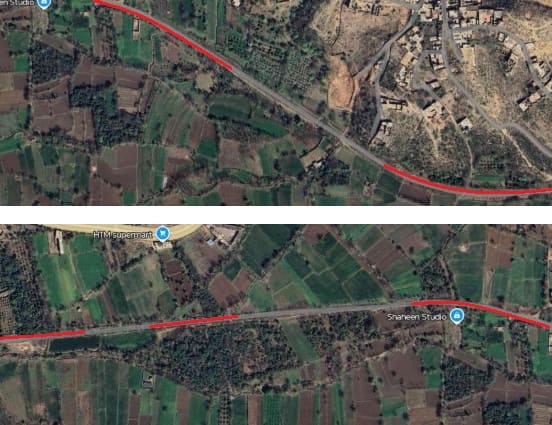
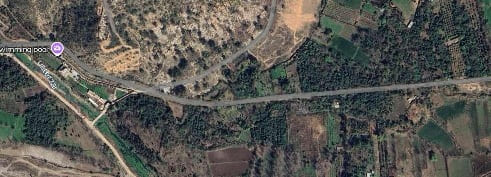

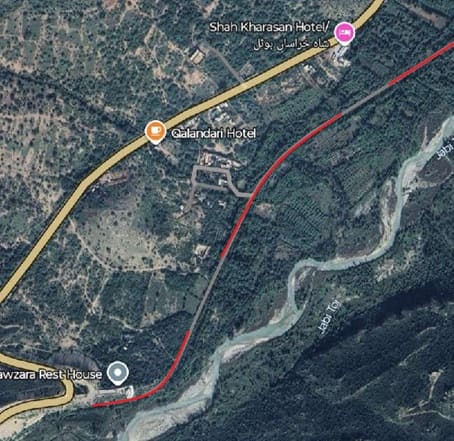
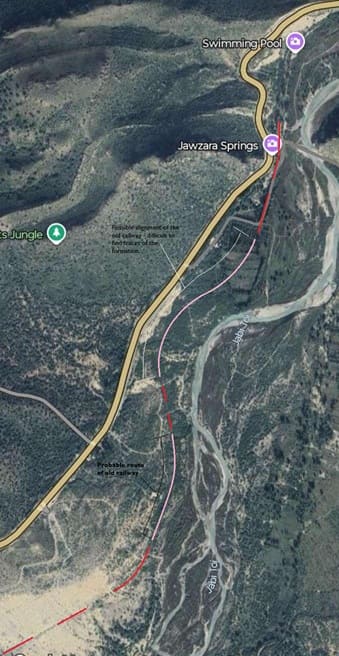
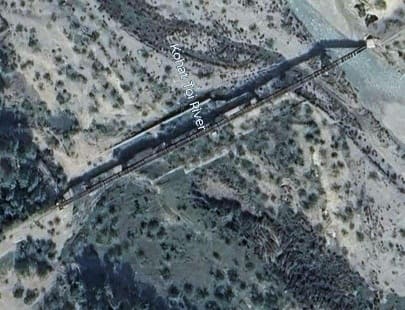
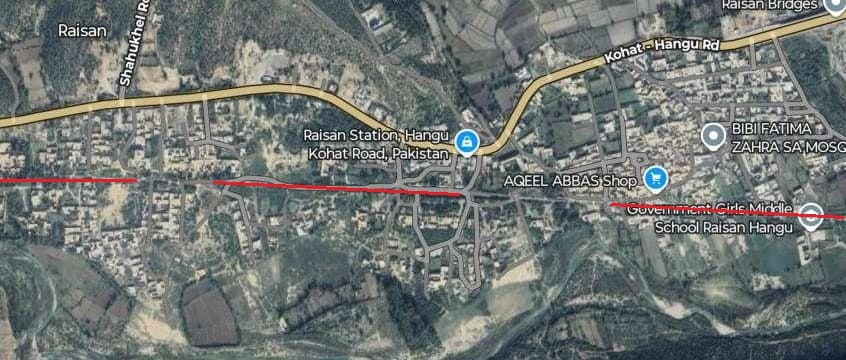
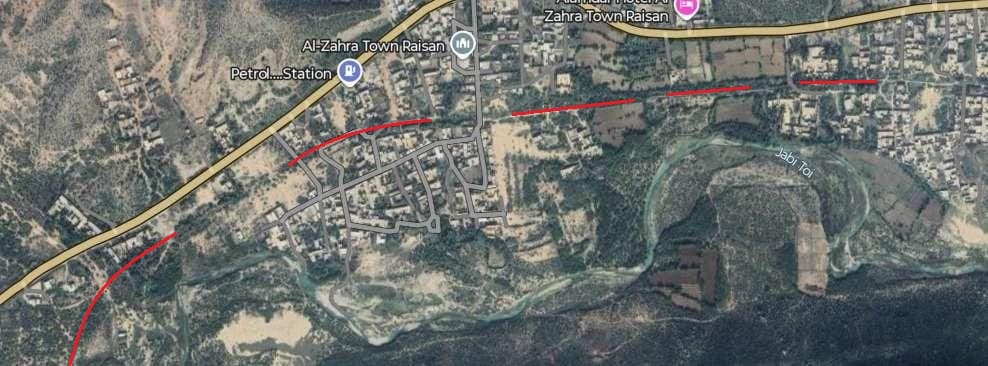
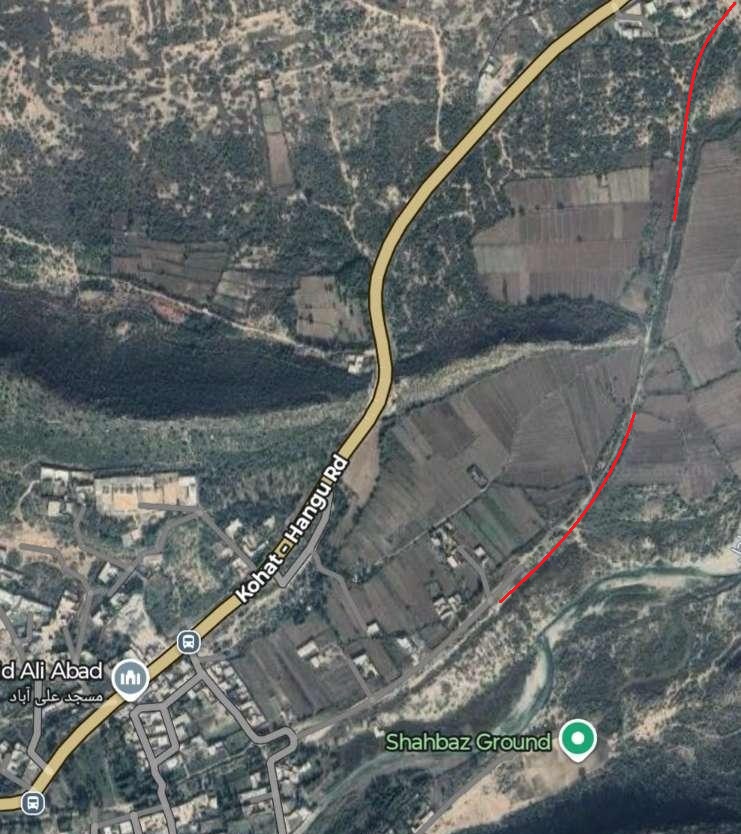
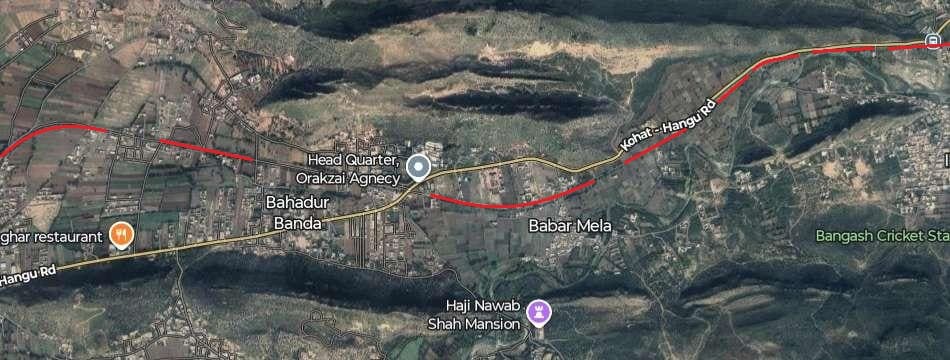
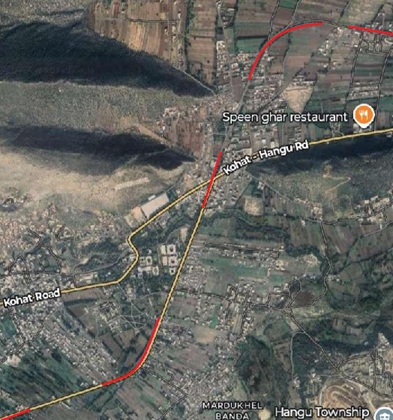
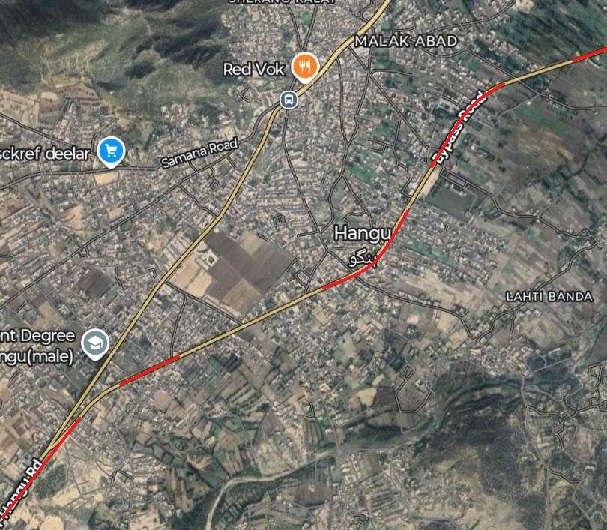
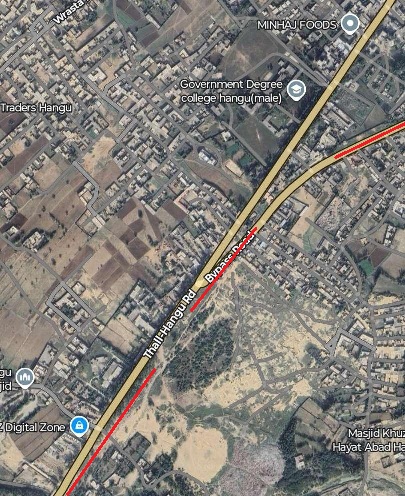
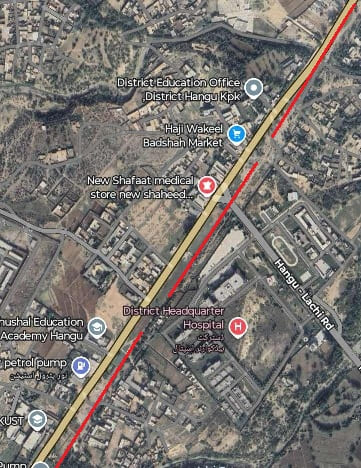
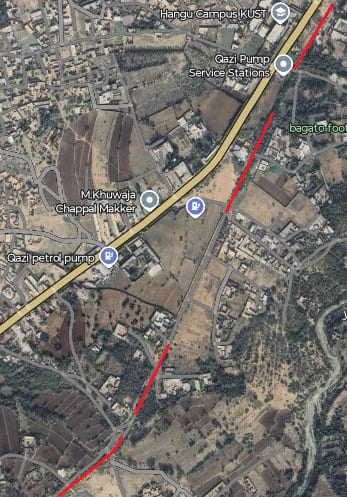
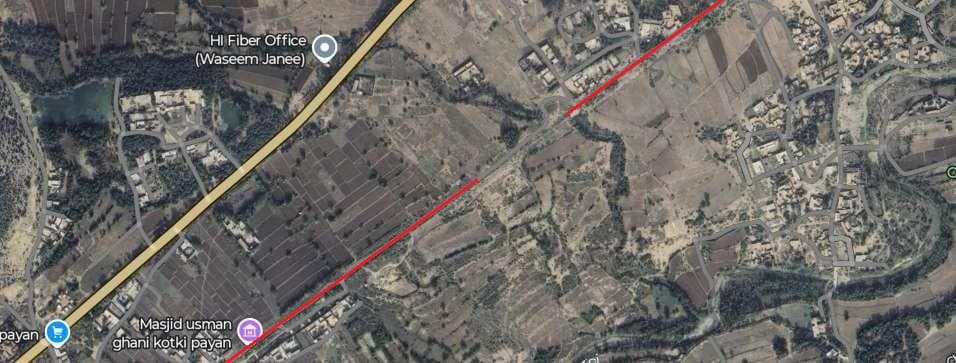
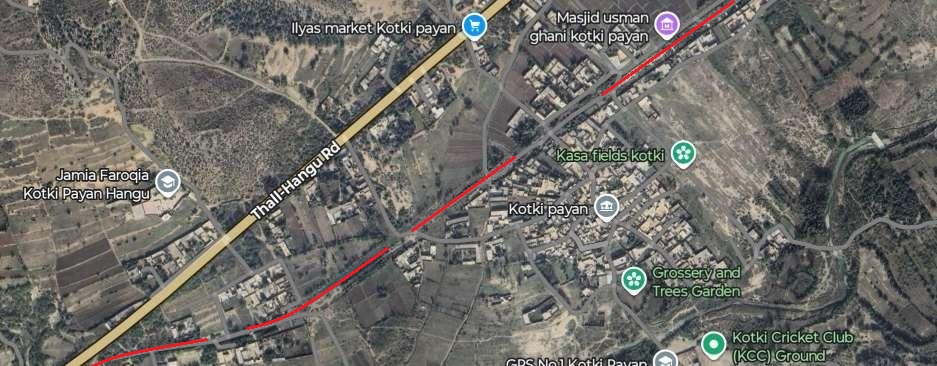
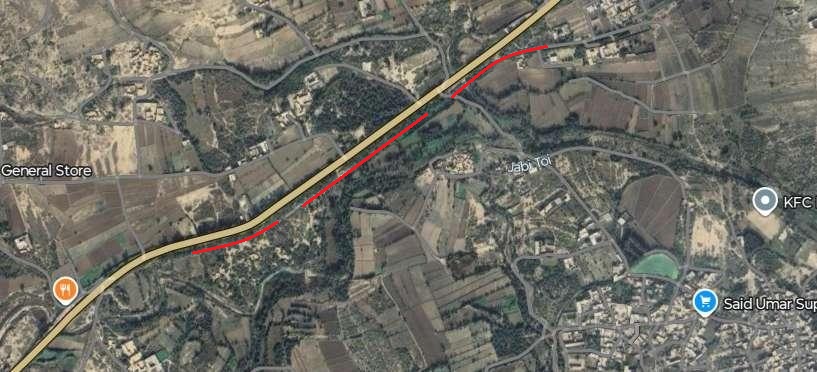
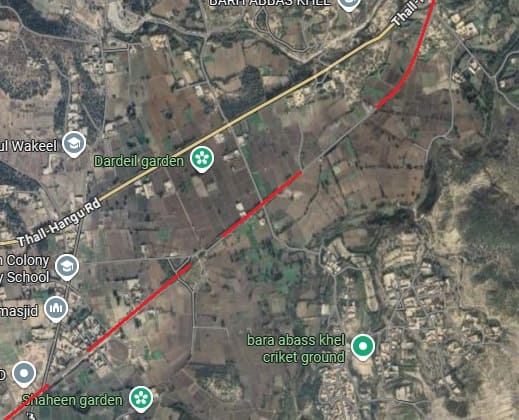
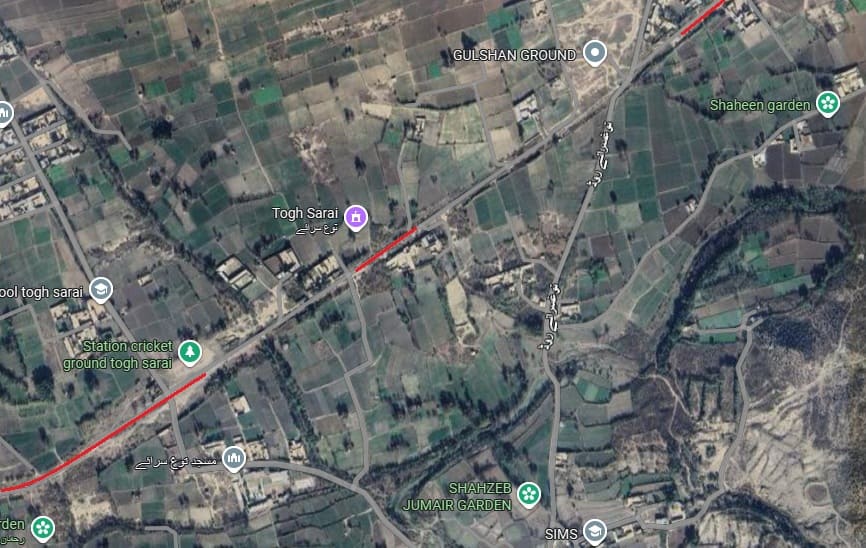
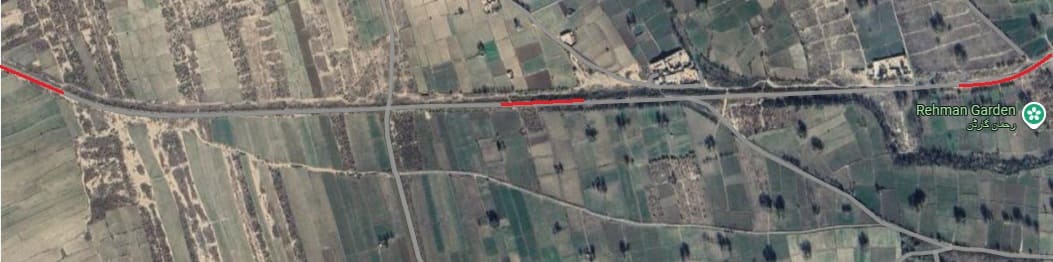
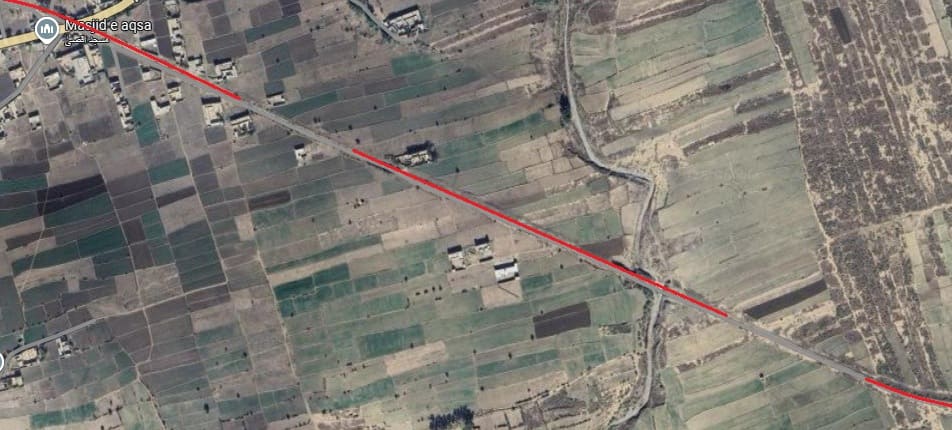
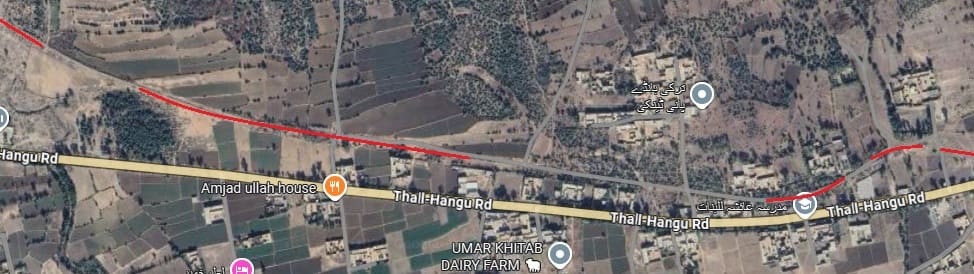
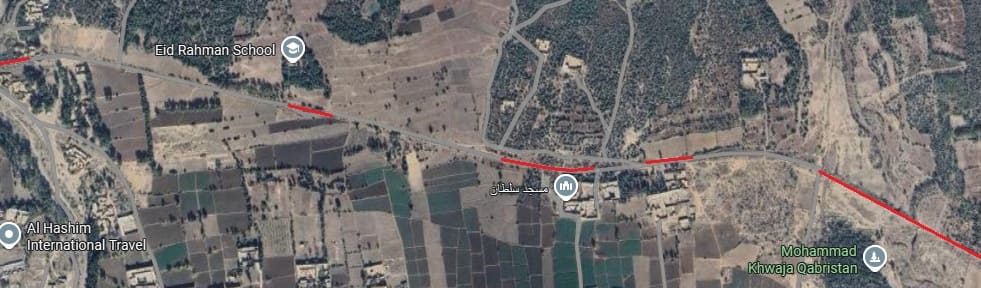
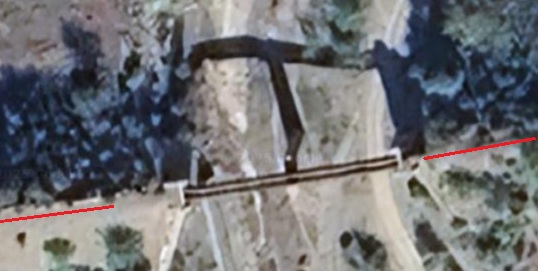
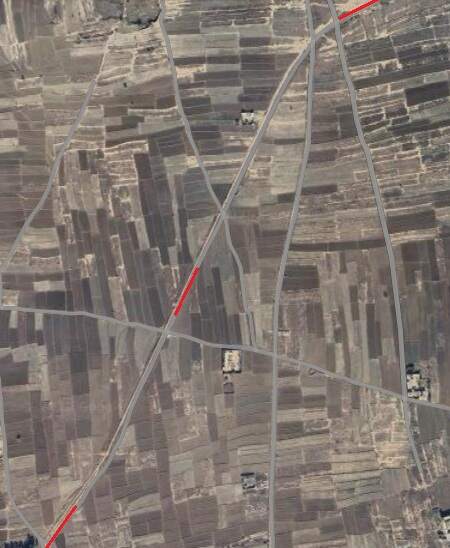

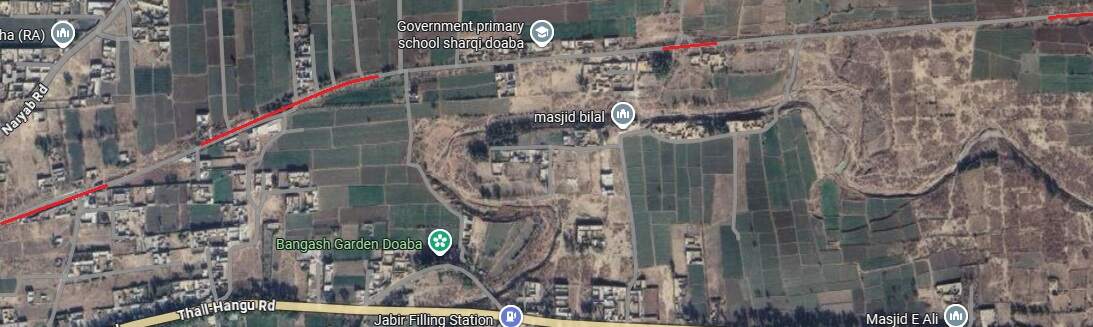
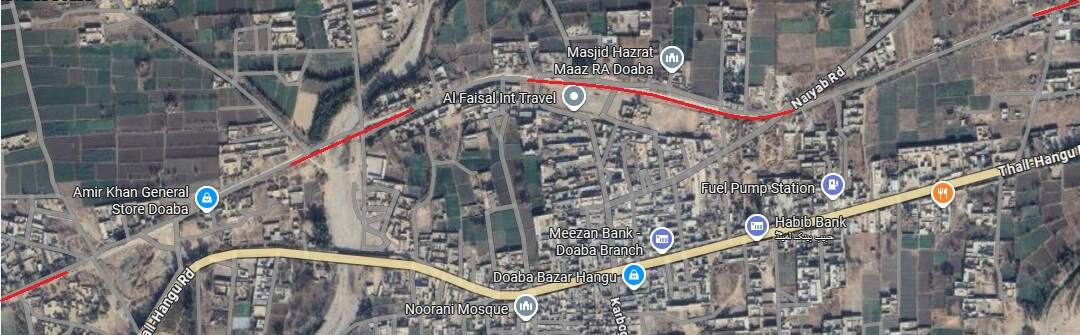
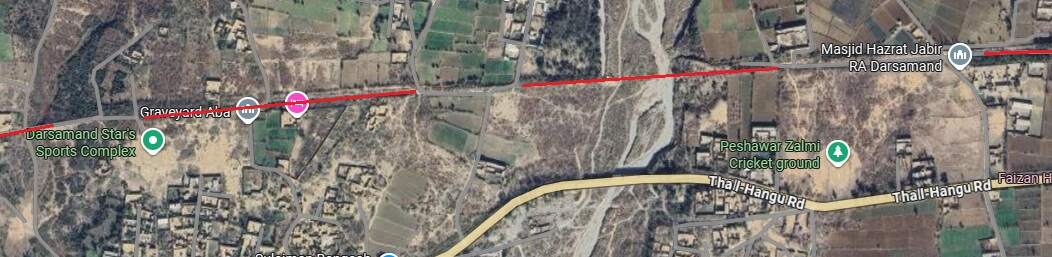
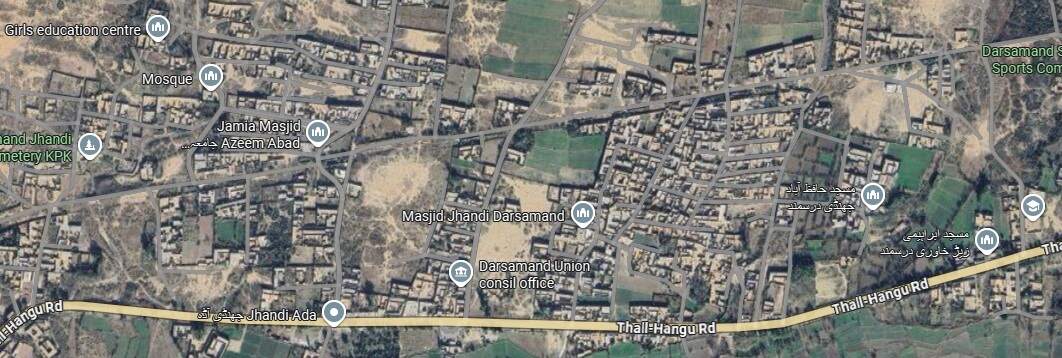
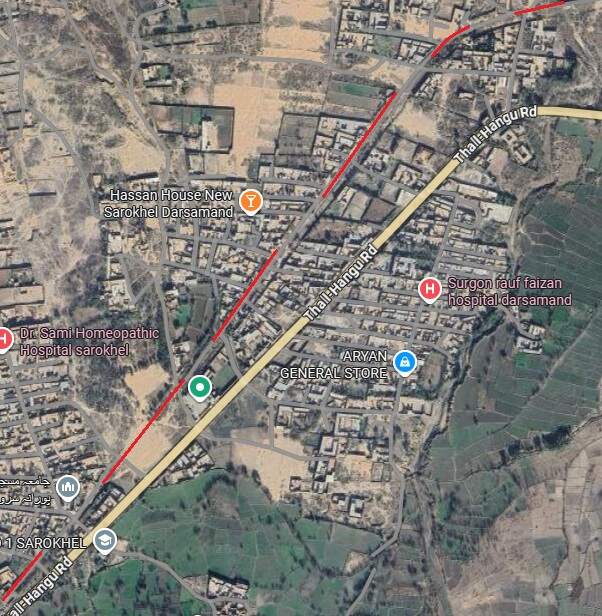
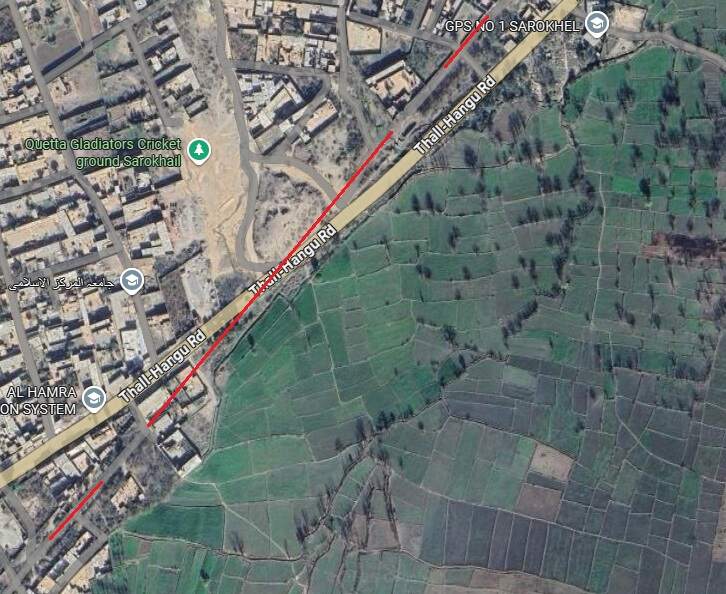
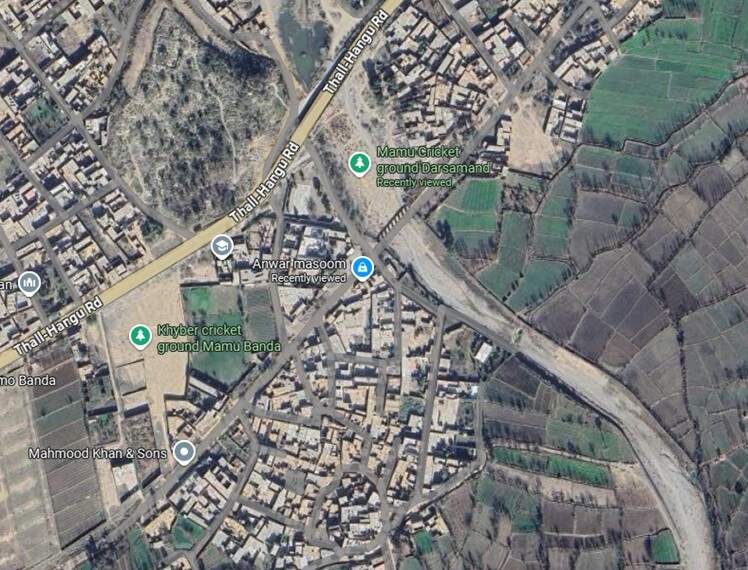
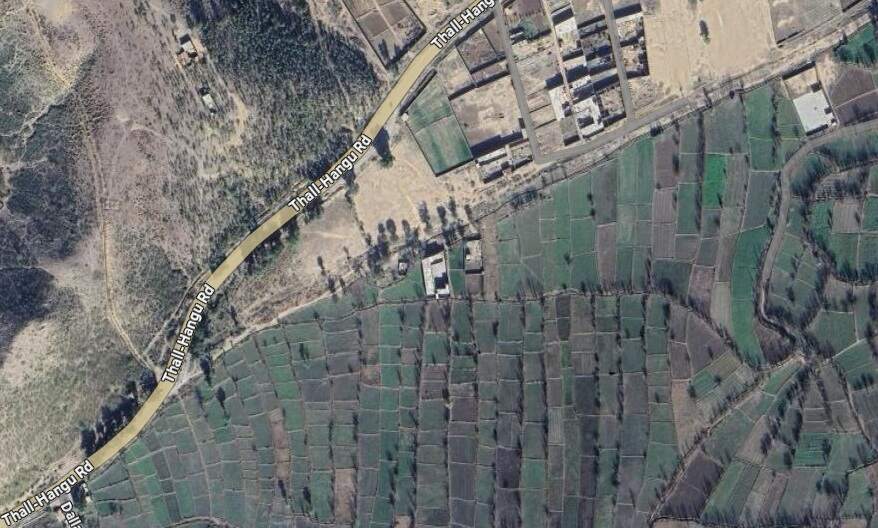
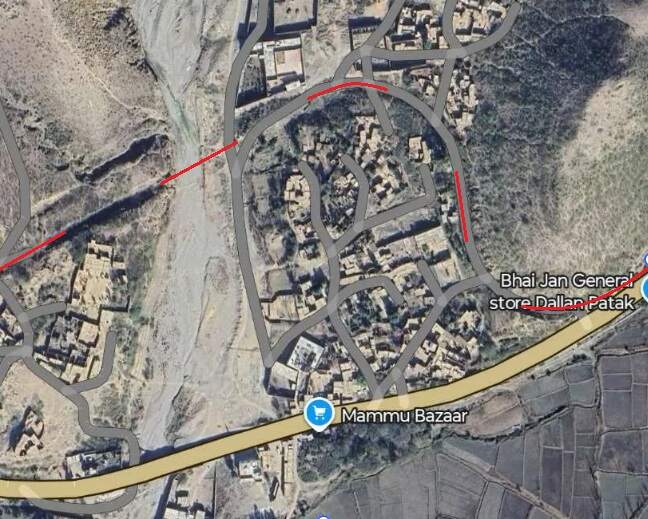
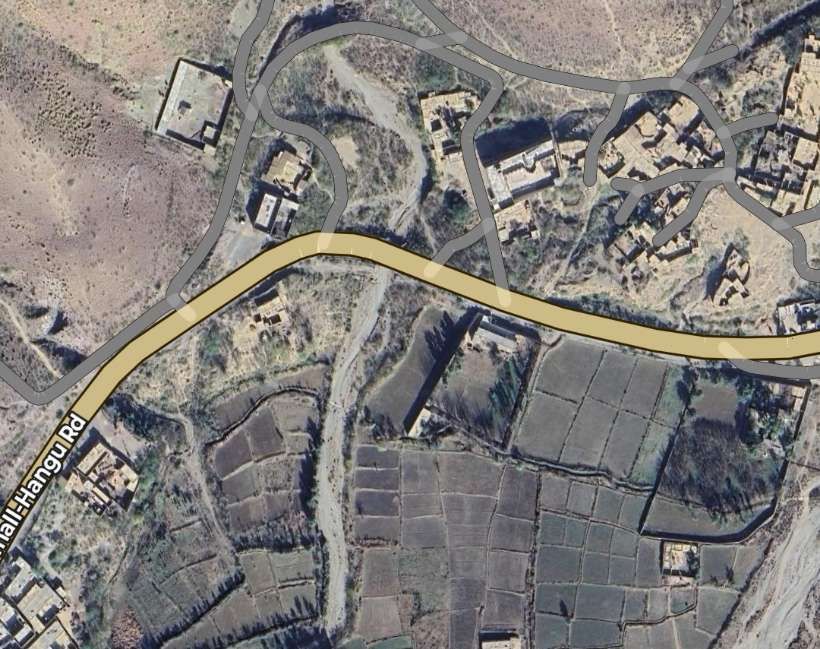
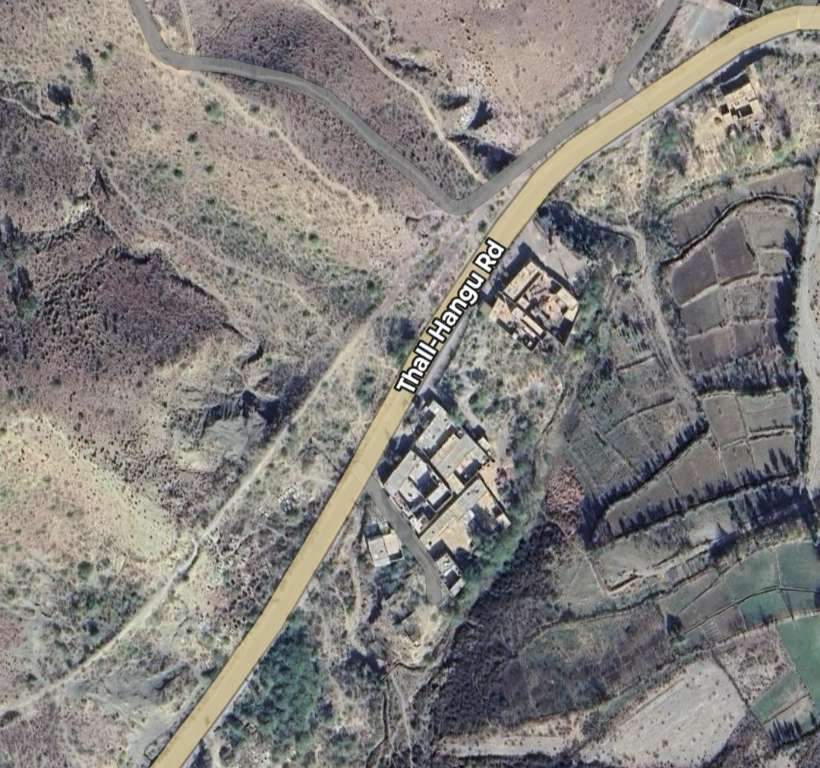
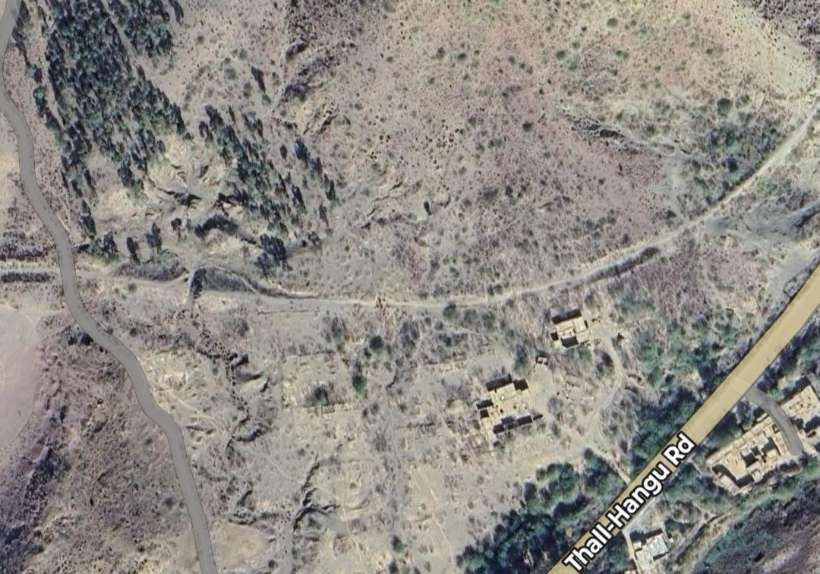
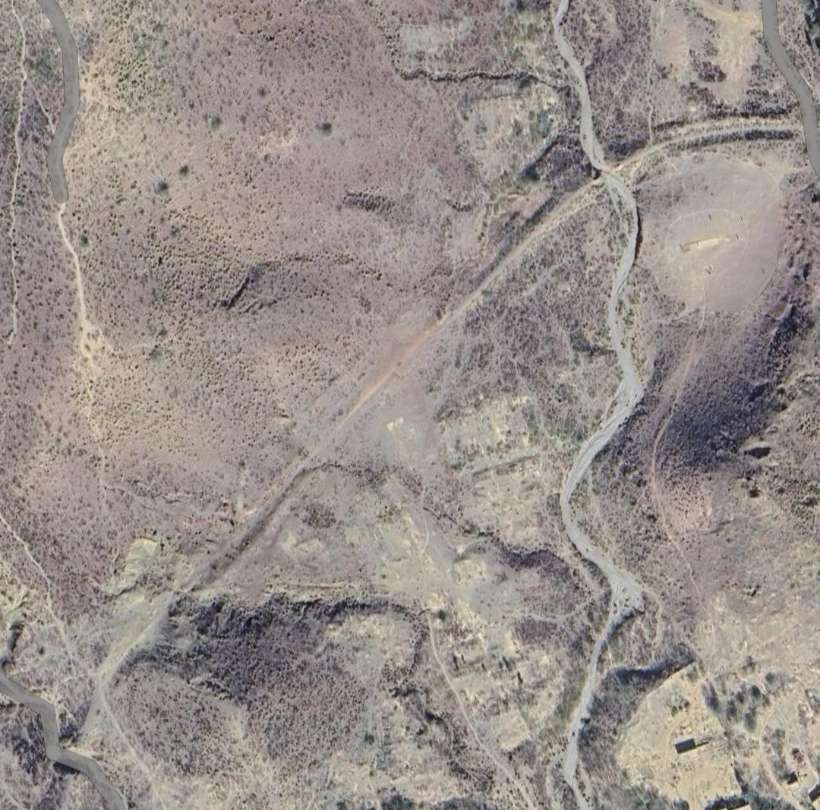
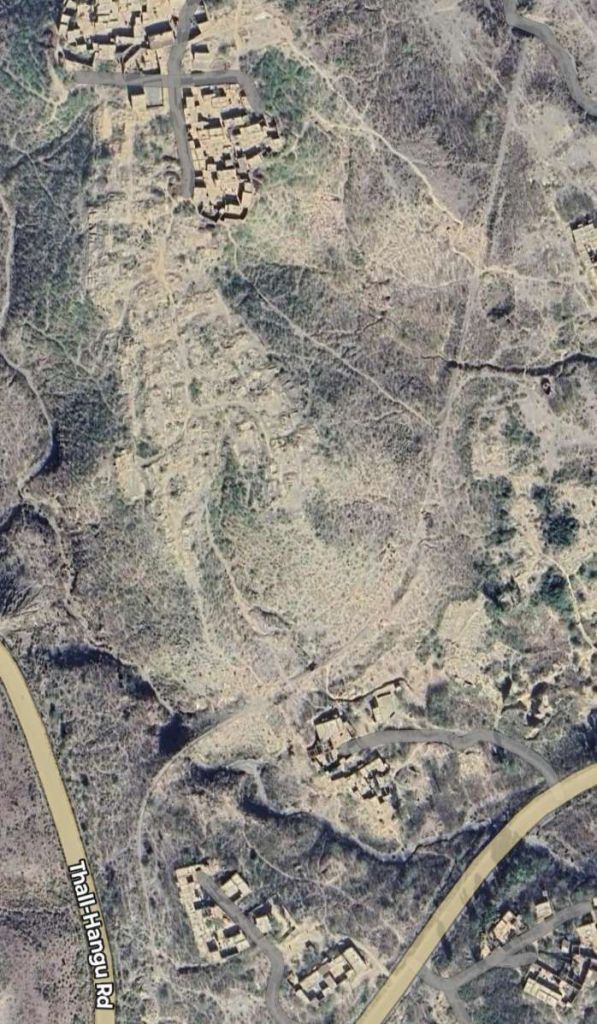
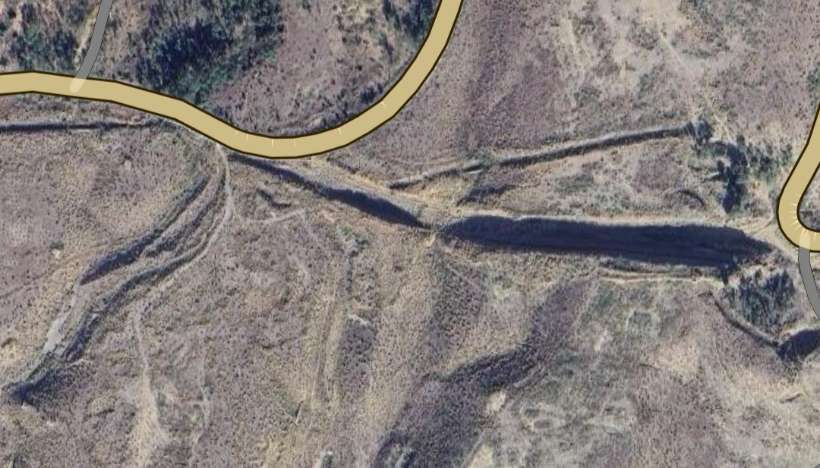
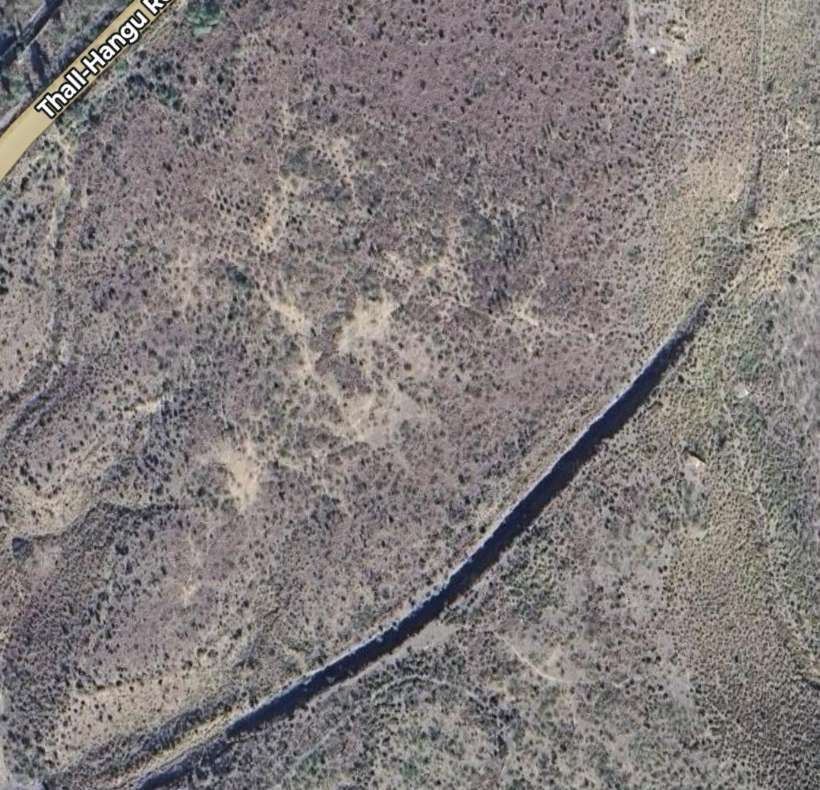
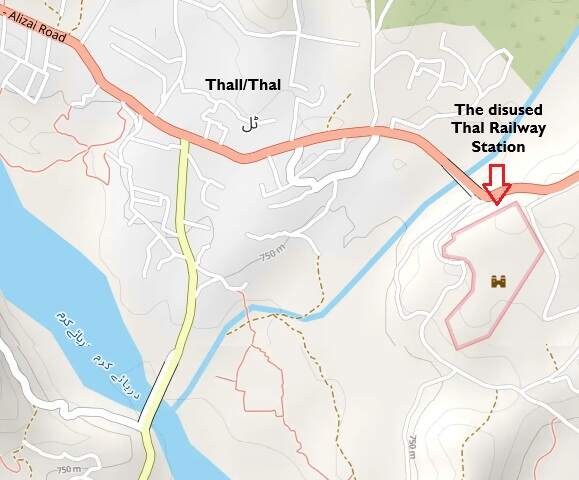
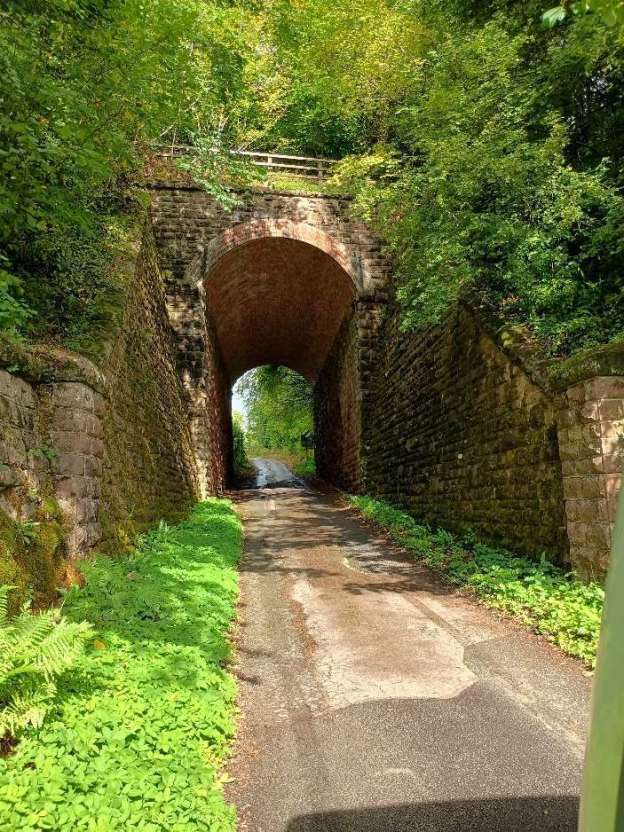

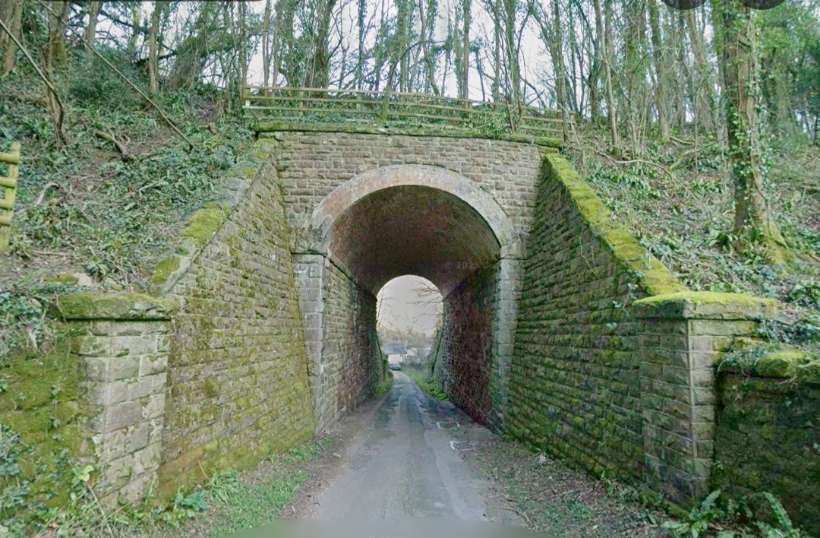

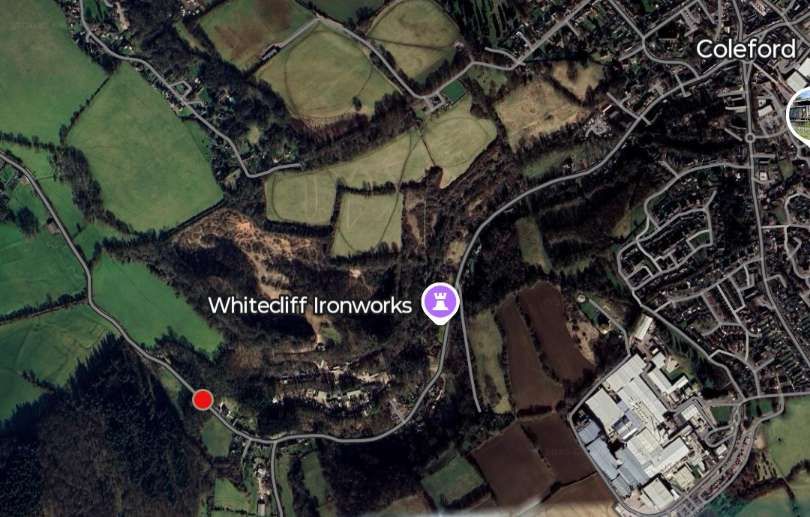
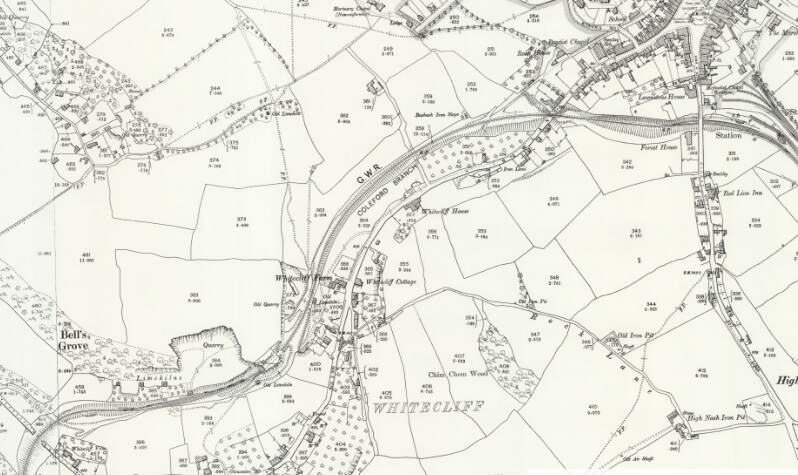
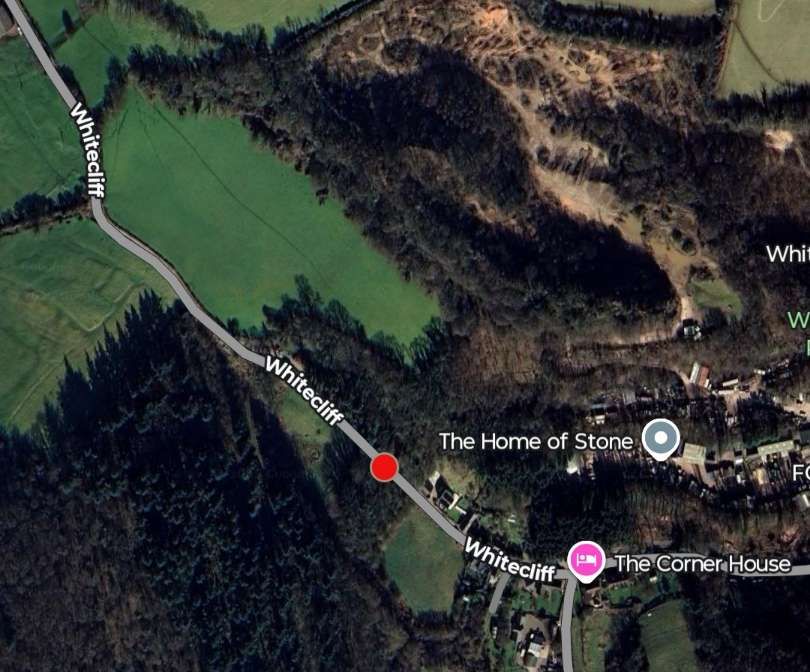
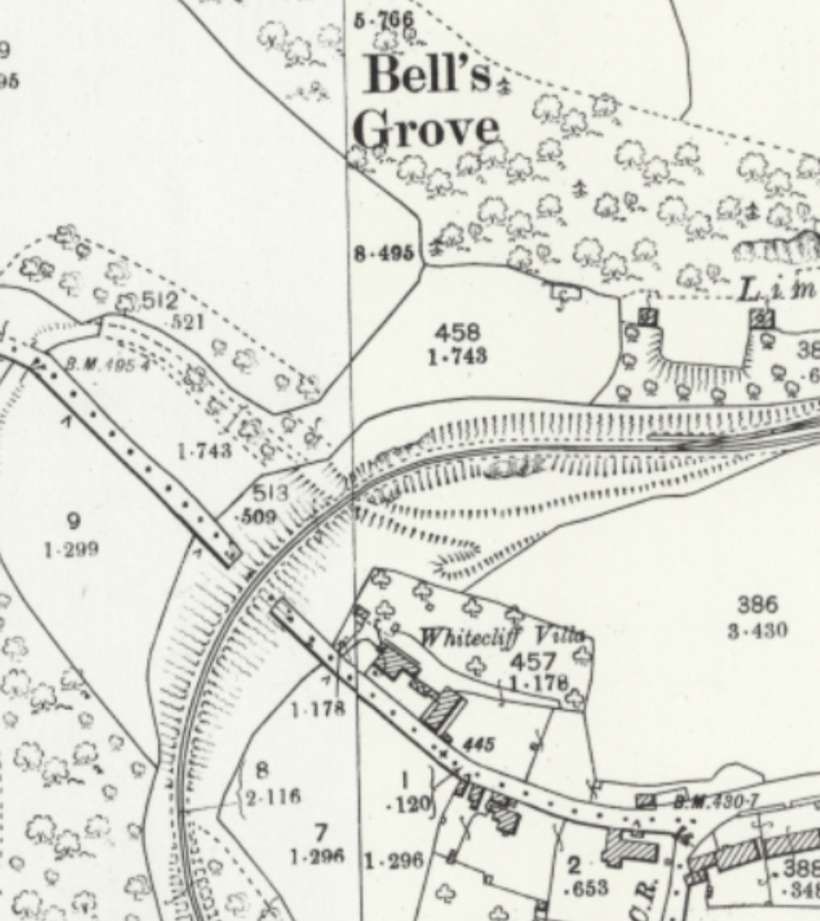
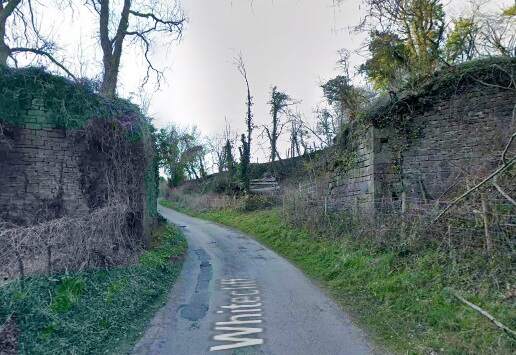
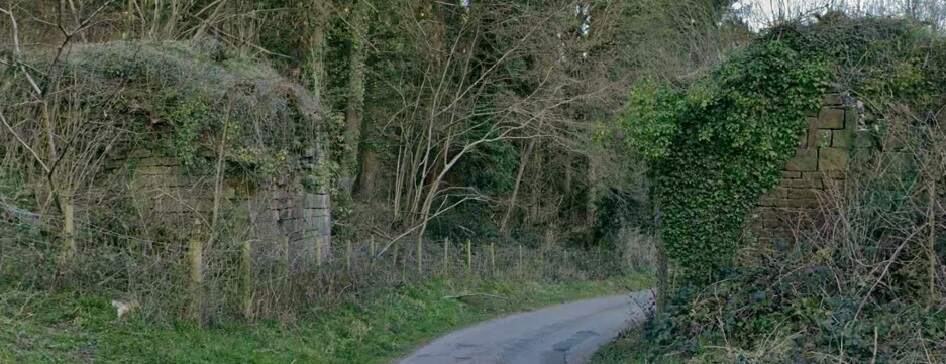
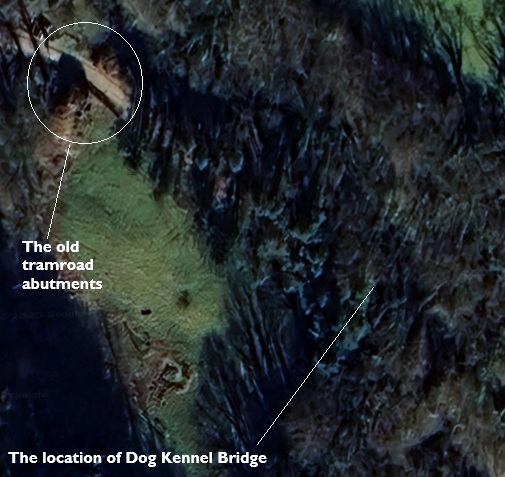

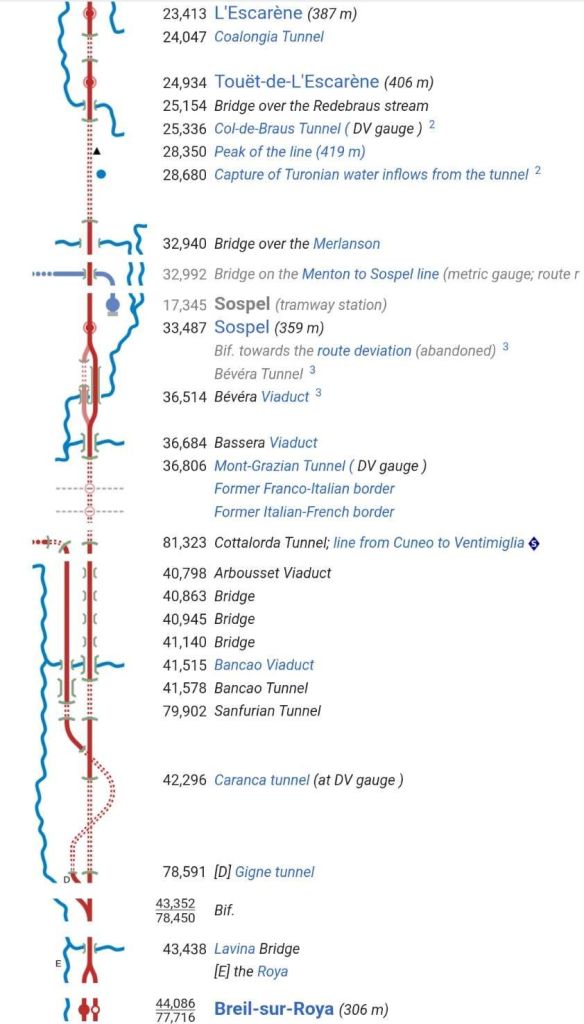
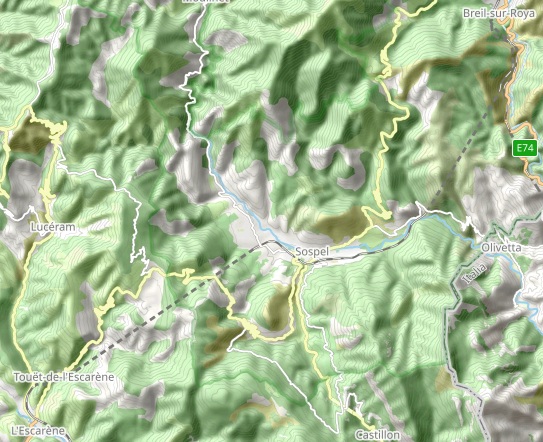
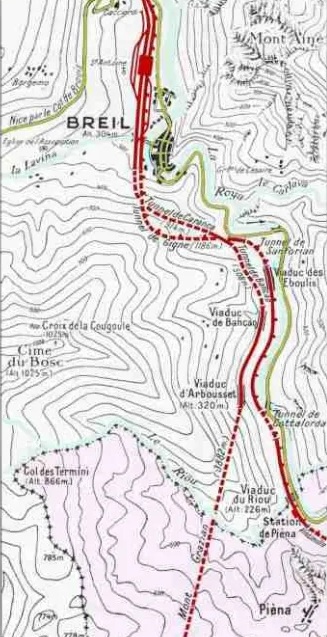
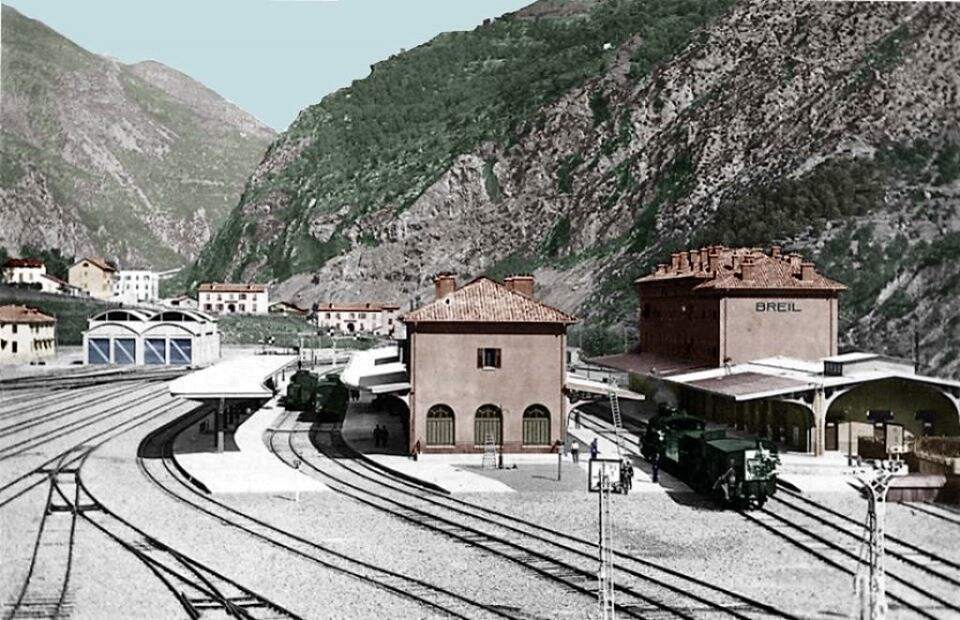
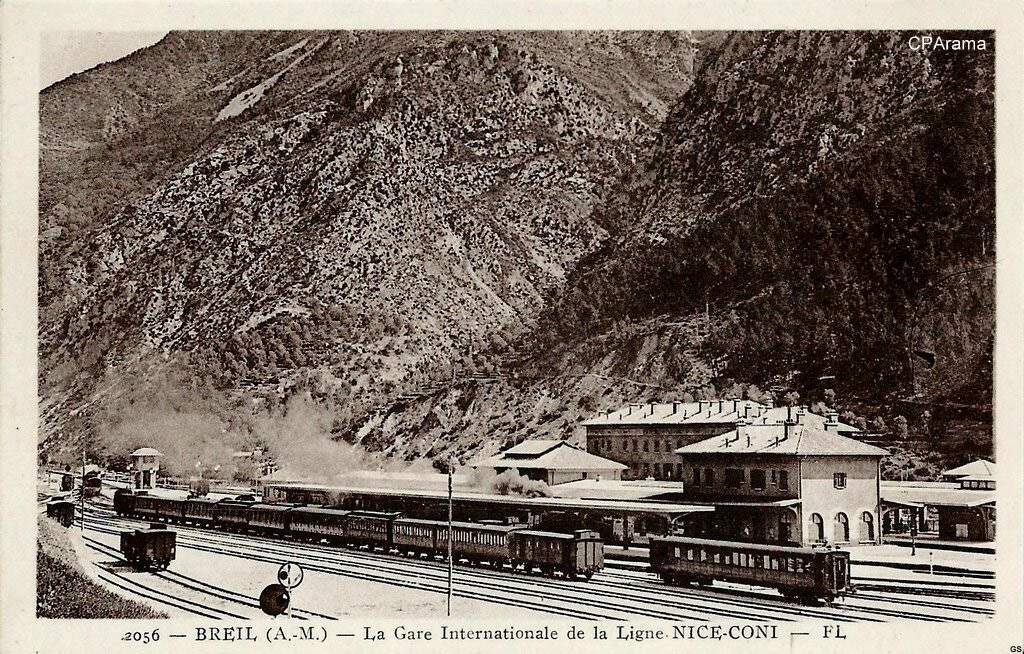
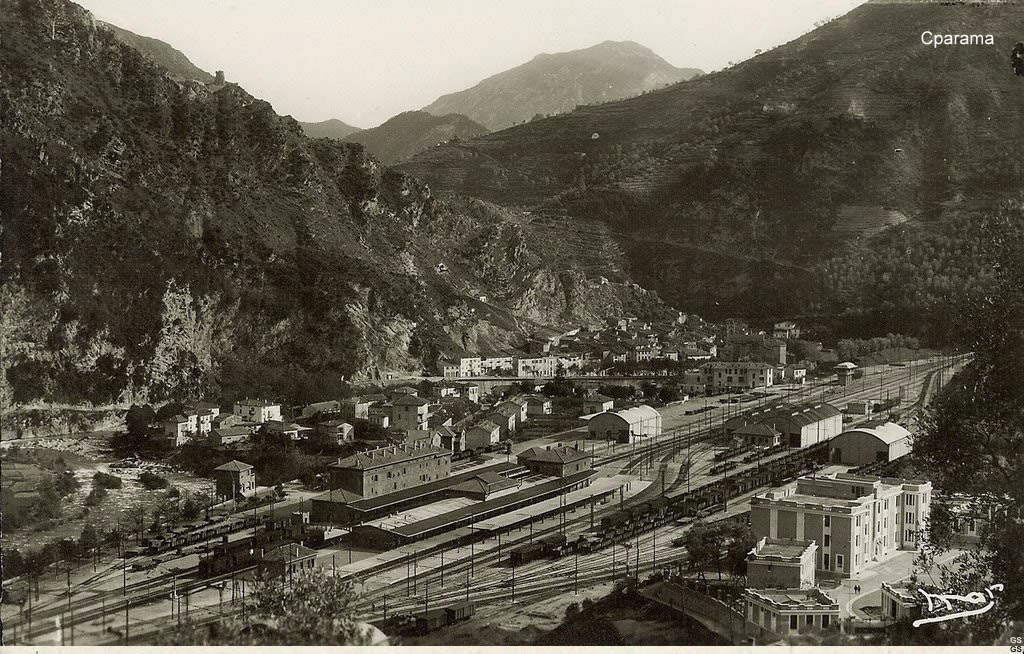
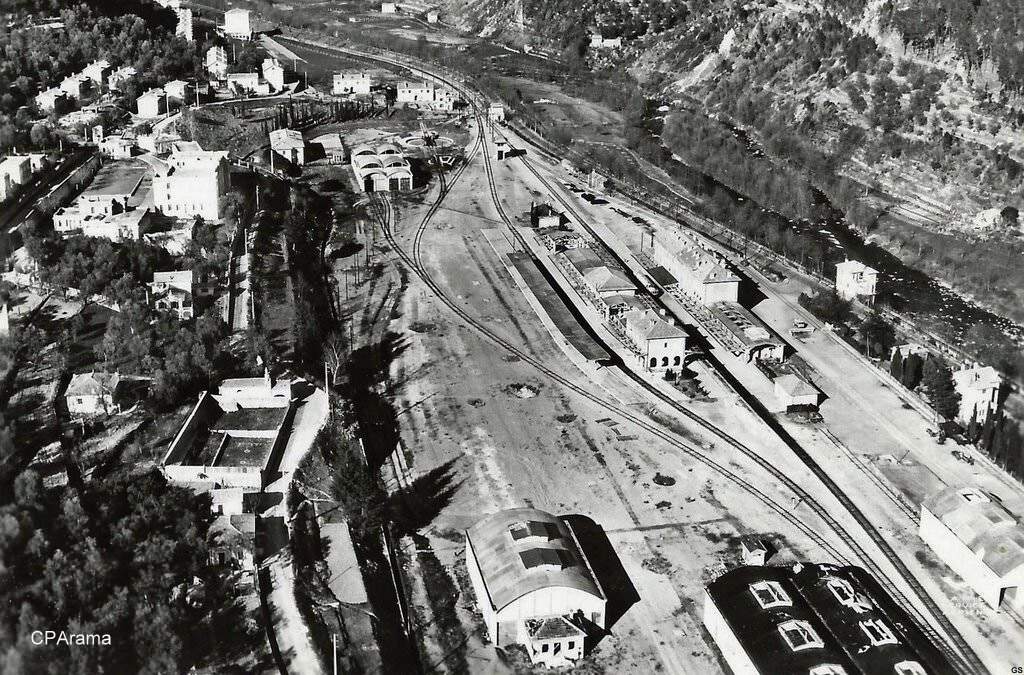
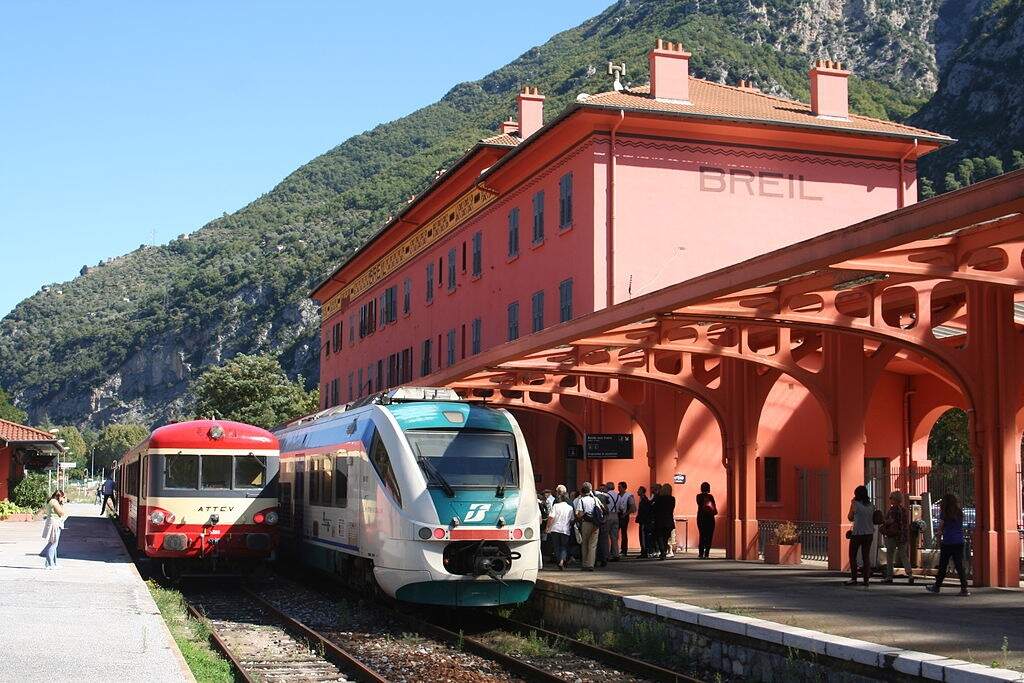

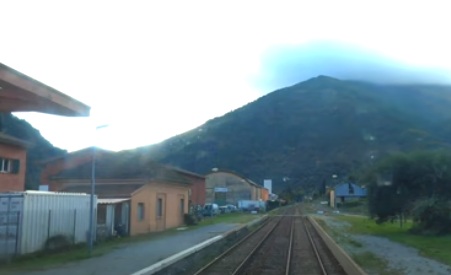
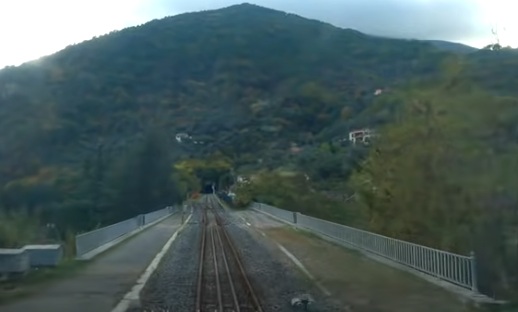
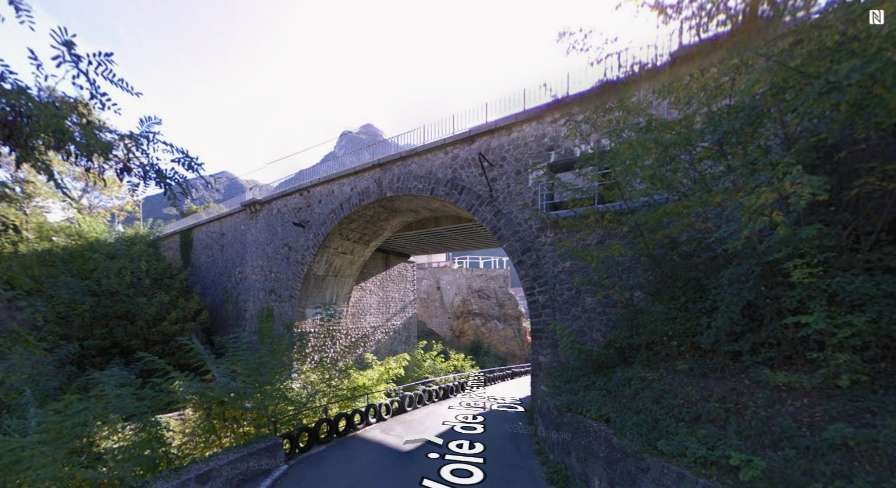
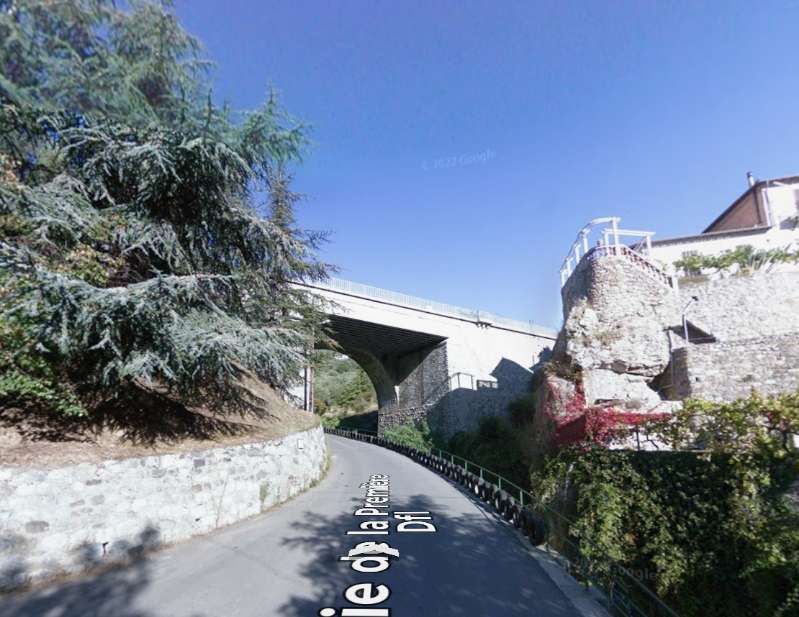

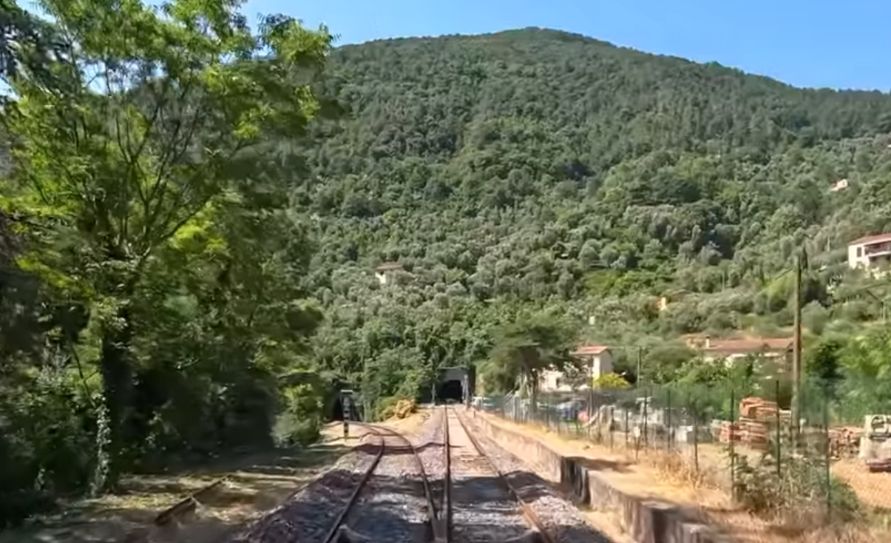
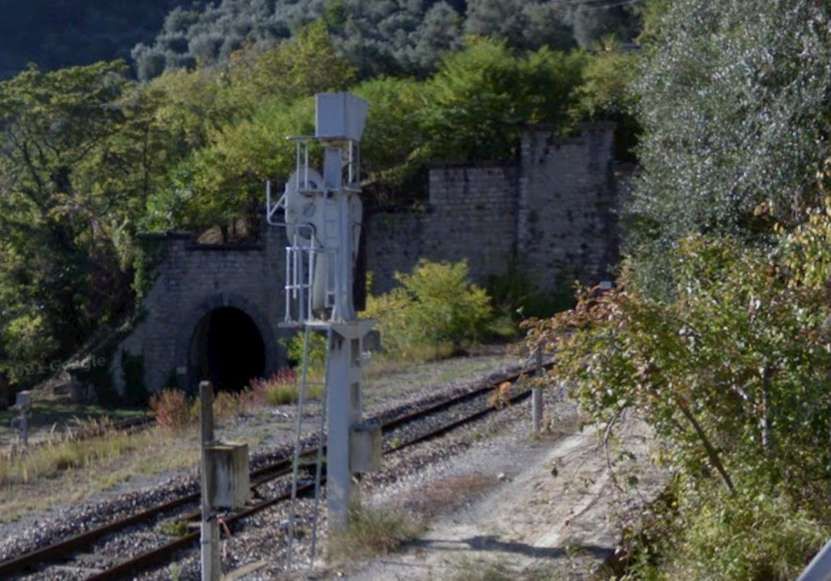
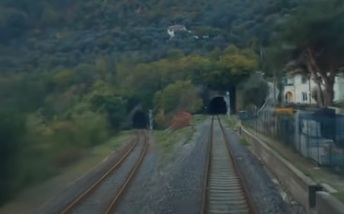
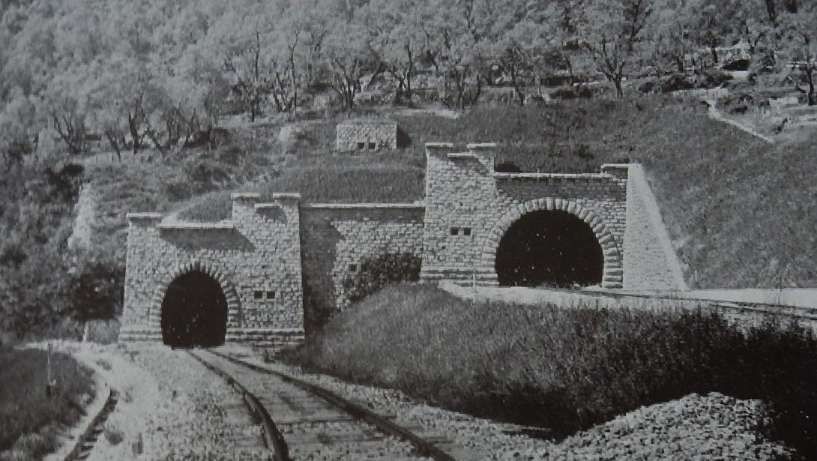
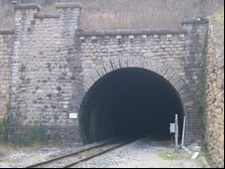
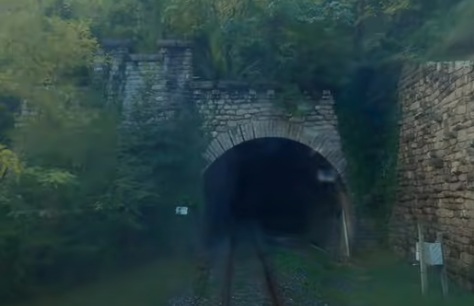
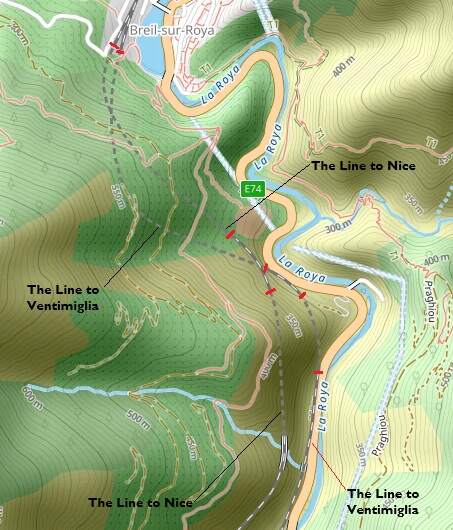
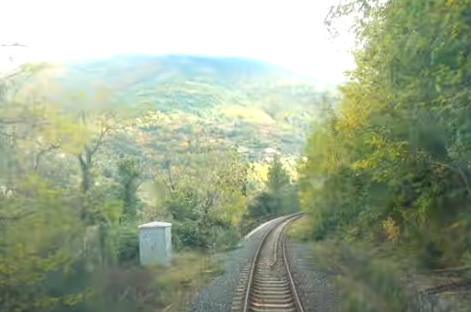
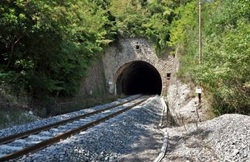
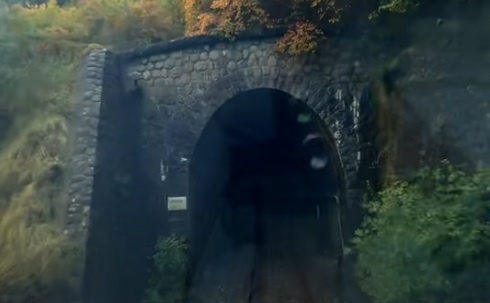
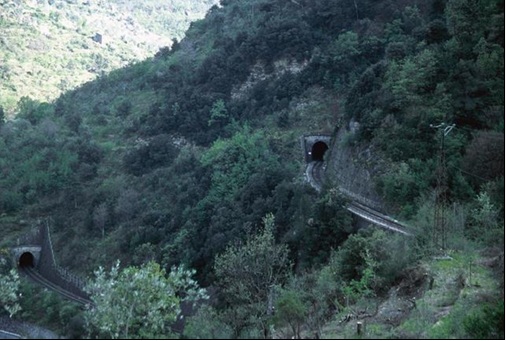
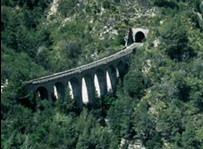
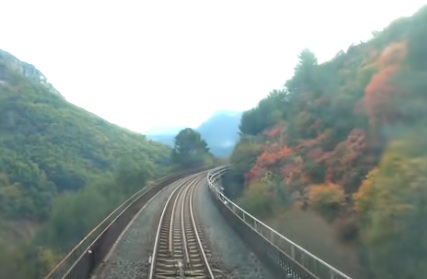
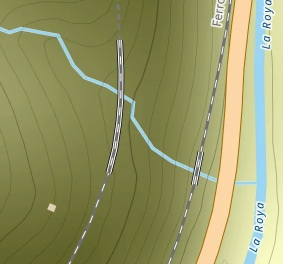
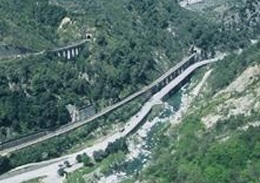
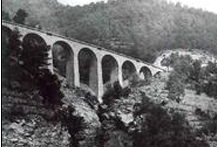
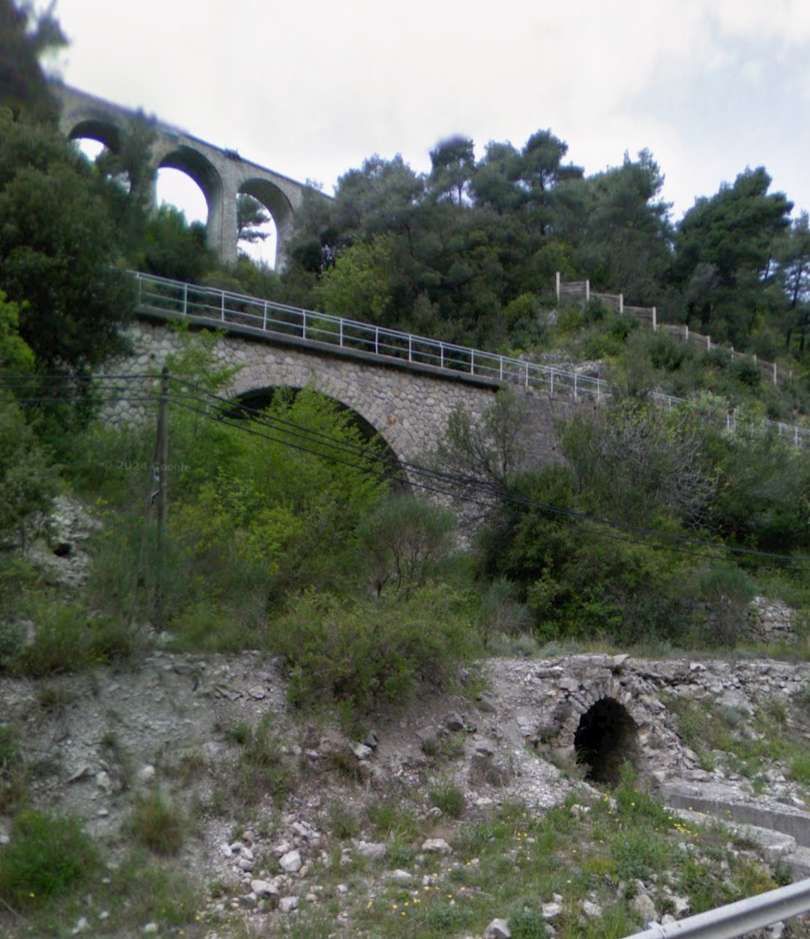

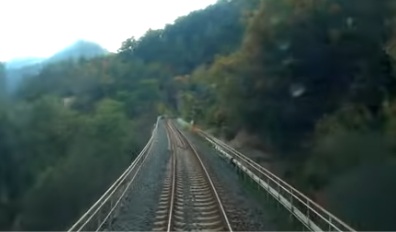


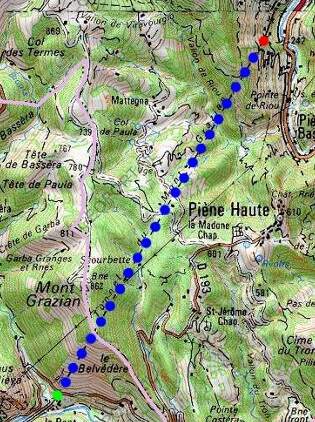
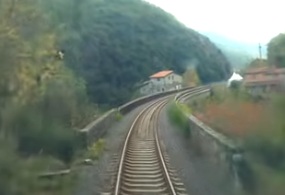
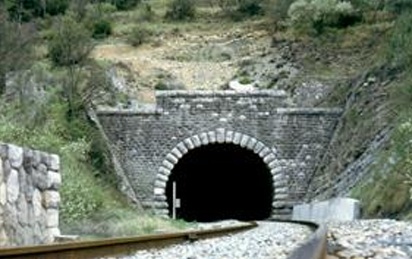
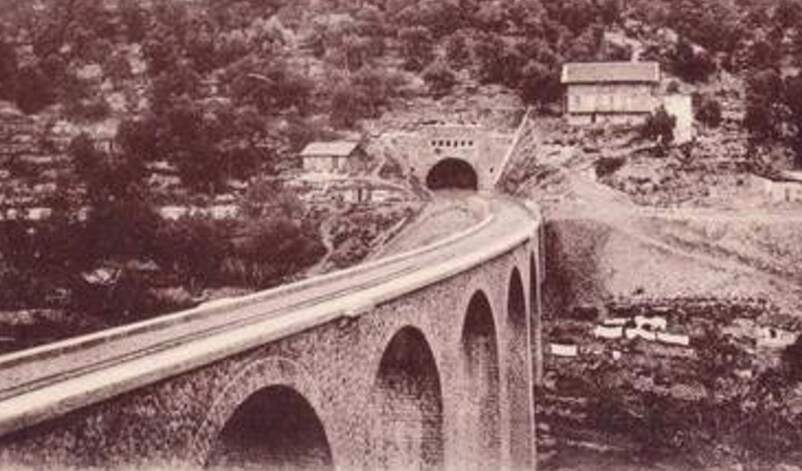
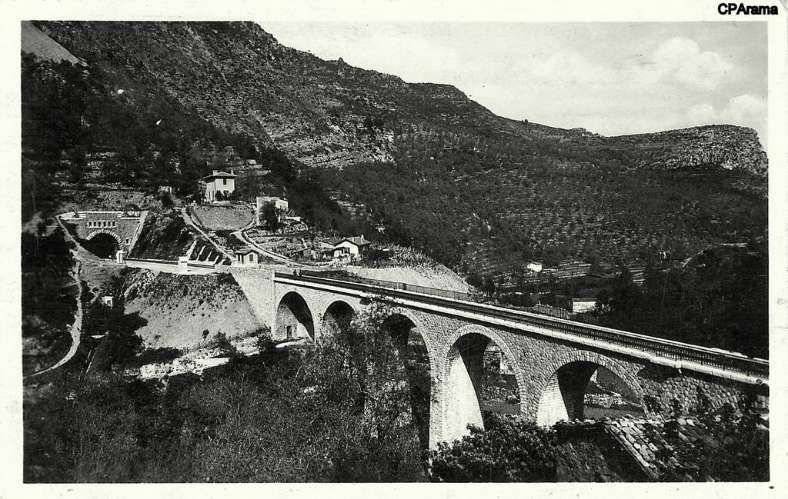

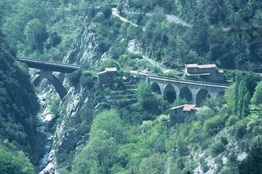
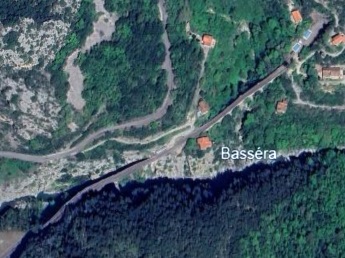
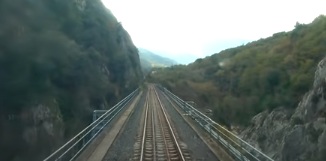
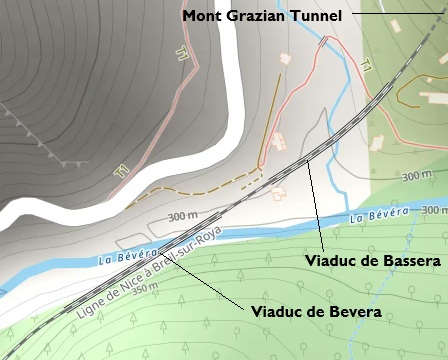
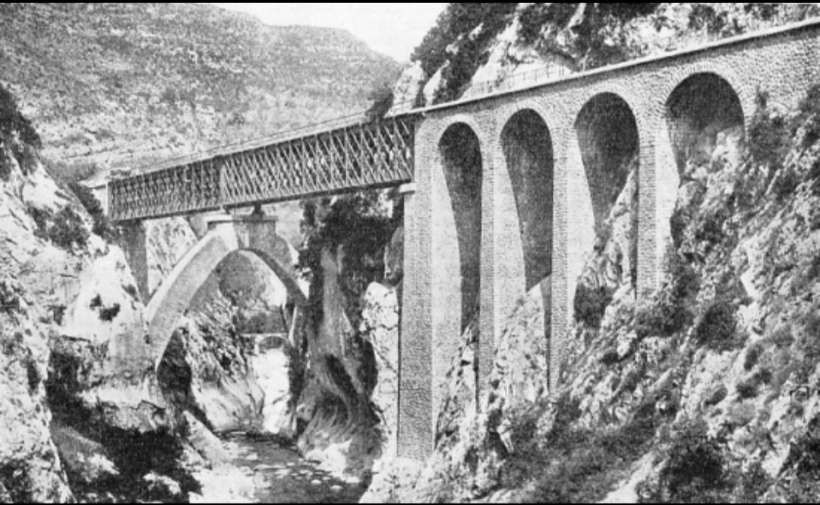
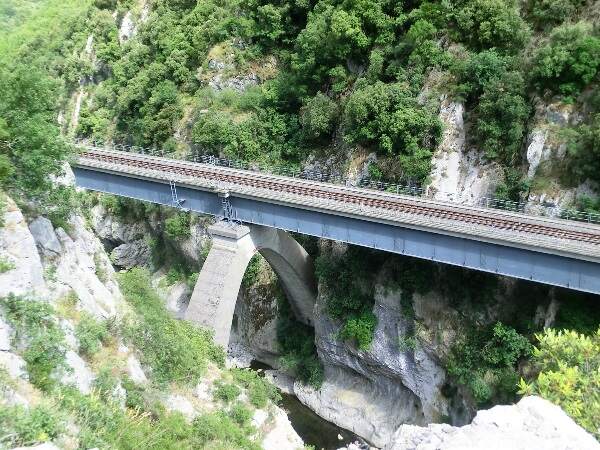
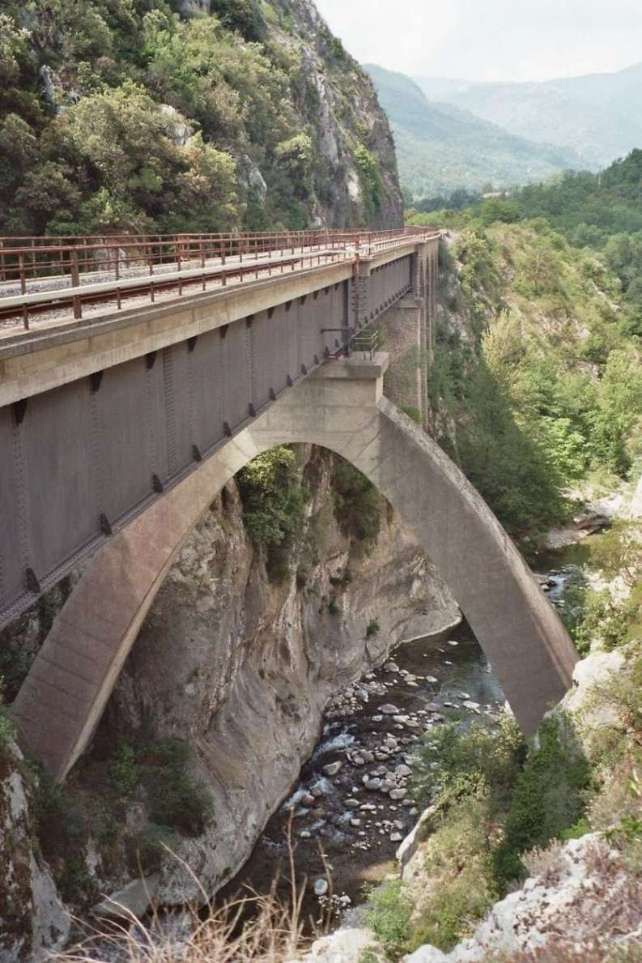
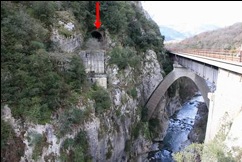
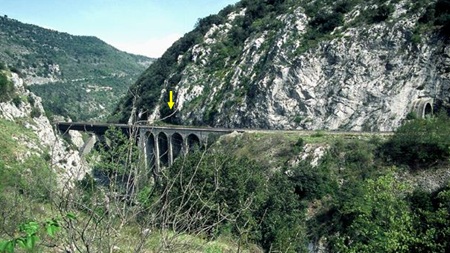
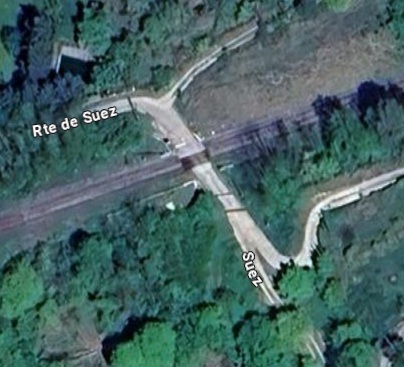
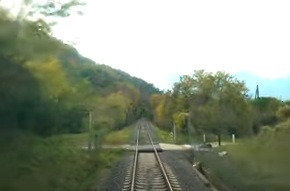
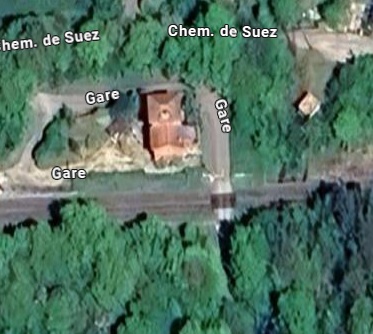
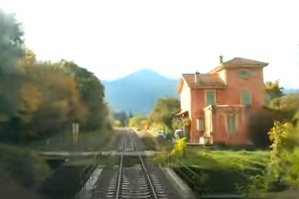
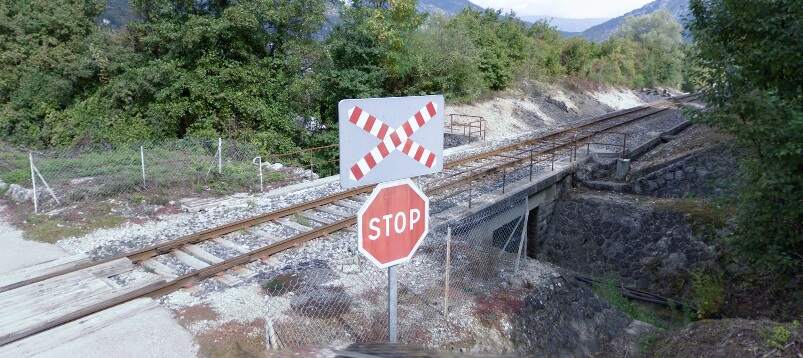
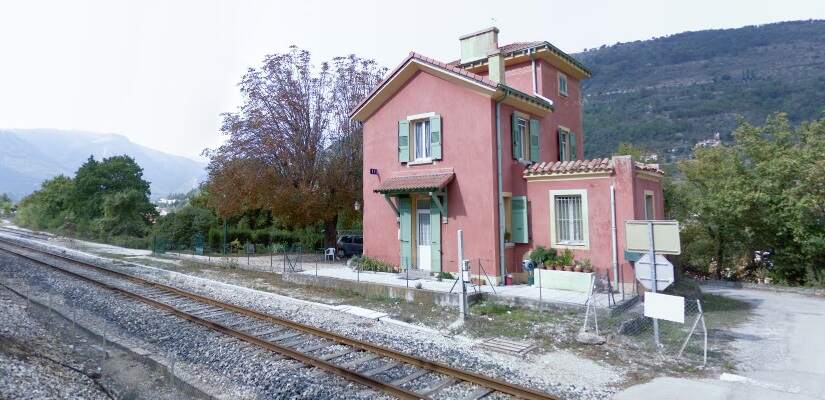
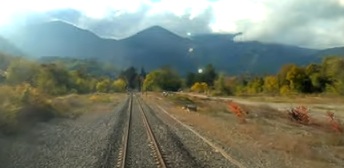
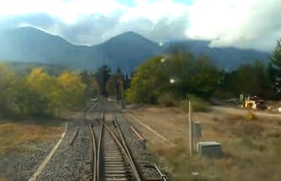
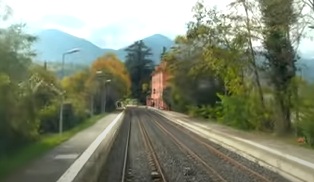
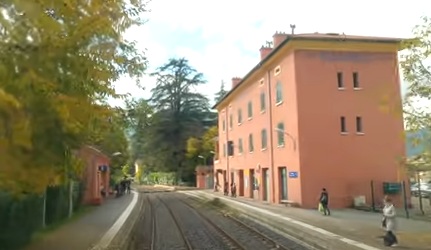
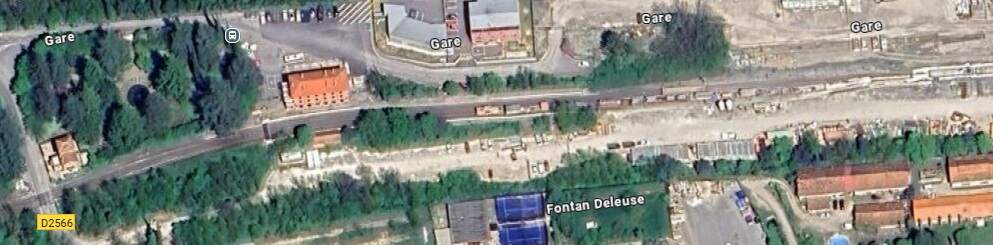
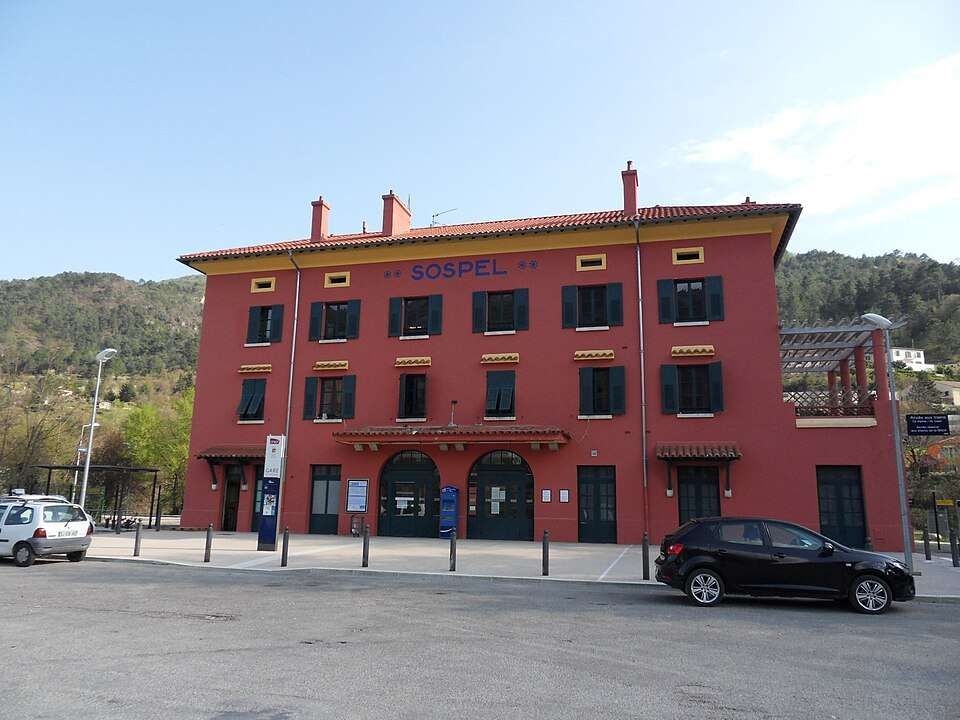
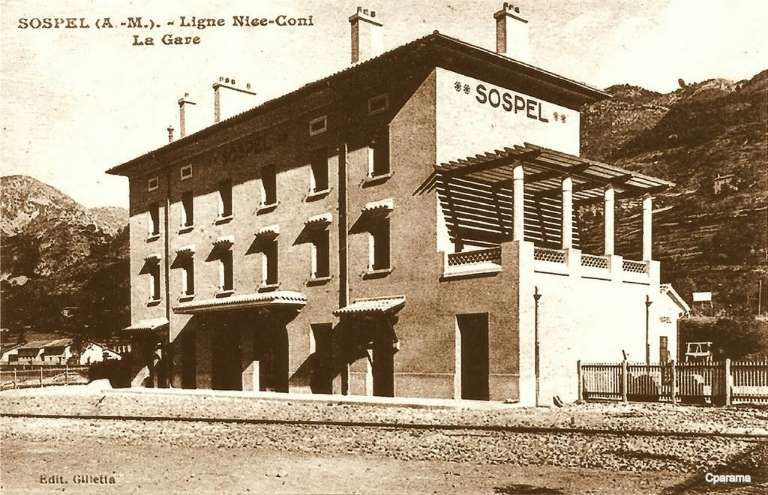
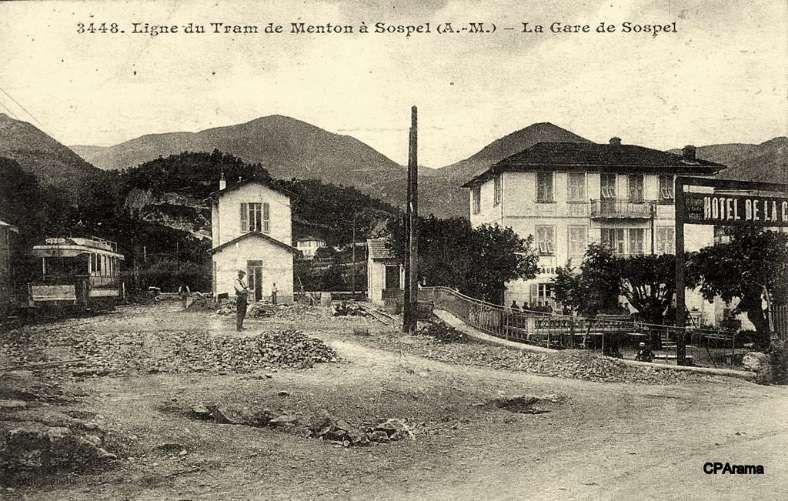
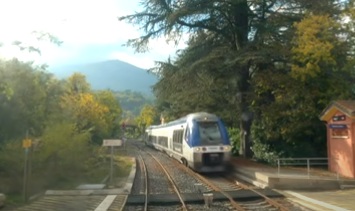
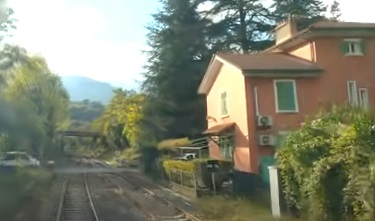
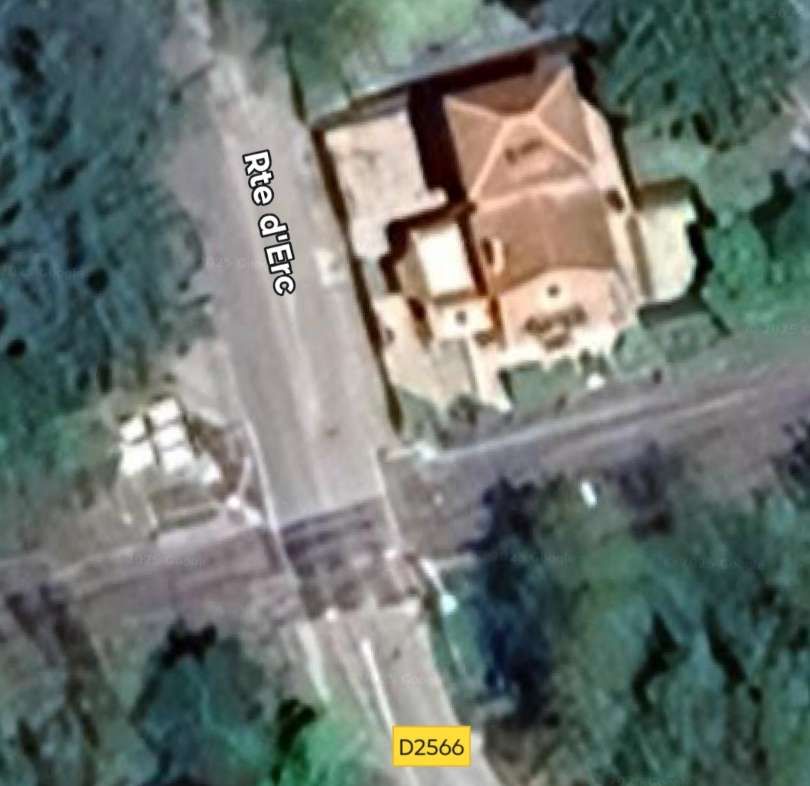
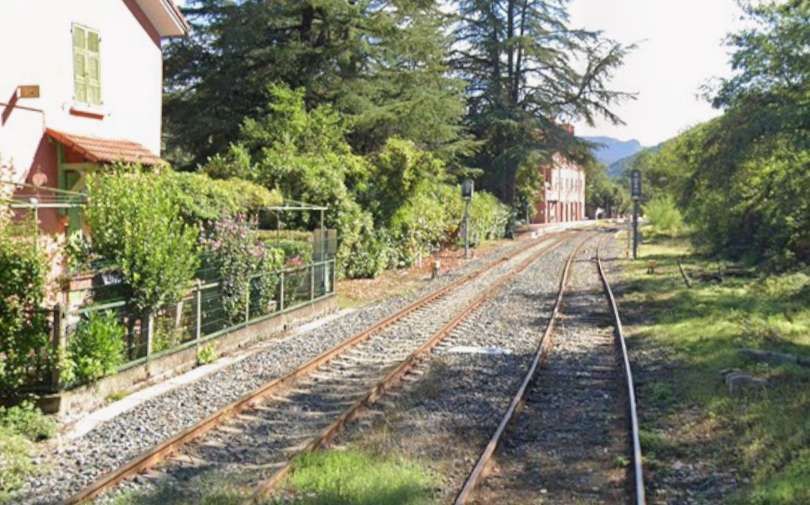

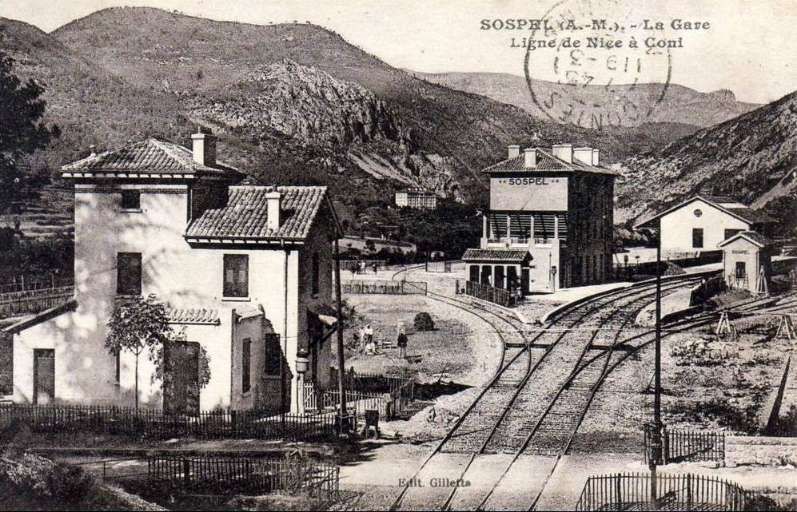
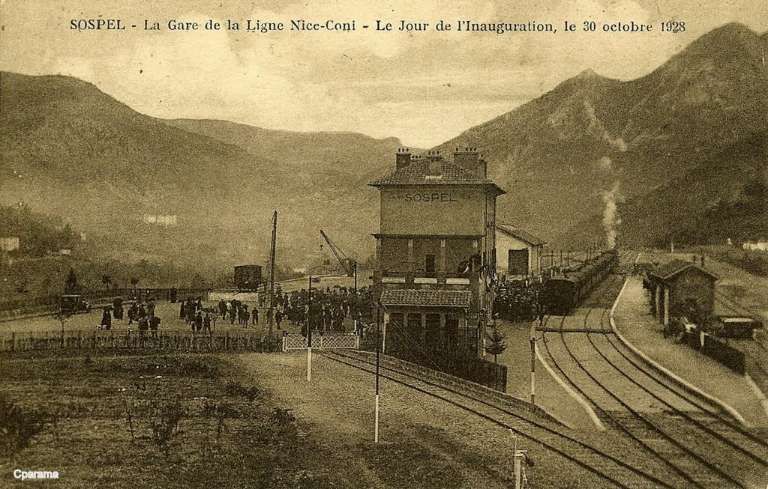
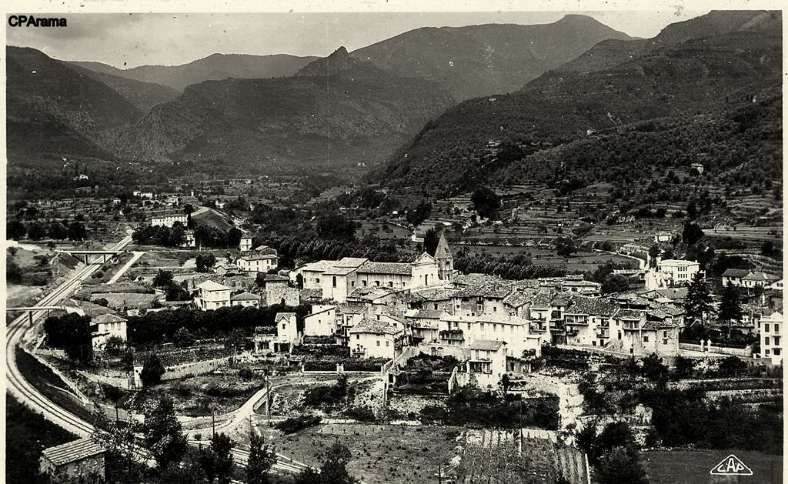
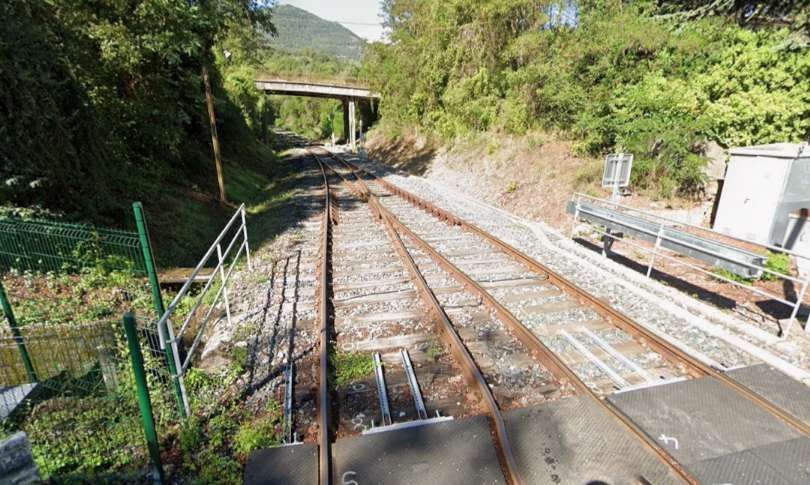
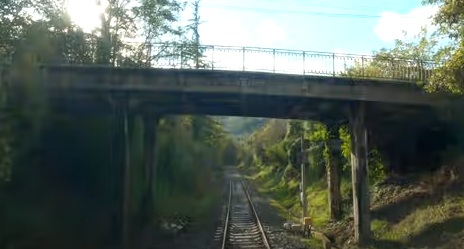
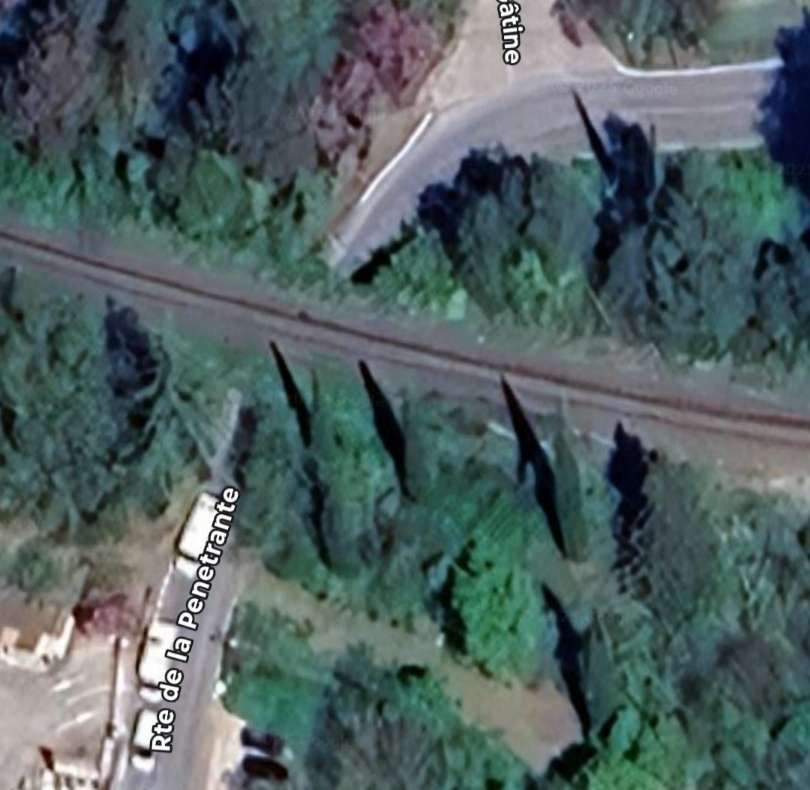

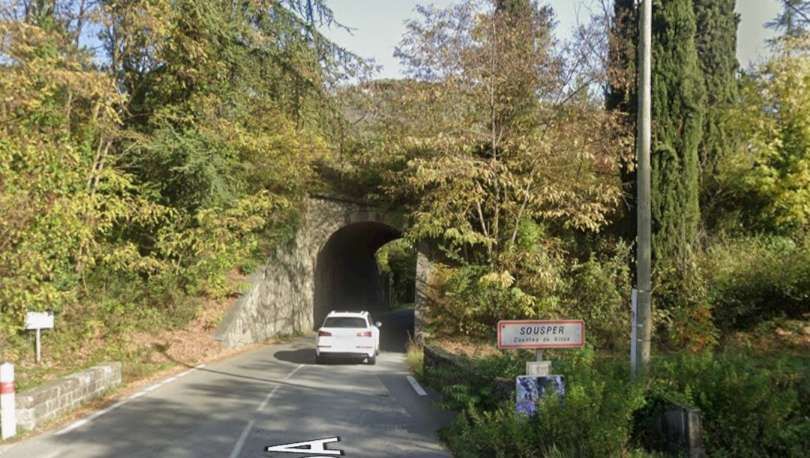
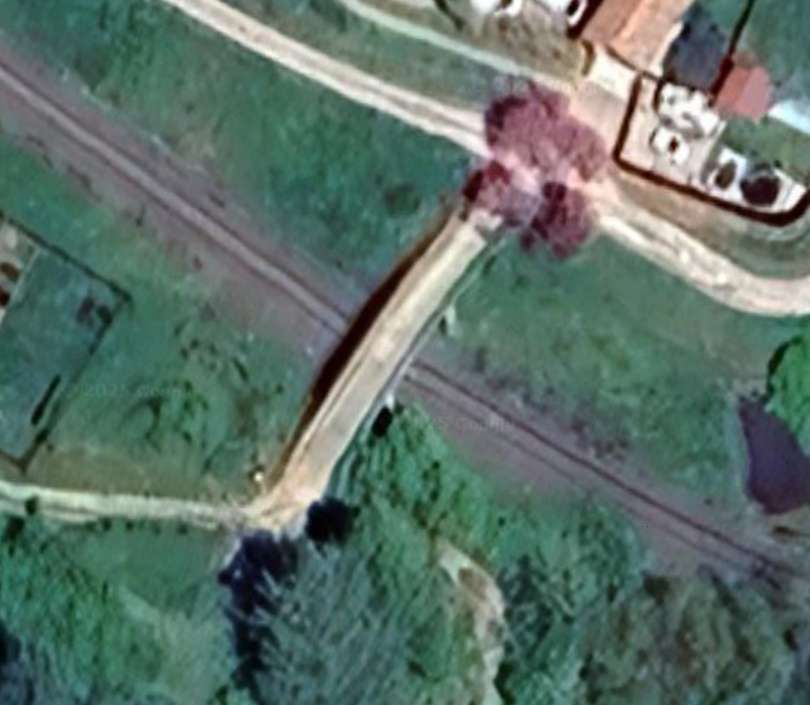
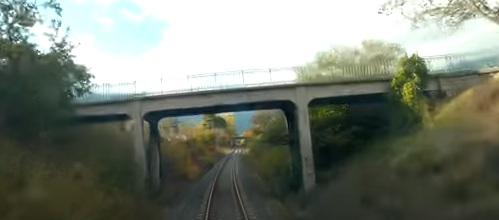
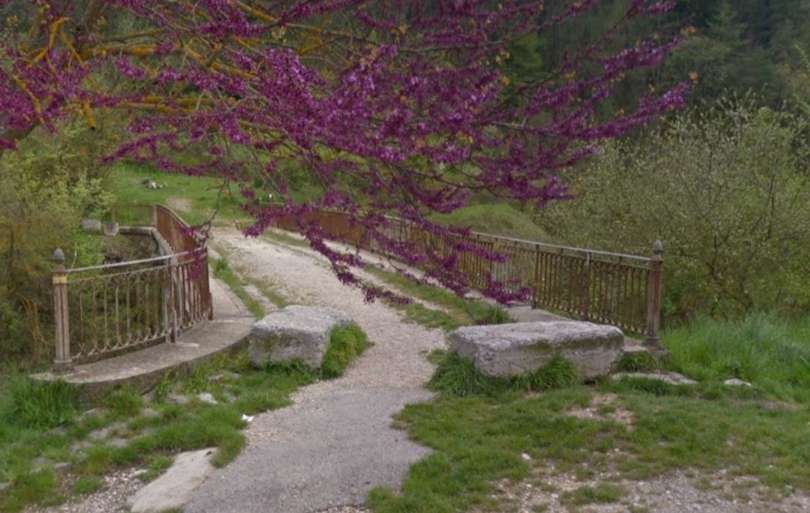

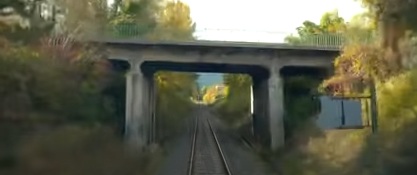
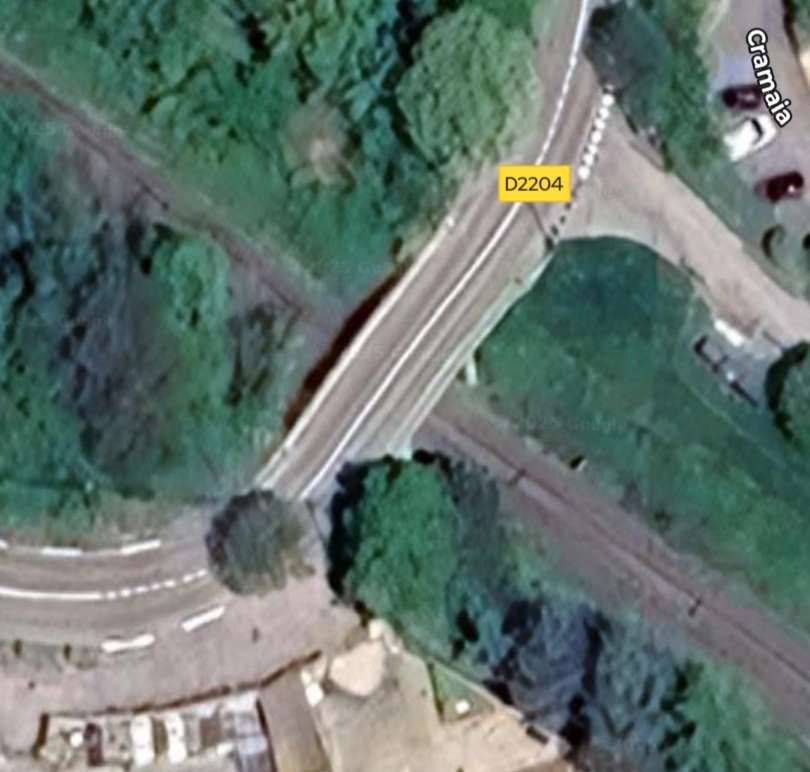

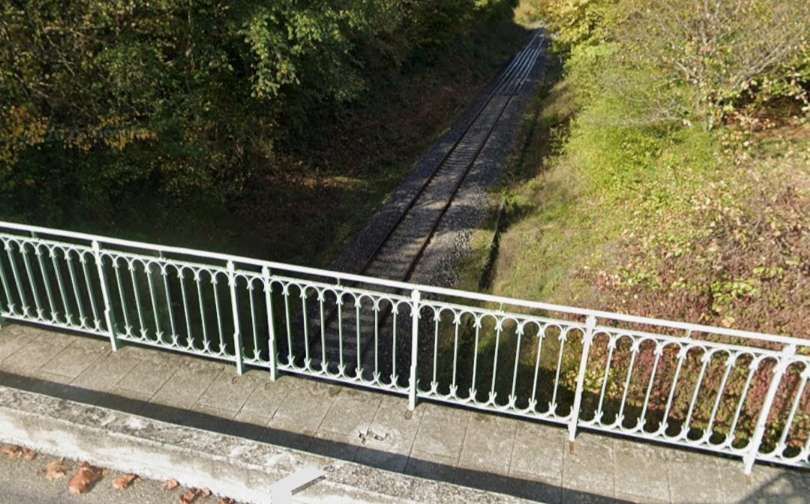
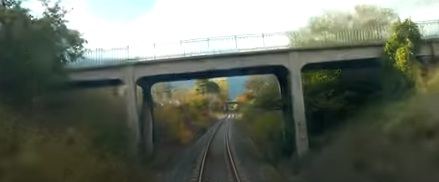
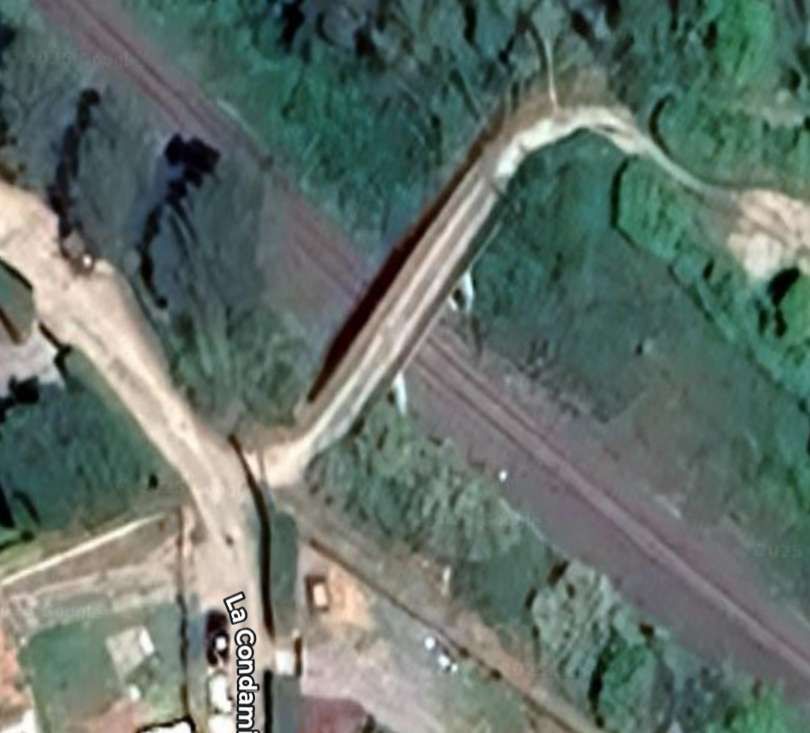
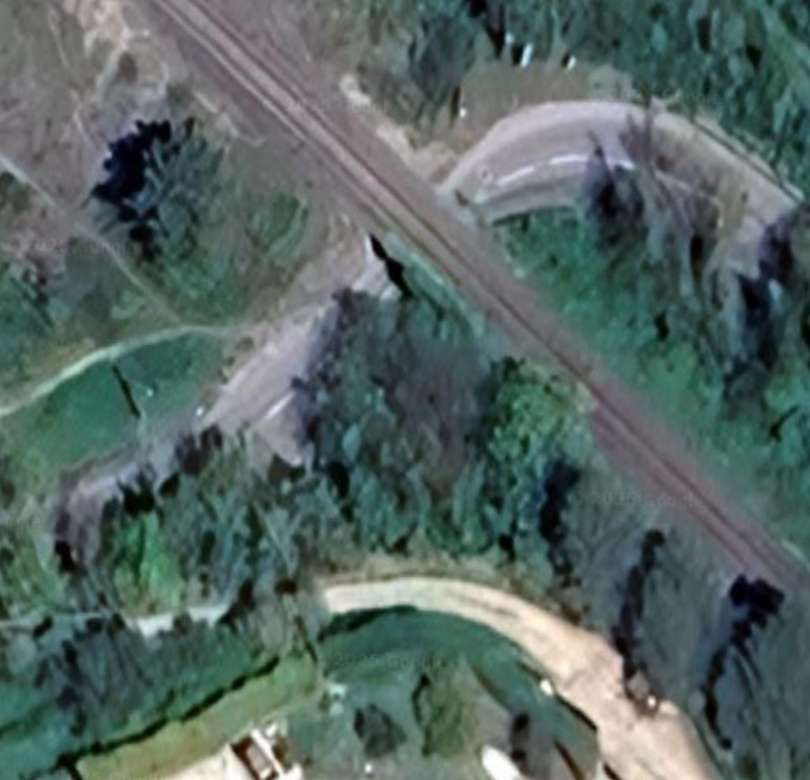

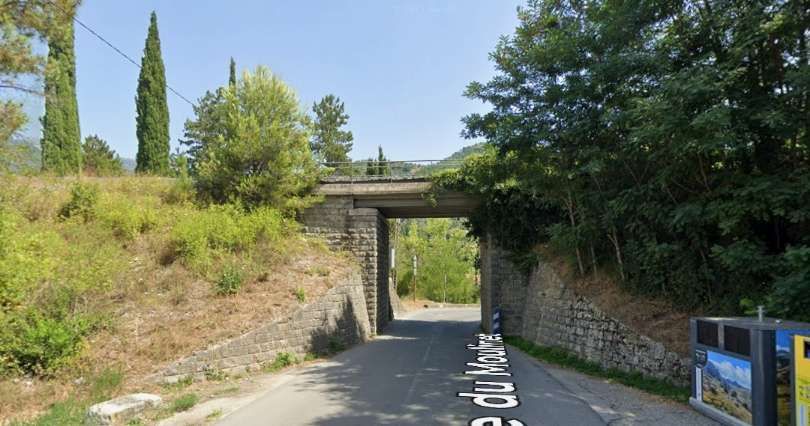
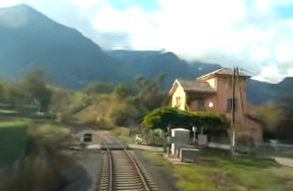
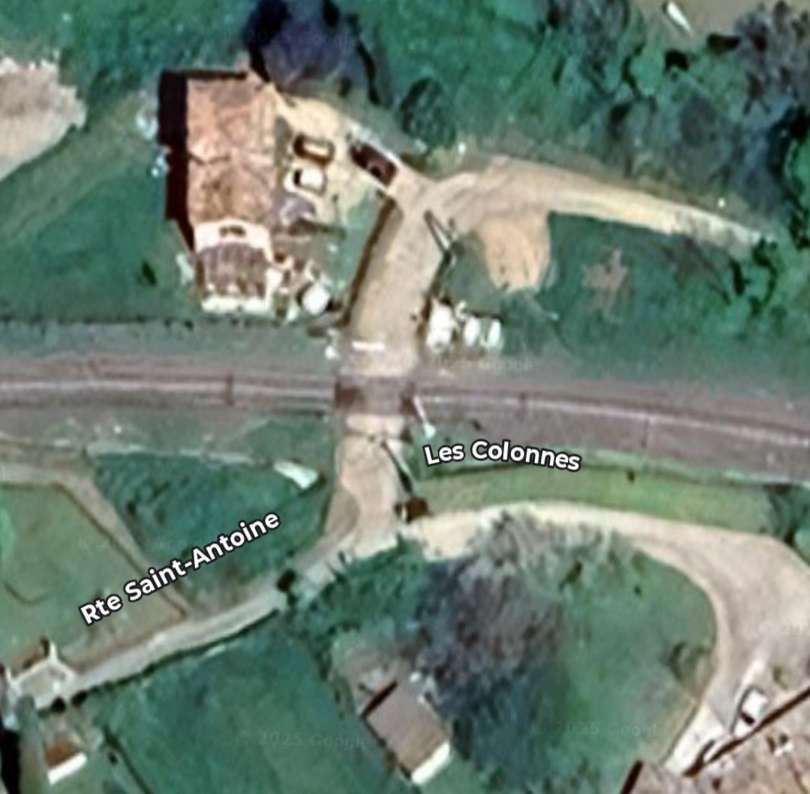
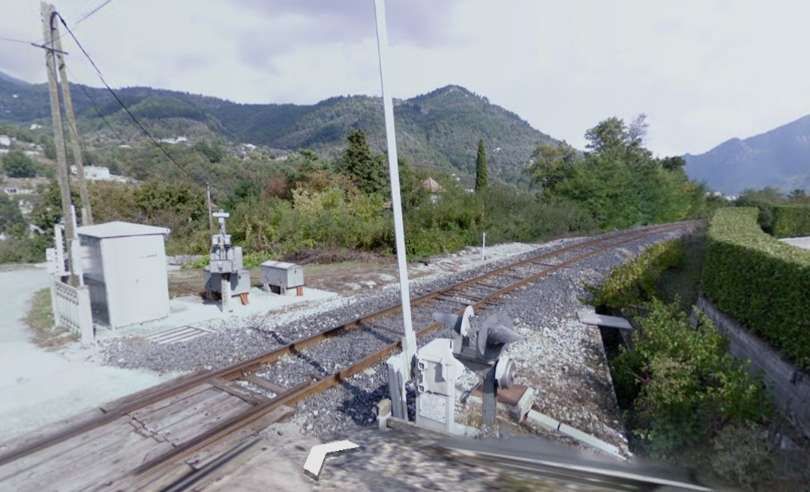
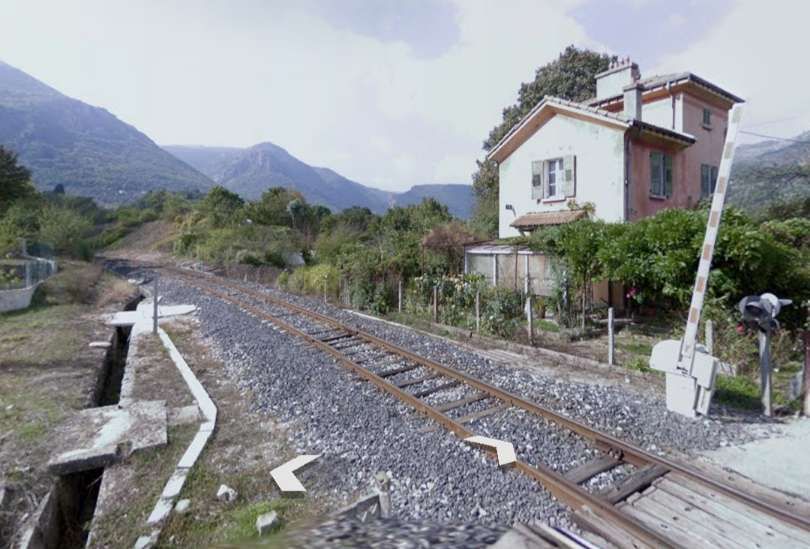

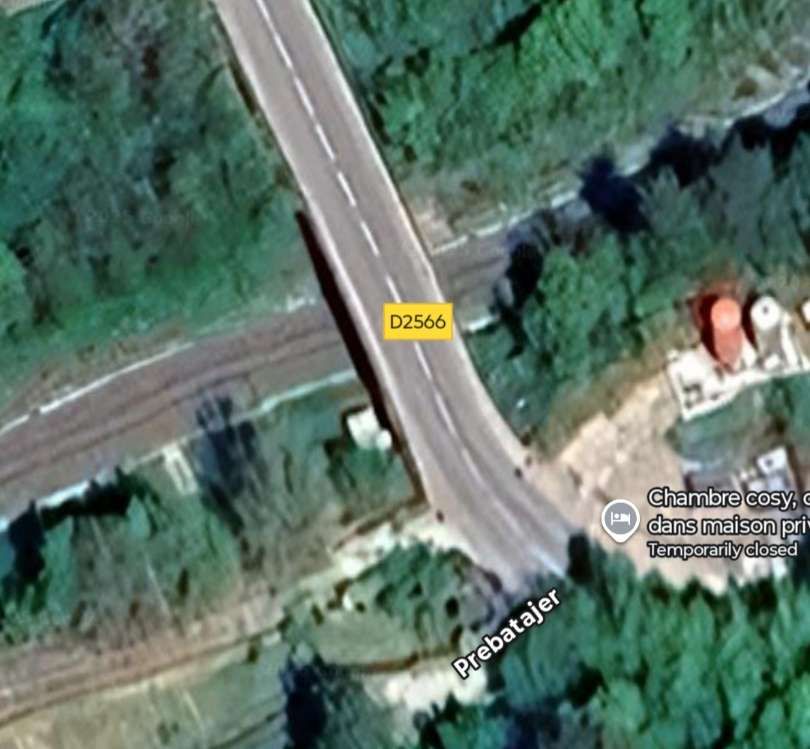
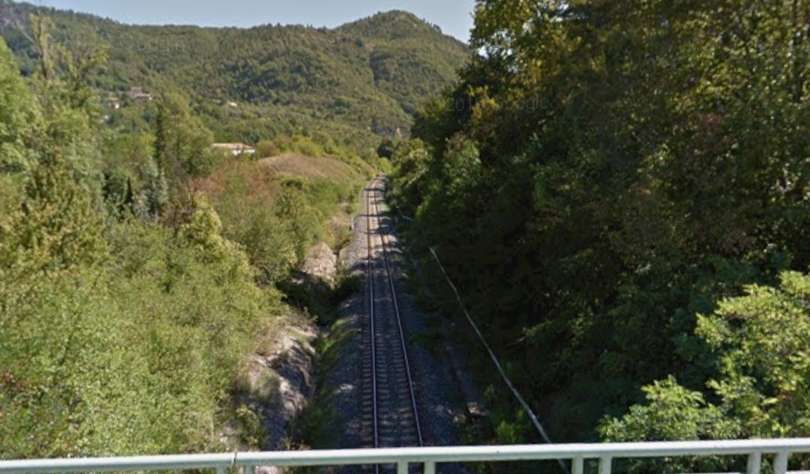
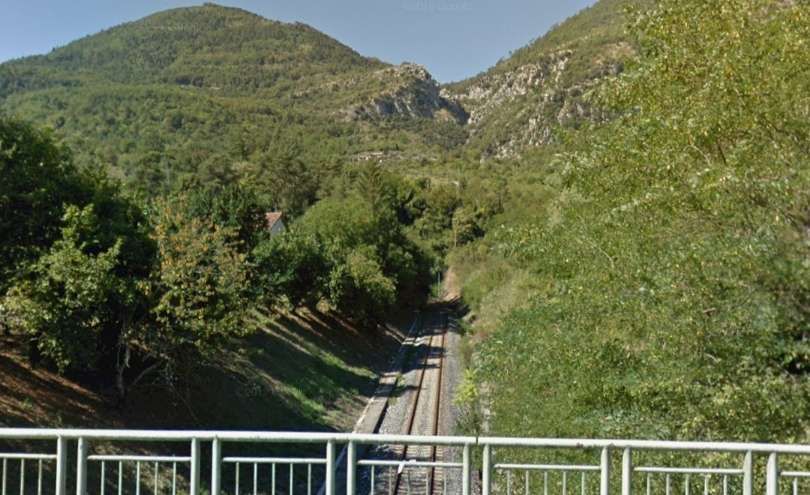
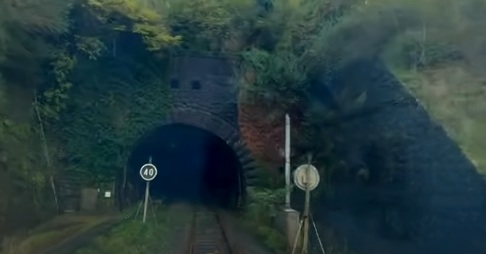
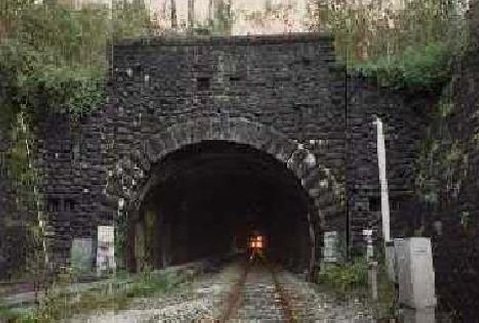
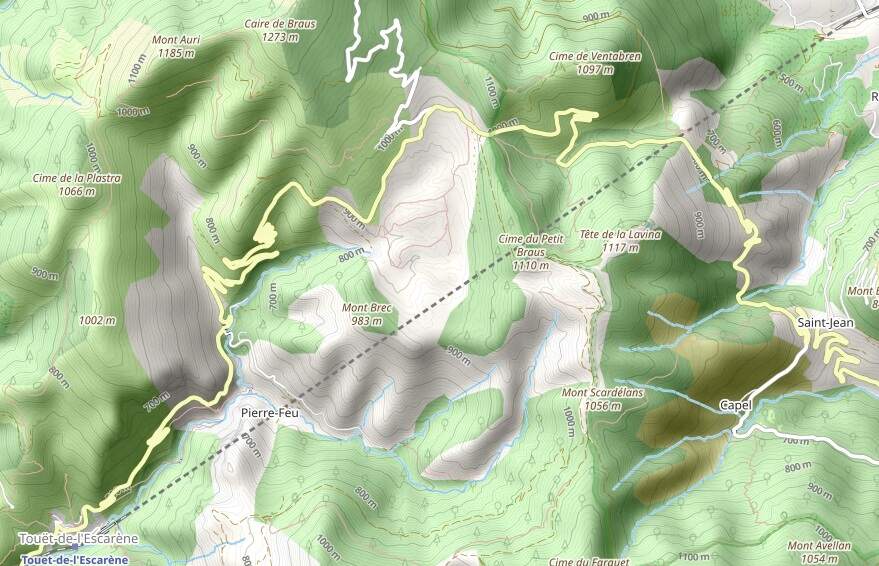
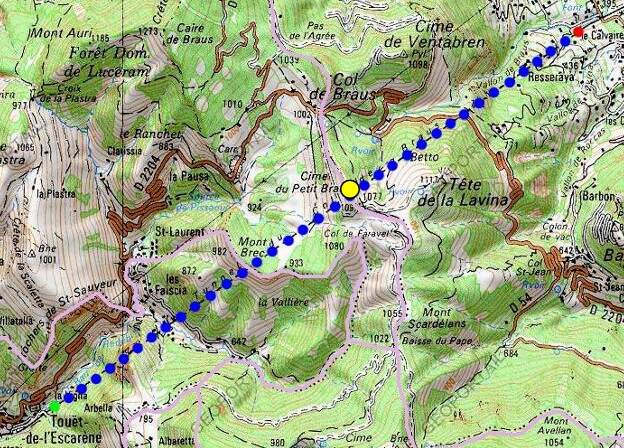
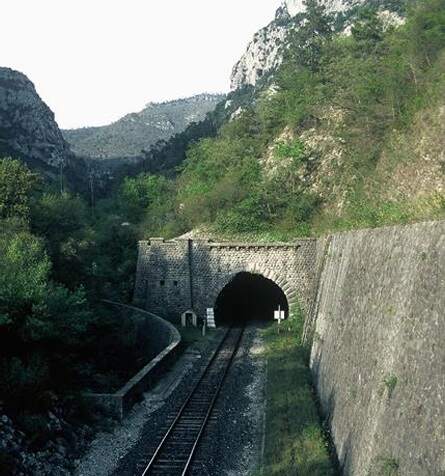
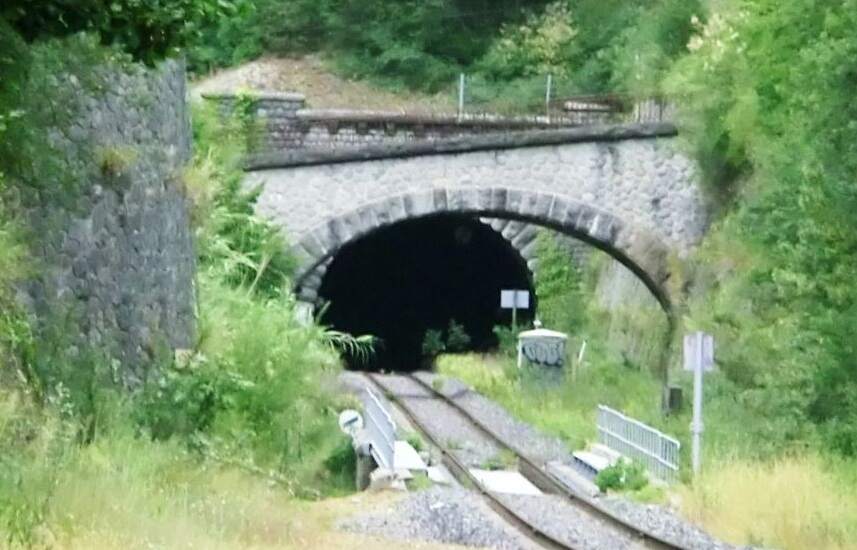
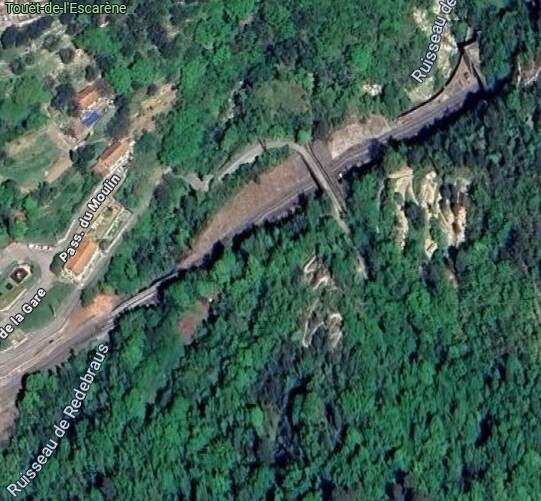
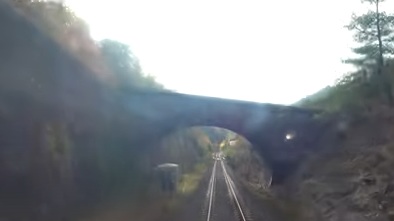
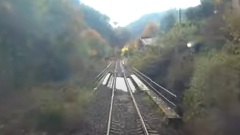
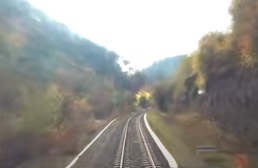
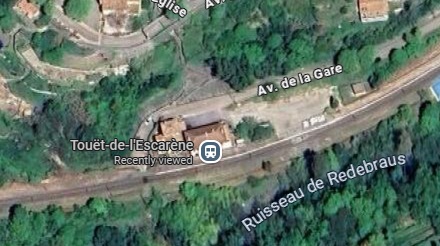
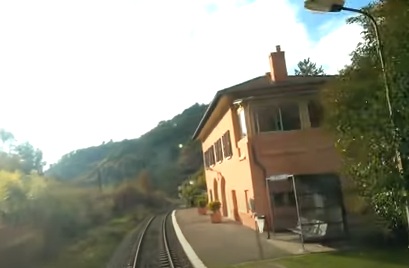
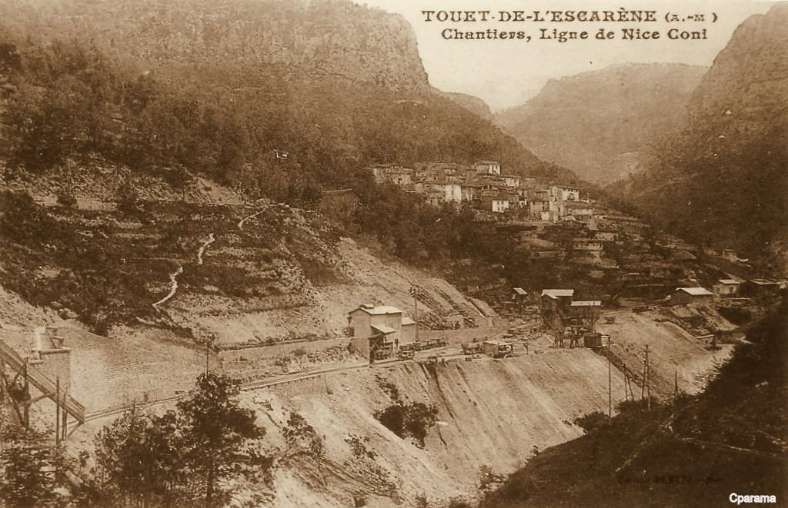

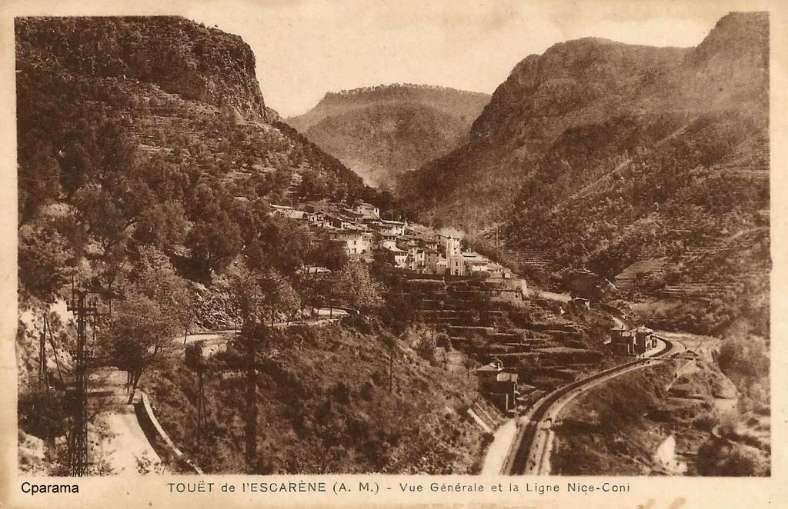
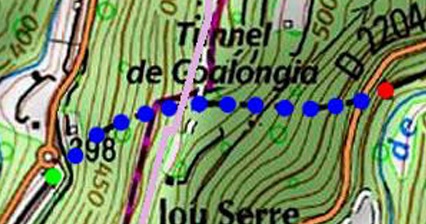
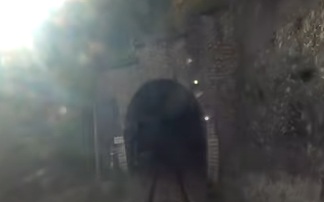
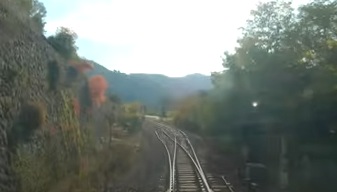
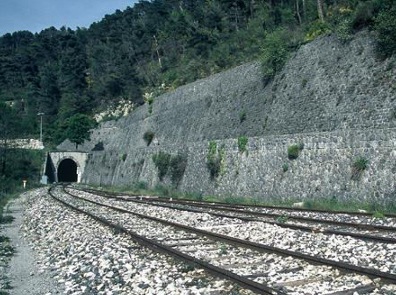
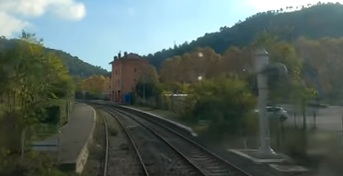
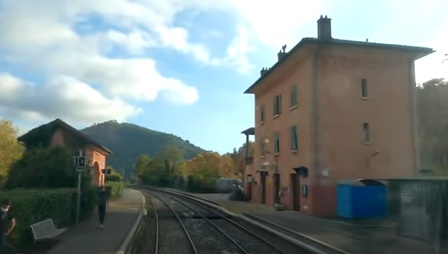
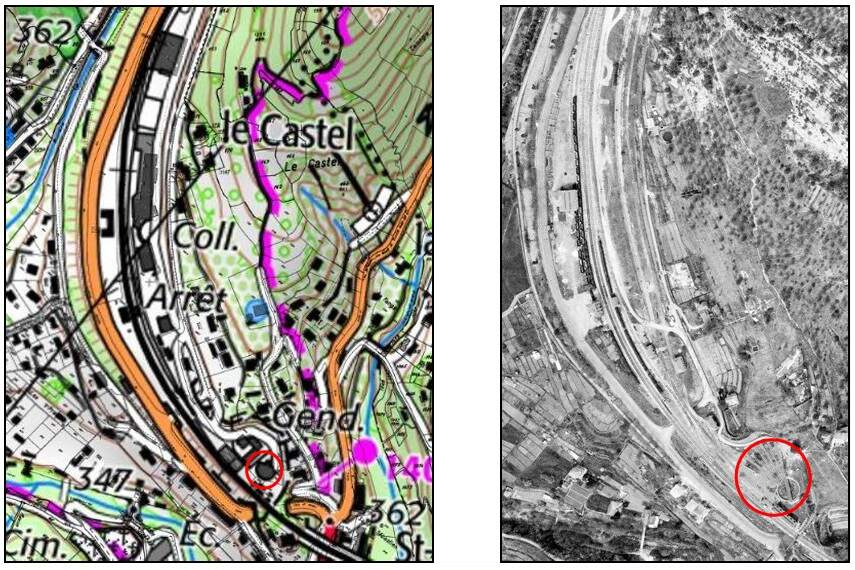
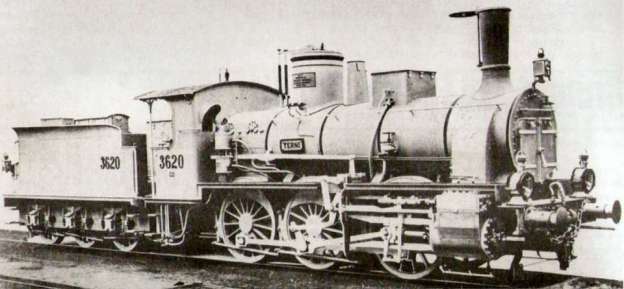

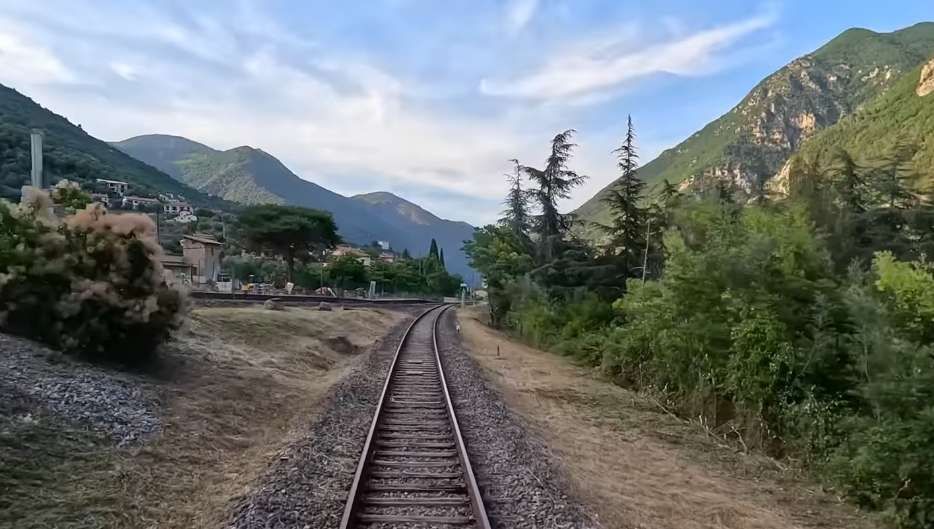
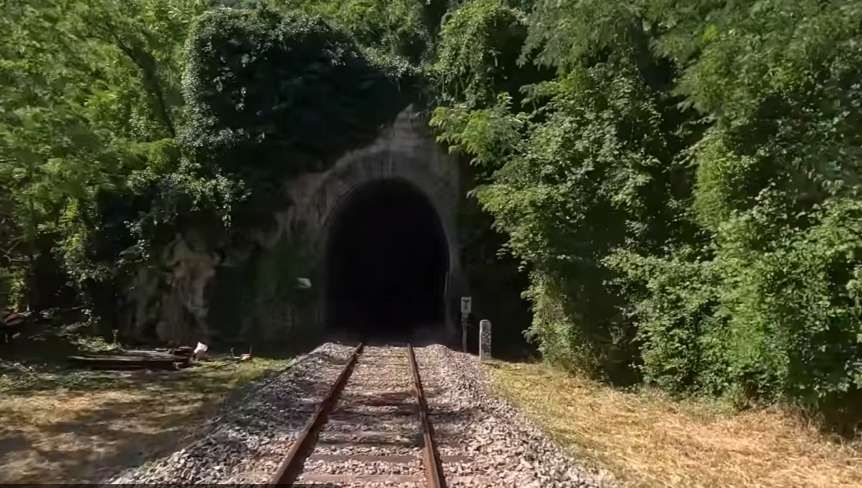
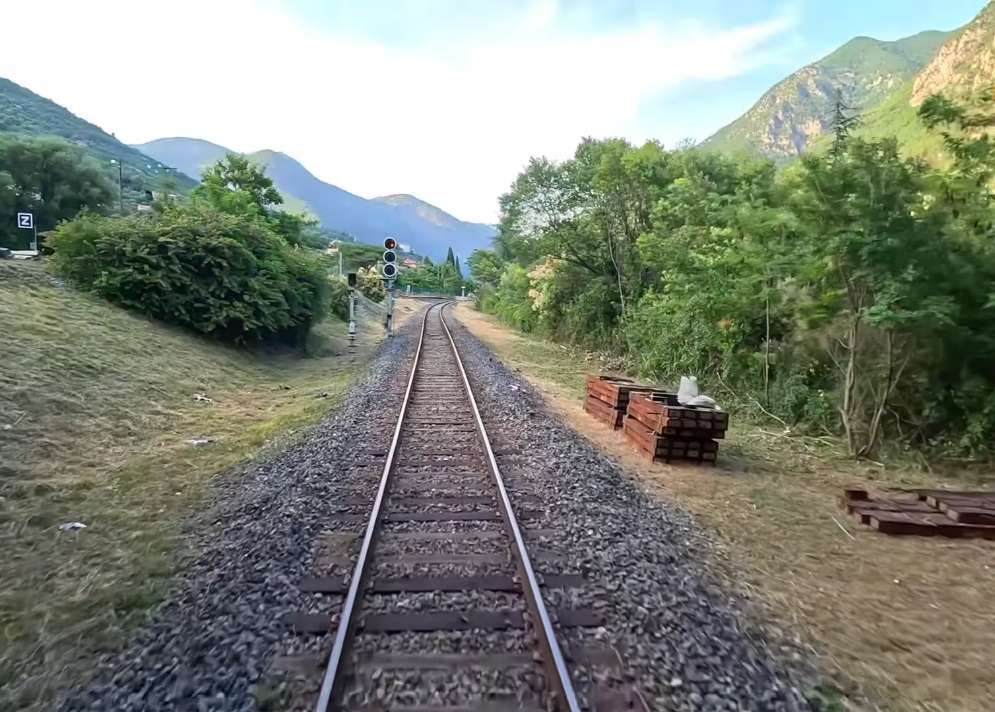
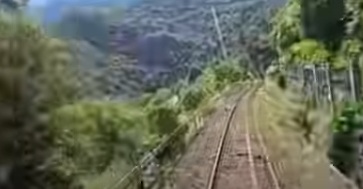
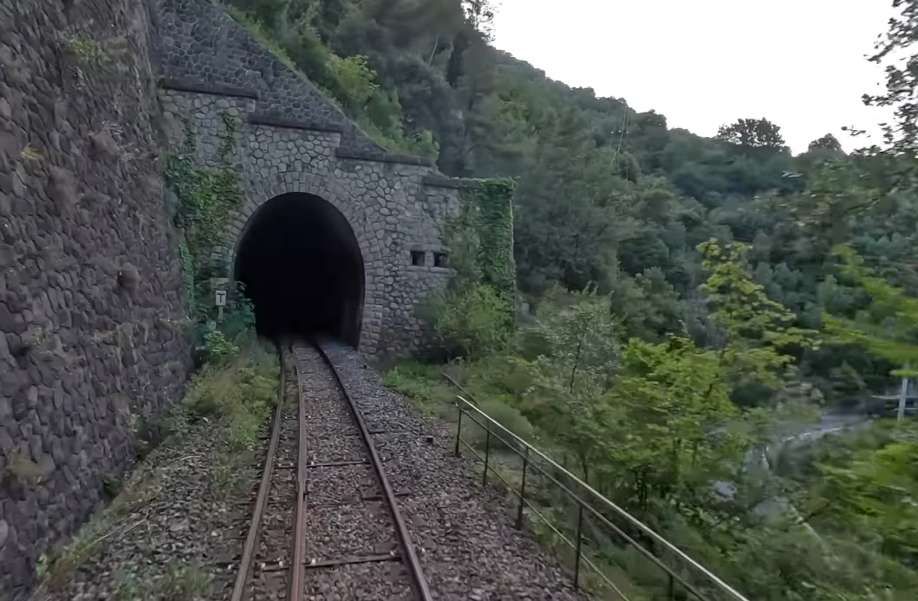
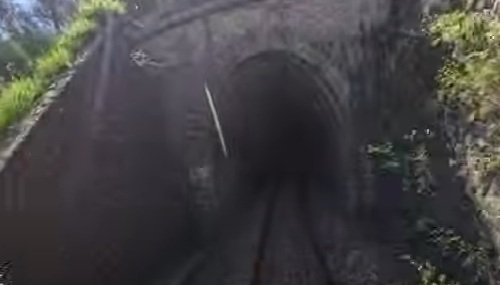

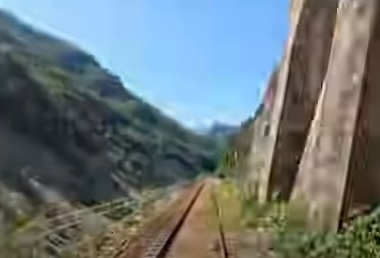
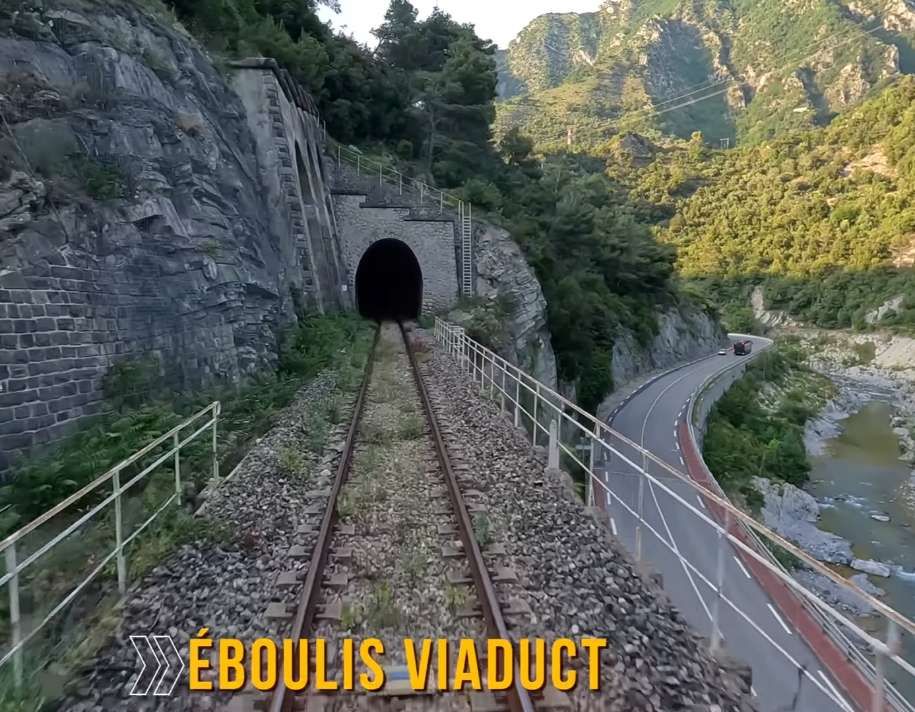
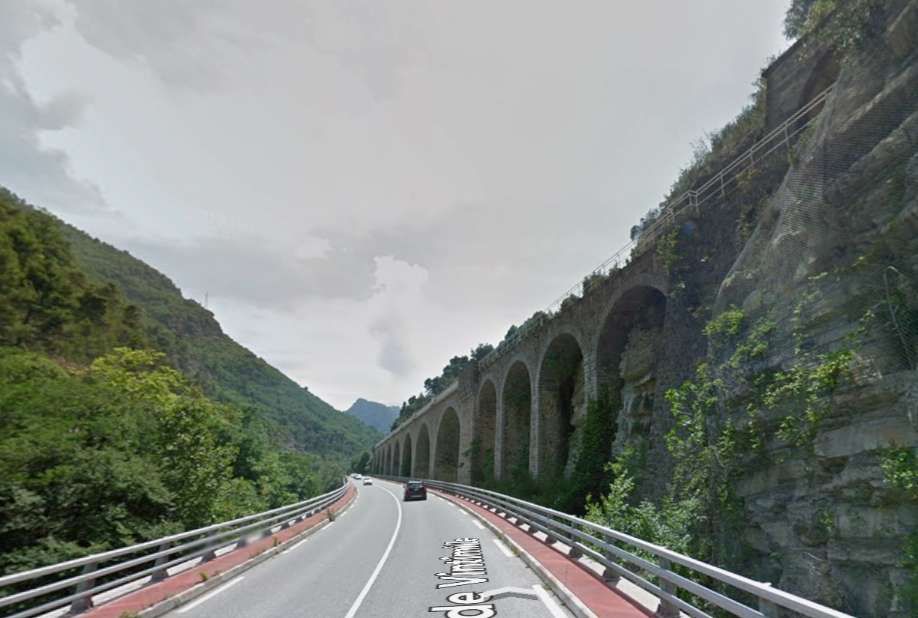
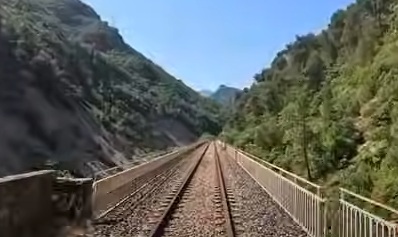
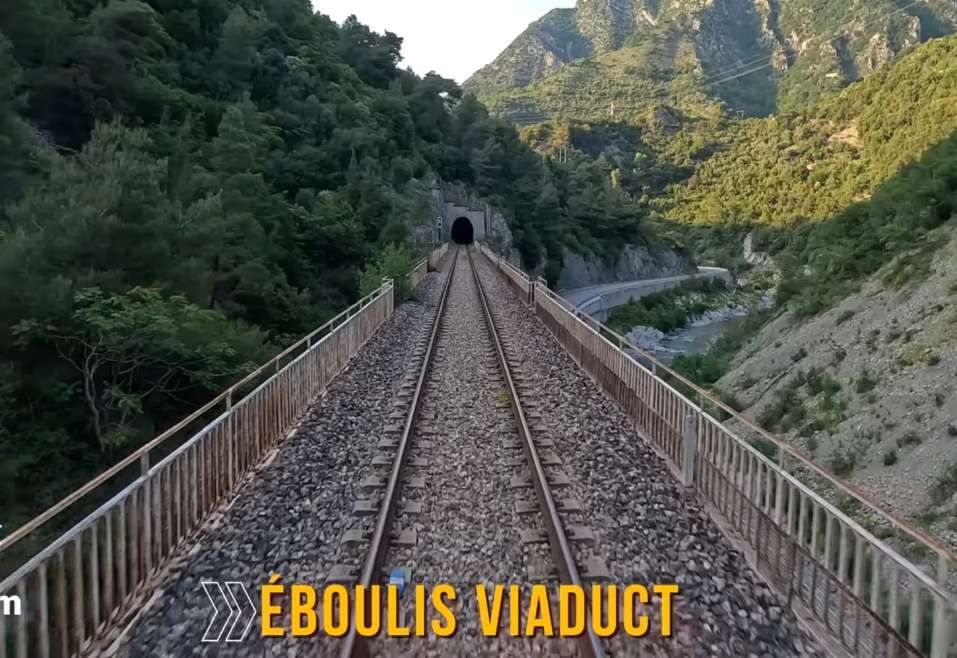

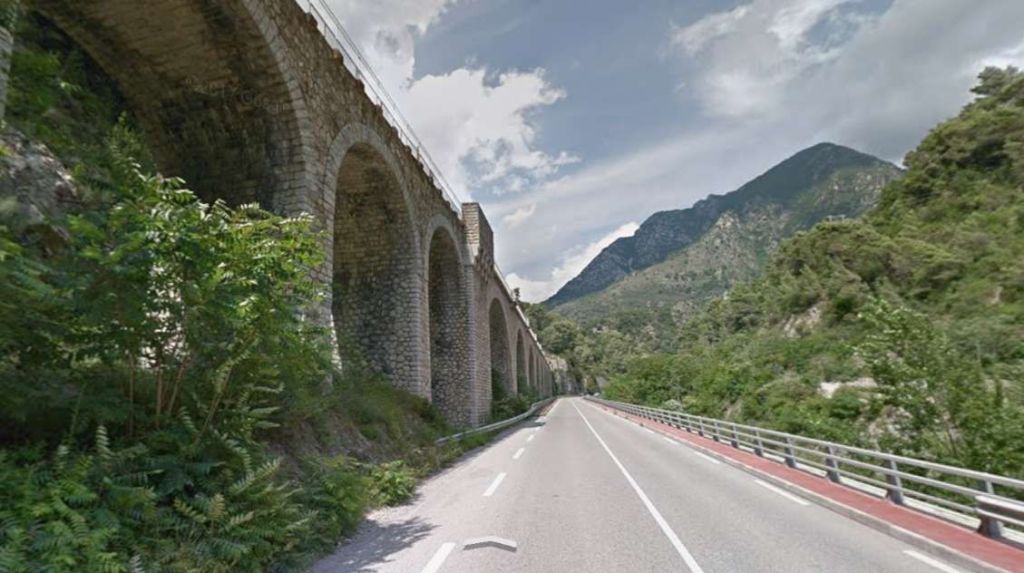
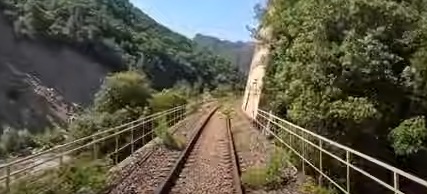
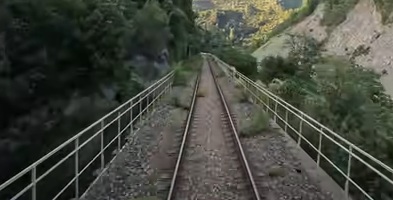

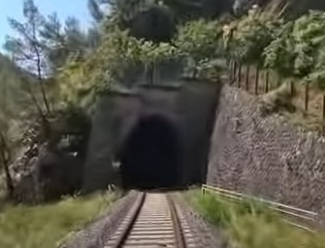
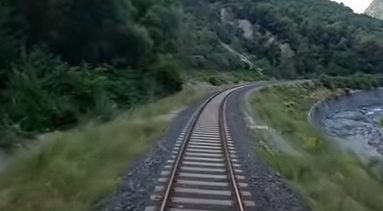
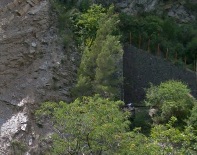
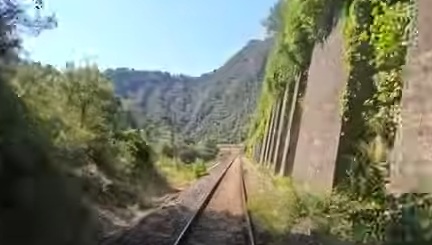
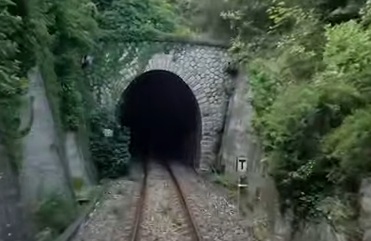
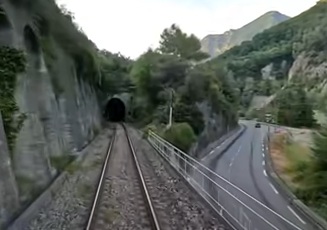
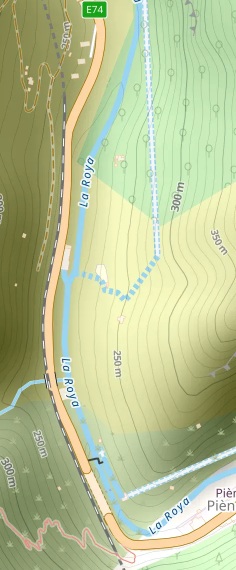
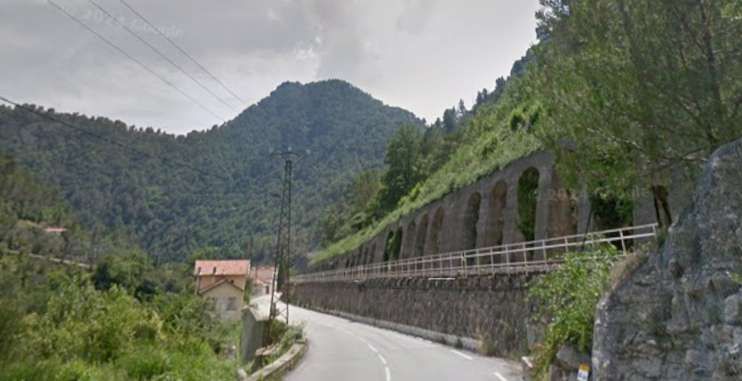
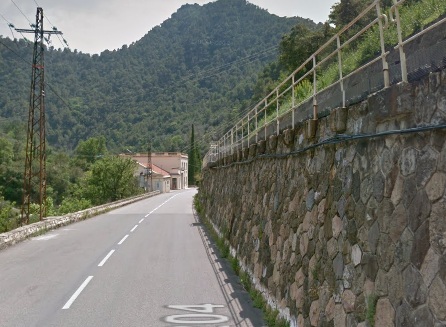
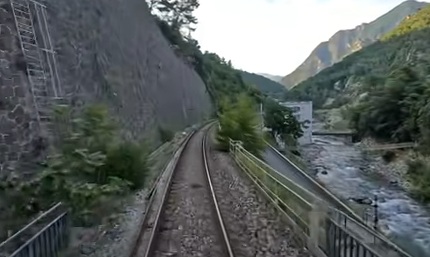
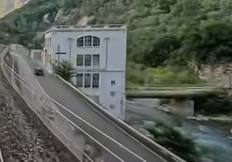
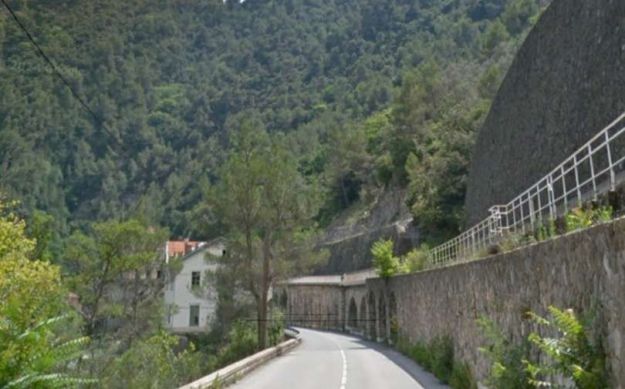

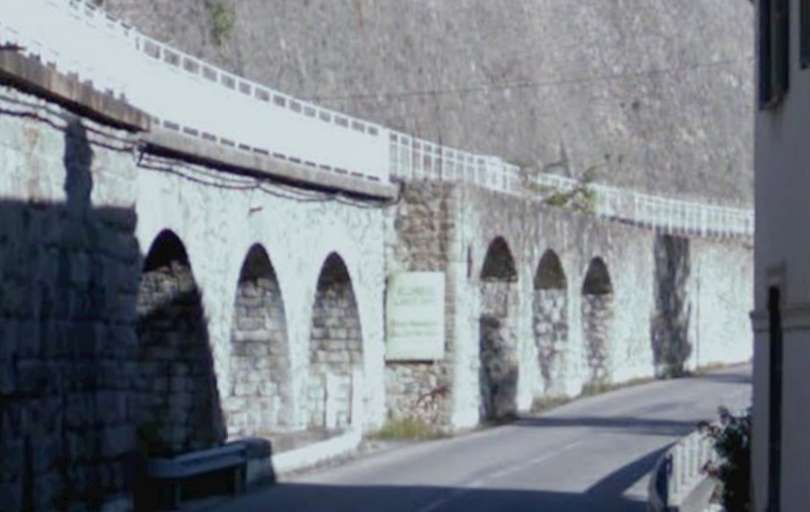
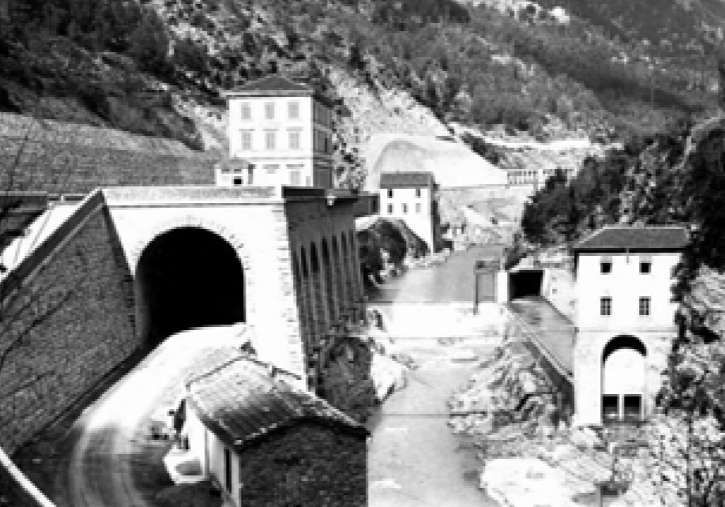
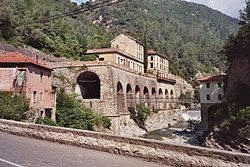
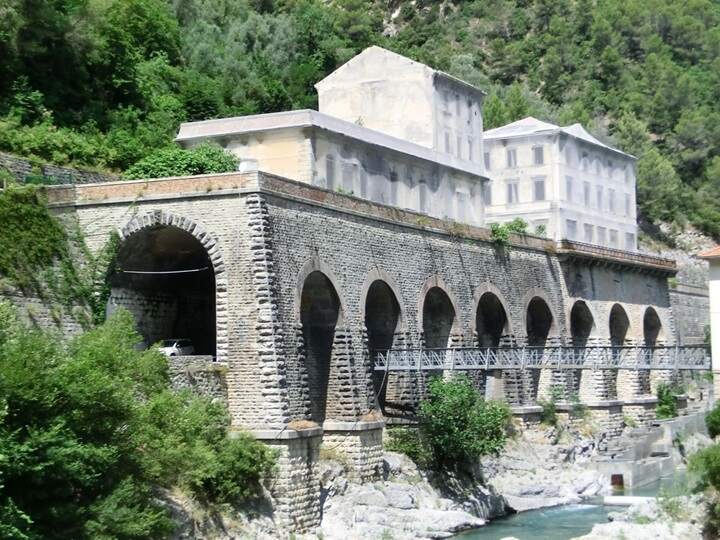
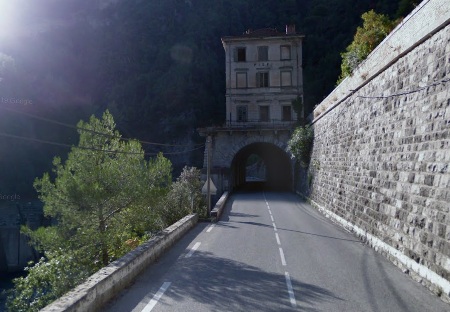
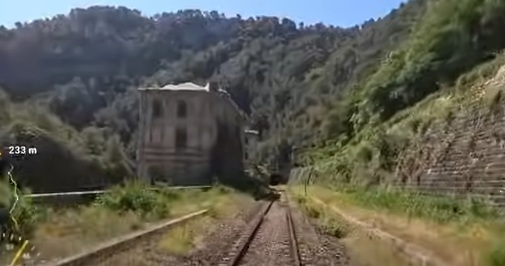
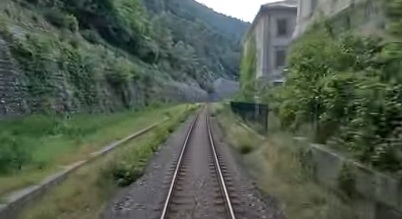
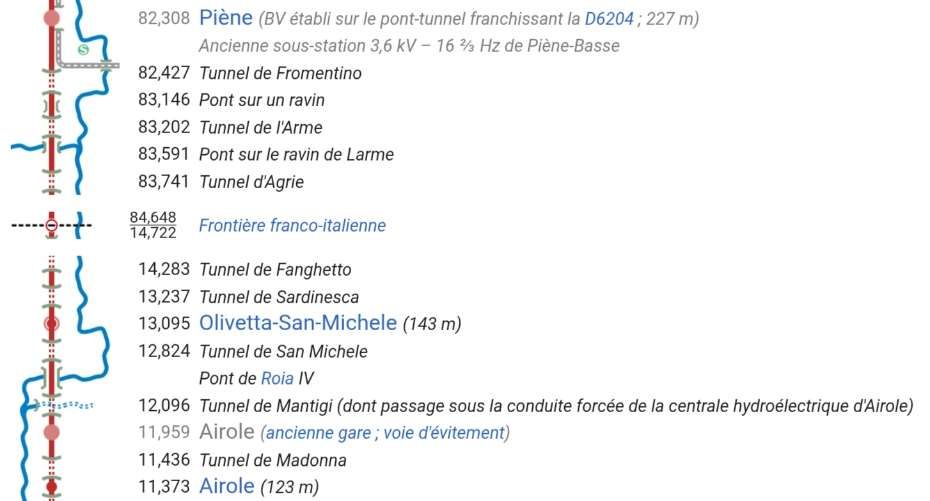

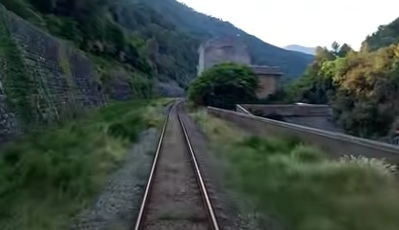
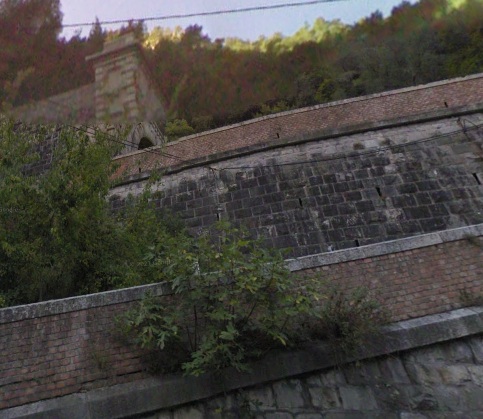
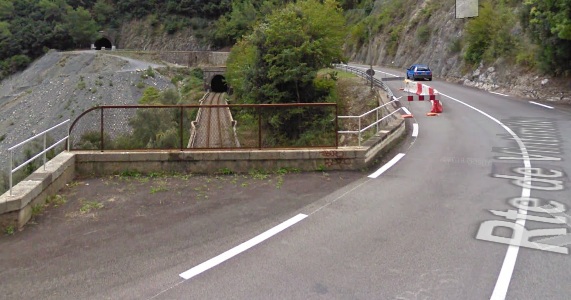
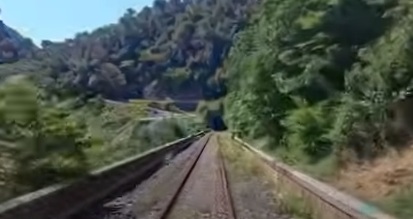
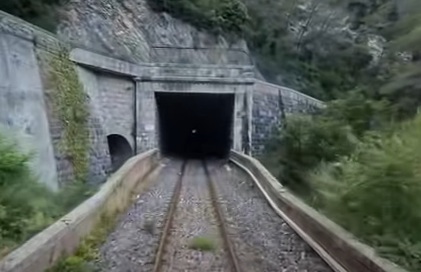

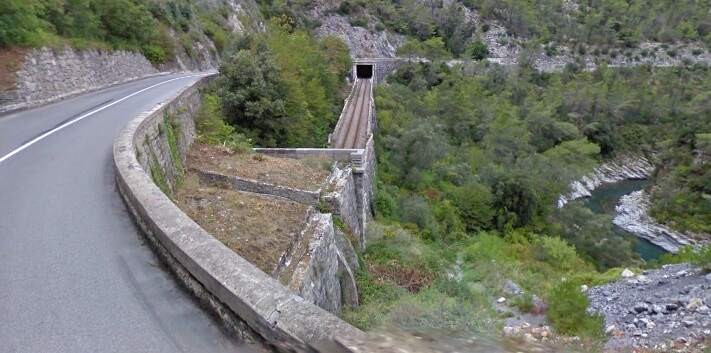
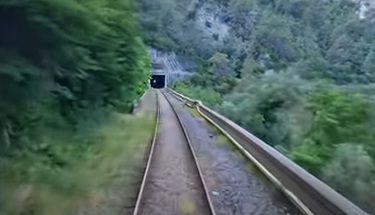
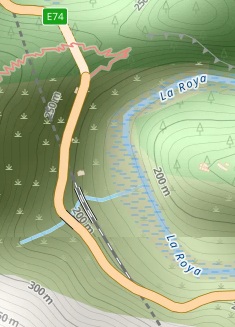
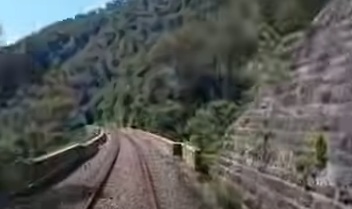
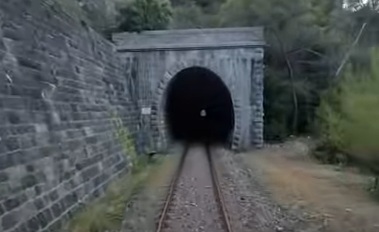
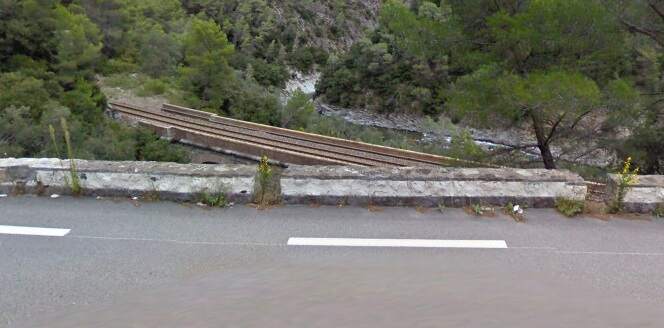
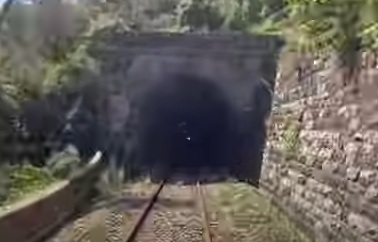
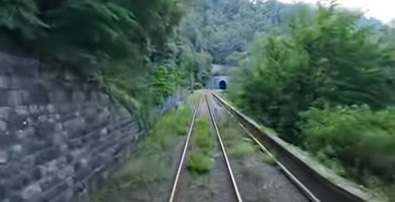
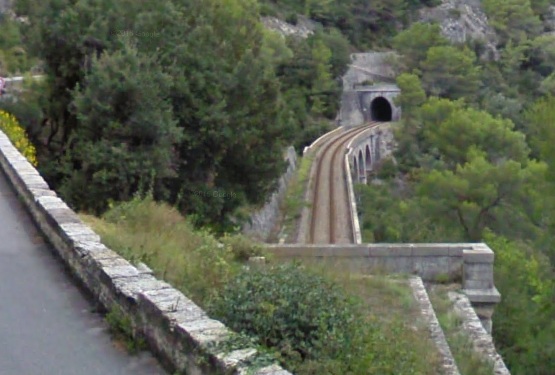
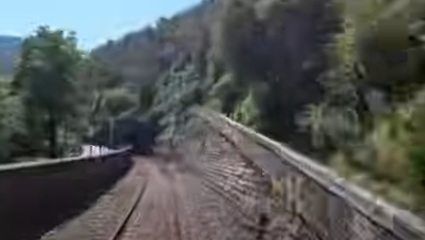

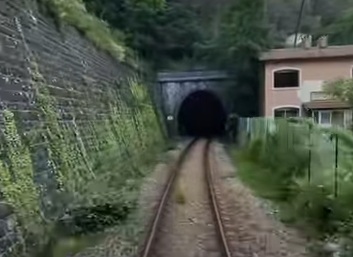
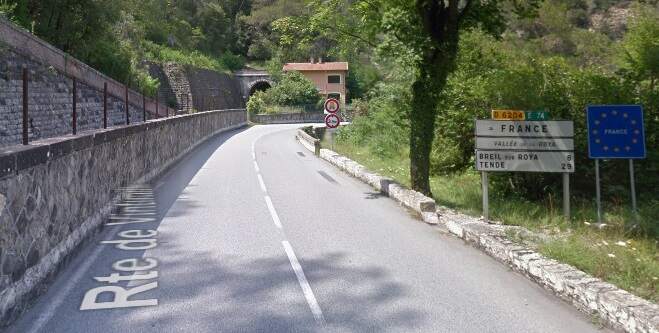
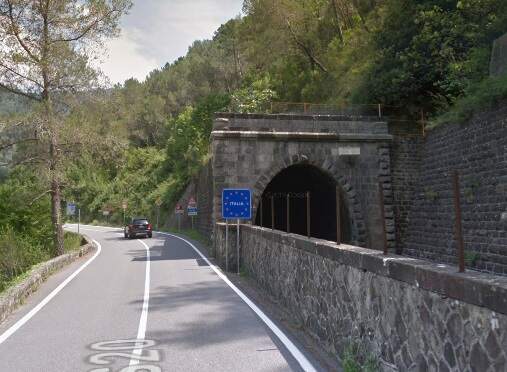
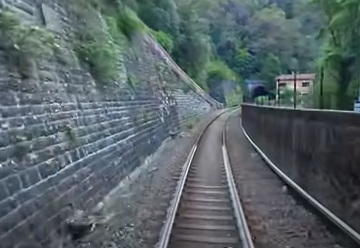
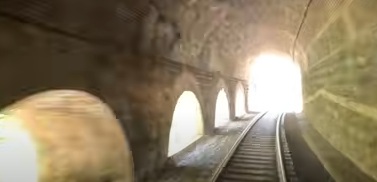
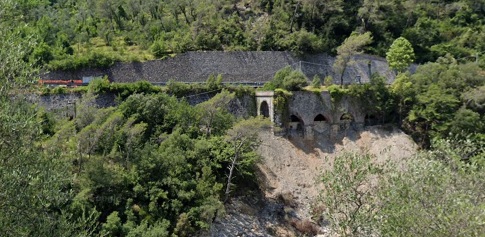
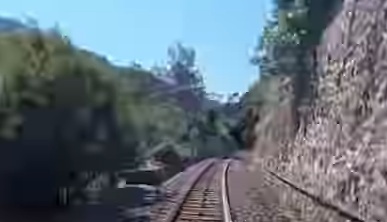
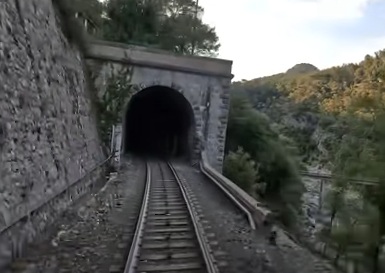
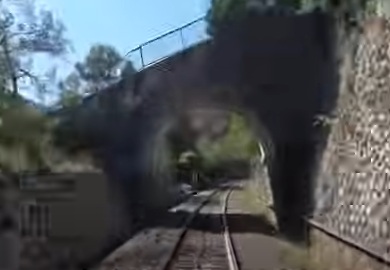
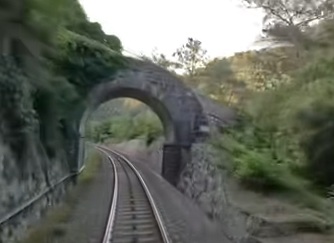
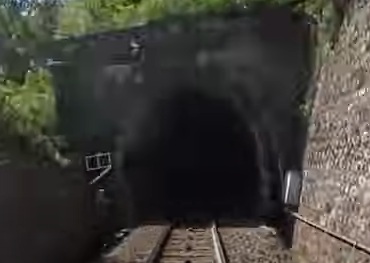
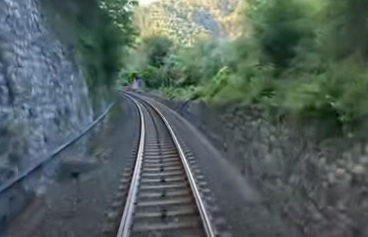
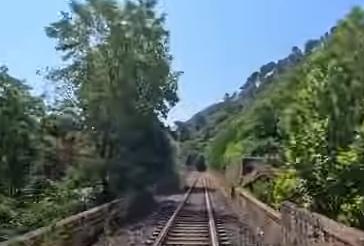
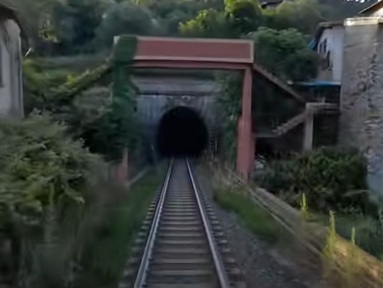
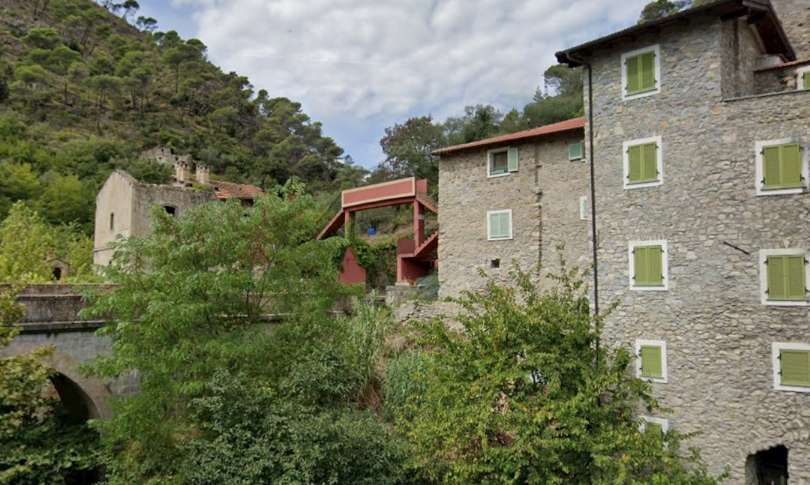
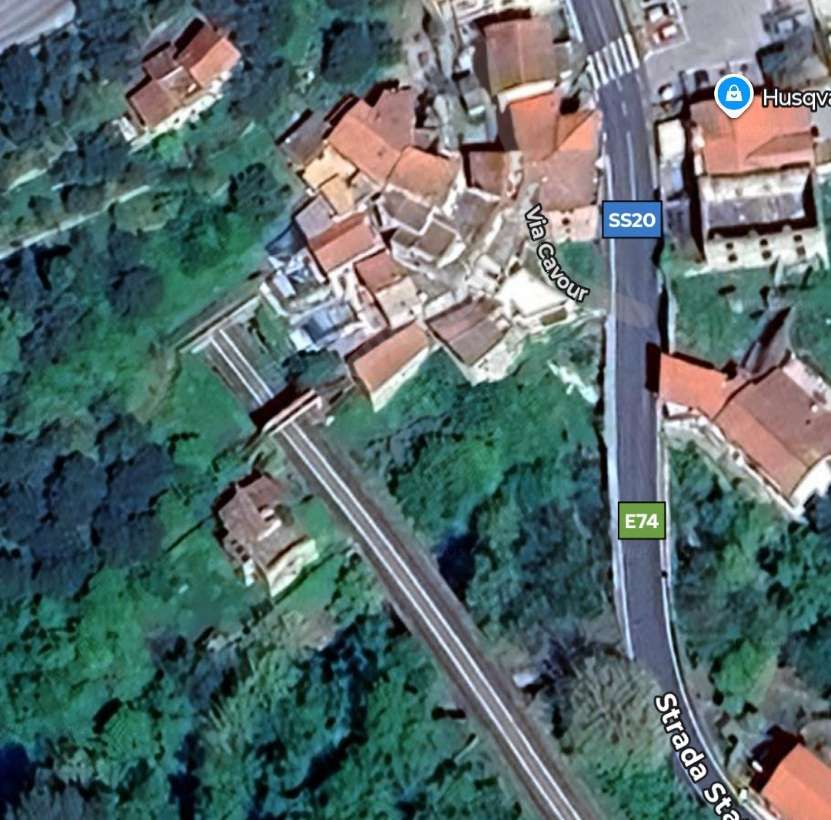
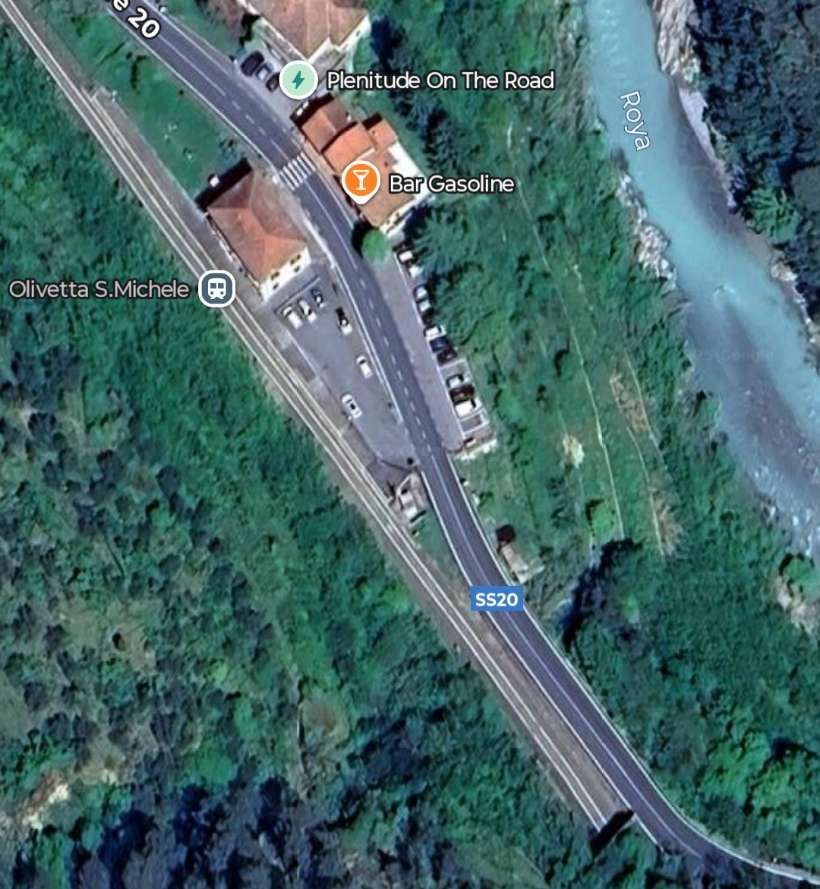
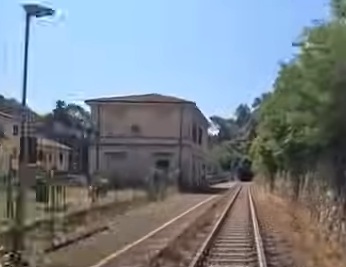
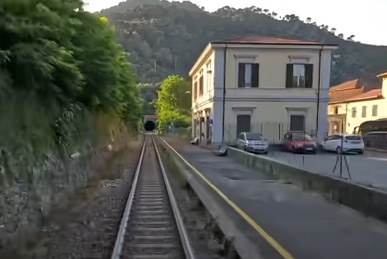
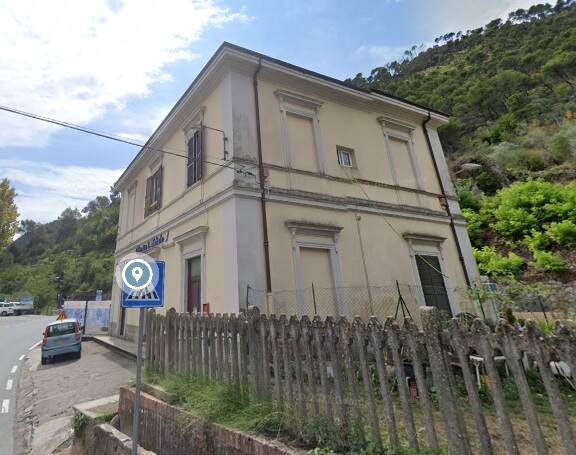
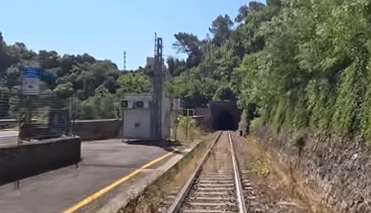
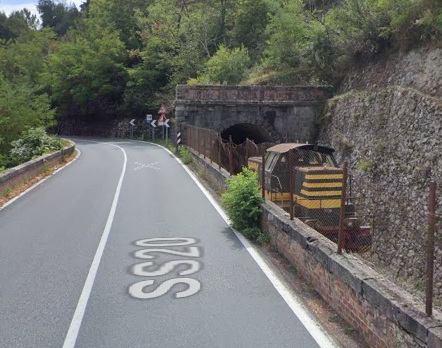
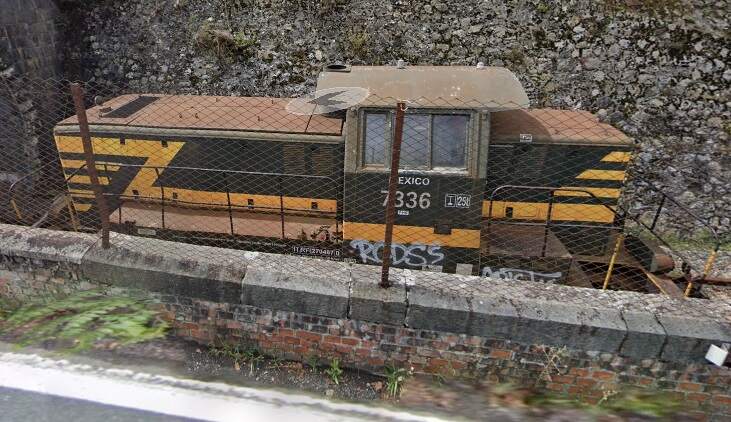
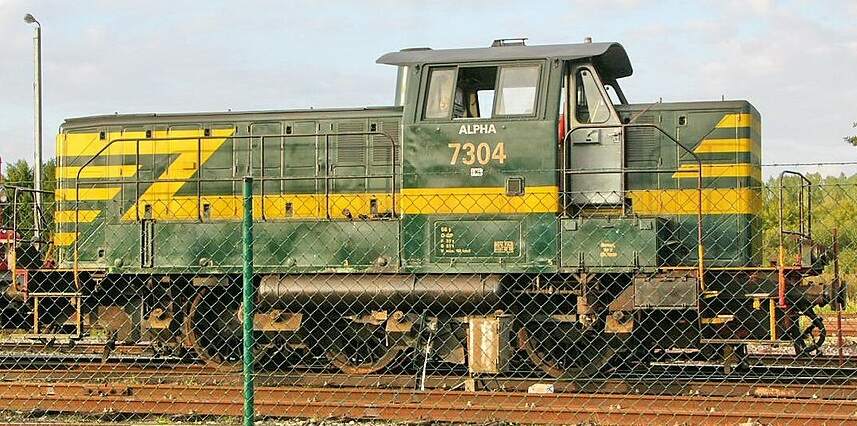
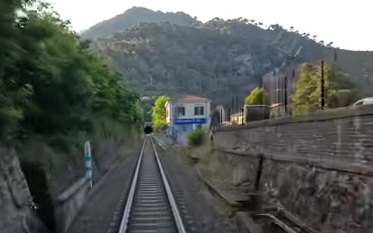
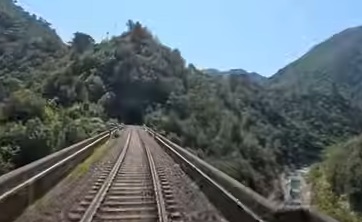
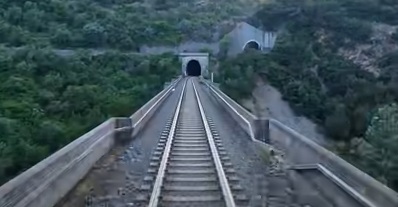
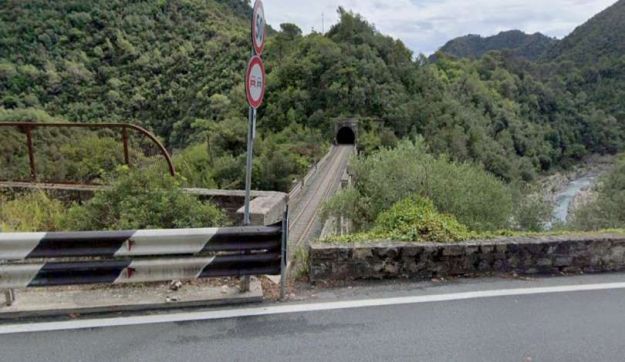
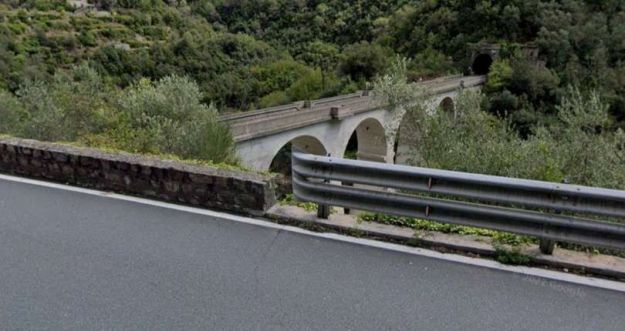
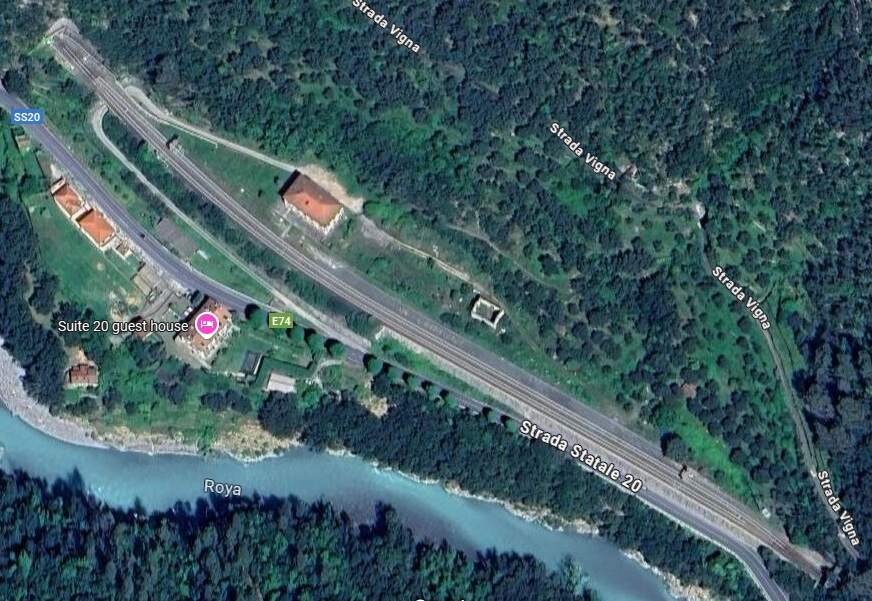
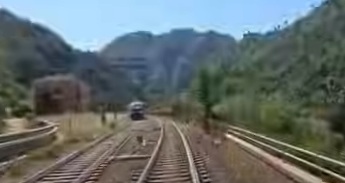
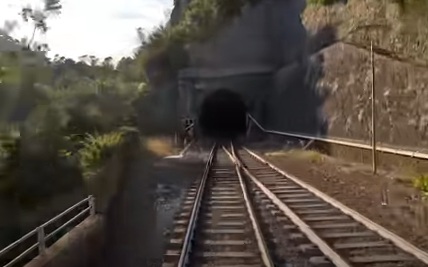
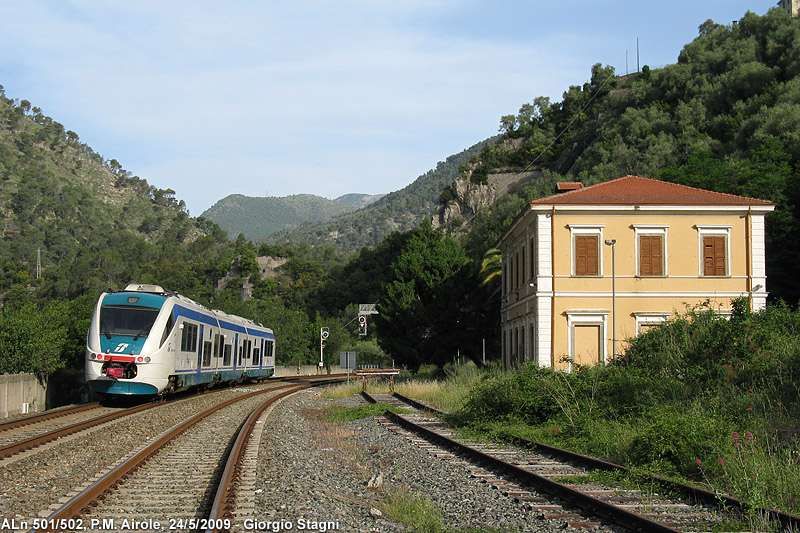
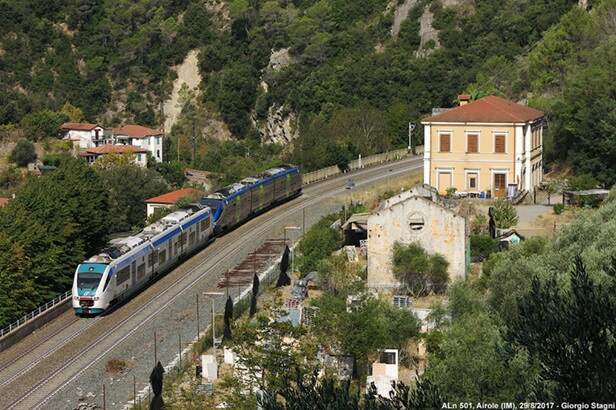
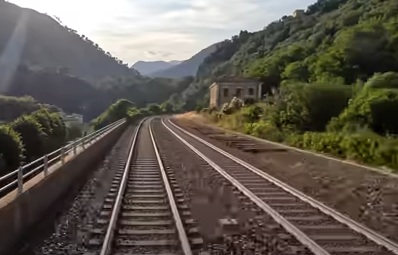
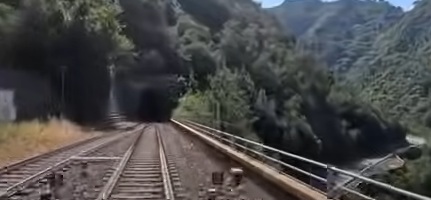
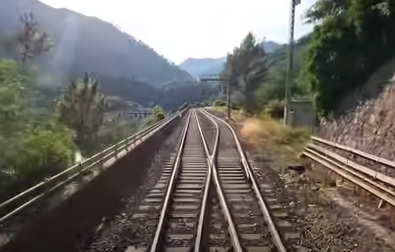
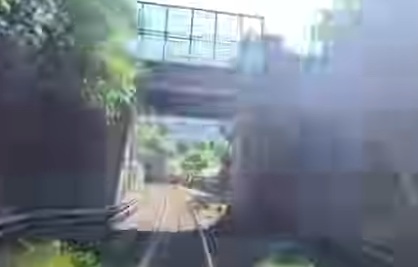
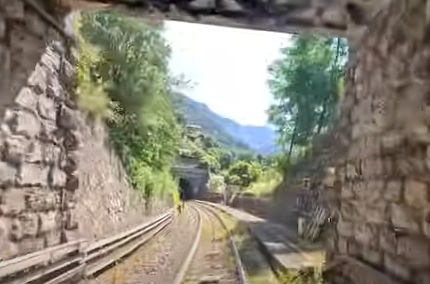
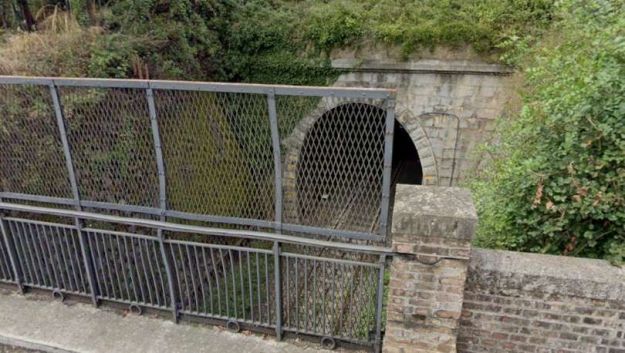
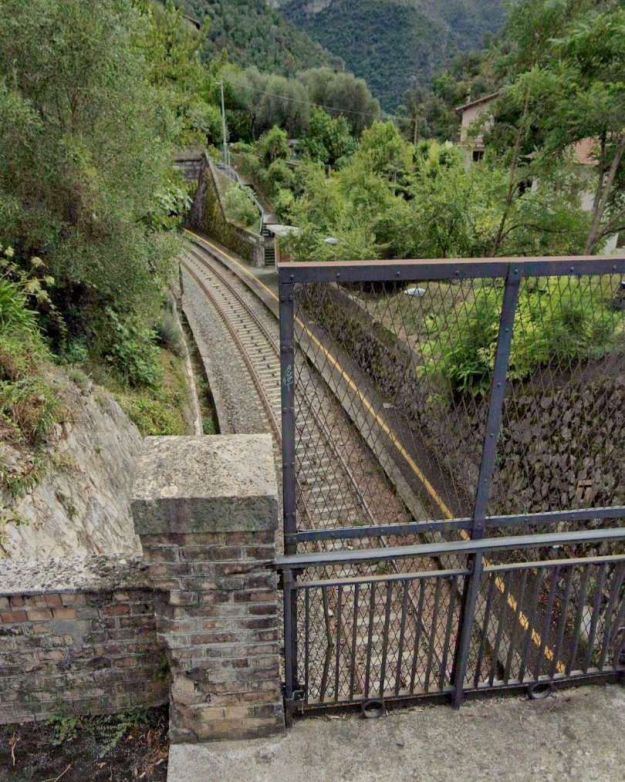
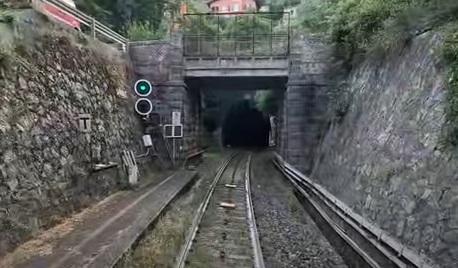
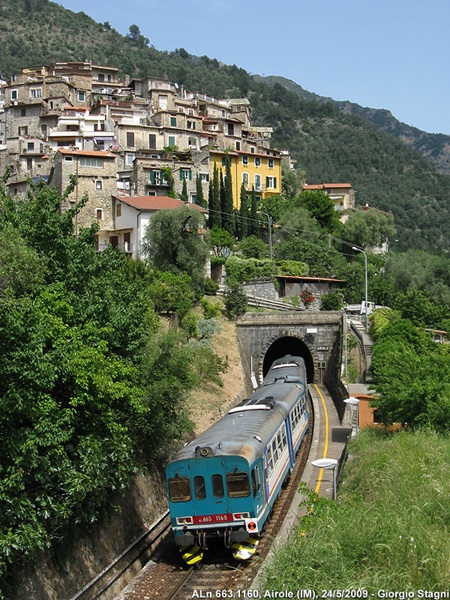
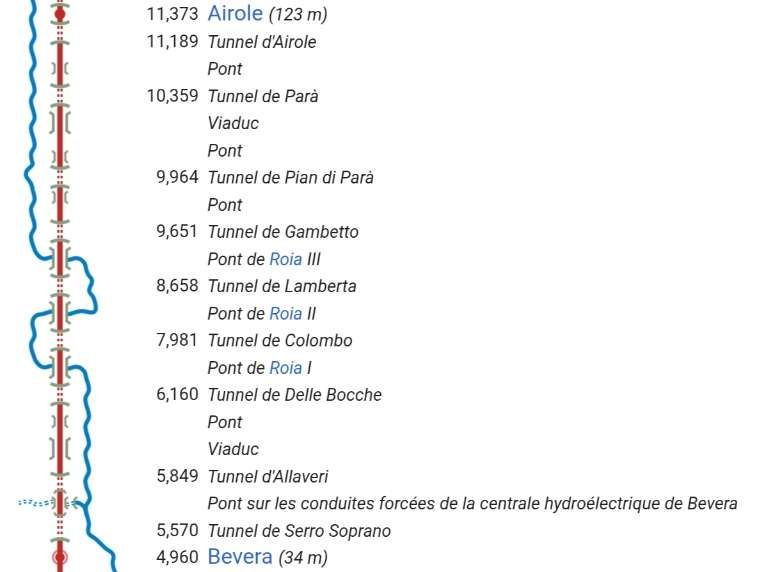
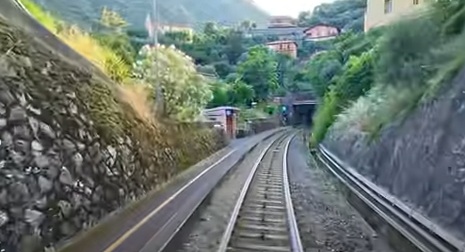
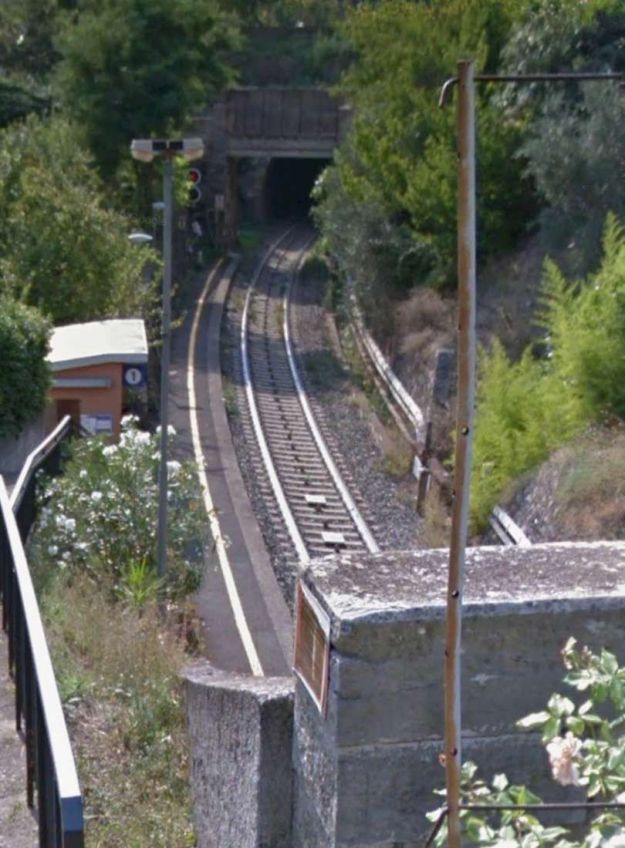
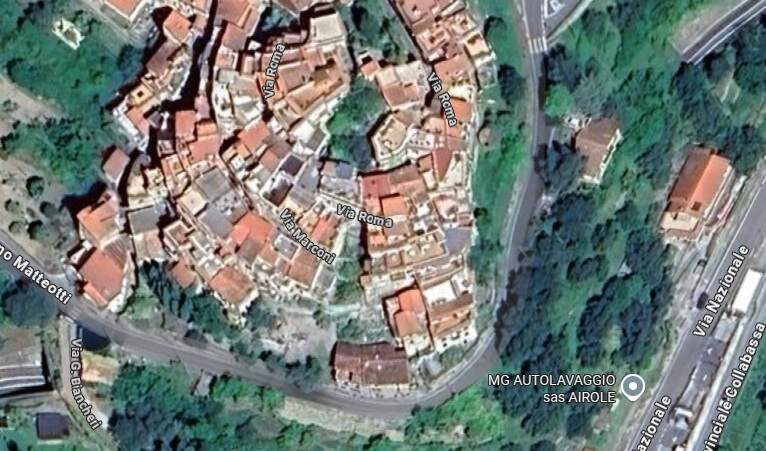
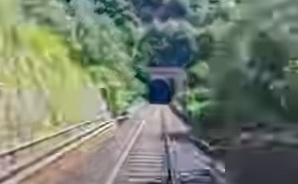
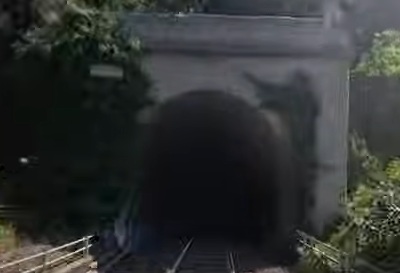
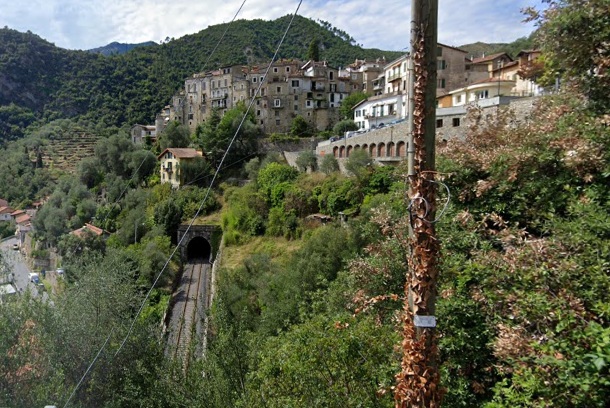

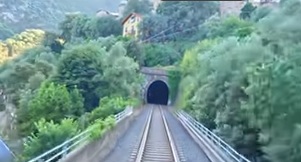
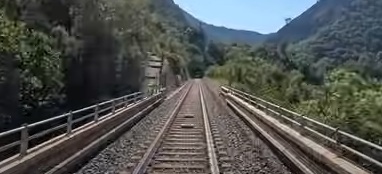
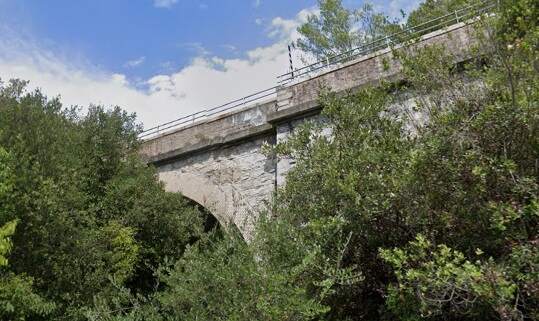
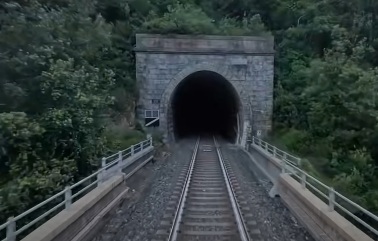
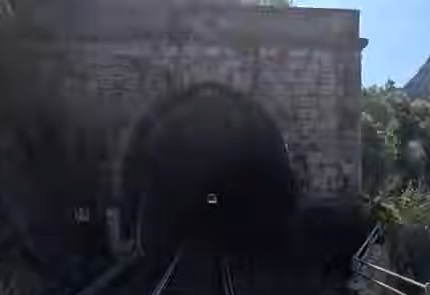
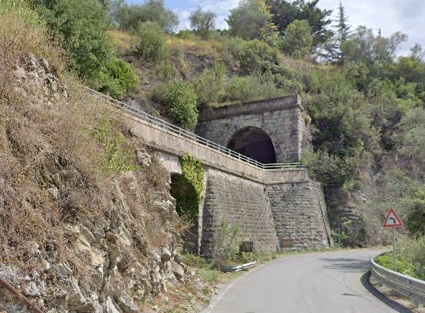

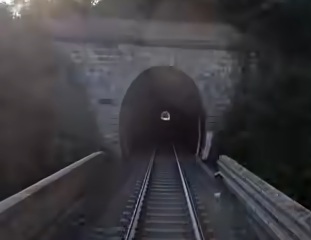
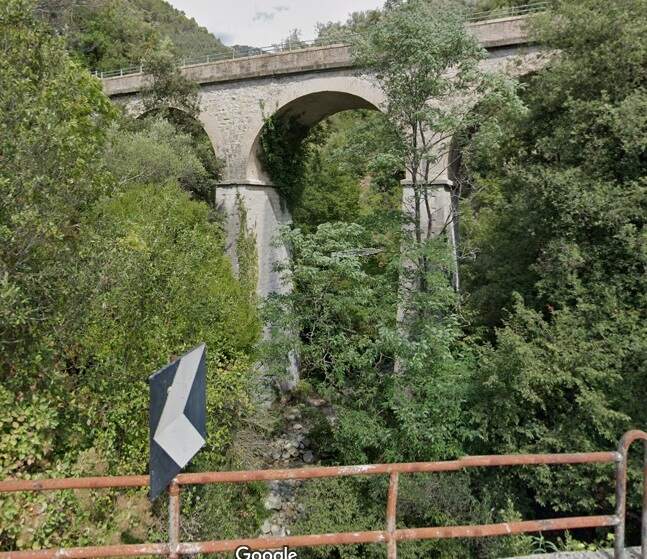
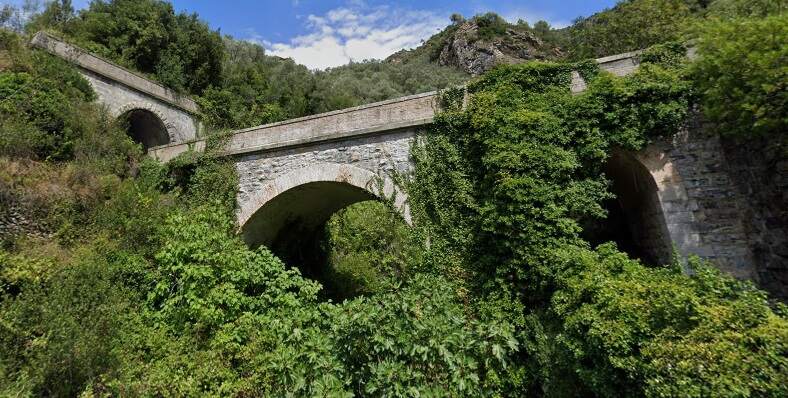
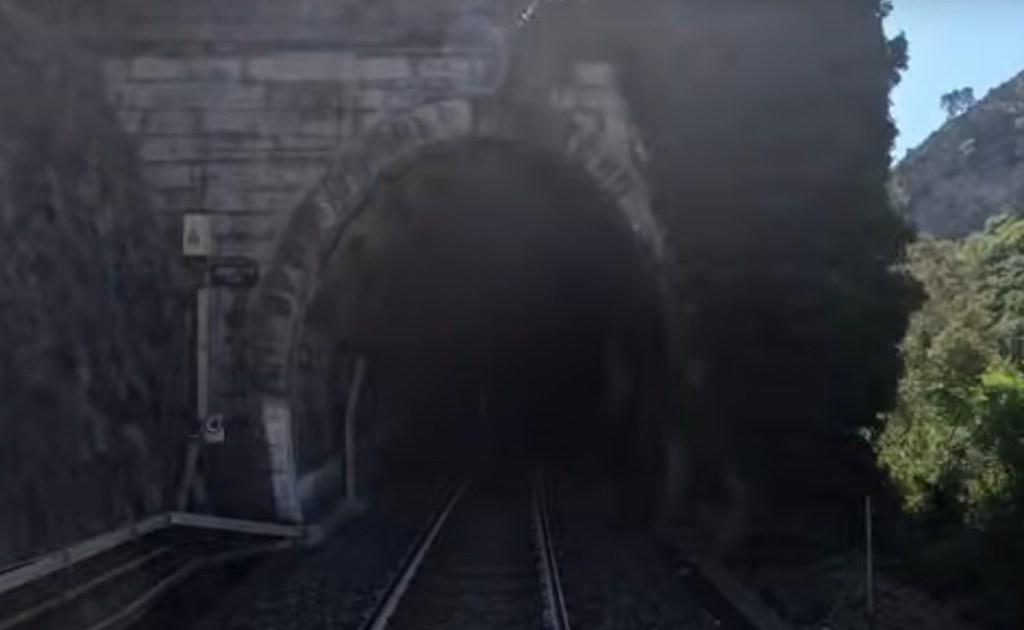

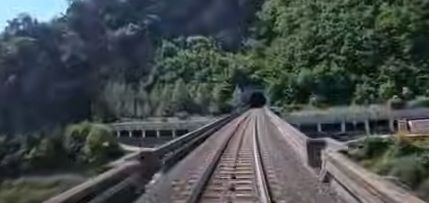
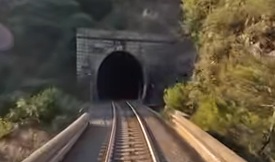
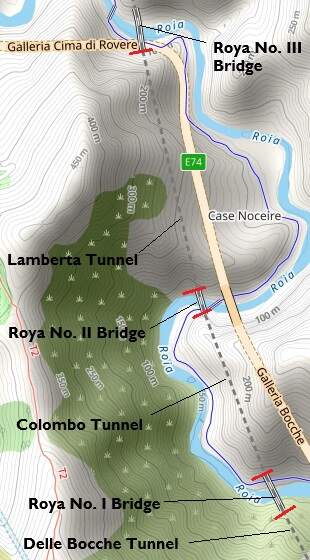
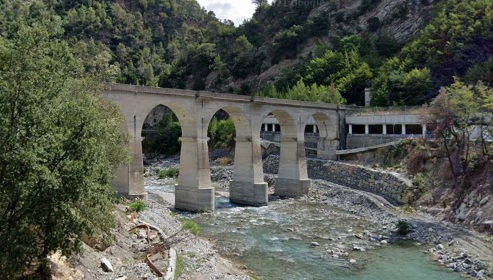
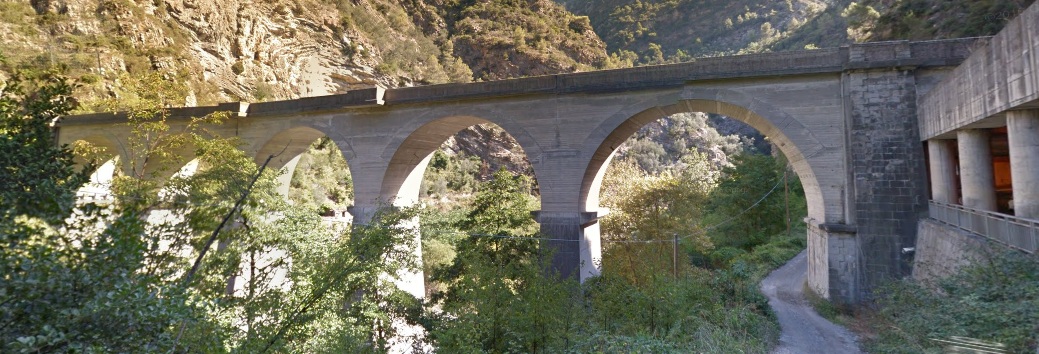

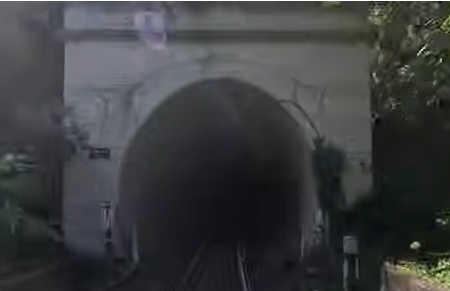
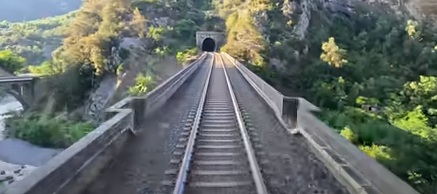
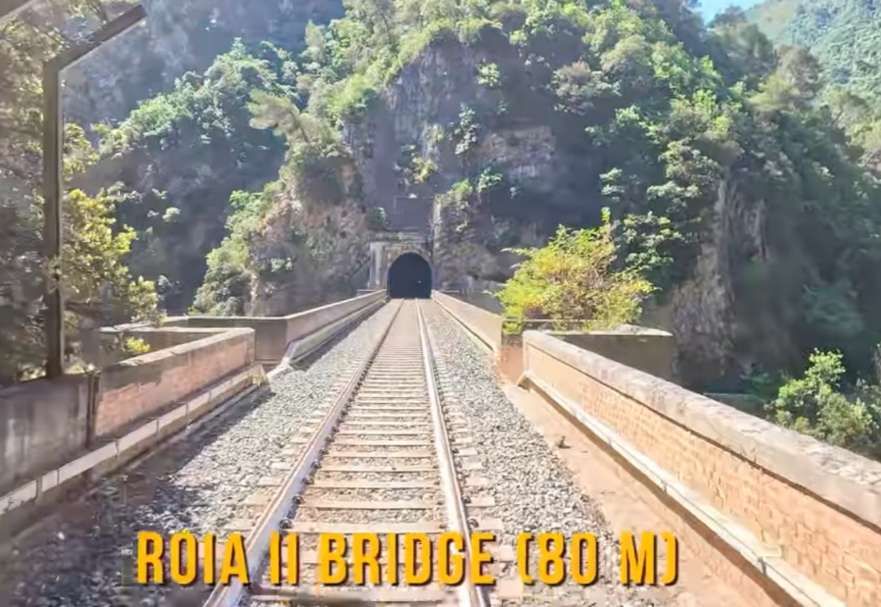
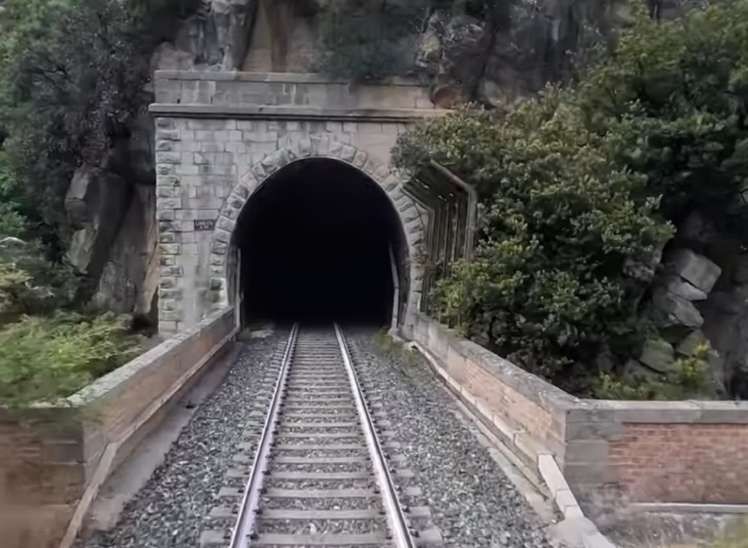
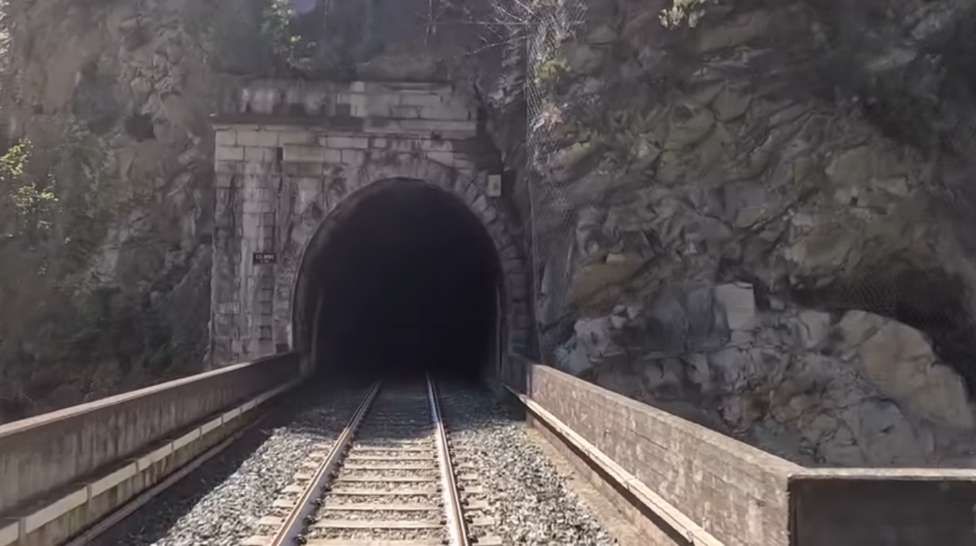
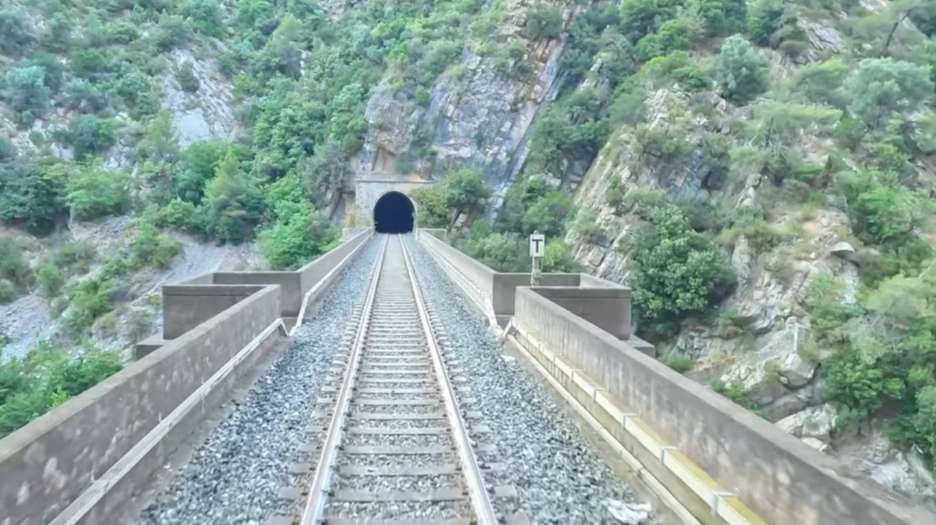
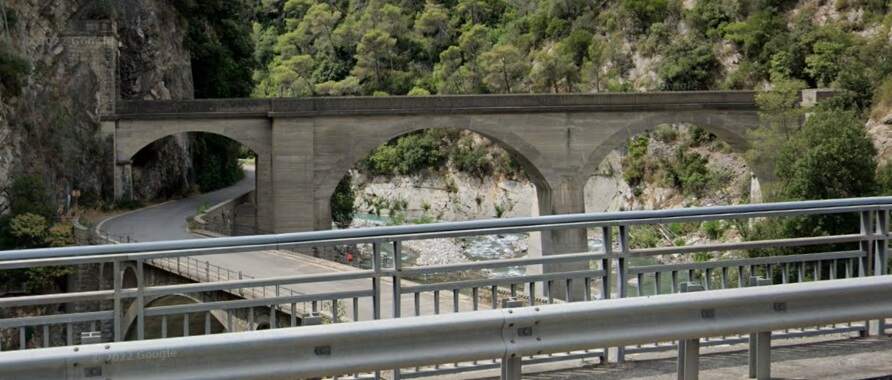
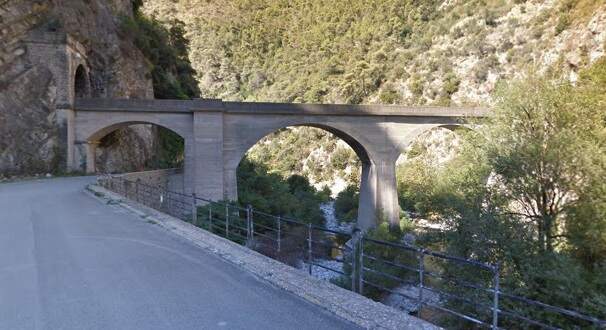
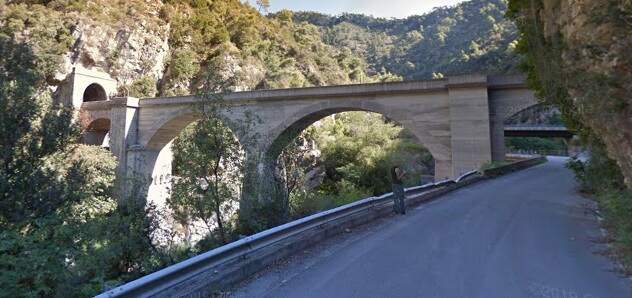
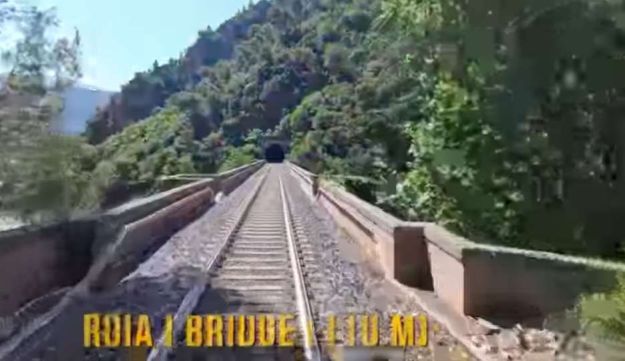
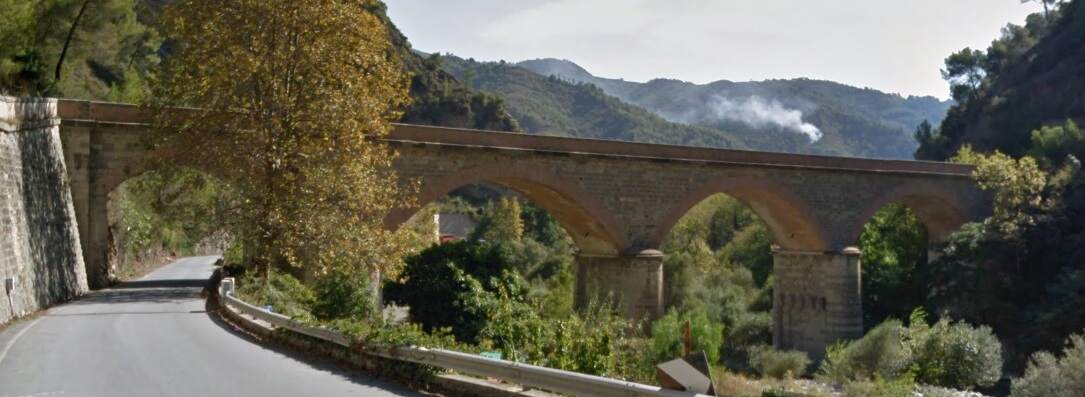
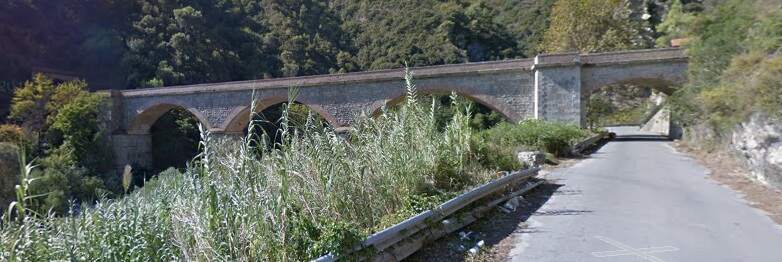
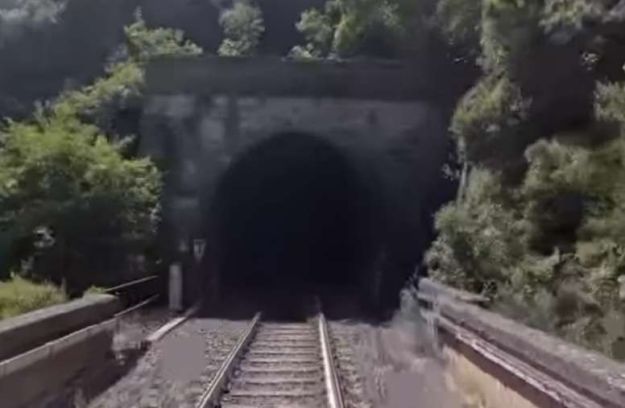
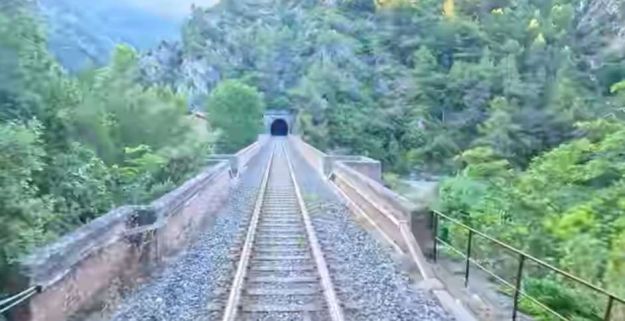
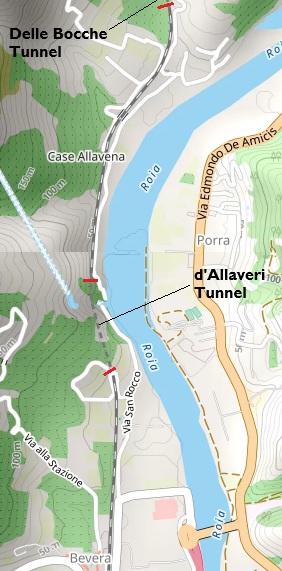
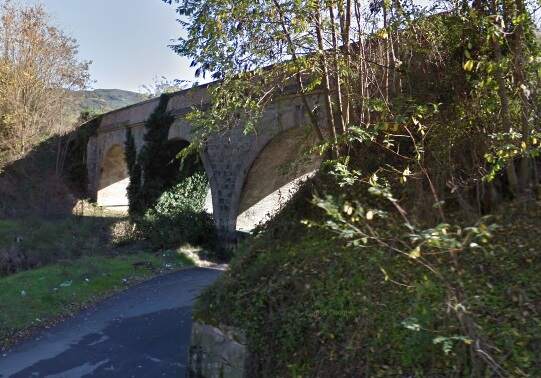
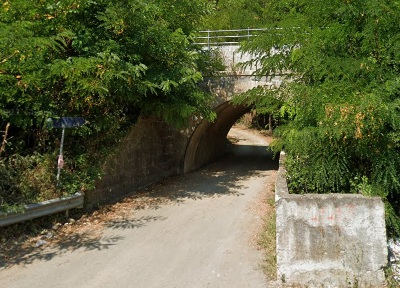
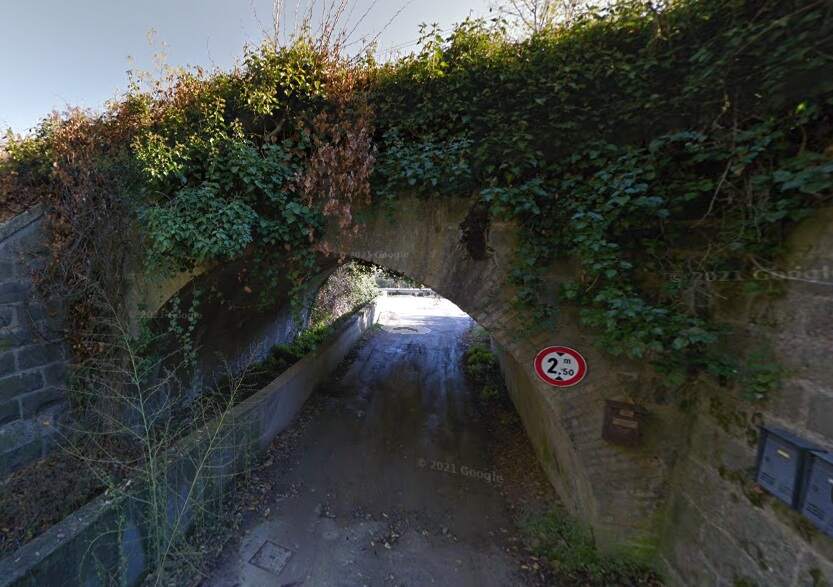

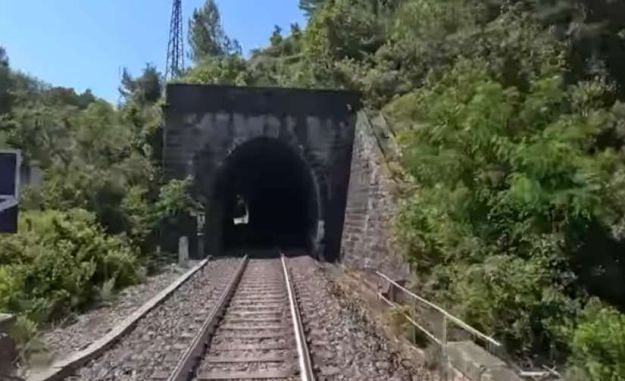
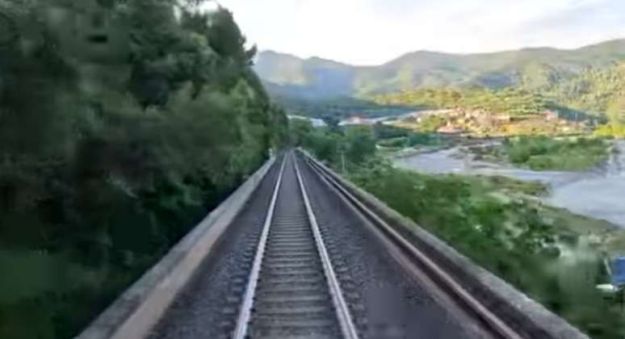
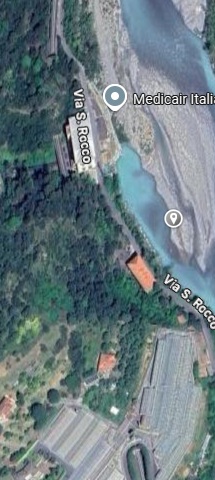
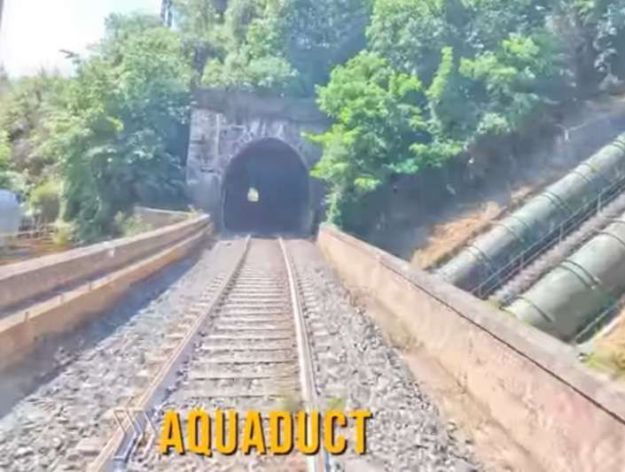
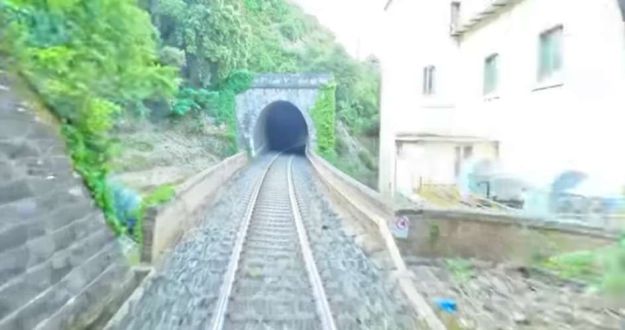
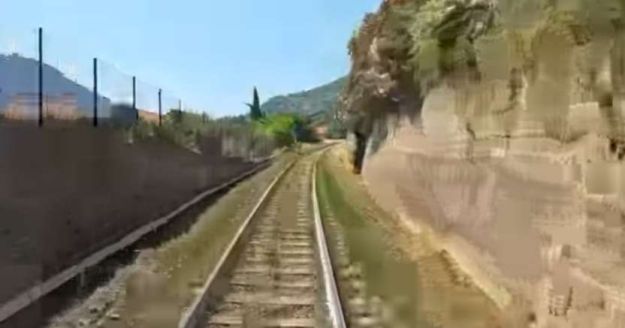
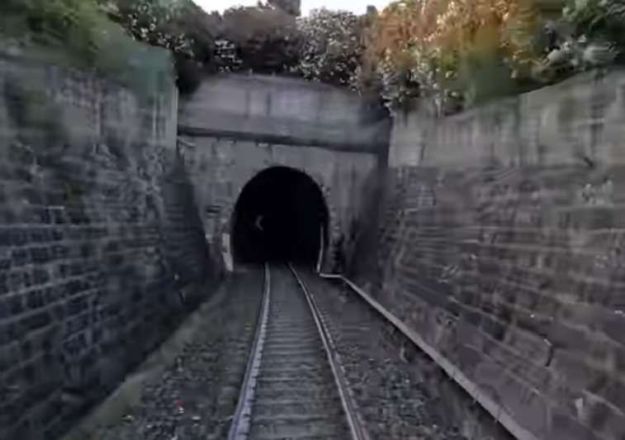

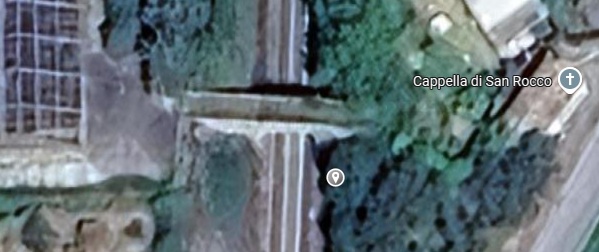
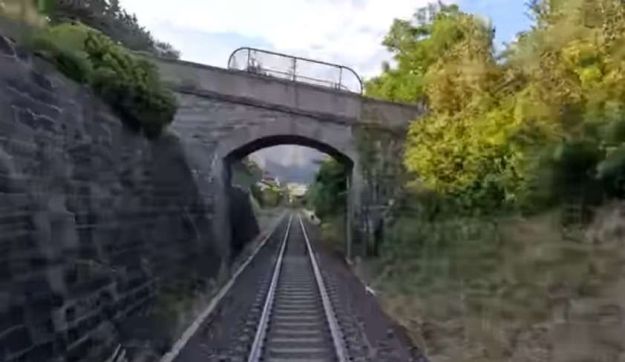
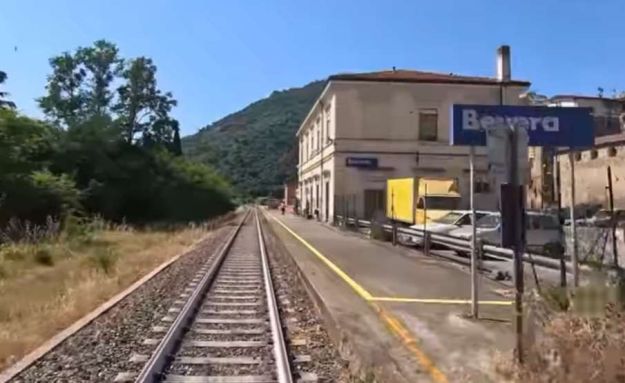
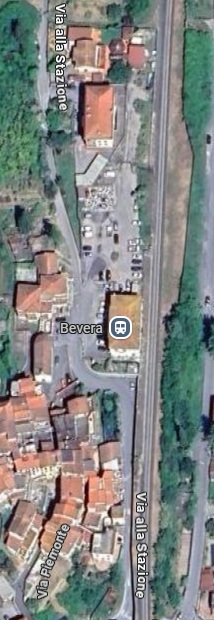
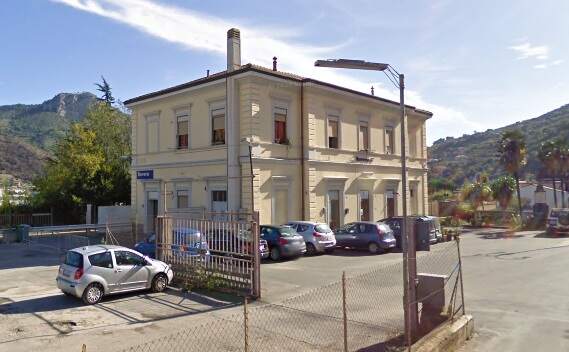
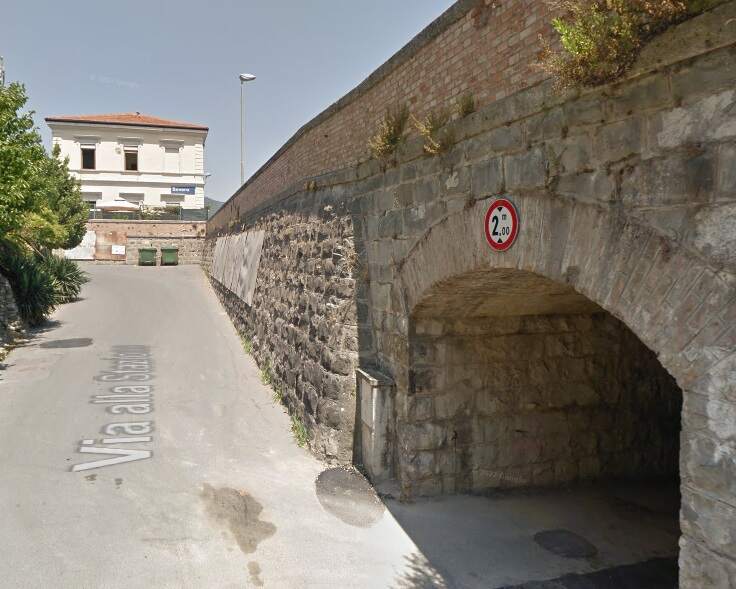
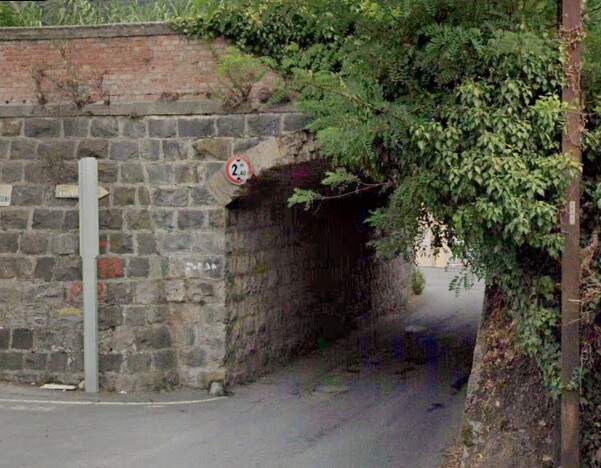
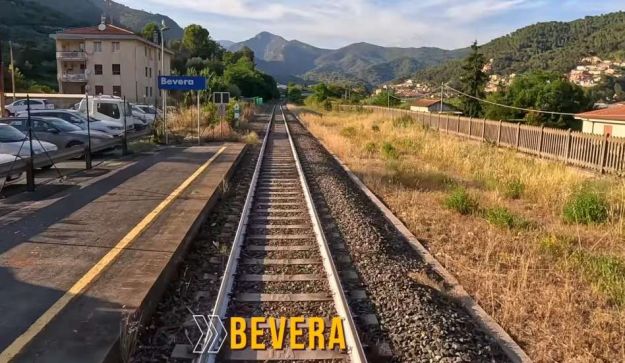
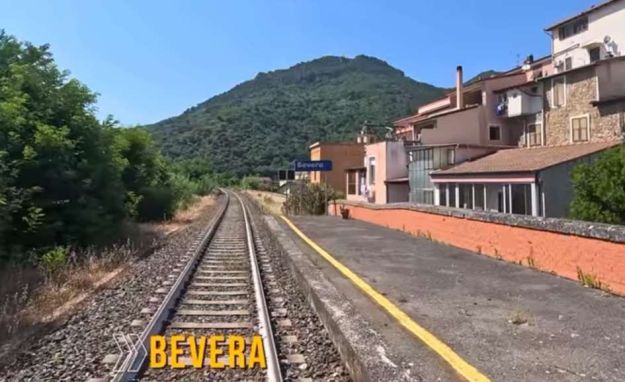
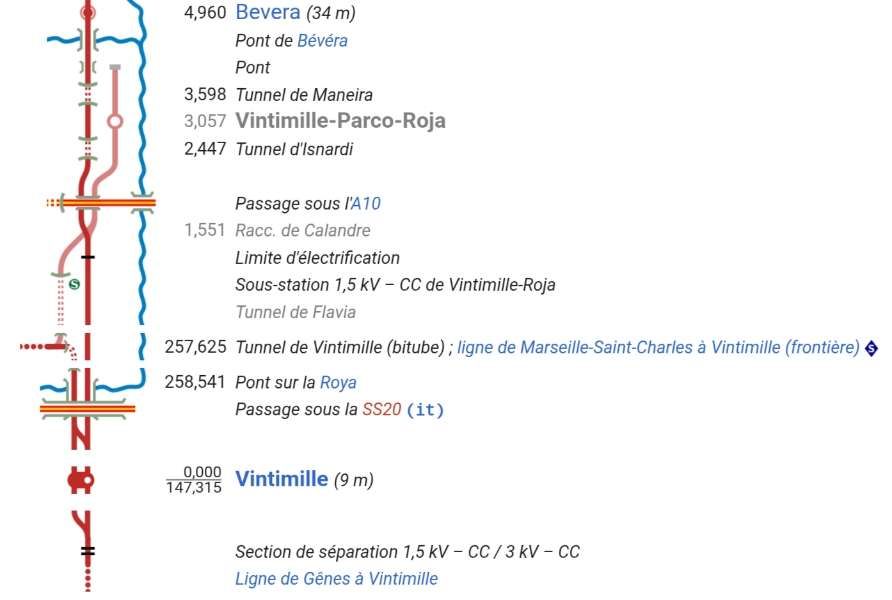
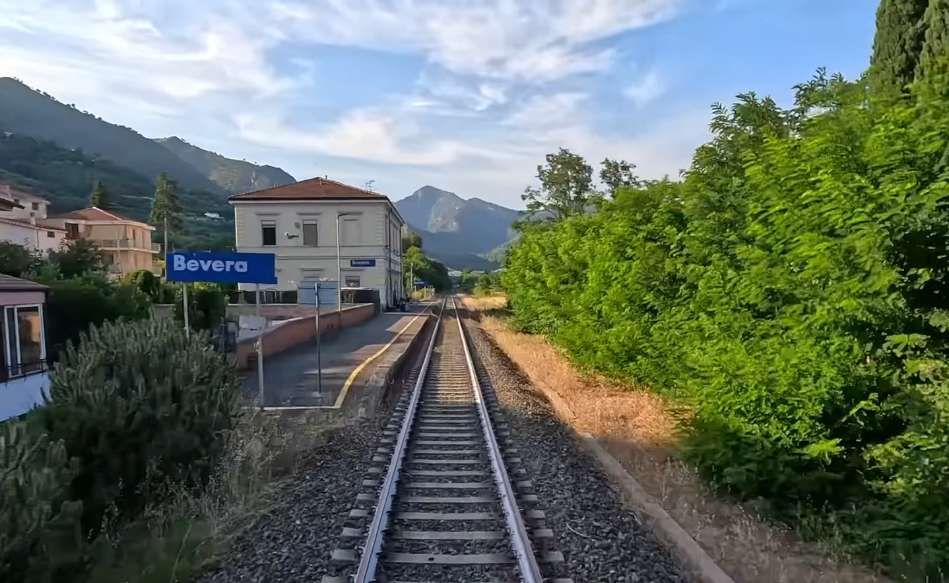
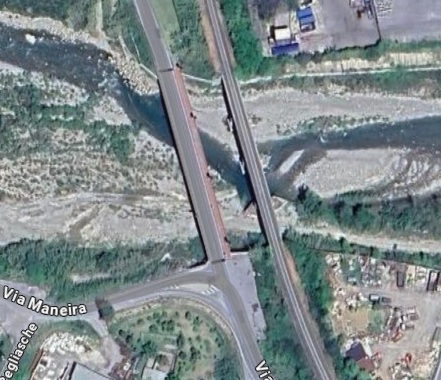
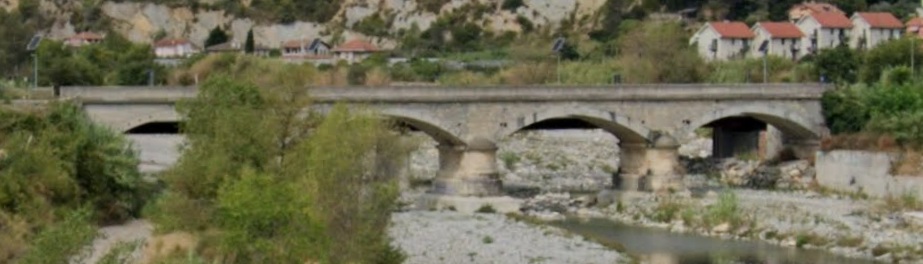
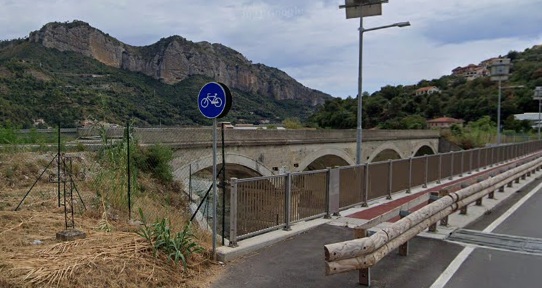
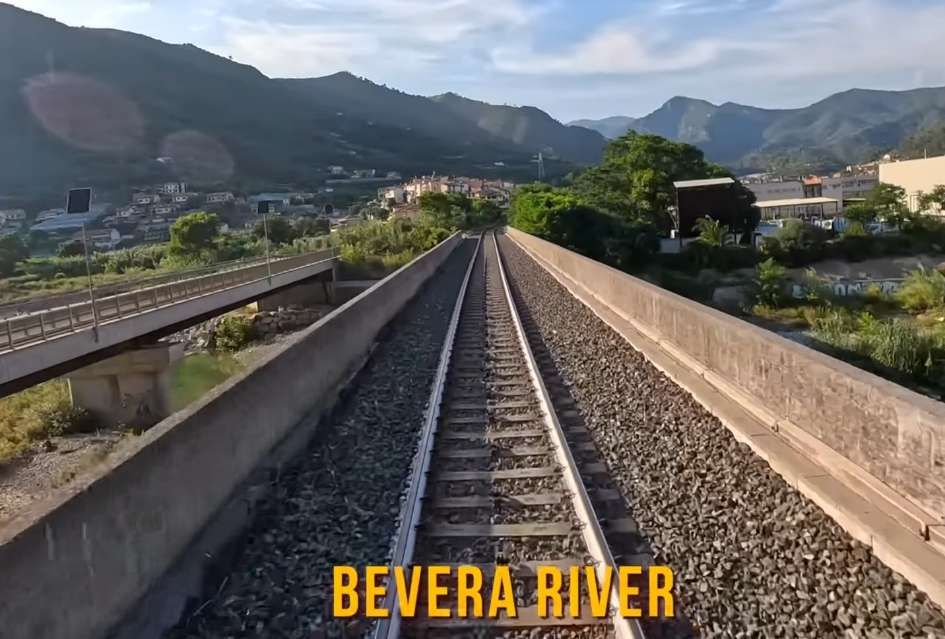

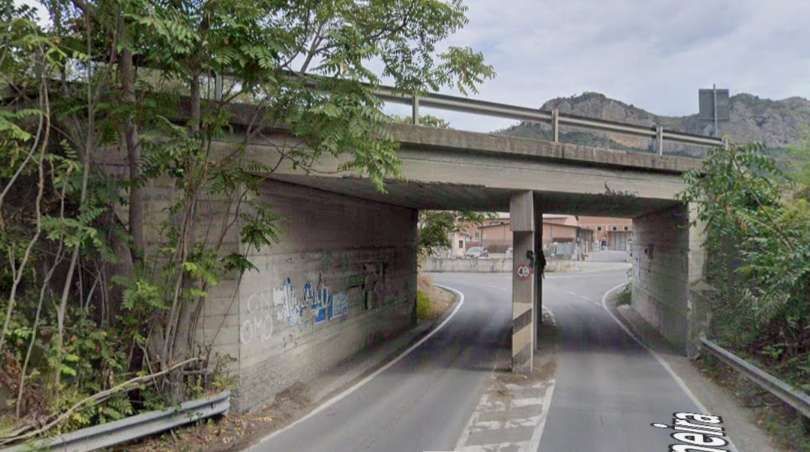
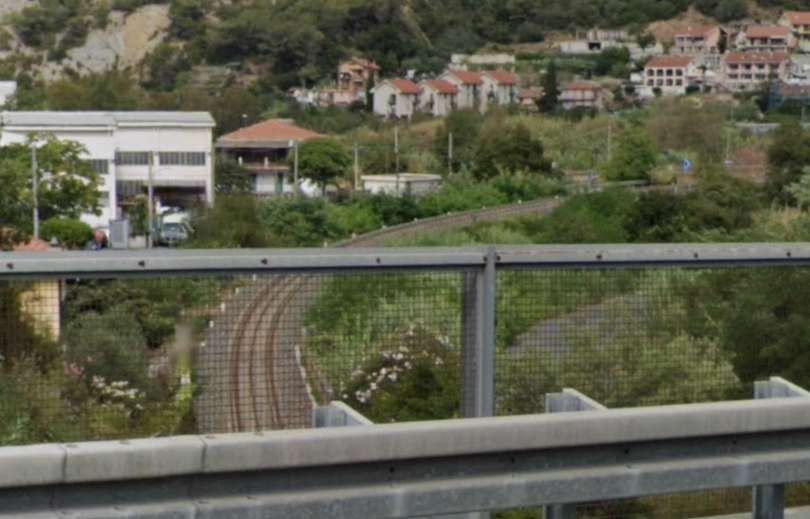
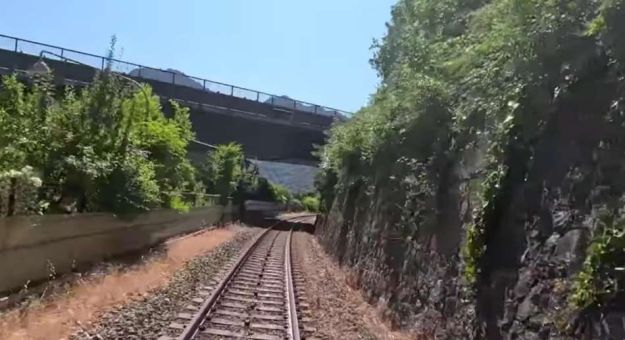
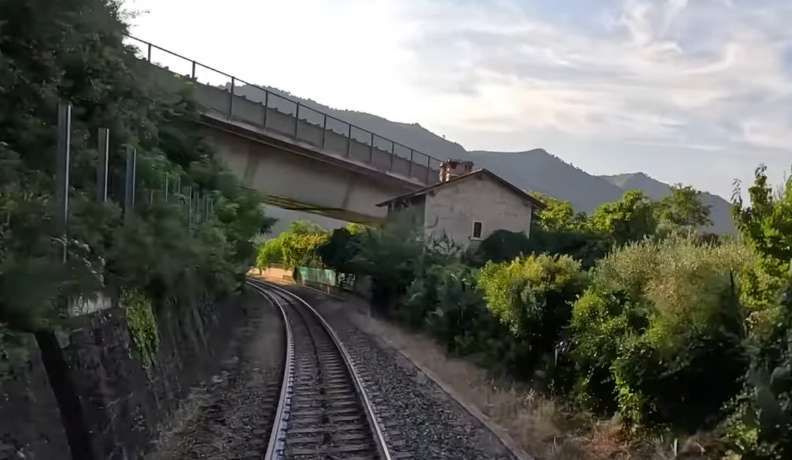
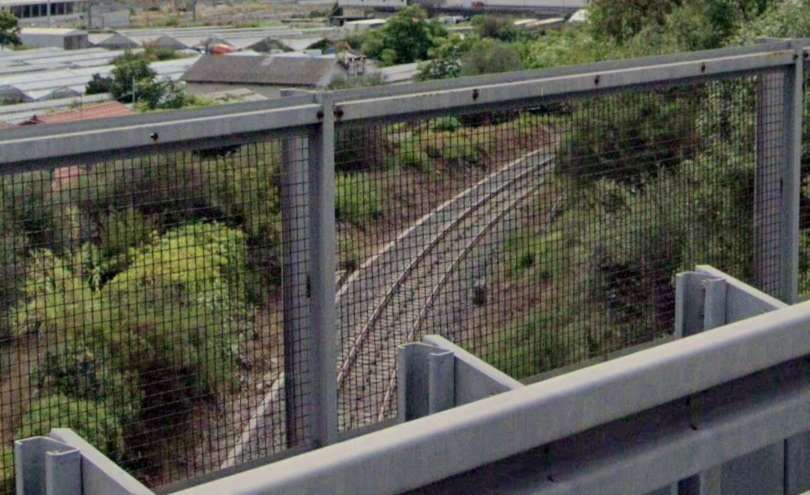
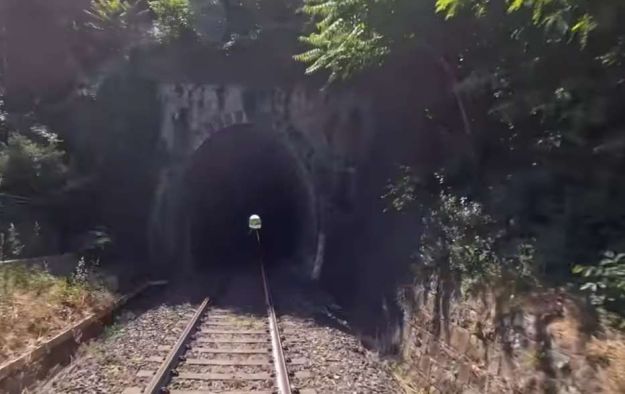
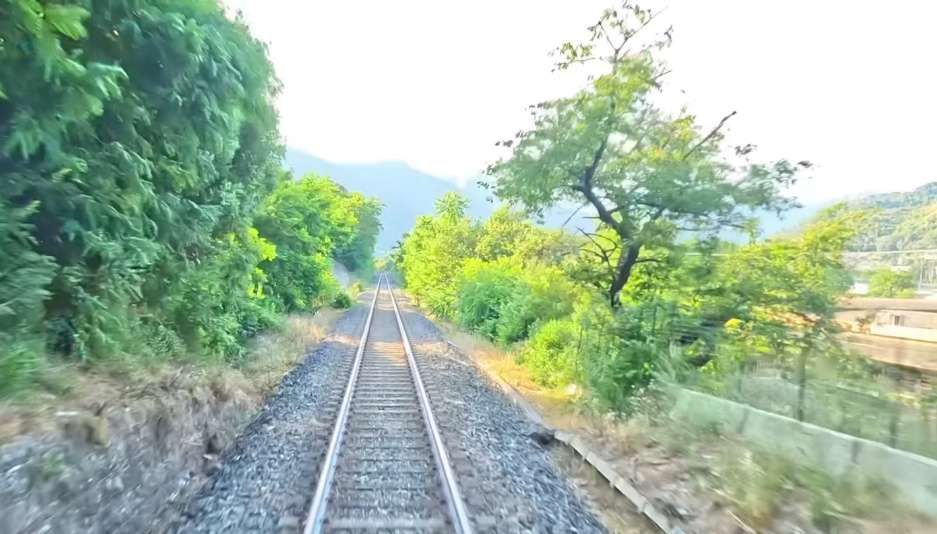
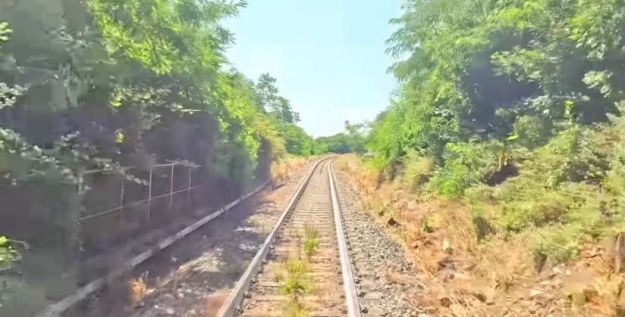
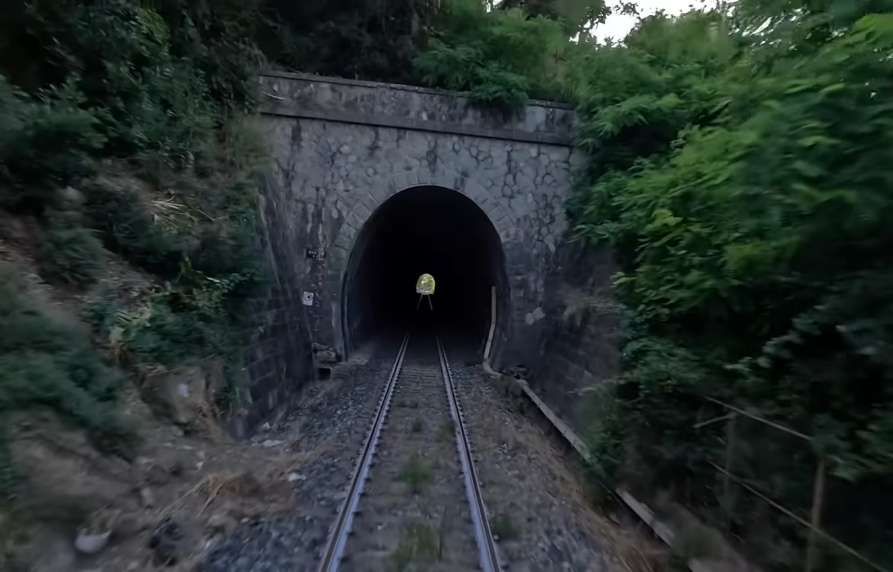
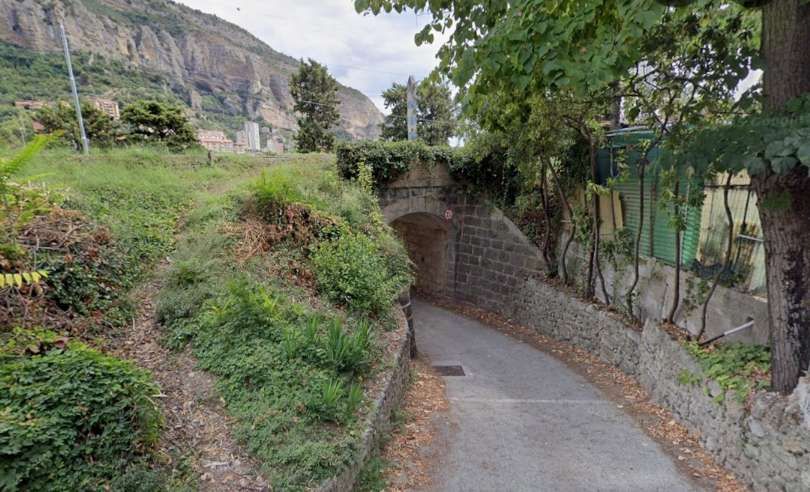

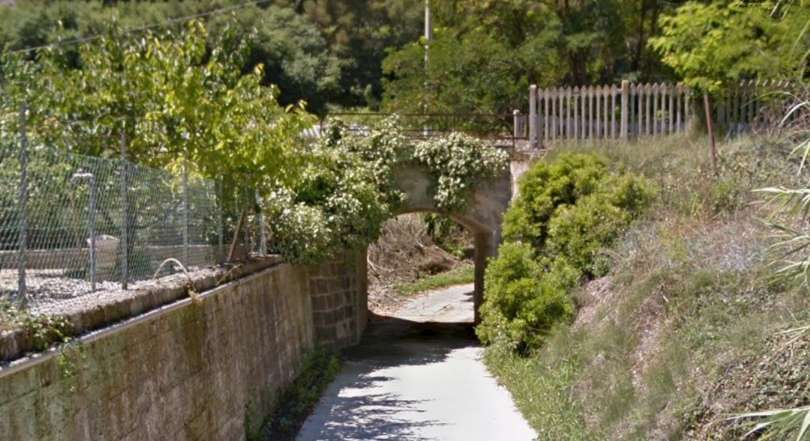
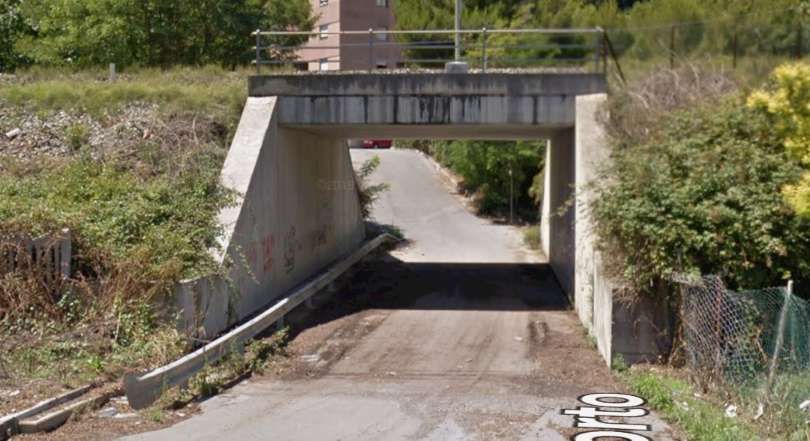
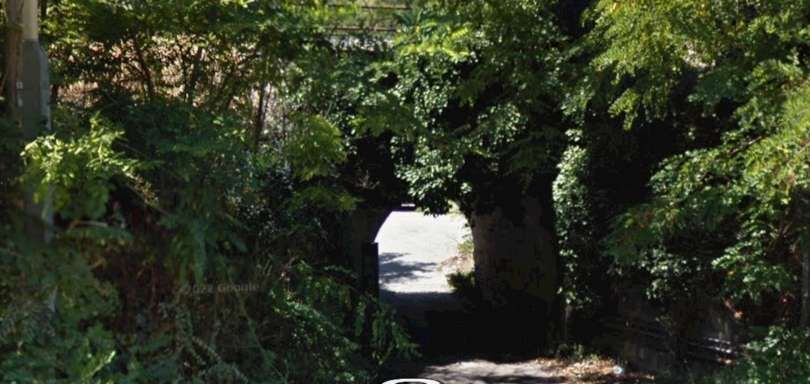
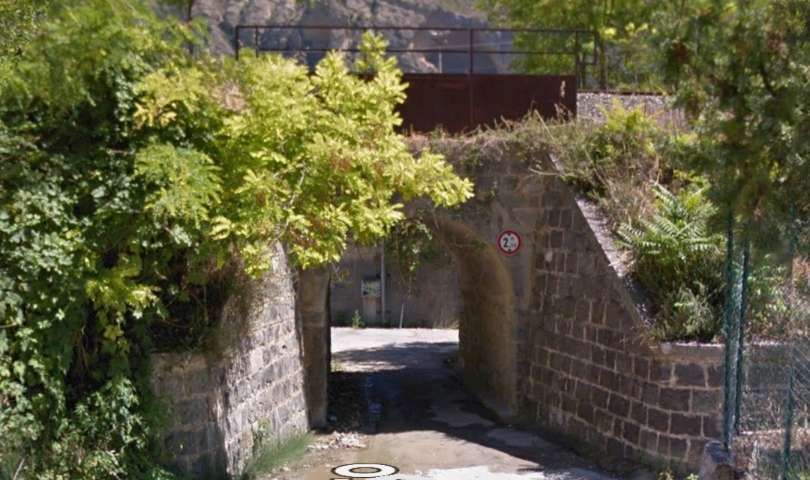
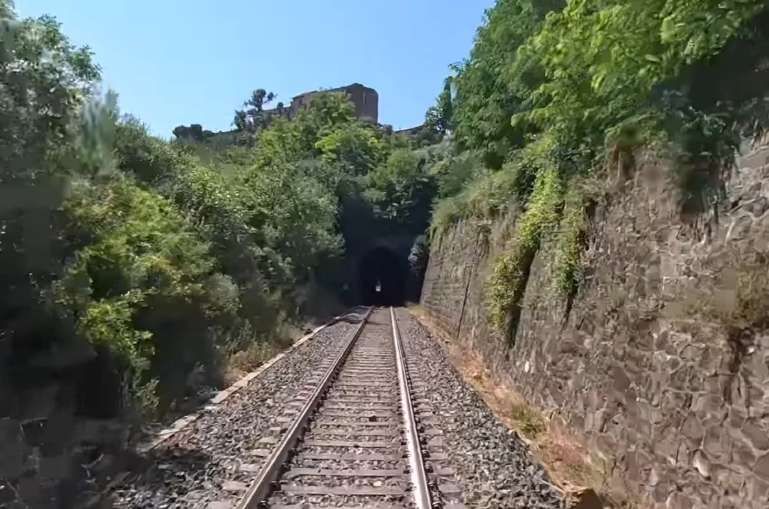
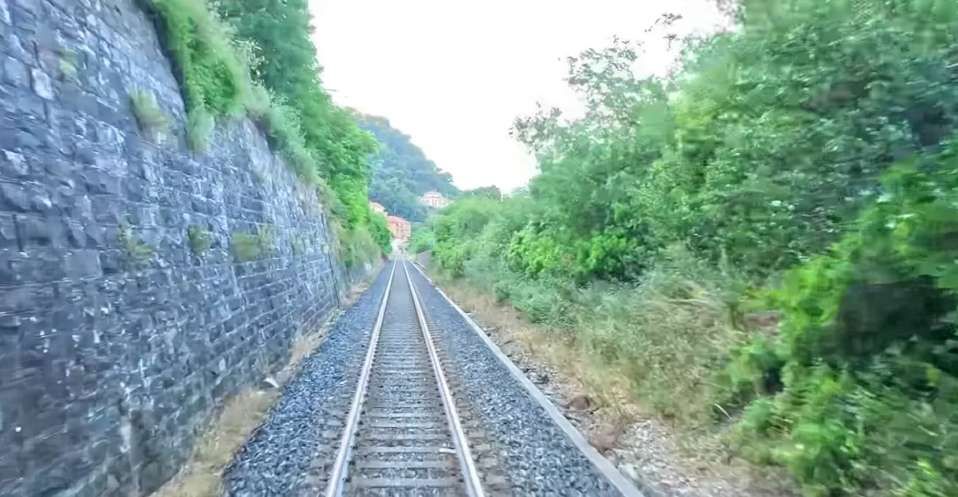
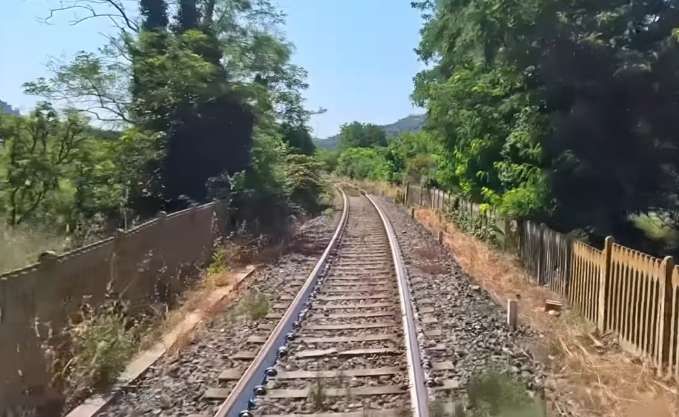
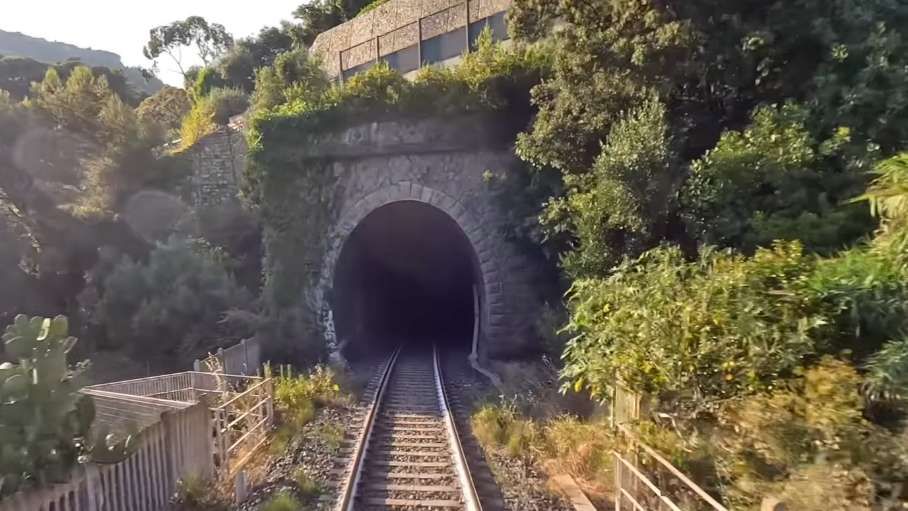
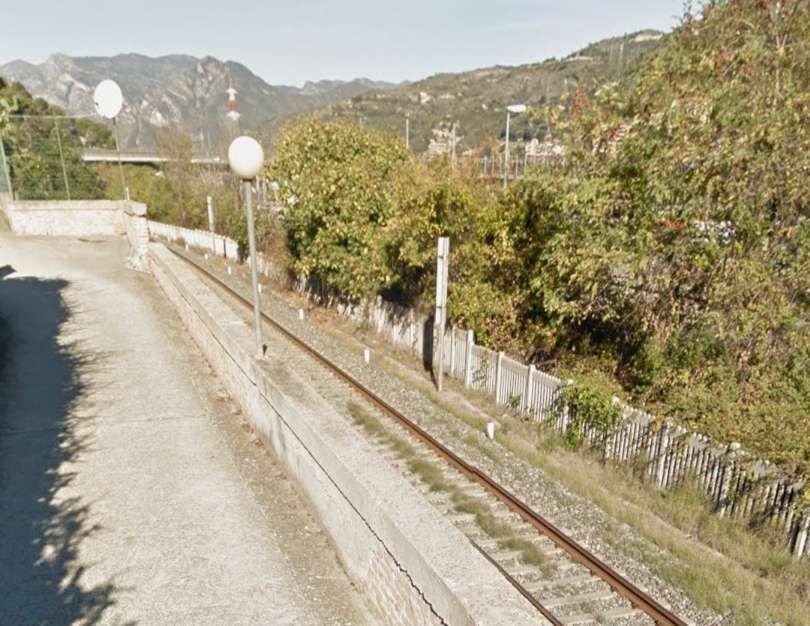
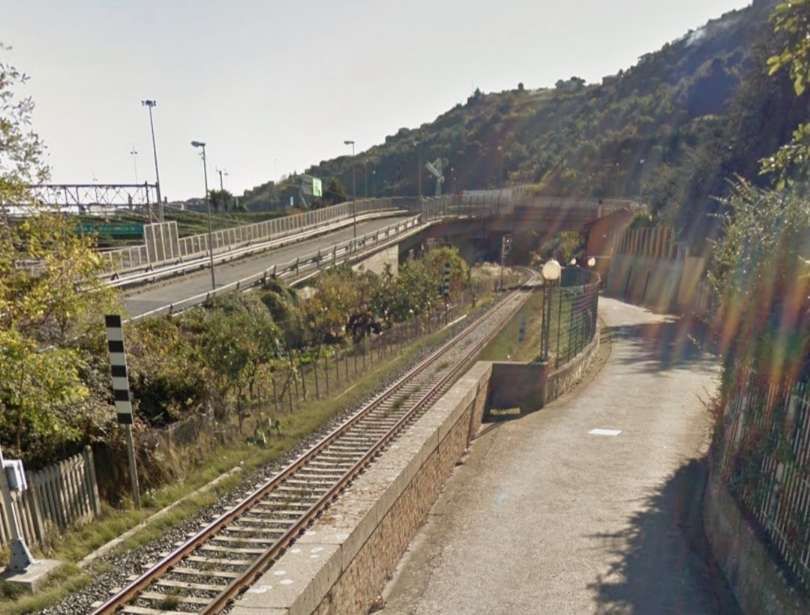
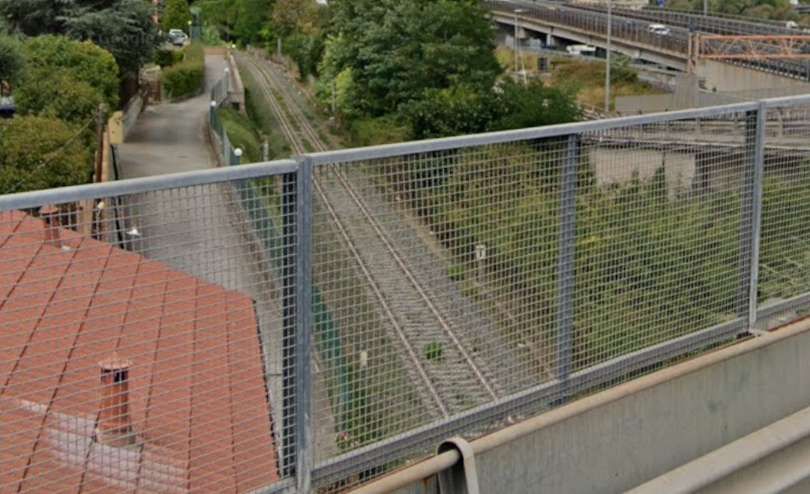
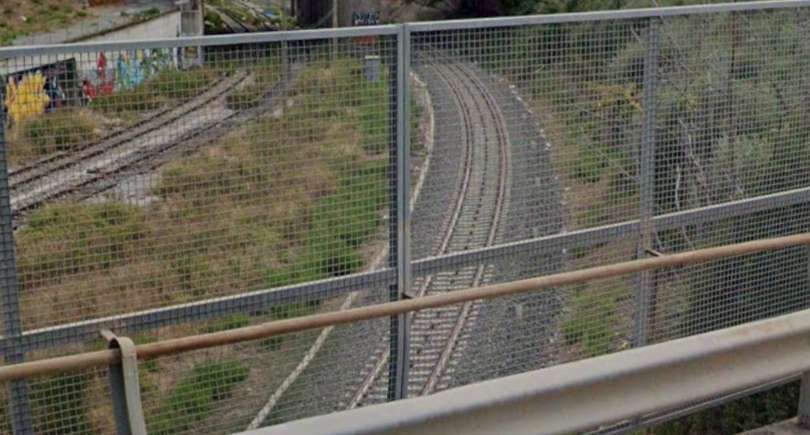
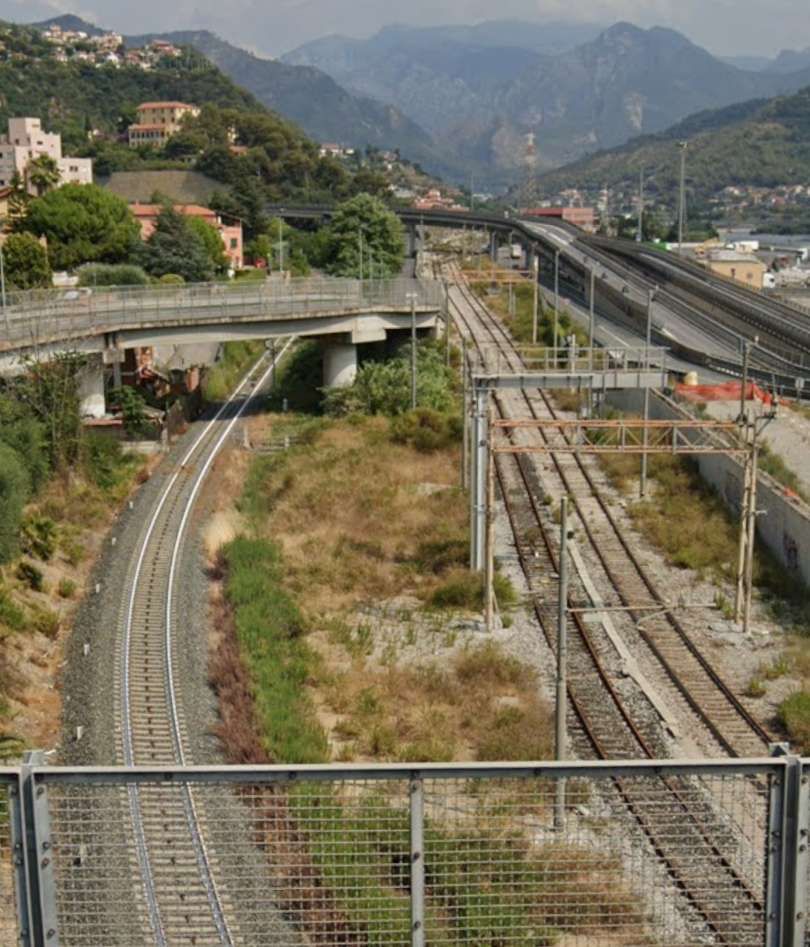
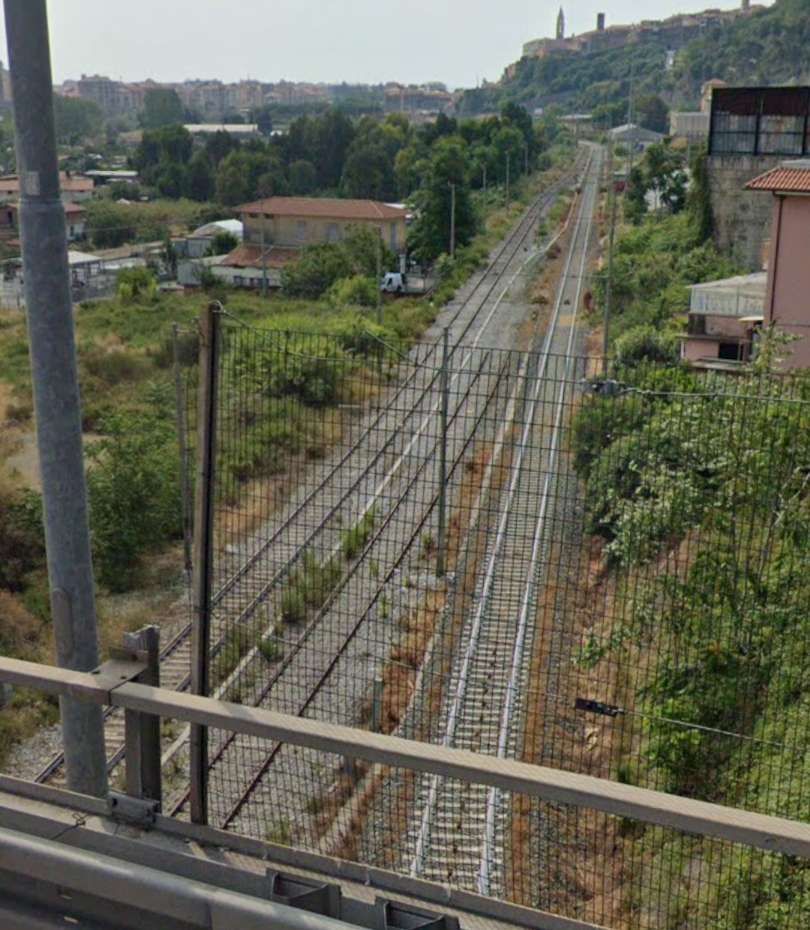
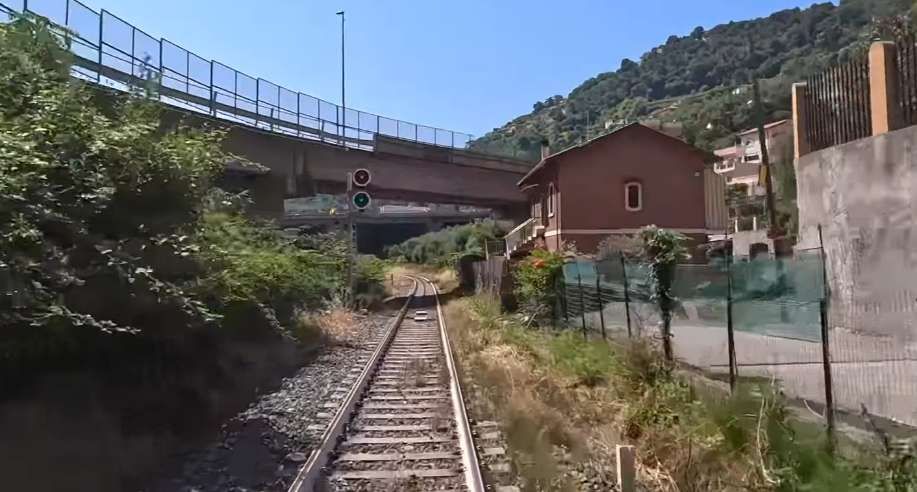

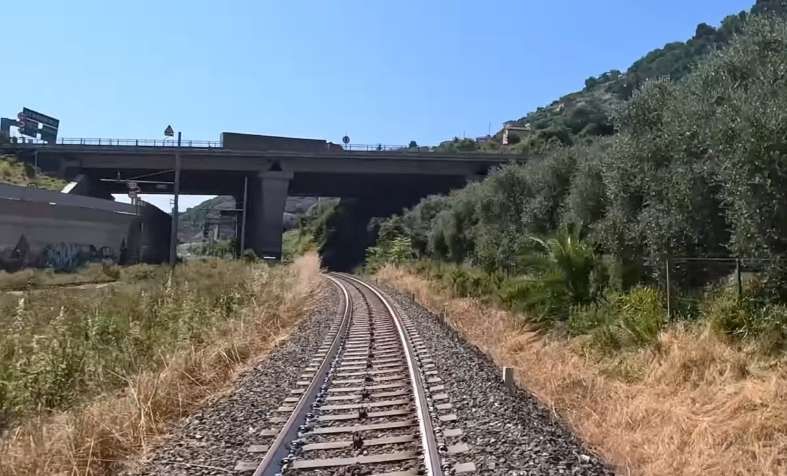
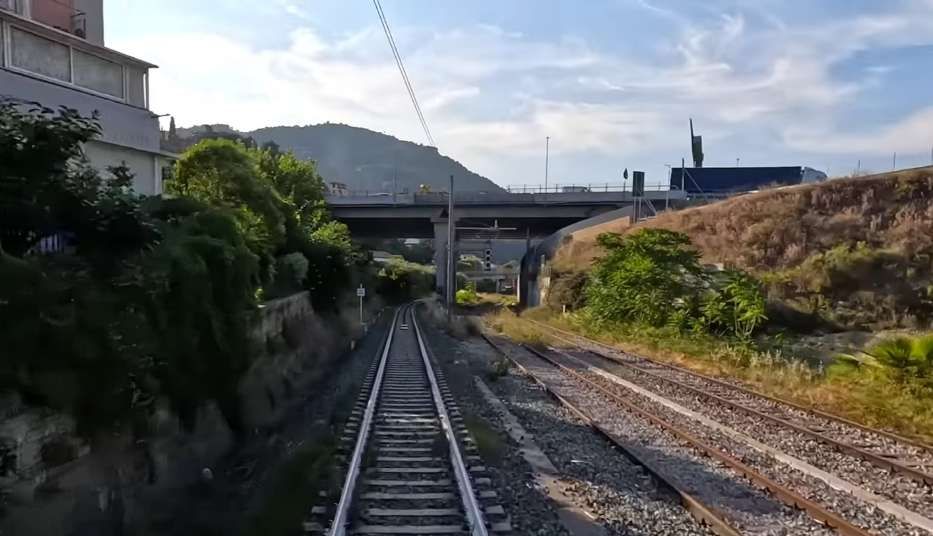
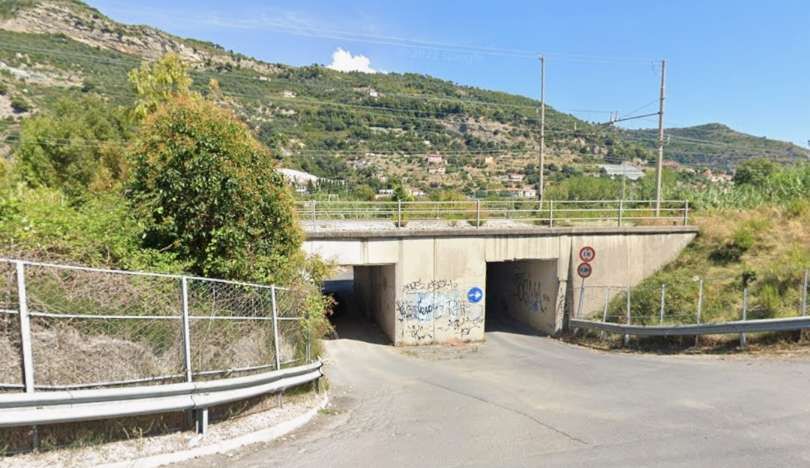
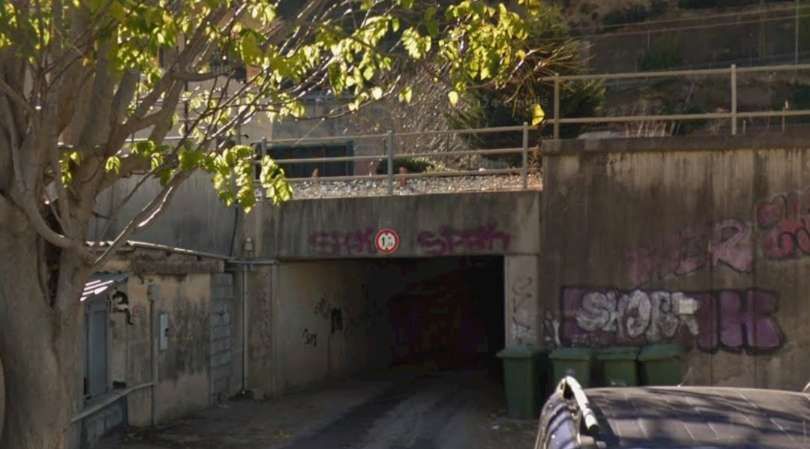
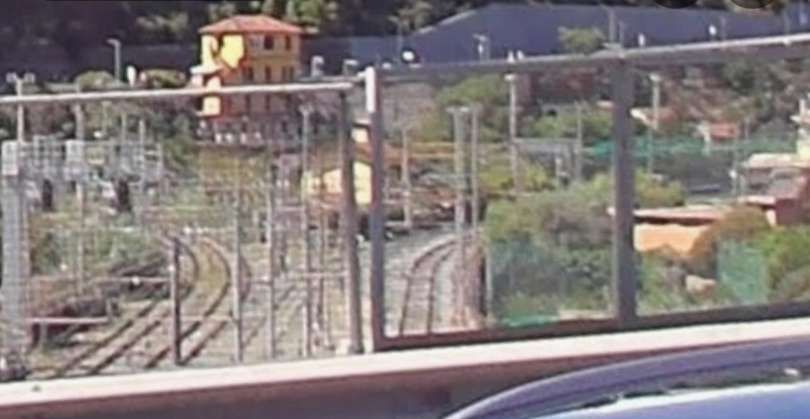
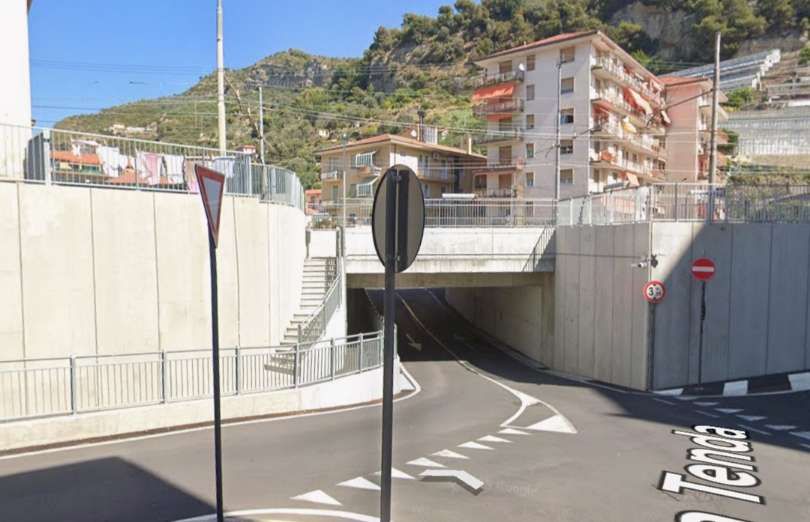
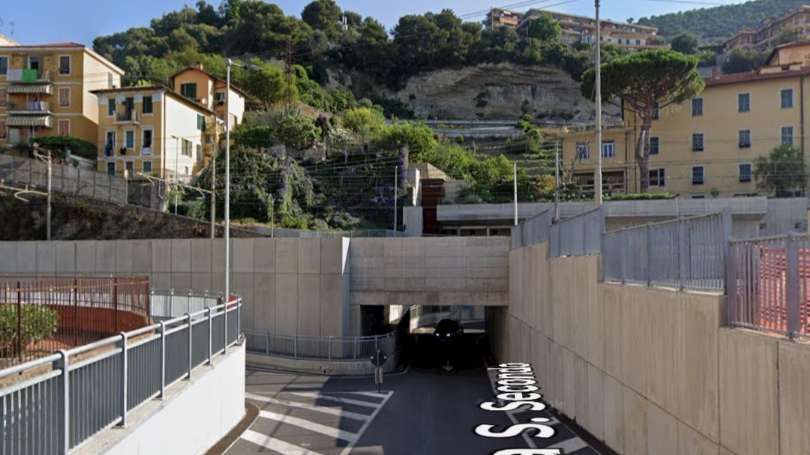


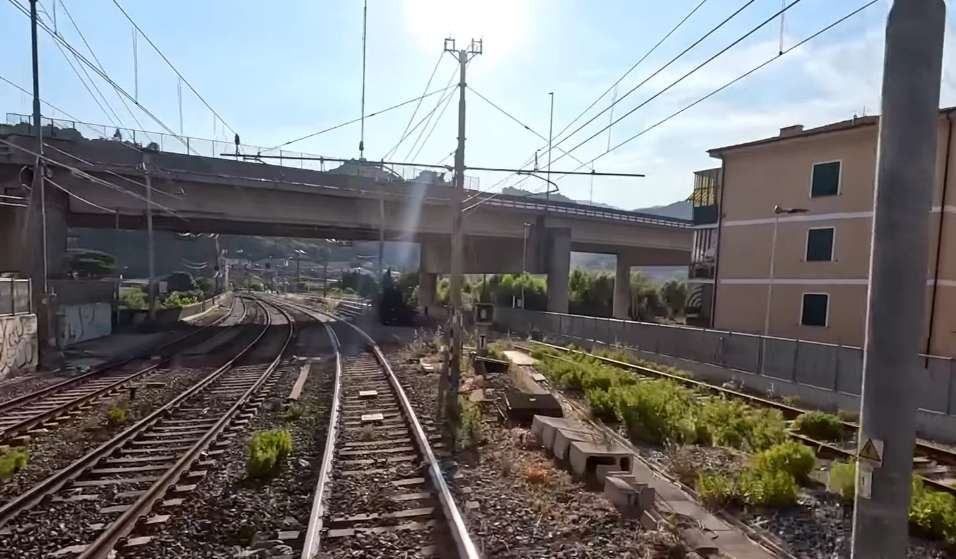
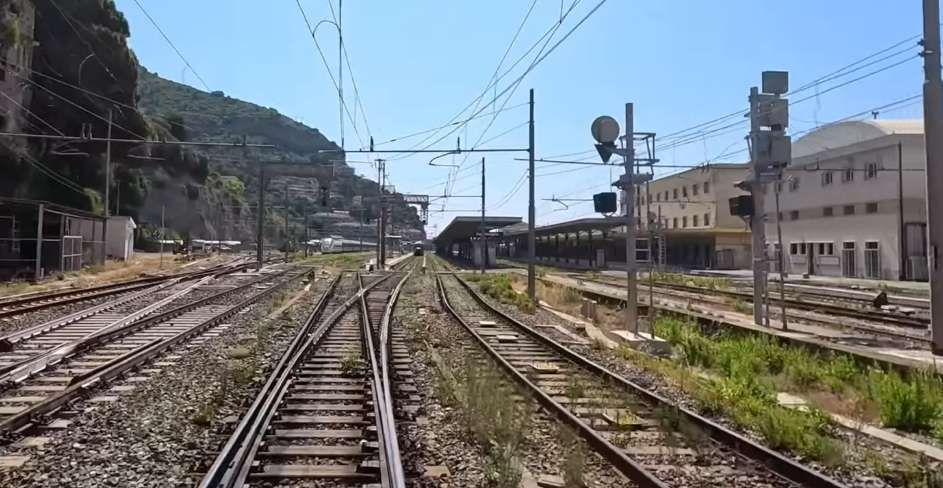
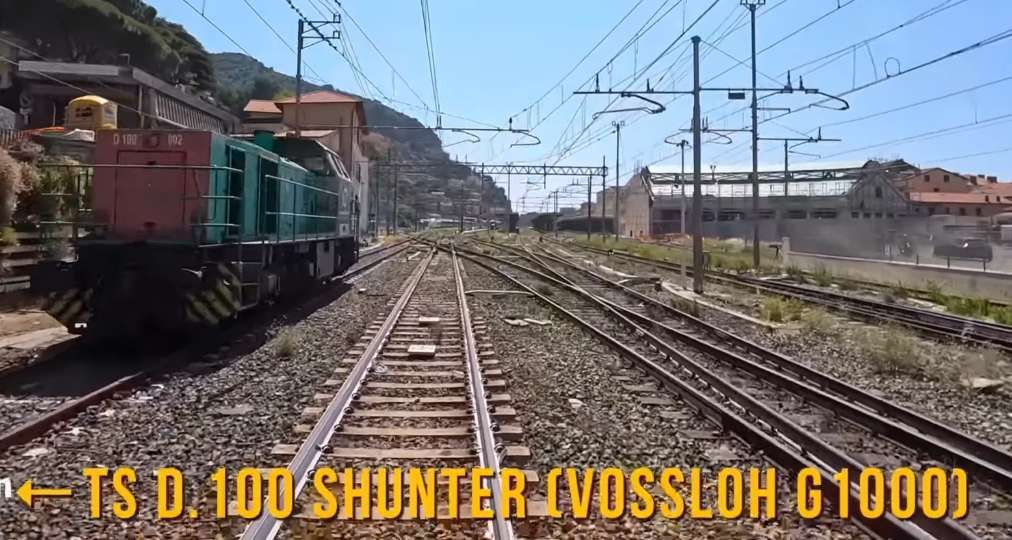
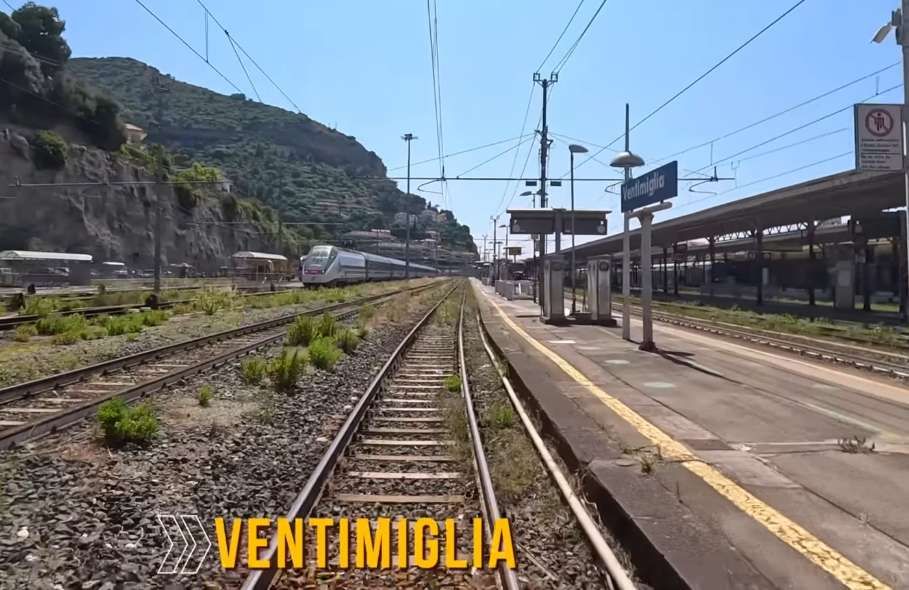
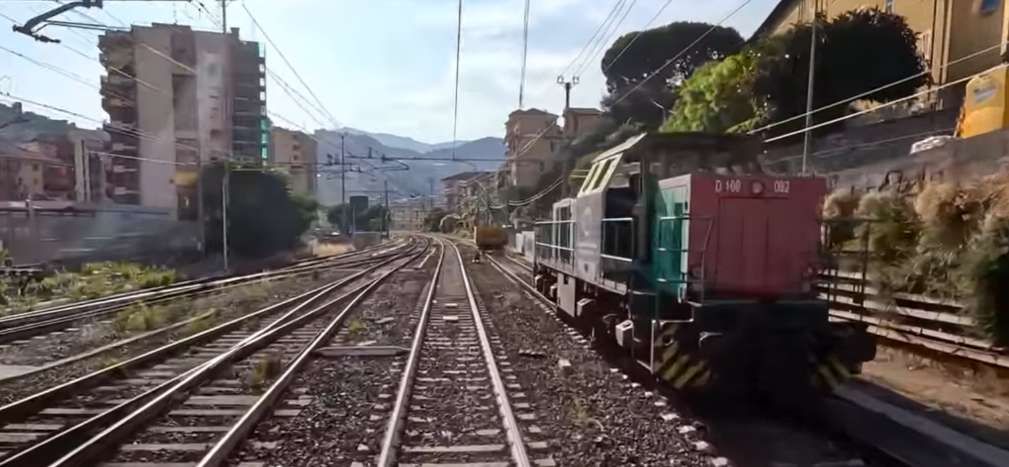
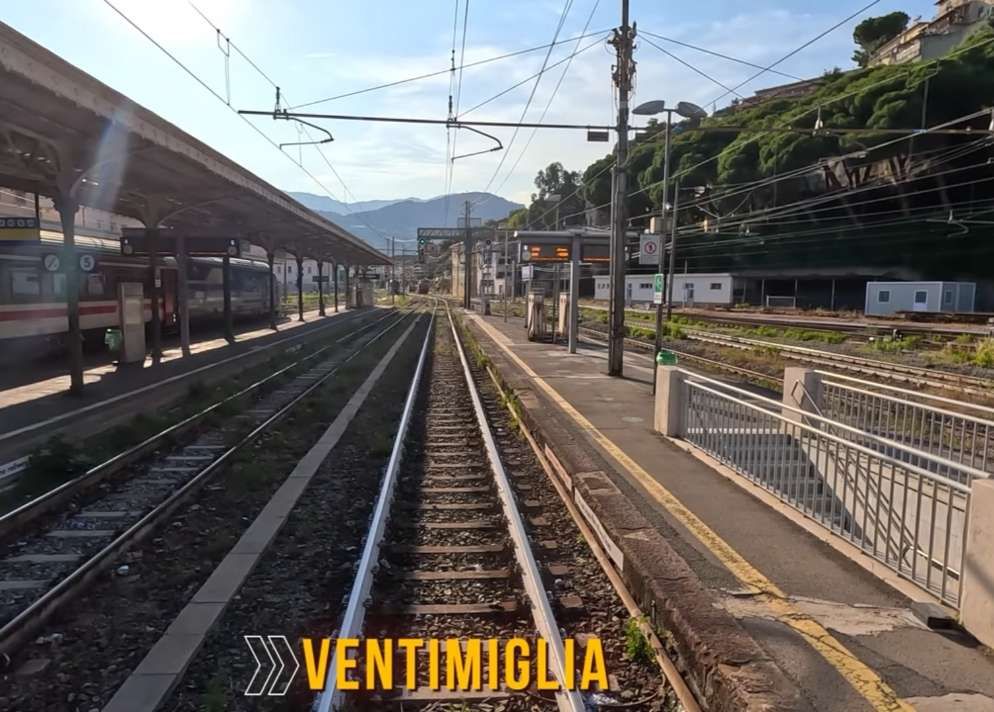
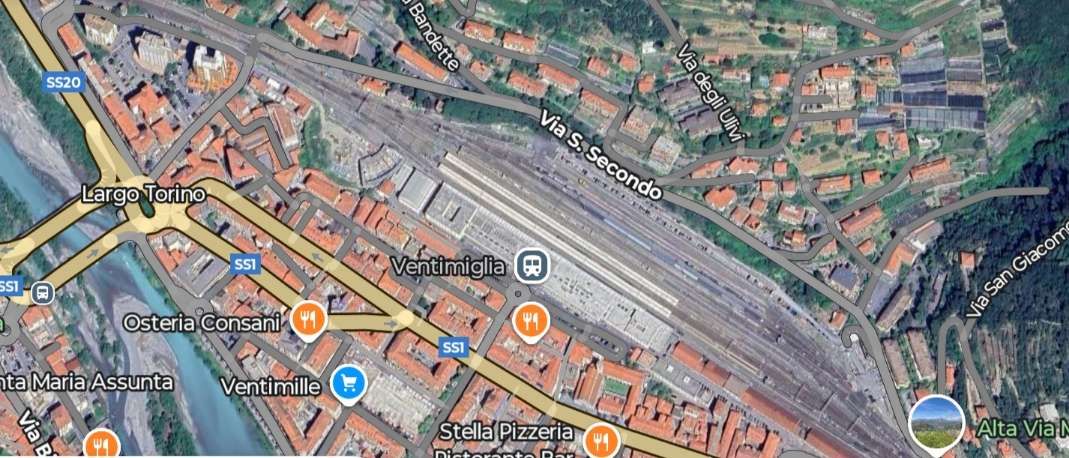
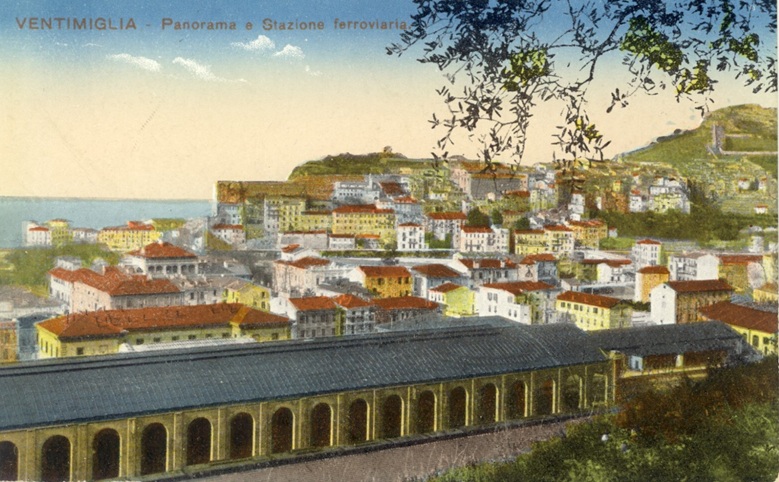
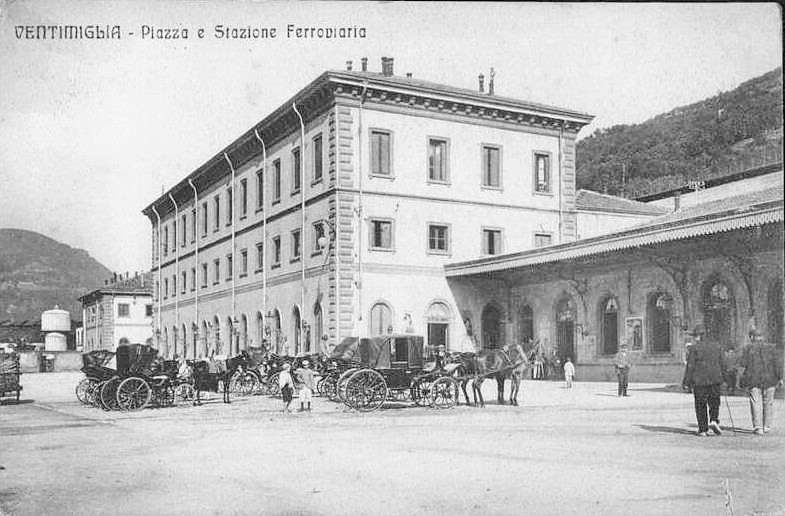
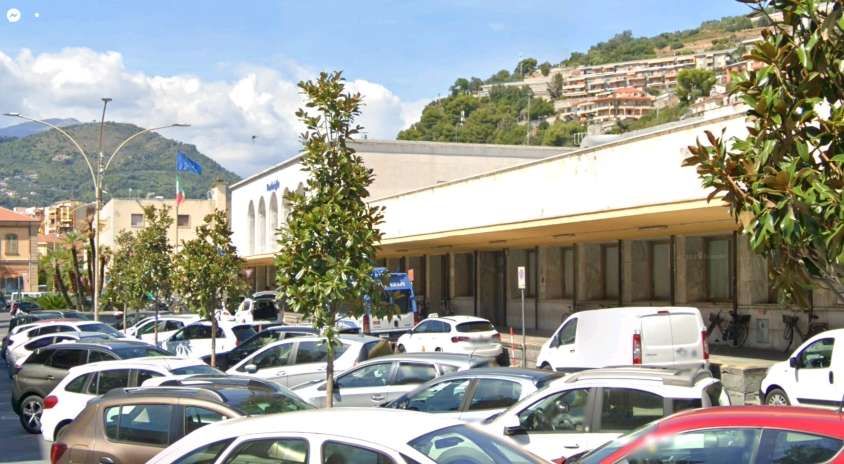
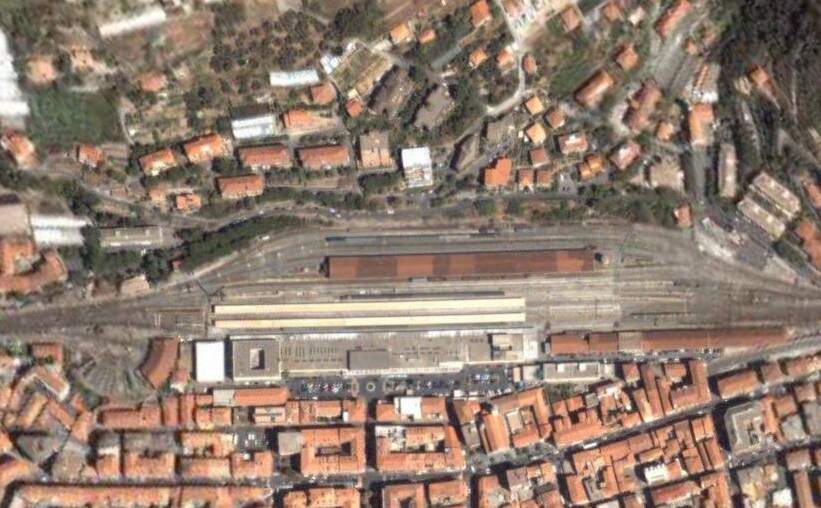
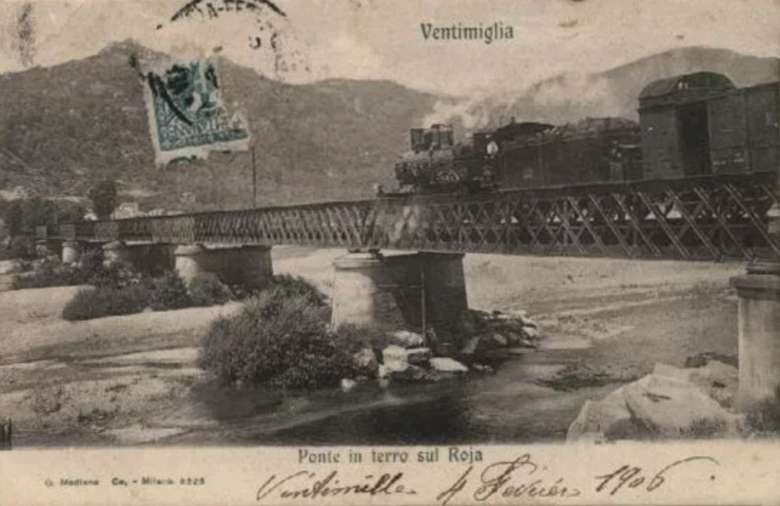

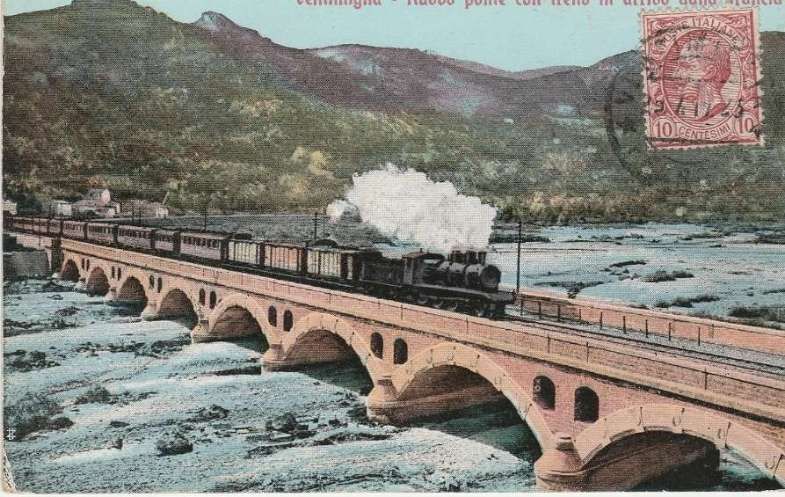
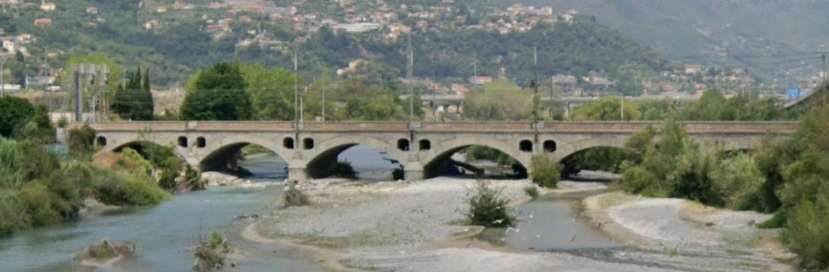
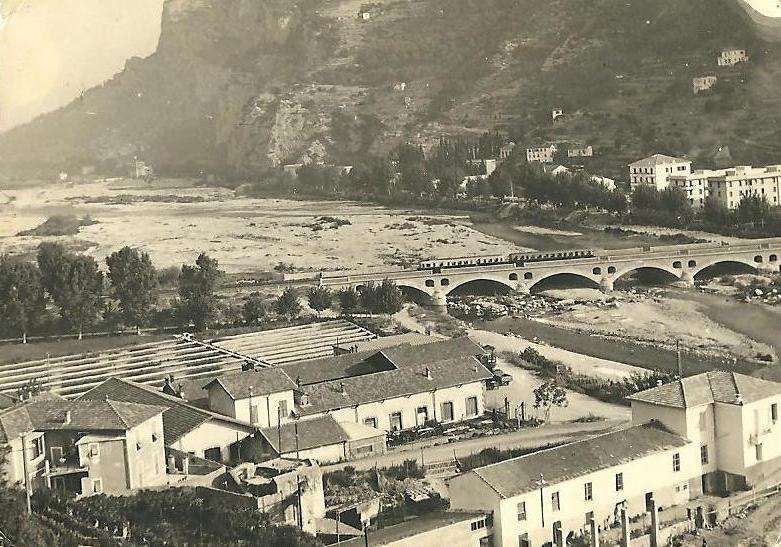
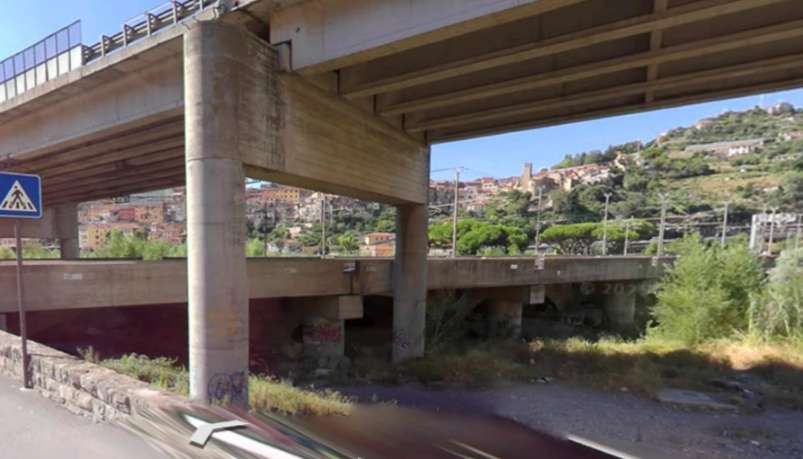
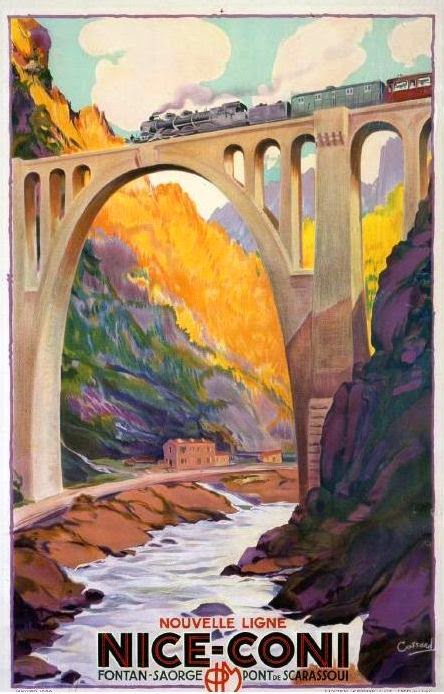
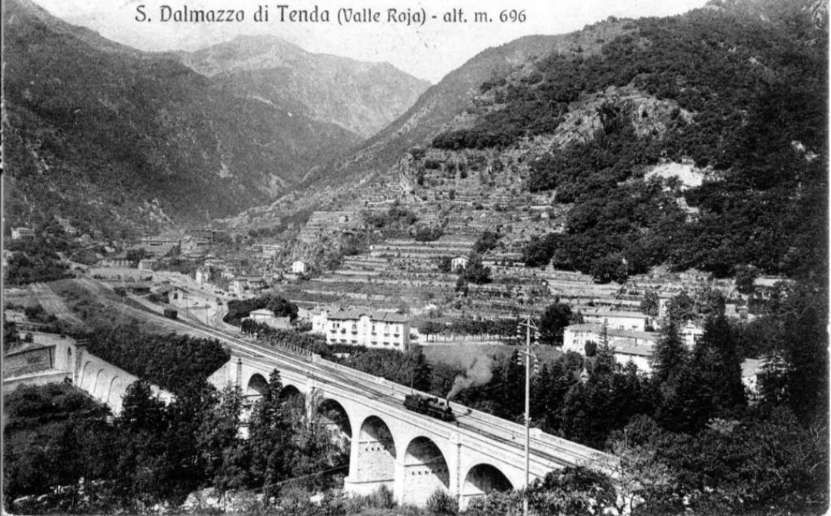
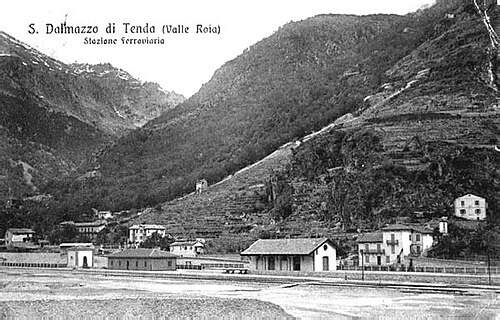
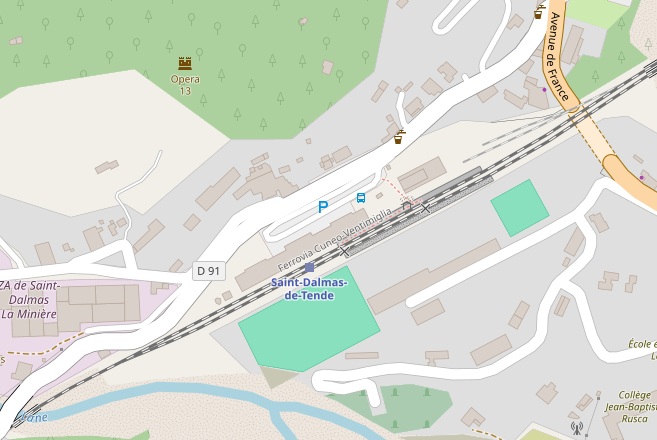
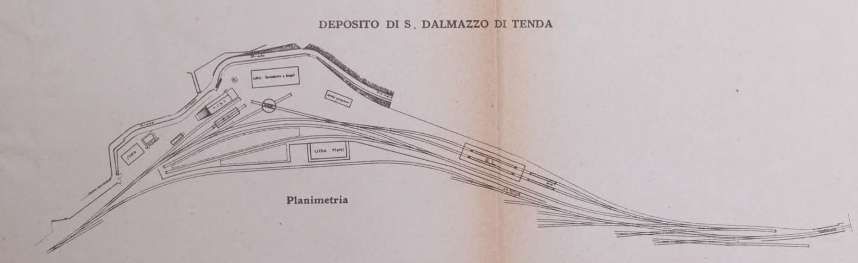
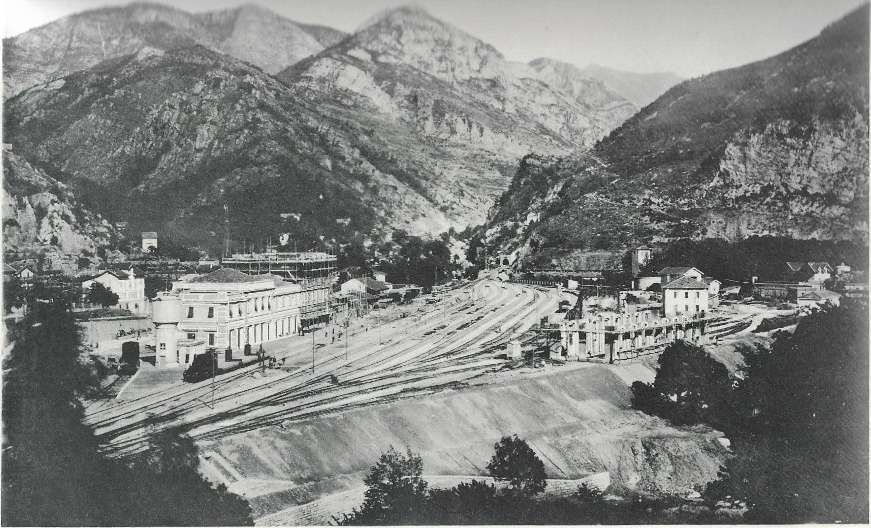
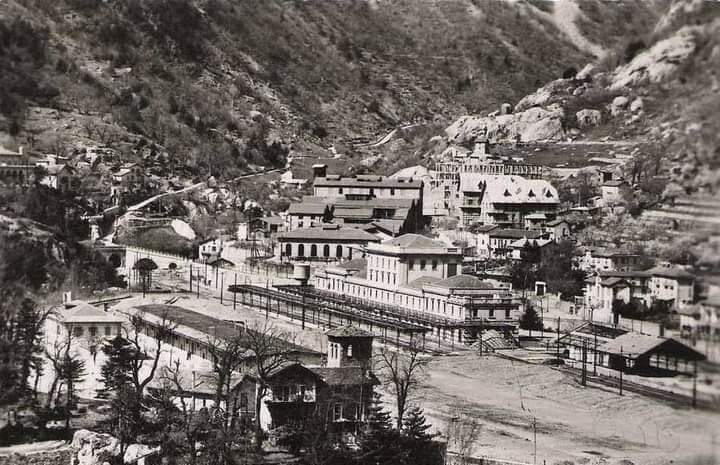

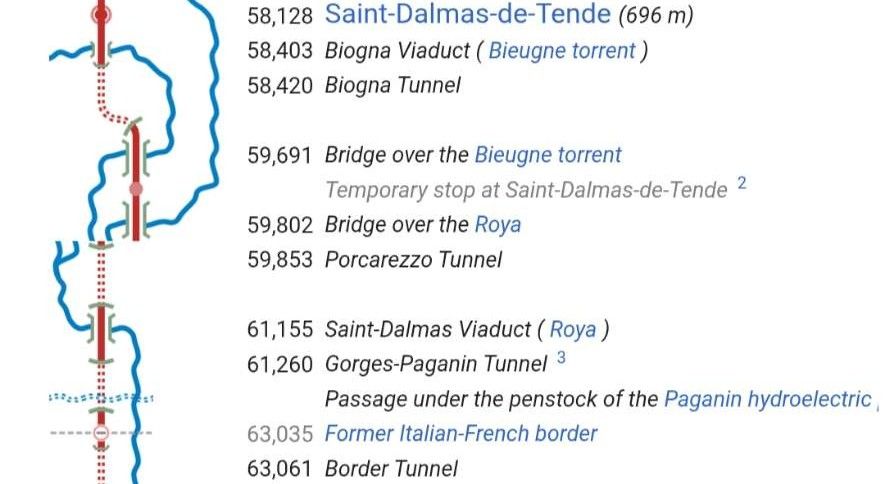

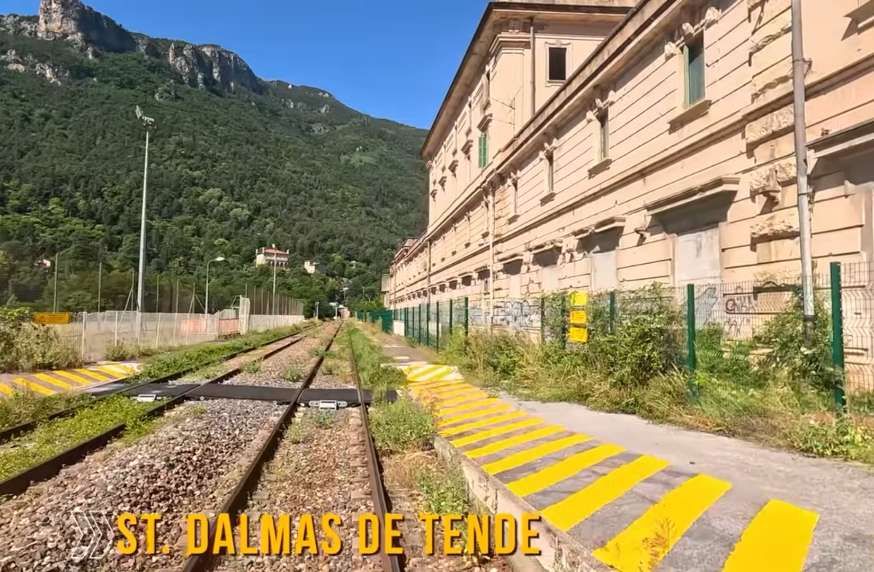

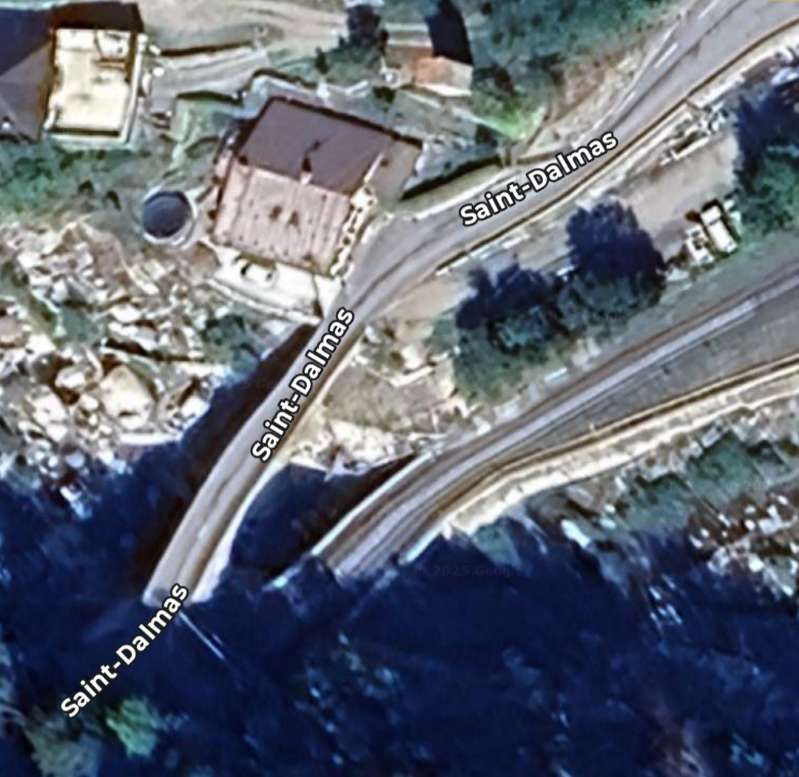

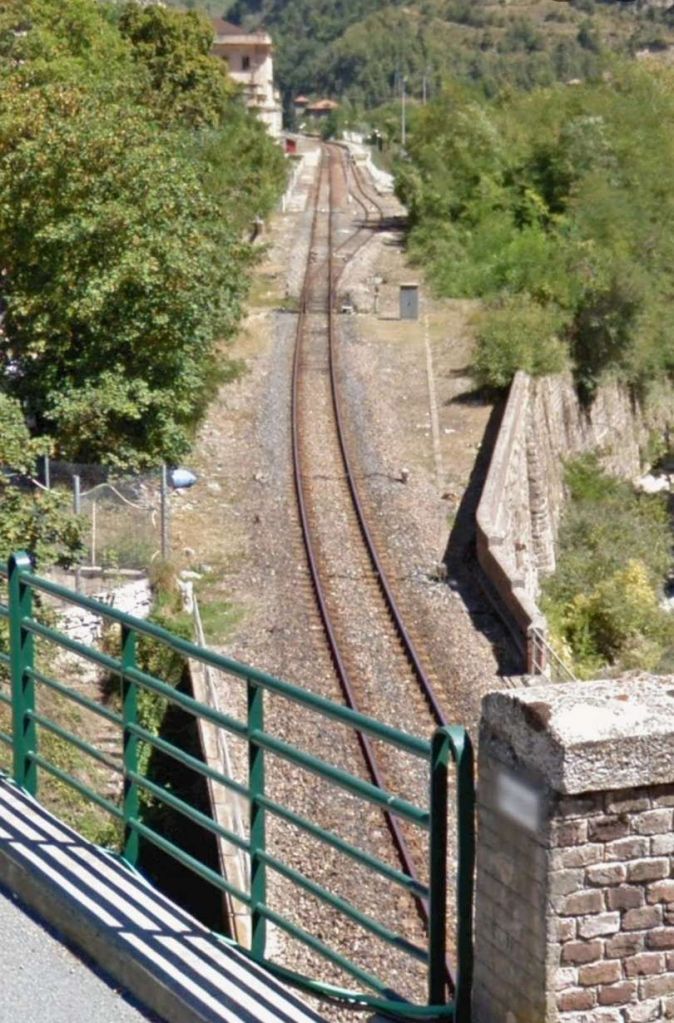
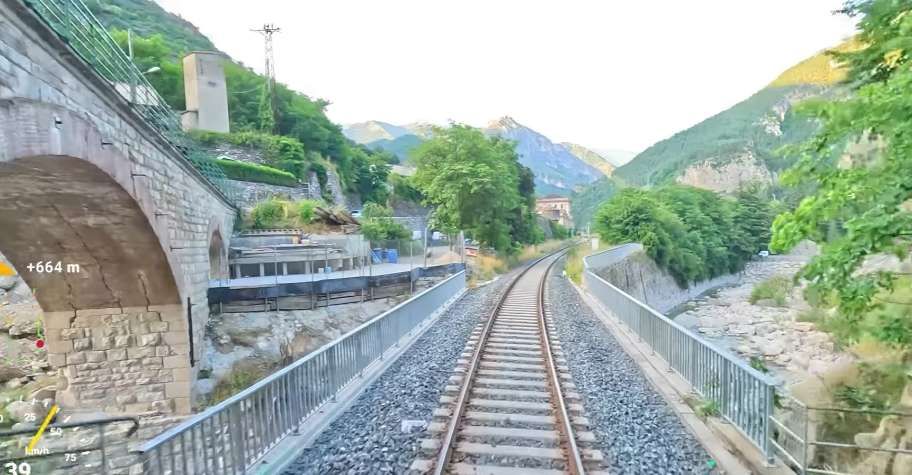
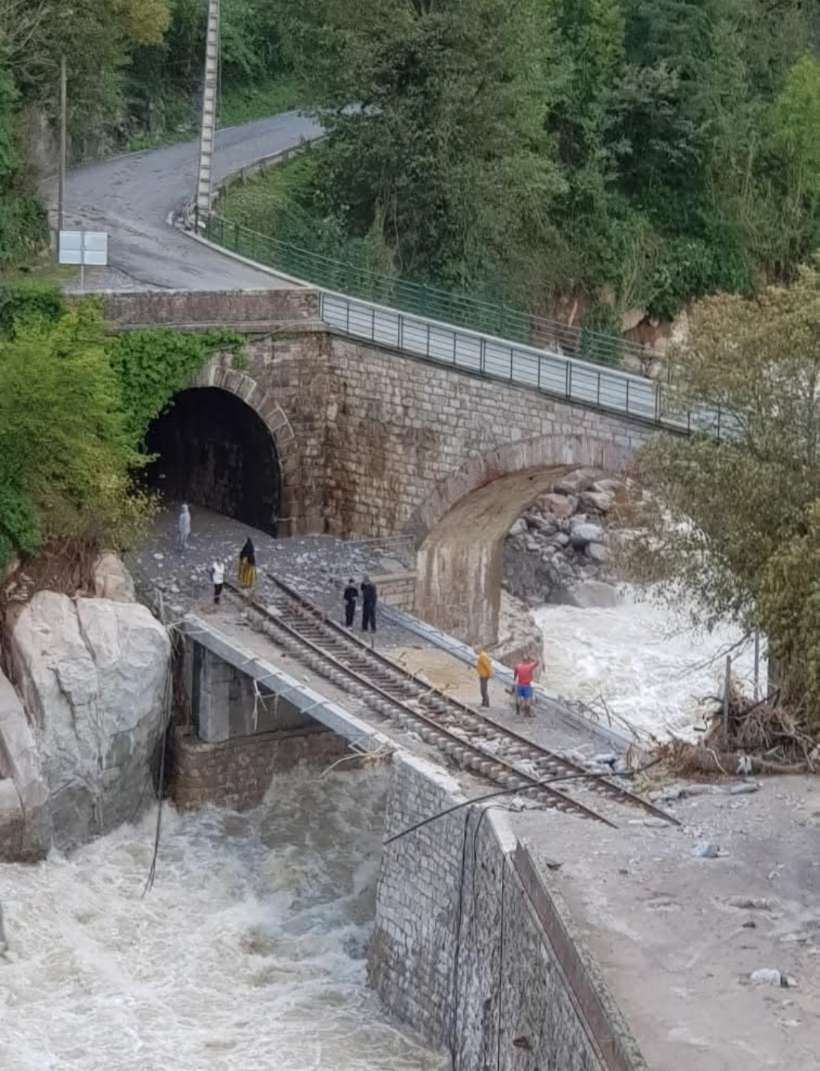
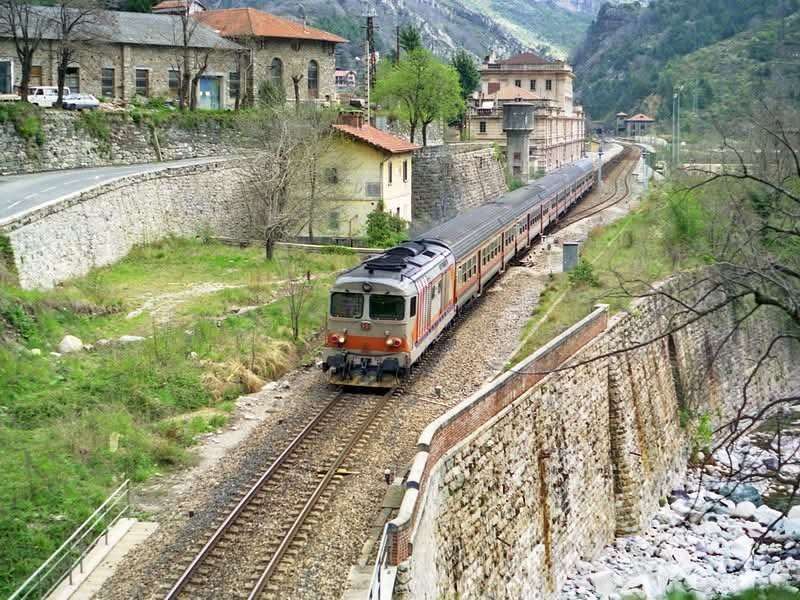
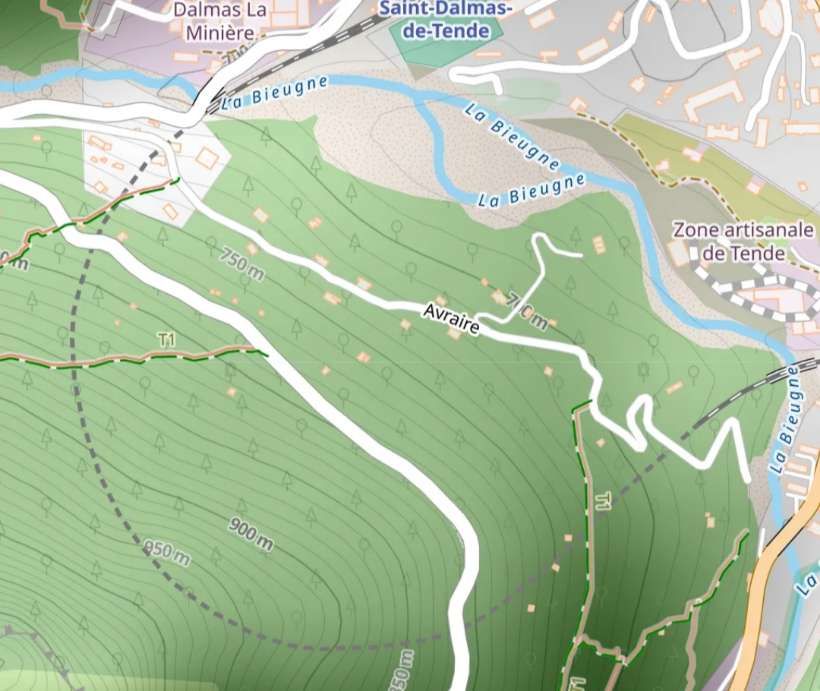
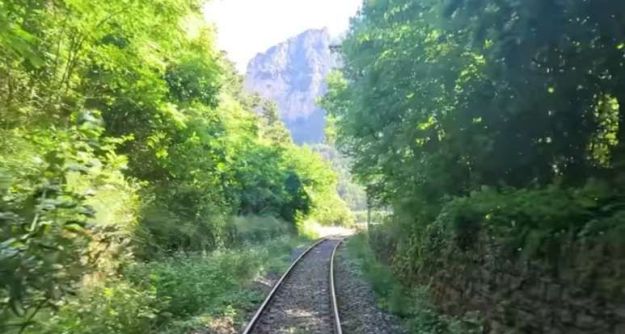
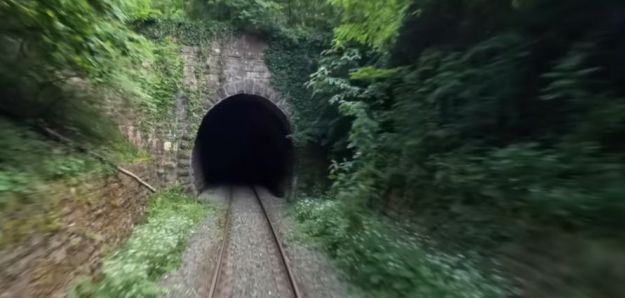
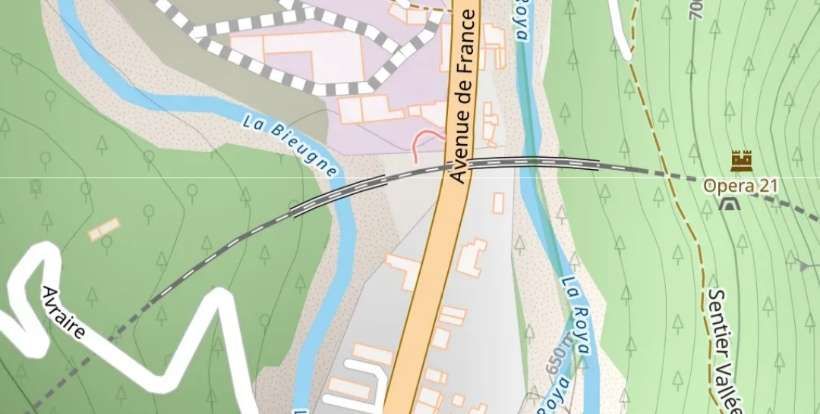
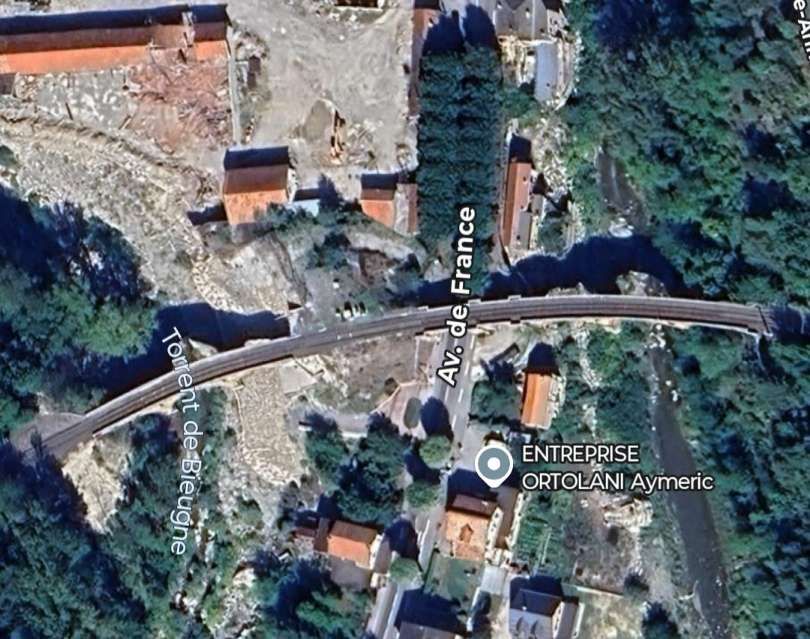
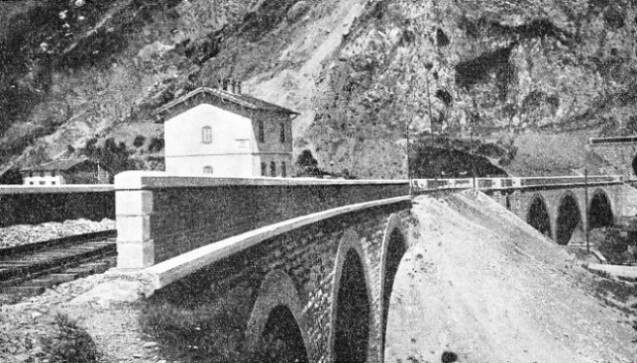
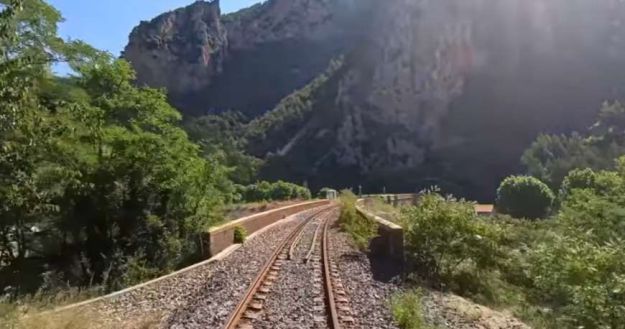
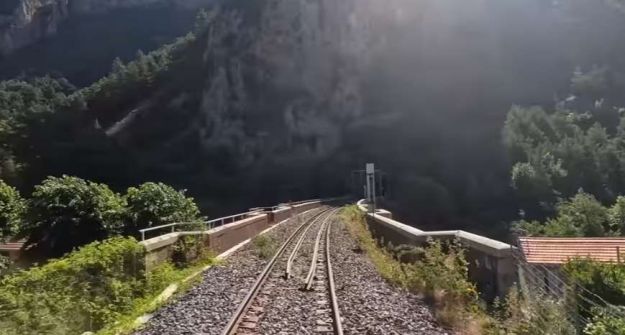
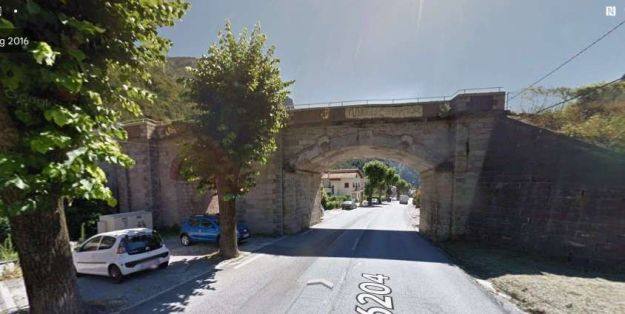
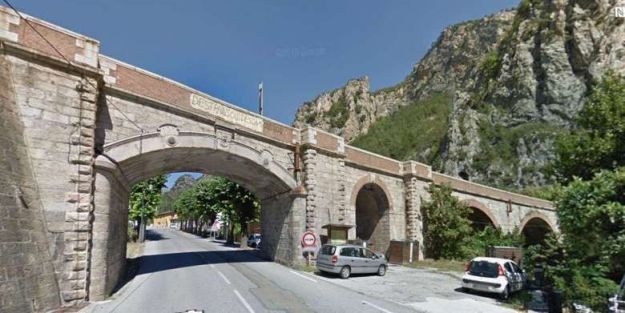
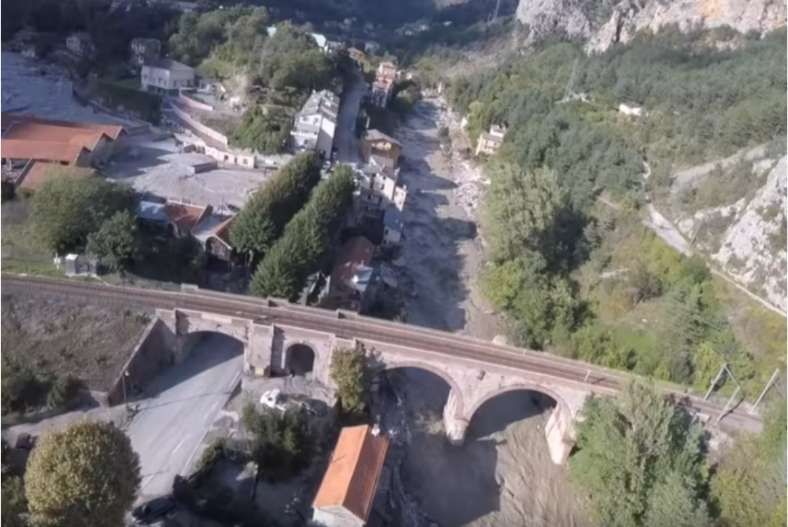
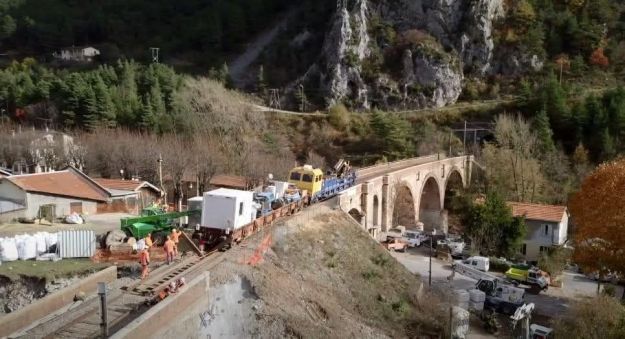
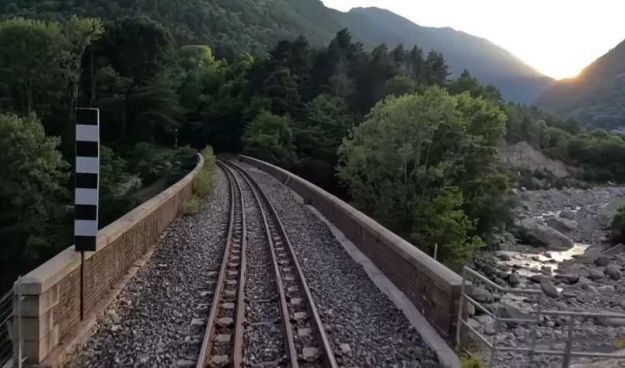
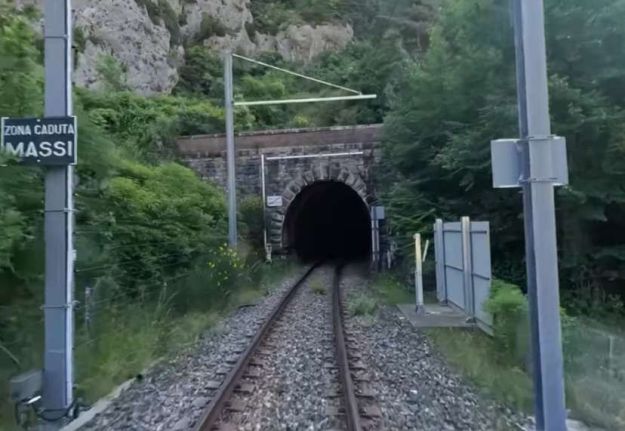
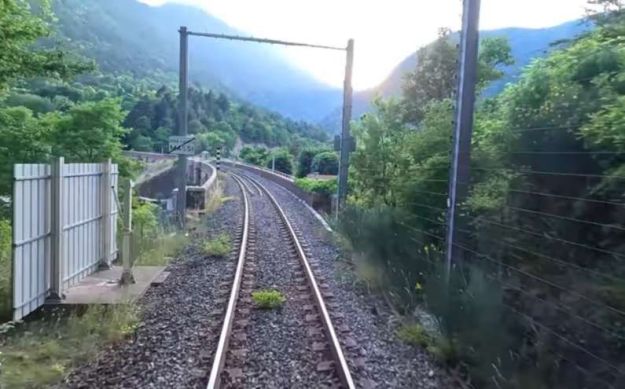

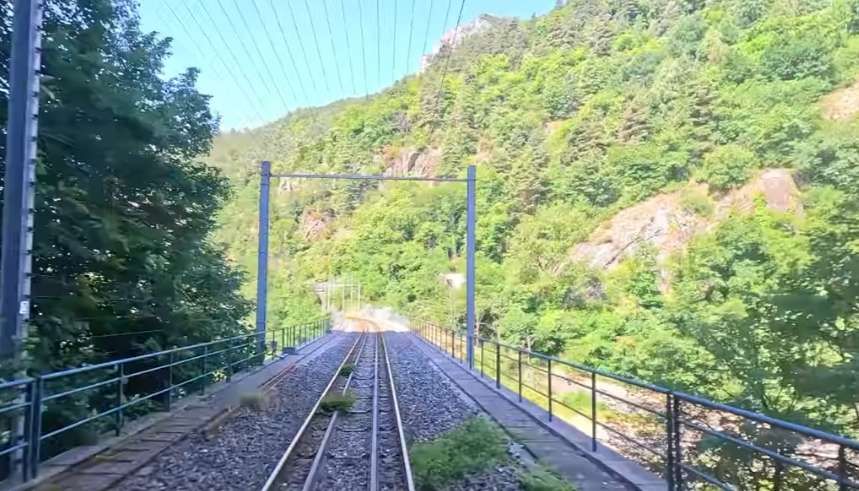
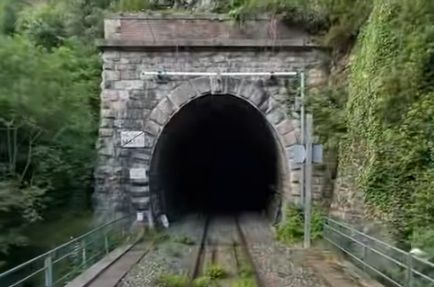
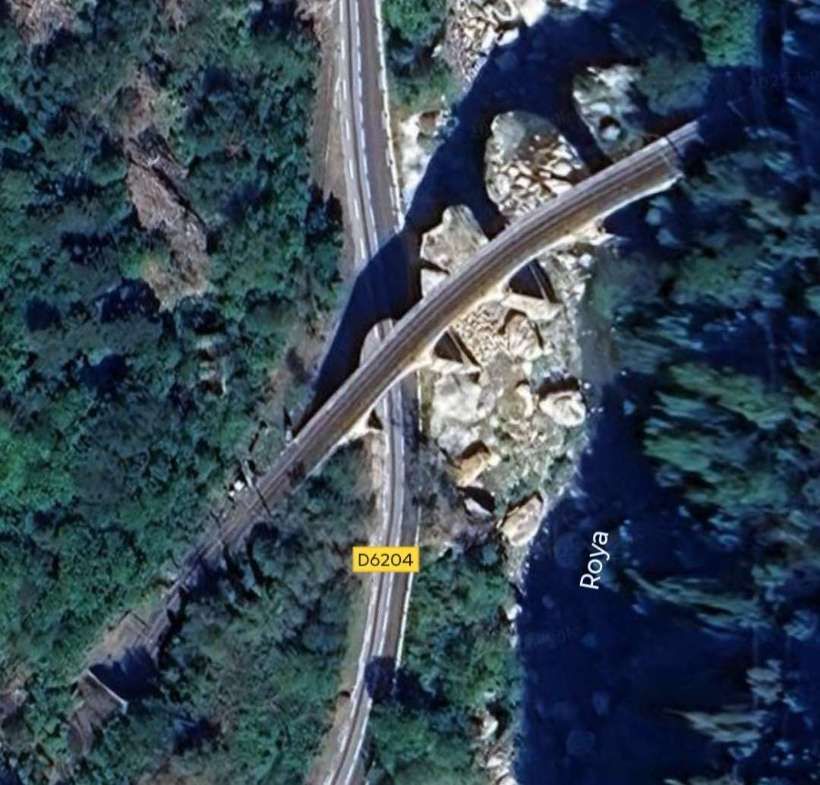
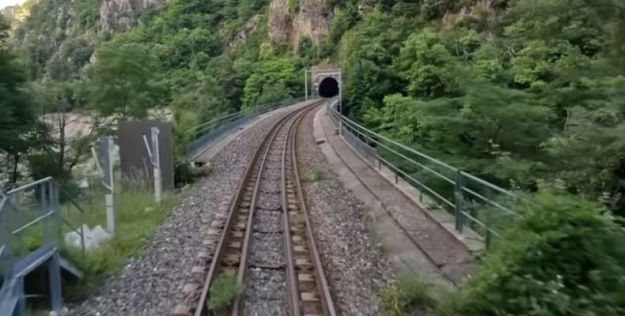
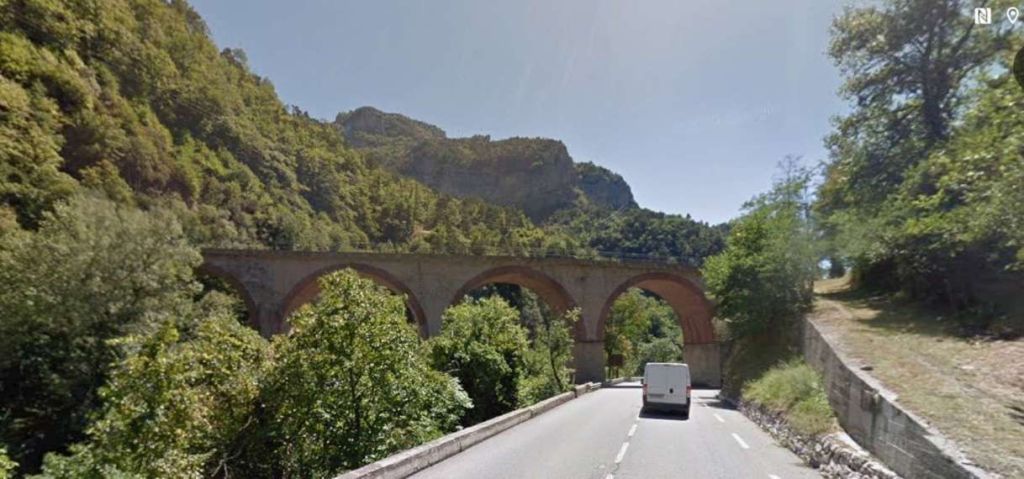
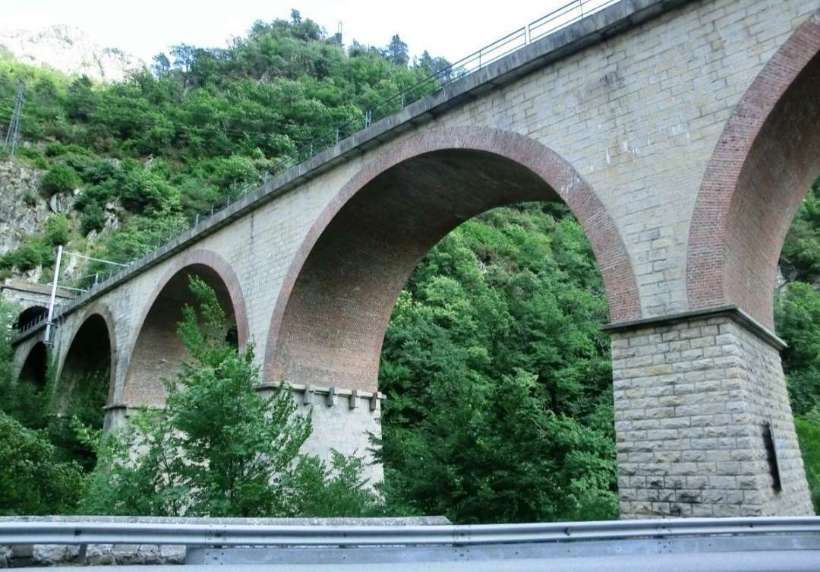
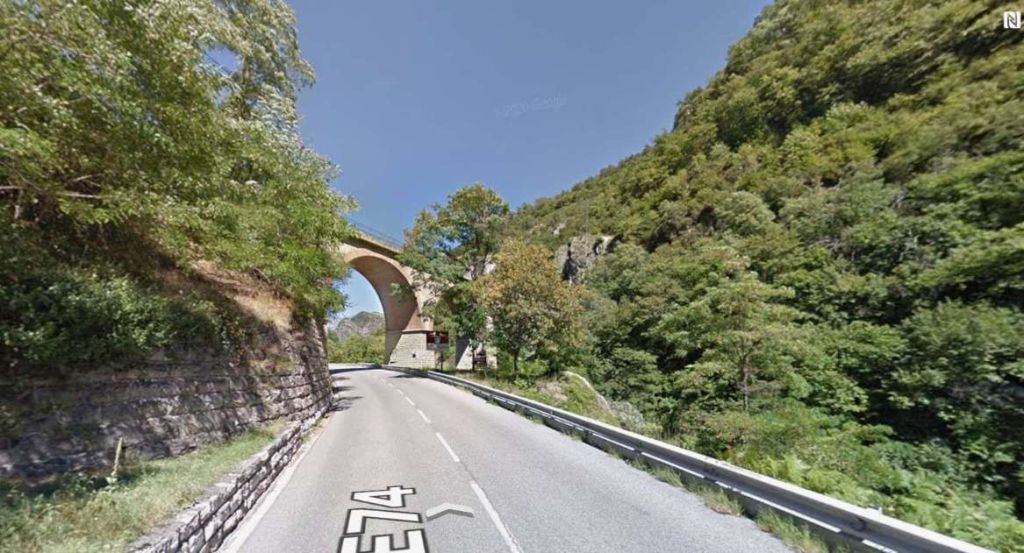
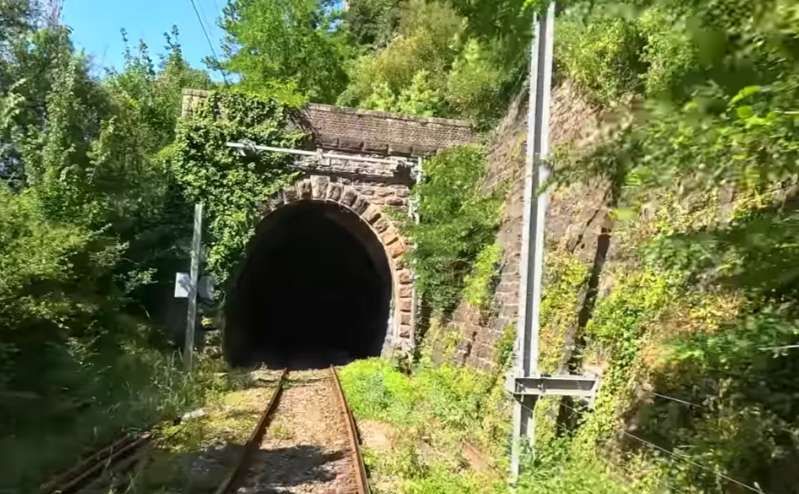
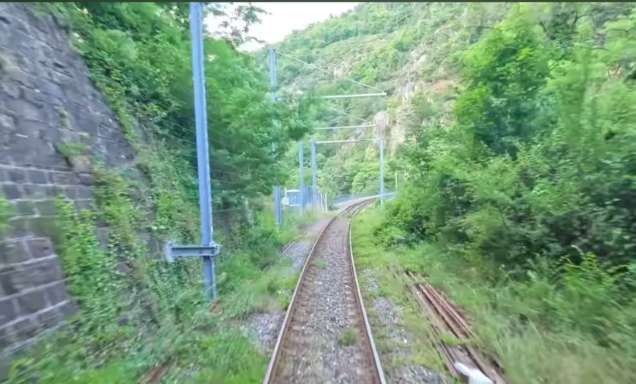
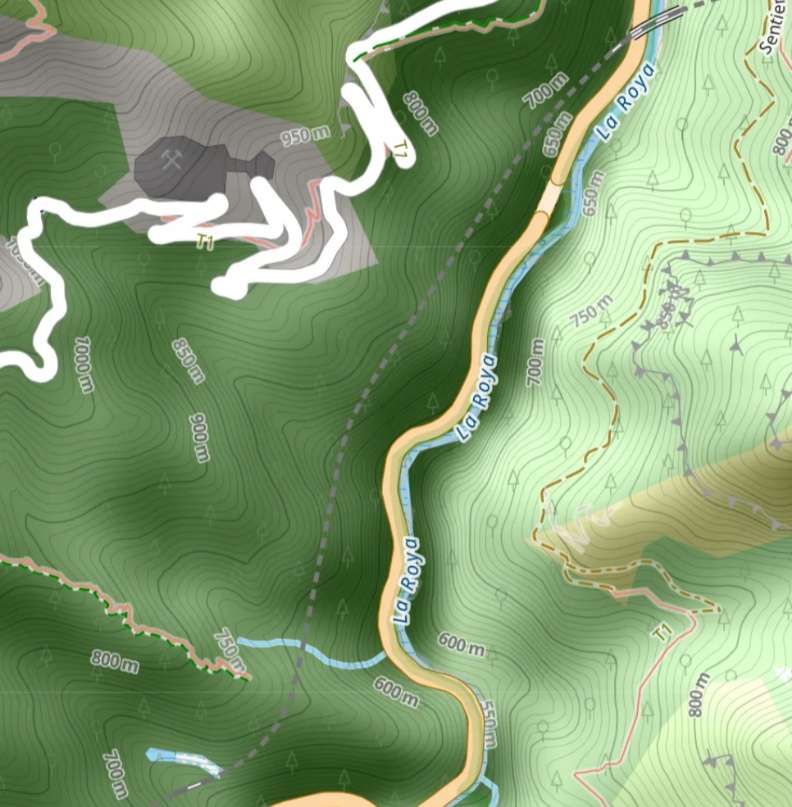
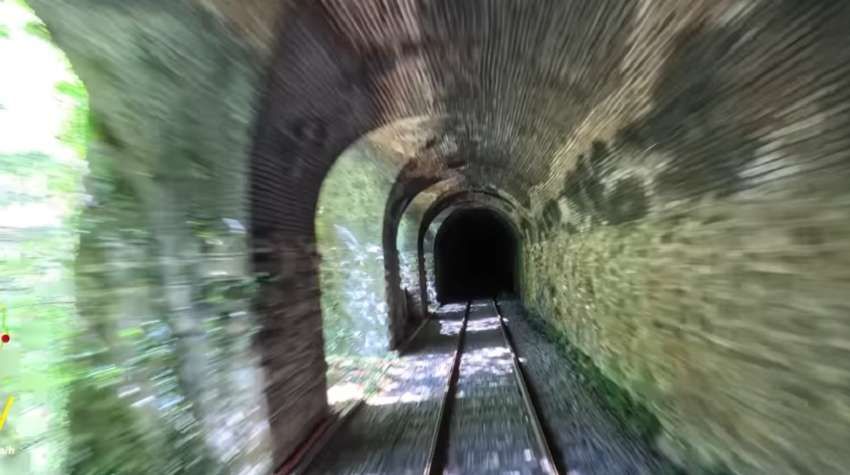
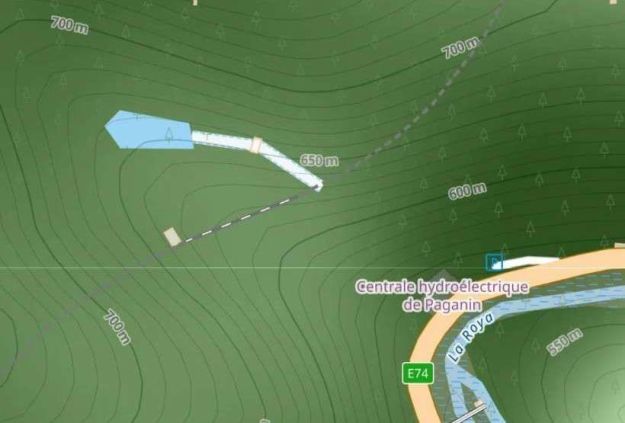
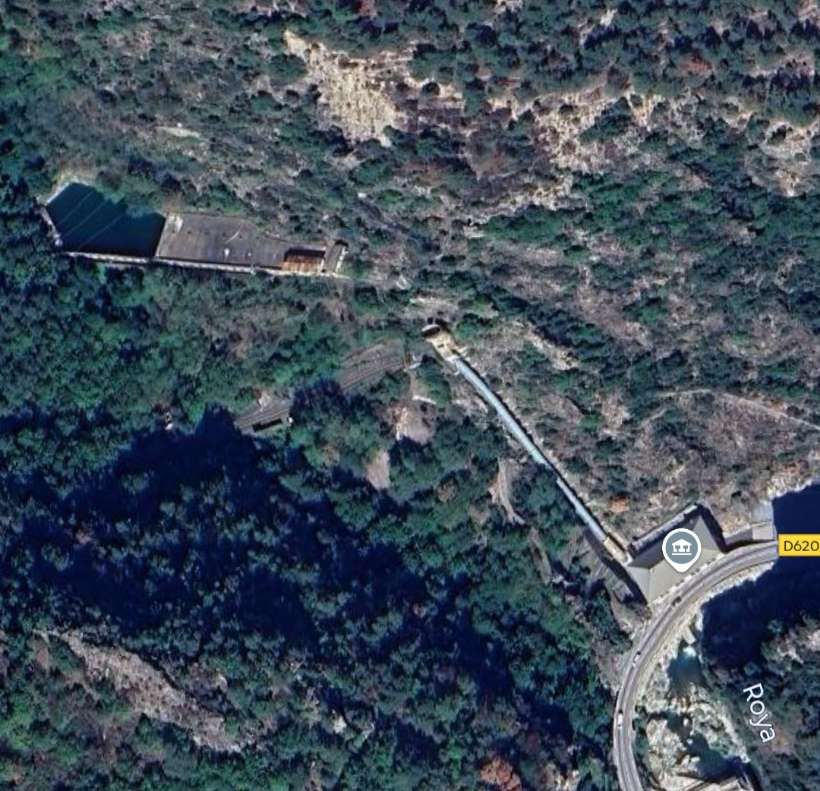

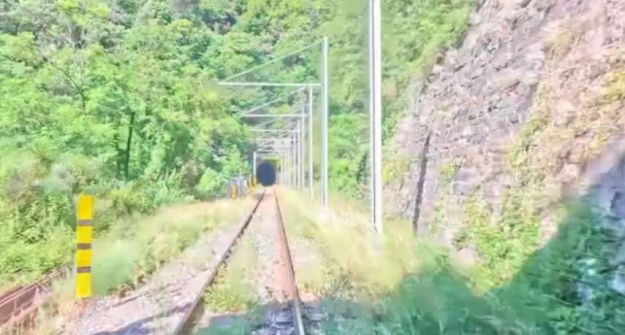
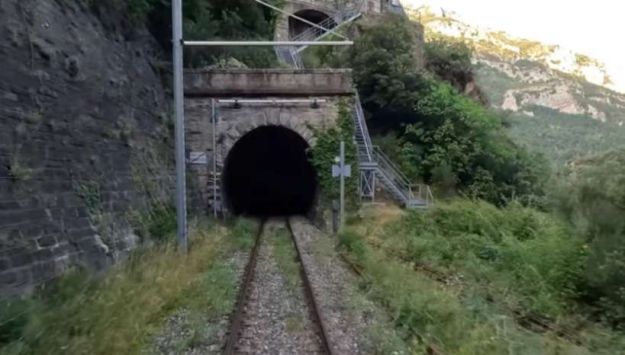
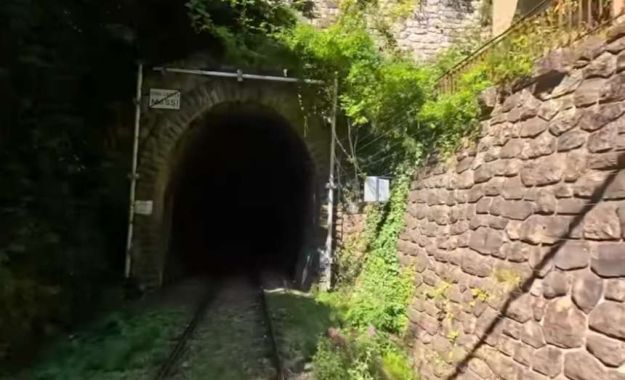
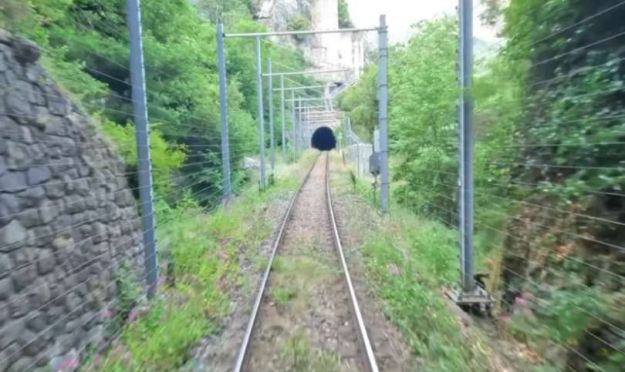
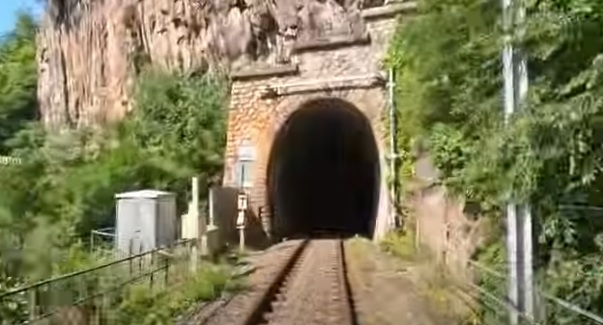
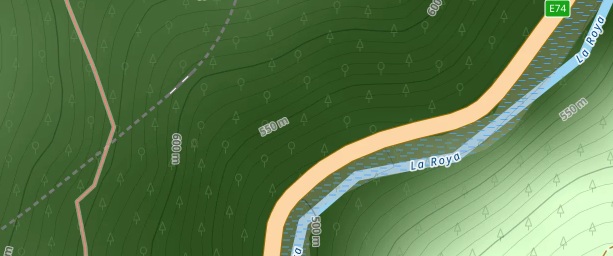
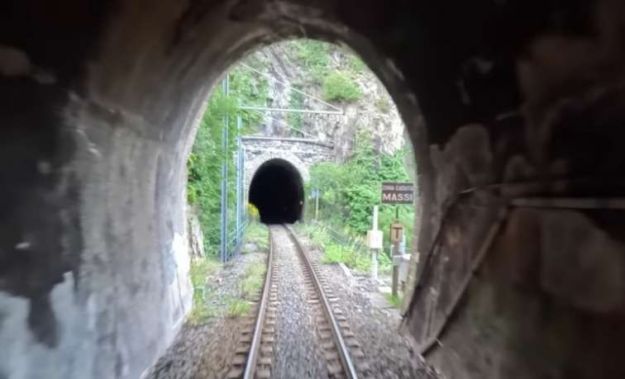
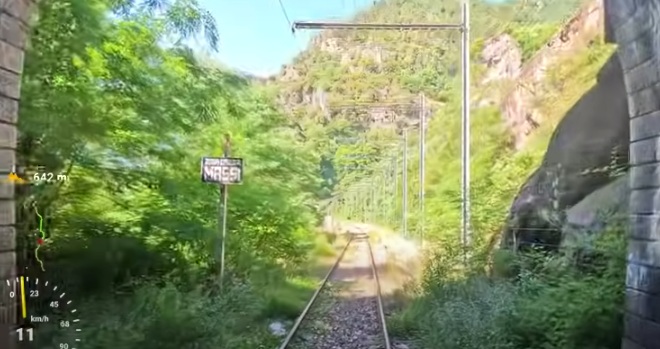
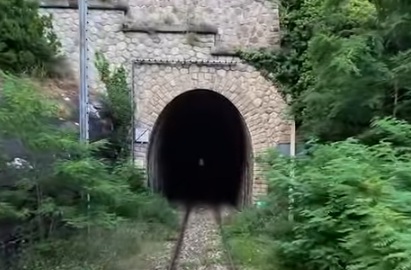
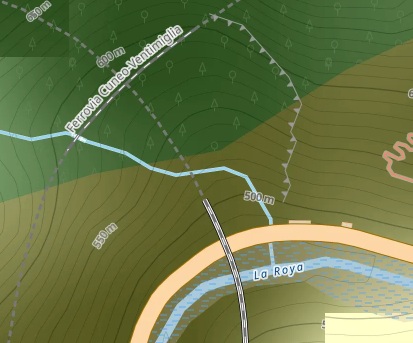
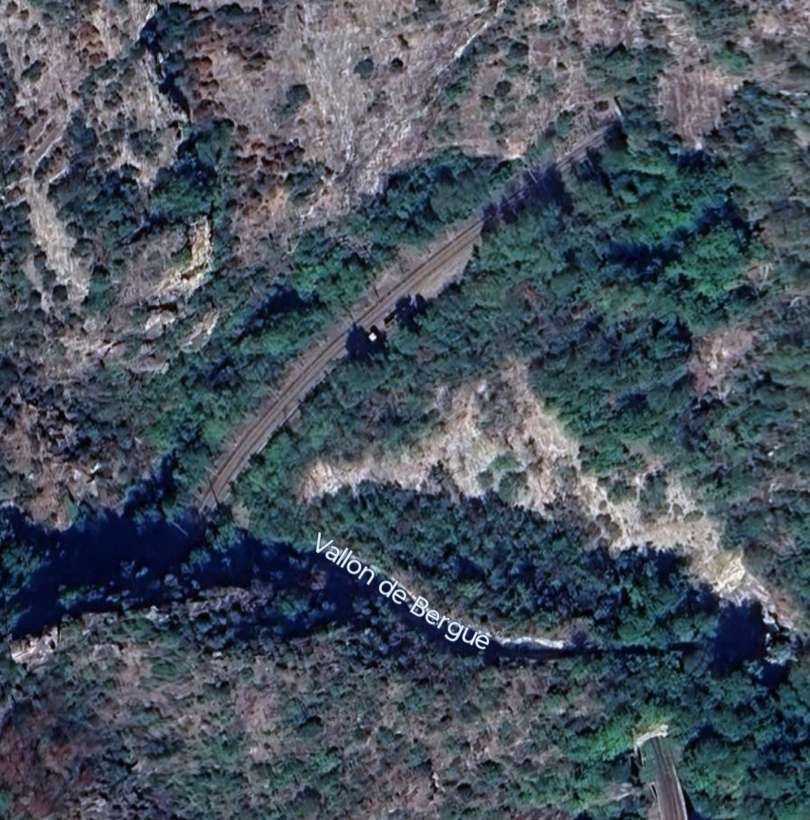

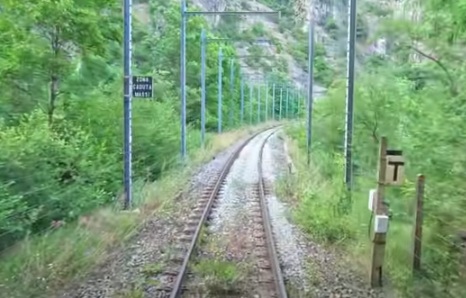
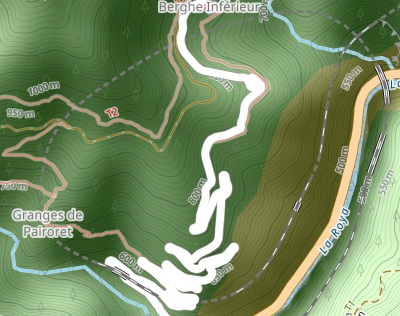

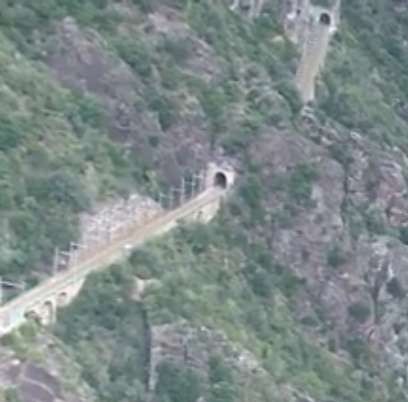
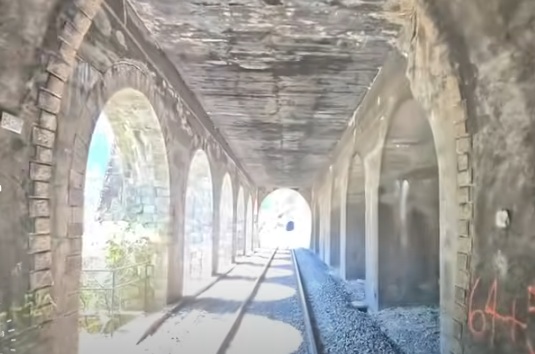

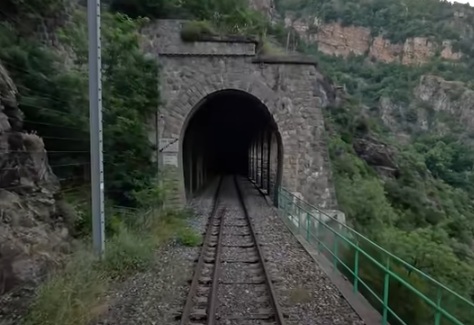
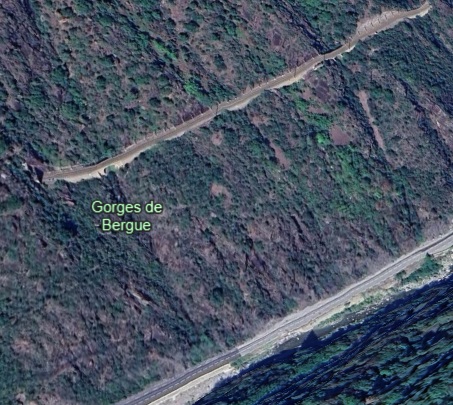
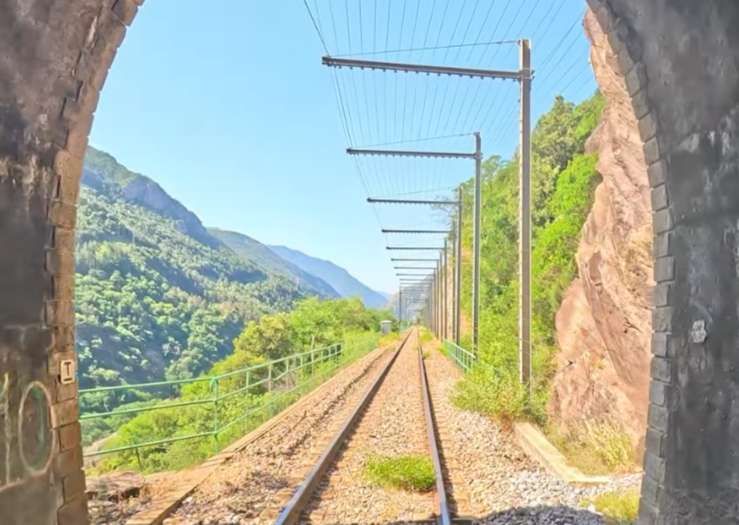

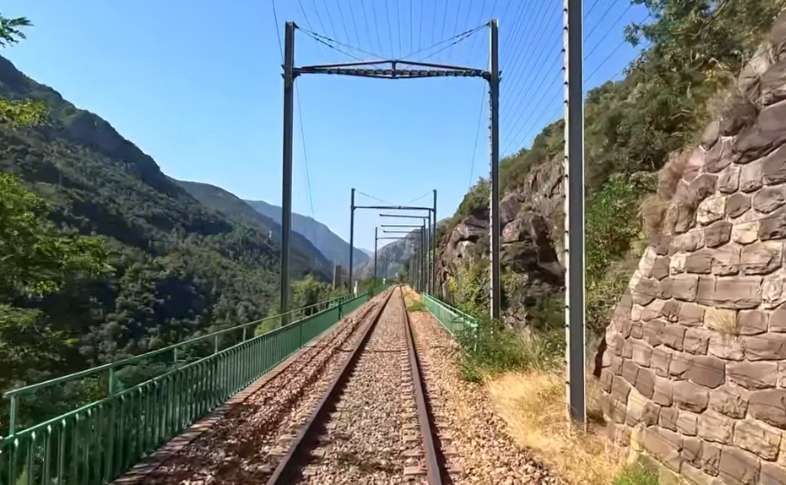
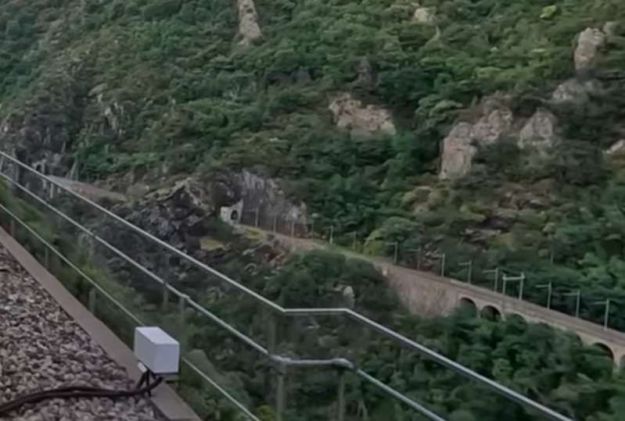


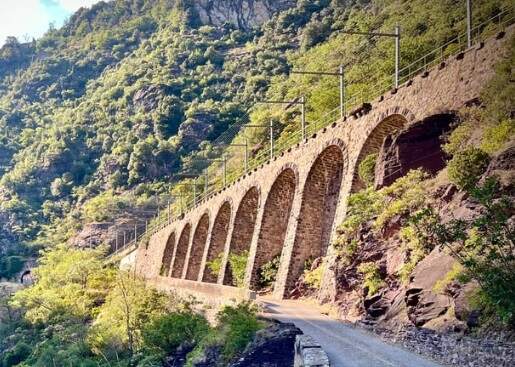
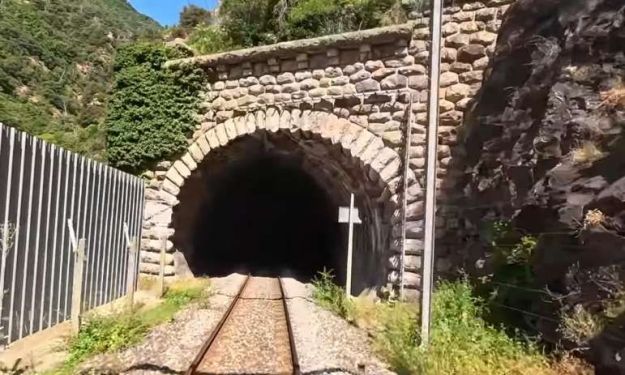
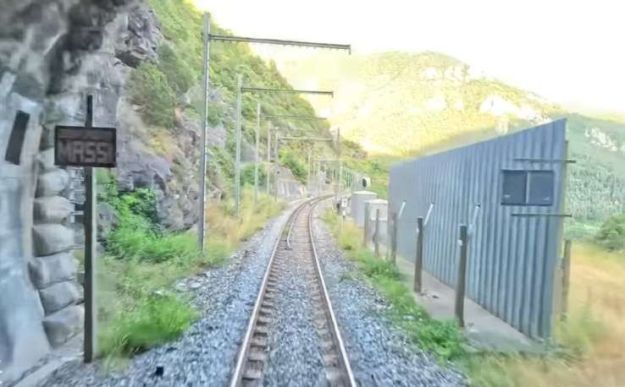
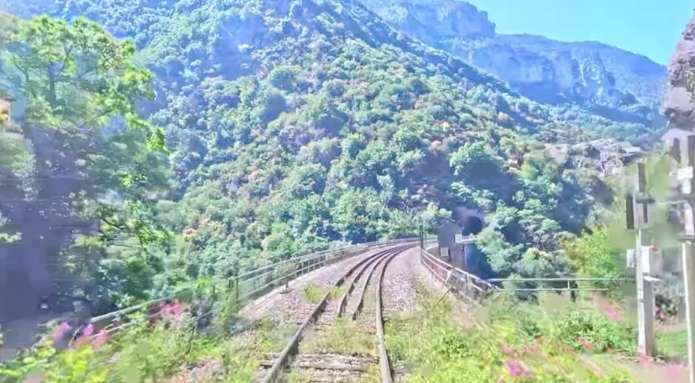
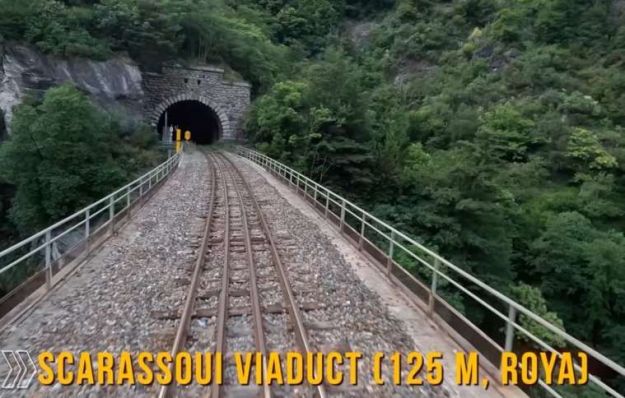
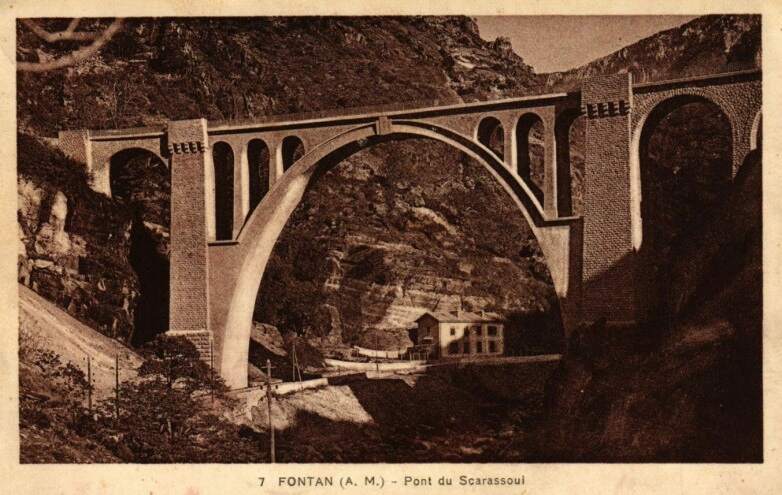
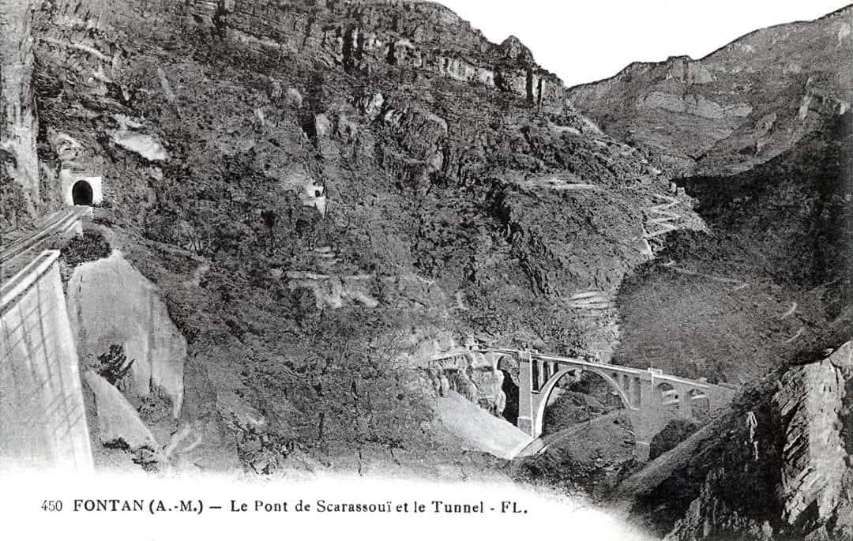
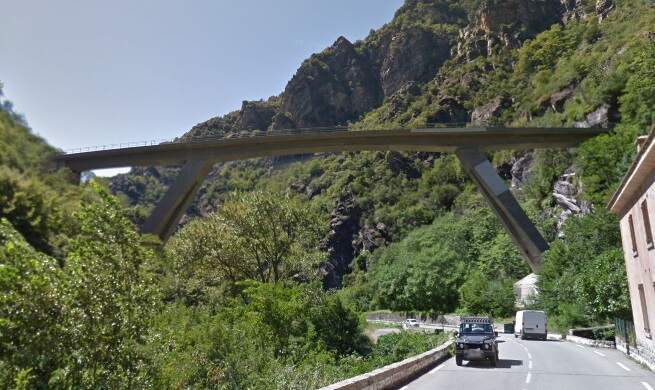
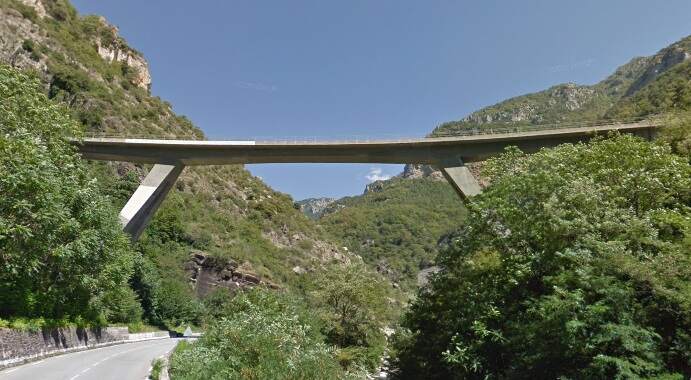
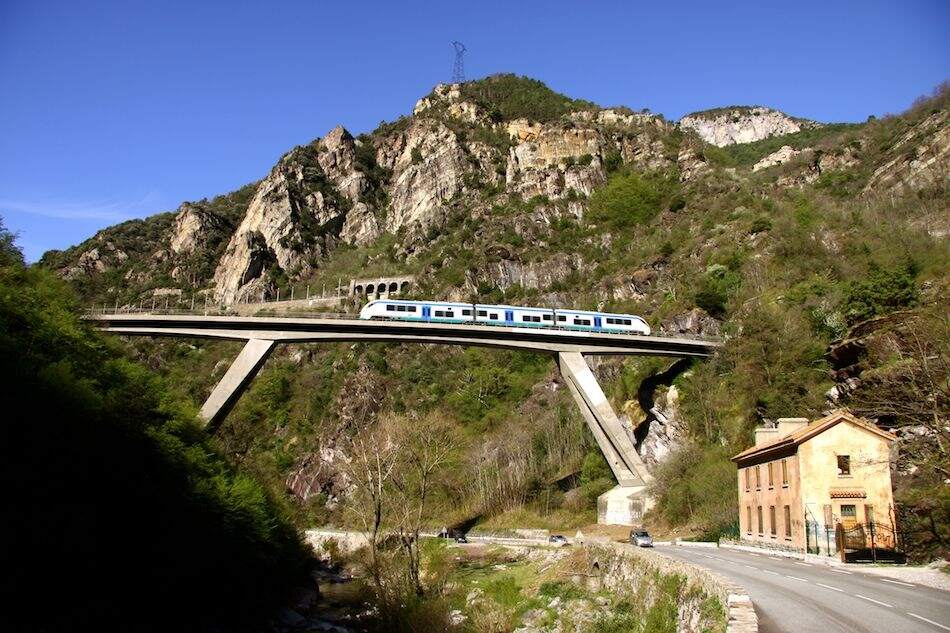
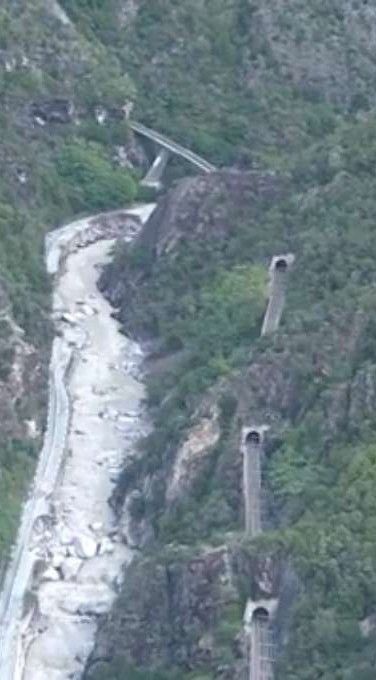
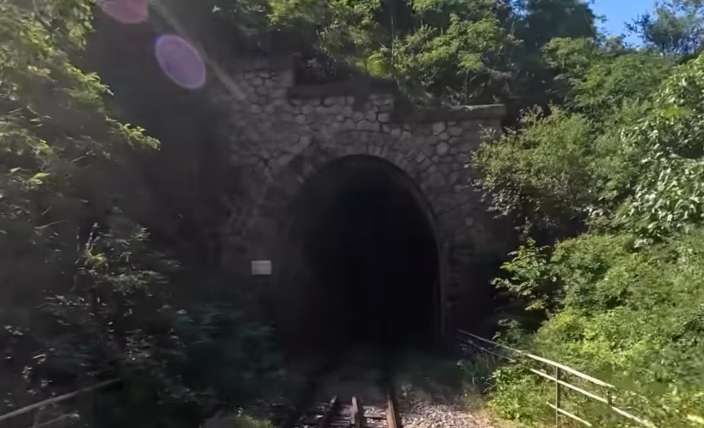
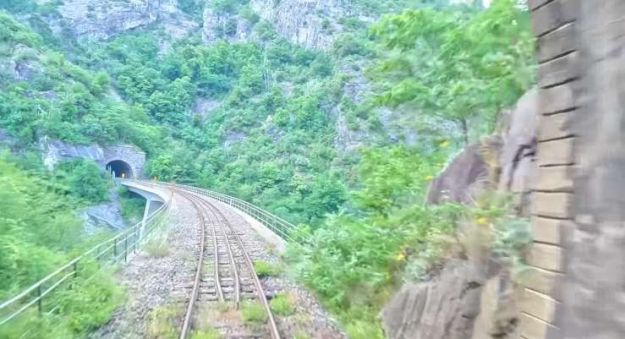
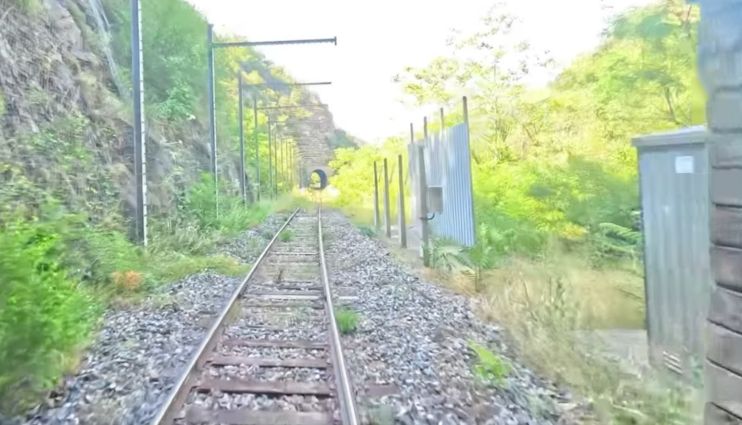
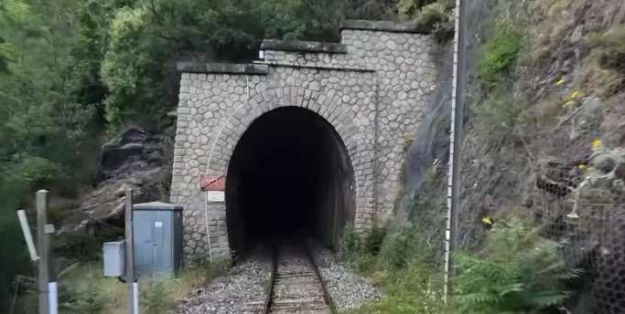
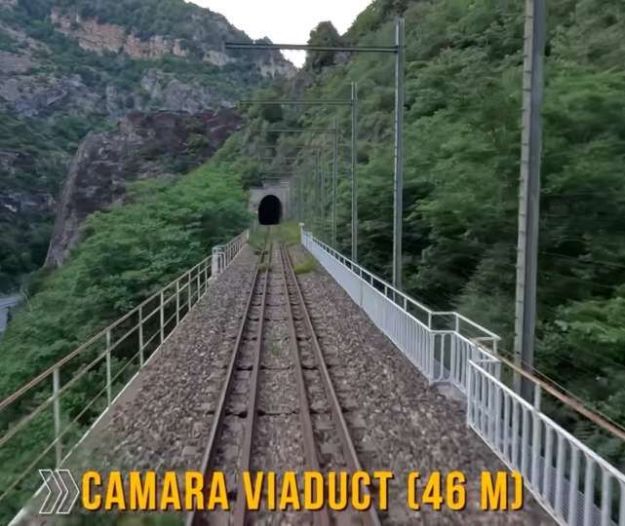
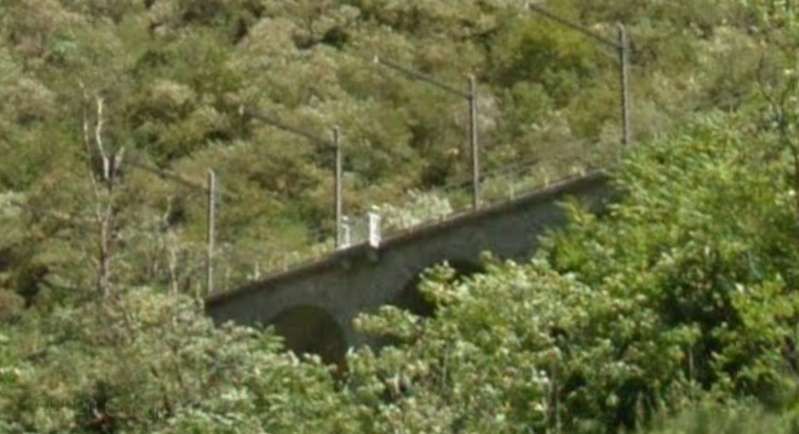

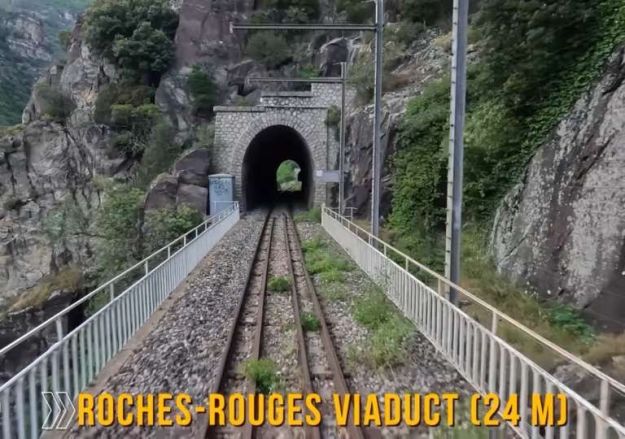

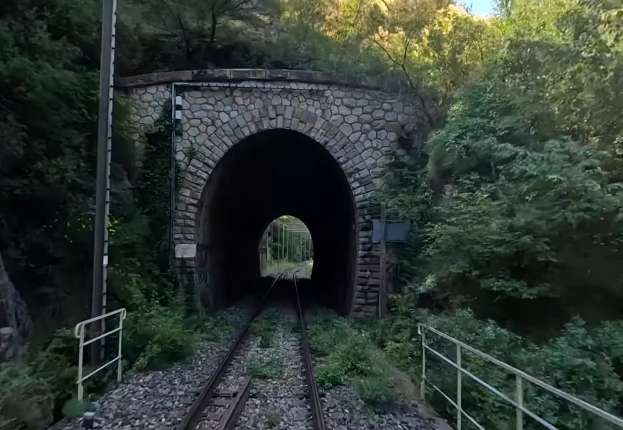
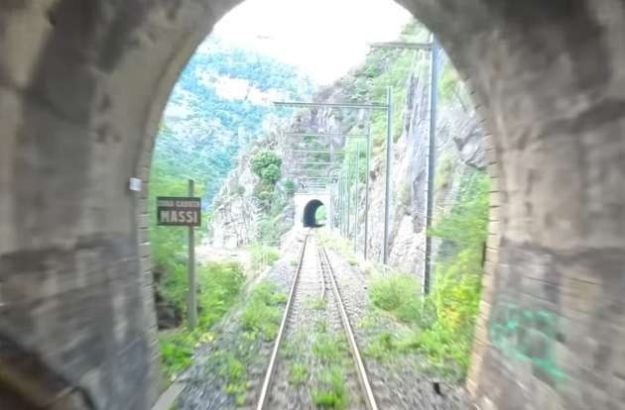
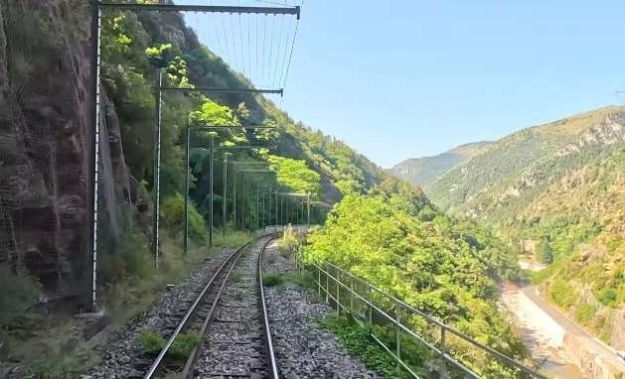
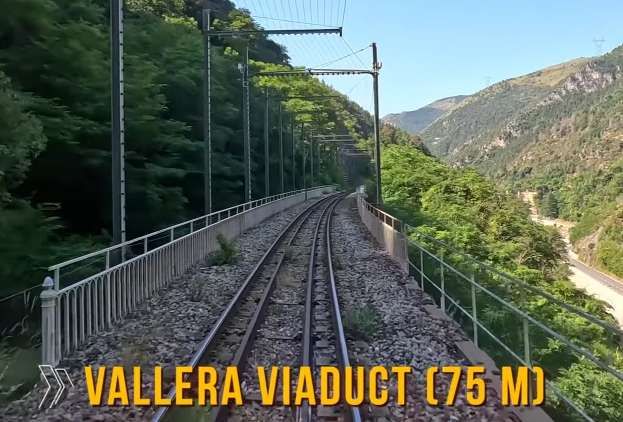
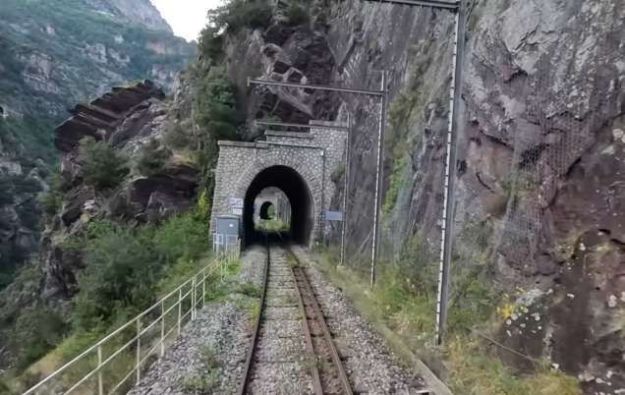
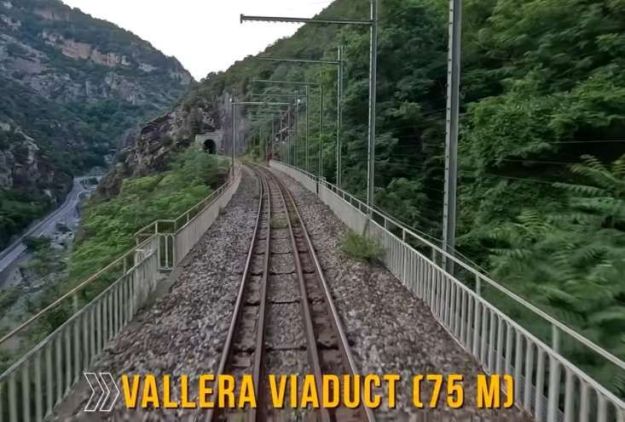
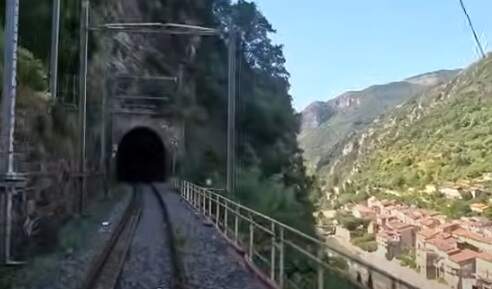
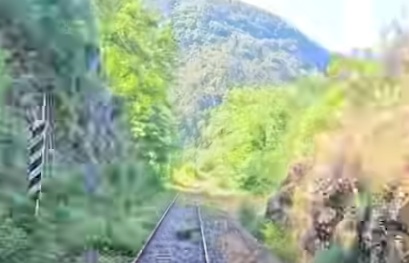
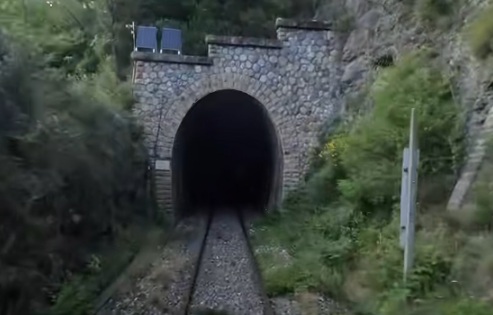
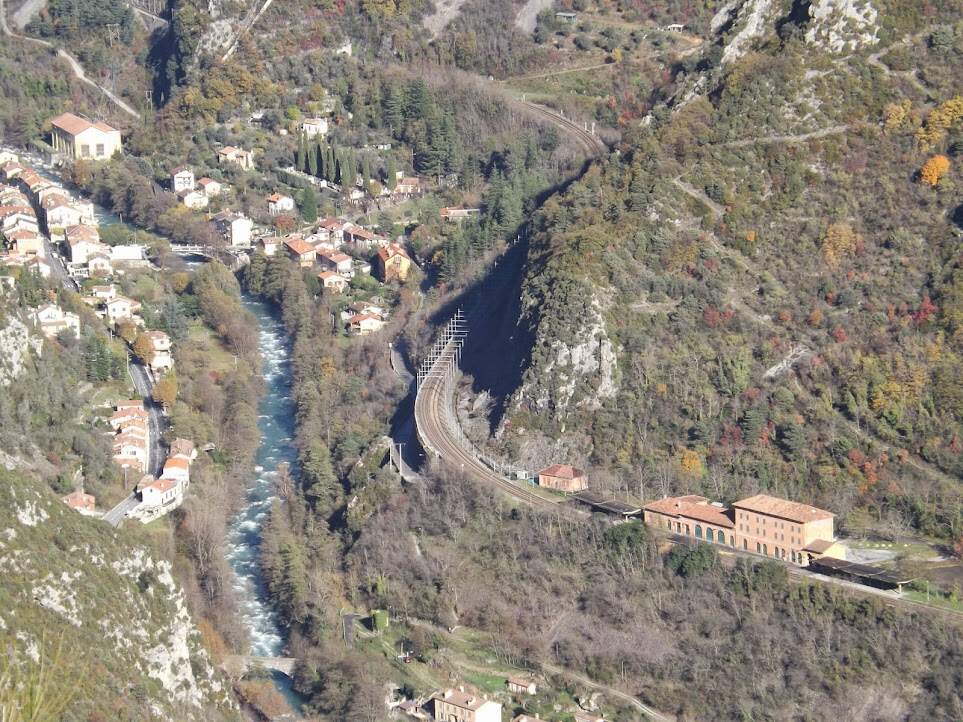
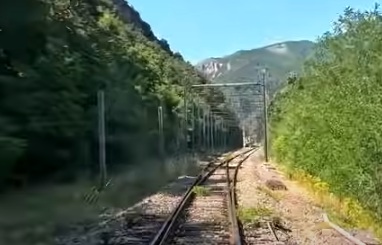
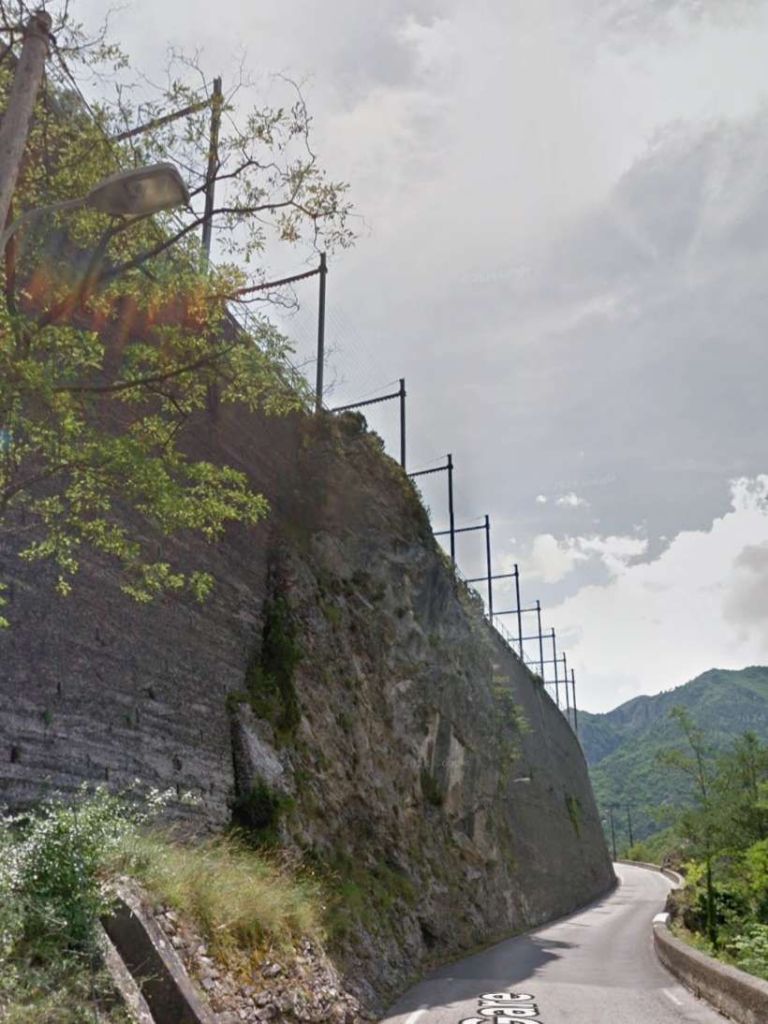
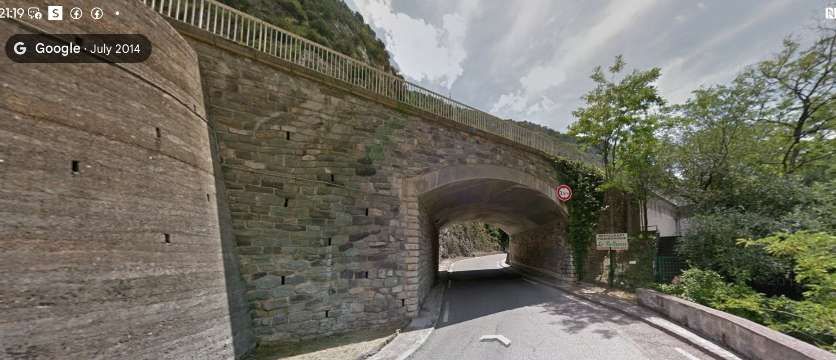
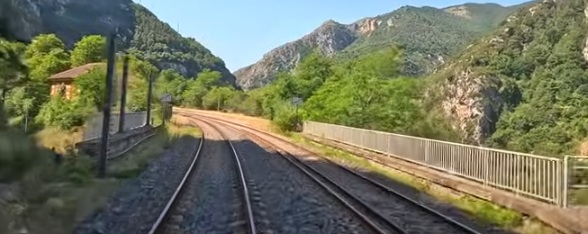
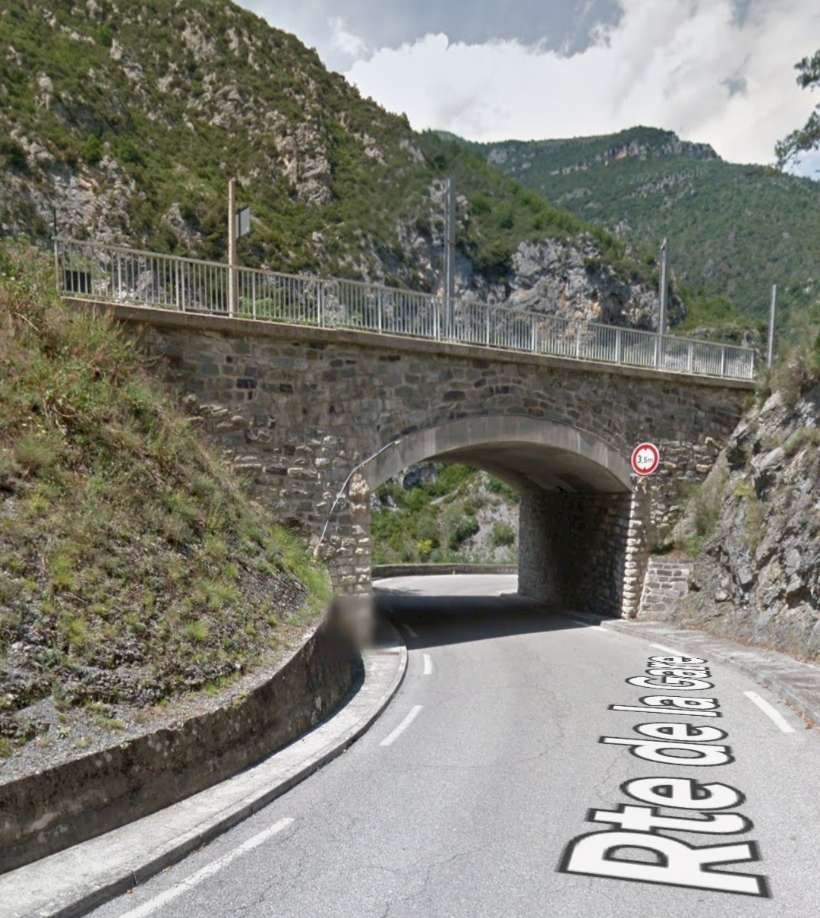
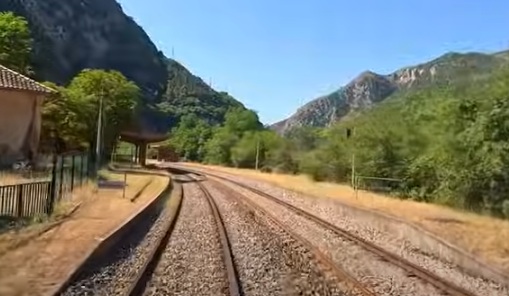
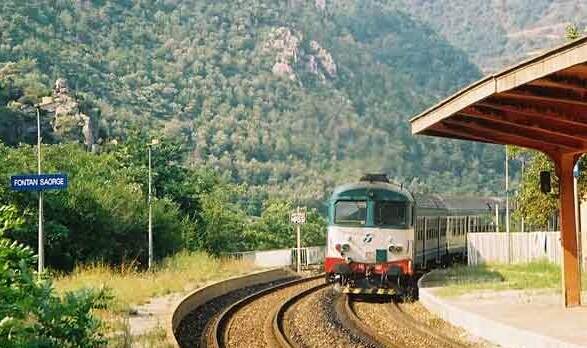

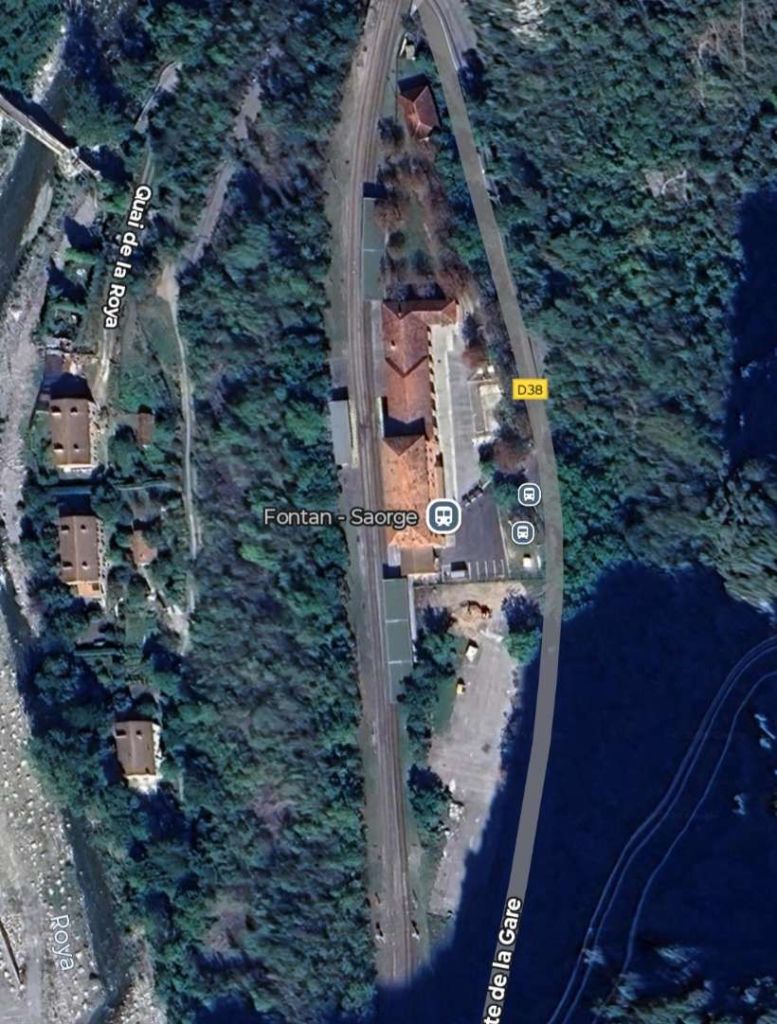
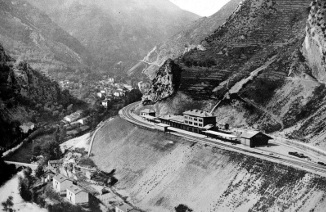

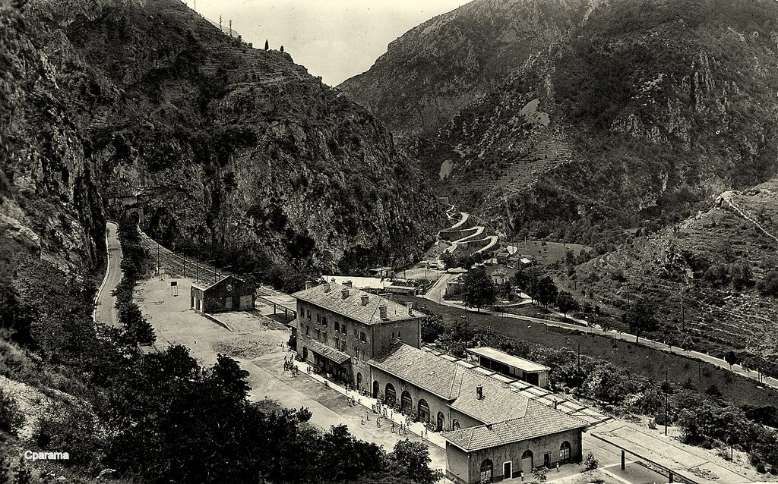
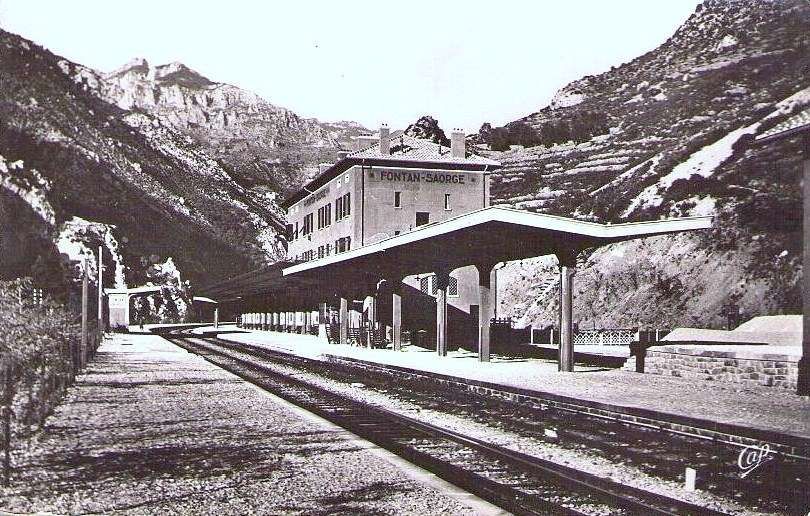
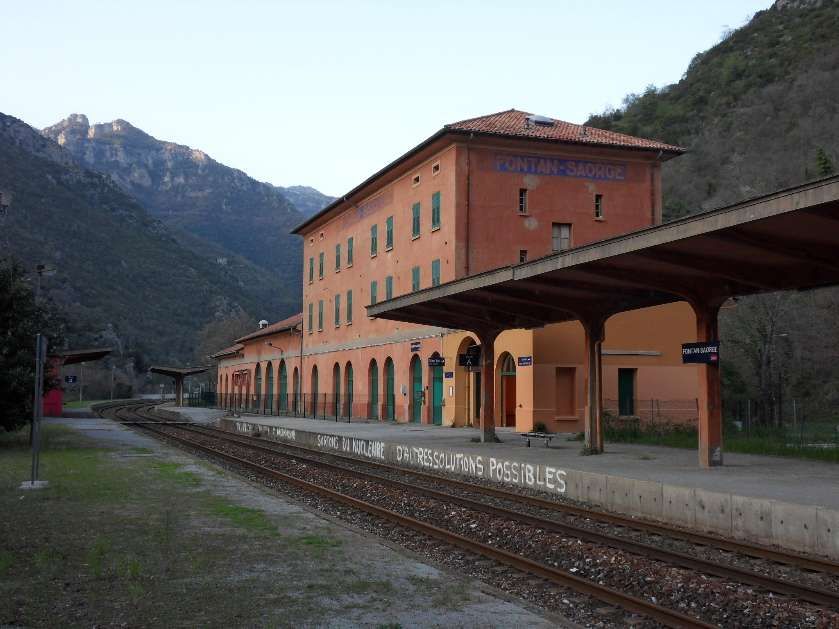
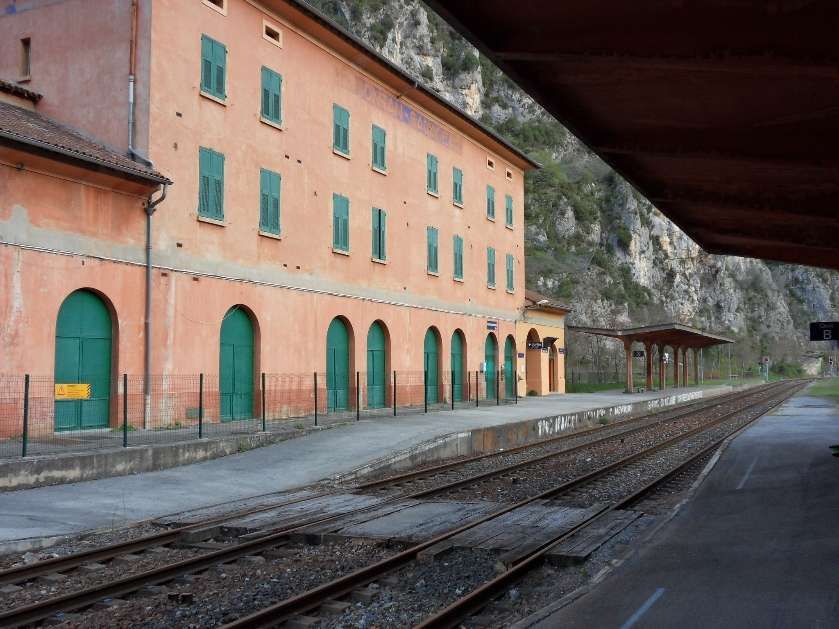
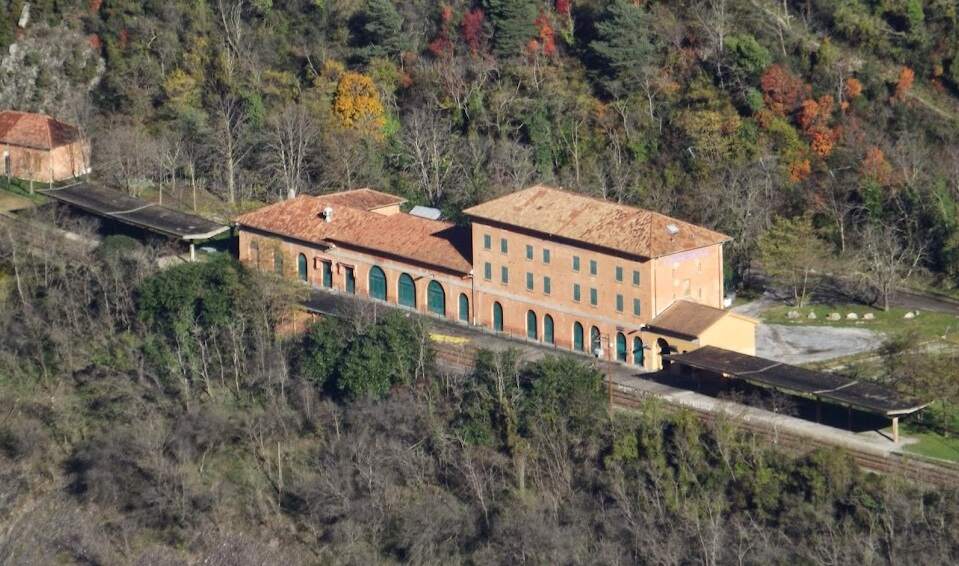
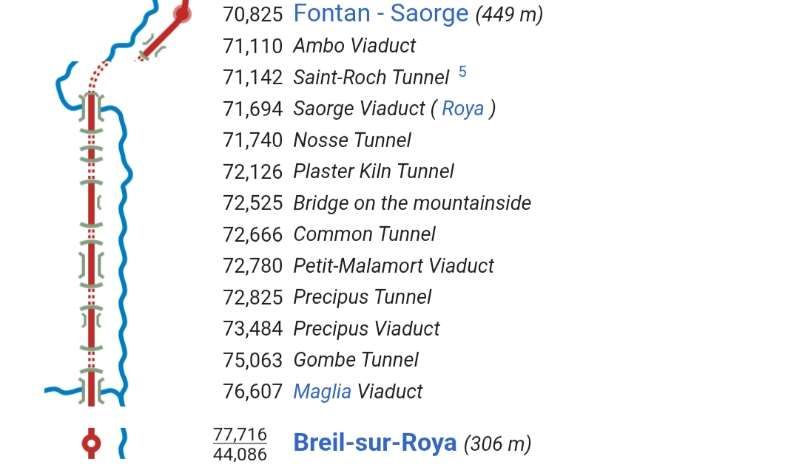
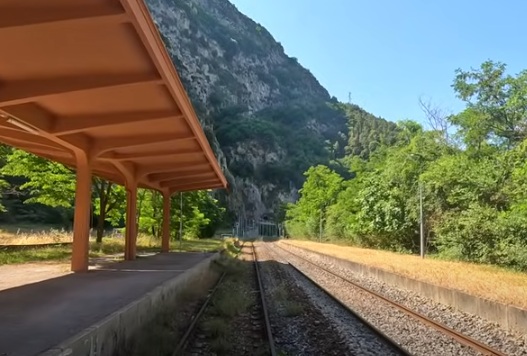
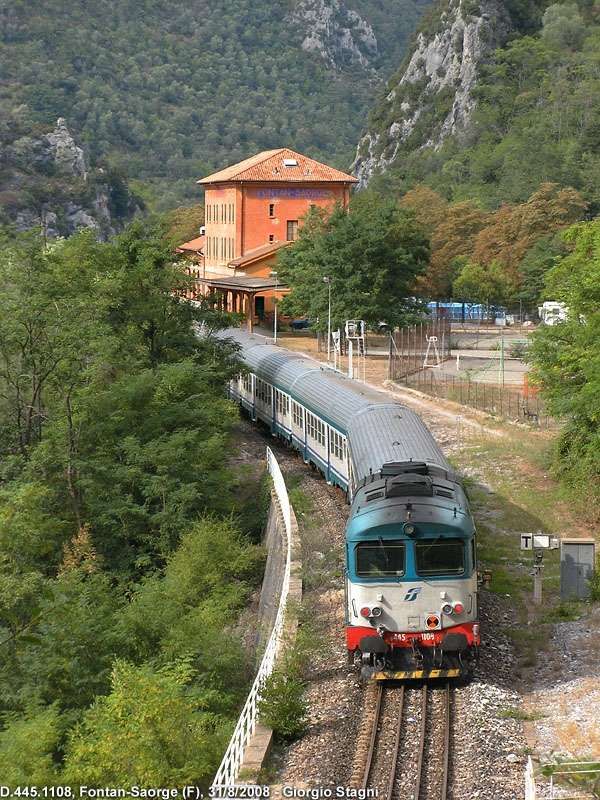
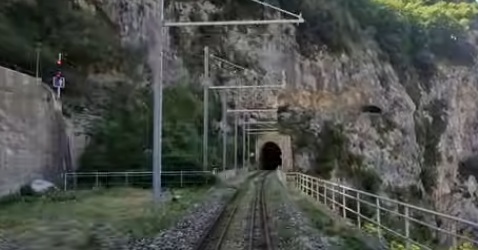
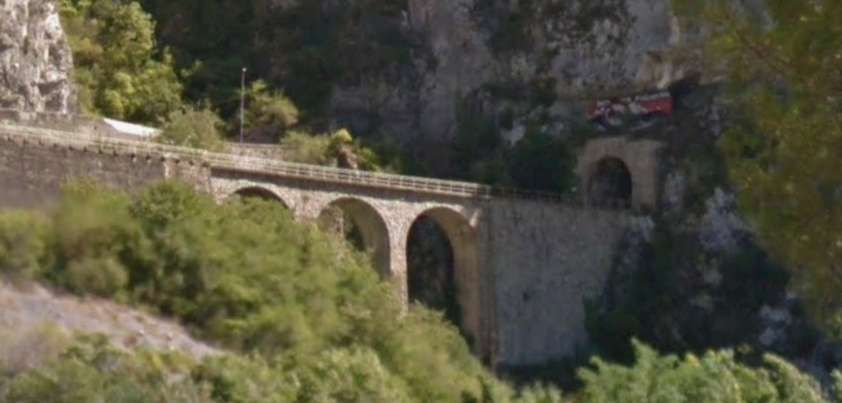
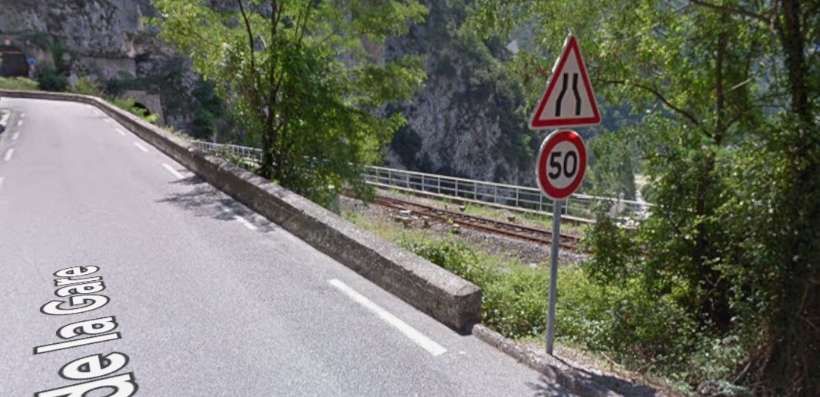
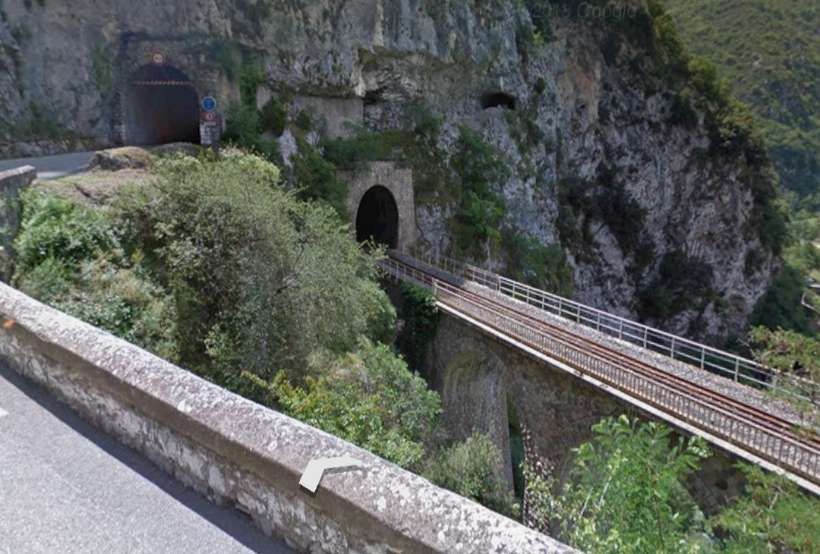

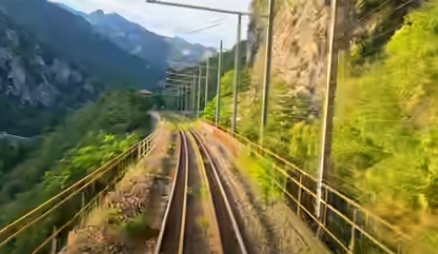
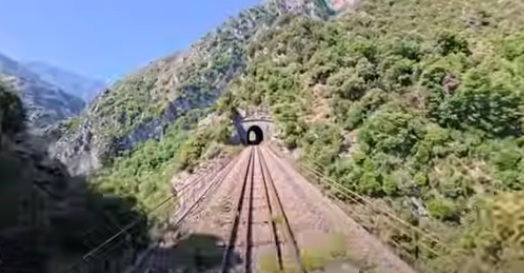
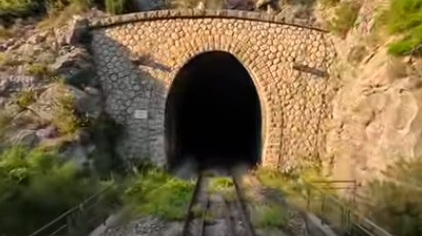
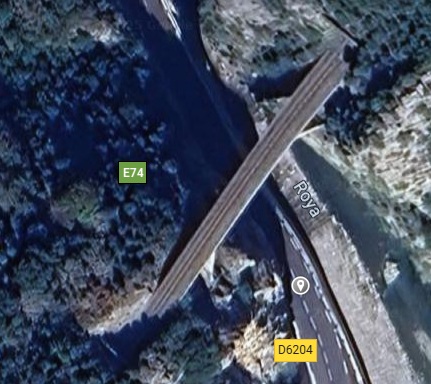
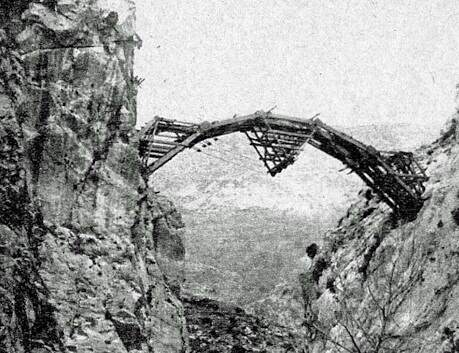
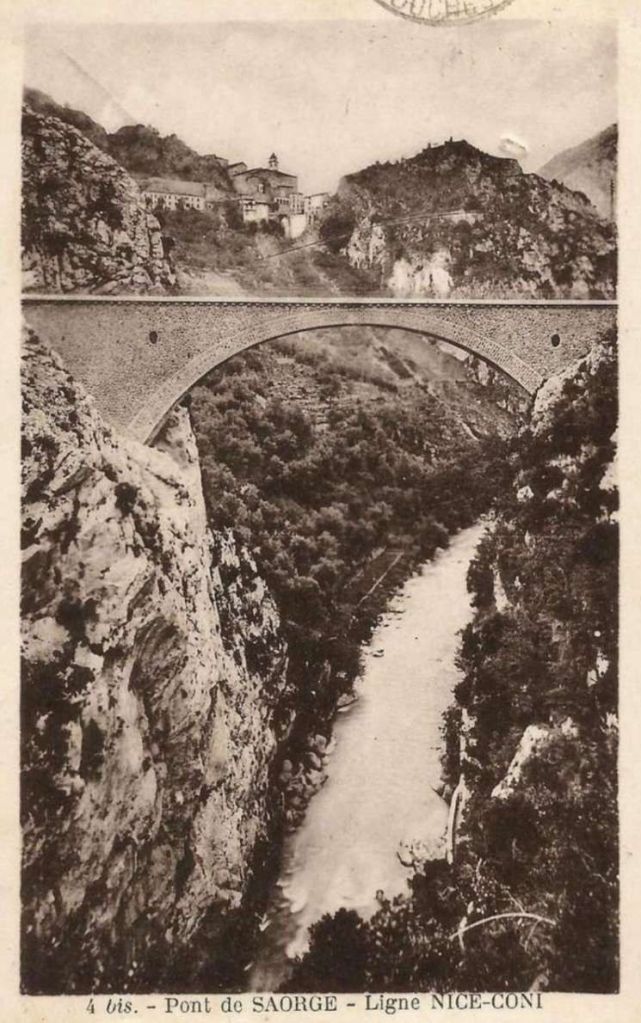
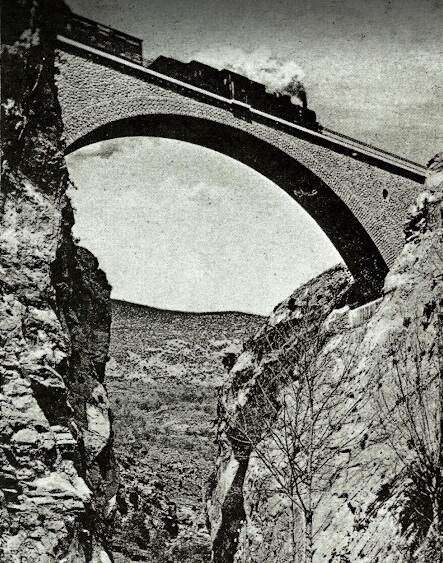
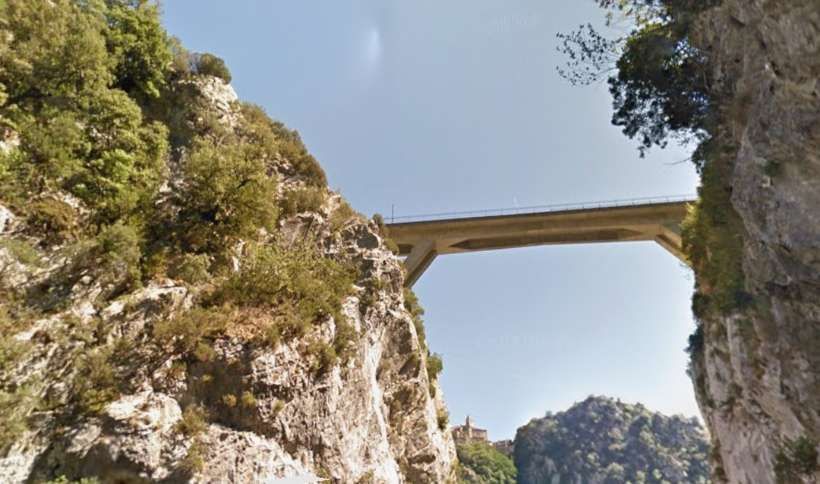
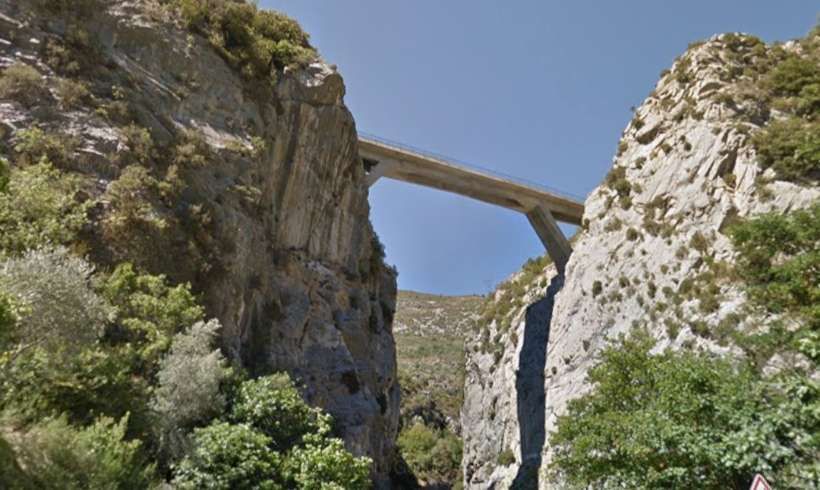
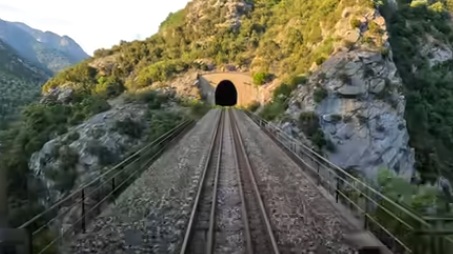
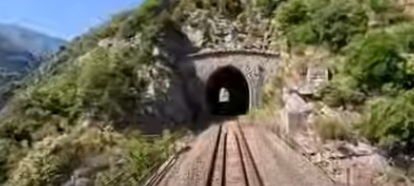
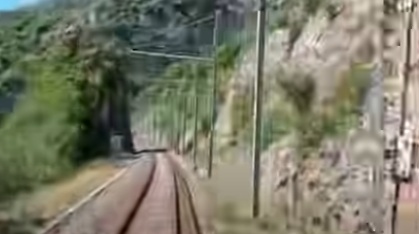
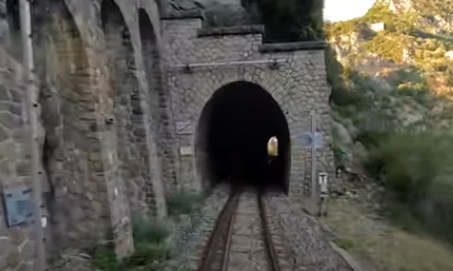
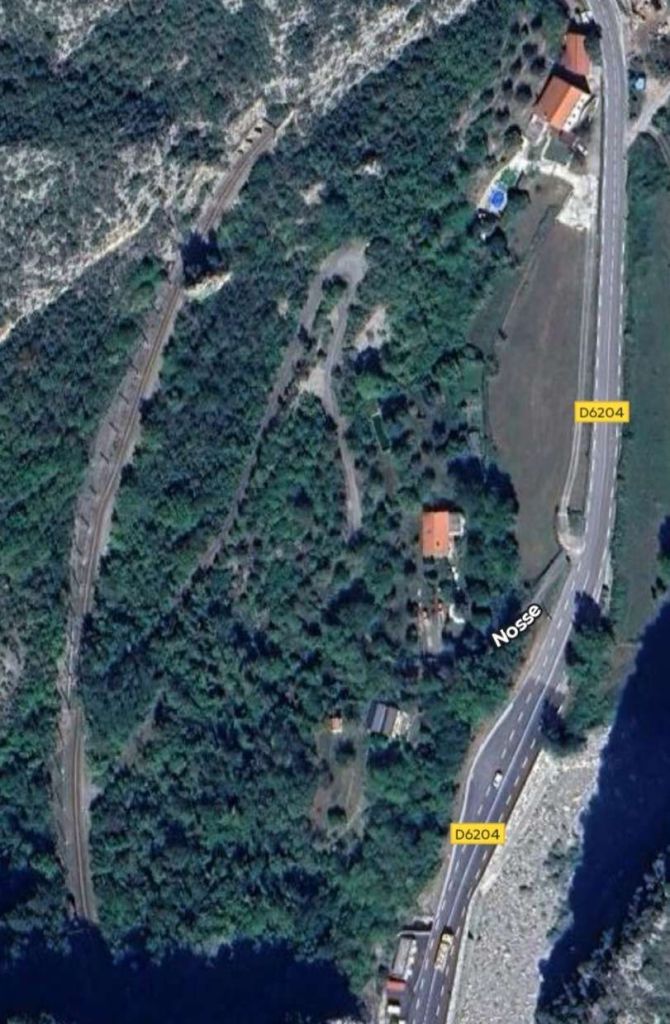
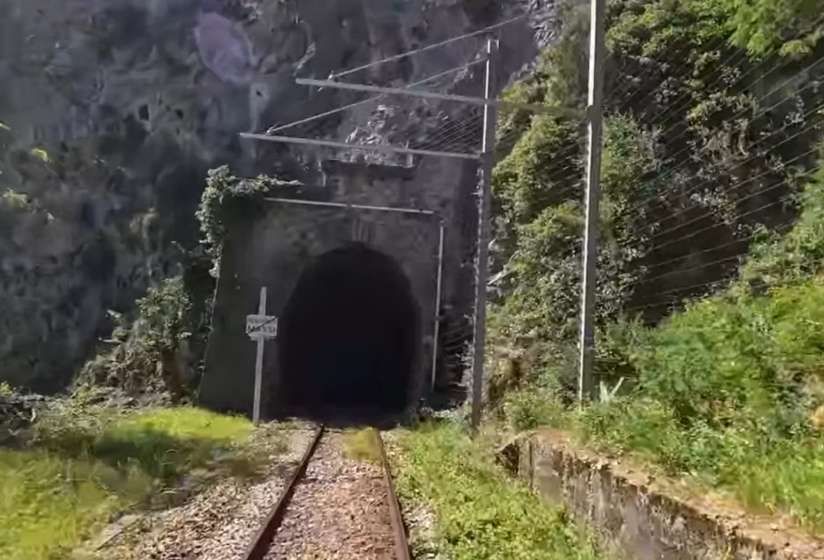
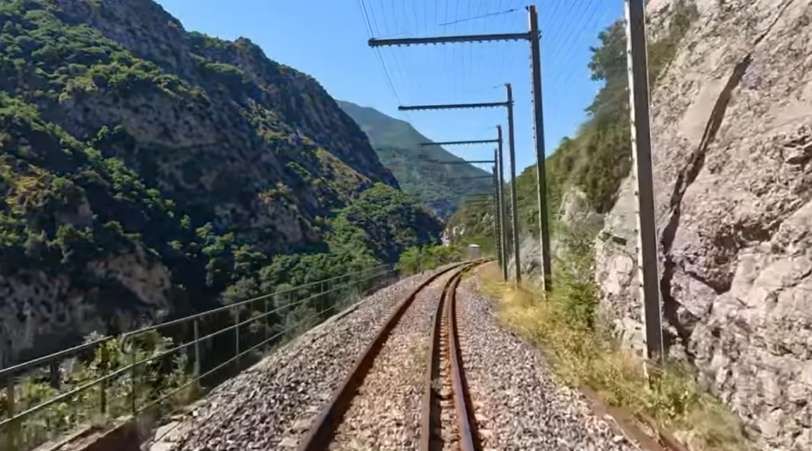
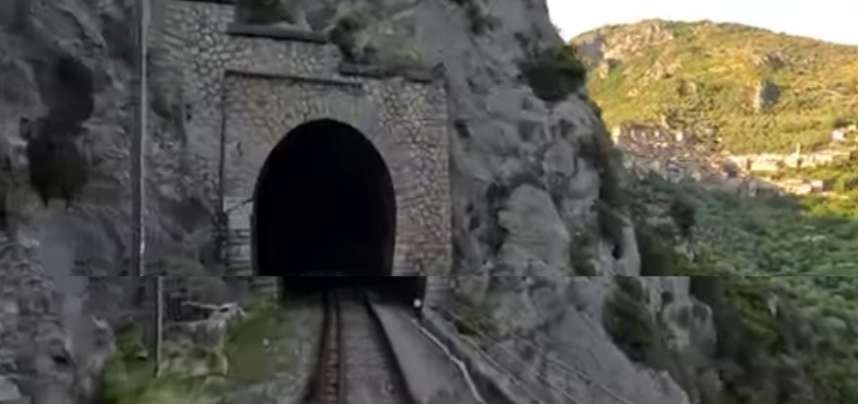

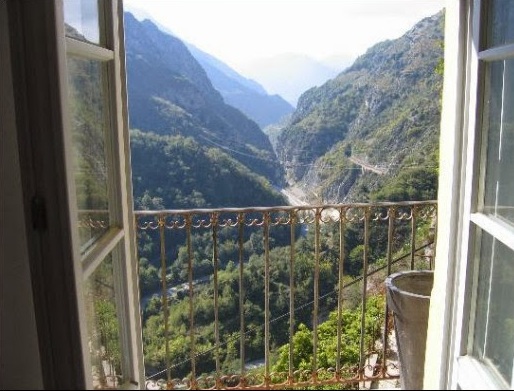
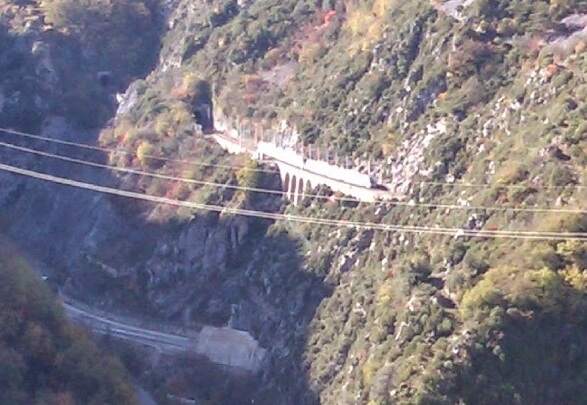
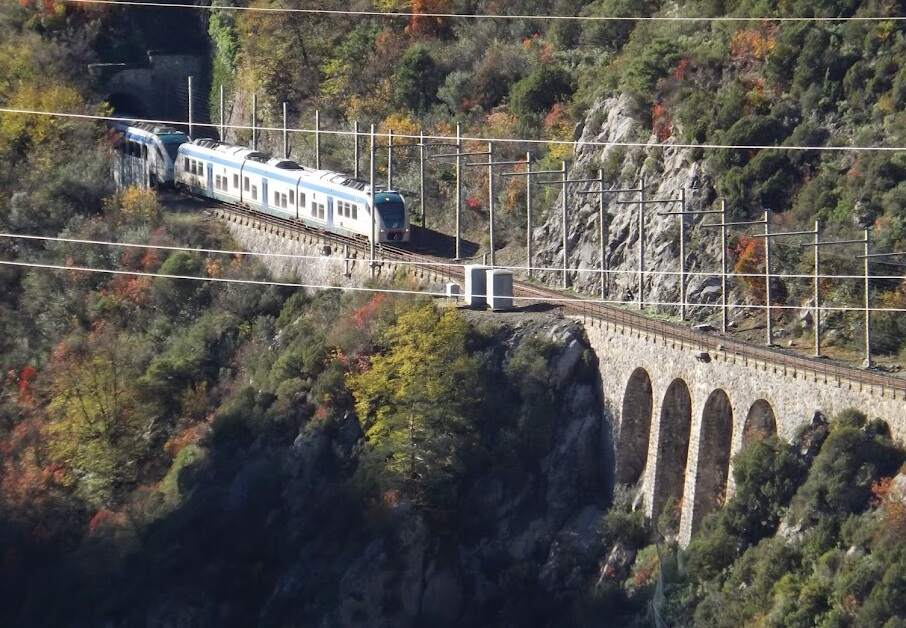
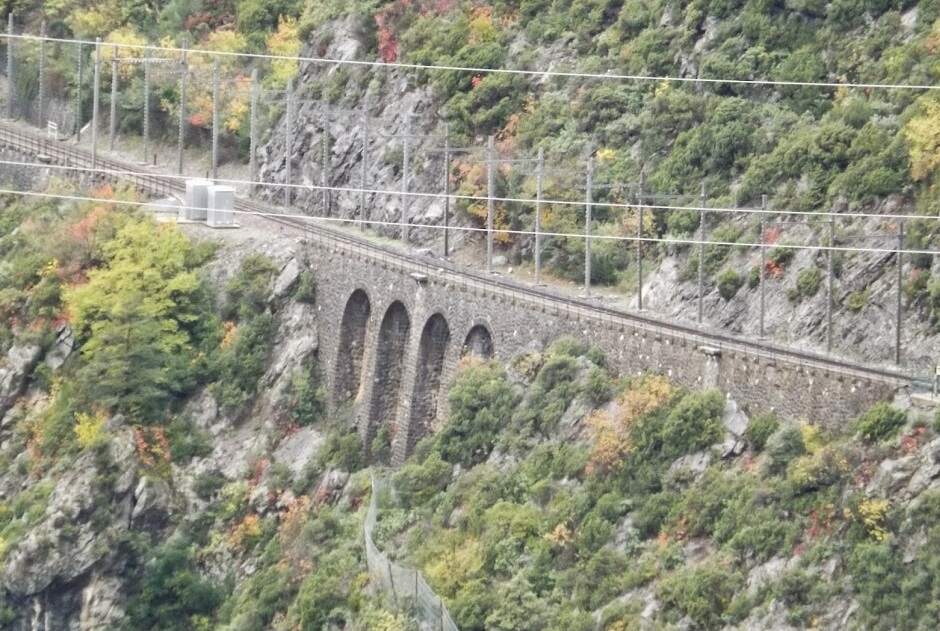
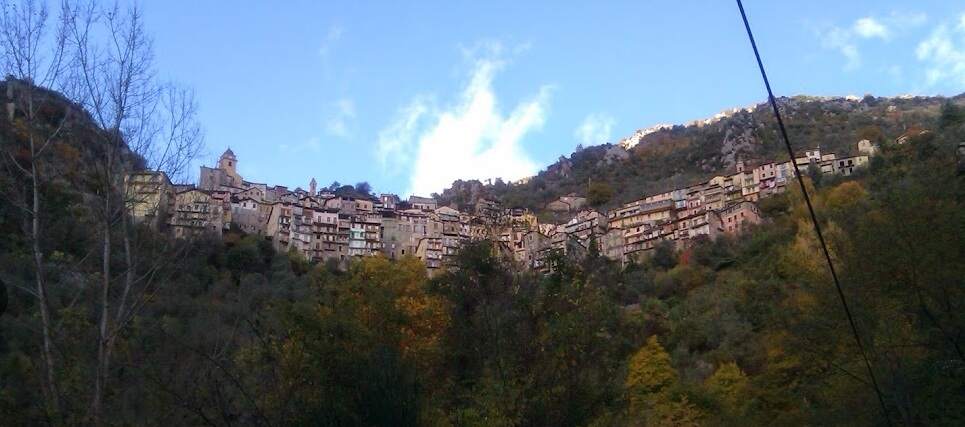
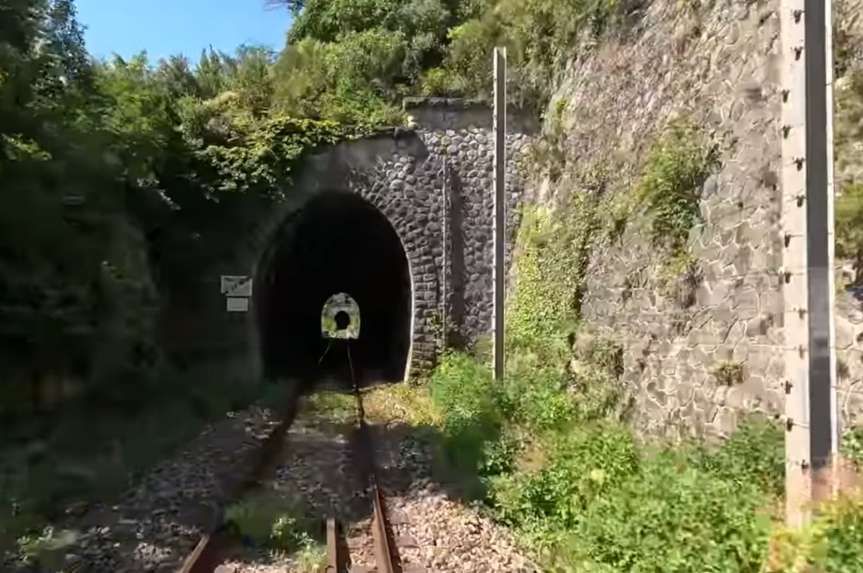
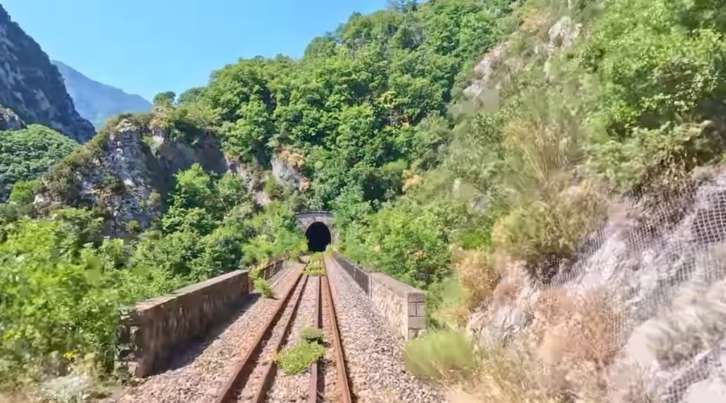
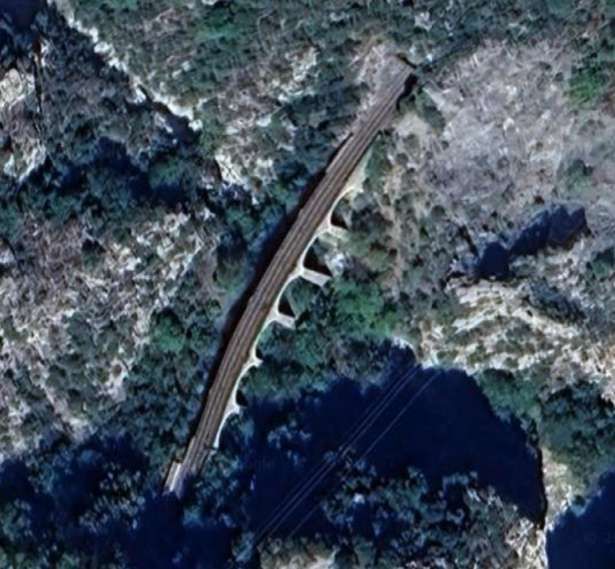
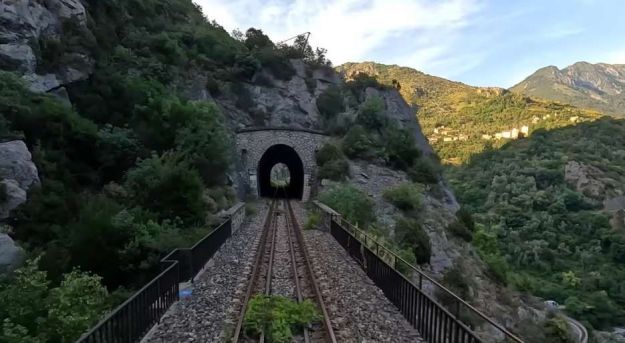
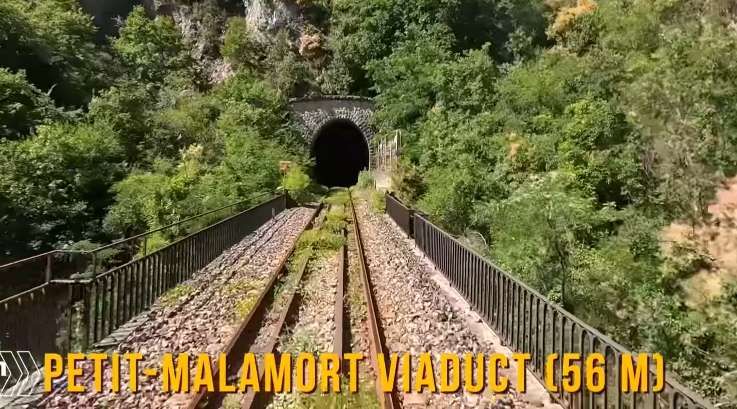
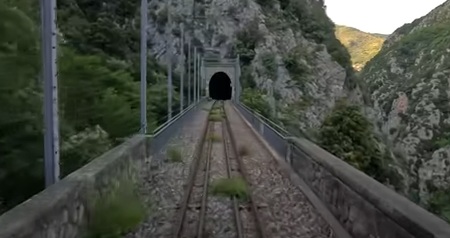
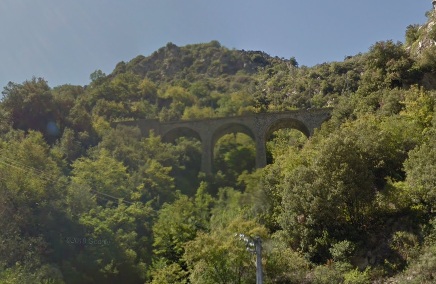
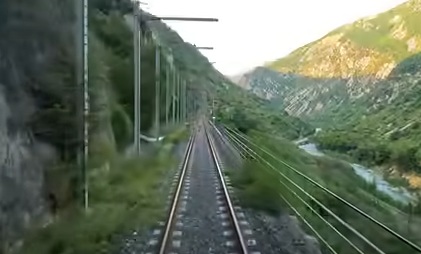
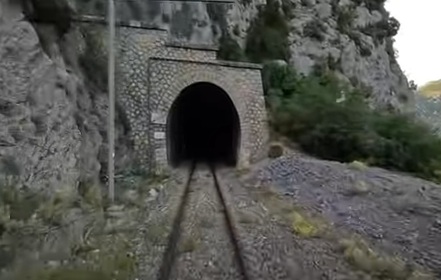
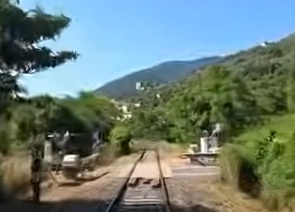
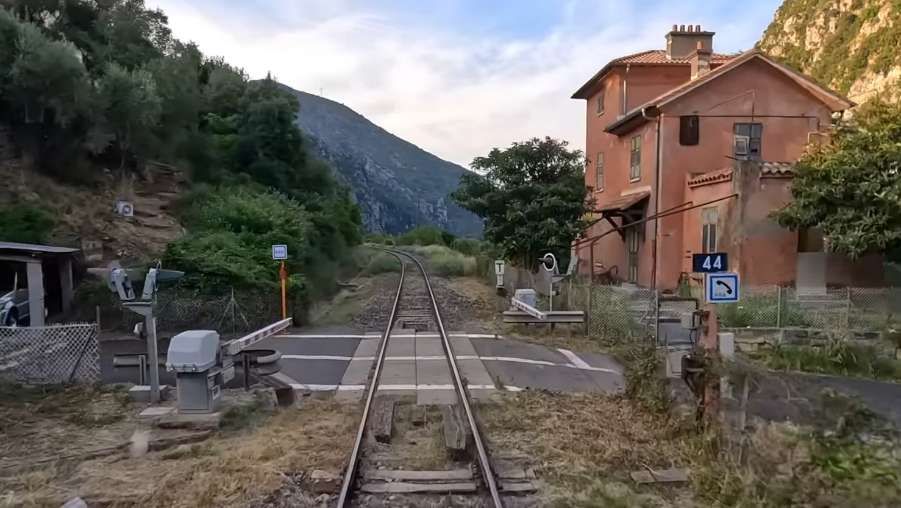
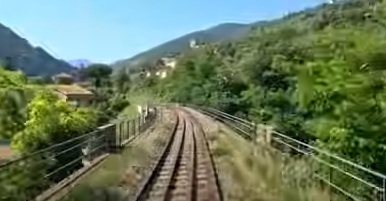
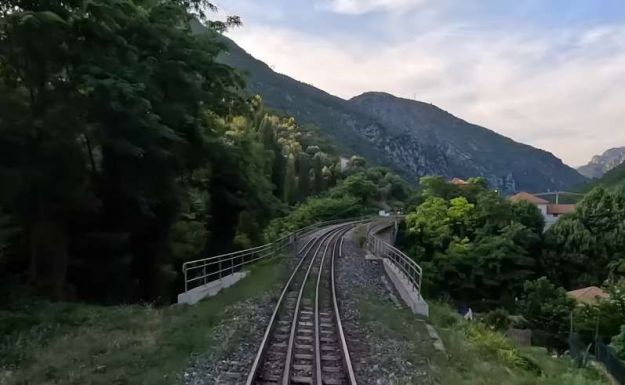
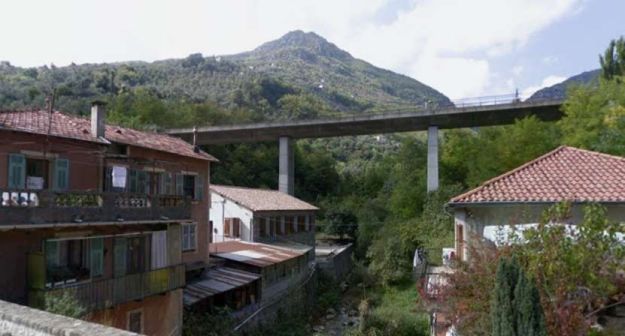
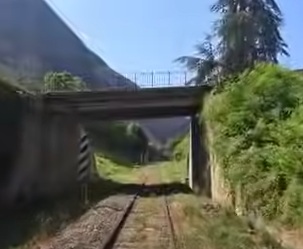

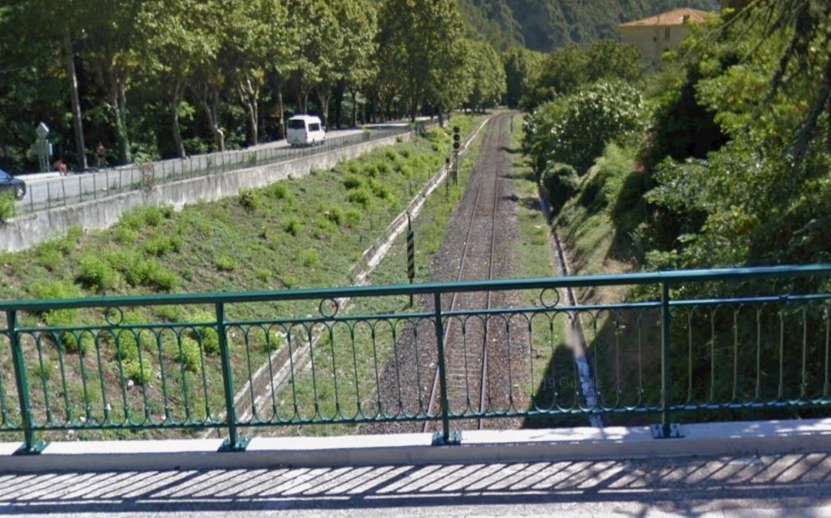
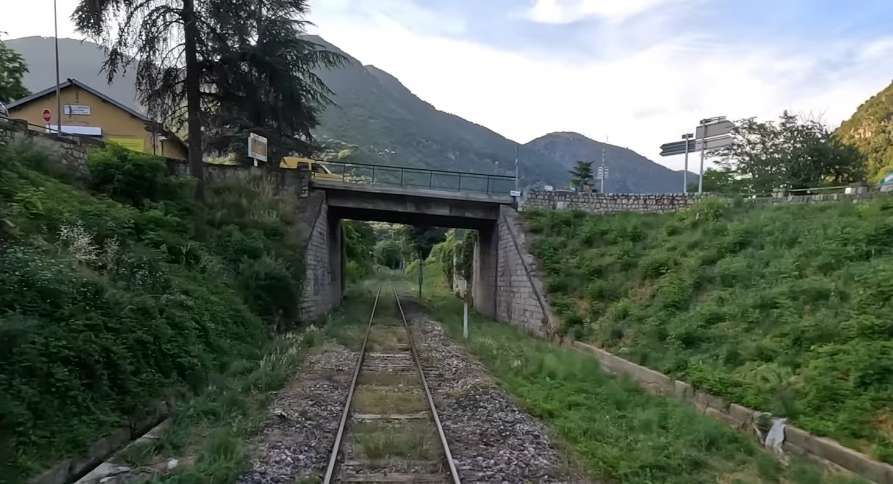
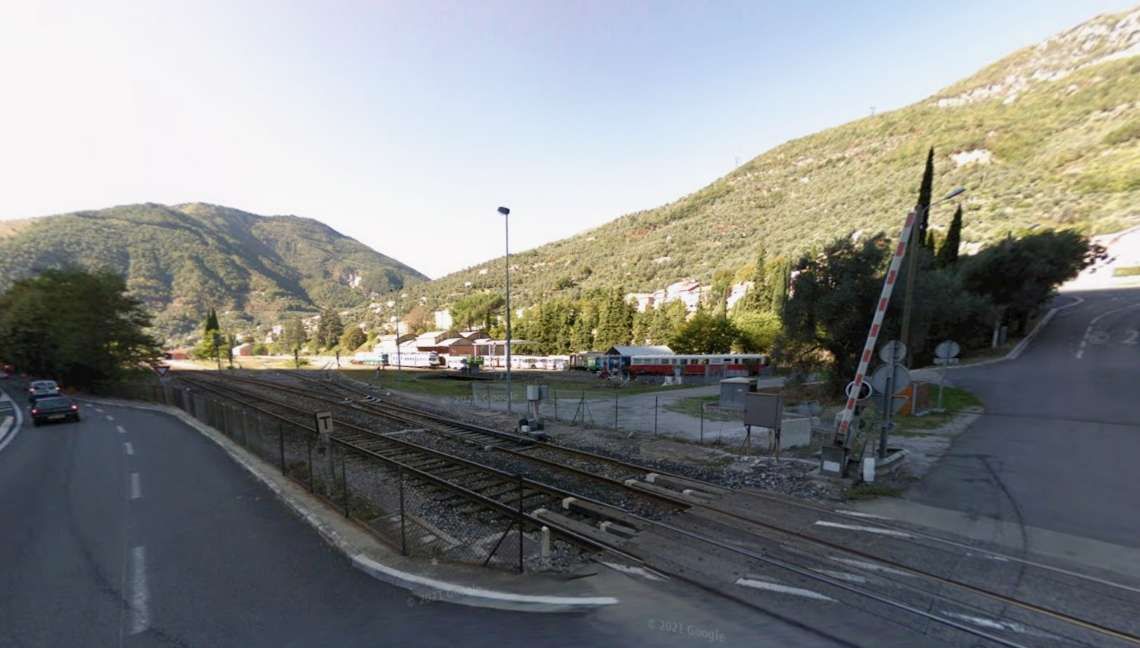
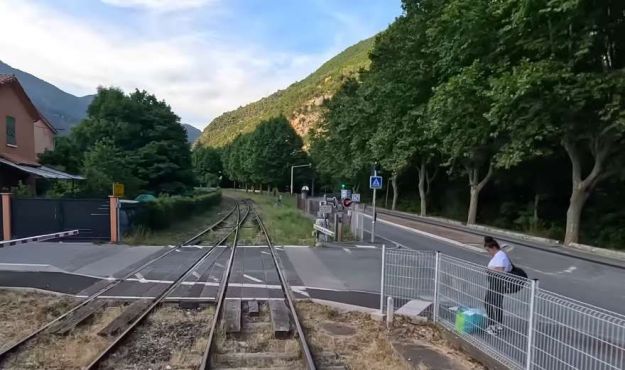
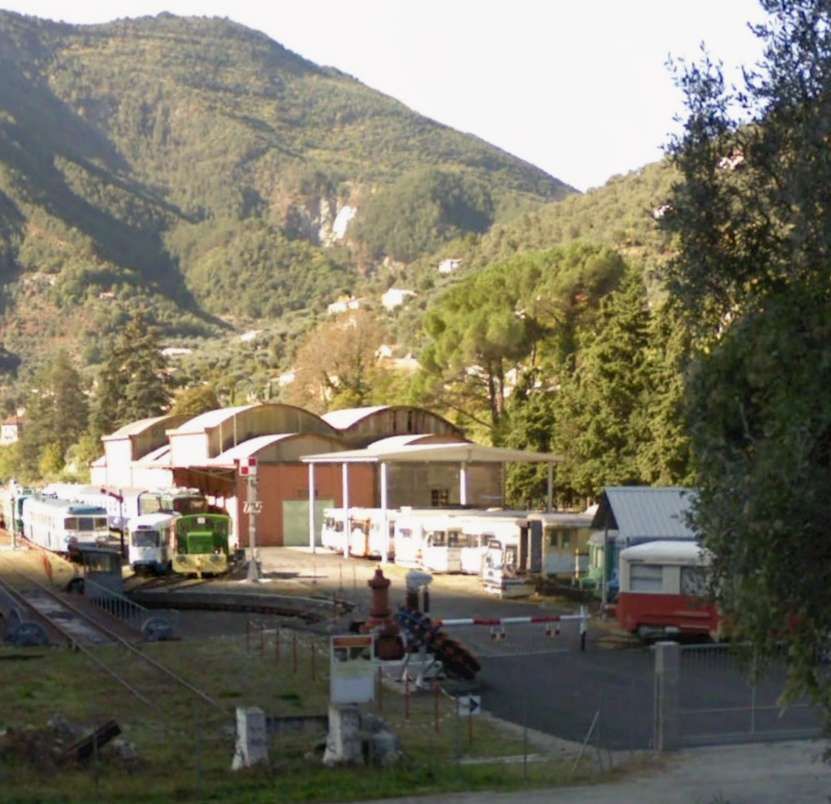
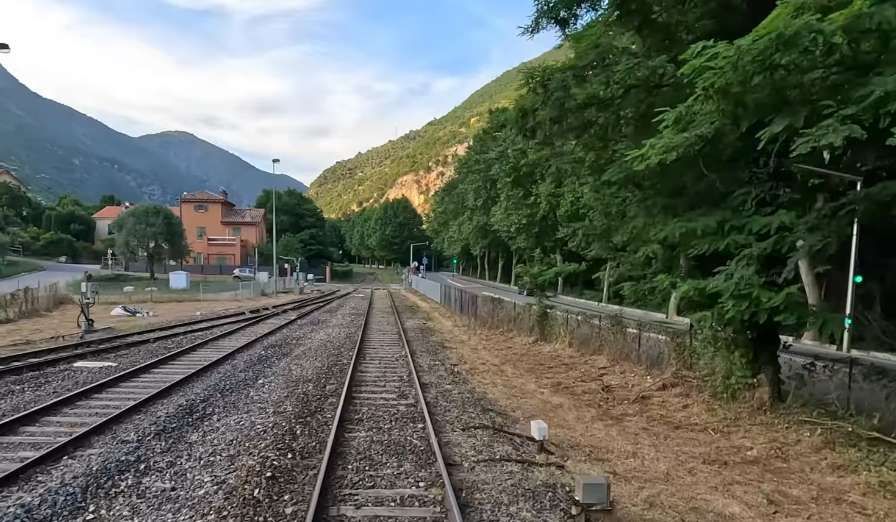
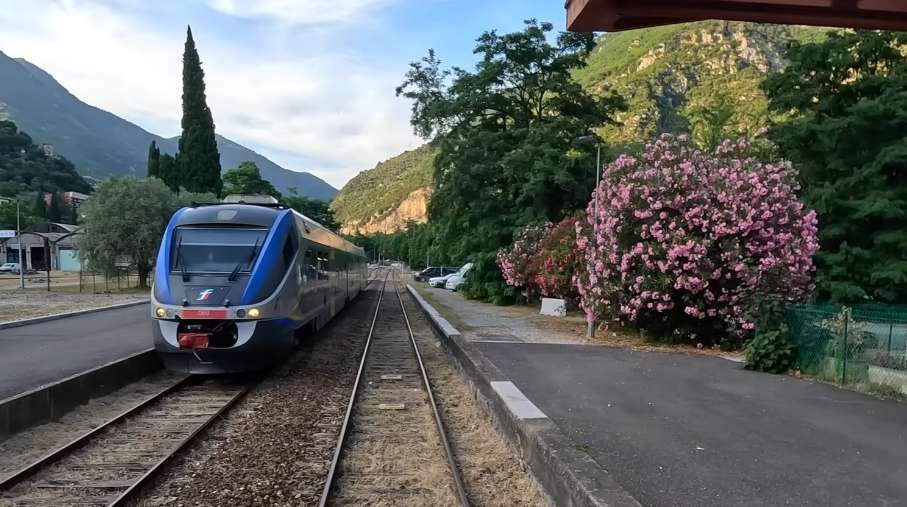
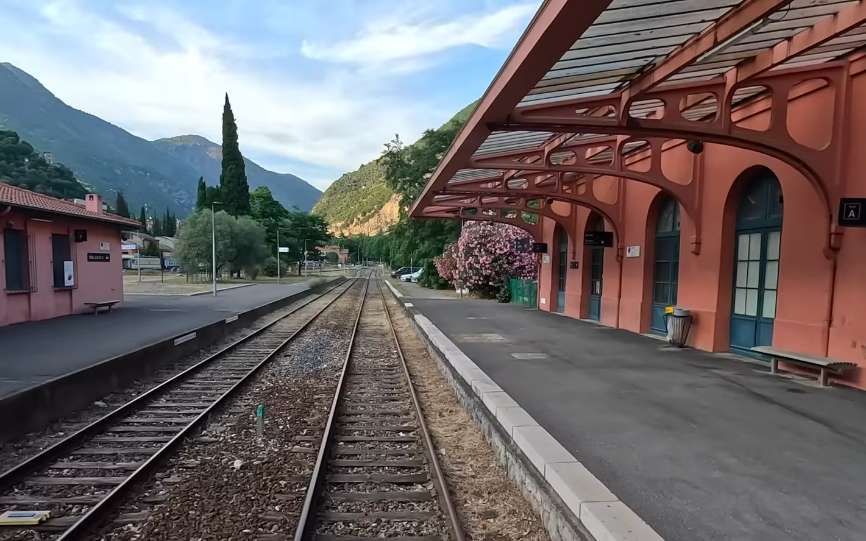
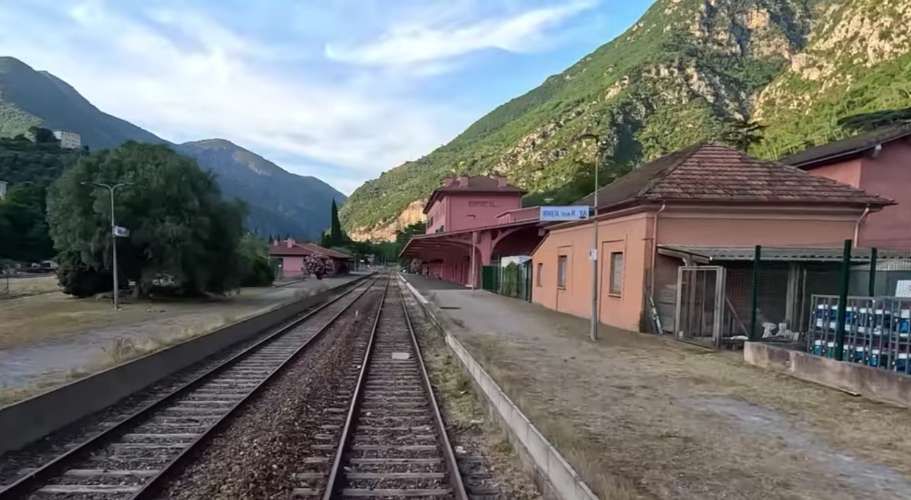
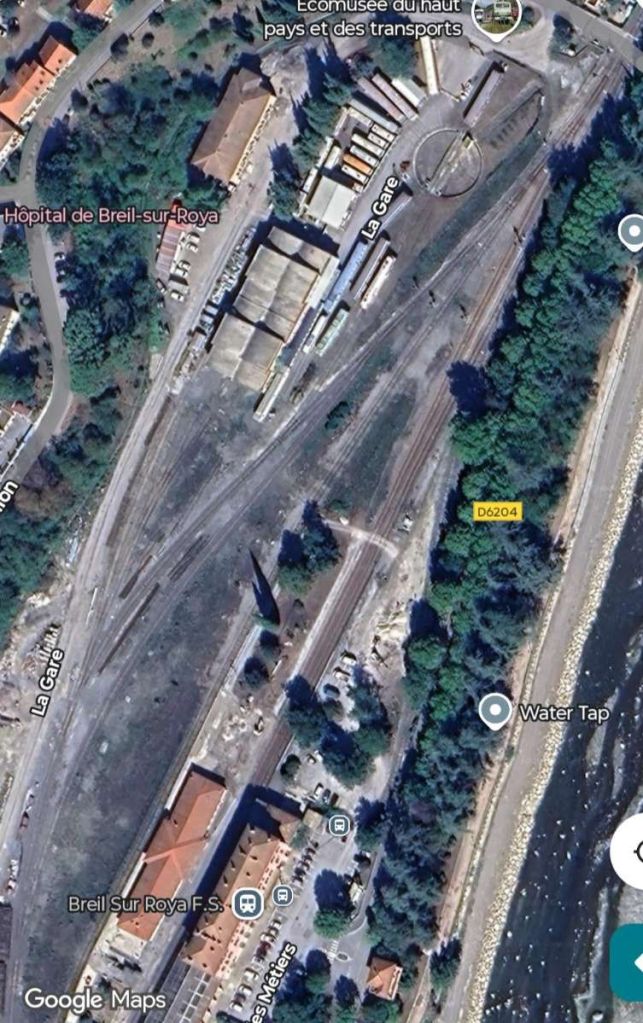
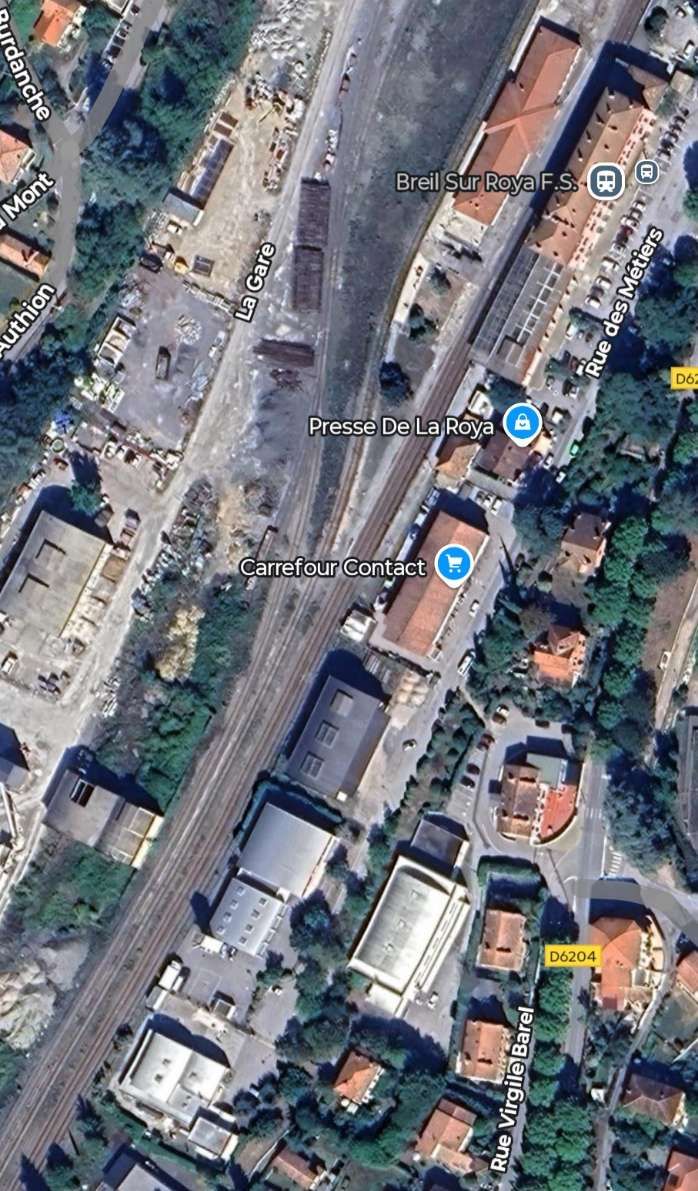
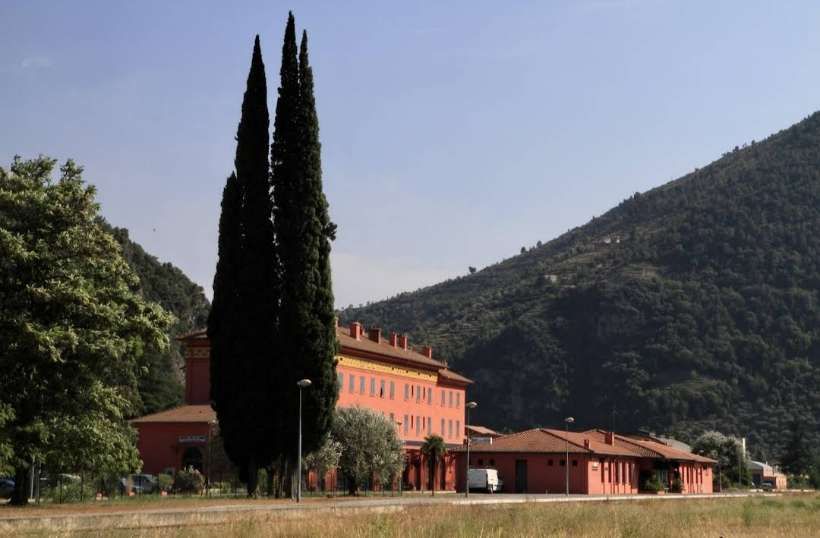
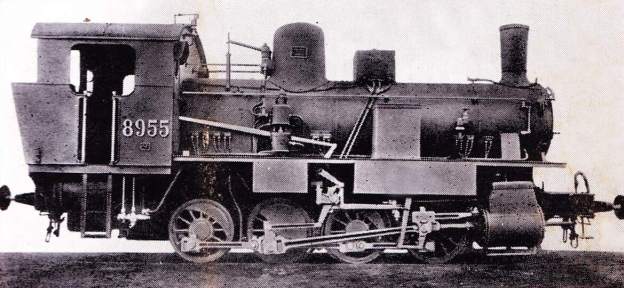
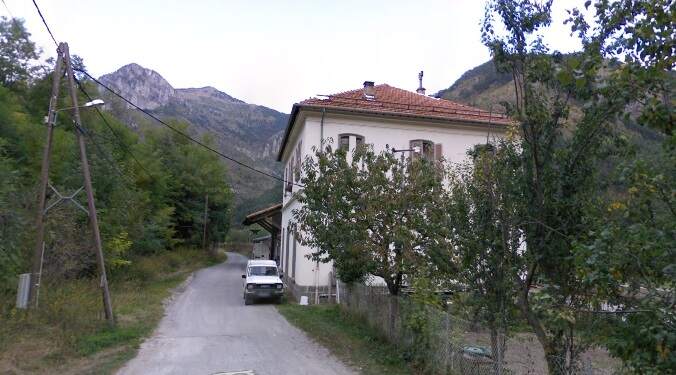
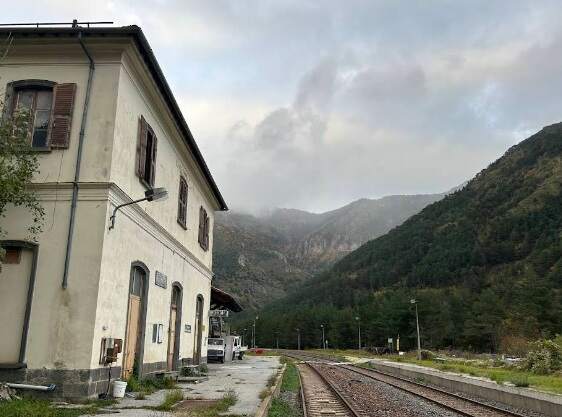
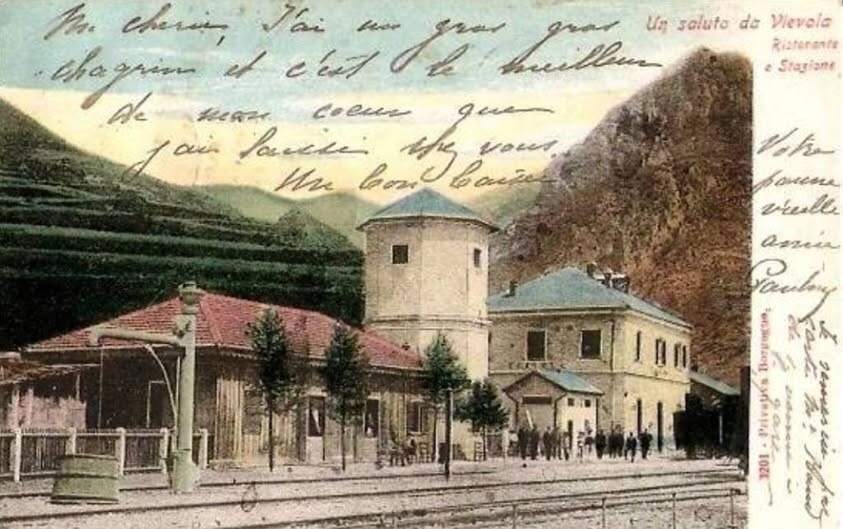
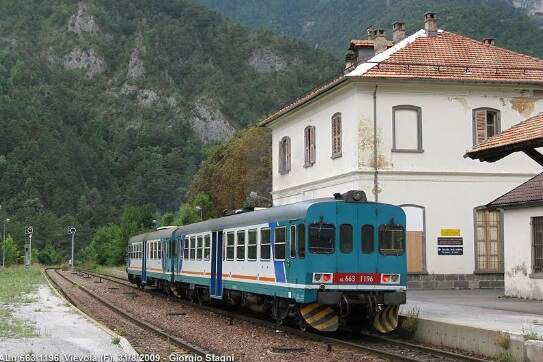
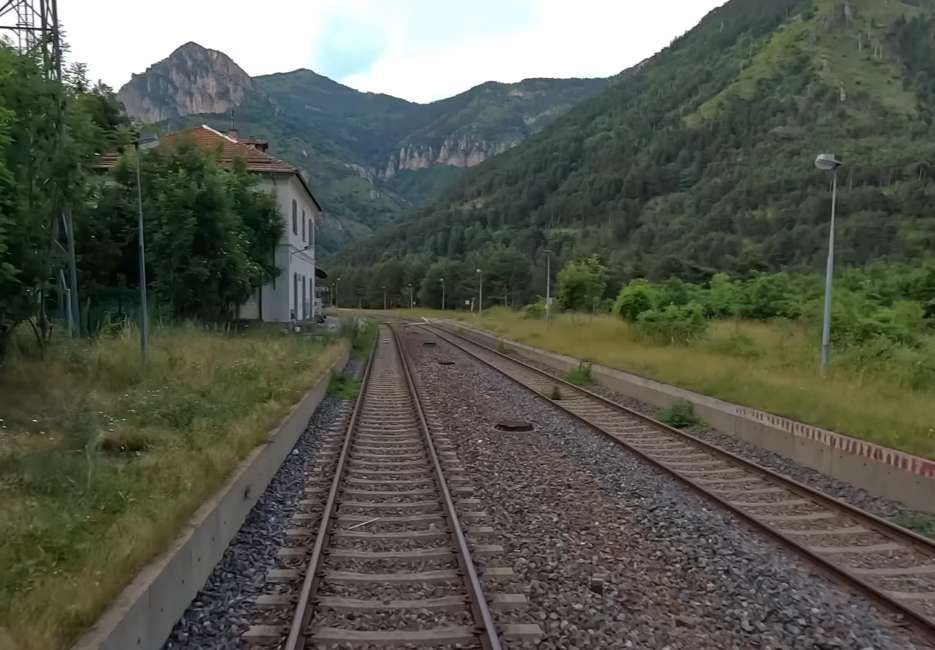

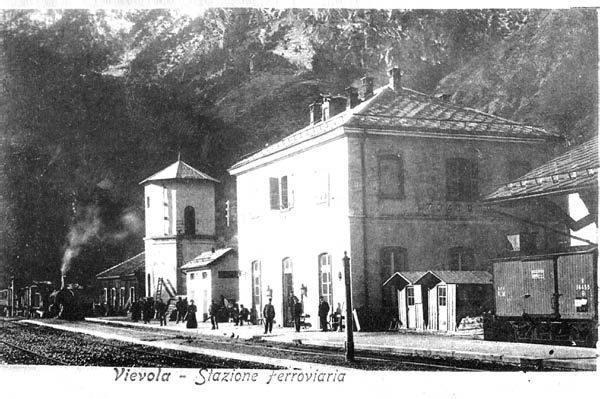

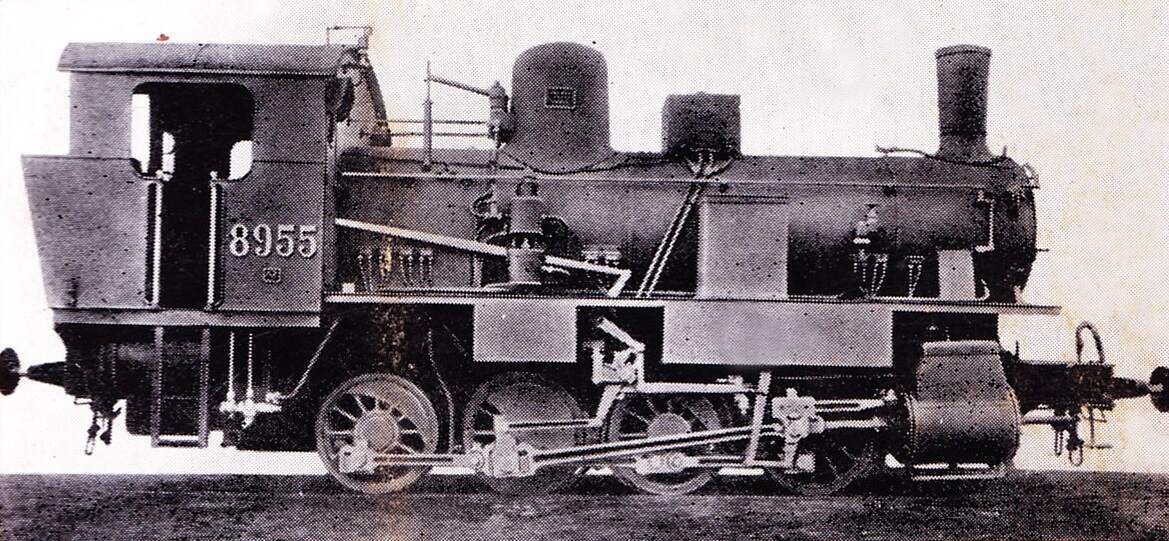
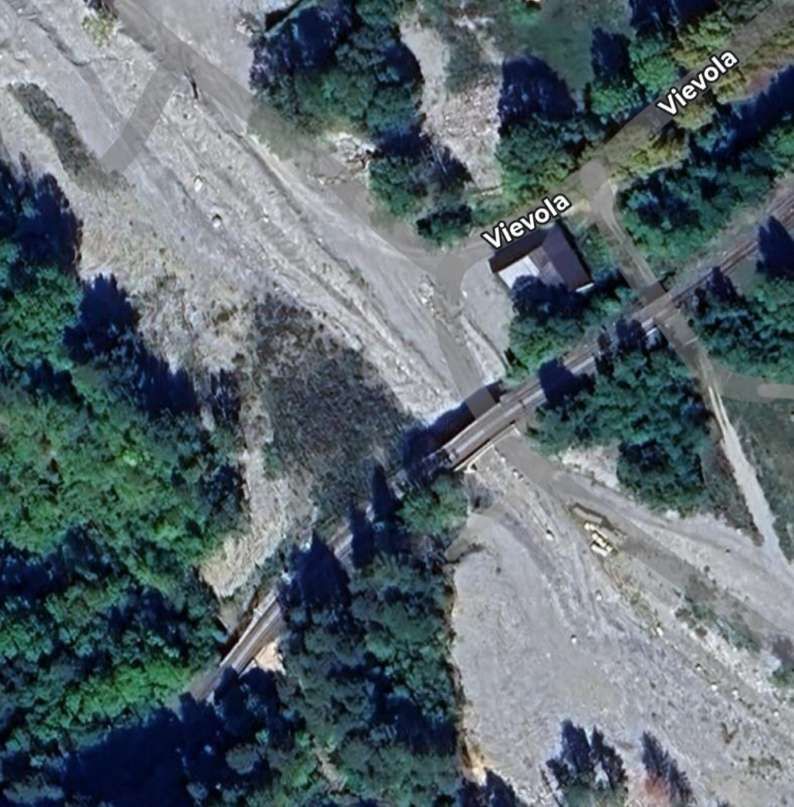
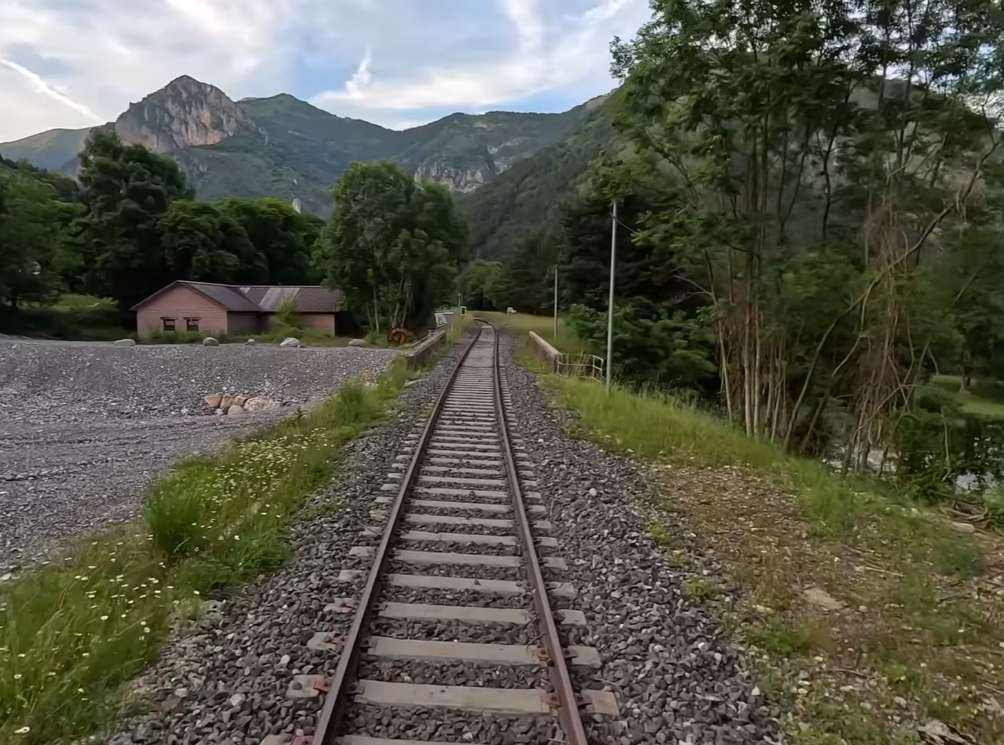
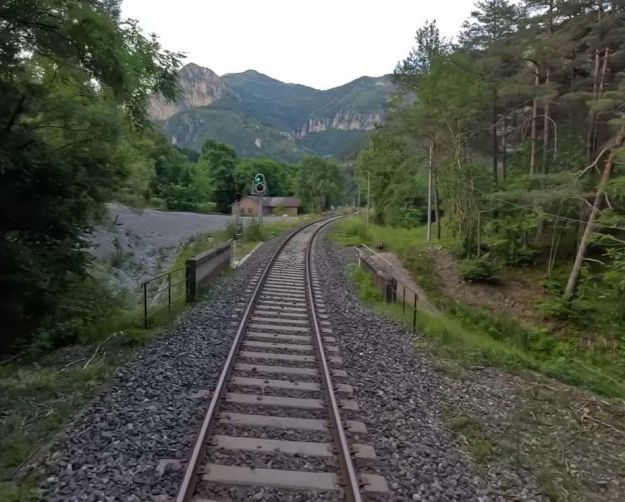
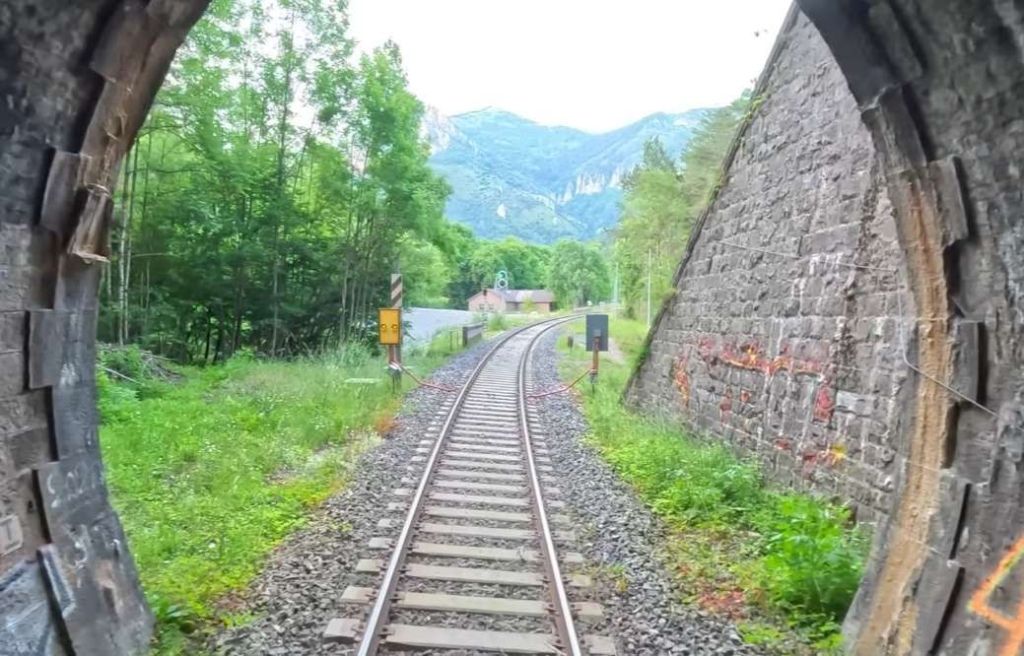
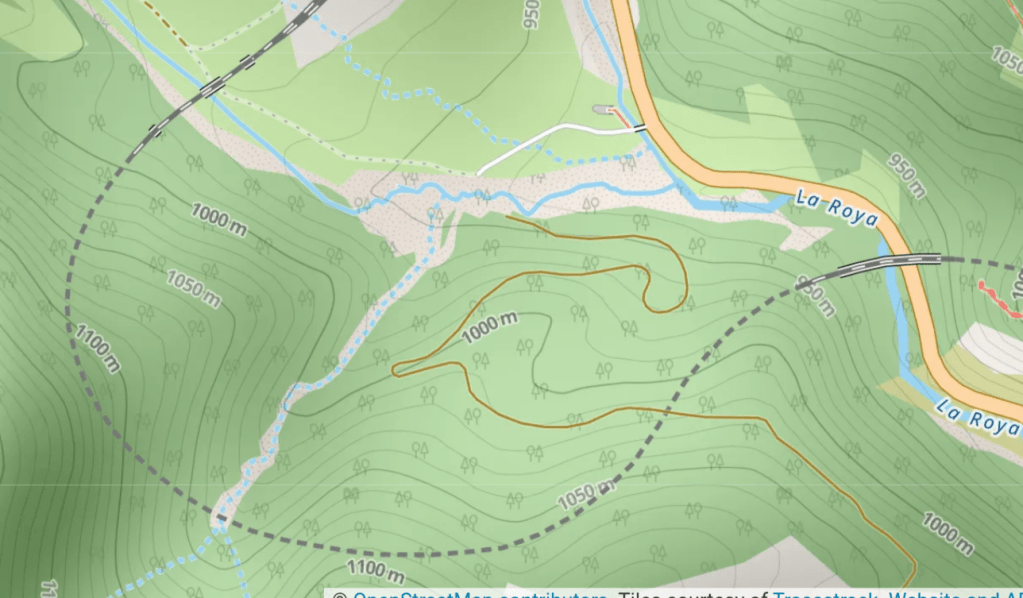
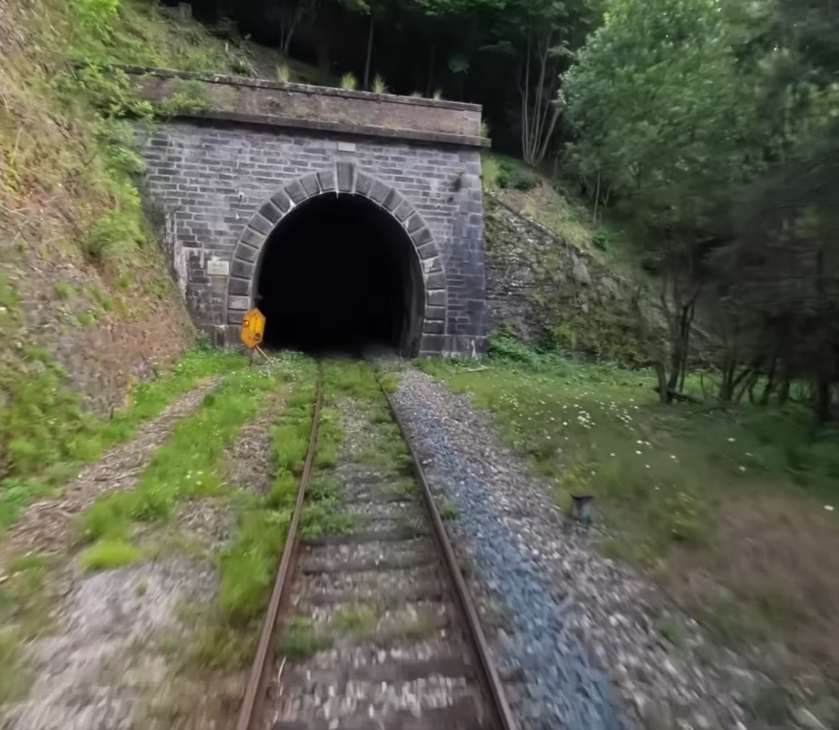
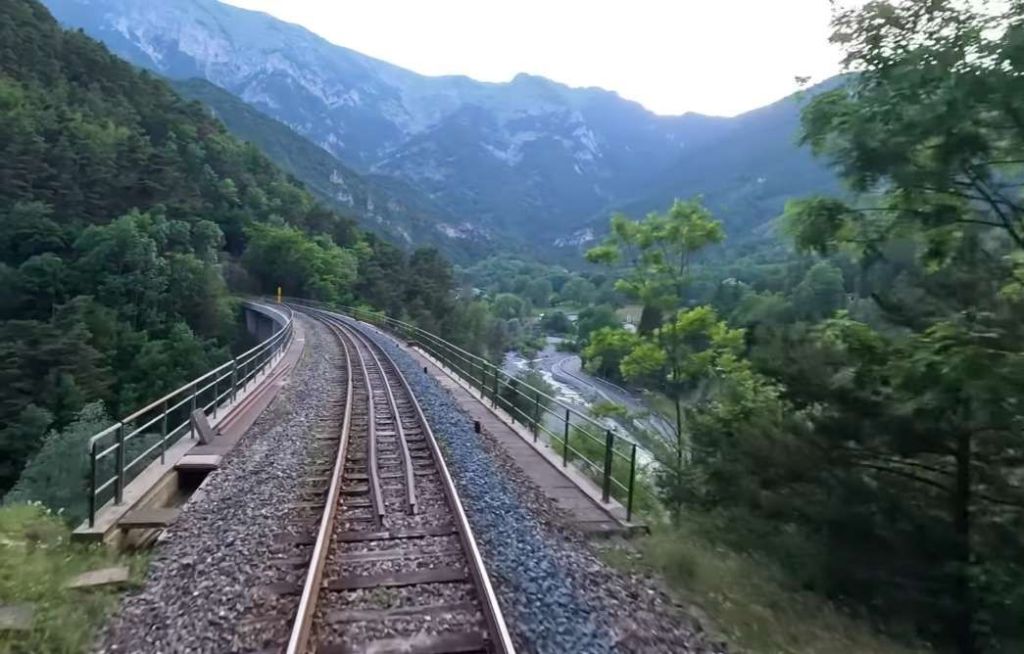
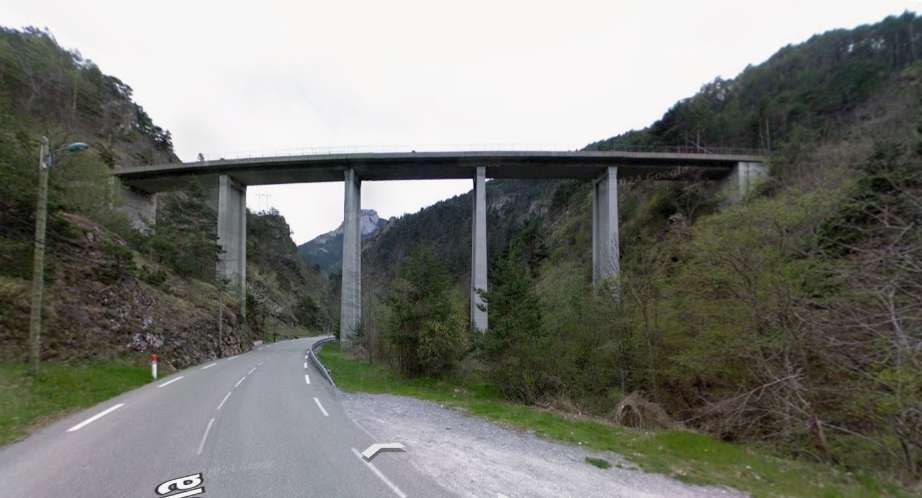
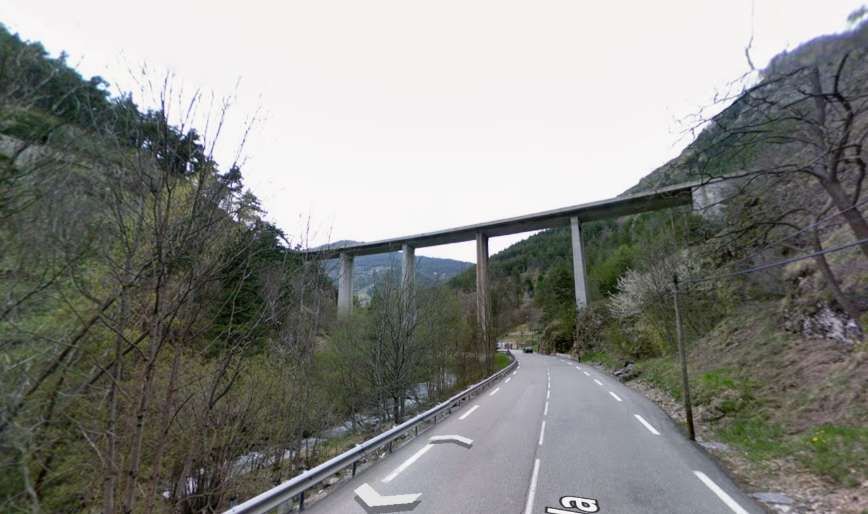
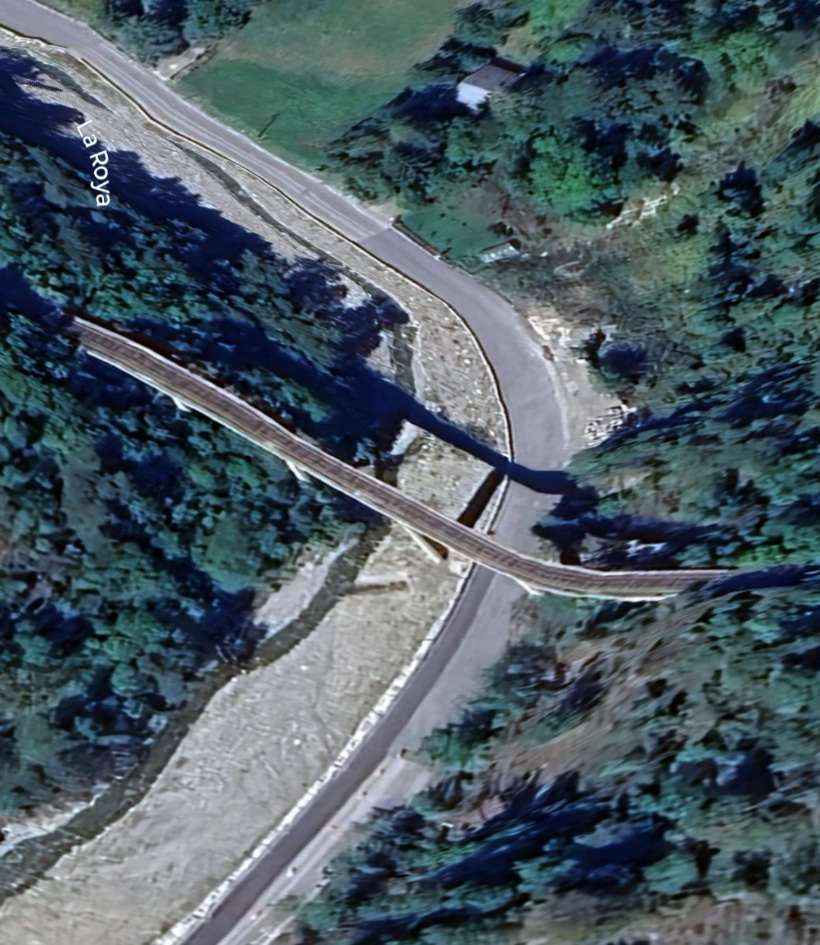

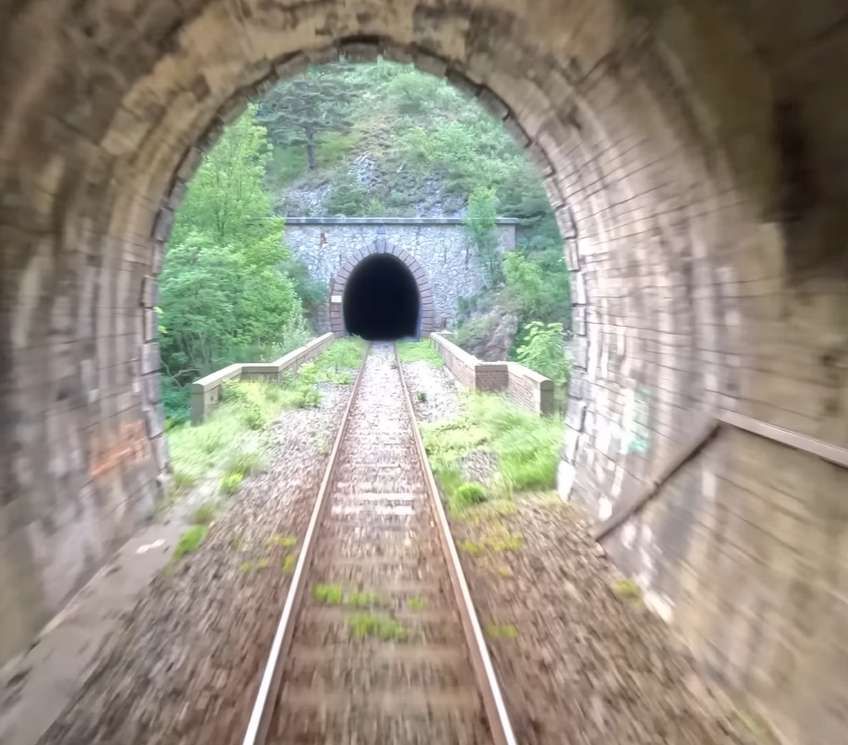
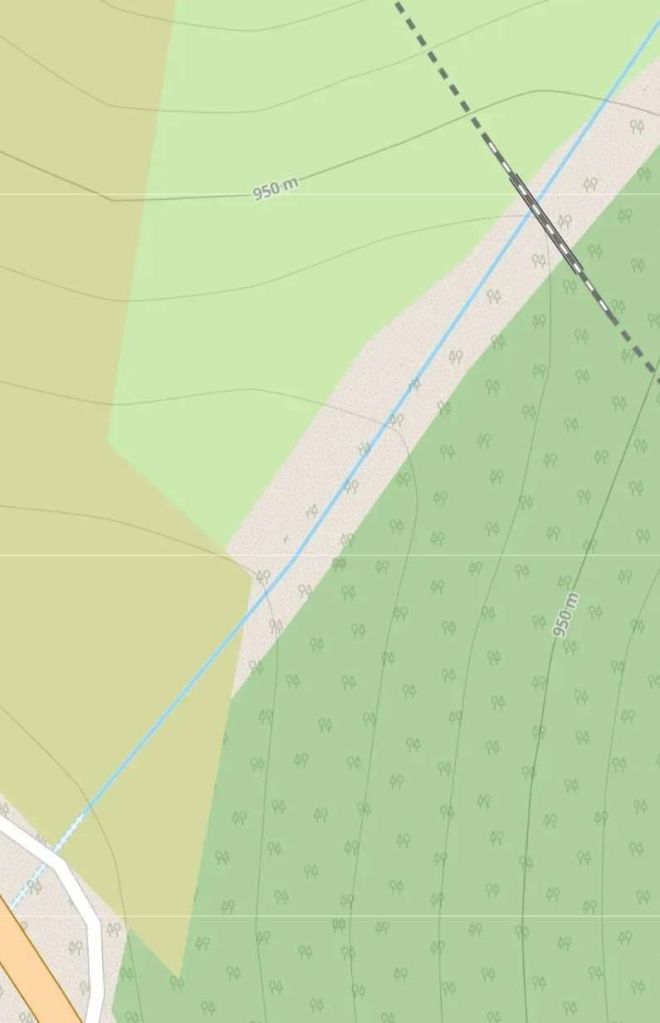
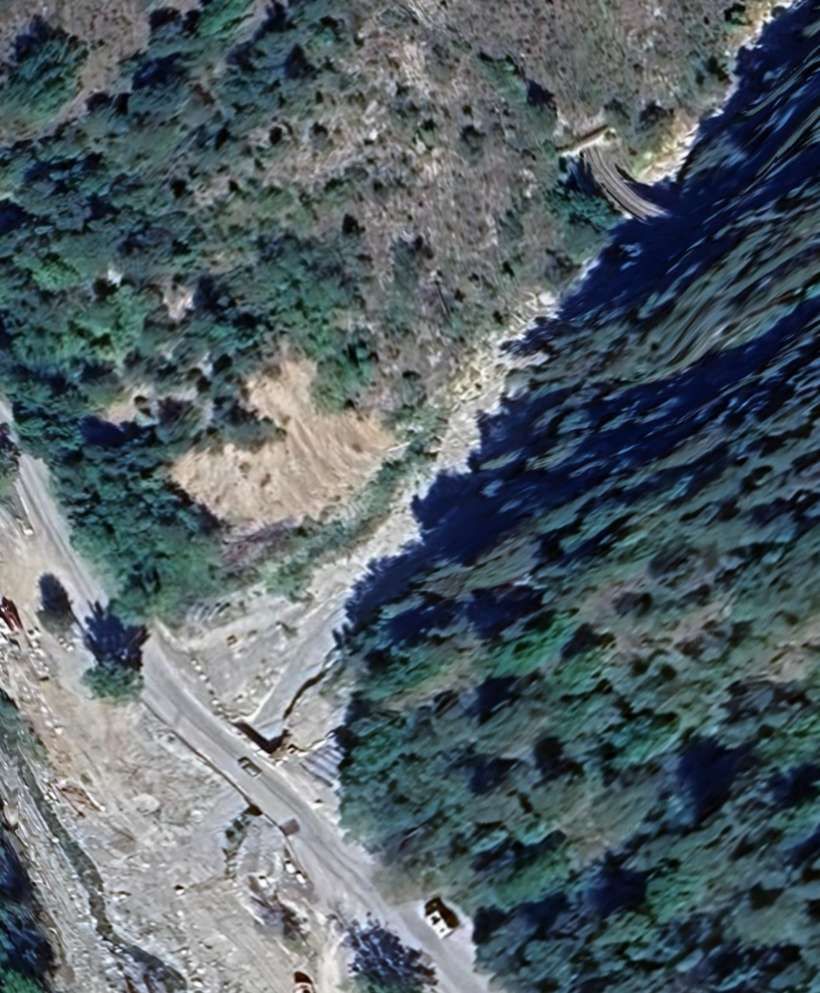
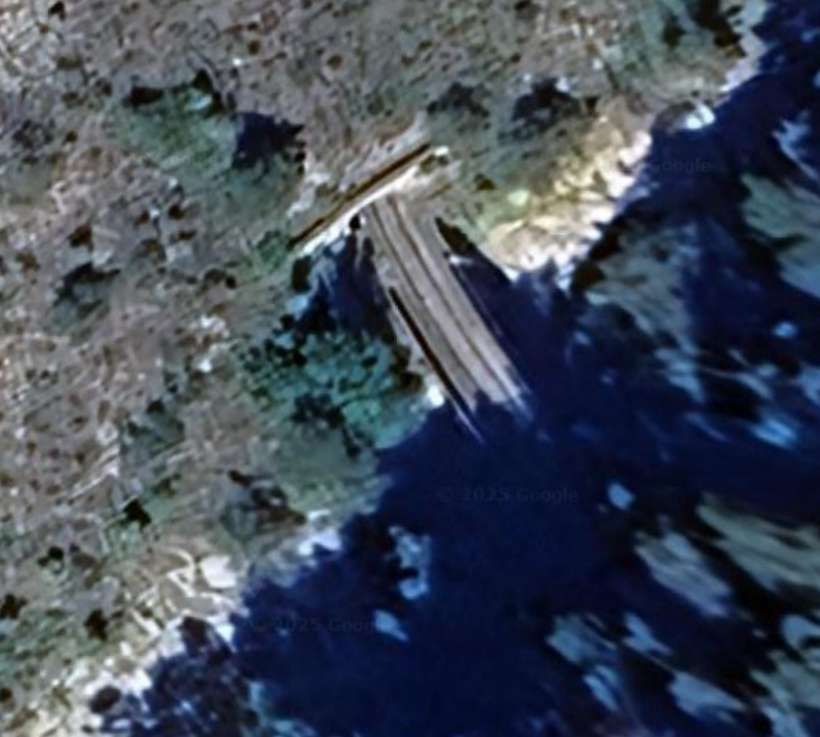
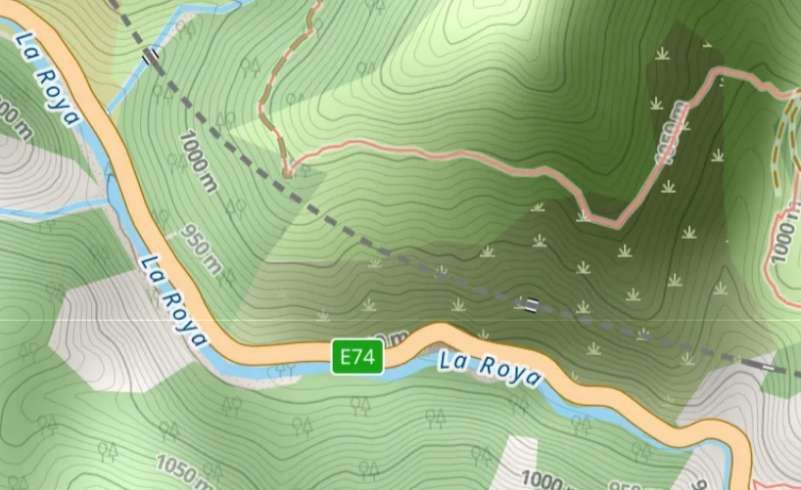

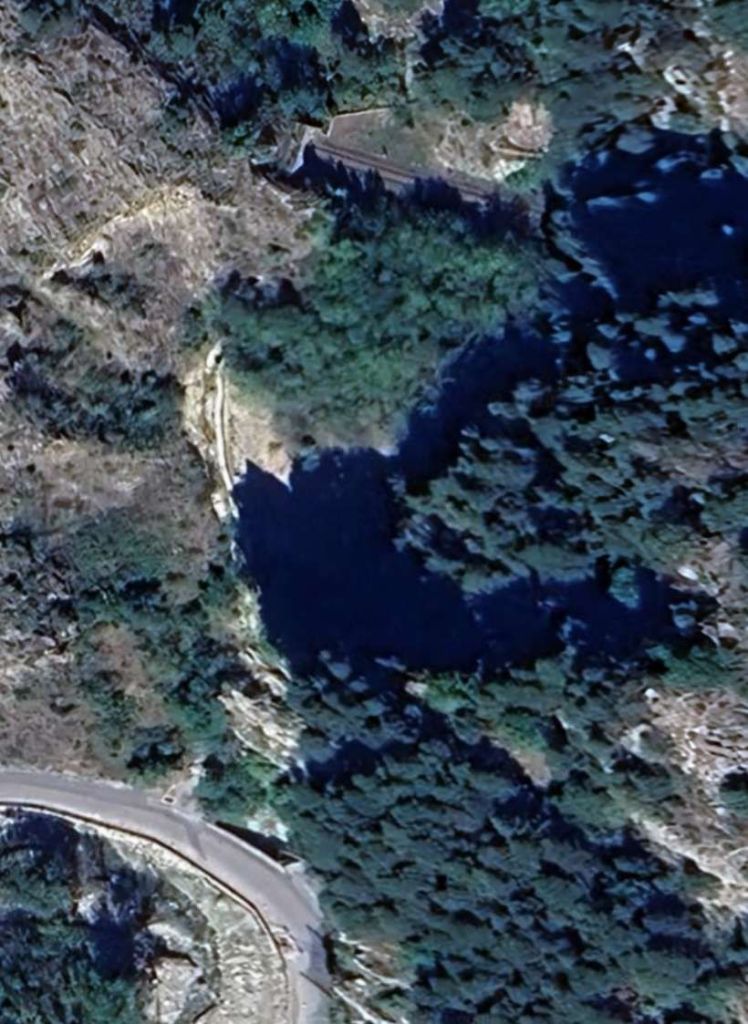
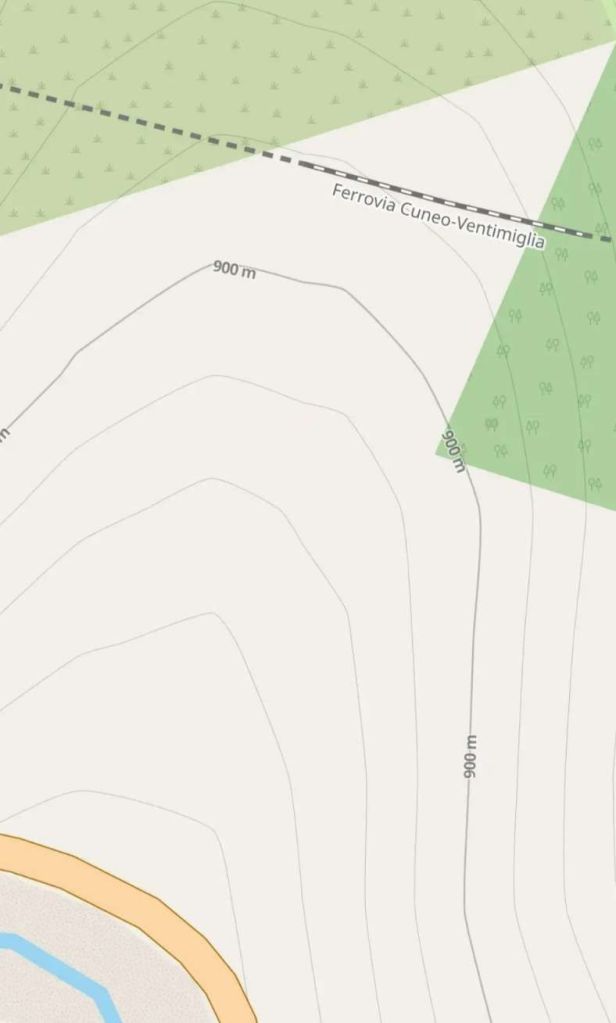
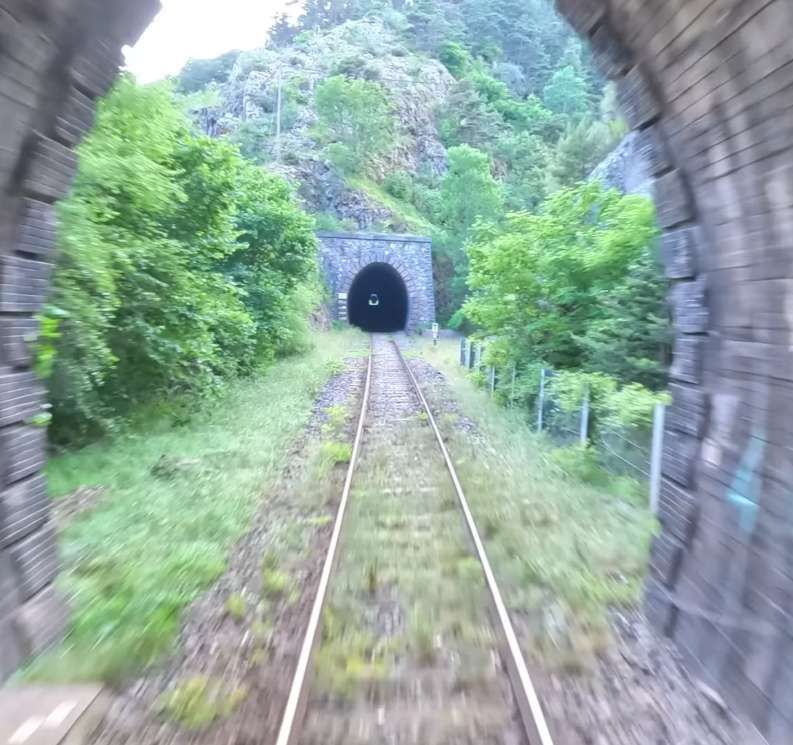
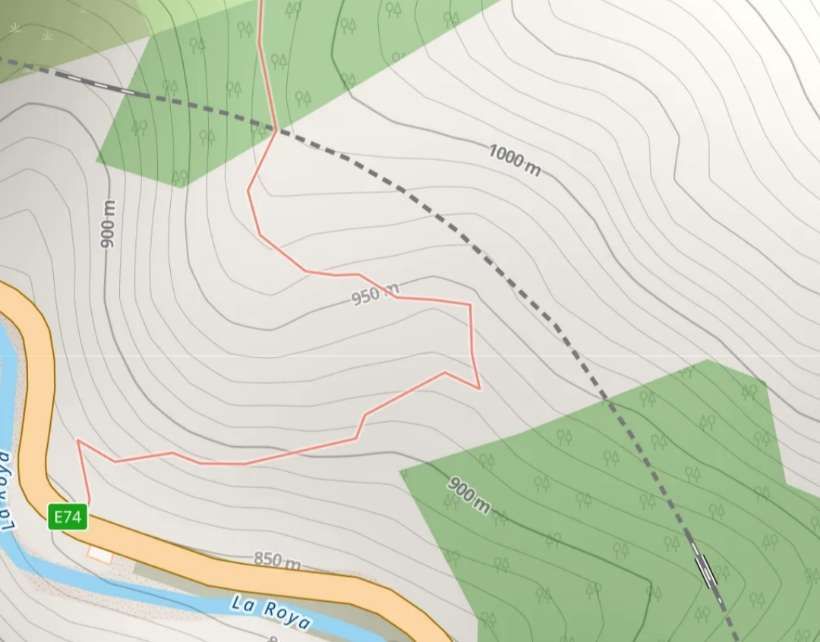
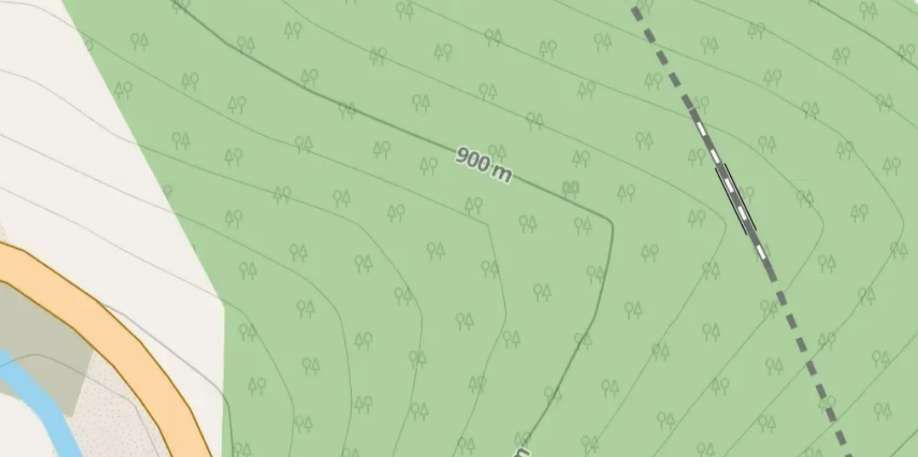
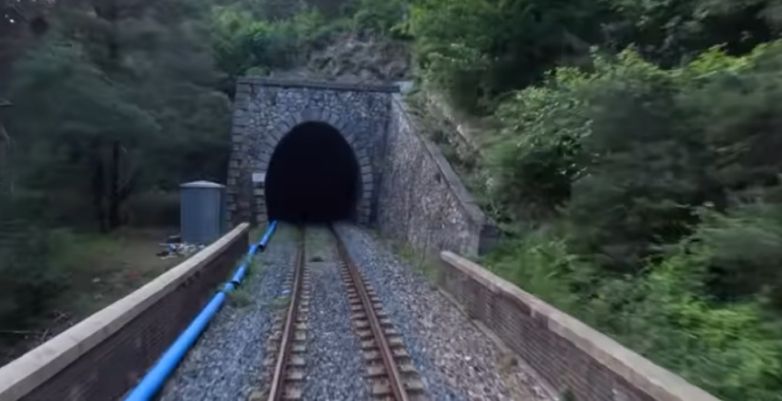
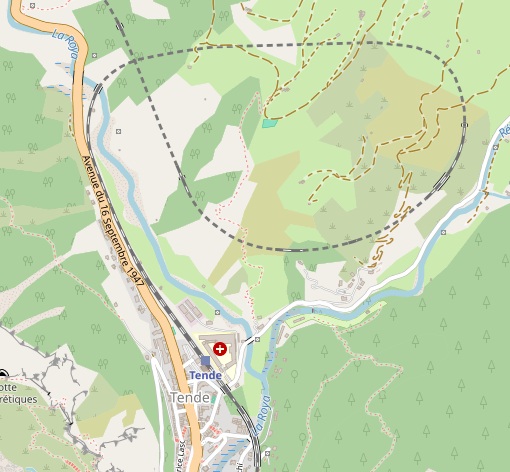

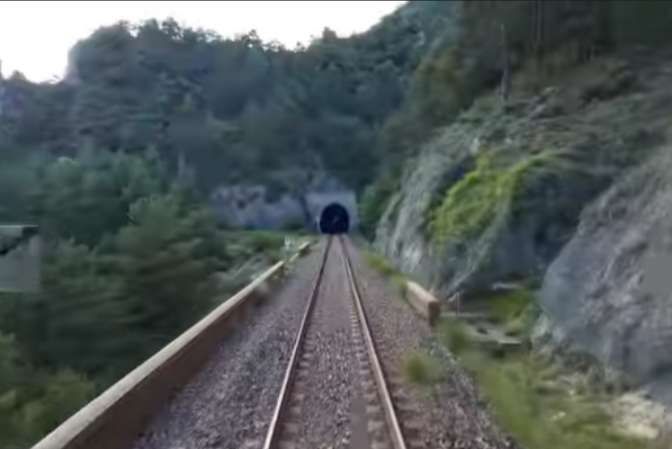
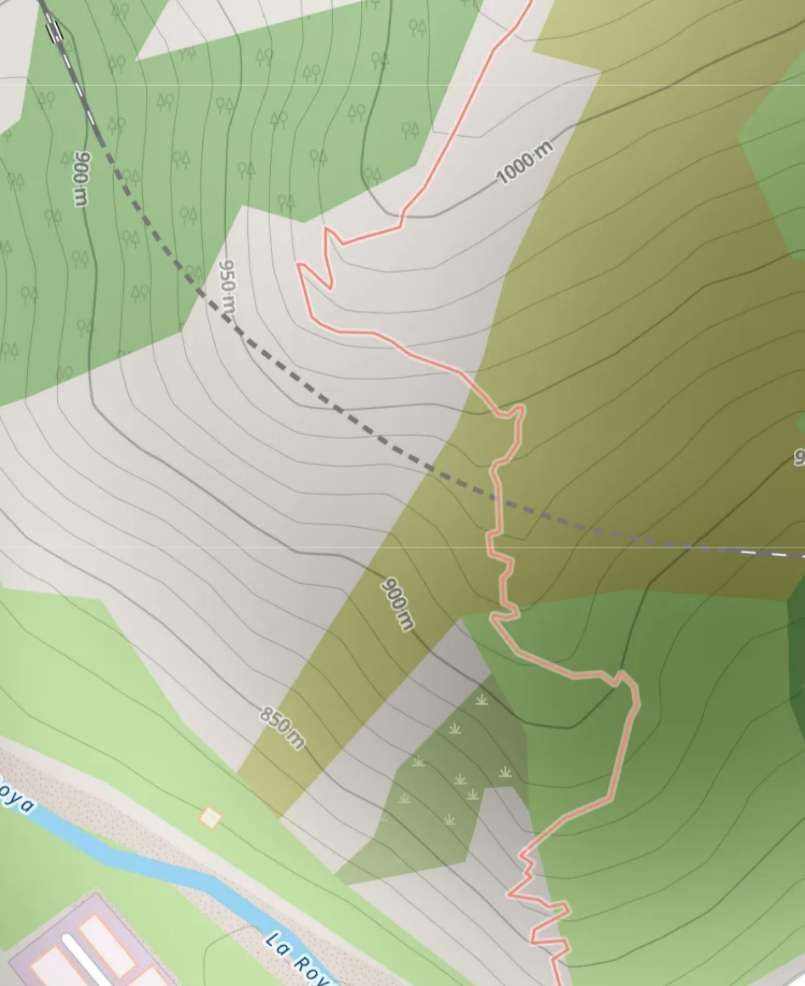
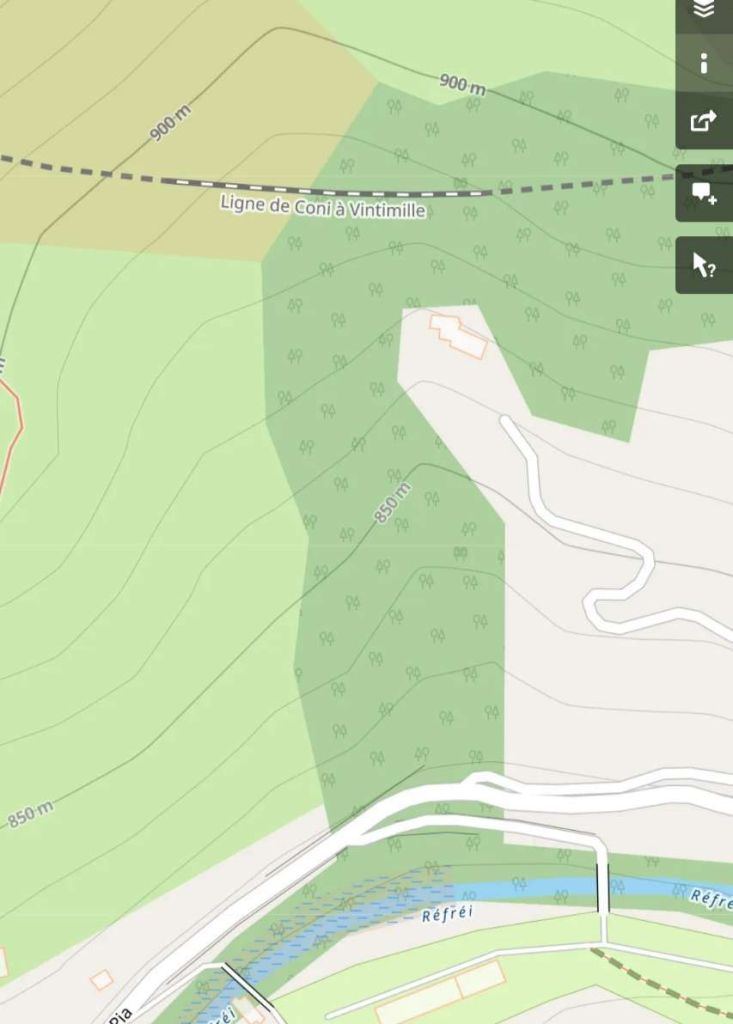
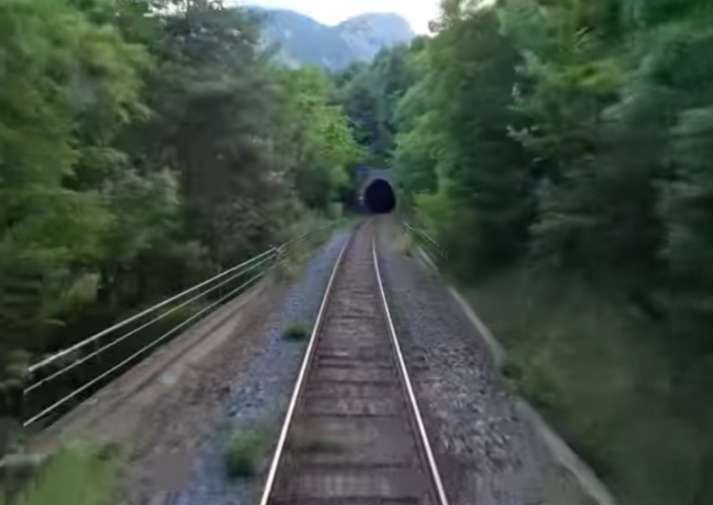
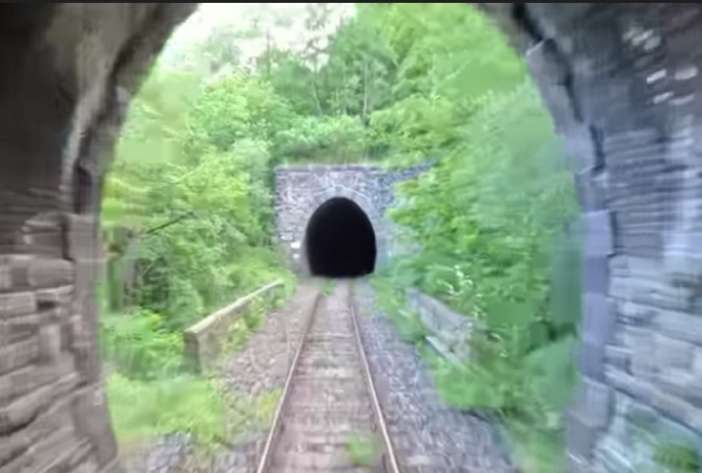

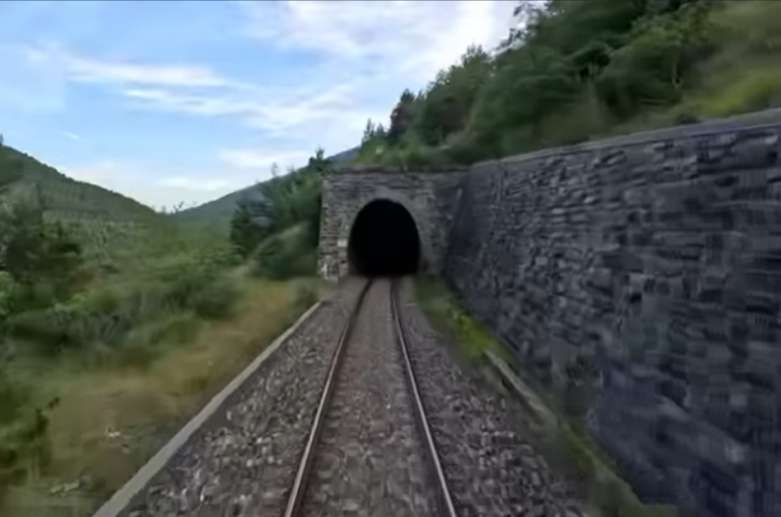
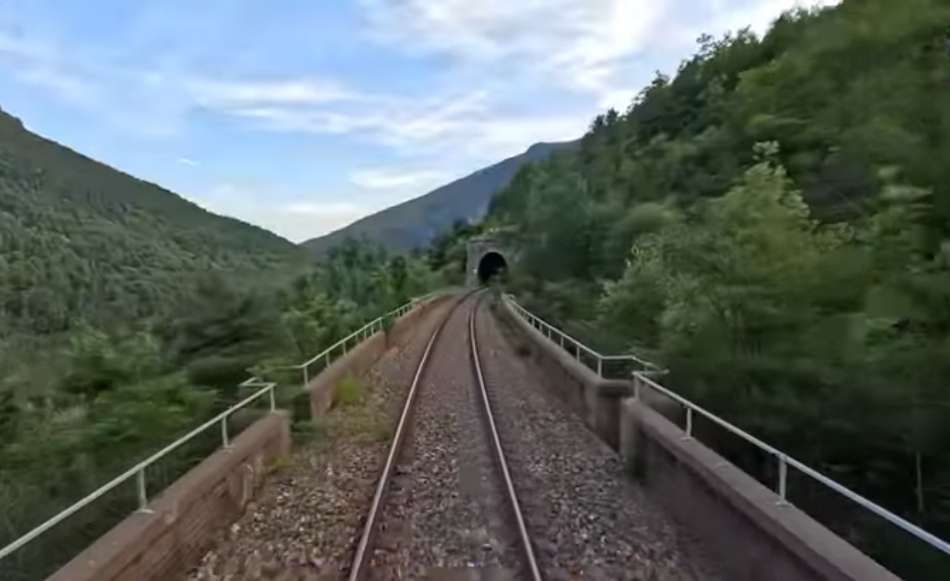
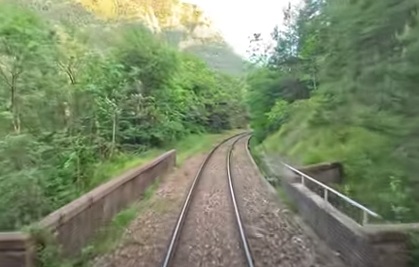
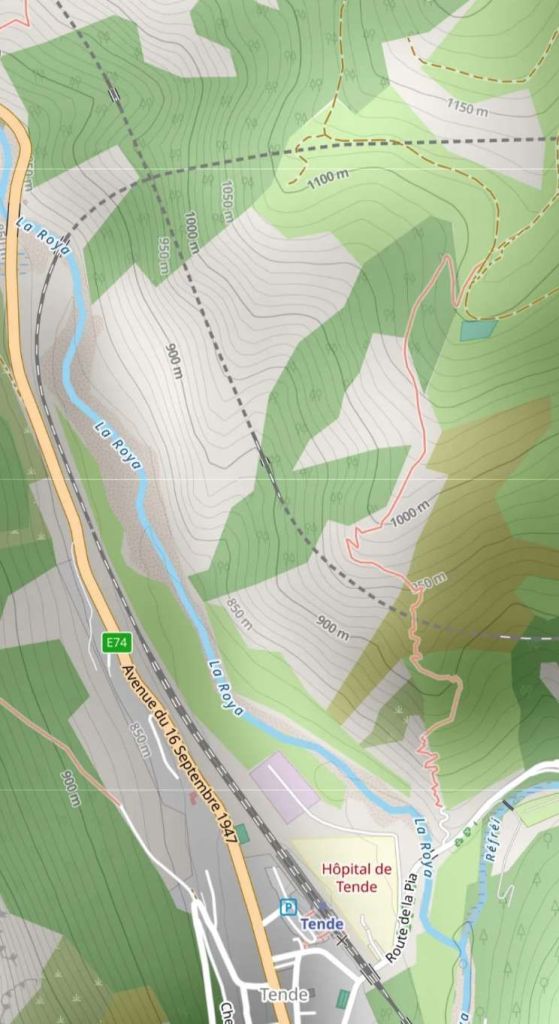
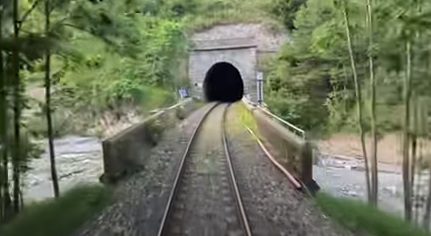
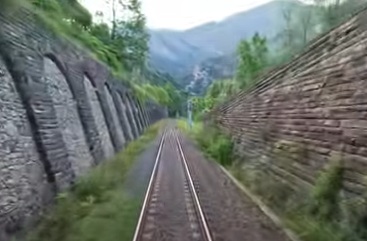
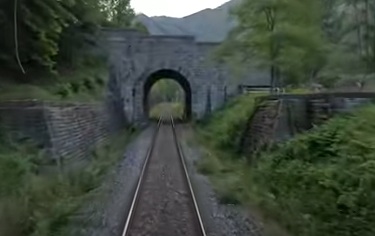
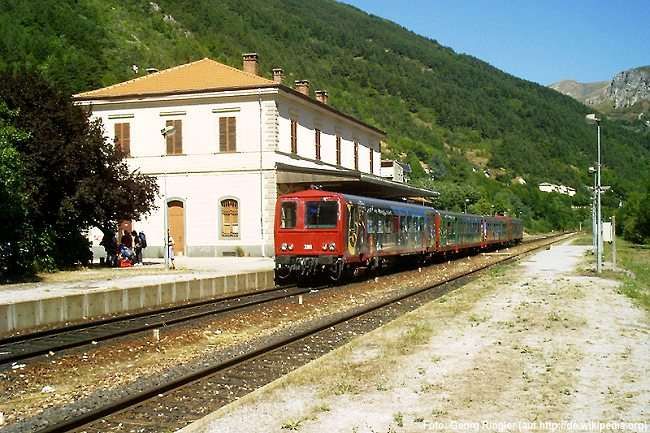
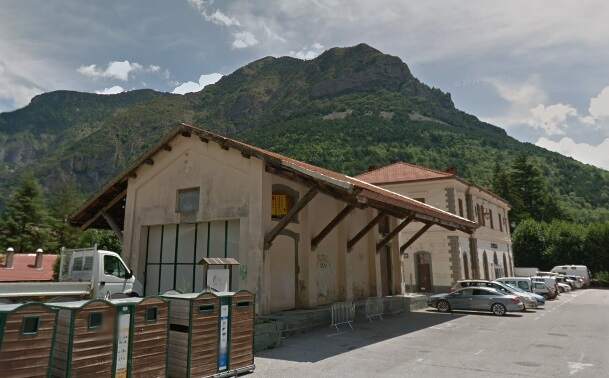
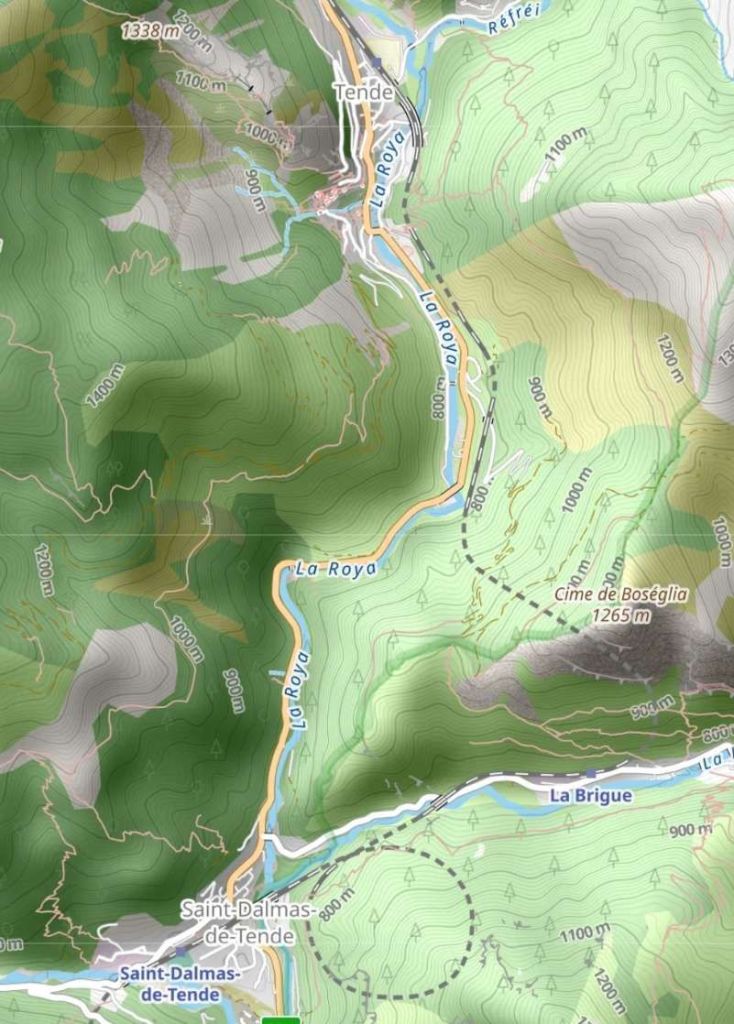
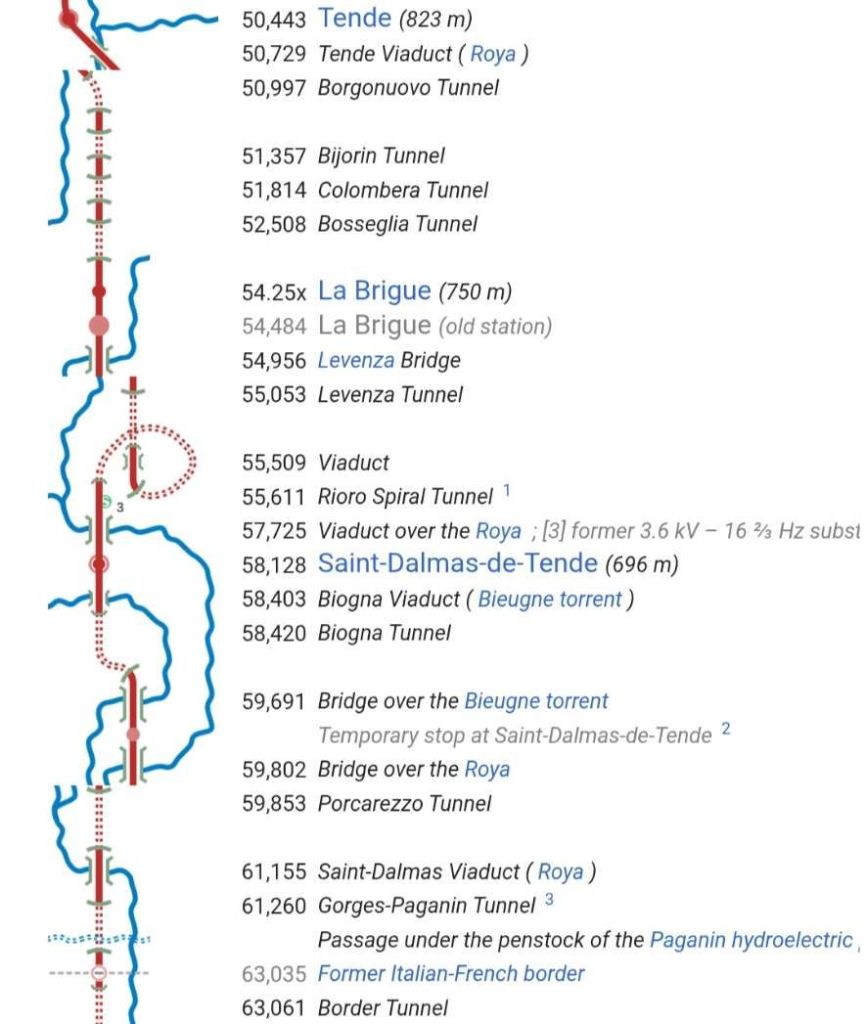
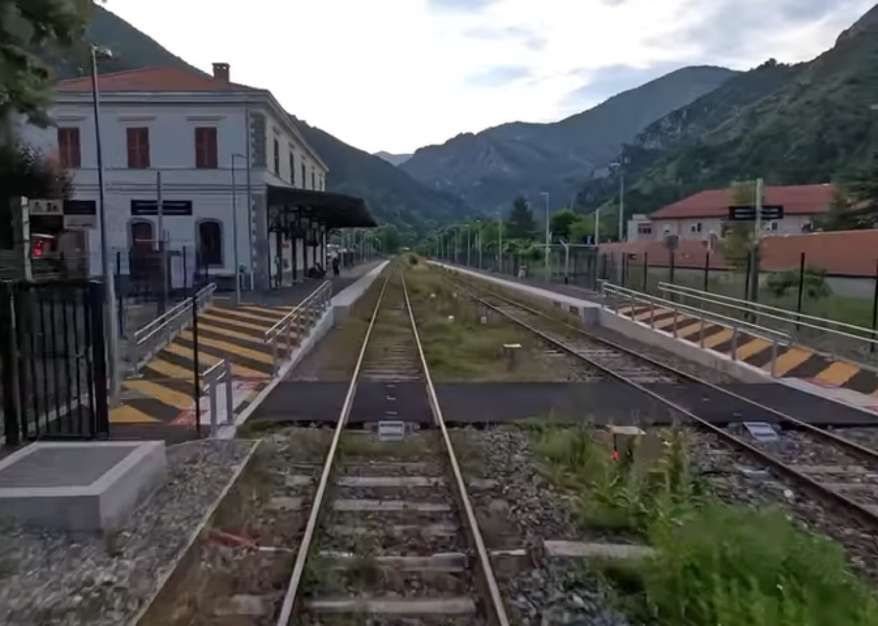
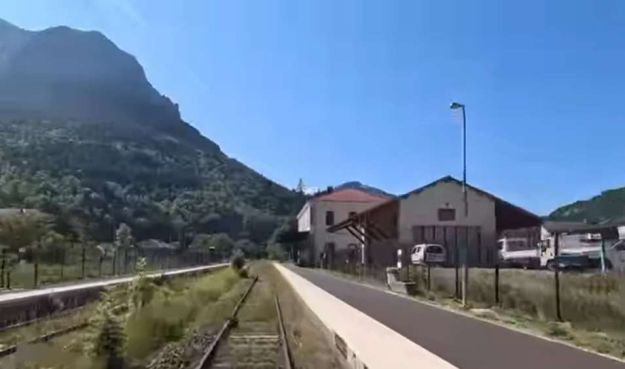
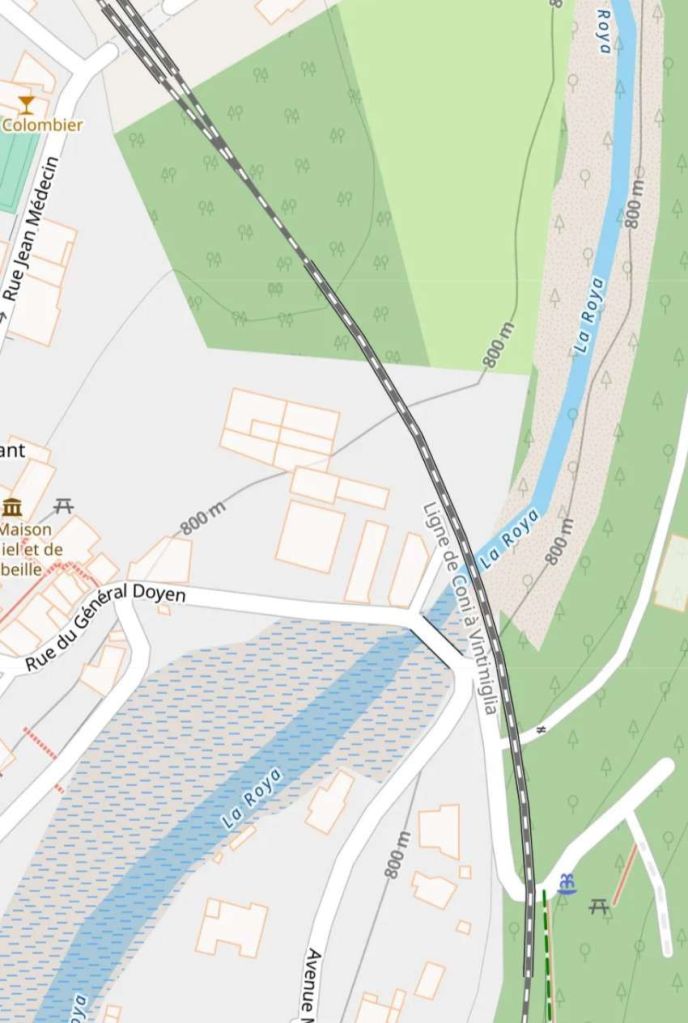
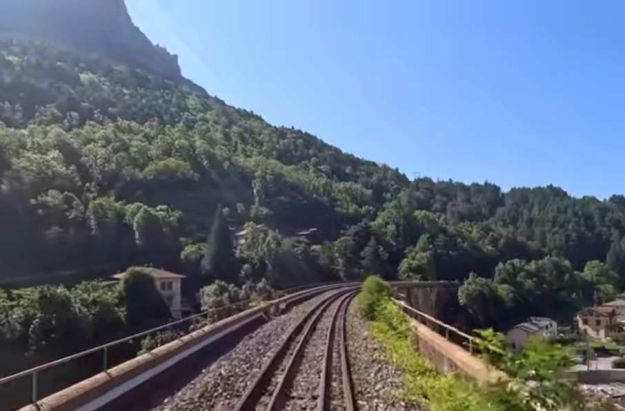
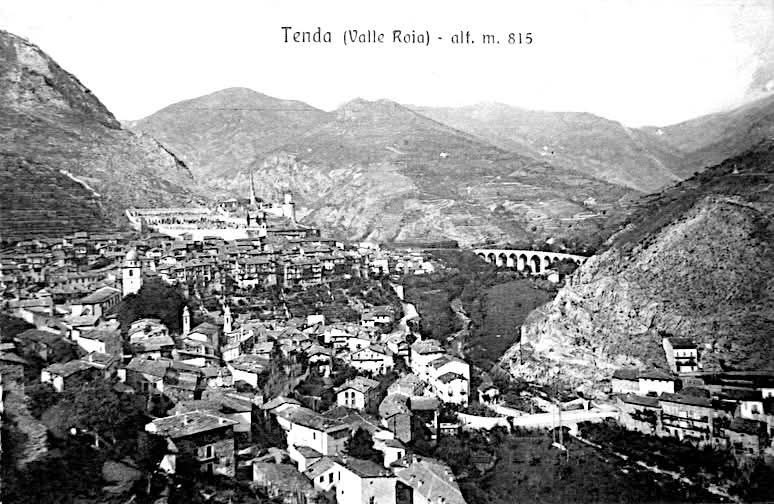
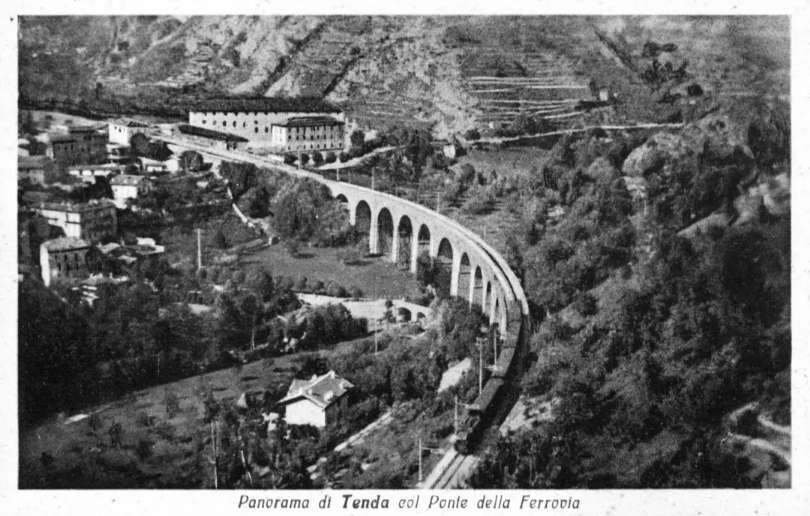
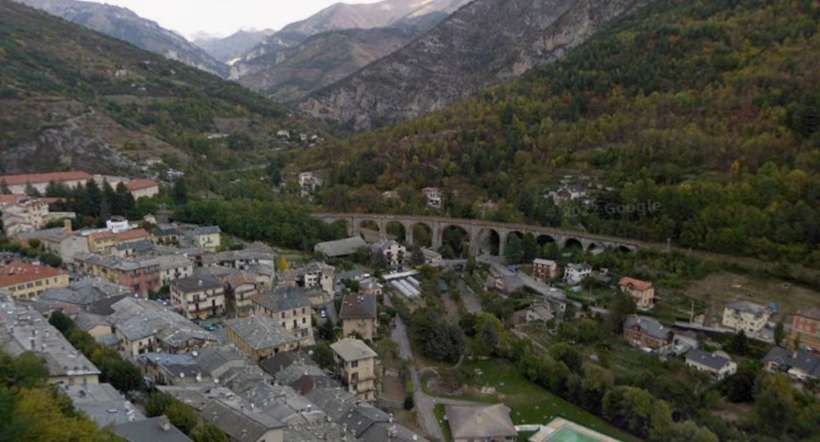
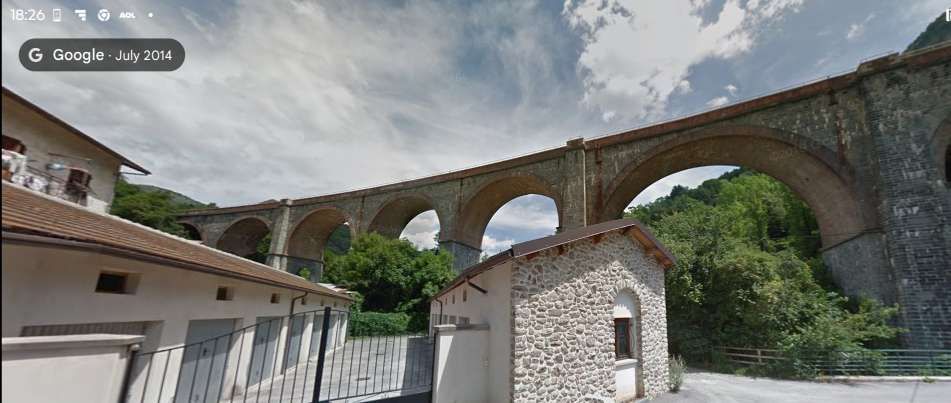
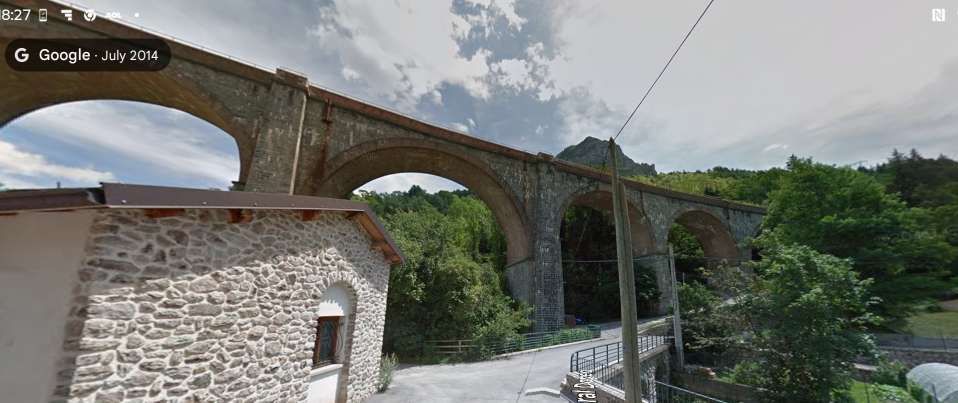
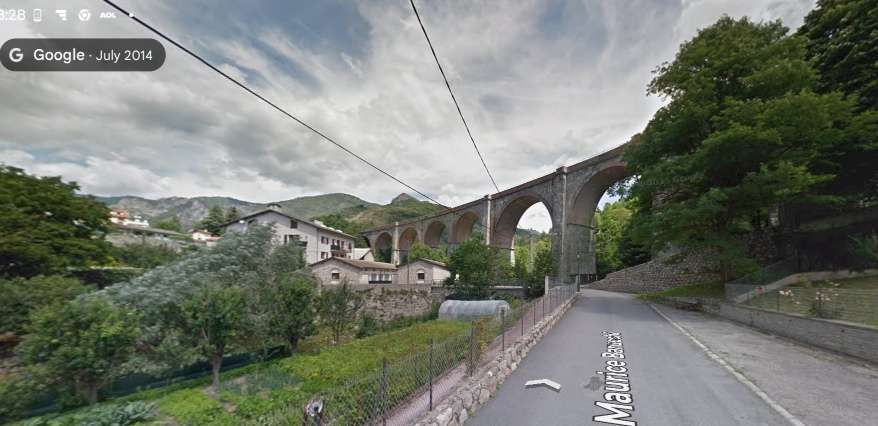


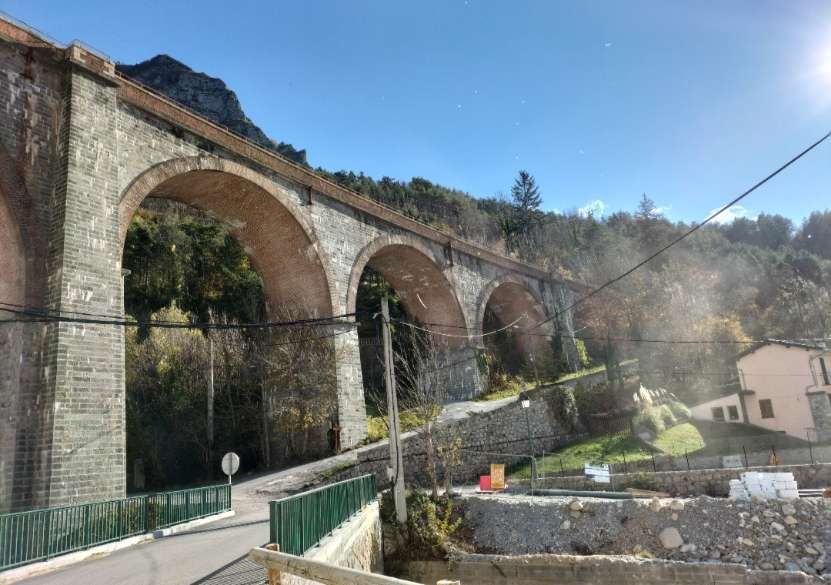
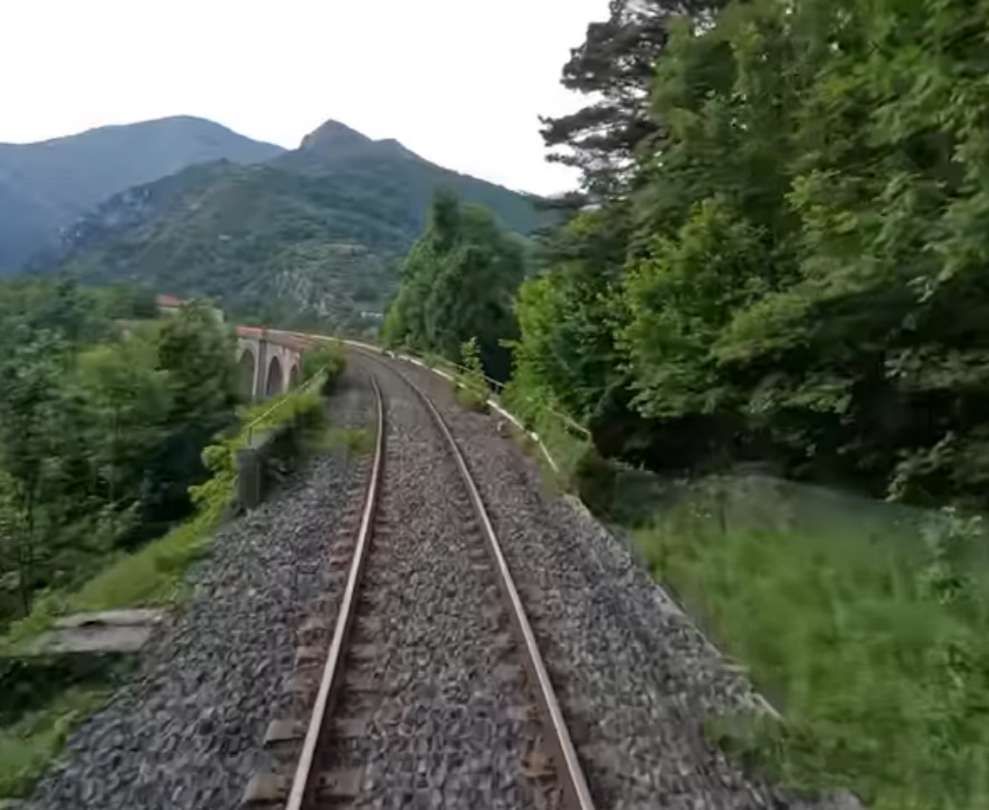

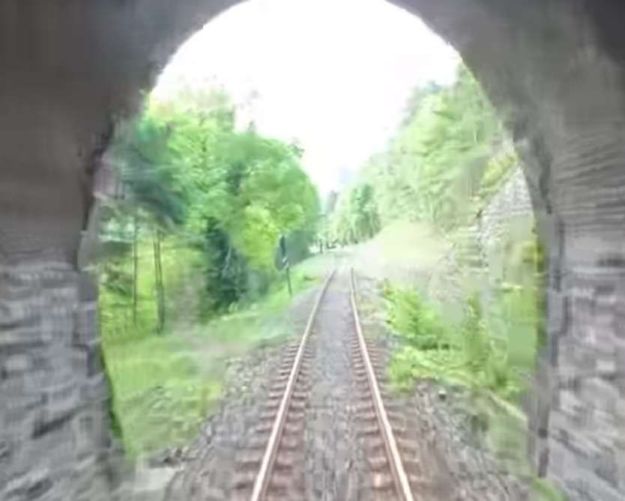

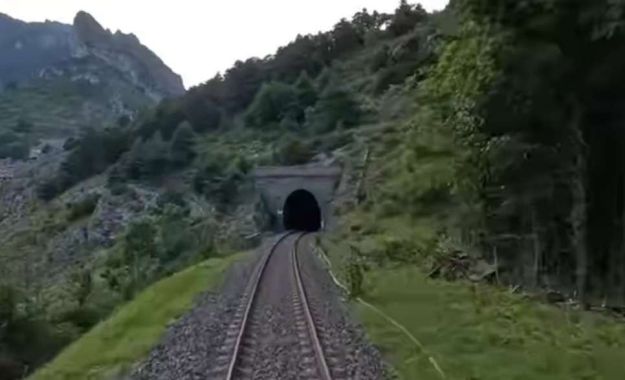
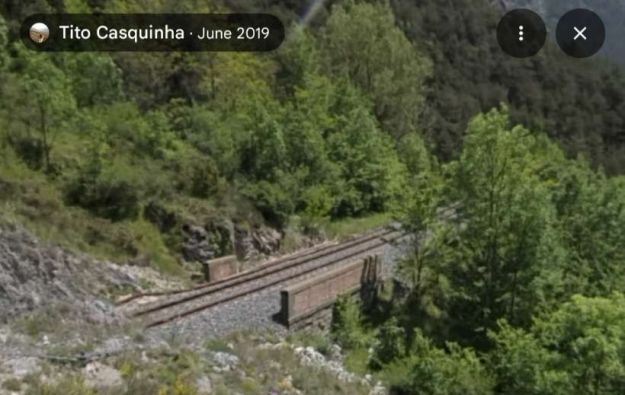
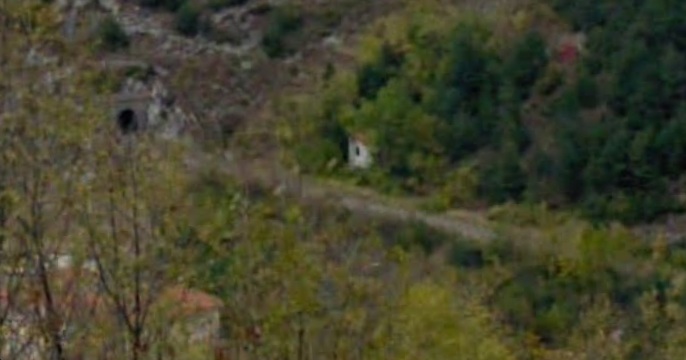
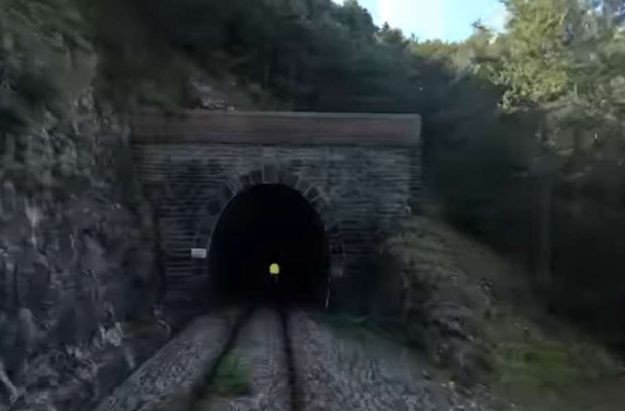


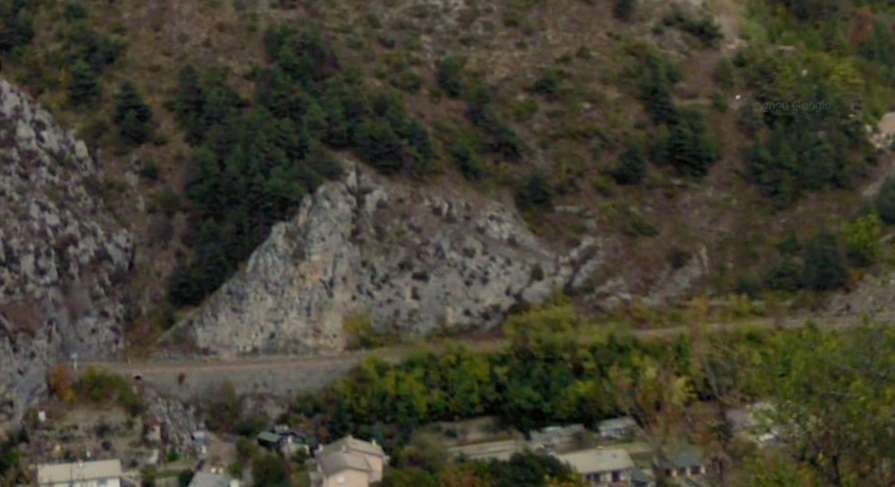
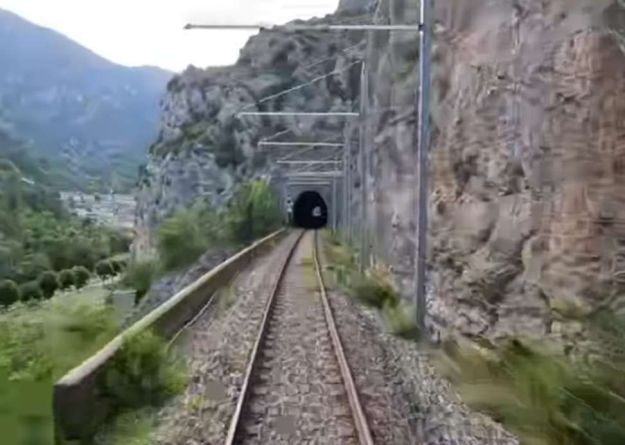
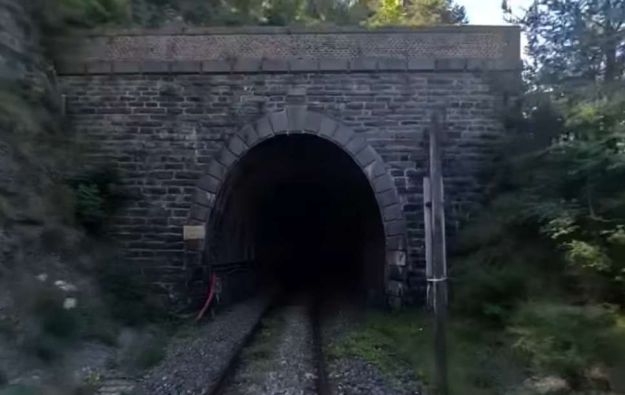

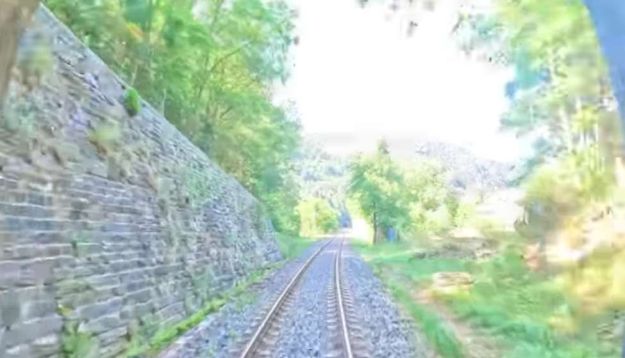
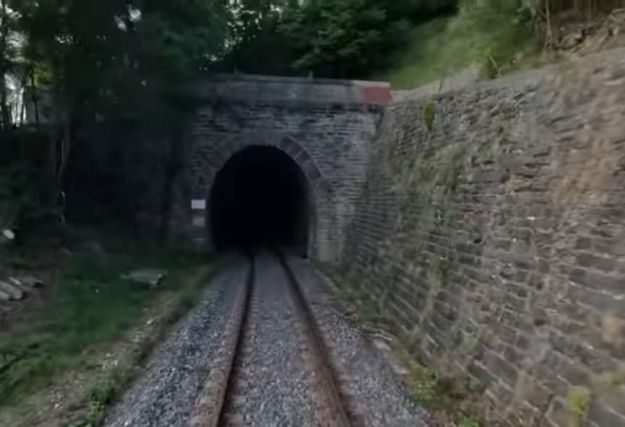
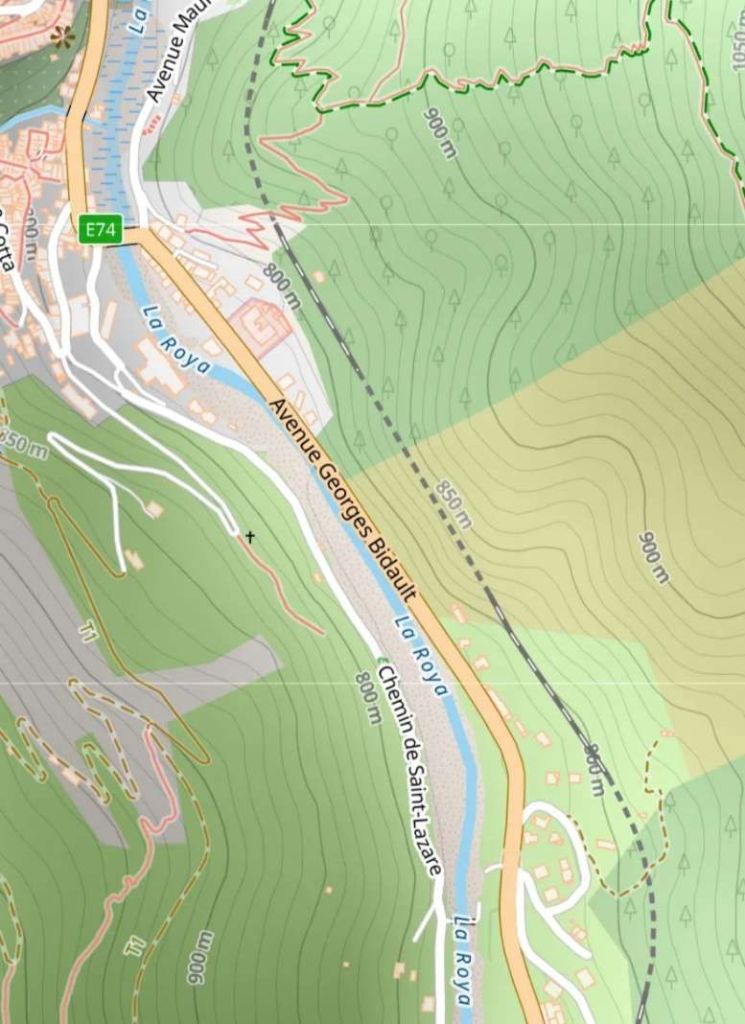
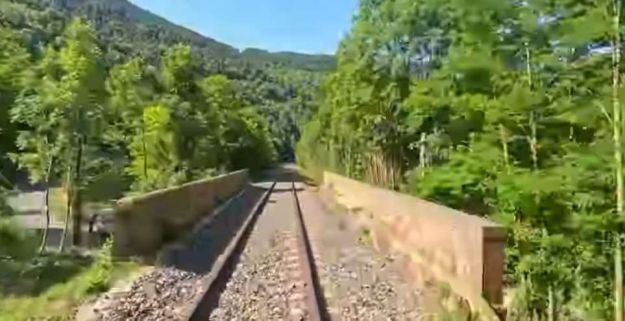
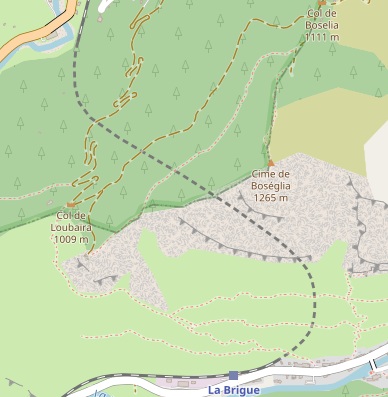
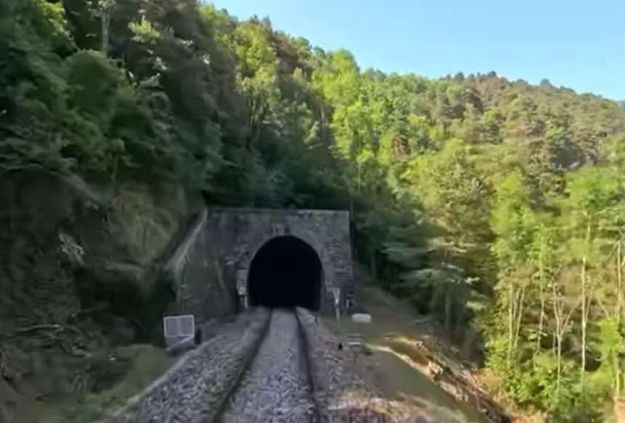
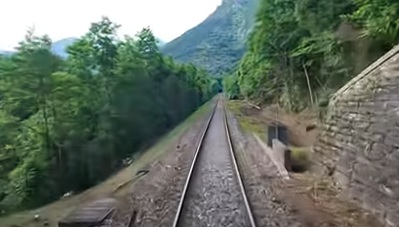
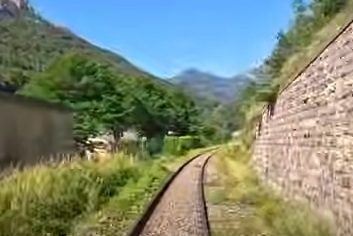
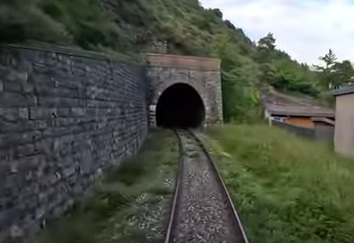
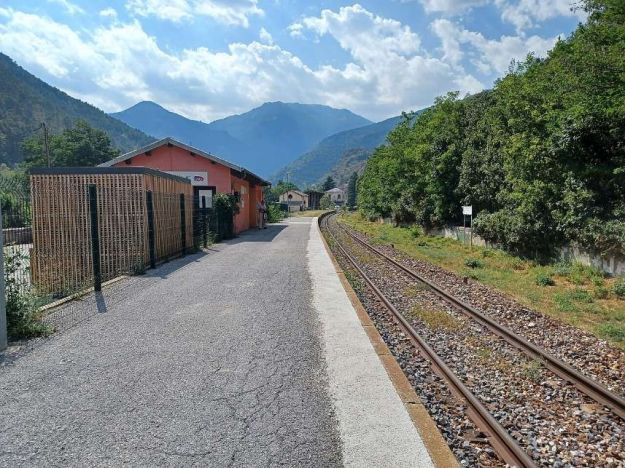
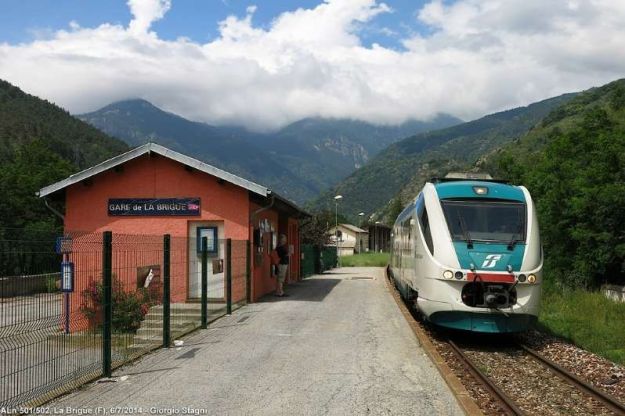
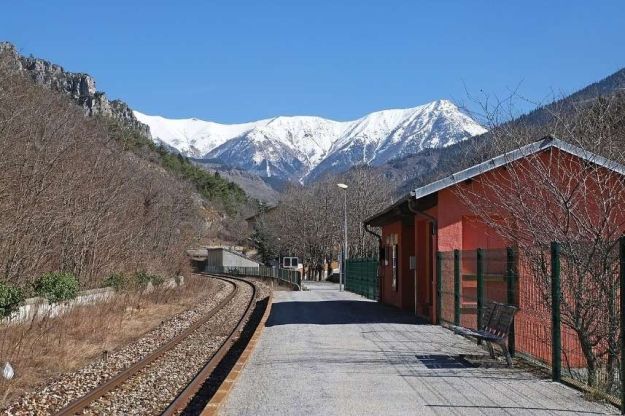
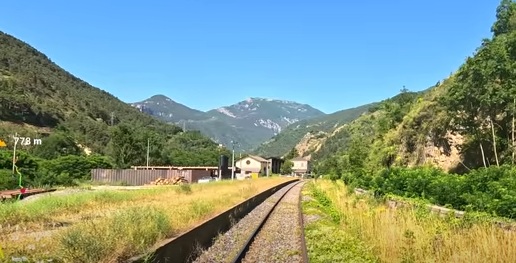

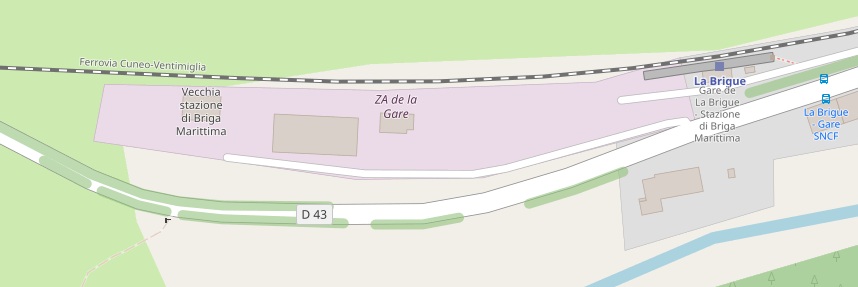

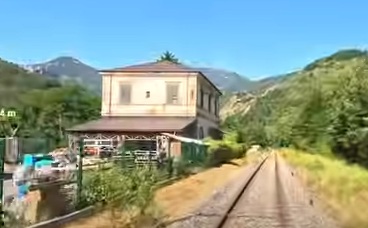

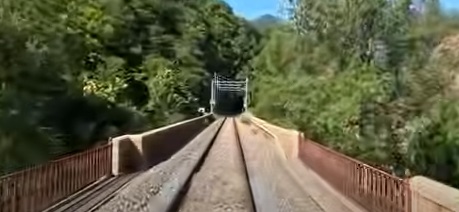
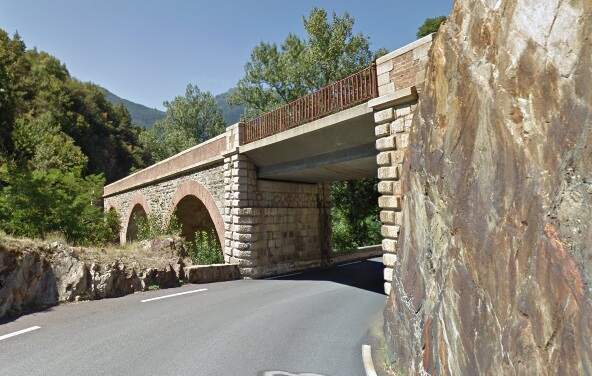
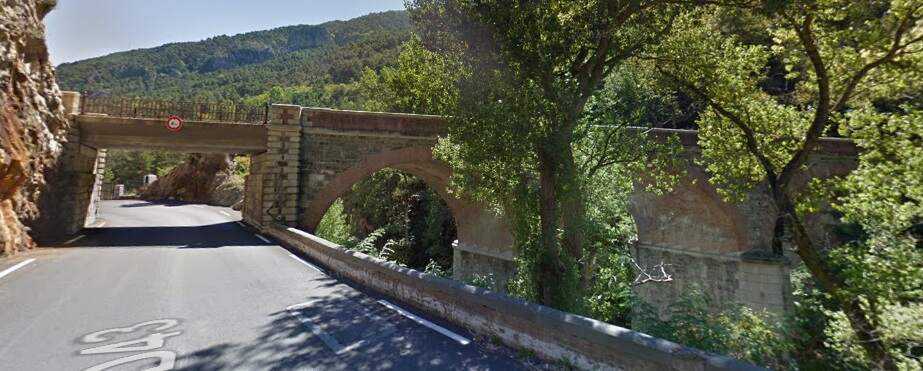
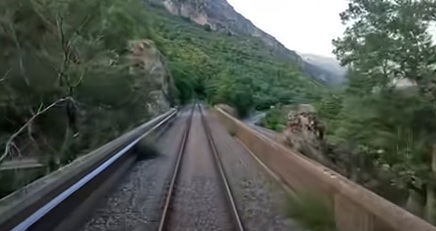
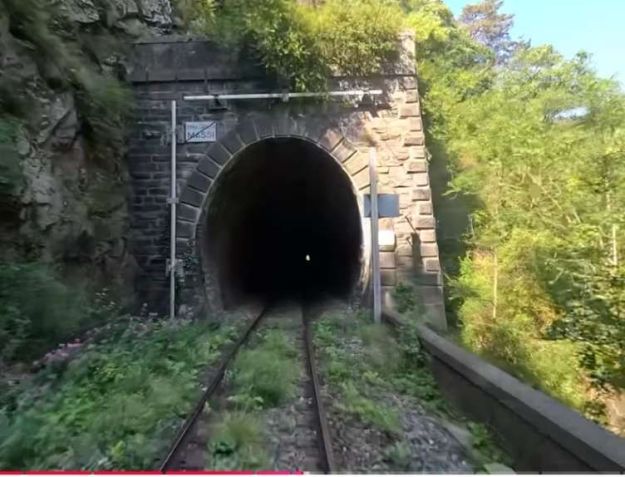

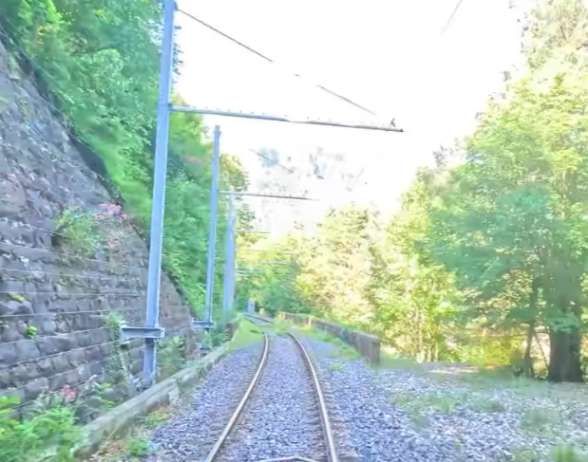
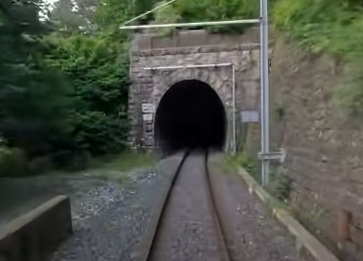
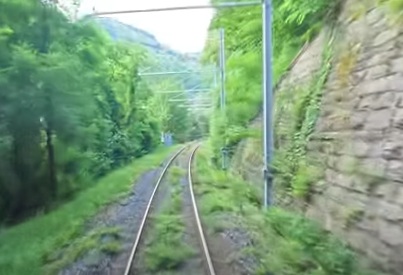
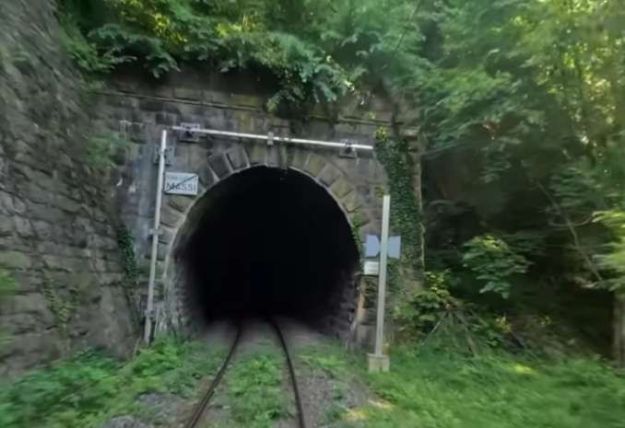
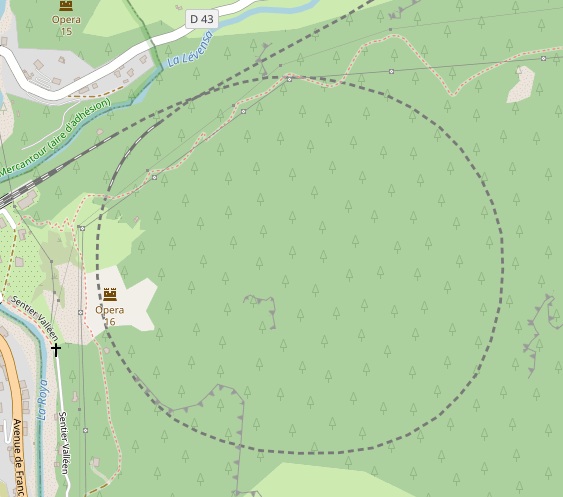
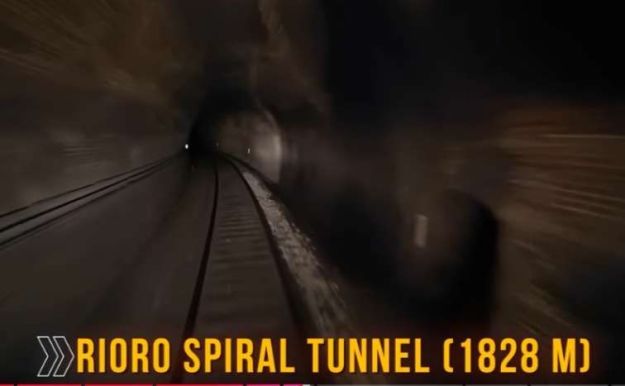
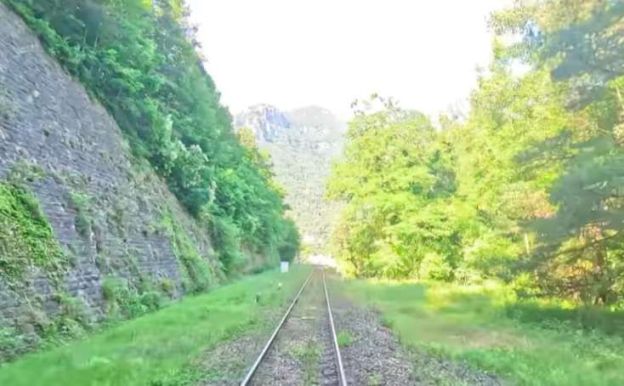
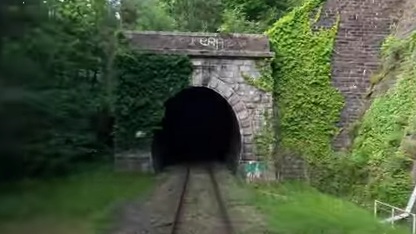
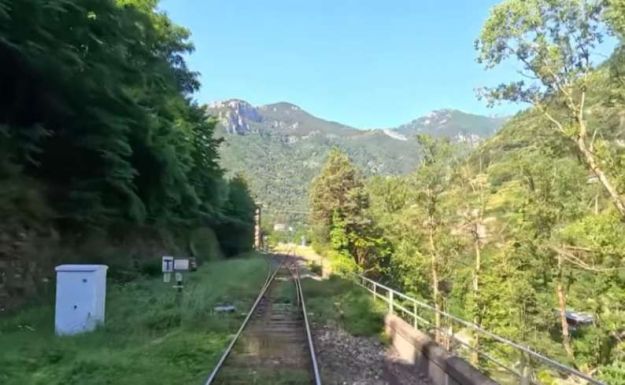

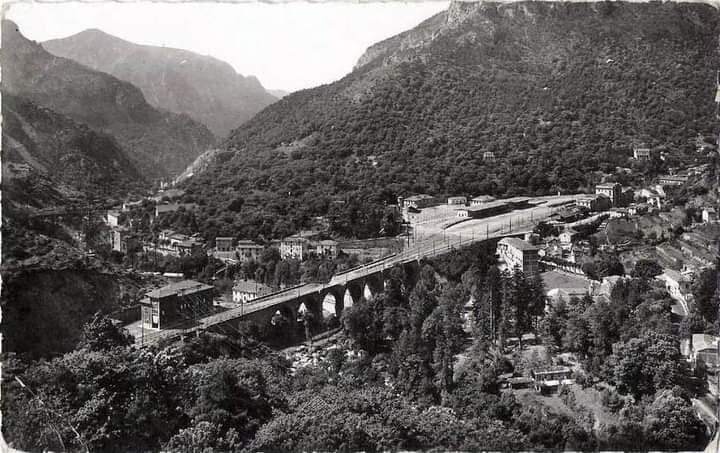
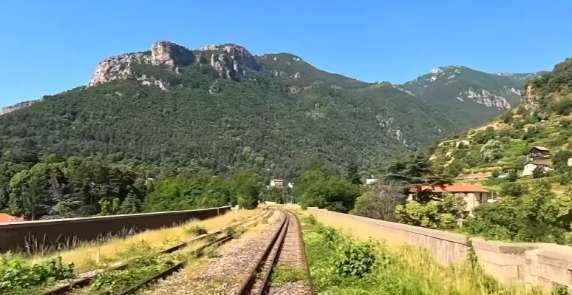
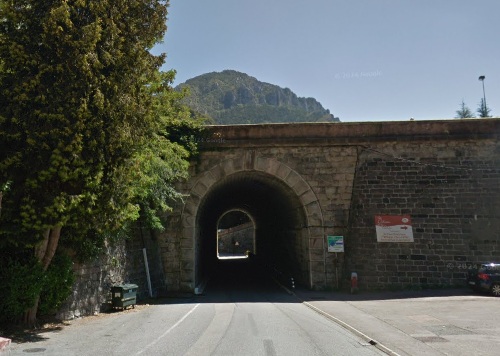
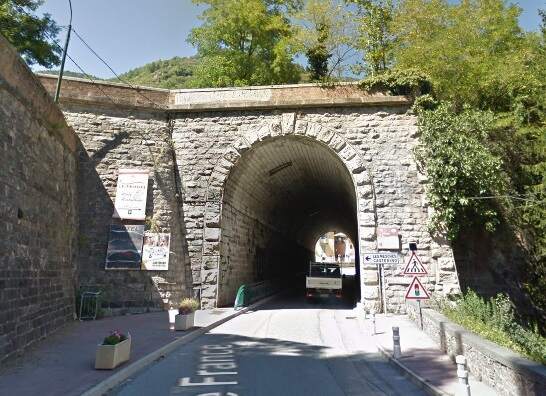
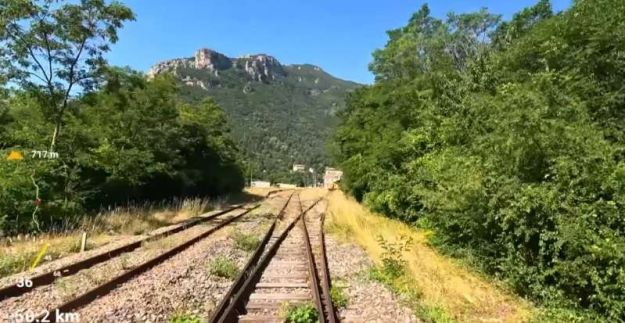
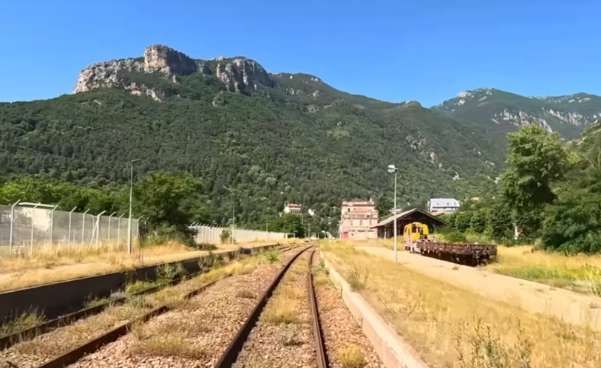
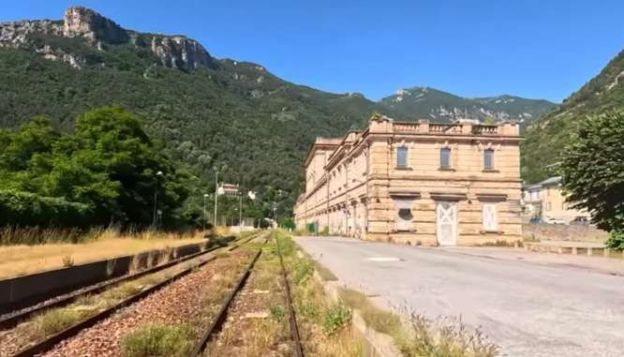
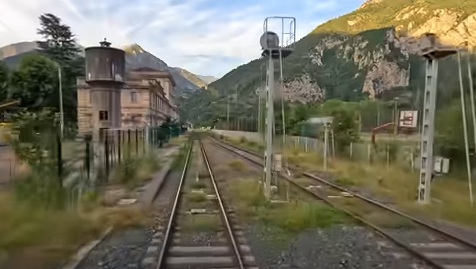
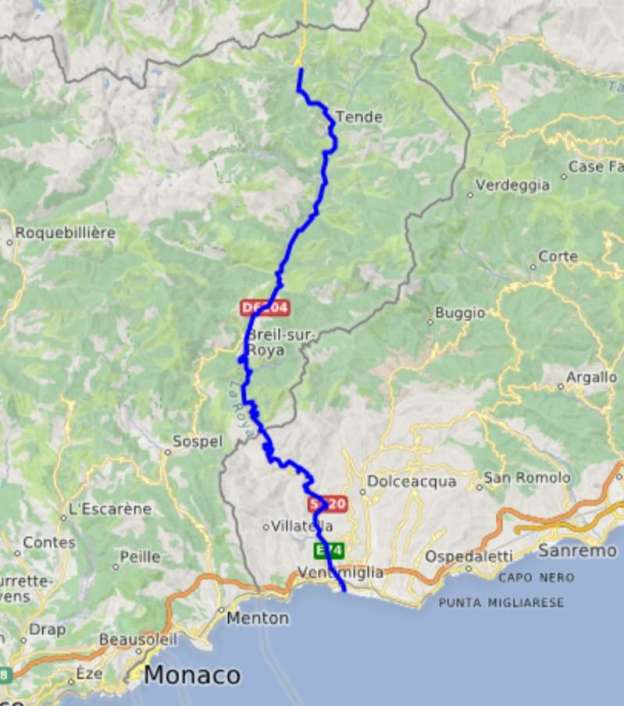
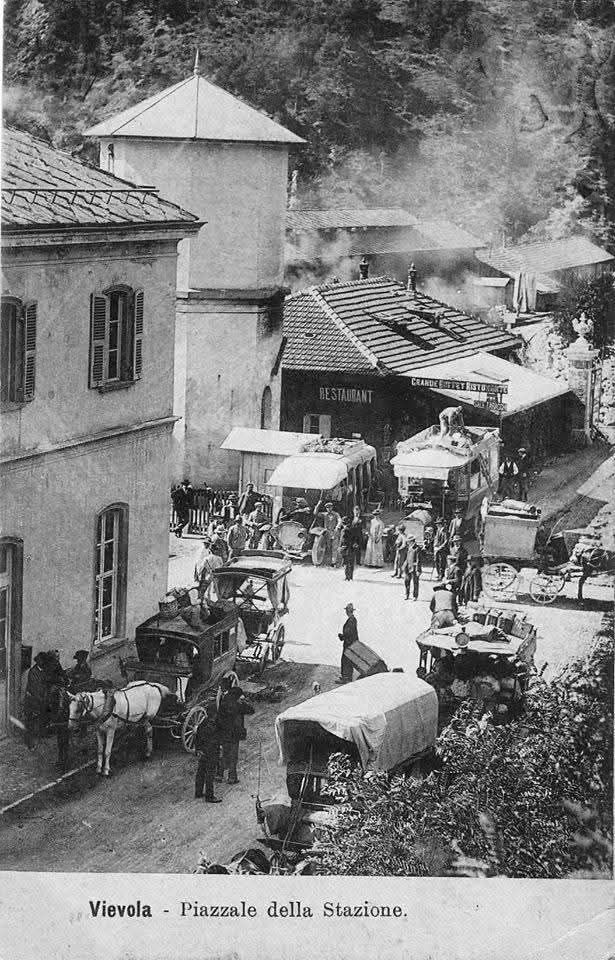
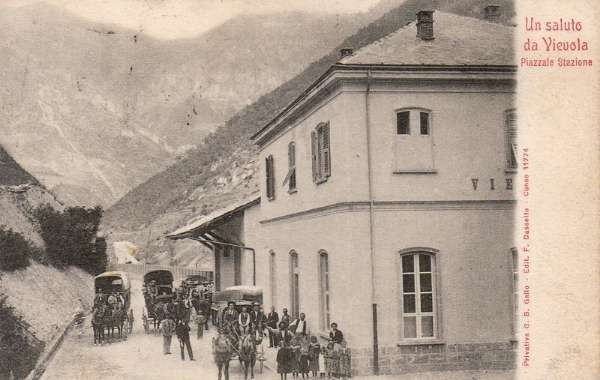


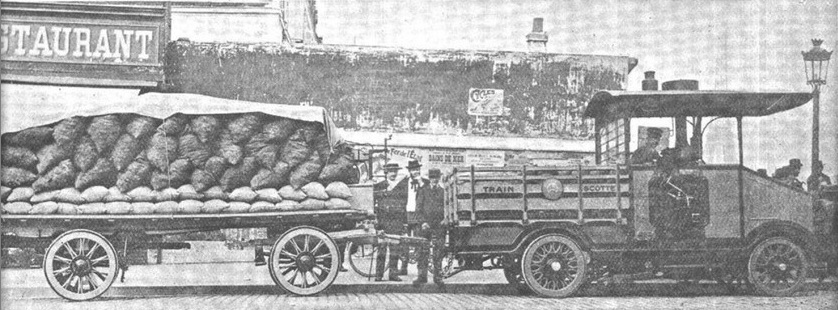
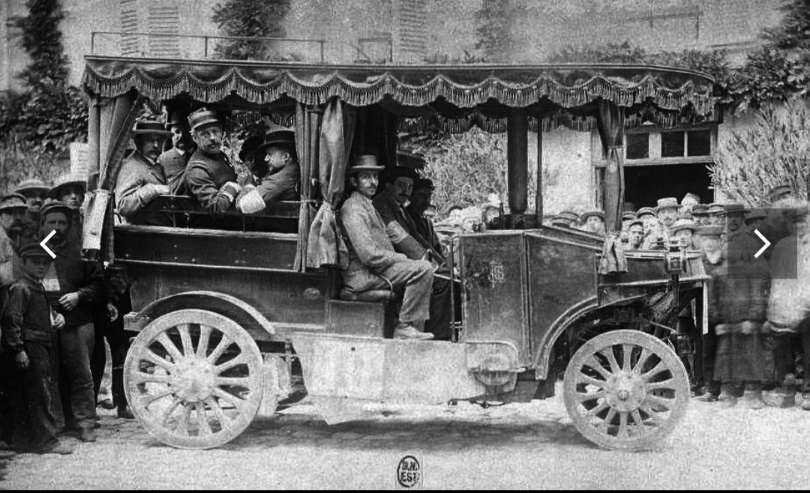
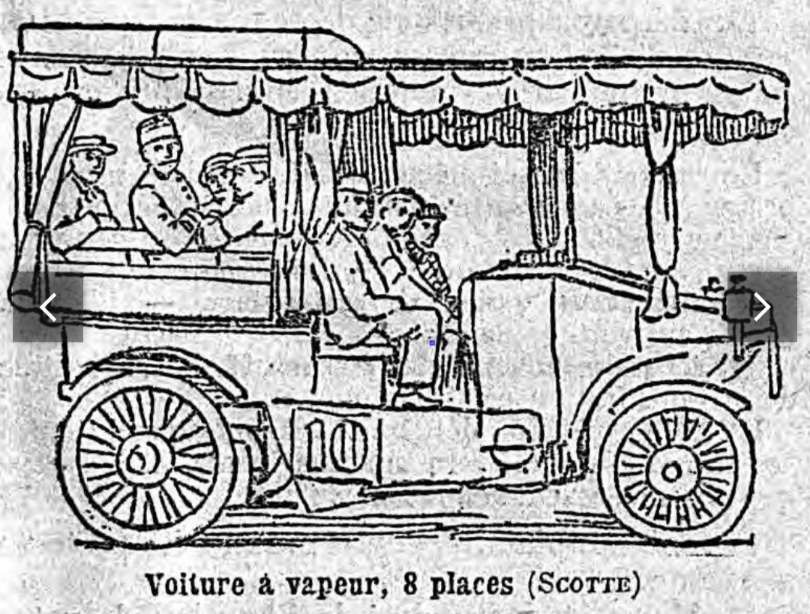
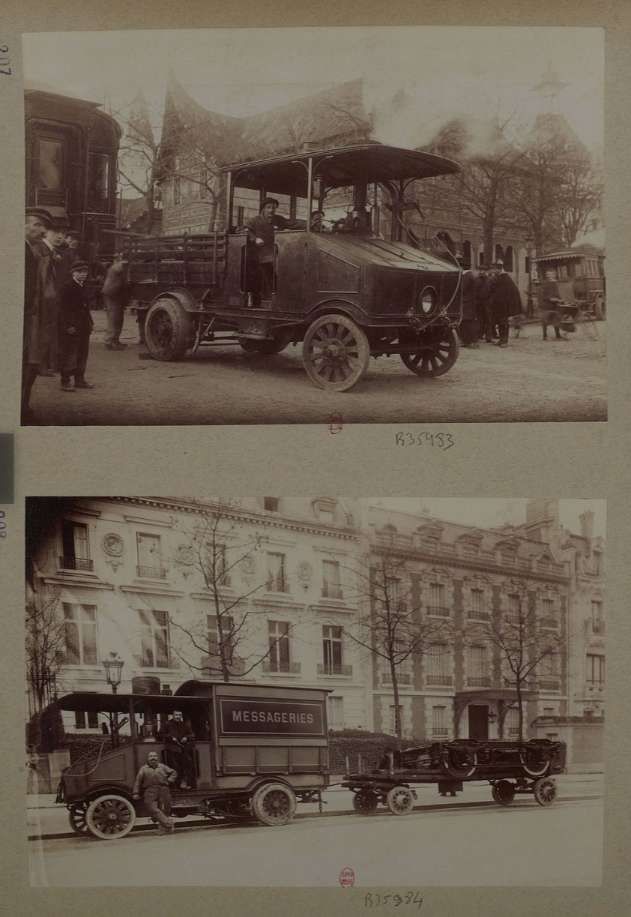
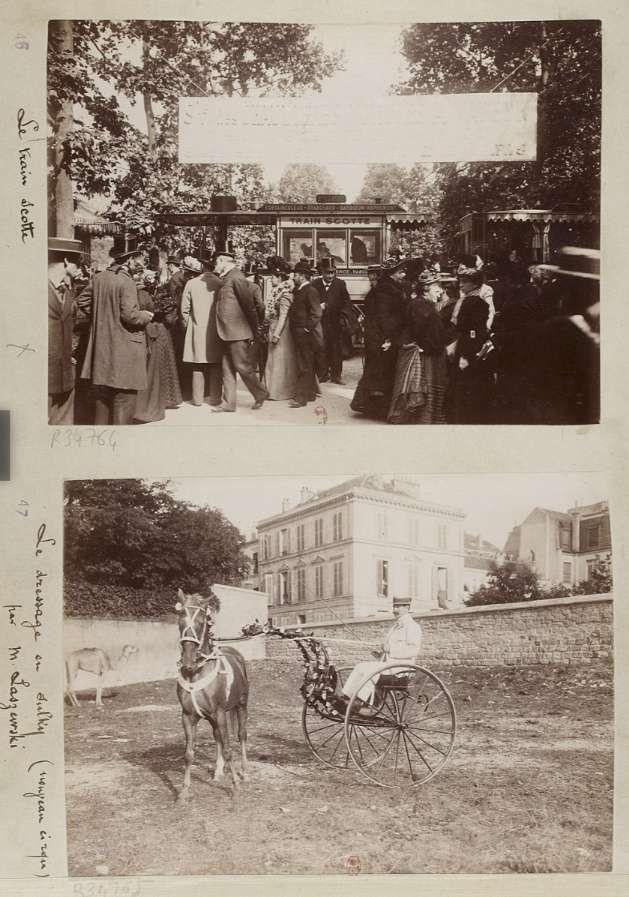

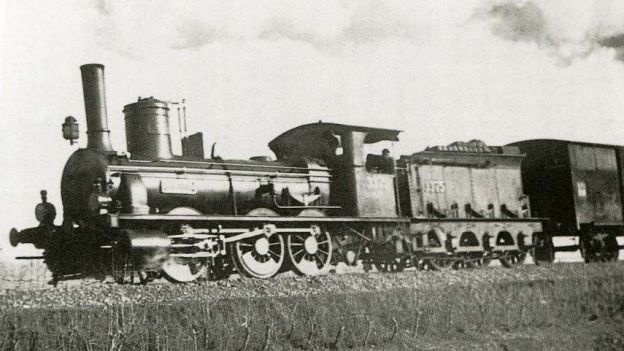
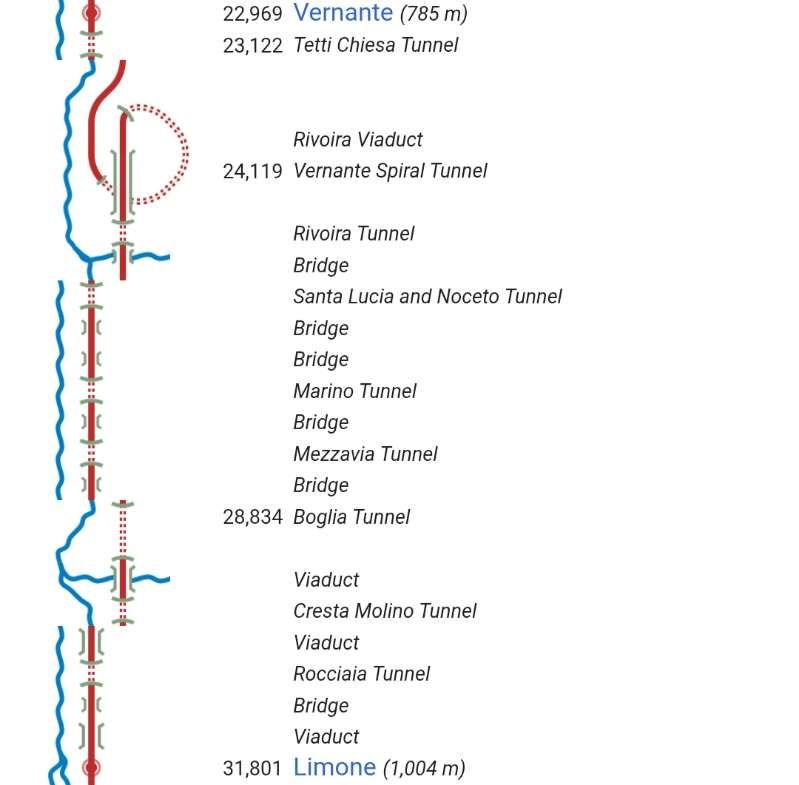
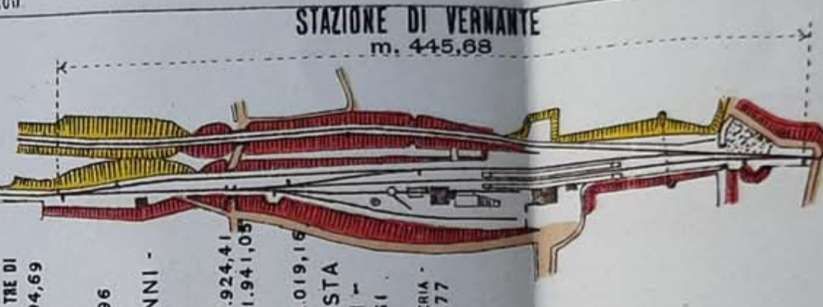
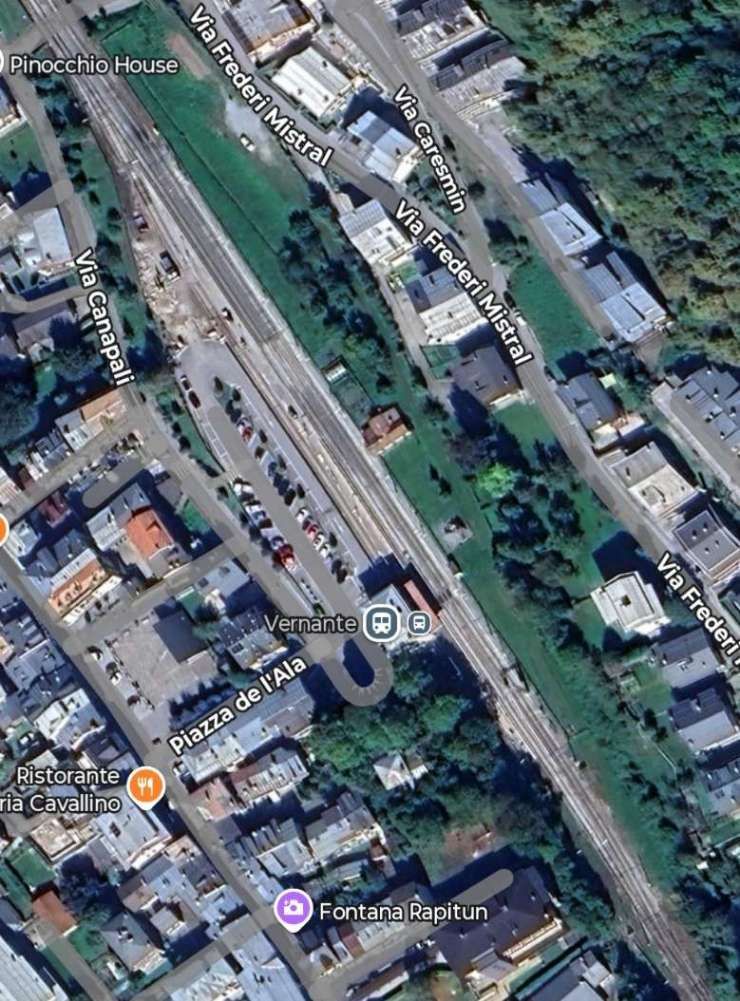
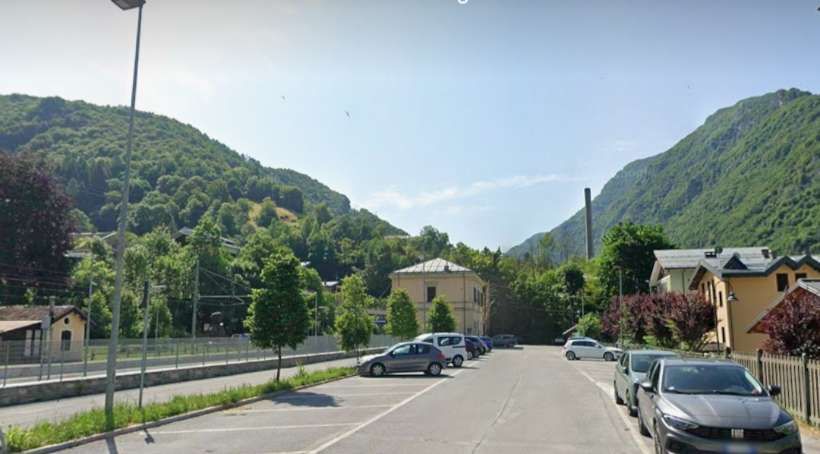
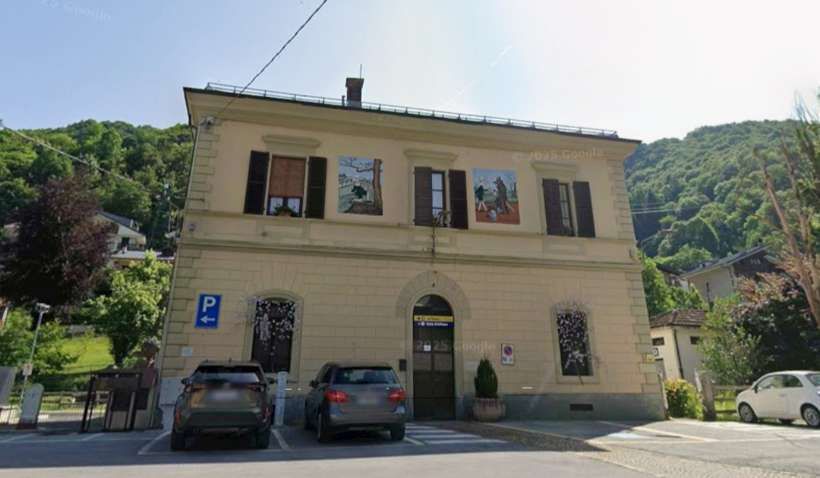
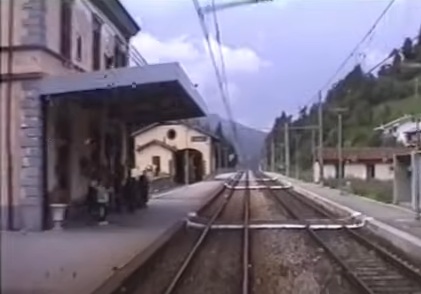
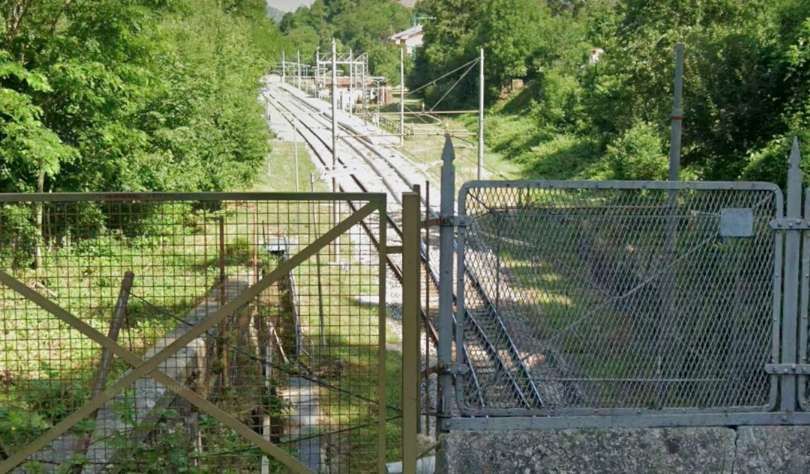
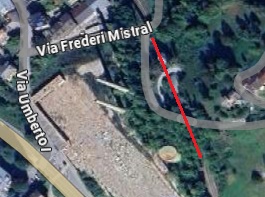
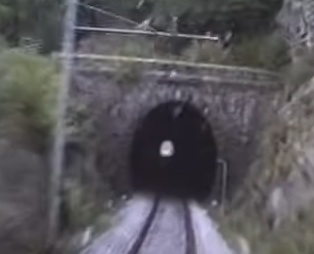
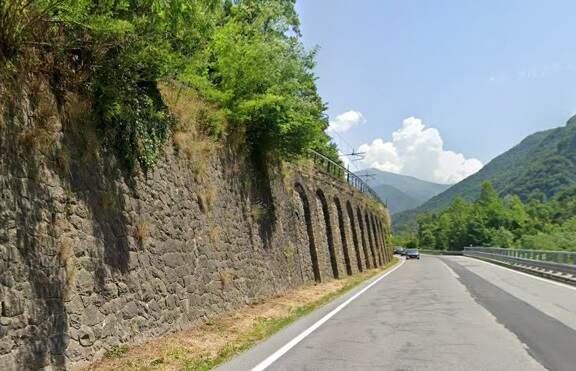
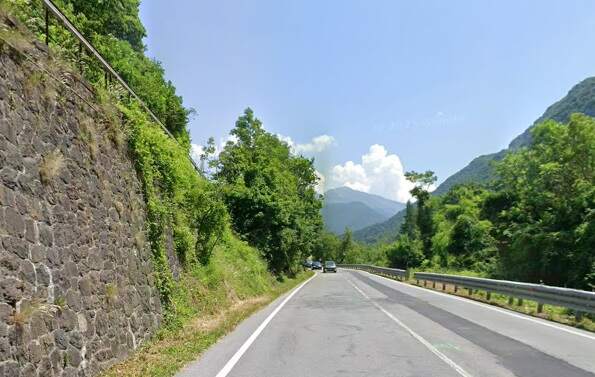
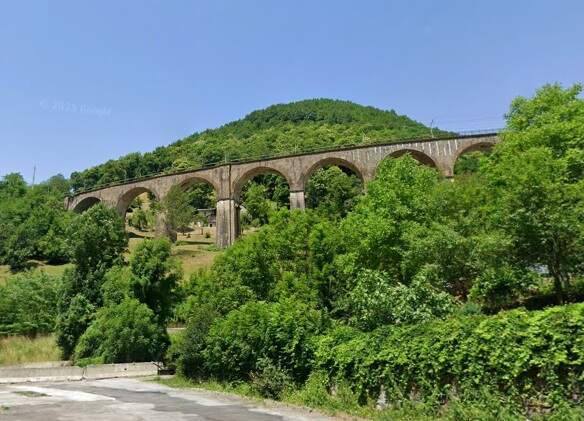
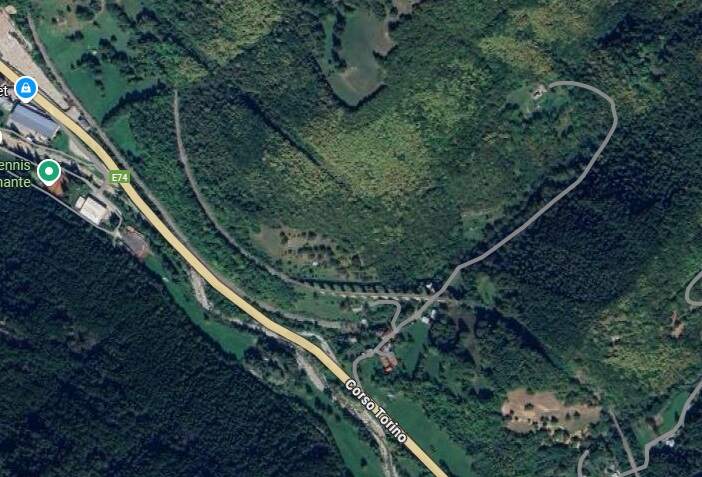
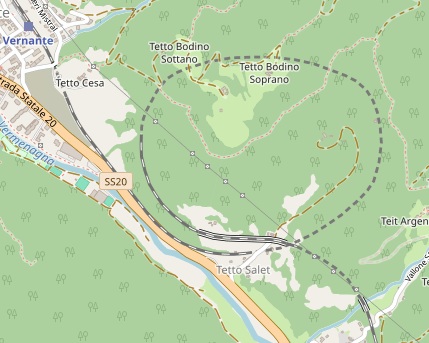
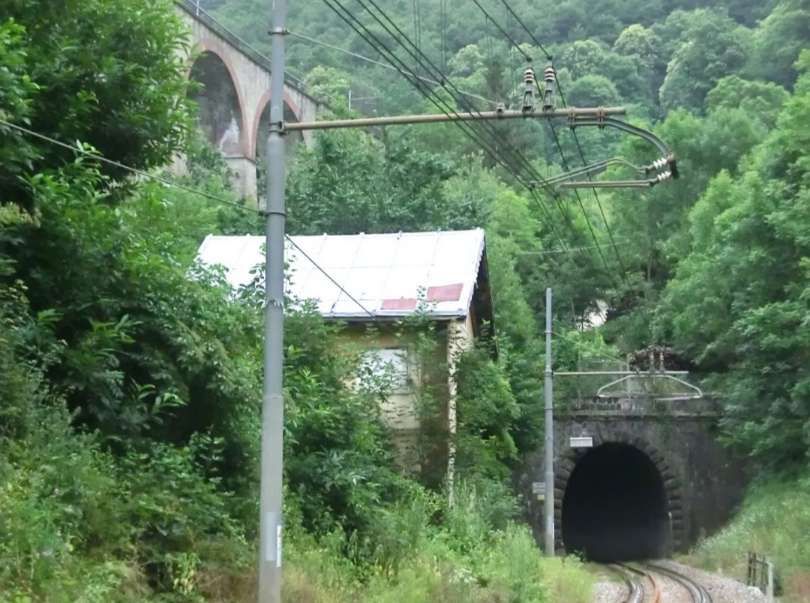
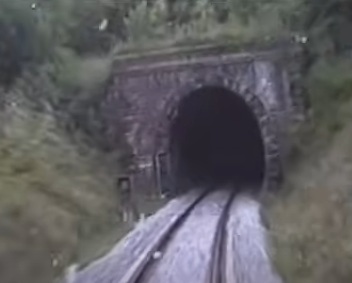
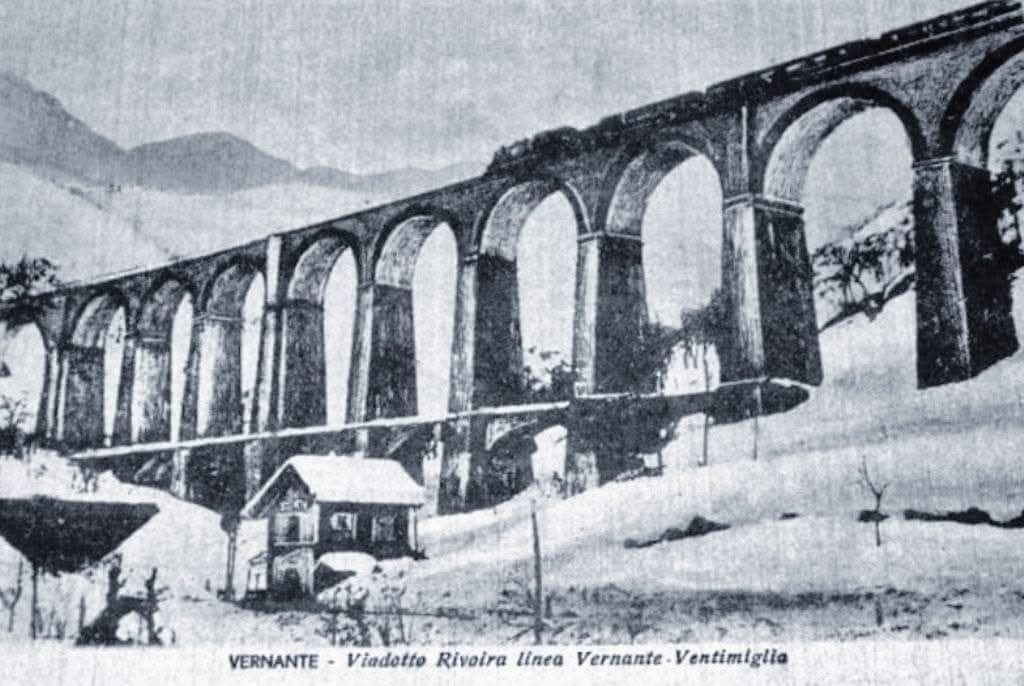
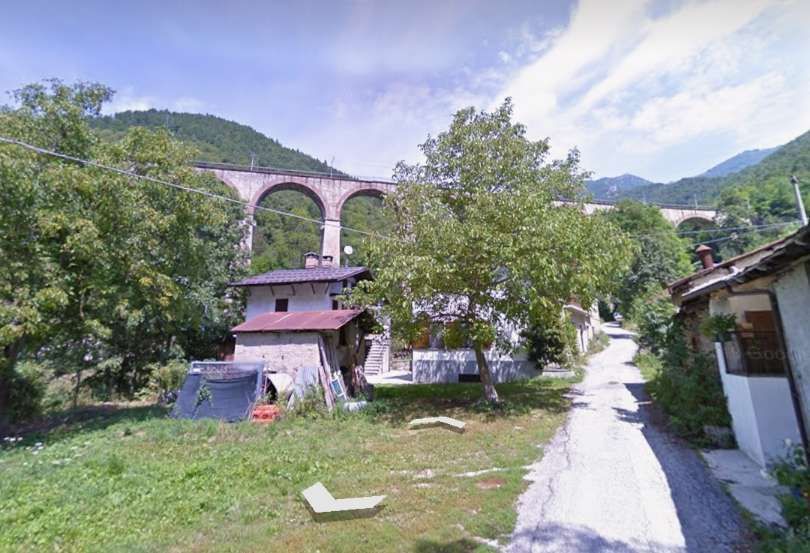
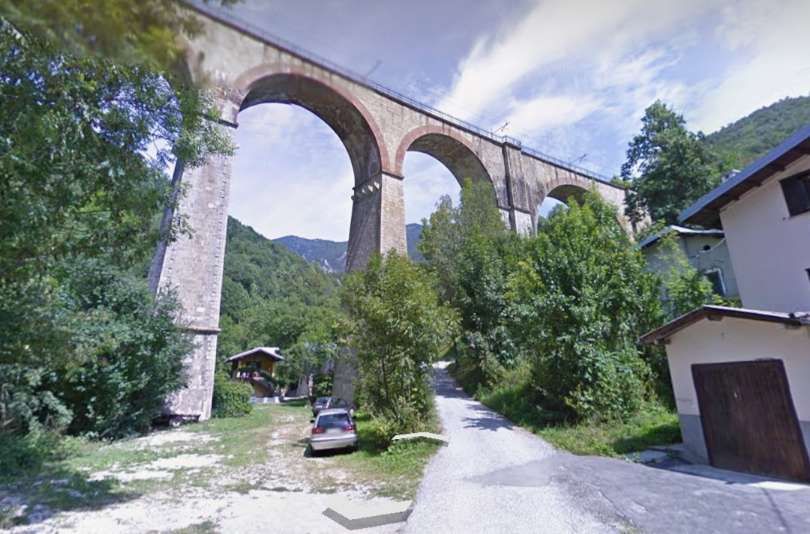

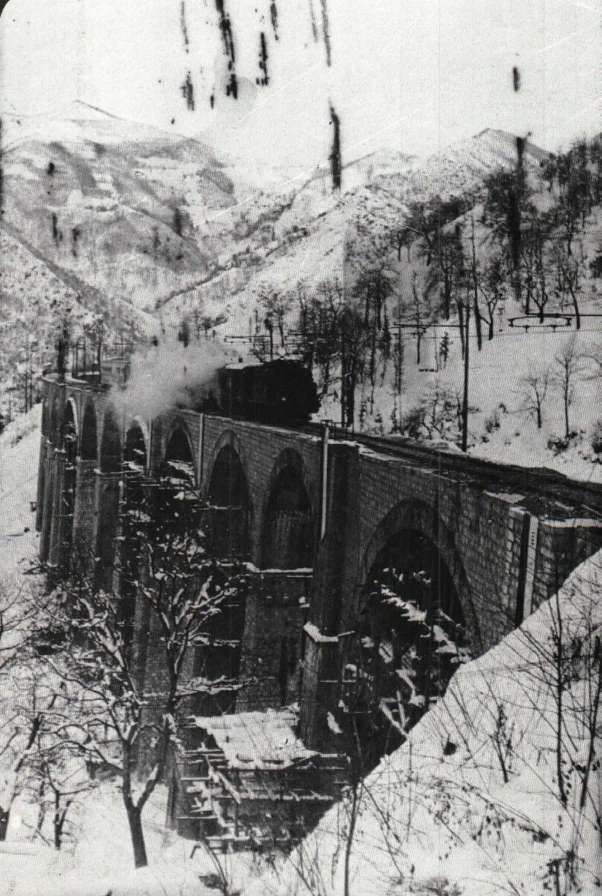
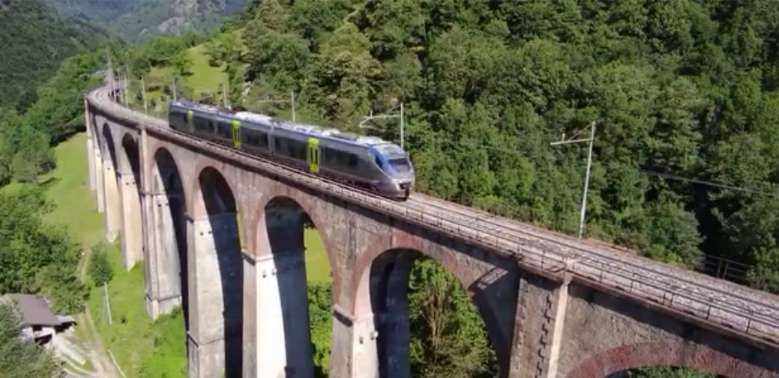
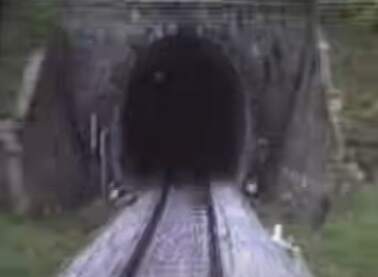
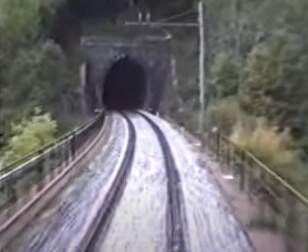
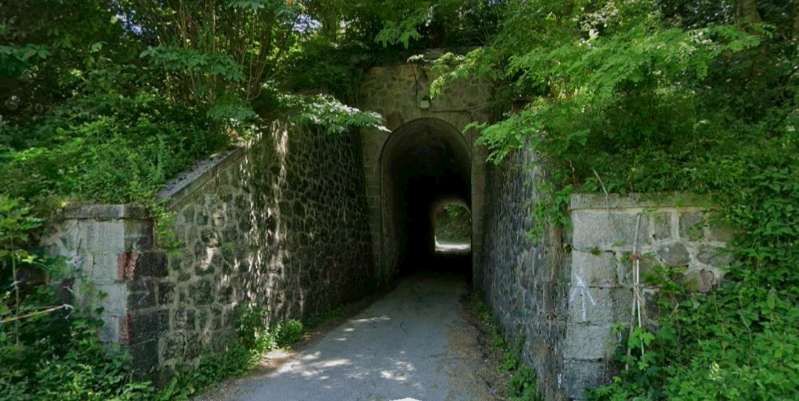
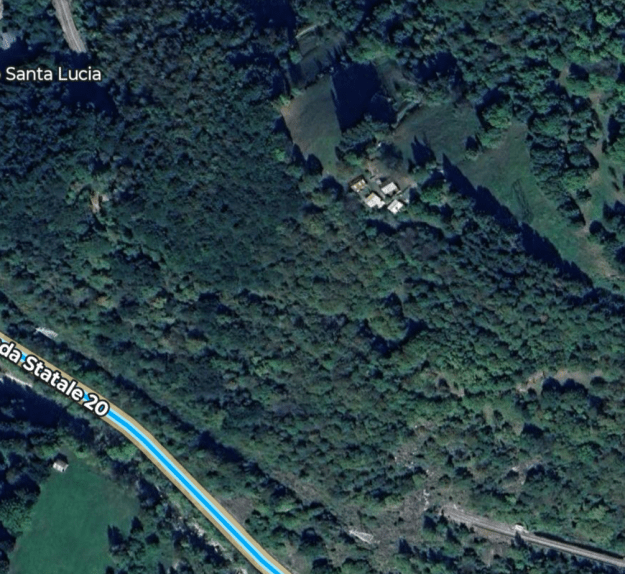
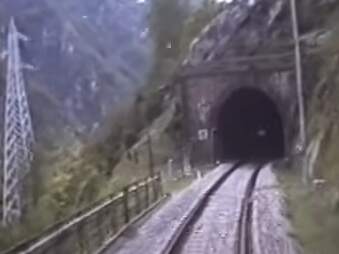
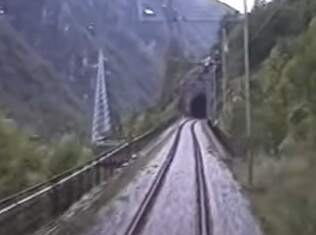
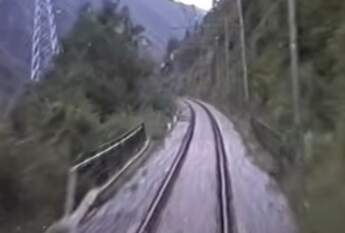
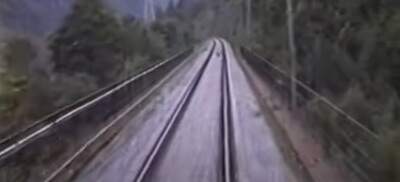
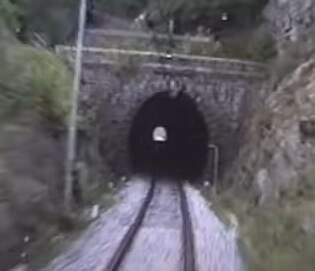
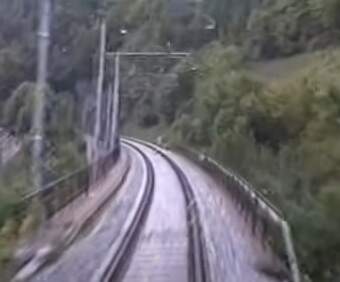
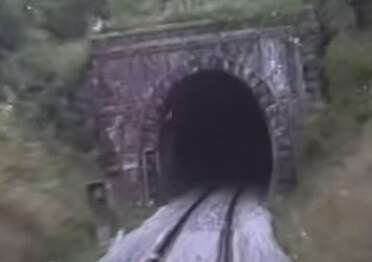

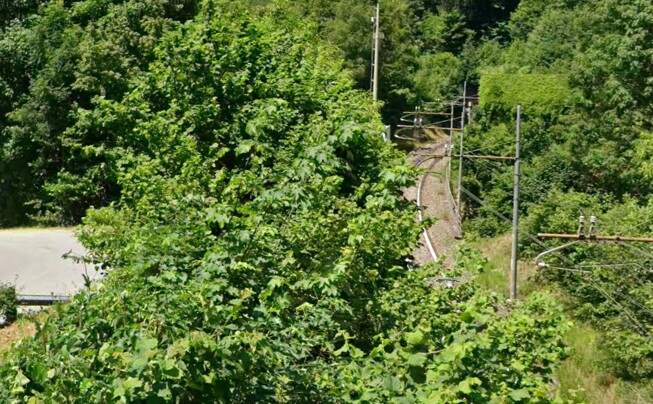
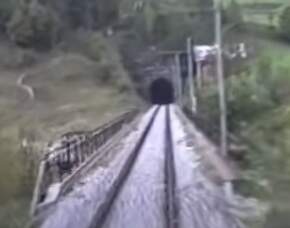
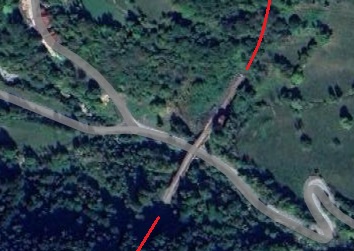
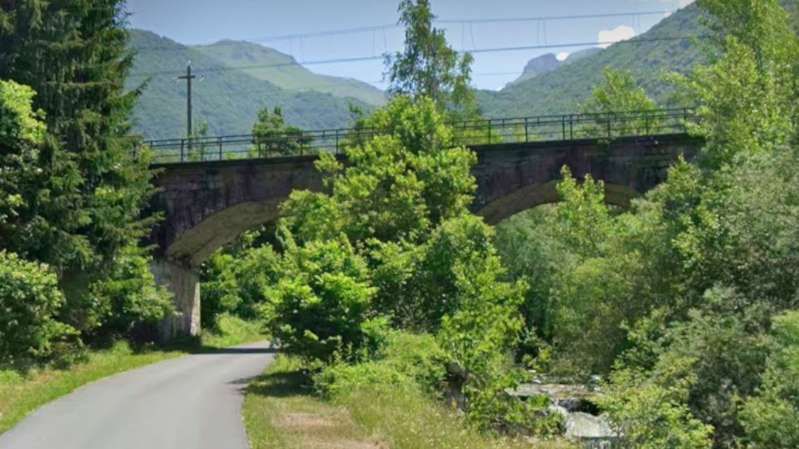

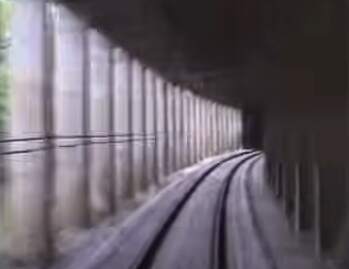
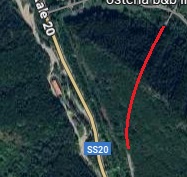
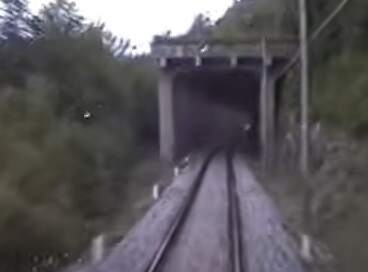
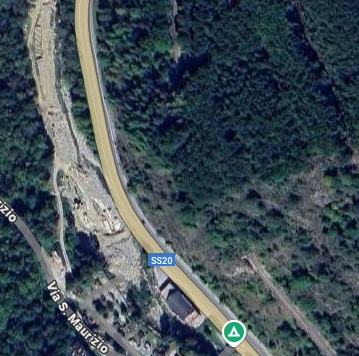
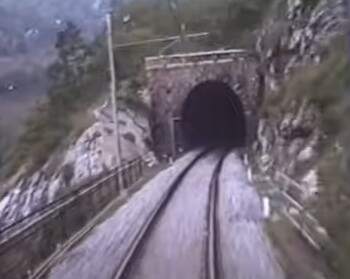
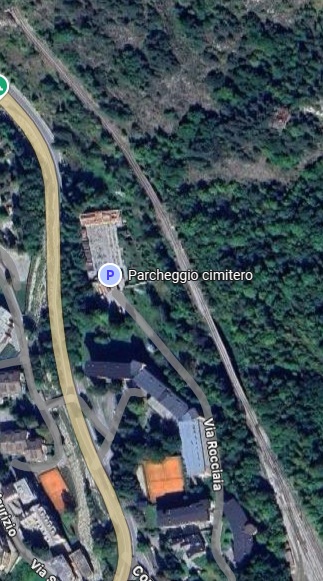

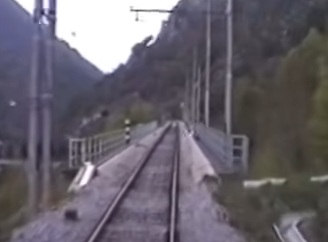

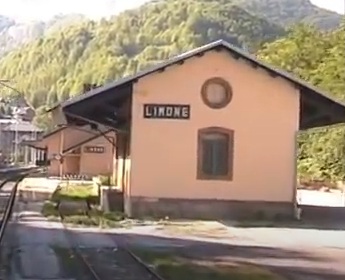
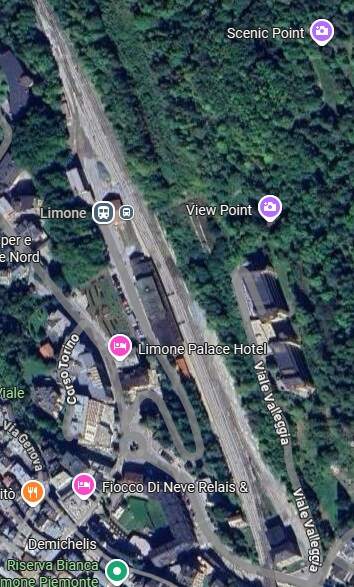
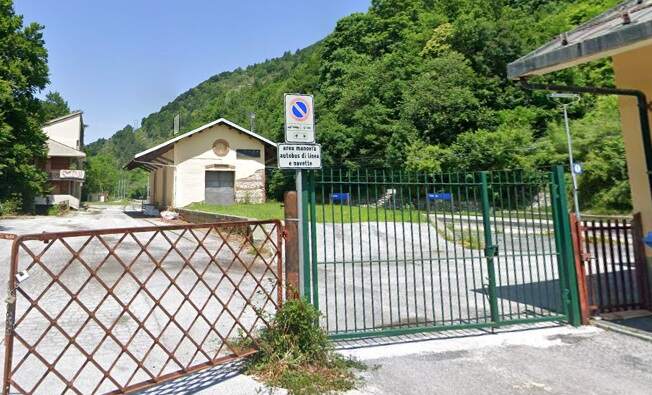
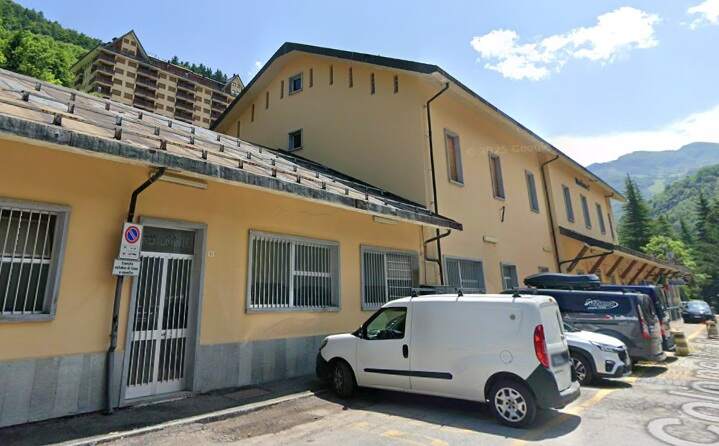
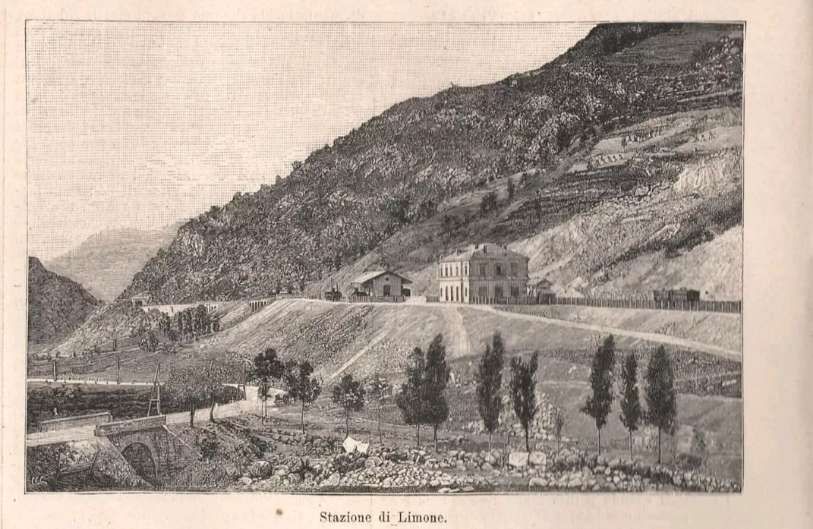
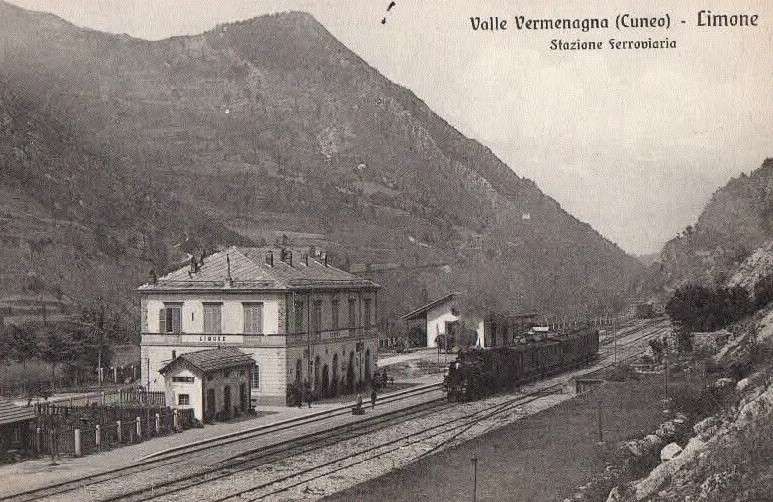
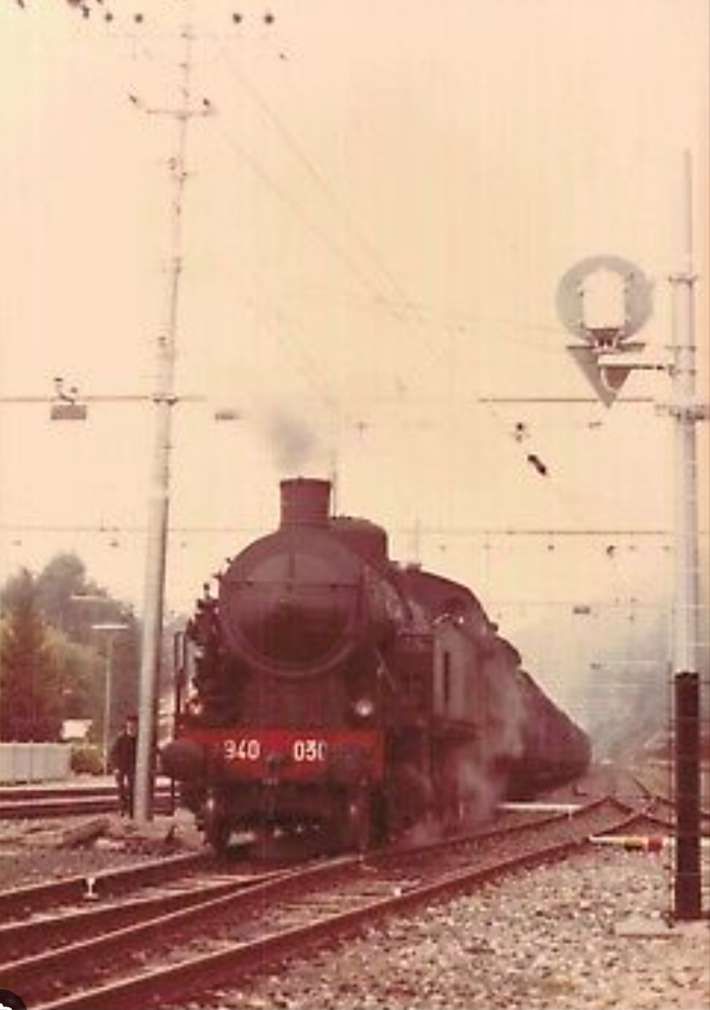
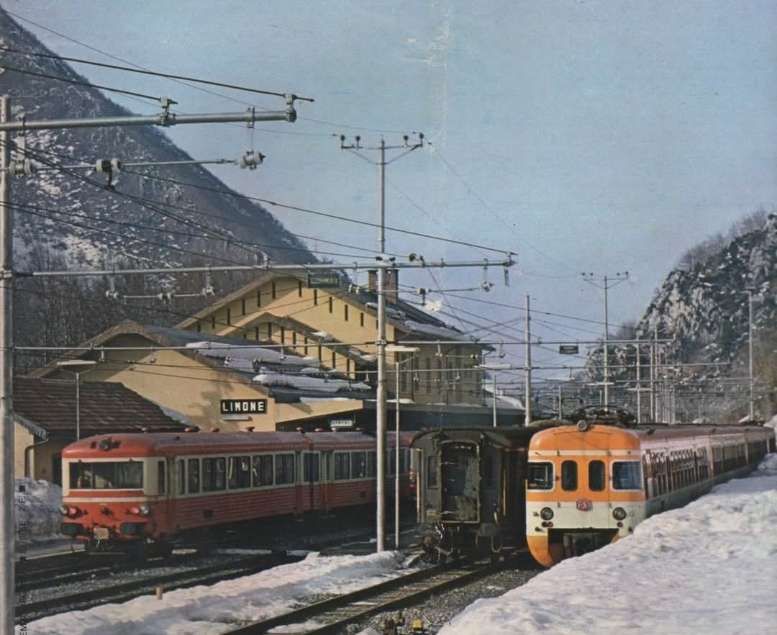
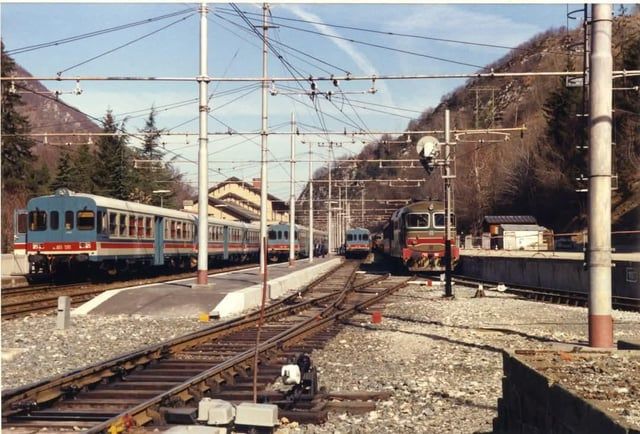
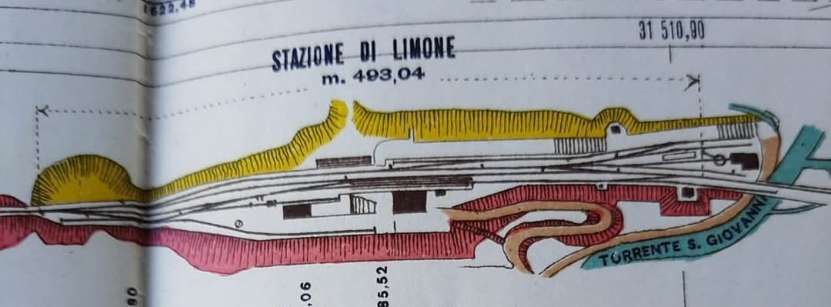
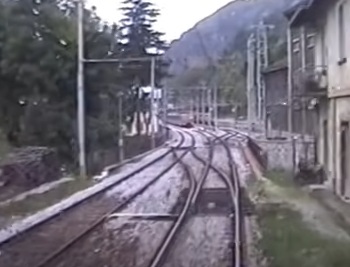
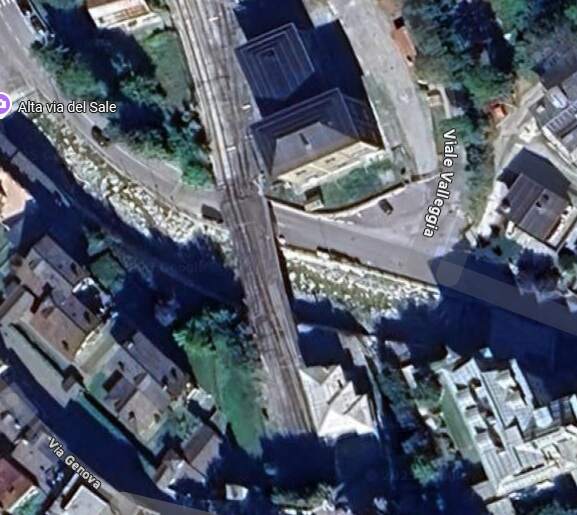
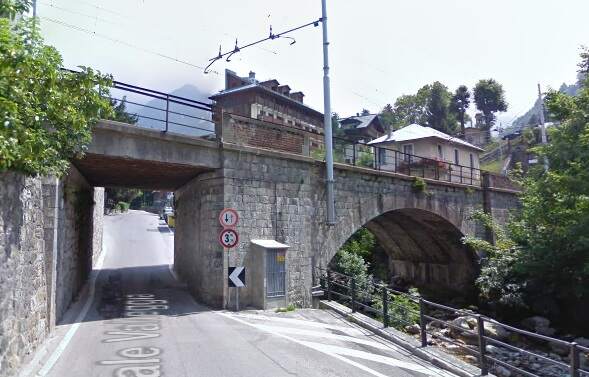
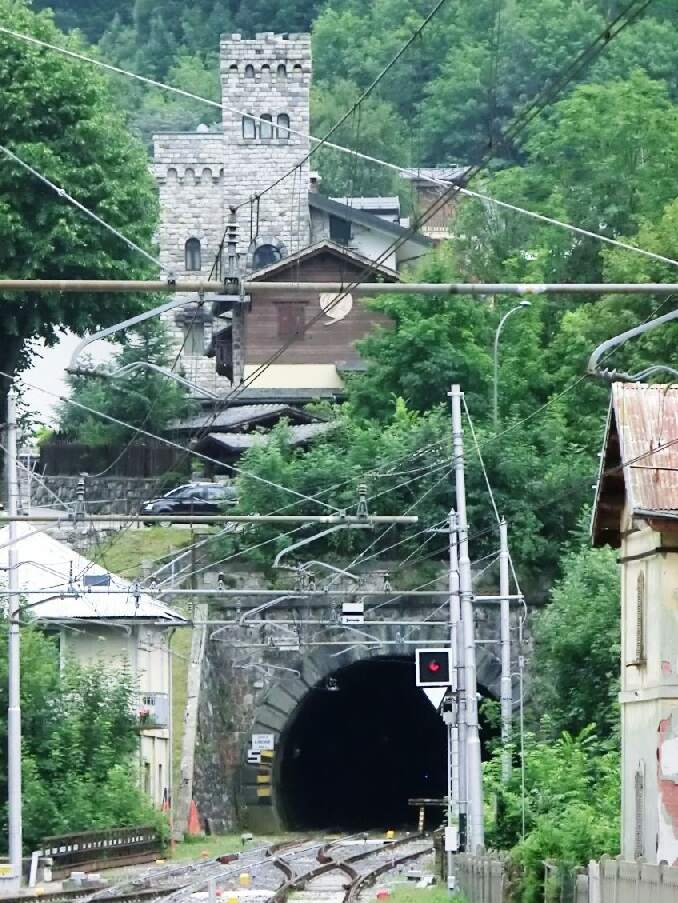
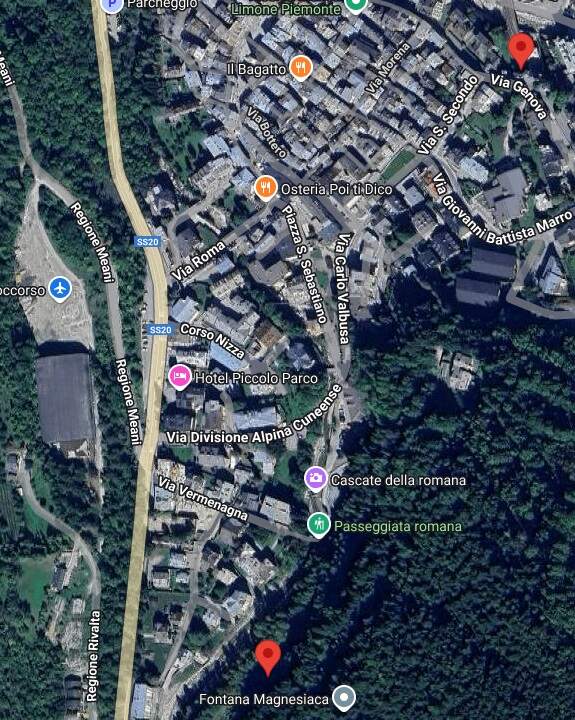
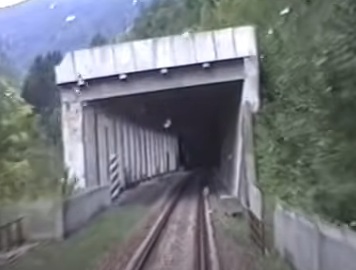
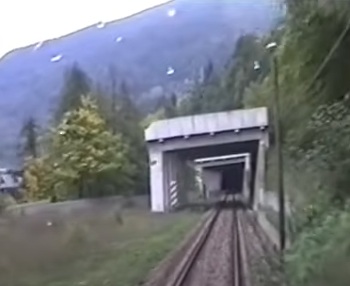
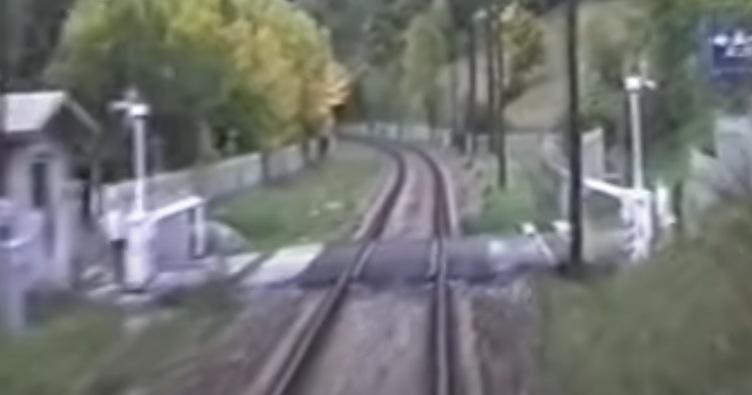
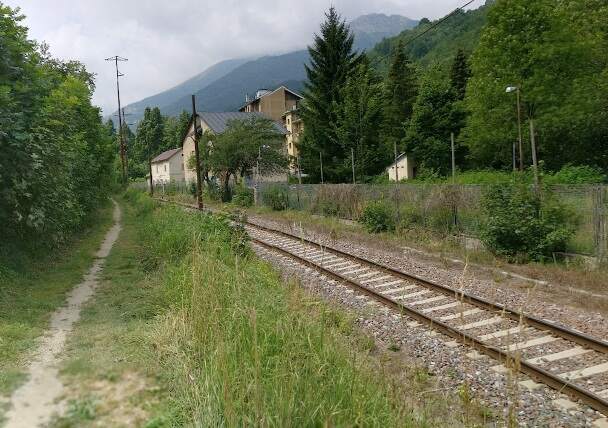
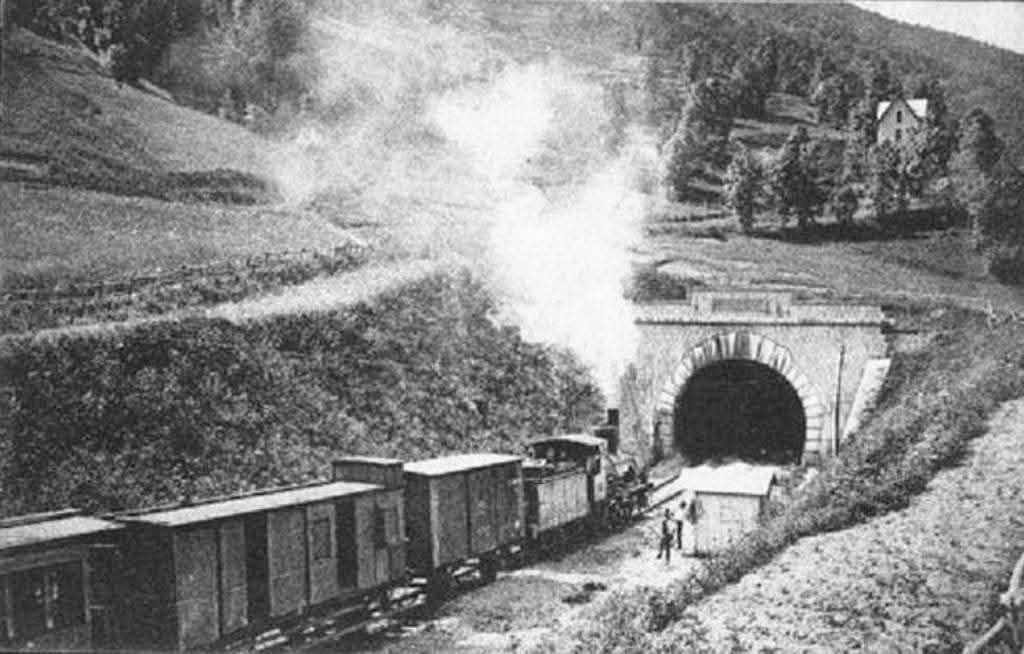
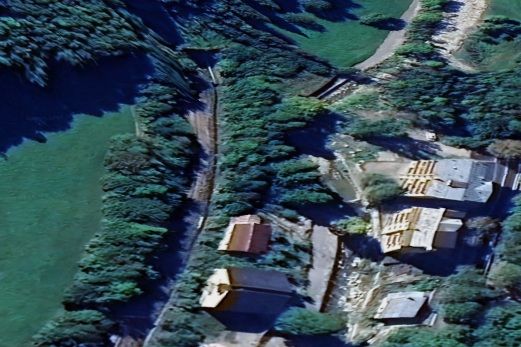
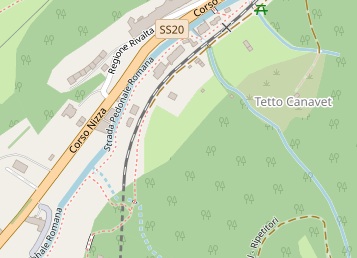
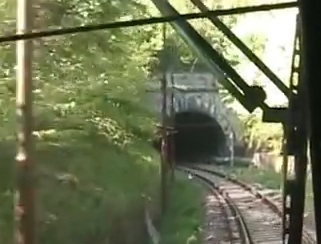
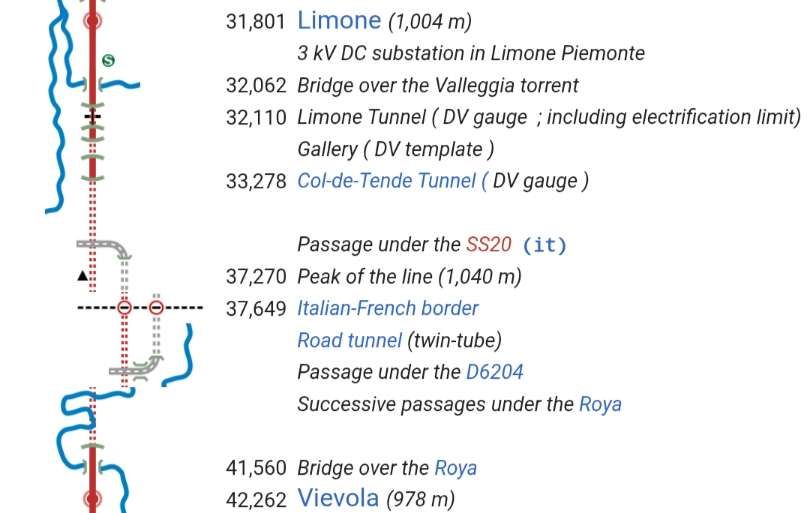
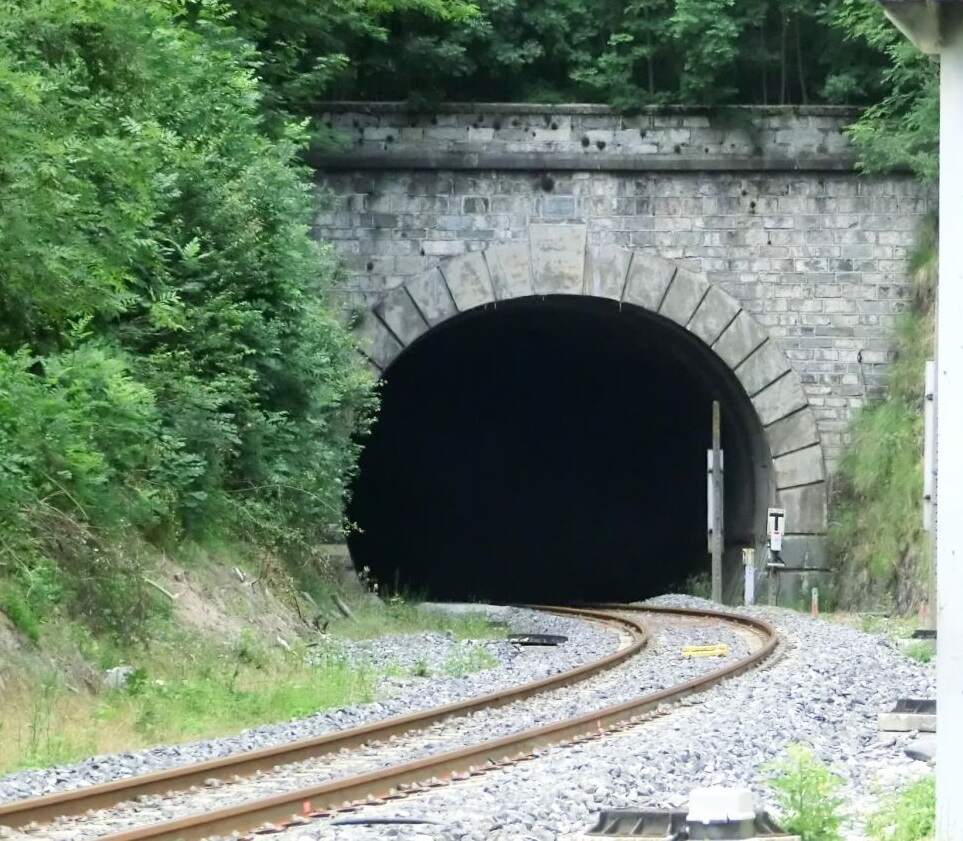
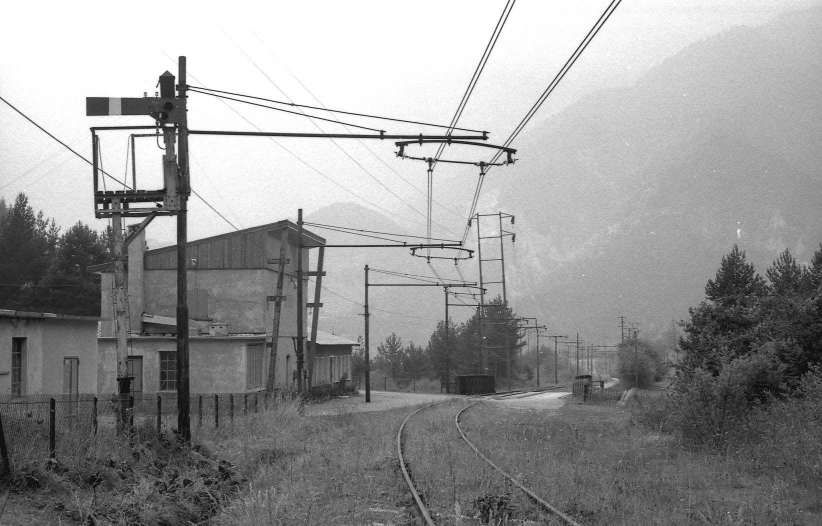
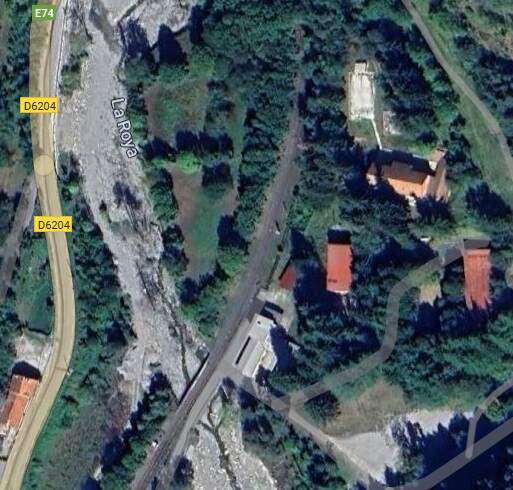

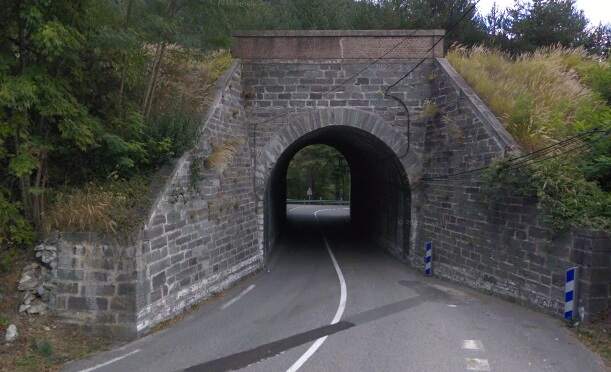
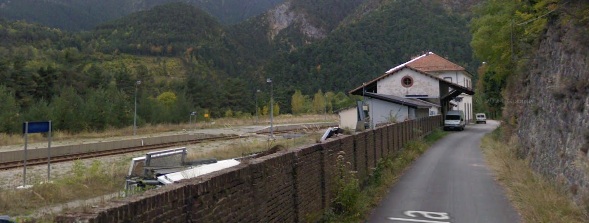

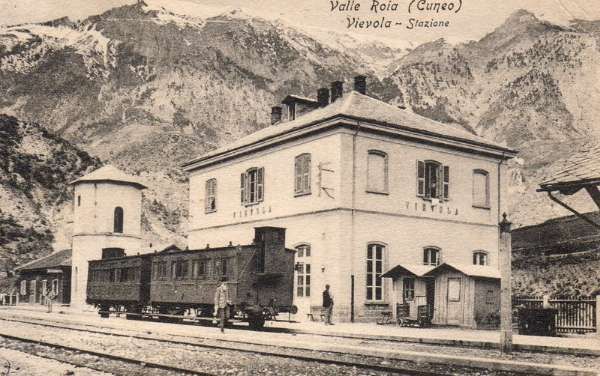
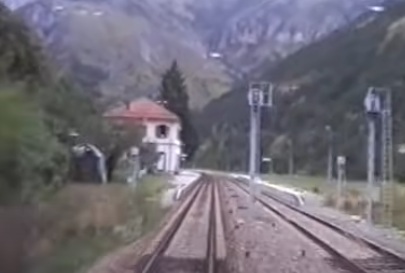
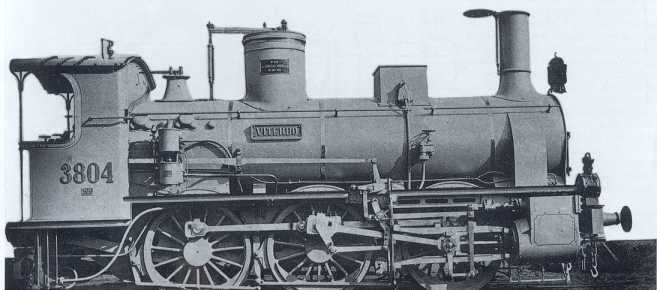
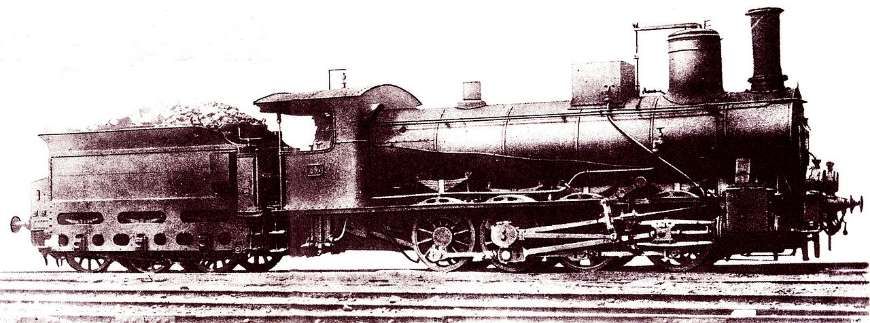

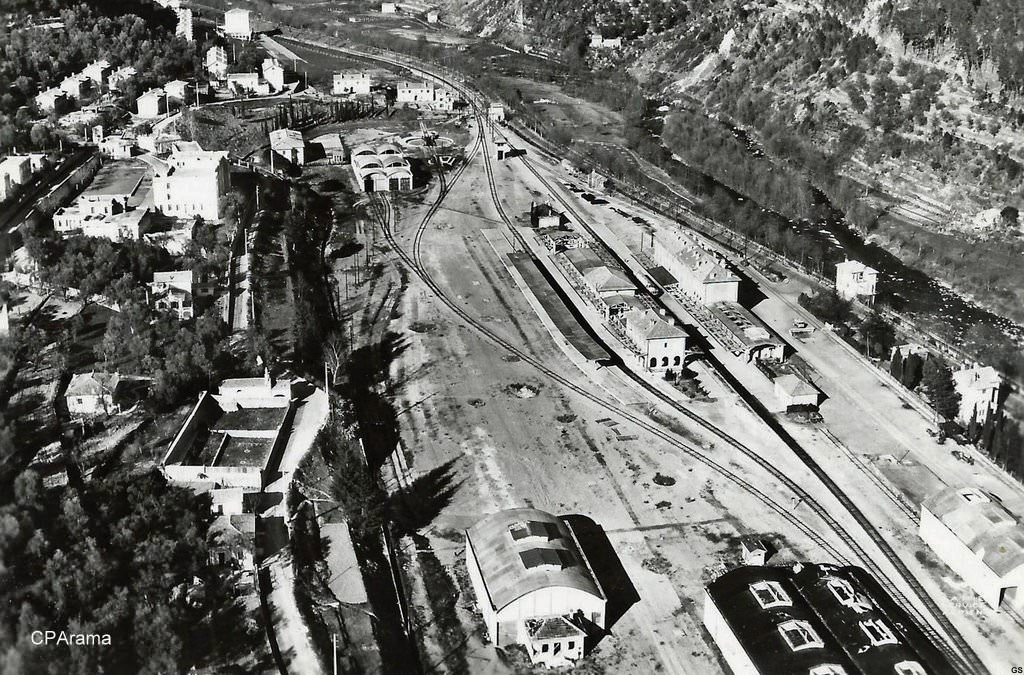