
The Modern Tramway and Light Railway Review of November 1963 carried an article by C.S. Dunbar about the Kingsway Tram Subway. It seemed an opportune moment to focus on the Subway as the southernmost portion of the tunnel was about to open to motor traffic as the Strand Underpass.
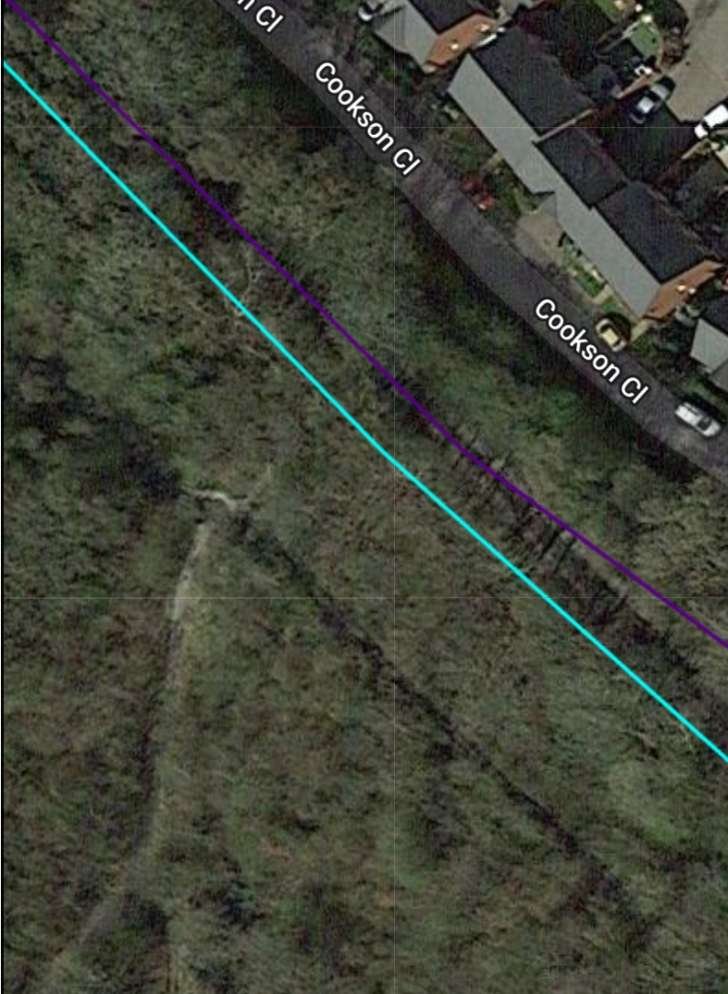
An image in my blog in an article about the last few years of London’s tram network prompted some response. [2] So, having read his article, I thought that reproducing most of C.S. Dunbar’s article here might be of interest to others. …
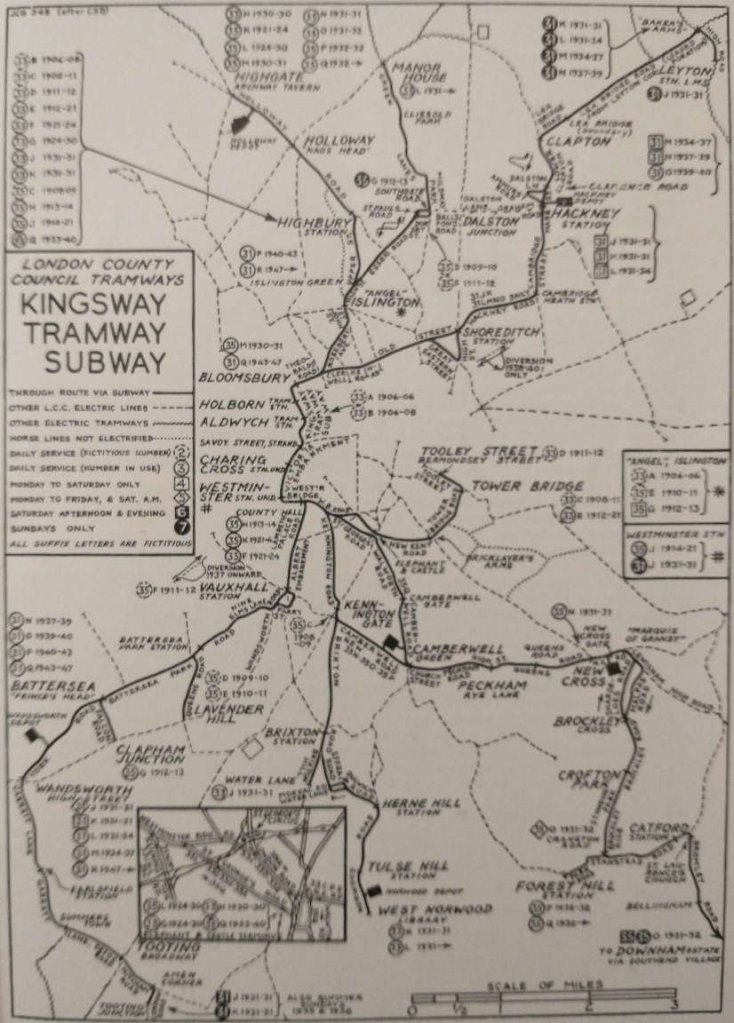
The former tramway subway ran beneath Aldwych and Kingsway. “When the London County Council, as the tramway authority for the Metropolis, decided that it would itself operate the services as the various leases fell in, the question of joining up the separate company systems became very important, particularly with a view to giving communication between the north and south sides of the river. The decision to clear an insanitary area in Holborn, and to construct Aldwych and Kingsway, led to discussion in 1898 on the possibility of using the new streets for a tramway to connect the northern and southern systems. It was then suggested that instead of running the trams on the streets, a sub-surface line should be constructed as an integral part of the improvement. Something similar had already been done in New York and Boston, and a deputation … was, therefore sent to those places.” [1: p385]
On the strength of their report, an application was made in the 1902 session of parliament for powers “to construct a subway for single-deck tramcars at an estimated cost of £282,000 from Theobalds Road to the Embankment at Waterloo Bridge, from which point a surface line would continue to and over Westminster Bridge. By the LC.C (Subway and Tramways) Act, 1902, the subway itself was approved for the whole proposed length, but the tramway was not authorised beyond the north side of the Strand. The proposed Embankment line was rejected and in fact it took the Council four years to secure powers. Many ridiculous arguments were advanced against the line, the most absurd, probably, being that the trams would interfere with members crossing the road to reach St. Stephen’s Club. Six Bills introduced by the Council between 1892 and 1905 to enable it to carry the tramways across Westminster and other bridges and along the Victoria Embankment were thrown out by one or other House of Parliament, and not until 1906 was the battle resolved in the Council’s favour.” [1: p385-386]
As events were to prove, “a great mistake was made in deciding that the subway should only provide for the passage of single-deck cars, but this decision was reached for three main reasons:
(1) to avoid a large sewer under Holborn would, it was thought, necessitate too steep a descent to be safe for double-deck cars – as it was there was a gradient of 1 in 10 from Theobalds Road;
(2) the position of the District Railway in relation to Waterloo Bridge and the gradient from the Strand presented difficulties in the way of making a satisfactory southern exit;
(3) there was a feeling that it might be found that London traffic could be handled more expeditiously with coupled single-deck cars than with double-deckers.” [1: p386]
Dunbar continues:
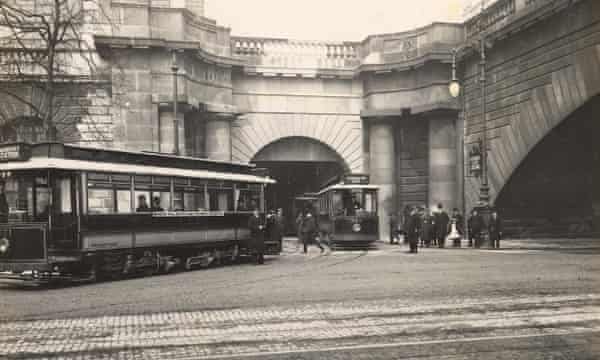
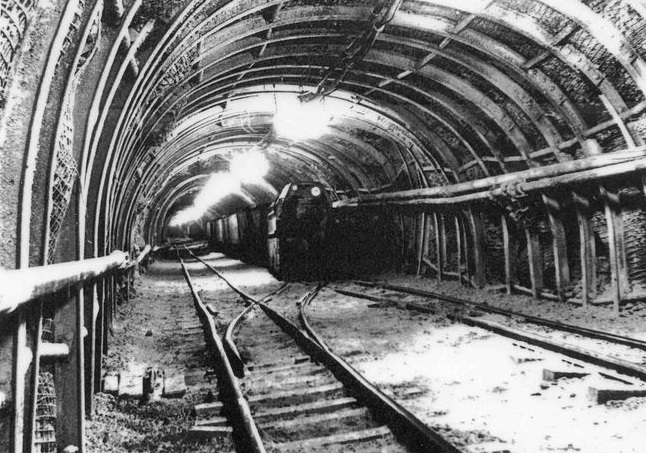
“Construction was undertaken at the same time as the new streets were laid out and as well as making provision for the trams, a pipe subway for gas and water mains 10 ft. high and 74 ft. wide was built on each side. The approach from Theobalds Road was by an open cutting 170 ft. long in the middle of the road. The tracks then passed into two cast-iron tubes, 14 ft. 5 in. in diameter and 255 ft. long, which took the tracks under the Holborn branch of the Fleet sewer. The rails were 31 ft. below the road surface when passing under Holborn, rising again at 1 in 10 to Holborn Station. Raised side-walks were provided in the single tunnels. From here to Aldwych the tunnel was 20 ft. wide with a roof of steel troughing just below the street. The running rails were laid on longitudinal wooden sleepers embedded in concrete, and since the conduit would not have to bear the weight of road traffic a special lighter design was used in which the normal slot rails were replaced by plates which could be lifted for maintenance. As usual with L.C.C. tramway figures it is difficult to ascertain the actual cost of the work, but it seems likely that the construction of the subway itself accounted for £133.500 for the 2,920 ft. from Theobalds Road to Aldwych, with a further £112.500 for permanent way and electrical equipment.
At the time the subway was opened it was not connected with any other electrified route, so it was decided to terminate the public service at Aldwych Station (situated at the junction of Aldwych and Kingsway) and to use the tracks which extended southwards from there towards the Strand as a depôt. Inspection pits were therefore constructed under this length and some repair equipment installed. An intermediate station was built at Great Queen Street (subsequently renamed Holborn). Pending the opening of Greenwich power station, current was obtained from the County of London Electric Supply Company at a cost of 1d per unit.
Single Deck Cars
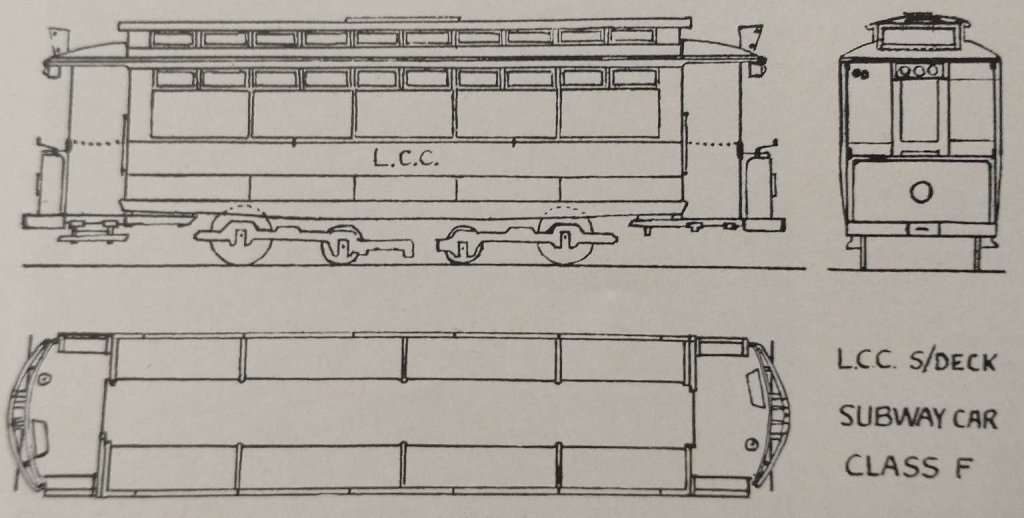
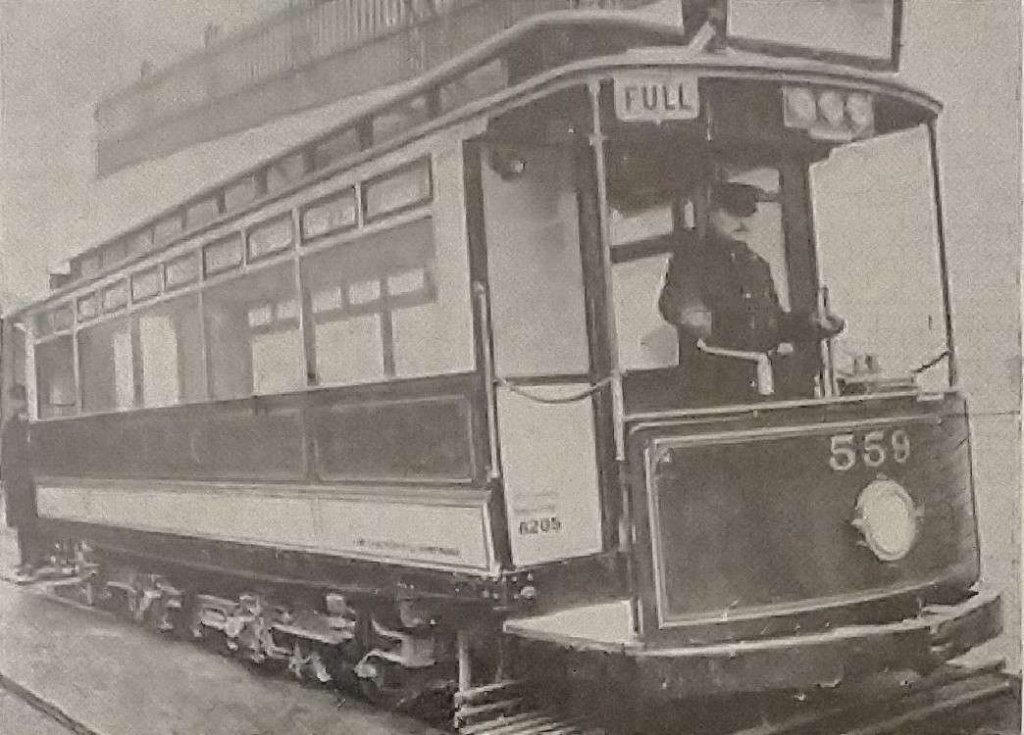
Sixteen Class F tramcars (numbered 552 to 567) were ordered from the United Electric Car Company, Limited, Preston at £750 each. The Board of Trade, then the Government Department concerned with tramways, was very focussed on the risk of fire in the tunnels and the new cars had to be as non-flammable as possible. “The underframes were therefore made of steel angle and channel sections, and the body panels were of sheet steel. The slatted longitudinal seats were of non-flammable Pantasote on angle steel supports; the seating capacity of the cars was 36. Even the adjustable spring roller-blinds, with which the windows were fitted, were supposed to be non-flammable. The inside finish was entirely in aluminium. The cars were 33 ft. 6 in. long over the fenders and 24 ft. 10 in. over the body pillars. The trucks were centre bearing maximum traction bogies by Mountain and Gibson with a 4 ft. 6 in. wheelbase and 311 in diameter driving wheels. The distance between the centre of the driving axles was 14 ft. 6 in. The controllers were by Dick Kerr and included provision for using the electro-magnetic brake for service stops.” [1: p387]
Dunbar continues:
Service 31 had more vicissitudes than the other two. Consequent upon the conversion of part of the Wandsworth service to trolleybuses on 12th September, 1937, it was cut back to Prince’s Head, Battersea. The conversion of the Shoreditch area caused its diversion on 10th December, 1939, to terminate at the lay-by at Islington Green (outside the Agricultural Hall) which had been put in in 1906 but never used for regular services, except possibly for a few weeks in 1909. Destination indicators, however, showed ‘Angel, Islington.’ There was a further curtailment on 6th February, 1943, when the service began working between Bloomsbury and Prince’s Head in peak hours and between Westminster Station and Prince’s Head at other times. This arrangement was unsatisfactory owing to the turning points being on through routes and the cars and crews being based at Holloway, and it was hoped as from January, 1947, to run between Islington Green and Wandsworth High Street. It was not, however, possible to introduce this improvement until 12th November, 1947.
In addition to the 100 E/3 type cars previously mentioned, 160 other cars were built to the fireproof specifications laid down for the Subway (HR/2 class 1854- 1903 and 101-159, E/3 class 160 to 210), and in later years some of these worked regularly on the subway services, particularly after war losses. After Hackney depôt closed, the cars for the subway were provided by Holloway depôt for all three services and also by Wandsworth (for 31), Norwood (33) and Camberwell (35). At one time in 1941, Holloway depôt was cut off for several days by an unexploded bomb and could only operate a shuttle service of two cars between Holloway and Highgate, during which period wooden E/1 cars from South London depôts were perforce used on the subway routes, turning back at Highbury Station. The famous L.C.C. car No. 1 of 1932 was intended for the subway services, with air-operated doors and folding steps for use at the subway stations, and worked from Holloway depôt on these services from 1932 to 1937. This car was sold in 1951 to Leeds and is now preserved at Clapham.
In 1937, the rebuilding of Waterloo Bridge necessitated the diversion of the subway exit to a position centrally beneath the new bridge, at a cost of £70,000 including a new crossing of the District Railway; after the changeover took place, on 21st November, 1937, the curved section of tunnel leading to the former exit in the bridge abutment was walled off and still exists. For the next three years, the trams entered the subway through the bare steelwork, as the new bridge took shape above their heads. In anticipation of a general conversion of the London tramways to trolleybus working, an experimental trolleybus (No. 1379) placed in service on 12th June, 1939, was so designed as to permit passengers to board and alight from the offside at Aldwych and Holborn Stations. Not until some years later did London Transport admit officially that this experiment had been a failure. The war brought a reprieve to the remaining London tramways, and was followed by a decision that the routes still working would be replaced by motor buses and the subway closed.
Owing to a need to replace worn-out buses, tramway replacement did not commence until 1950, when on 1st October, tram service No. 31 (Wandsworth High Street- Islington Green) was replaced by bus service 170 (Wandsworth High Street – Hackney L.T. Garage), running via Norfolk Street northbound and Arundel Street southbound, and taking about eight minutes from Savoy Street to Bloomsbury as against four minutes by tram. From 7th October, 1951, Camberwell depôt was closed for reconstruction and its share of service 35 taken over by New Cross. Finally, on Saturday, 5th April, 1952, trams ran through the Subway for the last time; tram service 35 (Forest Hill – Highgate) was replaced next day by bus service 172, and tram service 33 (West Norwood – Manor House) was replaced by bus service 171, West Norwood – Tottenham (Bruce Grove). The last car to carry passengers through the subway in service was E/3 No. 185, some time after midnight, and in the early hours of the following morning the remaining cars from Holloway depôt were driven south through the Subway to new homes or the scrapyard.
“A clerestory roof was fitted with a trolley plate on top, although the cars never actually carried a trolley-pole but were built solely for conduit operation. The height from the ground to the trolley plate was 11 ft. The internal height to the top of the clerestory was 7 ft. 94 in. and the width was 6 ft. 6 in. over the solebars, 6 ft. 8 in. over the pillars and 6 ft. 10 in. over the roof. There were five windows on each side. The first of the class, No. 552, was built with bulkhead doors of the twin sliding type and had side doors to the unvestibuled platforms, which interworked with the folding steps. These doors were removed before the car entered service, and the remainder of the class had the normal single door in each bulkhead and a simple sheathed chain across the platform sides.
Each bulkhead was fitted with an oil lamp above the nearside bulkhead panel, which showed either a white or red aspect externally and also threw a light into the interior of the car. These were replaced by electric lamps at an early date. Hanging from each canopy was a box for the colour- light headcode, and above the canopy was a destination indicator. Projecting from the roof at both ends was an iron bar; this struck against other bars hanging from signal lamps at the beginning of the descent from Theobalds Road travelling south and that from Holborn Station travelling north, so putting the aspect to red. Corresponding contacts were made on leaving the section in both directions to put the signals back to green, the object, of course, being to prevent more than one car in each direction being on the 1 in 10 gradient at one time.
To provide a northern connection with the subway, it was decided to electrify the line in Theobalds Road (by arrangement with the North Metropolitan Tramways Company, which then held the lease) and to construct a new line in Rosebery Avenue and St. John’s Street to the Angel, Islington. The estimate for this was £40,500, but owing to great difficulties with sub-surface mains and other obstructions the cost eventually reached £47,000. Part of the reconstructed roadway was carried on a concealed iron viaduct. Work was started on the reconstruction on 17th September, 1905. The Board of Trade inspected the Subway and the new line to the Angel on 29th December, 1905, and motormen then, began to be trained.” [1: p387]
A public service from Angel to Aldwych began on 24th February 1906, the delay was down to the Board of Trade’s worries over the non-flammable character of the tramcars. The ceremonial opening included “the first car, painted blue and gold, taking 12 minutes northbound and 10 south. This was good running, remembering that horse cars were working in Theobalds Road. Smoking was not permitted in the cars and this led one councillor to suggest the provision of open cars especially for smokers. Fares were fixed at 1d. from the Angel to Holborn Hall and from Holborn Hall to Aldwych and d. for the full journey. The novelty attracted a considerable number of passen- gers from the start and the takings for the first three days with a two-minute service averaged [just over 2s. 2d.] per mile as against 1s. per mile for the double-deckers in South London.” [1: p387]

“Meanwhile in July, 1905, the Council’s attention had been drawn to the fact that its compulsory powers for the acquisition of land and easements for the construction of the subway from Aldwych to the Embankment would expire in August. It therefore voted £50,000 for the necessary acquisition in the hope that powers for the Embankment tramway would eventually be secured. Actually £9,400 was paid to the Duchy of Lancaster and £15,250 to C. Richards and Company for the extinction of their interests in the arches under Wellington Street. In the Parliamentary session of 1905 powers were secured for an additional station south of the Strand under Wellington Street.
In November, 1905, the Council ordered a further 34 cars of a similar type to the first batch, but this time with Brush bodies, glazed bulkheads and Westinghouse equipment (Nos. 568-601, class G). It had not been possible to build steel bodies as cheaply as timber ones and the cost of these cars came out at £27,761, or nearly £817 each. On the delivery of these cars, there were sufficient to extend the route to Highbury Station on 16th November 1906, after High Street and Upper Street, Islington, had been reconstructed in the short time of 12 weeks. In fact the cars started running before the borough council had completed the wood paving at the sides of the carriageway.
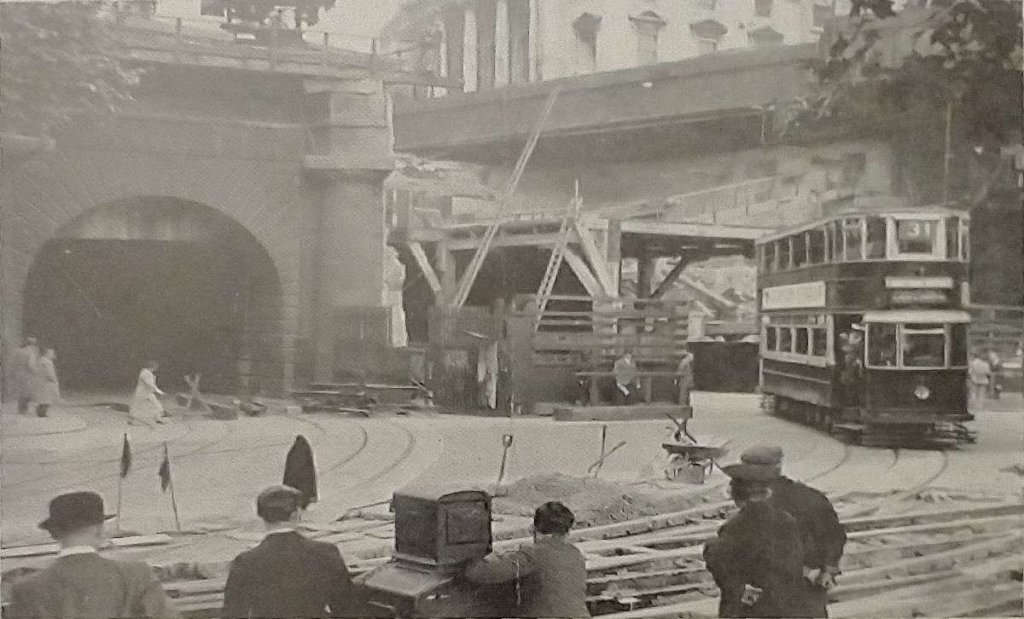
When the Embankment tramway was eventually opened and powers had been obtained for the subway link, work was pushed ahead on the remaining section. This fell on a gradient of 1 in 20 from Kingsway to the Strand, 1 in 108.3 under the Strand, and was then level; it was far more costly to construct than the original length, mainly owing to difficulties in crossing the District Railway. The final 620 ft, in fact, cost £96,000 exclusive of permanent way and equipment. The cost would have been £20,000 more had the proposed station at Wellington Street been built, but in March, 1907, the Council decided that the proposal should be aban- doned, as the site was only 200 yards from the Embankment and the platform would be 32 ft. below ground. This decision enabled the extension to be opened nine months earlier than would have been the case otherwise. The Council undertook the whole of the work by direct labour and completed it in about twelve months. South of Aldwych Station, the tracks curved sharply to the south-west in twin tunnels and continued beneath Aldwych as a single tunnel with brick-arch roof, separating again at the Strand into twin cast-iron tubes which continued to about a third of the way under Lancaster Place. The exit on to the Embankment was through the western wing wall of Waterloo Bridge and here a triangular junction was constructed. The eastern side of the junction, leading towards Blackfriars, was never used and was removed during the 1930 re-construction referred to later.
Through services were inaugurated on 10th April, 1908, from Highbury Station to Tower Bridge and from Highbury Station to Kennington Gate. Fares ranged from 0.5d. to 3d, (the maximum on both routes). Special workmen’s fares of 1d. single and 2d, return were given from any terminus to Waterloo Bridge. The journey times varied from 47 to 50 minutes on the Tower Bridge route and 41 to 44 on the other. A six minute service was given on each route with early morning extras between Highbury and Aldwych. The cars were stabled at Holloway and New Cross depôts.
The Kennington service did not pay and in looking for another route on which to use the single-deck cars, the management thought of Queen’s Road, Battersea, on which it was impossible to run double- deckers owing to a low railway bridge. The Kennington service was therefore diverted on 25th January, 1909, to work between St. Paul’s Road and Lavender Hill via Battersea Park Road, giving a service to the Lavender Hill area while the Wandsworth Road line was being electrified. As Essex Road was being reconstructed at this time, it is possible that cars actually turned at the Angel or at Agricultural Hall for some weeks. The through fare was 4d. and the journey time 52 minutes. Transfer fares to Kennington were given. In May, 1910, the Angel definitely became the northern terminus, with a short service working between St. Paul’s Road and Southampton Row. In the following year, the southern portion was cut back to Vauxhall, the crossover in Wandsworth Road by the gas works being used. Transfers were issued to Battersea On 17th June, 1912, the service was again extended but this time to Clapham Junction via Battersea Park Road and the Sunday afternoon service began to work from Southgate Road. In the summer of 1911 (probably on 22nd June) the Tower Bridge service was extended to Tooley Street (Bermondsey Street), the through fare remaining at 3d. and the journey time being 52 minutes, but a year or so later Tower Bridge again became the terminus. The junction westward into Tooley Street was replaced in 1923 by one in the opposite direction.
Until 1912, the cars carried colour-light headcodes, the original through services displaying red-green-red for Highbury Station – Tower Bridge and blank-green-blank for Highbury Station – Kennington Gate. When L.C.C. routes began to be numbered in September, 1912, the Tower Bridge service became 33 and that to Clapham Junction 35, the number being hung from the canopy. This arrangement, used on double-deck cars only until upper deck stencils were fitted, was retained on the subway cars until 1930. On 28th October, 1913, 35 was altered to run between Highbury and Belvedere Road only, the southern part of the service being taken over by 86 from Embankment to Clapham Junction. At this time cars on 35 turned at a lay-by in St. Paul’s Road at one end of the route and in Lambeth Palace Road at the other. A year or so later, Westminster Station became the southern terminus. Service 33 was withdrawn altogether, but reappeared after the 1914-18 war as a weekday service between Highbury and County Hall, while 35 then became Highgate – County Hall. After the withdrawal of 33, Tower Bridge Road was covered by 68 from Waterloo Station. In July, 1924, both 33 and 35 were extended to the Elephant and Castle via St. Georges Road, obtaining at last a terminus at which the cars could stand without obstructing other through services. The author believes that the subway services were the only ones which ever regularly used the southbound track in St. Georges Road. When cheap mid-day tickets were instituted, Savoy Street was taken as the ‘City terminus’ on southbound cars and Bloomsbury on northbound. [1: p387-389]
Decision to Enlarge
As years went by, the L.C.C. increasingly became aware that single-deck cars could not be made profitable. The use of double-deck rolling stock would allow many useful connections and the movement of rolling-stock across the Thames would be facilitated. The, then current, route for double-deck trams to cross the Thames was via North Finchley, Putney and Wandsworth.
In 1929, the L.C.C. decided to increase the headroom to 16 ft. 6 in. They sought to raise the roof at the northern end and deepen the tunnel at other places. The decision resulted in observations that the subway might well be “enlarged to take motor traffic as well as trams, but the Metropolitan Police Commissioner pointed out that congestion would arise at each end of the tunnel, that a serious traffic block would quickly develop if a vehicle broke down inside, and that there was a danger of exhaust fumes and even fire. The London Traffic Advisory Committee recommended that the tunnel could serve no useful purpose as a motor-way, and the L.C.C. would have nothing to do with the idea. Nevertheless, on the day the subway was reopened, The Times returned to the theme and hoped that the tunnel would be available for omnibuses and other vehicles ‘when tramways have had their day.'” [1: p390]
Dunbar continues:
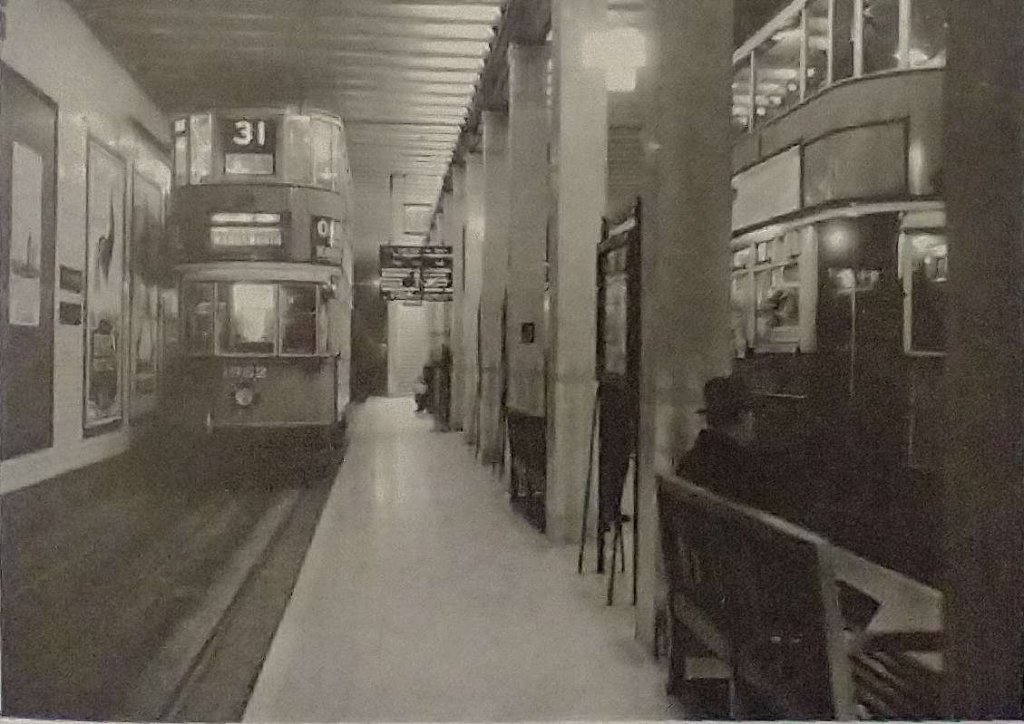
“The contract was awarded to John Cochrane and Sons, Limited, who started work on the street level on 11th September, 1929, this necessitating the temporary diversion via Hart Street and Theobalds Road of bus services 7 and 184. North of Holborn the roadway was opened up and the twin tunnels replaced (after sewer diversions) by one wide passage with a steel girder roof, while elsewhere the additional headroom was obtained by under-pinning the side walls with concrete and lowering the track by approximately 5 ft. The estimated cost was £326,000 including £76,000 for the reconstruction of the 50 single-deck cars. On and from 16th January, 1930, only one tram service (numbered 33) ran through the subway from Highgate to the Elephant, while 35 worked Highgate – Bloomsbury. The single-deck cars carried passengers through the subway for the last time on Monday morning, 3rd February, 1930, after which the subway was closed altogether, a connection being maintained by temporary L.G.O.C. bus service 175 (Islington – Charing Cross Embankment via Kingsway and Northumberland Avenue, returning via Norfolk Street, Strand and Aldwych). On 14th May another bus service – 161 – was put on between Islington and Waterloo on weekdays only. The two tramway stations were rebuilt and modernised, that at Holborn being finished in travertine, a cream marble used in ancient Rome. Standard trackwork with yokes and slot-rails set in concrete was used in place of the special type evolved for the original construction.
It had been hoped that the subway would be reopened by the Prince of Wales on 17th December, 1930, and in anticipation of this car No. 1930 was painted blue and gold. Actually, however, it was not possible to start experimental runs before 5th January 1931. The formal reopening was performed on Wednesday, 14th January, 1931, by the Chairman of the Council, Major Tasker, car No. 1931 painted white with blue lining being employed, followed by two other cars. These ran from the Embankment to Theobalds Road and back to Holborn Station, where one of the platform seats served as a rostrum for the speeches. Public service commenced at 5 o’clock next morning, with a one-minute headway and a total of 5,000 cars per week. The L.C.C. issued a special booklet describing the subway’s history and reconstruction and listing the new services and transfer facilities, together with the running times. [1: p390]

New Cars
“The subway service was worked by the new E/3 class cars (Nos. 1904-2003) which had been ordered in June, 1929, from Hurst, Nelson & Co., of Motherwell, and had been working on various South London services until the subway was ready. In the subway, it became necessary to use the drivers’ platforms and the front stairways for boarding and alighting at the island platforms of Holborn and Aldwych stations. The former bar-operated signals at Holborn and Bloomsbury were replaced by others worked by the passage of the plough in the conduit slot. The single-deck cars were withdrawn and the trucks and Westinghouse equipments used under new English Electric composite bodies, but still bearing the original numbers (552-601). The single- deck car bodies were offered for sale in 1930, to be collected at Holloway or Charlton. In earlier years, some of these cars were stabled, first at Jew’s Row and later at Clapham for the Queens Road service, while in 1911 some were sent to Hampstead for the experiment with coupled cars which took place between January and August of that year on the Hampstead – Euston route.
Public service through the subway began again on 15th January, 1931, with three services: 31, Hackney Station – Wandsworth High Street via Shoreditch and Battersea Park Road (73 minutes, weekdays), Hackney – Tooting Junction (Saturday evenings) and Leyton Station L.M.S. – Westminster Station (54 minutes, Sundays); 33, Highbury Station – Water Lane, Brixton (42 minutes, weekday peak hours), with occasional workings to Norbury; 35, Highgate, Archway Tavern-New Cross Gate via Kennington (59 minutes, daily). It was originally intended to work 31 through to Wimbledon via Haydon’s Road, but this was never done. From 19th April to 4th October, 1931, the Sunday working of this service was from Leyton, Baker’s Arms, to Tooting Junction (17 miles). A similar arrangement prevailed in subsequent summers, but for the rest of the year the Sunday workings were between Baker’s Arms and Wandsworth.
Service 33 was altered twice during 1931 and began operating in off-peak hours, being diverted first to Norwood on 14th May, and then at the other end to Manor House on 8th October, after which it remained unchanged. Also on 14th May, 1931, 35 was extended to Forest Hill (Cranston Road) via Brockley, the indicators actually showing Brockley Rise. A Saturday evening and Sunday working was instituted between Highgate and Downham via Brockley – 16 miles the longest tram service ever operated entirely inside the County of London. The dates of this service are uncertain, but it was definitely working on 8th October, 1931. It possibly ceased after 5th March, 1932, on which date the southern terminus of 35 became the lay-by at Forest Hill Station. On 30th June, 1932, the route was diverted via Walworth Road instead of via Kennington and thereafter remained unchanged. On 1st June, 1933, short workings were introduced between Highbury and Elephant and Castle via St. Georges Road. These were numbered 35A.” [1: p390-392]
Route 31 saw a series of different changes over its life. Dunbar tells us that “consequent upon the conversion of part of the Wandsworth service to Trolleybuses on 12th September 1937, it was cut back to Prince’s Head, Battersea. The conversion of the Shoreditch area caused its diversion on 10th December 1939, to terminate at the lay-by at Islington Green (outside the Agricultural Hall) which had been put in in 1906 but never used for regular services, except possibly for a few weeks in 1909. Destination indicators, however, showed ‘Angel, Islington’. There was a further curtailment on 6th February 1943, when the service began working between Bloomsbury and Prince’s Head in peak hours and between Westminster Station and Prince’s Head at other times. This arrangement was unsatisfactory owing to the turning points being on through routes and the cars and crews being based at Holloway, and it was hoped as from January 1947, to run between Islington Green and Wandsworth High Street. It was not, however possible to introduce this improvement until 12th November 1947.”[1: p392-394]
“In addition to the 100 E/3 type cars previously mentioned, 160 other cars were built to the fireproof specifications laid down for the Subway (HR/2 class 1854 to 1903 and 101-159, E/3 class 160 to 210). and in later years some of these worked regularly on the subway services, particularly after war losses. After Hackney depôt closed, the cars for the subway were provided by Holloway depôt for all three services and also by Wandsworth (for 31), Norwood (33) and Camberwell (35). At one time in 1941, Holloway depôt was cut off for several days by an unexploded bomb and could only operate a shuttle service of two cars between Holloway and Highgate, during which period wooden E/ cars from South London depôts were per- force used on the subway routes, turning back at Highbury Station. The famous L.C.C. car No. 1 of 1932 was intended for the subway services, with air-operated doors and folding steps for use at the subway stations, and worked from Holloway depôt on these services from 1932 to 1937. The car was sold in 1951 to Leeds and is preserved at Clapham. [1963]
In 1937, the rebuilding of Waterloo Bridge necessitated the diversion of subway exit to a position centrally beneath the new bridge, at a cost of £70,000 including a new crossing of the District Railway; after the changeover took place, on 21st November, 1937, the curved section of tunnel leading to the former exit in the bridge abutment was walled off and still exists. For the next three years, the trams entered the subway through the bare steelwork, as the new bridge took shape above their heads. In anticipation of a general con- version of the London tramways to trolley- bus working, an experimental trolleybus (No. 1379) placed in service on 12th June 1939, was so designed as to permit passengers to board and alight from the offside at Aldwych and Holborn Stations. Not until some years later did London Transport admit officially that this experiment had been a failure.” [1: p394]
The Second World War meant a reprieve for the remaining tramways in London. Trolleybuses were no longer seen as the future, the decision was taken to replace the trams with motor buses. The decision was taken to close the Subway. In practice tramway closures did not happen quickly. Already worn out buses were replaced first, so tramway replacement did not start until 1950. We have looked at the twilight years of London’s tramways in an earlier post in this series. [4]
On Saturday 5th April 1952, “trams ran through the Subway for the last time. … The last car to carry passengers through the Subway in service was E/3 No. 185, some time after midnight, and in the early hours of the following morning the remaining cars from Holloway depôt were driven South through the Subway to new homes or the scrapyard.” [1: p394]
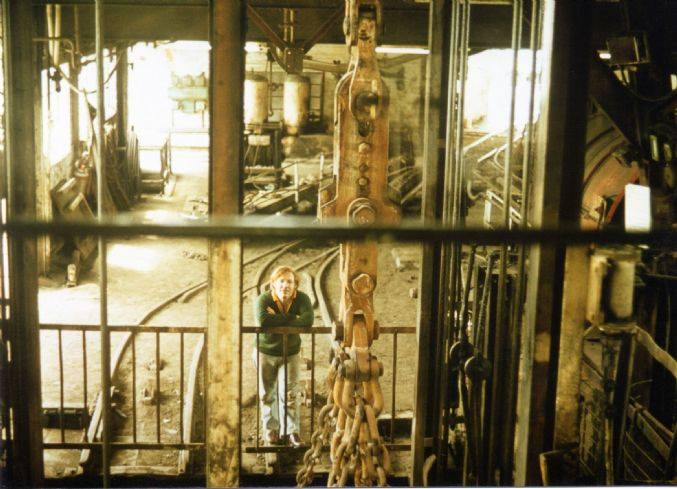
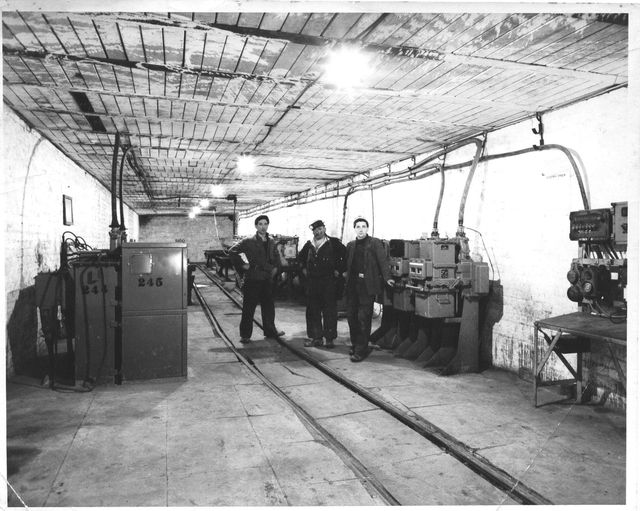
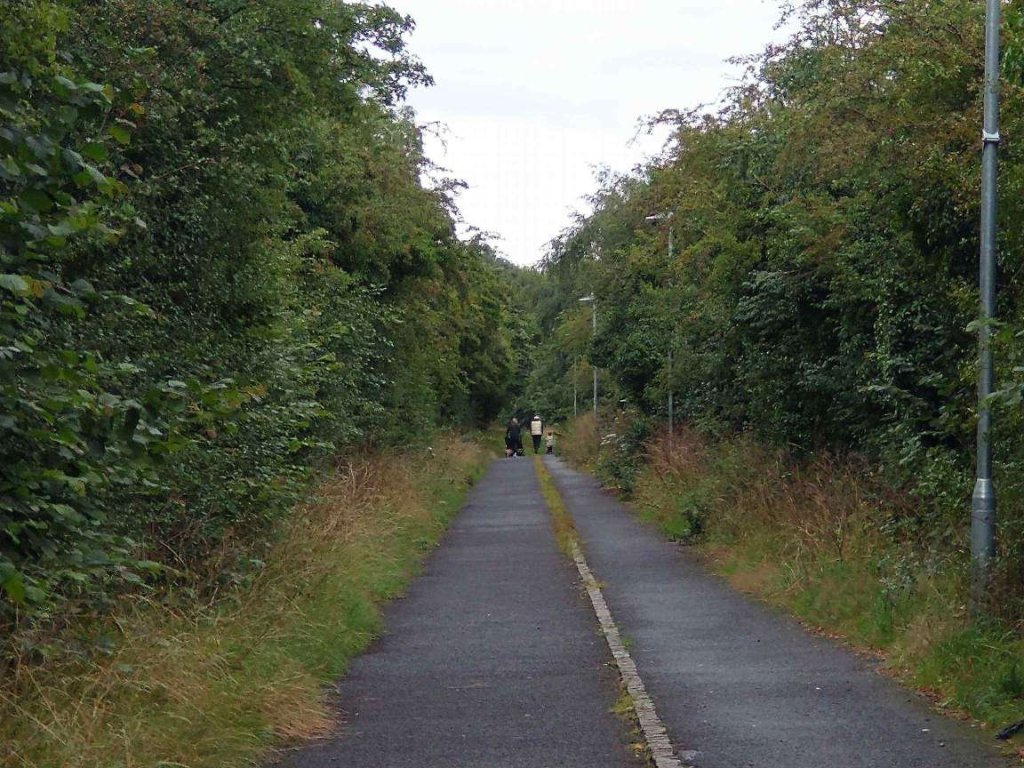
“The tracks remained unaltered, though disused, until the final abandonment of London’s tramways on 5th July, 1952, after which the street tracks were lifted in stages and those in the subway, cut at the approaches, were left as the longest section remaining in London. A technical committee was set up by the Minister of Transport to report on the possible use of the subway for motor vehicles, and tests with road vehicles were carried out both before and after closure, but the committee concluded that a satisfactory scheme would cost £1,200,000 and the Minister decided that the money could be better used in other ways. An alternative scheme to convert the subway to a car park was rejected because the cost (£175,000) was out of proportion to the benefit. In 1953, London Transport used the subway to store 120 retired buses and coaches in case they were needed for the Coronation, and in 1955 it was used to represent a railway tunnel in the film Bhowani Junction. A film company offered to take over the whole subway as a film studio, but this was rejected on account of the fire risk. Repeated questions in Parliament kept the issue alive, but in 1955 London Transport invited applications for the use of the tunnel as a store for non-flammable goods, and finally leased it in October, 1957, to S. G. Young & Co. of Blackfriars as a store for machine parts. The new tenants introduced fluorescent lighting colour-washed walls, and filled in part of the floor so as to use fork-lift trucks and pallets. After the trolleybus power supply ceased in 1959, the DC automatic pumps beneath the Strand at the lowest point of the subway were re-motored to work from the public supply.
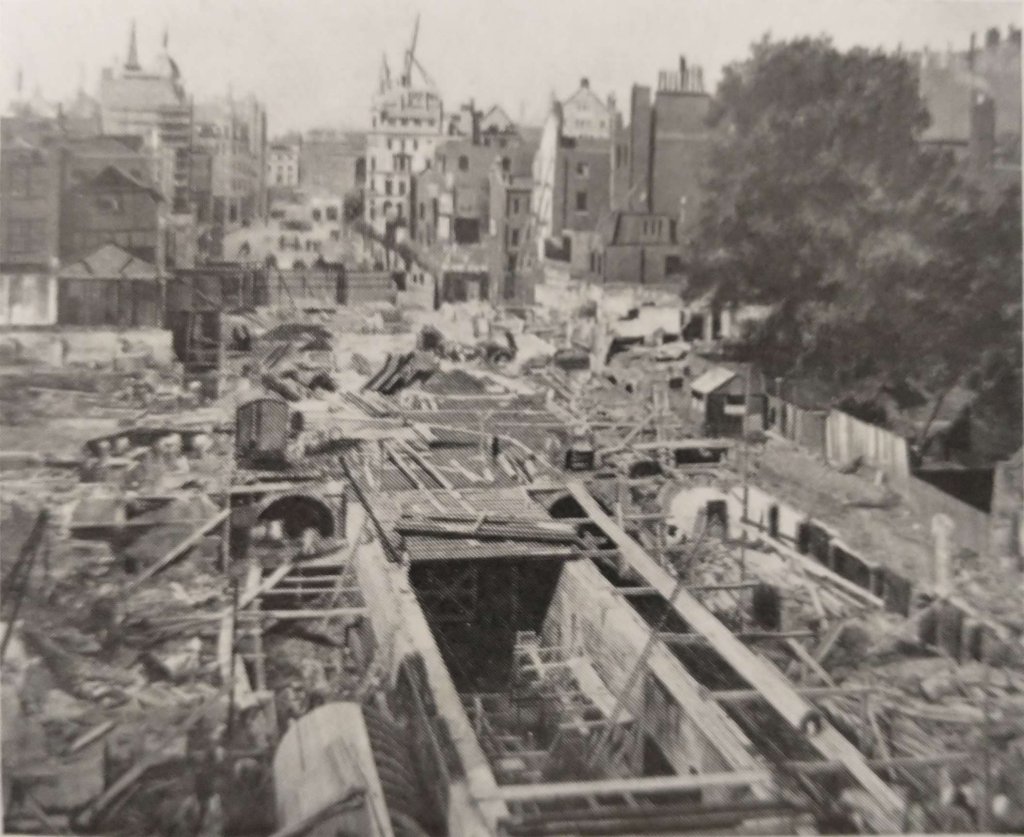
Meanwhile, in June, 1958, the London County Council expressed interest in taking over the subway and creating an underpass for light traffic beneath the Strand and Aldwych to deal with the traffic jams which often extend right across Waterloo Bridge. This plan involved about half the subway, from Lancaster Place to Kemble Street, and received official backing, though not until April 1962, did the Minister of Transport decide to make a grant of 75 per cent towards the estimated total cost of £1,306,512. The consulting engineers were Frederick Snow & Partners, and the contract for the reconstruction, totalling £1,025,233, was awarded in July, 1962, to John Mowlem & Co, who moved in on 1st September, 1962, and promptly began their 15-month task.” [1: p395]
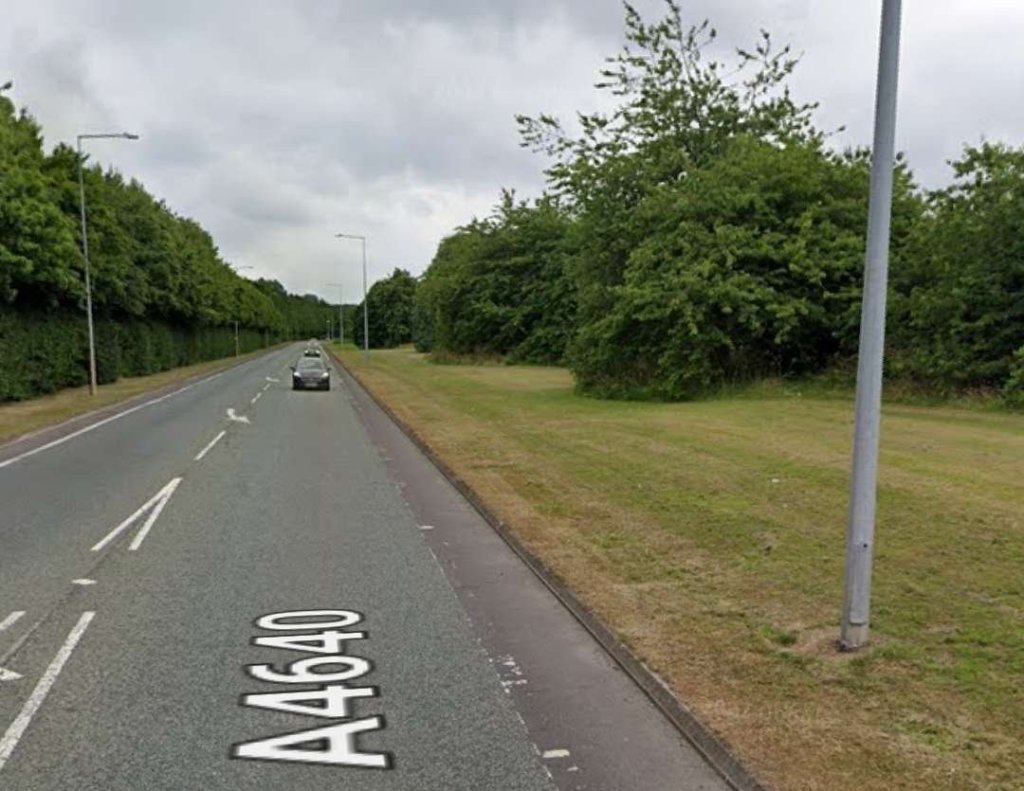
The new underpass opened on 21 January 1964. “It is only 17 feet (5.2 m) wide and, as a result, it is normally one-way northbound because of the side clearances required. The headroom is only 12.5 feet (3.8 m) due to the tunnel having to pass beneath [a] bridge abutment by a 1:12 gradient. An electronic ‘eye’ alerts drivers of tall vehicles and diverts them to an ‘escape route’ to the left of the entrance. However, high vehicles do still try to pass through and so get stuck occasionally.” [5]
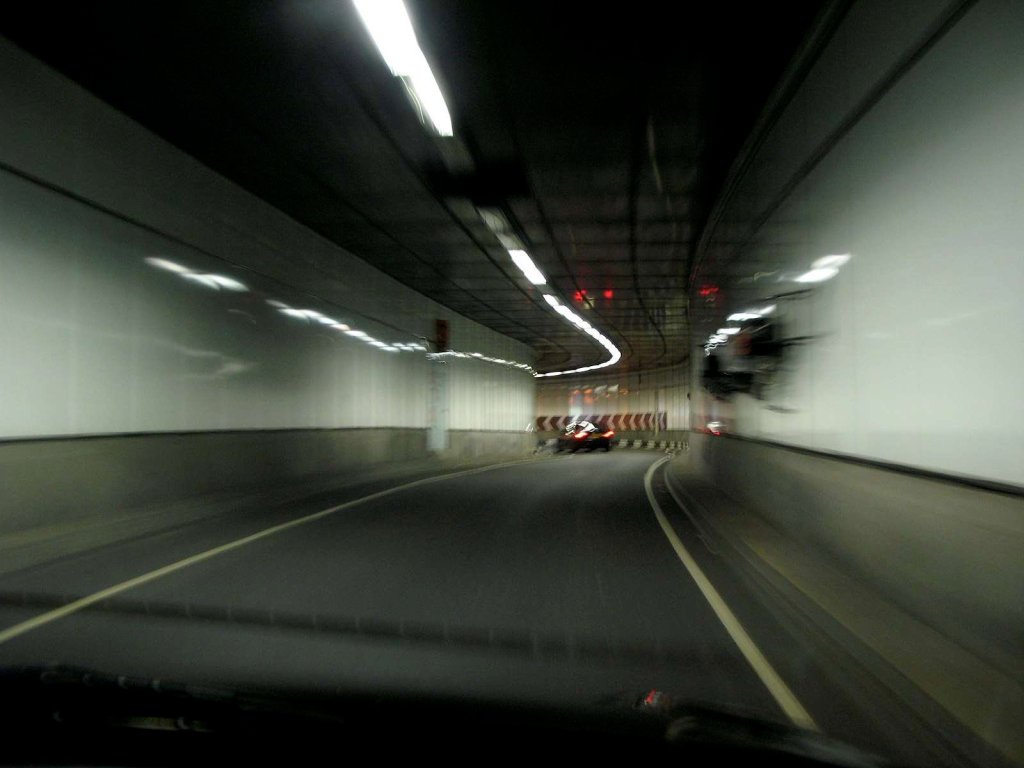
“The underpass is a concrete box within the former tram subway, with the road surface at the original track level. At the northern end of the underpass the road rises to the surface on a new carriageway supported by metal pillars. This passes through the site of the former Aldwych tramway station; because of the greater width requirement, 27 trees and some pavement sections were removed for it to be constructed.” [5]
“The tunnel was used by the 521 bus route northbound until it was withdrawn in April 2023. In 2012, the direction of traffic in the tunnel was temporarily reversed, so that it was in use by southbound traffic. This was to facilitate easier traffic flow during the 2012 Summer Olympics.” [5]
References
- C.S. Dunbar; London’s Tramway Subway; in Modern Tramway and Light Railway Review, Volume 26 No. 311, November 1963, p385-395.
- https://rogerfarnworth.com/2023/07/17/london-tramways-1950-1951-and-1952.
- https://amp.theguardian.com/uk-news/2021/jul/04/hidden-london-tram-station-opens-to-public-for-first-time-in-70-years-kingsway, accessed on 27th August 2023.
- https://rogerfarnworth.com/2023/07/17/london-tramways-1950-1951-and-1952.
- https://en.m.wikipedia.org/wiki/Strand_underpass, accessed on 28th August 2023.
- https://commons.m.wikimedia.org/wiki/File:Strand_underpass_in_2007.jpg, accessed on 28th August 2023.


