The featured image above was colourised by Simon Alun Hark. It makes the engine house and the mechanisms associated with the inclined plane so real. [14]
This schematic representation of the Shropshire Tub Boat Canals is helpful in clarifying the extent of the network. It shows the locations of all the inclined planes on the system. These are marked with a red arrowhead which in each case highlights the direction of the lift. The Trench Branch and Incline were in important link in the journey between the Shropshire Union Canal and the River Severn at Coalport, linking the Newport Canal to the Shropshire Canal. [10]
P. Whitehead [11] provides approximate statistics for the inclined planes on the Shropshire Canal as follows:
Lilleshall Inclined Plane: 123 yds long, 43 ft. This replaced an earlier vertical lift in a shaft and tunnel system. [11]
I first came across an example of these inclined planes before moving to East Shropshire. We drive past the Hay Incline when travelling by a circuitous route from Manchester to Ludlow. At the time I wrote a couple of short articles for my blog:
This article focuses on the Trench Inclined Plane which was built by the Shrewsbury Canal Company in 1792 after it took over the Wombridge Canal. The Wombridge Canal was a tub-boat canal in Shropshire, England, built to carry coal and iron ore from mines in the area to the furnaces where the iron was extracted. It opened in 1788. Trench Inclined Plane remained in operation until 1921, becoming the last operational canal inclined plane in the country. The canal had been little used since 1919, and closed with the closure of the plane. [15] [16]
The Inclined Plane consisted of twin railway tracks, each with a cradle in which a single tub-boat was carried. An engine and engine house were built at the top of the incline to provide power to the Incline. It was supplied by the Coalbrookdale Company and was replaced in 1842 by a new engine that lasted for 79 years, until the final demise of the incline on 31 August 1921. The remaining structural elements of the incline were remove in 1968 as part of the Telford New Town developments. [15][17]
The engine’s main function was to lift the tub boats I cradles out of the canal at the top of the incline over the end wall of the canal. The rails of the inclined plane ran up out of the canal and then down the main length of the Inclined Plane. Generally, the working traffic was in the downward direction of the incline, and was counterbalanced by empty tub-boats returning up to the top level. [17] This meant that little power was needed for the operation of the main length of the incline.
Incidentally, “a prominent feature near the top of the incline was the Wombridge Pumping Engine house. This was a Cornish type, with a tall chimney, and was erected in 1858, to pump water from the mines. The main cylinder was 60 inches (150 cm) in diameter, with a 10-foot (3.0 m) stroke, and it lifted water from a depth of around 600 feet (180 m). The engine developed 250 hp (190 kW) and normally ran slowly, raising 3,338 imperial gallons (15.17 m3) of water per minute, in three strokes. When running at maximum speed, it could achieve eleven strokes per minute.” [18]
These two images were shared by Brian Edwards on the Shropshire Past and Present Facebook Group in late August 2022. [20]
Maps and Illustrations of the Inclined Plane
The Trench Branch Canal left the Shrewsbury and Newport Canal at Wappenshall Junction.
An extract from the 1901 6″ Ordnance Survey which shows the Shrewsbury and Newport Canal (Shropshire Union Canal) running East-West, albeit in something of a ‘V’-shape with the Trench Branch running to the Southeast, off the bottom edge of the extract. [21]The same location on the ESRI satellite imagery provided by the National Library of Scotland. [21]Wappenshall Junction seen from the Northwest.[Google Earth, 2022]A much earlier view of Wappenshall Junction. The Trench Branch leaves this scene through the bridge on the far-right of the image which leads to Wappenshall Lock. [22]
The Trench Branch ran across open fields until it reached the industrial areas near Trench. The first length passed under Wappenshall Bridge, through Wappenshall and Britton Lock, Kinley Bridge, Wheat Leasows Bridge and Lock, Shucks and Peaty Locks, Hadleypark Bridge and Lock, Turnip Lock and Wittingham Bridge before reaching Baker’s Lock/Basin and Castle Iron Works, Hadley.
Richard Foxcroft provides a plan of the Shropshire Canals on ‘Exploring Telford’ a website which focusses on the industrial history of the area which is now Telford, particularly the canals and railways. An extract is shown below. [23]
The line of the northern end of Trench Branch of the Shropshire Canal as shown on ‘Exploring Telford’ [23]
I followed this length or the Trench Branch on the morning of 31st August 2022. Much of the route is on private land and where this is the case, the old canal has been reintegrated into its surroundings.
Access to the canal basin at Wappenshall Junction is at present restrict to site personnel only as the basin and associated structures are under going restoration.
Wappenhall Junction warehouses are undergoing restoration as is the canal basin. [My photograph, 31st August 2022] Grant funding has been provided and work is being undertaken predominantly by volunteers from the Shrewsbury & Newport Canals Trust [24]These new build properties front onto the line of the canal which is illustrated using a red line. The wall in the foreground is the wingwall of the arch-bridge which used to carry the village road over the canal. [My photograph, 31st August 2022]The village lane used to be carried on this structure. Closure of the branch-canal provided the opportunity to realign the road both horizontally and vertically. [My photograph, 31st August 2022]
South of Wappenshall was the Wappenshall Lock. Access to the lock was not possible. No access was possible to Britton Lock nor to Kinley Bridge. The location of Wheat Leasowes Bridge and Lock were easily found as they lie on the road between Preston upon the Weald Moors and Leegomery Round-about on the A442, ‘Queensway’.
The three images above were all taken on 31st August 2022. In sequence, they show: the view North along the line of the old canal which is marked by the field-ditch which remains alongside the hedge in this image; the view South across the road; and finally a view which shows a length of the old canal which is now in the garden of the property in the second image and which still retains water. [My photographs, 31st August 2022]
The length of canal visible in the garden of the property above was the length between the two locks, Wheat Leasowes Bridge Lock and Shucks Lock. The property concerned appears to be an extended lock-keeper’s cottage.
The 6″ OS Map of 1881, published in 1887 shows the bridge and the two locks. The road can clearly be seen to deviate to miss the lock on its alignment and it is unsurprising that once the canal became redundant, the road was realigned. [25]21st century satellite image covering roughly the same area as the map extract above. The lock-keeper’s cottage appears to have been extended. The open area of the canal falls within the curtilage of that property. [26]An extract from the 6″ 1901 OS Map published in 1902 which shows Peaty Lock and Hadleypark Bridge and Lock. [27]A 21st century satellite image of the same area as above, with the locations of the key features marked. [27]The alignment of the old canal at the point it crosses the modern A442, Queensway. Pety Lock was located just to the North of the new road. [My photograph, 31st August 2022]The overgrown route of the old canal to the South of the A442. It retains very little water but the channel is visible here for some distance. [My photograph, 31st August 2022]A picture of Hadleypark Lock taken from the location of the old bridge over the Canal at this point. [My photograph, 31st August 2022]Looking back to the North at the guillotine lock gate arrangement used on the Shropshire Canal.This is the guillotine lock gate mechanism at Turnip Lock. [May photograph, 31st August 2022]
These three images also come from Turnip Lock. The first shows the recess in the locak wall down which the gate slides. The remaining two images show the lock walls, first looking South towards Trench and then looking North towards Wappenshall. [My photographs, 31st August 2022]
Turnip Lock and then Whittingham Bridge appear on the 6″ OS Map of 1901 before the canal them bends towards the East aand passes Baker’s Lock and Basin and the site of Castle Iron Works. [28]The same area on the ESRI satellite imagery. The ochre line shows the approximate limit of public access. The canal runs through the Hadley Castle Business Park. Moveero (part of GKN) occupies the large buildings which sit over the site of the Castle Iron Works. [28][29] The Shropshire Star announced in April 2022, that GKN would be investing a further £20million in the site. [30]The 6″ OS Map shows the canal turning first to the East and then back towards the Southeast as it approached Trench Pool. [31]The line of the canal is highlighted through the industrial areas. Remnants can be seen in the top-left of this image and the alignment is, apart for where under modern structures or roads, still highlighted by a ribbon of deciduous trees. The A442 appears again in the form of the gyratory towards the right-side of this extract from the satellite imagery. Trench Pool appears on the extreme right [31]Trench Inclined Plane as it appears on the 1874 6″ OS Map. Trench Pool was used to store water for the canal system. The Shropshire Union Canal connects to the incline from the West via the Shrewsbury & Newport Canal. At the top of the incline there was a short stub branch to Wombridge Ironworks and a longer ‘Trench Branch’ or ‘Wombridge Canal’ which connected to the Donnington Wood and Coalport branches of the Shropshire Canal. [9]Trench Inclined Plane in 1901 as shown on the 25″ OS Map. Note the location of the bridge over the canal just to the South of Trench Pool, West of the Shropshire Arms. A photograph of that bridge appears below. [8]This extract from satellite imagery 9ESRI) shows the approximate location of the Inclined Plane and it engine house. [32]The bridge over the old canal at the bottom of Trench Inclined Plane. It linked the site of the Shropshire Ironworks with Trench Pool. This colourised photograph was shared by Simon Alan Hark on the Telford Memories Facebook Group on 9th August 2021. [12]
The following colourised photographs give an excellent idea of what the Inclined Plane was like and how it worked. They have been colourised by Simon Alun Hark.
Immediately after publishing the article about the most southerly length of the Branch (Part 3), I was contacted by Ian Turpin who built a model of Coalport East Railway Station some years ago. He sent me a copy of the 1″ 1833 Ordnance Survey (revised in the second half of the 19th century to show the railways of Shropshire) which covers the Branch.
In addition, as part of his research for his model railway project he took a number of photographs in and around both Madeley Market Station and Coalport East Station in the late 1980s. This addendum catalogues the pictures that he took. My thanks to Ian for providing these photographs, some of which show scenes which have disappeared since they were taken.
At the end of this article are pictures of Ian Turpin’s layout which he kindly sent to me.
But first, a series of pictures associated with the Branch which have come to light since the three articles were completed. ….
An aerial view of Coalport (East) Railway Station extracted from a larger aerial image included by Heritage England on the Britain from Above website. The view is from the South across the River Severn in 1948, (EAW019495) [1]This view looks to the West along the Branch from Coalport (East) Station. It emphahsises the gradients on the line. The gradient started immediately at the station throat as the gradient marker indicates. After passing under the overbridge trains encountered even steeper gradients. Looking through the bridge the increased grade can be seen. The bridge in this picture carries Coalport High Street and remains today to allow the Silkin Way and a rainwater sewer main to pass under. Pictures below show the propping required to allow the bridge to continue to carry road loading. [National Railway Museum]A picture of Coalport East Station in 1958, only a couple of years before final closure. This view looks West under the road bridge which spanned the Station. It was shared by Metsa Vaim EdOrg on the Telford Memories Facebook Group on 9th November 2020. [2]The dismantling of trackwork at Coalport East Station after the closure of the Branch. This picture was shared by Metsa Vaim EdOrg on the Telford Memories Facebook Group on 11th December 2021.[3]After the removal of the Branch trackwork, the route of the old railway was commandeered to provide a route from Telford New Town to the River Severn for the rainwater drainage main sewer. During construction,. the sewer was very prominent. After construction and with landscaping in place, only short section of the sewer pipe remained visible. Much of the length is now below the Silkin Way and in earlier articles we have seen evidence of its presence. This picture was shared in a comment on the image above by Geoff Martin on 12th December 2021. [3]A picture of the site of Coalport East Station in 1987. This view is taken from the same location as the photograph of 1958 above. It looks West under the road bridge which once spanned the Station. It was shared by Metsa Vaim EdOrg alongside the 1958 image on the Telford Memories Facebook Group on 9th November 2020. It illustrates the way in which the site has changed with the introduction of the main rainwater sewer. It precedes the pictures taken by Ian Turpin by only a year or two. [2]This photograph from the 1930s shows Coalport Bridge in the foreground. The Carriage Shed at Coalport Station can be seen immediately above the bridge. This image was shared by Marcus Keane on the Telford Memories Facebook Group on 18th March 2014. [4]Lin Keska shared this postcard image of Coalport Bridge in the comments about the above image on the Telford Memories Facebook Group on 26th February 2019. The passenger facilities can be seen to the left of the bridge. The carriage shed is again visible above the bridge and the high retaining wall behind the station site can be picked out to the right of the image. [4]Lin Keska also shared this image in the comments on the same post on 26th February 2019. This picture was taken in the 1960s. The site of the passenger station is now overgrown and the Carriage Shed has also been removed. [4]This photograph shows the front of the passenger facilities at Coalport East Station after closure of the passenger service in the 1950s. It was shared by Marcus Keane on the Telford Memories Facebook Group on 26th August 2015. [5]
Secondly, Coalport River Severn Warehouse
A close inspection of the 1881 6″ or 25″ Ordnance Survey will show a building straddling two of the sidings in the goods yard to the West of Coalport Station.
The 1881 6″ Ordnance Survey [6] shows a warehouse building alongside the River Severn to the West of the passenger facilities at Coalport East Station. This was the River Severn Warehouse noted fleetingly by Bob Yate in his description of the Branch. [7: p183]
Yate notes this warehouse in his shirt description of Coalport East Station: “Two run-around loops gave access to a small goods yard, and to the goods warehouse alongside the River.” [7: p183] By the time of the 1901 Ordnance Survey, the main warehouse element of the building had been demolished, leaving only a truncated section which acted as a good shed. The only picture that I have found of the building dates from after it had been partially removed.
Third, the relevant parts of the 1″ Ordnance Survey of 1833(revised to show rail routes). …
This first extract from the 1″ Ordnance Survey shows the length of the Coalport Branch covered in my first article about the line, Hadley Junction to Malinslee Station.This extract shows the length covered in Part 2 – Malinslee Station to Madeley Market Station. The thick black lines drawn on the map represent possible schemes to line the different rail routes in the immediate area.This extract shows the length of the Branch covered by the third article, from Madeley Market Station to Coalport Station (Coalport East Station).
Fourthly, Ian Turpin’s photos of Madeley Market Station. … Madeley Market Station Building seemed a little isolated and forlorn back in the late 1980s, although it seems not to have suffered any significant vandalism. The pictures were taken with a mind to being able to recreate the facilities at Coalport in model form as the buildings were of similar construction.
The Bridge Toll House at street level in the 21st century. The building originated as a warehouse (1793-1808), was in use as house by 1815 and as tollhouse from 1818, when the adjacent Coalport Bridge underwent major repairs. Shropshire County Council became owners in 1922, and it was restored after it passed to the Buildings at Risk Trust in 1994. [9]
The cottages to the North of the river and to the South of the Station site. The next two photographs show the same cottages from the NorthThe same cottages as shown on Google Streetview with the Bridge Toll House on the right. [Google Streetview, April 2023]
The photographs taken by Ian Turpin were all used as background material for the construction of a model railway centred on Coalport (East) Railway Station. The pictures were taken in the period before the road-bridge across the Severn was renovated.
And, before we turn to the photographs of Ian Turpin’s layout, …. two extracts from LNWR publications. The first of these shows the 1905 timetable for the Branch, the second is the LNWR working directions of 1917 for operating Motor Trains on the Branch. Both of these were forwarded to me by Ian Turpin. The working timetable shows that the Branch was worked by two engines. A two-coach motor-train worked the branch from May 1910 until sometime after the grouping with 50ft x 8ft arc roof stock (converted from ordinary non-corridor stock). The Branch was by this time rated third class only. Of the two coaches, one was LNWR No.103 (LMS No. 53450 and the other was LNWR No. 1815 (LMS No. 5338).
Ian Turpin’s layout which featured in The Railway Modeller in the 1990s.
Ian Turpin sent me the superb photographs of his excellent model below. They were taken for an article about his layout which was published in the Railway Modeller in the 1990s. He has very kindly agreed to their inclusion here.
Bob Yate; The Shropshire Union Railway: Stafford to Shrewsbury including the Coalport Branch; No. 129 in the Oakwood Library of Railway History; The Oakwood Press, Usk, Monmouthshire, 2003.
After writing recent articles about the northern section of the branch, I was contacted by David Bradshaw, co-author with Stanley C. Jenkins of ‘Rails around Oakengates’, an article in Steam Days magazine in March 2013. L, offering permission to use material from that article in this series of posts about the Coalport Branch. [1]
Along with discussion of all the railways in and around Oakengates (including the Lilleshall Co. private railways), David Bradshaw and Stanley C. Jenkins looked at the Wellington to Coalport Branch.
David suggested that I should use material from the article to supplement material included in my recent articles. My feeling is that the section of the ‘Rails around Oakengates’ article which covers the Coalport Branch should be reproduced in full. This addendum focusses solely on the relevant parts of the Steam Days article. [1: p168-170, 175, 176-177] ……..
The Wellington to Coalport Branch
The Great Western Railway had taken over the S&BR in 1854, and this may have prompted the LNWR to consider a scheme for converting the Shropshire Canal into a railway. This busy waterway was experiencing severe problems in terms of subsidence and water supply, and there was a major flooding incident in July 1855 when Snedshill tunnel collapsed. It was thought that the cost of repairs would probably exceed £30,000 and, faced with this heavy expenditure, the London & North Western Railway decided that the money would be better spent on the construction of a replacement railway from Hadley, near Wellington, to Coalport, which would utilise, as much as possible, parts of the troublesome canal.
The Coalport line passenger services became synonymous with Francis Webb’s ‘Coal Tanks’ (the sole survivor, No 58926, being a regular on the line), 300 of which were built by the L&NWR between 1882 and 1897 as an 0-6-2T derivative of Webb’s Standard ’17-inch’ 0-6-0 tender design. On 13 August 1947, in the last summer of the LMS, ‘Coal Tank’ No 7836 calls at Madeley Market station with a Coalport to Wellington working. The small town of Madeley was initially served by the Great Western Railway from 2 May 1859, on the Madeley Junction to Lightmoor route (the Madeley branch), and upon restarting its journey the depicted LMS train will pass over the GWR route at 90°. Madeley Market station opened with the Coalport line in June 1861, and clearly the local population found it more desirable to travel from here than on the GWR route, as the station on that line first closed to passengers in March 1915, as Madeley Court. W.A. Camwell/SLS Collection
It was then estimated that the proposed Coalport branch line would cost about £80,000, including £62,500 for the purchase of the waterway. Accordingly, in November 1856, notice was given that an application would be made to Parliament in the ensuing session for leave to bring in a Bill for the purchase and sale of the Shropshire Canal and the ‘Conversion of Portions thereof to Railway Purposes, and Construction of a Railway in connection therewith’.
The proposed line was described as a railway, with all proper stations, works, and conveniences connected therewith, commencing by a junction with the Shrewsbury and Stafford Railway of the Shropshire Union Company in the township of Hadley and parish of Wellington, in the county of Salop. at a point about two hundred yards westward of the mile post on the said railway denoting twelve miles from Shrewsbury’, and it terminated in the parish of Sutton Maddock, in the county of Salop, at a point ten chains or thereabouts to the east of the terminus of the Shropshire Canal at Coalport’.
The railway would pass through various specified parishes, townships, or other places, including Wellington, Hadley, Donnington Wood, Wrockwardine, Wombridge, Oakengates, Stirchley, Malins Lee, Dawley, Snedshill, Madeley, and Coalport, ‘occupying in the course thereof portions of the site of the Shropshire Canal’. Having passed through all stages of the complex Parliamentary process, the actual ‘Act for Authorising the Conversion of parts of the Shropshire Canal to Purposes of a Railway’ received the Royal Assent on 27 July 1857.
The canal was closed between Wrockwardine Wood and the bottom of the Windmill Hill inclined plane on 1 June 1858, although isolated sections of the waterway remained in use for many years thereafter. The work of conversion was soon underway, and on Thursday, 30th May 1861 The Birmingham Daily Post announced that the Coalport and Hadley line of railway would be opened on ‘Monday next’, implying that the first trains would run on 3rd May. In the event, this prediction was slightly optimistic, and on 12th June the same newspaper reported that, ‘in accordance with the arrangements arrested’. previously announced’, the Coalport branch had been opened for passenger traffic on Monday, 10tj June 1861.
As usual in those days, Opening Day was treated as a public holiday, and a large number of spectators had assembled at Coalport station to witness this historic event. ‘At the appointed time, the first engine, and train of first, second and third class carriages, moved off from the station, having a respectable number of passengers’.
The newly opened railway commenced at Hadley Junction, on the Stafford to Wellington line, and it climbed south-eastwards on a ruling gradient of 1 in 50 towards Oakengates (3.25 miles from Wellington), which thereby acquired its second station. Beyond, the route continued southwards, with intermediate stations at Dawley (6 miles) and Madeley Market (7½ miles), to its terminus at Coalport, some 9½ miles from Wellington. The final two miles of line included a continuous 1 in 40 descent towards the River Severn. An additional station was opened to serve Malins Lee, between Oakengates and Dawley, on 7th July 1862.
The steep gradients on this new line contributed to three alarming incidents that took place within the space of a few weeks, the first of which occurred shortly before the opening to passenger traffic, when a train of wagons ‘laden with bricks, stone and sand for the works now in progress at the Coalport terminus, under the care of a brakesman, suffered a brake failure and, ‘thus liberated, the train acquired excessive speed, dashed past the court, through Madeley, until it neared the entrance to the tunnel in Madeley Lane. Here, its further progress was arrested by a large plank being skilfully placed across the rails, and the insertion of some spragges in the wheels. Fortunately, no injury was done beyond destruction to the plank’
On 30 August 1860, The Birmingham Daily Post reported a similar incident, when a train of ballast wagons was traversing the line from Madeley’ and ‘a coupling chain gave way, causing the wagons to ‘dash down the gradient at a fearful velocity’. Fortunately, the ‘timekeeper’ at Coalport Works, aware that the runaways were approaching, threw a bar of iron across the line of rail, whereby its further progress was arrested’.
Incredibly, a third near-disaster occurred on the following day, ‘as the engine was returning from the Coalport terminus with a numerous train of empty carriages’. For reasons that were not entirely clear, the train derailed near Mr Eagle’s Chain Manufactory, which was on the highest embankment on the line and, having fallen part way down the 60ft embankment, the engine became deeply embedded in the earth, earth, a ‘great number of men and appliances’ being required to extricate it from its precarious resting place. It was subsequently revealed that the embankment had been subject to almost daily subsidence, which may have contributed to the accident.
The Coalport branch line was, from its inception, geared towards freight traffic rather than passengers, and there were numerous private sidings linked to nearby factories within the Oakengates Urban District. One of these sidings, known as Wombridge Goods, served Wombridge Iron Works, which had a connection with a surviving section of the Shropshire Canal. There was also Wombridge ballast siding and Wombridge Old Quarry siding, while other sidings served the iron foundry of John Maddocks & Son, and also the Lilleshall Company’s steel works at Snedshill.
Successive editions of The Railway Clearing House Handbook of Stations reveal further private sidings on the Coalport branch, including, in 1938, the Exley & Son siding and the Nuway Manufacturing Co siding at Coalport, and at Madeley Market there was the Messrs Legge & Sons’ siding and the Madeley Wood Cold Blast Slag Co siding.
The original train service consisted of three passenger trains in each direction between Wellington and Coalport, with a similar number of goods workings. This modest service persisted for many years, although an additional Thursdays-only train was subsequently provided in response to the increased demand on Wellington market days. In 1888 the branch was served by four passenger trains each way, together with five Up and three Down goods workings. By the summer of 1922 there were five Up and five Down passenger trains, with an additional short-distance service from Wellington to Oakengates and return on Saturdays-only.
In the final years of passenger operation, the timetable comprised five trains each way. In July 1947, for example, there were Up services from Coalport at 6.22am, 8.50am, 11.57am, 4.40pm and 7.40pm, with corresponding Down workings from Wellington at 8.04am, 10.02am, 1.40pm, 6.30pm and 9.15pm; a slightly different service pertained on Thursdays and Saturdays. The final branch passenger service in 1952. consisted of four Up and four Down trains, increasing to five each way on Thursdays and six on Saturdays.
A view looking north from the Canongate overbridge in Oakengates on 30 July 1932 finds a former L&NWR 0-8-0 in the goods yard, while passing on a northbound rake of five-plank wagons is a Webb 0-6-0, probably a ‘Cauliflower”. The sharply curved line on the extreme left is Millington’s siding, and this timber business was also served from the rear of the GWR goods yard, although the rival sidings to the sawmill were not connected to each other. From the GWR system an elongated siding crossed Canongate on the skew, it being one of four railway lines crossing this road, the others (all to the right of the photographer) being part of the Lilleshall Company system, although those relating to the Snedshill Iron Works would be in the hands of Maddock’s before the outbreak of war. The 0-6-0 is moments away from the platform ends of the LMS station, the properties to the right facing on to Station Hill, but it is worthy of mention that the photographer is equidistant from the GWR passenger station, out of sight to his left, and is even nearer to the industrial lines to his right, albeit they are much higher up the hill. Wrockwardine Wood crowns the distant hill. WH. Smith Collection Kidderminster Railway Museum.About 300 yards further south, and once again facing north, we overlook one of the busier connections from the Coalport line, our vantage point being the Holyhead Road overbridge, the old A5 trunk road. This view shows the Coalport branch in the cutting on the left, while the lines on the right connect to the former Snedshill Iron Works; a Hawksworth ‘9400’ pannier tank is seen shunting the siding in the mid-1950s. This was initially one of the connections to the Lilleshall network but in about 1938 the Lilleshall Company sold the Snedshill Iron Works to John Maddock’s & Son, an Oakenshaw-based engineering firm that was outgrowing its premises near the GWR station. Subsequent development saw the distant building become one of the most modem casting foundries in Europe, and post-war, pipe fittings became the principal activity. A.J.B. DoddA ‘9400’ 0-6-OPT, No 9401, is pictured with our previous vantage point in view. The bridge ahead is that carrying Holyhead Road across the Coalport branch, while rumbling beneath the photographer’s feet will be express trains passing through Oakengates tunnel; and it should also be remembered that the course of the Coalport line at this point was once a canal, because it was here that it sprang a leak! On the other side of the bridge is the link to the John Maddocks & Sons (ex-Snedshill Iron Works) siding, while the point diverging at the photographer’s feet is a spur south to the Priorslee Furnaces established by the Lilleshall Company. The L&NWR/LMS route in Oakengates was at a much higher level than that of the GWR, hence the tunnel, but most of the heavy industry that needed to be served was even higher up the hill, so the Coalport line from Oakengates (Market Street) station to here has been climbing at 1 in 50. With passenger operations on the branch eliminated in 1952, the freight-only days of this line saw the route’s ex-LMS identity blurred by the regular use of Hawksworth 0-6-OPTS on the daily goods job to Dawley & Stirchley, the line being cut-back to there from 5 December 1960, and of course the ‘TOAD’ parked on the running line further blurs traditional LMS and Western boundaries. A.J.B Dodd/Colour-Rail.com
Oakengates (Market Street)
The Coalport line diverged from the Wellington to Stafford route at Hadley Junction, and ran south-eastwards via Wombridge goods station, at which point various private sidings branched out to serve Hadley Lodge Brickworks and other industrial concerns.
Oakengates (LMS) on 9 August 1932, looking north towards the level crossing, complete with its diminutive L&NWR-designed Crossing box. Opened with the Coalport line as its primary intermediate station, the principal buildings are on the Wellington-bound side, with passenger facilities such as ticket purchases and Up-side waiting accommodated within the single-story. Trains would continue to call mere until 2 June 1952, less than a year after British Railways rebranded it Oakengates (Market Street), that being the road that lead to it, ather than Station Hill, which was its actual location. All the goods facilities were to the south of the station, part of the sidings being glimpsed to the left of this view, behind the fence, and these would be maintained until 6 July 1964 when the line from Hadley Junction to Dawley & Stirchley, the terminus of the Coalport line since 1960, would officially be taken out of use, although at some point the former Down line through here would be removed in the freight-only era. Mowat Collection
Oakengates, the largest station on the Coalport branch, was a short distance further on. The former LNWR and LMS station was renamed Oakengates (Market Street) on 18tj June 1951, to prevent confusion with the nearby GWR station, which was thereafter known as Oakengates (West). The town’s Coalport line station was orientated on an approximate north-to-south alignment, and its layout included Up and Down platforms for passenger traffic, with a level crossing immediately to the north of the platform ramps. The main station building was on the Up (northbound) platform, while the diminutive signal box was situated on the Down platform, in convenient proximity to the level crossing. The cabin was a standard L&NWR gable-roofed box, albeit of the smallest size.
Greetings from Oakengates. A commercial postcard, franked in October 1905, shows the station forecourt area of the LNWR station in Oakengates. The view is looking east up Station Hill, and the Methodist Chapel on the right was where my sister and I went to Sunday School in the late 1940s and early 1950s. Halfway up the hill, the Lilleshall Company main line crossed at road level and the disused canal passed under the road. David Bradshaw Collection
The main station building, which was similar to that at Coalport, was a typical LNWR design, incorporating a one-and-a- half-storey Stationmaster’s house at the rear, and an attached single-storey building, which contained the booking office and waiting room facilities. The single-storey portion faced on to the platform, and it featured two rectangular bays and a central loggia, which was fully enclosed by a wood and glass screen to form a covered waiting area. The residential block sported a steeply pitched slate-covered roof, whereas the booking office portion had a flat roof. The building was of local brick construction, with tall chimneys and slightly arched window apertures. This distinctive structure was erected, as were all the others on the line, by local builder Christopher Bugaley of Madeley. There was a detached gentlemens’ convenience on the Up platform, while facilities for waiting travellers on the Down platform comprised a small waiting room.
Two dead-end goods sidings at Oakengates were provided on the Down side, while the Up side sported a sizeable goods yard and a substantial goods shed. There was also a timber yard siding and an additional goods shed that was used by Millington’s, a local company. The 1927 Ordnance Survey map suggests that the timber siding ran to within a few yards of the local (Oakengates & District) Co-operative Society Depot, and it was hardly a stone’s throw from a connection from the GWR station. For a time I attended the Sunday School at the Methodist Chapel halfway up Station Hill and I was a regular at the classic Grosvenor Cinema, which was close to Market Street station. Halfway up Station Hill, the old canal and Lilleshall Company lines ran under and across the road respectively.
Motive Power on the Coalport Branch
The Coalport branch was typically worked by Webb ‘Coal Tank’ 0-6-2Ts, together with Webb 2-4-2Ts and ‘Cauliflower’ 0-6-0s. In earlier years the route had also been worked by L&NWR 0-6-0 saddle tanks such as No 3093, which was recorded on the line in 1895. The London & North Western Railway ‘Coal Tanks’, which included the still-extant No 58926 (seen on the Coalport line as late as 21 October 1950), enjoyed a long association with the route, but at the end of the LMS era these veteran locomotives were replaced by Shrewsbury-allocated Fowler class ‘3MT 2-6-2Ts, such as Nos 40005, 40008, 40048 and 40058. The goods trains, meanwhile, were worked by a range of ex-LMS locomotive types, including Fowler Class ‘3F’ 0-6-0s, ‘4F’ 0-6-0s, and also the occasional ex-L&NWR ‘Super D’ 0-8-0.
Webb 5ft 6in 2-4-2T No 6757 awaits departure from Coalport station with the 4.40pm service to Wellington on 5 September 1947, the use of a complete pre-Grouping era train on this duty being typical at this time. However, on the day the photographer noted that this ‘1P’ was in use instead of the usual ‘Coal Tank’, due to a locomotive shortage. More than likely it was the 4ft 5in driving wheels of the ‘Coal Tanks’, nominally ‘1F’-rated freight engines, that made them a more popular choice for the passenger jobs on this steeply graded line. Within a few yards of departing Coalport the branch climbed at 1 in 40, a grueling ascent, at worst 1 in 31, continuing almost relentlessly for about three miles, to a point just short of Dawley & Stirchley. The stop at Madeley Market, halfway up the climb, was either a blessing or a curse, depending on the health of the 19th century engine and its fire. I recall the ‘Coal Tanks’ on these duties, but by the time I started train spotting in 1951, these ex-L&NWR 2-4-2Ts had all been withdrawn. W.A. Camwell/SLS Collection
The passenger services, known locally as the ‘Coalport Dodger’ were poorly supported – except on market days in Oakengates and Wellington, and for the locally renowned Oakengates Wakes (Pat Collins Fair) – hence their early demise, particularly as the rival ex-GWR route to Wellington was more convenient. World War II staved-off closure for a few years, but in the early months of 1952 it was announced that passenger services would be withdrawn with effect from 2 June 1952, and as this was a Monday the last trains ran on Saturday, 31 May. Fowler Class ‘3MT’ 2-6-2T No 40058 worked the final trains, its smokebox adorned with black flags, a wreath and the chalked letters ‘RIP’.
A former L&NWR Webb ’17in Coal Engine’, LMS No 8148, is at the head of open wagons beyond the passenger extremity of the Coalport branch in about 1930, the carriage shed providing an attractive backdrop. This 500-strong class of engines were tender versions of the ‘Coal Tank’ design. The 0-6-0, outshopped new as L&NWR No 878 in June 1877, didn’t gain its post- Grouping running number until February 1926 and it would continue to serve the LMS until 1934; it is carrying the LMS (Western Division) shedplate for Shrewsbury, which had a two- road sub-shed at Coalport, this being attached to the other side of the carriage shed. Rail Archive Stephenson
Motive power on the line after the cessation of passenger services was often provided by Hawksworth ’94XX’ class 0-6-0PTs, such as Nos 9470 and 9472 (complete with broken front numberplate), or less frequently, by ’57XX’ class 0-6-0PTs. There was an incident when a ’57XX’ was derailed on the catch points just outside Oakengates station, although details are elusive. Wellington shed’s sole ‘1600’ class 0-6-0PT, No 1663, shunted the GKN Sankey sidings near the junction of the Stafford and Coalport lines and it is believed to have ventured up the branch on occasion.
A goods working which appeared at Oakengates after mid-day invariably featured an LMS Burton-based Class ‘3F’ or ‘4F’ 0-6-0, although on one unforgettable occasion, on 14th August 1957, Bath (Green Park)-allocated Stanier ‘Black Five’ class 4-6-0 No 44917, in ex-Works condition, turned up on this humble working. This train had apparently started life as a light-engine working that had left Shrewsbury (Coleham) at 5.10am and, on then reaching Shrewsbury (Abbey Foregate) at 5.35am, it picked up a goods working and eventually arrived at Priors Lee sidings, just outside Oakengates, at 2.20pm.
In the period from July to the end of October 1957, the following locomotives appeared on what local trainspotters called ‘the mid-day goods’ (although it actually arrived in the early afternoon) – Class ‘3F’ 0-6-0s Nos 43709 and 43809, Class ‘4F’ 0-6-0s Nos 43948, 43976, 43986, 44124 and 44434, and of course ‘Black Five’ No 44917 (71G).
It is interesting to note that excursion trains continued to run from Coalport after the withdrawal of the regular passenger services. On one occasion, around 1956, there were two excursions to the North Wales Coast on the same day, both of which were hauled by Class ‘5MT’ 4-6-0s. Only one of these workings stopped to pick-up at Oakengates, as the other ran straight through Oakengates station – it must have been one of the few examples of a ‘non-stop’ passenger working in the life of the line? On 23rd April 1955 the Locomotive Club of Great Britain joined forces with the Manchester Locomotive Society to run a ‘Shropshire Rail Tour’, which left Shrewsbury at 2.30pm behind ‘Dean Goods’ 0-6-0 No 2516 on a tour of local branch lines, which included the Minsterley and Coalport routes, the fare for this interesting excursion being 15s 6d.
A year or two later, on 2nd September 1959, the Stephenson Locomotive Society arranged a further tour of West Midland branch lines, including the Womborne, Minsterley and Coalport routes, a Swindon three-car Cross Country diesel-multiple-unit being provided instead of a steam-hauled train, ostensibly to ‘improve timings’.
Another abiding memory is of an excursion, believed to have been arranged by the late Cyril Poole, a teacher from Madeley Modern School, which departed behind a Hughes/ Fowler ‘Crab’ class 2-6-0 and returned in a tropical storm behind a ‘Super D’ 0-8-0, running tender-first. The train was made up to ten coaches and it took at least twenty minutes to surmount the 1 in 50 bank into Oakengates. Steaming was not an issue, but there were adhesion difficulties as the engine slithered and slipped up the bank – the noise level was something never to be forgotten!
References
D. Bradshaw and S.C. Jenkins; Rails around Oakengates; in Steam Days No. 283, March 2013, p165-179.
The canal length covered by this article is shown on this plan based on the Ordnance Survey Explorer map of the area. The plan is from an article by Andy Tidy on his blog, Captain Ahab’s Watery Tales. His excellent blog is worth reading. [8]
There were two inclined planes on this length of the Shropshire Canal, both are shown on this plan. Two previous articles cover the Hay Inclined Plane at Coalport which took tub boats down to the wharves alongside the River Severn. These can be found by following these links:
The Windmill Inclined Plane is buried under modern development.
There is more about both these inclined planes below.
Immediately South of Stirchley Iron Works there was a loop in the line of the canal which meant that it was on a tighter curvature than the engineers for the later LNWR Coalport Branch were happy with. The 6″ Ordnance Survey of 1881 shows that length of the canal running alongside the railway.
A short distance South of Stirchley Lane, the Canal entered a 281 yard long tunnel – Stirchley Tunnel. When the railway was built, the tunnel was opened out into a cutting. At this location the Ordnance Survey mapping above shows a rock face to the West side of the railway which highlights the location of the erstwhile tunnel.
A short distance beyond the location of the bridge in the above photo the canal route to the River Severn branches away to the left (East), the arm of the canal running to the West towards Horsehay continues South for a short distance before turning West across the old Bridgnorth turnpike road. The OS Map below shows both of the two arms of the Canal.
This extract from the 6″ OS mapping of 1881 shows the new railways which post-dated the Canal and has the old canal routes superimposed. Note the canal incline close to Windmill Farm and the branch running to the West from ‘Aqueduct’. The aqueduct which carried this arm over the old turnpike road can be seen on the extract. It gave a name to the hamlet immediately next to it. As will be seen from the satellite image below, Madeley Court Station is long gone. The GWR Madeley Branch remains in the early 21st century as it was used for merry-go-round coal trains serving Ironbridge Power Station until the power station closed. [1][2]A Google Maps satellite image extract showing approximately the same area as the OS map extract above. Sketched onto the satellite image are: the very approximate canal routes in blue; the length of the LNWR branch which is not used by the Silkin Way in red; and the old Bridgnorth Road alignment in black. The diversion of the Silkin Way was required with the building of the A4169 and the removal of the bridge deck where the LNWR Coalport Branch line crossed the GWR Madeley Branch. There are no features on the ground in the 21st century to define the line of the old canal as it passed through the are now called Brookside. The old road bridge next to Madeley Court Railway Station remains and carries the diverted Silkin Way across what was the GWR Madeley Branch. Towards the top of this satellite image Southall Road crosses the old railway by means of the bridge shown below. [3]
It is worth emphasising that the lines drawn above are only approximate, particularly in the case of the old Shropshire Canal. A somewhat more accurate alignment for the Canal is shown, length-by-length in the side-by-side images below
Looking Southwest across the aqueduct along what would have been the line of the branch canal. After crossing the turnpike road on this aqueduct, the branch canal turned sharply to the North before heading West towards Lightmoor. [My photograph, 2nd March 2023]Looking Northeast across the aqueduct along what would have been the line of the branch canal heading towards what is now the centre of Telford. [My photograph, 2nd March 2023]Looking Southeast along what was the turnpike road to Bridgnorth, through the arch of the aqueduct which was built in around 1792. [My photograph, 2nd March 2023]Looking Northwest towards modern-day Telford along what was once the Bridgnorth turnpike road. [My photograph, 2nd March 2023]The plaque placed on the aqueduct after its restoration in 2001, (c) Neil Brittain, 19th March 2013. [4]
The branch canal will be for another article. In this article we are following the route to the River Severn.
Aqueduct Village to the River Severn
Just South of the tunnel, the Canal to the Severn turned away to the East from the branch over the aqueduct. The 6″ Ordnance Survey of 1881 above shows the remains of the Canal, first heading East, then curving round to the South before turning East then South-southeast.
As it turned South-southeast it reached the head of the Windmill Inclined Plane which was 600yds long and had a 125 ft rise. [7]
Following the route of the Canal on the ground in the 21st century is difficult as the topography has changed significantly and the majority of the line is built over. Establishing the actual route is difficult, even with the aid of modern mapping tools available through the National Library of Scotland (NLS). The side-by-side option on the NLS website enables a line to be transferred with some accuracy. You will see that in producing the line on the ESRI image above I misjudged the alignment of the curves when transferring them from the 6″ Ordnance Survey of 1881 onto the ESRI imagery from the NLS. The side-by-side images permit the cursor to appear on both the map and the satellite image at the same time.
This first side-by-side image shows the length of the Canal which turns away from the later railway route. I have only mapped the actual length shows on the Ordnance Survey rather than try to interpret the line over the open fields of the map, or the housing in the satellite image. [10]
The four Streetview immediately below show the approximate points where the old canal alignment crosses modern roads. The first shows Aqueduct Lane just to the North of Chapmans Close and at the point where a modern access to the Silkin Way meets the lane.
Looking North on Aqueduct Lane just to the North of Chapmans Close. Aqueduct Lane was a highway in the mid 19th century and must have bridged the old canal. Nothing is known about any structure at this location. The Silkin Way is off to the left of the image and is at a significantly lower level than Aqueduct Lane. [Google Streetview, June 2022]Looking North at the bend in Lambeth Drive. The blue line is the approximate route of the old canal transposed from the side-by-side image above. The passageway immediatly alongside the blue line is not a public right of way, it merely provides access to a property behind the conifer that is prominent in the image. [Google Streetview, June 2022]Further East on Lambeth Drive the old canal’s route curve across the junction and will soon cross Brookside Avenue which is a short distance behind the camera. [Google Streetview, June 2022]Looking Northeast along Brookside Avenue at its junction with Lambeth Drive. The old canal’s route curves sharply round to the South. [Google Streetview, June 2022]
As we noted above, I have not tried to accurately plot the line of the old canal where it does not show on th Ordnance Survey mapping. The next length shown on the mapping is covered on the next side-by-side image below and includes the top part of the Windmill Inclined plane. The route of the incline is defined by the field boundary shown on the OS map.
This second side-by-side image shows the next mapped length of the old canal as it reaches the head on the incline adjacent to Windmill Farm. Once again, very little of the old topography remains and the area has seen significant housing development. [11]Looking East on one of the arms of Bishopdale with the approximate line of the old canal shown in blue. [Google Streetview, June 2022]Looking North on Bishopdale with the approximate line of the old canal shown by the blue line. [Google Streetview, June 2022]Looking to the East along the most southerly part of Brookside Avenue with the old canal route marked by the blue line. As the side-by-side image above shows, we are now a good distance down the Windmill Inclined Plane and it is impossible to be sure of the relative levels of the old canal incline and the modern road.
As we have already noted Windmill Inclined Plane was 6ooft long and saw a drop in levels towards the River Severn of 125ft. We have no pictures of the incline but we do have pictures of another incline on the Shropshire Canal which survived for a little longer and we have the Hay Incline to see in the 21st century. Photos have survived of Trench Incline while it was still operational.
Trench Inclined Plane was covered in another article on this site:
The original photos of Trench Incline were monochrome but modern technology now allows those images to be colourised. The images below hopefully give a good idea of what Windmill Inclined Plane might also have been like in operation. The images were colourised by Simon Alun Hark and shared by him on his Shropshire Nostalgia and Film Facebook Group. [12]
This extract from the 6″ Ordnance Survey shows Trench Inclined Plane close to the Shropshire Oron Works. Trench Pool is to the Northwest of the incline. The incline is marked as a tramway on the map extract. [13]Trench Inclined Plane viewed from the West with the Blue Pig (formerly the Shropshire Arms) Public House on the left of the image. At the top of the incline two different buildings are visible. The one at the top of the incline was the engine house for the incline. [14]The Engine House at the top of the Trench Inclined Plane. [15]Looking down the Trench Inclined Plane to the West. The Shropshire Iron Works (Trench Iron Works on later mapping) are immediately at the bottom of the incline on the left. Castle Car Works are further ahead. [16]The Trench Inclined Plane once again. This image shows how the iron tob boats were transported up and down the incline. At either end of the incline was a pool into which the cradles which carried the tub boats were submerged. Once a tub boats was positioned over the cradle it was picked up by the cradle which left the pool to climb or descend the incline. At the opposite end of the incline the process was reversed. [17]
These Canal Inclined Planes were a much more effective method of lifting the tub boats over significant height gains than would have been a series of canal locks. While these were expedient with tub boats, they would have been impractical for narrow boats which were of a much greater length.
A history of the inclined planes on the Shropshire Canal is provided by P. Whitehead in an article online which is entitled ‘Shropshire Tub Boat Canals‘. [18]
This hand-traced drawing which focusses on the tramways/tramroads serving Madeley Court Furnaces is part of a series included in research published by R.F. Savage and L.D.W. Smith entitled, The Waggon-ways and Plate-ways of East Shropshire. It shows the line of the Windmill Inclined Plane and the canal which it served continuing South towards the River Severn. [19: p179]This extract from the 6″ Ordnance Survey of 1881, published in 1888, shows the Shropshire Canal at the bottom of the Windmill Inclined Plane. The road crossing the canal is the Bridgnorth turnpike road. There are two Wharves show on the extract, one of which was accessed by means of an inclined plane from Kemberton and Halesfield collieries to the East, which is not shown on Savage & Smith’s traced drawing above. They do show a short length of tramroad running along the turnpike road on the West side of the canal. Although not coloured blue on this map extract, there was a canal basin at Tweedale. Its outline can be seen to the East of the Bridgnorth road just South of the Inn. [20]
Bradshaw and Jenkins tell us that “the canal was closed between Wrockwardine Wood and the bottom of the Windmill Hill inclined plane on 1st June 1858, although isolated sections of the waterway remained in use for many years thereafter.” [21: p169]
These side-by-side images show the Tweedale area with the old incline (shown in blue on the satellite image) running down from the location of Windmill Farm to a point close to the old Bridgnorth turnpike road. From this point South the canal remained open after the construction of the LNWR Coalport Branch. The OS Map used in these images is the 1901 6″ survey. The Inn, the canal basin and the warehouse at its western end no longer appear on the map. [22]The Three Furnaces Pub in Tweedale is on the East side of Bridgnorth Road. Behind it are the remains of a colliery slag-heap. That colliery waste built up over the years and swallowed the bottom end of the Windmill Inclined Plane. [My photograph, 21st March 2023]Google Maps satellite image showing the location of the canal bridge and the line of the old canal. [Google Maps, 21st March 2023]looking South down Bridgnorth Road across the ols canal alignment (shown in blue). The canal bridge was removed and the road was realigned. [My photograph, 21st March 2023]Looking North along the line of the canal across Bridgnorth Road. [My photograph, 21st March 2023]Looking South along the line of the canal from the junction of Tweedale North (Court Works Industrial Estate) and Bridgnorth Road. [My photograph, 21st March 2023]We noted when looking at the side-by-side images above that the 1901 Ordnance Survey did not show Tweedale Canal Basin. This image, from 1954, shows that the Basin was still present as late as the middle of the 20th century. The photo was shared on the Telford Memories Facebook Group by Marcus Keane on 16th January 2017. [23] A similar photograph, taken in 1957 from a point closer to tha abandoned tub boat can be found in Ivor Brown’s book “The East Shropshire Coalfields.” Ivor Brown writes: “Much still remained of the colliery canal and tramway systems in the 1950s. This view shows the basin for turning and loading boats at Halesfield Mine with a sunken tub boat and a crane stump remaining. While this tub boat was made of wood, some were of iron and one of these can still be seen at the Blists Hill Museum.” [24: p43]Further South, the canal continued in a generally southerly direction. Its route buried under the Tweedale Industrial Estate. [My photograph, 21st March 2023]Tweedale Basin and Wharf were to be found to the East of Bridgnorth Road under what, in the 21st century, is a dense canopy of trees. [Google Maps, 21st March 2023]Looking North across Tweedale along the line of the old canal. The building on the right is used by Bu Industrial Components Ltd. [My photograph, 21st March 2023]Looking South across Tweedale along the line of the canal. The building ahead is let out as a series of small units. Mmy photograph, 21st March 2023]We are now facing North at the back of the site in the last photograph on a footpath which from this point follows the line of the old canal. [My photograph, 21st March 2023]Looking to the South from the same location as the previous photo. This footpath follows the line of the old canal. [My photograph, 21st March 2023]Once again facing South along the line of the old canal The conifers ahead are adjacent to Prince Street, Madeley. There was a bridge over the canal at this location which is shown on the first monochrome image below. [My photograph, 21st March 2023]This extract from the 6″ Ordnance Survey of 1881, published in 1888, shows the Shropshire Canal as it passed under Prince Street and Hills Lane (later Queen Street). Also worthy of note on this map extract are Madeley Gas Works on the West bank of the canal and Hillslane Colliery on the East bank. The slag heaps for Hillslane Colliery were on both sides of the canal. The colliery and its slag heaps were served by an internal tramway/plateway which included a bridge over the canal. The canalat this point is beginning to close in on the line of the LNWR Coalport Branch. Madeley Market Station on that line can be seen on the bottom-left of this map extract. [20]Looking back to the North from the location of Prince Street Bridge along the line of the old canal which is followed by the footpath. The corrugated -iron- building on the right of this image is a remnant from the 1930s. It can be seen on the first monochrome aerial image below. [My photograph, 21st March 2023]Looking North across the location of Prince Street Bridge with the route of the canal shown by the blue line. [My photograph, 21st March 2023]This aerial image is an extract from a photograph on Historic England’s Britain From Above website. The reference number is EPW061719. This extract shows Prince Street Canal Bridge. The corrugated-iron building mentioned above can be seen in this image to the right of the canal. [26]Redevelopment of Madeley has resulted in the provision of a new road extending East out of the town centre, Kemberton Road. This photo is taken looking South across Kemberton Road and shows the line of the old canal. [My photograph, 21st March 2023]Looking back North towards Kemberton Road. [My photograph, 21st March 2023]This image is also an extract from the same aerial image as that showing Prince Street Bridge above. It was taken facing to the North. The photograph was part of a survey undertaken in 1939 and can be found on Historic England’s Britain from Above website. This picture features the Gas Works off Queen Street and the area around it in Madeley, and includes the Queen Street Canal Bridge, (c) Historic England, Britain From Above (EPW061719). [26]Looking South from the same location along the footpath/cycle way which follows the line of the canal at this location. [My photograph, 21st March 2023]Looking South towards Queen Street to the location of Queen Street canal bridge. The roofline straddling the route of the old canal is the JW Kingdom Hall. [My photograph, 21st March 2023]Looking North from the location of Queen Street bridge. The route of the old canal runs away from the camera behind the bus-stop. [My photograph, 21st March 2023]Just to the South of Queen Street the Jehovah’s Witnesses Kingdom Hall occupies the site of the old Gas Works and straddles the line of the canal. [My photograph, 21st March 2023]This extract from another aerial image, this time facing Southeast, shows the canal (running diagonally across the image from the bottom-centre to the right) heading away from the Gas Works to the South. The image has been affected by flare, hence the lighter shaded band running from centre-bottom towards the top-left, The trapezoidal area of scrubland which dominates the image is the site of the old Hillslane Colliery. (c) Historic England, Britain From Above (EPW061721). [27]This view looks back to the North along the line of the old canal. Hillslane Colliery would have been to the right of the canal. The higher ground to the left of the image was the spoil heap for the old colliery and was reached by a bridge carrying a tramway across the canal. The line of the tramway between Hill Lane Colliery and Shawfield Colliery would have been Just off to the right of the picture. That tramway appears on the OS map extract below. [My photograph, 21st March 2023]The 1901 6″ Ordnance Survey published in 1902 shows the canal running Southwest from adjacent to the Gas Works in Madeley. Hillslane Colliery is now named ‘Hills Lane Colliery’ but has recently become disused. The old tramway bridge across the canal remains. Further South a Cement Mill can be seen on the West bank of the canal, adjacent to the towpath. A bridge over the canal is shown at this point. Further South again, is a Corn Mill to the West of the Canal and Shawfield Colliery, also, by 1901, disused. Both collieries were linked to the Blists Hill Site which is just off the extract to the Southwest. Northeast of Shawfield Colliery there was another bridge across the canal. [25]Turning though a half-circle and looking South along the line of the canal. The blue line gives the approximate line of the canal, the red line, that of the old tramway which followed the canal from Hill Lane Colliery towards Blists Hill Furnaces. [My photograph, 21st March 2023]Further South again we can see the approximate parallel routes of the old canal and tramway. [My photograph, 21st March 2023]Further South again we can see the approximate parallel routes of the old canal and tramway. [My photograph, 21st March 2023]This photograph looks back along the line of the canal and tramway towards the erstwhile Madeley Gas Works. The trees on the line of the canal and tramway are those which appear across their line in the photograph above. [My photograph, 21st March 2023]Looking to the Southwest from the same point, along the approximate line of the tramway. The old canal ran parallel to the tramway but a little away to the right and probably at a lower level. [My photograph, 21st March 2023]Further Southwest and looking to the Southwest, the approximate line of the tramway is followed by the metalled path which begins to curve round to the right. The old canal ran parallel to the tramway but a little away to the right and at a lower level. The blue line suggests this but the actual line of the canal would have been lower down the embankment which is covered by vegetation. [My photograph, 21st March 2023]The 1881 Ordnance Survey again shows Shawfield Colliery with its local tramway network and another bridge across the canal to access spoil heaps to the Northwest of the canal. In 1881 it already also had a tramway leading down to the Brick and Tile Works and the Blists Hill furnaces.This Google Maps satellite image covers approximately the same area as the OS map extract above. Blists Hill; Furnaces are actually right on the bottom edge of this image, to the left.We are now at around the same point as the top-edge of the OS map extract above where the canal enters that extract. The route of the canal becomes a little more obvious as we walk towards the Blists Hill site a few hundred metres ahead. The area to the right of this image is holding water and very much appears to be the line of the canal. the next photo has a glimpse of the water in the marshy bottom of the canal. [My photograph, 21sy March 2023]Looking to the Southwest, in the bottom-right of this image there is a glimpse of water in the bottom of the old canal. [My photograph, 21st March 2023]Again looking Southwest, the old canal bed enters this image at the bottom-right. The old tramway is just off the left of the image. [My photograph, 21st March 2023]Looking Northeast at the same point as in the last photo. Water can be seen in the canal (on the left) and the footpath follows the old tramway. [My photograph, 21st March 2023]A panoramic image looking Southwest at the same location, shows the tramway on the left and the canal on the right. [My photograph, 21st March 2023]Here we have reached the Blists Hill Car park, this photo looks back Northeast along the line of the canal. [My photograph, 21st March 2023]Turning a half-circle again, this is the view to the Southwest from the same location. The carpark covers both the route of the old canal and much of the site of an old Brick and Tile Works. The main Blists Hill site is beyond the car park. [My photograph, 21st March 2023]The information board at the same location shows the line of the old canal. Our route above followed the westside of Sutton Way to a point close to the Subway and then the dotted line following the Southeast bank of the old canal. [My photograph, 21st March 2023]The canal features strongly in this artist-drawn aerial view of the Blists Hill Site. The car parks for the site are off the left of the image. The canal can be seen curving round the hillside following the contours until it reaches the Hay Inclined Plane which is indicated at the top-right of the image. [28]The tub boat display at Blists Hill Victorian Museum. [My photograph, 8th April 2022]Madeley Wood Brick & Tile Works buildings at Blists Hill. [My photograph, 8th April 2022]The canal at Blists Hill, viewed from the Northeast. [My photograph, 8th April 2022]The canal again, this time from the towpath with the wharf crane close to the camera. [My photograph, 8th April 2022]The view Northeast along the canal towpath giving a close view of the crane and pithead installed as part of the museum. [My photograph, 8th April 2022]A broader view Northeast along the canal towpath. [My photograph, 8th April 2022]Another 100 metres or so along the canal towpath. This is an image from TripAdvisor. [29]On the 6″ Ordnance Survey of 1881/1882, from a point close to Blists Hill furnaces the canal is shown heading South until just before reaching the Hay Inclined Plane it turned to the Southeast. [20]
The canal curved round to the top of the Hay Inclined Plane. The next map extract shows the full extent of the Hay Inclined Plane.
A further extract from the 6″ Ordnance Survey of 1881/1882 showing the full extent of the Hay Inclined Plane, its bridge over the LNWR Coalport Branch, and the Bridge carrying Coalport High Street over the incline. [32]An extract from Google Maps which shows the location of the Hay Incline in relation to the modern Blists Hill Victorian Town. The line of the canal above the Incline is marked clearly. [Google Maps, 30th March 2023]
The Incline is covered in two short articles which can be found here and here. A few pictures will suffice as part of this article. …
The Hay Inclined Plane in its original condition in the late 19th century when it was still in use.
The structures at the top of the incline are in good condition.
The rope on the track on the right shows that a tub boat has recently descended the inline on that track.
This picture was shared on the Memories of Shropshire Facebook Group by Stephen Williams on 25th January 2020.
The top of the Hay Inclined Plane seen from the Southwest. The canal which saw tub boats brought to the top of the incline is immediately behind the visible brickwork on the left side of the image. The engine house was to the right. Its chimney is visible, top-right. [My photograph, 8th April 2022]A panoramic view of the engine house at the top of the Hay Inclined Plane. [My photograph, 8th April 2023]The view South down the Hay Incline towards the River Severn. The rails, chairs and sleepers are the product of a 20th century restoration and not original to the incline. [My photograph, 8th April 2022]The bridge carrying the incline over what was the LNWR Coalport Branch. This picture is taken looking East along the line of the old railway which became the footpath and cycleway named The Silkin Way after Lewis Silkin, the Minister responsible for the post-war Labour Government’s New Towns Act, 1946. Dawley New Town was designated in 1963 but expanded and renamed Telford in 1968. The Town Park to Coalport section of the route was opened by Prime Minister, Jim Callaghan, in 1977. [33][My photograph, 29th March 2023]The plaque placed on the bridge with the opening of the Silkin Way. [My photograph, 29th March 2023]The bridge carry Coalport High Street over the Hay Incline. [My photograph, 17th February 2023]A panoramic photograph which shows the sharp bend in the canal at the bottom of the incline. From this point East, the Canal ran parallel to the River Severn and wharves allowed the loading and unloading of tub boats and vessels on the River Severn. [My photograph, 17th February 2023]The reamining length of the canal is illustrated on this extract from the 6″ Ordnance Survey of 1881/1882, published in 1883. By the time of this map, as we have already noted, the LNWR Coalport Branch ha effectively superseded the canal. Of note are the factories either side of the canal which formed Coalport China Works, the end on connection between the canal and one of the sidings at Coalport Station, and the presence of the GWR Severn Valley line on the South bank of the River Servern. [32] This Google Maps extract shows the base on the Hay Inclined Plane and the truncated length of the canal alongside the River Severn. The Silkin Way marks the line of the old LNWR Coalport Branch. [Google Maps, 3rd April 2023]Coalport China Museum and Youth Hostel in 2016, looking Southeast along the last section of the canal. Both sets of buildings were once Chins Factories. The Youth Hostel is on the left, the Museum on the right, (c) Adrian Snood and used here under a Creative Commons Licence (CC BY-NC 2.0) [30]From a location further to the Southeast, looking back Northwest towards the Hay Incline, (c) Diamond Geezer and used here under a Creative Commons Licence (CC BY-NC-ND 2.0). [31]
R.F. Savage & L.D.W. Smith; The Waggon-ways and Plate-ways of East Shropshire, Birmingham School of Architecture, 1965. An original document is held by the Archive Office of the Ironbridge Gorge Museum Trust.
Wikipedia provides this schematic map of the Coalport Branch which highlights the key stations and sidings. [17]
History
The history of the Coalport Branch begins with competition between rival rail companies in the area during the mid 1850’s. The GWR had control of the industrial areas of East Shropshire, whereas the LNWR only had access to the area via the Shropshire Canal which ran from Trench down to Coalport.
The Canal was going into disrepair and suffering from water shortages and subsidence. Canals in the area were difficult to maintain as the various mines in the area were causing significant subsidence.
The LNWR decided that it was best to discontinue costly maintenance and instead to build a railway line along the length of the Canal from Hadley to Coalport. Parts of the Canal were converted into railway track bed.
This is the last of a series of posts about the Coalport Branch the earlier two can be found at:
The use of a canal to provide a route for the railway was something that a number of railway companies pursued. In this case, the Canal provided a route for the railway down the East side of Dawley through what is now Telford Town Park, taking it past Aqueduct, Madeley and onto Coalport by the River Severn.
The Coalport Branch of the Shropshire Canal.
The history of the LNWR railway branch line is built on the story of the Canal and it is with that story that any investigation should begin. Separate articles cover the route of the Canal and the first of these can be found on this link:
Immediately to the South of Madeley Market Station was the station goods yard. Trains from Hadley Junction accessed the yard by means of a trailing connection, as can be seen on the Ordnance Survey map extract below.
There was a siding providing access to the Blists Hill site which was known as Legge’s Siding. It is interesting to note that, while there is local confidence that Legge’s siding existed, there is little evidence of it on maps of the area. Dave Cromarty comments: “Legge’s Siding (the connection to the Blists Hill Brickworks)? … Where did it leave the branch? You try finding a map with it on it. When you do, leg it down Legges Way (the road built on that portion of the branch alignment in the 1980s) and try and fathom out where it was. I settled on lamppost MY460 as a best guesstimate, but I’m still not convinced. Just down the road there’s a quite spectacular, by horse tramway standards, bridge which carried a tramway from Meadowpit Colliery in Madeley, to Blists Hill.” [8]
The Legge in the name of the modern road and this siding was George Legge of George Legge and Sons who bought Blists Hill Brick and Tile Works in 1912 and continues in operation there unitl 1938.
Legges Siding and the shorter siding to the South provided access to the Blists Hill site. We have already noted the large number of tramroad line in the immediate area (as shown on the 1881 OS map). Looking in detail at these tramroads is not part of the plan for this article. They will be covered in another article in due course. Anyone interested in the tramroads of East Shropshire will find an introductory article on this link:
The Bridges and the Tunnel over the Coalport Branch at Blists Hill
We saw these two bridges in a Google Streetview image above. The tunnel appears on the second 25″ map extract below, the two bridges on the first.
The two bridges crossing the valley can be seen in this image. Around 100 metres beyond the first bridge the old Coalport Road joins the modern road and the name of the road becomes Coalport Road. The road is then following its historic route and the old railway can be seen veering away to the left. The Silkin Way resumes following the old railway at that point. [Google Streetview, June 2022]
The first and lowest bridge is a footbridge which originally provided access from Coalport Road, which sits at bridge-deck level, to the Brick and Tile Works.
The footbridge which used to provide access over the Coalport Branch to the Brick and Tile Works at Blists Hill. This picture looks Southeast across the valley. [Google Streetview, June 2022]
The second, much higher bridge carried a plateway/tramway incline over the line of the Coalport Branch. the plateway brought coal from Meadowpit Colliery to power the blast furnaces at Blists Hill.
A view Northeast along Coalport Road and looking up towards the plateway bridge. [Google Streetview, June 2022]This schematic 3D map of the Blists Hill Site shows the plateway/tramway bridge bottom-centre (marked ’26’), the tunn el can be seen centre-right (marked ’56). The Silkin Way which follows the old railway curves between the two. This image looks at the site from the Northwest. [18]
The two bridges as seen from the North soon after the lifting of the track on the Coalport Branch. This image was shared on the Telford Memories Facebook Group by Andy Rose on 16th December 2021. [14]
The two bridges viewed from the Southwest with the old Coalport Branch passing underneath them. This image was also shared on the Telford Memories Facebook Group by Andy Rose on 16th December 2021. [14]
The two bridges viewed from the Southwest with the old Coalport Branch in the 21st century. This image was also shared on the Telford Memories Facebook Group by Andy Rose on 16th December 2021. [14]
The view North from the footbridge which crosses Legges Way and used to span the Coalport Branch. [My photograph, 29th March 2023]The view South from the footbridge with the high-level tramway bridge a few tens of metres away. The point where the original Coalport Road joins Legges Way can be seen on the right close to the white van. The road South is Coalport Road and the Simkin Way which follows the old railway alignment can be seen drifting away to the left at the same point. [My photograph, 29th March 2023]A view of one of the supporting piers of Lee Dingle Bridge which carried a tramway over the line of the Coalport Branch. As far as tramway/plateway structures go, this bridge is one of the more significant! [My photograph, 29th March 2023]An enlarged map extract of the 25″ OS mapping of 1901 which focusses on the Iron Works and furnaces. Top-left, the wharf which allowed transshipment between the tramroad network and the Coalport Branch is much easier to make out. The short tunnel which carried the Coalport Branch under the site is shown clearly. [10]Google Maps 3D view of the modern Blists Hill site from the South. The old furnaces were in the area in shadow in the top-right quadrant of the photo. Railmaponline.com has superimposed the line of the old railway on the image. [5]The view South at the point where Legges Way meets the old Coalport Road. The Silkin Way which follows the old railway is on the left. [My photograph, 29th March 2023]One of the large wheel castings that mark the route of the Silkin Way. [My photograph, 29th March 2023]The Silkin Way, the route of the old railway, continues to bear away to the left. Coalport Road can just be picked out on the right of this picture rising away from the line of the old railway. [My photograph, 29th March 2023]In a short distance the line passed under the Blists Hill Works site in a short tunnel. [My photograph, 29th March 2023]The old railway tunnel adjacent to Blists Hill Furnaces. As these various images of the tunnel show, the headroom is no longer large enough for standard gauge trains. It was retained to allow pedestrian access but was also used as the route of Telford’s main rainwater drain. [12]The North portal of the tunnel from the embankment on its Northeast. [My photograph, 29th March 2023]The view North along the route of the Coalport branch from above the North Portal of the tunnel. [My photograph, 29th March 2023]The view South from over the South Portal of the tunnel. [My photograph, 29th March 2023]
The South Portal from a few tens of meters further to the South. The large retaining structure on the left holds the Coalport Road above the line of the old railway. [My photograph, 29th March 2023]
The tunnel during the construction of the surface water storm drain which passes through it. This image was shared on the Telford Memories Facebook Group by Marcus Keane on 7th January 2022. [16]
A video featuring the tunnel, made in August 2020 by Andy PCD. [17]
“The brick-lined tunnel, through which the London and North Western Railway branch line to Coalport ran, was built in the 19th century to carry plateways on top so that materials could be taken from the Lloyds Coppice area to the Blists Hill Ironworks. The tunnel is 60-70 metres in length, with a wonderful echo.” [13]
“The railway track closed in 1964 and the line became part of the Silkin Way in 1977. Underneath the old track bed lies the main sewers and water run-off for the town of Telford.” [13]
Opinion on whether this is a surface water sewer or for foul water differs. It seems most likely that it is a surface water drain.
The same surface water drain to the South of the tunnel. This photograph was shared by Dave Thomas on the Telford Memories Facebook Group on 10th March 2021. It is taken from Coalport Road and looks down the line of the Coalport Branch [19]
Recent comments from Rob Breeze clarify the position over the sewers which follow the Silkin Way …… Rob says that there are two sewers, one foul water sewer and one surface water drainage sewer for some considerable distance. He says: “I’m not sure where they merge, but from somewhere north of Blists Hill the sewer pipe is carried on brackets in the upper corner of the stormwater drain. A few hundred yards south of the Blists Hill tunnel there is a concreted area with railings overlooking Coalport Road. At this point the stormwater drain diverges down and to the right to its outfall into the river just downstream of the road junction. The sewer continues underneath the former railway line/Silkin Way to where you saw it passing under the Coalport High Street bridge in your photo. From there it runs roughly parallel to the river to near Sutton Wharf, where it crosses over to the Coalport/Gitchfield Sewage Treatment Works.” …. My thanks to Rob for his comments.
This modern photograph is taken at a similar position to the monochrome image above but, in this case from above the surface water drain. Coalport Road can be seen on the right. [My photograph, 29th March 2023]A little further to the South there is evidence of the surface water drain running under the Silkin Way. Large manholes provide access to the drain. As the old railway dropped down towards Coalport, the drain was placed ina trench which meant that the level of the Silkin Way dropped to the level of the old railway formation. [My photograph, 29th March 2023]
Blists Hill
A detailed history of the site can be found on the ironbridge.org.uk website. [11] Sections of that website are reproduced below.
An artist’s impression of the furnaces at Blists Hill, probably more idyllic than real! The picture was painted in watercolour by Warrington Smyth (1817-1890) in 1847. [11]
Blists Hill in the mid to late 19th century. [11]
“Blists Hill’s industrial peak arguably occurred in the early 1870s, when the blast furnaces were their most profitable and a new mechanised brickworks was developing. However, this decade also saw the start of the site’s decline. It was during this decade that Blists Hill’s mine stopped producing ironstone and coal. Brick and tile clay continued to be mined and used by the adjacent brickworks, but the Madeley Wood Company had to begin sourcing its raw materials for Blists Hill’s blast furnaces from further afield and in 1872 built the Lee Dingle bridge to transport materials from Meadow Pit colliery in Madeley to Blists Hill’s furnaces. The mine at Blists Hill continued to operate but by 1900 only 12 people were employed there and following the First World War it was sold several times. Abandonment plans were discussed as early as 1925 but it wasn’t until June 1941 that the mine was completely abandoned, and the shaft was filled in.” [11]
“Blists Hill’s blast furnaces also suffered declining profits from the 1870s. By this time, the furnaces’ technology was old fashioned, but its cold-blast pig iron filled a niche in the market. However, like most of the Shropshire iron industry, it was facing competition from cheaper imports of iron from Europe and America and competition from the steel industry. The lack of raw materials being mined at Blists Hill and the subsequent need to transport them from further afield also increased costs. In 1908, two of the three furnaces were blown out (ceased operating) and following a national miners’ strike in 1912, which severely impacted the supply of raw materials, the final furnace was blown out. By this time, the Madeley Wood Company’s profits were coming from coal mining rather than iron or brickmaking and so they also sold their Blists Hill brick and tile works to George Legge & Sons in 1912. Under George Legge & Sons the works produced handmade and specialist products alongside their mass-produced bricks and tiles and continued to manufacture these products until 1938, when the company was liquidated. From 1945, sanitary pipes were made at the works but this ceased in 1956 and the works was closed.” [11]
Further information about the Hay Incline Plane can be found here and here.
The view Southeast from under the Hay Incline. The Coalport Branch continued curving lazily to the Southeast. [My photograph, 29th March 2023]A general view from the canal at the base of the incline which shows the bridge carrying Coalport High Street across the bottom of the incline. The Silkin Way passes beneath the incline about 60 metres beyond Coalport High Street. [My photograph, 17th February 2023]Looking Southeast along the canal. What is now the Coalport China Museum is on the right between the canal and the River Severn. The buildings on the left are now a Youth Hostel. The buildings on both sides of the canal are Coalport’s two historic China Works. [My photograph, 17th February 2023]A closer view of the China Works between the canal and the river. [My photograph, 17th February 2023]Now travelling Southeast behind properties in Coalport Village. The China Works Museum and the last length of the Shropshire Canal are away to the right off the photograph. [My photograph, 29th March 2023]The route of the old railway runs at the back of properties on Coalport High Street and Riverside Avenue. [My photograph, 29th March 2023]In this next extract from the 6″ 1881/1882 Ordnance Survey which was published in 1883 we see the approach to Coalport East Station on the North side of the River Severn. The bridge carrying Coalport High Street across the station mouth and the bridge carrying Coalport Road across the main station site. [21]In this next extract from the 6″ 1881/1882 Ordnance Survey which was published in 1883 centres on Coalport East Station. The bridge carrying Coalport High Street across the station mouth and the bridge carrying Coalport Road across the main station site. Extending West from the station towards the end of the canal, is a single siding. [21]The same location but on the 25″ Ordnance Survey of the same date. Both of the two Coalport Stations show very clearly on this extract. [22]The last length of the Branch and the station site at Coalport as shown on Google Maps. [Google Maps, 1st April 2023][32]New buildings now occupy the land on the North side of the old railway. [My photograph, 29th March 2023]Approaching the Coalport East Railway Station and before passing under Coalport High Street, the car park for the Brewery Inn sits, today, on the right side of the old line. [My photograph, 29th March 2023]The bridge carrying Coalport High Street over the Silkin Way and the old railway route. The storm drain which runs under the Silkin Way is here occupying significant space under the road-bridge. [My photograph, 29th March 2023]The Silkin Way passes under Coalport High Street alongside the modern storm drain. [My photograph, 7th February 2023]Looking Northwest towards the Coalport High Street bridge across the railway. [My photograph, 7th February 2023]Looking north across the bridge carrying Coalport High Street across the station throat. [Google Maps, October 2022]Looking Southeast from the South side of the bridge past cottages on the approach to the site of what was part of the railway station yard. [My photograph, 7th February 2023]Looking West along the same road towards Coalport High Street. [My photograph, 7th February 2023]Standing close to what was the station throat looking into the station site. [My photograph, 7th February 2023]The bridge over Coalport East station as in appears in 2023. [My photograph, 7th February 2023]Much closer to the bridge. The river is on the right. [My photograph, 7th February 2023]Coalport East station building on 15th April 1963. It was still standing despite the closure of passenger services in 1952. It sat on the West side of the bridge. Beyond the bridge the carriage shed can be seen, (c) Dr Neil Clifton and included here under a Creative Commons Licence. As can be seen, the original bridge is of a different construction from that in place in 21st century. (CC BY-SA 2.0) [23]A similar view of Coalport East Station when the passenger service was still operating. The train was known as the Coalport Dodger. The picture was taken between the two world wars. Apparently, this picture came originally from Gerry Hadley, grandson of engine driver Charles Hadley, of Coalport, who used to drive the train. It was carried by the Shropshire Star on 24th June 2020. [24]Another view of the station building and road bridge. The service from Wellington has just arrived at the platform. This image was shared by Metsa Vaim EdOrg on the Telford Memories Facebook Group on 12th December 2020. [25]Coalport East Railway Station seen from the passenger approach to the station. This image was shared on the Telford Memories Facebook Group by Marcus Keane on 28th January 2017. [26]The passenger facilities at Coalport East in the 1930s. This image comes from David Clarke’s collection and was kindly shared with me by email in April 2023. [41]The Coalport Dodger leaving Coalport East in 1948 in the hands of LMS 6601. The loco was renumbered 46601 by BR. It was a Webb 1P 2-4-2 5′ 6″ tank. This image was shared by Derek Norry on the Telford Memories Facebook Group on 3rd January 2016, copyright/photographer not known. [27]Standing in approximately the same place as the locomotive in the last image this 0-6-0 tender loco is in charge of a four coach excursion train at Coalport East Railway Station. The locomotive is numbered 2516 and is an ex-GWR Dean Goods, not to be confused with a Churchward 43xx 2-6-0 which for a time carried this number. 2516 was built in March 1897 and withdrawn in May 1956 The train is the SLS Shropshire Special and the photo was taken on 23rd April 1955. The picture was shared by Lin Keska on the Telford Memories Facebook Group on 5th February 2017. [28][37]2516 is shown here in colour still at the same location (note the efflorescence on the brickwork of the retaining wall. This time the loco is probably ready to depart as all the individuals around it in the image above are now back on the coaches. This image comes from David Clarke’s collection and was kindly shared with me by email in April 2023. [41]Another SLS special, this time in September 1959. David Clarke notes that the picture was taken on 12th September 1959. This image comes from David Clarke’s collection and was kindly shared with me by email in April 2023. [41]The Coalport Dodger at Coalport East Railway Station. This picture was taken by W.A. Camwell in 1948 and colourised by Simon Alun Hark. It was shared by him on the Shropshire Nostalgia and Film Facebook Group on 28th January 2022. The carriage shed is visible beyond the overbridge. The locomotive is an 0-6-2T ex-LNWR Coal Tank loco now carrying the LMS No. 7755. he leading coach is LMS No. 7199. Locomotive No. 7755 had previously carried the LNWR numbers 237 (from 1886 to 1921) and 3739 (from 1921 to 1928). It was built at Crewe, entering service in August 1886. It was withdrawn in September 1947, giving it a service life of just over 61 years [29][35]1952 was that last year with a passenger service on the line. This photo shows one of the last passenger services to leave Coalport East Railway Station. Probably it was the last such service. This appears to be BR loco No. 40058. The image was shared on the BROS Facebook Group by Peter Hunting on 7th May 2015. It was also sent to me by David Clarke. [30][41]LNWR loco No. 549, a Webb Coal Tank (2F), preparing to leave Coalport for Wellington. This is clearly a stage shot with those involved posing for the camera. The loco bore this number from entering service in December 1886 until it was renumbered 3287 in January 1922. It was renumbered by the LMS at the end of 1927 to LMS No. 7550. It was withdrawn in July 1931. The image is clearly a staged shot with those involved posing for the camera This image comes from David Clarke’s collection and was kindly shared with me by email in March 2023. [33][36]
Locomotives and Rolling Stock on theCoalport Branch
In LNWR days the branch passenger service was generally served by small tank locos and goods by 0-6-0 tender locos. However, details are are a bit sketchy. William H. Smith points to allocation of locomotives to Shrewsbury Shed (LNWR No. 30) as a way to narrow down the field of possible motive power on the line. He says that there is only one eyewitness confirmation of a locomotive that operated on the line 2-4-0 LNWR No. 1000. [15] Locomotives from the shed allocation in 1917 which may have operated on the line include, “0‒6‒2T ‘Coal tanks’, LNWR Nos. 119, 292, 2459 and … 2‒4‒2T LNWR No. 1157 … along with 17in Goods 0‒6‒0s 1713, 2437.” [15]
Smith presumes that goods traffic between the two world wars would have been carried predominantly in ‘private owner’ open wagons. He mentions local coalfield owners, Cornish china clay companies, “‘North and Rose’ and ‘St. Austell China Clay Co’ are two such wagons noted from photographs. ‘Lilleshall’ and ‘Madeley Wood Co’ were locals, as was the ‘Mid-Shropshire Coal Co, Coalport’. …. Movement of wagons to and from the Staffordshire and Shropshire Coalfields would be expected and indeed, following a check on some post-war wagon labels from the branch, consignments from Littleton, Baggeridge, Donnington and Rugeley Collieries were confirmed.” [15]
“During the war passenger services were reduced and the branch provided storage sites for ammunition and special trains were observed hauled by Stanier Class 5 4‒6‒0s.” [15]
Nationalisation initially brought little change. “The ‘Dodger’, as it was popularly known, was still hauled by the 0‒6‒2T coal tanks and there was still ex-LNWR 2‒4‒2Ts Nos. 46601 and 46757 around in 1949 and 1950 as a reminder of past days. However, in December 1949 Wellington shed received its first allocation of Fowler 2‒6‒2Ts (40005 and 40006) and these took over much of the passenger work.” [15]
Throughout much of the life of the branch, passenger services consisted of four trains on weekdays, the journey taking 30 minutes. [42] It seems that the quality of the service deteriorated somewhat over the last 2 to 3 years of the life of the line. If a train arrived at all, it was often made up of a single coach. Midland Red replacement bus services became more frequent and passenger numbers became unsustainable.
By 1952, Fowler 2‒6‒2T No. 40058 was in use on the line often pulling a single coach, bunker first down the line to Coalport before running round it’s coach and returning to Wellington smoke-box first. Rumours of closure during the autumn of 1951 “became fact and it was 40058 which hauled the final regular passenger train over the branch on 31st May 1952. Malins Lee station was also closed completely from this time.” [15]
The goods service was also undergoing changes, “in May 1953 the 0‒6‒2T Coal Tanks were withdrawn from the Shrewsbury shed and ex-Midland 2F 0‒6‒0s began to appear on Coalport goods trains. Soon afterwards control of the line passed to the Western Region and Coalport became known as Coalport ‘East’, supplies of stores now arriving from Swindon.” [15]
By December 1960, very little goods traffic was being generated on the southern portion of the line and the section of the line from Dawley and Stirchley Station to Coalport was closed. It seems that traffic from the Lilleshall Company had also ceased. The remainder of the line was clearly in terminal decline and was closed in July 1964. [15]
And finally …
It seems as though the Coalport Branch was given some serious consideration as a home for a Railway Preservation Society. … The group which eventually became the Chasewater Railway (Chasewater Country Park, Brownhills West Station, Pool Lane (Off the A5), Burntwood, Staffs WS8 7NL).
The Coalport Branch was one of three lines under consideration when looking for a permanent home for the railway. These notes were made in 1960 after a visit to Coalport. [43]
“On Sunday, October 23rd 1960, a small party consisting of David Ives, James Slater, T. Jones, Frank Harvey and D. Noel Draycott visited the Coalport to Hadley line in North Shropshire. Built by the London & North Western Railway, it runs from the very attractive Vale of Severn across high land and through an early centre of the iron and steel industry to a junction on the Wellington to Stafford line.
The branch had a terminus at Coalport Station which stands on a long shelf, part cut out and part built up on the steep bank of the Severn. The station buildings comprise a booking office, general and ladies waiting rooms, backing on to the station master’s house. The signal box was demolished and a ground frame installed shortly before services were withdrawn in 1952. The goods shed has also been demolished, but the three short sidings remain in the yard.
Further along the shelf past the station, there is a carriage shed sufficient for four bogie carriages, and an engine shed for two locomotives. These buildings are in fair condition, and the engine shed contains a large workshop space as well as a pit. All these buildings back on to the hillside, and on the opposite side there is a pleasant stretch of wooded land before it falls steeply away to the river which forms the boundary of the railway property.
The line rises steeply from Coalport Station with attractive views across and up the Severn Valley before it turns away to cross pleasant rolling countryside to the small town of Madeley. Here the station building is used as an office by an engineering firm, but the yard of some half dozen sidings is practically disused.
The line then continues to Dawley and Stirchley Station where a total of some 15 wagons of coal showed that an active coal merchant used the yard. As dusk was falling, the tour of inspection finished at this point. All the members of the party were impressed by the potentialities of the line for day trippers.” [43]
It seems that, had the decision been made to create a preservation line on the alignment of the Coalport Branch, Telford Steam Railway on the Wellington and Severn Junction line would have been very unlikely to have been formed. The line would, however, have been an excellent partner to the museum developments in the Severn Gorge which were to follow over the following decades, even if there would have been little room for the Silkin Way.
References
Bob Yate; The Shropshire Union Railway: Stafford to Shrewsbury including the Coalport Branch; Oakwood Press, Usk, 2003.
Just after I completed the first article in this series, David Clarke, who wrote the book ‘The Railways of Telford‘, [34] contacted me to offer some photographs from his collection for inclusion in this short series of articles. I reviewed David’s book soon after we moved to Telford. It was an invaluable first step for me in exploring the railways and plateways (tramroads/tramways) of the area. That review can be found here.
David Clarke; The Railways of Telford; Crowood Press, Marlborough, Wiltshire, 2016.
Very soon after publishing the first article about the Coalport Branch, [7] I was contacted by David Clarke with an offer of relevant photographs from his collection.
David Clarke is the author of a relatively recent book, “The Railways of Telford” which I reviewed soon after we moved to Telford. It was an invaluable first step for me in exploring the railways and plateways (tramroads/tramways) of the area. [1]
In the remaining articles about the Branch, relevant photographs for David’s collection will be included in the main article. As those relevant to Part 1 appeared after its publication, there are two of these and they are included in this addendum to Part 1.
This is a photograph from David Clarke’s collection of Hadley Junction in 1964, looking East towards Donnington. David comments: This photo “shows a long building on the right not shown on the aerial photo you posted. You can just make out some of the fighting vehicles Sankey made for the British Army on the wagons.” I have since been contacted by Ian Martin who tells me that the building is the covered stand along the touchline of the long gone Sankey football stadium. (Thank you, Ian). [3]This image shows an 0-6-0 locomotive (43652) descending towards the Coalport Branch (which just be picked out on the bottom-right of the photo) from the sidings adjacent to Snedshill Iron Works. The Lilleshall Brick and Tile Works at Priorslee can be made out at the top-right of the picture. The Greyhound Bridge carrying the A5 is off the image to the right. 43652 was a 3F locomotive designed by Johnson and built at the Vulcan Foundry. It entered service in 1900 and was scrapped in 1960. At the time of this photograph it was probably based at Burton Shed (17B). [3][4]
In addition to David’s photographs, I have found further images on line which I am permitted to share with you. The first is an aerial image from 1949 of the Castle Car Works at Hadley which incidentally includes Hadley Junction.
This aerial image looking towards the Southeast shows Castle Car Works as they appeared in 1949. The Works was rail-served at this time with an extended siding running to the West of the Works and providing access to sidings on both the South and North sides of the Works. Hadley Junction is visible in the top-right of this image, (c) Copyright Historic England, Britain from Above (EAW027684, 1949). [5]An enlarged extract from the above image focussing on Hadley Junction and its signal box. The sidings alongside the line were used by the Castle Car Works., (c) Copyright Historic England, Britain from Above (EAW027684, 1949). [5]Another extract from the Britain From Above image No. EAW027684. The Hadley Junction signal box it evident top-centre of this image. The extensive sidings alongside the mainline are visible, together with the junction providing access to Castle Works, (c) Copyright Historic England, Britain from Above (EAW027684, 1949). [5]Castle Car Works again, this time the aerial image is taken looking West in 1949. The Works siding running to the West of the Works and providing access to sidings on both the South and North sides of the Works can be seen in full. Hadley Junction is visible in the centre of this image. The bridge over Castle Street can be seen at the bottom-left of this picture. Castle Lane runs left to right across the image, passing under both the line to Coalport and that to Donnington and beyond, (c) Copyright Historic England, Britain from Above (EAW027682, 1949). [6]Castle Street Bridge in 1949, shown at the fullest magnification possible from the aerial image. A slight amount of flare has affected the image at this location, (c) Copyright Historic England, Britain from Above (EAW027682, 1949). [6]
I will add any further images relating to the first article about the Coalport Branch which come to light here.
References
David Clarke; The Railways of Telford; Crowood Press, Marlborough, Wiltshire, 2016.
Wikipedia provides this schematic map of the Coalport Branch which highlights the key stations and sidings. [17]
History
The history of the Coalport Branch begins with competition between rival rail companies in the area during the mid 1850’s. The GWR had control of the industrial areas of East Shropshire, whereas the LNWR only had access to the area via the Shropshire Canal which ran from Trench down to Coalport. The first article in this short series about the Branch covered the history of the line as well as following the line from its junction with the LNWR main line at Hadley as far as Malins Lee Station. It can be found on this link:
The history of the LNWR branch line is built on the story of the Canal and it is with that story that any investigation should begin. Separate articles cover the route of the Canal. The first of these can be found on this link:
A first extract from the 1901 25″ Ordnance Survey shows Dark Lane village and Malins Lee Railway Station just to the South of Dark Lane. Also evident alongside the LNWR Coalport Branch is a length of the old Coalport Branch of the Shropshire Canal. [43]The same area on the satellite imagery provided by Railmaponline.com. After crossing Dale Acre Way, the route of the old line heads South-southwest across open ground and then over land used for housing development. [44]Malins Lee Station as in appeared in 1932.The photograph seems to have been taken facing South from the bridge which carried Dark Lane over the line. The passenger facilities at the station seem to be a little different to others on the Coalport Branch. It is possible that this might reflect an earlier original use for the two storey element of the building? The station was closed for two years during WW1 as an economy measure and finally closed in 1952 with the line remaining open for goods traffic for more than a decade. Just to the South of the station a single siding which served immediately local industries can be seen. The chimney to the right of the image beyond the station buildings is probably that of Dark Lane Foundry. This picture was shared by Lin Keska on the Telford Memories Facebook Group on 15th August 2018. [45]Marcus Keane shared this composite image on the Telford Memories Facebook Group on 20th July 2014 which shows the location of Malins Lee Station in relation to the modern blocks of flats in Hollinswood. [46]
Malins Lee Railway Station, seen from the Southeast. The bridge over the line to the North of the Station carries Dark Lane. This image is embedded here from an article on the dawleyhistory.com website, (c) Collection of William H. Smith. [47]The Western arm of Downton Court looking North in the 21st century. The Coalport Branch route crosses the field ahead of the camera and then runs underneath the flats at this location. [Google Streetview, June 2022]The Eastern Arm of Downton Court looking Northeast. the purple line again approximates to the route of the old railway, passing under the buildings to the extreme right of the image which front onto Deercote. [Google Streetview, June 2022]K=Looking Southeast along Deercote with the approximate line of the Coalport Branch shown by the purple line. [Google Streetview, June 2022]Looking South on St. Quentin’s Gate with the approximate line of the Branch shown in purple. [Google Streetview, June 2022]
Loops of the Coalport Branch of the Shropshire Canal adjacent to, and South of, Malins Lee Railway Station
The Canal bed behind Malinslee Railway Station buildings in 1962. This image was shared on the Telford Memories Facebook Group by Marcus Keane on 27th February 2022. This view looks to the South along the back of the station buildings. The 25″ OS map extract above shows that at the time of the survey this area had a railway siding in place. The line of the canal curved away from the railway to the West before returning to the same alignment a short distance further South. [48]An extract from the 1881 Ordnance Survey, published in 1882 showing approximately the same area as that on the 25″ survey of 1901. Interestingly this earlier survey uses the name ‘Malinslee’ for the railway station rather than ‘Malins Lee’ as on the 1901 survey. Little Dark Lane Colliery, to the immediate West of the Station was still in use at the time of this survey. The standard-gauge siding to the West of the Station buildings, can be seen on this extract as serving a tramroad wharf, as can the longer siding visible in the 1932 picture above. Tramroads are not the subject of this article, but given that the tramroads shown seem to only serve the Little Dark Lane Colliery and the Dark Lane Foundry, the traffic on these lines may have either been horse-powered or even man-powered. When the Canal was active a wharf would have existed on the West side of the canal. [49]A further extract from the 1881 6″ Ordnance Survey, showing the next length of the railway. The route of the old canal is indicated approximately by the light blue dashed line. [49]A similar length of the railway is shown on this next extract from the 25″ 1901 Ordnance Survey. Of note, is Randlay Brickworks which has a connection to the Coalport Branch and the disused Wharf Colliery which was active in 1881. There is a Mineral Railway running to the West of the Wharf Colliery site and the GWR Stirchley Branch to the Southeast of Randlay Brick Works. [50]The same area on the satellite imagery provided by Railmaponline.com. [44]This image was sent to me as an email attachment by David Clarke in March 2023. It shows the rail siding leading from the LNWR Coalport line to Randlay Brick Works. David Clarke is the author of a relatively recent book, “The Railways of Telford” which I reviewed soon after we moved to Telford. It was an invaluable first step for me in exploring the railways and plateways (tramroads/tramways) of the area. My review of his book can be found here. [58]The route of the Randlay Brickworks Siding in 1962. This image was also sent to me as an email attachment by David Clarke in March 2023.This next extract from the 25″ 1901 Ordnance Survey takes us as far as the Stirchley Iron Works. The buildings can be picked out right at the bottom of the map extract on the left. Of note, is the Wrekin Chemical Works on the site of what was for a time Old Park Ironworks. This is connected both the LNWR Branch line via a tramway bridge over the line and to the GWR Stirchley branch denoted Mineral Railway on the right of the extract. [51]The same area on the satellite imagery provided by Railmaponline.com. Some of the old tramways are shown on this extract. [44]
A Loop of the Coalport Branch of the Shropshire Canal near Stirchley Ironworks
This section of the line on the 1901 25″ Ordnance Survey. [52]This is Railmaponline.com’s representation of the same area as that shown on the OS map extract above. The tramroads around Stirchley/Hinkshay Pools are shown as well as the Coalport Branch. The abandoned loop of the old canal can just about be made out through the trees. [44]
Andy Tidy surveyed the route of the Coalport Branch of the Shropshire Canal in March 2012 the majority of which lies underneath the formation of the LNWR Coalport Branch. He highlighted two areas worthy of note. The first adjacent to Hinkshay/Stirchley Pools and the second to the South of Dawley and Stirchley Railway Station where the Canal was in tunnel during its working life. [15]
Adjacent to the Hinkshay Pools, the Canal alignment deviated from the formation of the later Railway. Andy Tidy provided a plan (below) of the location which I have annotated with the key features he refers to. His pictures of the canal deviation can be seen here. [15]
Andy Tidy says: “No sooner has the line moved off the modern Silkin Way than it is in water, first in the undergrowth but then as it passes the first reservoir the bed squeezes through the foundations of a collapsed bridge and on into open water. … The towpath sits on a narrow strand of land between the canal and the Stirchley Pools Reservoir, a pretty spot which is carefully maintained as a nature reserve. This clear stretch of canal is haunting and as you walk under the shade of the trees you almost expect to meet a horse plodding the other way towing a string of loaded tub boats. … All too soon this enduring stretch of canal slides back into the railway bed, all traces are lost at it passes through the recently rebuilt Stirchley Station.” [15]This picture shows the length of the canal on the map above. It was shared by Andy Rose on the Telford Memories Facebook Group in February 2022. [16]Andy Tidy’s photograph in 2012 of the Stirchley Ironworks Bridge which crossed the Canal and later the railway. Stirchley Ironworks were on the right-hand side of the photographer, on the near side of the bridge, (c) Andy Tidy. [15]A relatively poor photo showing a steam service on the LNWR Coalport Branch heading North. The train has passed through Dawley & Stirchley Railway Station and is heading towards Malins Lee Station with Stirchley Chimney in the background. The picture was shared on the Telford Memories Facebook Group by Marcus Keane on 9th January 2022. [22]
Dawley and Stirchley Railway Station
Dawley and Stirchley railway station was opened in 1861 and closed to passengers in 1952. [3] When it opened, it was given the name ‘Stirchley’. The station was renamed Dawley & Stirchley in 1923, although closed to passengers as early as 1952 the line through the station site was not finally closed to freight until 1964. Although the goods service which originally served Coalport was restricted to only travelling to Dawley and Stirchley Station in 1960.[4][5]
The London and North Western Railway Society comments on the standard-gauge Coalport Branch as follows: “The first half of the route was originally part of the Shropshire Canal which the LNWR bought in 1857 and filled in, the line opening four years later. The passenger service, referred to locally as the Dawley Dodger, consisted of four trains on weekdays, the journey taking 30 minutes. It was withdrawn in 1952 but a string of private sidings between Wellington and Stirchley helped to keep that section open a further twelve years.” [5]
Through Telford Town Park and on through Dawley and Stirchley Station, the old railway line is now part of The Silkin Way. [6][7]
In the first half of the 19th century, before the LNWR branch line was built the tramway had a wharf on the Western bank of the Coalport Branch of the Shropshire Canal which was sited a little to the Northwest of the bottom of the map extract above. When the Coalport Branch of the LNWR was built the tramway was extended a little to run alongside the standard-gauge railway.
The Stirchley Canal Tunneland later Railway Cutting
Immediately South of the overbridge the station loop continued as shown on the 6″ Ordnance Survey (1883) map extract below.
South of Stirchley Lane the station loop continued for some distance. [18]
A very short distance further South, the Canal which preceded the railway entered a 281 yard long tunnel – Stirchley Tunnel. When the railway was built, the tunnel was opened out into a cutting. At this location the Ordnance Survey mapping shows a rock face to the West side of the line.
The location of what was once a canal tunnel but which remains as a disused railway cutting and, in the 21st century, a cycleway and footpath. [18]The Silkin Way to the South of Stirchley Lane as shown on Google Maps in 2023. [28]Looking South along the Silkin Way towards the cutting mentioned above. [My photograph, 2nd March 2023]Continuing to the South along the Silkin Way, we are now in the cutting and facing South. The original canal tunnel at this location was opened out when the railway was built. [My photograph, 2nd March 2023]At various points along the cutting the original canal tunnel’s walls, below arch springing level, can be seen. [My photograph, 2nd March 2023]Beyond the end of the original canal tunnel the railway cutting opens out to have more normal sloping sides. The remains of a railway workmans’ (platelayers) hut sit on the East side of the old line. [My photograph, 2nd March 2023]
There is little remaining of the canal structure at this location. However Andy Tidy points out that cottages adjacent to the site are called ‘Tunnel Cottages’ and that “a careful inspection of the west wall of the cutting reveals the unmistakable curve of the old canal tunnel as it was carved out of solid rock spanning 10ft at the waterline.” [15]
Remnants of Stirchley Canal Tunnel (c) Andy Tidy [15]Looking South along the Silkin Way under the arch bridge at the end of the rock cutting. This bridge carries a footpath in the 21st century. [My photograph, 2nd March 2023]Looking North towards Dawley and Stirchley Station along the Silkin Way under the same arch bridge at the end of the rock cutting. [My photograph, 2nd March 2023]Looking West across the same bridge. [My photograph, 2nd March 2023]
Aqueduct village and the GWR Madeley Branch
The OS Map extract below shows the next length of the branch line. To the South of what had been Stirchley Canal Tunnel there was a canal junction. One arm of the canal turned West and ran across towards Lightmoor, the other arm first turned East and then South down the incline near Windmill Farm. Neither branch survived the coming of the railway. The hamlet of Aqueduct straddled the old turnpike road to Bridgnorth which passed under the canal arm to the West. The aqueduct used to carry the canal is still standing in the 21st century although the old turnpike road is not in use as a modern highway. The railway cut through the village of Aqueduct as shown on the map extract.
This extract from the 6″ OS mapping of 1883 shows the new railways and has the old canal routes superimposed. Note the canal incline close to Windmill Farm and the branch running to the West. The aqueduct which carried this arm over the old turnpike road can be seen on the extract. It gave a name to the hamlet immediately next to it. As will be seen from the satellite image below, Madeley Court Station is long gone. The GWR Madeley Branch remains in the early 21st century as it was used for merry-go-round coal trains serving Ironbridge Power Station until the power station closed. [25][26]A Google Maps satellite image extract showing approximately the same area as the OS map extract above. Sketched onto the satellite image are: the very approximate canal routes in blue; the length of the LNWR branch which is not used by the Silkin Way in red; and the old Bridgnorth Road alignment in black. The diversion of the Silkin Way was required with the building of the A4169 and the removal of the bridge deck where the LNWR Coalport Branch line crossed the GWR Madeley Branch. There are no features on the ground in the 21st century to define the line of the old canal as it passed through the are now called Brookside. The old road bridge next to Madeley Court Railway Station remains and carries the diverted Silkin Way across what was the GWR Madeley Branch. Towards the top of this satellite image Southall Road crosses the old railway by means of the bridge shown below. [29]Looking South along the Silkin Way under Southall Road bridge. [My photograph, 2nd March 2023]Looking North along the Silkin Way under Southall Road bridge. [My photograph, 2nd March 2023]The same bridge from the top of the embankment on the Southwest corner of the bridge. [My photograph, 2nd March 2023]Looking Southwest across Southall Road, this image shows the roadside parapet of the bridge above. [My photograph, 2nd March 2023]
South of Southall Road Chapel Lane crossed the old railway at level.
The point at which Chapel Lane crossed the old railway. This view is taken looking South along the Silkin Way. The aqueduct which carried the old canal arm is off the the right of this image. [My photograph, 2nd March 2023]Looking North from Chapel Lane with the Southall Road bridge in the distance. The aqueduct is off the the left of this photograph about half the distance to Southall Road bridge. [My photograph, 2nd March 2023]Looking Southwest across the aqueduct along what would have been the line of the branch canal. After crossing the turnpike road on this aqueduct, the branch canal turned sharply to the North before heading West towards Lightmoor. [My photograph, 2nd March 2023]Looking Northeast across the aqueduct along what would have been the line of the branch canal heading towards what is now the centre of Telford. [My photograph, 2nd March 2023]Looking Southeast along what was the turnpike road to Bridgnorth, through the arch of the aqueduct which was built in around 1792. [My photograph, 2nd March 2023]Looking Northwest towards modern-day Telford along what was once the Bridgnorth turnpike road. [My photograph, 2nd March 2023]The plaque placed on the aqueduct after its restoration in 2001, (c) Neil Brittain, 19th March 2013. [30]Continuing to the South along the Silkin Way another arched underbridge is encountered. This bridge carried the LNWR Coalport branch over an access road. This view looks South over the bridge. [My photograph, 2nd March 2023]The stone arch underbridge viewed from the West looking towards what was once the main Bridgnorth Road. It is worth noting that some observers have indicated that this is the aqueduct. This is not the case, the bridge was built for the railway and at this point the Coalport Branch is no longer following the old Shropshire Canal. [My photograph, 2nd March 2023] A couple of hundred metres beyond the underbridge, the Silkin Way diverges from the route of the Coalport Branch. At this point the formation of the old line was crossed by the new A4169 and no features remain in the immediate vicinity of the new road. The road is a few tens of meters ahead. The red line shows the route of the old railway. [My photograph, 2nd March 2023]Railmaponline.com shows the are we are looking at with the line Coalport Branch in purple and that of the GWR Madeley branch in turquoise. [44]The same immediate area as shown on the 25″ Ordnance Survey of 1901. Madeley Court just edges onto the map extract in the bottom-left.Madely Court Iron Works is shown active and with a network of tramroads which do not seem to have access to the Coalport Branch. [53]Looking West along the A4169, Queensway at the point where the old railway crossed the line of the road. The formation would have been a little under 2 metres higher than the present road. [Google Streetview, June 2022]
Immediately South of the modern A4169, the old Coalport Branch crossed what was the GWR Madeley Branch. The abutments of the bridge remain and can be seen by trekking from the South towards the still remaining Madeley Branch.
Looking from the South across the Madeley Branch from adjacent to the South abutment of the bridge which carried the Coalport Branch over the Madeley Branch. The graffitied North abutment is visible beyond the railway track. [My photograph, 2nd March 2023]A view of the North abutment from a short distance further to the West. [My photograph, 2nd March 2023]Looking South-southeast from the South abutment of the old bridge along the formation of the Coalport Branch. [My photograph, 2nd March 2023]Just before the diverted Silkin Way re-joins the line of the Coalport Branch, the old railway crossed another stone-arched accommodation Bridge which provided access between Madeley Court and its windmill. The windmill is off to the left, Madeley Court is some distance to the right (West). [My photograph, 2nd March 2023]Madeley Mill alongside the Silkin Way, one cold January in the snow. A short walk under the arch bridge in the background is Madeley Court which is now a hotel. …The arch bridge carries the LNWR Coalport Branch. Just to the East of the line, and shown here, are the remains of a windmill, Madeley Mill. There has been a mill on the site since at least 1702 and the mill was last known to operate in 1840. It was later, apparently, used as a bunkhouse for the railway navvies. No machinery survives. The picture was shared on the Telford Memories Facebook Group by Lin Keska on 19th November 2022. [23]A similar view to that taken in snowy conditions. The Silkin Way is on the left of the picture, the underbridge is directly ahead. [My photograph, 2nd March 2023]While I was wandering around near the old windmill, the sun came out. [My photograph, 2nd March 2023]The underbridge viewed from the West. [My photograph, 2nd March 2023]Madeley Court in 2023 is a Hotel, temporarily in use to house Afghan refugees who worked with the British in Afghanistan. This picture was taken from just to the West of the underbridge in the last photo. [My photograph, 2nd March 2023]
Madeley Court Iron Works
In 1845-6, James Foster built three blast furnaces near the newly opened mines on his Madeley Court estate. They replaced his Wombridge furnaces, and Foster moved workmen and plant from Wombridge to create a modern ironworks. For most of their life only two of the three furnaces were in blast together. All the Madeley Court pig iron was sent to the Fosters’ ironworks in Staffordshire and Worcestershire to be blended with other types for the manufacture of high quality bar. The ironworks ceased working in 1902 but in 1912 were taken over by Thomas Parker, an electrical engineer. He and his son C. H. Parker established Court Works Ltd., a foundry firm which, seventy years later, had long specialized in iron castings for the electrical industry. [54]
The tramroads in this are will feature in a future article in the series about Telford’s tramroads/tramways. An overview of the wider area’s tramroads/tramways/plateways can be found on this link:
Historic England records this Grade II* listed building as being, “Mainly C16 with traces of C13 fabric. Built as a grange to Wenlock Priory. At the Dissolution bought in 1553 by Sir Robert Brooke, Speaker in the House of Commons, and stayed in the Brooke family until early C19. Tenanted by Abraham Darby I from 1709 until his death. Large ashlar house, at time of survey (1980) being restored. Tiled roofs with gables with parapet coping. Large brick shafted chimney stacks. Two-storeys and attics. L-shaped on plan, originally on west wing as well. The north-west hall range extensively rebuilt. Gabled stone attic windows with finials. Large stone mullion transom windows with dripmoulds. Early C17 stone porch to right hand of hall range with moulded round arch and ornate gables with volutes, pediments and strapwork foliage decoration. The east wing contains large C16 timber newel staircase and rooms with bolection moulded panelling and chimney piece.” [39]
Madeley Court, Shropshire as it appeared in the mid 20th century, (c) John Piper (1903-1992). [37] Madeley Court, sketch held by Historic England. [38]Madeley Court, image held by Historic England. [38]Madeley Court, an early 20th century postcard. [40]
Madeley Court to Bridge Street/High Street, Madeley
Returning to the route of the Coalport Branch, we continue to follow the old line in a South-southeasterly direction.
This extract from the 25″ Ordnance Survey of 1901, published in 1902, shows the length of the Coalport Branch from the Madeley Court area to the town of Madeley. Along this length the old railway was on a relatively high embankment. At the bottom-right of the extract it can be seen bridging Bridge Street, Madeley which became Madeley High Street. [55]The same area as shown by Railmaponline.com. [44]These two photographs show the line beginning to curve back from a South-southeast alignment to head South to the East end of Madeley High Street. [My photographs, 6th March 2023]The Madeley bypass is known as Parkway. The old railway was on embankment at this location and the Silkin Way required a concrete structure to span the route on the new road. [My photograph, 6th March 2023]The view East along Parkway on the approach to the roundabout at the East end of Madeley High Street. The bridge was constructed in the late 1960s. [My photograph, 6th March 2023]The Silikn Way approaching the bridge over Madeley High Street. [My photograph, 6th March 2023]
The Coalport Branch crossed Bridge Street on a single-span girder bridge. The road is now known as High Street. These next few pictures show the location through the years.
In a very short distance, the line passed through Madeley Market Station. The line was single through the station and a small goods yard was provided immediately South of the station on the West side of the line.
This photograph was shared as a comment by Andy Rose on a group post by Marcus Keane dated 27th February 2022 which showed the length of the Shropshire Canal bed directly behind Malinslee Railway Station; https://m.facebook.com/groups/674238619260811/permalink/7378452445506028, accessed on 29th August 2022.
Wikipedia provides this schematic map of the Coalport Branch which highlights the key stations and sidings. [3]
History
The history of the Coalport Branch begins with competition between rival rail companies in the area during the mid 1850’s. The GWR had control of the industrial areas of East Shropshire, whereas the LNWR only had access to the area via the Shropshire Canal which ran from Trench down to Coalport.
The Canal was going into disrepair and suffering from water shortages and subsidence. Canals in the area were difficult to maintain as the various mines in the area were causing significant subsidence.
The LNWR decided that it was best to discontinue costly maintenance and instead to build a railway line along the length of the Canal from Hadley to Coalport. Parts of the Canal were converted into railway track bed.
The use of a canal to provide a route for the railway was something that a number of railway companies pursued. In this case, the Canal provided a route for the railway down the East side of Dawley through what is now Telford Town Park, taking it past Aqueduct, Madeley and onto Coalport by the River Severn.
It is important not to confuse the LNWR station at Coalport with that on the opposite bank of the River Severn. The Severn Valley Railway chose to name its station ‘Coalport’ when it was subsequently built. Two stations with the same name on opposite sides of the river.
Eight months later, the LNWR decided to call their station on the north bank of the river Coalport East. It appears that at one time there were ambitious plans to join the two stations together by a bridge. These never came to fruition.
The LNWR branch opened as a single track on 17th June 1861. Unfortunately passenger numbers were low, but passengers were not the main reason for constructing the line. Freight traffic was expected to make the line profitable. The slow speed of the trains was not commensurate to passenger use, neither was the steep incline down to Coalport. Apparently, “some passengers were frightened to go on in case the train didn’t stop at the bottom!” [2]
The passenger service on the line closed on 2nd June 1952. Freight traffic continued until 1964.
The southern section of the line, from the northern end of Telford Town Park is now on the Silkin Way, a walkway named after Lord Silkin who was a pioneer of the Telford New Town development in the 1960’s. The northern length of the line has been lost under the development of the New Town. Part of the northern length of the line, North of Oakengates, is now a section of the A442 dual carriageway.
The Coalport Branch of the Shropshire Canal.
The history of the LNWR railway branch line is built on the story of the Canal and it is with that story that any investigation should begin. A Separate article cover the route of the Canal and the first of these can be found on this link:
Wellington Railway Station to Hadley Railway Station
Wellington Railway Station was the junction station for the Coalport Branch passenger services. The bay platform on the South side of the Wellington Station site was shared with the GWR Coalbrookdale line (Wellington & Severn Junction Railway). The station and the line to its East are covered in the link below:
Coalport East trains left the Shrewsbury to Birmingham line and for a short distance, to Hadley Junction, travelled along the line from Wellington to Stafford. After passing through Hadley Railway Station trains took to the Branch which curved away to the South of the main line.
Hadley Railway Station to Wombridge (Goods)
Experience shows that it is very difficult to plot a line on the ground when significant development has taken place. For the first section of this line the redevelopment from the 1960s into the 21st century has been very significant. In this article I have relied on modern satellite images provided by railmaponline.com. [4] As usual, historic mapping comes from the NLS (National Library of Scotland).
Hadley Railway Station appears on the left of this extract from the 25″ Ordnance Survey of 1901, published in 1902. The trackwork associated with the junction and with Castle Car Works can be seen at the top right of the extract. [60]The same area in the 21st century as shown on the ESRI satellite imagery provided by the NLS. [60]An enlarged extract from the 25″ Ordnance Survey which shows the area immediately around Hadley Station. [61]The same area on the modern satellite imagery of Google Maps. [62]Caren Craft shared the photograph of modern Hadley taking shape on the Hadley History Facebook Group on 26th June 2022. The photo was carried by the Shropshire Star on 15th August 2011. Both of the two railway bridges can be seen on the left of the image carrying the new single track railway line. [80]
Hadley Railway Station served the former Stafford to Shrewsbury Line and was the start of the branch to Coalport. The station was opened in 1849 and closed in 1964. The line through Hadley was closed from 1964, with the last remaining stretches of track being taken up in 1991. In the late 2000s a stretch of track was re-laid to the Telford International Railfreight Park for freight purposes only. [63]
Telford International Railfreight Park (known as TIRFP) is rail freight depot and construction development site located in Donnington to the north of Telford, on the former route of the Stafford to Shrewsbury Line. The terminal was opened in 2009. [64]
The old bridge at Hadley Station viewed from the North. [Google Streetview, June 2022]The old bridge at Hadley Station viewed from the South. [Google Streetview, June 2022]An early view looking North up Station Road under the railway bridge. This image was shared on the Hadley History Facebook Group by Caren Craft on 3rd July 2022. [71]
A later view (1963) of the bridge which was shared on the Hadley History Group by Tony Handley on 22nd March 2021. [73]
An even later image (1986) of the same bridge with the new pedestrian/cycleway bridges in place. This view was shared on the Hadley History Facebook Group by Lynne Purcell on 5th February 2021. [74]
Wombridge Priory was a small Augustinian monastery established in the early 12th century, it was supported by a network of minor nobility and was never a large community. Despite generally good financial management, it fell within the scope of the Suppression of Religious Houses Act 1535 and was dissolved in the following year. [82]
The priory was dedicated to St Leonard. St Leonard was particularly popular in the 12th century following the release of Bohemond I of Antioch, a captured crusader – a circumstance which he seems to have attributed to the saint’s intercession. White Ladies Priory, another Shropshire Augustinian house, was also dedicated to St Leonard, as was the parish church at Bridgnorth, [82] and at a later date, Malinslee Parish Church. Remains of the priory buildings remained visible until the 19th century but are now hidden beneath the churchyard and other development. They were excavated in the 1930s and again in 2011 and 2012. [82]
The church was designated to St. Mary and St. Leonard and was built in 1869 by George Bidlake. It is the fourth church on the site of the Priory.
An aerial view of Wombridge Church with some of the remains of the Priory evident. This photograph was shared on the Telford – The Ultimate Guide Facebook Group by Steve Bowers on 27th February 2023. [83]
The bridge which carried the Coalport Branch over what was once Wombridge Road was demolished to make way for the A442 Queensway.
This photograph was taken during the demolition of the bridge. It is the only photo I have been able to find of the old railway bridge. It appears to have been taken from the South. Headroom would have been quite limited. The photograph was shared by Paul Wheeler on the Telford Memories Facebook Group on 23rd November 2017. [84]
We continue on our journey along the old Coalport Branch with a ground-level shot along the A442 showing the line of the old railway.
Looking Southeast along the A442, Queensway from the Northwest-bound off slip road. The A442 was built over the line of the Coalport branch which was curving along the length ahead towards the Southeast. [Google Streeetview, June 2022]The 25″ Ordnance Survey from the turn of the 20th century again. The important feature on this length of the Coalport Branch was the bridge which carried Stafford Road over the line. [12]Once again, this satellite image covers approximately the same area as that covered by the OS map extract above. The purple line is the route of the Coalport Branch as recorded on railmaponline.com. [4]An image from the Southbound carriageway of the A442 from a position at the top-left of the satellite image above. [Google Streetview, June 2022]From the same Southbound carriageway, the bridge which carries Stafford road over the A442 is visible in the distance. The Coalport Branch followed a tighter curve than the modern road, passing under Stafford Road to the South of the modern bridge over the A442. [Google Streetview, June 2022]Stafford Road, Oakengates looking North across the bridge over the A442. The bridge over the Coalport Branch would have sat just to the South side of the modern A442 in roughly the location indicated by the purple line on the photograph. [Google Streetview, June 2022]
A Brown’s Sentinel bus crosses the Stafford Road bridge in Oakengates in March 1963. For much of his married life, Ron Dean was in the driving seat. And his wife Greta was his conductor. The camera is pointing towards the South. [15]
Stafford Road Bridge again, sometime in the 1960s before the A442, Queensway dual carriageway was built. This was probably taken at the time that a footbridge was being installed alongside the road bridge. The photo is taken facing South along the Brach line. It was shared on the Telford memories Facebook Group by Bear Yeomans on 7th February 2016. [16]Looking North from Stafford Road Bridge along the Coalport Branch towards Hadley Junction. This image was shared on the Oakengates History Facebook Group by Gwyn Thunderwing Hartley on 23rd May 2020. [50]Looking North under Stafford Road Bridge along the Coalport Branch. This image was shared on the Oakengates History Facebook Group by Gwyn Thunderwing Hartley on 30th July 2018. [51]This aerial photo of Oakengates was taken in November 1970. Just to the right of the top-centre of the image, Stafford Road bridge can be seen with the footbridge alongside it. The A442 is not evident, but the Coalport Branch cutting can be followed from the road bridge to the right. This image was shared on the Telford Memories Facebook Group by Marcus Keane on 22nd March 2022. [19]An enlarged extract from the picture immediately above showing Stafford Road bridge in the top-left. [19]This next length of the line takes us through Oakengates Market Street Railway Station and Goods yard. The 25″ Ordnance Survey of 1901, published in 1902 shows the station and goods yard to full advantage. [20]The railmaponline.com satellite image of the same area as in the map extract above. This begins to show how congested the area around Oakengates was with a variety of railway lines and sidings. [4]The level crossing to the immediate North of Oakengates Market Street Station with the gates closed to road traffic to allow the passage of a goods train in the capable hands of a Pannier tank! We are looking East up Station Hill. This view was shared by Gwyn Thunderwing Hartley on the Oakengates History Facebook Group on 10th March 2017. [55]Looking East up Station Hill from Oakengates Market Street Station forecourt. This image was shared by Metsa Vaim EdOrg on the Telford Memories Facebook Group on 2nd November 2019. [26]
This photograph is taken from a point just off the left of the above image and also looks East up Station Hill across the railway line, which was by the time the picture was taken, closed. The image was shared on the Telford memories Facebook Group by Marcus Keane on 13th November 2016. [27]
Oakengates Market Street Station from the East. This image was shared on the Oakengates History Facebook Group by Gwyn Thunderwing Hartley on 29th March 2021. [49]Oakengates Market Street Station as seen from the East on Station Hill, adjacent to the Police Station. This image was shared by Paul Wheeler on the Telford memories Facebook Group on 16th August 2017. [21]A view from almost exactly the same location in 2022. The police station site is on the left of the image, the modern railings in the same location as on the image above. The A442, Queensway, overbridge now dominates the scene. [Google Streetview, June 2022]Looking West into Oakengates after the removal of the passenger facilities at Oakengates Market Street Station. Rails remain in the road. It is possible that this photograph was taken in the late 1950s or the very early 1960s. It was shared on the Oakengates History Facebook Group by Gwyn Thunderwing Hartley on 10th March 2017. [56]This little tableau of three images (one above and two below) were shared on the Oakengates History Facebook Group on 16th July 2019 by Gwyn Thunderwing Hartley. Two of the pictures show the work going on to deal with a derailment of a Pannier Tank. The photographs of the derailment were sent to the Group by John Wood and were taken by Mike Dodd. Gwyn Thunderwing Hartley writes: A “derailment at Oakengates Crossing sometime before 1958. This is the LNWR LMS Rail line Market Street/Station Hill. Pic 3 shows where the then disused Line cuts across the Station Hill Road (the line ran between the Building and the Bus Stop traveling in the direction of Wellington), the building is the old Whitefoots Showroom, this was formerly a Pub, the building you can see the back of in the derailment pic is this same as in Pic 3. Much of this info is from John Wood.” The first picture shows the level crossing gates in the background and was taken looking Southeast with the Goods Yard and erstwhile Station Buildings beyond the Crossing gates to the South. The first of the two pictures below is taken looking North from the crossing gates. [57]HistoryLooking South from the level-crossing at the bottom of Station Hill and the top of Market Street. Market Street Railway Station buildings were off the image on the right. The station platform edge can be seen through the crossing gates. The line curves round passed the Goods Yard, under Canongate Bridge and on towards the A5 at Greyhound Bridge. The photo was shared by Gwyn Thunderwing Hartley on the Oakengates History Facebook Group on 9th November 2019. [58]Oakengates Market Street Station in the 1930s looking North towards Hadley, (c) C.L. Mowat used here with permission from dawleyhistory.com. [81]The view North through Oakengates Goods Yard and Market Street Station. The crossing gates at Station Hill/Market Street appear to be closed to rail traffic. The station building sits to their left in the centre of this image. This image was shared by Paul Wheeler on the Telford memories Facebook Group on 16th August 2017. An equivalent modern view from Canongate is not feasible because the industrial site is now screened by trees. [22]Looking North towards Oakengates Market Street Station through the Goods Yard in 1932. This picture was shared on the Oakengates History Facebook Group by David Bradshaw on 27th November 2016. The goods train is hauled by an unidentified 0‒6‒0 and is passing a Super D 0‒8‒0 waiting in the goods yard. The very sharp curve just apparent on the extreme left is Millington’s timber yard siding. The shed on the left was latterly used by the CWS as a store, (c) C.L. Mowat. [54] [81]Looking North through the area that was Oakengates Market Street Station Goods yard from the Eastern end of Commercial Way. The purple line shows the approximate route of the Coalport Branch. The white building at the centre of this image is the old goods shed now put to a different use! [Google Streetview, June 2022]Looking Southeast from the same location. The mainline of the Coalport Branch would have run along the treeline behind the industrial units. [Google Streetview, June 2022]The view from the Southeast on Canongate. The purple line shows the approximate location of the Coalport Branch which passed under the road by means of a bridge. [Google Streetview, June 2022]Canongate Railway Bridge was a brick-arched structure. It is seen here infilled to support the road above. This image was posted by BruceS on Waymarking.com on 2nd June 2015. [23]Looking North under Canongate Bridge towards Oakengates Market Street Station. This picture was shared on the Oakengates History Facebook Group by Gwyn Thunderwing Hartley on 12th October 2017. [52]An aerial image looking North along the line of the Coalport Branch in 1948. Canongate bridge is in the centre of the image, the Station is towards the top of the image beyond the goods yard, (c) Historic England, Britain from Above (EAW013748). [24]An extract from the above image which shows Canongate, the Goods Yard and the Station in greater detail, (c) Historic England, Britain from Above (EAW013748). [24]The next length of the Coalport Branch took it passed Snedshill Iron Works and into a tight corridor which included the GWR Shrewsbury to Birmingham railway Line, the Coalport Branch and a Mineral Railway. This area is again shown on the 25″ Ordnance Survey of 1901, published in 1902. [26]Railmaponline.com’s satellite imagery shows the same area as in the OS map above as it appears in the 21st century. All the lines mentioned above are included in the overlay to the satellite imagery. [4]Another extract from the aerial image of 1948 which showed Canongate Bridge, this shows the area to the South of Canongate. Snedshill Iron Works are on the right of the image. In the centre of the image are John Maddock and Co.’s works for whom the aerial photographs were taken. Those works do not feature on either the 1901 Ordnance Survey or the modern satellite imagery. [24]Looking North from the A5 bridge over the Coalport branch. Snedshill Ironworks are on the right of the image. The bridge at the centre of the image is the same one that appears at the bottom of the aerial image immediately above. This photograph was shared on the Telford Memories Facebook Group by Paul Wheeler on 18th March 2018. [37]Looking Northwest along Reynolds Drive, Oakengates. The Coalport Branch was in cutting at this location. The purple line gives an idea of its Route. Its route crosses Hawkshaw Close a 100 yards or so to the left, as shown below. [Google Streetview, June 2022]Looking South along Hawkshaw Close, Oakengates with the line of the Coalport Branch shown. As noted above the line was in relatively deep cutting at this location. Google Streetview, June 2022]Looking North from Newlands Road, Oakengates, towards Oakengates Market Street Station. At this point on the line we are a little to the North of the accommodation bridge shown on the 1948 aerial image above. The approximate route of the line is again shown by the purple line. The line was, however, in deep cutting at this location. [Google Streetview, June 2022]Looking South from Newlands Road, Oakengates, along the line of the Coalport Branch which was in deep cutting at this location. The road to the right of this image is Station Road which once ran immediately alongside the old railway line a little further to the South.[Google Streetview, June 2022]Looking North along Station Road across the line of the old railway. Station Road was diverted when the new roundabout (immediately behind the camers) was constructed. The next two monochrome images focus on this location as it was in 1948. [Google Streetview, June 2022]The same length of line, but this time as shown in an aerial image from the Northwest, also taken in 1948. The image features John Maddock’s works with Snedshill Iron Works beyond, (c) Historic England, Britain from Above (EAW013752). [25]A closer view of the top-right of the above image with the Coalport branch heading away to the South. This area saw significant alterations in the later years of the 20th century. The significant bridge carries what is designated the B5061 in the 21st century, but was the A5 Trunk Road. The works immediately beyond the bridge and alongside the A5 are the Lilleshall Company’s Snedshill Brickworks, (c) Historic England, Britain from Above (EAW013752). [25]The 1″ OS Map of 1898, published 1899, shows the location of the bridge. The immediate area is now under the Greyhound Roundabout which sits alongside the A442. [28]Looking Southeast along the A5 towards the Lilleshall works at Priorslee. The dominant building with the curved roof on the left of this image is the Lilleshall Company’s Snedshill Brickworks. The Coalport Branch passed under the bridge at the centre of the image. This phot was shared on the Telford Memories Facebook Group on 23rd February 2014 by Vince Allen. [29]Looking down into the cutting of the Coalport Branch from the East in 1973. The road running across the image is the A5. The arch bridge is the Greyhound Bridge which is eventually replaced by the Greyhound Roundabout. The picture was shared on the Oakengates History Facebook Group by Gwyn Thunderwing Hartley on 14th May 2019. [58]A local collapse of parapet walling alongside the bridge occurred in 1966. The bridge is off to the left of the photograph, the running line of the Coalport Branch just below the image. This press cutting was shared on the Telford Memories Facebook Group by Paul Johnson on 1st March 2014. [30]In this postcard aerial view of Snedshill Brickworks from the West, the Mineral Railway adjacent to the Coalport Branch is visible, crossing the A5 at the bottom edge of the image. The Coalport Branch is just off the bottom of the picture. [32]Snedshill Brickworks again, this time in the 1950s and viewed from the East. The A5 runs away to the right of the image. The cutting of the Coalport Branch runs across from middle-right to middle-left. The A5 bridge over the line is hidden by the Works buildings. This picture was shared on the Telford Memories Facebook Group by Marcus Keane on 26th March 2014. [36]From a similar angle to the last picture but taken from the Lilleshall Brickworks buildings in 1974, this image was carried by the Shropshire Star at the time. The A5 runs diagonally across the shot with the dwarf wall above the arched Greyhound Bridge visible to its right. The cutting of the Coalport Branch runs left to right across the centre of the image. The picture was shared on the Oakengates History Facebook Group on 22nd October 2020 by Gwyn Thunderwing Hartley. [59]
This photo does not have the best of definition, but it is worth including as it shows the view South across the Brickworks before redevelopment work in the area. The Shrewsbury to Birmingham line curves away to the East. The A5 bridge over the Coalport Branch is visible at the bottom of the image. [33]
This aerial image looks to the South at a time of great change in the local landscape. In the bottom-eft of the image, the A5 still runs on its route passed the Snedshill Brickworks and across what was once the Coalport Branch. Greyhound roundabout is under construction. South of the roundabout the mainline from Shrewsbury to Birmingham appears out of its tunnel and the A442 construction alongside it is well advanced. Toward the top of the image is the M54 construction work and in the top-right corner, part of Telford’s new town centre. [33]This aerial image is taken facing North. The Coalport Branch no longer features. Snedshill Brickworks remain and the A442 is not yet completed and there is little or no evidence of it North of Greyhound Roundabout. What will be the Northbound off-slip road from the A442 runs South away from the newly completed Greyhound Roundabout. [33]Looking North under the A5 towards Oakengates, apparently the bridge was known as Greyhound Bridge and gave its name to the roundabout that replaced it. This photo was shared on the Oakengates History Facebook Group by David Bradshaw on 27th November 2016. [54]
From this point South the A442 now occupies the space which once was used by the Coalport Branch. The Northbound slip road from the A442 can be seen following the line of the old railway on the Railmaponlin.com satellite image below.
The 25″ Ordance Survey of 1901, published 1902, shows the Coalport Branch passing over the GWR Shrewsbury to Birmingham main line. The GWR line passed under the area in a deep tunnel with the Coalport Branch above it also in a relative deep cutting. The two lines ran approximately parallel for a short distance. [31]Railmaponline.com shows the same area with the local lines overlaid on the satellite imagery from Google Maps. [4]The view North, back towards Oakengates from the northbound slip road of the A442. [Google Streetview, June 2022]The view South from the same location showing the approximate route of the Coalport Branch. [Google Streetview, June 2022]A little further South along the A442 with the approximate line of the Coalport Branch marked once again. [Google Streetview, June 2022]Further South again, this time the camera is on the southbound carriageway. The Coalport Branch ran approximately along the modern treeline. Beyond the horizon the A442 curves back over the formation of the old line. [Google Streetview, June 2022]Further South again the A442 crosses the line of the Coalport Branch. The next Railmaponline.com satellite image shows that the footbridge in this view is very close to the point where the A442 leaves the formation of the Coalport branch. [Google Streetview, June 2022]This next extract from the 25″ Ordnance Survey of 1902 shows the Shrewsbury to Birmingham line to the East of the Coalport branch and running parallel to it. Both pass under the road leading Northeast out of Hollinswood. The Coalport branch remains in cutting along much of its length on this map extract. [34]The same area on the satellite imagery provided by Railmaponline.com. The purple line shows the route of the Coalport Branch which, from close to the top-left of the image ran along a route immediately adjacent to the modern A442. Hollinswood Road has been replaced by a footbridge over the A442 and the Shrewsbury to Birmingham main line. It is further cut to the Southwest by the M54 and its junction arrangement, just off this image to the bottom-left. [4]Looking North towards Oakengates from the cycle track on the West side of the A442. The approximate route of the Coalport Brnach is indicated by the purple line. [My photograph, 13th March 2023]Looking Southeast from the cycleway alongside the A442. [My photograph, 13th March 2023]Another view looking North, but this time taken from the Footbridge/Cycleway bridge over the A442. [My photograph, 13th March 2023]Looking South from the same bridge with the route of the old railway indicated by the purple line. The bridge ahead carries the M54 over the A442. [My photograph, 13th March 2023]Looking South again, this time from the cycleway/footpath which runs under the M54 bridge over the A442. [My photograph, 13th March 2023]This is now the view South towards the Telford Station footbridge. My photograph, 13th March 2023]A few steps ahead and turning a half-circle, this is the view looking North under the M54 Bridge with the old railway route marked by the same purple line. [My photograph, 13th March 2023]The view South once more showing the line of the old railway. [My photograph, 13th March 2023]Looking North-northwest on Rampart Way under the footbridge leading to Telford Railway Station. The approximate line of the Coalport Branch is shown by the purple line. The M54 runs parallel to and beyond the purple line [Google Streetview, June 2022]Looking to the Southwest under the Station Footbridge with the line of the Old Coalport Branch shown in purple. [Google Streetview, June 2022]Old Dark Lane Colliery and Brickworks appear at the top of the next extract from the 25″ Ordnance Survey of 1901, published in 1902. Dark Lane Village is at the bottom of the image. Dark Lane village was lost as part of the development of Telford. The Branch has turned away from the Shrewsbury to Birmingham line towards the South. [35]The same area on the satellite imagery provided by Railmaponline.com. The route of the old line cuts across the West side of the A442 interchange and then South through housing and across Dale Acre Way. [4]Looking South across Hollinswood Interchange along the line of the Coalport Branch. [Google Streetview, June 2022]Looking East along the northern arm of Dunsheath. The line of the old railway crosses the housing development immediately this side of the black car and the van (approximately)! [Google Streetview, June 2022]Looking East along the southern arm of Dunsheath. The line of the old railway crosses the housing development as shown by the purple line. [Google Streetview, June 2022]
Old Darklane Colliery and Brickworks
The Colliery was opened in 1855 and closed finally in 1885. The owners were: Beriah Botfield (1855-1860]; Leighton and Grenfell (1869-1870); and Haybridge Iron Co. Ltd (1875-1885). [38]
Dark Lane Village
Dark Lane Village was lost in its entirety to the redevelopment which produced Telford. Dark Lane Row and the Methodist Chapel appear at the bottom of the OS map extract above. The remainder of the village features at the top of the OS Map extract below. Malins Lee Station was on the South side of the village. Little Dark Lane Colliery to the West. There were three long rows of cottages which were known locally as: Long Row (about 550ft long and containing 20 houses); Bottom Row (a little over 500ft long and containing 25 houses); and Short Row (nine houses built by the Botfield family in around 1825). A full description of the village and pictures of the buildings can be found on the Dawleyhistory.com website. [39]
The last extract from the 1901 25″ Ordnance Survey in this article covers Dark Lane village and Malins Lee Railway Station. [47]The same area on the satellite imagery provided by Railmaponline.com. After crossing Dale Acre Way, the route of the old line heads South-southwest across open ground and then over land used for housing development. [4]Looking West on Dale Acre Way. the approximate location of the old railway is shown by the purple line. [Google Streetview, June 2022]The view West in the 1960s along Dark Lane the GWR mineral railway was hidden in the dip. The road then rose relatively steeply to cross over the Coalport Branch. The bridge can be seen middle-left of this image. [40]This Streetview image is taken from approximately the same location as the picture immediately above. [Google Streetview, June 2022]This bucolic colour image shows the road featured in the image above but this time from a location adjacent to Bottoms Row, Dark Lane. The bridge over the Coalport Branch can be seen again on the horizon. This photo was shared on the Telford memories Facebook Group by Marcus Keane on 28th February 2023. It was colourised by Simon Alun Hark. [42]This image is taken from the same geographical location as the one immediately above, facing in the same direction. The light blue line indicates the alignment of the old Dark Lane. [Google Streetview, June 2022]This postcard view shows Bottom Row with the Methodist Chapel beyond. The bridge on the right of the image carried Dark Lane over the Coalport Branch. Malins Lee Station was beyond the bridge to the right of the image. A matching modern image is not practical as the camera location is now in the midst of a copse of trees close to the boundary of the exhibition centre car park. [39]
‘The Miner’s Walk‘ website provides more information about the area around Dark Lane village. [41] It includes a hand-drawn overlay of modern roads over the Ordnance Survey of the 1880s.
Malins Lee Station as in appeared in 1932.The photograph seems to have been taken facing South from the bridge which carried Dark Lane over the line. The passenger facilities at the station seem to be a little different to others on the Coalport Branch. The station was closed for two years during WW1 as an economy measure and finally closed in 1952 with the line remaining open for goods traffic for more than a decade. Just to the South of the station was a single siding which served immediately local industries. This picture was shared by Lin Keska on the Telford Memories Facebook Group on 15th August 2018. [45]Marcus Keane shared this composite image on the Telford Memories Facebook Group on 20th July 2014 which shows the location of Malins Lee Station in relation to the modern blocks of flats in Hollinswood. [48]Malins Lee Station once again. This photo seems to have been taken from the filed opposite the station. The tall chimney behind the station was probably that of Dark Lane Foundry. This photograph was shared by Marcus Keane on the Telford memories Facebook Group on 24th January 2018, (c) Ray Farlow, circa 1907. [43]Malins Lee Station passenger facilities. The photograph was shared on Telford Memories Facebook Group by Marcus Keane on 20th September 2017. [44]Malins Lee Station had been closed to passengers for 12 years when this photograph was taken of a goods service on the Coalport Branch. The picture was shared on the Telford memories Facebook Group by Lin Keska on 15th August 2018. [46]
We have reached the end of this article. Two further articles will cover the remaining length of the LNWR Branch to Coalport East. The next article can be found on this link:
The Coalport Branch of the Shropshire Canal appears on the schematic plan below. The tub boat canals were linked to the Shropshire Union Canal via the Newport Canal (the Shrewsbury and Newport Canal).
This schematic representation of the Shropshire Tub Boat Canals is helpful in clarifying the extent of the network. It shows the locations of all the inclined planes on the system. These are marked with a red arrowhead which in each case highlights the direction of the lift. The Trench Branch and Incline were in important link in the journey between the Shropshire Union Canal and the River Severn at Coalport, linking the Newport Canal to the Wombridge Canal which became a part of the Shropshire Canal. [2]
An Act of Parliament dated 11th June 1788 enabled the construction of the Shropshire Canal. It was opened along nearly its full length by 1791 and served the major ironworks and collieries in its immediate vicinity. These included “the Snedshill and Priors Lee Furnaces, the Lilleshall Company’s early mines, the Madeley Court Ironworks, Blists Hill Furnaces and the Coalbrookedale Company.” [24: p 167]
The Shropshire Canal was blighted by subsidence throughout its life. Many of the mines in the area were shallow workings only had short working lives and, once the reserves that they exploited were exhausted, were abandoned. Their demise often resulted in water loss from the canal, a problem which could not be addressed quickly. Of more substantial difficulty were the occasions when subsidence led to more significant structural damage to the waterways and their associated inclined planes.
Initially, the majority of the loads carried by the canal were transported only short distances between industrial sites in the immediate area. Over time, first coal and pig iron and later other products were dispatched to a variety of destinations outside the area. An inclined plane (the Hay Inclined Plane) linked the Canal to the River Severn. See:
Coalport grew significantly as a result of this trade and “within a few years two potteries, a rope works and a chain works opened there.” [24: p167]
A length of the canal from Trench to Shrewsbury was open by 1797, but it remained isolated from the rest of the canal network until 1835, when the Birmingham and Liverpool Junction Canal built the Newport Branch from Norbury Junction to a new junction with the Shrewsbury Canal at Wappenshall. [1]
The Trench Branch brought the Canal to the top of Trench Inclined Plane, that length of canal and the Inclined Plane are covered in an article which can be found here:
At the top of the incline a junction was made with the Wombridge Canal which is marked as a continuation of the Trench Branch on OS Maps.
The Wombridge Canal opened in 1788, and parts of it were taken over by the Shrewsbury Canal Company in 1792, who built the inclined plane at Trench. It lowered tub-boats 75 feet (23 m), and remained in operation until 1921, becoming the last operational canal inclined plane in the country. The canal had been little used since 1919, and closed with the closure of the plane. [3]
As the schematic plan of the Shropshire Canal network above shows, from the top of Trench Inclined Plane (Wombridge Wharf) tub-boats could be taken in two different directions. Turn to the South and it was only a short journey to Wombridge Iron Works. This short length of the canal is shown on an extract from the 6″ Ordnance Survey of 1881 below. …
Trench Inclined Plane enters this map extract from the 6″ OS Map of 1881 (published in 1887] in the top-left corner. Wombridge Ironworks are shown in the bottom-right of the image. Wombridge Collieries appear close to the centre of the map. Wombridge Ironworks where extended, before the time of the Ordnance Survey, across the line of what was a slightly longer canal arm. [5]This is an extract from a wider plan of the Shropshire Canal network included on the website, ‘Exploring Telford’. It shows a longer length of the canal South of Trench Inclined Plane, running on passed Wombridge Iron Works, Wombridge Forge and on to Wombridge Farm. The website ‘Exploring Telford’ [21] was developed by Richard Foxcroft. Richard, sadly died in 2018, I have been unable to contact anyone about his website. The plan from which this extract is taken appears on the Homepage of ‘Exploring Telford’. [21] The line shown on this computer generated drawing matches well with the drawing included immediately below and which was sourced from British History Online [22]Wombridge and Priorslee in the 1840s. The area of interest to us here is in the top-left of the image around Wombridge. That area is enlarged below. [22]An enlarged extract from the plan above. In the 1840s, the canal arm which extended South of Trench Inclined Plane was already truncated with short lengths isolated from the network still in use. [22] British History Online indicates that this length of the canal (South of Wombridge Ironworks) was probably abandoned by 1819. [23]
Northeast of Trench Inclined Plane the Wombridge Canal linked across to Old Yard Junction. Here the Donnington Wood Canal continued Northeast and the Coalport Branch ran to the South.
Travelling South on the Coalport Branch Canal, tub-boats would have immediately encountered Wrockwardine Wood Inclined Plane.
Construction of the Wrockwardine Wood Inclined Plane took place in 1791 after the Ironmaster, John Wilkinson petitioned Parliament to extend the Shropshire Canal from Snedshill to form a junction with the Donnington Wood Canal. [4]
P. Whitehead [11] provides approximate figures for the inclined planes on the Shropshire Canal as follows:
Wrockwardine Wood Inclined Plane: 350yds long, 120ft rise. Or 316yds long, 113ft 2in rise. (But note the information provided by British History Online below and reference [17] which gives different dimensions again.
Windmill Inclined Plane: 600yds long, 125 ft rise.
Lilleshall Inclined Plane: 123 yds long, 43 ft. This replaced an earlier vertical lift in a shaft and tunnel system. [11]
The Coalport Branch continued South. The majority of its route is picked up on John Rennie’s plan showing the proposed route of his Shrewsbury & Wolverhampton Railway which predated the construction of the LNWR’s Coalport Branch.
An extract from a plan drafted by John Rennie in 1844 showing the proposed route of the Shrewsbury and Wolverhampton Railway through Wellington and Shiffnal [Shifnal]. This plan predates the LNWR’s construction of its Coalport Branch. The Shropshire Canal can be seen clearly at the centre of the extract. This plan is held by the Shropshire Archive Ref. X6008/201 and is included here with their kind permission. The original map is at a 1″ to 1 mile scale. [10]An enlarged extract taken from the image immediately above. The extract shows the top of the Trench Inclined Plane in its top-left corner with the Wombridge Canal running sinuously East towards the canal junction from where the Donnington Canal heads Northeast and the Coalport Branch runs to the South. The Coalport Branch crosses the line of the proposed railway just to the Northwest of Priorslee, where a branch canal can be seen heading to the West. This is the Ketley Canal. Coalport Branch then runs parallel to the intended railway for a short distance before turning South along the East side of Dawley. Just to the Southwest of Stirchley it passes through a tunnel and at a junction divides into two. One arm runs to the South of Great Dawley in a generally Westerly direction. The other branch heads to the Southeast before encountering Windmill Inclined Plane to the Northeast of Madeley Court. From here it heads South towards the Hay Inclined Plane and the River Severn both of which are off John Rennie’s plan to the South. [10]
The route of the Canal can be picked out in greater detail on the 6″ Ordnance Survey which was completed in 1881 and published in 1888. By this time the LNWR’s Coalport Branch had been built and the canal can only been where it had not been replaced by the railway. There are, however, some very short sections of the canal still visible alongside the railway route even into the 21st century.
Wrockwardine Wood, north-east of Oakengates town centre, was originally a detached piece of woodland, later a township, belonging to the manor and parish of Wrockwardine, the rest of which lay 7 km. to the west. British History Online provides a history and a plan of the area. The plan (reproduced below) clearly shows the Inclined Plane. “An inclined plane on the Shropshire Canal rose 122 ft. in 320 yd. from the junction to a summit level on Cockshutt Piece. The Shropshire Canal closed in 1857, the Shrewsbury c. 1921. [19] An underground level, perhaps navigable, ran between Donnington Wood furnaces and the area north-west of the Nabb by c. 1800. [20]” [17]
The 1847 plan of Wrockwardine Wood as provided by British History Online. It shows the Inclined Plane to the right-side of the map slightly above the centre line. The high point of the Inclined Plane was at the Northeast end where it left the Wombridge/Donnington Wood Canals at the Old Yard Junction. This map is enlarged below. [17]Wrockwardine Wood Inclined Plane. [17]Another extract from the 6″ Ordnance Survey of 1881. The Canal route can more easily be seen on this image as, although disused, significant length were still holding water in 1881 and are coloured blue. Oakengates is on the West side of the Canal and Snedshill Ironworks can be made out at the bottom edge of the map extract. [6]I have drawn the approximate alignment if the canal onto this image. The curved edge of Wrockwardine Wood one-third along the top edge of this ESRI (NLS) satellite image extract from the left defines the point at which the canal alignment enters this image. It curves round to the Southeast, running on the Northeast side of the A442 which dominates the centre of the image. It runs along the line of the lower portion of Willows Road before running South through the modern site of Fitchett (Redland) Business Park (which sits alongside the first designated length of the Silkin Way) and then across the A442 alongside what was once Snedshill Ironworks. The line is defined by the western edge of the woodland on the West side if the A442, the East side of the Reynolds Drive estate and the tree line in Madin Park. [13]The 1881 6″ Ordnance Survey shows a section of canal alongside Snedshill Iron Works still ‘in water’. South of the Works and before reaching what was for many years the A5 Trunk Road. The newer Coalport Branch began to run along the line of the old canal. One of the Works sidings followed the line of the canal to join the LNWR branch. The red-dashed line approximately indicates the route of the canal. The blue-dashed line is the approximate route of the old Ketley Branch canal. [6]
The Loop adjacent to, and South of, Malinslee Railway Station
The Canal bed behind Malinslee Railway Station buildings in 1962. This image was shared on the Telford Memories Facebook Group by Marcus Keane on 27th February 2022. [14]An extract from the 1881 Ordnance Survey, published in 1882 showing the area to the South of Dark Lane. Little Dark Lane Colliery to the immediate West of the Station was still in use at the time of this survey. The standard-gauge siding to the West of the Station buildings can be seen on this extract as serving a tramroad wharf, as can the longer siding to the South. Tramroads are not the subject of this article, but given that the tramroads shown seem to only serve the Little Dark Lane Colliery and the Dark Lane Foundry, the traffic on these lines may have either been horse-powered or even man-powered. When the Canal was active a wharf would have existed on the West side of the canal. [25]A further extract from the 1881 6″ Ordnance Survey, showing the next length of the canal. The route of the old canal is indicated approximately by the light blue dashed line. [25]The next extract from the 6″ Ordnance Survey of 1881 takes the canal as far South as Stirchley Ironworks. There are a myriad of tramroad sidings shown at the time of the 1881 survey. Many of these are associated with Oldpark Iron Works and they fill the space between the old canal route and the Works. Most of these will not have been present in the period while the canal was active. As we will see below, there was at least one tramroad bridge across the canal in the time before the canal was replaced by the LNWR Coalport Branch. [25]
The Loop near Stirchley Ironworks
Andy Tidy surveyed the route of the Coalport Branch of the Shropshire Canal in March 2012. He highlighted two areas worthy of note. The first adjacent to Hinkshay/Stirchley Pools and the second to the South of Dawley and Stirchley Railway Station where the Canal was in tunnel during its working life. [15]
Adjacent to the Hinkshay Pools, the Canal alignment deviated from the formation of the later Railway. Andy Tidy provided a plan (below) of the location which I have annotated with the key features he refers to. His pictures of the canal deviation can be seen here. [15]
Andy Tidy says: “No sooner has the line moved off the modern Silkin Way than it is in water, first in the undergrowth but then as it passes the first reservoir the bed squeezes through the foundations of a collapsed bridge and on into open water. … The towpath sits on a narrow strand of land between the canal and the Stirchley Pools Reservoir, a pretty spot which is carefully maintained as a nature reserve. This clear stretch of canal is haunting and as you walk under the shade of the trees you almost expect to meet a horse plodding the other way towing a string of loaded tub boats. … All too soon this enduring stretch of canal slides back into the railway bed, all traces are lost at it passes through the recently rebuilt Stirchley Station.” [15]Looking North along the Silkin Way, this is the Stirchley Ironworks Bridge which crossed the Canal and later the railway. Stirchley Ironworks were on the left-hand side of the photograph, on the far side of the bridge. [My photograph, April 2022]This picture shows the length of the canal on the map above. It was shared by Andy Rose on the Telford Memories Facebook Group in February 2022. [18]
The remaining length of the canal to the South of Stirchley Iron Works is covered in a second article which can be found on this link:
A P Baggs, D C Cox, Jessie McFall, P A Stamper and A J L Winchester; Wrockwardine Wood, in A History of the County of Shropshire: Volume 11, Telford, ed. G C Baugh and C R Elrington (London, 1985), pp. 323-326. British History Online http://www.british-history.ac.uk/vch/salop/vol11/pp323-326, accessed on 29th August 2022.
This photograph was shared as a comment by Andy Rose on a group post by Marcus Keane dated 27th February 2022 which showed the length of the Shropshire Canal bed directly behind Malinslee Railway Station; https://m.facebook.com/groups/674238619260811/permalink/7378452445506028, accessed on 29th August 2022.
References provided in Reference [17] C. Hadfield; Canals of W. Midlands (1969), 40, 151, 251, 328-9; I.G.M.T., Lilleshall Co. colln. 106, 110; Trinder, Ind. Rev. Salop. (1981), 76, 84-5, 153.
Reference provided in Reference [17] Shropshire Records Office 691/1; Salop. News Sheet, xvii. 7-8.
A P Baggs, D C Cox, Jessie McFall, P A Stamper and A J L Winchester; Wombridge: Growth of settlement, in A History of the County of Shropshire: Volume 11, Telford, ed. G C Baugh and C R Elrington (London, 1985), pp. 285-289. British History Online http://www.british-history.ac.uk/vch/salop/vol11/pp285-289; accessed on 2nd September 2022.
A P Baggs, D C Cox, Jessie McFall, P A Stamper and A J L Winchester; Wombridge: Communications, in A History of the County of Shropshire: Volume 11, Telford, ed. G C Baugh and C R Elrington (London, 1985), pp. 284-285. British History Online http://www.british-history.ac.uk/vch/salop/vol11/pp284-285; accessed on 2nd September 2022.
Bob Yate; The Shropshire Union Railway – Stafford to Shrewsbury including the Coalport Branch (OL129); Oakwood Press, Usk, Monmouthshire, 2003.
The Lilleshall Company was a dominant force in the East Shropshire area and developed a network of canals and tramroads to transport goods between their many different sites. “The company’s origins date back to 1764 when Earl Gower formed a company to construct the Donnington Wood Canal on his estate. In 1802 the Lilleshall Company was founded by the Marquess of Stafford in partnership with four local capitalists.” [31]
Bob Yate, in his important book, “The Railways and Locomotives of the Lilleshall Company,” introduces the historical development of the transport provision of the Lilleshall Company, referring first to the Company’s canal network. The construction of these canals which, while of some significance, was unable to provide for all of the sites being built and run by the Company.
“In order to reach the workings of the pits, quarries and works that these canals served, a system of tramways was soon developed. These were almost certainly constructed using wrought iron rails from the start, and were definitely of plateway construction.” [1: p36]
Yate goes on to explain that the tramroads/tramways/plateways had various gauges and comments that these short lines “linking the workings to the canals, gradually lengthened as their usefulness became apparent. So it was that in October, 1797 the ironmaster Thomas Botfield agreed with his landlord, Isaac Browne to carry 1,200 tons of coal each month from Malins Lee (about two miles south of Oakengates):to some convenient wharf or quay adjoining the River Severn, and to the railway intended to be made by John Bishton & Co. and the said Thomas Botfield, or to some intermediate wharf or bank between the said works and the River Severn upon the line of the intended railway.” [1: p35]
An extract from Robert Baugh’s Map of Shropshire of 1808. The red line drawn onto the map was added by ‘Dawley History’. The map from which the extract was taken is available on the ‘Dawley History’ website. It is worth noting that St. Leonard’s Malinslee, next door to which we live, is shown as Dawley Church. [7]
Yate continues: “This railway was working by 1799, running from Sutton Wharf, near Coalport, to Hollinswood, where it connected with several ironworks and mines to the north in the area of Priorslee. The total length of this line was about eight miles, and it is presumed to have been horse worked. Bishton and Onions, whose ironworks was situated at Snedshill, were certainly involved in the original line, and by 1812 it had become the property of the [Lilleshall] Company. This is recorded on Robert Baugh’s map of 1808, and again on the Ordnance Survey maps of 1814 and 1817, although in the latter two cases it is not shown in its entirety.” [1: p35]
Yate notes that the Company were sending down around 50,000 tons of coal annually and much iron. “However, the Shropshire Canal was not enjoying the most robust of business climates, and attempted in June 1812 to negotiate for the Company’s business, although this seems to have been unsuccessful. However, in April 1815, William Horton on behalf of the [Lilleshall] Company agreed that the tramway would be removed, and that its business would be transferred to the canal. In turn, the Company: received compensation of some £500. as well as favourable tonnage rates.” [1: p35]
This means that the direct tramroad link to the River Severn was very short-lived.
The closure of this mainline tramroad/tramway had little effect on the ‘internal’ network of routes serving the Lilleshall Company’s various pits and works. Yate tells us that, by 1833, the main tramways were: a line running along Freestone Avenue to Lawn Pit, near to Priorslee Hall, and to Woodhouse Colliery; branches east of Stafford Street, Oakengates and north of Freestone Avenue; a continuation of the main line northwards crossing Station Hill, Oakengates to the east of the Shropshire Canal, and on to meet the Wrockwardine inclined plane near to Donnington Wood. [1: p35]
“By 1856, further tramways had been laid around the area of Snedshill Ironworks linking to the canalside warehouses, and branches reaching out to the waste heaps south and west of the ironworks. These spoil heap lines continued to expand in subsequent years around the Priorslee Ironworks, and south therefrom.” [1: p35]
Several of the coal pits in the Donnington Wood area were, by 1837, linked directly to the Old Lodge Furnaces and no longer needed to make use of the canal network. These tramroads were horse-drawn with minor exceptions on short, level runs where trams were manhandled. Yate comments: “It is nonetheless interesting to consider that wayleaves were granted in 1692 at Madeley and in 1749 at Coalbrookdale to permit the use of oxen. Admittedly this was over the roads of the area, but a good case could possibly be made for their employment as motive power on the tramroads, as surely local customs would be a powerful influence.” [1: p35]
Using the canal network became increasingly problematic. The underground workings in the area caused some subsidence and as a consequence canals could require significant repairs and be out if action for a time.
The Lilleshall Company’s tramroads eventually developed into a significant standard-gauge network. The later part of the transport story of the Lilleshall Company is for another time and another article!
In this article we concentrate on, what was, a relatively early (1799 to 1815), wrought-iron plateway tramroad. Perhaps we should bear in mind that it is possible that the Lilleshall Company saw no major financial advantage in lifting the whole line from Sutton Wharf into the Company’s industrial heartland and that elements of this tramroad came to be used as part of a later network of tramroads or railways If this was not true for the wrought-iron plates/rails themselves, it is much more likely that any embankments and cuttings could be used in this way. This may perhaps be something we will discover along the way.
The Tramroad Running North from Sutton Wharf
Savage and Smith provide some information about the line in their research in ‘The Waggon-ways and Plateways of East Shropshire‘. They provide two different series of drawings – the first set are 1″ to a mile plans relating to specific eras in the development of the local tramroads. The extract here is taken from the plan which relating to 1801-1820. [2: p85]
The line is shown in red ink, the Shropshire Canal is the heavy black line. The dotted and dashed thin lines are later railway routes. The short red dashes at the North end of the tramroad indicate that the route of the tramroad is not as certain as the length shown in continuous red ink.
Savage and Smith comment on the tramroad: “In 1808 Robert Baugh’s map of Shropshire shows the line from Oakengates to Sutton Wharf, but not with any great accuracy. Part of it is shown on the two inch ordnance survey of 1814 and 1817, but only as far as Holmer Farm. After this it disappears. Its owners seem to have been the Lilleshall Company and they sent down annually 50,000 tons of coal and much iron. It was agreed to remove it and transfer business to the Shropshire canal for compensation of £500 and a guarantee of favourable rates.” [2: p140]
The second series of plans provided by Savage and Smith are to a scale 6″ to a mile. At this larger scale, it at first seems that they are not prepared to show the same level of certainty over the actual route of the tramroad than on the 1″ to a mile map above. In fact the difference between the two lines shown has as much to do with the scale of the source mapping used. The long dashed red line in the more northerly section of the plans produced here indicates that the route was obtained from a 0.5″ to a mile plan. So they acknowledge that, while the route definitely existed, issues with scaling inevitably mean that there is greater uncertainty over the detailed alignment. We are probably best advised to see the route from Sutton Wharf to Holmer Farm as relatively reliable and to check the detail of the route from that point North. The 6″ to a mile plan is a fold-out plan and because of its length, difficult to photograph.
Savage and Smith also only show the line running to the North of Dark Lane, rather than around the West of Oakengates. With these provisos Savage and Smith show much of the length of the Sutton Wharf tramroad.
My photographs of the 6″ plan are not of the greatest clarity. But the two images provided here give sufficient clarity to make out the significant features that Savage and Smith recorded in the 1960s. [2: p139]
Their contribution is important, as they were able, in their onsite surveys, to record details subsequently lost with the remodelling of the landscape and the construction of new transport arteries by the Telford Development Corporation.
Our investigation of the route of the tramroad begins at its southern end at Sutton Wharf.
Below the key to Savage and Smith’s 6″ to a mile drawings there are a series of maps and satellite images showing the location of the Wharf.
The 6″ Ordnance Surveys of 1881/82, published in 1883 and of 1901, published in 1902 show the railways serving the immediate area to the West and South of Sutton Wharf. The GWR Severn Valley Railway is to the South of the River Severn with its station close to Bridge Inn. The LNWR Coalport Branch is on the North side of the Severn. The two stations are linked by Coalport Bridge.
Coalport Bridge remains in use in the 21st century, the two railways have disappeared. One picture of the bridge as it appears in the 21st century is provided below. The LNWR line is now the Silkin Way which links the River Severn with the centre of Telford. The Severn Valley Railway Coalport Station is, in 2023, a site with a variety of different holiday accommodation available.
The 6″ Ordnance Survey of 1881/82 published in 1883. This shows the new railways serving the immediate area to the West and South of Sutton Wharf. The GWR Severn Valley Railway is to the South of The River Severn with its station close to Bridge Inn. The LNWR Coalport Branch is on the North side of the Severn. The two stations are linked by Coalport Bridge. [3]The same area as shown on the 6″ Ordnance Survey of 1901, published in 1903. Twenty years after the 1881/82 survey the most significant change in the immediate area of Sutton Wharf is the appearance of Coalport Brick & Tile Works on the South bank of the River Severn. [4]The same area as in the map extracts above but this time as shown on the modern ESRI satellite imagery also provided by the NLS (National Library of Scotland}. Coalport Bridge remains. The two railway stations have seen major changes. The station site on the North bank of the Severn is now the Southern end of the Silkin Way, a cycle path/footpath leading North to central Telford. The station on the South Bank is now, the 2023, holiday accommodation. There is a new private bridge across the River Severn just to the West of Sutton Wharf. [4]The same area once again, this time on OpenStreetMap with the location of the old wharf marked. The route of the old tramroad is identified by the dotted line which points towards the Wharf. It can be seen to the North of the northern boundary of Sutton Wood. [5]This photograh of Coalport Bridge has been released into the public domain by its author, Peterlewis at English Wikipedia. This applies worldwide. [8]
As an aside, here are some details about Coalport Bridge as provided on Wikipedia: “Architect and bridge-builder William Hayward (1740–1782) designed the first crossing over the Severn at Coalport, based on two timber framed arches built on stone abutments and a pier. It was originally built by Robert Palmer, a local timber yard owner based in Madeley Wood, and opened in 1780. The bridge, known as Wood Bridge, connected the parish of Broseley on the south bank of the river with the Sheep Wash in the parish of Madeley and Sutton Maddock on the north bank. … The wooden bridge was short-lived and lasted less than 5 years until 1795, when severe winter flooding virtually washed away the mid-stream supporting pier.” [9]
The bridge remained closed from 1795 until the Trustees had it rebuilt in 1799 “as a hybrid of wood, brick and cast-iron parts, cast by John Onions (Proprietor’s Minute Book 1791–1827). The two original spans were removed and replaced by a single span of three cast iron ribs, which sprang from the original outer sandstone pier bases. The bridge deck was further supported by two square brick piers, the northern one constructed directly on top of the stone pier base and the southern one set back slightly towards the river bank. The remainder of the superstructure was built of wood and may have reused some of the original beams. However, by 1817, this bridge was failing again, attributed to the insufficient number of cast iron ribs proving inadequate for the volume of traffic. Consequently, the bridge proprietors decided to rebuild Coalport Bridge once again, this time completely in iron. The quality of the castings is good, especially by comparison with the castings of the Iron Bridge upstream. The bridge was recently (2005) renovated and the static load lowered by replacing cast iron plates used for the roadway with composite carbon fibre/fibreglass plates, with substantial weight saving.” [9]
“The date of 1818 displayed on its midspan panel refers to this substantial work which allowed the bridge, subscribed to by Charles Guest, one of the principal trustees, to stand without major repairs for the next 187 years.” [9] In 2004-2005, during the closure (which lasted about a year), not only were major works undertaken to the span of the bridge, it was also necessary to reconstruct the two brick arches supporting the verges at the south side of the bridge. The bridge “still takes vehicular traffic, unlike the more famous Iron Bridge, albeit limited to a single line of traffic, a 3-tonne weight limit and a height restriction of 6 ft 6in (1.98 cm).” [9]
An extract from a plan submitted to Telford and Wrekin Council as part of a planning application for the extension of the Sutton Wharf Caravan Park. The approximate location of the Wharf is shown by the bold red line. [6]
From the Wharf, an inclined plane was needed to gain height to the land above the Severn Gorge. The location of the incline is shown below.
This Google Earth satellite image focusses on the North side of the River Severn and Sutton Wood. The Wharf location is again marked and the line of the Inclined Plane shown. Beyond the top of the incline the tramroad headed in a north-northeast direction following first a modern metalled minor road and then modern field boundaries. [Google Earth]The route of the tramroad as it approached the top of the Inclined Plane. This photograph is taken facing South on the line of the tramroad. [Google Streetview]Turning through 180 degrees to look along the route of the tramroad as it headed away from the River Severn. [Google Streetview]The old tramroad followed the field boundaries heading North. Towards the top of this extract from the 6″ Ordnance Survey its formation was used by a later footpath. [3]Approximately the same area as in the map extract above but shown, this time on modern satellite imagery [Google Earth]Continuing North along the line of the old tramroad. The formation from the top of the incline is followed, in 2023, by a minor road. [Google Streetview]The minor road continues northwards along the line of the old tramroad. [Google Streetview]The minor road turns towards the Northeast. The field boundary shows the line of the old tramroad. [Google Streetview]Google Earth’s bird’s eye view (3D) of the same location. The road turns away to the Northeast. The tramroad continues in a Northerly direction. [Google Earth]A very short distance along the minor road, we get this view of the field boundary and the route of the old tramroad. {Google Streetview]
The next opportunity to look at the line of the tramroad comes at the point where its route is joined by a footpath which appears on the 1882 Ordnance Survey above and still is in existence today. The route appears on the modern 1:25,000 Ordnance Survey Explorer Series mapping as shown below.
The route of the tramroad is shown by the straight red line along the field boundaries in the extract from the 1:25,000 Ordnance Survey. The route North of that red line curved around towards the Northwest following the line of the Monarch’s Way Footpath. It passes to the North of Brickkiln Coppice and crosses the road which links Coalport to the A442. [OS Explorer Sheet 242]Looking back South along the field boundary which marks the line of the old tramroad from the point that the Monarch’s Way begins to follow the route of the tramroad. [My photograph, 9th February 2023]The symbol for the Monarch’s Way which has been placed on various gateposts along the route. [My photograph, 9th February 2023]The old tramroad route continues to follow the field boundaries as it runs North. [My photograph, 9th February 2023]The old tramway route passes through the gate ahead and remains alongside the field boundaries beyond. [My photograph, 9th February 2023]Looking back to the South through the kissing gate which appeared in the last photograph. [My photo, 9th February 2023]The 6″ Ordnance Survey of 1882 has a redline imposed which shows that the old tramroad route curves round to the Northeast edge of Brickkiln Coppice, crosses the road between Coalport and the A442 and runs North-northwest along Brick Kiln Lane. [10]Looking North, once again, the tramroad route begins to turn away to the Northeast. [My photograph, 9th February 2023]The alignment of the old tramroad ran through the Northeastern edge of Brickkiln Coppice. [My photograph, 9th February 2023]The Monarch’s Way continues to follow the old tramroad route through the Coppice. [My photograph, 9th February 2023]The route of the old tramroad crosses the road from Coalport to the A442 and runs onto Brick Kiln Lane. [My photograph, 9th February 2023]Looking back along the line of the old tramroad from the road linking Coalport to the A442.The red line highlights the route through the Northeaast end of Brickkiln Coppice. [Google Streetview]The old tramroad route is now followed, in the 21st century, by Brick Kiln Lane. [Google Street View]The property ahead has been built across the line of the old tramroad which continued North from this point. Its route, at first, follows the line of modern field boundaries and then crosses open fields. [Google Streetview]This next extract from the 6″ Ordnance Survey shows the old tramroad running North-northwest and then curving round to cross the line of the A442 in a Northeasterly direction and then curving back to the North. [10]Google Earth’s 3D view looking North from the top of Brick Kiln Lane shows the line of the old tramroad running North. [Google Earth]This panoramic view is taken from the field to the East of the old tramroad route. The old tramroad line followed the hedge running across the picture. [My photograph, 9th February 2023]Google 3D image looking back to the South. The old tramroad turned towards the East at the end of the field boundary and crossed the line of the modern A442. [Google Earth]Looking North along the A442. The actual point at which the tramroad crossed the line of the road is difficult to determine. This location is approximately correct. [Google Streetview]In plan on this satellite image we can see the approximate alignment of the tramroad crossing the A442 and then turning to the North into what is now an industrial estate.The 1901 6″ Ordnance Survey with the next length of the route of the old tramroad shown. It crossed Mad Brook and ran North-northwest close to the field boundaries before turning North-northeast. [11]The same area as that covered by the Ordance Survey map extract immediately above. What was open fields is now the Halesfield Industrial Estate. It is only feasibile to provide approximate locations where the old tramroad route crosses modern industrial estate roads. [11]The view North-northwest from point ‘1’ on the satellite image above. [Google Streetview, June 2022]The view North-northwest from point ‘2’ on the satellite image above. [Google Streetview, June 2022]The view Northeast along Halesfield 10, from point ‘3’ on the satellite image above. [Google Streetview, June 2022]The view North-northeast along Halesfield 14, from point ‘4’ on the satellite image above. [Google Streetview, June 2022]The view East-southeast along Halesfield 13, from point ‘5’ on the satellite image above. [Google Streetview, June 2022]The view East along the A4169, from point ‘6’ on the satellite image above. [Google Streetview, June 2022]The 1901 6″ Ordnance Survey with the next length of the route of the old tramroad shown. It approximately followed field boundaries while heading North-northeast beofre curving round to the North. Tramroads/tramways are shown on the OS Mapping of 1901. These would not have been present while the tramroad we are following was active. Neither Halesfield Colliery nor Kemberton Colliery were active at the time that the Lilleshall tramroad was in use. The local landscape will have been significantly altered by the spoil heap shown on this 1901 mapping. [12]The same area as that covered by the Ordance Survey map extract immediately above. What was open fields is now, very much, part of the urban environment. It is only feasible to provide approximate locations where the old tramroad route crosses modern roads. [12]
Two collieries appear on the 1901 OS mapping – Halesfield and Kemberton Collieries. These would not have been present when the tramroad was active in this area. By the 1950s these two pits were worked as one by the NCB and together employed over 800 men. “John Anstice sank Kemberton Pit when director of the family company in 1864 mainly for coal but it also produced ironstone and fireclay. … Halesfield was sunk as an ironstone and coal mine in the 1830s and continued to work coal until the 1920s, it later became the upcast and pumping shafts for Kemberton pit.” [13]
Apart from the A4169 at the bottom of the satellite image (which is already shown above), the only modern road which crosses the line of this section of the old tramroad Is Halesfield 18. Google Streetview images in this area were taken at the height of Summer in 2022 when vegetation was at its most abundant and as a result show nothing of note.
The next extract from the 1901 6″ Ordnance Survey has the line as drawn by Savage and Smith continuing North-northwest, running very close to the buildings of Holmer Farm and across Mad Brook twice before crossing the lane between The Hem and Stirchley, Northwest of Holmer. There are some reasons to question the Savage and Smith alignment. They have transferred the alignment from the 0.5 to 1 mile drawings produced in 1836 for the proposed Shropshire Railway between Shrewsbury and Wolverhampton. [14]The same area as shown in the 6″ OS map extract above but on the modern ESRI satellite imagery from the NLS. Savage and Smith’s alignment of the old tramway is superimposed again. [14]A closer extract from the Robert Baugh’s Map of Shropshire of 1808 which we have already seen. The red line drawn indicates the route of the Tramroad. The map from which the extract was taken is available on the ‘Dawley History’ website. At first sight, this map suggests a different alignment in the vicinity of Stirchley to that recorded by Savage and Smith, as it shows the village of Stirchley very close to the line of the old tramroad. However, it also shows Mad Brook very close to Stirchley. I am reasonably convinced that the old tramroad ran relatively close to the line of the brook. On this map this occurs close to Stirchley but to the south there is some distance between them. The position of the brook as shown on the 1827 and1836 maps below matches later Ordnance Survey mapping and aligns much more closely with the tramroad route shown on this extract from Baugh’s Map. [7]An extract from Greenwood’s Map of 1827 showing Mad Brook running further to the East. [18]This map was included in the British History Online Website. [16] It comes from A History of the County of Shropshire: Volume 11, Telford. [17] Sadly, for our purposes the line of what would by then have been a disused tramroad is no longer shown. However, the field boundaries in the vicinity of the brook are unusual. There appears to be a corridor roughly following the route of Mad Brook which appears on later mapping as well. In my naivety I would have expected the field boundaries to extend down towards the brook.Mad Brook is a lot less obvious on the 6″ OS Mapping of 1883, but the corridor of land is evident again. [15]Returning to the 6″ OS map extract from 1901 that we have already seen. Savage and Smith’s plotted line remains but I have added what appears to be the more likely route of the old tramroad as a red-dashed line. The illustrated discussion above covers the more northerly deviation. The more southerly deviation follows the line of a footpath which may well have been on the old formation. If correct then the tramroad would have run immediately alongside Mad Brook where by, by 1901, the brook passed under the more modern railway. However, the line shown seems more logical to me than the relatively arbitrary straight line. I’d be interested in any reflections on this from others. [14]If my assumption is correct that the tramroad ran close to Mad Brook at the bottom of the 6″ OS map extract above then this culvert is on its approximate line. When the railway was built, Mad Brook was culverted here. The outfall from Holmer Lake now runs under the A442 and through the stone culvert. The picture is taken from the Southwest bound carriageway of the A442, Queensway. [Google Streetview, October 2022]
Our discussion about the old tramroad alignment is essentially speculative. We are in a better position than Savage and Smith were to trace routes using modern technology, but even so our possible route remains speculative. I have reproduced in in approximation on the same modern satellite image as were encountered above. Should it be correct, then some of its route can be followed and some locations can be photographed but all with a healthy sense of scepticism.
The ERSI satellite image which we have already seen, with a sketch of my suggested route of the tramroad included alongside the Savage and Smith alignment. MY suggestion is shown by red-dashed lines. [14]Holmer Lake looking South towards the outfall. The tramroad would have crossed the line of the a442 a few hundred feet to the left of the outfall. The redline shown on the photograph is an approximation to my suggested route of the tramroad. [Google Streetview, March 2009]
Holmer Lake is a reservoir owned by Severn Trent Water and serves Telford and the surrounding areas. The land around Holmer Lake includes areas of woodland and grassland. [19] Mad Brook was dammed in in 1968-70 to create a balancing reservoir at the behest of Telford Development Corporation. [16][17]
Holmer Lake agin, this time looking Northwest from the same spot in the photo above. [Google Streetview, March 2009]Looking East along Holmer Farm Road, showing, very approximately, the route of the old tramroad. [Google Streetview, June 2022]Looking East-Northeast along Grange Avenue showing the approximate line of the old tramroad. [Google Streetview, June 2022]Turning about 90 degrees to the North-Northwest, we look along another arm of Grange Avenue with the route of the old tramroad suggested by the red line, entering from the right, running for a distance along the road in a North-Northwest direction and approximately following the modern road as it curves to the right ahead. [Google Streetview, June 2022]Further North along Grange Avenue, the route of the old tramroad probably veered away from the modern road. Mad Brook still runs close to the old tramroad route and is just off to the left of this photograph. [Google Streetview, June2022.
The next length of the old tramroad brings us passed the site of Grange Farm and Grange Colliery, Stirchley Ironworks and close to Randlay Pool. Mad Brook meanders North, initially close to the line of the old tramroad, moving away West beyond Grange Farm and then getting lost in the midst of Stirchley/Oldpark Ironworks.
Savage and Smith’s traced alignment for the tramroad has been transferred to this next extract from the 6″ Ordnance Survey of 1901 as the solid, but sinuous, red line. It seems to me to be likely that the actual route was close to the line drawn by Savage and Smith, but just a very short distance to the West over the length Southeast of Grange Farm and a lesser distance to the West over the length immediately Northwest of Grange Farm. [20]A similar area to that on the OS map above with an imposed solid red line indicating, approximately, Savage and Smith’s traced tramroad route and my assessment of the likely route in the line of red dashes. There is very little difference between the two routes both have to have passed to the East side of Grange Farm. Both are difficult to plot on the modern landscape which is now heavily wooded. [20]Looking East on Stirchley Road towards Grange Avenue from above the line of Mad Brook. The Savage and Smith traced line of the tramroad would have crossed the line of Stirchley Road close to the junction. The red line shown is an approximation to my assessment of the route which seeks to follow map features on the older OS mapping. [Google Streetview, June 2022]Looking North along Swansmede Way across the probable line of the old tramroad. [Google Streetview, June 2022]The view from the West on Grangemere into the site old what was Grange Farm. The old tramroad would have run across the photograph beyond the older farm buildings on the right, probably in what is now a wooded area beyond. [Google Streetview, June 2022]Looking North at the top of Grangemere in the 21st century. The old tramroad alignment is suggested by the red line. [Google Streetview]
These images are taken at and around the site of Grange Colliery. On the image above, the spoil heaps from the colliery were immediately off-screen to the left the colliery yard ahead to the North. The image below was taken a from a point just to the North of the bins awaiting collection and looking to the left.
Grange Colliery probably opened by 1833. The extent of seams that could be worked was restricted by the Limestone fault, east of which the coal lay deeper. [21][17] By 1881 all the pits except Grange colliery had been closed. Despite the lease of mineral rights at Grange Colliery to Alfred Seymour Jones of Wrexham in 1893, the colliery was closed in 1894. [21][17]
Looking Northeast from the top of Grangemere along a modern path which leads into Telford Town Park today. This track is likely to follow the line of the old tramroad from Sutton Wharf. In the area ahead and to the North there were a number of major industrial sites all linked by a series of tramroads which post-dated the tramroad that we are following but predated the later railways. [Google Streetview, June 2022]The route of the old tramroad from Sutton Wharf is show by a red-dashed line on this 2023 Google Maps satellite view. The paths in Telford Town Park are clearly marked on Google Maps. The path at the East side of the Park passing close to Stirchley Chimney is very likely to be on the line of the old tramroad. [Google Maps, February 2023]
The closer satellite view of part of Telford Town Park above gives us a good point to stop to think about the historical timeline in the immediate vicinity of Stirchley Chimney. The tramroads in this immediate area were looked at in an earlier article in this series which can be found here. [22]
Savage and Smith [2] and other sources provide sufficient information to allow us to pull together that timeline. We have already noted that the tramroad was operating by 1799 and abandoned by 1815. Other Tramroads around Stirchley and along the route of the Shropshire Canal came along, generally, in piecemeal fashion.
The canal predated the Tramroad. It was built to link Donnington Wood with Coalport on the River Severn, a distance of about 7 miles. Construction commenced in 1789 near Oakengates and reached Blists Hill relatively quickly. A shaft and tunnel were intended to get loads down to river level. However, it seems as though natural tar was found oozing out of the tunnel wall and it was turned into a tar extraction business. In its place the Hay Incline was built to bring tub boats down to river level. [23] The incline has also been covered previous articles: here [24] and here. [25]
Once the canal has been completed a number of businesses decided to use the canal as a route to the outside world. Before 1830 a wharf had been established on the West side of the Canal close to Hinkshay/Stirchley Pools which provided for colleries, brickworks and ironworks to the West and North.
A somewhat out of focus extract from Savage and Smith’s 1″ to one mile drawing of local tramroads which appeared in the period 1821 to 1830. The black lines are the canal network, the red lines, the tramroad network. The Tramroad link to the wharf at the Shropshire Canal can be seen to the Northwest of Stirchley. [2: p87]Also rather out of focus, this extract is taken from Savage and Smith’s 1″ to one mile covering the period 1831 to 1840. There are additional links to the canal and a significant increase in Tramroads around Oakengates. [2: p89]
The 1840s saw minor additions to the tramroad network around Madeley (South of Stirchley), the next decade saw considerable developments alongside the canal as shown on the next Savage and Smith extract below.
Better focus, this time! This extract is taken from Savage and Smith’s 1″ to one mile covering the period 1851 to 1860. There are additional tramroad routes following the canal and a small additions around Madeley. The canal is gradually becoming less significant and a length between Stirchley and Madeley has by this time been closed. Savage and Smith are still showing very little to the East of the Canal, just two short lengths. [2: p95]
There was little change in the immediate area over the next 15 years. The next image covers the period 1876-1900 and again only shows minor changes to tramroads in the vicinity of Stirchley The railways now dominate the transport landscape.
Savage and Smith’s plan covering 1876-1900. The Wharf on the canal Northwest of Stirchley is now a wharf alongside the LNWR Coalport Branch, a change that only required a bridge over a remain length of the canal. Significant tramroad changes can be seen to the West and serve pits in the Dawley Area taking goods to Lightmoor and Coalbrookdale. [2: p99]
Missing from Savage and Smith’s 1″ to one mile drawings is the GWR branch parallel to the LNWR branch and running from the North down towards Stirchley. The route of that line is shown below in a turquoise colour on the mapping supplied by RailMapOnline.
RailMapOnline extract cover the area shown on the Google Maps satellite image above. As can be seen, its route replaced tramroad access to Grange Colliery and the Ironworks closer to Randlay Pool. [26]
The next few photographs take us along the route of what is the old tramroad from Sutton Wharf and that of the GWR Mineral Line along the East side of Stirchley Chimney which still stands in the 21st century.
At the bottom-right of the Google Maps satellite image above, the old tramroad route runs from the top of Grangemere into Telford Town Park in a Northwesterly direction before turning North onto the line of one of two arms of the old GWR Mineral Railway. [My photo, 22nd February 2022]The route North runs close to Strichley Chimney. [My photo, 22nd February 2023]The line followed a large radius right-hand curve passing to the East of the remaining Stirchley Chimney which is just off this picture to the left. The fencing protects the public from what is a significant drop within the area immediately around the chimney. [My photo, 22nd February 2023]Looking North along the line of the old tramroad. Blue Pool is to the right of this image, Randlay Pool beyond the trees to the left. In later years, two branches of the old Mineral Railway met at this point. [My photograph, 22nd February 2023]Looking back to the South, the old tramroad alignment is shown as a red line, Blue Pool is to the left, Randlay Pools to the right and the paths follow the two branches of the later Mineral Railway. [My photograph, 22nd February 2023]This next extract from the 6″ Ordnance Survey of 1901 shows, as a solid red line, the approximate route of the old tramroad as plotted by Savage and Smith in the 1960s and taken from early 0.5″ to one mile scale mapping. There is no apparent indication of earthworks along this line. The railway embankments present on the 1901 OS mapping suggest that the line drawn by Savage and Smith is unlikely to be the actual route of the old tramroad. It is only my opinion, but it would seem more likely, given relative levels, that the earthworks used by later tramroads and the GWR Mineral Railway are likely to be enhanced versions of the earthworks required by the much earlier tramroad from Sutton Wharf. The difference in scale between Savage and Smith’s source drawings and the 6″ to 1 mile scale on which they plotted their route mean that there is every possibility that my alternative is correct and still remains within reasonable tolerances to allow their line to be seen as reasonably accurate given the resources available to them in the 1960s. [27]The same area as in the OS map extract above but on modern satellite imagery with the routes discussed shown as on the OS mapping. The area has been transformed beyond recognition. After the time of the OS map extract above a quarry was opened up to the East of the Randlay Pool, and when exhausted became what is known in the 21st century as Blue Pool. The large building top-left is Telford International Exhibition Centre. [27]The old tramroad and the later Mineral Railway run Northwards on what is now a path In Telford Town Park between Randlay Pool and Blue Pool. [My Photograph, 22nd February 2023]Part of the information board at Blue Pool. [My photograph, 22nd February 2023]An information board alongside the footpath which follows the route of the old tramroad and the Mineral Railway. [My photograph, 22nd February 2023]The image shown on the top-right of the information board is difficult to make out as there is fogging and scratching to the protective sheet over the face of the noticeboard. This is the same image, sourced from the pages of the Shropshire Star. It shows Randlay Brickworks which sat a couple of hundred metres North of the information board and features what is likely to be a LNWR locomotive on the branch on embankment across the Randlay Pool. If so, the old tramroad route and the GWR Mineral Branch would follow a line behind the buildings of the Works. [28]
The information board reads: “From at least 1882, the Great Western Railway (GWR) ran a mineral railway from Hollinswood down the Randlay valley to serve the coal and iron industries in Stirchley. Within the Town Park, this followed a course from Randlay Brickworks to the Grange. … The Mineral Railway stopped travelling South to the Grange between 1903 and 1929 and terminated at the Wrekin chemical works. [These were at the present location of Stirchley Chimney.] Its use finally reached the end of the line in 1954. The line of the Mineral Railway is preserved today on this pathway and evidence remains including posts, buildings and artefacts.” There is also a note on the board about a network of sidings which linked various industrial works to the main line of the mineral railway alongside a sketch-map of the area.
The sketch-map from the information board, a little out of focus and fogged because of the deterioration of the covering plastic protection to the board. Various industrial railways and tramroads are shown. The wide yellow line running North-South is the LNWR Coalport Branch, that in the top-right corner is the main line between Shrewsbury and Wolverhampton which was once part of the GWR. The red line leaving the GWr line close to the top of the image and running parallel to but to the East of the LNWR branch is the GWR Mineral Line to Stirchley. Other red lines give an impression of the different tramroads link with the teo standard gauge branch lines. [My photograph, 22nd February 2023]The footpath continues to follow the old tramroad and Mineral Railway line Northwards [My photograph, 22nd February 2023]Further North, approaching the site of the Randlay Brickworks, the footpath continues to follow the old tramroad and Mineral Railway line Northwards [My photograph, 22nd February 2023]To the left of this image is the site of Randlay Brickworks and beyond it the top end of Randlay Pool. The old tramroad and the later Mineral Railway continue northwards towards Hollinswood and Oakengates. Savage and Smith’s drawn route of the tramroad is approximately the left hand red line. The old mineral railway and my suggestion of the actual route of the old tramroad is the right hand red line. [My photograph, 22nd February 2023]The information board that the Randlay Brickworks site. [My photograph, 22nd February 2023]
North of Randlay Pool the line of the old tramroad and the line of the GWR Mineral railway plunge into undergrowth and the topography of the area beyond this point for some distance is very unlikely to be the same as that present in 1901. In the top half of the satellite image above the lines crossed three modern roads, Stirchley Avenue, Queen Elizabeth Avenue and Dale Acre Way, then run geographically along the line of Downemead for a short way.
Stirchley Avenue looking Northwest towards the exhibition centre. The old tramroad crossed the line of the road somewhere on this curve. [Google Streetview, June 2022]Queen Elizabeth Avenue looking West toward the exhibition centre. The old tramroad crossed the road somewhere this side of the road signs ahead. [Google Streetview, June 2022]Dale Acre Way in Hollinswood, looking Southwest towards the roundabout close to the exhibition centre. The old tramroad route crosses Dale Acre Way between the camera and the Deercote Road junction ahead in the vicinity of Hollinswood Local Centre which is just off this picture to the right.A closer image of Downemead showing the approximate alignment of the old tramroad and the later Mineral Railway. [Google Maps, February 2023]
On the extract from the satellite imagery below the line is picked up running approximately along Downemead before crossing Dale Acre Way once again. At the point where Downemead meets Dale Acre Way at its North end, Dale Acre Way is running approximately along what was Dark Lane shown on the 6″ Ordnance Survey immediately below. Comparing the two images immediately below shows how much topographic change has occurred in the 120 years since the 1901 Ordnance Survey. Effectively the only feature which remains in the 21st century is the Shrewsbury to Wolverhampton Mainline railway which runs from top-left to bottom-right across both the map and the satellite image.
This next extract from the 6″ Ordnance Survey of 1901 shows, as a solid red line, the approximate route of the old tramroad/Mineral Railway. Both Savage and Smith’s plotted line and the old Mineral Railway resume the same course. [29]The same area on ESRI satellite imagery (NLS) as shown in the 6″ OS map extract above. The line drawn is inevitably approximate and represents a line transferred from the 6″ OS map extract, which itself is transferred from Savage and Smith’s 6″ to 1 mile drawing of the line. Savage and Smith scaled from 0.5″ to 1 mile original plans up to 6″ to 1 mile. [29]Looking North on Downemead along the approximate line of the old tramroad [ Google Streetview, June 2022]Further North on Downmead, the old tramroad alignment is shown running North through what is now a children’s play area to the East of Downemead. The junction of Downemead with Dale Acre Way can just be picked out ahead. [Google Streetview, June 2022]Looking West along Dale Acre Way across the line of the old tramroad and later Mineral Railway. [Google Streetview, June 2022]Looking North from Dale Acre Way along a green passageway which very approximately follows the line of the old Tramroad/Mineral Railway. The probable alignment is under the housing visible through the trees right of centre of the image. [My photograph, 25th February 2023]Looking North from the end of Duffryn towards the A442 which is just beyond the trees ahead. [Google Streetview, June 2022]Looking Northwest along the slip road from the A442. The old tramroad crossed the line of the slip road at around the position of the white-painted directions on the tarmac. It is impossible to be sure to the relative levels of road an old tramroad. {Google Streetview, June 2022]Looking Northwest along the other slip road to the A442 towards the roundabout which sits above the main road. The redline shows the approximate route of the old tramroad, but please note again, that it is impossible to be sure to the relative levels of the modern road and the old tramroad/Mineral Railway. [Google Streetview, June 2022]Looking North across the railway lie which passes under the roundabout. The line is still in use as the main line between Wolverhampton and Shrewsbury. Telford Railway Station is ahead to the left of the image beyond the trees. [Google Streetview, June 2022].Beyond the vegetation ahead the line of the old tramroad crosses the access road to the Railway Station. [Google Streetview, June 2022]Euston Way looking North-northwest. The line of the old tramroad runs to the left of the building at the centre of the image. [Google Streetview, June 2022]Looking Northwest at the junction of Euston Way and the access road to Titan House. The old tramroad/Mineral Railway route runs directly ahead between the Premier Inn on the left and the office block on the right. [Google Streetview, June 2022]The view North from the rear carpark of the Premier Inn. The old tramroad ran along what is now an embankment parallel to the kerb edge of the carpark. [Google Streetview, June 2022]The M54 looking West, the old Tramroad/Mineral Railway route crosses the motorway on an angle in the vicinity of the 100 metre marker for the junction slip road. [Google Streetview, November 2022]
From the North side of the M54 as far as Hollinswood Road, the modern ladscape is heavily wooded and it would be impossible to pick out important features on the ground as the satellite image below shows.
North of the M54 there are no features on the modern landscape until the old line crosses the modern Hollinswood Road. [Google Maps, February 2023]On this next extract from the 6″ Ordnance Survey of 1901, once again, the red line shows the approximate route of the old tramroad. Snedshill Brickworks and Priorslee Furnaces were close to the route of the old line. [30]A very similar area to that shown on the 6″ OS mapping above. [30]Looking back from the end of the tarmac on Hollinswood Road along the line of the old tramroad to the South East into the woods mentioned above. {My photograph, 25th February 2023]St. James House on Hollinswood Road with the route of the old tramroad travelling Northwest shown by the redline. [My photograph, 25th February 2023]Looking back to the South-southeast towards St. James’ House. [My photograph, 25th February 2023]Looking North-northwest along the line of the old tramroad. [My photograph, 25th February 2023]
Beyond the buildings shown above the old tramroad route crosses the A442 slip road which is just beyond the industrial estate as shown below. …
The A442 sliproad as shown on Google Streetview with the approximate route of the old line marked by the red line. [Google Streetview, June 2022]Looking North-northwest across the A442. The line of the old tramroad was close to straight through this length, linking the approximate points it passed through leaves a curve which is the result of image distortion in the camera! [Google Streetview, June 2022]The old line curved away North into what is now woodland running alongside the A442. [Google Streetview, June 2022]
It is at this point that we leave the old line. We are close to Oakengates and there was at one time a very large number of different tramroads ahead, part of the Lilleshall Company’s internal network. We will pick up this tramroad when we look at that network.
References
Bob Yate; The Railways and Locomotives of the Lilleshall Company; Irwell Press, Clophill, Bedfordshire, 2008.
R.F. Savage & L.D.W. Smith; The Waggon-ways and Plateways of East Shropshire; Birmingham School of Architecture, 1965. Original document is held by the Archive Office of the Ironbridge Gorge Museum Trust.
A P Baggs, D C Cox, Jessie McFall, P A Stamper and A J L Winchester; Stirchley: Manor and other estates; in ed. G C Baugh and C R Elrington; A History of the County of Shropshire: Volume 11, Telford; London, 1985, p185-189; via British History Online, http://www.british-history.ac.uk/vch/salop/vol11/pp185-189, accessed 20th February 2023.
Christopher Greenwood; Map of the County of Salop, 1827; Facsimile Copy, Shropshire Archaeological and Historical Society, 2008.


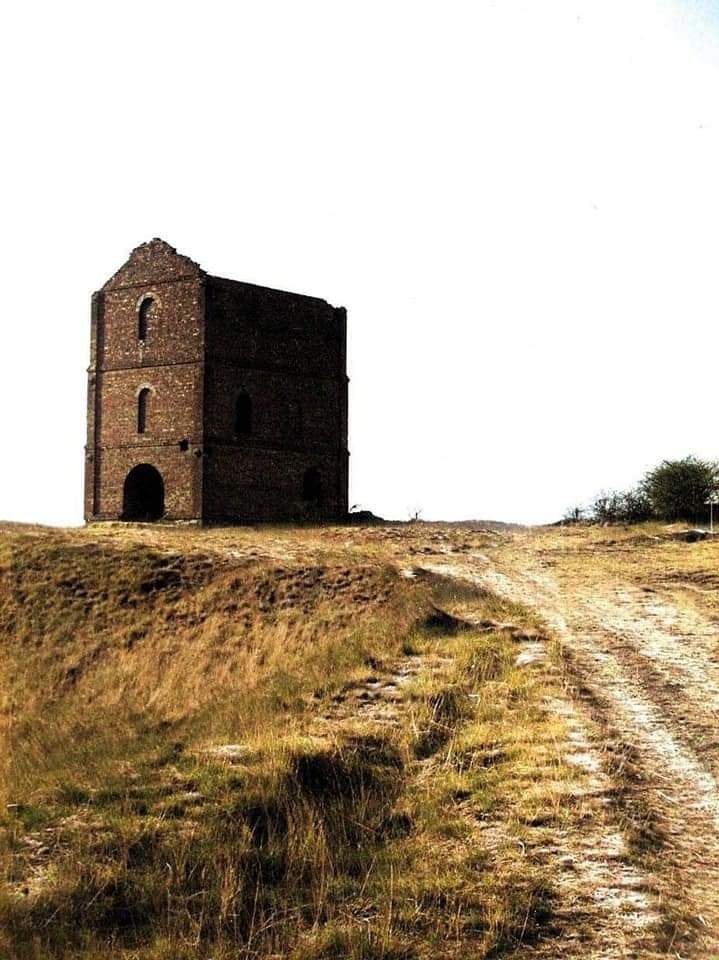

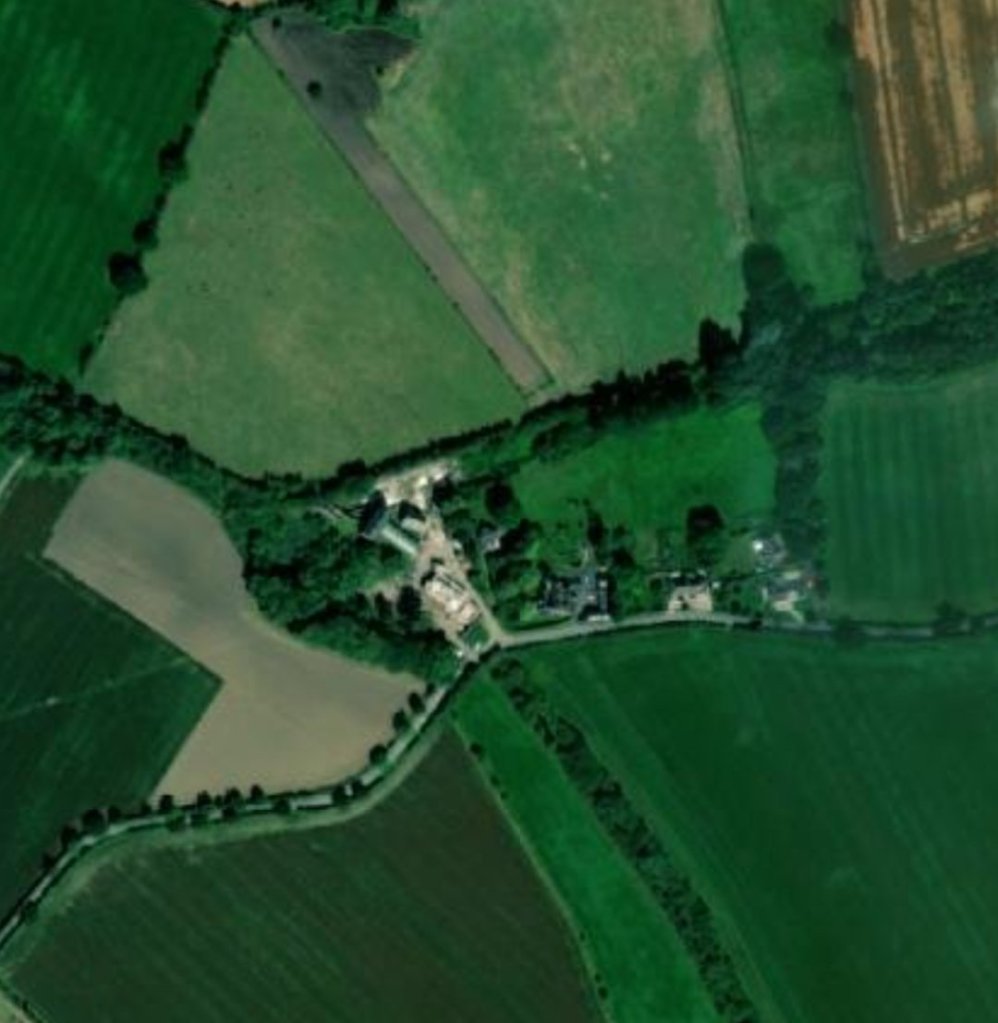
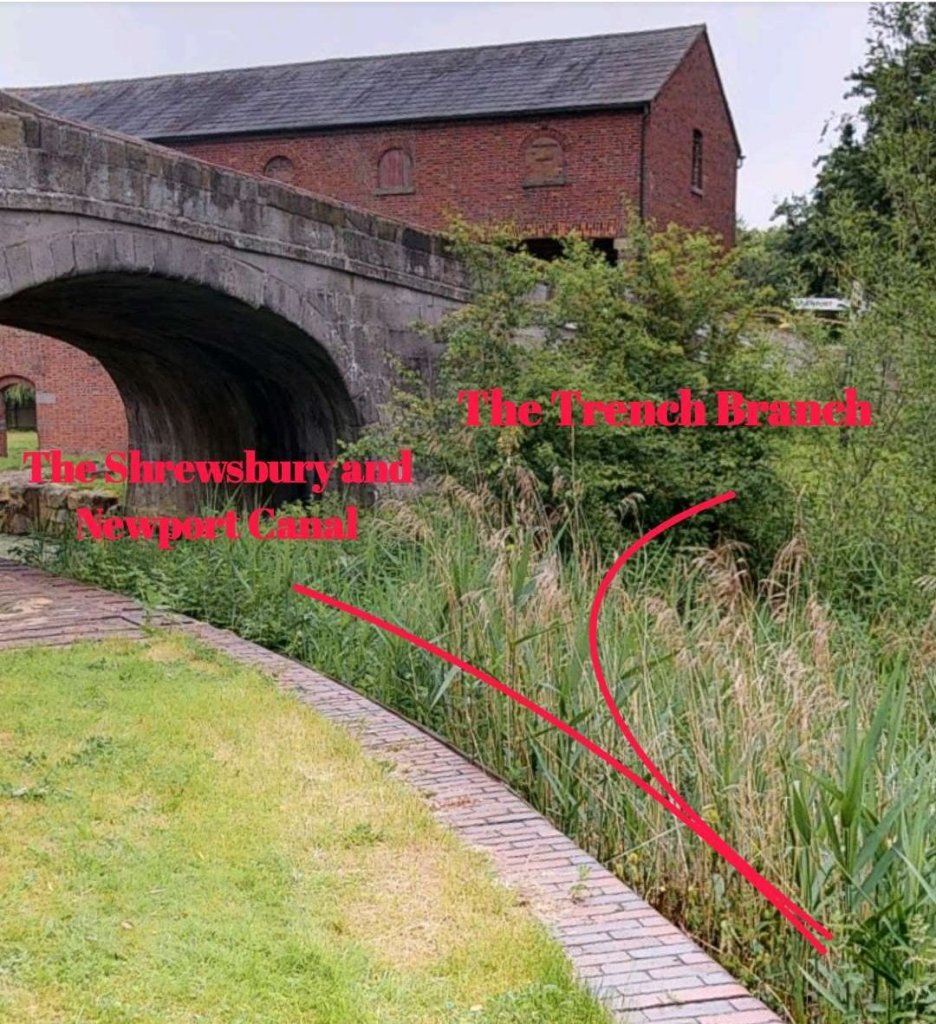
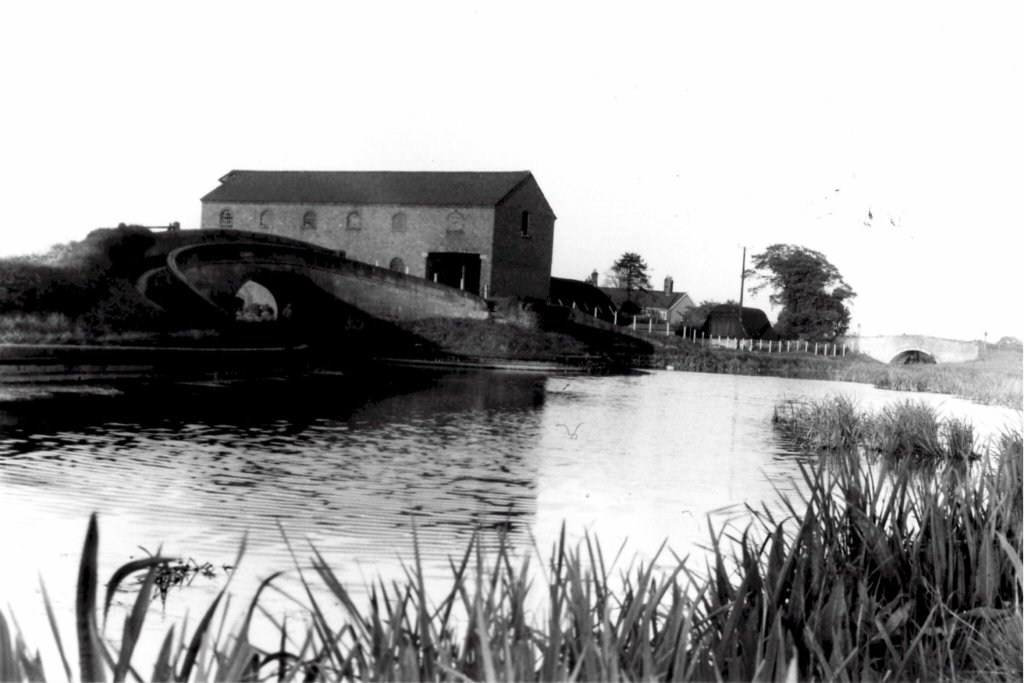
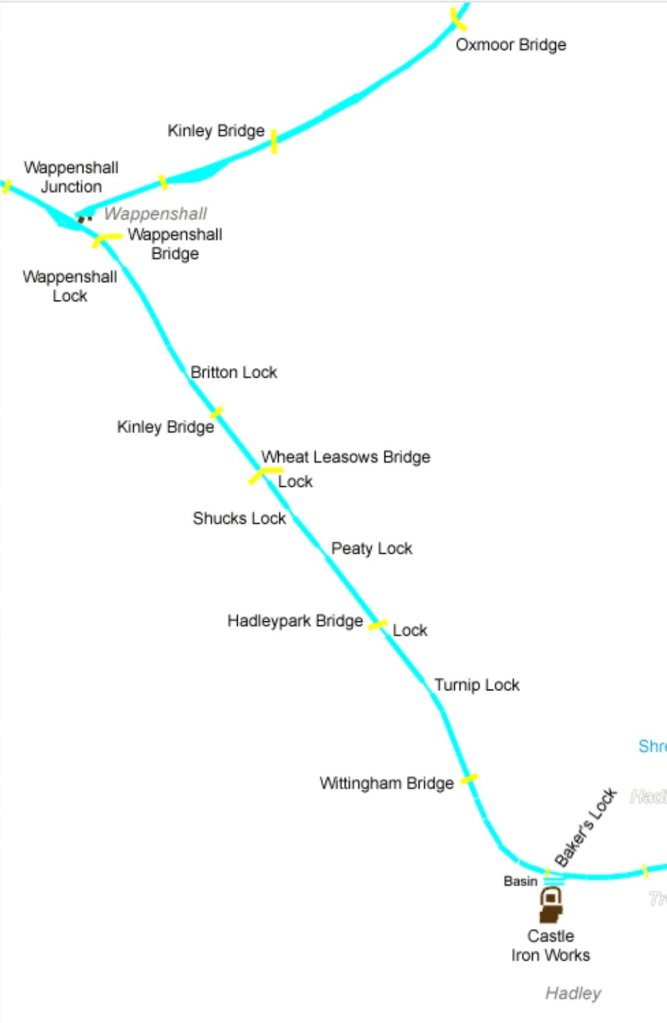
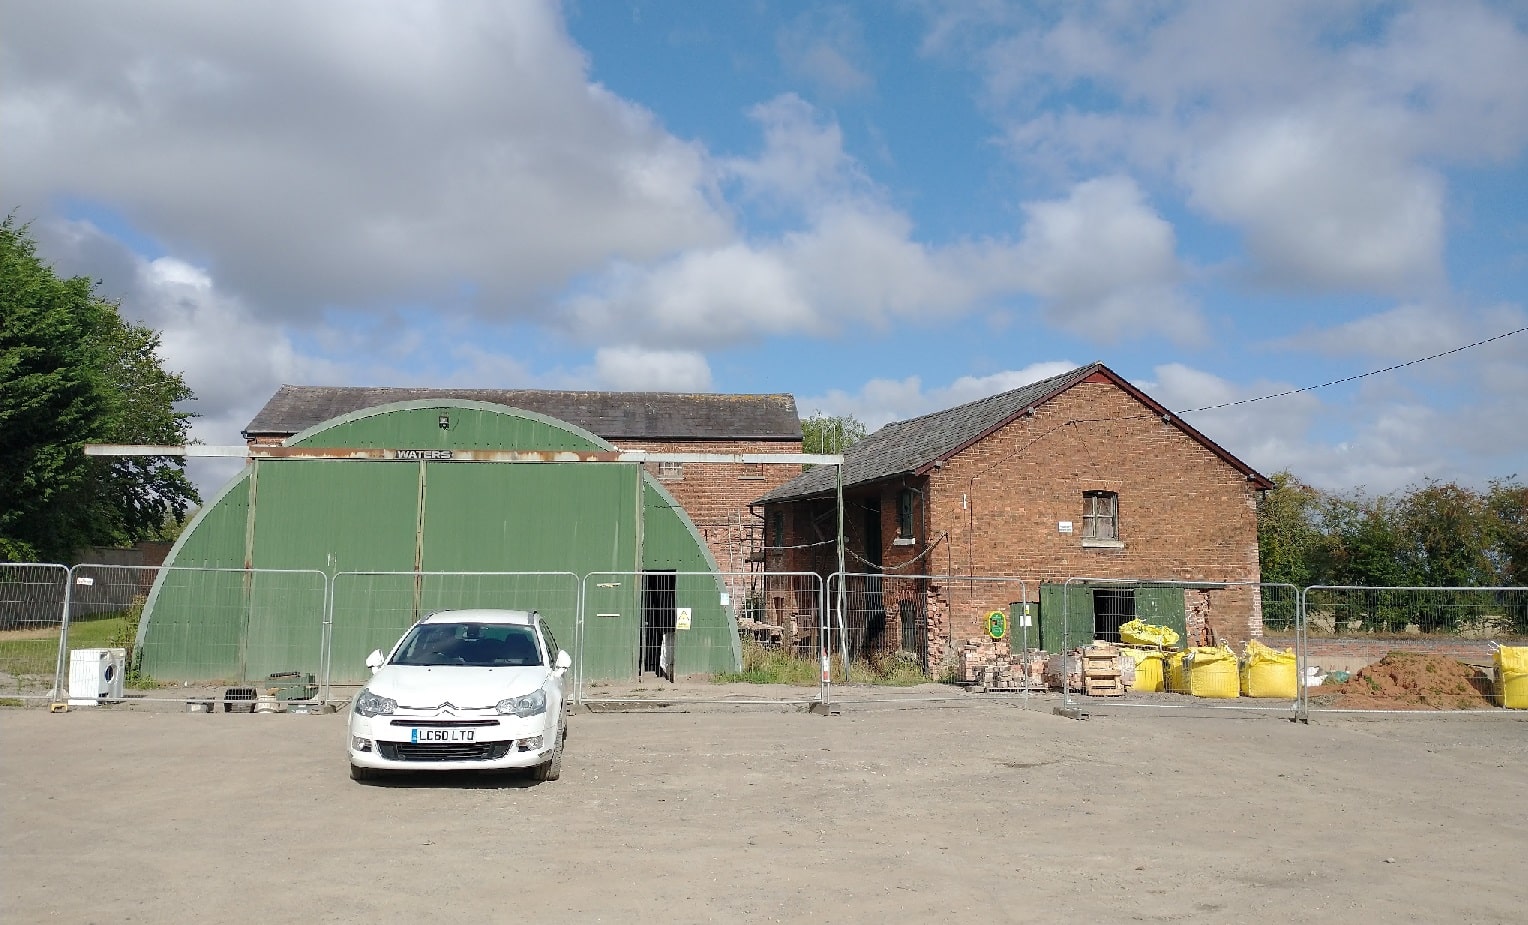
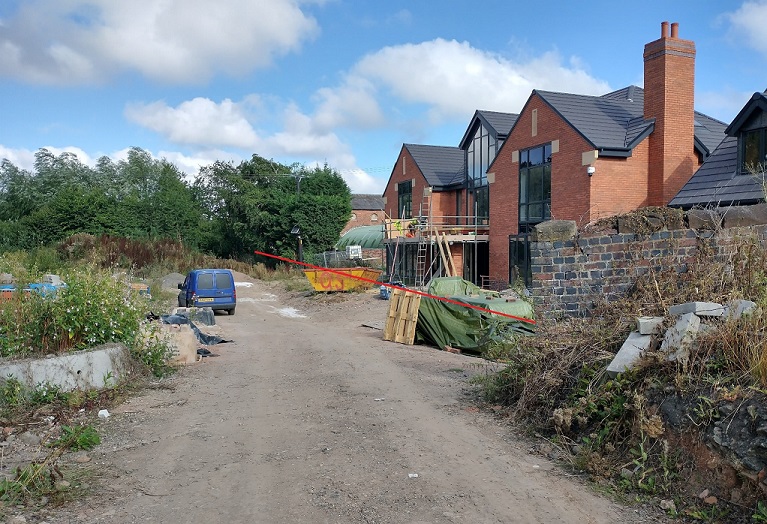
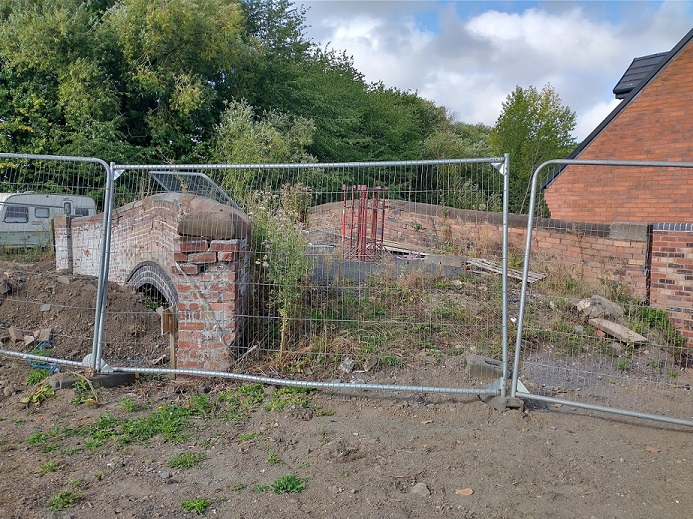
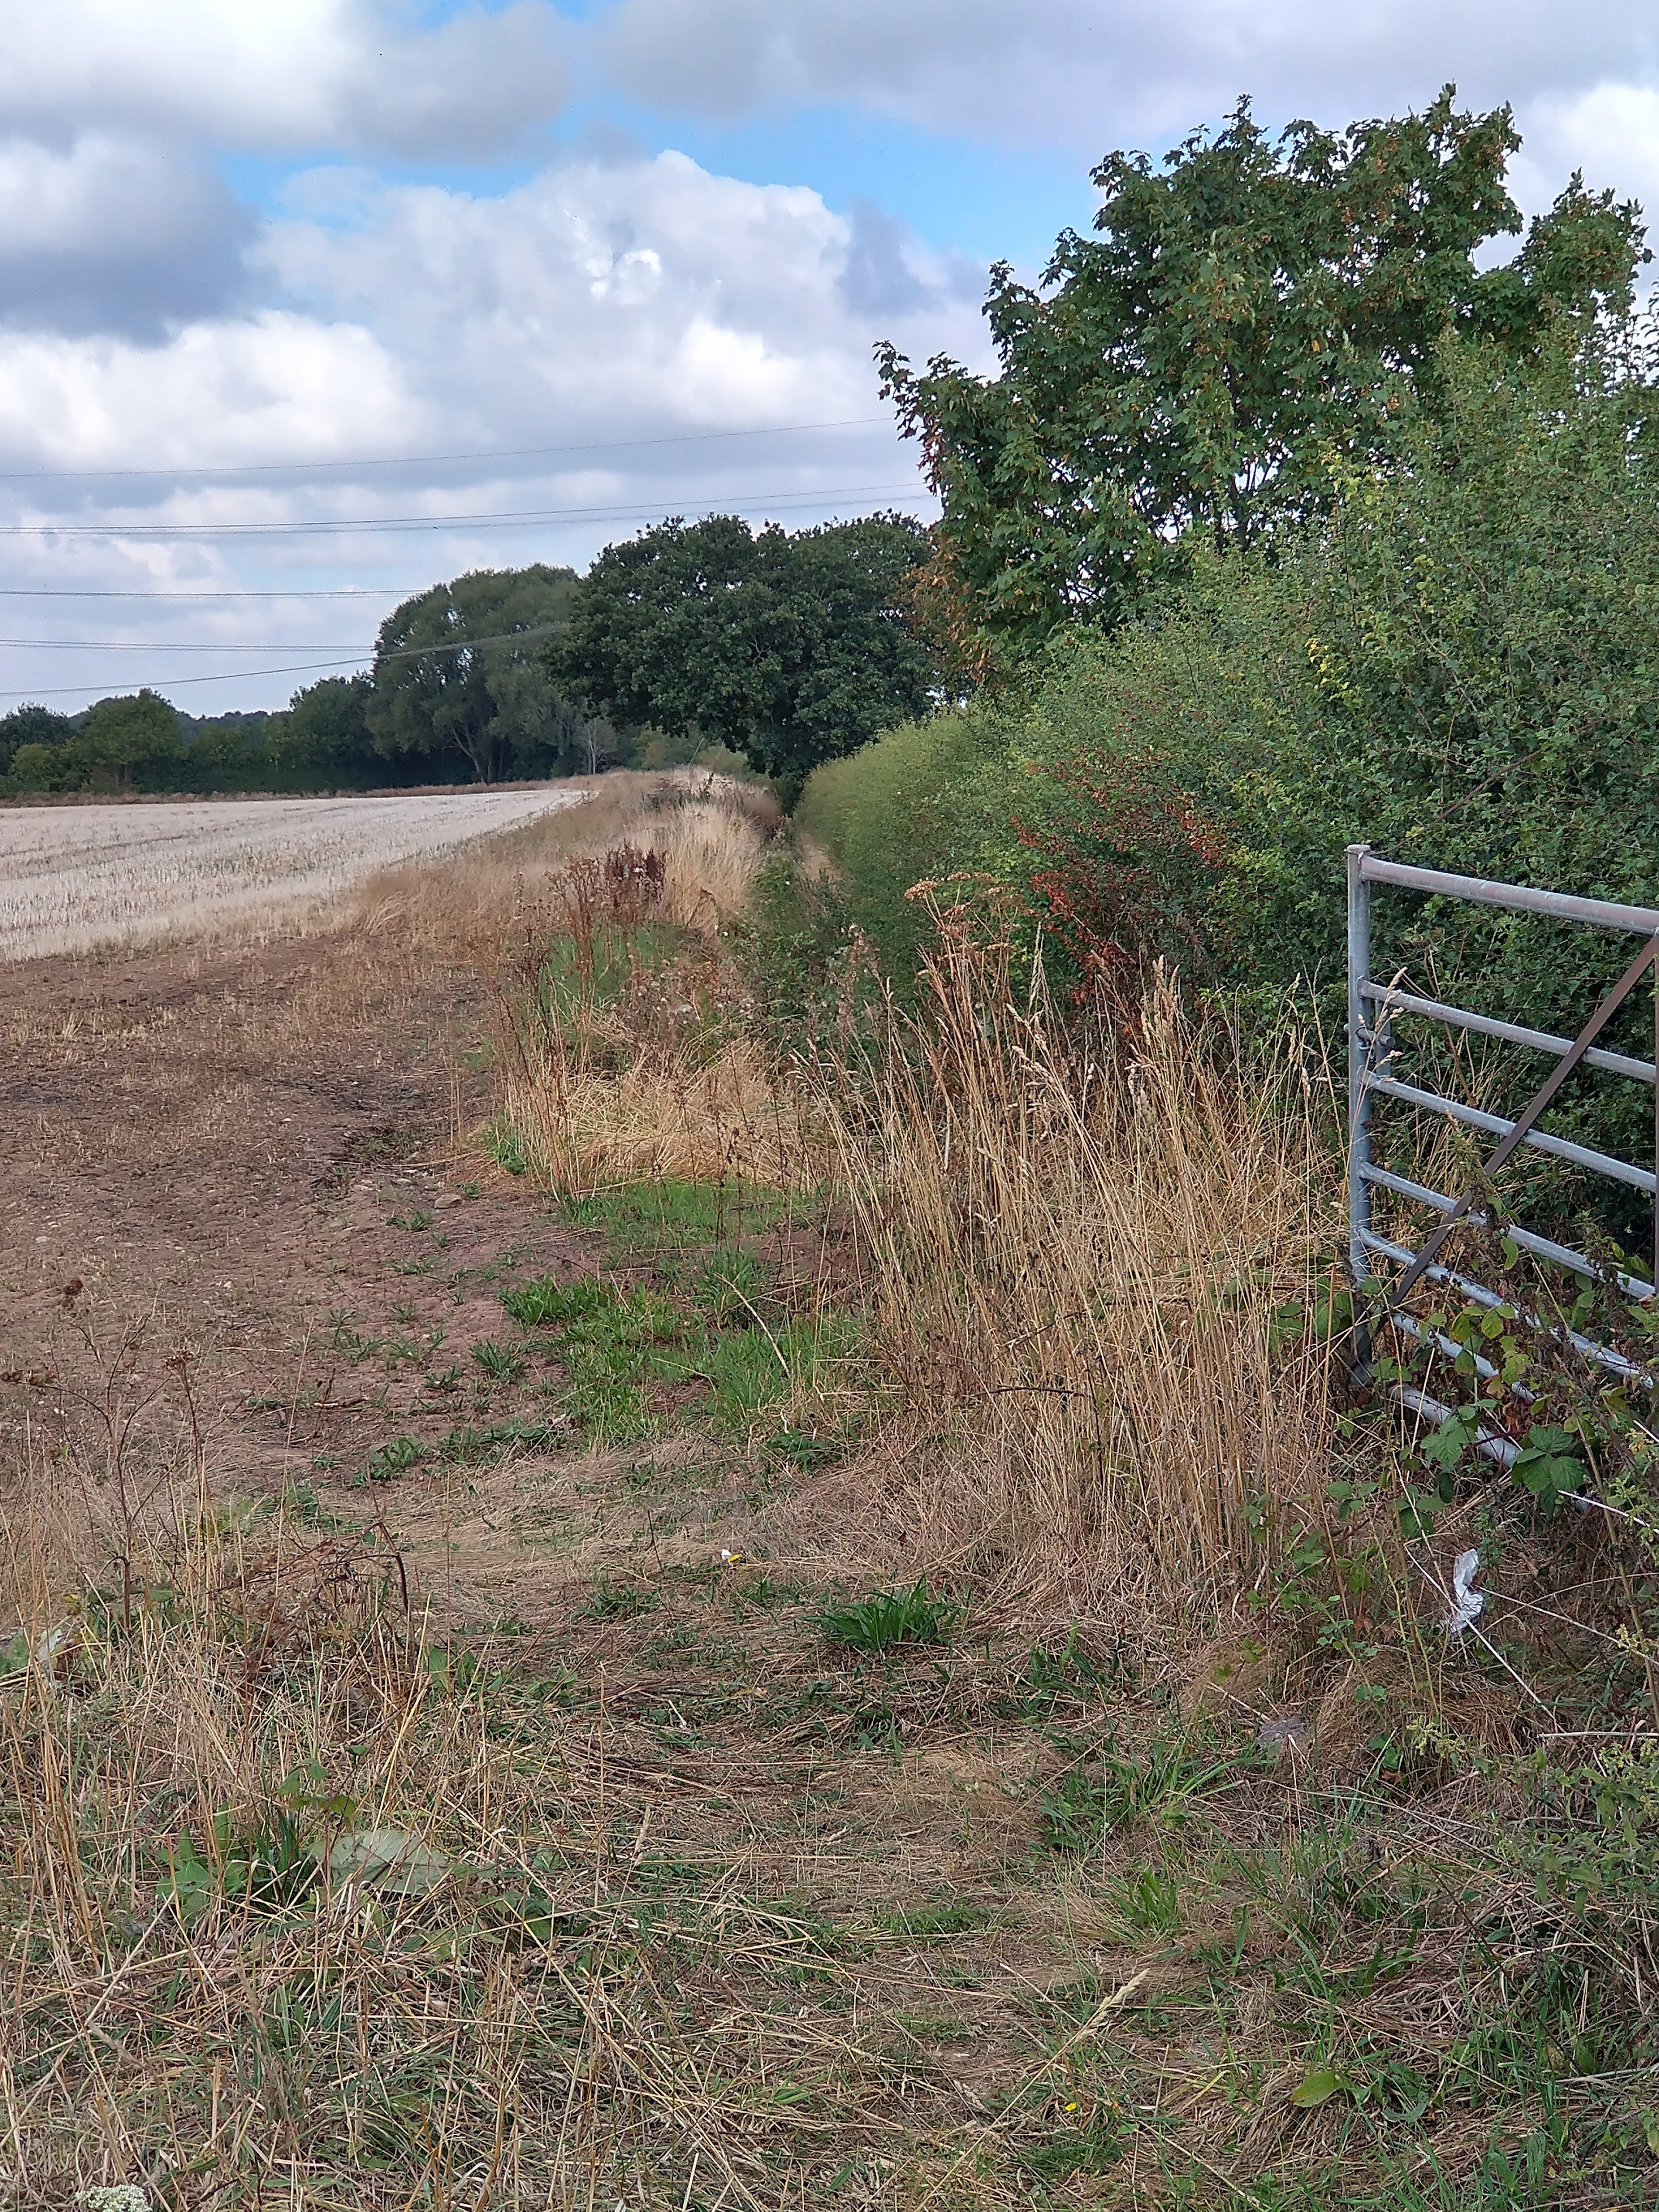
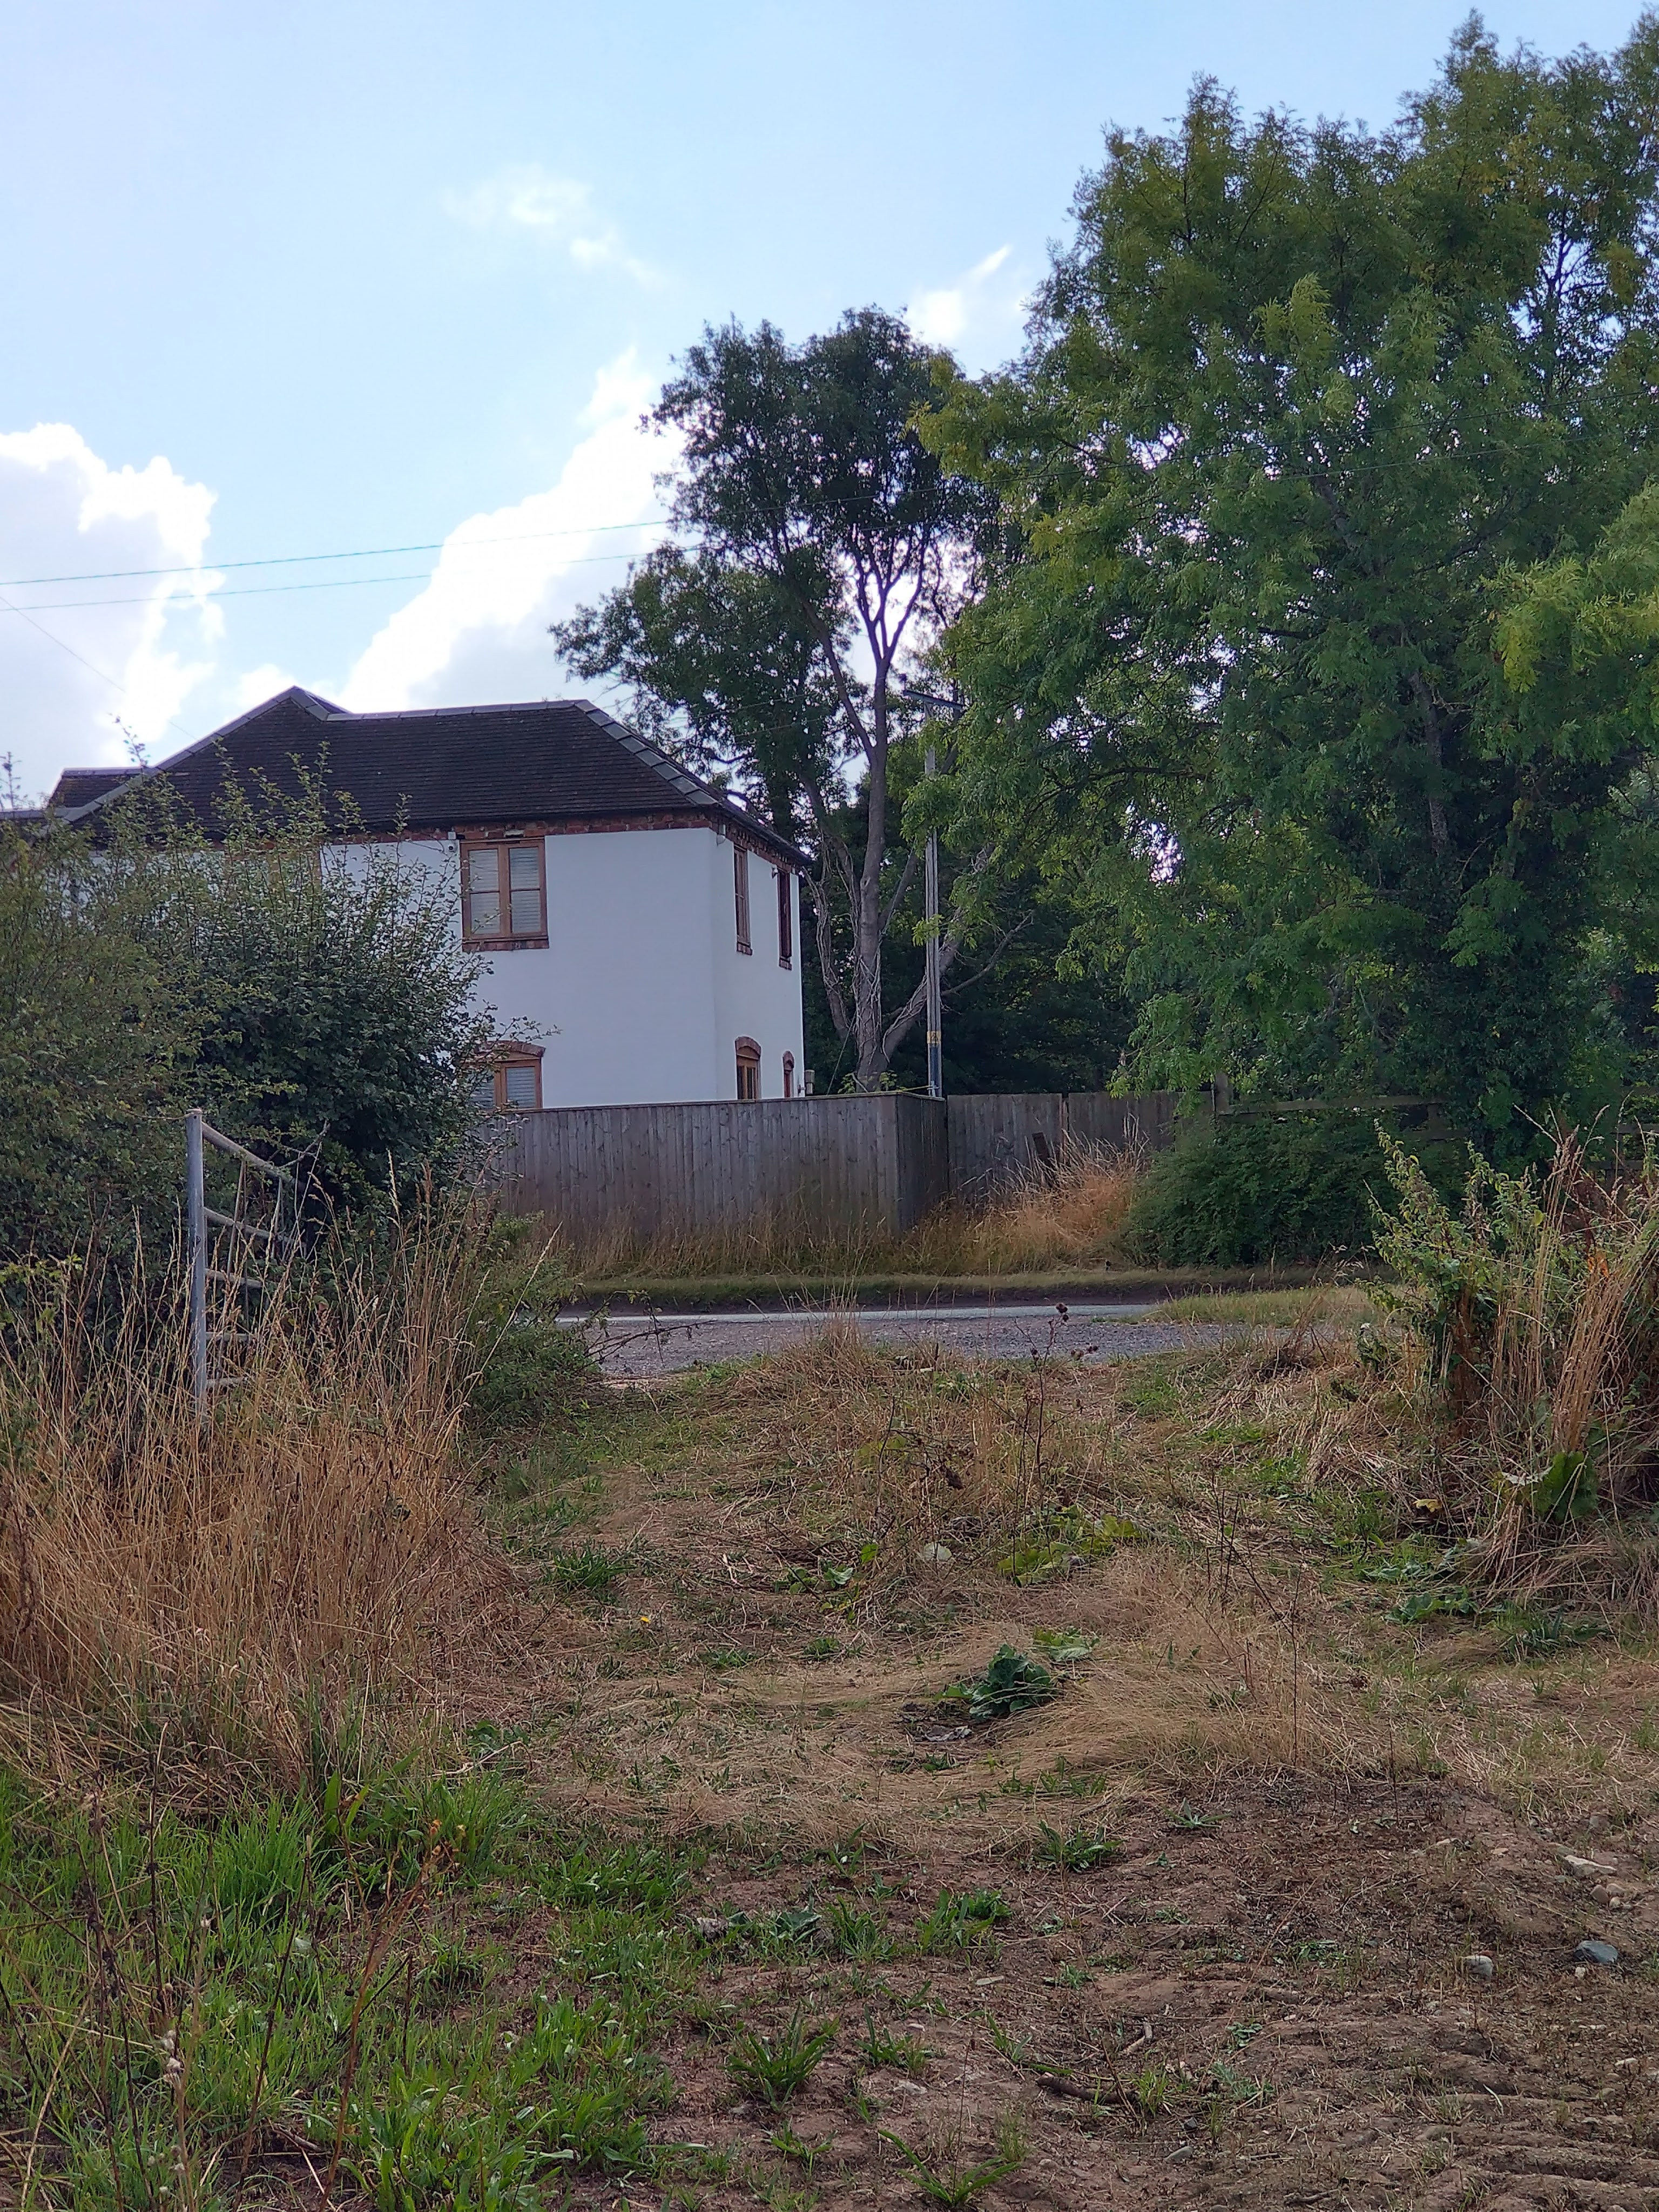
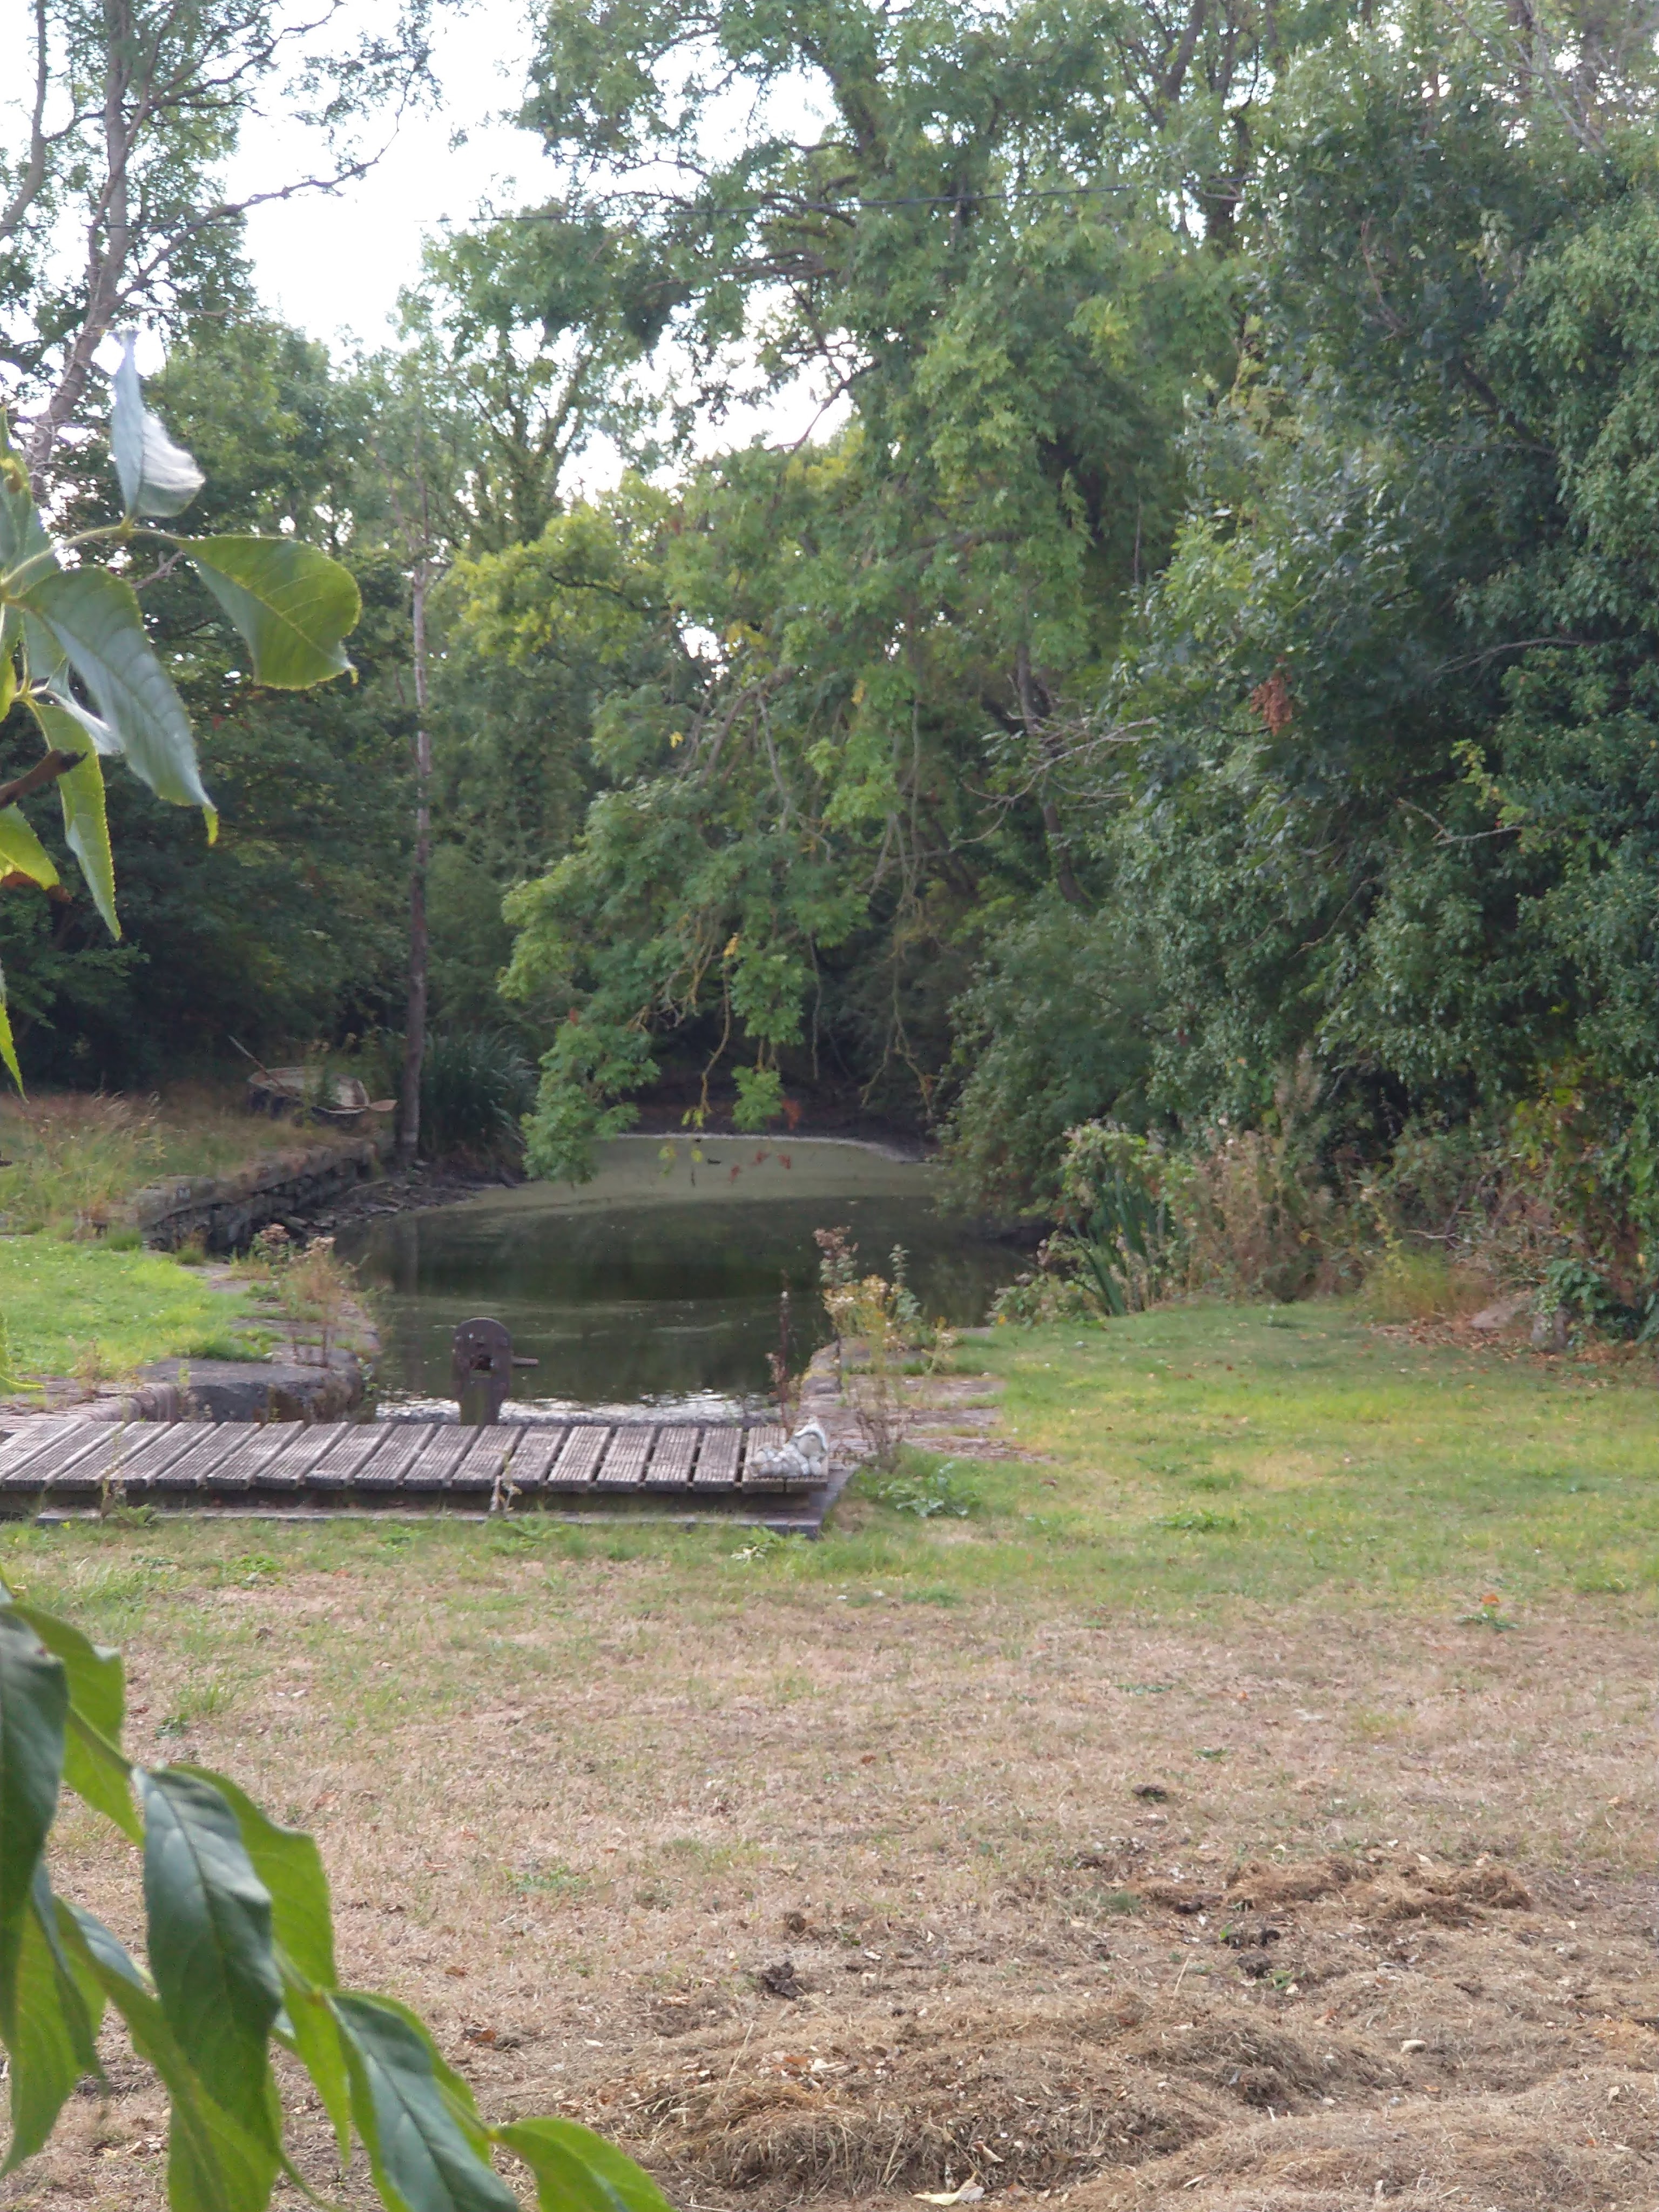
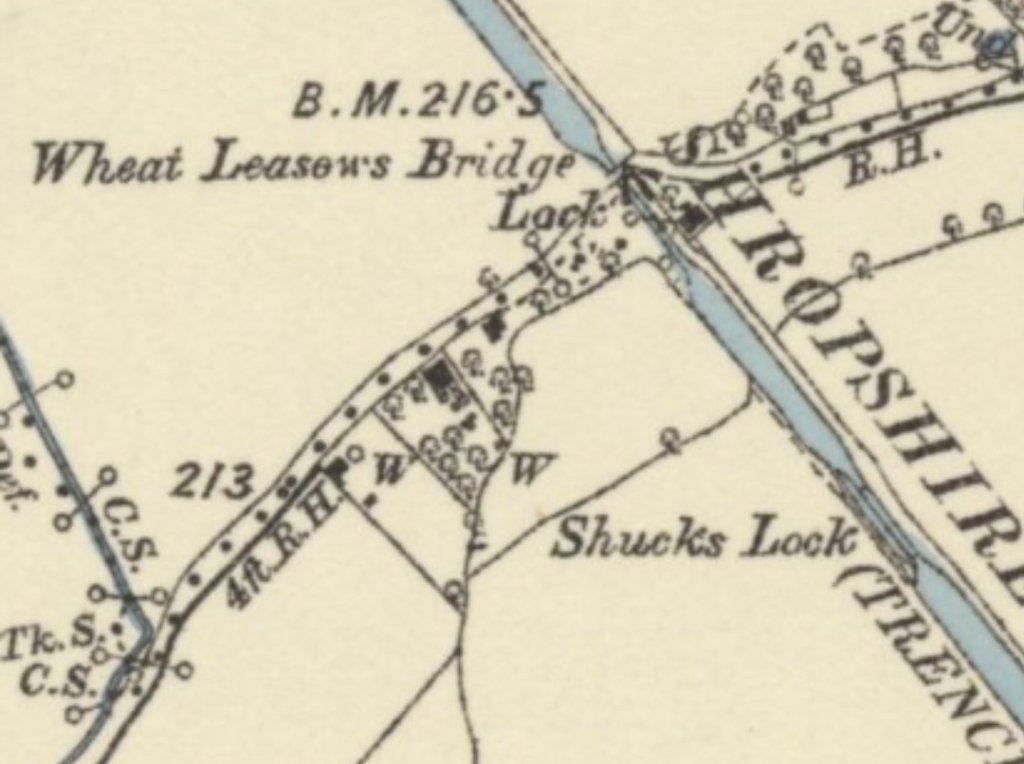
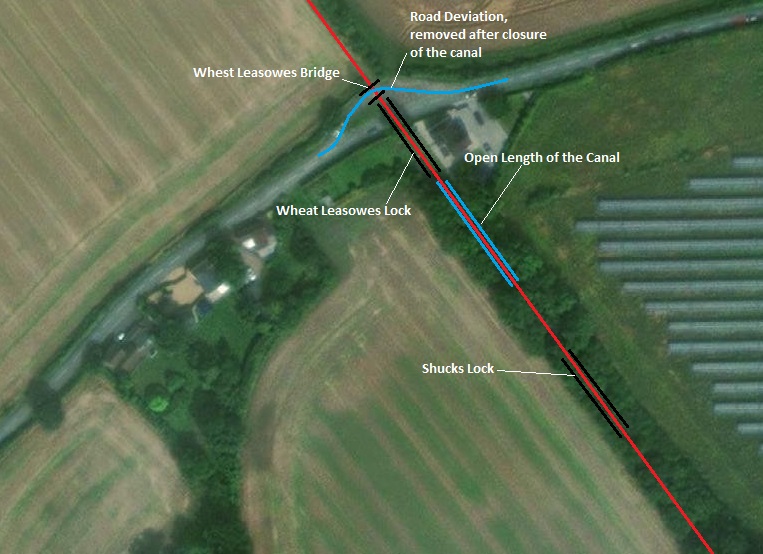
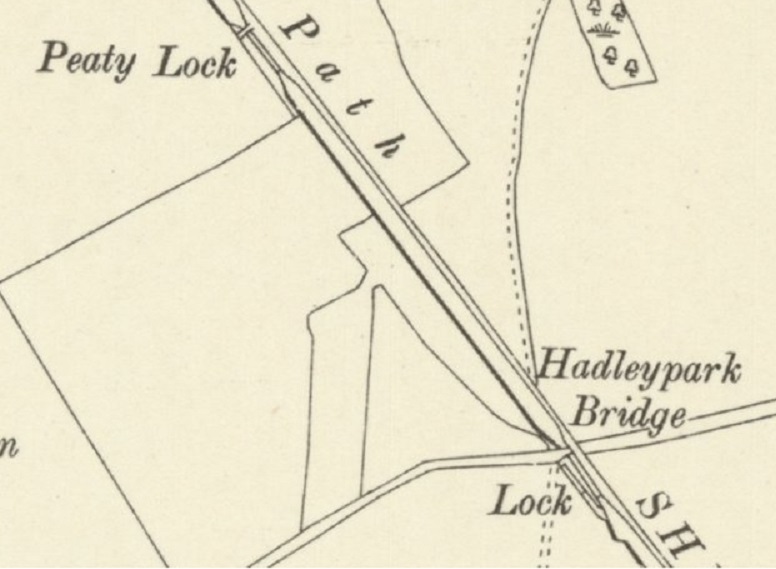
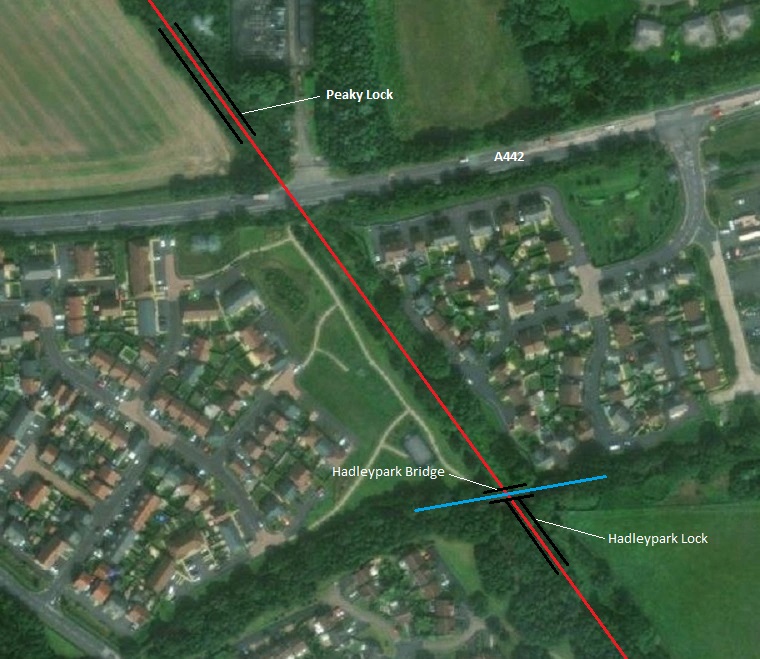
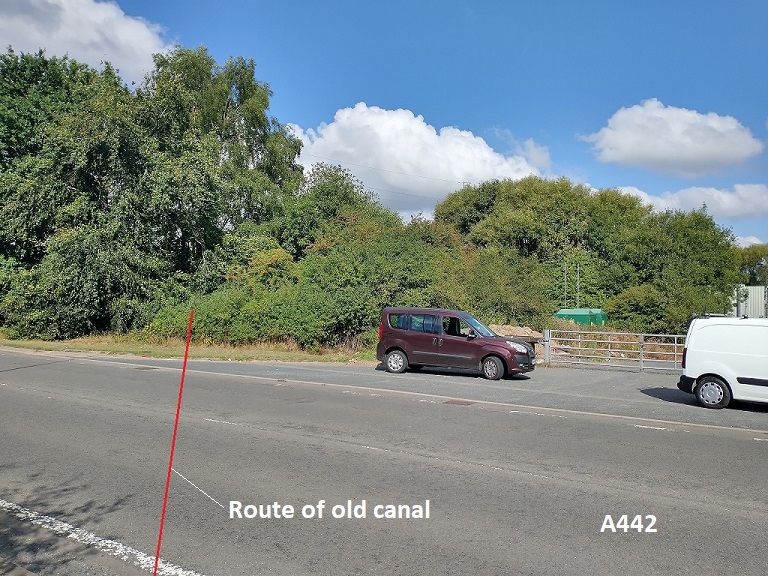
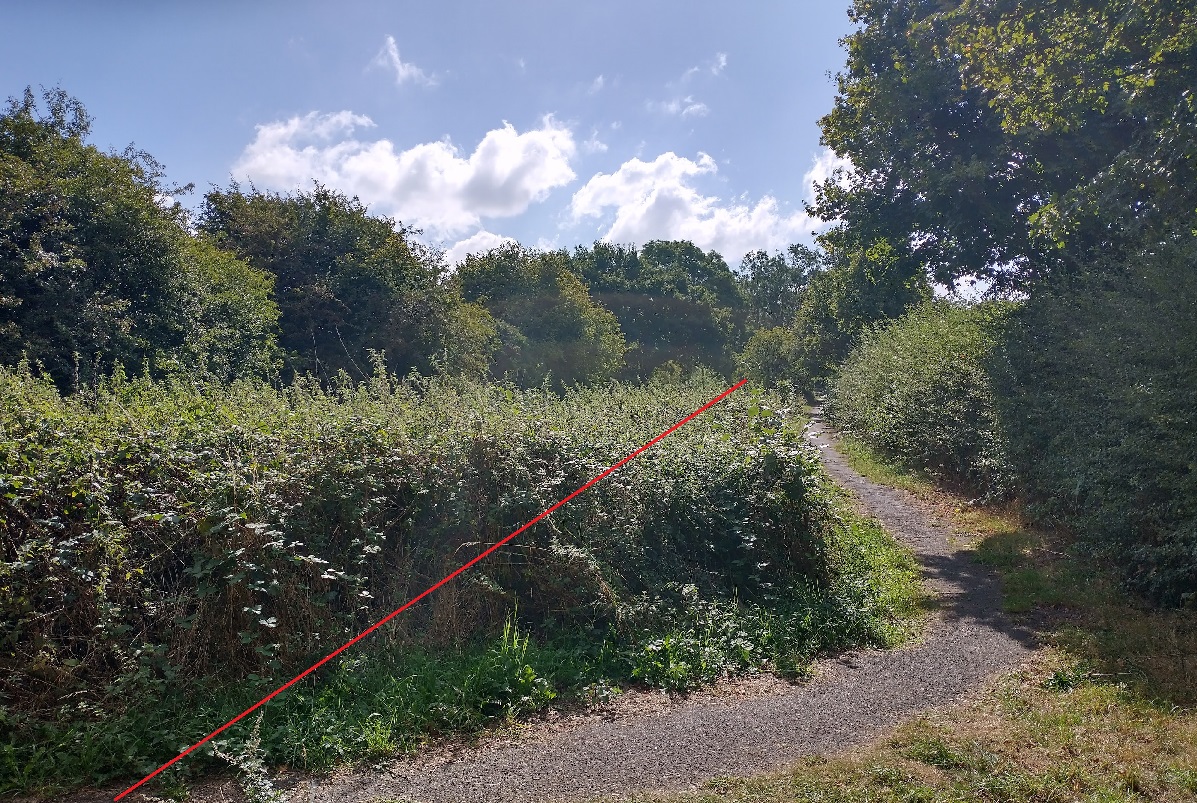
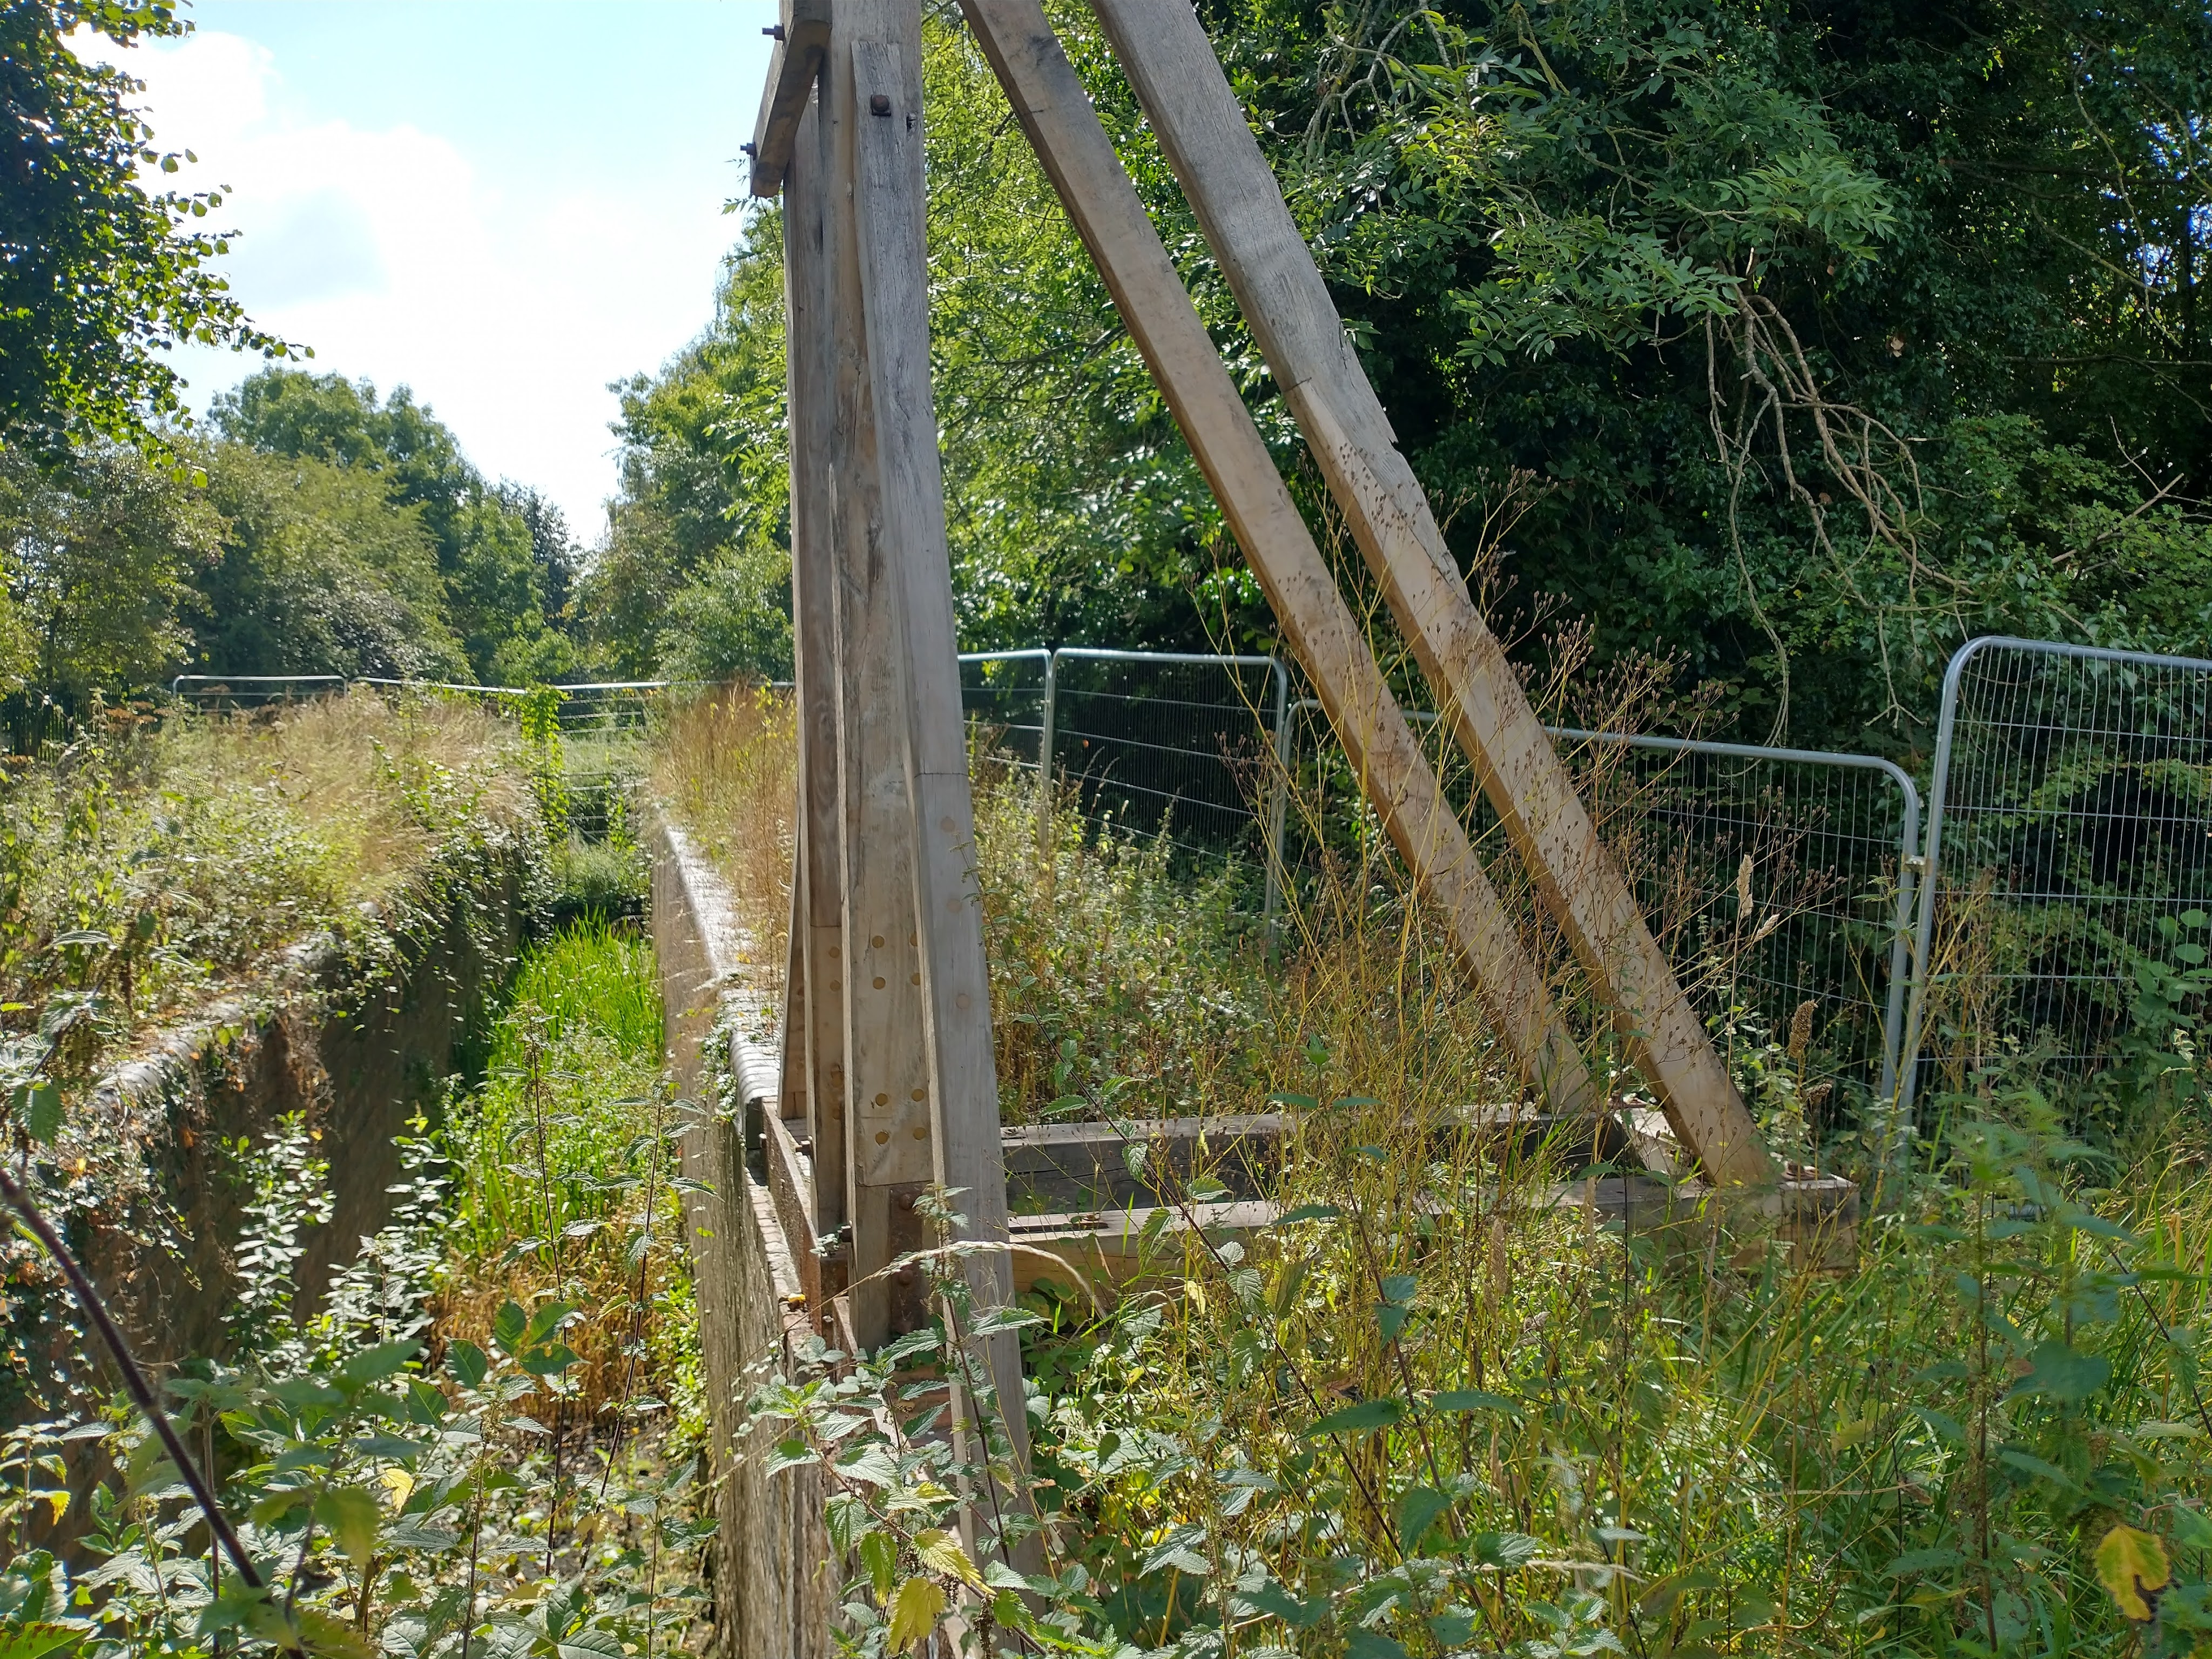
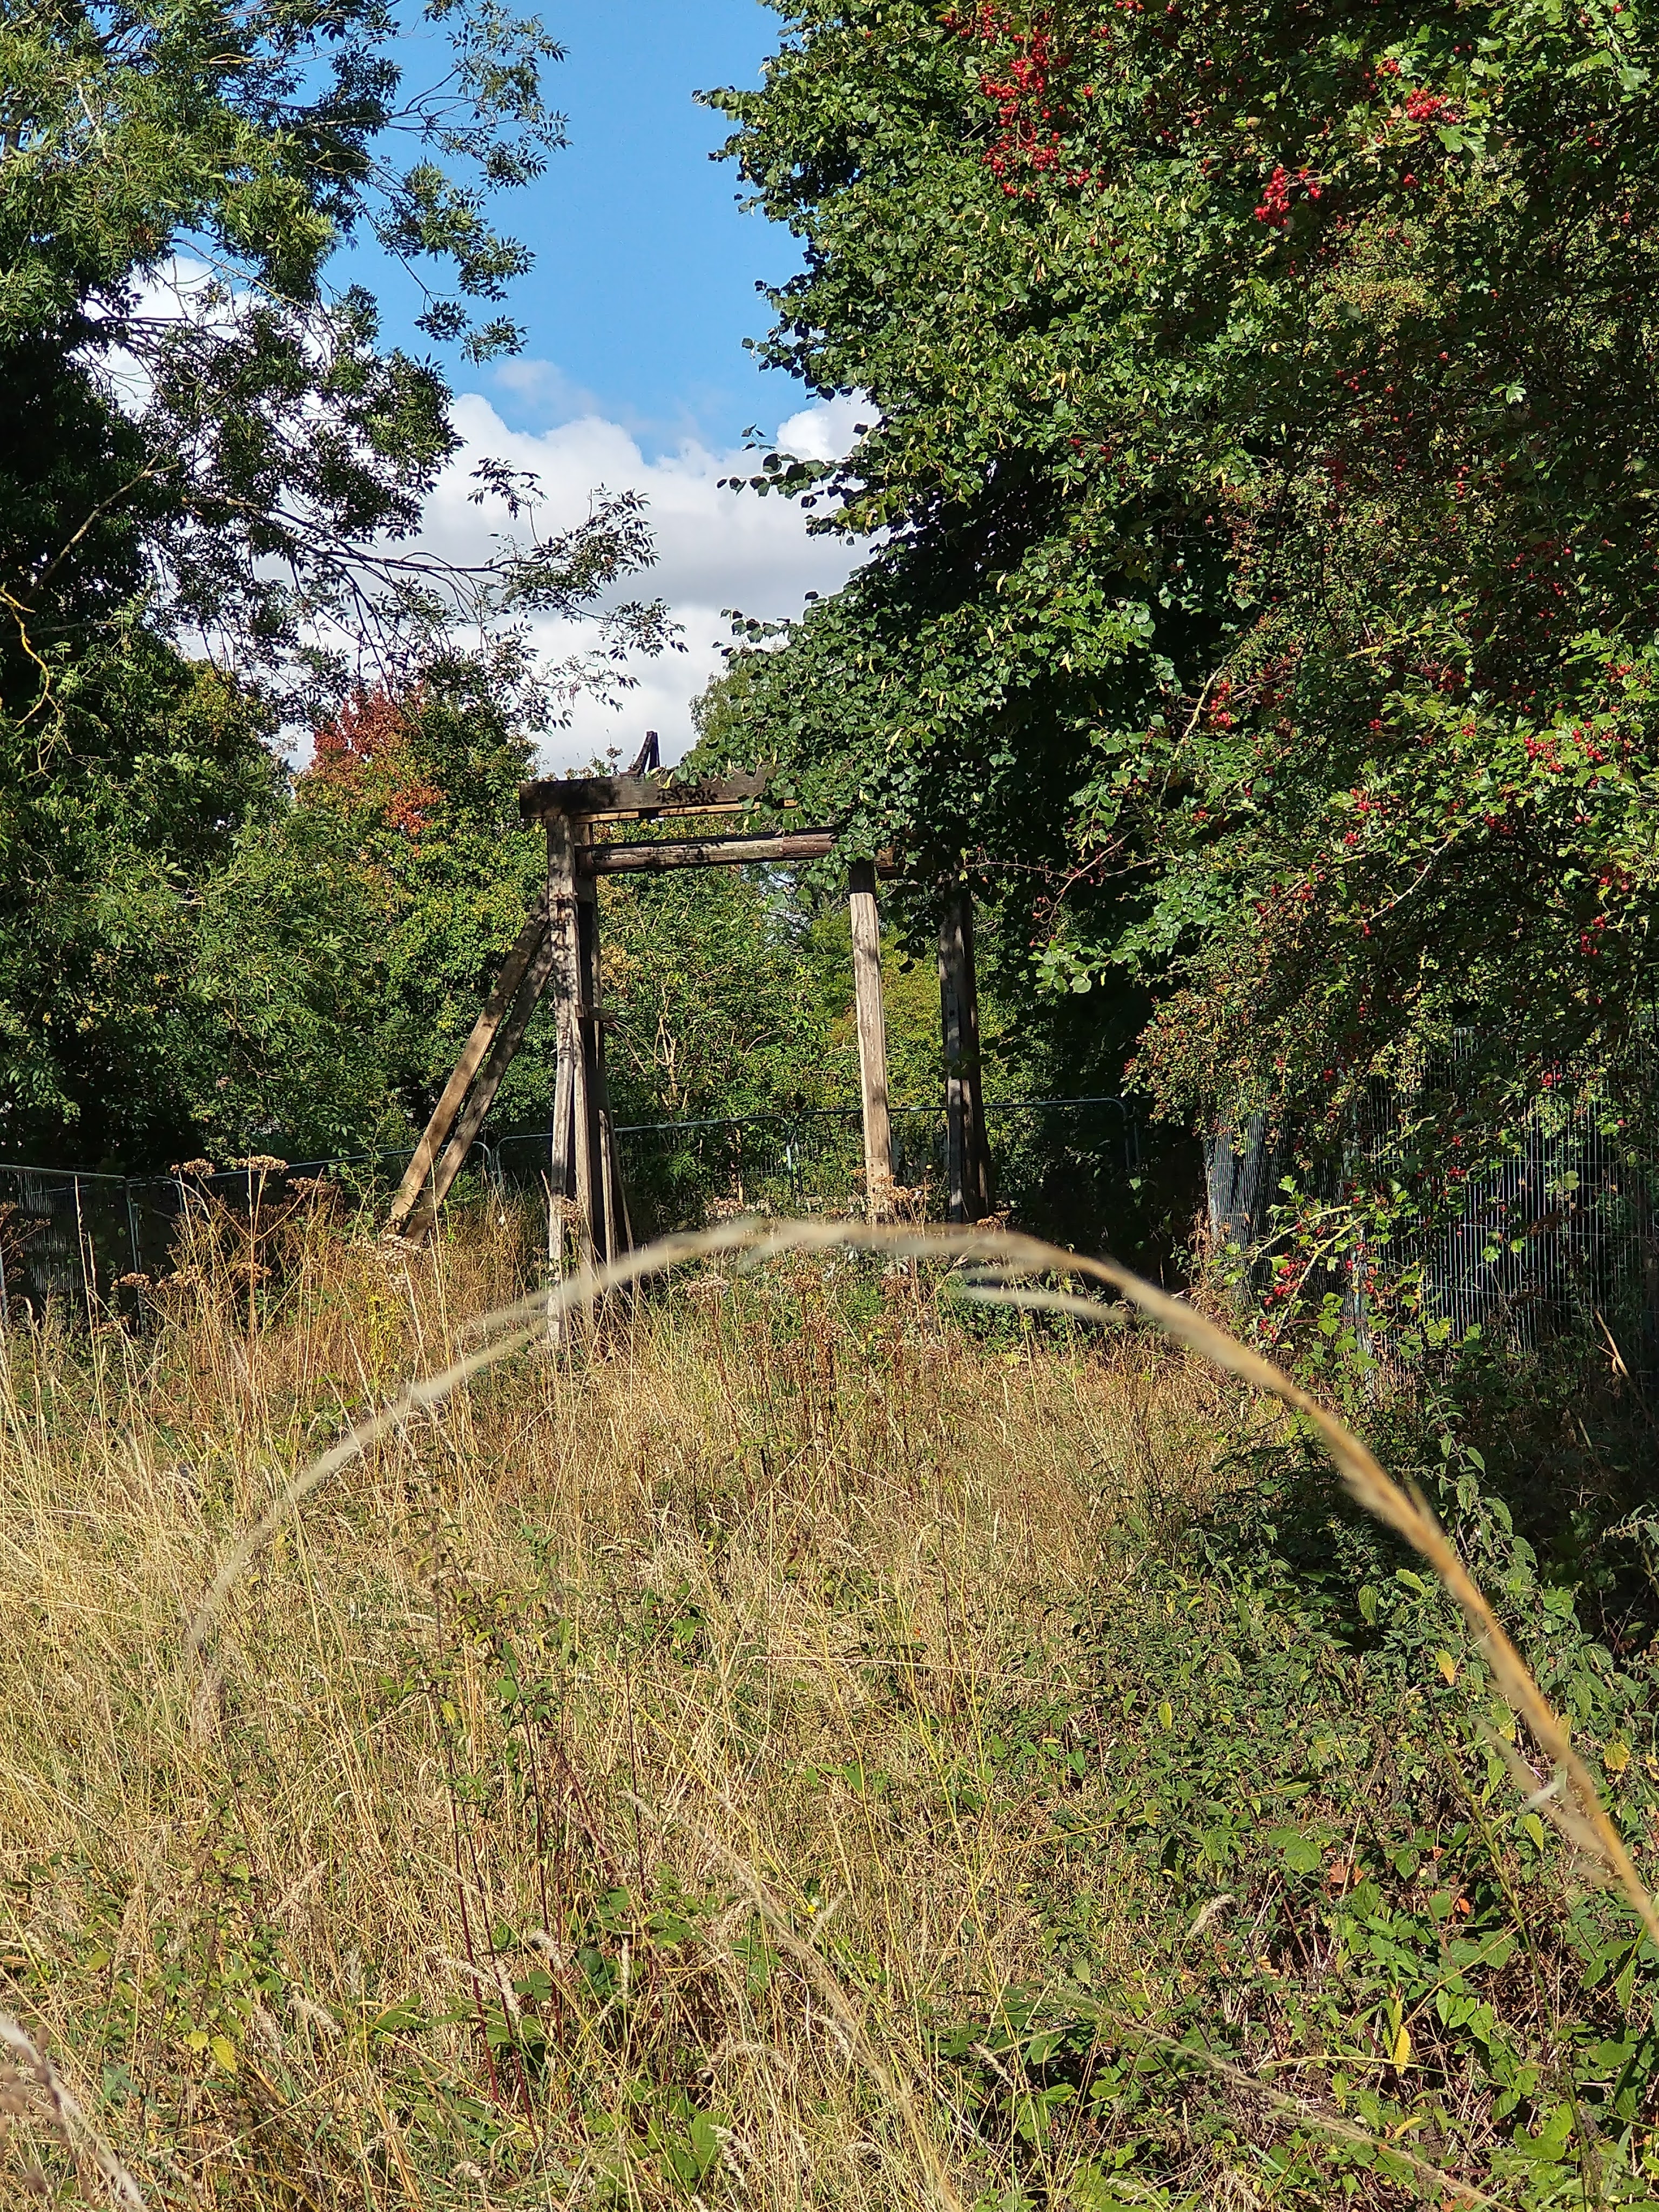
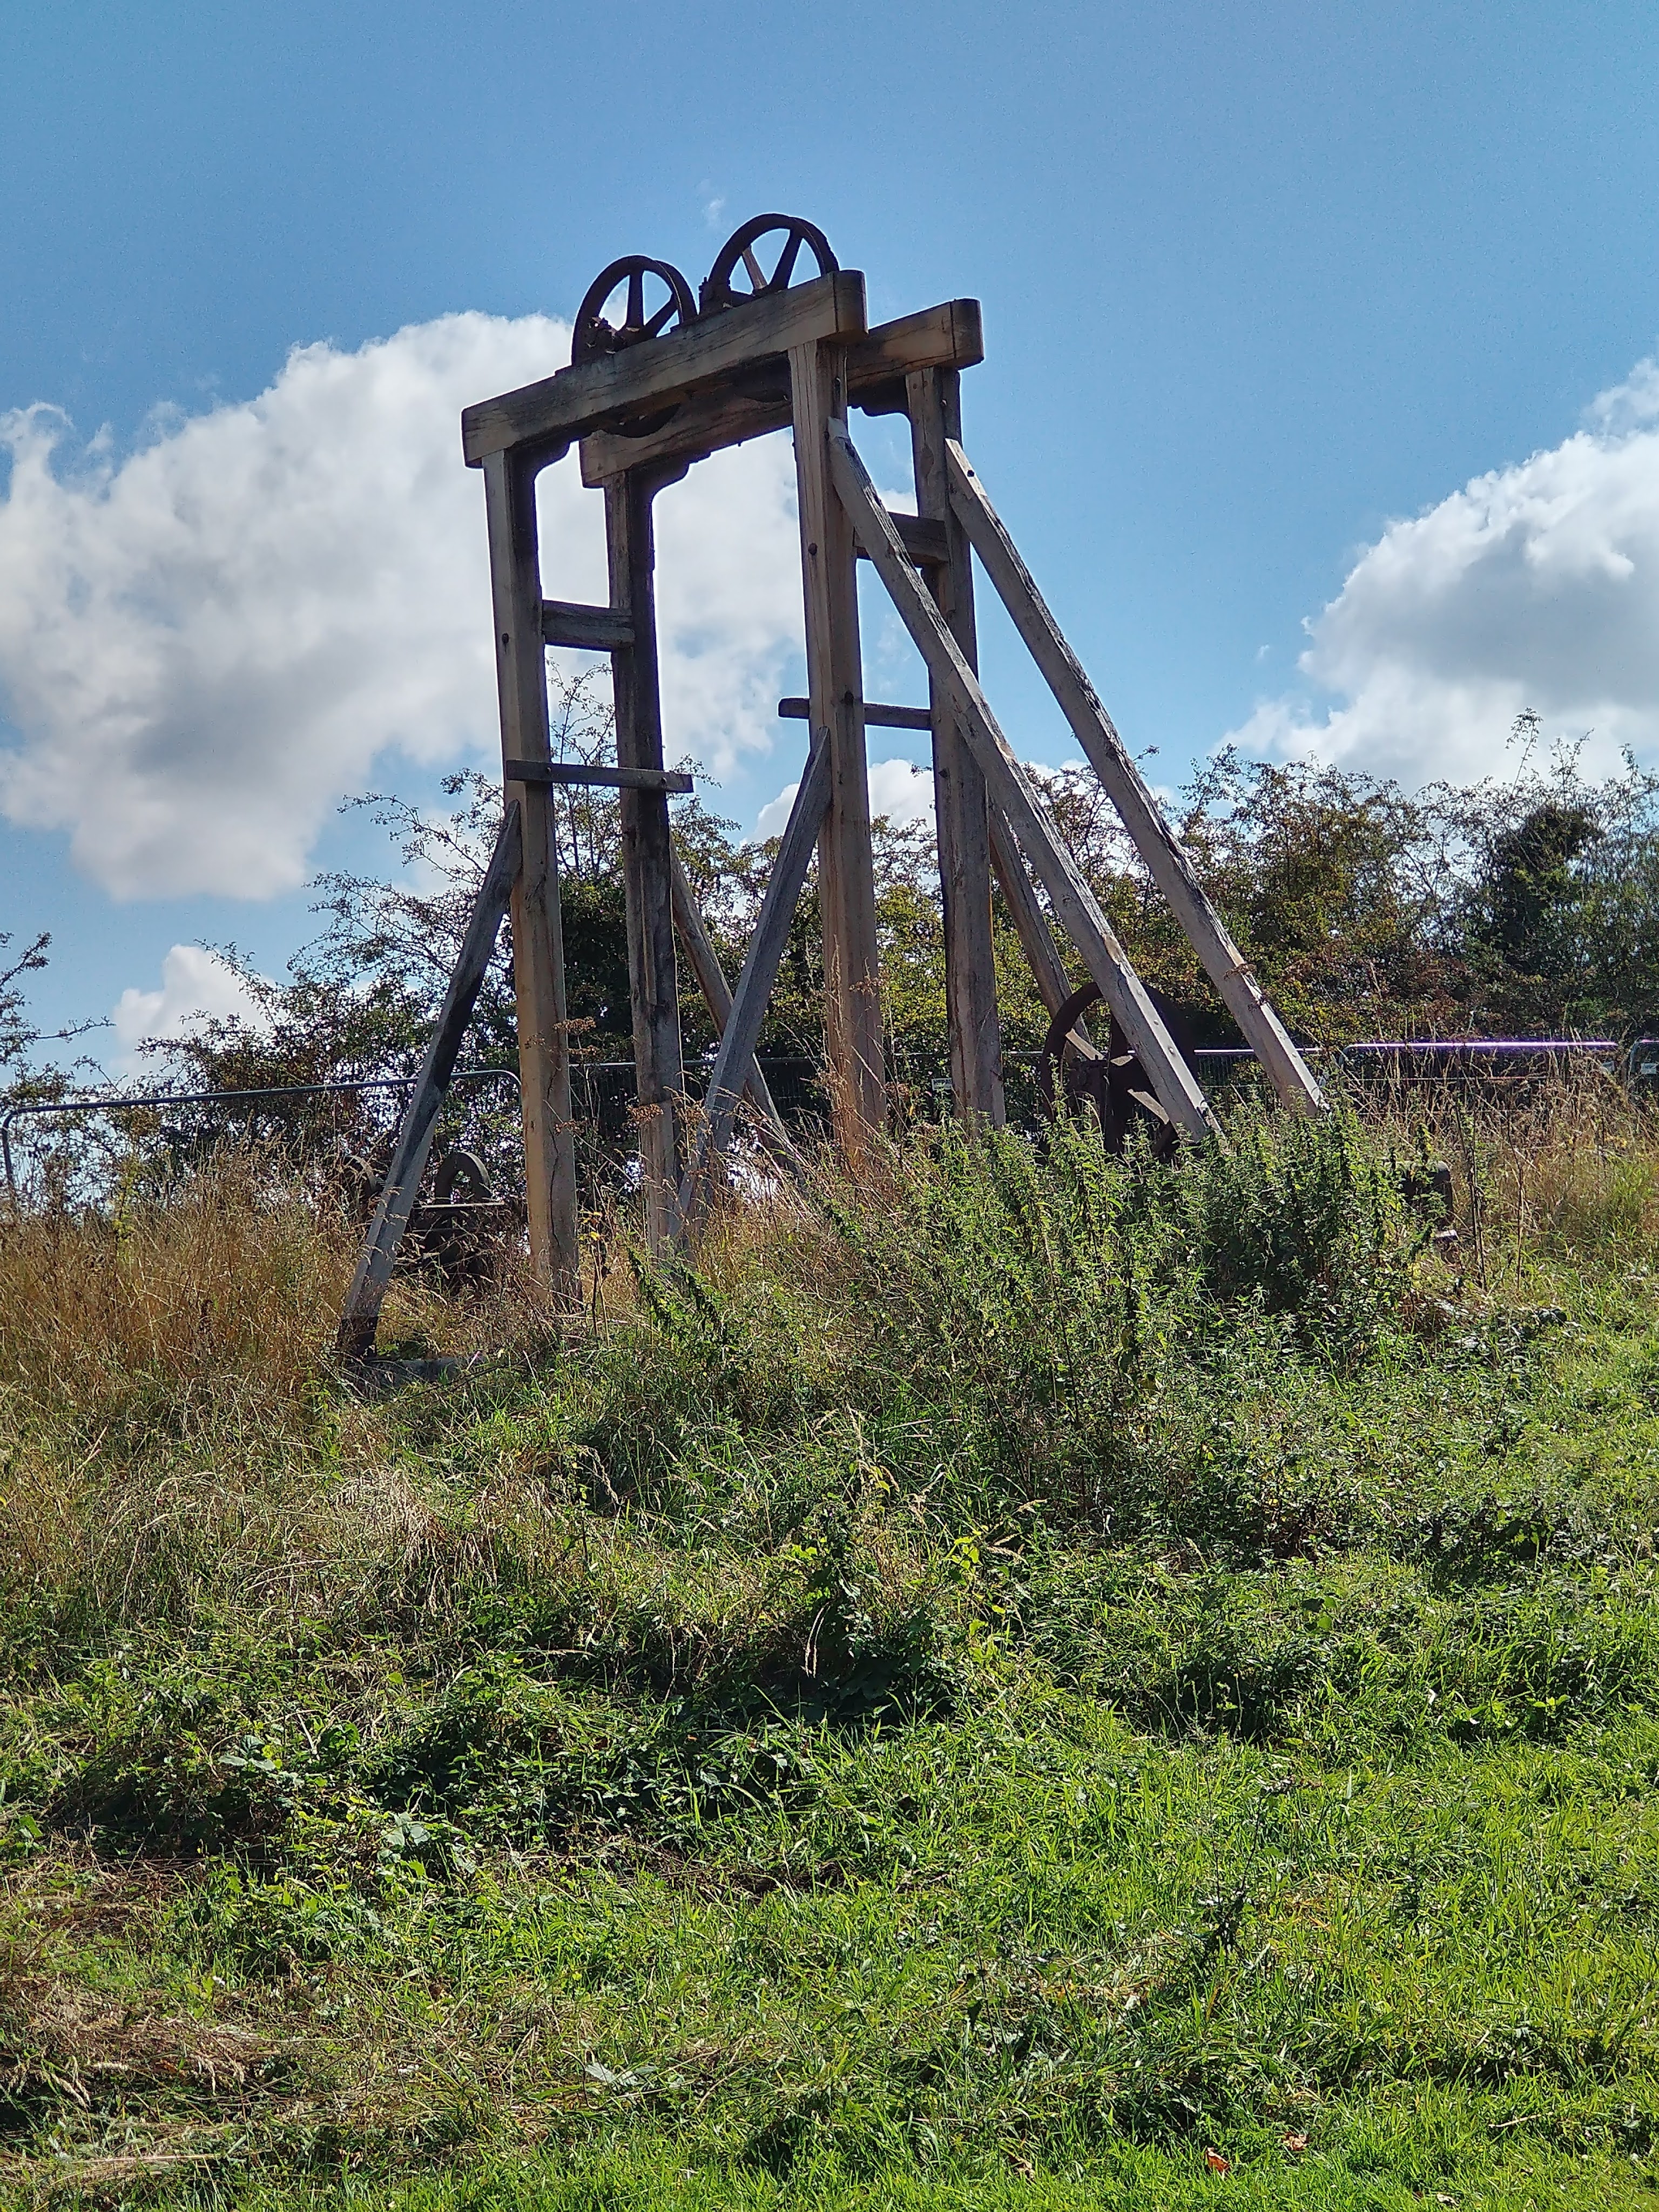

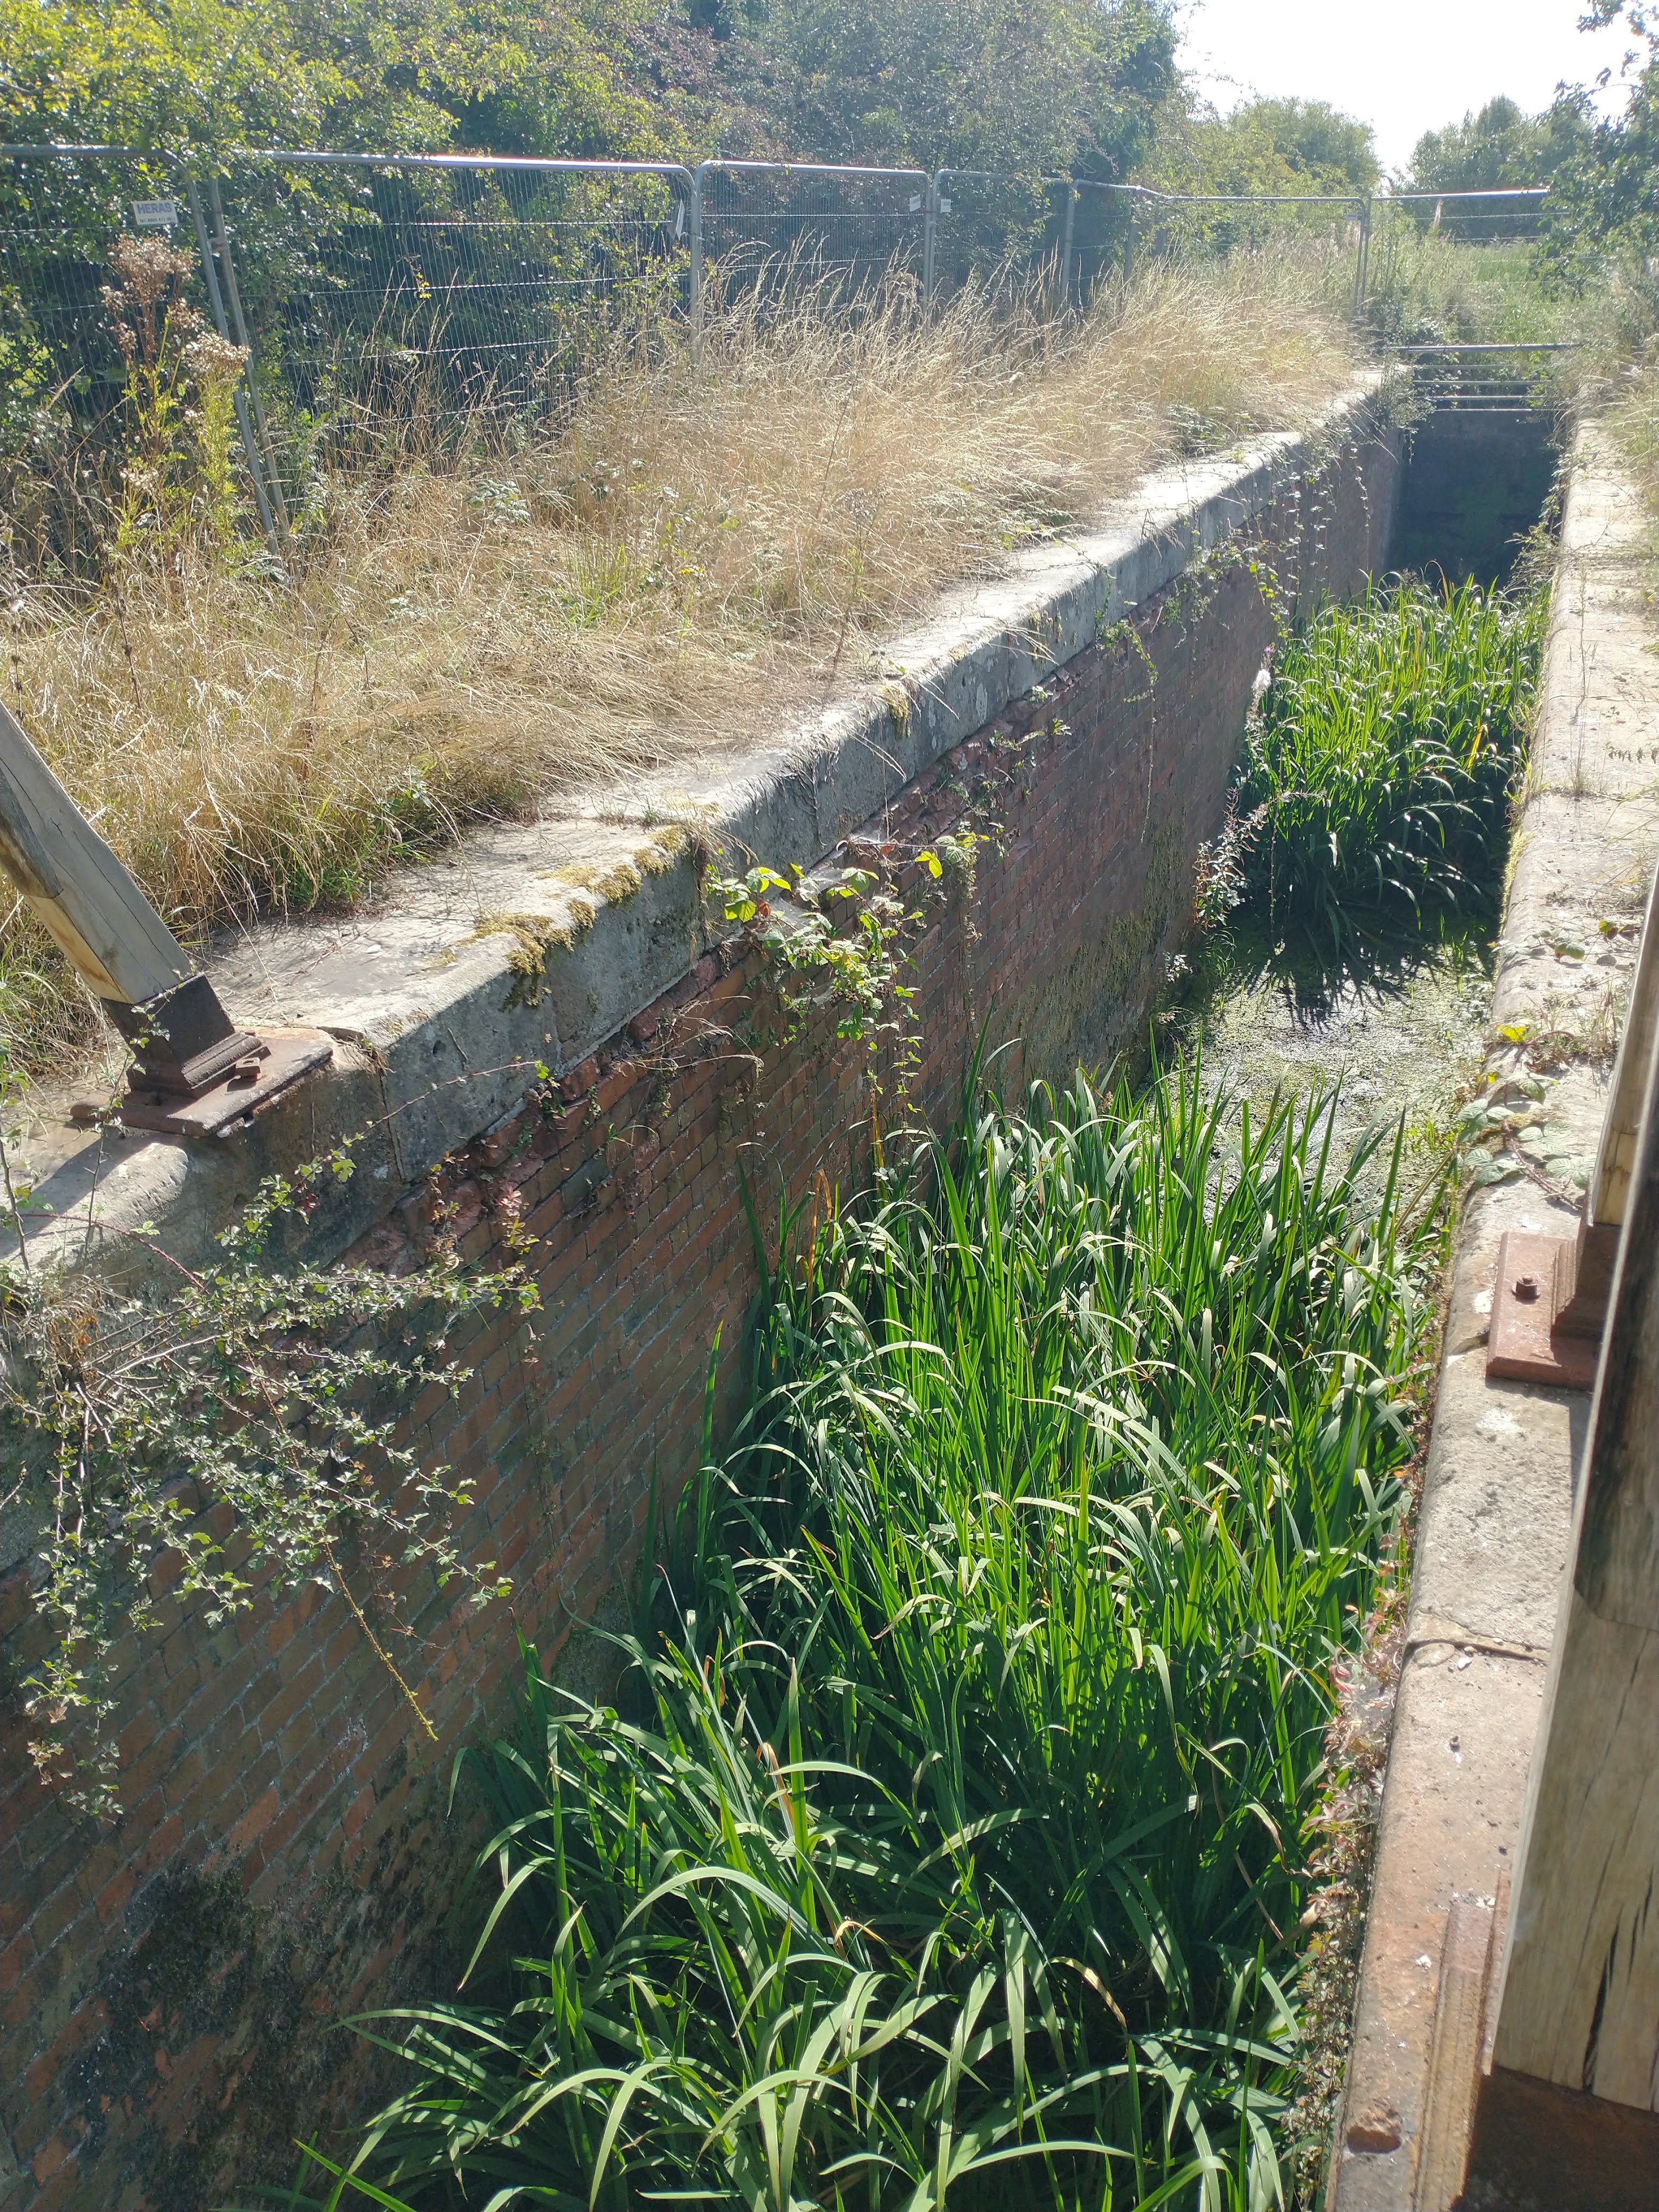
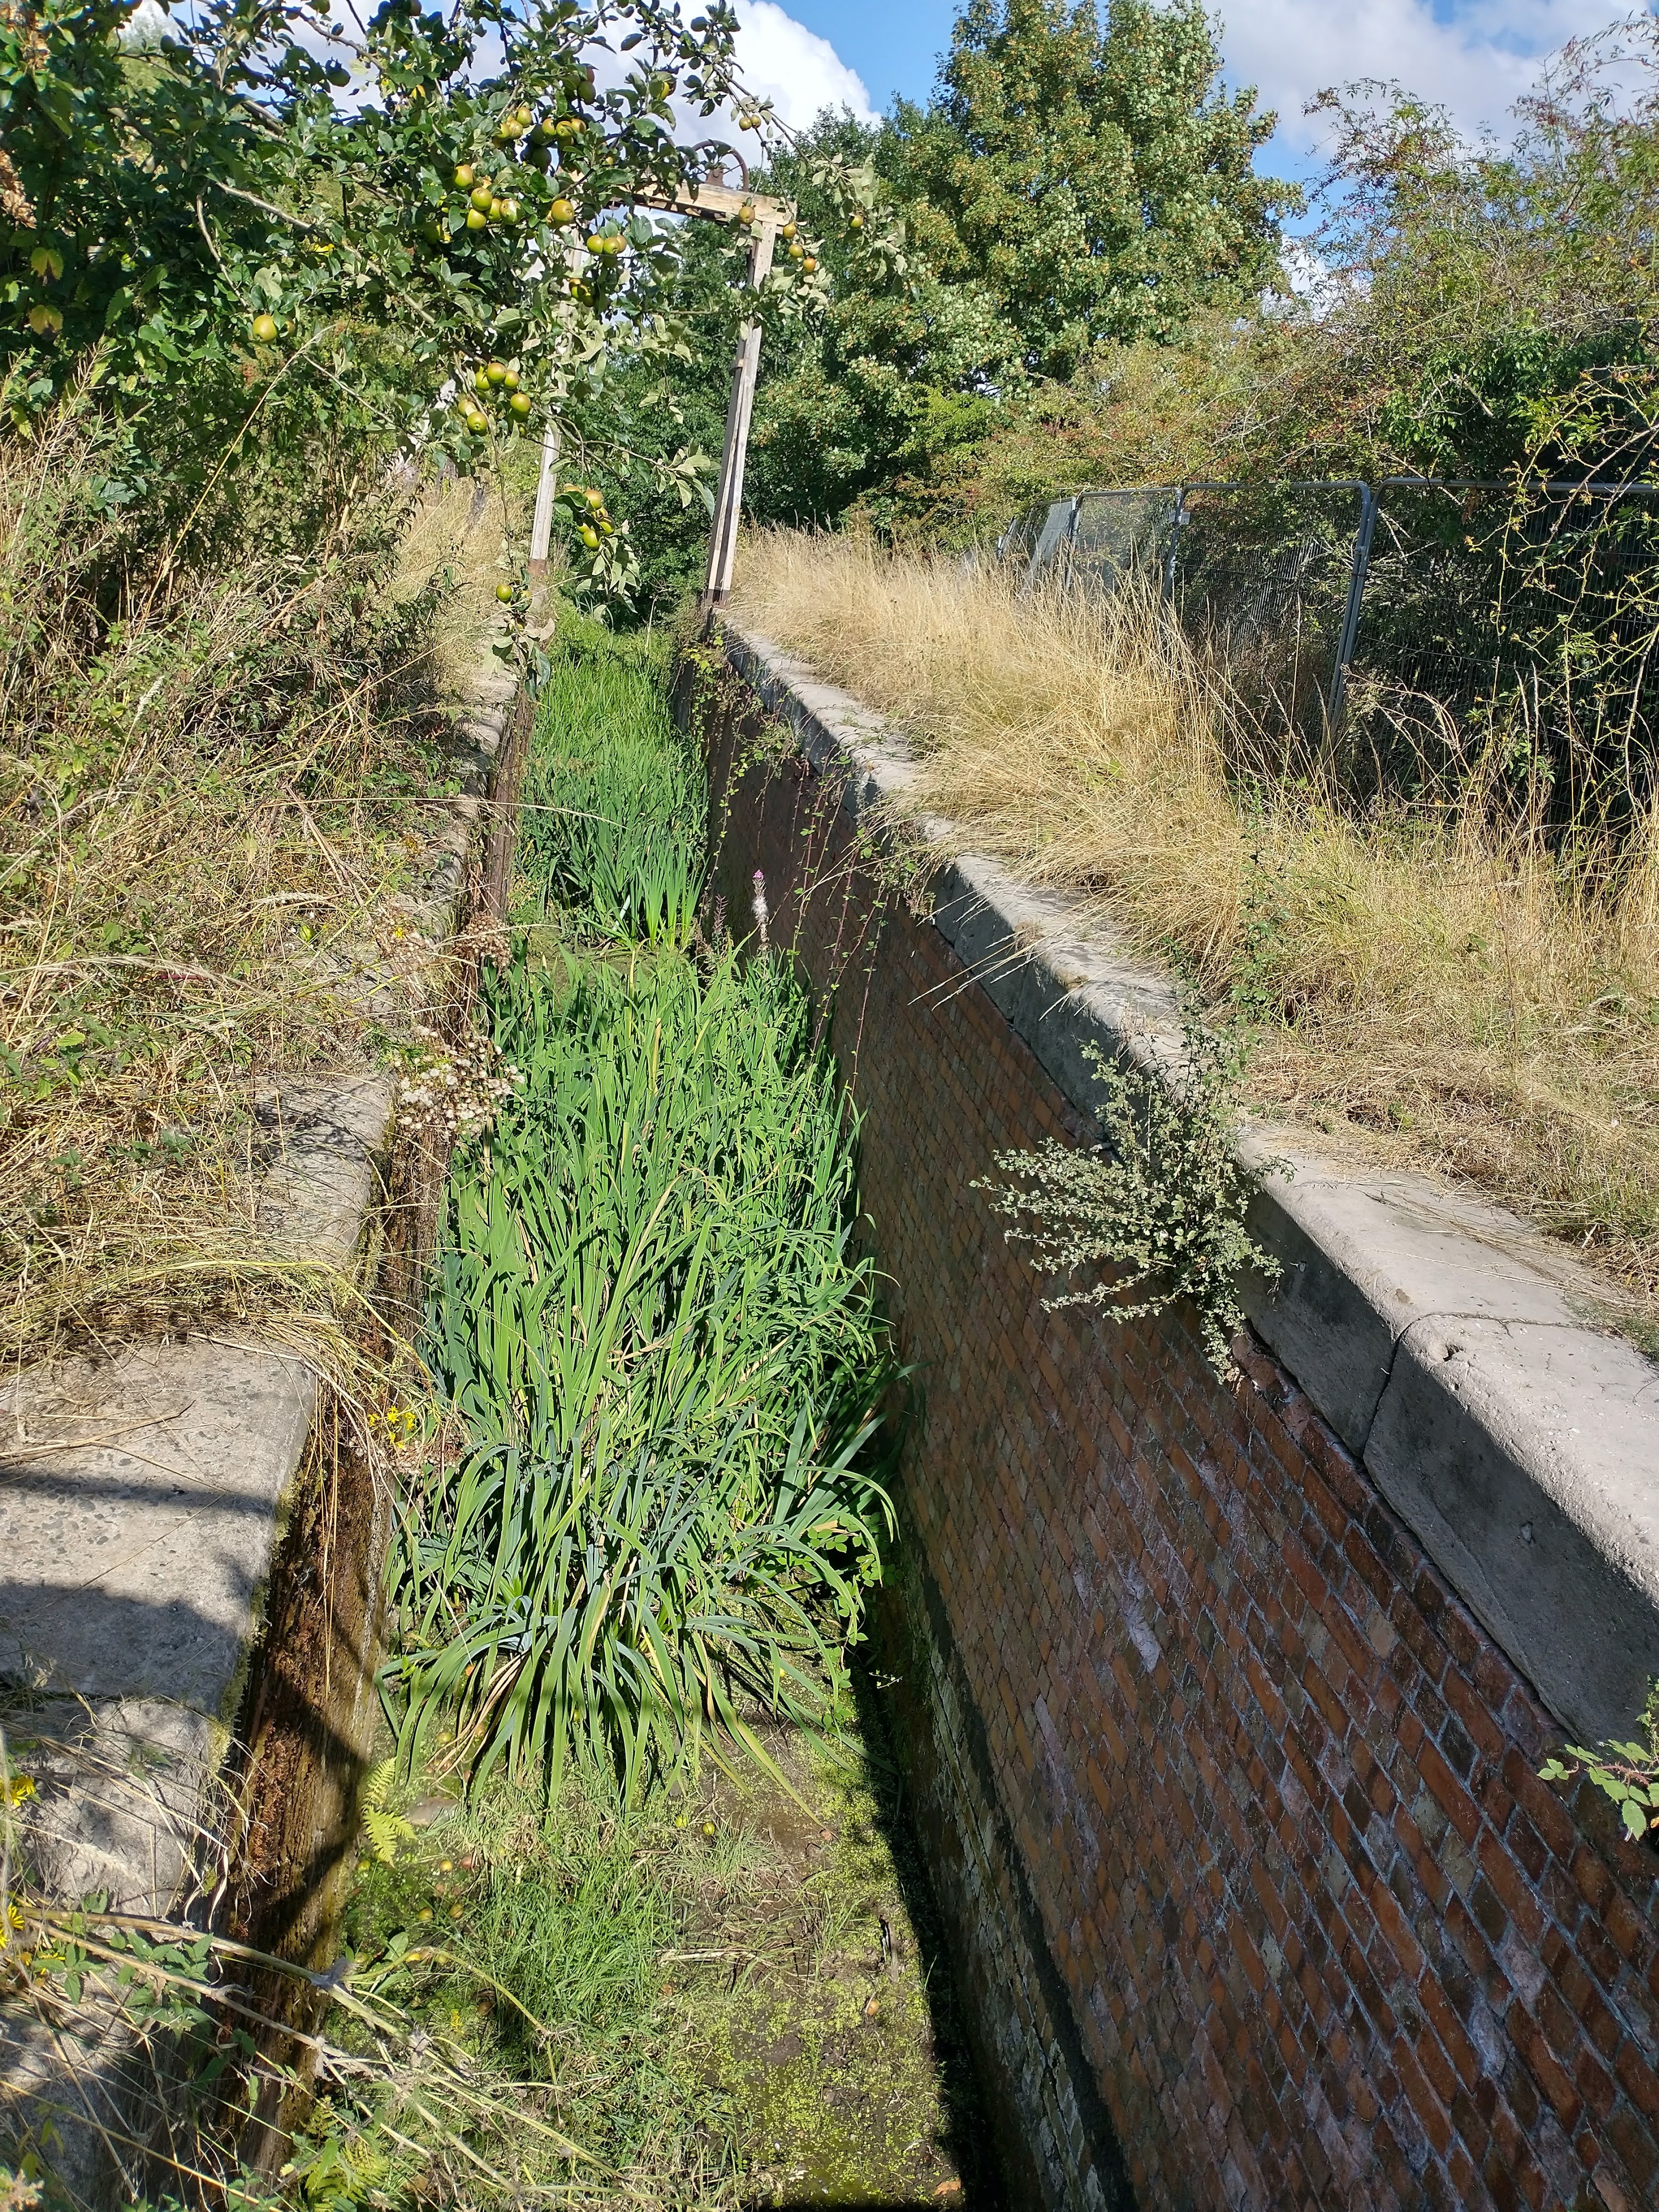
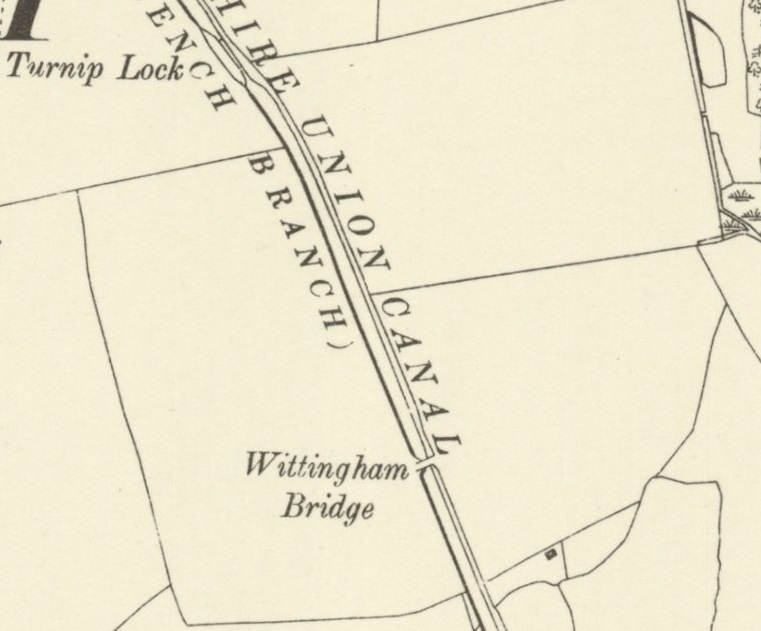
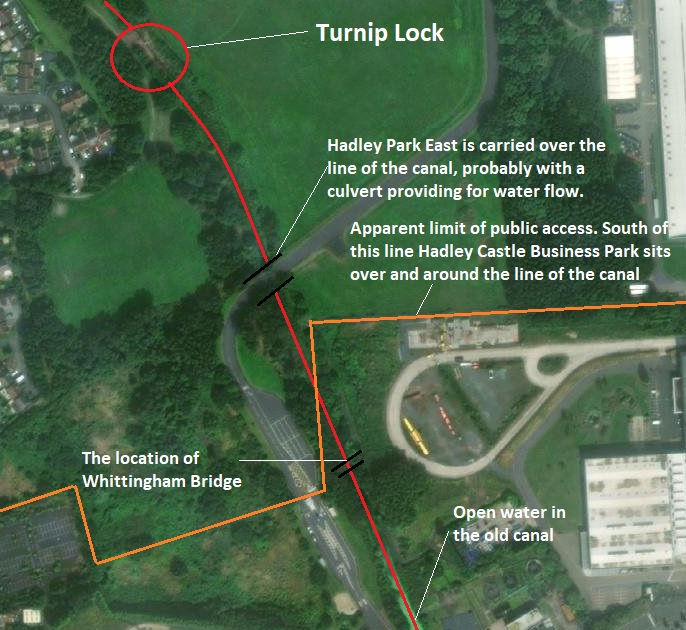
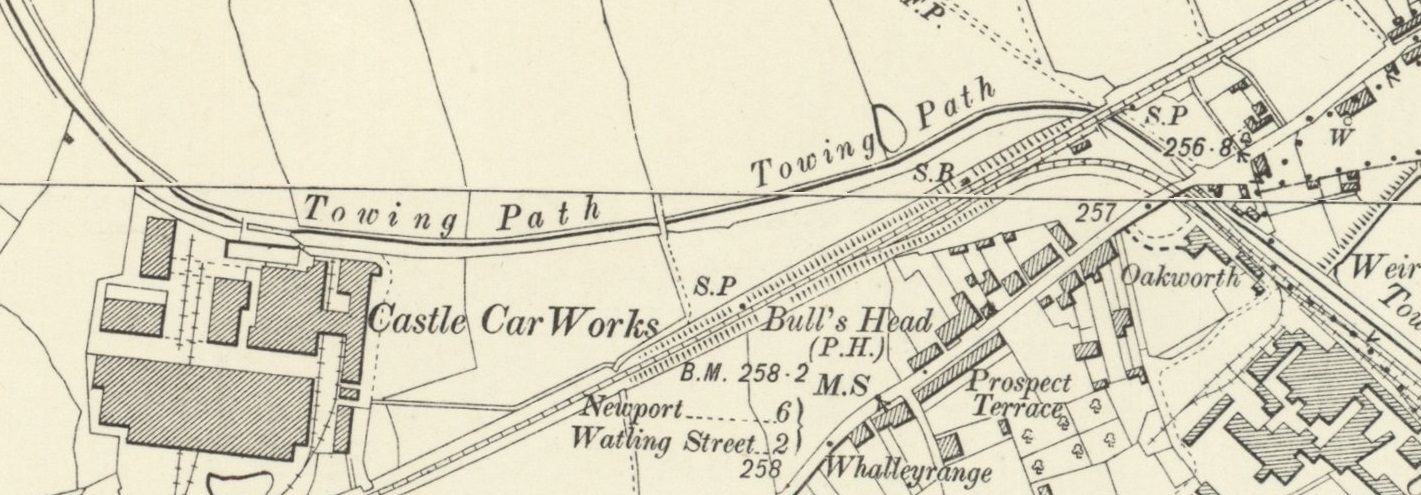
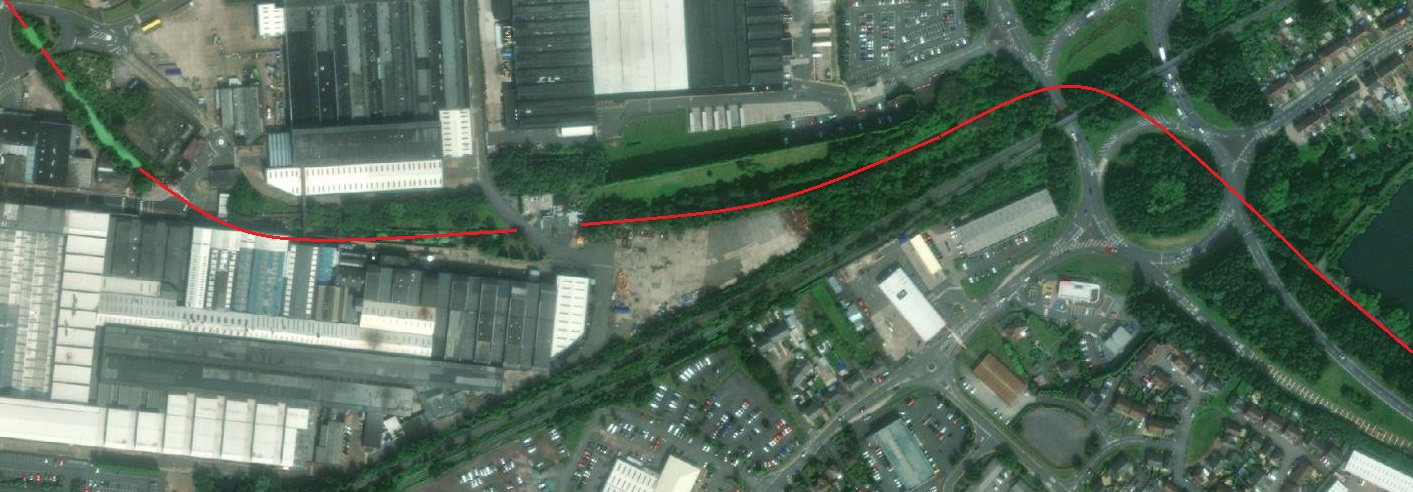
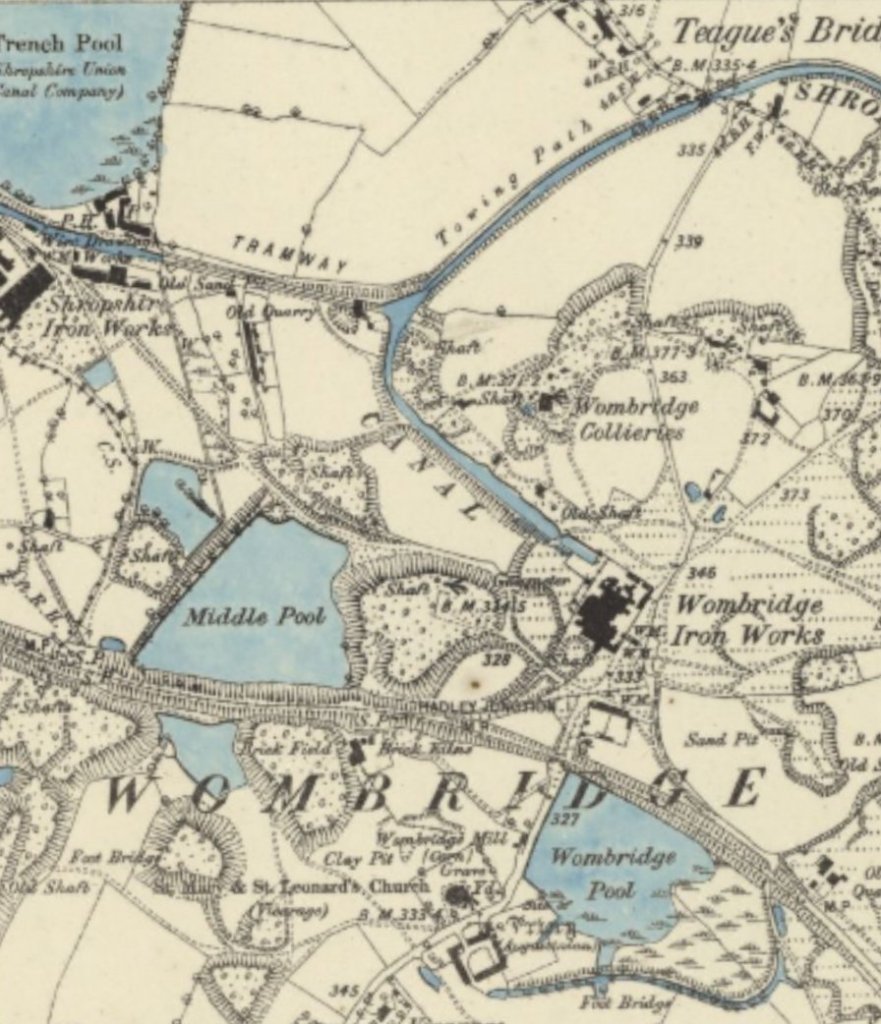
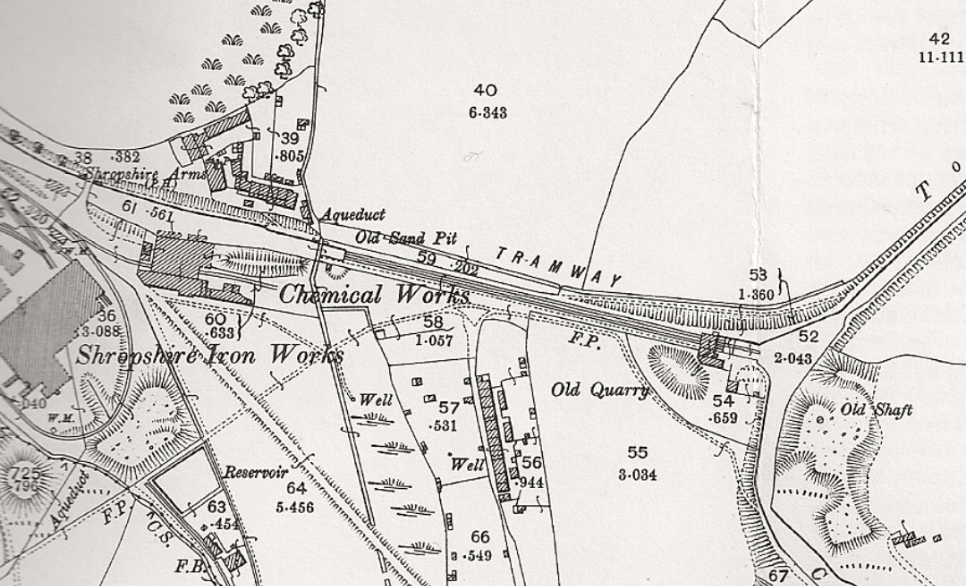
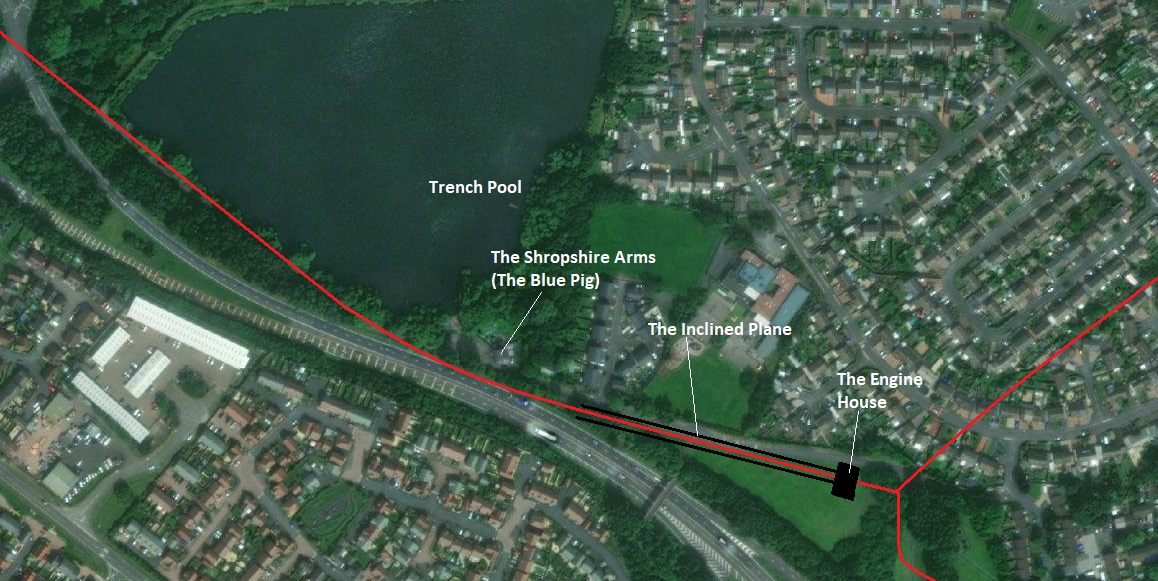
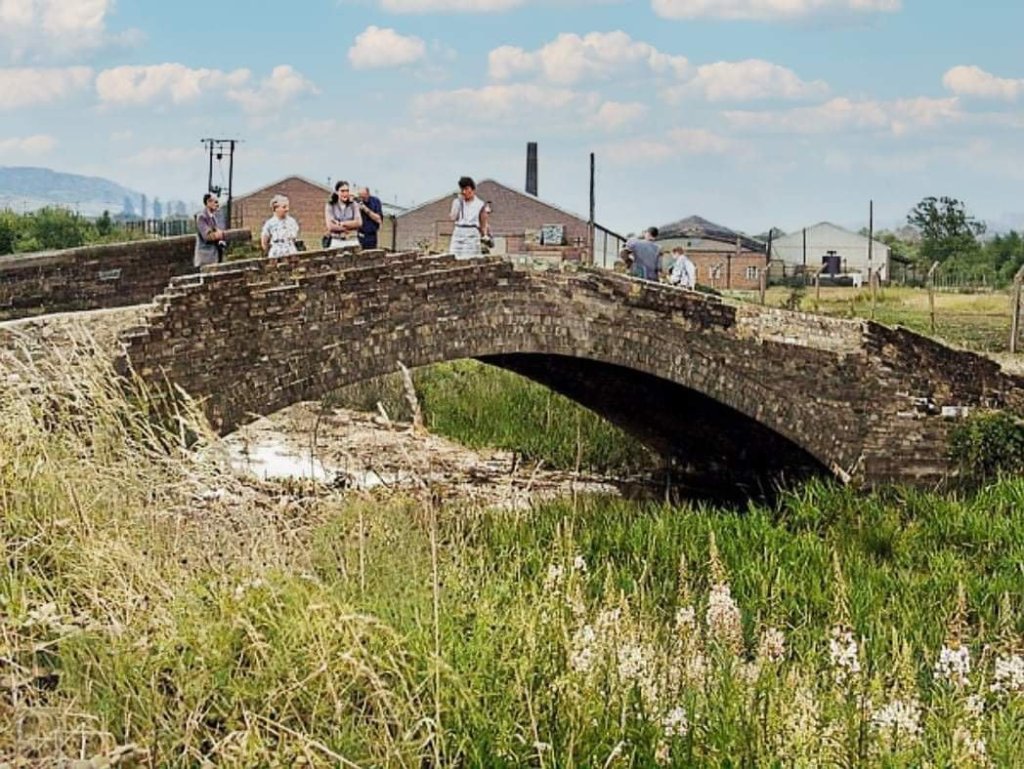
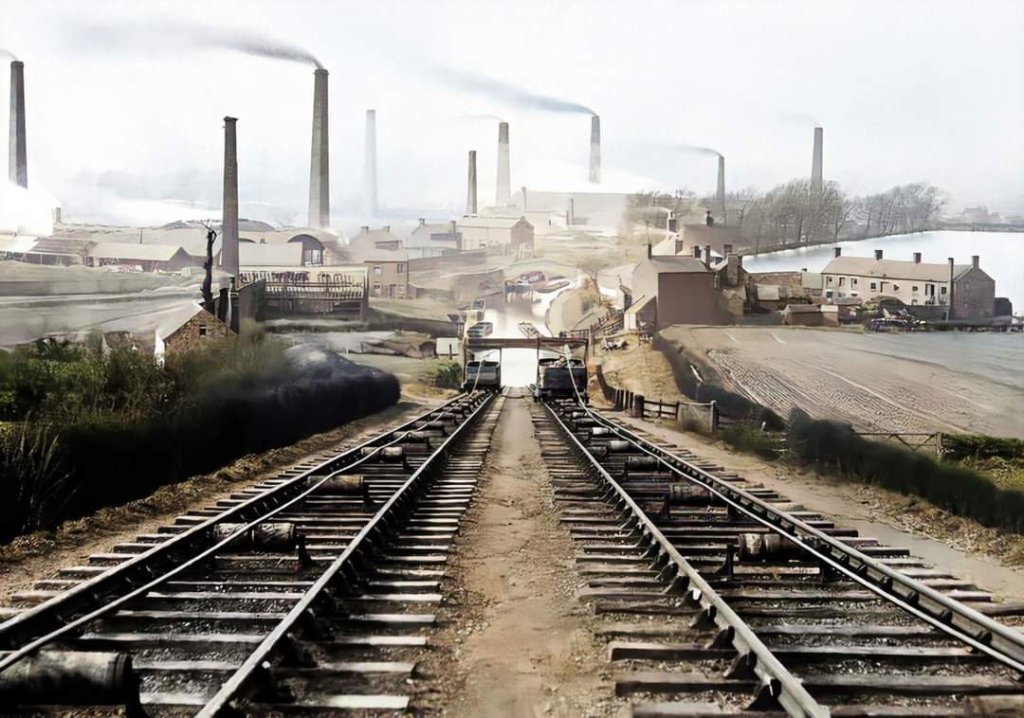
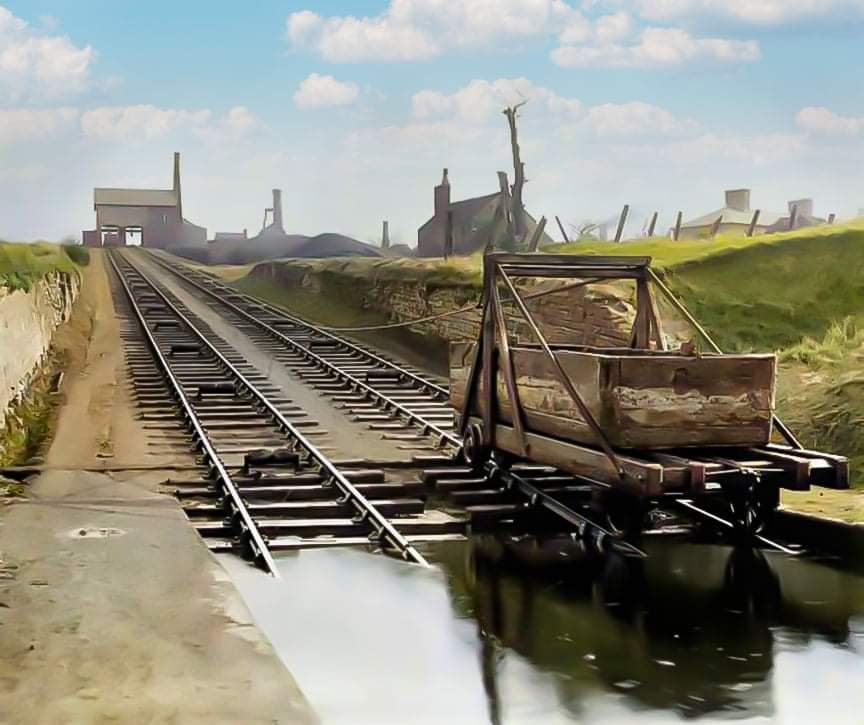
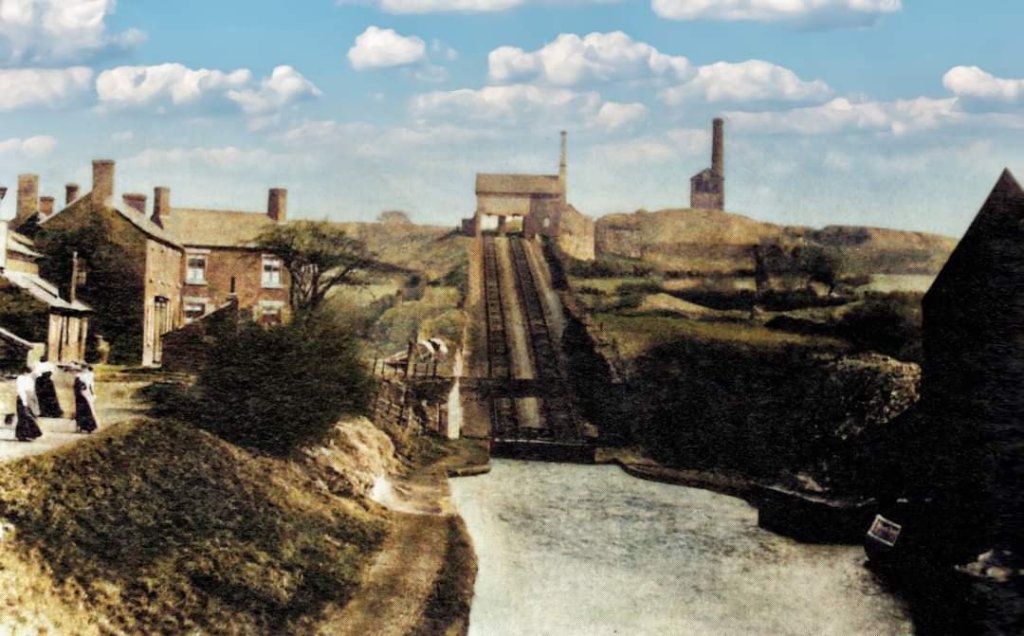
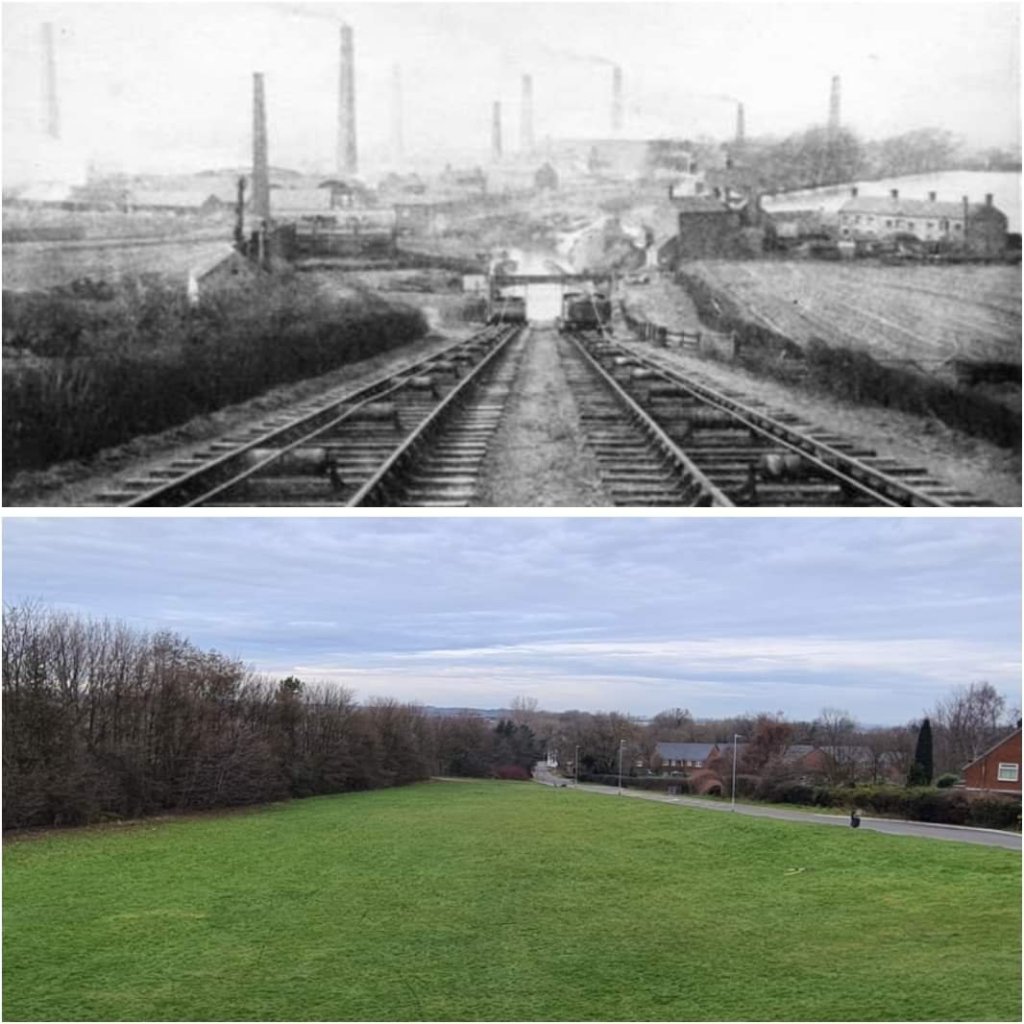
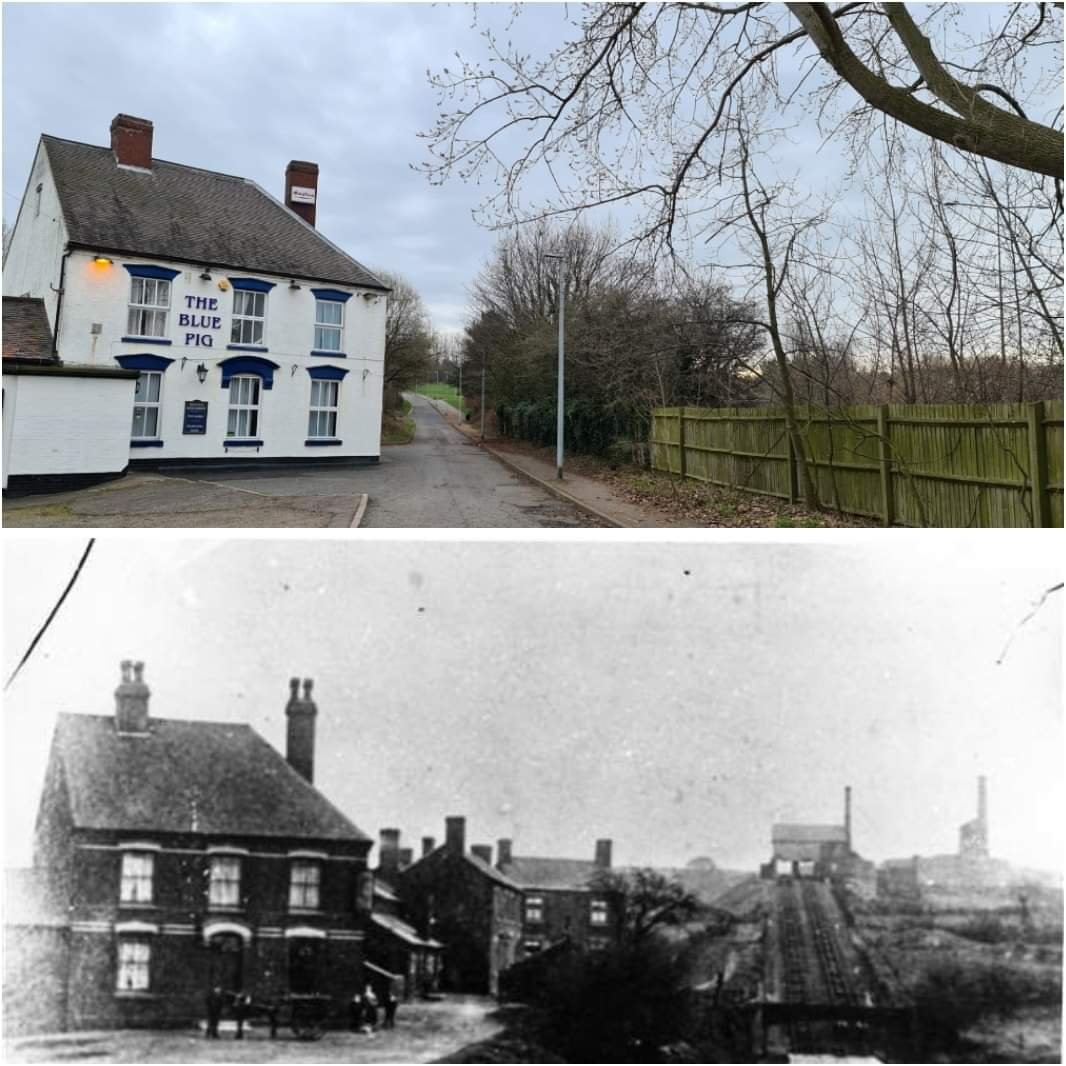
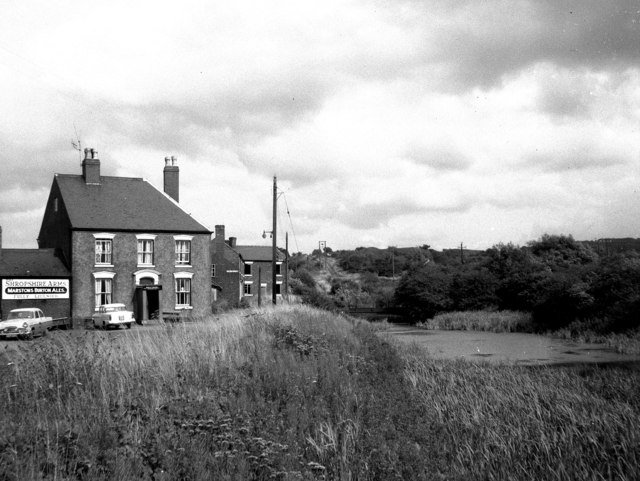


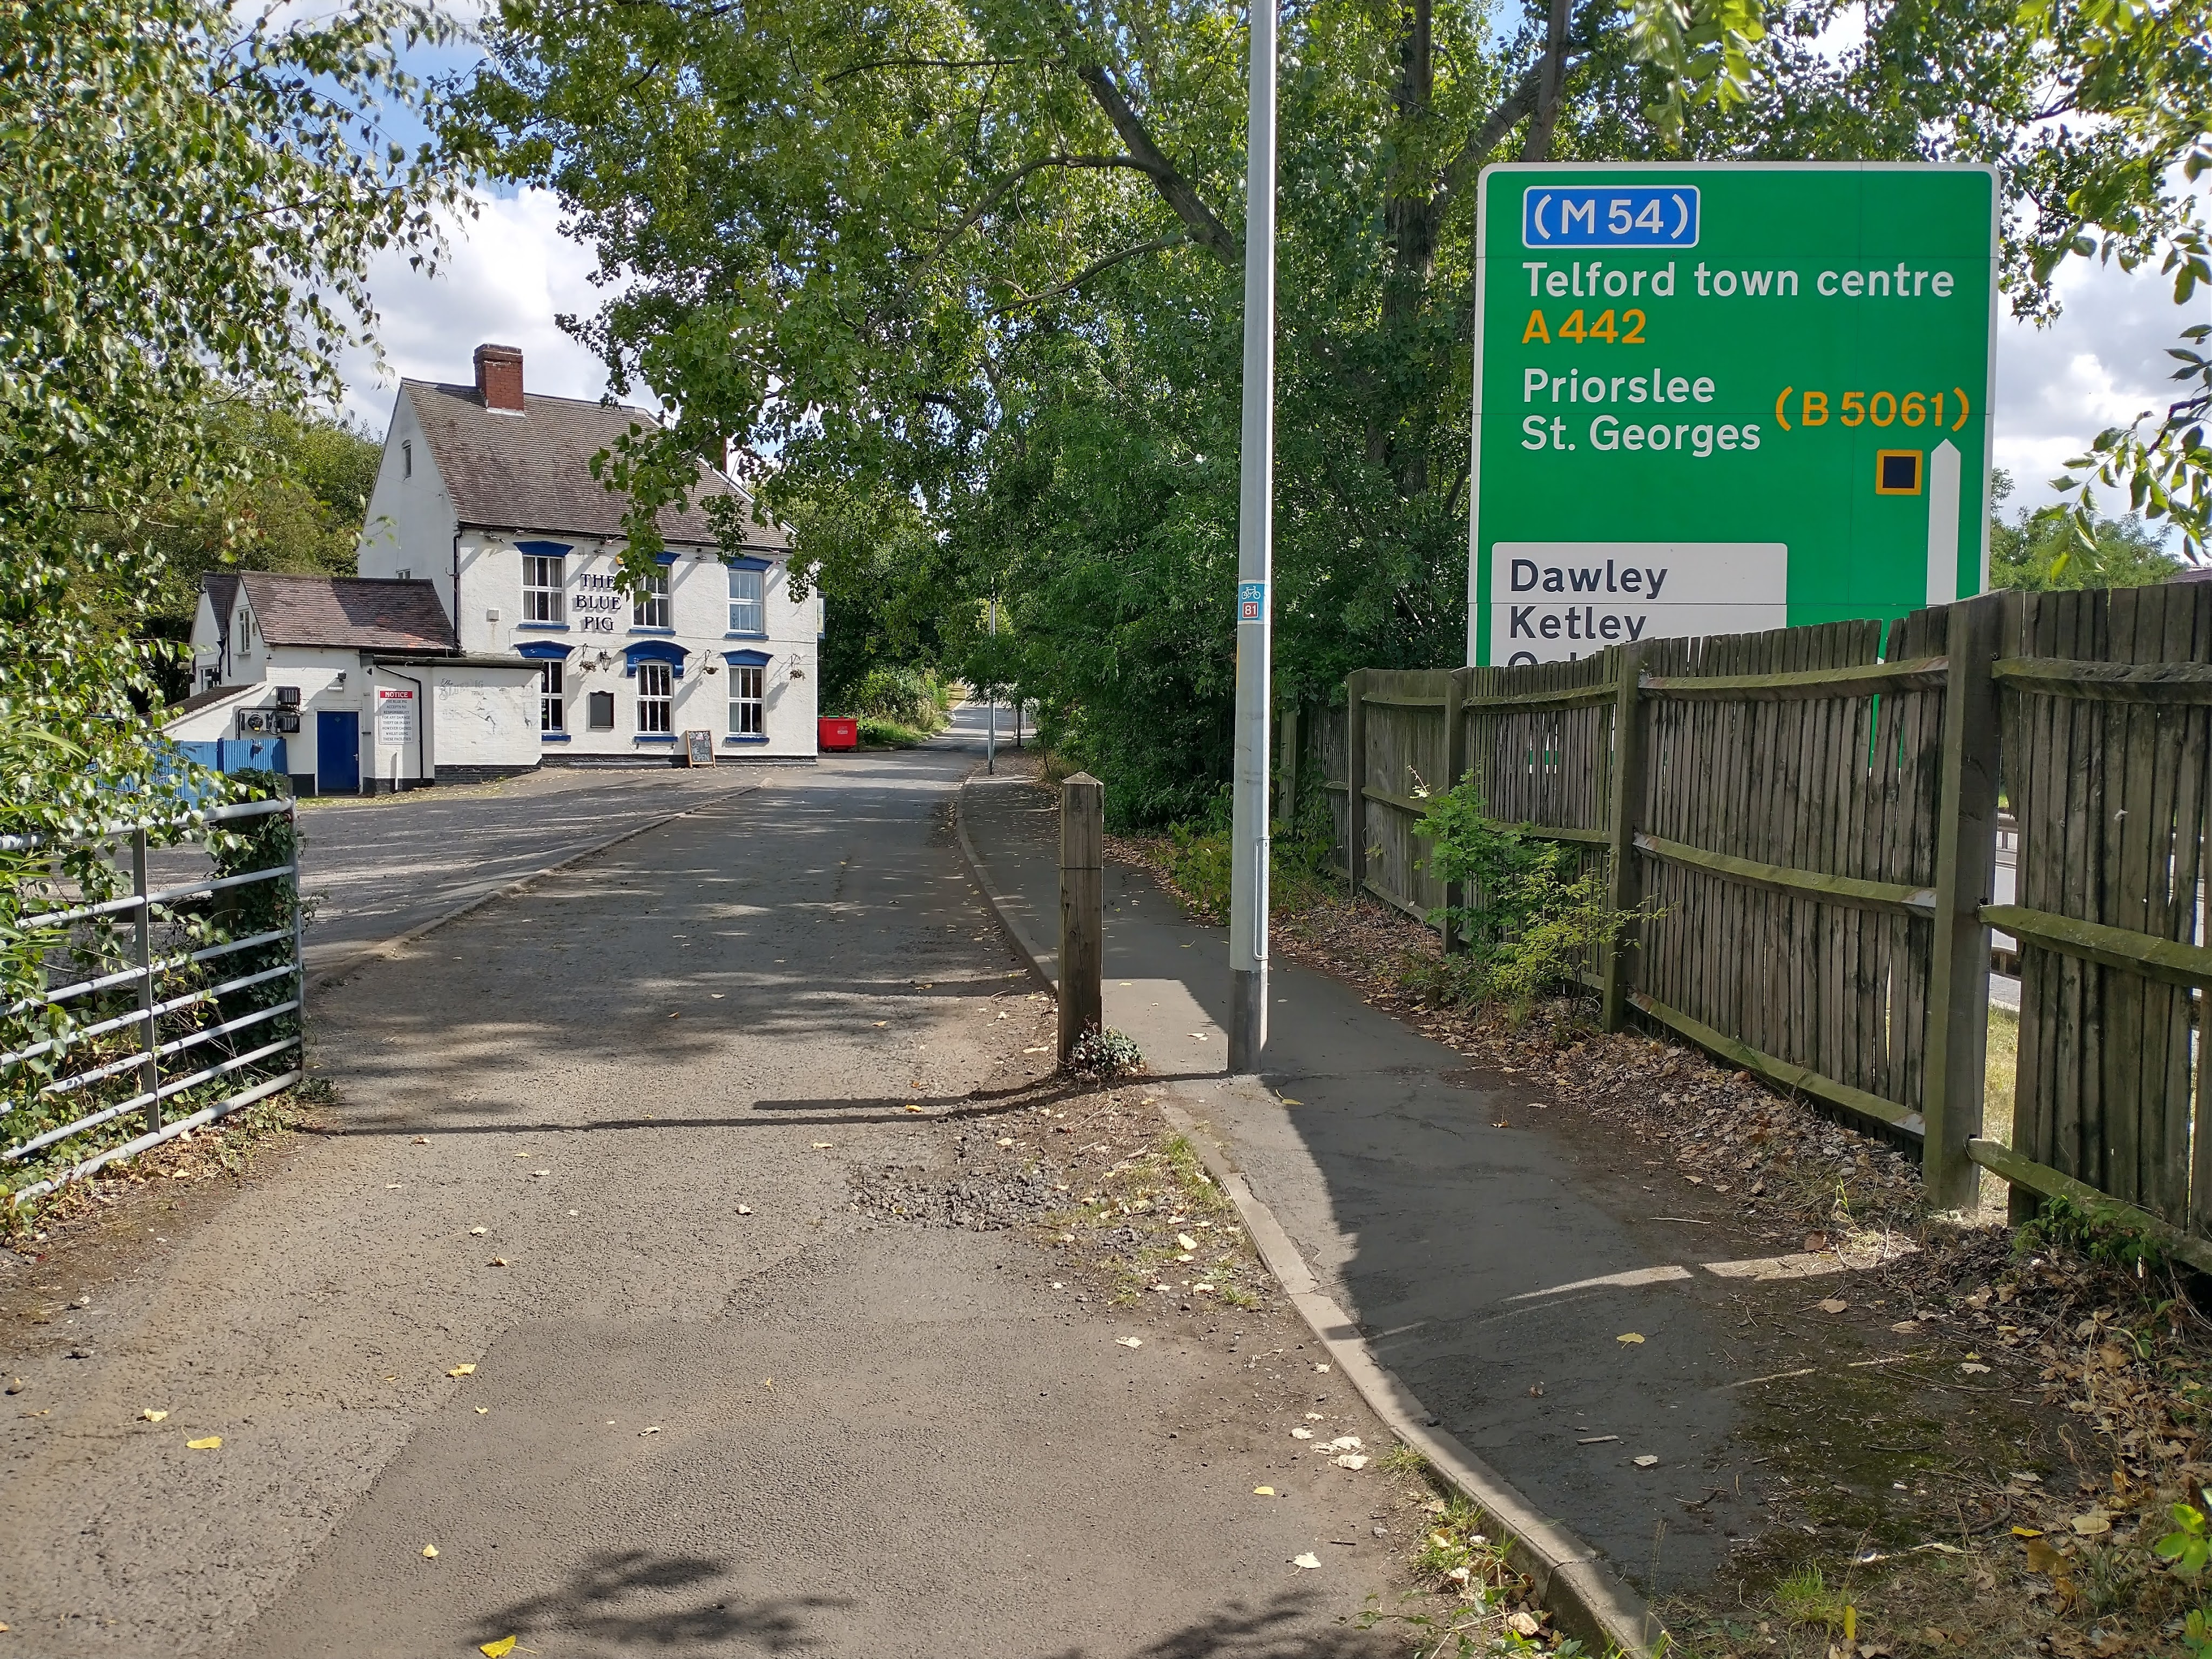
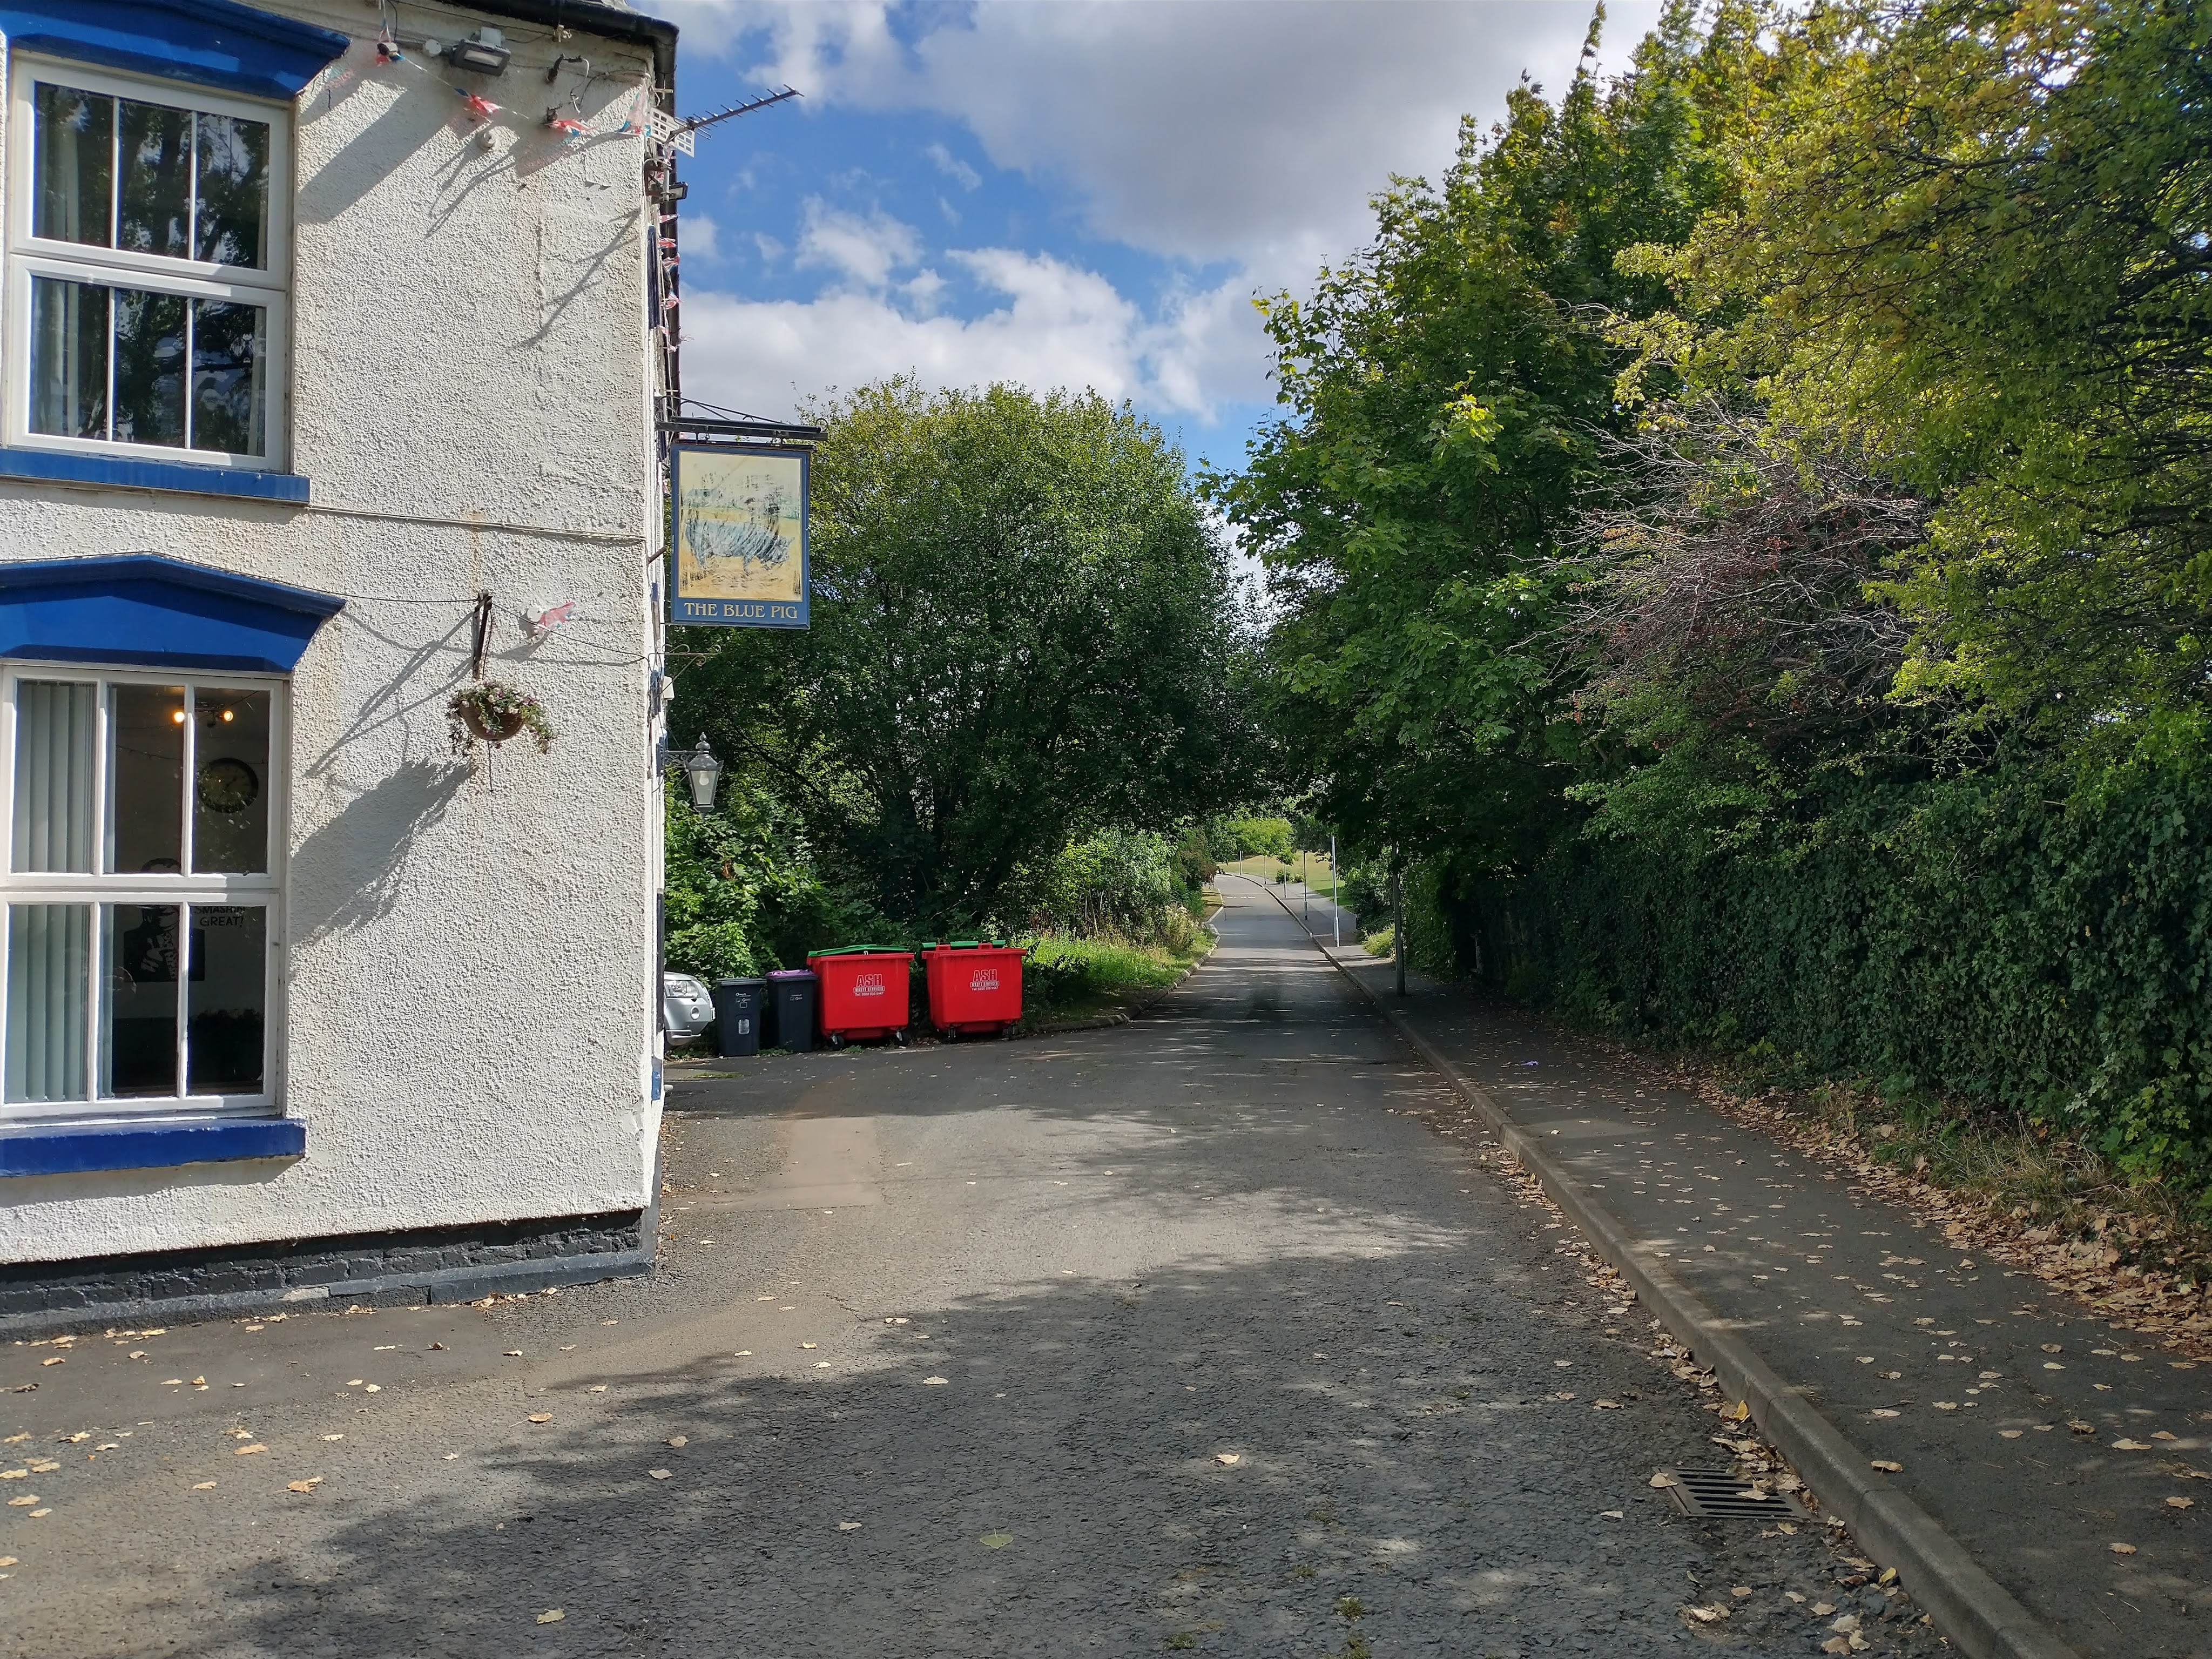

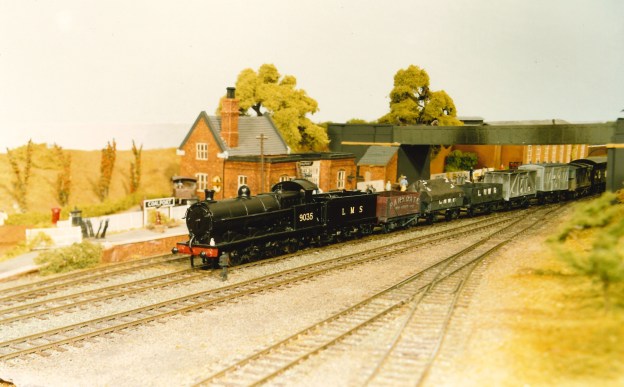


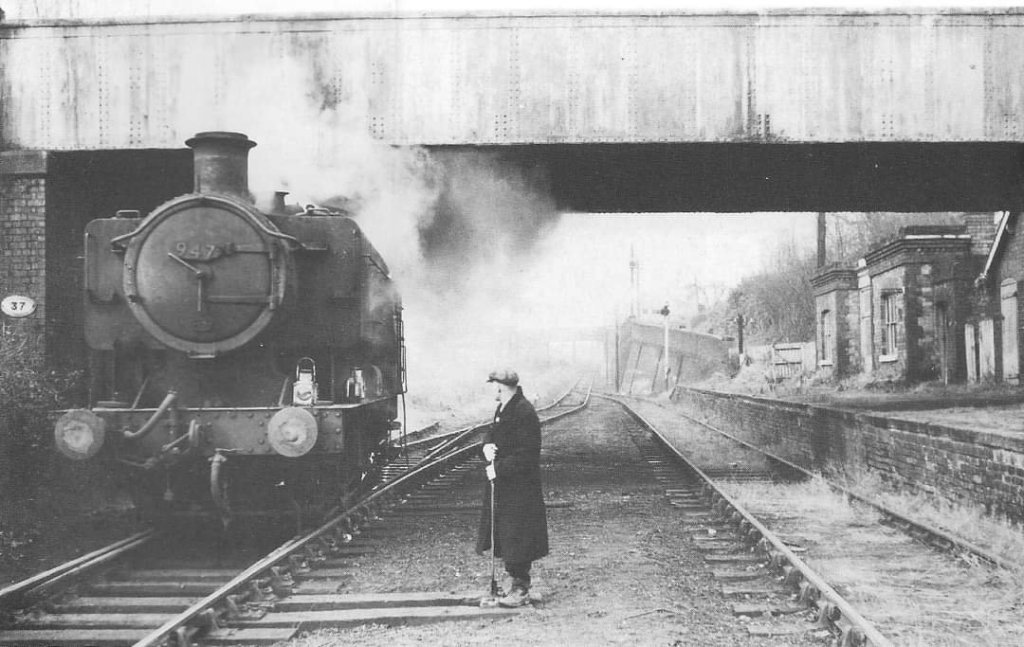
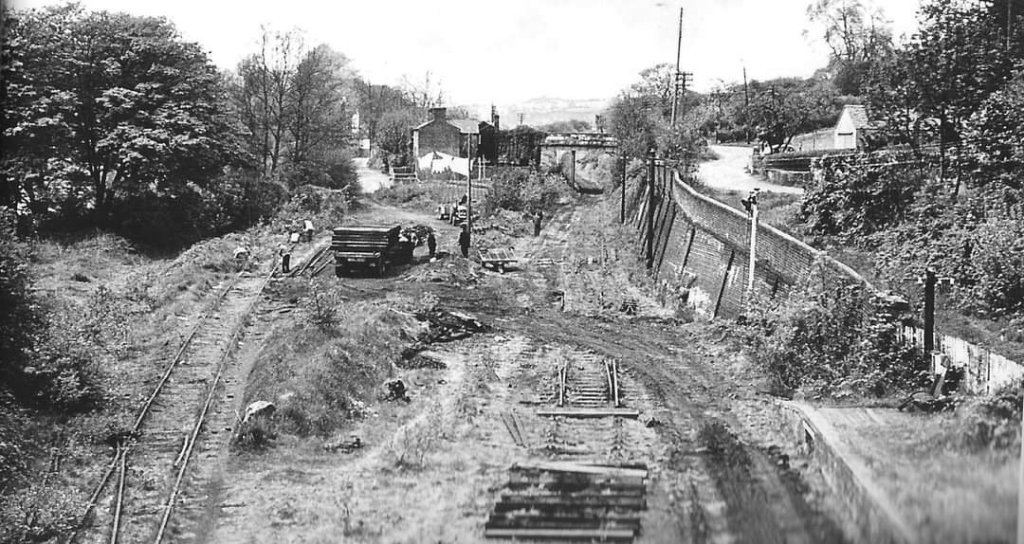
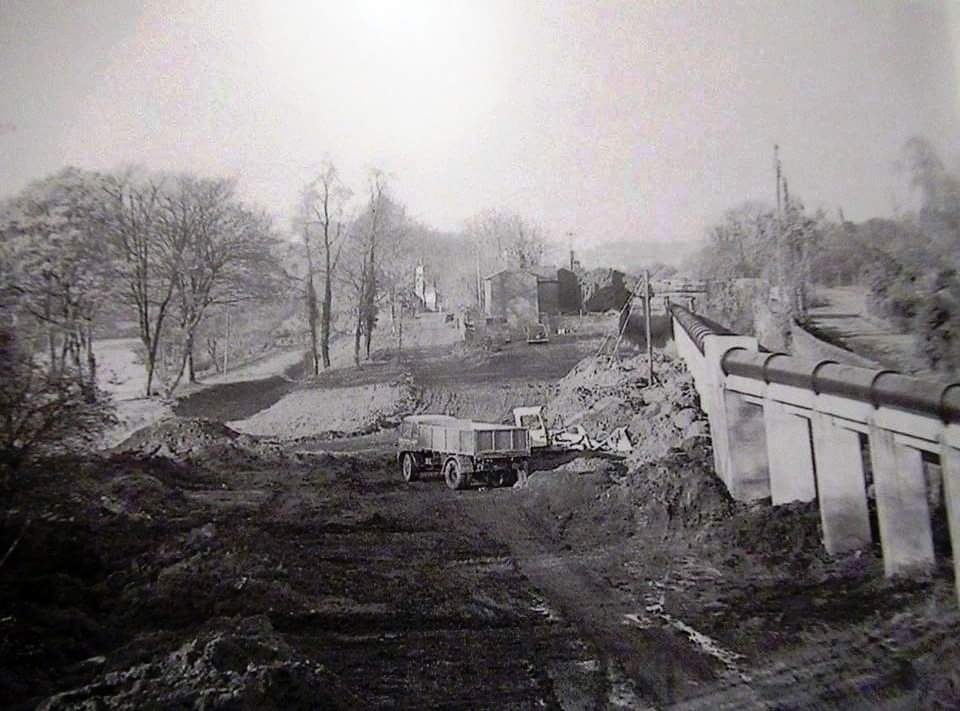

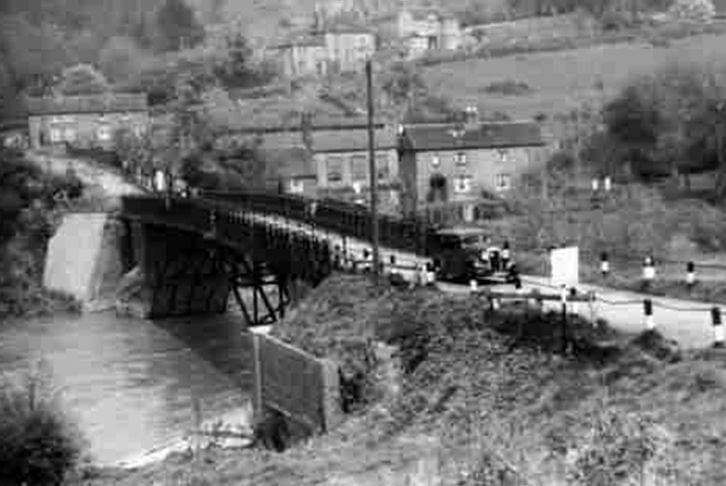
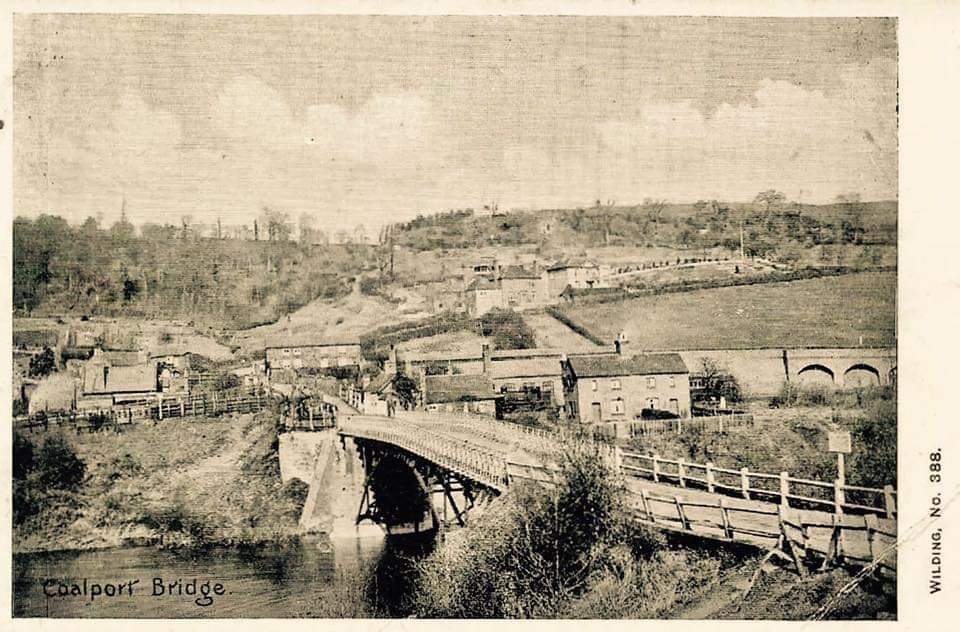
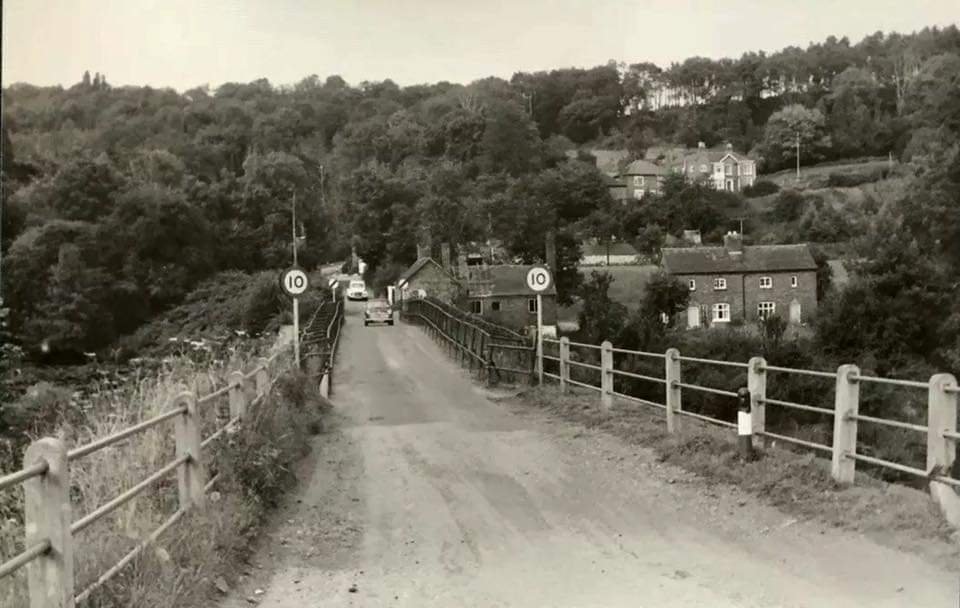
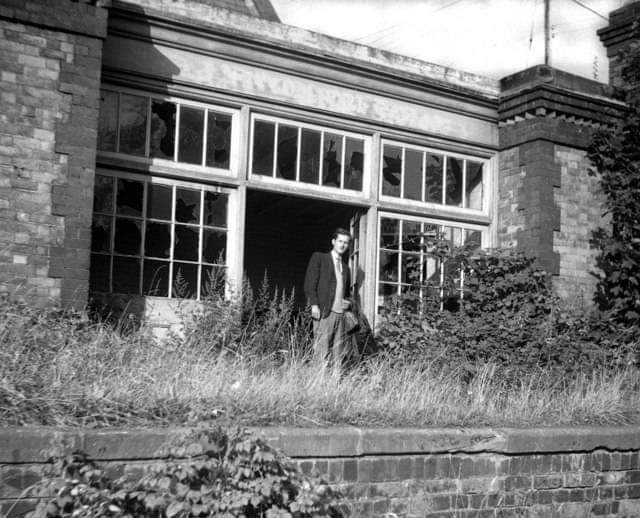
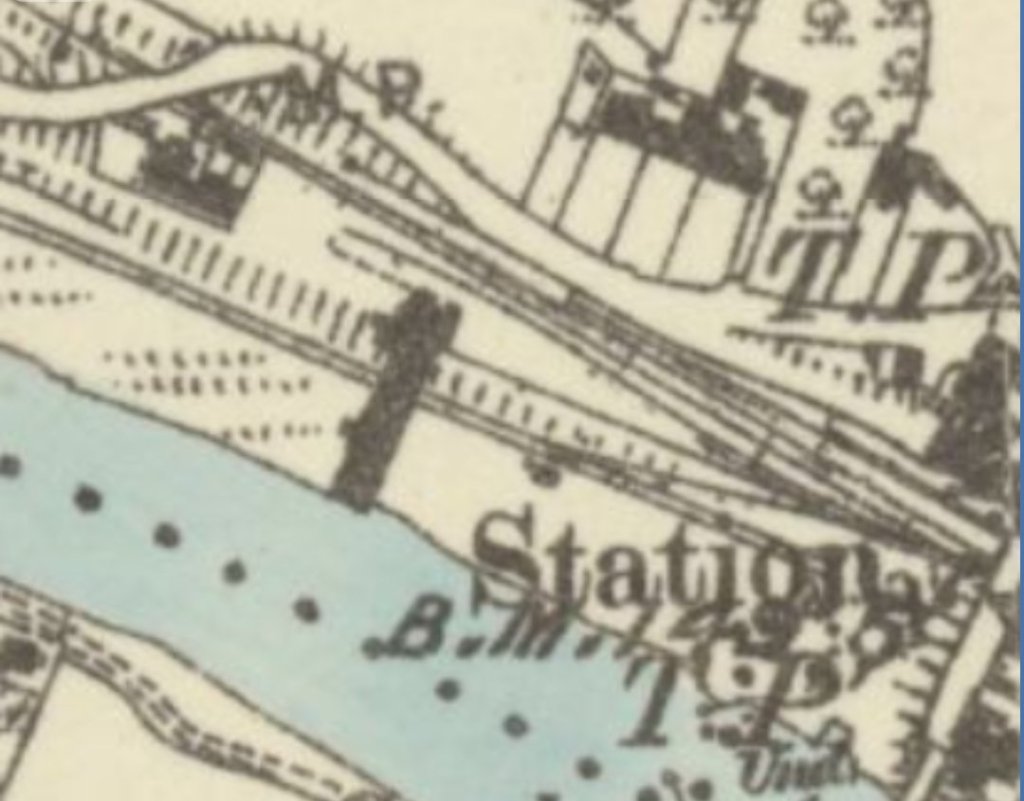
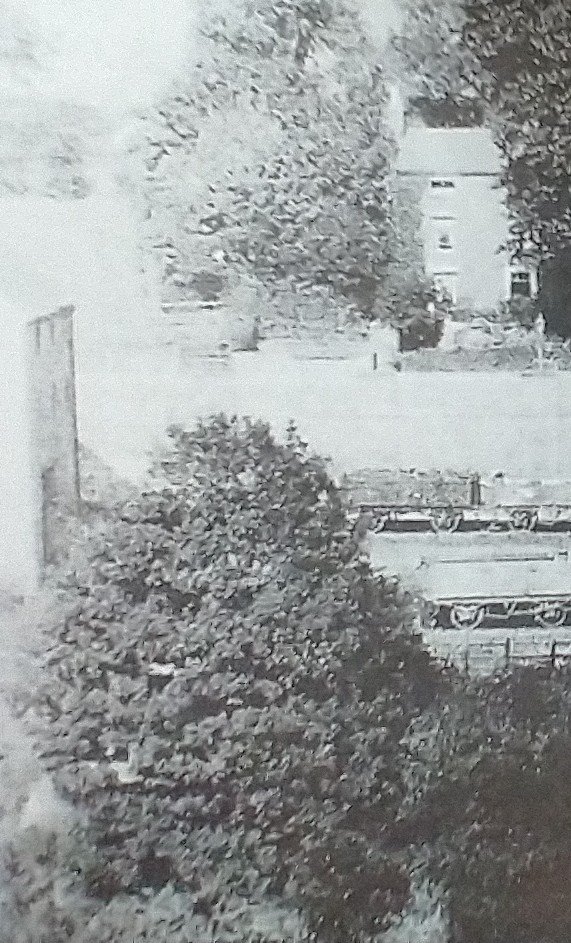

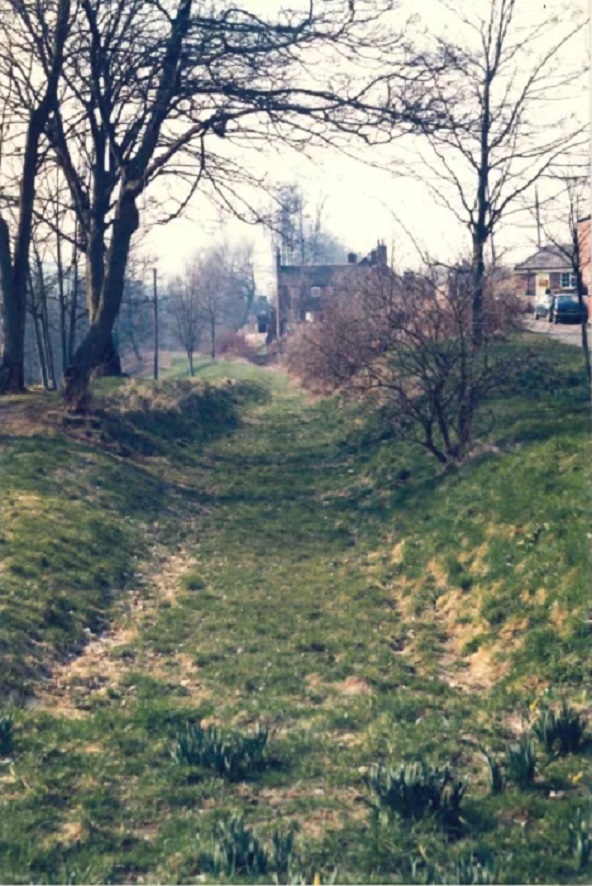
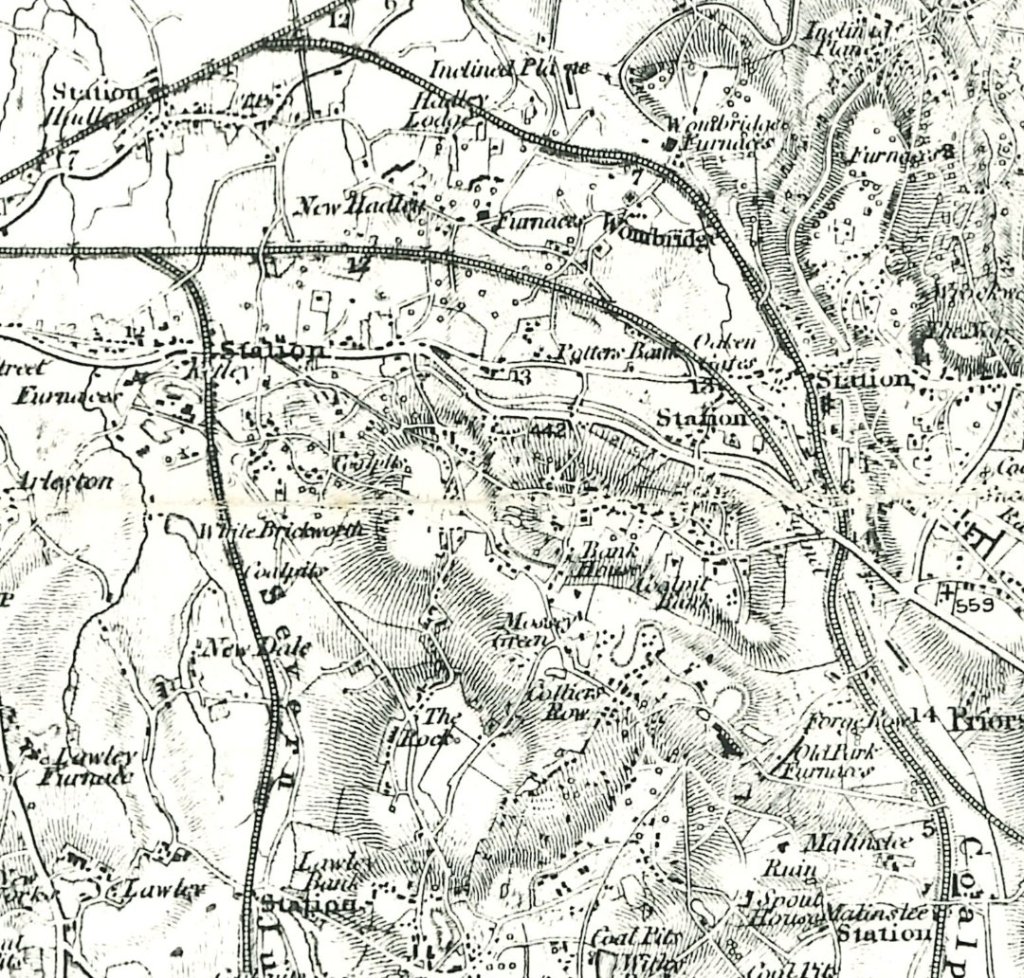
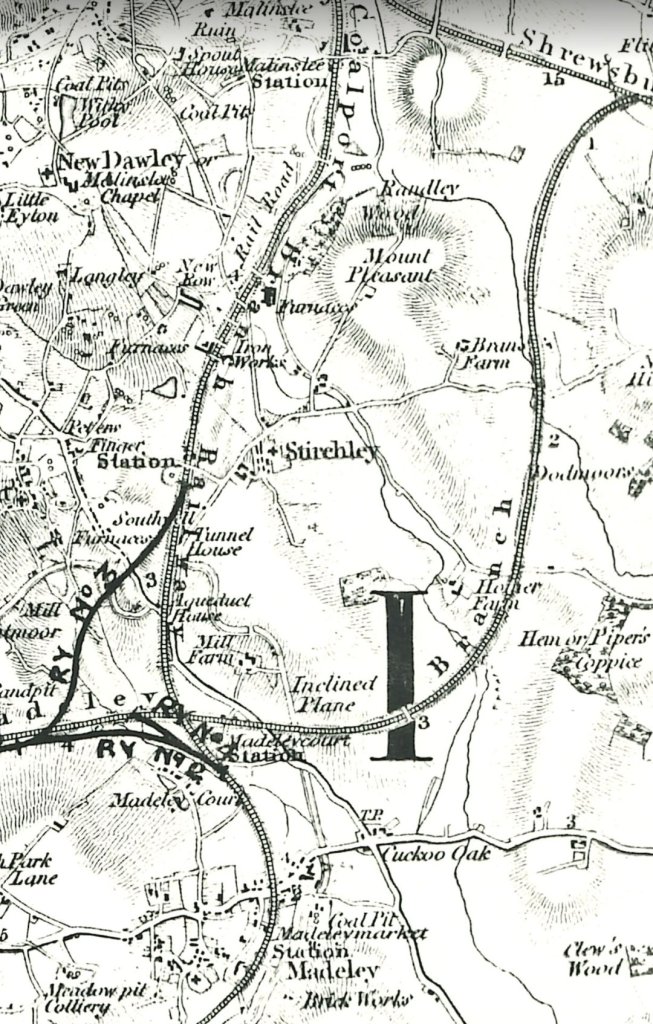
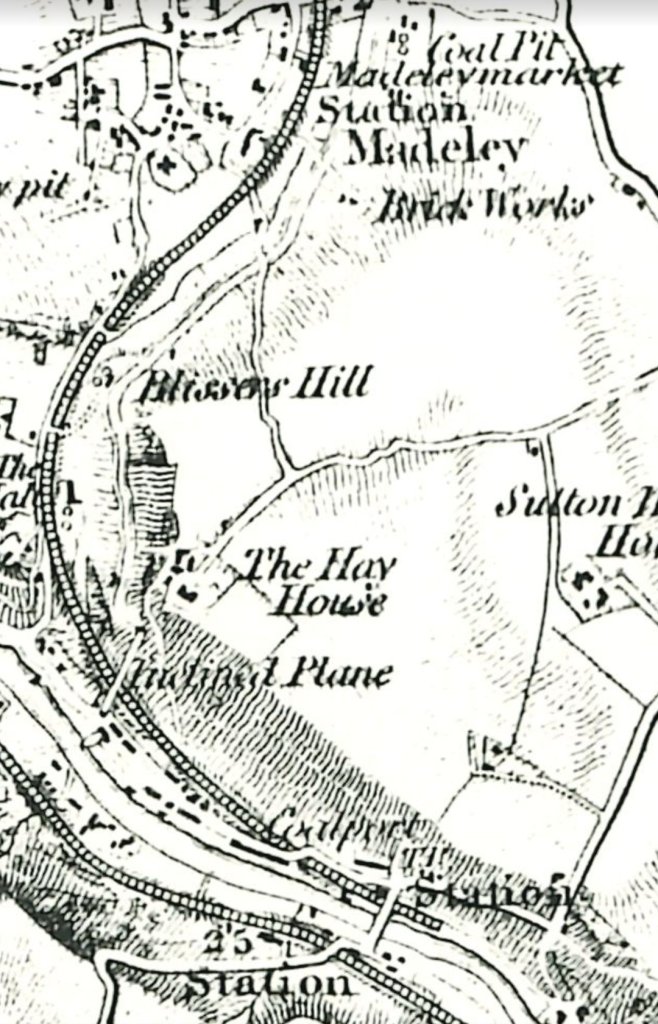
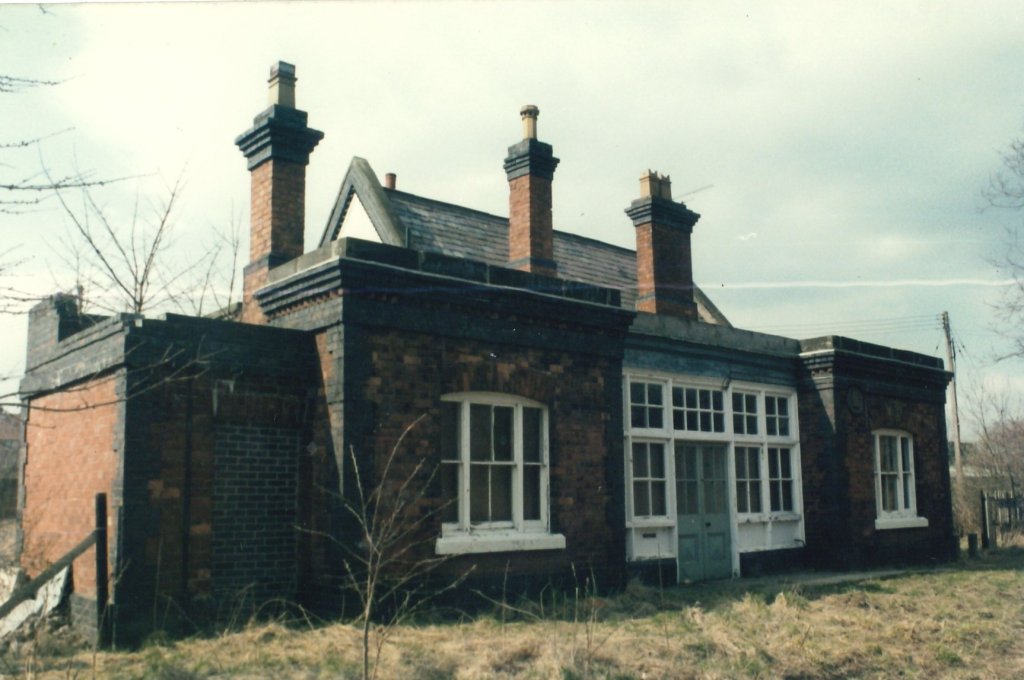
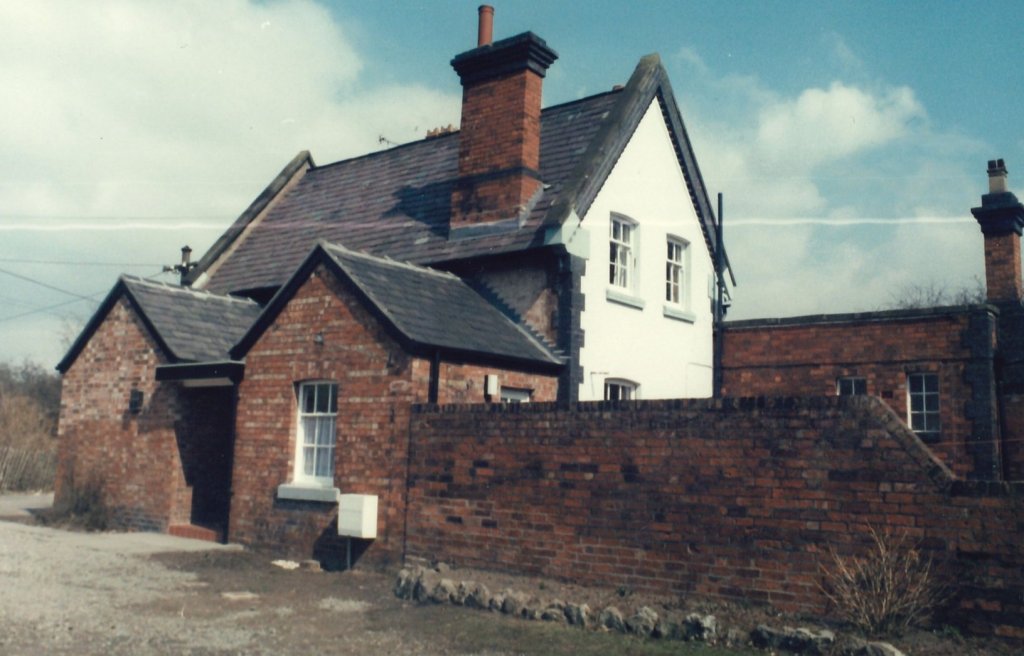
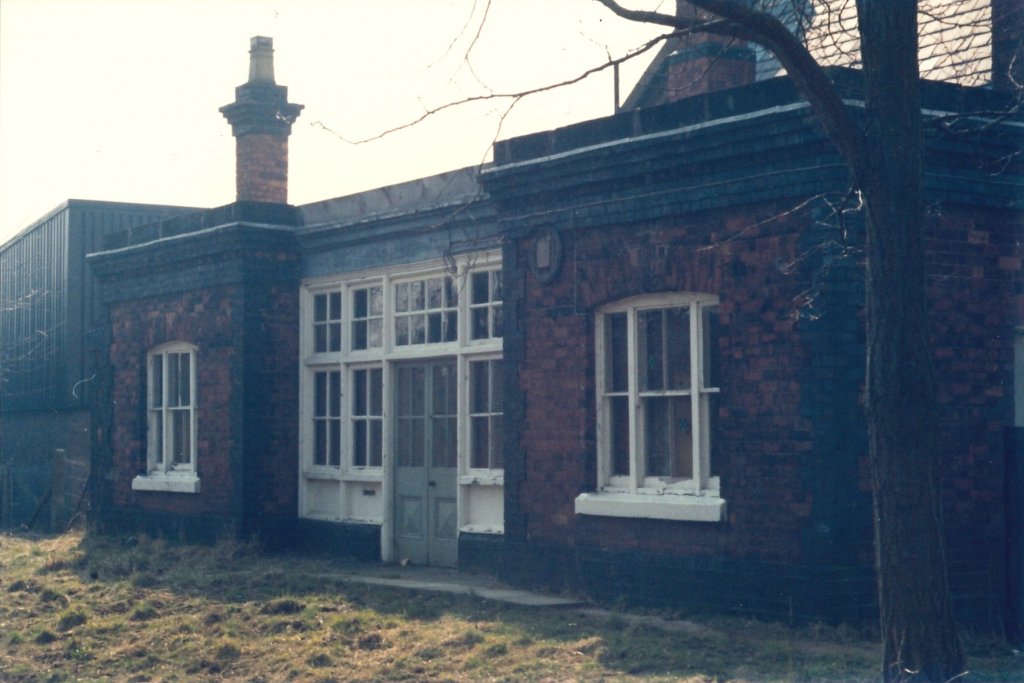
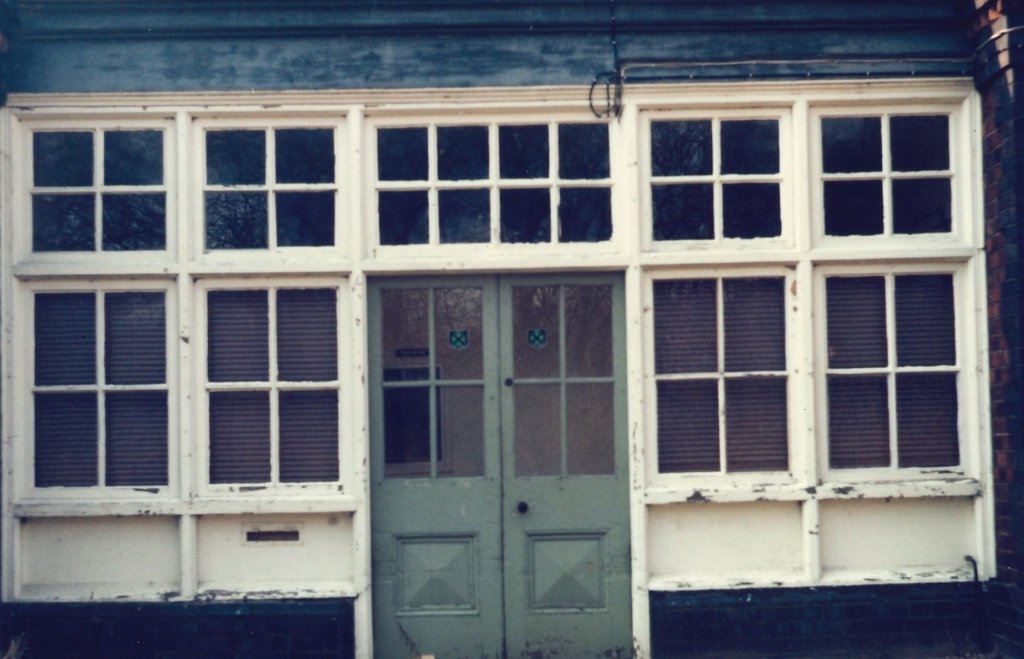
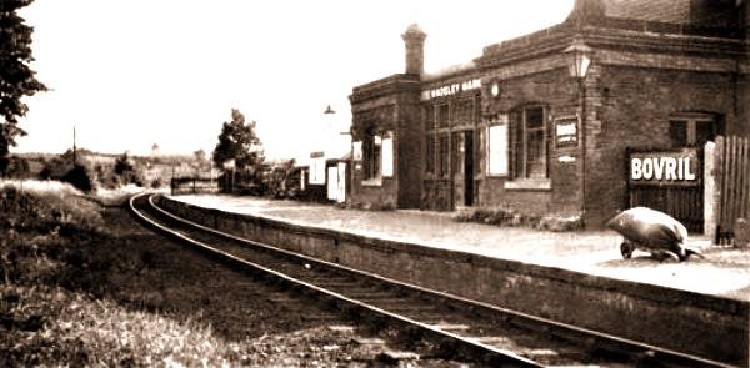
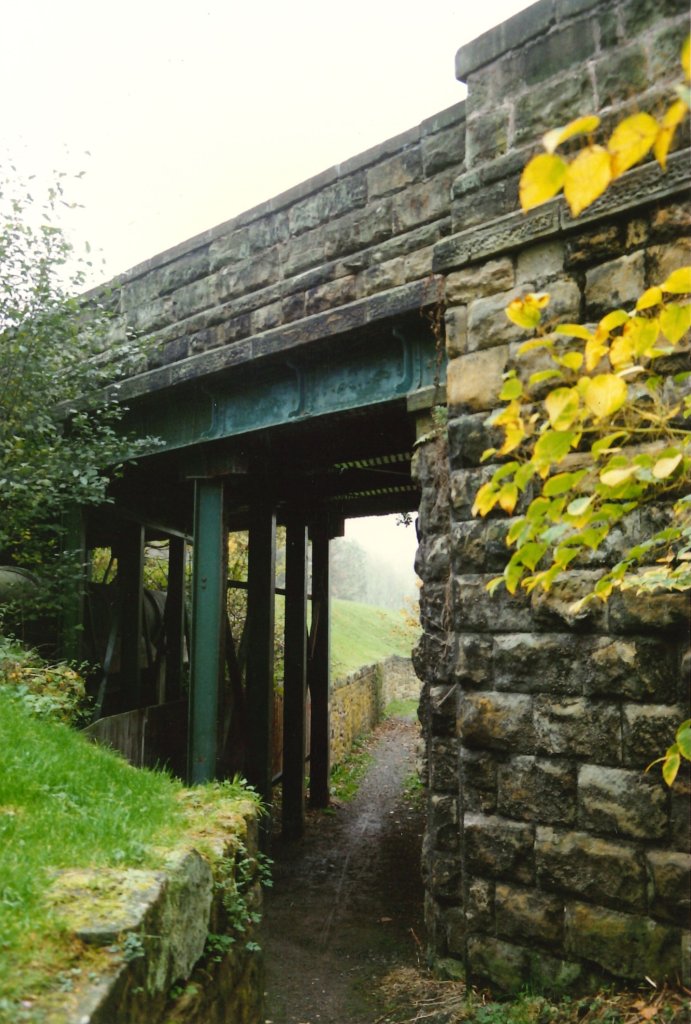
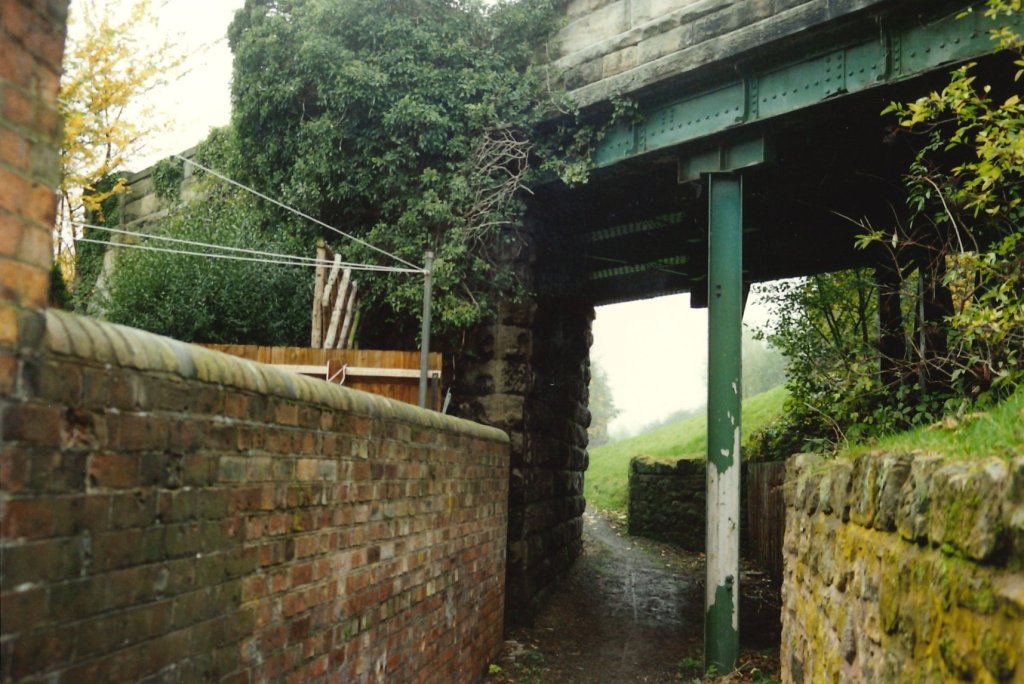

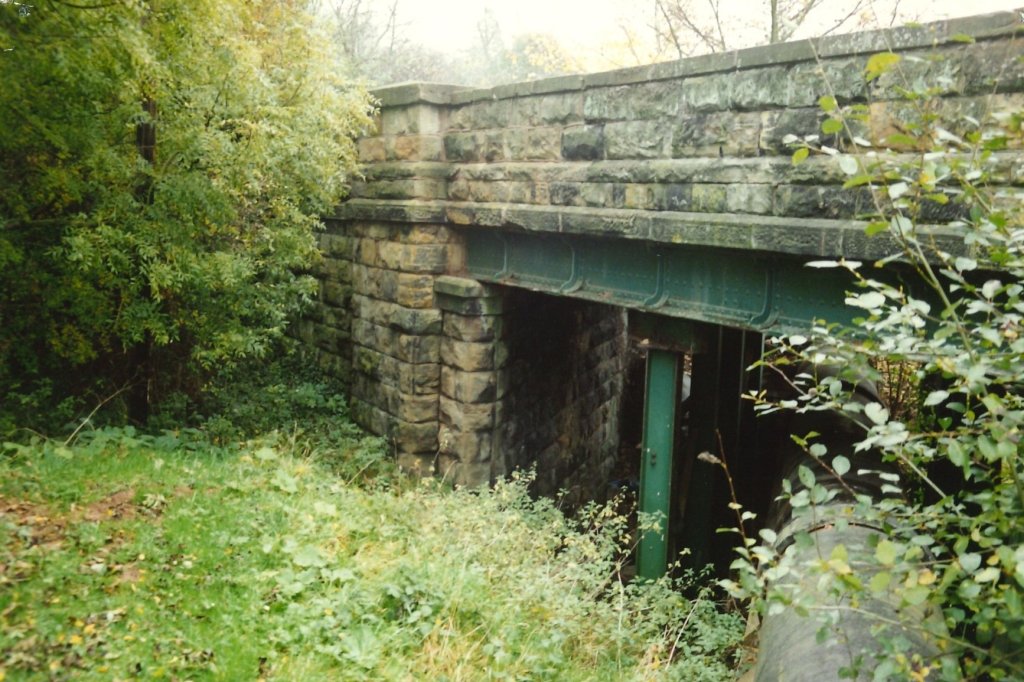

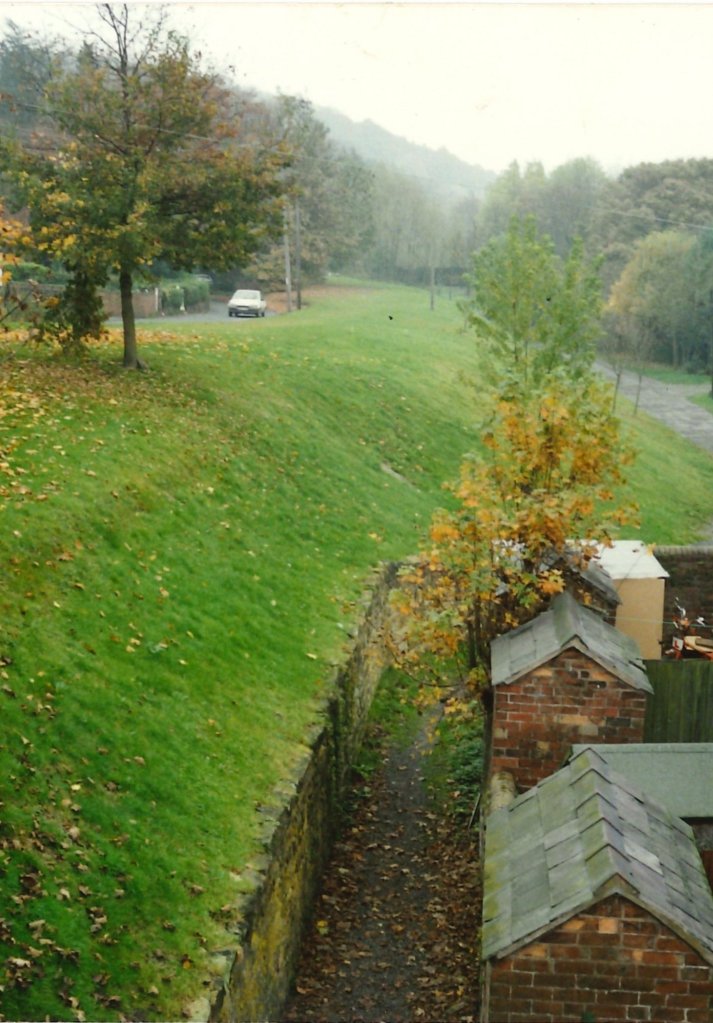

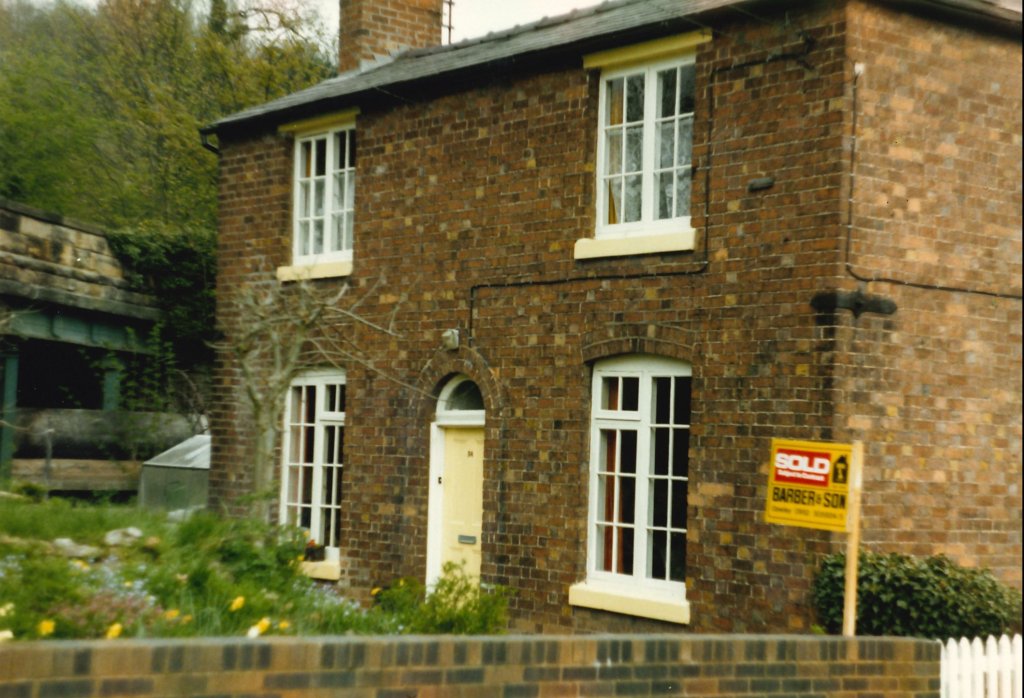
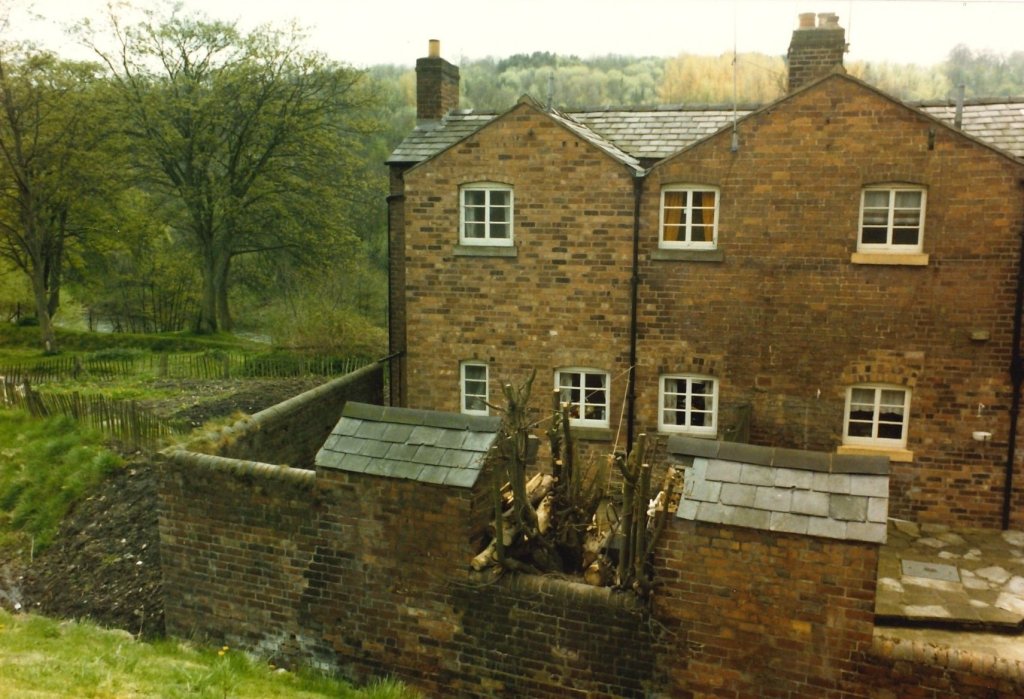
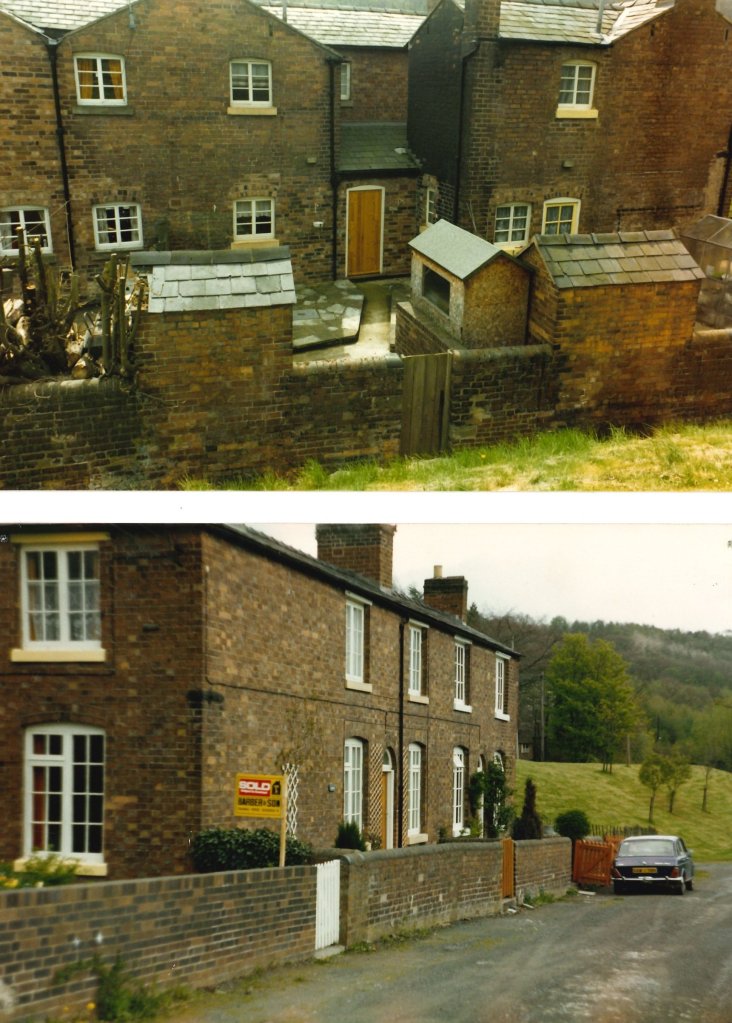
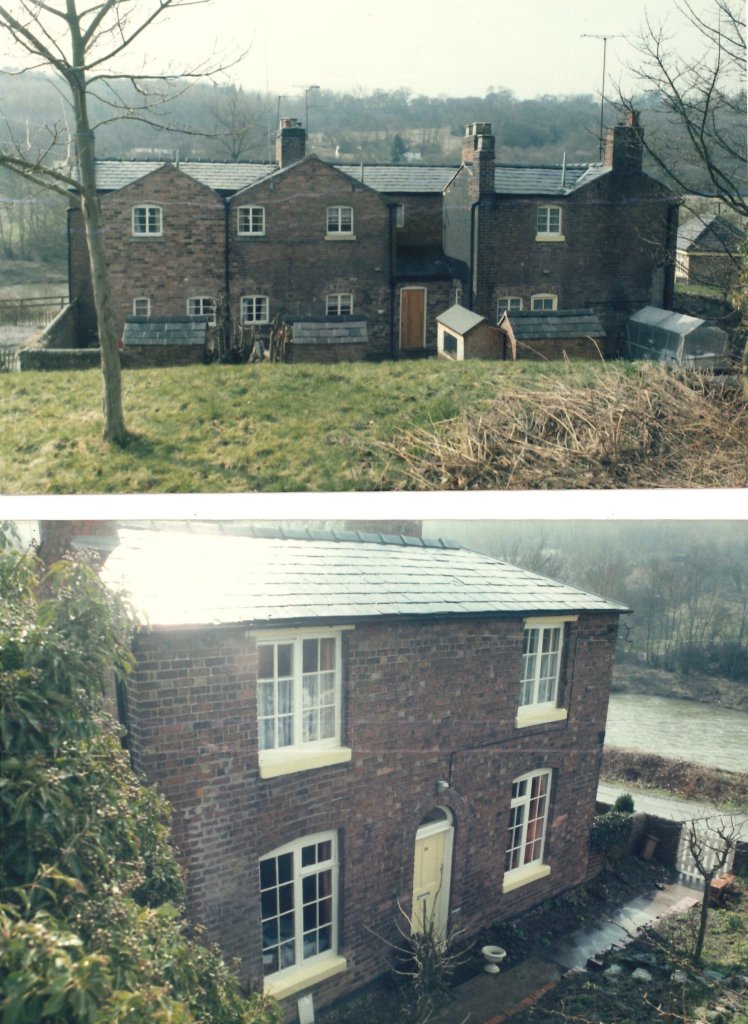
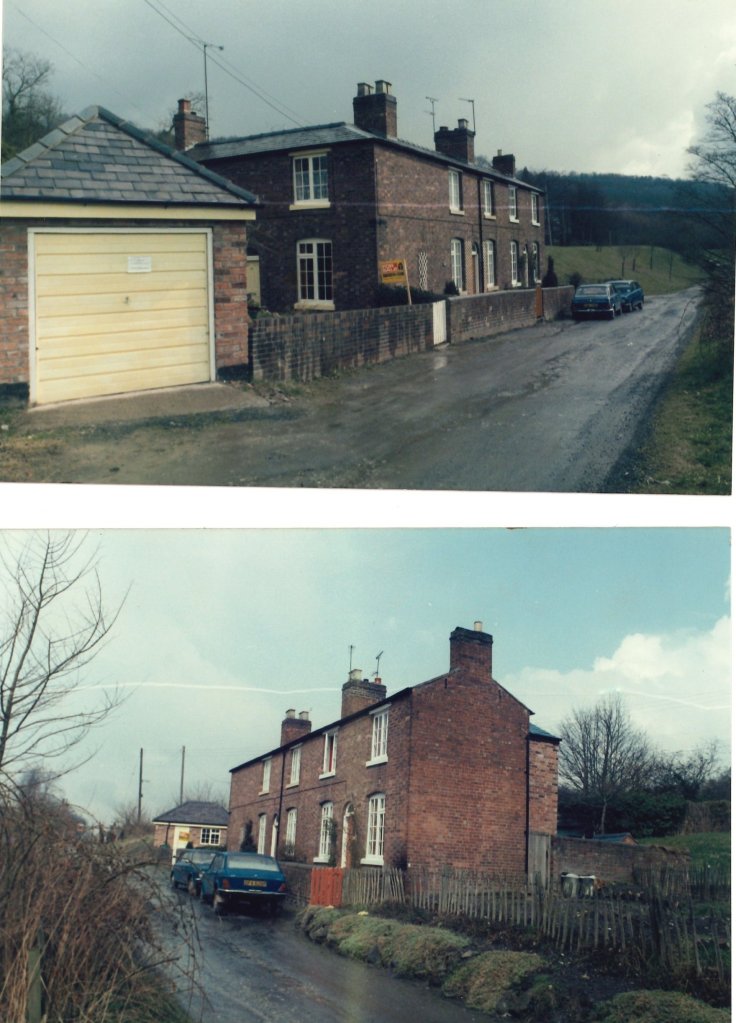
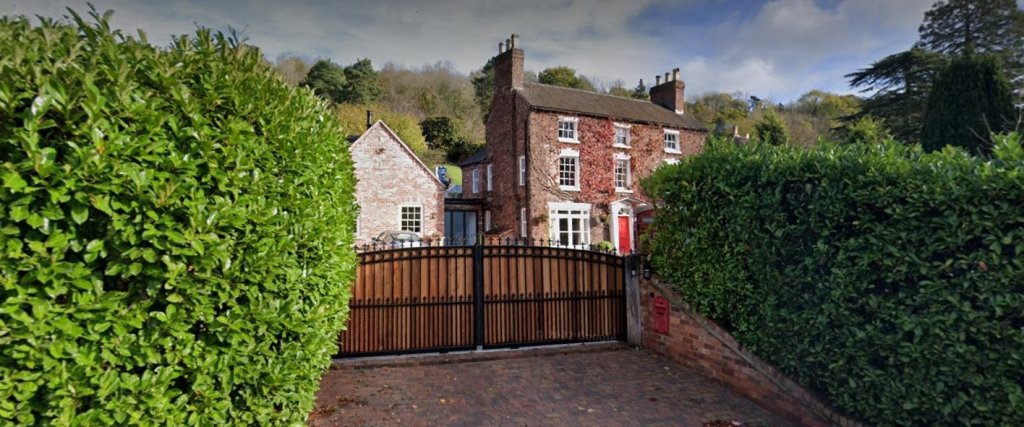
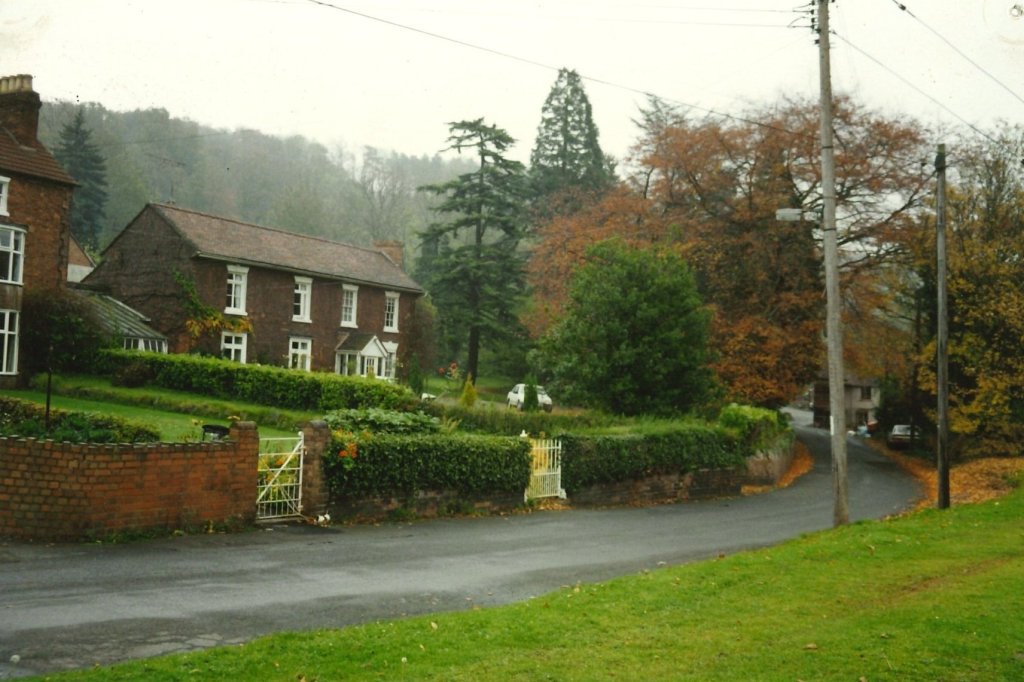

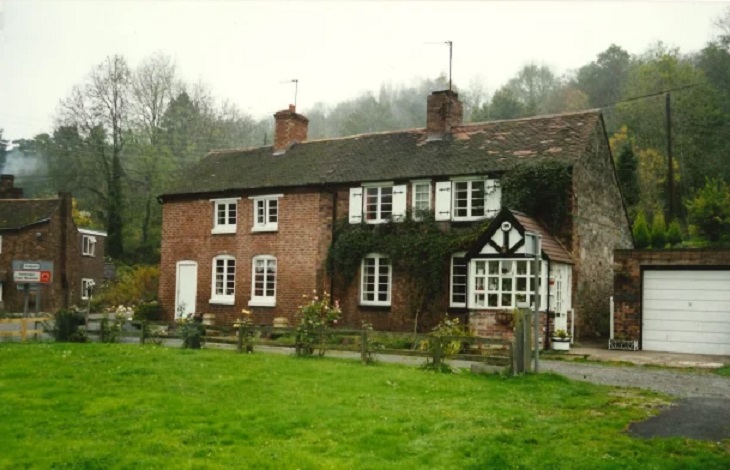
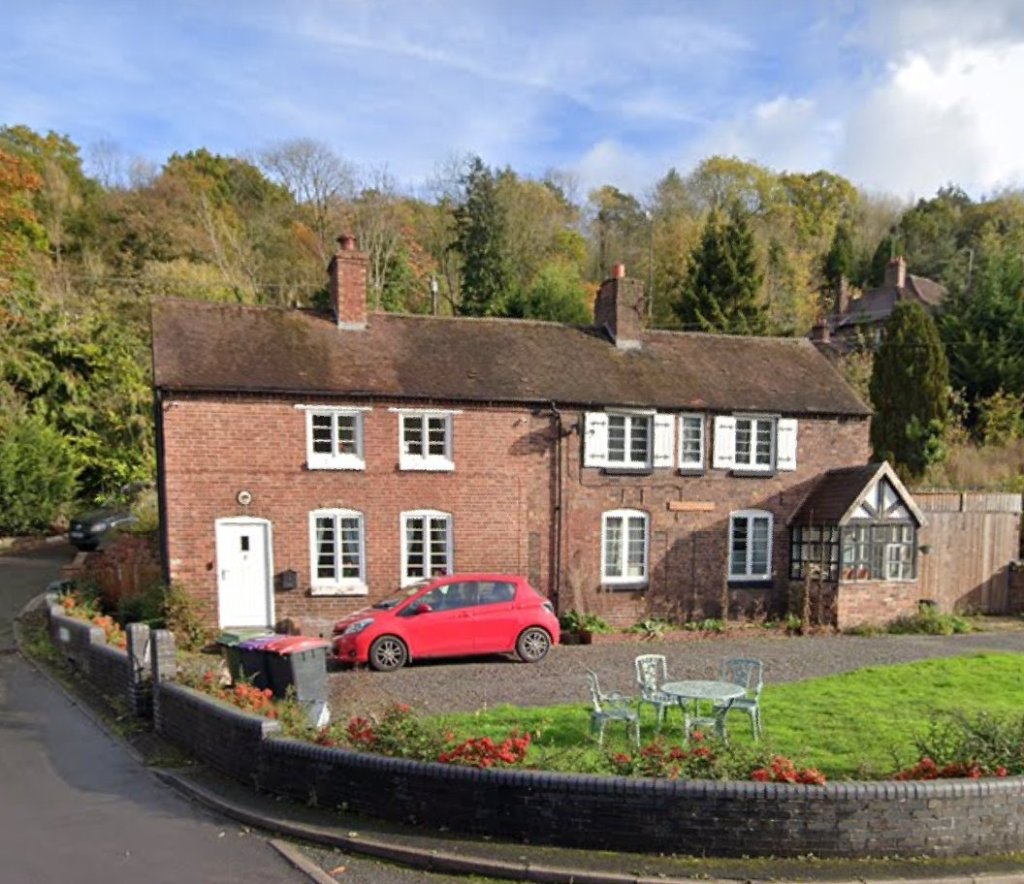
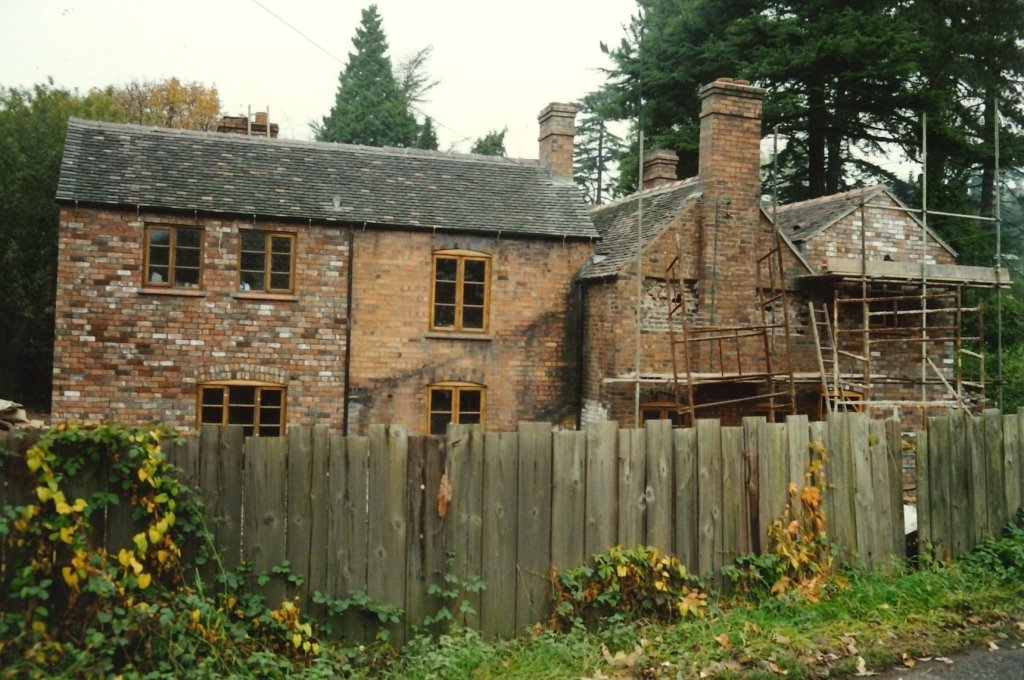

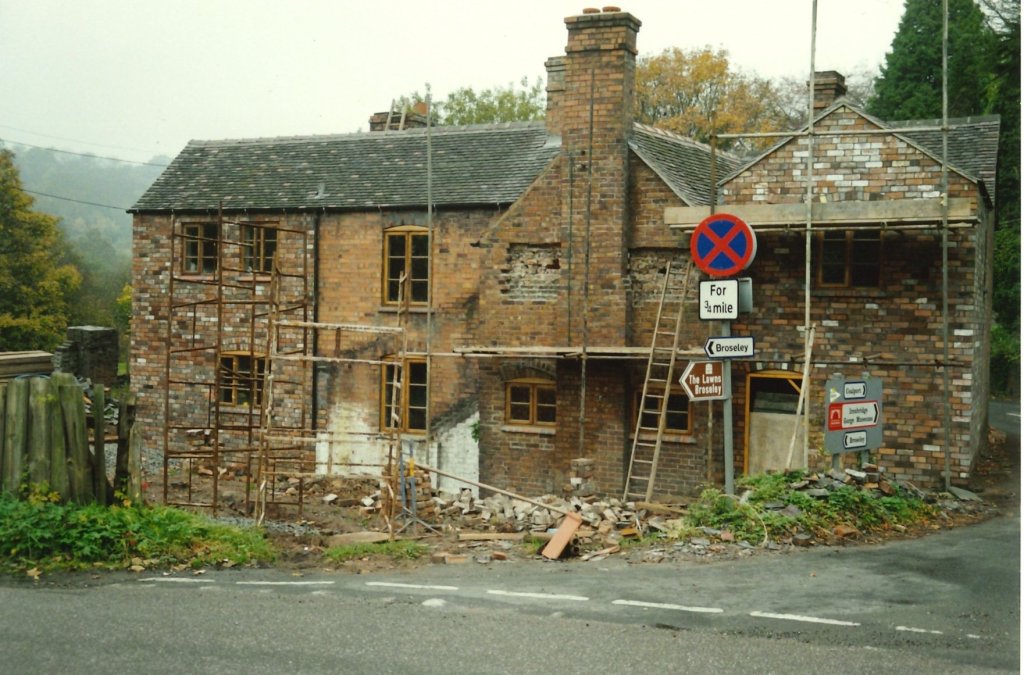
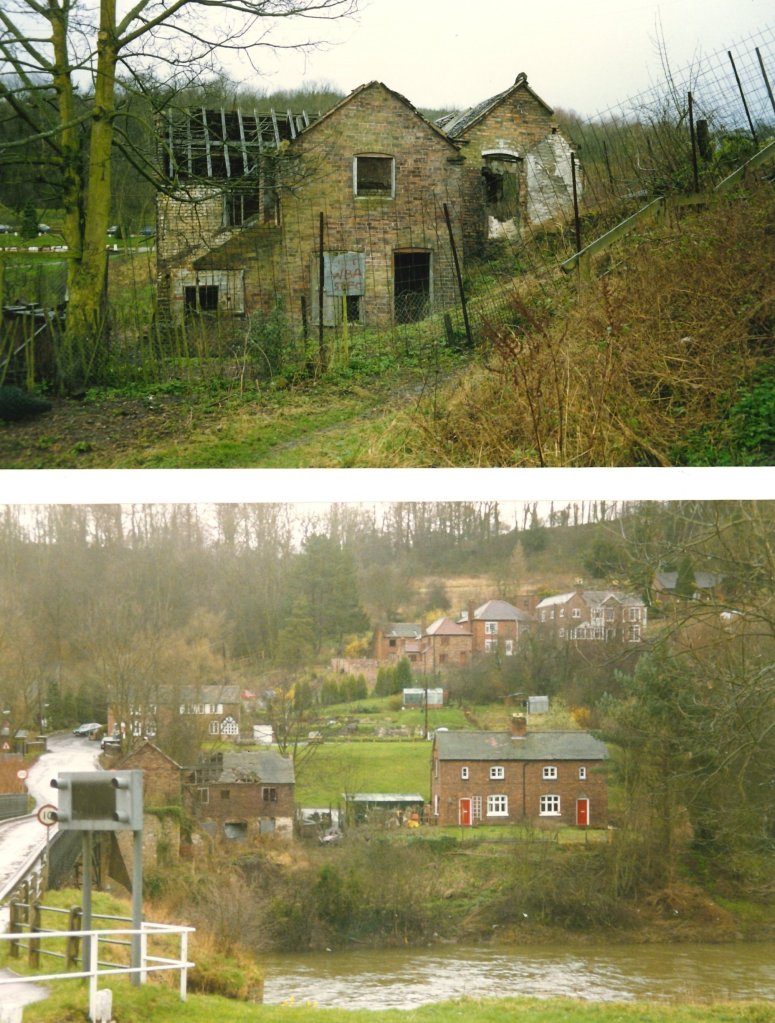
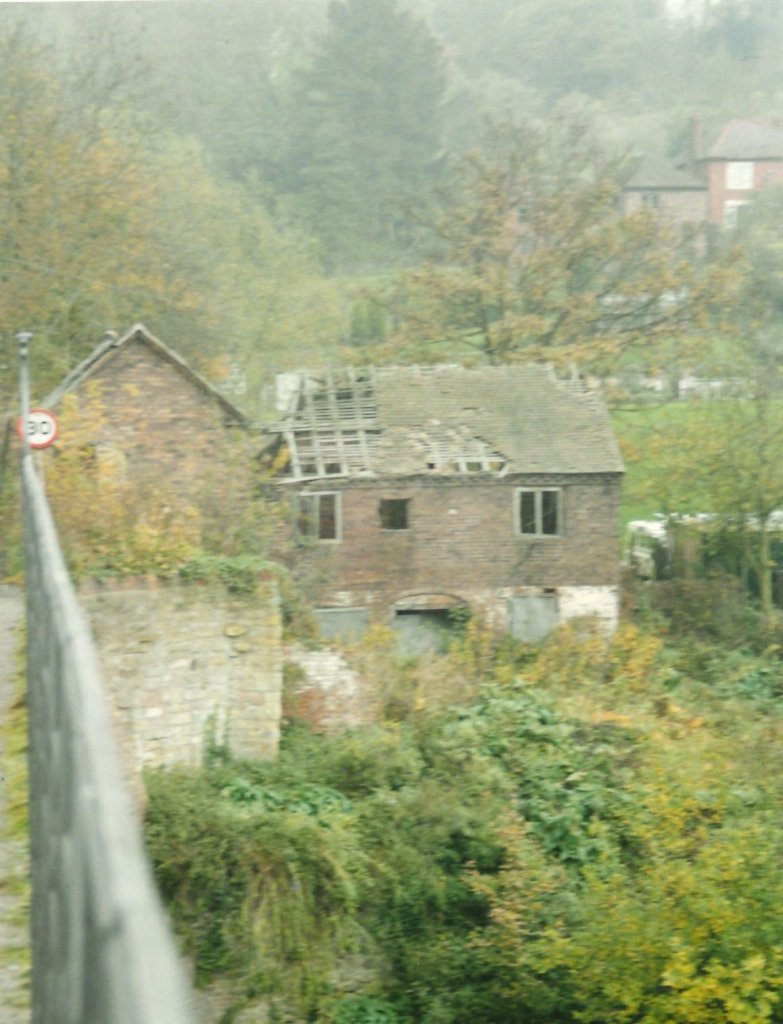
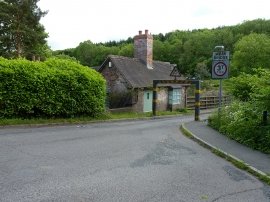
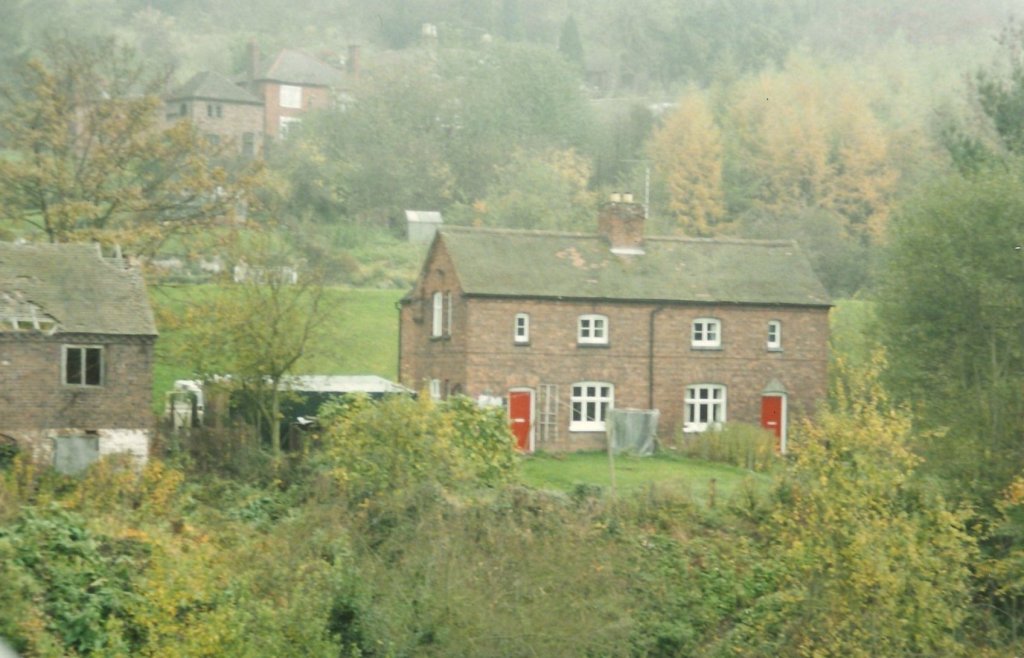
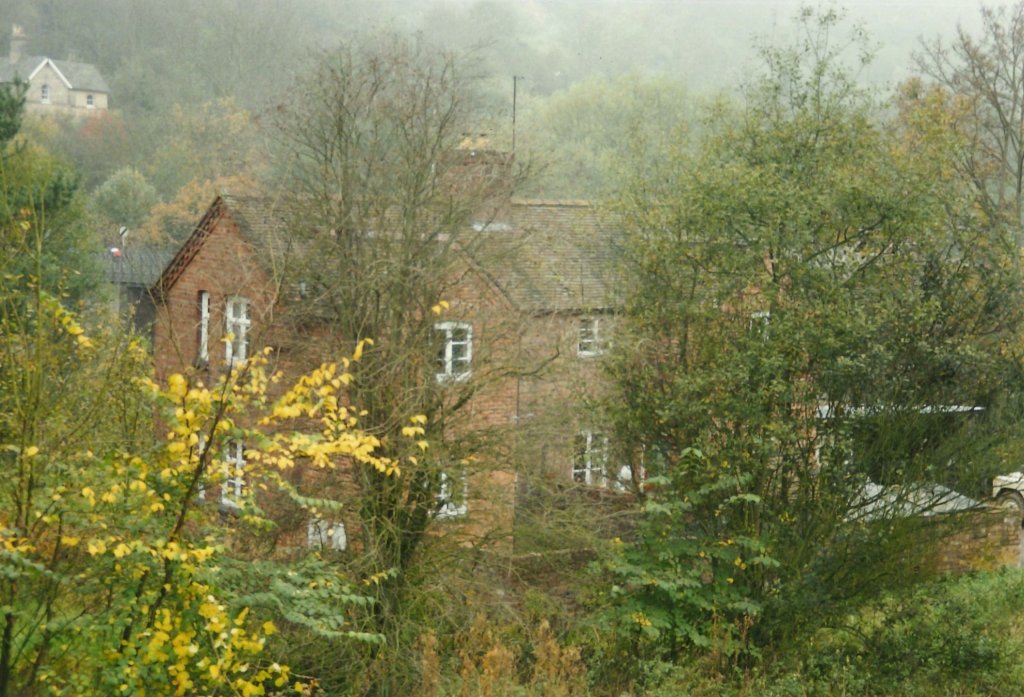
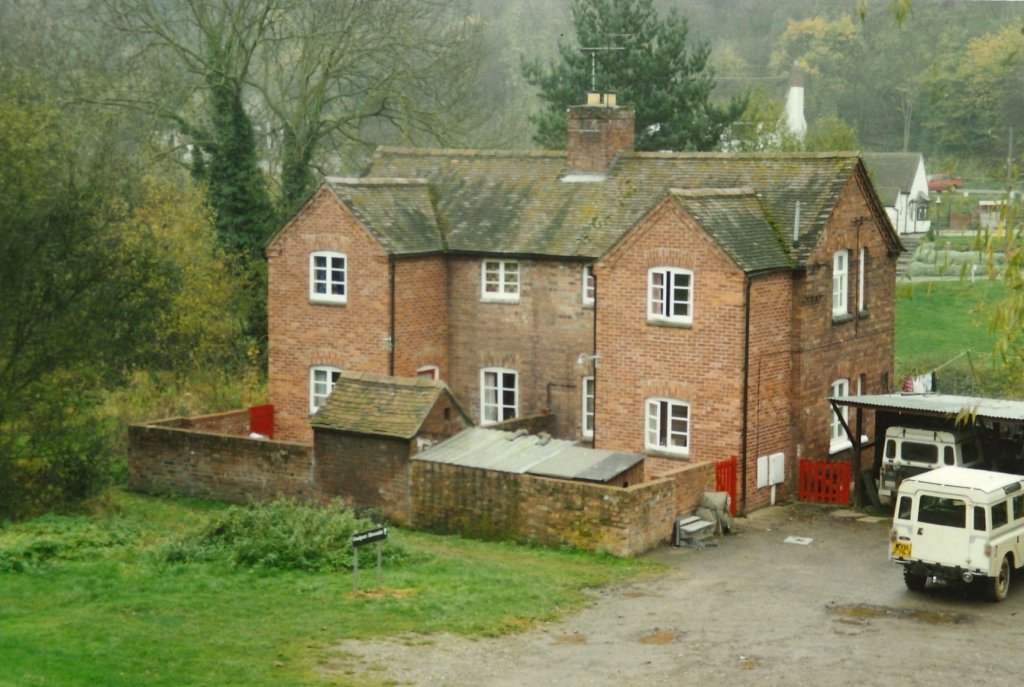
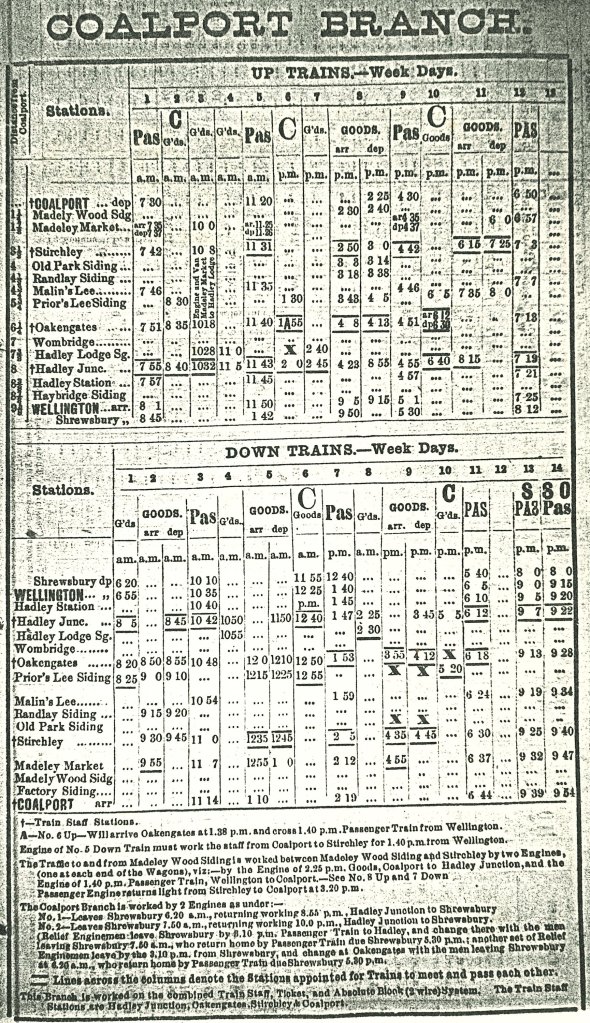
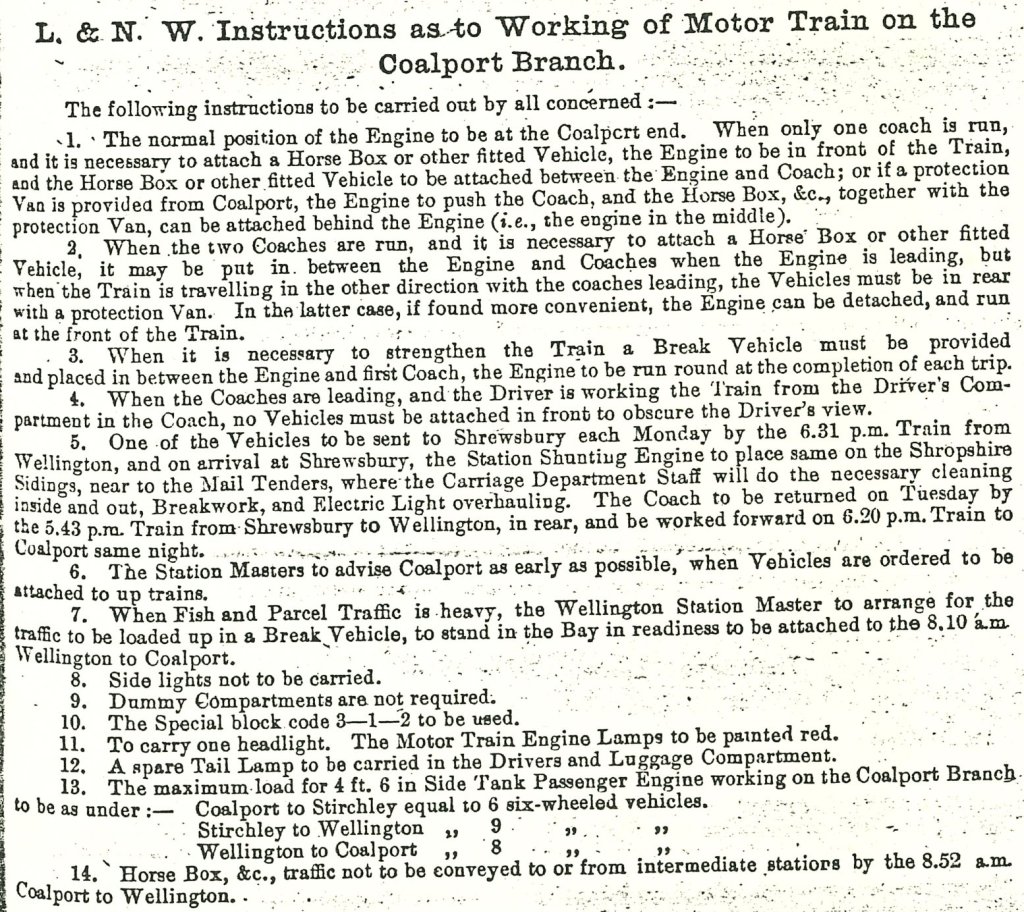
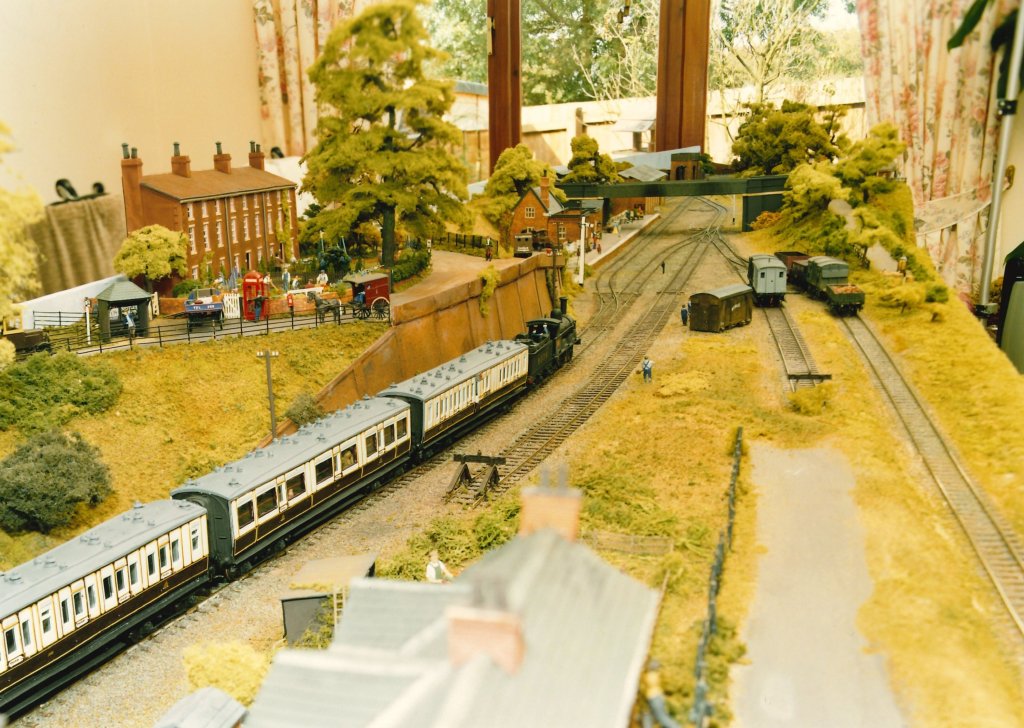
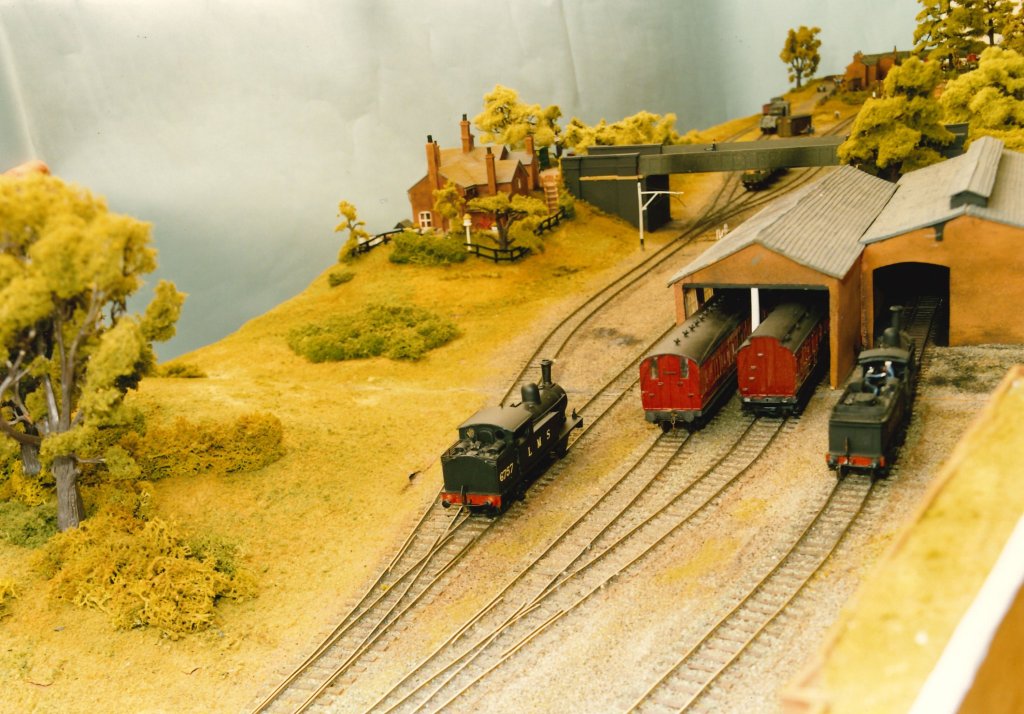
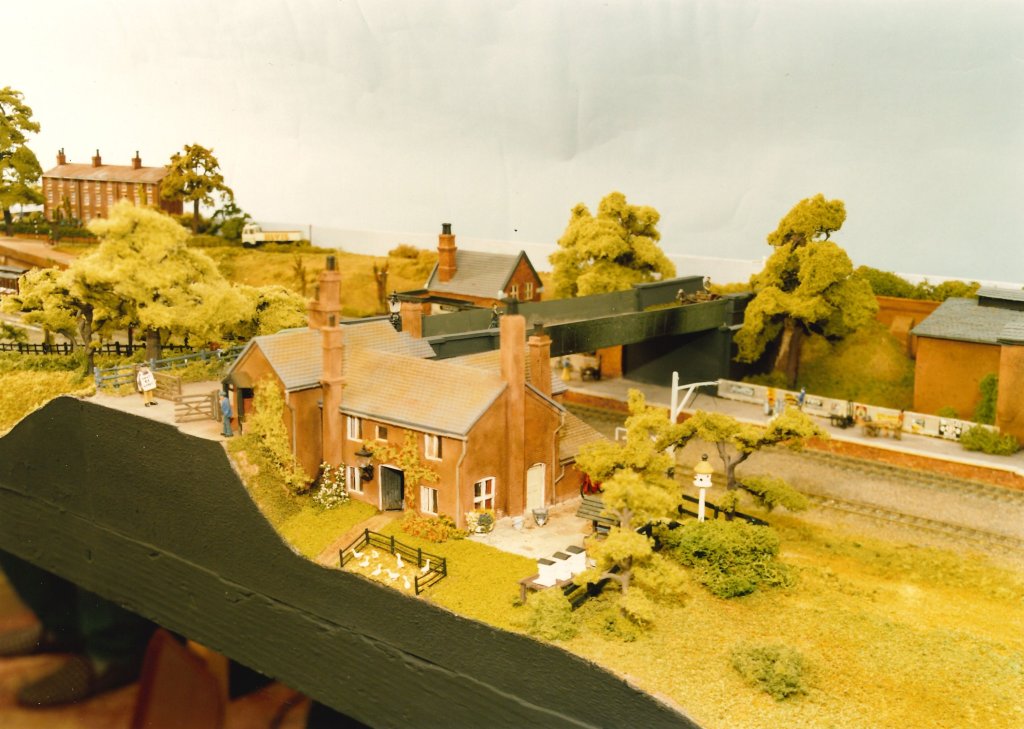
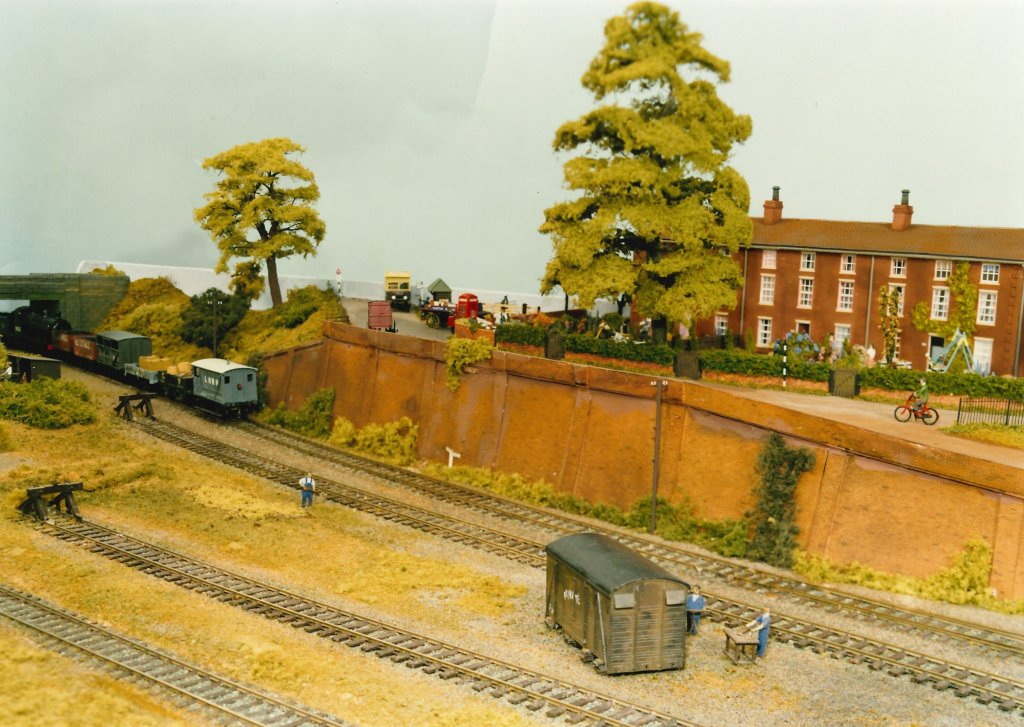
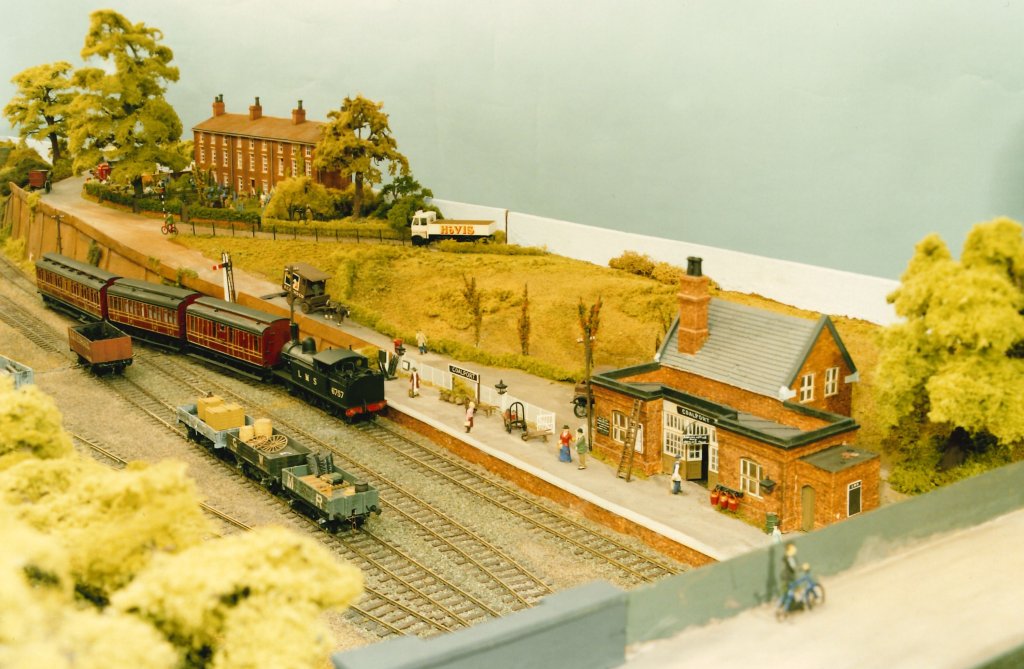
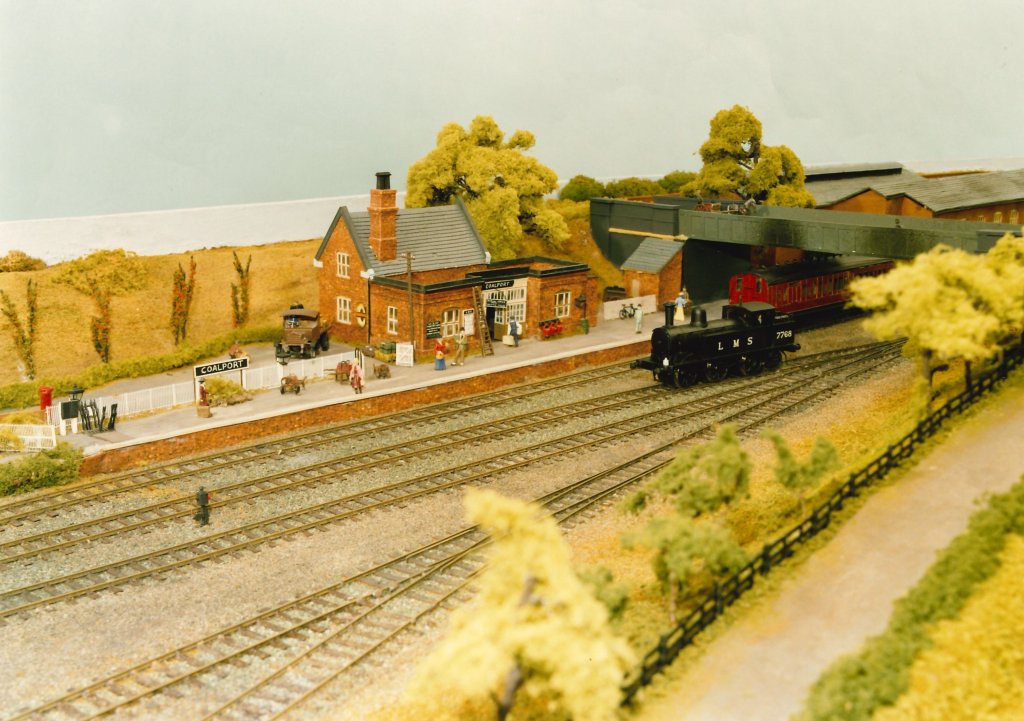
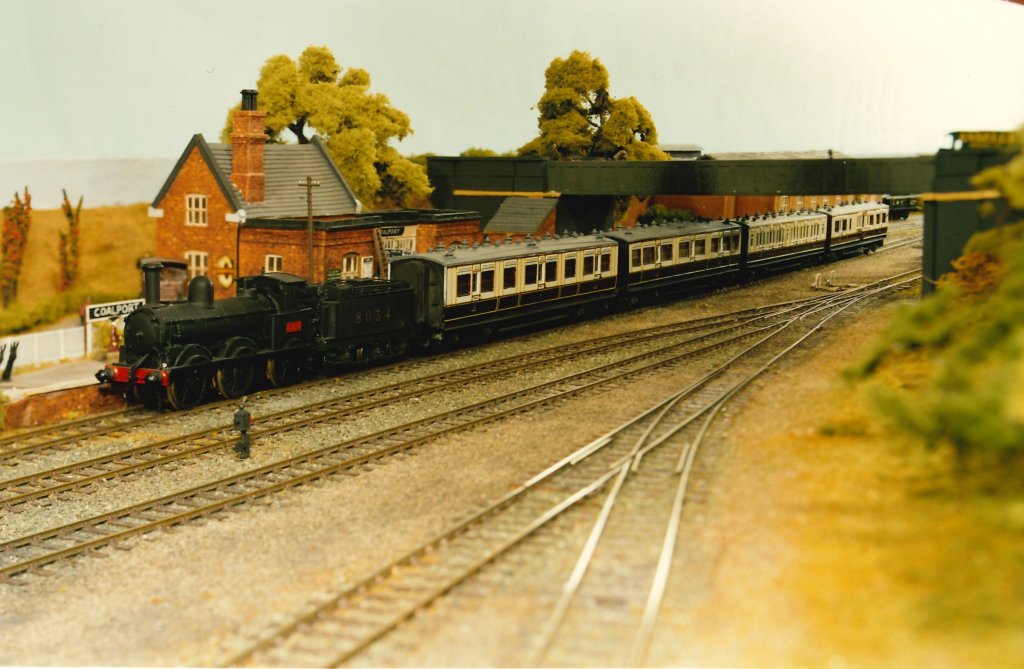

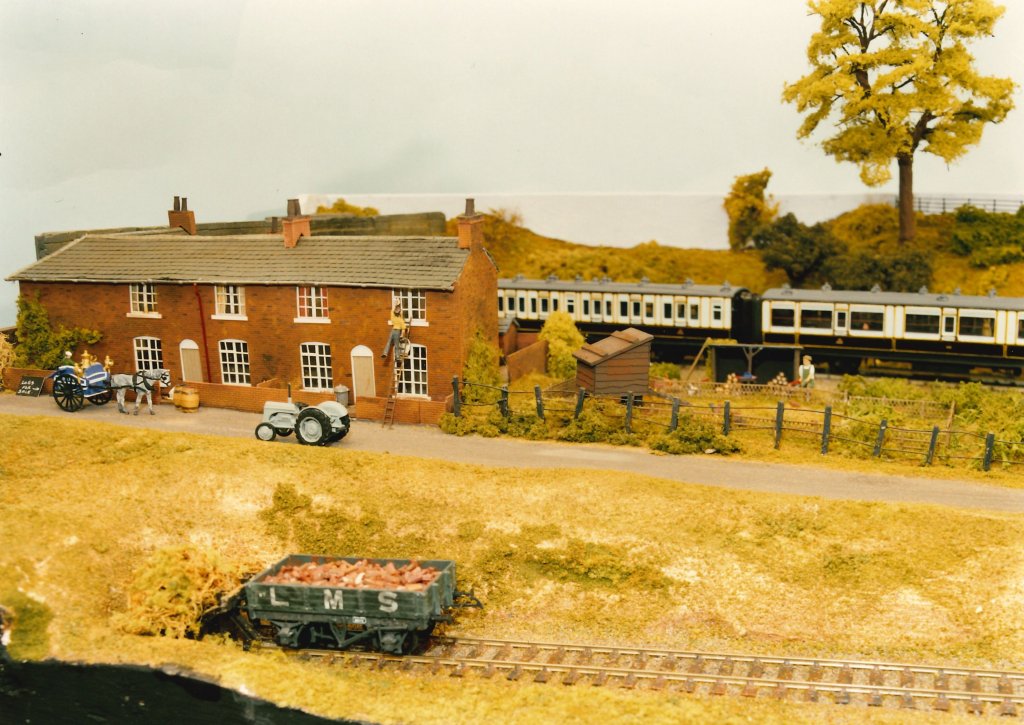
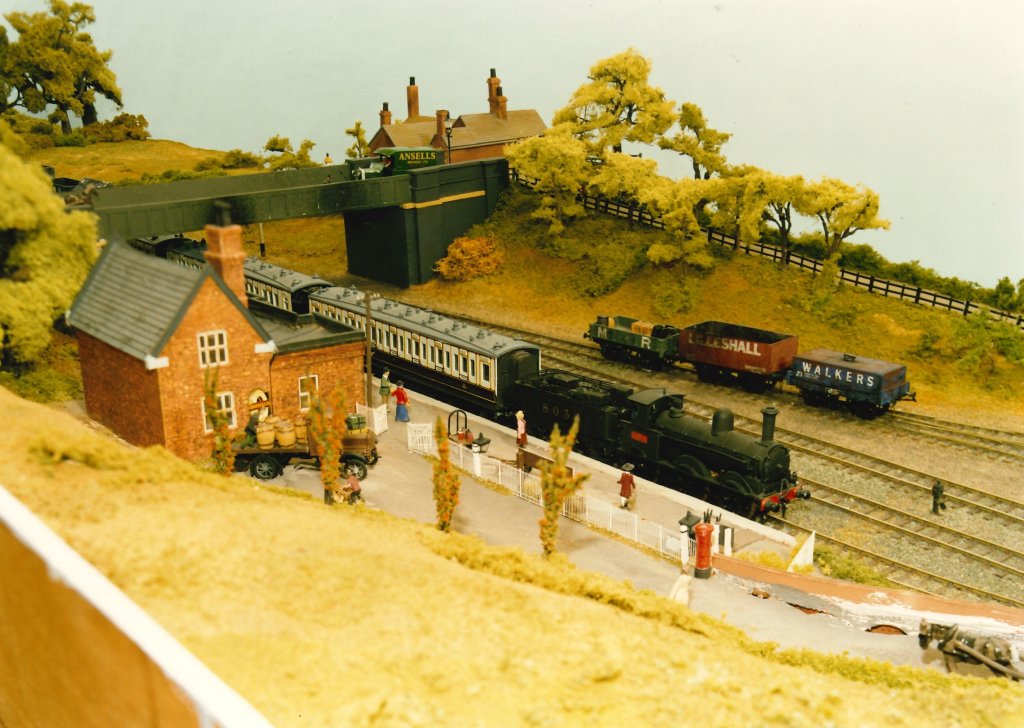
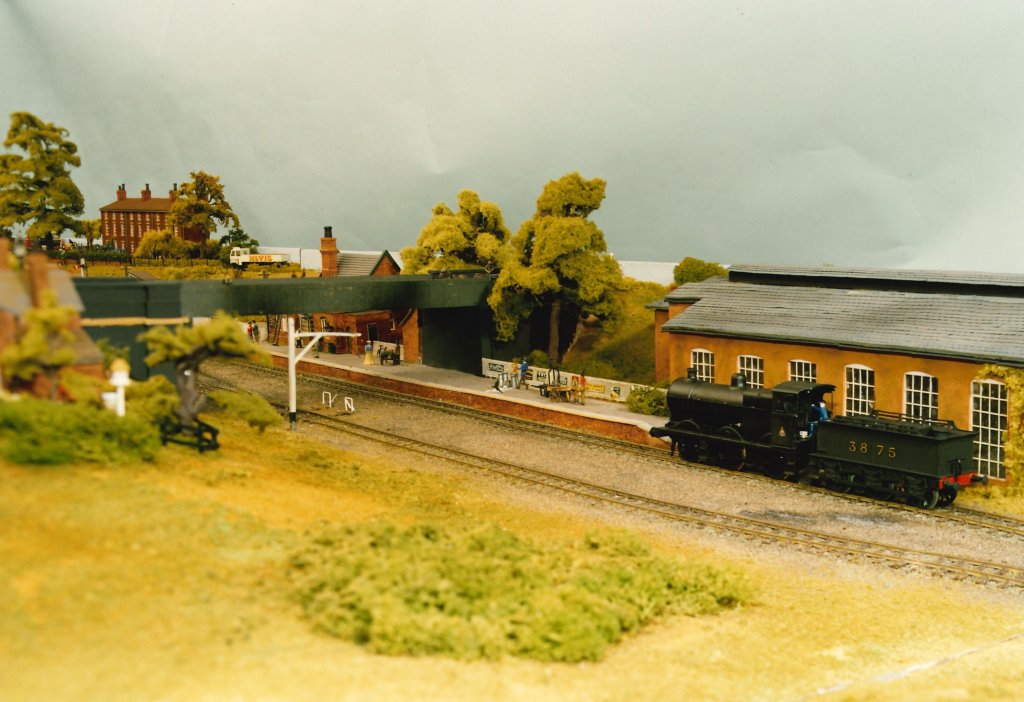
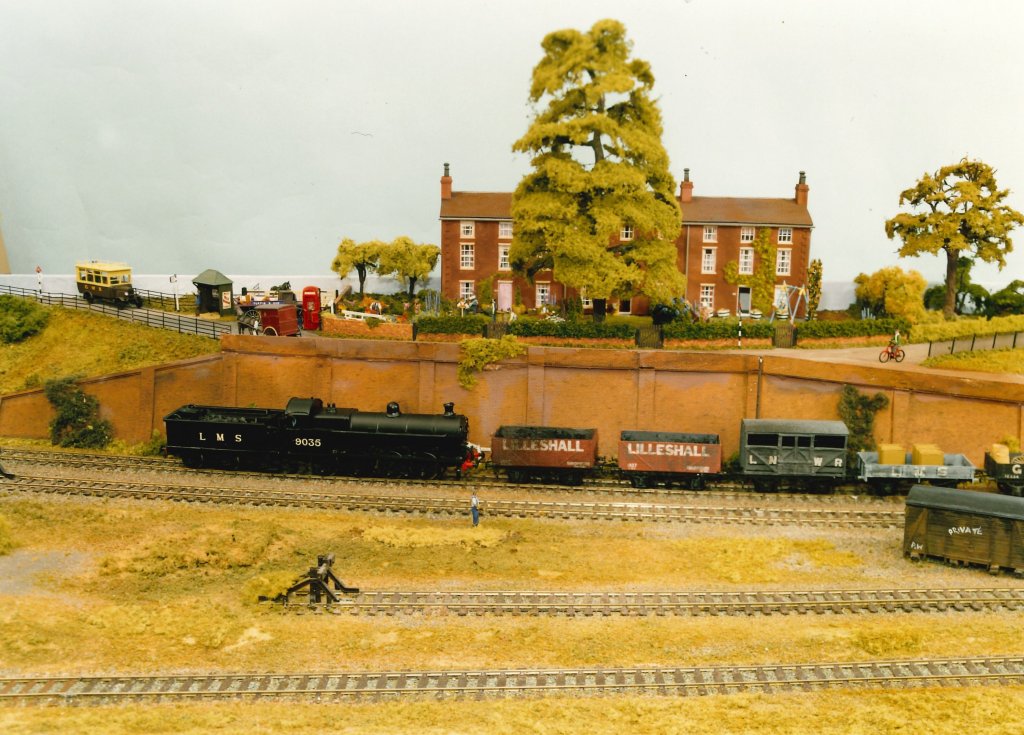
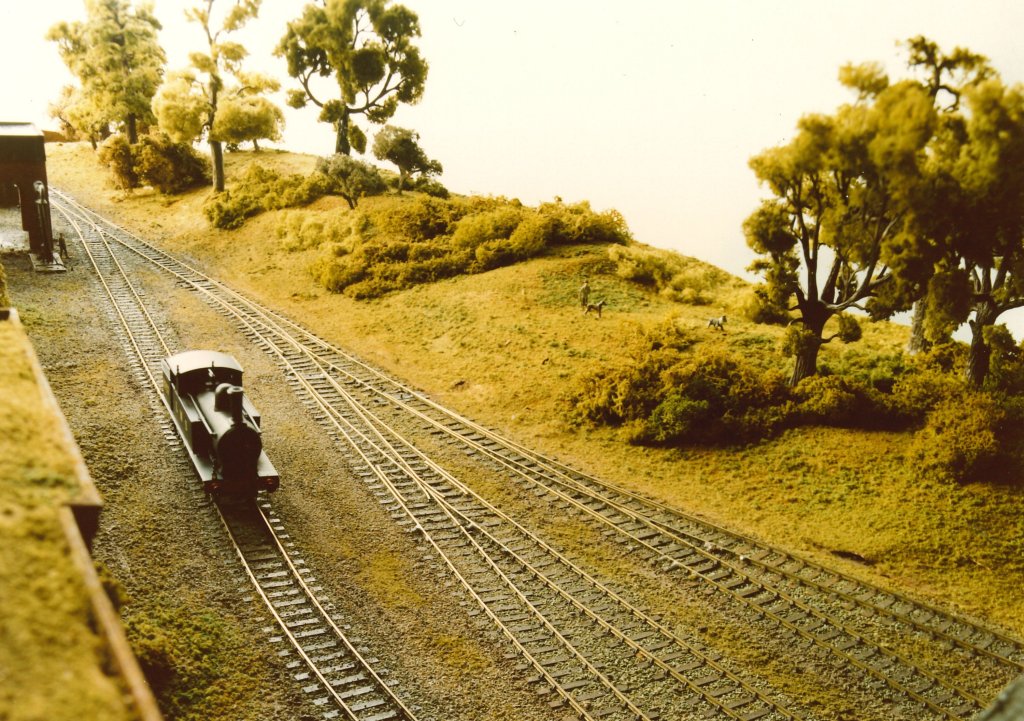

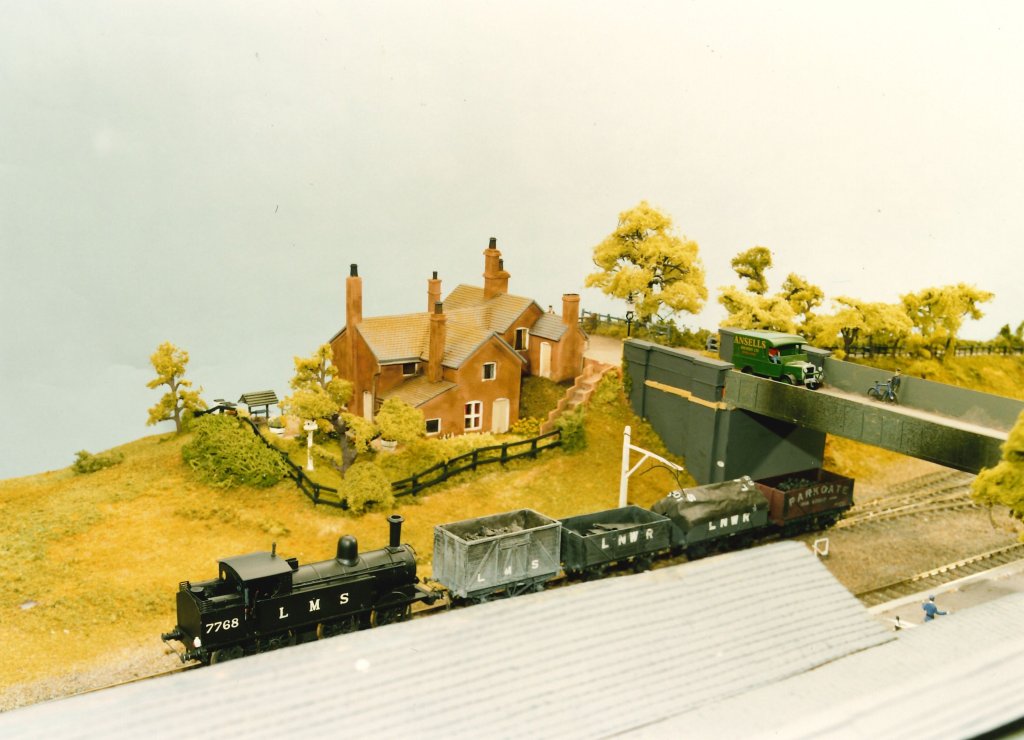
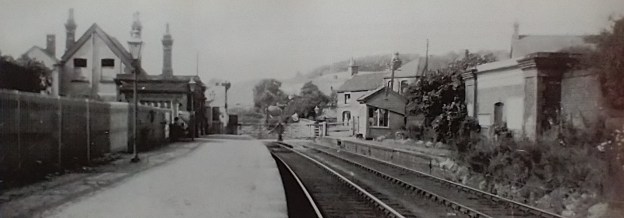
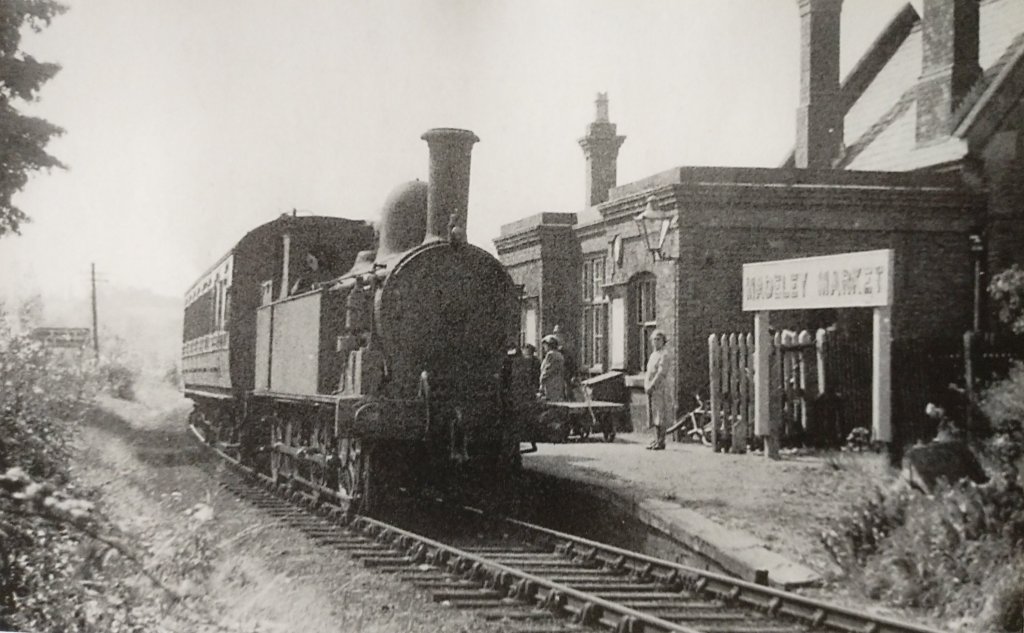
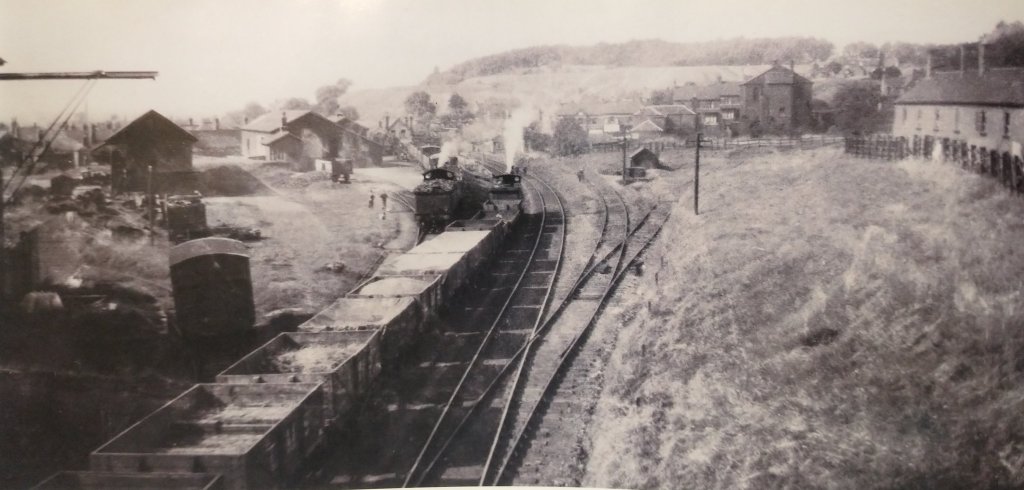


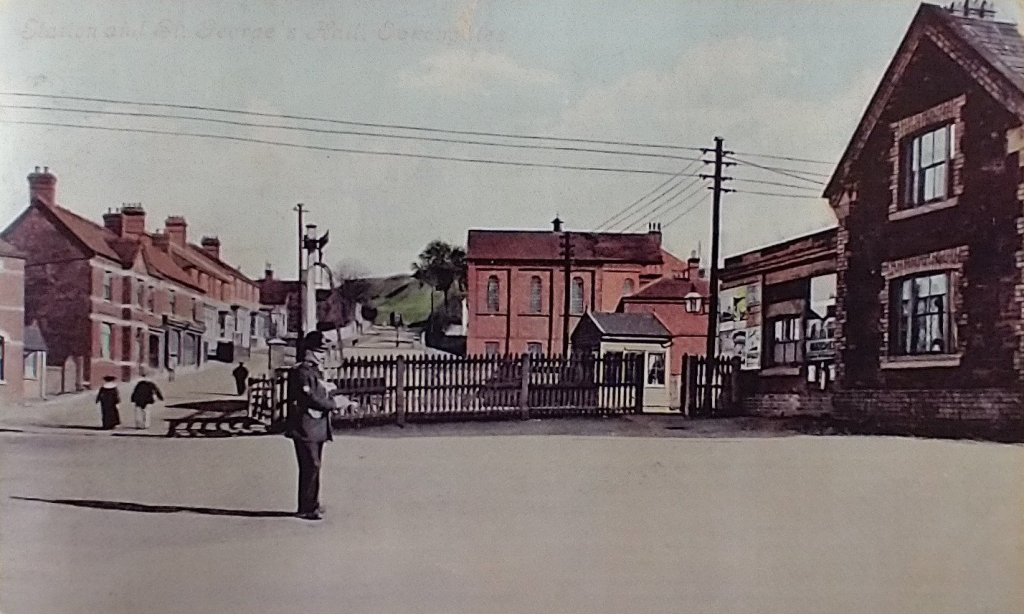
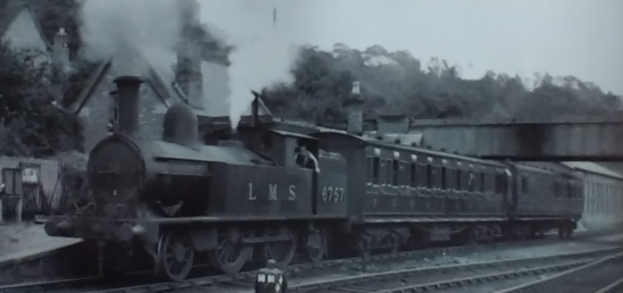
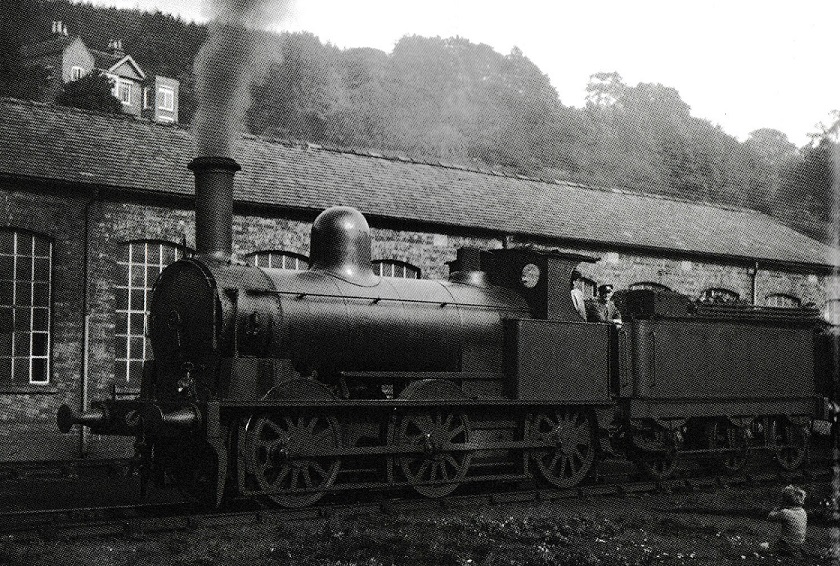
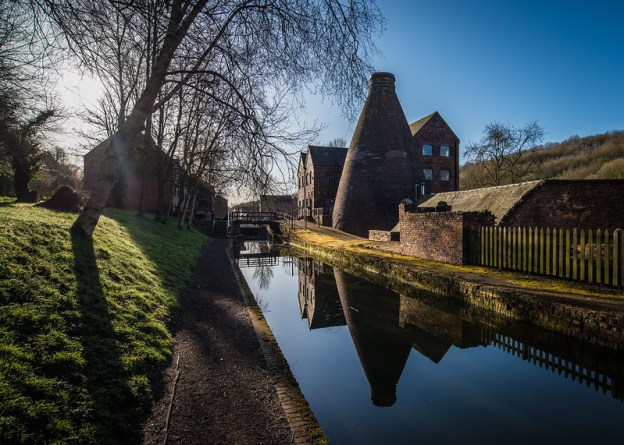
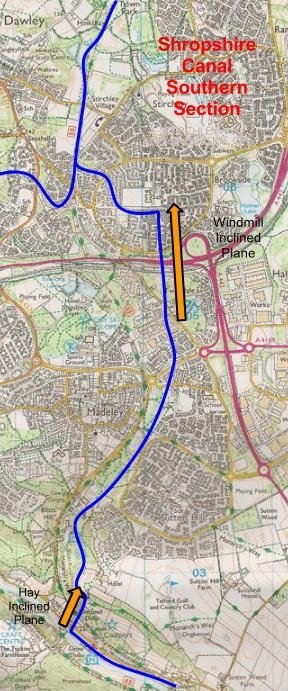
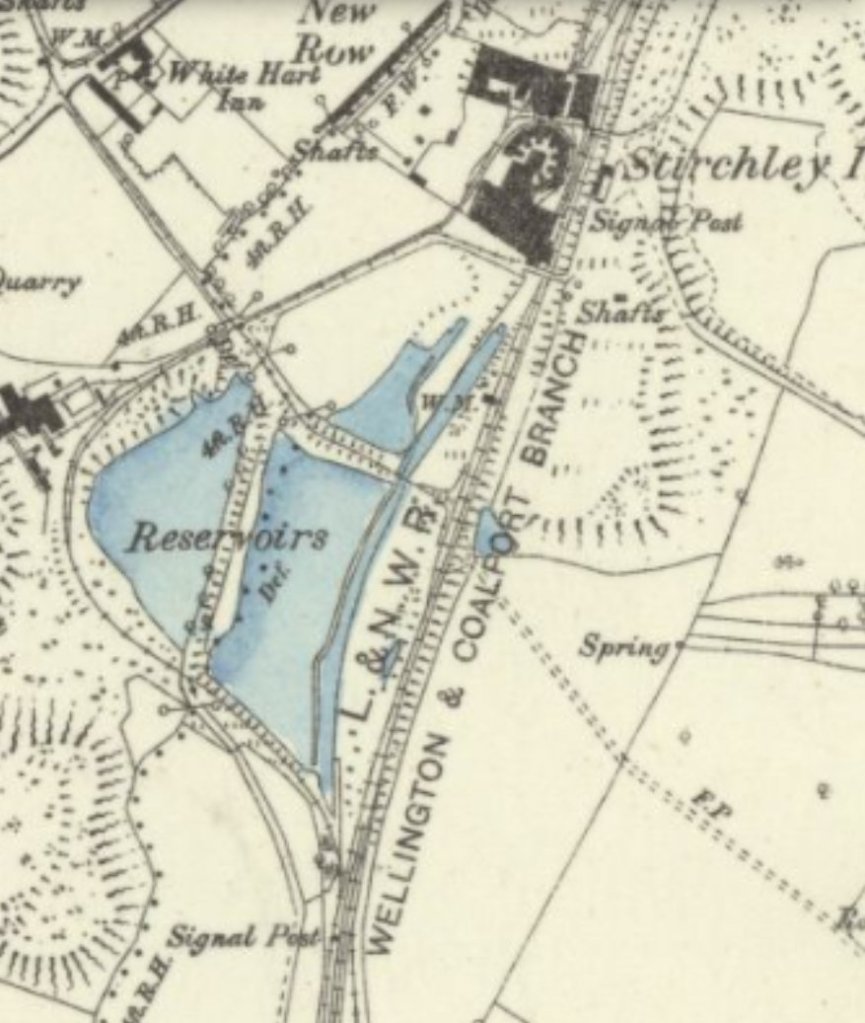
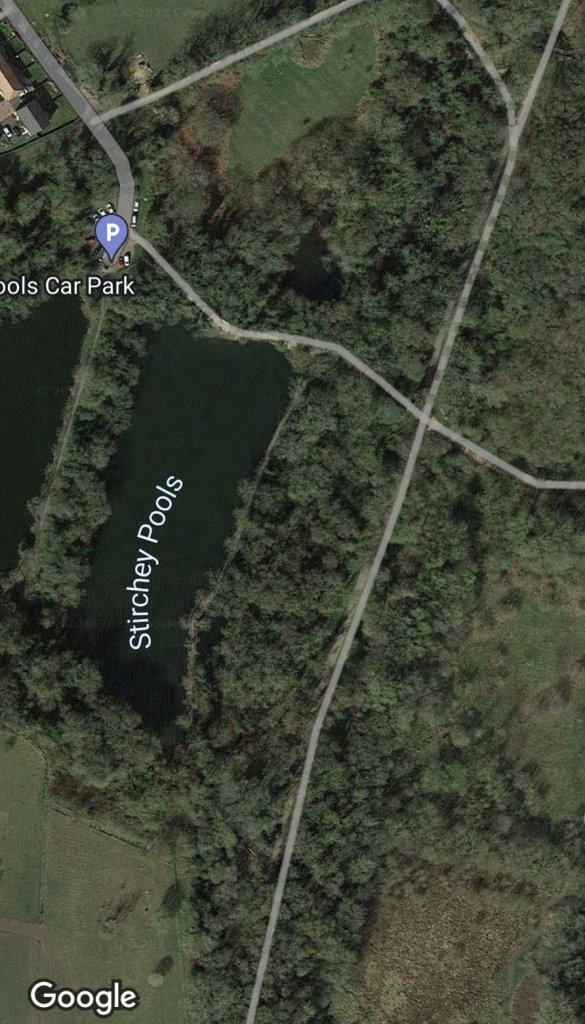

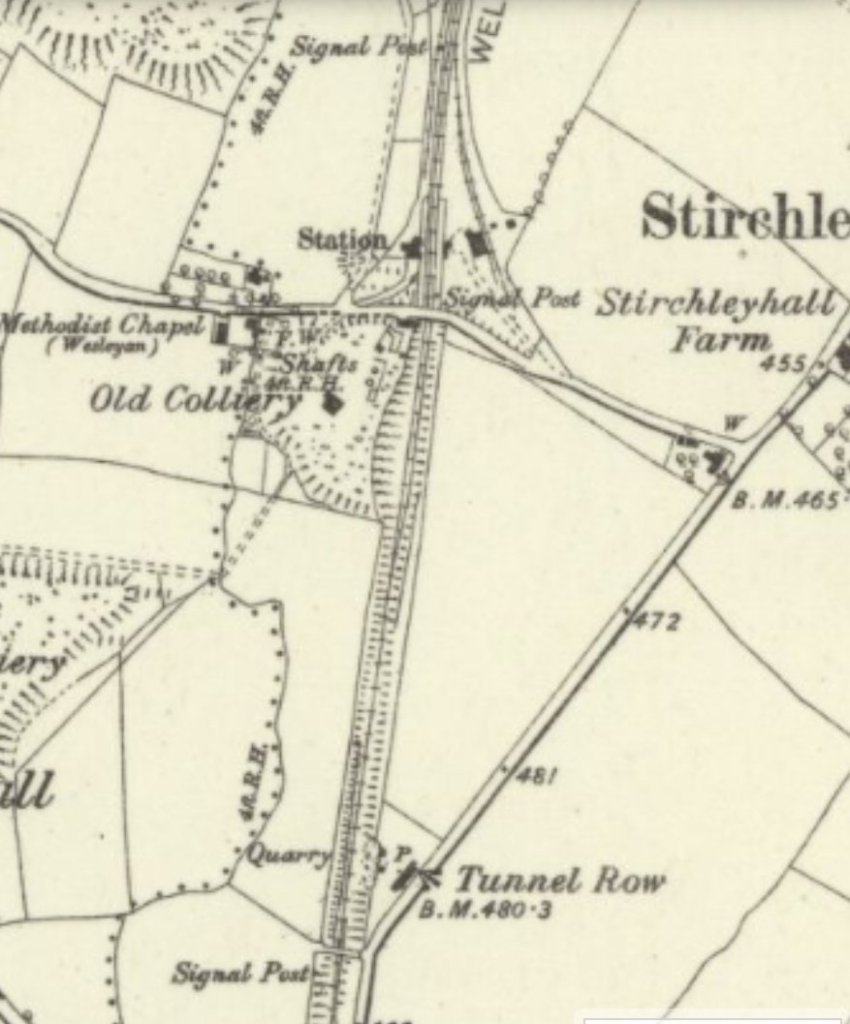


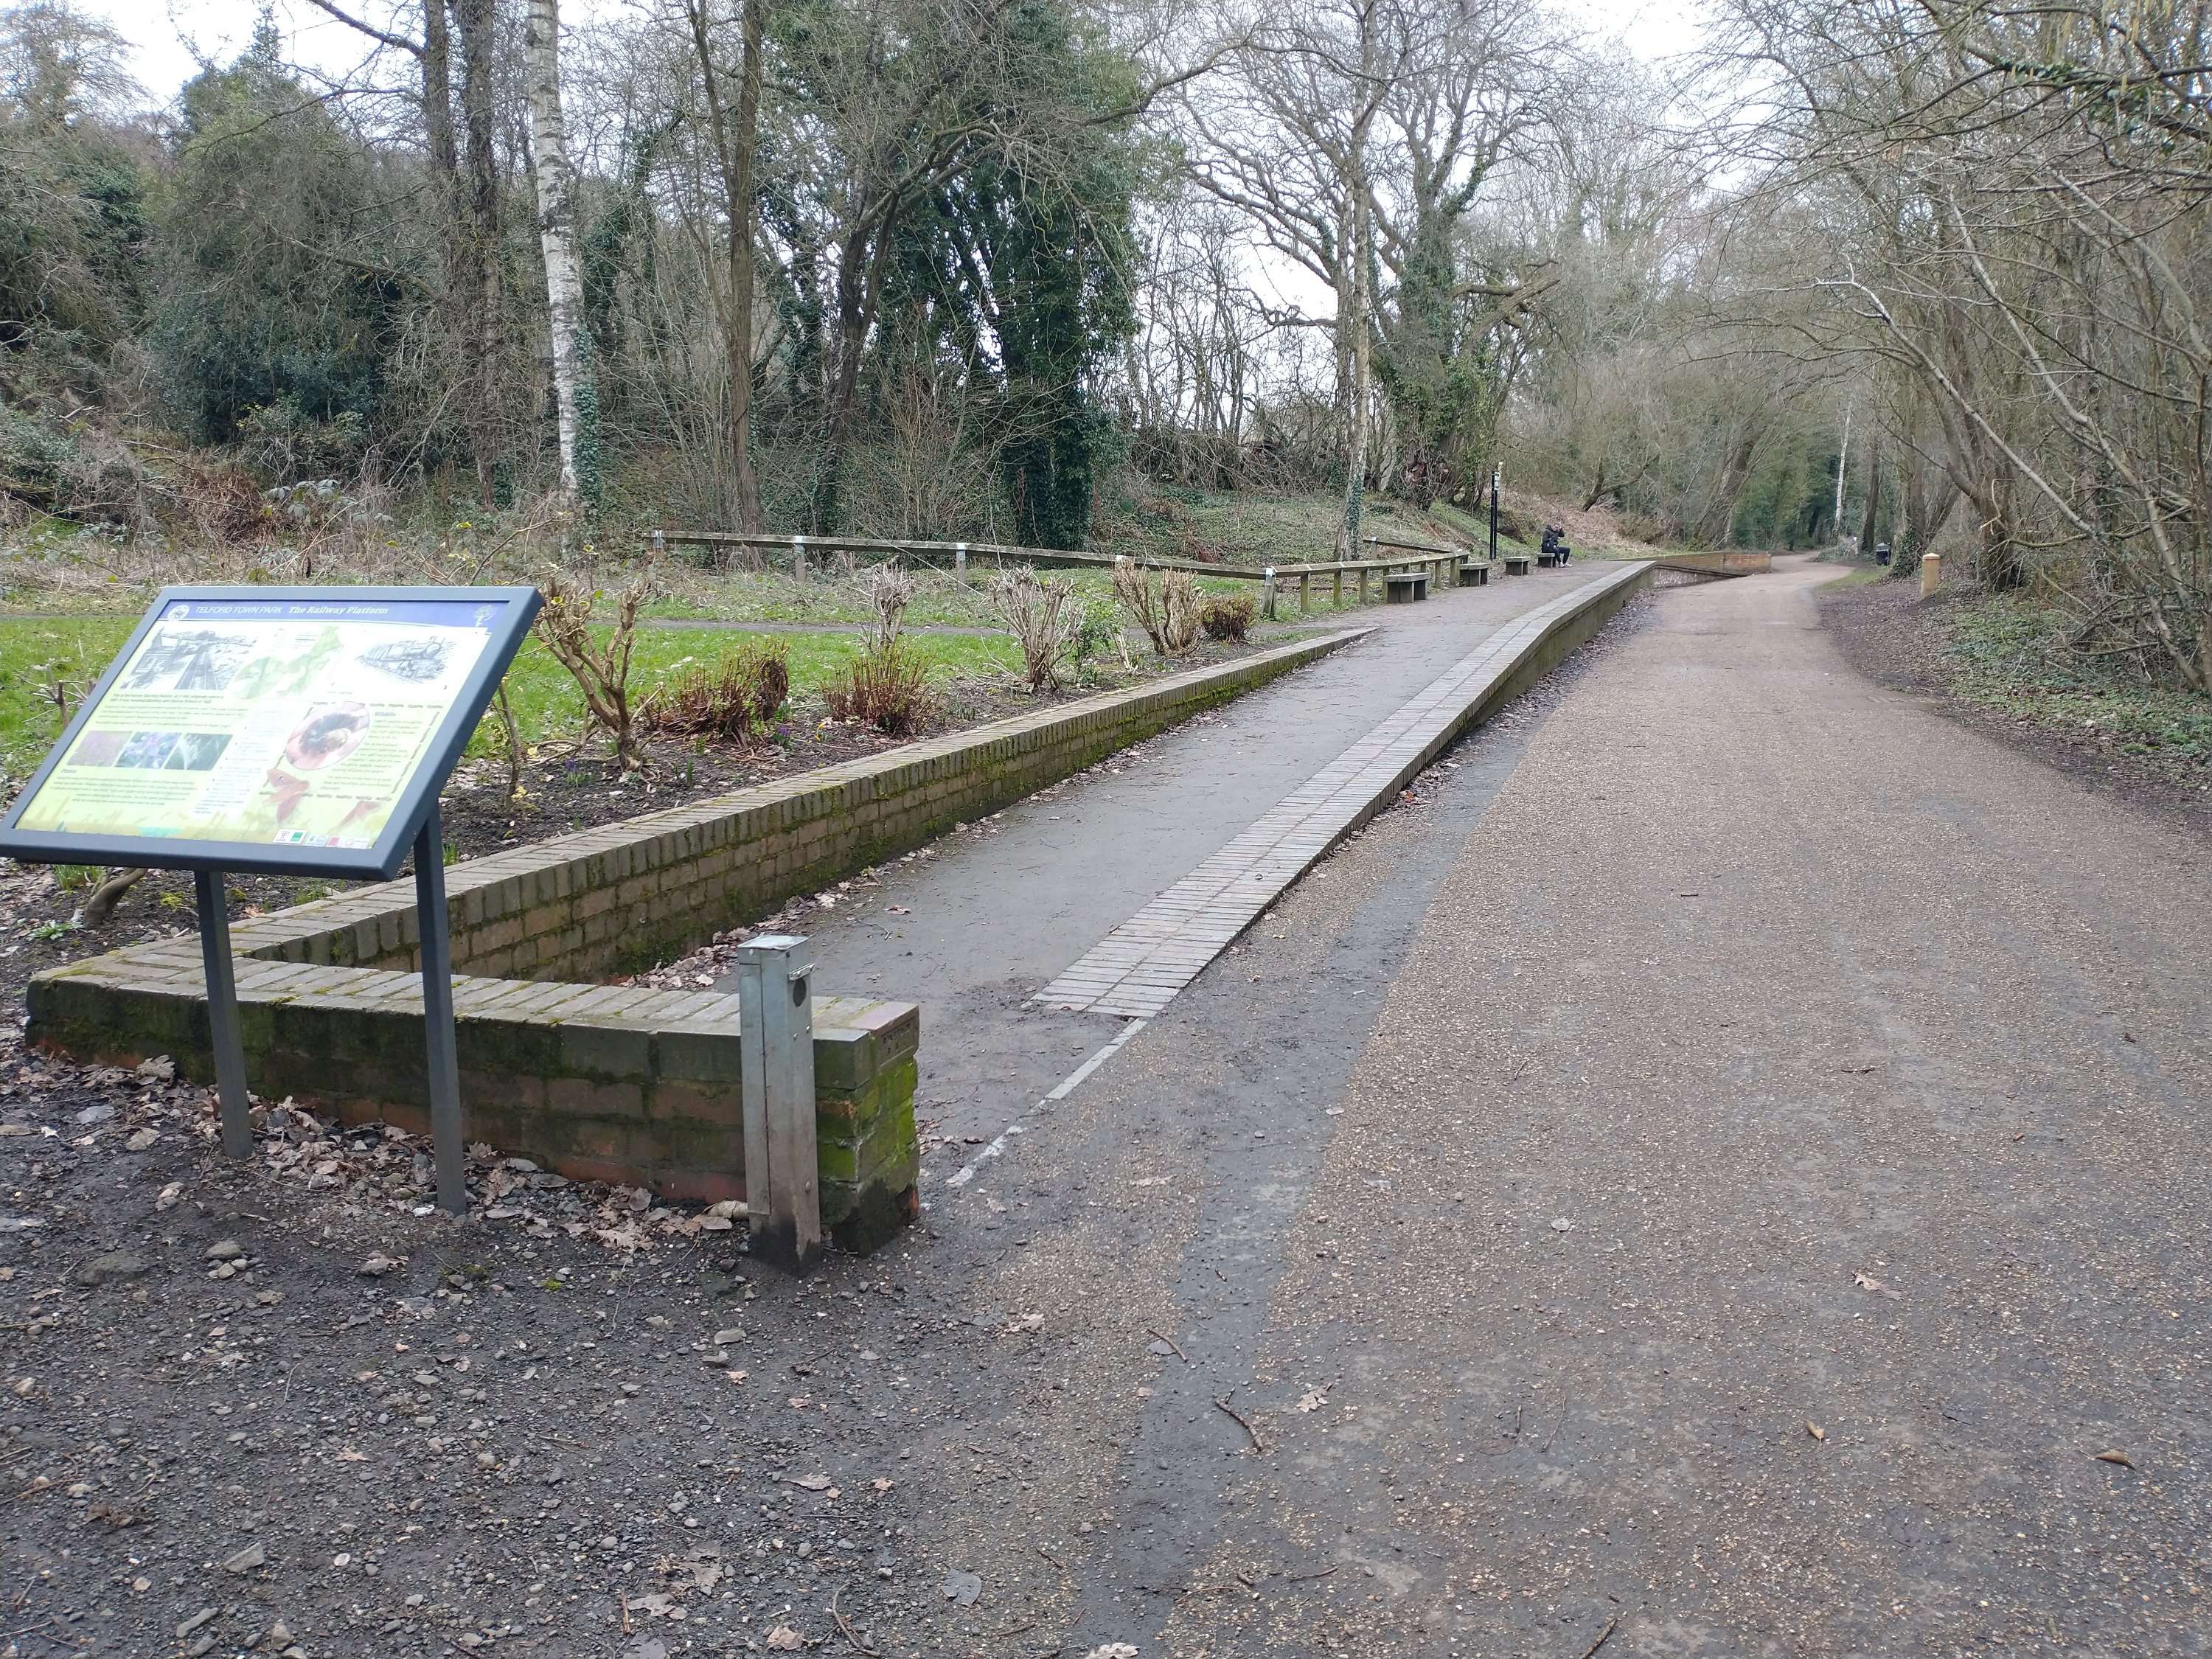
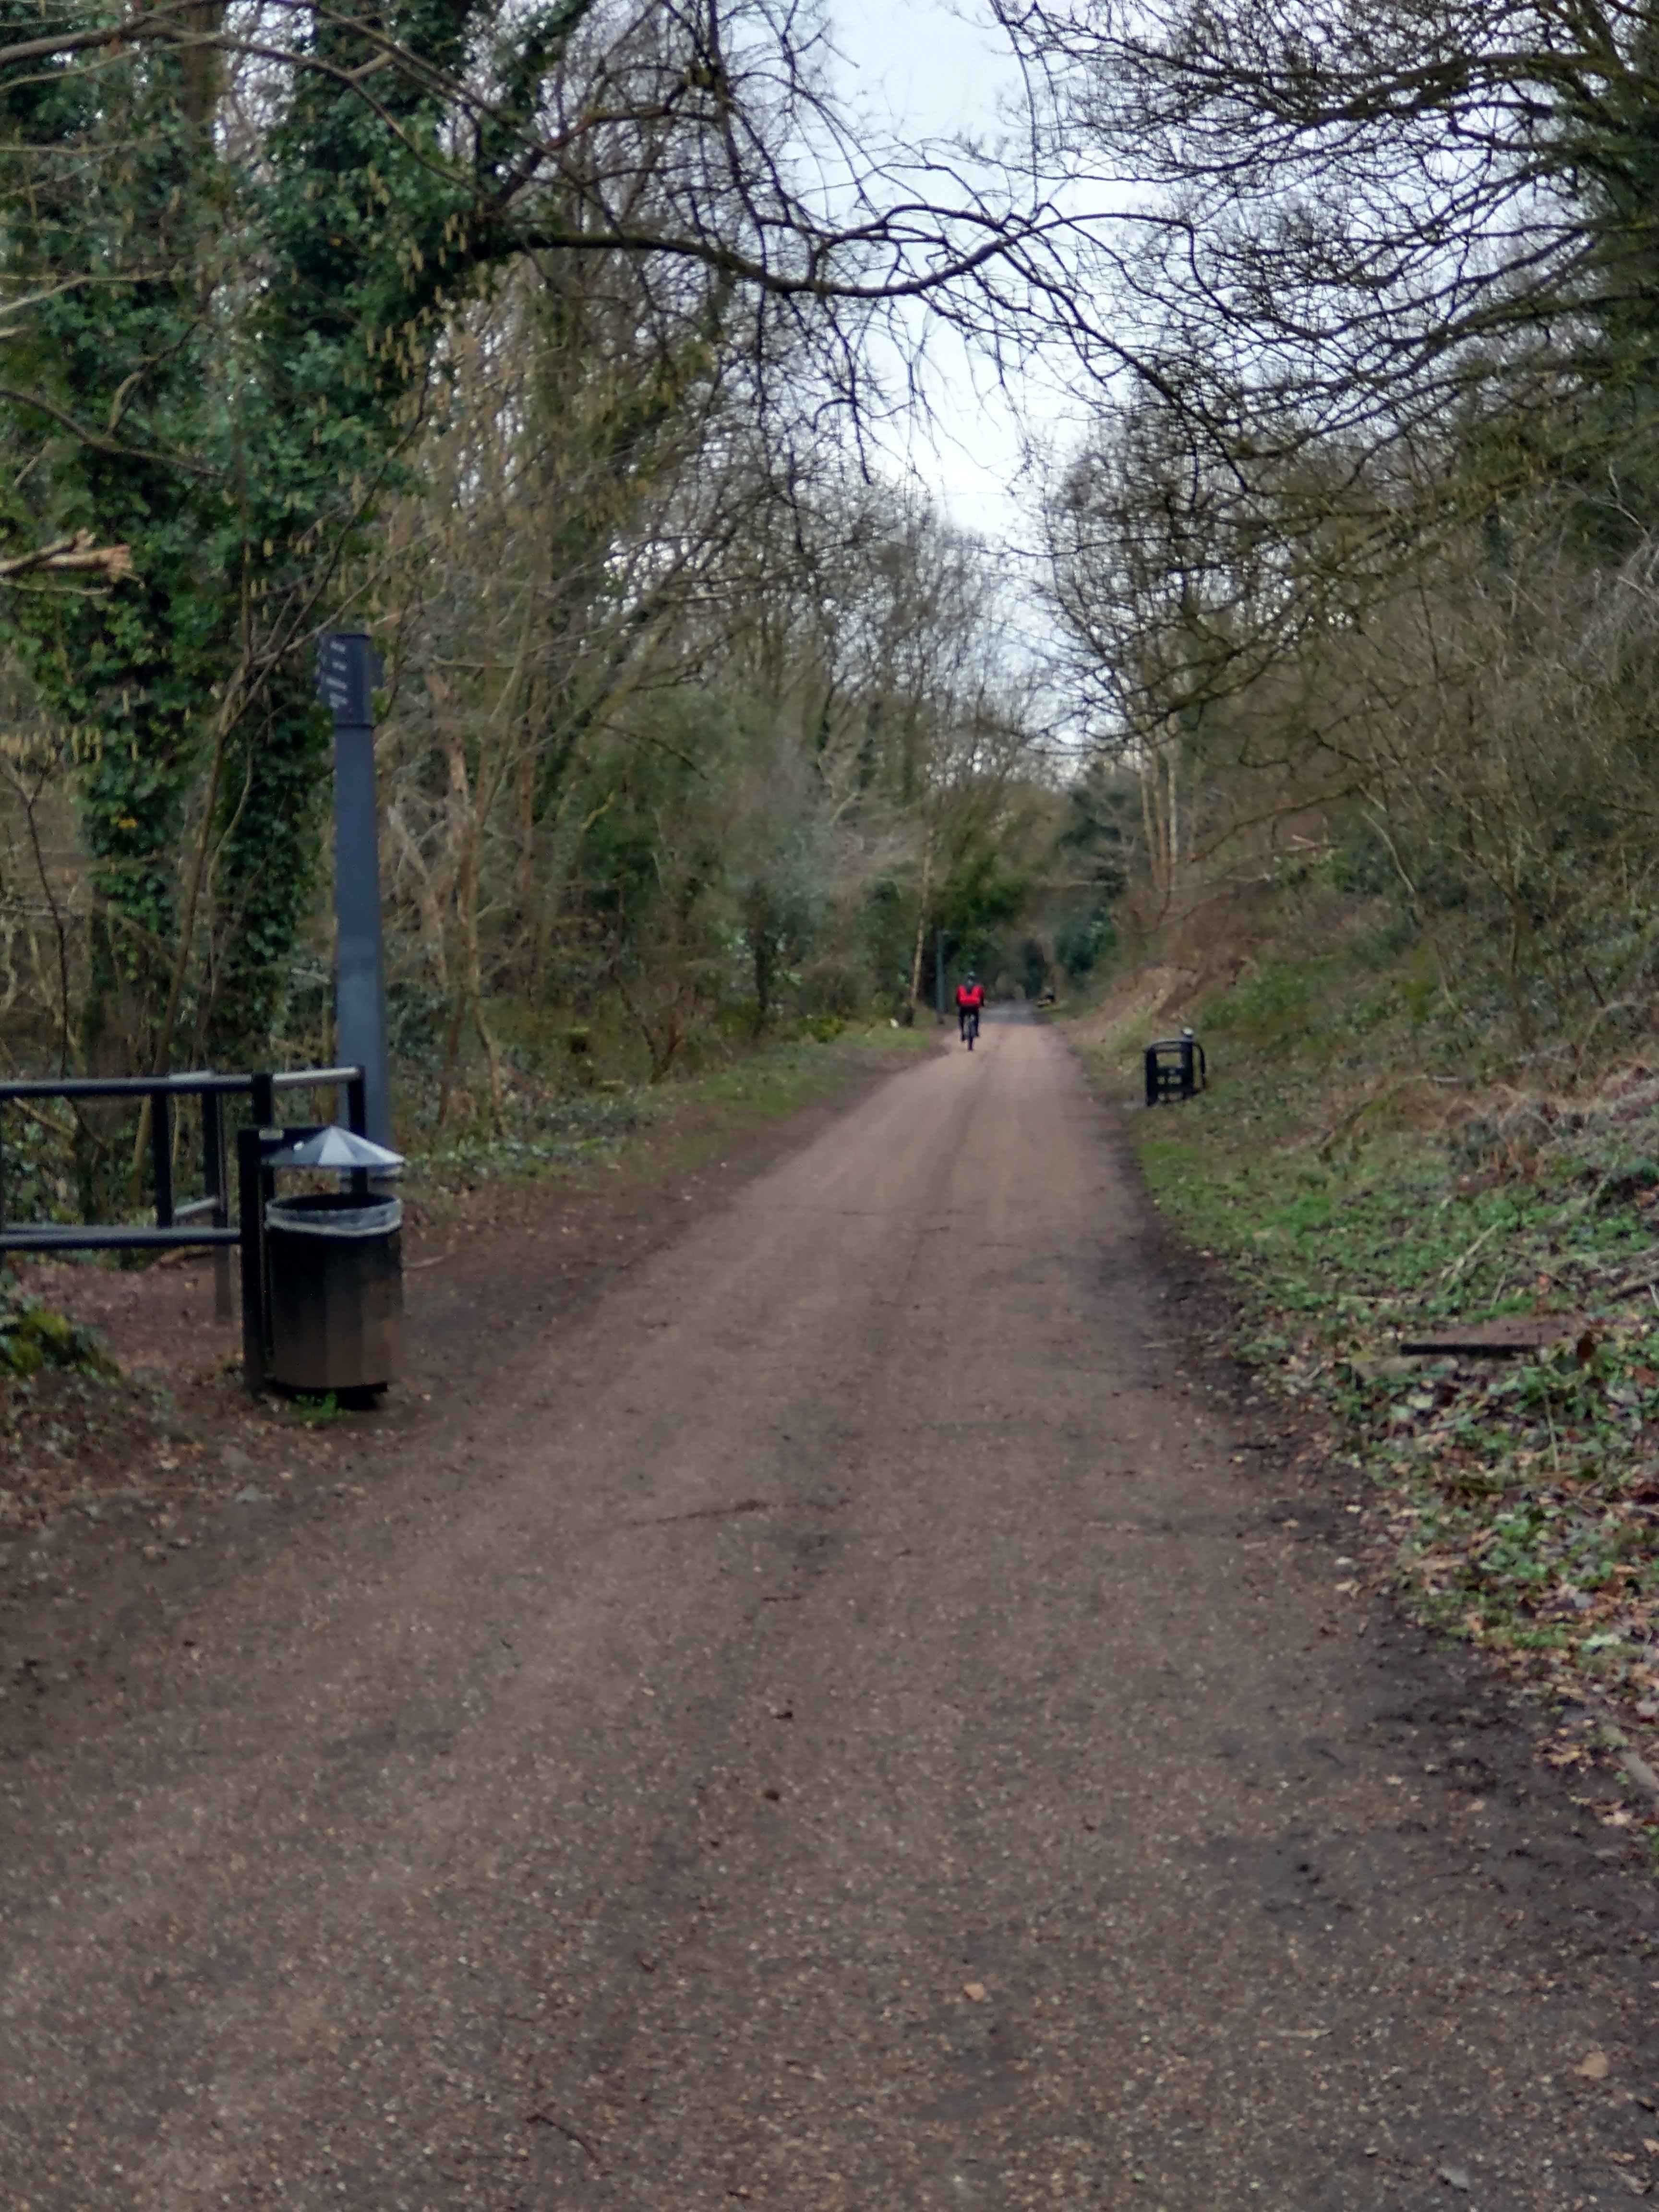
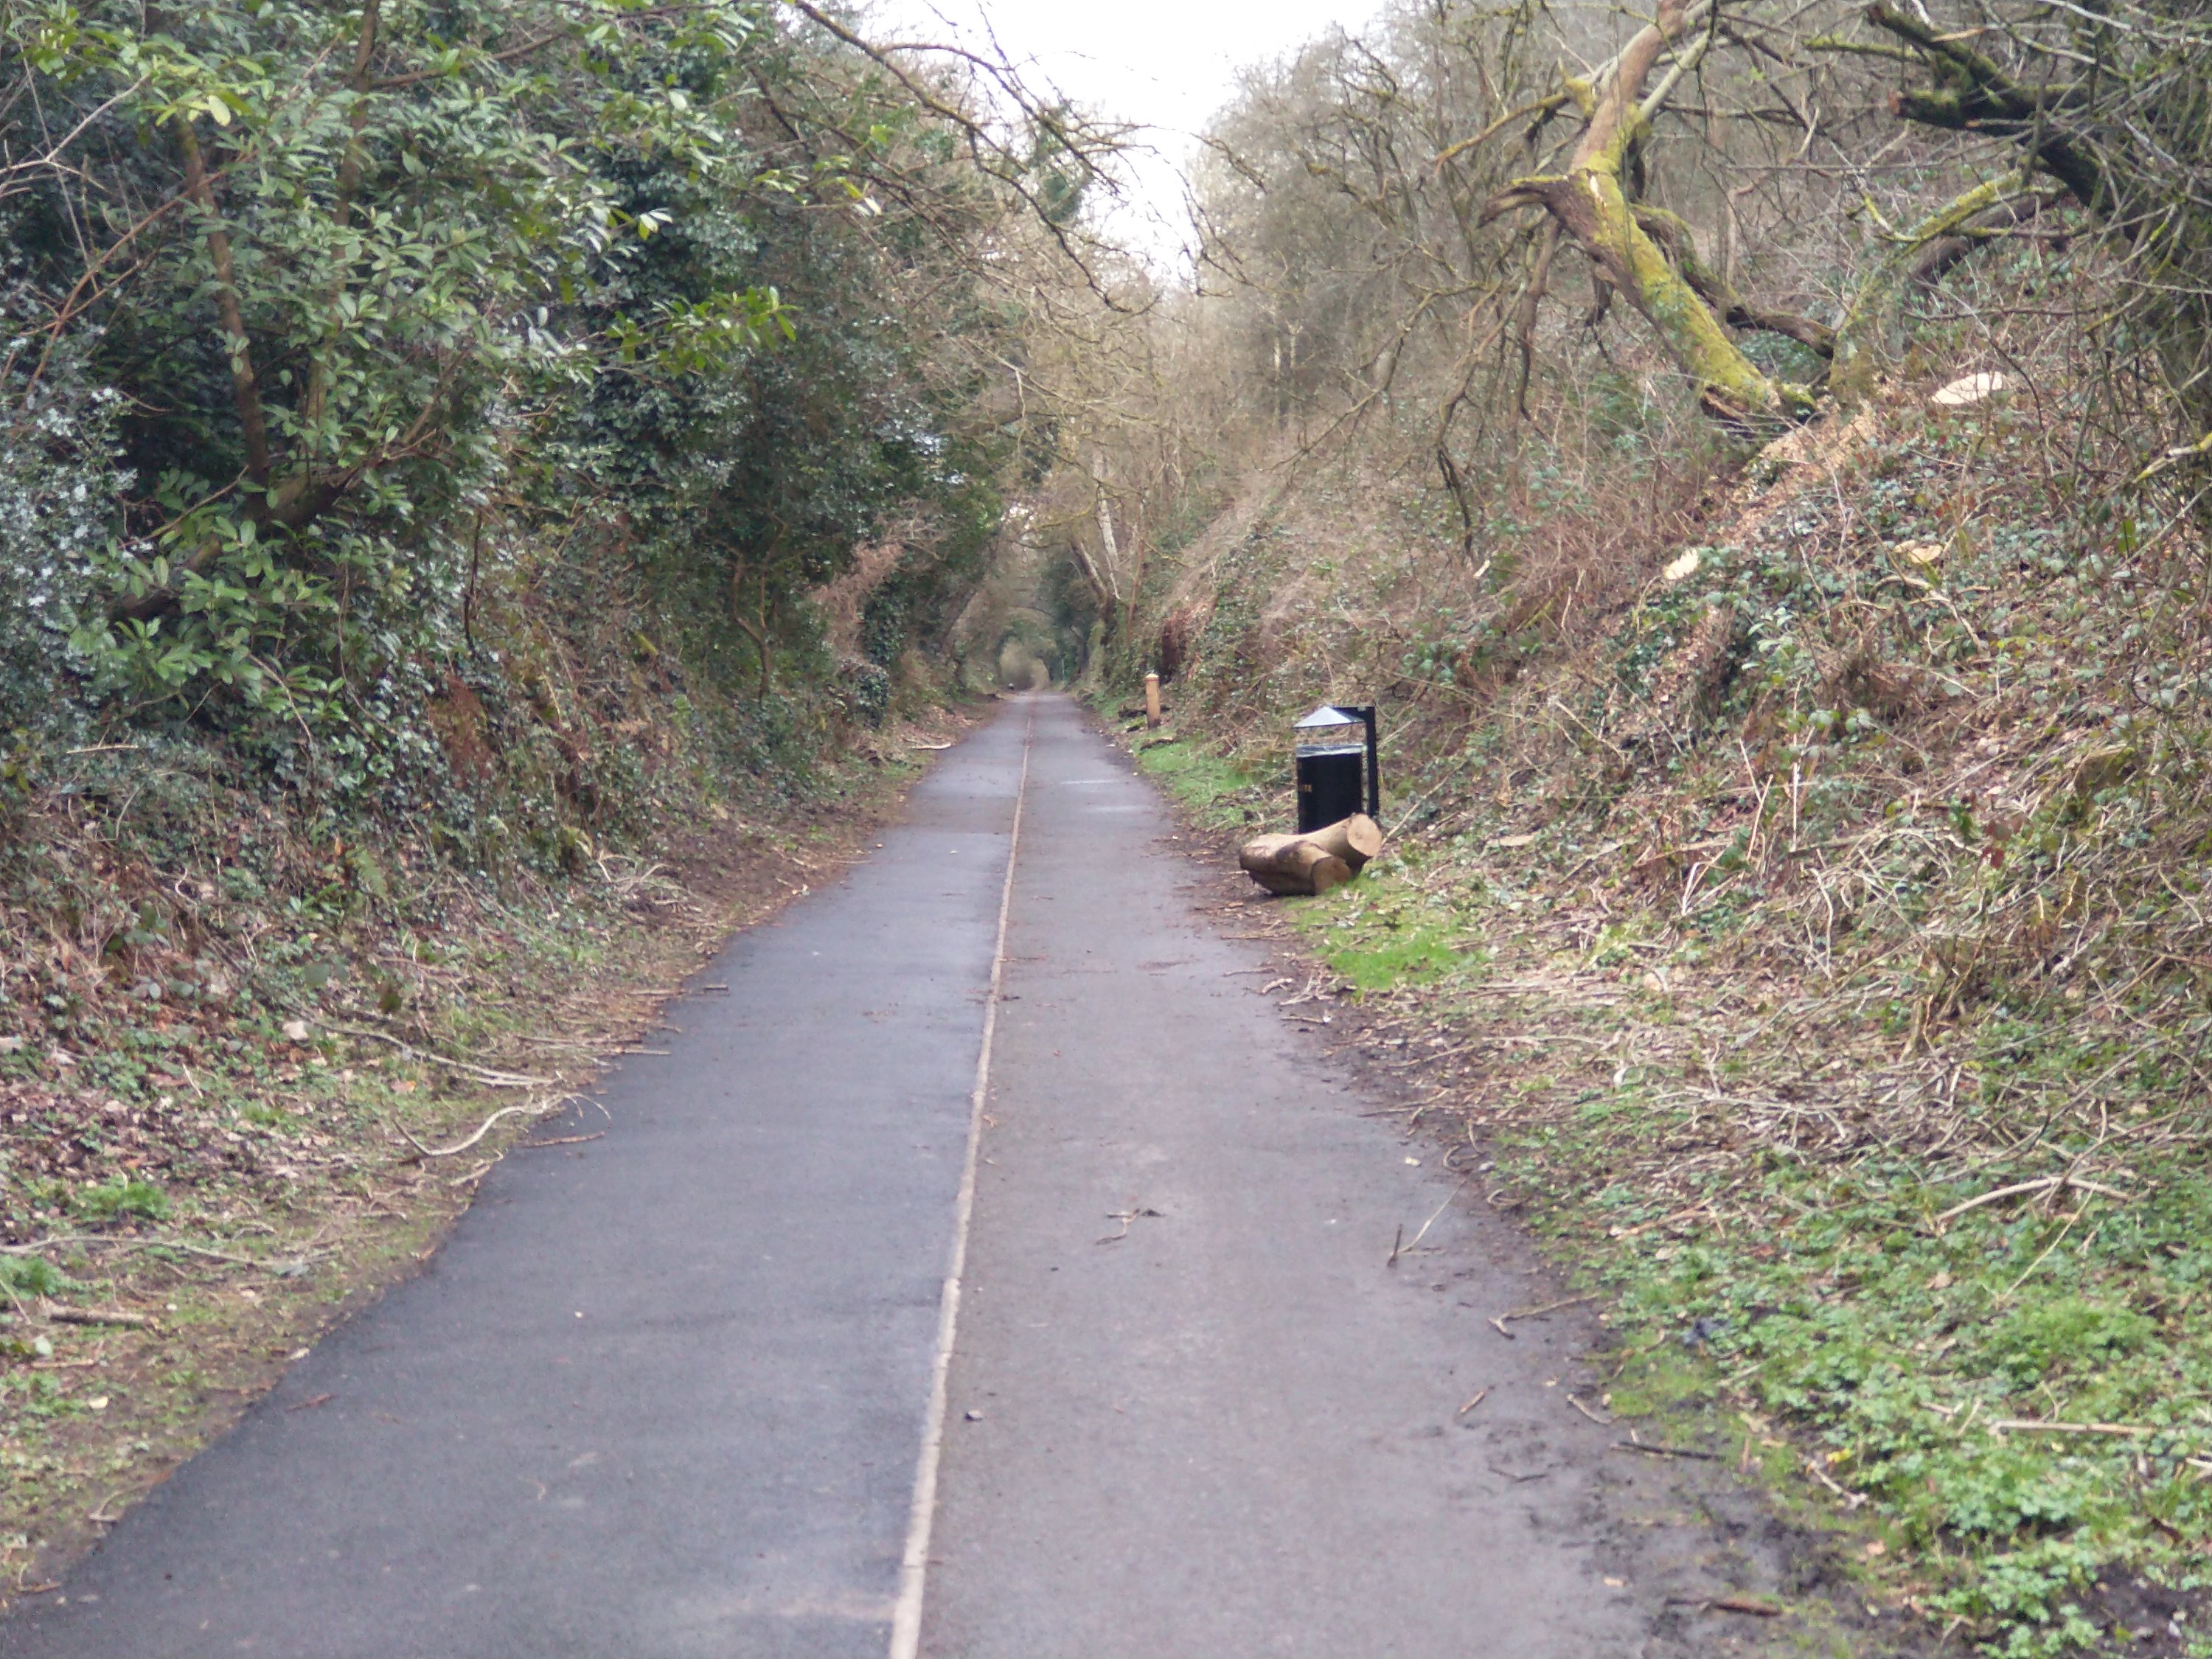
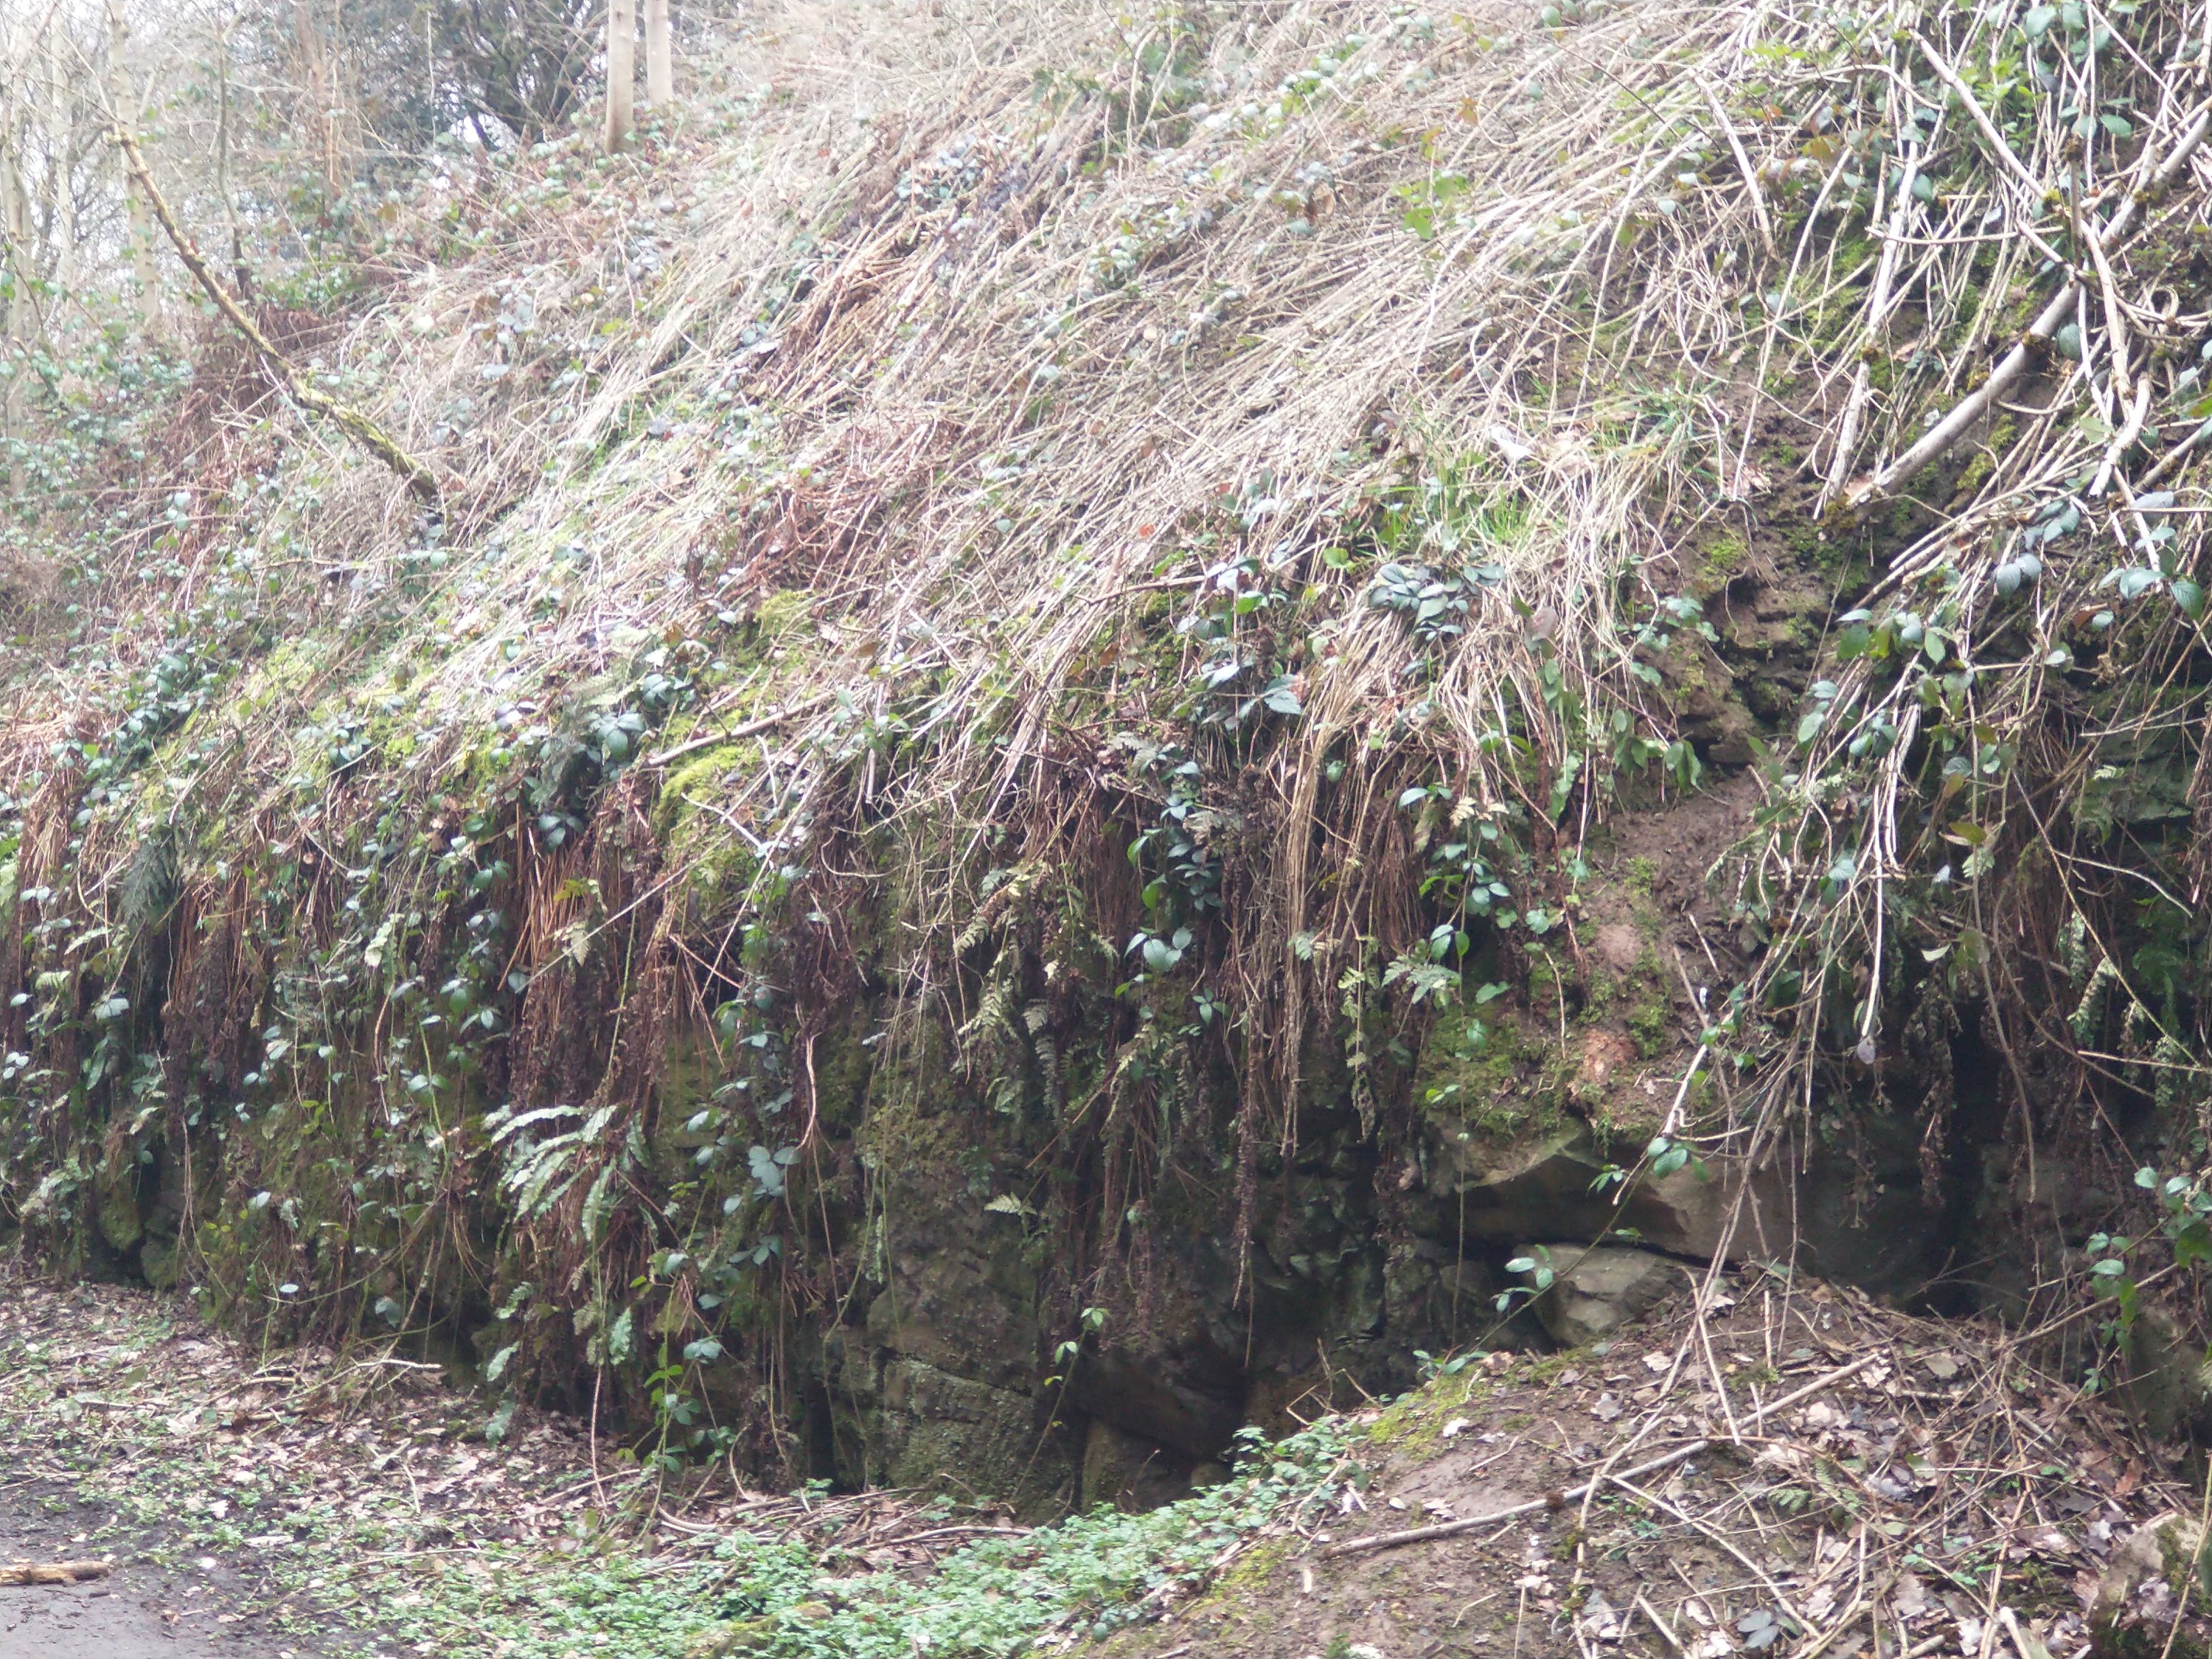

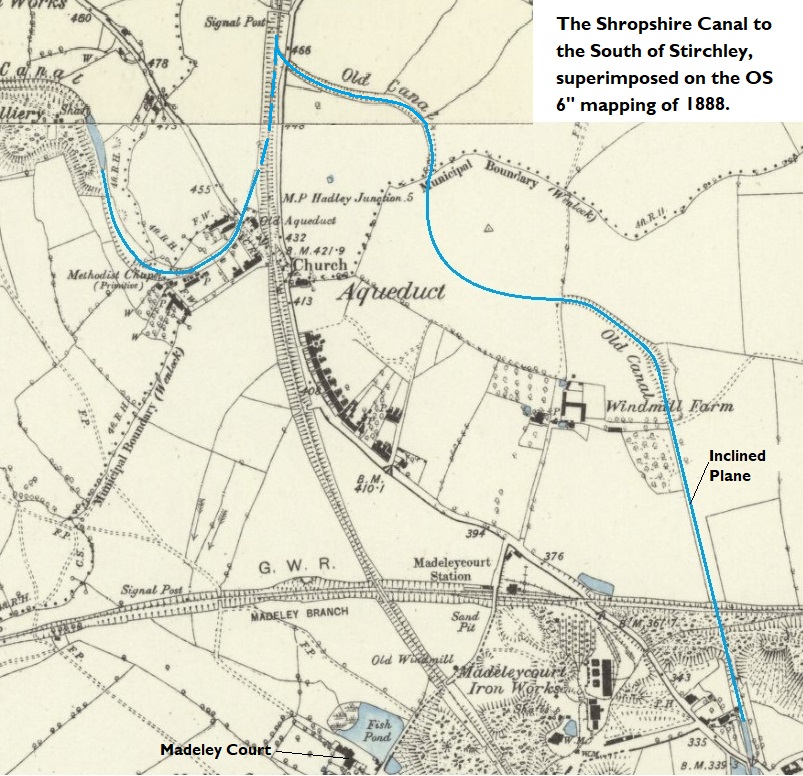
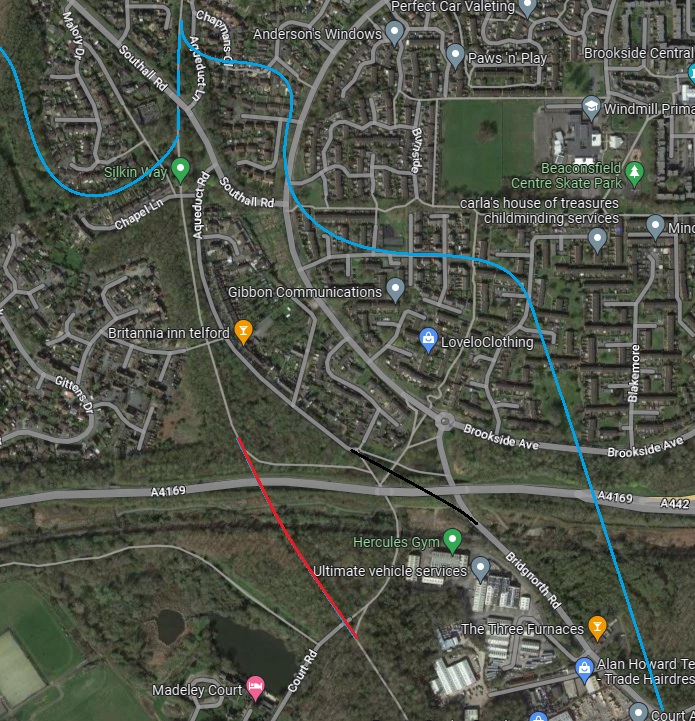
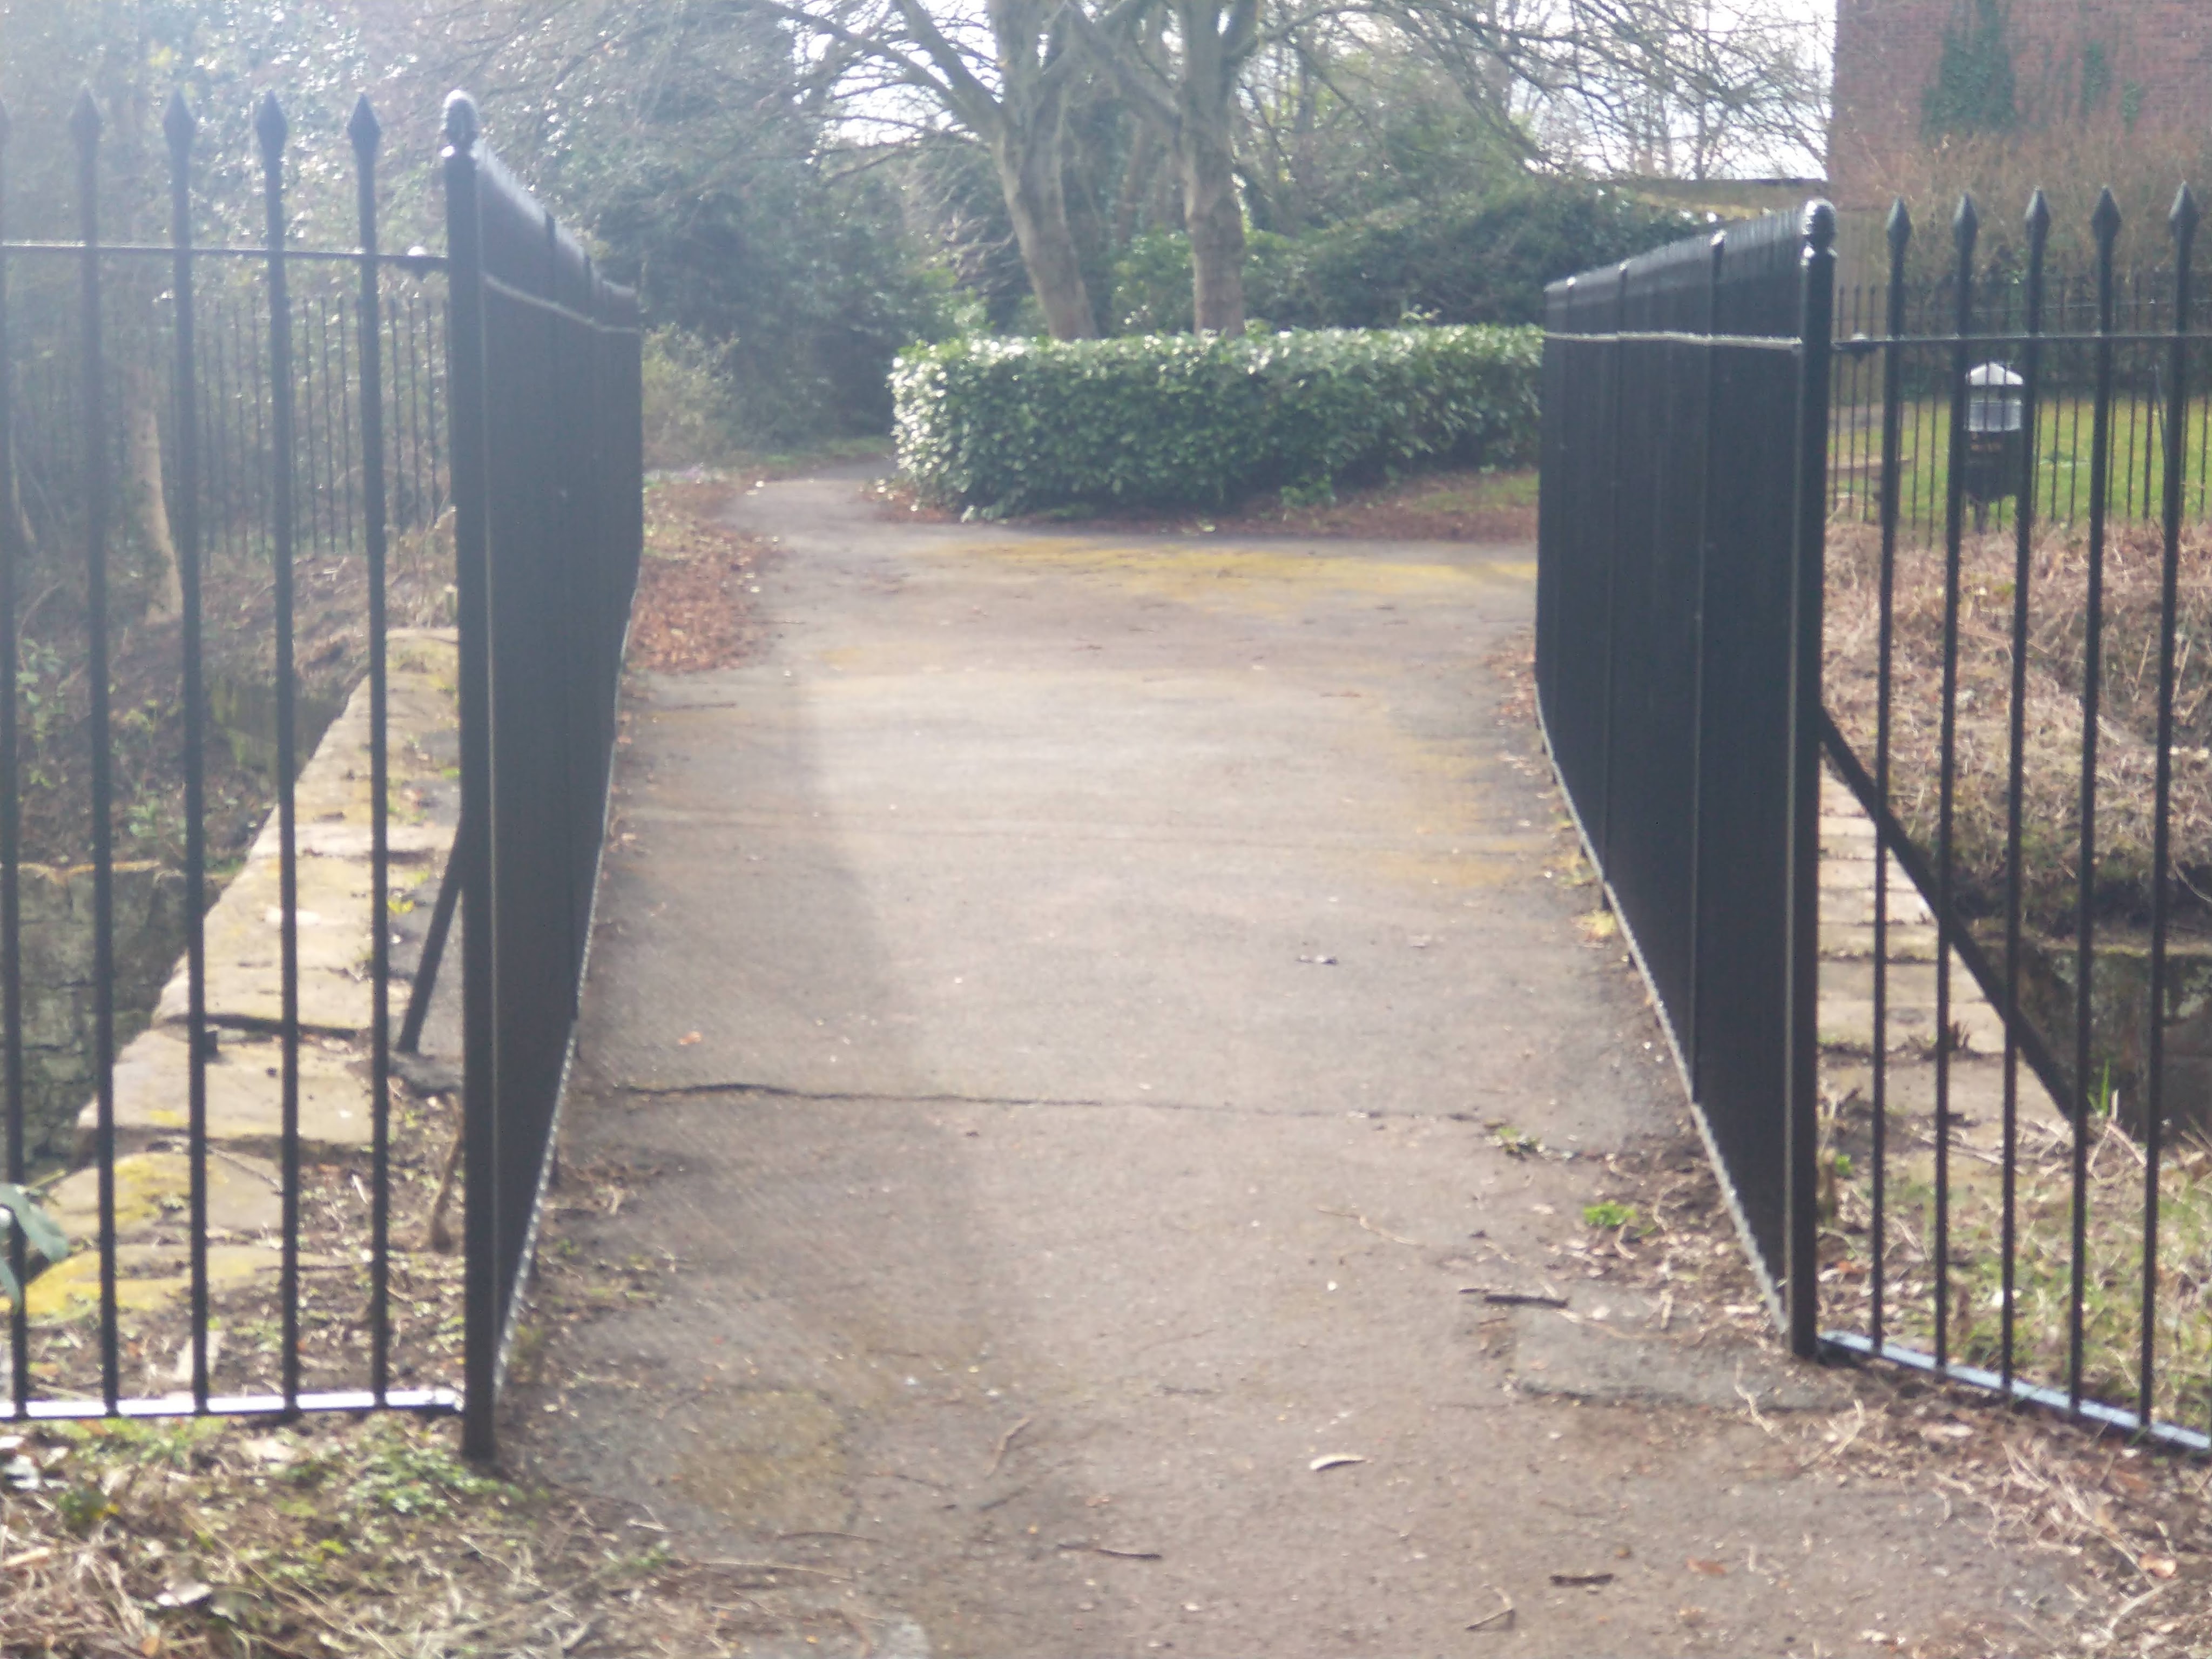
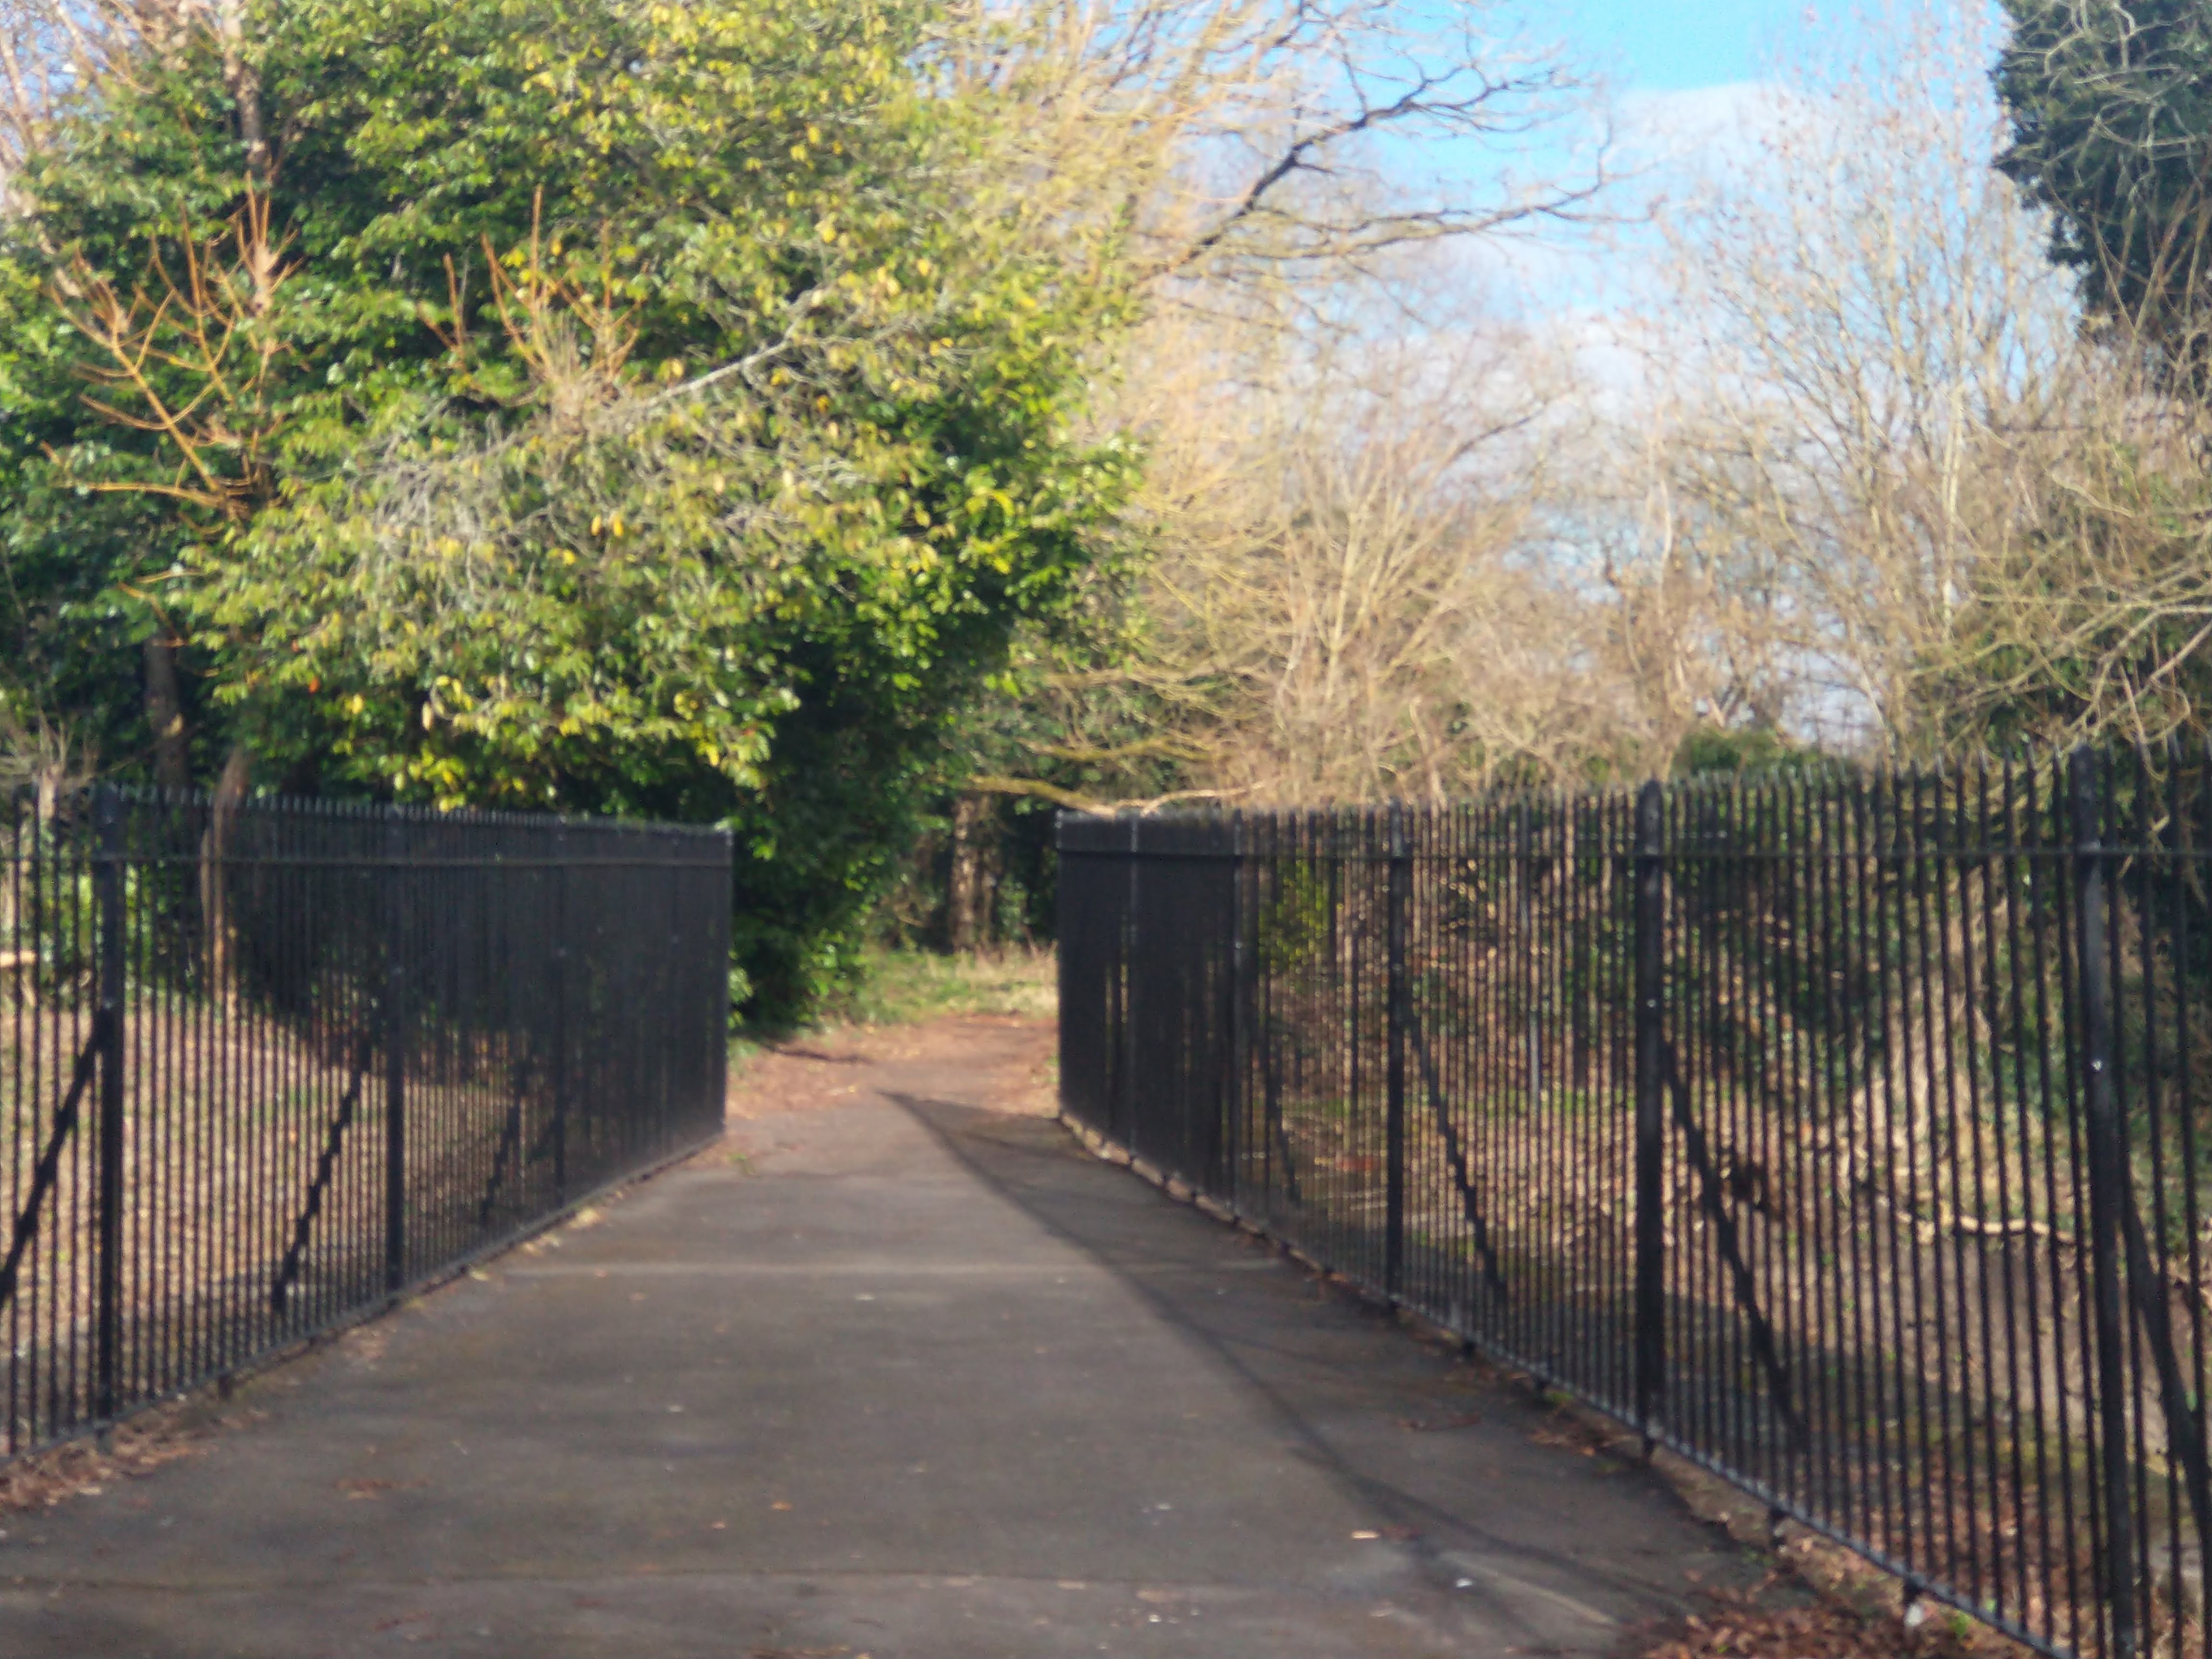
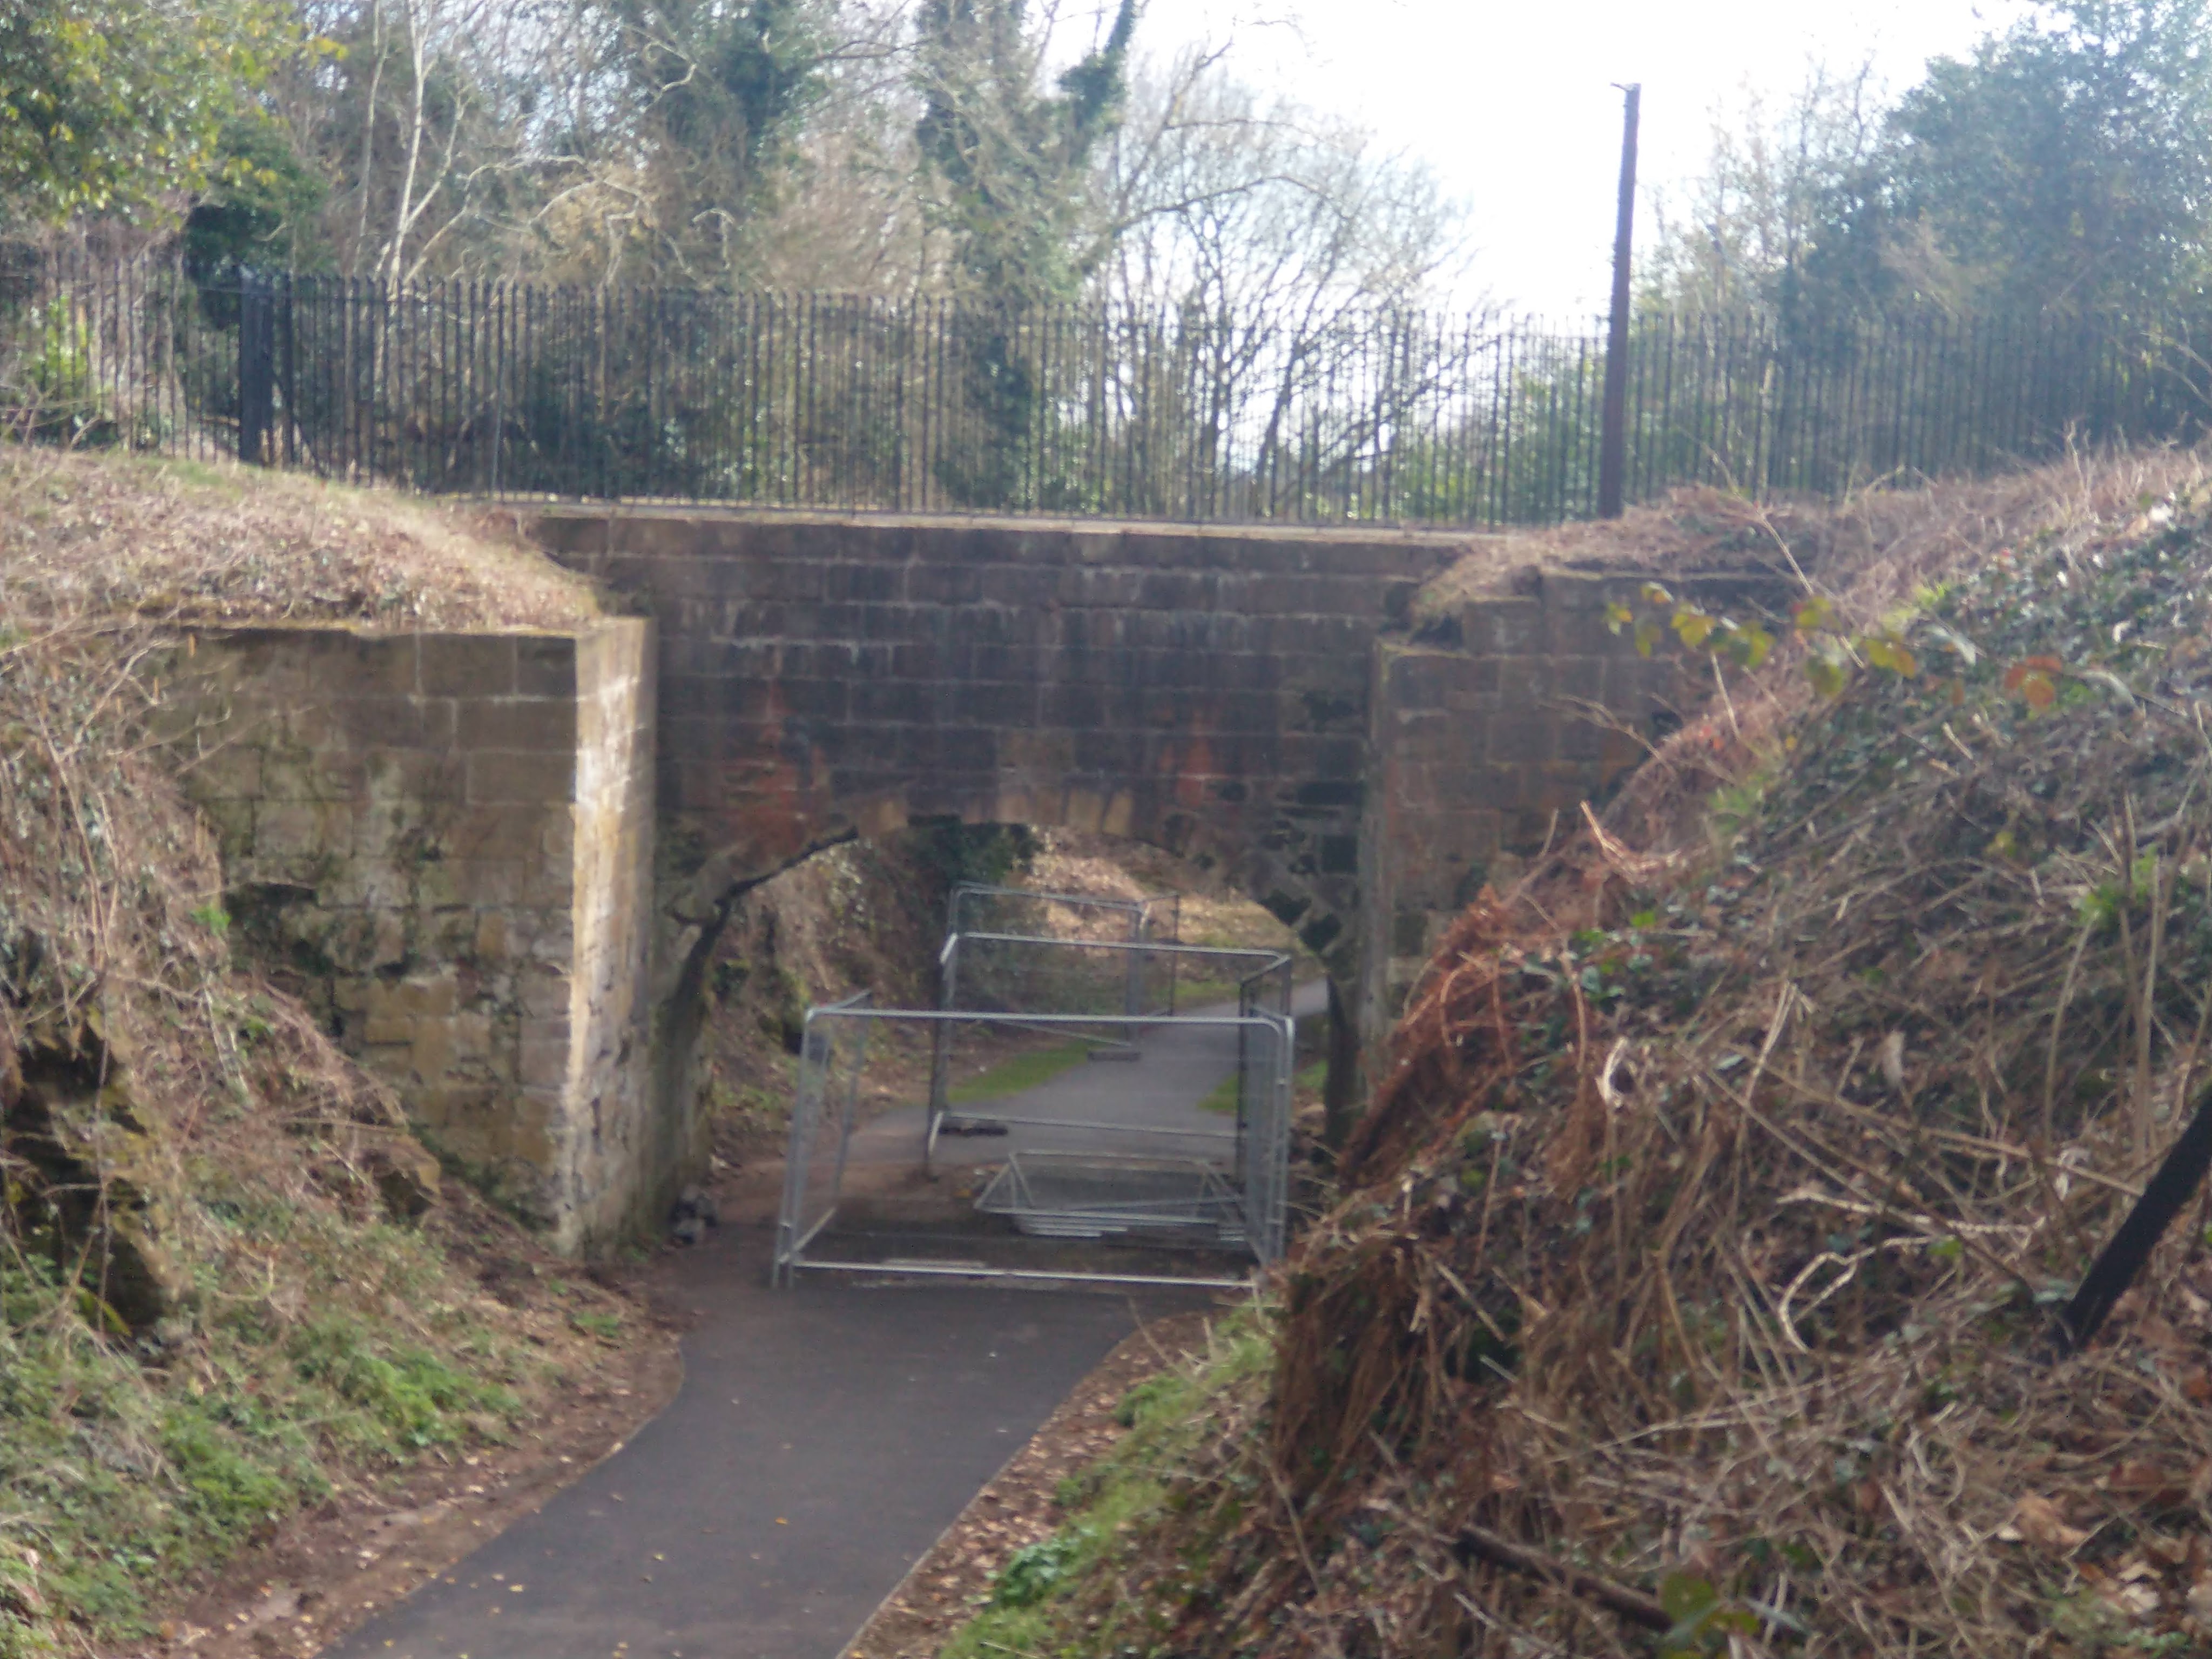
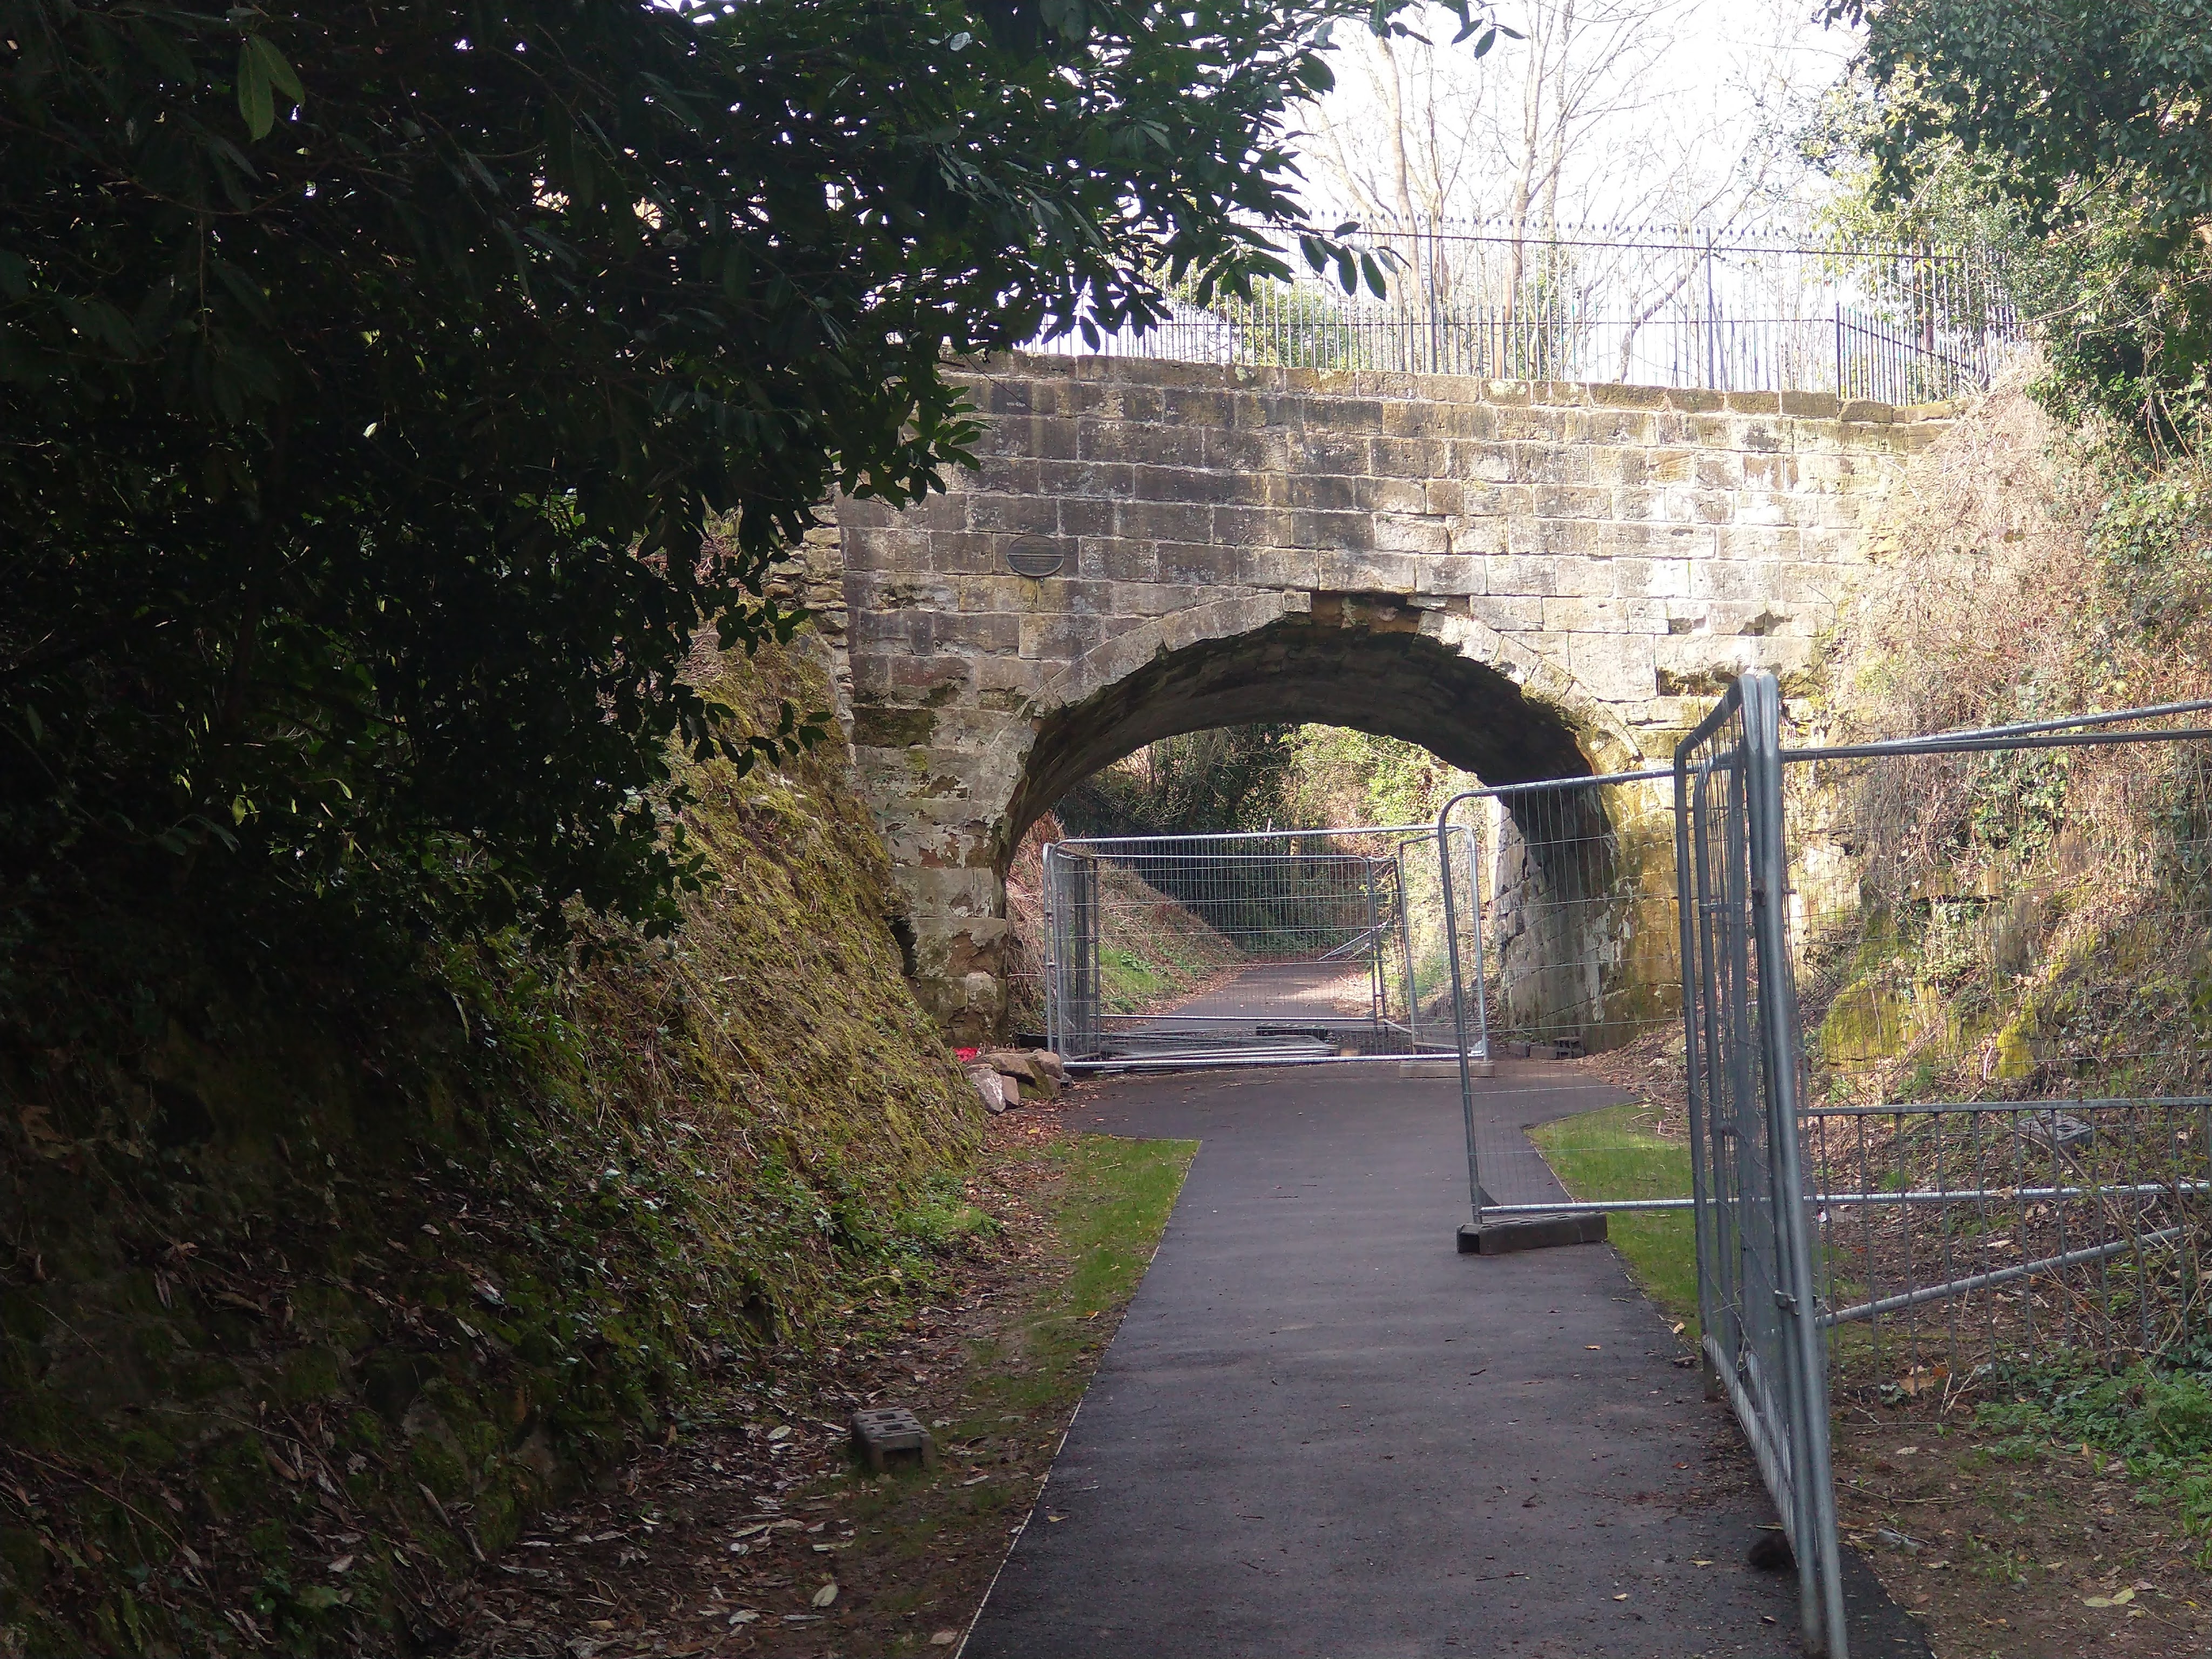
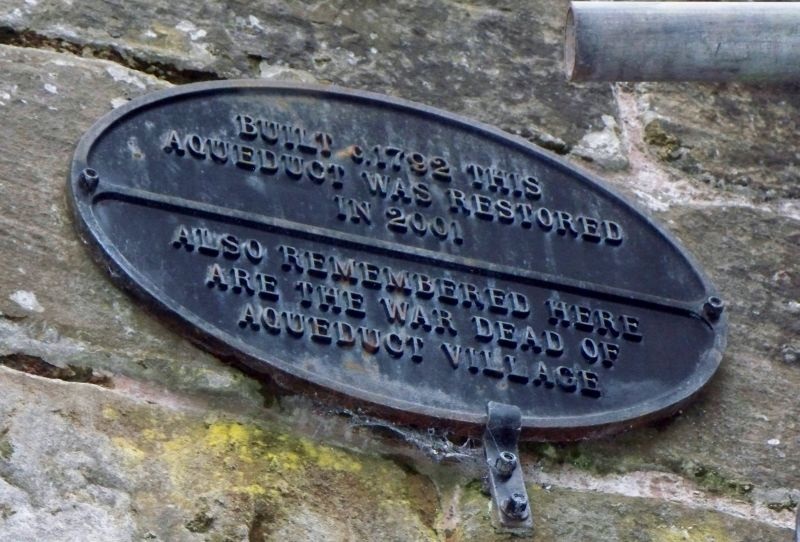
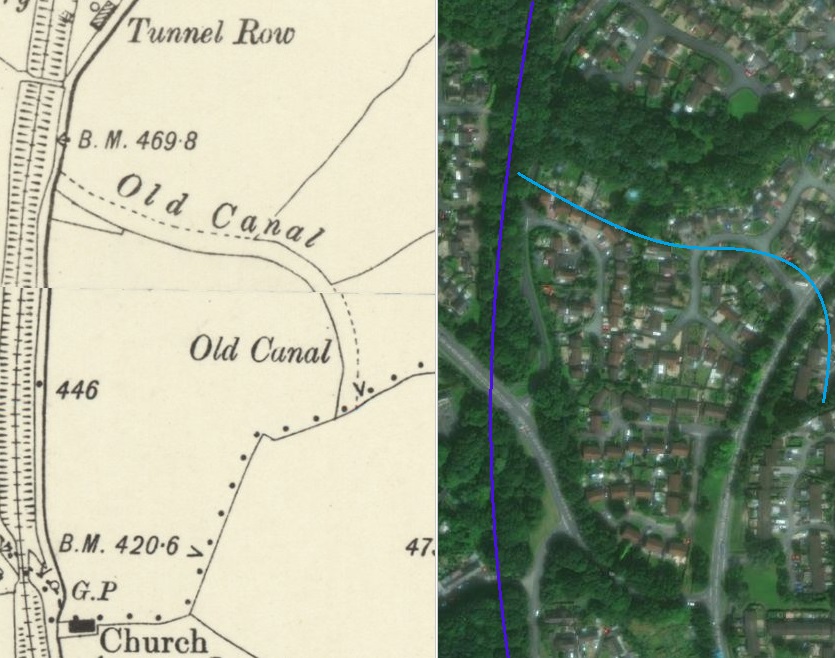
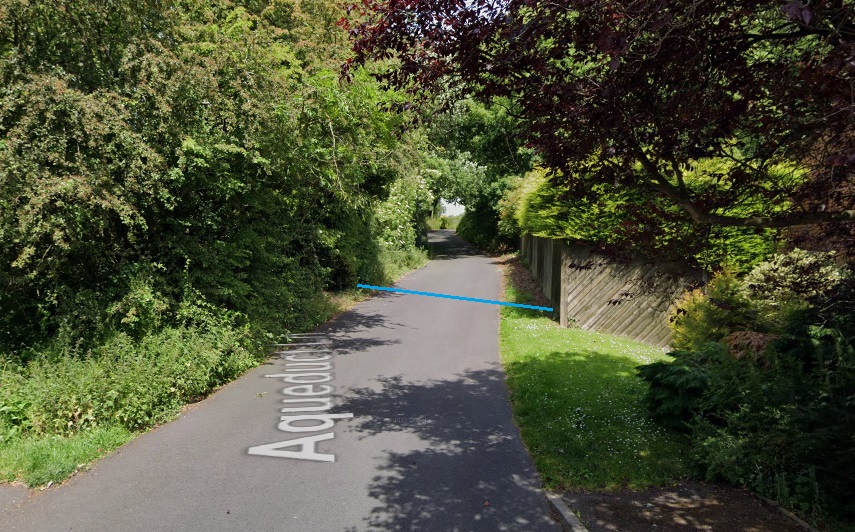
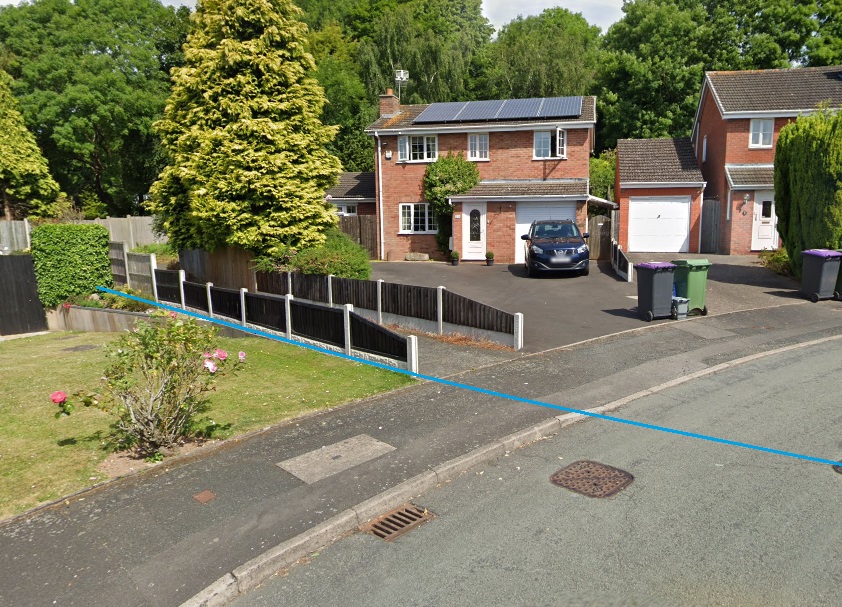
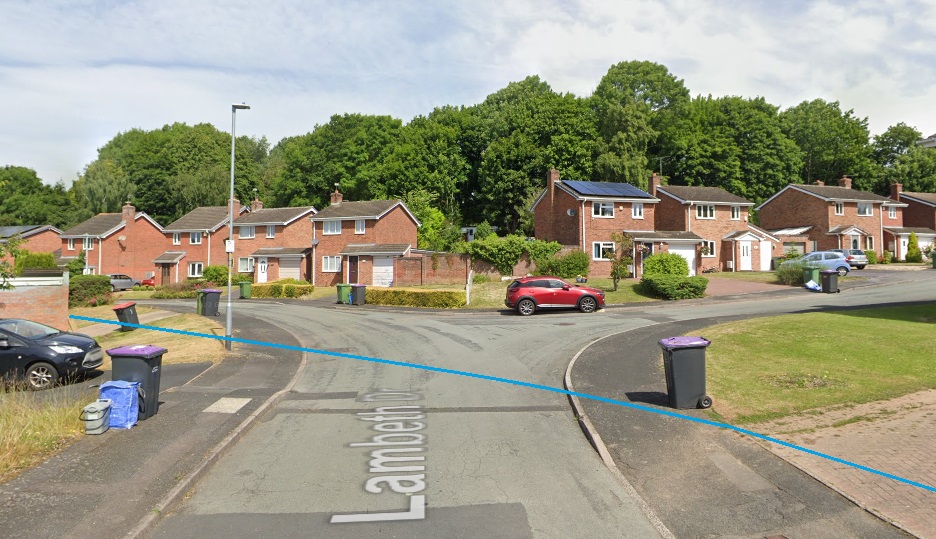
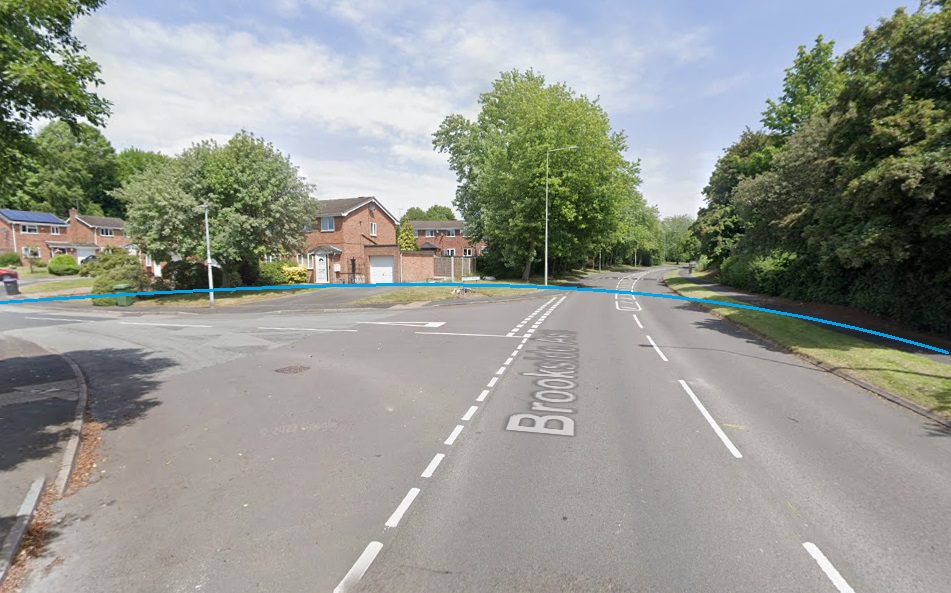
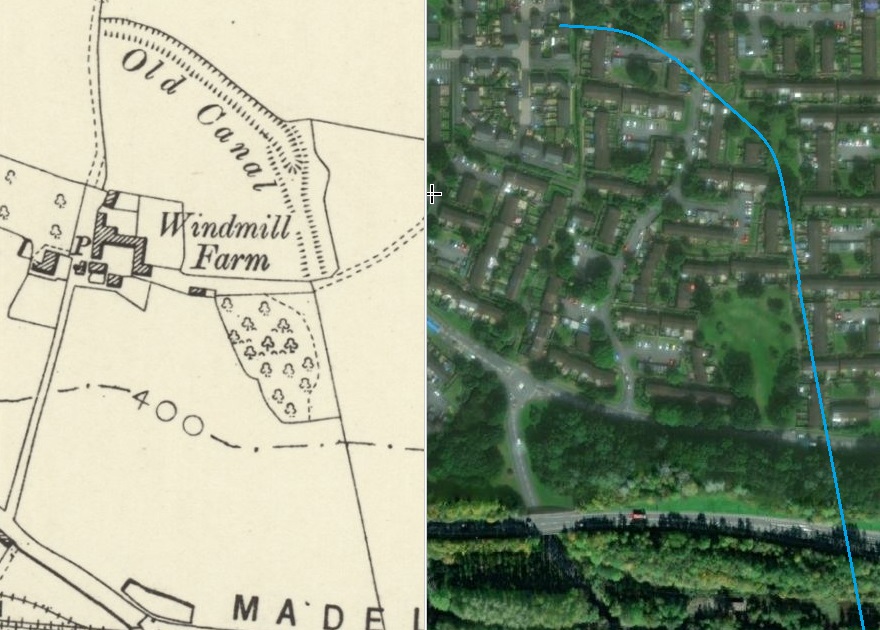
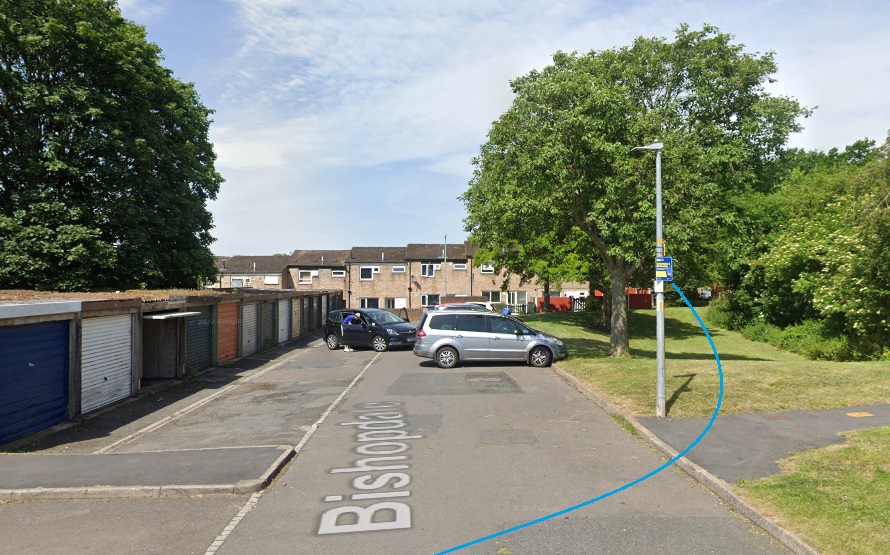
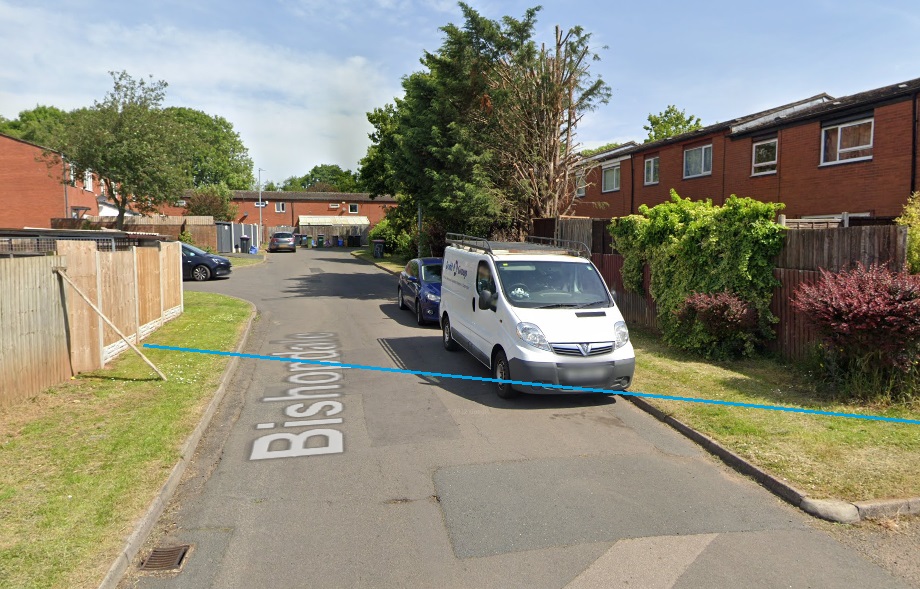
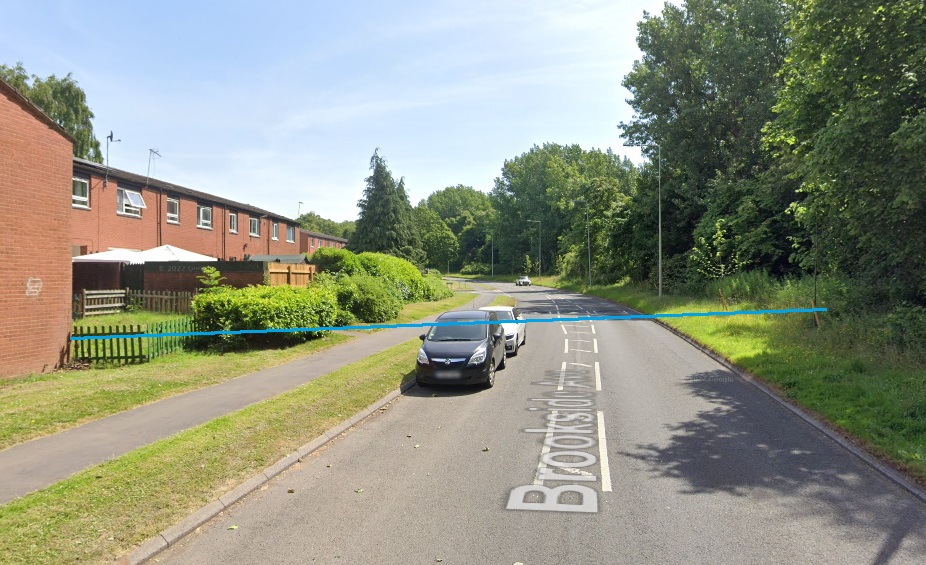
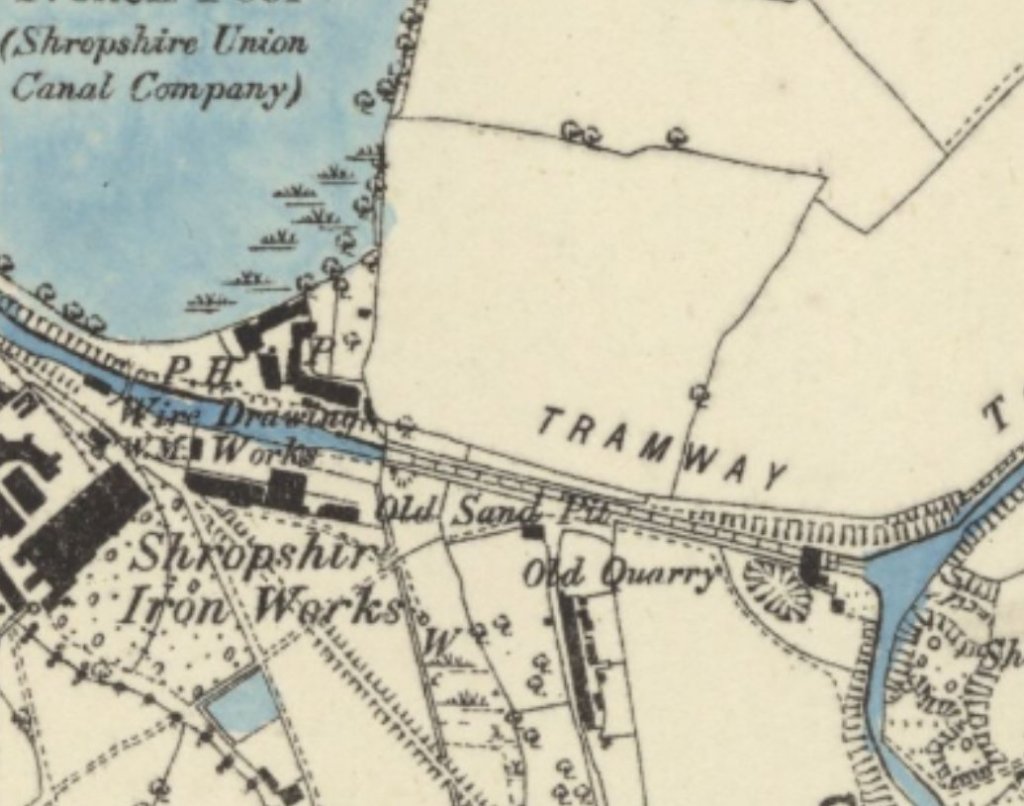
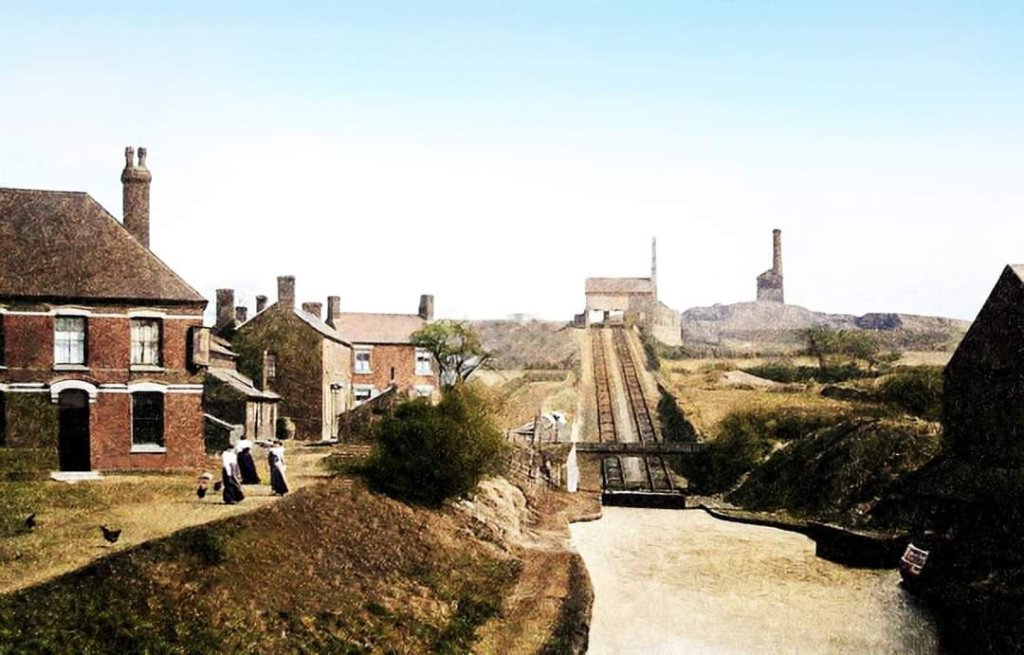
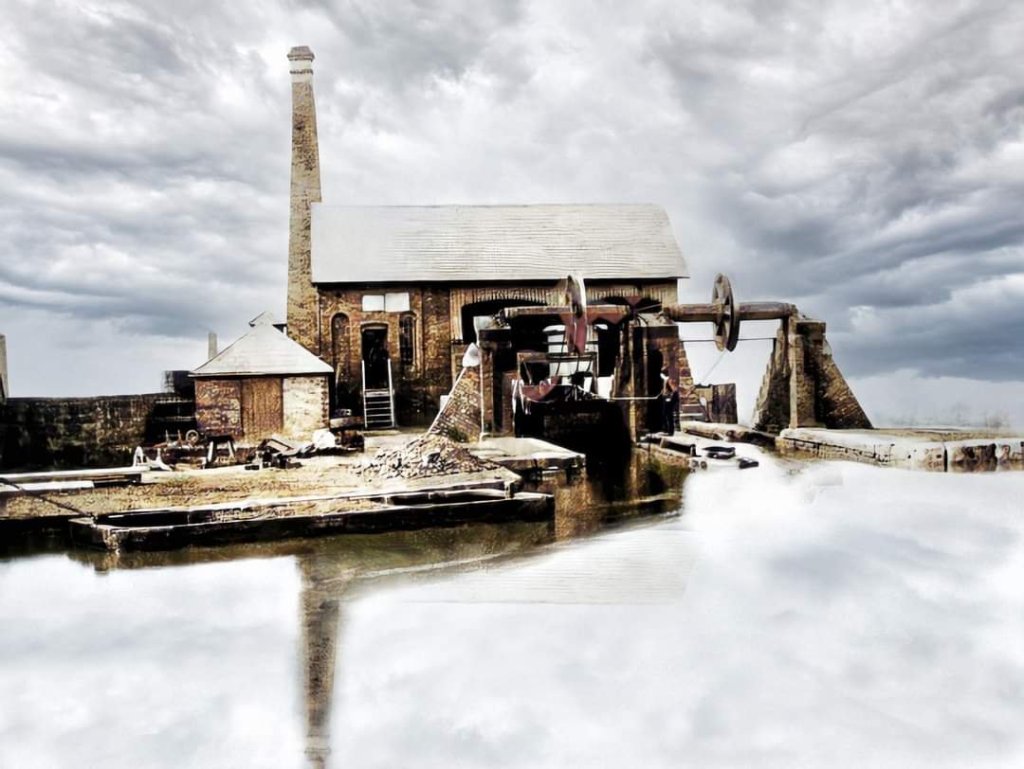
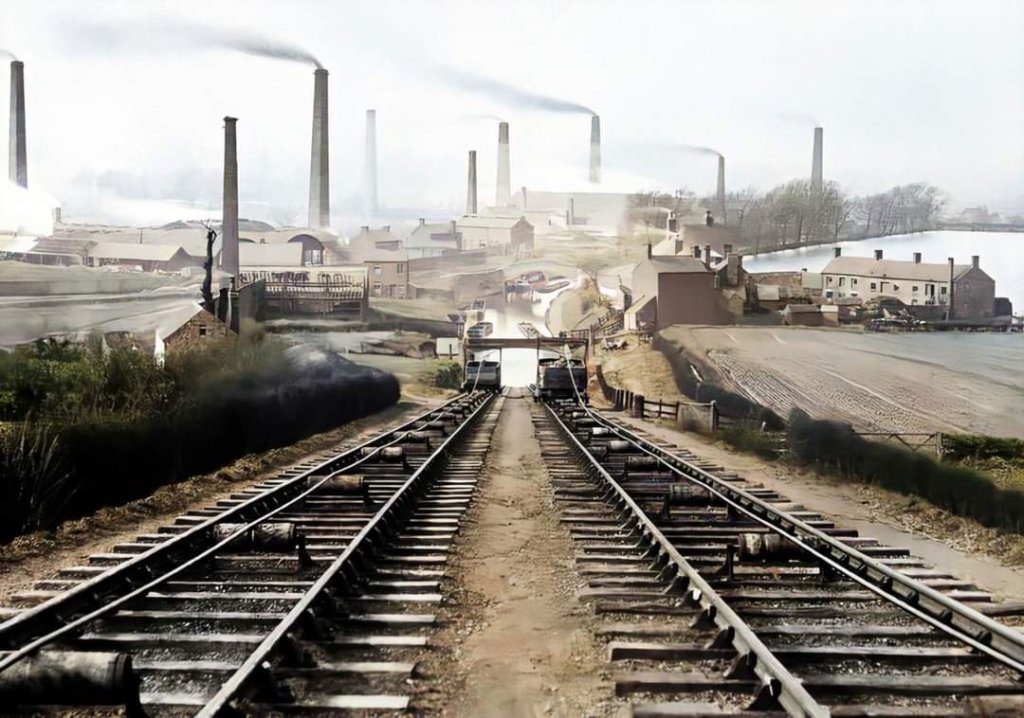

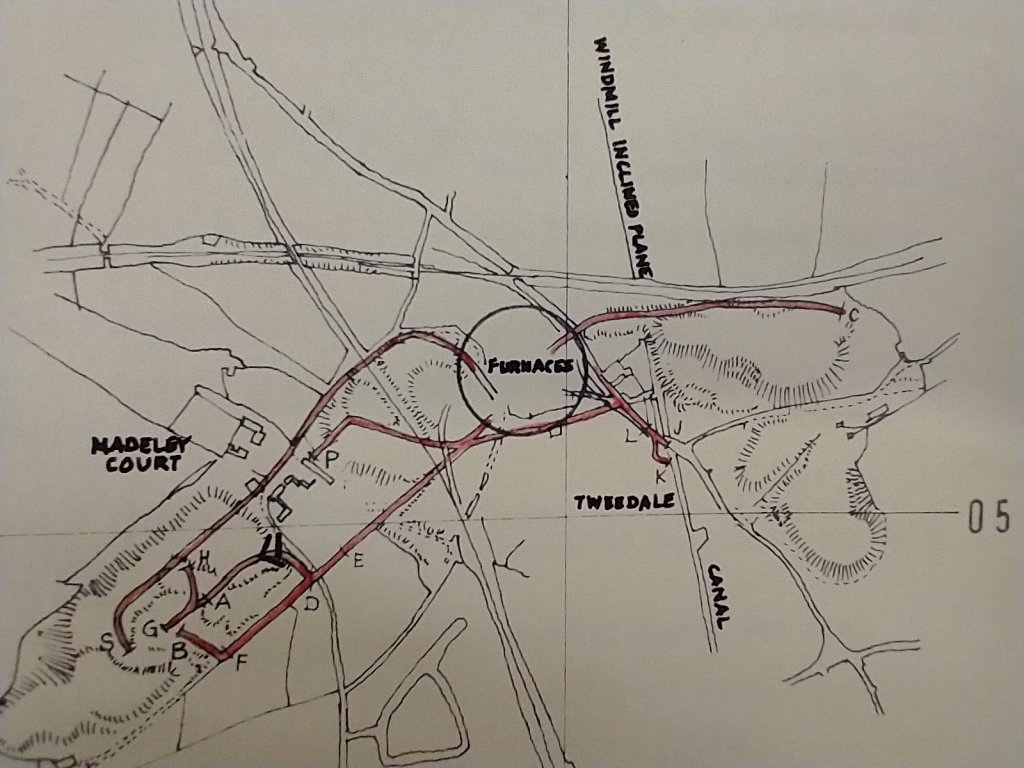
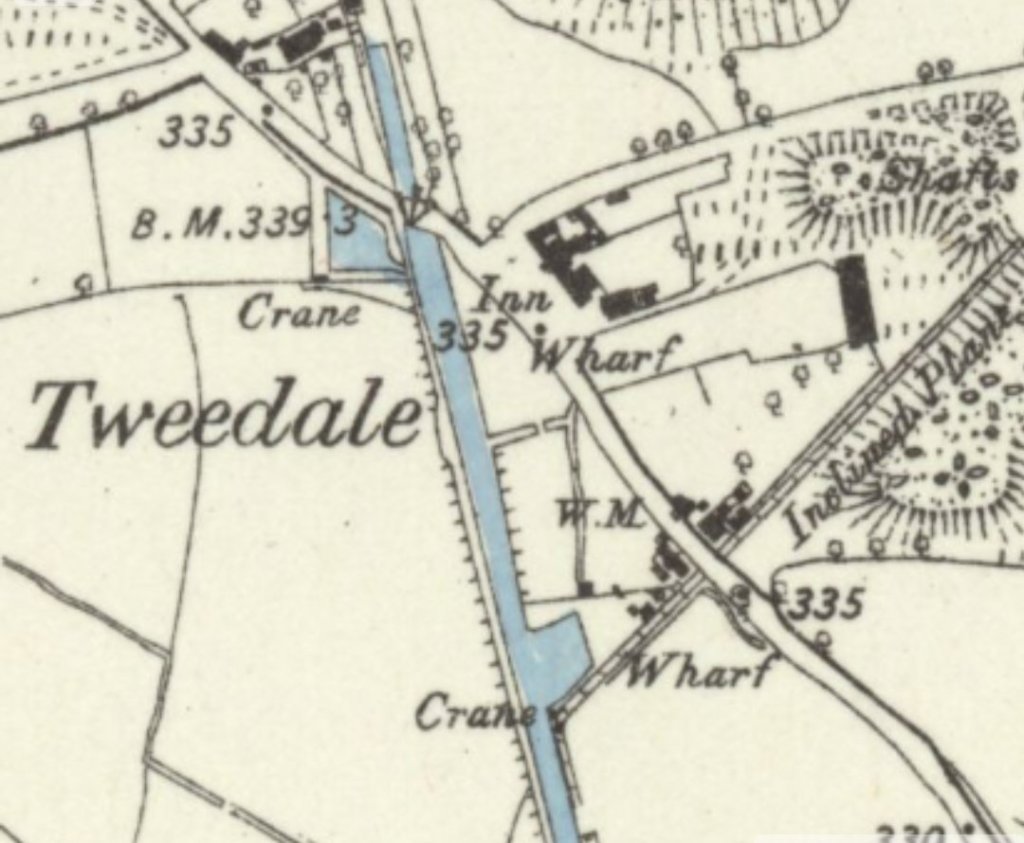
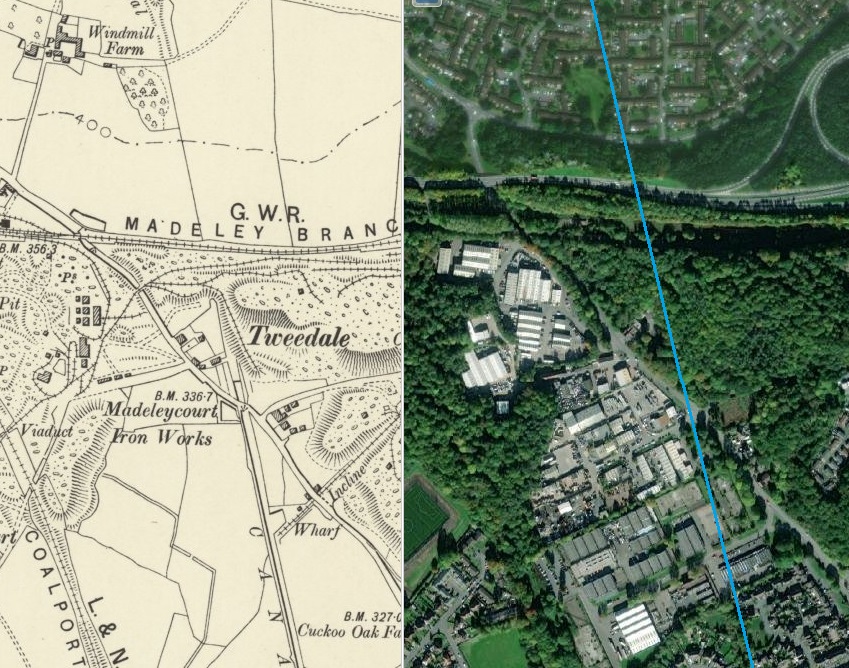
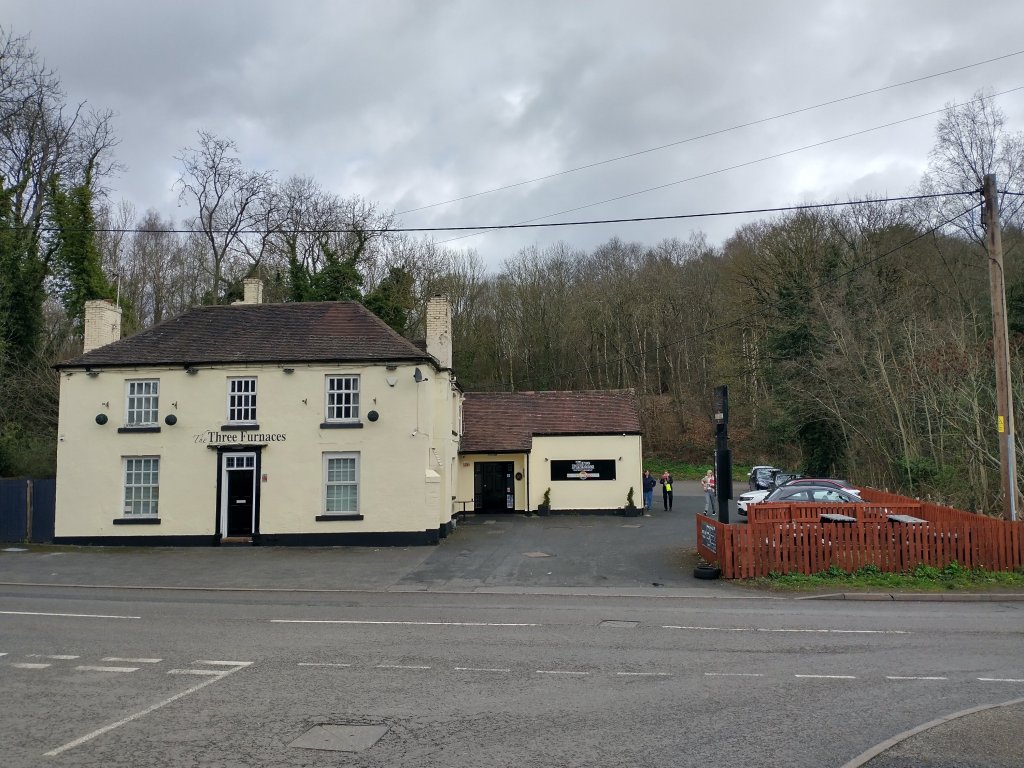
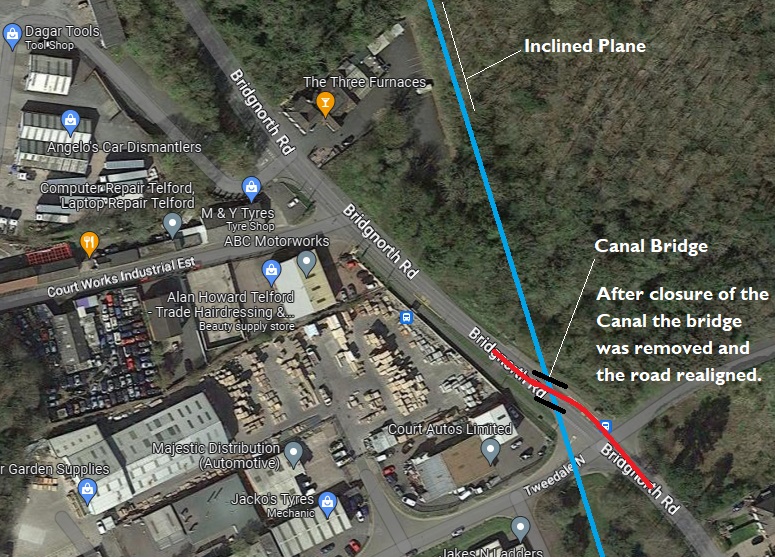
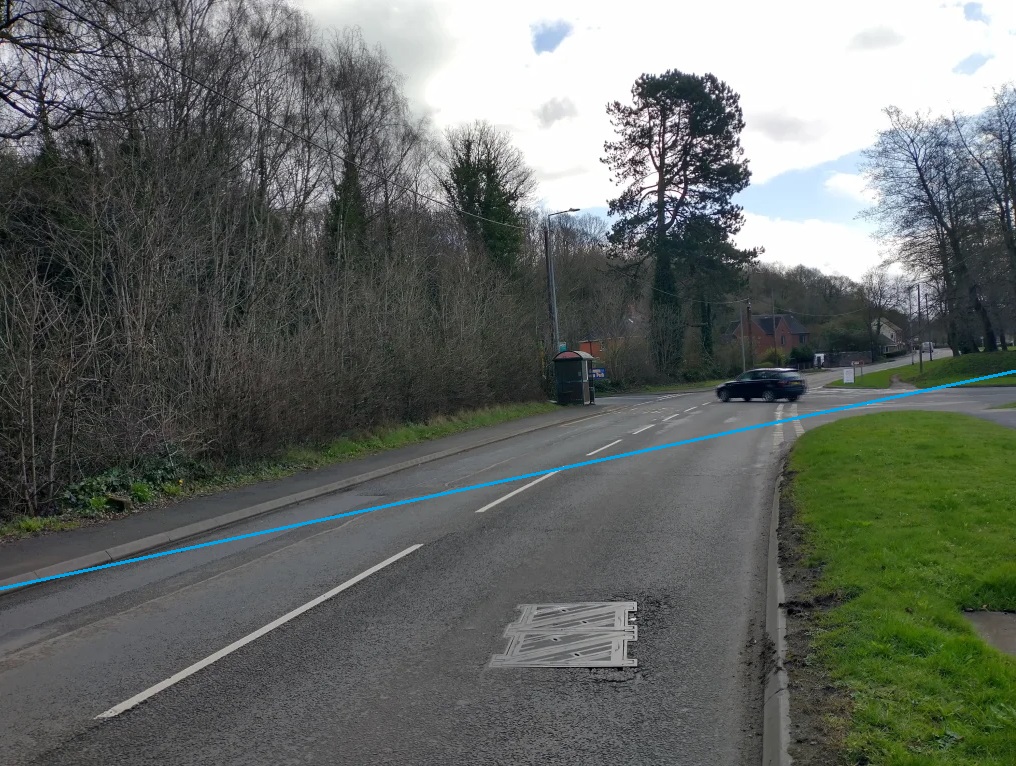
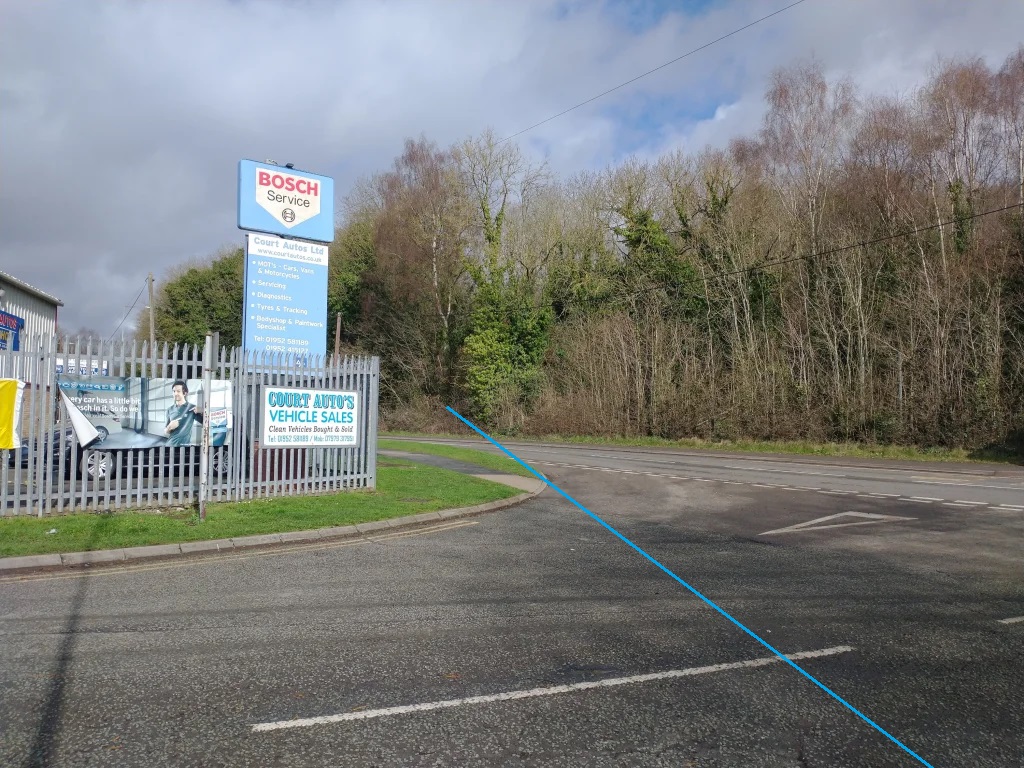

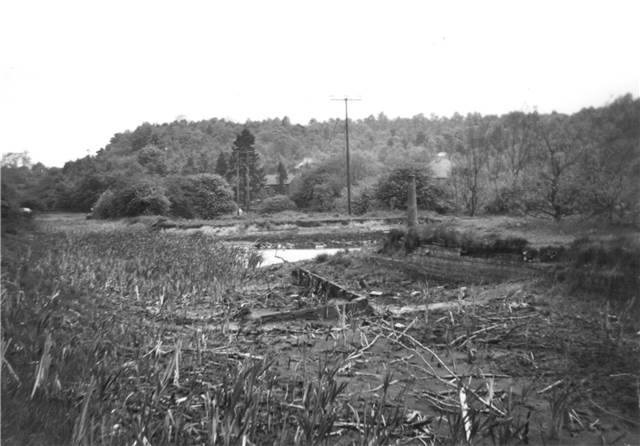
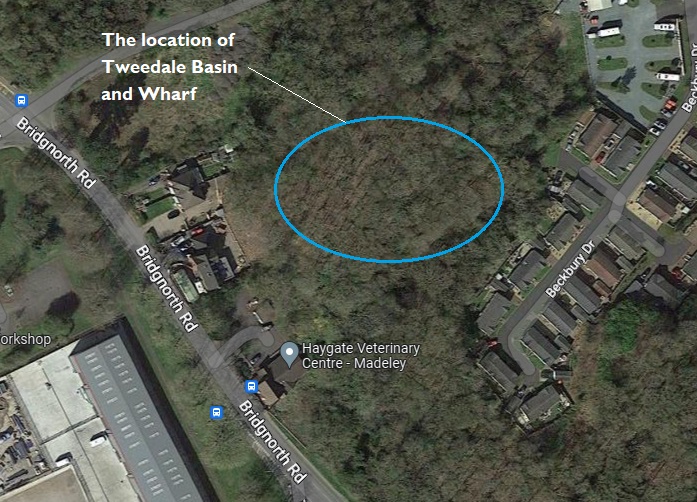
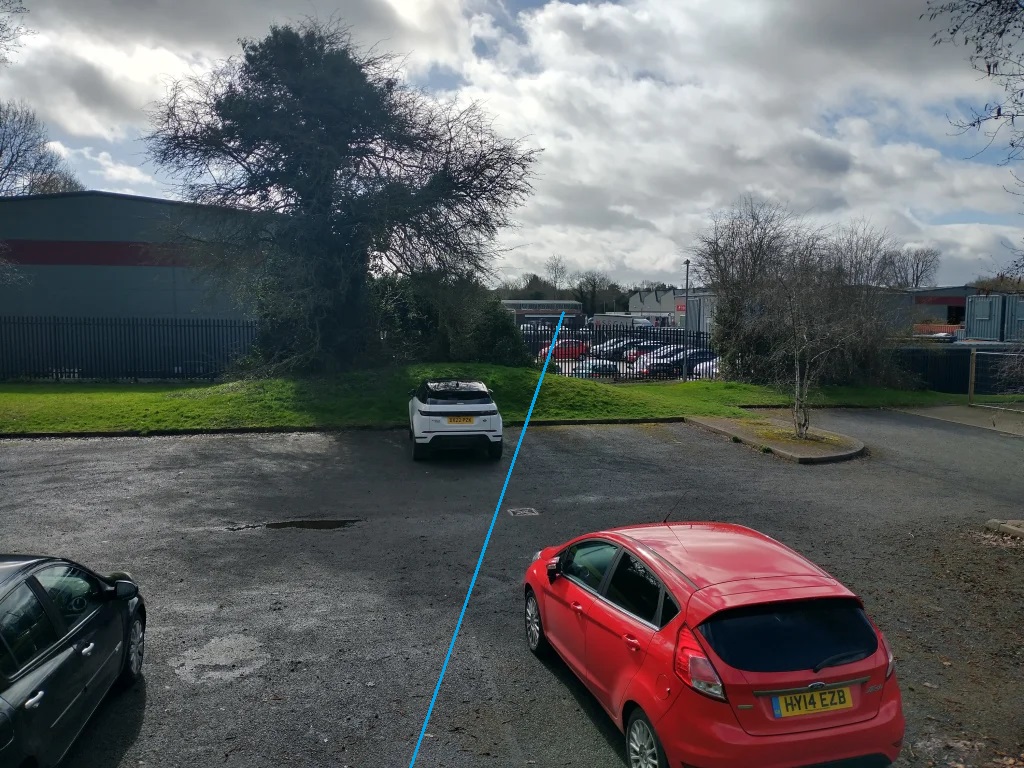
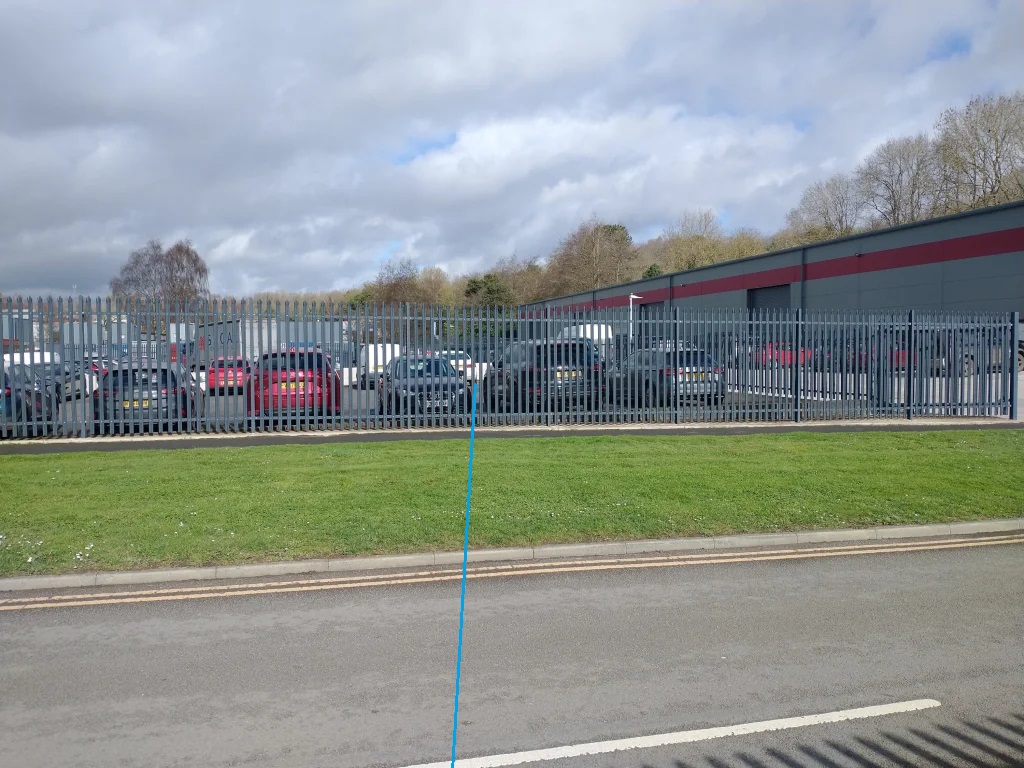
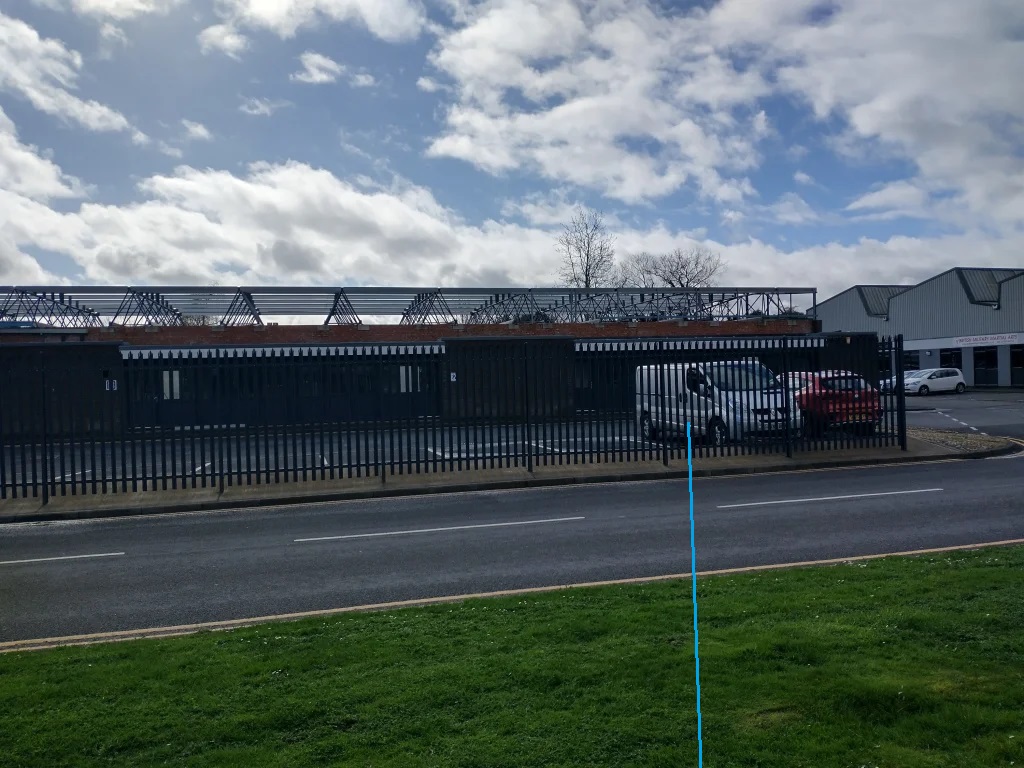
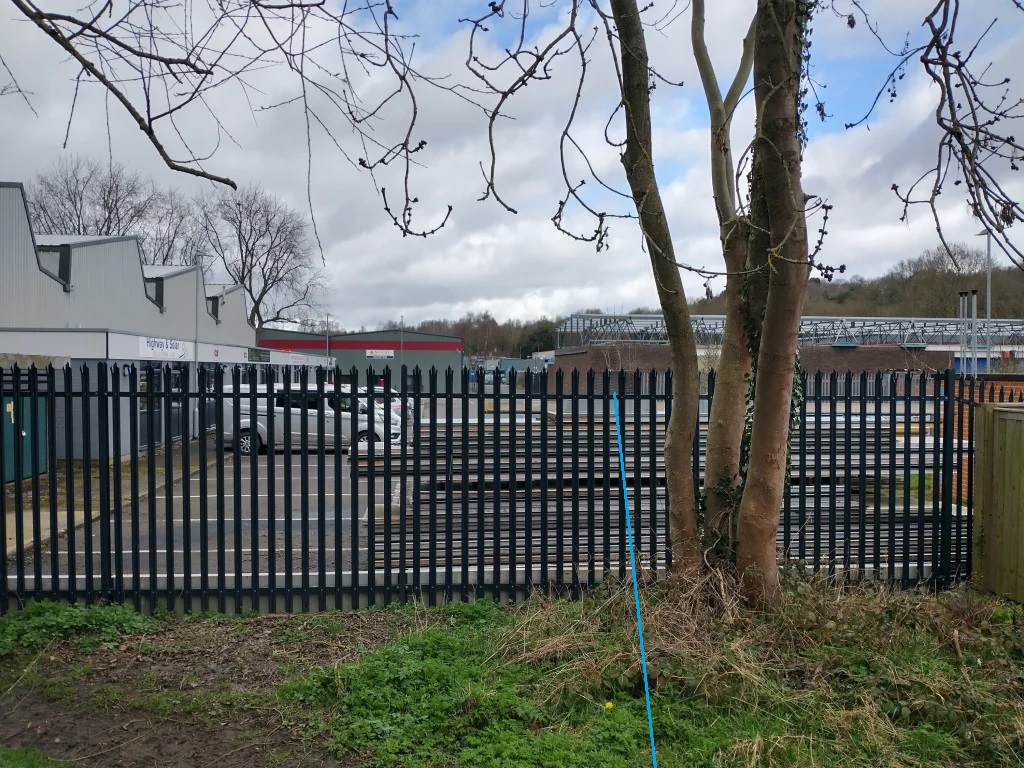
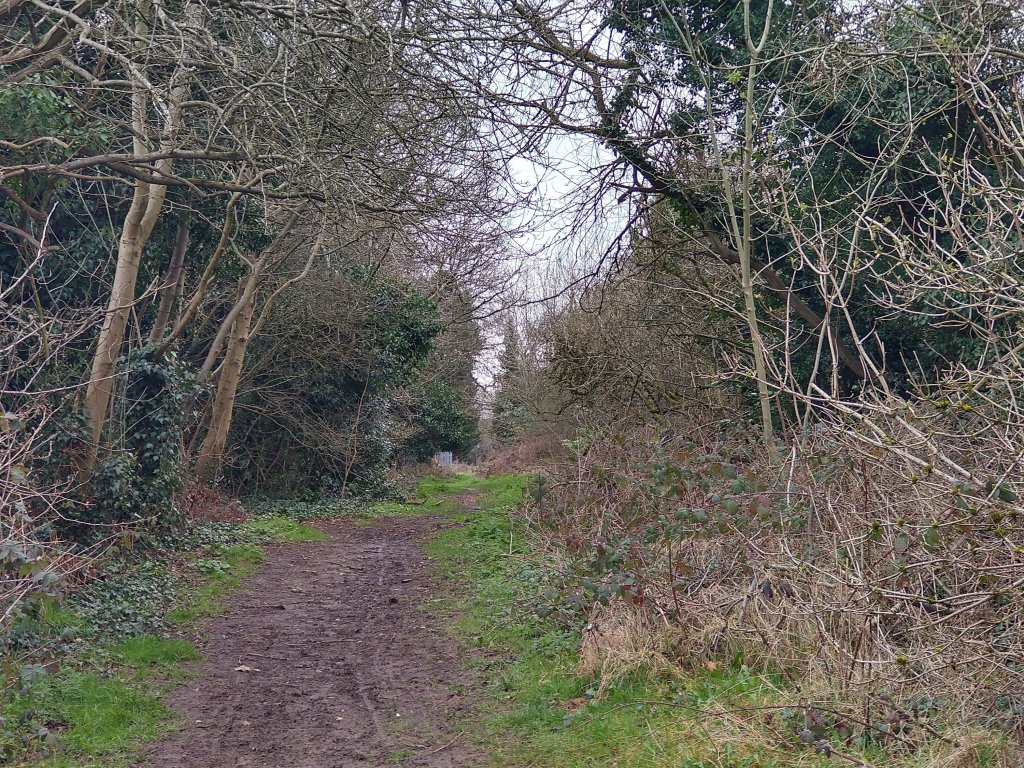
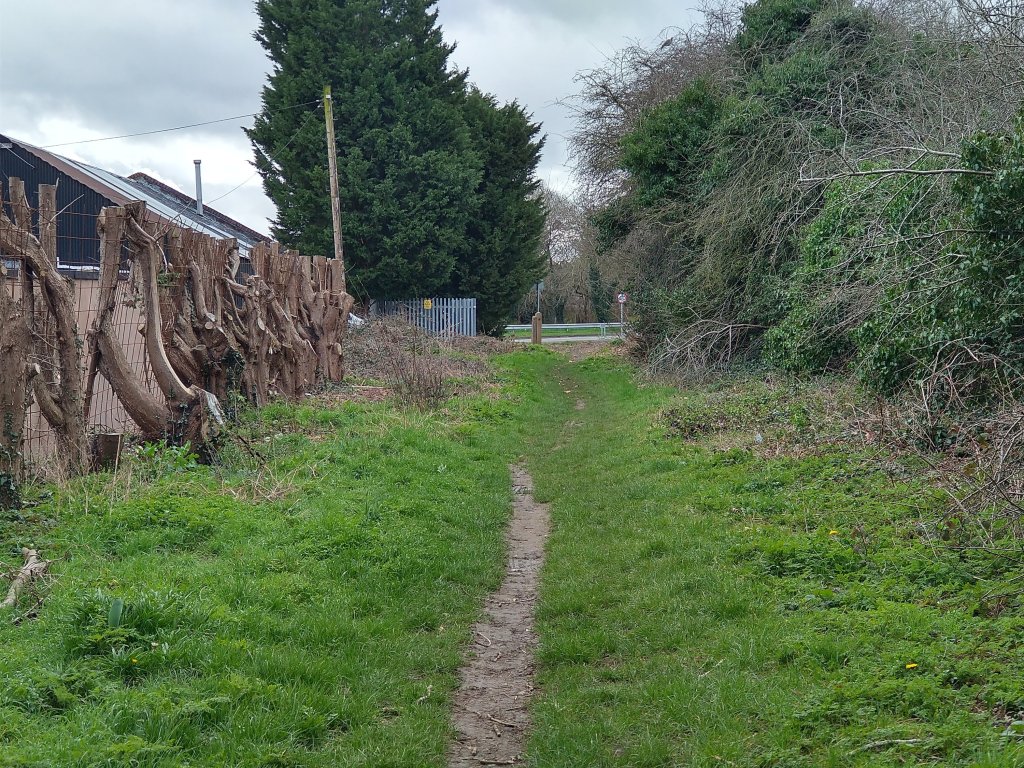
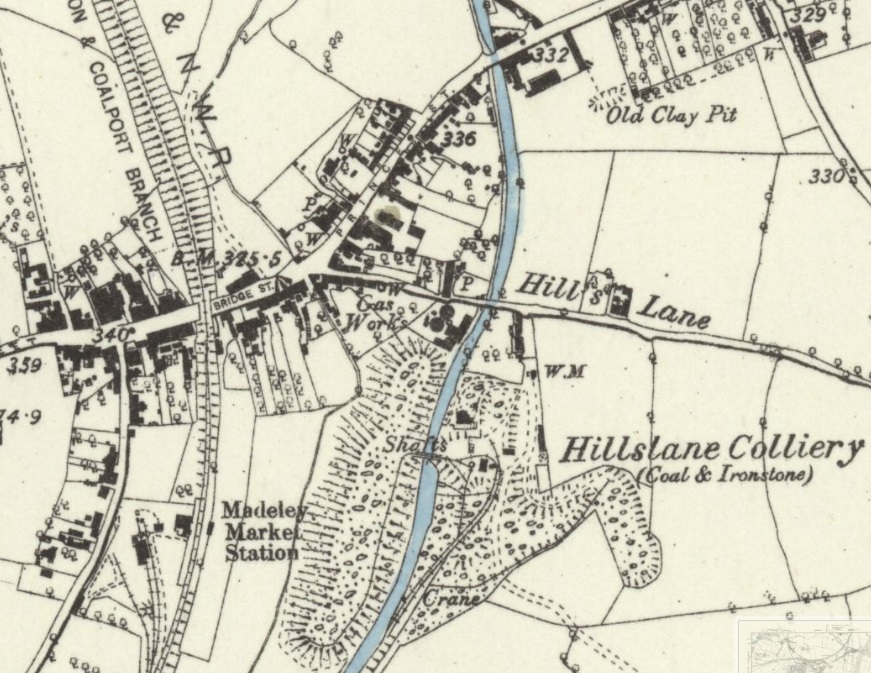
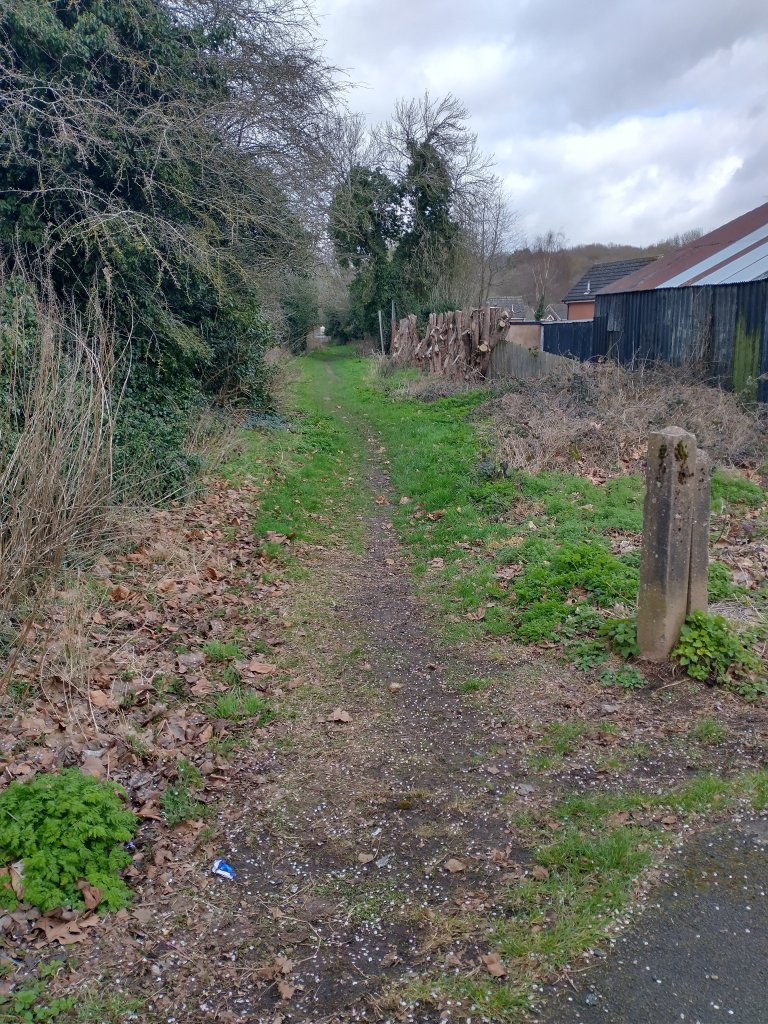
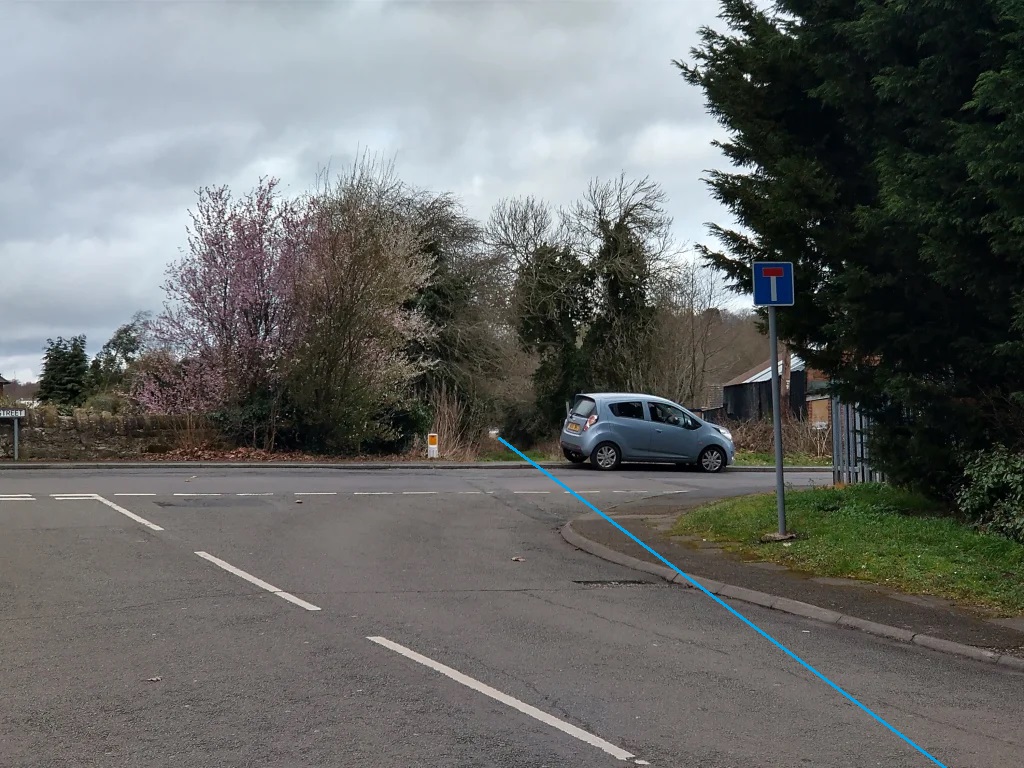


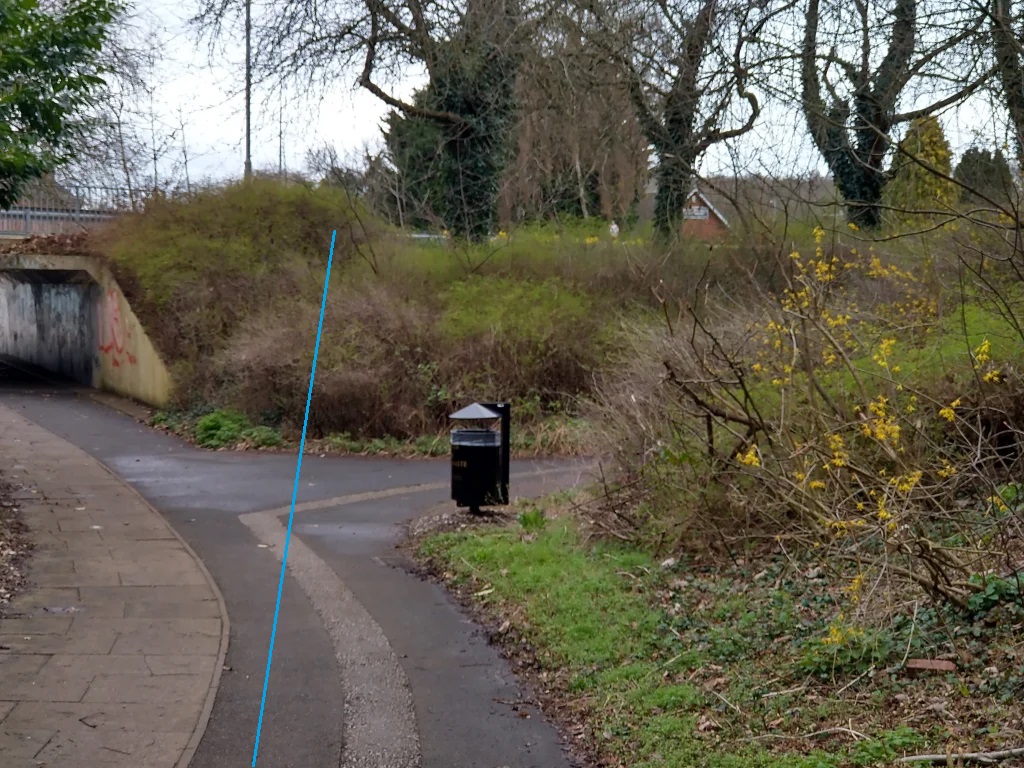
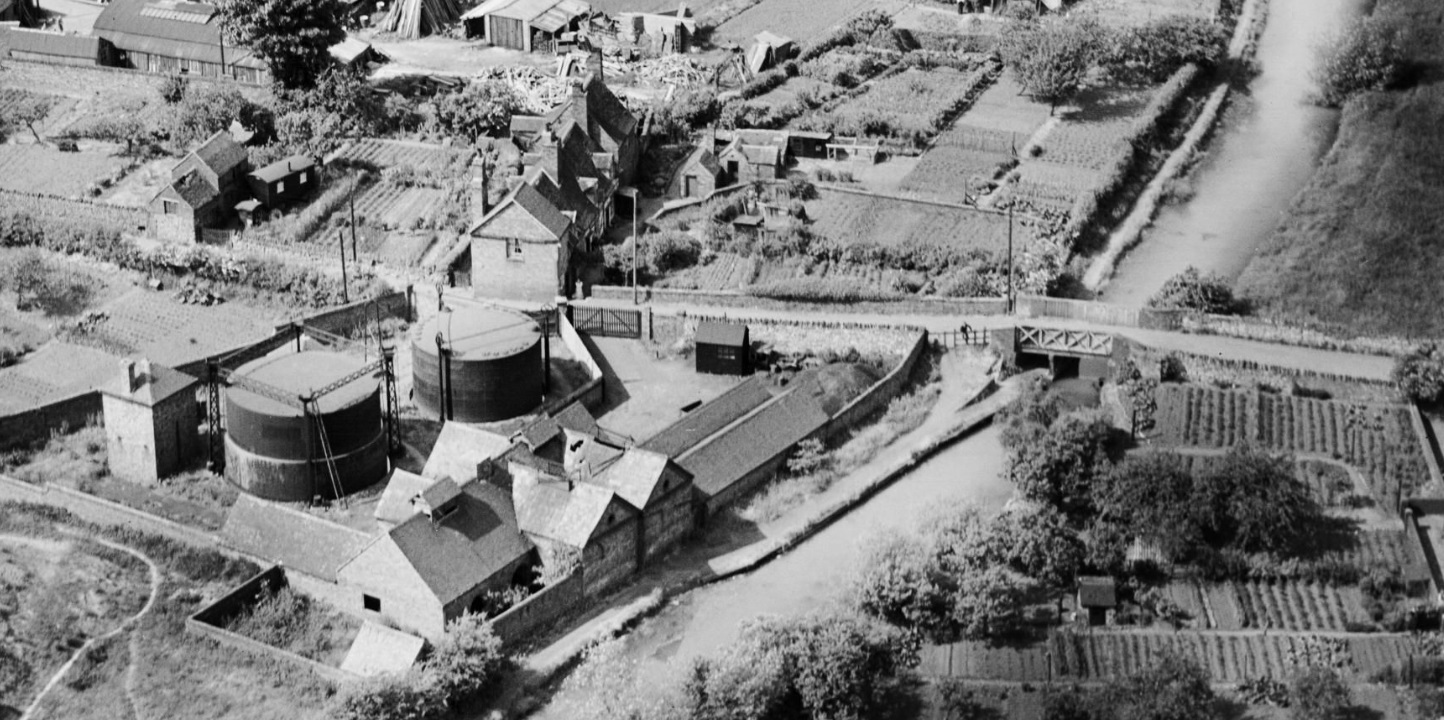

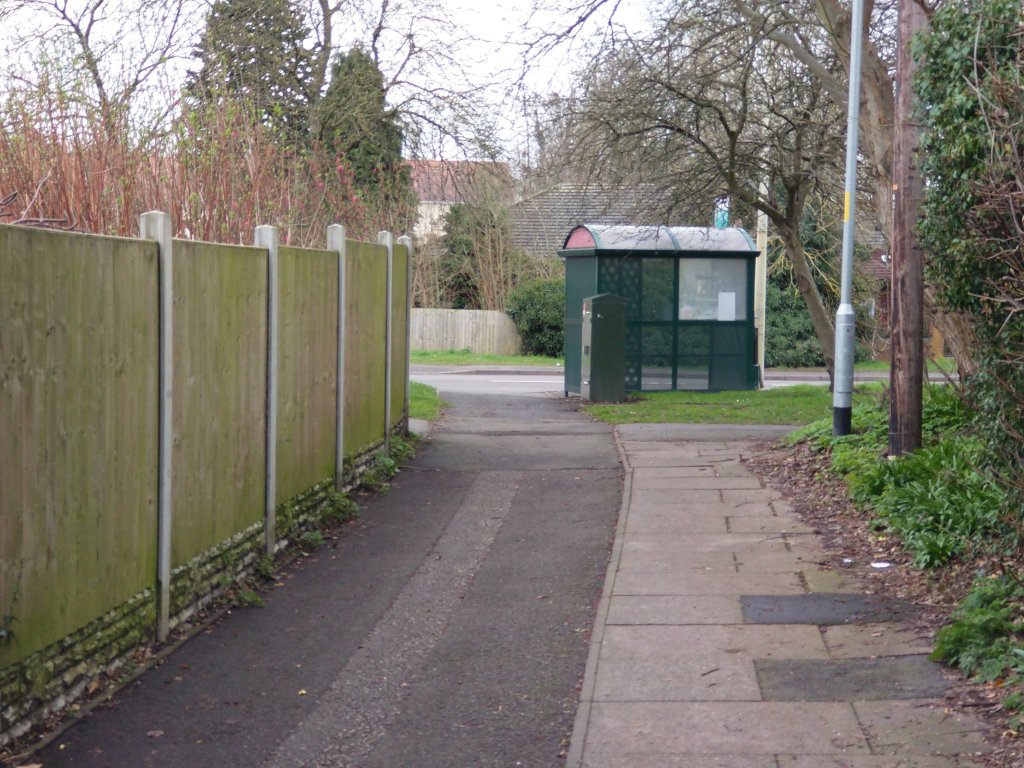
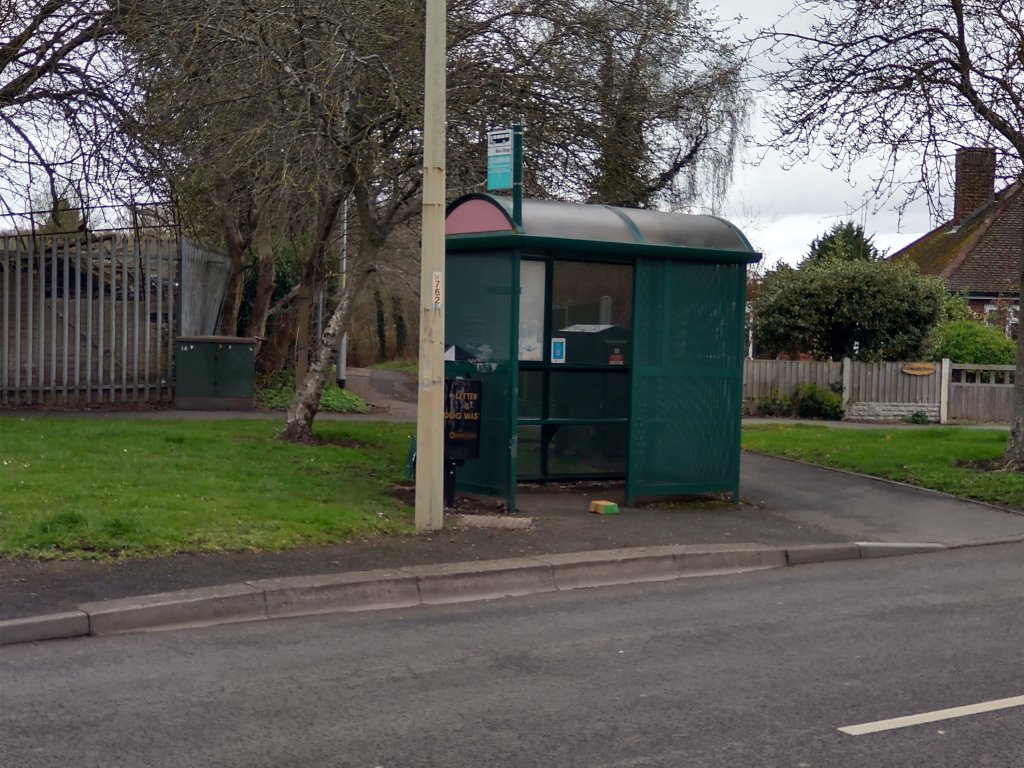
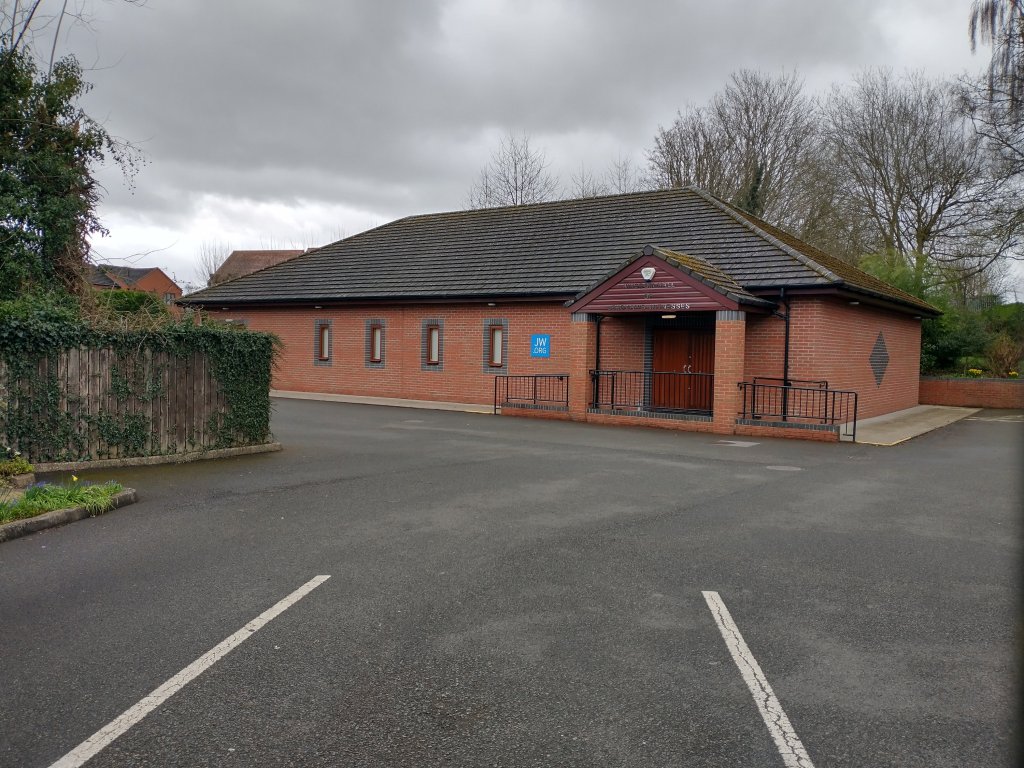
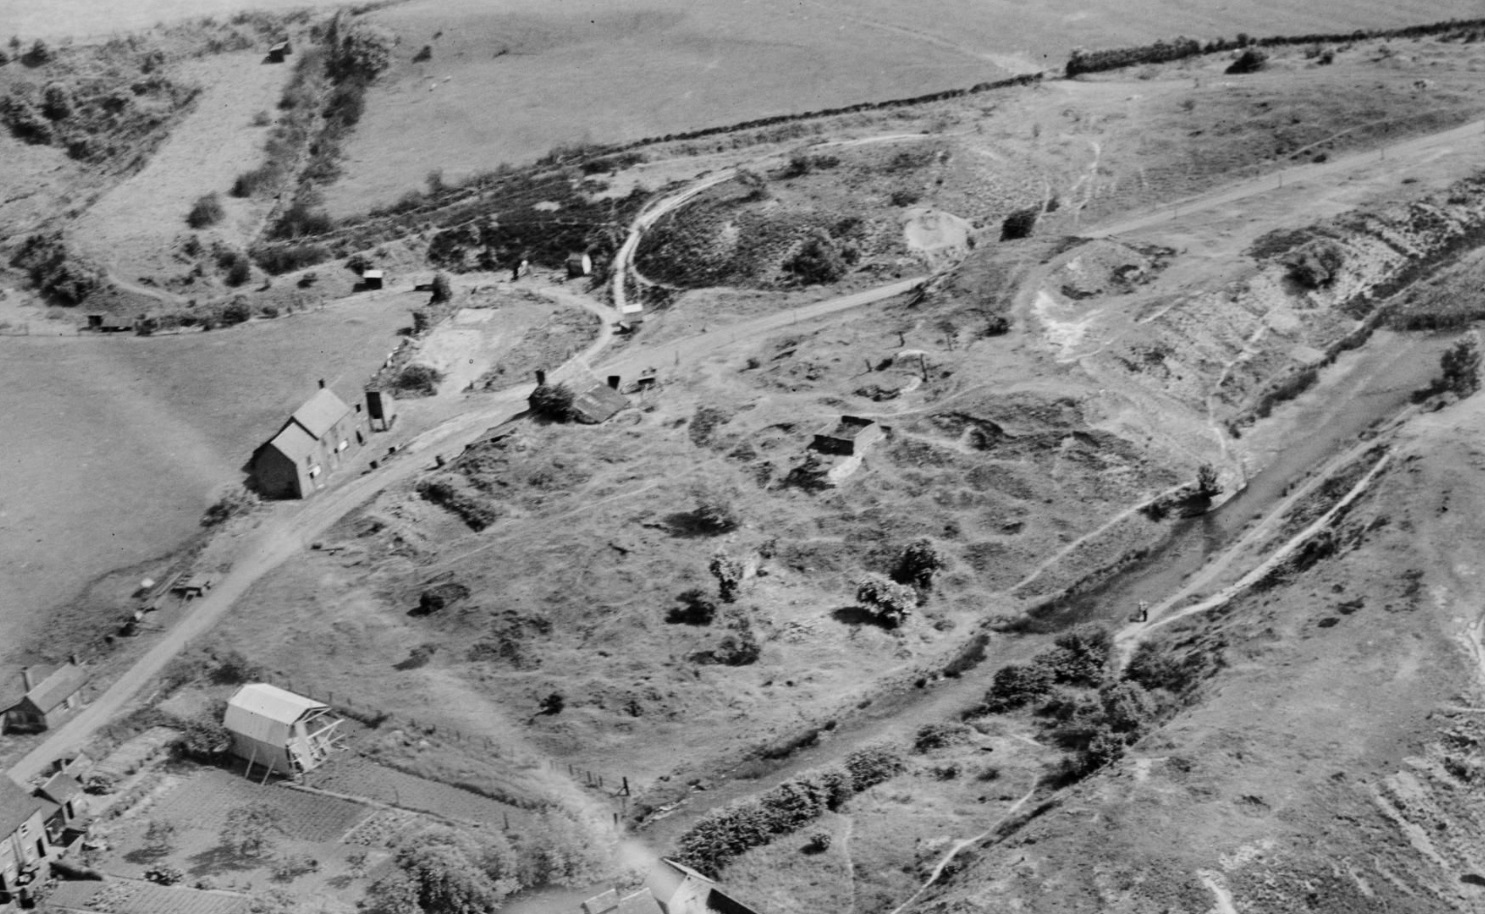
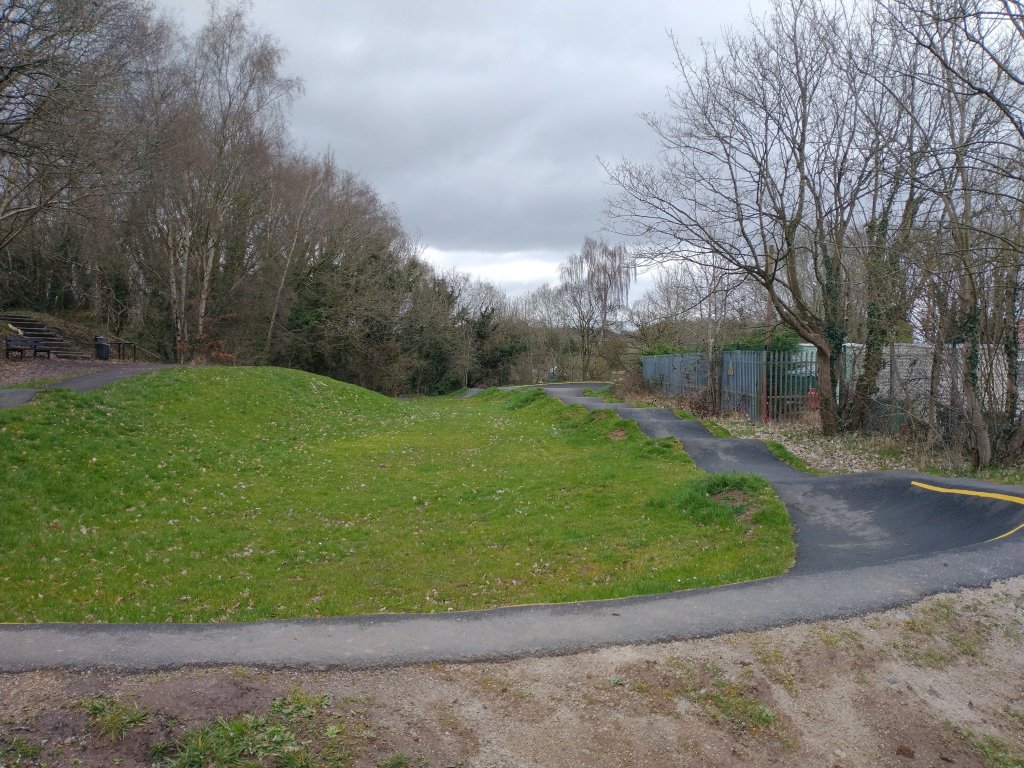

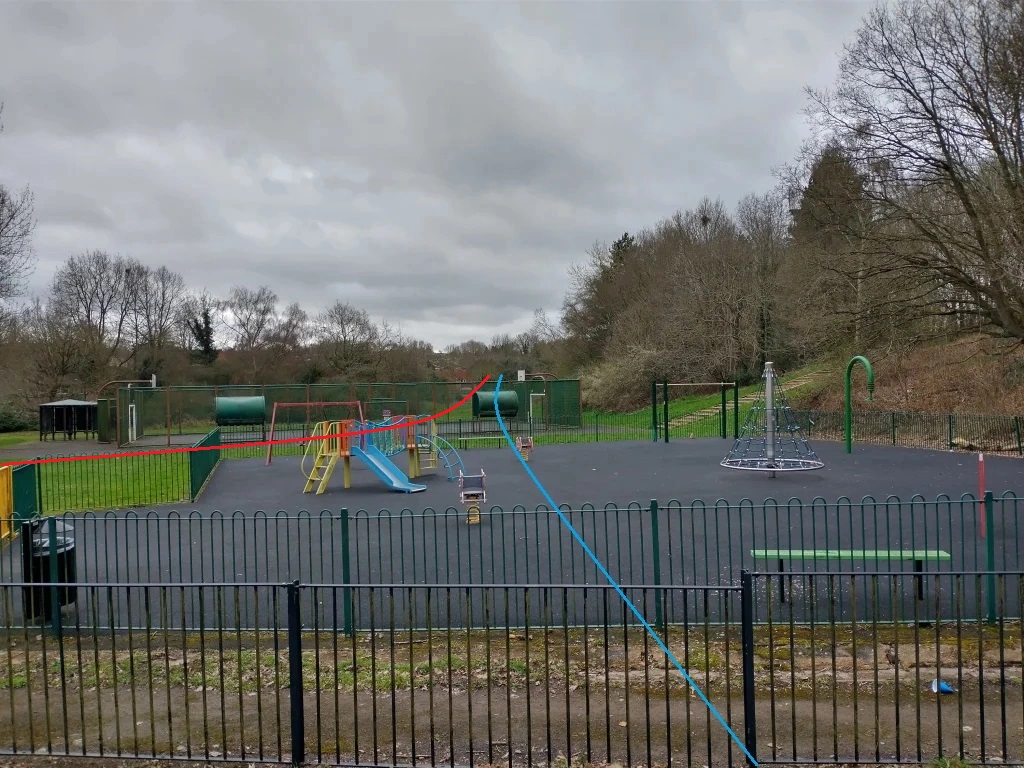

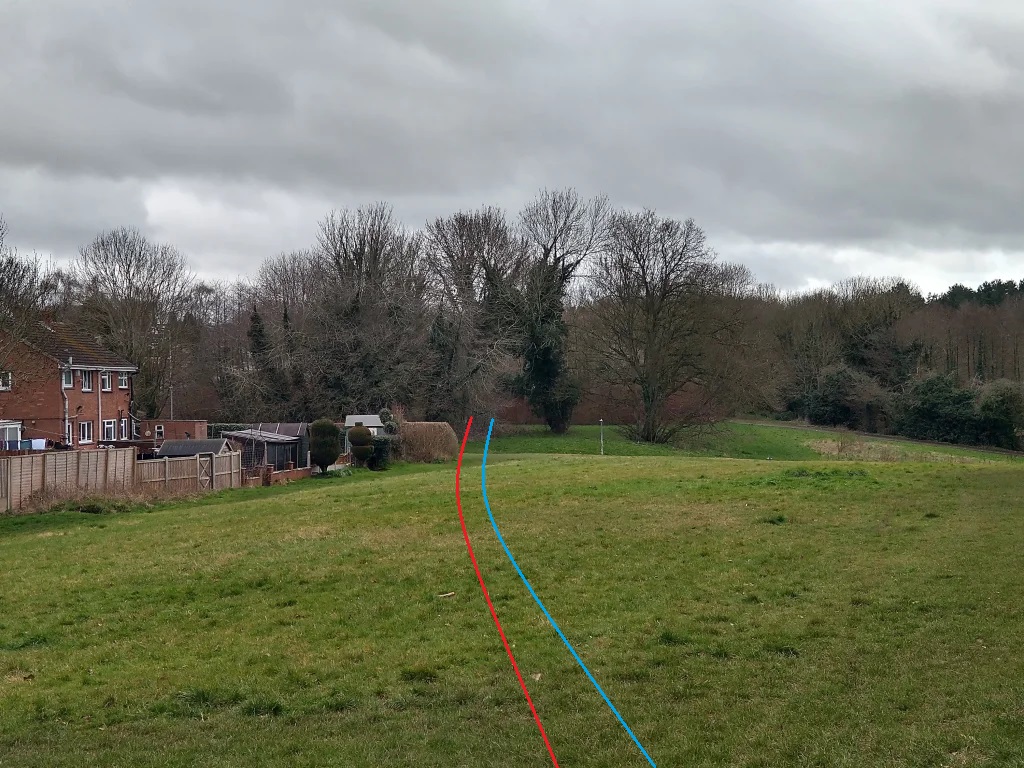
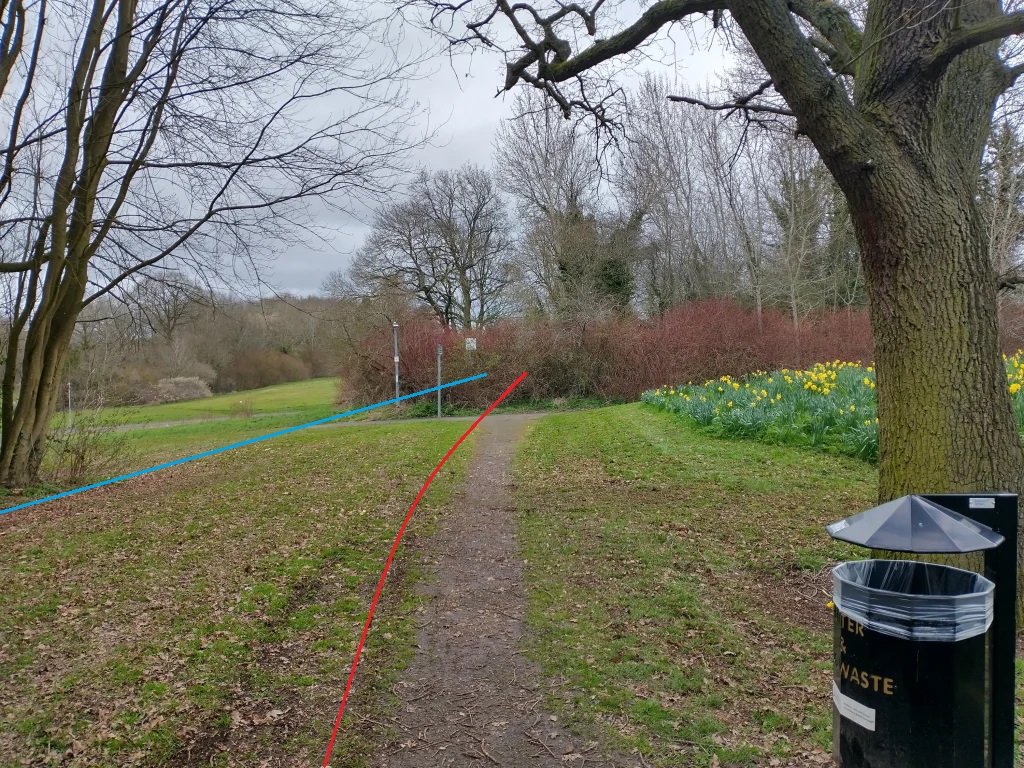
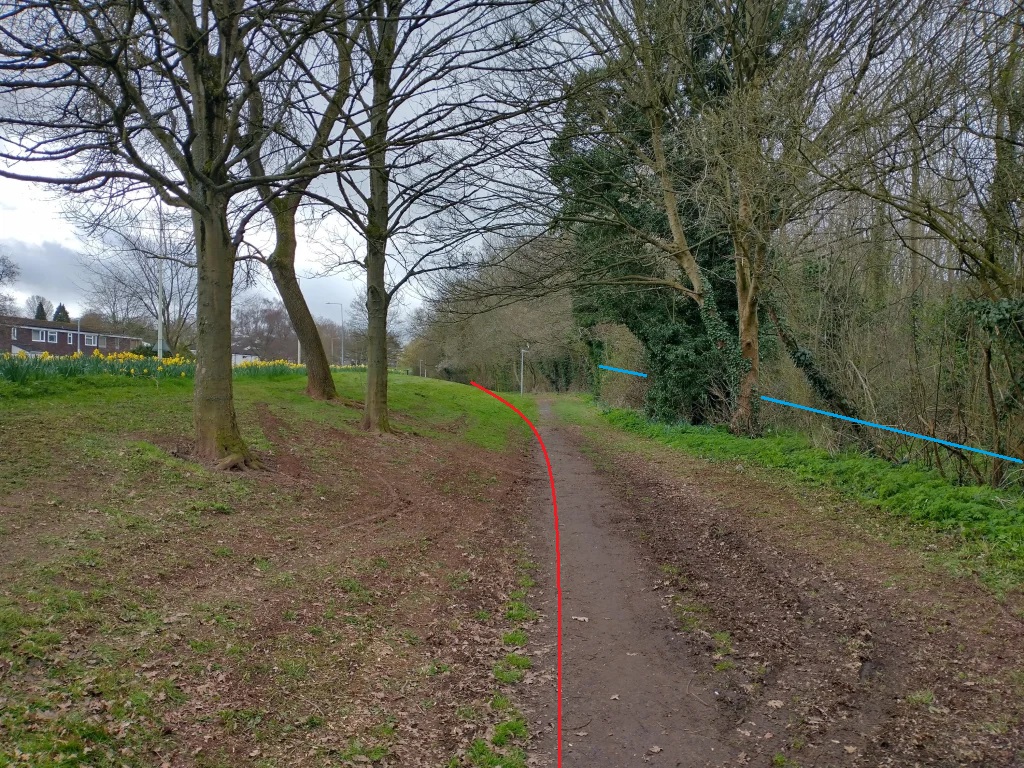
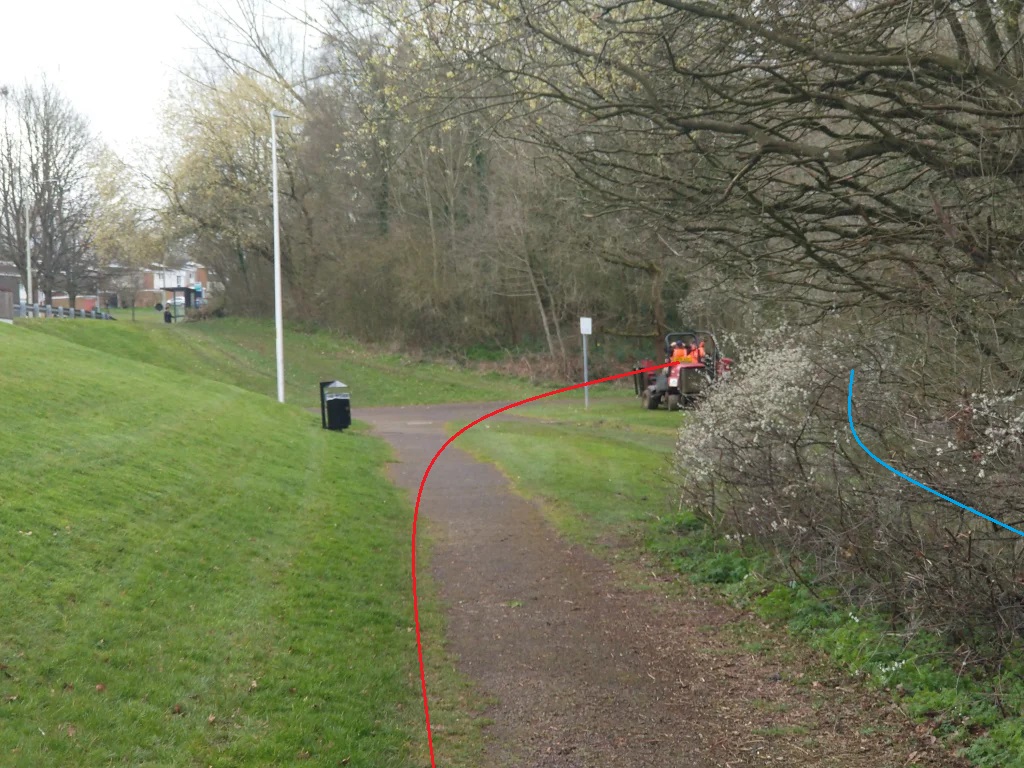
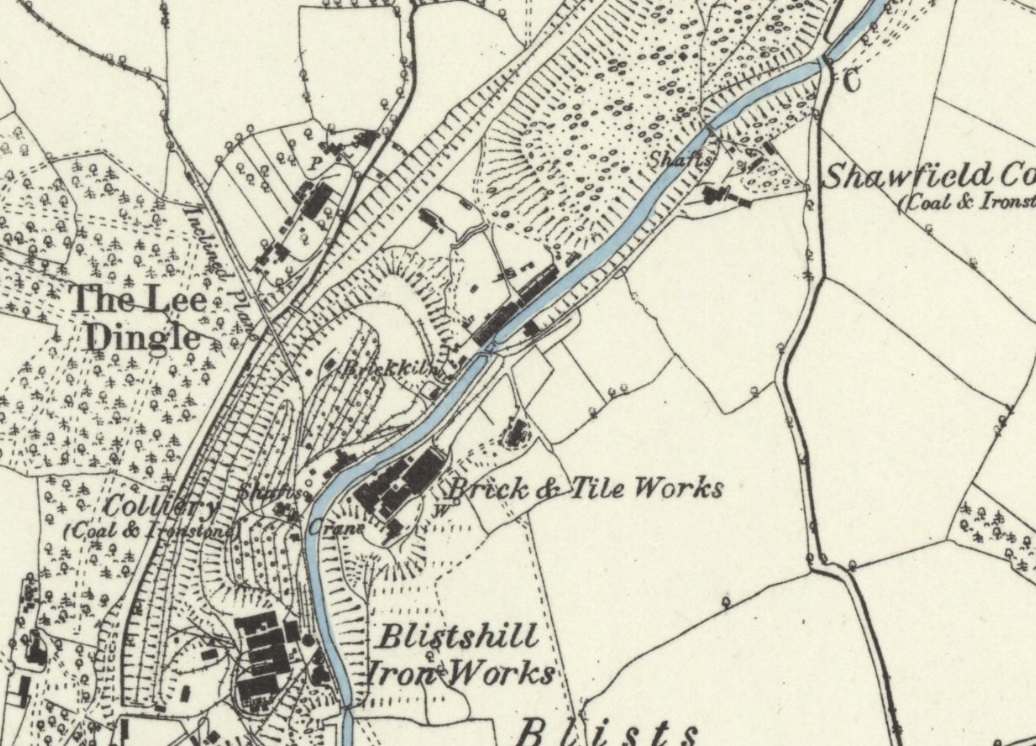
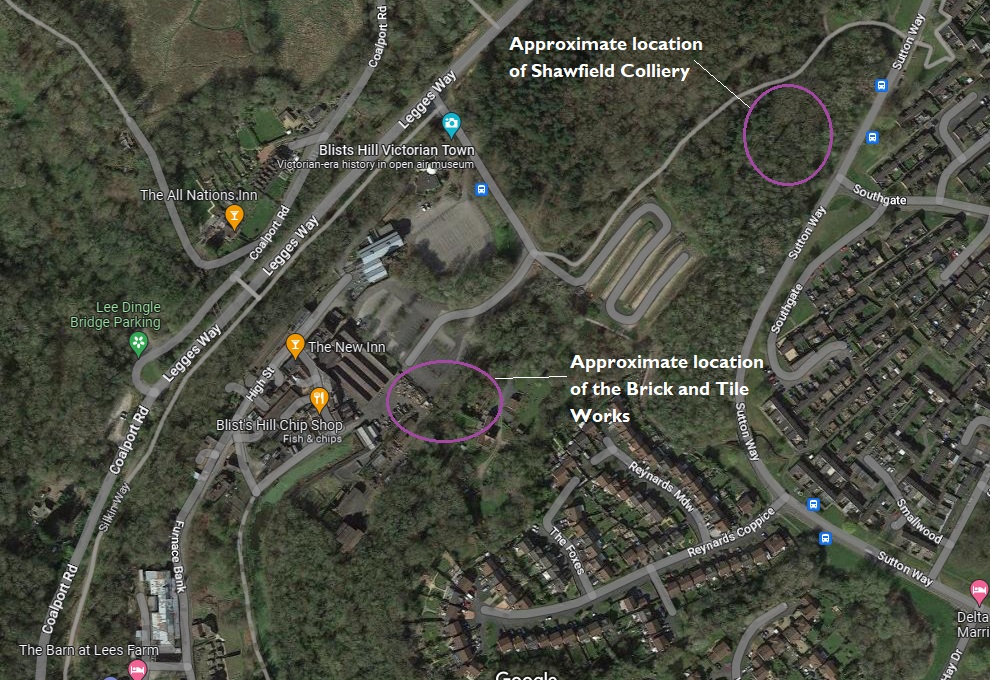
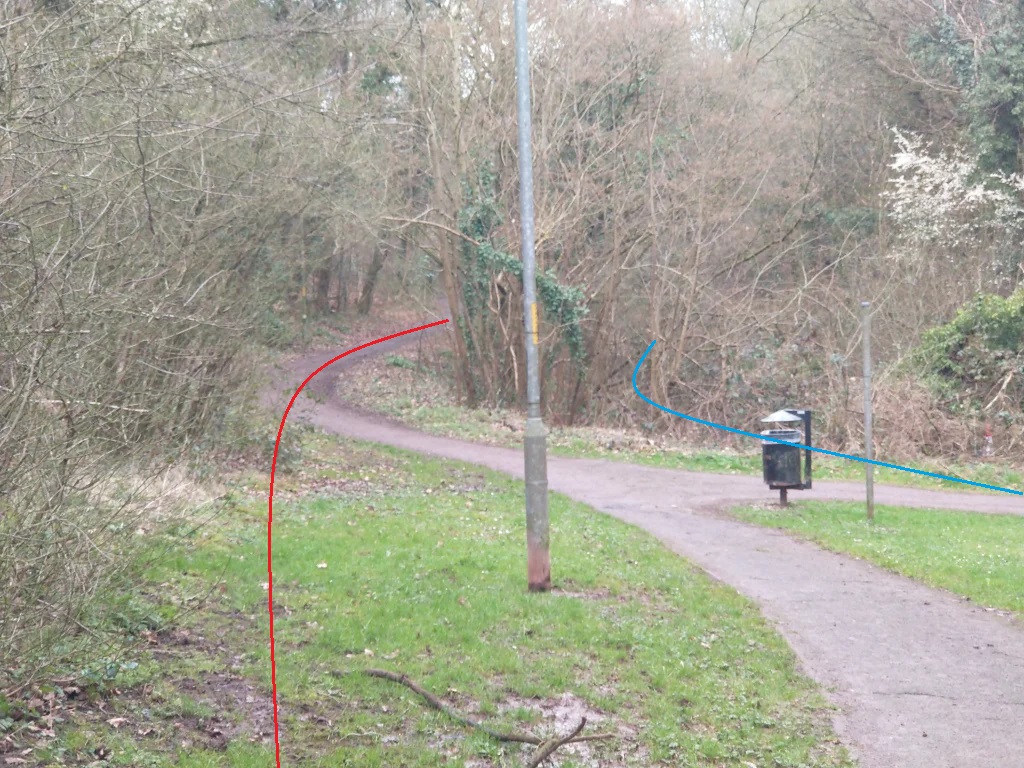
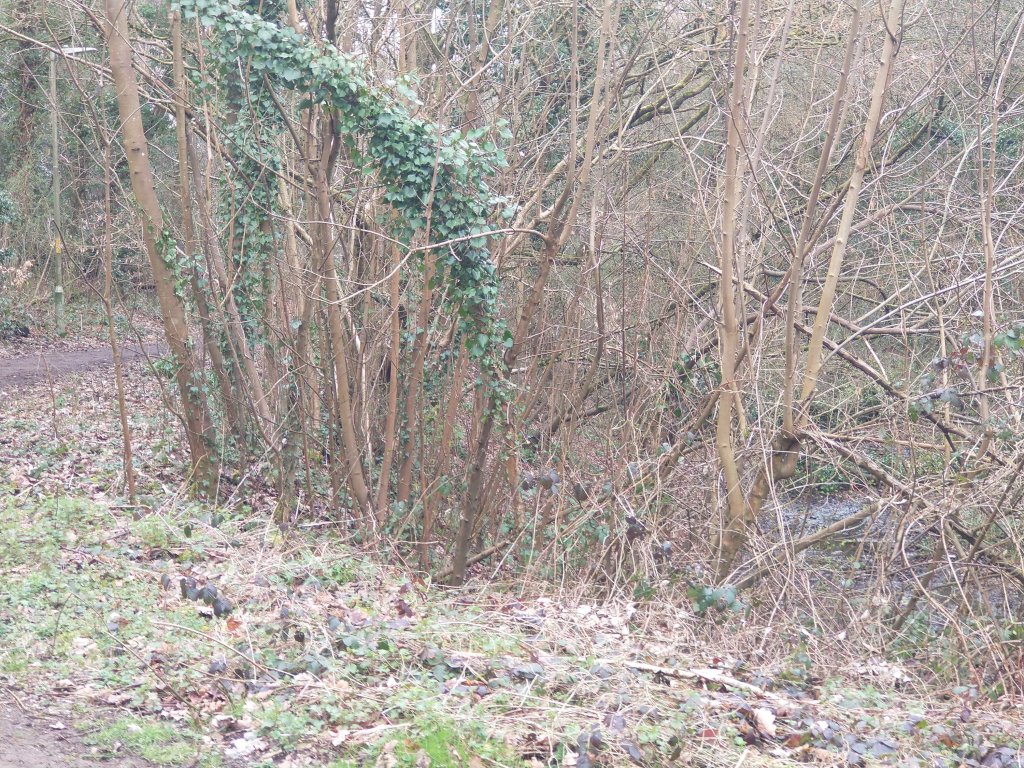
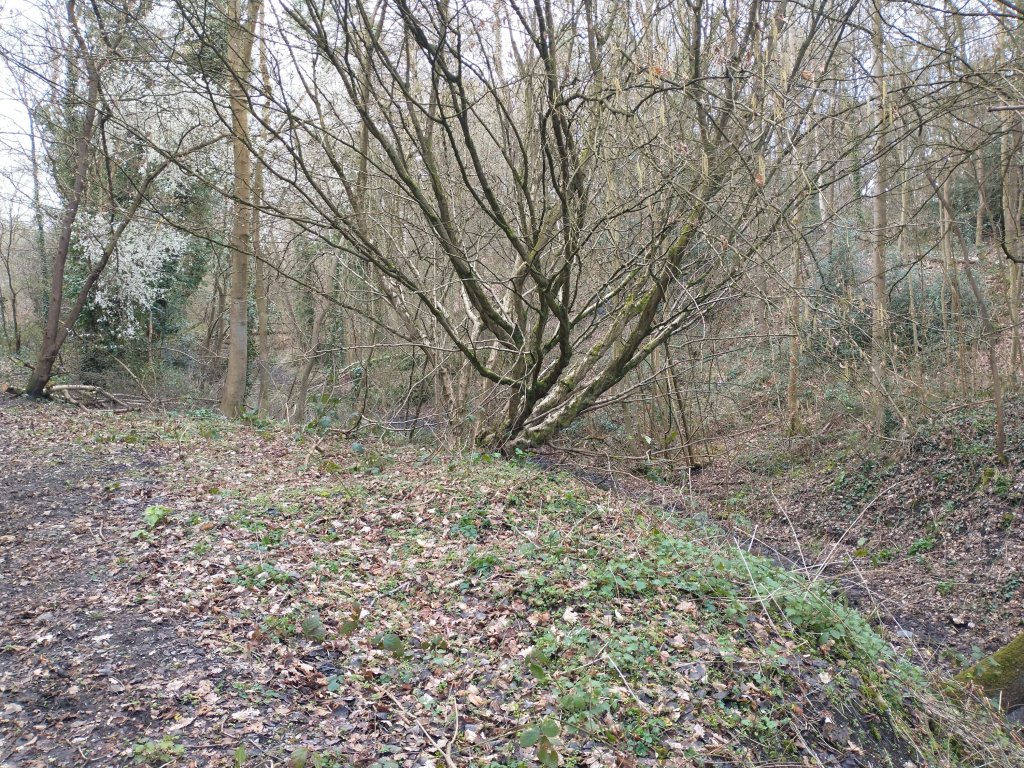
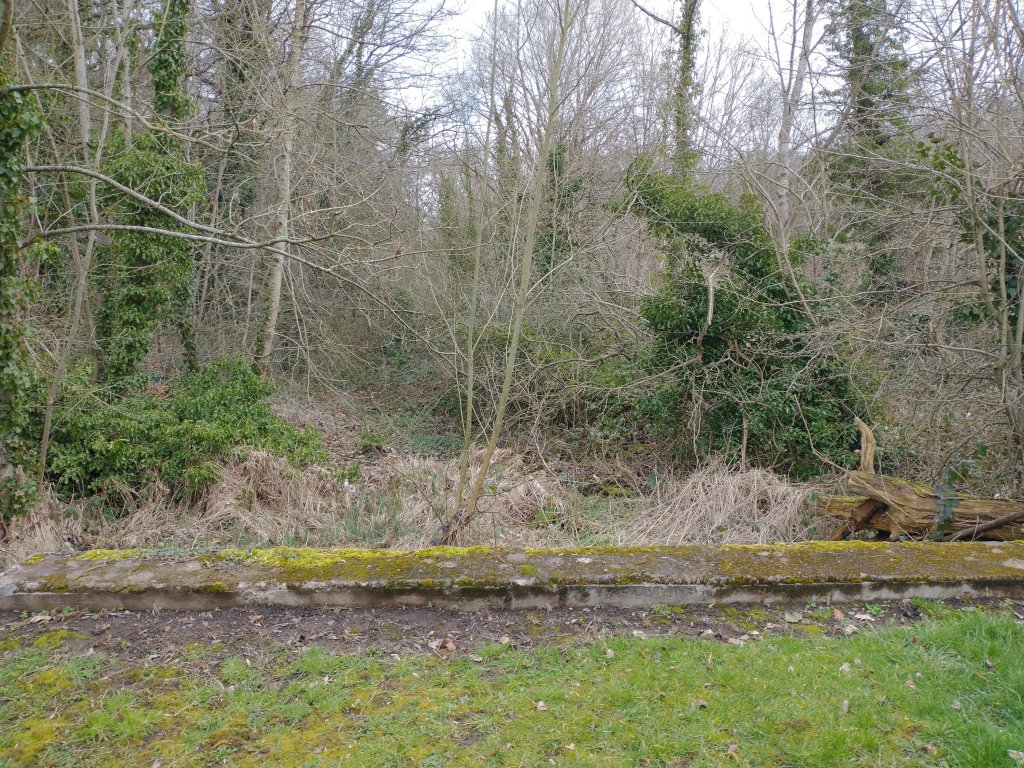
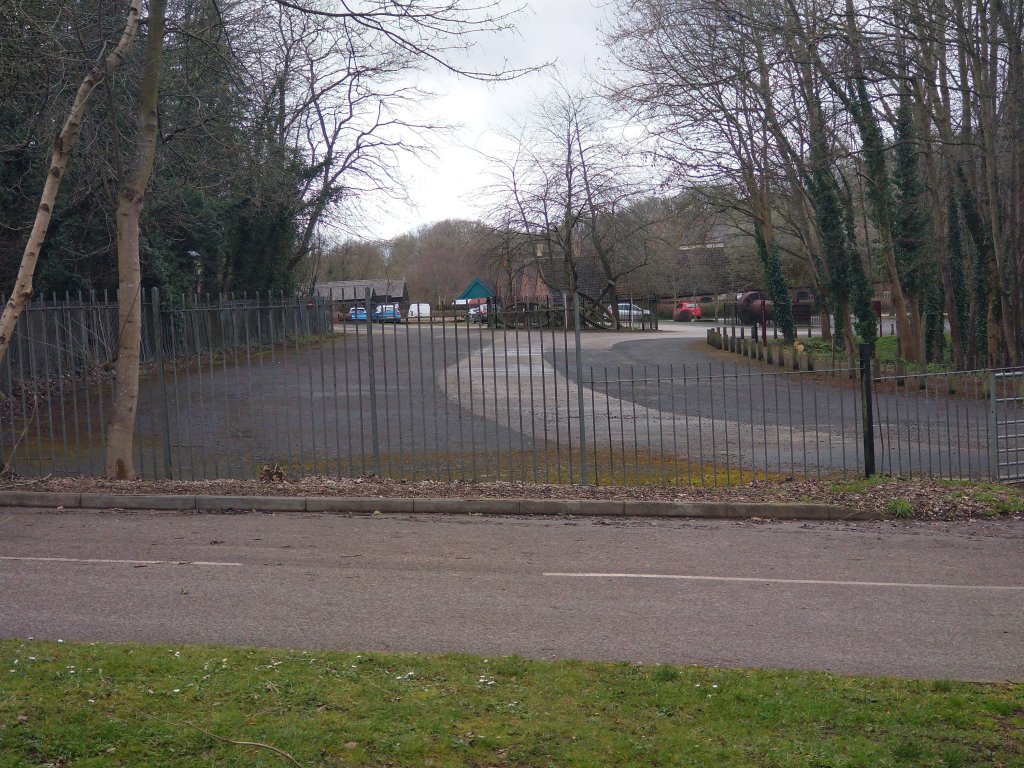
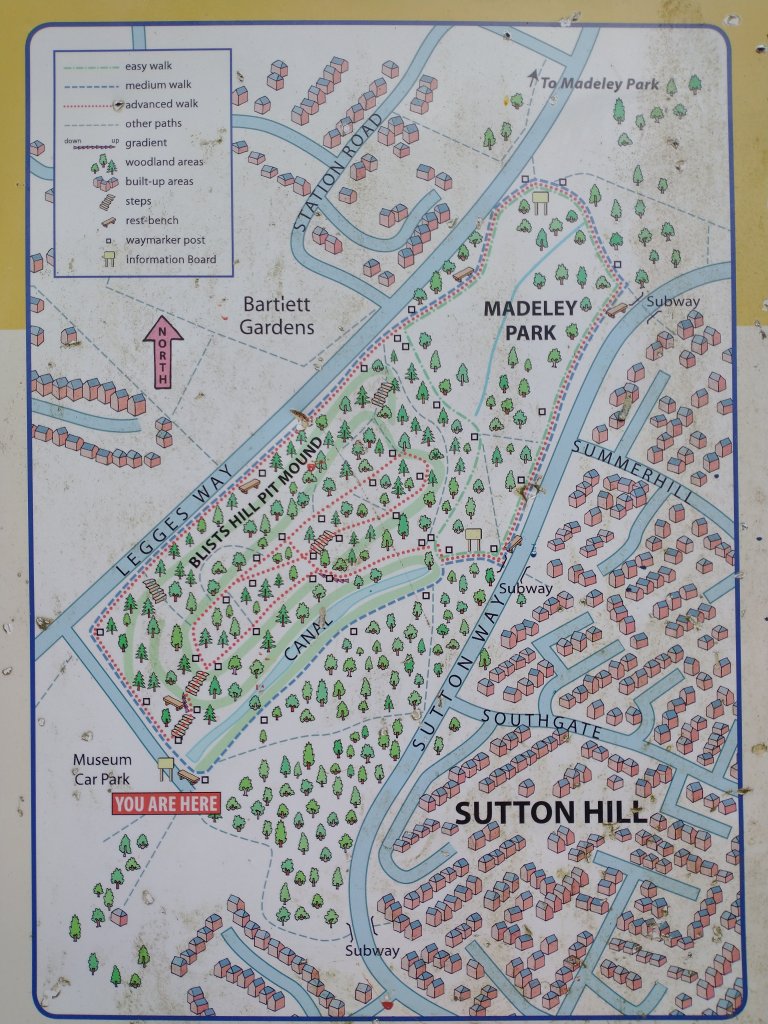
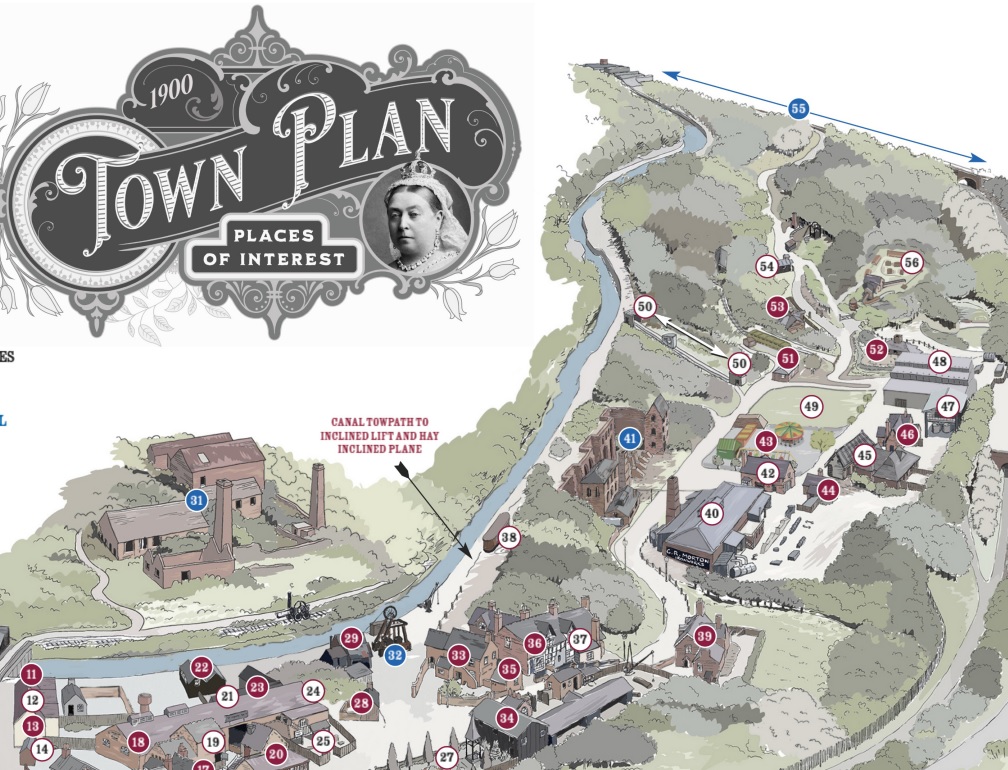
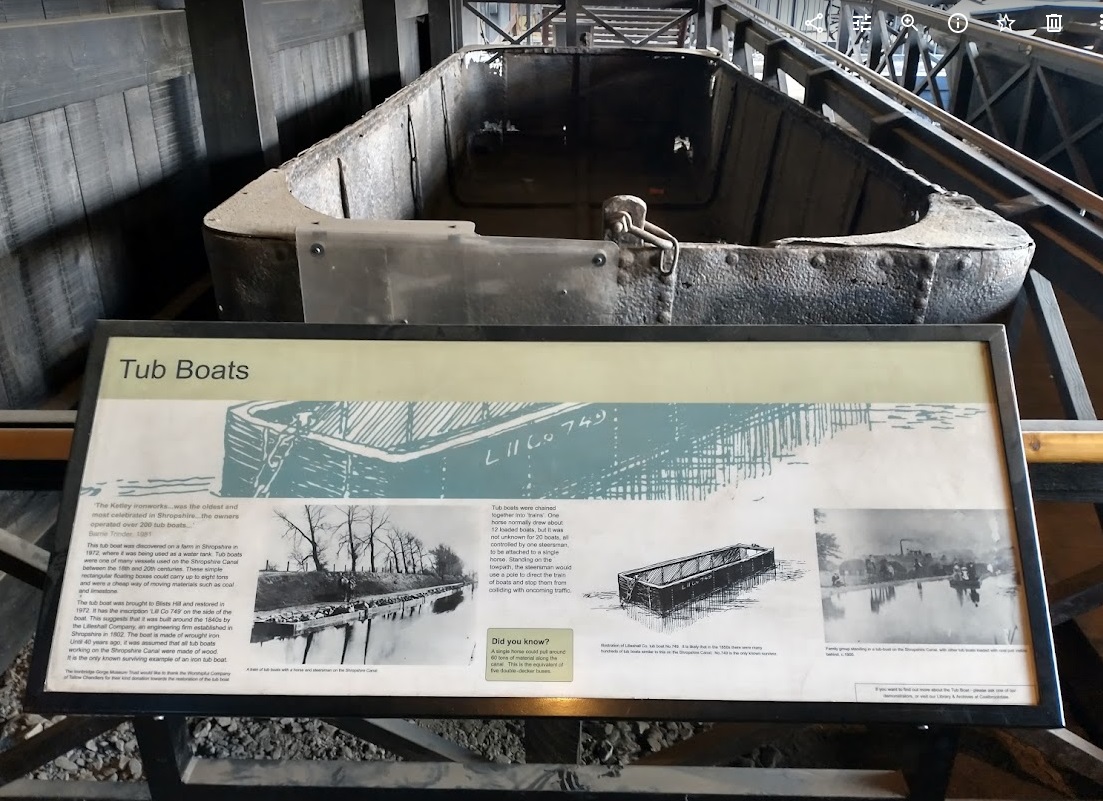
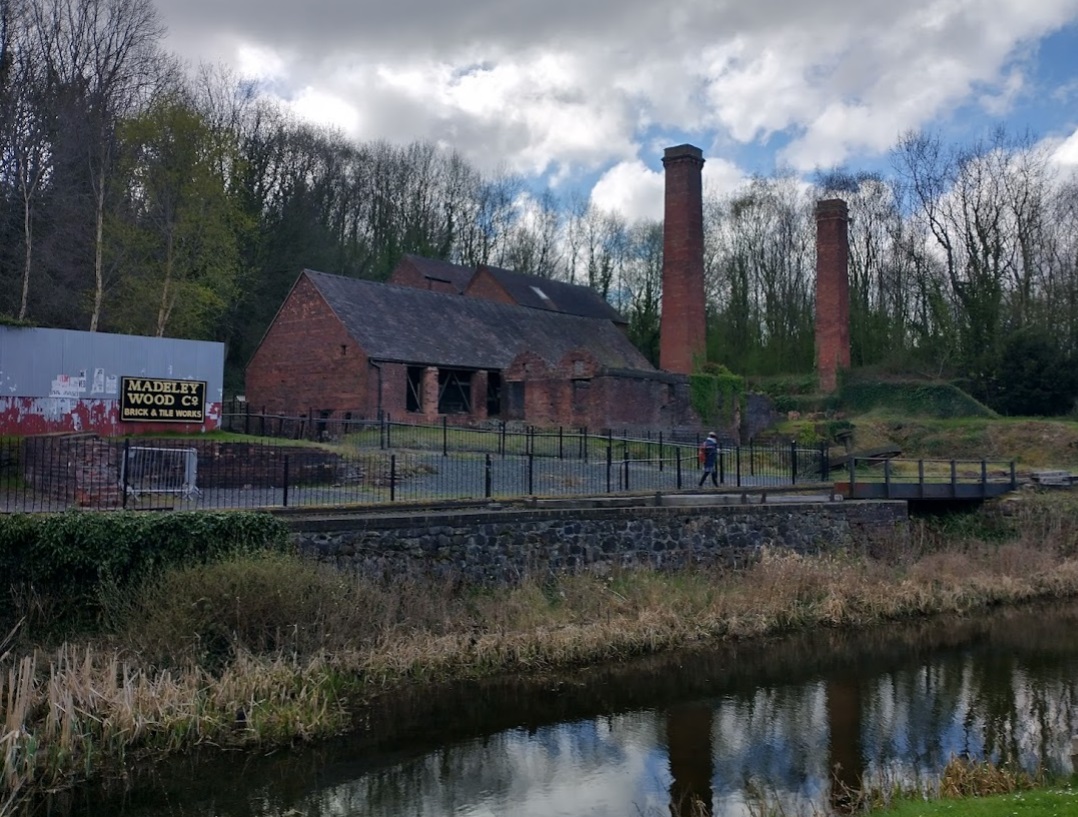
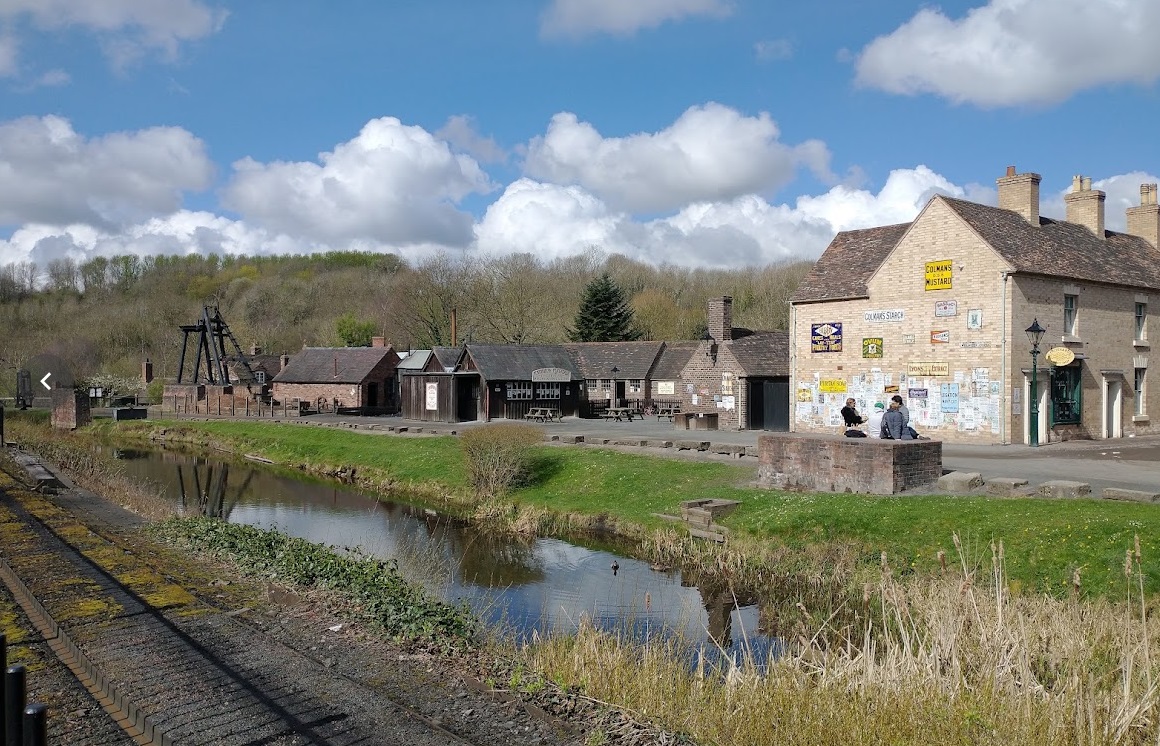
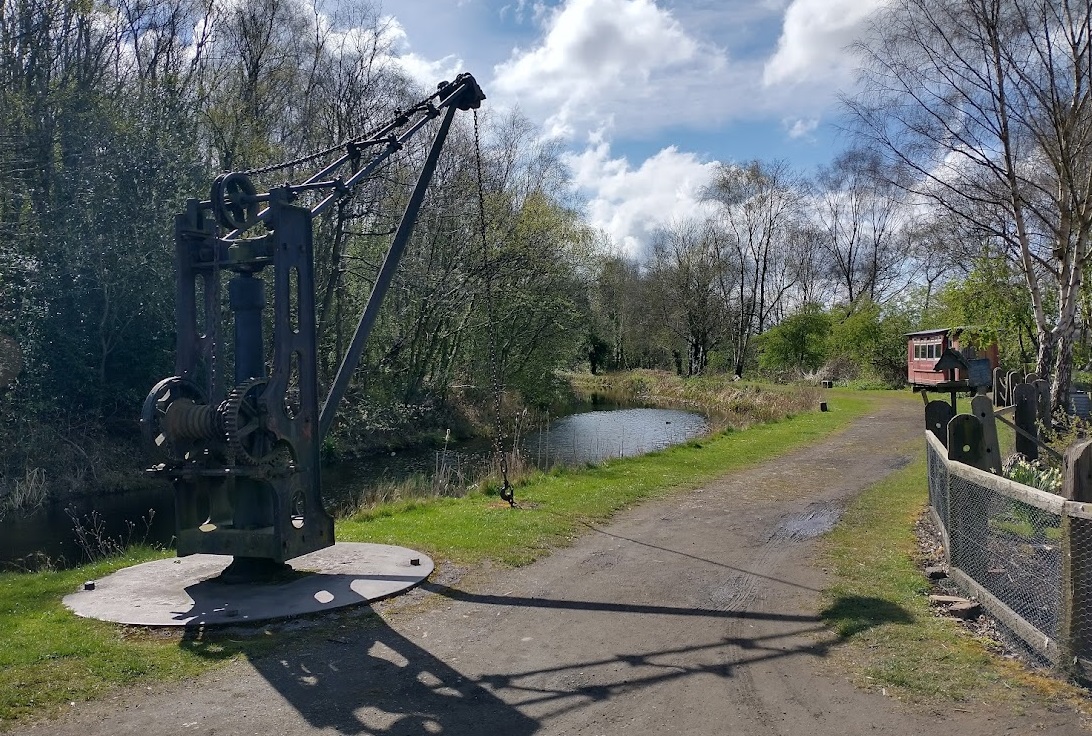
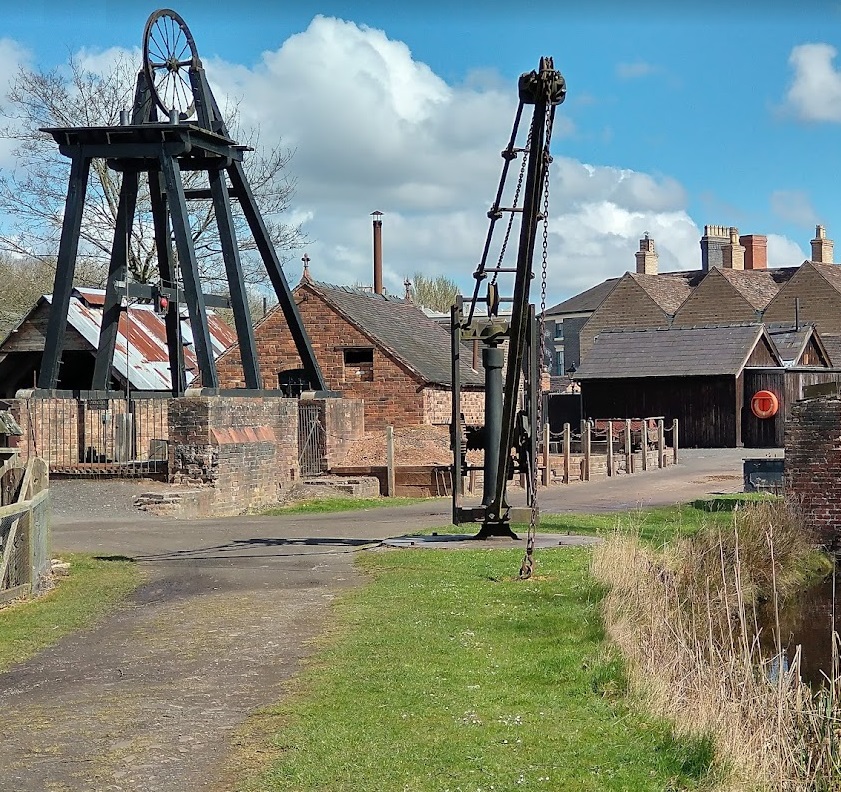
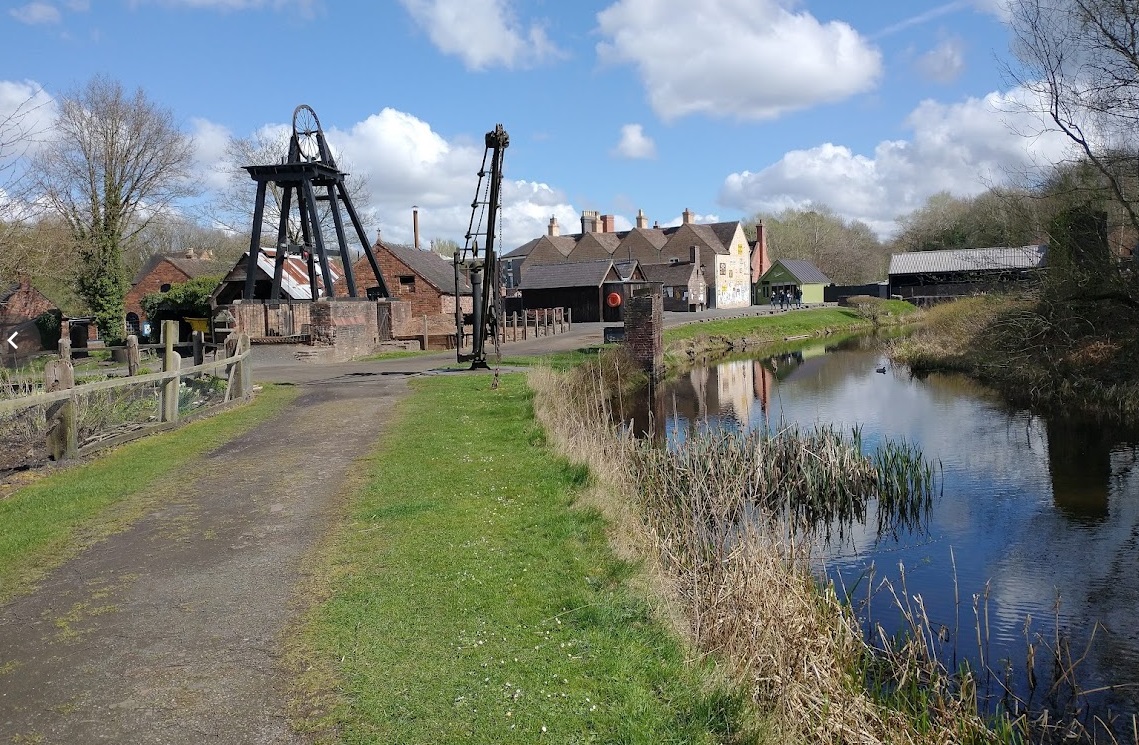
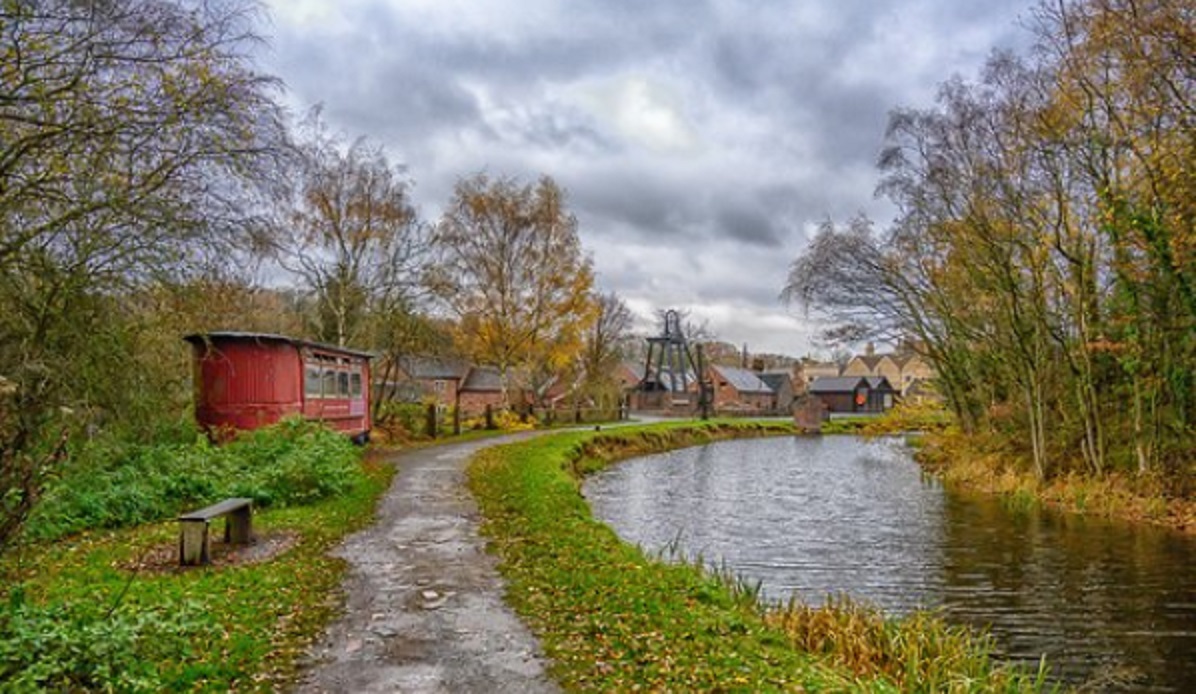
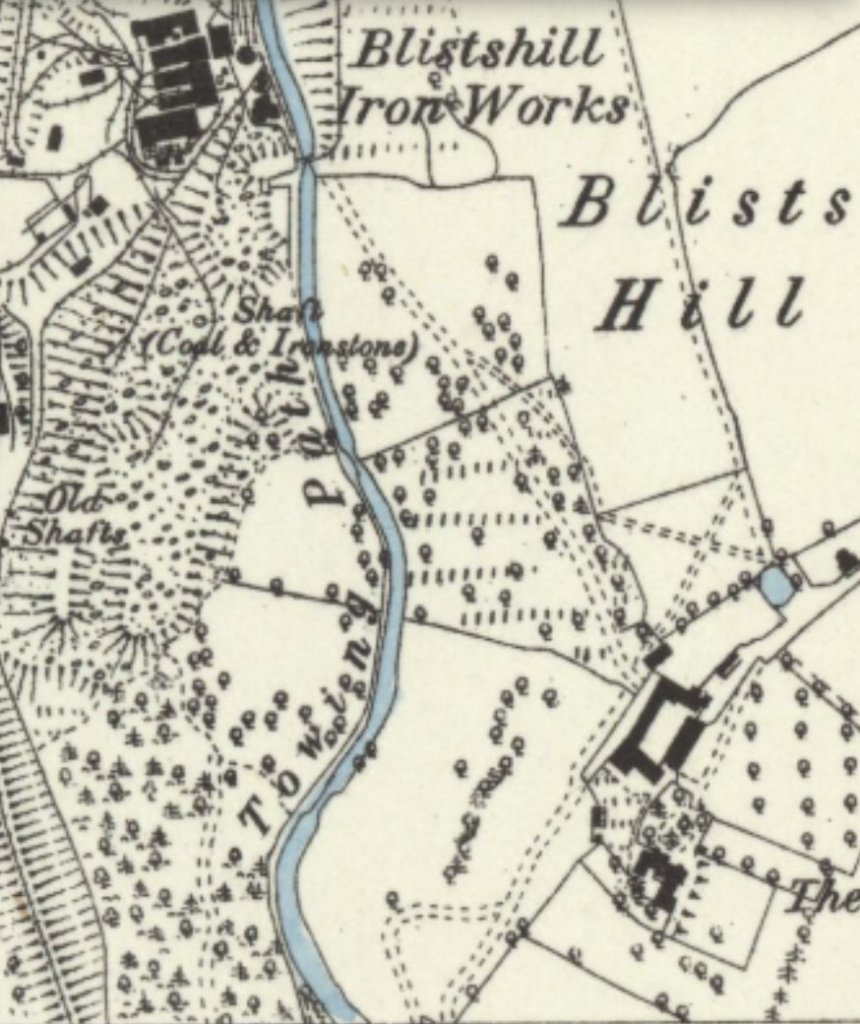
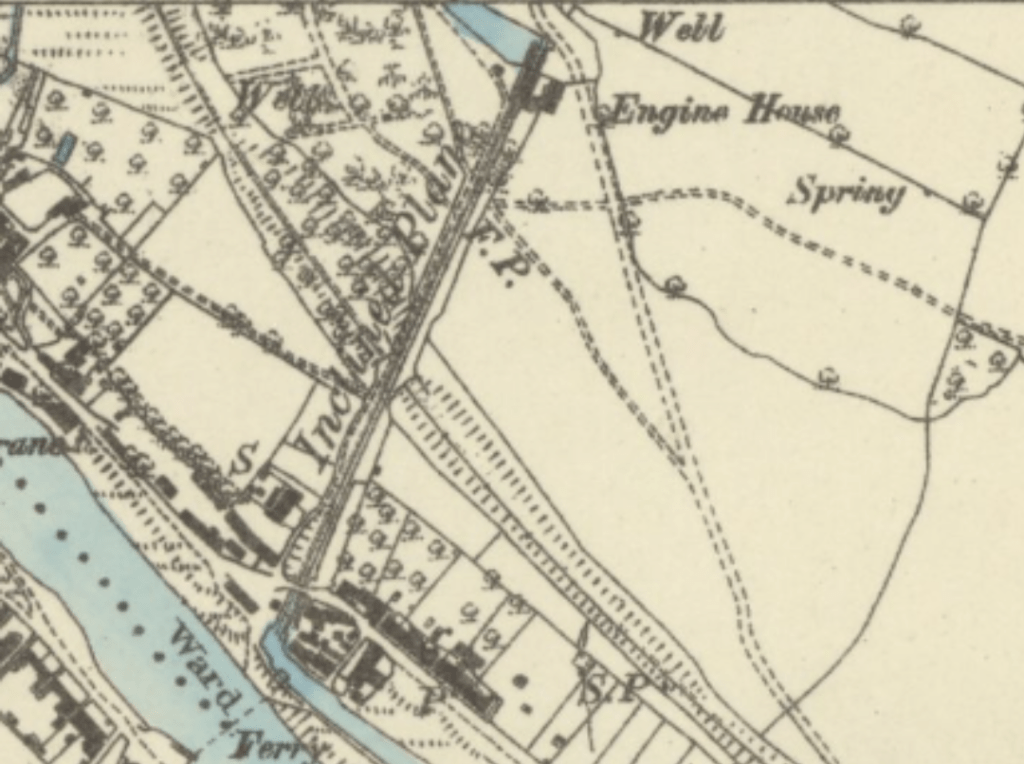

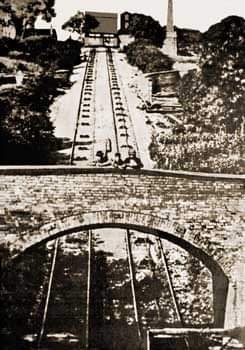
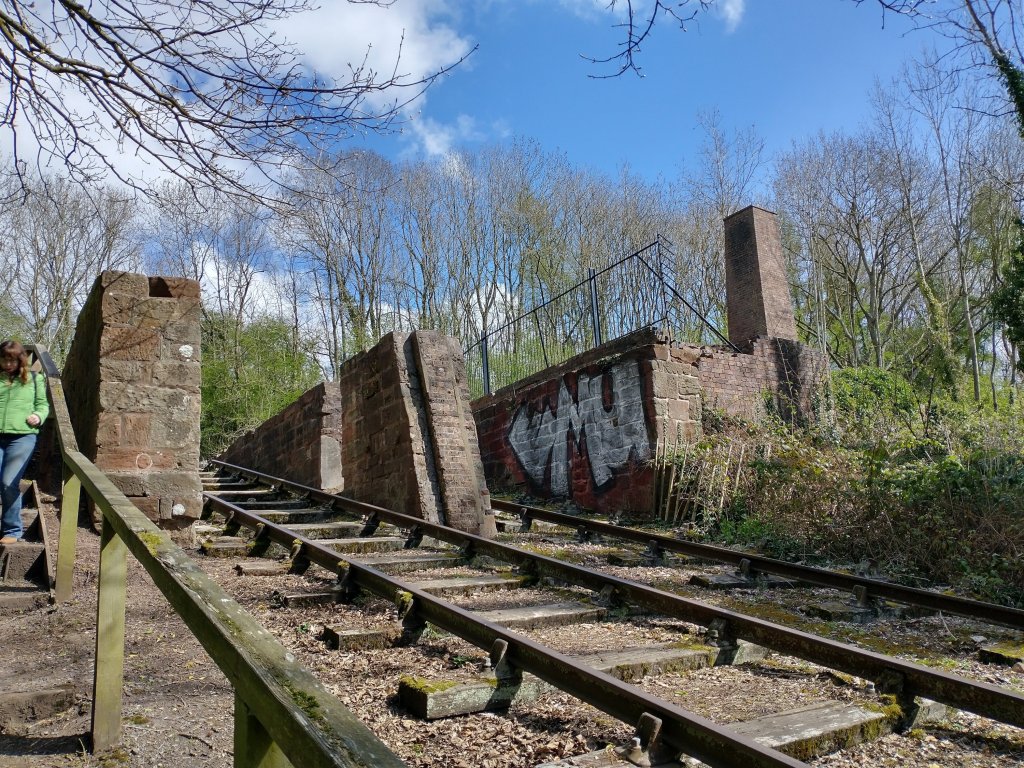

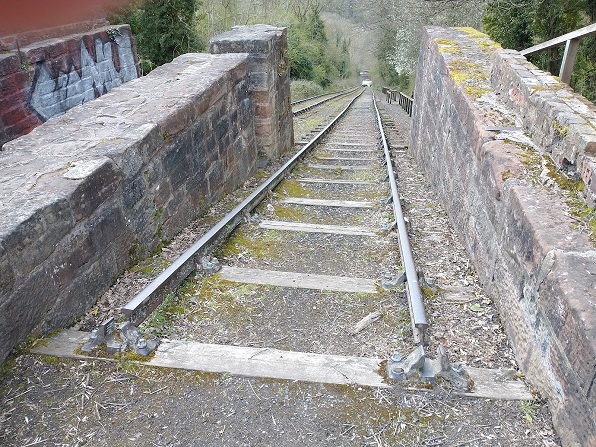
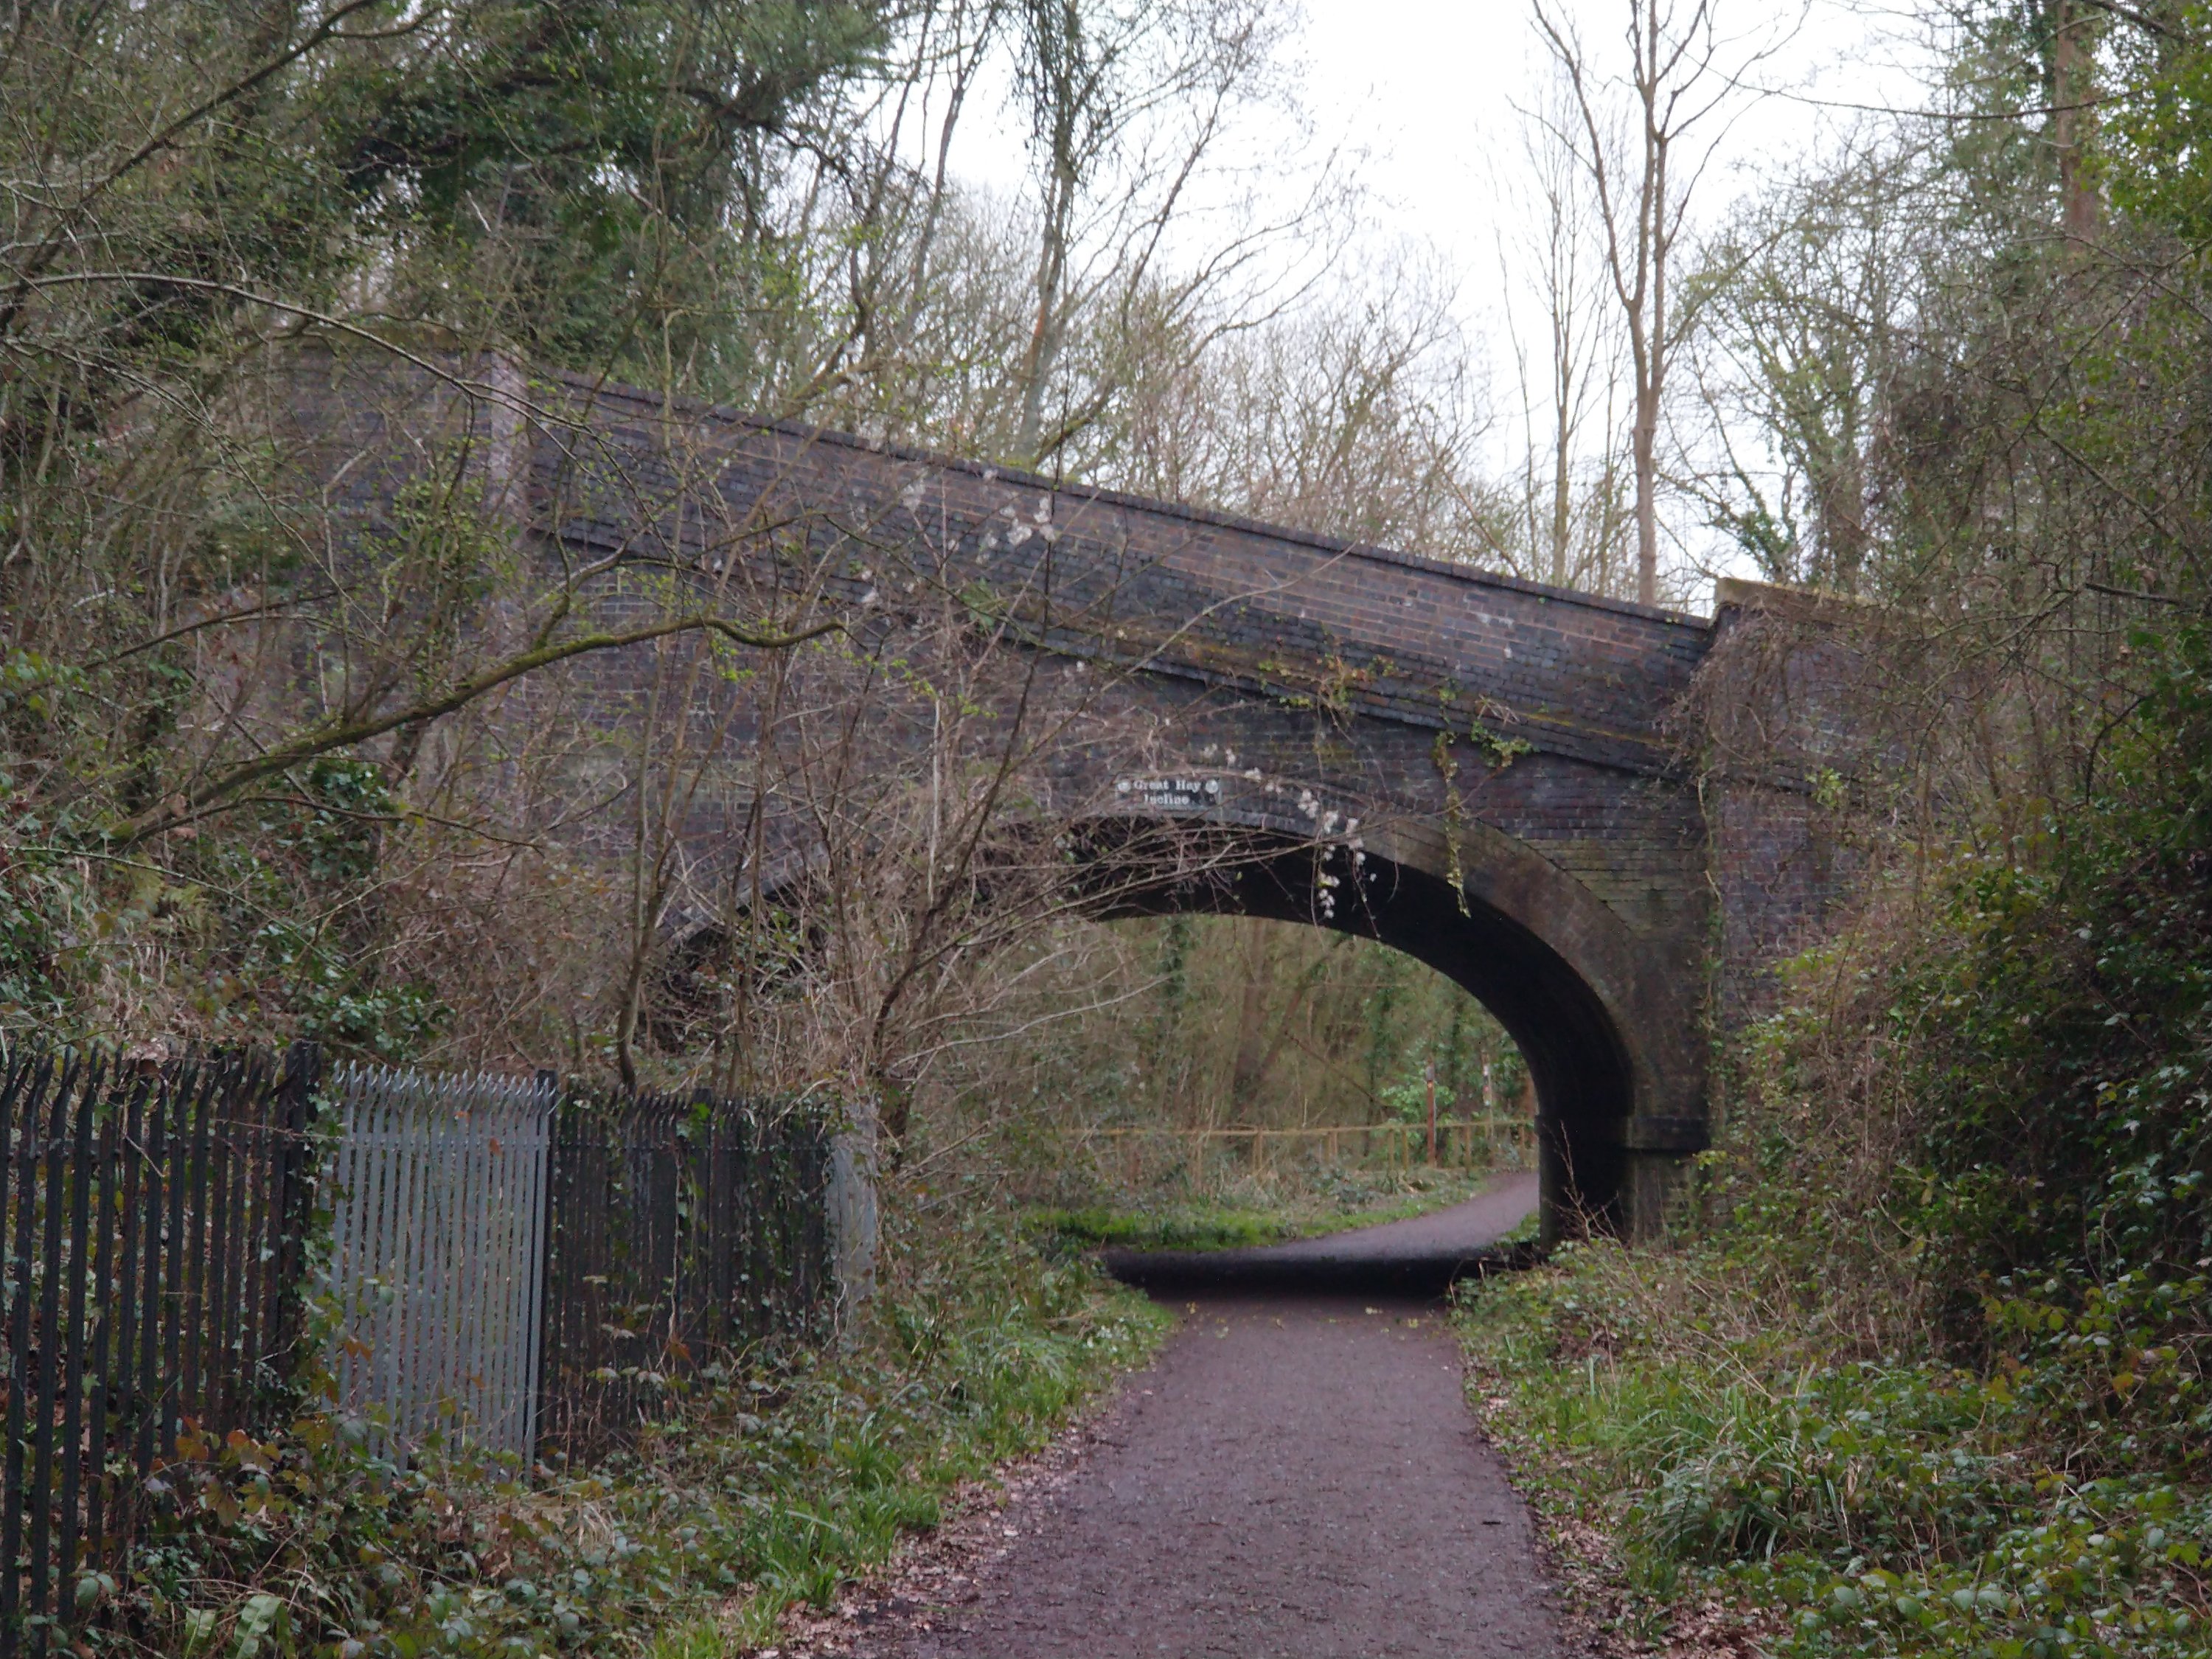
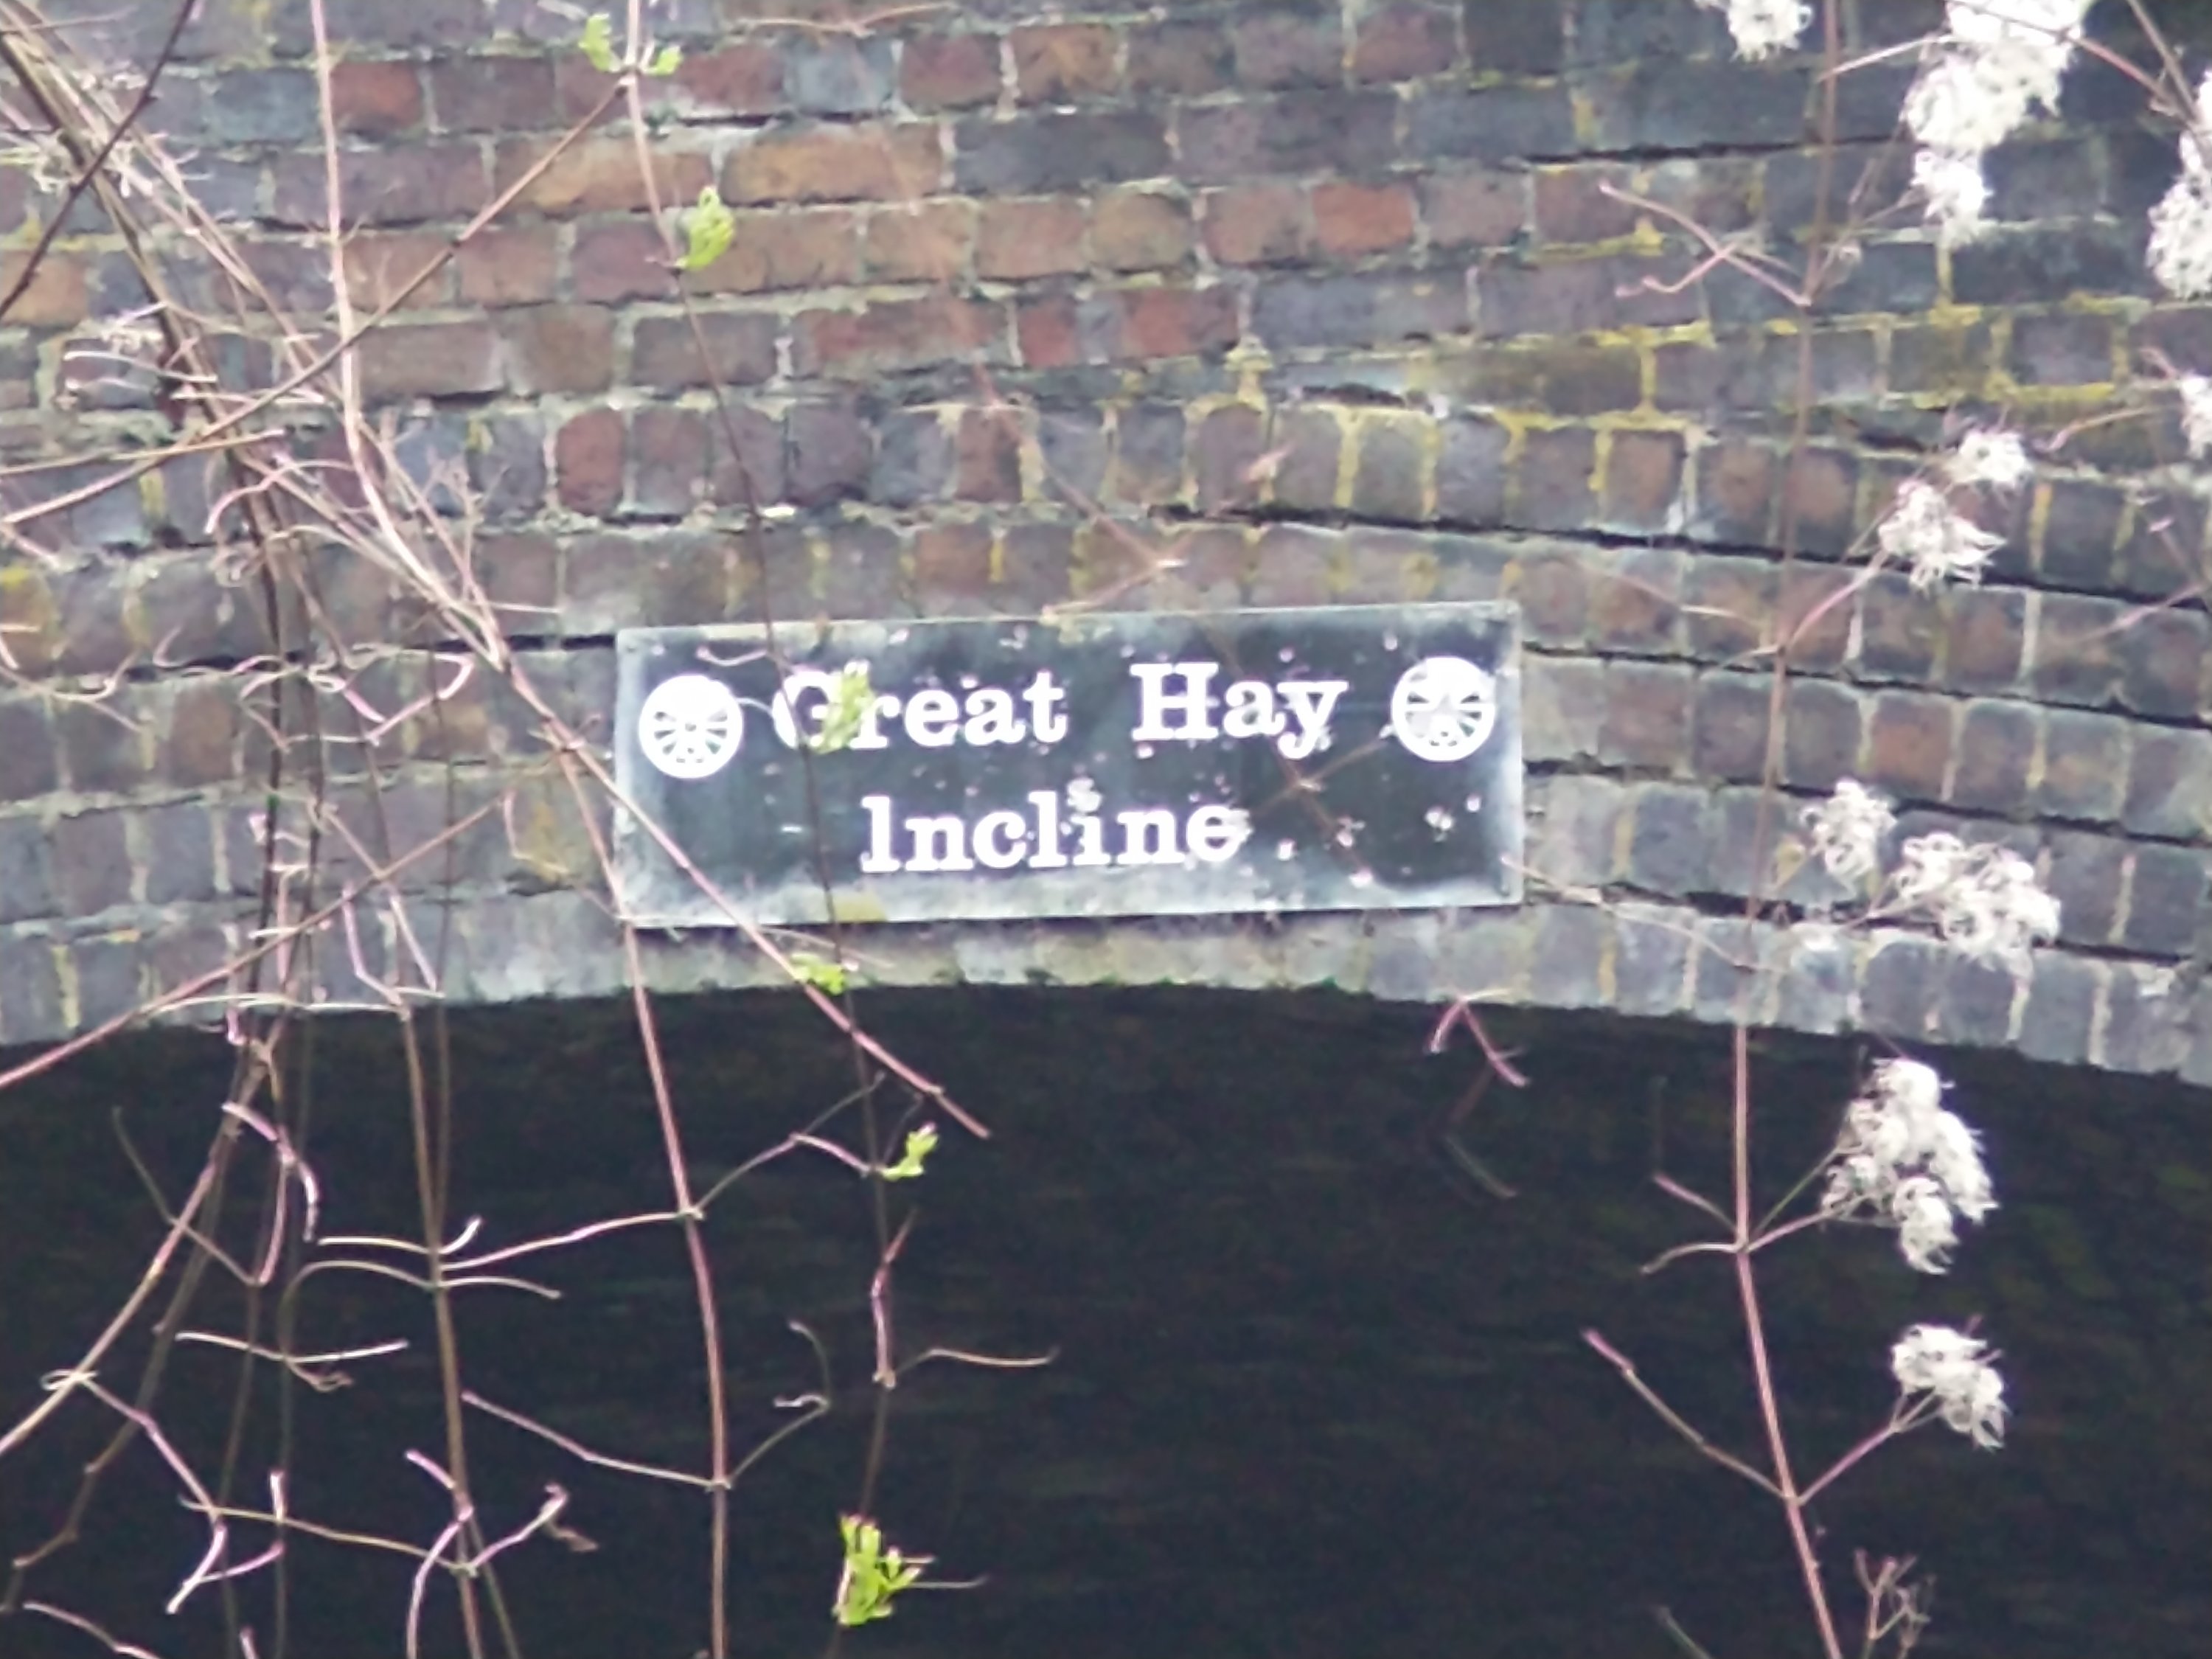

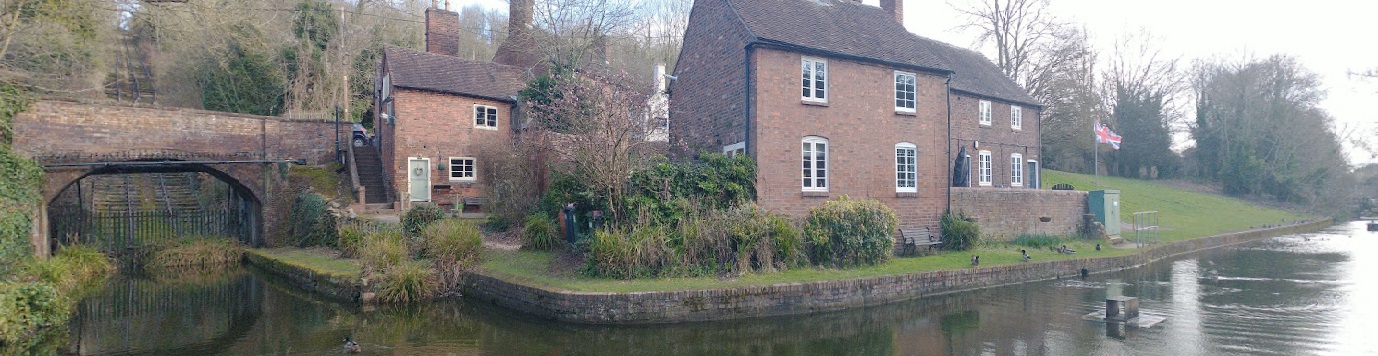
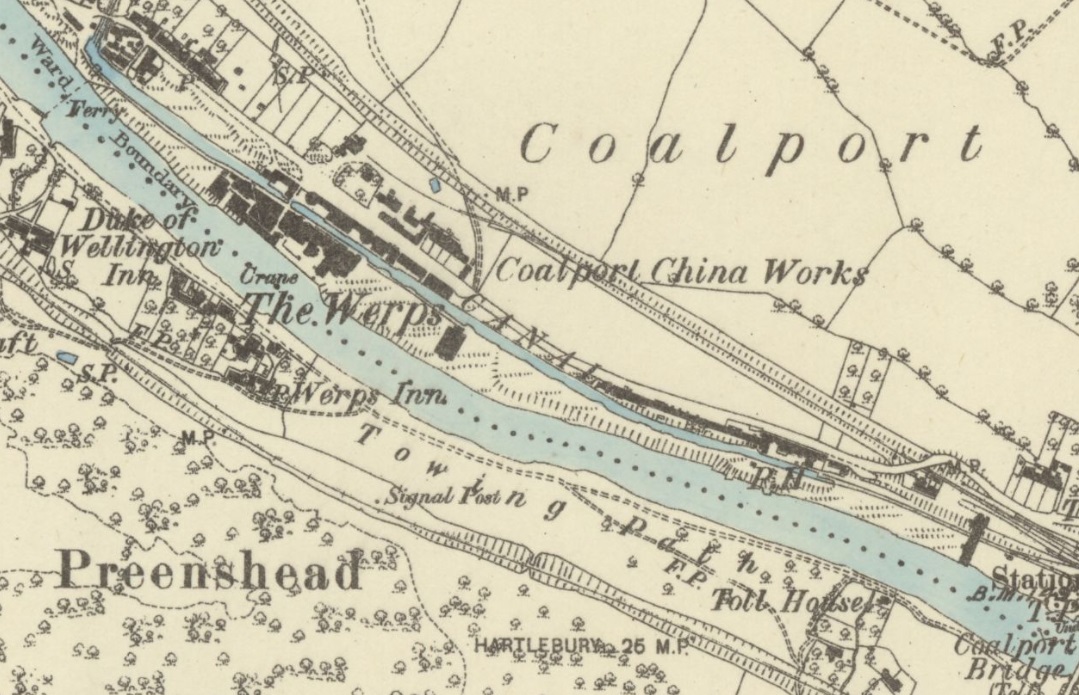
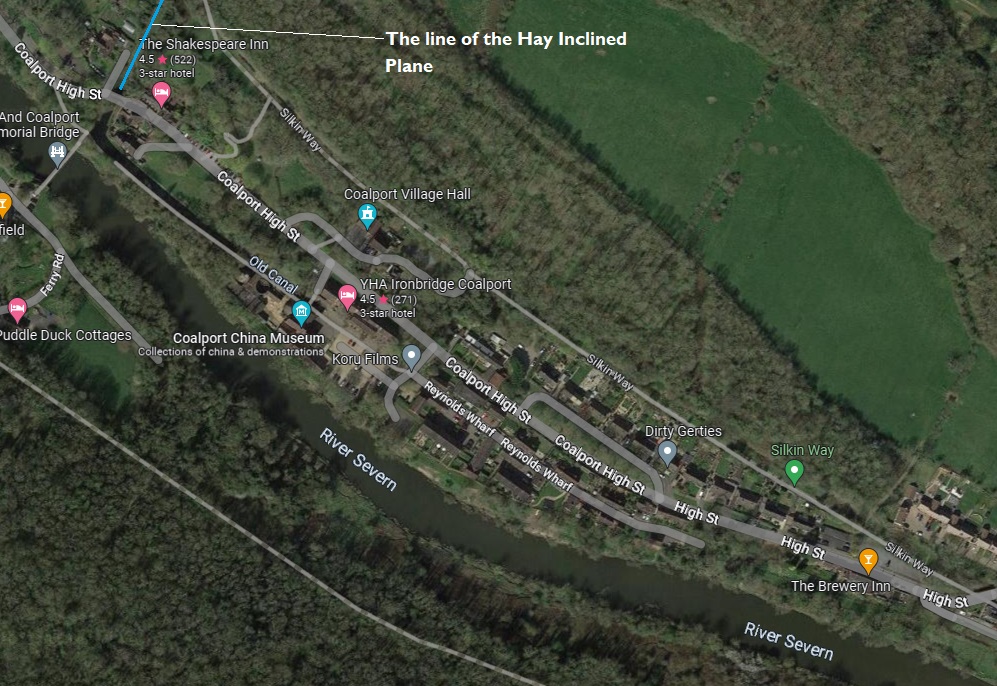

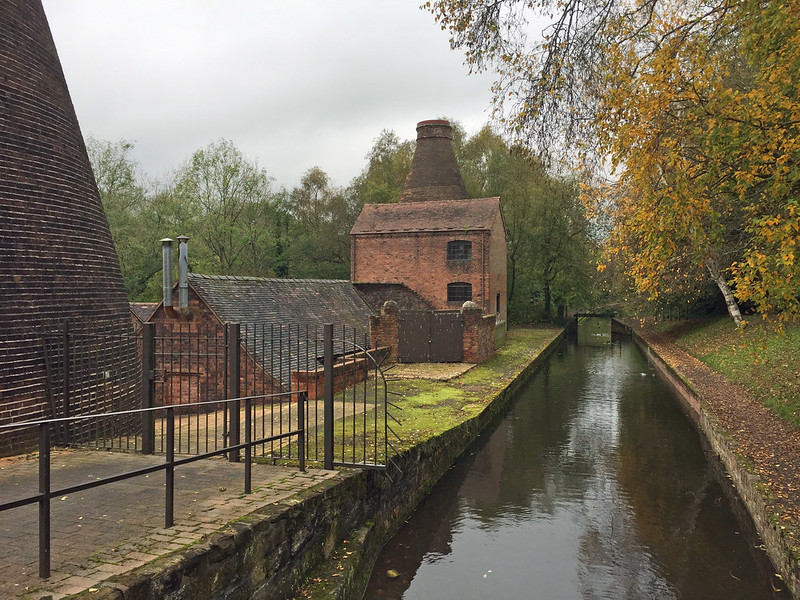

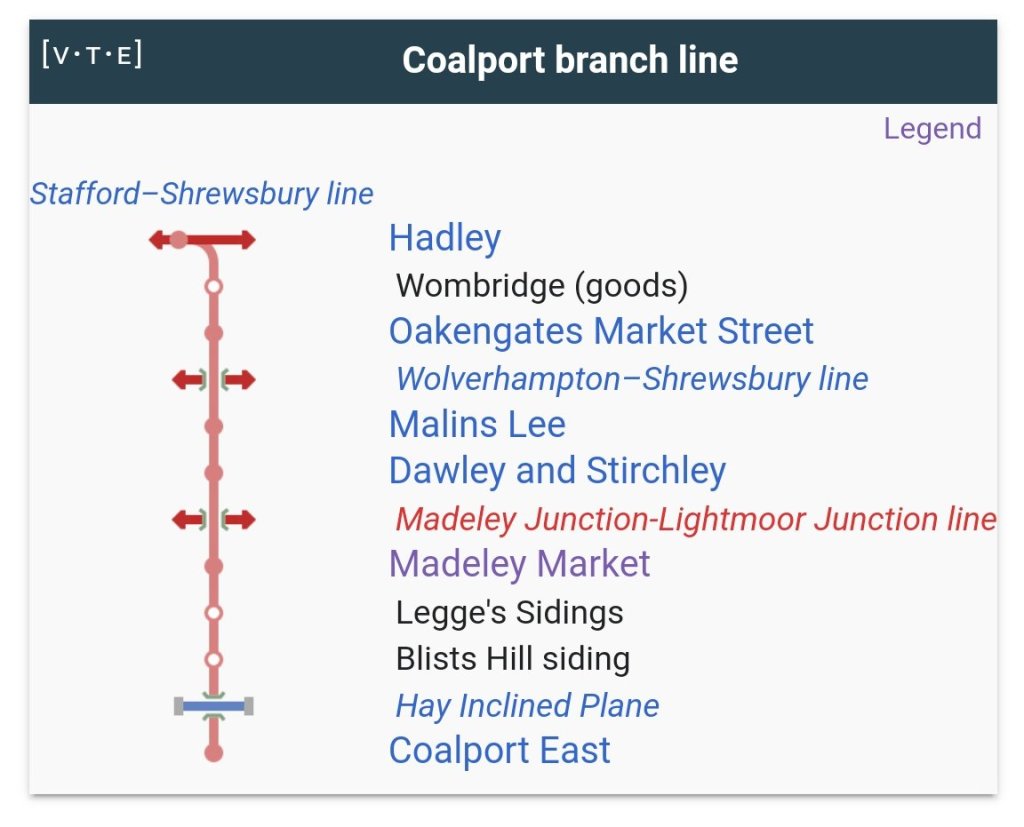


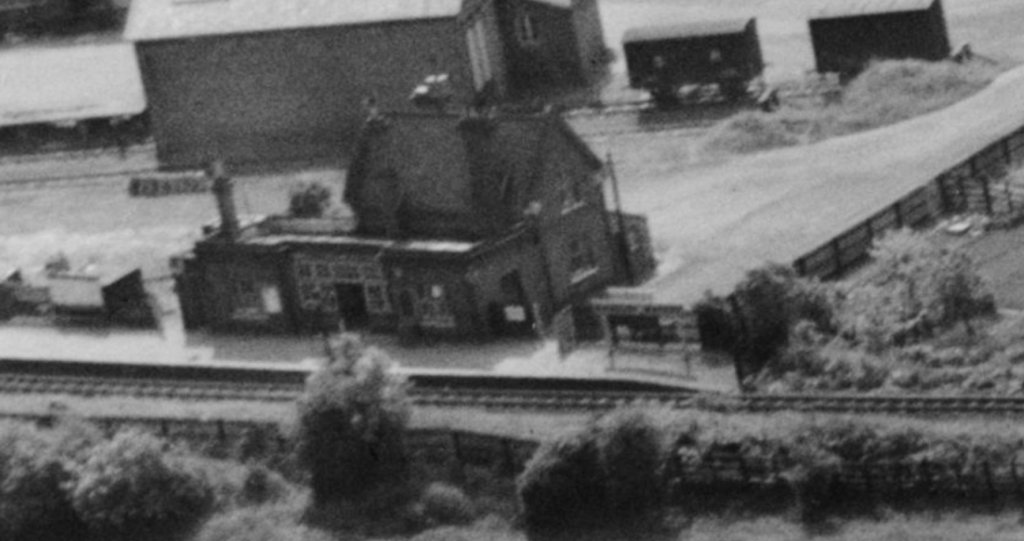


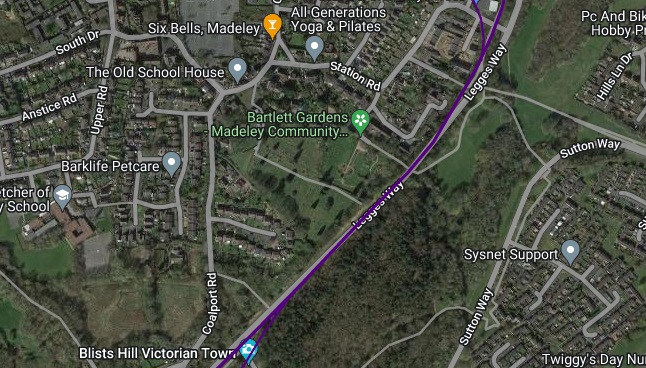
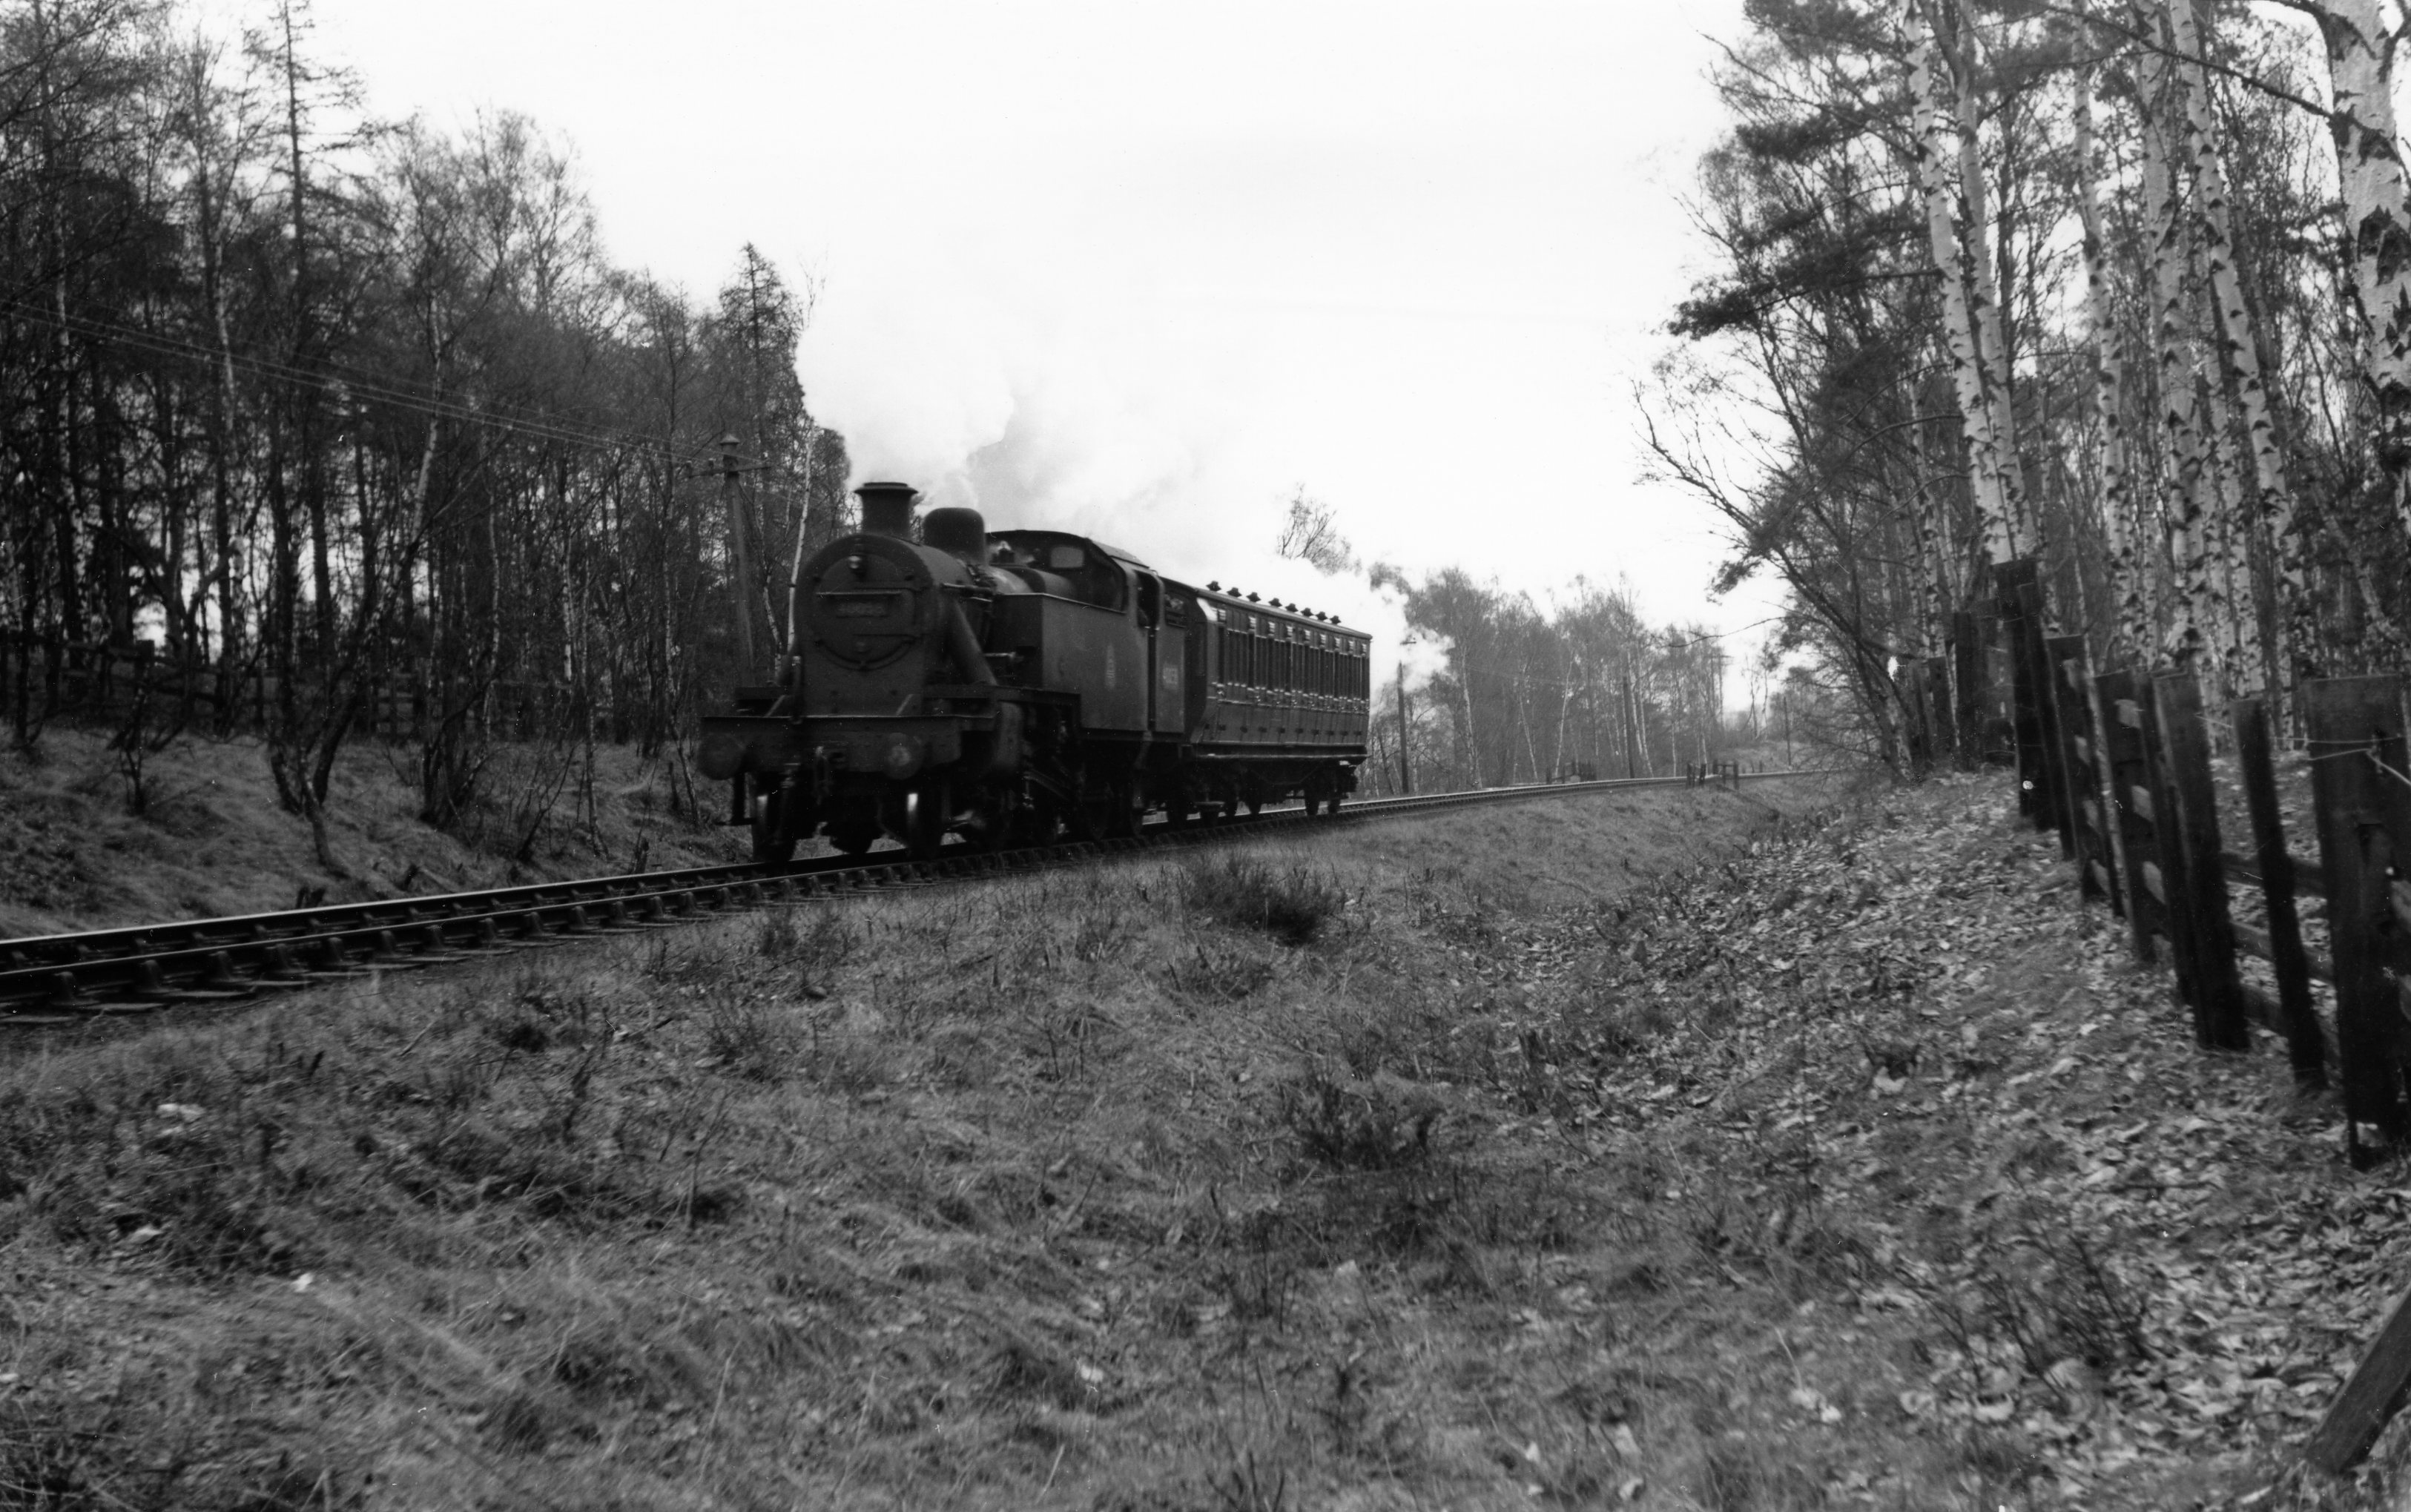


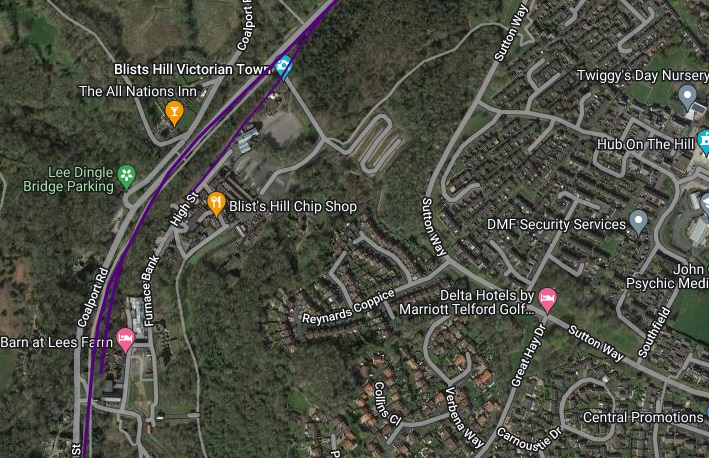


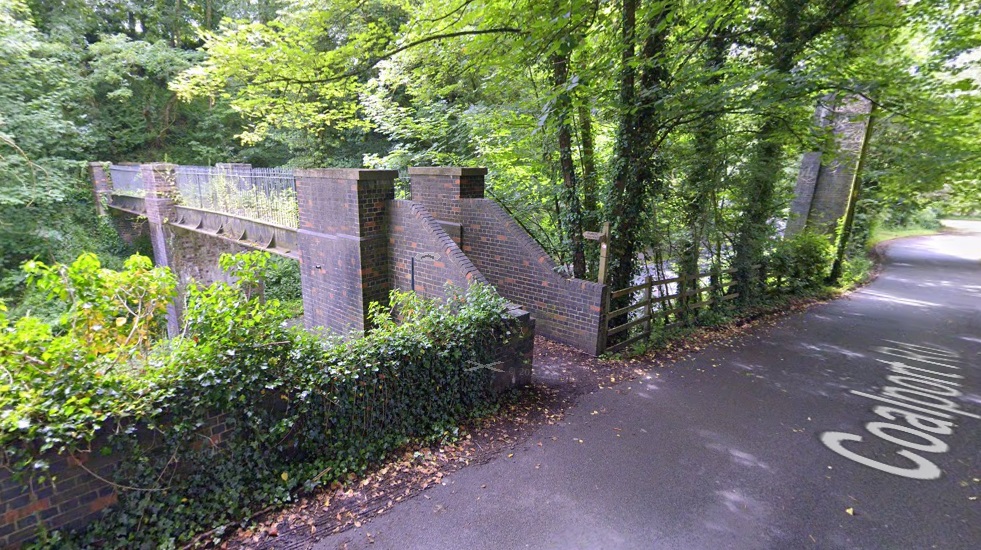
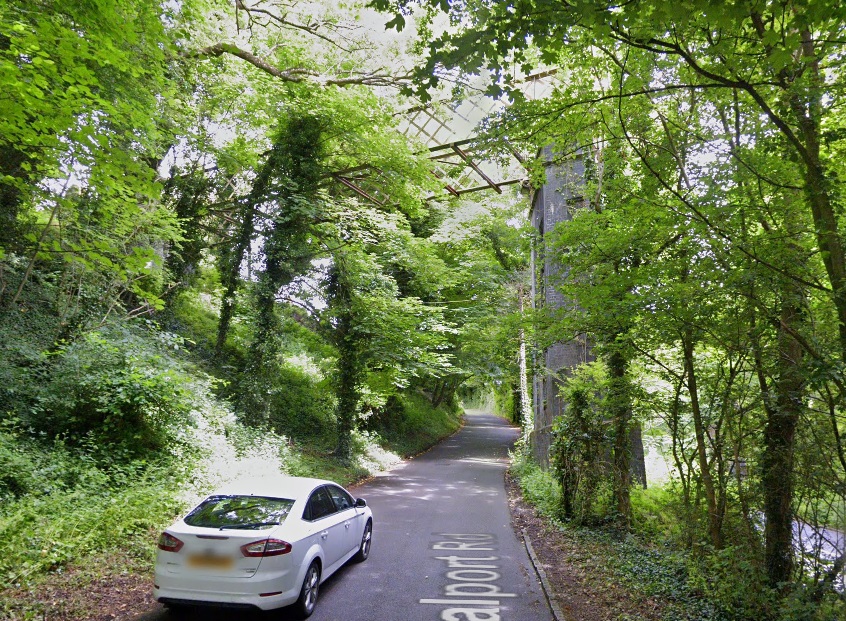


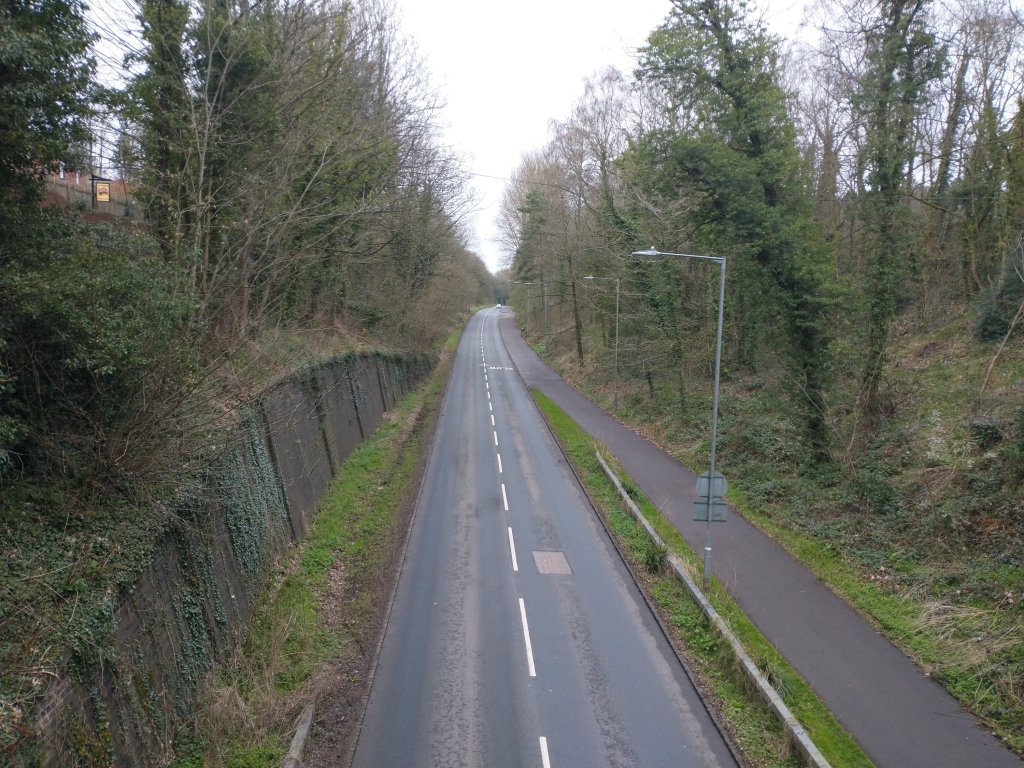


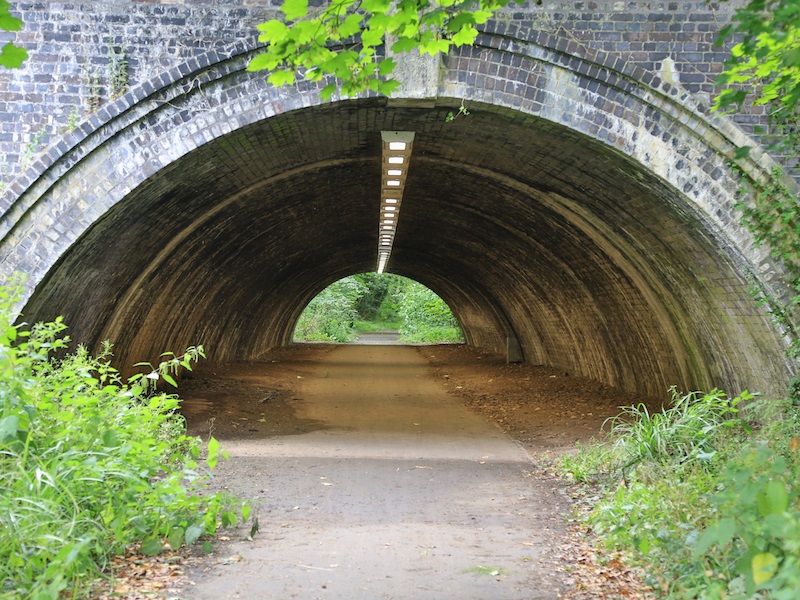


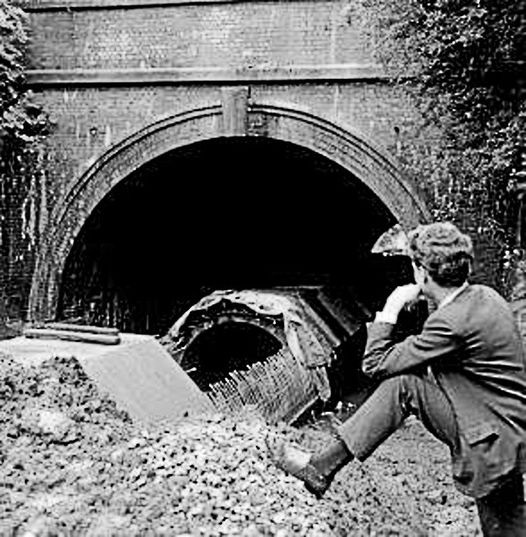


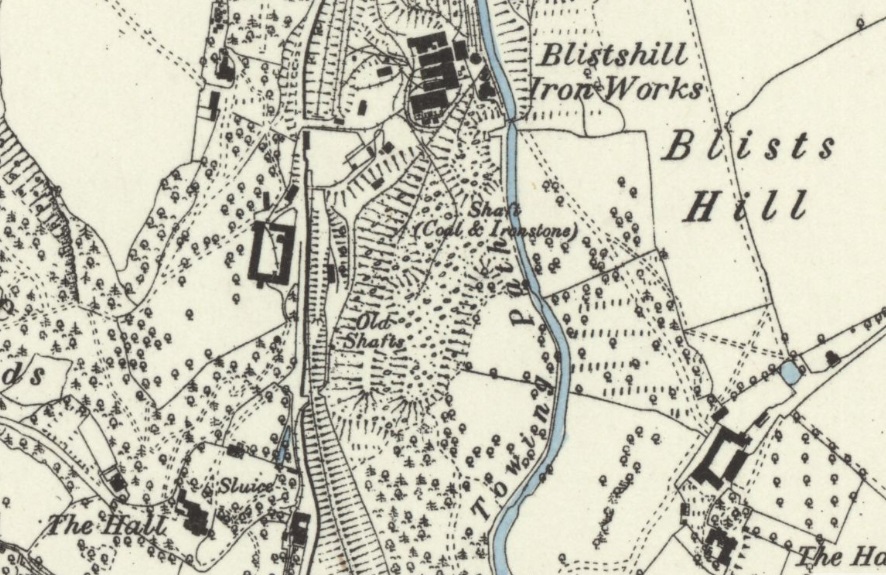
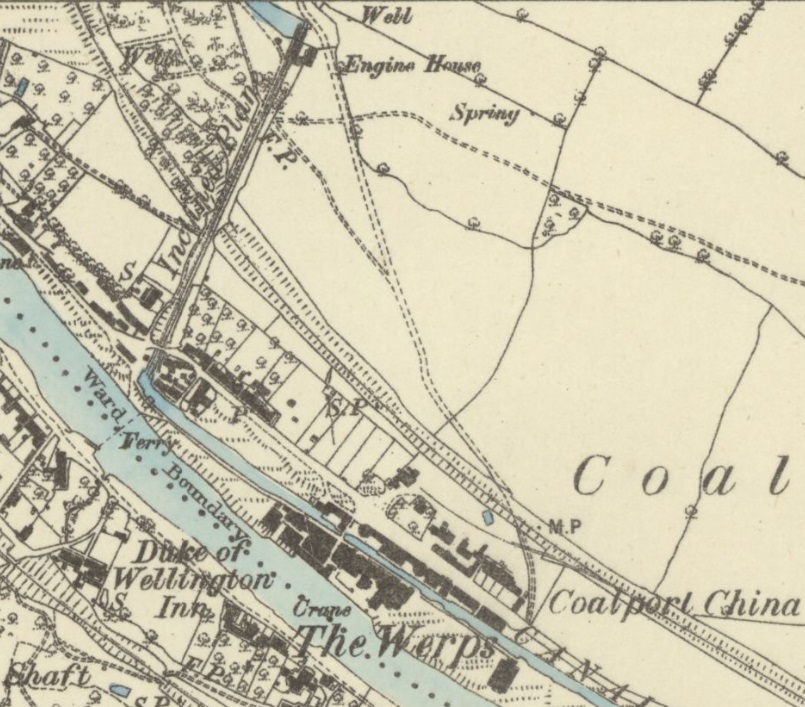
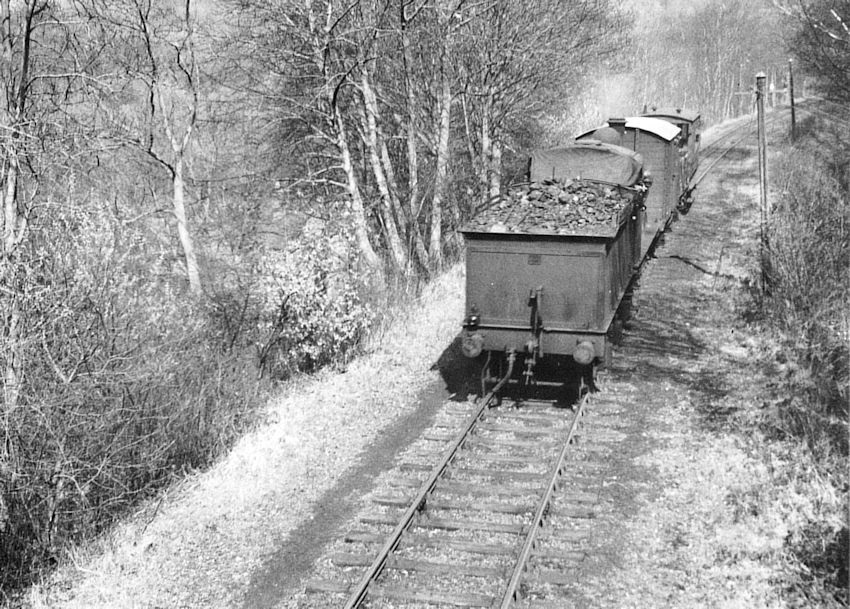


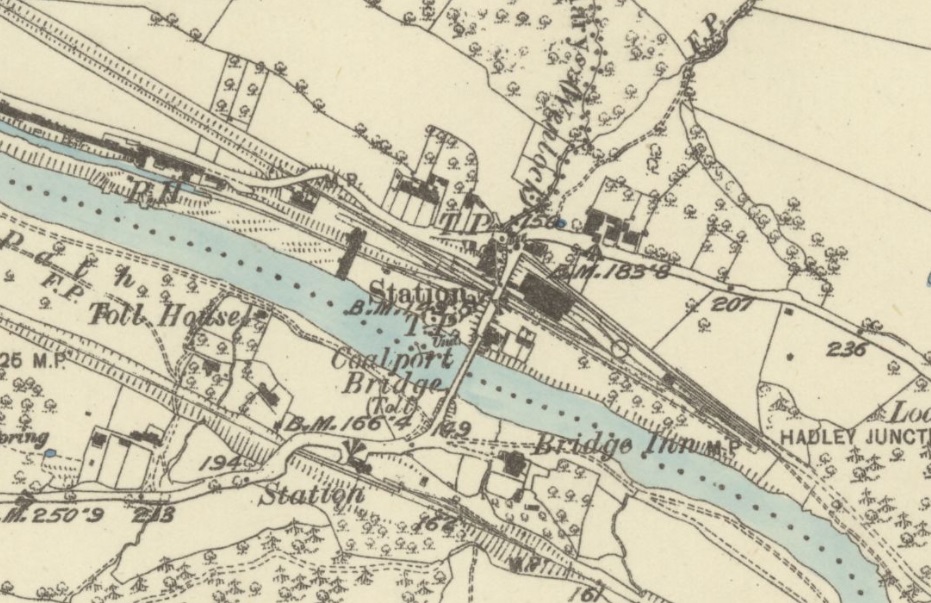

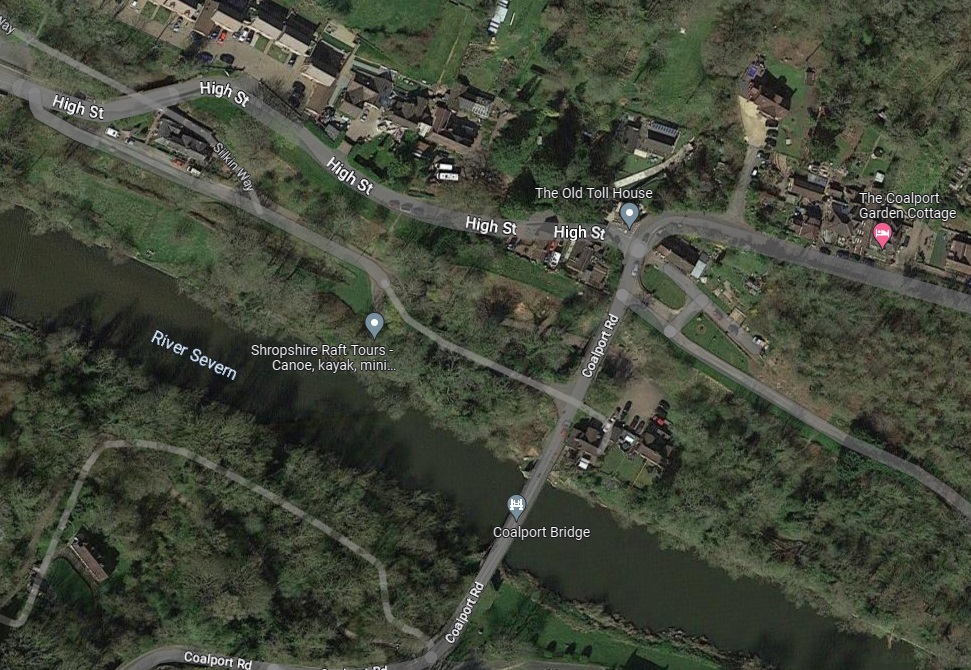

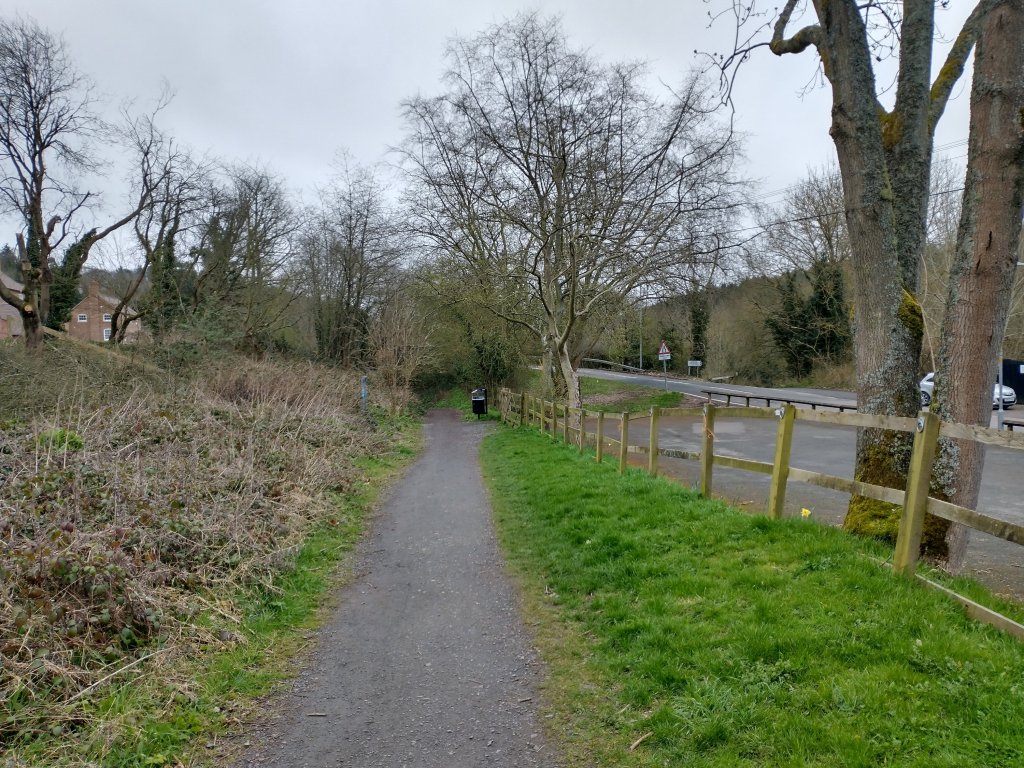


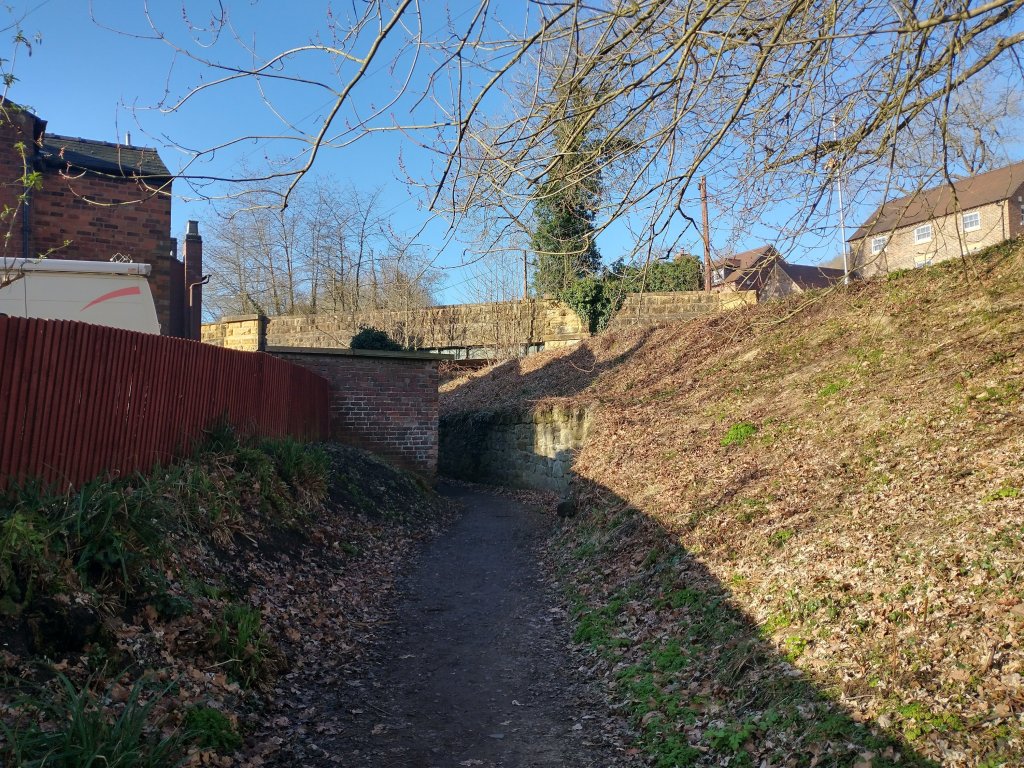

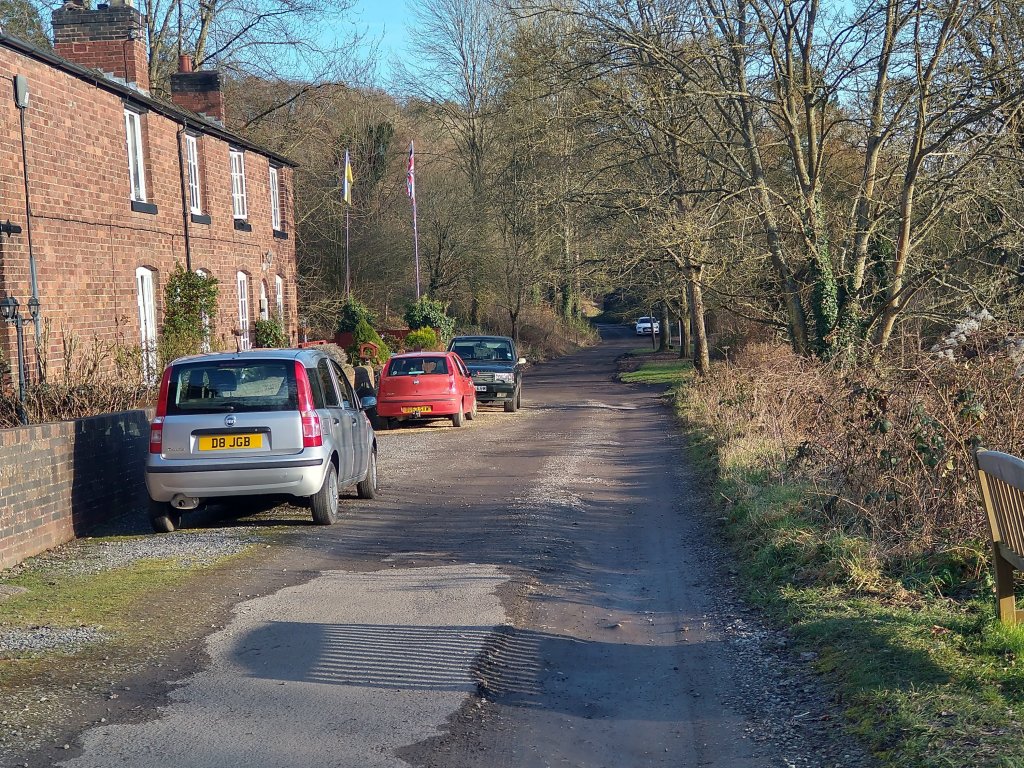


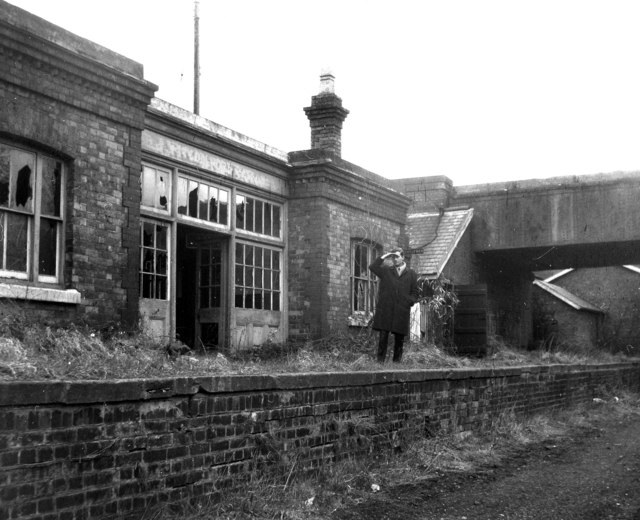


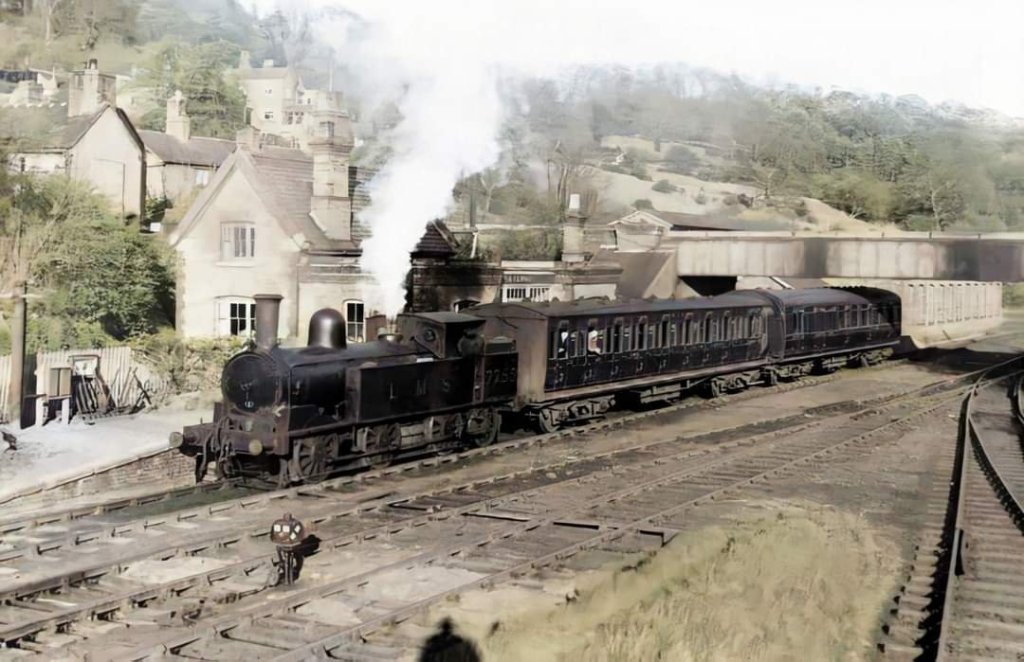
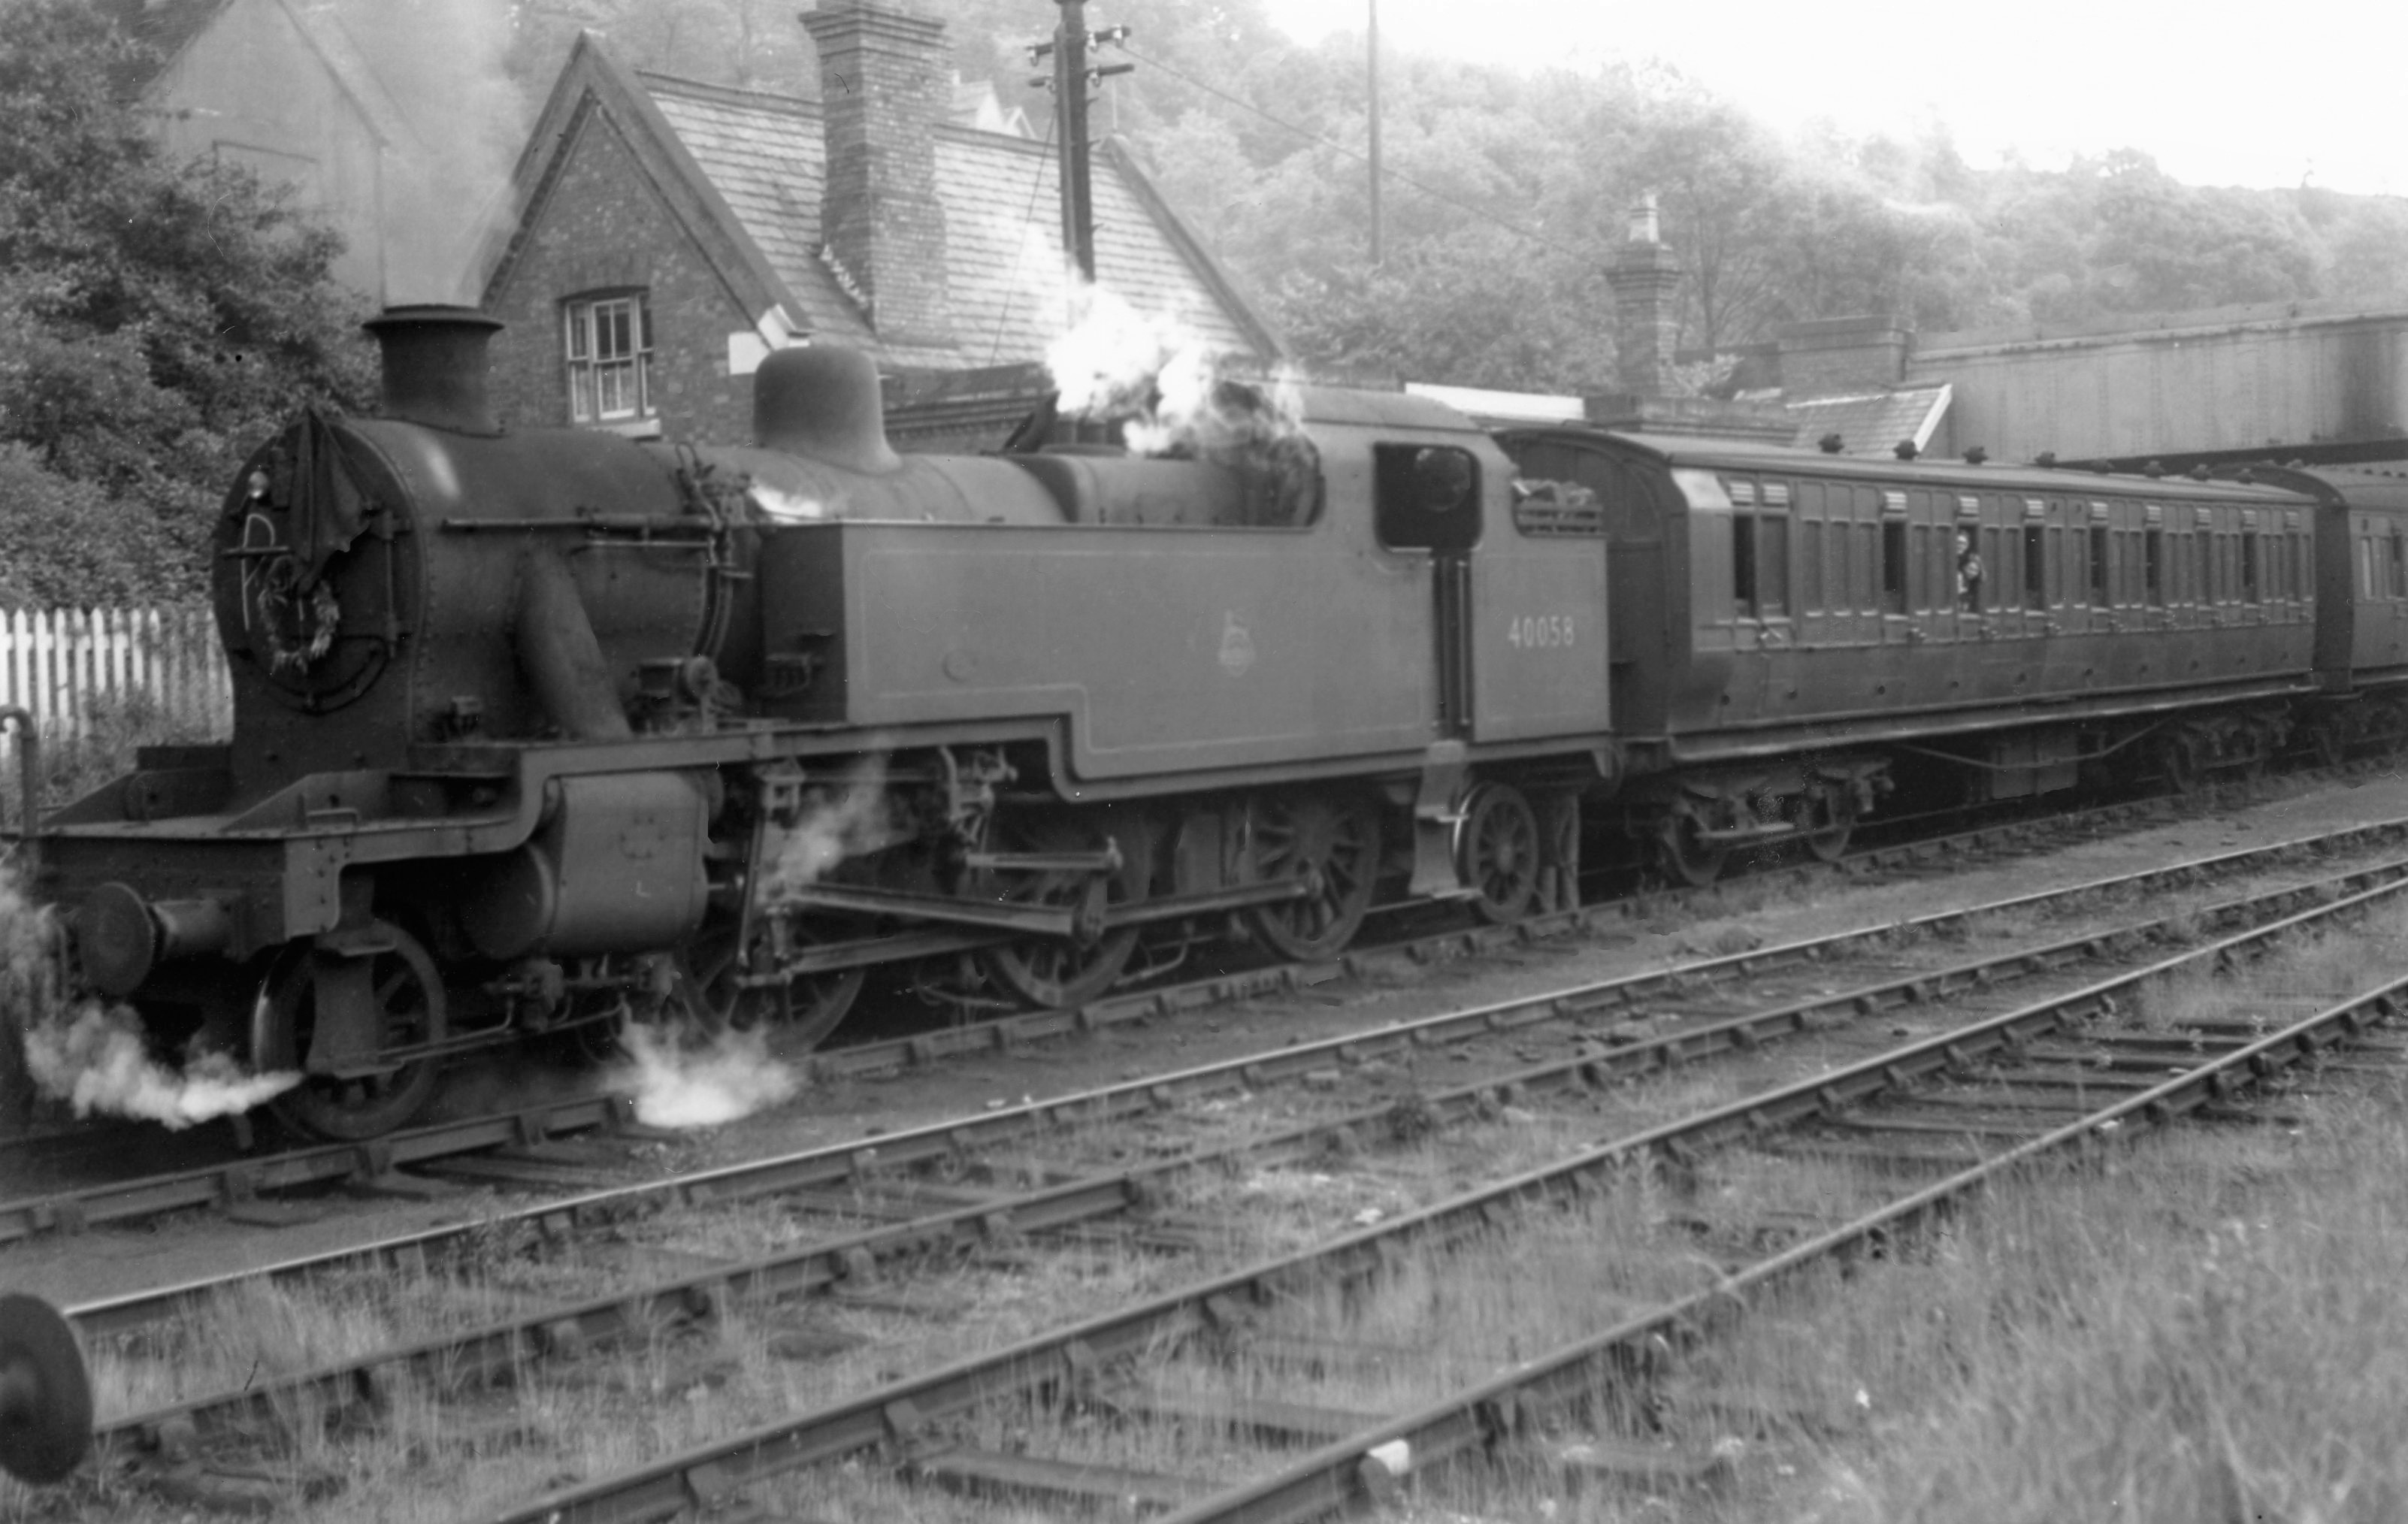

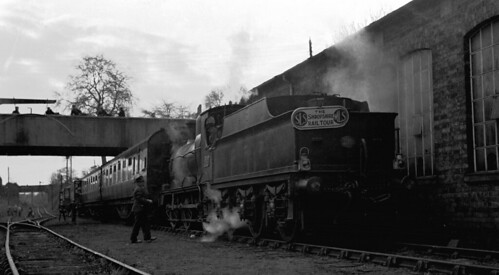


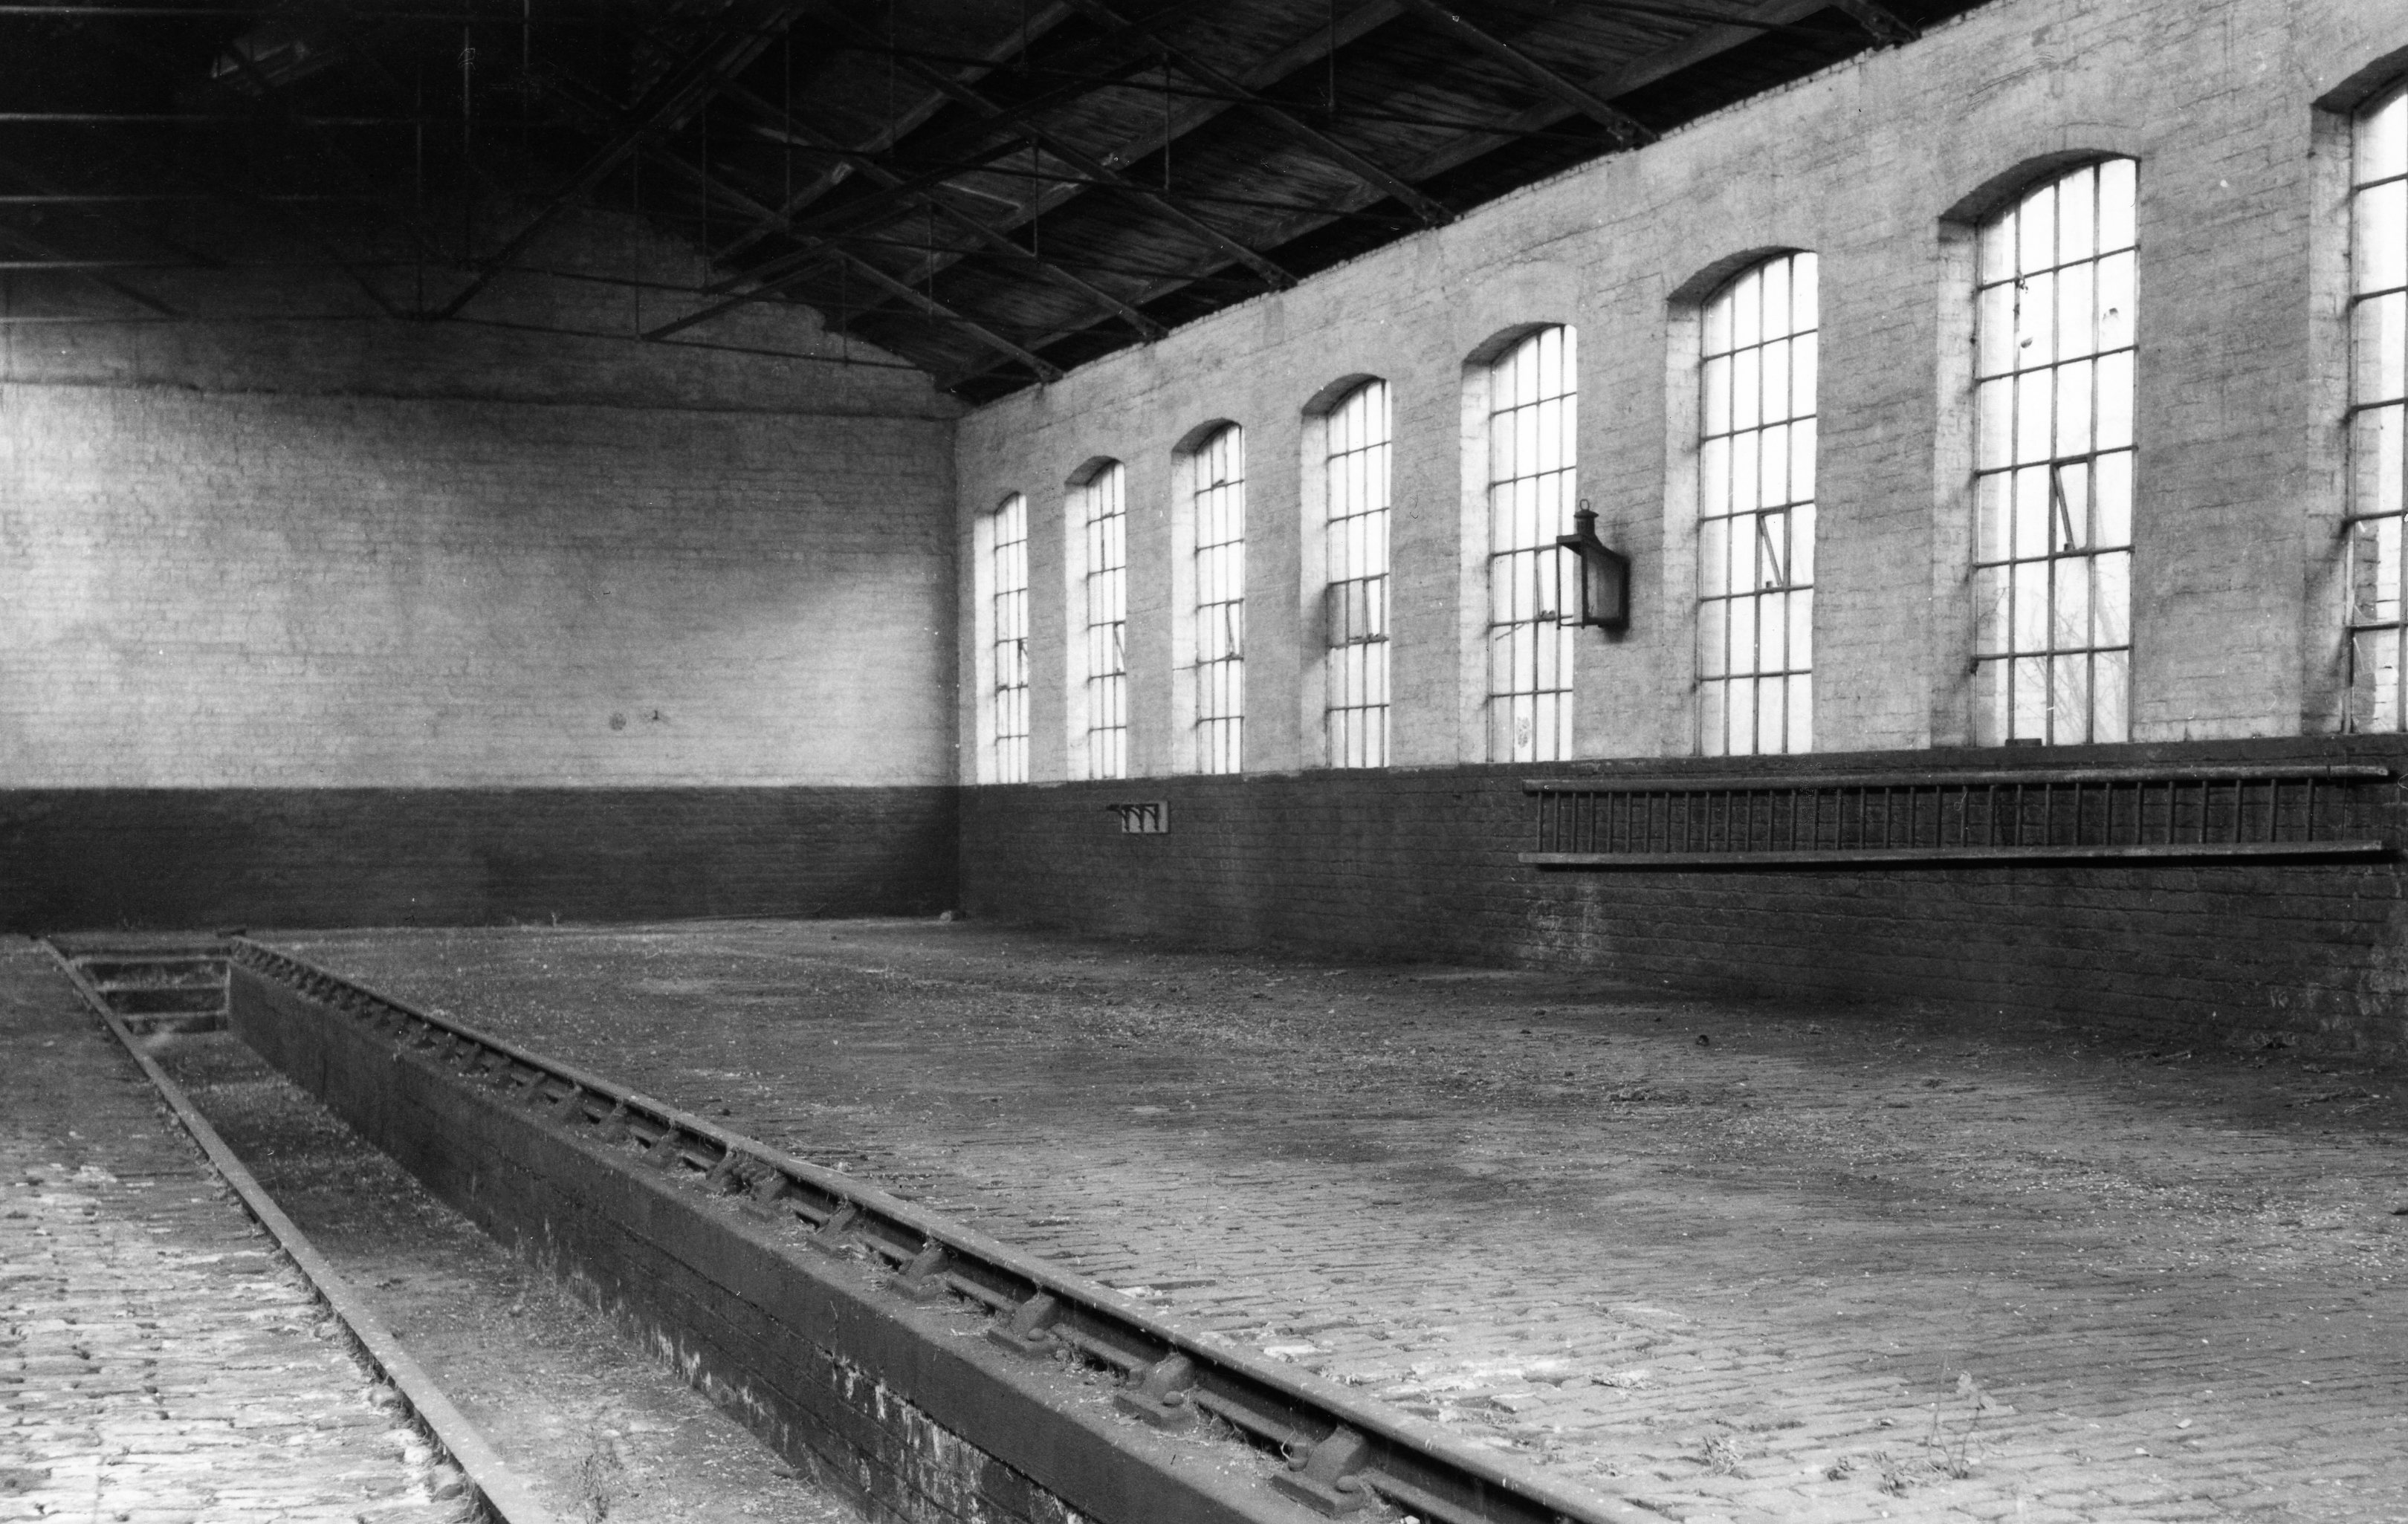

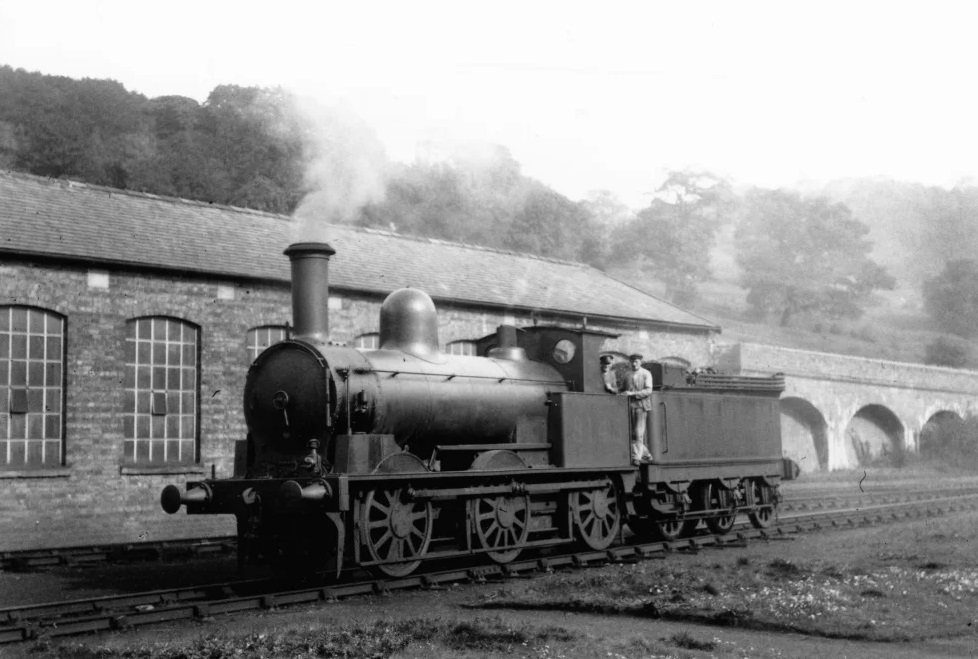
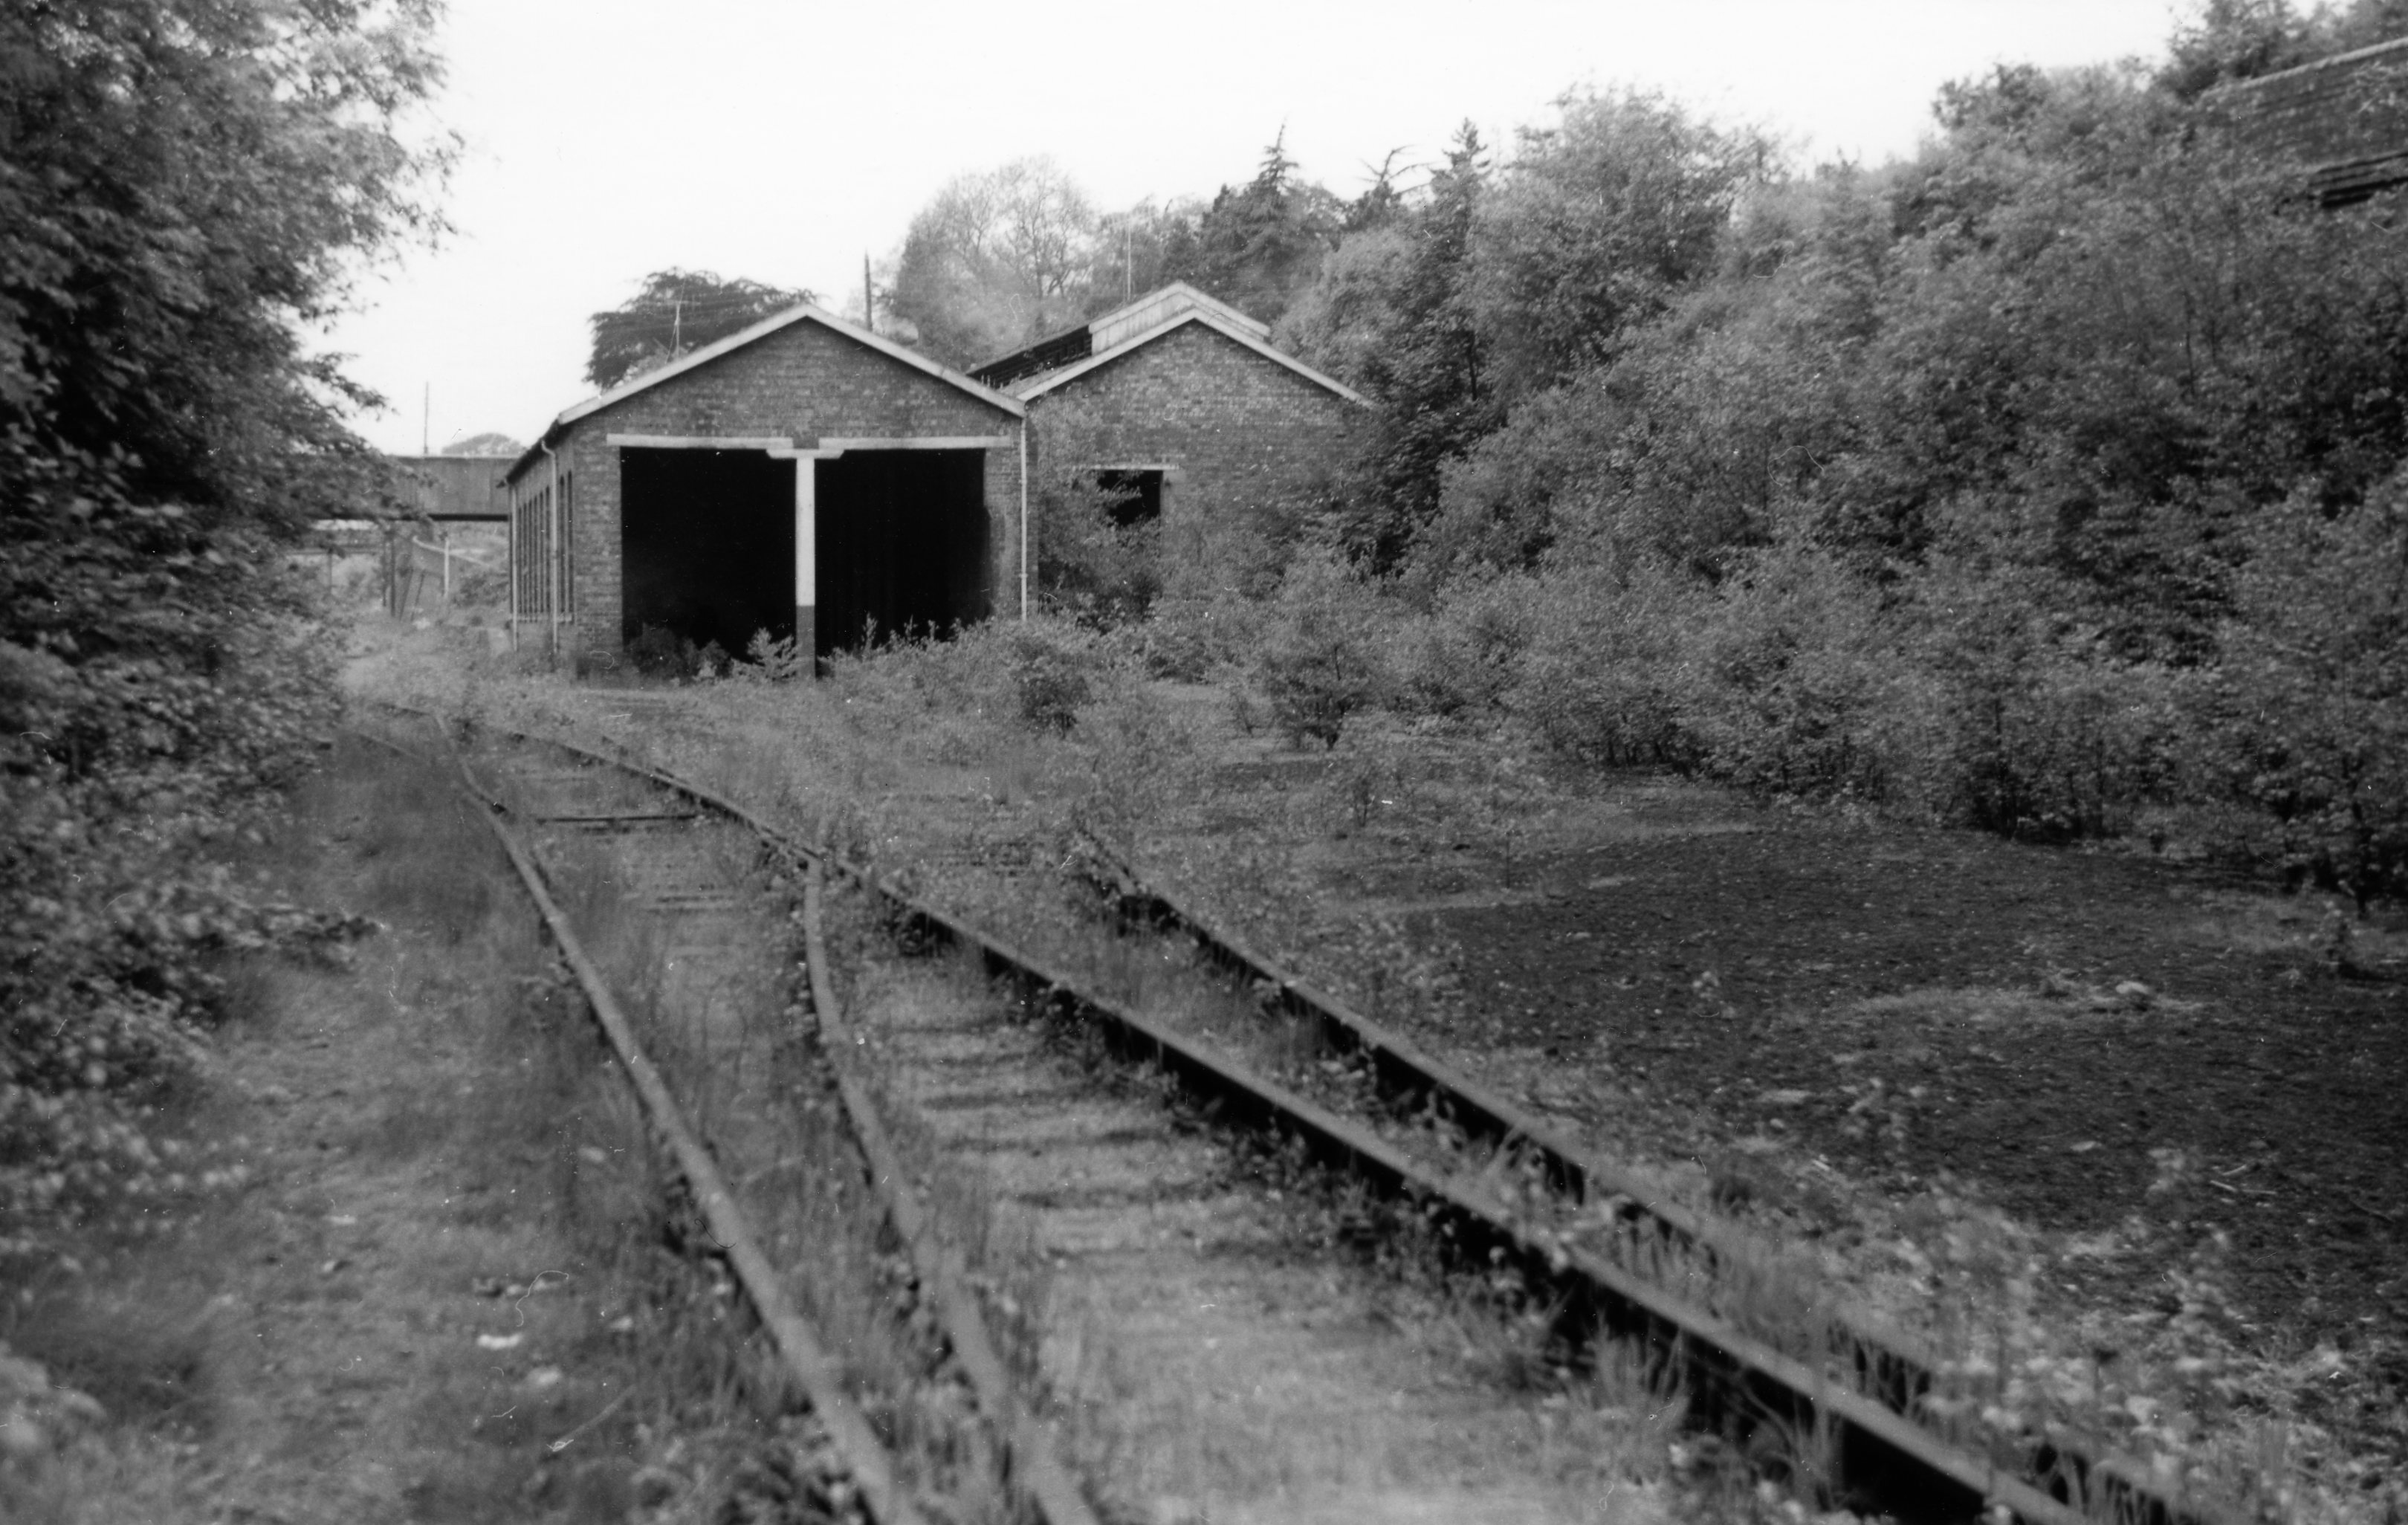


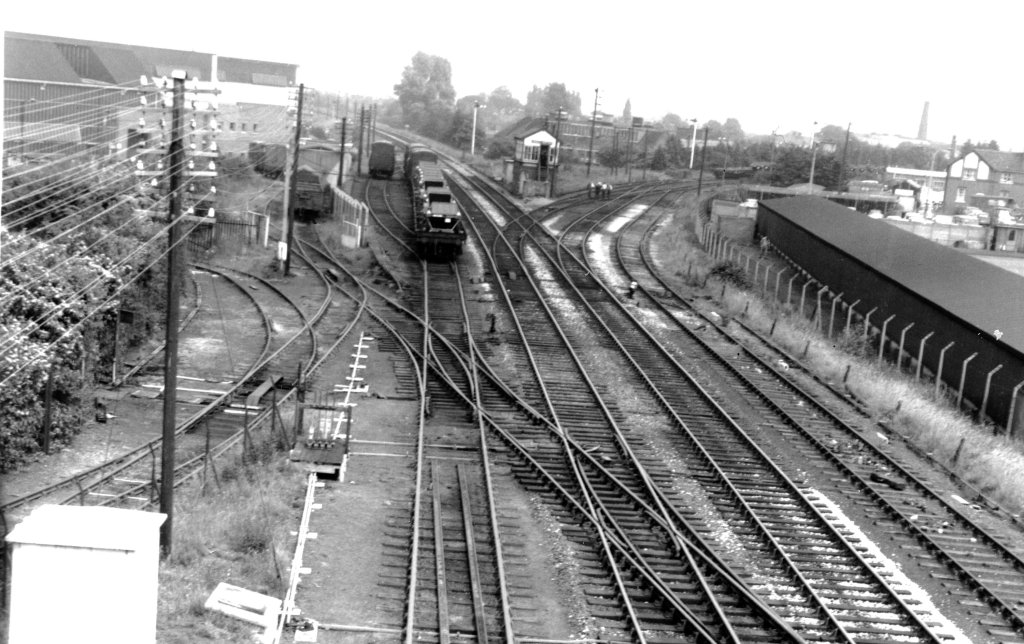

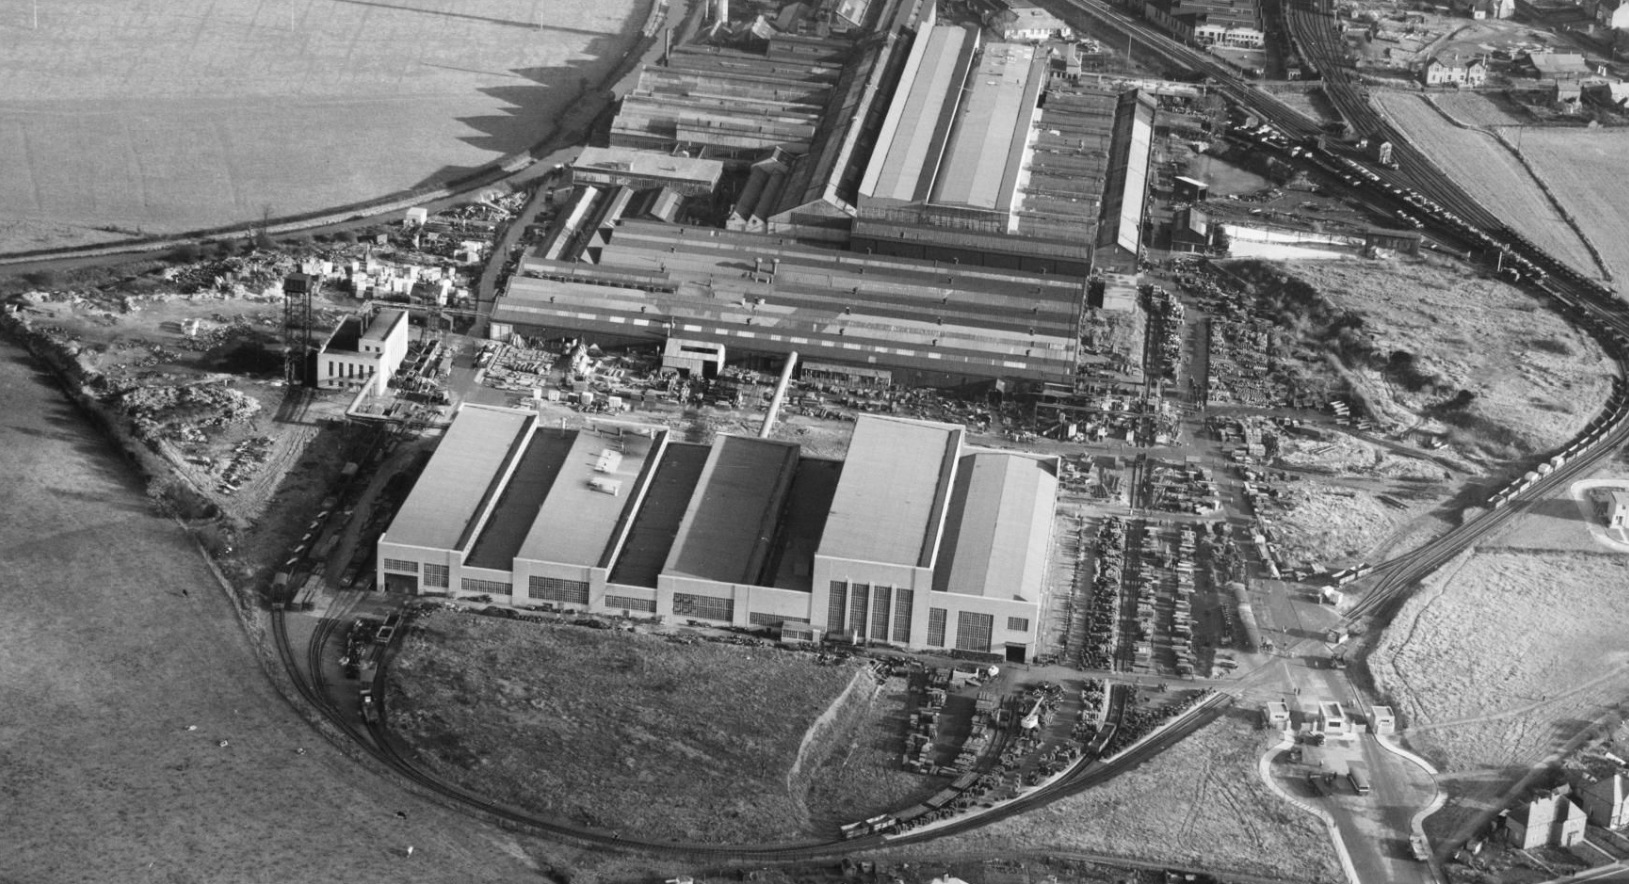
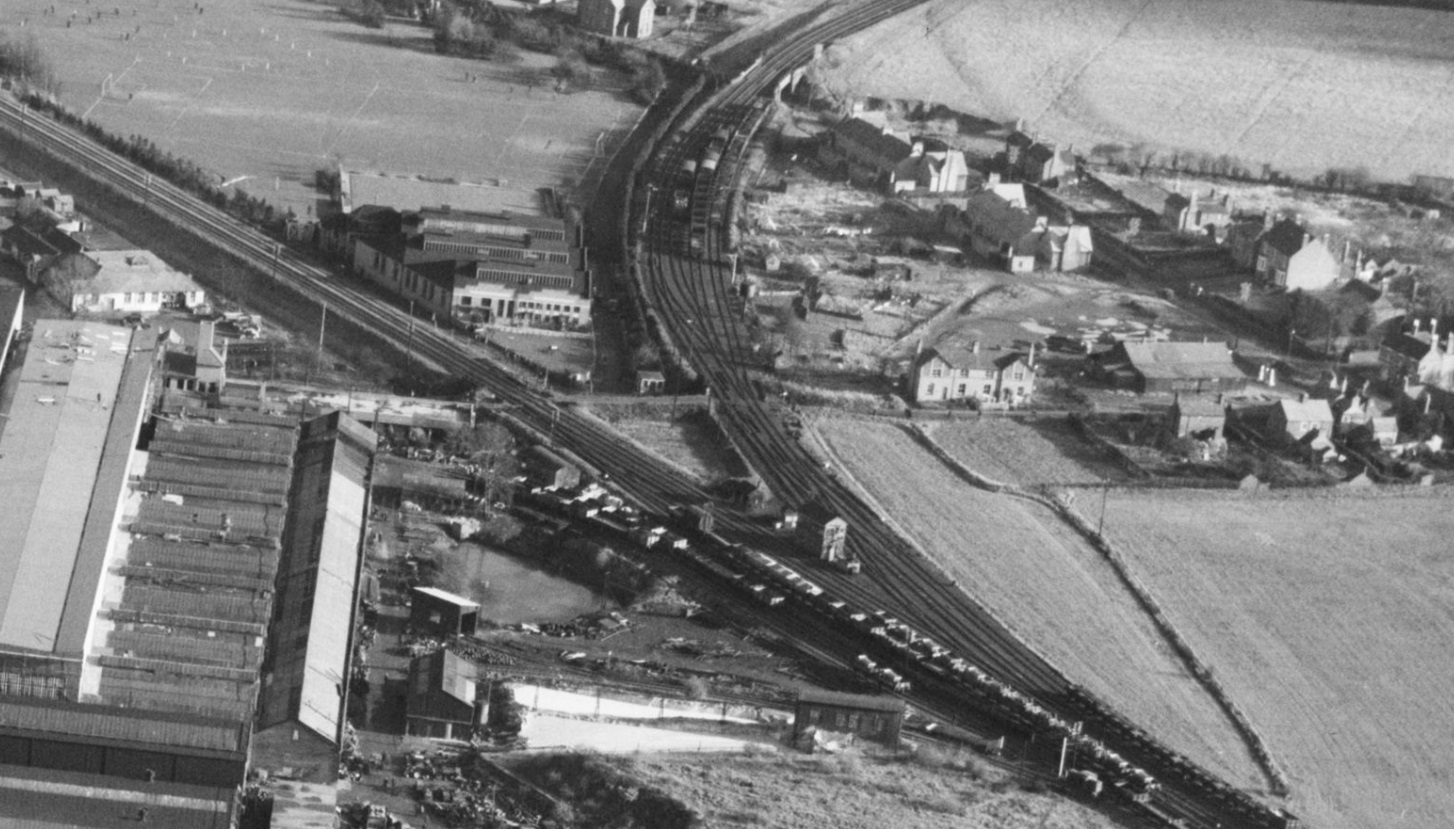
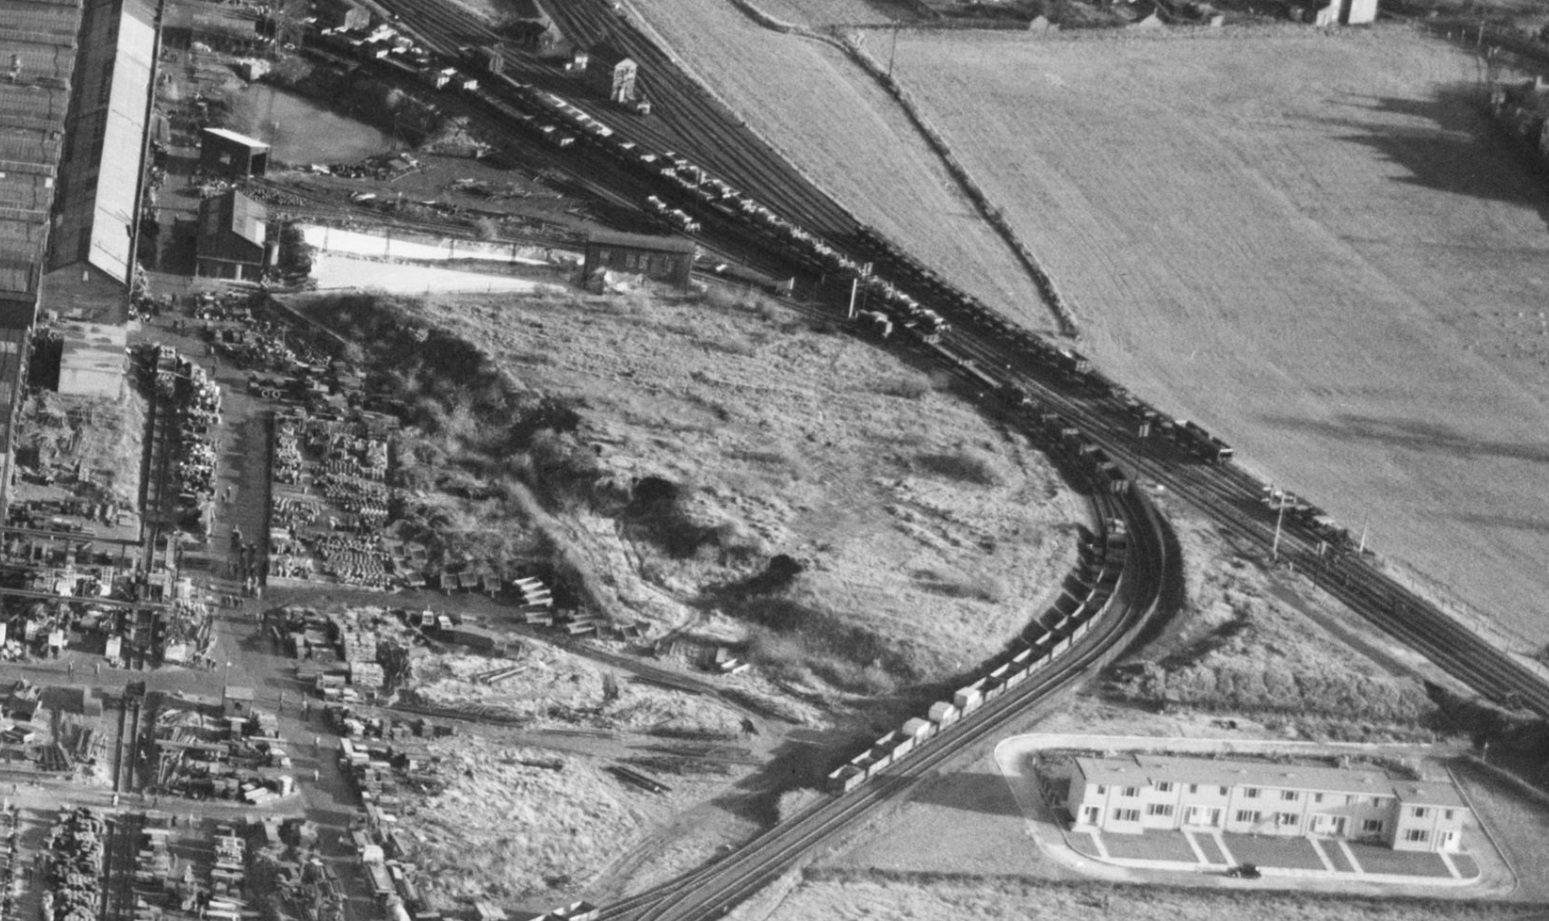


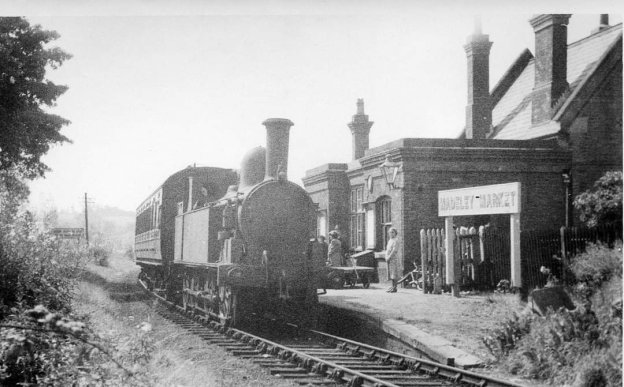
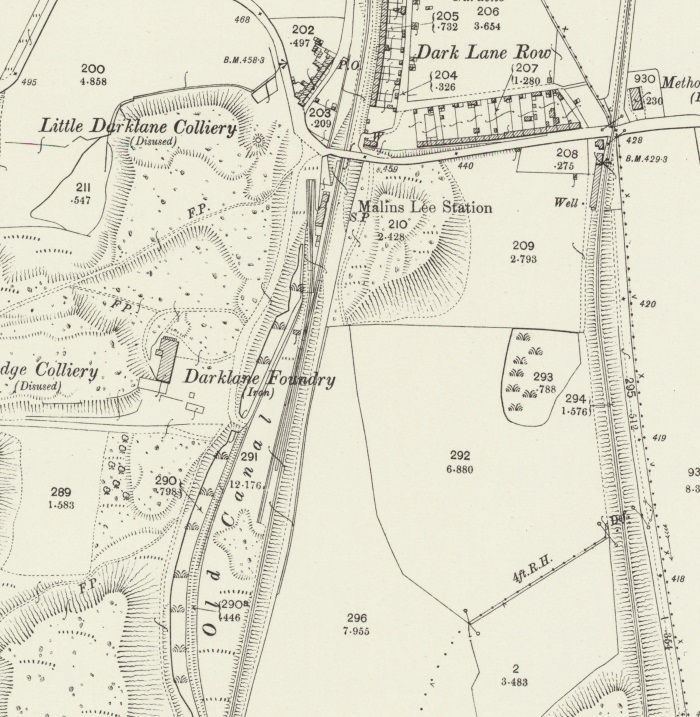
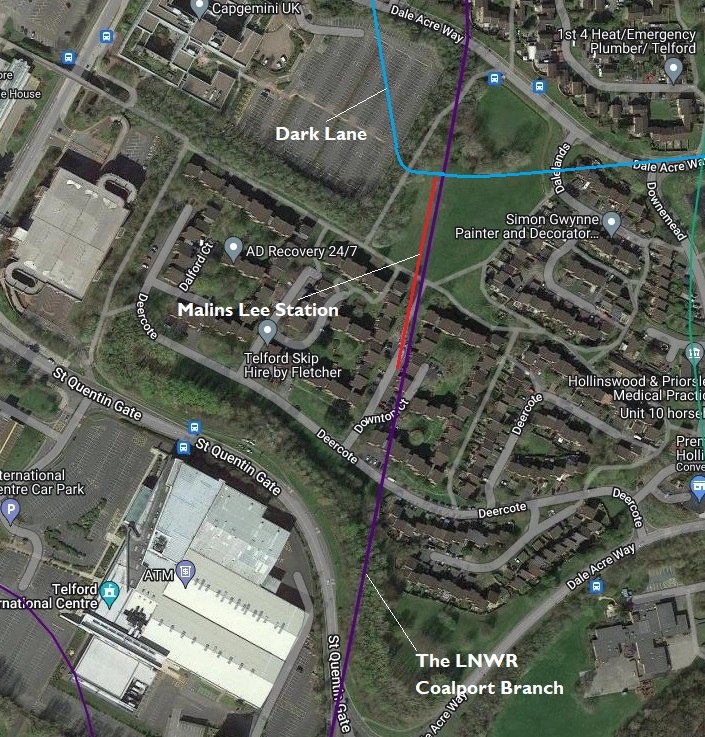
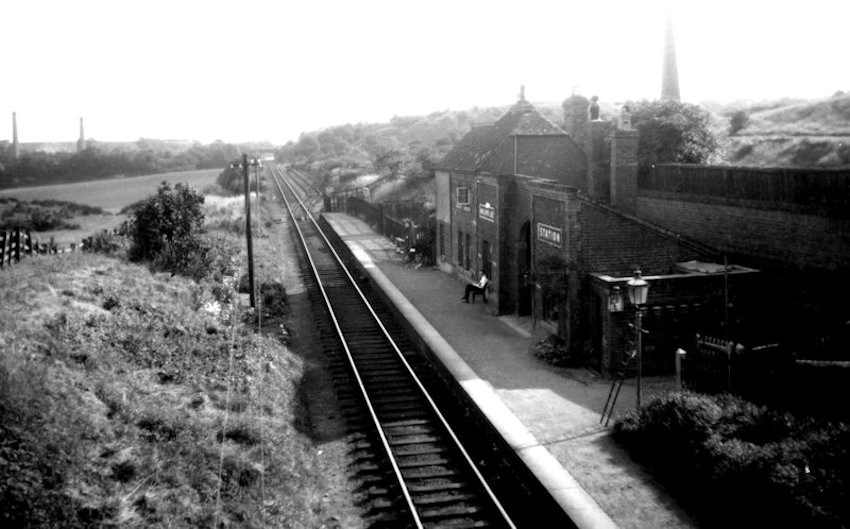
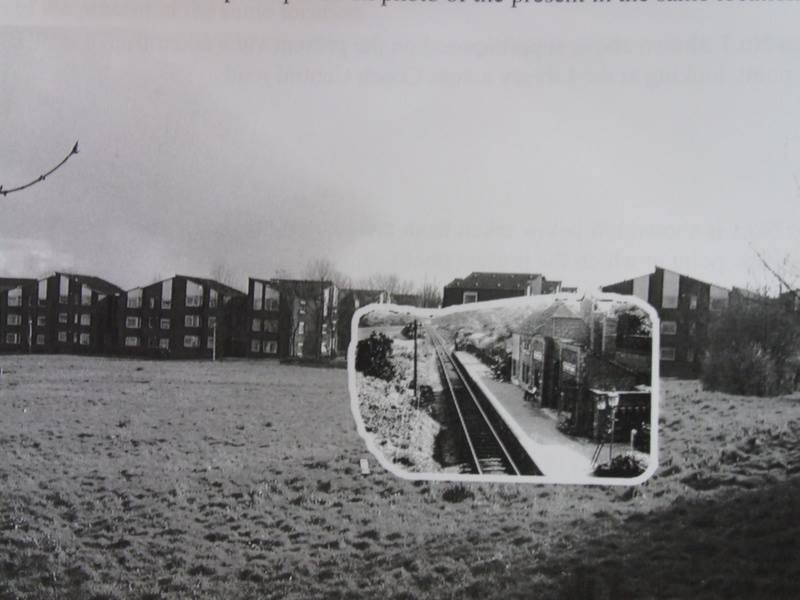
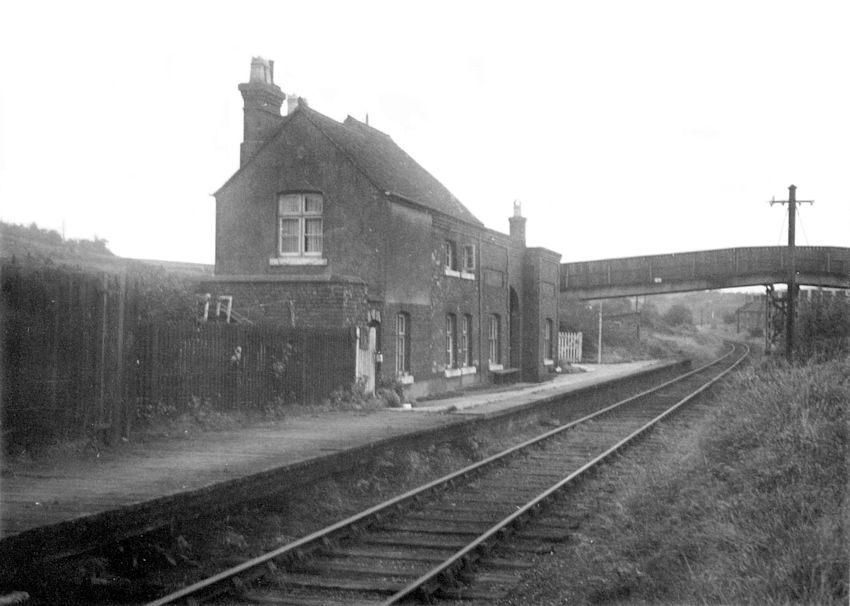
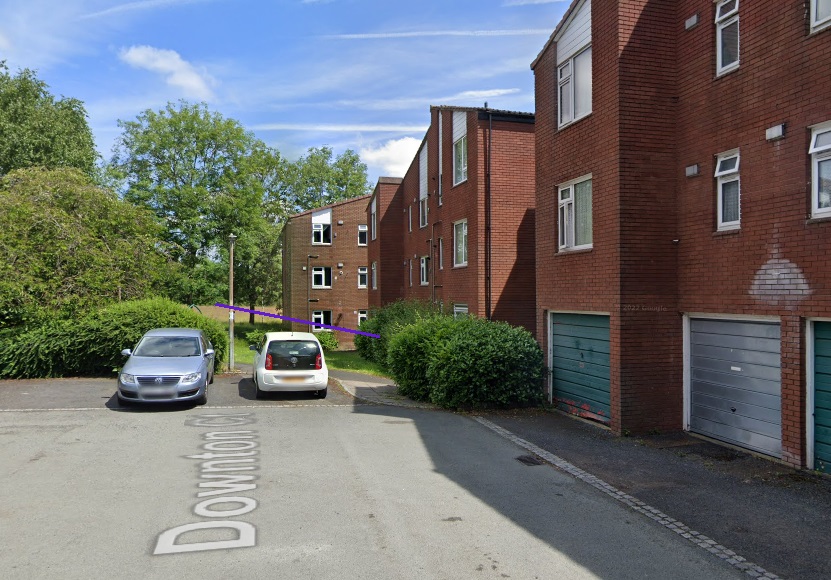
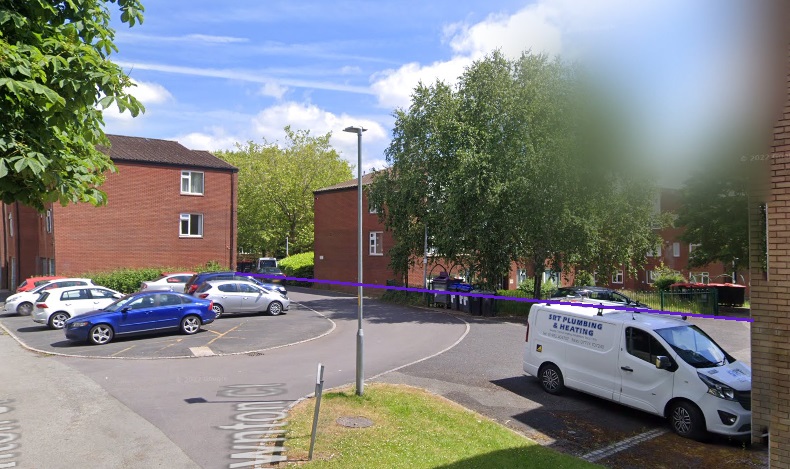
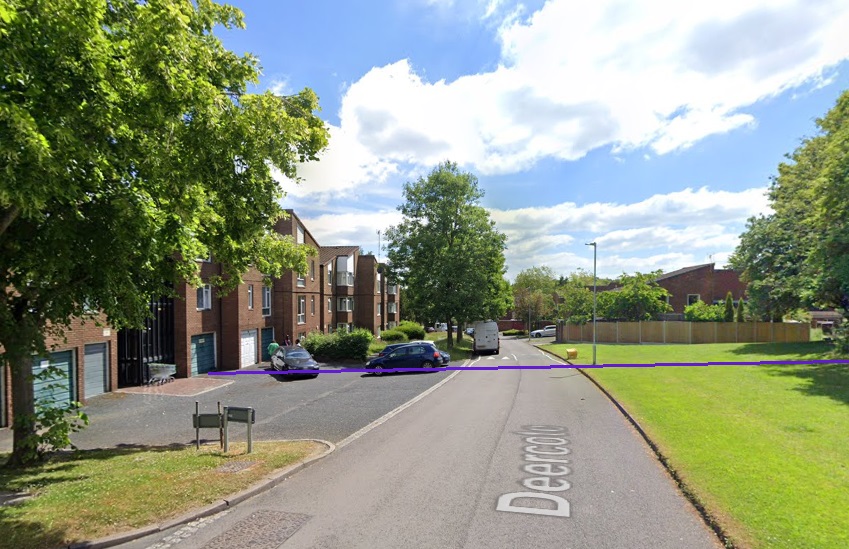


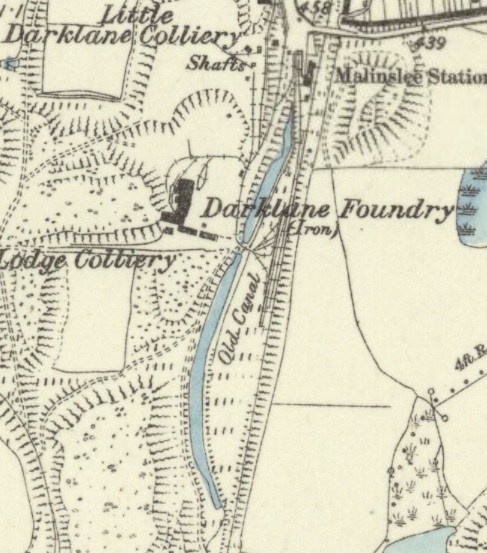
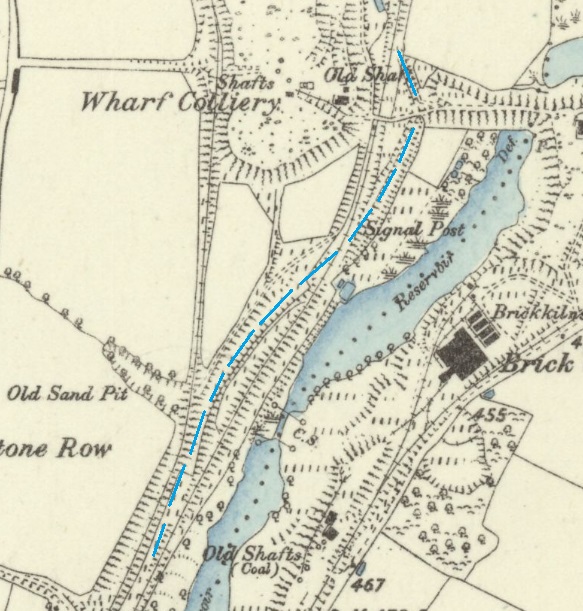
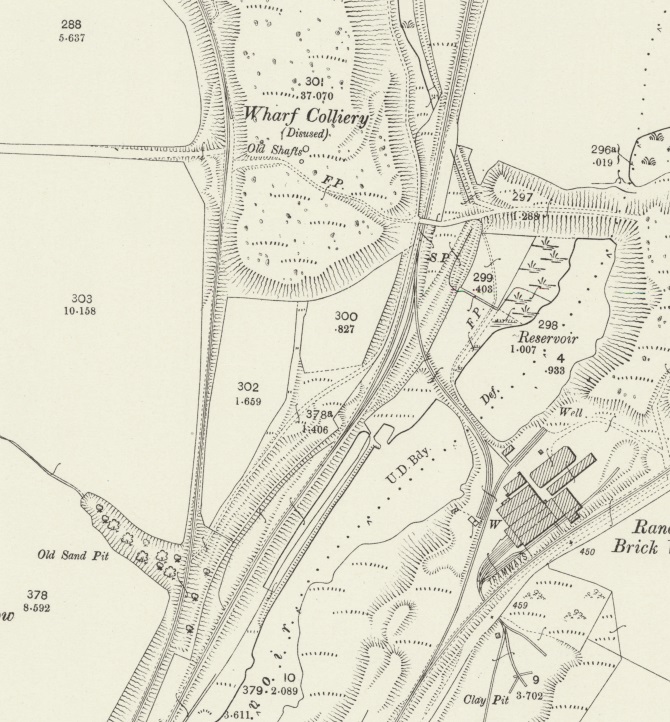
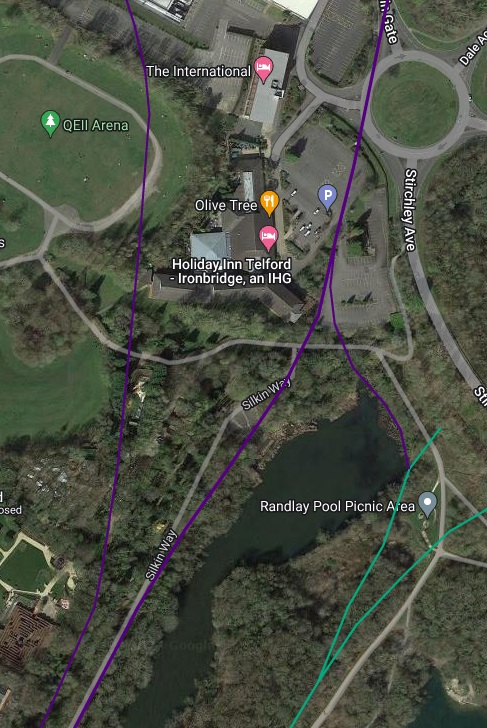
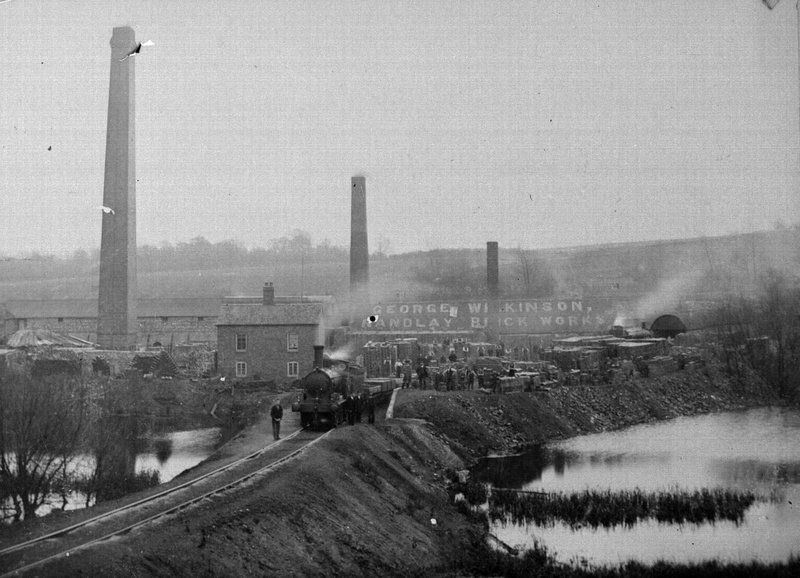
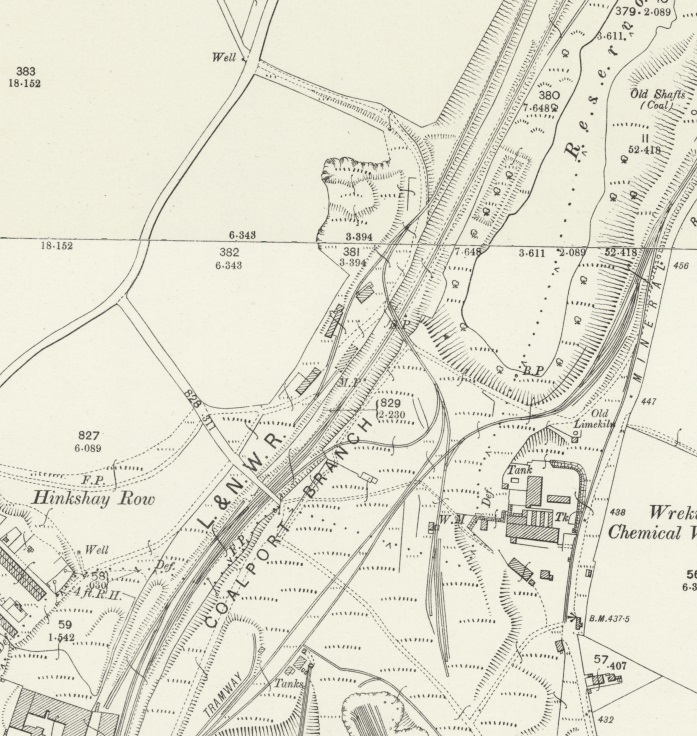
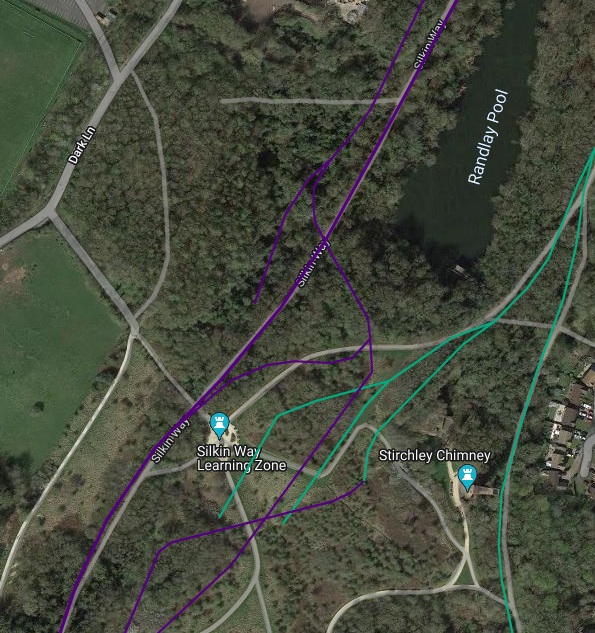
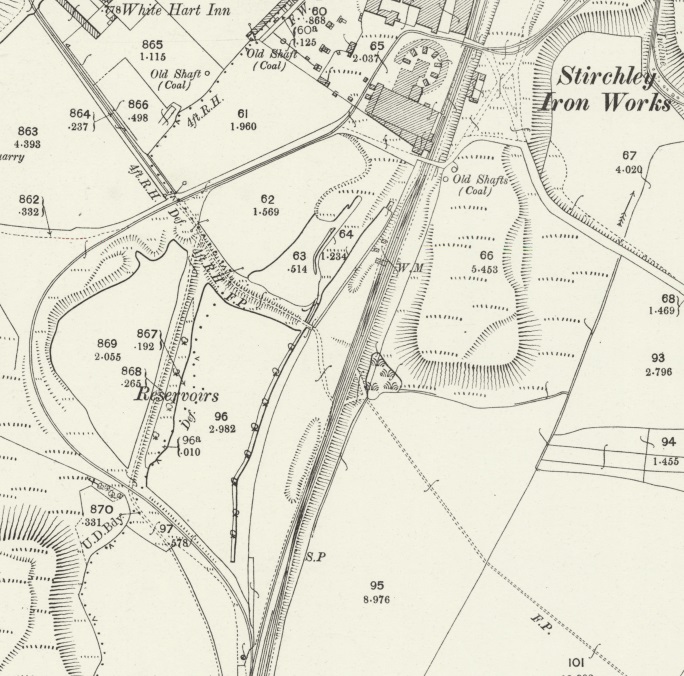
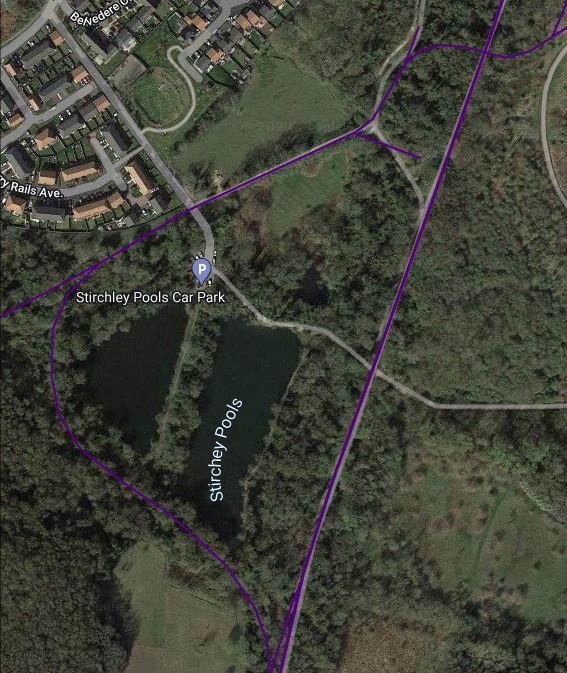

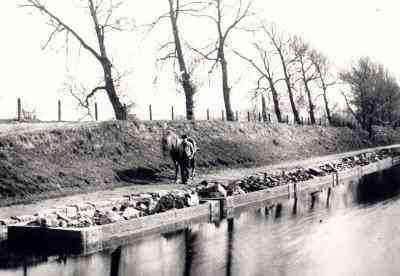
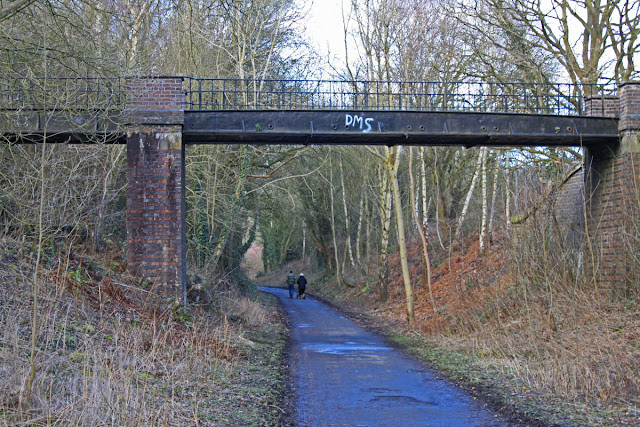

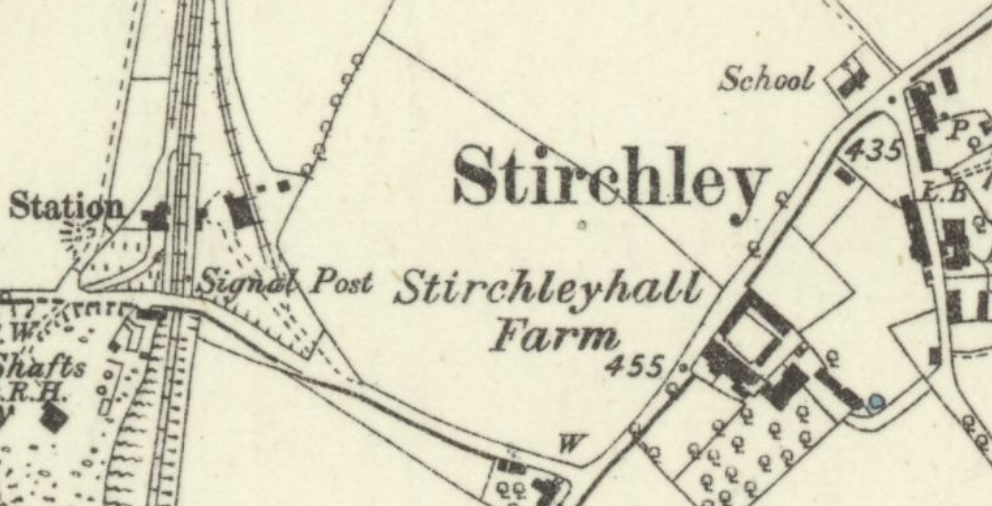
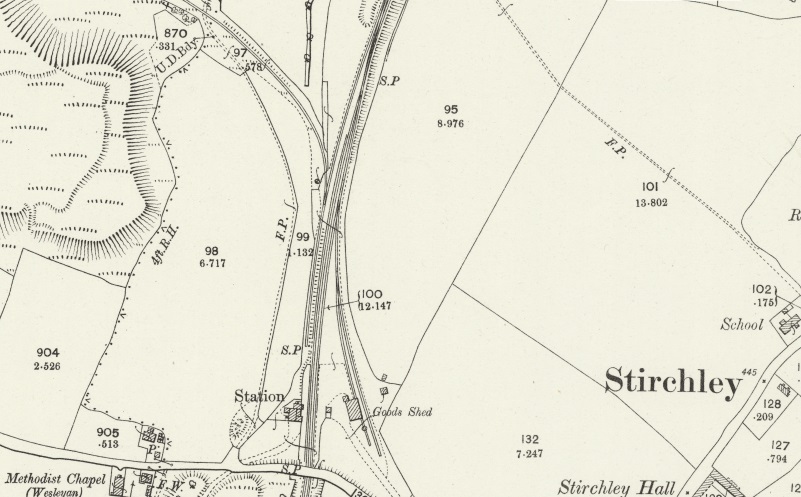
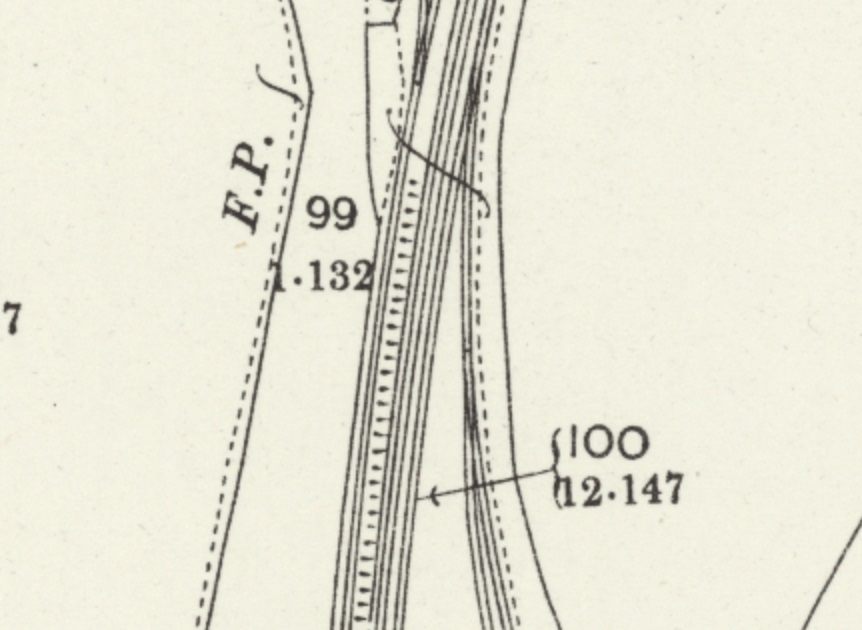
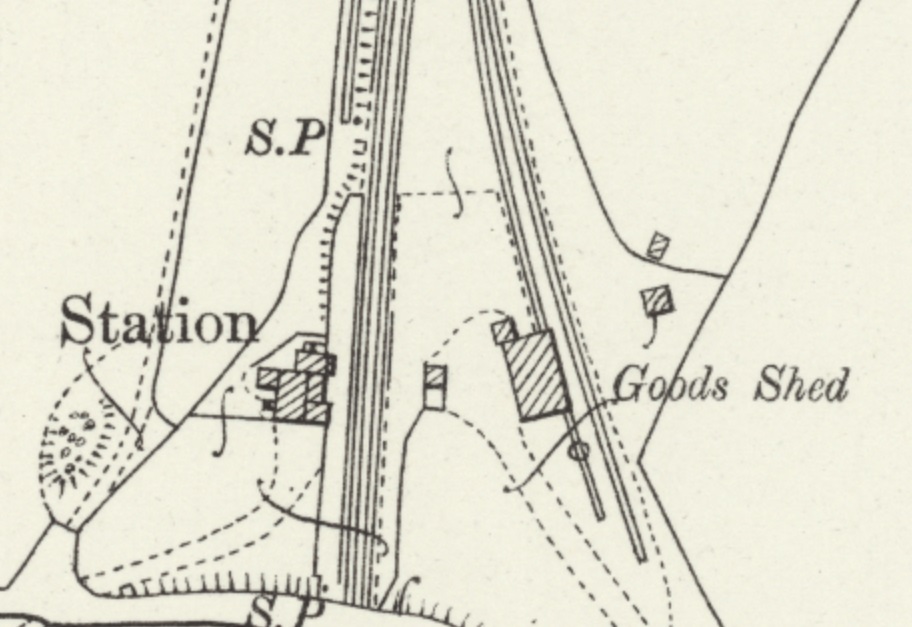
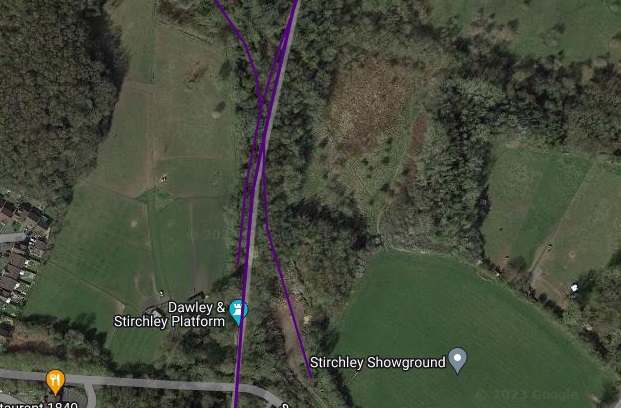
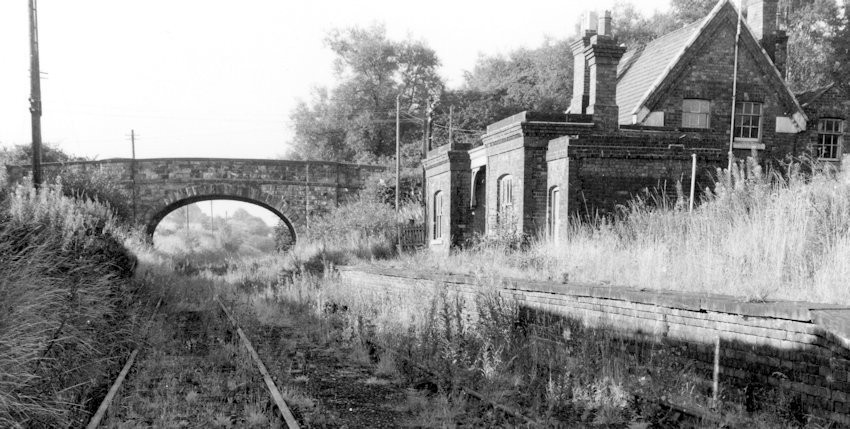
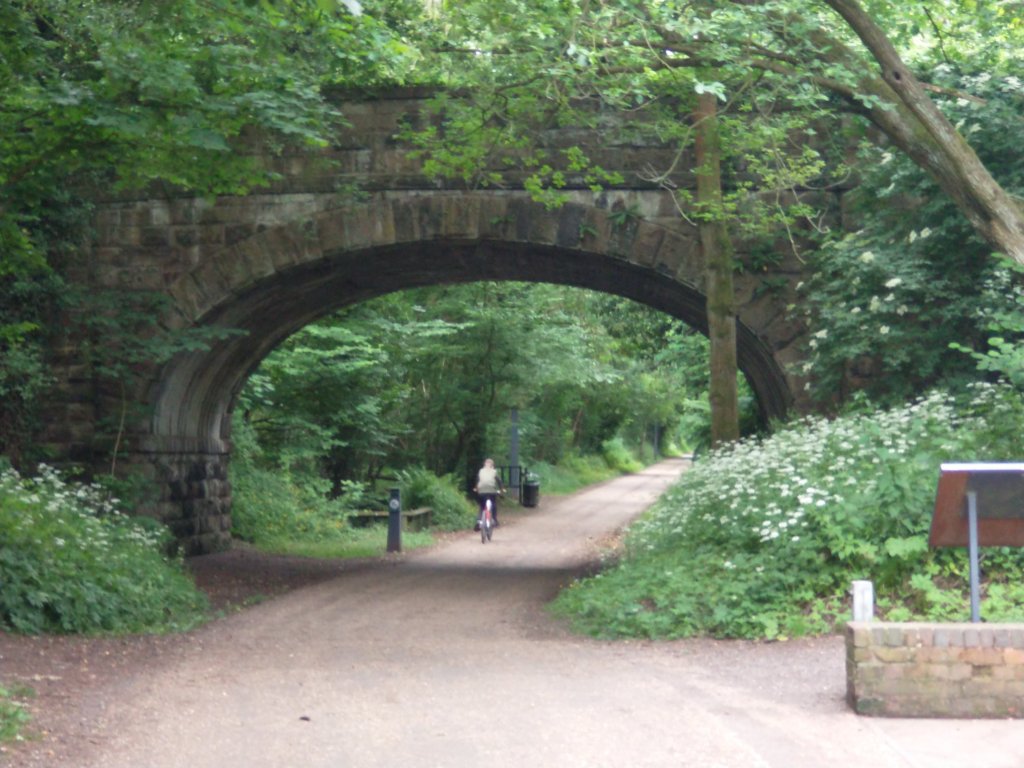
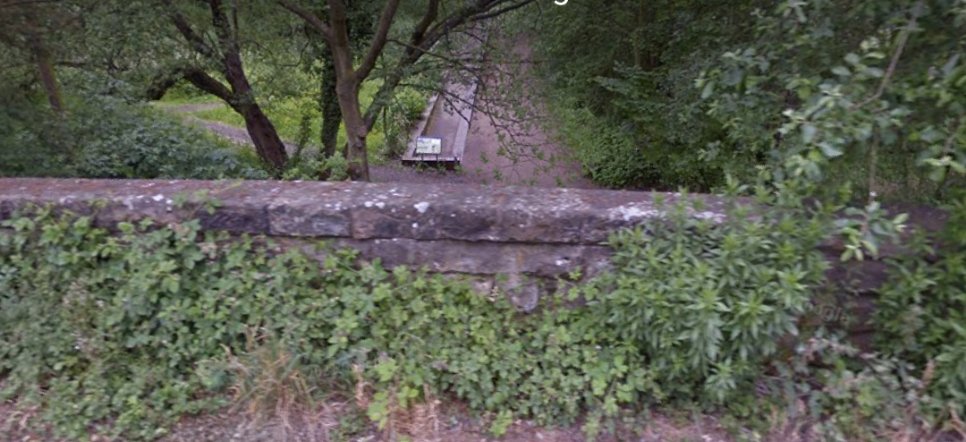
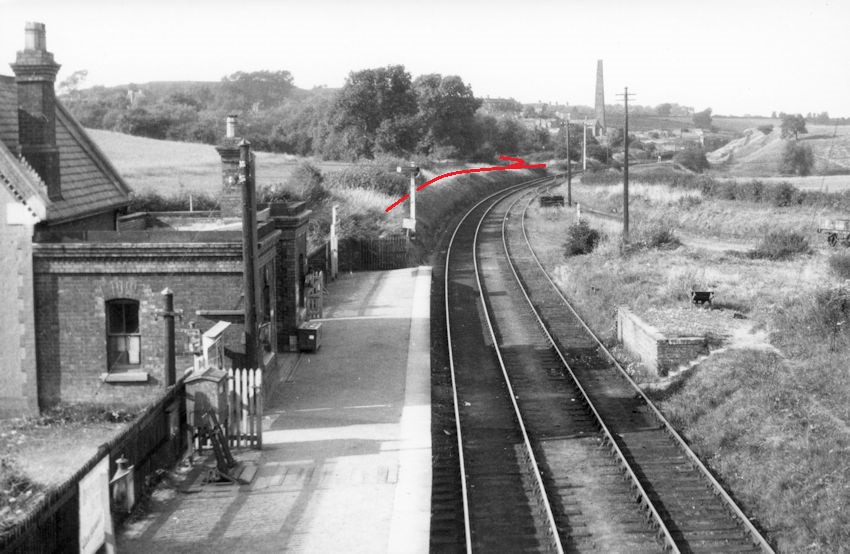
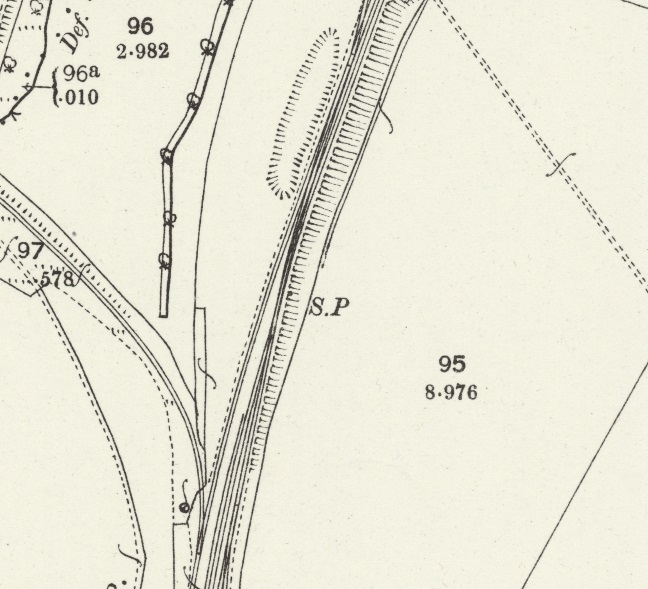
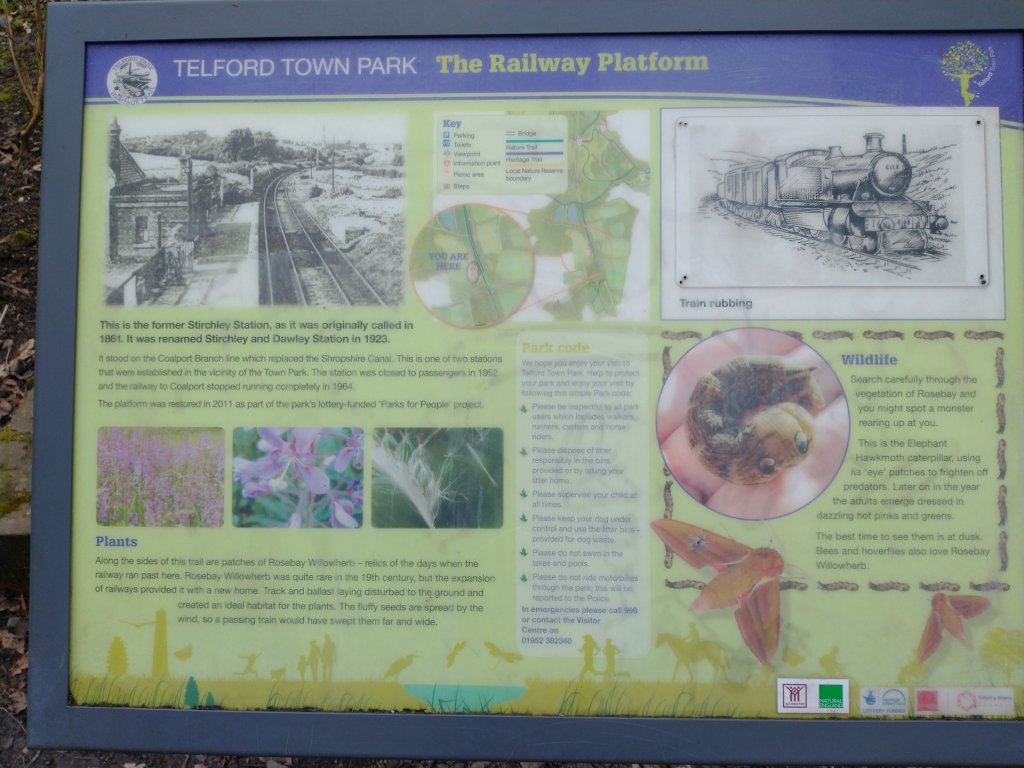
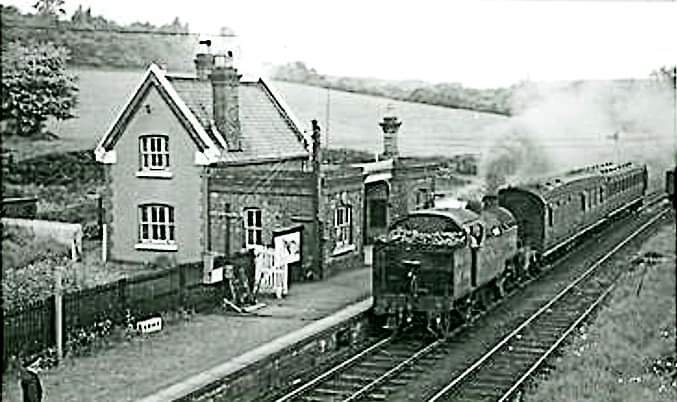
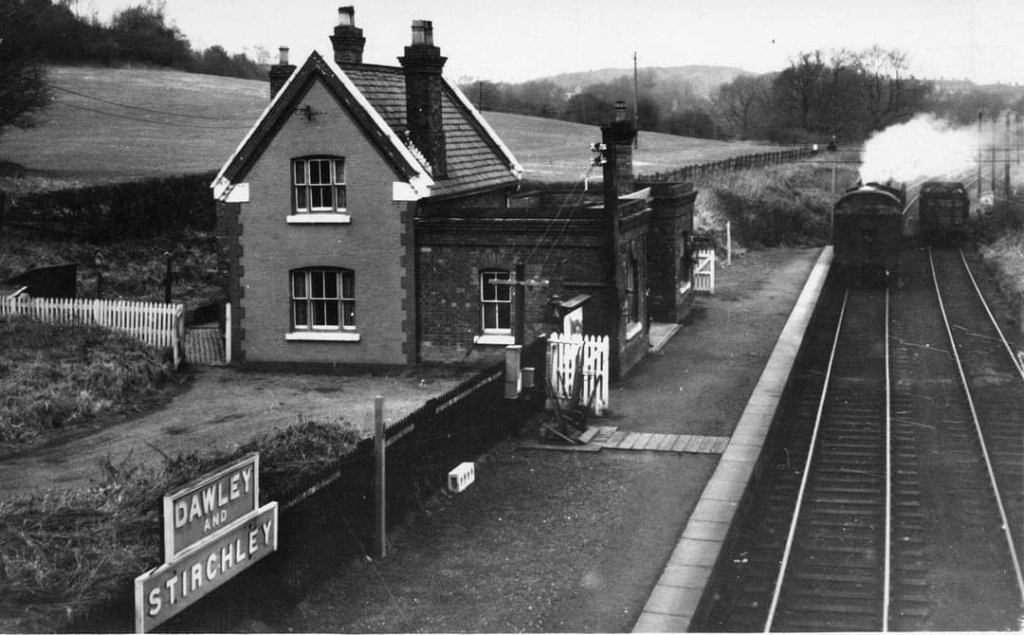

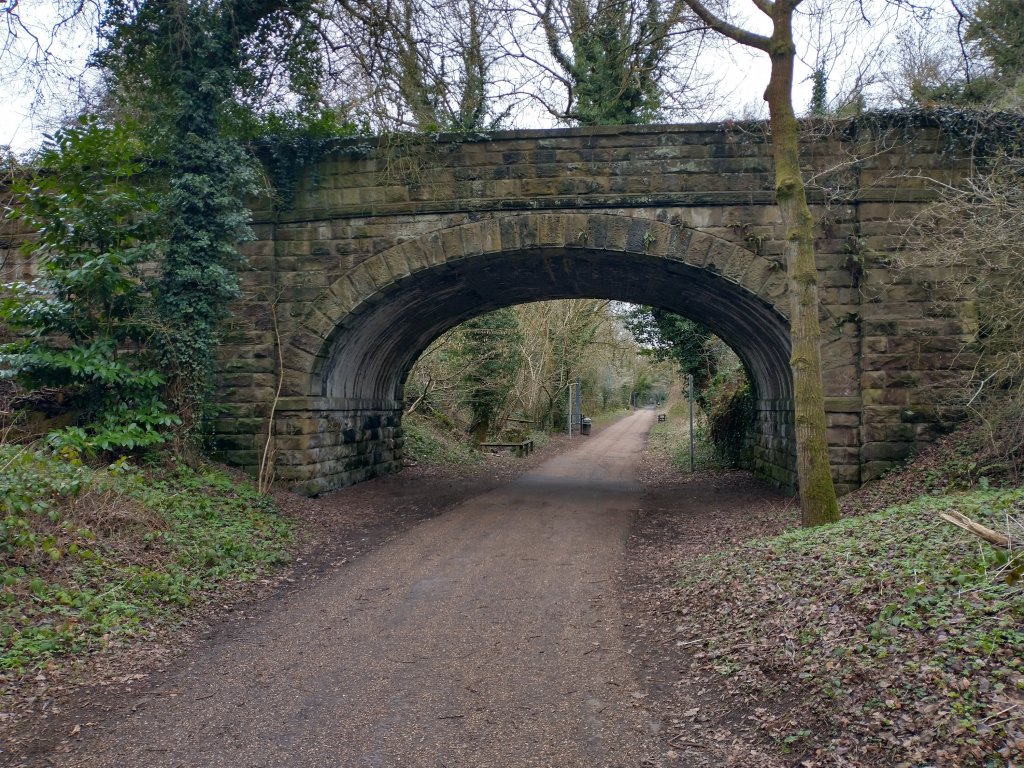
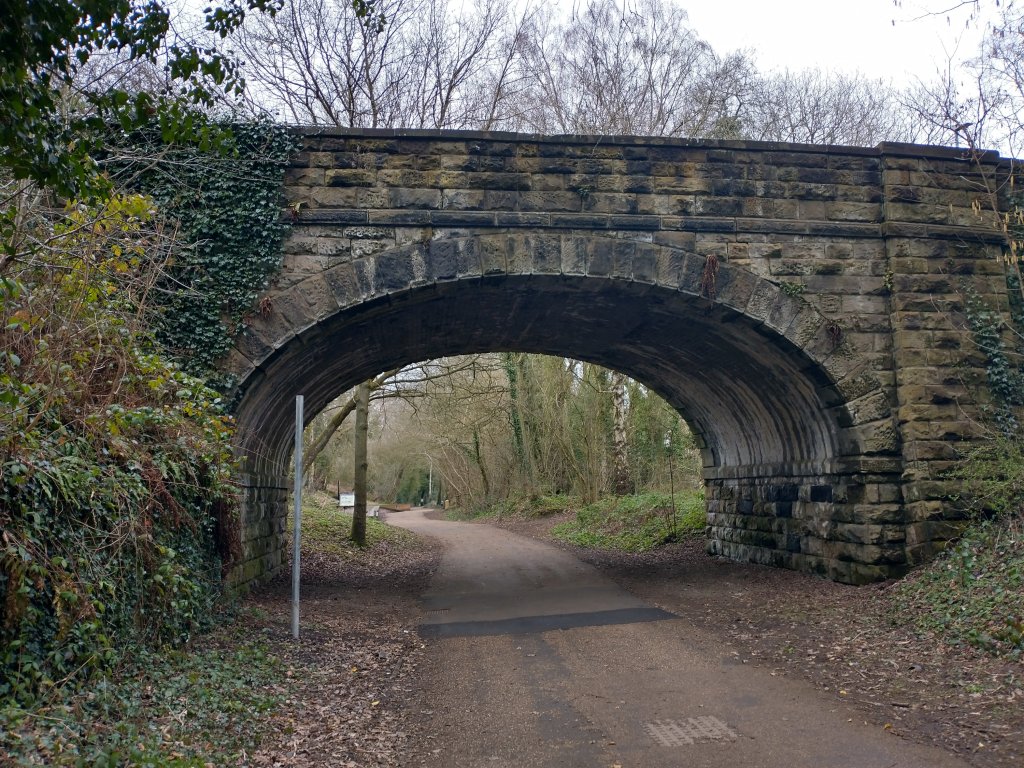

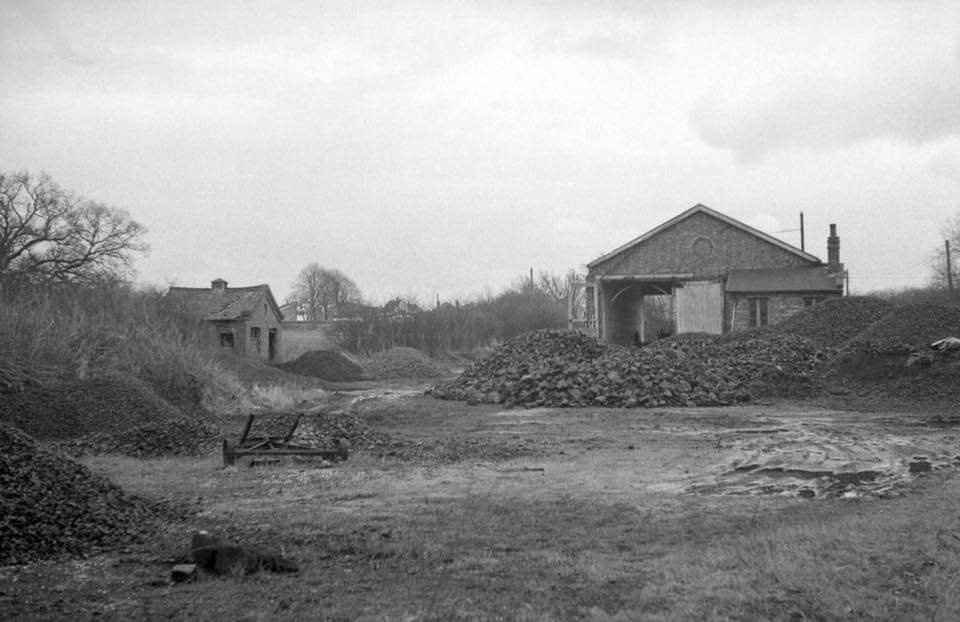
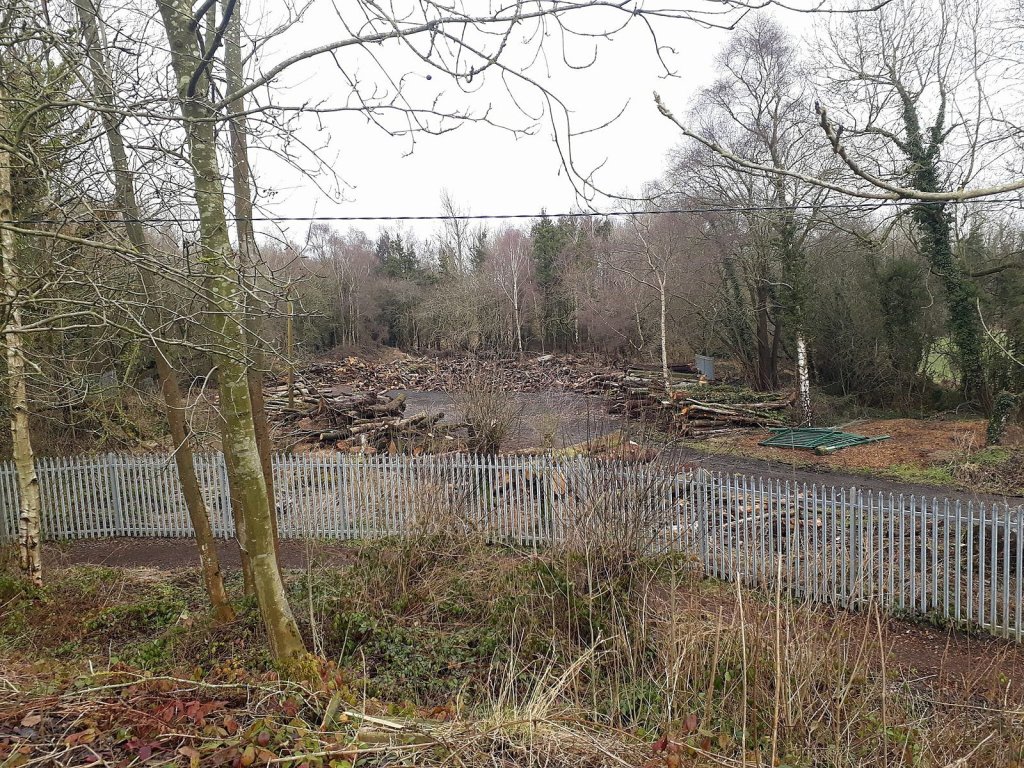
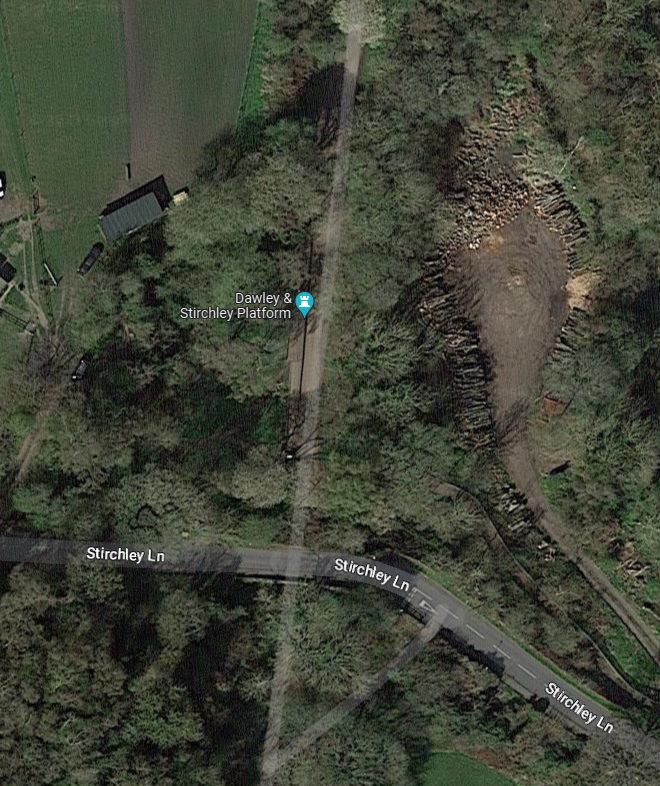
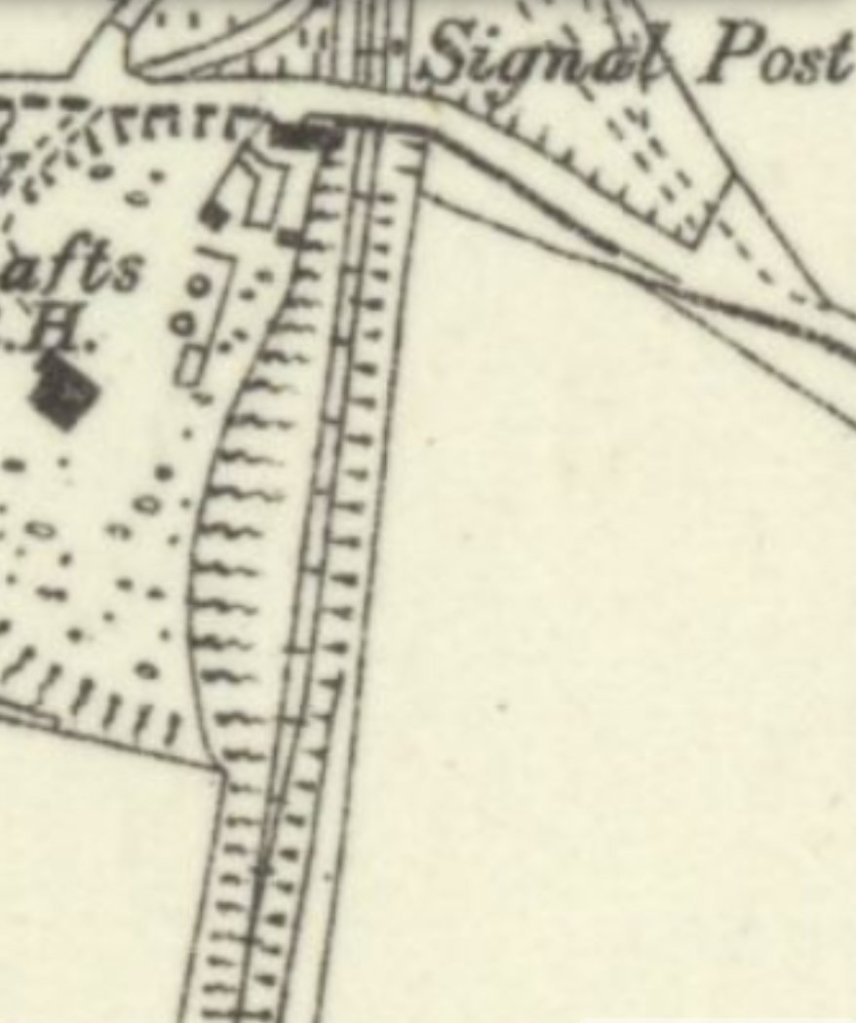
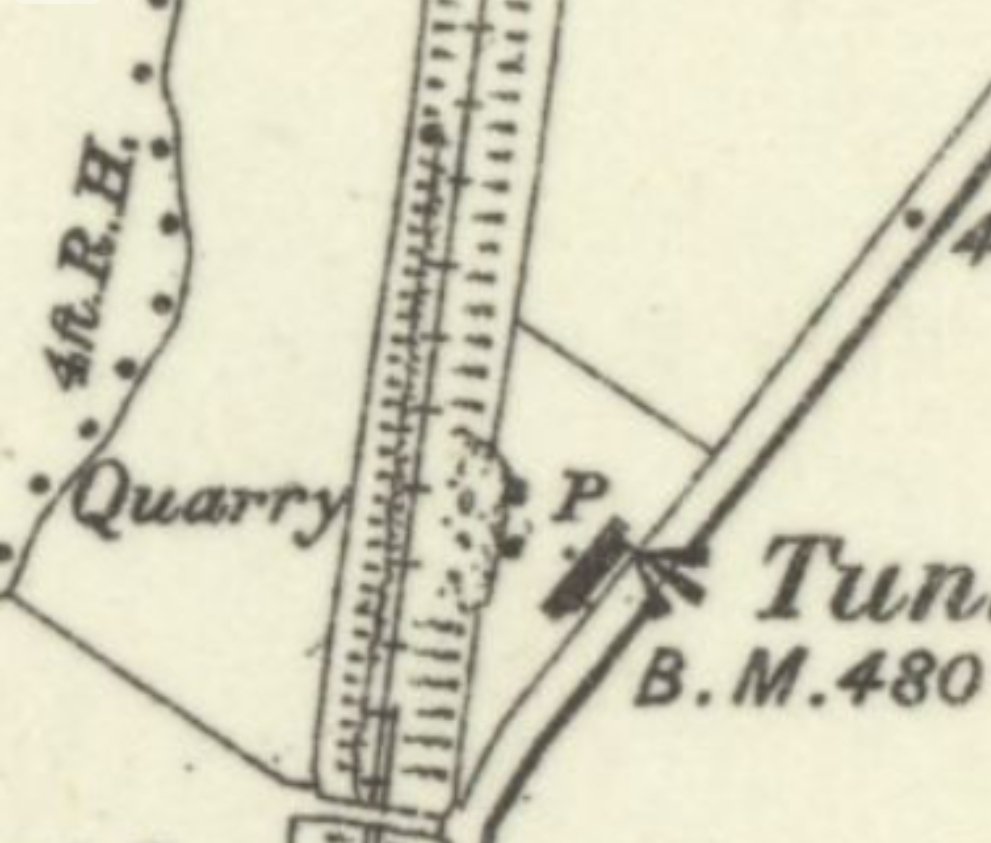
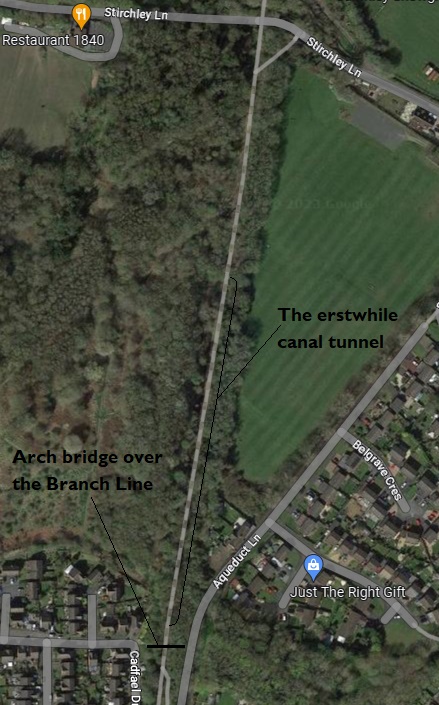


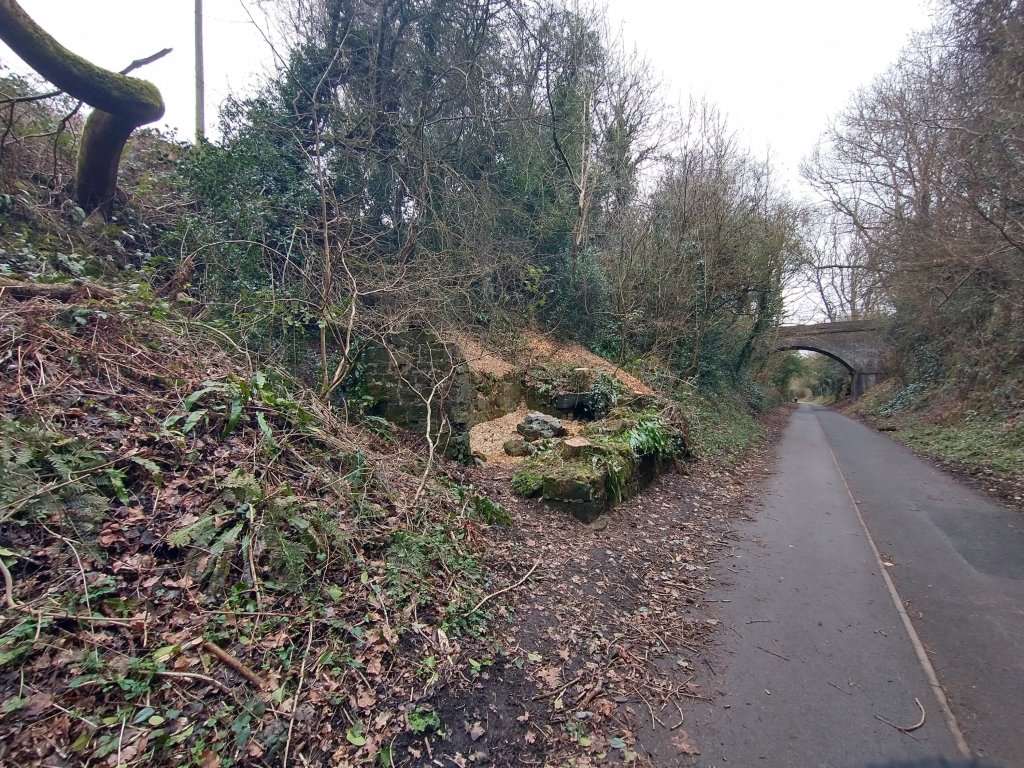
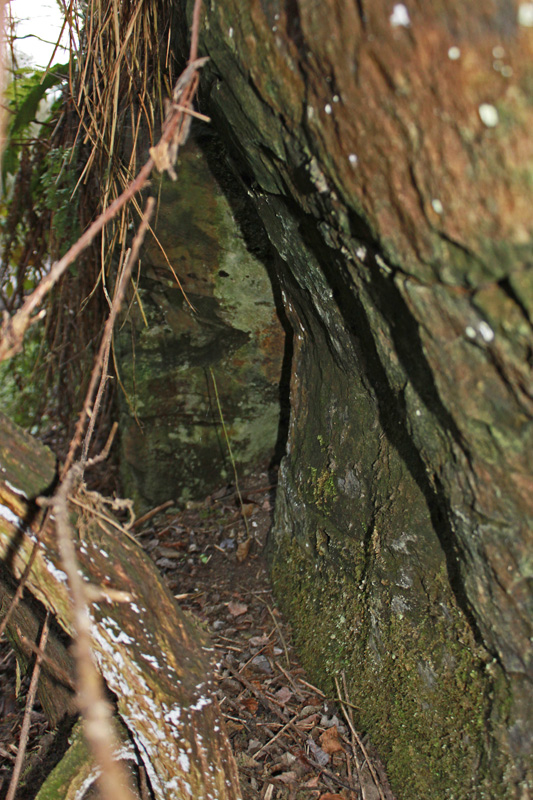
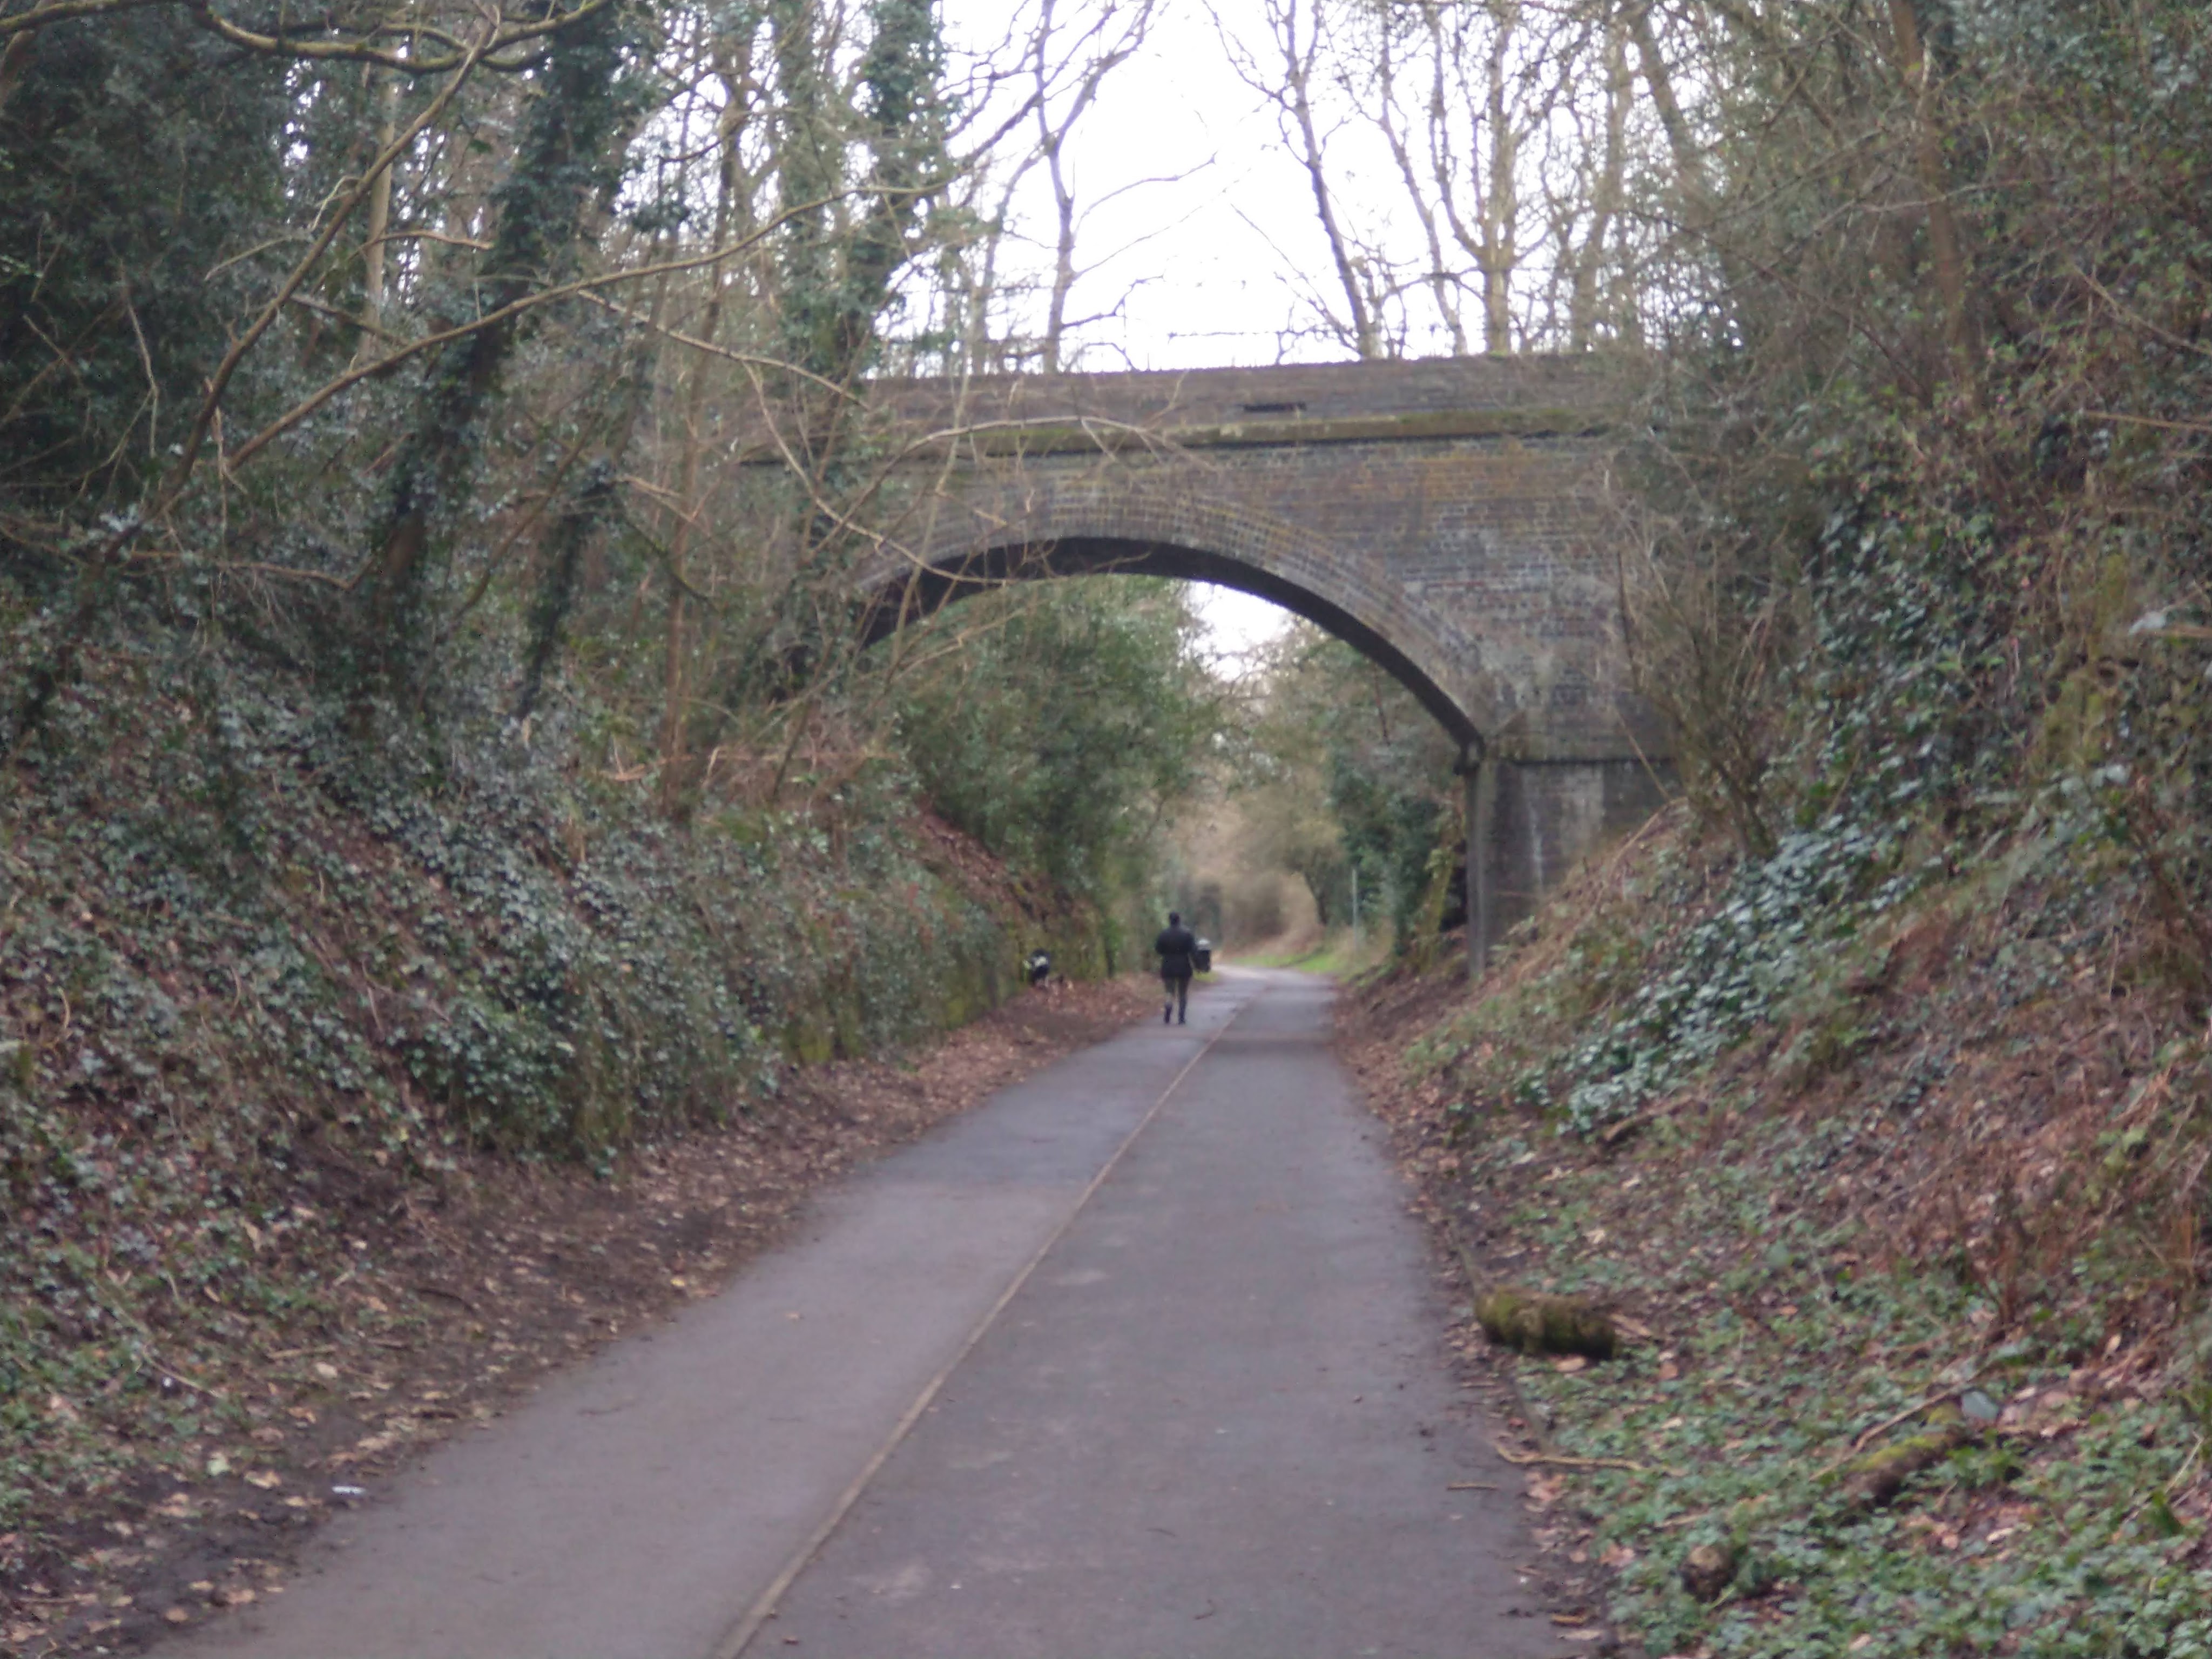
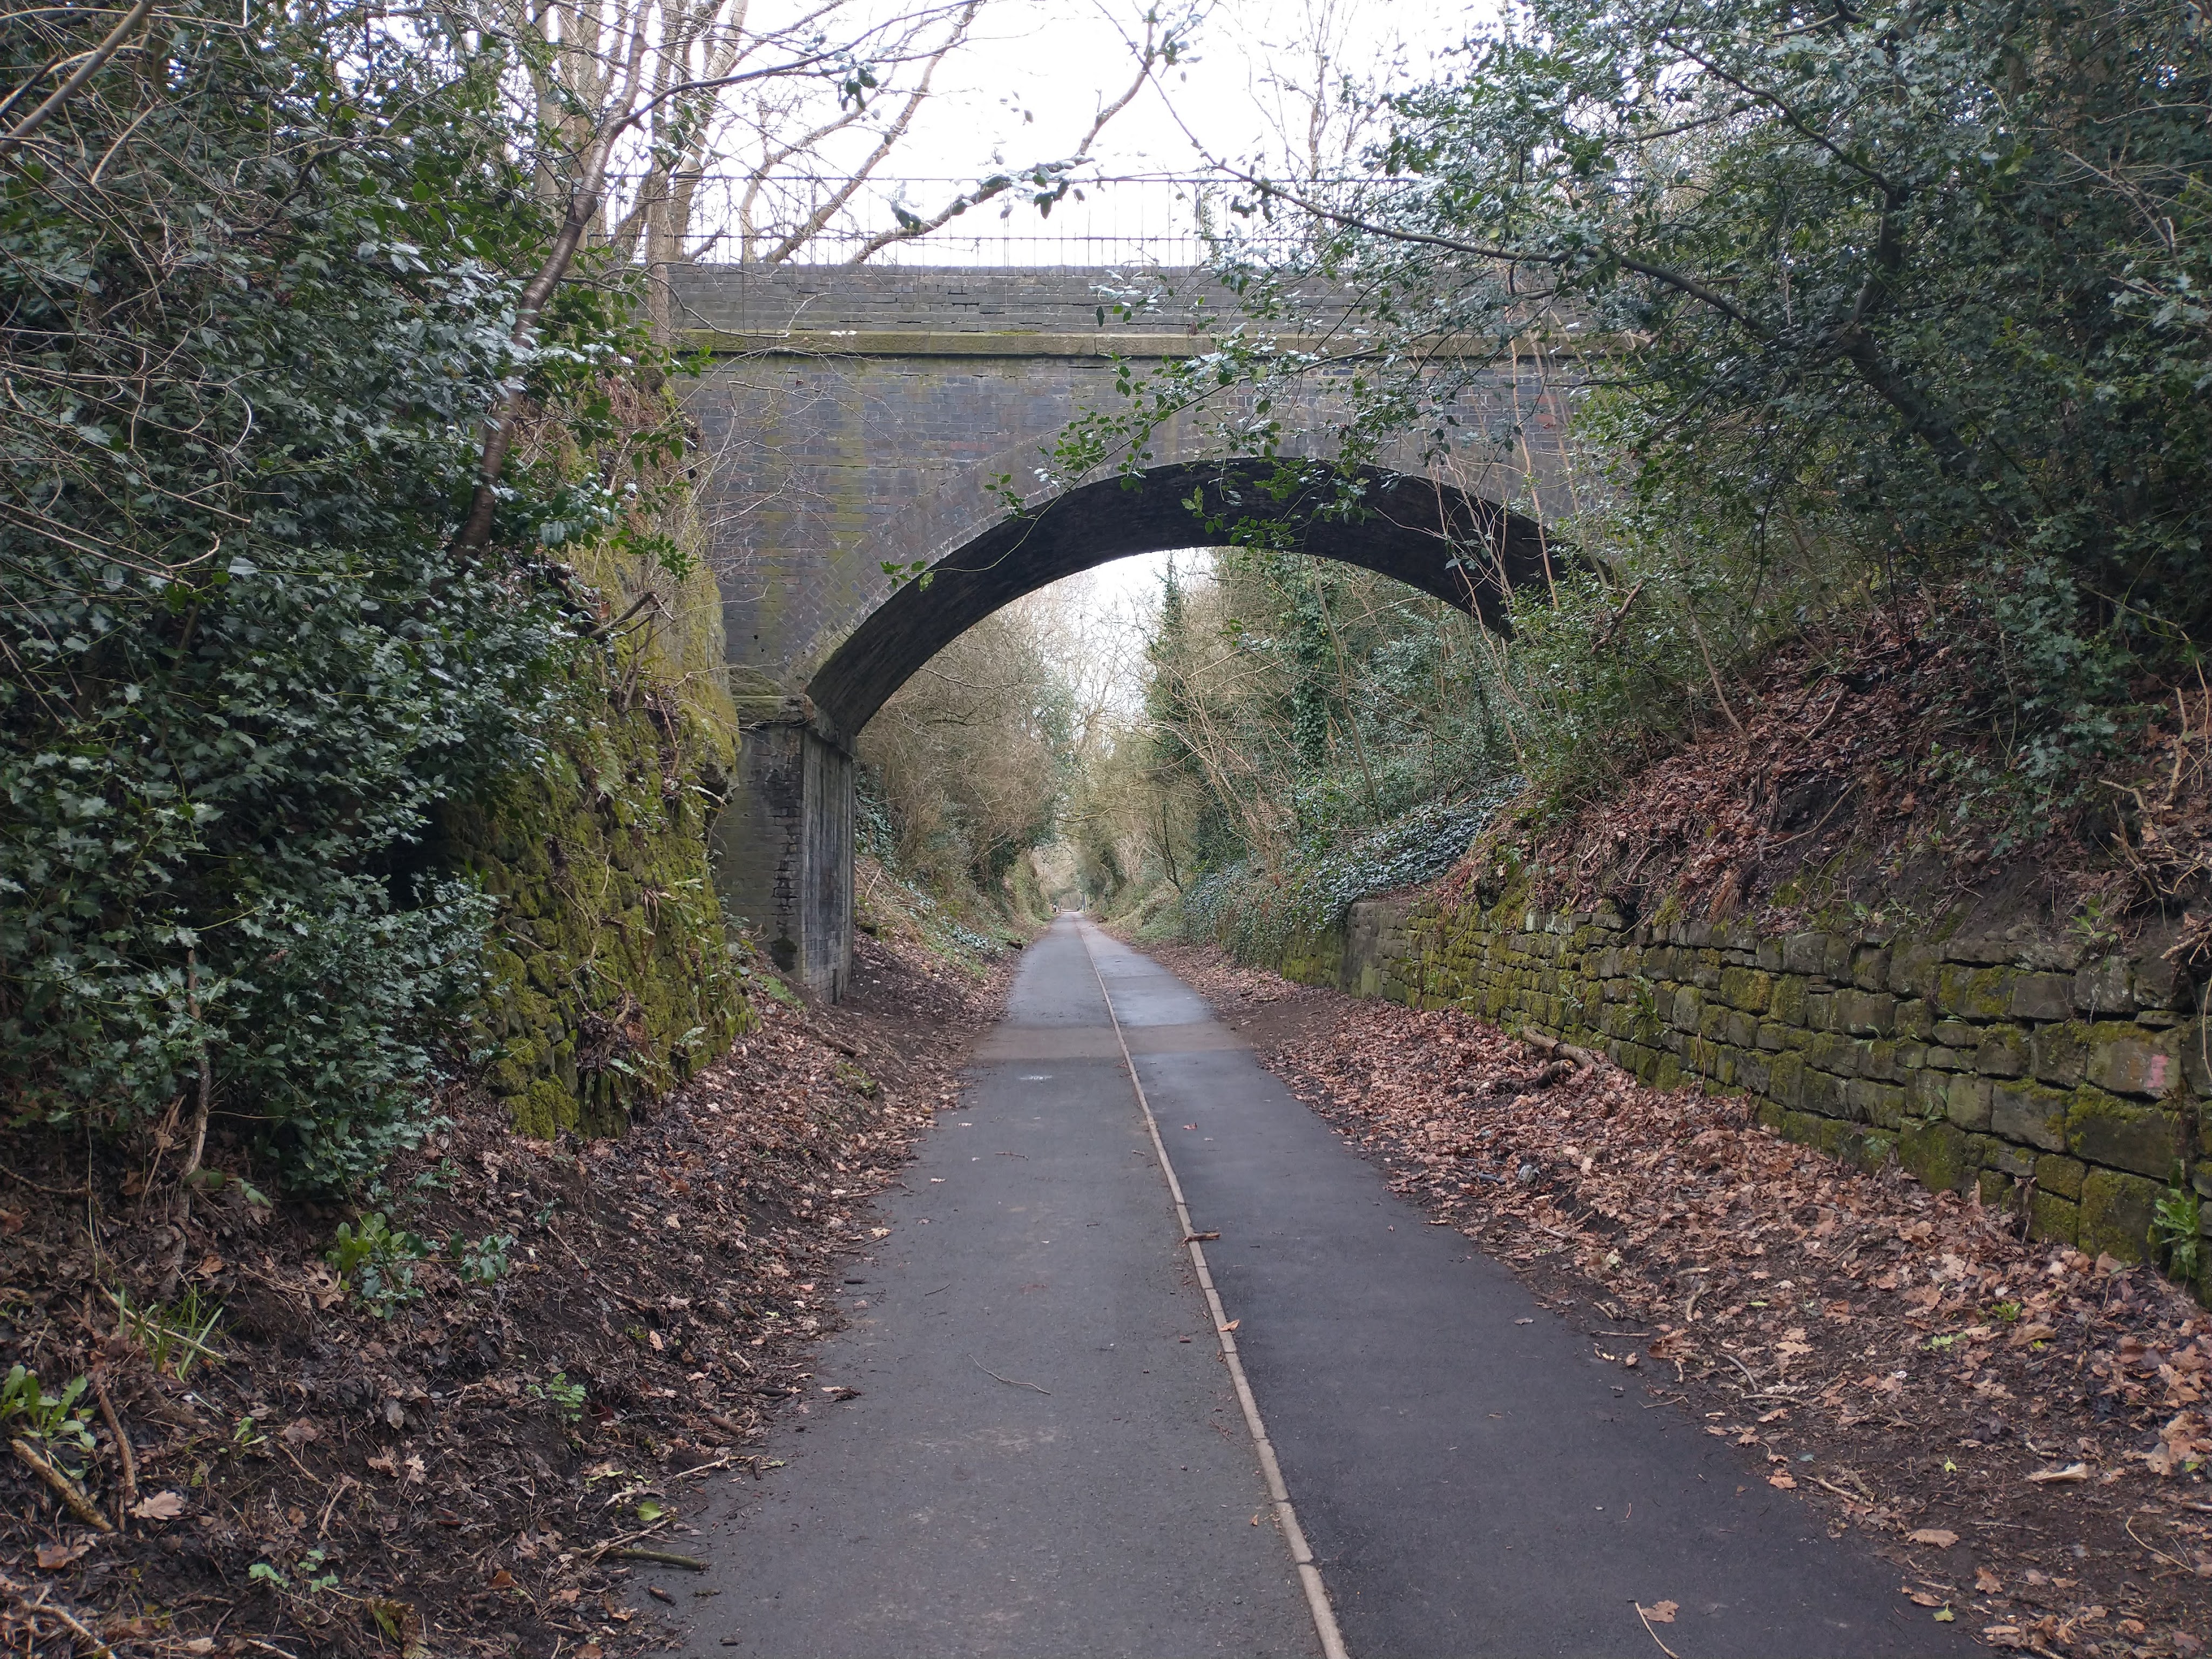
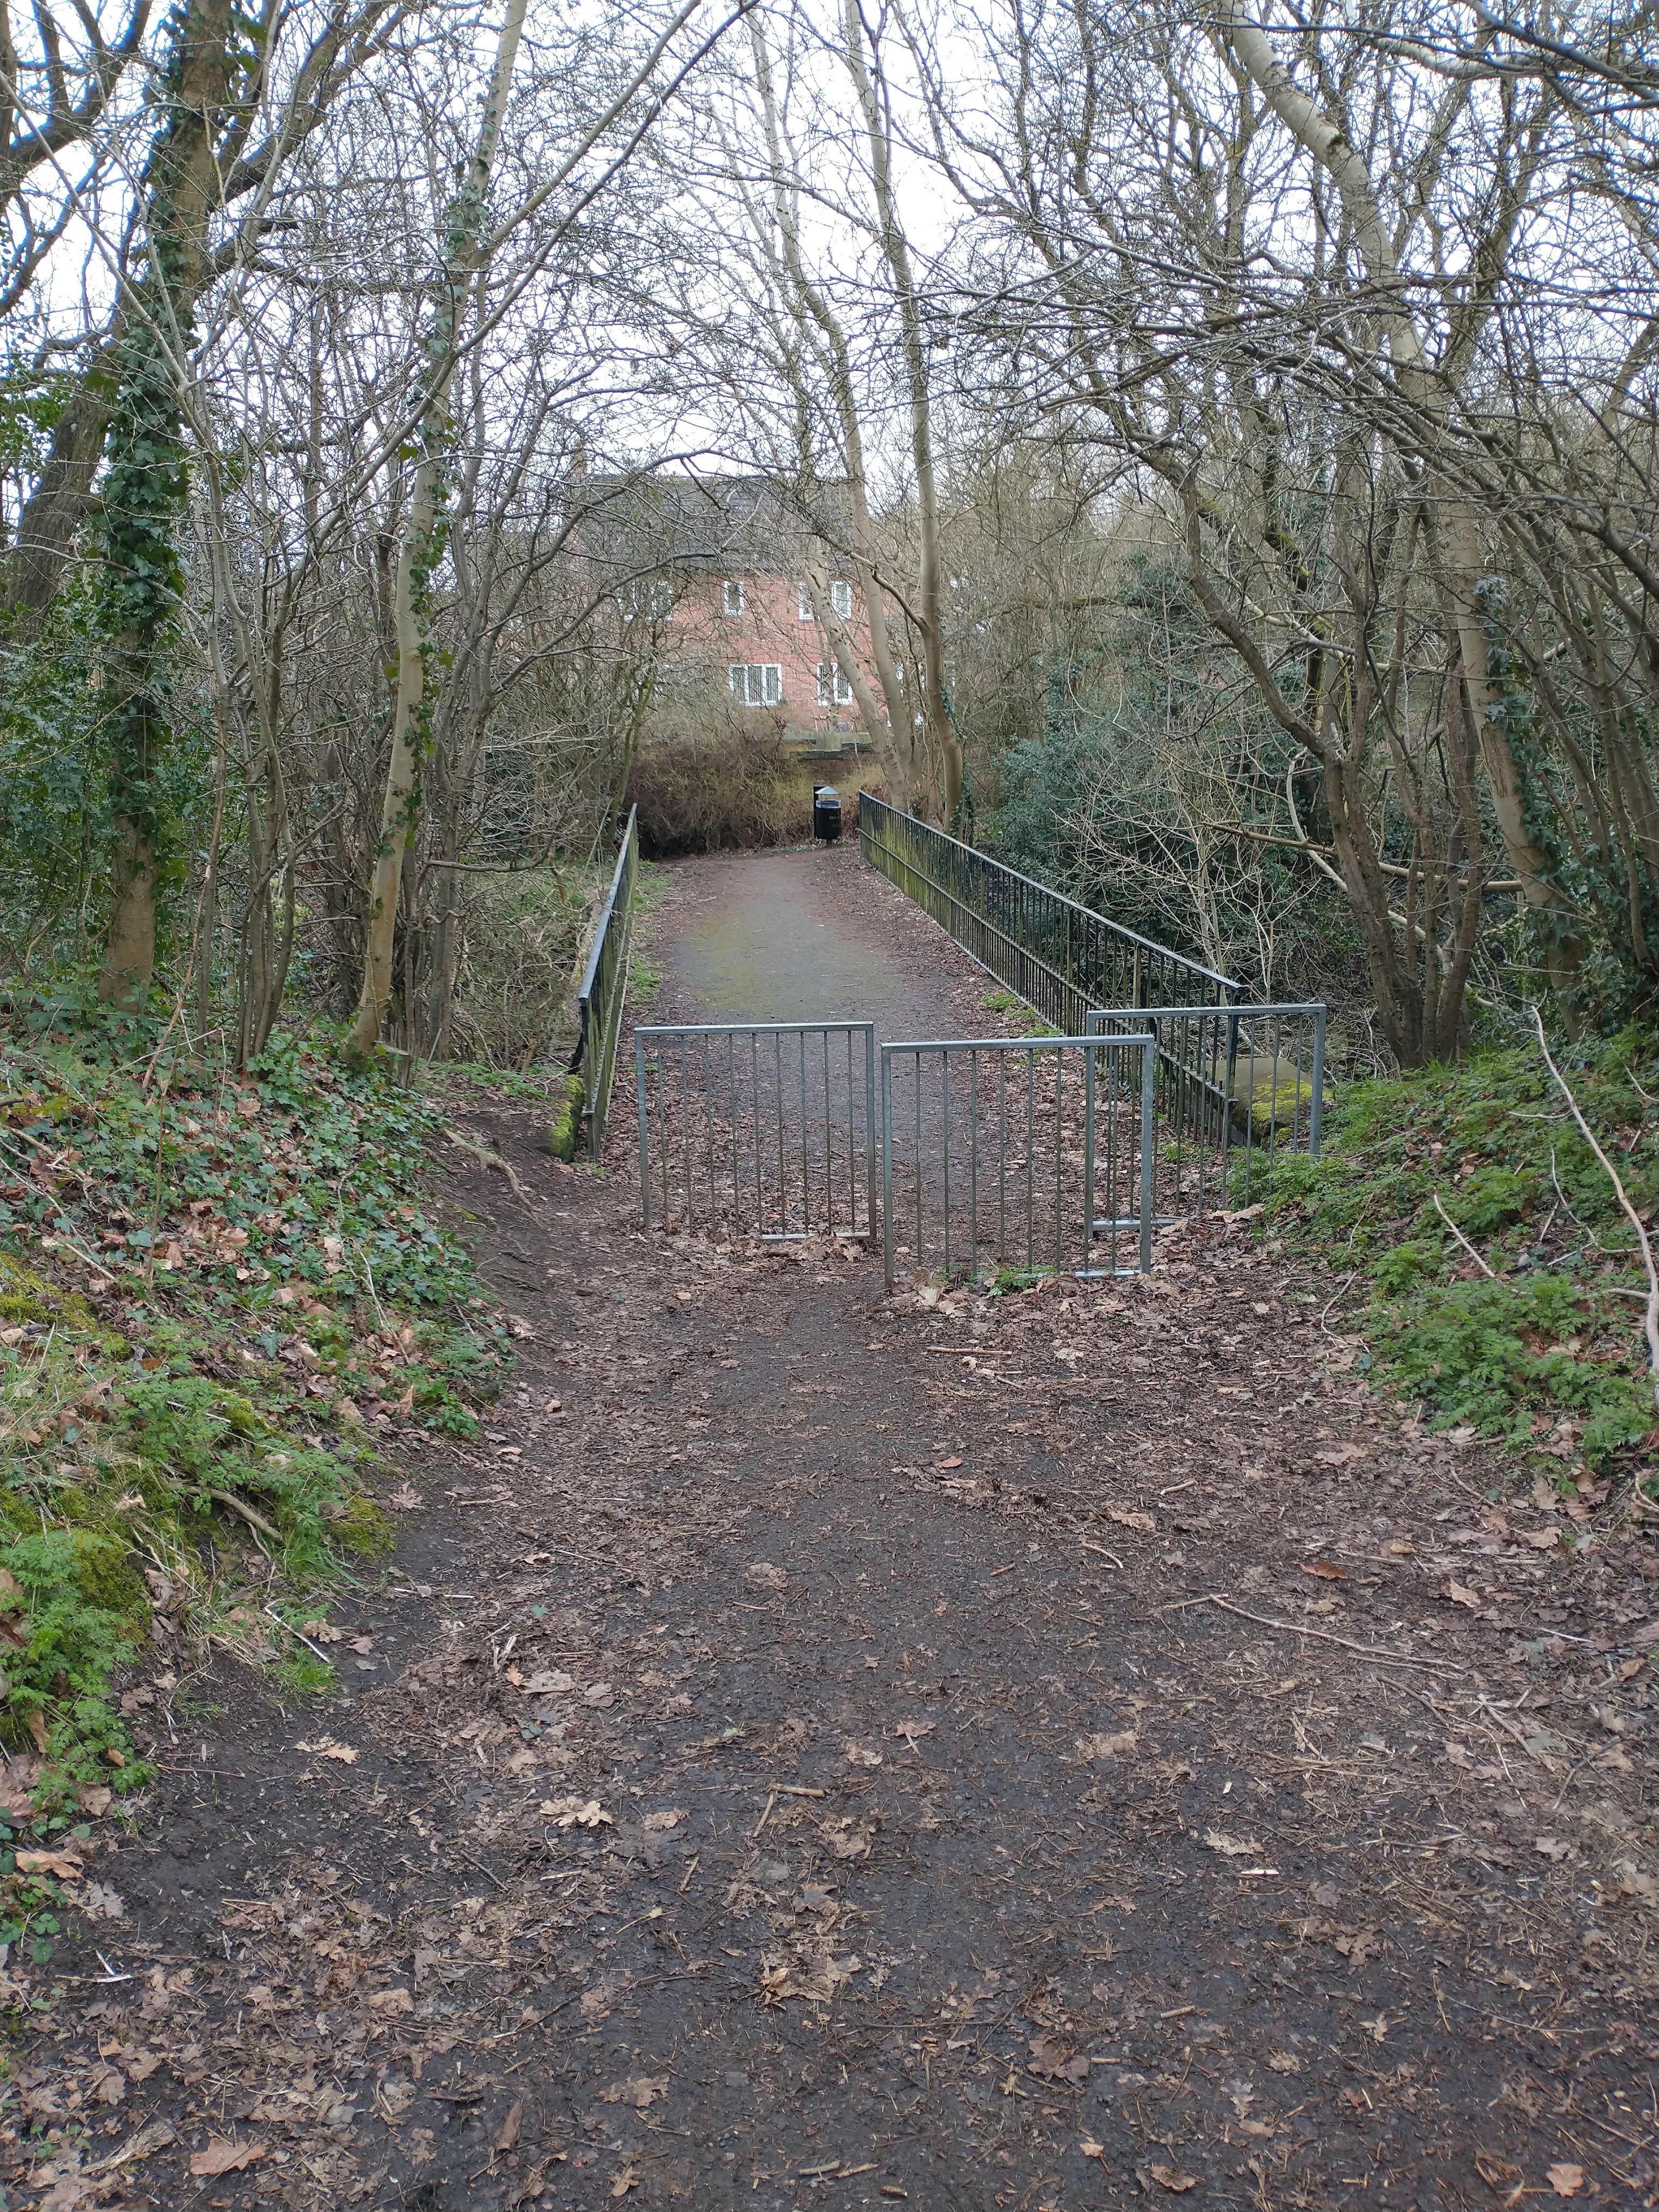
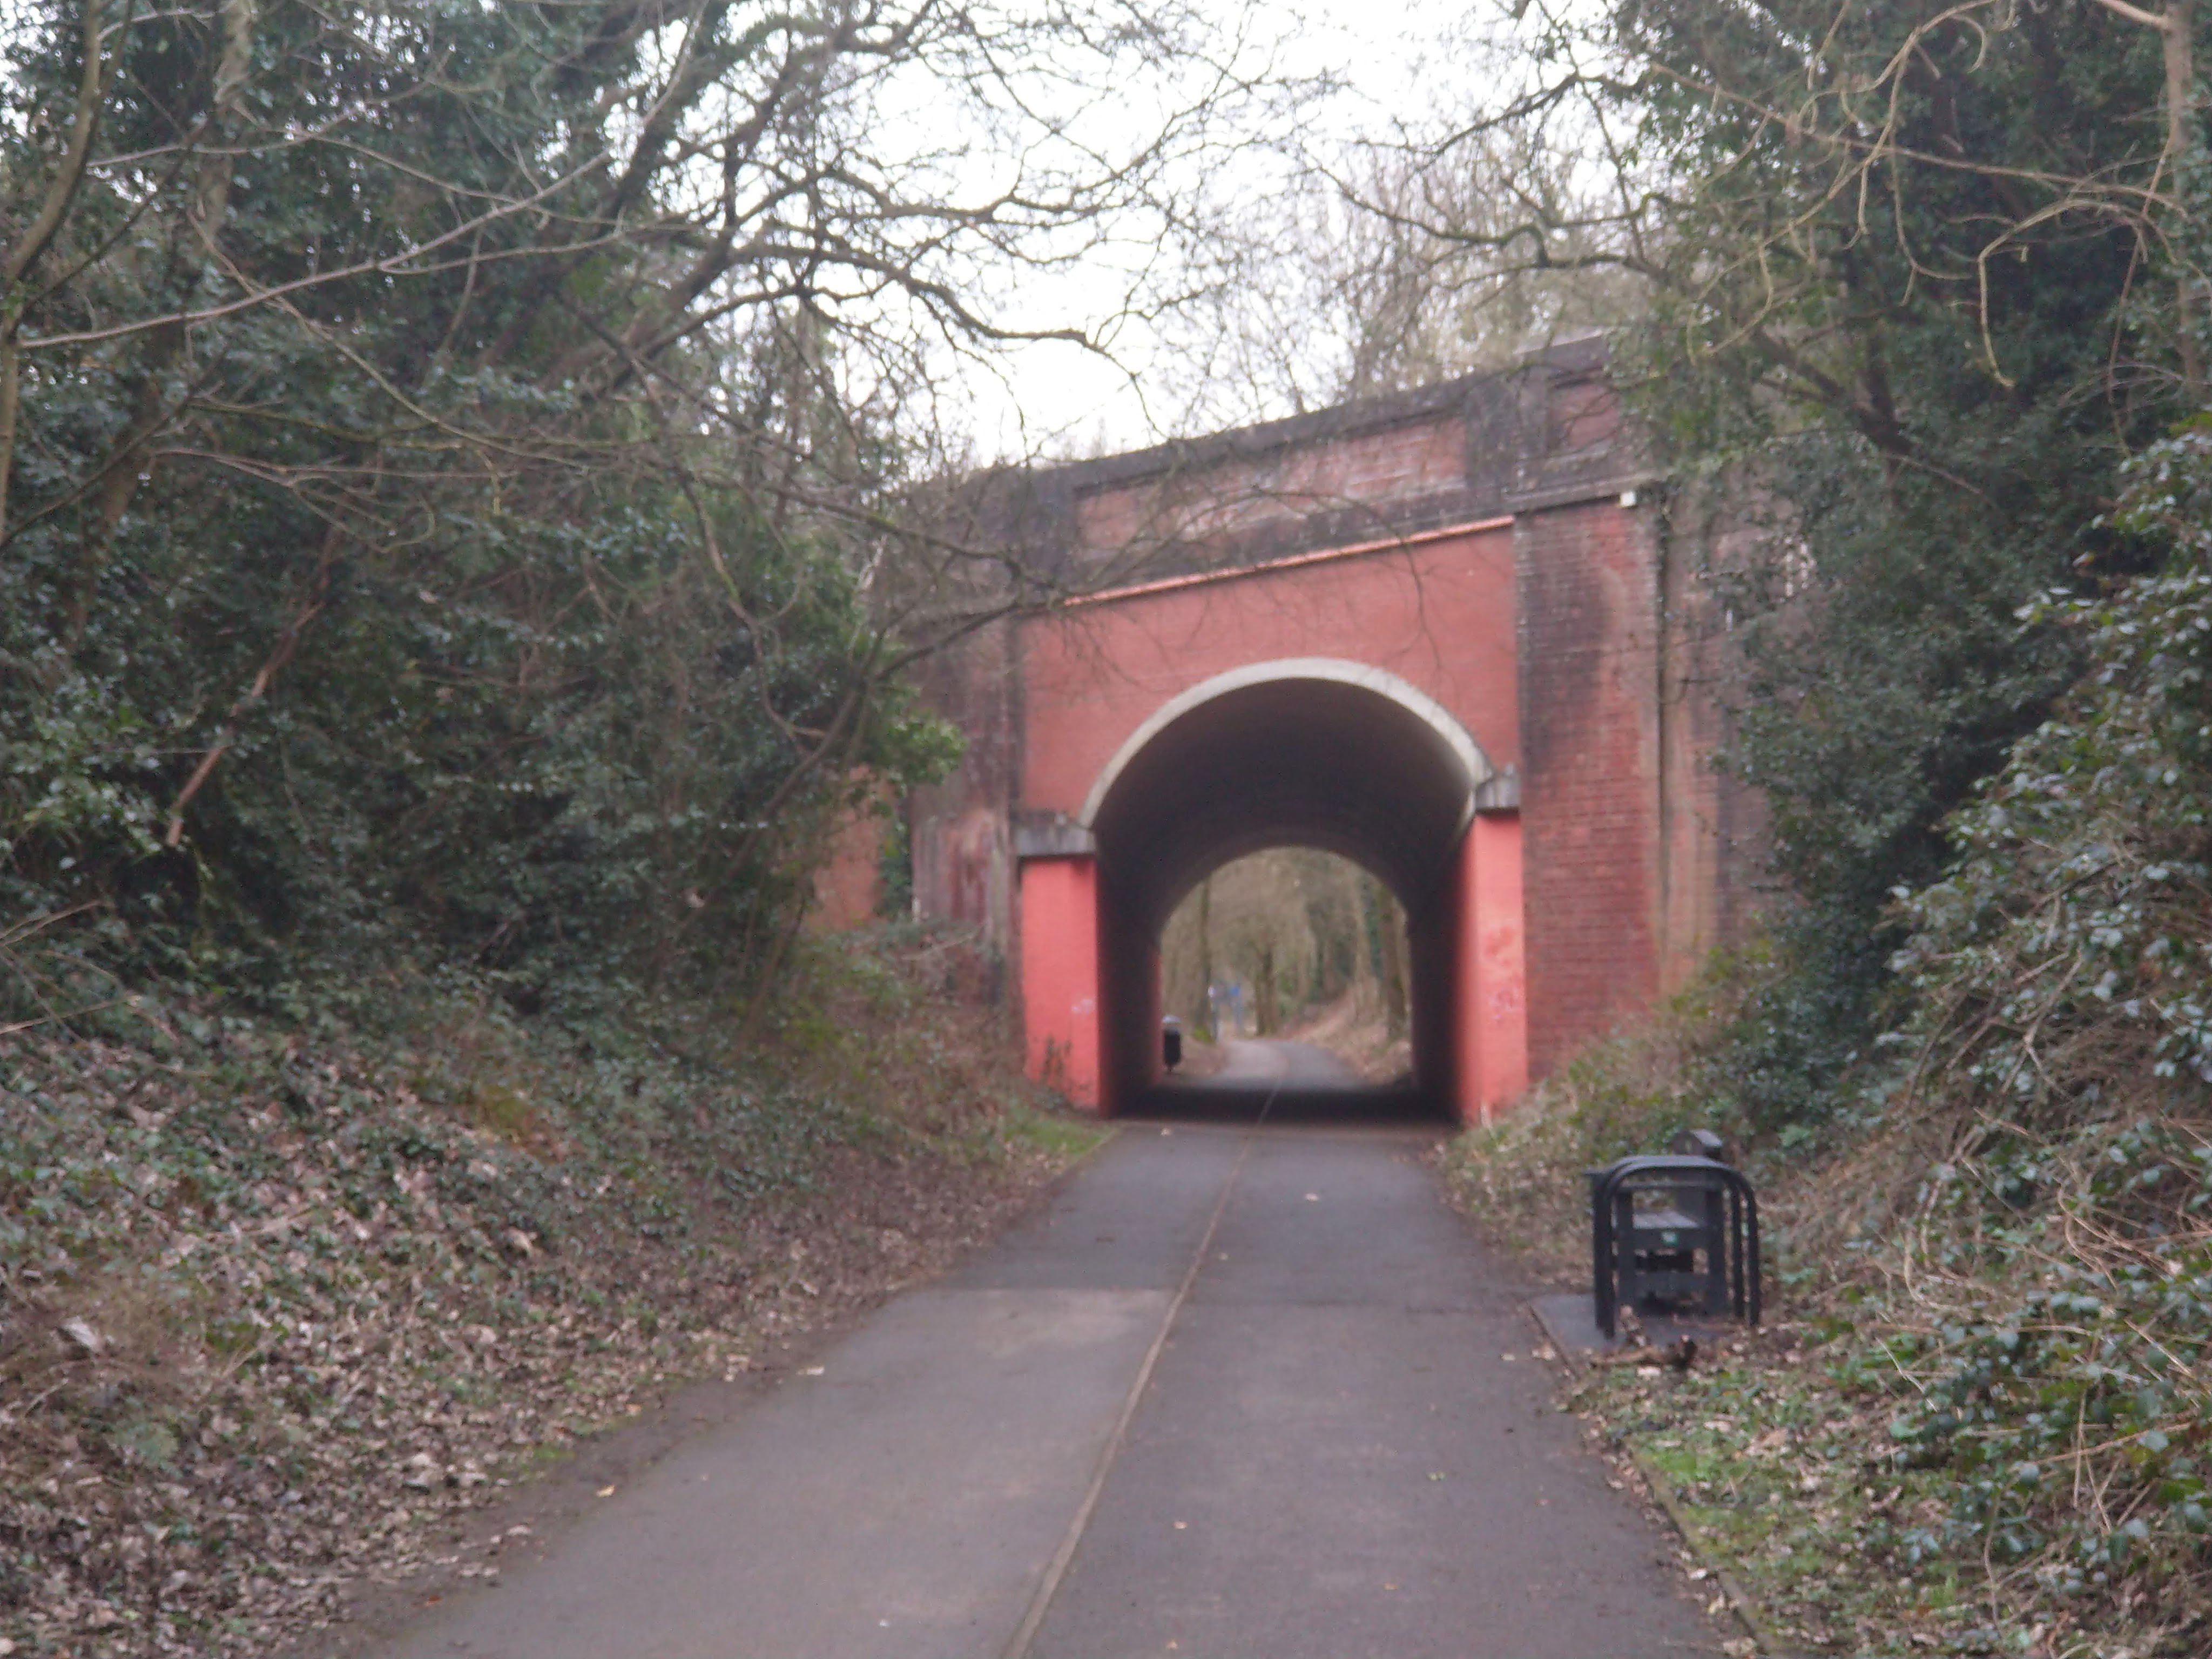
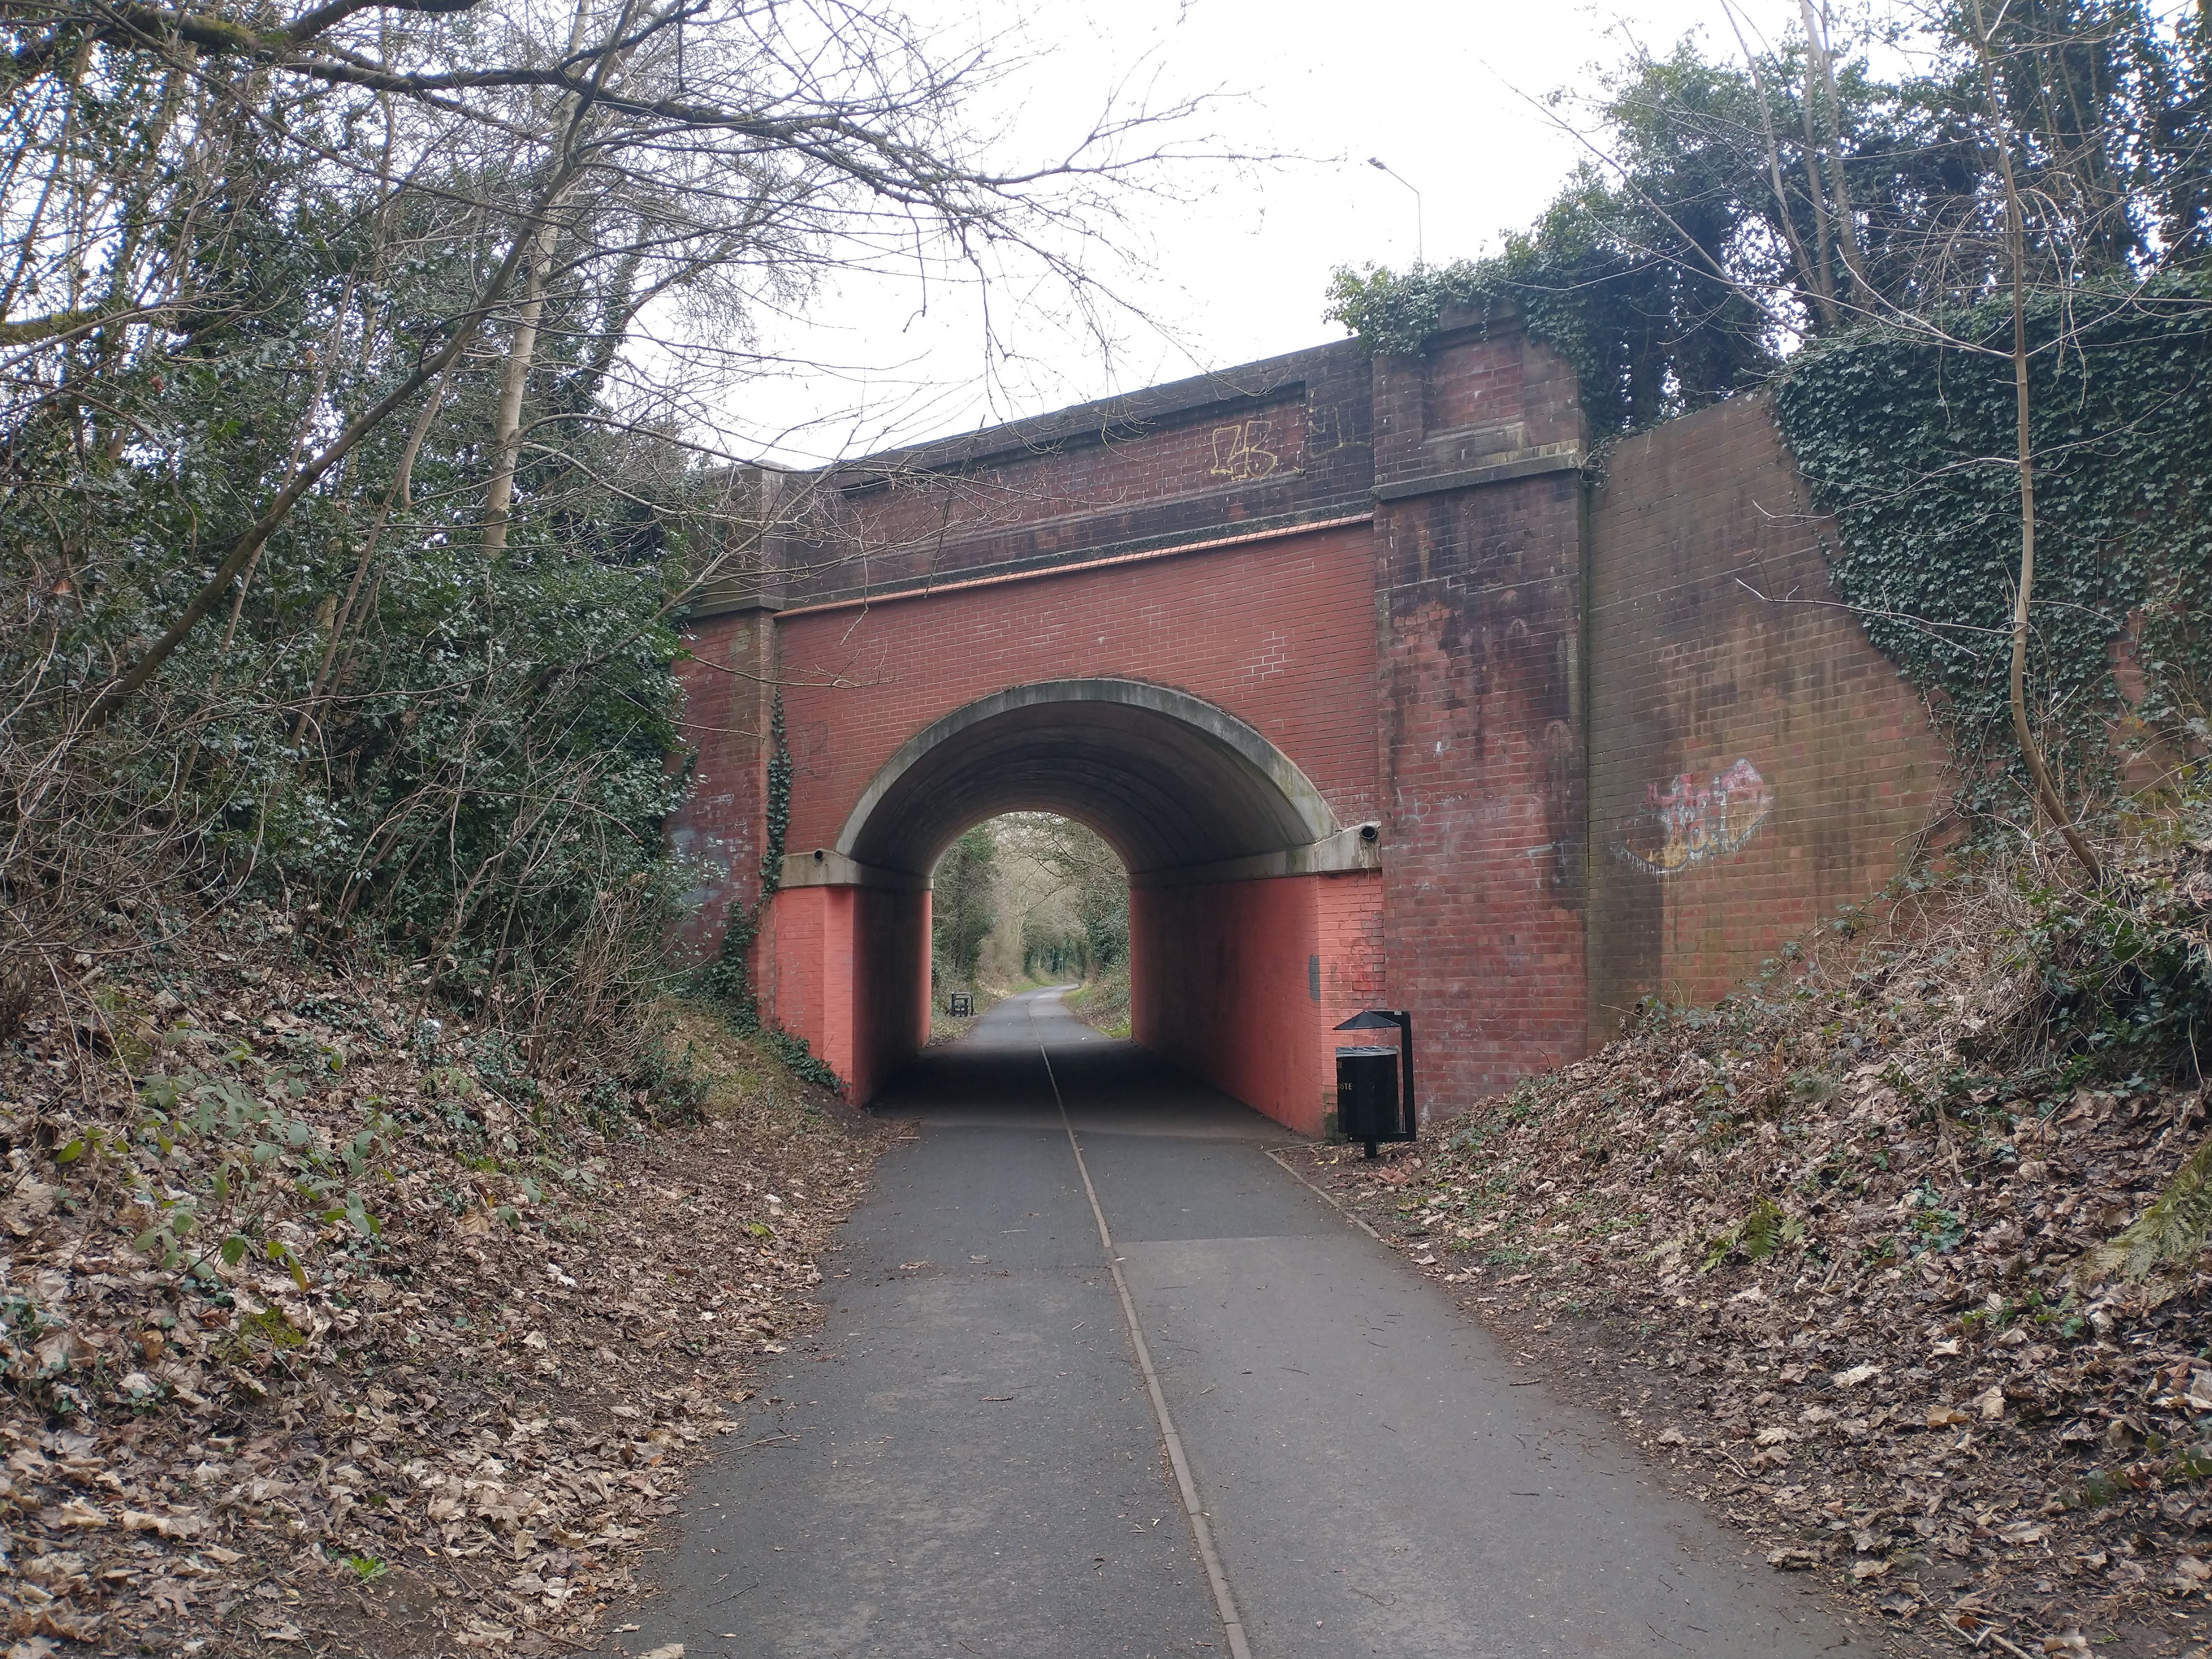
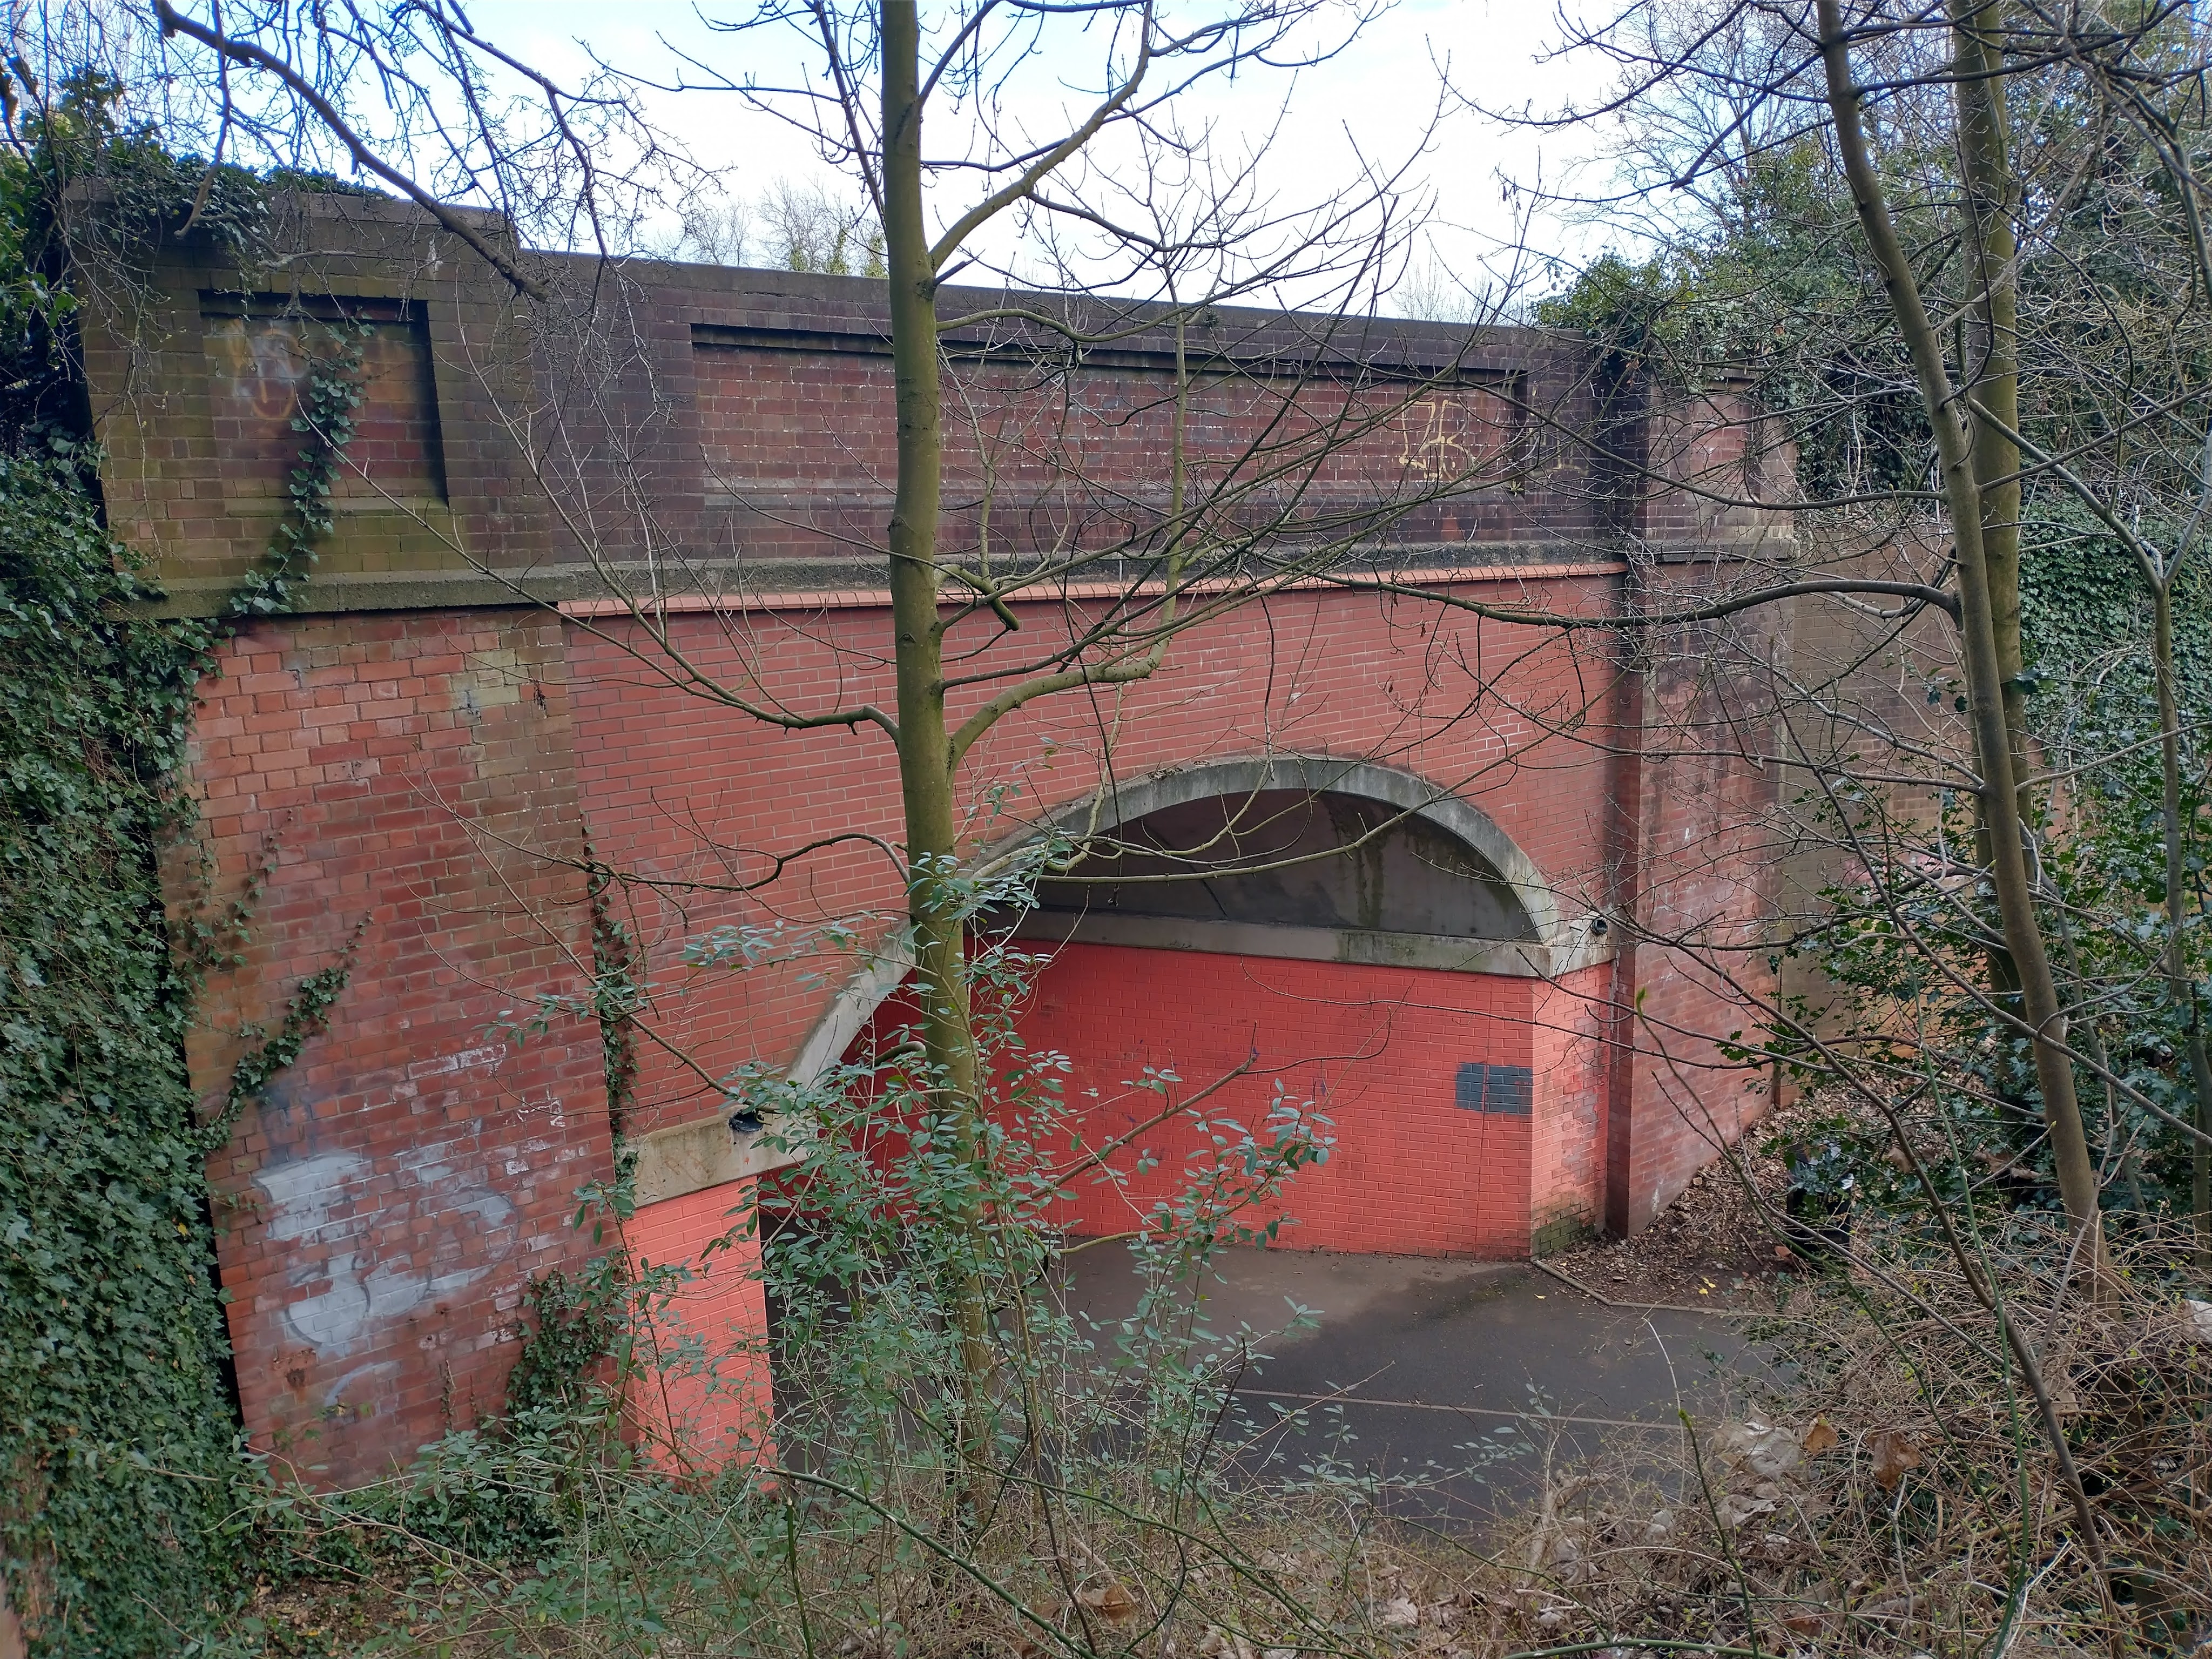

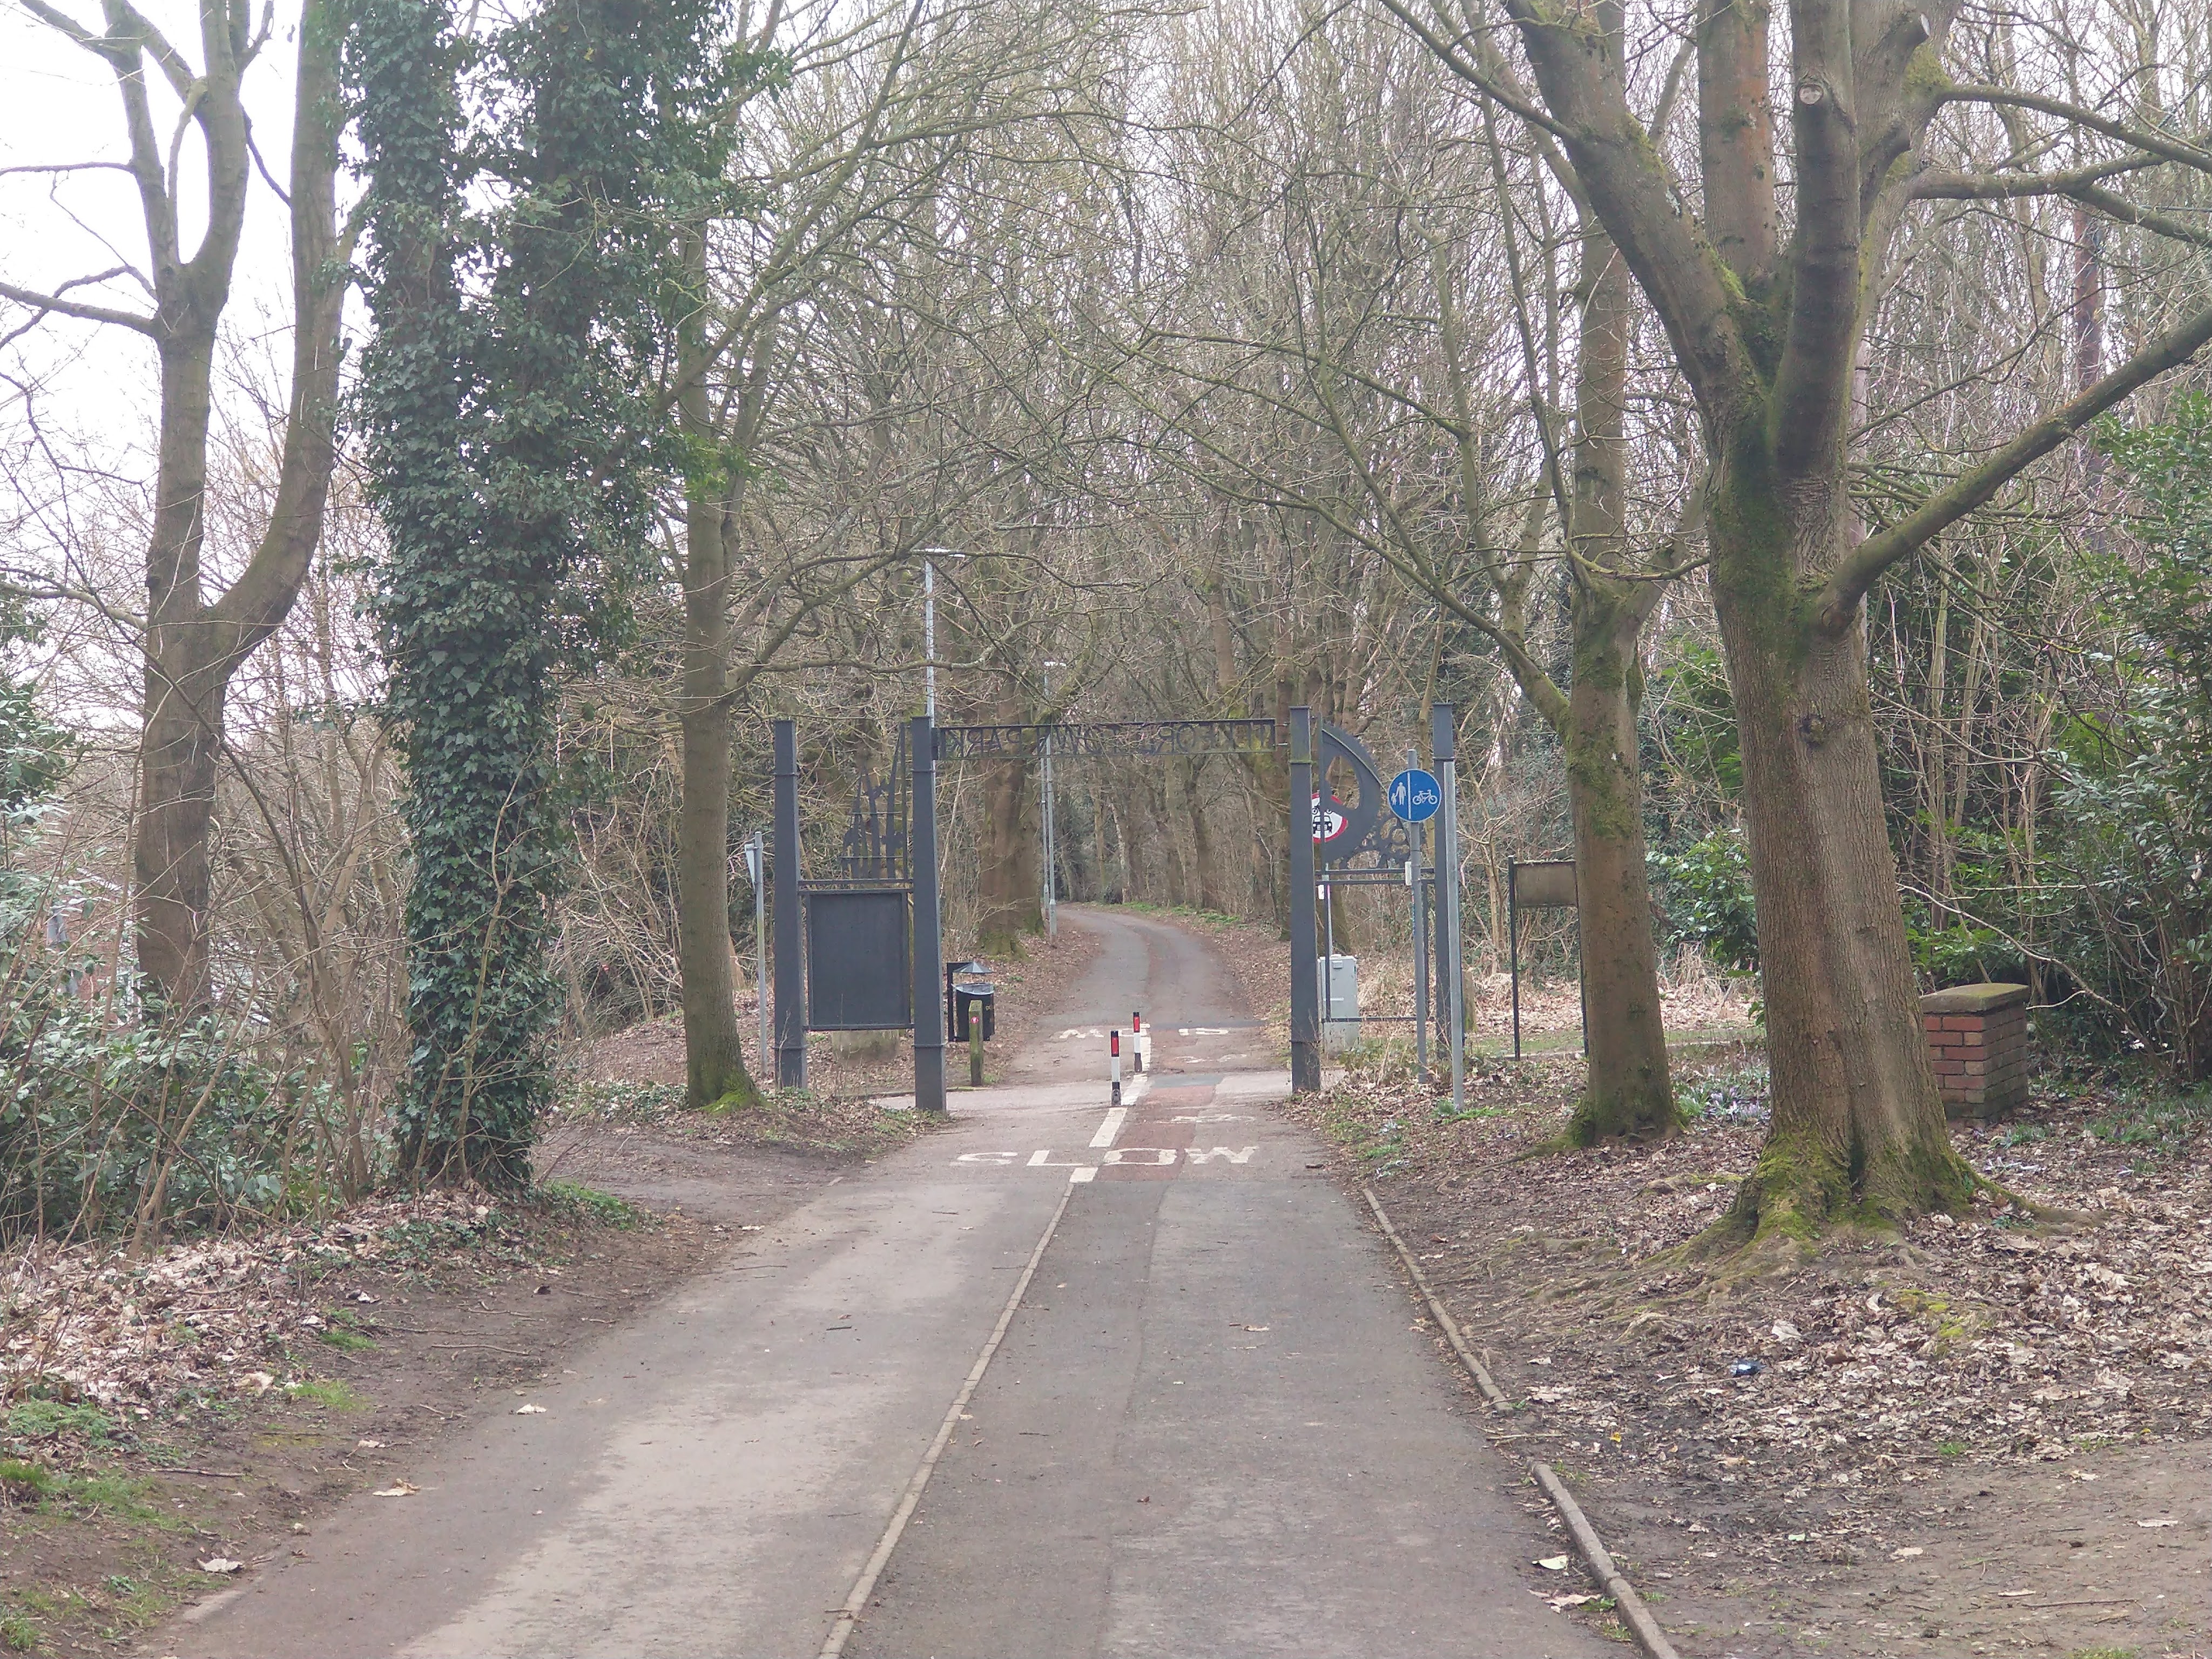
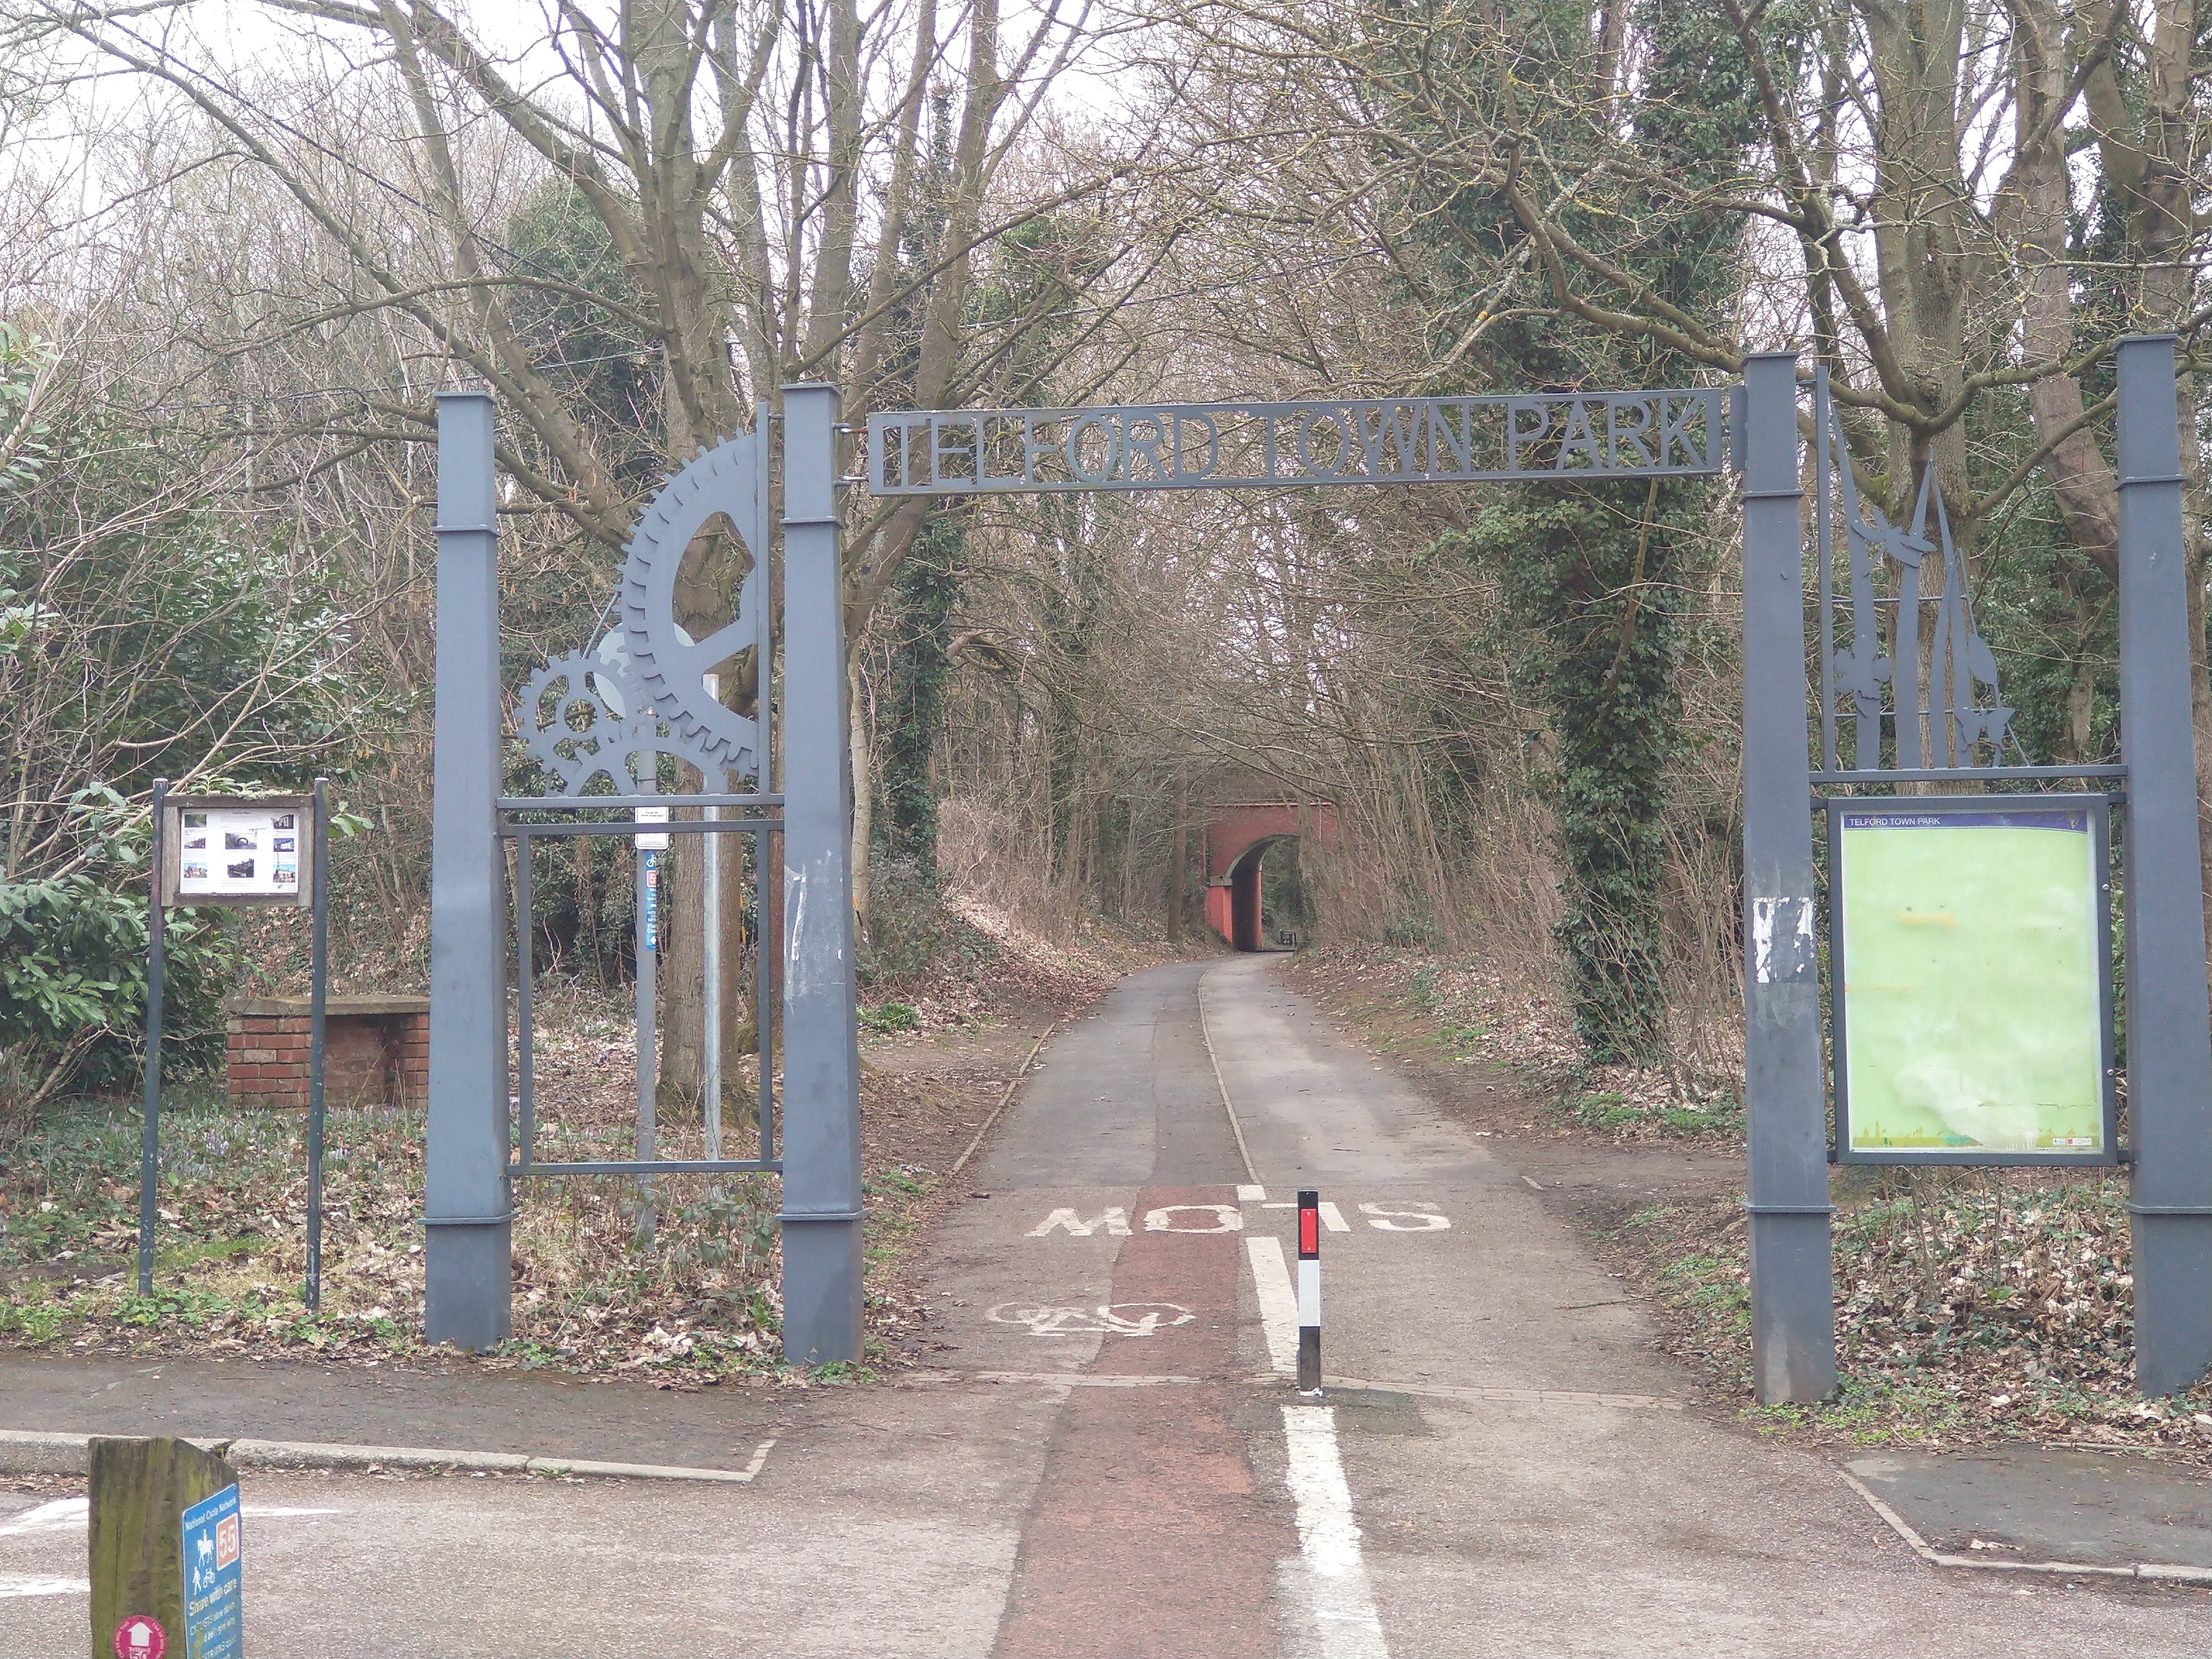
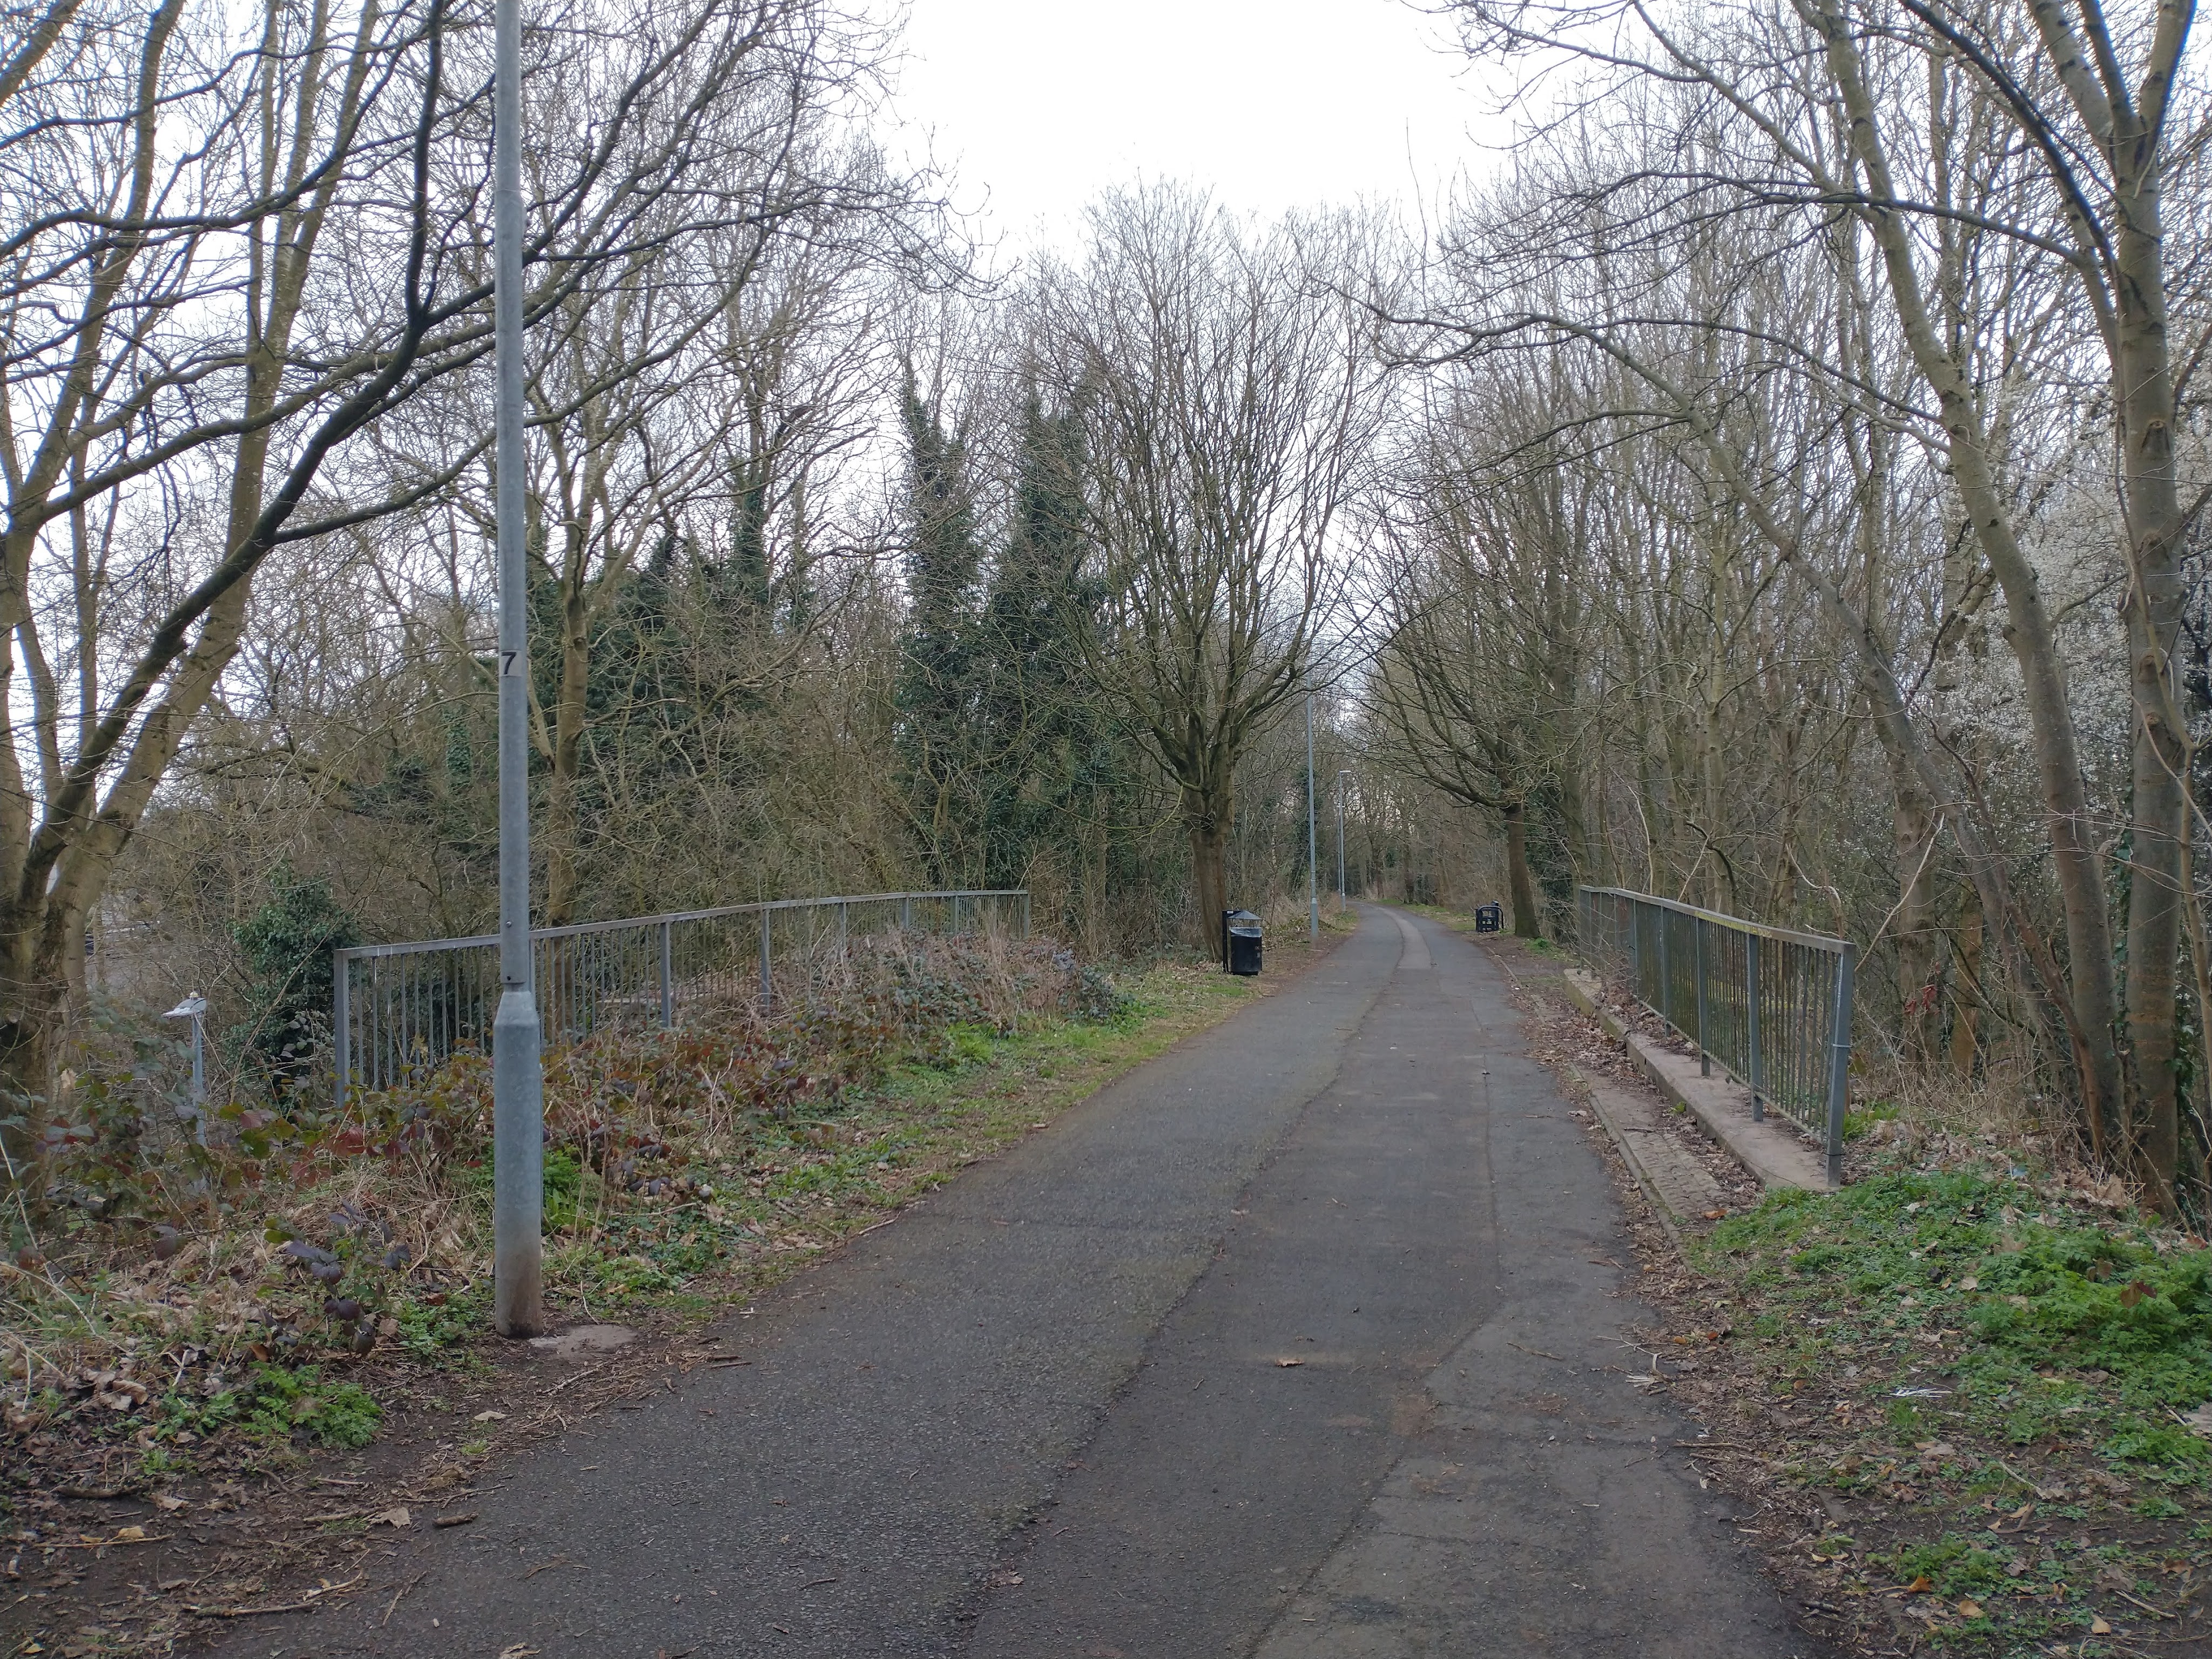
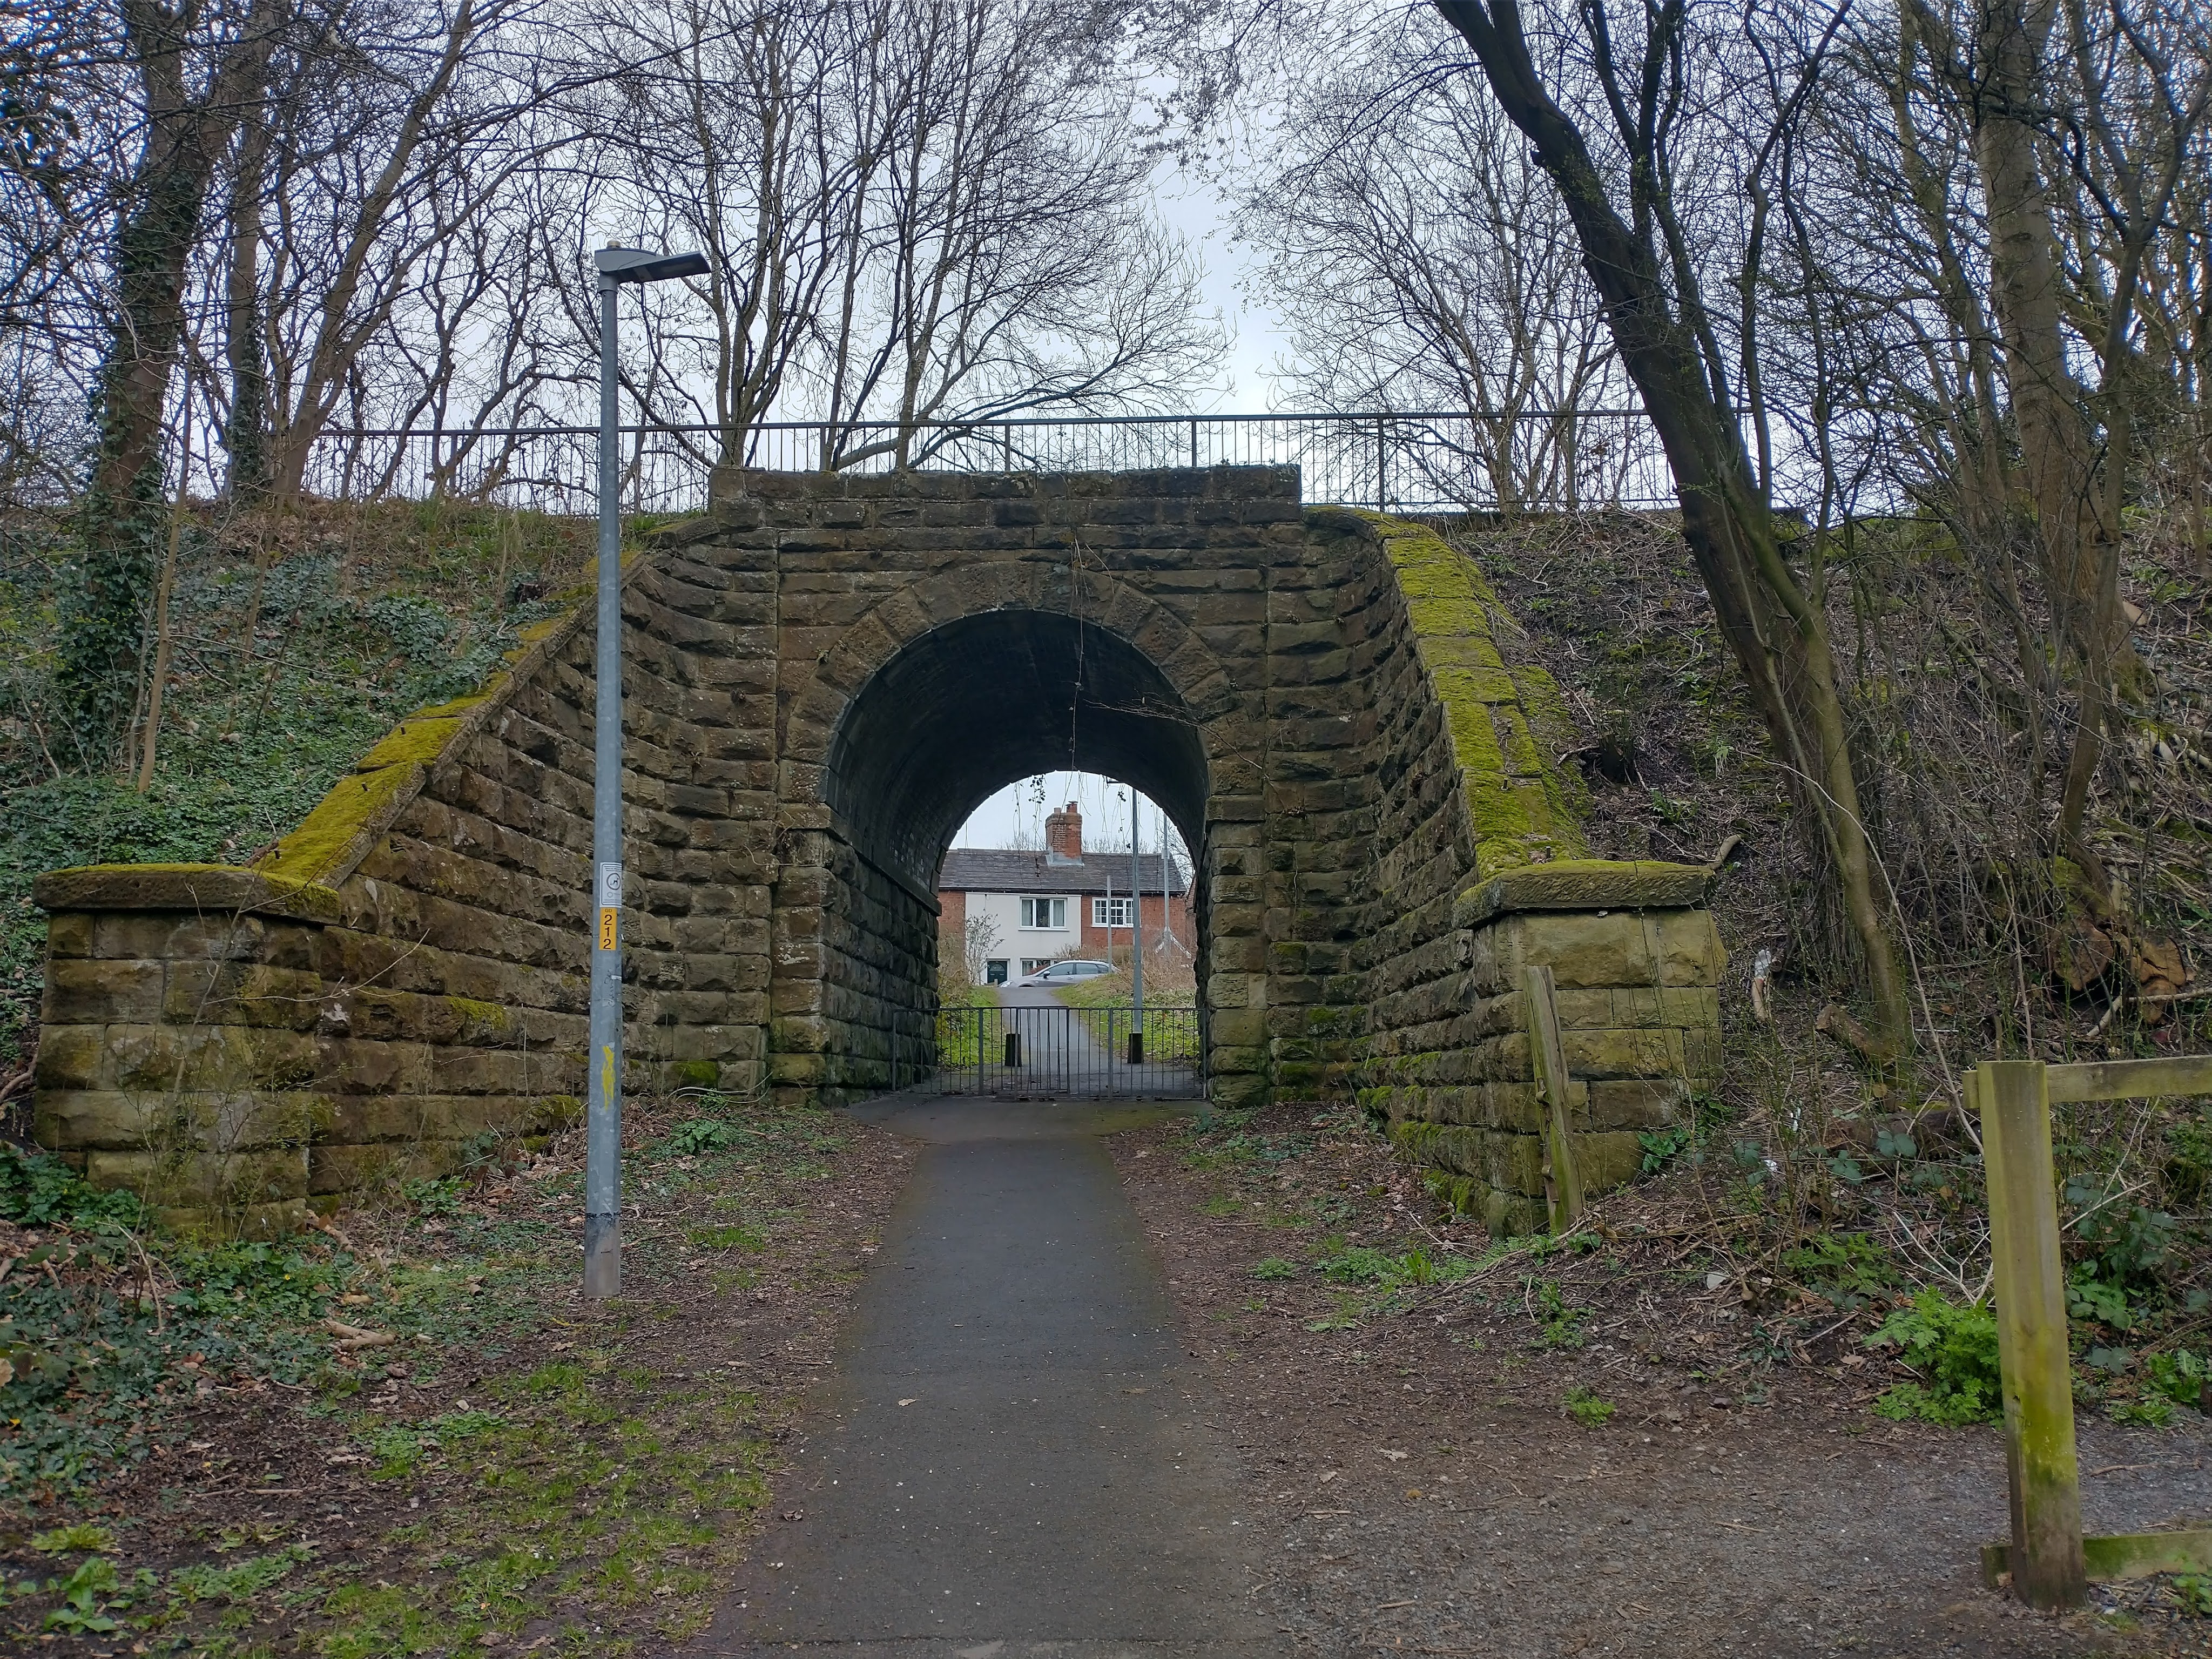
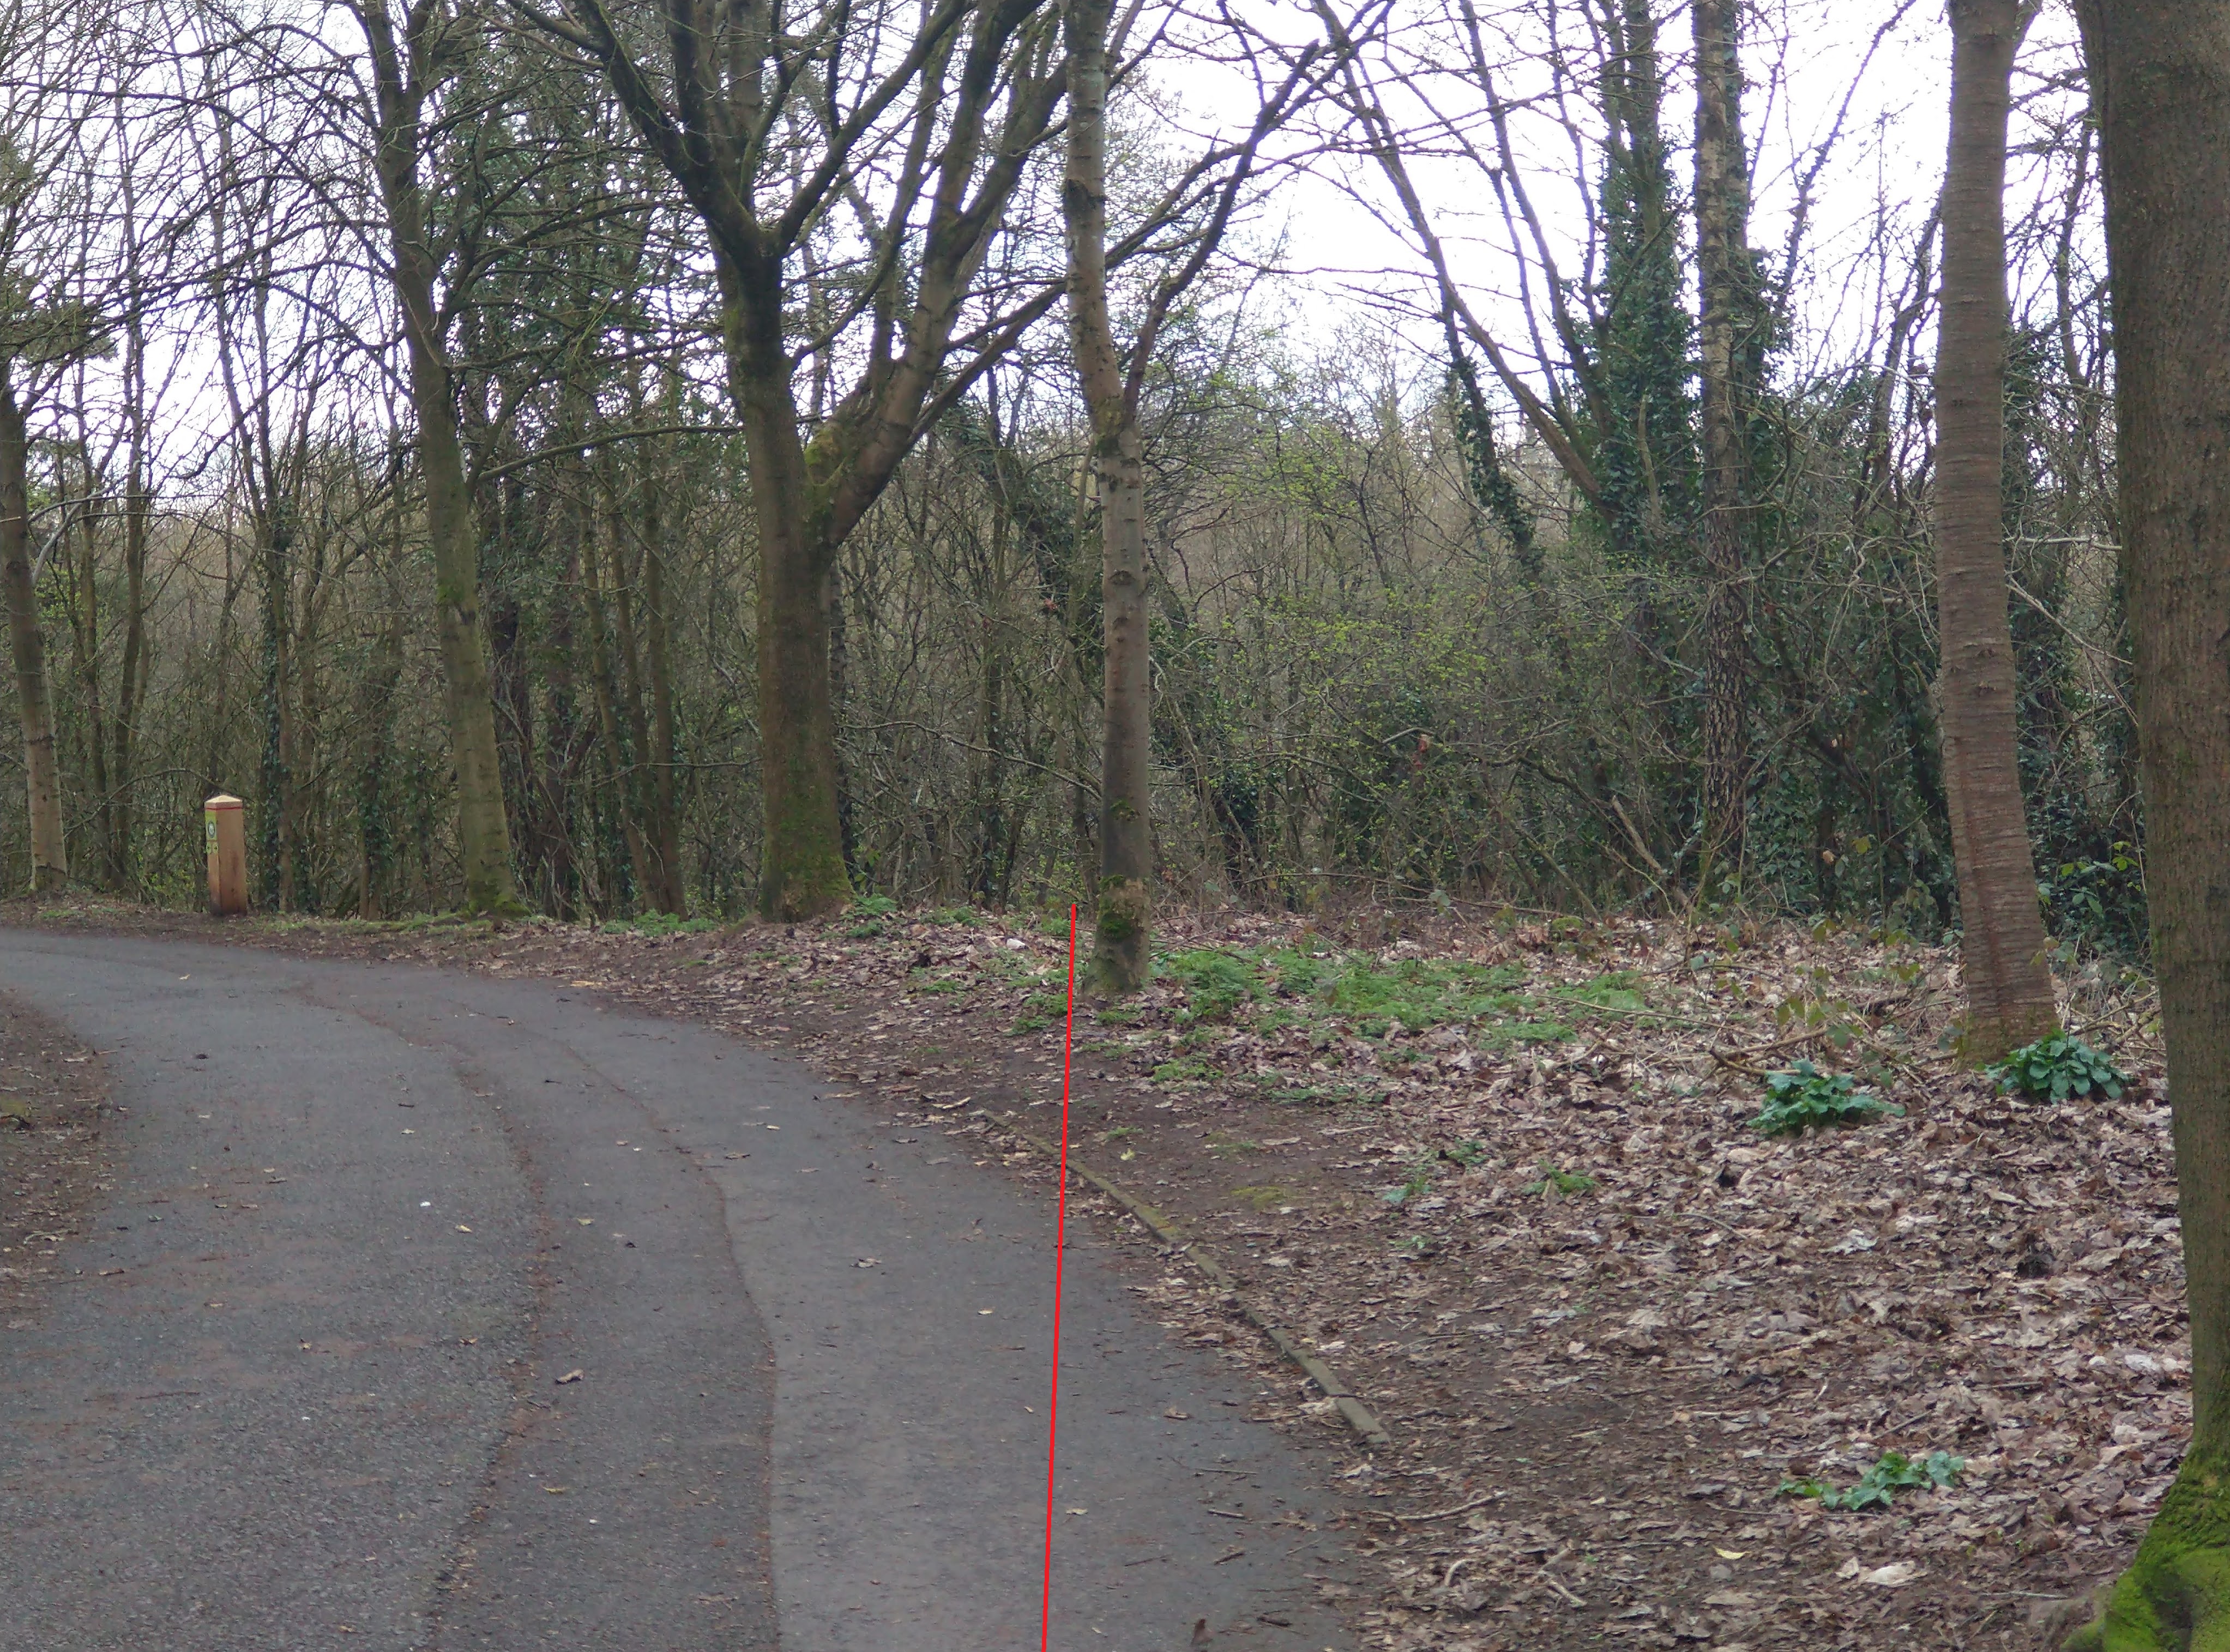
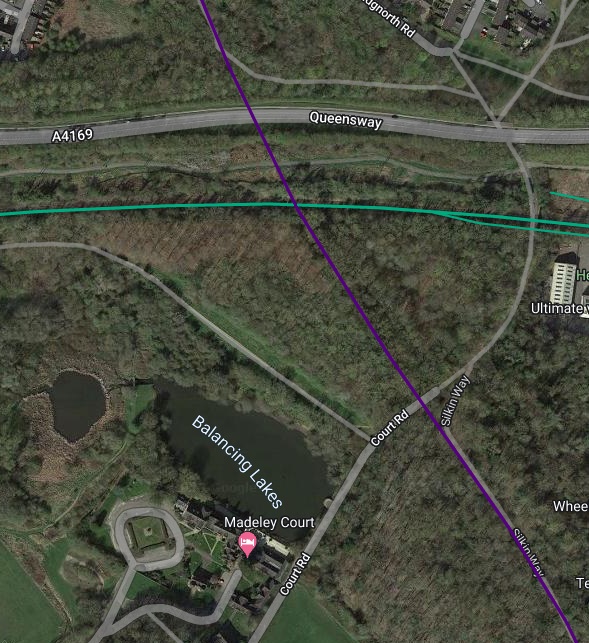
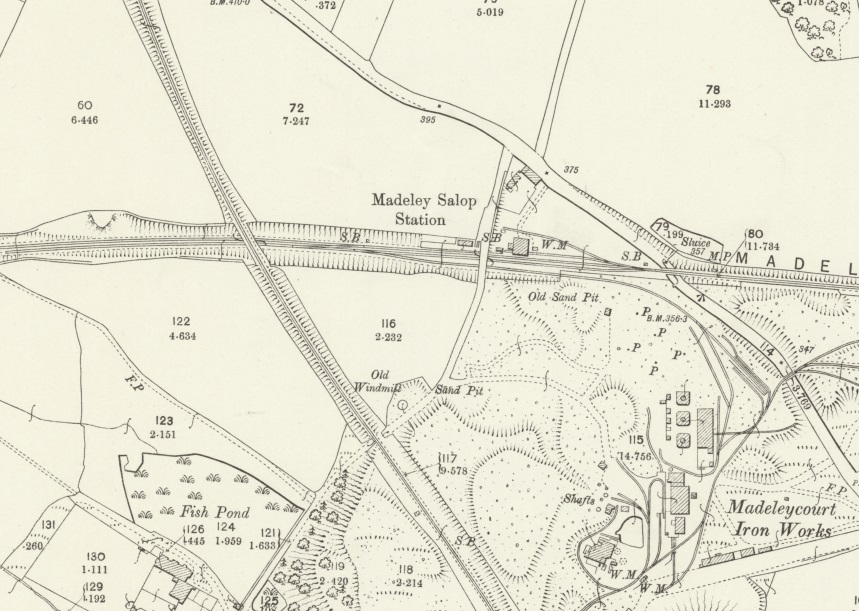
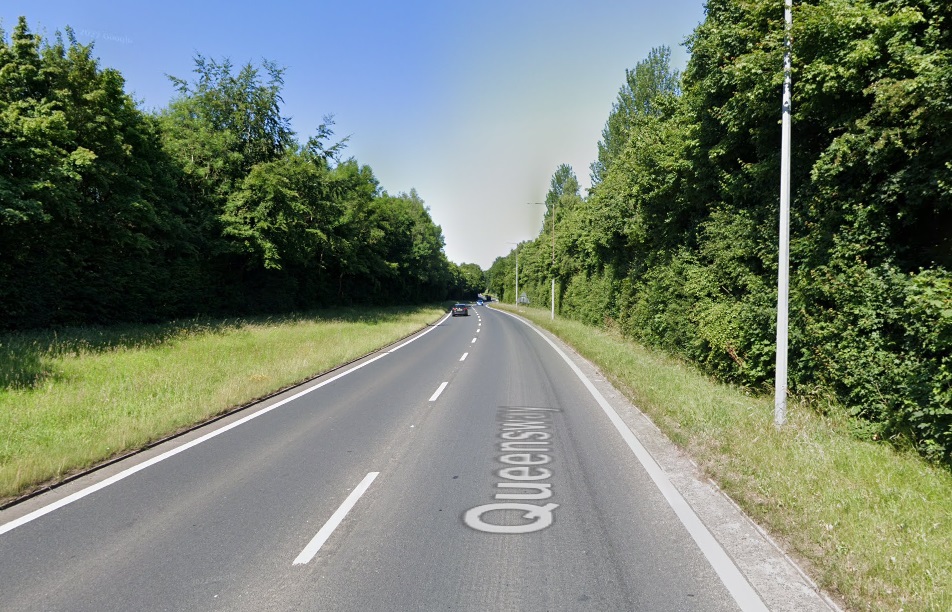
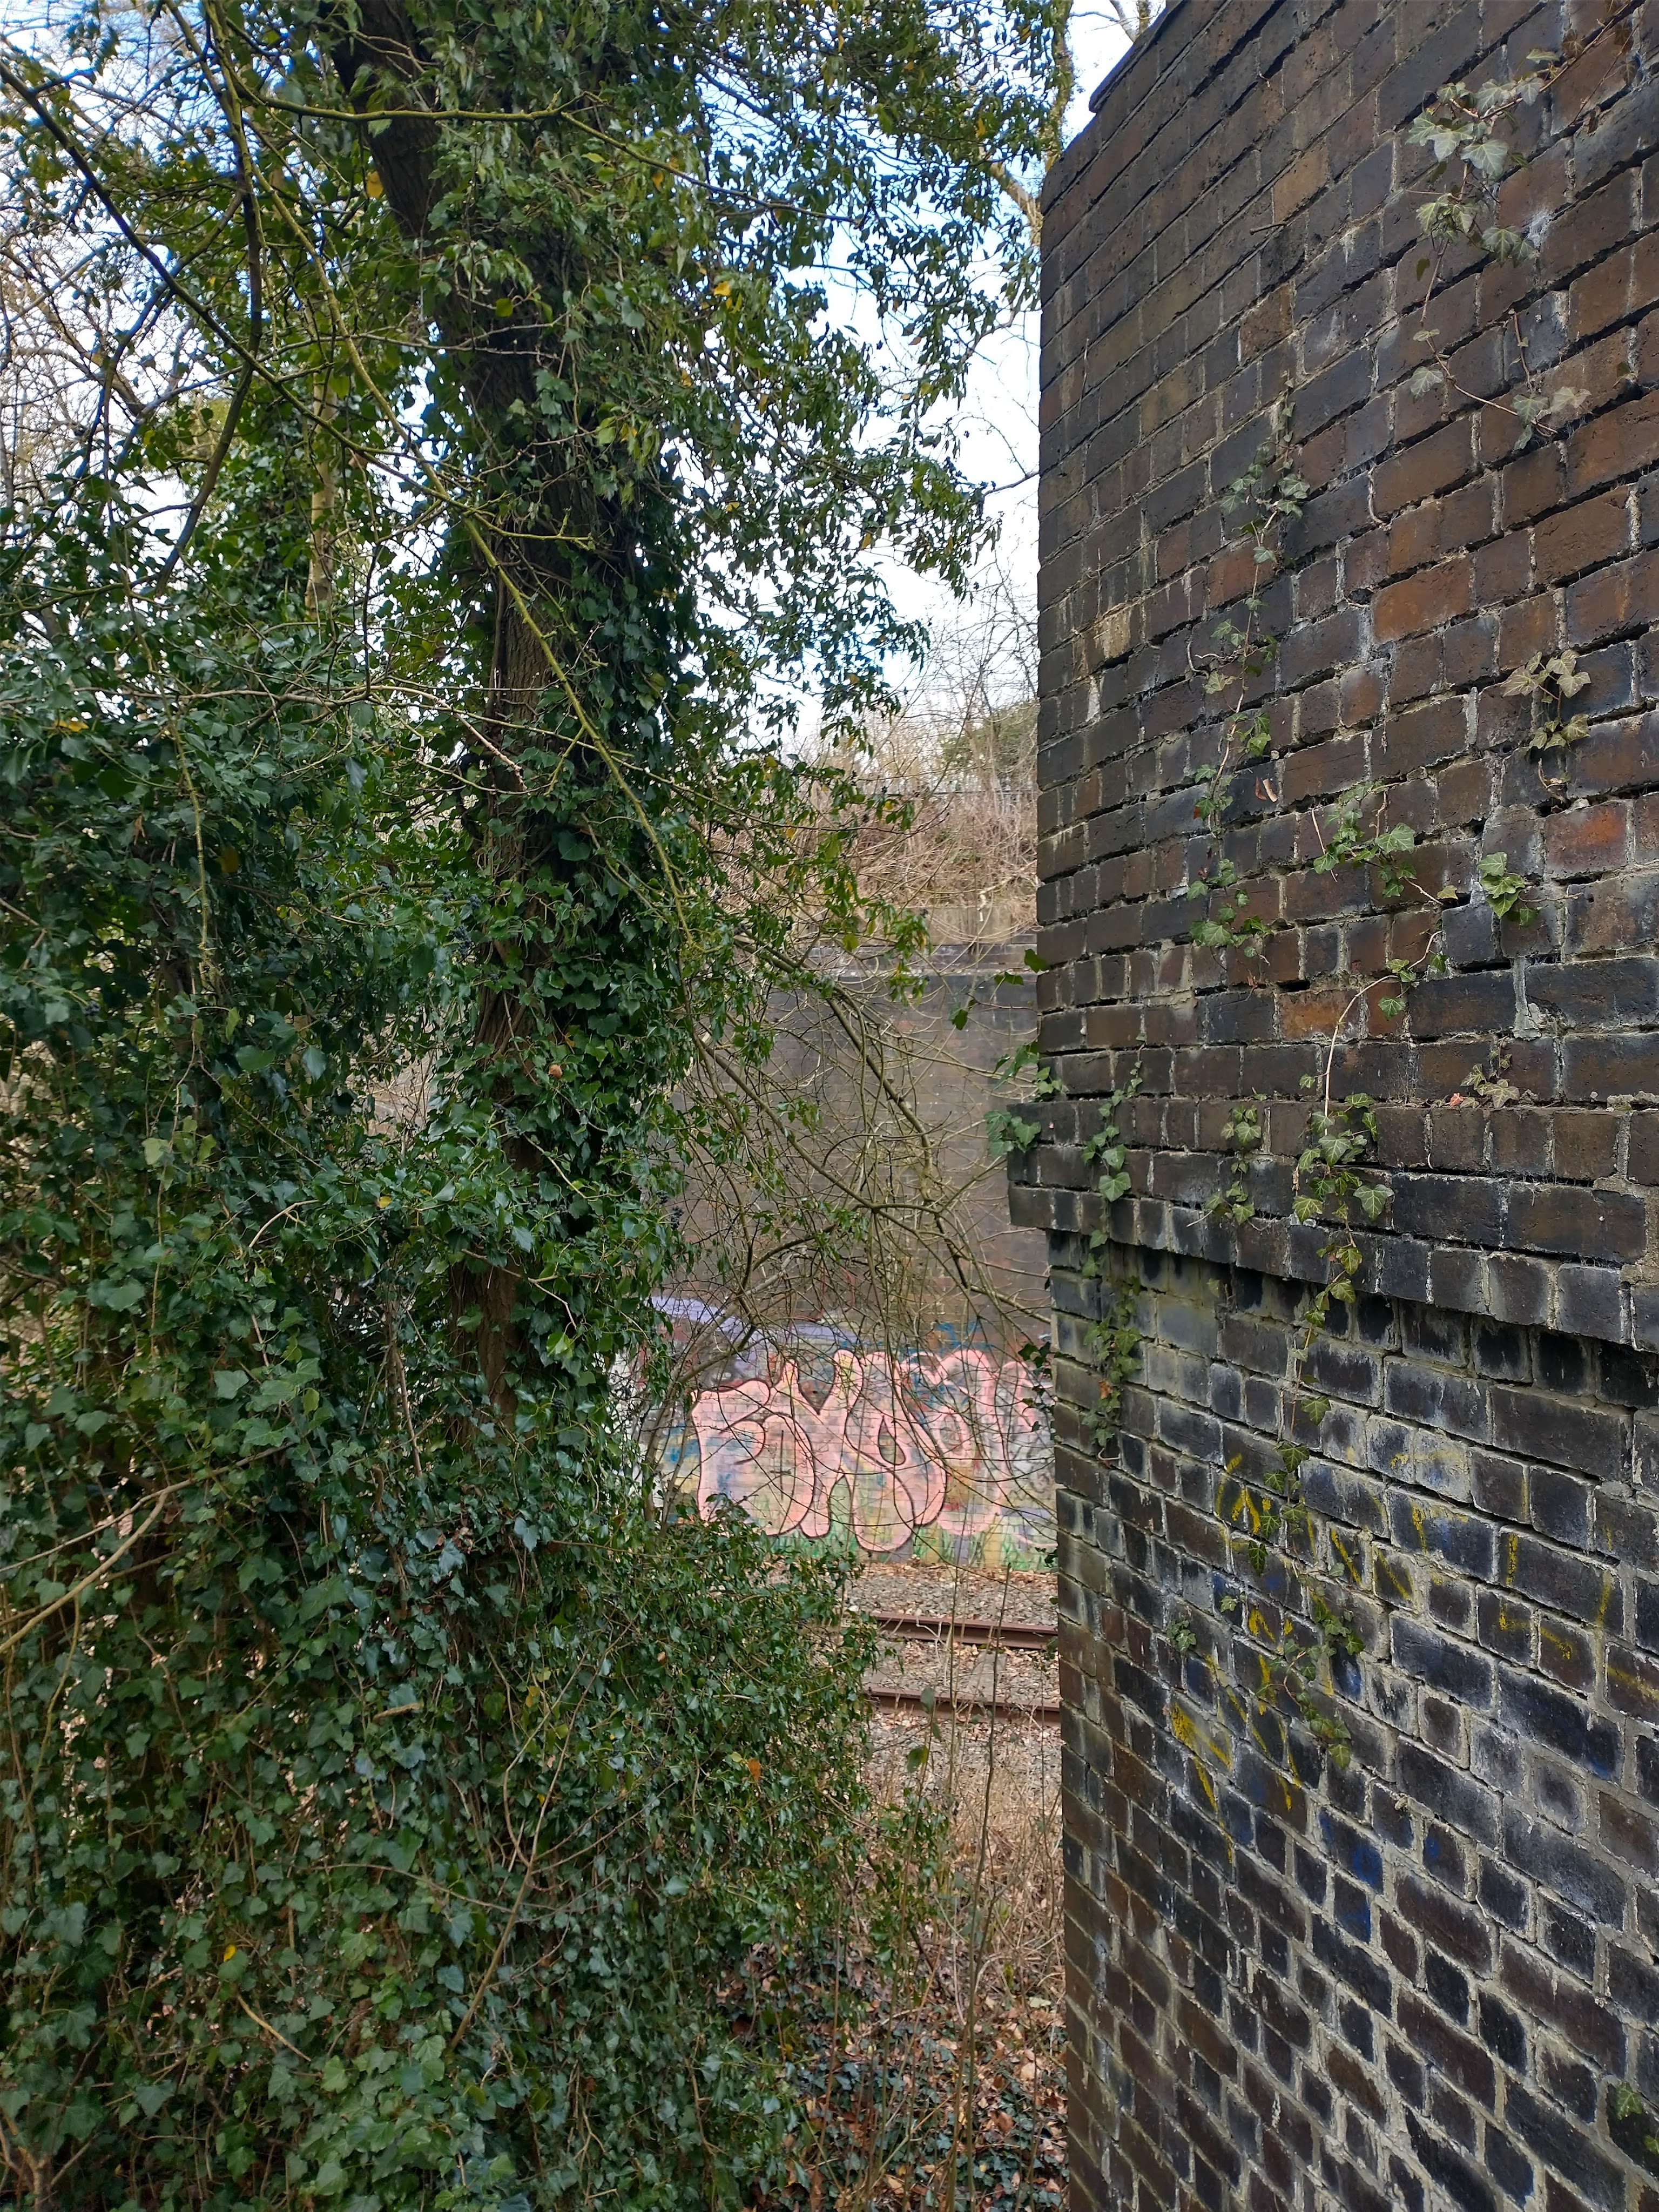
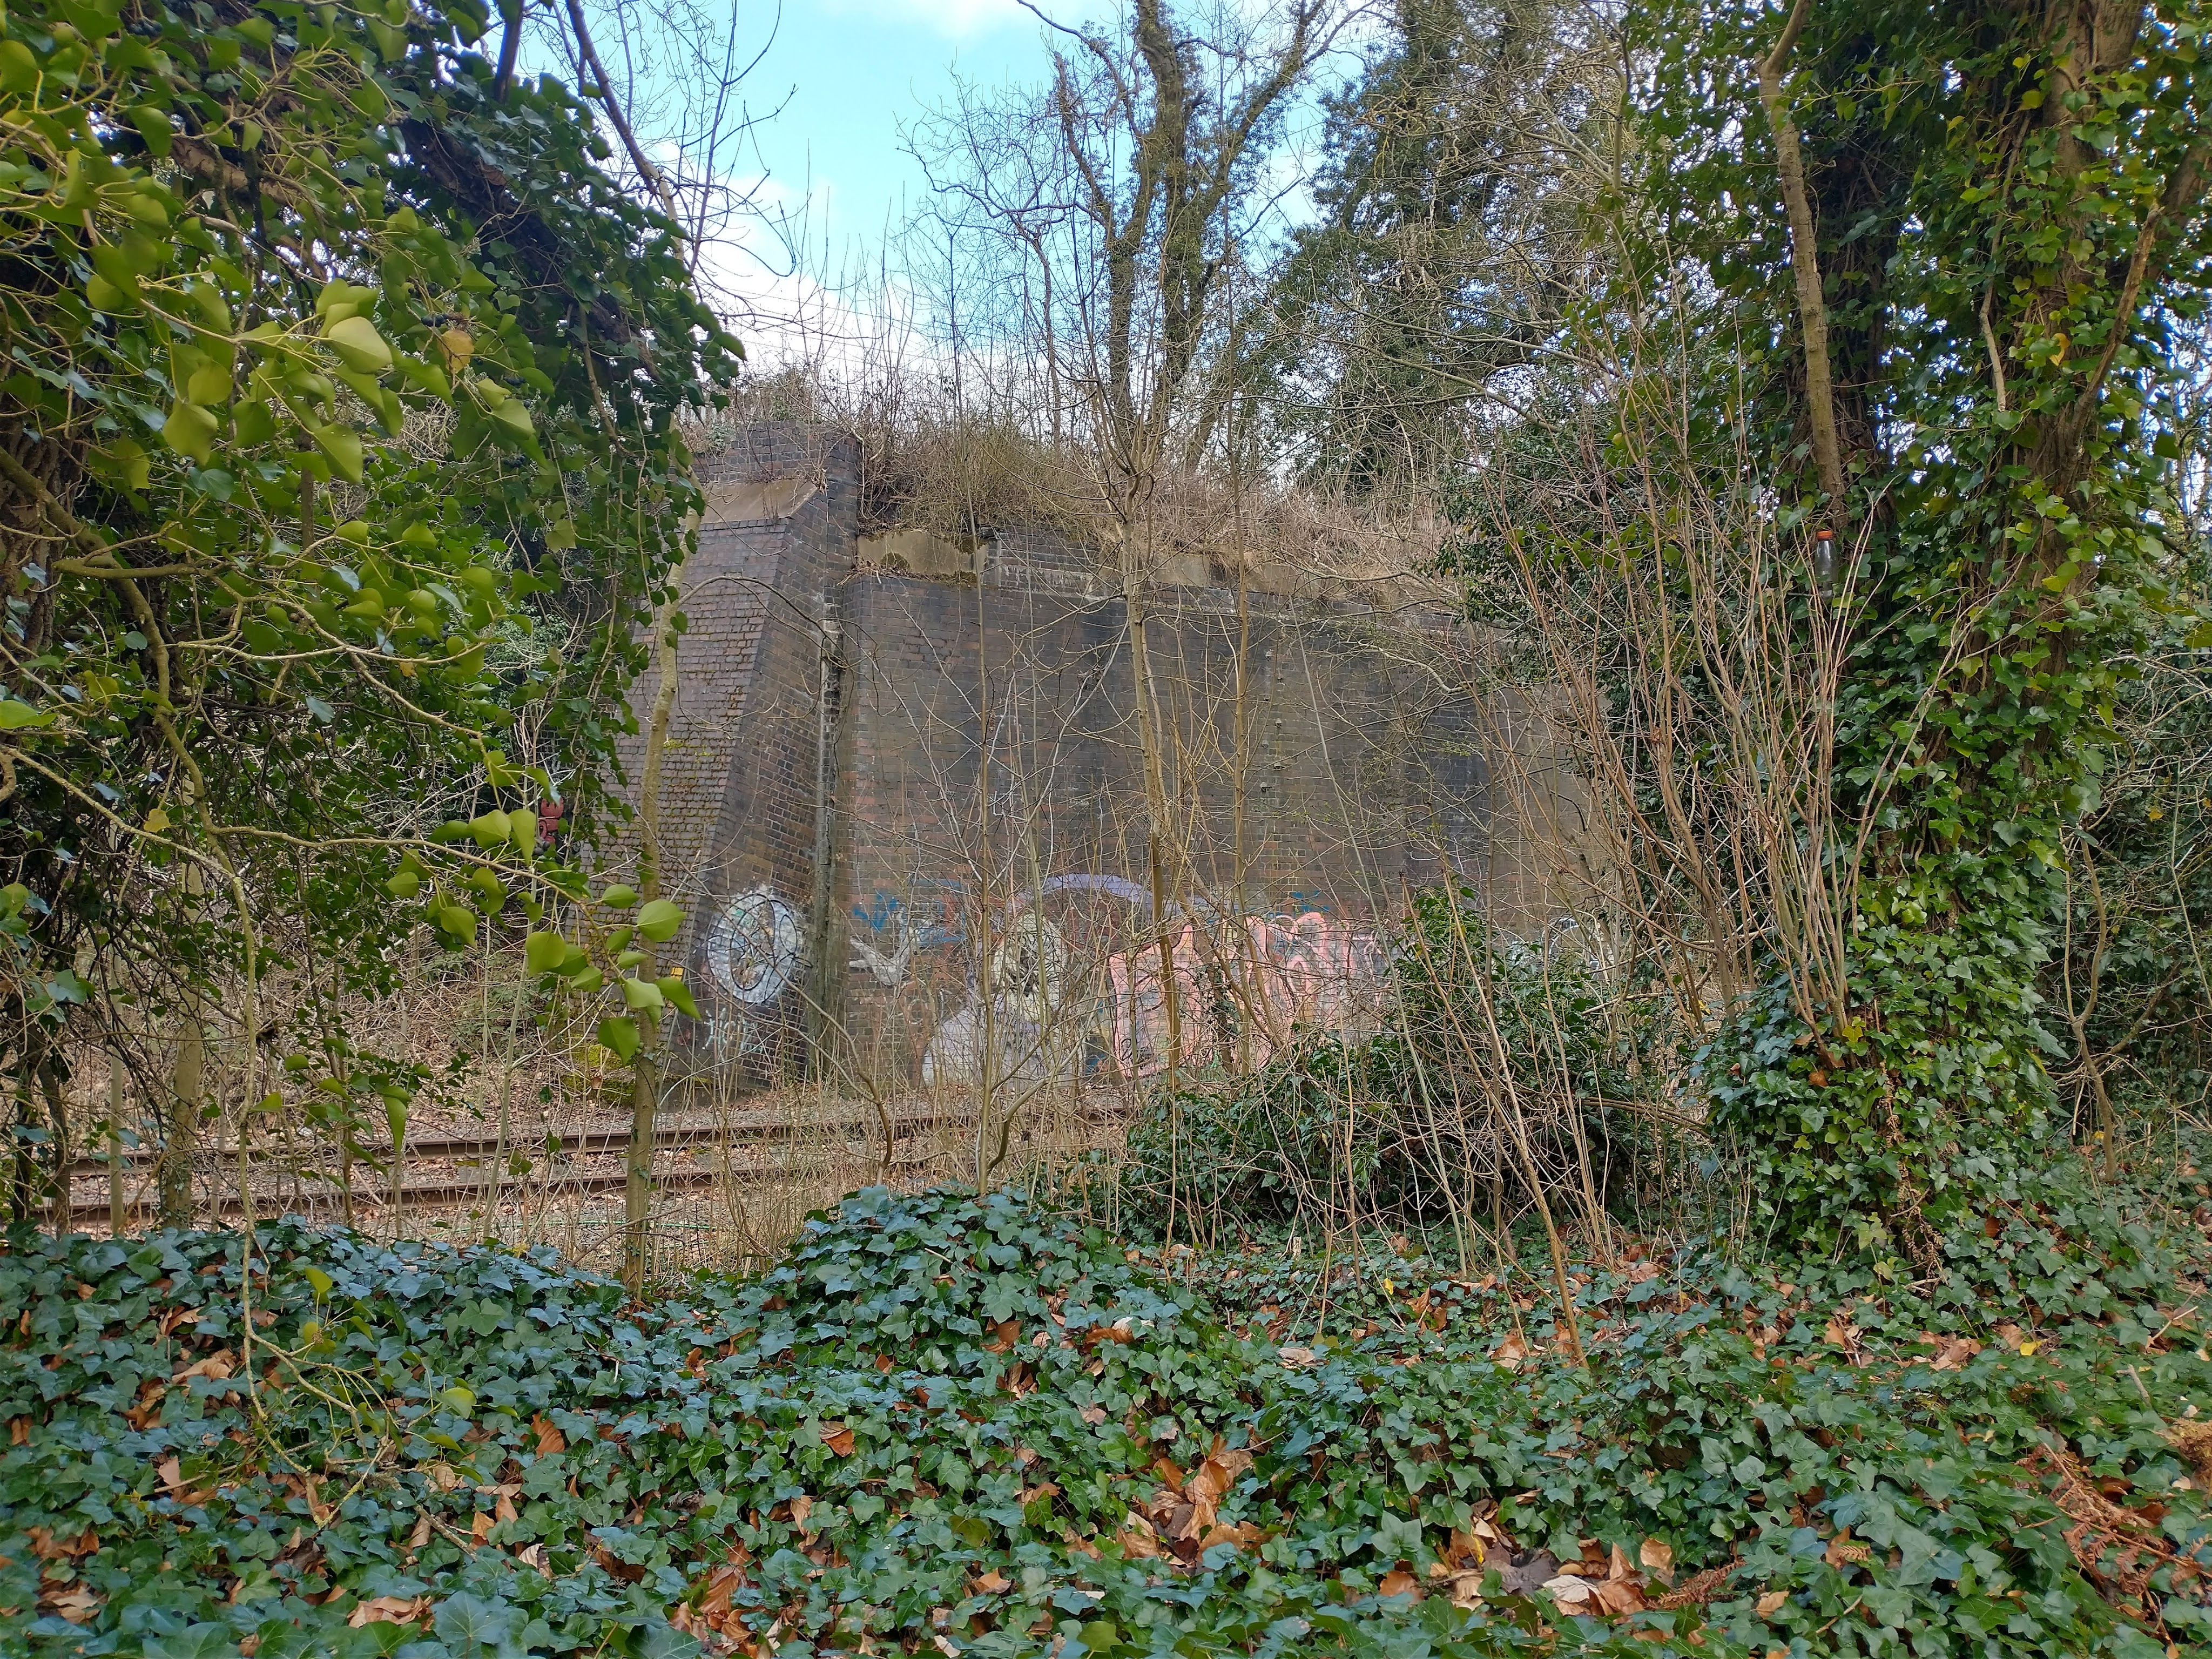
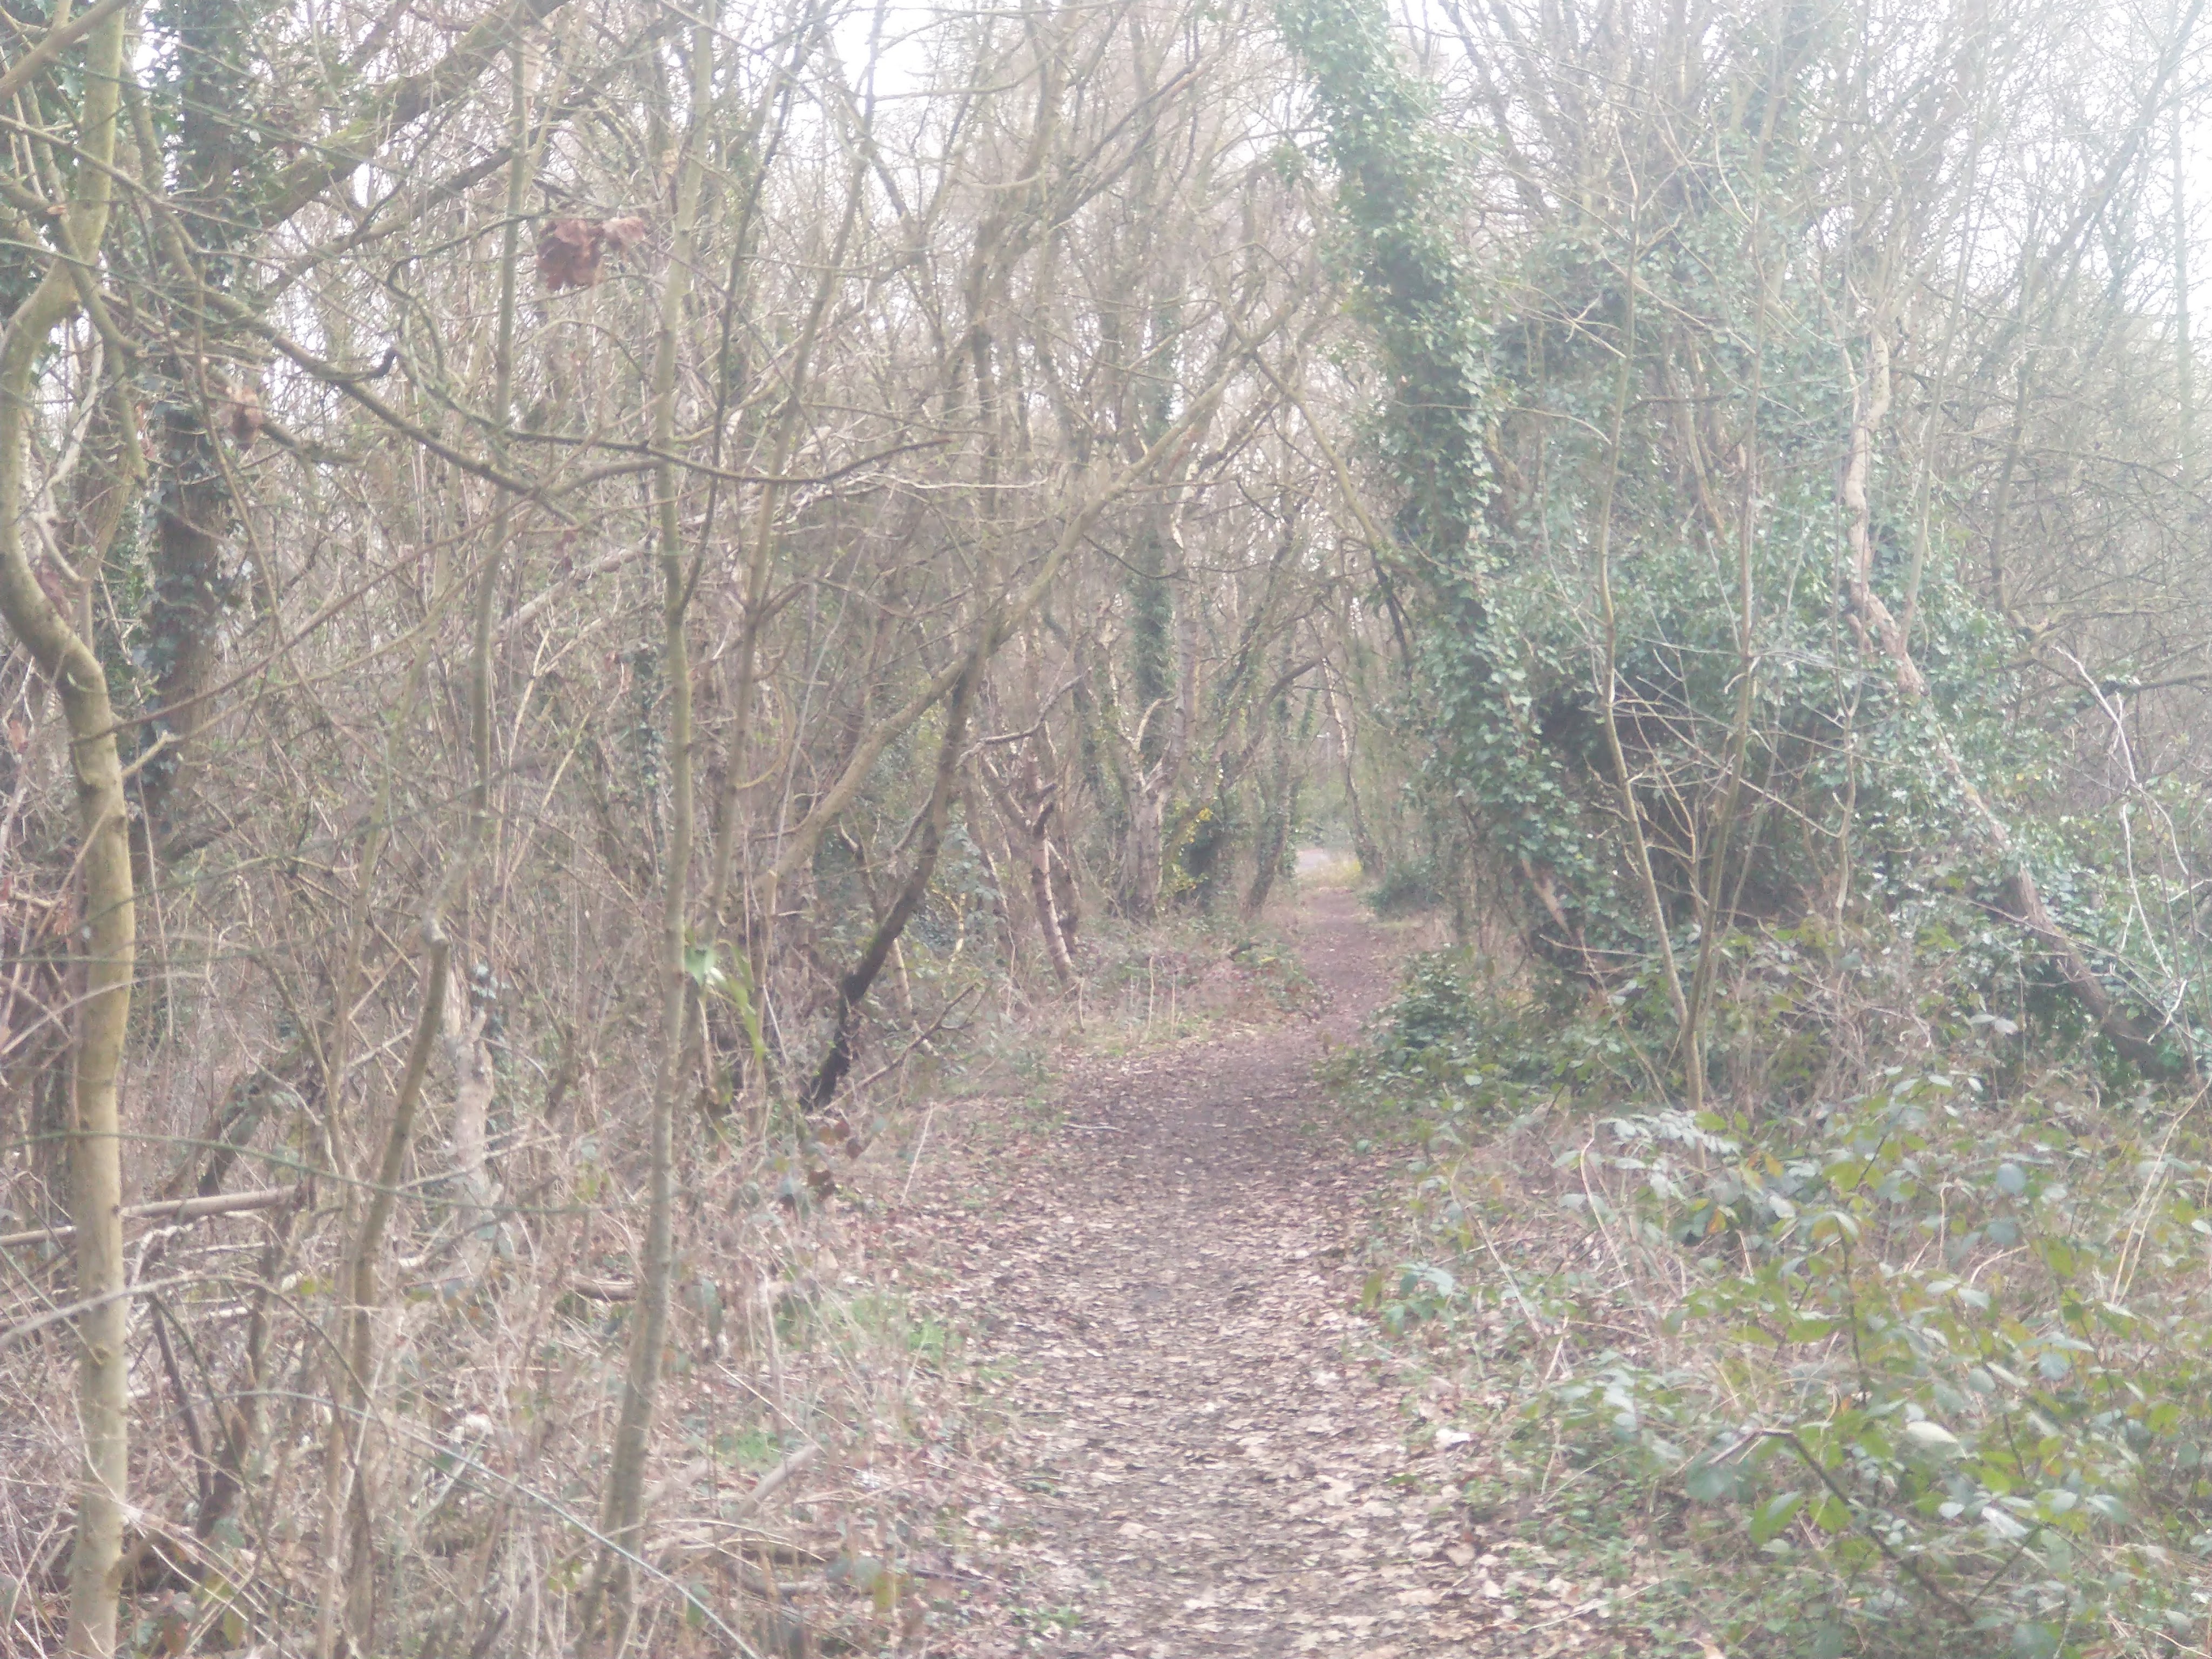
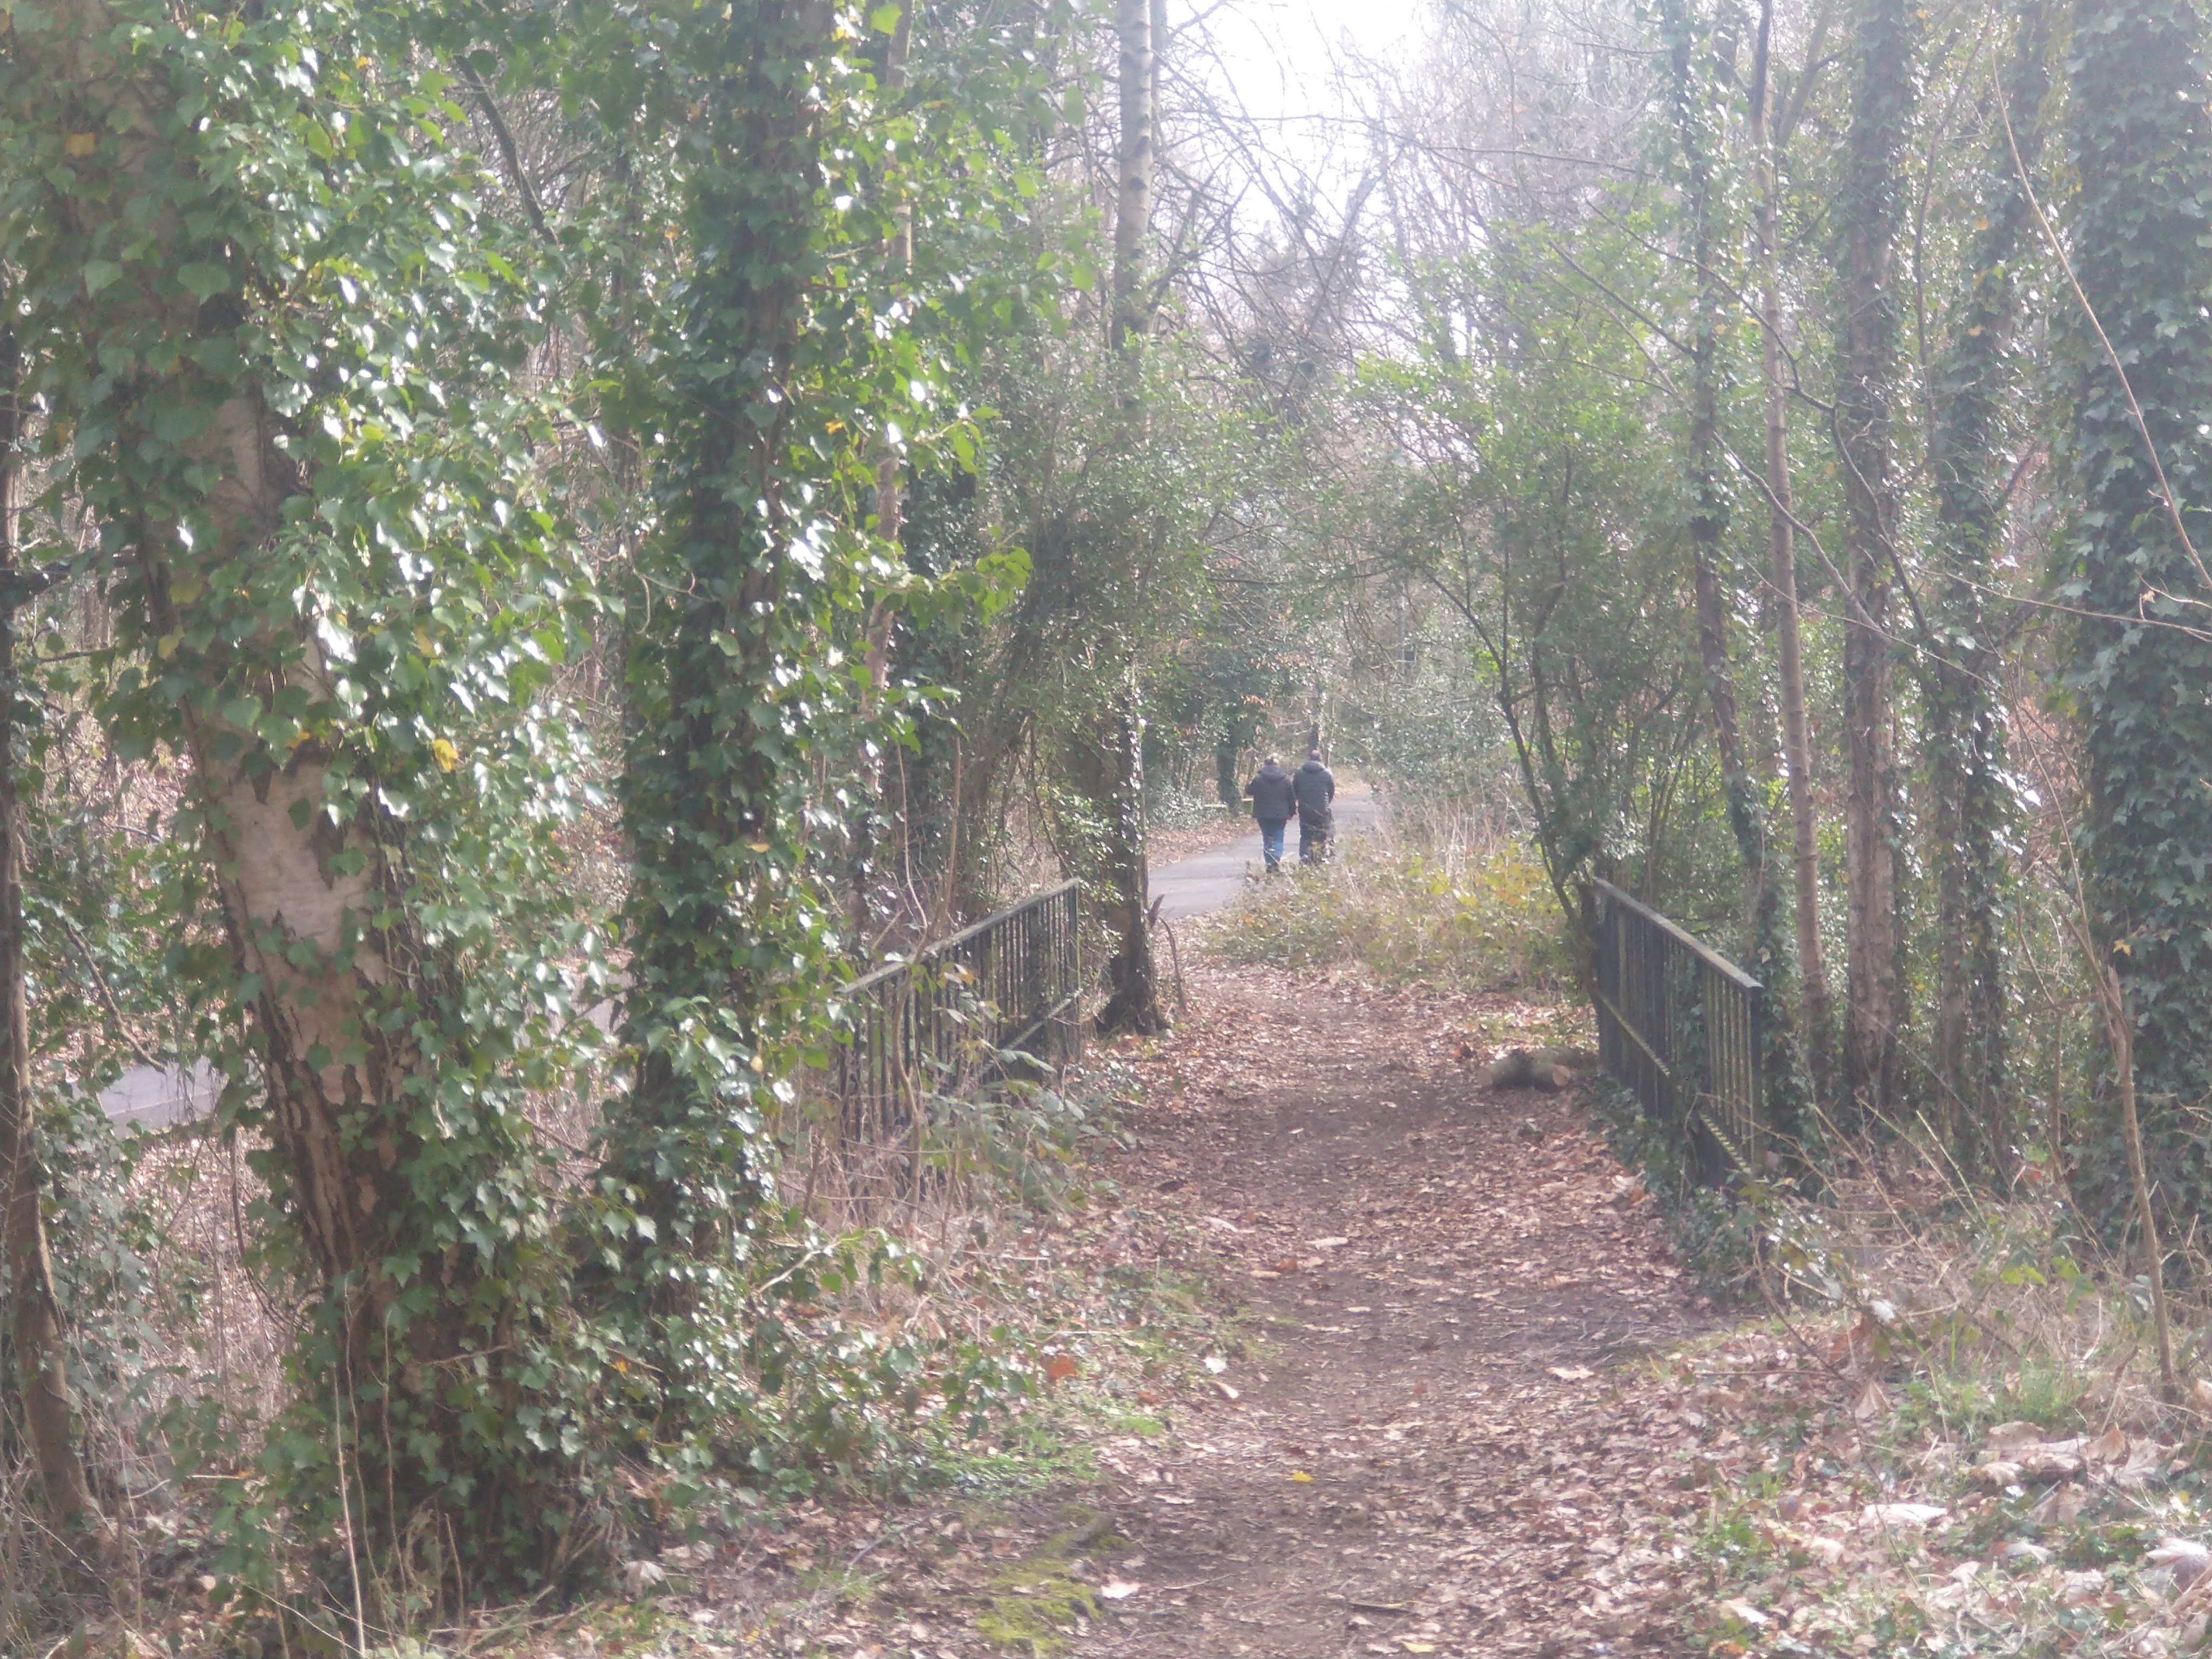
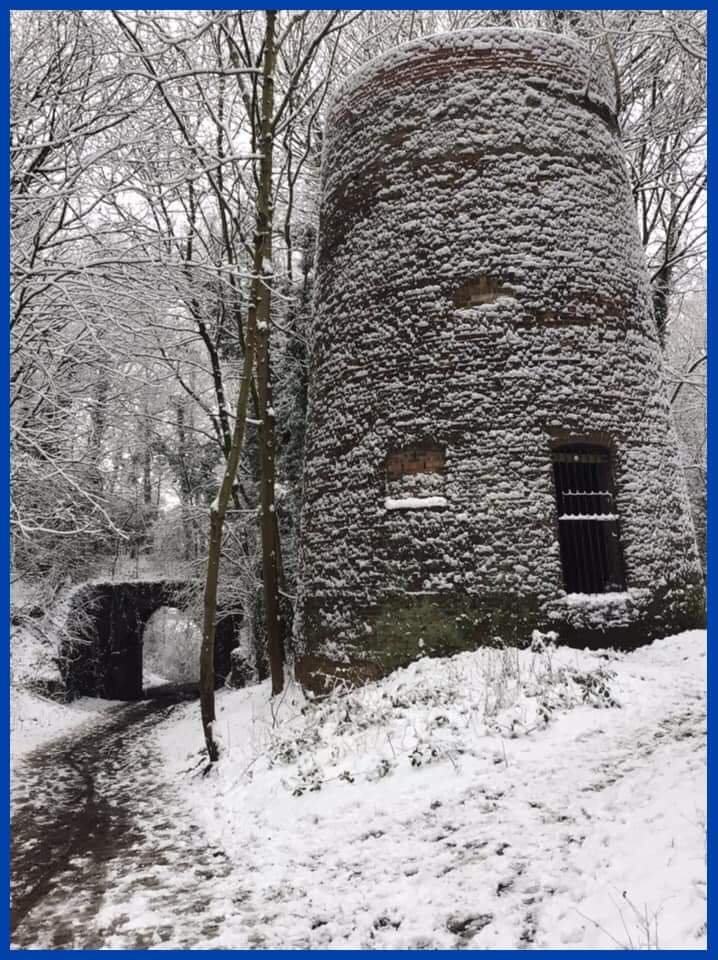
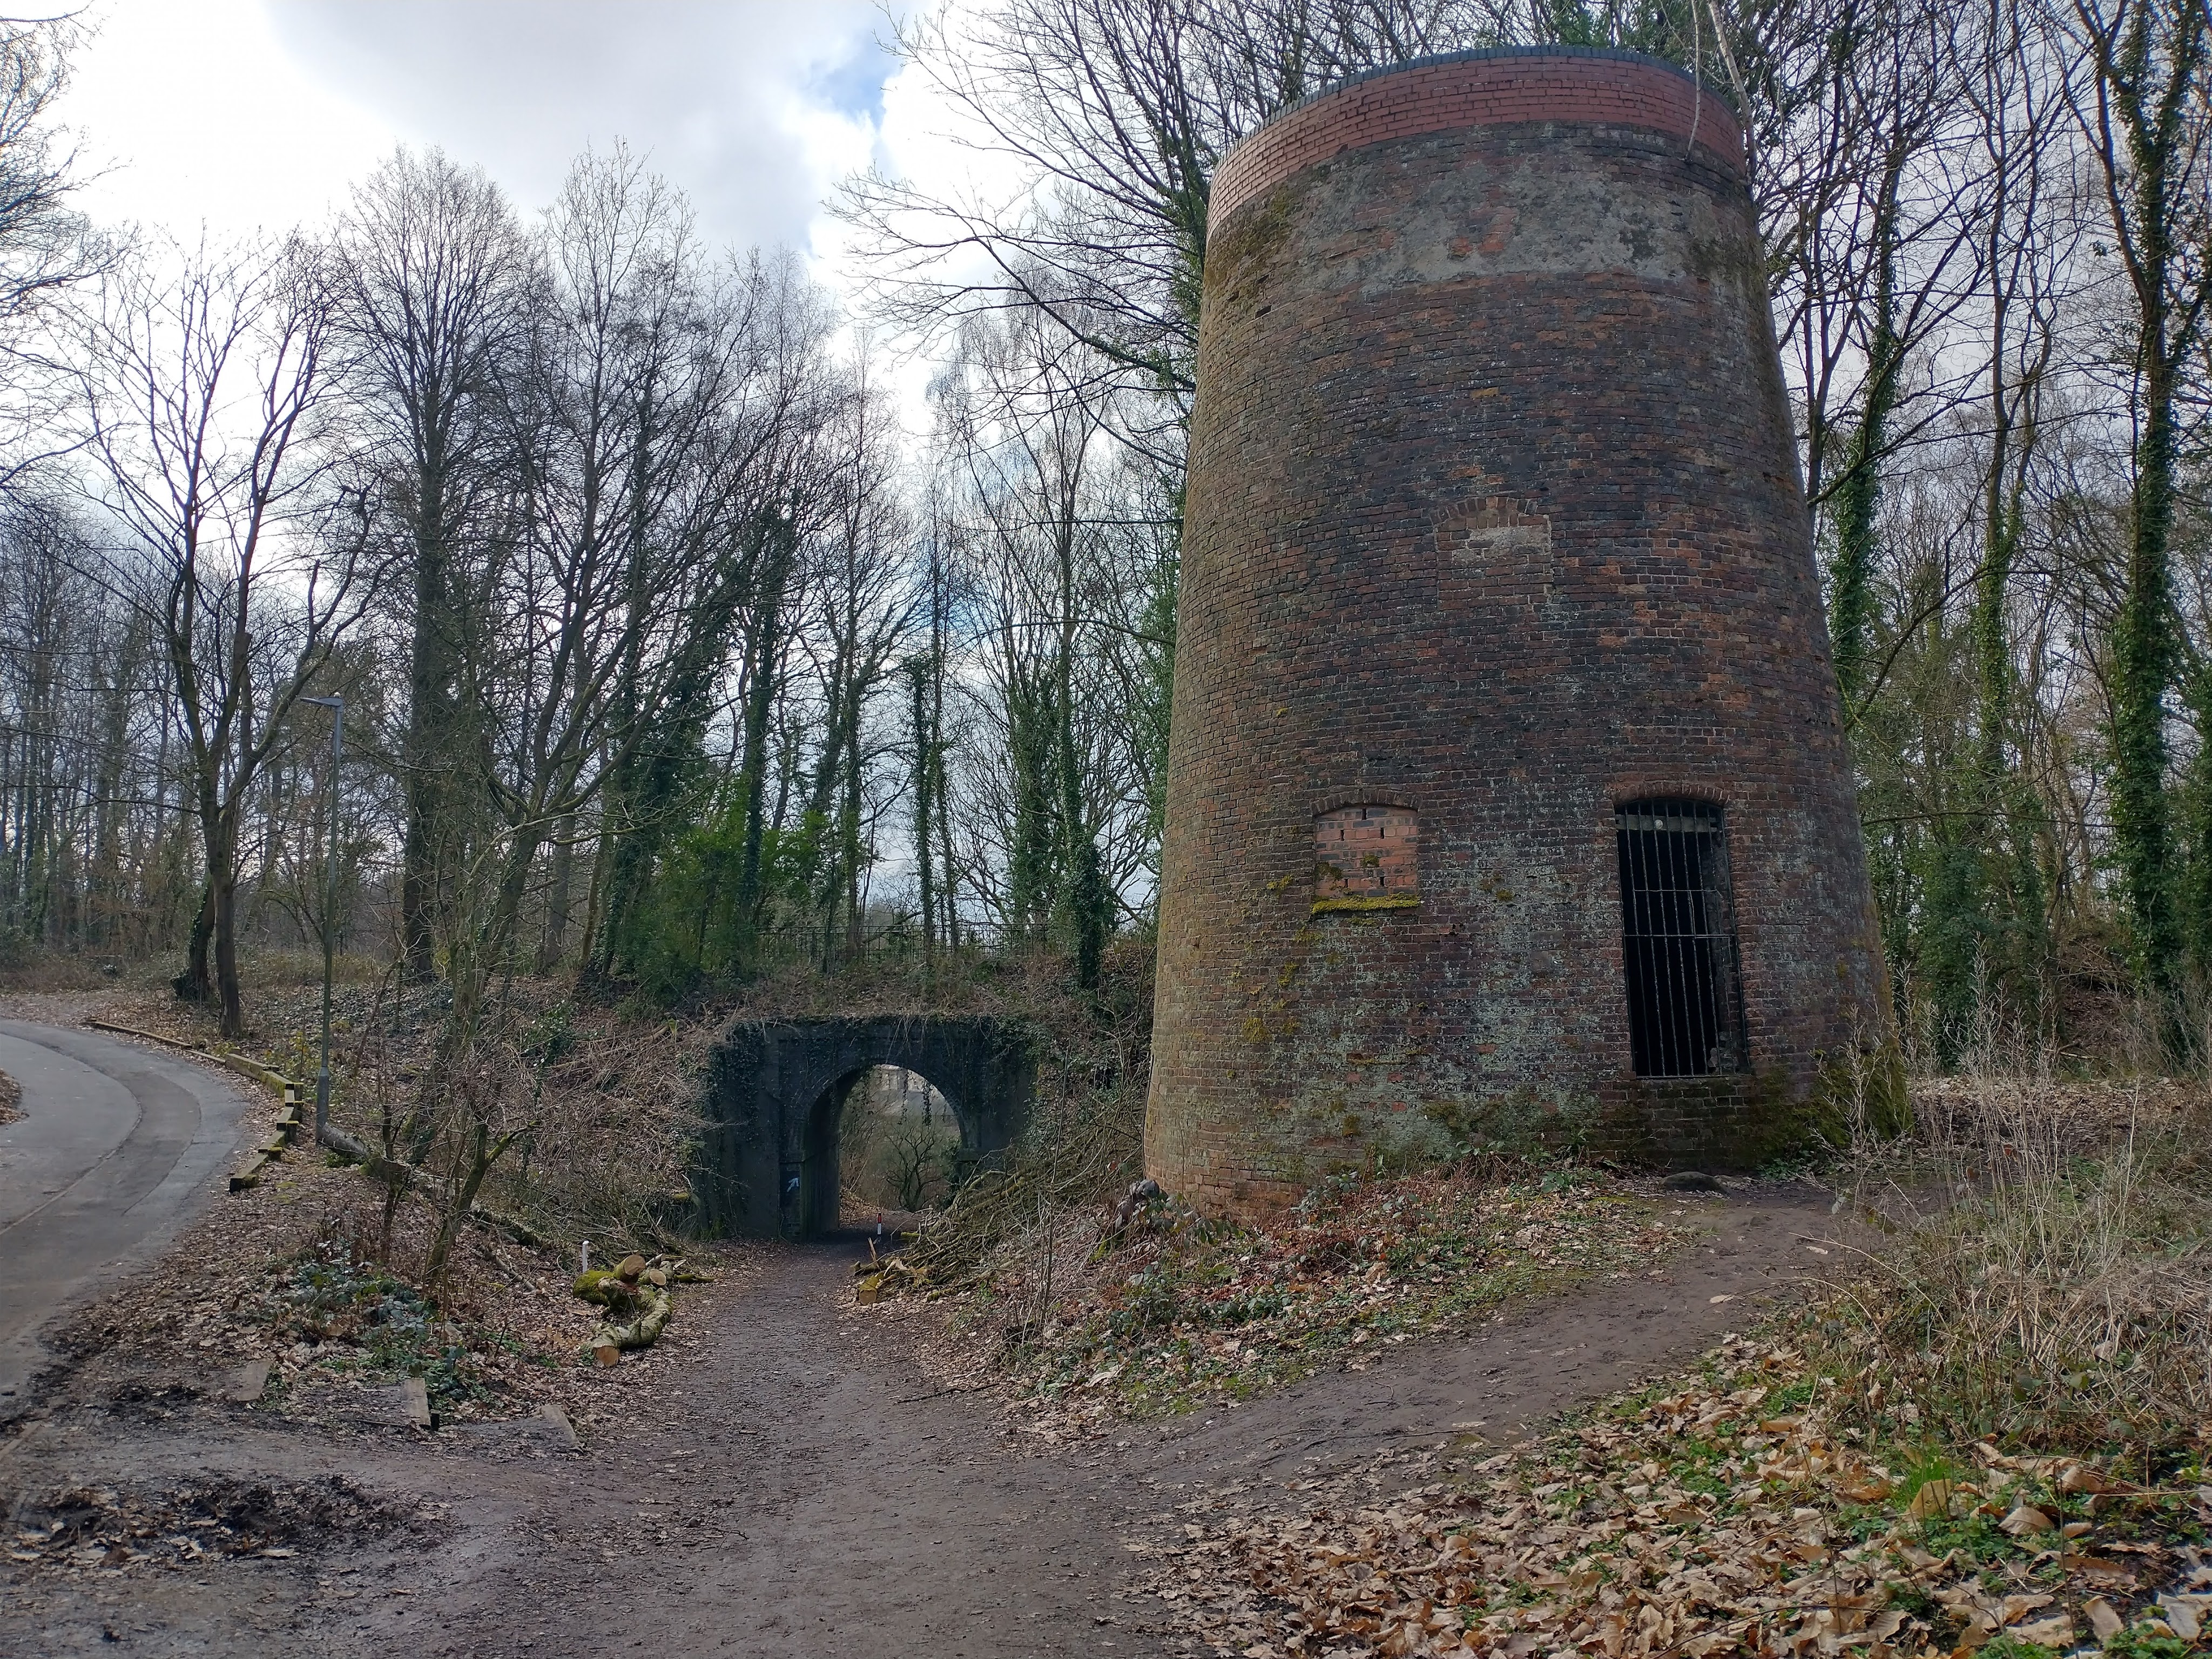


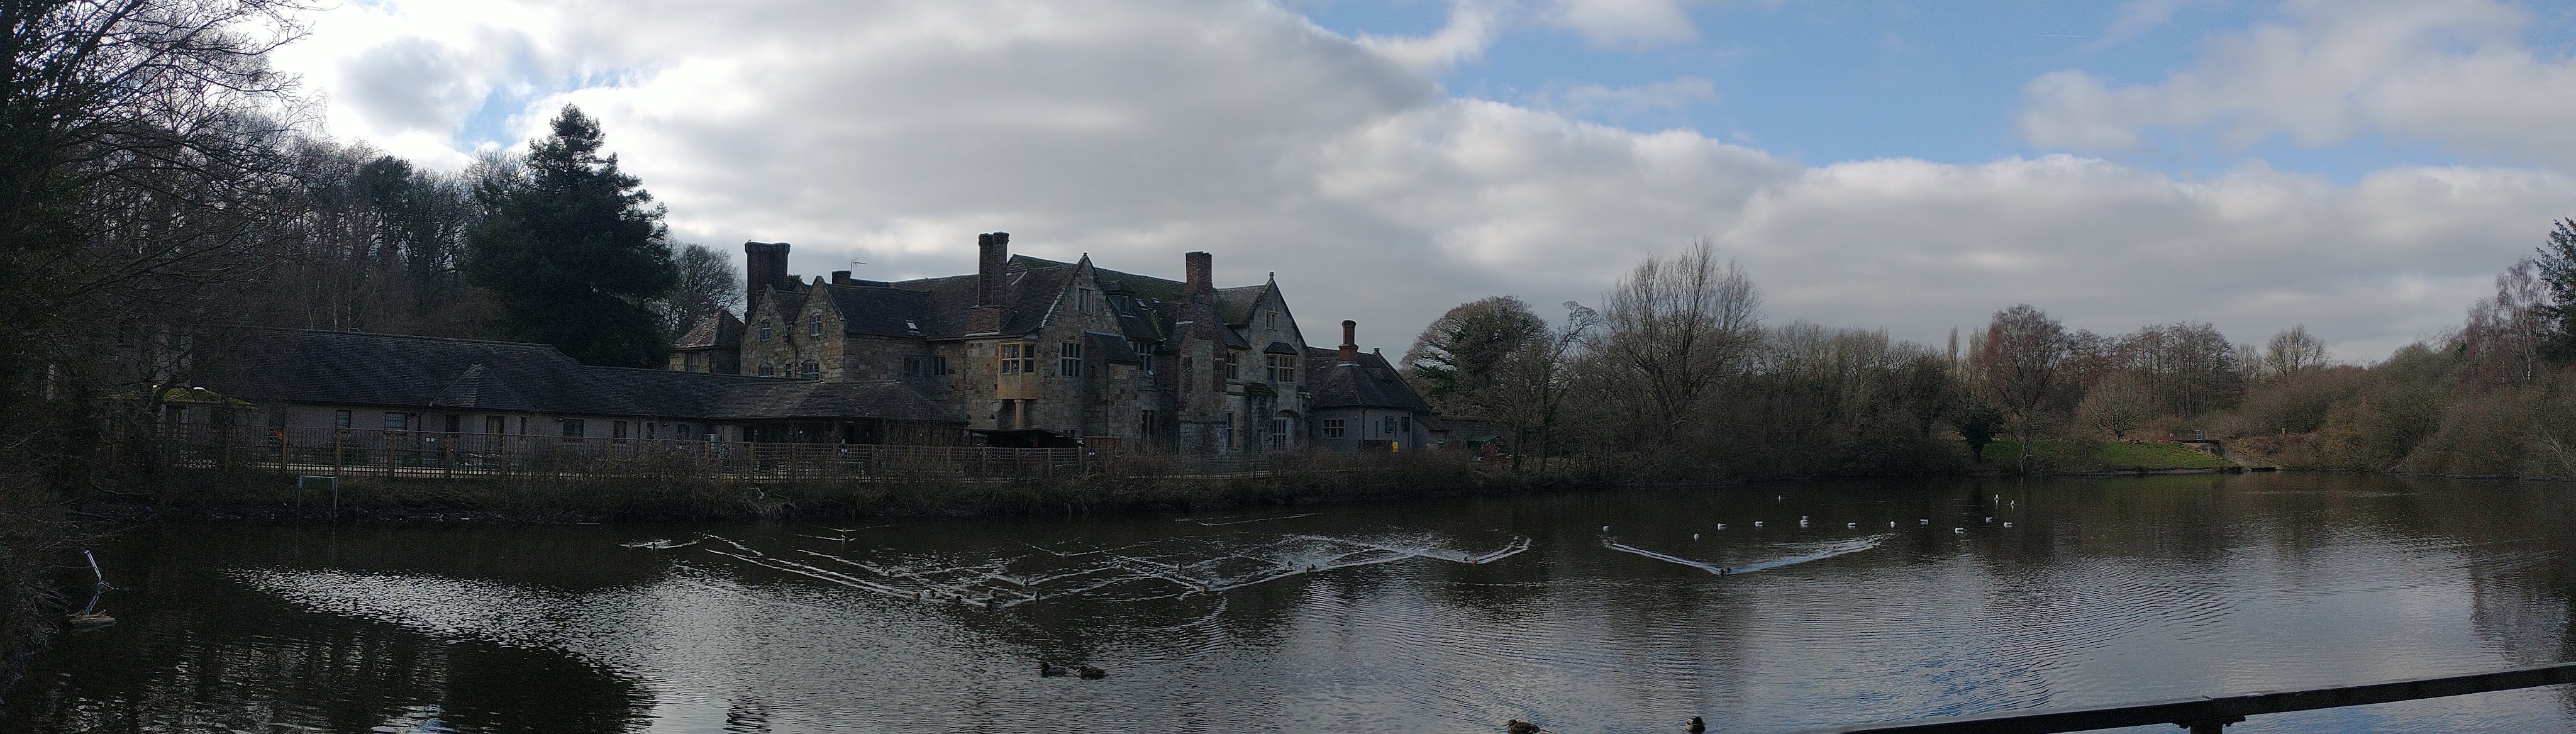
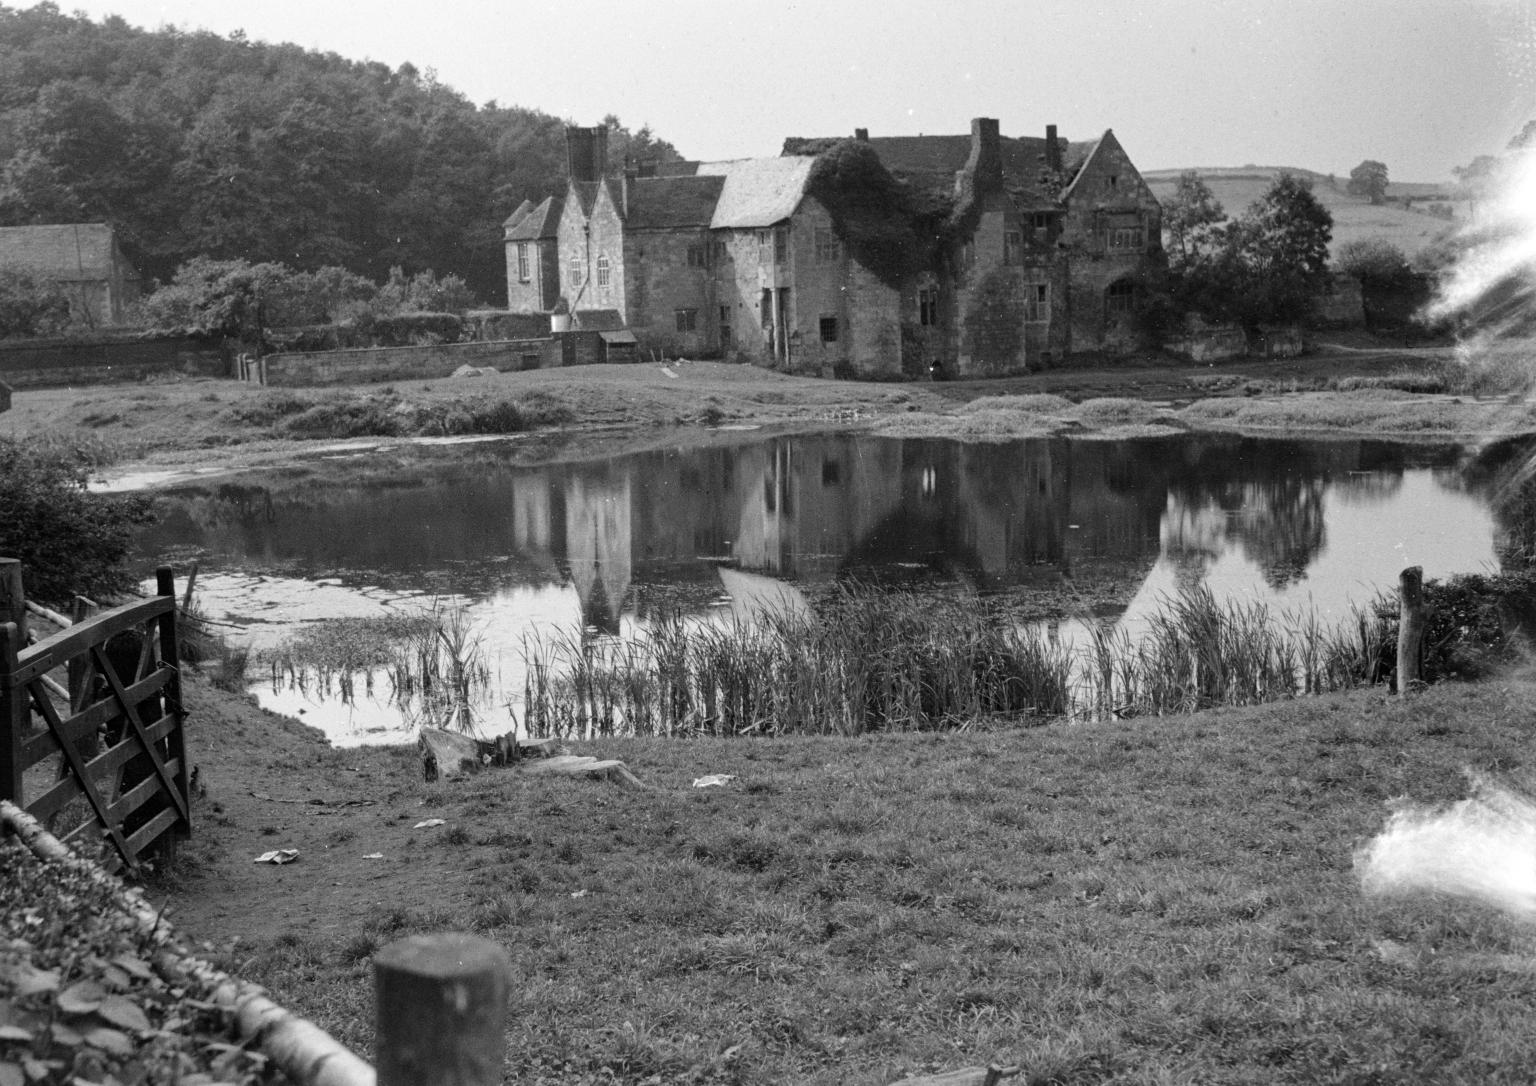

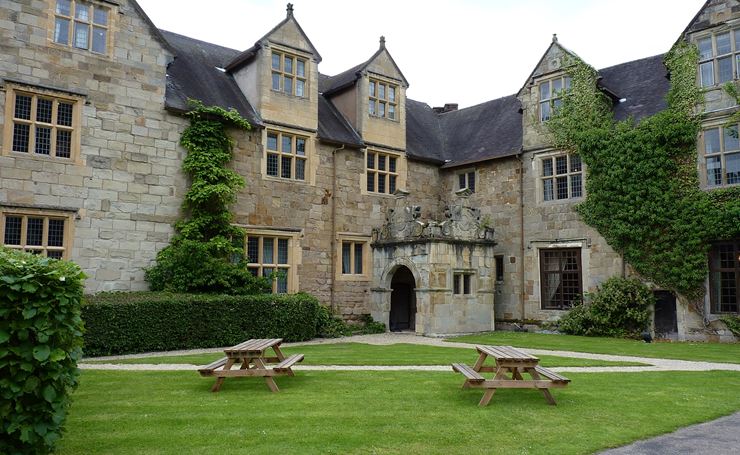
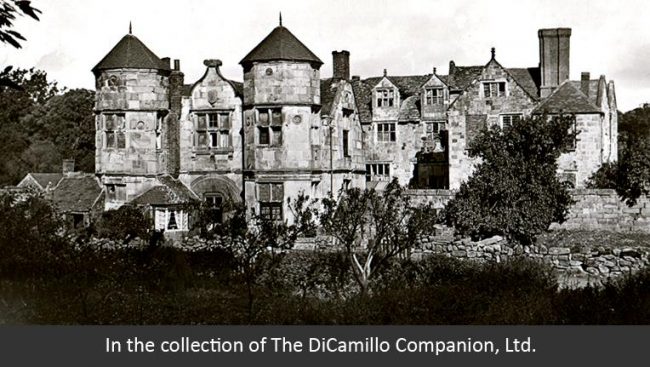
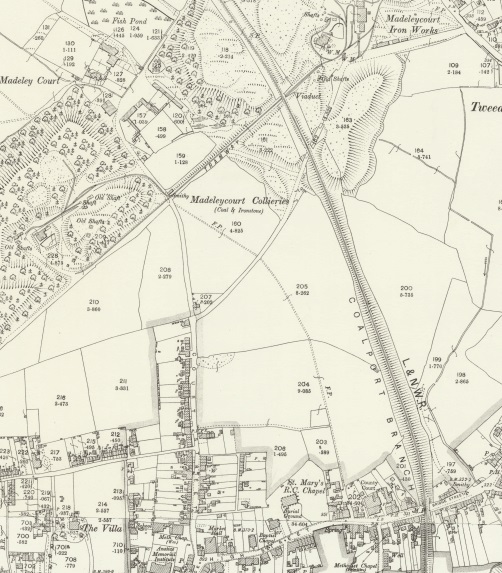
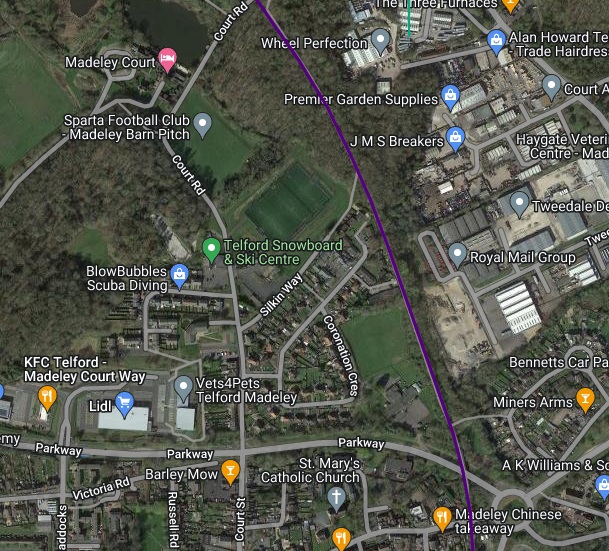
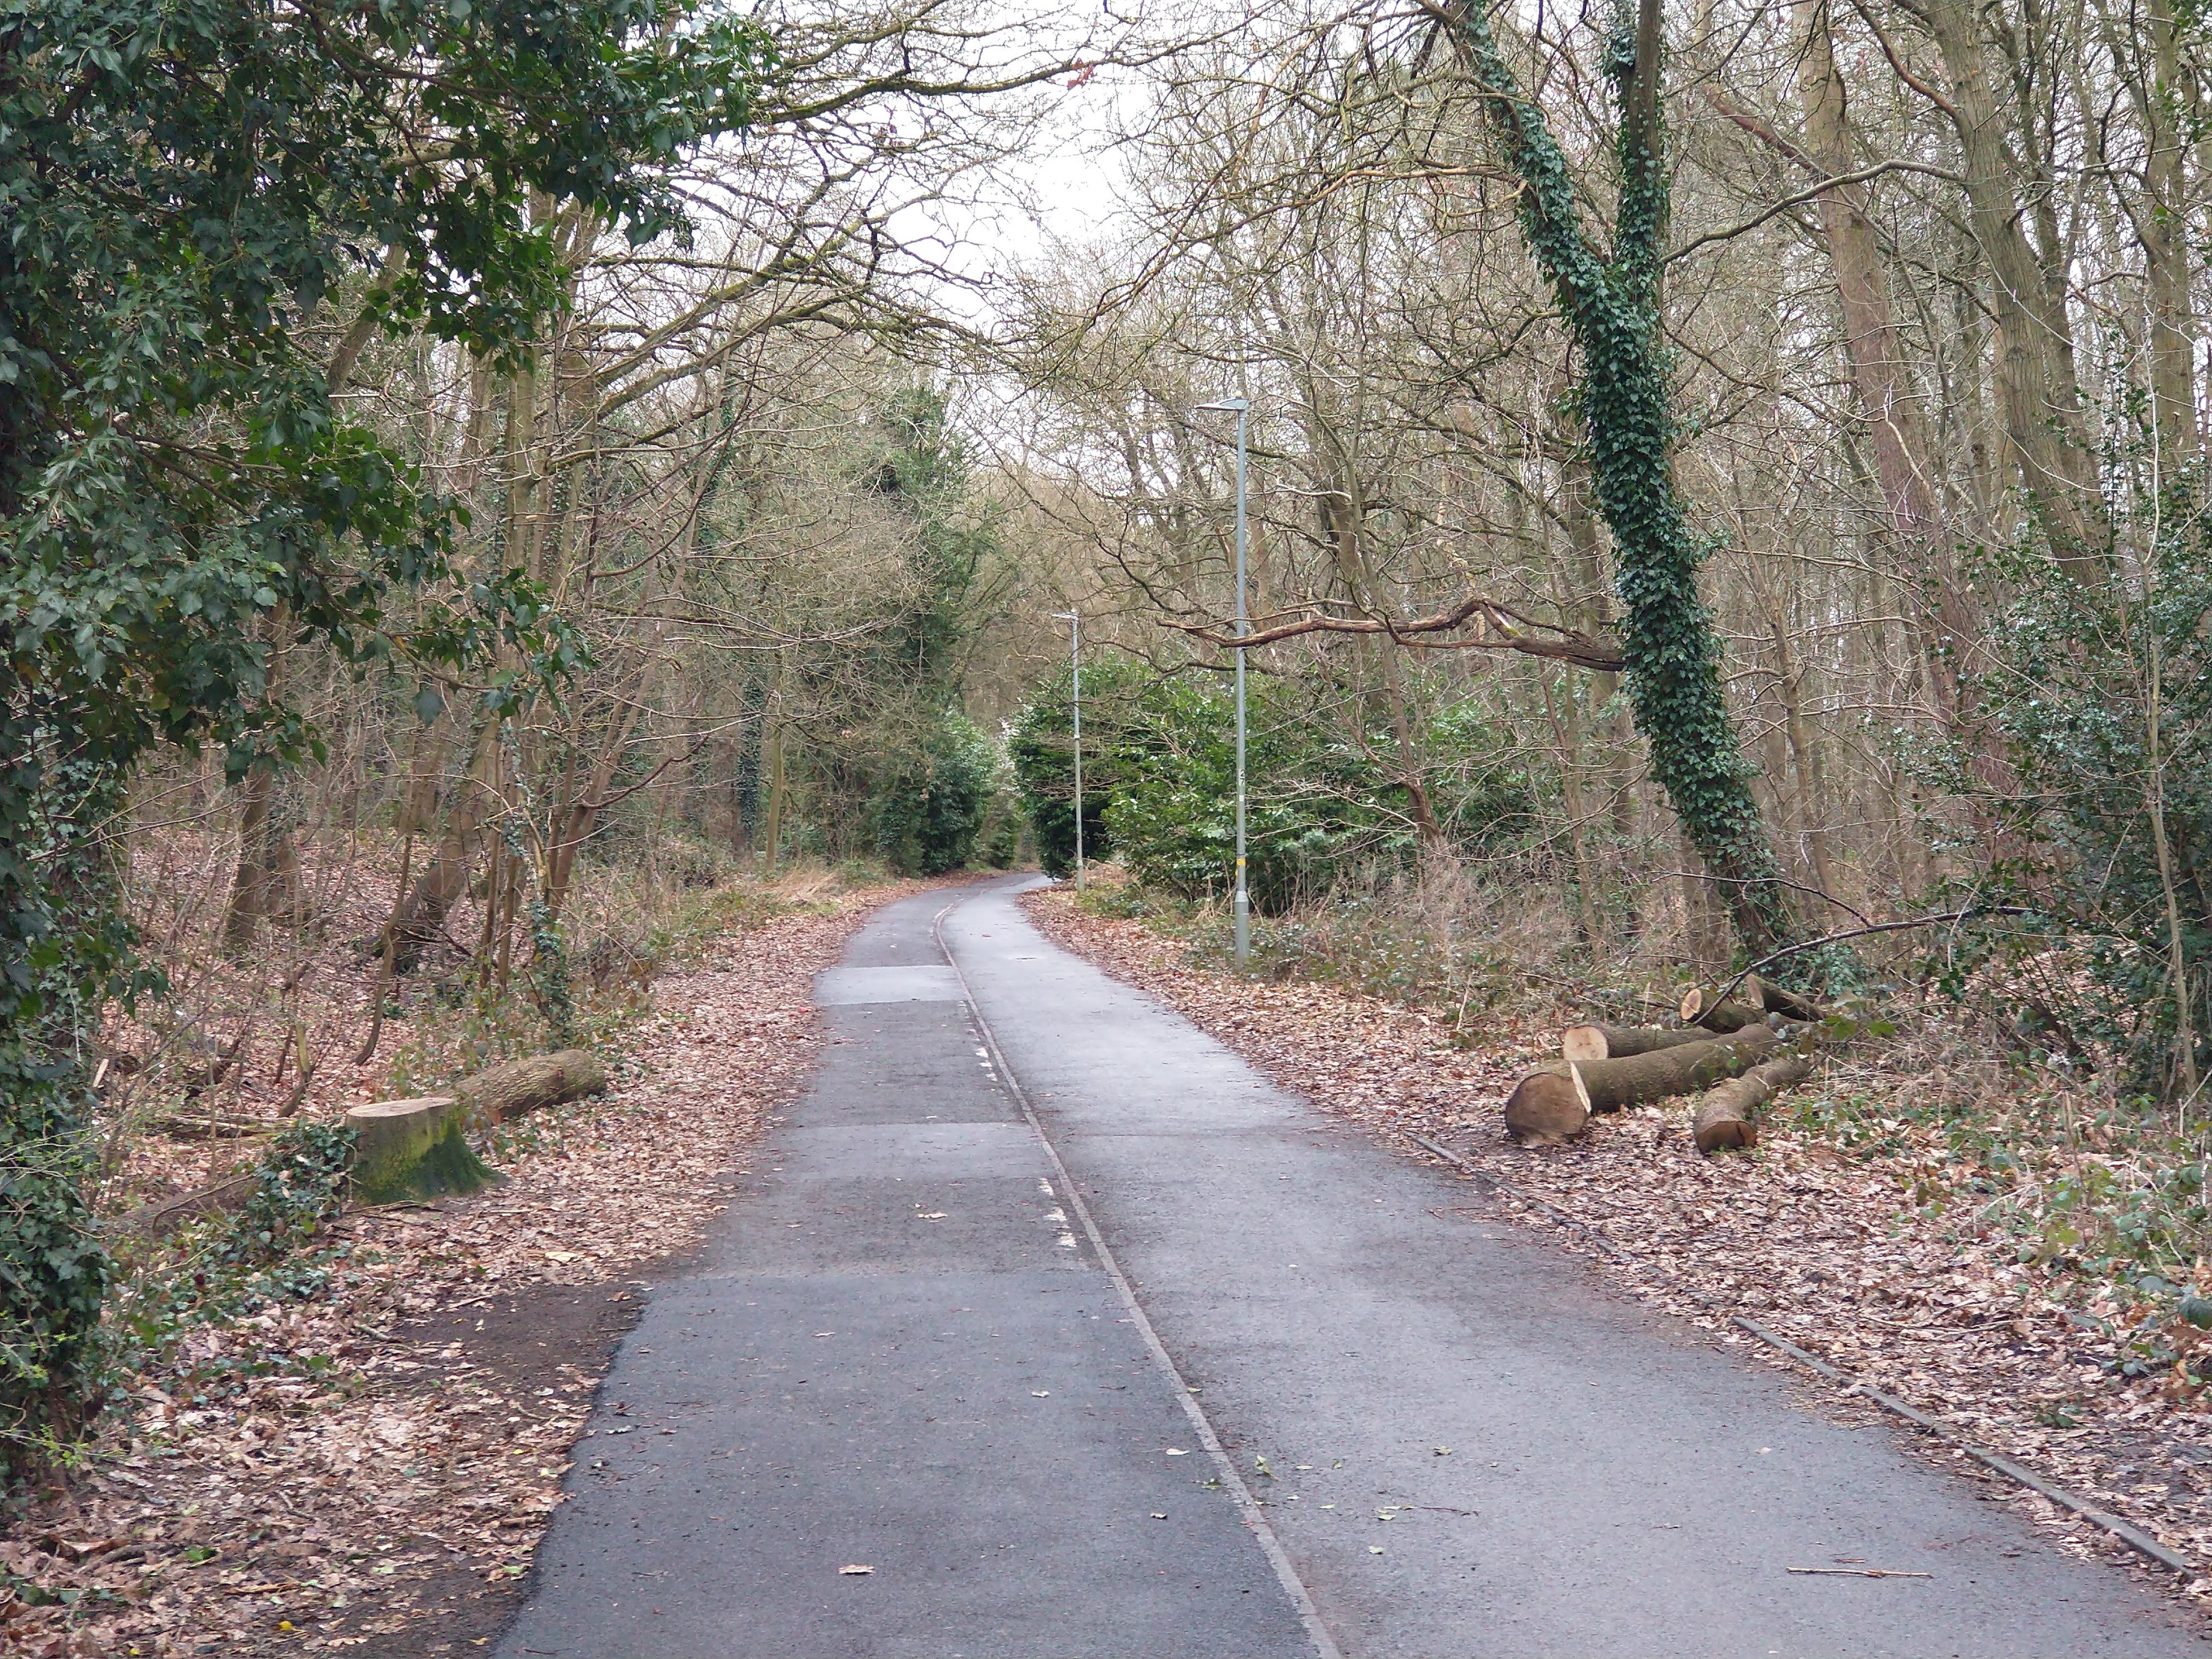
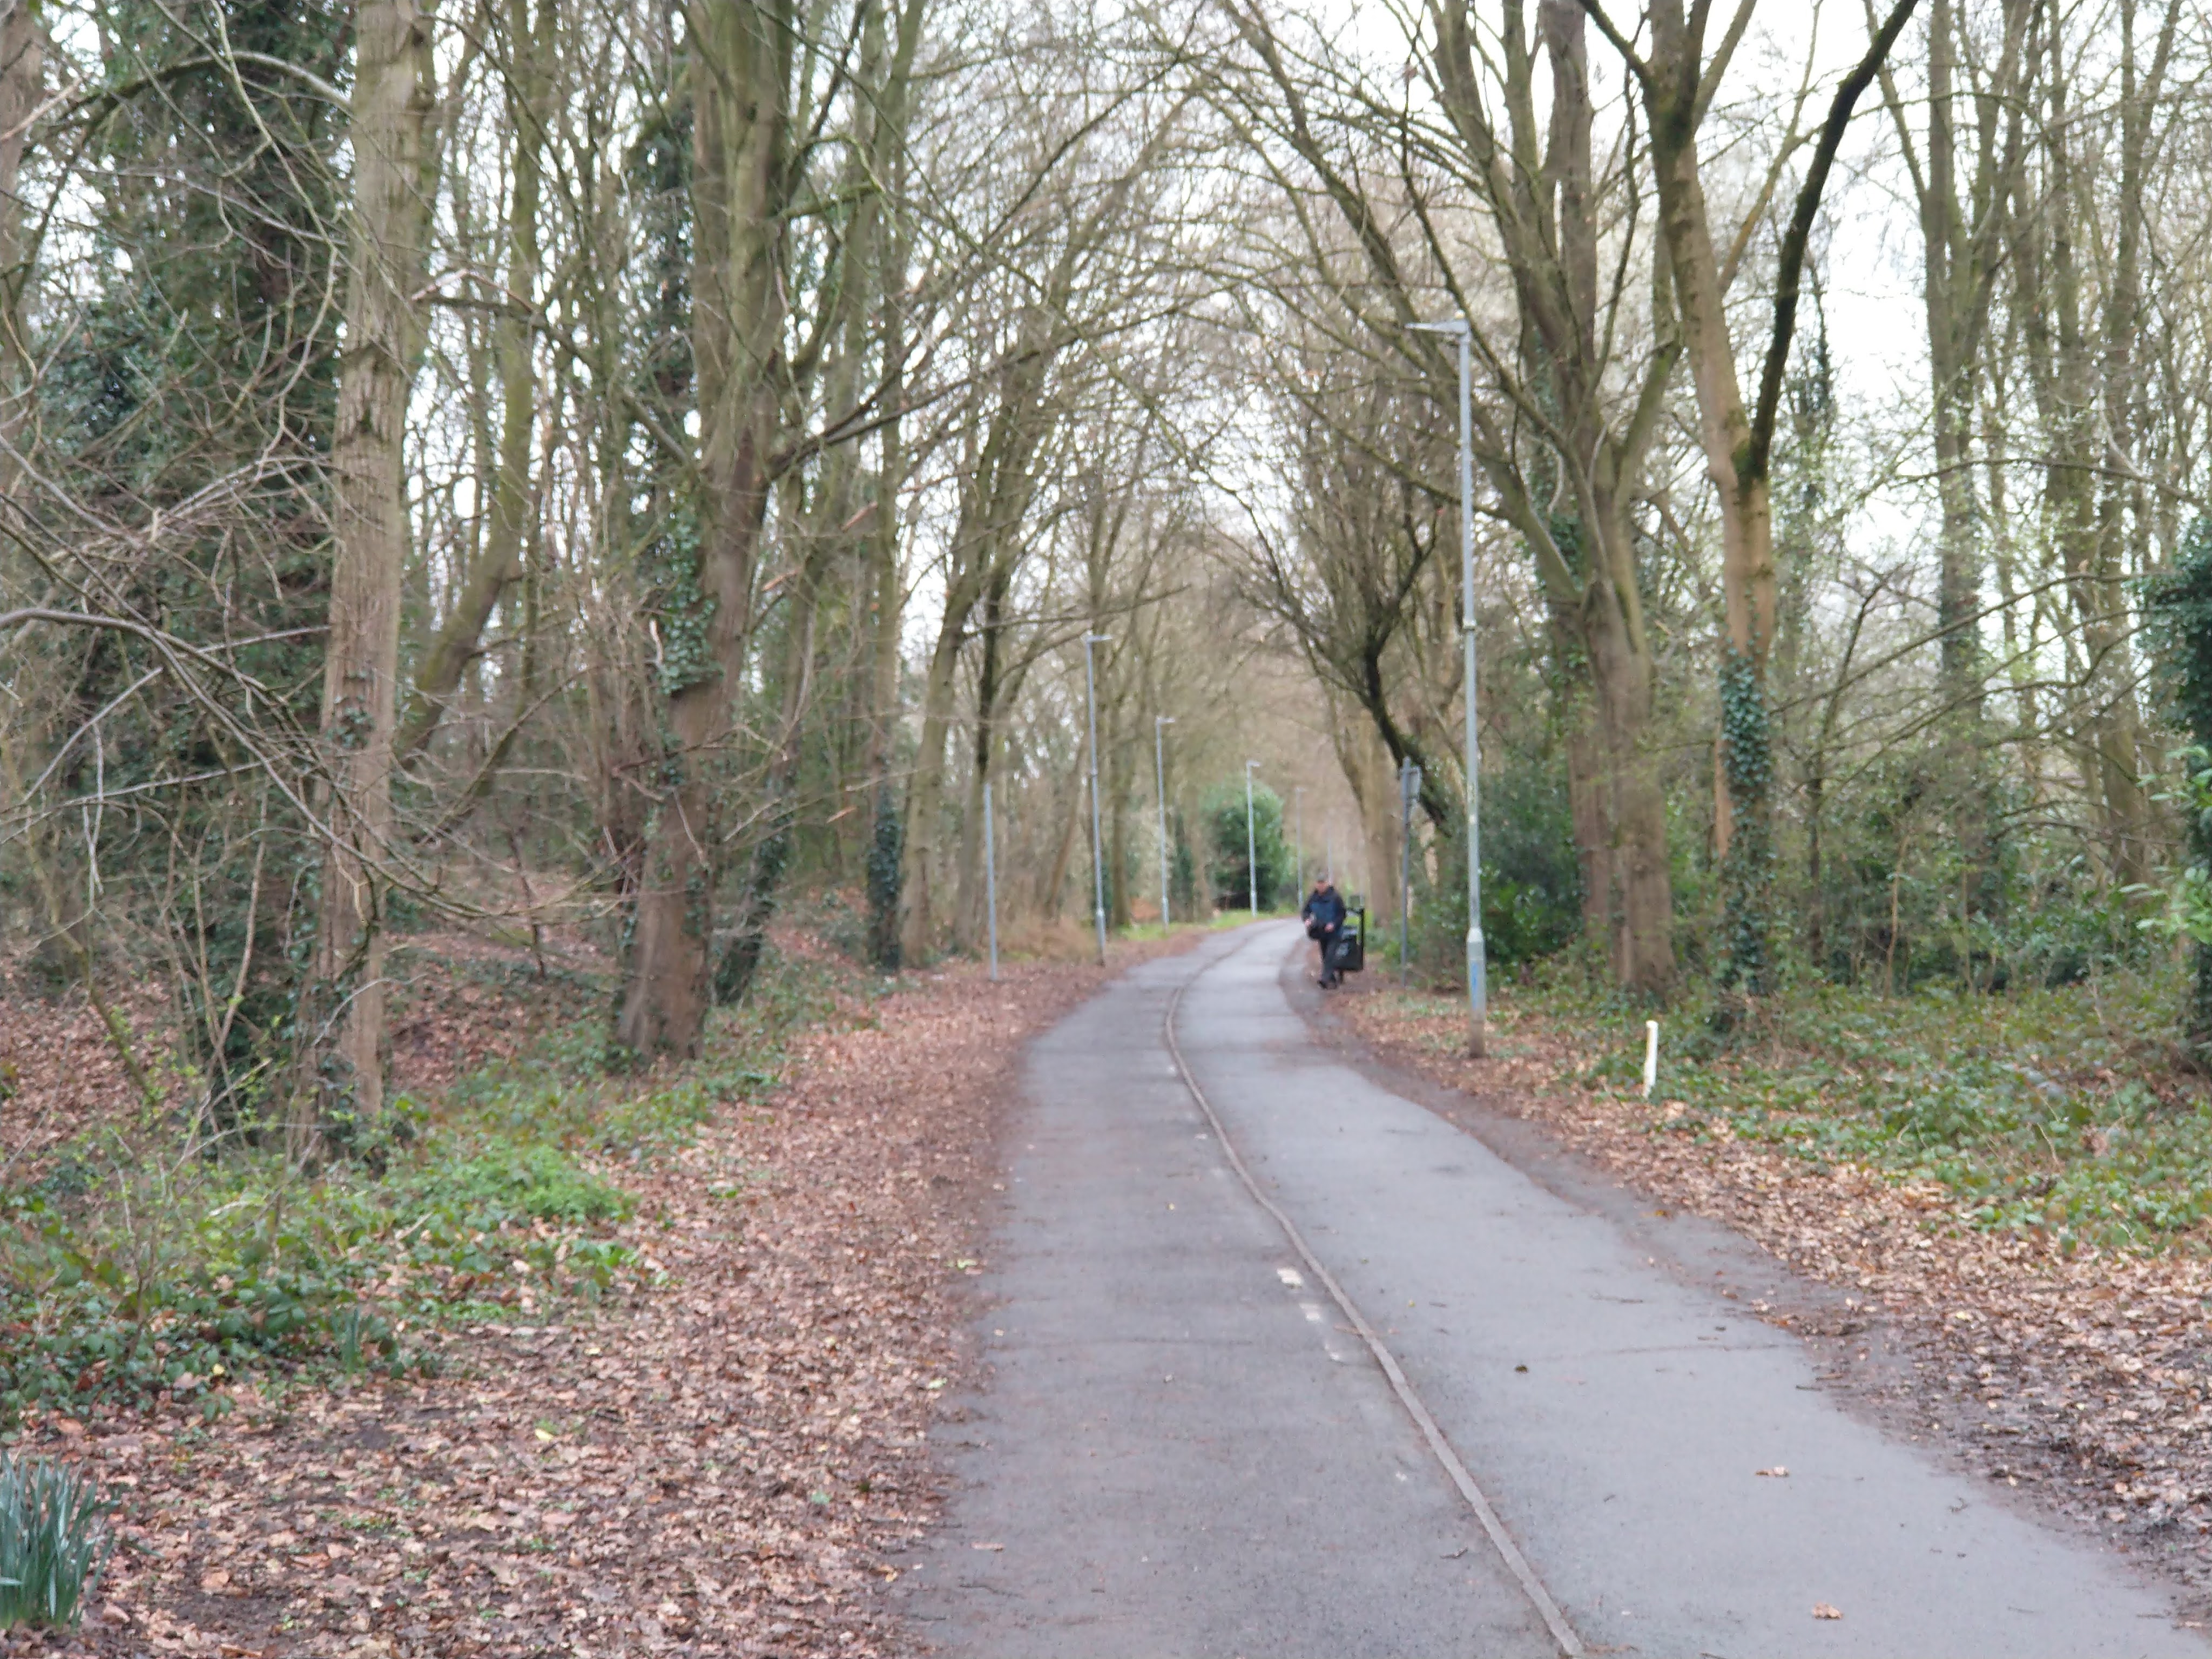
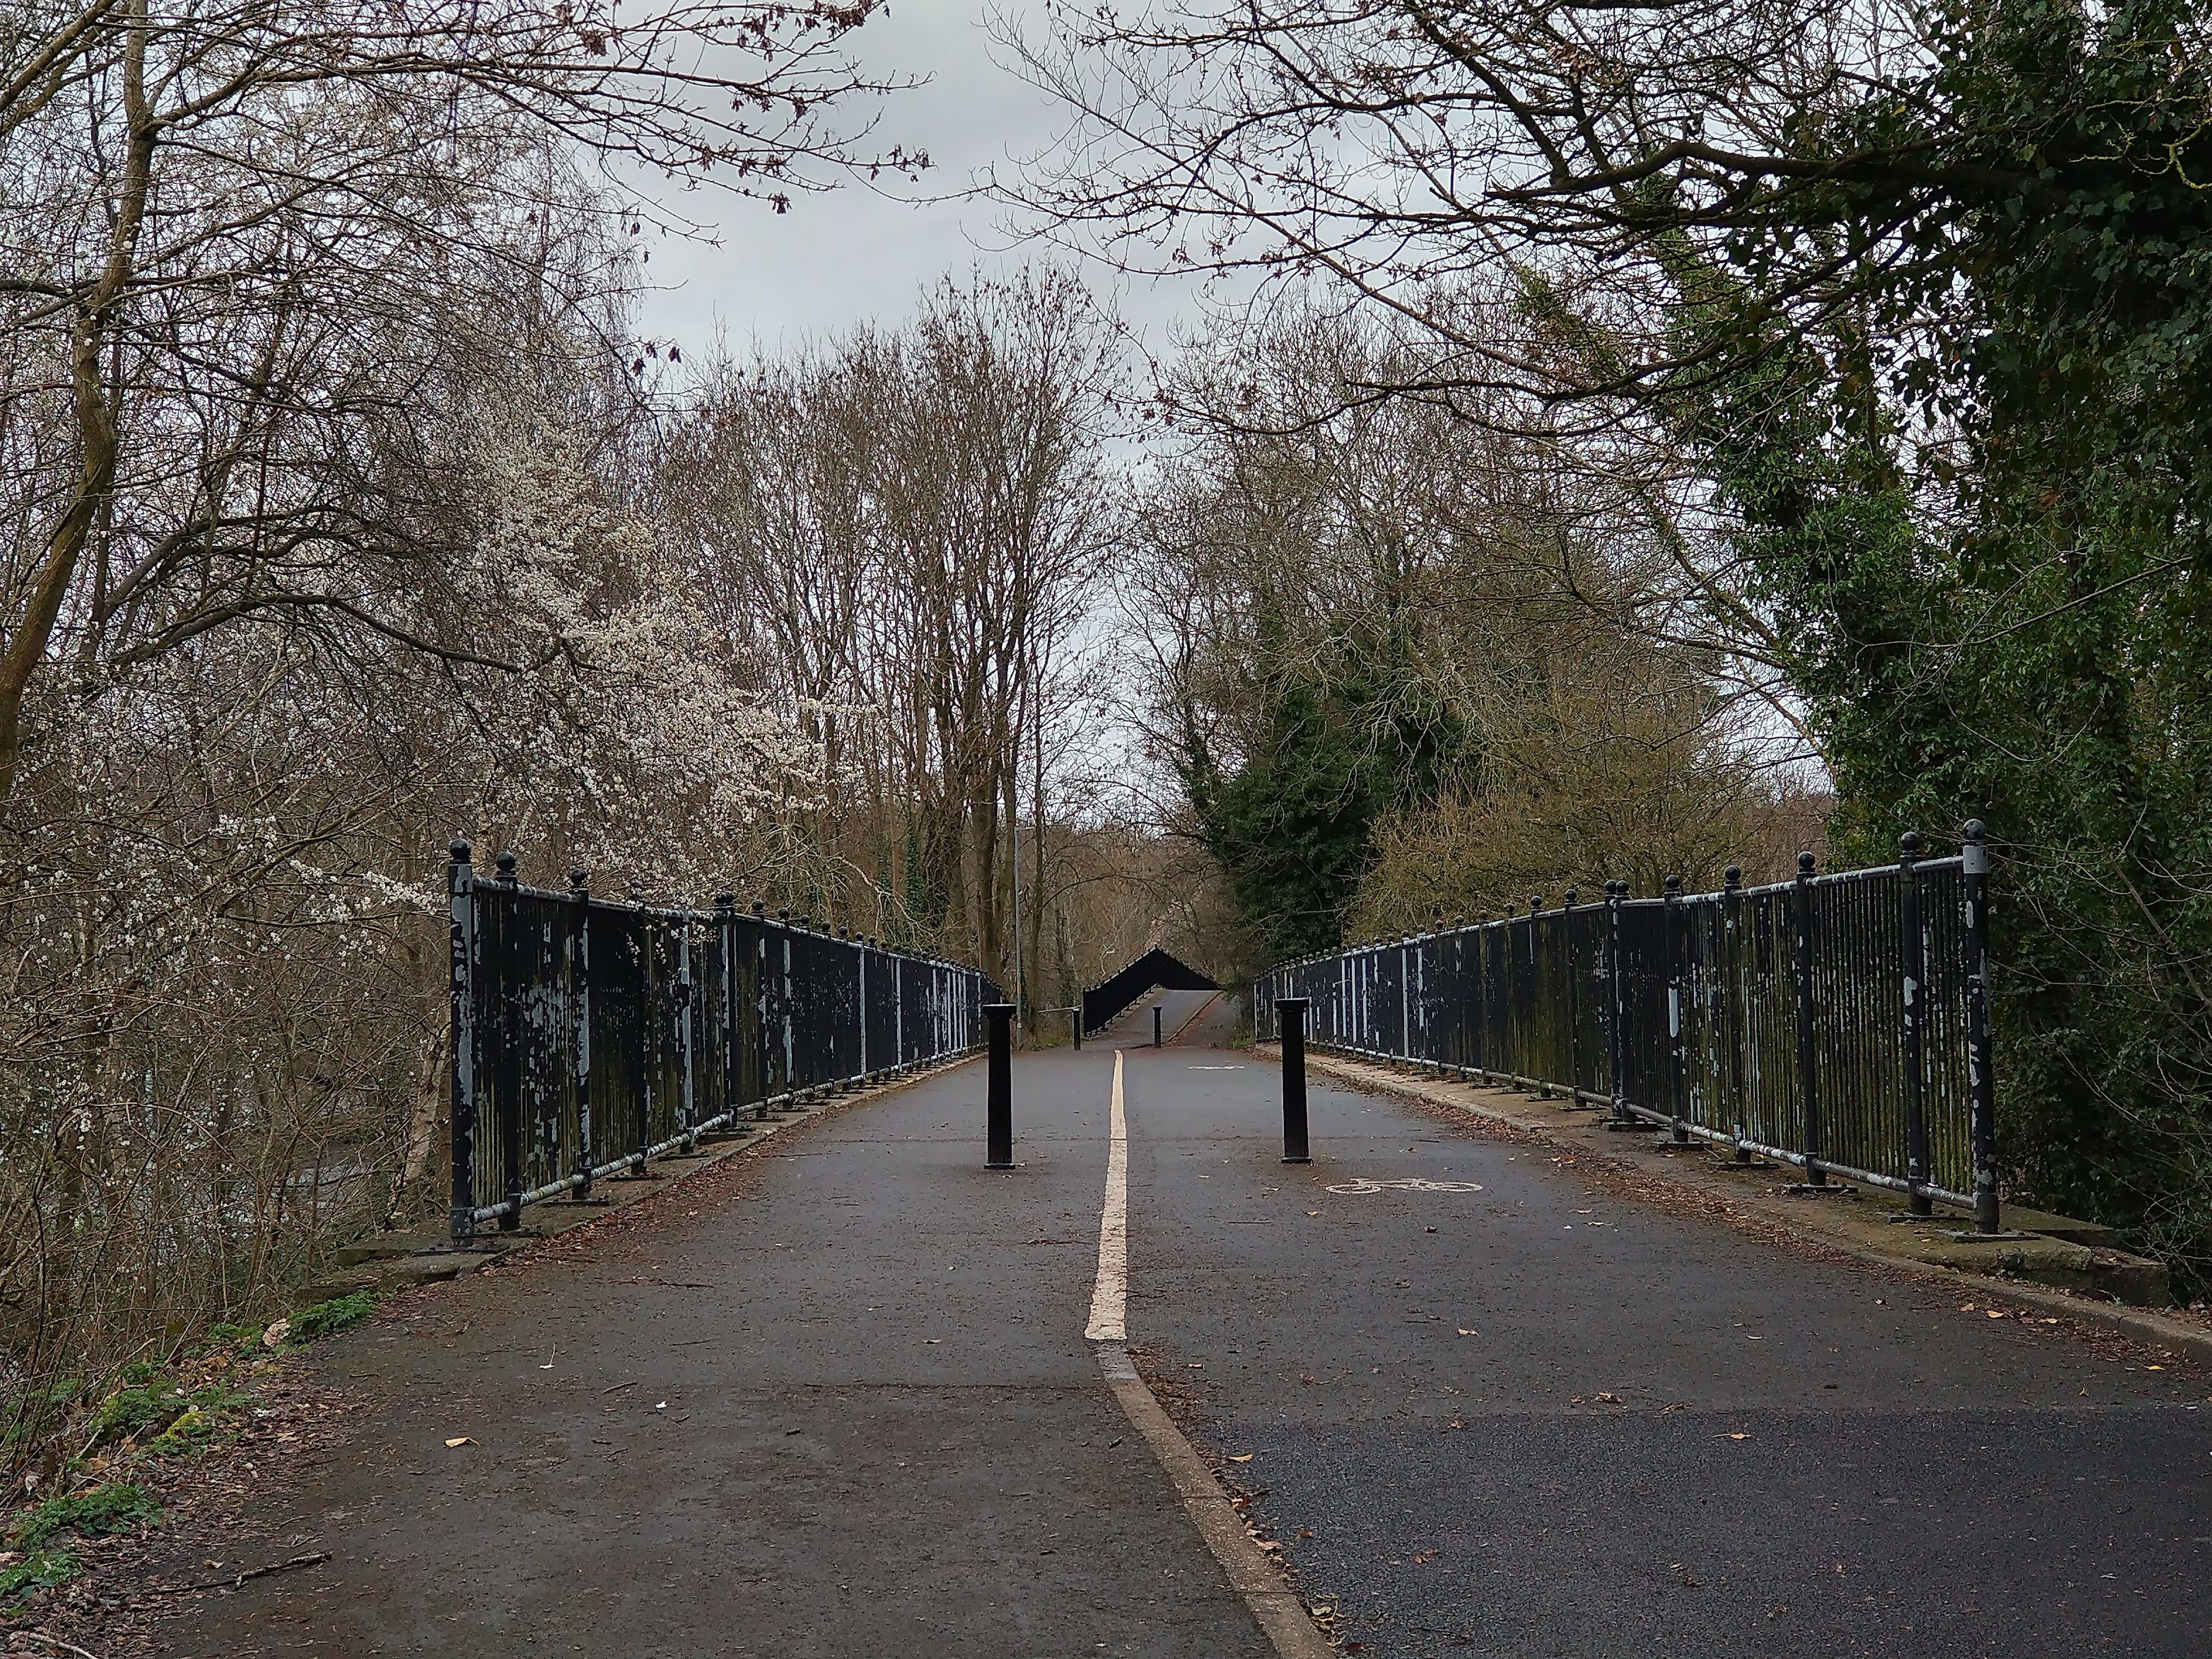
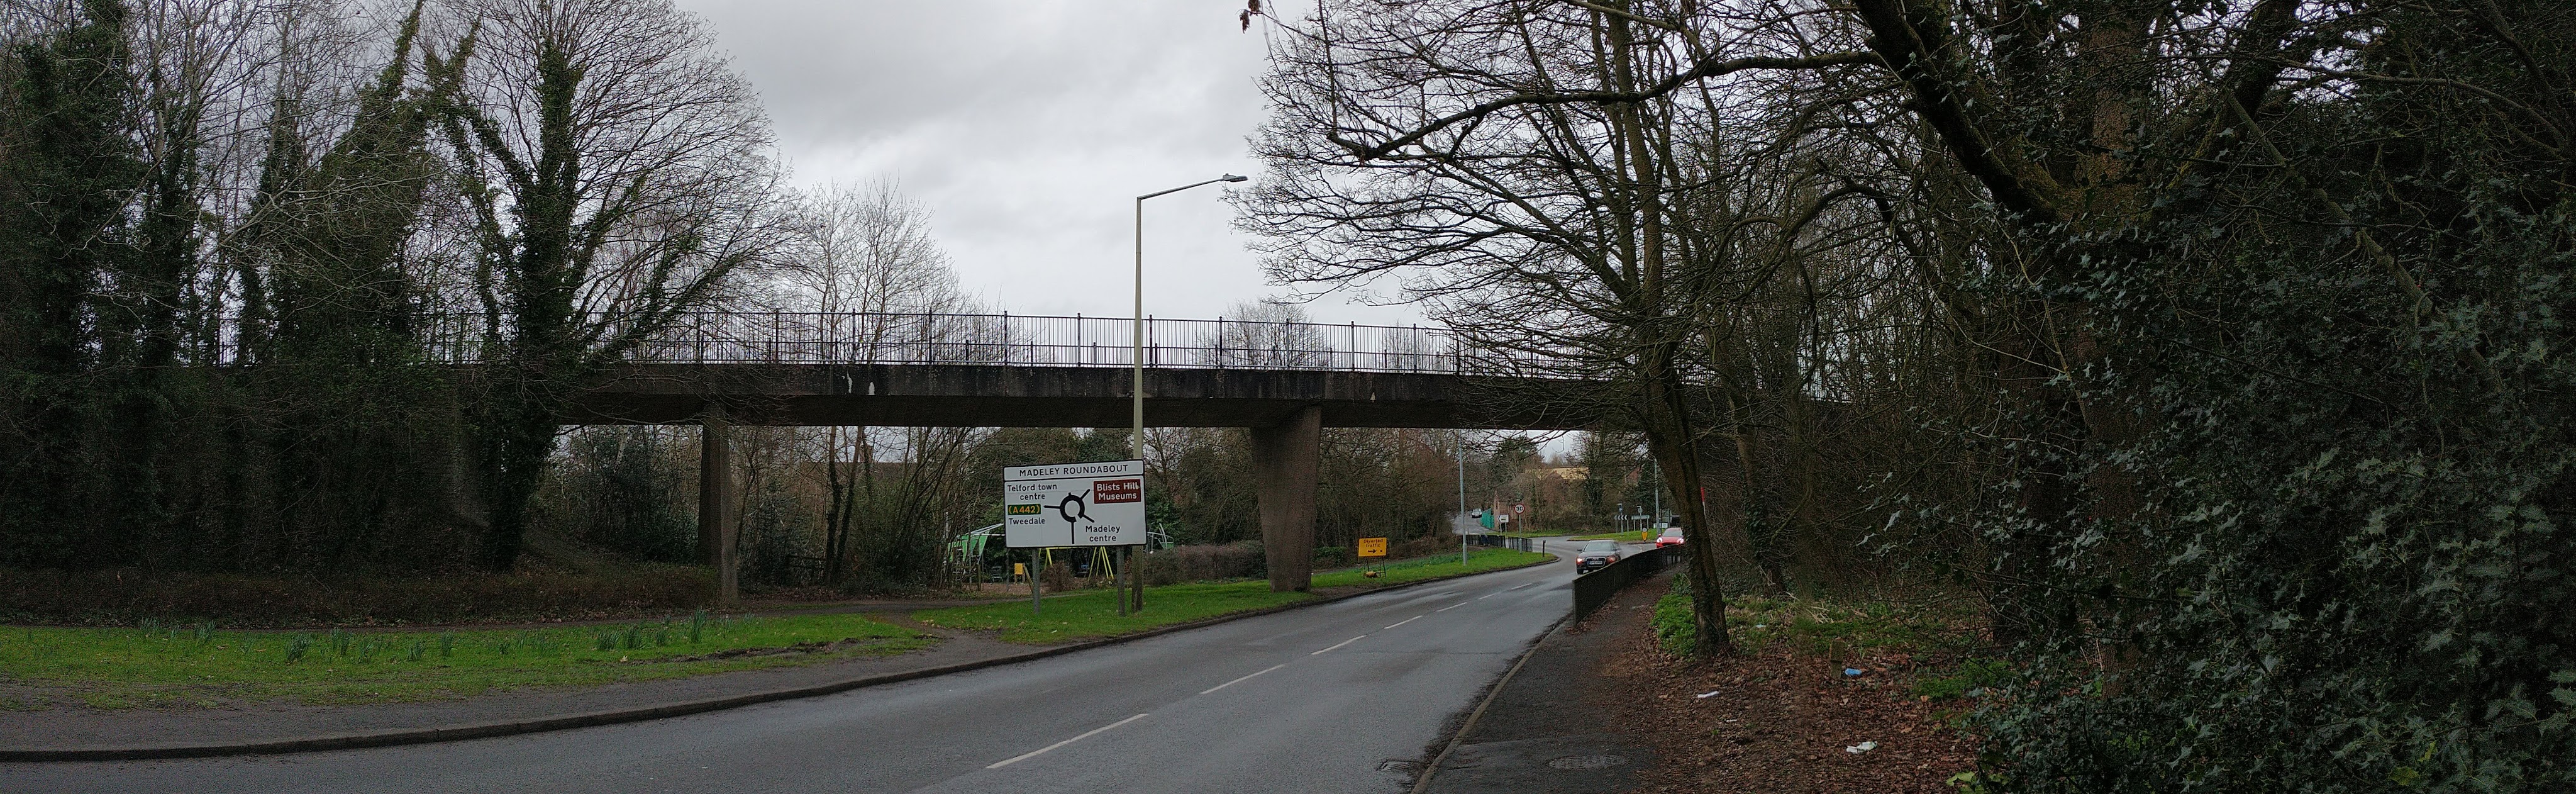
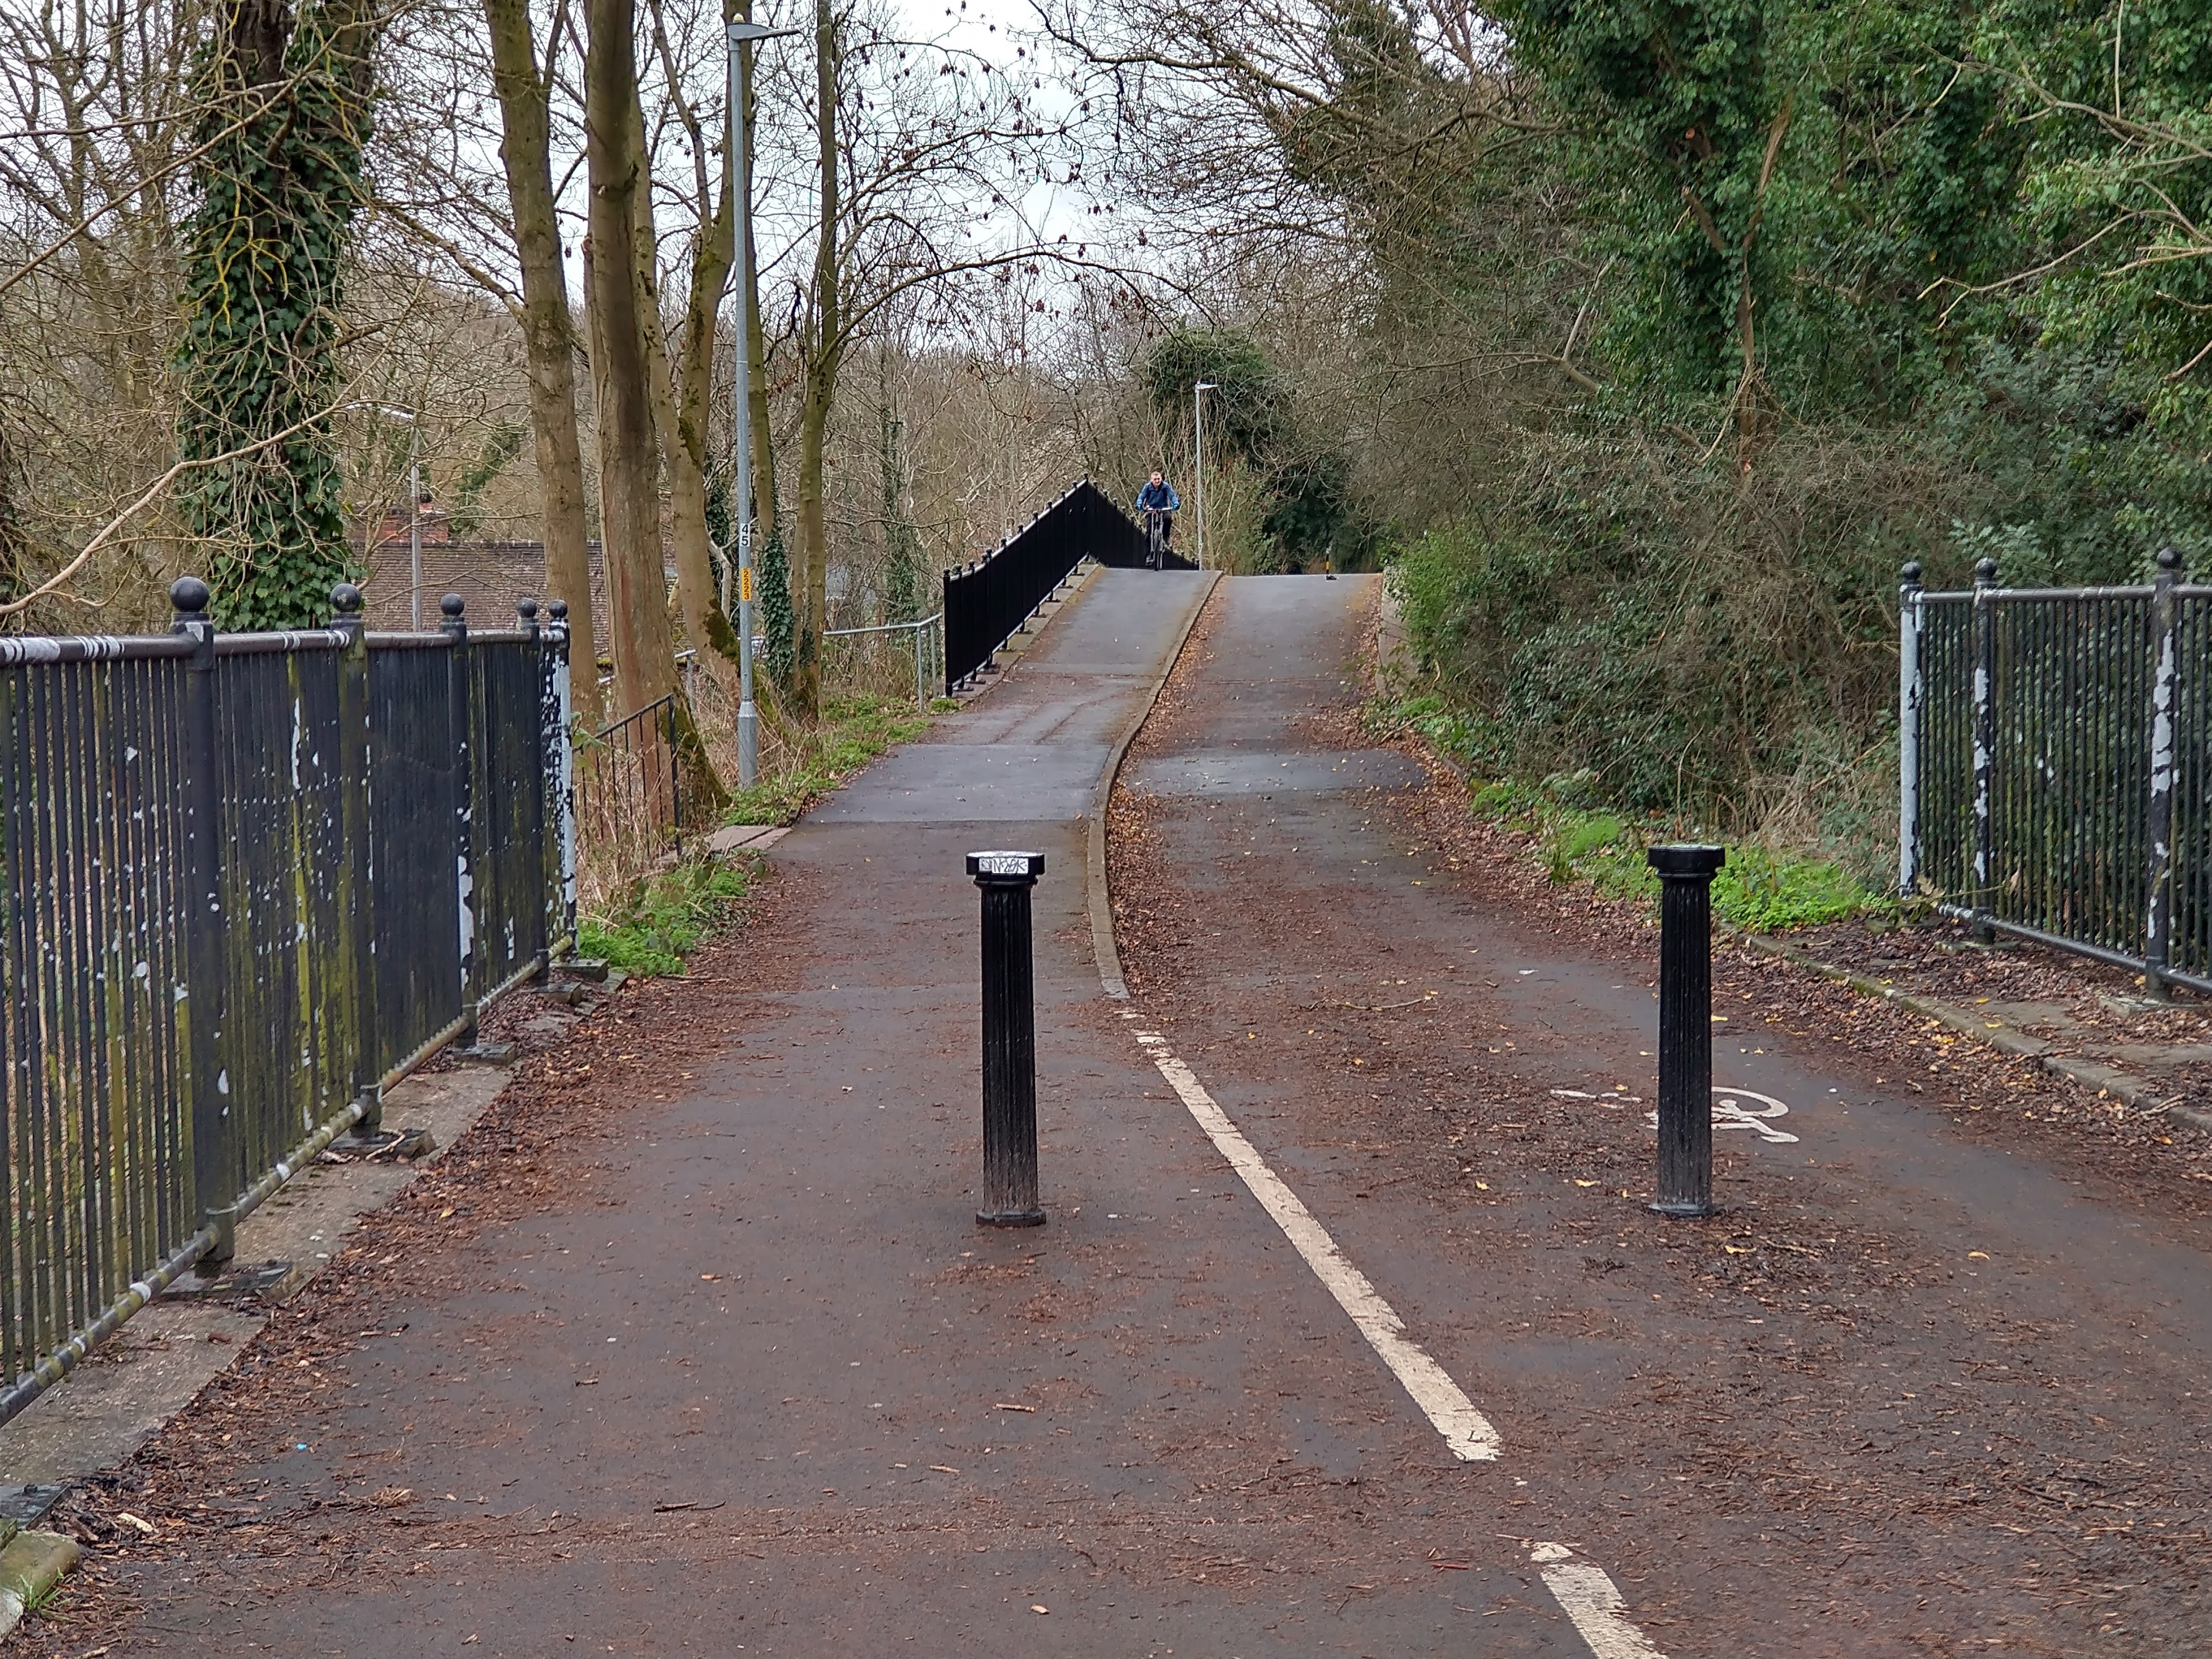
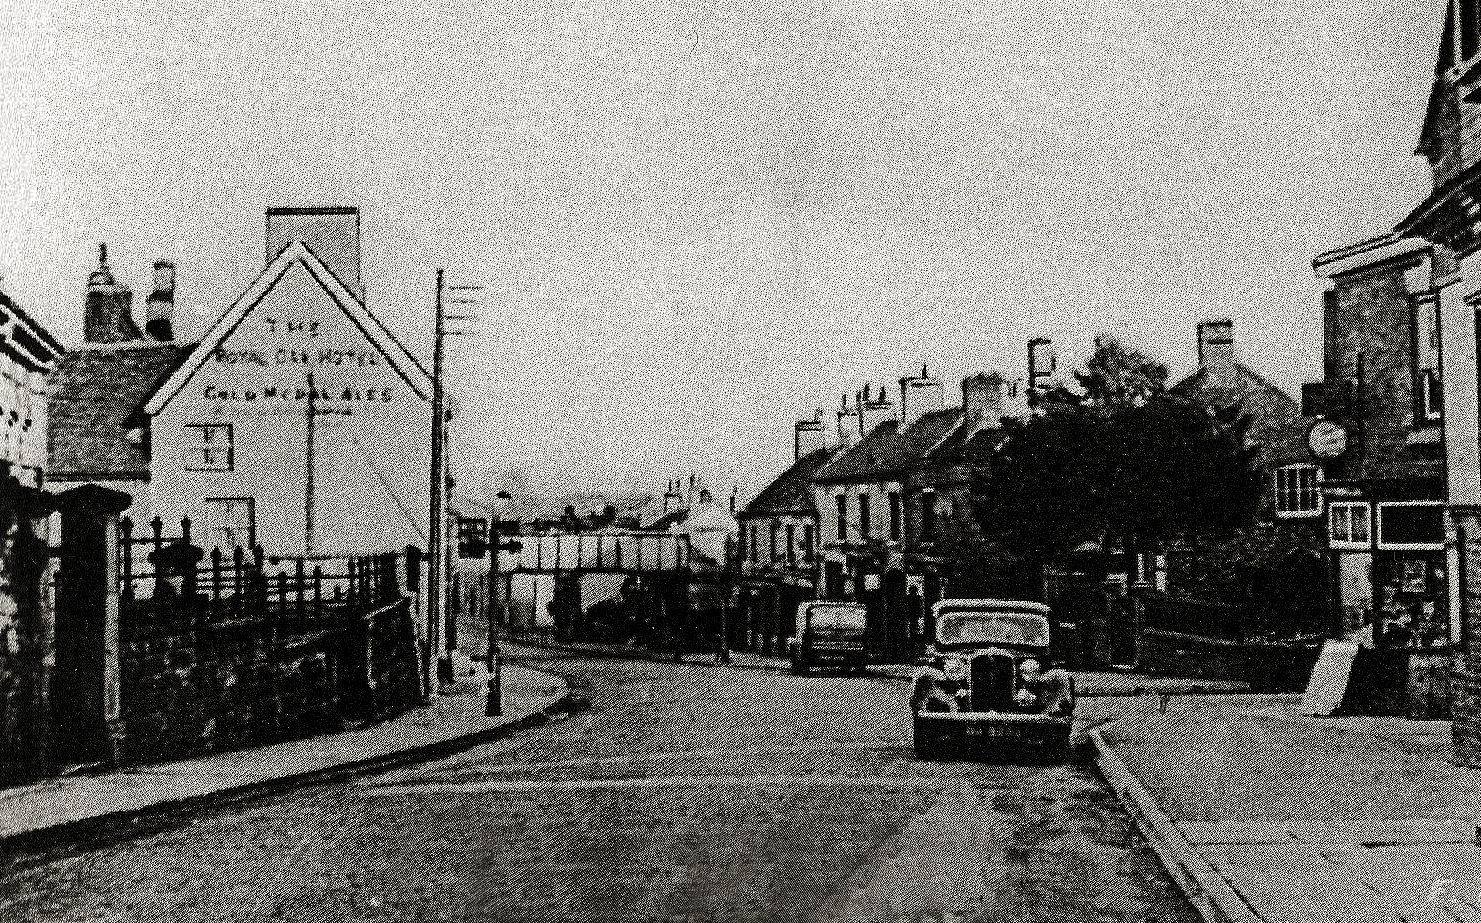
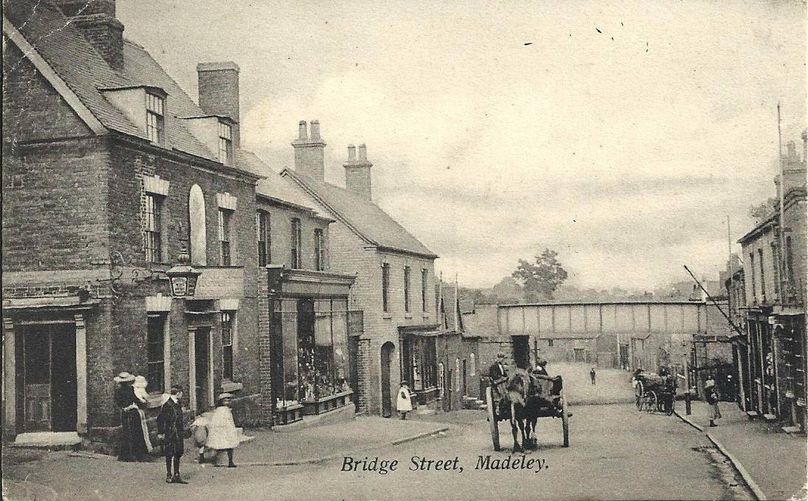
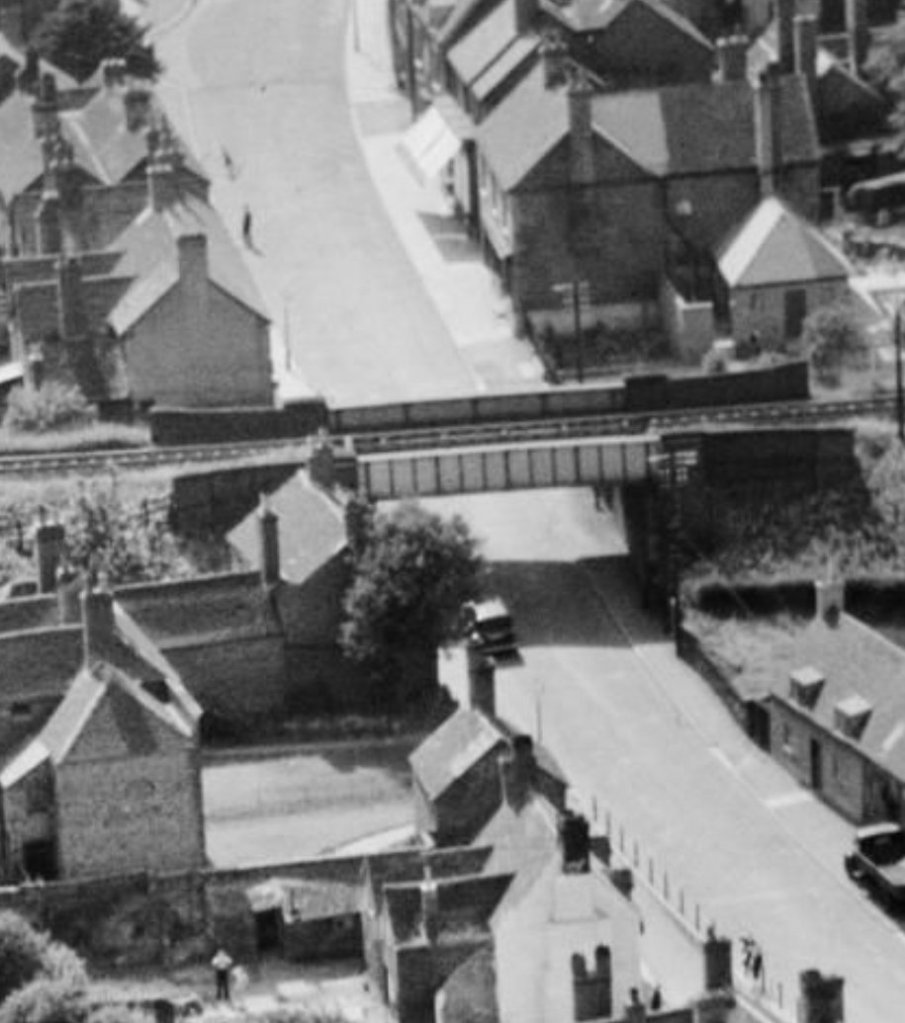
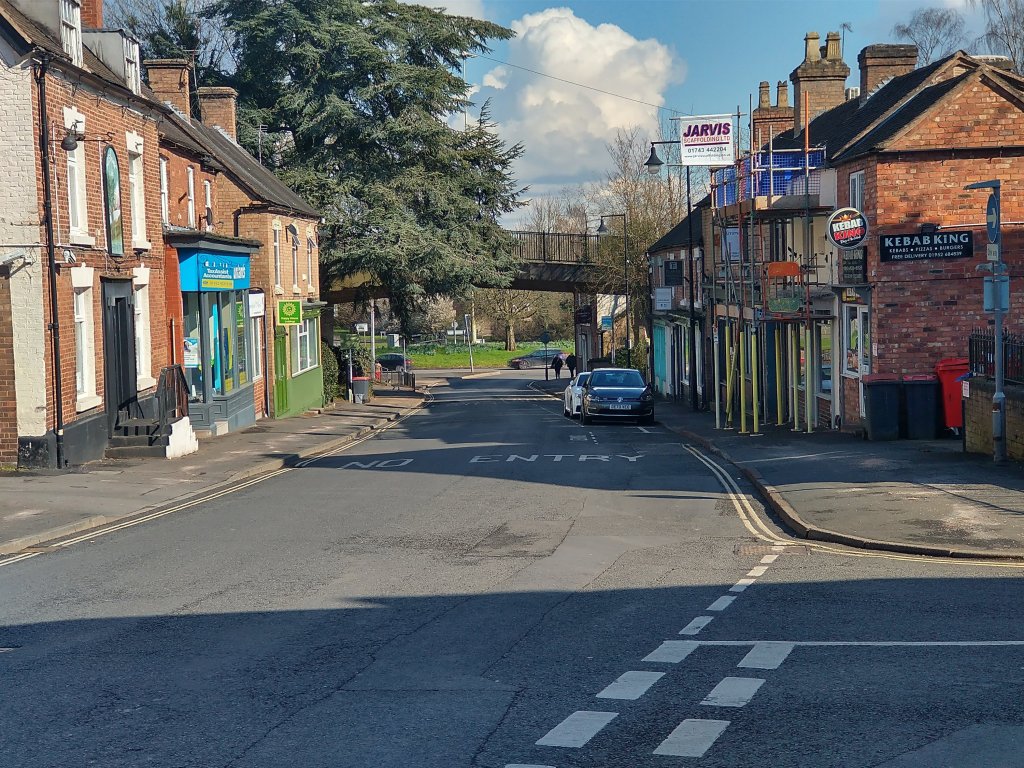
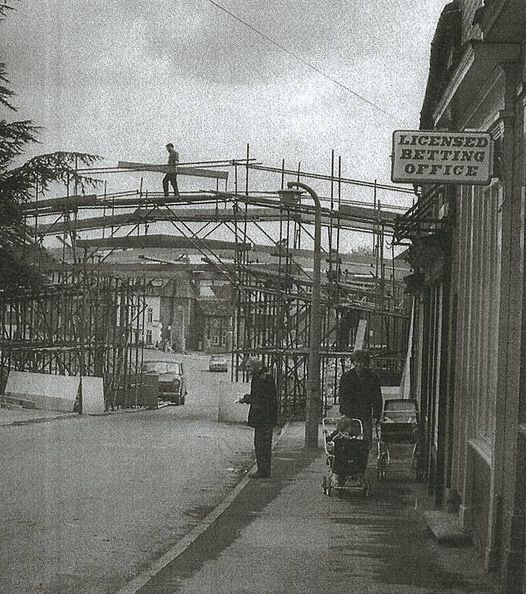

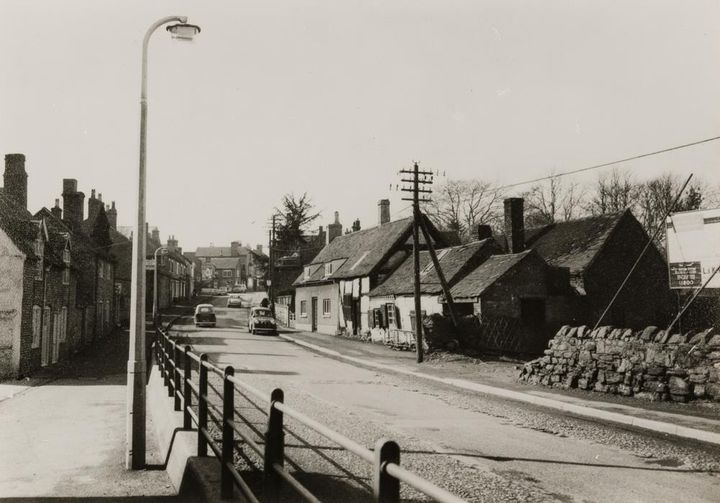
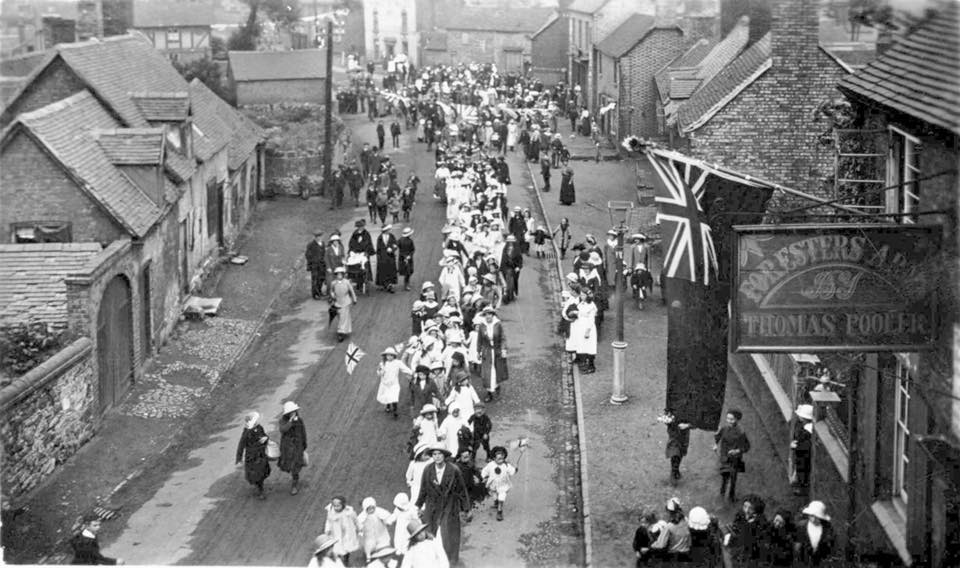
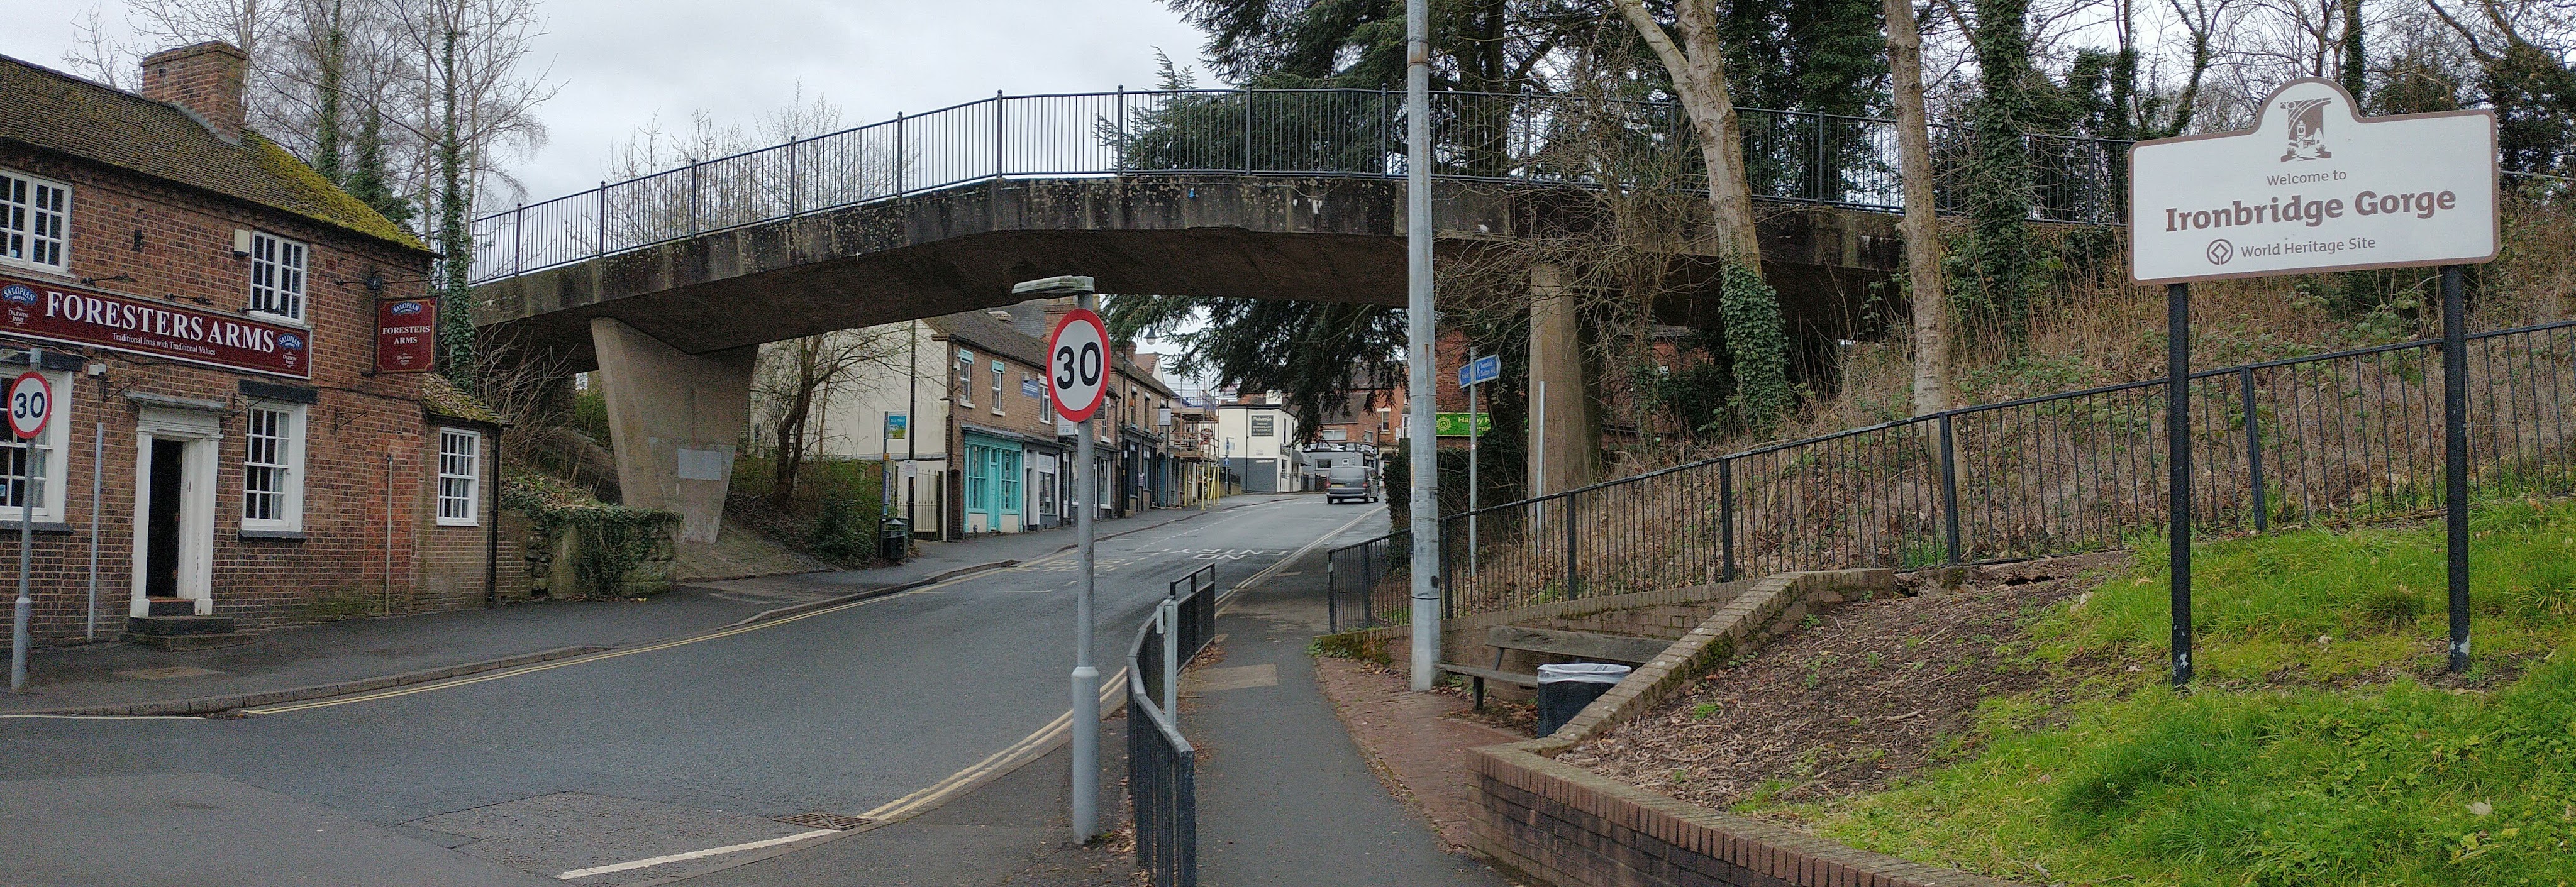
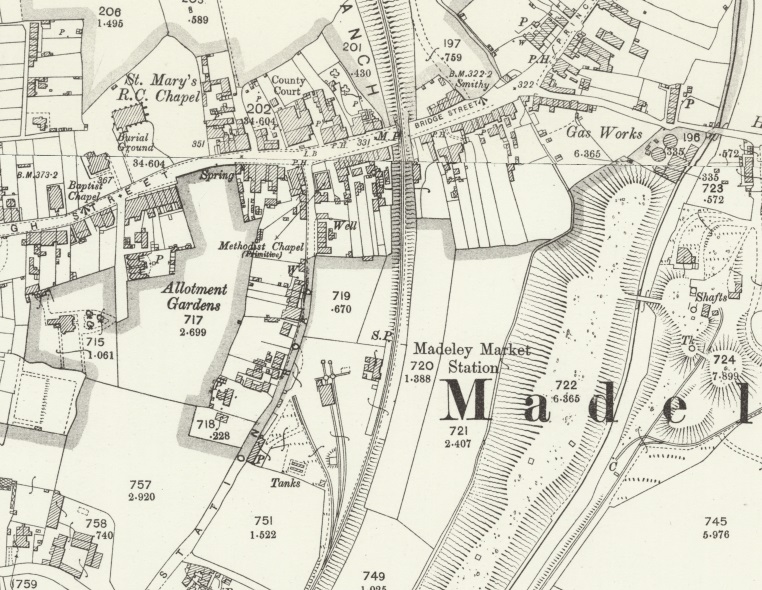
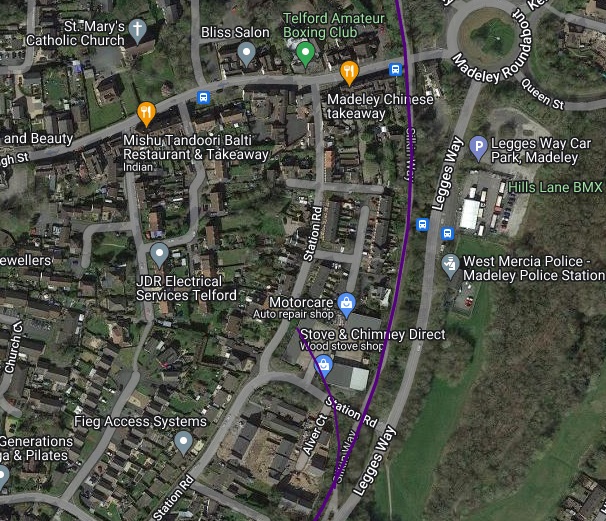
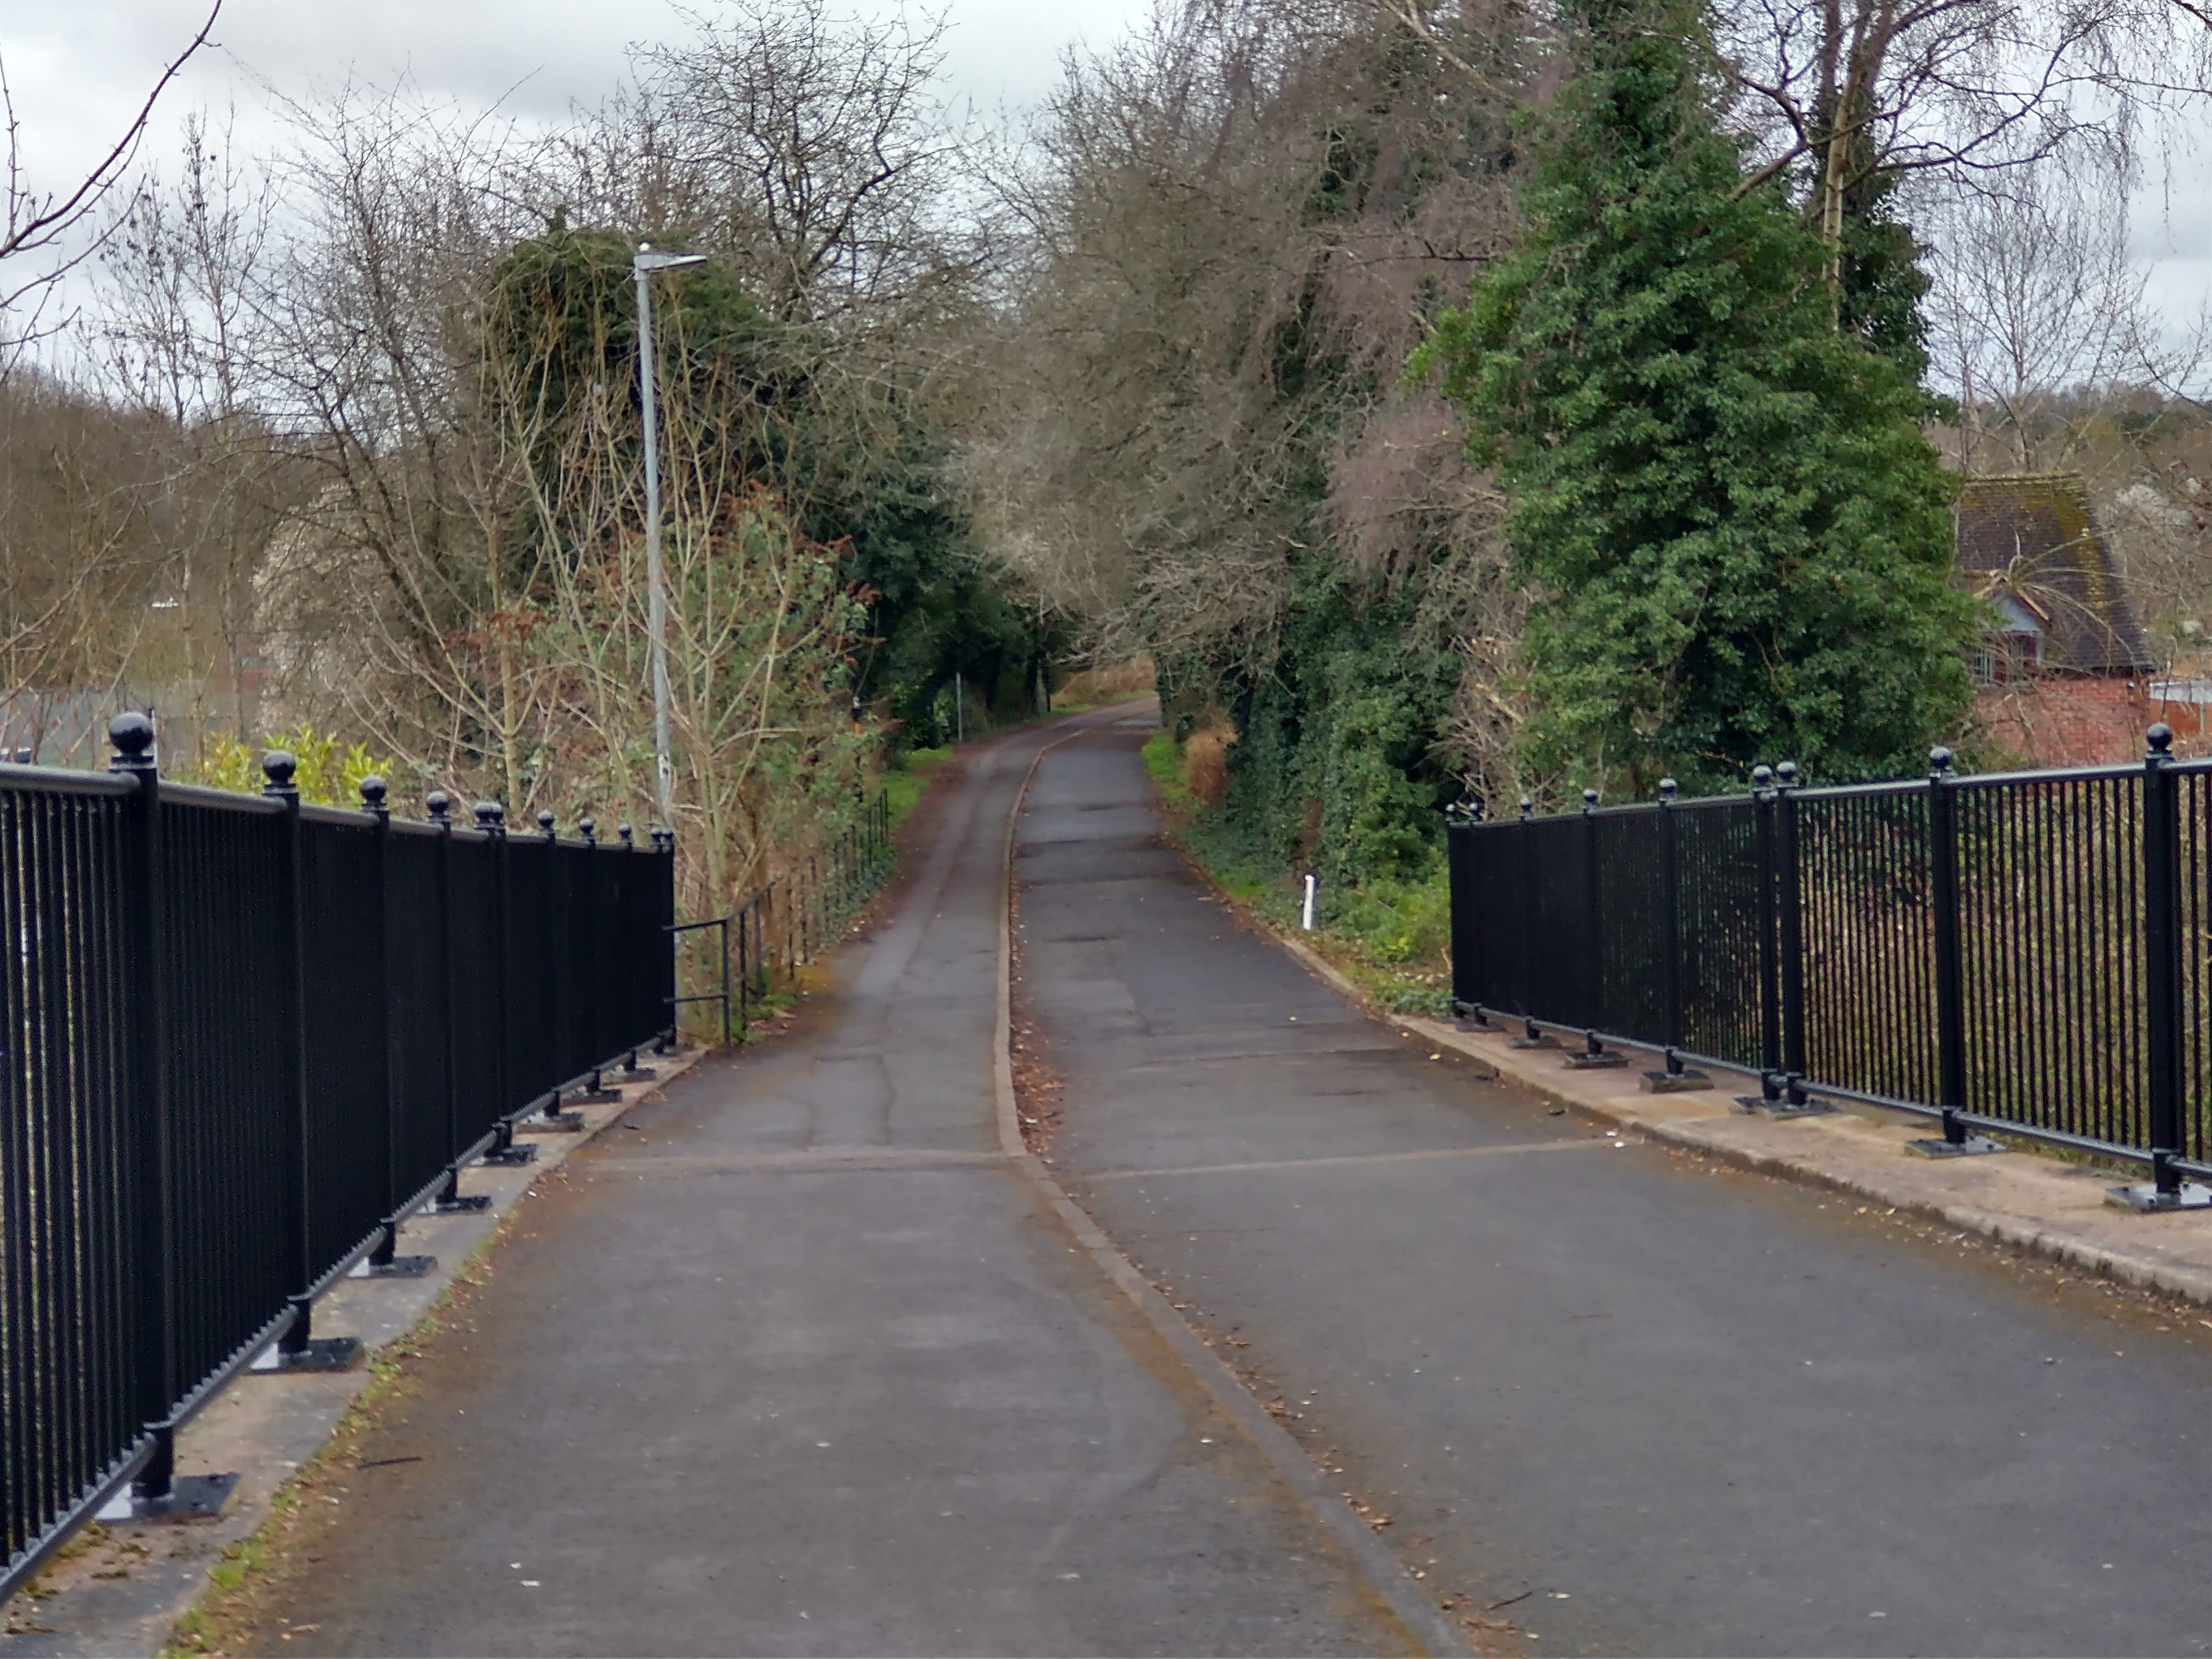
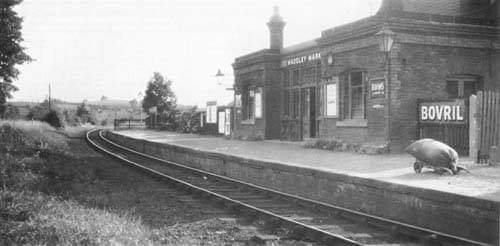

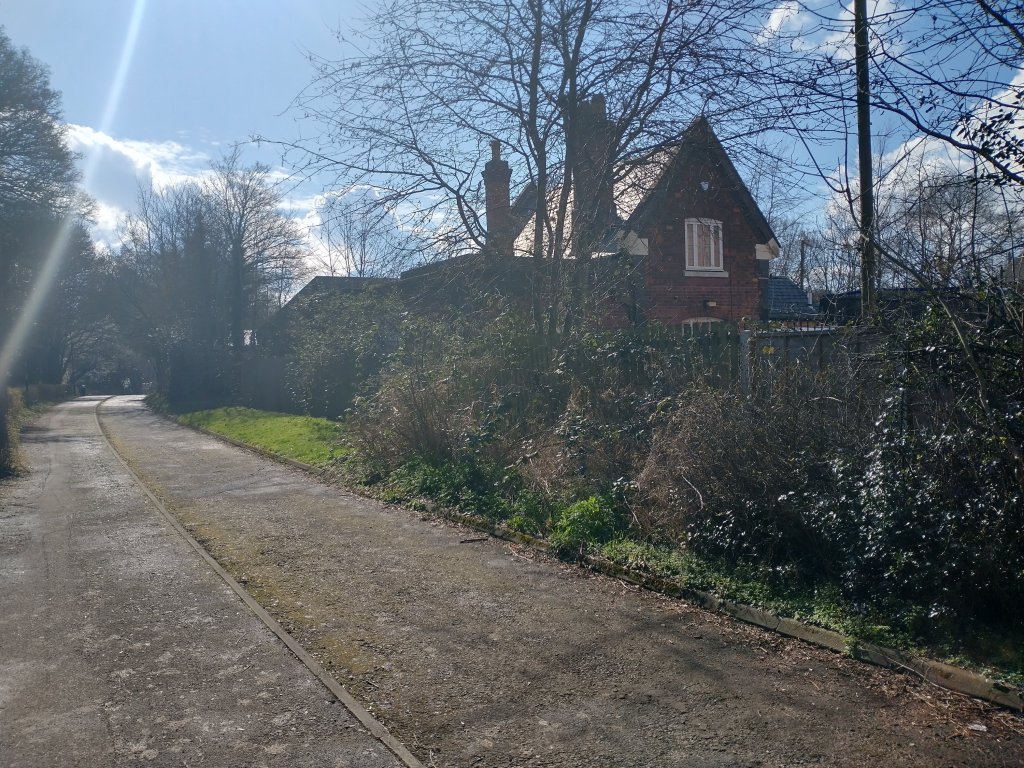
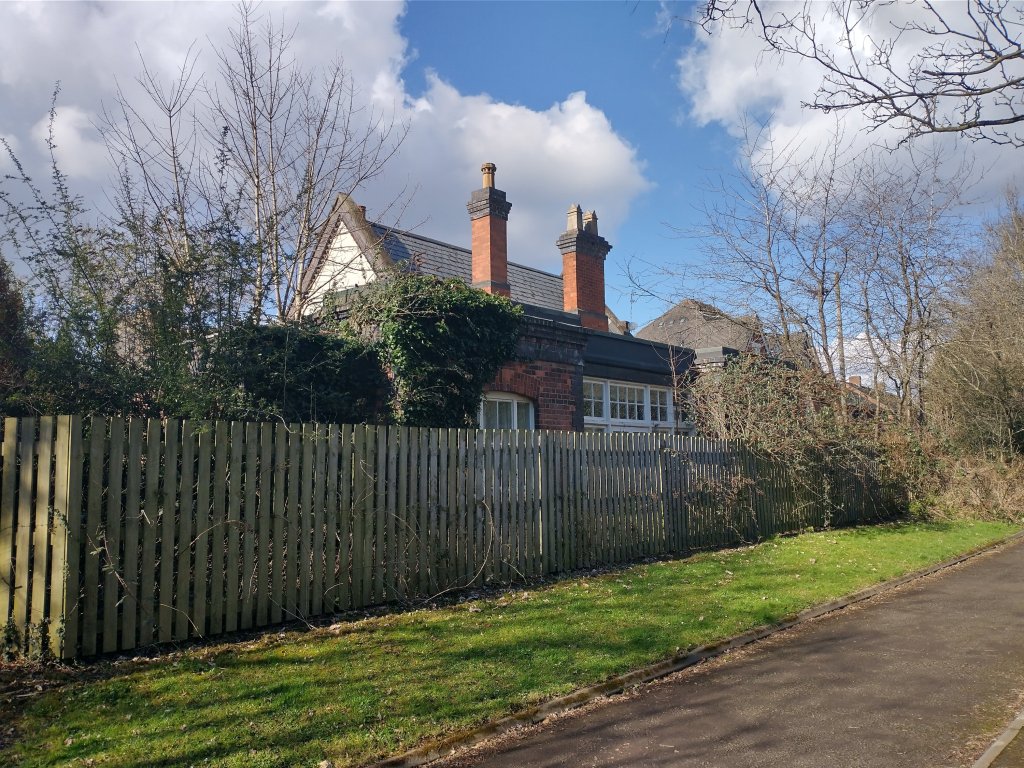
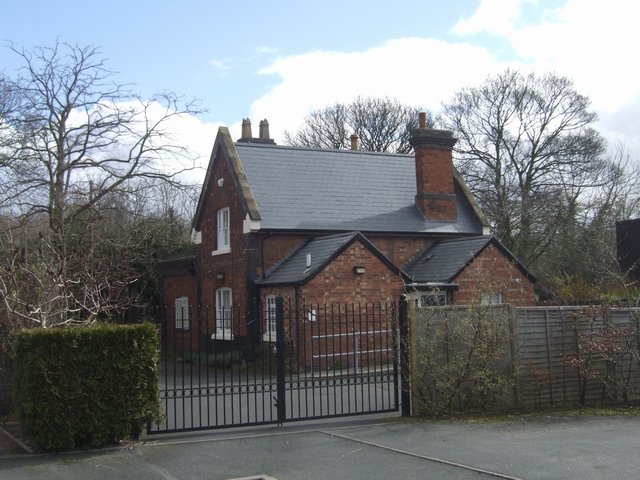
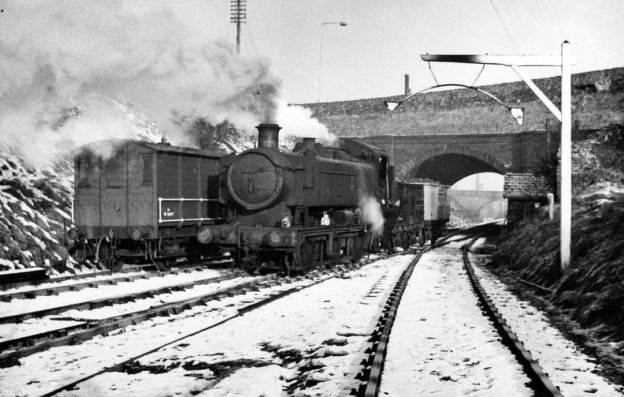
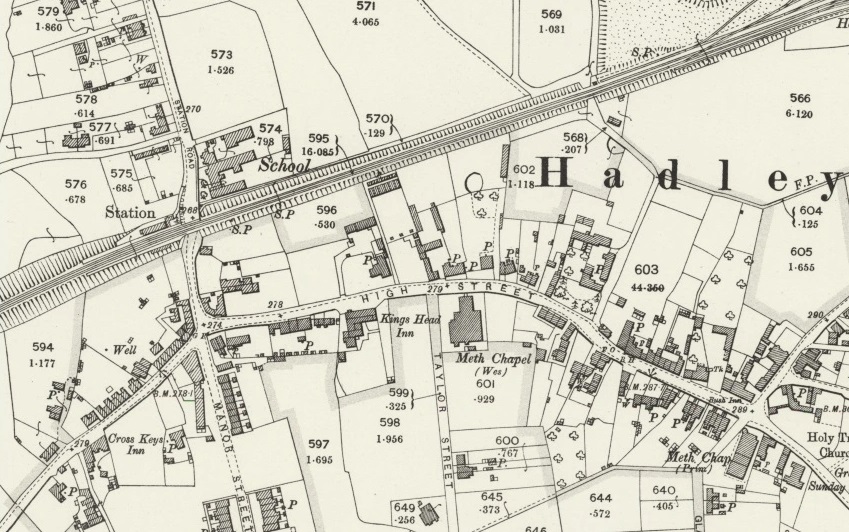
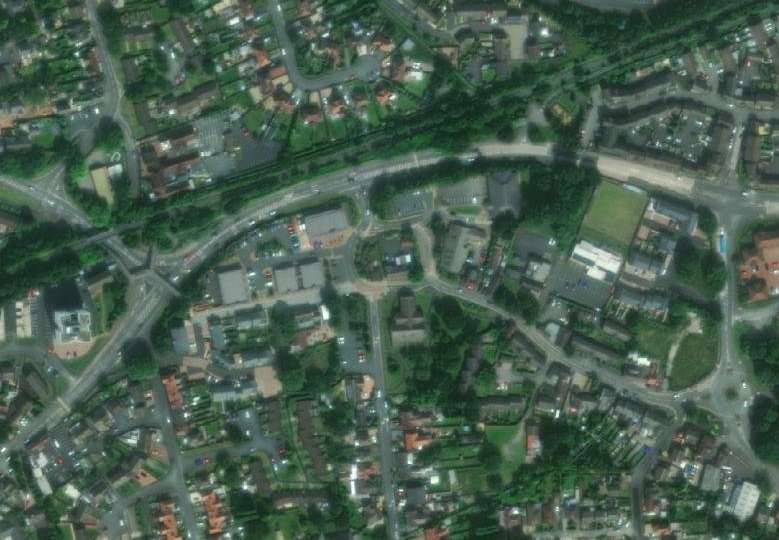
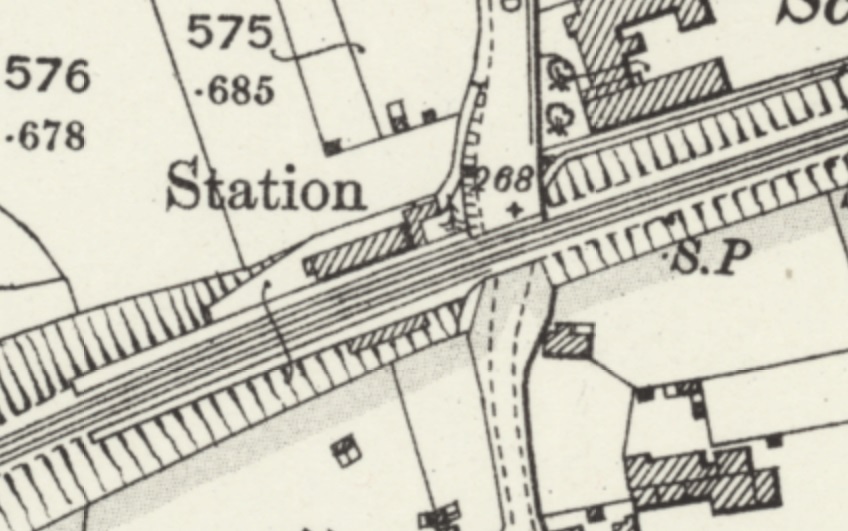
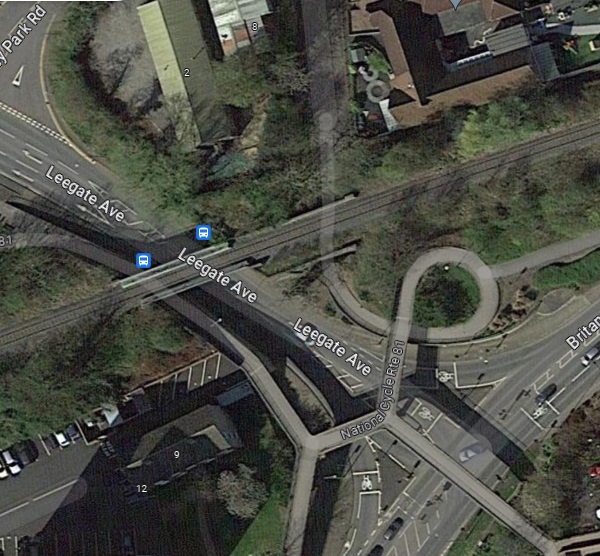
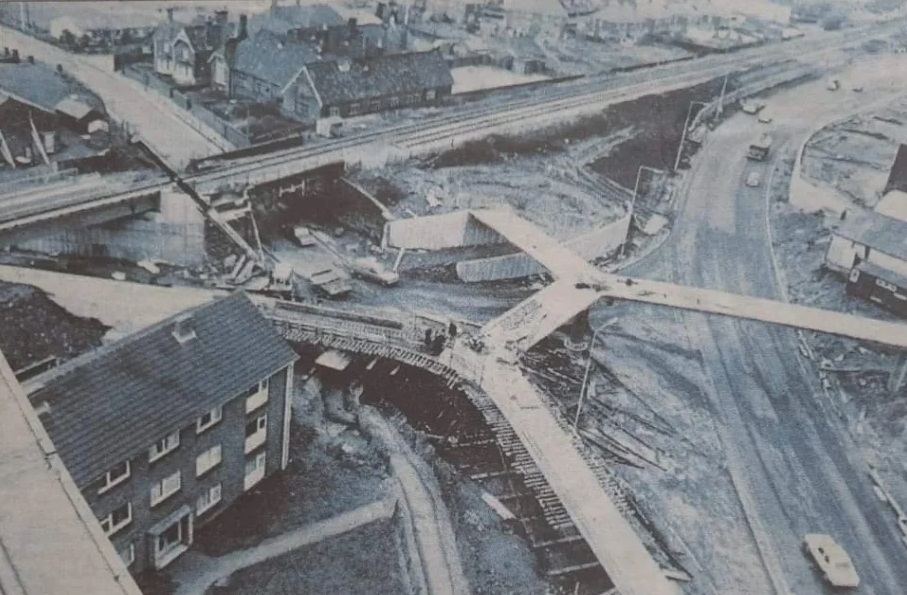
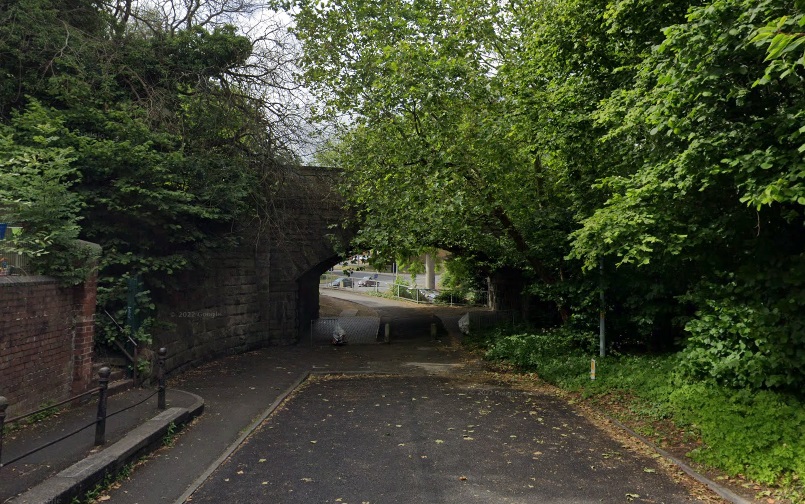
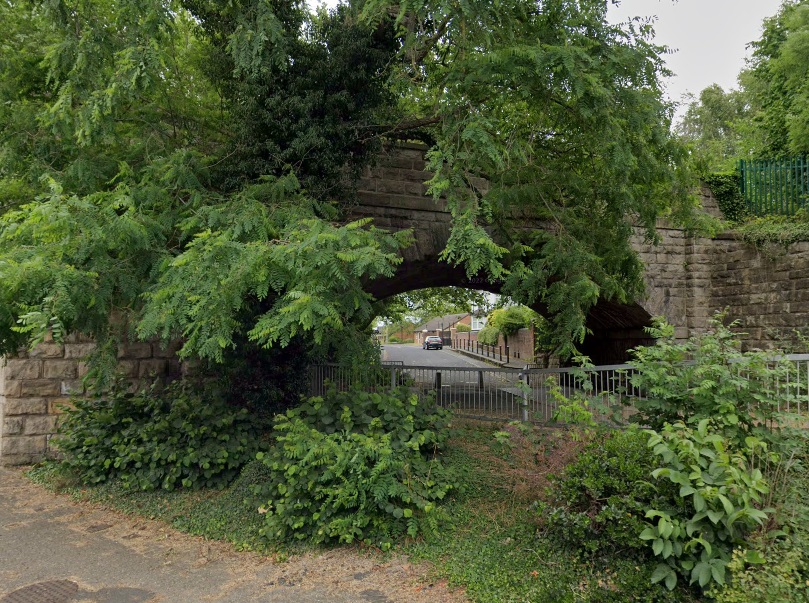
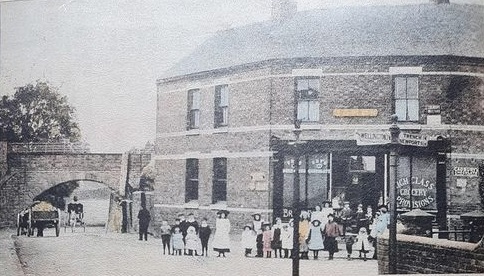
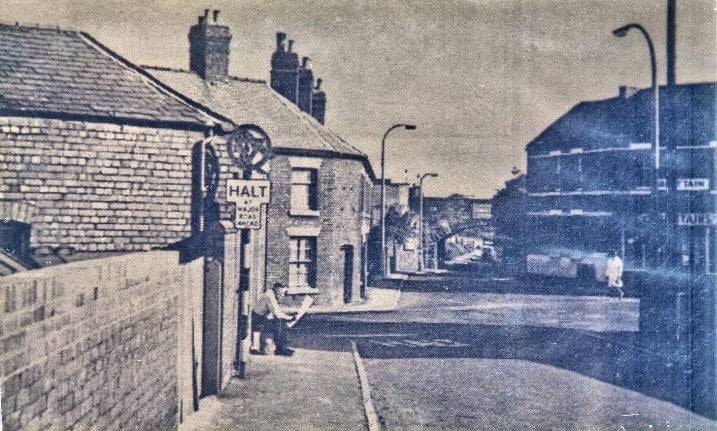
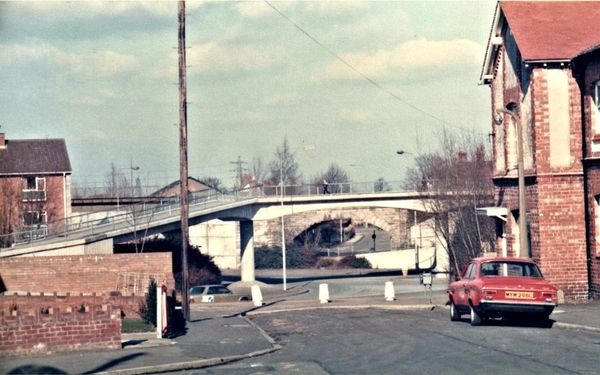

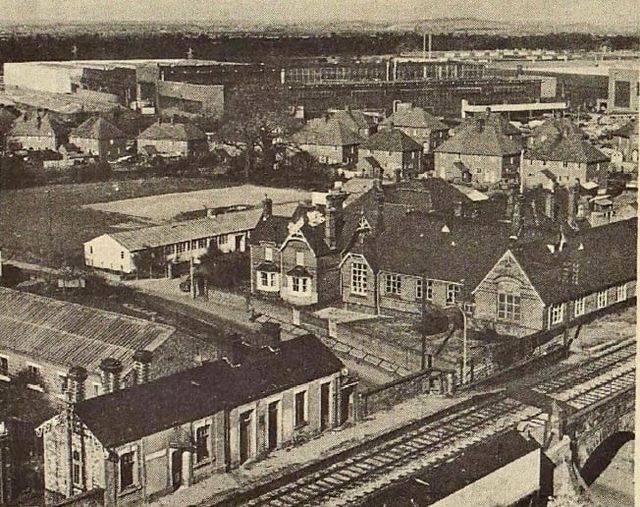
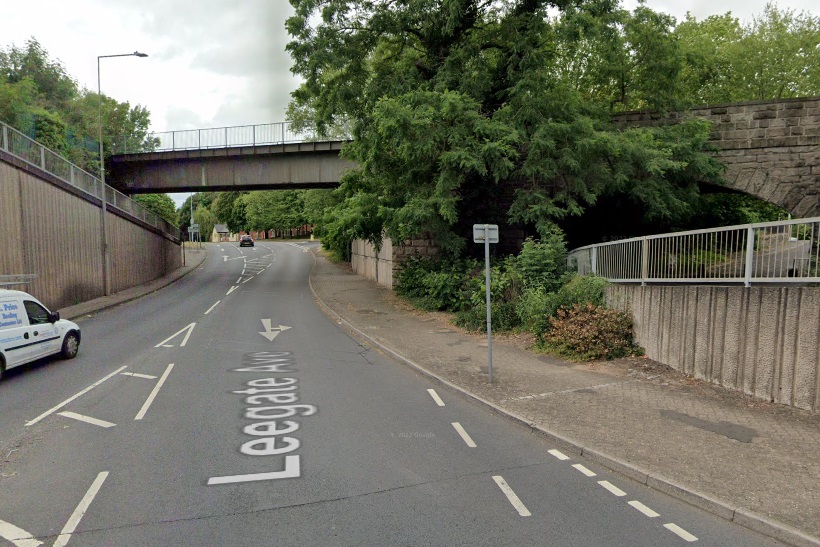

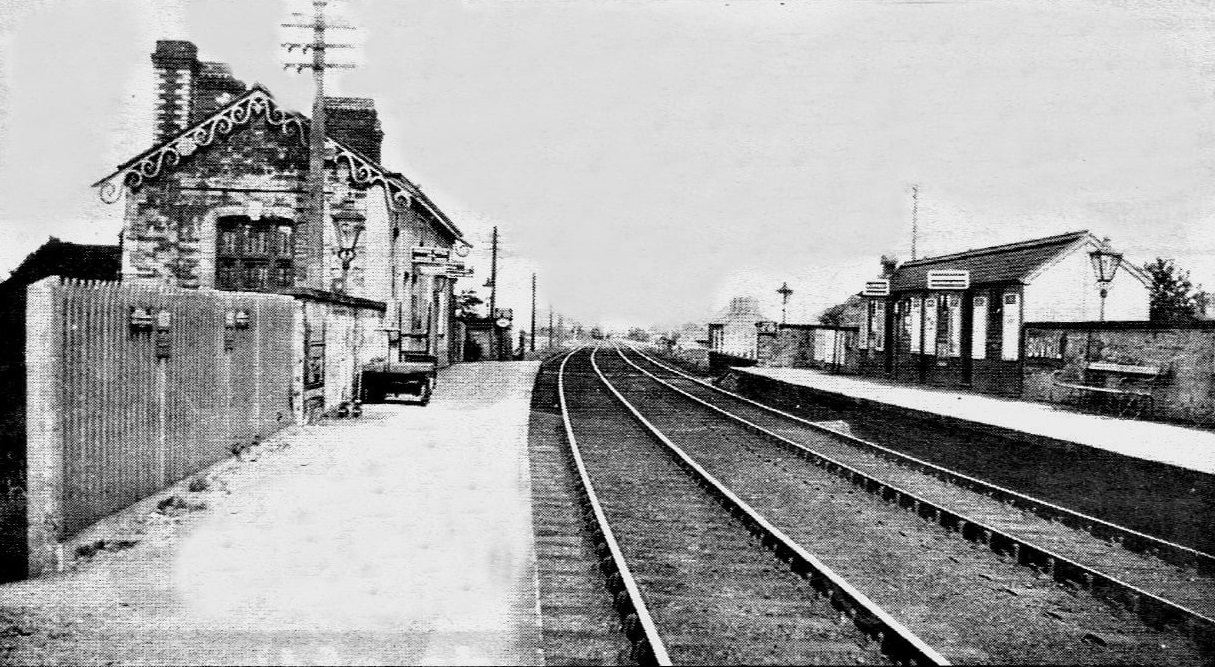
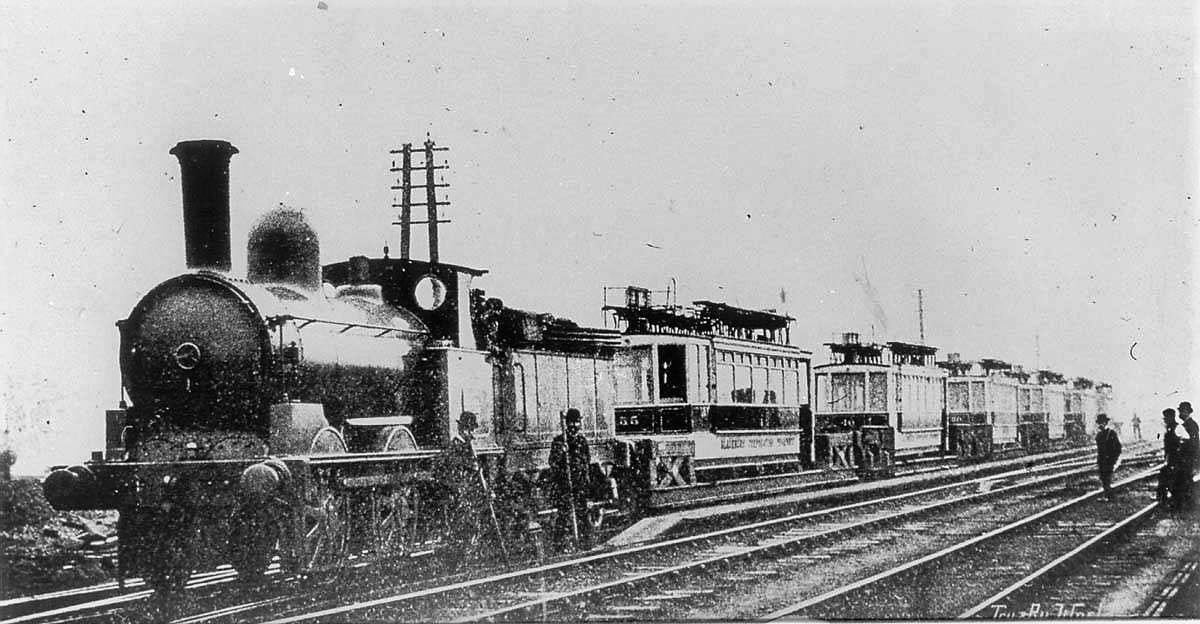


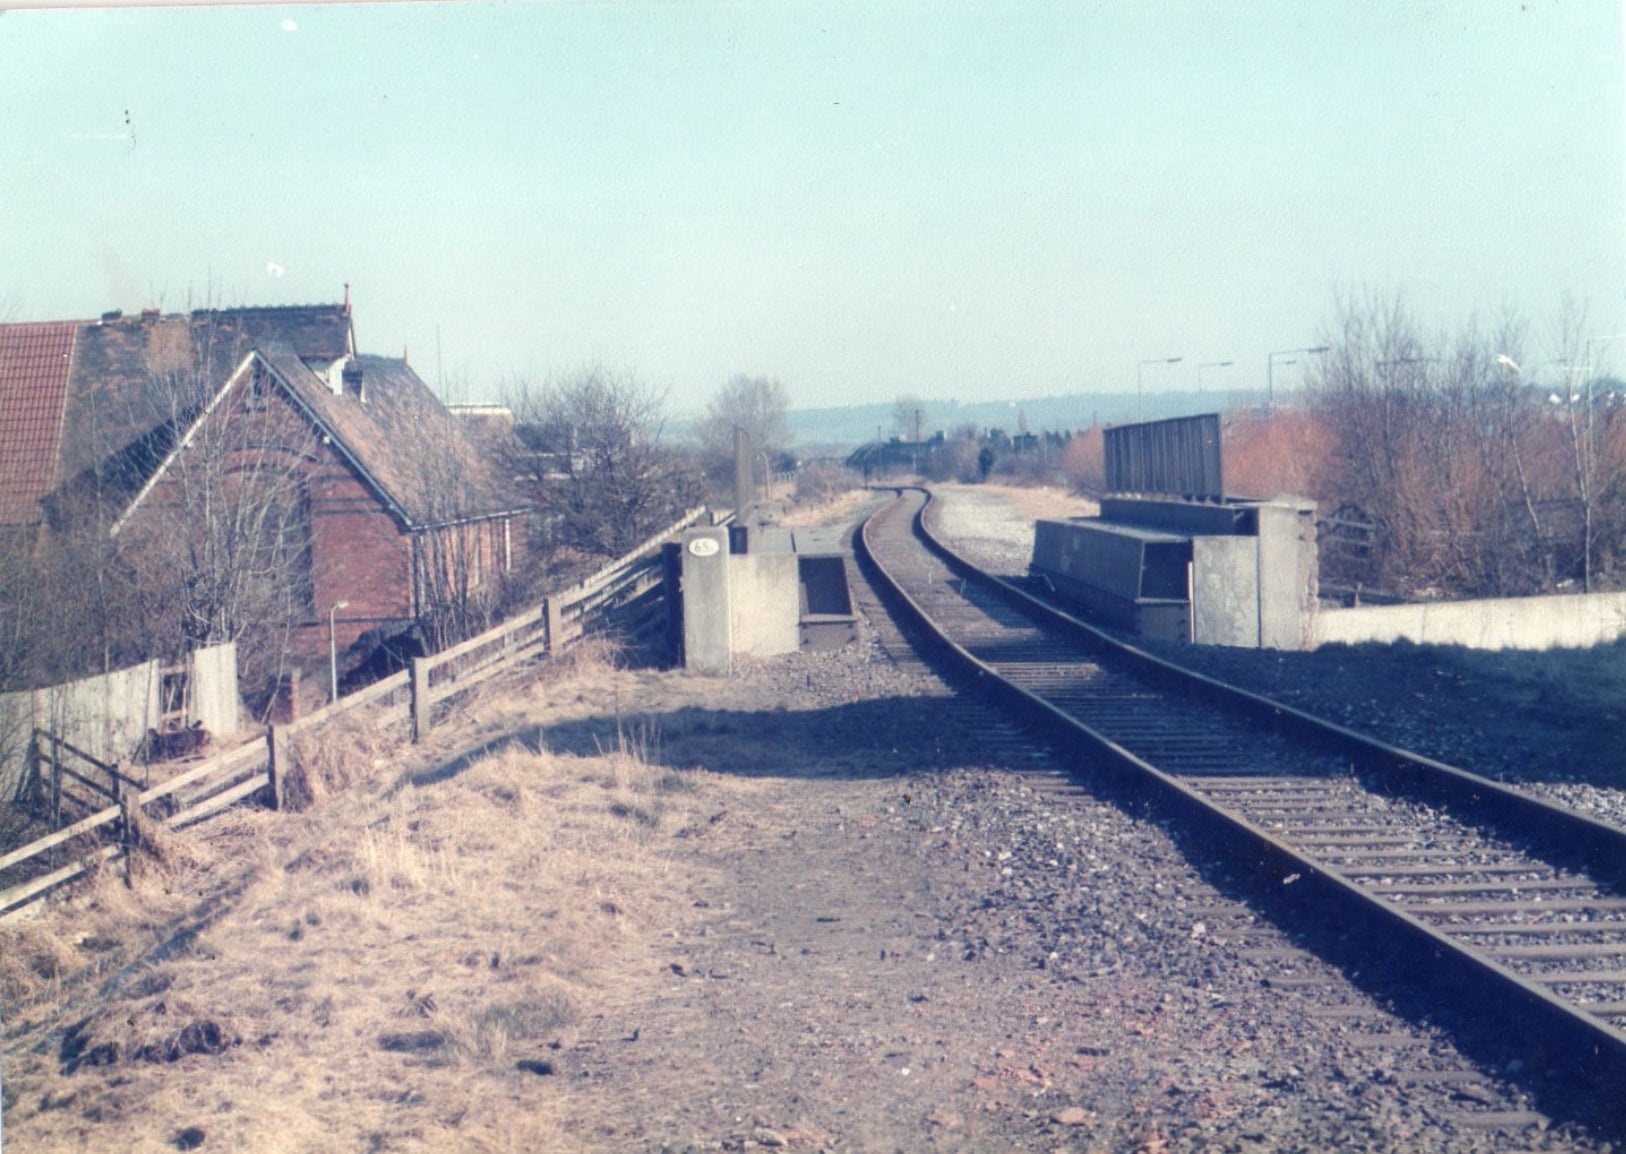

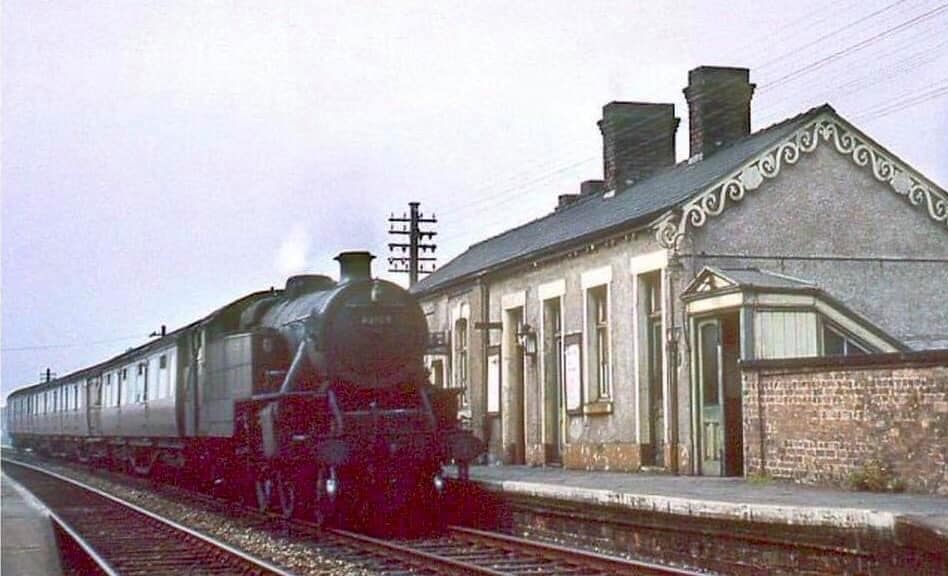
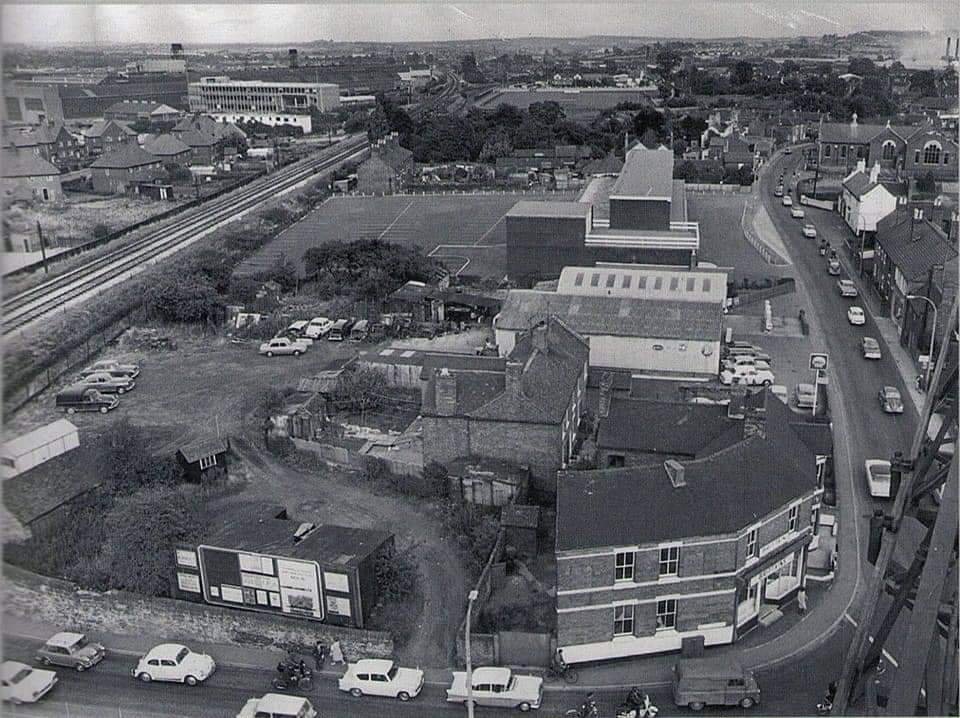

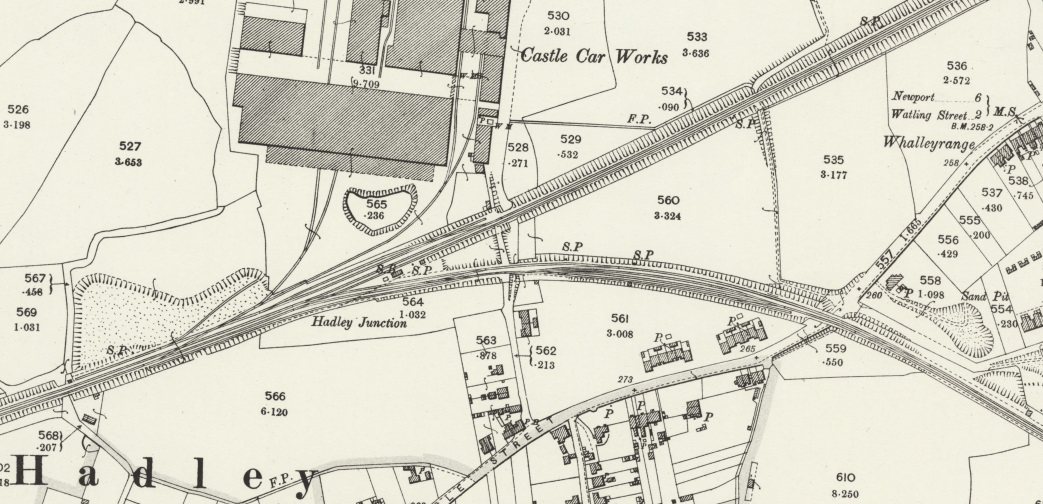

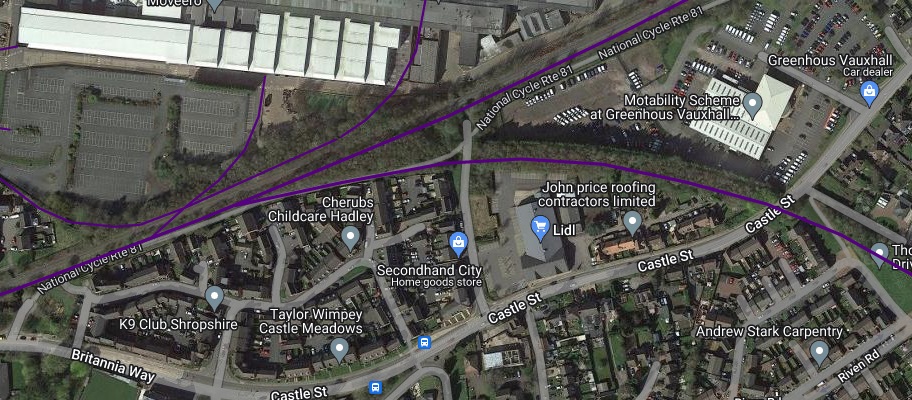
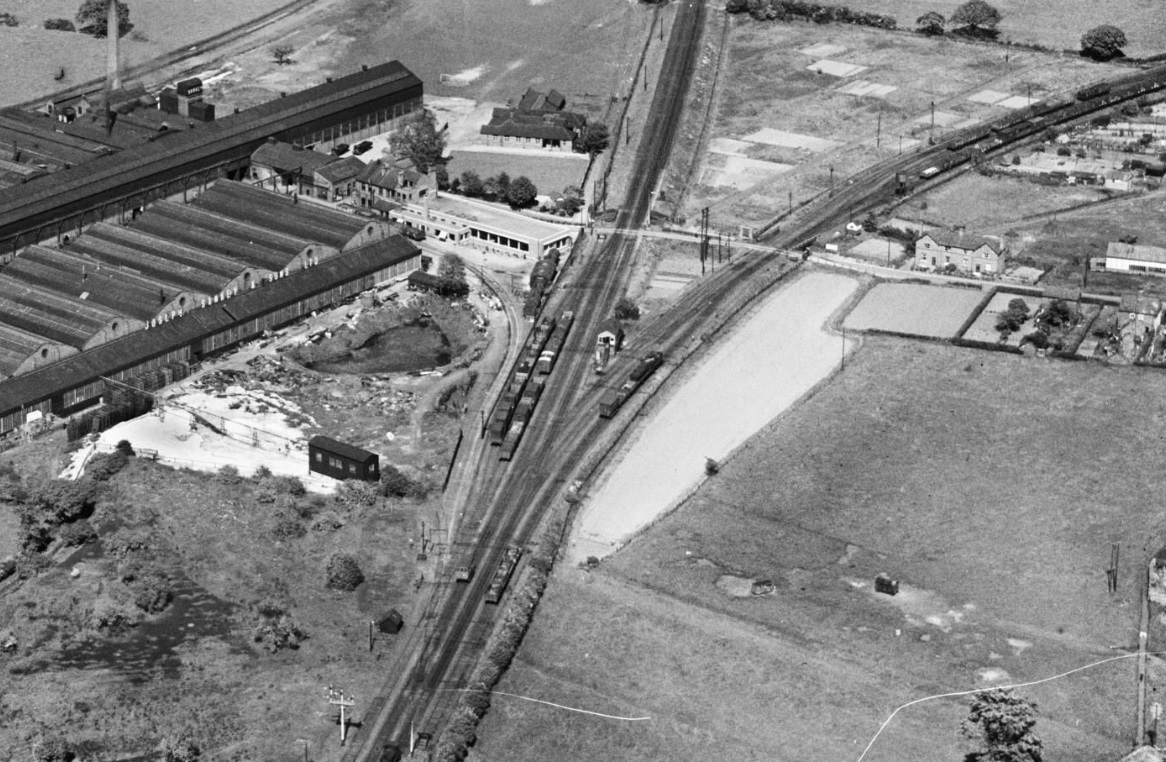
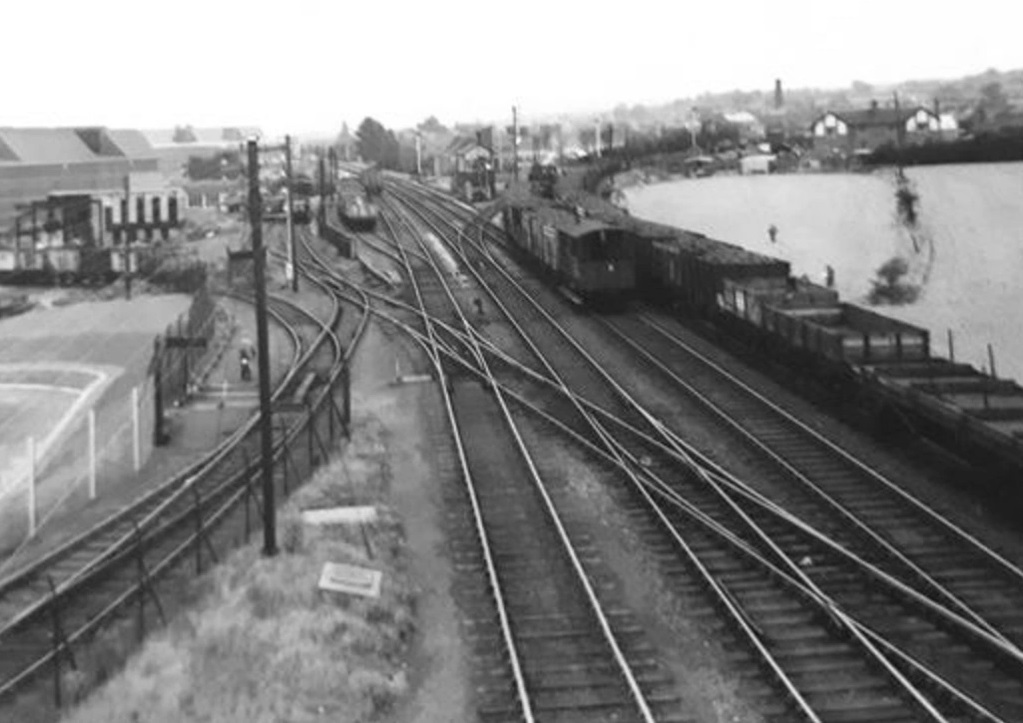
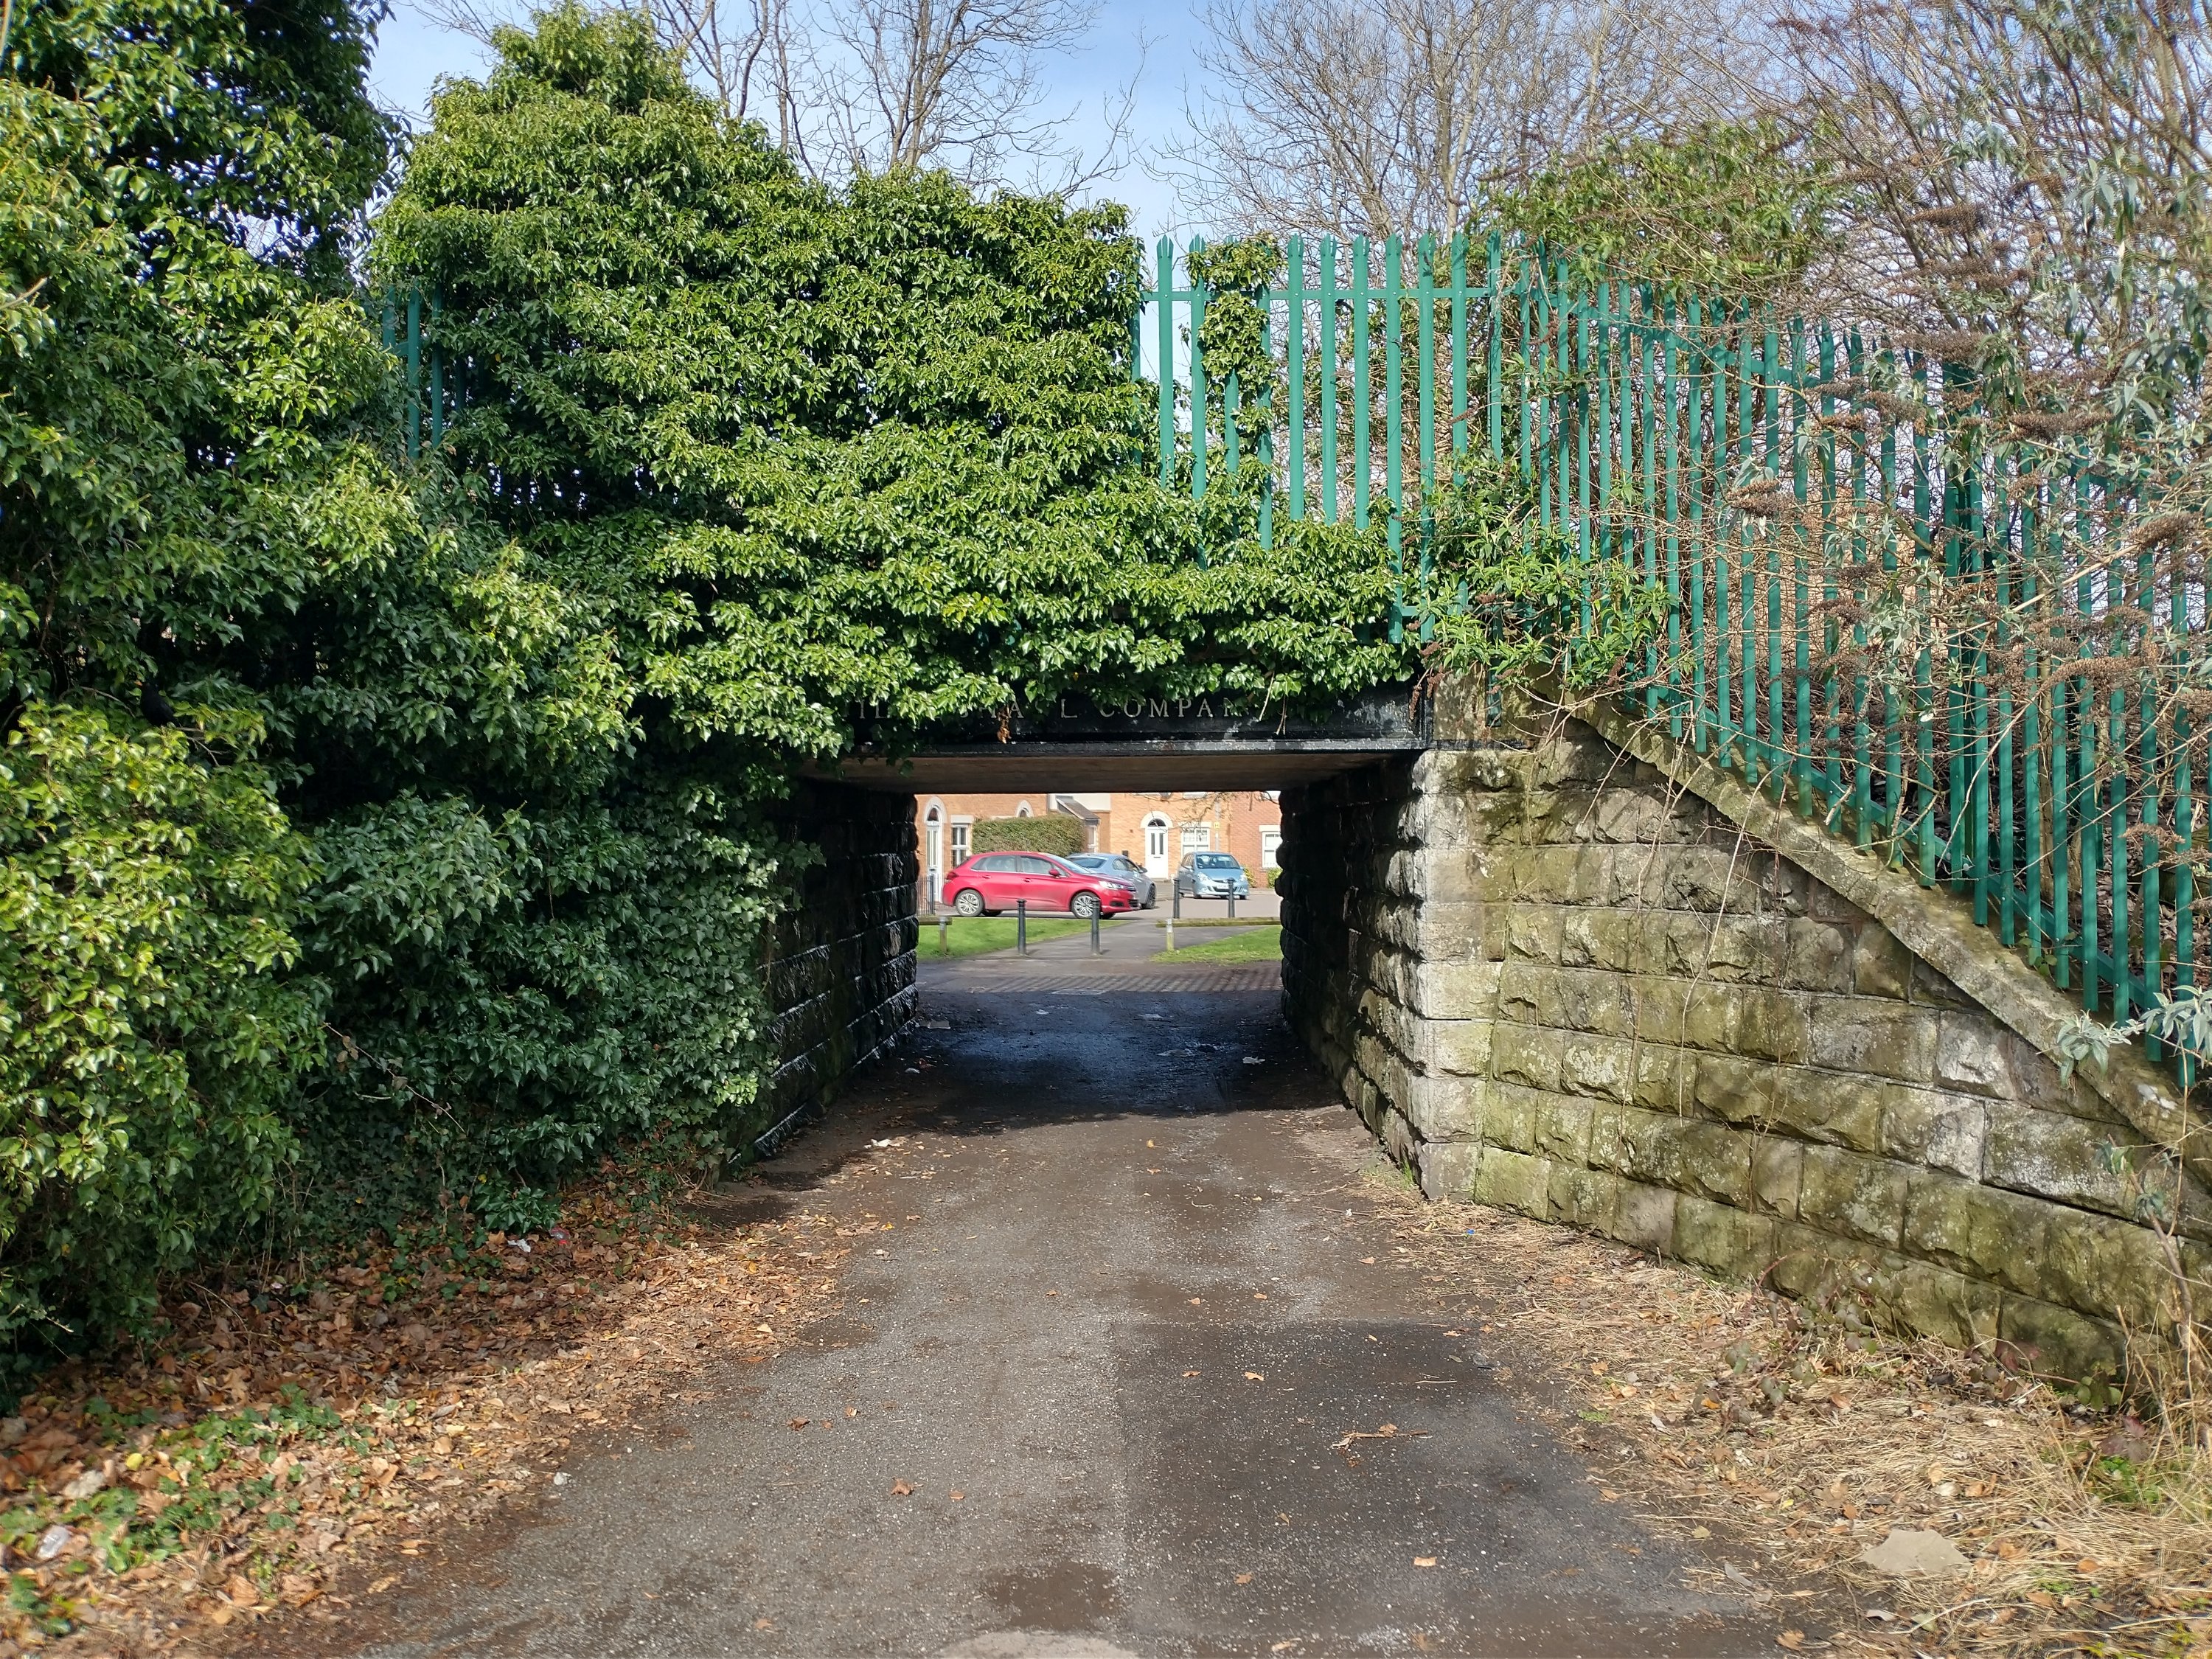
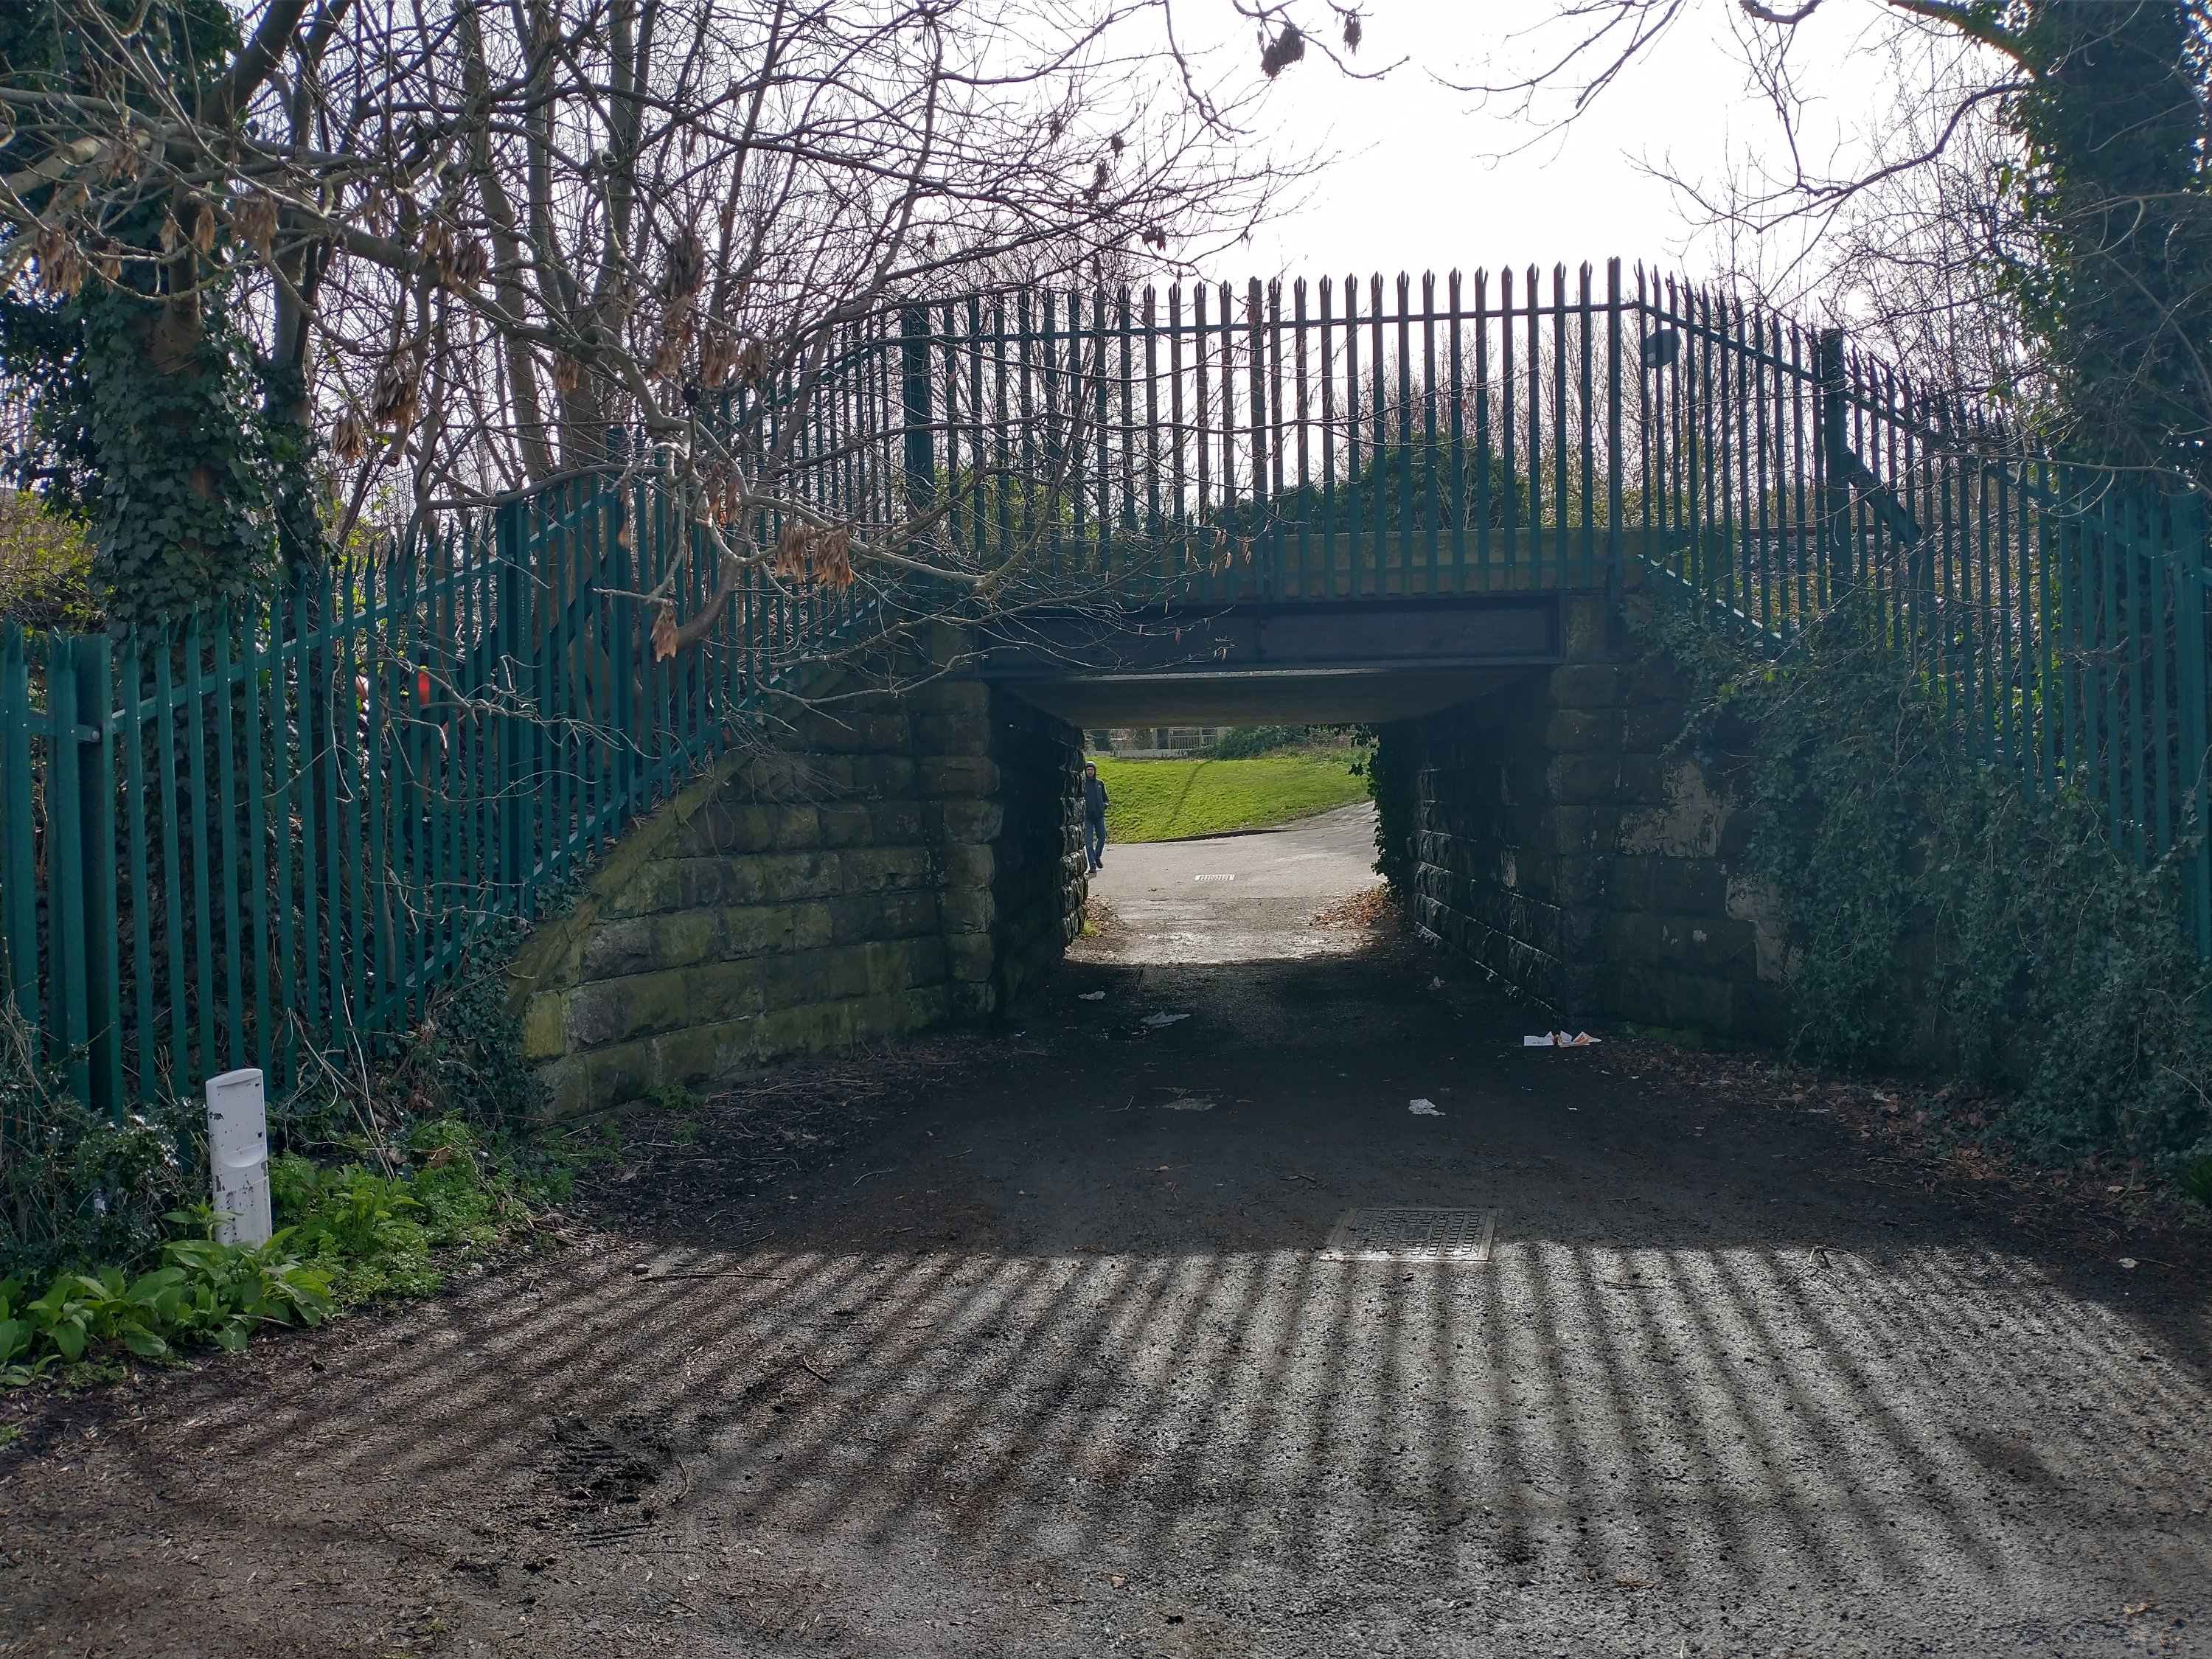
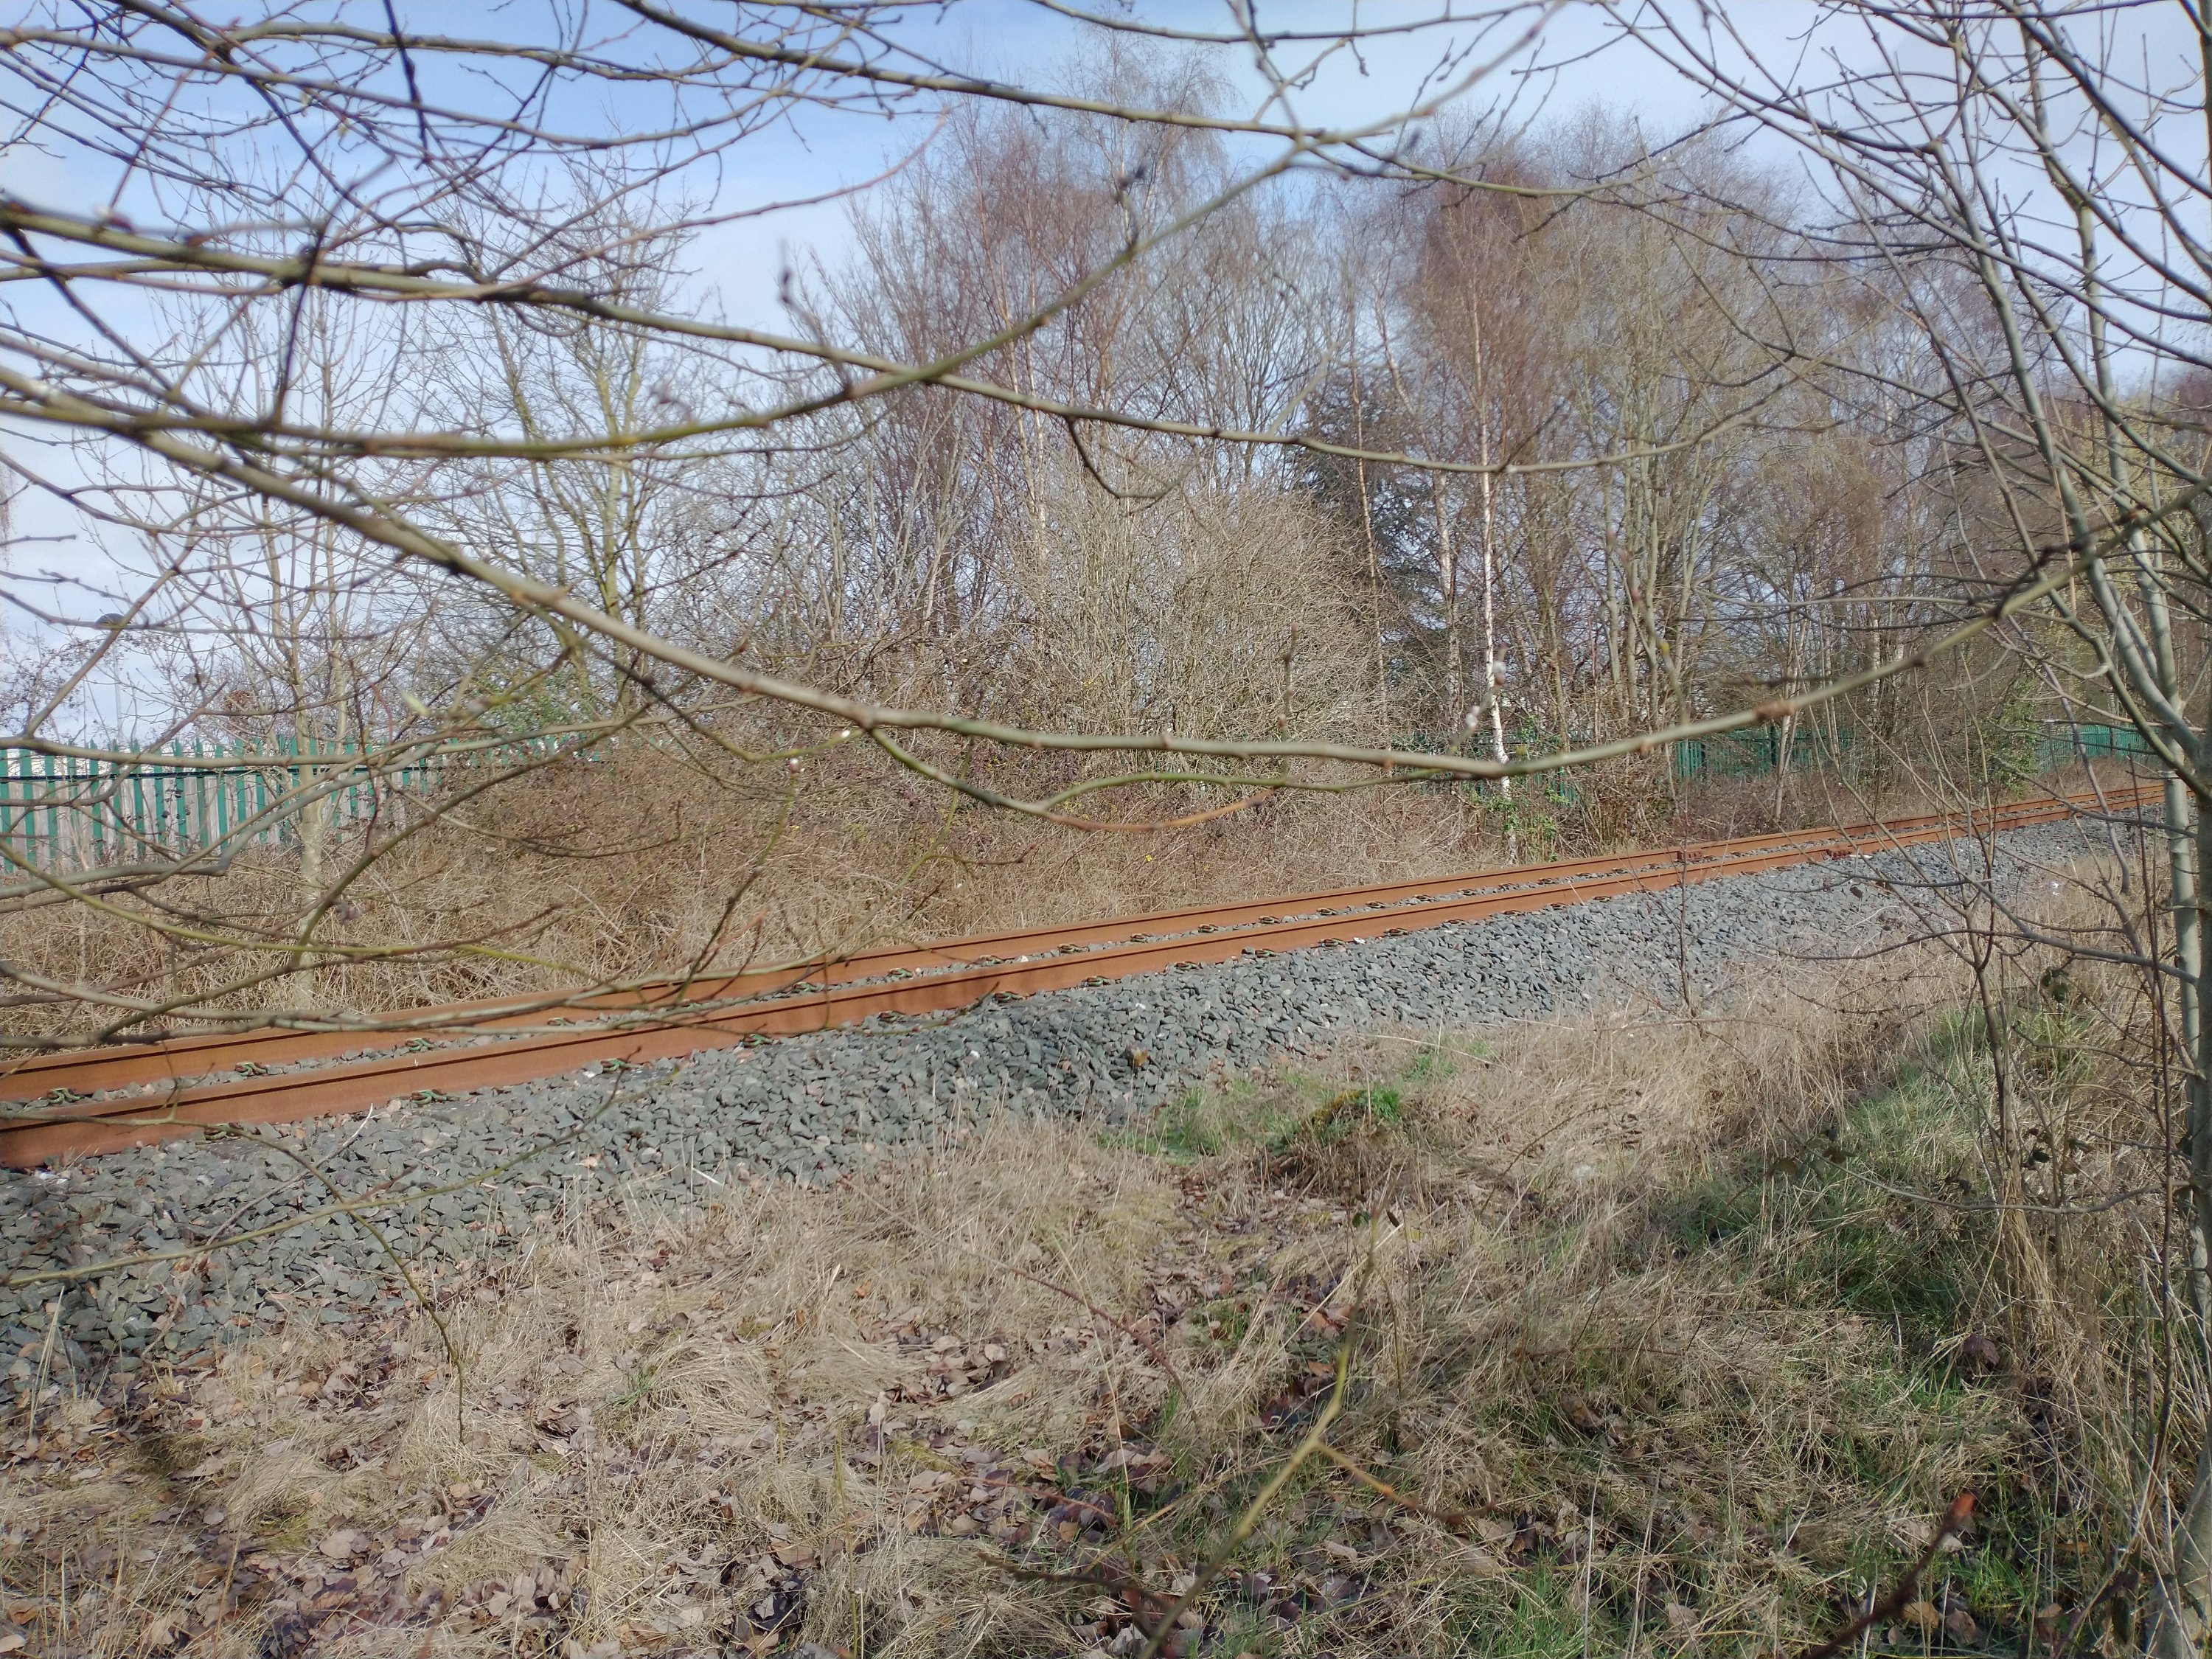
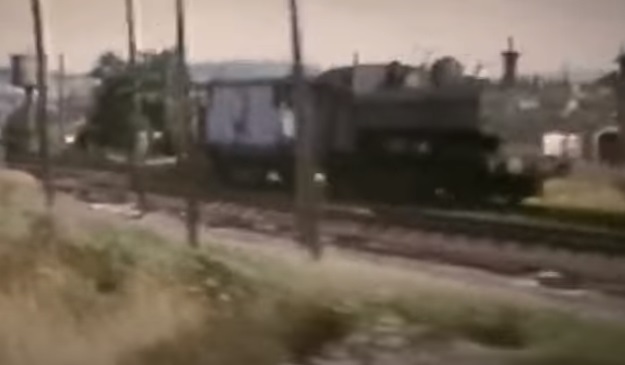
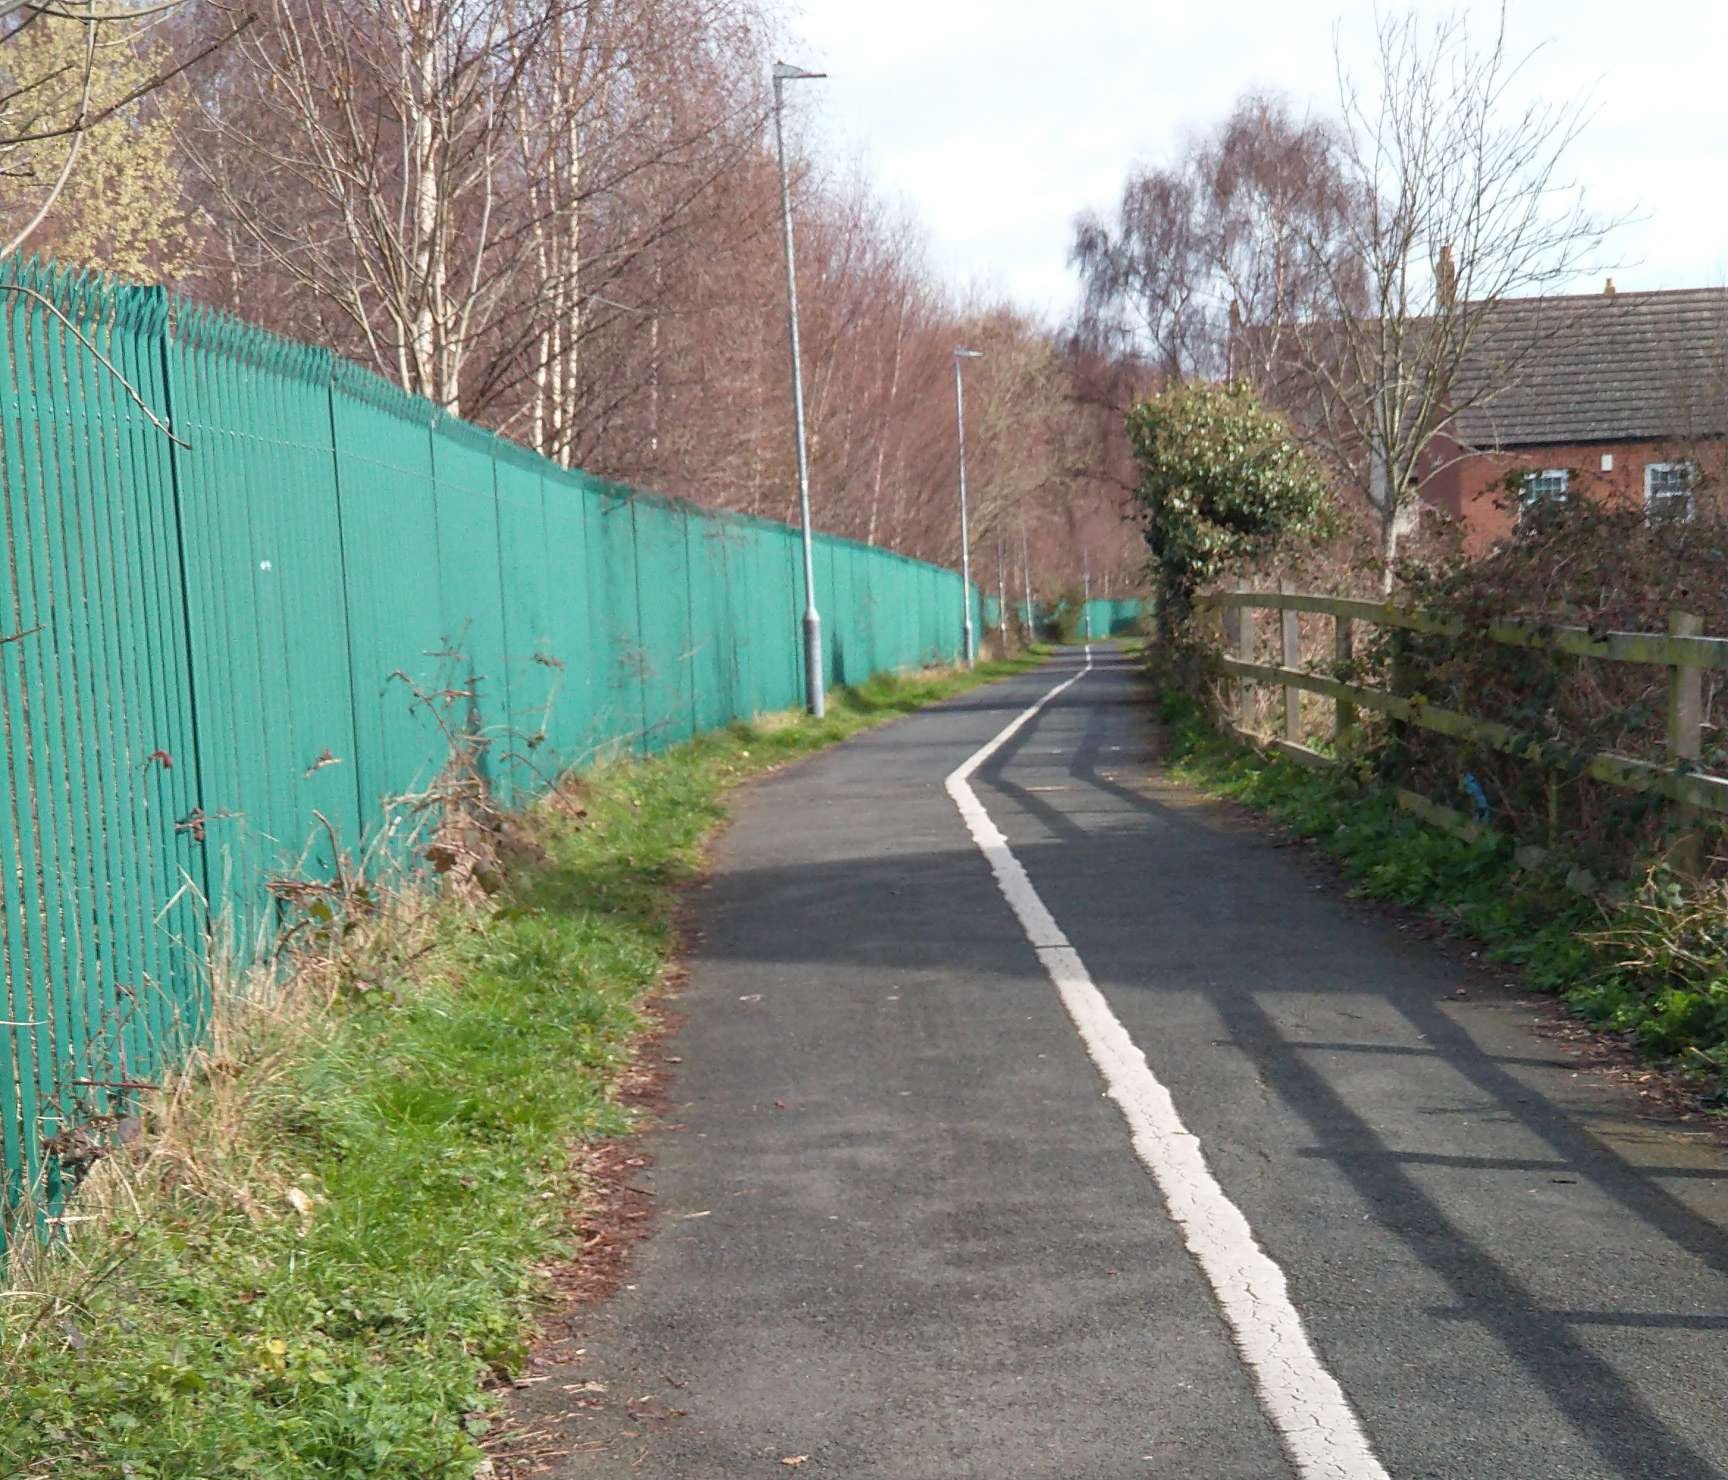
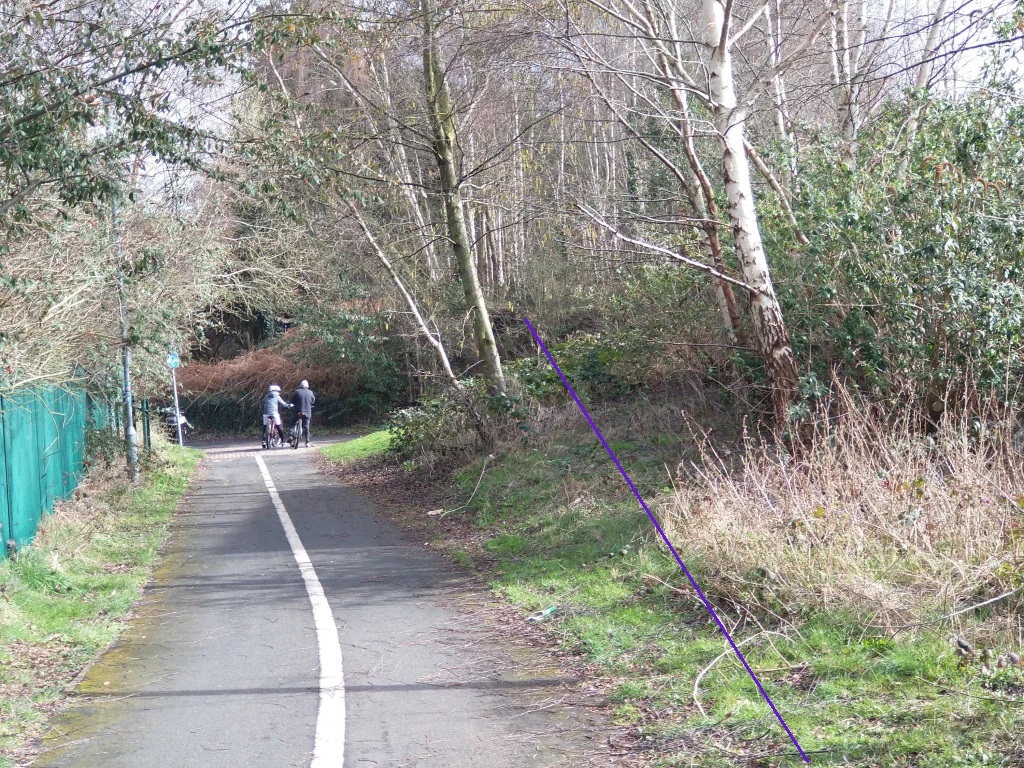
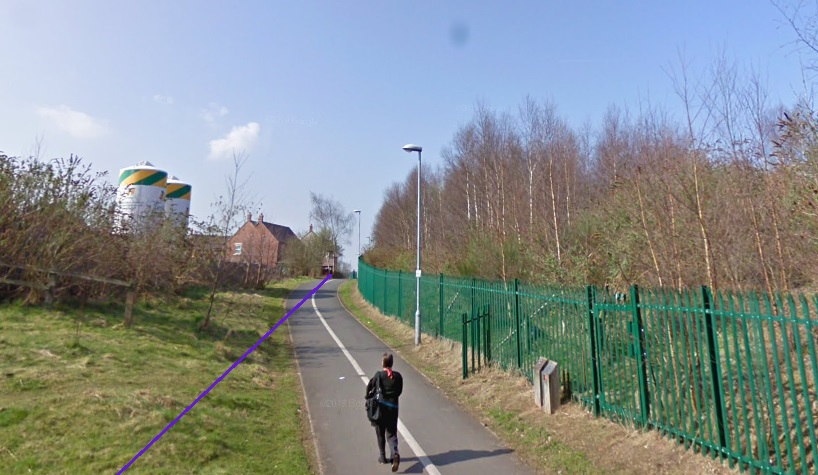
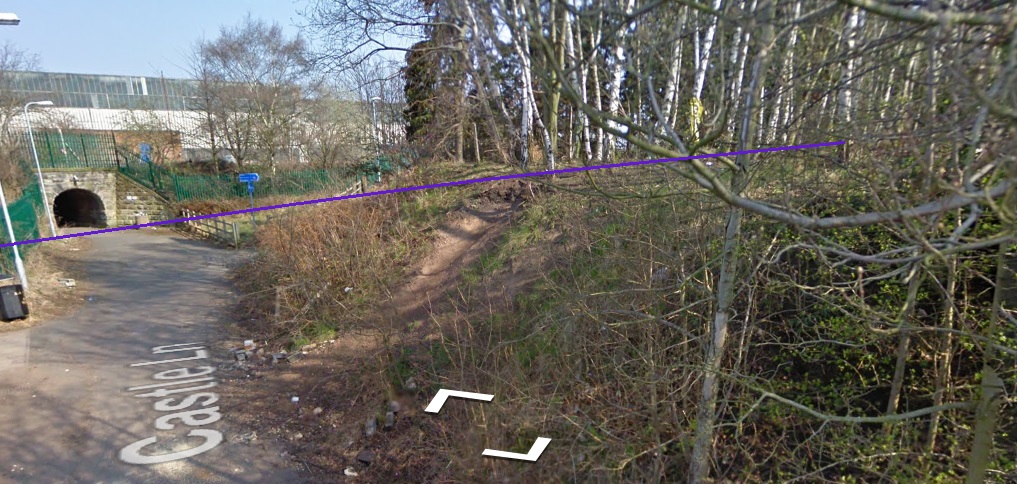
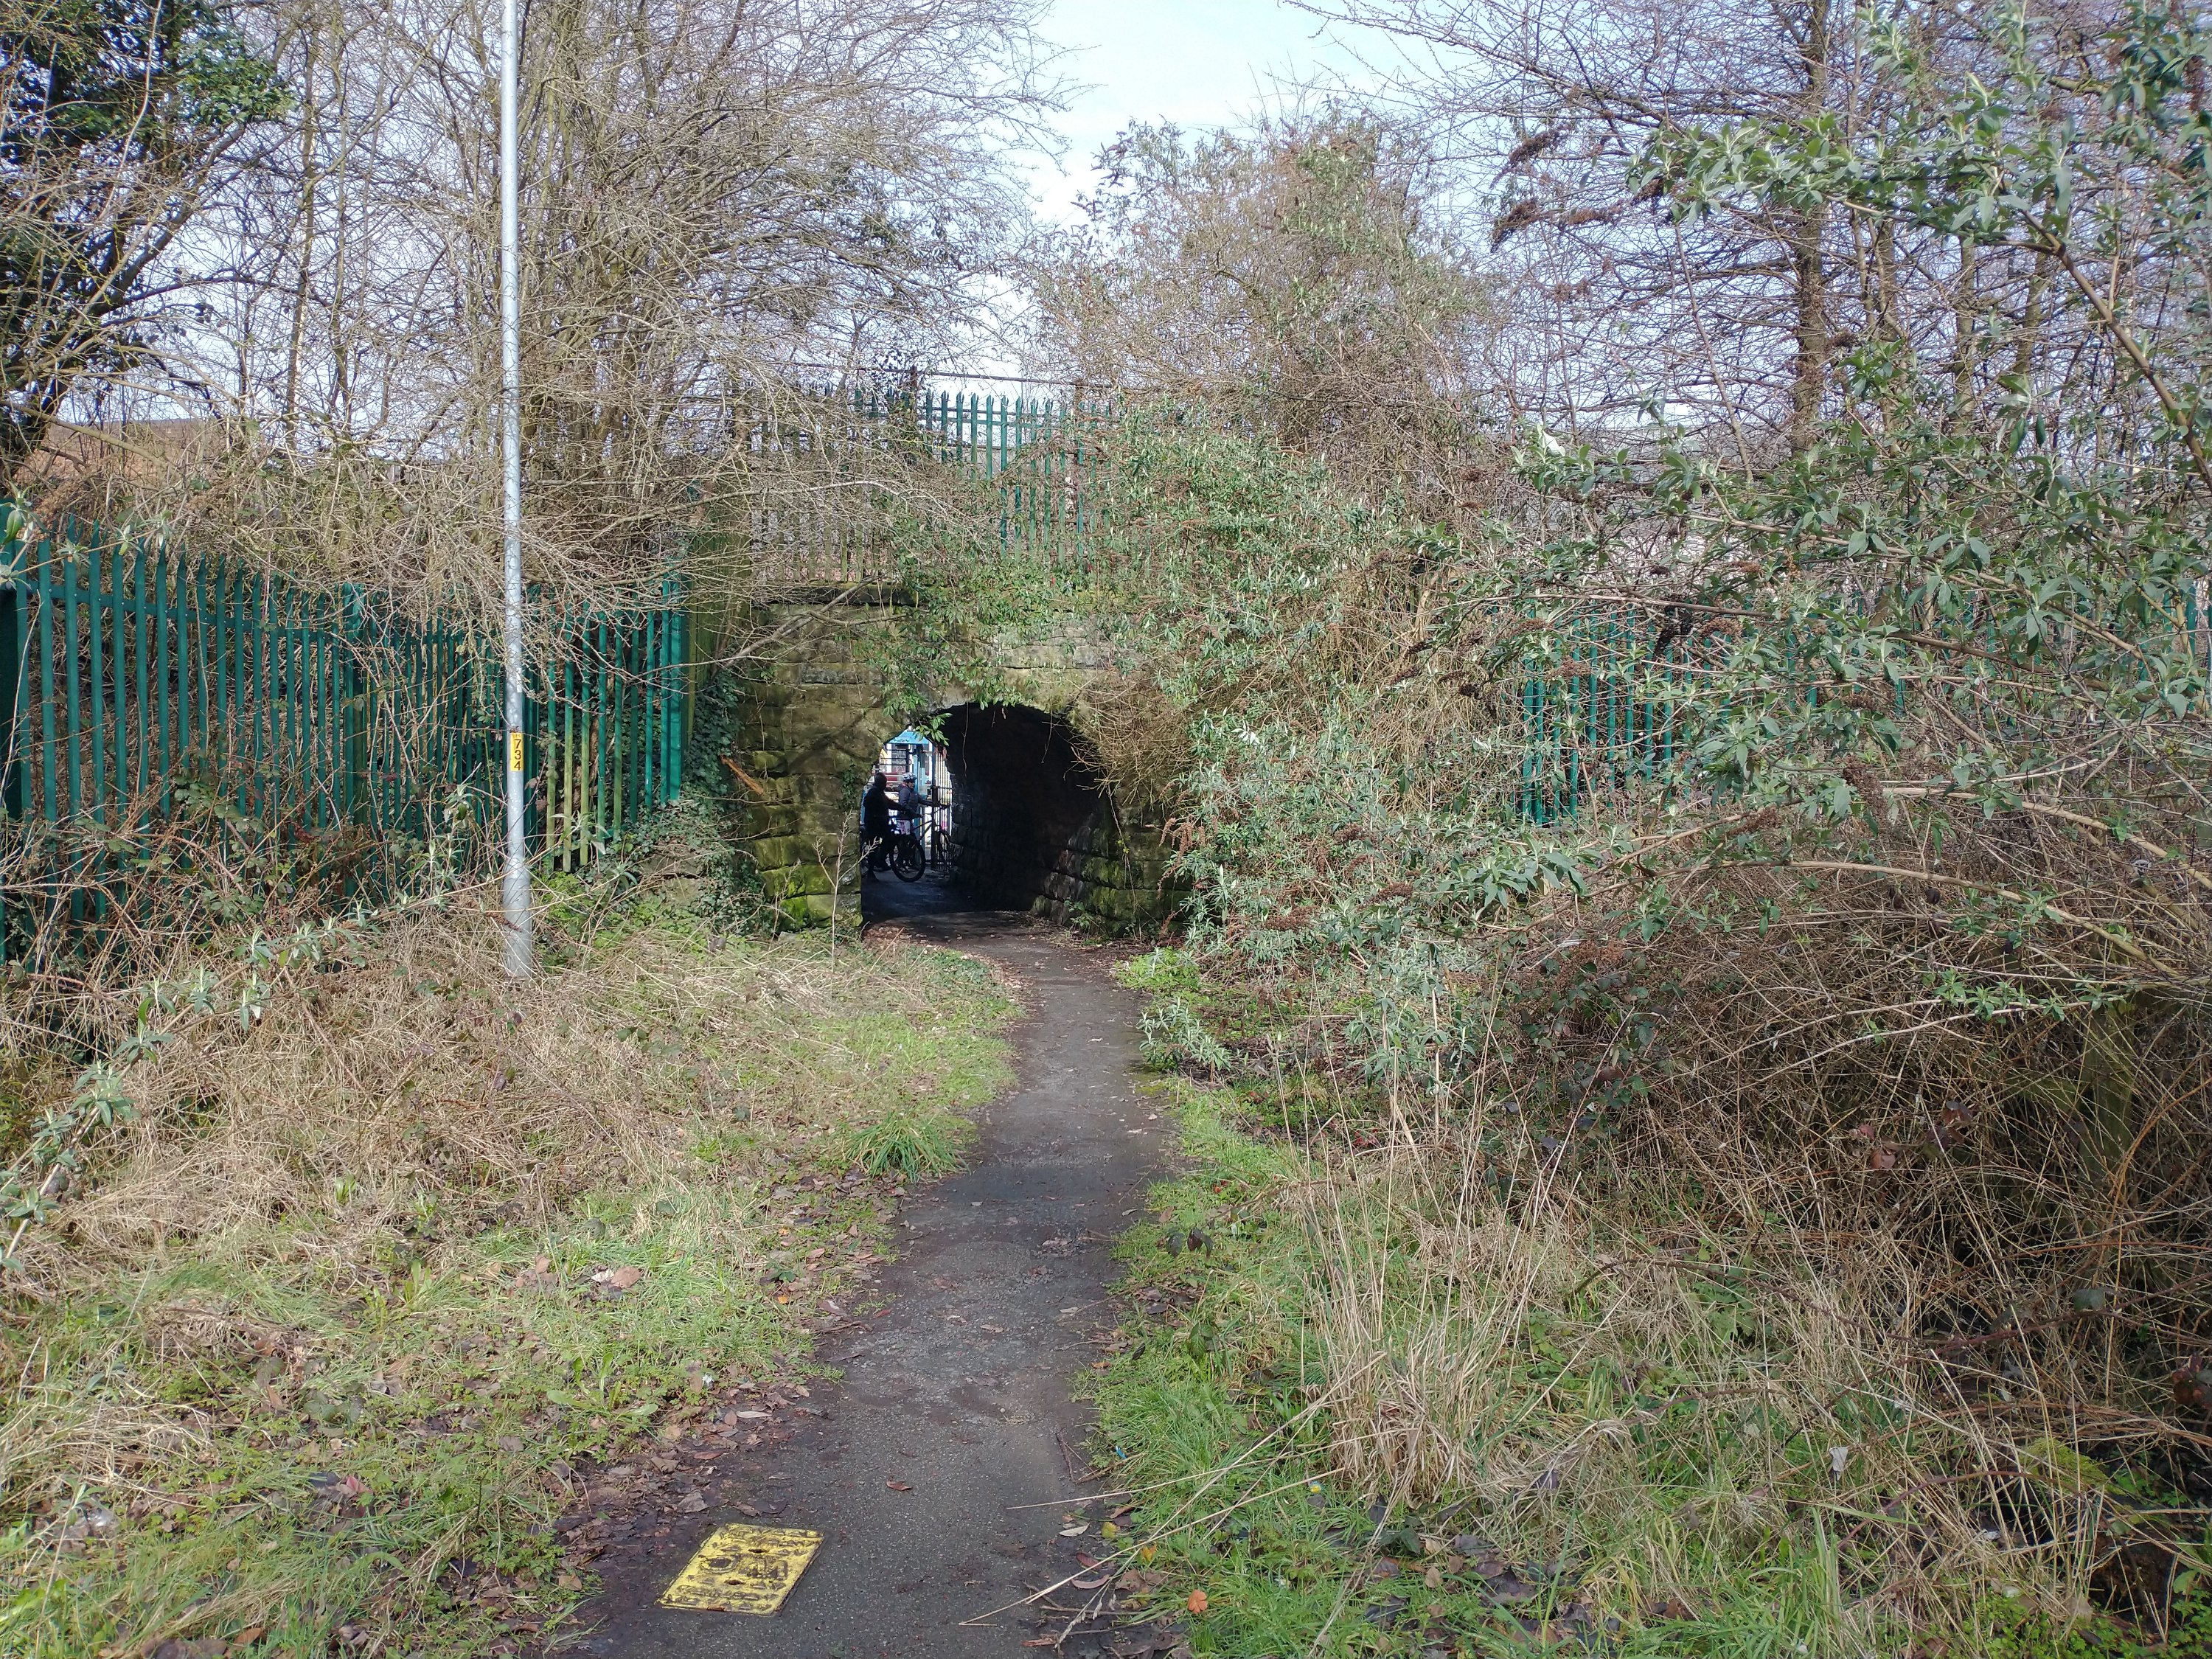
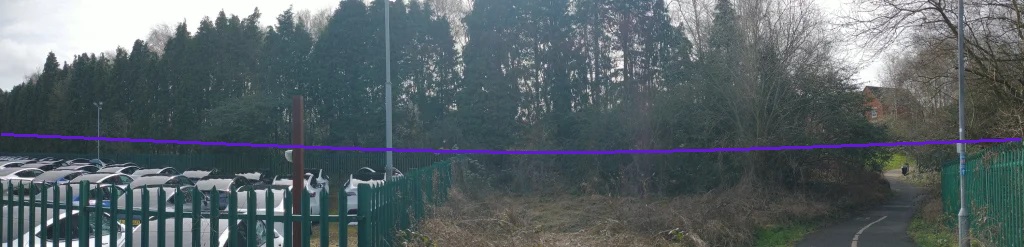
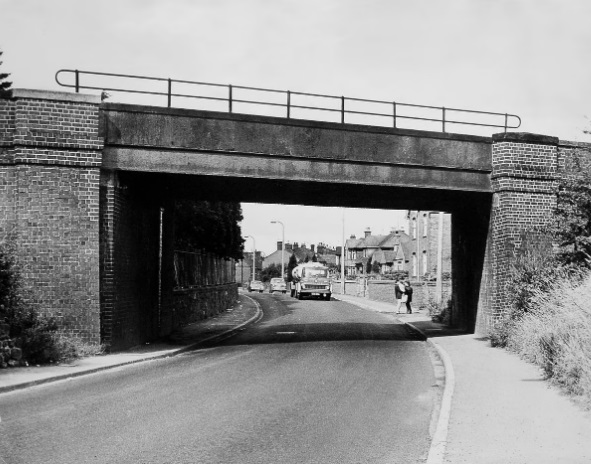
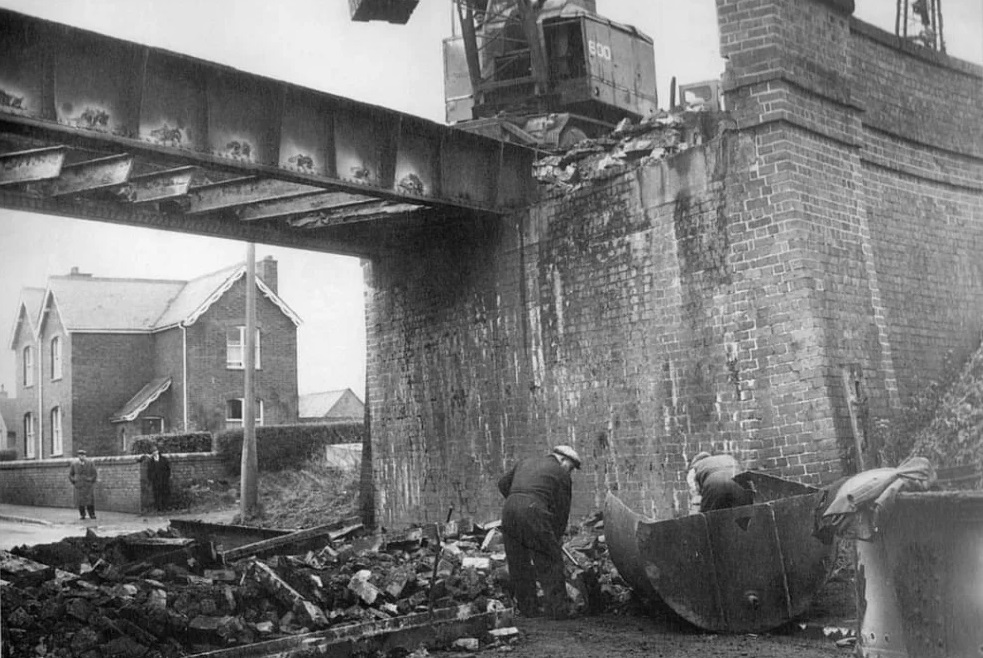
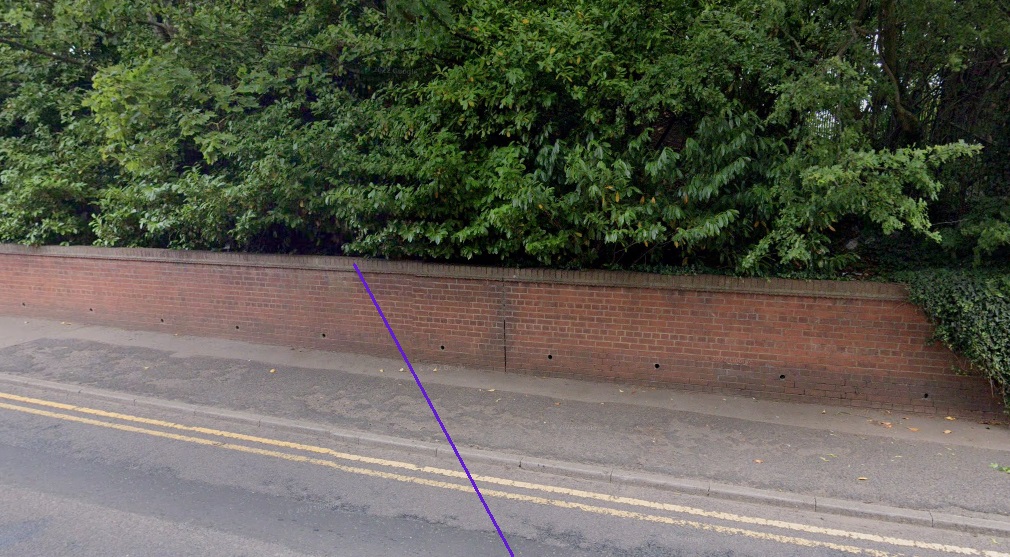
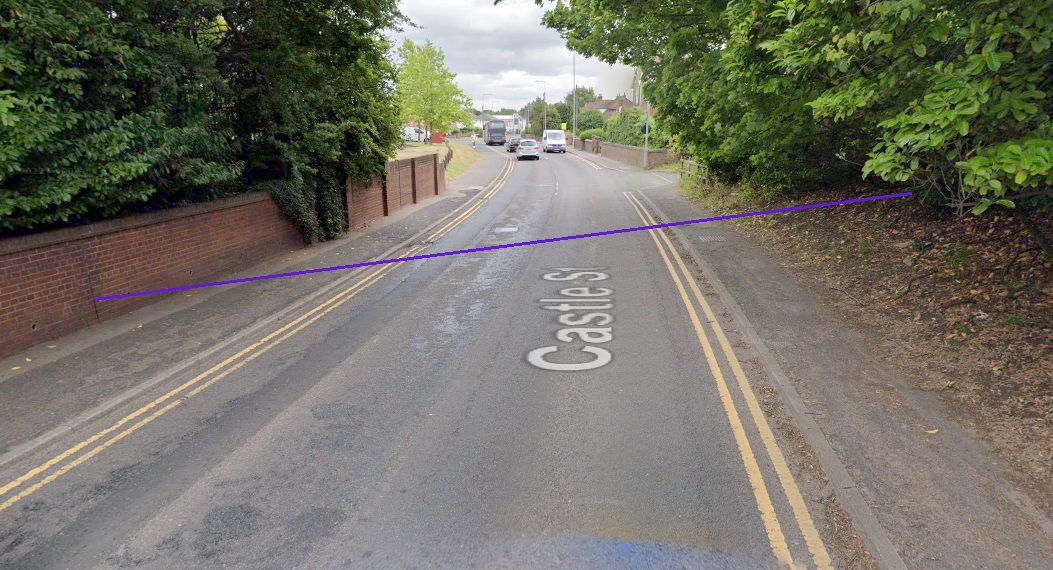
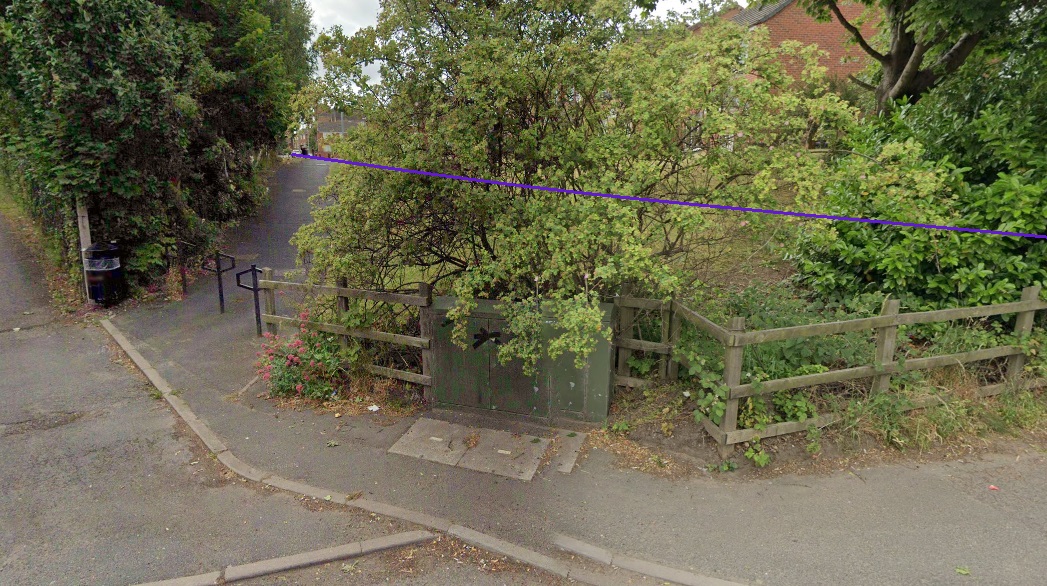
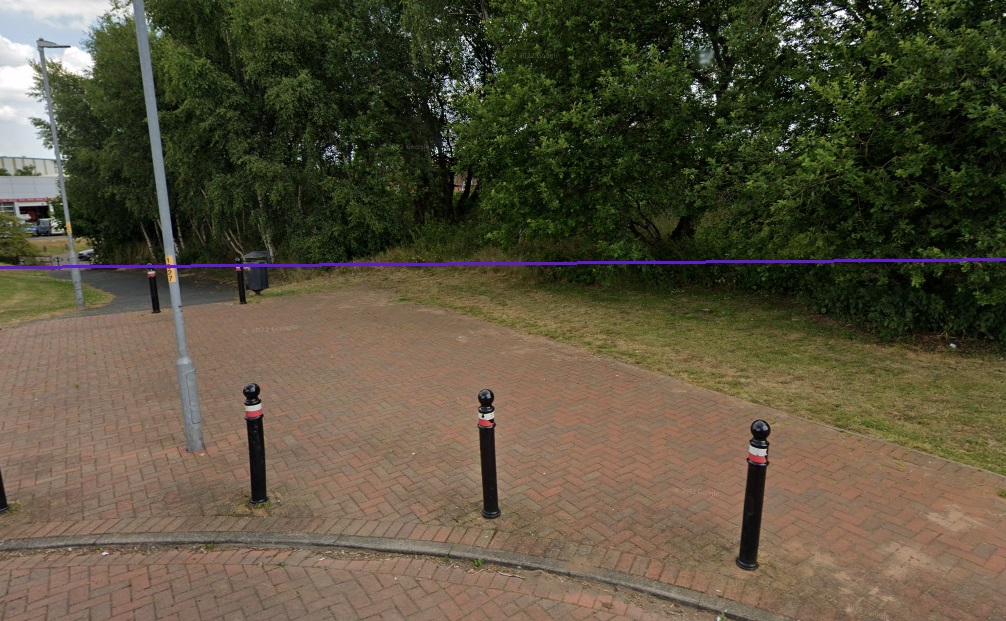
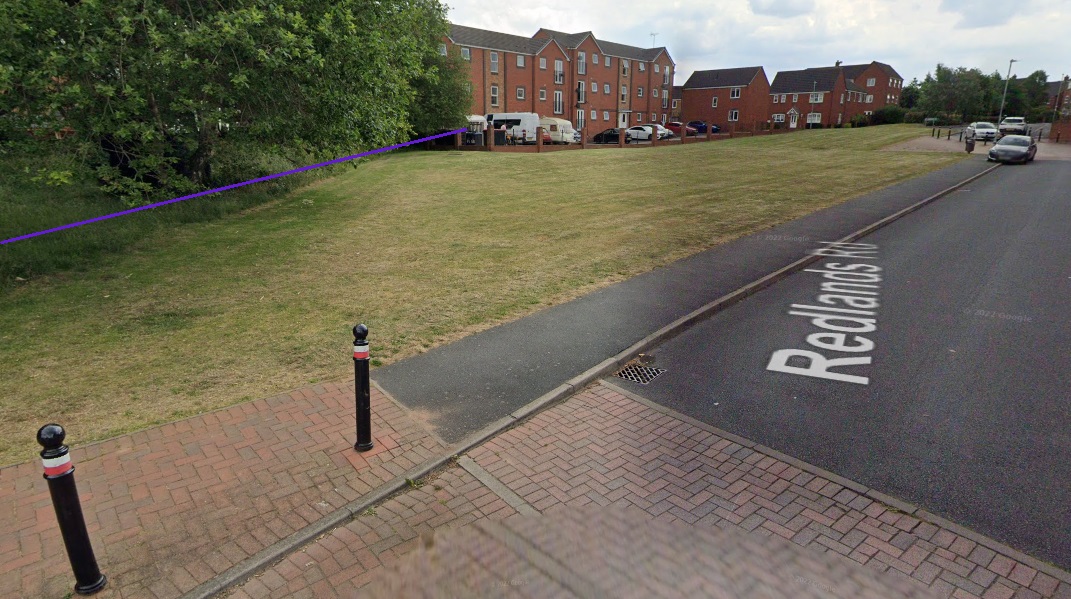
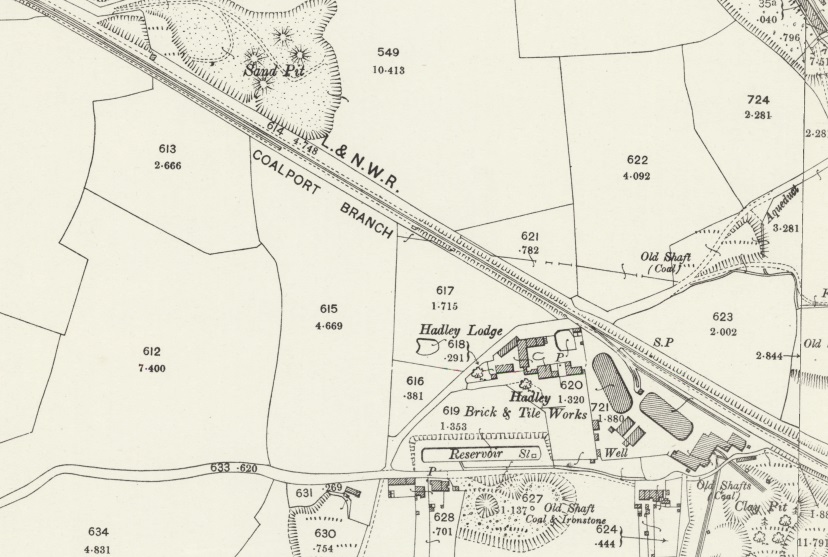
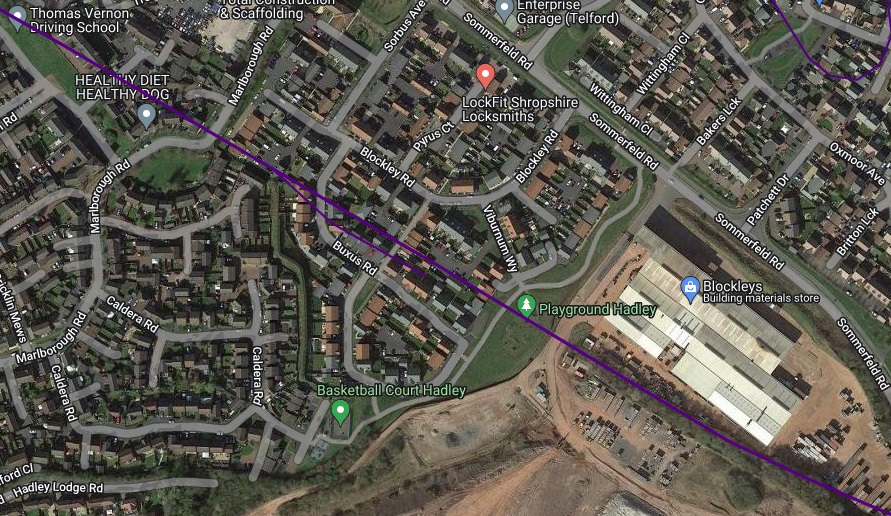
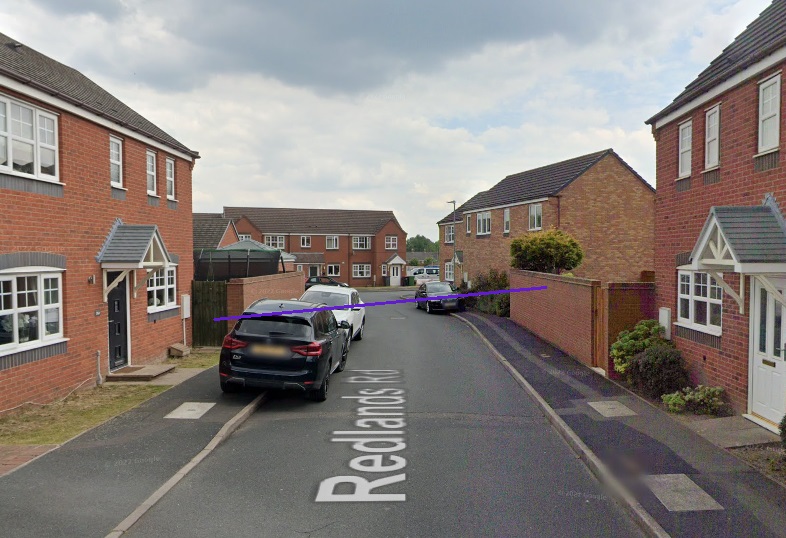
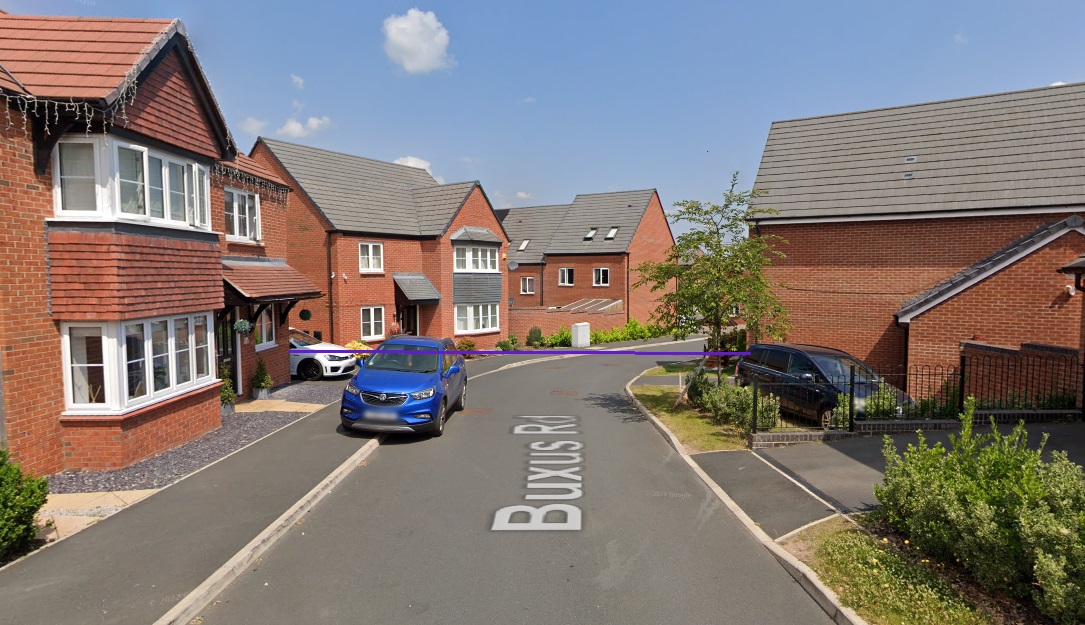


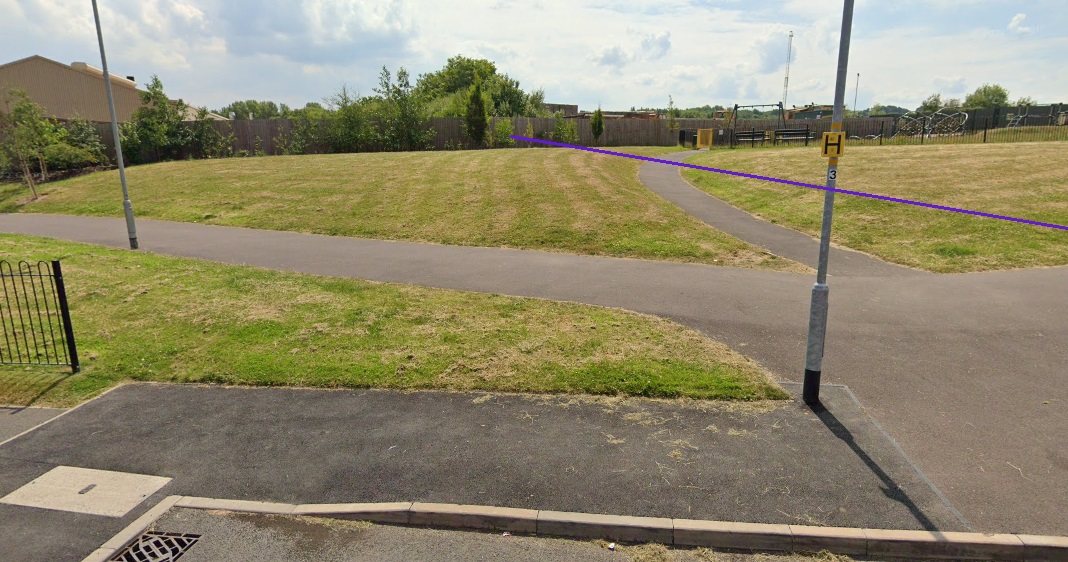
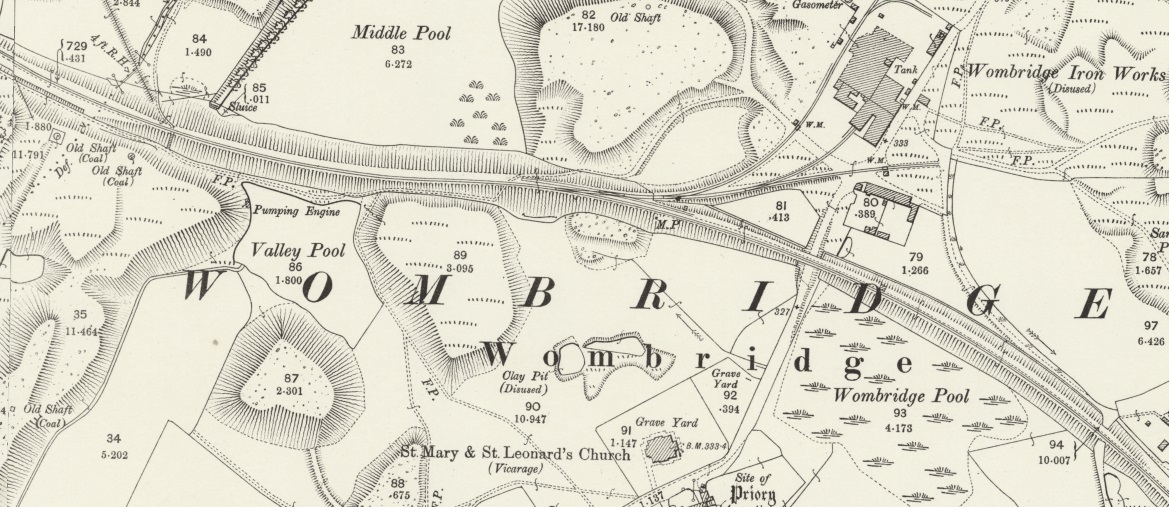
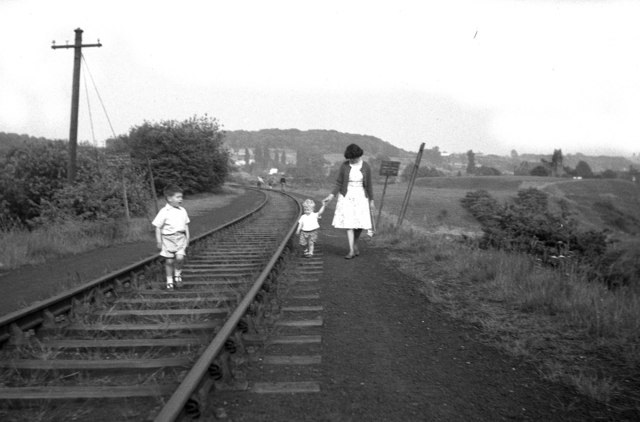
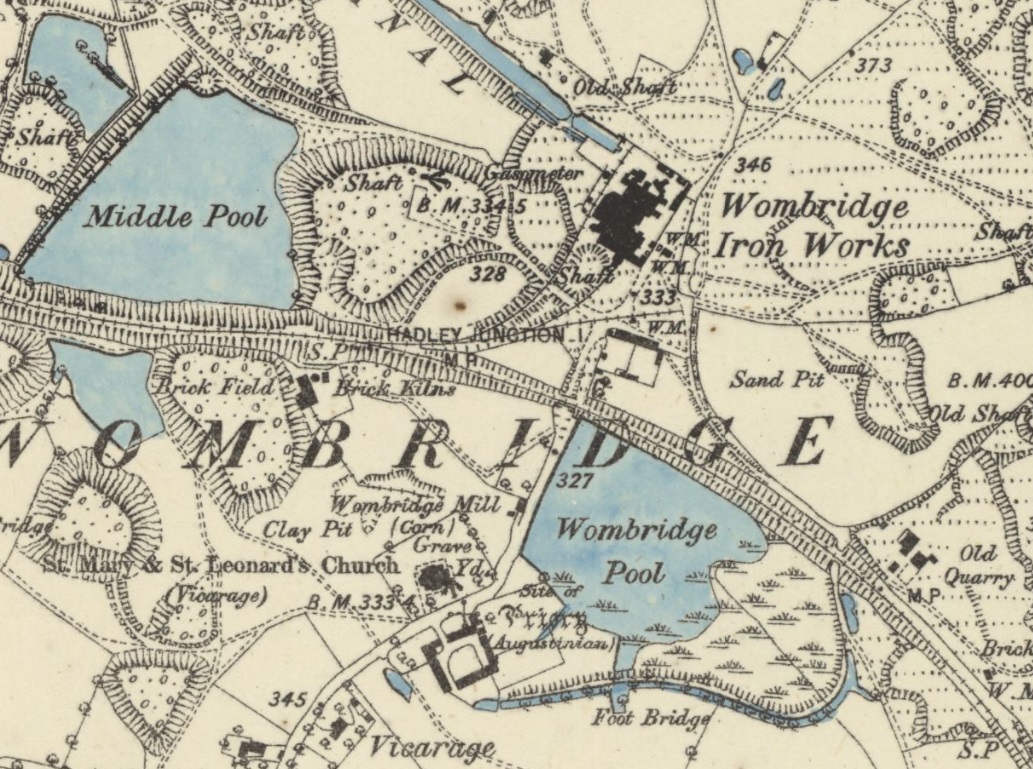
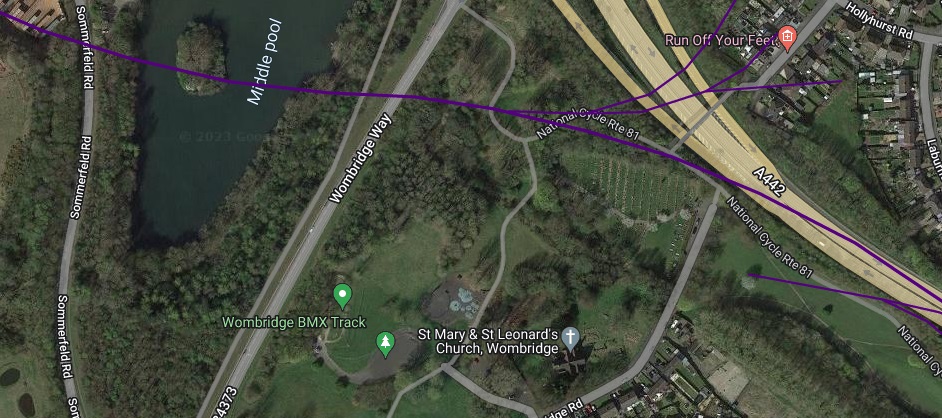
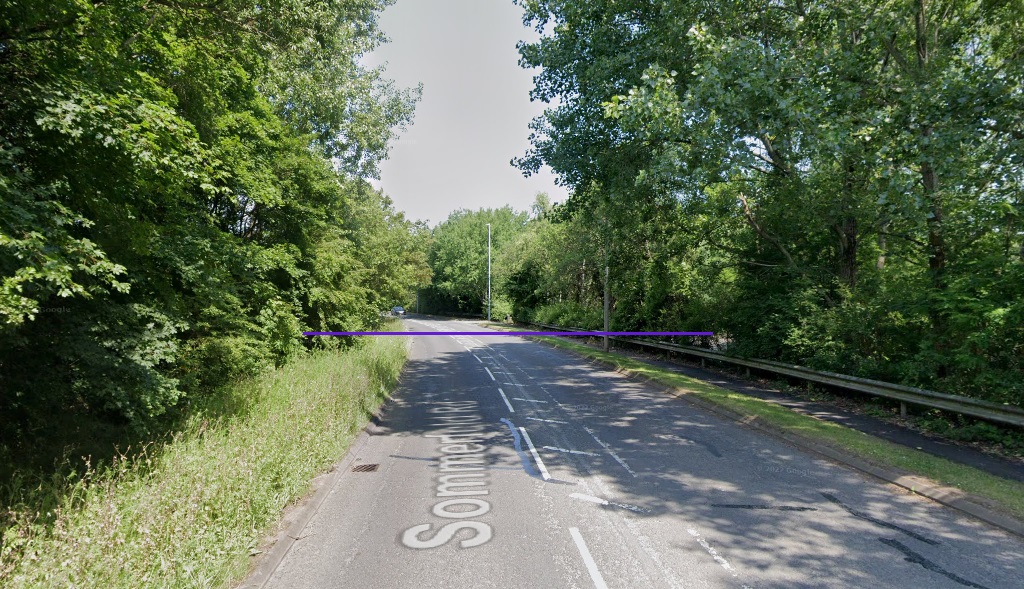
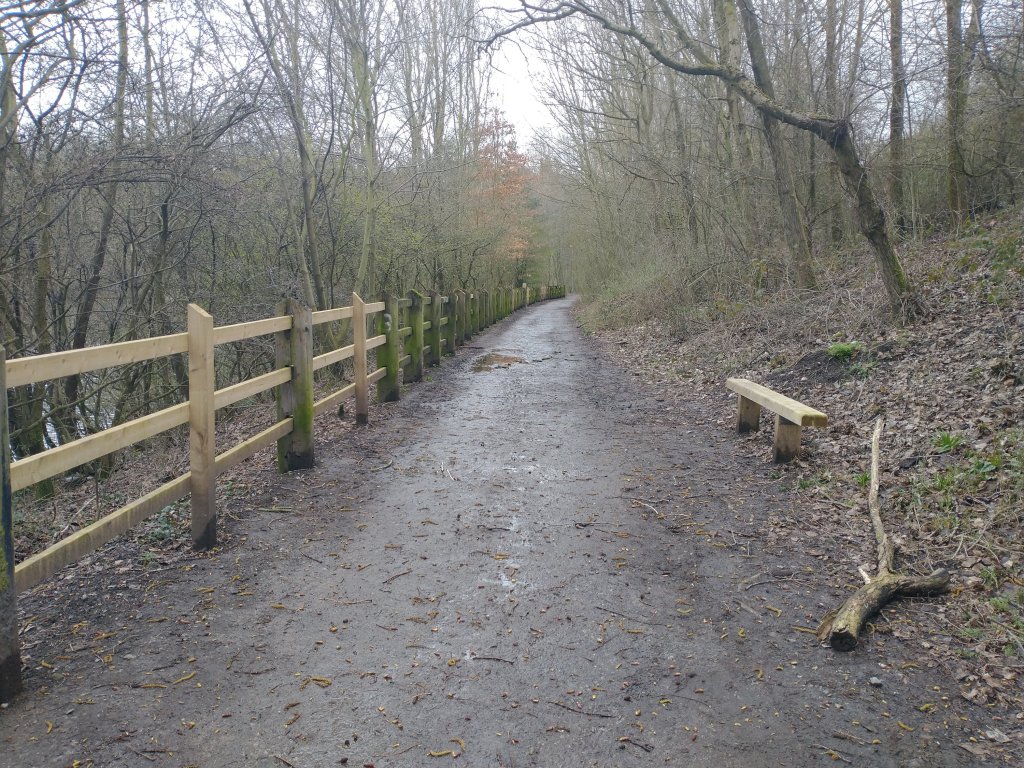
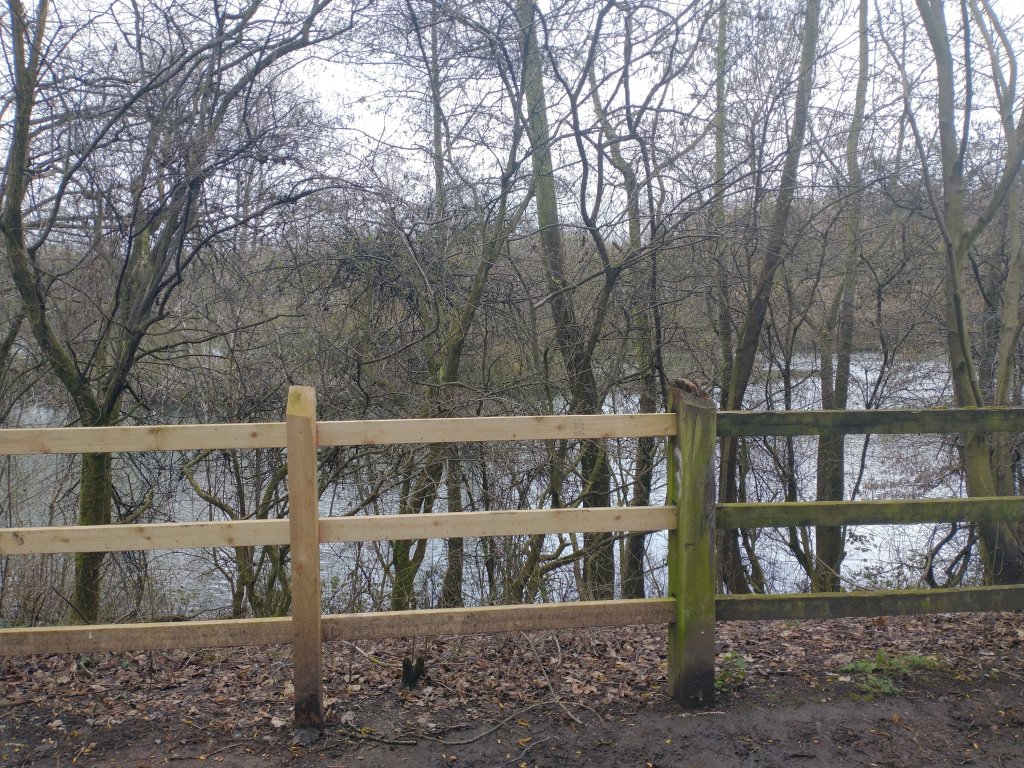
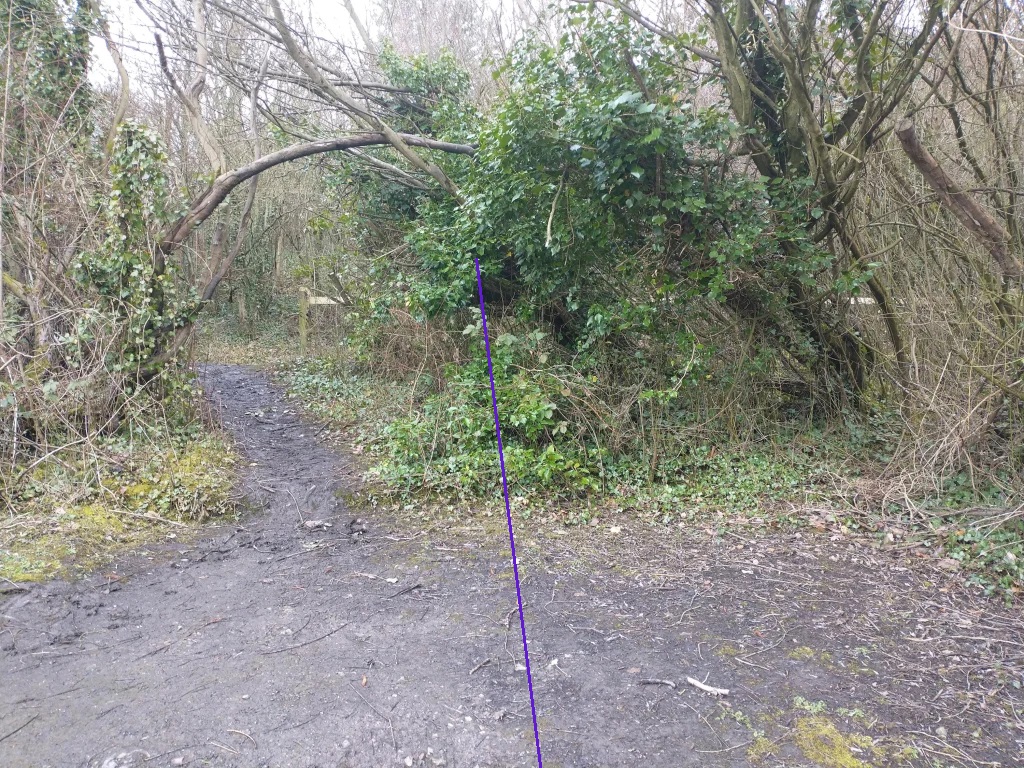
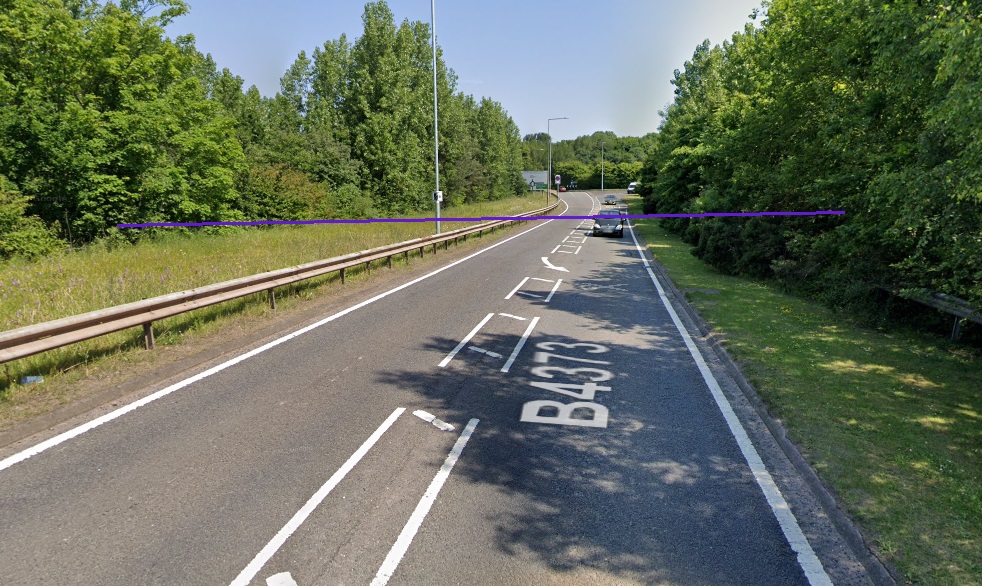
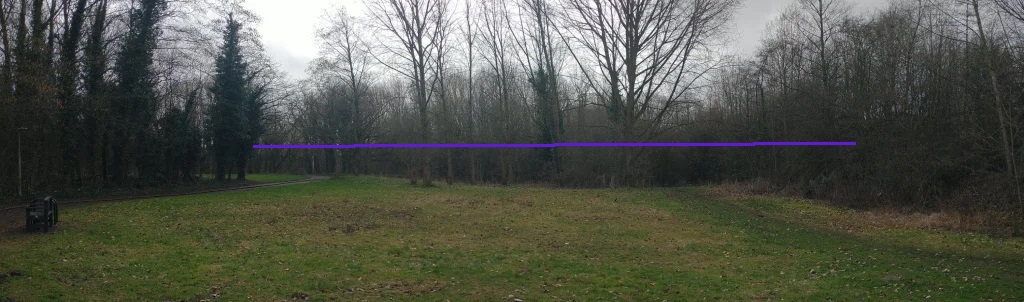
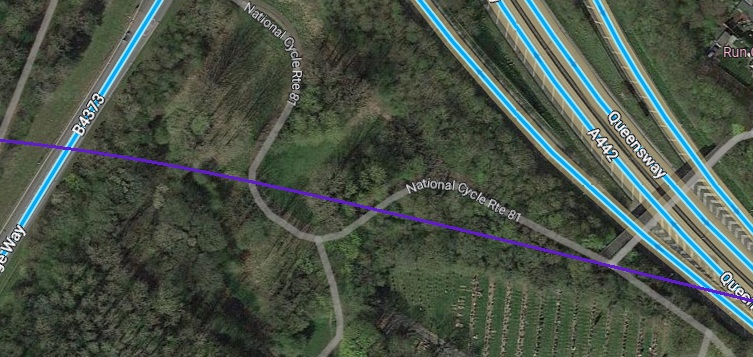
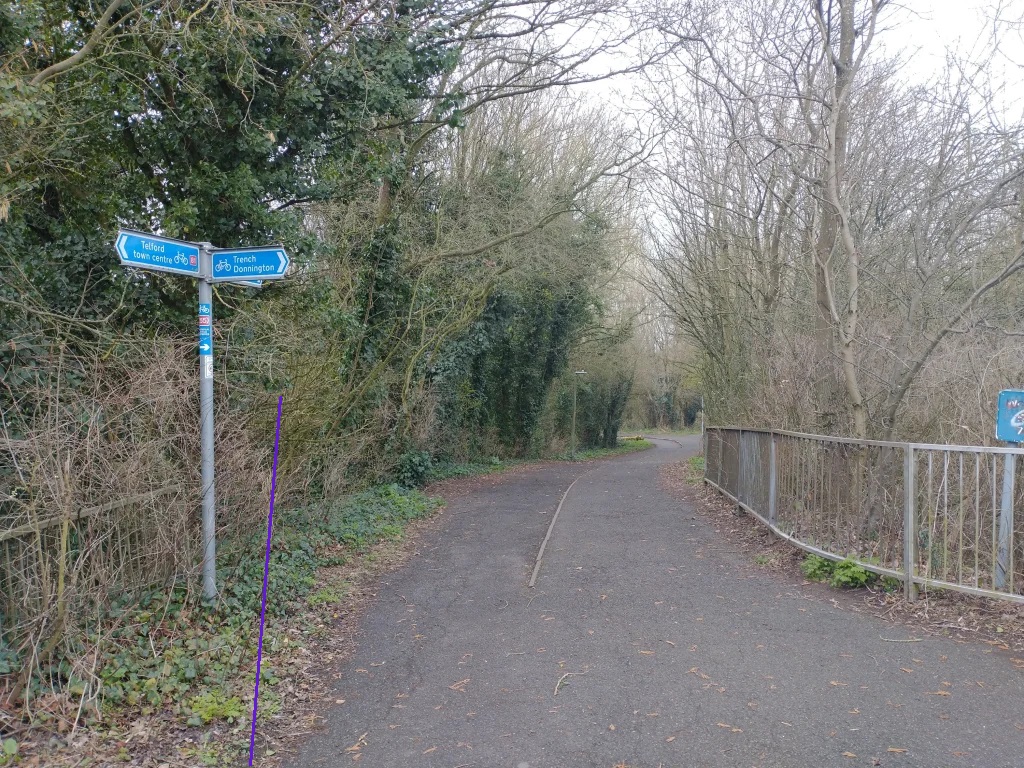
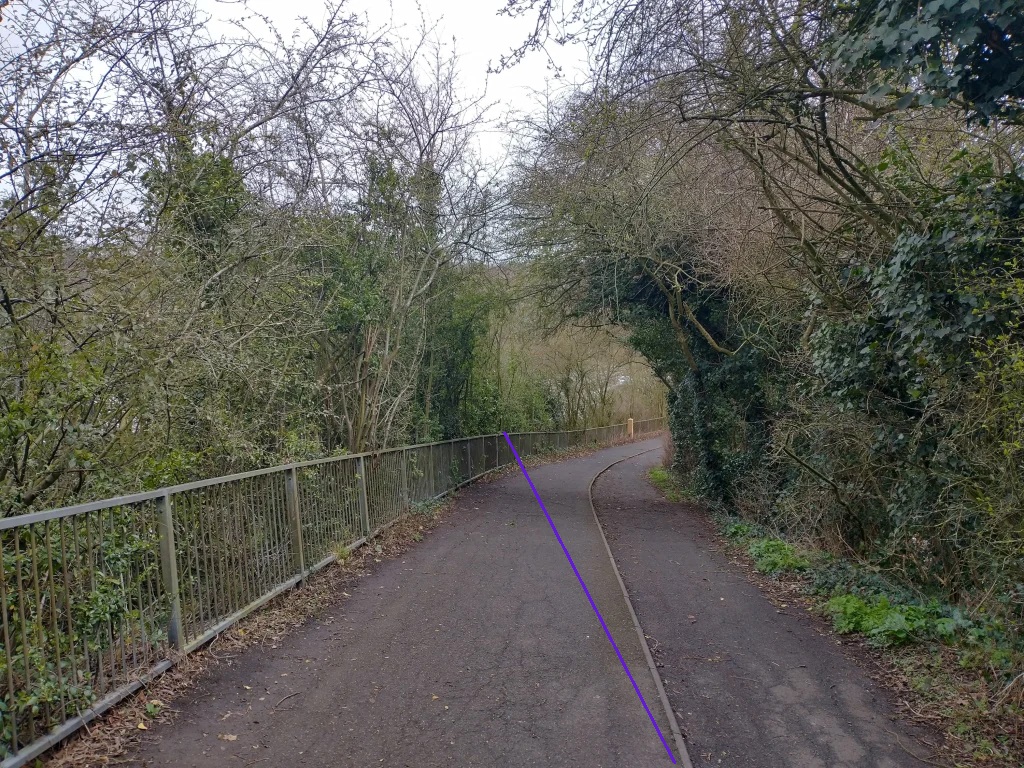
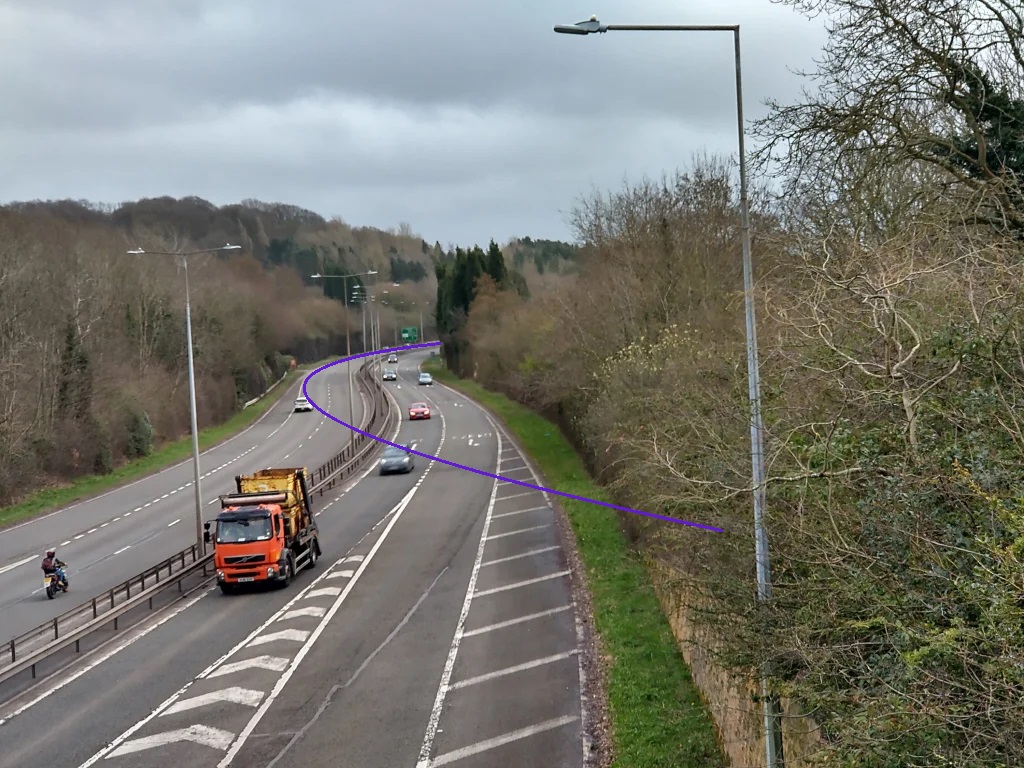
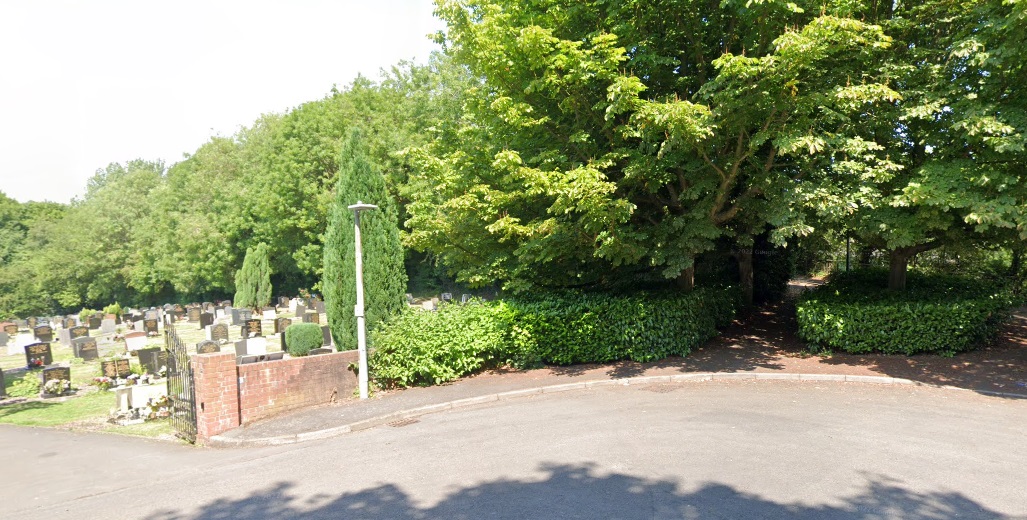
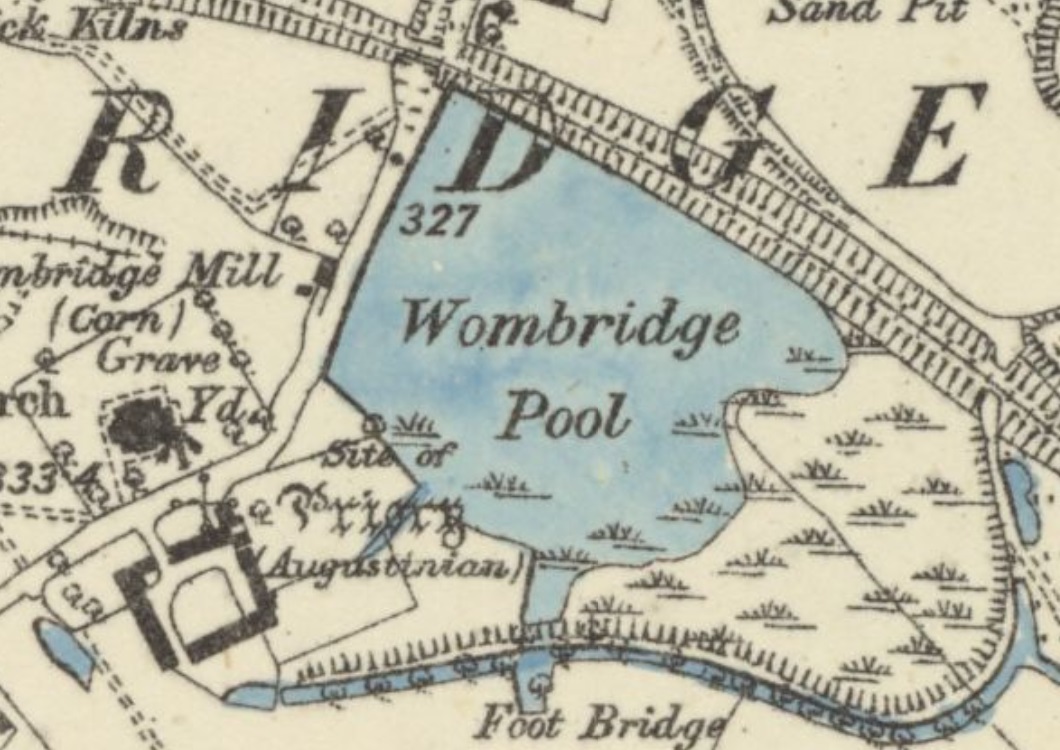
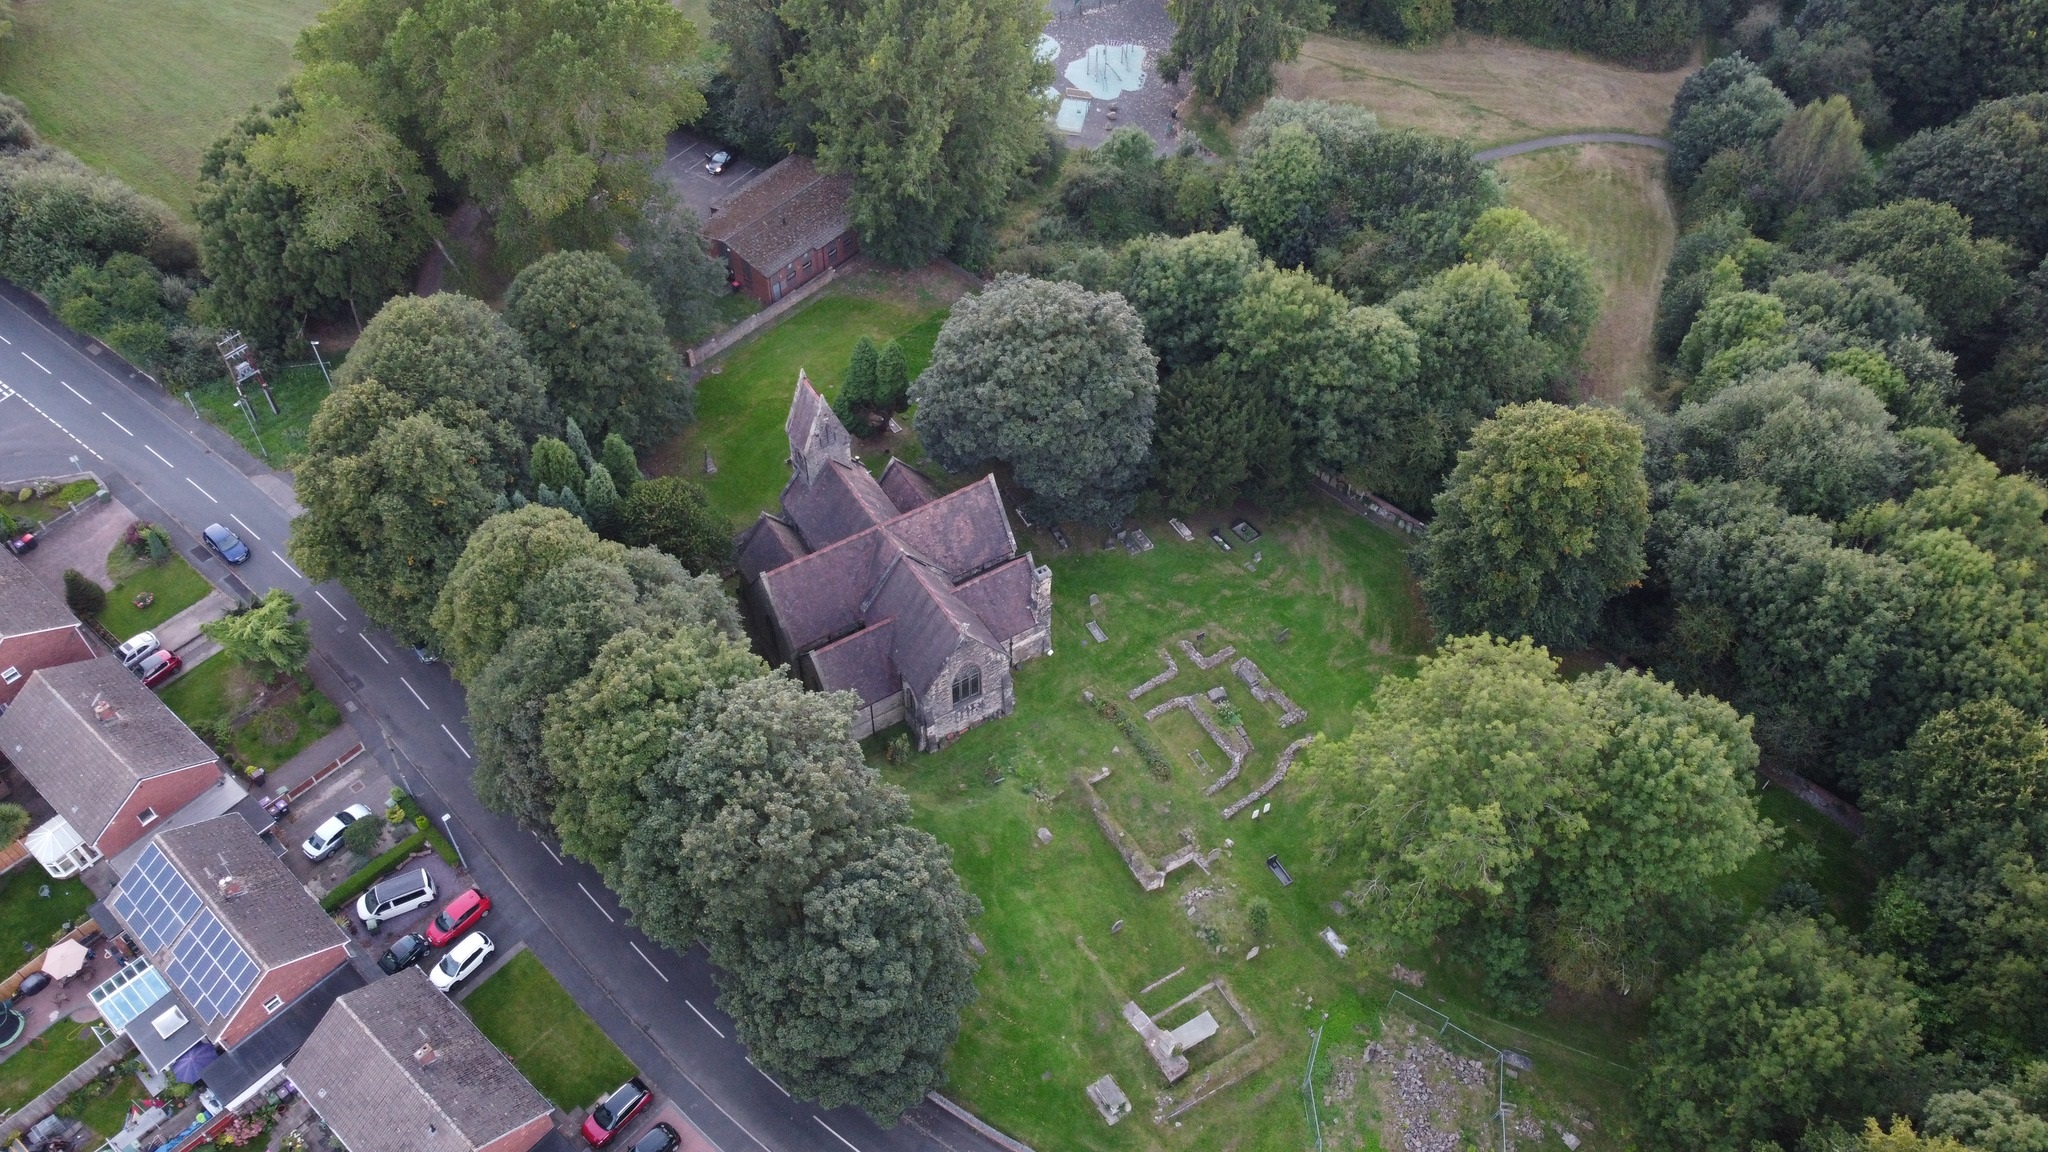
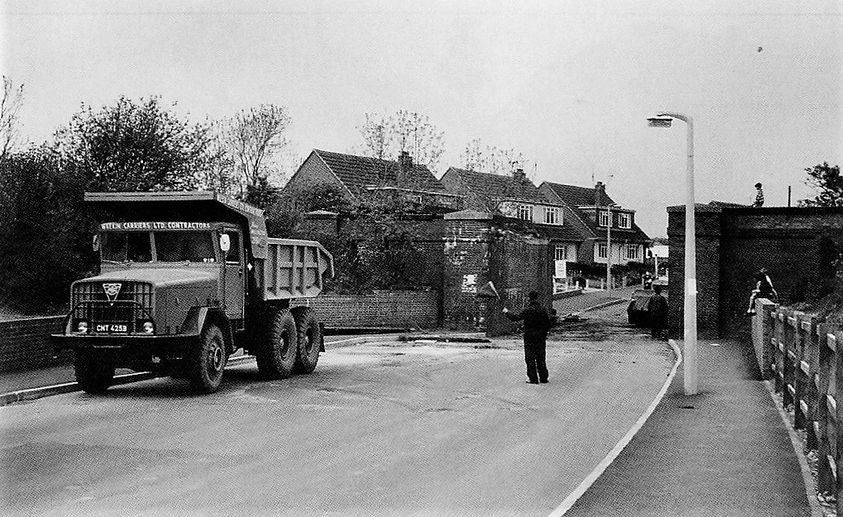
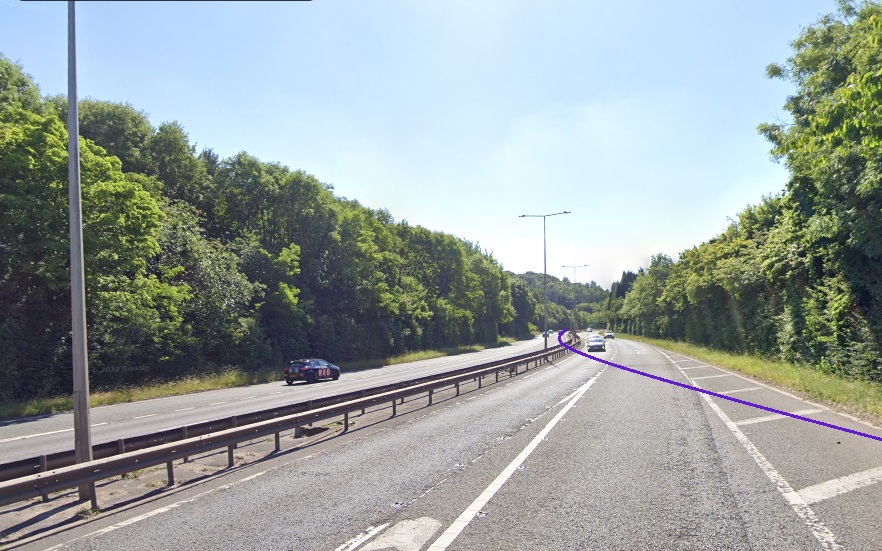
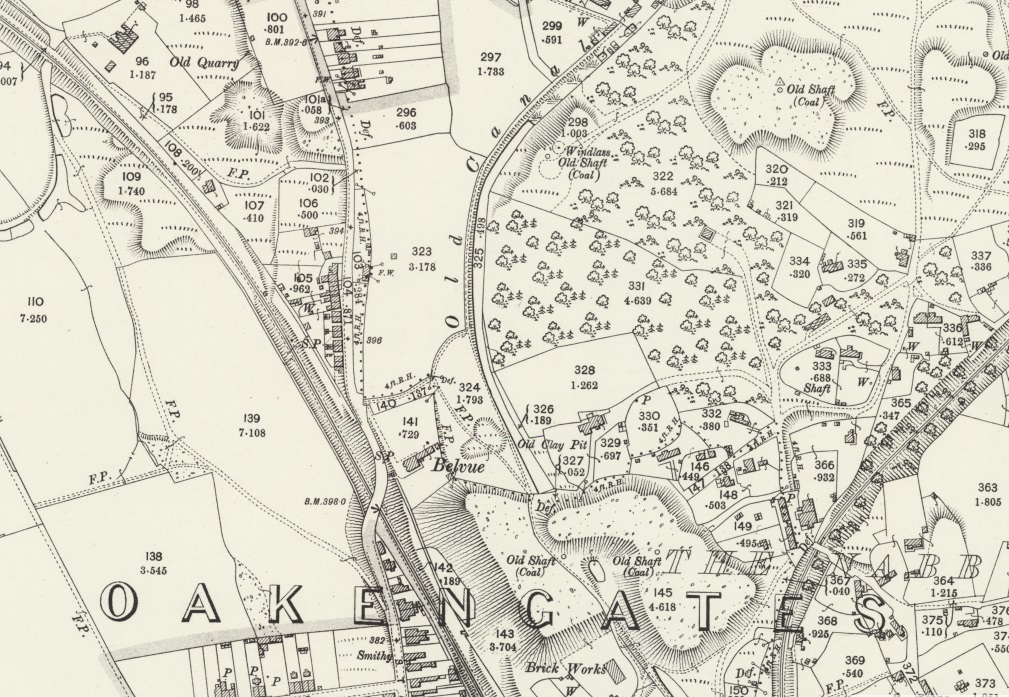
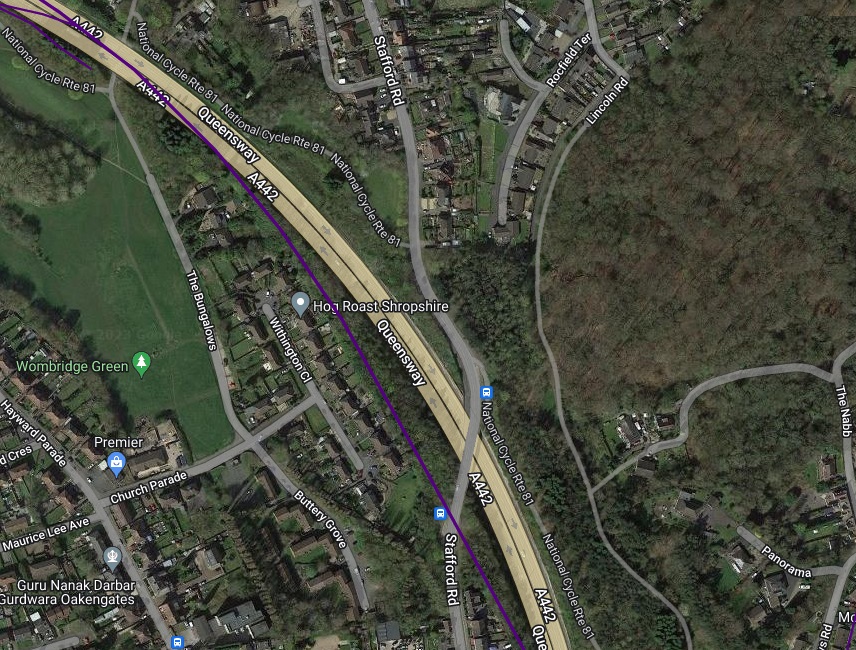
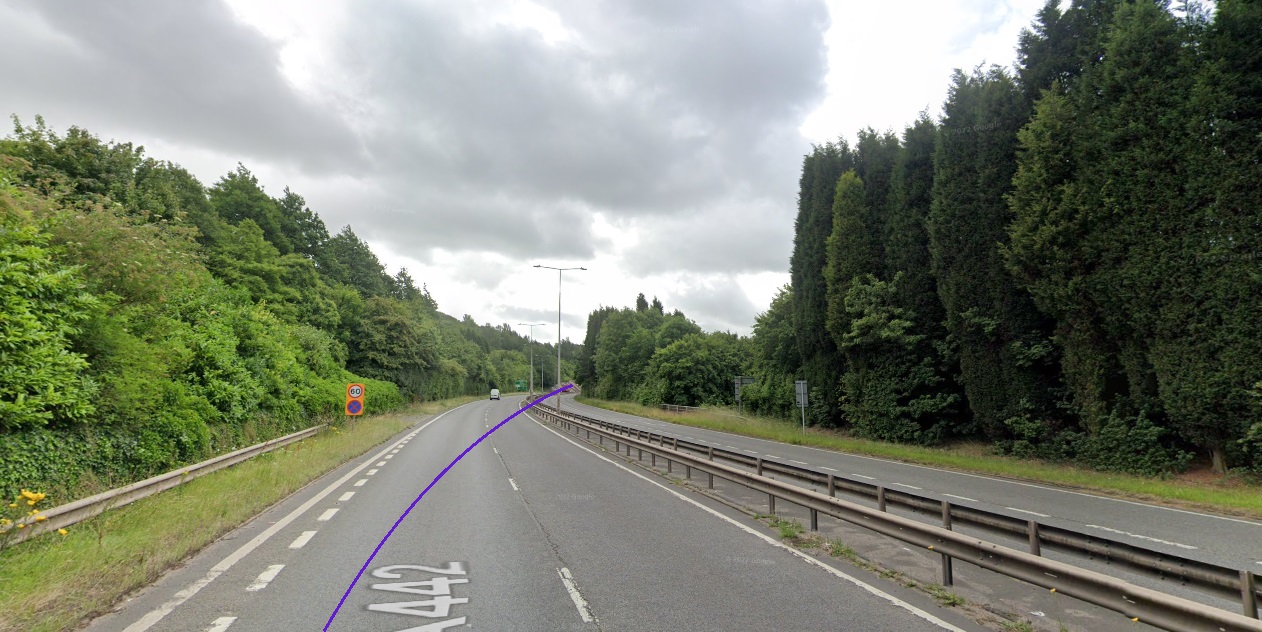
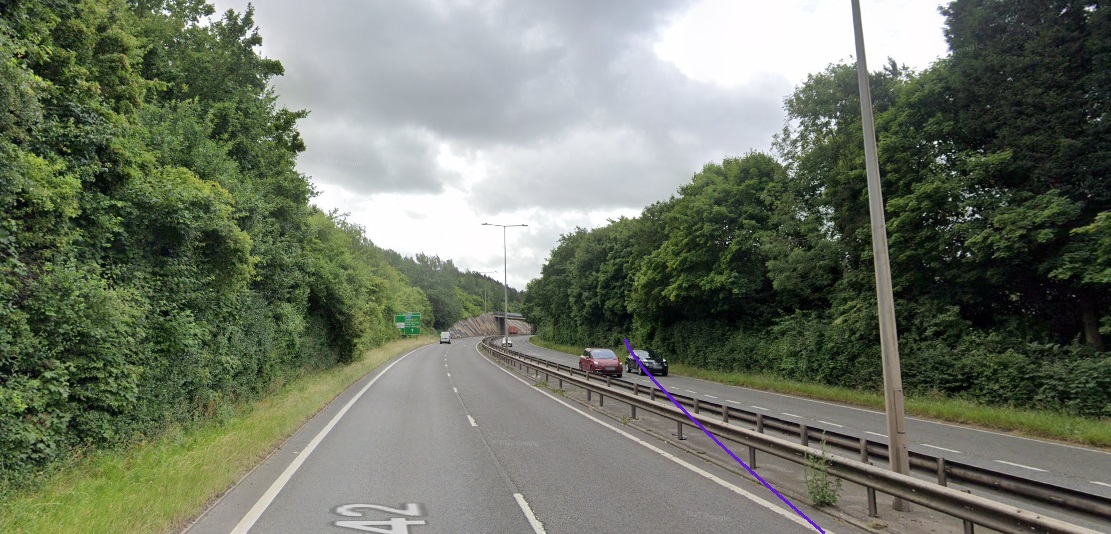
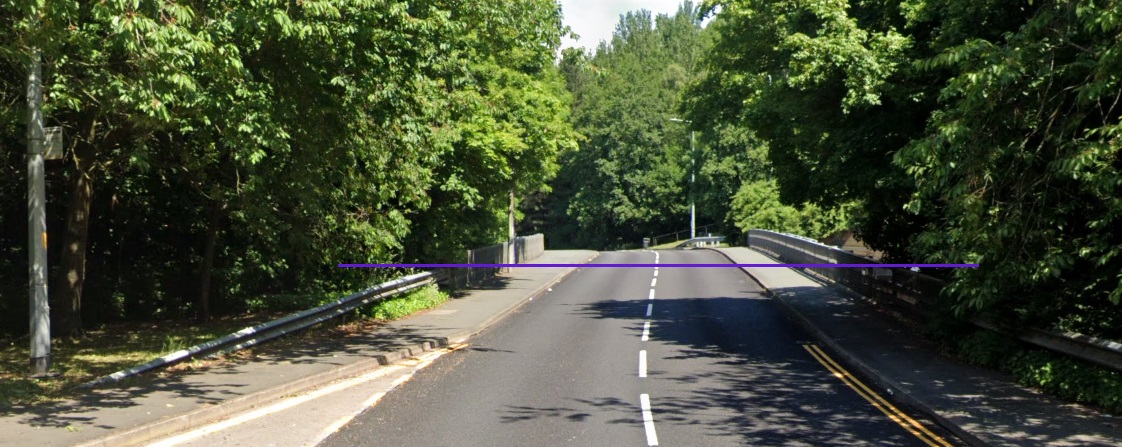
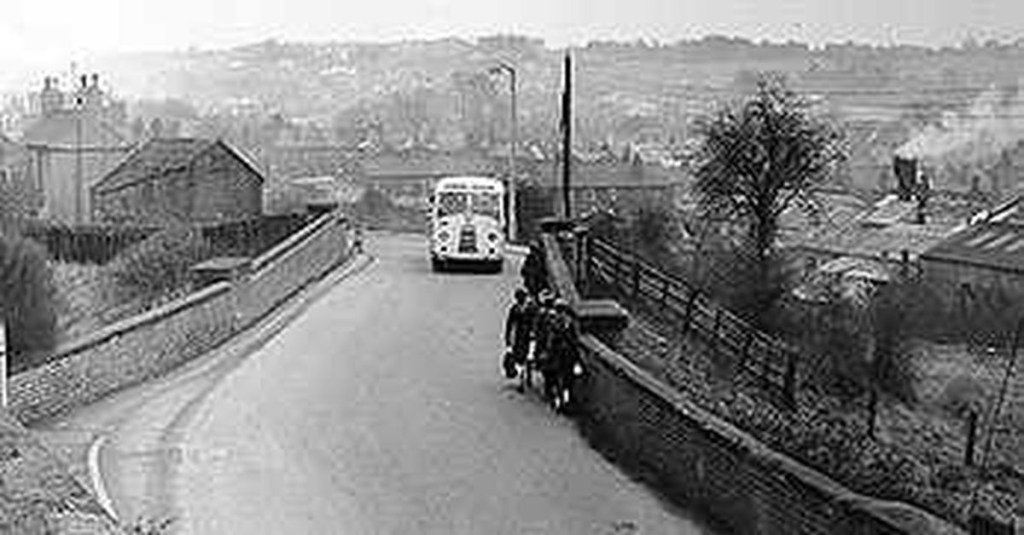
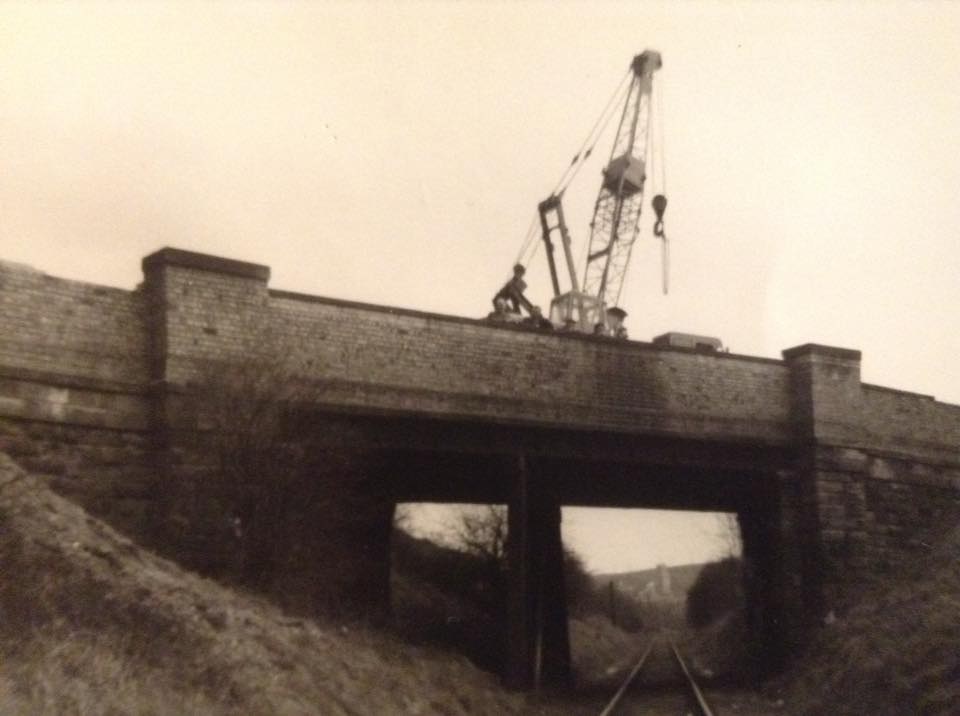
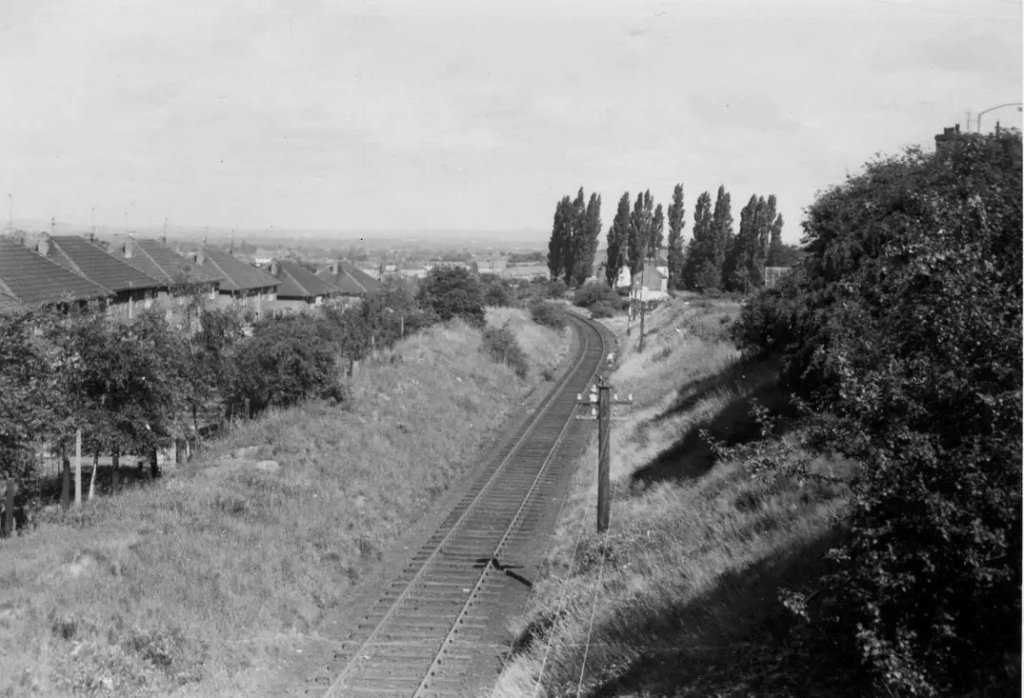
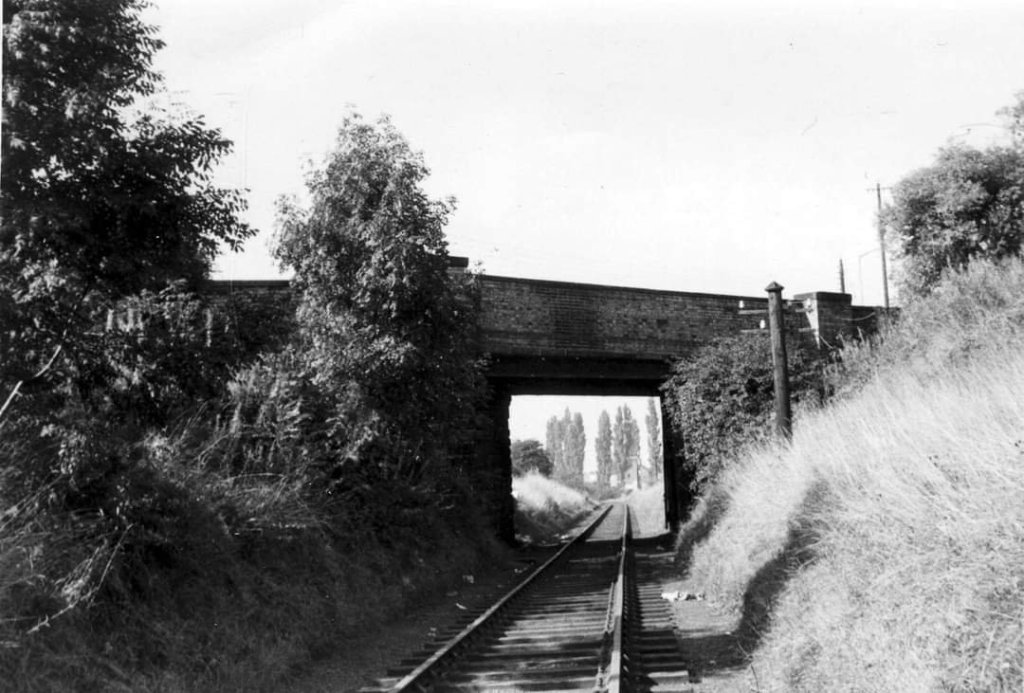
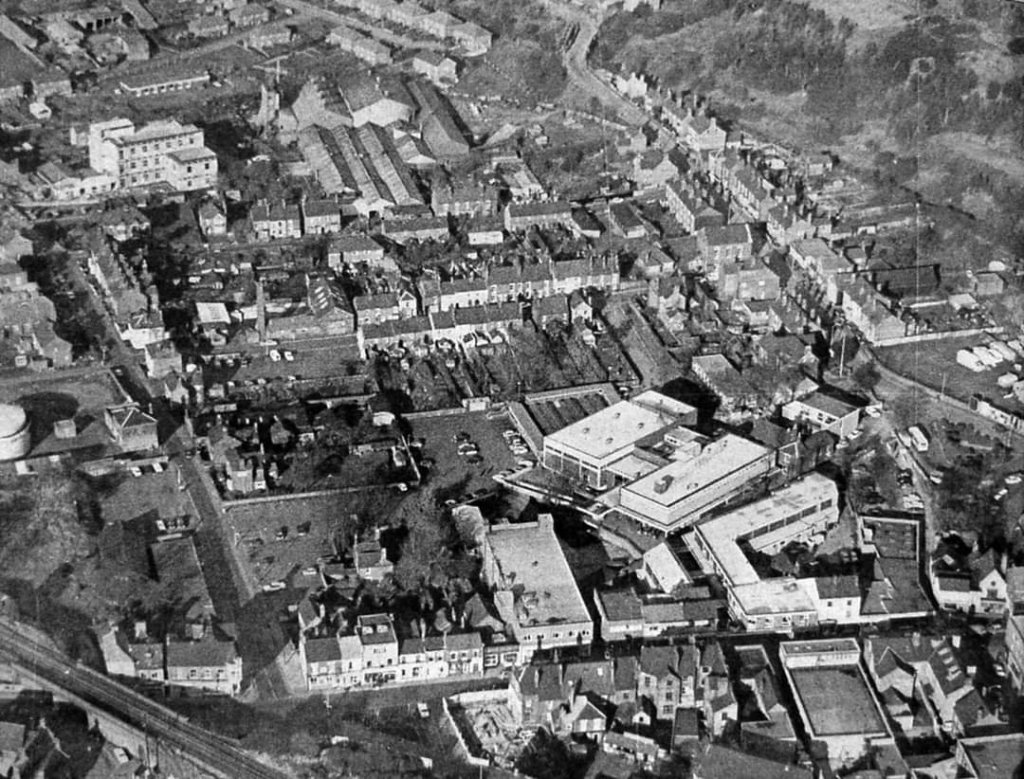

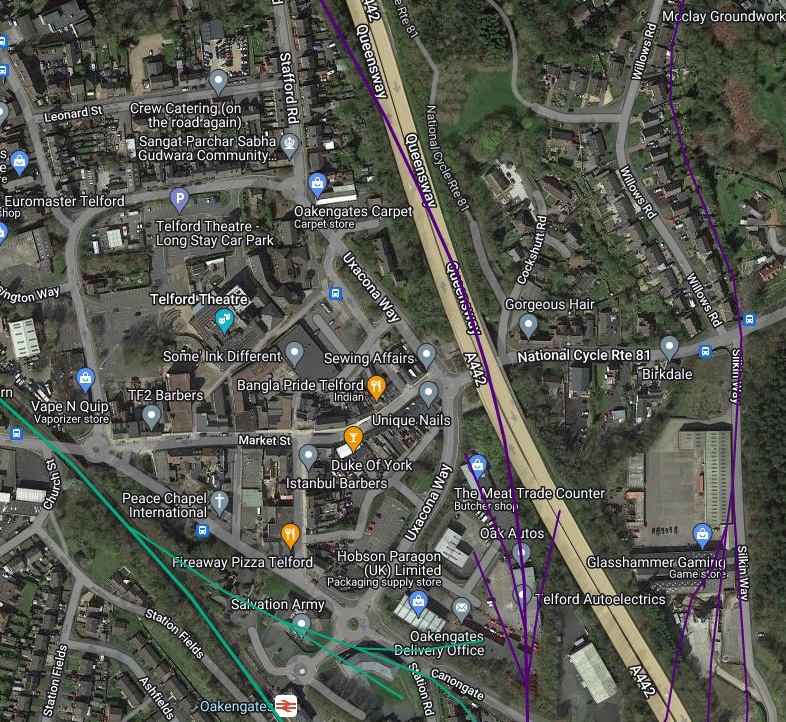
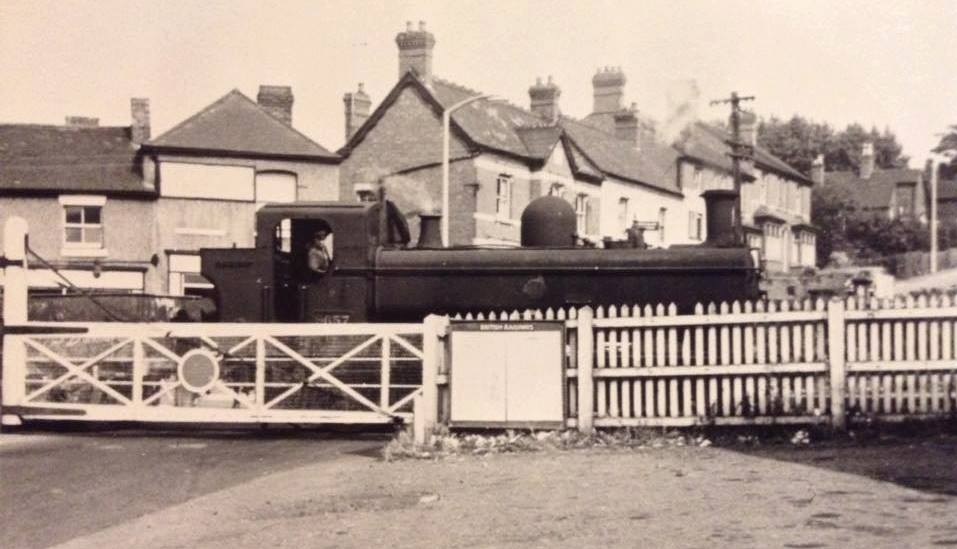
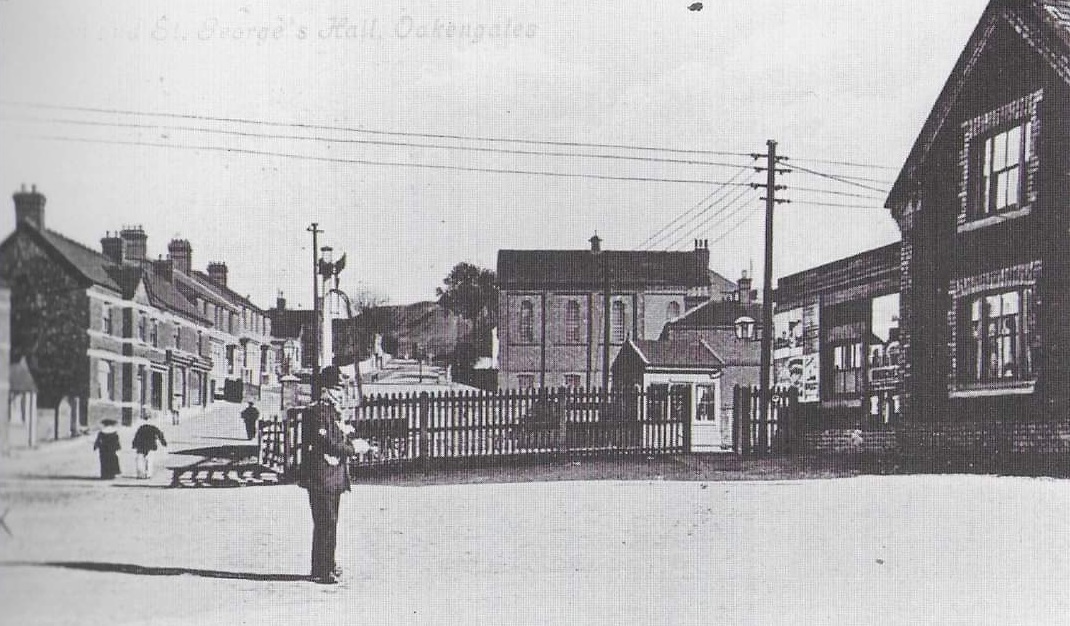
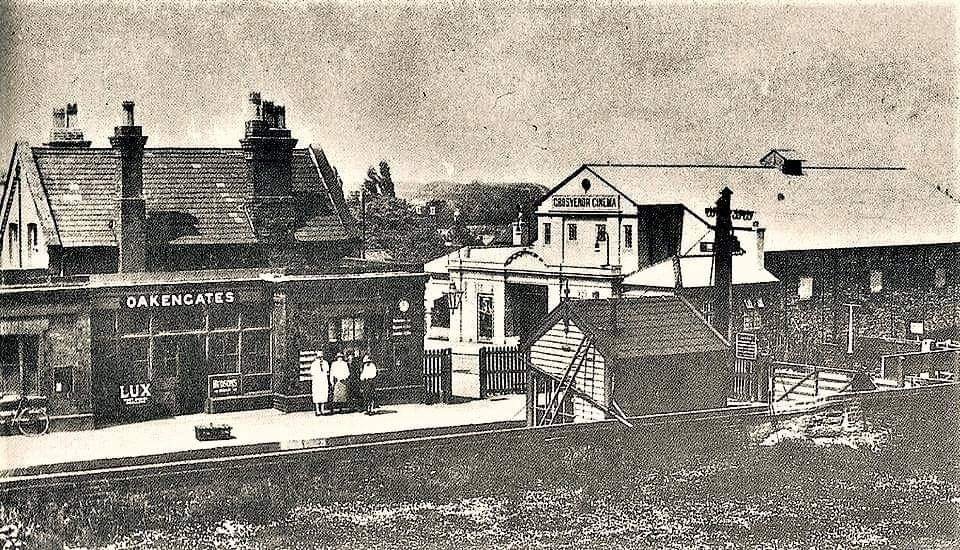
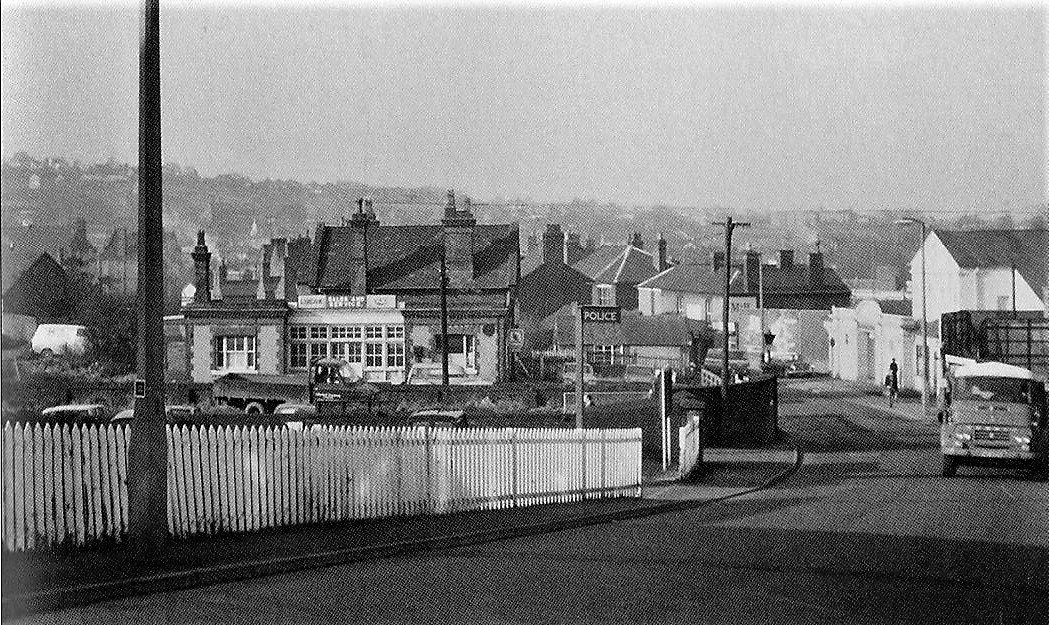
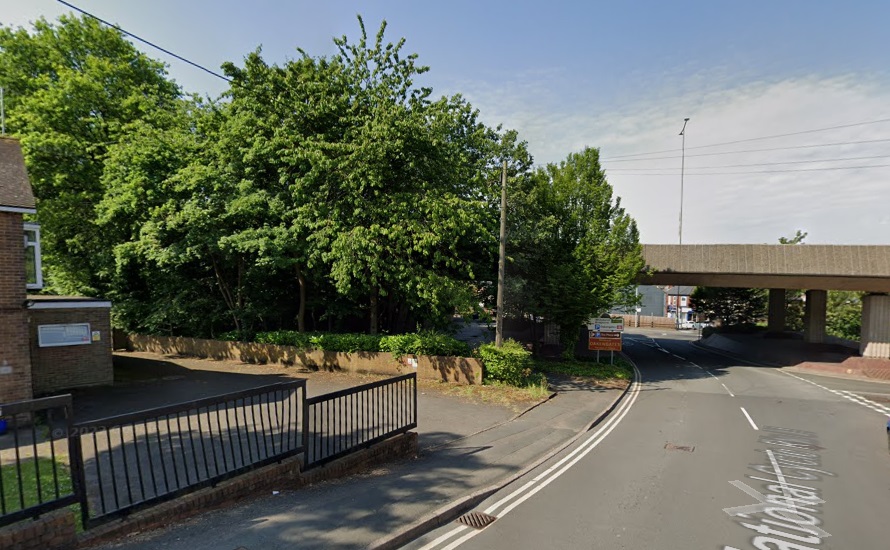
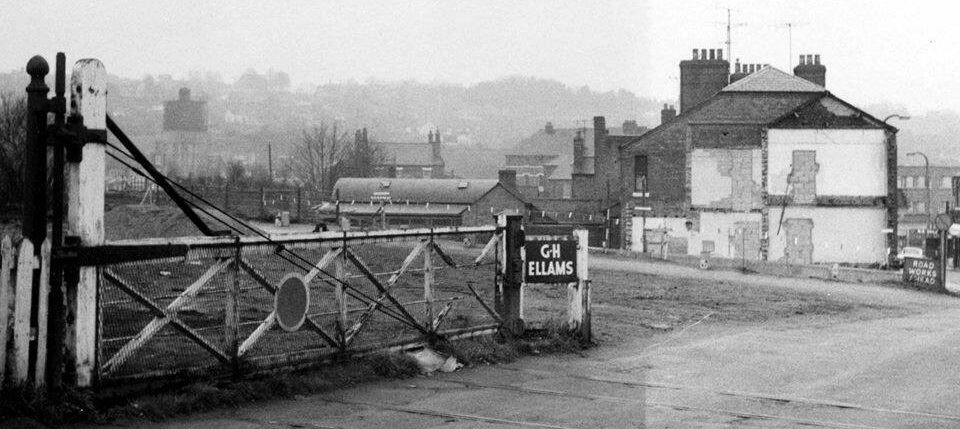
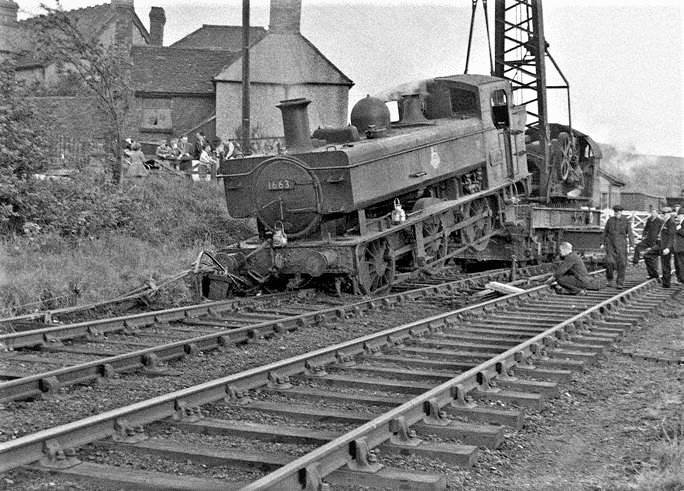
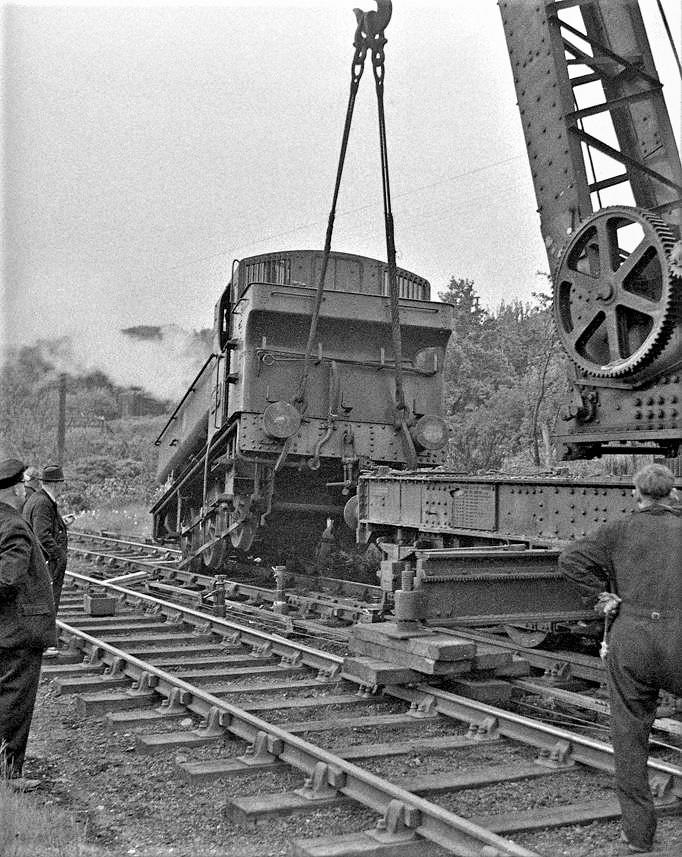
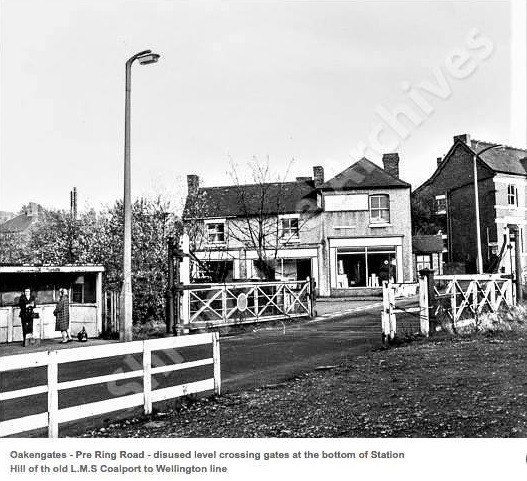
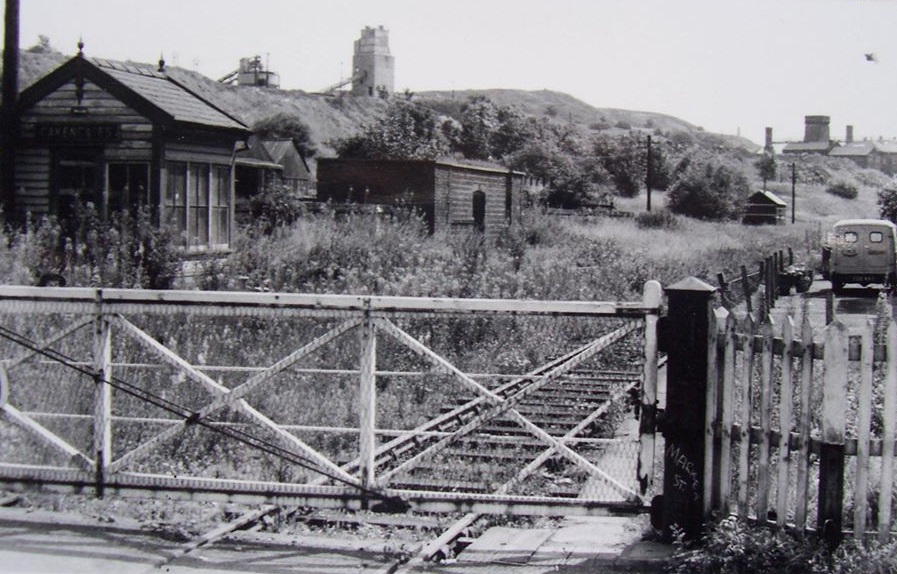

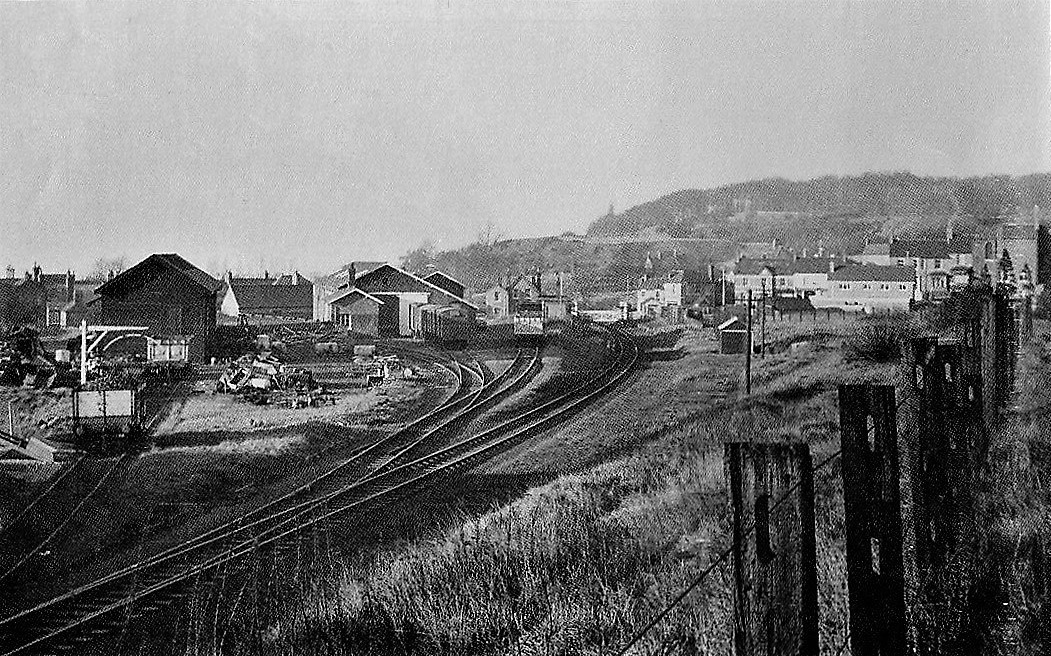
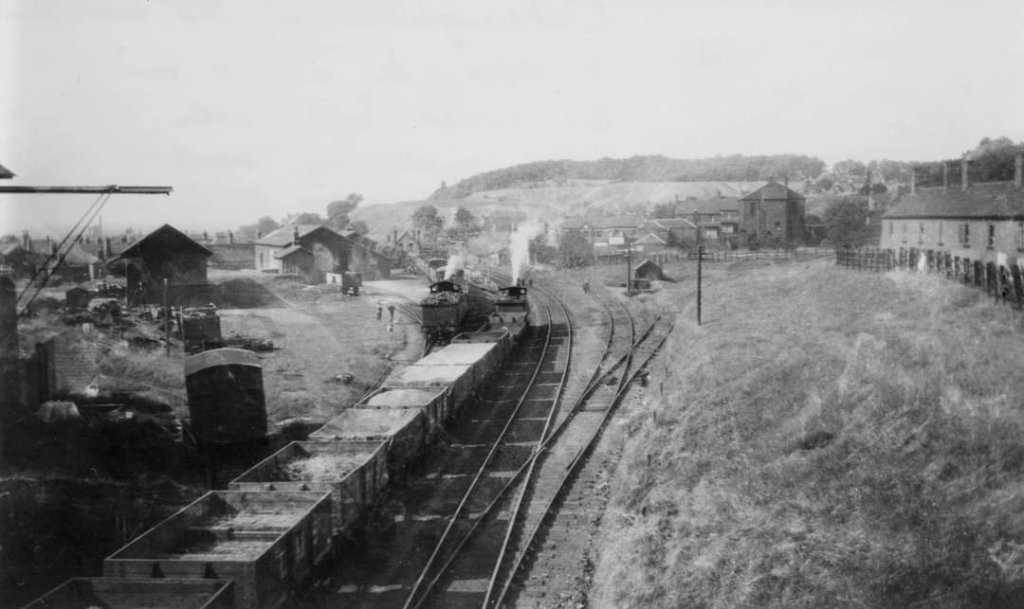
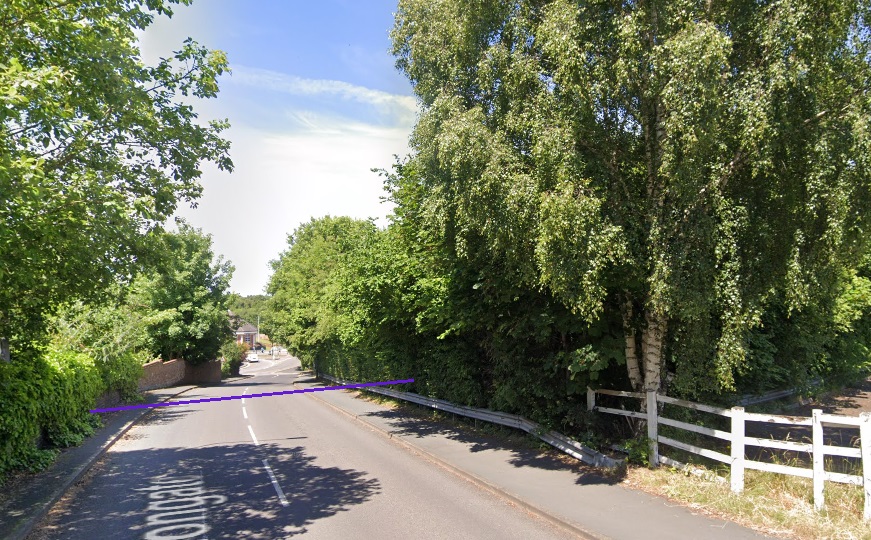

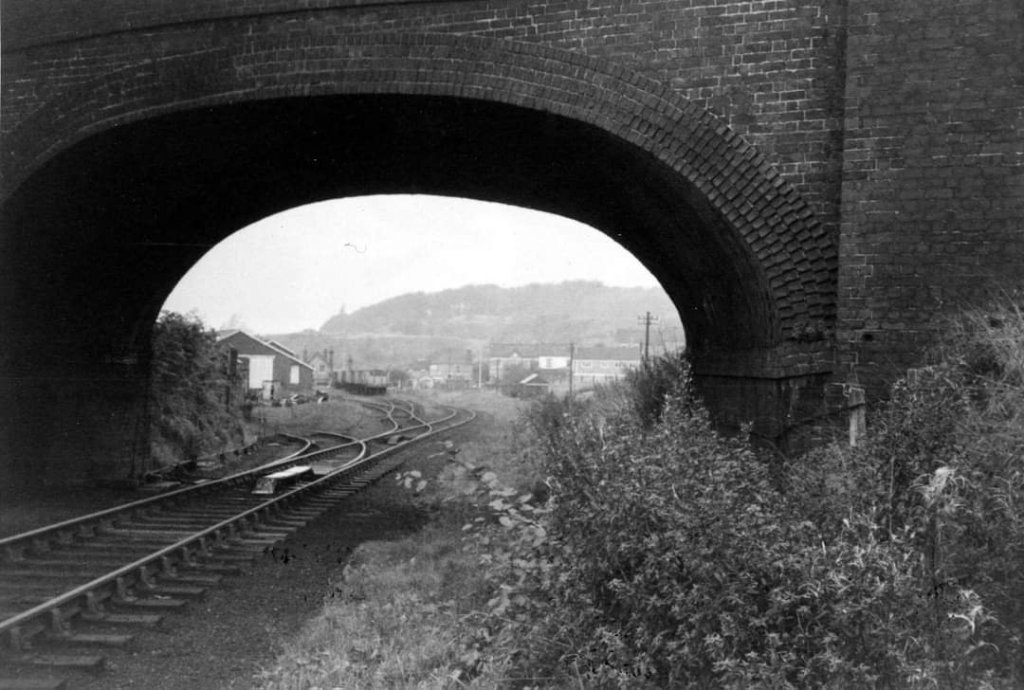
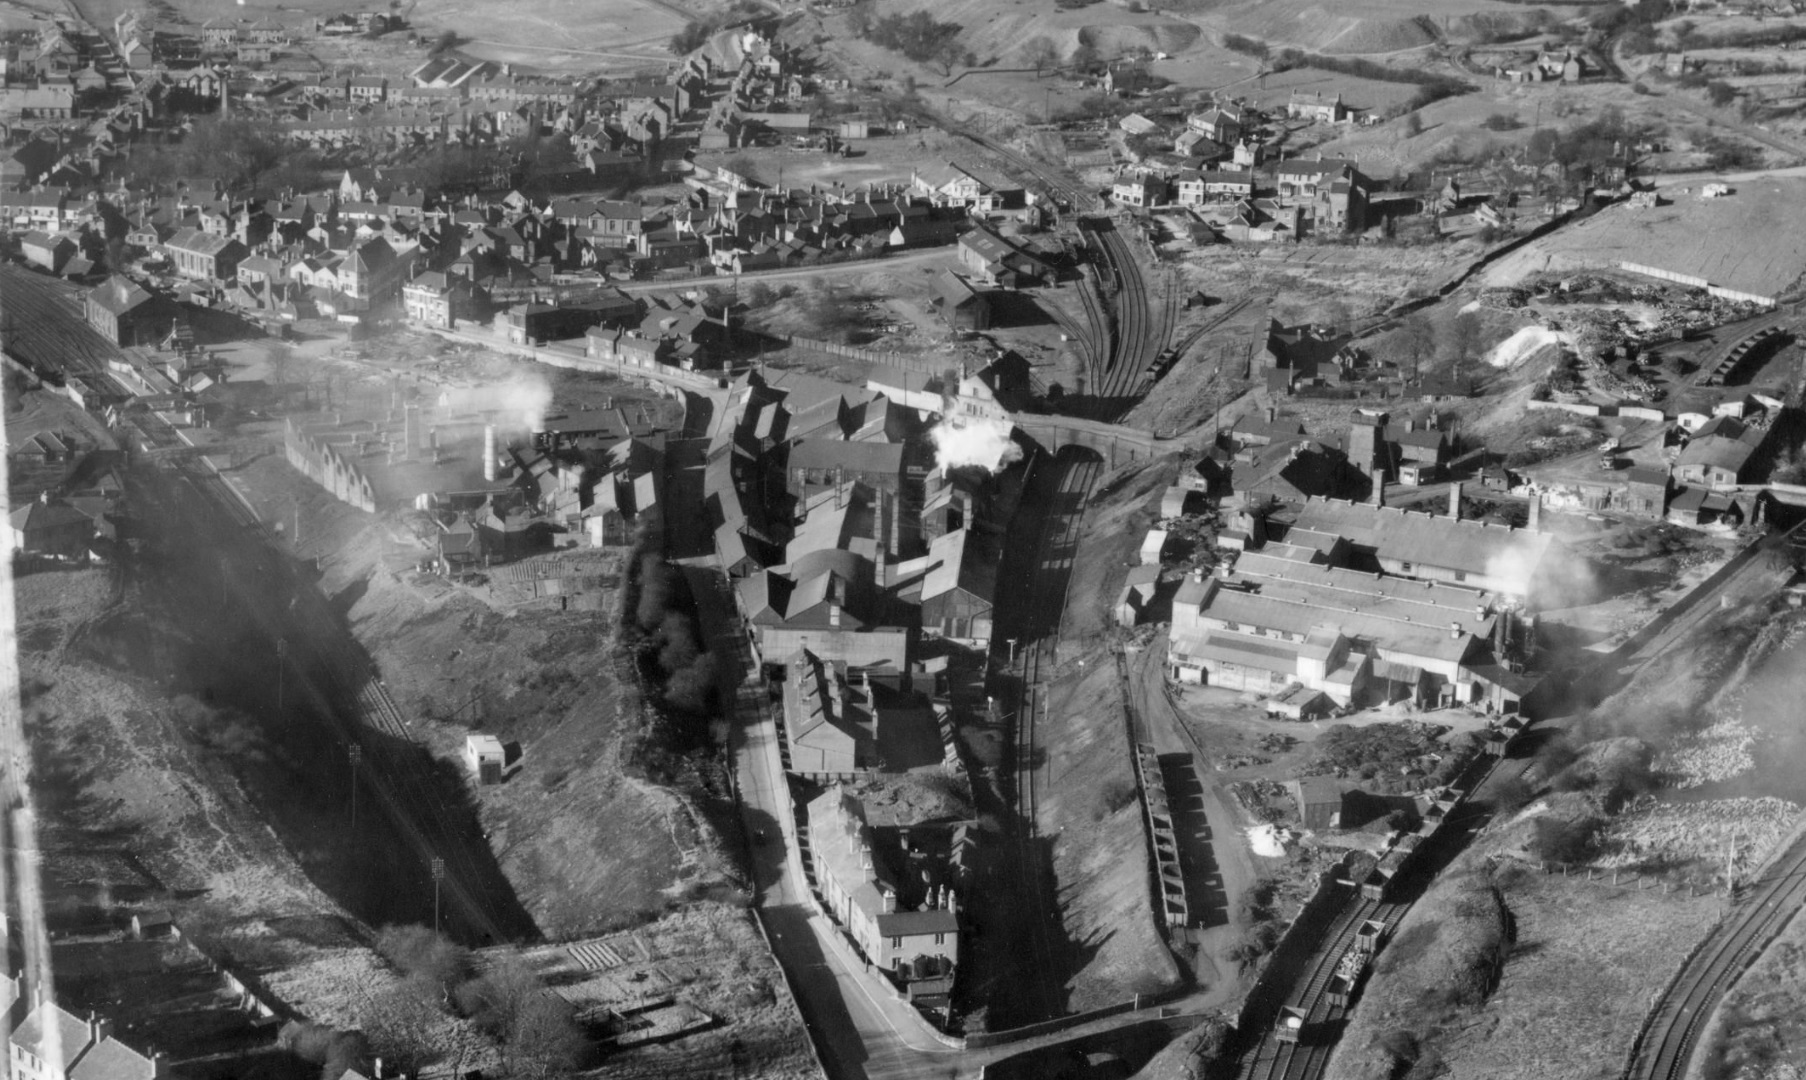
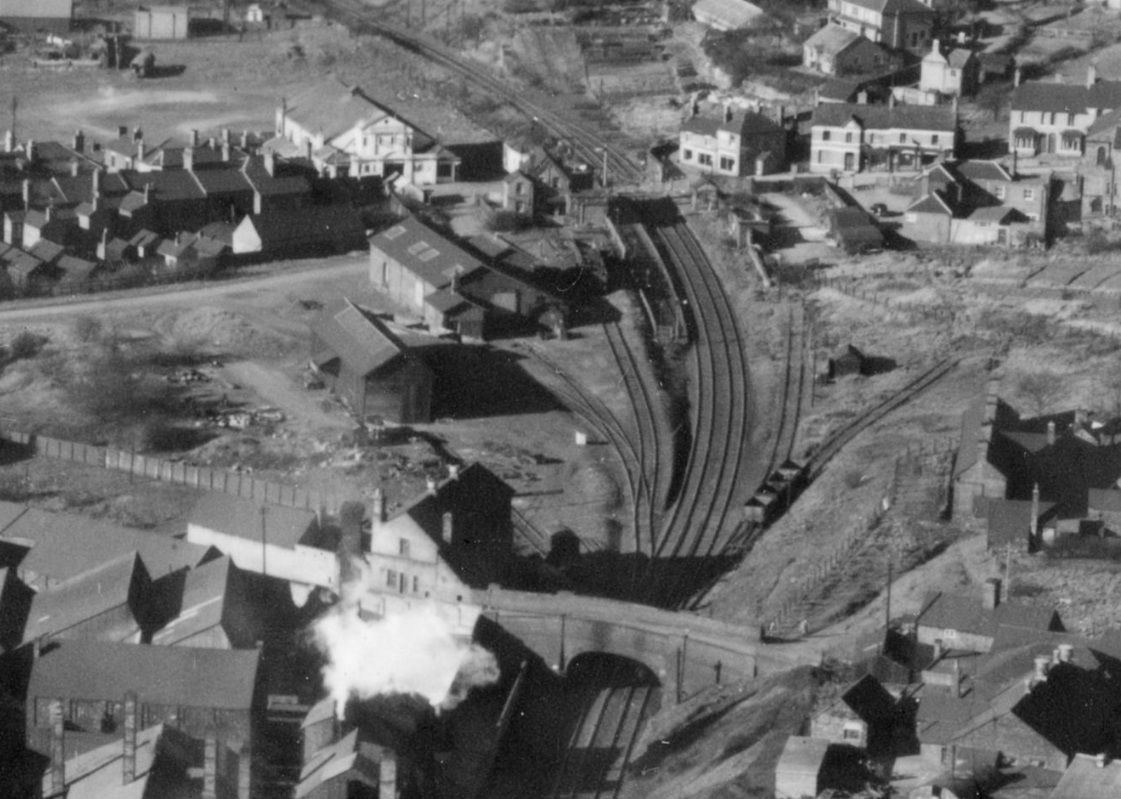
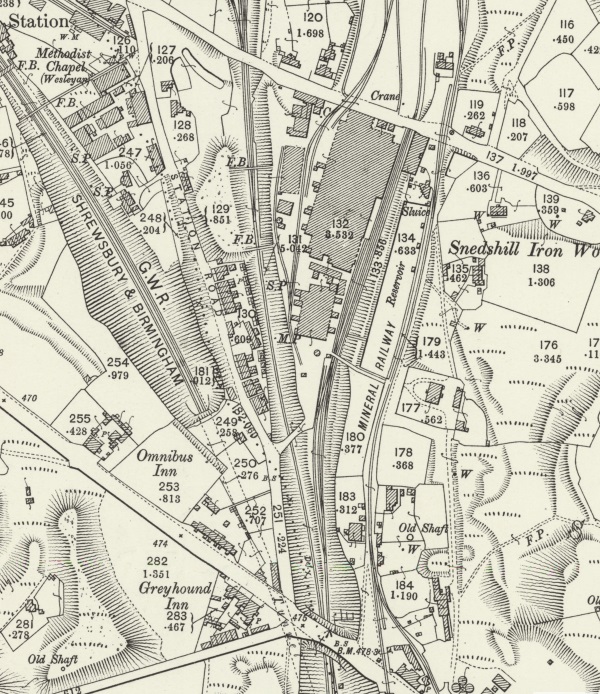

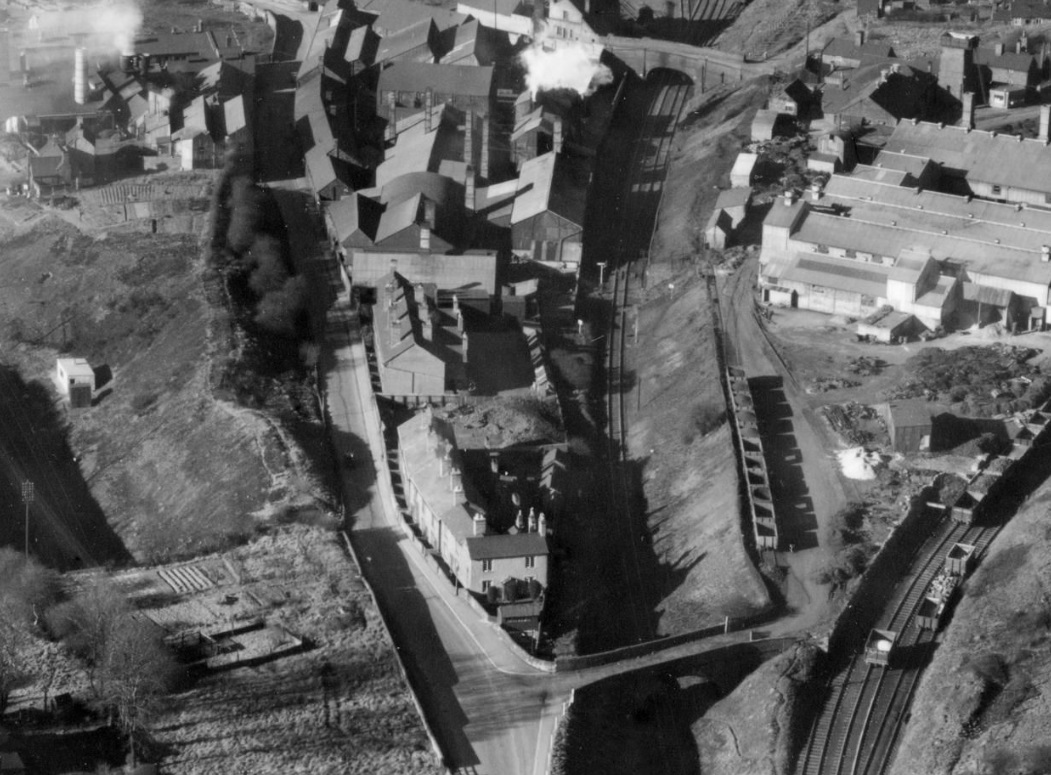
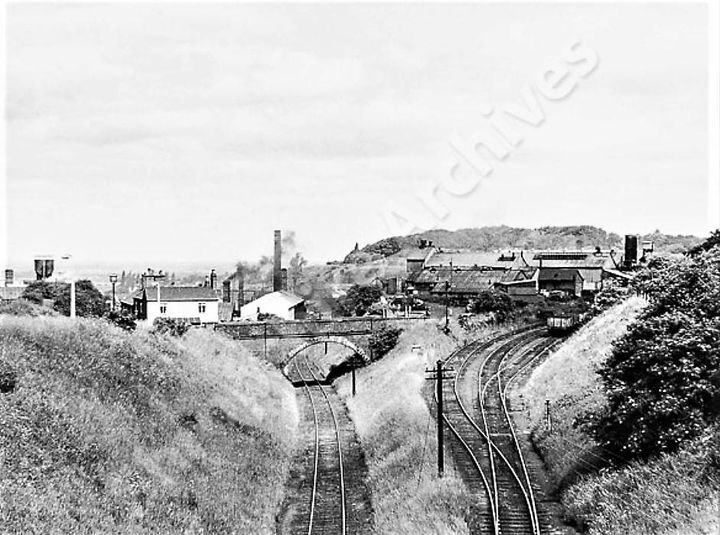
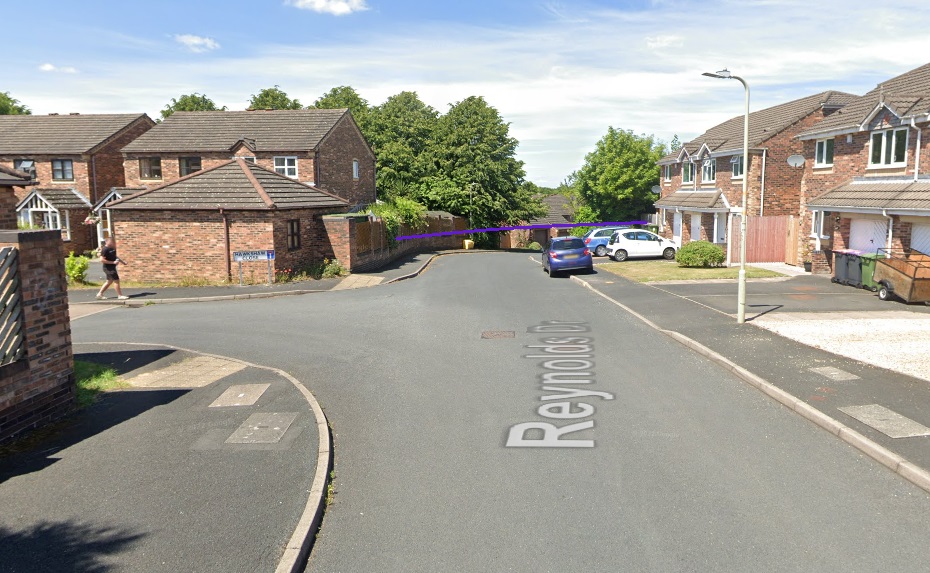
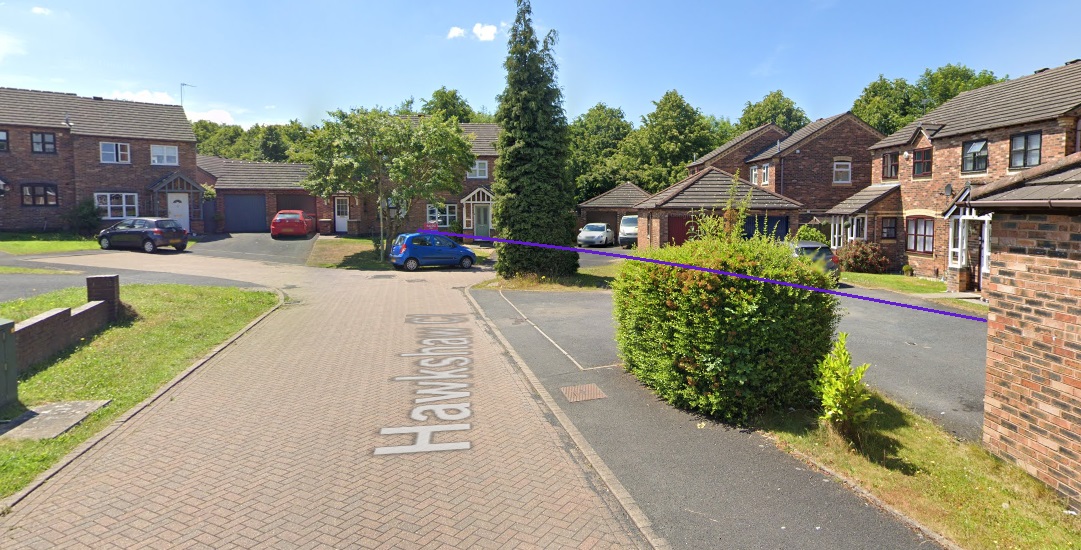
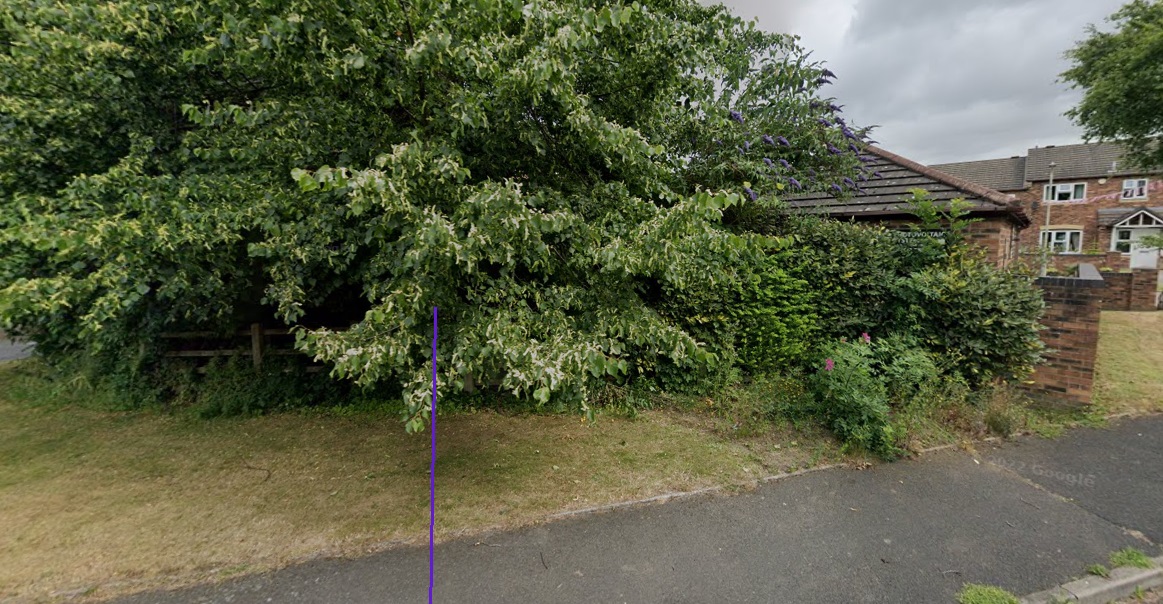
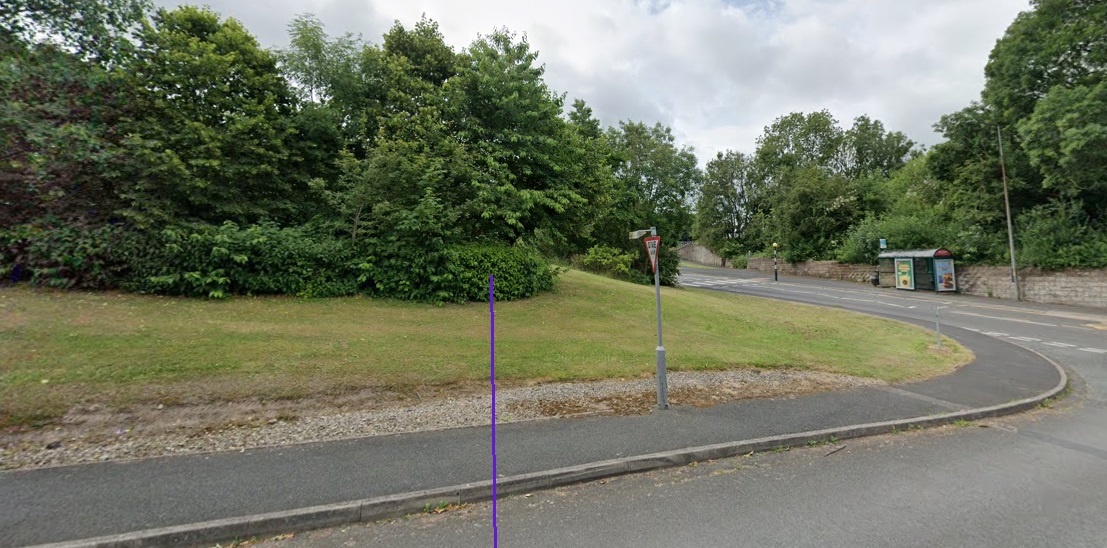

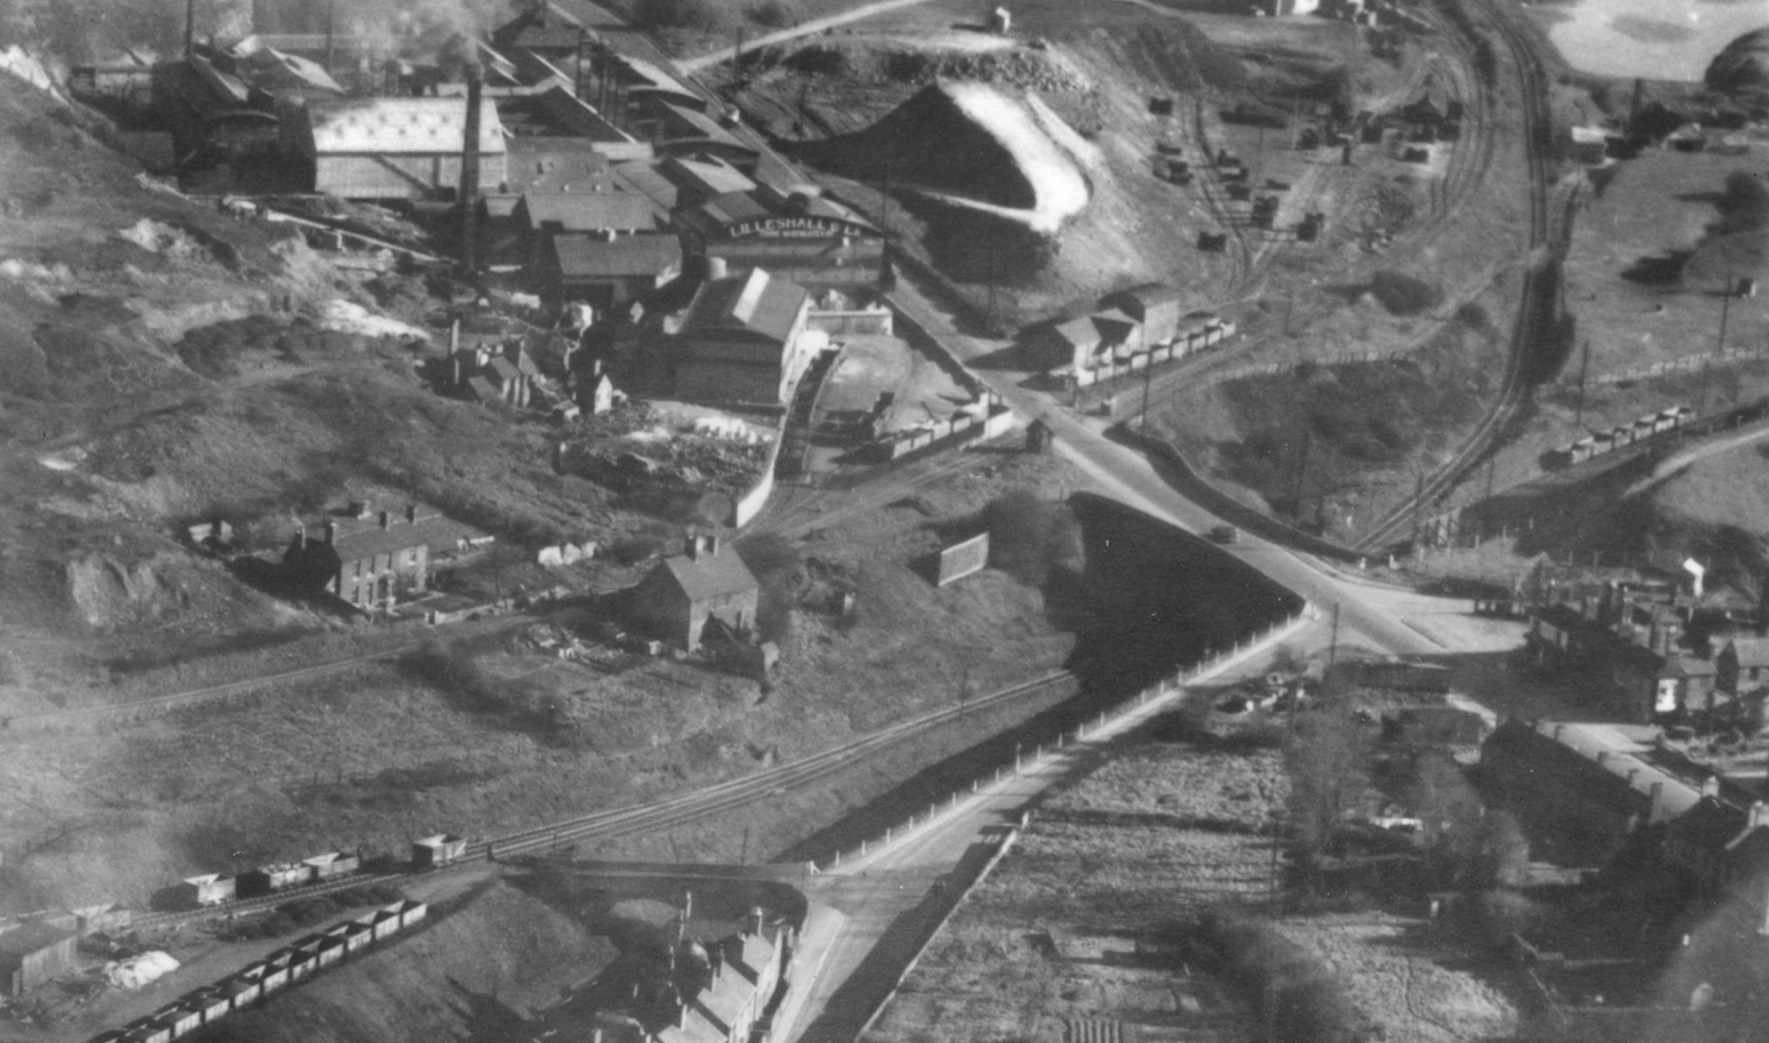
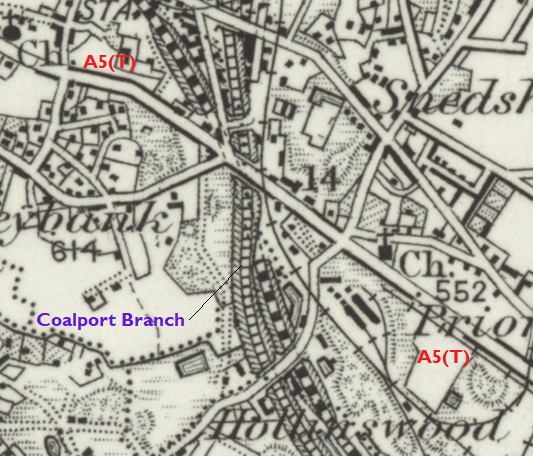
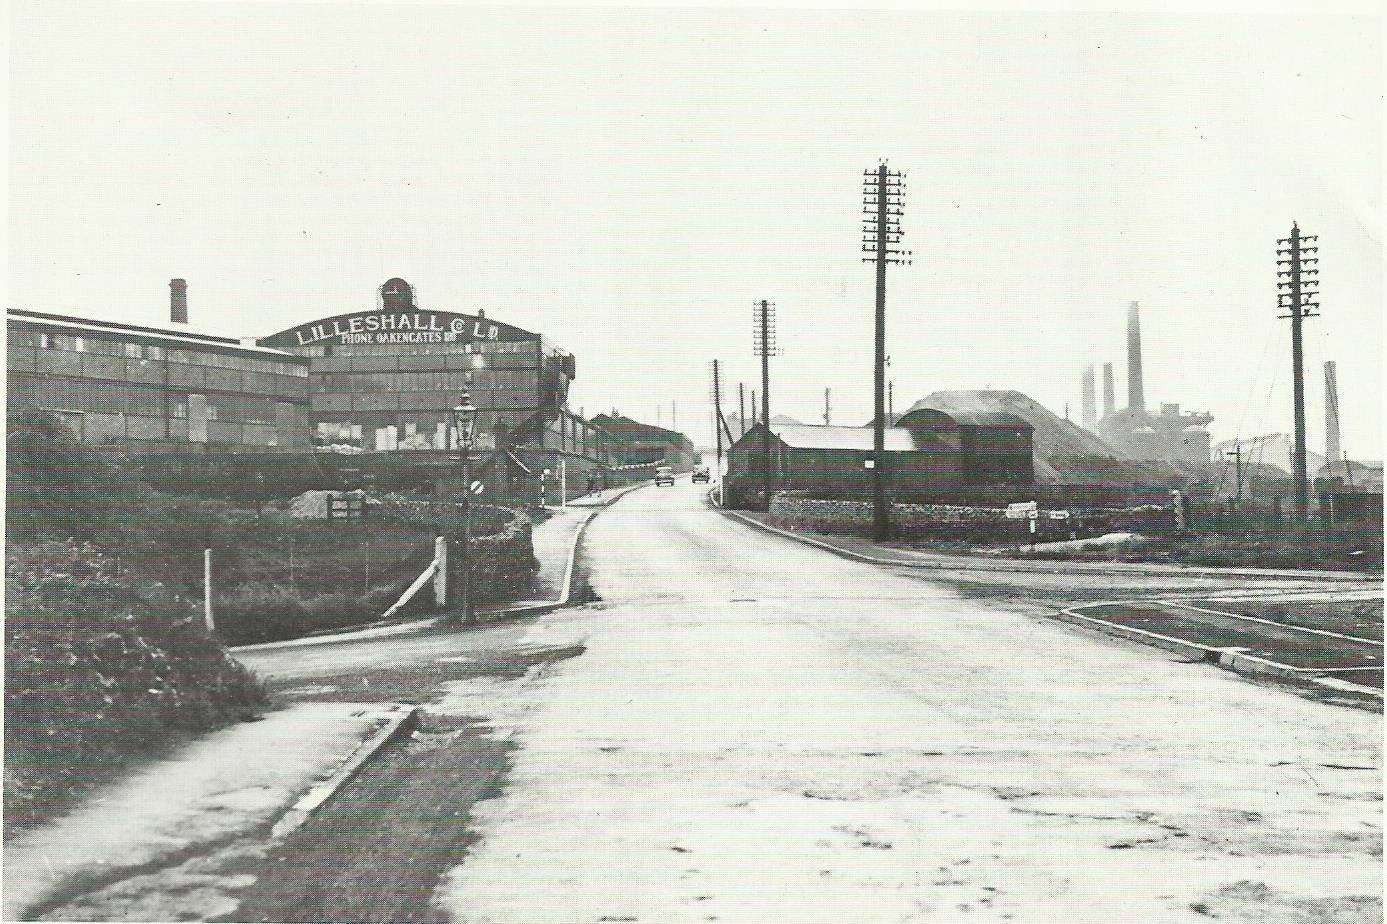
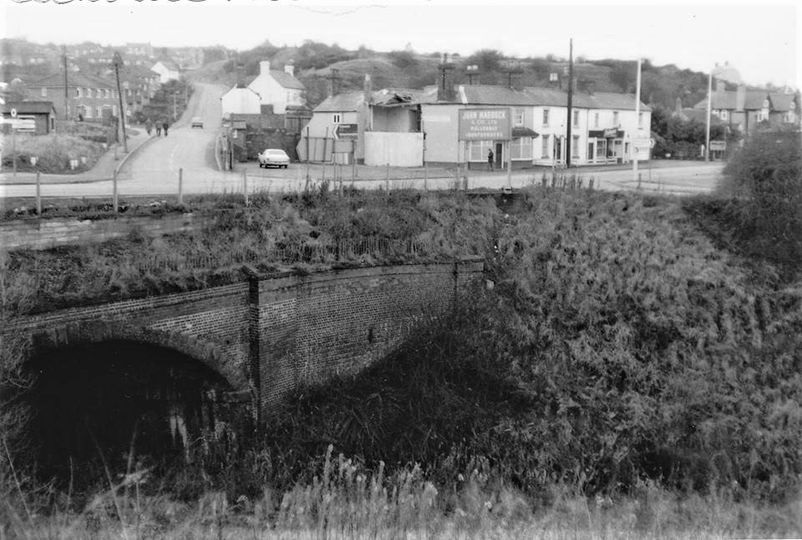
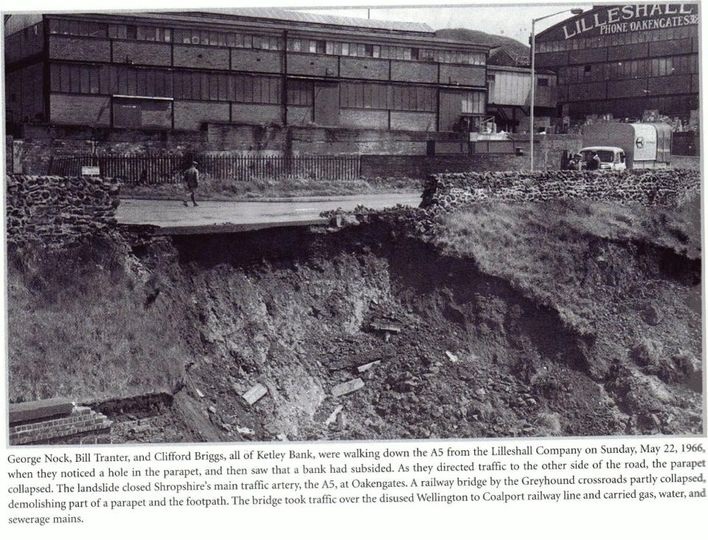
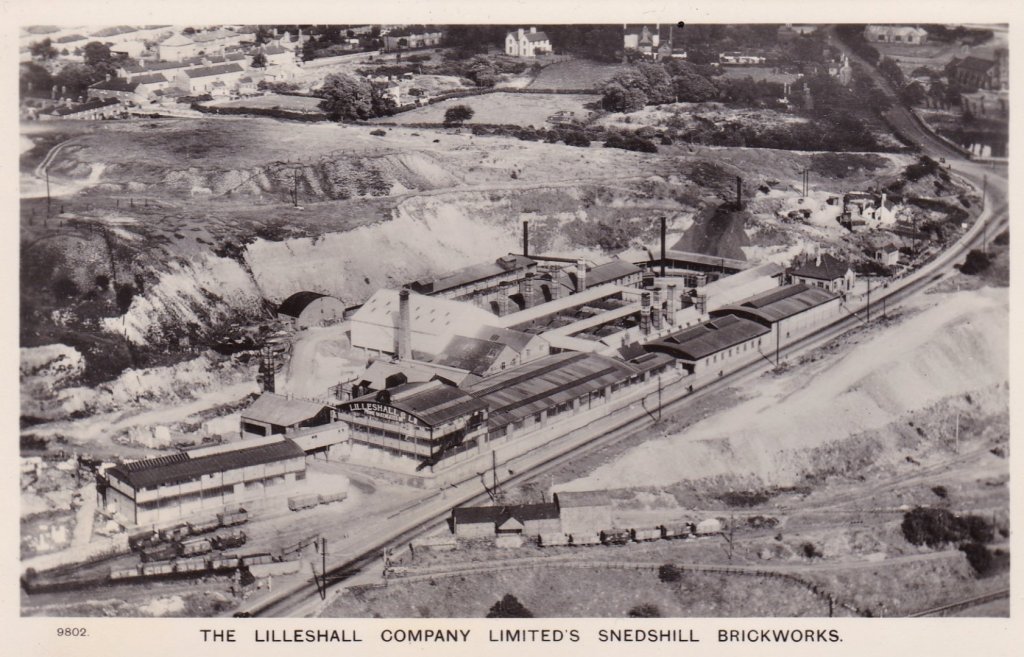
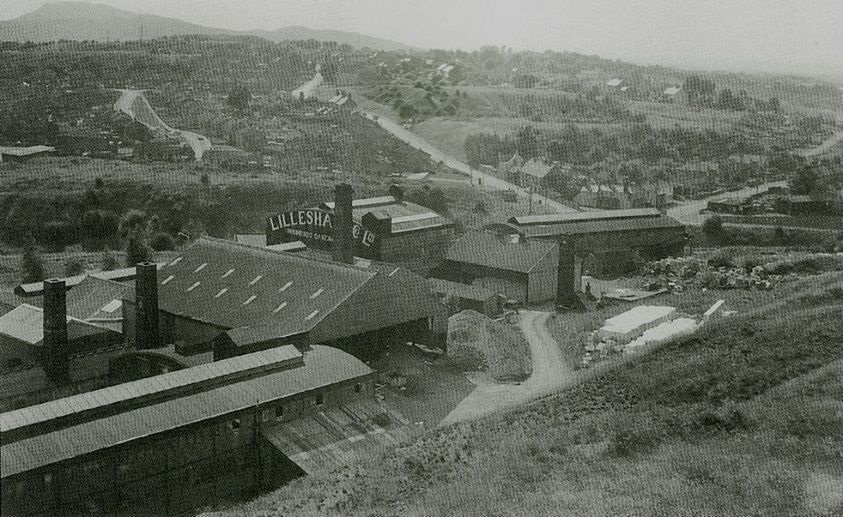
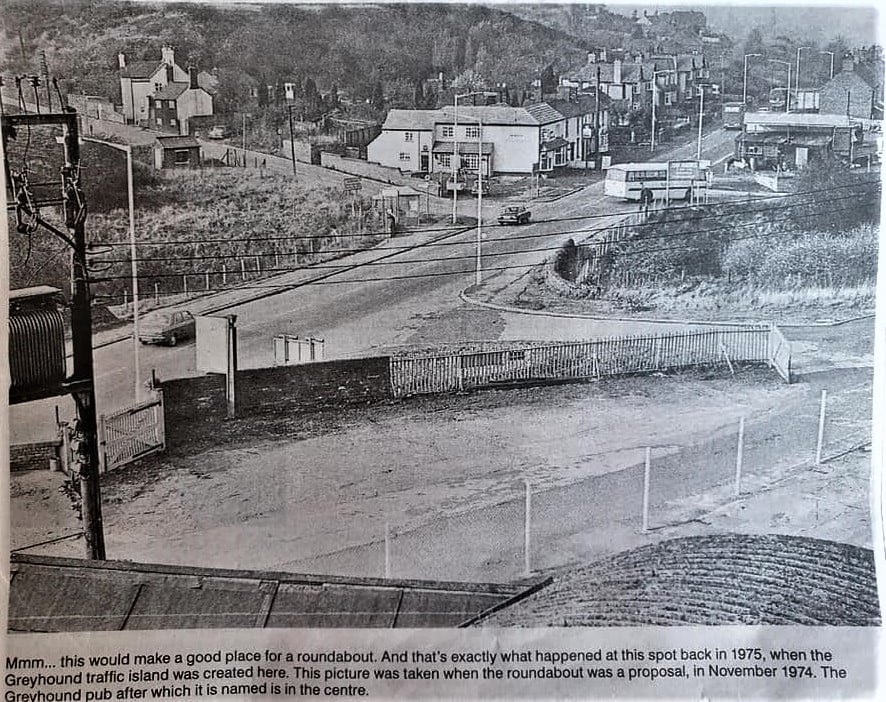
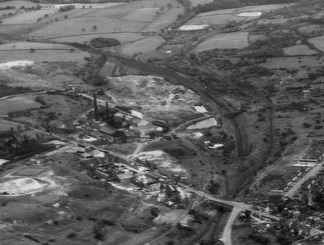
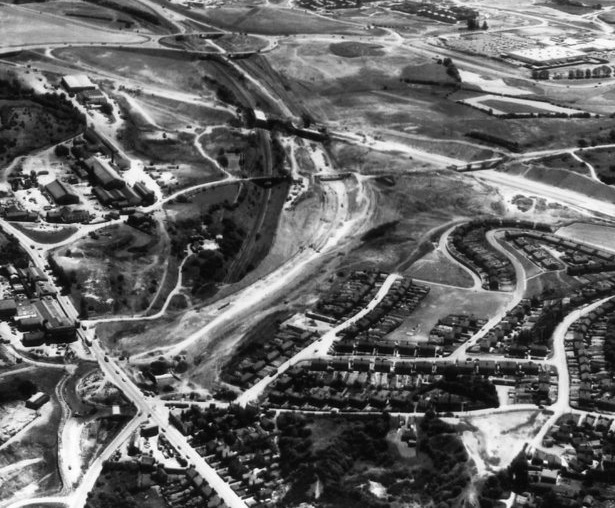
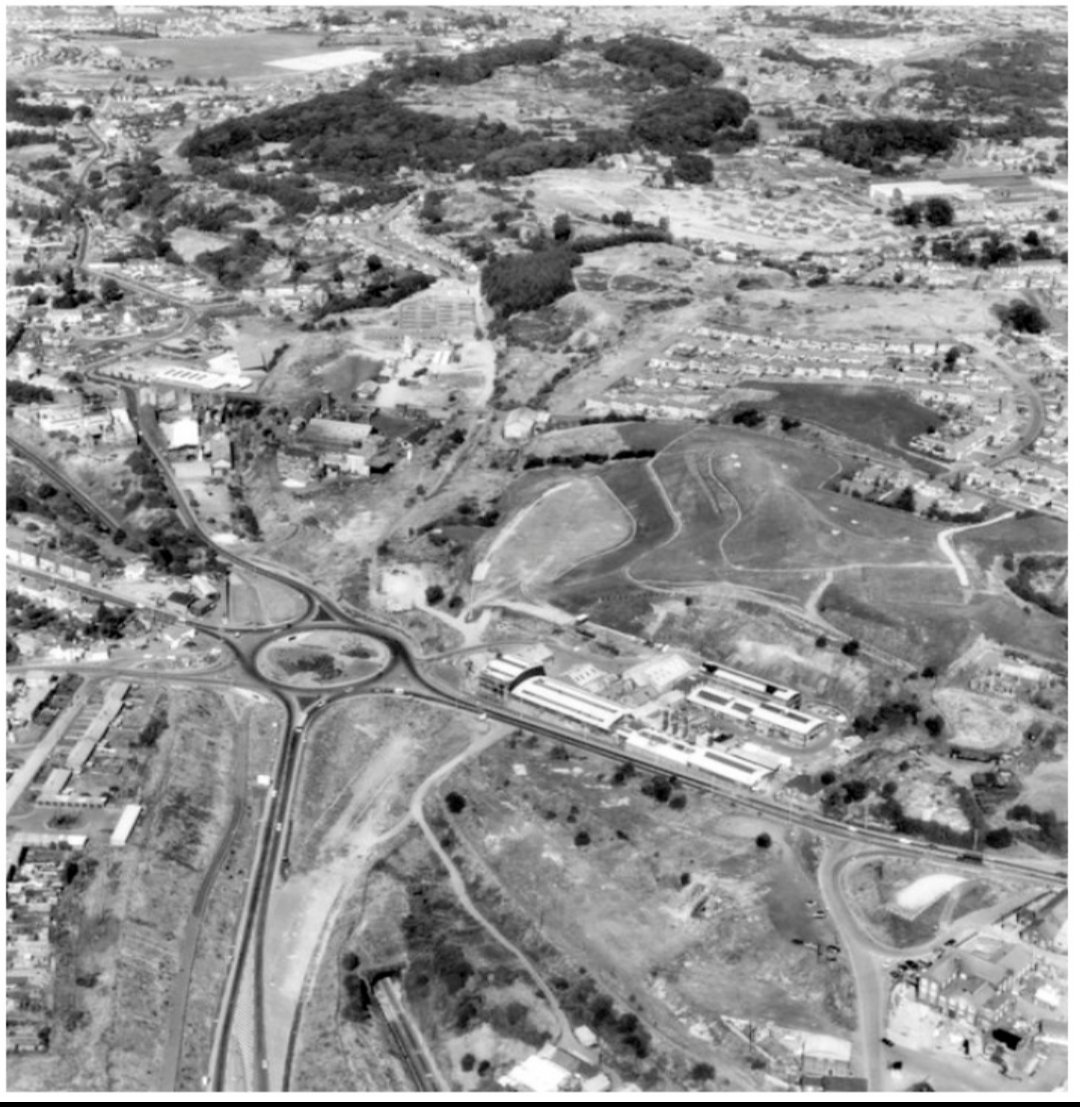

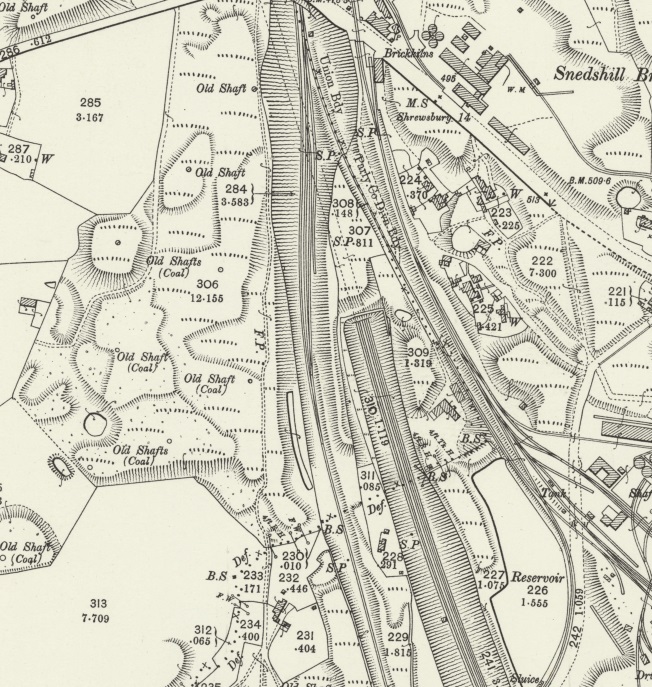
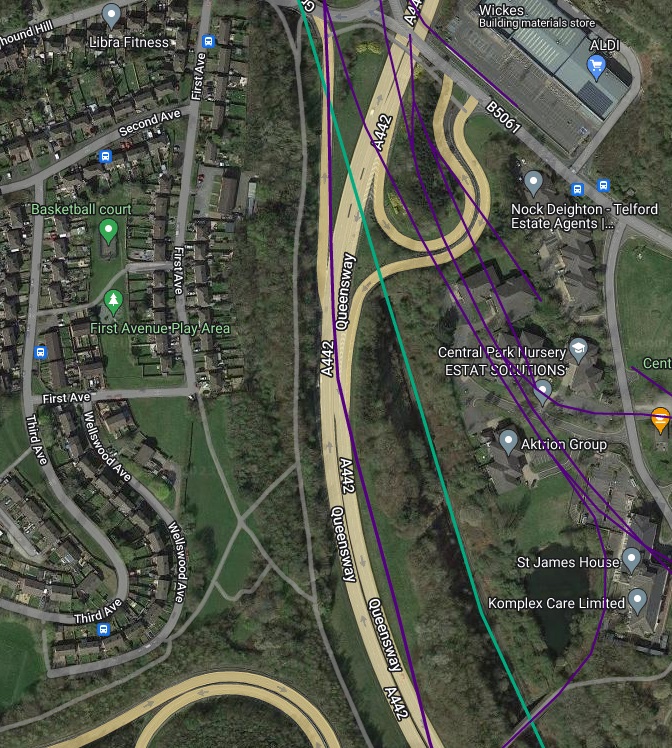
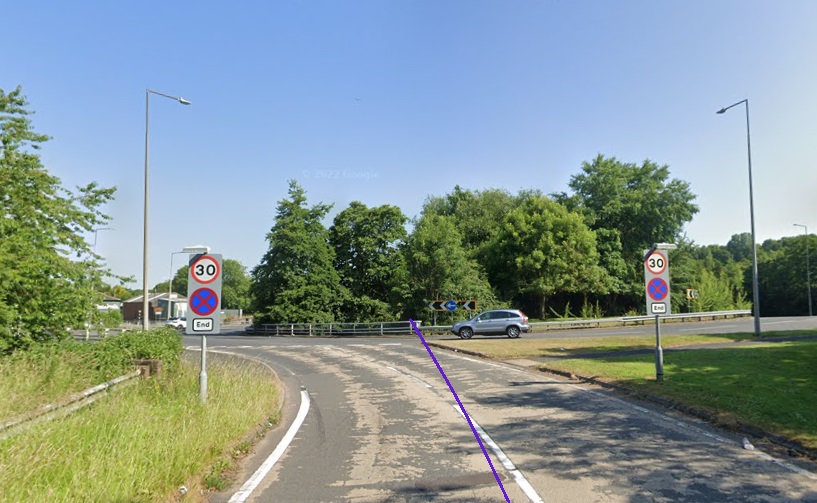
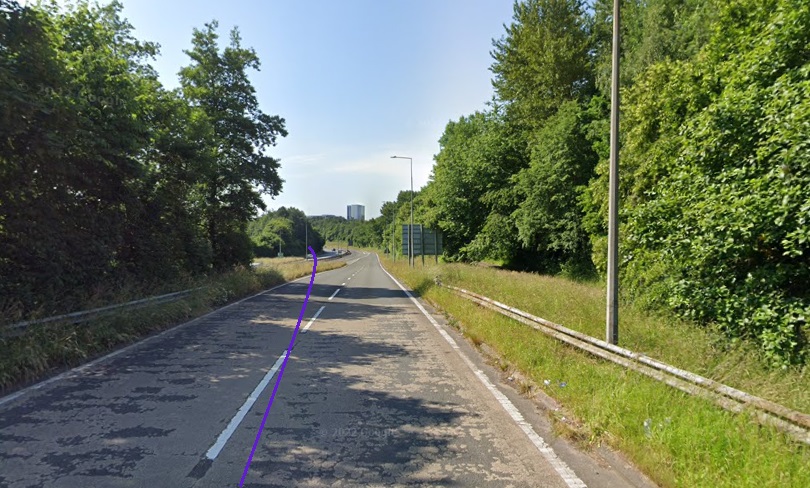
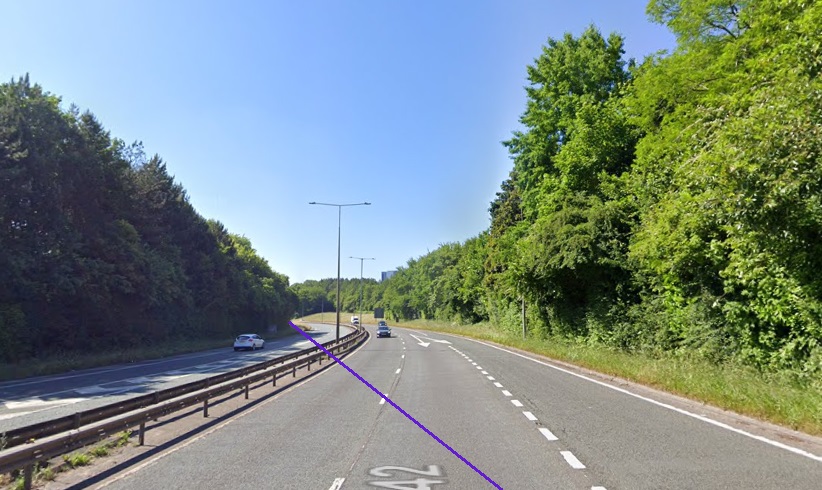
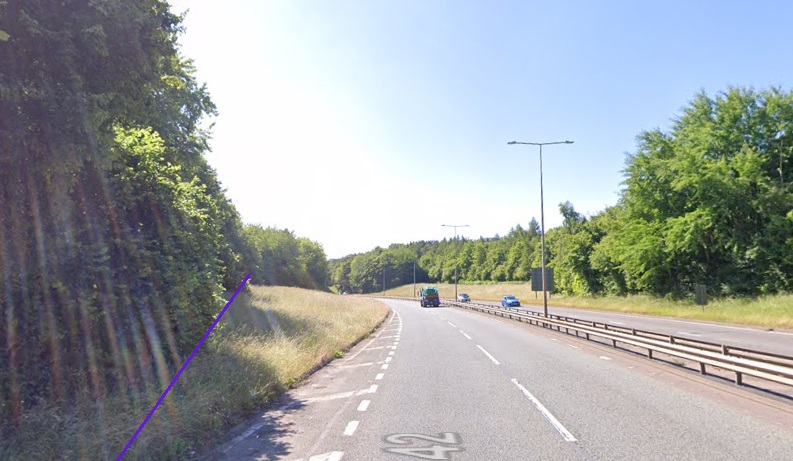
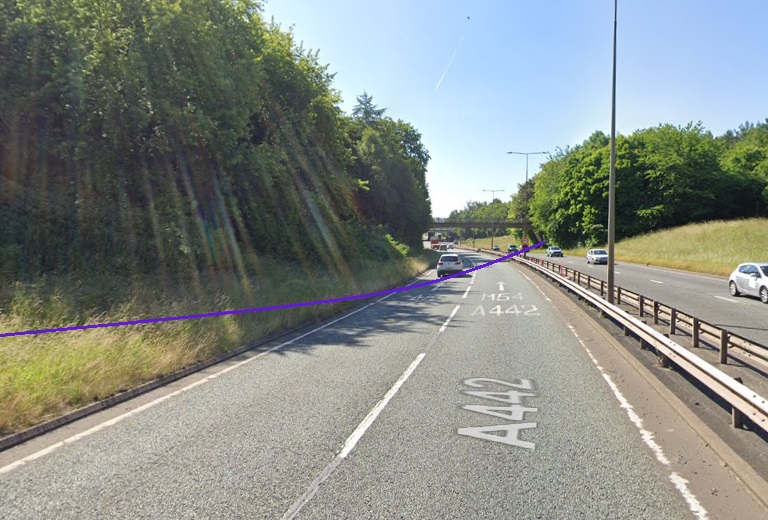
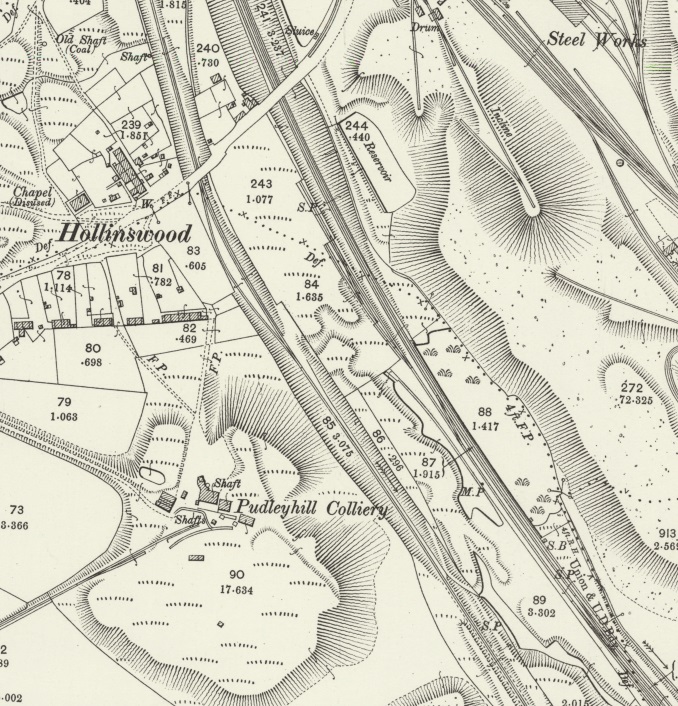
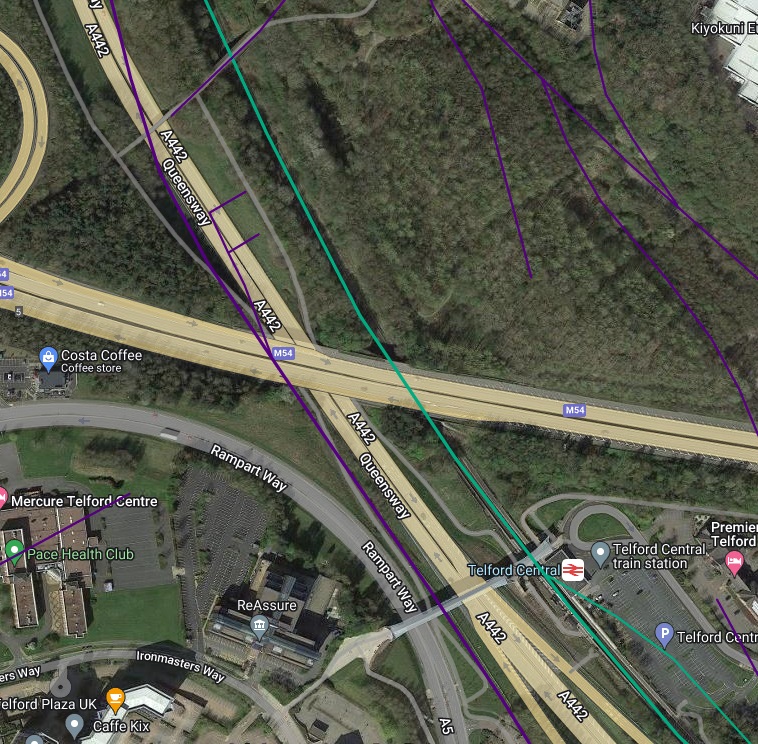
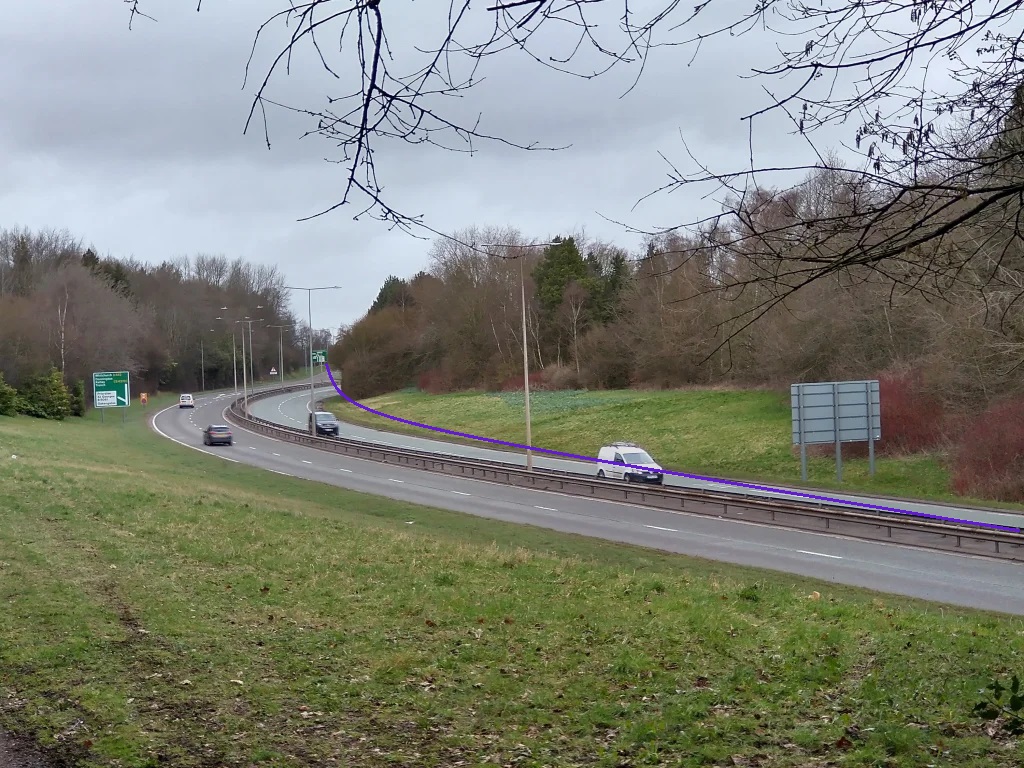
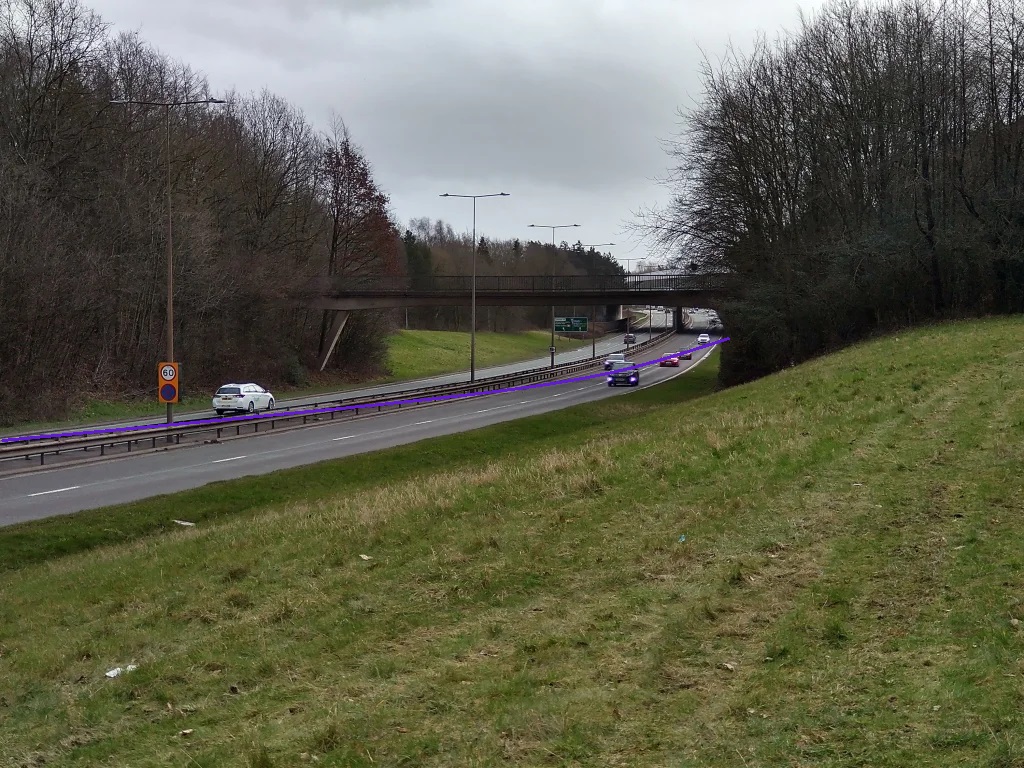
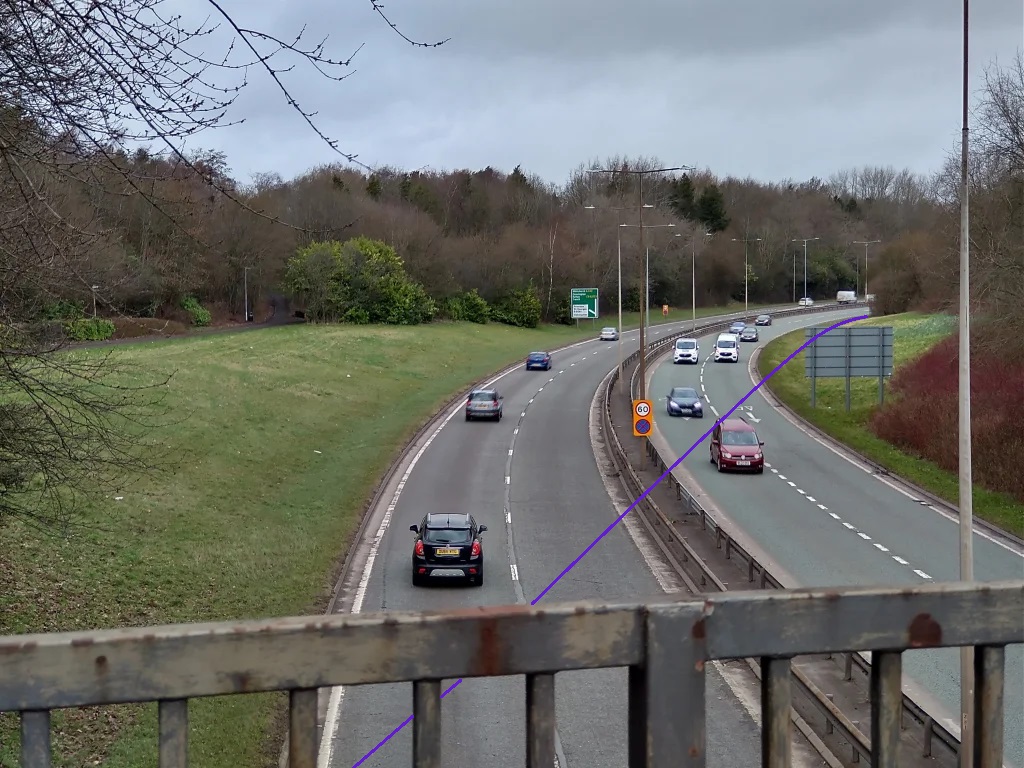
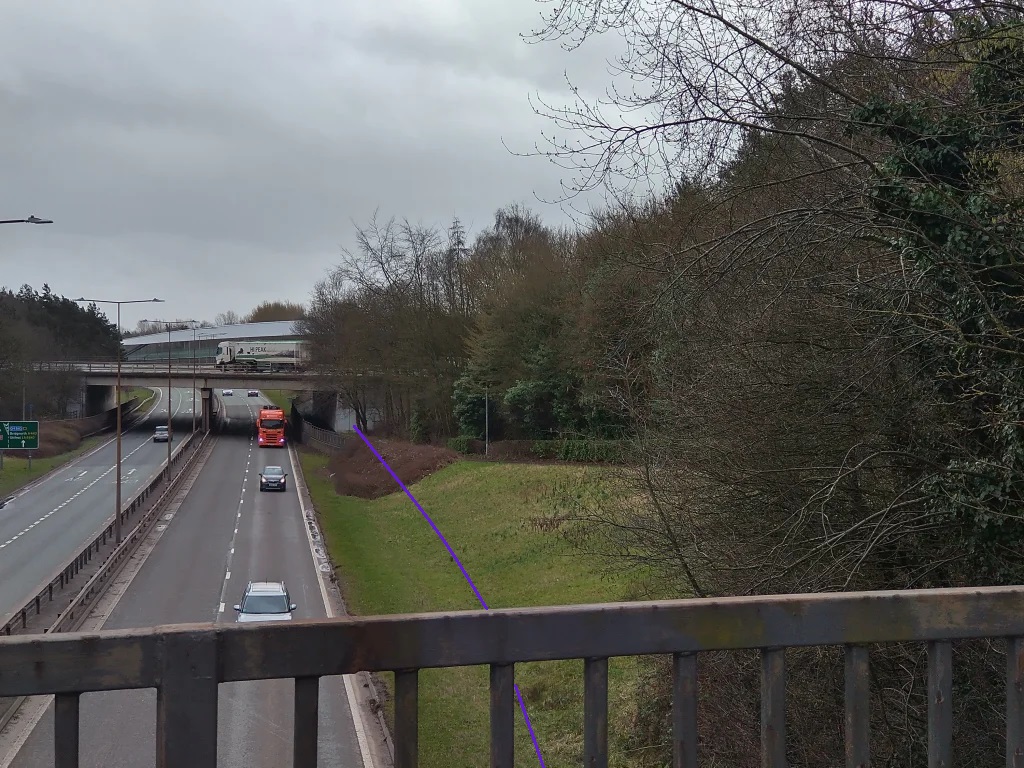
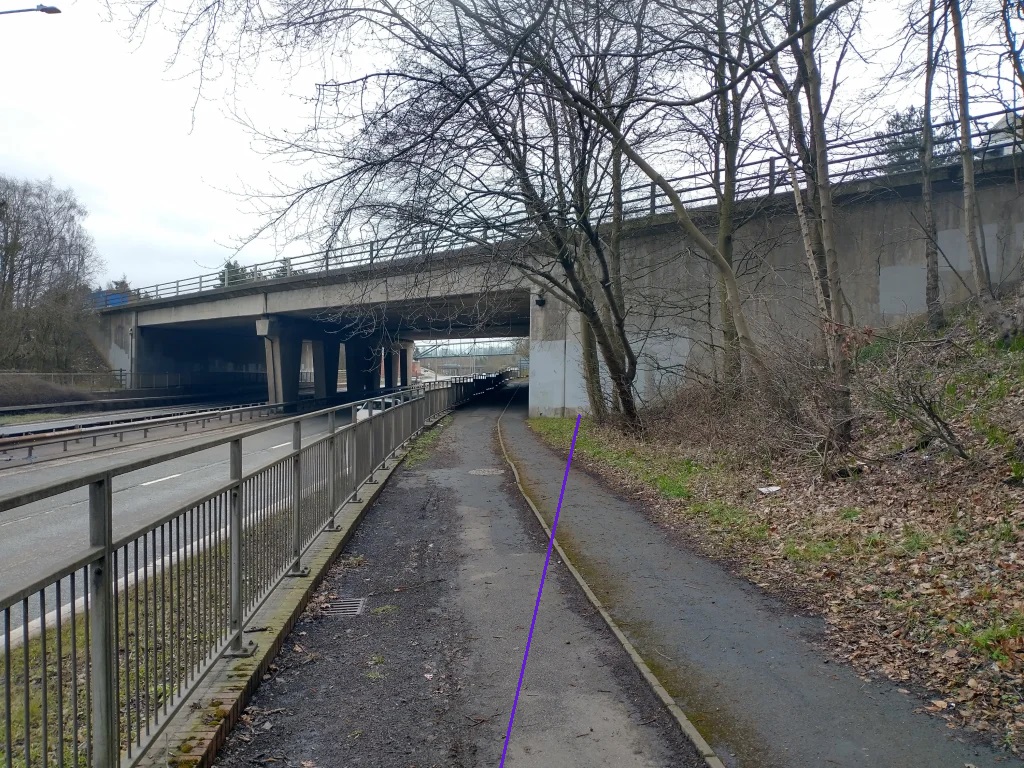

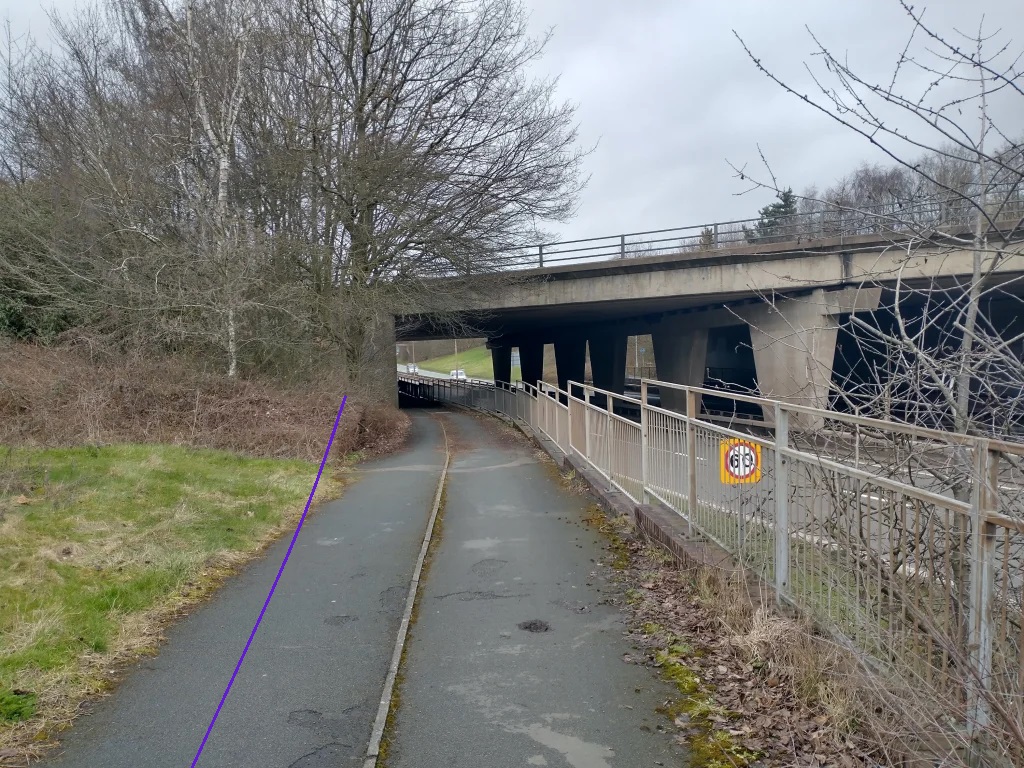
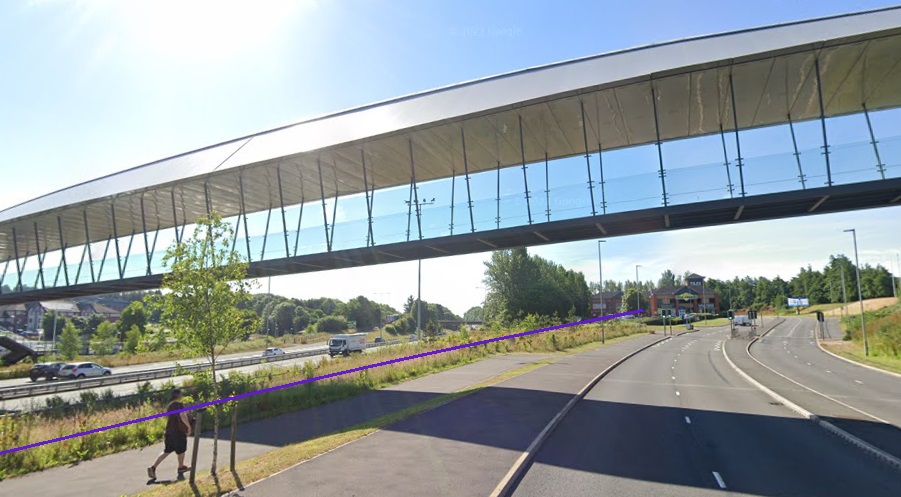
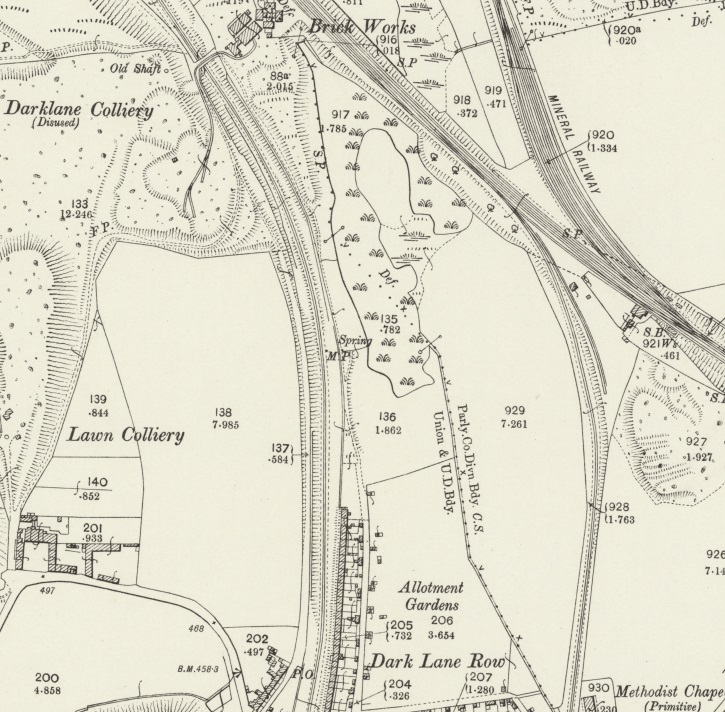
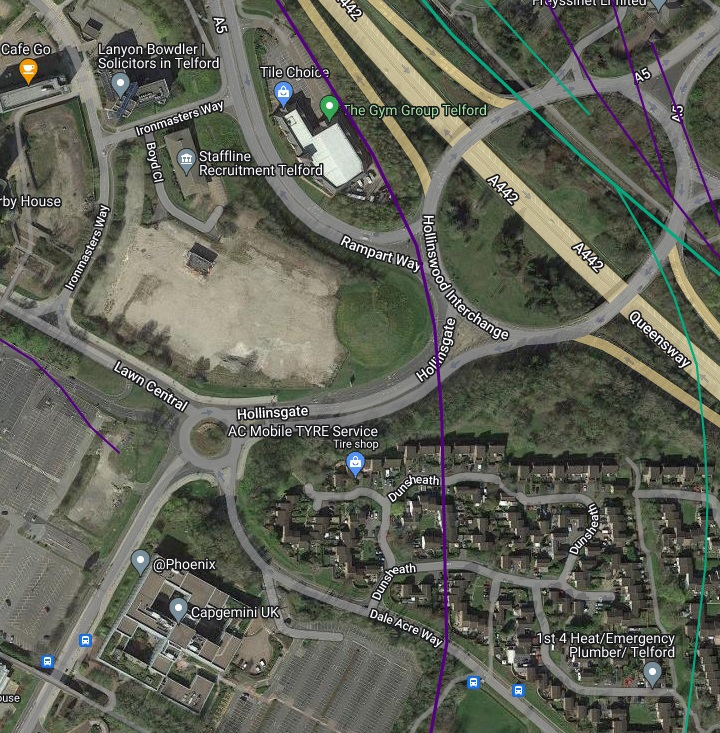
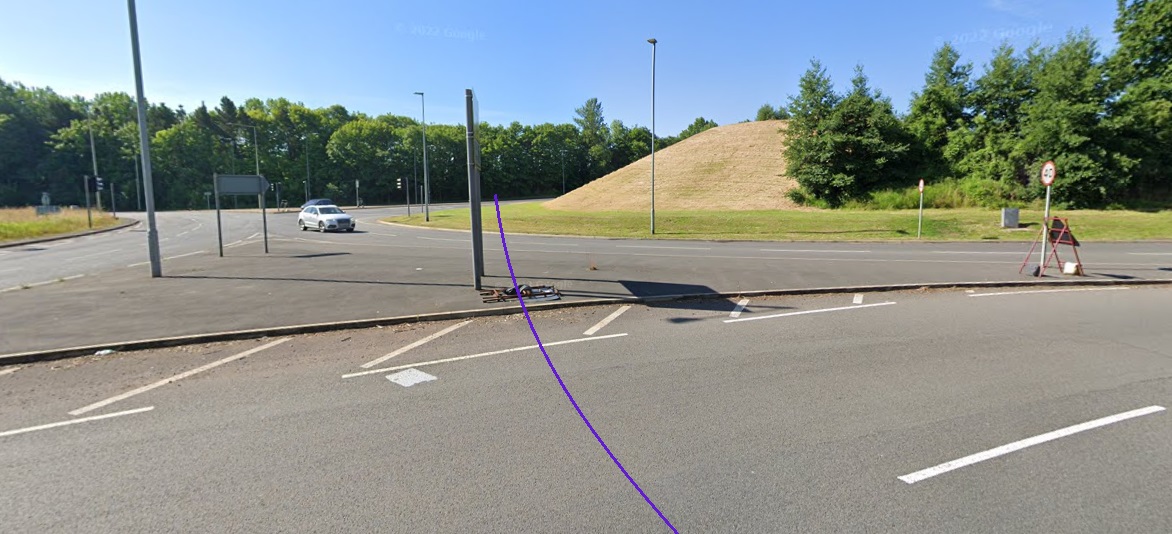


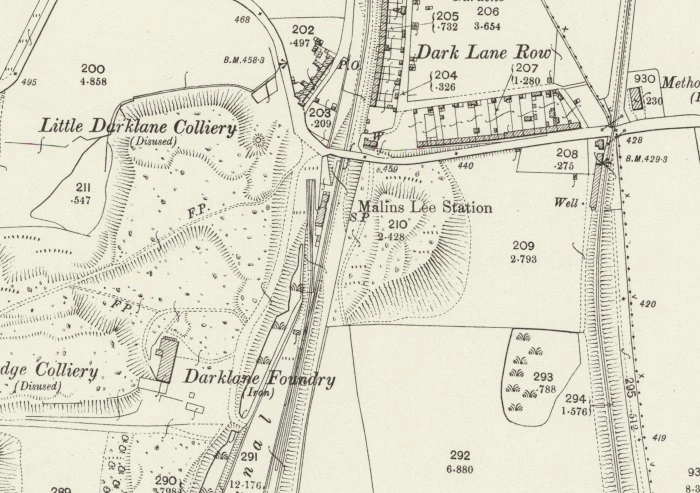

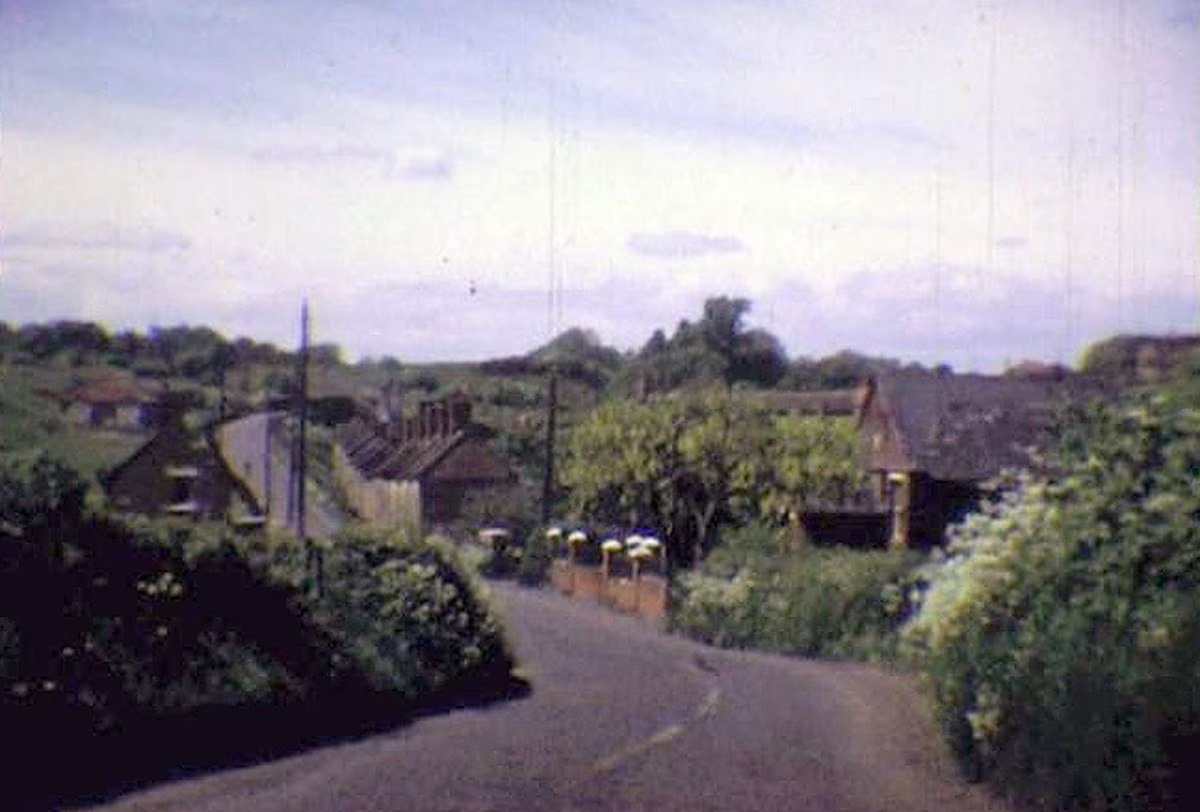

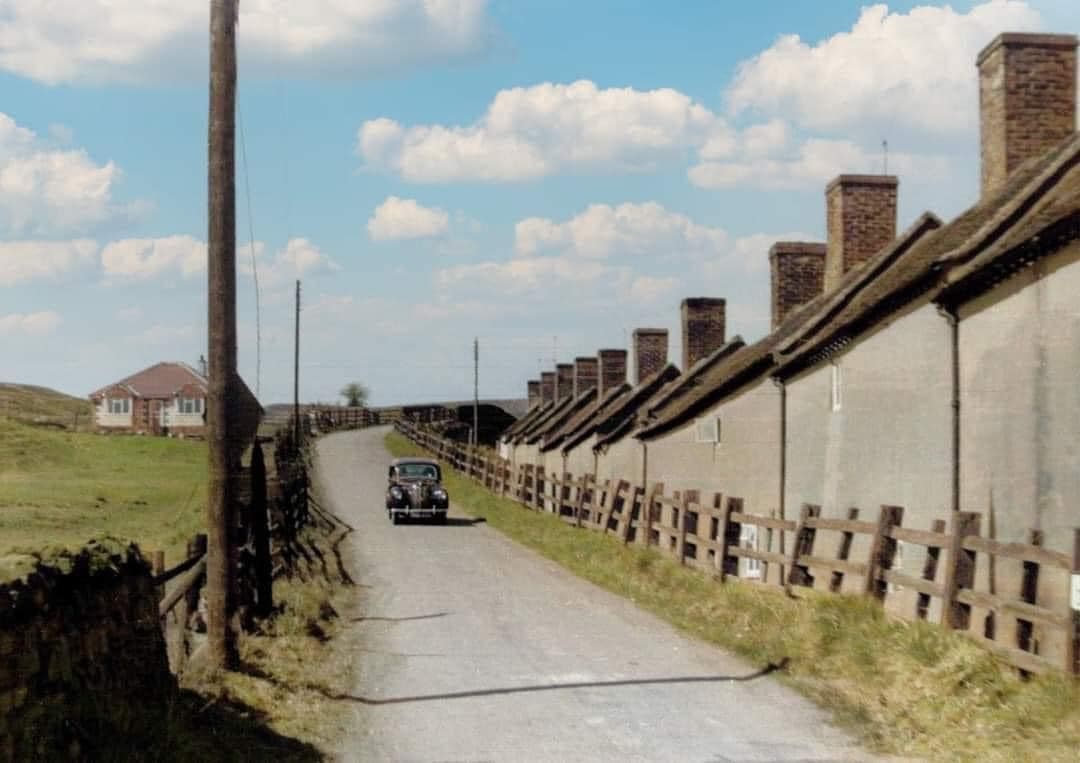
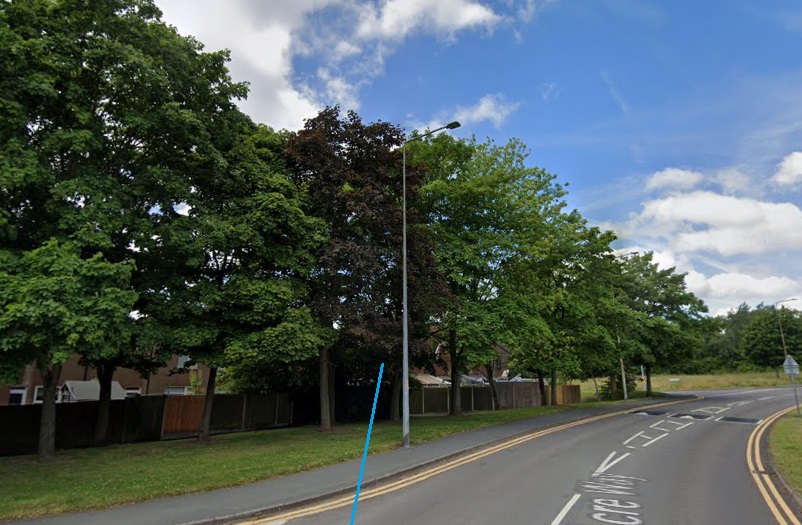
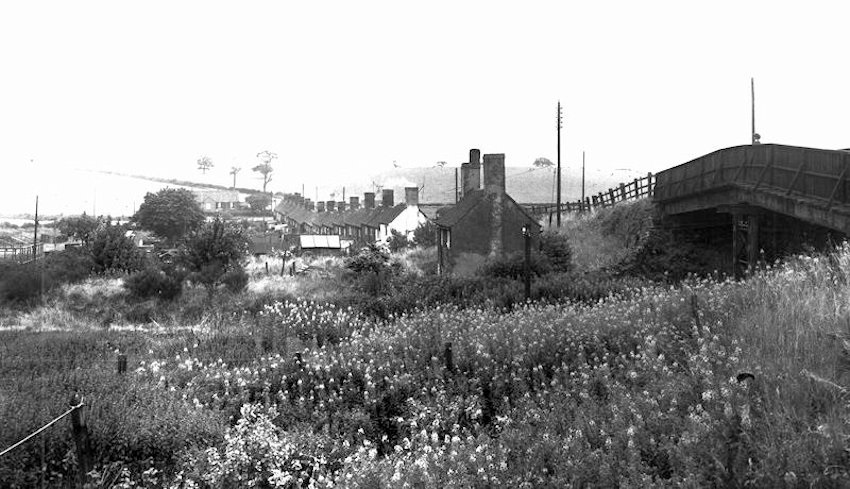

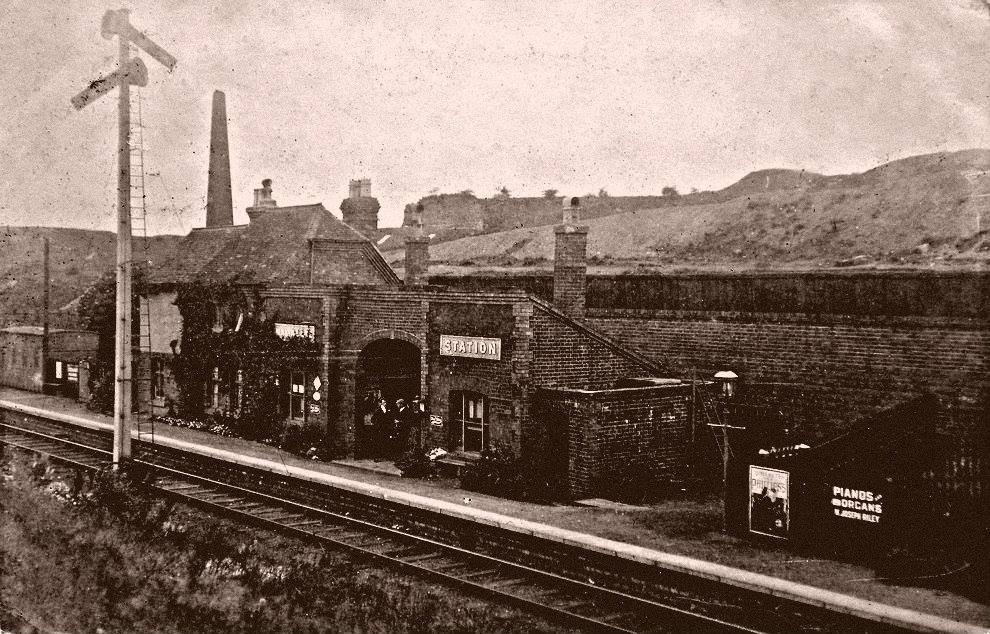
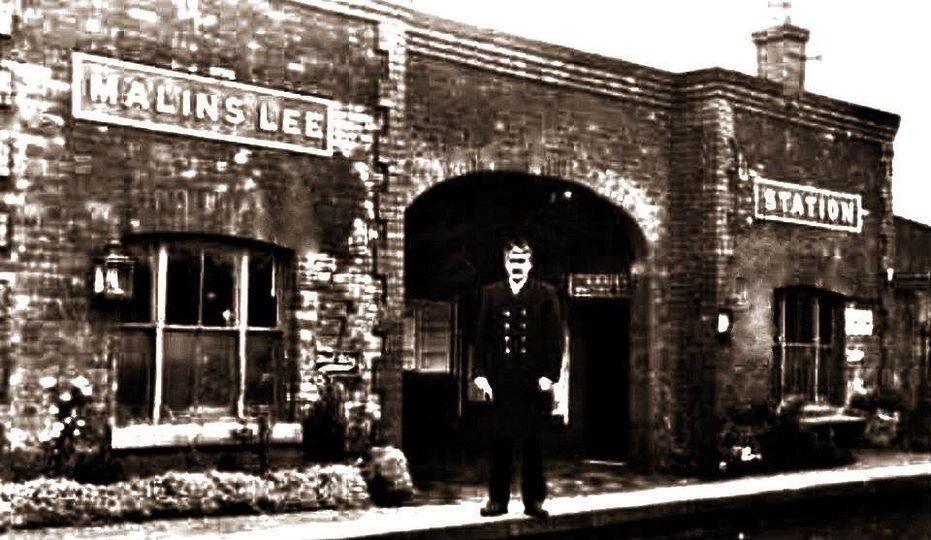
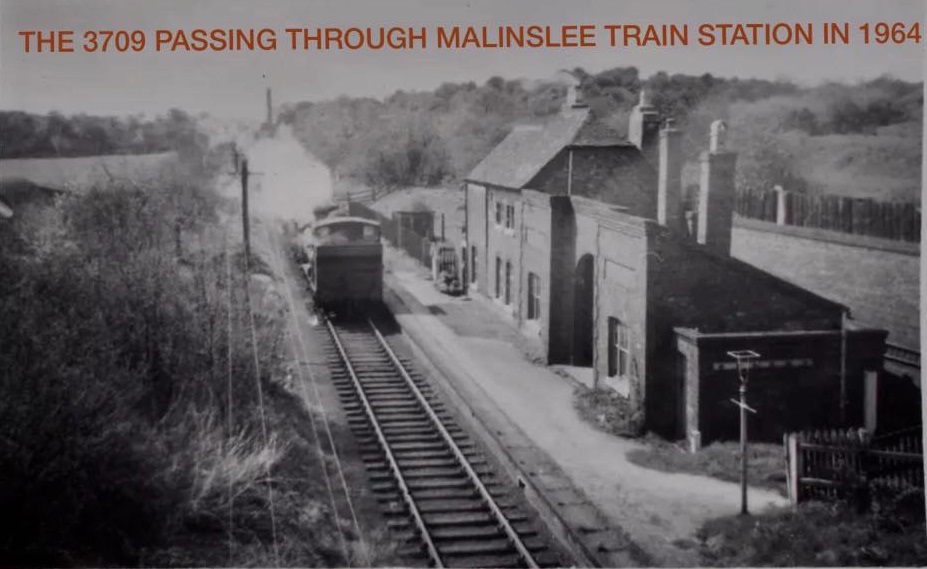
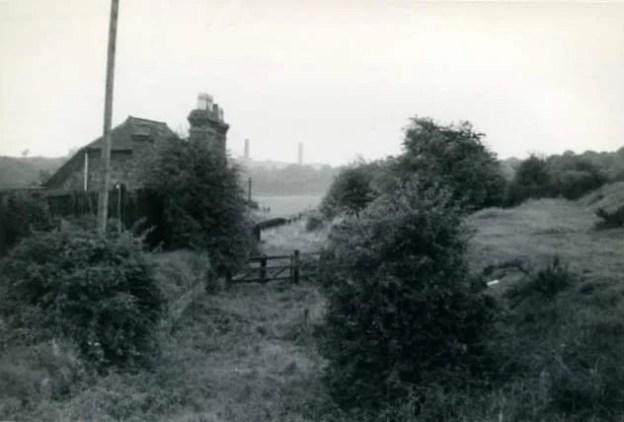
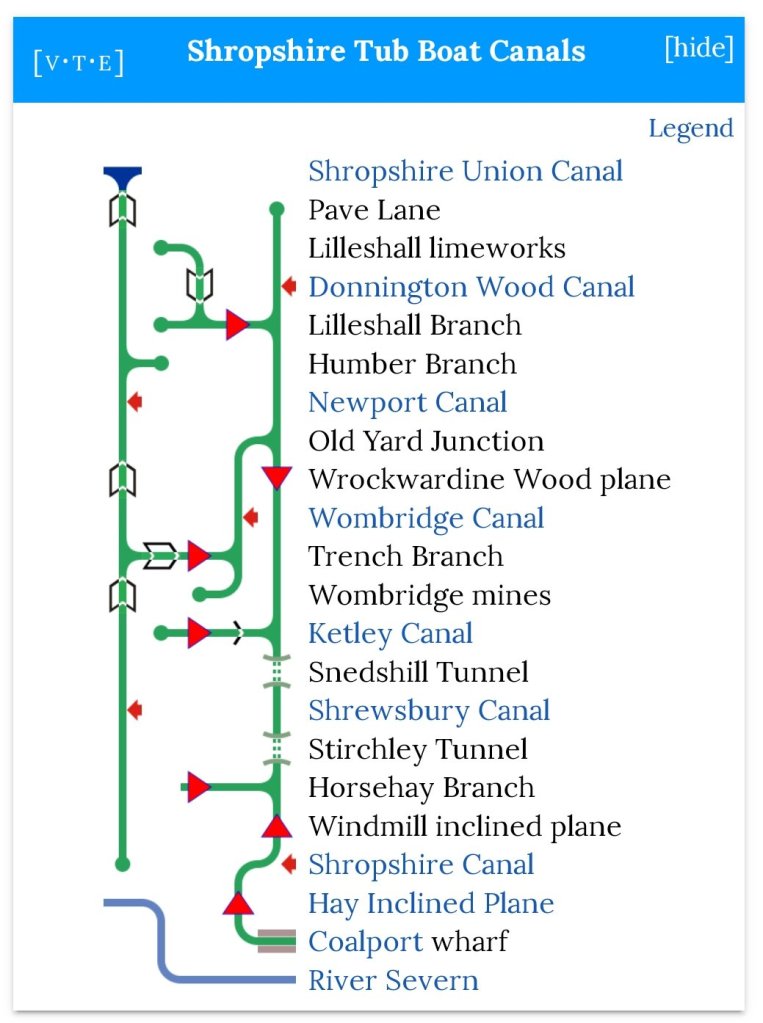

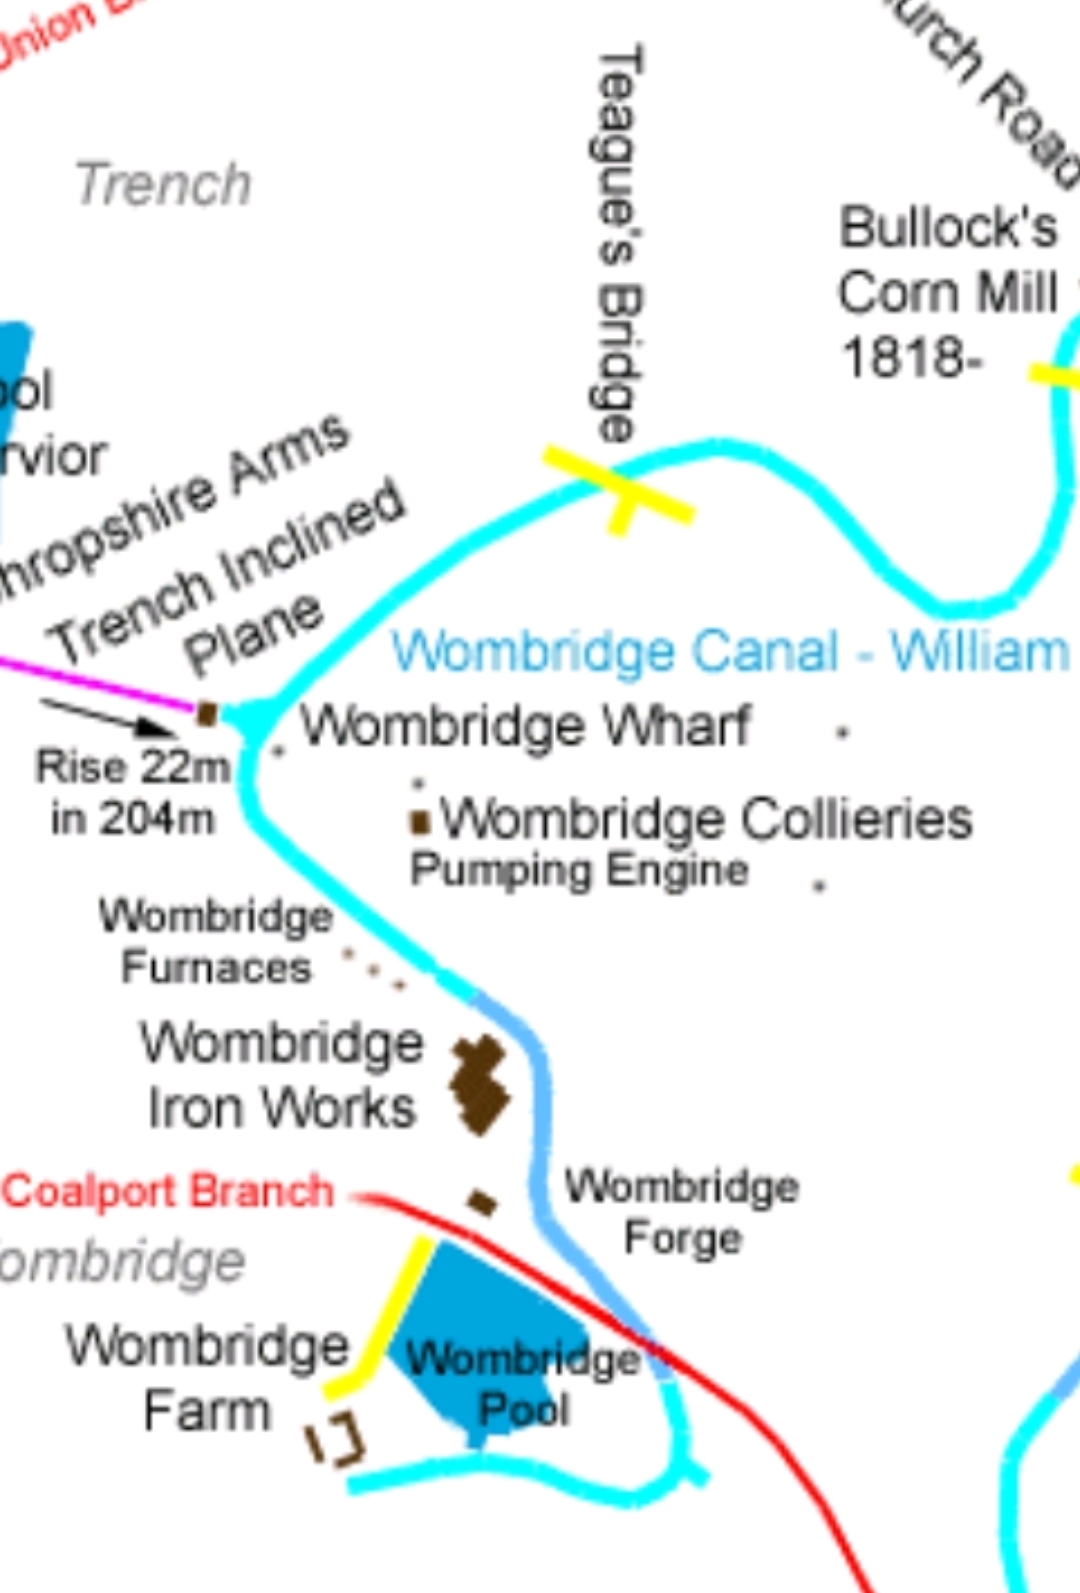

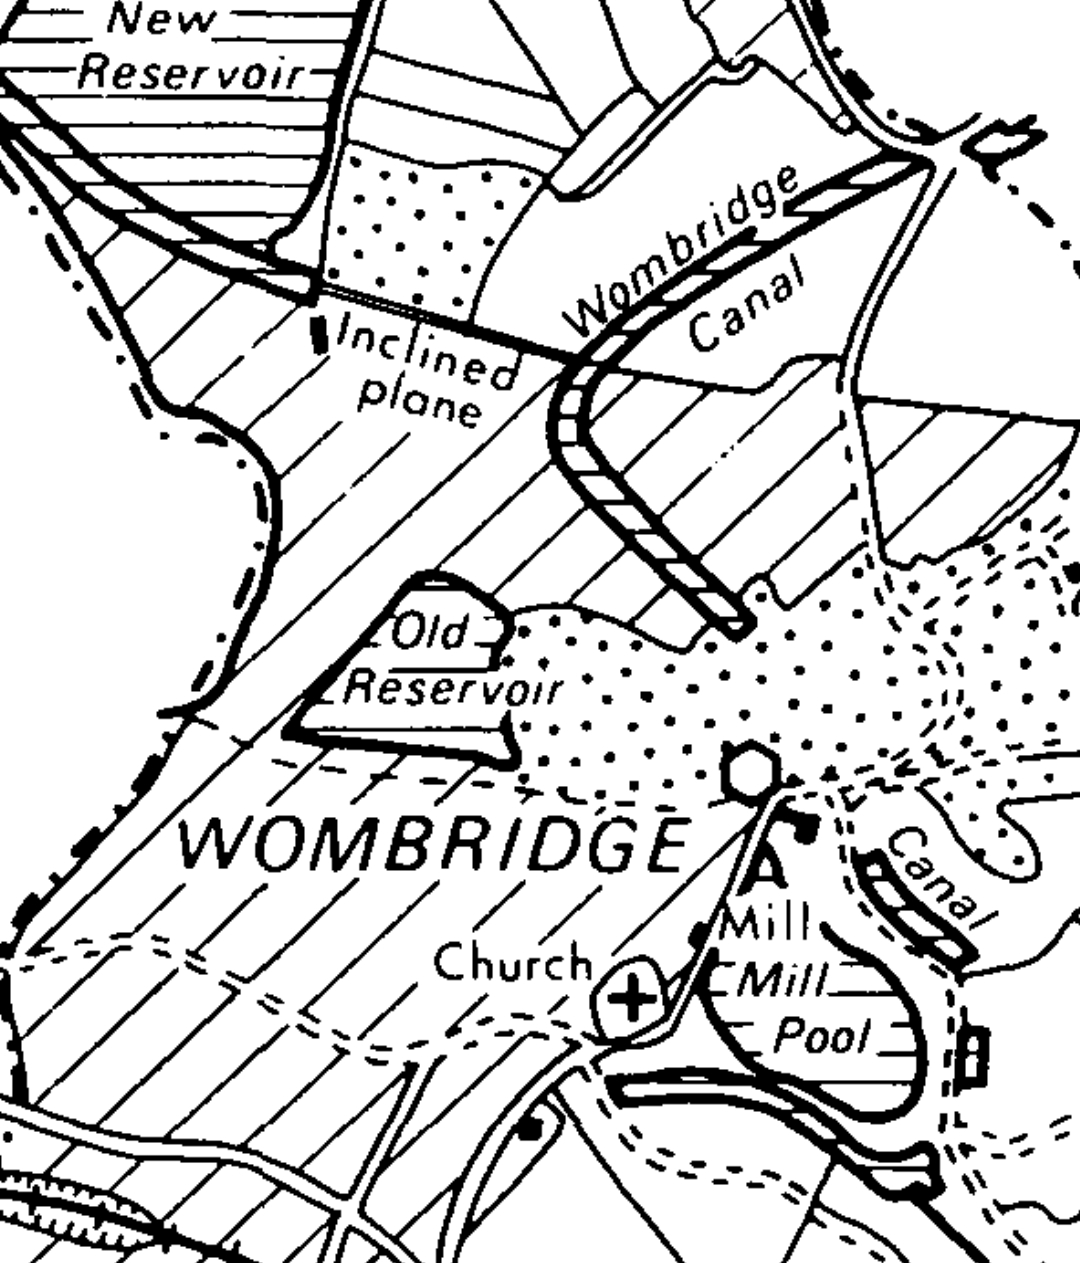
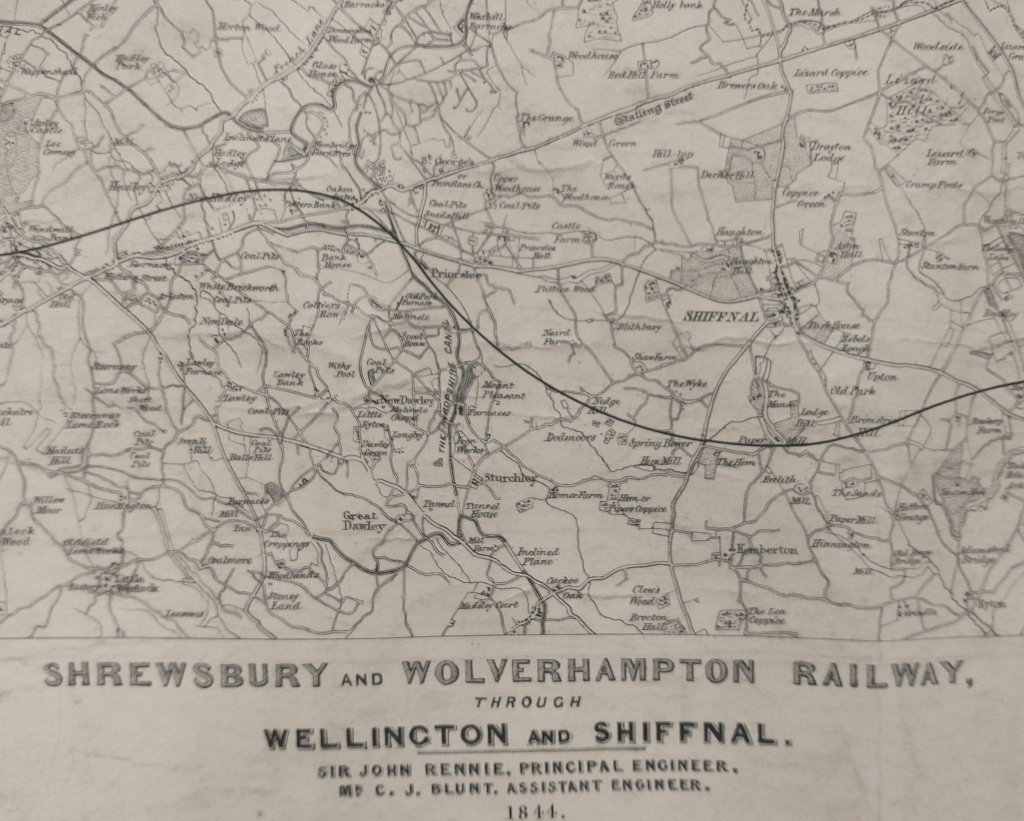
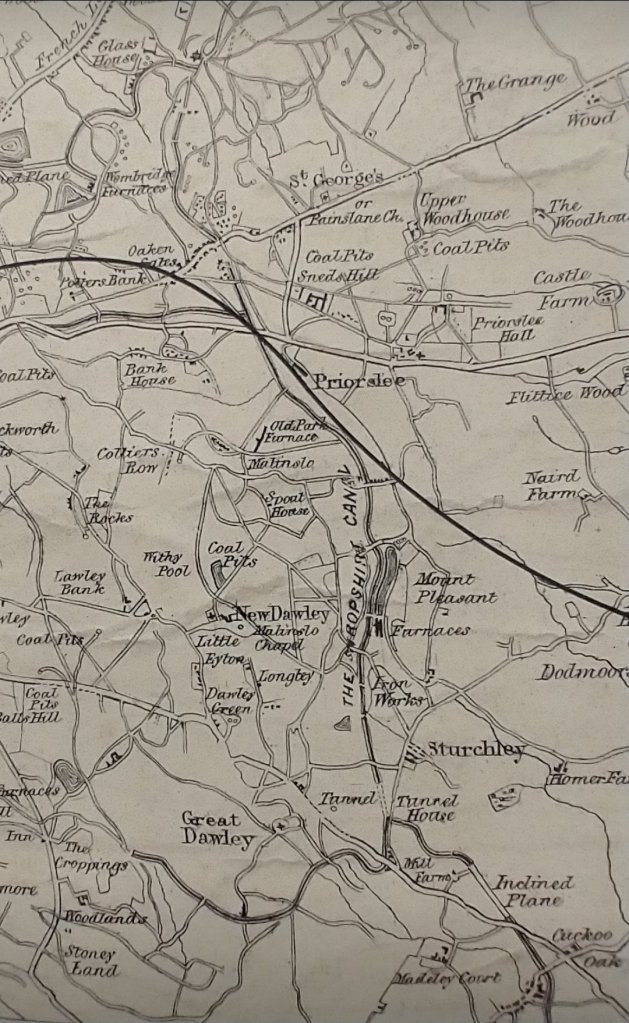
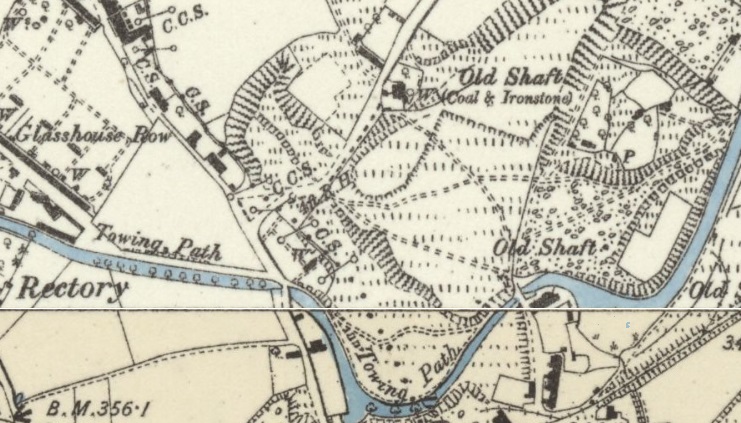
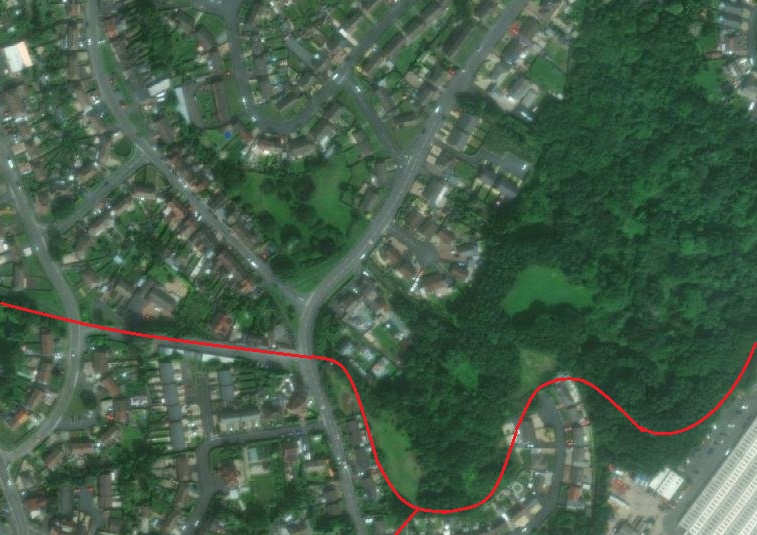
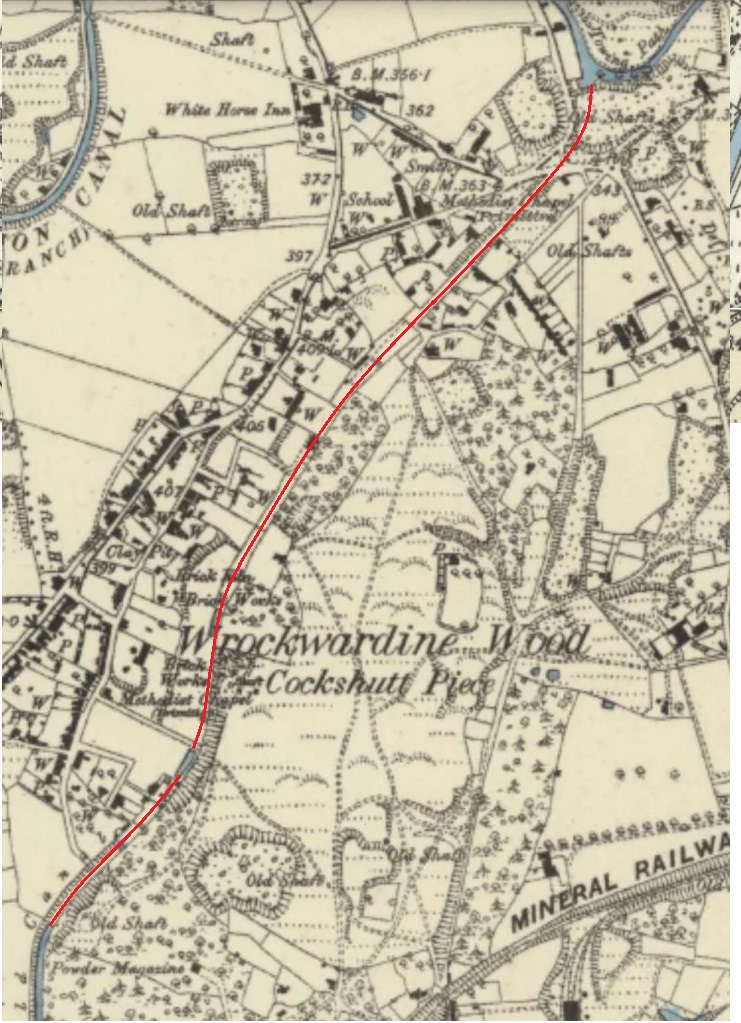
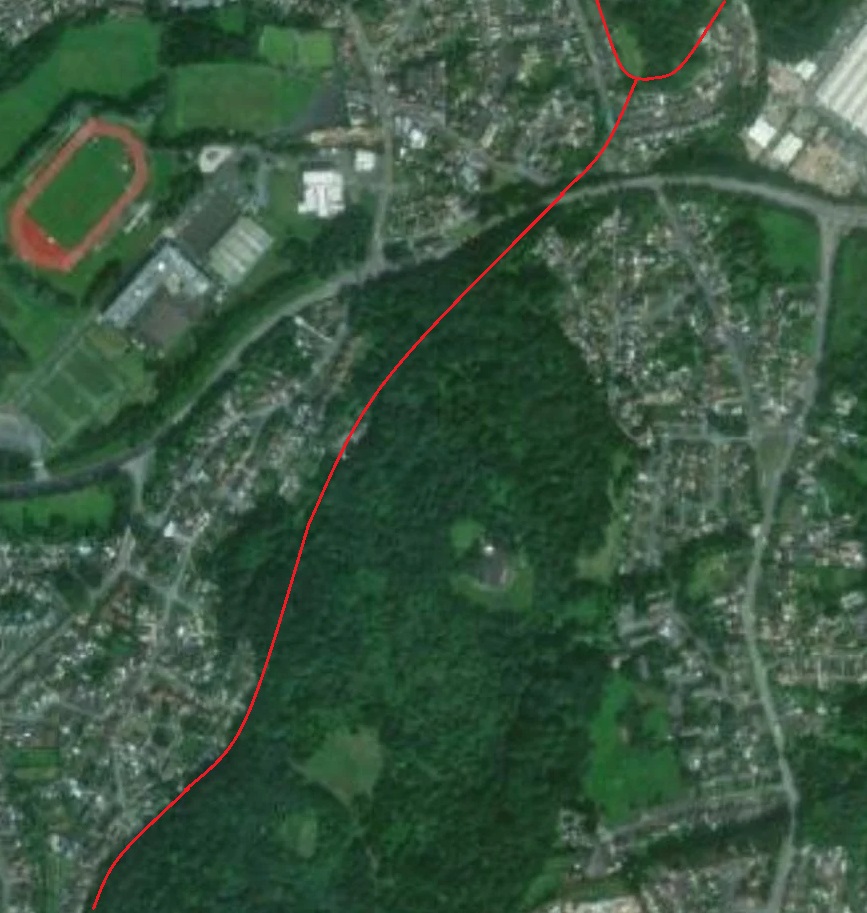
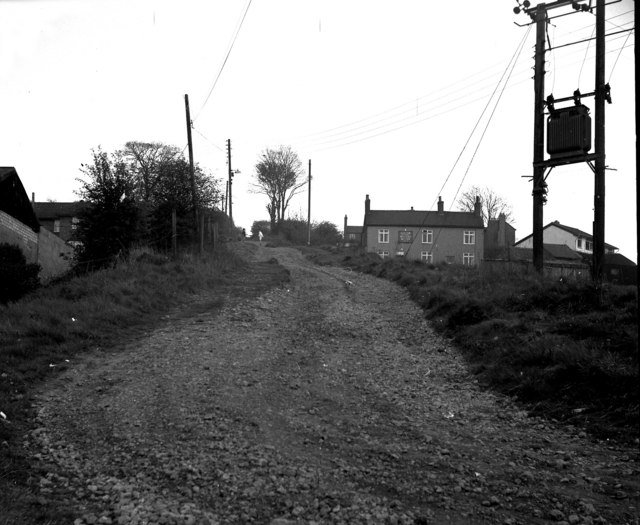
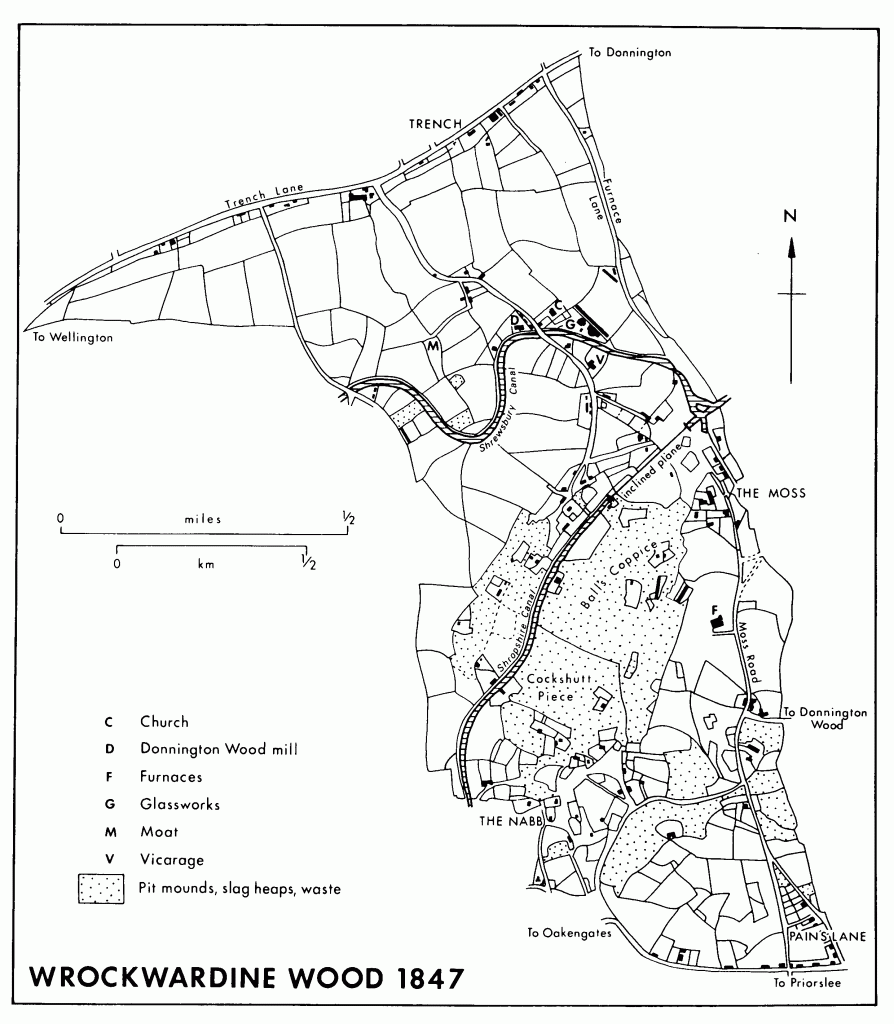
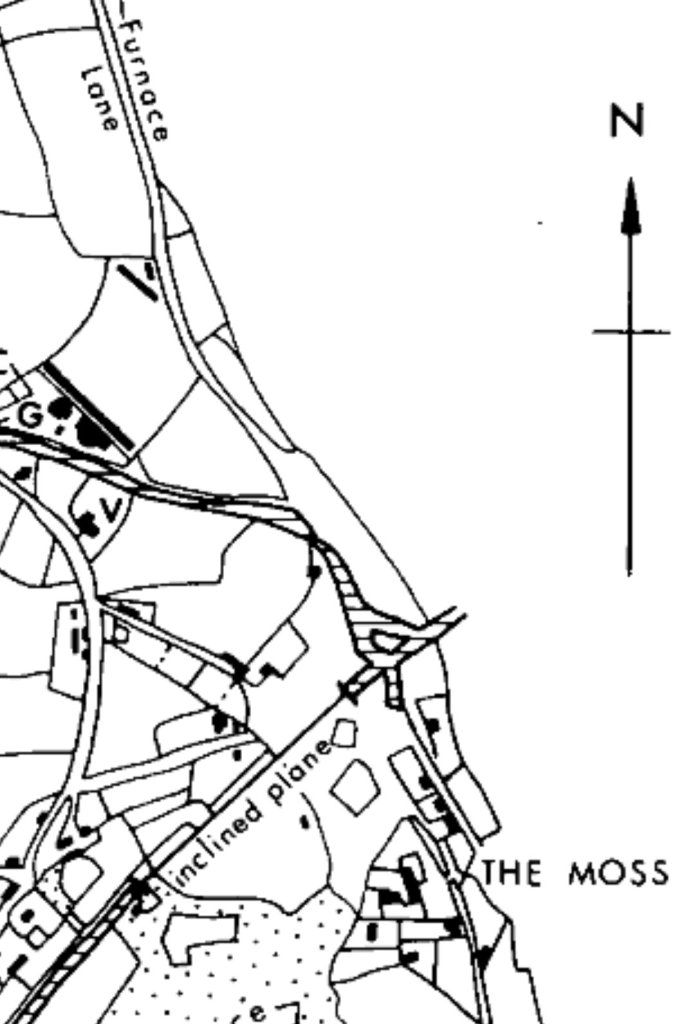
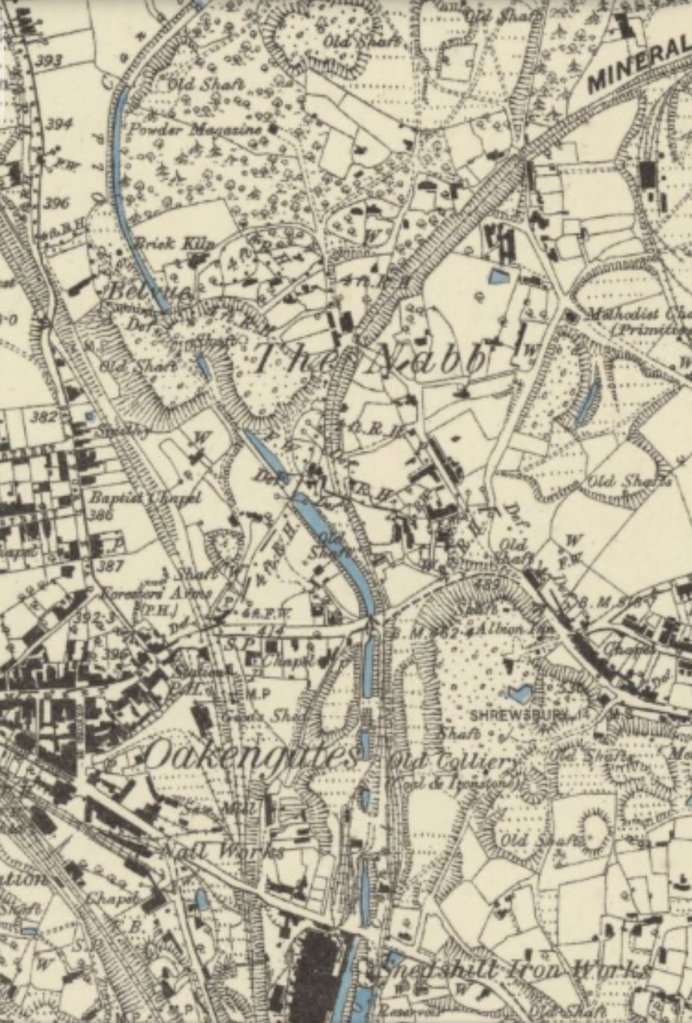
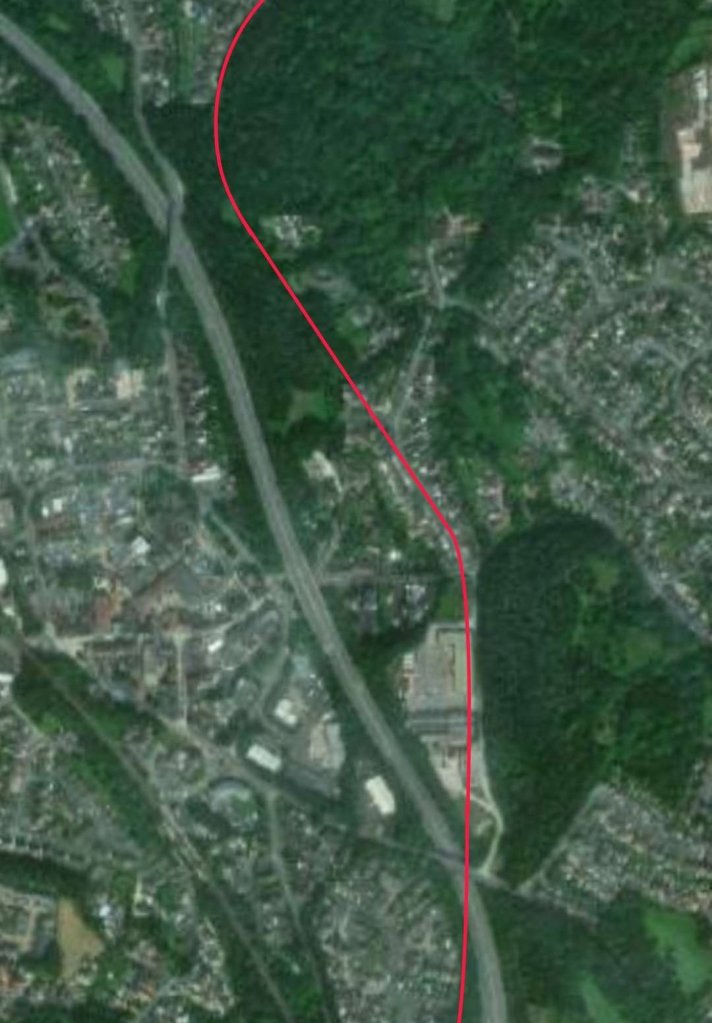
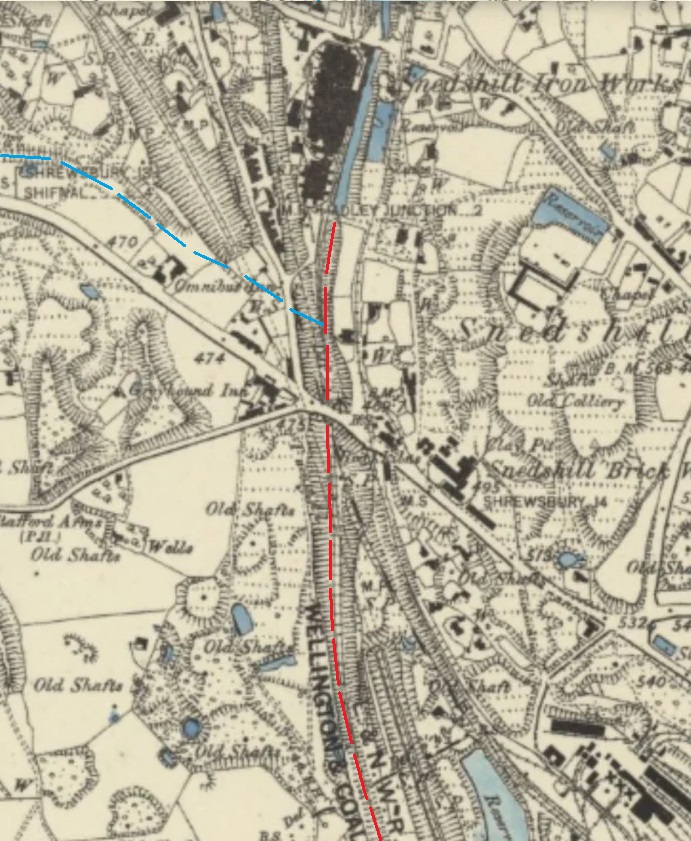
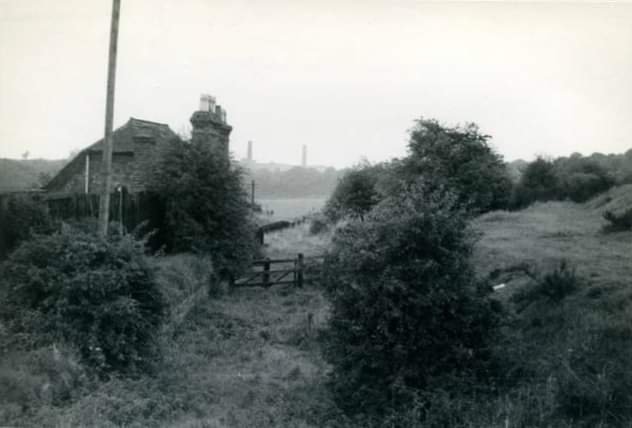
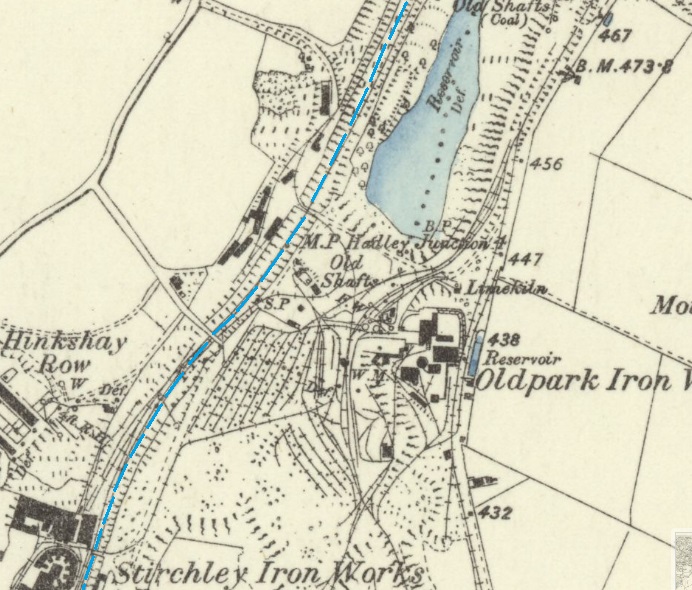
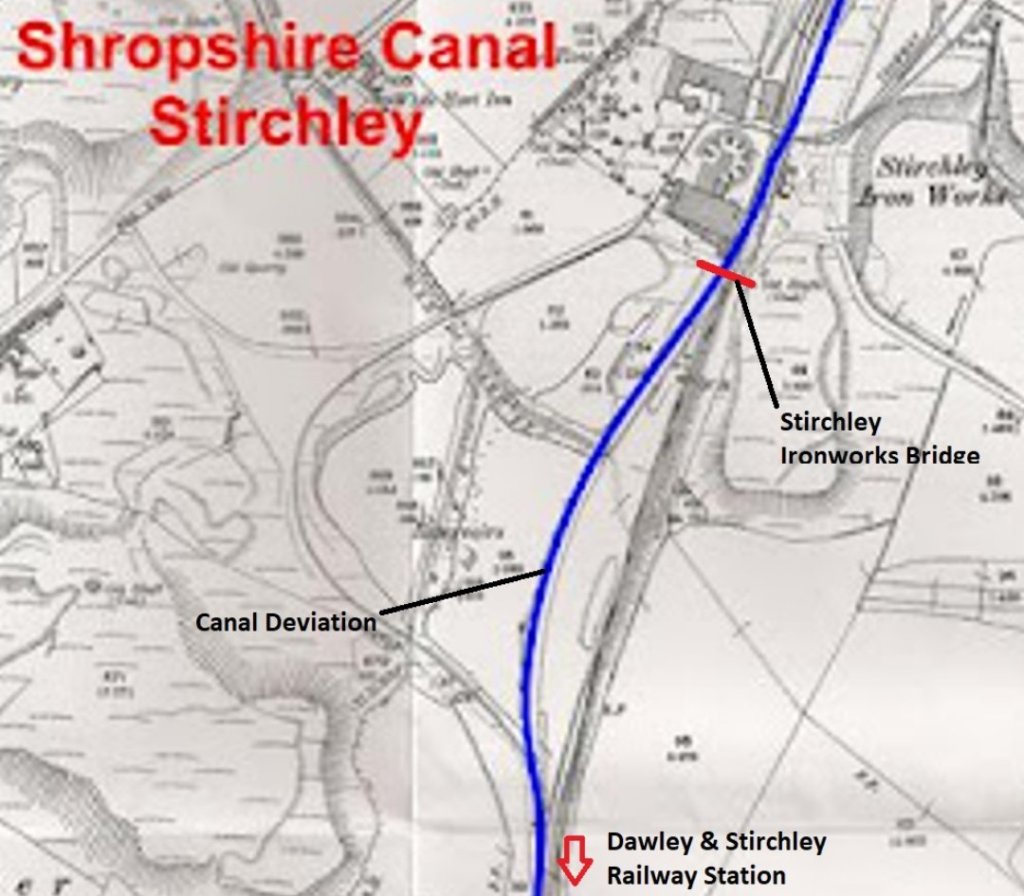


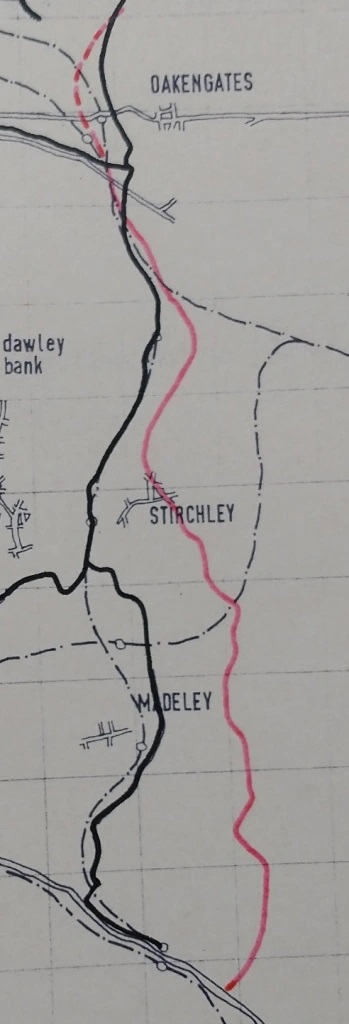
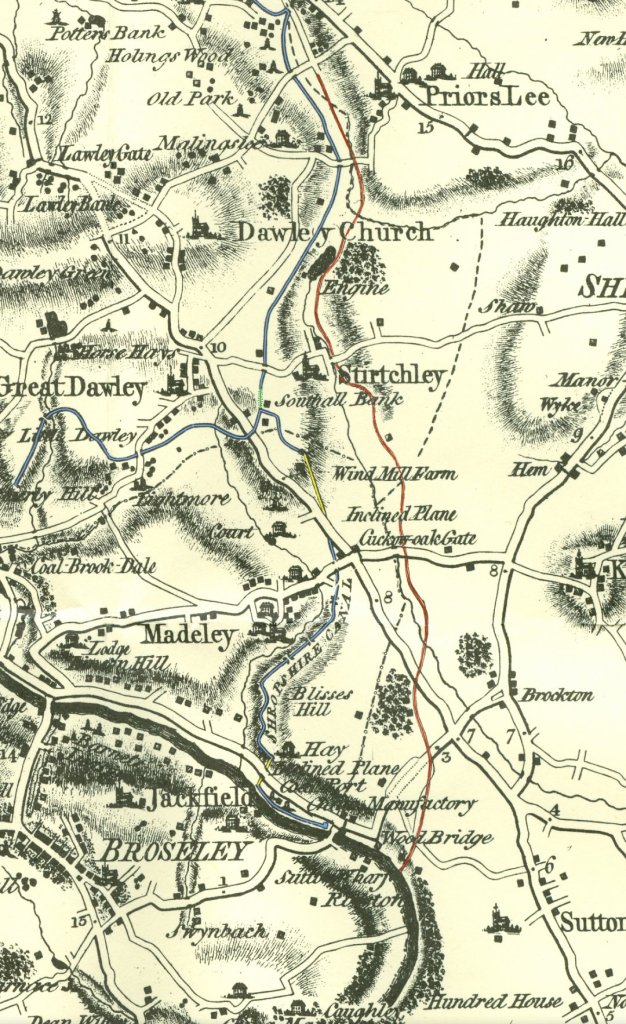

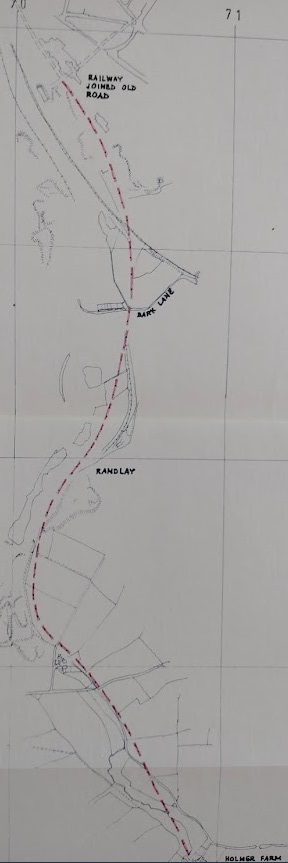
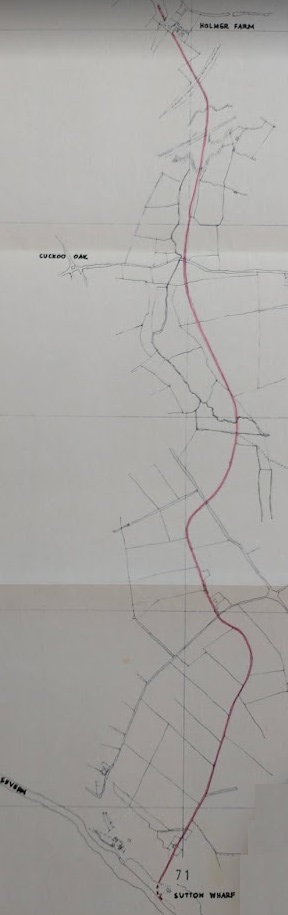
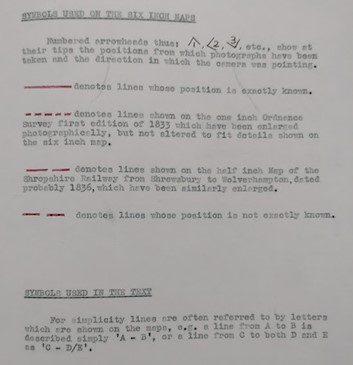
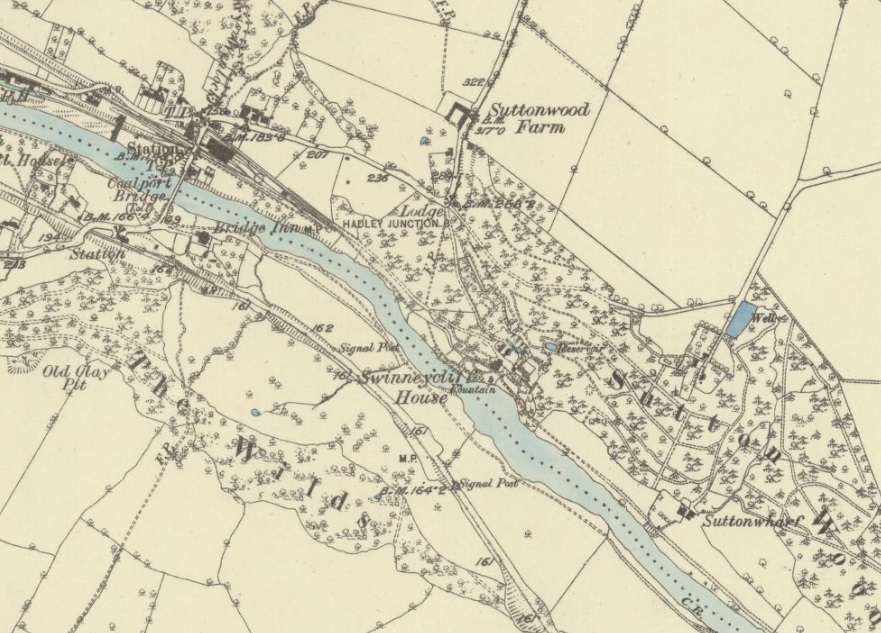
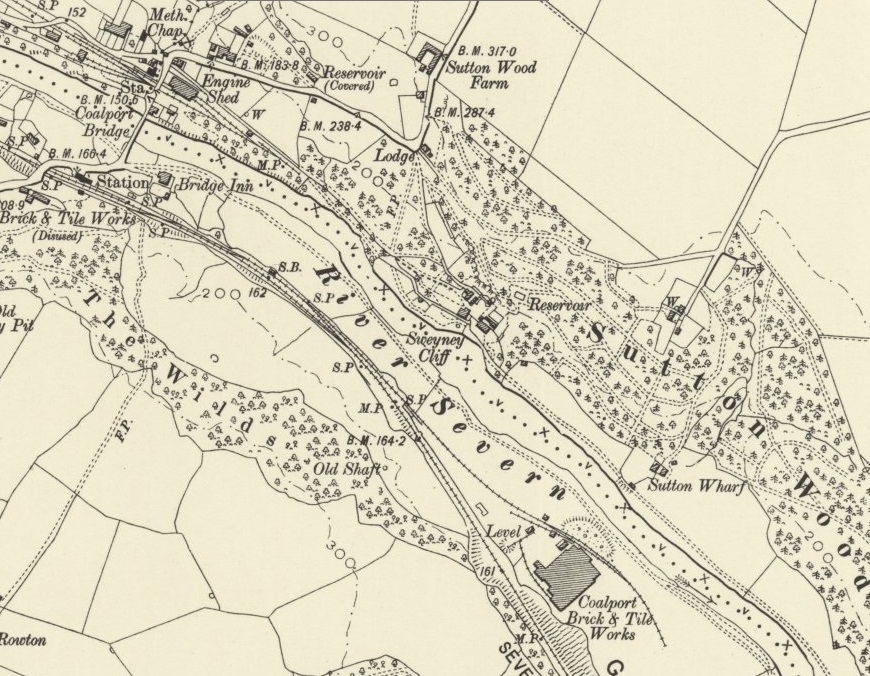
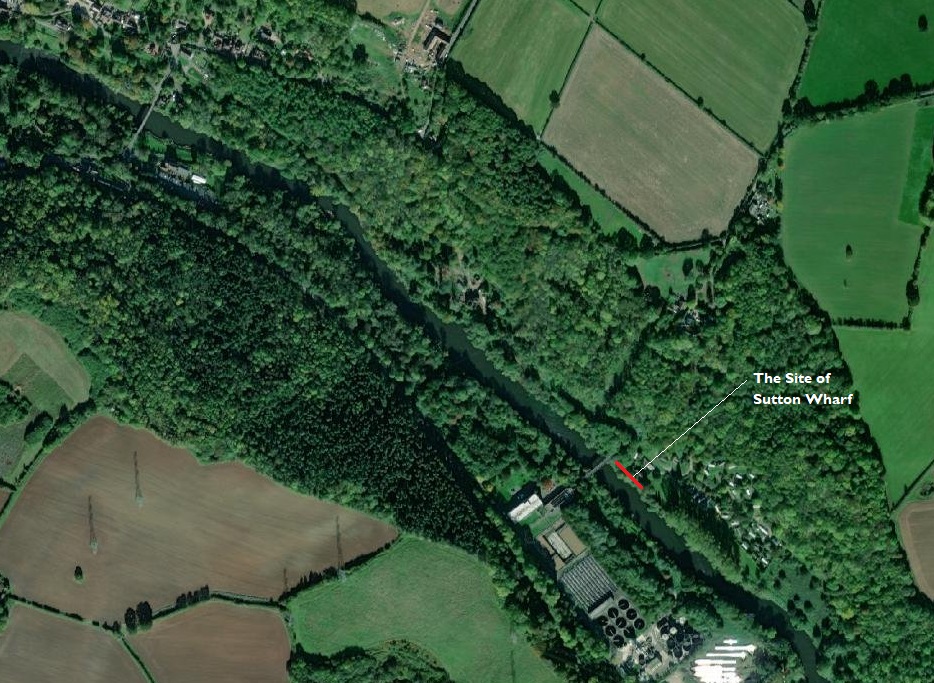
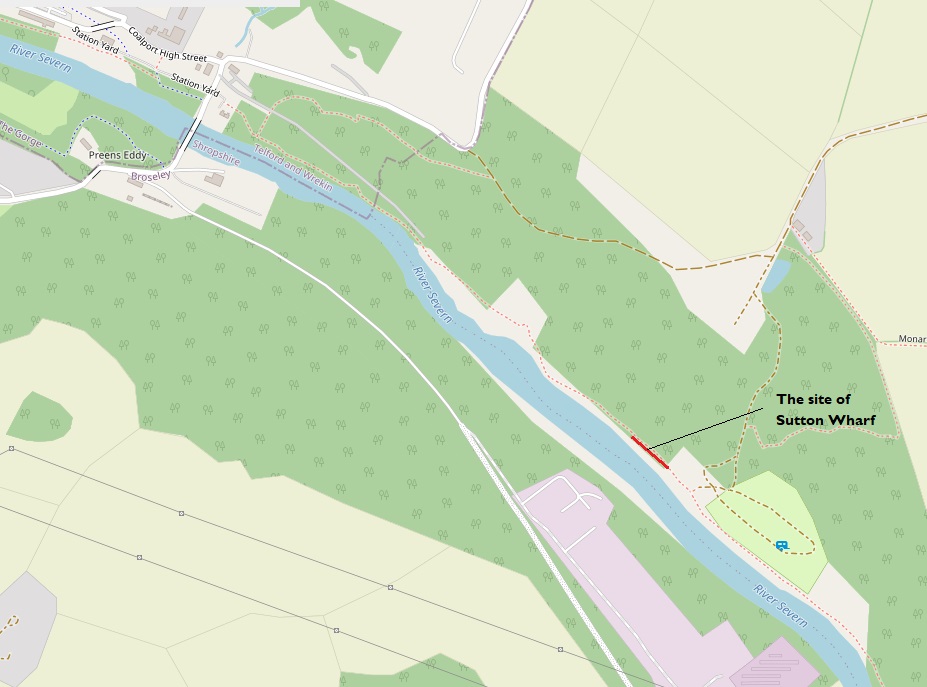
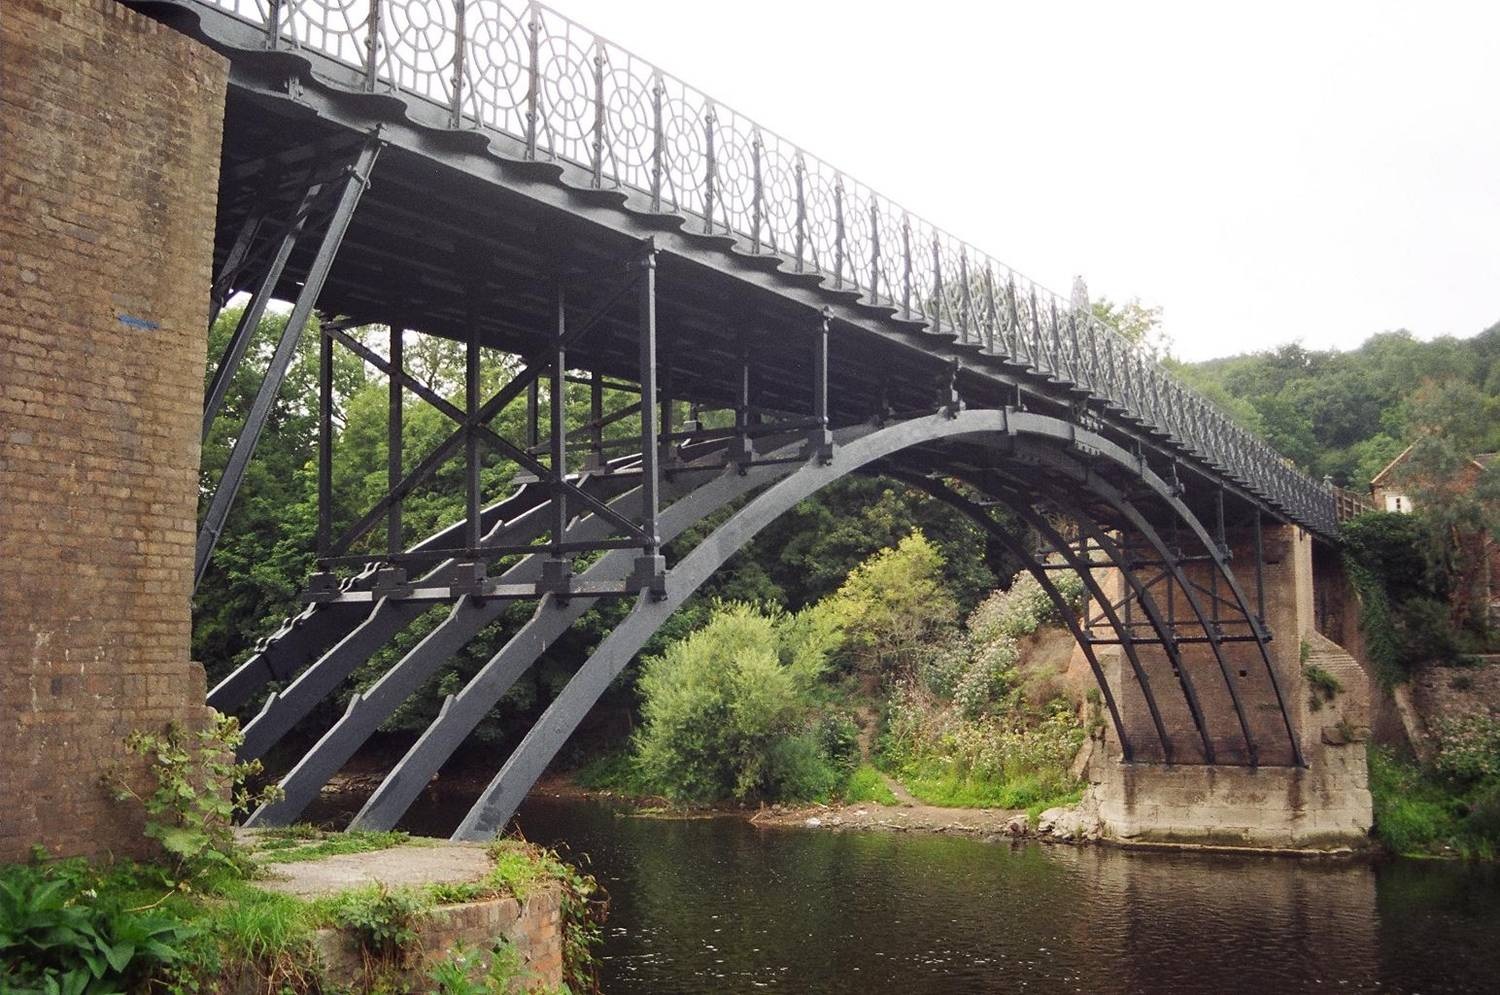
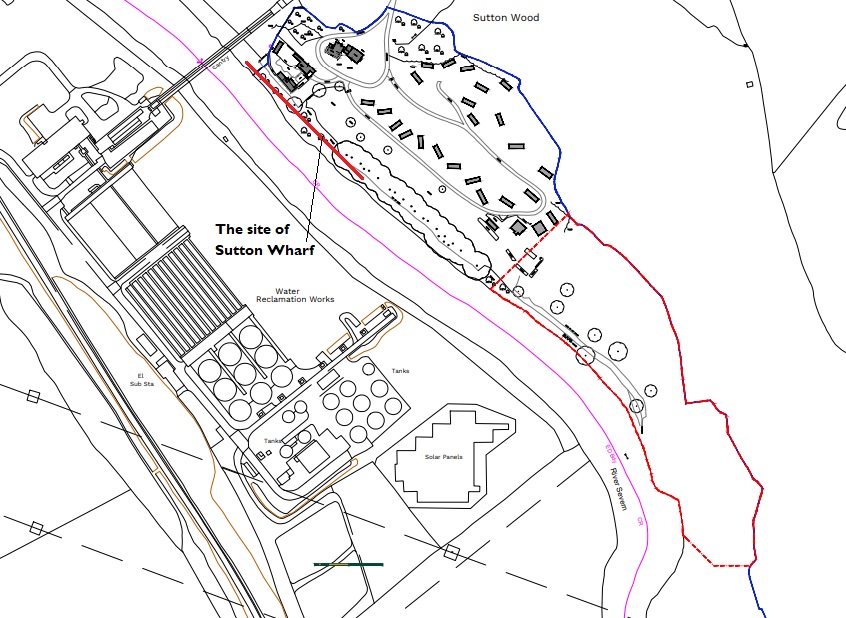
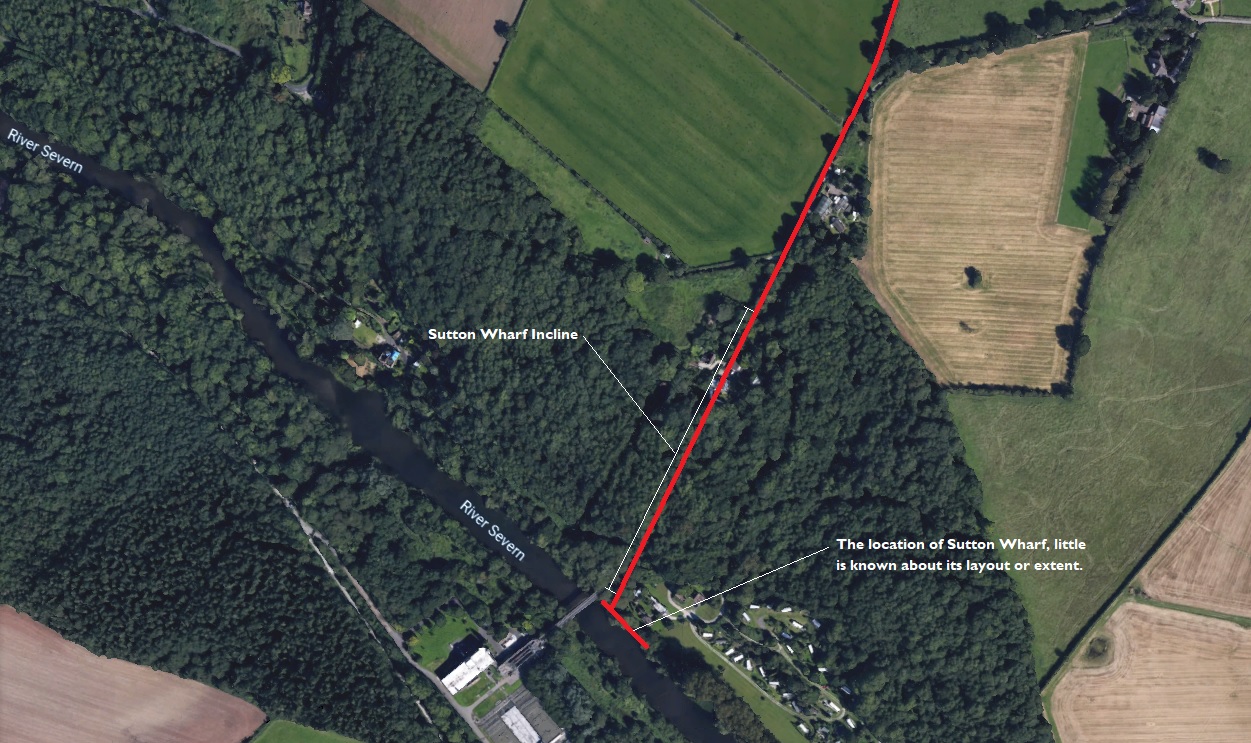
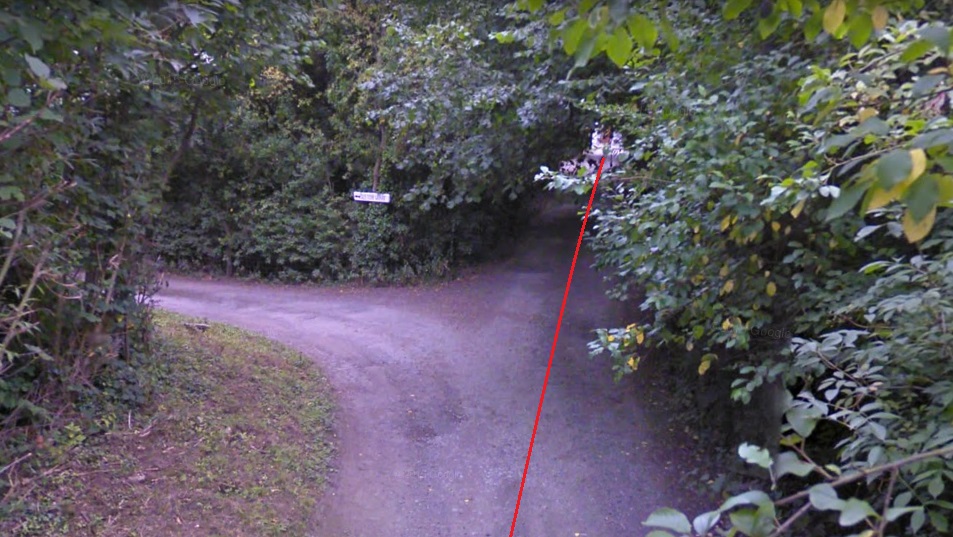
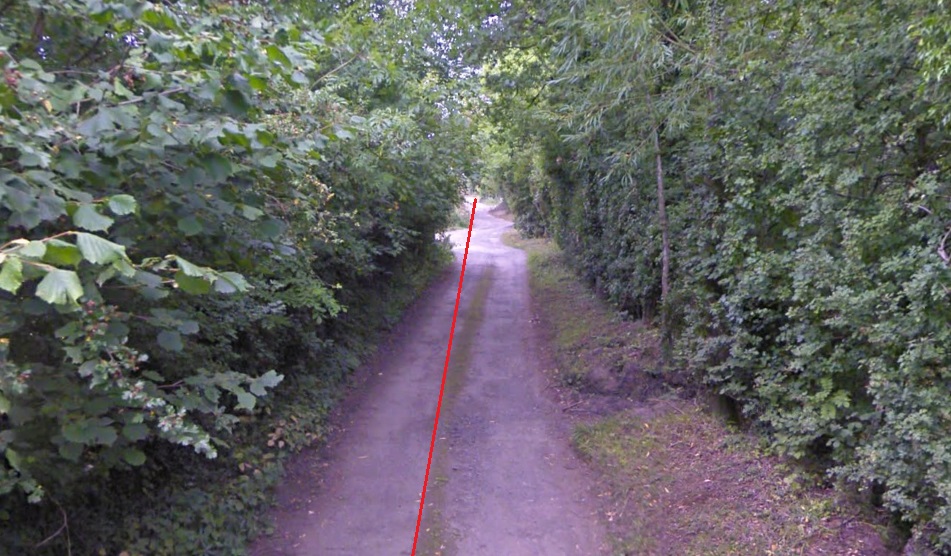
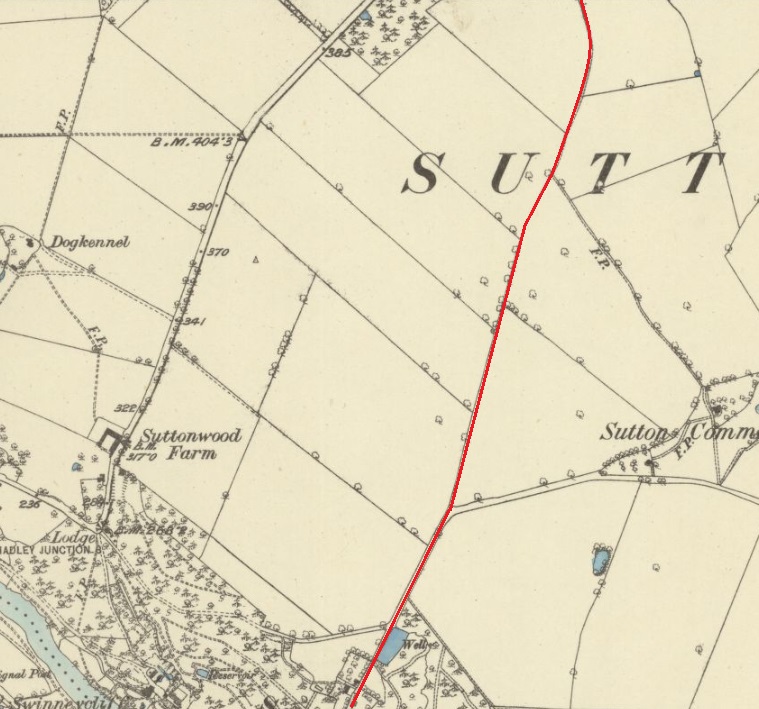
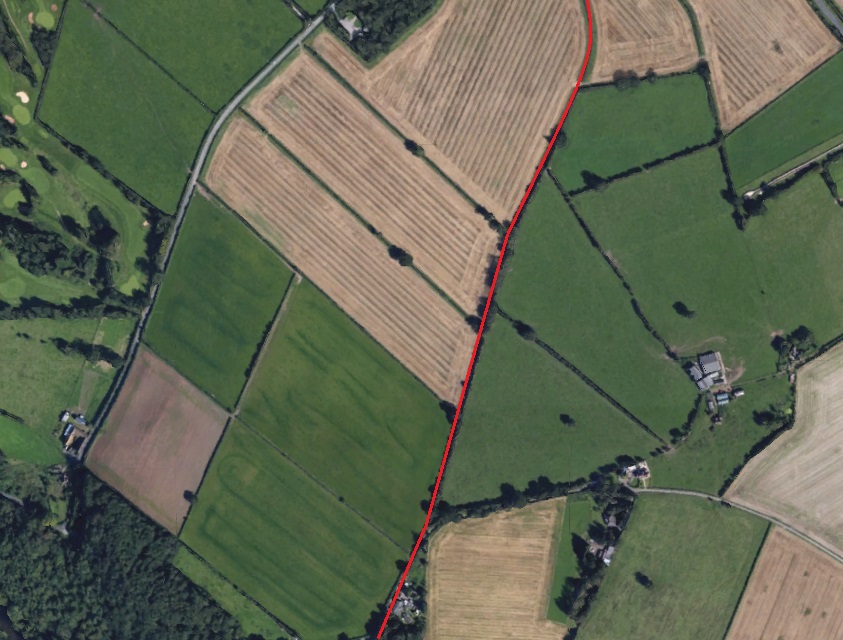
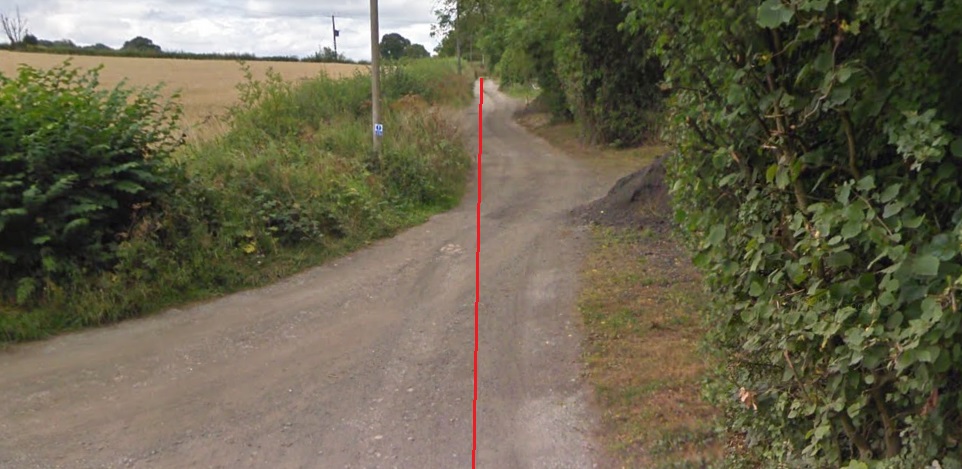
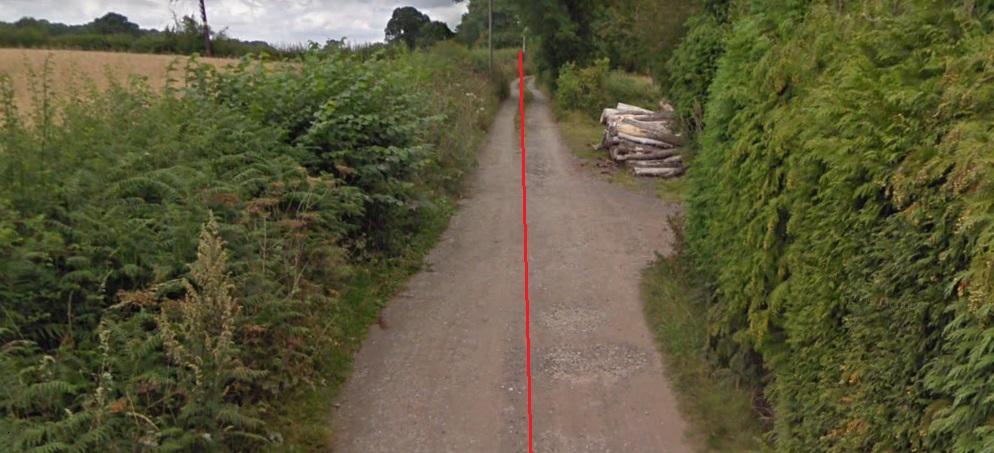
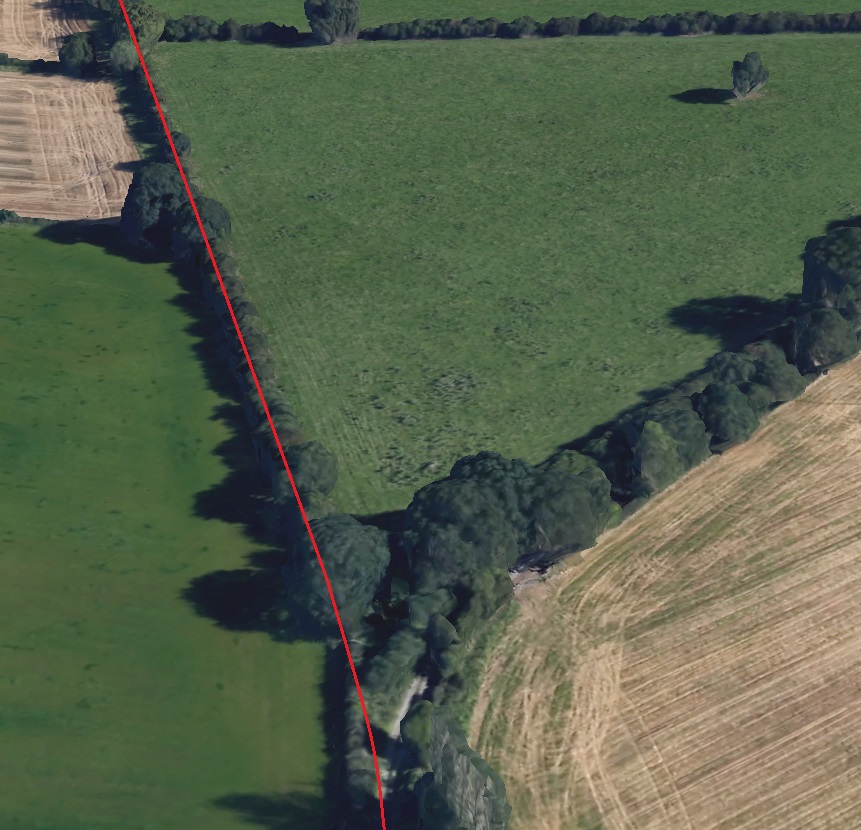


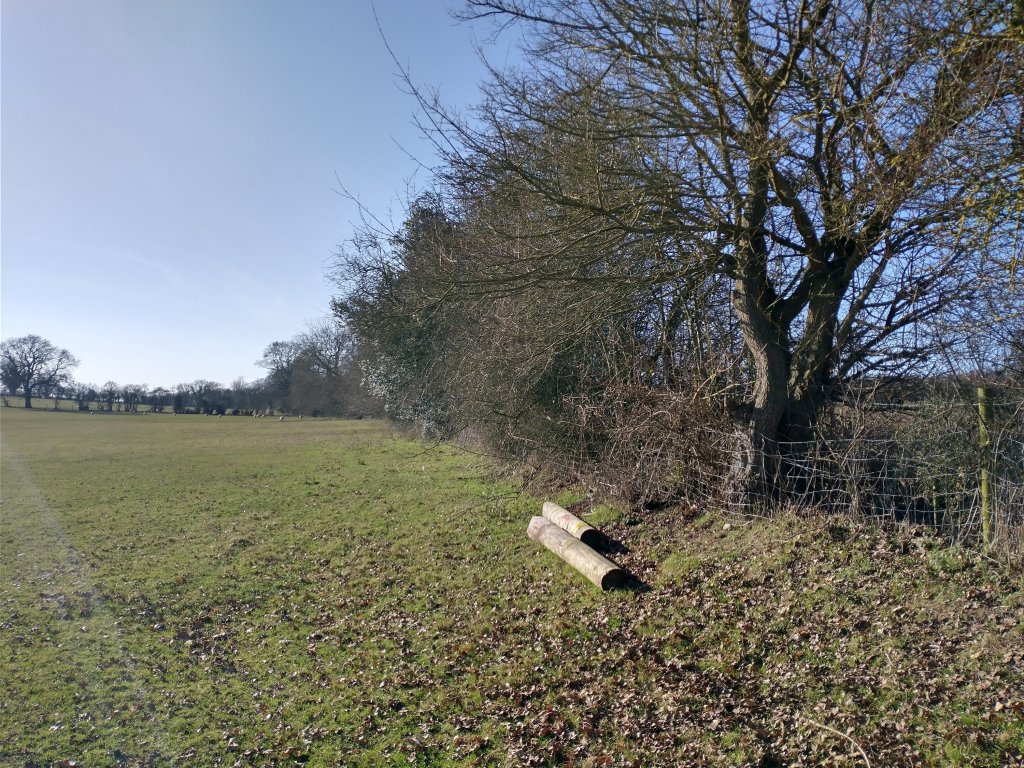
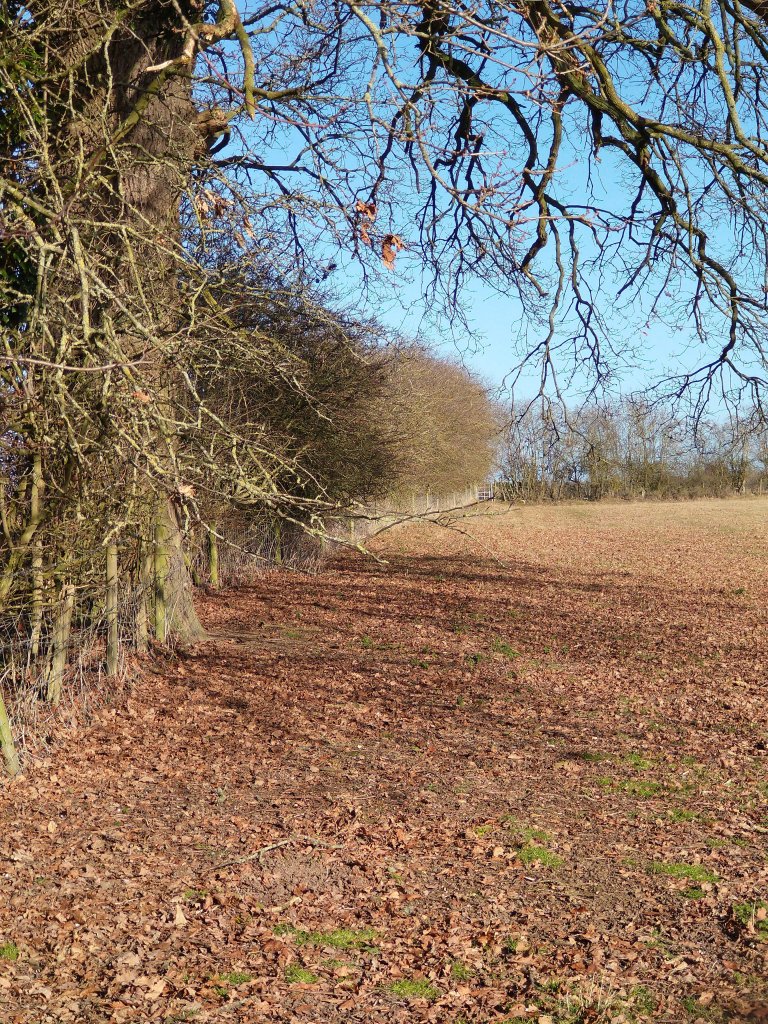


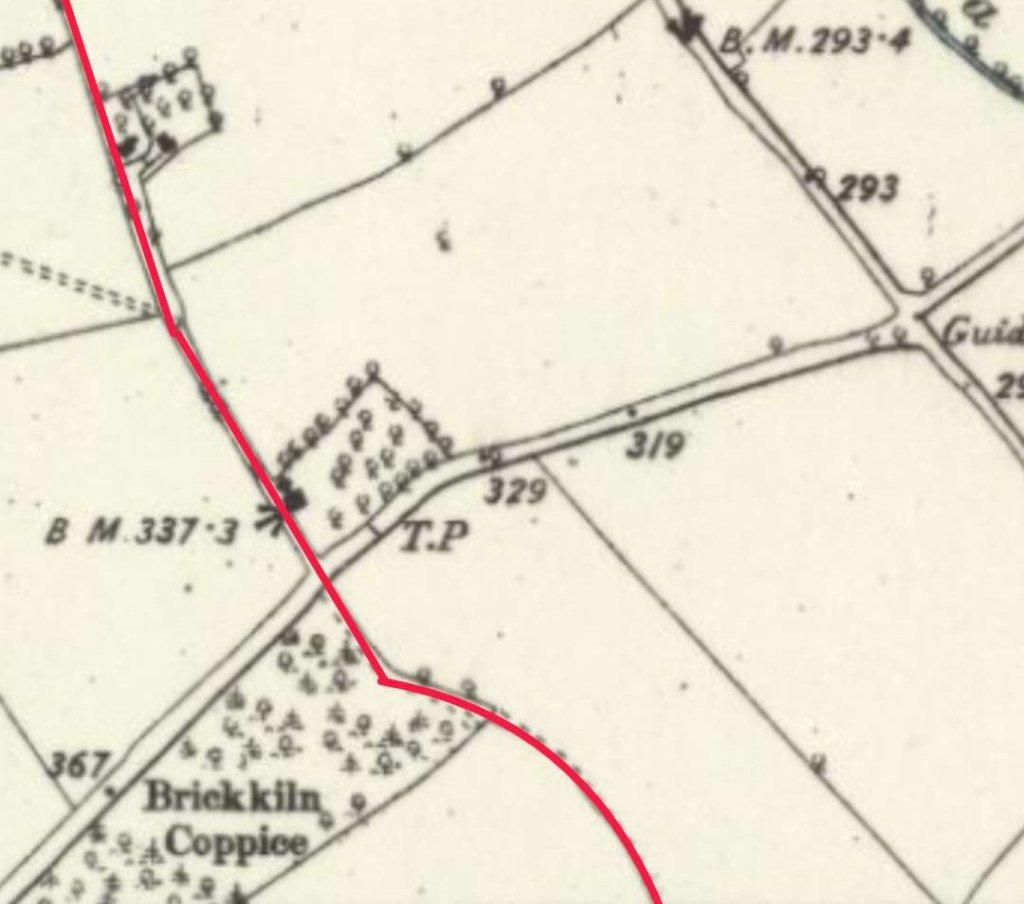
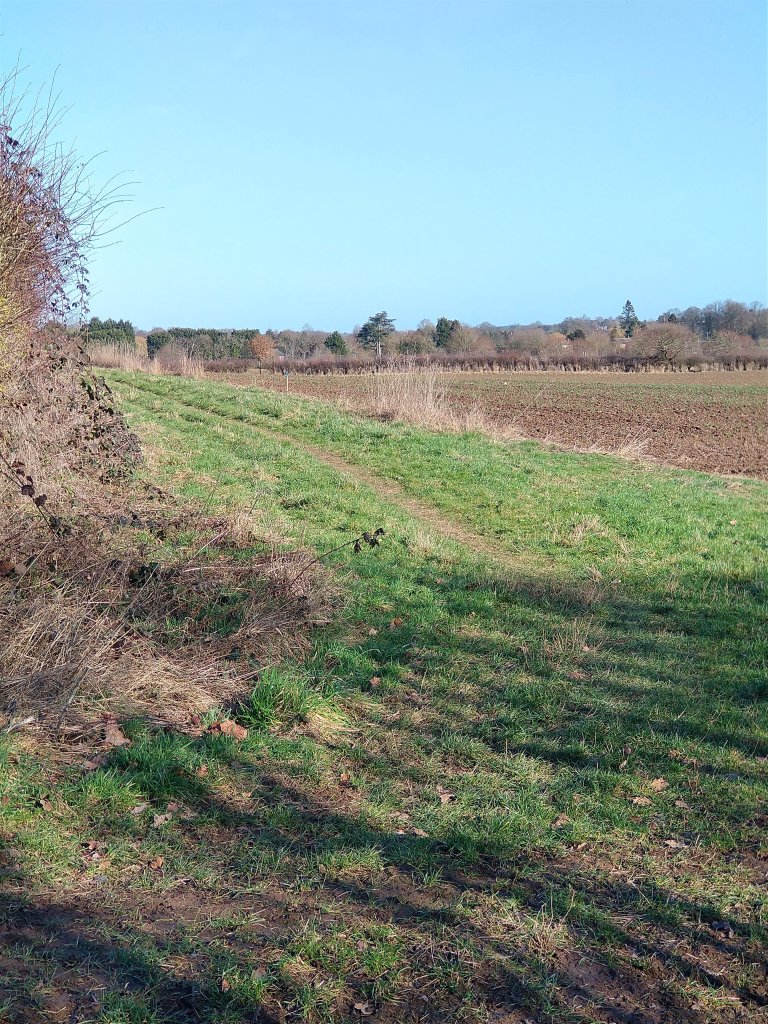
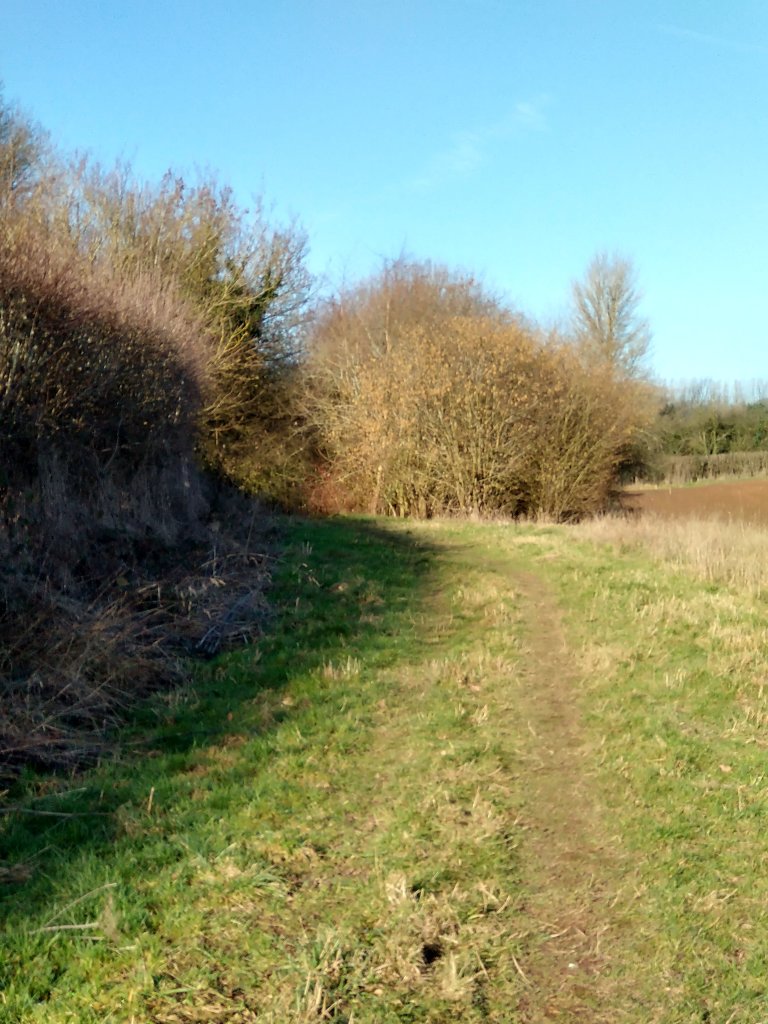
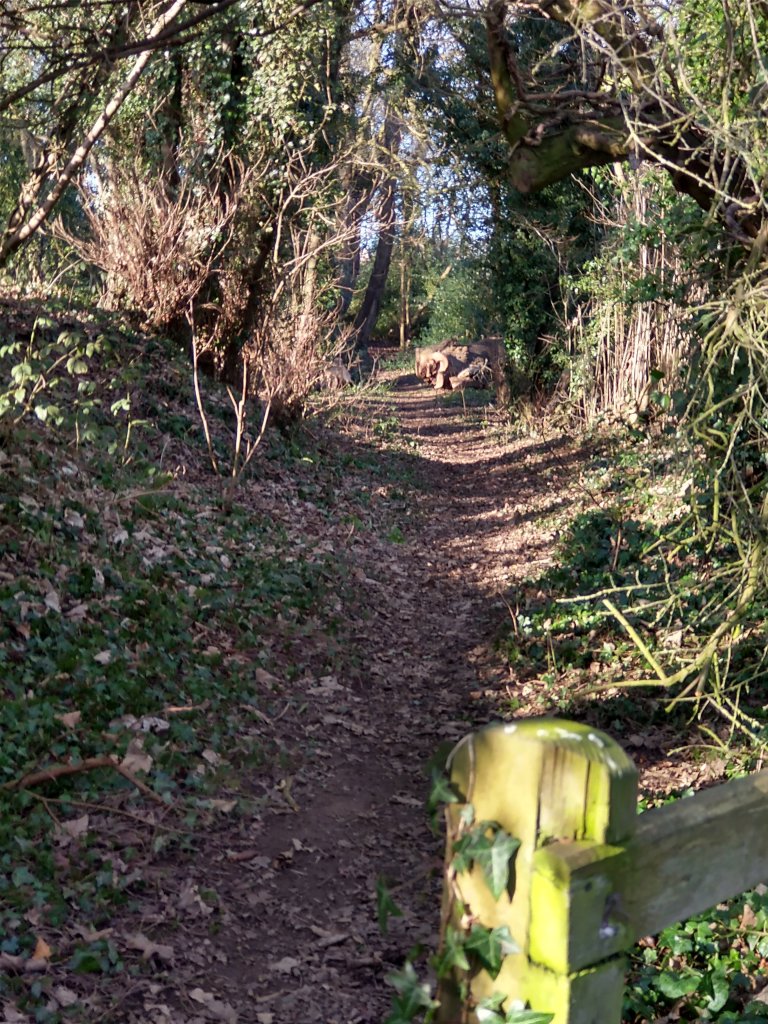
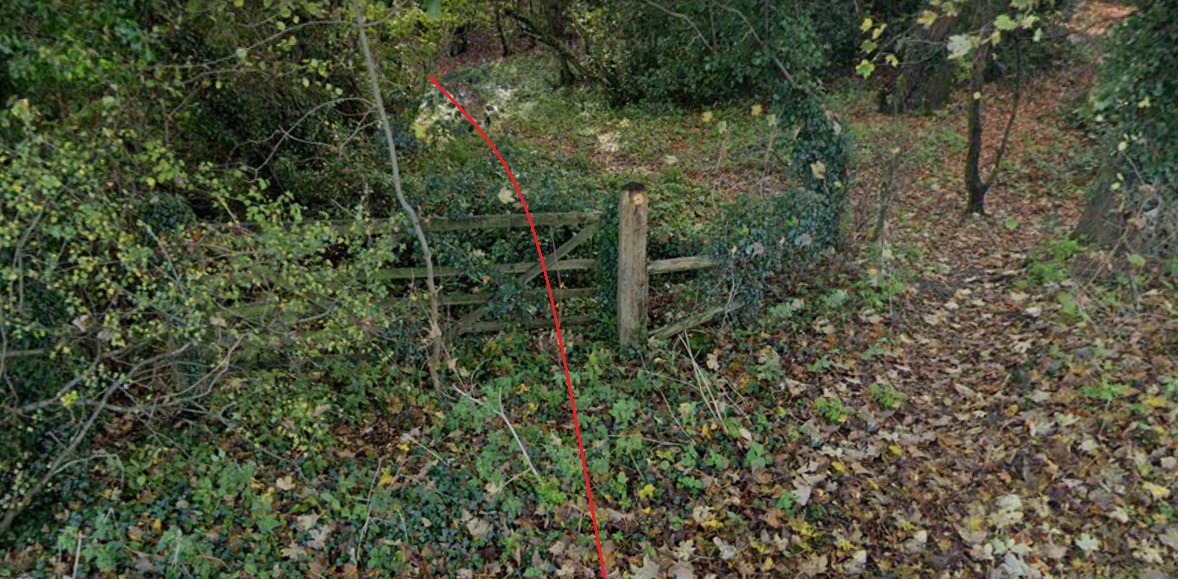
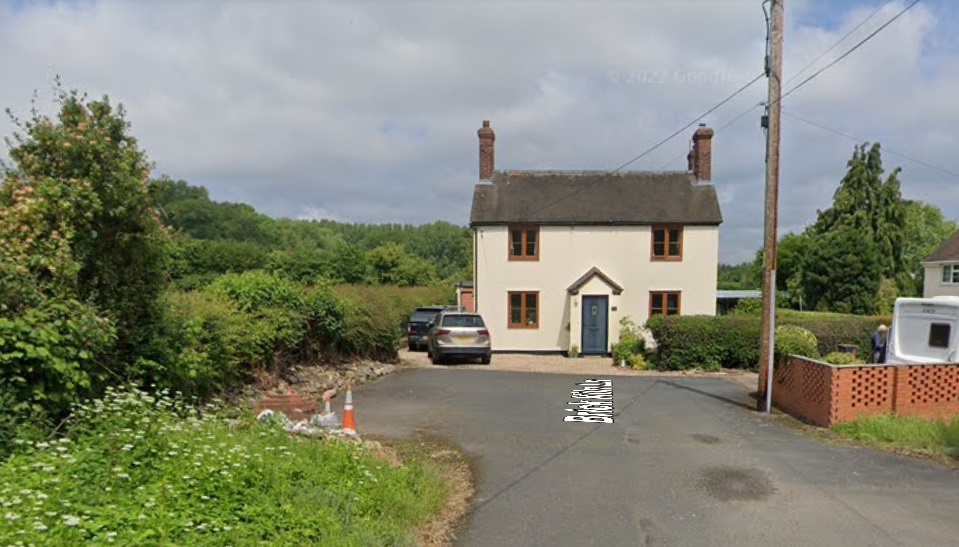
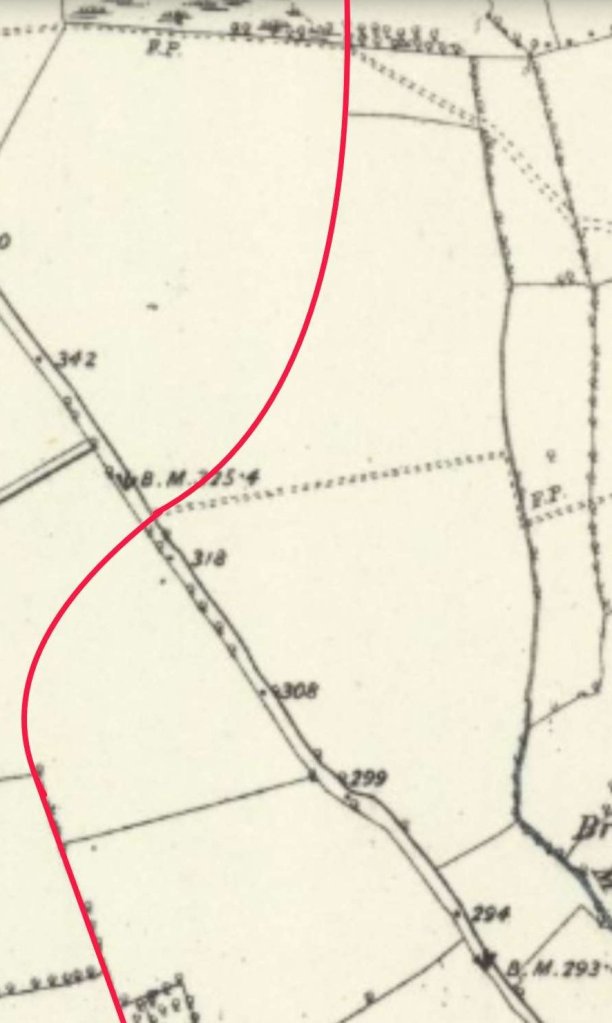
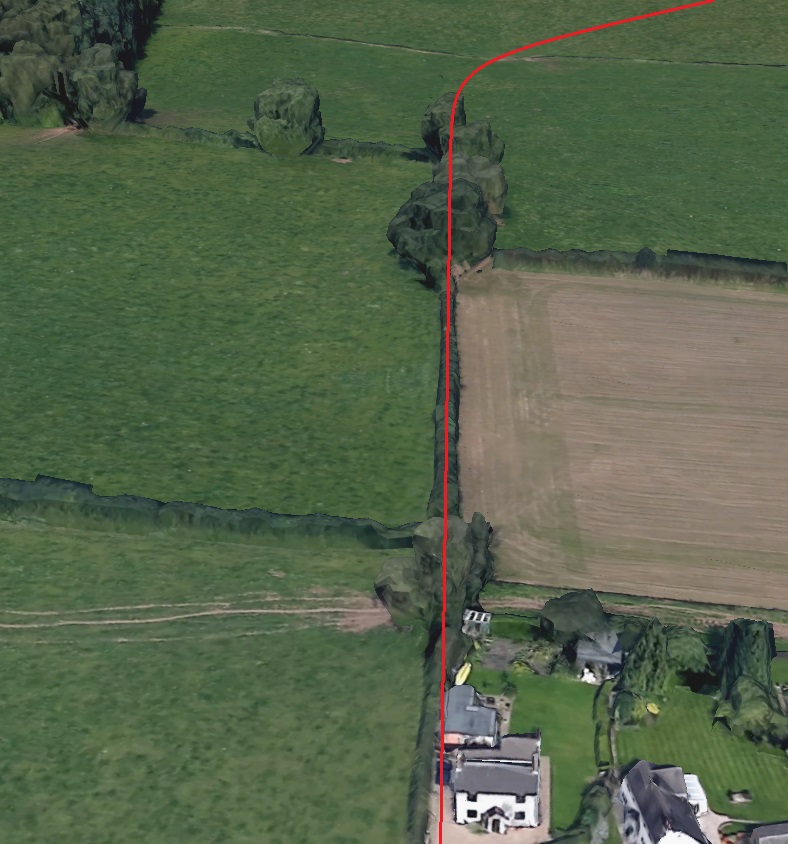
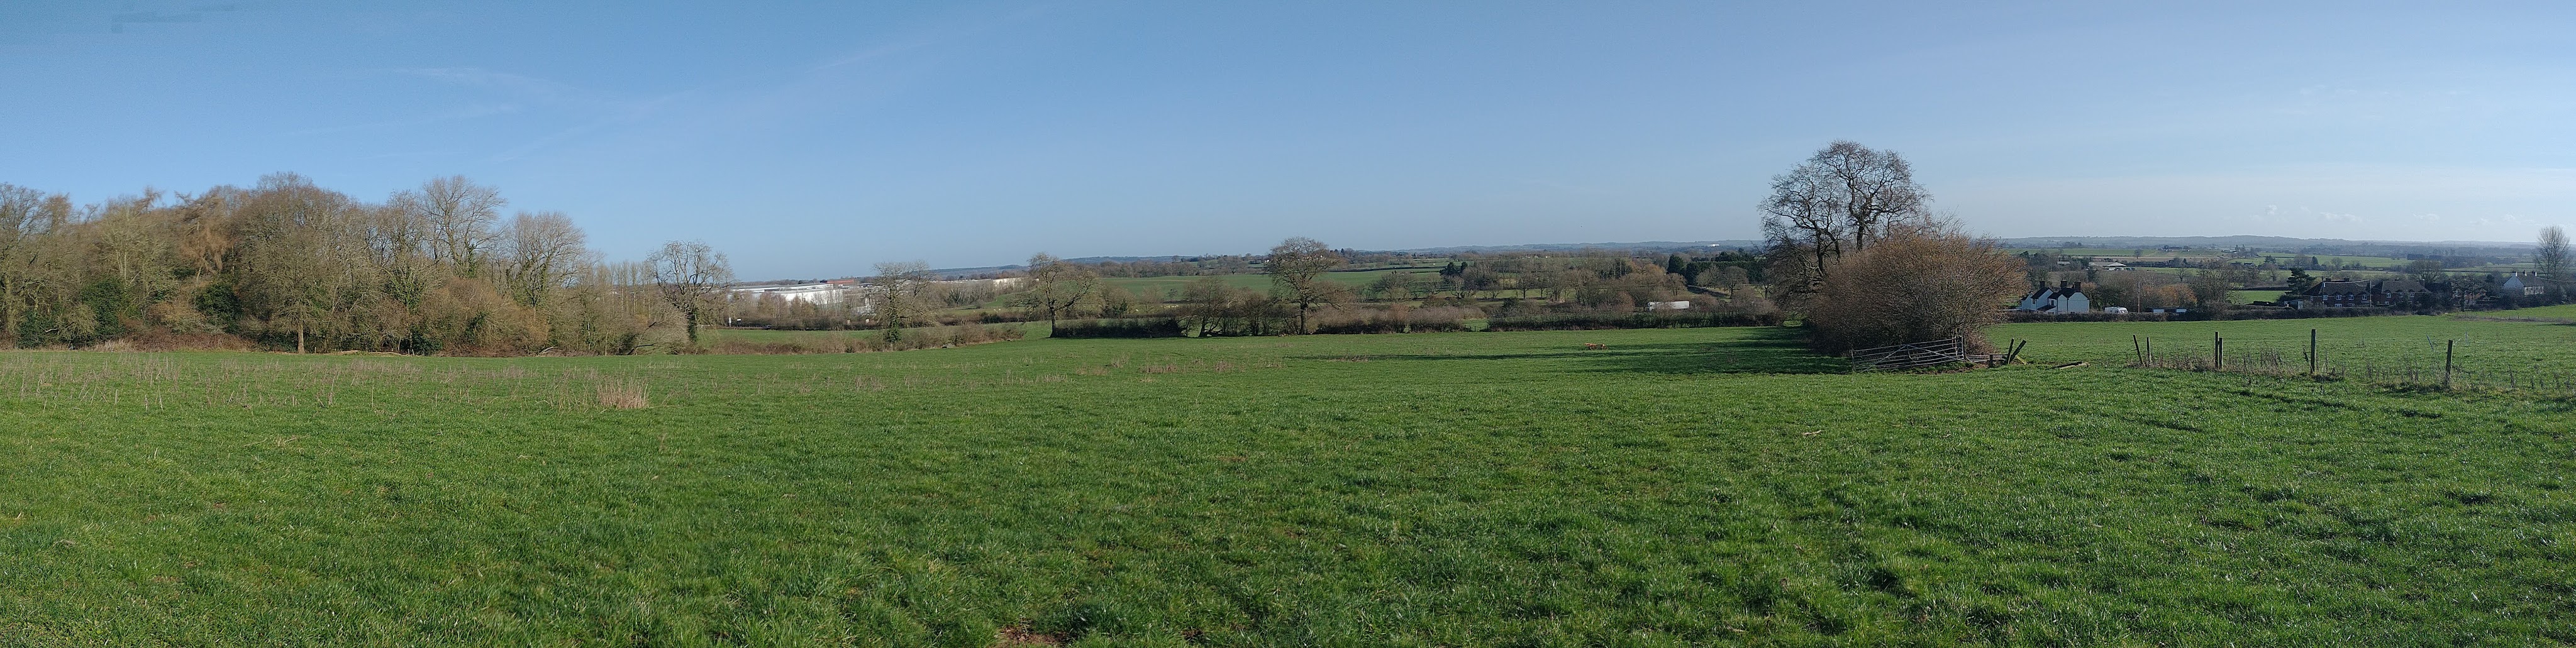
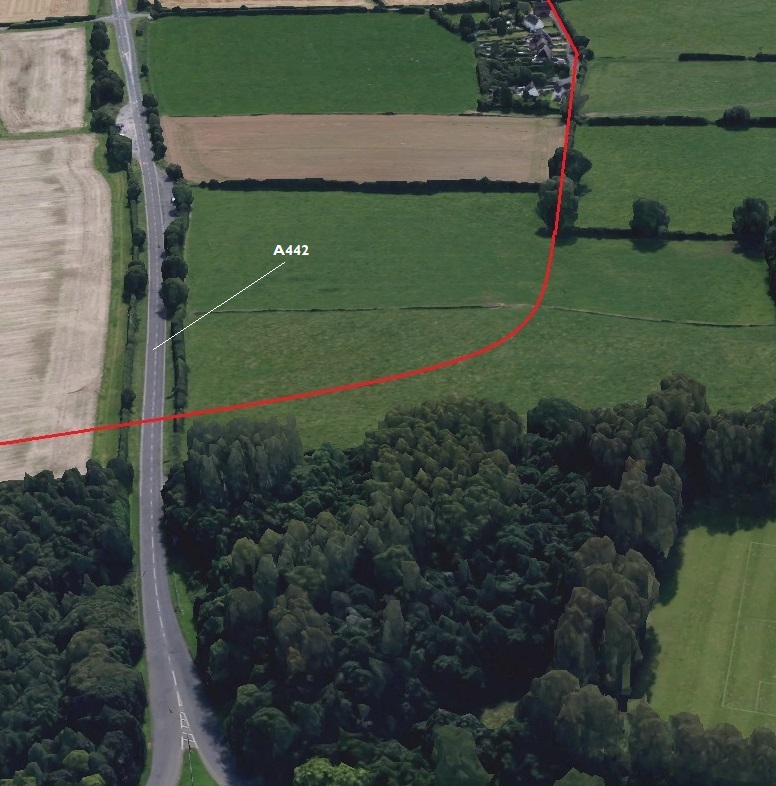
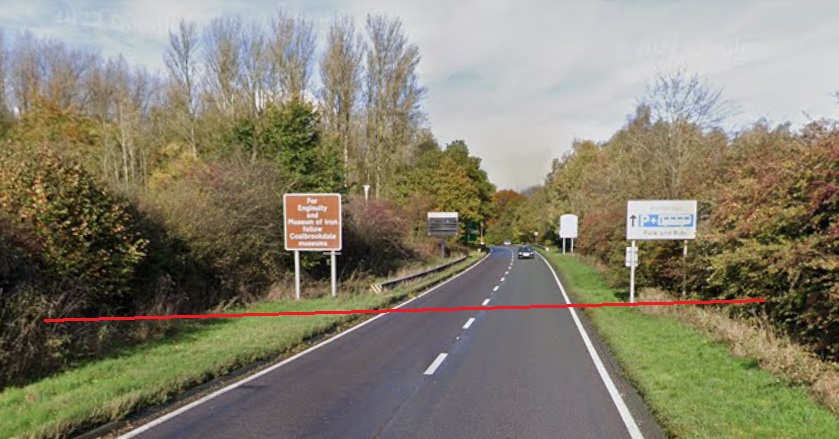
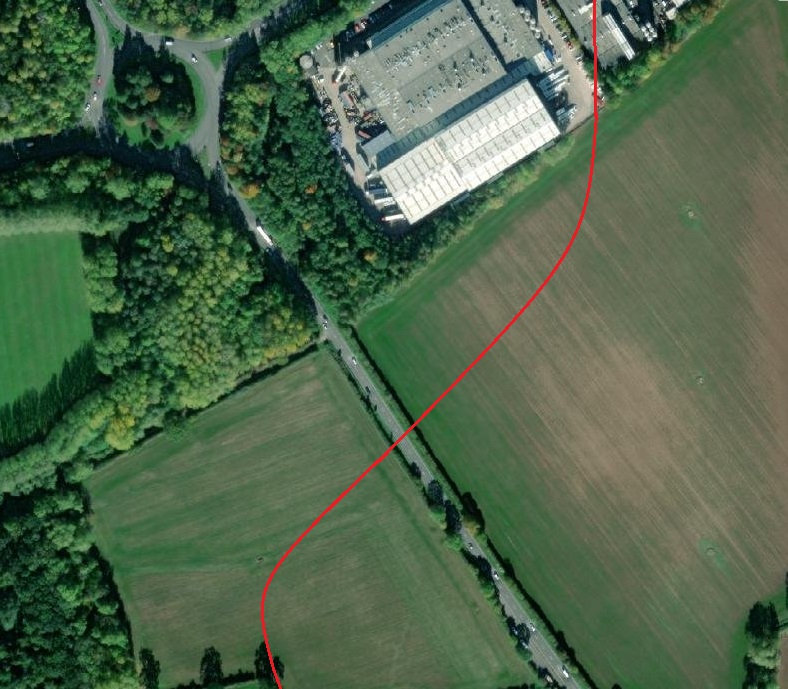
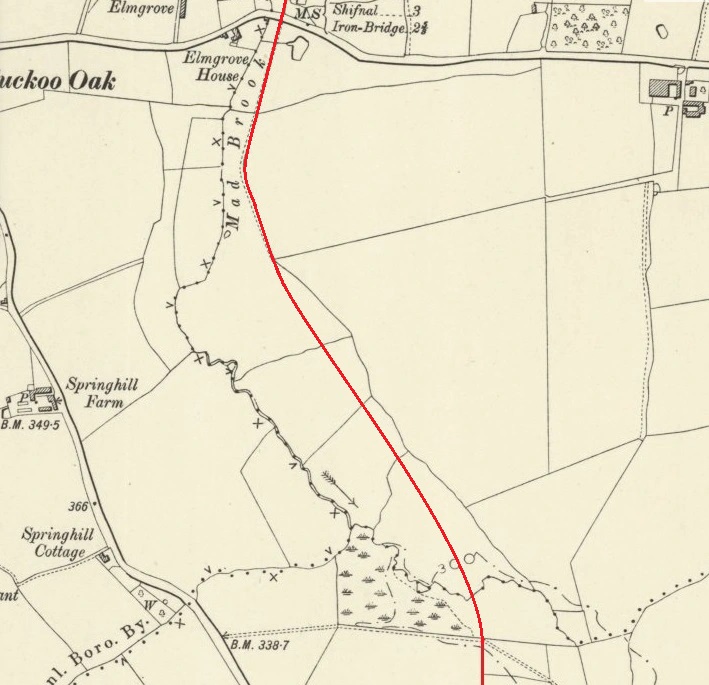
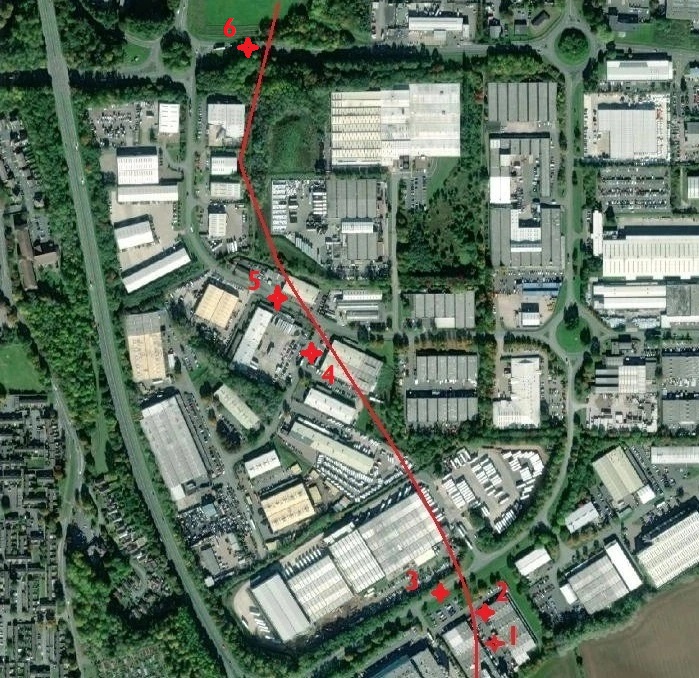
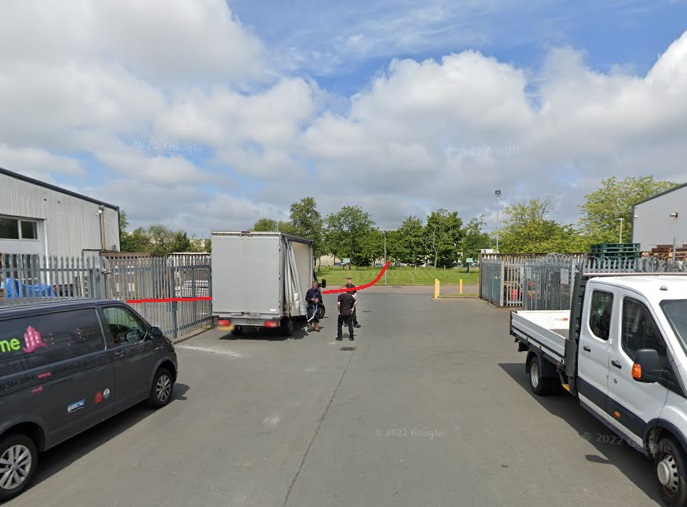
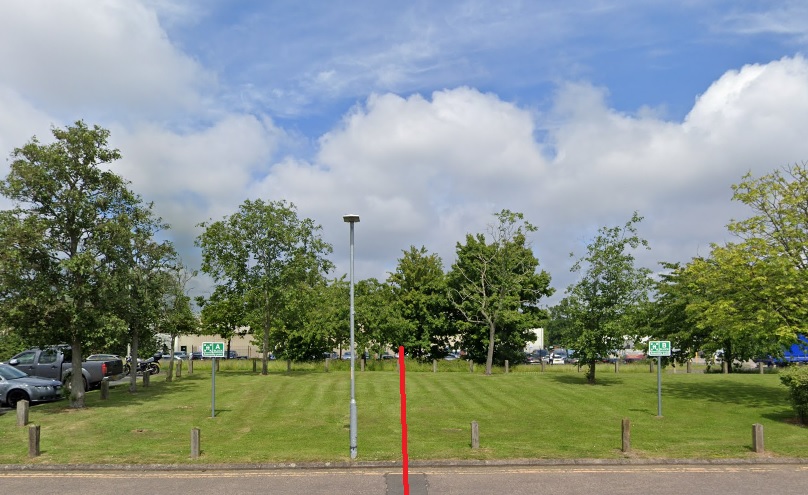
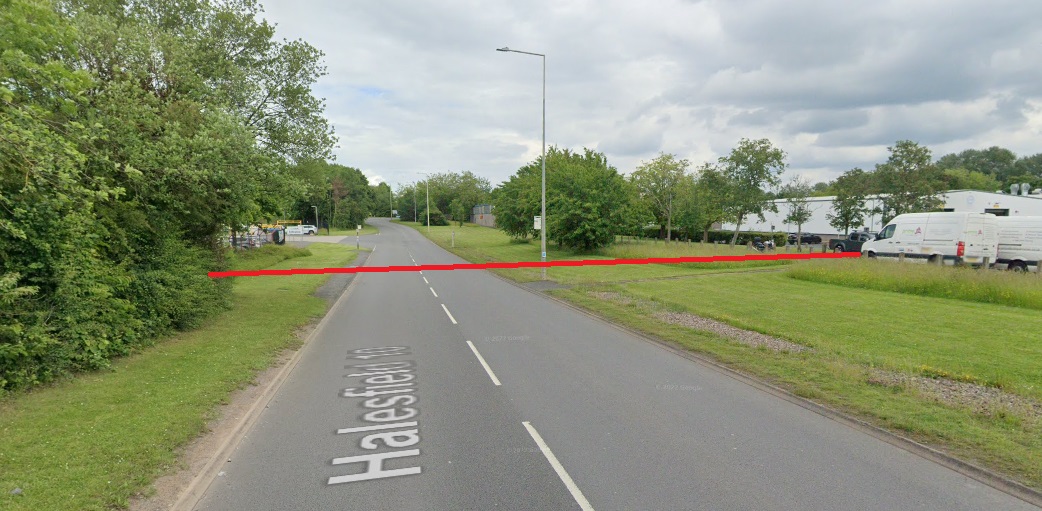
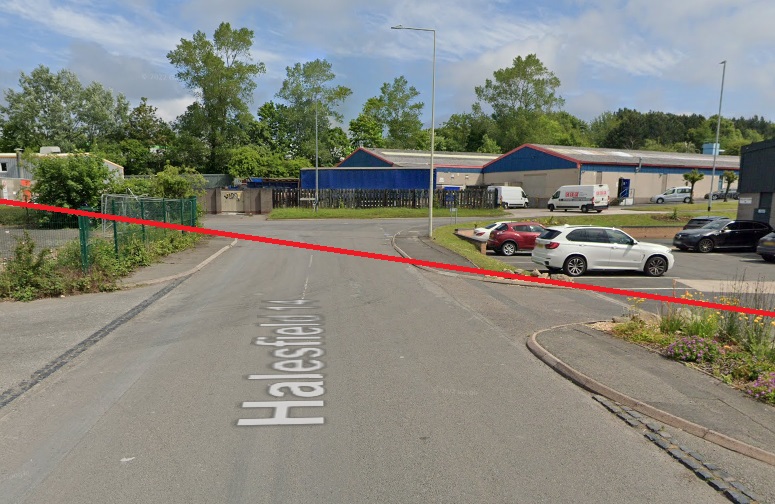
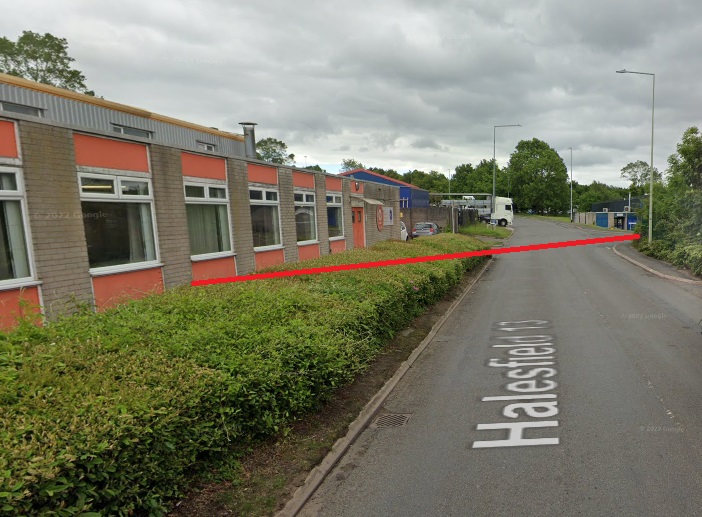
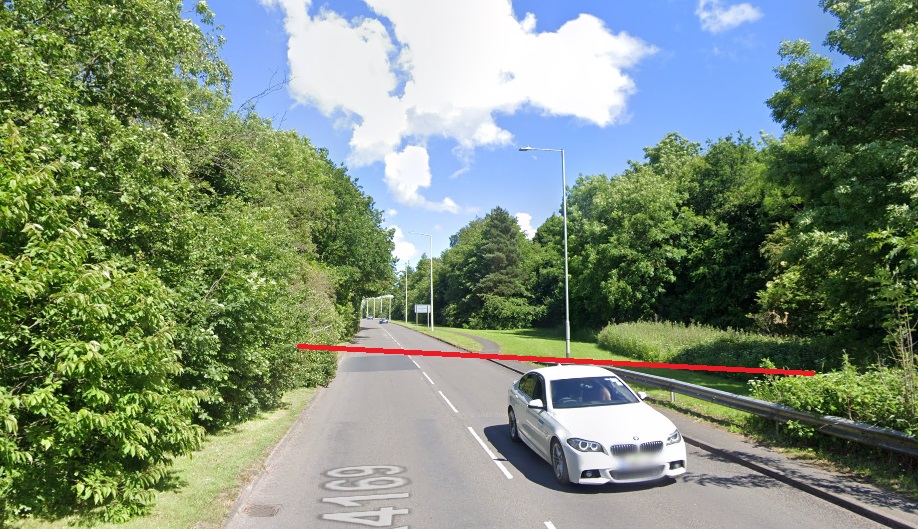
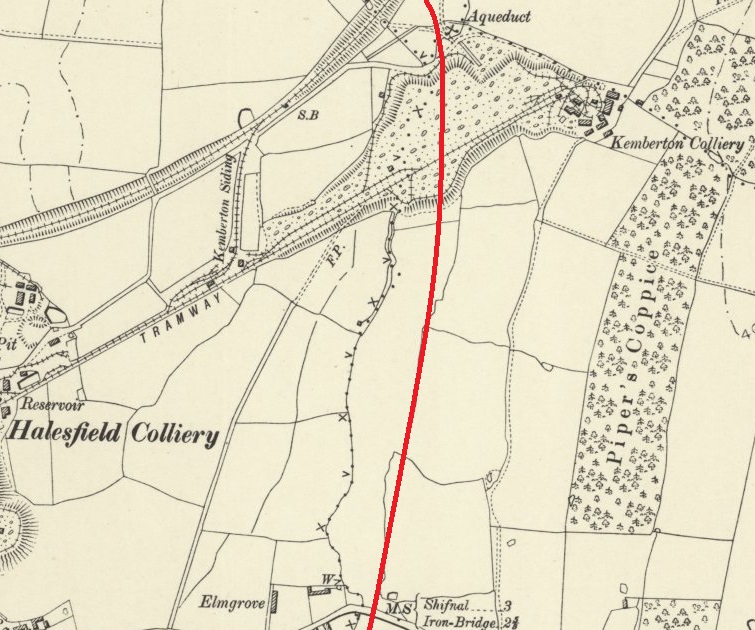
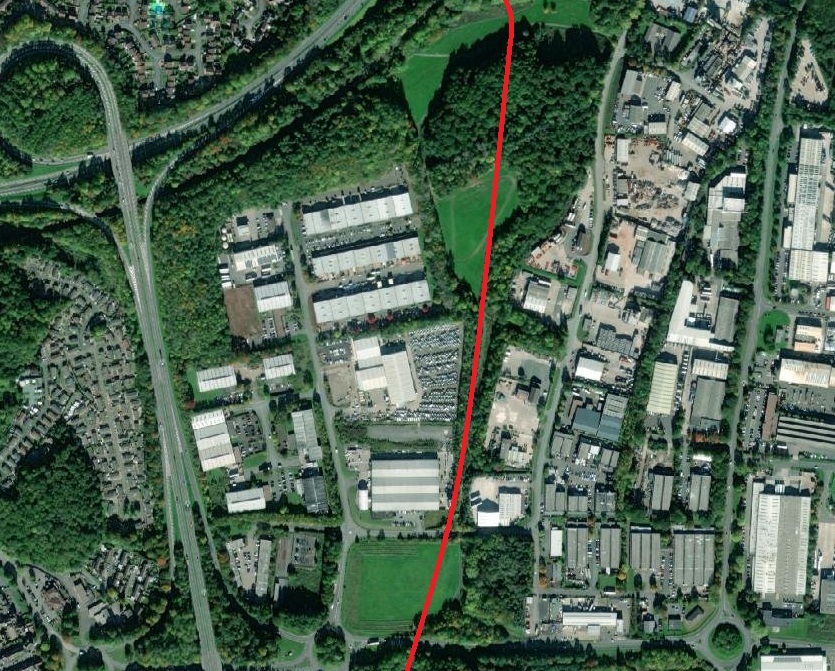
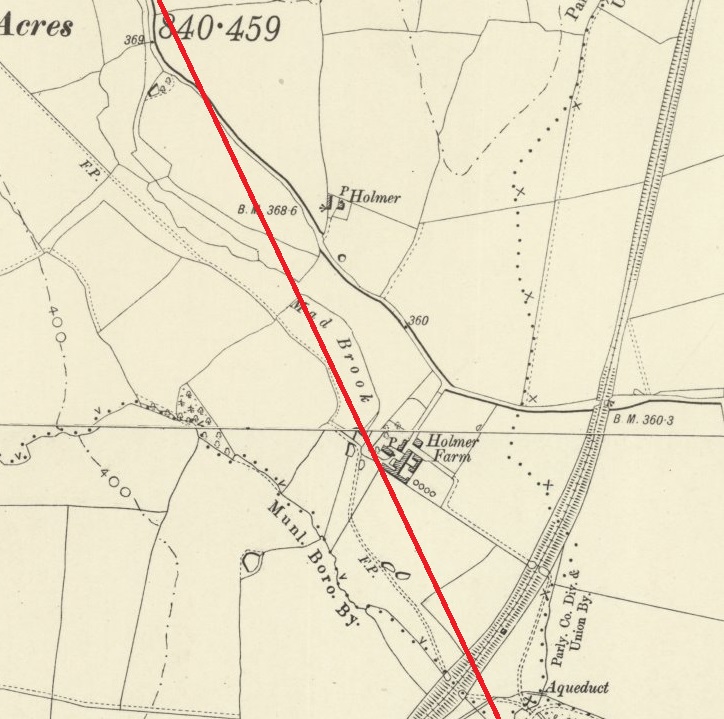
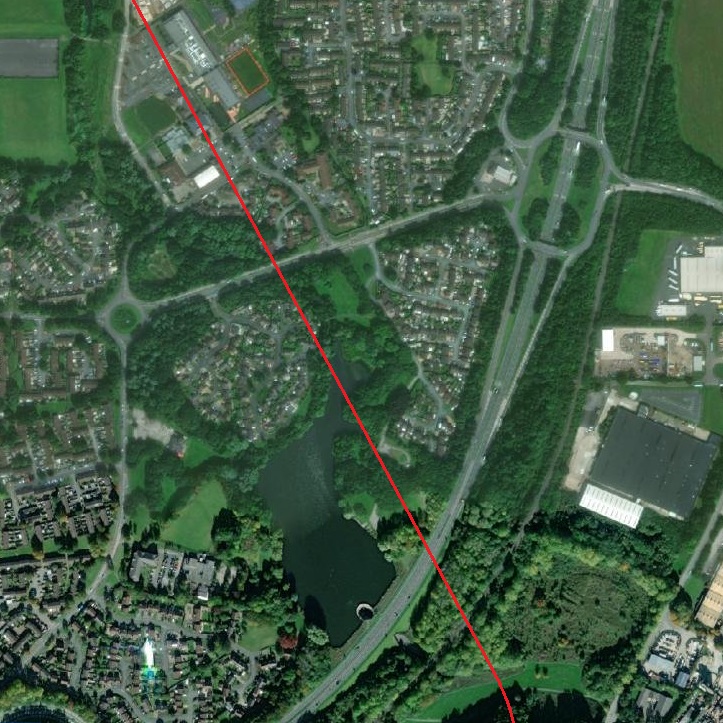
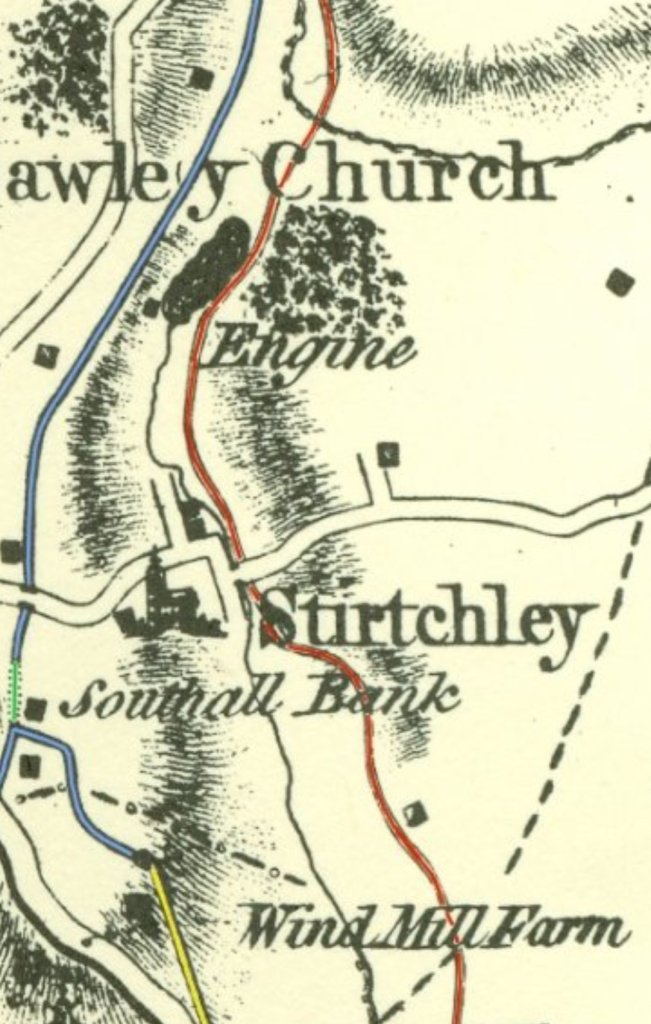
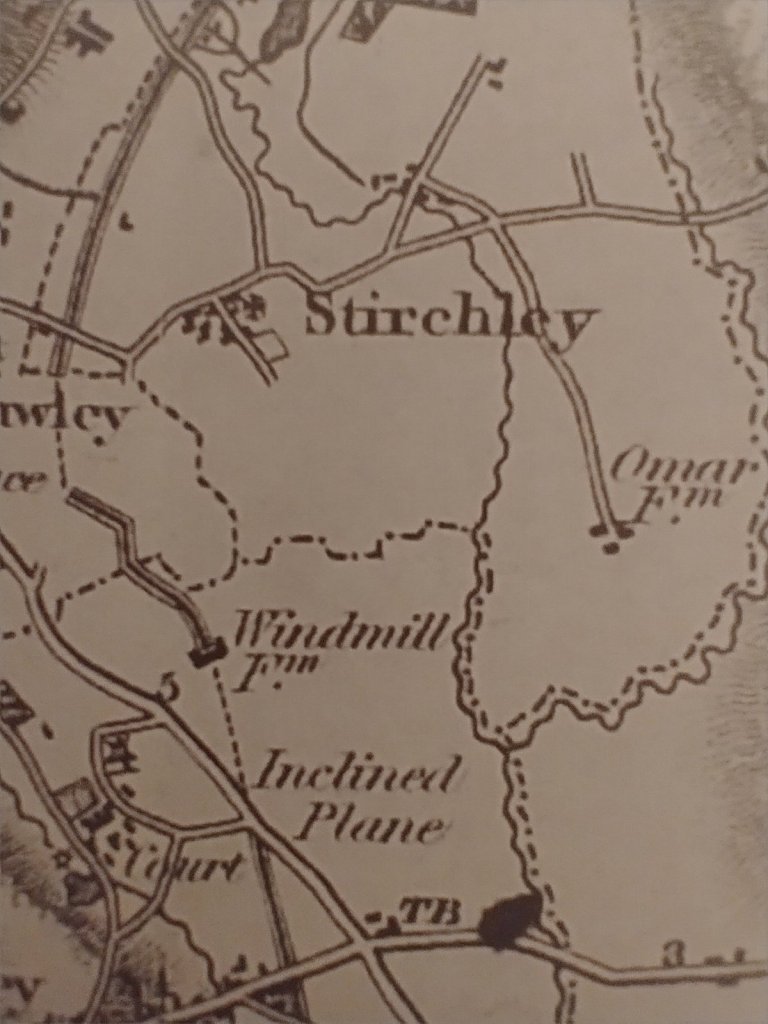

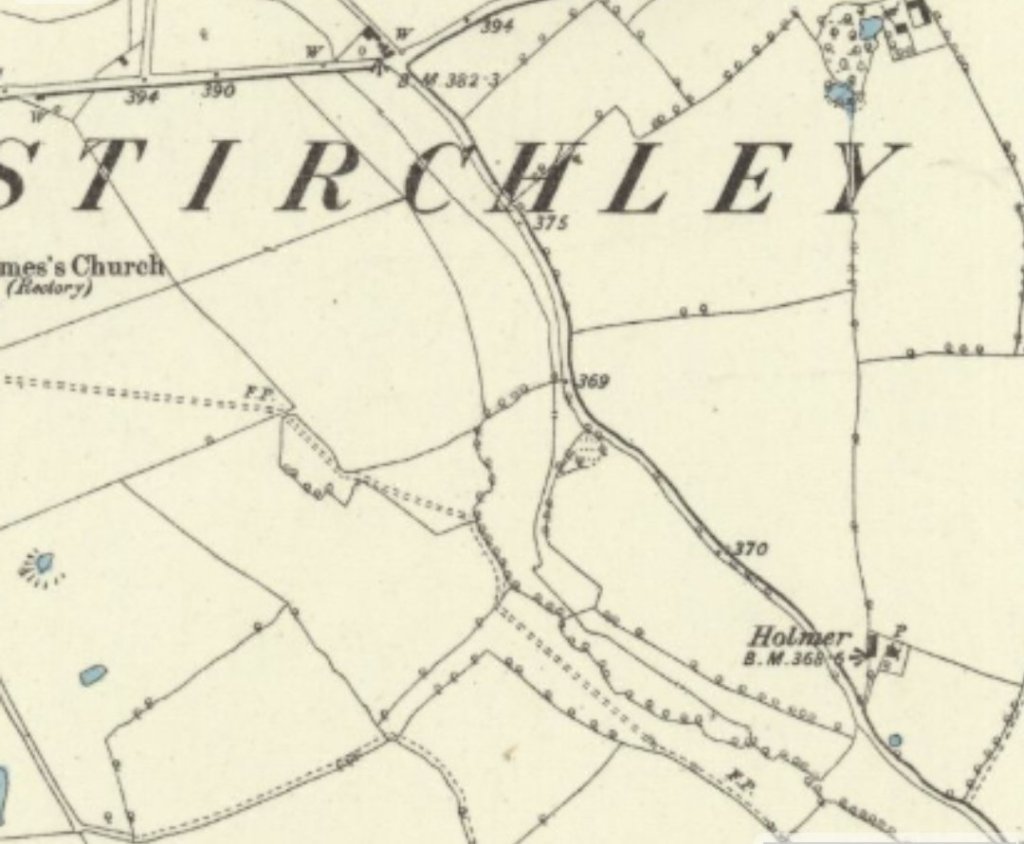

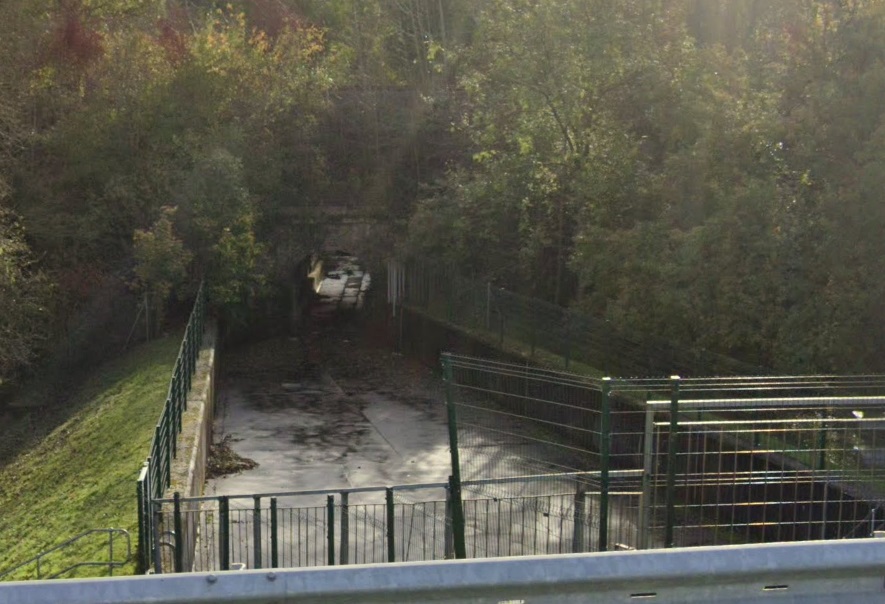
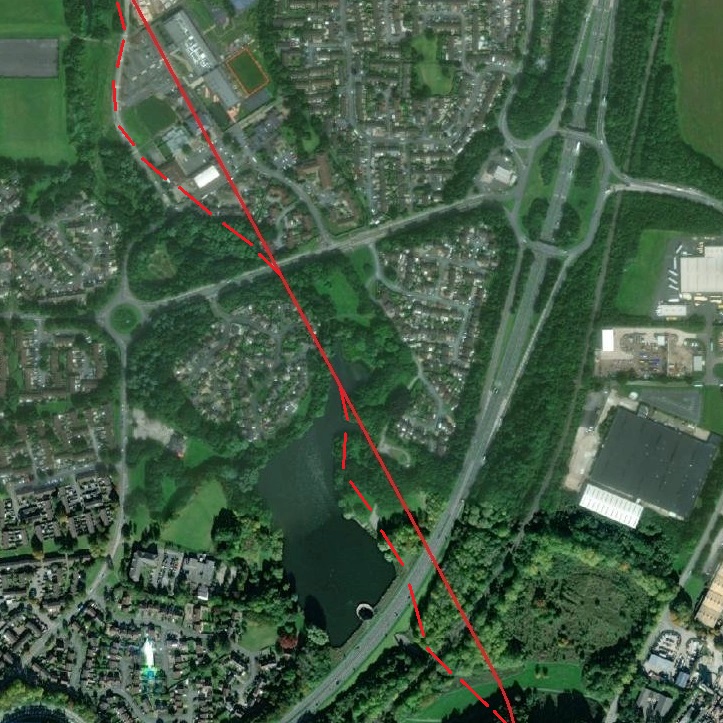
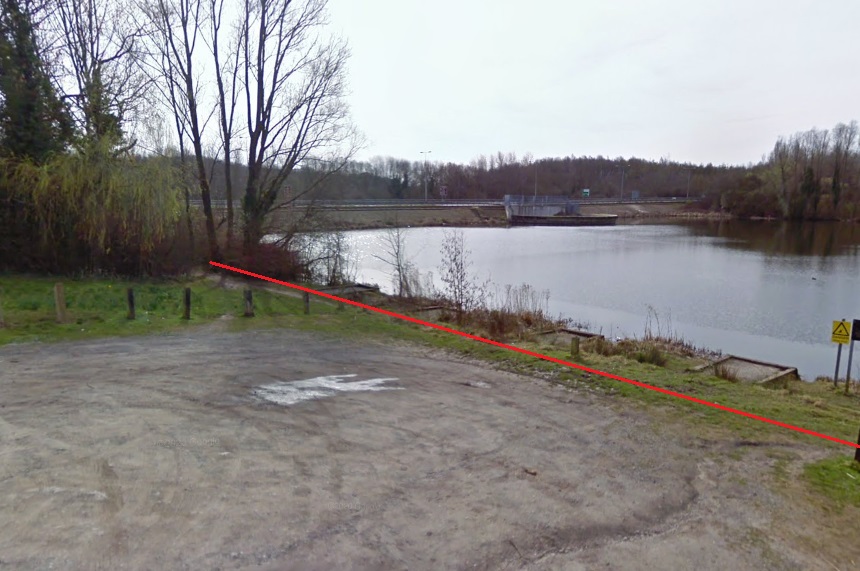
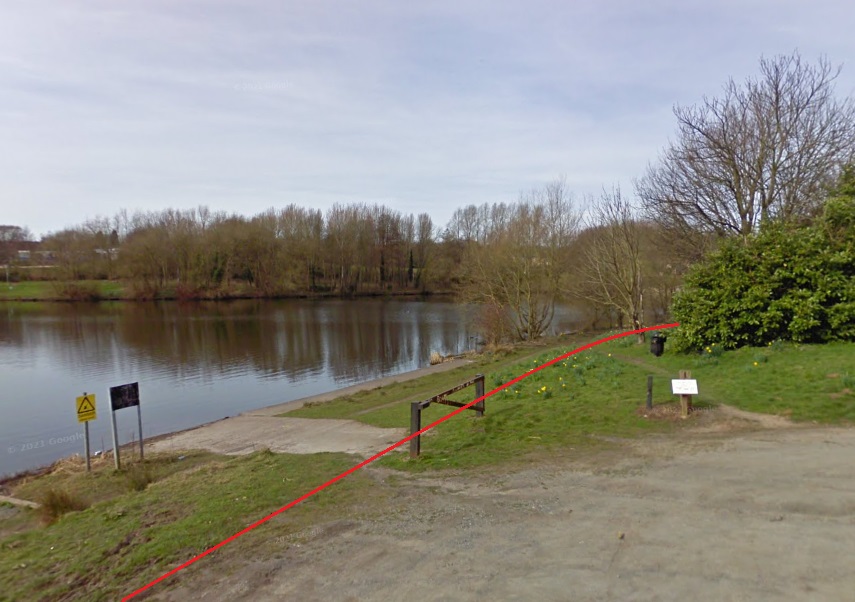
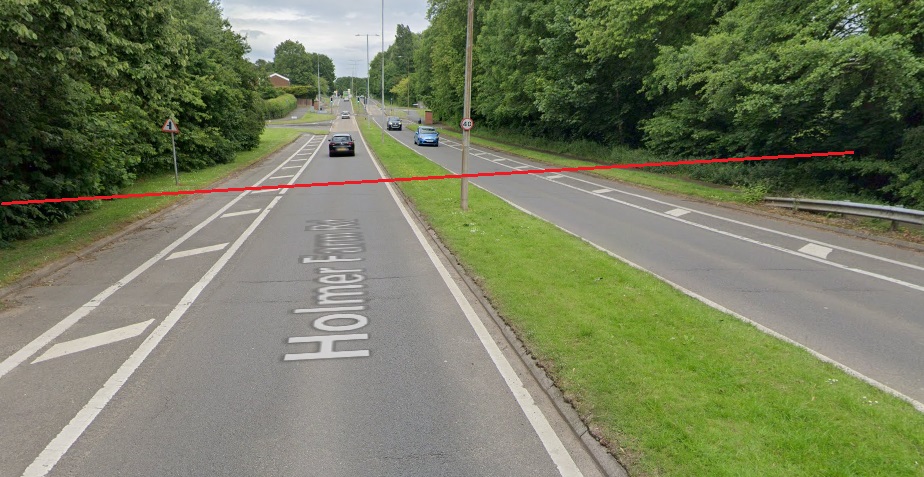
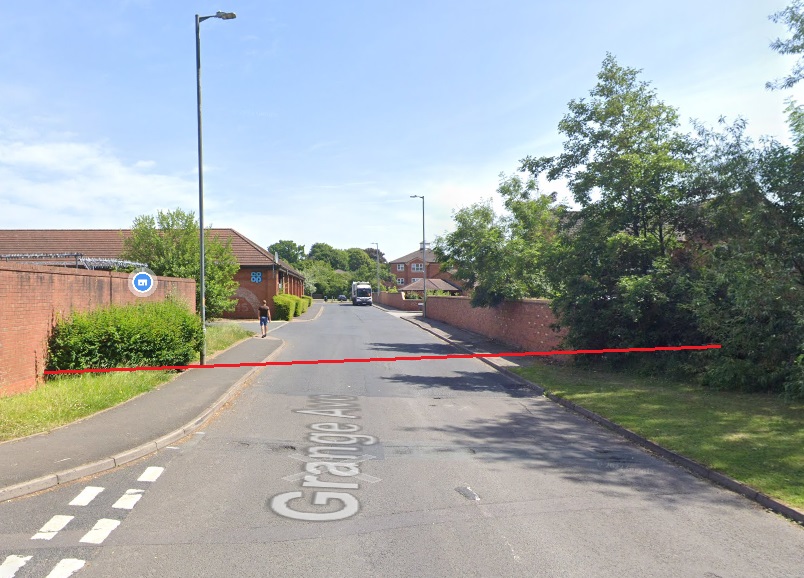
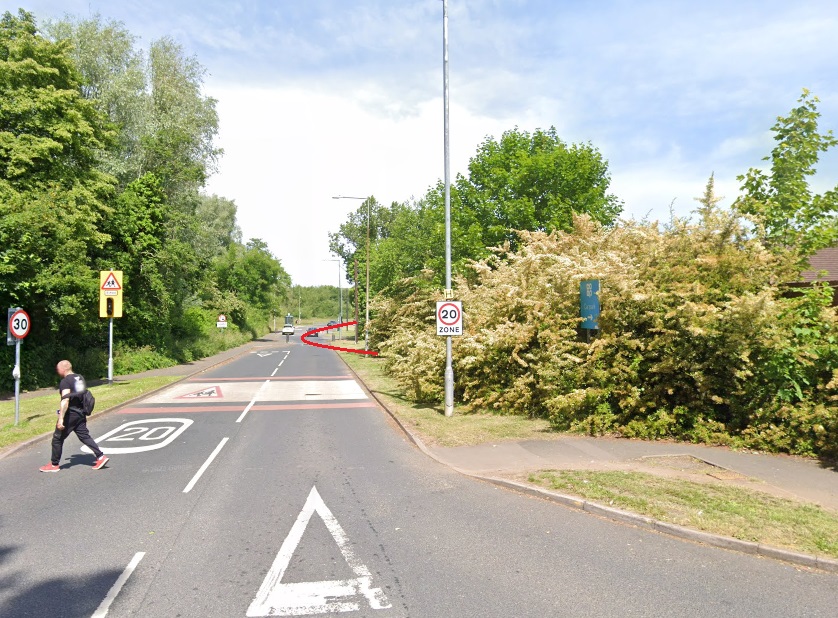
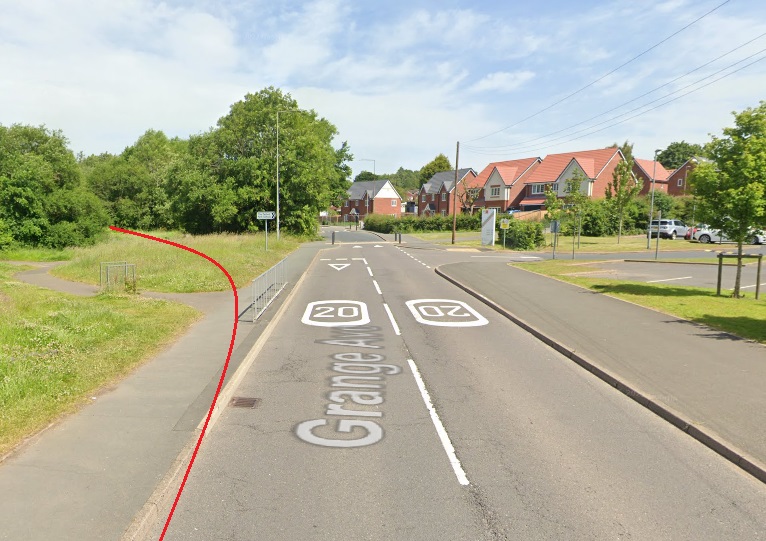
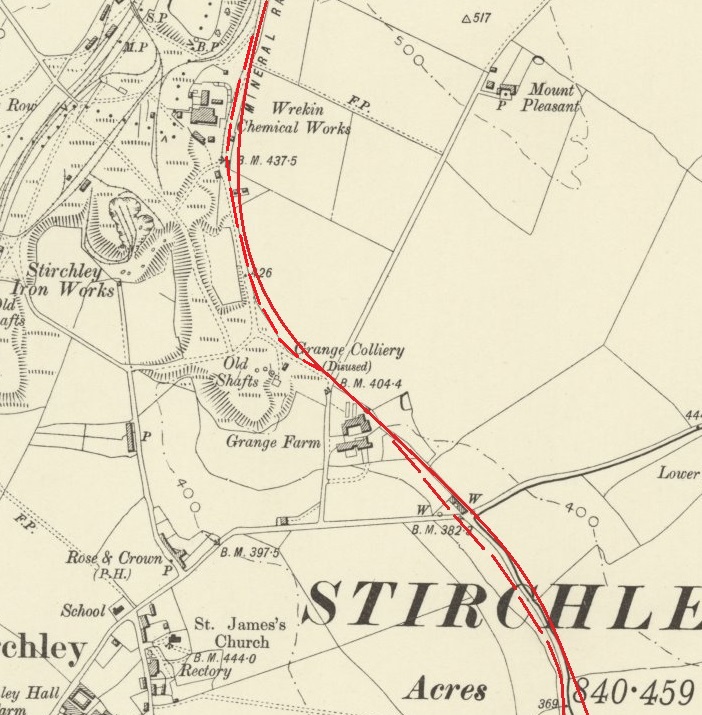
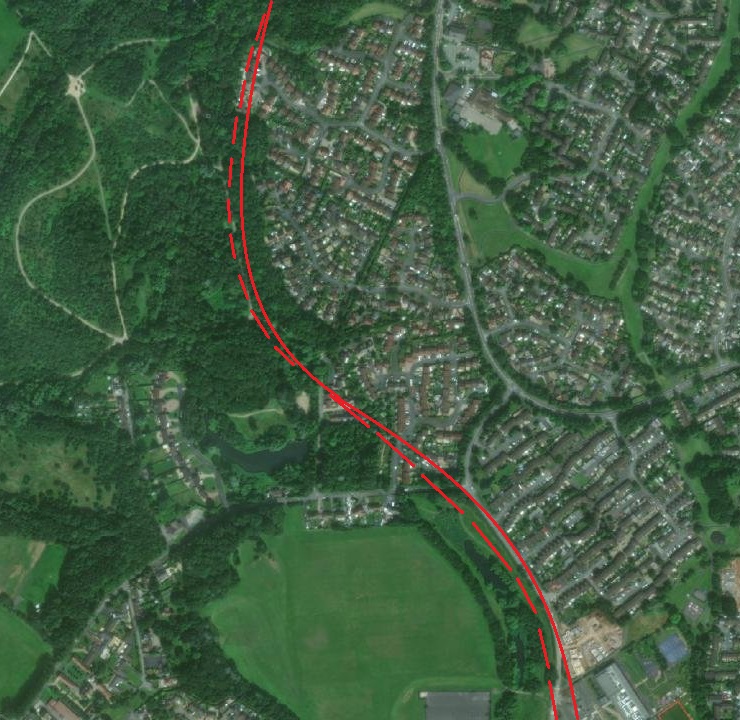
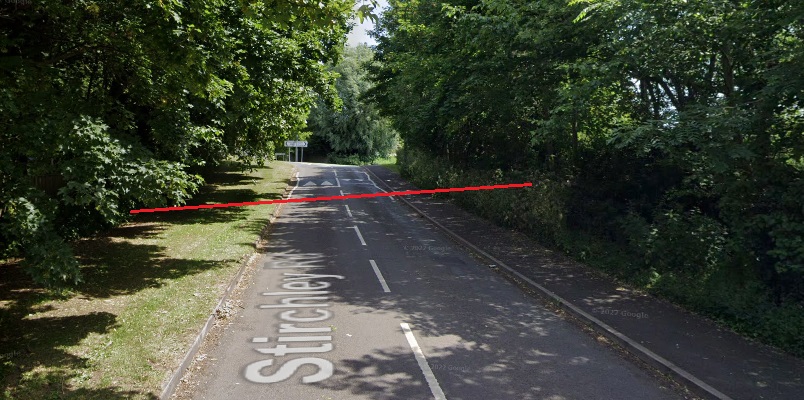
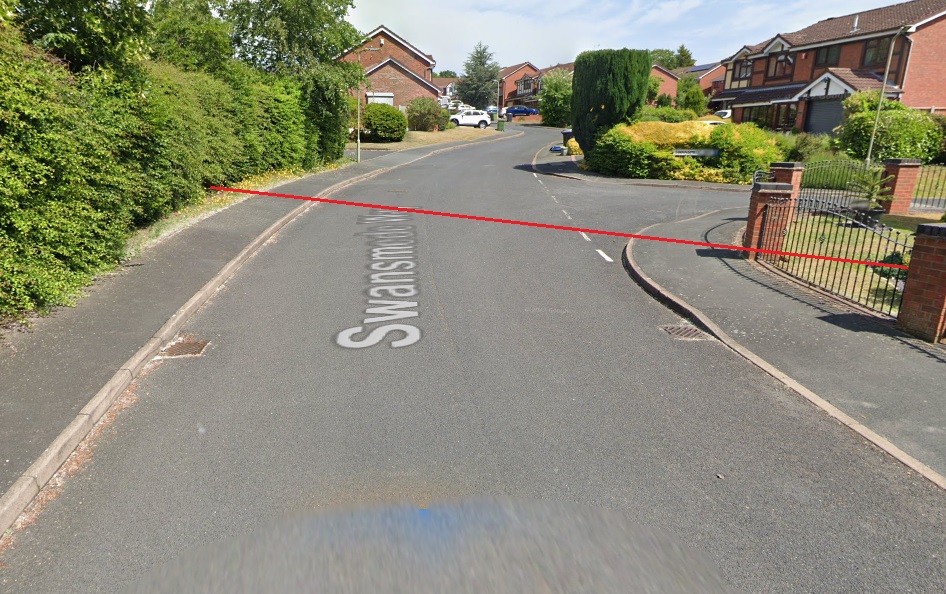
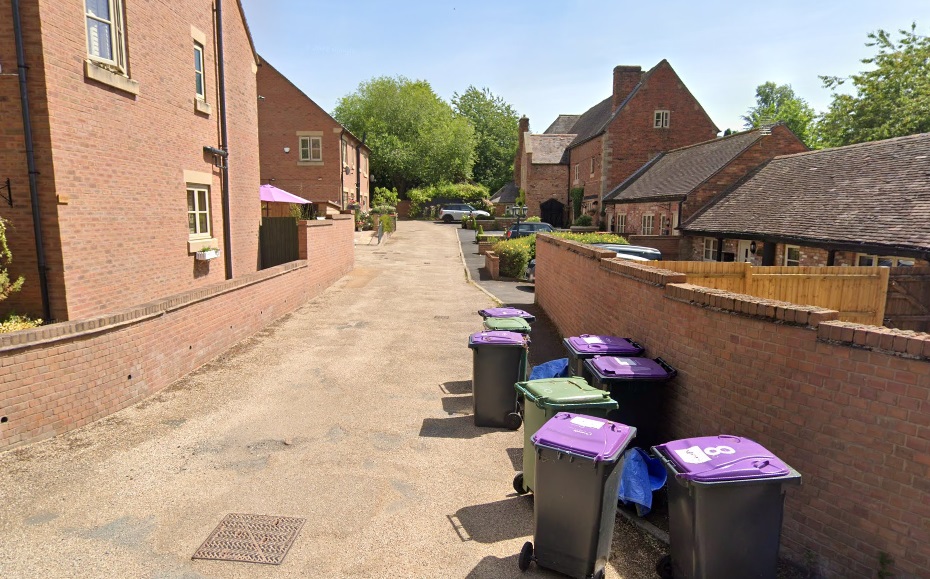
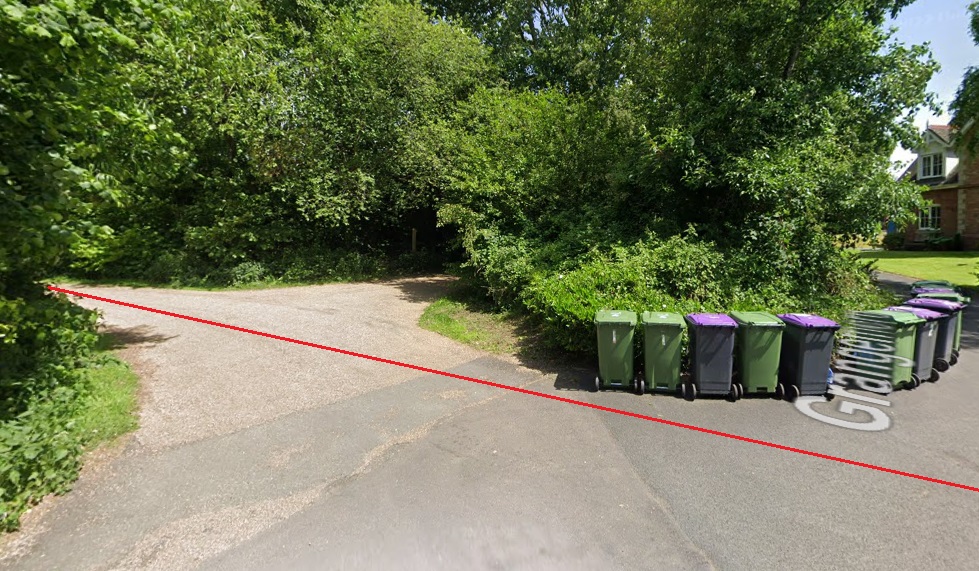
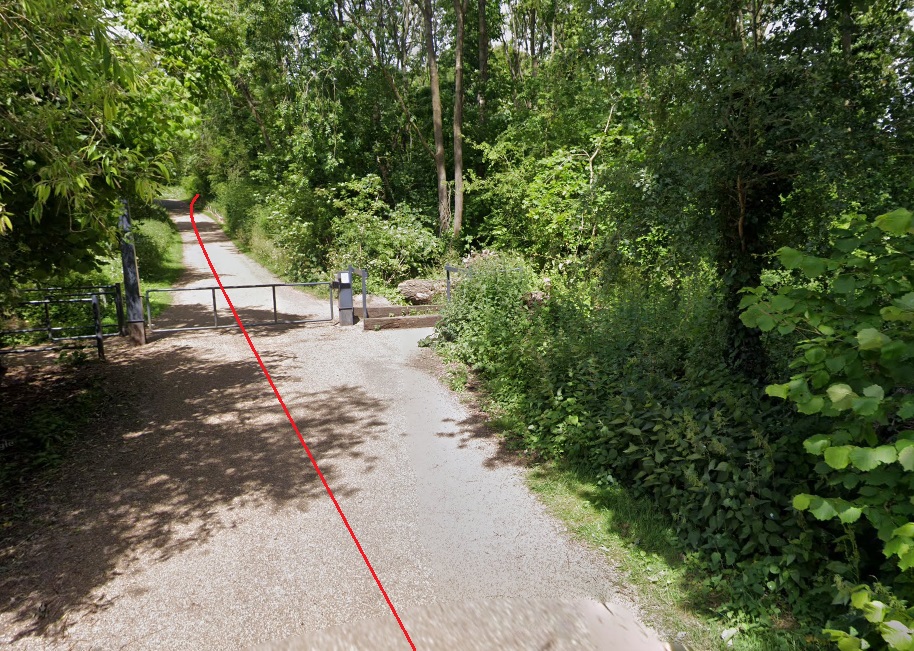
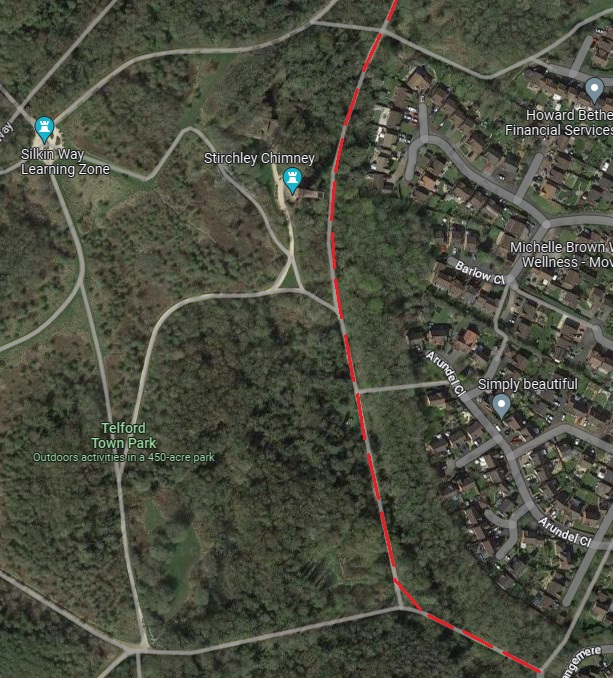
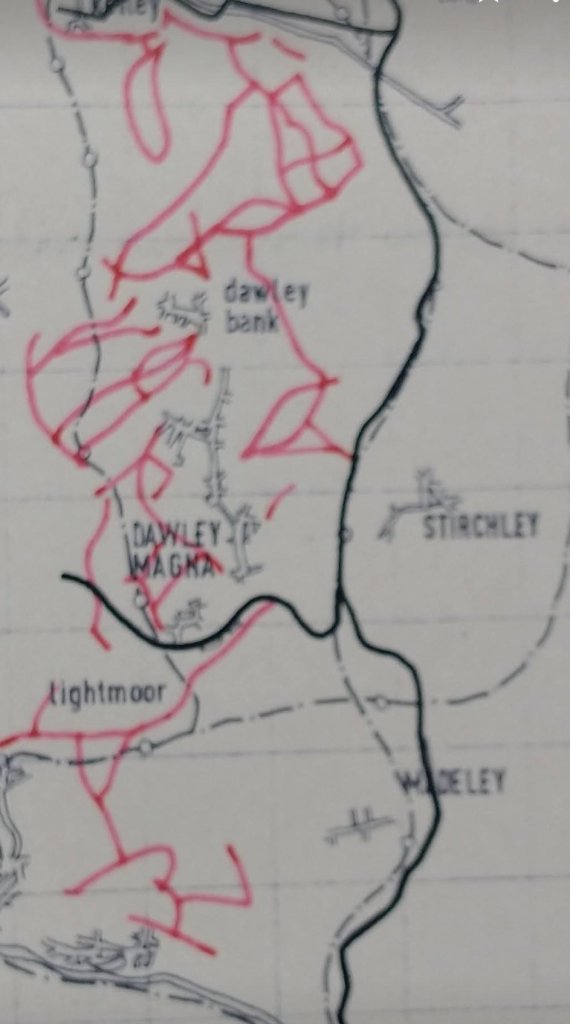
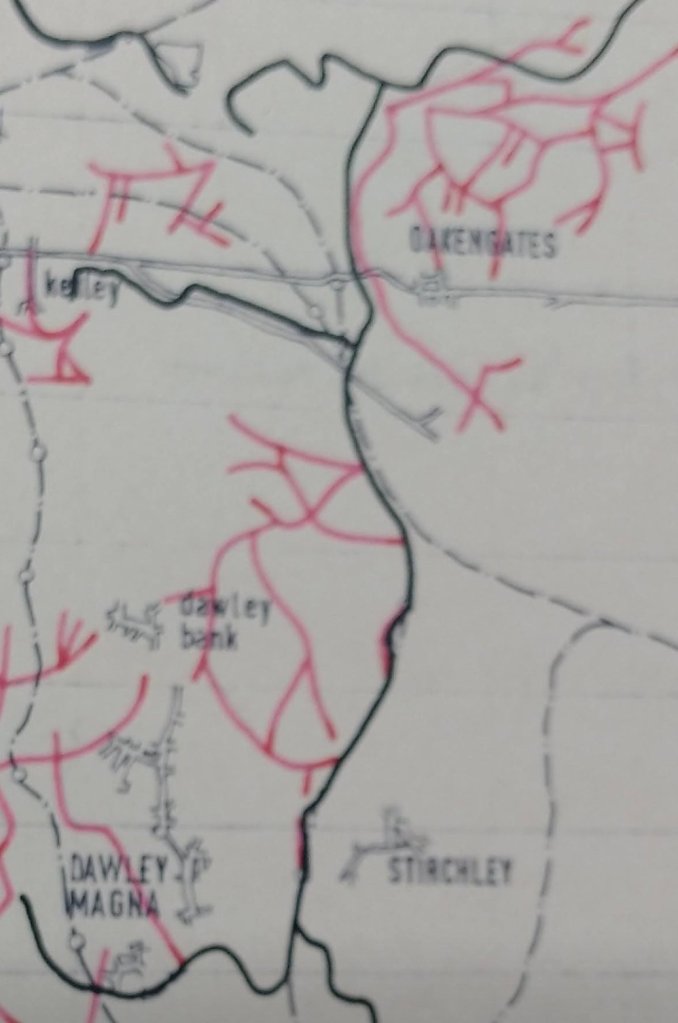
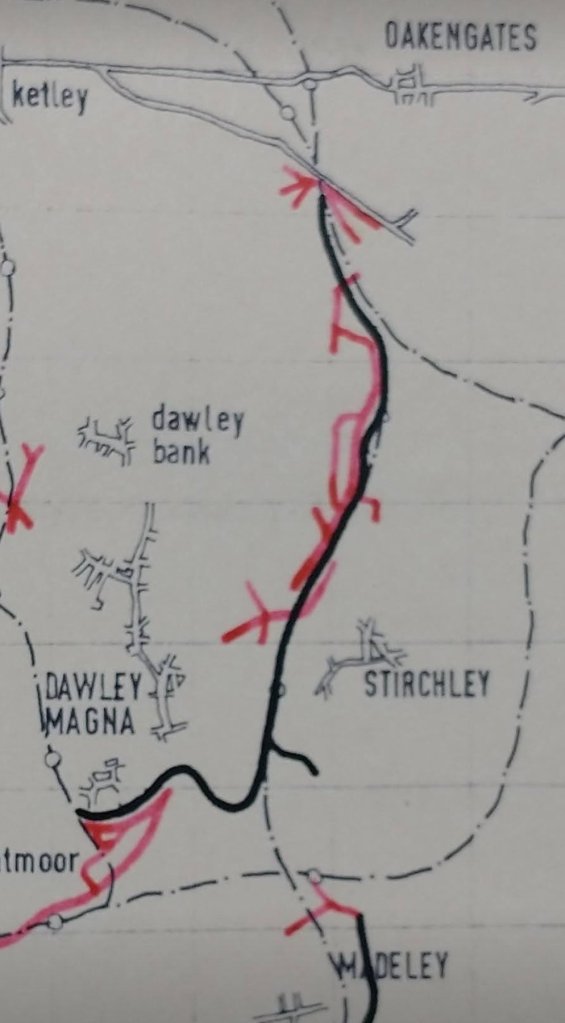
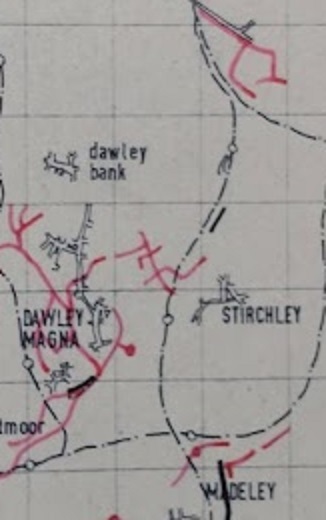
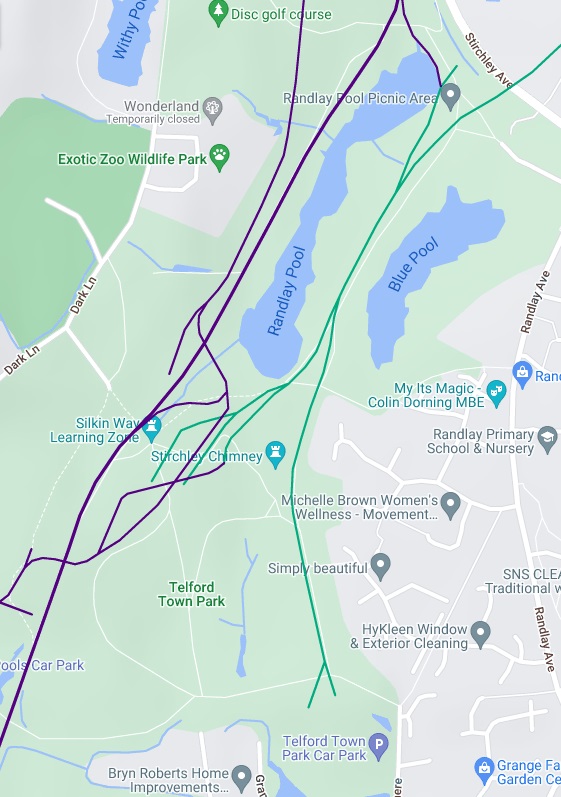
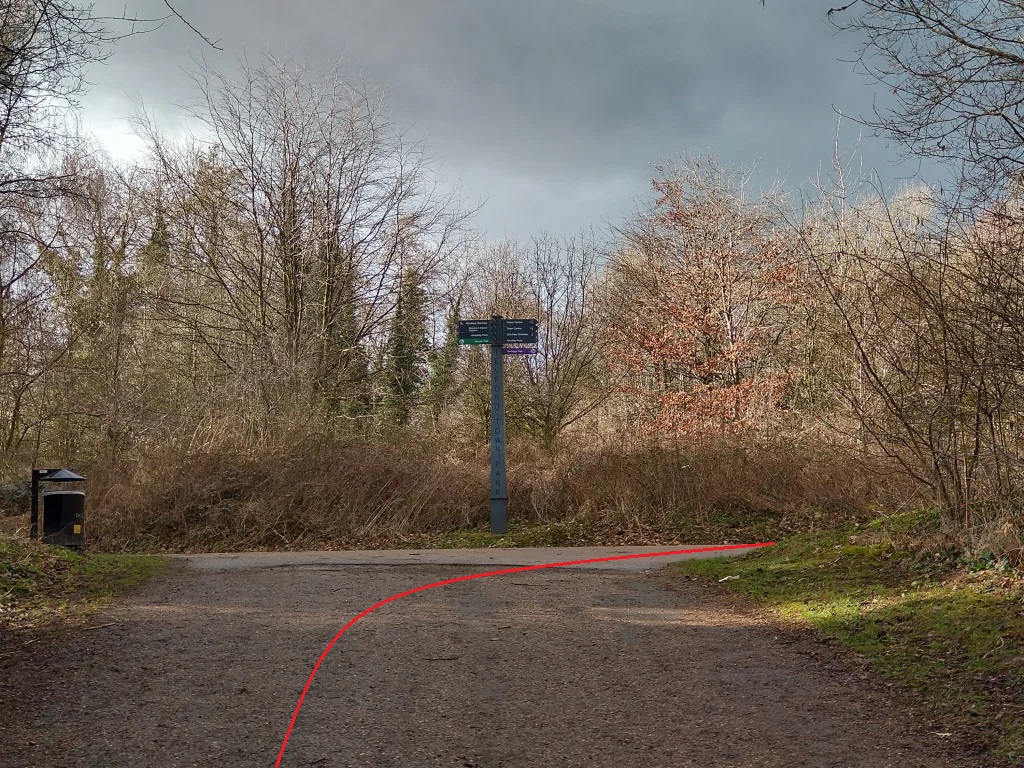
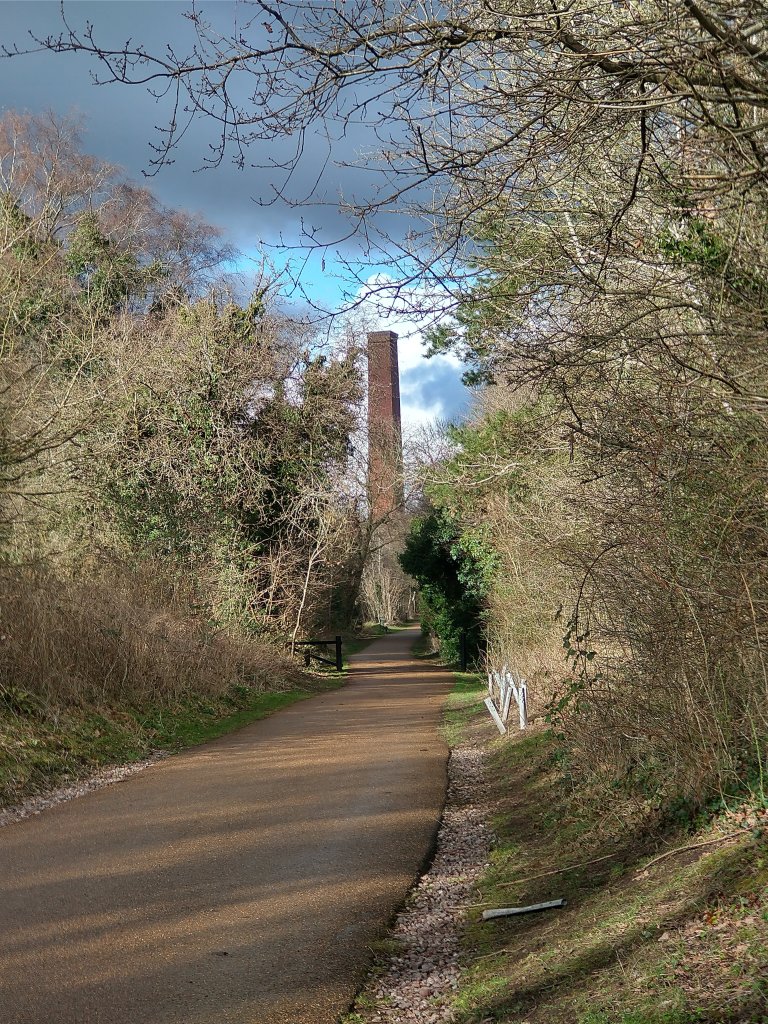
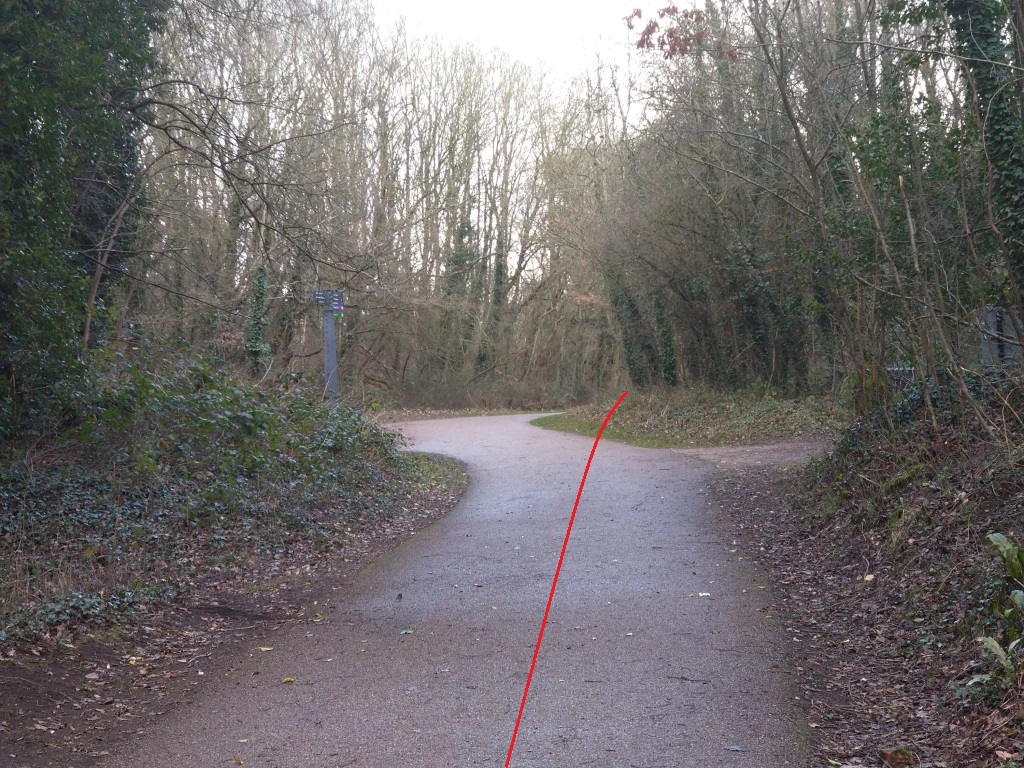
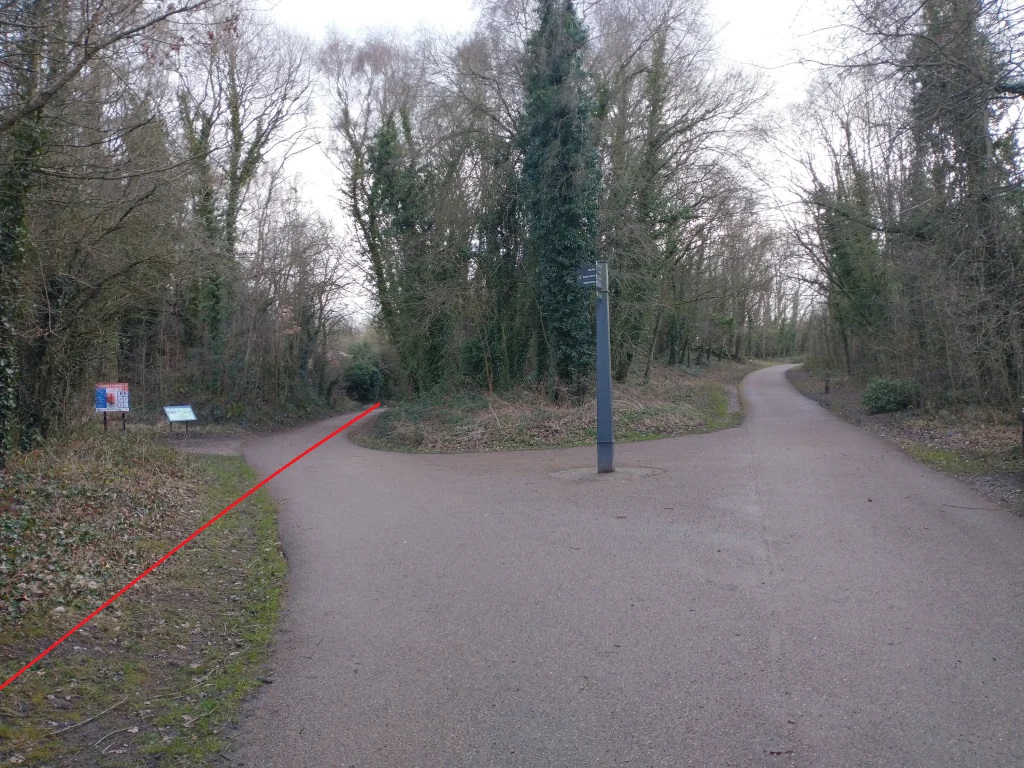
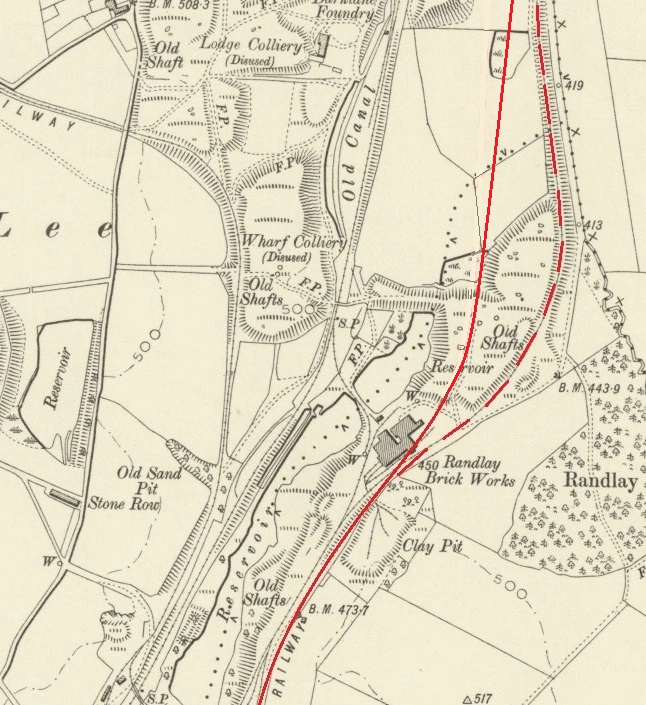
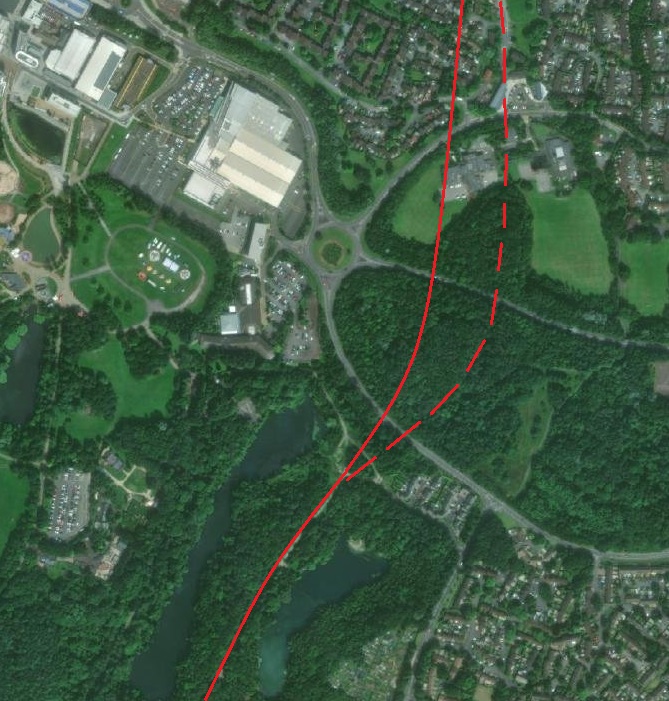
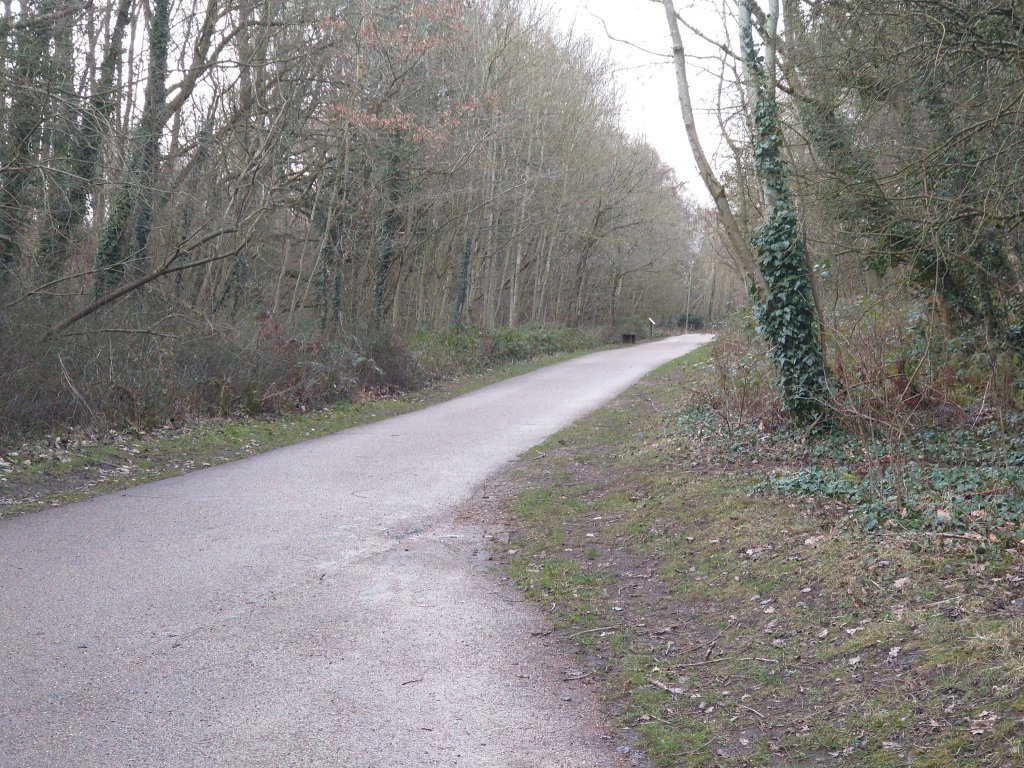
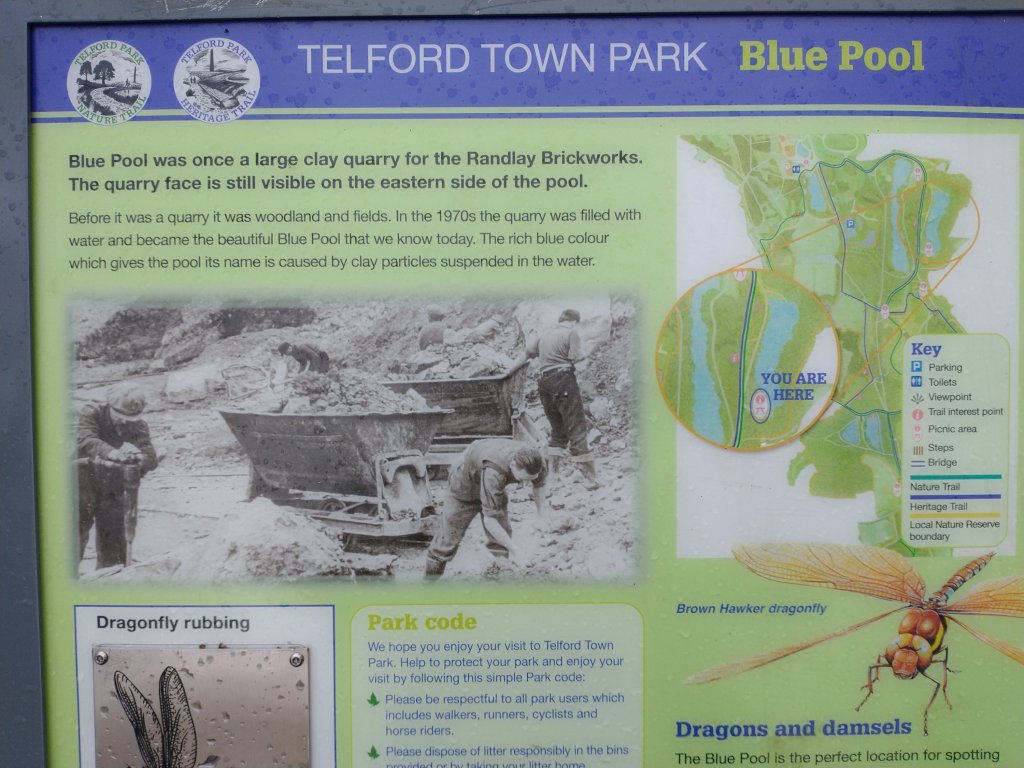

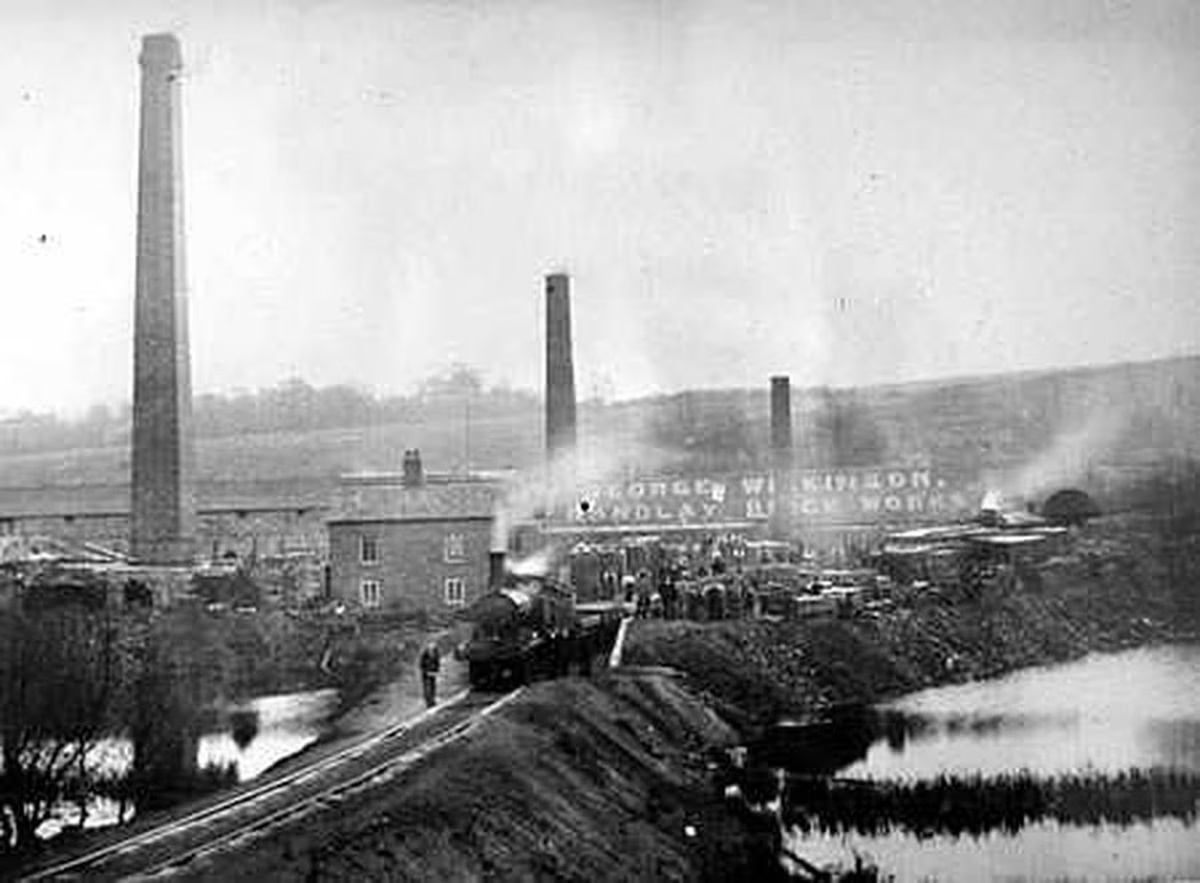
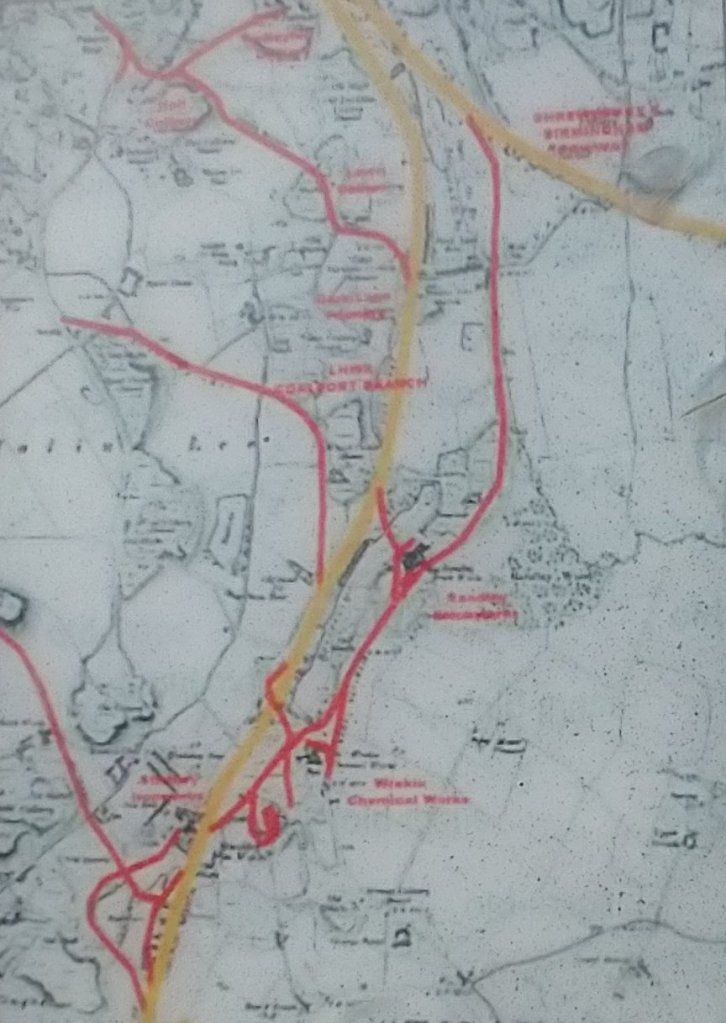
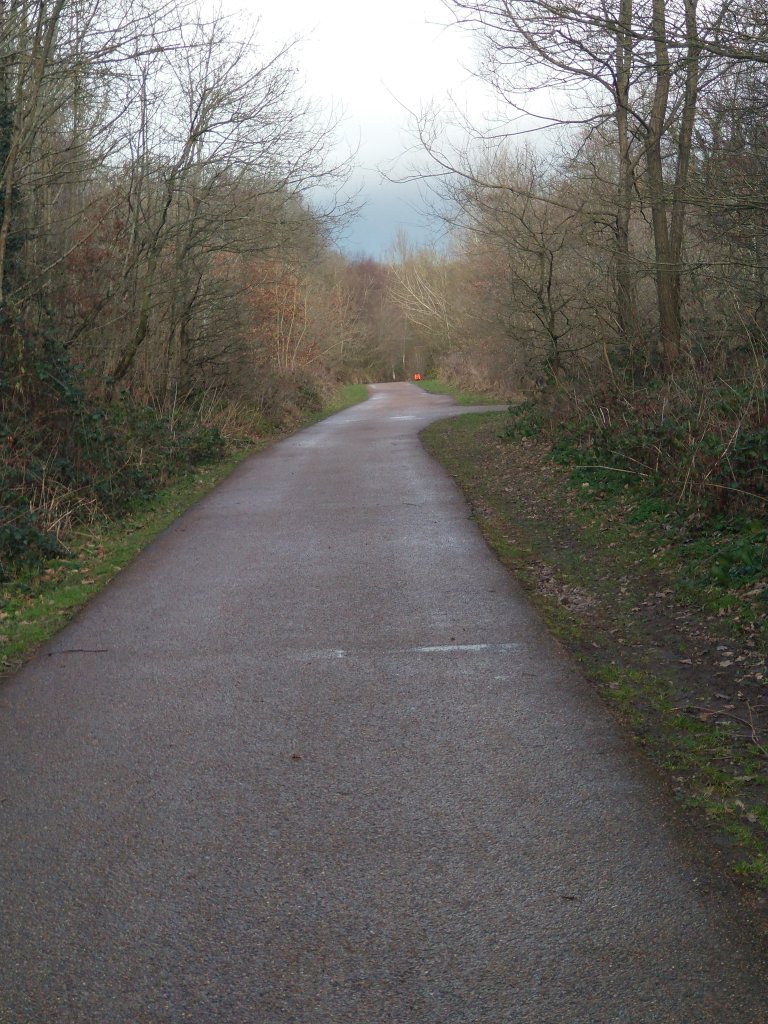
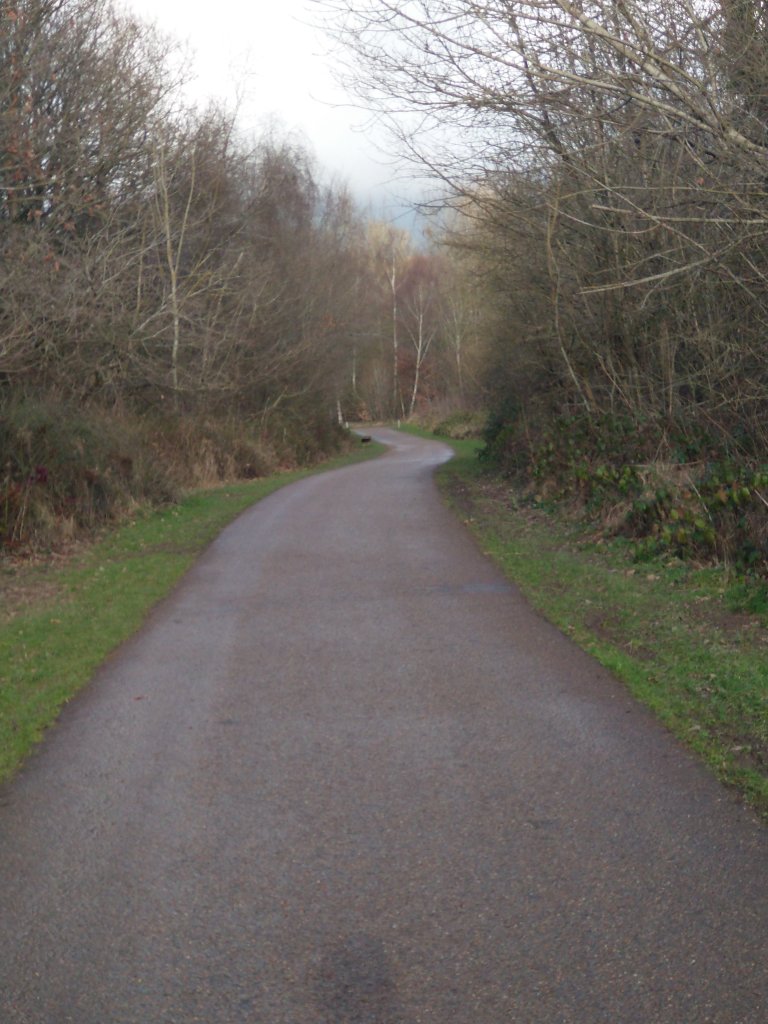
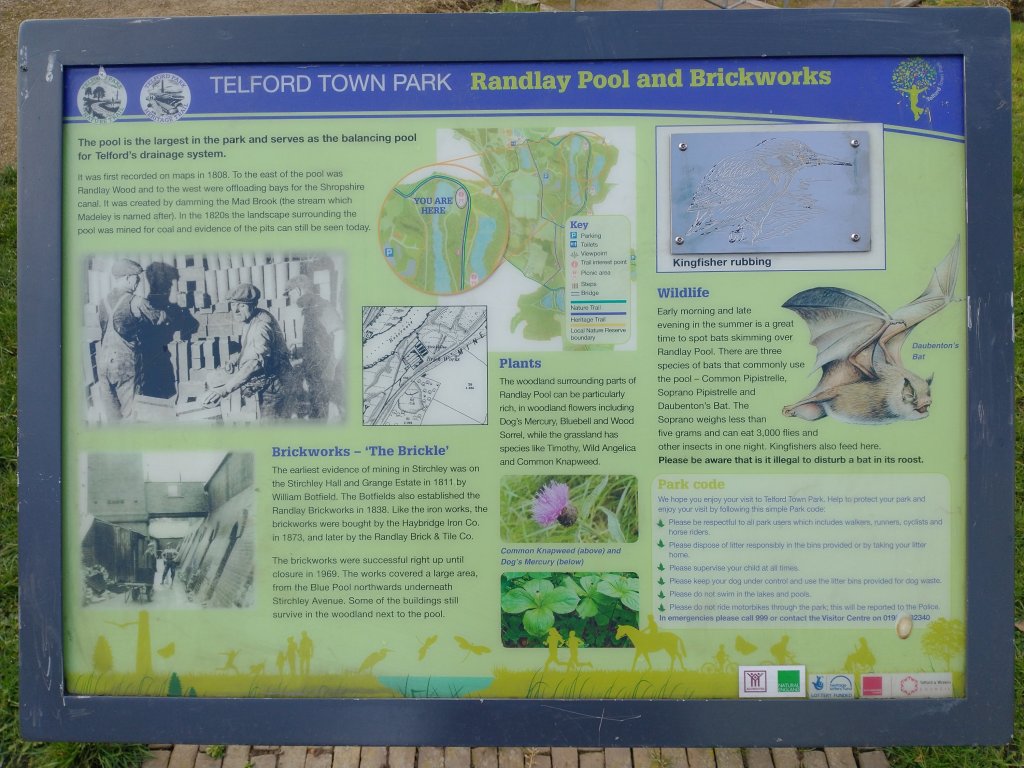
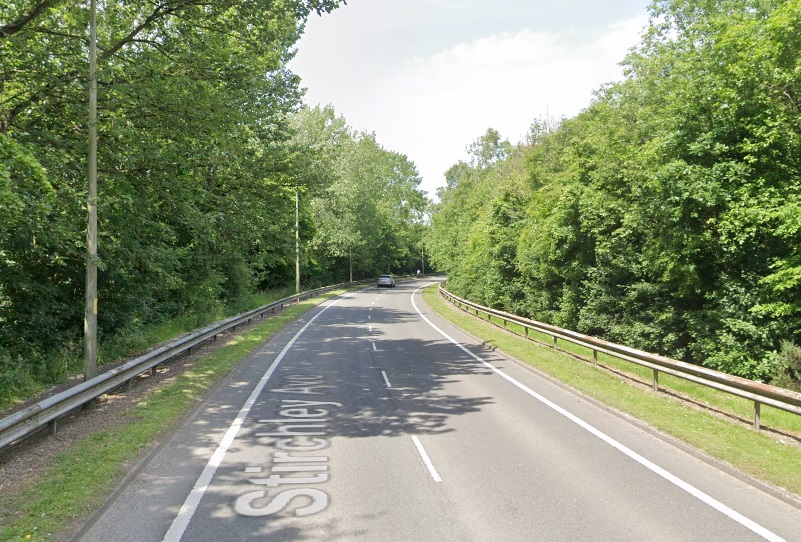
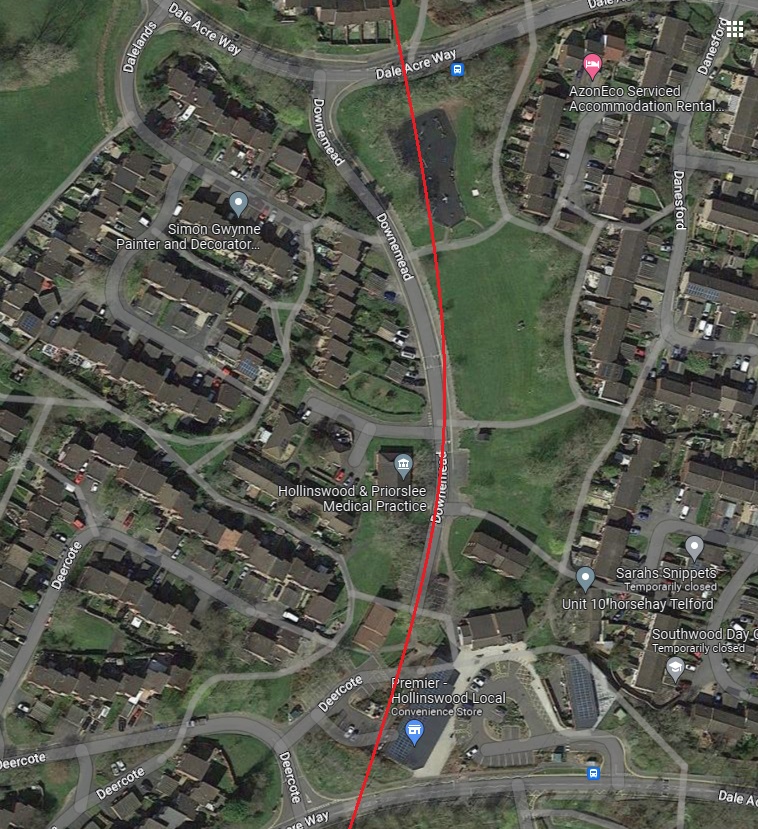
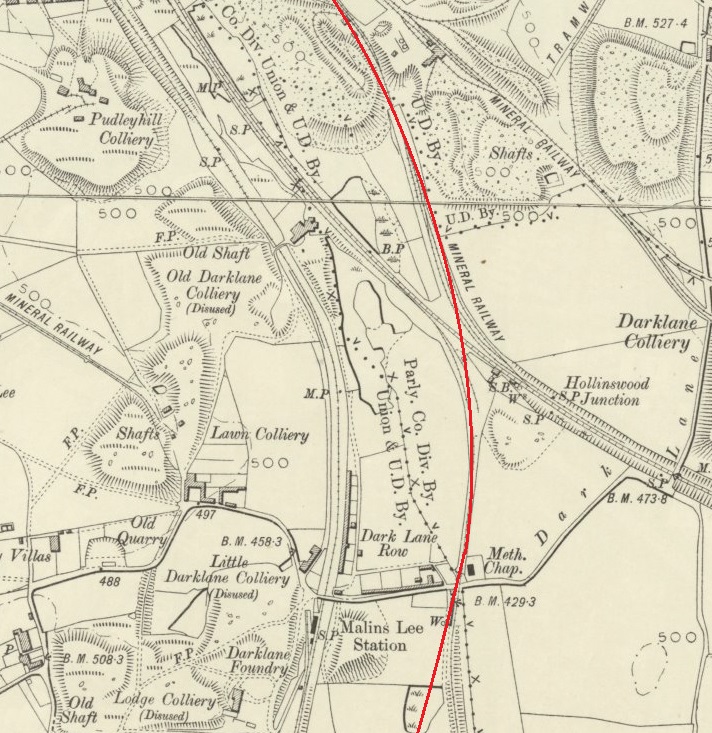
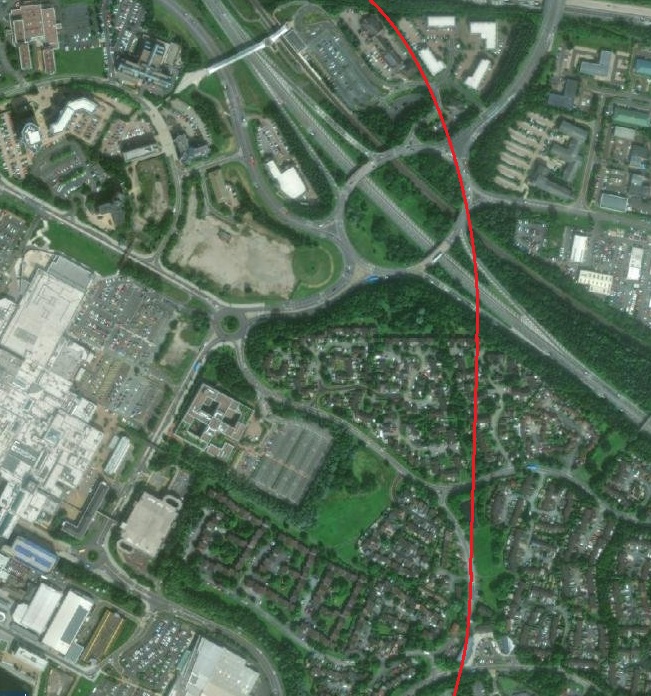
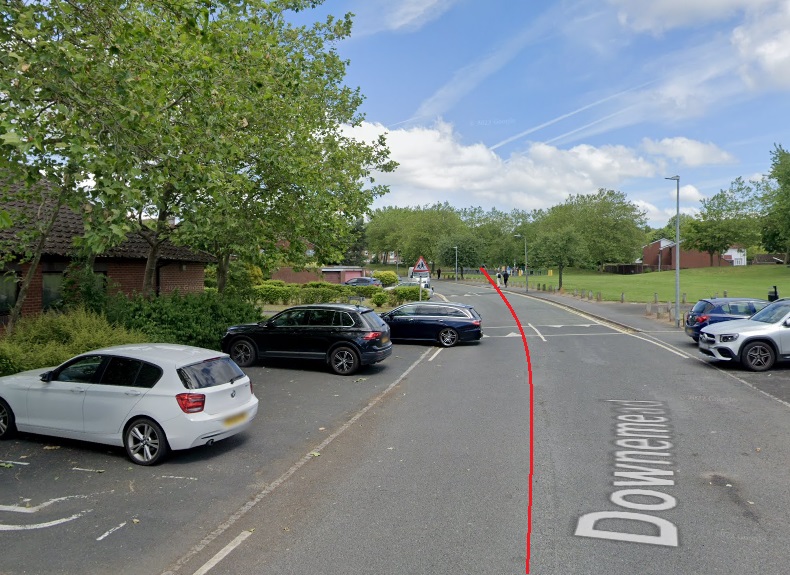

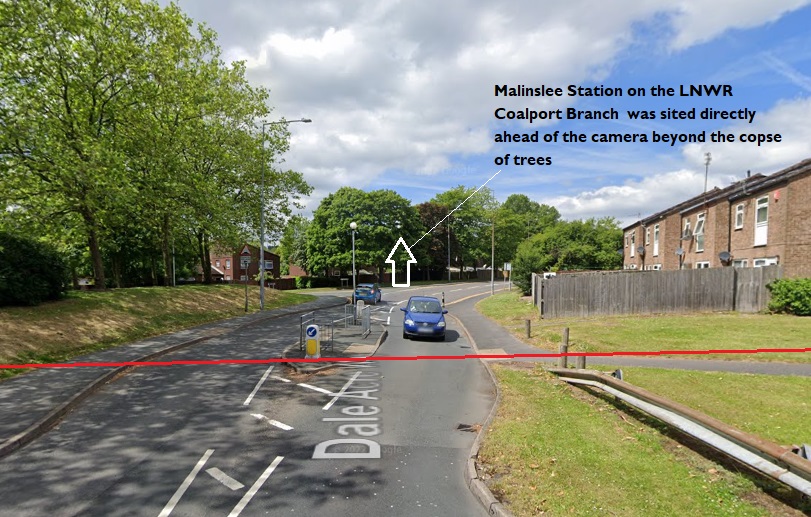
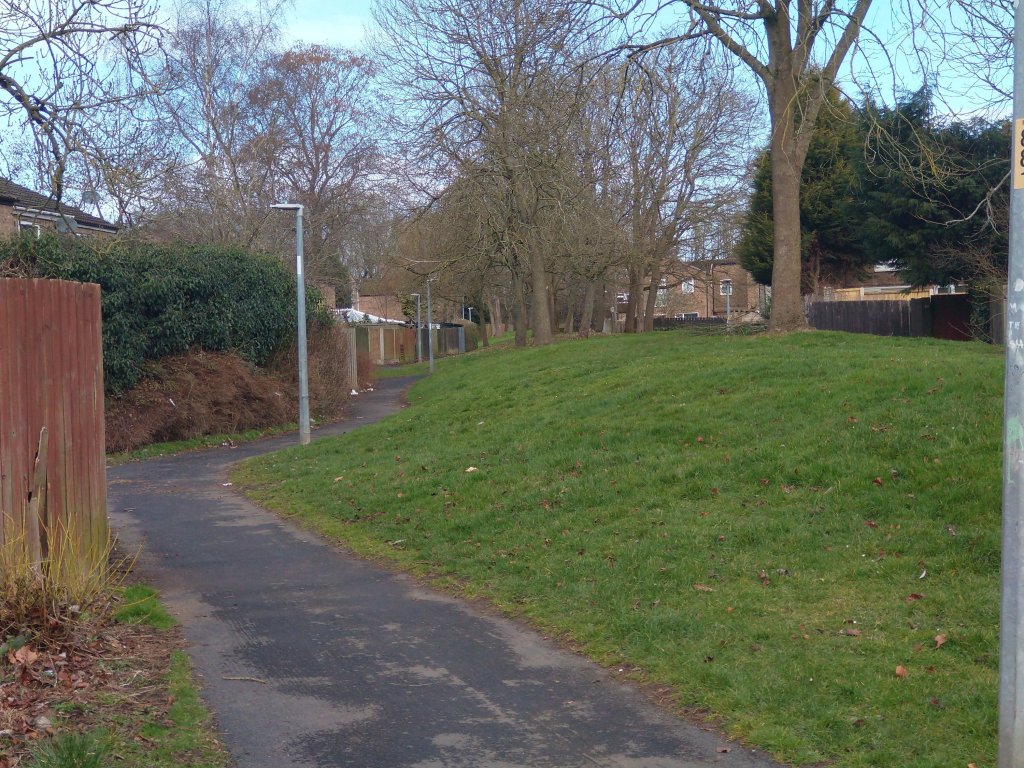
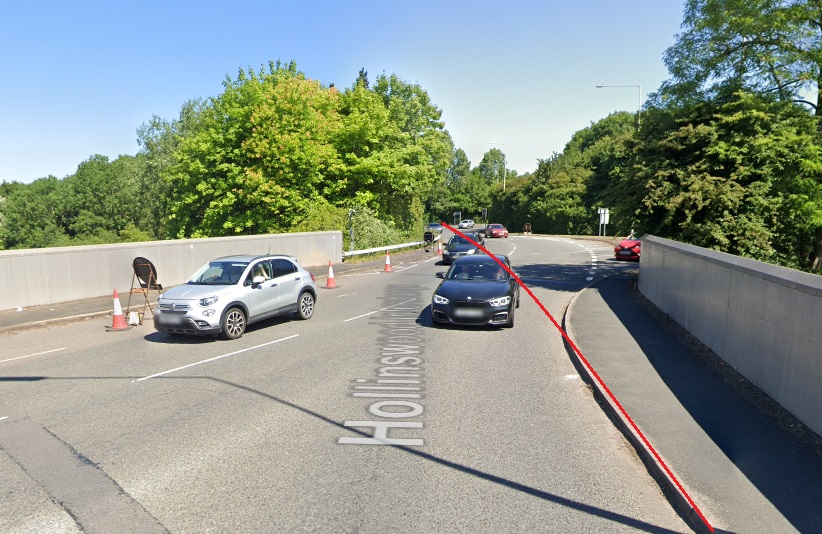
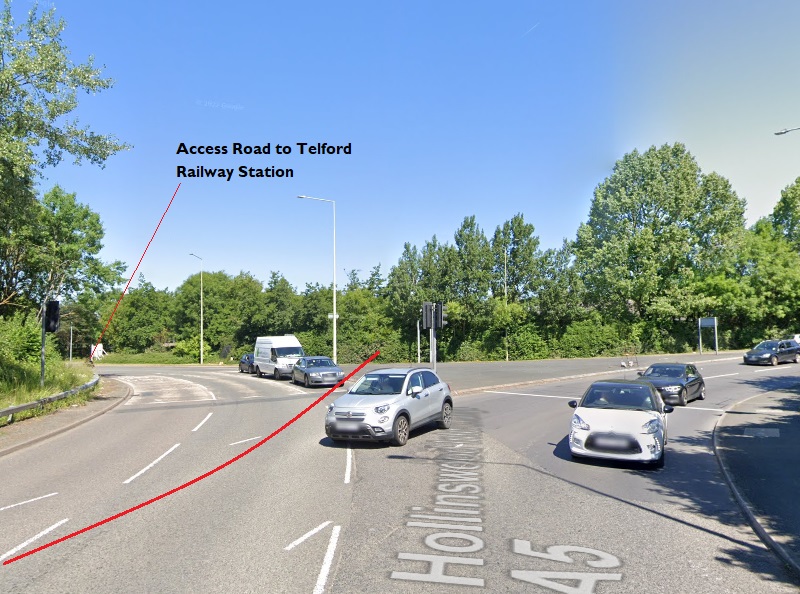
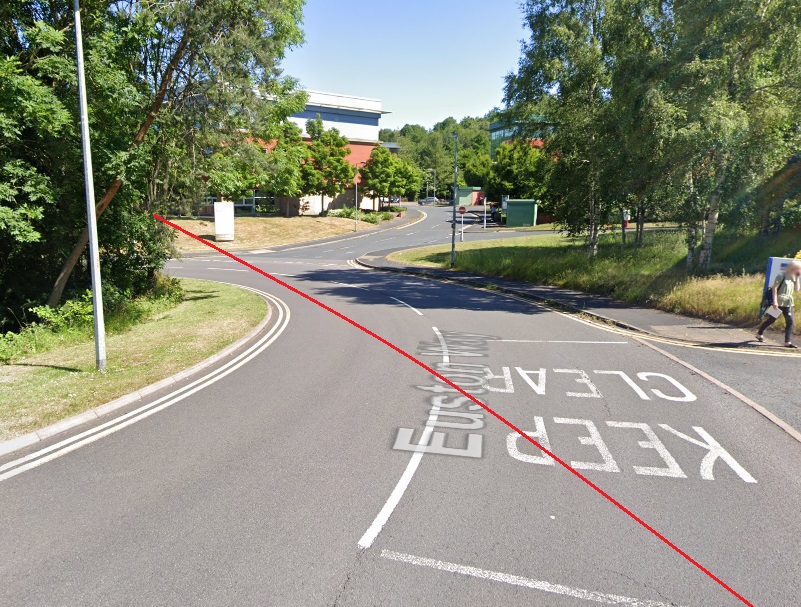
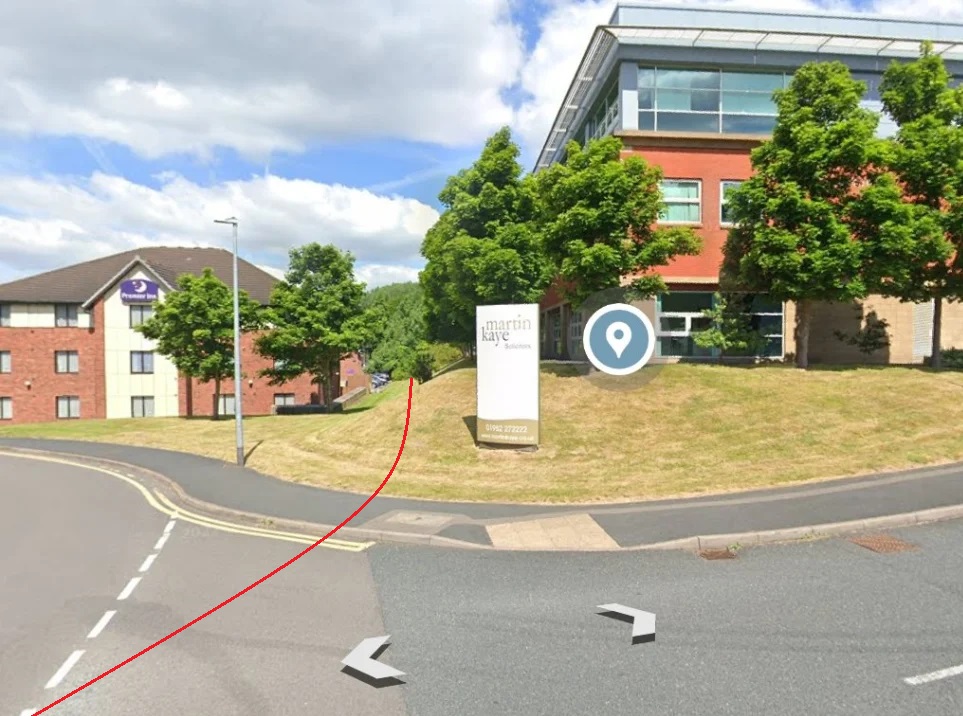
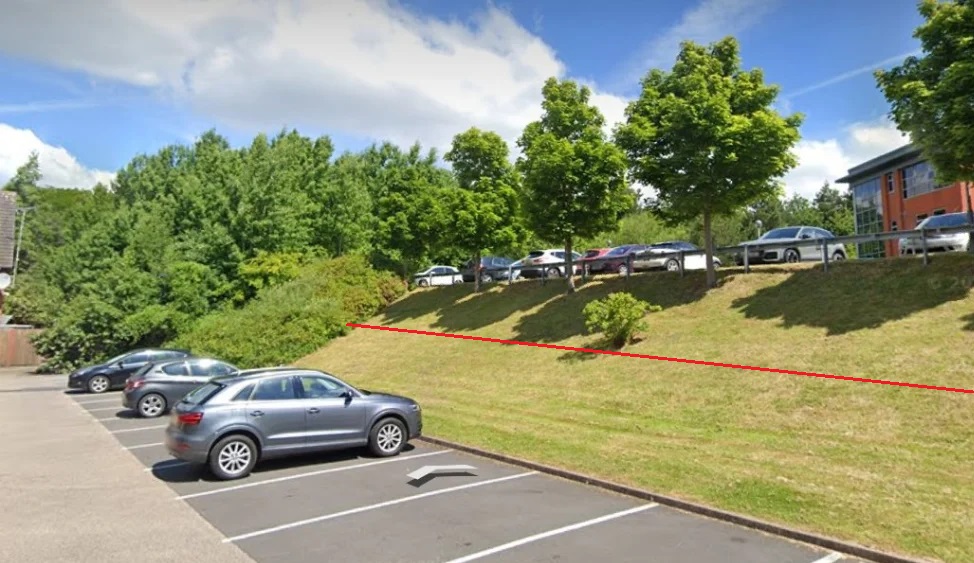
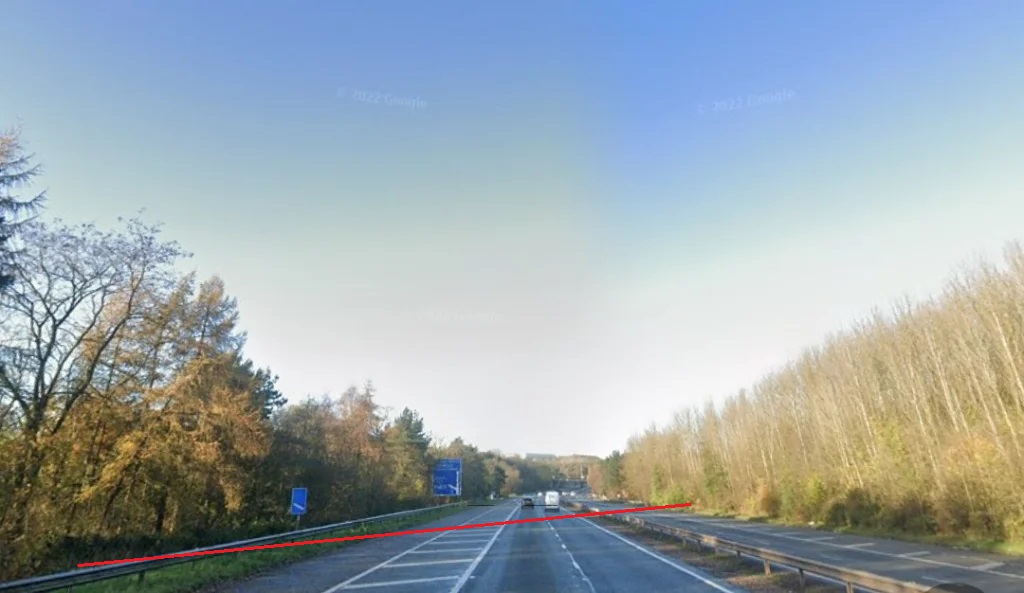
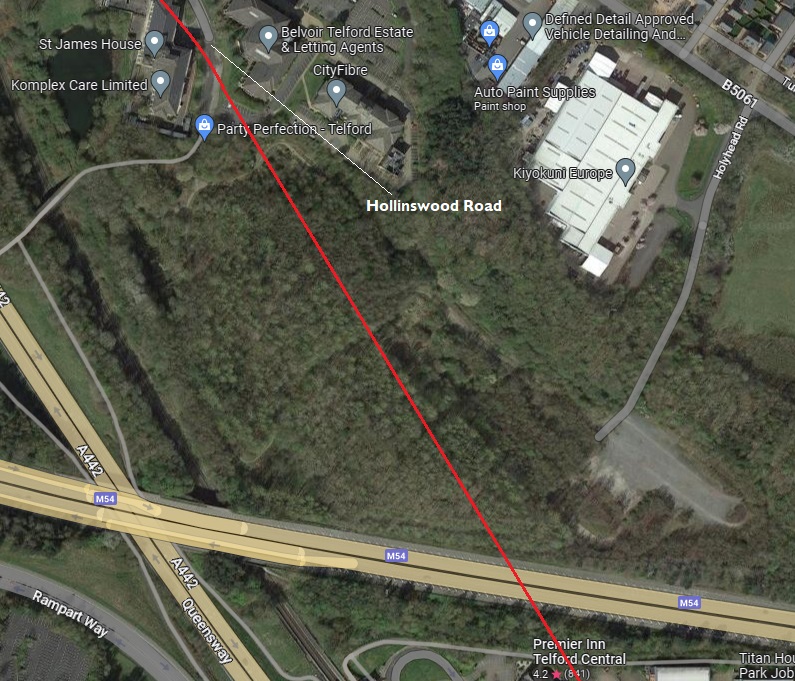
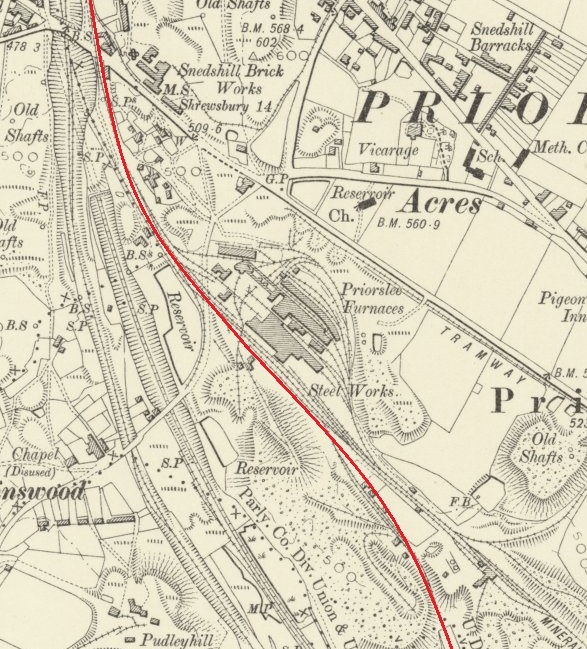
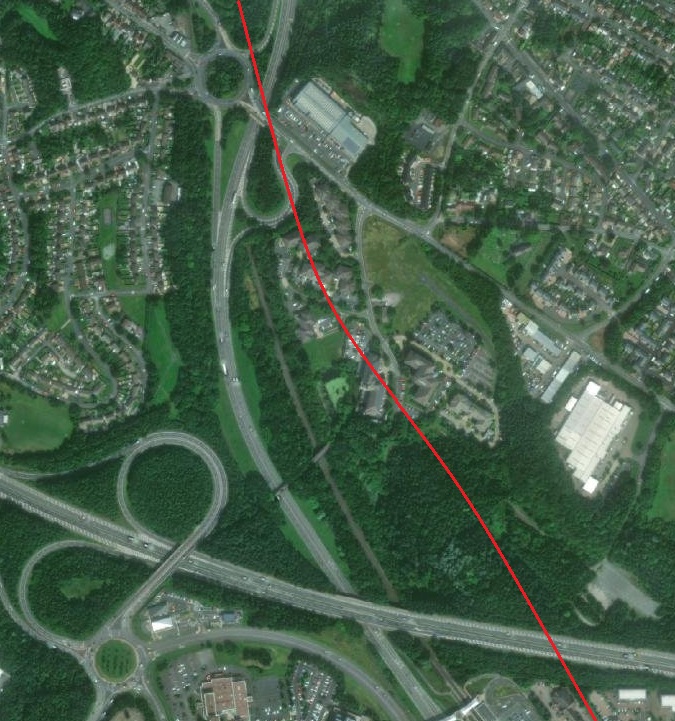

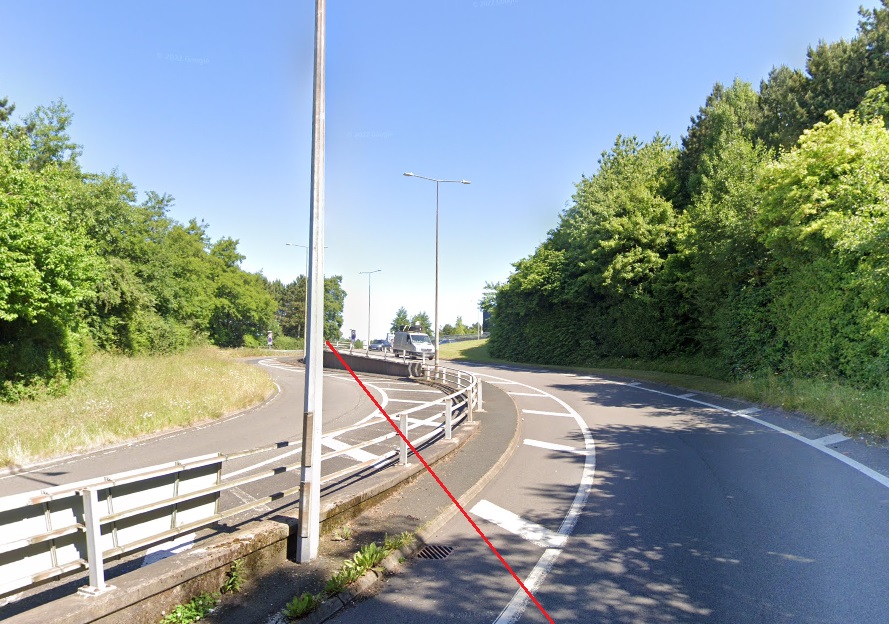
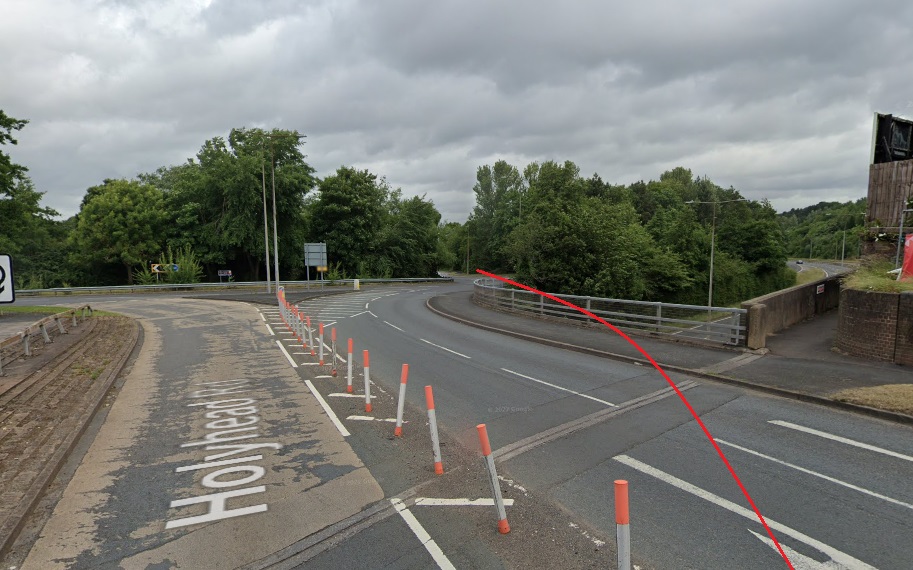

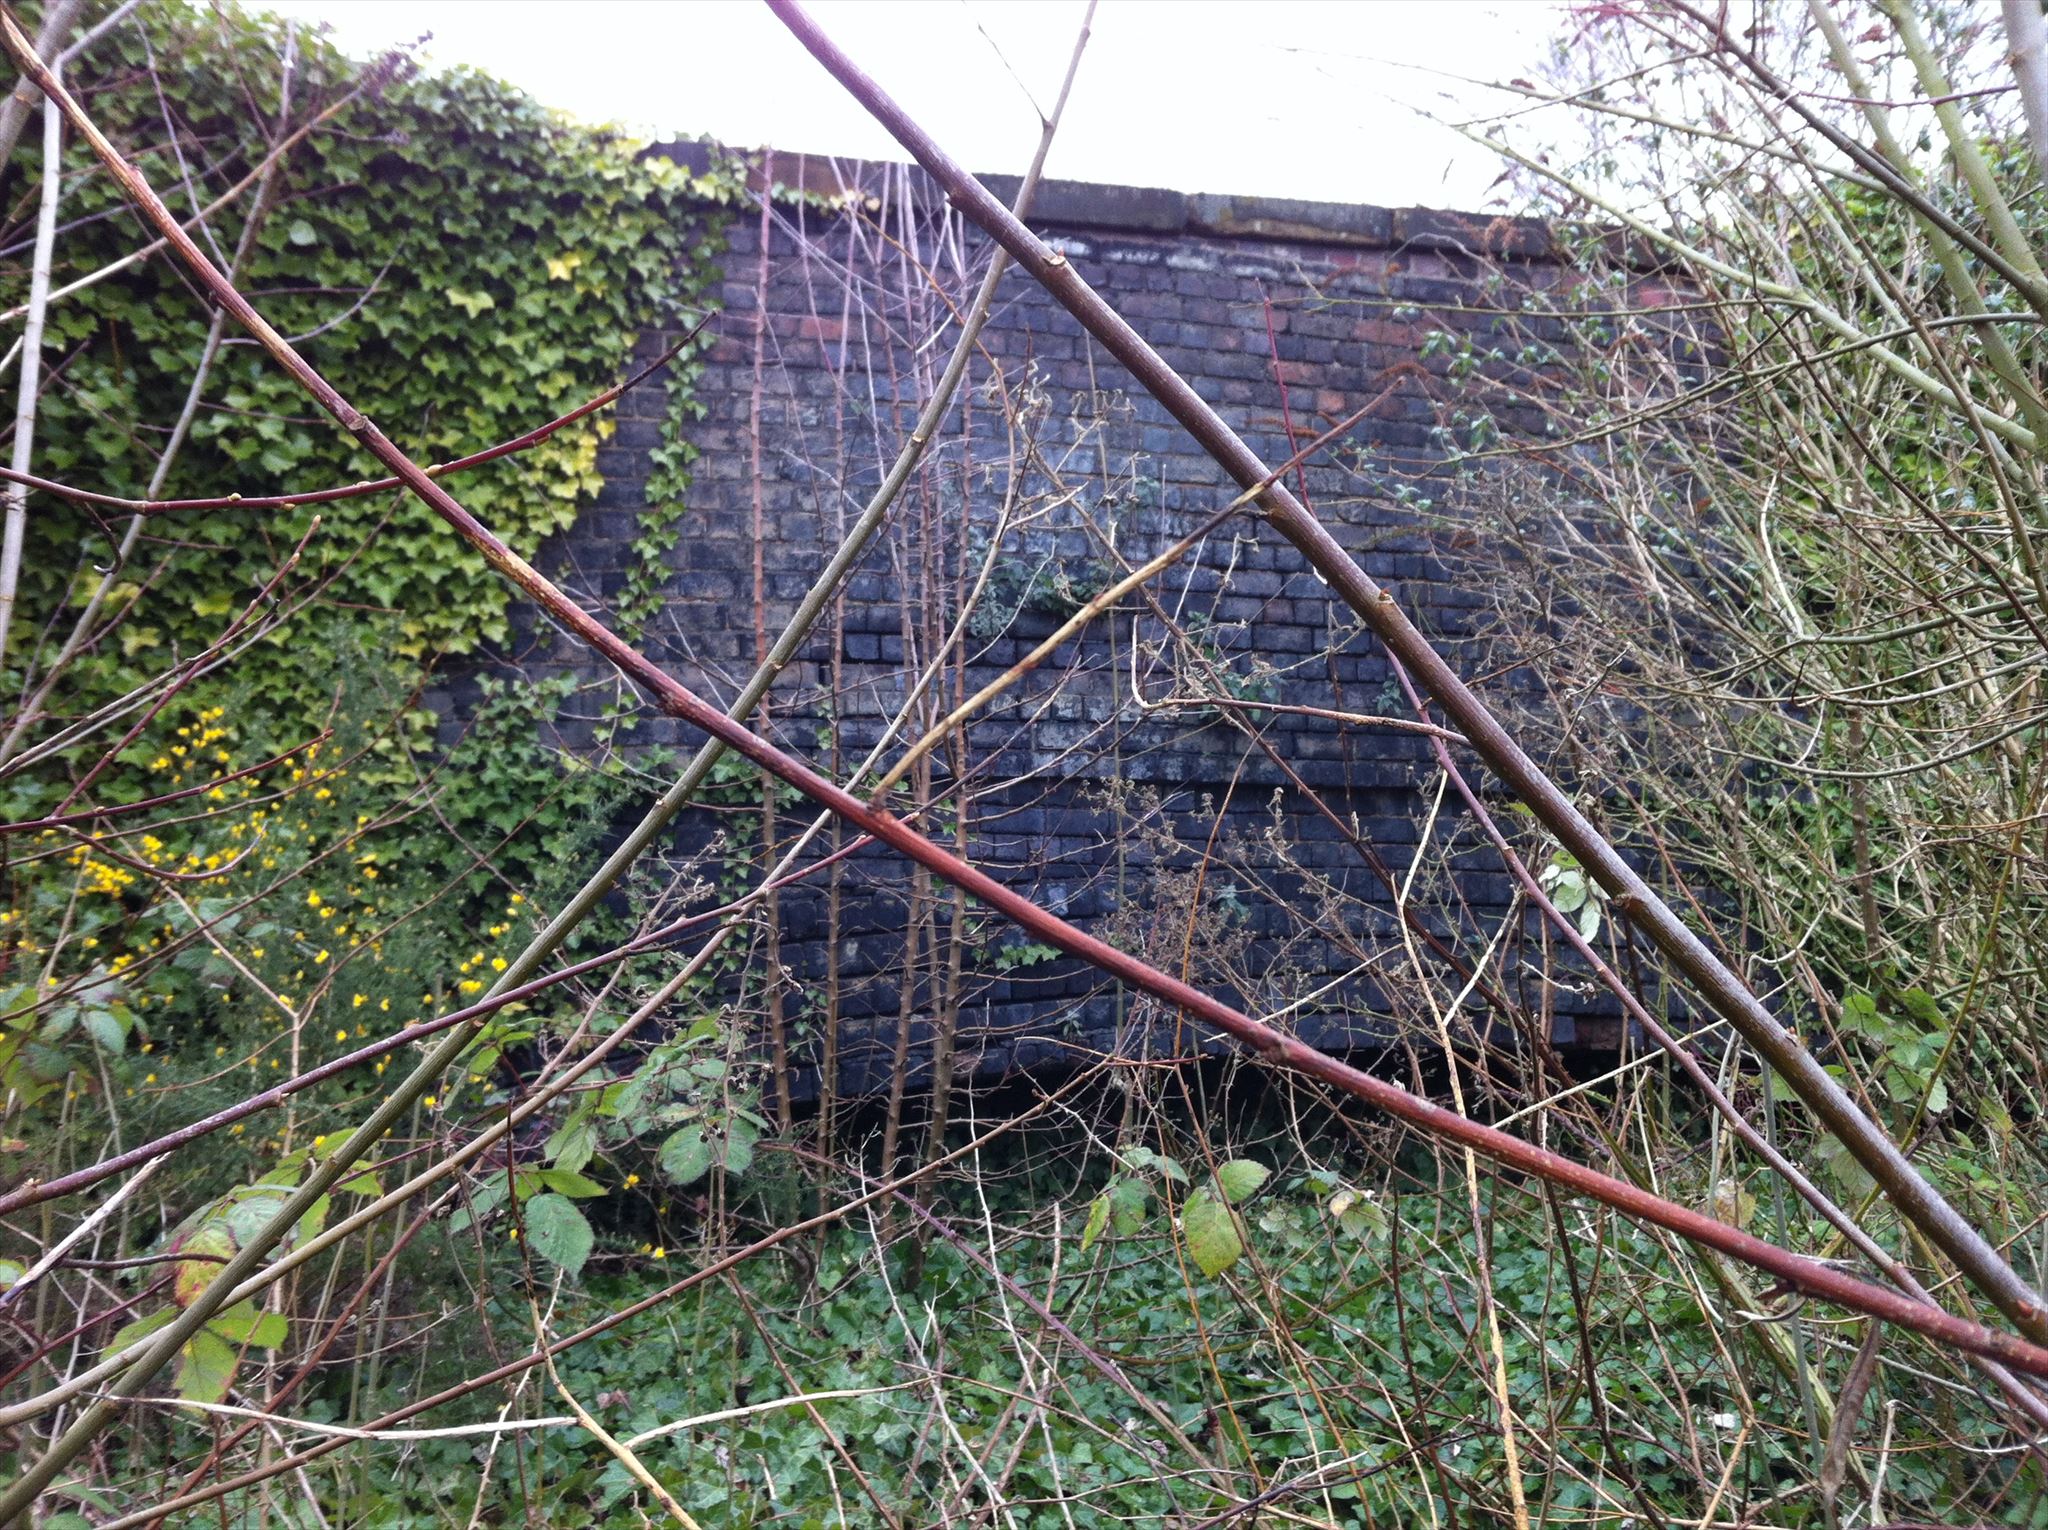