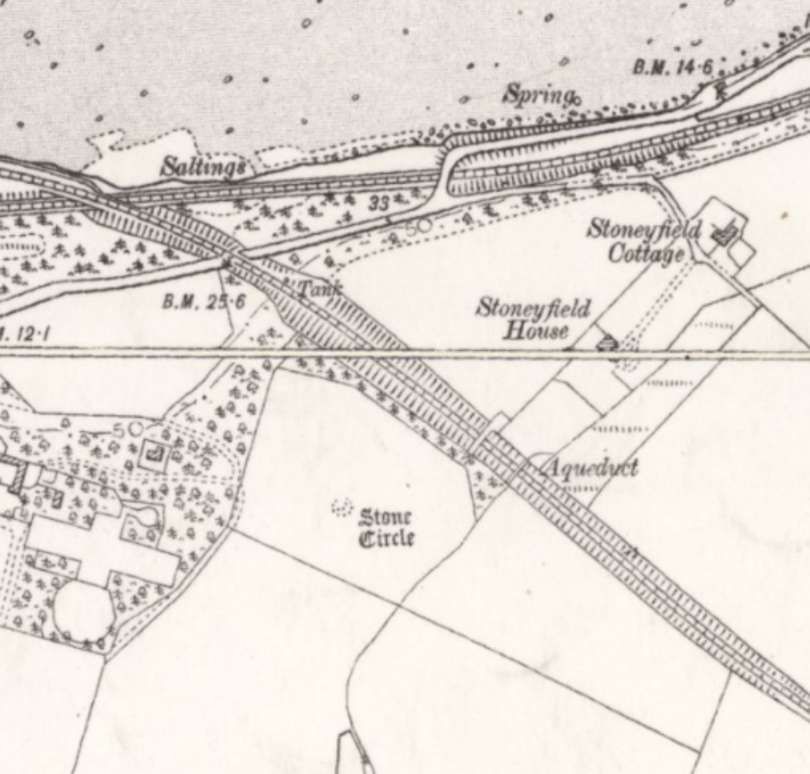
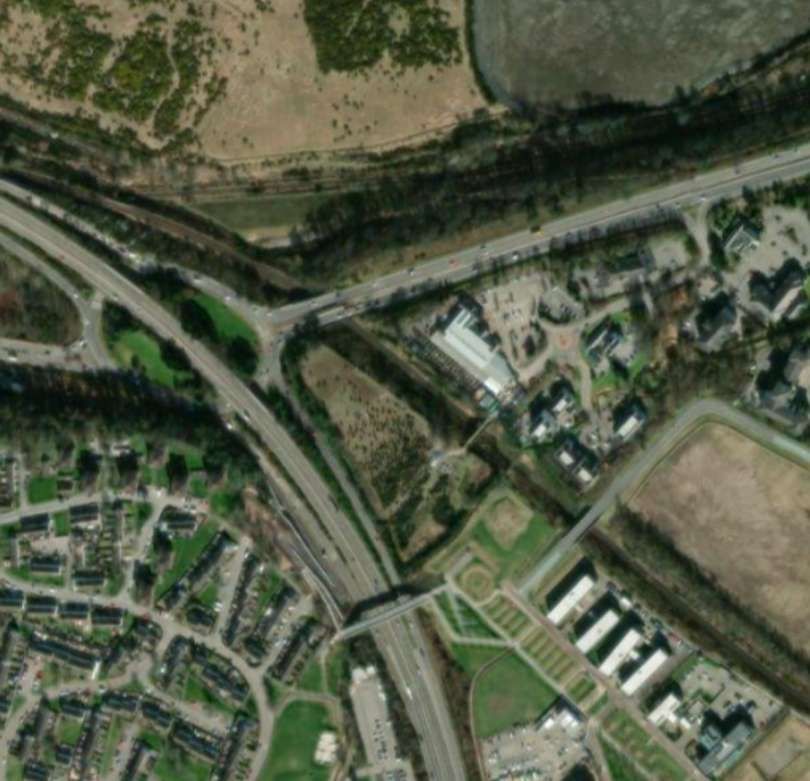
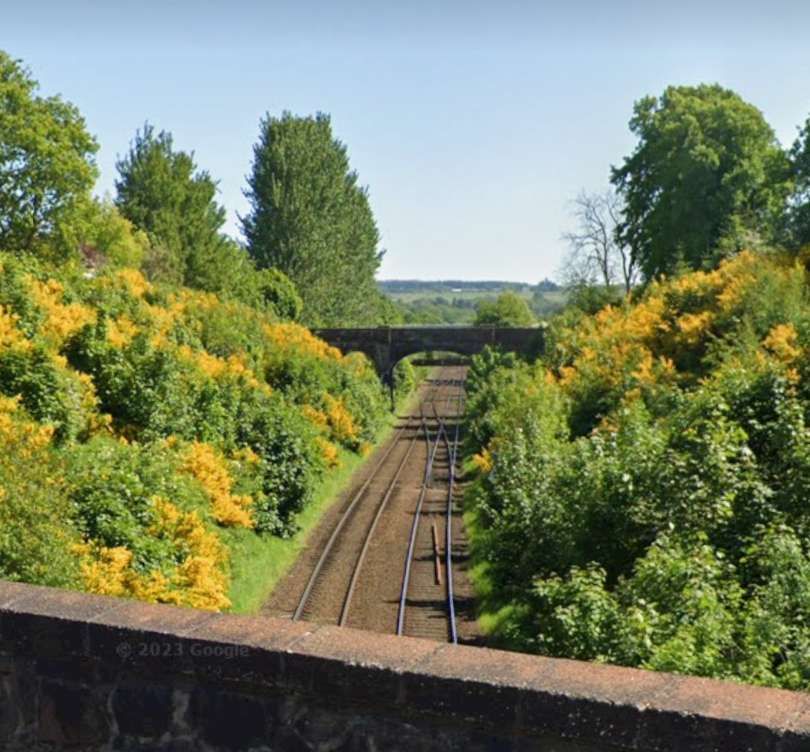
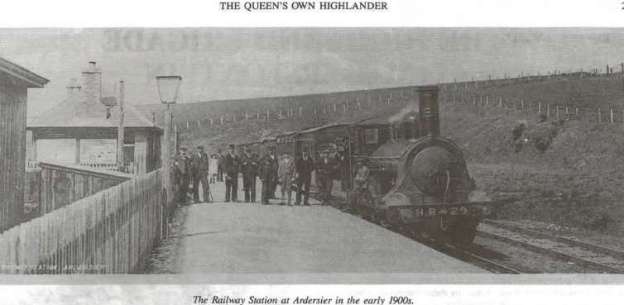
The January issue of The Railway Magazine usually focussed on Scotland. The January 1959 edition was no exception. [1] Included in the Magazine were articles by:
H.A. Vallance about The Strathspey Line.
J.W. Grant about Scottish 0-4-4 Tank Engines.
G.H. Robin about The Lanarkshire & Dunbartonshire Railway.
M.D. Grenville about Scottish Railways in 1859.
This article picks up on the article by H.A. Vallance, and begins a journey along the Strathspey line which ran down the valley of the River Spey from Keith towards Abernethy. Initially the line ran Southwest along Strathisla before crossing the watershed to Strathspey.
At much the same time (November 1860) as the Highland Railway promoted its scheme from Forrest to Grantown-on-Spey and on across the Grampians by the Druimuachdar Pass into Strathtay, the Great North of Scotland Railway subscribed £100,000 to a nominally independent scheme was promoted by the Keith & Dufftown Railway. In addition to its subscription, the Great North of Scotland Railway undertook to work the railway.
Vallance tells us that from Dufftown, “the Strathspey Railway was to run north-westwards for nearly four miles to Craigellachie, and thence in a south-westerly direction, through Strathspey, for some 28 miles to Abernethy. Connection with the Inverness & Perth Junction Railway (IPJR) was to be provided by a short branch south of Grantown. The railway was authorised on 17th May 1861 (five days before the IPJR), and the construction of the main line went ahead with all possible speed, but the works on the branch at Grantown were not undertaken.” [1: p4]
The railway between Dufftown and Abernethy opened on 1st July 1863. Two months later, on 9th September, the last section of the IPJR was opened. The lack of a physical link between the two lines meant that the Strathspey line suffered financially. Vallance says that powers for the link were obtained on 5th July 1865, “when the Strathspey Company was authorised to extend its railway from Abernethy to a junction with the line to Perth some two miles north of Boat of Garten. Earlier in the year, the IPJR and its associated companies had been amalgamated, and in June had assumed the title of the Highland Railway.” [1: p5]
The Strathspey trains were extended from Abernethy to Boat of Garten on 1st August 1866, but a dispute with the Highland Railway soon arose with the Highland Railway over costs associated with the junction signal box meant a temporary closure of the link until the dispute could be settled. The link reopened 1st June 1868 on the basis that a separate track would provided for the Strathspey, from the original junction as far as the Station at Boat of Gareth where a physical connection would occur.
The Strathspey line also formed a junction at Craigellachie with the Morayshire Railway which gave a cess Loosiemouth via Elgin. The short connection between the Morayshire Railway and the Strathspey line was opened on 1st July 1863. Vallance notes that once the working agreement with the Great North came into force, “the Morayshire Railway virtually lost its separate identity. The Great North thus secured complete control of a route from Keith to Elgin, but many years were to elapse before through trains between Aberdeen and Inverness ran via Craigellachie.” [1: p5]
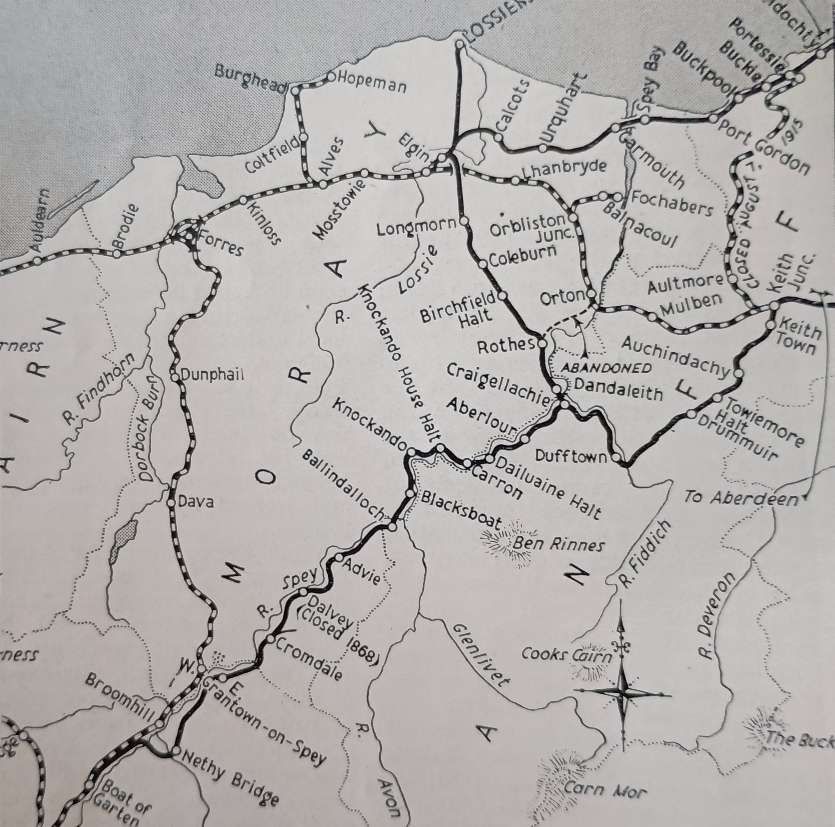
An extract from a drawing in H.A. Vallance’s article which shows the length of the Strathspey line from Keith through Dufftown and Craigellachie to Boat of Garten. Great North of Scotland lines are shown solid black, those of the Highland Railway are shown dashed. [1: p4]
On 30th July 1866, “the Great North obtained powers to absorb the Keith & Dufftown and the Strathspey Railways, and the fusion became effective two days later. At the same time, the Morayshire Company was authorised to amalgamate with the Great North as soon as mutually acceptable terms had been agreed; but so involved were its finances that it was not possible to reach an agreement until 1880.” [1: p5]
Keith to Dufftown
This length of the line has become the preservation line, the Keith and Dufftown Railway. Their website is on this link. [41]
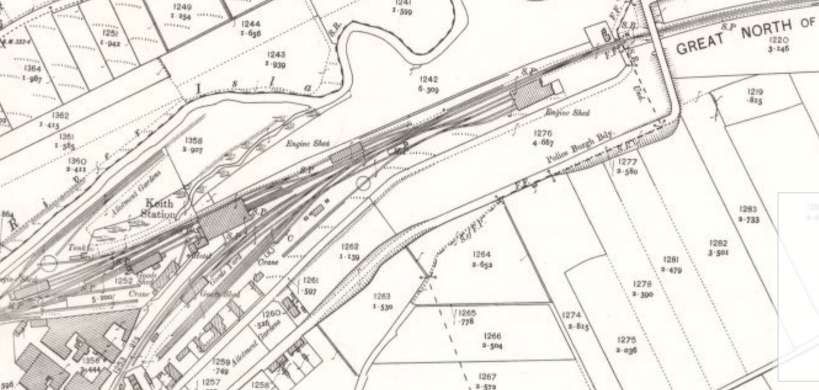
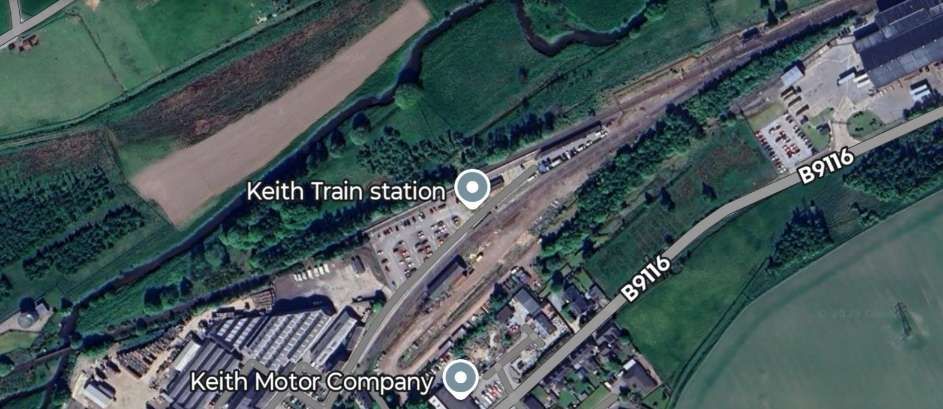
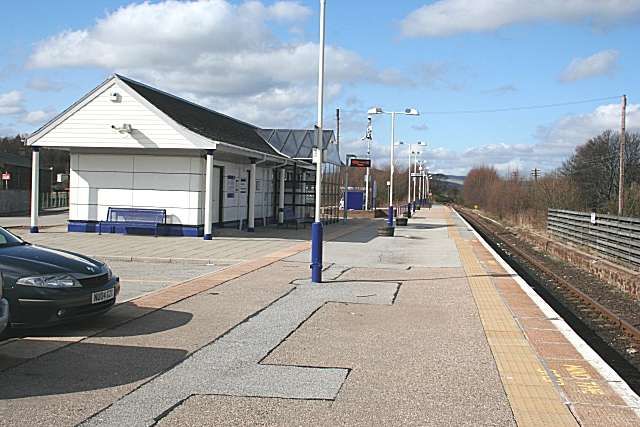
In the 21st century, “only a single platform remains in full-time use at Keith Railway Station, though the Dufftown branch platform (numbered 1) is available if required for turning back trains from the Aberdeen direction. … The bays have been filled in, having been abandoned and tracks lifted in the early 1970s after the closure of the Moray Coast Line (for which the station was a terminus). A signal box (which retains the name Keith Junction) remains at the eastern end to control a passing loop on the single track main line beyond the station, the now little-used goods yard (formerly used by trains accessing the nearby Chivas Regal whisky plant) and the stub of the Dufftown branch.” [6]
Further information about Keith Railway Station can be found here. [7]
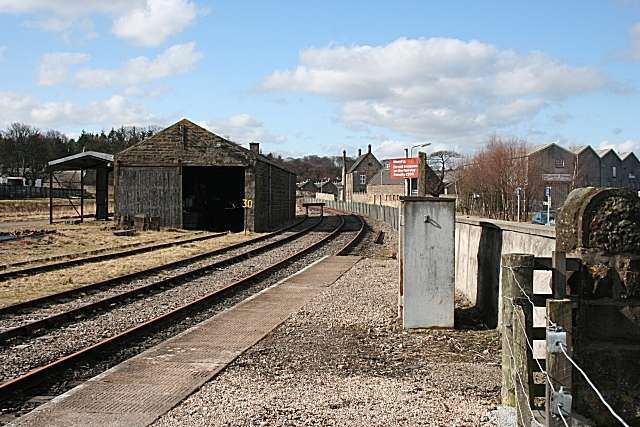
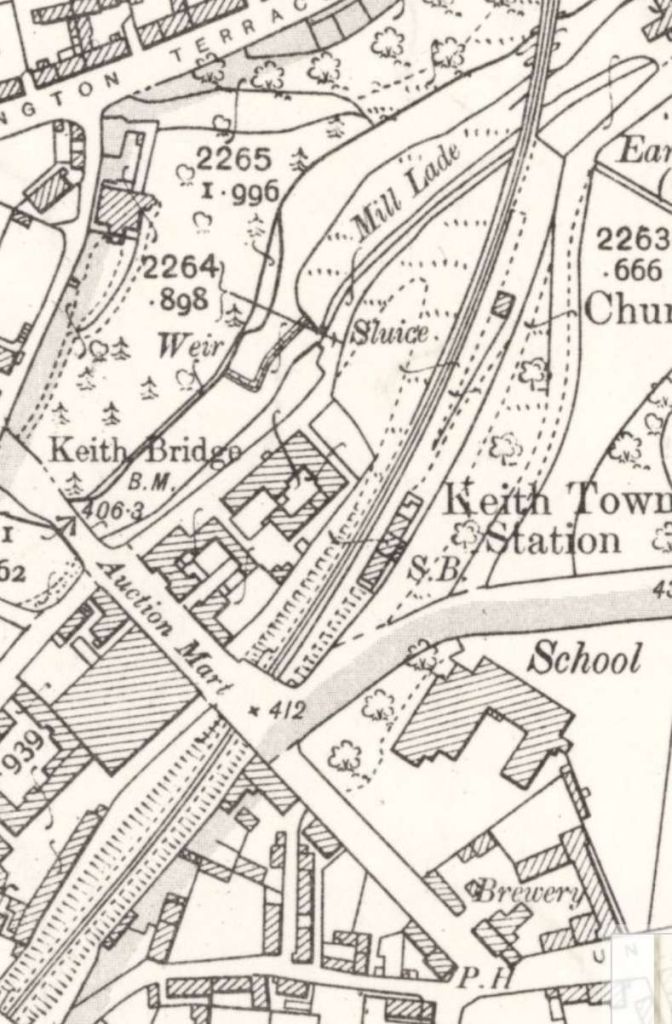
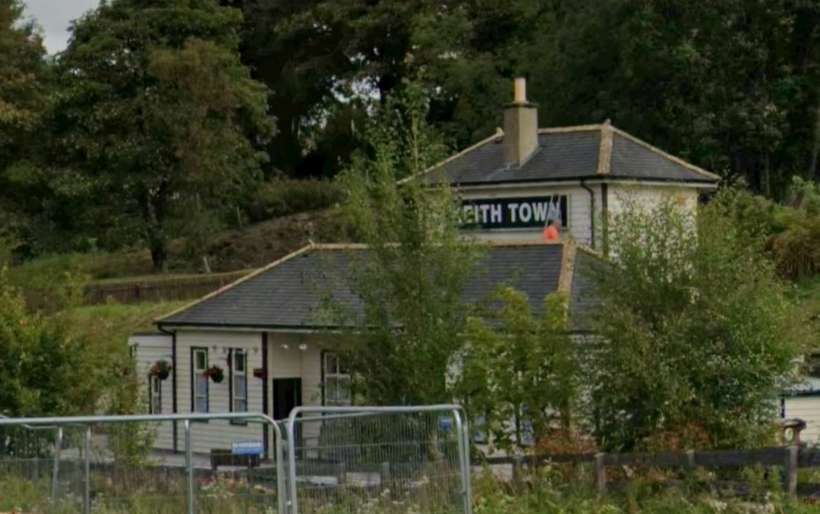
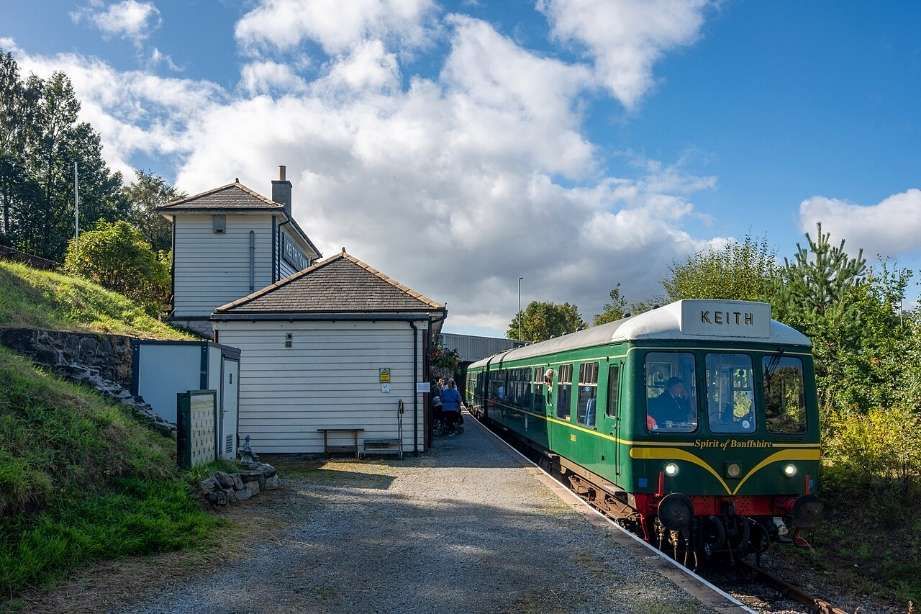
Vallance describes a journey along the line in 1959. Starting from Keith Station (Junction), “the Craigellachie line ascends Strath Isla for some eight miles, past the single-platform station of Keith Town, Auchindachy, and Drummuir.” [1: p5]
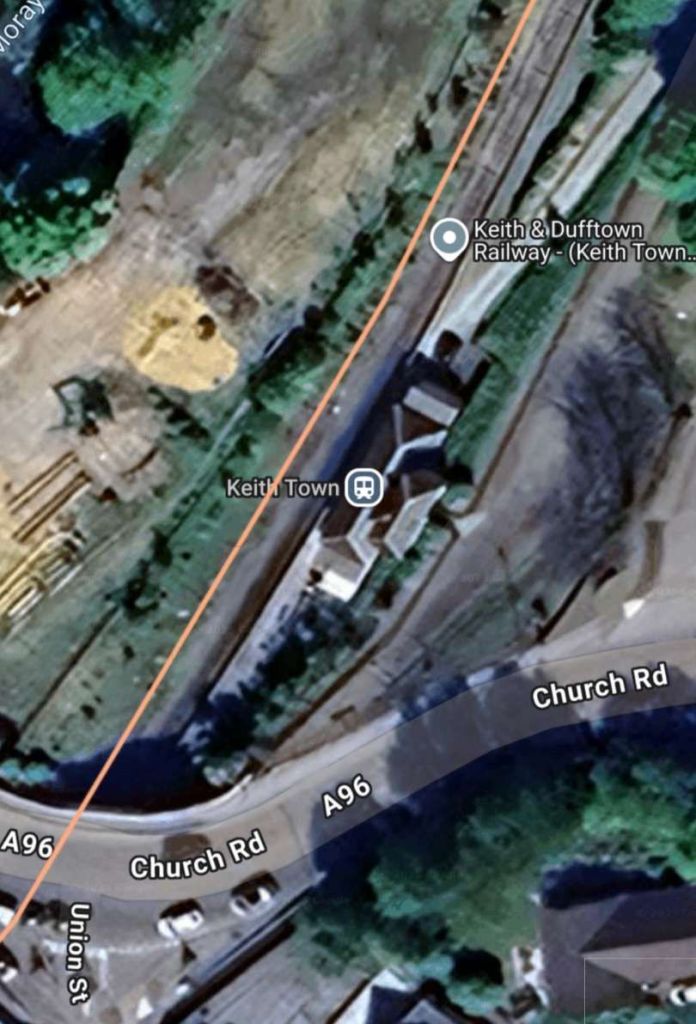
The line continues from Keith Town Station, Southwest towards Auchindachy.
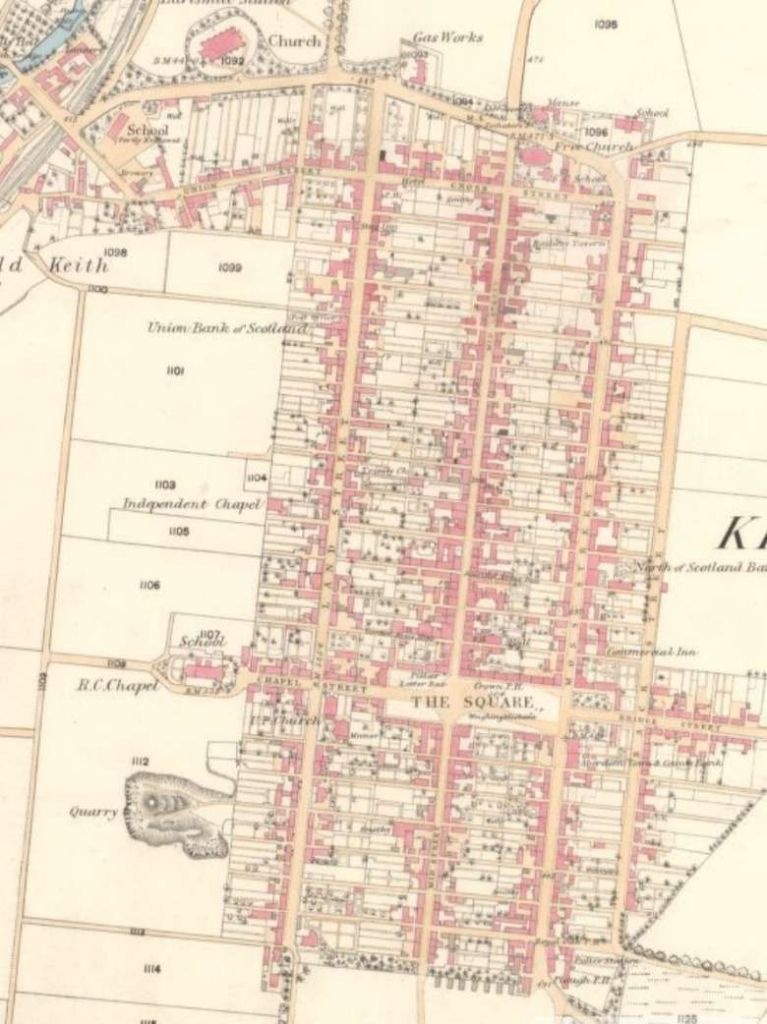
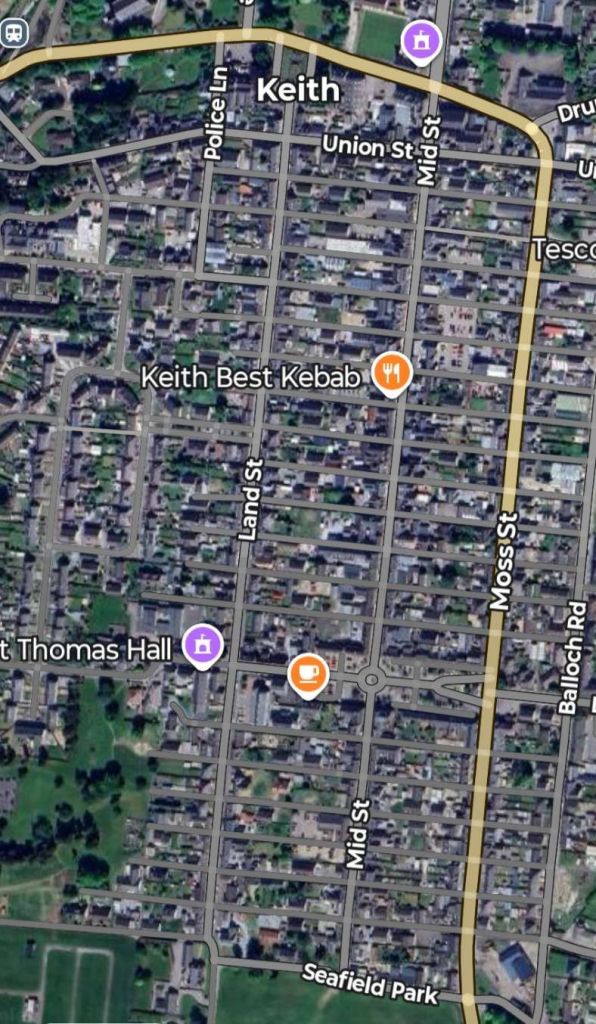
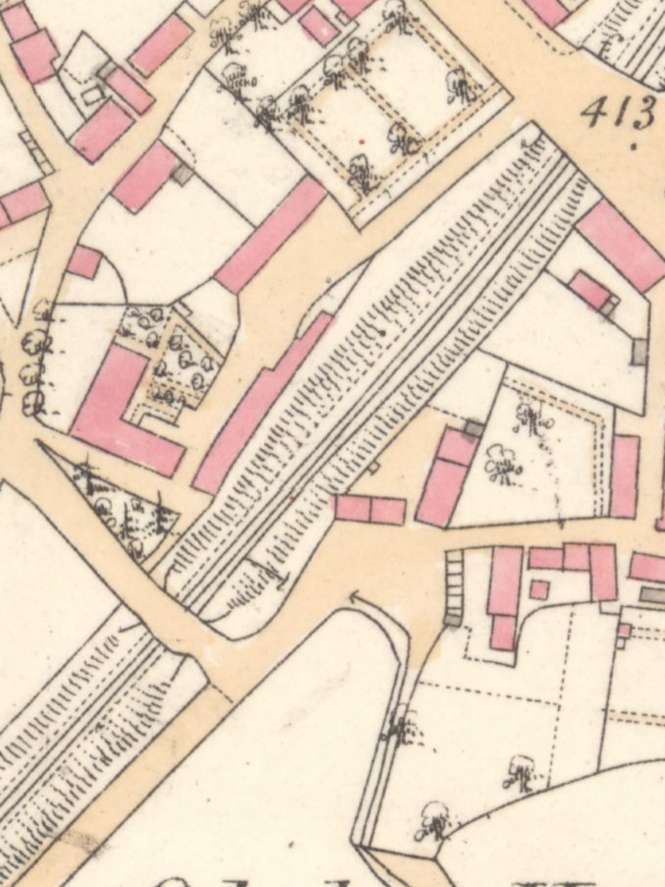
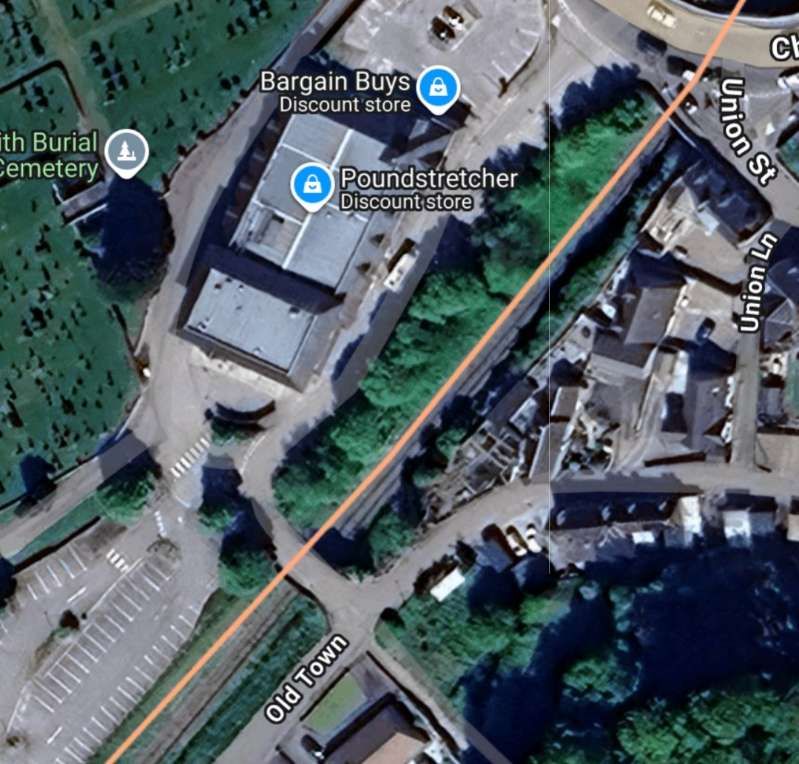
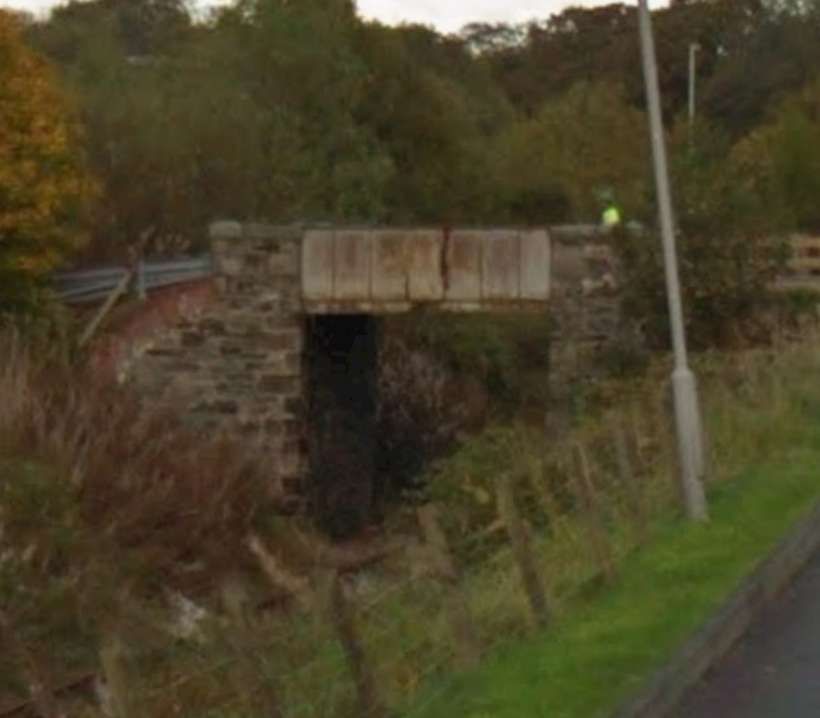
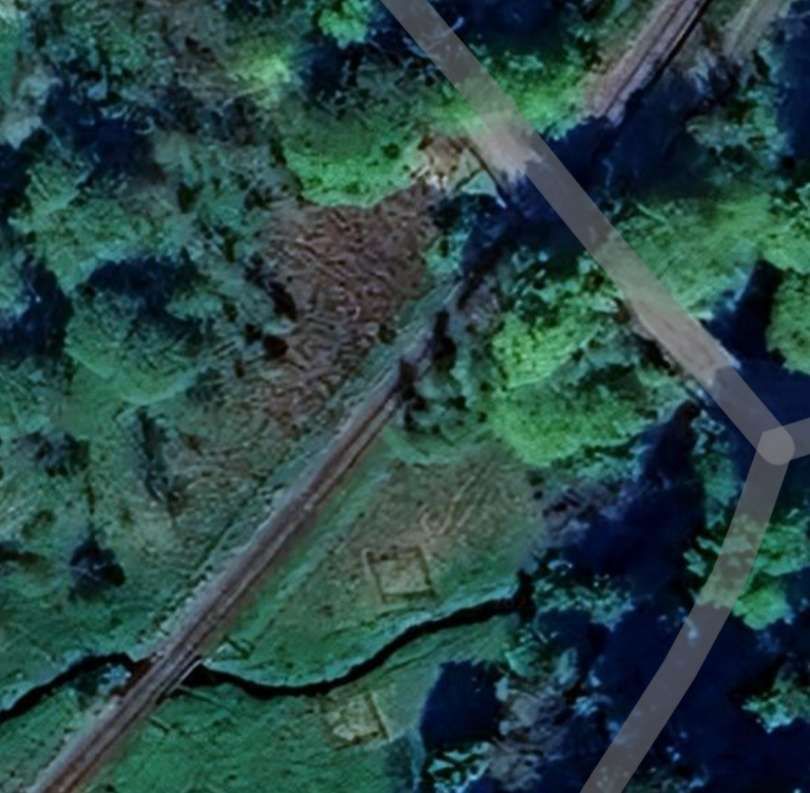
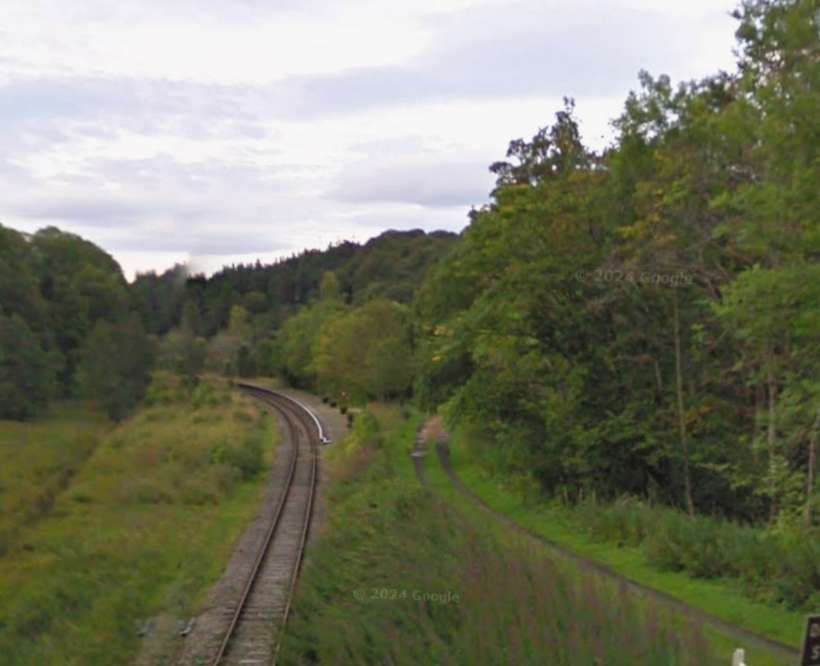
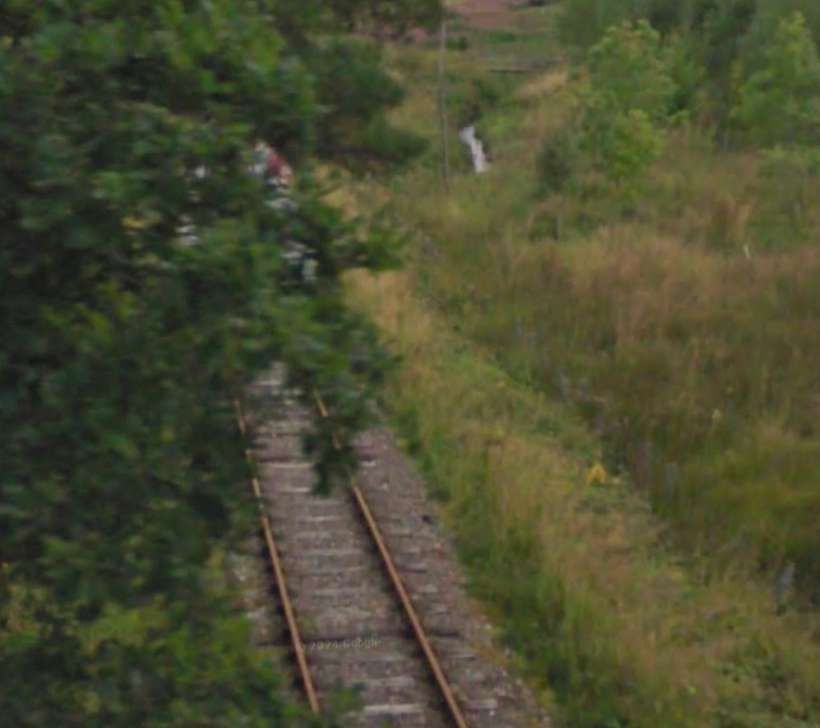
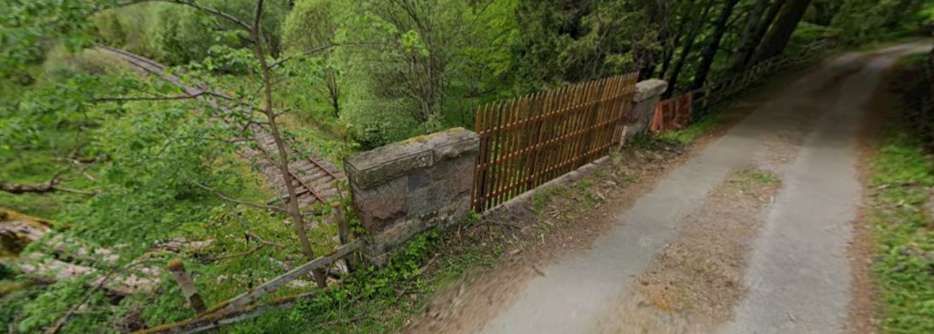
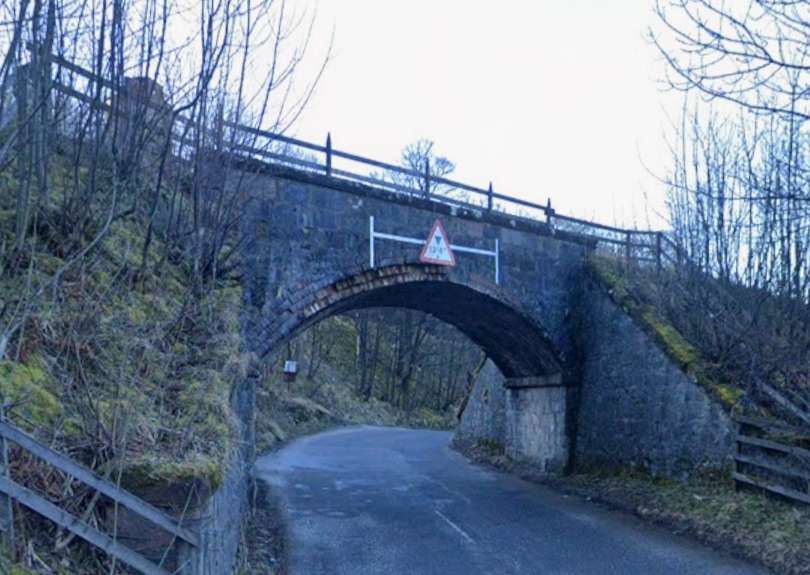
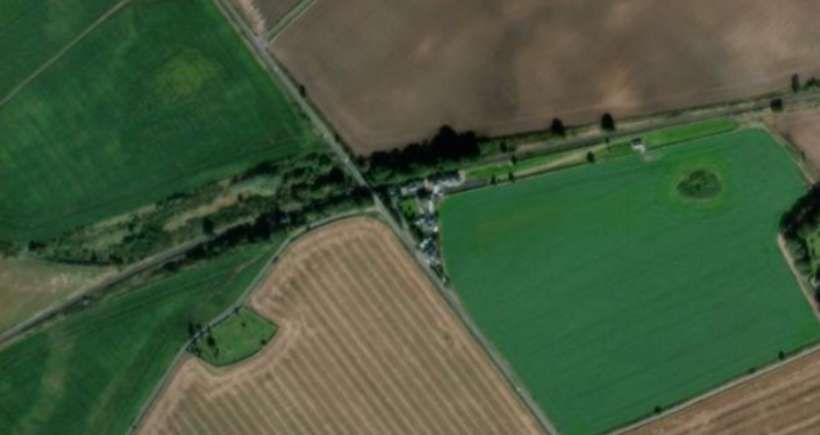
Just to the Southwest of Keith Town Station the line passed under two bridges. The first carries Bridge Street which became the A96. The second [11]Approximately the same area in the 21st century as seen on Railmaponline.com’s satellite imagery. [9]The bridge carrying the A96 over the line as seen from the next bridge down the line. [Google Streetview, October 2014]The bridge carrying Old Town over the line to the Southwest of the A96, seen from the South on Old Town. [Google Streetview, October 2014]
Strathisla Mill sat on the banks of the Isla.
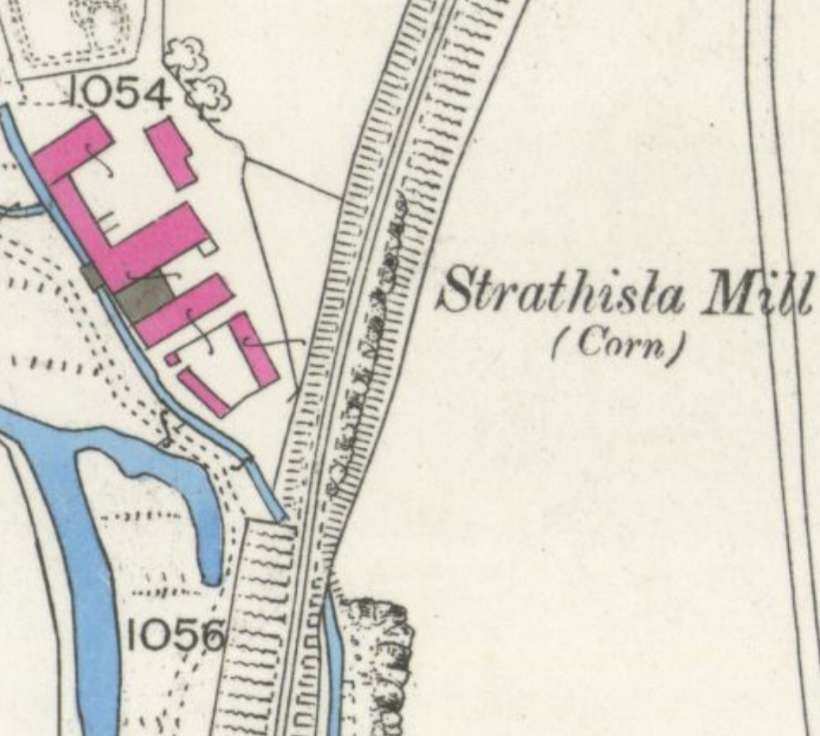
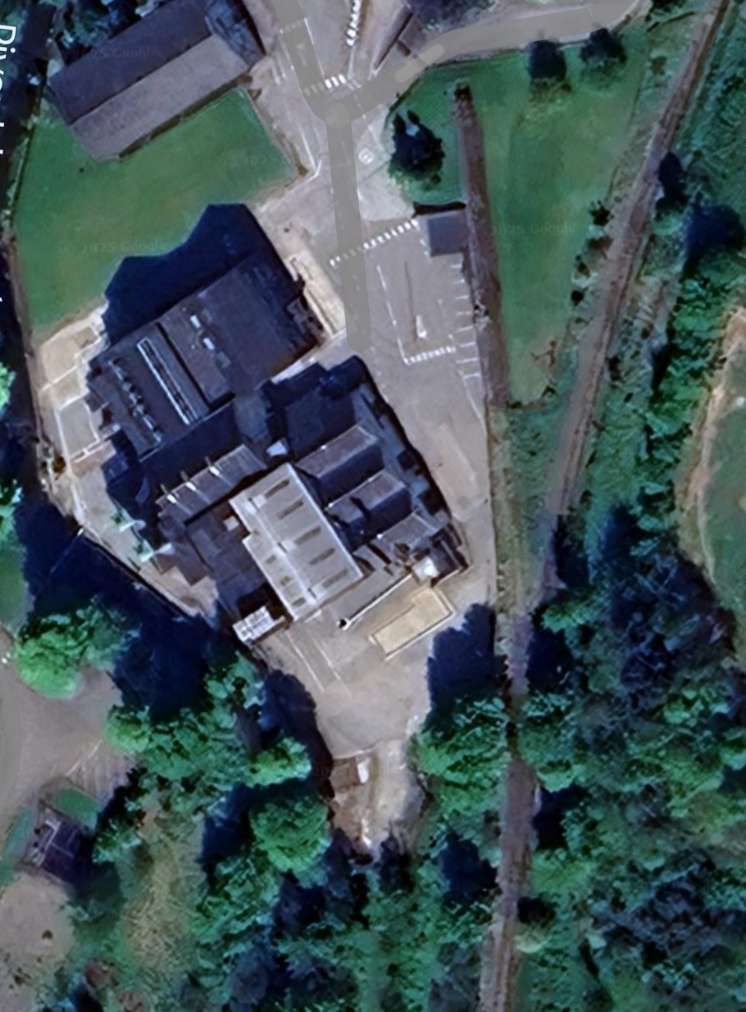
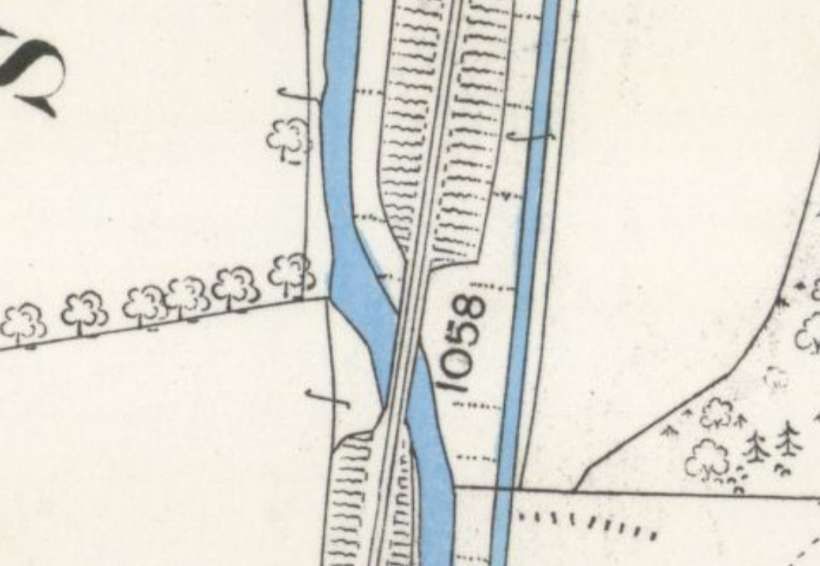
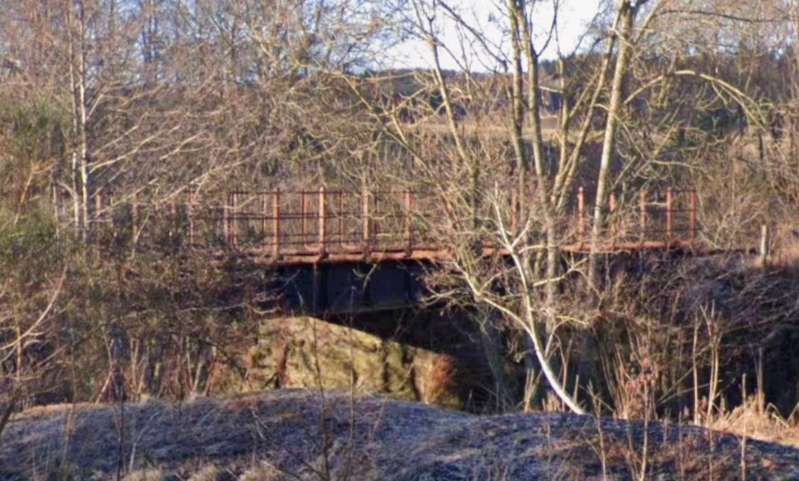
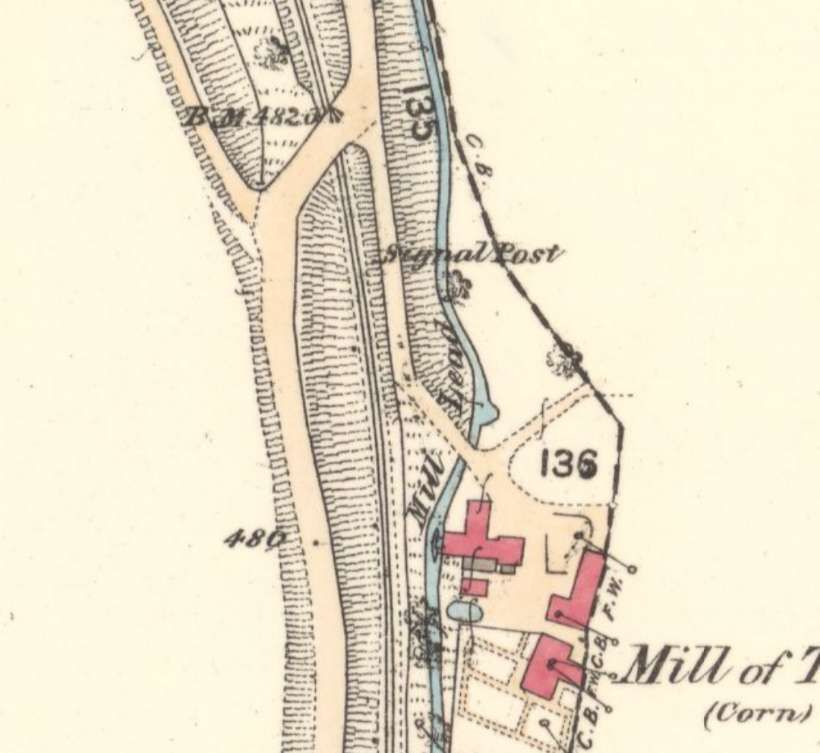
Strathisla Mill on the banks of the River Isla was passed just before the line bridged the river. [12]The same location in the 21st century. The older mill buildings are now part of the Strathisla Distillery complex. [Google Maps, January 2026]The bridge over the River Isla to the South of the mill buildings. [12]The same bridge over the River Isla, in the 21st century. [Google Maps, January 2026]The next bridge along the line. [13]The same location in the 21st century. [Google Maps, January 2026]The same bridge seen from the Southeast. [Google Streetview, October 2014]The same bridge seen from the North. [Google Streetview, October 2014]
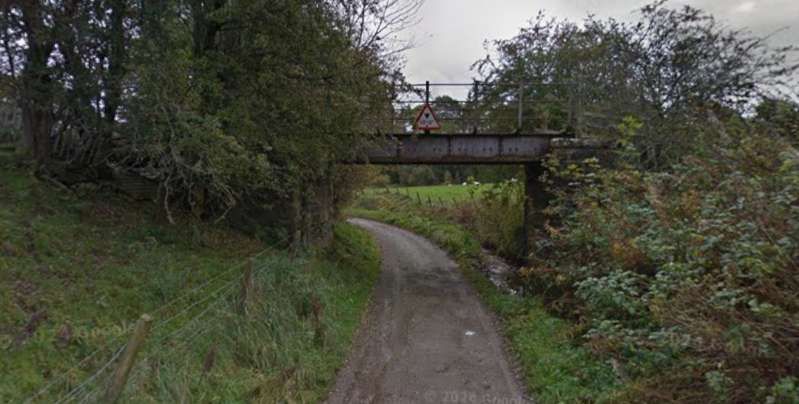
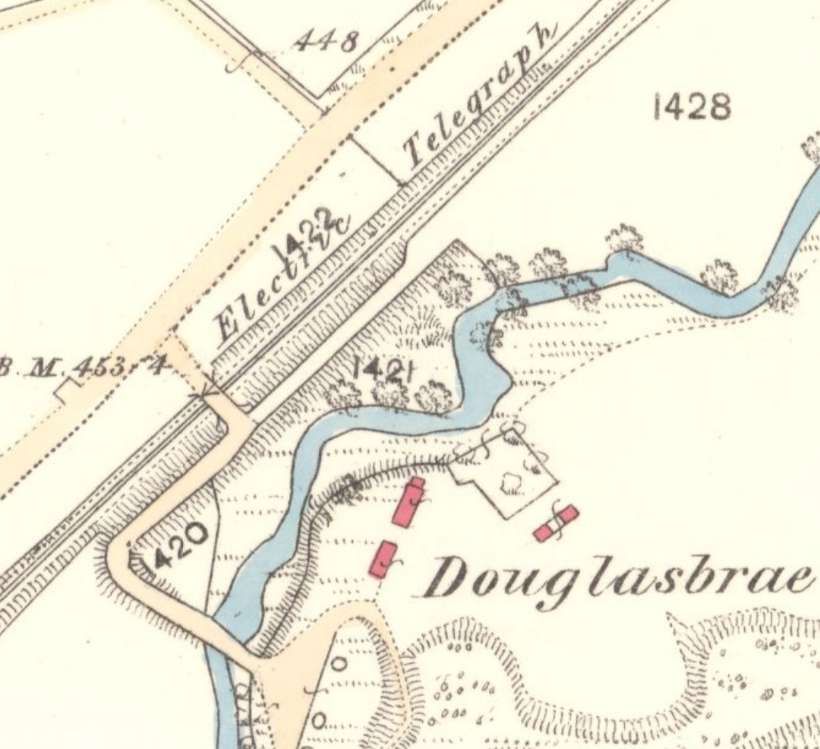
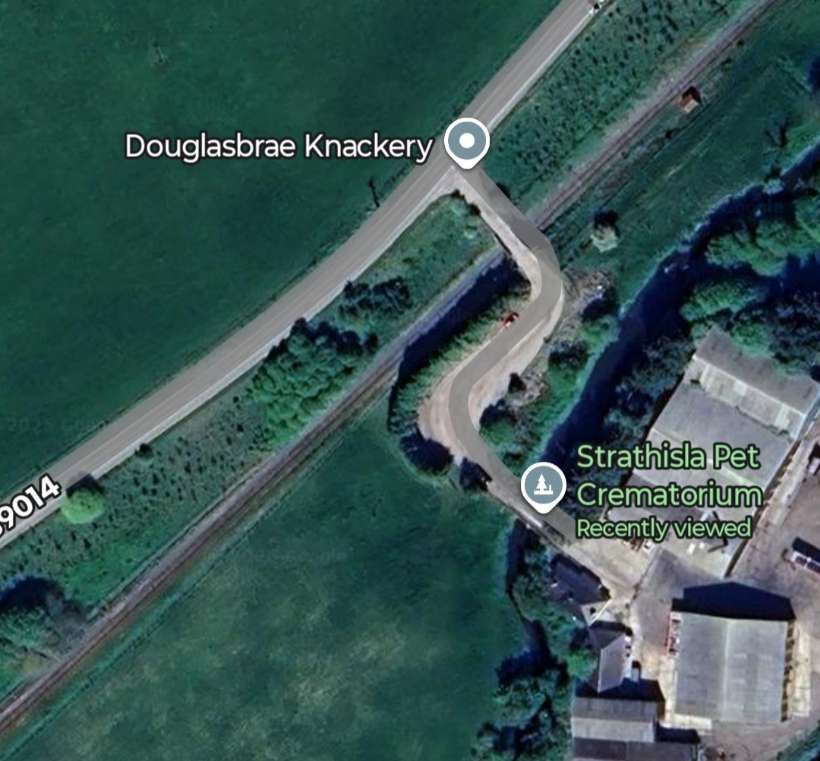
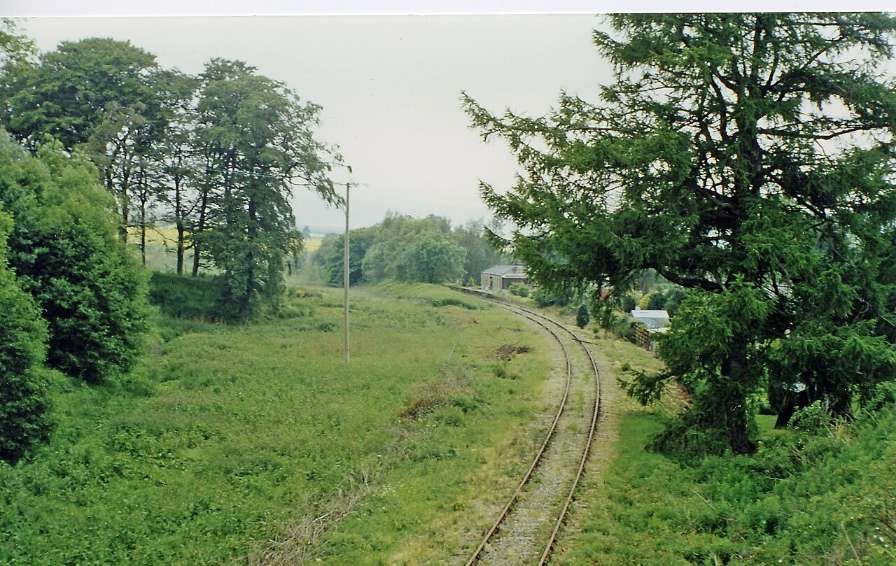
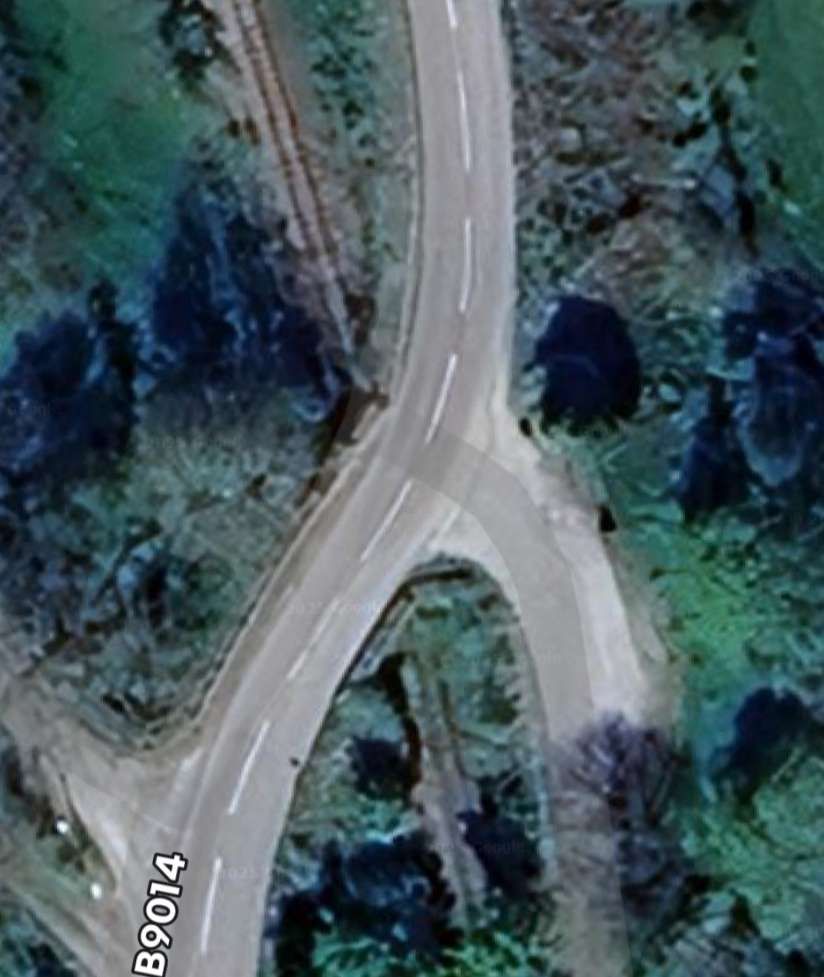
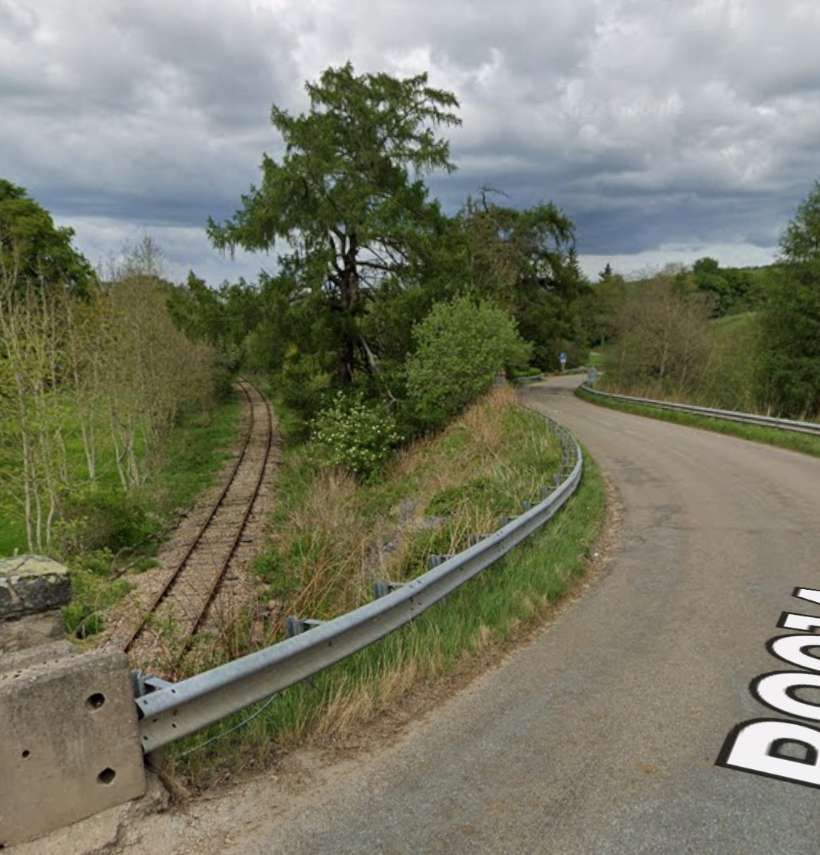
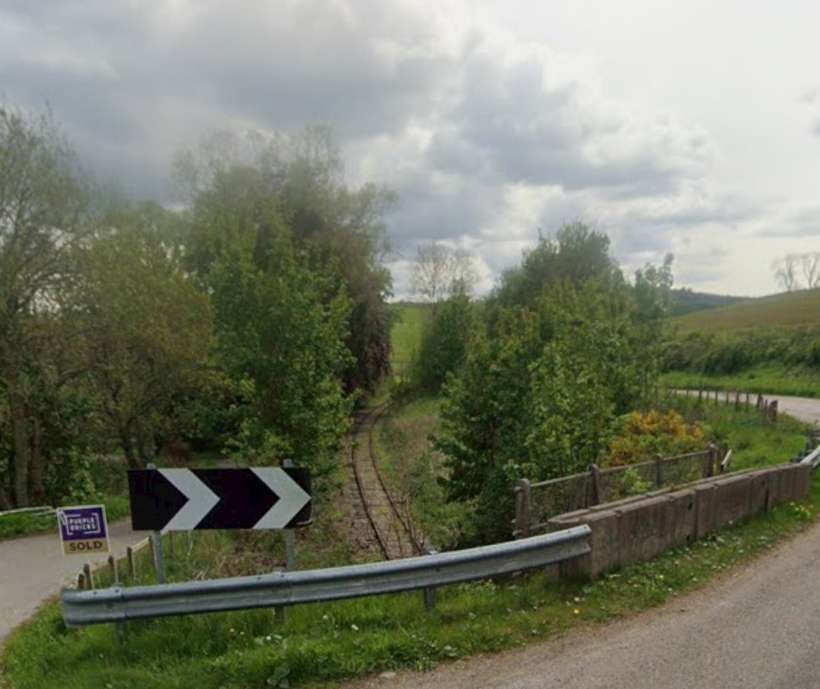
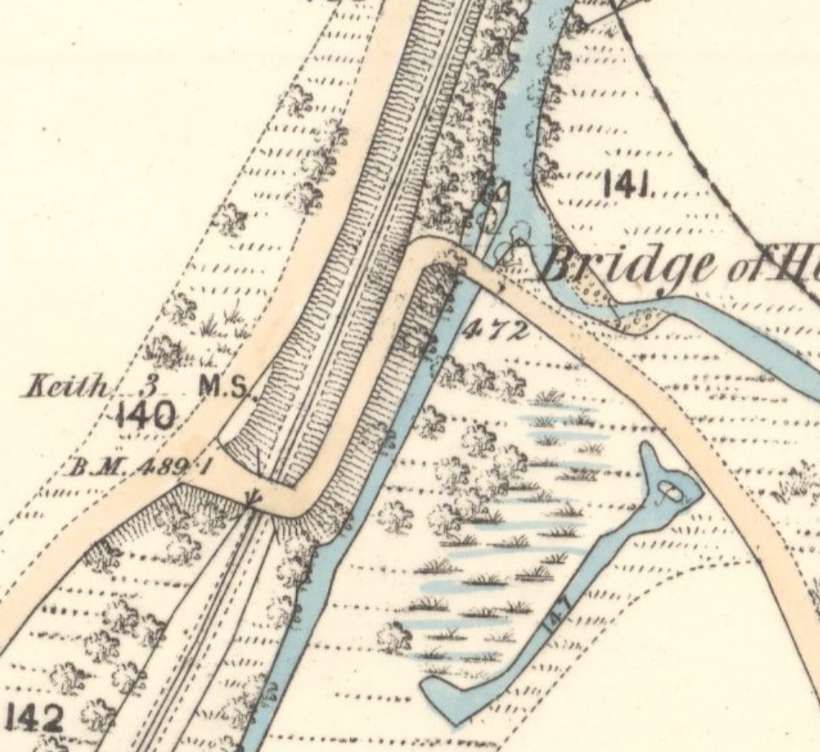
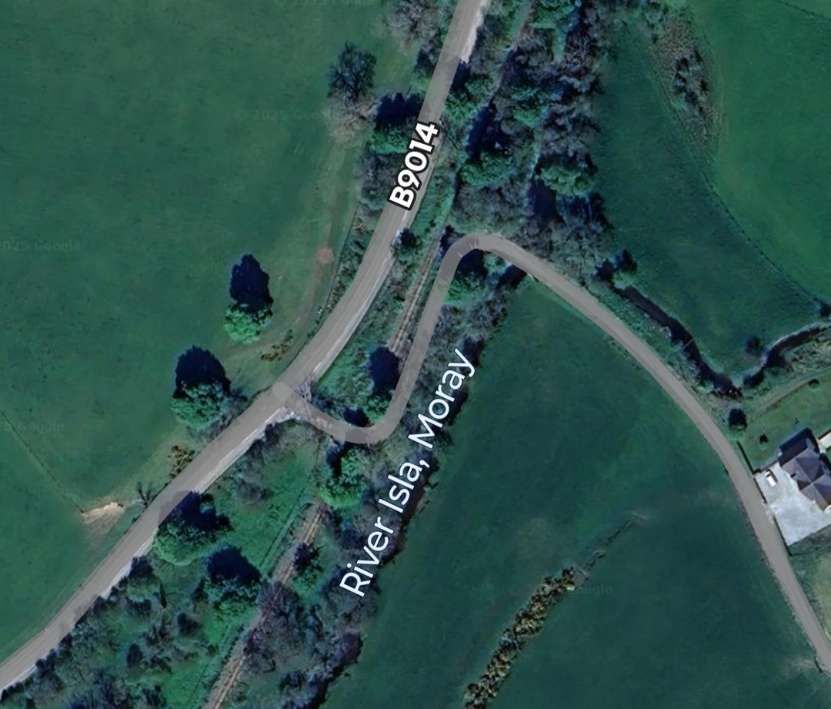
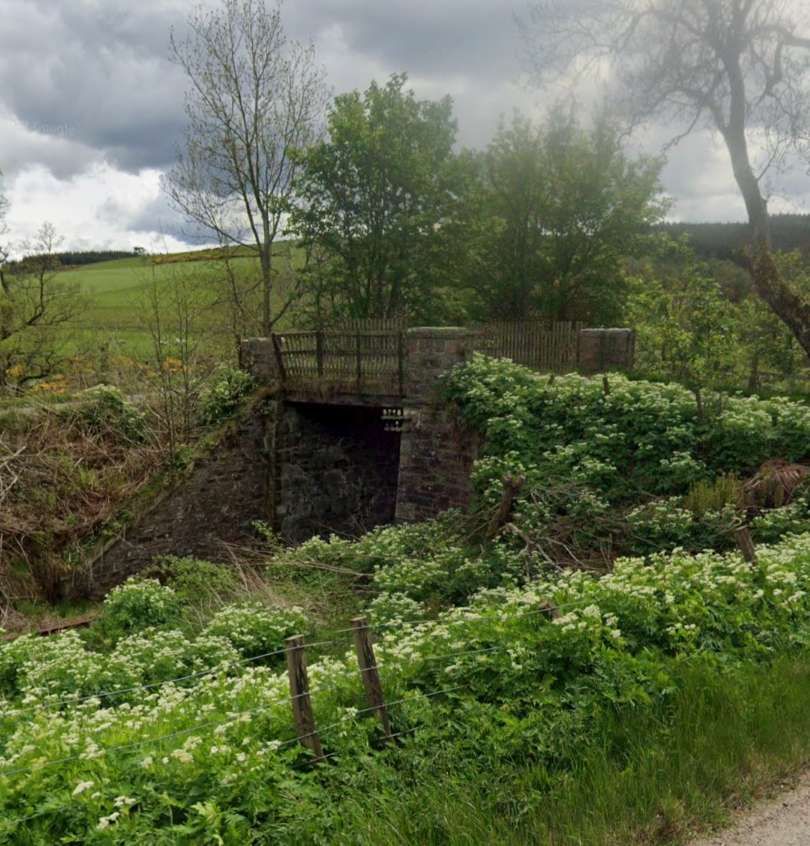
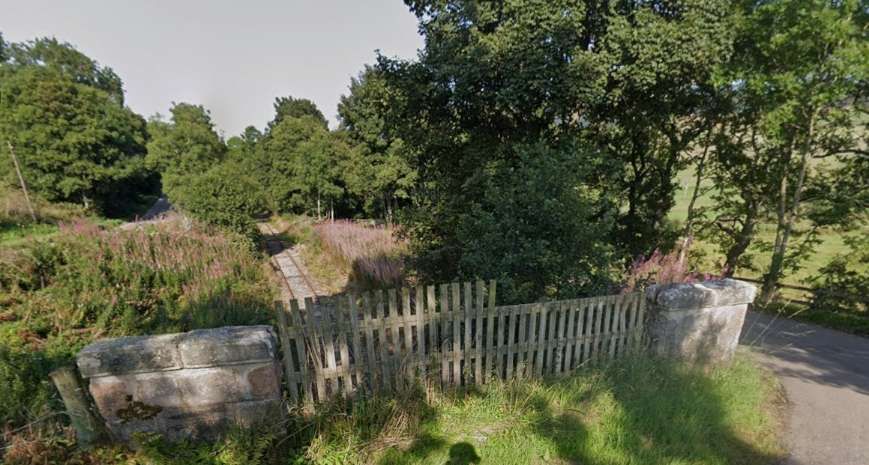
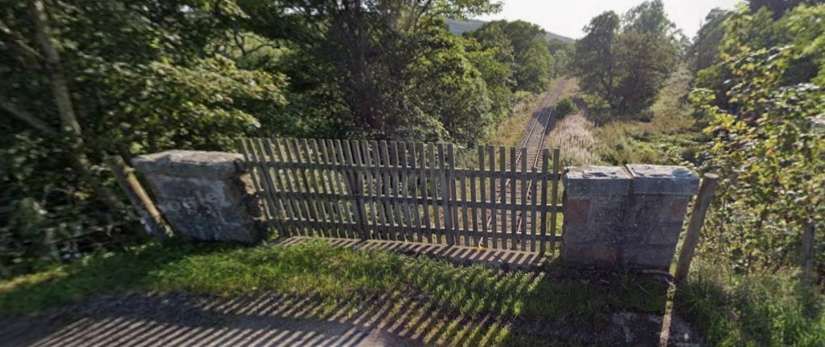
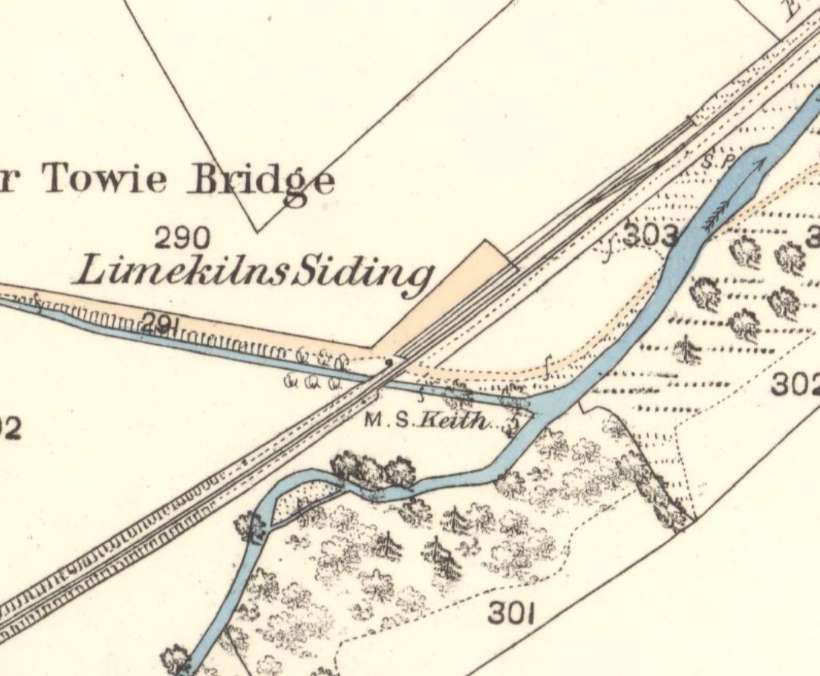
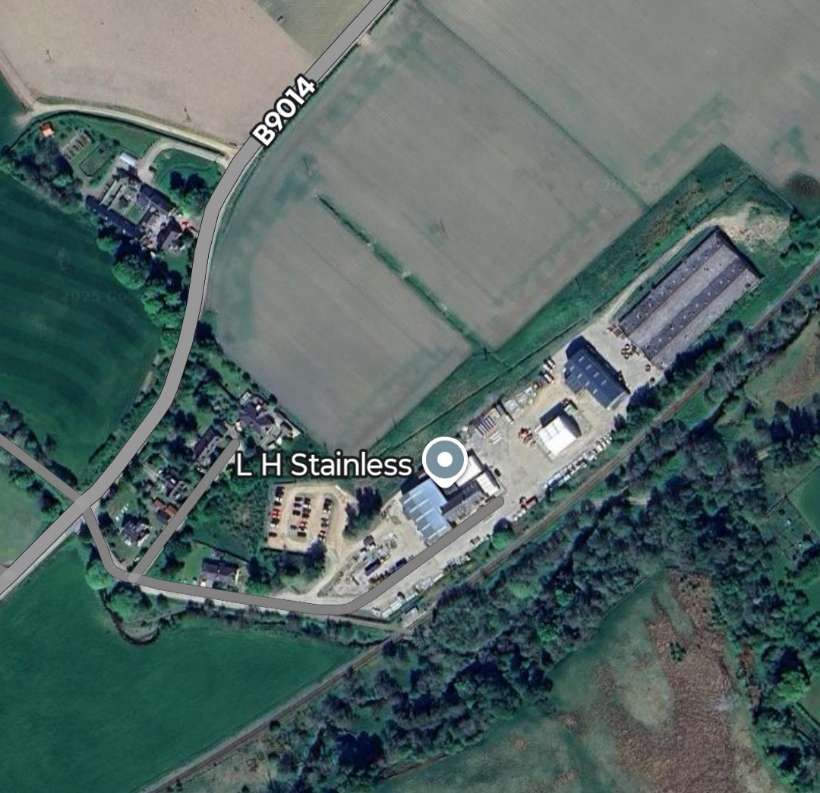
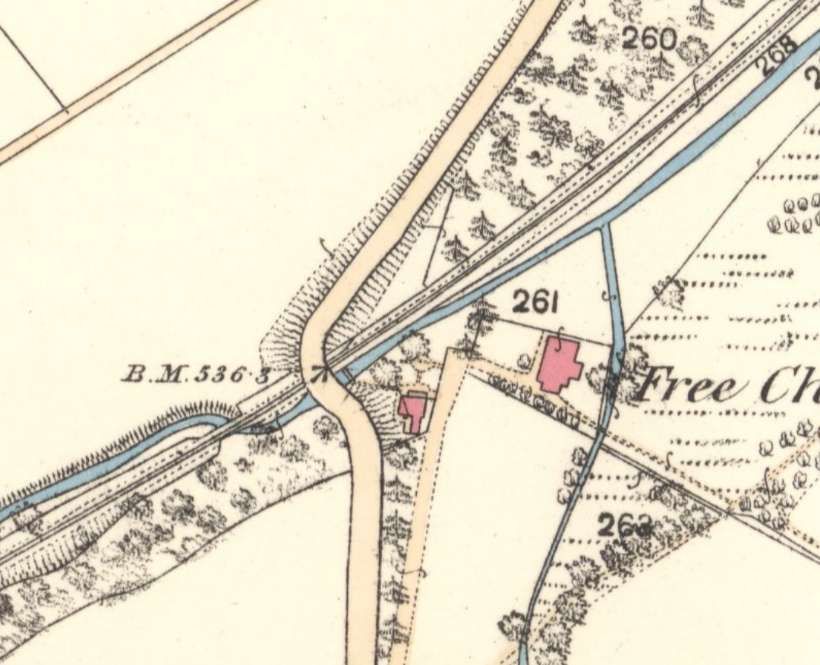
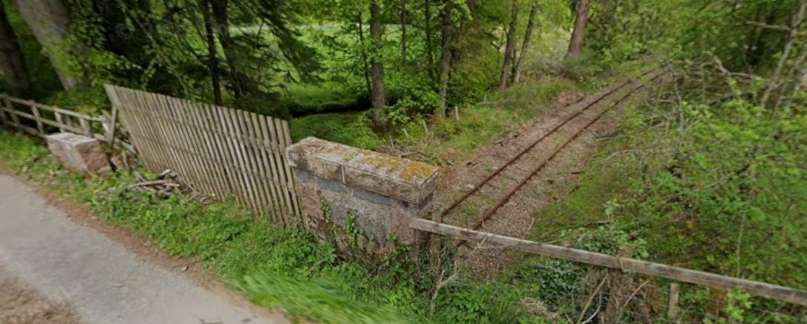
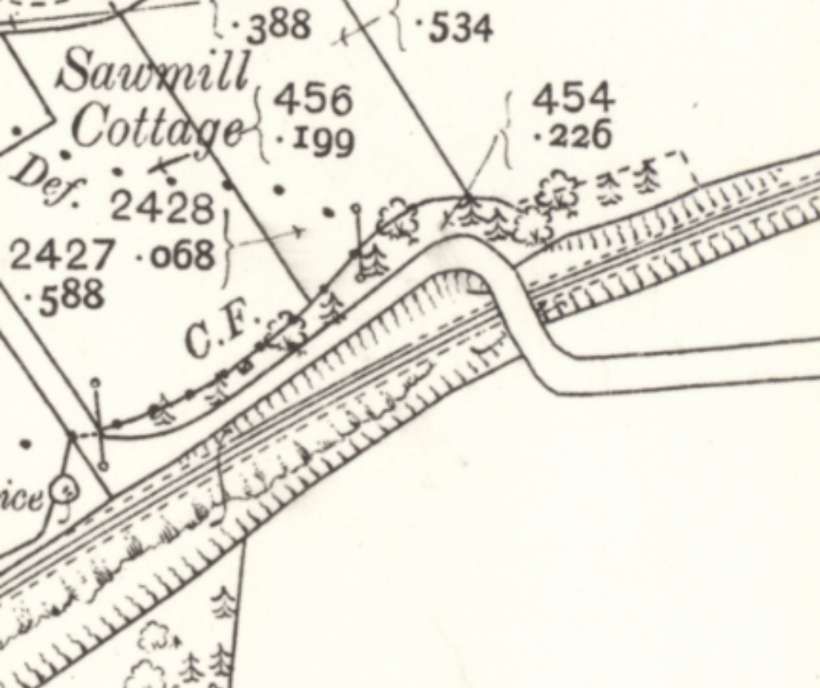
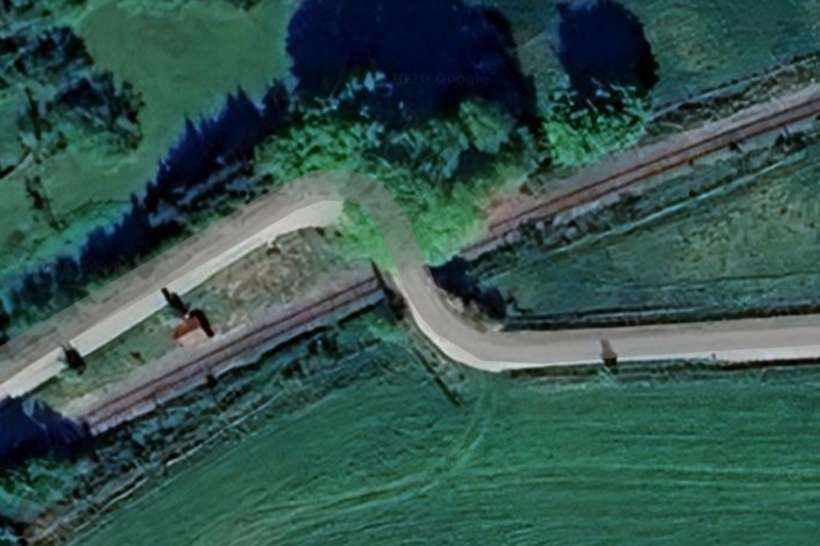
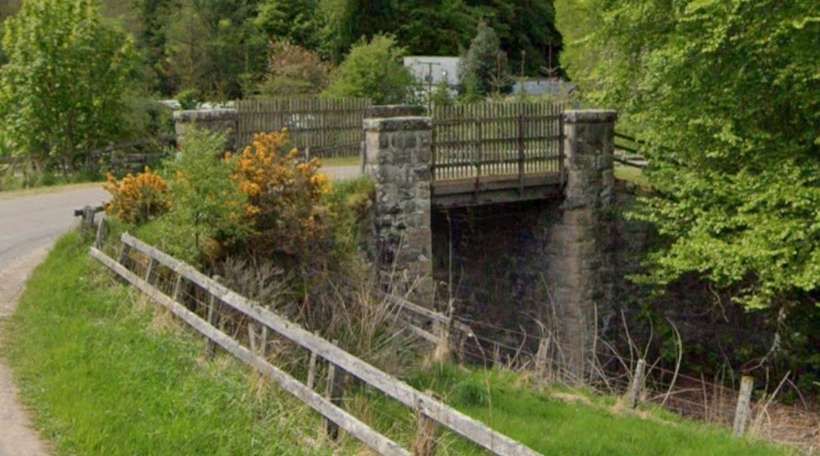
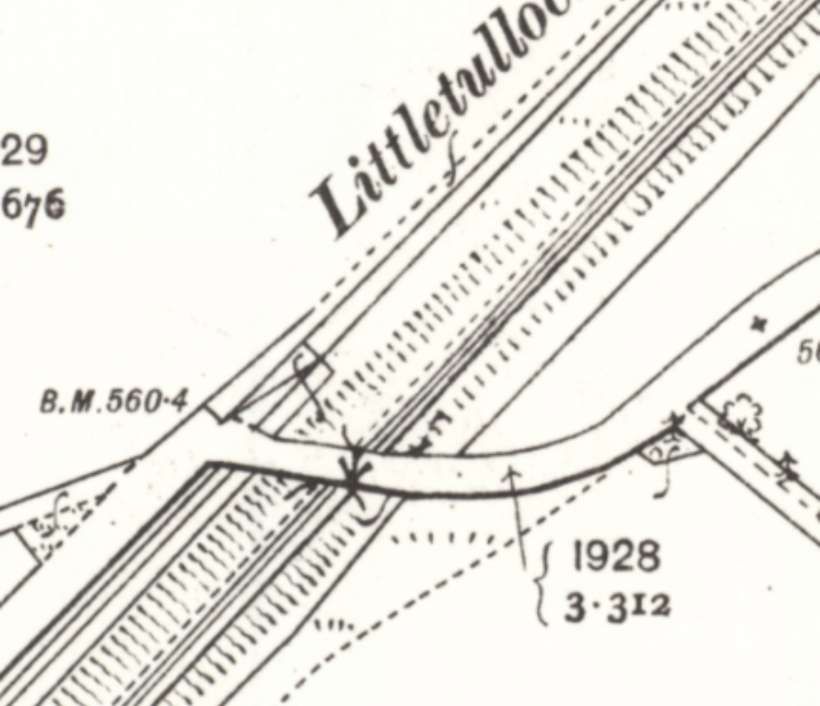
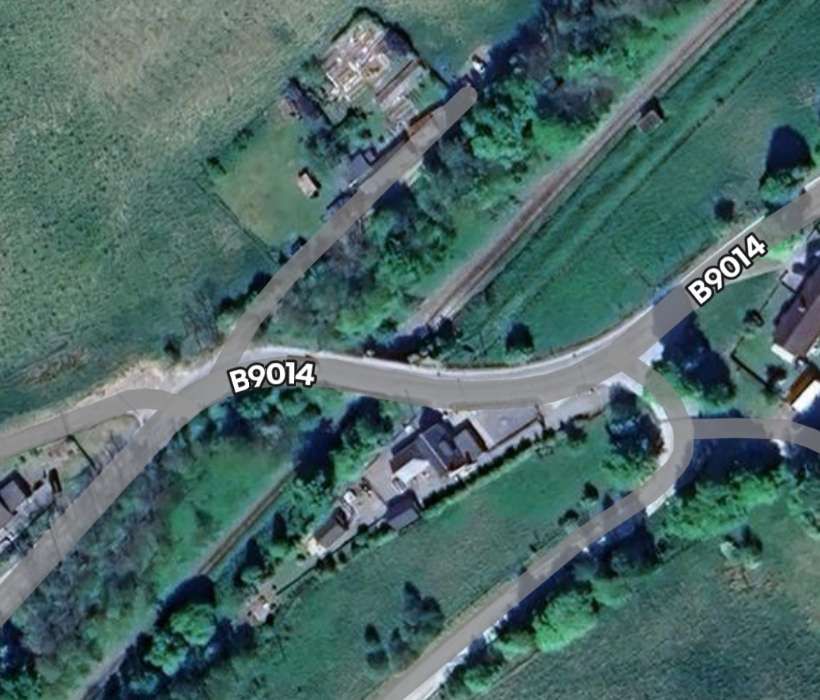
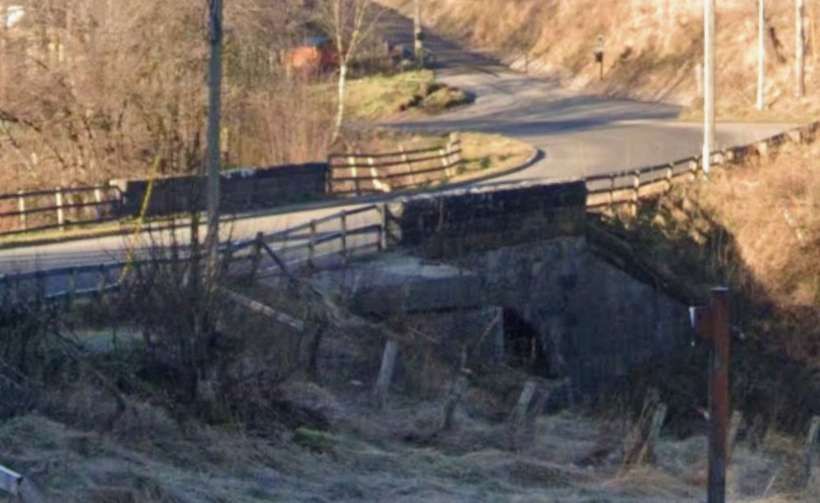
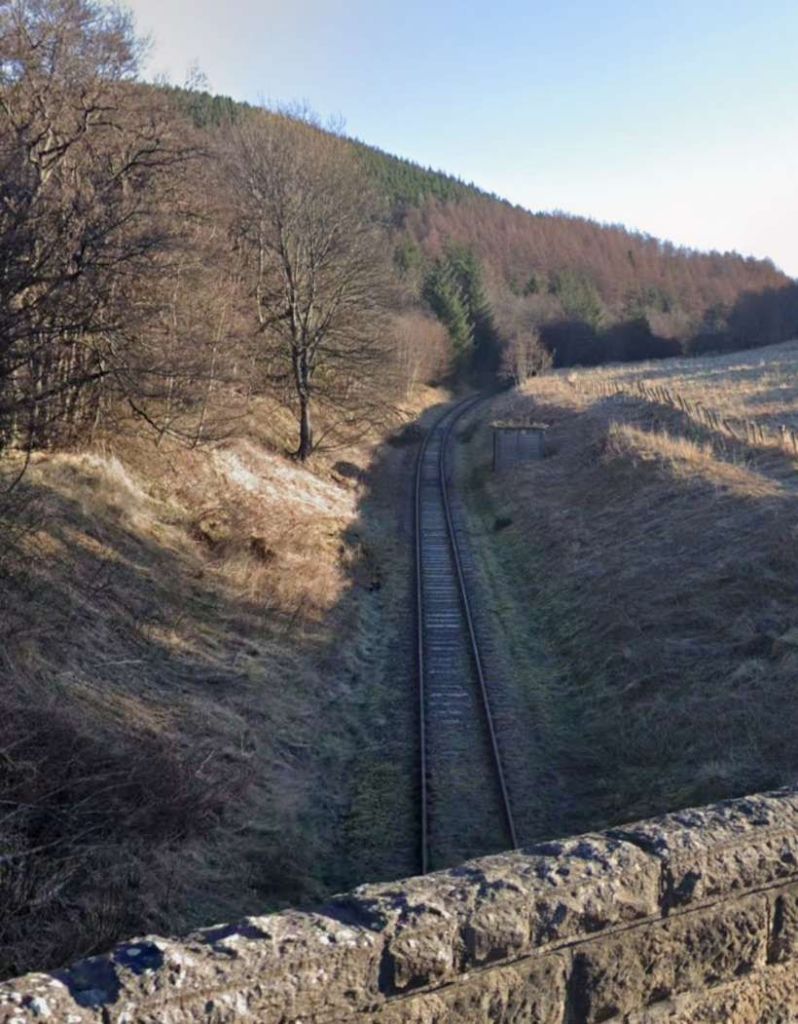
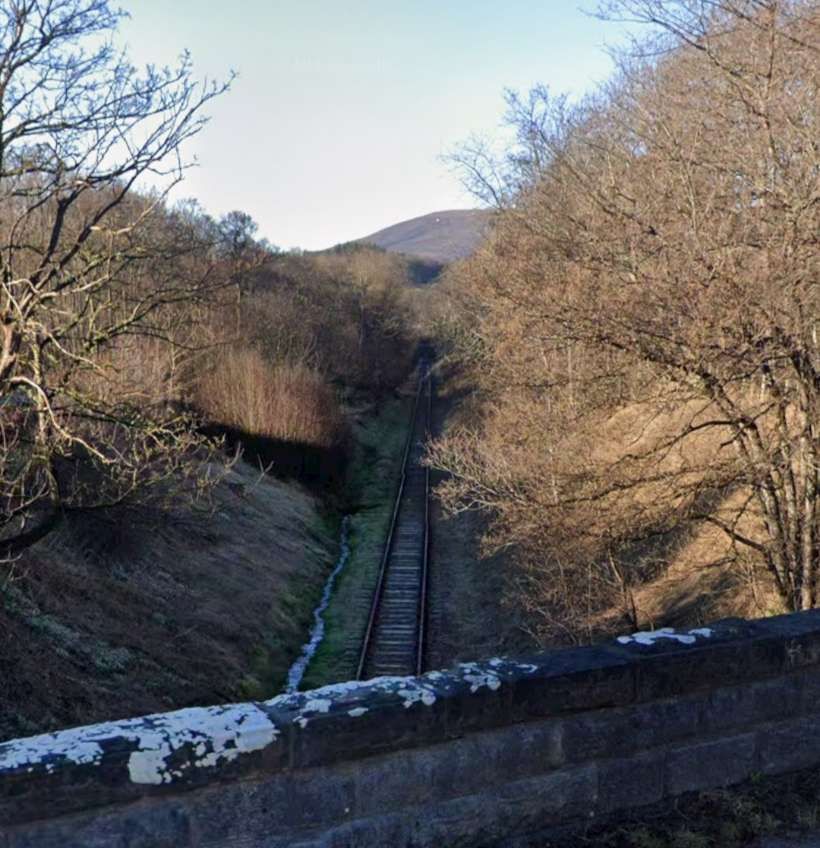
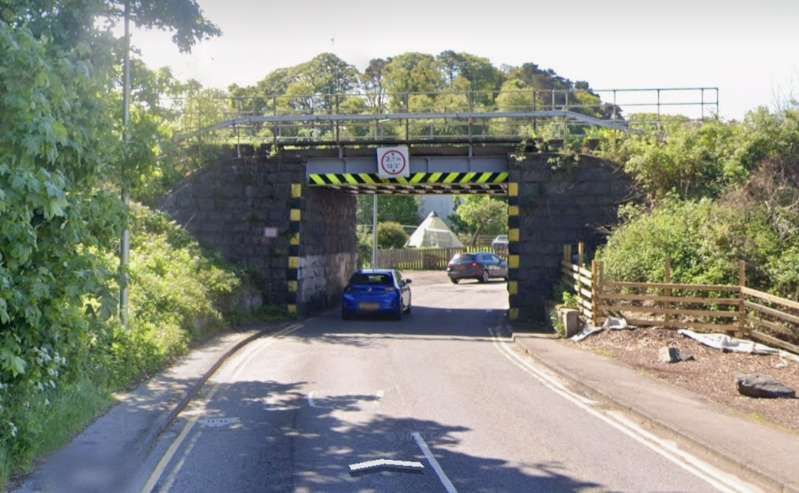
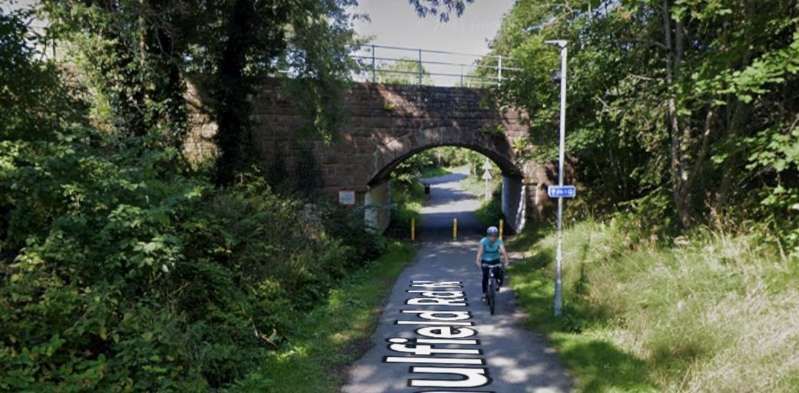
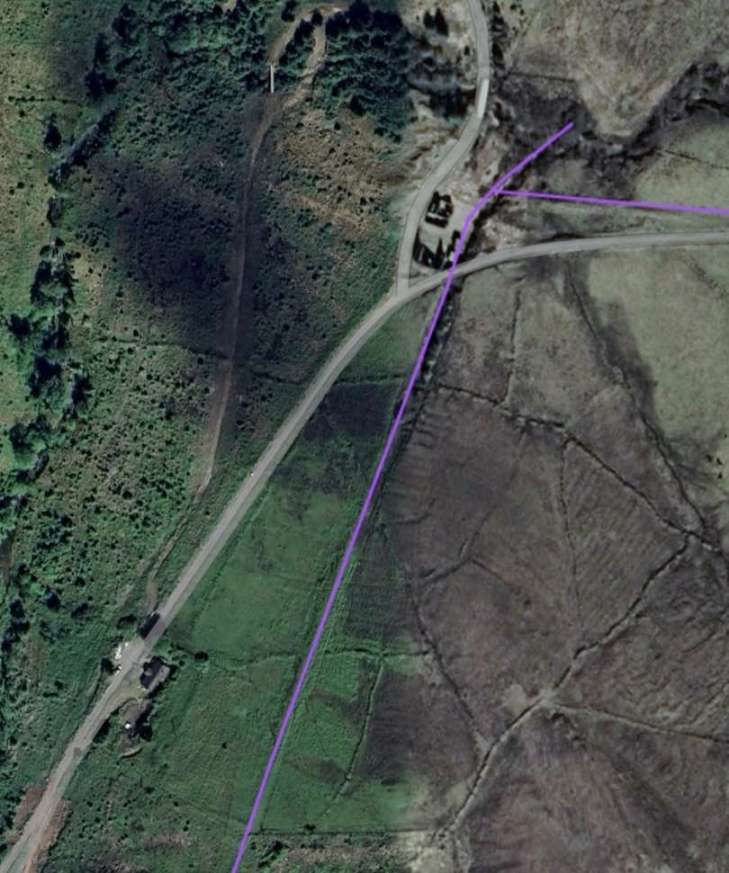
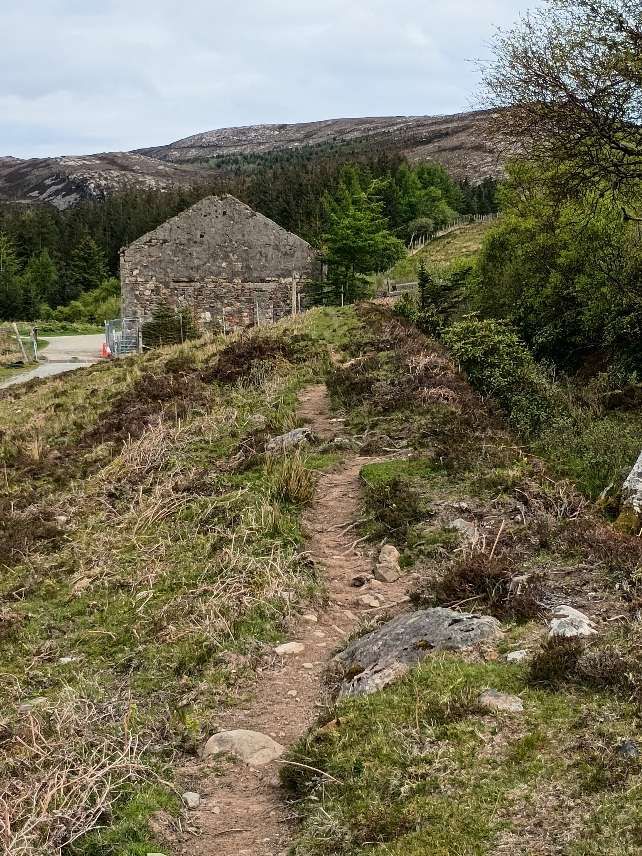
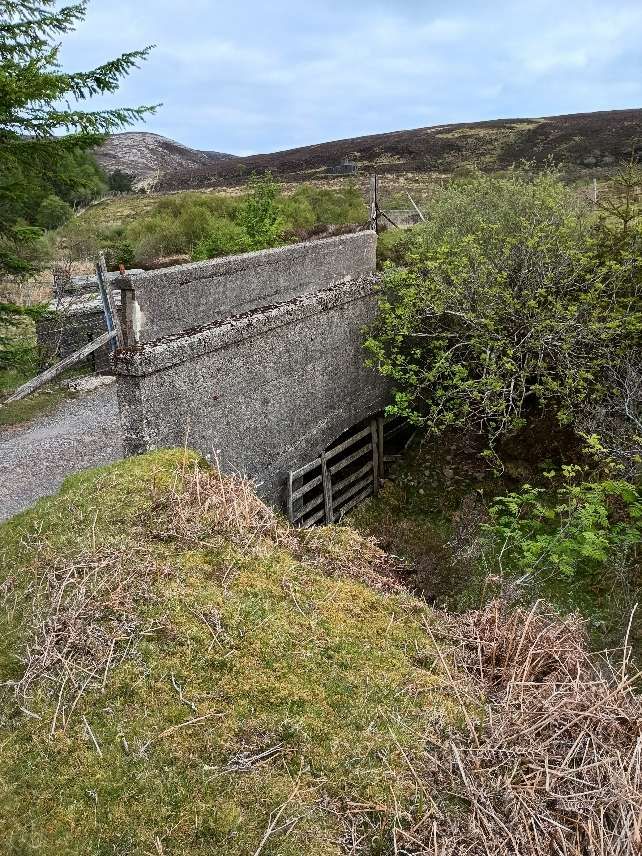
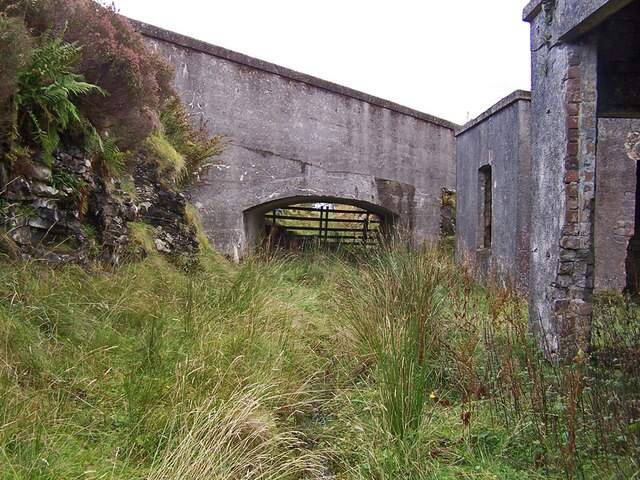
Further Southwest another overbridge links the Douglasbrae Lime Kilns to the road network. The main road here is now the B9014.
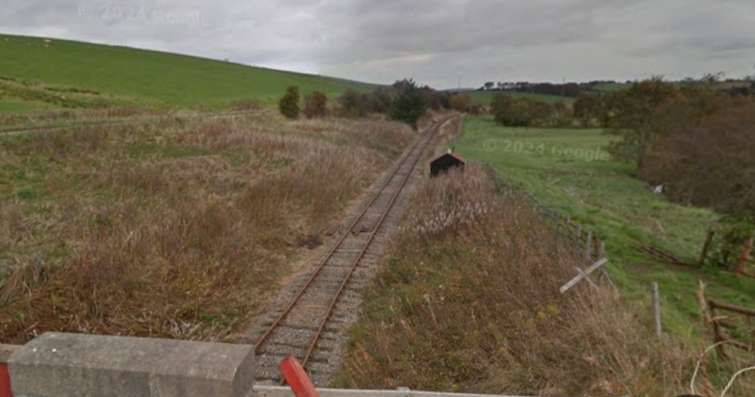
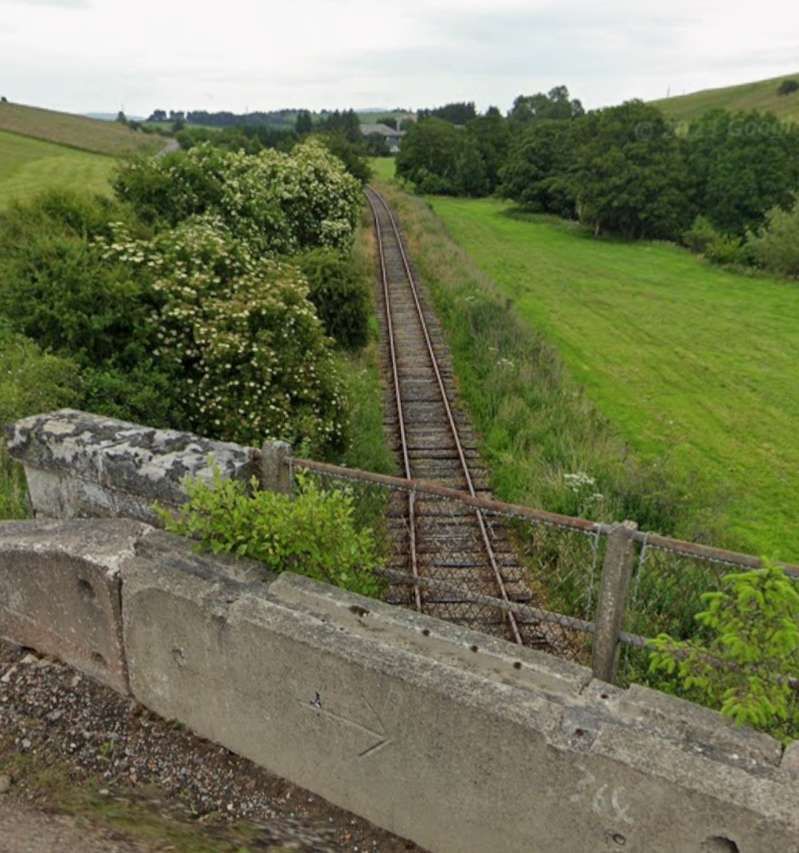
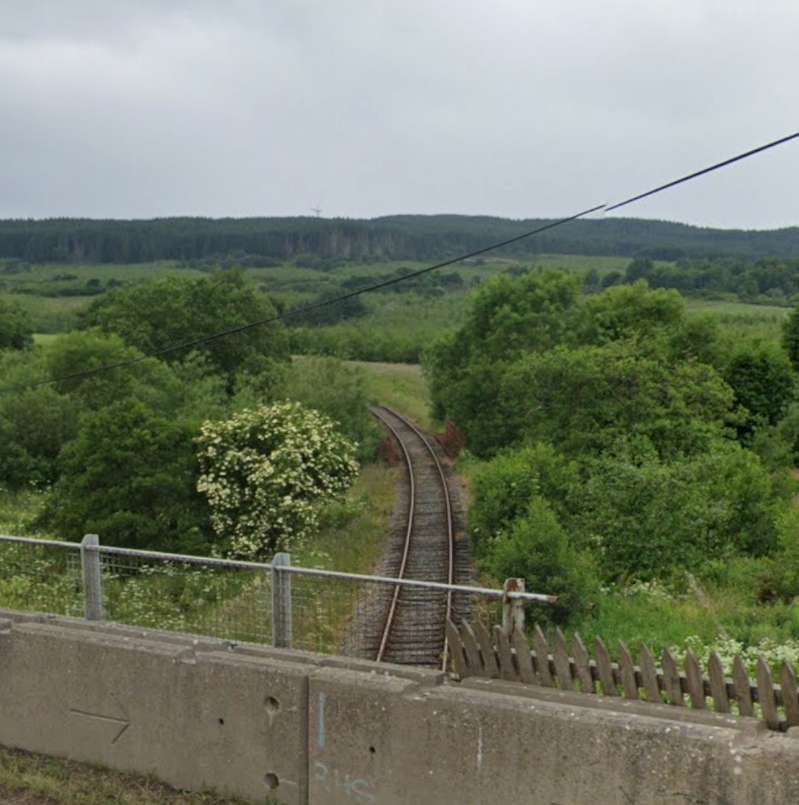
The next overbridge carried the access road to Douglasbrae Lime Kilns over the River and the railway. [13]The same location in the 21st century. I am not quite sure what I think about the two different names given to the site of what we’re on e the Douglasbrae Lime Kilns – Strathisla Pet Crematorium sounds so much better than Douglasbrae Knackery! [Google Maps, January 2026]Looking back to the Northeast from the bridge carrying the access road. [Google Streetview, October 2014]The bridge carrying the access road, seen from the Southwest on the B9104. [Google Streetview, June 2023]The view Southwest along the line from the access road bridge. [Google Streetview, October 2014]
The line continues Southwest towards Bridge of Maisley.
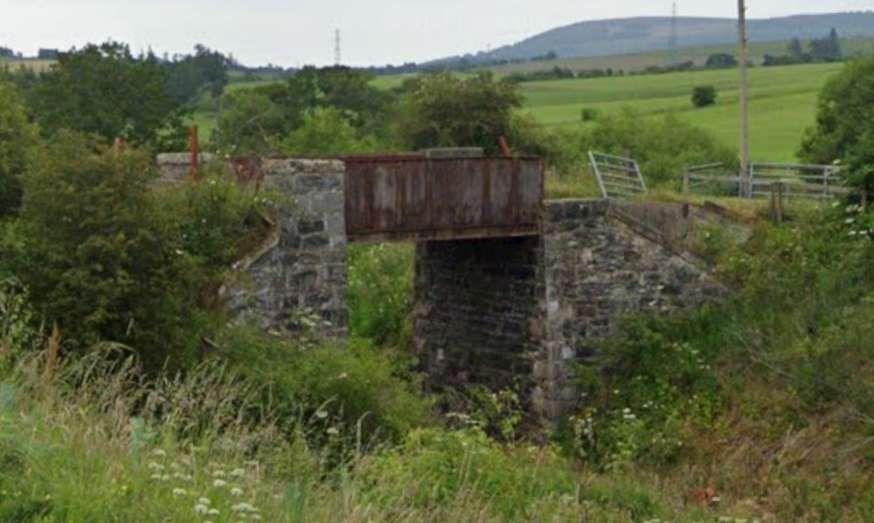
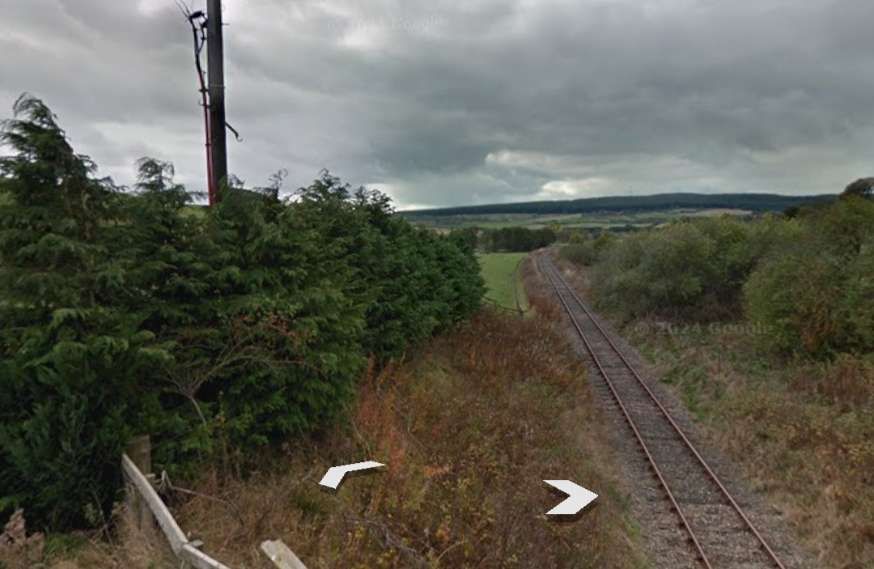
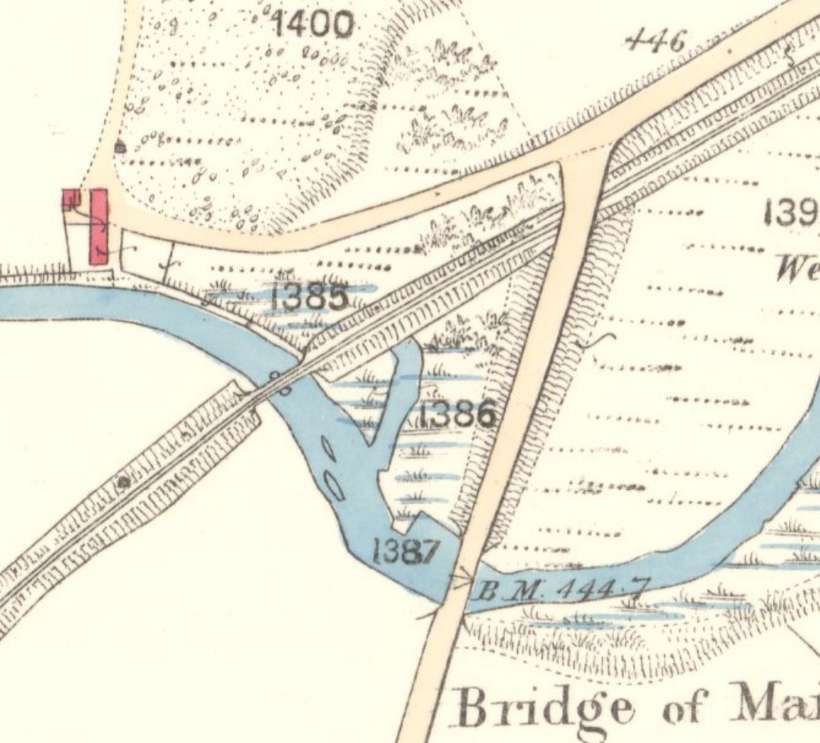
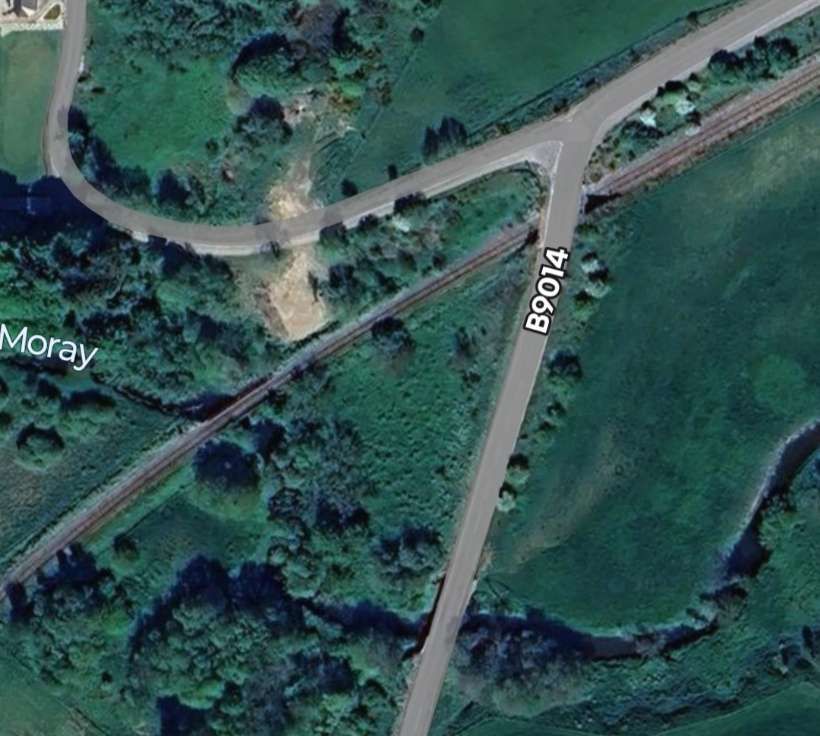
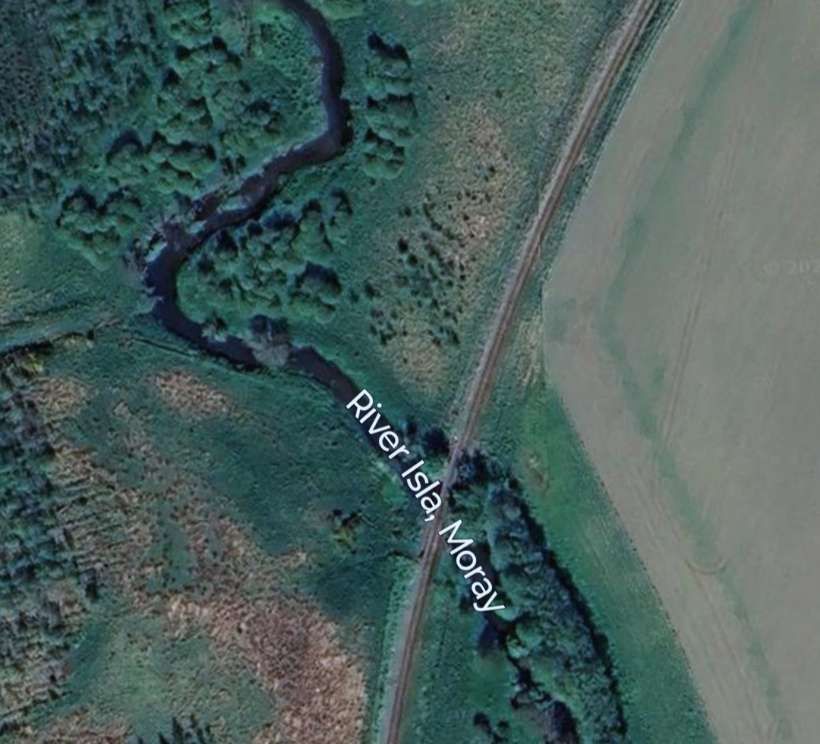
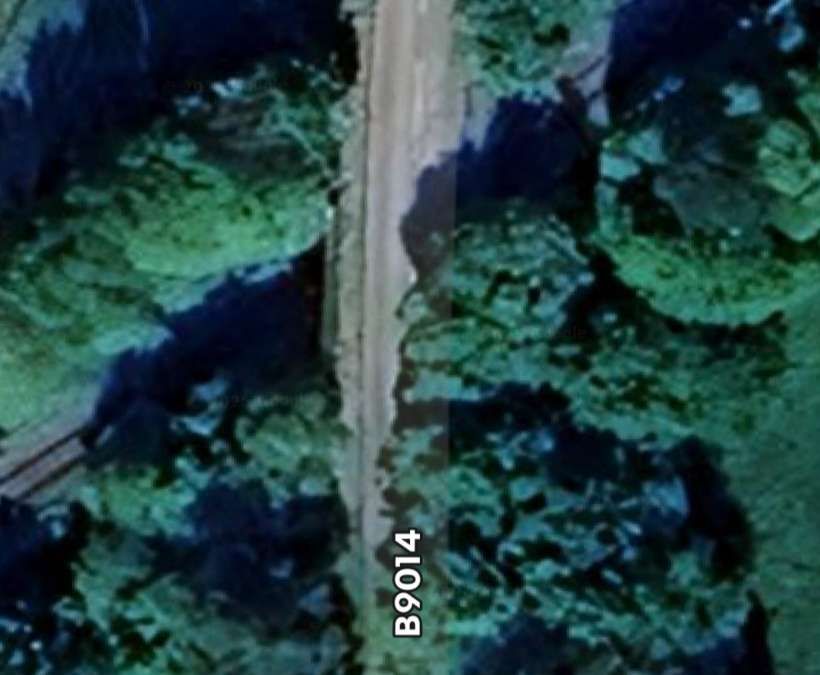
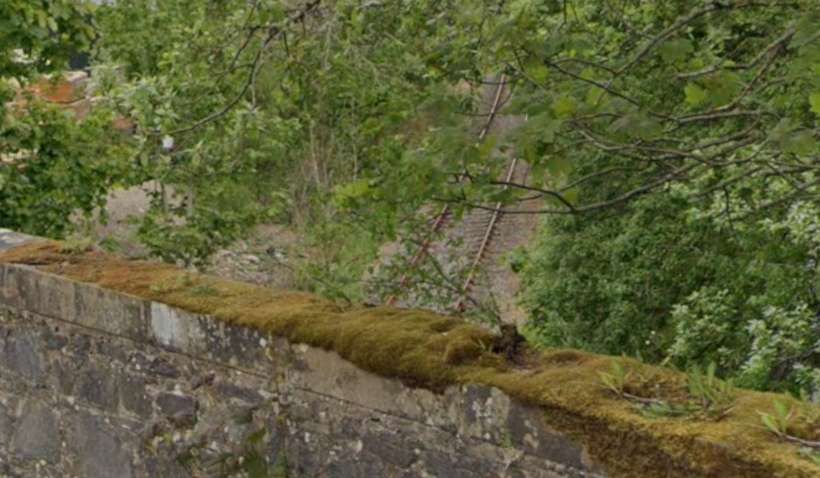
At Bridge of Maisley the line passed under what is now the B9104, close to a junction with a minor road which first served Maisley Lime Works, before running West on the North side of the River Isla. The railway then bridges the river, crossing from the North bank to the South bank. [13]The same location in the 21st century, the three bridges are still evident. [Google Maps, January, 2026.The bridge which carries the B9014 across the railway, seen from the road to the Northeast of the line. [Google Streetview, June 2023]The view back to the Northeast along the railway. [Google Streetview, June 2023]The view ahead to the Southwest along the line. [Google Streetview, June 2023]The railway bridge over the Isla is hidden by vegetation from the B9014. This is the view from the North on the minor road mentioned above. [Google Streetview, March 2022]The railway remains on the South side of the river for a very short distance before crossing back to the other bank, travelling in a southerly direction. [13]The same location in the 21st century. [Google Maps, January 2026]
A short distance to the South, the line approaches Auchindachy Station.
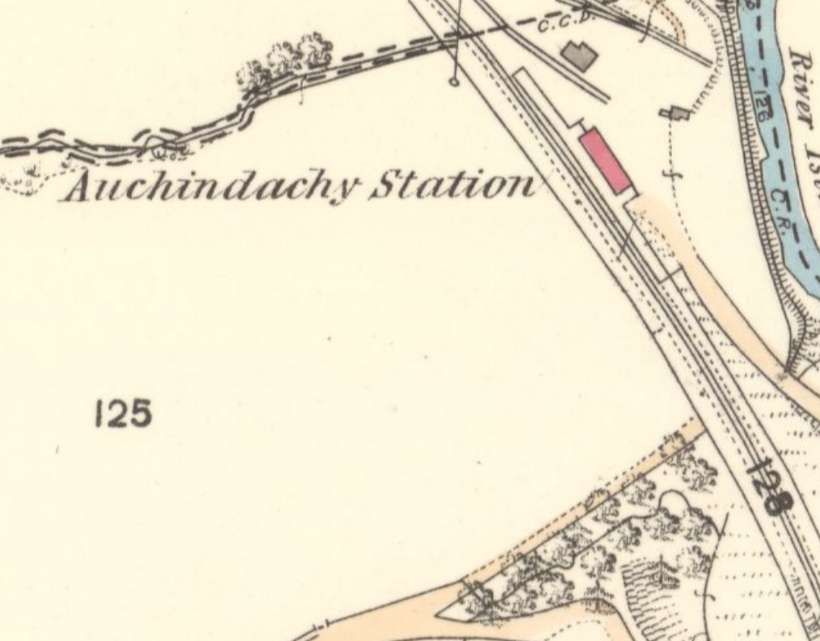
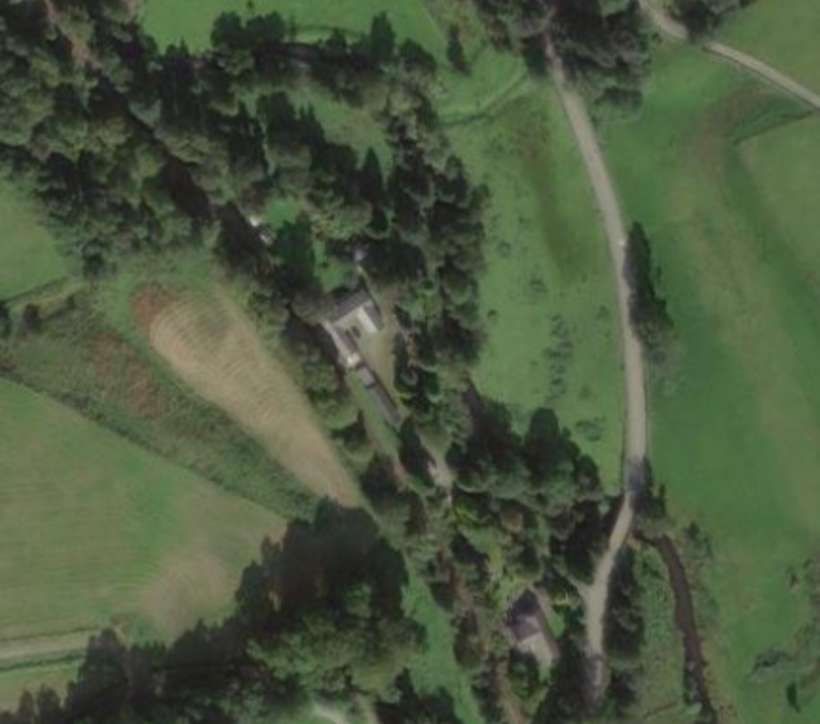
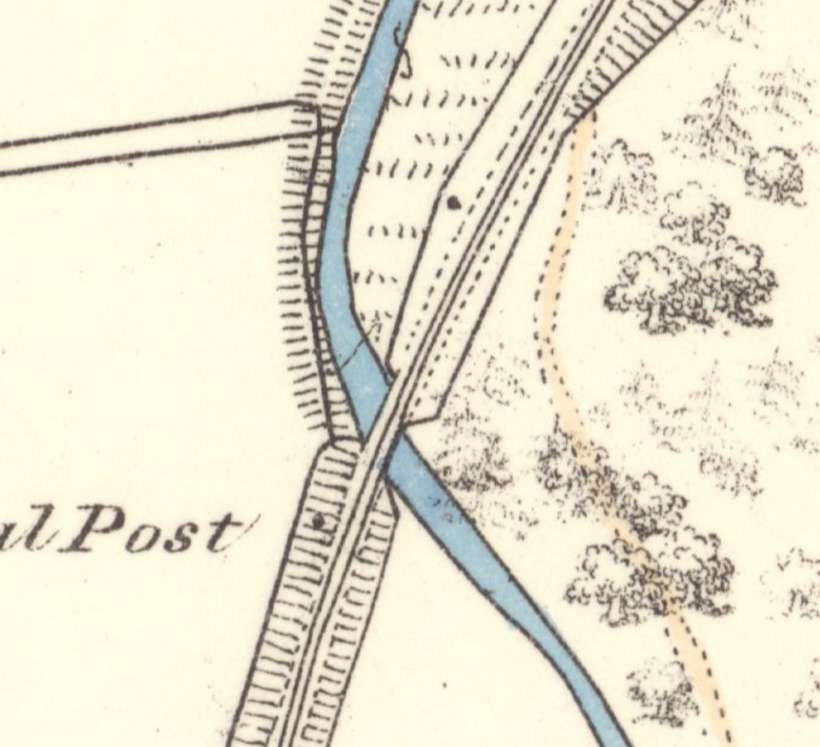
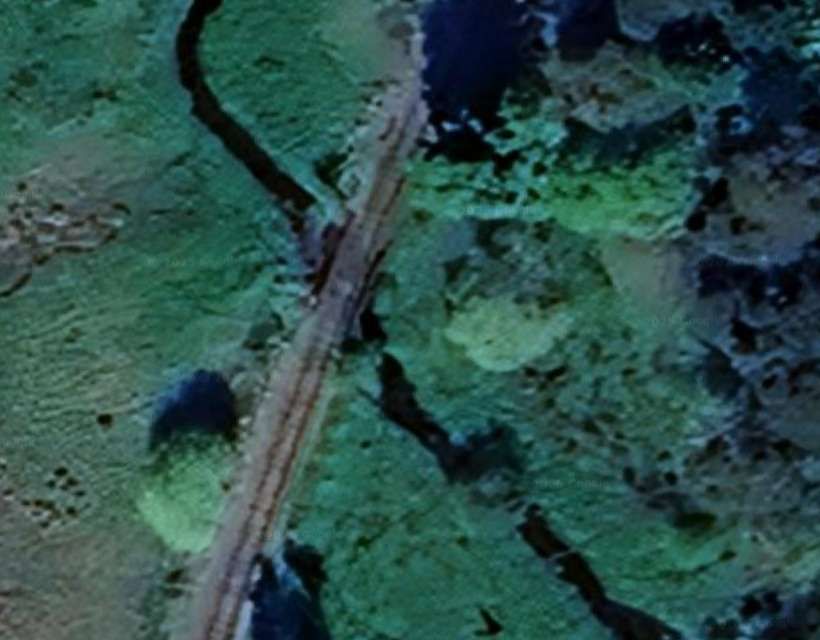
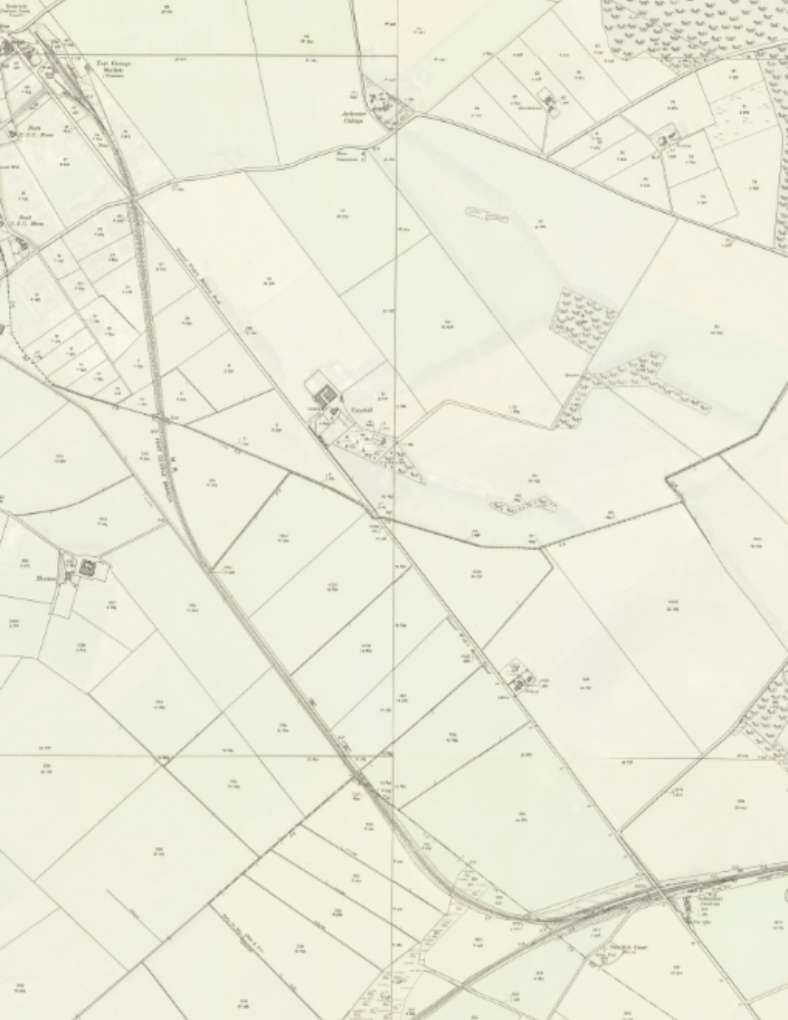
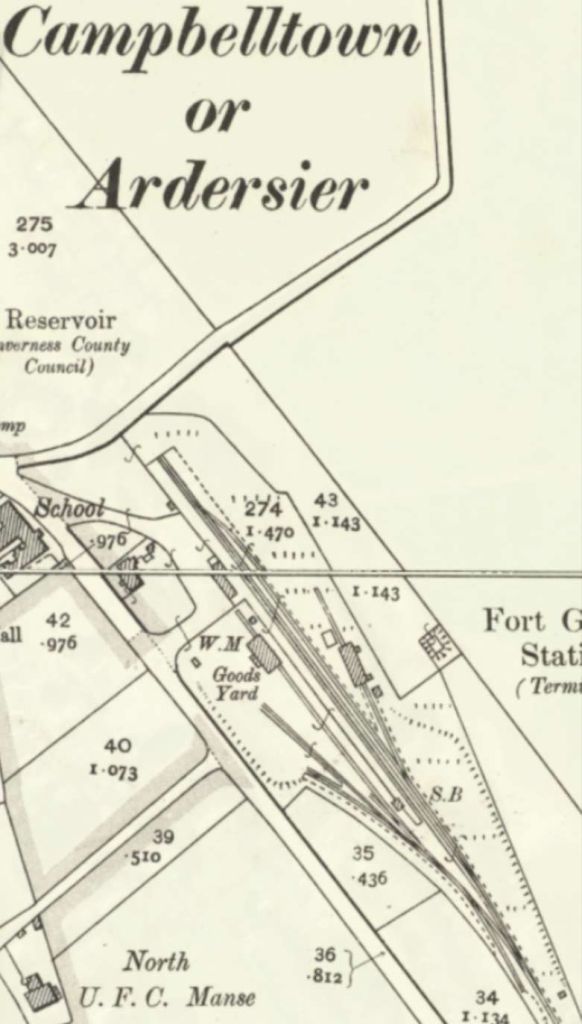
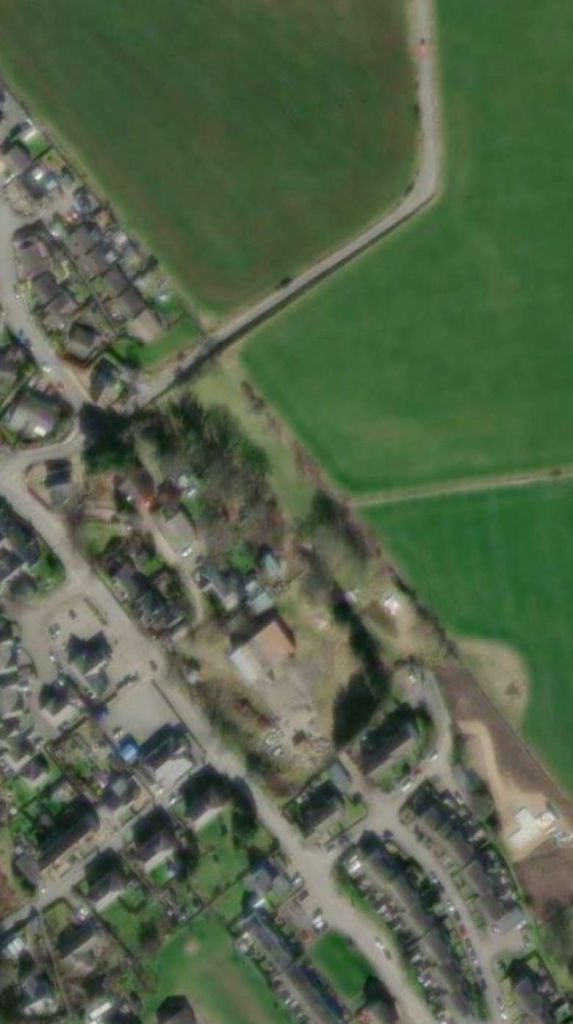
Auchindachy Station as shown on the 1868 25″ Ordnance Survey, published in 1869. [15]The location of Auchindachy Station as shown on the ESRI satellite imagery provided by the National Library of Scotland (NLS). [16]
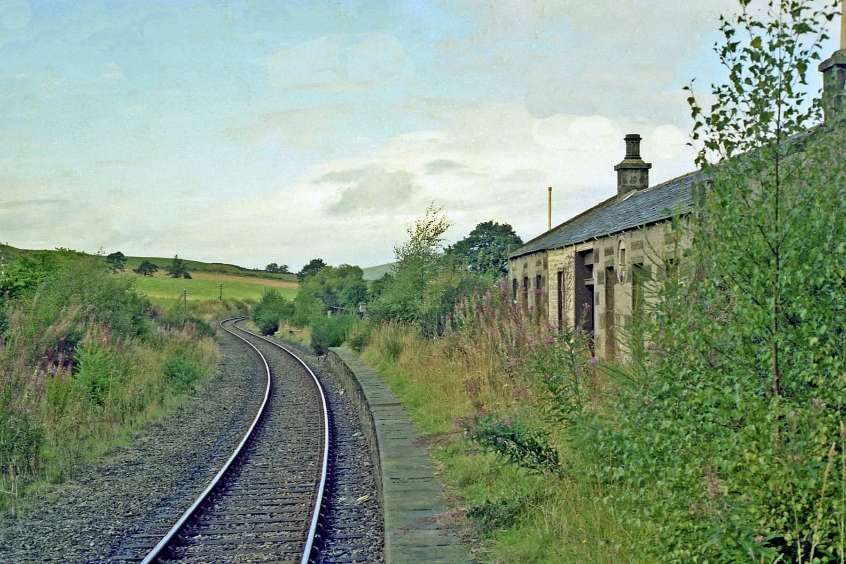
Auchindachy Railway Station had two platforms set on a gentle curve. Photographs of the station can be found here. [17]
Turning to look to the Southwest. In 2022, the view along the line was completely obscure by tree growth. The photograph below was taken earlier in the 21st century.
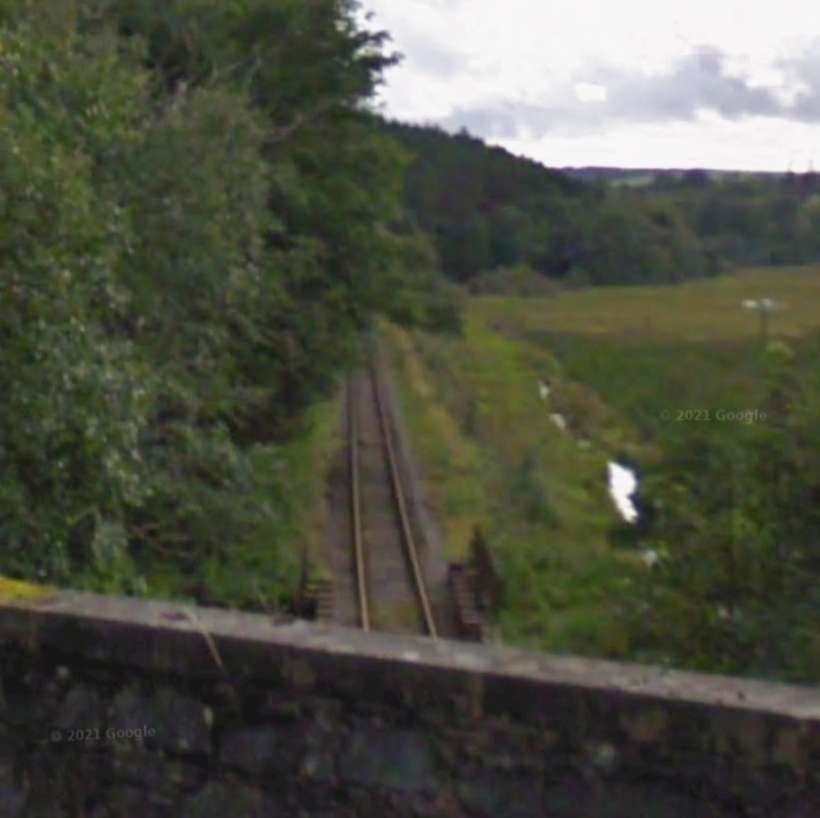
Looking Southwest along the line from the bridge carrying the B9014 over the line. [Google Streetview, August 2011]A short distance further Southwest the railway bridges the River Isla again. [20]The same location in the 21st century. [Google Streetview, January 2026]
In short shift trains heading South entered Drummuir Railway Station. …
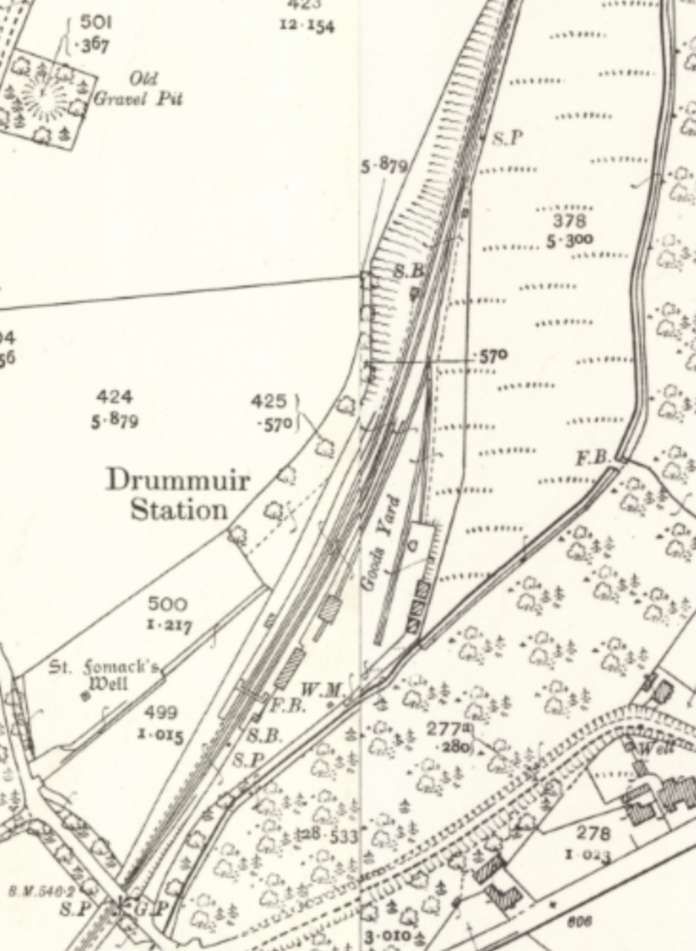
Drummuir Railway Station at around the turn of the 20th century. [23]The same location in the 21st century. [Google Streetview, January 2026]
Drummuir station was first opened in 1862 by the Keith and Dufftown Railway. The station was closed to passengers by British Railways in May 1968, but the line remained open for freight and special excursions for some time. It was reopened as a preserved station in 2003 by the Keith and Dufftown Railway Association.
Further pictures of Drummuir Railway Station can be found here. [26]
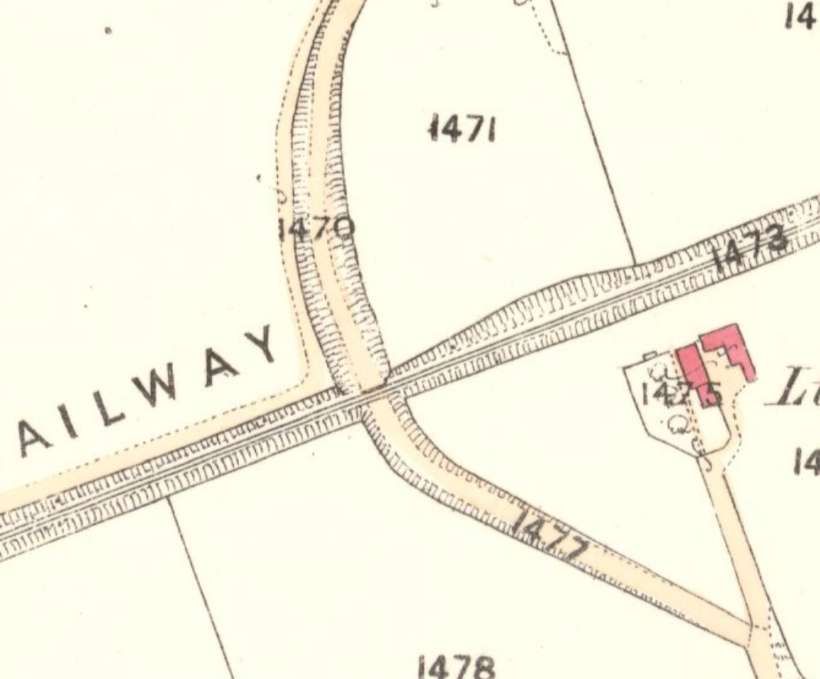
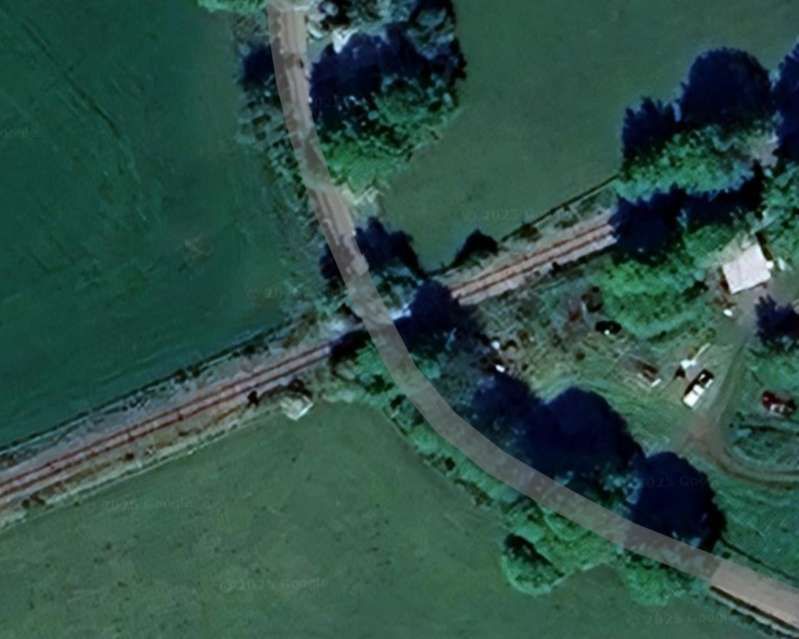
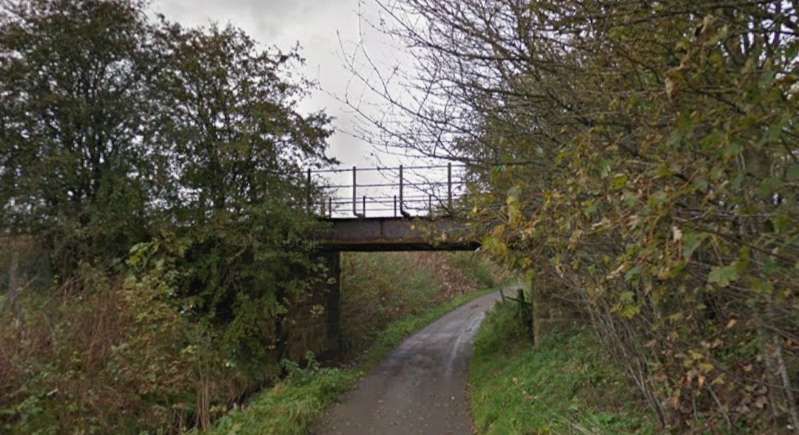
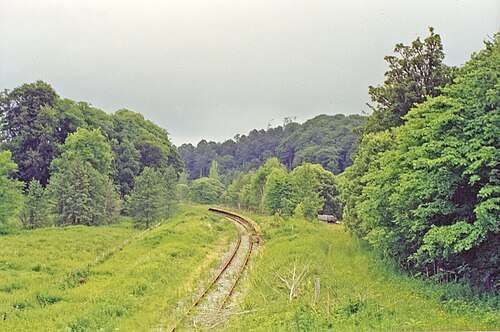
Immediately Southwest of the site of Drummuir Station the line passes under a road bridge and crosses the Burn of Drumhendry. This is the location at the turn of the 20th century. [27]The same location in the 21st century. [Google Maps, January 2026]Looking back to the Northeast through Drummuir Railway Station. [Google Streetview, September 2011]Looking Southwest from the road bridge, the view ahead is obstructed by foliage but it is possible to seethe Burn of Drumhendry after it has passed under the railway. [Google Streetview, September 2011]The bridge over the Burn of Drumhendry seen from a point to the Northwest of the bridge over the railway. [Google Streetview, September 2011]The next structure along the line, again at the turn of the 20th century. [27]The same location in the 21st century. The railway can just be made out but the route of the road is less easy to pick out so its centre-line is highlighted by the blue line. [Google Maps, January 2026]At the same location, the bridge parapet and the view back along the line towards Drummuir. [Google Streetview, May 2022]At the same location, the other bridge parapet and the view ahead along the line. [Google Streetview, May 2022]
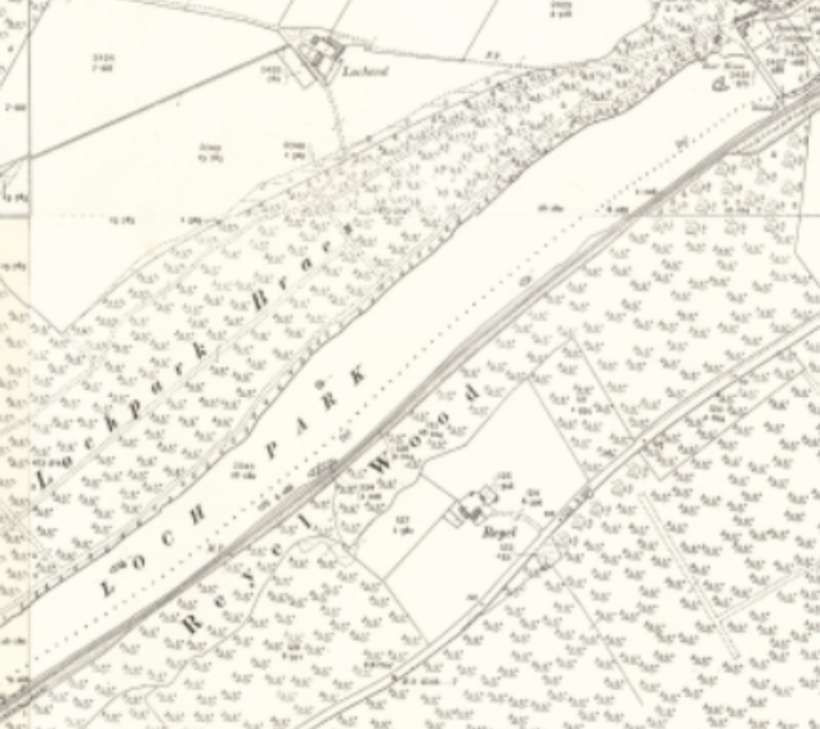
“About a mile beyond Drummuir is Loch Park, a narrow sheet of water lying in a wooded gorge. The railway skirts its southern shore on a narrow ledge at the foot of the precipitous hillside.” [1: p5]
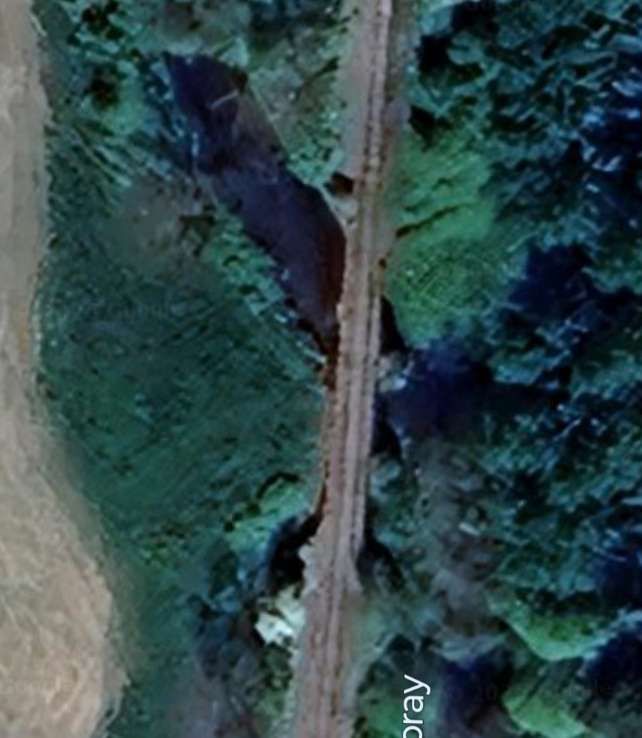
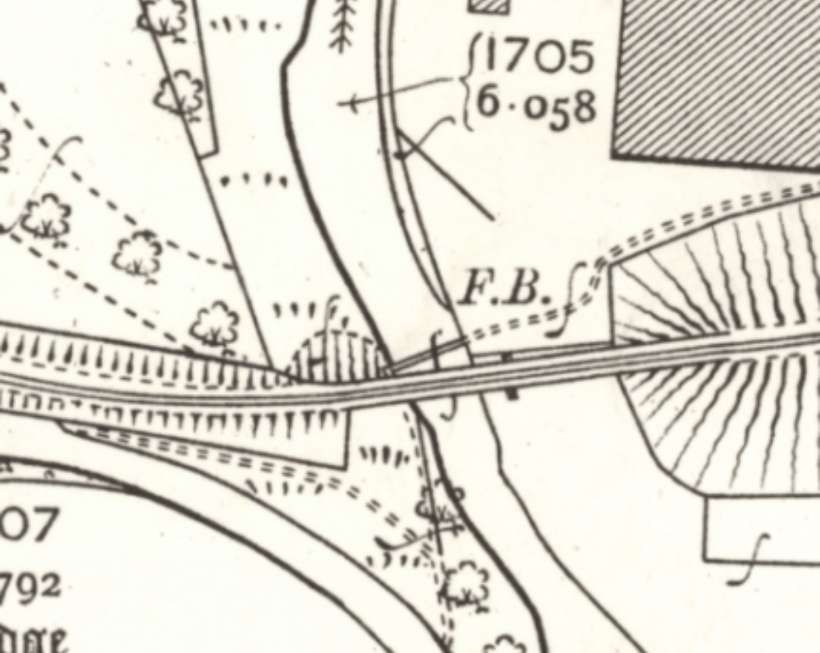
Just before passing the dam at the East end of the Loch the line passes under the road which runs across the West end of Loch Park.
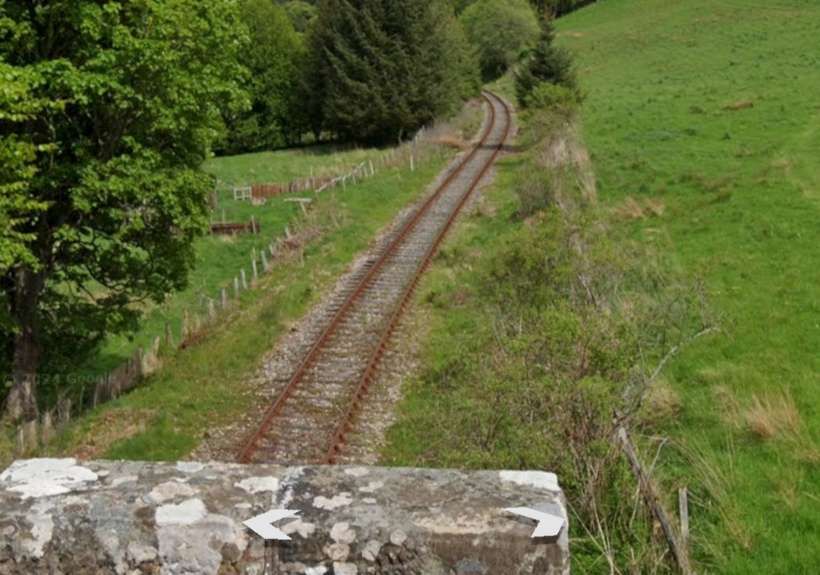
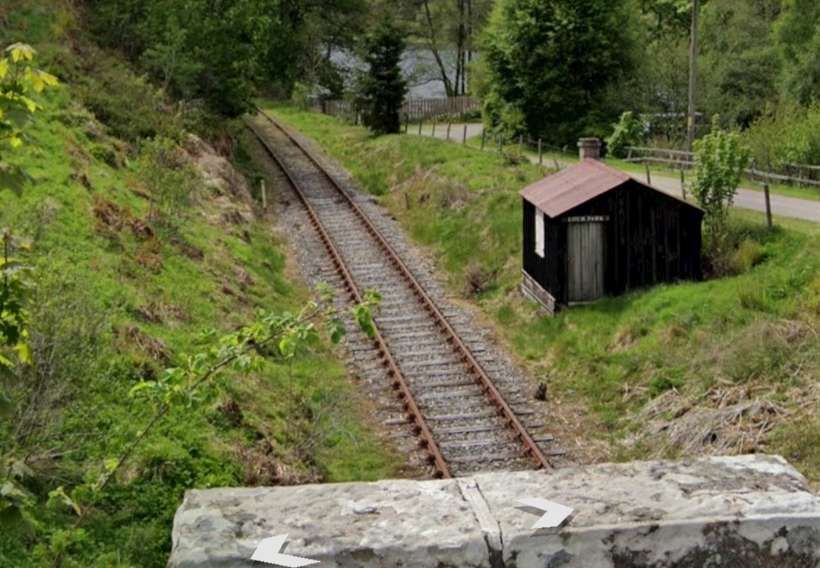
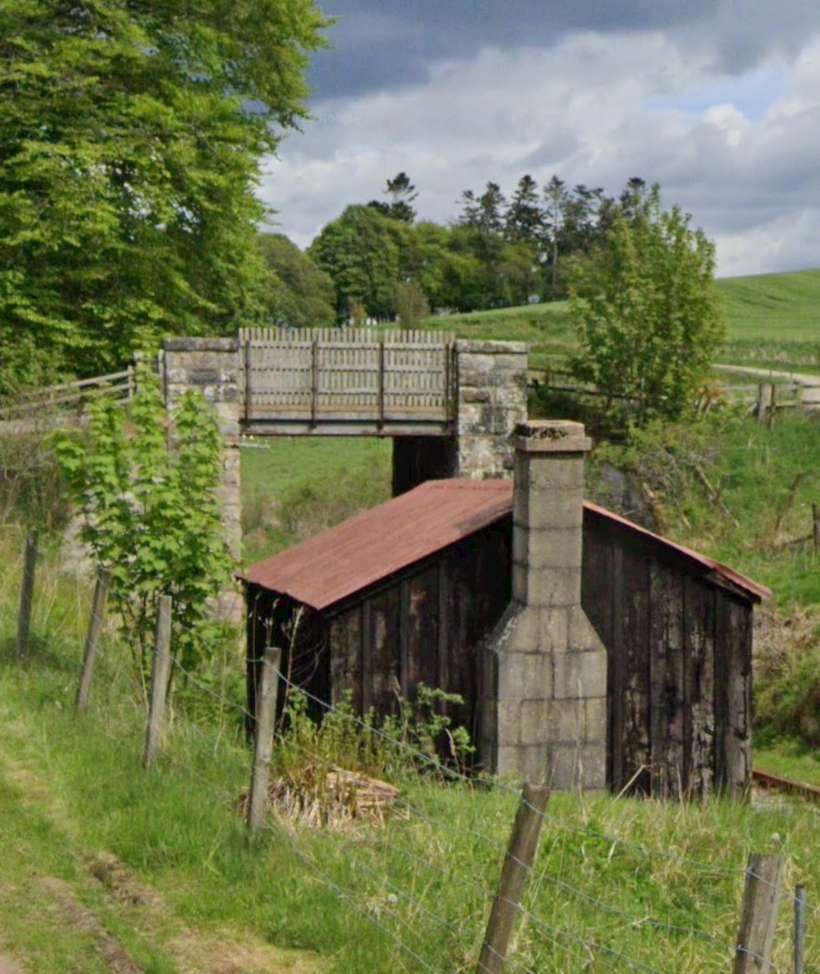
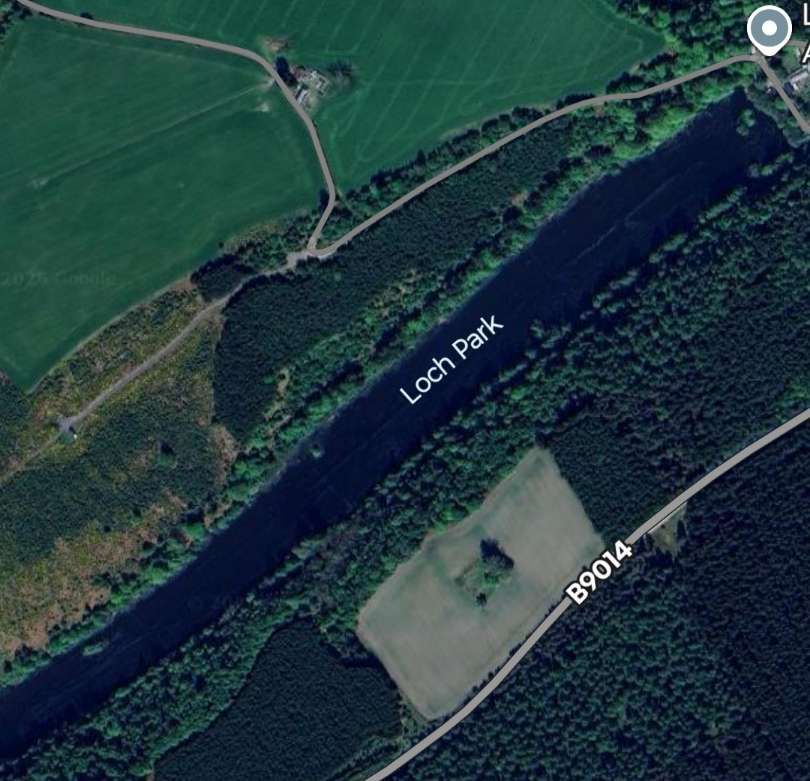
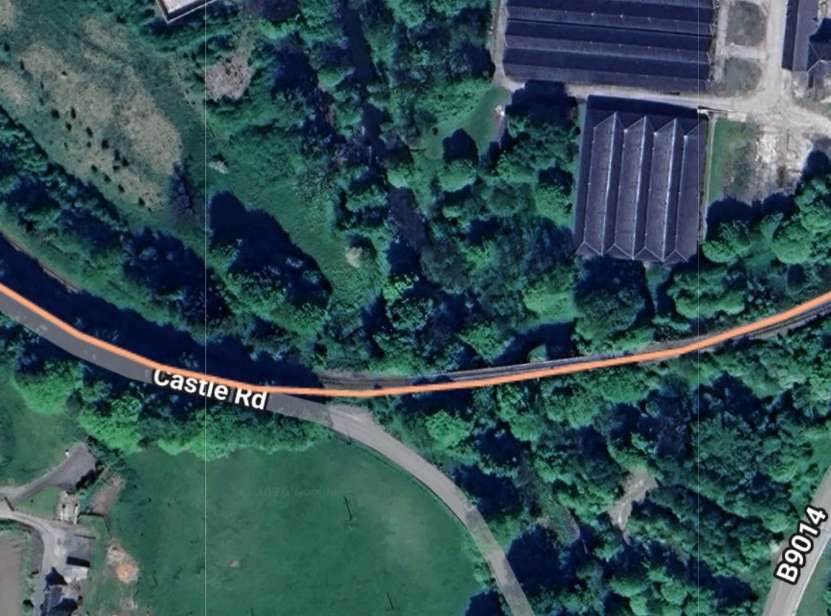
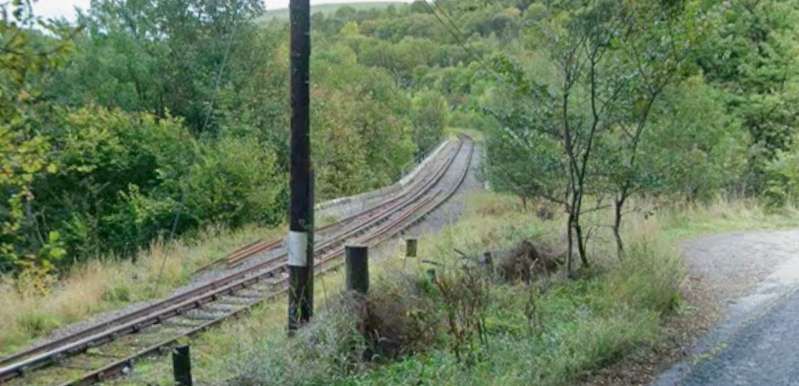
Just before the line passes Loch Park it is bridged once again. [27]The same structure in the 21st century. [Google Maps, January 2026]The tidy looking structure seen from the road to the East. [Google Streetview, May 2022]Looking East back along the line from the bridge. [Google Streetview, May 2022]Looking West along the line from the bridge towards Loch Park. Note the well-kept permanent way but between the railway and the road. [Google Streetview, May 2022]A view from the West looking past the platelayer’s hut towards the road bridge. [Google Streetview, May 2022]This modern satellite image shows the railway running alongside Loch Park. Its route appears as a dark line in the trees immediately adjacent to the Southeast shore of the Loch. [Google Maps, January 2026]A very similar area as it appears on the 25″ 2nd Edition OS Map from the turn of the 20th century. [28]
“From the summit at the western end of Loch Park, the line descends at 1 in 60 into the valley of the River Fiddich, which is crossed on a masonry bridge shortly before Dufftown is reached. ” [1: p5]
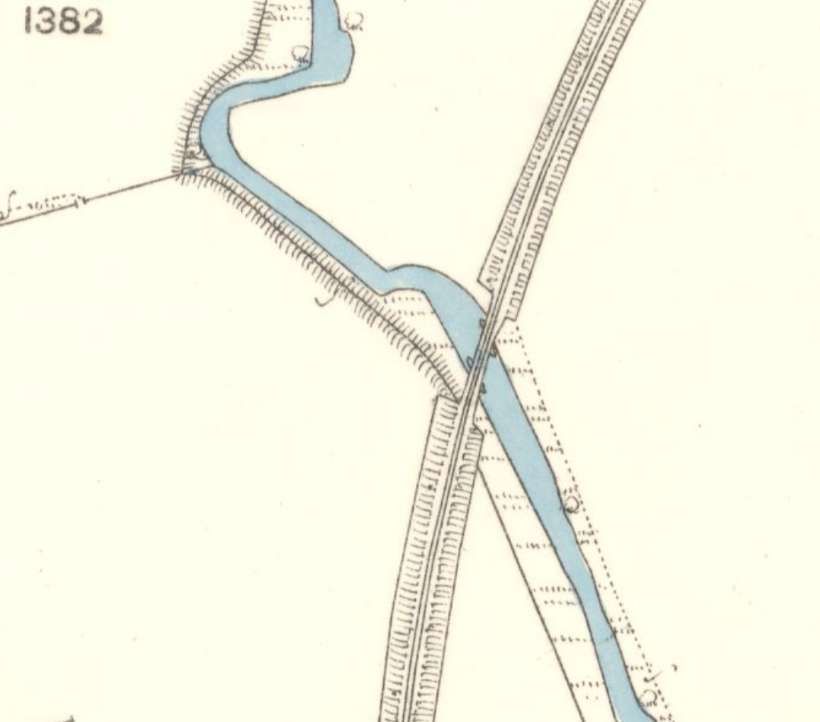
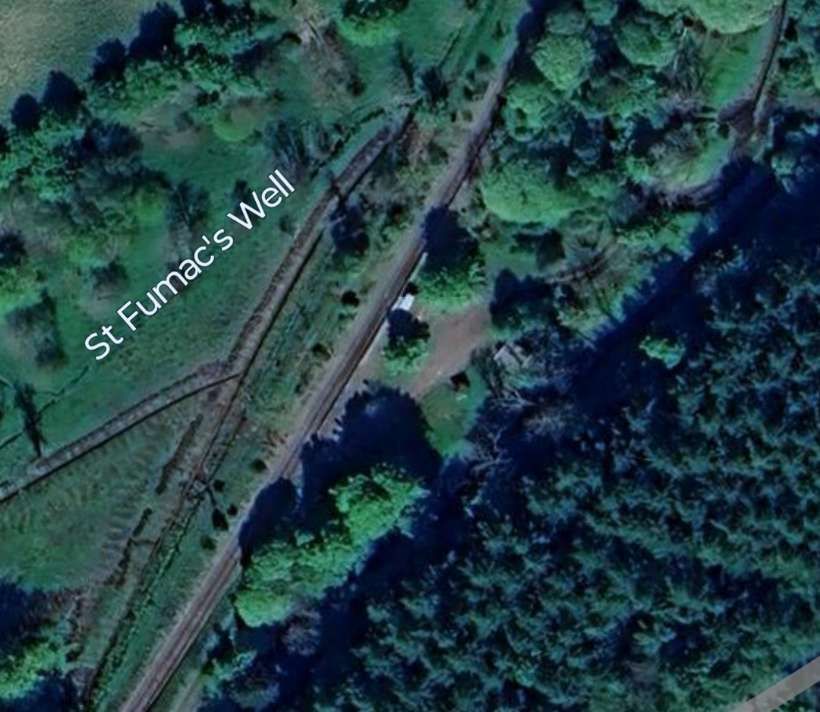
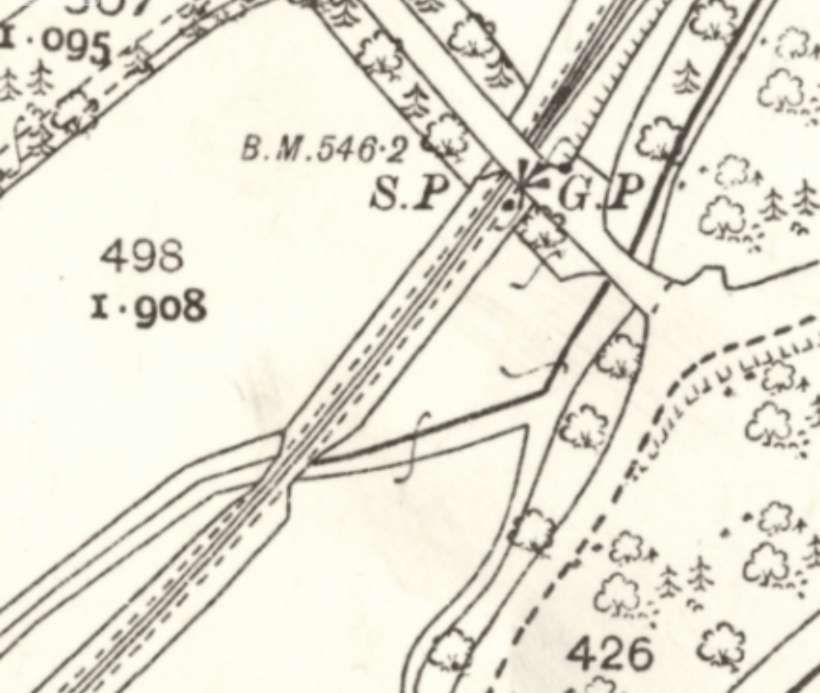
The next structure to the Southwest appears on the map extract below. …..
The line passes under what will be the B9014. [29]The same location with the B9104 crossing the line in the 21st century. [Google Maps, January 2026]The bridge seen from the Northeast. [Google Streetview, May 2022]Looking Northeast along the line from the B9014 bridge. [Google Streetview, May 2022]Looking Southwest from the same bridge. [Google Streetview, May 2022]
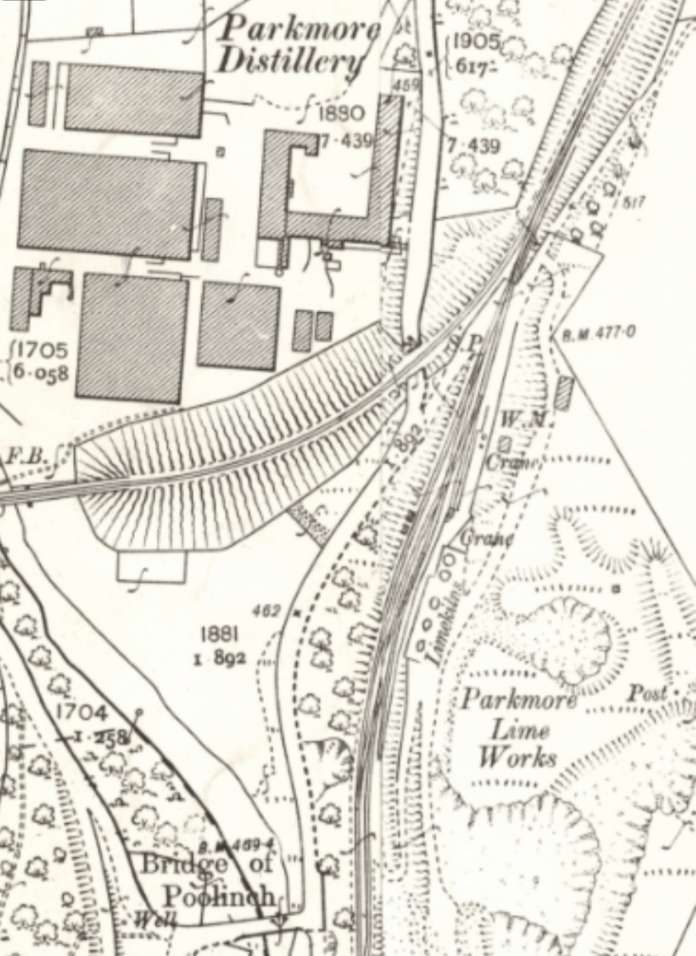
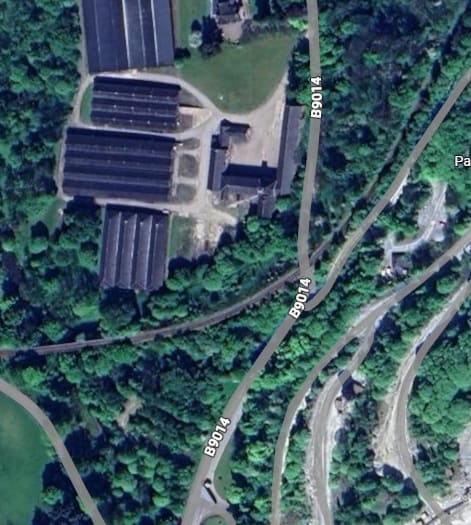
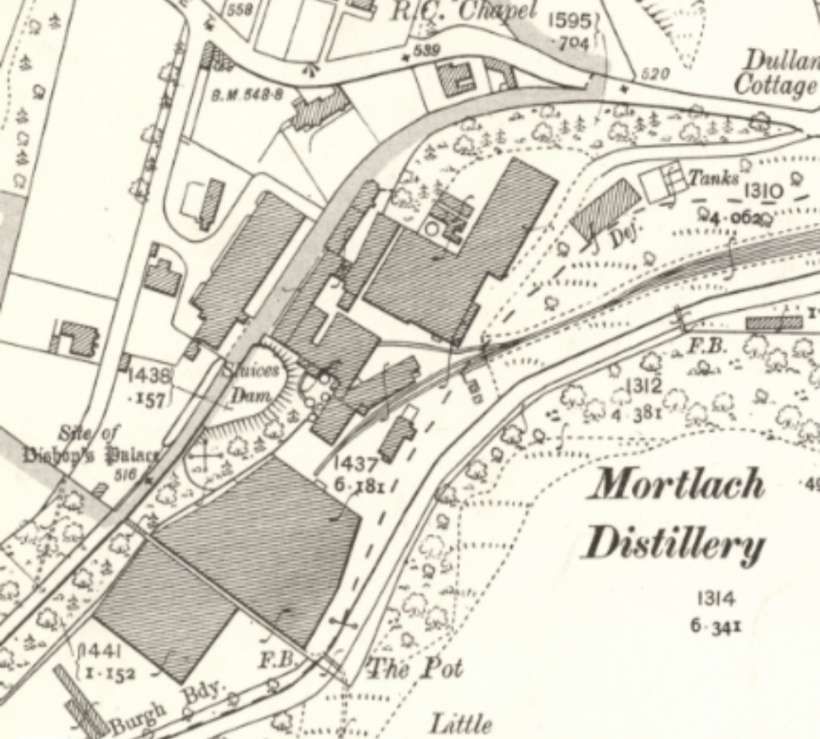
The next map extract shows the junction close to the Parkmore Distillery, where a branch serving Parkmore Lime Works and Glendullan and Mortlach distilleries left the main line. …
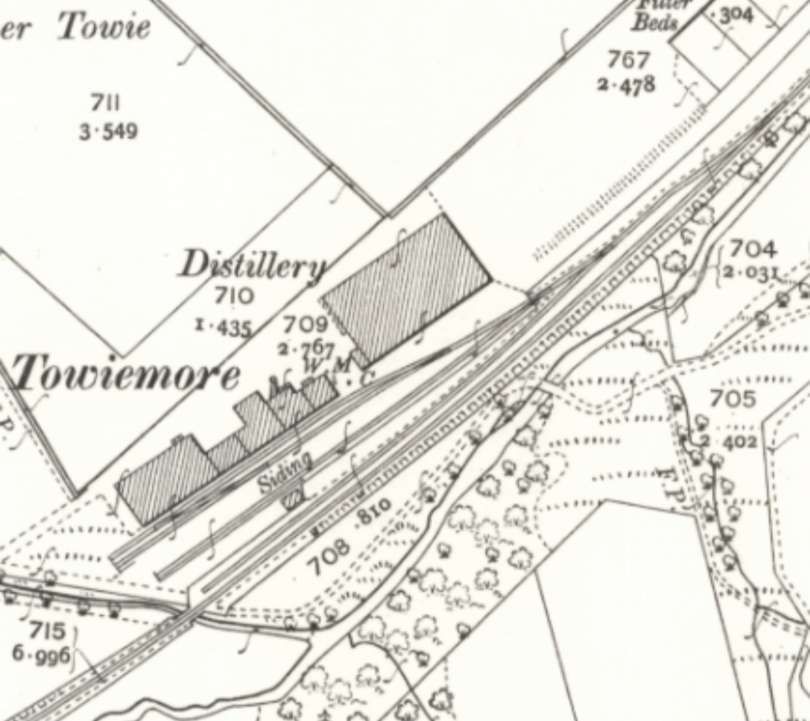
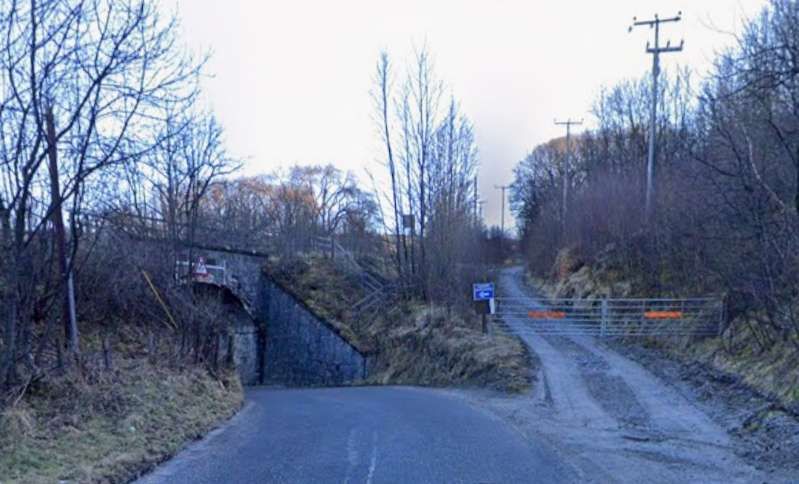
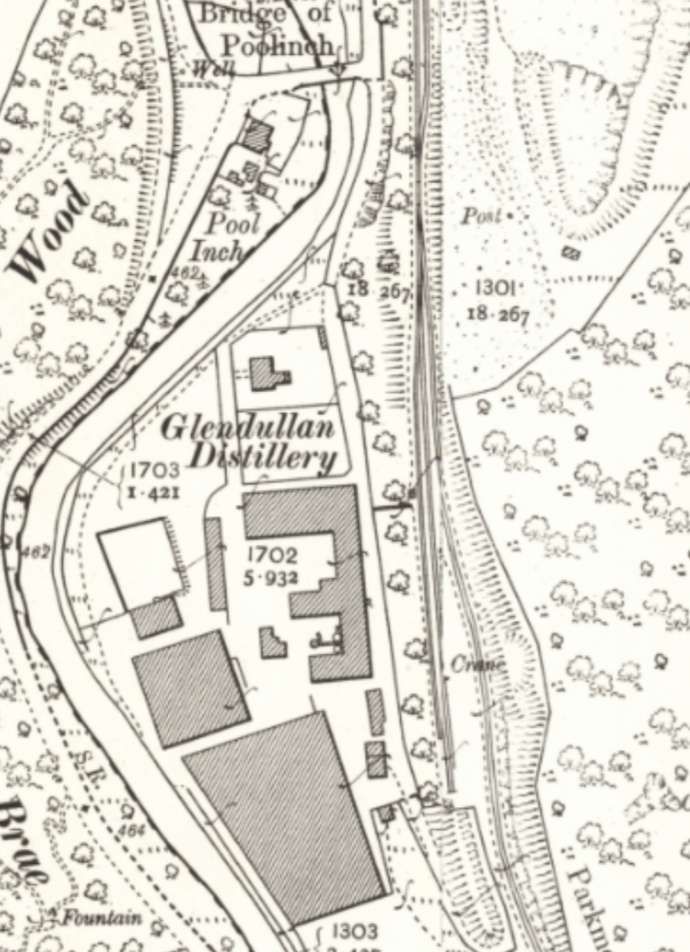
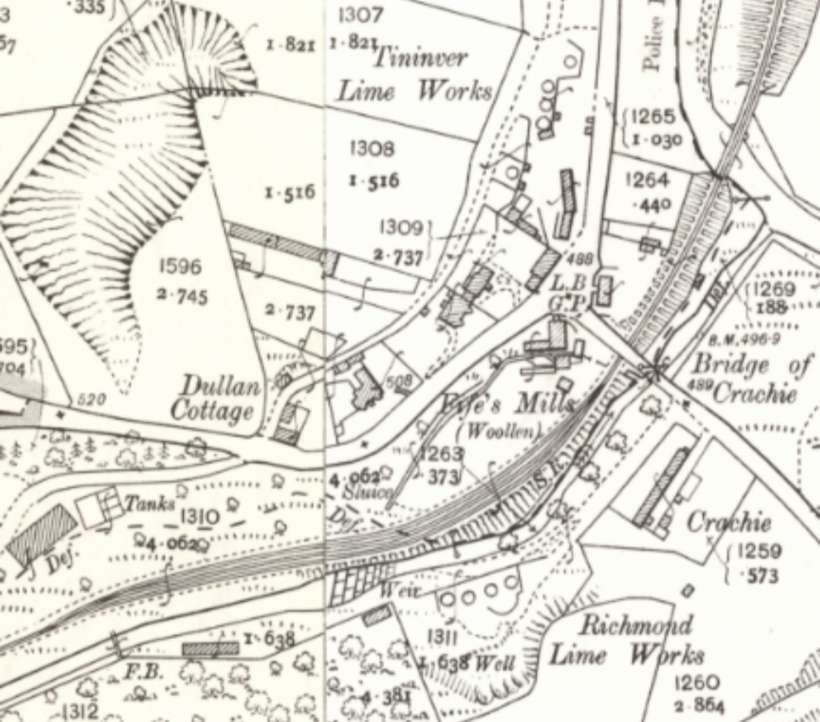
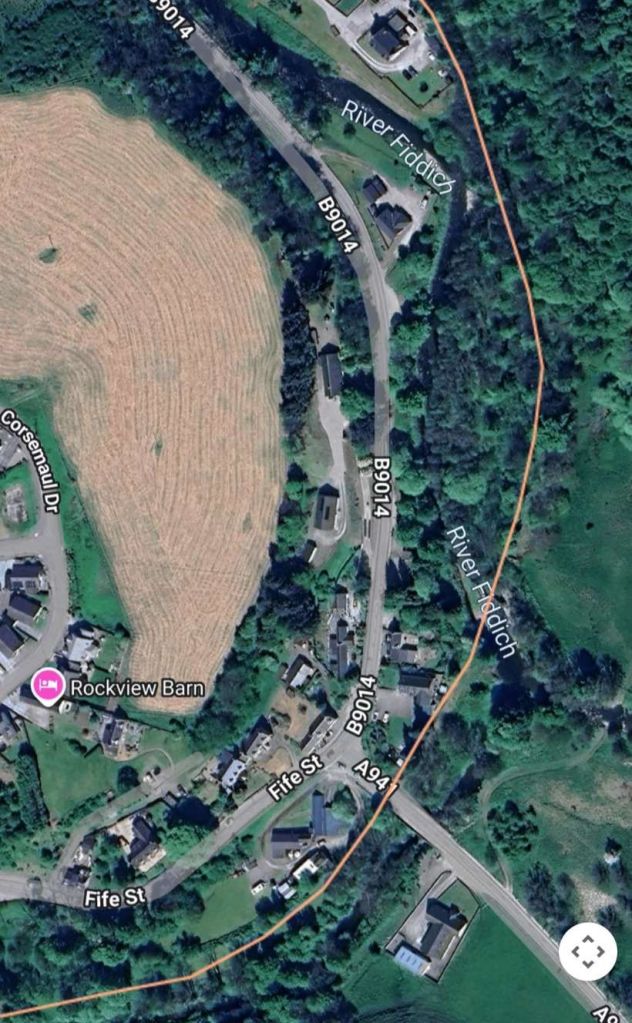
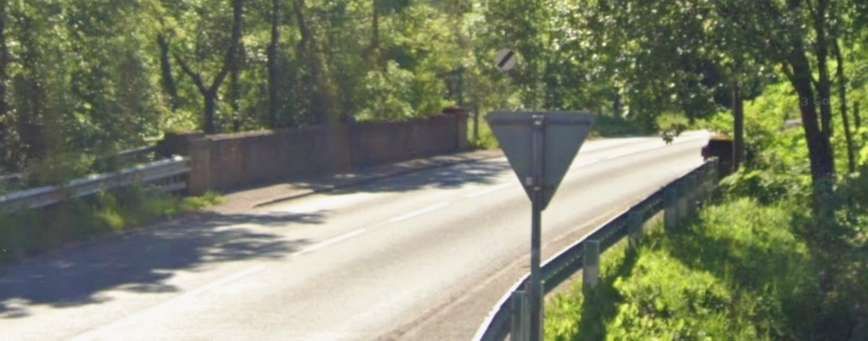
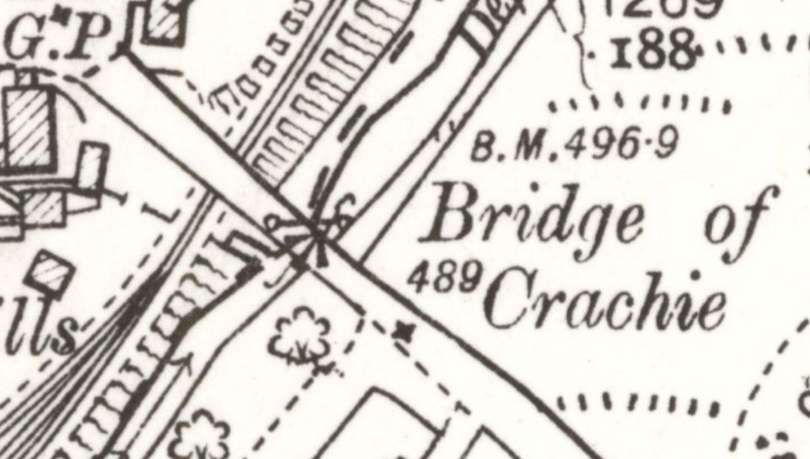
The line to Dufftown continued to the West on the South side of the Parkmore Distillery, while the short branch ran south to serve local industry. At the turn of the 20th century, the Parkmore Limekilns had their own short siding. [30]Approximately the same area in the 21st century. [Google Maps, January 2026]The railway bridge over the B9104, seen from the North. [Google Streetview, May 2022]A view from the South on the B9104. The railway bridge carrying the line over the B9104 is on the left. The access road from rail level down to the road network is on the right. The branch line ran through the area which, in the 21st century, is wooded at the right side of the image. [Google Streetview, March 2022]Glendullan Distillery had its own short siding with the line running towards Mortlach Distillery. [31]Glendullan Distillery is owned by Diageo in the 21st century. The alignment of the old railway siding and branch are shown by the orange lines superimposed on the Google Maps satellite imagery. [9]The line curves round the East side of Dufftown. [32]The route of the line as it appears on the railmaponline.com satellite imagery. [9]The bridge carrying the A941 over the route of the old branch to Mortlach Distillery and over Dullan Water – the Bridge of Crachie. [Google Streetview, June 2023]A closer view of the bridge over rail and river. [32]
The branch only ran a short distance beyond the Bridge of Crachie to serve Mortlach Distillery
The short branch terminated at Mortlach Distillery. [33]A similar area in the 21st century with the railway route superimposed again. [9]
Returning to the main line we see it bridging the River Fiddich. …
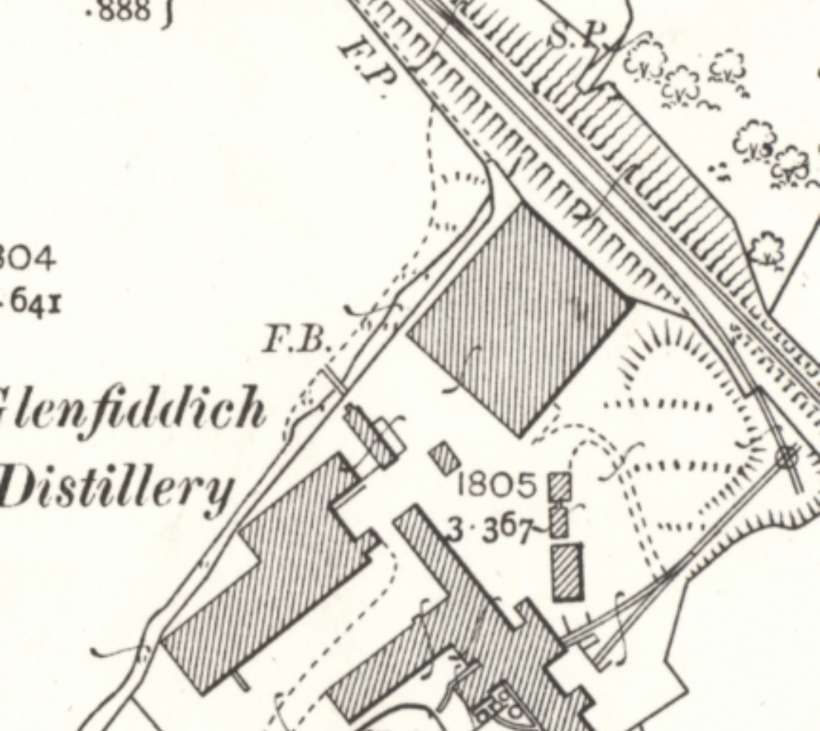
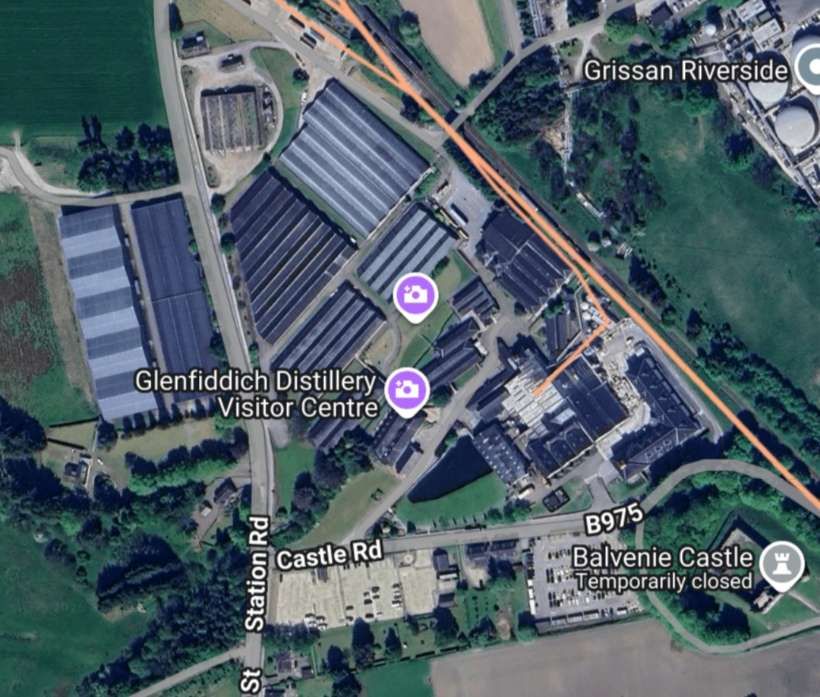
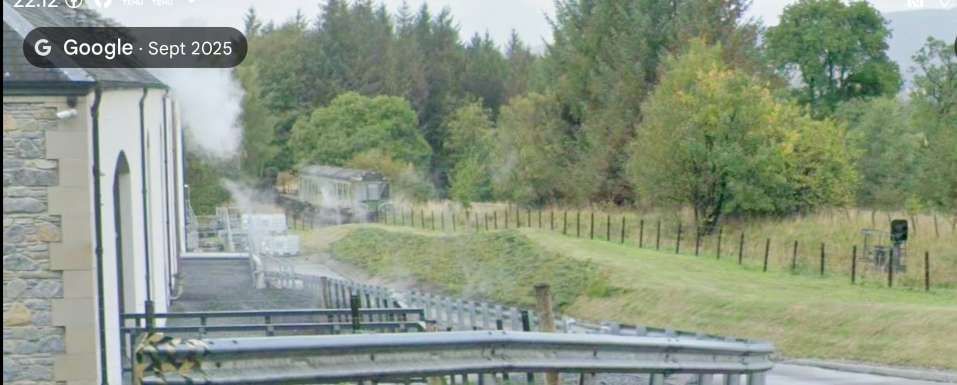
The main line bridges the River Fiddich and begins to curve round to the Northwest. [34]The route of the line is again superimposed on the modern satellite imagery. [9]The view looking East from Castle Road (B975) towards the bridge over the River Fiddich. [Google Streetview, September 2025]As the line approached Dufftown Station it passed Glenfiddich Distillery. [35]The Glenfiddich Distillery in the 21st century with the original railways shown as orange lines superimposed on the satellite imagery from railmaponline.com. [9]Looking North alongside Glenfiddich Distillery from Castle Road (B975), the line can be seen in a shallow cutting on its approach to Dufftown Railway Station. A DMU can be made out in the middle left of the photograph. [Google Streetview, September 2025]
A remarkable number of distillery buildings survive in the 21st century in the immediate vicinity of Dufftown. The most famous of these is the Glenfiddich Distillery which continues to produce a significant volume of Whisky. [37]
Parkmore Distillery buildings are no longer used for producing Whisky. They were operational from 1894 but mostly silent from 1931, closing officially in 1988; its well-preserved buildings are now used by Edrington Group for whisky warehousing, with its rare existing whisky valued by collectors and its grounds sometimes hosting whisky experiences. [38]
Glendullan Distillery is a significant but often behind-the-scenes producer of single malt Scotch whisky, primarily for Diageo’s blends like Johnnie Walker, though it also contributes to The Singleton range. Founded in 1897, it operates a larger, modern facility built next to the original, which now serves as storage and workshops after its closure in 1985. [39]
And Mortlach also remains active. It was founded in 1823 and is now owned by Diageo. Its Whisky is a key component in several Johnnie Walker bottlings,and Diageo also markets four Mortlach single malts. [40]
Balvenie Distillery, owned by William Grant & Sons Ltd., sits to the Northeast of the Glenfiddich Distillery on the East side of Dufftown Station. Grant left his employment at Mortlach Distillery to set up his own company in 1886 when the foundations of the new distillery were laid. The distillery remains active. “David Stewart MBE, Balvenie’s Malt Master, is one of the industry’s most experienced experts and began working with William Grant & Sons in 1962. He was the first to create the process that would later be known as wood finishing, whereby whiskies are matured in one type of cask, such as ex-Bourbon barrels, then transferred into a second cask type (such as ex Sherry, Port or Rum), resulting in a greater depth and complexity of the final flavour of the whisky. He received his MBE from Queen Elizabeth II on the 5th of July, 2016, for his services to the Scotch Whisky Industry.” [42]
Kininvie Distillery is a Speyside single malt Scotch whisky distillery in Dufftown, owned by William Grant & Sons, built in 1990 primarily to supply their popular blends like Grant’s and Monkey Shoulder, though it now releases its own single malts, often using shared facilities (mash/fermentation) with its sister distillery, The Balvenie. [43]
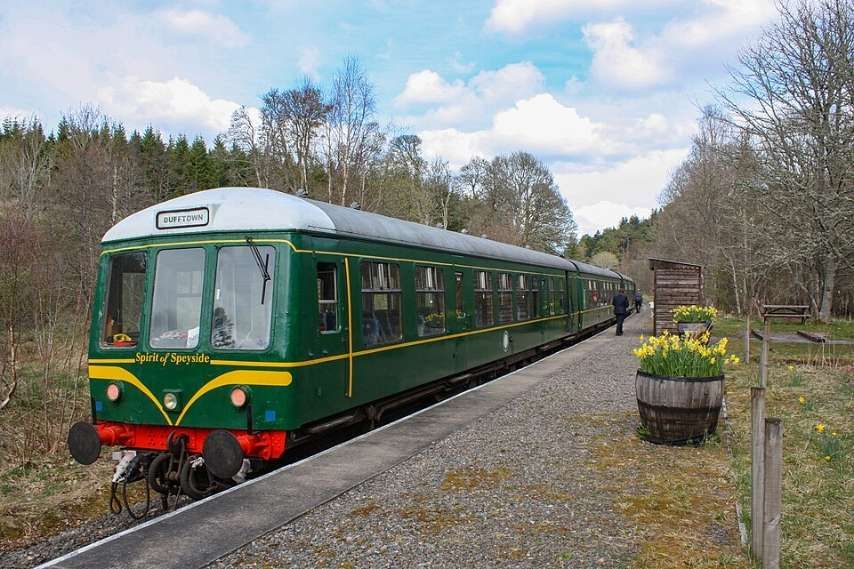
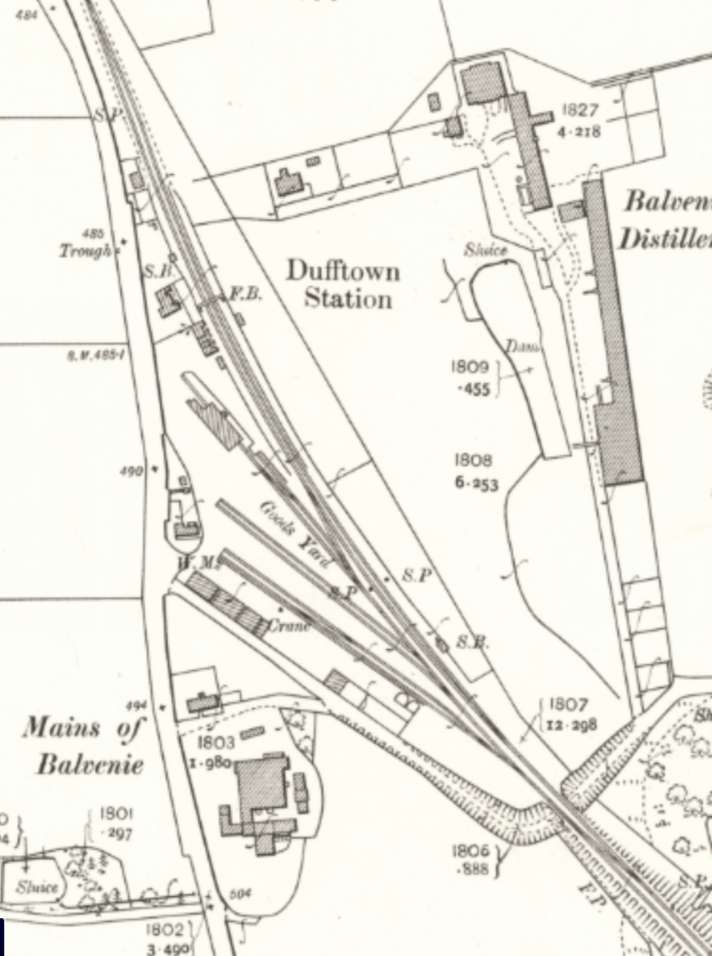
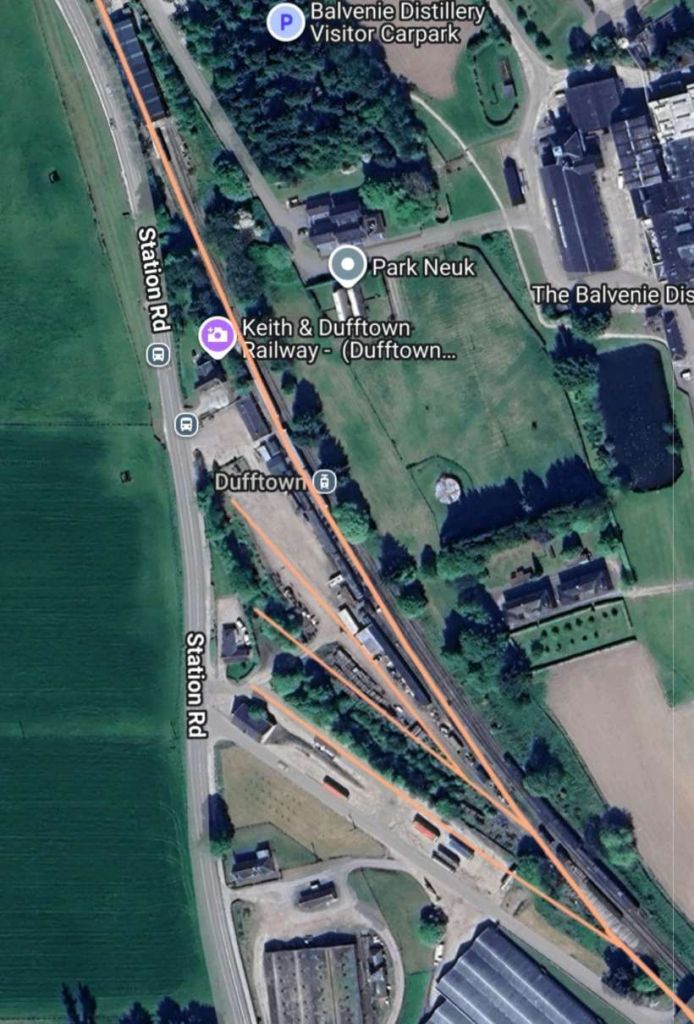
Dufftoen Railway Station at the turn of the 20th century. [36]Dufftown Railway Station in the 21st century. It is now the terminus of the preservation line. [9]
Dufftown Railway Station “first opened on 21st February 1862 by the Keith and Dufftown Railway. There was a goods yard to the southwest, which is used for stock storage nowadays. The station closed on 6th May 1968 to passengers. The line for westbound trains was lifted shortly after. Goods traffic ceased around 1991. In 2003, the Keith and Dufftown Association reopened the station and the line as a preserved railway and set up their headquarters at the station.” [44]
Some images of Dufftown Station can be found here [45] and here. [47]
We complete this leg of the journey standing on the platform of the preservation railway at Dufftown Railway Station. The next leg of the journey will take us over the watershed into Strathspey.
References
The Railway Magazine Volume 105 No. 693, Tothill Press, London, January 1959.
H.A. Vallance; The Strathspey Line; in The Railway Magazine Volume 105 No. 693, Tothill Press, London, January 1959, p3-9.
Roger Hutchinson tells the story of Lord Leverhulme’s interest in Lewis, Harris and (to a much lesser extent) Skye, in the years following the First World War. Lord Leverhulme purchased Lewis and later Harris with a view to developing the islands.
Mingled in with the story are Lord Leverhulme’s plans for transport infrastructure and particularly railways. Hutchinson first introduces railway plans in comments attributed to Thomas Mawson who wrote about Lord Leverhulme’s plans in the Manchester Guardian. Late in 1918, Mawson wrote: “before any … industry can be a success [on Lewis] it will be necessary to provide better transit facilities by sea and land. Safe harbours are the first essential of all economic developments. Engineers are accordingly at work making preliminary surveys for railways which will connect the principle harbours of the island with Stornoway, their natural base. We may soon have a railway on the east coast, connecting Port of Ness, another railway connecting with Callernish on the west, and possibly a third to Loch Seaforth, connecting the Isle of Harris directly with Stornoway. As supplementary to these the main roads are likely to be further improved and motor routes created as feeders to the railways. … A natural corollary to the introduction of railways and harbour facilities will be an increase in the number and size of the steamers trading with the mainland. A trawling fleet, too, is bound to appear as an arm to the fishing industry. Ice factories, cold storage, and canneries for the curing and treatment of fish for export are already planned, and the work of construction will soon begin.” [1: p91]
Hutchinson goes on to comment: “The idea of giving Lewis a couple of branch railway lines was neither original nor utterly ridiculous. Just twenty years previously, in 1897 and 1898, two separate private enterprises, the Highland Railway Company and the Highland Light Railway Company, had surveyed and proposed small-gauge lines between Stornoway and Tarbert in Harris and between Stornoway and Breasclete and Carloway on the west coast. The £500,000 schemes had collapsed when the amount of capital required to be raised by private subscription – £290,000 – was not forthcoming.” [1: p93-94]
Also, “Lewis did have railways, around the turn of the 19th/20th century. There was a railway from the quarry at Bennadrove to Stornoway. Posts related to this track can still be found in the Castle Grounds, opposite the Caberfeidh Hotel.” [5] …
It seems that under Lord Leverhulme’s tenure, “a trackbed was laid near Garrabost in Point, but a railway was never built. The same fate befell the track, linking Carloway to Stornoway along what is now the Pentland Road.” [5]
Very little other evidence exists of his proposed railways, and it is entirely possible that the remains referred to in the last paragraph could relate to much earlier railway proposals. [8]
Lord Leverhulme “planned to develop several smaller fishing harbours around the island’s coast that would be linked by new [his proposed] railways and roads to Stornoway, which would be transformed into a huge fish-processing centre. There was also to be a cannery, an ice-making factory, and a plant to make glue, animal feed and fertiliser from the offal.” [2]
“A chemical industry would also be developed to process the plentiful seaweed around the island; peat would be used in large scale power stations; and unproductive land would be transformed into forests, or fruit or dairy farms. Lewis would grow to become an island of up to 200,000 people. … He had prominent architects and town planners produce a vision of a future Stornoway in 1920. There was to be a town hall and art gallery, a bridge to connect the town to the Castle grounds, long avenues and a railway station, with a war-memorial on South Beach. None of these were constructed although he did give the town a gas supply, and he also intended to use electricity to light the streets.” [2]
For all Lord Leverhulme’s grandiose plans, he was unable to stay the course. His plans “failed in Lewis partly from trying to force the people into too rapid and too fundamental change; he was used to a totally different lifestyle and he tried to define progress on his own terms.” [2]
He faced determined resistance from the local population whose overwhelming desire was for croft land and the freedom to choose what work to undertake. As a result, they did not take to the idea of industrial jobs centred in Stornoway and, in fact, regarded that kind of work, even though salaried, as effective slavery.
“Despite the growing tensions, Leverhulme spent over £1 million in Lewis. Two model housing schemes were built in Stornoway, one on Matheson Road and another on Anderson Road, to house Leverhulme’s managers and employees. New roads were built in Lewis: a concrete bridge, now known as the Bridge to Nowhere, was constructed in Tolsta as part of a scheme to create a coastal road linking Tolsta to Ness at the north tip of the island. The road was never completed.” [3]
Lord Leverhulme’s failure to understand the basic, even visceral, connection between the people and the land was significant.
His proposals centred on his perception of a significant fishery in the waters around Lewis which would sustain industrialised fishing and canning. In reality the stocks were not as great as he believed and the postwar demand for canned fish deteriorated (partly because of barriers to trade with Russia imposed by the UK after the Russian revolution) and as more and more fresh fish from other sources became available. He saw the sale value of fish reduced by 90%.
Lord Leverhulme believed that his offer of good housing and allotments close to Stornoway would ultimately be more attractive than a hand-to-mouth crofting lifestyle. He could not have been more wrong. “What the crofters most needed was casual work to supplement their subsistence farming; what was proposed was regular employment in an industrial process. They did not want to be dependent on any landlord, even a millionaire philanthropist, for their livelihood, and most preferred to take control of their own destiny.” [3]
He stubbornly refused crofters access to good farmland in favour of his desire to see the island self-sufficient in milk, which could anyway be cheaply be imported from Aberdeenshire. As a consequence many men of Lewis raided those farm lands, began building and setting up crofts.
Only a matter of a few short years after the conclusion of the war, Lord Leverhulme had decided that his project was over.
A young doctor, Halliday Sutherland arrived in Stornoway in 1923 “a half-built factory on which work had been abandoned, a derelict small-gauge railway, and thousands of pounds’ worth of machinery rusting on the shore.’ Anxious to uncover the reasons for such a depressing scene, Sutherland approached what was presented in his later transcription as a bellicose old man working a croft in the Back district. The man had no desire, Sutherland said, ‘to answer a whistle at six in the morning and work for wages in Lever’s factory. No damn fear. Poor as I am, I’m master here, and could order you off this croft. … Why did some of us raid his pasture-land? A dairy farm for the island it was to be. I’ve another name for that a monopoly in milk. No damn fear. We are poorer now than we were. Why? Because the line-fishing in the spring has failed. Why? Because of these damned trawlers that spoil the spawn, and half of them are Lever’s English trawlers. He makes us poor, and then wants us to work for him.'” [1: p169][4]
Had Lord Leverhulme’s grandiose plans for Lewis and Harris resulted in lasting changes, there would probably have been some significant changes on Skye. Not the least of these changes may have been the provision of some form of railway from Kyle of Lochalsh onto Skye and through Broadford and Portree to Dunvegan inthe North of the Isle of Skye.
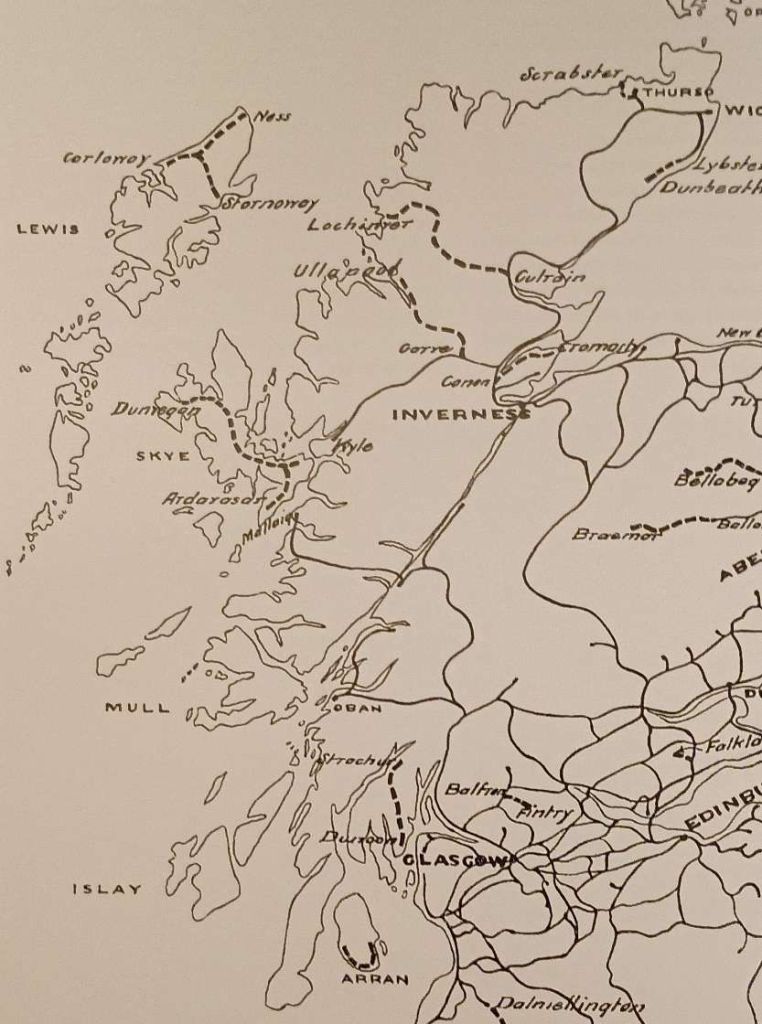
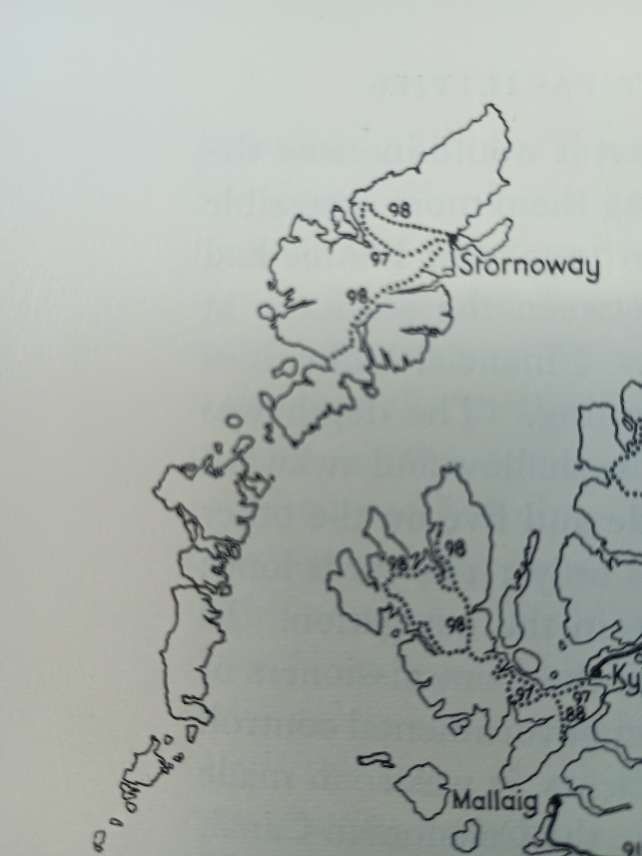
David Spaven & Julian Holland provide a map of proposed railway lines in Scotland. This map shows these proposed but unbuilt railways as dotted lines. Of particular relevance here are the lines on Lewis and on Skye. Although it should be noted that the routes marked predated Lord Leverhulm’s interest in Lewis and Harris by some considerable time. [7: p166 – extract from larger map]
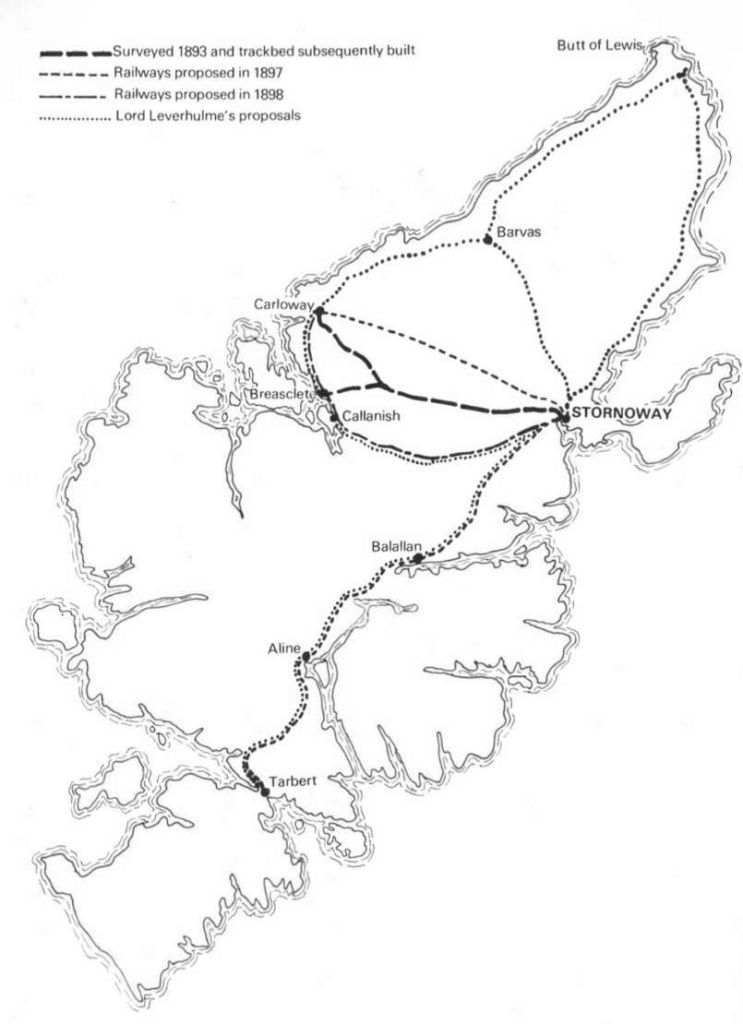
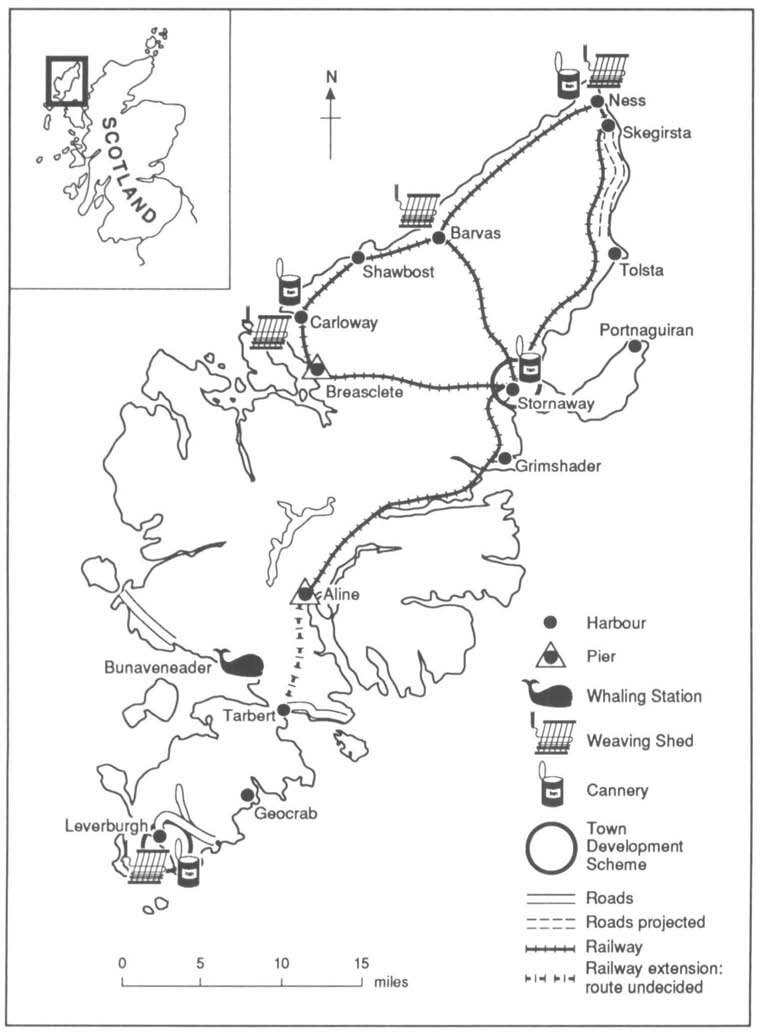
Spaven and Holland’s map does not tell anything like the full story of the planned railways for Lewis and Harris. The map below, provided by Ian B. Jolly shows considerably more detail. It is included in an article in The Narrow Gauge magazine. [15]
Proposed railways on Lewis/Harris. [15: p10]
The Napier Commission’s report on crofting published in 1884 proposed the use of light railways on Lewis and Skye. As a result, The Hebridean Light Railway Co. was formed to promote 130 miles of railway in Skye and Lewis. This led to surveys being undertaken by Alex MacDonald, Engineer, of a possible railway linking Stornoway to Breasclete and Carloway. The survey report was dated 1st June 1893.
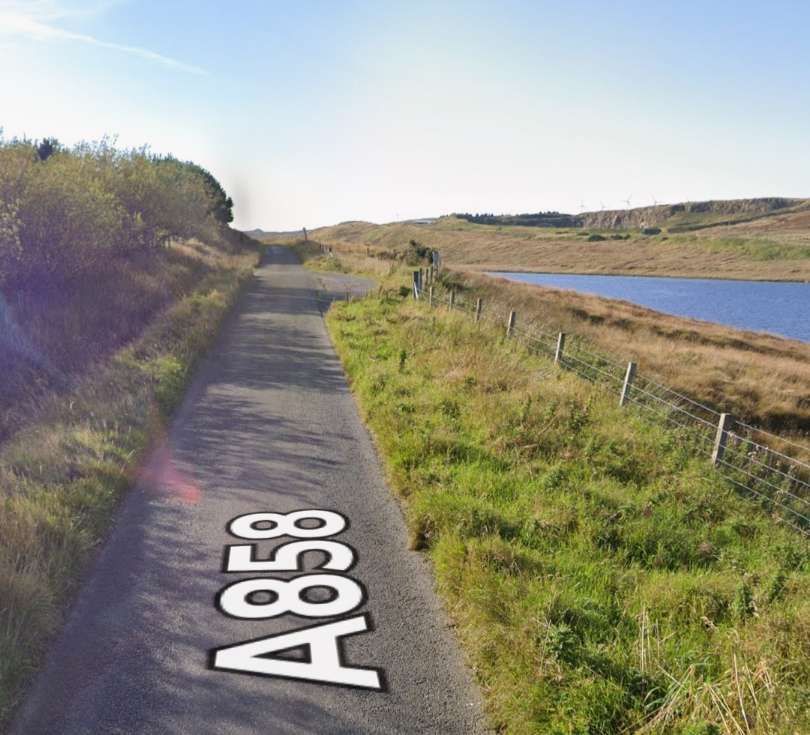
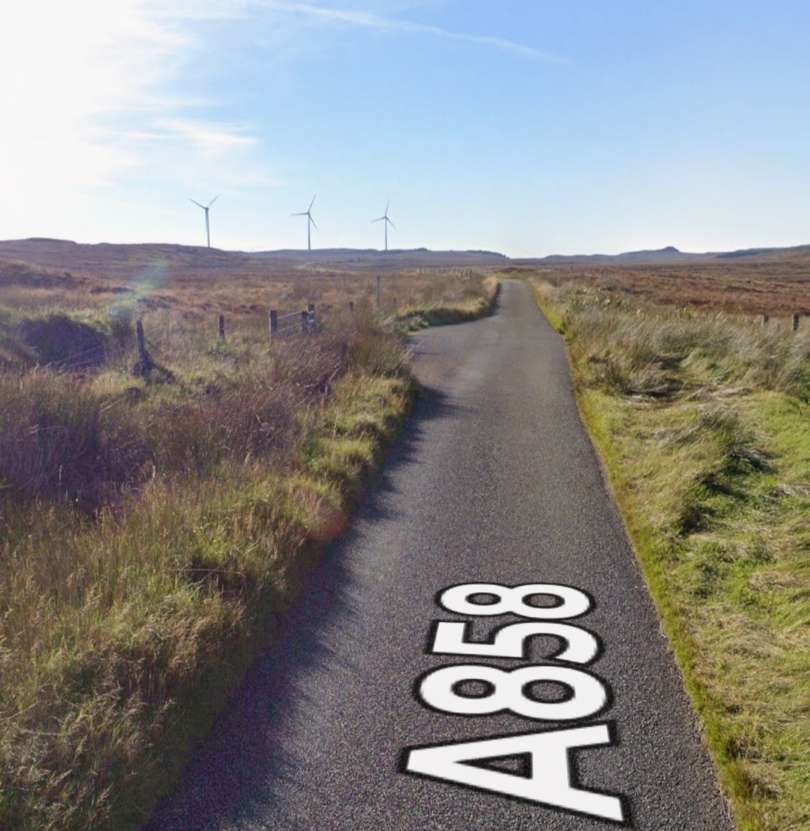
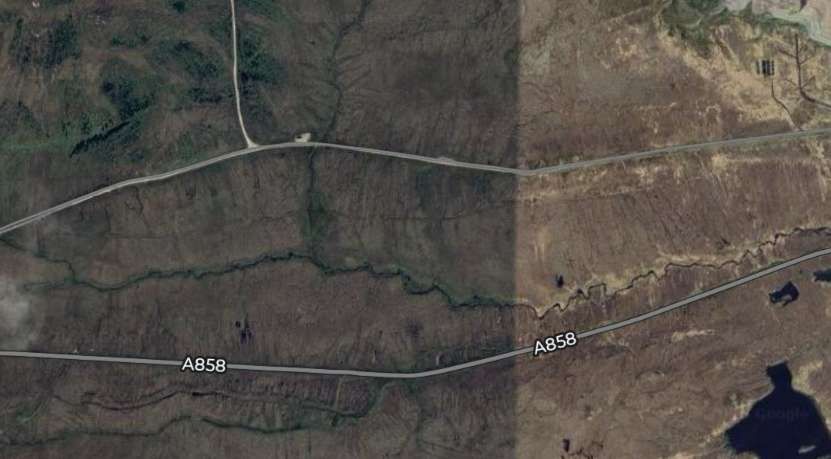
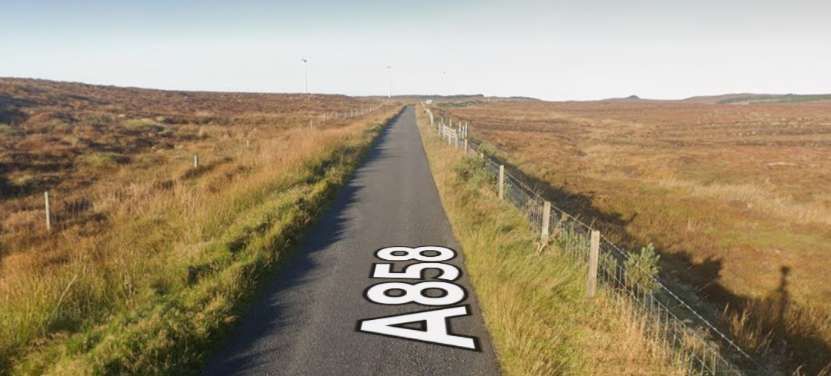
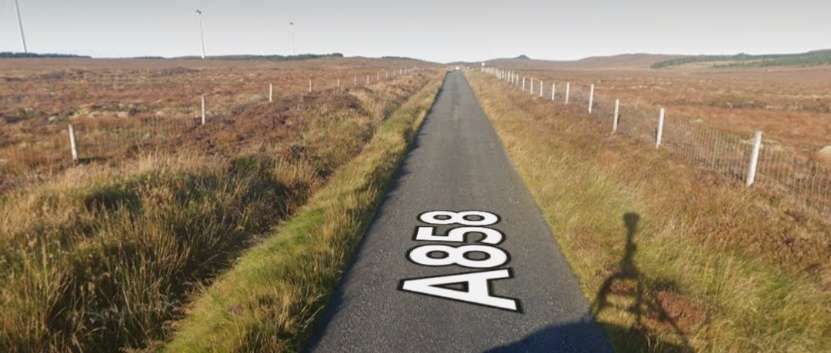
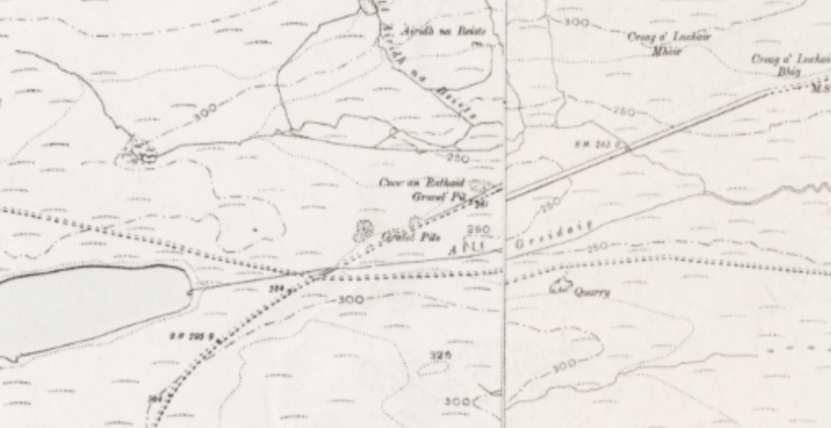
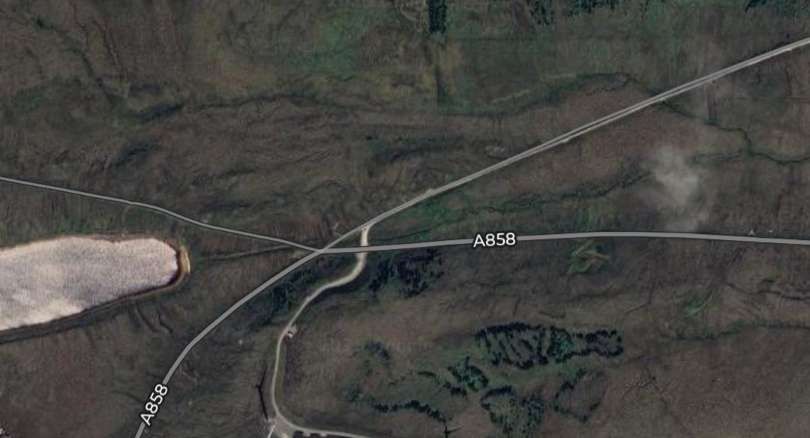
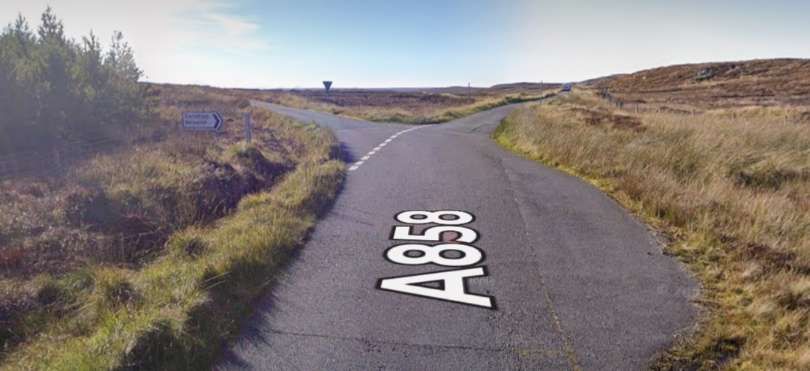
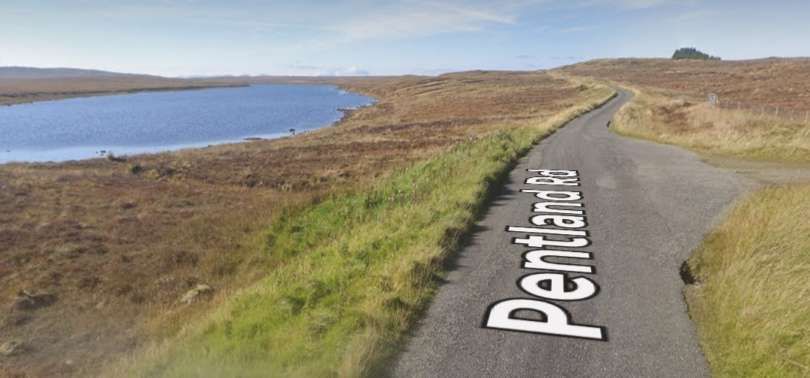
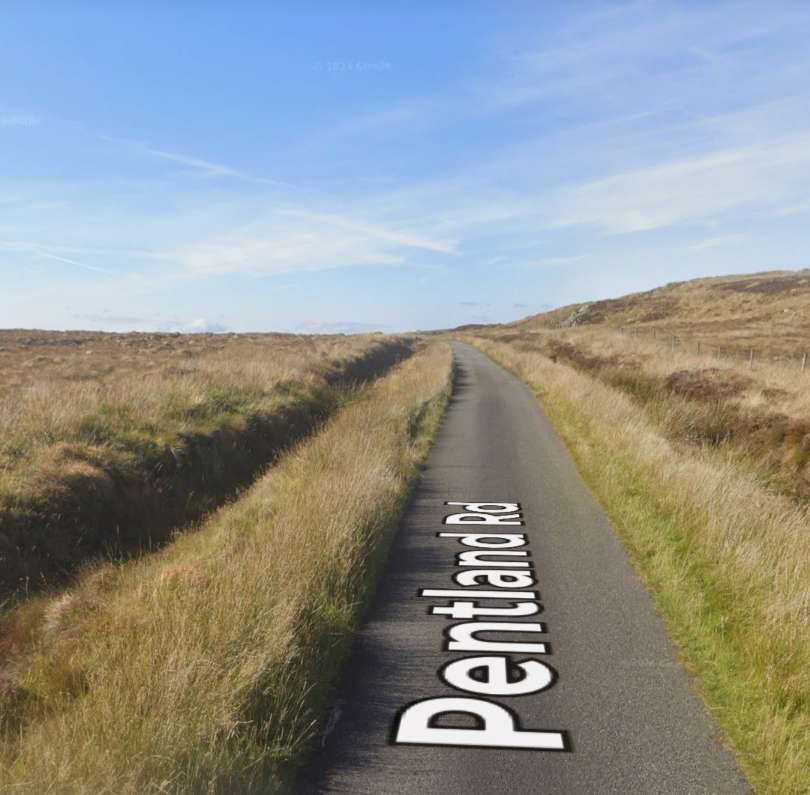
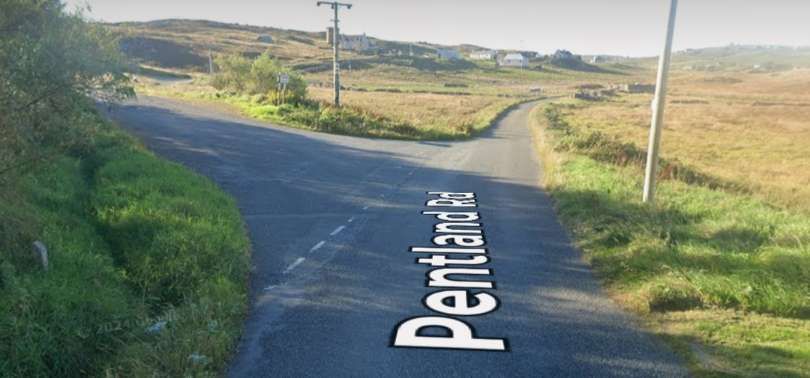
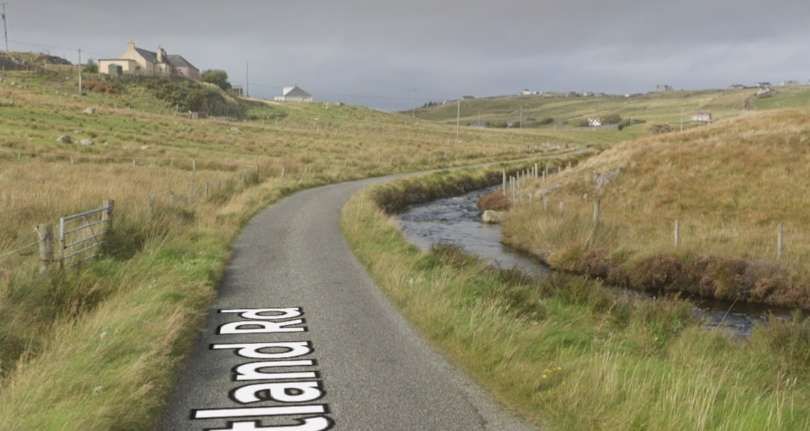
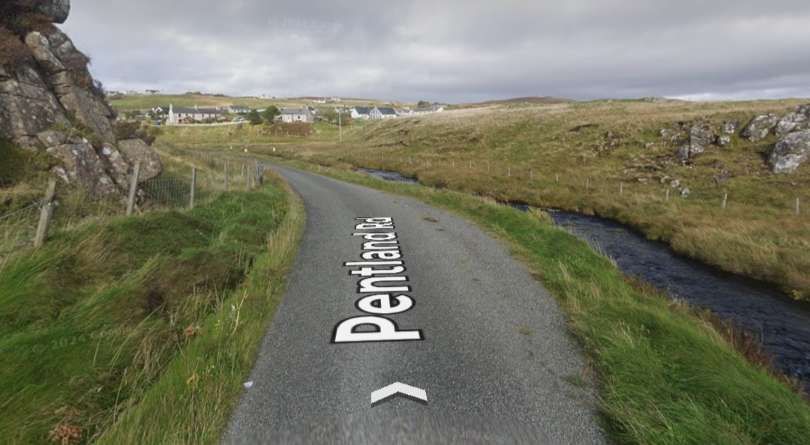
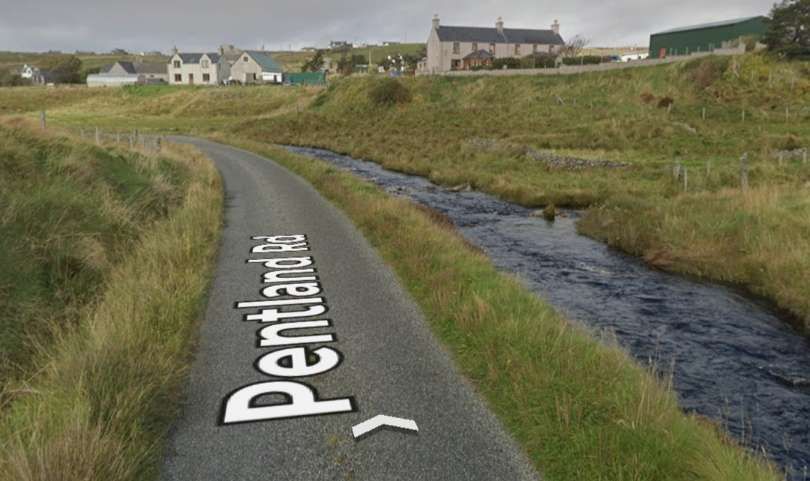
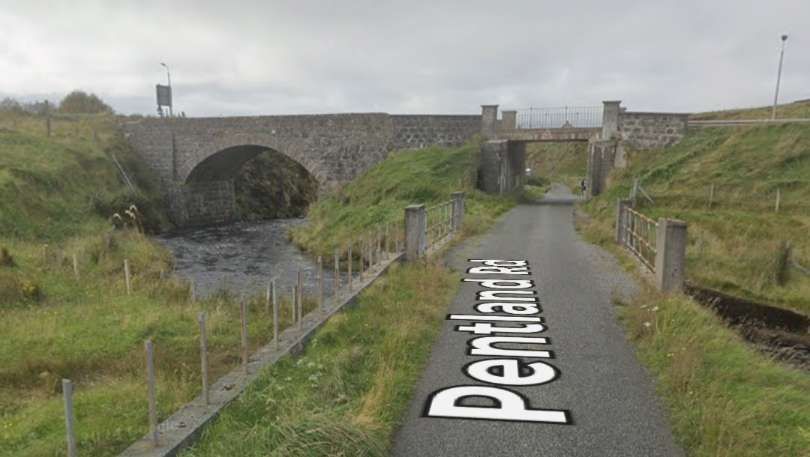
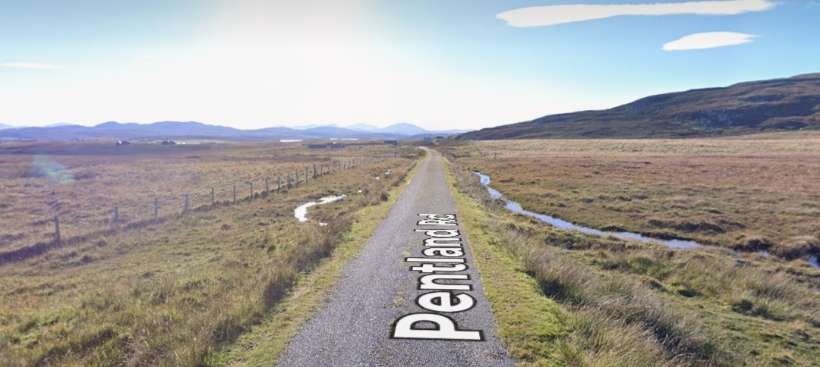
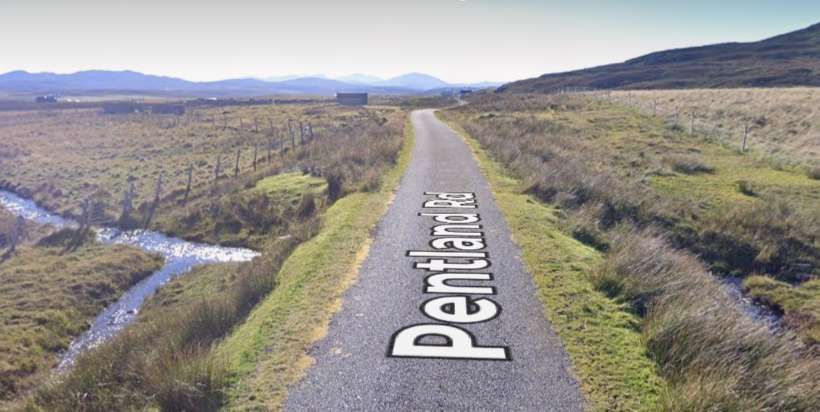
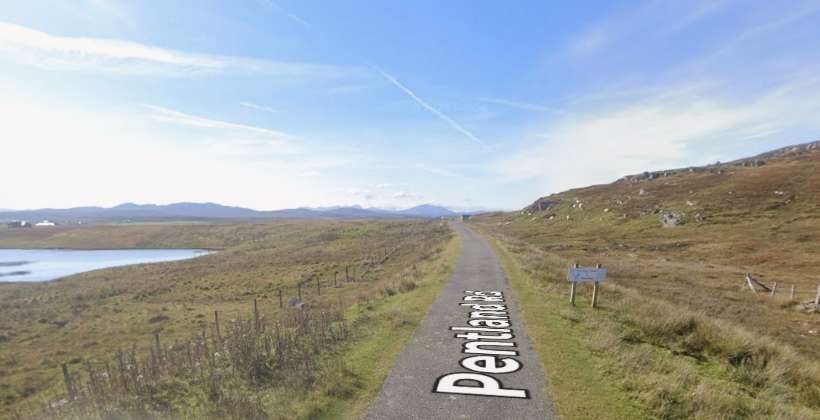
Ian Jolly reports that “the trackbed of this line was constructed and, for the first two or three miles out of Stornoway now forms the A858 road, while the rest of the route is an unclassified road to Breasclete.” [15: p12] The unclassified road is the ‘Pentland Road’ which has two arms, one to Carloway and one to Breasclete.
Jolly also notes that O’Dell and Walton, include in their book, ‘Highlands and Islands of Scotland’, a map showing projected railways for Lewis and Skye in 1897 and 1898. In fact, this is just a small part of a map covering the whole of Scotland and are at best schematic in nature. [15: p12][16: p206]
The Outer Hebrides and Skye, showing various schemes which did not come to fruition in the later years of the 19th century and mark with the year in which the schemes would have been constructed. The lines drawn are no more than indicative of the routes proposed. There is no indication of schemes proposed in the 20th century. [16: p206]
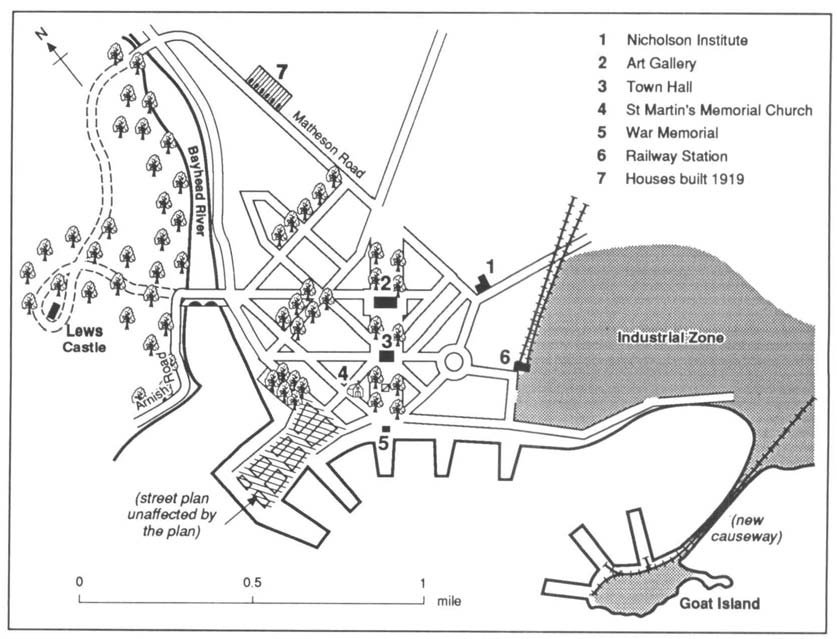
One further map is worth noting. This map is provided in a paper by John and Margaret Gold and shows Lord Leverhulme’s development plan for Lewis and Harris. …
Lord Leverhulme’s Development Plan: this gives a good idea of the scope of Lord Leverhulme’s imagination. His ideas were built on the assumption that the fishery around Lewis and Harris was likely to sustain yields over many years. His plans were well-developed. [45: p197]
Later, in April 1919, Jolly says, there were proposals (elsewhere reported as being considered during the first world war) put to a meeting at Staffin, in the north-east of Skye, when representations were made to the Secretary of State, Ministry of Transport and the Highland Reconstruction Committee for a system of light railways on the East side of Skye. There was a similar meeting at Uig, also on Skye, in September 1920 when representations were made to the Ministry of Transport for a light railway connecting Uig to Kyleakin via Portree. Both these meetings were reported in the local press at the time.. [15: p12]
Jolly mentions a comment by Lord Leverhulme which was reported the Highland News, 17th May 1919, that the new harbour at Stornoway should come before the light railway.
Nigel Nicolson, in Lord of the Isles, notes that in a relatively short time (circa. 1920) Lord Leverhulme was looking seriously at light railway schemes on Lewis and had marked out their courses. Leverhulme’s scheme would have had a terminus at Stornoway and three lines:
1) A line South through Balallan to Aline with later extension to Tarbert.
2) A line West, then North to Callanish and Carloway and return to Stornoway via Barvas; and
3) A Branch North from Barvas to serve townships near the Butt of Lewis and return down the east coast through Tolsta to Stornoway.
The total track mileage would have been about 100 miles. The gauge was to be 3ft using WDLR rails being sold as surplus. Lines to be steam worked but Leverhulme wanted electric working! [15: p12] [17: p110-111]
None of these schemes came to fruition.
Photographs and further information can be found in a copy of The Narrow Gauge which is available online. [15]
The Stornoway, Breasclete and Carloway Route
We noted above that construction work did commence on the lines surveyed in 1893, specifically that the trackbed was constructed “and, for the first two or three miles out of Stornoway now forms the A858 road, while the rest of the route is an unclassified road to Breasclete.” [15: p12] It should be noted that the unclassified road follows the planned railway to Carloway as well as to Breasclete and is known as the Pentland Road.
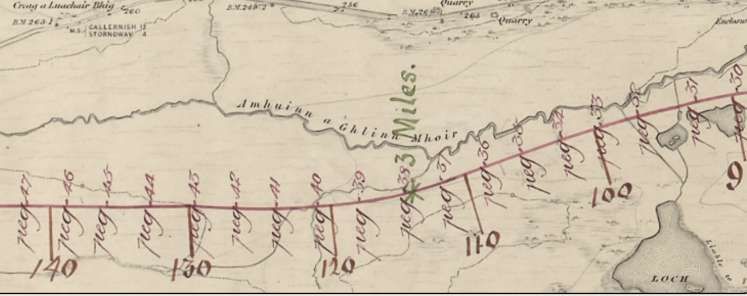
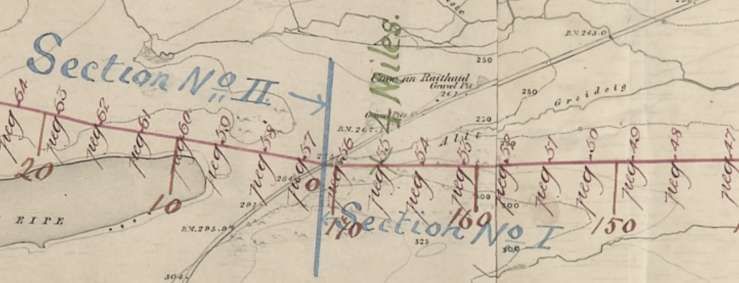
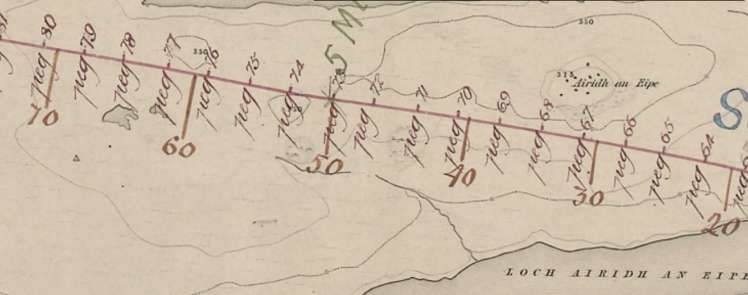
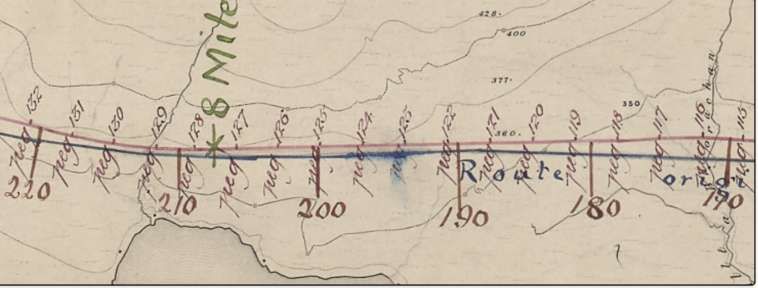
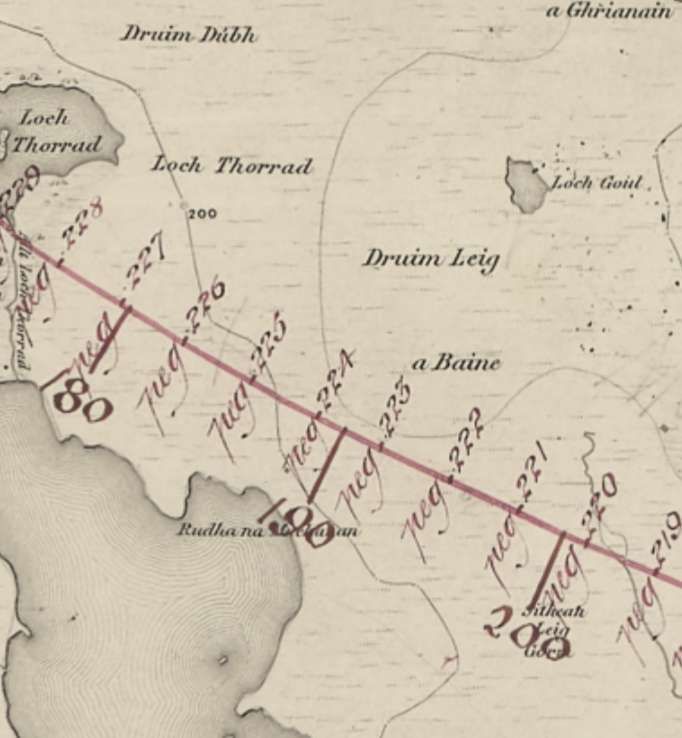
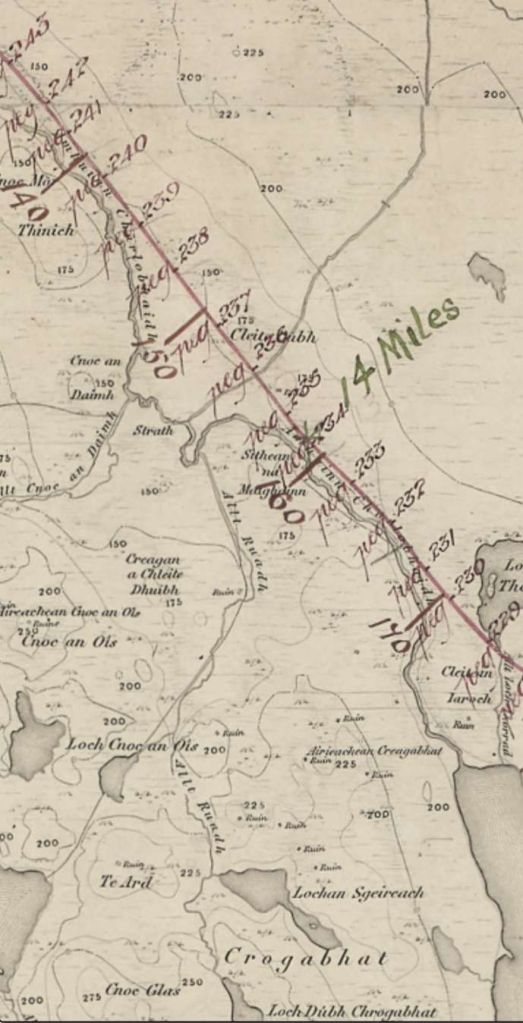
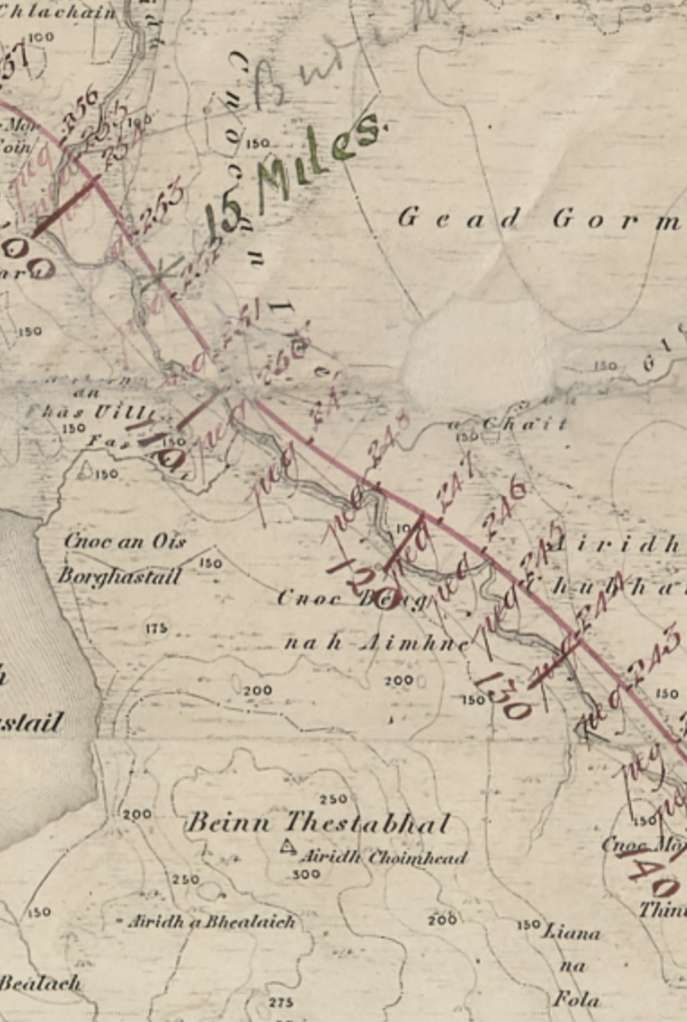
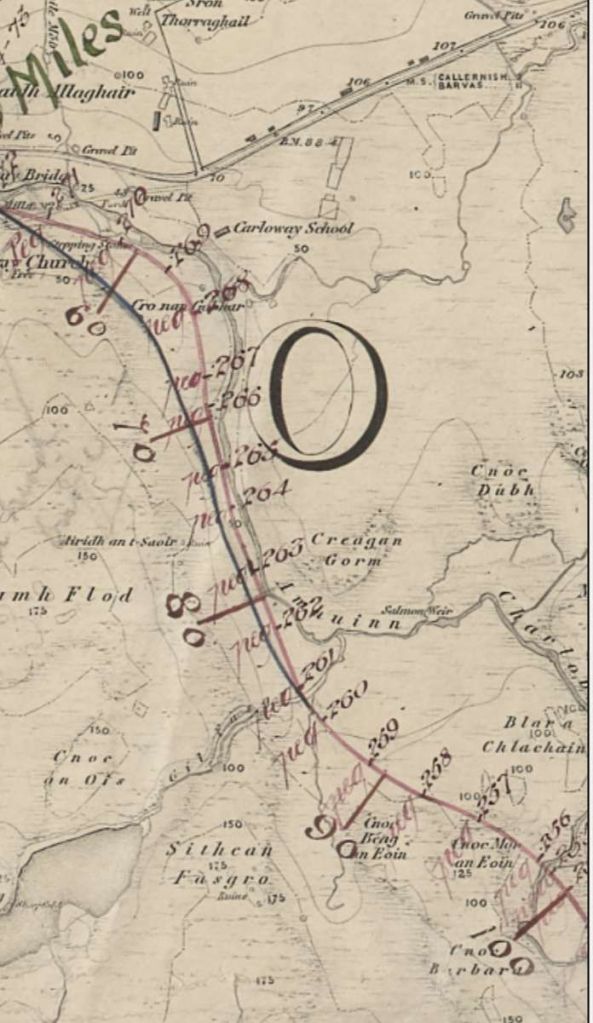
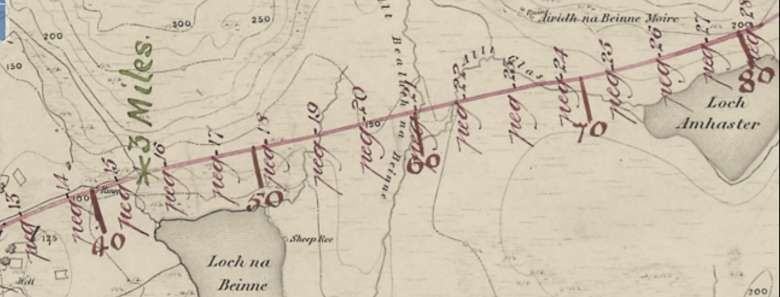
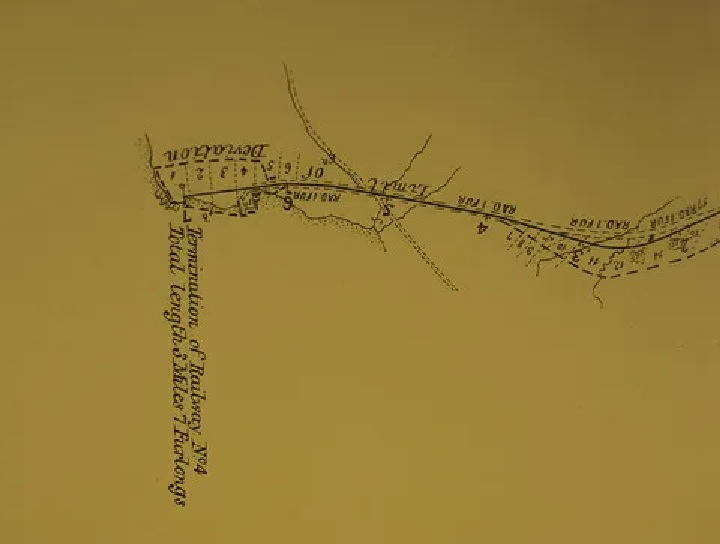
It is nigh impossible to establish the location of the Stornoway terminus from this limited information. Given that modern roads follow the formation of the planned railway route it is quite easy to follow the routes to Breasclete and Carloway. There is, however, a specific, relevant resource held at Stornoway Public Library. It comprises 4 sheets from the 1″ Ordnance Survey 1st Edition mapping from the 1850s, that have been stuck together, with the route itself annotated on top. A digital version of this map has been made available by the National Library of Scotland (NLS). [18] Please note that after navigating to the correct webpage, it will be necessary to scroll down to find the annotated map.
The proposed railway “was planned to connect Carloway and Breasclete on the west coast with Stornoway. Work began on the scheme, but ran into economic and legal problems. Although the railway was never constructed, the ‘Pentland Road’, largely followed the same route, and was built instead by 1912. The road was named after John Sinclair, better known as Lord Pentland who was the Secretary for Scotland between 1905 and 1912 and who helped to secure funding for the completion of the road.” [18]
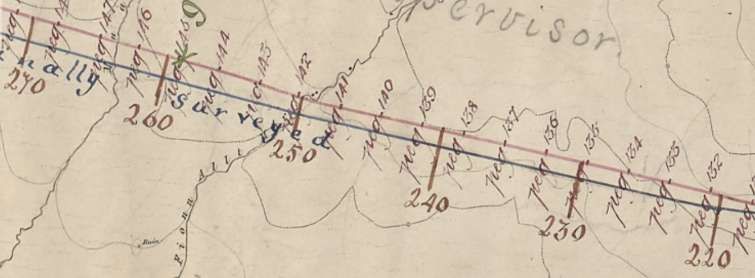
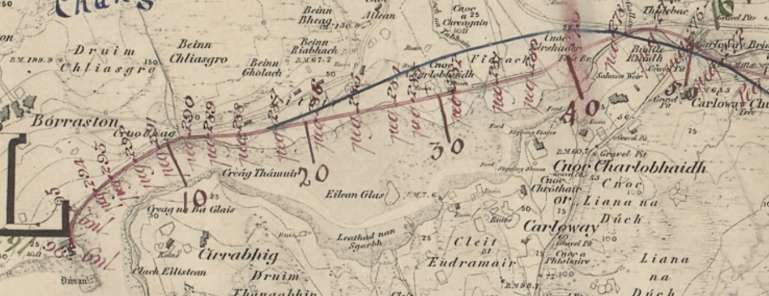
The map is made up of “four original Ordnance Survey first edition six-inch to the mile maps from the 1850s that have been stuck together, with the route itself annotated on top. … Near Carloway, there is an additional Blue line shewing route originally surveyed changed to avoid damaging arable land.” [18]
Carloway and Breasclete were the western termini of the network with the line to Breasclete appearing to be a branch line.
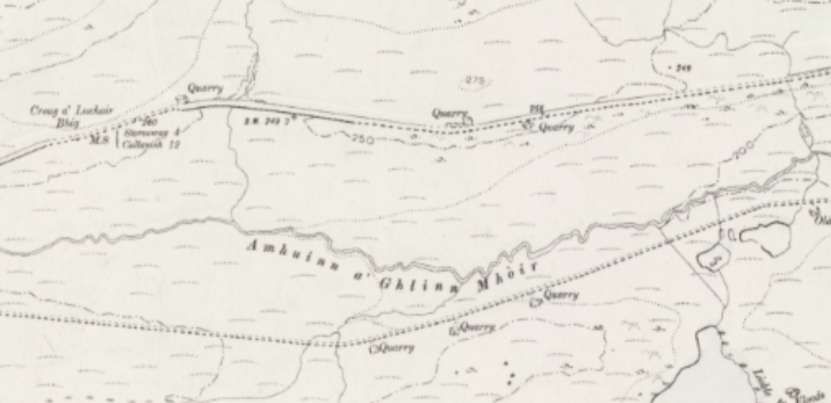
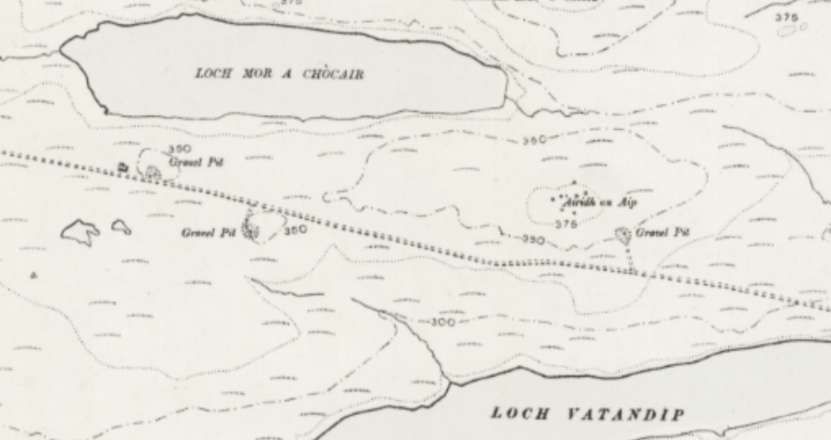
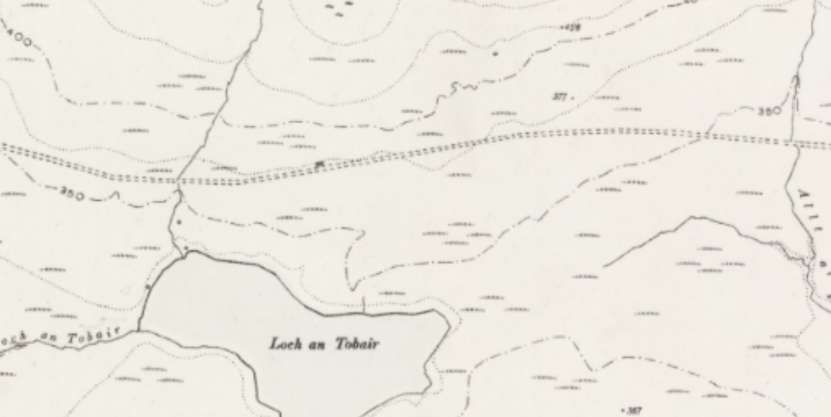
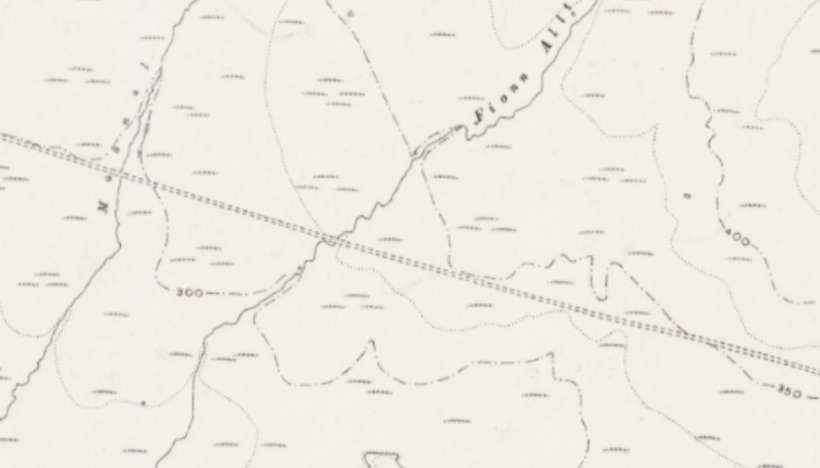
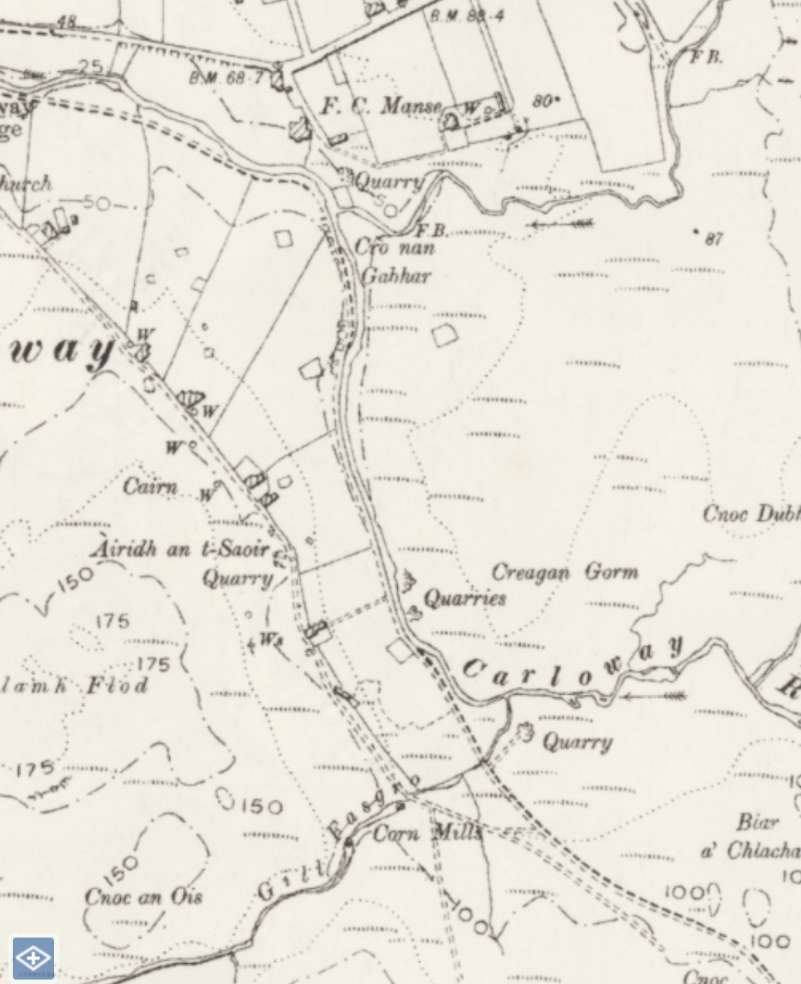
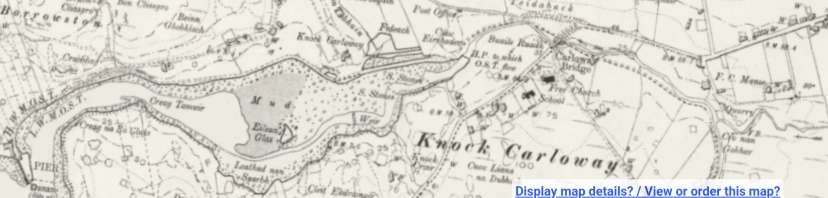
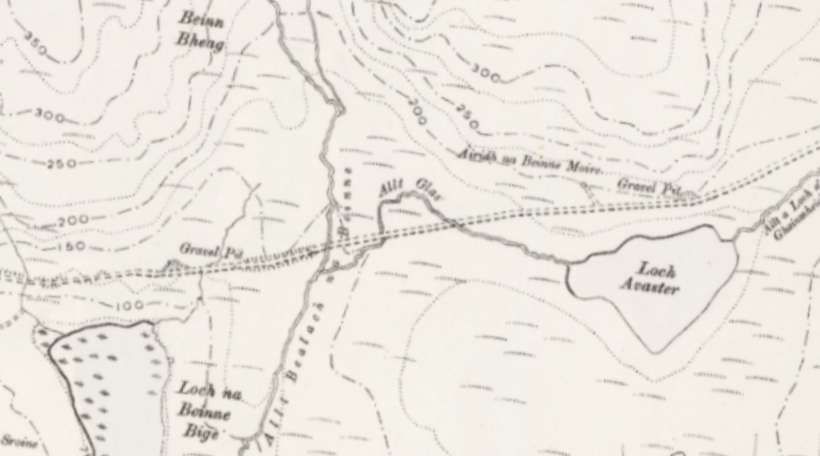
The extracts from the annotated 1″ Ordnance Survey of the 1850s run in sequence from Stornoway to Carloway and then from the junction to Breasclete. They are the sepia coloured map extracts. Beneath each extract from the 1″ Ordnance Survey is the 2nd Edition 6″ Ordnance Survey from around the turn of the 20th century. These extracts precede the construction of the Pentland Road but show the route the road(s) will take as a dotted track.
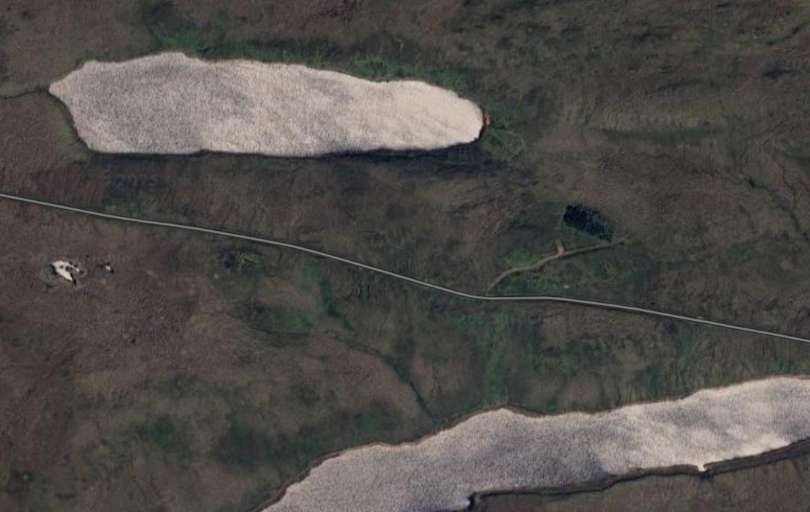
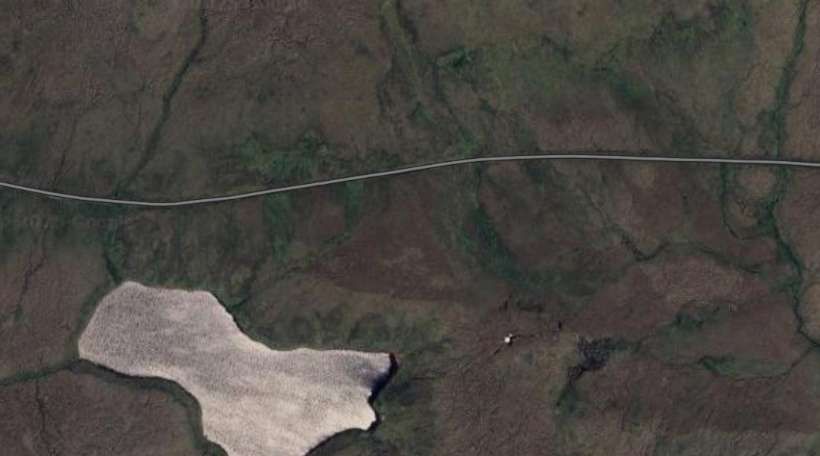
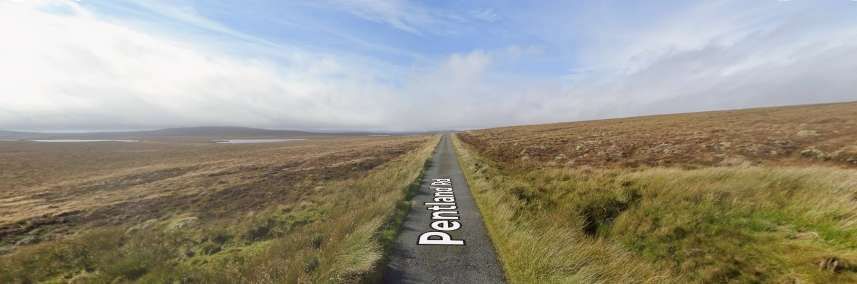
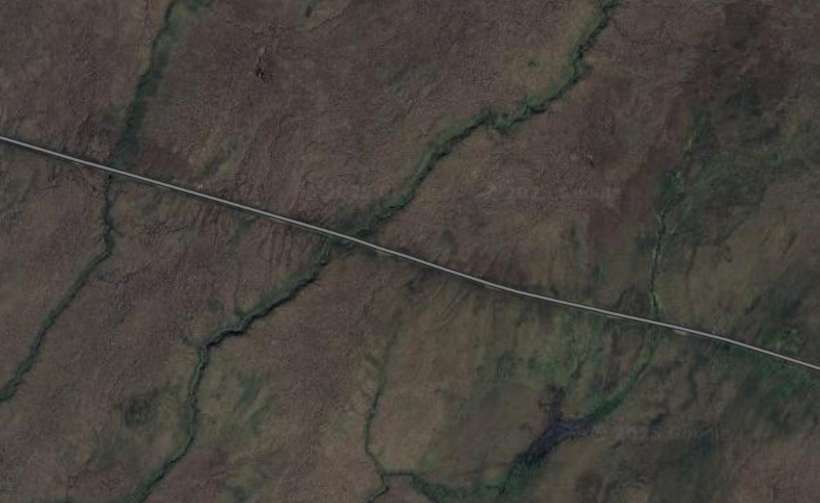
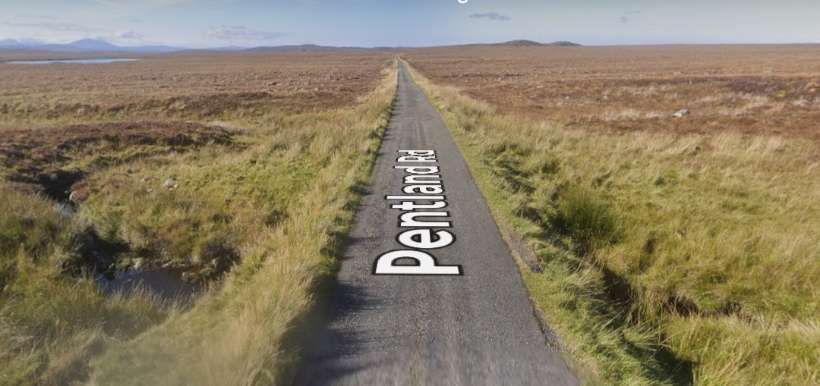
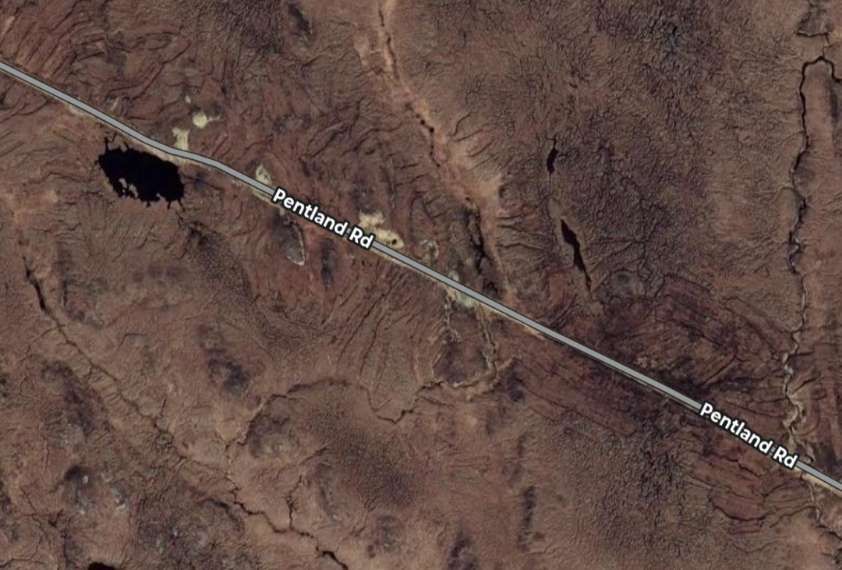
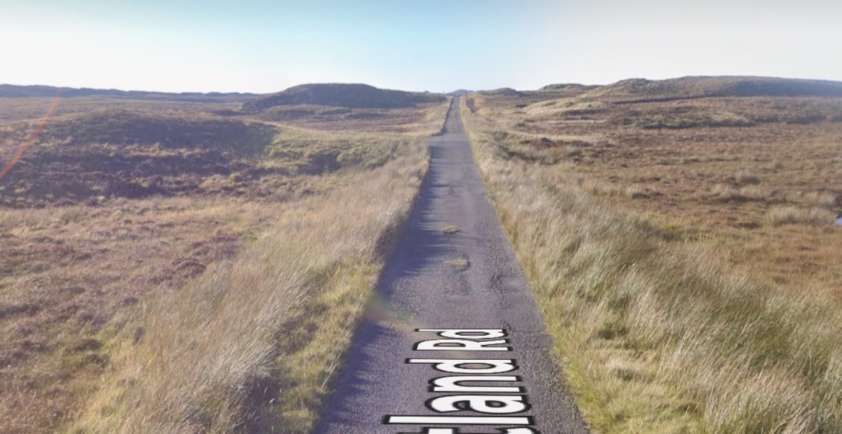
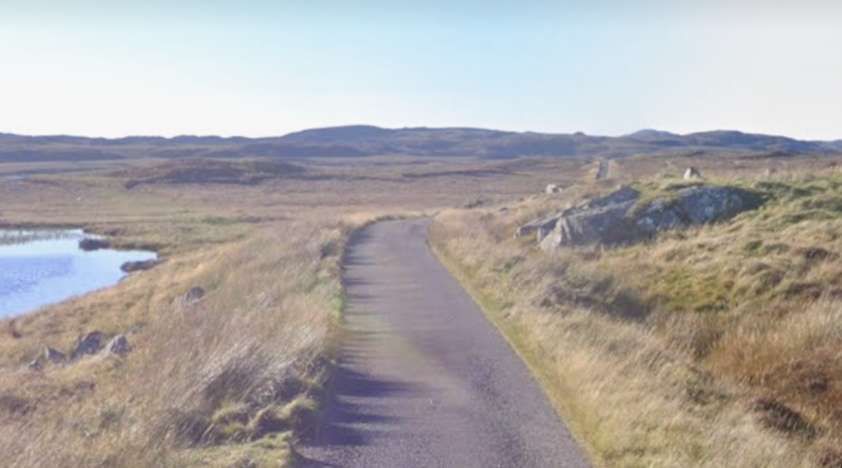
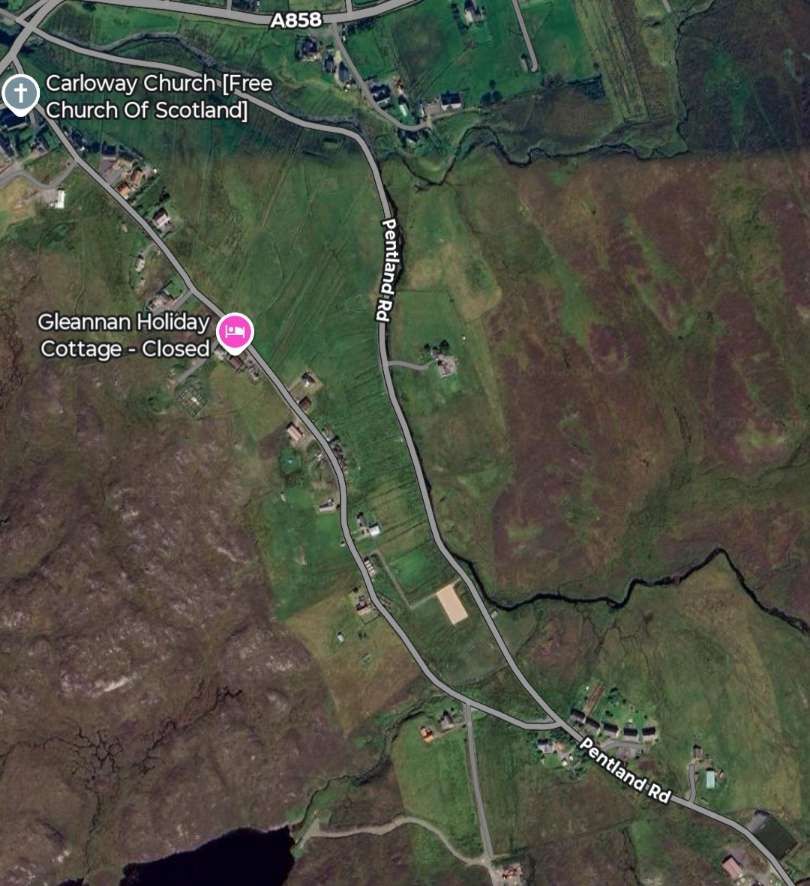
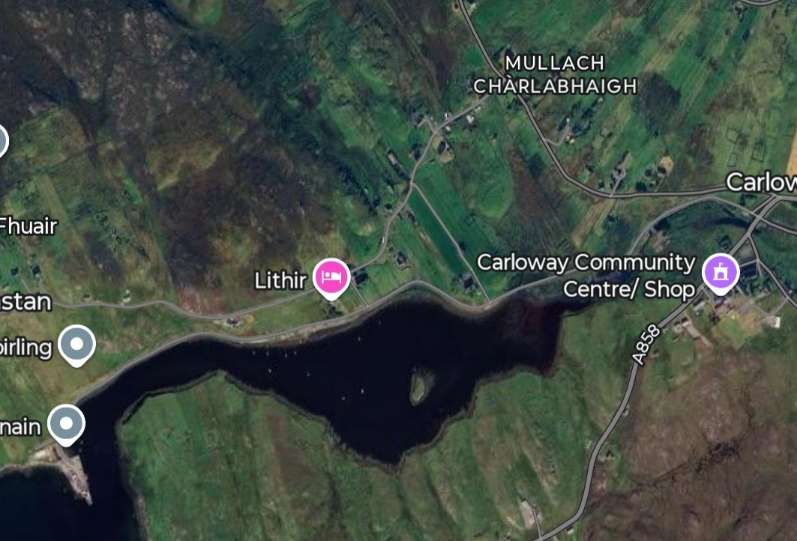
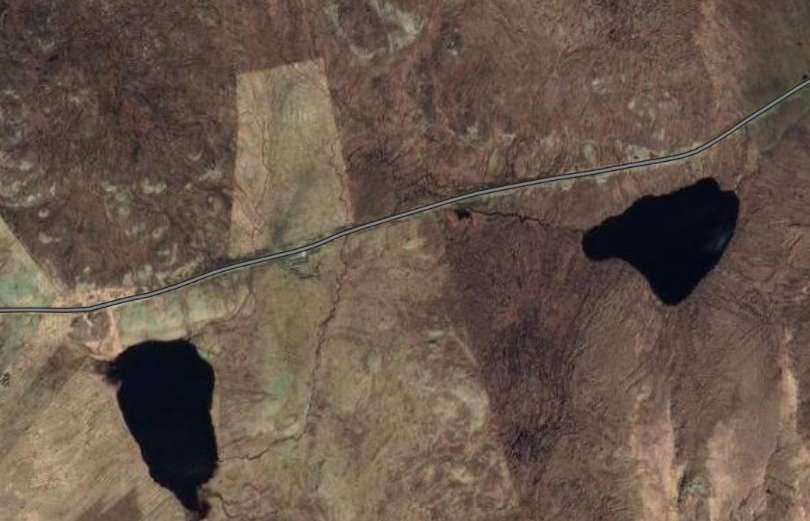
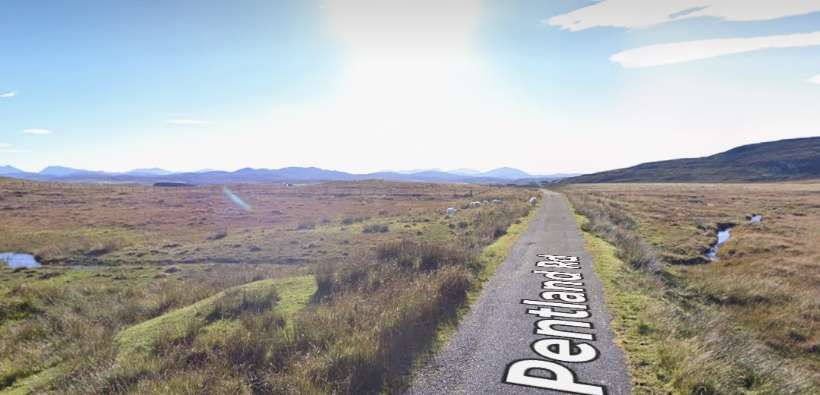
Modern satellite imagery is then provided alongside some Streetview images to show the built roads which were completed in 1912 and which are still in use in the 21st century.
There is some doubt over the route of the line approaching and entering Stornoway. Two possibilities with supporting drawings start our look at the line. …
Stornoway to Carloway
Close to Stornoway the alignment of the planned, but never built, railway is not certain. The first possibility is shown immediately below. This takes the mapping provided by the NLS. … [18] The second alternative was discovered by ‘Tom’ in the National Archives at Kew and highlighted on his blog. [53][54]
First, the NLS supplied drawings from the Stornoway Public Library. …
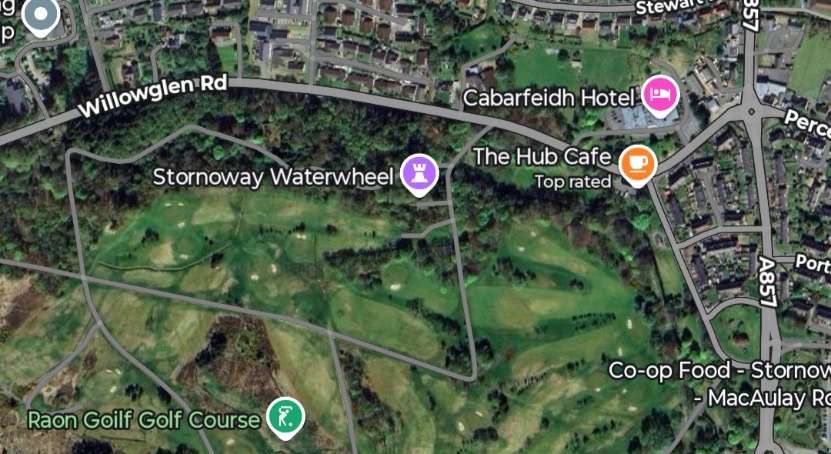
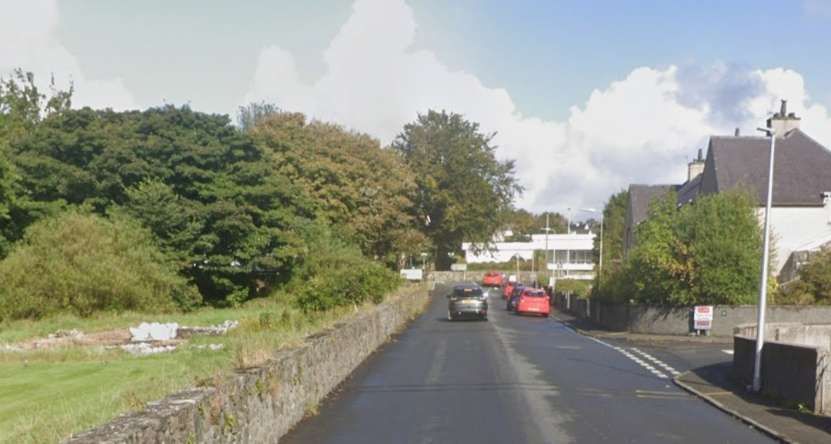
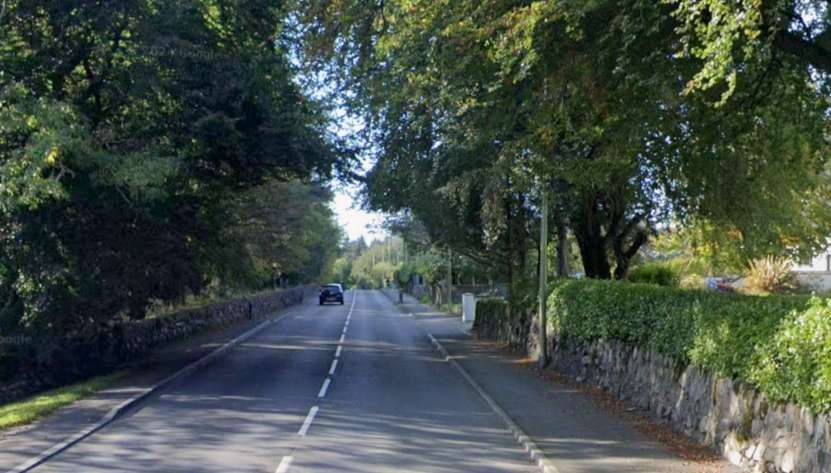
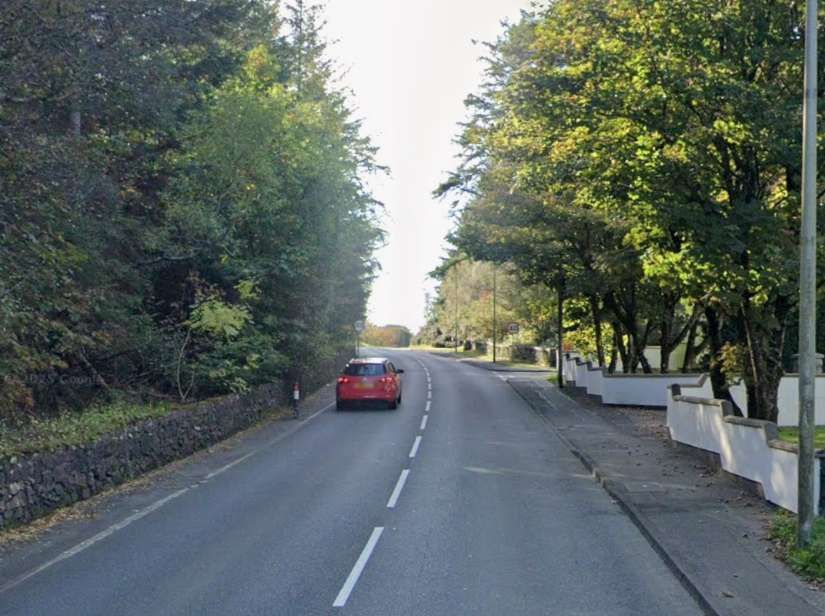
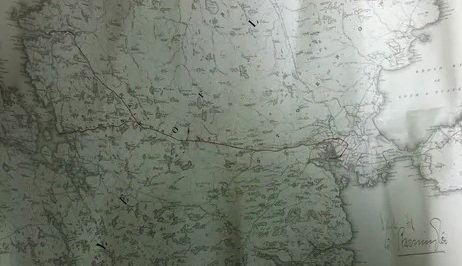
The most easterly length of the proposed railway is shown turning South into Stornoway but no indication is given of the planned terminus. [18]A closer focus from the 6″ OS mapping shows a road following the line of the proposed railway. That road appears to predate the planned railway and it is possible that the line would have run within the road width or on the verge. [19]Willowglen Road first runs North-northwest, then turns through Northwest and West before leaving Stornoway in a West-southwest direction. It is not clear where the Stornoway terminus of the line was expected to be, perhaps to the West of the modern A857 on the portion of Willowglen Road which runs North-northwest from its junction with the A857? [Google Maps, July 2025]Looking North-northwest along Willowglen Road. Rather than this road being built on the line of the planned railway it is likely that the line would have run on the verge of what may well have been a narrower highway at the end of the 19th century. [Google Streetview, September 2024]Now heading West-northwest, the width of the modern Willowglen Road accommodates the planned railway route. [Google Streetview, September 2024]Further West with Willowglen Road now heading in a West-southwest direction. The older road may well have been narrower than the modern road and could have accommodated a railway on its verge. [Google Streetview, September 2024]
Second, the alternative alignment for the East end of the line which appears in documents at the National Archives. [53][54]
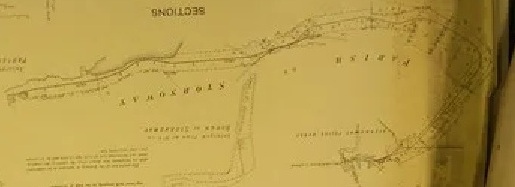
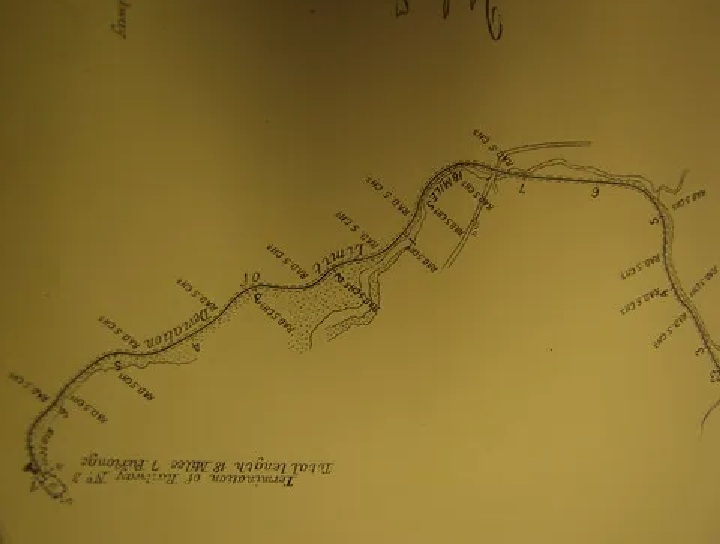
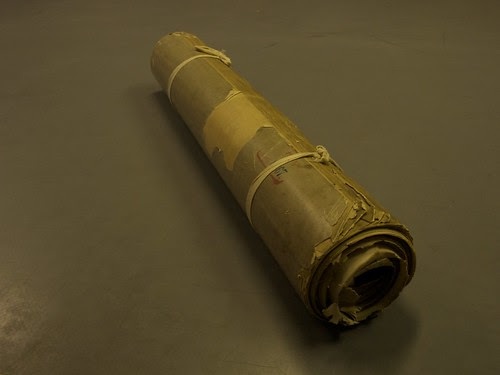
The Hebridean Light Railway Company, a blog by ‘Tom’ includes this photograph of a plan from the National Archive at Kew.This plan matches the plan provided by the NLS throughout the length of the line with the exception of the eastern end of the line. [54]
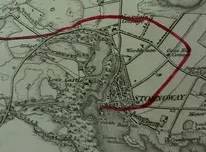
This image shows the eastern end of the line at Stornoway. The route takes a line to the North of what is now Willowglen Road, and to the North of what was Manor Farm, now the Cabarfeidh Hotel, then swinging in a wide arc round the East side of Stornoway before running across the South of the town. [54]
The superimposed red line is a diagrammatic representation of the route, but it does have some resonance with the later temporary railway built by Robert McAlpine & Co. which is covered towards the end of this article. It does however match with other papers in the bundle which ‘Tom’ discovered in the National Archives. …
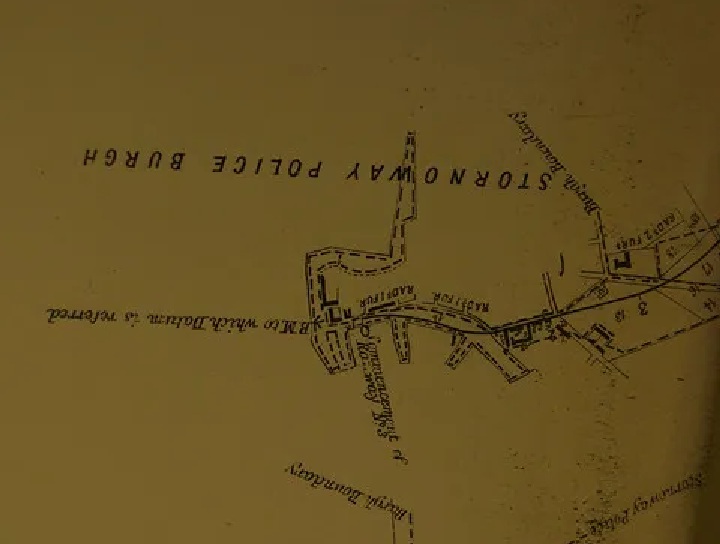
A very low resolution photograph of the plan of the proposed railway around Stornoway. This is a match for the red line shown above. [54]
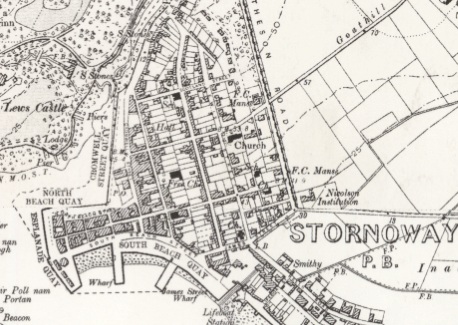
A closer view of the last portion of the proposed line on the South side of Stornoway. This compares well with the 6″ Ordnance Survey extract below. It shows that the plan was for the line to terminate at the West end of South Beach Quay. [54]
An extract from the 6″ Ordnance Survey of 1895, published 1899. [55]
The remainder of the route to the West of Stornoway. …..
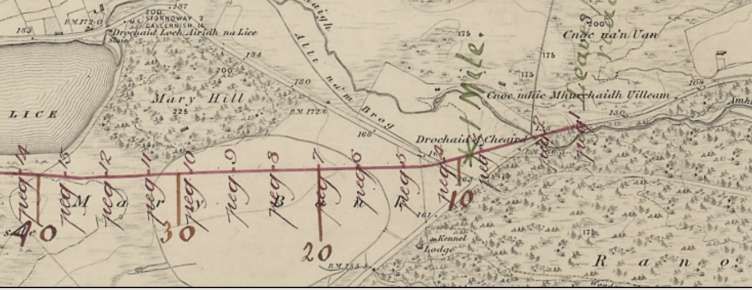
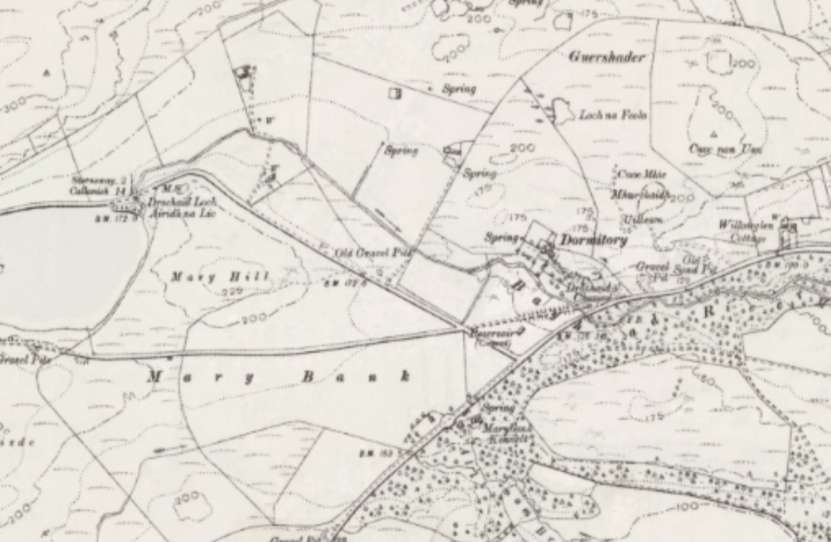
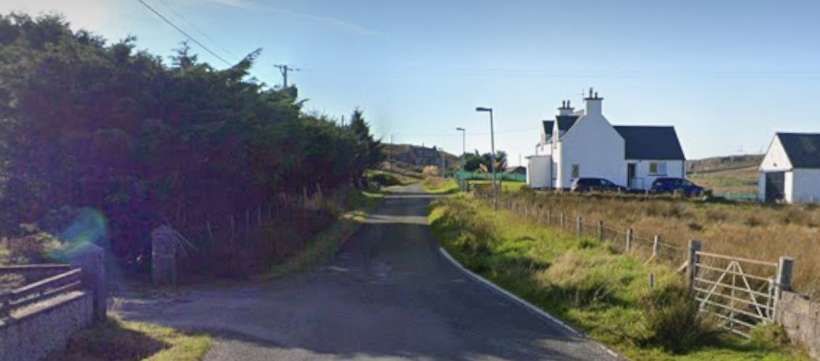
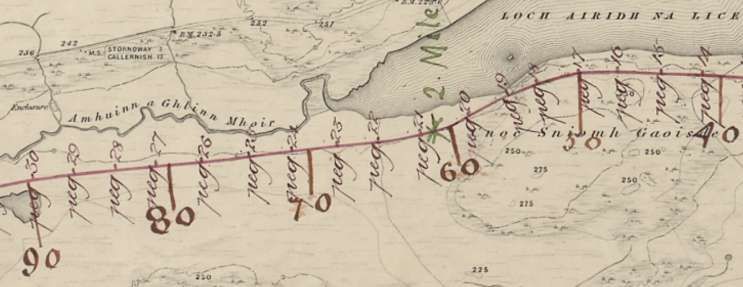
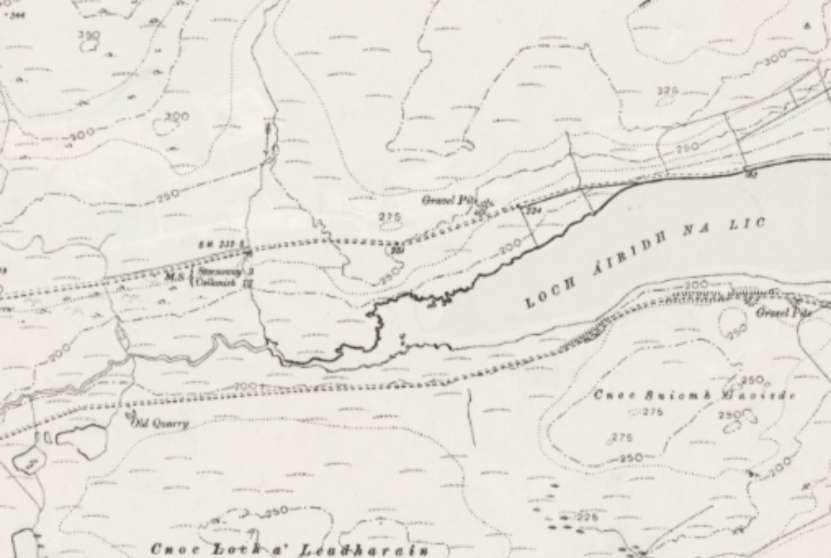
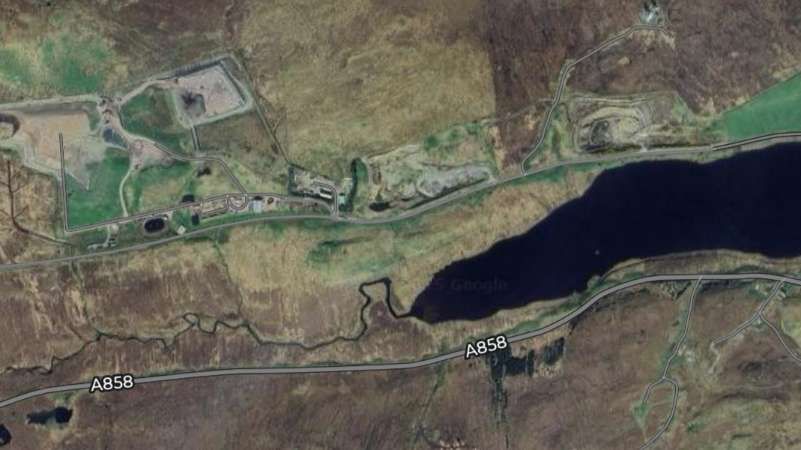
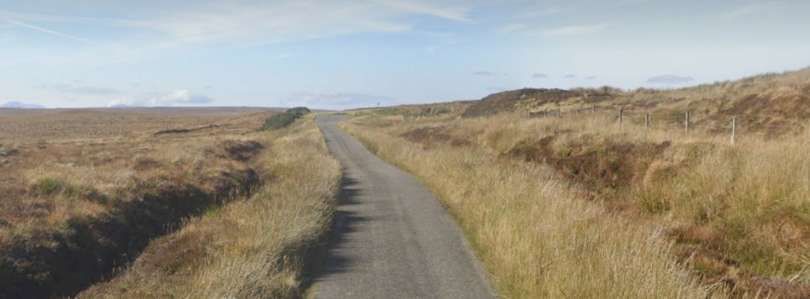
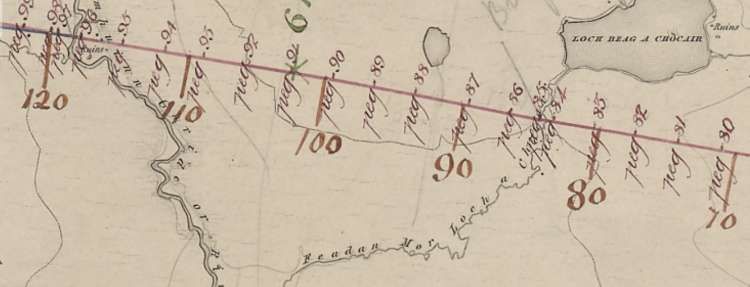
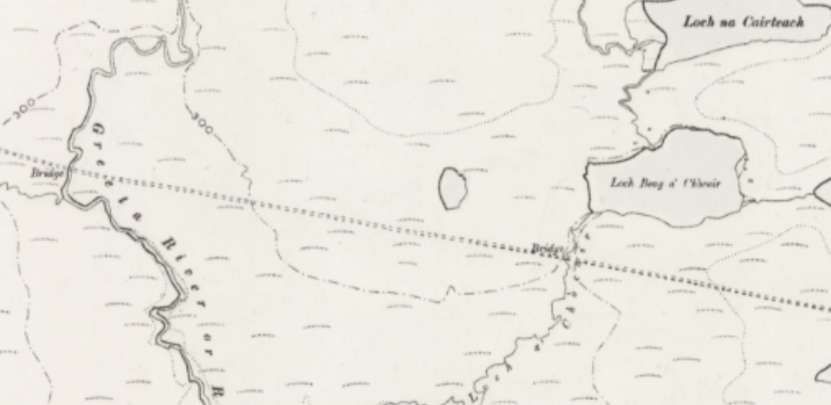
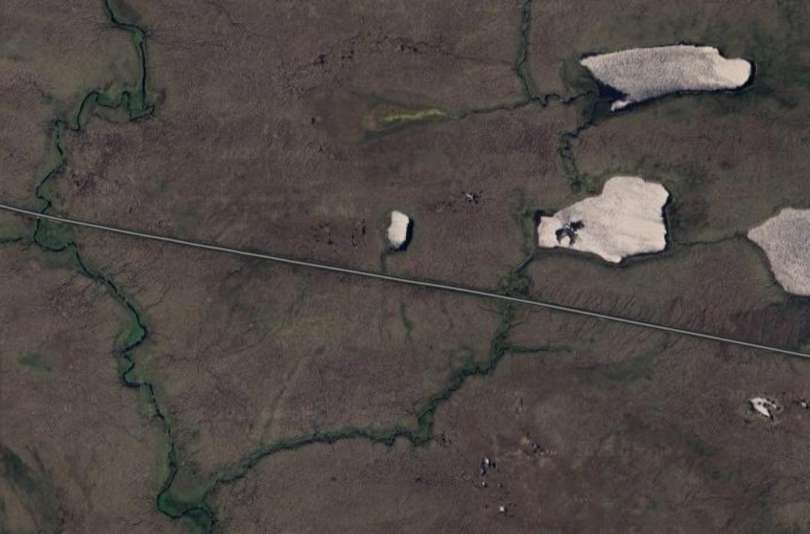
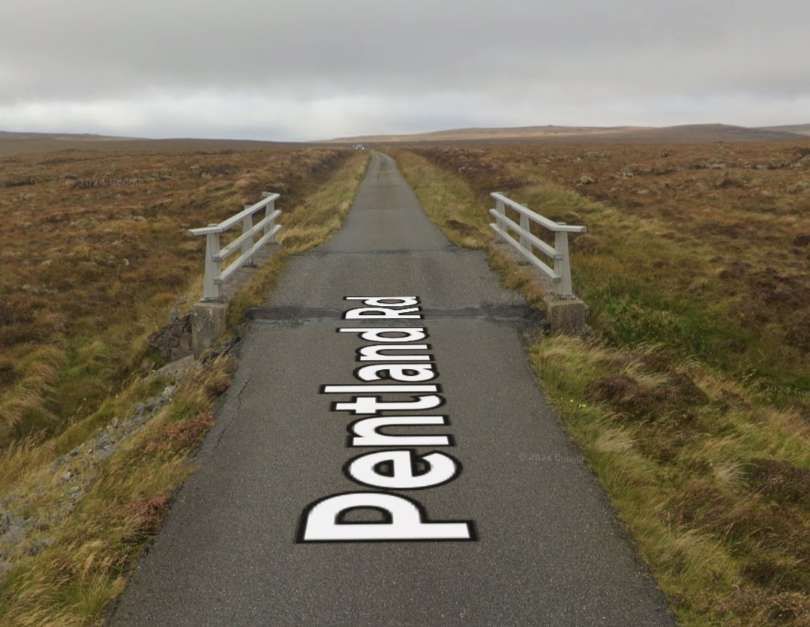
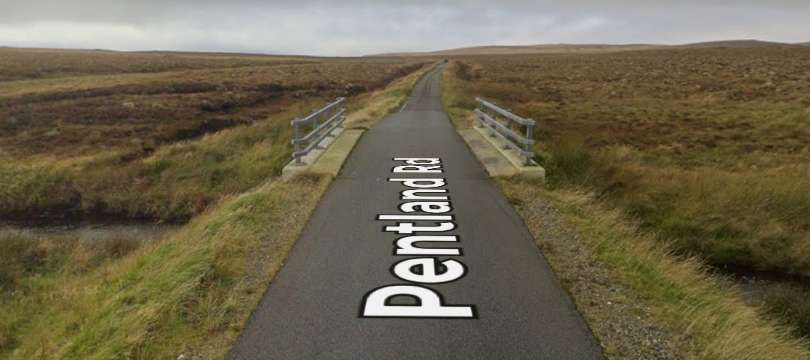
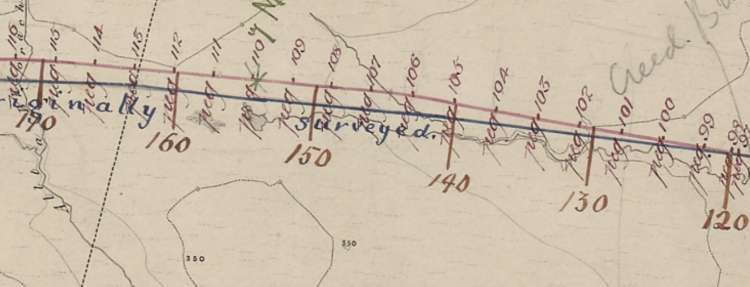
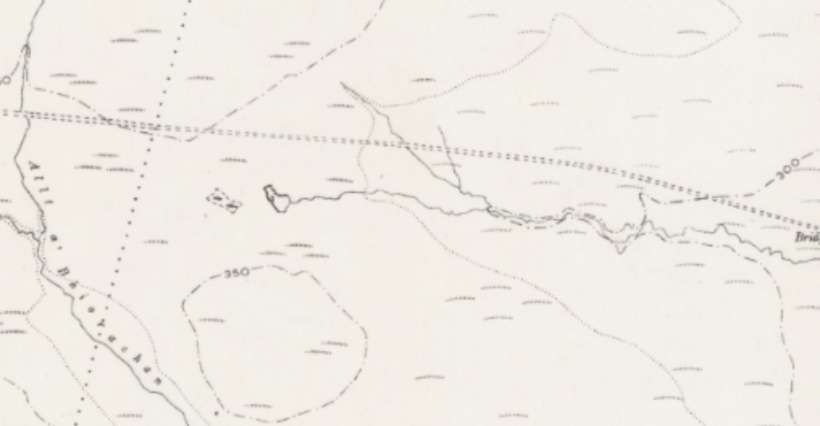
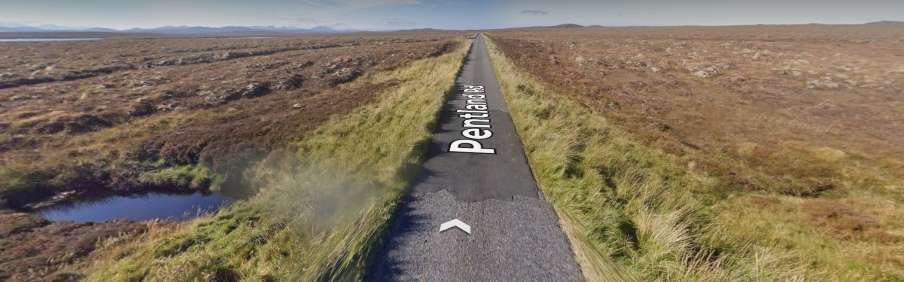
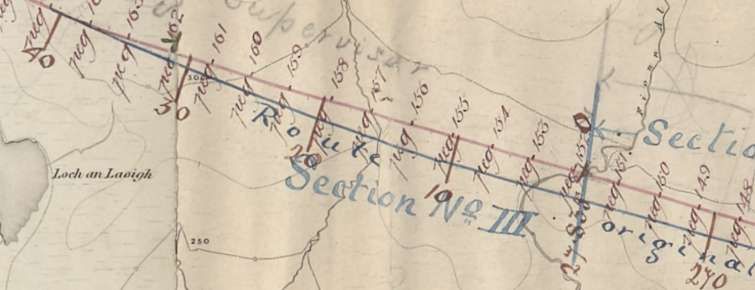
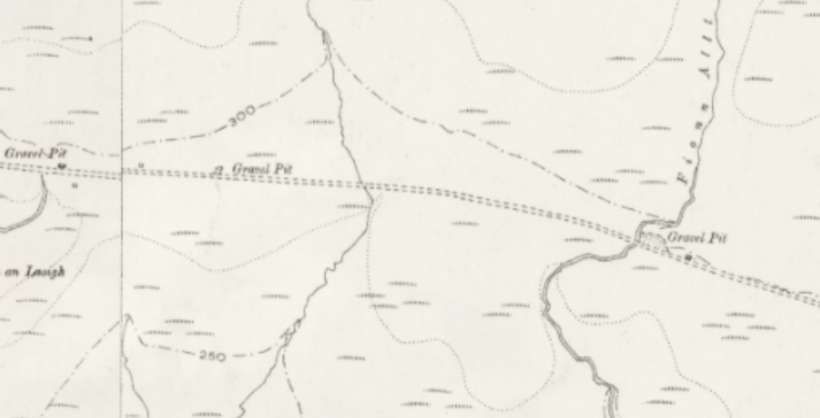
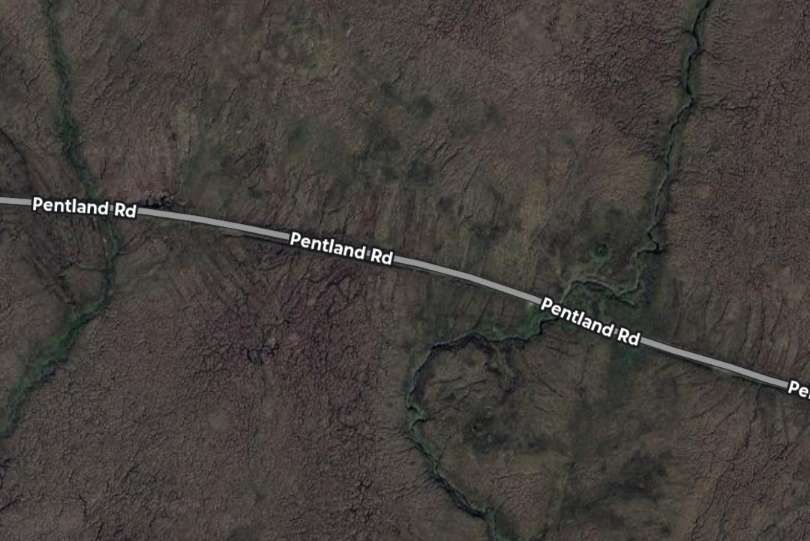
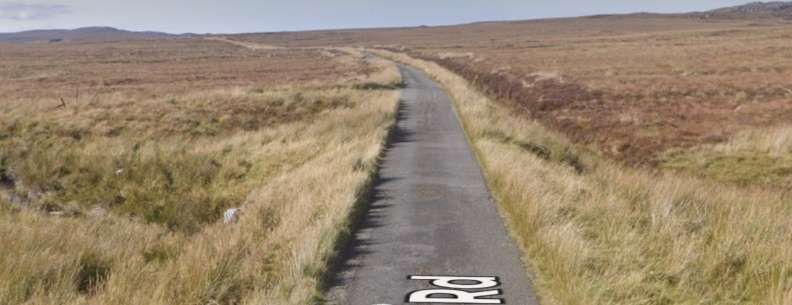
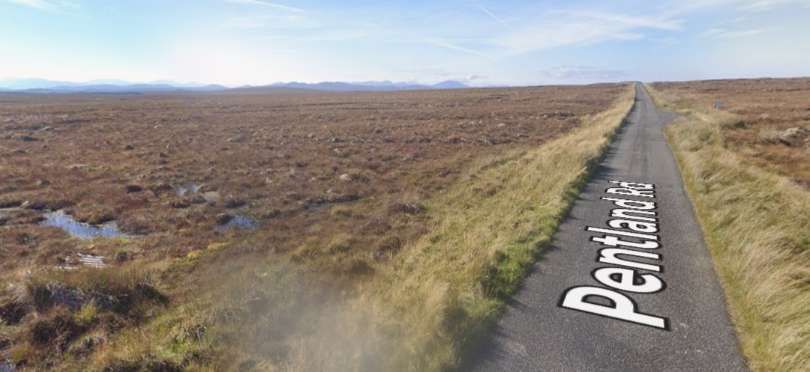
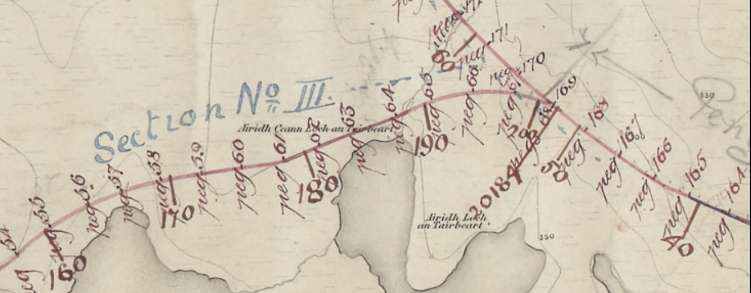
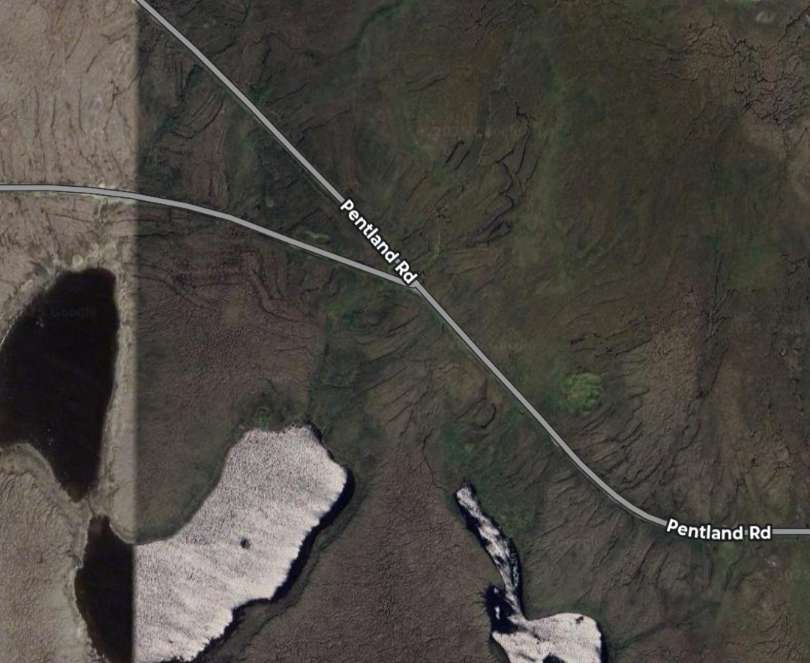
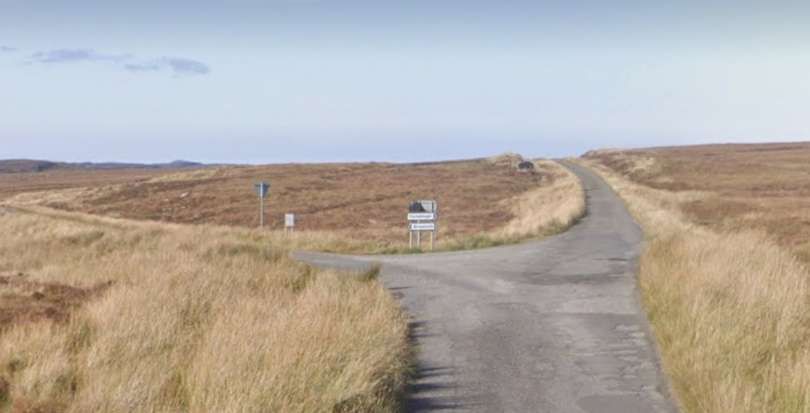
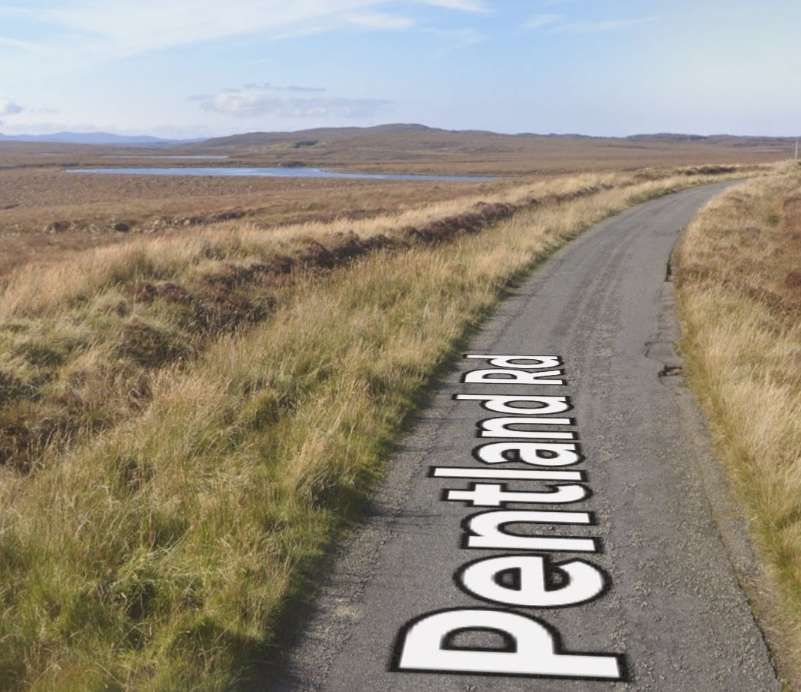
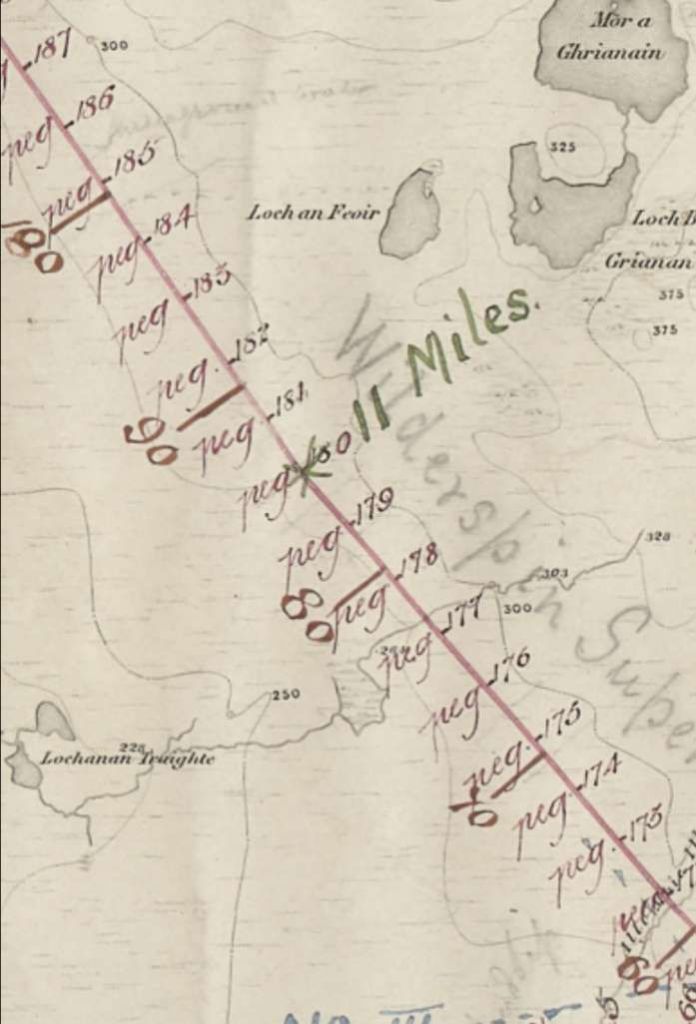
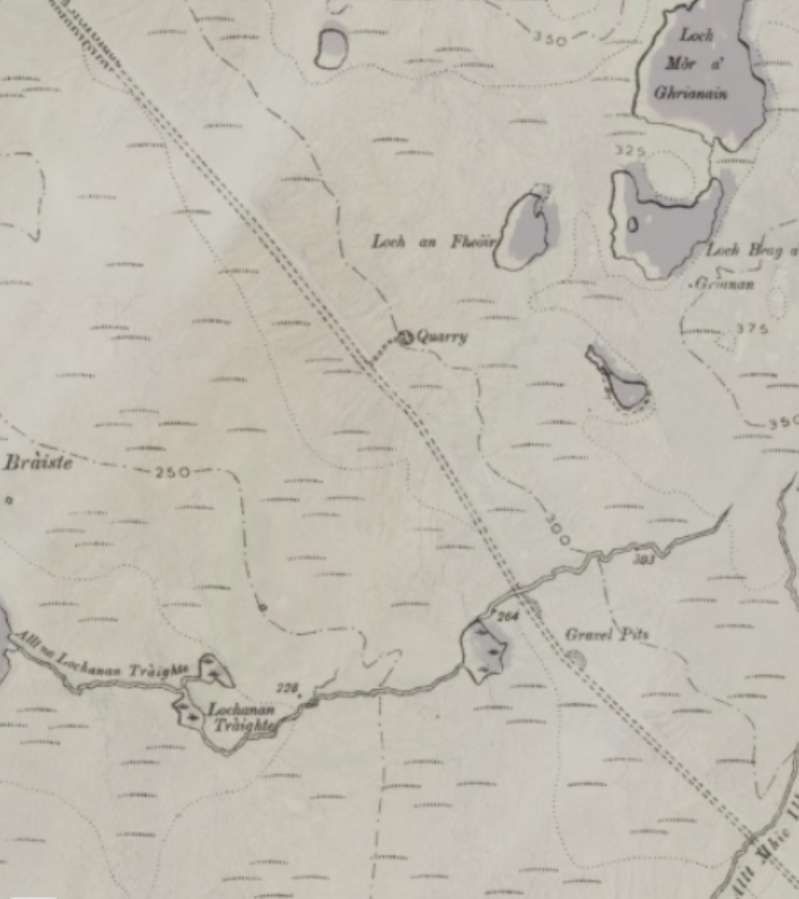
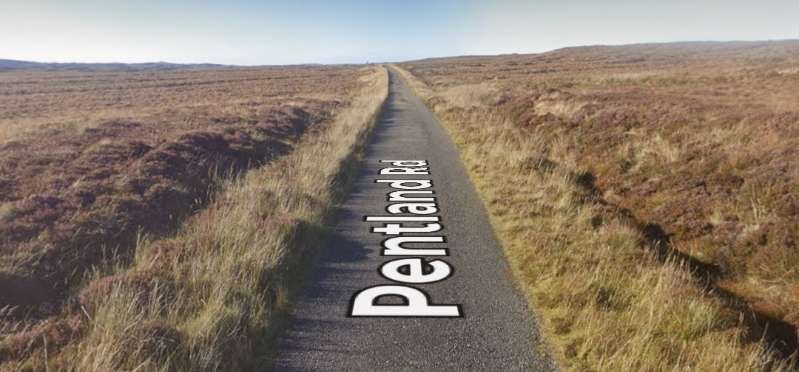
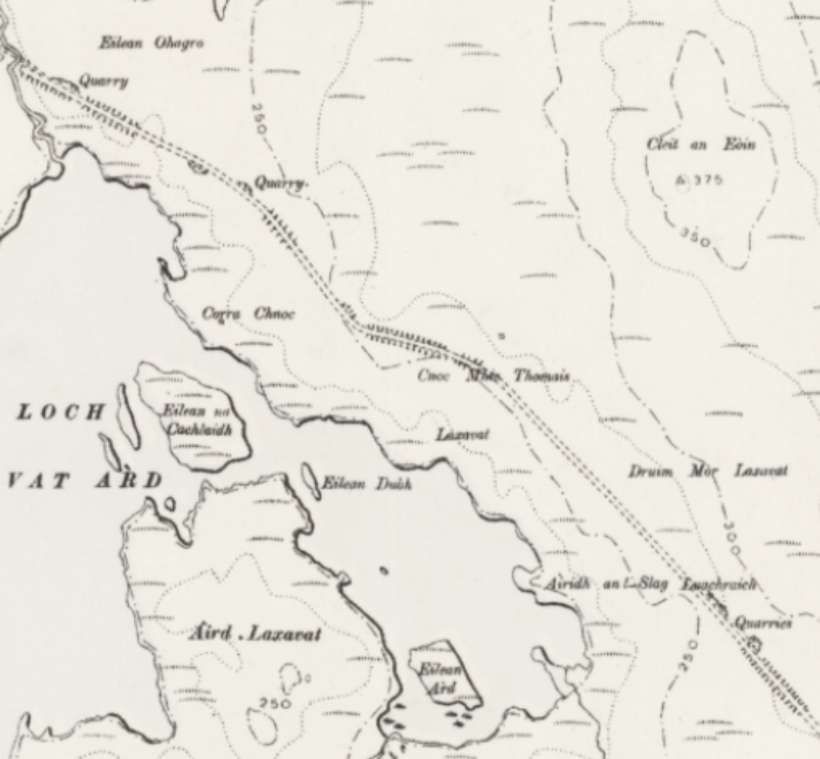
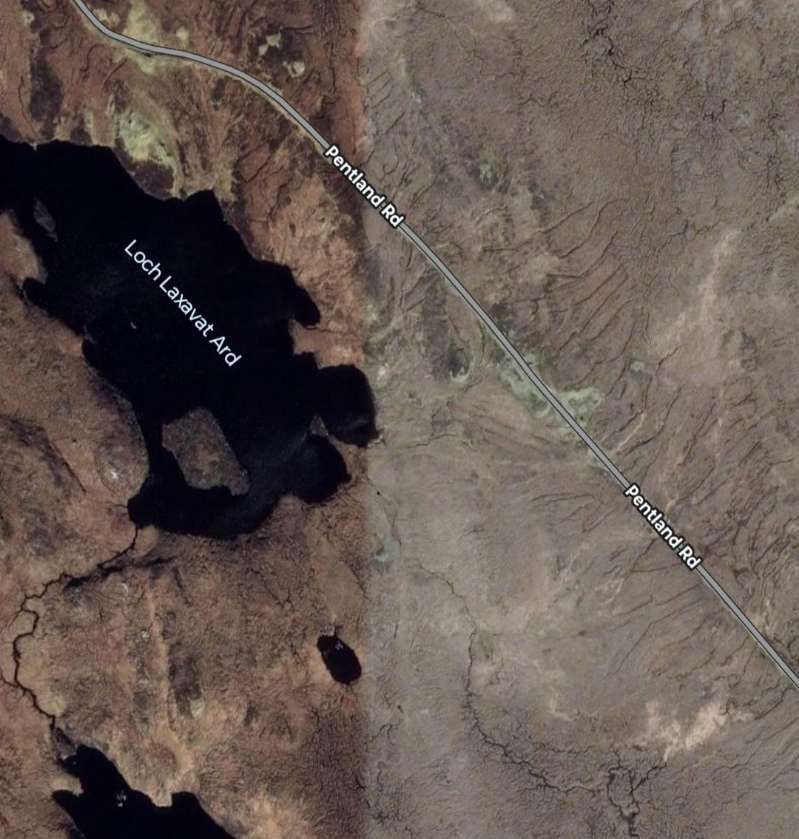
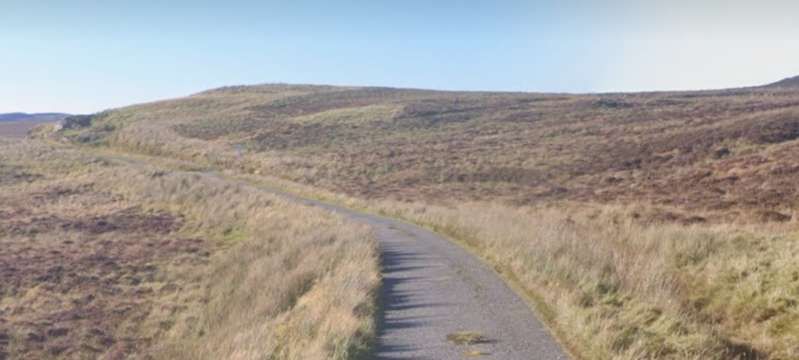
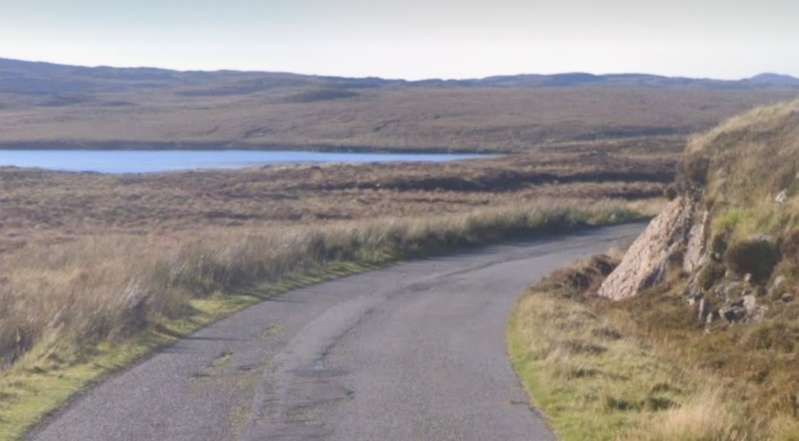
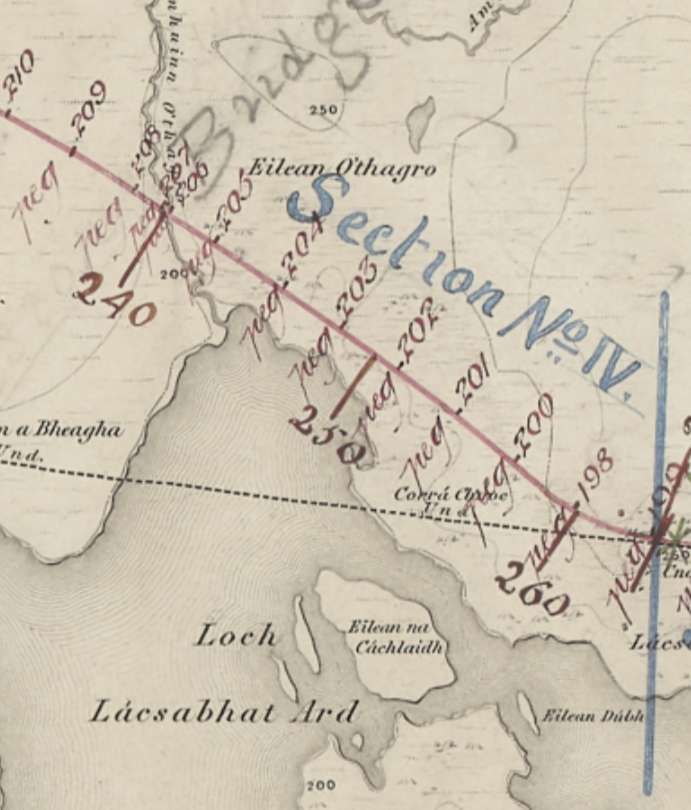
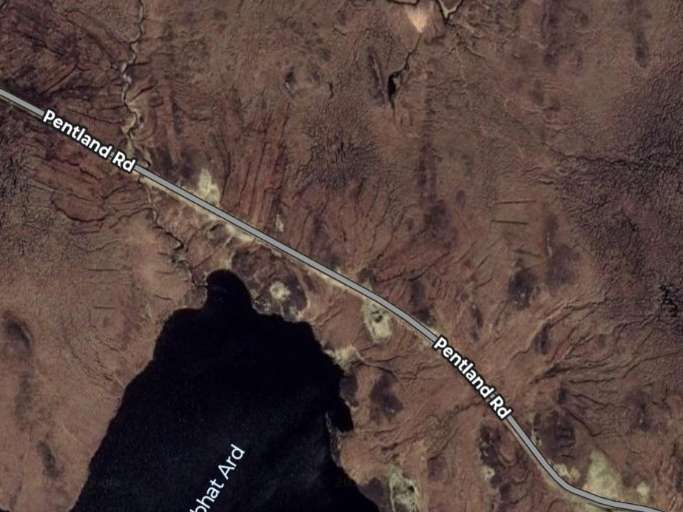
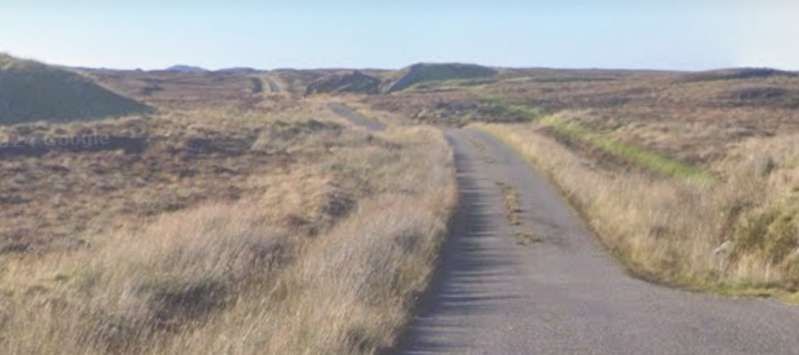
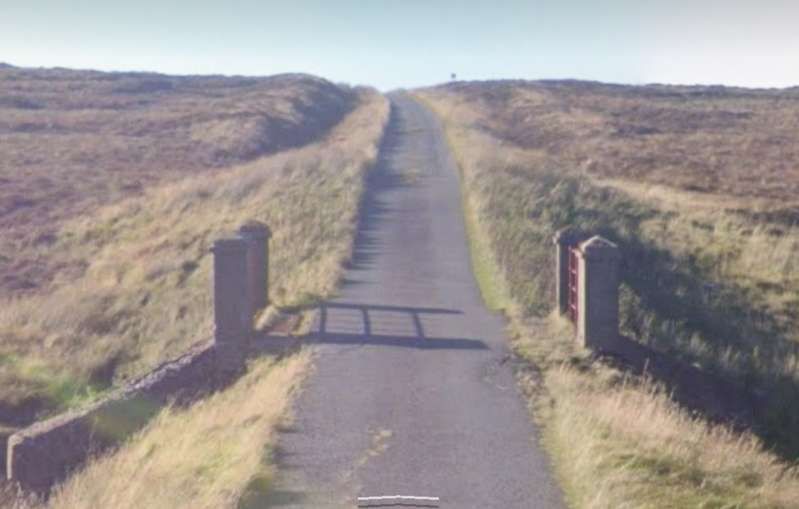
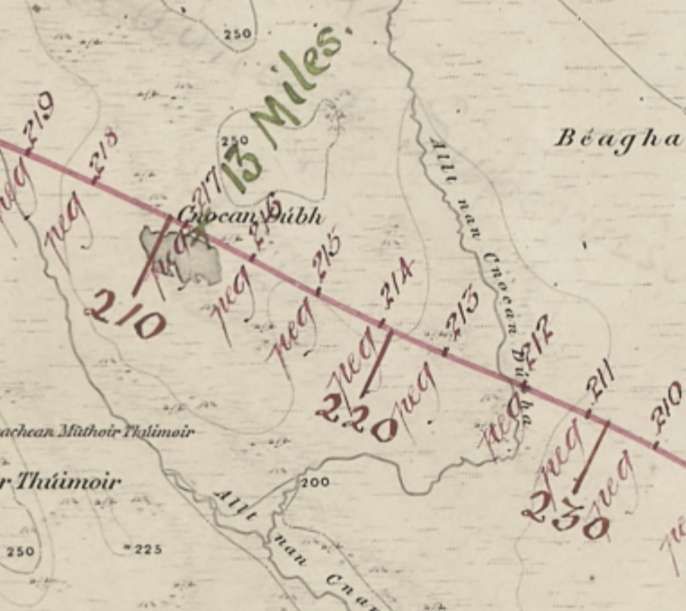
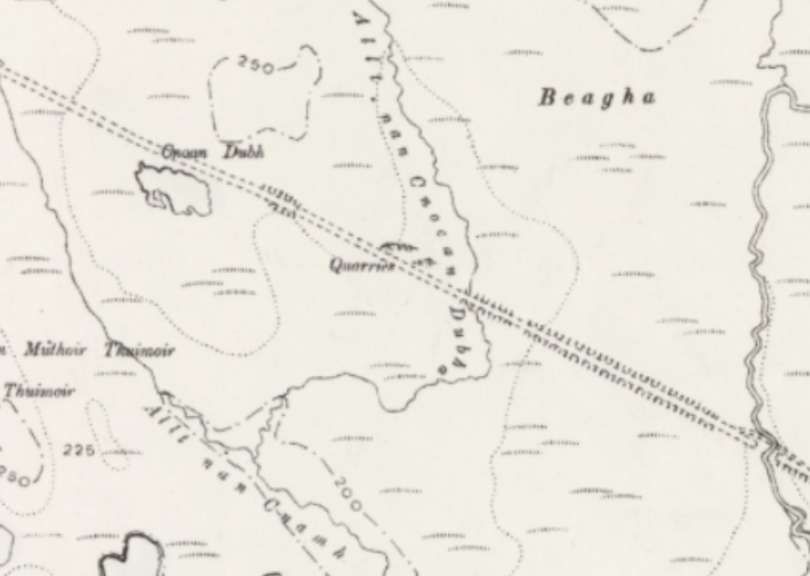
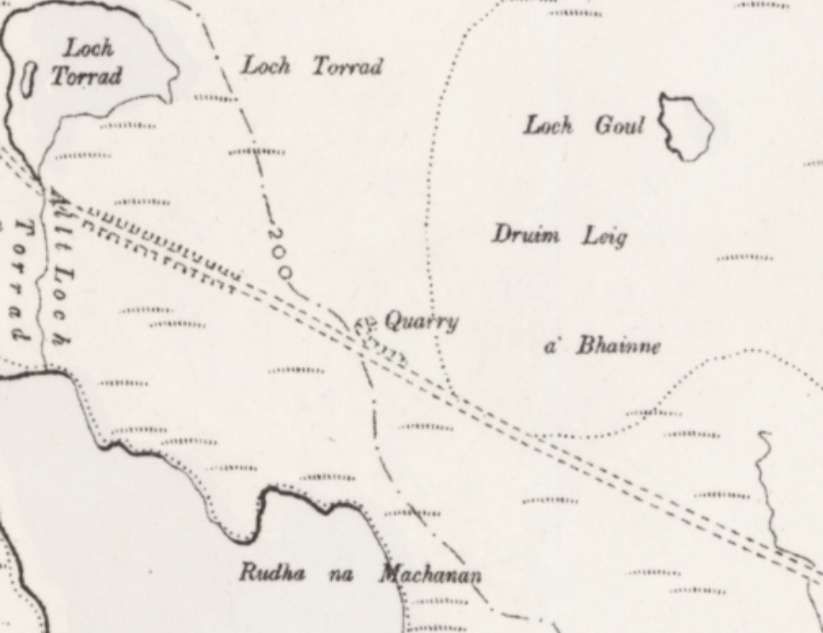
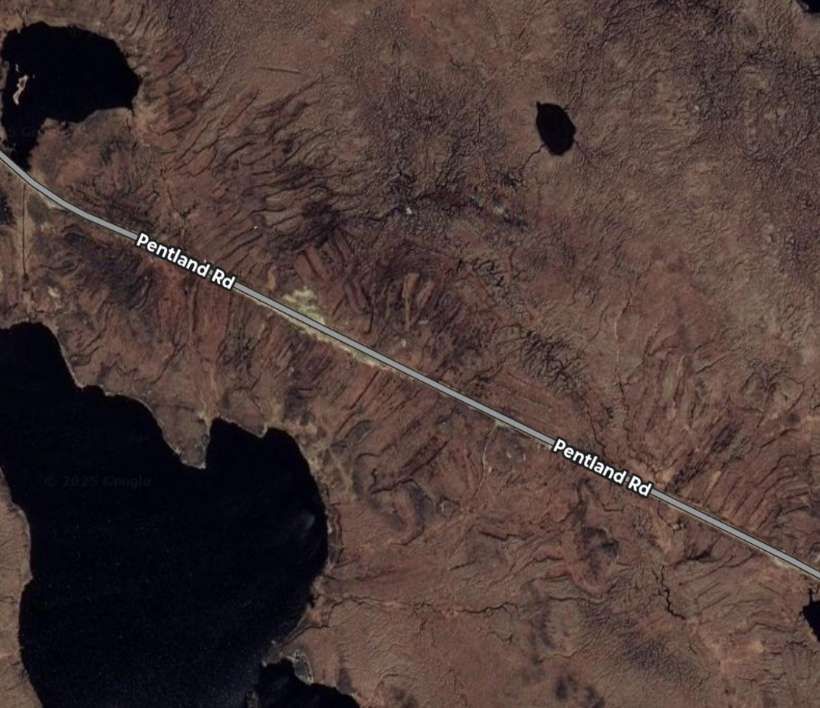
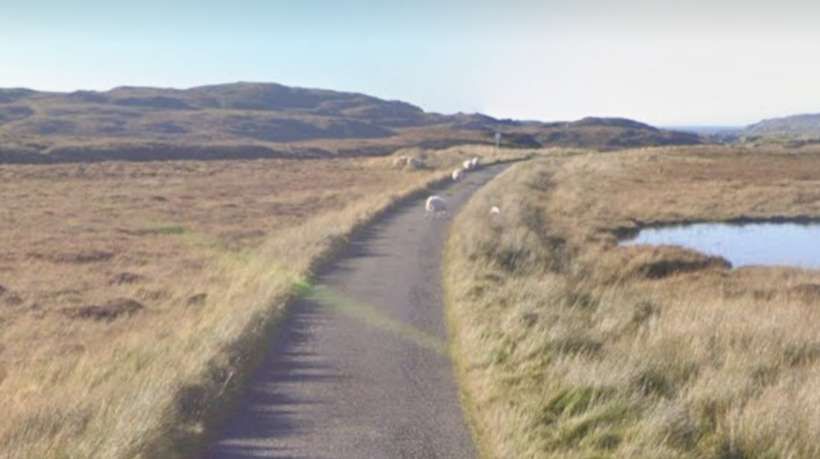
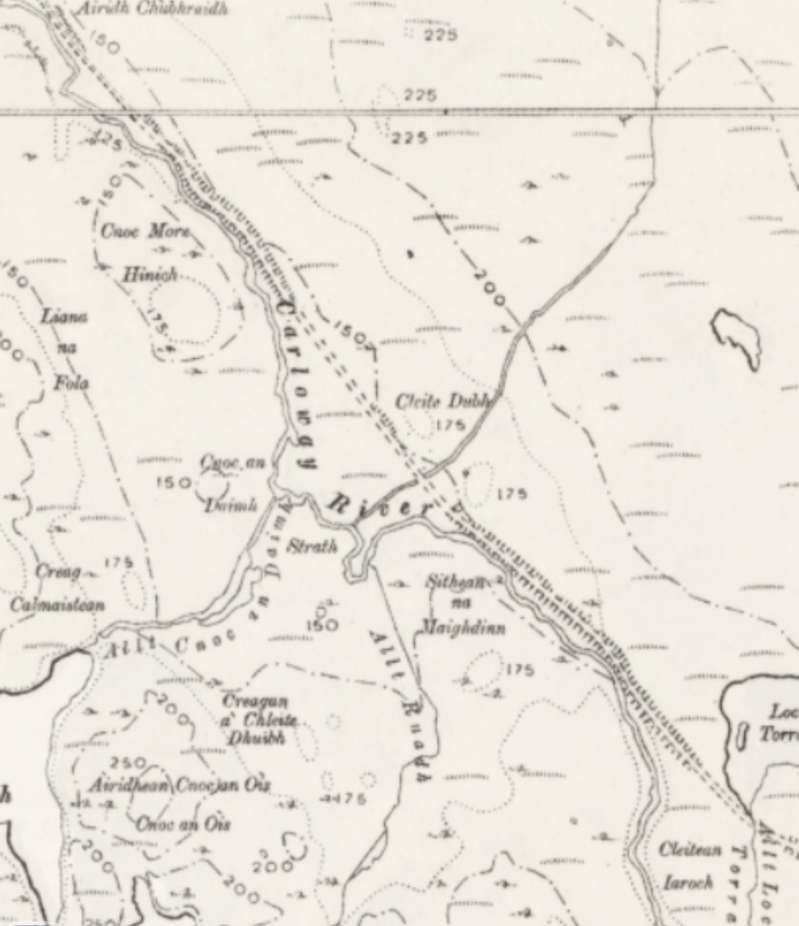
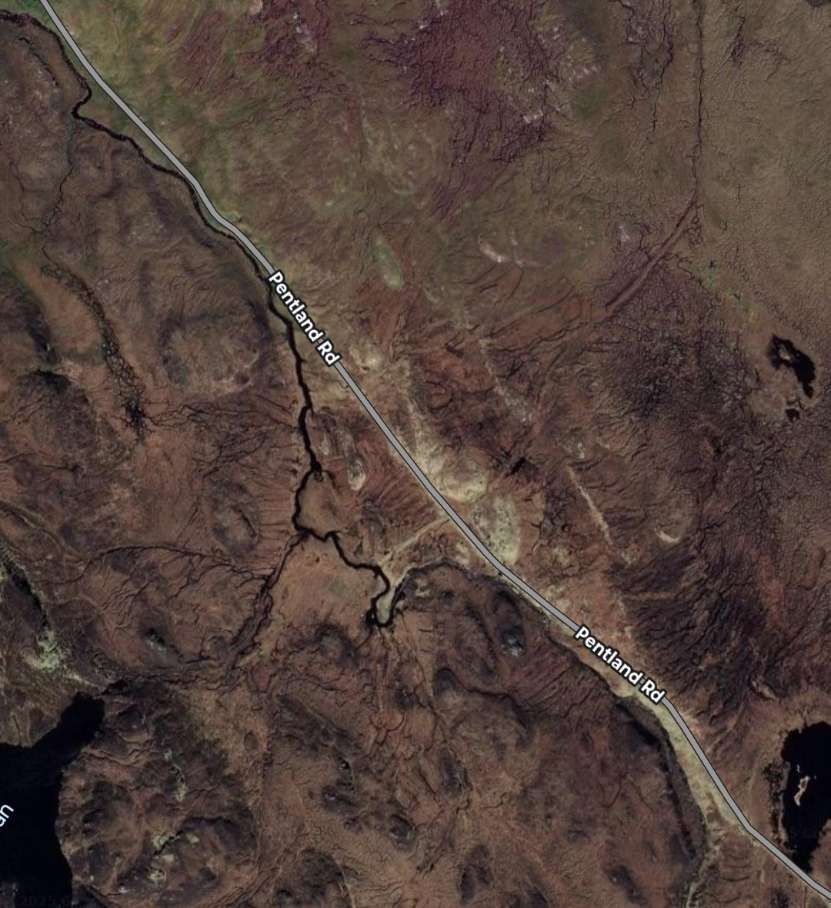
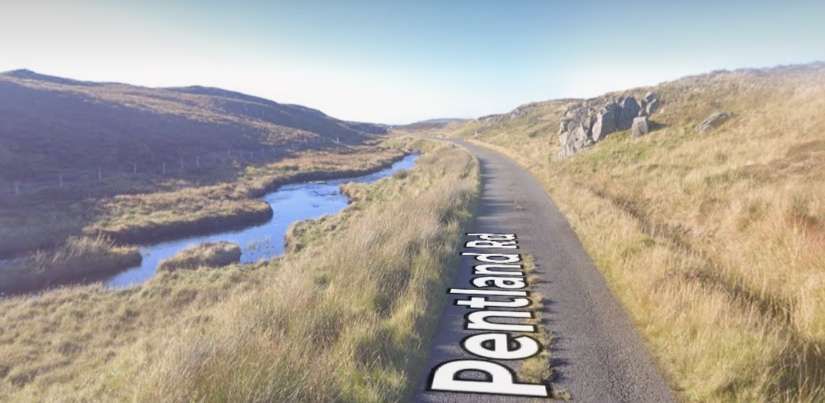
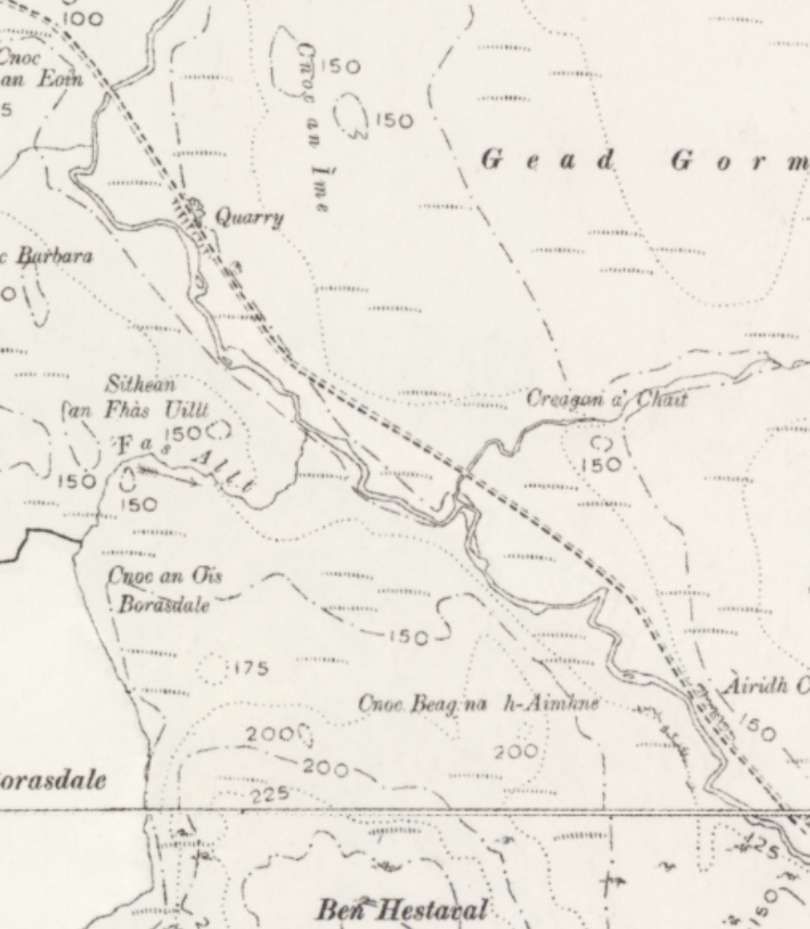
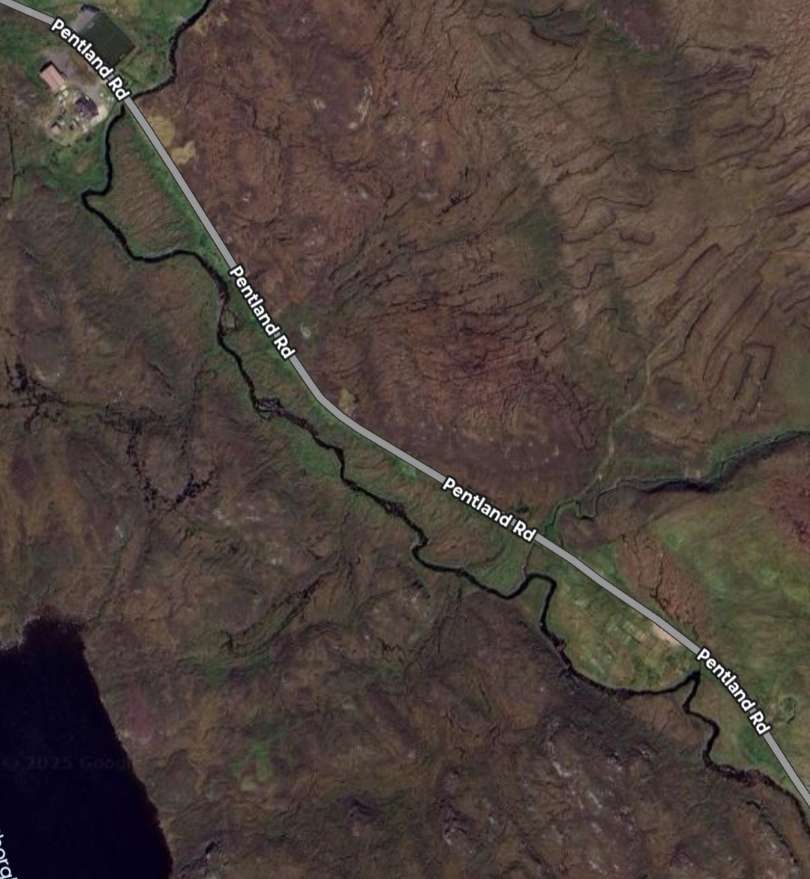
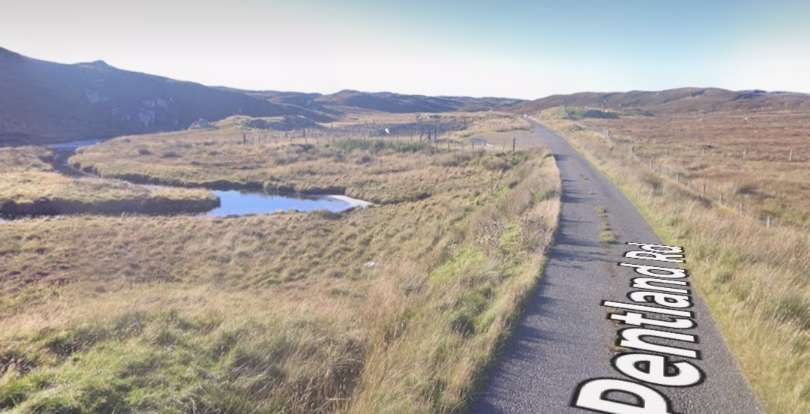
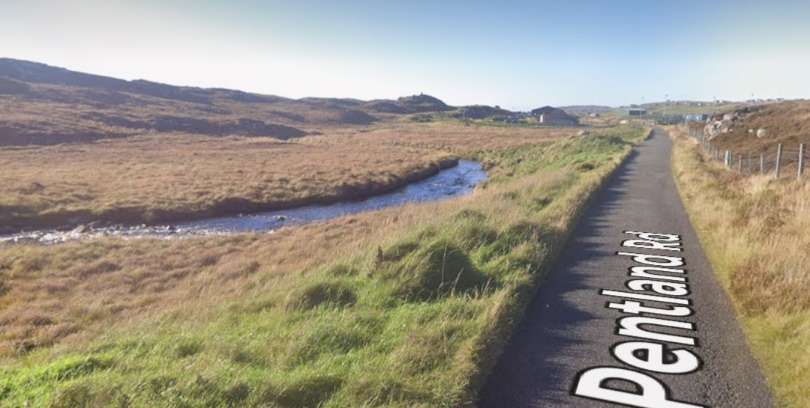
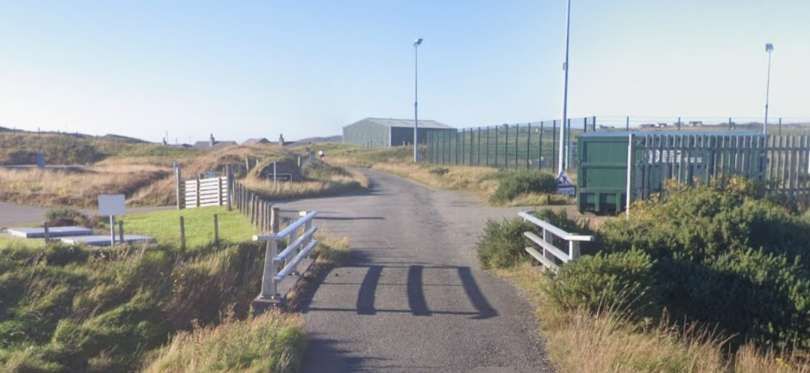
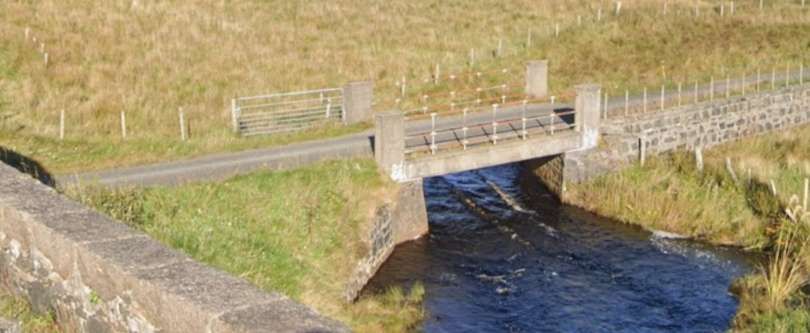
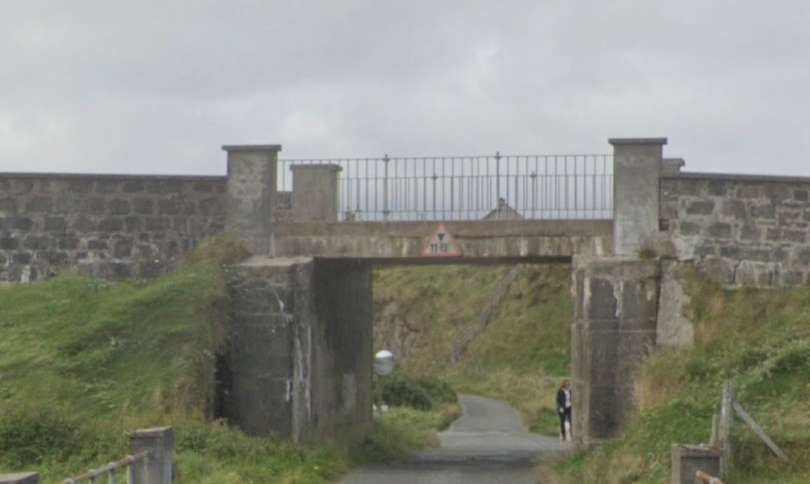
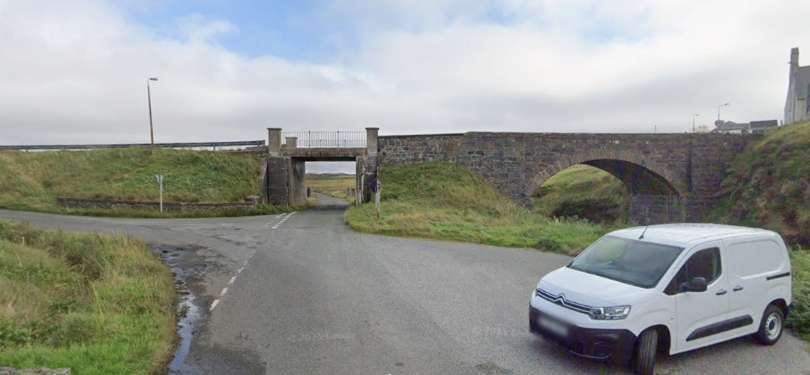
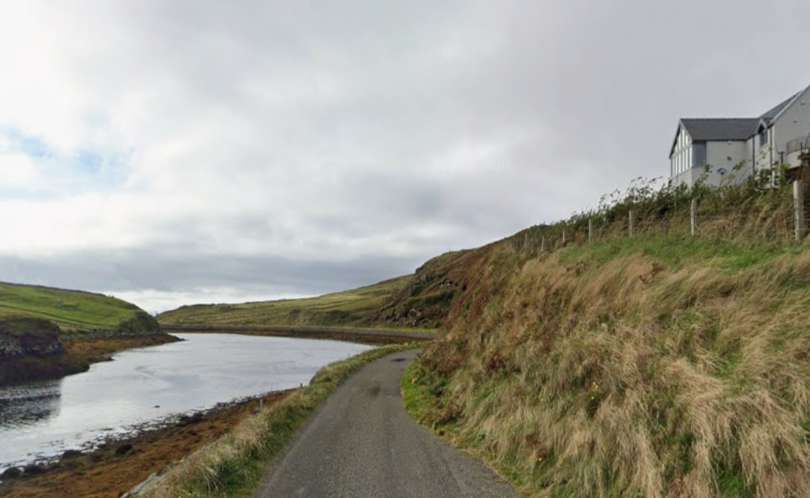
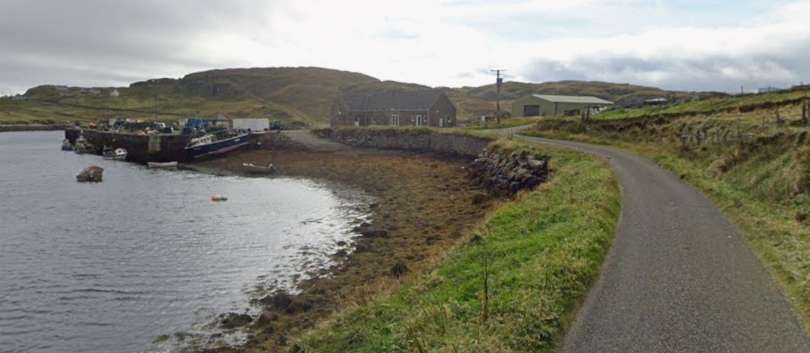
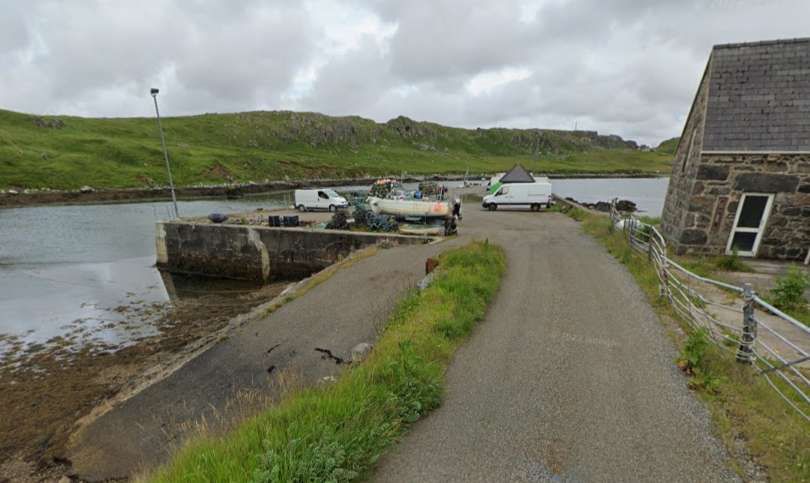
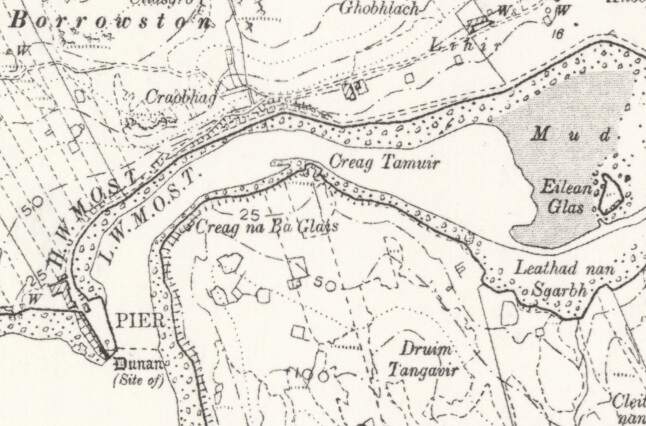
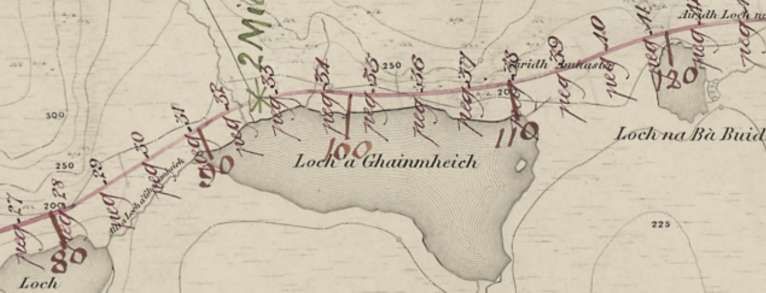
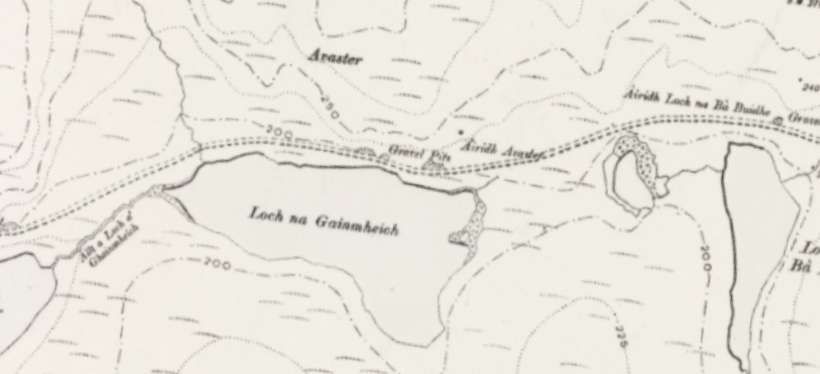
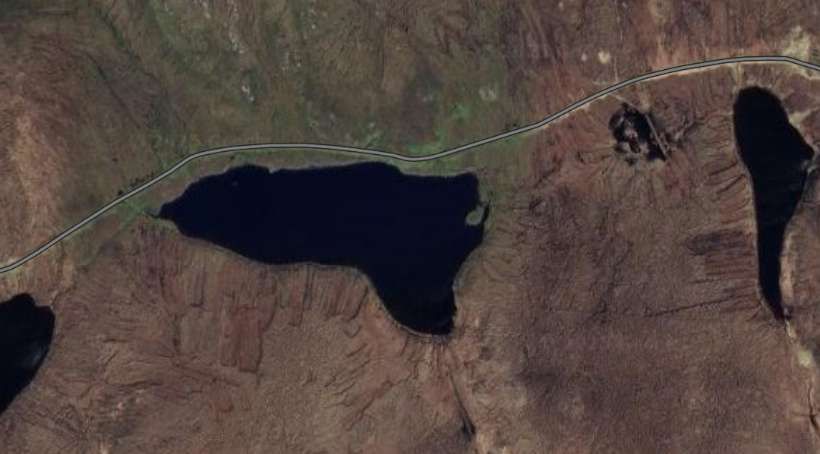
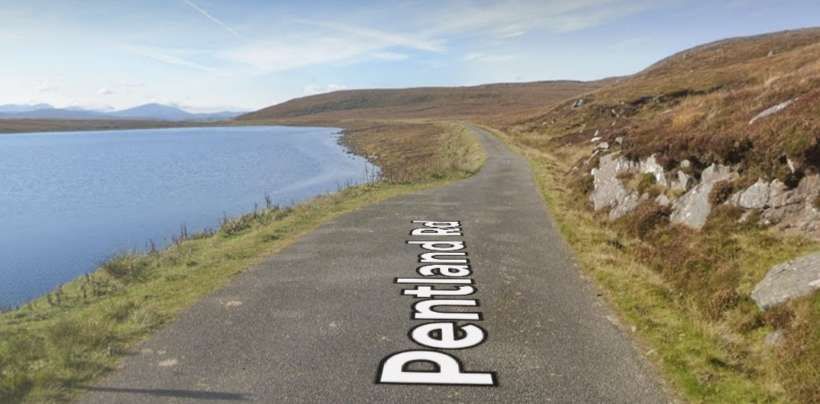
The red line is the line of the 1893 survey. [18]There is a short section – the hypotenuse of a triangle formed by two roads – at the surveyed line which at the turn of the century was no more than a track along the line of the planned railway. There was then a section of road to the South of Mary Hill before the surveyed route separated from existing roads at the East end of Loch Airidh na Lic. [20]The same area as shown in the map extracts above. [Google Maps, July 2025]This photograph looks from Willowglen Road down the first length of the planned railway route which was independent of existing roads. The planned railway would have run ahead down the centre of the image. A lane can be seen to the right side of Willowglen Road which leads onto the old railway route as shown below. [Google Streetview, September 2024] The first length of road built over the line of the planned railway making use of the civil engineering work undertaken before the railway scheme was abandoned. [Google Streetview, September 2024]The A858 enters this photograph from the left and turns left to run directly ahead of the camera. From this point onwards the road which is now the A858 was built over the line of the railway which was not completed. [Google Streetview, September 2024]The view West along the A858 and therefore also along the line of the intended railway. [Google Streetview, September 2024]Further West, another West-facing view along the lines of the planned railway. [Google Streetview, September The route of the planned railway ran along the South shore of Loch Airidh na Luv. [18]The formation for the planned railway can be seen following the surveyed route. [21]The same area as it appears on Google Maps. [Google Maps, July 2025]Looking West along the A858 which is built on the line of the planned railway. Loch Airidh na Luv is on the right of the photograph. [Google Streetview, September 2024]Further West along the A858, also looking West. [Google Streetview, September 2024]The route surveyed continued West along the South side of Amhuinn a’ Ghlinn Mhoir. [18]The formation follows the surveyed route. [22]The same area as it appears on 21st century satellite imagery. [Google Maps, July 2025]Looking West at the third point from the right of the satellite image above. [Google Streetview, September 2024]Looking West at the third point from the right of the satellite image above. [Google Streetview, September 2024]The surveyed route then switches to the North shore of Loch Vatandip. [18]The track follows the surveyed route, bridging Allt Greidaig just East of Loch Vatandip. [23]The same area in the 21st century. The A858 turns away from the surveyed line of the railway and the Pentland Road begins. [Google Maps, July 2025]Looking West at the road junction the images above. The A858 bears away to the left, the Pentland Road continues ahead and bears to the right. [Google Streetview, September 2025]The loch on the left is Loch Vatandip. [Google Streetview, September 2024]Further West along the single track Pentland Road, looking West. [Google Streetview, September 2024]The surveyed route ran West-northwest above the North shore of the loch. [18]While the surveyed line is straight on the map extract above, the line of the track shows a minor deviation as it heads West-northwest between Loch Vatandip and Loch Mor a Chocair. [24]The same area in the 21st century, the same minor deviation in the alignment of the Pentland Road. [Google Maps, July 2025]The same minor deviation in the road alignment seen from the East. [Google Streetview, September 2024]The surveyed route continues on the same bearing. [18]The track on the formation of the proposed railway matches the survey, passing to the South of Loch Beig a Chocair and bridging two streams – Loch a Chocair and the Greta River (or the River Creed). It seems that work on the railway extended to the construction of bridges ready for the final addition of the rails. [25]The same length of road in the 21st century. [Google Maps, July 2025]The first of two bridges on this length of road, built for the railway that never arrived! [Google Streetview, September 2024]The second of those bridges, also seen from the East. [Google Streetview, September 2024]This is the first of four map extracts where the original survey route is shown in blue. The red line being that which was used. No reason for this alteration is provided. [18]Small culverts or pipes are not marked on the OS mapping but there must be one over Allt a’ Bhiorachan at the left of this map extract and possibly two other smaller culverts or pipes close to the centre of the extract. [26]Having checked each of the three locations where streams run under the surveyed route which is now a road, there is no visible structure, so there is probably no more than a drainage pipe at each location. [Google Maps, July 2025]The surveyed route has now turned slightly to run East-West, before turning West-northwest again to the North of Loch an Tobair. [18]It seems that the final alignment of the earthworks prepared for the railway was, over the first half of this extract, North of either of the marked survey lines. A further culvert/pipe must have been provided for the stream flowing South into Loch an Tobair. [27]The same area in the 21st century. [Google Maps, July 2025]No sign of a structure at the point where the feed to Loch an Tobair passes under the road so a drainage pipe must suffice. The wide open skies on Lewis are amazing! [Google Streetview, September 2024]Now back on an West-northwest alignment, the original survey line (blue) and that deemed to have actually been used (red) run in parallel. [18]The same length as it appears on the 6″ OS mapping at the turn of the 20th century. No bridges are marked at the crossing point of the two streams which suggests that smaller culverts or drainage pipes were used. [28]The same area in the 21st century. [Google Maps, July 2025]The first (most easterly) drainage ditch crosses the line at this location, a pipe of some sort must pass under the road. [Google Streetview September 2024]At the second (more westerly) location, standing water is visible to the South of the road, drainage from North to South must be by a pipe. [Google Streetview, September 2024]The two surveyed routes come together again North of the East end of Loch an Laoigh. [18]Three gravel pits are marked along this length of the formation. No bridges are marked so culverts must have been employed for the two watercourses. The track appears to run a little to the North of the surveyed alignment. [29]The two streams shown on the map extracts above. Both show water downstream of the road, one appears to have a corrugated plastic pipe under the road. [Google Maps, July 2025]The location of the more easterly watercourse seen looking West: a plastic pipe can be seen to the left of the road. [Google Streetview, September 2024]Drainage water can be seen to the left of the road in this West-facing view at the location of the more westerly watercourse. No drainage pipe is visible from the road. [The proposed junction with the line to Breasclete heading West-southwest and that to Carloway heading Northwest. [18]The linto Carloway heads Northwest and crosses Allt Mhic Ille Chetheir. [30]The junction: Breasclete is to the East and Carloway to the Northwest. [Google Maps, July 2025]The junction seen from the Southeast. [Google Streetview, September 2024]The road to Carloway: both arms of the road are called Pentland Road. [Google Streetview, September 2024]The proposed line ran to the West of a group of three lochans – Loch Mor a Ghrianain, Loch Beag a Ghrianain and Loch an Fheoir. [18]Continuing Northwest the planned line to Carloway crossed Allt nan Lochanan Traighte and ran passed a small quarry which was not marked on the 1″ mapping of the 1850s. [31]The modern road continues to follow the planned railway route. Google Maps, July 2025]The road travels on a causeway with drainage ditches on each shoulder. [Google Streetview, September 2024]The surveyed route curves around the top of Loch Laxavat (Lacsabhat) Ard. [18]A larger area than shown on the survey sheet above which shows clearly a relatively tight curve on the alignment of the railway formation to the Northeast of the Loch. [32]This satellite image matches the area shown on the extract from the 1″ Ordnance Survey of the 1850s. [Google Maps, July 2025]The road follows the planned railway route curving to the left to avoid higher ground. [Google Streetview, September 2024]Then curving to the right around a rock outcrop. [Google Streetview, September 2024]The tight curve mentioned in the notes about the extract from the 6″ OS mapping above appears towards the bottom-right of this extract from the survey plans. [18]This 6″ OS extract takes the line to a point just to the West of the River Ohagro which feeds onto the North of Loch Laxavat Ard. It will be noted that there is a break in the embankments built for the proposed railway where a bridge would have been placed over the river. A short diversion provides access by means of a ford across the river. The ‘as built’ looks NE of embankments do not follow the survey to the East of the River Ohagro. [33]A similar area to that shown on the 6″ Ordnance Survey. [Google Maps, July 2025]The road can be seen undulating ahead, possibly foreshortening exaggerates this effect. The 6″Ordnance Survey shows that embankments were constructed at the end of the 19th century. [Google Streetview, September 2024]The bridge over the River Ohagro which feeds into Loch Laxavat Ard. This bridge was not constructed as part of the railway contact and had to be built as part of the construction of the Pentland Road early in the 1910s. [Google Streetview, September 2024]Another culvert takes the line over the Allt nan Cnocan Dubh. [18]This next extract from the 6″ Ordnance Survey takes the track beyond Conan Dubh to approximately the same point on the surveyed line as the 1″ extract above. [34]A very similar length of the road as shown in the map extracts above. [Google Maps, July 2025]Looking Northwest along the Pentland Road at the centre of the satellite image above. [Google Streetview, September 2024]Further West the road curves round a rick outcrop on the North side of Conan Dubh. [Google Streetview, September 2024]This next length of the survey takes the proposed line as far as Loch Thorrad. [18]No obvious provision is made for the proposed line to cross the Allt Loch Thorrad, so a culvert or drainage pipe must be presumed. [35]This satellite image takes us as far as Loch Thorrad (which can be seen on the North side of the road at the left side of the image. [Google Maps, July 2025]Loch Thorrad is to the right of the road as it curves a little to the Northwest. [Google Streetview, September 2024]From Allt Loch Thorrad onwards the line heads Northwest. [18]After crossing the Allt Loch Thorrad the earthworks got the planned railway stay to the Northeast of the Carloway River. One tributary to the Carloway is crossed as the proposed line headed Northwest. [36]The road now follows the valley of the River Carloway. [Google Maps, July 2025]This and the next image show the road following the planned railway route alongside the River Carloway. [Google Streetview, September 2024]The road picks its way between rock outcrops and the river. [Google Streetview, September 2024]The earthworks remain on the Northeast side of the Carloway River for most of this length. [18]The same length of the proposed railway. The Carloway River stays on the Southwest side of the river until the top-left of this extract, where the line crosses the River. One stream is culverted under the railway. [37]We are relatively close to Carloway: the road follows the Northwest bank of Carloway River before the river passes under the road near the top-left of this satellite image. [Google Maps, July 2025]This and the next image are two photographs showing the Carloway River meandering around close to the road. [Google Streetview, September 2024]Buildings at the edge of the village of Carloway can just now be picked out in the distance e. [Google Streetview, September 2024]Looking Northwest along the Pentland Road over the bridge carrying the road over the Carloway River which flows left to right under the bridge. [Google Streetview, September 2024]Two alternative alignments for the proposed railway appear again close to Carloway. The original surveyed route is shown by the blue line. The planned route was moved so as to avoid the better farmland. [18]Track which follows the formation of the planned railway crosses Gil Fasgro and runs immediately adjacent to the Carloway River. [38]The Pentland Road runs down towards Carloway following approximately the red line from the survey. Google Maps, July 2025]At the junction in the bottom-right of the satellite image the Pentland Road heads North following the river valley. [Google Streetview, September 2024]The Pentland Road runs alongside the Carloway River. [Google Streetview, September 2024]Closer to Carloway and still alongside the River. [Google Streetview, September 2024]On the right of the image the Heidagul River joins the Carloway River and from this point on the combined stream is known as the Heidagul River. Google Streetview, September 2024]The final length of the survey shows the revised alignment (in red) close to the river and crossing the Carloway River close to Carloway Bridge. The surveyed route extends as far as the pier a Borraston, Dunan Pier. [18]The last length of the Carolway line as recorded in the bundle from the National Archives that ‘Tom’ discovered and wrote about on his blog. [54]This extract from the 6″ Ordnance Survey of the turn of the 20th century covers a similar area as the 1″ map extract above. The pier can be seen bottom-left. The line of the planned railway is less clear from the 6″ OS in Carloway but becomes much clearer on Google Streetview images as it follows the North shore of the estuary. [39]The 21st century satellite imagery highlights.more clearly the route of the planned railway and what became the Pentland Road through to the Dunan Pier near Borraston. Of particular interest is the arrangement of structures close to Carloway Bridge. A bridge over the Heidagul River and a bridge which now carries road over road will both have been built as part of the aborted railway works. [Google Maps, July 2025]This view shows the two structures noted above. The masonry arch structure is Carloway Bridge which carries the modern A858. The bridge over the river in the foreground was built for the railway as was the bridge which carries the A858 over Pentland Road. [Google Streetview, September 2024]The bridge over the Heidagul River built for the planned railway, seen from Carloway Bridge. [Google Streetview, September 2024]A closer view from the East of the bridge built to carry the road over the railway that never was! [Google Streetview, September 2024]Looking back East towards the two bridges carrying the A858 in Carloway. [Google Streetview, September 2024]
The next seven images form a sequence showing the last length of the route to the pier at Borraston. Note the causeway in the third image which will have been built for the railway. …
The pier at Dunan near Borraston. [All seven images: Google Streetview, September 2024]Dunan Pier was the end of the line: shown here in an extract from the 6″ Ordnance Survey 2nd Edition from the end of the 19th century. [49]
The Junction to Breasclete
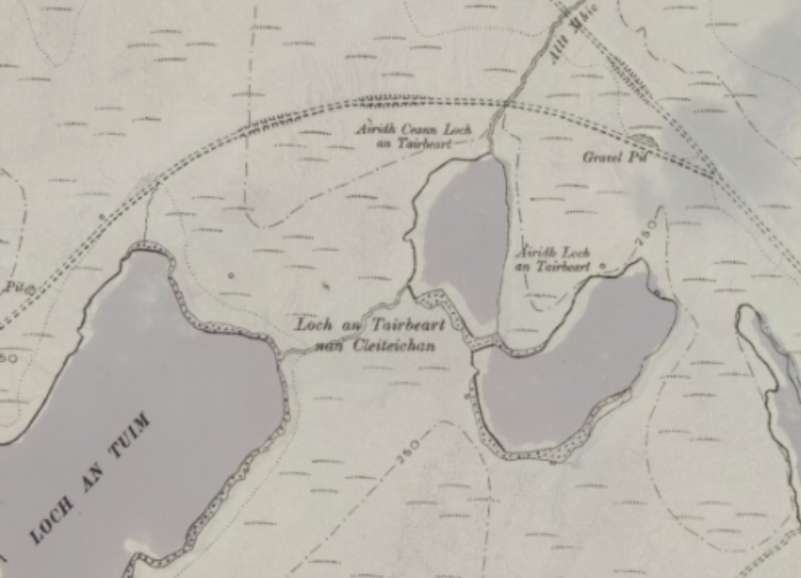
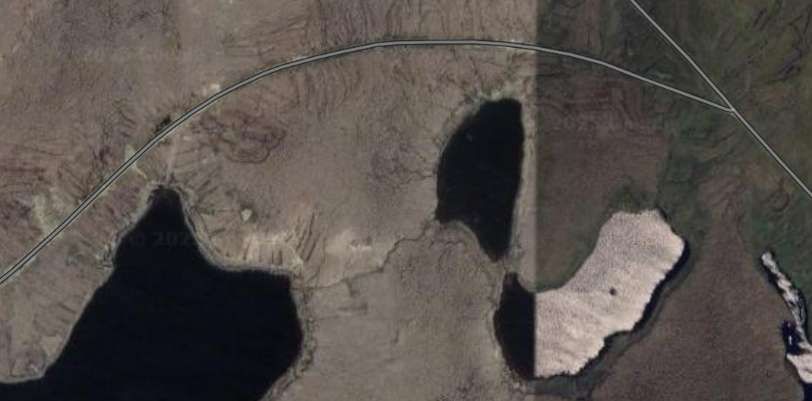
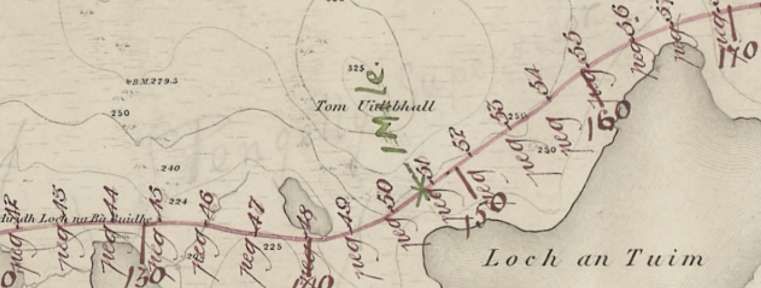
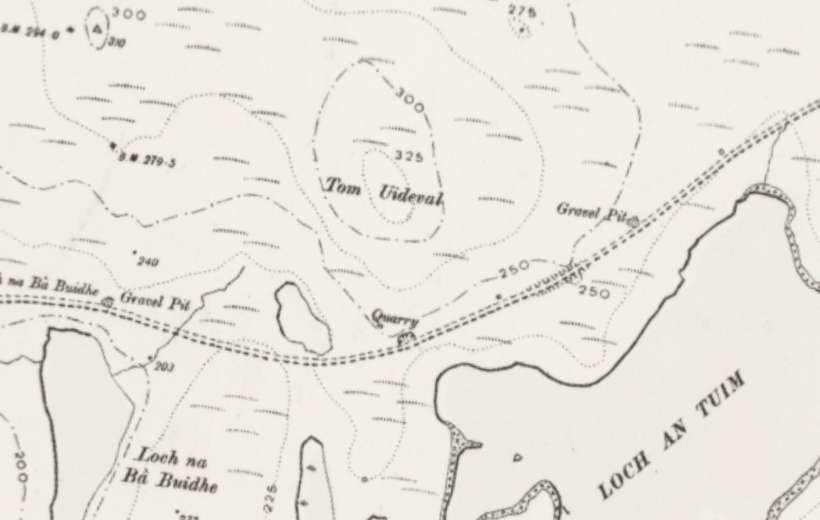
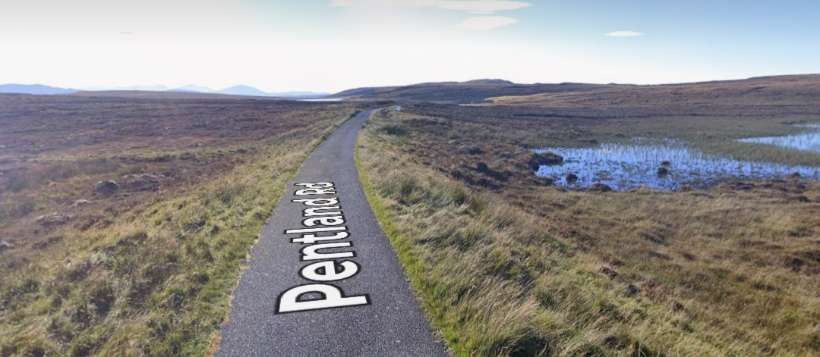
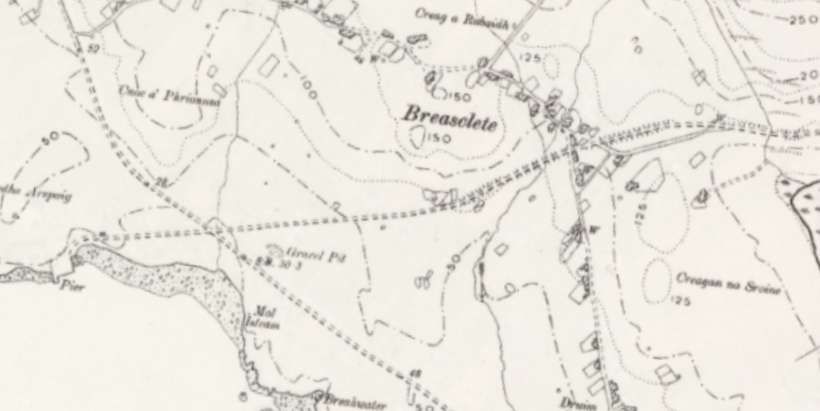
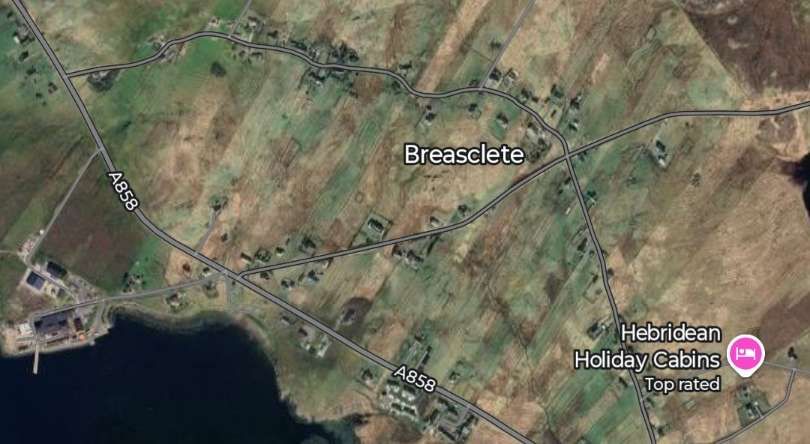
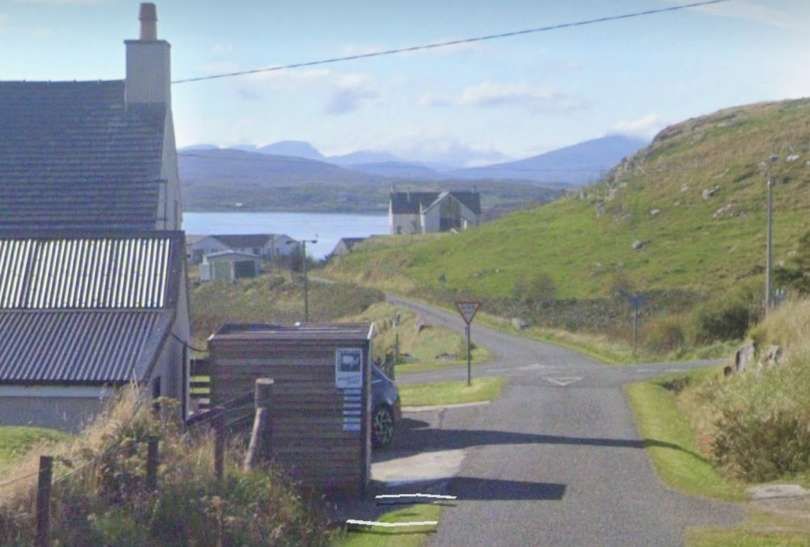
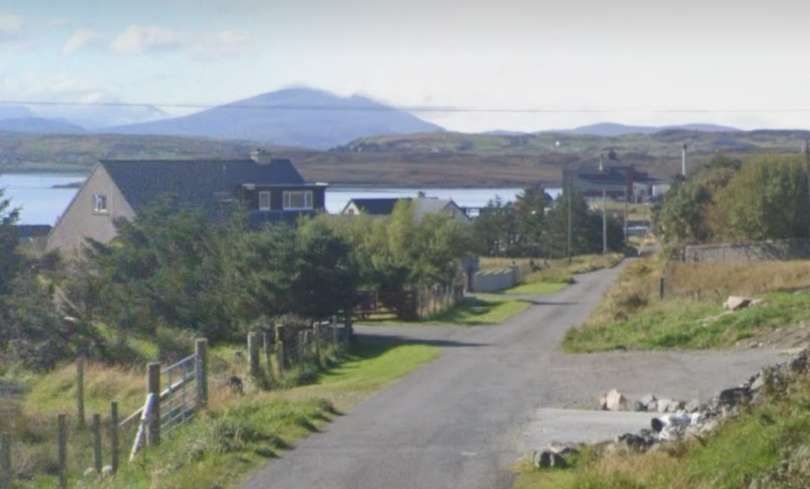
The surveyed route of the branch line to Breasclete curved round the North side of Loch an Tairbeart nan Cleiteichan and Loch an Tuim. [18]The track which appears on the 6″ OS mapping from the turn of the 20th century takes a single radius curve a little to the North of the surveyed alignment. [30]The single track road built on the earthworks of the abortive railway project curves round the North side of Loch an Tairbeart nan Cleiteichan and Loch an Tuim. It is a smooth curve as shown on the 6″ Ordnance Survey from the turn of the 20th century. [Google Maps, July 2025]The road to Breasclete is also called Pentland Road. It heads away to the left of th. [Google Streetview, September 2024]The surveyed route then turns to a Westerly alignment South of an unnamed lochan and across the North end of Loch na Ba Buidhe. [18]Another small quarry sits on the North side of the track. Presumably the small quarries at intervals along each of the planned railway routes were used to supply stone for embankments along the formation. [40]The same length of the road. [Google Maps, July 2025]The view West from the centre of the satellite image above. [Google Streetview, September 2024]The surveyed route ran across the North side of Loch na Ba Buidhe, Loch a Ghainmheich and Loch Avaster (Amhaster), turning to head West-southwest. [18]The same area as it appears on the 6″ Ordnance Survey from the turn of the 20th century. [41]The same area in the 21st century. [Google Maps, July 2025]Looking West from the centre of the satellite image above. Loch a Ghainmheich is on the left . [Google Streetview, September 2024]Continuing in a Southwesterly direction, the surveyed route ran on the North side of Loch na Beinne Bige. [18]A similar area as it appeared at the end of the 19th century. The track following the built formation for the railway follows the surveyed alignment closely but turns away from it to the left of this map extract. [42]The same area as shown on the 6″ Ordnance Survey extract above. [Google Maps, July 2025]Allt Glas flows under the road, presumably in a drainage pipe, twice the first of these locations is shown here. [Google Streetview, September 2024]Allt Glas flows under the road again although it appears to both pass under the road and to have found a path on the North side of the road. [Google Streetview, September 2024]Allt Bealach na Beinne also passes under the road, Allt Glas joins it on the left of this photograph. [Google Streetview, September 2024]Looking West-southwest along Pentland Road, Loch Na Beinne Bige is on the left. [Google Streetview, September 2024]The final length of the surveyed route for the planned railway. Two alignments are shown, the original (in blue), the revised (in red). [18]This extract comes form the documents held by the National Archives and photographed by ‘Tom’ for his blog as noted below. [54]The track which follows the prepared formation for the planned railway passes to the North of both of the surveyed routes as it runs through the village of Breasclete, regaining the red surveyed alignment to the West of the village and running through to the pier. [43]A very similar area to that shown on the 6″ OS map extract above. [Google Maps, July 2025]Facing West-southwest approaching the crossroads in Breasclete. [Google Streetview, September 2024]Continuing West-southwest along Pentland Road towards the pier at Breasclete. #[Google Streetview, September 2024]The second crossroads in Breasclete. [Google Streetview, September 2024]Approaching the pier at Breasclete. [Google Streetview, September 2024]
We have followed the two lines that almost got built on Lewis. sadly, lack of funding resulted in a project that was quite well advanced, being abandoned. As noted, the earthworks were later (1912) used to create the single track Pentland Road which appears in many of the modern images above. There remains some uncertainty over whether the early construction works were designed first for a railway or were just designed as an easily graded public road. [50] It is possible that some construction work for a road was undertaken but the National Archives hold plans for a railway dated to the same period, predating the construction of the Pentland Road which was not completed until 1912. [53]
The plans, which include proposals for railways on Skye and on Lewis were accessed by ‘Tom’ in preparing for a modelling project centred on these intended railways. This image comes from an early blog. [53] The images relating to Lewis come from a later blog. [54]
Lord Leverhulme’s Planned Railway Station, Stornoway
Lord Leverhulme was very interested in town planning, The National Library of Scotland has on its website, a town plan of Stornoway drafted by James Lomax-Simpson, Leverhulme’s godson and also his chief architect at Port Sunlight. The plan is entitled, ‘Port Sunlight plan of Stornoway, showing proposed lay-out’ and is dated 16th July 1919. It is 710 mm x 710 mm in size. The plan is included on the website, courtesy of The Stornoway Trust. [44]
“Simpson took charge of the Architectural Department of Lever Brothers from 1910 and he was made a director in 1917. In his role as Company Architect, he worked in over twenty-five different countries around the World, but he also carried out much work for Lever himself, including alterations and additions to Lews Castle. The plan also illustrates part of Leverhulme’s ambitious ideas for redeveloping Stornoway along garden city lines, with new suburbs, broad avenues, circuses, and open spaces. The new planned railways, that were part of the wider plans for the economic transformation of Lewis, curve in and down to the Harbour on the eastern side of the town. Existing roads are shown with dashed lines. In places, ‘Parlour Cottages’ were planned, which had been constructed at Port Sunlight, as larger ‘Arts and Crafts’ residences for working families with a parlour at ground-floor level. Although visionary and ambitious, some of the new planned streets would have demolished much of the original old town. Over time, the plans were subsequently altered, shown as annotations on top of the original plan. Some construction began along these lines in the 1920s, but economic difficulties and considerable opposition to Leverhulme’s plans by the islanders curtailed developments, and the schemes were largely abandoned by 1923.” [44]
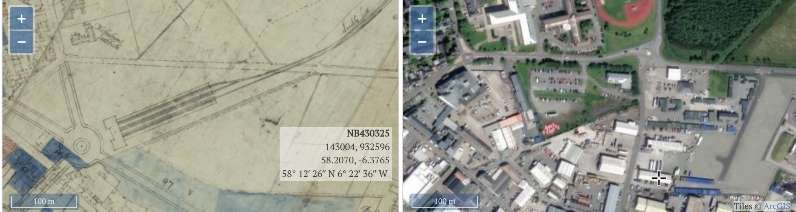
Small extracts from the plan are included here. They show a proposed railway station close to the Harbour on the East side of the town. Each of the three extracts is paired with the ESRI satellite imagery provided by the NLS. …
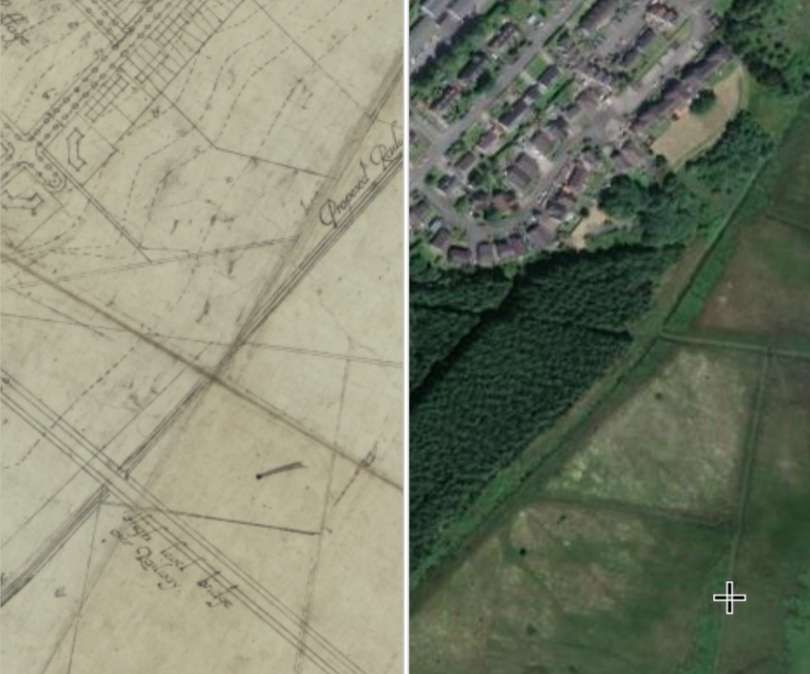
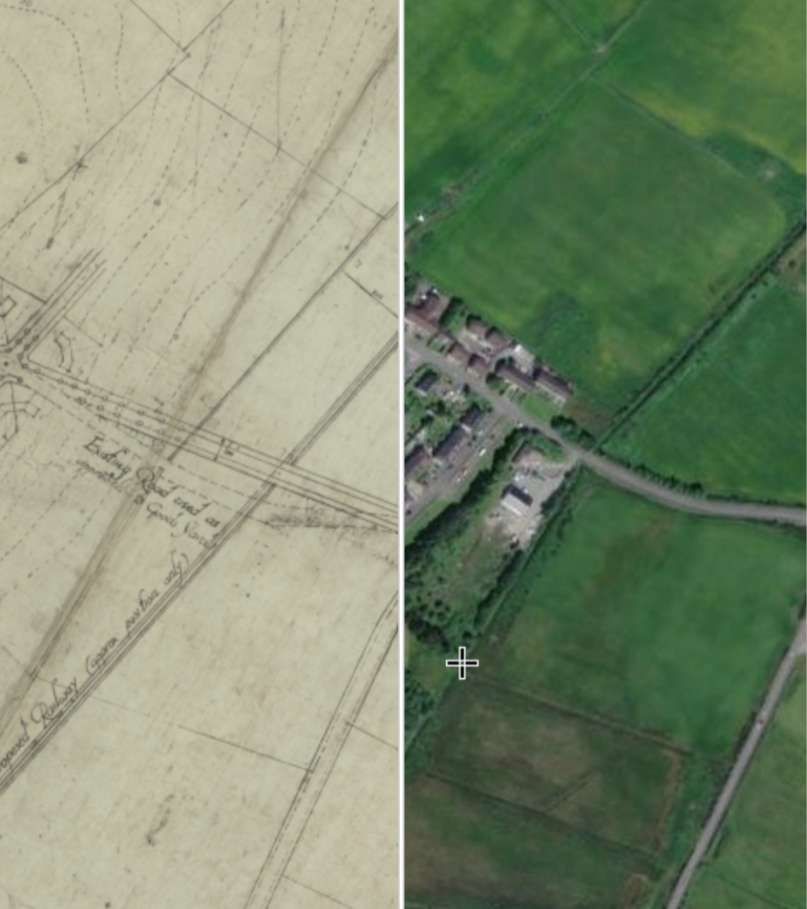
The proposed station location with the main station building facing out onto a circus/roundabout close to the harbour. [44]A double track line was planned Northeast from the station. [44]The detail becomes more sparse further Northeast. [44]
These plans did not see the light of day!
Goat Island
Lord Leverhulme’s plans included the construction of a causeway to link Goat Island to the mainland and the provision of additional quays on the West side of the island. He expected to provide a light railway along the causeway to link his Cannery and associated industries to the quays. John & Margaret Gold provide a plan showing Leverhulme’s intentions for Stornoway and Goat Island. [45: p200]
John & Margaret Gold comment that in Leverhulme’s Plan: “An industrial area was located in the east of the town. Goat Island would act as home base for the MacLine Drifters and Trawler fleet and was joined to the mainland by a causeway. The ice plant and cannery were situated inland near the site of the existing fish-oil and guano works. A light railway would connect them with the quays. There were tweed mills, electricity generating plant, a laundry and a dairy to take the increased output from the east coast farms. Between the industrial area and the residential districts was the railway station serving both freight and passenger purposes.” [45: p200]
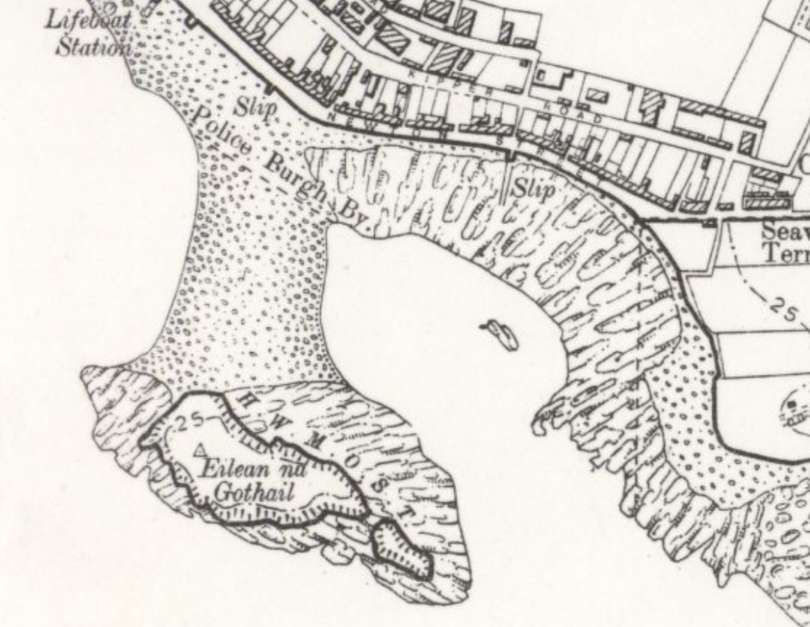
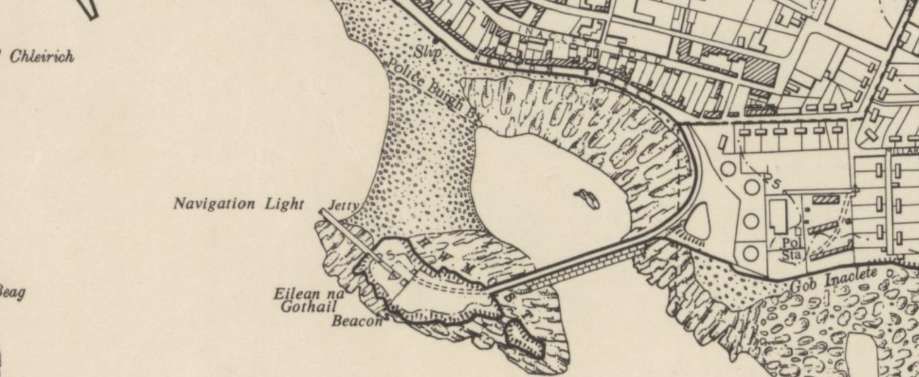
Lord Leverhulme’s Development Plan for Stornoway: the railway line noted in the paragraphs about Stornoway’s railway station can be seen to the right of centre. The light railway planned to serve Goat Island is shown in the bottom-right of this map. [45: p200]Goat Island in 1895 as it appeared on the 6″ Ordnance Survey of 1895, published in 1899. [46]
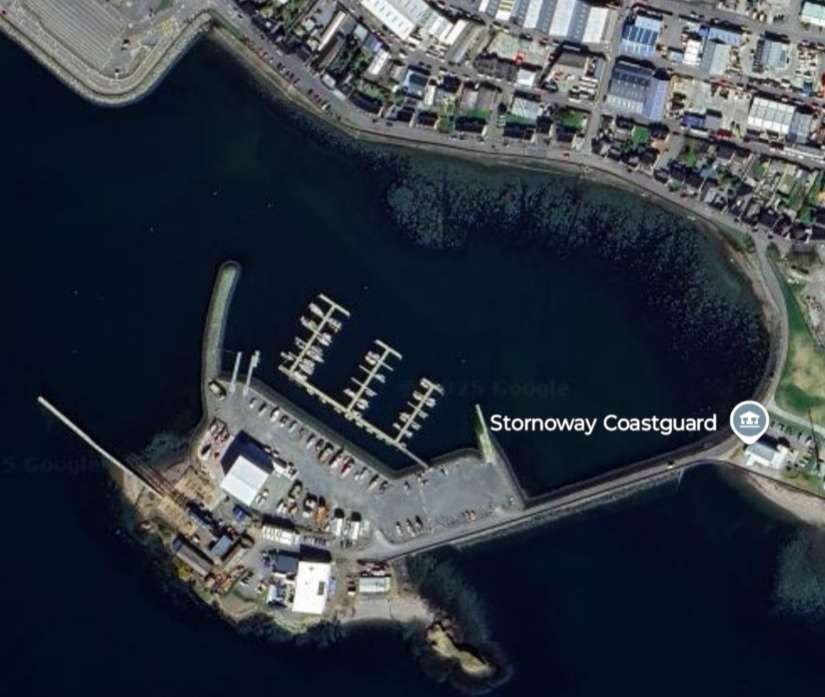
It would not be until after the Second World War, in 1947, that the causeway was built. It was 2,030 feet in length. Work undertaken that year also included the construction of an embankment to the south of the causeway; the construction of the Slipway and a jetty at Goat Island; the demolition of No. 3 Pier. The work was authorised by The Stornoway Harbour Order Confirmation Act, 1947. [48]
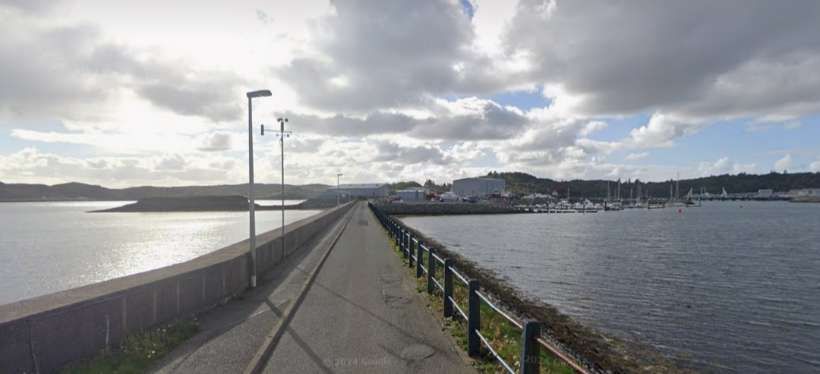
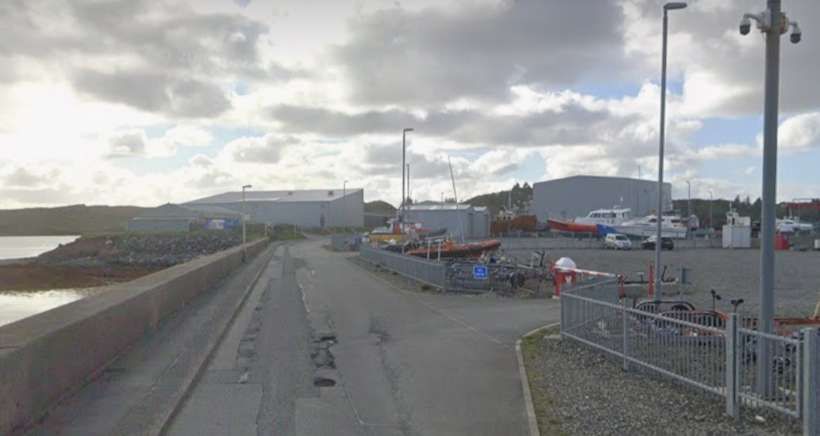
Goat Island and causeway as they appeared on the 6″ Ordnance Survey of 1958. [47]Goat Island and Causeway in the 21st century. [Google Earth, July 2025]The causeway to Goat Island. [Google Streetview, September 2024]Goat Island seen from the causeway. [Google Streetview, September 2024]
While the causeway was built, the railways were not!
The Branahuie Railway (3ft-gauge)
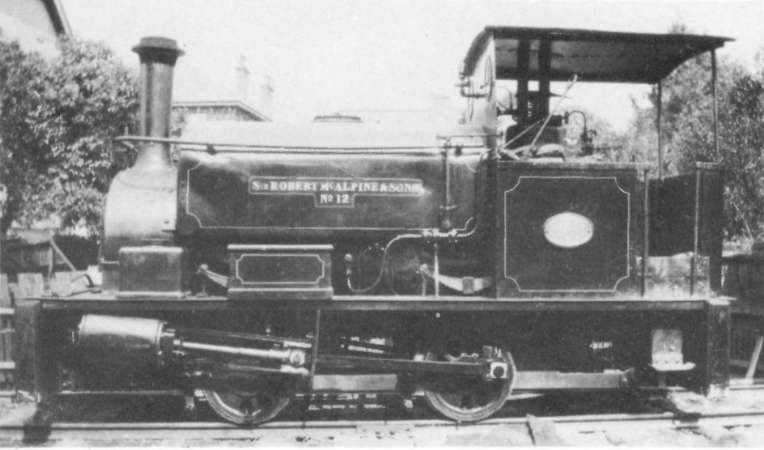
One line that did get built on Lewis in Lord Leverhulme’s time was a 3ft-gauge line built by “Sir Robert McAlpine and Co. for the Harris & Lewis Welfare Development Co. Ltd. (a company owned by Lord Leverhulme) – part of a £345,000 contract to build the canning factory, roads and houses. … [It] was in operation by 1920 when the first loco arrived – [that] was McAlpine’s Loco No 34, an 0-4-0ST built by Hudswell Clarke (Works No 1037) in 1913 and delivered to McAlpine’s Pontstycill Reservoir contract near Merthyr Tydfil in South Wales. It carried the plant number 778 when it arrived but that had changed to 606 by the time it left in 1923 moving to the Maentwrog reservoir contract in North Wales. It then worked on other contracts until it was sold for scrap to George Brothers in 1956. The second loco to work on the line was another 0-4-0ST built by Hudswell Clarke in 1901 (Works No 597). It was new to Newcastle & Gateshead Water Co Ltd at Whittledean reservoir carrying the name ‘PONT’. It was sold back to Hudswell Clarke who resold it to McAlpines in 1906 on their Culter reservoir contract. It arrived at Stornoway as Plant No 1780 in 1920 leaving on 25th May 1923 as Plant No 813. Last recorded as being for sale at McAlpine’s Ellesmere Port depot in 1929.” [8]
A first reference was made to the Branahuie line in the Highland News on 15th May 1919 when Sir Robert MacAlpine & Son wrote to the Council seeking permission to lay a light railway from Manor Farm to Goathill Road crossing public roads at three different places. Gates and fences were included in the scheme which received Council permission. In June 1919, MacAlpine applied for permission to lay a water main at Manor Farm to supply water to engines. This was agreed at charge of £5 per annum. [15: p12]
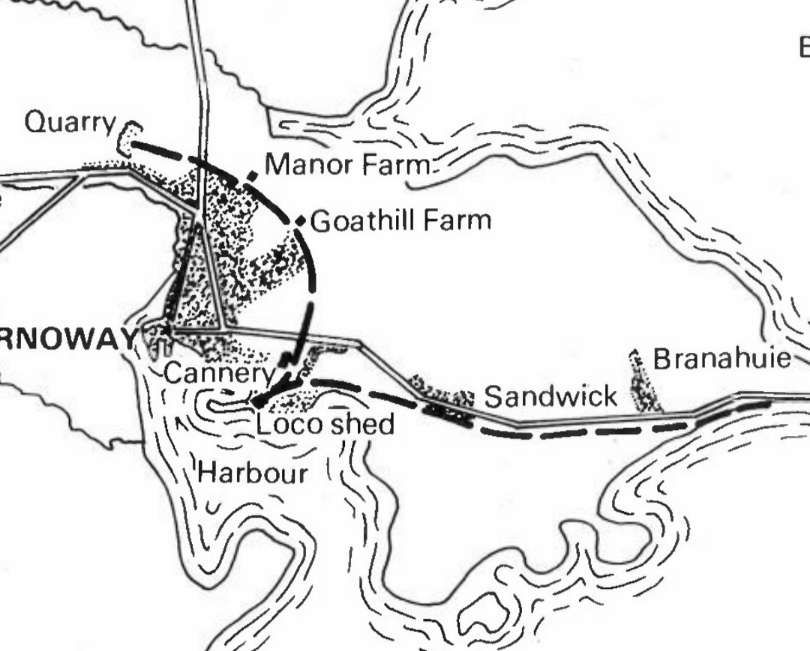
Jolly records these details: “The line was some five miles long and was used for the construction of Leverhulme’s Cannery, from where it ran northwards past Goathill and Manor Farm (Coulregrein), where there was a watering point, to the Town Council’s Dormitory Quarry beneath the War Memorial. This line ran around the then outskirts of the town and much has been built over. Another line ran south from the cannery to the locomotive shed (also now built over). From here another line ran eastwards across the fields to Sandwick, then for 2.5/3 miles beside the A866 to the beach at Branahuie. The evenly graded trackbed is very distinct alongside the undulating road on this section. A shallow cutting can also be seen on the northern line. … At least two steam locos were used on the contract by MacAlpines.” (15: p12]
Jolly provides this drawing of the route of the 3ft-gauge contractor’s railway. It is schematic in nature and not to scale. Manor Farm and Goat Hill Farm appear to the Northeast of Stornoway and of the line. The Cannery is marked, as is the Loco Shed. The line to Branahuie is also shown. I have not been able to find any greater detail as to the route of the line than the text description of the route above. [15: p9]
Jolly continues: “The cannery was completed in late 1921 or early 1922, and at the end of May 1922, the “Contract Journal carried an advertisement: ‘For sale-railway track and plant inc. two 3ft gauge locos Hudswell Clarke, … built 1901 and 1913, and 59 wagons 3ft gauge, 34 wagons 2ft gauge. Plant will be handed over to purchasers FAS (free aboard ship) Glasgow-Lewis & Harris Welfare & Development Co., Bebington, Nr. Birkenhead’. Only two locomotives fit this description: Hudswell Clarke 597/1901 was delivered new to the Newcastle & Gateshead Water Co, and was later used by McAlpine on the Motherwell Corporation Culter Waterworks contract between 1903 and 1906. Its later history is not known for certain. The later machine, Hudswell Clarke 1037/1913, was supplied to McAlpine for work on the Pontstycil reservoir between 1913 and 1917. It was subsequently used on the Maentwrog Hydro-Electric reservoir contract, near Ffestiniog, from 1924-28, and must therefore have been retained by McAlpine.” [15: p12-13]
The Route
Lord Leverhulme’s Cannery sat to the East of Stornoway town centre. Appropriately, its address was Cannery Road. The building was never used as a cannery and later became a Harris Tweed Factory.
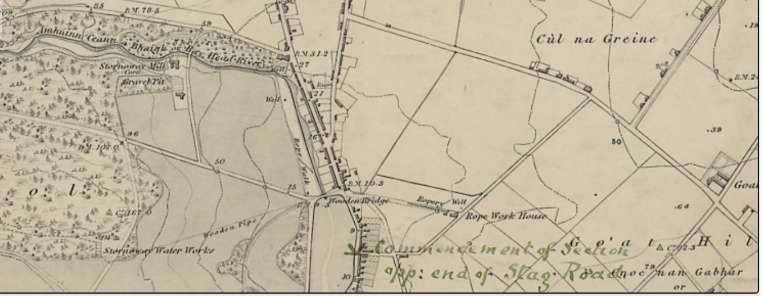
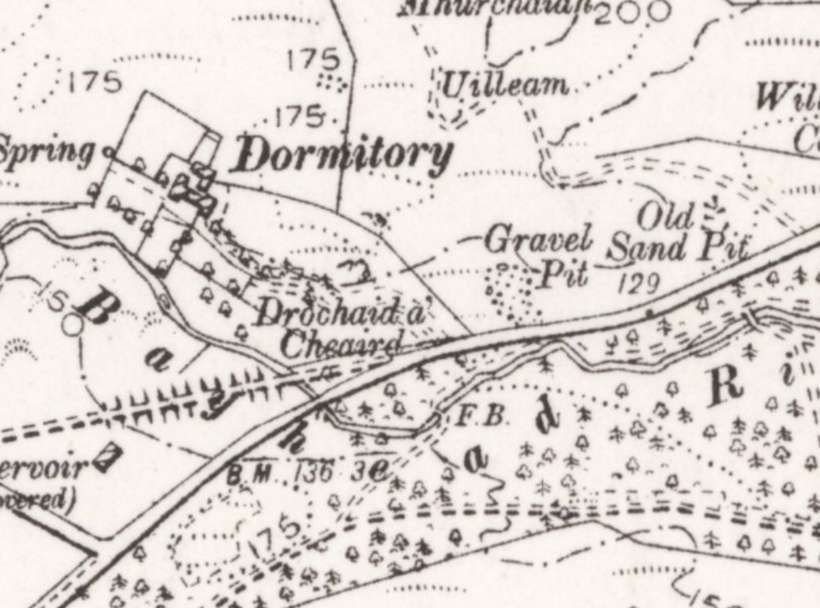
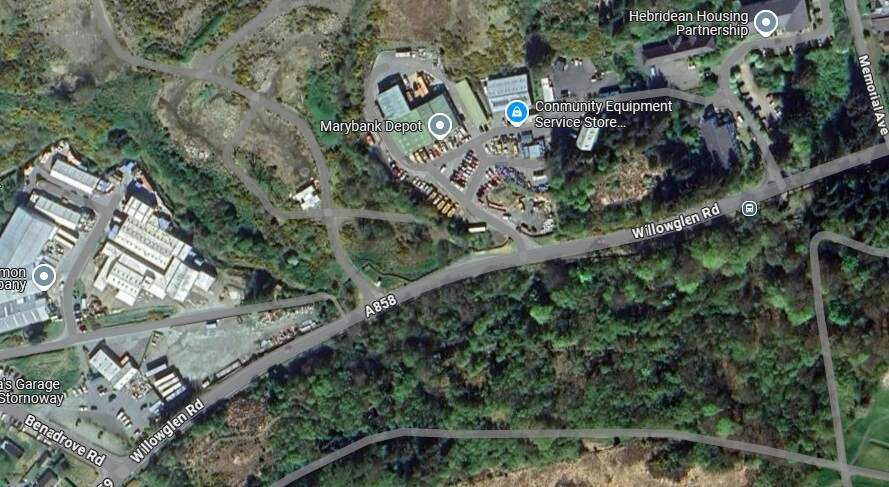
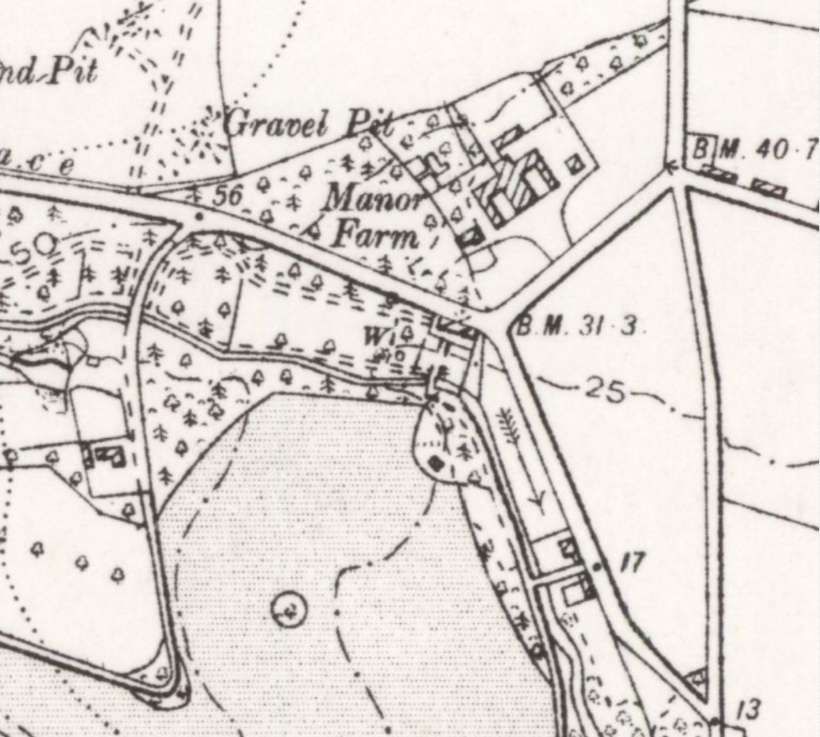
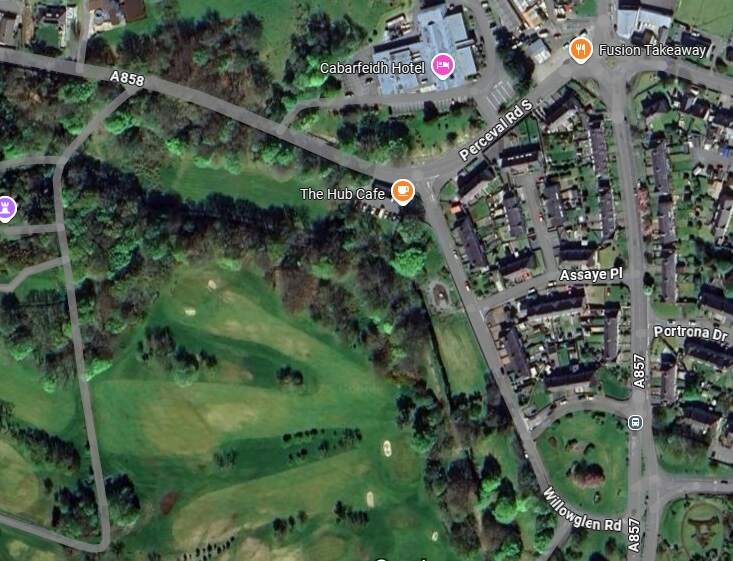
As Jolly mentions, material for the construction contract was excavated at a quarry at Dormitory which was to the West of the War Memorial (itself to the North of the town). Jolly also mentions that the temporary railway line ran close to Manor Farm (in the 21st century the Caber feidh Hotel occupies this site). His sketch map above shows the line running to the South of Manor Farm. This suggests that the line ran close to Willowglen Road, on its North side. Assuming that this is the case then the Contractor’s railway would have crossed Percival Road South close to its junction with Willowglen Road.
There has been mention of an incline leading from a point close to the War Memorial into Stornoway which may be a remnant of the line. [8]
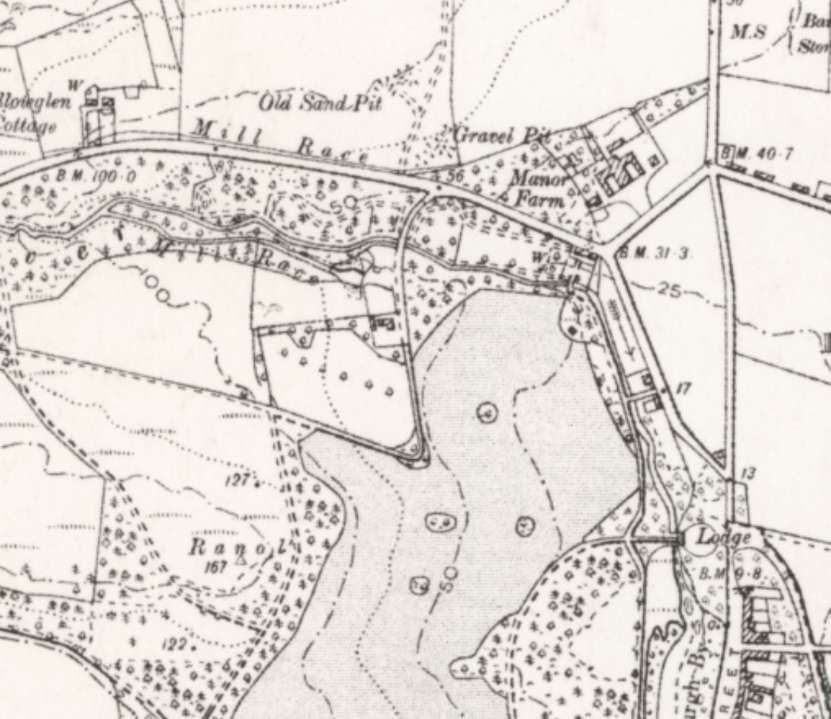
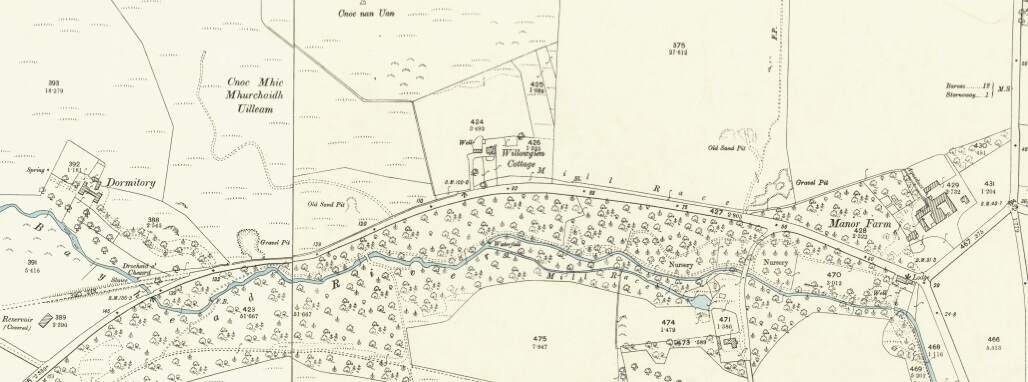
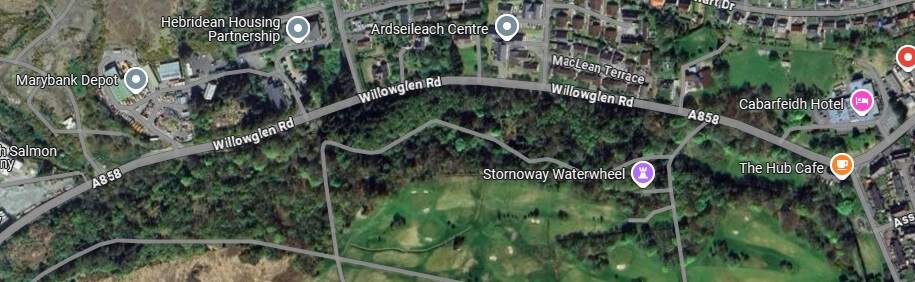
The area from Dormitory to Manor Farm as shown on the 6″ Ordnance Survey Second Edition. [51]Pretty much the same area as it appears on Google Maps. [Google Maps, July 2025]A closer view of the area around Dormitory as it appears on the 6″ Ordnance Survey from the end of the 19th century. The contractor’s railway would have run East from the quarries close to Dormitory, probably parallel to and on the North side of what would eventually become the A858 (Willowglen Road). [52]A similar area in the 21st century. [Google Maps, July 2025]A closer view of the area around Manor Farm as it appears on the 6″ Ordnance Survey from the end of the 19th century. The contractor’s railway would have run West-East, probably parallel to and on the North side of what would eventually become the A858 (Willowglen Road). [52]Much the same area in the 21st century. [Google Maps, July 2025]
After crossing what is now called Percival Road South, the line crossed Macaulay Road and curved round through Goat Hill, passing the Poor House and the Hospital, running close to the pre-existing Fish Oil Works (adjacent to which Leverhulme’s Cannery was to be built). The Locomotive Shed was South and West of that location, as was a junction between the line from the quarry and the line East to Branahuie.
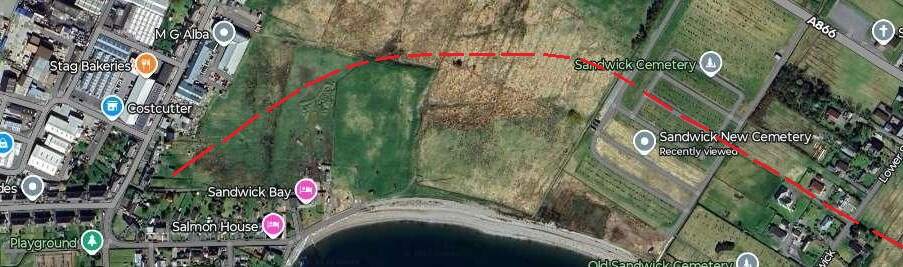
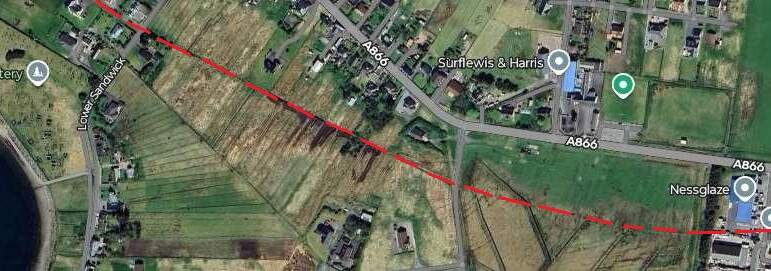
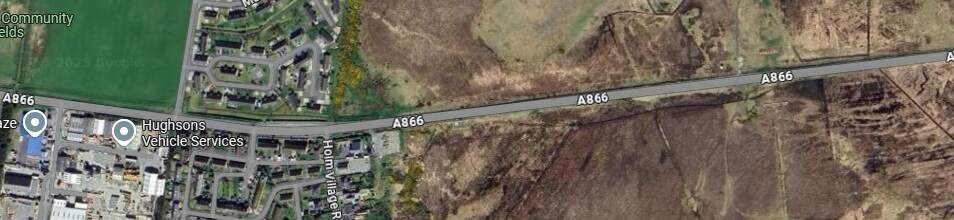
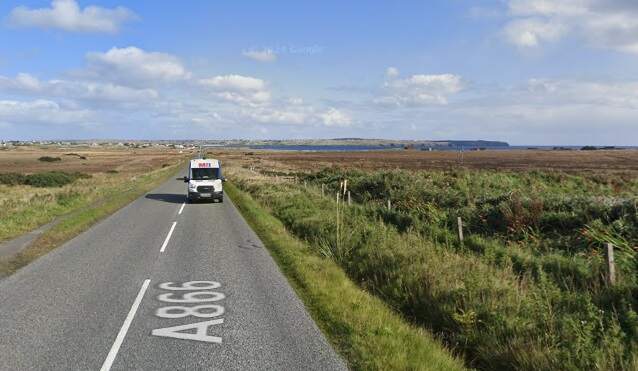
The line of the contractor’s railway heading East is not clear. The red-dotted line gives an idea of the possible alignment. Initially over open fields it has then been covered, by the extended cemetery at Sandwick and by housing developments. [Google Maps, July 2025]Some field boundaries support the assumed route but there is no guarantee that this is the actual line of the contractor’s railway. At the right side of this image the line has once agin been built over. [Google Maps, July 2025]The only indication as to the route of the line to the East of the built up area that I have been able to find is Jolly’s comment that the line ran alongside the A866. He says (above) that the line of the old railway is level while that of the road undulates. [Google Maps, July 2025]This view East along the A866 is taken from a point a little to the East of the end of the development visible at the left of the satellite image immediately above. It is not beyond the bounds of possibility that the land immediately to the right of the road was the route of the contractor’s railway, but it does not appear as though the highway undulates as much as Jolly suggests. [Google Streetview, September 2024]Further to the East, a relatively slight gradient is evident in the road but there is little evidence of an old railway formation alongside the road. [Google Streetview, September 2024]Jolly has the remaining length of the contractor’s railway to Branahuie continuing along the South side of the A866. [Google Maps, July 2025]
It is entirely possible that the road now evident in the 21st century is not that which was present in the 1920s. It is very likely that the road to Branahuie was a single track road in the 1920s and that the widening of the road has covered the formation from the contractor’s railway line.
Stornoway Waterworks Railway(2ft-gauge)
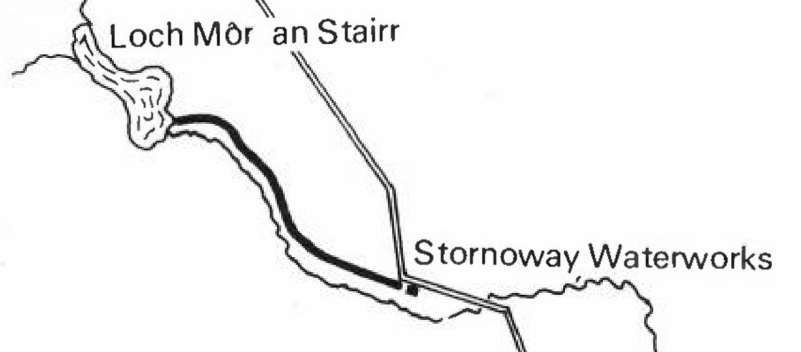
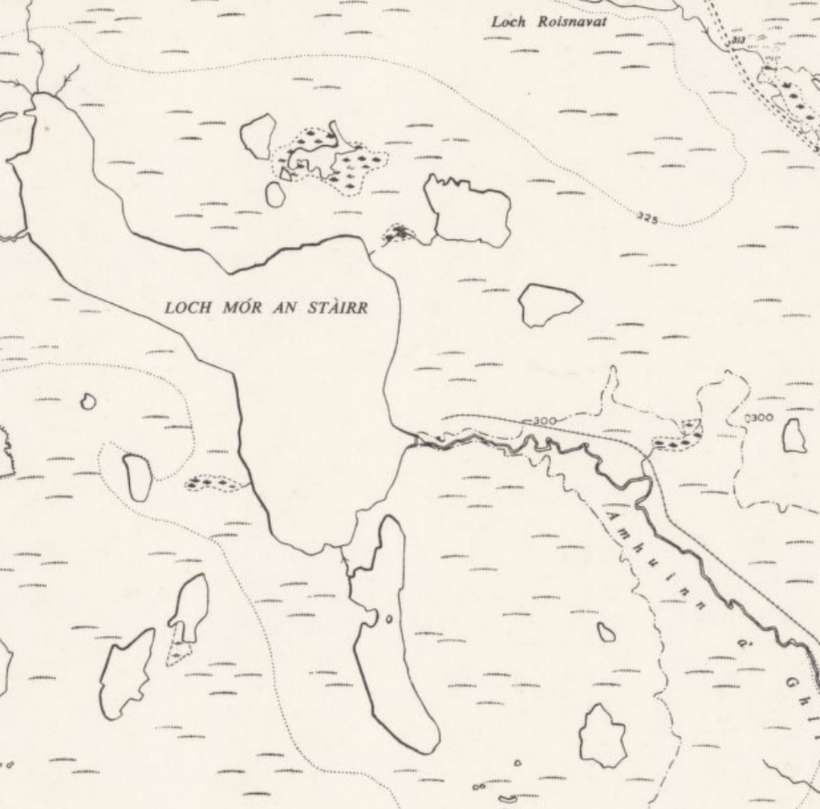
“Since the 1870s Stornoway’s water supply had come from Loch Airigh na Lic, about two miles west of the town, but by the mid-1930s this was proving insufficient for the population of around 5000 which was swelled by four or five hundred herring drifters operating out of the port during the season. Loch Mor an Stairr, five miles north-west of the town, was chosen to augment the supply as it was free from pollution and some distance from public roads. The exit from the Loch was between peat banks some 65ft apart, and it was across this that a concrete dam, 92ft long, was constructed. Pipes led at different levels to a small valve house on the north bank of the outlet stream, and a 9inch main then connect[ed] to the filter houses beside the main road.” [15: p8]
The Waterworks Railway. Another small extract [15: p9]
The work was facilitated by the construction of a 2ft-gauge railway line.
A Simplex locomotive was used on the Stornoway Waterworks Railway. This locomotive was a 20hp model built by Motor Rail Ltd. It operated on the 2-foot gauge line that served the Stornoway Waterworks. Its Works No. is not known. One source suggests No. 110U082 but the records at the Apedale Valley Light Railway have that works number attributed to a 3ft-gauge locomotive at the Bo’ness & Kinneil Rly. [10] It is worth noting that the Almond Valley Light Railway has a 2ft 6in-gauge example. [11]
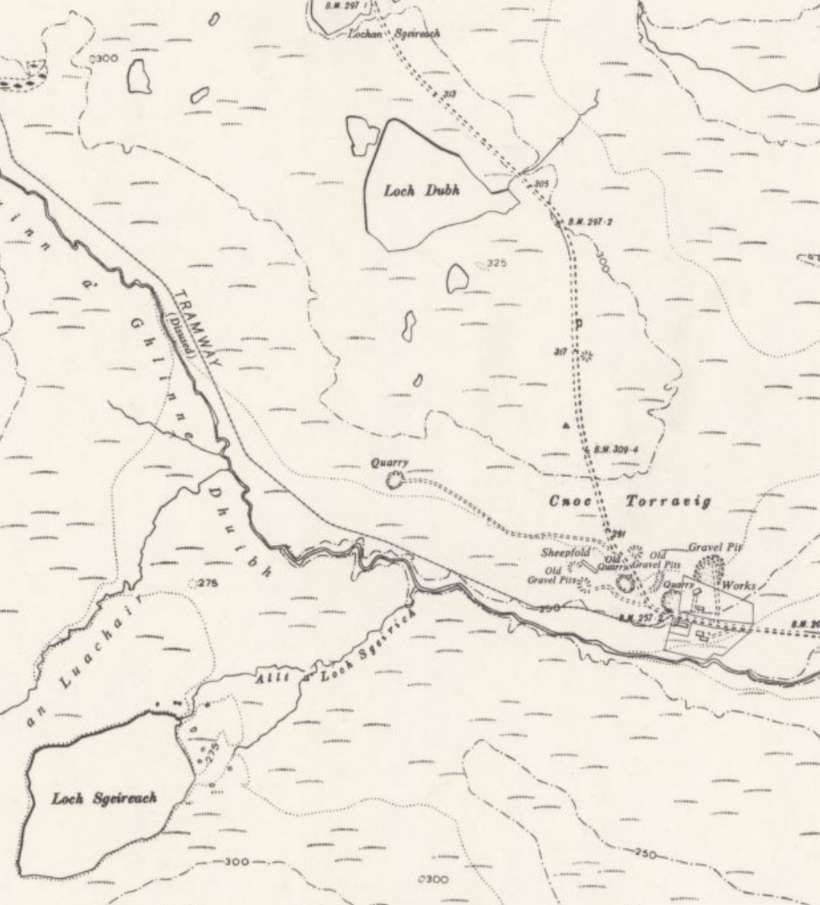
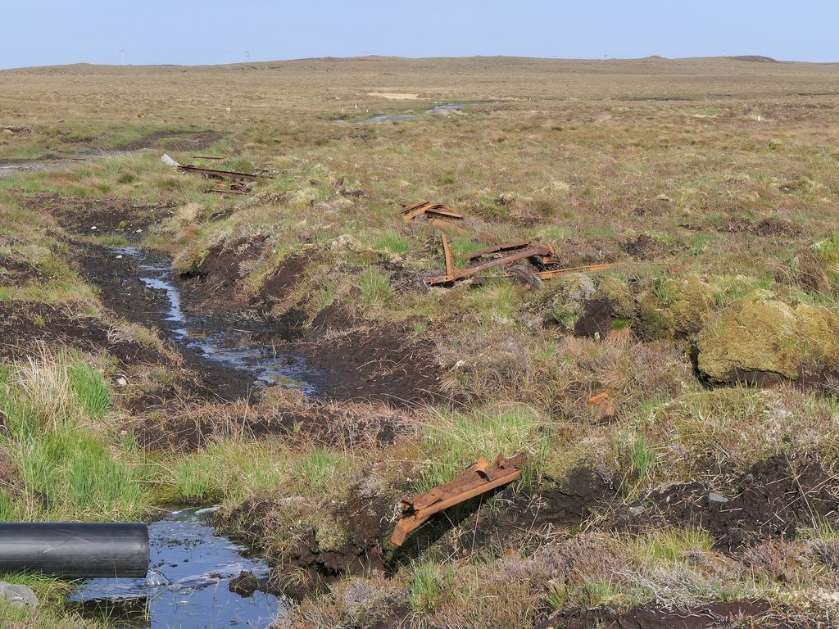
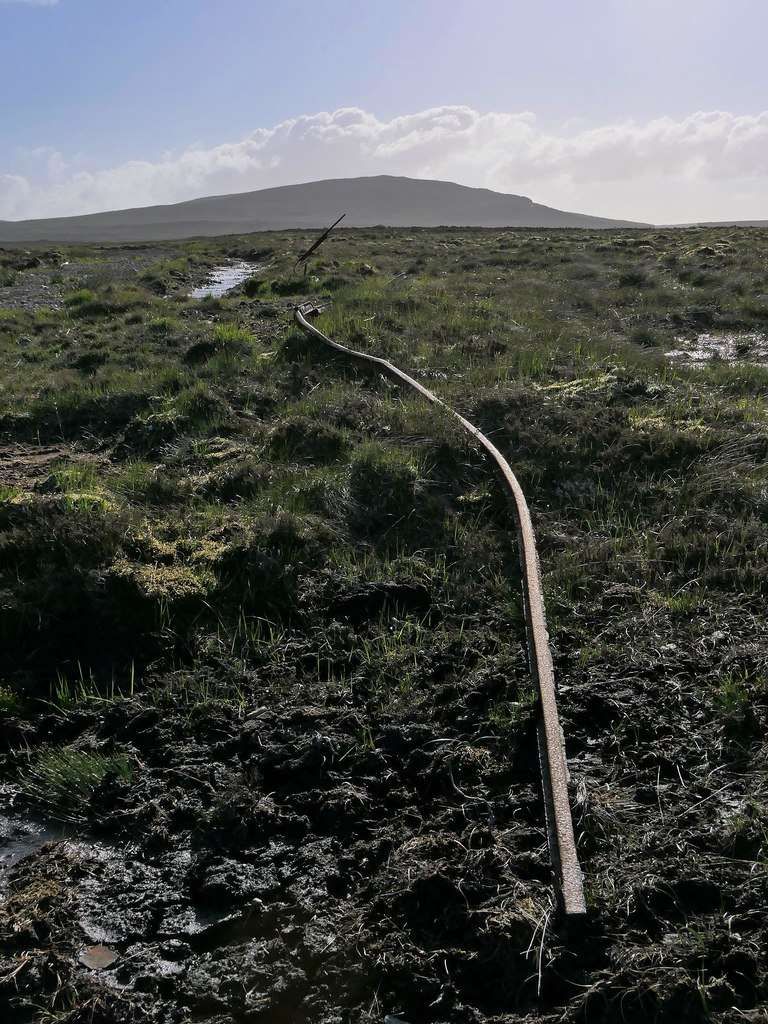
The Stornoway Waterworks Railway was built in the 1930s and ran for approximately 1.5 miles between Stornoway Waterworks and Loch Mòr an Stàirr. It was used to transport materials during the conversion of the loch into a reservoir for the waterworks and for subsequent maintenance works. It was closed by the 1960s. [12][13]
Writing about the locomotive and the construction work in 1982, Ian B. Jolly states: “The Contractor for the dam and pipeline was G. Mackay & Son. of Edinburgh, who started work on the dam in 1935. Their work was completed mid-1936 when the pipeline was connected direct to the town’s mains – the filter house and covered reservoirs were completed within the next few years. … A locomotive-worked narrow gauge tramway was used by MacKay & Son to construct the dam. Rock was excavated and crushed in a small quarry east of the main road. across which it was transferred by lorry to the tramway terminus. Stone and other materials were then carried by rail to the site of the dam. The railway was left in-situ and used by Stornoway Town Council for maintenance of the dam for many years. The loco, a 20 h.p. bow-framed model built by the Motor Rail & Tramcar Company of Bedford, was in use until at least 1940 when Mr Alex Macleod, the fitter who maintained it. was called up for military service. By 1943 the engine had been removed and it had been reduced to a frame and wheels. in which form it is believed to have been in use, pushed by hand, until the early 1960’s as the line’s only item of rolling stock. The loco frame is now [1982] very delapidated and derailed about half a mile from the filter house. It was originally fitted with a Dorman 2JO two-cylinder petrol engine; not the later, but similar 2JOR engine. The axleboxes have ‘W D 1918’ cast on them. whilst the loco had been fitted with the narrow pattern of brake column. This suggests that it was built during late 1918 for the War Department Light Railways, but sold directly as Government Surplus. Motor Rail’s records throw no light on its identity – the only locomotives credited to G. Mackay & Son of Edinburgh are two 40 h.p. ‘protected’ machines: LR3057 4wPM MR 1336/1918 and LR3088 4wPM MR 1367/1918. Both were in the service of MacKay by 21st June 1924. MR 1336 was later with Inns & Co Ltd, Moor Mill Pits. Colney St, Herts. and MR 1367 was with Thomson & Brown Bros Ltd, of Edinburgh by 16th February 1933. There is no mention of a 20 h.p. loco but MacKay was obviously no stranger to Motor Rail & Tramcar Company products.” [15: p9]
Jolly further notes that “Rolling stock on the line at the time of the dam construction consisted of nine one-cubic-yard skips, a mixture of side and end tippers. The derelict remains of several [could in 1982] be seen at the foot of the bank beneath the filter house, one being a single end tipper. The axle boxes [were] marked ‘Du Croo & Brauns’ – the Dutch firm of railway equipment suppliers. … Most of the track from the roadside terminus to just beyond the loco [had by 1982] been removed without authority – probably for fencing posts! However, the track layout [could] be traced because the turnouts [had in 1982] been left in place. These [were] rivetted to corrugated steel sleepers, whilst the remaining track [was] spiked to wooden sleepers or clipped to corrugated steel sleepers.” [15: p11]
Of further interest, is the significant variation in rail cross-section and weight (between 14lb and 20lb per yard). Jolly also notes that, “On the lengths of prefabricated track where the rails [were tied accurately to gauge, three distinct gauges [could] be measured – 2ft, 60cm (1ft 11.5/8in) and 1ft 11½ in! The loco wheels [were] set to 60cm gauge.” [15: p11]
In 1982, only minimal earthworks were evident, with track following the undulation of the land but, says Jolly, “there is a rise of just over 25 feet from one end of the line to the other. The track terminates near the dam without so much as a buffer stop or siding. The remains of the loco and line will probably survive for many years to come, as scrapmen are unknown in the Outer Hebrides.” [15: p11]
Another photograph which shows remains of point work close to the Waterworks can be seen on the Railscot.co.uk website. [14]
Other Railways?
Jolly comments: “There appear to have been three other industrial railways in Lewis, lain D.A. Frew referred to the horse-worked system on the outskirts of Stornoway. This served the factory of the Lewis Chemical Co, promoted in the late nineteenth century to extract paraffin-oil from peat by a patent process. Garrabost Brickworks, about 8 miles east of Stornoway) is reputed to have had a short line. The brickworks is shown on the 1852 6in map but no railway, and the 1897 edition shows the works as ‘disused claypit. We were also told of Marybank Quarry, west of Stornoway, where there was a hand worked line from the rockface about 100 yards to the crusher. The quarry was operated in the few years before the last war by William Tawse of Aberdeen.” [15]
Other lines are referred to in a blog about the island accessed through the BBC website. The blog is entitled ‘Arnish Lighthouse’ and includes these words. … “Lewis did have railways, around the turn of the 19th/20th century. There was a railway from the quarry at Bennadrove to Stornoway. Posts related to this track can still be found in the Castle Grounds, opposite the Caberfeidh Hotel. … A trackbed was laid near Garrabost in Point, but a railway was never built.” [56]
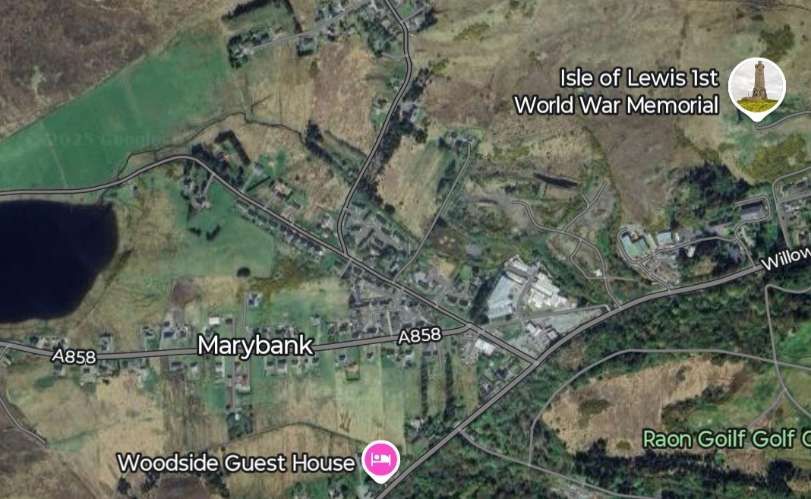
I have not yet been able to find anything further about any of these short lines. There is an active quarry at Bennadrove. This is not far from Marybank
This final satellite image shows the relative locations of Marybank and Bennadrove to the West of Stornoway. It also encompasses most of the different line referred to in the immediate vicinity of Stornoway. [Google Maps, July 2025]
Records
Plans illustrating the surveyed railway routes proposed by Lord Leverhulme can be accessed at Tasglann nan Eilean Siar, the Hebridean Archives. [6]
References
Roger Hutchinson; The Soap Man: Lewis, Harris and Lord Leverhulme; Birlinn, Edinburgh, 2003 (latest reprint 2017).
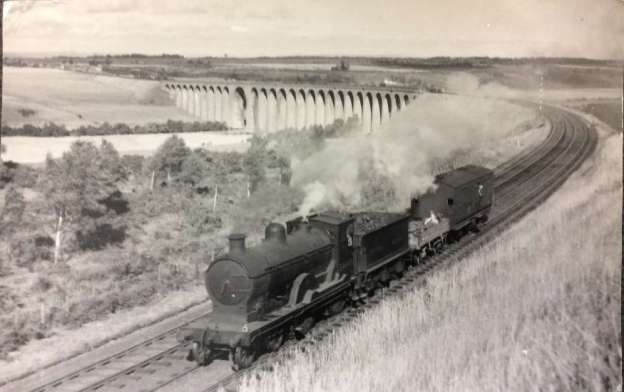
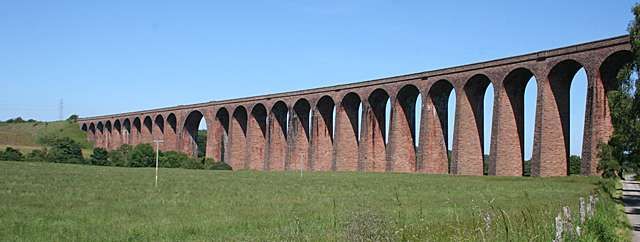
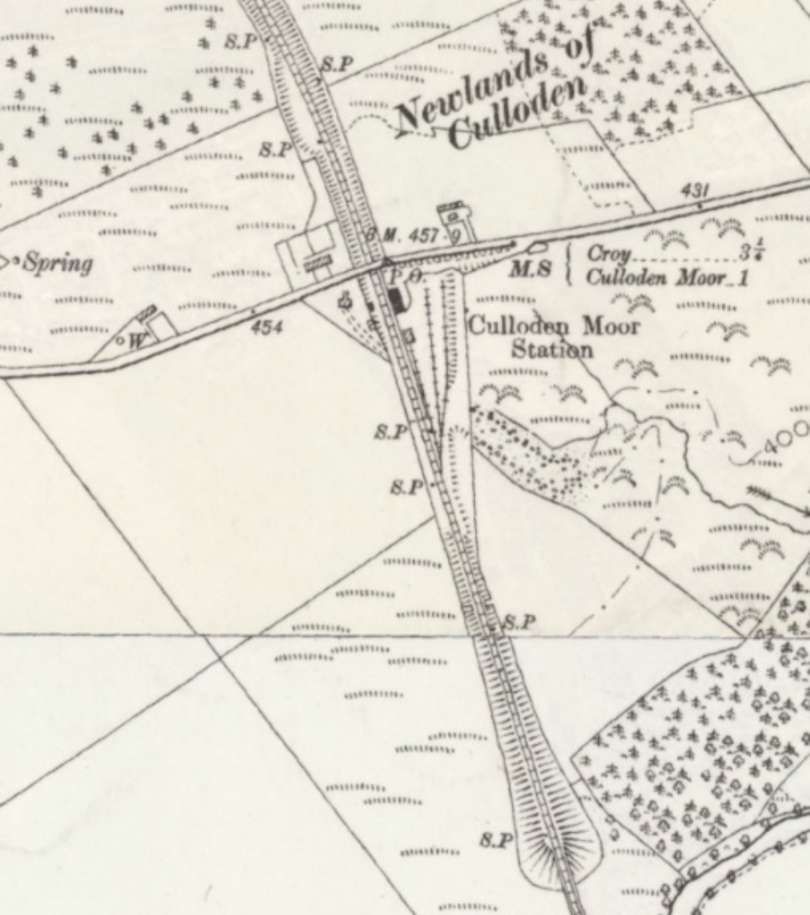
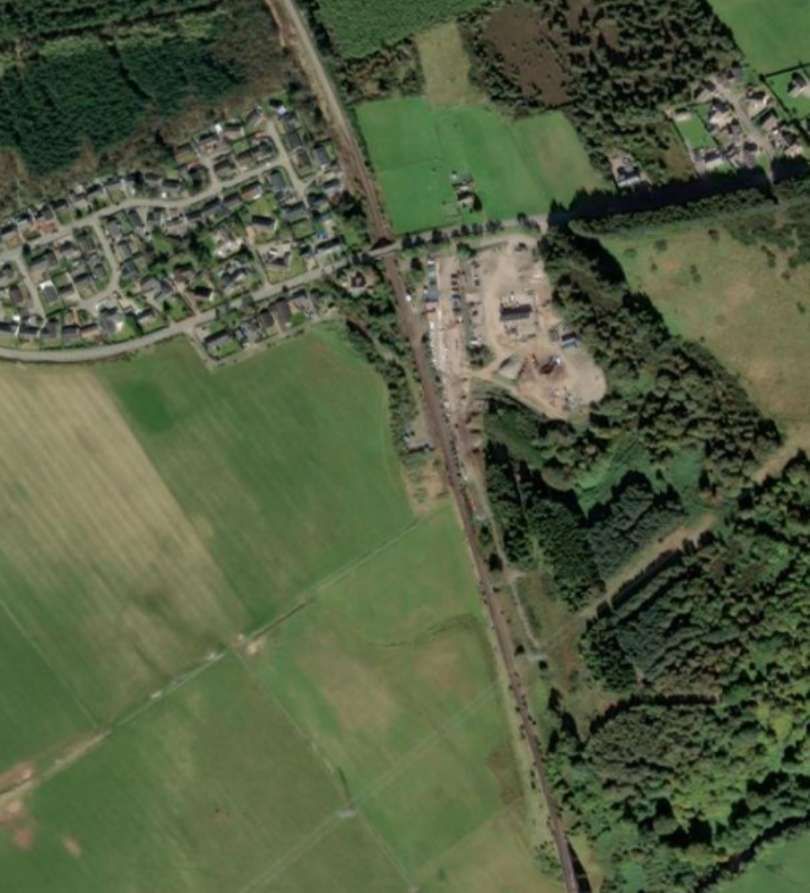
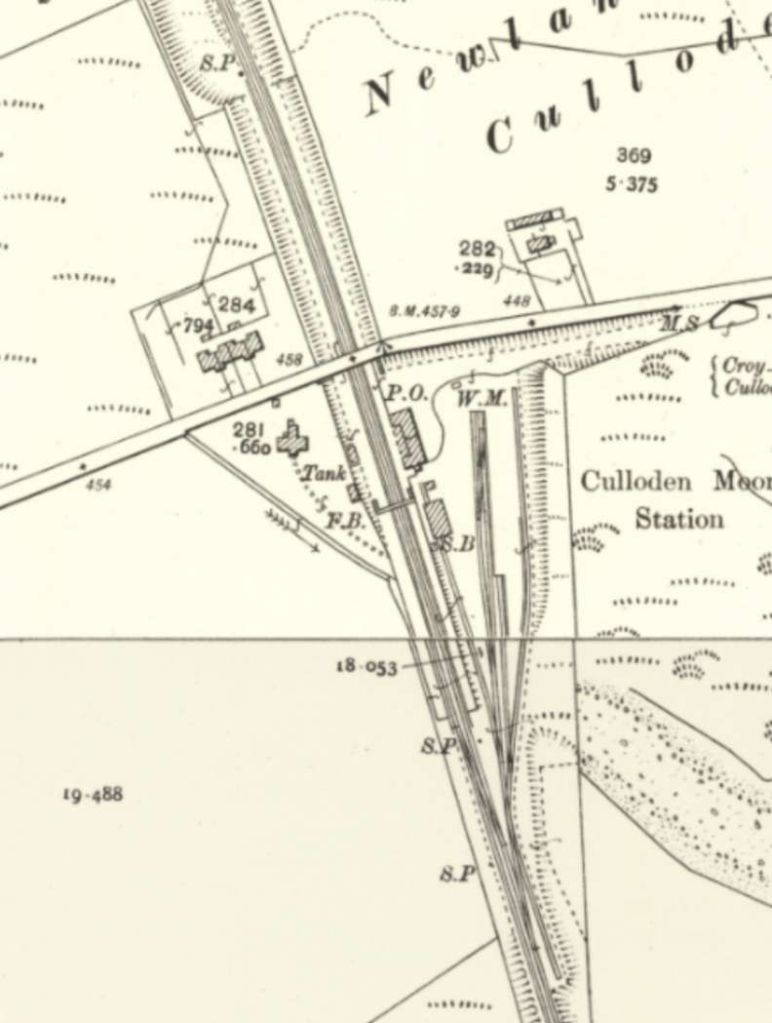
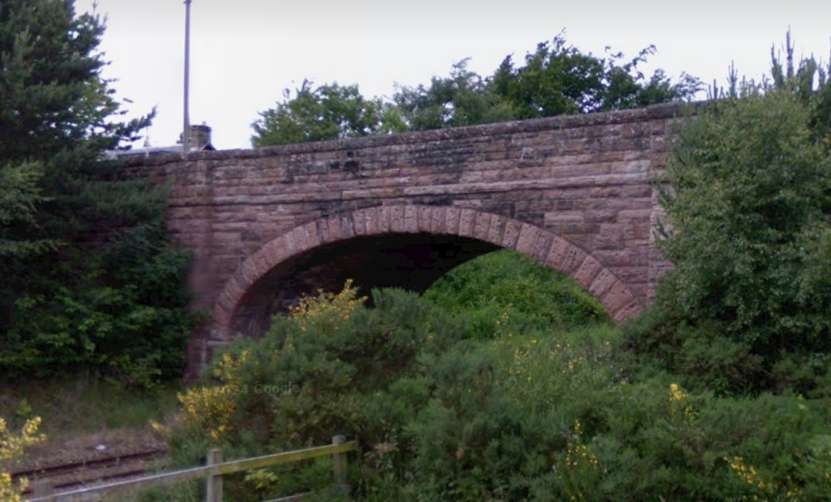
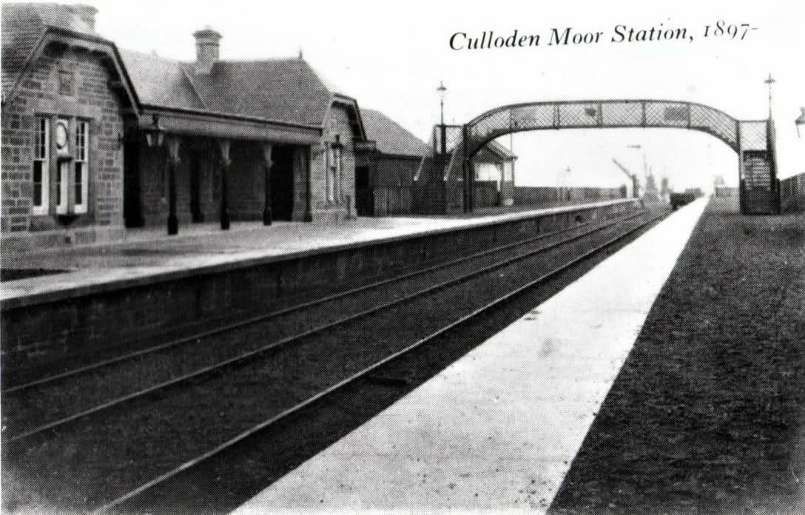
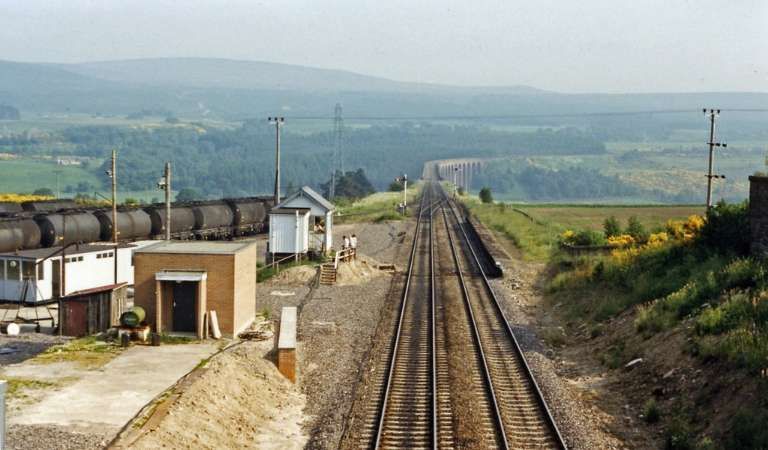
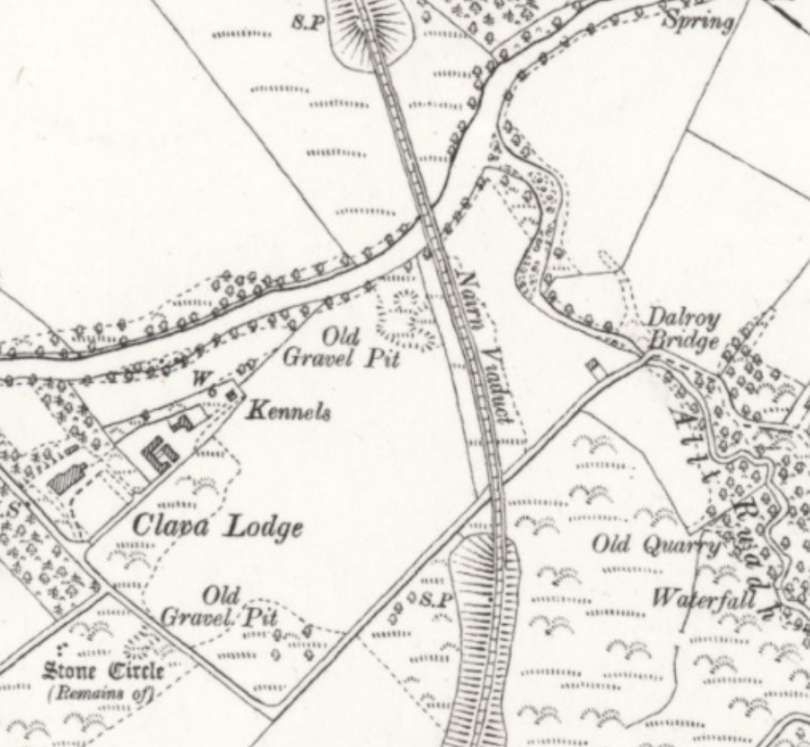
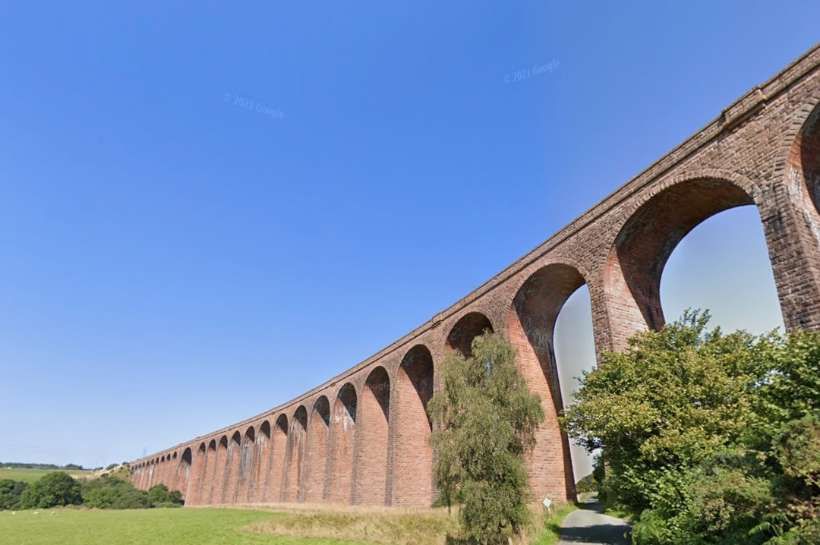
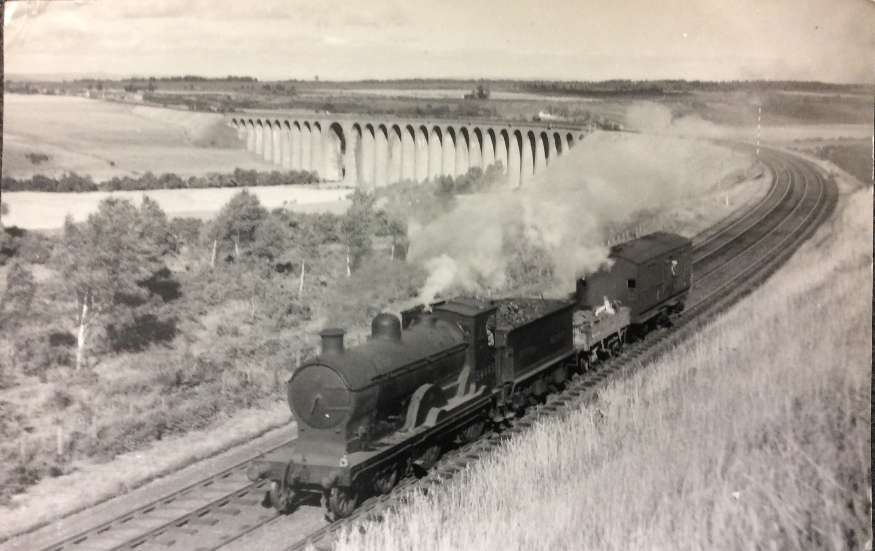
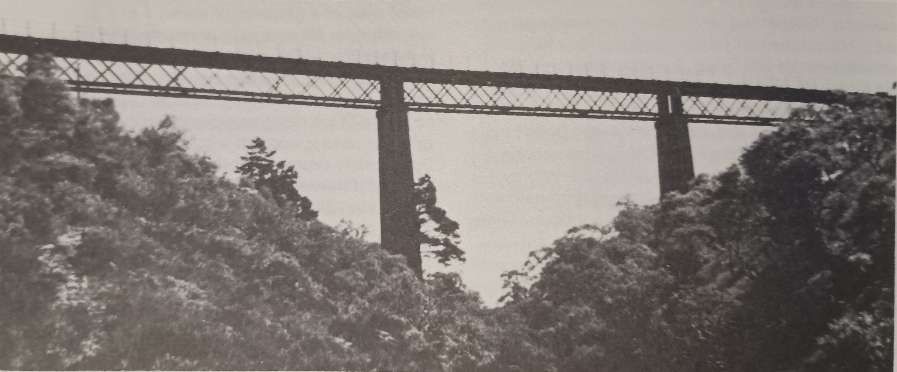
The featured image at the head of this article shows BR No. 54445 with an permanent way train passing Culloden Moor Viaduct travelling towards Aviemore. [54]
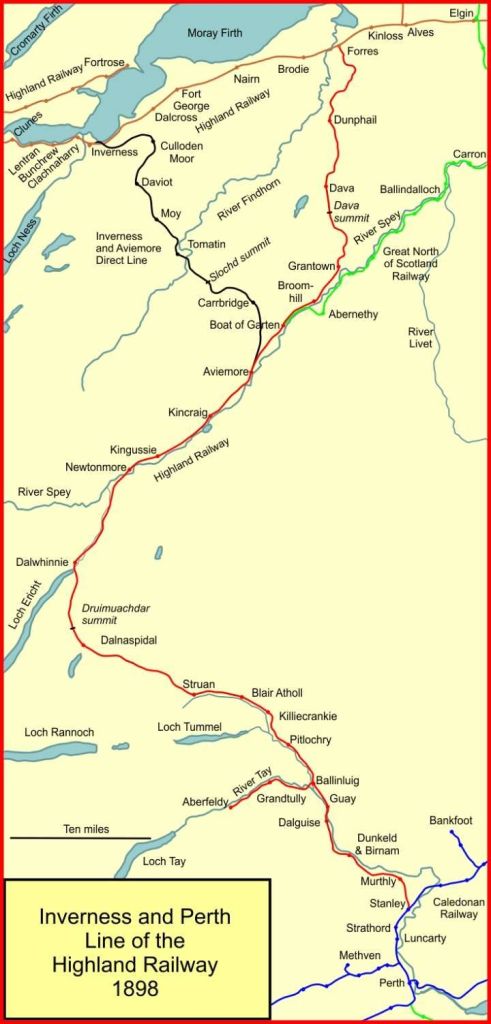
The Inverness and Aviemore Direct Railway was built by the Highland Railway to provide a shorter and more direct route between Inverness and Aviemore, carrying its main line traffic to Perth and the south.
Earlier articles about the Highland Railway can be found here, [7] here, [8] here, [9] here, [10] and here. [11]
The original route via Forres and Dava, built by the Inverness & Perth Junction Railway (I&PJR), “ran over wild and remote terrain as far as Aviemore, and then on to Dunkeld. From there trains used the Perth and Dunkeld Railway to Stanley Junction, and from there the Scottish North Eastern Railway to Perth. This was a considerable improvement [over the only previously available route via Aberdeen], although operation of the line over the mountainous route was difficult. The traffic from east of Forres proved to be lighter than anticipated, and at the same time traffic from Inverness and from the Inverness and Ross-shire Railway became increasingly dominant. The deviation to Forres before turning south was now a serious liability.” [1]
It was also clear that the Great North of Scotland Railway (GNSR) was planning its own independent line between Elgin and Inverness and the West Highland Railway was known to be considering a line along the Great Glen connecting from Fort William to Inverness. “The Highland Railway was alarmed at both of these competitive encroachments into what it considered to be its own territory. It anticipated that Parliament would look favourably on them, if it could be shown that the Highland Railway was not taking adequate steps to improve its own line and its service to passengers and goods customers.” [1][2: p44][3: p103-104]
“The solution was a new line of 34 miles running directly south from Inverness, rejoining the existing Perth line at Aviemore. This became the Inverness and Aviemore Direct Railway, informally known as the Carr Bridge line, or later the Carrbridge line. Its authorising Act of Parliament was passed on 28th July 1884.” [1][3: p104][4: p175]
As Acworth noted in 1890, the Highland Railway “could never face a Parliamentary Committee and maintain that the existing facilities to Inverness were sufficient, when it had taken no steps to supply the additional accommodation whose necessity it had itself asserted only a few years before … The construction of the new road will mean to [the Highland Railway], in the first place, a capital expenditure of some hundreds of thousands of pounds; secondly the cost of working some thirty additional miles; thirdly no additional traffic whatever; and lastly, the reduction of the passenger fares by as many pence as the new road will be shorter in miles than the old.” [1][5:p74-75]
“Having received the authorisation, the Highland Railway did nothing to hasten actual construction, no doubt believing that the danger of encroachment had been staved off. In any event, for the Highland Railway this was the most important development of the decade. … The cut-off was 34 1⁄2 miles of new line between Aviemore and Inverness. For six years from obtaining the necessary Act on 28 July 1884, the company managed to stave off any real action, although by 1886 agreements about land acquisition were made with proprietors. Altogether four extensions of time to complete the line were granted: two before and two during construction.” [1][2: p44][3: p103-104]
The Inverness to Aviemore Direct Railway was opened in stages: the first, from Aviemore to Carr Bridge, opened on 8th July 1892 as a branch line operated by a tank engine, and carrying very little traffic. [1][3: p103-104] The line from Carr Bridge to Daviot opened on 19th July 1897.
The route was completed for through running by the opening between Daviot and Millburn Junction, Inverness, on 1st November 1898. [1] Ot should be noted that there is some ambiguity over the dates. [1: Note 1]
In October 1897, it was decided to install double track on the as-yet unopened section between Inverness and Daviot. This involved widening some completed single-track bridges. [1][2: p8]
“The new line incorporated the Highland Railway’s second-highest summit: Slochd at 1,315 feet. The Strathnairn Viaduct near Culloden Moor is Scotland’s longest masonry viaduct at 600 yards in length; there are 29 arches. [1][3: p133-134][4: p197] Major enlargement of the track facilities was also carried out at Millburn Junction in Inverness. The total cost of the line was almost a million pounds.” [1][2: p46]
From the opening of the direct line from Aviemore… “the traffic planners had to cater for two main lines into Inverness from the south. In the summer of 1909, seven scheduled trains ran each day between Perth and Inverness. The night train from Perth left at 12.50 a.m., with sleeping car from Glasgow, and travelled via Carrbridge, arriving at 5.10 a.m. A connecting train left Aviemore for Forres at 4.00 a.m., arriving also at 5.10 a.m. Nairn passengers went on to Inverness and changed trains there. At 5 a.m. another train left Perth, conveying sleeping cars from London and through carriages from southern railways, running via Carrbridge and arriving at Inverness at 8.35 a.m. This ran only from 1 July to 11 August. Fifteen minutes later the ‘normal’ night train from London left Perth, and arrived in Inverness at 9.08 a.m. This train was also noted as conveying Sleeping Carriages Euston to Strathpeffer.” [3: p184-185]
“A Forres connection left Aviemore at 8.25 a.m., arriving at 9.35 a.m. The Mail left Perth at 6.15 a.m. and reached Aviemore at 8.33 a.m. Here it divided, the direct Inverness portion arriving at 10.10 a.m., and the Grantown portion arriving in Inverness at 11.15 a.m. A Saturdays-only train left Perth at 9.25 a.m., reaching Inverness at 1.50 p.m.; its Forres connection left Aviemore at 12.45, arriving 1.56 p.m. A train for Inverness via Forres still left Perth at 11.50 a.m., running non-stop to Newtonmore, which it reached at 1.44 p.m.; Forres was reached at 3.25, and Inverness at 4.15. Only ten minutes later, the old Parliamentary left Perth, stopping at all stations (five on request only) and reaching Inverness via Carrbridge at 4:36 p.m.” [3: p185]
The Route
Inverness Railway Station was covered in the first article in this series. [7]
A single extract from the 6″ Ordnance Survey undertaken at the turn of the 20th century will suffice here. Note the Lochgorm Works at the top of the extract on either side of the loop which allowed East/West movements without trains needing to enter the station. The locomotive facilities centred on the roundhouse which can be seen on the right side of the extract. [12]This 21st century ESRI satellite image, provided by the NLS shows that non-rail uses now sit over the site of the old locomotive shed and turntable. The basic layout of the railway infrastructure remains as does part of the Works. [12]Heading East from Inverness Railway Station, two lines ran in parallel. Somewhat counter-intuitively the lines to Forres and beyond ran on the South side of the lines which will bear away South. [13]Both lines continue to be used in the 21st century, although it is difficult to make out the detail on this extract from the ESRI satellite imagery provided by the NLS. [13]This next extract from the 6″ Ordnance Survey of 1901 shows the more northerly set of lines rising up to bridge the lines to Forres. [14]On this next extract from the ESRI satellite imagery it is slightly easier to make out the two lines. [14]This extract from Google Maps shows the two lines crossing as they both pass under the modern A9. [Google Maps, June 2025]Looking West from the Harbour Road Crossing along the Forres line towards Inverness Railway Station. [Google Streetview, 2022]Looking East along the Forres line from the Harbour Road Crossing. [Google Streetview, 2022]Harbour Road looking North. The Inverness to Aviemore Direct Railway is bridging the road. [Google Streetview, 2022]This time looking South through the bridge. [Google Streetview, 2022]
The Inverness to Aviemore Direct Railway curves round to the Southeast.
Away from the coast line, the railway is in cutting. [18]The modern satellite image illustrates the growth of Inverness. The presence of the A9 is a significant change to the landscape. [18]Looking back round the curve towards Inverness Railway Station from the A96. [Google Streetview, 2023]Looking ahead along the Inverness to Aviemore Direct Railway from the bridge carrying the A96 over the line. [Google Streetview, 2023]For the first part of this journey along the line, each map extract overlaps with the previous extract. That is true for this and two further extracts. After that just discreet locations are featured. [15]The same area in the 21st century. [15]A further length of the line takes it as far as Caulfield Road North. [16]The same length of line in the 21st century. [16]Caulfield Road North is now National Cycle Route No. 7, this view looks Northeast along the cycleway through the bridge carrying the railway. [Google Streetview, 2022]The line continues East, at the turn of the 20th century its route was through open fields. [17]The same location in the 21st century. [17]
The line begins a wide curve round to the South to cross Culloden Moor. The line is initially in cutting, then on embankment and then in cutting on its approach to the site of Culloden Moor Railway Station.
The view Northeast along the railway from the bridge carrying Tower Road. [Google Streetview, 2022]The view Northwest along Culloden Road. The railway is carried over the road on a stone arch bridge. [Google Streetview, 2022]As the line curves around towards the Southeast it bridges a million nor road by means of another stone arch bridge.b[Google Streetview, 2022]By the time that the line passes under the B9006 it has already run through platform faces of the old Culloden Moor Railway Station to the North side of the road. The line is, by this time, almost on a North-South alignment. This view looks back North along the line from the bridge. [Google Streetview, 2022]Turning through 180°, this view looks South through the old station site towards the Strathnairn Viaduct (alternatively, the Nairn Viaduct or the Culloden Viaduct). [Google Streetview, 2022]Culloden Moor Railway Station as it appears on the 6″ Ordnance Survey undertaken at the turn of the 20th century. [19]The location of Culloden Moor Railway Station in the 21st century. [19]The 25″ Ordnance Survey from the turn of the 20th century. The footbridge was removed when it was realised that the road bridge was perfectly adequate for pedestrian access between platforms. The railway workers’ cottage and the Stationmaster’s House are on the West side of the line. [23]
Culloden Moor railway station served the village of Culloden from 1898 to 1965 (1967 for general goods). It was a two platform station just to the north of the Nairn Viaduct. Its location was closed too to the site of the Battle of Culloden. The platforms remain but the station buildings have gone.
The roadbridge at Culloden Moor Railway Station site, seen from what was once the station forecourt. The site to the East of the railway is, in the 21st century, occupied by Iain Cowie Plant Hire and Groundworks Ltd. [Google Streetview, 2008]
Both platforms at the station had a water column, with the water tank on the northbound platform. There was a bitumen depot adjacent to the station and in later years the goods sidings at the station could be seen filled with bitumen tank wagons. The depot closed towards the end of the 20th century. [22]
Another photograph of the station can be seen here. [25] South facing photographs of Culloden Moor Railway Station have the Culloden Viaduct appearing in the distance.
Culloden Viaduct (Nairn or Strathnairn Viaduct) as it is shown on the 6″ Ordnance Survey from the turn of the 20th century. [26]The same viaduct as it appears on the modern ESRI satellite imagery provided by the NLS. [26]Culloden Viaduct looking North-northwest from the minor road at the South side of the river valley. [Google Streetview, 2022]BR steam locomotive 54445 with up permanent way train passing Culloden Moor Viaduct. It should, of course, be noted that No. 54445 was an ex-Caledonian Class 113 4-4-0 locomotive. These locomotives were classed 3P by the LMS. Introduced in 1916, these locomotives worked to a boiler pressure of 175 psi, had 20″ x 26″ cylinders and driving wheels of 6′ 6″ diameter. The locos without their tenders weighed in at 61 tons 5 cwt and produced a tractive effort of 19,833 lbs. [54][55]
The viaduct was designed by Chief Engineer Murdoch Paterson and built by The Highland Railway. Twentynine arches carry the line over the valley of the River Nairn. It opened in 1889 and it remains the longest masonry viaduct in Scotland at 1800ft (549m) long and is a Category A listed building. [27}
South of the viaduct the railway head for a short distance to the Southwest before turning Southeast as it arrives at Daviot Railway Station.
En-route the line crosses a minor road and
Looking Northeast along the next minor road to be bridged by the line. [Google Streetview, 2022]Looking back towards Culloden from a bridge carrying the National Cycle Route No. 7 over the line. [Google Streetview, 2022]Turning through 180° and looking forward along the line towards Daviot Railway Station with the gorse in full bloom. [Google Streetview, 2022]Daviot Railway Station at the turn of the 20th century. The double -track line from Inverness became a single line to the Southeast of Daviot. [28]The same location in the 21st century. [28]
Daviot Railway Station opened on 19th July 1897.Ot was, for a short time the Northern terminus of the line from Aviemore until Culloden Moor Railway Station opened in 1898. Wikipedia tells us that, “on the northbound platform was the station building and to the southwest was the goods yard. There were two signal boxes: one to the north which was built, but never opened. The other signal box was to the south in between the goods sidings. It was relocated slightly to the north in 1952. The station closed on 3rd May 1965. The signal box closed in 1969. Only the platforms remain.” [29]
Ernie’s Railway Archive has an excellent photograph of the station which can be viewed here. [30]
Moy Railway Station was further to the Southeast and is shown here in an extract from the 6″ Ordnance Survey from the turn of the 20th century. [31]A satellite image of the same area in the 21st century. The A9 is the most significant change visible (running diagonally across the bottom third of the image). [31]
Wikipedia tells that Moy Railway Station opened on 19th July 1897. “The station building was situated on the southbound platform. Goods facilities were handled at the northeast. There were two signal boxes: north and east. Despite their names, they were both situated to the west. The station closed to both passengers and goods traffic on 3rd May 1965.” [32] The station building at Moy was of a very similar design to that at Culloden Moor and Daloit.
AmBaile has a monochrome image of the station at Moy. This image can be seen here. [34]
The modern A9 crosses the line of the railway to the East of Moy. The next two images are taken from the A9 road bridge.
Looking back along the railway from the A9 overbridge towards Moy. [Google Streetview, June 2022]Looking forward towards Tomatin from the A9 overbridge. [Google Streetview, June 2022]
Further Southeast we teach Tomatin Railway Station. …
The next station along the line was Tomatin Railway Station. [33]The same area in the 21st century. [33]
AmBaile has a few photographs of Tomatin station. These can be seen here, [35] here, [36] and here. [37]
Findhorn Viaduct is around 500 metres East of Tomatin village. …
The next significant location on the line is the Findhorn Viaduct which is approximately 500 metres East of the village of Tomatin and carries the line over the valley of the River Findhorn. [38]The same area as shown on the ESRI satellite imagery from the NLS. [38]
“The Findhorn Viaduct was designed and built for the Highland Railway between 1894 and 1897 by Murdoch Paterson, their chief engineer, and John Fowler, who was the consulting engineer and who also worked on the design of the Forth Rail Bridge. The viaduct was Fowler’s suggestion in order to create a more direct route; the railway company had originally planned a more circuitous route around the valley, over a mile longer. The steel for the lattice work was supplied by the Butterley Iron Company in Derbyshire, England. The granite for the piers was supplied by Kemnay Quarry in Kemnay, Aberdeenshire, which also supplied materials for the Forth Bridge. … It was opened to traffic on 19 July 1897. The viaduct is a Category B listed building, first listed in 1971, a status which grants it legal protection.” [39]
The highest point on the line between Inverness and Aviemore is at Slochd. The Slochd Summit “is a mountain pass on the A9 road and the Highland Main Line Railway. It is the highest point on the line between Inverness and Aviemore. An old military road and National Cycle Network Route No. 7 also go over the summit, the latter largely following the old A9. … Both the road and the railway have signs marking the spot – the A9 is at a height of 1,328 feet (405 m), while the railway reaches 1,315 feet (401 m). The Slochd Summit is the second highest place on the route from Inverness to Perth – the Pass of Drumochter at 1,500 feet (460 m) is higher and bleaker.” [41]
Close to Slochd the railway crosses the Allt Slochd Music on a high viaduct. [42]The same area in the 21st century. [42]The listed building record for the Allt Slochd Music Viaduct. [43]
A very short distance to the East of Slochd, the old A9 (now National Cycle Route No. 7 crosses the old railway. …
This photograph is taken from the old A9 road bridge and looks back along the railway towards Slochd. The modern A9 flyover sits above both the old road and the railway. [Google Streetview, June 2022]Looking ahead to the Northeast and Carrbridge from the old A9 bridge. [Google Streetview, June 2022]Bird’s eye view of the railway and old and new A9s at the same location. This image was shared on the Carr-bridge Past and Present Facebook Group by James Ross on 11th June 2024. [52]
East of the old A9 the railway curves round from a Northeasterly direction to a Southeasterly one. It runs down the valley of the Bogbain Burn crossing the stream a number of times on its descent. The modern A9 runs a little to the South of the railway. The Bogbain Burn joins the Allt nan Ceatharnuch and flows to the North of the railway before crossing under both the railway and the modern A9. It then flows into the River Dulnan to the West of the A9 and the railway.
The River Dulnan flows under the A9 and the railway and then flows down through Carrbridge. The railway station sits about 1.5 km Southwest of the village close to the river. It remains open in the 21st century.
An historical photograph of the railway bridge over the river can be seen here. [53]
The River Dulnan Railway Bridge, seen from the A9 to the South. [Google Streetview, 2023]Carrbridge Railway Station at the turn of the 20th century. The Dulnan River features in the top-left of the image. [44]The same area in the 21st century. The modern A9 runs parallel to the railway rather than through Carrbridge. [44]
Carrbridge Railway Station was opened on 8th July 1892 when the Highland Railway opened the line from Aviemore. For five years Carrbridge was the terminus of the line from Aviemore.
Northbound services commenced on 8th July 1897 when the line to Daviot was opened, the line through to Inverness opened on 1st November 1898. … The station was built with a passing loop on the otherwise single track railway, a signal box (automatic token-exchange apparatus was used) and several sidings on the north side of the line. The station building is thought to be by the architect William Roberts, dating from 1898. A camping coach was positioned here by the Scottish Region from 1954 to 1965. [46]
Southeast of Carrbridge Railway Station, the line curves through a heavily wooded landscape towards the South. It continues to be closely followed by the modern A9.
This wintery scene was recorded in March 2023 looking Northeast from the A9. The lack of foliage means that the railway can be seen close to the road. The location is the Knock of Kinveachy. The old A9 is still in use beyond the road as the B9153 and then the A95. [Google Streetview, March 2023]
The A9 begins to turn away from the railway to the South of Kinveachy. The A95 passes under the railway as it heads South, along the route of the old A9.. A new skew bridge carries the railway over the road in the 21st century.
This view looks Northeast along the A95 under the railway bridge. [Google Streetview, March 2023]The location of the old railway bridge over the A9, (the A95 in the 21st century). [47]The same location in the 21st century: the new A9 can be seen in the top-left corner of this satellite image. The A95 (the old A9] can be seen to the right of the railway at the top of the image,then passing under the railway before leaving the image bottom-left. [47]
The railway heads due South towards Aviemore, before drifting towards the West … Three small lochans were in the path of the railway. …
Now on the final run down to Aviemore. The old A9 can be seen on the left of this extract from the 6″ Ordnance Survey from the turn of the 20th century. The railway crosses the small Loch nan Carraigean.[48]This modern image shows that by the 21st century the lochans have almost completely disappeared. Just a small pool remains at the location of Loch nan Carraigean. A quarry has been opened up between the railway and what is now the A95. [48]Aviemore Railway Station at the turn of the 20th century. The River is the River Spey. There was very little to Aviemore at the turn of the 20th century – the Station and Hotel and a few private dwellings. [49]This 21st century satellite image of the same area shows a considerable amount of development to the North of the Railway Station. [49]This wider view shows just how significant the development over 125 years has been. The modern A9 can be seen on the left of this image. [49]
In the 21st century the journey between Inverness and Aviemore takes less than 45 minutes. The older main line through Forres was abandoned as part of the cuts which followed the Beeching Report in the mid-1960s. As we noted when looking at the route via Forres and Dava, a preservation railway is active at the southern end of that line and shares Aviemore Railway Station with ScotRail. The line is followed by walkers and cyclists on The Dava Way. [50]
An article about the Gorres/Dava route can be found here. [8]
In January 1950, G. Charles published a short (2 page) article about the Duke of Sutherland’s railway interests. [1]
It was only the nationalisation of the British railways which brought to an end the Duke of Sutherland’s hobby of owning and running his own train with running powers over LMS lines.
Charles noted in 1950, that the Duke of Sutherland was the only individual owner of a private railway carriage in the UK. He notes that wealthy men in the USA owned private carriages until the 1930s.
We perhaps ought to remind ourselves that the royal family had access to a number of sets of rolling stock on different railway company lines. A tradition which remained in place once the UK railways were nationalised.
We should perhaps also note that the Duke of Sutherland was not alone in owning his own locomotive which ventured onto the main line railways of the UK. The story of the diminutive ‘Gazelle’ includes its first ownership by a wealthy businessman who took it out onto the main line. Its story can be found here. [2]
Since Charles article of 1950, we have become used to private owners being able to run stock (locomotives, carriages and wagons) on lines which belong to the nation in some guise or other. Indeed, the whole railway network began to operate in this way with privatisation in the 1990s.
Charles continues to tell the story of the Duke of Sutherland’s railway involvement. … “The railway through Sutherland, from Golspie to Helmsdale (17.25 miles), was projected by the third Duke, and built at his own expense, after a local undertaking, the Sutherland Railway, had succeeded only in completing its line from Bonar Bridge to Golspie, 6 miles short of Brora, the intended terminus. The line was authorised on 20th June 1870, but construction already had been begun, and the railway was completed on 19th June 1871. A private station was provided, 2 miles north of Golspie, to serve Dunrobin Castle, the seat of the Duke. The railway from Golspie to Helmsdale was worked by the Highland Railway, but it was not until 28th July 1884, that the Duke sold his undertaking to that company, of which he was already a director. He was also a director of the London & North Western Railway.” [1: p9] Some notes about the Sutherland Railway are included below.
“To enable his railway to be opened before the connection with the Sutherland Railway, at Golspie, was completed, the Duke had purchased a locomotive and some coaches. After the Highland Railway took over the working of the line, the engine was used to haul the Duke’s private saloon between Inverness and Dunrobin, but south of Inverness, the saloon was attached to main-line trains. These arrangements were continued after the railways north of Inverness were amalgamated with the Highland Railway, and persisted after the grouping, in 1923.” [1: p9]
“The locomotive was a small 2-4-0 tank engine, built by Kitson & Company Leeds, and named Dunrobin. It had outside cylinders 10 in. diameter x 18 in. stroke, and coupled wheels 4 ft. diameter. The weight in working order was 21 tons.” [1: p9]
The first ‘Dunrobin‘ was a small 2-4-0 tank engine, built by Kitson & Company, Leeds. It was used to pull the two daily passenger trains on the line. When the Duke of Sutherland’s Railway reached Golspie in June 1871, the railway operations were transferred to the Highland Railway and the locomotive was used exclusively for the Duke of Sutherland’s private train. [4: p35-36] Dunrobin was sold to the Highland Railway in 1895. It was rebuilt in 1896 with a larger boiler and cylinders. The Highland Railway numbered it 118 and named it Gordon Castle for use on the Fochabers branch. Later it was renamed Invergordon and used as a shunter in that town, where it survived until just after the Grouping. [14]
“The original Dunrobin was acquired by the Highland Railway, and rebuilt at the Atlas Works, with a larger boiler, and new cylinders. It was numbered 118, named Gordon Castle, and put to work on the branch from Orbliston Junction to Fochabers. Some years later, it was renamed Invergordon, and used for shunting at Invergordon Harbour. During the first world war, it was loaned to the Great North of Scotland Railway, and was scrapped in 1923. The second Dunrobin performed shunting duties at Invergordon, and at Rosyth, during the [second world] war.” [1: p9]
The Duke of Sutherland’s locomotive Dunrobin designed by David Jones and built in 1892. [1: p18]
The second Dunrobin survived into preservation. Along with the four-wheel saloon it was sold to Captain Howey and initially preserved as static exhibits at New Romney on the Romney, Hythe and Dymchurch Railway in Kent.
Dunrobin and its carriage at New Romney. [19]
Following Howey’s death in 1963, the locomotive and carriage were sold to Harold Foster, who had them transported to Canada. Foster was declared bankrupt in 1965, [15] and the locomotive and carriage were bought for $15,000 by the Government of British Columbia. Dunrobin was then overhauled at the British Columbia Hydro workshops, to enable it to take part in the Canadian railway centennial celebrations in 1966. [20] Dunrobin and its carriage (58A) became exhibits at Fort Steele heritage village, where Dunrobin was steamed occasionally. It was last steamed at Fort Steele in 2005. [16]
This image is embedded from the Beamish Museum website. It shows Dunrobin and 58A being tested on 27th June 1966, on the BC Hydro sidings at New Westminster, British Colombia. This photo is one of an extensive set (plus a scrapbook) recording Dunrobin’s life in British Columbia. [20][21]
In 2010, both were declared surplus to requirements [15] and in January 2011, Beamish Museum announced that it had purchased both the locomotive and carriage which arrived back in the UK in May 2011. Dunrobin was taken to Bridgnorth on the Severn Valley Railway, where restoration work was undertaken. [17] Progress on restoration was slow as the condition of the locomotive was worse than had been anticipated. By 2020 work had made good progress but was halted by the pandemic. In 2021, Beamish Museum, received a grant of £150,000 to allow work to be completed. At that time, the Museum was anticipating that the project would be completed within 2 or 3 years. [20]
Heritage Railway Magazine No. 181 contains a feature article on Dunrobin which can be found here. [18] At present Beamish Museum is still expecting Dunrobin to be in steam at the Museum in 2025. [22]
The Two Carriages
“In 1899, a large saloon was built for the Duke at Wolverton Carriage Works, London & North Western Railway. It was designed by Mr. C. A. Park, Carriage & Wagon Superintendent, L.N.W.R., who used it as the prototype for the royal train built in 1903 for King Edward VII and Queen Alexandra, an example of railway coachbuilding, decoration, and furnishing unequalled during the [first half of the 20th century]. This train was used subsequently by King George V and Queen Mary, and George VI and Queen Elizabeth, until 1941. King Edward VIII never used it, as he preferred the late Lord Stamp’s “President’s Car,” which also [was] used by the Princess Elizabeth and Princess Margaret.” [1: p9-10]
“After the death of the third Duke, in 1892, his son decided to have a more powerful engine, and David Jones, Locomotive Superintendent, Highland Railway, designed a 0-4-4 side tank engine, with 13 in. x 18 in. inside cylinders, and a boiler carrying a working pressure of 120 lb. per sq. in. The diameter of the coupled wheels was 4 ft. 6 in., and of the trailing wheels 2 ft. 6 in. This engine was built at the Atlas Works, Glasgow, in 1895. Like its predecessor, it was named Dunrobin, and was painted dark green, with black bands, and yellow lining. A seat with leather cushions, extending the full width of the cab, was provided over the coal bunker for passengers riding on the footplate. The front weather board was autographed by several illustrious travellers, who inspected the engine while they were guests of the Duke.” [1: p9][14]
The large saloon in the paint shop at Wolverton in June 1949. [1: p19]
“In February, 1949, the Duke of Sutherland advertised his saloon for sale, for conversion into a bungalow; but a Lincolnshire firm of coachbuilders recognised the vehicle from its description, and purchased it. The new owner, the Lincolnshire Trailer Company, Scunthorpe, intend[ed] to preserve the saloon as an example of the finest British coach work in existence. It … also acquired the Duke’s locomotive and smaller saloon, Arrangements [were] made with Capt. J. E. P. Howey, Chairman of the Romney, Hythe & Dymchurch Railway, for the engine and the saloons to be exhibited at New Romney.” [1: p10]
“The large saloon [was] 57 ft. long over headstocks, and 61 ft. over the buffers. The width [was] 8 ft. 6 in., and height from rail level to the top of the roof 12 ft. 7 in., and to the side cornices 10 ft. 9.5 in. The saloon [was] carried on four-wheel bogies with a wheelbase of 8 ft., and spaced at 39 ft. centres. It [was] fitted with the vacuum and Westinghouse brakes. …. The saloon [was] divided into a large lounge (13 ft. 10 in. long, and extending over the full width of the vehicle), a smoking room (7 ft. long) three single berth sleeping compartments, a pantry, and a luggage and attendant’s compartment. Two of the sleeping berths [had] separate toilets, and a third toilet adjoin[ed] the smoking room. The lounge [was] furnished with two movable settees, a round table, and four dining chairs; and the smoking room [had] four fixed armchair seats, convertible into two beds, and two folding tables. The vestibules at each end of the saloon [had] end observation windows, but no gangways to connect with other vehicles on the train. Complete privacy for the occupants [was] thus assured.” [1: p10]
The smoking compartment of the Duke of Sutherland’s large Saloon. [1: p19]
“Stone’s system of electric lighting [was] installed, and there [were] electric bells to the attendant’s compartment, and electric fans for ventilation in hot weather. The fittings of the pantry include[ed] an oil cooker, a sink and a dresser. Steam heating apparatus, and a self-contained high-pressure hot-water system, [were] provided for warming the vehicle. … The interior decorations of the saloons and berths [were] of Spanish mahogany, white enamelled, and picked out in gold leaf, with solid silver lighting fittings. The ceilings [were] in figured lincrusta, finished in white and gold leaf. The couches and easy chairs [were] upholstered in green figured tapestry, with loose chintz covers, and the pelmets and curtains [were] of green silk and chintz to match. Turkey carpets [were] laid in the lounge and the smoking room, but elsewhere, Wilton pile carpets, underlaid with thick grey felt, [were] used. The external finishings of the saloon [were] dark Sutherland green, on the lower panels, and white, picked out with gold leaf, on the upper panels. The roof and the tyres [were] painted white.” [1: p10]
The bogie saloon is now part of the National Railway Museum’s collection. As of January 2011 it was under the care of the Scottish Railway Preservation Society at the Bo’ness and Kinneil Railway. [14] It remains on display in Museum Hall No. 2 in the Museum of Scottish Railways at the Bo’ness and Kinneil Railway. Further details can be found here. [23]
This photograph of the bogie saloon (57A) is embedded here from the Museum of Scottish Railways website. Please click on the image to go to their website. [23]
“The smaller saloon [ran] on four wheels, and [was] 25 ft. long and 8 ft. 6 in. wide. It [was] divided into a saloon, 14 ft. 3 in, long, with side and end windows, and a brake van, 10 ft. long. The saloon [was] furnished with six armchairs and a table, and there [were] three fixed seats in the brake van. The interior decorations [were] of mahogany and maple, and the external finish resemble[d] that of the larger saloon. When the Duke was travelling by special train, north of Inverness, the large saloon was steadied by having the smaller vehicle attached behind it.” [1: p10]
The Duke of Sutherland’s small four-wheel saloon, used for local journeys, and for steadying the large saloon. [1: p18]
The smaller saloon is now at Beamish Museum. It travelled there in 2011 and underwent limited refurbishment to allow it to be placed in service at the Museum. In 2018 it saw its first use at the Museum. [20]
This photograph of coach 58A is embedded her from Heritage Railways Magazine’s website from 2018. Please click on the image to be taken to the report on their website. [24] Should image-link fail, please click here. [25]
The Sutherland Railway and the 3rd Duke of Sutherland
“The Sutherland Railway had opened in 1868, terminating at Golspie. The Duke continued the line to Helmsdale from his own resources. It opened from a Dunrobin Castle station to West Helmsdale in 1870, and for some months the Duke had it operated as a private railway. In 1871 the line was completed from Golspie to Helmsdale, and operated as a part of the Highland Railway. … It was absorbed into the Highland Railway in 1884 and continues in use today as part of the Far North Line.” [3]
Various interests in Inverness and in Sutherland sought to extend railways to the North of Inverness. The first step in this was the Inverness and Ross-shire Railway which opened as far as a Bonar Bridge station on 1st October 1864. [4: p30]
“Next came the Sutherland Railway which obtained Parliamentary powers to build a line from Bonar Bridge to Brora in 1865. [5] This was assisted by the commercial drive and financial resources of The Duke of Sutherland.” [3]
The Sutherland Railway ran out of money when it reached Golspie. It was “unable to continue to Brora as authorised. By now the Inverness and Ross-shire Railway had been absorbed into the Inverness and Aberdeen Junction Railway, and it was only by the negotiating pressure of the Duke of Sutherland that the line reached Golspie. The Duke of Sutherland had a seat at Dunrobin Castle, which would have been on the Brora line, but was now not railway connected. … The Duke of Sutherland decided to build a line himself, and this became the Duke of Sutherland’s Railway. It obtained its authorising act of Parliament, the Duke of Sutherland’s Railway Act 1870 … on 20th June 1870. [4: p33-36] The act authorised a 17-mile line along the coast from Golspie to Helmsdale, on the borders of Caithness, taking over the Golspie to Brora powers of the Sutherland Railway.” [3][5]
“Engineering difficulties at both ends of the line delayed the completion of the line throughout, but the section from Dunrobin to a point just short of Helmsdale was finished by the autumn of 1870. The Duke decided that the railway should be opened forthwith, and a temporary station, known as West Helmsdale, was built at Gartymore. An engine and some coaches were purchased for working the line, but since there was as yet no physical connection with the Sutherland Railway at Golspie, the stock had to be placed on wagons and hauled along the road by a traction engine.” [3][4: p33-36]
“The opening ceremony was performed on 17th September 1870 by Princess Christian of Schleswig-Holstein. … From the date of the opening ceremony, the railway was privately operated, but after a Board of Trade inspection it was opened to the public on 1st November 1870.” [3][7]
“After the public opening, a service of two trains a day in each direction was run. On 19th June 1871 the works were completed and the railway was opened throughout, and the Highland Railway took over the working. [4: p33-36] The temporary terminus at Dunrobin became a private station serving the castle, at which trains called by request to pick up or set down passengers. In 1902 the buildings were reconstructed to the designs of the estate architect.” [3]
On 28th July 1884 the Duke of Sutherland’s Railway was absorbed into the Highland Railway. [3][4: p40]
It is worth noting that the Duke of Sutherland made a significant loss in undertaking all this work. He later commented in 1870 that it might have been possible to have turned a small profit if he had chosen to undertake the work as a narrow gauge line. …
“The Duke of Sutherland said he wished he had known more of the Festiniog Railway six years ago. ‘I have expended’, said His Grace, ‘about £200,000 in promoting and making railways in the North. Had these lines been constructed on the narrow gauge, and had they in consequence cost only two-thirds of the sum that has been expended on them, I should have obtained a direct return on this large sum which I have laid out for the benefit of my estates and of the people in those remote districts. As it is I shall suffer considerable loss.” [8]
The expenditure in the 1860s of £200,000 is the equivalent of close to £31,077,000 in 2025! [9] It is astounding that the Duke’s holdings meant that expenditure of that sum of money did not bring about bankruptcy. “The pound had an average inflation rate of 3.11% per year between 1860 and 2025, producing a cumulative price increase of 15,438.46%! … A pound today only buys 0.644% of what it could buy back then.” [9]
George Granville William Sutherland-Leveson-Gower, 3rd Duke of Sutherland (1828-1882) had interests around the country but of particular interest to me is his involvement with developments in East Shropshire which became the Lilleshall Company. He also held shares in other industrial ventures, including coal and ironstone mines.
The 3rd Duke of Sutherland inherited significant wealth and estates, including those in West Midlands, which included the estate of Lilleshall. He was also known for his interest in industrial projects, like the Shelton Iron & Steel Co. where he was a principal shareholder. The Duke’s involvement with the Lilleshall estate and his other industrial interests demonstrate a broader pattern of wealth accumulation and investment within his family. The family’s influence extended beyond the specific “Lilleshall” company to include other industrial and land ownership ventures, particularly within the West Midlands region. [10][11][12]
In 1892, the 3rd Duke of Sutherland’s obituary included these words: “…The late Duke was keenly devoted to science as employed for the promotion of the prosperity and material comfort of the tenants on his vast estates. He did more than, perhaps, any other man in the world to utilise cultivation by steam, and at one period he used all the resources and talent of the firm of John Fowler and Co., of Leeds, in this direction. He constructed at his own expense a railway in Sutherlandshire. It is said that an admiring navvy, seeing him start from Dunrobin Station one day, exclaimed to his mate, ‘There, that’s what I calls a real Dook. Why? There he is a driving of his own engine on his own railroad and burning of his own blessed coals!’ One who knew him well has said of him: ‘He was ever ready to assist in the development of ingenious ideas in machinery, mechanical appliances, and the like’...” [12][13]
References
G. Charles; The Duke of Sutherland’s Saloons and Locomotives; in The Railway Magazine, January 1950, Volume 96, No. 585, Transport (1910) Ltd., Westminster, London, p9-10.
Tony Streeter; Dunrobin: Overlooked, outcast and unwanted – until now!; in Steam Railway No. 384; Bauer Media, Peterborough, (7 January – 3 February 2011), p7–8.
Robin Jones; Steam comes home… twice; in Heritage Railway No. 151; Mortons Media Ltd., Horncastle, p24–25.
Will Marsh; Steam Locomotive Notes; in Severn Valley Railway News. No. 220; Winter 2022, p18.
There was a 19th century proposal for a public railway to Dunvegan and Portree which never came to fruition. A later proposal was the Hebridean Light Railway which was promulgated by the Hebridean Light Railway Company. It intended to operate on the Scottish islands of Skye and Lewis. [8] The Skye line was to have connected the port of Isleornsay (for ferries from Mallaig on the Scottish mainland) and the port of Uig on the north-west coast of the island, from where ferries would have sailed to Stornoway on Lewis. Another line was then proposed to link Stornoway to Carloway, the second settlement of Lewis. Branch lines were also proposed to Breasclete [9] and Dunvegan. [10]
The line was proposed in 1898, but was never completed. Records of the proposals are held in the National Archives at Kew. [11]
Although these schemes never came to fruition, at least six industrial railways have existed on Skye and adjacent islands at one time or another. These include:
TheLoch Cuithir to LealtDiatomite Railway – Details of this line can be found here. [5]
The Talisker Distillery Tramway – This short 23″-gauge tramway opened in 1900 and closed in 1948. Details can be found here. [6]
The Skye Marble Railway – Soon after the turn of the 20th century a line was opened between the Kichrist Quarries in Strath Suardal and Broadford Pier/Quay. Different sources say that this was initially either and aerial ropeway or a horse-worked tramway. Whatever form the initial arrangements took, by the end of the first decade of the 20th century, it was operating as a steam-hauled 3ft-gauge railway which for a short while (certainly no more than 4 years) employed a Hunslet 0-4-0ST, originally built in 1892 and previously used on the construction of the County Donegal Railway and various other contractors projects. This line is covered in more detail in the article which can be found here. [7]
The Raasay Iron Ore Mines and Their Railway – the railway operated from 1913 to 1919. [1][2]
More can be discovered about Raasay’s railway here. [12]
The Quartzite Quarry at Ord (opened in 1945) was equipped with a 3ft-gauge railway along which wagons were pushed by hand to a loading embankment. A short article can be found here. [13]
Storr Lochs Hydroelectric Power Station (opened in 1952) which included a standard gauge electric cable railway which still routinely carries spares and supplies down a 1 in 2 gradient. Another short article can be found here. [14]
Other railways on Skye or on adjacent islands? One source commented that Skye had thirteen different railways/tramways open at one time or another. I have only been able, so far, to identify the ones listed here. Should others be aware of more historic rail sites on Skye, I would be interested to hear. Maybe that source intended their list to include the abortive schemes mentioned at the head of this article? One particular proposal, which never came to fruition, has imaginatively been taken as the basis for the story of the fictitious Highland Light Railway Company. [15]
Storr Lochs hydro-electric power station was commissioned in 1952. It was built by the North of Scotland Hydro-Electric Board, and used water from Lochs Leathan and Fada, to provide the first general supply of electricity to the island. The power station has a total output of 2.40 MW. Because the location of the turbine house was not easily accessible, it was (and continues to be) served by a standard-gauge electric funicular railway. [1]
The location of Storr Lochs Hydroelectric Power Station in the Northeast of the Isle of Skye. [1]
The funicular is the only working railway on the Isle of Skye. It is below the spectacular stacks and landslips of The Storr on the Trotternish Peninsula, a few kilometres north of Portree.
The cable railway was built early in construction of the power scheme, and used to carry materials and equipment to the shores of Loch Bearreraig. In the concrete foundation of the railway over 600 rough steps were built. The first pipeline was constructed for the 1952 opening, and the second pipeline, running parallel added in 1956. [7] The maximum gradient on the railway is 1 in 2. [9]
Photographs of the construction of the scheme can be found here. [10]
Other pictures of this site can be seen here. [11]
There was a short tramway in the quartzite quarry close to Ord which was operational in the mid-20th century. …
The small village of Ord sits on the Northwest side of the Sleat Peninsula. [1]The small building shown on this map near to Coille a’ Chuaraidh is the approximate location of the quarry. [6]A road from the village runs Southeast across the Sleat Peninsula. The quartzite quarry was on the North side of the road at Coille a’ Chuaraidh. [1]
J.G. Stein & Co. of Bonnybridge commenced quarrying at Ord, Sleat Peninsula, Isle of Skye in 1944 and this continued until 1960. Silica was extracted from the quartzite ore and used as a heat resistant substance in industrial furnaces, fire bricks, cements, boilers etc. Only the explosives store and a storage building, now used as a bothy, survive. [1]
Ore was removed from the quarry in trucks that ran on a very short rail track to the road where it was loaded onto lorries and taken to the pier at Armadale. The ore was then loaded into a waiting puffer (coastal trading boat). [1]
The high cost of transport away from Skye meant that the quarry was uneconomic and it closed in 1960. [2]
The tramway/railway was very short – only 110 metres in length. [4]
The tramway was operated by manpower, no mechanical propulsion was employed. Rolling stock consisted of a number of wooden-framed tipper wagons, allegedly used on the Skye Marble Railway. [3]
This image is a postcard view of the Skye Marble Quarry.At the centre of the image is one of the tipper wagons used at Kilchrist and which may well have been bought for use at Ord Quarry. [5]
Until the 1970s, there were a number of these wagons gradually deteriorating on the beach at Ord, although there is no longer any sign of them. [4]
The featured image for this article is the only photograph I have been able to find of ‘Skylark’, the locomotive which for a matter of only a few years operated on the Skye Marble Railway. Further notes about the locomotive can be found in this article.This information board across the road from Kilchrist Church, features Skylark at the head of a train of wagons. [5]
Some sources say that in 1904, an aerial ropeway was constructed to transport marble to Broadford Pier from Kilchrist Quarries (alternatively known as Kilbride Quarries or Strath Suardal). The quarries were used to excavate marble. [1][2] Other sources talk of the line being worked first by horses. [14] There was an incline between the upper and lower Quarries at Kilchrist which appears to have been rope-worked. It is most likely, given the length of line from Kilchrist to the quay at Broadford and the relatively shallow gradients, that the line from the marble works down to Broadford was worked by horses, but it is entirely possible that an aerial ropeway was employed. Nothing remains of the line beyond the formation which now carries a footpath once South of Broadford, and, as will be seen below, some rails in the surface of the pier at Broadford.
The main length of the line was converted to a tramway/railway in 1910. It was, in total, over 6 km in length. [4] Some sources quote 3.5km [viz. 2] and probably take that length from the length of the footpath which follows the route of the old railway. The Skye Marble Railway was a 3 ft (914 mm) narrow gauge [5] line which only operated from circa. 1910 to 1912/1913. [6][7]
The Northern half of the Skye Marble Railway as shown on railmaponline.com’s satellite imagery. [8]The Southern half of the Skye Marble Railway as shown on railmaponline.com’s satellite imagery. [8]
It seems appropriate at this point to take a break from our journey along the line to find out as much as possible about the locomotive which was used on the Skye Marble Railway for a short time in the early 20th century. The website of the Industrial Railway Society (IRS) has some more information about this locomotive which the Skye Marble Company knew as ‘Skylark’. … The engine was first known as ‘Bruckless’, the notes which follow come from the IRS archives and were pulled together by D. Cole in 1965, in part from work undertaken by Dr. Iain D. O. Frew: “Delivered to T.S. Dixon in May 1892 through the agency of Josiah Buggins as ‘Bruckless’ for the Donegal-Killybegs contract of the County Donegal Railways, it was sold in 1894 after the completion of the contract and later worked for the Preston Corporation Waterworks Department on the construction of the Spade Mill No.1 Reservoir at Longridge. There it was named ‘Skylark’. Subsequently, in 1907, it went … to the Skye Marble Company and was used firstly by a contractor in building the Company’s railway from Torrin to Broadford, and then, from 1909, to work the railway itself. In 1913, following the failure of the quarries, the line was lifted and the locomotive sold to W.N. Jackson, a Glasgow metal merchant. He in turn sold it to J. Mackay, contractor for the Roundwood Reservoir in County Wicklow. This contract passed to H. & J. Martin Ltd. in 1915, and after its completion in 1925 the locomotive was scrapped.” [15]
D. Cole undertook further research into Hunslett’s records and was able to ascertain that “from July 1897 – the date from which the earliest detailed Hunslet spares records have survived – to March 1905 spares were sent to the Newcastle & Gateshead Waterworks. Delivery was sometimes to Otterburn, and the name of the locomotive was frequently quoted as ‘Bruckless’. No name was quoted by Preston Corporation when ordering spares between March 1907 and March 1910.” [15]
Cole was also able to confirm that:
from November 1910, spares were sent to W.R. Herring with the locomotives name quoted as ‘Dilworth’; [15]
in January 1911 and May 1911, spares were sent to Skye Marble Ltd. but no name was quoted; [15]
in August 1913, spares were ordered for the locomotive named ‘Skylark’ by W.H. Jackson, Glasgow, but sent to Mr. Easter, Skye Marble Cottages, Broadford, Isle of Skye; [15]
from May 1914 to May 1916, spares were sent to John Mackay, Dublin Waterworks, Roundwood, Co. Wicklow; [15] and
the last spares of all were sent out in January 1921 to H. & J. Martin Ltd., Roundwood Reservoir. – K.P.P. [15]
We now continue the journey along the old railway route. …
This view looking South towards the village of Broadford shows the footpath below the road (to the left beyond the dwarf wall) which probably follows the line of the old railway. [Google Streetview, December 2021]
The alignment of the railway which I have proposed here is supported by Railscot. On their page about the railway the alignment is shown adjacent to the shore rather on the higher ground to the West. [7]
The yellow-brick abutment on the Northside of the river is original, the modern footbridge sits on that abutment but is on a different alignment to the old railway. There is no remaining abutment on the South side of the river, so a new smaller abutment was constructed to support the footbridge. A comparison is made and pictures are provided, on this site. [5] The photographs towards the bottom of that webpage give an idea of the alignment of the old railway bridge. Which crossed from the North abutment to a point on the South bank of the River Broadford marked by the young tree in the image below.
The modern footbridge sits on one of the abutments of the old railway bridge beyond the river in this picture. The old railway bridge spanned the river on a line between the North abutment and the young tree, in leaf, at the centre of this image which looks North from the A87. [Google Streetview, May 2022]
From the South bank of the river and running South the line shown on railmaponline.com’s satellite imagery seems to be realistic, following, as it does, a curved route to the East of the location pictured above. …
Crossing the modern A87, the old railway ran Southeast crossing the modern Glen Road (which did not exist at the time the railway was operating) close to Broadford (Church of Scotland) Church and then curved round to the East of Strath Suardal Way (which also did not exist when the railway was working). [8]
The next two images show the formation of the old railway on a low embankment on the East side of Strath Suardal Way.
This photograph was taken at the roundabout looking South-southwest along Strath Suardal Way. The low embankment runs behind the street lighting. [Google Streetview, December 2021]Further along Strath Suardal Way and looking Southwest, the low embankment is again visible blue beyond the street lighting columns. [Google Streetview, December 2021]Towards the end of Strath Suardal Way the line of the old railway turned away to the Southwest. [8]The old Railway’s route runs through the evergreen trees on the left side of this West-southwest facing photograph. [Google Streetview, December 2021]The line then ran over open moorland to the East of the road to Elgol (the modern B8083). [8]Initially the route of the old railway and the modern B8083 converge as they head South-southwest. [8]The footpath access to the line of the old railway can be seen just as the old railway route and the B8083 begin to diverge. [8]The footpath access to the line of the old railway as seen from the B8083. Just beyond the second gate the footpath turns to the right and follows the old railway formation. The first length of the footpath runs through a protected plantation of young trees. [Google Streetview, December 2021]
The four photographs immediately below show the first few hundred metres of the footpath along the old railway – as far as the plantation boundary fence which can be seen beyond the two low gateposts in the fourth photograph.
When marble was discovered near Kilchrist in Strath Suardal on the slopes of Ben Suardal about 3 miles (5 kilometres) Southwest of Broadford, a large factory was built near the quarry for cutting and polishing the quarried blocks. The Marble was formed by the heating of limestone by igneous intrusions in the Tertiary Era. It appears that small scale workings were active as early as the 18th century, developing throughout the 19th century. [14]
“On level ground by the South side of the Broadford to Torrin road are the remains of an industrial complex belonging to the old marble quarries. The remains consist of a ruinous concrete shed/warehouse 60m long, a railway platform, traces of the railway line and sidings, and four brick-built circular bases 2.4m in diameter.” [17]
From adjacent to the lower quarry, with its own branch, spoil heaps and concrete bases, [22] the line continued South but as a rope-worked incline.
Looking South up the incline towards the upper quarry. [My photograph, 5th May 2025]
The view South up the incline to the upper quarry. This image is embedded from here. [19]. Clicking on the image takes you directly to the original image which is one of a series of photographs of the route of the old railway can be found here. [5]
In a rocky cleft immediately to the East of the track to Boreraig, are the remains of two former dynamite stores, one within the other. The older, larger building with walls of rubble construction, envelopes a smaller concrete blockhouse. Close to these are the remains of the ot for the winding wheel for the rope-worked incline.
Also located at the upper quarry (but of which I did not get photographs) are two machinery stands:
2m square with 11 bolts protruding
6.5m by 5.2m with 4 stanchions protruding.
The Demise of the Line
The operation was not a commercial success. The railway line was abandoned by 1914 when the operating company became bankrupt. The line was offered for sale as part of the liquidation of the business. The sale comprised a 9½-in, 4-wheeled locomotive, 500 tons of 35 pounds (16 kg) and 56 pounds (25 kg) flat-bottomed rail and 9,000 6-foot creosoted sleepers. [4][20]
Extracting the marble proved difficult and expensive and quarrying finally ended here in 1939. [21]
There is an excellent book by Laurence & Pamela Draper, which they self-published in 1990, entitled “The Raasay Iron Mine: Where Enemies Became Friends.” I picked up a copy second-hand from an online sales site. That book covers the operation on Raasay in some detail. This article looks at the railways involved.
An extract from the Ordnance Survey 1″ Mapping of 1930 (Sheet 25) shows the line of the railway running North-northeast from the pier at Suisnish to Mine No. 1. A dotted line represents the line to Mine No. 2. [8]
Raasay Iron Mine
L. & P. Draper tell us that “Just before the First World War the Scottish coal and iron-ore mining, and iron-smelting, firm of William Baird and Company opened up an iron-ore mine on the Island of Raasay in the Inner Hebrides. … In association with the mine, Baird’s built several kilometres of narrow-gauge railway, a crusher, five calcining kilns, a huge ore hopper and a reinforced concrete pier. Many aspects of the installation, such as this pier, diesel-electric power generation and the provision of powerful external electric lighting, were very advanced for their time.” [1: pV][3: p146]
The BBC tells us that “William Baird and Co. Ltd … owned the Raasay estate and initiated the mine’s operations. The mine was developed just before the war and was crucial in providing iron ore for the British war effort, with the ore being transported to Ravenscraig for smelting.” [2]
Because most of the local men had been called up, Baird’s arranged for German Prisoners of War to work the installation from 1916 onwards. In permitting this, the British Government probably “contravened the Hague Convention which specifically banned the employment of Prisoners of War on munitions production; in 1920 the British Government attempted to destroy all relevant records, and was largely, but not entirely, successful. To enable prisoners to be used, the project was effectively nationalised (although that word was not actually used), with Baird’s operating it as agents for the Government; this was a standard system of management in the First World War. … Prisoners and local people worked in harmony together as colleagues, but relationships between Baird’s and the Ministry of Munitions were at times hostile. At the end of 1917 the local men, who were badly paid compared with men doing similar work elsewhere, went on strike, and there were allegations in Parliament that German Prisoners of War were being used as strike breakers, with a result that Winston Churchill himself made statements in response; these allegations were at best only half truths.” [1: pV][3: p146]
This map was reproduced in an article written by the Drapers for Der Anschnitt in 1999. It shows Baird’s initial plans for a railway were altered to move the kilns away from Suishnish House (modern spelling Suishnish). [1: p2]]3: p150]
A probable total of almost 200,000 tons of raw iron ore was produced over the life of the mines, which in the first instance ran until six months after the end of the First World War. “Everything was maintained in full working order, [but] almost the only further iron to be yielded, in the Second World War, came out as scrap from the dismantled installation itself.” [1: pV][3: p146]
L. & P. Draper tell us that, “After hostilities ceased on 11th November 1918 there was a rapid fall in demand for iron, and on 21st December 1918 the Government stated that it wished to terminate its agreement with Baird’s, asking: … do you want the prisoners after about the end of January 1919? … Baird’s said that it did, for a while, if the Ministry could take the output; otherwise the prisoners were not needed. … The Ministry was anxious that the whole installation should be shut down by 31st March 1919.” [1: p30]
It appears that there was probably no resolution between Baird’s and the government over ownership of remaining stocks of iron ore at the mine when it closed but L. & P. Draper note that in the years after the war, whenever a full load of coal was delivered to Raasay, the steamers involved left Raasay with a full hold of iron ore. [1: p31-32]
“Soon after the war ended there was unrest on the island, partly because the fisheries had failed and partly because many of the veterans returned expecting that their interpretation of promises which had been made to them, that they would be re-located on more fertile ground, would be honoured. Following the example of many other Hebridean islanders since the latter years of the nineteenth century, they forcibly took over the south end of the island and some men served terms of imprisonment as a consequence. However, Baird’s sold the estate to the Scottish Board of Agriculture during the 1921-22 post-war crisis and many islanders were re-settled on land which they had coveted.” [3: p155-156]
“ln the mid nineteen thirties, twenty years after its heyday, the installation was still in good working order as Baird’s had placed the works on a care and maintenance basis and employed a full-time 3-to-5 man crew … who kept the machinery in perfect working order. They painted the ironwork, including the large expanse of the end of the calcined-ore hopper, with red Iead, and ran the installation once each week. lt was capable of being started at relatively short notice at a time of national emergency. However, this was not to be, probably because of the cost of winning the relatively low grade ore, and after the onset of the Second World War the only iron to come from the site was the installation itself as scrap. lt is not clear whether the formal abandonment on 15th May 1941 was the beginning of dismantling, or just the date on which the plan was drawn. … Three, if not all, of the kilns were taken to Lingdale, in Cleveland, Yorkshire where three were re-erected . They continued in intermittent production until about 1962. lt is not known which ones were rebuilt, but it seems likely that they were Nos 3, 4 and 5 which had been unused on Raasay.” [3: p156]
Raasay Iron Ore Mines Railways
“No 1 Mine was connected to the pier at Suishnish by a virtually straight railway. A short steeply-inclined spur to the outcrop site left the main line at the entrance to No 1 Mine; No 2 Mine was connected by a spur from the main line. The railway led directly from the mines to the top of the crusher, on the hill overlooking the pier. Just below the crusher stood the kilns. An inclined railway connected the area just above the crusher down to the pier; this is also the route by which the coal was taken from the pier up to the crusher. Coal and iron ore were mixed in the crusher and taken by conveyor belt to charge the kilns. Below the kilns, more belts took the calcined ore to a hopper, from whence it was ultimately loaded onto ships at the seaward end of the pier.” [1: p33][3: p151]
Prior to the construction of the 4 ft. 6 in. railway the first output from the iron ore mine was transported by horse and cart down the narrow lane through Inverarish. [5: p78] But before the completion of the facilities near East Suishnish Pier, the incline was already bringing iron ore down from Mine No. 1 and the Outcrop Site.
We focus first on the railway infrastructure at the southern end of the line where the processing plant and pier were sited. The drawing below shows the layout of the site.
Two enlarged details from the image immediately above, show parts of the rail infrastructure on the site.
This first enlargement shows the steeply inclined line which ran down the side of the crusher to the pier. [3: p151][British Geological Survey: BGS C 2183]This second enlarged extract shows the rail line running out onto the reinforced concrete pier. A short train of open wagons appears to be sitting on the rail line. [3: p151][British Geological Survey: BGS C 2183]
A third and a fourth extract, this time from photographs provided by the Munro Daughters for L. & P. Draper’s book, show the incline in use while the calcined-ore storage hopper was being constructed. …
Perhaps it is worth noting here that the wagons used on the network were known as ‘hutches’. They were 5ft long overall, the body being 4ft long x 3ft wide and 2ft in height. Wheels were 1ft in diameter (1ft 2in over the flanges) and the axles were centred 1ft 6in apart. The overall height was 3ft 7in above rail height. [1: p65]
The hutches “were assembled from kits in the top of the crusher. They were pushed by hand initially, and were stiff until they were greased. … 4 wheels and 2 axles weighed 1 hundredweight 1 quarter 14 pounds (70kg). 200 sets were ordered on 28.4.13 and a further 100 on 5.6.14, so the mine must have had at least 300 hutches.” [1: p66]
“The Pier Haulage Road was in 3 sections. The lower one, at a gradient of about 1 in 4.5, extended for 67 metres, the middle one at about 1 in 10 for 25 metres, and the upper one at about 1 in 4 for 83 metres. At the bottom of this incline the track was diverted around a huge L-shaped concrete block designed to catch runaways. … The hauler house … was used solely for haulage on the incline above the pier.” [1: p63]
The railway was, apart from the lower section, the Pier Haulage Road, largely double track. It was multi-level in the vicinity of the processing plant and the incline to the Outcrop Site was single track. Rails were 30lbs/yard, spiked into sleepers. Where there was traffic across the rails an inverted U-shaped bridging rail was used. [1: p65]
The track plan of the rails around the processing plant provided by the Drapers shows a complex arrangement with some very tight radius curves. It is not surprising that the ‘hutches’ needed to have a short wheelbase.
Track layout in the vicinity of the Crusher House. [1: p66-67]The same building, the Hauler House, seen from further North on the second incline. The mountains of Skye sit beyond the Sound of Raasay. [My photograph, 7th May 2025]
L. & P. Draper tell us that the extensive system of narrow gauge lines were 2ft 3in gauge. The main line “extended in a straight line … from the pier root up an incline, the ‘Pier Haulage Road’, to a level ore storage area above the crusher and on to the No 1 Mine entrance at a distance of 2.6 kilometres. … At a distance of 1.4 kilometres from the pier a straight spur, 0.9 kilometre in length, left the main line … to No 2 Mine. … The junction layout is shown [below].” [1: p63]
The incline climbs to the North. [My photograph, 7th May 2025]This telephoto shot shows the incline continuing to the North and shortens the distance to the mountain in the distance, which is Dunn Cana (Caan). [My photograph, 7th May 2025]Looking back towards Skye from within the shallow cutting in the previous pictures. [My photograph, 7th May 2025]Further North and looking North, the incline remains relatively clear of vegetation. [My photograph, 7th May 2025]Railmaponline.com shows the line continuing North. [10]Continuing North. [My photograph, 7th May 2025]And again, further North and looking North. Dun Caan has dropped below the horizon as we continue the climb. [My photograph, 7th May 2025]Railmaponline.com shows the location of the junction between the lines toMine No.1 to the North and Mine No. 2 to the Northwest. Just to the South of the junction, the remains of the Hauler House for the line to Mine No. 2 can be seen. [10]Approaching the location of the junction from the South: the remains of the Hauler House sit close to the centre of the image. [My photograph, 7th May 2025]The railway junction between the line to/from Mine No. 2 and the main line which ran between the pier and Mine No. 1. [1: p40]Looking Southeast along the line of the railway built to serve Mine No. 2. The line passed under that serving Mine No. 1. The bridge was between the camera and the Hauler House. [My photograph, 7th May 2025]
Heading North from the junction, the route of line to Mine No. 1 now runs through a protected area where deciduous native trees have been planted among sparce examples of older trees.
The route of the incline is a waymarked path. For the most part it is a relatively easy walk. A section of the line crosses what is now a plantation protected from deer to allow newly planted native trees to mature. [My photograph, 7th May 2025]The route of the old railway continues North through the plantation. [My photograph, 7th May 2025]Railmaponline.com’s satellite imagery shows the line serving Mine No. 1 continuing North-northeast on the same alignment as the line South of the junction. The planted area can be made out at the bottom of this image. It is also possible to make out the line of the stream valley that the line had to cross. It runs diagonally from the bottom-centre of the image to the left side of the picture. [10]The line continued North towards the location of the viaduct. [My photograph, 7th May 2025]The remains of the viaduct come into view as the land begins to drop away. [My photograph, 7th May 2025]The Southern abutment of the three span viaduct which carried the line to Mine No. 1 over the valley of a tributary of the Inverarish Burn.A view North from the top of the Southern side of the valley. The two tall concrete columns remain in place but the bridge deck is long gone. Note the steep, stepped path on the North side of the valley. [My photograph, 7th May 2025]The Northern abutment of the viaduct remains in place but it has lost the westernmost pilaster. [My photograph, 7th May 2025]
Apart from minor cuttings and embankments to maintain the design gradient on the incline and the structures immediately around the junction, there were only two significant structures. Both were viaducts: that on the main line carried it over a ravine formed by a tributary of Inverarish Burn, that on the line to Mine No. 2 carried it over Inverarish Burn and Fearns Road. The Drapers tell us that these viaducts were “of iron girders with a decking of timbers measuring 12in x 6in in section. They had iron railings on each side, and the one to No. 2 Mine had steel-plate sides to prevent ore accidentally falling onto the road below.” [1: p65]
This photograph of the viaduct carrying the line to Mine No. 1 appears in L&P Draper’s book courtesy of John MacLeod. [1: p64]
North of the viaduct on the line serving Mine No. 1, the railway continued in a North-northwest direction towards the mine, continuing to climb towards the mine buildings.
At the northern end of the railway incline, the line from the pier extended into the mine entrance of No. 1 Mine. It first passed under the road to Fearns before also passing under a separate incline which connected the facilities at the mine entrance to the surface workings where the iron bearing strata was exposed at ground level – the outcrop site. L. & P. Draper produced the drawing below which is based on the historic Ordnance Survey mapping.
Mine No. 1 and the Outcrop Site. [1: p46]This extract from the railmaponline.com satellite imagery shows the full length of the single track incline notes above. [10]
The arrangement of the two rail lines is illustrated in the photograph below. …
Having covered the full length of the main line to Mine No. 1, we turn to the branch line serving Mine No. 2.
We did not walk the route of the line which served Mine No. 2: the first part of. its route is shown on this extract from railmaponline.com’s satellite imagery. The purple line on this map extract stops short of Fearns Road and Inverarish Burn. The line continued North-northwest across the road and the burn on a three span viaduct. The abutment of the viaduct remains but the bridge decking was removed for scrap some decades back. The viaduct was of the same design as that on the line to Mine No. 1 with additional steel panels attached to the deck parapets over Fearns Road to prevent accidental spillage onto people using the road. [10]This extract from railmaponline.com’s satellite imagery extends the lilac line across the valley of the Inverarish Burn to a terminus at the location of Mine No. 2. Fearns Road is shown running across the image with the Burn at its North. The Valley was crossed by a three-span viaduct to a very similar design to the viaduct on the line to Mine No. 1. Its location is marked by the three parallel lilac line. [10]
Only the abutments and piers of the viaduct carrying the line serving Mine No. 2 remain. The four images below show this remains.
Mine No. 2 only saw very limited use and closed relatively quickly after it opened. L. & P. Draper are of the opinion that, “because of severefaulting there was virtually no production from No 2 Mine, which must have been an expensive white elephant considering the cost of constructing the high viaduct, hauler house and other mine-head buildings. However, it was not entirely unused, as Baird’s built a sawmill by No 2 Mine, and all timbers used in the mine, for pit props, railway sleepers, power poles and other purposes were sawn there and transported by rail.” [3: p153]
Calcination is a process which involves a controlled burn of crushed ore mixed with imported coal. It is specifically designed to draw off water and unwanted minerals from the iron ore but without heating it to a temperature which would result in the production of metallic iron.
Alexander Nicolson; Handbook to the Isle of Skye andAdjacent Islands; Archibald Sinclair, Celtic Press, Glasgow, 1936.
The featured image above shows Highland Railway No. 29 at Fort George Railway Station in Ardersier in charge of a train of four wheel coaches. Staff at the station seem to be included in the photograph. The locomotive was built in October 1863 as a 2-2-2 and originally called ‘Highlander’. She was rebuilt as a 2-4-0 in August 1871 and renamed ‘Forres’. She was withdrawn in 1898 which means that the annotation under the photograph is a little inaccurate. The locomotive is seen in the image above in its latter guise, so the image was probably produced between 1872 and 1898. The picture was shared on The Highlanders’ Museum Fort George Facebook Page on 23rd February 2014. [12]
The Disused Stations Website has full details and photographs of Fort George Railway Station, here. [1]
AmBaile also has a number of photographs which can be found here. [2]
The full length of the Fort George Branch is shown on the extract from the 25″Ordnance Survey from the turn of the 20th century below. …
The Fort George Branch of the Highland Railway at the turn of the 20th century. Gollanfield Junction Station and the Highland Railway’s main line between Inverness and Forres appears in the bottom right of the map extract. [3]Fort George Railway Station in Ardersier was built in the 1890s and named after the first station on the Inverness-Nairn line, called Fort George Station, which had been built to serve the Fort to the North. The station on the Inverness-Nairn line was then renamed Gollanfield Junction Station. The station at Ardersier opened 1on 1st July 1899. It closed to passengers and goods on 5th April 1943. [4][5]The same area in the 21st century as recorded on the ESRI satellite imagery from the NLS. [4]These two images show bungalows on the station site in the 21st century. [Google Streetview, August 2021]Looking Northwest along the line or the old railway towards the terminus. [Google Streetview, August 2021]
Just to the South of the station throat the line bridged the junction of two roads. These became the B9006 and the B9092.
The railway bridged the junction of two roads a short distance South of the railway station throat. [6]The same area in the 21st century. The trees mark the line of the old railway. [6]The location of the railway bridge, seen from the Southeast. The B9006 was an old military road. [Google Streetview, August 2021]The location of the railway bridge, seen from the Northeast. The trees are on the line of the old railway embankment. [Google Streetview, August 2021]The same location seen from the Northwest. [Google Streetview, August 2021]
The line ran across open fields with no more structures than a few culverts to carry water from drainage ditches, until it curved to the East into Gollanfield Junction Railway Station.
Gollanfield Junction Station as it appeared on the 25″ Ordnance Survey of 1904, published in 1905. It was opened in 1855 by the Inverness and Nairn Railway and initially named Fort George after the military base nearby. In July 1899, the Highland Railway opened the direct branch to Fort George (sited in the village of Ardersier). With the opening of the branch, the station was renamed Gollanfield Junction. Passenger services on the branch were withdrawn in 1943 and it closed to all traffic in August 1958. The following year, the station was renamed Gollanfield by British Railways. [7][8]The same location in the 21st century. Goods traffic at the station ceased in May 1964 and it was closed to passenger traffic on 3rd May 1965. Most of the buildings were subsequently demolished after closure, but the station house remains standing and is used as a private residence. [8][9]
It is interesting that this short branch was deemed worthwhile as an investment. It brought the railhead only a short distance closer to Fortrose George.
Vallance tells us that, “The original line from Inverness to Nairn had provided a station to serve the military post of Fort George. This was only Fort George in name, as the depot itself was some 3½ miles to the north, at the end of a sandy tongue of land jutting out into the Moray Firth. It was felt that the fort should be made more accessible by rail, and powers were granted on 4th July 1890 for the construction of a branch, 1½ miles long, from the existing Fort George station to the village of Ardersier, which lies some two miles south of the depot proper. The terminus of the new line was to be called Fort George. … The surrounding country is level and sandy, and no difficulties were experienced in the construction of the line, which was opened for traffic on 1st July 1899. The junction station was renamed Gollanfield Junction, from the farm of the same name in the neighbourhood.” [10: p46]
David Ross has little to add to this apart from a few fleeting references, primarily to Fort George rather than its railway station, other than to note the construction of the branch line. [11: p95]