Tag Archives: electric tram

Shaker Heights Rapid Transit Lines – Modern Tramway Vol. 12 No. 137, May 1949

Modern Tramway talks, in 1949, of the Shaker Heights Rapid Transit (SHRT) Lines as “A high speed electric light railway entirely on reserved track, connecting a beautiful high class residential district with the centre of a large city. affording such speedy and efficient service that the car-owning suburban residents prefer to use it and park their cars on land provided by the line; a system which makes a handsome profit and has recently taken delivery of 25 of the most modern type of electric rail units in the world [which] are only some of the outstanding facts about Shaker Heights Rapid Transit.” [1: p101]

Two images from Modern Tramway which show: first , a station in Shaker Heights which shows the central reservation and a car of standard type; second, a PCC car equipped for multiple-unit operation, one of a fleet of 25 delivered in 1948. [1: p112]

The network was created by the Van Sweringen brothers and purchased after their bankruptcy, and a period of 9 years in receivership, by Cleveland City Council in 1944. [2]

The official ownership details down the years are:

1913–1920: Cleveland & Youngstown Railroad
1920–1930: Cleveland Interurban Railroad
1930–1935: Metropolitan Utilities
1935–1944: Union Properties (47%), Guardian Savings and Trust (33%) and Cleveland Trust (20%)
1944–1975: City of Shaker Heights
1975–present: Greater Cleveland Regional Transit Authority.” [4]

The SHRT connected the city of Cleveland, Ohio, with the largest residential area known as Shaker Heights, six miles East.

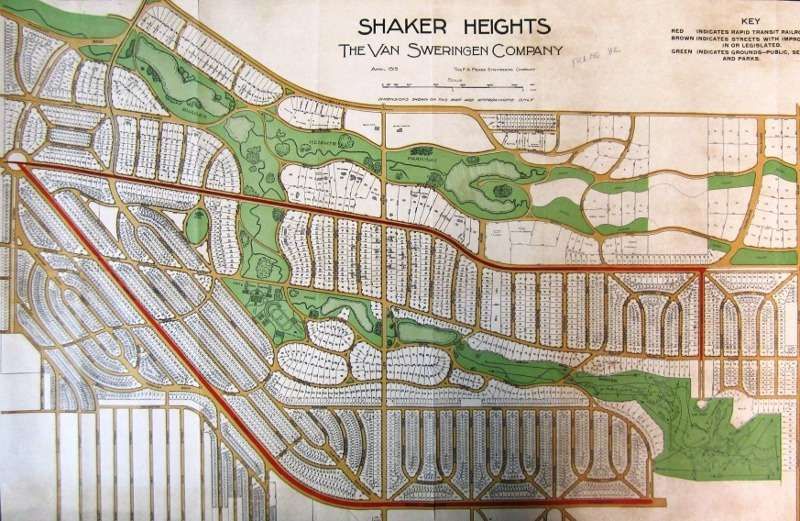
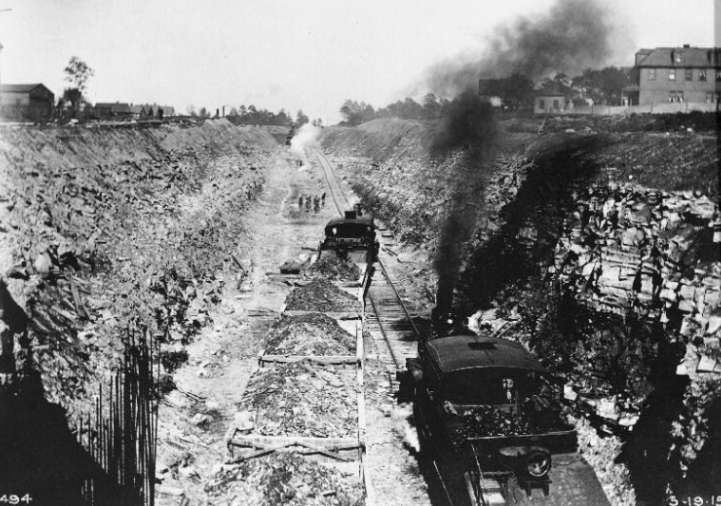
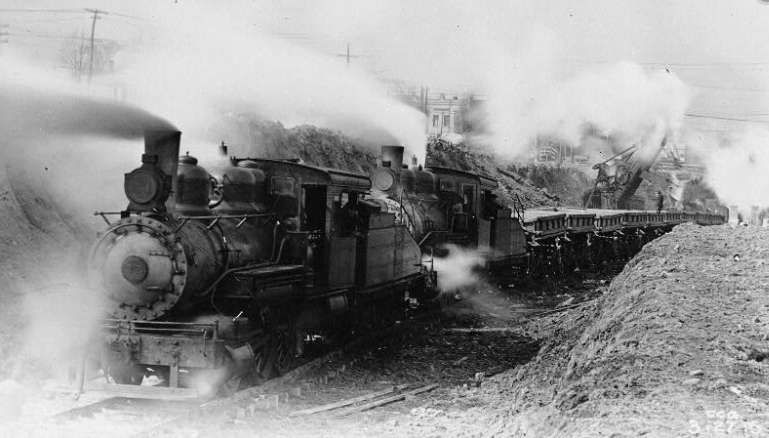
The Van Sweringen brothers planned the line “in the early 1900’s as part of a land development scheme, … to serve the district that would grow up on the Heights and beyond, and the charter was obtained in 1907. The land development was planned around the line, and the engineers allowed for a railway area 90 feet wide through the property with 50 feet of open space each side of the tracks (room for four tracks and a grass verge on each side). Building was delayed by the First World War and the line was not opened until 11th April, 1920.” [1: p101]

In this 1919 map of Shaker Heights prepared for the Van Sweringens by the F. A. Pease Engineering Co., the relationship between the construction of the two lines of the new Shaker Rapid Transit and the proposed expansion of residential development in the Shaker Lakes Park area is clearly observable. Shaker Square is at the left of this map, © Shaker Historical Society, Public Domain. [11]
Construction work on the Shaker Heights Tramway with steam-powered construction trains, circa. 1919/1920. Steam construction trains on the east side of Cleveland, just west of Shaker Square, © Public Domain. [7]
Another view of steam locomotives at work on the construction of the line, circa. 1919/1920. [7]
The newly built tramway West of Shaker Square (Moreland Circle), at time of construction, circ. 1920. [7]
Original rolling-stock on the Shaker Heights Rapid Transit Line. [7]
Later general view of the mainline, east of Shaker Square. [7]

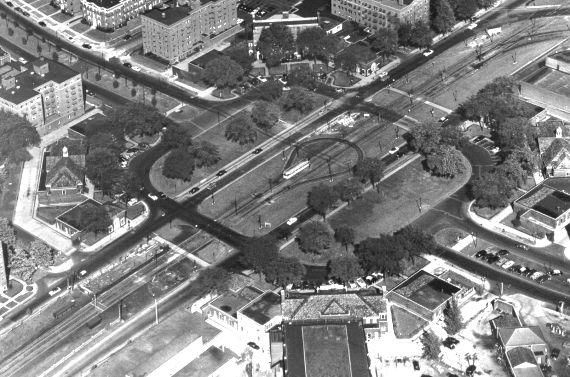
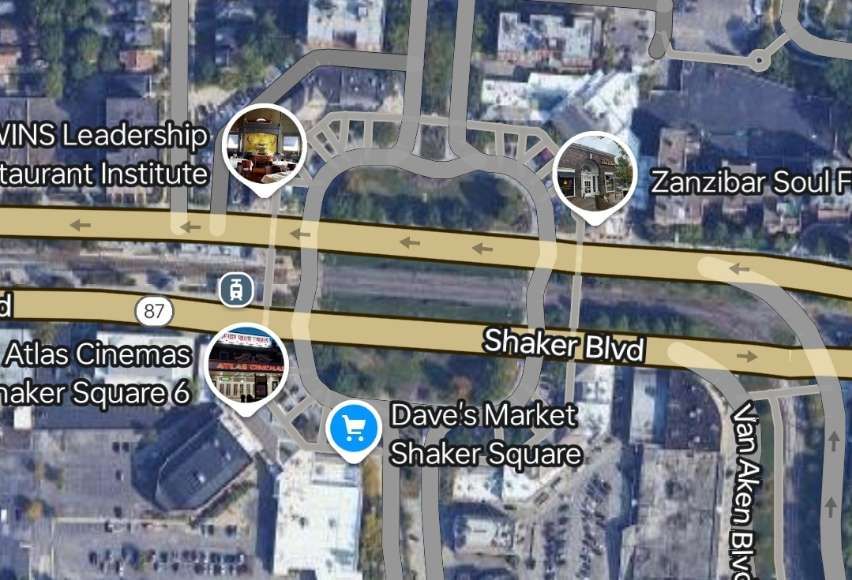
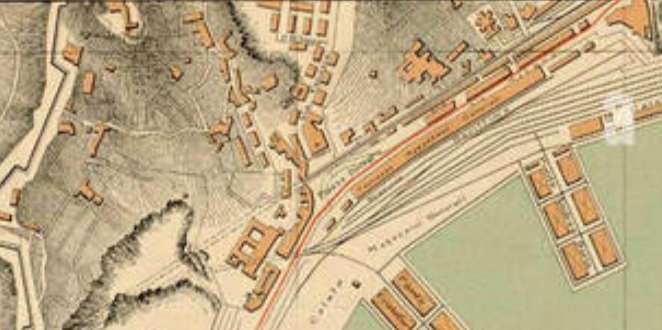
Tower City Station to Shaker Square

On 20th July 1930, Shaker Rapid Transit cars began using the Cleveland Union Terminal (CUT), after the Terminal Tower opened. [12]

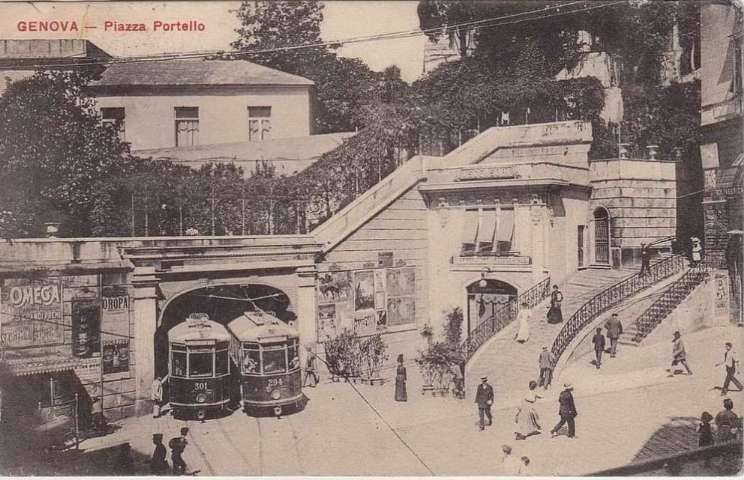
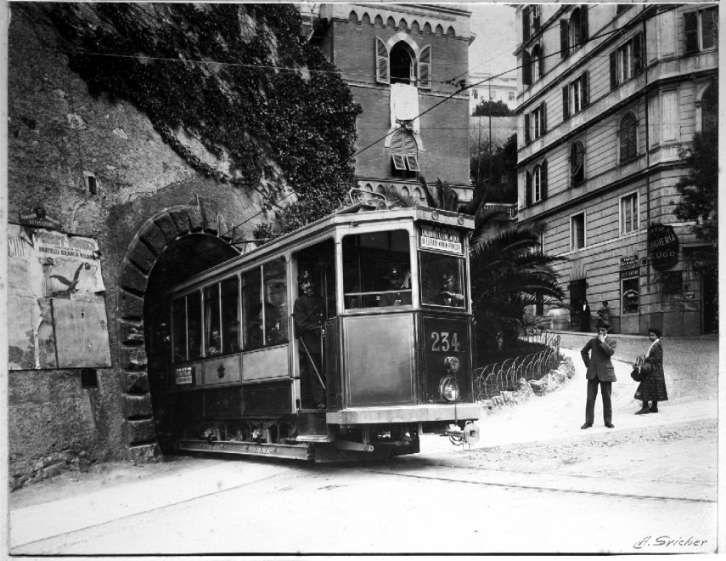
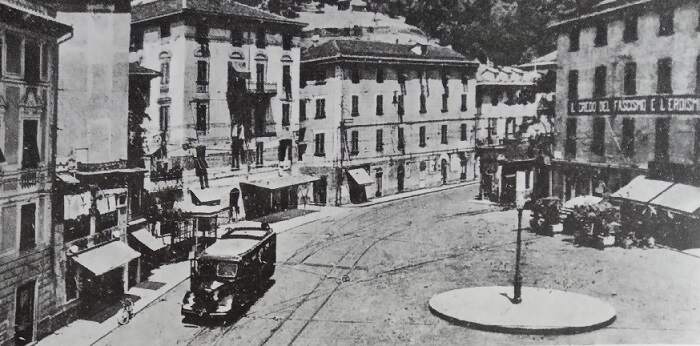
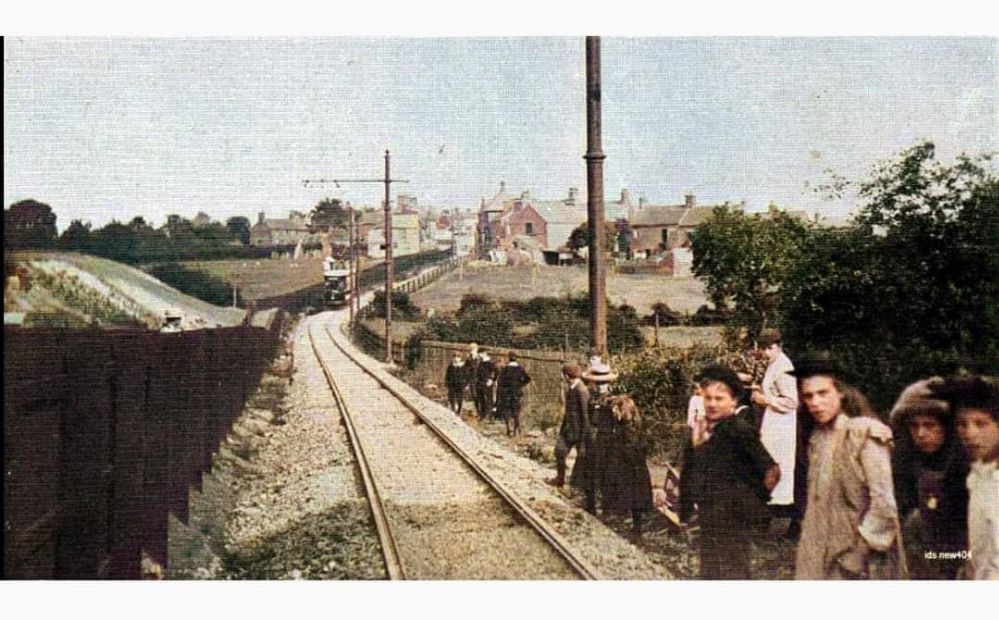
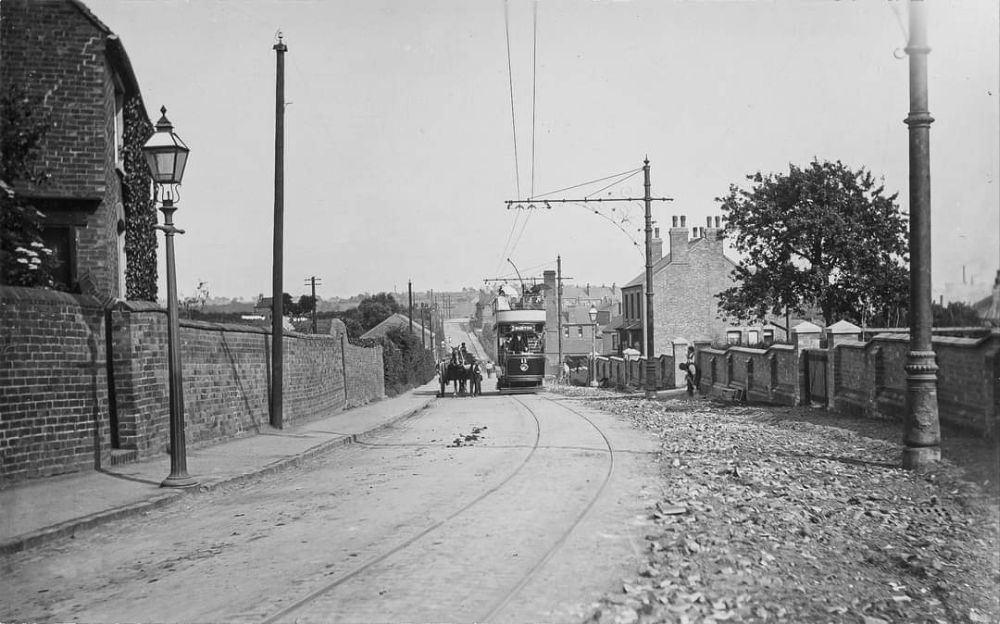
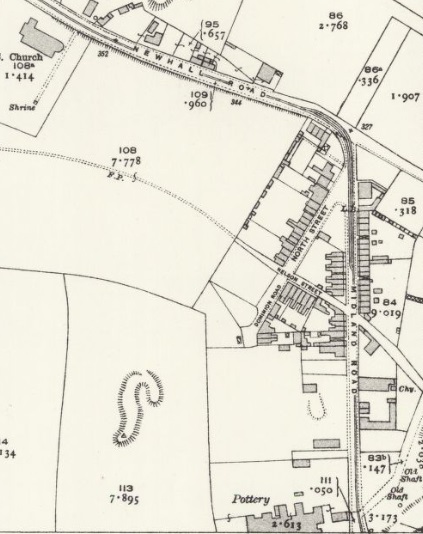
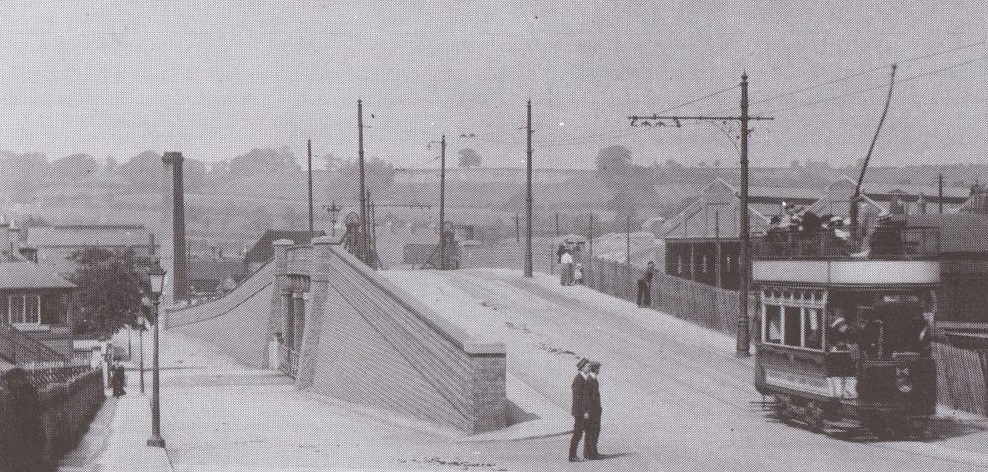
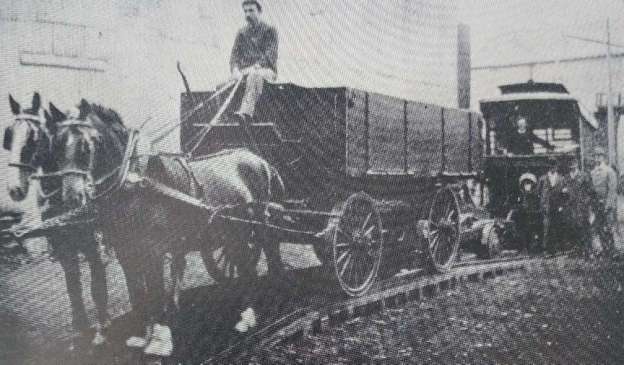
Before this, on 17th December 1913, trams began operating on the first 1.6-mile segment in the median of what would become Shaker Boulevard, from Coventry Road east to Fontenay Road. [12] The line was grandly named ‘The Cleveland & Youngstown Railway’.

In 1915, the tram service was extended to Courtland Boulevard. In 1920 it became apparent that the plan to link Cleveland to Youngstown would not succeed and the line was renamed as ‘The Cleveland Interurban Railway’ (CIRR). In April of that year, the Van Sweringen brothers opened a segregated (trams separate from other rail and road traffic) line from East 34th Street to Shaker Heights with their trams using the urban tram (streetcar) network to reach the city centre. [12]
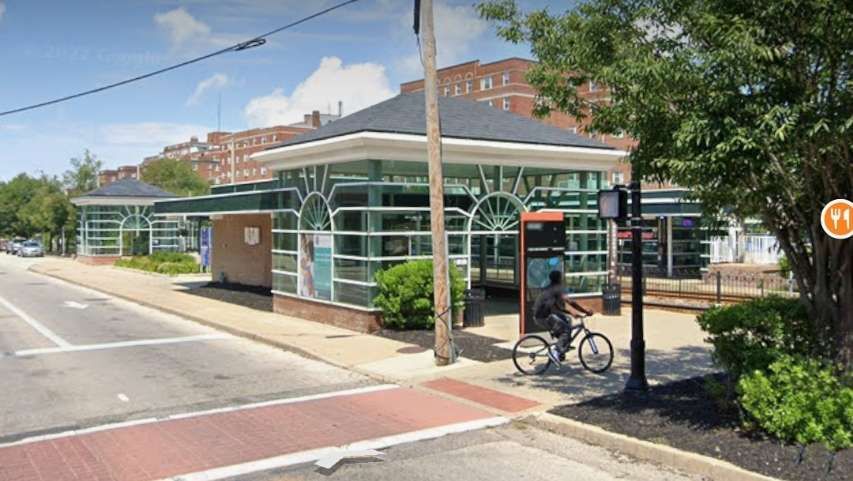
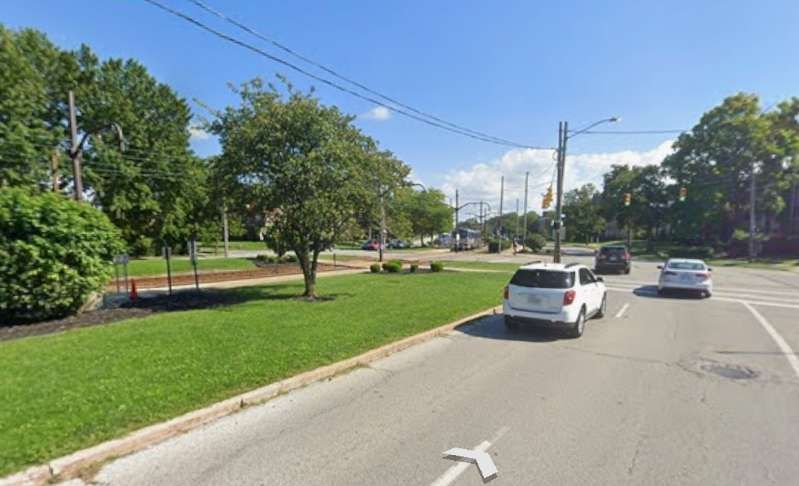
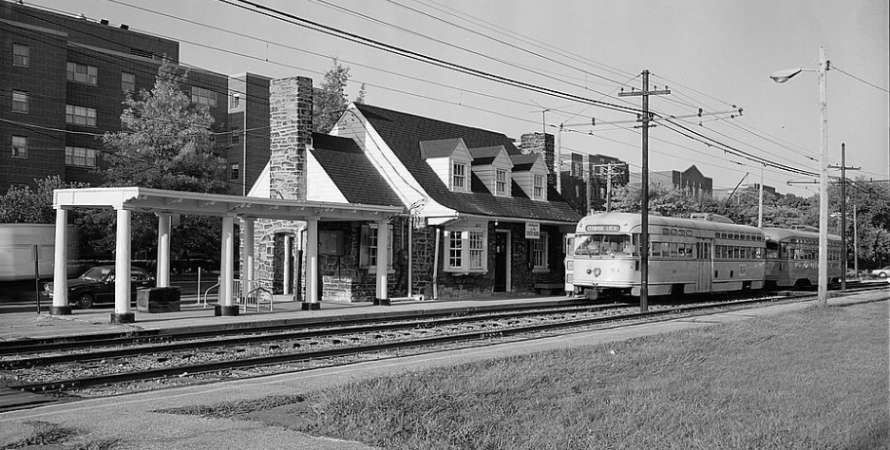
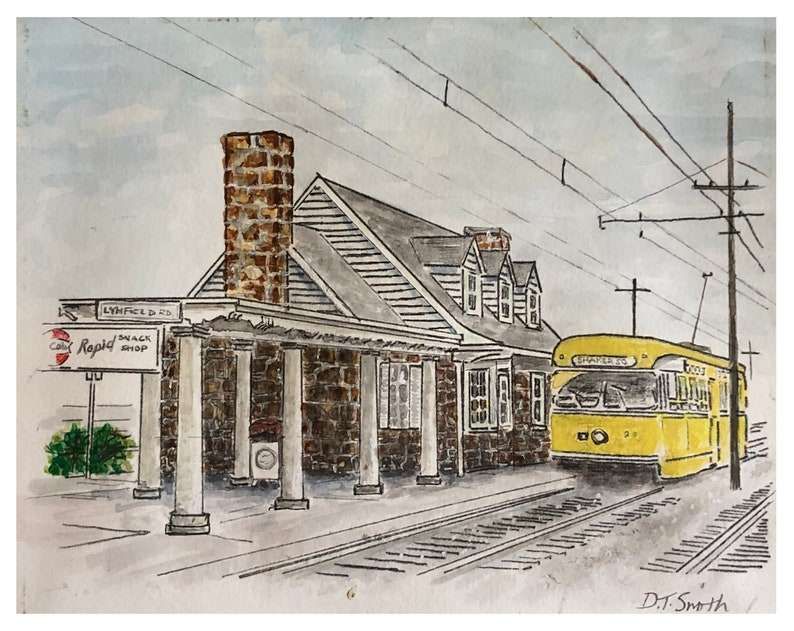
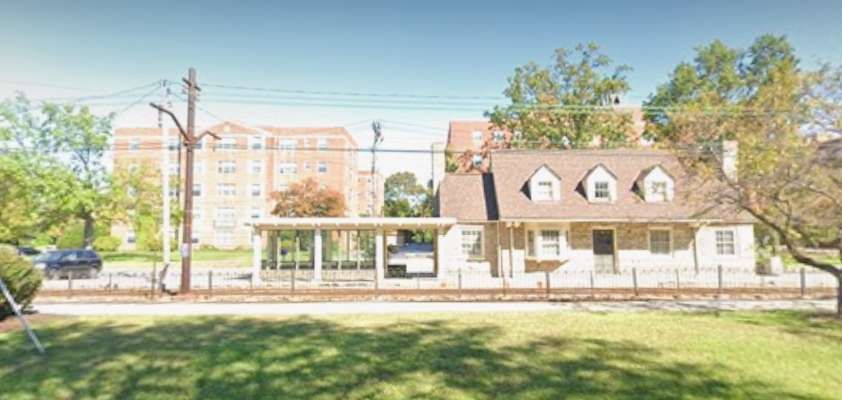
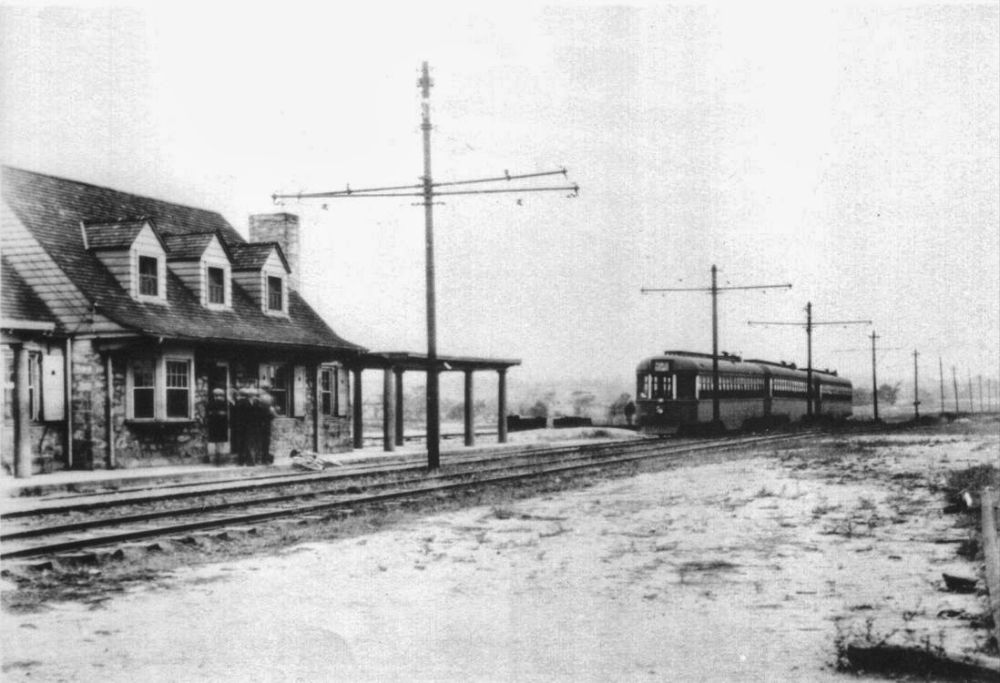
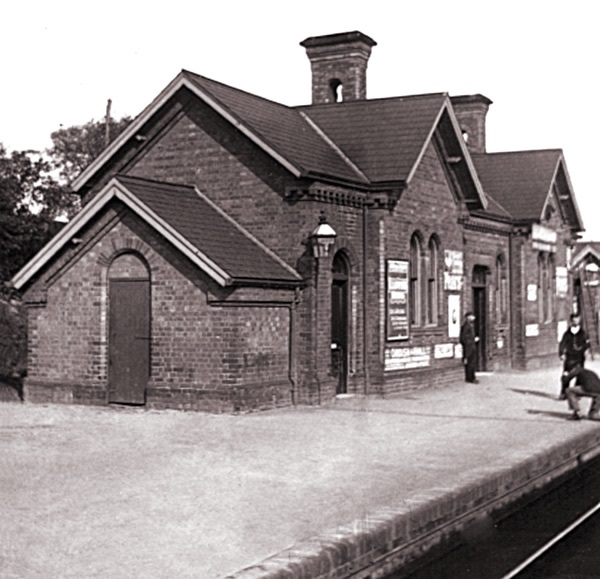
In 1923, the Standard Oil Company built the Coventry Road Station for $17,500. … In 1924, the Shaker trains were referred to as ‘the private right-of-way rapid transit line’, but calling it ‘the rapid’ probably dates back further than that.” [12]

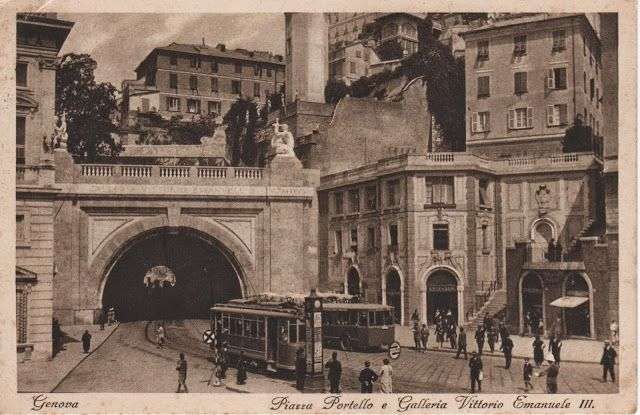
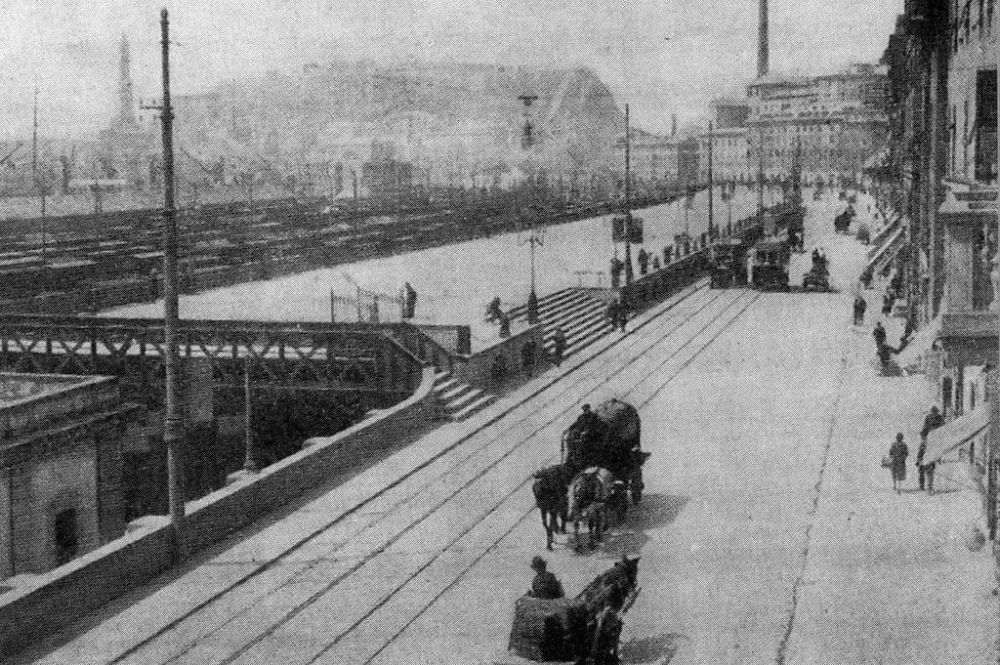
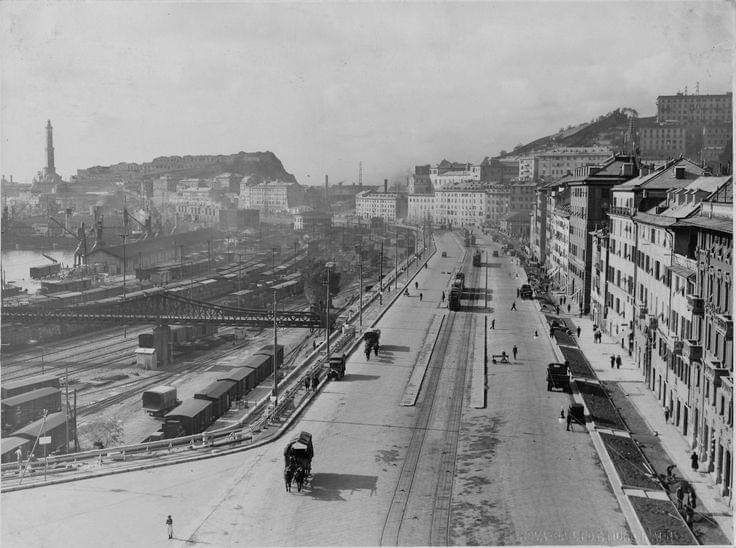
The historic station at Tower City (1927 onwards) was the early terminus of the Shaker Heights Rapid Transit Lines which were extended along the Cleveland Waterfront.

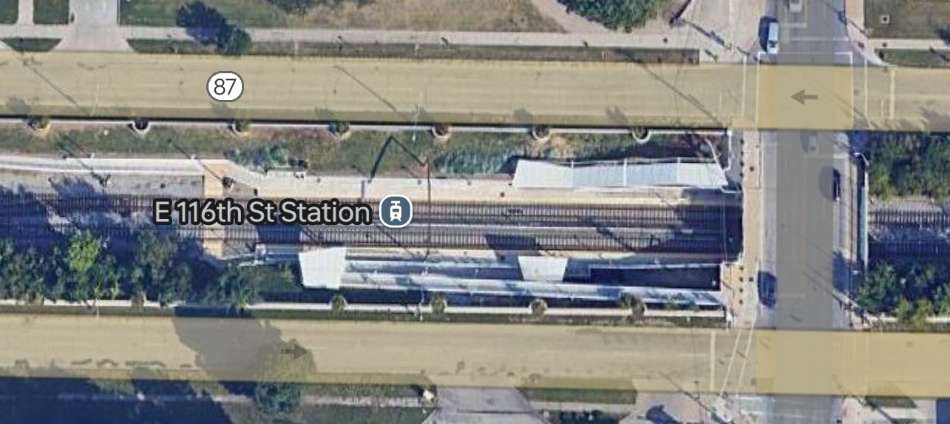
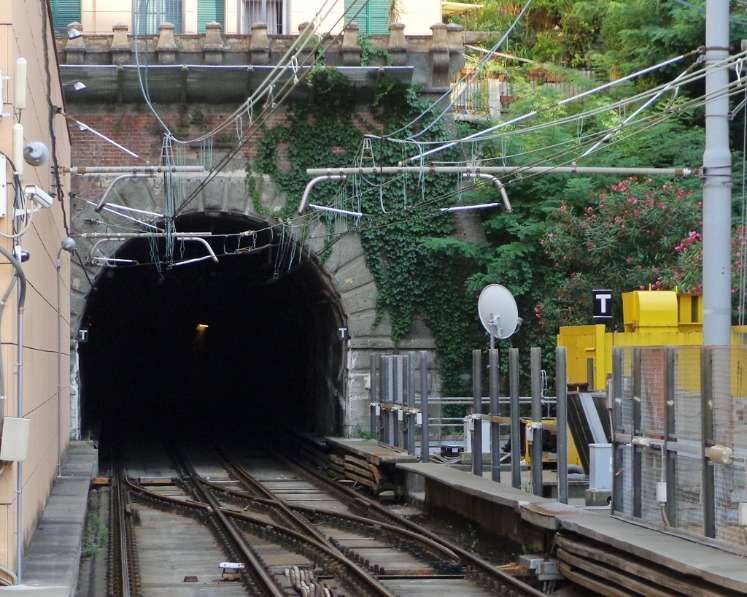
The modern Tower City Station is the central station of the Cleveland, Ohio RTA Rapid Transit system, served by all lines: Blue, Green, Red and Waterfront. The station is located directly beneath Prospect Avenue in the middle of the Avenue shopping mall. The station is only accessible through the Tower City Center shopping complex. [13]

Shaker Rapid Transit Tracks on Cleveland city streets, East Side, prior to opening of sub-grade tracks into Terminal Tower project, 1927, © Public Domain. [7]
View showing tracks & reinforced concrete tunnel north of Shaker Rapid Transit car yards, Kingsbury Run, Cleveland, © Public Domain. [7]
The depot for the tramway network – the RTA Central Depot. [Google Earth, January 2025]
Looking North on East 75th Street through the bridge carrying the tramway. [Google Streetview, October 2022]
On the way East out of Cleveland the tramway was elevated passing over this truss bridge and reinforced concrete viaduct at East 80th Street in Cleveland, © Public Domain. [7]
The same bridge from above. [Google Earth, January 2025]
And a 3-D image of the same bridge. [Google Earth, January 2025]
Woodhill Station in the 21st century. [Google Maps, January 2025]
The line East towards Shaker Square from the junction of Buckeye Road and Woodhill Road. Woodhill Station is behind the camera. [Google Streetview, September 2022]
A little further to the East is East 116th Street Station. East 116th Street crosses the line at the right of this picture. [Google Maps, January 2025]
The view East towards Shaker Square from East 116th Street. [Google Streetview, September 2022]
An aerial view of Shaker Square in 1951, © Unknown. [14]

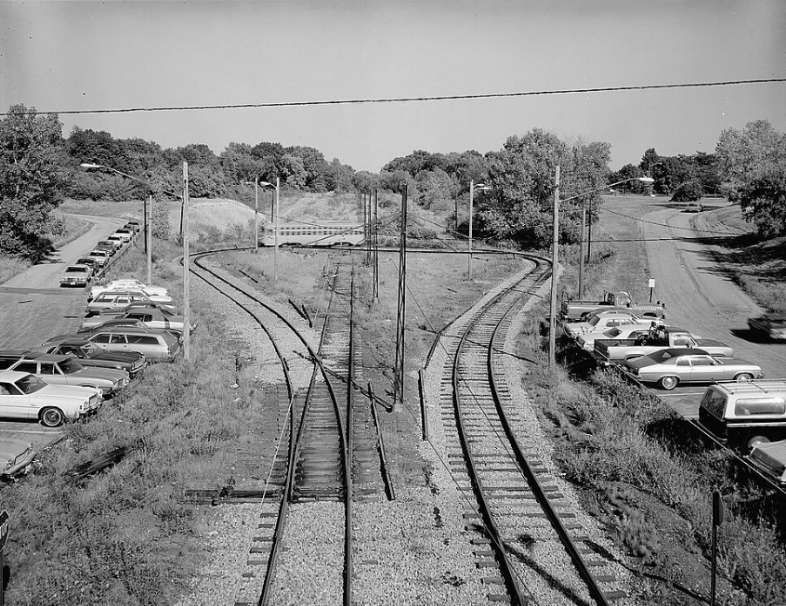
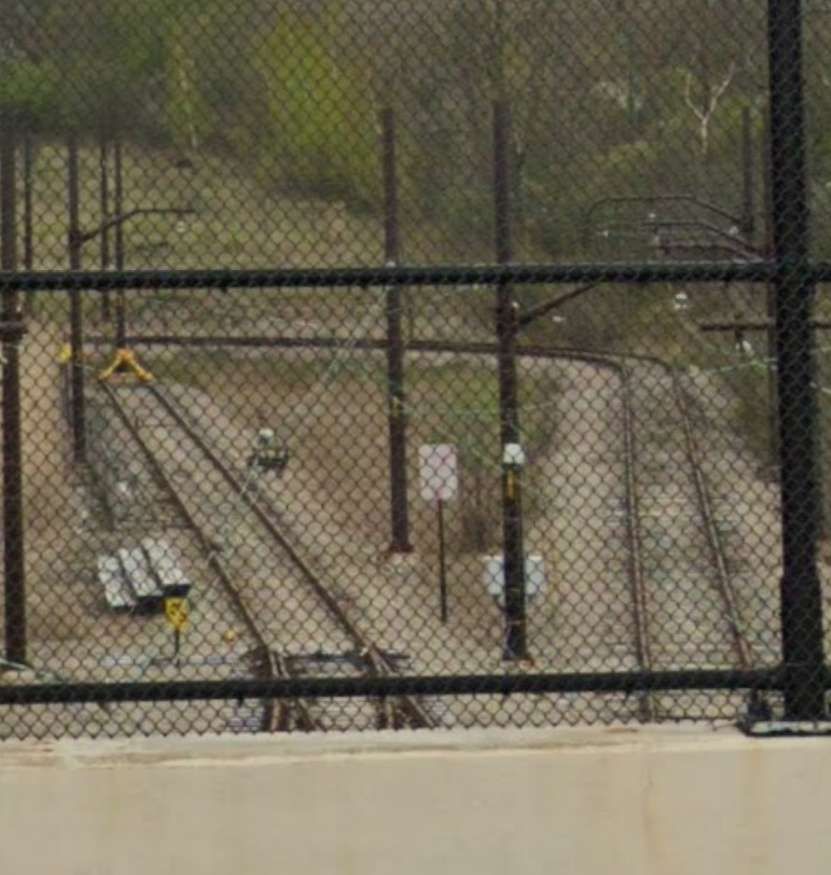
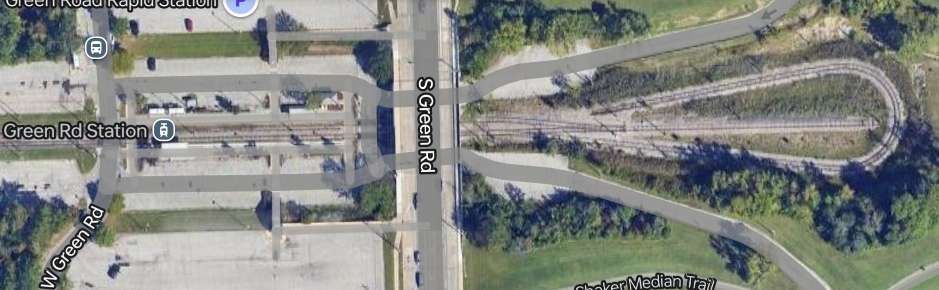
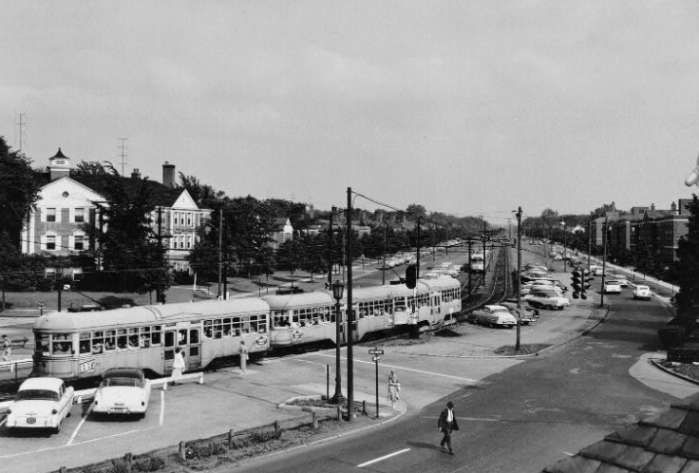
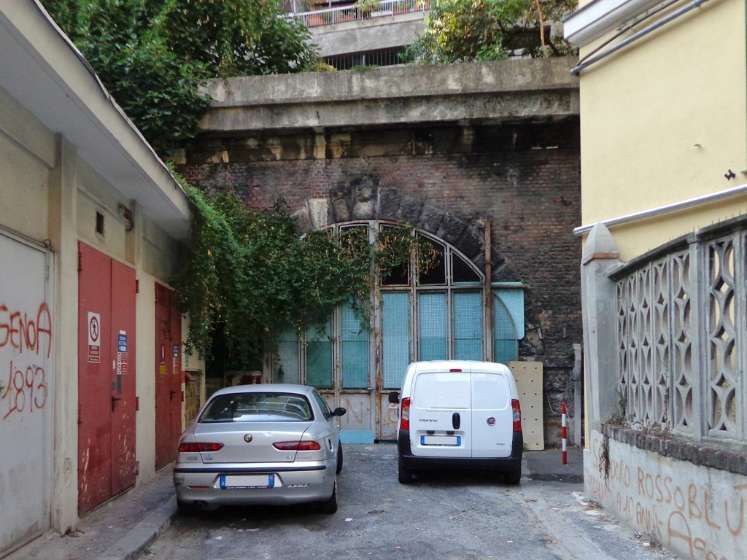
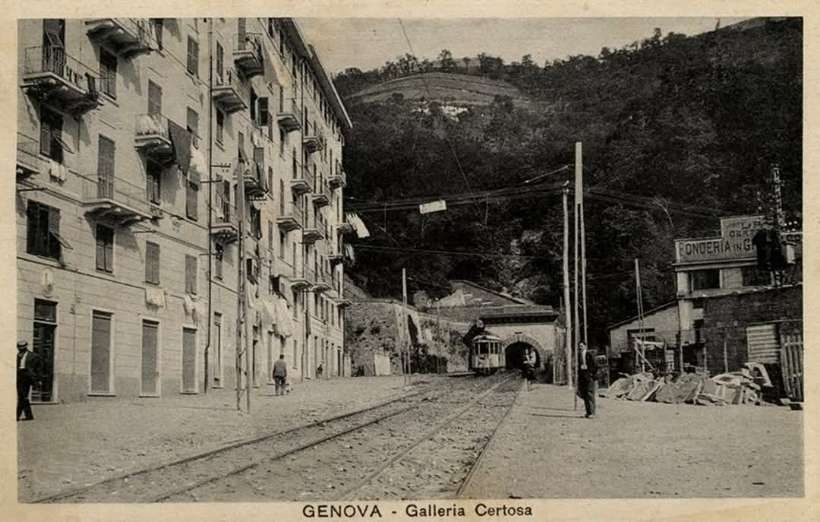
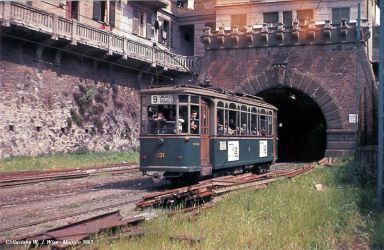
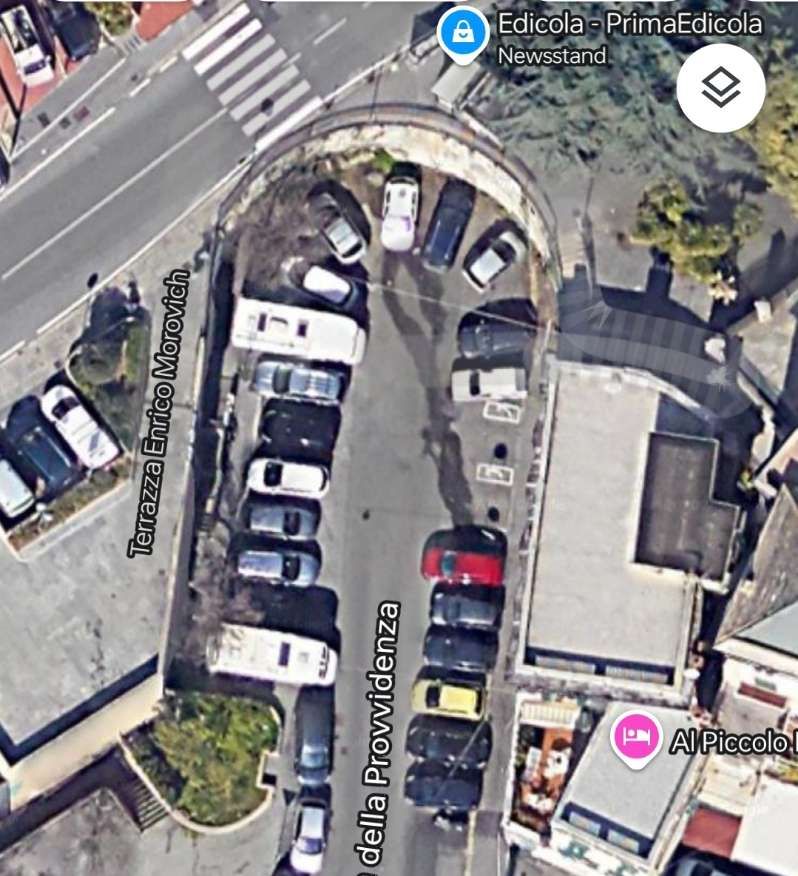
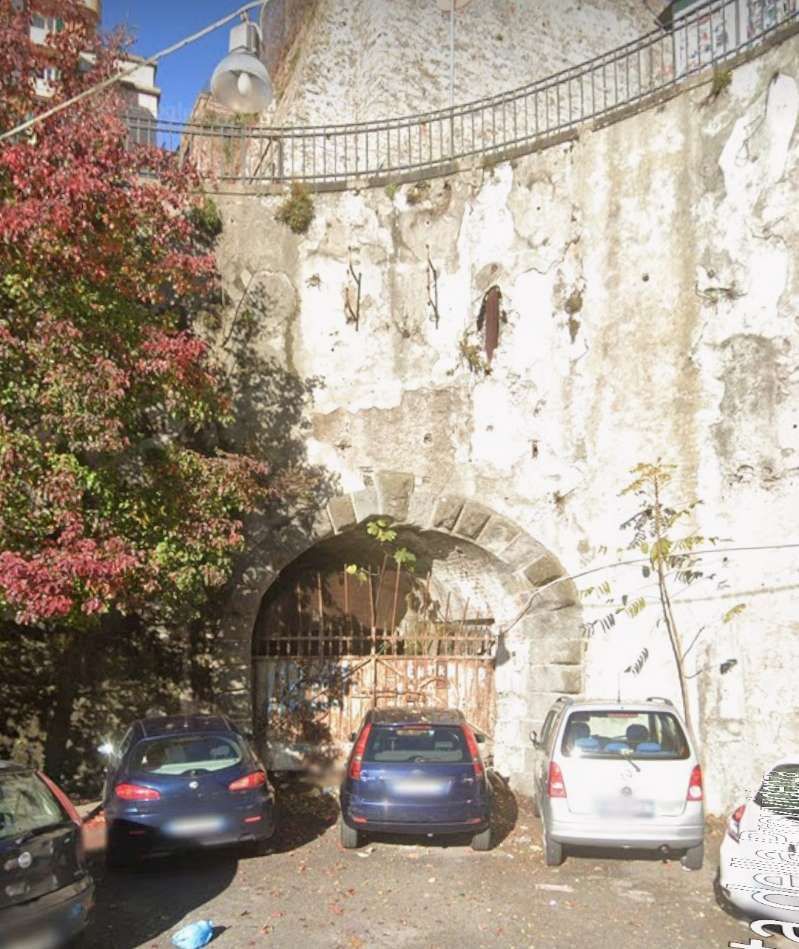
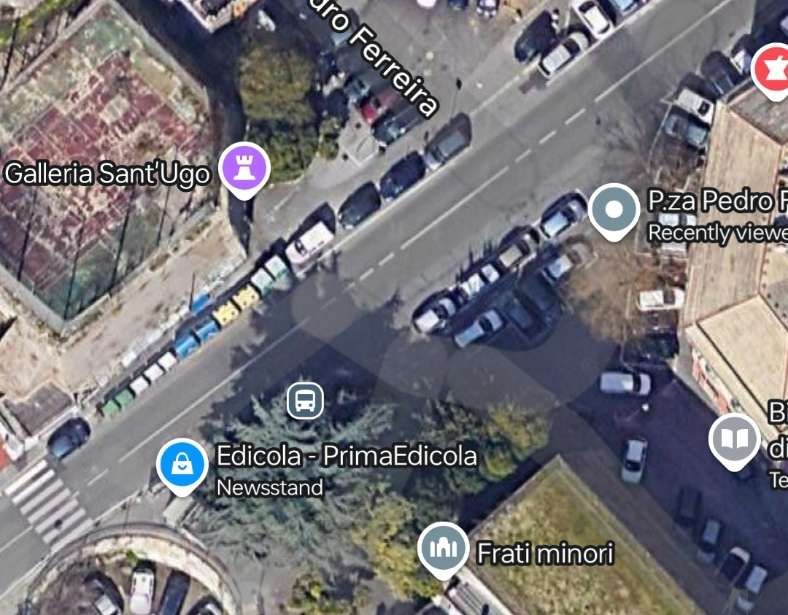
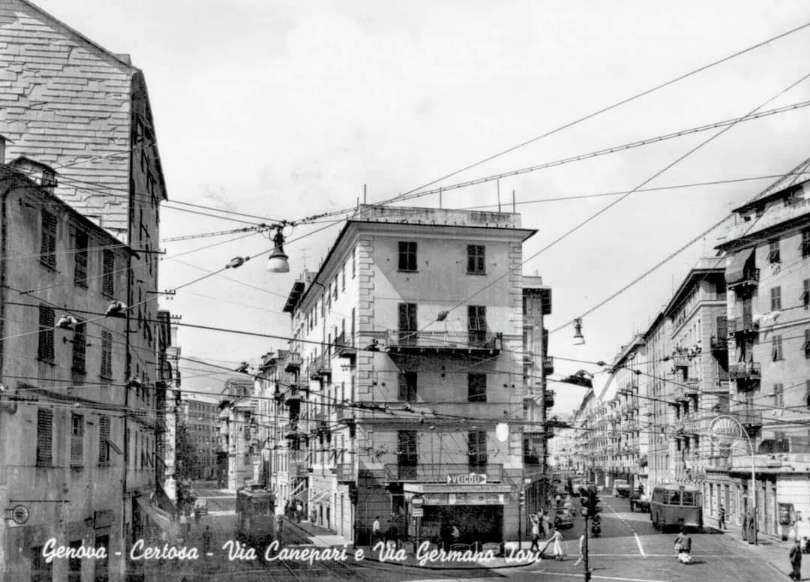
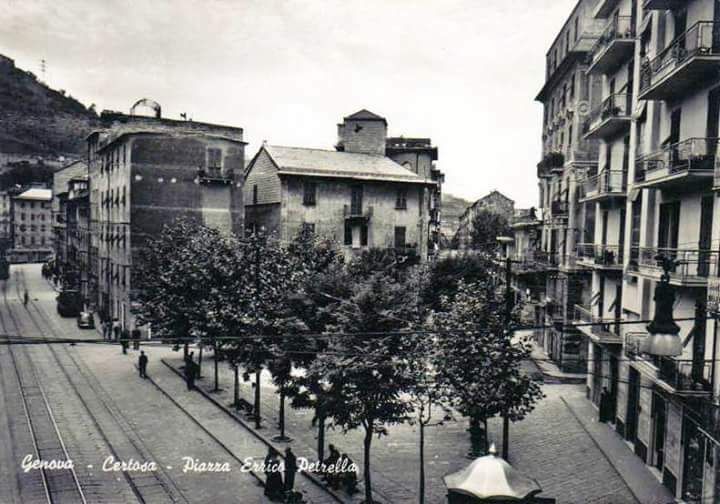
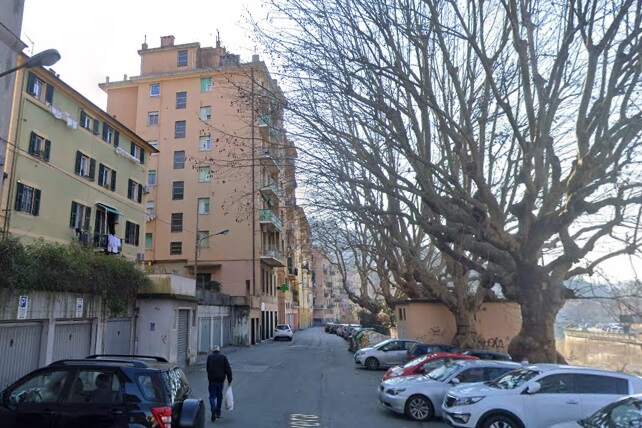
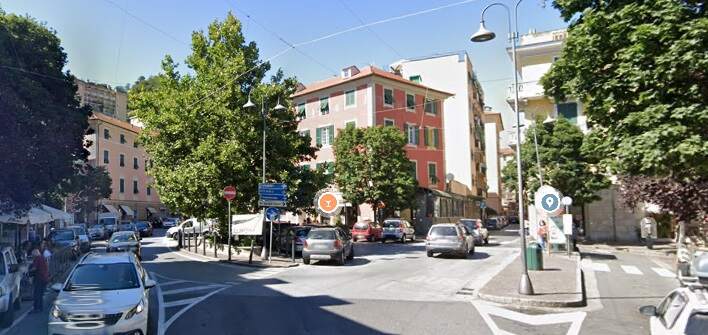
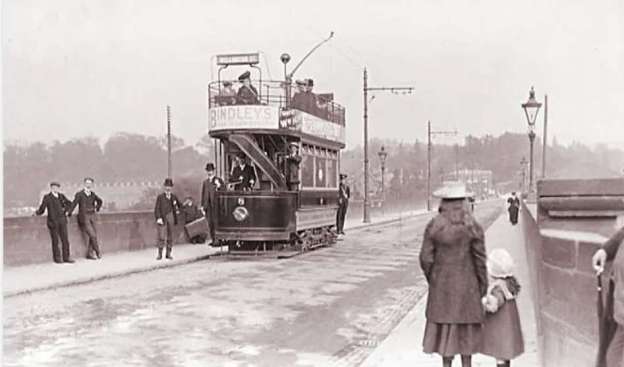
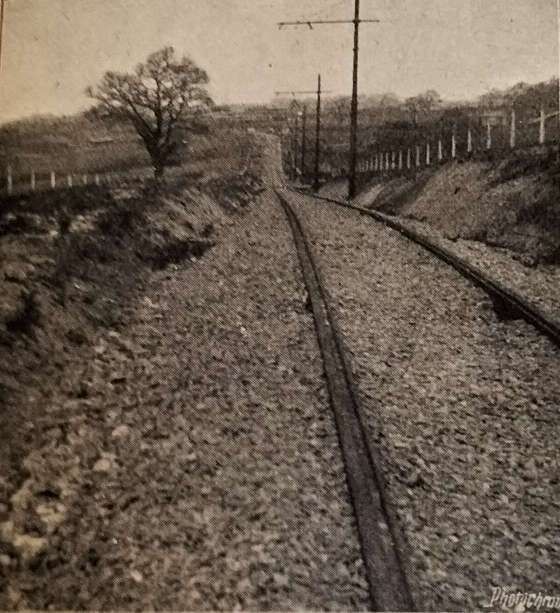
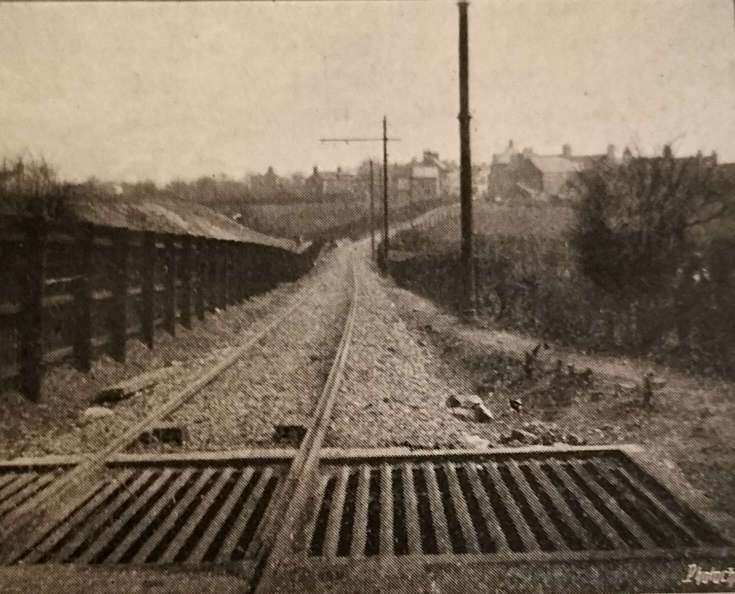
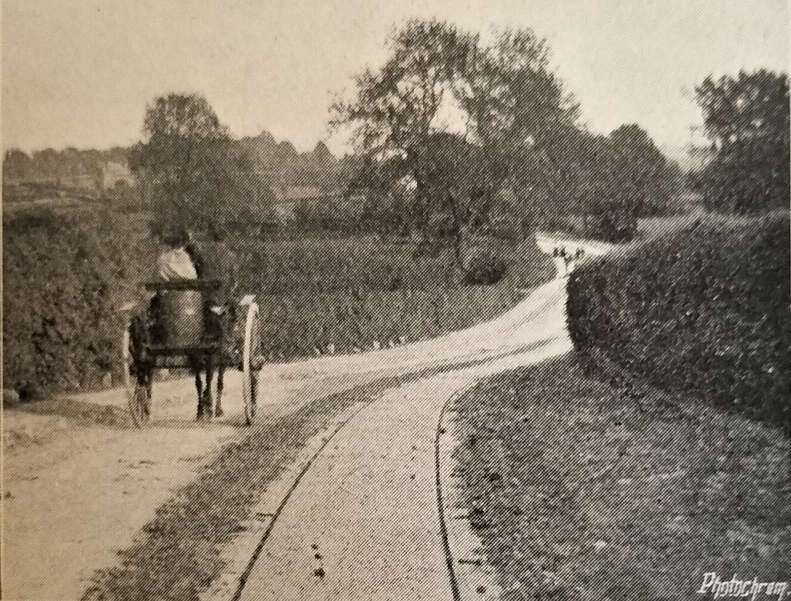
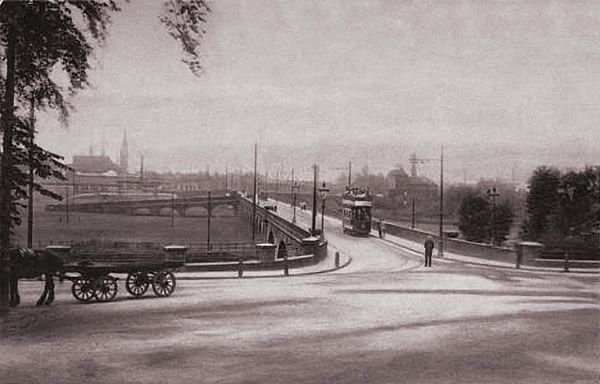
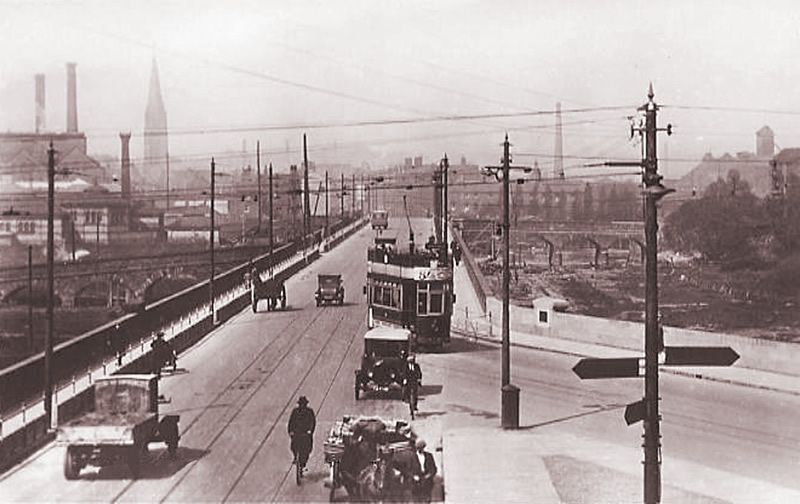
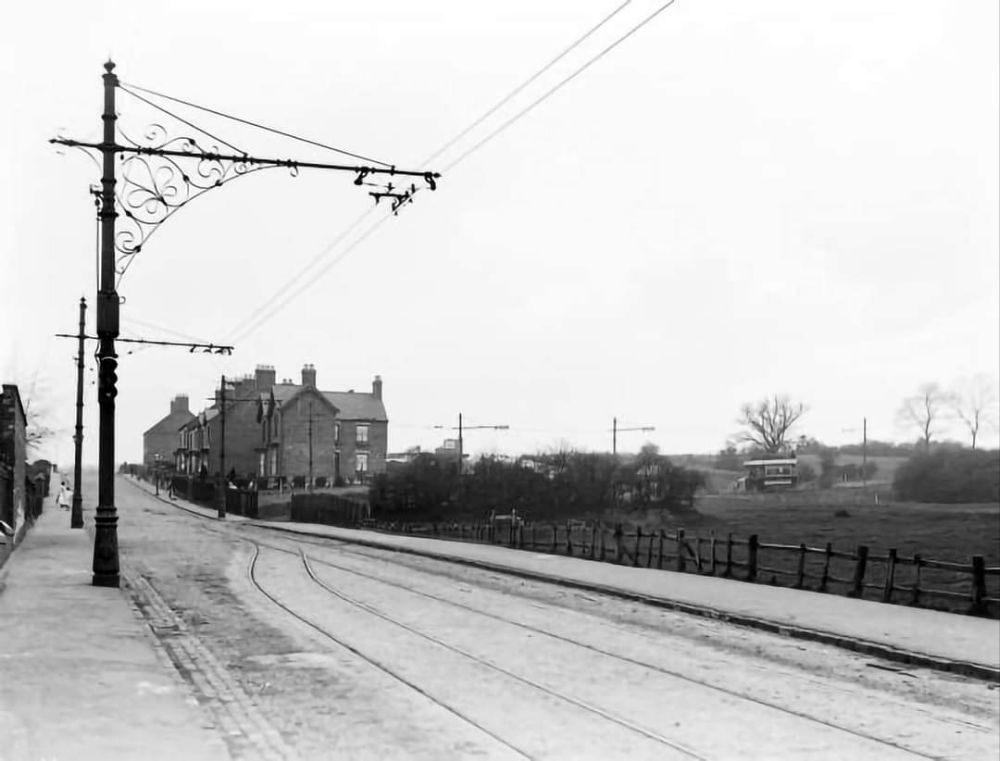
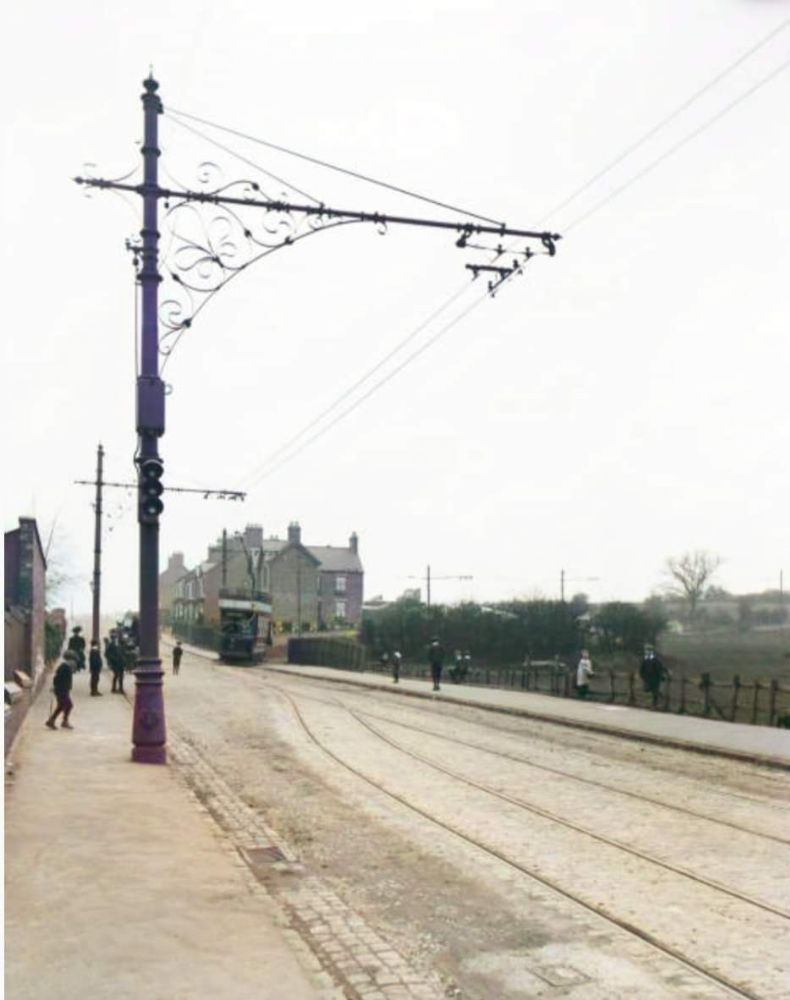
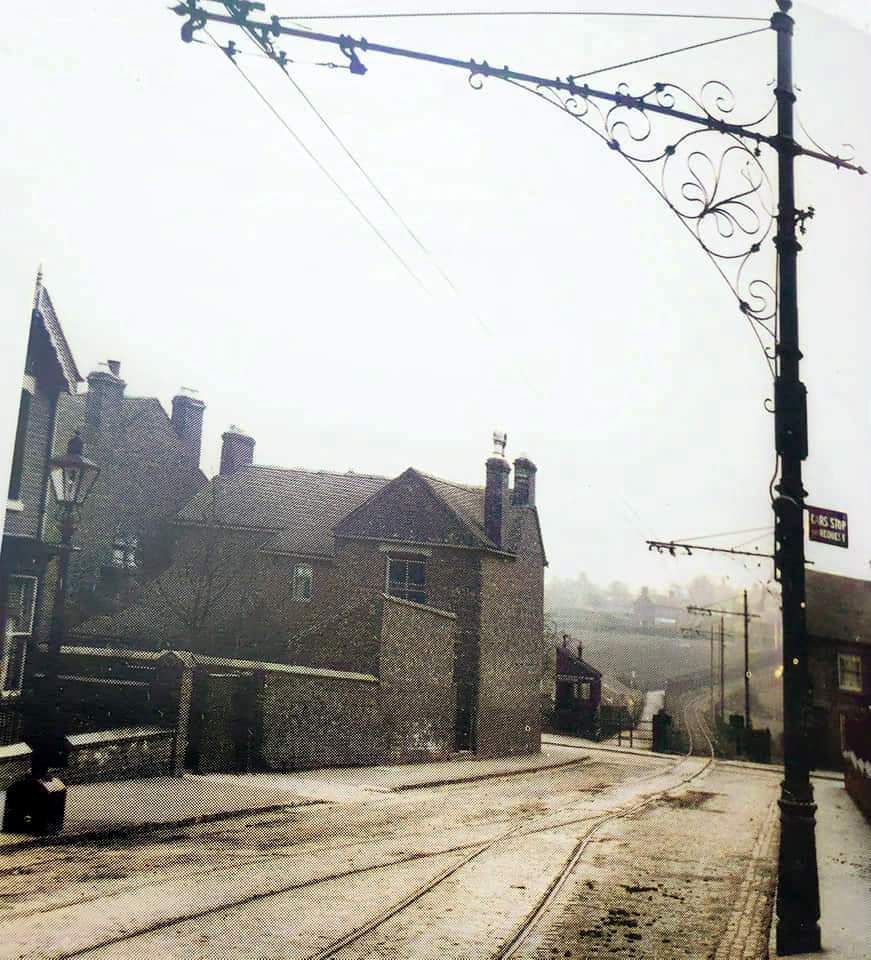
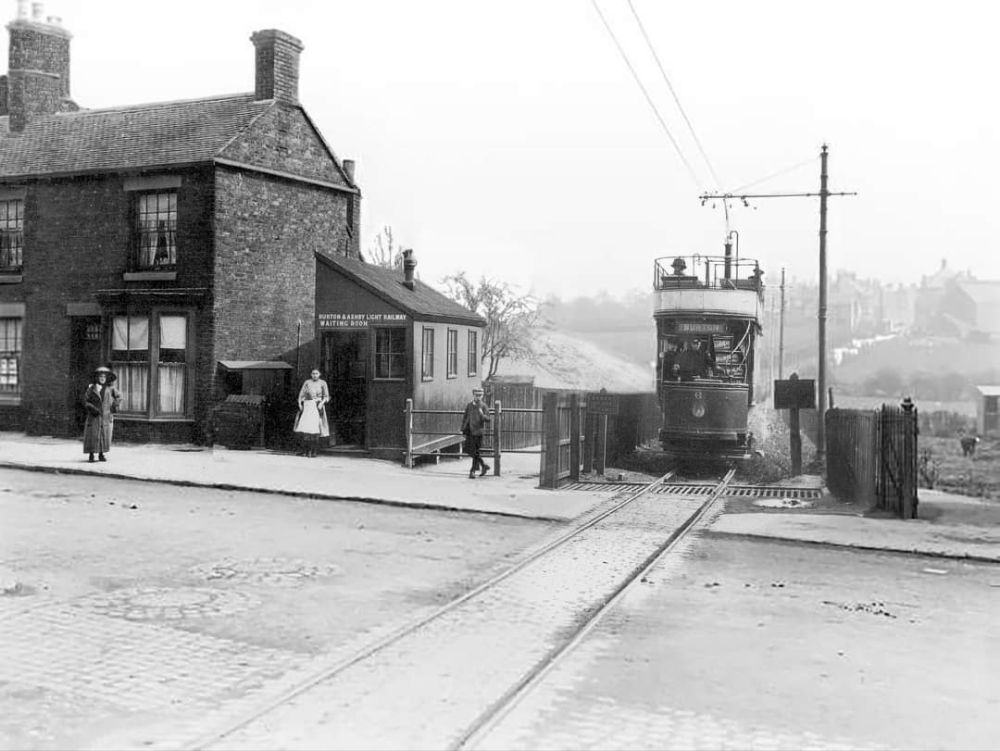
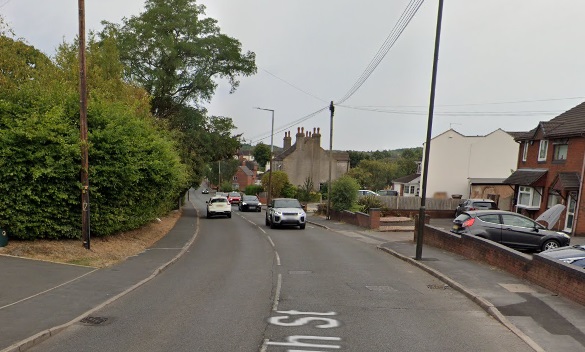
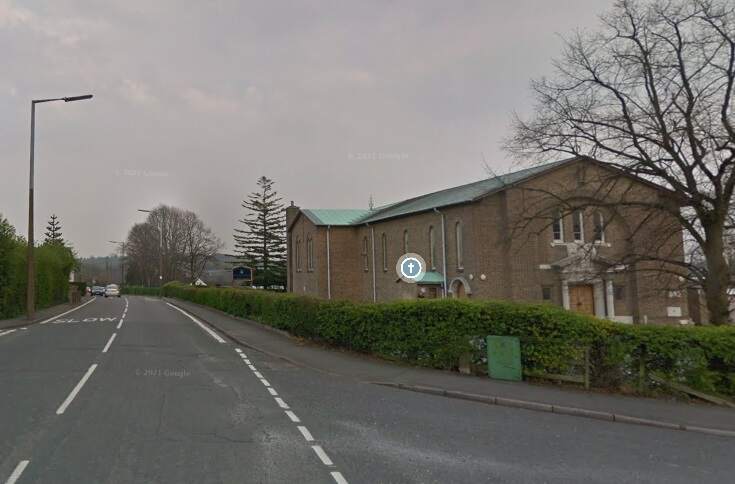
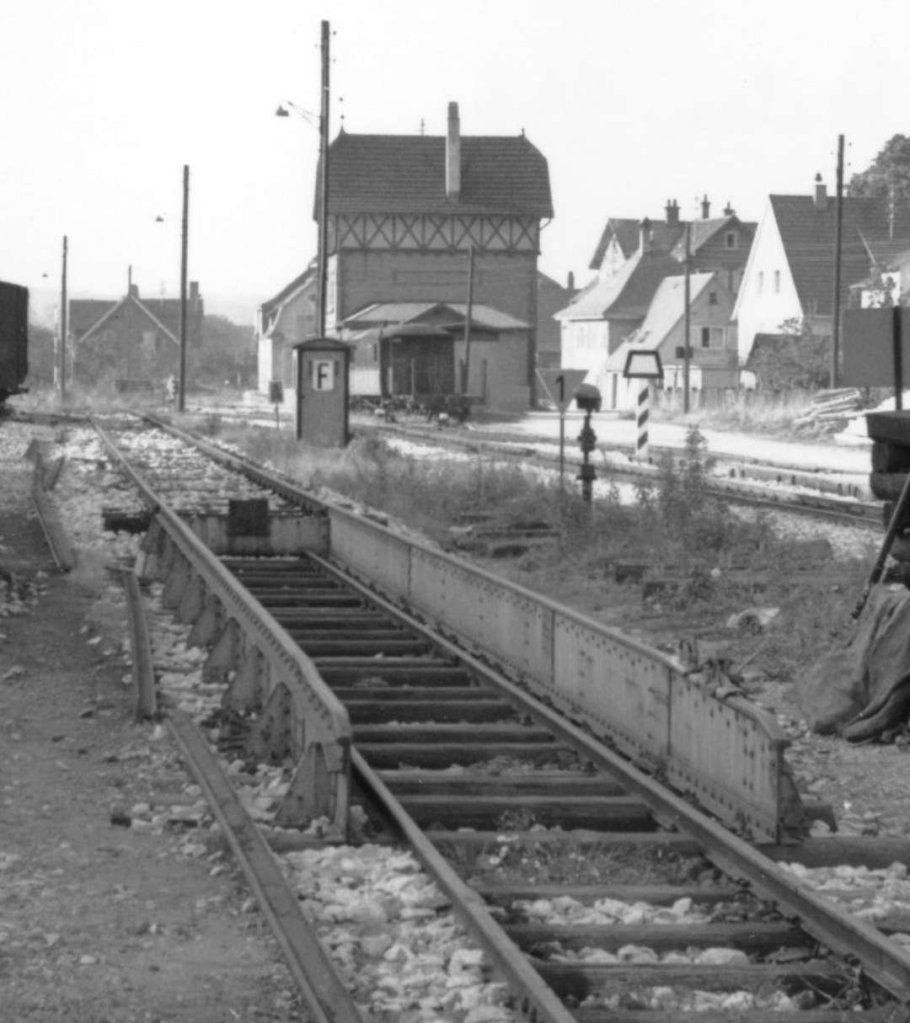
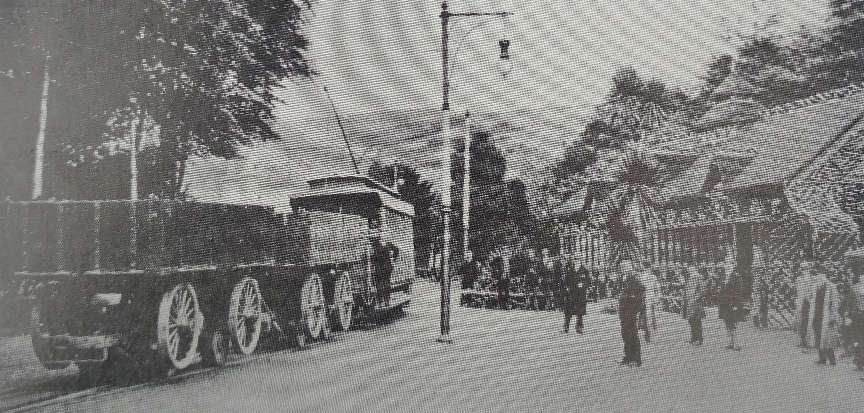
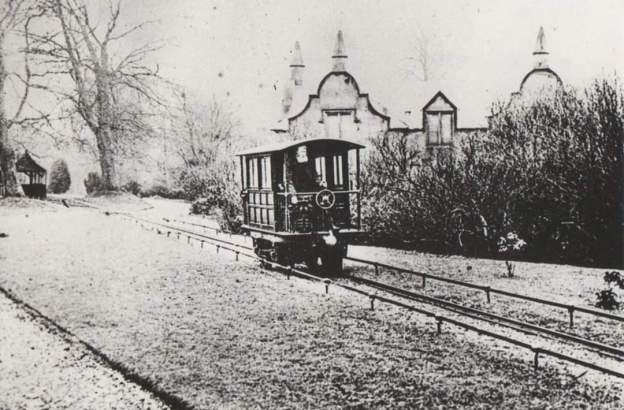
A few photographs between Shaker Square and Green Road. ….

Tram No. 91 at Shaker Square in 1965. This view looks West towards the city centre, © Unknown. [10]
Tram No. 42 at Shaker Square in the late 1960s. No. 42 is running in multiple unit (MU) mode with another Shaker Heights Rapid Transit PCC, © Robert Farkas. [9]
Shaker Square in the 21st century. The tram station is on the left of the image. The junction to the right of Shaker Square is the junction between the lines to Green Road and Moreland. [Google Maps, January 2025]
Two views of Shaker Square Station from the East in the 21st century. [Google Streetview, July 2022]
Green Road Station seen from the flyover on South Green Road. [Google Streetview, April 2023]
The end of the line at Green Road. The turnabout at Shaker Blvd. In the distance can be seen graded right-of-way, with poles, for 1937 expansion that was never constructed, © Public Domain. [7]
The same loop seen looking East from South Green Road in 2023. [Google Streetview, April 2023]
South Green Road is in the centre of this extract from Google Maps. The Station is to the left, the return loop to the right. [Google Maps, January 2025]

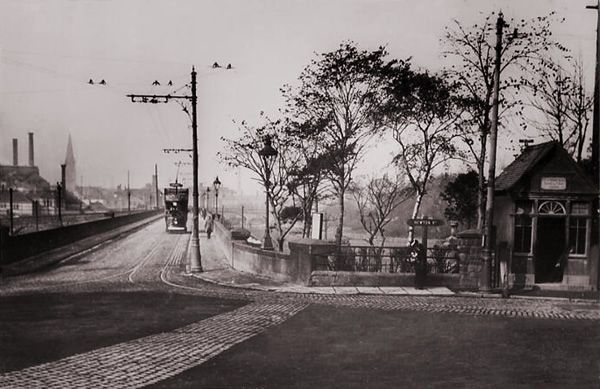
A few photographs taken along the Moreland Line. …..

Van Aken Boulevard Line/Moreland Line at Drexmore Road, Shaker Rapid Transit, 1956, © Public Domain. [7]
A ground-level view of Drexmore East Station and the junction between Drexmore Road and Van Aken Boulevard in the 21st century. [Google Streetview, September 2022]
General view of Lynnfield Station, Van Oken Line/Moreland Line, Shaker Heights Rapid Transit; now an antique store, © Public Domain. [7]
An artist’s sketch of the same station. [8]
The same building in the 21st century, now an antiques store. [Google Streetview, October 2021]
Warrensville Center Road Loop, Shaker Boulevard Line of Rapid Transit, 1936, © Public Domain. [7]
An overview of Warrensville Station. [Google Maps, January 2025]
The Warrensville terminus of the More look and Line. [Google Streetview, April 2023]
The end of the line as seen from Tuttle Road in the 21st century. The loop seen in the monochrome image above has been removed. [Google Streetview, April 2023]

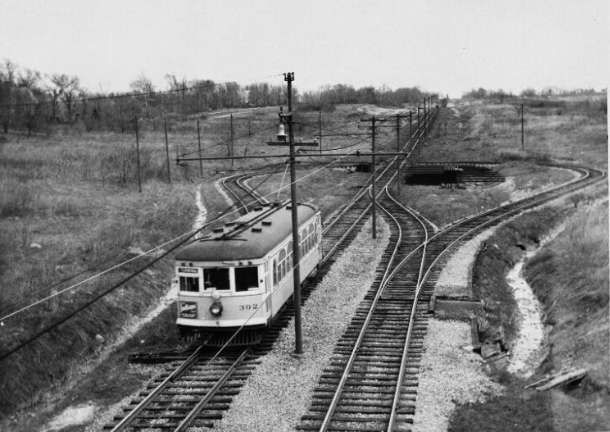
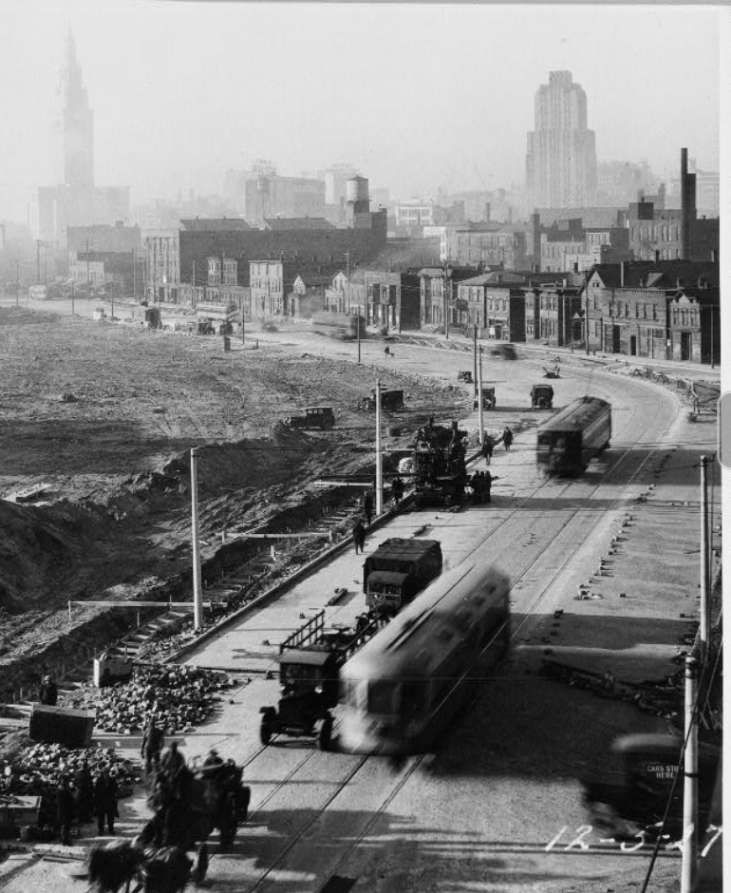
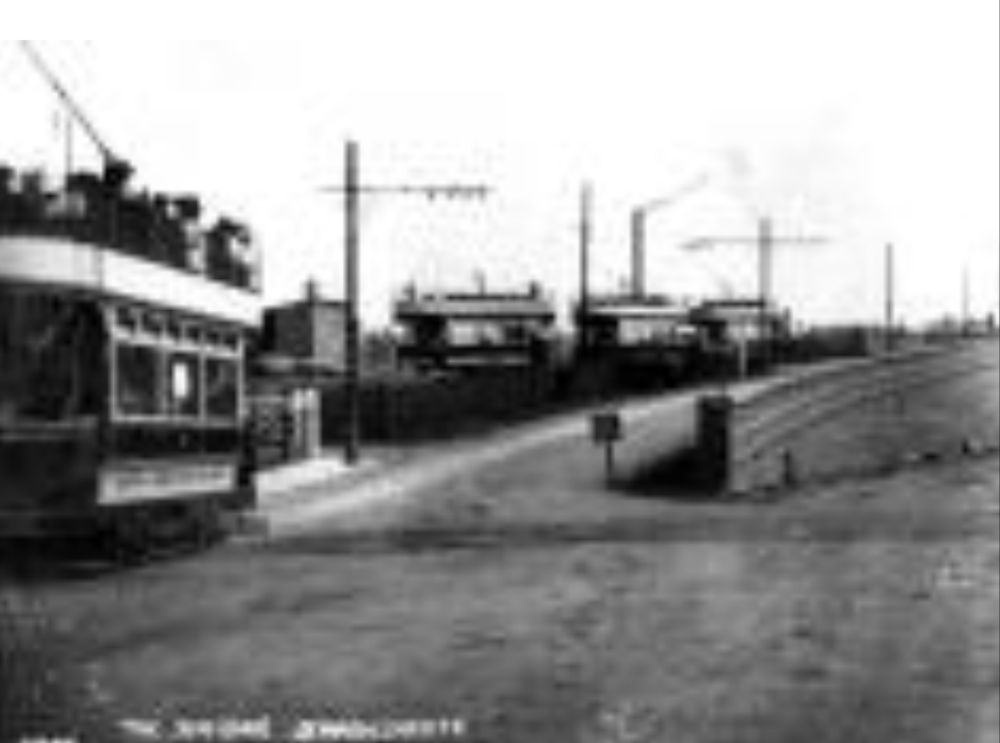
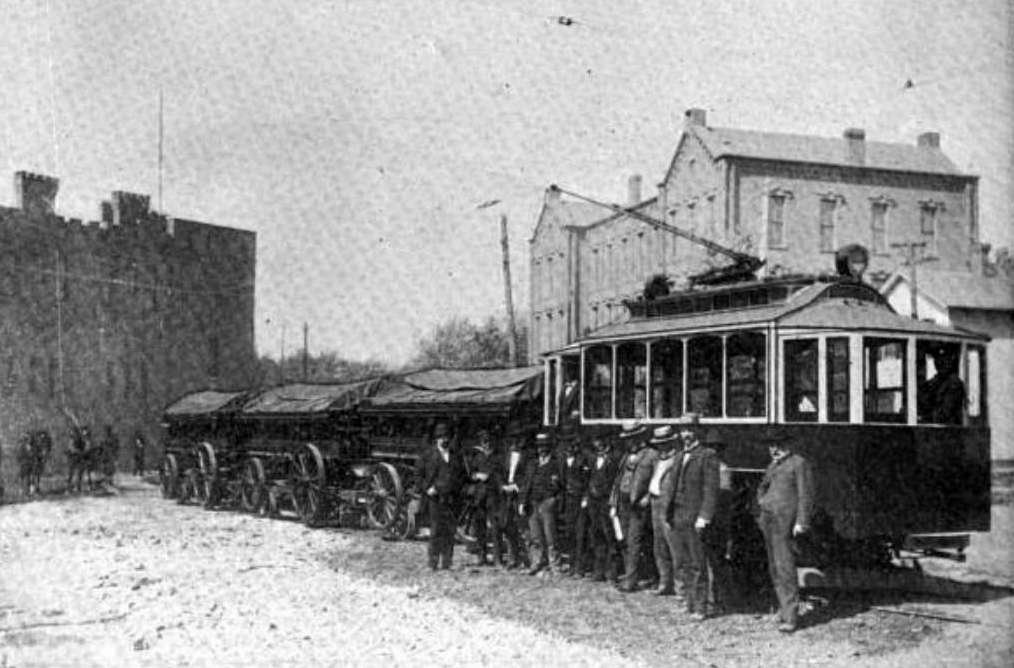
The first cars were ordinary tramcars from the Cleveland City system, specially refitted for fast service. “In July, 1930, the SHRT (which had formerly entered the city over street tracks) was brought into the main line railway terminus over existing railway tracks. By this time the line extended for 9.5 miles from the Union Terminal Building in Cleveland to Green Road, at the far end of Shaker Heights; in addition, there was a branch line to Moreland.” [1: p101]

The two lines in the suburbs were extended. The Moreland line in 1929, eastward from Lynnfield (its original terminus) to Warrensville Center Rd. The Shaker line, in 1937, was extended from Warrensville Center Rd. to a new loop at Green Rd. [2]
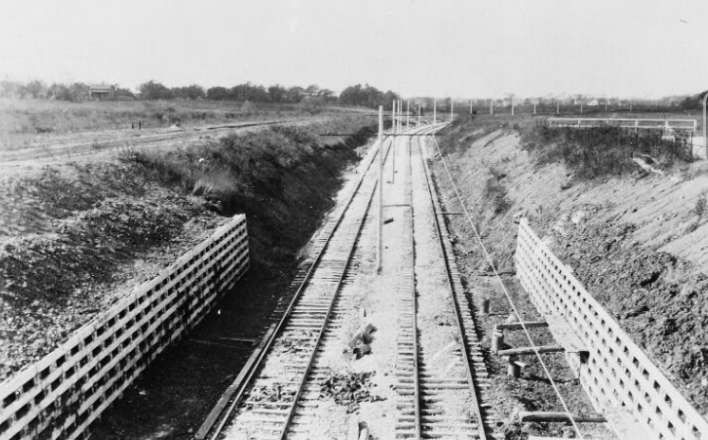
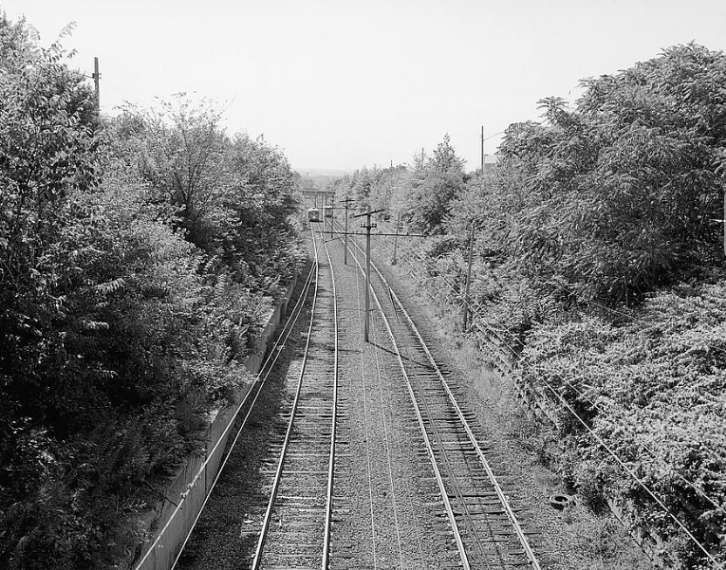
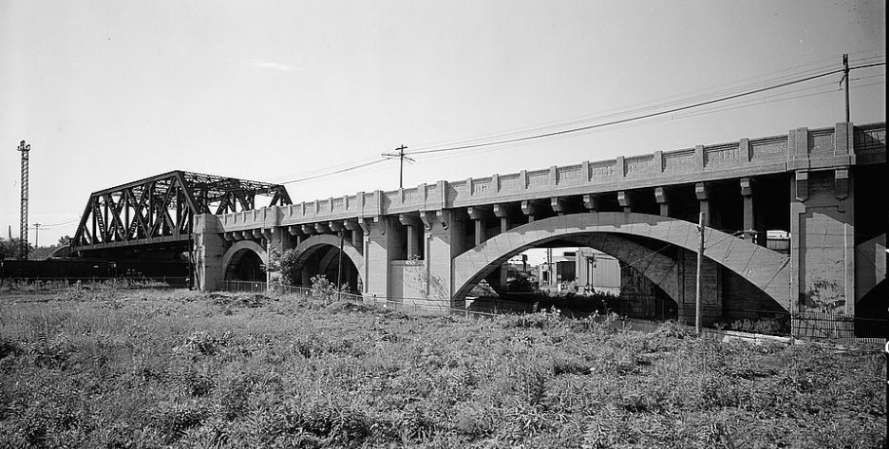
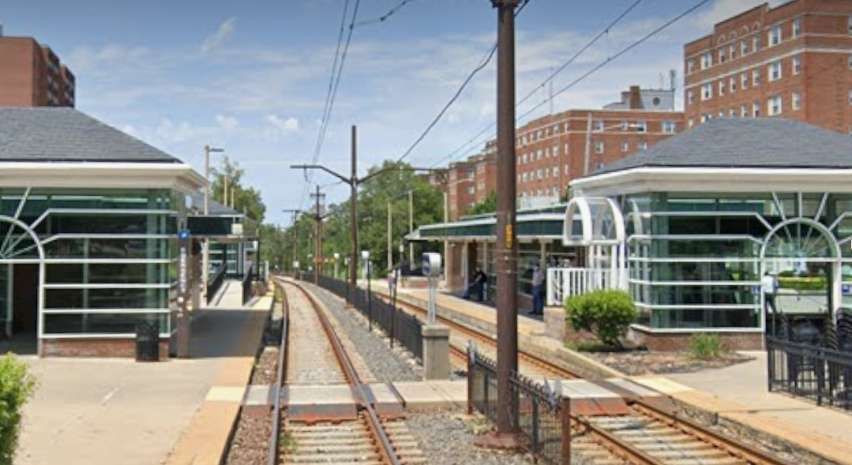
Under the main floor of the Union Terminal Building, the SHRT tracks are adjacent to the main line railway platforms. The six miles out to Shaker Square are on an ascending grade along the valley of the Cuyahoga river, and are entirely on private right-of-way; from Shaker Square onwards, the line runs through a grass reservation in the centre of Shaker Boulevard as far as Green Road Terminal.” [1: p101]

The branch to Moreland, a suburb of smaller type property, diverges about 500 feet east of Shaker Square station, running in a south-easterly direction; at this terminus are storage yards with car parking facilities inside a U track formation.” [1: p101]
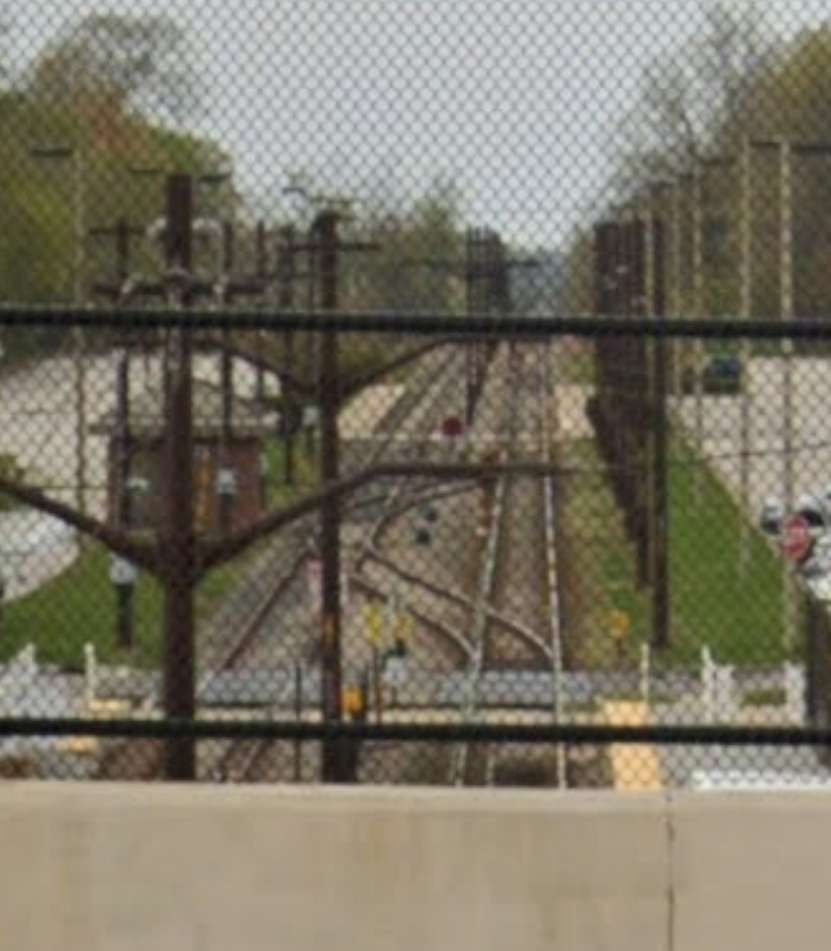
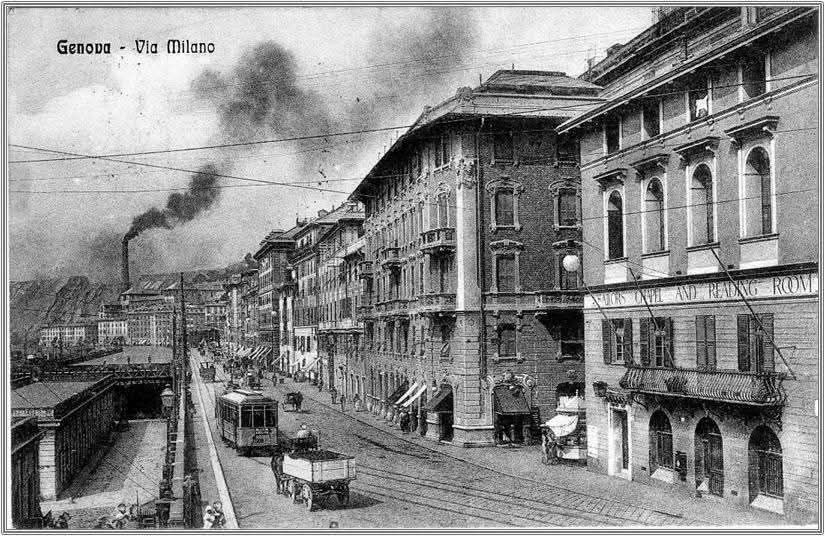
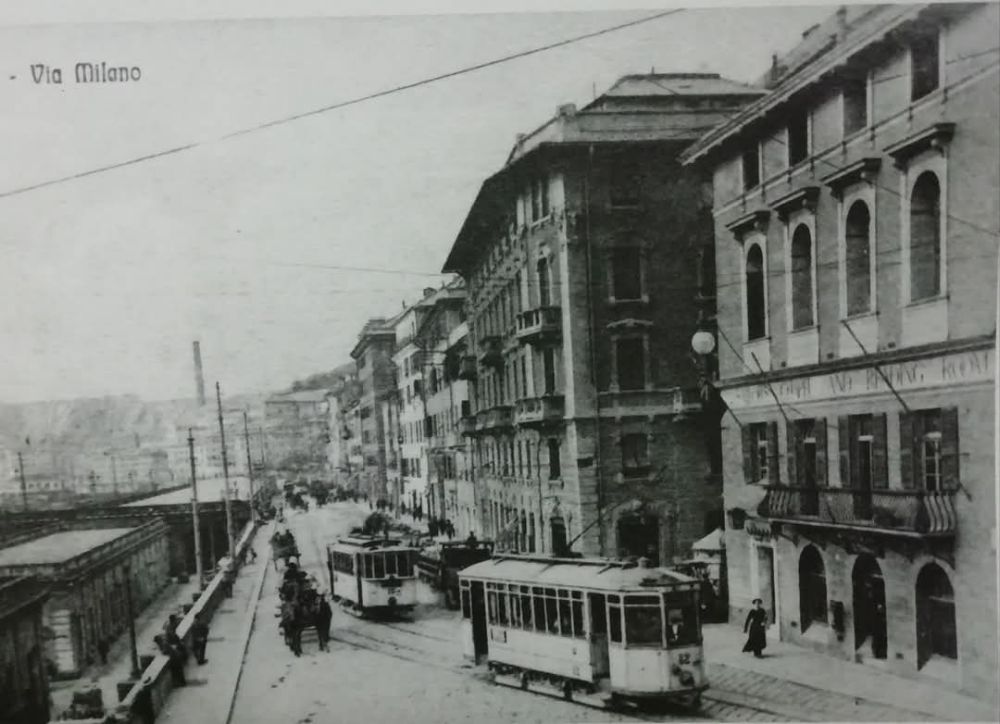
The overhead is compound catenary out to East 55th Street, Cleveland, and normal trolley-wire elsewhere; the line is signalled throughout and road crossings are well spaced.” [1: p101]

The journey from Green Road outer terminus to the Union Terminal Building in downtown Cleveland “is covered in 22 minutes including 16 stops en route. The six miles from Shaker Square down into Cleveland (which include four curves with speed restriction) are covered in 8-9 minutes by non-stop cars. The up-grade increases the express timing on the outward journey to Shaker Square to 12 minutes.” [1:p101]
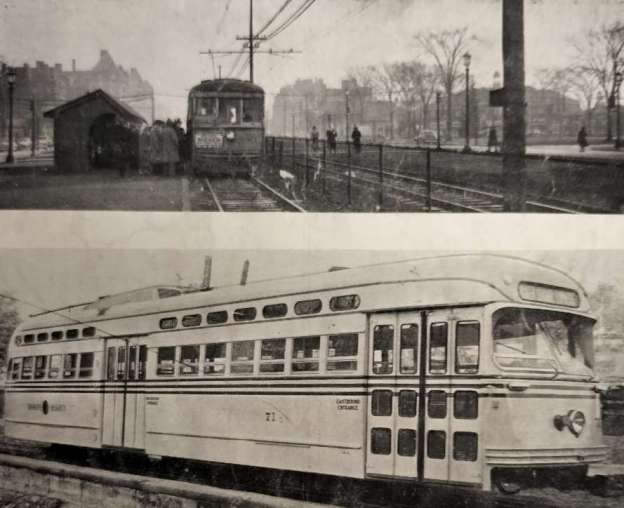
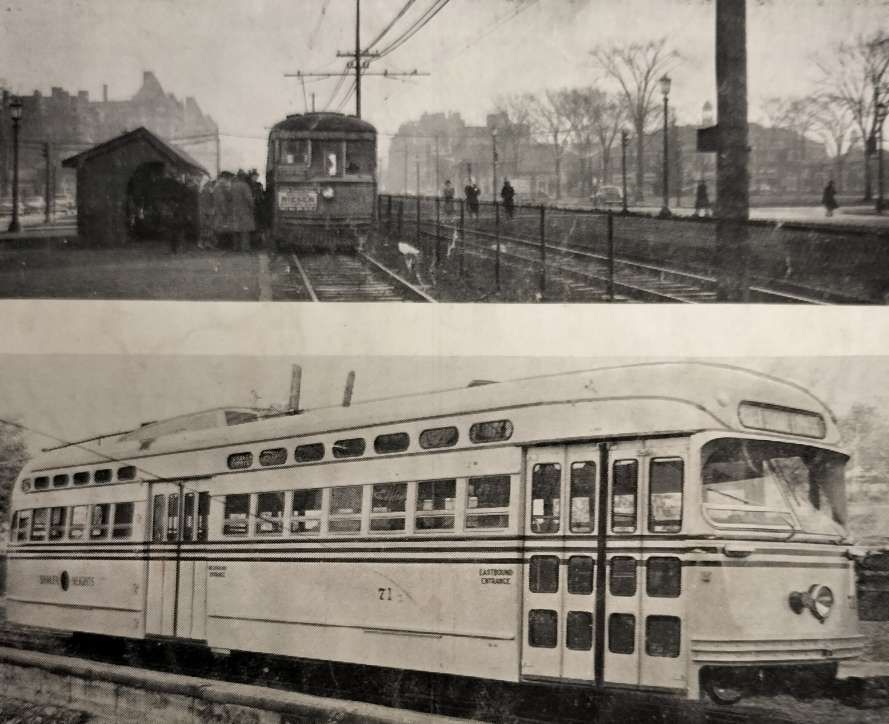
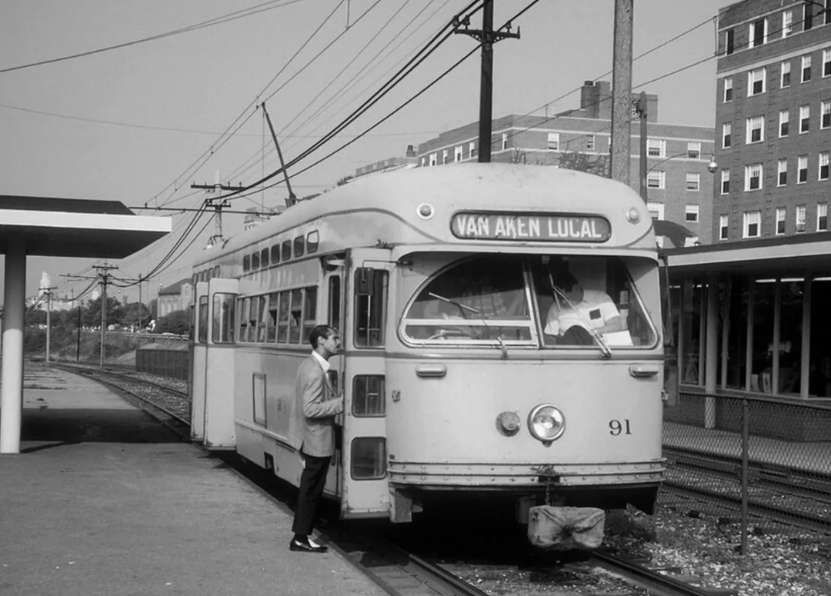
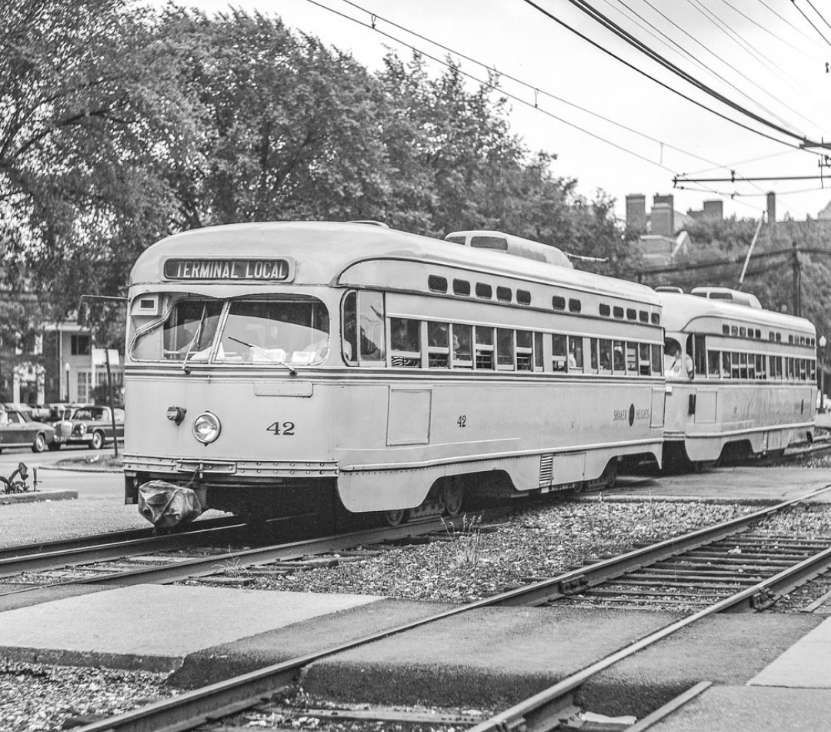
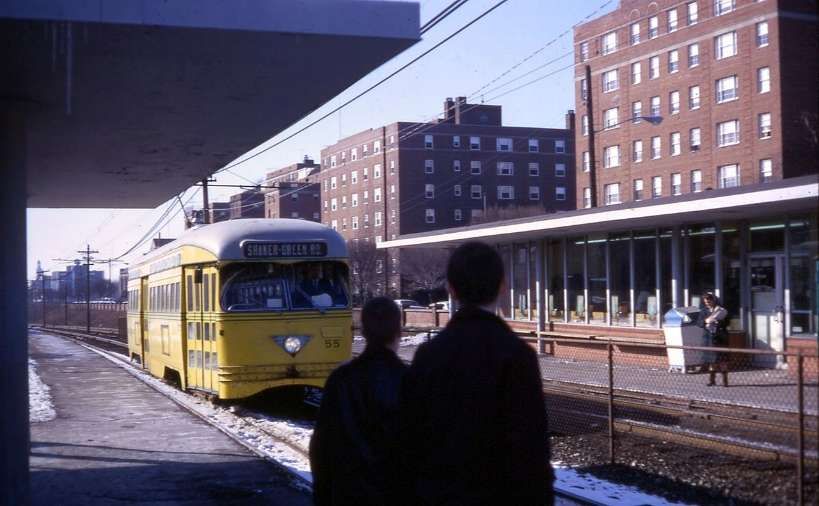
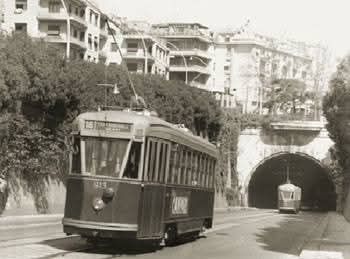
When the City Council bought the line in 1944, the Director of Transportation, Mr. Paul K. Jones, began to modernise the existing fleet and to look around for new cars. He chose PCC cars with multiple unit equipment, and after trial runs in 1946 with a PCC-MU car ordered for Boston’s tramways, he ordered 25, to be modified to suit the SHRT’s demands and these were delivered towards the end of [1948]. They have Sprague Multiple Unit Control and are equipped for MU operation in trains of up to six cars. Other details are: Seating capacity. 62; overall length, 52ft. 7in.; overall height, 10ft. 4in.; width, 9ft.; truck wheel base, 6ft. 10in.; livery, canary yellow.” [1: p101]

A new $60,000 sub-station was built by 1949 in Shaker Heights which ensured adequate power for the PCC cars. Other improvements undertaken were “the doubling of car parking space at stations and an increase in service frequency.” [1: p101]

Extensions of the SHRT were, in 1949, considered likely; at that time, the line had been graded beyond Green Road as far as Gates Mills and steel poles had been erected part of the way. (This extension never occurred even though the preparatory work had been undertaken.) [7]

The Moreland Branch had been graded south to the Thistledown Race Track beyond Warrensville and there was little doubt, at that time that this extension would be completed. It turns out that this extension also never came to fruition.

In Cleveland itself, the City Council … asked for 31 million dollars for the purpose of financing extensions of its city lines east and west of the city. The East Side line was laid out and partly graded by the original builders of the SHRT; it left the Heights line at East 60th Street and needed, at the time of writing of the article in Modern Tramway, only a few months’ work to complete.” [1: p101]

Snow [had] no effect on the operation of the SHRT and the line [carried] on when local bus and trolley bus lines [had] ceased … in the severe winter of 1947-8; and all the year round, as mentioned before, the owners of the $75,000 homes of Shaker Heights [left] their cars behind and [travelled] into town by the faster and more reliable means so amply provided.” [1: p102]

In 1955 the Cleveland Transit System (which was formed in 1942 when the City of Cleveland took over the Cleveland Railway Company) opened the first section of the city’s new rapid transit line, now known as the Red Line. It used much of the right-of-way and some of the catenary poles from the Van Sweringen’s planned east-west interurban line adjacent to the NYC&StL tracks. The first section of the CTS rapid transit east from Cleveland Union Terminal included 2.6 miles (4.2 km) and two stations shared with the Shaker Heights Rapid Transit line, necessitating split platforms with low-level sections (for Shaker Heights rapid transit cars) and high-level sections (for CTS rapid transit cars).” [4]

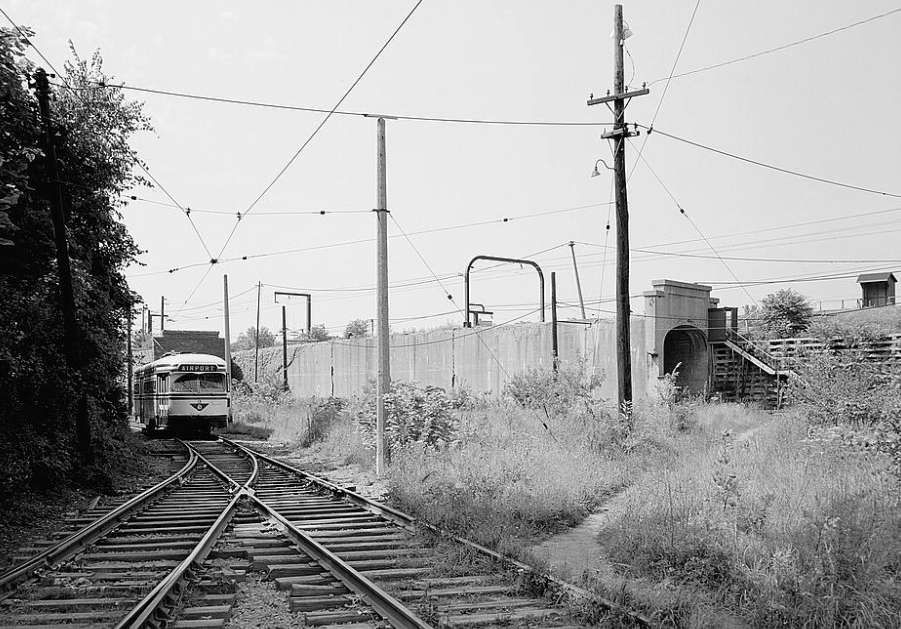
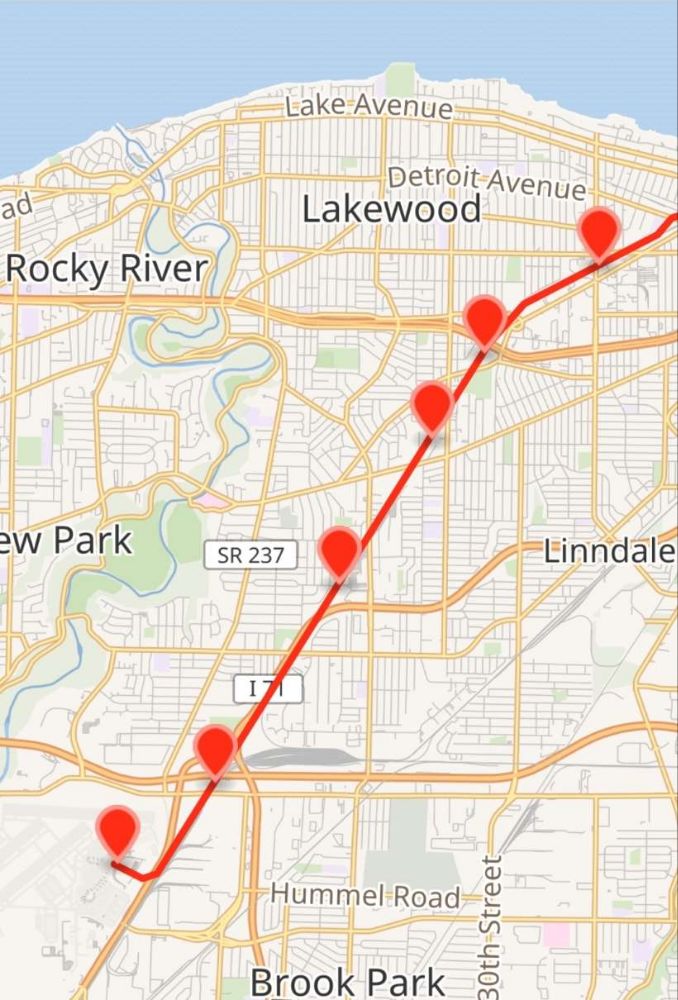
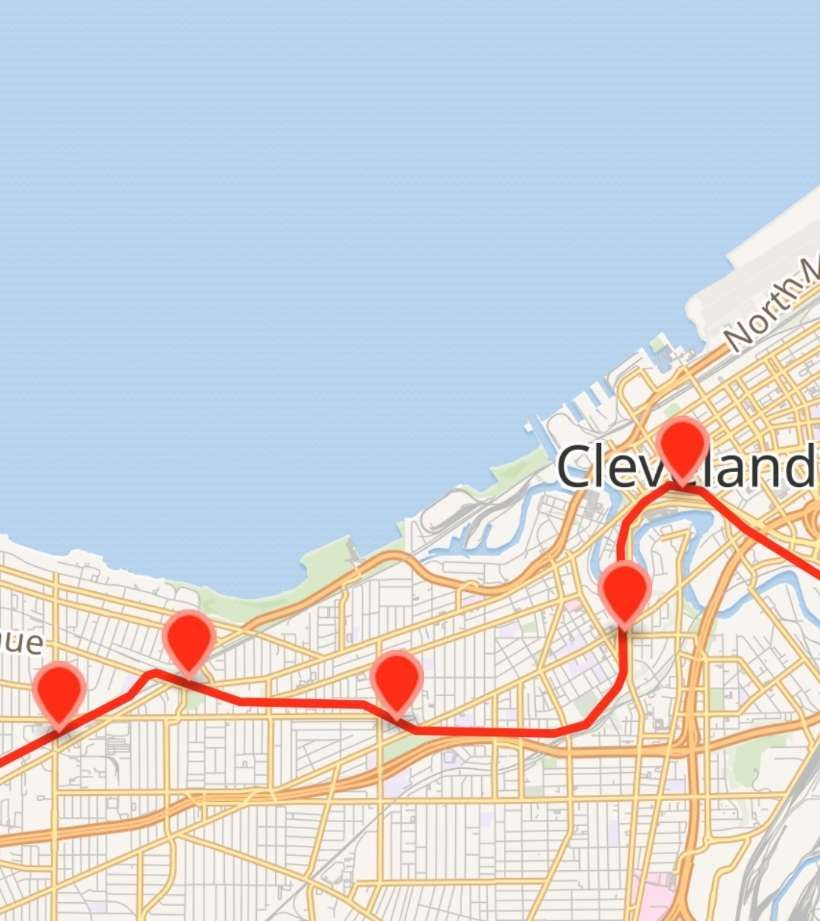
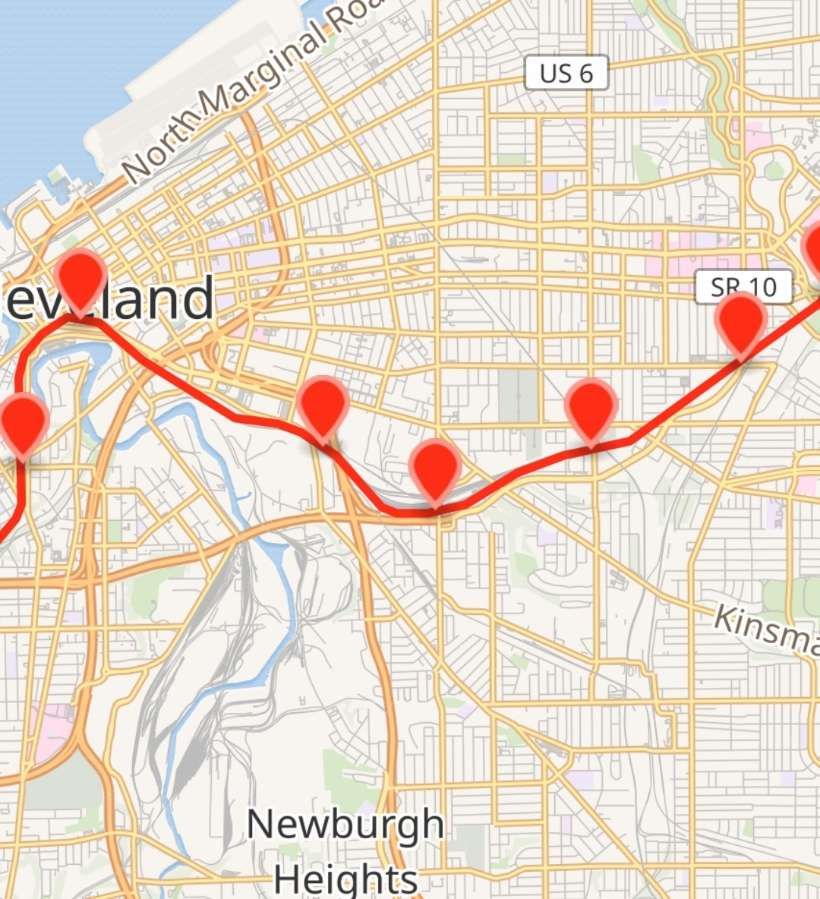
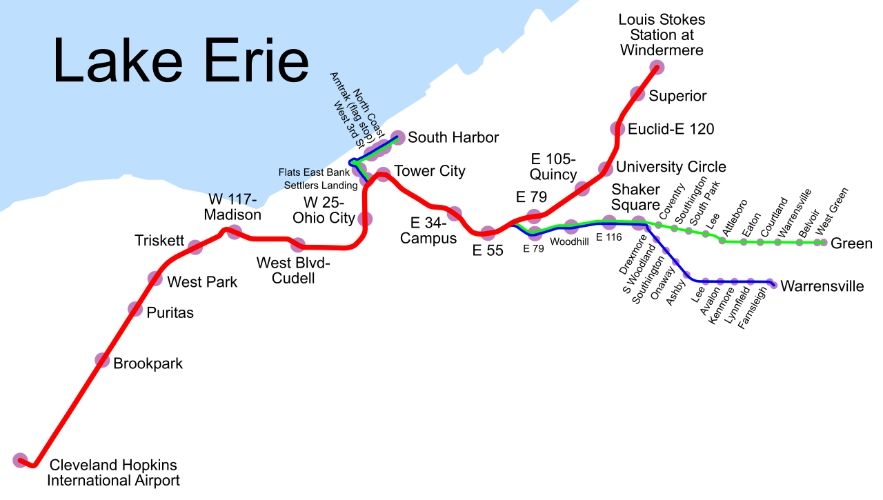
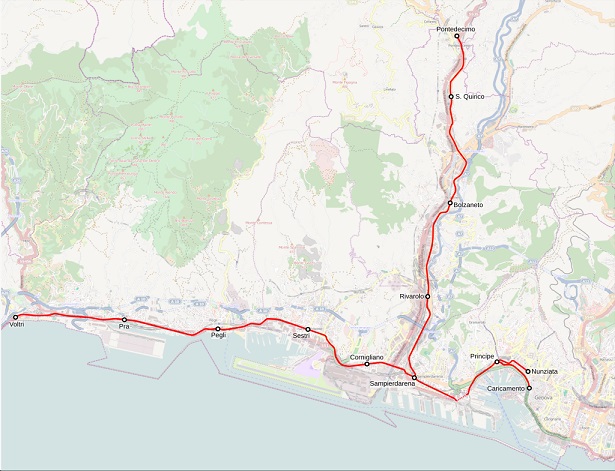
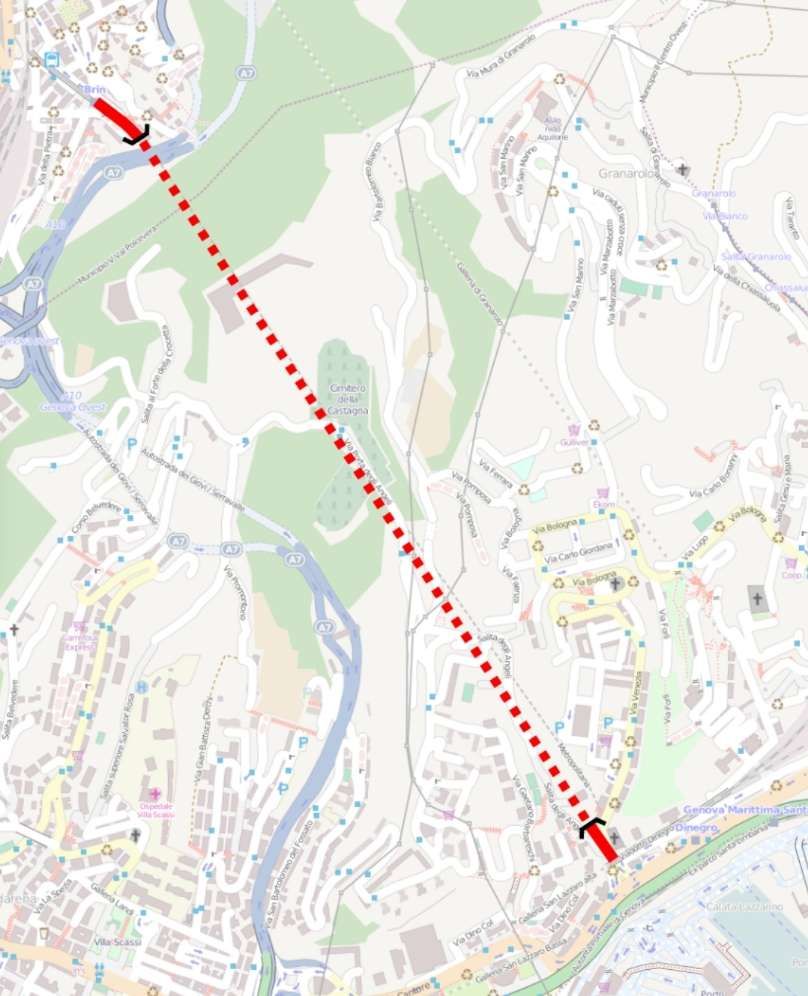
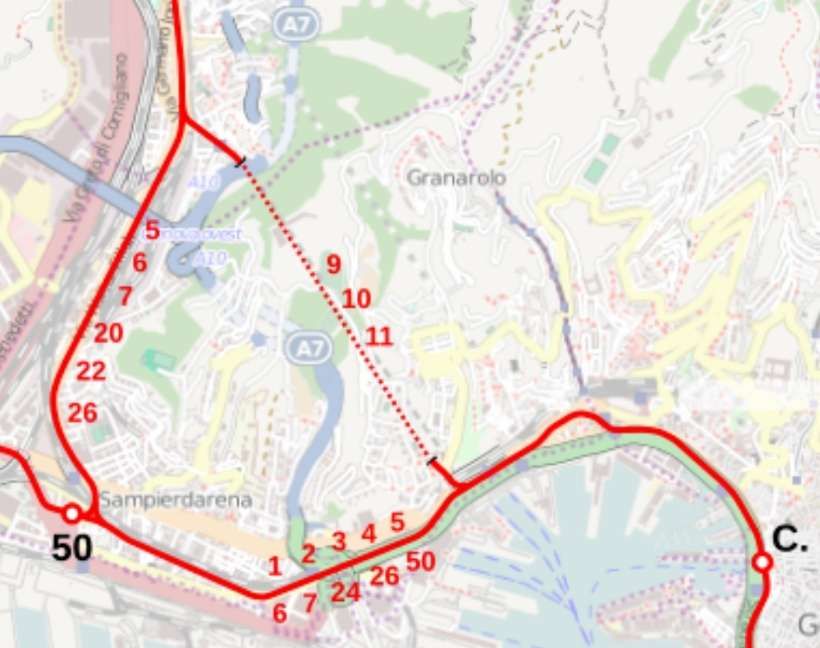
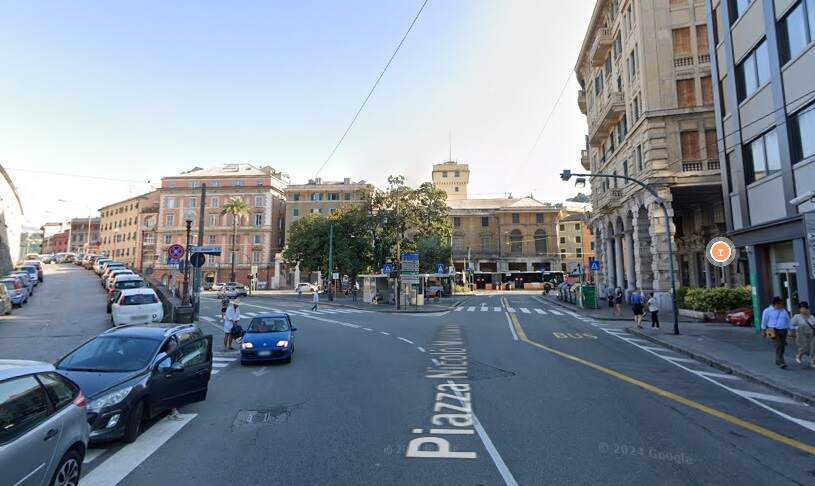
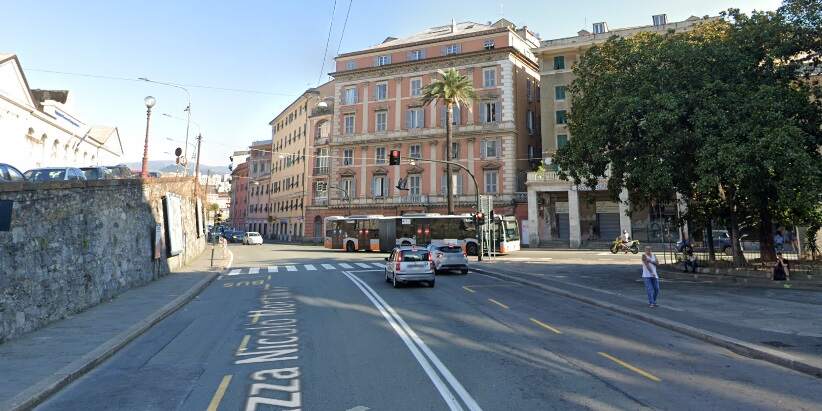
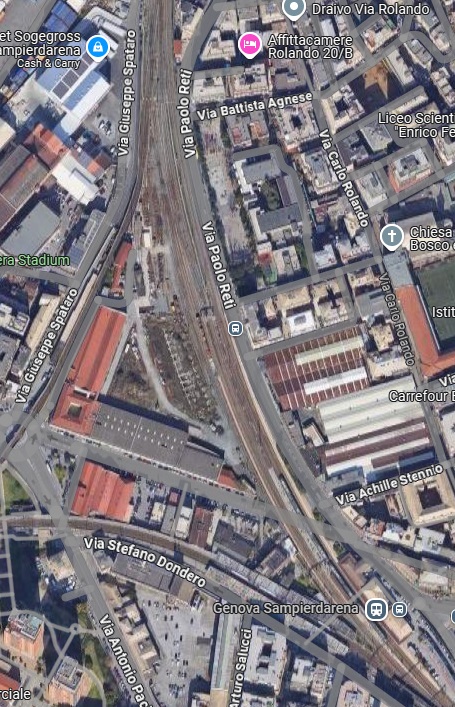
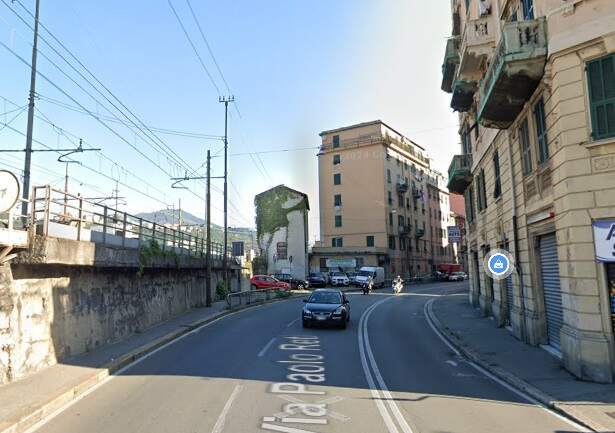
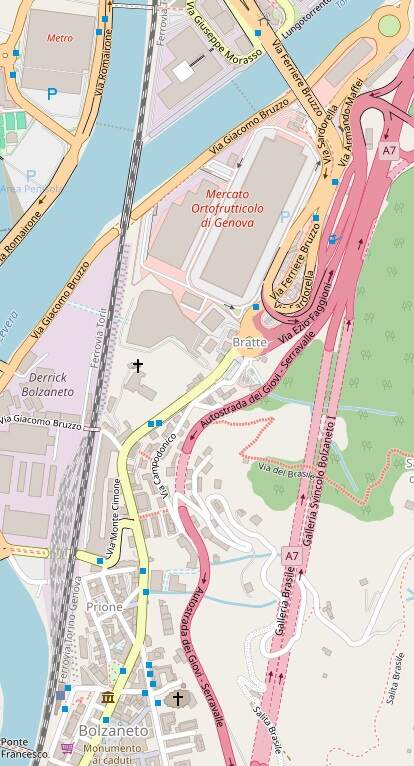
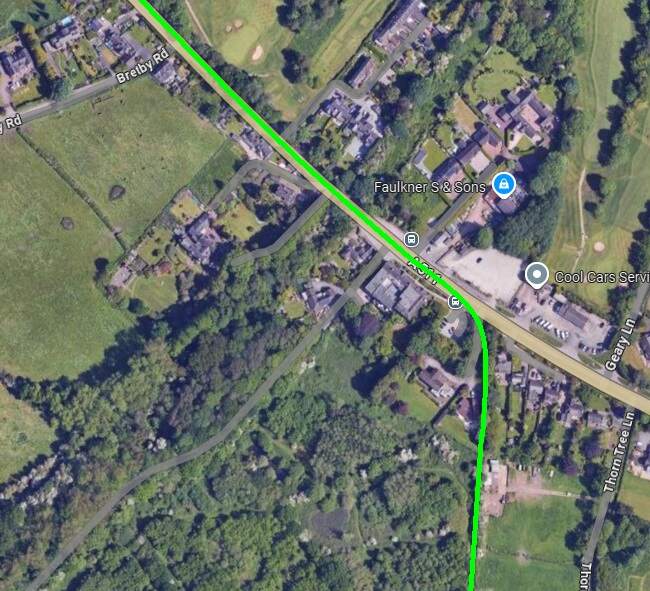
In the 21st century, the Red Line (formerly and internally known as Route 66, also known as the Airport–Windermere Line) is now “a rapid transit line of the RTA Rapid Transit system in Cleveland, Ohio, running from Cleveland Hopkins International Airport northeast to Tower City in downtown Cleveland, then east and northeast to Windermere. 2.6 miles (4.2 km) of track, including two stations (Tri-C–Campus District and East 55th), are shared with the light rail Blue and Green Lines; the stations have high platforms for the Red Line and low platforms for the Blue and Green Lines. The whole Red Line is built next to former freight railroads. It follows former intercity passenger rail as well, using the pre-1930 right-of-way of the New York Central from Brookpark to West 117th, the Nickel Plate from West 98th to West 65th, and the post-1930 NYC right-of-way from West 25th to Windermere.” [5]

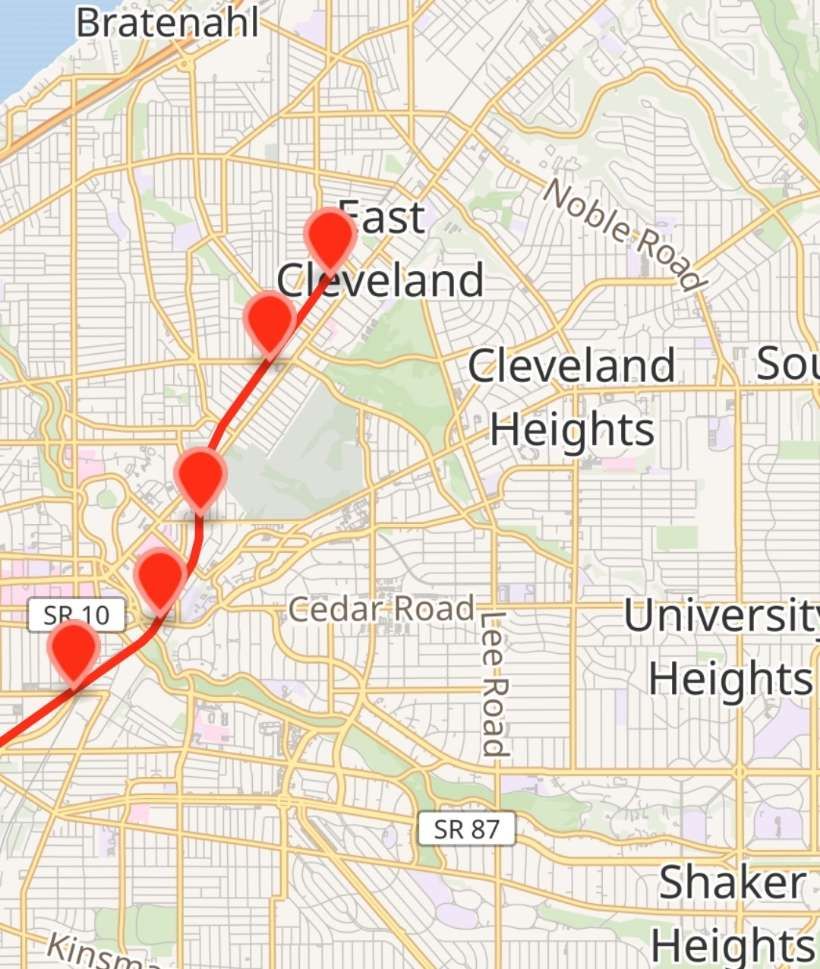
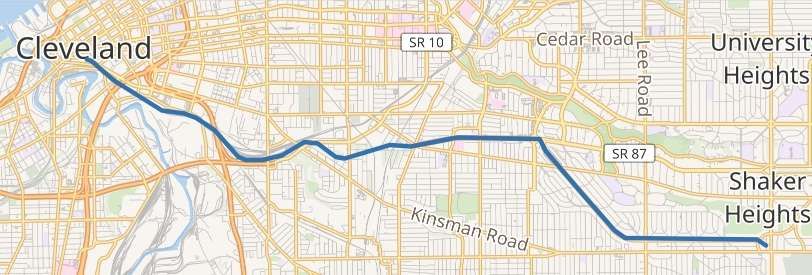
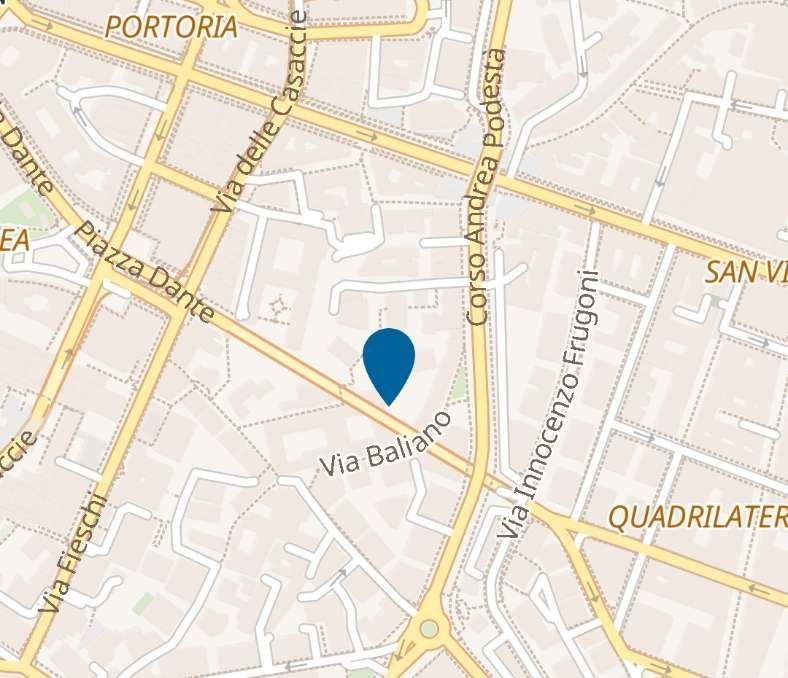
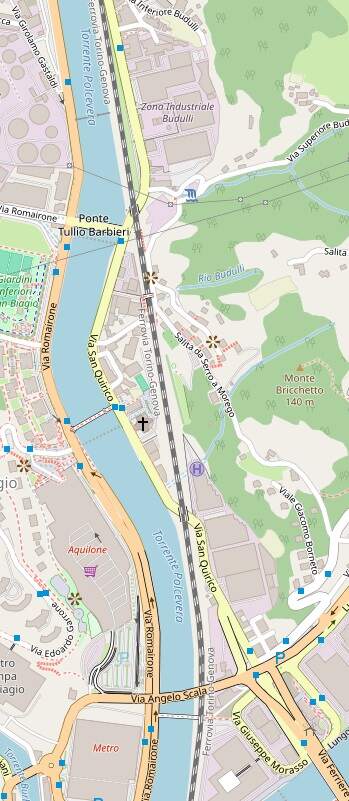
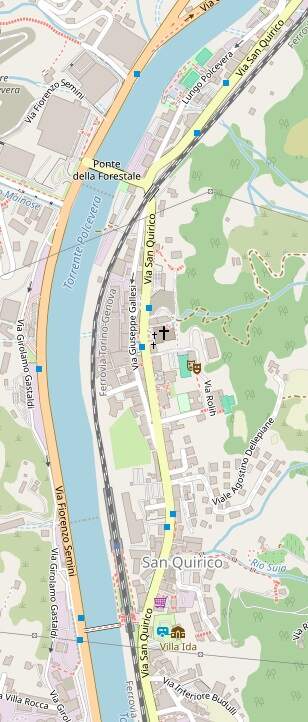
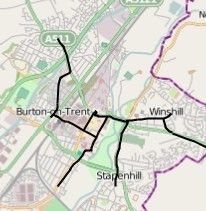
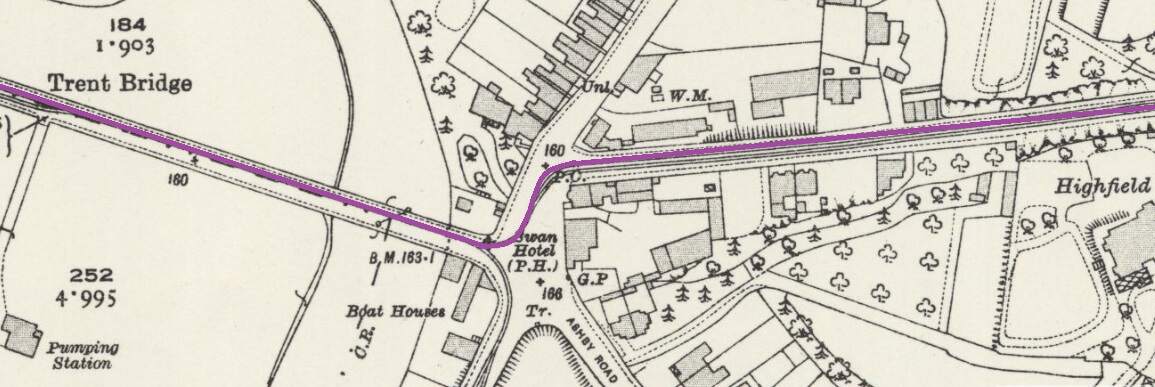
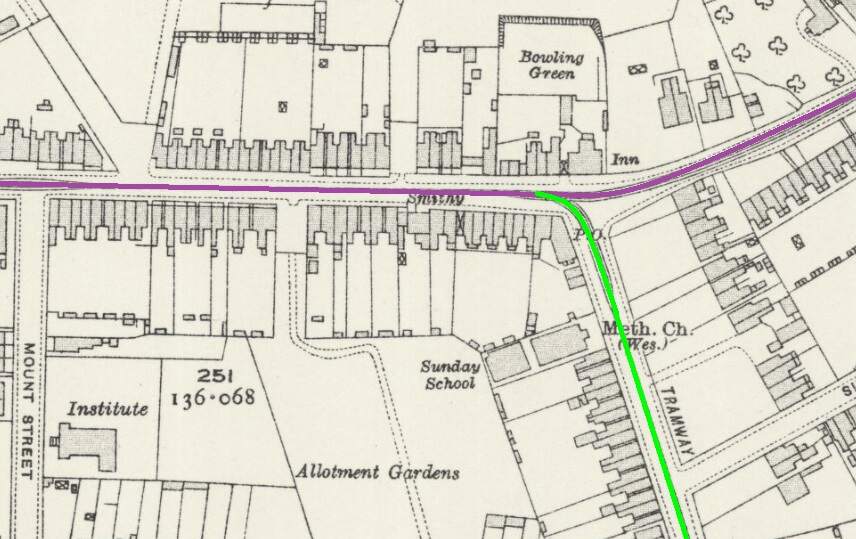
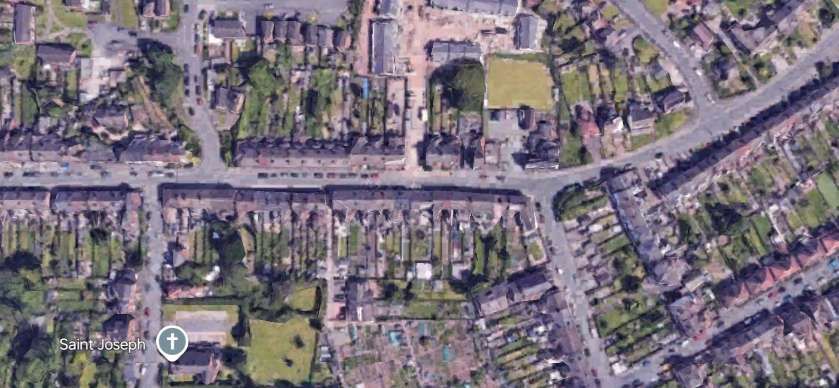
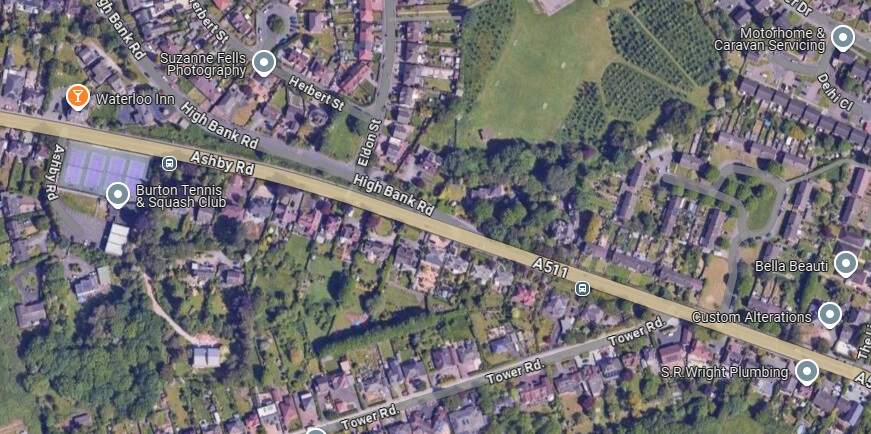
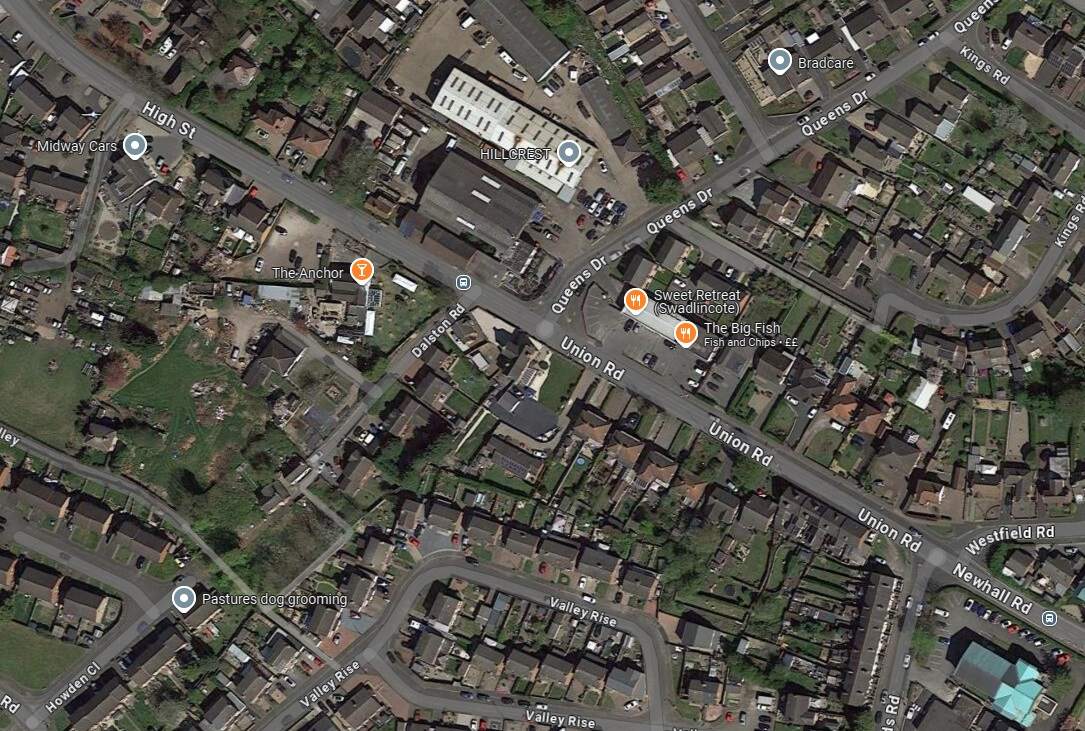
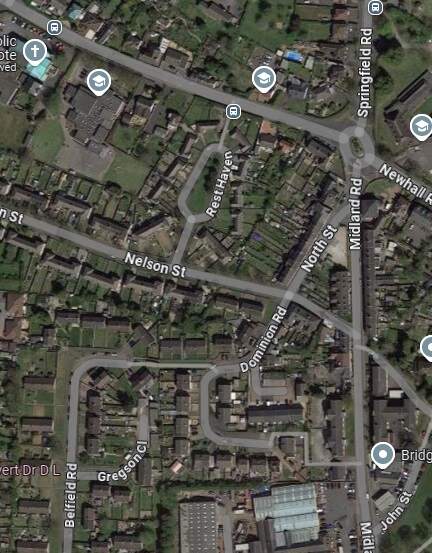
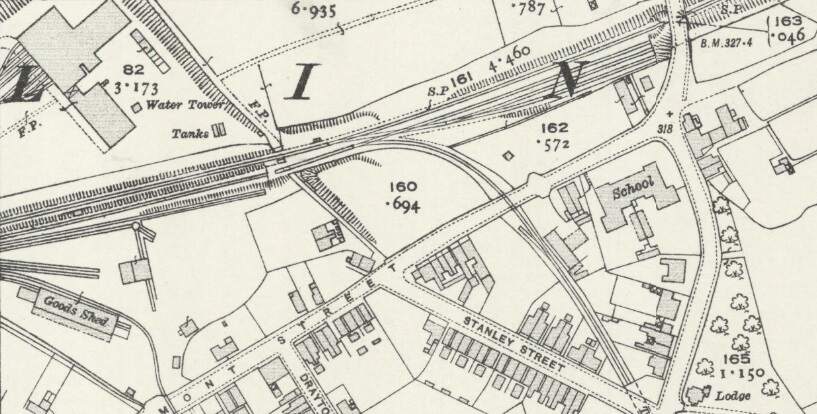
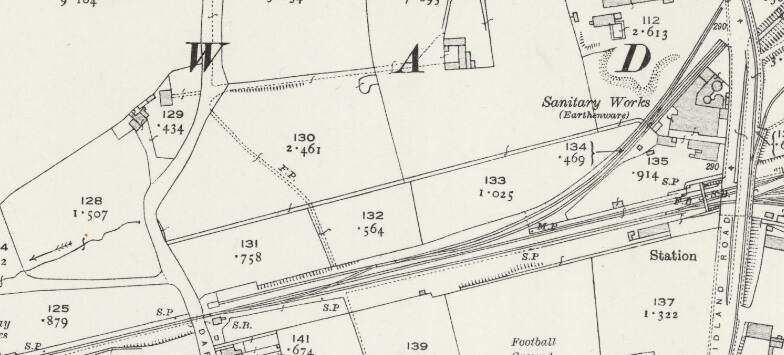
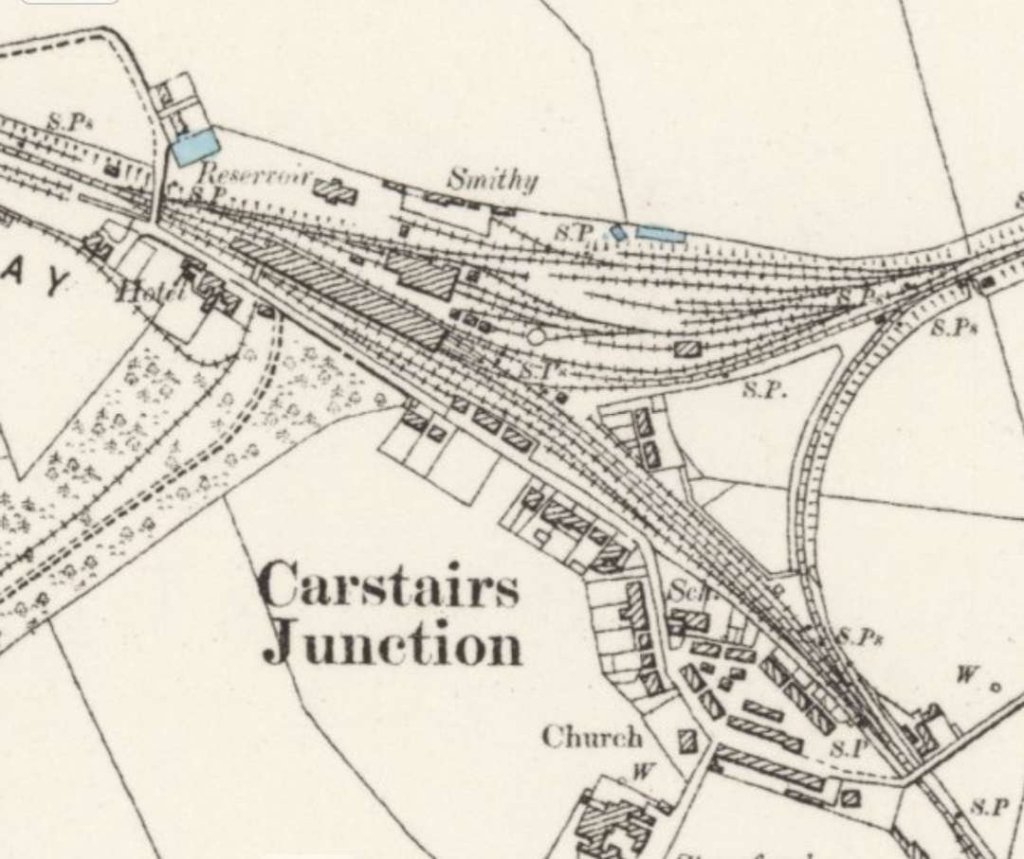
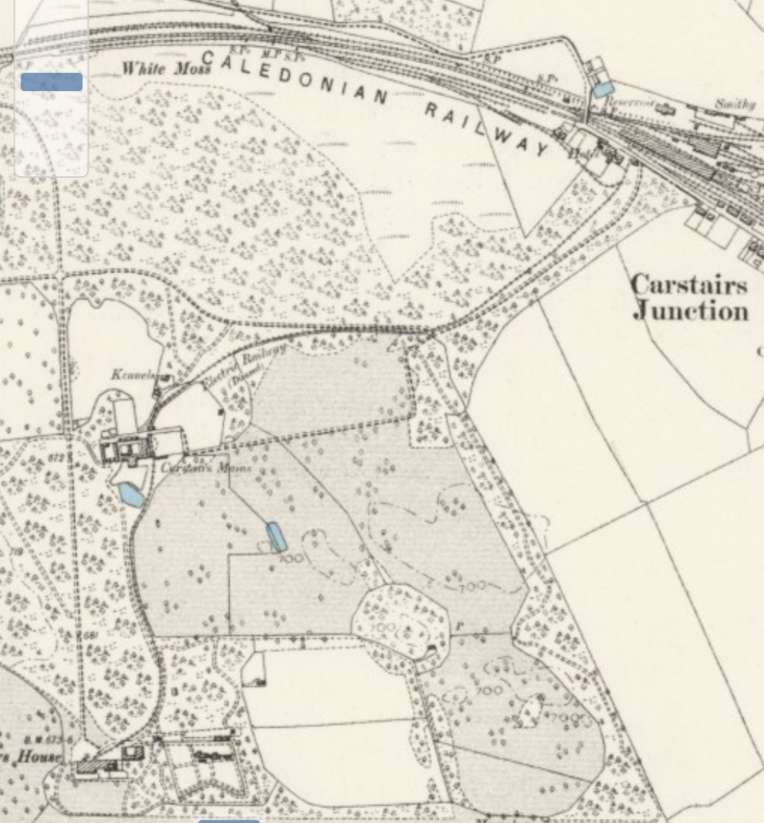
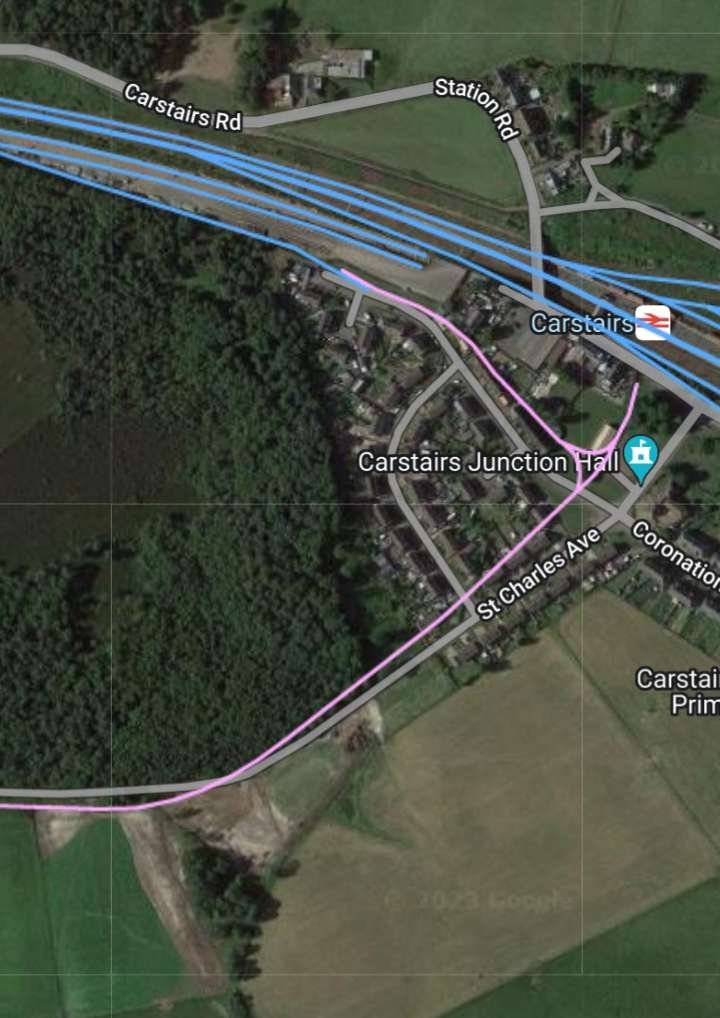
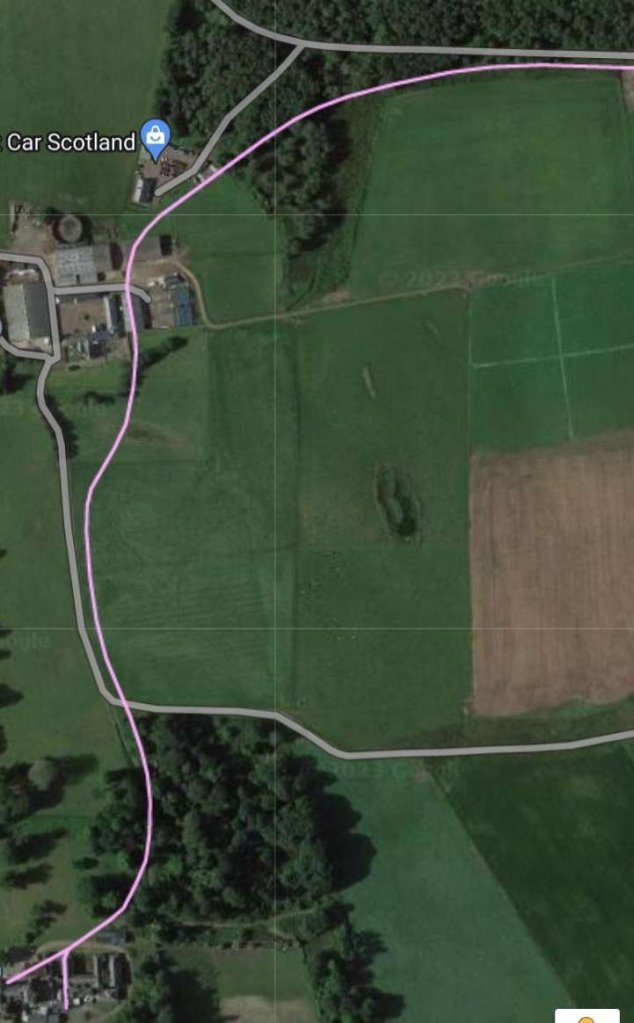
The Red Line is shown on the four extracts from OpenStreetMap below. [5]

These four map extracts show the full length of the Red Line from the airport in the West to East Cleveland. [5]

In the 21st century the two original Shaker Heights routes form the Blue Line and the Green Line as part of Cleveland, Ohio’s Rapid Transit System.

The Blue Line (formerly known as the Moreland Line and the Van Aken Line, and internally as Route 67) is a light rail line of the RTA Rapid Transit system in Cleveland and Shaker Heights, Ohio, running from Tower City Center downtown, then east and southeast to Warrensville Center Blvd near Chagrin Blvd. 2.6 miles (4.2 km) of track, including two stations (Tri-C–Campus District and East 55th), are shared with the rapid transit Red Line, the stations have low platforms for the Blue Line and high platforms for the Red Line. The Blue Line shares the right-of-way with the Green Line in Cleveland, and splits off after passing through Shaker Square.” [3]

The Blue Line from Cleveland to Shaker Heights shown on OpenStreetMap. [3]

The Green Line (formerly known as the Shaker Line) is a light rail line of the RTA Rapid Transit system in Cleveland and Shaker Heights, Ohio, running from Tower City Center downtown, then east to Green Road near Beachwood. 2.6 miles (4.2 km) of track, including two stations (Tri-C–Campus District and East 55th), are shared with the rapid transit Red Line; the stations have low platforms for the Green Line and high platforms for the Red Line. The Green Line shares the right-of-way with the Blue Line in Cleveland, and splits off after passing through Shaker Square.” [4]

This map shows the extent of the three lines – red, blue and green, © Public Domain. [6]

Tram Cars

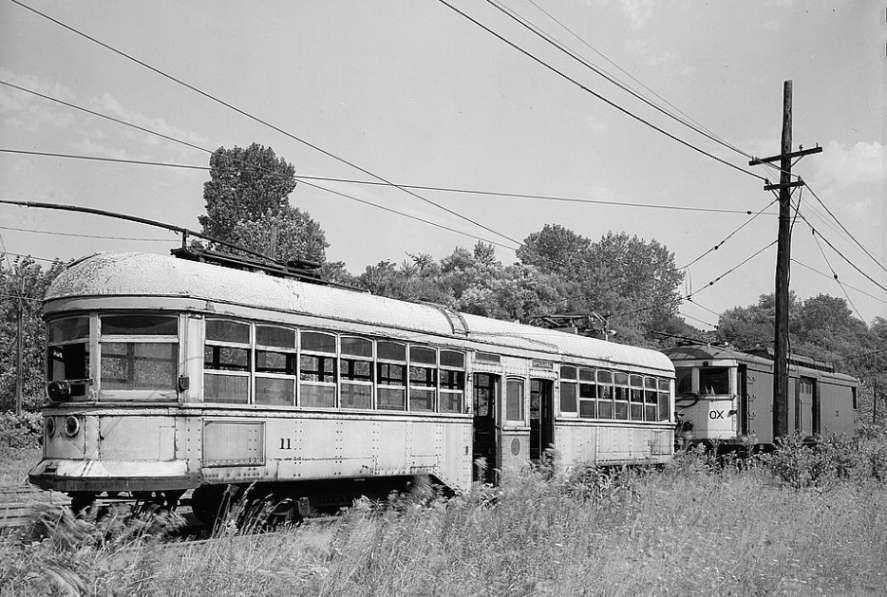
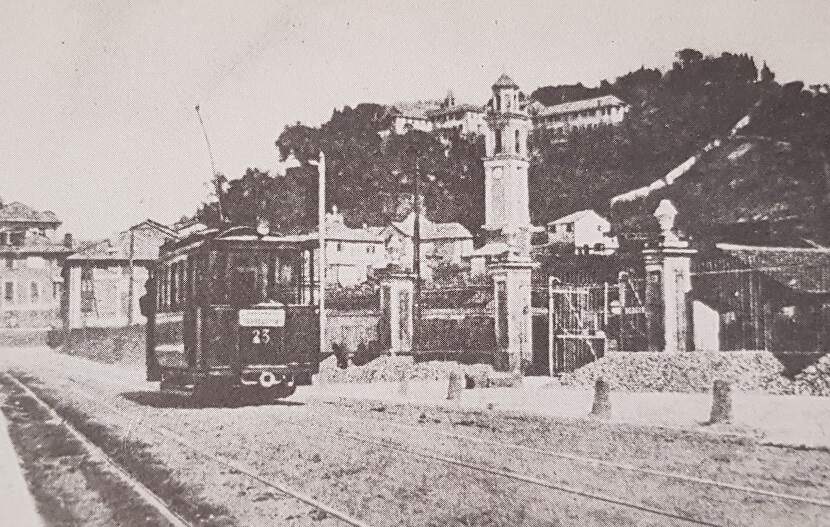
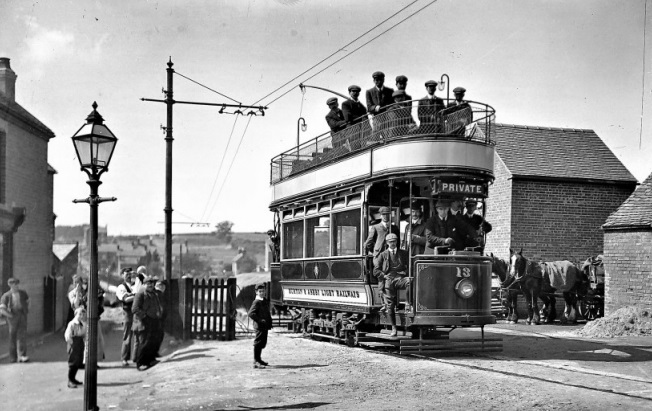
Tram cars used on the Shaker Heights lines since 1920 include: the 1100-series and 1200-series centre-entrance fleet; the colourful PCC cars; and the current fleet of Breda LRVs which have operated the line since 1982. [15]

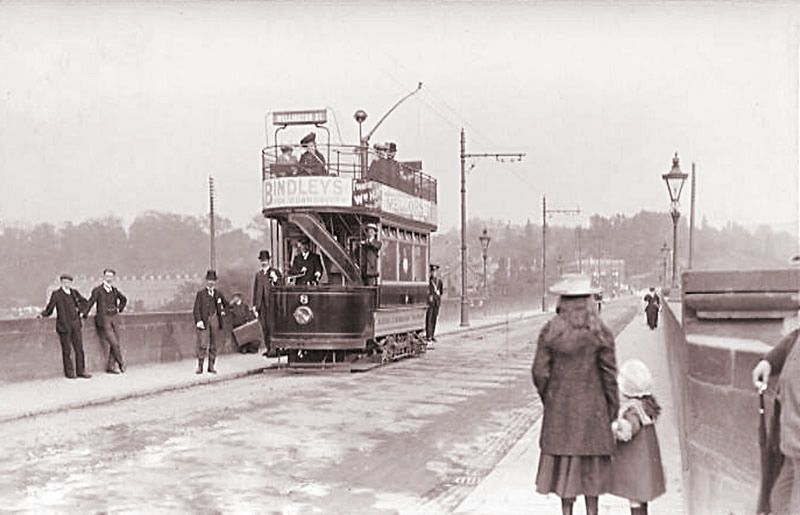
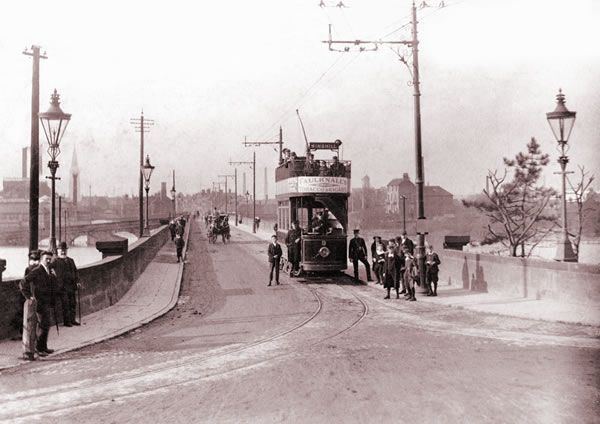
Cleveland’s 1100-series and 1200-series center-door cars were built in the mid-1910s.  “Not only were these cars distinctive and immediately identifiable as Cleveland cars, but many of them outlasted the Cleveland street railway itself.  This was because the suburban streetcar route to Shaker Heights, barely on the drawing board when the center-door cars were built, bought a handful of 1200-series cars to hold down service when it was new.  For years these cars were the backbone of service to Shaker Heights until the last of them were finally retired in favor of PCC cars in 1960.” [16]

A three-car train of 1200-series centre-door cars waits at what was then the Lynnfield Road terminus of the South Moreland Boulevard line around 1923 during the early years of the Shaker Heights operation.  The line was extended to Warrensville Center Road in 1930 and in 1950 South Moreland Boulevard was renamed Van Aken Boulevard. This photograph  is held in  Shaker Historical Museum photograph collection. © Public Domain. [16]

Cleveland’s PCC Trams began arriving in the late 1940s, as we have already noted. PCC (Presidents’ Conference Committee) trams were streetcars of a design that was first “built in the United States in the 1930s. The design proved successful domestically, and after World War II it was licensed for use elsewhere in the world where PCC based cars were made. The PCC car has proved to be a long-lasting icon of streetcar design, and many remain in service around the world.” [17]

The Shaker Heights Rapid Transit network purchased 25 new PCC cars and 43 second-hand cars. A total of 68: the original 25 Pullman cars were extra-wide and had left-side doors. The second-hand cars were: 20 cars purchased from Twin Cities Rapid Transit in 1953; 10 cars purchased from St. Louis in 1959; 2 former Illinois Terminal cars leased from museums in 1975; 2 cars purchased from NJ Transit in 1977; 9 ex-Cleveland cars purchased from Toronto in 1978. PCCs were used until 1981. [17]

The Cleveland Transit System had 50 PCCs purchased new and 25 second-hand. The second-hand cars purchased from Louisville in 1946. All  Cleveland’s cars were sold to Toronto in 1952. Of these, nine cars were (noted above) sent to Shaker Heights in 1978. [17]

Pullman Standard PCCs “were initially built in the United States by the St Louis Car Company (SLCCo) and Pullman Standard. … The last PCC streetcars built for any North American system were a batch of 25 for the San Francisco Municipal Railway, manufactured by St. Louis and delivered in 1951–2. … A total of 4,586 PCC cars were purchased by United States transit companies: 1,057 by Pullman Standard and 3,534 by St. Louis. Most transit companies purchased one type, but Chicago, Baltimore, Cleveland, and Shaker Heights ordered from both. The Baltimore Transit Co. (BTC) considered the Pullman cars of superior construction and easier to work on. The St. Louis cars had a more aesthetically pleasing design with a more rounded front and rear, compound-curved skirt cut-outs, and other design frills.” [17]

Both the Cities of Cleveland & Shaker Heights purchased PCC trolleys after WWII.  Cleveland operated theirs from 1946 to 1953 before they sold them to the City of Toronto.  Shaker Heights operated their PCCs for a much longer period – i.e. from 1947 up until the early 1980s.” [18]

A PCC Streetcar approaching Shaker Square Station, © David Wilson and licensed for reuse under a Creative Commons Licence (CC BY 2.0). [4]

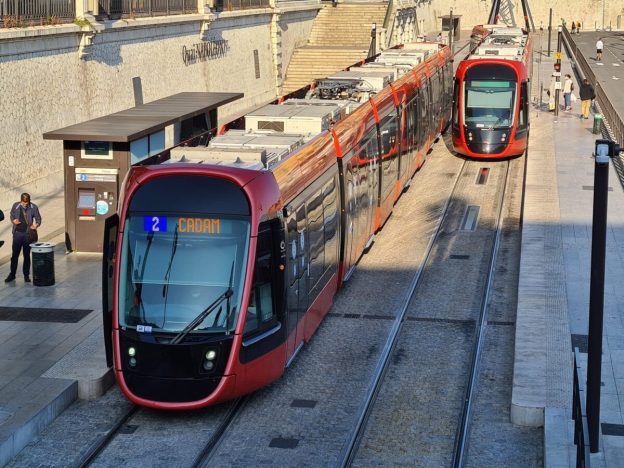
Cleveland’s Breda LRVs are a fleet of 34 vehicles operating on the Blue, Green and Waterfront lines. One is shown below on the Blue Line and one on the Green Line. [19]

Two Breda LRVs on duty on the Blue Line and the Green Line towards the end of the 20th century, © Michael Barera and licenced for reuse under a Creative Commons Licence (CC BY-SA 4.0). [19]

The LRVs were purchased from the Italian firm, Breda Costruzioni Ferroviarie, to replace the aging PCC cars. They were dedicated on 30th October 1981. [3]

The cars consist of two half bodies joined by an articulation section with three bogies. The two end bogies are powered, and the central bogie under the articulation section is unpowered. “The car is slightly more than 24 m (79 ft 10 in) long, is rated AW2 (84 seated passengers and 40 standing), and can travel at a maximum speed of 90 km/hr (55 mph). This speed can be reached in less than 35 sec from a standing start.” [20]

Overall length: 79ft 11in.

Width: 9ft 3in

Tare weight: 84,000lb

Acceleration: 3mph/sec.

Service braking: 4mph/sec.

Emergency braking: 6mph/sec.

Each LRV “is bidirectional with an operator’s cab at either end and three doors per side. The passenger door near the operator’s cab is arranged to allow the operator to control fare collection. The 84 seats are arranged in compliance with the specification requirements. Half the seats face one direction and half the other. Each end of the car is equipped with … an automatic coupler with mechanical, electrical, and pneumatic functions so that the cars can operate in trains of up to four vehicles.” [20]

In 2024, the Greater Cleveland Regional Transit Authority board approved “the selection of Siemens Mobility for a contract to replace the Breda light rail vehicle fleet. … The planned framework contract with Siemens Mobility would cover up to 60 Type S200 LRVs, with a firm order for an initial 24. … The high-floor LRVs will be similar to cars currently used by Calgary Transit, with doors at two heights for high and low level platforms, an infotainment system, ice cutter pantographs, 52 seats, four wheelchair areas and two bicycle racks. … The fleet replacement programme currently has a budget of $393m, including rolling stock, infrastructure modifications, testing, training, field support, spare parts and tools. This is being funded by the Federal Transportation Administration, Ohio Department of Transportation, Northeast Ohio Areawide Co-ordinating Agency and Greater Cleveland RTA.” [21]

References

  1. Shaker Heights Rapid Transit Lines; in Modern Tramway Vol. 12, No 137, May, 1949, p101,102,112.
  2. https://case.edu/ech/articles/s/shaker-heights-rapid-transit, accessed on 1st January 2025.
  3. https://en.m.wikipedia.org/wiki/Blue_Line_(RTA_Rapid_Transit), accessed on 1st January 2025.
  4. https://en.m.wikipedia.org/wiki/Green_Line_(RTA_Rapid_Transit), accessed on 1st January 2025.
  5. https://en.m.wikipedia.org/wiki/Red_Line_(RTA_Rapid_Transit), accessed on 1st January 2025.
  6. https://commons.m.wikimedia.org/wiki/File:Cleveland_Rapid_map.svg, accessed on 1st January 2025.
  7. https://www.loc.gov/resource/hhh.oh0092.photos/?st=brief, accessed on 1st January 2025.
  8. https://www.etsy.com/uk/listing/1213398530/shaker-rapid-shaker-heights-oh-cleveland, accessed on 2nd January 2025.
  9. https://akronrrclub.wordpress.com/tag/shaker-heights-rapid-transit-lines, accessed on 2nd January 2025.
  10. https://www.ebay.co.uk/itm/276745885984?mkcid=16&mkevt=1&mkrid=711-127632-2357-0&ssspo=bTaNd6pwTTu&sssrc=4429486&ssuid=afQhrar7TGK&var=&widget_ver=artemis&media=COPY, accessed on 2nd January 2025.
  11. https://clevelandhistorical.org/items/show/418, accessed on 2nd January 2025.
  12. https://www.riderta.com/dec-17-1913-first-light-rail-service-operates-shaker-heights, accessed on 2nd January 2025.
  13. https://en.m.wikipedia.org/wiki/Tower_City_station, accessed on 2nd January 2025.
  14. https://www.shakersquare.net/history, accessed on 2nd January 2025.
  15. https://clevelandlandmarkspress.com/book_details.php?bid=5#&panel1-5, accessed on 2nd January 2025.
  16. https://hickscarworks.blogspot.com/2013/10/h1218.html?m=1, accessed on 2nd January 2025.
  17. https://en.m.wikipedia.org/wiki/PCC_streetcar, accessed on 3rd January 2025.
  18. https://cs.trains.com/mrr/f/13/t/290183.aspx, accessed on 3rd January 2025.
  19. https://commons.m.wikimedia.org/wiki/Category:Breda_trams/LRVs_in_Cleveland, accessed on 3rd January 2025.
  20. https://www.google.com/url?sa=t&source=web&rct=j&opi=89978449&url=https://onlinepubs.trb.org/Onlinepubs/state-of-the-art/2/2-031.pdf&ved=2ahUKEwinxYDwr9qKAxX0U0EAHWvkKooQFnoECBEQAQ&usg=AOvVaw2t9tHFDwPvUHB1juJqbqWe, accessed on 3rd January 2025.
  21. https://www.railwaygazette.com/light-rail-and-tram/cleveland-light-rail-vehicle-fleet-renewal-approved/64031.article, accessed on 3rd January 2025.

Genoa’s Early Tram Network – Part 1 – General Introduction, Tunnels, The Years before World War One, and the Early Western Network.

Introduction and Early History

We begin this article with a look at maps of the Piazza Raffeale de Ferrari and its immediate environs over the years around the turn of the 20th century. The Piazza became one of two focal points for tramways in the city (the other was Caricamento).

I found the series of maps interesting and they provoked a desire to find out more about the network of horse-drawn and later electric trams and tramways of Genoa. ….

This map of 1886 shows the Piazza Raffeale de Ferrari a little to the left of the centre. Via Carlo Felice runs away from the Piazza to the North-northeast, Via Roma to the Northeast. The map extract is taken from the Italy Handbook for Travellers of 1886 produced by Karl Baedeker, © Public Domain. [10]
This map of 1906 is taken from Karl Baedeker’s Italy Handbook for Travellers. It shows an enlarged Piazza Raffeale de Ferrari, © Public Domain. [11]
This version of the map was produced for the 1913 Baedeker guide. This has tramways shown and the Piazza is beginning to take a shape that is more recognisable in the 21st century, © Public Domain. [12]

Italian Wikipedia informs us that: “The first public transport in Genoa was provided by a horse bus service linking the city centre and Sampierdarena, that started in 1873. In 1878, the French company Compagnia Generale Francese de Tramways (CGFT, French General Company of Tramways) began to build a horse tram system.” [16][17]

A map of the horse-drawn tramways operated by the French company Compagnia Generale Francese de Tramways, © Arbalete and licenced for reuse under a Creative Commons Licence (CC BY-SA 2.0). [19]

Towards the end of the century, the new urban plan led to the construction of new roads with wider carriageways, principal among these were:

  • Via Assarotti connecting Piazza Corvetto to Piazza Manin;
  • Via XX Settembre, built between 1892 and 1899, widening Strada Giulia and connecting the Palazzo Ducale (Piazza de Ferrari) with Porta Pila and the banks of the River Bisagno (once the eastern boundary of the city);
  • Corso Buenos Aires, once outside the city walls, was lowered to the level of Ponte Pila and the new Via XX Settembre, to form a single artery that would connect the centre with the Albaro district;
  • Corso Torino, perpendicular to Corso Buenos Aires.

After this work was done, the city began to look more modern and the widened streets made room for tramways in the centre and East of the city. The municipal administration began to plan new lines, both towards the eastern suburbs and in the central districts of the city. [19]

The city welcomed competition and set up a series of concessions which were given to different groups: the French Company kept the Western concession; Val Bisagno and the hilly areas to two Swiss businessman (Bucher & Durrer); and the east of the city was granted to a group of local businessmen. [19][20: p66]

The two parties, other than the French, formed companies:  Bucher created the Società di Ferrovie Elettriche e Funicolari (SFEF) in 1891. [20: p85] The Genoese entrepreneurs founded the Società Anonima Tramways Orientali (SATO) in 1894. [20: p120] The two companies took on the two concessions which envisaged electric traction on metre-gauge lines to accommodate running on the narrow winding streets of the city centre. [19]

By 1894, SFEF had achieved no more than a single short electric tram line between Piazza Manin and Piazza Corvetto, whilst SATO had not progressed beyond the planning stage. The CGFT system had extended through the city and the Val Polcevera, but was still horse operated.” [16][17]

In 1894, the German company Allgemeine Elektrizitäts Gesellschaft (AEG) … bought both the SFEF and SATO companies. The following year AEG created the company Officine Electrical Genovesi (OEG), … which took over the city’s existing electricity supply company, and the Società Unione Italiana Tramways Elettrici (UITE), … which purchased the CGFT’s concession. By the end of 1895, AEG had a monopoly of both electricity supply and public transport provision in the city.” [16][17] Under AEG’s “ownership, SFEF and SATO developed a tram network of more than 53 km (33 mi) reaching Nervi and Prato, whilst UITE electrified their lines to Voltri and Pontedecimo.” [16][17]

As we have already noted, the first electric traction line connected Piazza Corvetto to Piazza Manin, running along Via Assarotti. [20: p92] It was activated by SFEF on 14th May 1893 [20: p96] The single-track line was 800 metres long and ran on a constant gradient of 7% [20: p95]; the tickets cost 10 cents. The electrification (600 V DC) was via an overhead cable and was carried out by AEG of Berlin, which, as we have already seen, later acquired a significant shareholding in the company. [19][20: p86-87]

In subsequent years the SFEF network expanded rapidly; in 1895-96 the Monte line to the North of the city centre entered into service, including the Sant’Ugo spiral tunnel; in 1896 the line from Piazza Principe to Piazza Brignole was born. It included two tunnels in the Castelletto area. [21: p20] , In 1897, the Val Bisagno line up to Prato began operation. [19][21: p26]

The first SATO line entered into service on 26th July 1897, connecting Piazza Raibetta to Staglieno through the Circonvallazione a Mare, [20: p122] followed two years later by the long coastal line to Nervi. [20: p127] In 1900 the eastern trams reached the central Piazza de Ferrari, travelling along the new Via XX Settembre which was formed through widening of the old Via Giulia. [19][21: p53]

The two networks, SFEF and SATO, were technically compatible and the two companies, both controlled by AEG, soon unified the two networks. [20: p142]

Finally in December 1901, AEG merged SFEF and SATO into an enlarged UITE.” [16][17]

An early postcard image showing a tram at work on Corsa Andrea Podesta, © Public Domain. [19]
This map shows the three companies’ lines immediately prior to the date of unification under UITE. The Green lines were UITE (the former French Company). The Red lines were SFEF. The Blue lines were SATO, © Arbalete and authorisedd for reuse under a Creative Commons Licence (CC BY-SA 2.0. [19]

The enlarged UITE found itself managing 70 km of network, divided between the 30 km of the ‘Western network’: (formerly the French Company) and the 40 km of the ‘Eastern network’ (formerly SFEF and SATO). [20: p170-171] The unification of the network led to an increase in overall traffic, symbolised by the creation of the vast ring terminus in Piazza de Ferrari in 1906. [20: p129]

This seems the right time to look again at the ‘ring terminus’ in Piazza de Raffeale Ferrari. ….

Trams on Piazza Raffeale de Ferrari Genoa (Genova), © Public Domain. [1]
A similar view in the 21st century. [Google Streetview, 2015]
Trams on Piazza Raffeale de Ferrari, Palazzo Ducale is on the left of the photograph, © Public Domain. [7]
A ground-level view from a similar location.  [Google Streetview, 2009]
Another view of Piazza Raffeale de Ferrari and of Palazzo Ducale, © Public Domain. [8]
A similar view of Palazzo Scale from ground-level across the Piazza Raffeale de Ferrari. [Google Streetview, 2015]
Also on Piazza Raffeale de Ferrari, trams gather again! But when is this? The building to the right in the image below is not present in this image, yet is present in the image of the Piazza earlier in this sequence of images, © Public Domain.
From a similar direction as the image above. The building on the left is very much the same as the building on the left in the monochrome image above. Was that monochrome photo taken prior to the building on the right being built, or was the building destroyed during the First World War and then rebuilt at a later date? [Google Streetview, 2016]
The Piazza Raffeale de Ferrari in the 21st century. North of the piazza, at the top-right of this image two streets run out of the piazza. Via Roma curves away to the Northeast and what was Via Carlo Felice (now Via XXV Aprile) heads North-northeast. [Google Maps, November 2024]
Piazza Raffeale de Ferrari, Via Roma (to the right of the building on the right side of this image), and Via Carlo Felice (now Via XXV Aprile), © Public Domain. [7]
The same location in the 21st century. Via Roma is on the right side of the building at the centre of this image. Via XXV Aprile (once Via Carlo Felice) is on its left. [Google Streetview, July 2015]

In 1908, after three years of construction work, Galleria Certosa (Certosa Tunnel) was put into use. It facilitated tram journeys to and from the Polcevera valley, avoiding the crossing of San Pier d’Arena. [19][21: p38] The tunnel connected Piazza Dinegro, in the port area, to the Rivarolo district in Val Polcevera. It was 1.76 km long. [22]

In 1934, Galleria Certosa was used every day by five lines: Tram No. 9 (San Giorgio-Rivarolo), tram No. 10 (San Giorgio-Bolzaneto), tram No. 11 (San Giorgio-Pontedecimo) and the two circular lines between San Giorgio and Sampierdarena. [22]

Tram No 78 at the southern entrance to Galleria Certosa, © Public Domain. [22]
In the mid-20th century, Tram No 836 providing the No.10 service exits the South Portal of the tunnel. This image was shared by Paolo Siri on the Sei di Certosa Se … Facebook Group on 2nd February 2014. [23]
The South Portal (seen in the monochrome image above) is no longer in use, © Arbalete and authorised for reuse under a Creative Commons Licence (CC BY-SA 3.0) [22]
Galleria Certosa was a lengthy tunnel. It is shown here superimposed on a modern map of Genoa, © Arbalete and authorised for reuse under a Creative Commons Licence (CC BY-SA 3.0) [22]
A view looking towards Galleria Certosa from some distance to the Northwest through the site of what became Brin Metro Station. This image was shared on the Foto Genova Antica Facebook Group on 28th September 2020 by Pietro Spanedda, © Public Domain. [37]
Tram service No. 9 (Tram No. 831(?)) is about to enter the North portal of the tunnel. This image comes from the mid-20th century. [24]
The North Portal of Galleria Certosa. Much of the tunnel is now used by the Metro. Brin Metro Station is immediately behind the camera, © Arbalete and authorised for reuse under a Creative Commons Licence (CC BY-SA 3.0) [22]

Tram Tunnels (Galleria)

Having noted the construction of Galleria Certosa in the early years of the 20th century (above), it is worth looking at some other tunnels which were built to facilitate the movement of trams.

Galleria Vittorio Emanuele III (renamed Galleria Giuseppe Garibaldi on 27th November 1943)

There seems to be quite a story to the life of this tunnel! The first two photographs show the first tunnel. They focus on the portal in Piazza Della Zeccan.

Piazza della Zecca with trams approaching and leaving a single track tunnel on the line of what will be Galleria Giuseppe Garibaldi. Piazza della Zecca has still not reached its fullest extent and the tunnel portal still has to be constructed, © Public Domain. [70]
Piazza della Zecca in a more complete form but still with a single track tunnel. [71]

These next two photographs show the tunnel as it was first widened in the form which preceded the Galleria Vittorio Emanuele III which had a much smaller bore.

Two views of Piazza Portello with trams exiting and entering the Galleries which preceded Galleria Vittorio Emanuele III, © Public Domain. [38][39]
An engraving of the proposed Galleria Vittorio Emanuele III, © Public Domain. [26]
The Southeast end of Galleria Vittorio Emanuele III during construction with trams using the narrow older tunnel which preceded the larger bore seen on other photographs below, © Public Domain. [26]
Galleria Vittorio Emanuele III later during construction work the full size bore is now complete but the decorative portal still has to be built, © Public Domain. [26]
A postcard view of the Southeast Portal of Galleria Vittorio Emanuele III (later Giuseppe Garibaldi), © Public Domain. [26]
The Southeast Portal of Galleria Giuseppe Garibaldi in the 21st century. [Google Streetview, August 2024]
The Northwest Portal of Galleria Vittorio Emanuele III (later Giuseppe Garibaldi) soon after construction, © Public Domain. [25]
A 21st century view of the Northwest portal of Galleria Giuseppe Garibaldi. [Google Streetview, August 2024]

Galleria Sant’Ugo

A tram at the lower Portal of Galleria Sant’Ugo, © Public Domain. [27]
The route of Galleria Sant’Ugo appears on city centre maps North of Principe Railway Station. Its lower entrance was on Salita Della Provvidenza. Its upper entrance only a very short distance away to the Northeast but at a higher level in Piazza Ferreira. [27]
Galleria Sant’Ugo left the surface at the North end of Salita Della Provvidenza. [Google Maps, November 2024]
The lower entrance to Galleria Sant’Ugo in the 21st century. [Google Streetview, December 2020]
The Upper Portal of Galleria Sant’Ugo in Piazza Ferreira, © Public Domain. [28]
The upper (marked by the purple flag) and lower entrances of Galleria Sant’Ugo were geographically very close together! [Google Maps, November 2024]
The upper entrance to Galleria Sant’Ugo in Piazza Ferreira. [Google Streetview, August 2024]

Galleria Chrisoforo Colombo

Named after Christopher Columbus, whose house was nearby, the gallery was opened to the public in the 1930s and was hailed as the city’s gateway to the sea. It connected Piazza de Ferrari and Piazza della Vittoria.

The Northwest Portal of Galleria Chrisoforo Colombo in its early years, © Public Domain. [28]
The Northwest Portal of Galleria Chrisoforo Colombo in the 21st century. [Google Streetview, August 2024]
The Southeast Portal of Galleria Chrisoforo Colombo in its early years, © Public Domain. [29]
The Southeast Portal of Galleria Chrisoforo Colombo in the 21st century. [Google Streetview, August 2024]
The blue flag points to the line of the Galleria Chrisoforo Colombo.
A closer view of the location.

Galleria Regina Elena (today Nino Bixio)

The West Portal of Galleria Regina Elena (now Nino Bixio), © Public Domain. [30]
The West Portal of Galleria Nino Bixio in the 21st century. [Google Streetview, August 2024]
The East Portal of Galleria Regina Elena (now Nino Bixio), © Public Domain. [30]
The East Portal of Galleria Nino Bixio in the 21st century. [Google Streetview, August 2024]
The location of Galleria Nino Bixio. [Google Maps, November 2024]

Galleria Dei Tram Via Milano

Now long gone, there was a tram tunnel on Via Milano to the Southwest of the city centre. It took the tramway (and roadway) under San Benigno Hill. It was.built in 1878 by the Compagnia Generale Francese dei Tramways for its horse-drawn trams. Its Southwest portal was in Largo Laterna. Its Northeast portal is shown in the first image below.

The Northeast portal of the Galleria on Via Milano before its demolition when the San Benigno Hill was raised to the ground. The three images below show the Southwest end of the tunnel. This image was shared by Silvia Brisigotti on the Foto Genova Antica Facebook Group on 3rd February 2024, © Public Domain. [34]
A similar location on Via Milano in the 21st century. There are no features to tie the two images together! [Google Streetview, August 2024]
Three different images showing the Southwest portal of the Galleria Via Milano and its immediate environment. The third of the images illustrates its proximity to Genoa’s (Genova’s) Lighthouse on Largo Laterna. These images were shared by Silvia Brisigotti on the Foto Genova Antica Facebook Group on 16th January 2024, © Public Domain. [35]
A similar location on Via Milano in the 21st century. The lighthouse can be seen on the right of this photograph. [Google Streetview, August 2024]

Until Galleria Certosa was constructed all tram services for the Western suburbs of the city had to pass through this tunnel.

Galleria Goffredo Mameli

This tunnel curved through the Eastern parts of the city from Via Piave to Via Carlo Barabino at the bottom of Piazza Palermo.

Galleria Goffredo Mameli. [Google Maps, November 2024]
In Piazza Palermo, UITE No. 937 exits Galleria Goffredo Mameli in service on the Line 15, De Ferrari – Galleria Mameli – Nervi Service in the later years of the network’s life, © Public Domain. [36]
Looking East at the bottom of Piazza Palermo towards the West Portal of Galleria Goffredo Mameli. [Google Streetview, August 2024]
The South Portal of Galleria Goffredo Mameli, © Public Domain. [40]
The South Portal of Galleria Goffredo Mameli. [Google Streetview, August 2024]

The Years Before World War One

In the early years of the 20th century, the municipal administration began to consider the idea of taking control of the tram service. In anticipation of this, in 1913, it built its own line from Marassi to Quezzi, known as Municipal Line A, it was operated by UITE on behalf of the Municipality. [19][21: p44]

Before the start of World War 1, the tram network provided these services: [19]

I. Western Network:

1 Caricamento – San Pier d’Arena (Sampierdarena in other sources) – Sestri – Pegli – Voltri
2 Caricamento – San Pier d’Arena – Sestri – Pegli
3 Caricamento – San Pier d’Arena – Sestri
4 Caricamento – San Pier d’Arena
5 Caricamento – San Pier d’Arena – Rivarolo
6 Caricamento – San Pier d’Arena – Rivarolo – Bolzaneto
7 Caricamento – San Pier d’Arena – Rivarolo – Bolzaneto – Pontedecimo
8 Caricamento – Galleria Certosa – Certosa
9 Caricamento – Galleria Certosa – Certosa – Rivarolo
10 Caricamento – Galleria Certosa – Certosa – Rivarolo – Bolzaneto
11 Caricamento – Galleria Certosa – Certosa – Rivarolo – Bolzaneto – Pontedecimo

II. Eastern Network:

21 De Ferrari – Manin – Staglieno
22 De Ferrari – Manin
23 De Ferrari – Manin – Castelletto
24 De Ferrari – Manin – Castelletto – San Nicholo
25 Circuit in the hilly suburbs
26 Piazza Principe – Corso Ugo Bassi
27 De Ferrari – Zecca – Principe
28 Caricamento – De Ferrari – Galliera ‘Ospital
29 De Ferrari – Carignano
30 Circular Raibetta – Brignole – Corvetto – Raibetta
31 De Ferrari – Staglieno – Molassana – Prato
32 De Ferrari – Staglieno – Molassana
33 De Ferrari – Pila – Staglieno
34 Staglieno – Iassa
35 Pila – Staglieno
36 Pila – Staglieno – Molassana
37 De Ferrari – San Fruttuoso
38 De Ferrari – Foce
39 De Ferrari – San Francesco – Sturla – Priaruggia – Quinto – Nervi
40 De Ferrari – San Francesco – Sturla – Priaruggia – Quinto
41 De Ferrari – San Francesco – Sturla – Priaruggia
42 De Ferrari – San Francesco – Sturla
43 De Ferrari – Villa Raggio – Lido
44 De Ferrari – Tommaseo – San Martino – Borgoratti
45 De Ferrari – Tommaseo – San Martino – Sturla
46 De Ferrari – Tommaseo – San Martino
47 De Ferrari – Tommaseo
48 Raibetta – Pila

III. Municipal line:

A De Ferrari – Quezzi

The Western Network, particularly before World War One

Lines 1 to 11 constituted the Western Network. All of these lines had their city centre terminus at Piazza Caricamento. The Piazza is shown on the adjacent 1916 map.

The map shows part of the Port area of Genoa (Genova) in 1916 with a significant series of standard-gauge railway sidings in evidence (black lines) and some red lines which indicate the metre-gauge tram routes. Piazza Caricamento is close to the water halfway down the map extract. [31]

A typical photograph of a freight movement on the standard-gauge railway serving the port. The building behind the locomotive front onto Piazza Caricamento., © Public Domain and shared by Enrico Pinna on the Foto Genova Antica Facebook Group on 22nd January 2023. [33]

The postcard images below show trams operating in Piazza Caricamento at different times over the life of the tram network in the 20th century.

Piazza Caricamento, (postcard dated 1908), © Public Domain. [31]
Piazza Caricamento (postcard dated 1910), © Public Domain. [31]
Piazza Caricamento, (postcard dated 1936), © Public Domain. [31]
Piazza Caricamento, later than the previous view, © Public Domain. [31]
Piazza Caricamento in October 1942 sowing war damage to properties on the East side of the Piazza, © Public Domain. [32]

There were three main routes out of Piazza Caricamento, one of which followed the coast round to meet the lines on the East of the city. The other two shared the bulk of the services leaving the piazza. One of these two routes ran West through San Pier d’Arena (Sampierdarena), the other ran through Galleria Certosa.

The only tramway route serving the western suburbs before the construction of Galleria Certosa is shown here in black between Pizza Caricamento, Principe and San Pier d’Arena (Sampierdarena), © Arbalete and authorisedd for reuse under a Creative Commons Licence (CC BY-SA 2.0). [19]
The distribution of tramway routes in the West of the city after Galleria Certosa was put into use, © Arbalete and licenced for reuse under a Creative Commons Licence (CC BY-SA 2.0). [19]

The route to San Pier d’Arena (Sampierdarena) closely follows the coast and ran through the Galleria on Via Milano before the San Benigno Hill was raised to the ground.

The 1916 map shows the first length of the tramway Northwest of Piazza Caricamento (red line) which served both the two routes mentioned above. It ran on the south side of Principe Railway Station across the top of the Port. [31]
A crowded Pizza Acquaverde, located in front of the Principe Station, dominated by the statue of Christopher Columbus. Among buses and trolleybuses there is a tram waiting at the station. Another tram (a 900) is on the route from Piazza Caricamento towards Sampierdarena. This image probably comes from the late 1950s or early 1960s, © Public Domain. [36]
The redline marking the tramway runs down the West side of the Port on this next extract from the 1916 – Via Milano, later Via Bruno Buozzi. [31]
An early postcard image showing the curve from Via San Benedetto into Via Milano.[42]
The same location, also prior to the widening of Via Milano and the renaming of the fist length ahead as Via Bruno Buozzi. [41]
The same location in the 21st century. [Google Streetview, 2010]
Via Milano (eventually Via Bruno Buozzi) with tram tracks on the seaward side. A promenade separates the FS sidings from the carriageway and trams, © Public Domain. [47]
A view Northeast along Via Milano before the widening of the highway and its renaming as Via Bruno Buozzi. [49]
A later view of Via Milano/Via Bruno Buozzi with tramway tracks in the centre of the widened carriageway, © Public Domain. [46]
Somewhat later in the 20th century and taken a little further to the West, this postcard image shows the same centre-of-carriageway tracks the section of Via Milano seen here was renamed Via Bruno Buozzi. [45]
Via Bruno Buozzi in the 21st century. [Google Streetview, August 2024]
This extract from the same 1916 map shows the line of the Galleria which carried the tramway West towards San Pier d’Arena (Sampierdarena). [31]
The view back towards the centre of Genoa from the point where the tramway turned to run through the Galleria under San Benigno Hill, © Public Domain. [48]
It is difficult, given the modern layout of this area of Genoa, to be definitive about the location of the monochrome image immediately above. This image is taken from a very similar position. The skyline at the rear of this image is a very good match for that in the image above.  [Google Streetview, May 2014]
The tramway turned to the right to enter the tunnel under San Benigno Hill. The tunnel portal was beyond the end of the masonry wall behind the steeply inclined accessed road onto the hill. There is no practical modern equivalent to this view, © Public Domain.  [44]

Pictures of the Galleria can be seen earlier in this article.

West of the Galleria, the original tramway ran along what is now Via Giacomo Buranello (what was Via Vittorio Emanuele) to Sampierdarena. This route appears to the North of the SS1 on the satellite image below.

In this extract from Google’s satellite imagery Sampierdarena is marked top left. The modern SS1 runs along the line of what was Via Milano. Careful inspection of this image shows the railway sidings which remain on the South side of the SS1.
Via Vittorio Emanuele (later Via Giacomo Buranello) looking West, (c) Public Domain. [93]
The same view in the 21st century. [Google Streetview, August 2024]
Looking West, Sampierdarena, Piazza Vittorio Veneto. A tram is arriving in the Piazza from the West. It has travelled along Via Cornigliano, © Public Domain. [50]
A view of Piazza Vittorio Veneto from a similar bearing, but this time at ground level in 21st century
  Via Cornigliano leaves the Piazza to the left rear. [Google Streetview, August 2024]

Before looking at line further West from Sampierdarena we need to note a line which was added to the network before WW1.

A second tramway was built which ran alongside the railway sidings on what is now the SS1, it was then Via Milano, towards Sampierdarena. The route is illustrated by the mid-20th century view below.

Trams on Via Milano/Via Sampierdarena – in this image, the tracks of the Genoese port can be seen, populated by a range of FS goods wagons. Two 900 UITE units are passing each other on tram tracks which occupy the centre of Via Milano, © Public Domain. [36]
Looking East along the SS1 during some major roadworks. The railway sidings are just off to the right side of the photograph. [Google Streetview, August 2024]

That route along Via Sampierdarena (Via Milano and Via Colombo) and then Via Pacinotti is illustrated at the bottom of the map below. After running along the centre of Via Sampierdarena, trams turned inland, heading Northwest to join the earlier route, West of Piazza Vittorio Veneto on Via Pacinotti.

A map provided by the Marklinfan.com Forum which shows the new coastal tram route mentioned above. [92]

The Western Network’s Coastal Line(s)

At Sampierdarena the original lines of the Western network separated. Some lines continuing along the coast and others turning inland. The lines diverged at the West end of Piazza Vittorio Veneto. The coastal line ran along what is today Via Frederico Avio, then turned onto what is now Via Antonio Pacinotti, before turning West on what is now Via Raffaele Pieragostini, crossing the River Polcevera at Ponte di Cornigliano, running along Via Giovanni Ansaldo before joining Via Cornigliano at Piazza Andrea Massena.

This image shows the tramway at what is now the junction between Via Frederico Avio (entering bottom right) and Via Antonio Pacinotti (which heads away from the camera). At the time this was Via Garibaldi. (c) Public Domain. [61]
The same location in the 21st century. The vacant lot is the location of the building on the right of the monochrome image above. [Google Streetview, August 2024]
This mid-20th century postcard view shows trams following Via Cornigliano West of Piazza Massena, © Public Domain. [50]
Piazza Massena at the East end of Via Cornigliano as it appears in the 21st century. The tramway followed Via Cornigliano round to the left ahead. [Google Streetview, August 2024]
Another view of Piazza Massena in Cornigliano. This image was shared on the C’era una volta Genova Facebook Group by Gianfranco Dell’Oro Bussetti on 8th March 2017, (c) Public Domain. [2]
A similar view of Piazza Massena in 2024. [Google Streetview, August 2024]
Looking West along Via Cornigliano to the West of San Pier d’Arena (Sampierdarena), © Public Domain. [36]
The same location in the 21st century. [Google Streetview, August 2024]
The route West followed the yellow road on this extract from Google Maps satellite imagery. A modern flyover takes the present SS1 over the railway. The original route of the tramway follo
Two images which show the metre-gauge tramway crossing the standard-gauge railway, © Public Domain. [4]
The tramway/road underpass built in the 1930s. A significant amount of excavation was required to take trams under the railway, © Public Domain.[5]
Looking West along the line of the Tramway towards the underpass in the 21st century
Looking back Northeast towards the underpass in the 21st century.[Google Streetview, Aug 2024]
Tram No. 999, the last of the UITE series, is in transit on the Pegli seafront, in service on Line No. 1, Caricamento to Voltri. Miramare Castle is on the sea front. The Castle is in use as a hotel in the 21st century, © Public Domain. [50]
Lungomare di Pegli (SS1) and Miramare Castle in the 21st century. [Google Streetview, August 2024]
This photograph was taken from Miramare Castle. A 900 series tram is heading West and a tram is approaching from the West.  [50]
A similar view, taken from a point a little further to the West, in 21st century
Looking East at Pegli 1925. [58]
At ground level in the 21st century. Looking East from a similar location on the SS1( Via Pegli). [Google Streetview, August 2024]
The terminus of some tram routes at Pegli!, (c) Public Domain. [91]
The same location in the 21st century. [Google Streetview, August 2024]

Beyond Pegli, only Line No. 1 travelled on to Voltri. These next few photographs were taken in Voltri.

An early view West towards Voltri along Via Voltri. [52]
The same location in the 21st century. [Google Streetview, August 2024]
The tramway outside Voltri Railway Station, © Public Domain. [60]
The same location in the 21st century. [Google Streetview, August 2024]
Looking East along Via Dom Giovanni Verita towards Genova, © Public Domain. [51]
The same location in 21st century. The station building can be seen on the right of the image. [Google Streetview, August 2024
Back in the day, Via Dom Giovanni Verita was Corsa Garibaldi. This view looks East along the road towards the railway station. The buildings in the distance match those in the two images above., © Public Domain. [43]
Looking West on Via Dom Giovanni Verita, the station building is just beyond the red lorry cab. The three roofs of the furthest buildings are the same as those in the three images above. [Google Streetview, August 2024]
Looking West across the bridge on Don Giovanni Verita, Voltri, early in the 20th century, © Public Domain. [54]
The same location, looking West. [Google Streetview, August 2024]
Looking West along Via Carlo Camozzini, Voltri in the mid-20th century, © Public Domain. [57]
Looking West from a very similar location on Via Carlo Camozzini. [Google Streetview, August 2024]

The tram depot was in Voltri close to the mouth of the River Cerusa (below).

The bridge in this image spans the mouth of the Cerusa River. The photograph looks East towards Genoa. The building just beyond the river on a platform above the beach is the Tram Depot. There are clearly tram tracks running towards the camera which suggests that the line’s terminus was to the West of the Cerusa River. [56]
The same view in the 21st century. [Google Streetview, August 2024]
The tram depot in Voltri seen from the Northeast. The bridge over the River Cerusa is off to the right o, © Public Domain. [55]

We have followed the Western Network as far as we can along the coast. We now need to look at the line(s) of the Western network which ran up the valley of the River Polcevera from Sampierdarena.

To do this we need to return to Piazza Vittorio Veneto in Sampierdarena.

The Western Network and Val Polcevera (the Valley of the River Polcevera)

The lines to the North left Piazza Vittorio Veneto at its Western end, passing immediately through an underpass under the FS Standard Gauge railway.

In the 19th century the route was known as ‘Via Vittorio Emanuele’. In the early years of the 20th century the road was renamed ‘Via Umberto 1’. In 1935, the city gave the road the name ‘Via Milite Ignoto’ (the Unknown Soldier). This decision appears to have been short-live as very soon the road was divided into two lengths, the more southerly length becoming ‘Via Martiri Fascisti’, the remaining length, ‘Via delle Corporazioni’. After the end of Word War Two renaming again occurred. In 1945 the names which continue to be used in the 21st century were chosen – ‘Via Paolo Reti’ and ‘Via Walter Fillak ‘. Fillak and Reti were partisans in WW2. [59][66]

A view from above … This is Piazza (Via) Vittorio Emanuele seen from the West. The tram tracks can be seen heading away through the underpass in the foreground. [75]

The route of this part of the old tramway network begins at this rail underpass (where the street is now named, ‘Piazza Nicolo Montano’, having once been Via Nino Bixio), [65] before running along Via Paolo Reti and then Via Walter Fillak. Just beyond the underpass the railway station access left the road on the left. The first old postcard views below show this location.

Two pixelated, low definition images showing the bottom end of what was Via Umberto 1. One the left in both images is the incline leading to the Sampierdarena Railway Station forecourt. [59]
A tram sits at a stop at Piazza Montano. This image was shared on the Foto Genova Antica Facebook Group by Annamaria Patti on 22nd May 2022. [3]
Three further postcard views, of better quality, of the bottom end of Via Umberto 1, (c) Public Domain. [59][62][63]
The view to the Northeast from the rail underpass in 2024. The station approach is on the left. The old tramway curved round to the left below the station approach’s retaining wall. [Google Streetview, August 2024]
Just a little further along the old tram route. The retaining wall on the left supports the station approach road. The tramway ran on along what is now Via Paolo Reti. For some distance the road was flanked by a retaining wall supporting the FS standard-gauge railway. [Google Streetview, August 2024]

The adjacent Google satellite image shows roads over which the old tramway ran. In the bottom right is Piazza Nicolo Montano. It is also possible to make out the station approach ramp which has a number of cars parked on it. In the immediate vicinity of the passenger railway station, railway buildings can be seen separating Via Paolo Reti from the railway but very soon the road and the railway run side-by-side with the railway perhaps 2 to 3 metres above the road. Via Eustachio Degola passes under the railway just to the North of the station buildings. Towards the top of the satellite image, Via Paolo Reti can be seen turning away from the railway wall. [Google Maps, December 2024]

Via Paolo Reti (the former Via Umberto 1) turns away from the railway wall which is now much lower than it was near the station buildings. [Google Streetview, August 2024]
Via Umberto 1, looking North from the bend visible in the photograph above where the road leaves the side of the railway, (c) Public Domain. [68]
Via Paolo Reti (once Via Umberto 1) at the same location as the monochrome image above. [Google Streetview, August 2024]

The monochrome image below purports to show Piazza San Marino. As far as I can work out the piazza was historically, ‘Piazza Vittorio Emanuele III’ and later renamed for another partisan from World War 2 – ‘Piazza Ricardo Masnata’.

A relatively low quality image of Piazza San Marino and Via Umberto 1. The piazza later became Piazza Ricardo Masnata. This view looks North with a tram visible on the left, (c) Public Domain. [64]
Piazza Ricardo Masnata, looking North. There is little to link this image from 2024 with the monochrome image above, other than the alignment of the roads and the shape of the piazza. However, at the centre of this image is a lower building which also appears in the monochrome image. [Google Streetview, August 2024]
Via Umberto 1 looking North from what became Piazza Ricardo Masnata, (c) Public Domain. [67]
The same location in the 21st century. [G
Via Umberto 1, now Via Walter Fillak with a tram heading towards Genoa. [69]
The same location on Via Walter Fillak in the 21st century. [Google Streetview, August 2024]

The line from Sampierdarena ran towards Certosa where, once Galleria Certosa was completed, it met the line through the tunnel.

A satellite view of Certosa. Trams approached the centre of Certosa from the South-southwest on Via Walter Fillak, from the Southeast on Via Beedetto Brin and from the Northnorthwest on Via Germano Jori. [Google Maps, December 2024]
Galleria Certosa can be seen in the right background of this image. The tram is turning towards the underpass beneath the FS standard-gauge railway, © Public Domain. [72]
A similar view in the 21st century. The Metro station at Brin is at the high level. [Google Streetview, October 2020]
A tram has just passed under the railway (on Via Benedetto Brin) and is approaching the junction with Via Germano Jori (then Umberto 1) and Via Teresio Mario Canepari, © Collection of Stefano Finauri, Public Domain. [73]
A very similar view in the 21st century. [Google Streetview, August 2024]
A mid-20th century postcard view, looking North from junction between Via Germano Jori and Via Teresio Mario Canepari. A tram is heading South along Via Germano Jori, © Public Domain. []
The same view in the 21st century, at the junction of Via Germano Jori, Via Teresio Mario Canepari and Via Benedetto Brin. [Google Streetview, August 2024]
Piazza Errico Petrella looking South, Via Germaon Jori is on the left, Via Certosa on the right. A tram can be seen in the distance at the junction of Via Germano Jori with Via Benedetto Brin and Via Walter Fillak. [74]
Looking South from Piazza Errico Petrella with Via Germano Jori ahead and Via Certosa behind the white canopies to the right. [Google Streetview, August 2024]
A tram on Via Umberto 1 in Certosa. It is difficult to locate this photograph in the 21st century as much of the built environment has changed but it is most likely a view North from Piazza Errico Petrella, © Public Domain. [53]
This is a possible location for the monochrome image above. This view looks North from Piazza Errico Petrella, the street geometry is similar, but the buildings do not match. In Certosa, northbound and southbound traffic is separated. This is Via Germano Jori. [Google Streetview, August 2024]
Looking South from the bridge over the River Torbella. The building on the right is the
Biblioteca Civica – Cervetto Rivarolo. Trams ran over this bridge and along Via Germano Jori which is the right fork in the road ahead. [Google Streetview, August 2024]
Looking North from the bridge over the Torbella river which separated Certosa from Rivarolo (Superior). This image was shared on the C’era una volta Genova Facebook Group by Luca Dasso on 17th December 2020, (c) Public Domain. [76]
A tram at the same location in the early 20th century. This image was shared on the C’era una volta Genova Facebook Group by Robert Cito on 19th October 2023, (c) Public Domain. [78]
A similar view North from the bridge over the River Torbella in the 21st century. [Google Streetview, August 2024]
This is a 1905 photograph looking North on Via Gioachino Rossini close to its junction with Via alla Stazione di Rivarolo (on the left). This image was shared on the C’era una volta Genova Facebook Group by Luca Dasso on 24th July 2018, (c) Public Domain. [81]
Continuing North through Rivarolo on what was still in the early years of the 20th century, Via Umberto 1. Tram No. 6 is heading for Bolzaneto. This image was shared on the C’era una volta Genova Facebook Group by Robert Cito on 18th October 2023. It is again difficult to accurately locate this image. A bridge similar to that shown on this photo remains but the landscape around it seems much altered, (c) Public Domain. [77]
This extract from a file based on openstreetmap.org shows the remaining length of the tramway, from Rivarolo through Bolzaneto and San Quirico to Pontedecimo, (c) Arbalete, and authorised for reuse under a Creative Commons Licence (CC BY-SA 3.0). [19]

The tramway followed Via Celesia through Rivarolo (Superior). Rivarolo and Via Celesia can be seen at the bottom of this extract from openstreetmap.org. [79]

This image from the early 20th century looks North along Via Celesia. Space on the street was clearly at a premium! [80]
Via Celesia in the 21st century. [Google Streetview, August 2024]

North of Via Celesia, the tramway ran along Via Rivarolo.

This postcard shows the junction at the North end of Via Celesia, circa. 1920s. Via Rivarolo is ahead. This image was shared on the C’era una volta Genova Facebook Group by Mario Vanni on 18th August 2019, (c) Public Domain. [82]
The smae location in the 21st century. [Google Streeetview, August 2024]
This next extract from openstreetmap.org shows Via Rivarolo entering bottom-left. Trams ran on into Teglia on Via Teglia and continued on to Bolzaneto (in the top-right of this extract) along Via Constantino Reta. [79]
This postcard view looks South along what is now Via Teglia (then Via Regina Margherita. This image was shared on the C’era una volta Genova Facebook Group by Elio Berneri on 19th October 2020, (c) Public Domain. [83]
A very similar view at the same location in the 21st century. [Google Streetview, August 2024]
Car 906 in service on line 7 Caricamento – Pontedecimo, one of the longest of the UITE, is seen here running in Bolzaneto. The photograph was taken facing North. In the background you can see another Tramcar, as well as a third on the track in the opposite direction, (c) Public Domain. [84]
A similar North facing view in Bolzaneto in the 21st century. [Google Streetview, August 2024]
A tram waits at Piazza del Municipio in Bolzaneto. This image was shared by Mario Vanni on the C’era una volta Genova Facebook Group on 8th July 2021, (c) Public Domain. [85]
A very similat view of the same location in the 21st century. The road on which the bus is standing is now known as Via Pasquale Pastorino. [Google Streetview, August 2024]
A few hundred metres to the Northeast is the area known as ‘Bratte’. A tram waits in the mid-20th century to set off for Caricamento. This image was shared on the C’era una volta Genova Facebook Group by Roberto Della Rocca on 12th December 2020. [86]
A similar view at the same location in the 21st century. [Google Streetview, August 2024]

North of Bratte, Trams crossed the River Secca, a tributary of the Polcevera, following Via Ferriere Bruzzo and then continued North alongside the River Polcevera on Via San Quirico.

Tram No 79 leads a trailer car South on Via San Quirico in the first decades of the 20th century. It seems as though Ponte Tullio Barbieri can be seen behind the tram. This image was shared by Sergio De Nicolai on the C’era una volta Genova Facebook Group on 21st October 2018. [88]
A similar location on Via San Quirico in the 21st century. [Google Streetview, July 2022]

Trams passed under the FS Standard-gauge lines close to Ponte Tullio Barbieri. [Google Streetview, June 2022]
Trams ran on through the centre on San Quirico on Via San Quirico.
Before returning to the side of the river, passing under the railway again. [Google Streetview, July 2022]

The next length of the journey is the last. Trams terminated at Pontedecimo. [79]

A tram and trailercar on Lungo Polcevera in Pontedecimo close to Pontedecimo Railway Station, This image was taken looking South along the river bank and was shared by Giorgio Gioli on the C’era una volta Genova Facebook Group on 4th November 2020. [89]
This view looks South along the bank of the River Polcevera at a location similar to that in the image above. [Googler Streetview, January 2021]
The central piazza in Pontedecimo. The terminus of the tram service. This image was shared on the C’era una volta Genova Facebook Group by Roberto Cito on 29th October 2023. [87]
Trams terminated in Pontedecimo. [Google Streetview, July 2022]
The tram depot at Pontedecimo. This image was shared on the C’era una volta Genova Facebook Group by Alessandro Lombardo on 30th October 2019. [90]

References

  1. https://commons.m.wikimedia.org/wiki/File:Genova,_piazza_De_Ferrari_with_tram.jpg, accessed on 10th November 2024.
  2. https://www.facebook.com/photo/?fbid=1401973673209093&set=gm.1438159026228377, accessed on 4th December 2024.
  3. https://www.facebook.com/photo/?fbid=10225181204176020&set=pcb.4980915058674284, accessed on 4th December 2024.
  4. https://www.facebook.com/share/p/uff2Q5eUj27cv1zK, accessed on 4th December2024
  5. https://www.facebook.com/share/p/XS39hojRUKuee7Fk, accessed on 4th December 2024.
  6. Not used
  7. https://www.guidadigenova.it/storia-genova/portoria-piccapietra, accessed on 14th November 2024.
  8. http://www1.palazzoducale.genova.it/storiche/storica10, accessed on 14th November 2024.
  9. https://www.facebook.com/groups/gianfranco.curatolo/permalink/4283487231695528/?app=fbl, accessed on 14th November 2024.
  10. https://commons.m.wikimedia.org/wiki/File:Genoa_1886_-_Italy_handbook_for_travellers.jpg, accessed on 15th November 2024.
  11. https://commons.m.wikimedia.org/wiki/File:Genoa_1906_-_Italy_handbook_for_travellers.jpg, accessed on 15th November 2024.
  12. https://commons.m.wikimedia.org/wiki/File:Genova_italy_1913.jpg, accessed on 15th November 2024.
  13. https://www.stagniweb.it/foto6.asp?File=tram_ge&Inizio=1&Righe=1&InizioI=1&RigheI=50&Col=5, accessed on 15th November 2024.
  14. https://www.collectoravenue.it/index.php/en/shop/cartolinagenovapiazzacorvettotram194033892-detail, accessed on 15th November 2024.
  15. https://www.ebay.co.uk/itm/152214705370?mkcid=16&mkevt=1&mkrid=711-127632-2357-0&ssspo=JNiy4OlNSAG&sssrc=4429486&ssuid=afQhrar7TGK&var=&widget_ver=artemis&media=COPY, accessed on 15th November 2024.
  16. https://en.m.wikipedia.org/wiki/AMT_Genova, accessed on 15th November 2024.
  17. Storia [History] (in Italian). AMT Genova; https://www.amt.genova.it/amt/amt-istituzionale/storia, accessed on 15th November 2024.
  18. http://www.uwrbancenter.comune.genova.it/sites/default/files/quaderno_arch_2011_03_21.pdf, accessed on 16th November 2024.
  19. Rete tranviaria di Genova; https://it.wikipedia.org/wiki/Rete_tranviaria_di_Genova, accessed on 26th November 2024.
  20. AMT (ed.); History of public transport in Genoa; Genoa, SAGEP Editrice, 1980.
  21. Paolo Gassani; Photo history of the tramway in Genoa , Genoa, Nuova Editrice Genovese, 1982.
  22. https://it.m.wikipedia.org/wiki/Galleria_Certosa, accessed on 27th November 2024.
  23. https://www.facebook.com/share/yMAPjmu6yE9CdhCt, accessed on 27th November 2024.
  24. https://www.lapolcevera.it/news/id/2352/cat/0/tip/1/Quando-da-Certosa-si-arrivava-a-Dinegro-con-il-tram-.html, accessed on 27th November 2024.
  25. https://dearmissfletcher.com/tag/galleria-giuseppe-garibaldi, accessed on 27th November 2024.
  26. https://www.facebook.com/groups/gianfranco.curatolo/permalink/8064067336970813/?app=fbl, accessed on 27th November 2024.
  27. https://m.wikidata.org/wiki/Q57466295, accessed on 28th November 2024.
  28. https://uk.pinterest.com/mantero1059, accessed on 28th November 2024.
  29. https://pastvu.com/p/720638, accessed on 28th November 2024.
  30. https://www.genovacollezioni.it/Default.aspx?q=CARTOLINE%20PAESAGGISTICHE&t=GALLERIA%20REGINA%20ELENA, accessed on 28th November 2024.
  31. https://ceraunavoltagenova.blogspot.com/2014/10/piazza-caricamento.html?m=1, accessed on 28th November 2024.
  32. https://ceraunavoltagenova.blogspot.it, accessed on 28th November 2024
  33. https://www.facebook.com/groups/fotogenovaantica/permalink/5685345834897866/?app=fbl, accessed on 28th November 2024.
  34. https://www.facebook.com/groups/fotogenovaantica/permalink/6981769868588783/?app=fbl, accessed on 28th November 2024.
  35. https://www.facebook.com/share/p/drRbQXEGcmKJdz6A/?, accessed on 28th November 2024.
  36. https://www.stagniweb.it/foto6.asp?File=tram_ge&Inizio=1&Righe=10&InizioI=1&RigheI=50&Col=5, accessed on 29th November 2024.
  37. https://www.facebook.com/share/p/FMgB1iVAaWiPNnKh, accessed on 29th November 2024.
  38. https://jenikirbyhistory.getarchive.net/topics/tram+transport+in+genoa, accessed on 29th November 2024.
  39. https://www.facebook.com/share/p/d9oFanfv5vD5WaiNhttps://www.facebook.com/share/p/d9oFanfv5vD5WaiN/, accessed on 29th November 2024.
  40. https://www.facebook.com/share/p/wYt15NoX8Mr9ypWg, accessed on 30th November 2024.
  41. https://images.app.goo.gl/gsrU1q3rJALvZngS7, accessed on 30th November 2024.
  42. https://www.guidadigenova.it/en/museums-genoa, accessed on 30th November.
  43. https://uk.pinterest.com/antoniettasatta48, accessed on 30th November 2024.
  44. http://www.sanpierdarena.net/Miani.htm, accessed on 30th November 2024.
  45. https://www.stagniweb.it/foto6.asp?File=l_cart&righe=1&inizio=31&InizioI=1&RigheI=50&Col=5, accessed on 30th November 2024.
  46. https://genovaquotidiana.com/2019/01/18/via-buozzi-il-civ-fa-capitozzare-gli-oleandri-e-rivendica-il-gesto-su-facebook-ma-e-un-reato, accessed on 30th November 2024.
  47. https://www.facebook.com/share/p/ZWYfrGt7G1939S9u, accessed on 30th November 2024.
  48. https://it.pinterest.com/pin/484981453600622954, accessed on 30th November 2024.
  49. https://www.genovacollezioni.it/Default.aspx?q=CARTOLINE%20PAESAGGISTICHE/LE%20VIE%20%28GENOVA%29, accessed on 30th November 2024.
  50. Not used
  51. https://www.ebay.co.uk/itm/115763406405?mkcid=16&mkevt=1&mkrid=711-127632-2357-0&ssspo=Fbvtwm00Q0S&sssrc=4429486&ssuid=afQhrar7TGK&var=&widget_ver=artemis&media=COPY, accessed on 1st December 2024.
  52. https://picclick.it/GENOVA-VOLTRI-Autostrada-355749405047.html, accessed on 1st December 2024.
  53. https://www.facebook.com/groups/fotogenovaantica/permalink/8344927118939711/?app=fbl, accessed on 1st December 2024.
  54. https://www.facebook.com/share/p/6tSJoFzSasA4xmu3, accessed on 1st December 2024.
  55. https://www.facebook.com/share/p/zEf2KTXYZhPjguZX, accessed on 1st December 2024.
  56. https://www.facebook.com/share/p/4hRGt2WPmqNiZVbp, accessed on 1st December 2024.
  57. https://www.facebook.com/share/p/aGd9JKEJxxSRn9ia, accessed on 1st December 2024.
  58. https://www.facebook.com/share/p/idwwKc9CdoGfQZJw, accessed on 1st December 2024.
  59. http://www.sanpierdarena.net/Umberto%20I%20via.htm, accessed on 1st December 2024.
  60. https://www.facebook.com/share/p/HHN7WWEPXs9oNcEo, accessed on 1st December 2024.
  61. http://www.sanpierdarena.net/Garibaldi%20%20via.htm, accessed on 2nd December 2024.
  62. https://en.todocoleccion.net/postcards-europe/italia-sampierdarena-tranvia-via-umberto-i-postal-ano-1924~x354863523, accessed on 2nd December 2024.
  63. https://www.ade-commerce.com/genova/11488-444.html, accessed on 2nd December 2024.
  64. https://www.ebay.it/itm/174536201862, accessed on 2nd December 2024.
  65. http://www.sanpierdarena.net/Bixio%20Nino.htm, accessed on 2nd December 2024.
  66. http://www.sanpierdarena.net/MASNATA%20piazza%20.htm, accessed on 2nd December 2024.
  67. https://www.ebay.it/itm/224002923884, accessed on 2nd December 2024.
  68. https://www.ebay.it/itm/254349164553, accessed on 2nd December 2024.
  69. https://www.ebay.it/itm/393235493801, accessed on 2nd December 2024.
  70. https://www.facebook.com/share/p/An4Vodj6noSjruUM, accessed on 2nd December 2024.
  71. https://www.facebook.com/share/p/CYT3Wkb6YWLbAT24, accessed on 2nd December 2024.
  72. https://www.ebay.co.uk/itm/350908506772, accessed on 3rd December 2024.
  73. https://www.facebook.com/share/p/DXjPiBiqC7sCL643, accessed on 3rd February 2024.
  74. https://picclick.it/44459-Genova-Certosa-Rivarolo-Panorama-151828747218.html, accessed on 3rd December 2024.
  75. https://www.facebook.com/photo/?fbid=10232988450560527&set=gm.7724149347629282&idorvanity=903038299740455&__cft__[0]=AZVr5xtKCXiMxS-c4pGOUE3YGYCwwYGpM43-lfcKbcKTSCD-BJe-fmJqn0qZfyk9TQED9y_VPuVRzq39J0bFbkLKoFGz6kOLg0891_K6_MOv0Iq1Ppxm6nLu6CcX01puDbgn7DQaGoOiSU3LQ-XfdPP8CaXDW7hbVVaj06T_R6VqX7IqYNr9LOS5PfXk2EZygGbITURlAhuoWhjV1VaQ1mLb&__tn__=EH-R, accessed on 3rd December 2024.
  76. https://www.facebook.com/photo?fbid=3861773430513069&set=pcb.3821731724537750, accessed on 3rd December 2024.
  77. https://www.facebook.com/photo?fbid=299207253067928&set=pcb.7027731573937733, accessed on 3rd December 2024.
  78. https://www.facebook.com/photo/?fbid=299896119665708&set=pcb.7032010463509844, accessed on 3rd December 2024.
  79. https://www.openstreetmap.org/search?query=genova#map=13/44.47342/8.90957, accessed on 3rd December 2024.
  80. https://www.facebook.com/share/p/qf1DLAhNoiuB3JbA, accessed on 3rd December 2024.
  81. https://www.facebook.com/photo/?fbid=2032824086741355&set=gm.1992781060766168, accessed on 3rd December 2024.
  82. https://www.facebook.com/photo/?fbid=1285825284920697&set=gm.2607205412657060, accessed on 3rd December 2024.
  83. https://www.facebook.com/photo/?fbid=3732530906786449&set=gm.3658399444204313, accessed on 3rd December 2024.
  84. https://www.stagniweb.it/foto6.asp?File=tram_ge&Inizio=5&Righe=10&InizioI=1&RigheI=50&Col=5, accessed on 3rd December 2024.
  85. https://www.facebook.com/photo?fbid=1877966582373228&set=pcb.4394846693892914, accessed on 3rd December 2024.
  86. https://www.facebook.com/photo/?fbid=10218412266399363&set=gm.3808759165835006, accessed on 3rd December 2024.
  87. https://www.facebook.com/photo/?fbid=306188622369791&set=pcb.7071692396208317, accessed on 3rd December 2024.
  88. https://www.facebook.com/photo/?fbid=469944593414846&set=gm.1813515448747610, accessed on 3rd December 2024.
  89. https://www.facebook.com/photo/?fbid=10217065604864645&set=gm.3704153626295561, accessed on 3rd December 2024.
  90. https://www.facebook.com/photo/?fbid=2406380456348447&set=gm.2755847204459546, accessed on 3rd December 2024.
  91. https://commons.wikimedia.org/wiki/File:Genova_Pegli,_tramway_terminus.jpg, accessed on 10th December 2024.
  92. https://www.marklinfan.com/f/topic.asp?TOPIC_ID=4530&whichpage=1, accessed on 16th December 2024.
  93. https://www.facebook.com/photo/?fbid=851357163339749&set=gm.6796097163822722&idorvanity=574539035978597, accessed on 16th December 2024.

The Burton and Ashby Light Railway – Part 1

An article by Seymour Glendenning in the July 1906 issue of The Railway Magazine focussed on the newly opened Burton & Ashby Light Railway. [1]

The light railway was a 3ft 6in gauge electric tram line supplied with electricity from a diesel generator plant near Swadlincote. [17] The power plant sat alongside the tram depot. [1: p56]

Glendenning explains that the rail network in the area between Burton and Ashby-de-la-Zouch was, of necessity design round the topography of South Derbyshire which resulted in the Midland Railway bypassing some significant industry and associated communities. A branch, built by the Midland Railway, off the main line penetrated the South Derbyshire Hills to serve Bretby Colliery. Another Midland Railway branch line described a rough horseshoe alignment, leaving the mainline not far from the Bretby Colliery line. This second branch served Newhall, Swadlincote and Woodville with a short branch designated as the Woodville Goods Branch.

This network of lines meant that the journey from Burton to Ashby was longer than the two towns might have hoped, and that transport to and from Ashby and Burton and the villages in the hills was much longer than it might be if an alternative could be designed which could cope with the steeper gradients necessary on a more direct route.

Initially local interests brought a bill before Parliament for the construction of a Light Railway. The Midland Railway opposed the bill which was then withdrawn with the Midland Railway agreeing to construct the line. Glendenning notes that it took only two years from the Midland’s agreement to carry out the project to its completion in 1906.

The Light Railways was “an electric railway, laid upon the public highway, with stopping places at all penny stages and intermediate points, while the various villages and towns through which it passes will practically serve as stations. … [Some] of the line … resembles that of a branch railway, fenced or hedged in on either side, this being necessary in consequence of short cuts across fields or garden plots. … The electric current is taken from an overhead cable, suspended from steel poles or standards, placed at frequent intervals along the line of route.” [1: p54]

Two photographs which look along lengths of the Light Railway which run remote from local highways. The image above illustrates some severe gradients close to Bretby and is taken looking towards what eventually became the A511. The one below shows a cattle grid and fencing to the East of Bretby Road looking towards Newhall. Both © S. Glendenning,  1906. [1: p55]

Glendenning tells us that “the greater part of the track [was] laid singly and on one side of the public highway, a double road being laid at frequent intervals to serve as crossing places. An enormous expense, however, [was] incurred in widenings and clearance. For nearly half-a-mile in Newhall the street … had to be widened, involving the demolition of a number of houses and the clearing away of numerous front gardens. In Ashby itself, also, where the tram [had] to take some very abrupt curves on its tortuous way to the station, valuable property [was] cleared away in Bath Street and Market Street, in order to afford a safe route for the cars.” [1: p54]

The route of the line(s) is shown in black on the map extract below.

The Burton and Ashby Light Railway. [2]
The Light Railway alongside the road to the East of Burton – 569 ft. above sea level, © S. Glendenning. [1: p56]

The line runs through 3 counties – Staffordshire, Derbyshire and Leicestershire. In 1906, Glendenning starts to describe the route:

At the western extremity is Burton, with its huge breweries which supply a great part of the world’s beer. It was intended at first that, after crossing the Trent Bridge, the railway should leave Burton up a steep slope between the Winshill and Stapenhill roads, but eventually it was mutually agreed between the town and the railway that the Corporation track should be used as far as Winshill. The new line, therefore, begins at High Bank Road, with a very deep curved gradient up to Moat Bank, where a height of 250 ft. above Burton is reached. A fine stretch of hilly country then opens to view, with Brizlincote Hall on the right; next the line dips 60 ft. to cross a lateral valley. Then it rises again, and follows a number of switchback undulations until it enters Newhall, which is 400 ft. above ordnance survey datum line. Newhall furnishes a strong contrast to the fair country west of it. Collieries, brick yards, and pipe works abound. Newhall displays the characteristics of mining villages, i.e., it is dingy, squalid, and untidy. However, its teeming population will doubtless find the new line a very great convenience, both for business and pleasure purposes, and there seems little doubt but what the Midland Railway Company will reap a continued harvest of fares from the thousands of miners and their families. From Newhall, the level of the track gradually descends until it is below 200 ft., and then leaves the Ashby main road to take a right-angled turn into Swadlincote. Here the line, after going due south for a time, is carried over the old railway the single loop to Swadlincote and Woodville before mentioned on a long bridge of steel girders, resting on blue brick piers. The bridge [as can be seen below] has a switchback appearance, while the [second view below] taken from Swadlincote goods yard, shows a Midland Railway train passing under [the bridge there]. Shortly after crossing the bridge the track takes an abrupt turn to the left, in order to resume its eastward direction. At the same place, there is a branch about two miles long, going first south and then south-west to Gresley. The road towards Ashby rises continuously until it reaches a height of 569 ft. above sea level. It passes through the heart of the Derbyshire Potteries, where a great industry is carried on in the manufacture of furnace bricks, sanitary pipes, and common earthenware. Furnaces and kilns abound in Swadlincote, and the subsidiary industry of crate making is also much in evidence.” [1: p54-55]

The bridge over the Midland Railway at Swadlincote with light railway construction close to completion, © S. Glendenning. The tram depot and the generating house can be see on the right side of this image[1: p54]

Before continuing to follow Glendenning’s description of the line East from Swadlincote, it is worth looking at the first part of the line already described by Glendenning on contemporary mapping from the early 20th century, and as it appears in the 21st century.

The Burton terminus of the line was in Wellington Street, although as we have already noted the route within Burton ran not on Midland Railway metals but on those of the Corporation.

Burton-on-Trent’s tramway network opened on 3rd August 1903. “The system comprised four routes going out from Station Street to Horninglow, Branston Road, Stapenhill, and Winshill. The depot was in Horninglow Road. … The initial 20 tramcars were built by the Electric Railway & Tramway Carriage Works of Preston. A further four cars were obtained in 1919. … The system was closed on 31 December 1929.” [3]

The Burton-on-Trent tramway network. The terminus of the Burton and Ashby Light Railway was to the West of the railway station which sits, in the adjacent map extract, below the second ‘n’ of Burton-on-Trent. The terminus of the tramway was close to the Town Hall on Wellington Street, just beneath the second ‘o’ of Burton-on-Trent.

The terminus of the Burton and Ashby Light Railway was outside the post office on Wellington Street, just a stone’s throw from Burton Town Hall and the railway station just a short distance to the Southeast. The lilac line superimposed on the 1920 25″ OS map (published in 1922), shows the route of the line which ran along the town’s tramway network. [4]
The same area in the 21st century. [Google Earth, October 2024]
The railway station, seen from the Northwest in 1927. Burton-on-Trent Railway Station Passenger Facilities were at road level above the station platforms. Borough Road ran across the front of the station building, at the centre of this extract from Britain From Above aerial image No. EPW019724. The route followed by trams from the Burton and Ashby Light Railway started off the bottom of the image on Wellington Street and followed Borough Road. [11]
The 1920 25″ OS mapping shows the route continuing along Station Street and turning up High Street. [5]
Approximately the same area in the 21st century. [Google Earth, October 2024]
Burton and Ashby Light Railway trams continued Northeast on High Street. [6]
The Light Railway trams continued to follow the track of the Corporation Tramways across Trent Bridge. [7]
The Light Railway’s trams continued to the East along Bearwood Hill Road. [7]
Trent Bridge and Bearwood Hill Road to the East.

A series of images showing Trent Bridge in tramway days follows below.

Electric Tram on Trent Bridge, © Public Domain. [10]
Electric Tram on Trent Bridge, © Public Domain.[10]
The view West across Trent Bridge towards the centre of Burton-on-Trent during roadworks in 2018. These historic tram tracks were used by the trams of both the Corporation and the Burton and Ashby Light Railway. [8]
The Lilac line shows the Burton Corporation Tramway route with the vivid green line marking the route of the Burton and Ashby Light Railway after it turned South along High Bank Road. [7]
A similar area in the 21st century – Bearwood Hill Road and High Bank Road Junction. [Google Earth, October 2024]
High Bank Road turns to the East and rises to meet Ashby Road (A5110. [12]
Ashby Road (A511). Both these map extract come form the 1920 revision of the 25″ Ordnance Survey. [12]
Approximately the same area as is covered by the two 1920 25″ OS map map extracts above. [Google Maps, October 2024]
Trams ran up/down the centre of High Bank Road. This photograph looks East towards the point where High Bank Road meets the present A511, Ashby Road. The A511 is just to the right of this image behind the hedging. [Google Streetview, July 2023]
Looking East along the A511, Ashby Road. [Google Streetview, August 2023]
The Burton and Ashby Light Railway appears to run down the centreline of Ashby Road. 1920 25″ Ordnance Survey. [13]
A distance further along Ashby Road the Light Railway crossed the Midland Railway Colliery Branch which, in 1920, only ran a little further Northeast of the road bridge and served a coal wharf just Northeast of the bridge. The Midland Railway Branch served Bretby Brick & Stoneware Works which sat to the Southwest of this location and, further to the South, Bretby Colliery. [13]
A similar area in the 21st century. The green line shows the route of the Light Railway.
Looking Southeast on Ashby Road/Burton Road (A511). The parapets of the Midland Railway Branch Line Bridge can still be seen. [Google Streetview, August 2023]
The view Southwest towards Bretby Colliery along the line of the abandoned Midland Railway Bretby Colliery Branch from the A511 road bridge in 2021, © Ian Calderwood and licensed for reuse under a Creative Commons Licence (CC BY-SA 2.0). [16]
Looking Northwest along what was eventually to become the A511. The Stanhope Arms is on the left of the photograph. [This image was shared on the Newhall, Stanton & Bretby Yesteryears Facebook Group by Marcus Payne on 10th September 2020, (c) Public Domain for the original image. [24]
A tram on what was to become the A511 close to Bretby Colliery. This image was shared on the Newhall, Stanton & BretbyYesteryears Facebook Group by Keith Townsley on 5th December 2020, (c) Public Domain. [24]
A tram turns onto the Ashby Road, later the A50 and later still, the A511 from the dedicated length of the line leading to Sunnyside. This image was shared on the Newhall, Stanton & Bretby Yesteryears Facebook Group by Marcus Payne on 10th September 2020, (c) Public Domain. [24]
A tram close to Bretby Colliery. It appears to be turning South off what was to become the A511. This image was shared on the Newhall, Stanton & Bretby Yesteryears Facebook Group by Marcus Payne on 5th August 2020, (c) Public Domain. [24]
A slight diversion from the route of the Burton and Ashby Light Railway allows us to see Bretby Colliery as it appeared in 1899. It sat alongside Newhall Park Road. The line on the West side of this image is the Midland Railway Branch which further to the North we have seen passing under the route of the light Railway. See the map extract above this one. [14]
Pre-contact plans for the construction of the Midland Railway Bretby Colliery Branch Line. The Burton and Ashby Light Railway crossed this line at the bottom right of the plan. [15]

After crossing the Midland Branch the Burton and Ashby Light Railway turned of the road that became the A511 (Burton Road) to the South and rather then following a highway picked its own route through the fields.

The Burton and Ashby Light Railway turned South off Burton Road (A511) to the East of what was the Stanhope Arms. [Google Streetview, August 2023]
A tram on what appears to be the length of the line between the A511 and Sunnyside, (c) Public Domain. [9]
The Burton and Ashby Light Railway followed its own fenced route South as Far as Sunnyside where it turned to the East. [16]
The modern satellite image has the approximate route of the tramway superimposed in green. Before reaching Sunnyside, the railway followed what is now the line of ‘The Tramway’ a modern small estate road. It then turned towards the East running down Sunny side and across it junction with Bretby Road. [Google Maps, October 2024]
A view looking Northwest on Sunnyside – on the right of this image a tram can be seen approaching Sunnyside from the North. This image was shared on the Newhall, Stanton & BretbyYesteryears Facebook Group by Keith Townsley on 5th December 2020, (c) Public Domain. [27]
On this very similar image, a tram is turning onto Sunnyside. This image was shared on the Newhall, Stanton & Bretby Yesteryears Facebook Group by Marcus Payne on 10th September 2020, (c) Public Domain for the original image. [24]
Looking Southeast along Sunnyside towards Bretby Road with the Light Railway rails in the road surface. This image was shared on the Newhall, Stanton & Bretby Yesteryears Facebook Group by Marcus Payne on 12th September 2020, (c) Public Domain for the original image. [24]
Looking Southeast from Sunnyside across its junction with Bretby Road and along the line of the Light Railway which ran next to Matsyard Footpath. This image was shared on the Newhall, Stanton & Bretby Yesteryears Facebook Group by Julie Brown on 14th August 2022, (c) Public Domain [25]
A similar view in 2024. The Light Railway ran along the line of the footpath. {Google Streetview, February 2023]
The view towards Newhall from Bretby Road. This image was shared on the Newhall, Stanton & Bretby Yesteryears Facebook Group by Marcus Payne on 10th September 2020, (c) Simnett, Public Domain for the original. [24]
This further extract from the 1920 25″ Ordnance Survey shows the line entering Newhall village alongside Matsyard Footpath and then running along the High Street. [16]
Approximately the same area as it appears on Google Maps satellite imagery. The line entered at the top left corner of this image and then ran onto and along High Street (B5353). [Google Maps , October 2024]
Looking Northwest from High Street, Newhall along Matsyard Footpath. The green line shows the approximate line of the old railway. [Google Streetview, February 2023]
A tram approaching High Street, Newhall from the Northwest. This image was shared on the Newhall, Stanton & Bretby Yesteryears Facebook Group by Marcus Payne on 10th September 2020, (c) Public Domain for the original image. [24]
Tram No. 13 entering Newhall at the same location as the Google Streetview image above, (c) Public Domain. [18]
High Street, Newhall. This image was shared on the Newhall, Stanton & Bretby Yesteryears Facebook Group by Marcus Payne on 10th September 2020, (c) Public Domain for the original image. [24]
A tram on Newhall High Street. This image was shared on the Newhall, Stanton & Bretby Yesteryears Facebook Group by Julie Brown on 16th January 2023, (c) Public Domain [26]
The line ran on Southeast along High Street, Union Road and Newhall Road (B5353) passing St. Peter & St. Paul’s Catholic Church (which appears bottom-right on this map extract). [16]
A tram on High Street/Union Street, Newhall. This image was shared on the Newhall, Stanton & Bretby Yesteryears Facebook Group by Julie Brown/Keith Townsley on 15th February 2023, (c) Public Domain. [24]
Much the same location in the 21st century. [Google Streetview, August 2022]
Approximately the same area as that shown on the extract from the 1920 25″ Ordnance Survey. [Google maps, October 2024]
Looking Southeast along Newhall Road, B5353 with St. Peter and St. Paul Roman Catholic Church on the right of the image. The Button and Ashby Light Railway ran down Newhall Road towards Swadlincote. [Google Streetview, Aril 2019]

Another extract from the 1920 25″ Ordnance Survey. Trams from Burton-on Trent remained on Newhall Road for only a short distance, turning South along Midland Road. [16]

The same area in the 21st century, as shown by Google Maps satellite imagery. [Google Maps, October 2024]

This next extract from the 1920 25″ Ordnance Survey shows the Burton and Ashby Light Railway heading South towards Swadlincote Market Place along Midland Road. Sitting to the West of the Light Railway Bridge and at a lower level was Swadlincote Railway Station. To its North were some Sanitary Earthenware Works. [20]

The North end of the bridge on Midland Road, a tram is approaching from the North. Three trams are waiting to head out from the depot access road towards the Market Place. [29]
Glendenning provided a photograph of the bridge in this photograph under construction (see above). The bridge appears on the map extract immediately above and is seen here in use by the Burton and Ashby Light Tramway, (c) Public Domain. [19]
The bridge over the Swadlincote and Woodville Branch seen from the East. A Midland Railway locomotive is about to depart the yard through Swadlincote Railway Station which is on the far side of the bridge. The station footbridge can be seen beneath the Light Railway Bridge. [1: p57]
A similar view in the 21st century. [Google Streetview, August 2022]

The tram depot for the Burton and Ashby Light Railway was accessed at high level off the bridge shown above.

The tram depot off Midland Road, Swadlincote, seen from the West. The trams on the depot are (left to right) Nos. 18, 5, 14, 9 and 10. On the left of the depot is the horse-drawn trolley tower. The map extract immediately below shows the depot (top-left). [17]

We digress a little here to take a quick look at the Midland Railway’s Swadlincote and Woodville Branch which passes under the Light Railway in the image above.

This extract from the 1921 revision of the 252 Ordnance Survey shows the Swadlincote and Woodville Brach to the East of the Light Railway overbridge. Note the Mineral Railway leaving the Branch approximately at the centre of this extract. [21]

To the East of the overbridge a Mineral Railway left the Swadlincote & Woodville Branch in a southerly direction, it served a number of industrial concerns including: Anchor Glazed Brick and Sanitary Pipe Works (which sat to the Southwest of Swadlincote High Street and which were served by means of a bridge under High Street); Swadlincote Sanitary Pipe Works (on the East side of the High Street/Hill Street); Jack i th’ Holes Pottery (by means of a tunnel under Hill Street and Granville Colliery); Middle Sinks & Chimney Pots Works; and Hill Top Works (by means of a tunnel under Granville Colliery.

To the West of the overbridge sat Swadlincote Railway Station and the branch line headed away from Swadlincote to the West-southwest.

Swadlincote Railway Station sits on the West side of Midland Road close to the Light Railway Bridge. The map extract shows the Swadlincote and Woodville Brach heading away to the West-southwest. [20]

West of Swadlincote, the Swadlincote and Woodville branch served a number of industrial concerns, those closest to Swadlincote included: Swadlincote Old Colliery (and associated Brick & Pipe Works); Stanton Colliery (and Hawfields Brickworks); and Cadley Hill Colliery.

Returning to the Light Railway, we note that at Swadlincote Market Place a branch left the main line to Ashby-de-la-Zouch which ran South from Swadlincote to serve Castle Gresley.

The Castle Gresley Branch

The branch line to Castle Gresley first ran West-southwest along West Street and then, by means of a relatively wide arc (see the small image below), turned down Alexandra Road. Track was dualled along these two streets as far as a point a little to the South of the Public Library. [20]

The Light Railway turned South into Alexandra Road by means of a wide arc. The green line gives the approximate alignment of the double track tramway at this location. [Google Streetview, March 2023]
Tram No. 10 dropping down Alexandra Road towards Swadlincote Town Centre. Sharpe’s can be seen at the bottom of the hill. This image was shared by Keith Townsley on the New and Old of Swadlincote & Burton on Trent Facebook Group on 10th April 2021. [28]

The line ran South from Alexandra Road into Church Avenue. It then turned to the South-southeast along Wilmot Road before sweeping round to the West on York Road before turning sharply into Market Street. [20]

The Light Railway ran off Wilmot Street in a wide arc through what is now park land. [Google Streetview, March 2023]

The Burton and Ashby Light Railway (Gresley Branch) swept round from Market Street into Church Street. [20]

Trams swept round from Market Street into Church Street. [Google Streetview, April 2019.
The line continued in a generally westerly direction passing Church Sanitary Earthenware Works and Church Gresley Colliery. Sharp right and left curves took the railway through the square at the colliery gates and onto Castle Street. [22]
The light Railway served the square outside Castle Gresley Colliery which is now a roundabout. It turned sharply towards the North and then back to wards the West as it left the square. [Google Streetview, March 2023]

A short distance along Castle Street took the line as far as Gresley Railway Station where the Gresley Branch terminated in front of the Station buildings.

The branch line terminated outside Gresley Railway Station buildings. [22]
These two views shows the Gresley Station buildings before closure of the Station. Both show the platform elevation of the station, (c) Public Domian, found on the Burton-on-Trent Local History site maintained by Kevin Gallagher. [23]

Gresley Station is long-gone, the railway remains in place in the 21st century.

The location of Gresley Station seen from High Cross Bank Roundabout on the A444. [Google Streetview, March 2023]

References

  1. Seymour Glendenning; The Burton and Ashby Light Railway; in The Railway Magazine, London, July 1906, p53-57.
  2. https://en.m.wikipedia.org/wiki/Burton_and_Ashby_Light_Railway, accessed on 12th October 2024.
  3. https://en.m.wikipedia.org/wiki/Burton_upon_Trent_Corporation_Tramways, accessed on 12th October 2024.
  4. https://maps.nls.uk/view/115473366, accessed on 12th October 2024.
  5. https://maps.nls.uk/view/115473402, accessed on 12th October 2024.
  6. https://maps.nls.uk/view/114591101, accessed on 12th October 2024.
  7. https://maps.nls.uk/view/114591071, accessed on 12th October 2024.
  8. https://www.derbytelegraph.co.uk/burton/tram-tracks-removed-burton-bridge, accessed on 13th October 2024.
  9. https://www.mediastorehouse.com/mary-evans-prints-online/tram-burton-trent-staffordshire-14196889.html, accessed on 13th October 2024.
  10. http://www.burton-on-trent.org.uk/category/surviving/trentbridge/trentbridge5, accessed on 13th October 2024.
  11. https://www.britainfromabove.org.uk/image/EPW019724, accessed on 13th October 2024.
  12. https://maps.nls.uk/view/114591101, accessed on 16th October 2024.
  13. https://maps.nls.uk/view/114591110, accessed on 16th October 2024.
  14. https://maps.nls.uk/geo/explore/#zoom=17.0&lat=52.77838&lon=-1.59835&layers=168&b=ESRIWorld&o=100, accessed on 16th October 2024.
  15. https://www.midlandrailwaystudycentre.org.uk/twochainplans/small/RFB00809sm.pdf, accessed on 16th October 2024.
  16. https://maps.nls.uk/view/114591323, accessed on 16th October 2024.
  17. https://lmssociety.org.uk/topics/tramways.shtml, accessed on 17th October 2024.
  18. https://www.dfhs.org.uk/filestore/2019_June_137.pdf, accessed on 17th October 2024.
  19. https://gsq-blog.gsq.org.au/travel-on-my-mind/swadlincote-tram_ed/, accessed on 17th October 2024.
  20. https://maps.nls.uk/view/114591362, accessed on 17th October 2024.
  21. https://maps.nls.uk/view/114591365, accessed on 17th October 2024.
  22. https://maps.nls.uk/view/114591395, accessed on 17th October 2024.
  23. http://www.burton-on-trent.org.uk/category/amenities/railway/railway5, accessed on 17th October 2024.
  24. https://www.facebook.com/groups/1074190616309168/search/?q=tram, accessed on 18th October 2024.
  25. https://www.facebook.com/groups/1074190616309168/permalink/1629307357464155, accessed on 19th October 2024.
  26. https://www.facebook.com/groups/1074190616309168/permalink/1749624235432466, accessed on 19th October 2024.
  27. https://www.facebook.com/groups/1074190616309168/permalink/1200997590295136, accessed on 19th October 2024
  28. https://www.facebook.com/photo/?fbid=270915844746315&set=gm.3880045305414122, accessed on 19th October 2024.
  29. https://www.search.staffspasttrack.org.uk/search.aspx?&PageIndex=4&SearchType=2&ThemeID=475, accessed on 20th October 2024.

The Modern Tram Network in Nice 2023

Nice is a picturesque city nestled in the French Riviera. It is renowned for its stunning landscapes, vibrant culture, and rich history. In recent years, one of the most remarkable transformations in the city’s infrastructure has been the development and expansion of its modern tram network.

In November 2017, I wrote two short articles about the History of Trams in and around Nice and the development of modern trams in Nice.

https://wordpress.com/post/rogerfarnworth.com/2332

https://wordpress.com/post/rogerfarnworth.com/2342

After those two articles about the modern trams, further articles have explored the old first generation electric tramway network in and around Nice, extending to Cannes to the West, Menton to the East and into the hinterland North of the coast. All of these can be found on this blog under the Railways and Tramways tab, and then under ‘French Railways and Tramways’ … ‘Railways and Tramways Around Nice’. Indeed at the time of writing that series of articles continues to develop. The most recent articles have focussed on the coastal tramways between Cannes and Menton.

In November 2023, it seems to be a good time to review progress on the growing tram network in and around Nice, particularly since we would be staying in the area for 10 days.

The modern tram network in Nice has undergone significant development and expansion over the past few decades. The initial line, Line 1, was inaugurated in 2007 as part of a city-wide urban revitalization project. Since then, the network has expanded to include two more lines: Line 2, which opened in 2019, and Line 3, scheduled to be operational in the near future.

I asked ChatGPT to give me a short introduction to the modern tram network, this is what that AI software came up with:

The introduction of a modern tram network has had a profound formal impact on the cityscape of Nice. The sleek, contemporary design of the trams, characterized by clean lines and a bold colour scheme, seamlessly integrate with the city’s existing architecture. The tram tracks, which run through the heart of Nice, have been ingeniously incorporated into the urban fabric, enhancing the overall aesthetic appeal of the city. The tram stops, with their modern structures and vibrant lighting, serve as architectural landmarks, contributing to the city’s cosmopolitan image.

The modern tram network in Nice plays a vital role in ensuring efficient and accessible transportation for both residents and tourists. Trams in Nice are known for their punctuality, frequency, and reliability, allowing passengers to reach their destinations quickly and comfortably. With dedicated lanes and priority at traffic signals, trams efficiently navigate through the city, avoiding congestion and minimizing travel times. Furthermore, the accessibility of trams is commendable, with low floors, ample space for wheelchair users, and clearly marked priority seating, ensuring that everyone can travel with ease.

The modern tram network in Nice also brings substantial environmental benefits to the city. By encouraging the use of public transportation over private vehicles, the tram system helps reduce air pollution and carbon emissions. Additionally, the trams in Nice are electrically powered, relying on clean energy sources, which further contribute to a more sustainable and eco-friendly transportation system. This commitment to environmental stewardship aligns with the city’s dedication to creating a greener future.

Beyond its formal and functional impact, the modern tram network in Nice fosters social cohesion and urban integration. The trams serve as communal spaces, bringing together people from different walks of life into a shared mode of transportation. This enhances the sense of community and interaction among residents and visitors, contributing to a vibrant and inclusive urban environment. Moreover, the tram system connects various neighborhoods, enabling better access to education, employment opportunities, and cultural amenities, further promoting social and economic development.

The modern tram network in Nice has transformed the city, both in its physical appearance and its provision of efficient and sustainable transportation. With its formal integration, efficiency, accessibility, environmental advantages, and social cohesion, the tram system has become an invaluable asset for the city and its residents. As Nice continues to evolve, the tram network will undoubtedly play a crucial role in shaping the city’s future, ensuring that it remains a model of modernity and progress.”

…….. Chat GPT

A fine, and glowing, introduction to the tramway network but which says no more than any city might want to say as an introduction to the use of trams in its urban environment. Hopefully we can add considerably more specific detail relating to Nice’s tramway network.

First a reminder of the history of trams and tramways in Nice:

The first tramway in Nice opened in 1879, was electrified in 1900, and was followed by a departmental network in 1906. The entire network was electrified in 1910. In the 1920s, the network had 11 lines, some of which were partially used for goods transport. However, the tram was criticised and was replaced by buses on some lines beginning in 1927. The last tramway in Nice ceased service on 10 January 1953. ” [1]

The Developing Network

The Tramway de Nice is a 27.5-kilometre (17.1 mile), tramway in Nice. It is operated by the Société Nouvelle des Transports de l’Agglomération Niçoise, which is a division of Transdev. [2] The network operates under the name ‘Lignes d’Azur‘. [1]

The first line opened on 24th November 2007 and replaced bus lines 1, 2, 5 and 18. From the start, the system had 20 No. Alstom Citadis trams in service, providing a tram every seven minutes. Wikipedia states that “since its inception, the number of passengers has increased from 70,000 per day in 2008 to 90,000 per day in 2011. The frequency has gradually increased to a tram every four minutes in 2011.” [1]

The success of the trams resulted in the city authorities deciding to create additional lines. “The West-East T2 Line serves the Nice Côte d’Azur Airport to the West through the construction of a multimodal centre and the Port of Nice to the East. This line runs through a tunnel in the centre of Nice. A future extension of the West–East line, North along the Var valley, is proposed. Another extension, running further West from the airport, across the River Var, is also proposed. [3] In addition, the Nice authorities decided to extend Line 1 to the Pasteur neighbourhood.” [1]

The extension along the Var valley mentioned in the Wikipedia article is now, in 2023, operational as Ligne 3.

The Modern Tramway in Nice: Ligne 1 is shown in red; Ligne 2 in dark blue; and Ligne 3 in cyan. This is the network as it existed in November 2023 at the time of our visit. [3]

A further line, Ligne 4, is now under development with public consultation having taking place in October 2021 and archaeological investigation in St. Laurent-du-Var and Cagnes-sur-Mer undertaken between April and July 2023. [6]

The public inquiry for Ligne 4 was held in June and July 2023. [7] The proposed route is shown below. [8]

The Public Inquiry decided in favour of the creation of Ligne 4, with two reservations and one recommendation:

Reservation 1:

Boulevard Marechal Jean must be reconsidered, not as the route of the proposed line but in order to mitigate present congestion. Specifically, the authorities must: create shaded spaces; separate and reduce circulatory flows as much as possible for reasons of calm and safety; increase and promote as much space as possible reserved for pedestrians; use permeable surfacing; take advantage of the arrival of the tram to make Boulevard Marechal Juin attractive in order to revitalize businesses, professions and other activities. “The Commission, without calling into question the choice of route, requests that a new development proposal for Boulevard Maréchal Juin be submitted to public consultation at the most appropriate time.” [9]

Reservation 2:

Related to access provisions to one specific location, a clinic. The Commission required that, in addition to a ramp currently proposed, a suitable mechanised/motorised means of access from the tram stop to the clinic should be provided. [9]

Recommendation:

The current proposals only allow for one parking space for a funeral hearse for the Sainte Famille church in Cagnes-sur-Mer. The commission saw no reason why 4 such spaces could not be provided to give adequate provision for religious services without blocking the tramway. The commission also asked that the authorities give consideration to greater investment in the planned local park-and-ride provision to allow “the construction of underground parking lots, thus creating a landscaped public garden with an interesting perspective.” [9]

In the light of, often, protracted planning procedures in the UK, it is worth noting that the Inquiry finished towards the end of July and that the full report and summary report were published and available to the public by 7th September 2023, around 5 weeks after the closure of the Inquiry!

Looking further forward a fifth line is being considered. Ligne 5 will run from Drap to the eastern centre of the city of Nice.

A Focus on Ligne 1

On 27th May 2008, Railway Technology reported on the development of the first line which had opened in November 2007.

A map of Ligne 1. [24]

The system’s distinguishing technical feature is the use of batteries aboard the trams to avoid the necessity of erecting overhead line equipment (OHLE) on two sections of the route. This was felt necessary to protect the character of the distinctive Italianate architecture and also because of restrictions such structures would put in the way of Nice’s carnival processions, both relevant to the area’s substantial tourism industry.” [4]

Apparently, the relatively short distances involved lent substance to the belief that battery operation was was more appropriate than the alternative Alstom OHLE-free system, APS. That alternative system has been used in Bordeaux and was due to be installed on “systems in Angers, Reims, Orléans and the Al Safooh tramway in Dubai, the more elaborate Alimentation Par le Sol/APS (ground-supply) format requires specialised equipment aboard the vehicles and also in the permanent way.” [4]

There are sections of grassed tracks throughout the system and Nice took the opportunity to undertake significant reworking of space, excluding general traffic from specific areas which then became tram/pedestrian only areas. That possibility has also been embraced in the ongoing development of the different lines which make up the system in 2023.

The European Investment Bank made a €150m loan for the project which had a total cost of approximately €560m, of which just over 70% related to creating the tramway. Areas of expenditure indicative of the demands of the setting included storm water drainage works (€25m), rebuilding of Place Massena (€13m), public lighting (€4m) and tree planting (€1m).” [4]

At the time Railway Technology produced their article, they could write that, “The 8.7km double-track 1,435mm gauge line, with two brief sections where tracks diverge through narrow streets, forms a ‘U’ configuration, the two arms largely serving demand in residential areas and institutions. The base is near the southern end of the main thoroughfare Avenue Jean Médecin and the two open spaces near the Old Town, Place Masséna and Place Garibaldi, respectively 440m and 470m sections without OHLE. These ‘gaps’ are joined by a 320m section with OHLE between Opéra-Vieille-Ville and Cathédrale-Vieille-Ville stops where trams run conventionally.” [4]

Ligne 1, has only seen minor changes since it was first opened. Its western terminus is at Las Planas, and it is there that the line has its depot. “Built on sloping ground, the complex makes use of the restricted site by a line spiralling over the entry tracks beyond the Las Planas stop to give access to the depot proper and a short test track. Located close to the A8 autoroute, Las Planas also incorporates a park-and-ride facility.”

Its Eastern terminus was for some time at Pont Michel but an extension to Pasteur was completed in 2013.

Ligne 1 was initially supposed to transport 65,000 passengers/day. But it was quickly adopted by the people of Nice. Today, Ligne 1 can transport nearly 100,000 passengers/day and supports the ongoing development and attractiveness of the neighbourhoods it passes through. “Around 126,500 residents and more than 42,000 jobs, or 37% of Nice’s population and nearly a third of the city’s jobs, are less than 400 metres from the line. With 22 stations and a frequency of one tram every 4 minutes, Ligne 1 allows residents of the city to reduce their travel time.” [5]

An Atom Citadis Tram on Ligne 1, crossing Place Garibaldi in Nice. The tram uses onboard nickel metal hydride batteries to cross this and Place Masséna, © Mirabella and authorised for use under a Creative Commons Licence (CC BY-SA 3.0). [22]

At its opening, Ligne 1 was operated by a fleet of 20 No. 20 Alstom Citadis type 302 trams. “The fully air-conditioned, 100% low-floor, modular five-unit double-ended trams could be extended in response to the high take-up of the service. Roof-mounted Ni-MH (nickel-metal hydride) traction batteries with an operational life of at least five years were supplied by Saft under a €2m contract, giving trams a range of up to 1km at a maximum speed of 30km/h with air-conditioning in operation, the switching of power being either from the overhead line or the batteries is activated by the driver, with the pantograph fully lowered when running without OHLE.” [4]

Each tram’s driver console features visual and audio indications of the need to operate the power changeover sequence. The batteries recharge from the overhead supply while in conventional operation. There is no additional external infrastructure needed to operate the trams under battery power over the OHLE-free track.” [4]

The approximate Ligne 1 end-to-end journey time is 30min. “The control centre is at the depot, linked with trams and to the extensive network of video monitoring of the system. Benefiting from road traffic exclusions and priority at crossings, in this totally urban setting, trams can attain an average 18km/h, as opposed to 11km/h for buses.” [4]

The approximate Ligne 1 end-to-end journey time is 30min. “The control centre is at the depot, linked with trams and to the extensive network of video monitoring of the system. Benefiting from road traffic exclusions and priority at crossings, in this totally urban setting, trams can attain an average 18km/h, as opposed to 11km/h for buses.” [4]

A Focus on Ligne 2

Ligne 2 connects the Airport with Nice’s Port Lympia, traversing central Nice. It connects with Ligne 1 at Avenue Jean Medecin and at Place Garibaldi.

A plan of Ligne 2, Nice. [25]

Following the success of tram Ligne 1, the mayor of Nice, Jacques Peyrat, decided to create a new line crossing Nice from east to west. This line would make it possible to serve the entire western district of the city which represents around 200,000 people, to transport more passengers (around 105,000) than with buses (around 70,000) as well as to reduce road traffic.

Between 2007 and 2008 a dedicated bus route to the Airport was provided, but the election of  Christian Estrosi as Mayor in March 2008 put an end to that project. [18]

On 25th June 2008, “Christian Estrosi announced that Ligne 2 would be built on the Promenade des Anglais, which would have made it possible to reduce costs and build the line more quickly as there would have been little or no traffic preparatory work to be done. The trams would have to be powered from the ground in order to prevent an overhead line damaging the view.” [18]

The controversial project along the Promenade was finally abandoned when on 9th October 2009, the mayor of Nice announced that Ligne 2 of the tramway would be built through the city, abandoning the route along Promenade des Anglais. The revised project meant that Ligne 2 would be 8.6 km long, including 3.6 km in tunnel. on the surface, the line would serve Nice-Côte d’Azur airport, the planned Saint-Augustin multimodal station (connection with the SNCF, the future TGV and the future tram Ligne 3) then would pass through Avenue René-Cassin, Avenue de la Californie and Rue de France. From the intersection with Boulevard François Grosso, the route would run underground with the stations Alsace-Lorraine, Musiciens, Place Wilson (near the future new town hall of Nice), Garibaldi, Île de Beauté (Port of Nice ) and Place Arson. The route would then return to the surface as far as a terminus at Nice-Riquier SNCF station.” [18]

The intention was for the work to be completed in 2016:

2013: construction of the tunnel in the city centre.

2016: commissioning of line 2 from Saint-Augustin to the port.

The Public Inquiry took place in December 2011 and January 2012 and some changes were made to the scheme as a result. These included:

  • The Eastern terminus being placed on the Cassini Quay at the Port.
  • A new stop being included at Sainte Helene.
  • Compensation being made available to traders affected by construction work.

In 2013, the line was divided into two sections. The first part between CADAM, Magnan and the Airport was given a target completion date of 2017, the remainder was scheduled for completion by 2019. [18]

Tramway Ligne 2 Nice during final trials at the end of the on-street construction phase, © Jesmar and included here under a Creative Commons Licence (CC BY-SA 4.0 DEED). [25]

As the scheme developed the programme had to be amended. In June 2018, the length of the line between Magnan and CADAM was opened; in December 20th18, the length between Grand Arenas and the Airport terminal was completed; in June 2019 the length between Magnan and Avenue Jean Medecin was commissioned; and the final length to Port Lympia opened in December 2019. [18]

The cost of the work was estimated at 770.7 million euros, including 758.7 million euros for the work defined in 2009 and 12 million euros to cover modifications made by the public inquiry. This was financed by: the State (52.8 million); the general council of Alpes-Maritimes (50 million); the regional council of Provence-Alpes-Côte d’Azur (26 million); the European Regional Development Fund (3 million); and the airport company (between 10.2 and 12.6 million); the city of Nice (50 million); the General Investment Commission (4.69 million for rolling stock purchase); a loan from the European Investment Bank (250 million); and a loan from the city’s deposit and consignment fund (250 million). [18]

A New Depot

A new depot was built for Ligne 2 alongside the Ligne 1 depot at Henri Sappia.

A schematic plan of the new depot. The storage lanes are to the left of the diagram, numbered ‘2’ in the legend. [18]

The Henri Sappia depot is too small to accommodate all the trains from Ligne 1 and Ligne 2 simultaneously, a new depot has been built next to it. It is also the operational centre for the line. It is located between the A8 motorway and the Nikaia Palace with a total area of approximately 40,000 s². It is large enough to accommodate the 44 m trams of Ligne 2 as well as Ligne 3 and the future Ligne 4, around sixty. It is made up of a maintenance workshop, a storage centre of 2,860 m², a centralized control station of 130 s² and parking for two hundred and fifty vehicles. [18]

Ligne 2 Alstom Citadis X05 Tram at Nice Airport, © Snoopy 31 and used under a Creative Commons Licence (CC BY-SA 4.0 DEED). [23]

The Trams

Alstom Citadis X05 trams are in use on Ligne 2. Unlike Ligne 1, the new tramway does not feature overhead contact lines on the entire surface section of the route. This option was requested by the Nice Côte d’Azur Metropole to integrate the new tramway line into the urban landscape while preserving the city’s architecture. Instead, the line has been installed with intermittent charging in stations. [20]

Alstom supplied its latest ground-based static charging technology, SRS, which allows a tram to charge safely and automatically in under 20 seconds while stopped at a tram stop. The trams are equipped with an on-board energy storage device, Citadis Ecopack. Equipped with this technology, trams can charge up at each station as passengers get on and off, without extra stopping time and without driver intervention. [20]

Citadis X05 trams incorporate new technologies designed for lower energy consumption. The vehicles incorporate a 100% low-floor design. They have balcony-style windows, multi-purpose areas, LED lighting, CCTV cameras, emergency intercoms, electrical braking, permanent magnet motors and sensor-based air-conditioning. [21]

Heating, ventilation, and air conditioning (HVAC) systems installed in the trams contain separate controls for passengers and driver zones. Each bogie offers a 750mm-wide central aisle. The entrance height of the intermediate front doors is 326mm and 342mm. The trams’ crash absorption resistance complies with the EN15227 standards. [21]

Each motorised bogie of the vehicle is fitted with two air-cooled permanent magnet traction motors. They provide a maximum acceleration of 1.3m/s² and permit deceleration of 1.2m/s², while the compression load is 400kN. [21]

The contract with Alstom was worth €91m and covered the delivery of 19 Citadis X05 trams and all necessary land-based static charging points. The contract also includes options for up to 18 further trams and associated energy charging systems and maintenance services. [21]

A Focus on Ligne 3 …

Ligne 3 connects the Airport with Saint Isidore, stopping at Allianz, Nice’s sports stadium. It connects with Ligne 2 at the airport, Grand Arenas, Paul Montel and Digue des Francais.

A route plan of Ligne 3 which runs North-South along the valley of the River Var. [26]

Ligne 3 is 7km long in total, stretching from Terminal 2 at Nice Airport to the heart of the Saint-Isidore district, North along the valley of the River Var. It has 11 stations in total including 5 stations in common with the West-East line. Trams travel at an average speed of 22km/hr. 12,000 passengers per day is the average usage. Trams run at a Frequency of 10 minutes and 6 trams are dedicated to the line. Additional trams are operated on march days or events and on these days a frequency of 3 minutes is sustained. It is predicted that by 2026 25,000 jobs, 11,400 inhabitants and 5,400 new homes will be served by the line. [27]

In 2017, the route Ligne 3 was finalised by the authorities. The work had an estimated cost of 56.3 million euros excluding taxes, partly subsidized by the State (3.5 million), the region (8 million), the department ( 4 million) and the city (15 million). Construction work began on 19th March 2018 and the line opened in full on 13th November 2019. [28]

An Alstom Citadis X05 Tram on Ligne 3 with the Alliance Riviera Stadium in the background, © Snoopy 31 and used under a Creative Commons Licence (CC BY-SA 4.0 DEED). [28]

At the end of 2019, 6 additional tram sets were put into service to allow the operation of Ligne 3. These were identical to the trams in use on Ligne 2 and are powered in the same way as the Ligne 2 trams, operating without overhead contact lines.

The Charles Ginésy maintenance centre was established as part of the construction work. It is located at the Charles Ehrmann sports park and now is common to both Ligne 2 and Ligne 3, It has been designed to accommodate and maintain the whole fleet of trams on the two lines. [27]

New park-and-ride facilities accommodate 630 vehicles.

A Focus on Ligne 4 …

The city of Nice believes that the ongoing development of the tram network brings significant benefits which are focussed in 3 main areas: [10]

  • Mobility: facilitating travel thanks to the tramway and cycle paths, creating new park and ride facilities, increasing intermodality, ensuring a quality, regular service to the sectors crossed,
  • Quality of life : a reclassified living environment, less pollution and less noise, less car traffic, a more beautiful and peaceful city, more modern and green,
  • Economic development: a more attractive city that encourages activity, a mobility offer superior to current trips to shops and businesses, a saving on travel costs, job creation during the construction phase.

Ligne 4 “will connect the three most important municipalities in the Metropolis in terms of population and jobs: Nice, Saint-Laurent-du-Var and Cagnes-sur-Mer. It will serve 18 stations, including 14 new ones, over a length of 7.1 km of track created, supplemented by 4 new park-and-ride facilities comprising 1,200 spaces (Saint-Laurent-du-Var station, Val Fleuri, Hippodrome, Parc des sports of Cagnes-sur-Mer). Thus, 40,000 passengers will be transported every day, calming traffic and avoiding 4,500 tonnes of greenhouse gas emissions per year from 2028.” [7]

A bird’s eye view of the proposed Ligne 4 with the Line 2 route to the Airport on the left. [12]
Before and After aerial images associated with the planned construction of Ligne 4, showing the area outside the boundary of Nice Airport. [12]

This line will be accompanied by the planting of 1,160 trees and the preservation of 365 trees along the route and 30,000 m² of green tramway.

The route will run from the CADAM (administrative center) in St. Laurent-du-Var to the Cagnes-sur-Mer Sports Park.

St. Laurent-du-Var as it will probably look from the air after completion of Ligne 4. [13]

A Focus on Ligne 5 …

As part of the creation of this new transport axis, it is planned, in addition to the creation of 7.6 km of additional tramway on predominantly grassed trackway tram platform,, to give more space to pedestrians and bicycles. Thus, a continuous cycle route will be created between Drap and the eastern centre of Nice. More generous pedestrian spaces will be created along this axis to rebalance the city for the benefit of local residents.” [10]

Like the other lines, the entire route will be accessible to all. Developments will be made on and around the stations to guarantee all people benefit from its presence. In the light of this additional and improved pedestrian crossing points over the River Paillon will be created specifically at two locations where tram stations will sit on significantly widened bridges: Pont Jumeaux and Pont Anatole France, which are not very accessible to pedestrians today. The objective is to encourage pedestrian crossing of the Paillon by giving more dedicated space.

Pont Anatole France station is a good example of this desire to connect the two banks. This station will be located on the bridge and will therefore be easily accessible from both banks via generous spaces for pedestrians.” [10]

The proposed route of Ligne 5. It extends from the station of the future Palais des Arts et de la Culture (now the Palais des Expositions) in Nice to Drap Town Hall. 7.6 km in all The proposed route will need to be refined and confirmed, in particular by collecting public opinion. The positioning of the tram stops may change. A series of superb visuals were produced during early development work and these can be found here. [11]

Ligne 5 could have been envisaged as an extension to Ligne 1, indeed it was seen as an extension in very early considerations for a tram network in Nice. However, Ligne 1 is acting a full capacity and would require significant alteration to accommodate the additional traffic produced by an extension to Drap.

In the light of this Ligne 5 is intended to be independent of Ligne 1 with its own terminus at the Palais des Expositions. By deviating from the route of Ligne 1, Ligne 5 includes “new  neighbourhoods and both banks of the Paillon.” [10] It will, however, be “interconnected with Ligne 1 at Pont-Michel, so that Ligne 5 trams can reach the maintenance centre in Nice-Nord.” [10]

An artist’s impression of Ligne 5 at Pont St. Michel. [19]
A ‘possible’ Bird’s eye view of Ligne 1 and Ligne 5 at Place de l’Armee du Rhin after completion of Ligne 5. [11]
An artists impression of Ligne 5 on Boulevard Vérany and the banks of the River Paillon. [11]
Two trams are shown in this artist’s impression of the Pont Jumeaux crossing of the River Paillon with its adjacent tram stop. [11]
Another aerial view, this time showing a tram on the proposed route along Boulevard de l’Ariane and the banks of the River Paillon looking towards the hills. [11]
La Trinité – A tram crossing the River Paillon on Pont Anatole France through the proposed tram stop. [11]
Another bird’s eye view of the proposed tramway at La Trinité, the River Paillon and Pont Anatole France with a tram turning to run alongside the river. [11]
Les Chênes Verts tram stop in Drap and La Trinité. [11]
The approach to the Drap will bring trams across the River Paillon immediately adjacent to the terminus. [11]

Public Consultation took place between January and March 2022 and as a result some refinements were made to proposals. Currently (November 2023) the project includes for:

– 7.6 km of tramway

– 16 stations 

– 25 minutes between the two terminals

– 1 tram every 8 minutes

– 50,000 inhabitants and 28,000 jobs served

– 16,000 fewer cars every day in the Paillon valley

– 2000 tonnes of CO² avoided per year.

The calendar for the development and implementation of the project is:

2024: public inquiries (environmental, water law, public utility, land, etc.)

2026: Construction of the length through Pont-Michel to Pont Garigliano

2028: Construction of the remaining length to Drap. [11]


The public consultation resulted in a near unanimous approval of the project. 98% of the opinions expressed by the public were favourable. And 100% of elected representatives supported the scheme. [16]

The service station (left) at the Garigliano crossroads, in Nice, will disappear to allow the passage of the tram, © Richard Ray. [16]

This project is eagerly awaited by residents and we know how to recognize when a consultation is going well,” said the leader of the environmentalists, Juliette Chesnel-Le Roux. [16]

The Nice Côte d’Azur Metropolis has obtained European funding of 823,924 euros to finance all the studies carried out for the tram project linking the Ariane district to the city center of Nice and La Trinité. This funding comes from the European Regional Development Fund (ERDF) which aims to strengthen economic, social and territorial cohesion within the European Union as part of the Integrated Territorial Investment of the Nice Côte d’Azur Metropolis.” [17]

And further into the Future?Towards Monaco?

It is possible that Ligne 2 may be extended. Some consideration is being given to an extension to Ligne 2 of the tramway, beyond the current eastern terminus of the Lympia port, towards the principality of Monaco. “It would provide a second rail line between the metropolis of Nice Côte d’Azur and Monaco, and be an alternative to the TER PACA network.” [20]

References

  1. https://en.wikipedia.org/wiki/Nice_tramway, accessed on 26th October 2023.
  2. https://web.archive.org/web/20130515035144/http://www.lignesdazur.com/presentation/?rub_code=9&thm_id=7&gpl_id=, accessed on 26th October 3023.
  3. https://www.frenchrivieratraveller.com/Nice/Transport/Tramway.html, accessed on 26th October 2023.
  4. https://www.railway-technology.com/projects/nice-trams/?cf-view, accessed on 24th November 2023.
  5. https://projets-transports.nicecotedazur.org/ligne-1/hier-aujourdhui, accessed on 24th November 2023.
  6. https://projets-transports.nicecotedazur.org/actualites, accessed on 24th November 2023.
  7. https://projets-transports.nicecotedazur.org/ligne-4/enquete-publique-du-lundi-12-juin-au-vendredi-21-juillet-2023-inclus, accessed on 24th November 2023.
  8. https://projets-transports.nicecotedazur.org/wp-content/uploads/2023/09/Ligne-4-tramway-rapport-d-enquete.pdf, accessed on 24th November 2023.
  9. https://projets-transports.nicecotedazur.org/wp-content/uploads/2023/09/Ligne-4-tramway-CONCLUSIONS-DUP-MECDU.pdf, accessed on 24th November 2023.
  10. https://projets-transports.nicecotedazur.org/questions-reponses/#faq_27231, accessed on 25th November 2023.
  11. https://projets-transports.nicecotedazur.org/ligne-5/le-projet-de-la-ligne-5-de-tramway-nice-la-trinite-drap, accessed on 25tj November 2025.
  12. https://projets-transports.nicecotedazur.org/wp-content/uploads/2023/06/MNCA_TRAM-L4_BROCHURE_TT-SAVOIR_A4_BD.pdf, accessed on 25th November 2023.
  13. https://saintlaurentduvar.fr/blog/ligne-4-du-tramway-l-enquete-publique-est-lancee, accessed on 25th November 2023.
  14. https://twitter.com/Elodieching/status/1484215486867021824?t=JFKe_qZVQzGO-STX2SqQrQ&s=19, accessed on 25th November 2023.
  15. https://www.lemoniteur.fr/article/metropole-de-nice-la-t5-une-ligne-de-tram-vertueuse.2215172, accessed on  25th November 2023.
  16. https://www.nicematin.com/transports/approuve-a-lunanimite-trace-prefere-craintes-exprimees-bon-depart-pour-le-projet-de-tramway-entre-drap-et-nice-777378, accessed on 25th November 2023.
  17. https://www.investincotedazur.com/ligne5-tramway-nice, accessed on 25th November 2023.
  18. https://fr.m.wikipedia.org/wiki/Ligne_2_du_tramway_de_Nice, accessed on 25th November 2023.
  19. https://www.pss-archi.eu/forum/viewtopic.php?pid=835184, accessed on 25th November 2023.
  20. https://www.intelligenttransport.com/transport-news/18414/tram-design-revealed-for-the-east-west-line-of-the-nice-cote-dazur-metropole, accessed on 26th November 2023.
  21. https://www.railway-technology.com/projects/citadis-x05-light-rail-vehicles, accessed on 26th November 2023.
  22. https://commons.m.wikimedia.org/wiki/File:Nice_tramway_place_Garibaldi.jpg, accessed on 26th November 2023.
  23. https://en.m.wikipedia.org/wiki/File:Ligne_2_Tram_de_Nice_07-20.jpg, accessed on 26th November 2023.
  24. https://moovitapp.com/index/en/public_transit-line-L1-Nice-3260-854686-771043-0, accessed on 26th November 2023.
  25. https://www.batiactu.com/edito/ligne-2-tramway-nice-arrive-a-aeroport-54985.php, accessed on 26th November 2023.
  26. https://www.frenchrivieratraveller.com/Nice/Transport/Tramway.html, accessed on 26th November 2023.
  27. https://www.nice.fr/fr/transports-et-deplacements/la-ligne-3, accessed on 26th November 2023.
  28. https://fr.m.wikipedia.org/wiki/Ligne_3_du_tramway_de_Nice, accessed on 26th November 2023.

Going “Piggy-Back” in 1899!

Modern Tramway Journal included a short article in October 1963 about developments in 1899 on the Isle of Man, and particularly about the use of ‘Bonner Wagons’ by the Isle of Man Tramways and Electric Power Company Limited. [1]

An item about ‘Bonner Wagons’ in the “American technical Press attracted the attention of Mr. Alexander Bruce, Chairman of the Isle of Man Tramways and Electric Power Company Limited, the predecessors of the Manx Electric Railway. Mr. Bruce was engaged in promoting and constructing a 10-mile extension of the coastal tramway from Laxey to Ramsey, and this line was intended to enter Ramsey along the seafront and possibly terminate at the pier, where freight could have been transhipped direct to and from cargo steamers without the expensive carriage necessary at Douglas. The new line also involved a rail-side steam power station at Ballaglass remote from road access. But the Ramsey Town Commissioners would not allow the sea-front route, and Mr. Bruce was forced to adopt instead the inland route and terminus which we know today. This line was opened to Ballure on 5th August, 1898, and into Ramsey on 24th July, 1899.” [1: p350-351]

Included in the tramway promotion was a granite quarry at the Dhoon, “purchased in 1895 and staffed partly by skilled Scottish sett-makers brought over from Dalbeattie, the centre of the Scottish granite industry. Setts from Dhoon Quarry were used for paving the Upper Douglas Cable Tramway, and setts and roadstone were produced both for the island’s roads and for export to the mainland. The export trade would provide an excellently balanced freight traffic on the electric line, the rail wagons taking the setts to Ramsey harbour and returning laden with coal for the power station at Ballaglass.” [1: p351]

After the Town Commissioners had prevented the extension of the tramway to Ramsey harbour, Mr. Bruce ordered several 3 ft. gauge ‘Bonner Wagons’ from the USA, which would “travel over the tramway to the outskirts of Ramsey, and could then be transferred to road by a removable ramp at one of the several level crossings. These wagons also came in very handy to counter a demand from the Ramsey Commissioners early in 1899 for 5 per cent of the gross receipts earned on the portion of the line in their area; Mr. Bruce threatened to turn the cars back at the town limits, and pointed out that by using the Bonner Wagons in the town the Company could carry on their freight traffic as they pleased. The Ramsey Commissioners soon gave way, and in return were treated on 9th June, 1899, to a special trip from Ballure to Snaefell Summit and back.” [1: p351-352]

Increasingly after the Second World War, the practice of hauling laden road trailers and semi-trailers on flat rail carsdeveloped in North America. “In this way, the railways of North America are attracting to that share of the long-distance freight that would normally move by road, quoting long-haul charges sufficiently low to represent to the haulier a clear saving over sending the load by road throughout, with its own tractive unit and crew.” [1: p350]

In the early years of railway travel “private carriages (with or without their occupants) were often conveyed on railway-wagons in the early years of railways, and in the days when motor-cars were less reliable than they are now they would quite often cover long distances in motor car vans attached to the train in which their owner travelled a forecast of today’s car-carrier trains. This method was also used for freight vehicles such as the pantechnicons of furniture-removal firms and (of course) by the circus, but the more usual method was for freight consignment to be bulked in railway wagons or vans, the railway company providing carriage services in the towns served, with transhipment in its own terminal warehouses.” [1: p350]

In competition with the mainline railways there were interurban services which predominantly carried passenger traffic but additionally sought freight traffic if it could be handled efficiently. Often such movement attracted significant transshipment costs. “In an effort to reduce these handling costs and quote competitive rates for collection-and-delivery traffic, a few American interurbans adopted a device known (after its inventor) as the Bonner Railwagon. The Bonner Wagon was in fact two separate vehicles which could be combined in one for the rail journey. The main portion was a substantial spring-axle high-sided cart of about four tons capacity, mounted on four spoked road wheels and designed to be drawn by horses when running on the streets; the second, smaller portion was a small axle-carrying truck on four flanged solid disc type wheels, on which the cart would ride for the rail journey, and which supported the cart’s axles at a height sufficient to bring the road wheels well clear of the tracks and pointwork.” [1: p350]

The first demonstration of the Bonner Railwagon system using horse-drawn wagons in Toledo in 1898. [4]

The mechanism was similar to the practice espoused by some European narrow-gauge railways where standard-gauge wagons could be carried over narrow-gauge lines. A typical example would be the practice as used on the Brünig Railway in Switzerland or on the Hartsfeldbahn in Bavaria which made use of Rollbocken in the mid-20th century.

The Rollbocke was an invention by Director Langbein of the Saronno branch of Maschinenfabrik Esslingen, which supplied many European narrow-gauge railways with it. The Härtsfeldbahn had up to 28 units, but then in connection with the expansion of the Rollbocke traffic to the Aalen-Ebnat section in 1950, 16 rental vehicles from the WEG-Bahn Amstetten-Laichingen were added. In 1960 another 16 units followed from the DB route Nagold-Altensteig. [2]

A typical Rollbocke (or dollie). [2]
A standard-gauge freight wagon on ‘dollies’ (rollbocken) at the ramp in Neresheim, around 1970. (Photo: Kurt Seidel Collection)[2]

The use of these Rollbocken was somewhat different in nature to the use of Bonner wagons as separate units were used for each axle of a larger-gauge wagon. Pits were provided to allow the Rollbocken to pass under the larger-gauge wagons.

Rollbock pit in Gbf Aalen in 1967. (Photo: Winkler / Härtsfeld Museumsbahn archive). [2]

The transfer of a Bonner Wagon between road and rail was done by means of a ramp at each side of the rails. In the USA, “the interurban car would shunt the wagon towards this ramp, the sides of which would offer support to the road wheels and as the move proceeded would cause the road wagon to rise clear of the rail vehicle; the latter would then be drawn out from underneath, after releasing appropriate locking devices, leaving the road wagon to be hauled by horses to its destination in the town.” [1: p350]

The transfer taking place in North America. Typically, Bonner wagons had wide-spaced wheels and no cross axles, and were parked astride the railway tracks on small ramps. A specially designed rail car was then run underneath them. Pneumatic jacks lifted the trailer wheels off the ramps slightly and clamped them securely in place. The transfer from road to rail could be accomplished in as little as four minutes. The system promised great efficiency and cost savings as high as 50% by eliminating the re-handling of freight between trucks and rail cars. Nor would cars have to sit idle waiting to be loaded or unloaded. [3]

Although the use of Bonner Wagons “was not widespread, even in America, the method sur- vived long enough to be used in the late 1920s in conjunction with motor tractors by the Lake Shore Electric Railway, with transfer ramps in the outskirts of Cleveland and Toledo at either end of an 85-mile main-line run. Bonner Wagons could be run in trains of any reasonable length, bar couplings being provided between the projecting ends of the rail units.” [1: p350]

An advert in North America from the Electric Railways Freight Company who were freight agents for the Lake Shore Electric Railway Company (1931). [3]

Returning to the Isle of Man, “when the line to Ramsey was fully operative, the Bonner Wagons settled down to a regular routine; granite setts from the Dhoon to Ramsey harbour, coal to Balla- glass power station, empty to Dhoon, and so on. The loading ramp was a removable installation, apparently used at Queens Drive crossing and not at the Ramsey Palace terminus, though even out at Queens Drive local residents often complained of the nocturnal noises caused by the shunting and transfers. It seems from this that the ramp could only be installed and used after the last passenger car had gone past at night, to be removed again before the first car in the morning. … Another ramp was installed at Derby Castle (Douglas) to perform the same rites as at Ramsey for journeys to and from Douglas harbour, and also for general freight traffic in the town.” [1: p352]

Transferring a Bonner Wagon from rail to road on the ‘Bonner siding’ at Derby Castle, Douglas, showing the ramps which supported the road wheels while the rail carrier was being moved. [1: p351]
A train of Bonner wagons hauled by a Manx Electric cross-bench car of the 14-18 series, at Laxey Station in 1899. The building on the right was later lost to fire. [1: p351]

So far as we know, the three Bonner Wagons on the Manx Electric Railway, survived for about 20 years. They were probably the only example of ‘Piggy-back’ vehicles on any British tramway or electric railway. Pearson & Price commented in 1963 that, at that time, the Bonner Wagon name “live[d] on … in an unexpected way, for the Derby Castle layout include[d] one siding that [ran] all alone behind the car shed nearest to the sea-front, and … that piece of track [was] known to the staff as the ‘Bonner siding’. The Dhoon granite quarry finally closed down in 1961, having belonged to the Highways Board for many years.” [1: p352]

References

  1. F.K. Pearson & J.H. Price; ‘Piggy-Back’ in 1899; in Modern Tramway and Light Railway Review, Volume 26 No. 2, Light Railway Transport League and Ian Allan, Hampton Court, Surrey, October 1963, p350-352.
  2. https://www.hmb-ev.de/fahrzeuge/rollbock-2, accessed on 24th August 2023.
  3. http://justacarguy.blogspot.com/2018/07/bonner-road-rail-wagons-something-ive.html?m=1, accessed on 24th August 2023.
  4. https://www.lakeshorerailmaps.com/clevelandfreight_3.html accessed on 24th August 2023.

The First Permanent Electric Railway in Scotland – The Carstairs House Tramway.

The July 1962 issue of ‘Modern Tramway’ included a short article about the Carstairs House Tramway, written by Christopher T. Harvie. [1]

Wikipedia states that the Carstairs House Tramway operated between Carstairs railway station and Carstairs House between 1888 and 1895. [2] Railscot has slightly different information. It indicates that the tramway opened in 1889 as an electric tramway but reverted to being horse-powered by 1896. It continued operating in this way until 1925. [3]

Carstairs Junction Station as it appears on the 6″ Ordnance Survey of 1896/1898. The tramway can be seen on the left of the map extract running from close to the Hotel. [4]
The full length of the tramway appears on this smaller scale extract from the OS mapping. Carstairs House appears bottom-left. [5]

The two RailMapOnline extract below show the full length of the line superimposed on Google Maps satellite imagery. [7]

The route of the tramway is shown by the pink line on these extracts. [7]
Looking Southwest along St. Charles Avenue in Carstairs. The drive to Monteith House is directly ahead. The tramway route ran under the modern properties on the right. [Google Streetview, October 2010]

Carstairs House is now known as Monteith House. It overlooks the River Clyde and sits “about one mile from the main Glasgow-London line of the Caledonian Railway at Carstairs West Station, and in 1886 the owner decided to build a tramway from the railway station to carry passengers to the house, agricultural implements and supplies to the Home Farm, and the great amount of coal then needed for heating the mansion. Accordingly plans were made for a line of 2 ft. 6 in. gauge, electrified at 250 volts, the current being generated by a turbine driven by a waterfall on the Clyde. … The positive and negative conductors were wires running alongside the tracks, supported by insulated posts about a foot high. On the car there was a double shoe to pick up current.” [1: p226]

At Carstairs House there were a few short branches serving a carriage shed and stores/outhouses. Between the House and the railway station was Carstairs Mains Home Farm where there were two further branch lines, one into the yard and the other to a sawmill. The sawmill provided the Caledonian Railway “with a considerable traffic in timber, the area being well forested. Leaving the Farm, the line cut across wooded country to rejoin the road and run alongside it to the main gates of the Estate where, at a lodge immediately opposite the railway, the terminal for passengers was situated. Shortly before it reached the lodge a branch diverged to the left, to run to a transfer siding with the Caledonian Railway.” [1: p226]

This extract from the 25″ Ordnance Survey of 1896/1897 shows the terminus of the line at the roadside opposite the Caledonian Railway station and the siding which ran Northwest alongside the Caledonian Railway to a transfer platform. [6]

There were three electric cars used for passenger services, “the first was a saloon four-wheeler built at the House in 1886. The other two were probably obtained second-hand from the electric railway demonstrated at the 1886 Edinburgh Exhibition and may have been built by the North Metropolitan Tramway Company of London.” [1: p227]

The small six-seat 2ft 6in gauge tram constructed locally for the Carstairs House tramway can be seen below. Different sources give different information about the year in which electric operation ceased. Most probably electric operation ceased in 1905 but the tramway itself survived for a further 30 years in order to ship coal and other freight from Carstairs station to the house and to export sawmill products from the estate, through the use of horse-drawn wagons. The tram, which was powered through electricity generated by a hydro-electric plant, drew its current from raised conductor rails, as clearly visible in the photograph below.

One of the Carstairs electric trams in action on the Tramway. The conductor rails can clearly be seen in this photograph. This image was shared on the I Belong to Carstairs Facebook Group on 21st July 2020 by Mark Allison. [8]

A further image showing one of these trams can be found in a book by Peter Waller, Lost Tramways of Scotland: Scotland West. [9]

In 1905, apparently, the owner was electrocuted by falling on the live electrical contacts. The result was that the electrical equipment was removed, the electric cars were placed in storage in their dedicated shed. They remained there until the final closure of the line.

Harvie tells us that:

“After the removal of the electrical equipment, horses took over the working of the line and its history continued uneventfully until the first world war, when it saw a period of intense activity as a transporter of spagnum moss, or bog-cotton, which was used as a substitute for American cotton during the period of unrestricted submarine warfare.

The line continued in use until around 1935, when the Montieth family left Carstairs House. Apparently the electric cars were then scrapped, after over thirty years of disuse. As the coming of the motor-car had ended its passenger services the agricultural tractor and motor-lorry meant the end of its usefulness as a freight carrier.

Shortly after the opening of the line there was put forward a plan for the construction of a network of local electric railways to serve the towns of Motherwell, Hamilton and Wishaw, after the same pattern as the Carstairs House Tramway, with power generated by the Falls of Clyde, near Lanark. Although this scheme remained a proposal, both parts of it were later carried out independently, a conventional electric tramway of 4 ft. 7 in. gauge being built to link these towns with Glasgow in 1903 and a generating station being built on the Falls of Clyde by the Clyde Valley Power Company.” [1: p227]

Two photographs of the information board near Carstairs Railway Station, Carstairs Junction. The Information Board stands near the junction of Strawfrank Road and St. Charles Avenue, close to where the tramway would have started. These photos were sent to me by Steve Pearce and are included here with his kind permission, © Steve Pearce.

References

  1. Christopher T. Harvie; The Carstairs House Tramway; in Modern Tramway and Light Railway Review, Volume 25 No. 295, Light Railway Transport League and Ian Allan Hampton Court, Surrey, p226-227.
  2. https://en.m.wikipedia.org/wiki/Carstairs_House_Tramway, accessed on 8th August 2023.
  3. https://www.railscot.co.uk/companies/C/Carstairs_House_Tramway, accessed on 8th August 2023.
  4. https://maps.nls.uk/geo/find/#zoom=15.4&lat=55.69277&lon=-3.66831&layers=298&b=11&z=0&point=0,0, and https://maps.nls.uk/view/75651318 accessed on 8th August 2023.
  5. https://maps.nls.uk/geo/find/#zoom=14.7&lat=55.68984&lon=-3.67589&layers=298&bk=11&z=0&point=0,0, and https://maps.nls.uk/view/75651318, accessed on 8th August 2023.
  6. https://maps.nls.uk/view/82893909, accessed on 8th August 2023.
  7. https://www.railmaponline.com/UKIEMap.php, accessed on 8th August 2023.
  8. https://m.facebook.com/groups/352799184389/permalink/10158618389784390, accessed on 8th August 2023.
  9. Peter Waller; Lost Tramways of Scotland: Scotland West; Graffeg, Llanelli, October 2022.

Manx Electric Railway – 1957 to 1962 – a review 5 years after nationalisation. ….

The June and July 1962 issues of ‘Modern Tramway’ included a 2-part review of the first five years of operation and maintenance of the Manx Electric Railway (MER) after nationalisation on 1st June 1957.

June 1962 marked the end of the first term of office of the MER Board. … ‘Modern Tramway’ Journal, in its June 1962 edition, begins:

“We should first explain something of how the Isle of Man Government sets about its work; day-to-day administration is in the hands of Boards of Tynwald, consisting partly of elected members of the House of Keys (the Manx House of Commons) and partly of non-Tynwald members appointed by the Governor. These Boards occupy much the same position as Ministries in the British Government, except that they serve in a part-time capacity. The M.E.R. Board, set up in 1957, has three Tynwald members and two others.

The first Manx Electric Railway Board was appointed in May, 1957. Its Chairman was Sir Ralph Stevenson, G.C.M.G., M.L.C., with Mr. R. C. Stephen, M.H.K. (a journalist), Mr. A. H. Simcocks, M.H.K. (a lawyer), Mr. T. W. Kneale, M.Eng. (a former Indian Railways civil engineer, with an expert knowledge of permanent-way) and Mr T. W. Billington (an accountant) as it’s members. … They were entrusted with the task of running the railway and reconstructing much of the permanent way, and an annual estimate of the money required was to be presented to Tynwald by 31st March of each year. No changes were made in the railway’s staff, the full-time management, as under the Company, remaining in the capable hands of Mr. J. Rowe (Secretary and Joint Manager) and Mr. J. F. Watson, M.I.E.E. (Chief Engineer and Joint Manager), who occupy the same posts today.

The new Board took over from the Company with due ceremony on 1st June, 1957, but found during their first year of office that, owing to rapidly rising costs, far more money than anticipated would be needed to reconstruct the railway at the rate intended, and to keep it running. Instead of a grant of £25,000 per year (the figure agreed upon by Tynwald), they would require £45,000, and after Tynwald had rejected both this request and their alternative proposed economies (cutting out early and late cars, and closing down in winter) the entire Board, with the exception of Mr. Kneale, resigned. A new Board then came into being, the Chairman being Mr. H. H. Radcliffe, J.P., M.H.K., with the following gentlemen as Mr. Kneale’s new colleagues: Mr. W. E. Quayle, J.P., M.H.K.. (Vice-Chairman), Lieut.-Commander J. L. Quine, M.H.K., and Mr. R. Dean, J.P. The new Board undertook to do their best to run the railway within the originally- planned subsidy of £25,000 per year, and reaffirmed that they would continue the work of reconstruction, but at a rate such as to lie within the original budget, the effect being of course that the rate of reconstruction has been somewhat slowed down and the method of financing has varied from that originally planned. The original. intention was to finance the relaying of the Douglas-Laxey section by an outright. annual grant, so that the track would enjoy. many years of debt-free life, but after the 1958 re-appraisal Tynwald reverted to the proposal of the second Advisory Committee to finance this work by a loan repayable over the 20-year life of the new track.” [1: p201-203]

A map of the MER and other rail routes. I find the hand drawn maps, which appear in the post-war to 1960s period magazines, of greater interest than the computer-aided mapping/drawings of layer years. This image should assist in placing elements of the MER referred to in the text. [1: p202]
Roughly the same area as shown on the hand-drawn map above. The light blue line is the MER. The red lines are the Isle of Man Railway. The pink line is the Groudle Glen Railway. The Green line is the Douglas Bay Horse Tramway. The Dark Blue line is the Snaefell Mountain Railway. Manx Northern Railway is shown in Yellow. []

Modern Tramway continues:

“In July, 1958, the Board was granted borrowing powers up to a maximum of £110,000, and of this the sum of £20,000 has been borrowed at 5 per cent, the usual interest and sinking funds being set up to provide for repayment. The money was used to relay 200 tons of rails, including labour, rail fastenings, sleepers and ballast. In January, 1960, however, Tynwald made a special grant of £9,000 for the next stage of the track relaying, with another grant a year later, while the traffic results from the 1960 and 1961 seasons were so good that in these two years a sizeable part of the £25,000 operating subsidy remained in hand and was able to be spent on relaying; 4,000 sleepers were bought out of the annual grant in 1961, and 100 tons of rails and 4,000 sleepers by the same means early in 1962. …

Since June, 1957, despite the overall financial stringency, quite a lot has therefore been done. Five hundred tons of new rail have been laid, and to date the Board has completely renewed about seven single-track miles of line between Douglas and Laxey. Concurrently, more than half of the 24,000 sleepers on this section have been renewed. To date, new 60 lb. per yard flat-bottom rails have been laid on the following sections: both tracks from Douglas Bay Hotel to Onchan, the northbound track from Far End to Groudle, both tracks from Groudle to Baldrine, the northbound track from Baldrine to Garwick, the southbound track from Ballagaune to Ballabeg, the north- bound one from Ballabeg towards Fairy Cottage, and the southbound track from Fairy Cottage to South Cape, plus new crossovers at Onchan Head and Groudle. Many of the new sleepers were produced on the island by the Forestry Board, but the more recent ones have been imported from Scotland since no more are available locally at present. The old ones, apart from a few sold to the Groudle Glen railway, are sent to Douglas prison and cut up there for firewood.

Since the M.E.R. Company had been living a hand-to-mouth existence for several years prior to the nationalisation, the management had lost touch with manufacturers, and had to make fresh contacts. This has had the incidental advantage of allowing them to benefit from the very latest improvements in track components, and much of the recent relaying has been done with elastic rail spikes, while to the north of Ballagaune is an experimental 200-yard length of track laid with rubber pads, giving a superb and almost noiseless ride. Modern techniques have also been adopted when relaying some of the sharp curves, with careful prior calculations to determine the correct transition and super-elevation for each, instead of the rule-of-thumb methods used in earlier days.

The permanent way renewal carried out to date represents about half the total trackage between Douglas and Laxey, including all the heavily-worn sections which in 1956 were overdue for renewal. At the time the Government took over, it was hoped to relay the entire line to Laxey within seven years, followed by the Snaefell line in the ensuing three. …

Corresponding renewals have also been made to the overhead line, using round-section trolley wire and phosphor-bronze overhead parts supplied by British Insulated Callenders’ Cables Ltd., who have undertaken to continue the manufacture of whatever components the MER. may require. With gradual change to grooved wire at Blackpool, the Manx Electric will probably be the last British user of tradi- tional round trolley wire, with its big trolley wheels and “live” trolley poles reminiscent of American interurban practice. The gradual corrosion of the overhead standards in the coastal atmosphere … has been very largely arrested by a very thorough repainting.” [1: p204-205]

By 1962, traditional liveries had been brought back, with full ‘lining-out’ and ‘Manx Electric Railway’ logo. The two cars here are, first, winter saloon car No.19 at Laxey during the 1961 Light Railway Transport League convention, and, second, reupholstered saloon No. 57 at Derby Castle Works. Both pictures © J.H. Price. [1: p203]

Further support from the Manx Government was forthcoming during the first-year period after nationalisation under a scheme designed to offset the seasonal nature of the island’s biggest industry, tourism. £7,000/year was allocated dependent on the level of employment achieved. This funding could not be for planned major work as it covered the provision of work for those employed in the summer tourism period. It was “used for marginal rather than essential work, and the Board prepare[d] estimates of such work that could usefully be done and submit them to Tynwald for eventual adoption later on. Under these schemes, Laxey and Ramsey stations [were] resurfaced in tarmac, and the whole of the Douglas-Ramsey line and most of the Snaefell line [were] completely weeded and the fences and drainage works trimmed and cleaned, which when related to the real mileage (all double track) is a considerable achievement. … The Board, … in addition, treated the whole right-of-way with a selective weed-killer. … The chemical [was] applied by a special 6-ton wagon rebuilt as a weed-killer tank wagon, with a small petrol engine providing pressure spraying at 5 m.p.h. This unit [was] based at Laxey depot.” [1: p205]

Track maintenance formed the largest element of the Board’s expenditure. Little, other than routine maintenance, was done to rolling stock during this period. Physical deterioration to stock was reduced as a result of track improvements. As the images above show, some stock received cosmetic treatment, what might be called rebranding in the 21st century world.

Modern Tramway continues:

“The passenger stock remains at 24 cars and 24 trailers (excluding trailer 52, which is now a flat car). … With the increased amount of track work, car No. 2 has been converted each winter to a works car, with work-benches and equipment in place of its longitudinal seats, but like No. 1 it can be restored to passenger service in mid-summer if need be. Certain freight wagons not required for engineering purposes, including those lying derelict at Dhoon, have been dismantled in the general clearing-up. The average age of the present 48 cars and trailers is now 61 years, but most of them are only used in the summer and should be good for many years yet.” [1: p205]

This begs the question about the stock remained on the MER in the 21st century. …

In 2023, Wikipedia tells us that, “The Manx Electric Railway … is unique insofar as the railway still operates with its original tramcars and trailers, all of which are over one hundred years old, the latest dating from 1906. Save for a fire in 1930 in which several cars and trailers were lost, all of the line’s original rolling stock remains extant, though many items have been out of use for a number of years, largely due to the decrease in tourism on the island over the last thirty years. Despite this, members of each class are still represented on site today, though not all are in original form or in regular use.” [2]

The following list details what has happened to the full fleet of motorised trams:

No. 1: built in 1893 by G.F. Milnes & Co., Ltd is an Unvestibuled saloon and painted Red, White and Teak. It has 34 seats and is painted in the MER 1930s house style. It remains available for use.

No. 2: built in 1893 by G.F. Milnes & Co., Ltd is an Unvestibuled saloon and painted Red, White and Teak. It has 34 seats and is painted in the MER 1930s house style. It remains available for use.

Tram Car No. 2 in 2009 in a different livery, standing at the Derby Castle terminus, © Gordonastill and licenced for reuse under a GNU Free Documentation License. [8]

No. 3: lost in 1930 in a shed fire.

No. 4: lost in 1930 in a shed fire.

No. 5: built in 1894 by G.F. Milnes & Co., Ltd is a Vestibuled saloon and painted Red, White and Teak. It has 32 seats and is painted in the MER 1930s house style. It remains available for use.

No. 6: built in 1894 by G.F. Milnes & Co., Ltd is a Vestibuled saloon and painted Maroon, White and Teak. It has 36 seats and is painted in the MER late Edwardian livery. It remains available for use.

No. 7: built in 1894 by G.F. Milnes & Co., Ltd is a Vestibuled saloon and painted Blue, Ivory and Teak. It has 36 seats and is painted in the original MER livery. It was rebuilt between 2008 and 2011 and remains available for use.

No. 8: lost in 1930 in a shed fire.

No. 9: built in 1894 by G.F. Milnes & Co., Ltd is a Vestibuled saloon and painted Red, White and Teak. It has 36 seats and is painted in the standard MER livery. It is illuminated and remains available for use.

No. 10: built in 1895 by G.F. Milnes & Co., Ltd is a Vestibuled saloon, painted Grey and has no seats. It was rebuilt as a freight car and is currently stored.

No. 11: was scrapped in 1926.

No. 12: was scrapped in 1927

No. 13: was scrapped in 1957.

No. 14: was built in 1898 by G.F. Milnes & Co., Ltd is a roofed ‘toastrack’ and painted Maroon. It has 56 seats and was rebuilt/restored to original condition between 2015 and 2018 and remains available for use.

No. 15: was withdrawn from service in 1973, it is currently stored. It was originally built by G.F. Milnes & Co., Ltd in 1898 and is a roofed ‘toastrack’. It is painted Red & White and has 56 seats.

No. 16: was built in 1898 by G.F. Milnes & Co., Ltd is a roofed ‘toastrack’ and painted Red & White. It has 56 seats . The livery is described as ‘House Style’. It remains available for use.

Tramcar No.16, a roofed ‘toastrack’ car in the Nationalisation livery with an unidentified ‘toastrack’ trailer also in the Nationalisation livery. This photograph was taken in 2009, © Gordonastill and licenced for reuse under a GNU Free Documentation License. [9]

No. 17: was built in 1898 by G.F. Milnes & Co., Ltd is a roofed ‘toastrack’ and painted Red &White. It was withdrawn in 1973. It has 56 seats and is currently stored.

No. 18: was built in 1898 by G.F. Milnes & Co., Ltd is a roofed ‘toastrack’ and painted Red &White. It has 56 seats and was withdrawn to storage in 2000.

No. 19: was built in 1899 by G.F. Milnes & Co., Ltd is a winter saloon and is painted Maroon, Cream & Teak. It has 48 seats and is in its original livery. It remains available for service.

No. 20: was built in 1899 by G.F. Milnes & Co., Ltd. It is a winter saloon and painted Red, White & Teak. It has 48 seats and is in 1970s style. It remains available for service.

No. 21: was built in 1899 by G.F. Milnes & Co., Ltd. It is a winter saloon and painted Green & White. It has 48 seats and is in nationalisation livery. It remains available for service.

No. 22: was built in 1899 by G.F. Milnes & Co., Ltd. It is a winter saloon and painted Red, White & Teak. It has 48 seats and is in standard livery. It remains available for service.

No. 23: was built in 1900 by the Isle of Man T. & E.P. Co., Ltd. It is a Green & Grey Locomotive. It was withdrawn to storage in 1994.

No. 24: was lost in a shed fire in 1930.

No. 25: was built in 1898 by G.F. Milnes & Co., Ltd was a roofed ‘toastrack’ and painted Red &White. It had 56 seats and was withdrawn in 1996.

No. 26: was built in 1898 by G.F. Milnes & Co., Ltd was a roofed ‘toastrack’ and painted Red &White. It had 56 seats and was withdrawn in 2009.

No. 27: was built in 1898 by G.F. Milnes & Co., Ltd was a roofed ‘toastrack’ and painted Yellow, Red &White. It had no seats and was withdrawn in 2003.

No. 28: was built in 1898 by the Electric Railway and Tramway Carriage Co., Ltd. It was a roofed ‘toastrack’ and painted Red &White. It had 56 seats and was withdrawn in 2000.

No. 29: was built in 1904 by the Electric Railway and Tramway Carriage Co., Ltd. It is a roofed ‘toastrack’ and painted Red &White. It has 56 seats and was rebuilt between 2019 and 2021.

No. 30: was built in 1904 by the Electric Railway and Tramway Carriage Co., Ltd. It was a roofed ‘toastrack’ and painted Red &White. It had 56 seats and was withdrawn in 1971.

No. 31: was built in 1906 by the Electric Railway and Tramway Carriage Co., Ltd. It was a roofed ‘toastrack’ and painted Red &White. It had 56 seats and was withdrawn in 2002.

No. 32: was built in 1906 by the United Electric Car Co., Ltd. It is a roofed ‘toastrack’ and painted Green &White (Nationalisation livery). It has 56 seats and is still available for service.

No. 33: was built in 1906 by the United Electric Car Co., Ltd. It is a roofed ‘toastrack’ and painted Red &White (Nationalisation livery). It has 56 seats and is still available for service.

No. 34: was built in 1995 by Isle of Man Transport. It is a diesel locomotive, painted Yellow & Black.

As an aside, G.F. Milnes & Co., Ltd was initially based in Birkenhead but before the turn of the 20th century had purchased a site in Hadley, Shropshire, now part of Telford. “Production commenced at Hadley in June 1900, and the works in Birkenhead closed in 1902. There were around 700 employees and 701 tramcars were built in 1901. The business benefitted from the rush of orders when horse and steam tramway systems were converted to electric traction, but the market had begun to contract by the beginning of 1903. The Company went into receivership in September and, after some complex manoeuvering, became part of the United Electric Car Company Ltd. in June 1905.” [3]

Hadley is only a few miles away from our home in Malinslee, Telford. The Works are still referred to as the Castle Car Works.

Other rolling stock on the MER included four roofed ‘toastrack’ trailers which were lost in the 1930 fire (Nos. 34, 35, 38, & 39); two ‘toastrack’ trailers in storage (No. 50, withdrawn in 1978; and No. 55, withdrawn in 1997); two ‘toastrack’ trailers being rebuilt in 2020 (Nos. 36 & 53); nineteen available for passenger service in 2020 (Nos. 37, 40-44, 46-49, 51, 54, 56-62); and two flatbed trailers (Nos. 45 & 52). [2]

MER roofed ‘toastrack’ trailer No. 37 © Gordonastill and licenced for reuse under a GNU Free Documentation License. [6]
Flatbed trailer No. 45 © Gordonastill and licenced for reuse under a GNU Free Documentation License. [7]

In addition to ‘home-based’ stock the MER has welcomed a number of visiting vehicles over the years details of which can be found on Wikipedia. [2]

Returning to the ‘Modern Tramway’ articles: the Journal reported that, “Maintaining this picturesque but veteran fleet has brought its usual quota of problems, and in view of the age of much of the equipment the Company has installed an ultrasonic flaw-detector at Derby Castle works, which is being used very successfully to detect cracks in axles, and has also been used to test axles bought from British Railways before turning them down to size for use in trailers. This method of flaw-detection is markedly superior to the earlier method with magnetic fluid, since the latter could not reveal faults that were hidden by the wheel boss or the gear seating. The car motors are being rewound with glass fibre insulation, which is expected to cure burn-outs caused by the moisture that tends to accumulate while the cars are idle in winter, and should therefore bring longer motor life. Cars 7 and 9 have been fitted experimentally with hydraulic shock-absorbers on the bogie bolster springs to counteract excessive sideways motion, and the Brush type D bogies of car No. 2 have had their axlebox leaf-springs replaced with a system of brackets and coil-springs, allow- ing more movement in the hornways and. giving a smoother ride. The Management hope that these two modifications when combined will give a vastly superior ride on the ten cars with this type of bogie.” [1: p205]

In the second of the two articles, [4] the Journal continued to note that in 1960 further modern compressor sets were purchased from Sheffield Corporation which were fitted to cars Nos.1, 5, 6, 7, 9, 16, 25, 26, 27, 32 & 33.

For a short while after nationalisation a green and white colour scheme was employed to mark the change. It was quickly realised that the vehicles looked their best when painted and trimmed in accordance with their builders intentions. So, in 1962, the Journal noted that, “The more recent repainting of M.E.R. cars has therefore seen a reversion to varnished teak and Post Office red with white and light brown secondary colourings, and with full lining, crests and detail in pre-war style, and many visitors have expressed their pleasure at this reversion. For the open cars, the equivalent livery is red and white, in each case with the full title instead of the initials M.E.R. During the winter of 1960, saloon trailer No. 57 was splendidly re- upholstered in blue moquette, replacing the original cane rattan which dated quite unchanged from 1904, and No. 58 has undergone the same transformation during the past winter; the concurrent refurbishing of the interior woodwork is a joy to behold. The red used on these two cars is somewhat deeper than that mentioned above.” [2: p221-222]

Planned addition provision of four new saloon cars had by 1962 been deferred indefinitely. Grants being only sufficient to address trackwork concerns. And, since inflation had seen the cost of new cars rise significantly, it was likely that in future the Board would “probably be forced back on the alternatives of reconstructing existing cars or buying others second-hand, if any can be found. Unfortunately, the engineering restrictions imposed by the 3ft. gauge and the 90ft. radius curves and reduced clearances are such that none of the available second-hand cars from Continental narrow-gauge systems is acceptable, and although quotations were obtained for relatively modern cars from the Vicinal and the E.L.R.T., the Vicinal cars were too wide and the cost of the others including modifications was prohibitive. In the whole of Continental Europe, the 3ft. gauge (exact or approximate) is found on electric lines only in Majorca, Linz and Lisbon, and although Lisbon has some two-motor Brill 27G trucks that would be ideal for the MER, the Lisbon tramway staff think the world of them and have no intention of selling.” [2: p222]

The Journal also observed that “the problem of the two main-road crossings between Douglas and Laxey, … still remains unsolved, and although a quotation was obtained for installing powerful flashing lights, the Highways Board whose responsibility this is has not yet been willing to find the money. This is a pity, for 1962 will see the introduction of a car-ferry steamer from the mainland and the arrival of many motorist visitors unfamiliar with such Manx phenomena as rural electric railways. Despite the vigilance of MER drivers, accidents are likely to continue at these points until something drastic is done; in the meantime, some prominent warning boards and white letters on the road surface would be better than nothing.” [2: p222]

A quick look at Google Maps/Streetview shows that by 2023 that problem had been resolved.

The road crossing closest to Douglas is at the top-right of this extract from RailMapOnline. [5]
The view North-northeast along the A2 at the above crossing. [Google Streetview, October 2010]
The road crossing closer to Laxey. [5]
The view North along the A2 at the crossing above. [Google Streetview, October 2010]

By 2010, both crossing points were protected by standard crossing lights.

During the 5 years from 1957 to 1962 traffic, as predicted, fluctuated with the weather. It was “doubly unfortunate that the first two summers (1957 and 1958) were rather poor ones. However, the splendid weather in the summer of 1959 revitalised the railway, and the new Board was happily surprised to find that the returning popularity of the railway was sustained in 1960 and even more evident in 1961.” [2: p222]

The Journal provided a comparison of passenger numbers on a number of heritage lines on the Isle of Man and in Wales. Their table is reproduced below.

‘Modern Tramway’ cautions against making too much from the figures in this table as season are not comparable. It is clear however that the MER was performing acceptably when it’s performance was judged against its peers. [2: p222]

Throughout 1957 to 1962, the MER operated with the limits imposed by Tynwald (operating revenues plus an annual grant of £25,000, supplemented by monies allocated under employment relief schemes). A wage increase threatened to upset this equilibrium, but Tynwald responded by increasing the annual grant by £3,000 in 1961. Performance improvements meant that the sum was not actually drawn down.

References

  1. Manx Electric 1957-1962; in Modern Tramway, Volume 25, No. 294, June 1962; Light Railway Transport League and Ian Allan, Hampton Court, Surrey, p201-205
  2. https://en.m.wikipedia.org/wiki/Manx_Electric_Railway_rolling_stock, accessed on 4th August 2023.
  3. https://en.m.wikipedia.org/wiki/G.F.Milnes%26_Co., accessed on 5th August 2023.
  4. Manx Electric 1957-1962; in Modern Tramway, Volume 25, No. 295, July 1962; Light Railway Transport League and Ian Allan, Hampton Court, Surrey, p221-225.
  5. https://www.railmaponline.com/UKIEMap.php, accessed on 5th August 2023.
  6. https://commons.m.wikimedia.org/wiki/File:MER-Trailer-37.jpg#, accessed on 6th August 2023.
  7. https://en.m.wikipedia.org/wiki/Manx_Electric_Trailers_45-48, accessed on 6th August 2023.
  8. https://commons.m.wikimedia.org/wiki/File:MER-Tram-2.jpg#, accessed on 6th August 2023.
  9. https://commons.m.wikimedia.org/wiki/File:MER-Tram-16.jpg#, accessed on 6th August 2023.

‘The Modern Tramway’ – Part 7 – The Manx Electric Railway. …

The January 1957 edition of ‘The Modern Tramway’ reported a significant decision made by the Manx Government at the end of 1956 in respect of the future of the M.E.R. (the Manx Electric Tramway). [1]

On 12th December 1956, “the House of Keys decided by 17 votes to four that the railway, instead of being allowed to close, should be purchased by the Manx Government and run as a national tourist attraction. In addition to the purchase price of £50,000, they approved a scheme to relay the Douglas-Laxey and Snaefell track over ten years and to construct four new cars for the base service.” [1: p4]

Given the general attitude across the British Isles in the 1950s this might have seemed to be an unlikely outcome. As The Modern Tramway comments:

This is a historic decision, the first case in which the powers that be have recognised that an electric tramway, no less than a narrow-gauge or miniature railway, constitute a real tourist attraction. Again, it is perhaps the first case in which real heed has been paid to suggestions first put forward in these pages, [The Modern Tramway]. …

On 20th June [1956], the House of Keys rejected the advice of a committee that the Manx Electric Railway be allowed to close, and appointed a new committee to investigate the possibility of continuing the system. … [That committee] found that the cost of essential track renewals was the same as already quoted (£90,000 for Douglas-Laxey, £36,000 for Snaefell and £139,000 for Laxey-Ramsey) and that the only major saving would be to limit the purchase of new rolling stock to the four motor cars needed for the base service. It would however be possible to get ten more year’s life from the existing track north of Laxey and reconsider the future of the Laxey-Ramsey section later on, and they also obtained a reduction in the purchase price from £70,000 to £50,000 by leaving out two hotels and allowing the company to retain its investments. They therefore reported that the cost of taking over the railway and running it for ten years would be £50,000 for purchase, £25,000 for ten years’ trading losses and £225,000 for renewals, and the question before the Manx Parliament was whether this expenditure would be justified.”

A Future for the M.E.R.; The Modern Tramway Volume 20, No. 229, January 1957, p4. [1:p4]
Laxey in 1963: toastrack motor car 26 runs round its trailer, no.56, after terminating here on a short journey from Douglas, © Copyright Alan Murray-Rust and licensed for reuse under a Creative Commons Licence, CC BY-SA 2.0. [5]

After summarising the costs of improvements and renewal the article quoted the Committee’s Report:

We think everyone will agree that the existence of the Railway is a very great asset to the Visiting Industry. It has been at all times well patronised, and its failure would be a serious loss to the amenities of the Island as a visiting resort. Numerous letters have appeared in the local Press deploring the proposal to close the Railway and indicating the value which visitors place upon it, and the enjoyment derived from its use. Some of us feel that in any event the moral effect of closing this scenic railway which has served to supply visitors with the means of access to many of our Glens, some of which have already been purchased on behalf of the Isle of Man Government, would have a very serious effect upon the whole future of the Isle of Man and that no steps should be spared within reasonable limits to maintain it in existence.”

A Future for the M.E.R.; The Modern Tramway Volume 20, No. 229, January 1957, p4. [1:p4]

The Committee published their report in November 1956 and, in it, went on to mention the effect on the Island’s economy as regards unemployment, electricty supply, road improvements and winter work schemes, but the tourist industry naturally was their main concern. They paid tribute to the directors’ willingness to compromise which had led to the reduction in the purchase price.

A full debate took place in the Court of Tynwald on 12th December 1956 and was voted on. 17 members were in favour, four against with two abstentions.

In practice, this meant that a Board of Tynwald was set up to run the line. That Board took control of the line in 1957; and were tasked with a complete renewal of the track between Douglas and Laxey before 7 years had elapsed. After completion of that renewal, the Snaefell Mountain Railway was to be addressed in the next 3 years. In addition, purchase of 4 new cars, at an estimated cost of £8,000 each, was approved.

The Modern Tramway closes it’s article with an encouragement, first, to the Manx Tourist Board to “advertise the line as much as they can; … as a national asset the M.E.R. can and must take its proper place in the excellent handbooks and posters which the island distributes. Special guests should be taken for a trip over the line (in the directors’ saloon, of course) just as they were when it was new, and there might be a thing or two to be gleaned from the Talyllyn Railway or the R.H. & D. in the field such as selling guides, postcards and history brochures, conducting visitors round the sheds, putting together a small museum or even running a named express. Bi-lingual station name boards (as suggested by the Visiting Industry Commission) and altitude posts on the mountain railway.” [1: p5-6]

And secondly, to the Light Railway Transport League properly support the decision of the Tynwald. This, the article suggests should at least include:

  • a League visit on an annual basis,
  • a publication covering the history of the line,
  • members choosing to take their holidays on the Isle of Man,
  • regular talks about the island and it’s unique forms of transport.
Manx Electric Railway special train at Dhoon Quarry in September 1975: the train consists of the original motor car, No.1 of 1893, and ‘Royal Saloon’ no.59 of 1895, and was working an enthusiast trip. At this time No.1 was normally only used for maintenance work, and had been equipped with platforms screens to give some protection to the driver. The front dash panel can be seen to be seriously dented, and the body can be seen to be in need of attention. It was ‘rescued’ from this condition in 1979 and restored as part of the Tynwald Millennium celebrations.

Dhoon Quarry sidings, originally serving the quarry of that name, has for many years served as the main permanent way storage location. Note the large pile of new sleepers on the left, ready replace rotten ones like the pile on the right, © Copyright Alan Murray-Rust and licensed for reuse under a Creative Commons Licence, CC BY-SA 2.0. [6]

2023 sees the 130th anniversary of the opening of the M.E.R., the Company advertises its Douglas to Ramsey service, the Snaefell service and the Steam railway together. [2] The M.E.R. has, since nationalisation, had a chequered history. The Company’s website has a short history of the service which tells us that:

The new timetable introduced in June 1958 with 11 round trips to Ramsey between 10am and 6pm was met with immediate disapproval, so much that nearly the entire Board resigned. After the appointment of a new Board in July 1959, a service of 20 round trips with a winter service was the agreed replacement, allowing the mail contract to continue.

By 1965 the relaying of the Derby Castle to Laxey section and rewiring was near enough complete. Tynwald’s commitment to the M.E.R was tested in January 1967 where a short section of the wall at Bulgham collapsed, meaning temporary termini had to be set up north and south of the accident site. Reconstruction of the embankment started in May, and was finished in mid-July.

The Laxey-Ramsey section was closed after a few years of speculation in September 1975, causing the railway to lose the mail contract. Following Government debate it was decided to keep the Ramsey section closed for 1976, the railway as a result becoming the high topic at the year’s General Election!

Support for the M.E.R meant that the Laxey-Ramsey section was reopened for the 1977 season, with the amalgamation of the Steam Railway and M.E.R  under the title of Isle of Man Railways coming shortly after during 1978 (though the name of the M.E.R Board was not changed) Both railways were to be marketed jointly and timetables coordinated, working in turn with the amalgamated bus network. The M.E.R looked to be safe, with the Centenary of Electric Traction Celebrations coming to the fore in 1979.

The ‘Centenary of Electric Traction’ Celebrations were very successful for the Manx Electric Railway, with the restoration of Freight Trailer No.26 and Locomotive No.23 to display condition, the opening of the Electric Railway Museum in Ramsey Car Shed, and the Grand Cavalcade at Laxey, during which all the operational stock was exhibited to the general public. Car No.1 was also restored to operational passenger use, with Car No.2 following in Winter 1980/81.

During 1983 the Manx Electric Railway and National Transport Boards were amalgamated, to become the Isle of Man Passenger Transport Board, with Car No.6 receiving the title ‘Isle of Man Passenger Transport’ post-overhaul. During the same year, Locomotive No.23 was also restored to operational condition, receiving again trucks and equipment from Car No.33. It ran during the May 1983 and 1984 ‘Vintage Transport’ Weekends, being very popular for visiting and local enthusiasts. Further repairs were undertaken to areas of the Bulgham section of the M.E.R, with the northern section of the retaining wall (near today’s excursion platform) receiving attention.

In 1986, the Board system was scrapped and the M.E.R came under the control of the Department of Tourism and Transport (Today the Department of Community, Culture and Leisure). Following two years of planning, the ‘Year of Railways’ was launched in 1993, with the Centenary of the Manx Electric Railway being the prime focus.” [3]

Ballacannell, Manx Electric Railway, Ballabeg – 1963:
winter saloon No. 19 with trailer rounding the curve to the South of the level crossing near Laxey, © Copyright Alan Murray-Rust and licensed for reuse under a Creative Commons Licence, CC BY-SA 2.0. [7]

Wikipedia informs us that:

The section between Laxey and Ramsey was closed again in summer 2008, after a consultancy report commissioned by the Isle of Man Government exposed critical failings in the permanent way, deeming it unsuitable for passenger service in the near future. The … Tynwald, agreed to spend nearly £5 million for track replacement in July–September, allowing trams to run on a single track. … Manx authorities were considering vintage buses as a replacement during the closure. … In 2009, the full line operated continuously, and it has continued to do so during the summer season since the beginning of the 2010 season at Easter, except for [a] COVID-related suspension, with no rail-related incidents affecting services.

Until 1998, the line operated a year-round service, but since then it has run seasonally, usually between March and the beginning of November, though the dates can vary from season to season.” [4]

30 years have passed since the centenary celebrations and the Company now maintains its own website and an active social media presence.

References

  1. A Future for the M.E.R.; The Modern Tramway; Volume 20, No. 229, January 1957, p4-6.
  2. https://www.iombusandrail.im/media/2693/isle-of-man-railways-2023-timetable.pdf?fbclid=IwAR0Q2DVcvjKFmRpHqAKWSf3x4a7_fAoSXGSyYm_DhIYeD1OO_hmidJiFL54, accessed on 19th June 2023.
  3. https://manxelectricrailway.co.uk/features/history, accessed on 19th June 2023.
  4. https://en.m.wikipedia.org/wiki/Manx_Electric_Railway, accessed on 19th June 2023.
  5. https://www.geograph.org.uk/photo/6470337, accessed on 19th June 2023.
  6. https://www.geograph.org.uk/photo/6879694, accessed on 19th June 2023.
  7. https://www.geograph.org.uk/photo/6471516, accessed on 19th June 2023.