Category Archives: Greater Manchester and Surrounding Areas

Stockport’s 21st Century Trams and Transport for Greater Manchester’s Plans for the Future.

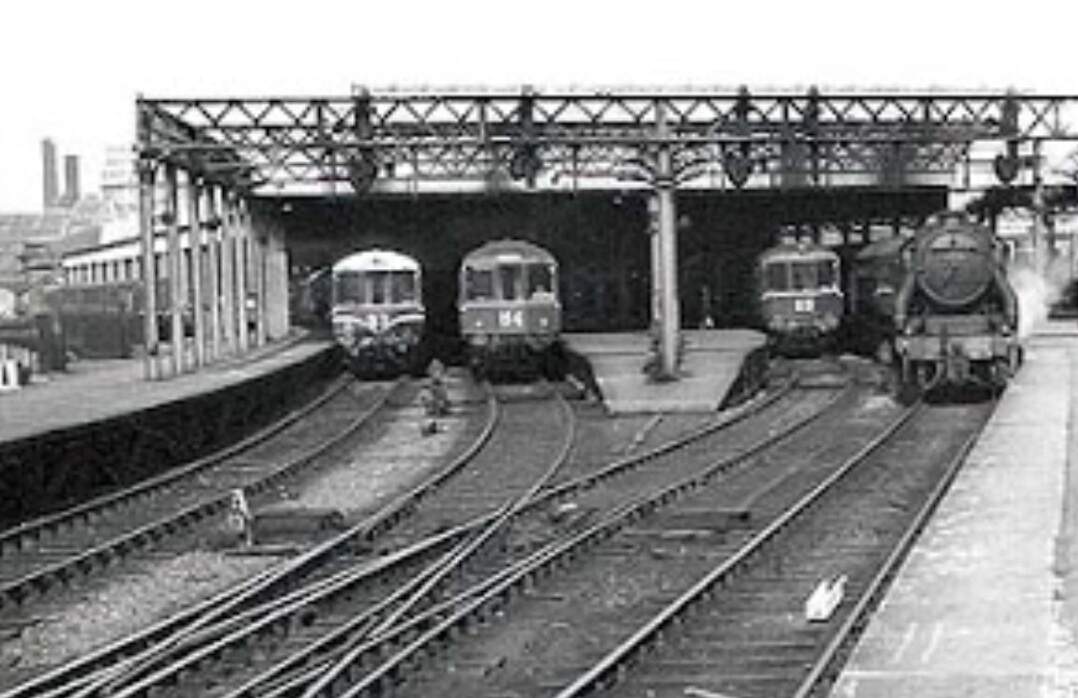
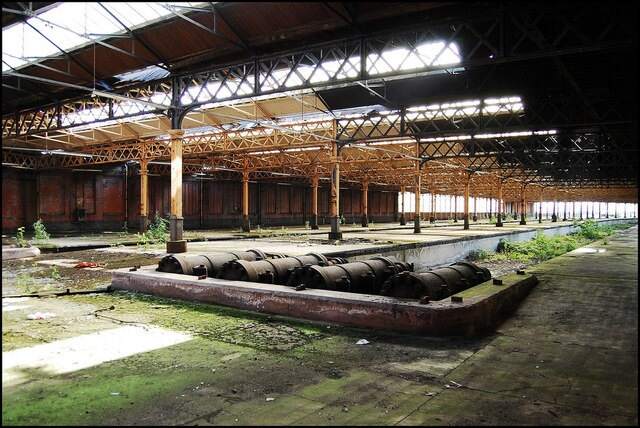
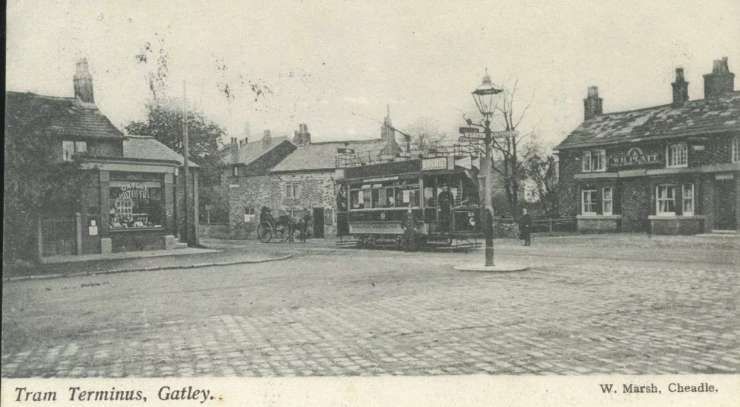
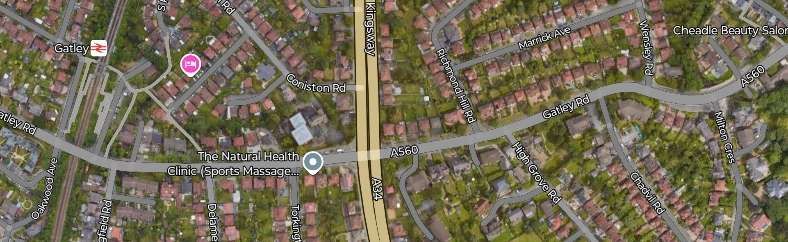
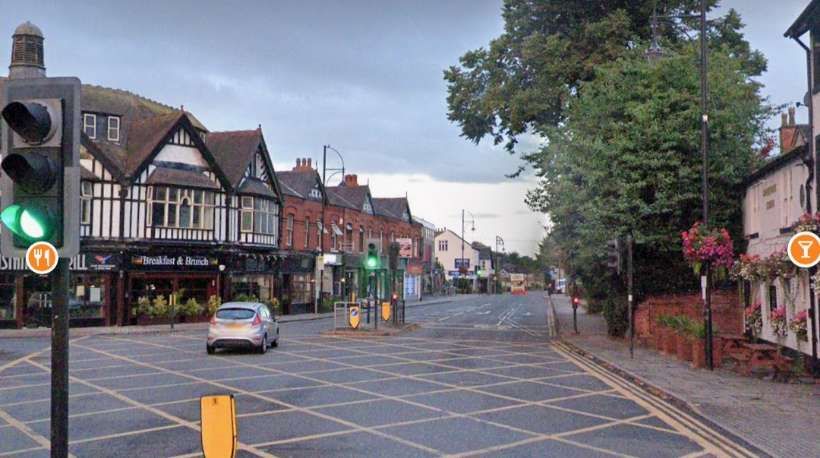
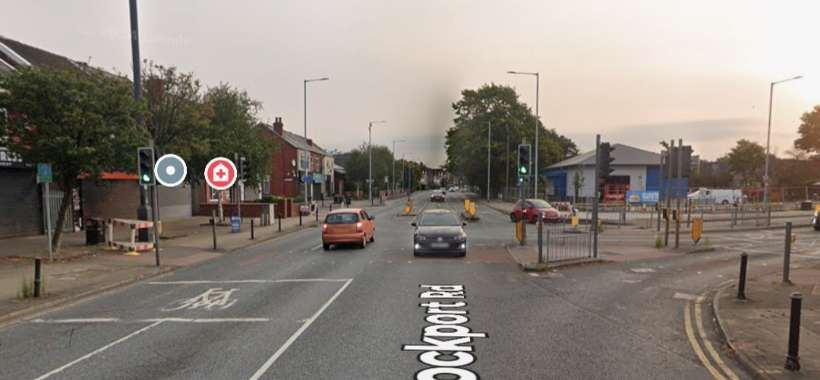
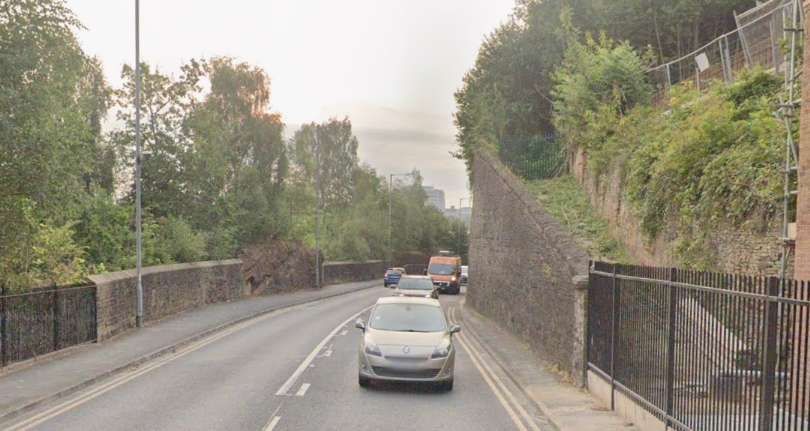
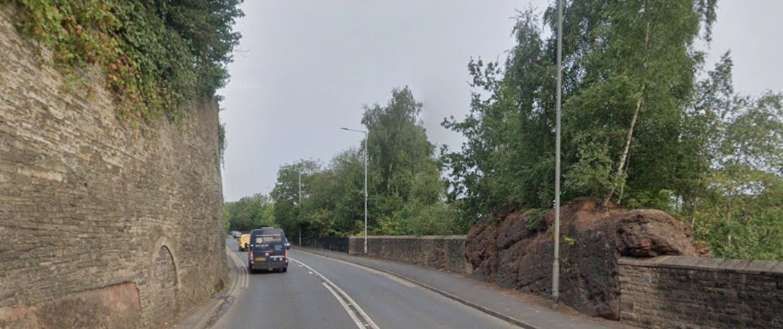
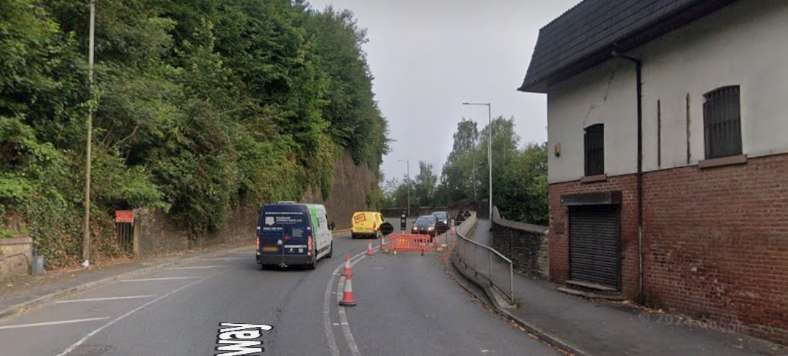
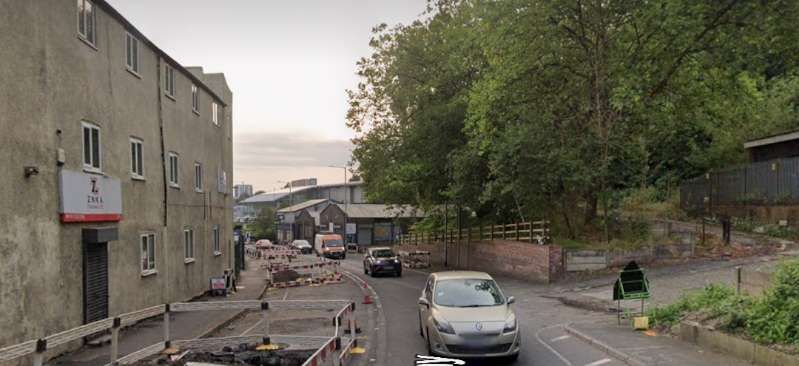
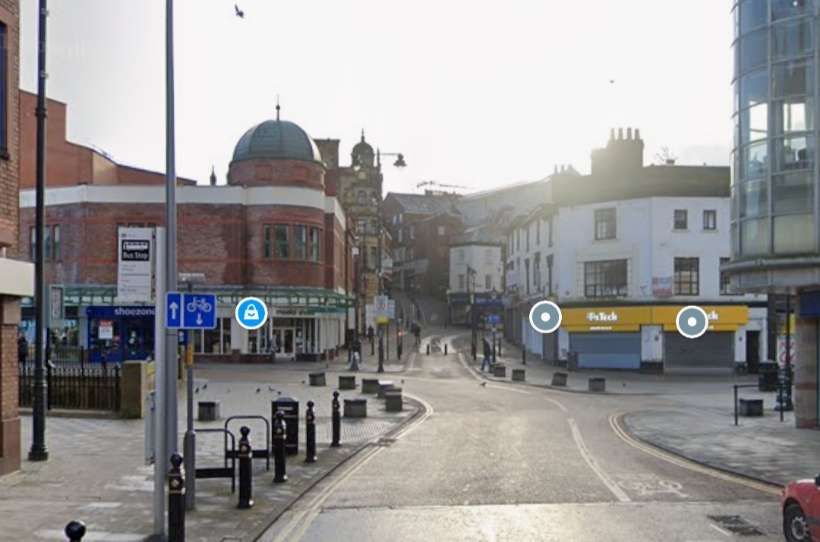
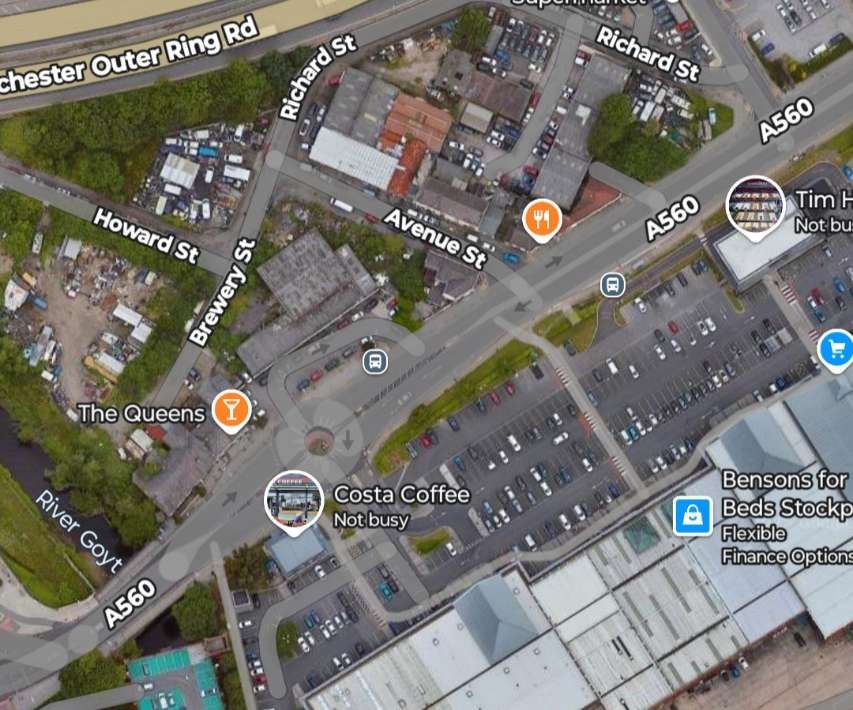
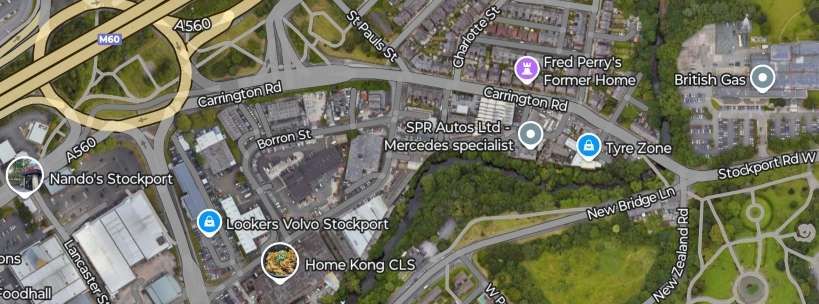
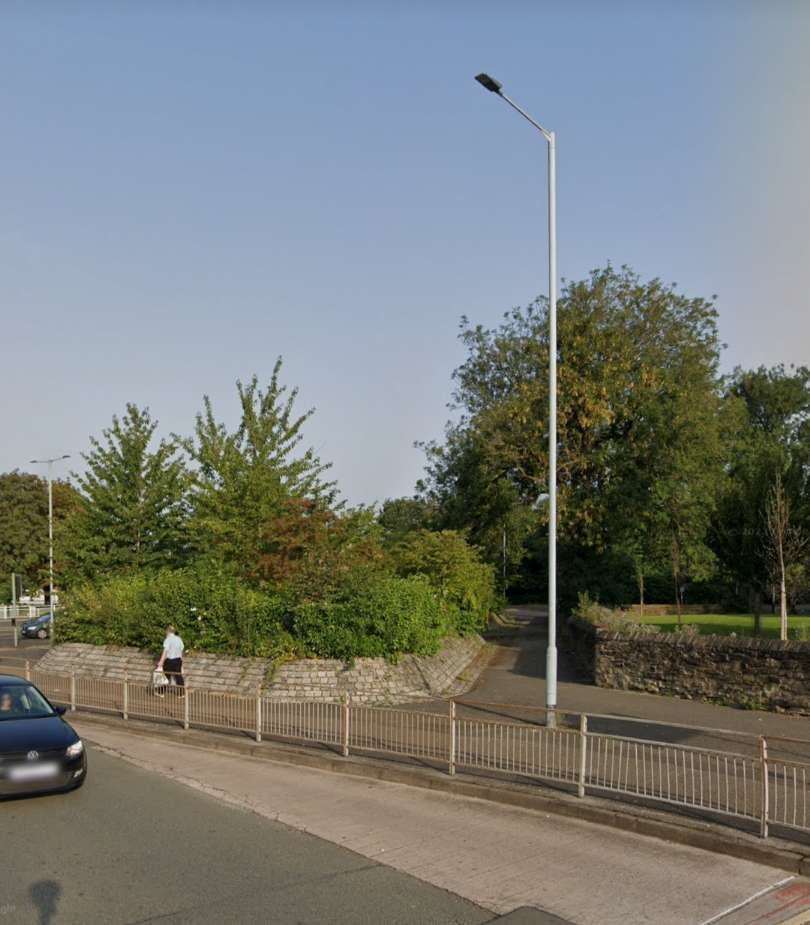
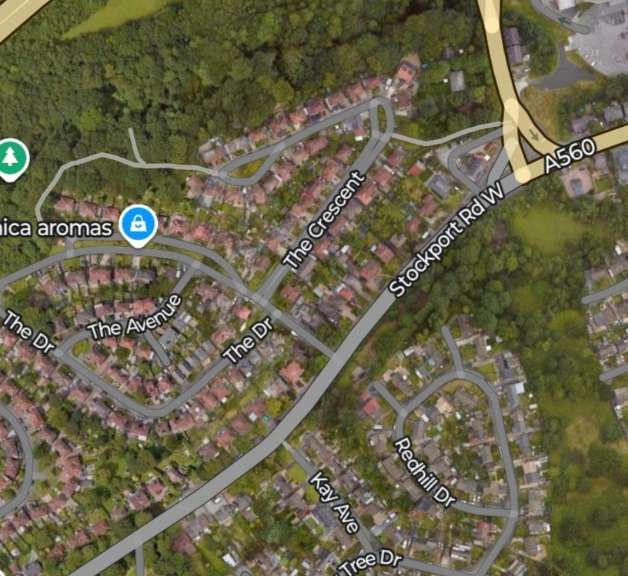
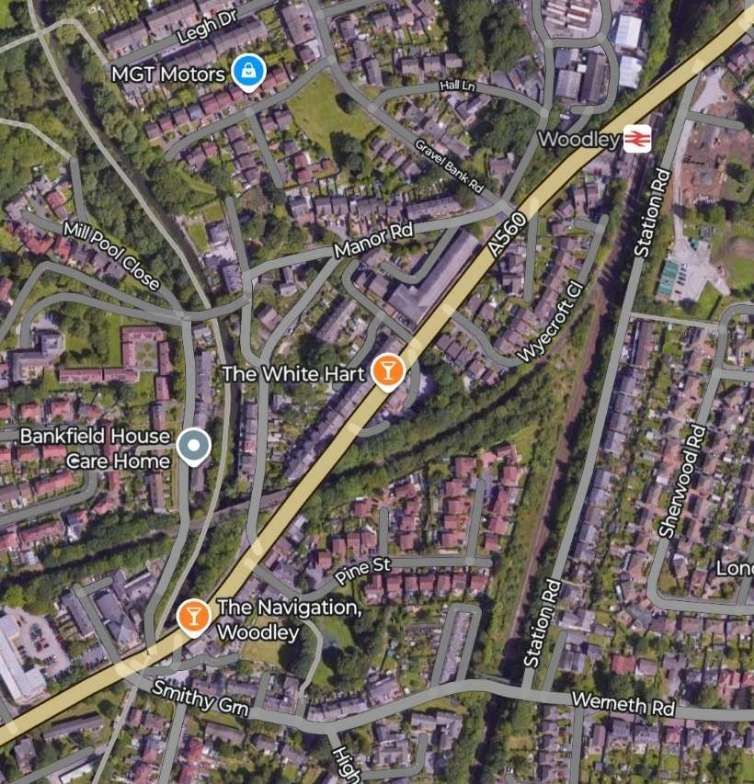
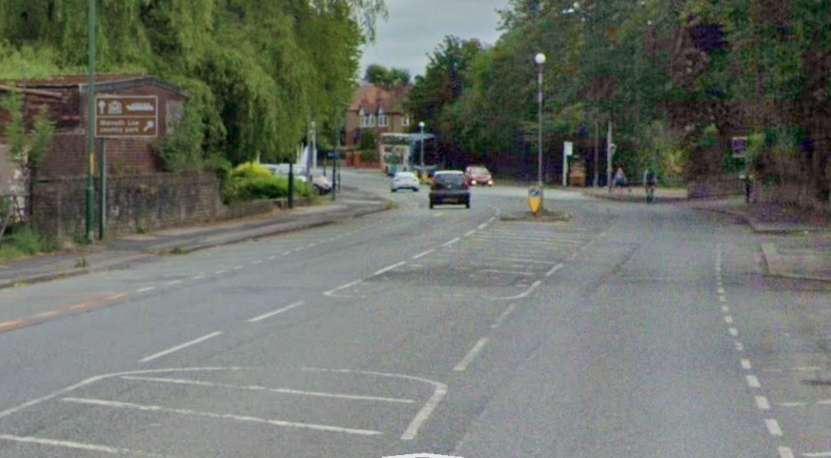
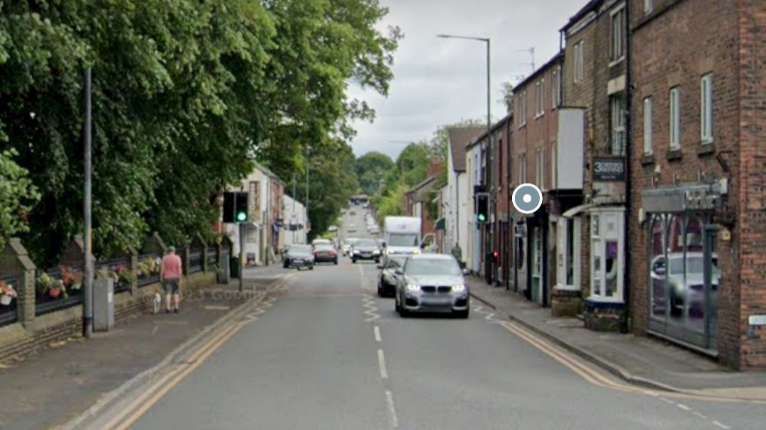
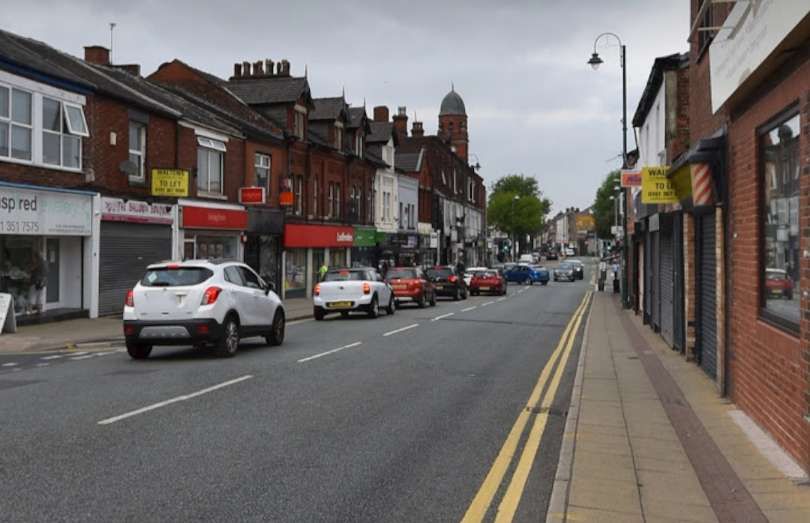
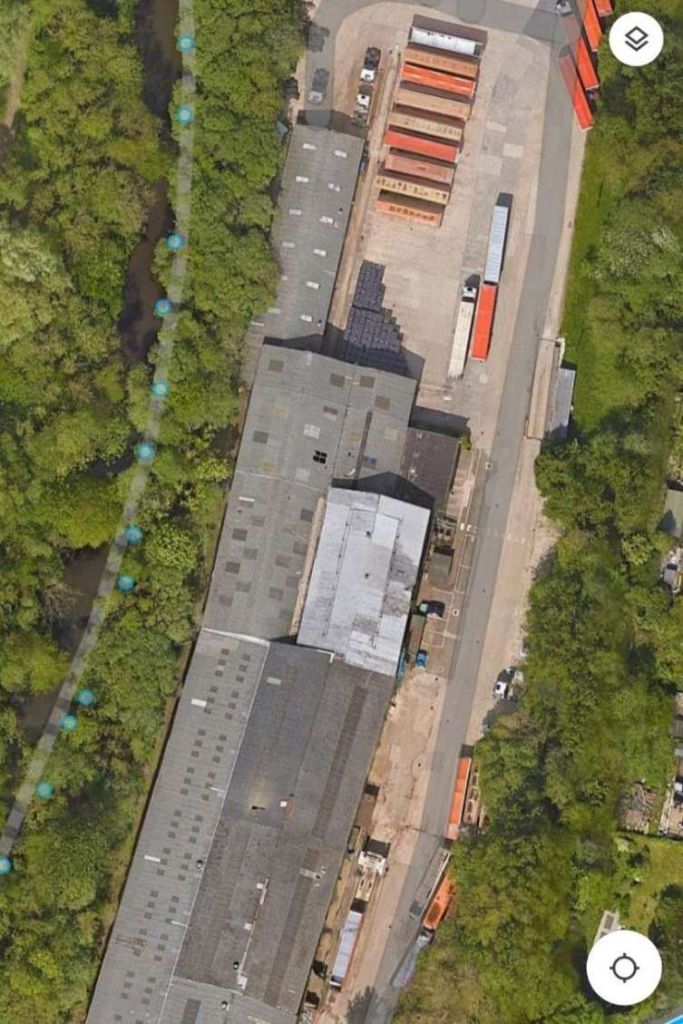
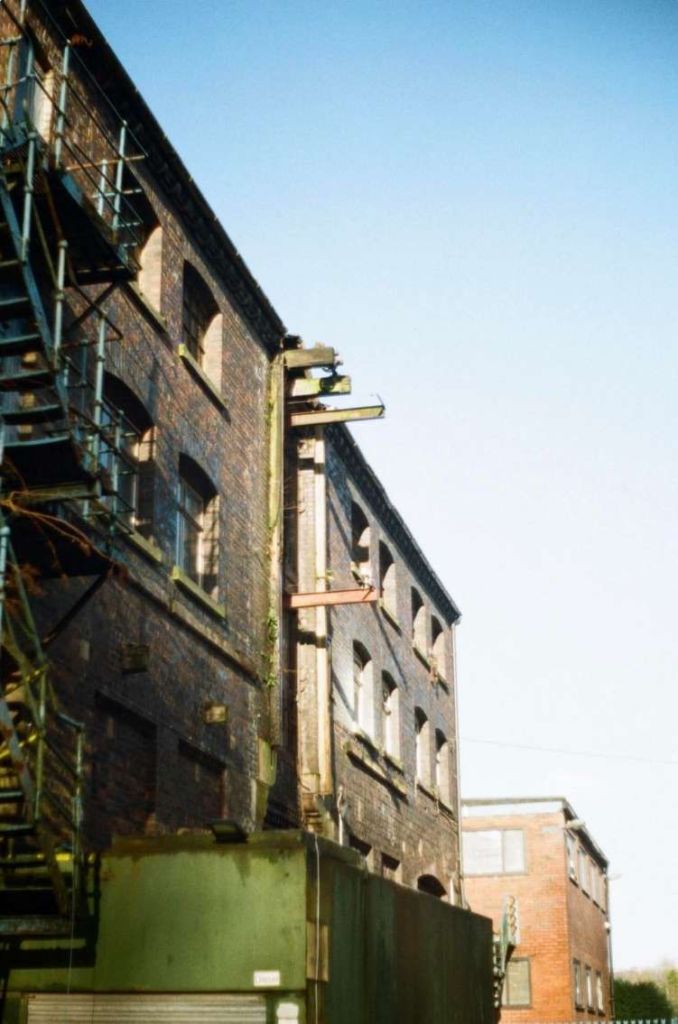
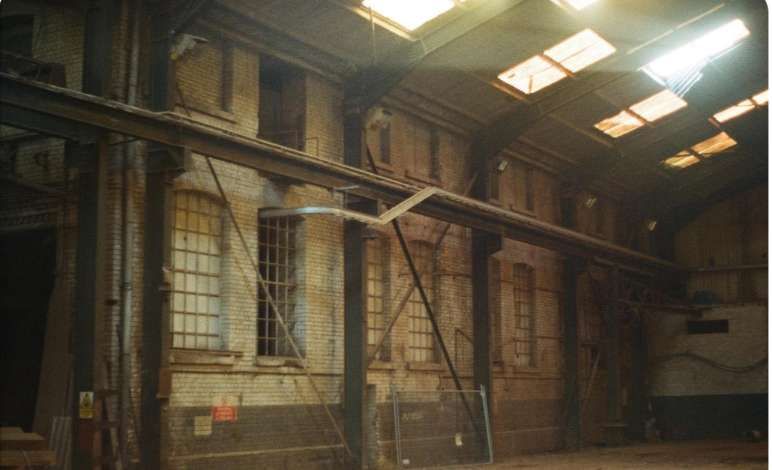
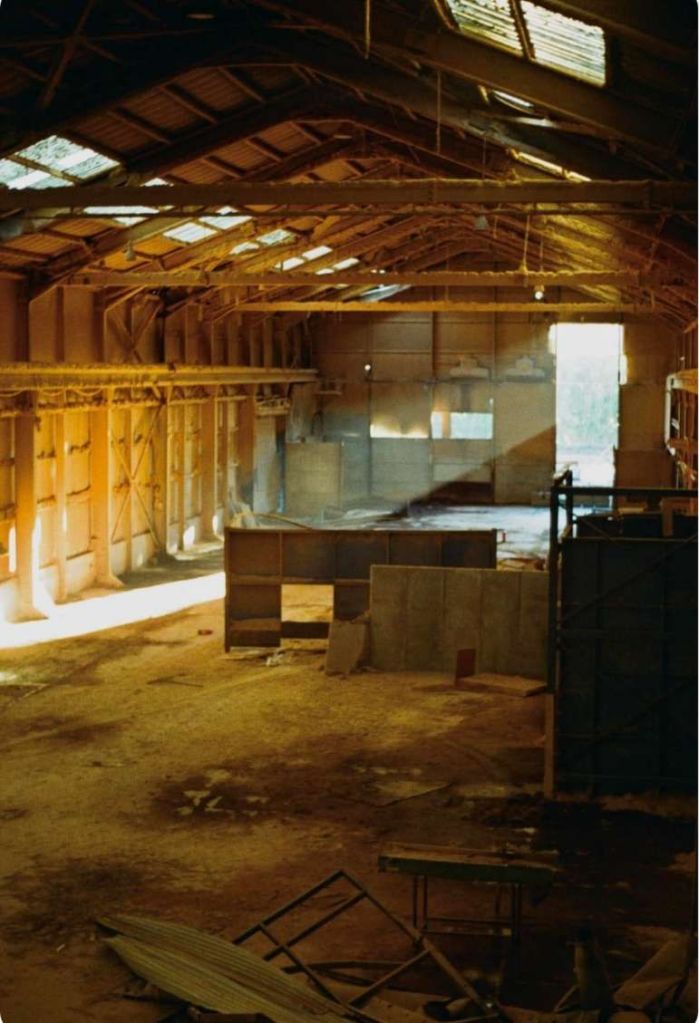
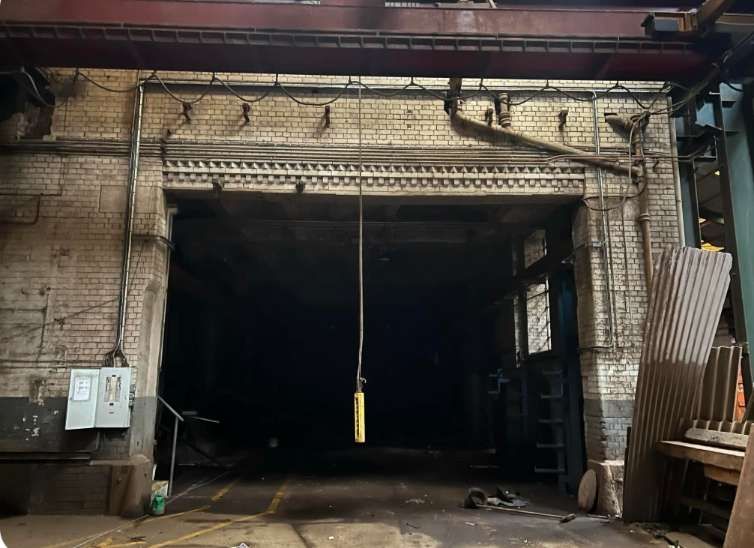
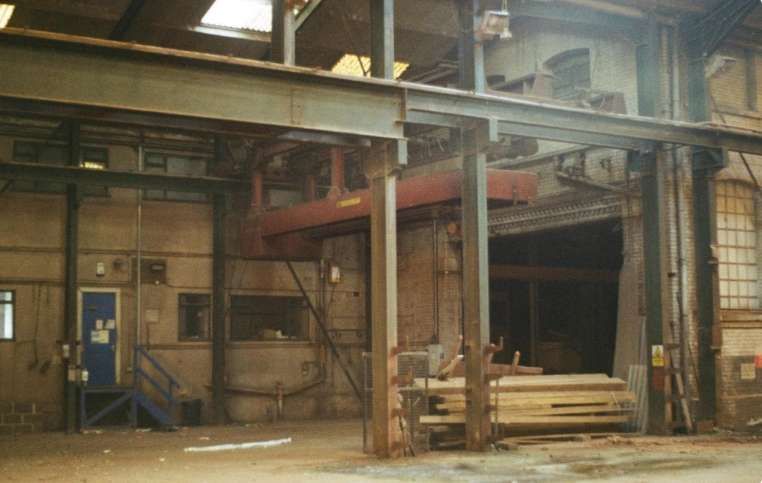
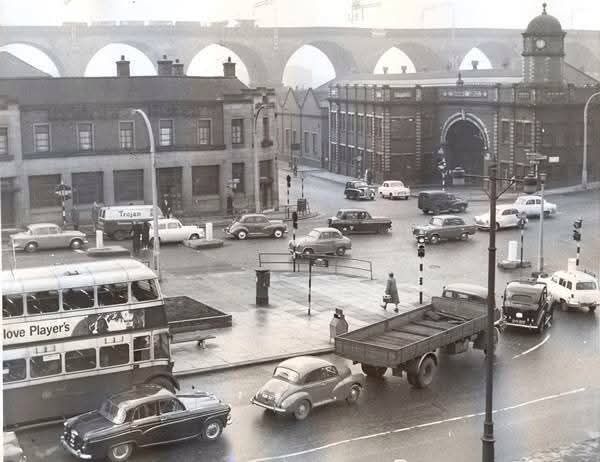
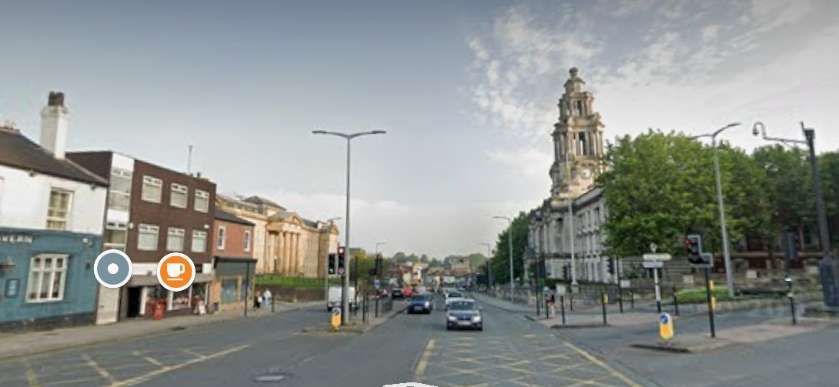
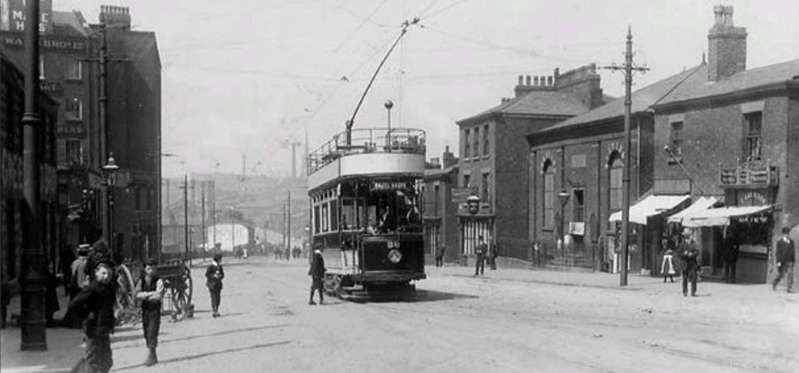
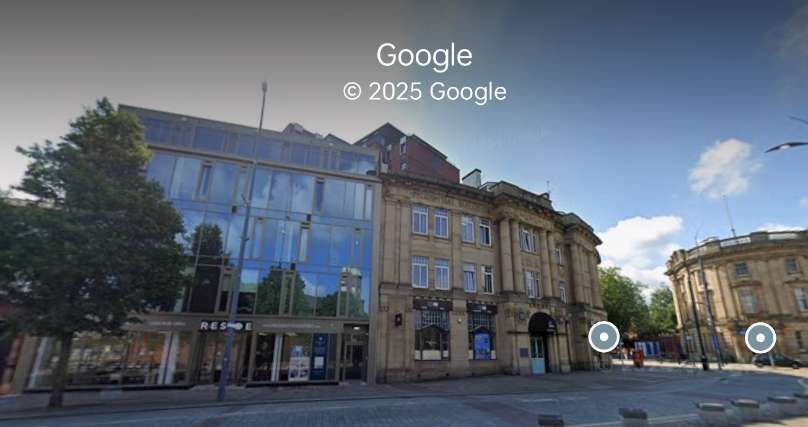
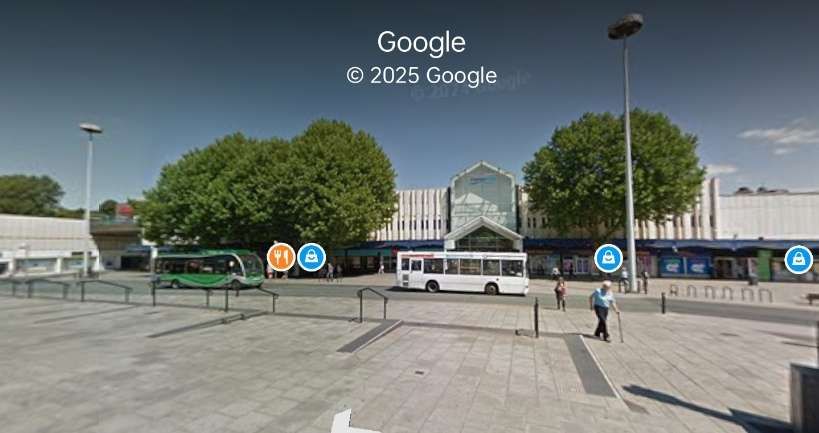
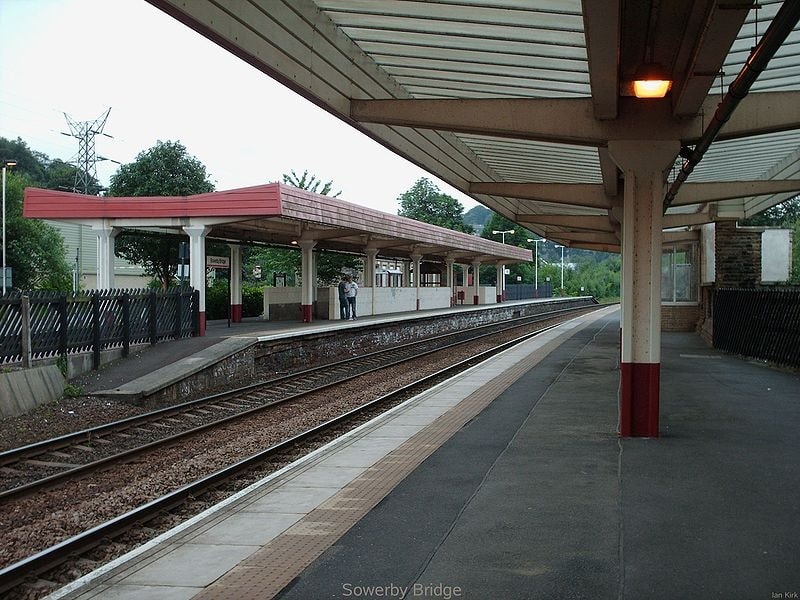
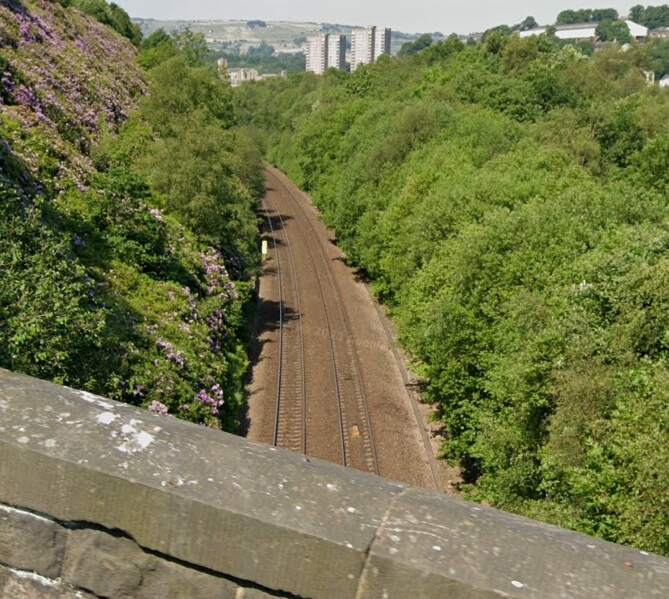
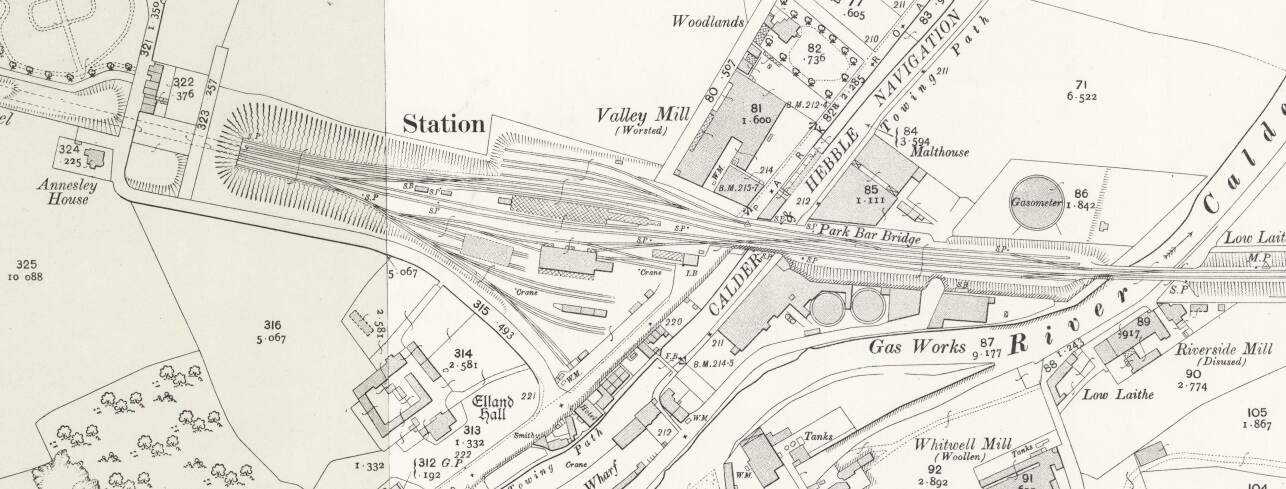
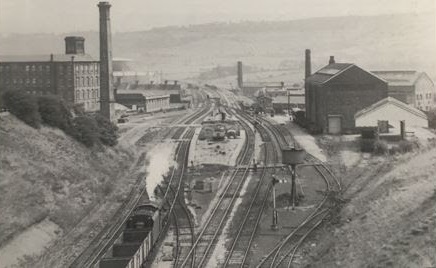
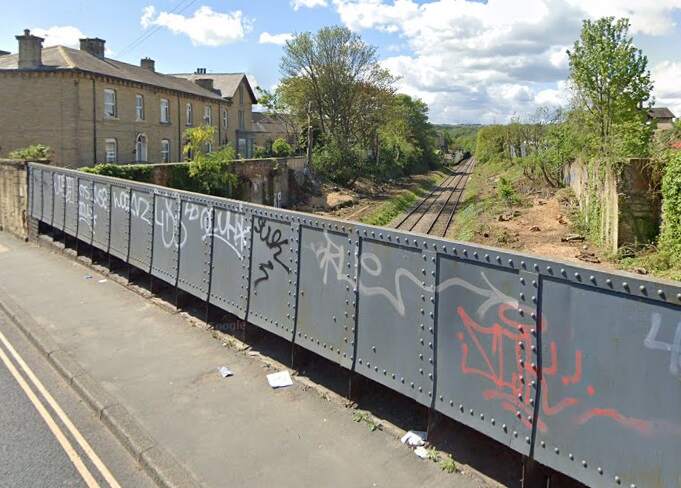
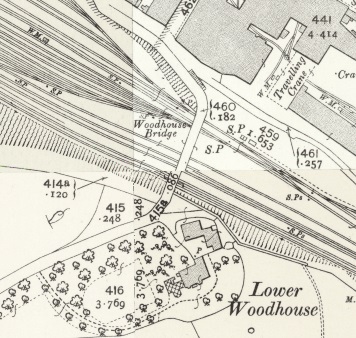
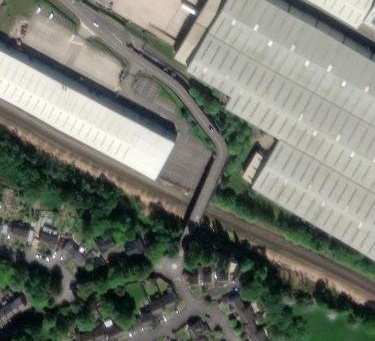
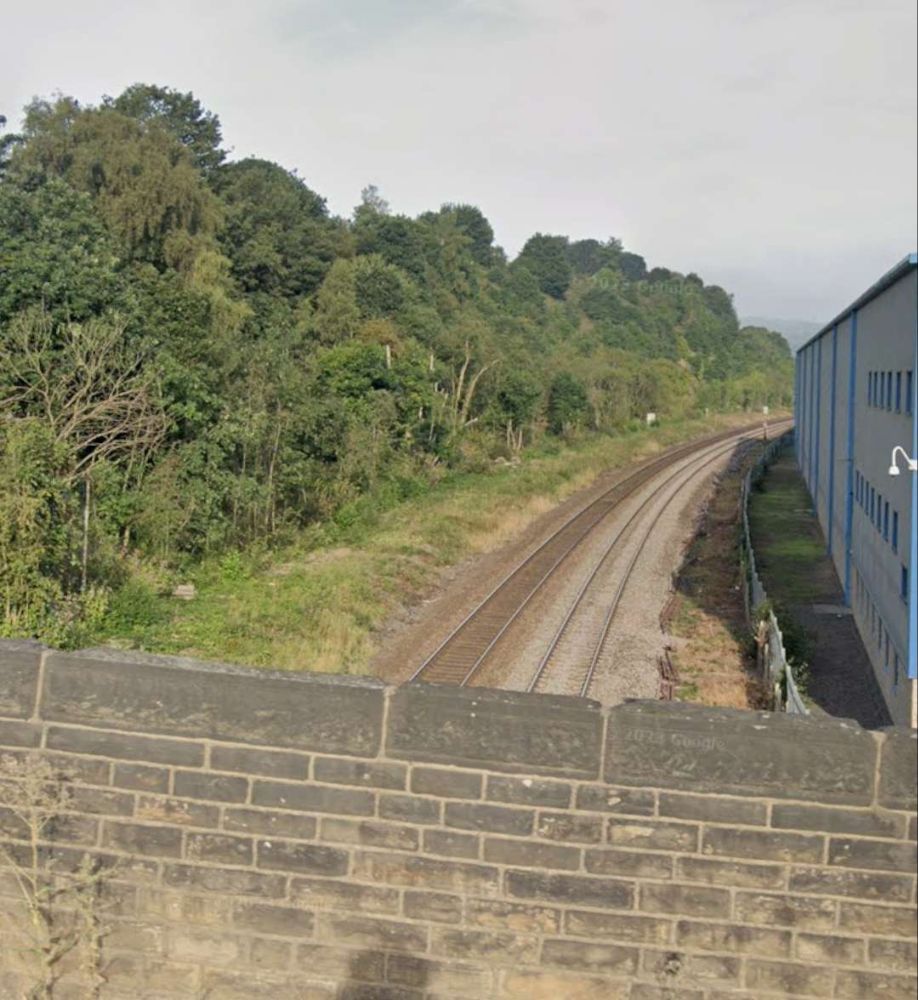
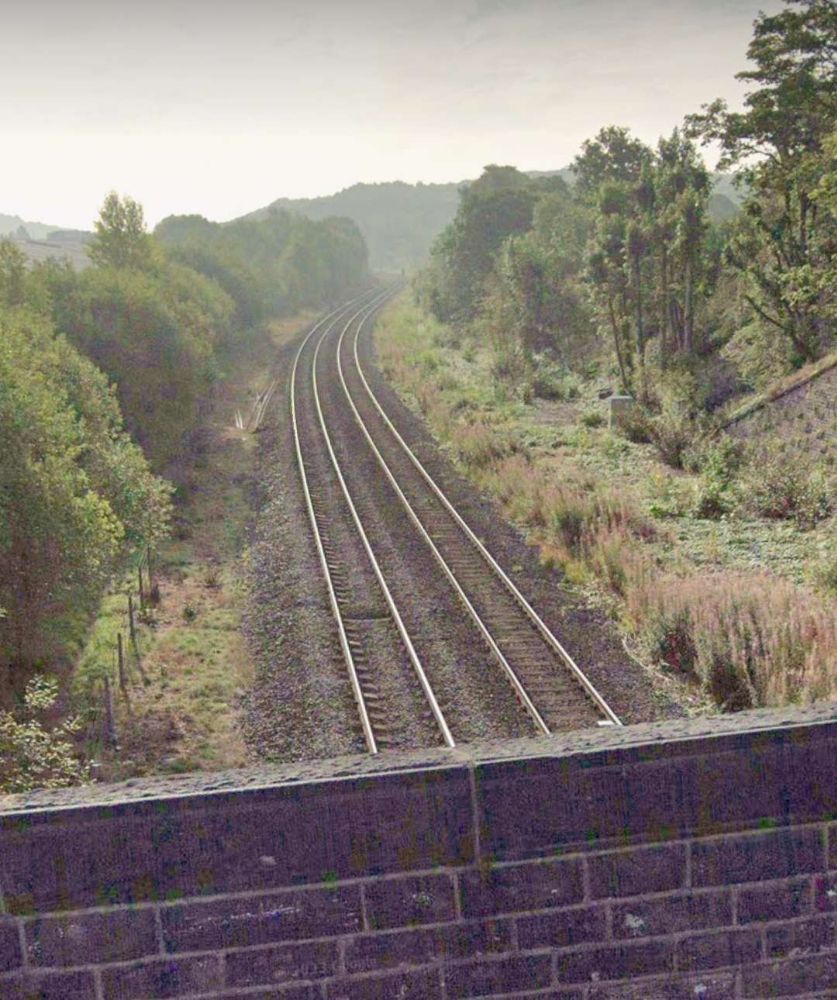
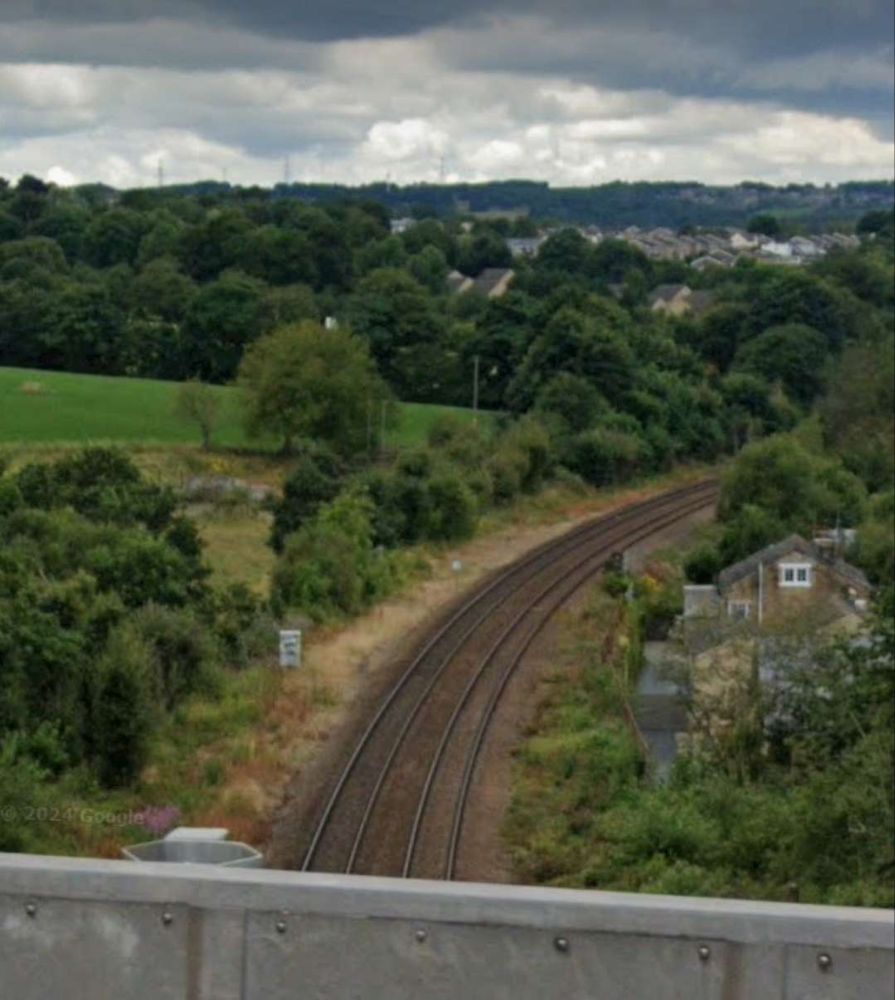
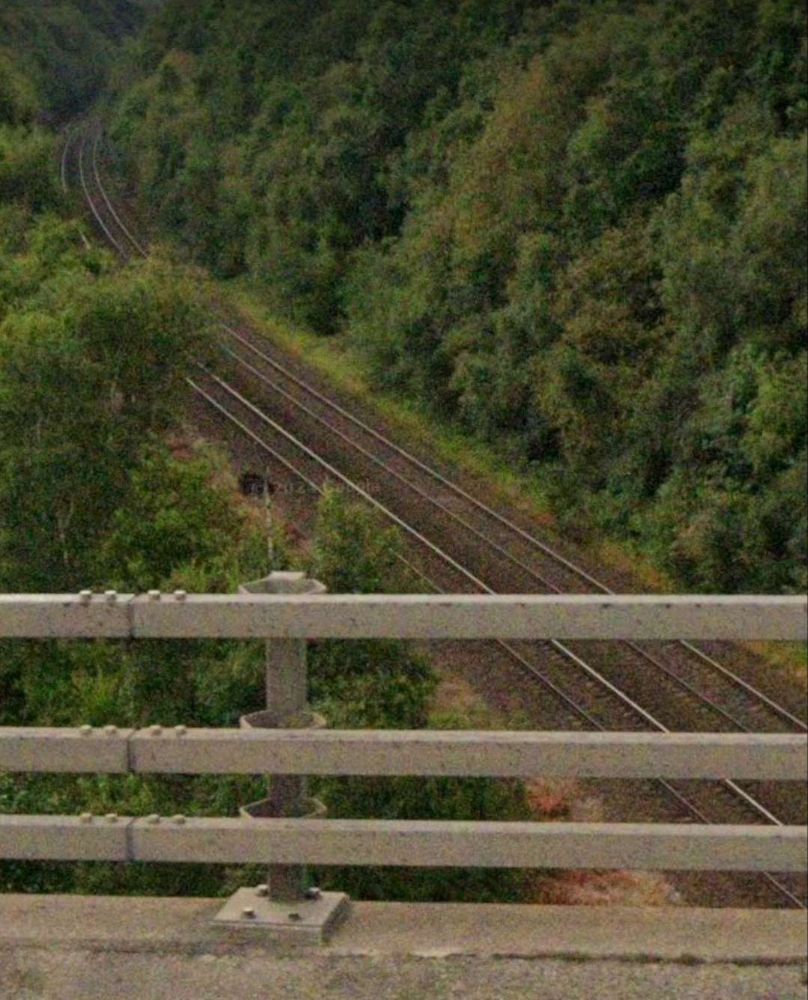
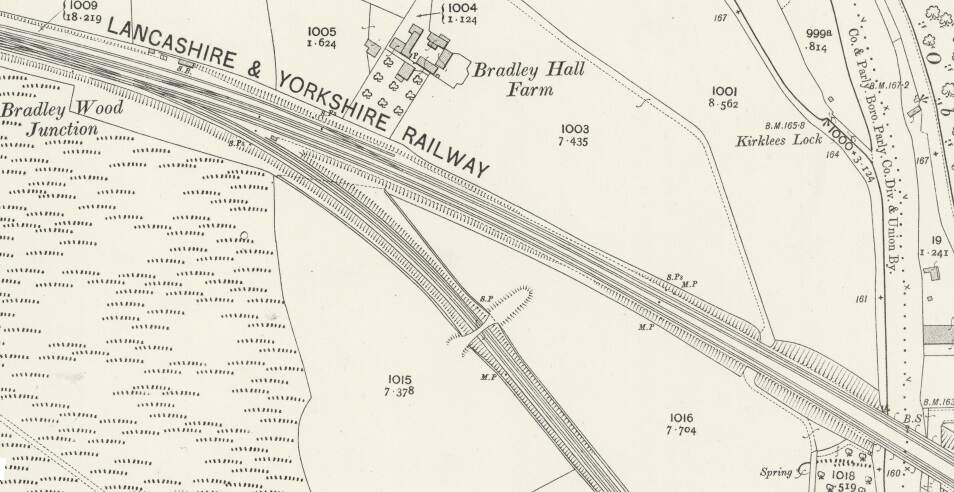
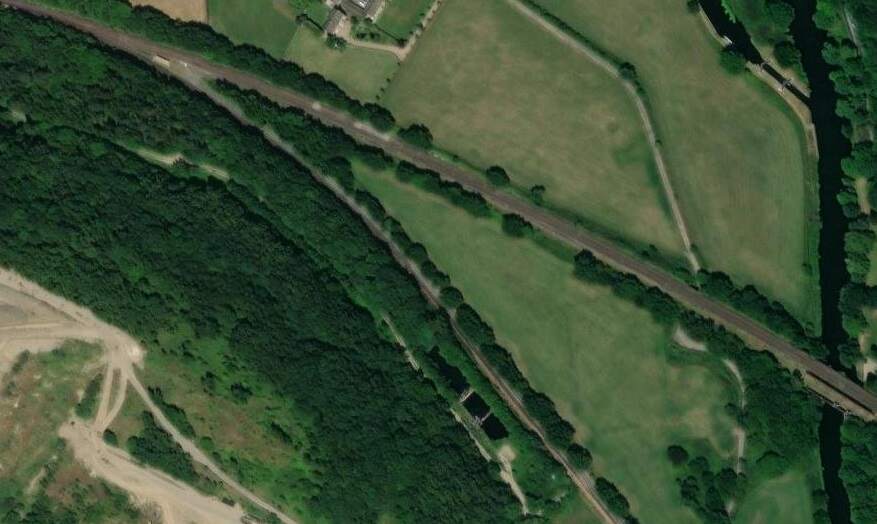
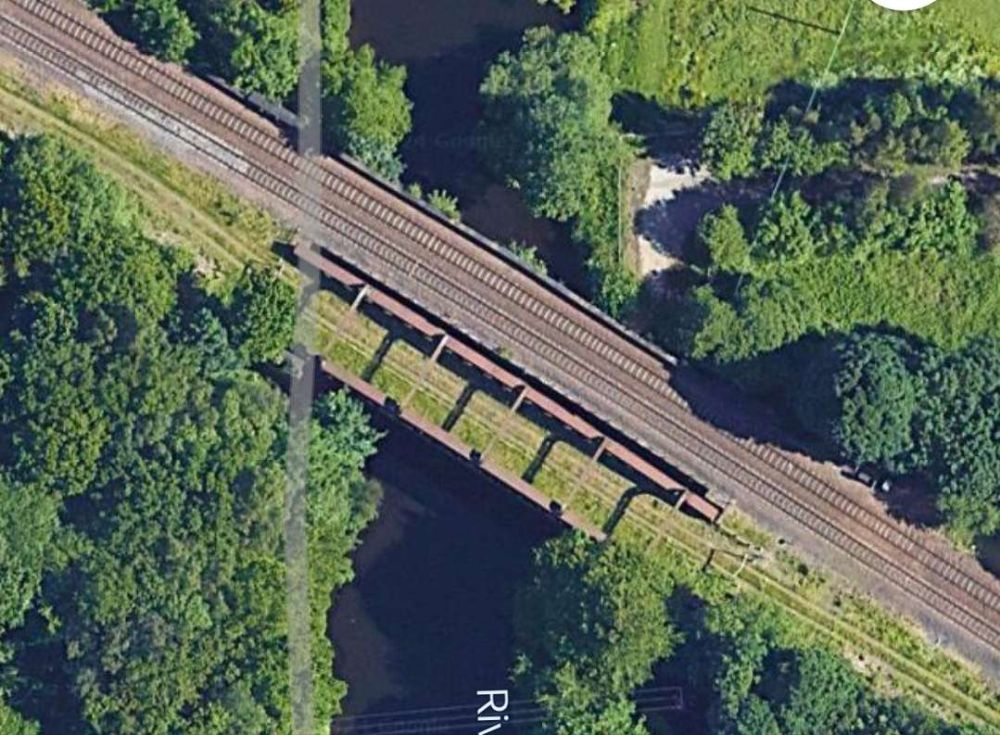
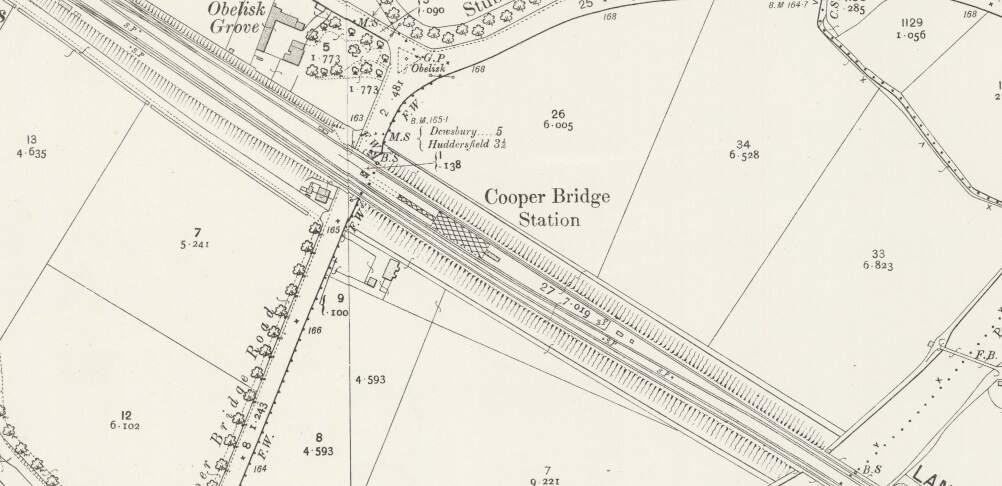
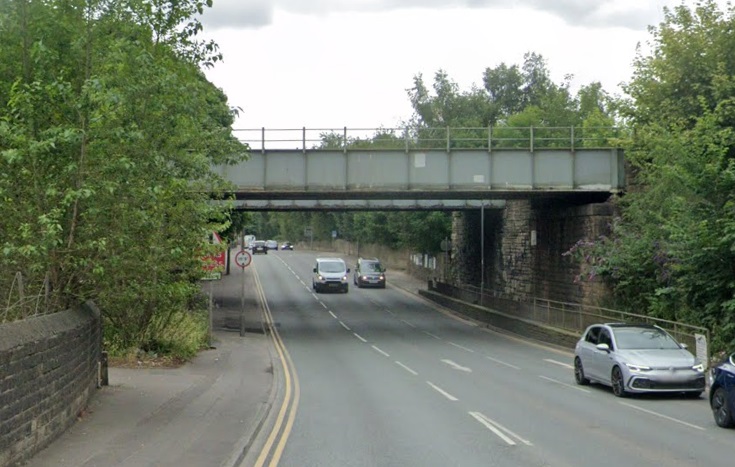
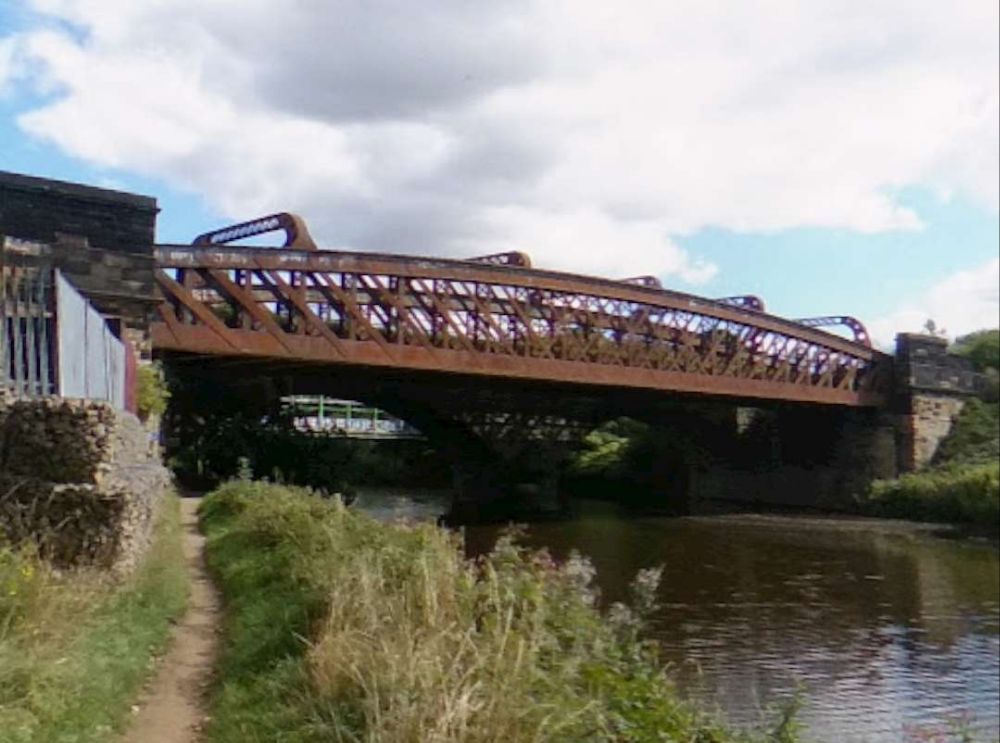
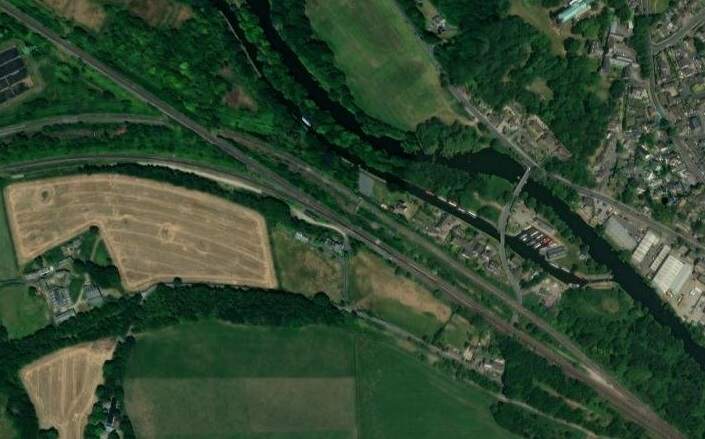
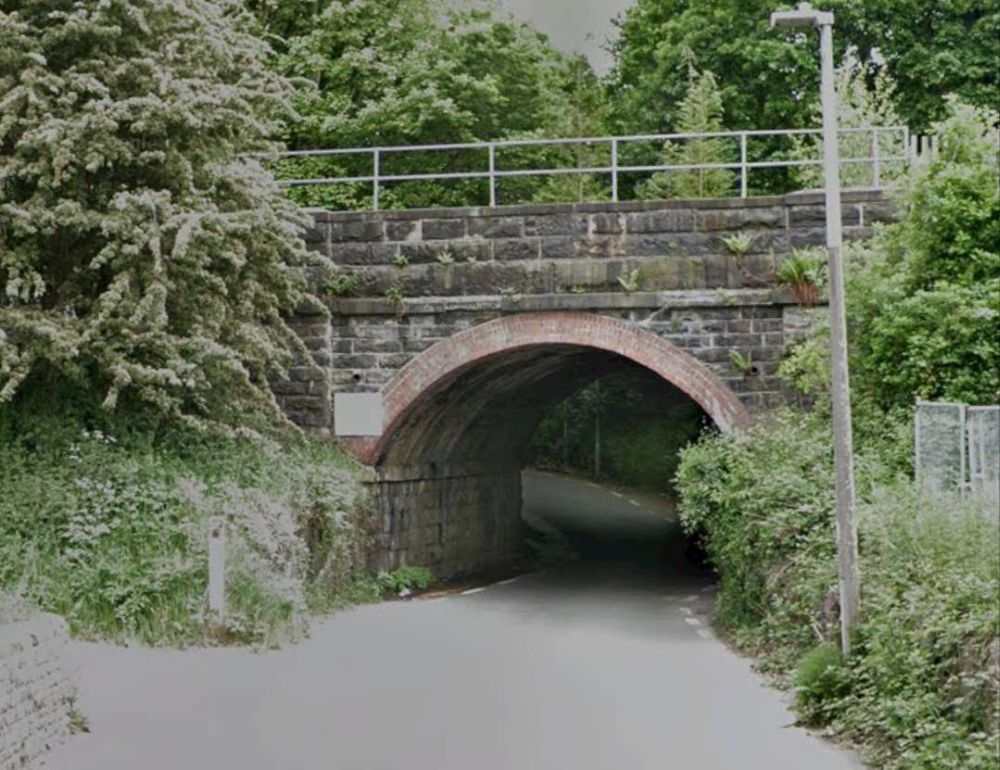
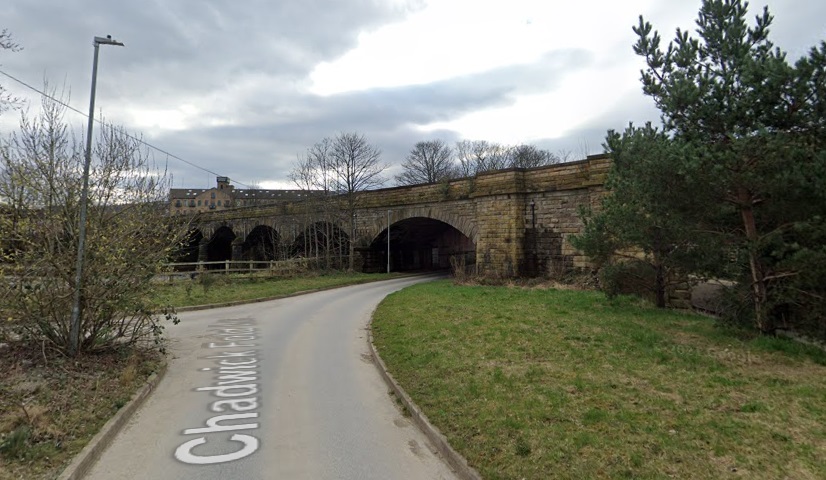
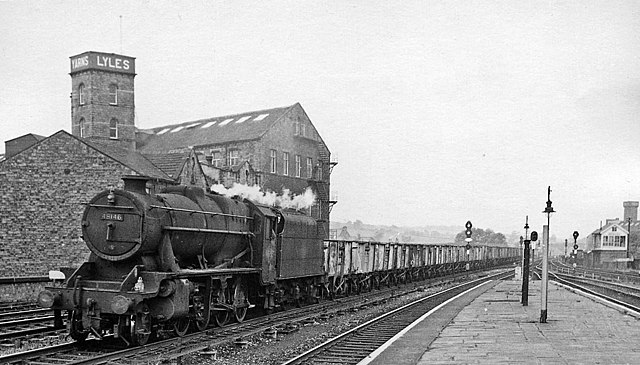
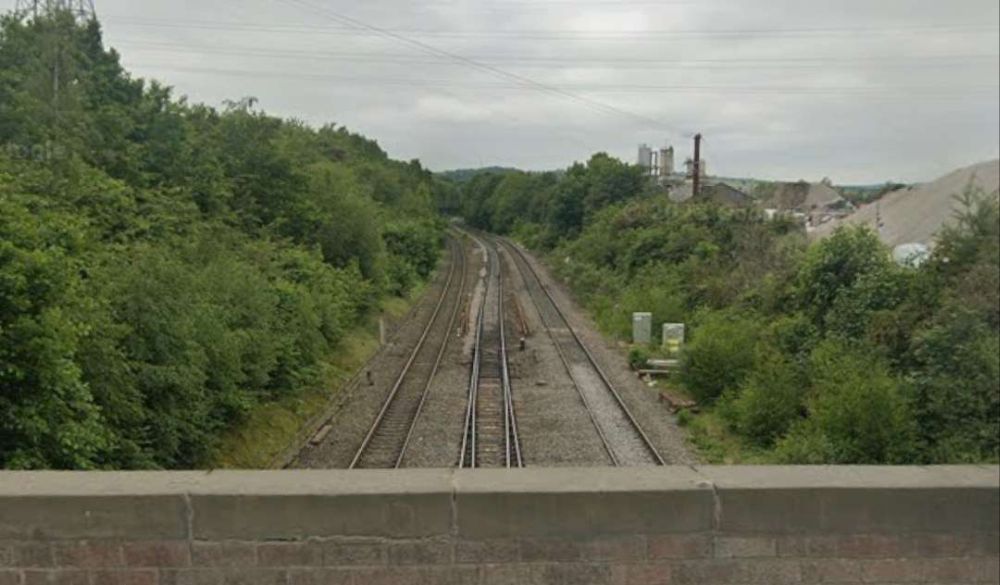
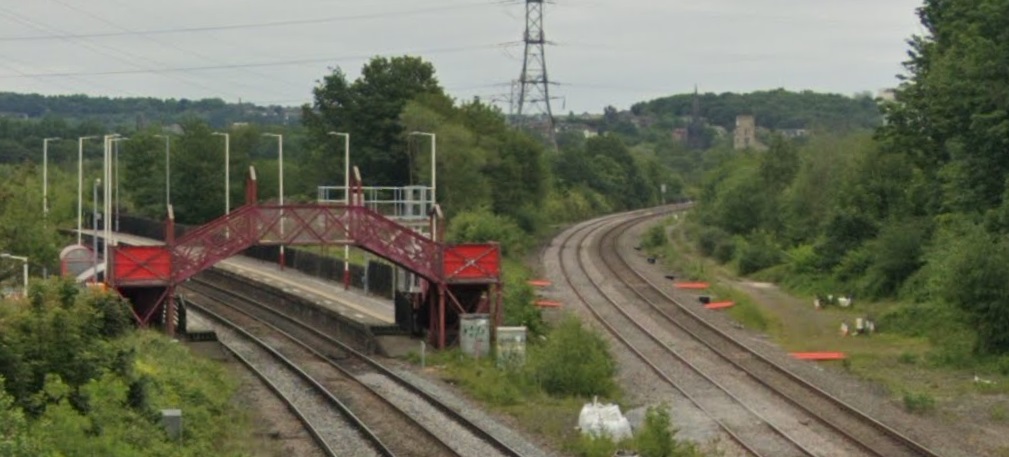
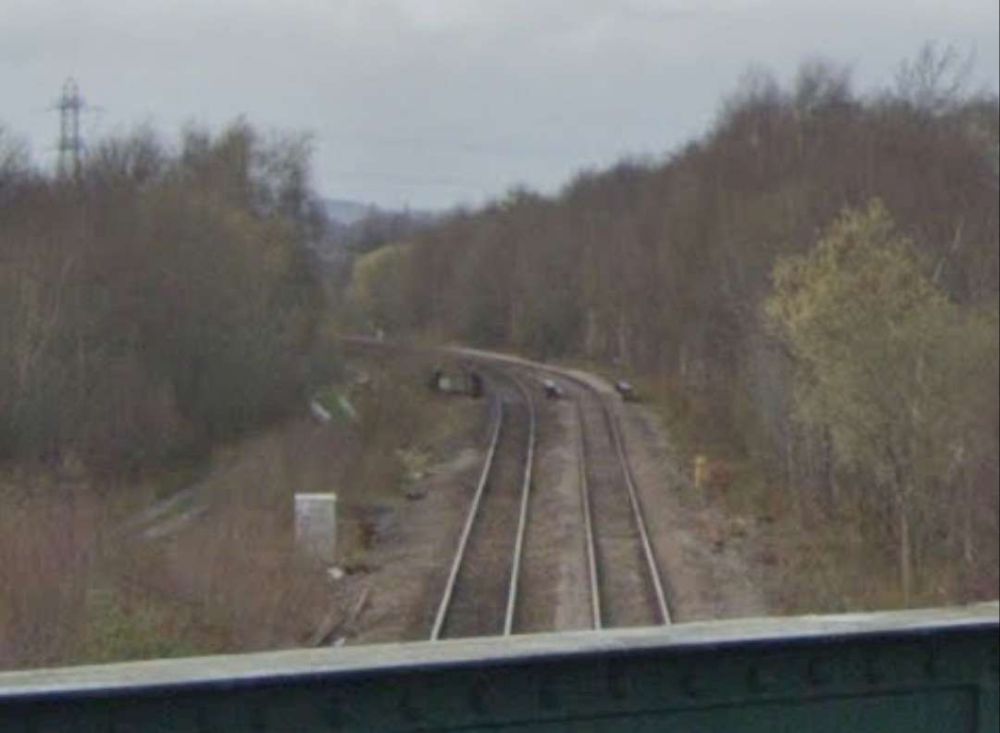
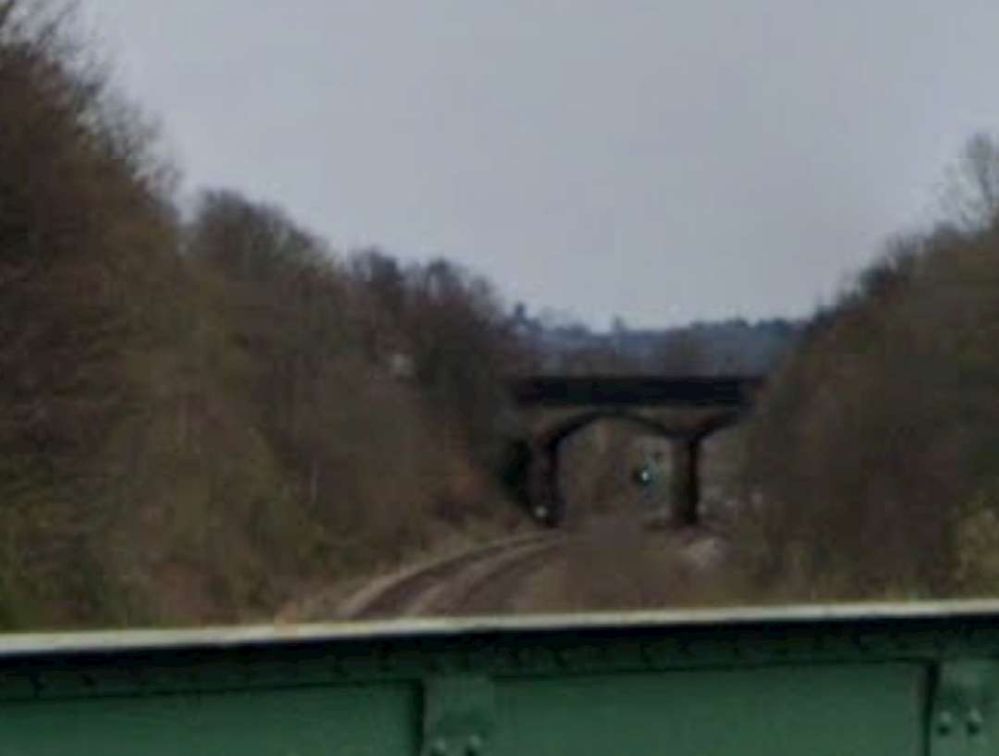
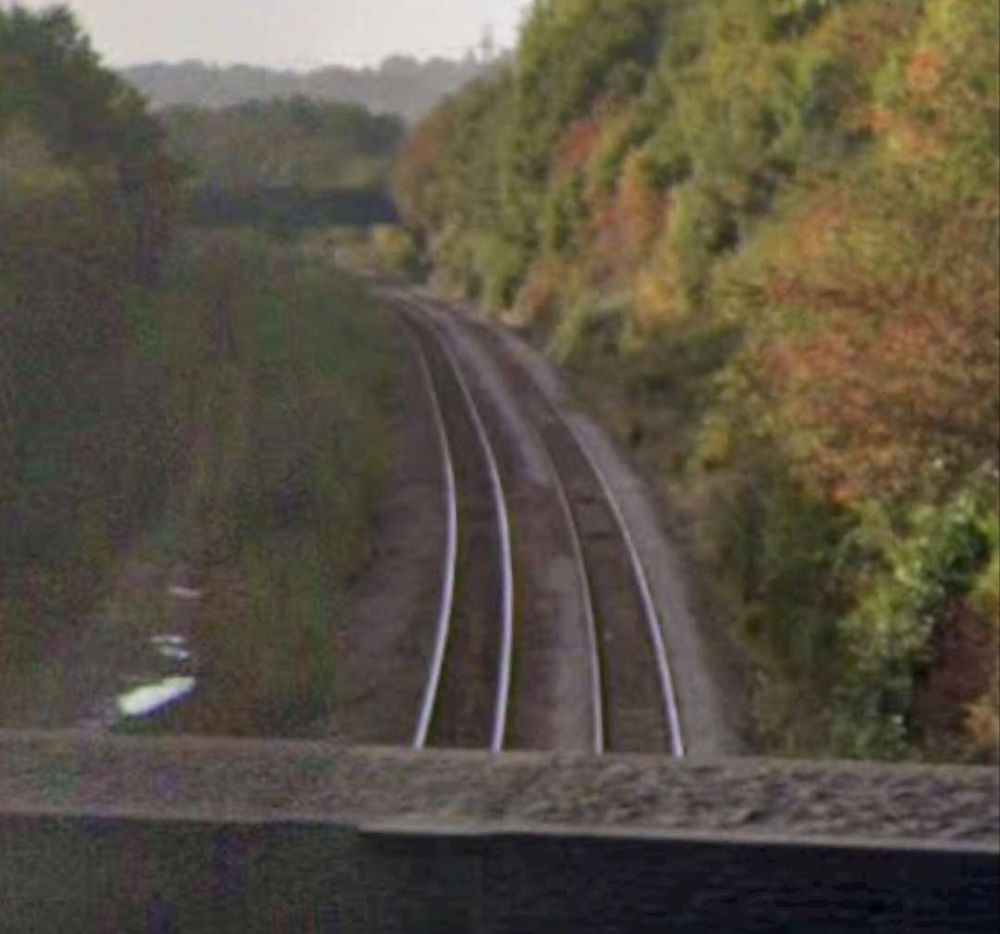
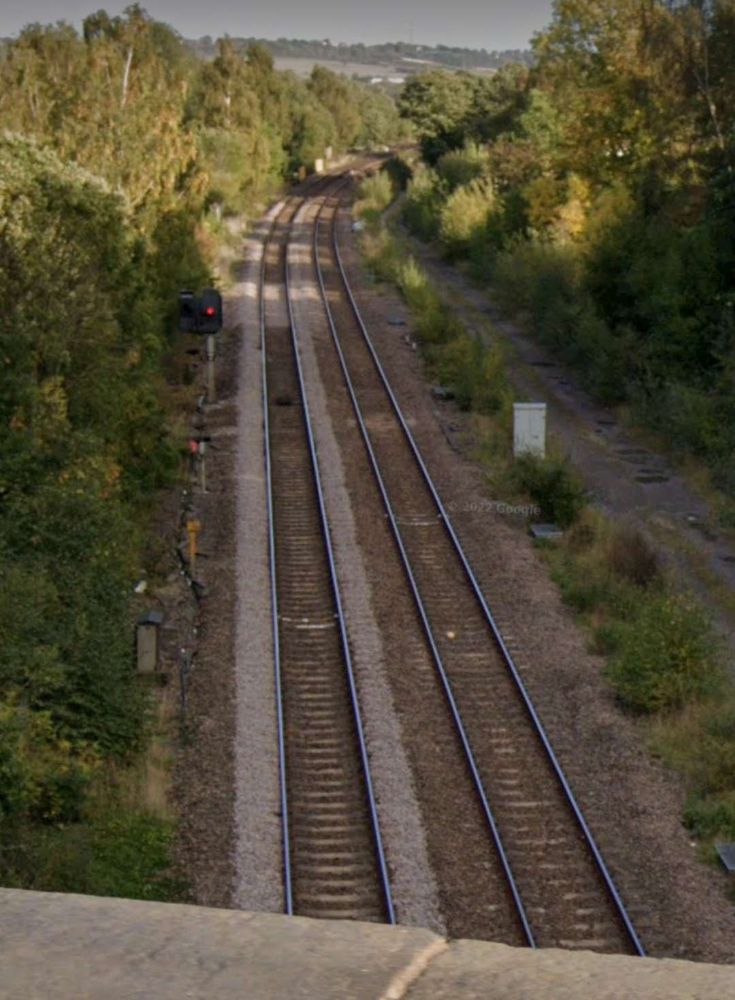
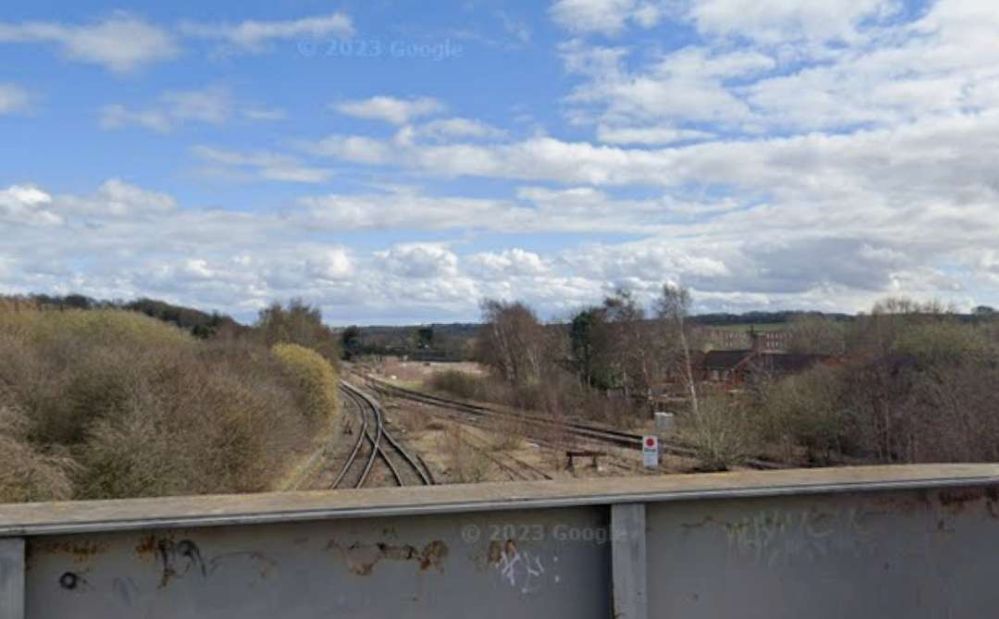
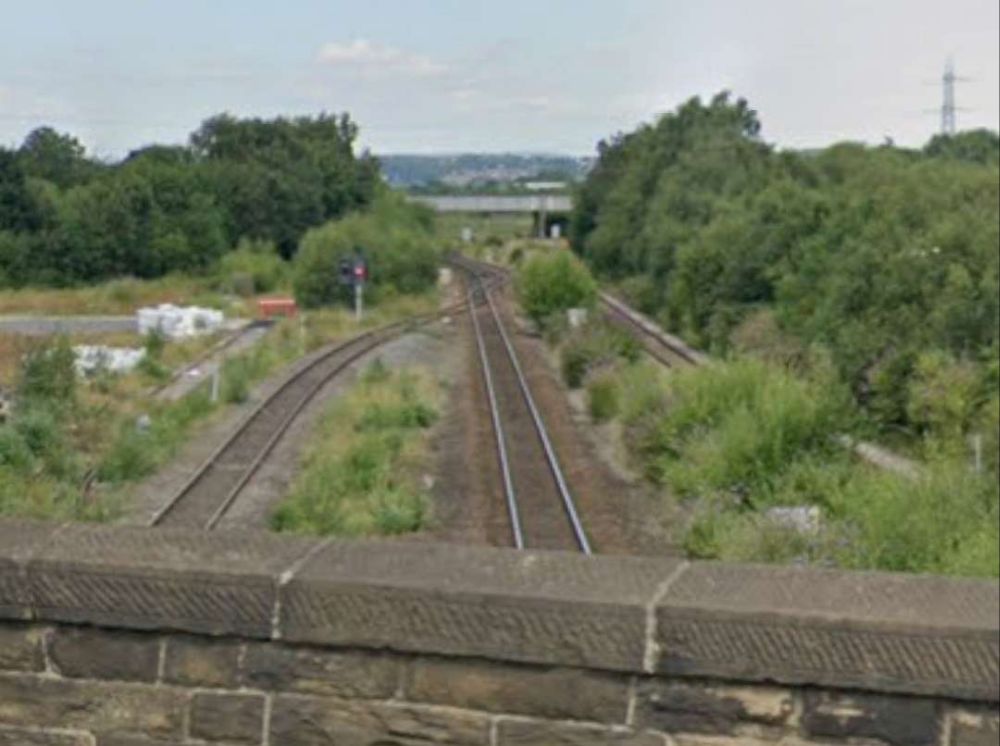
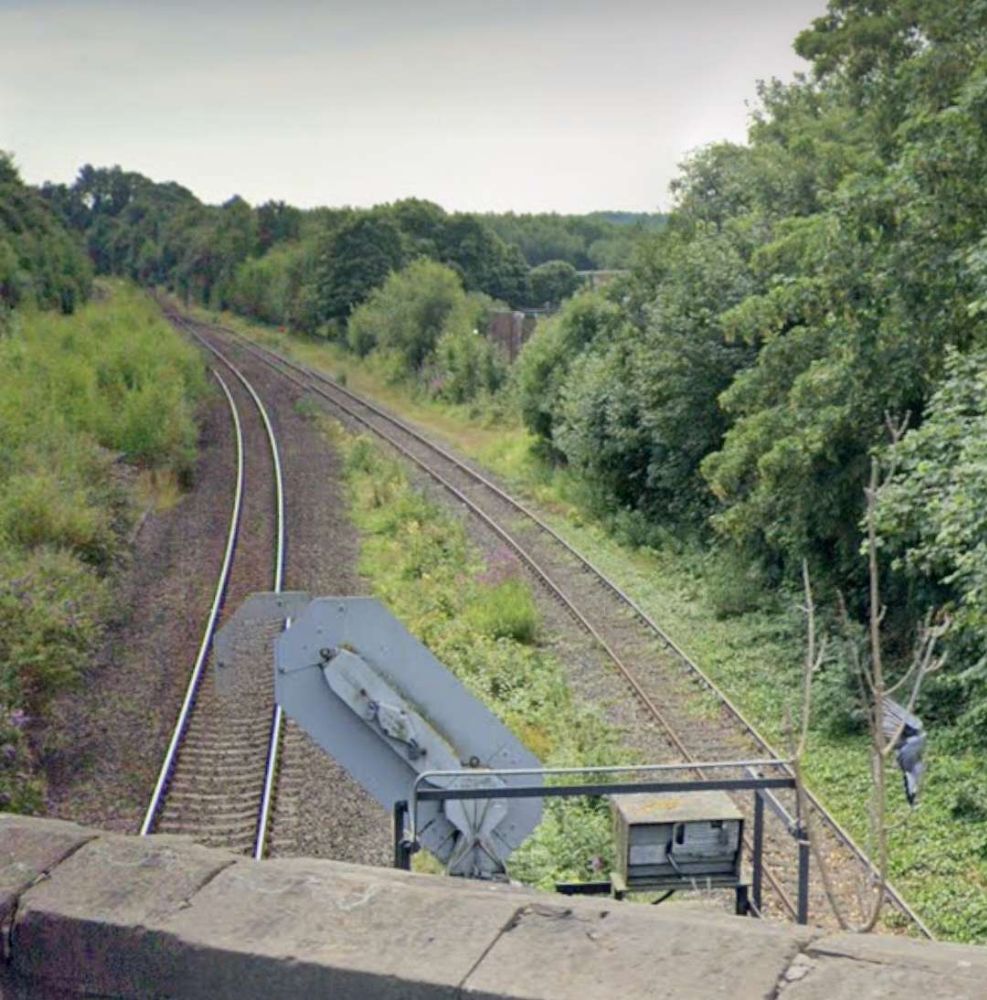
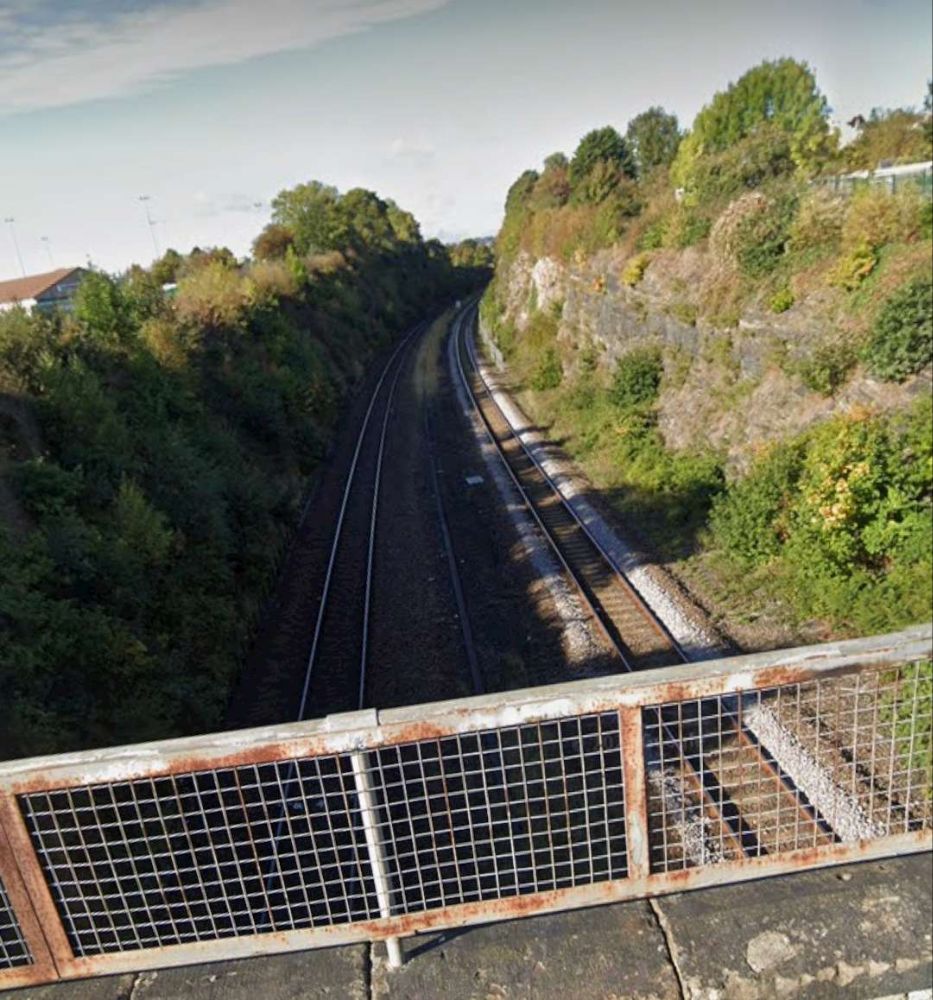
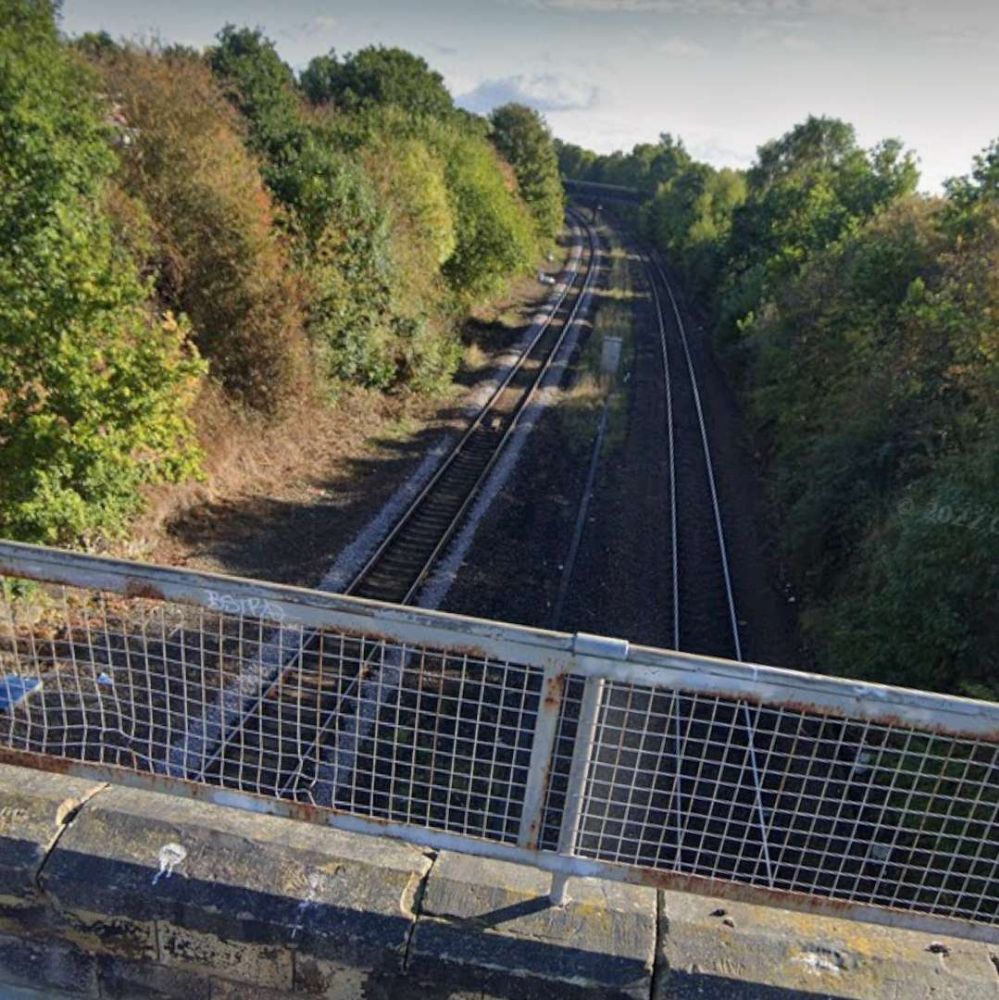
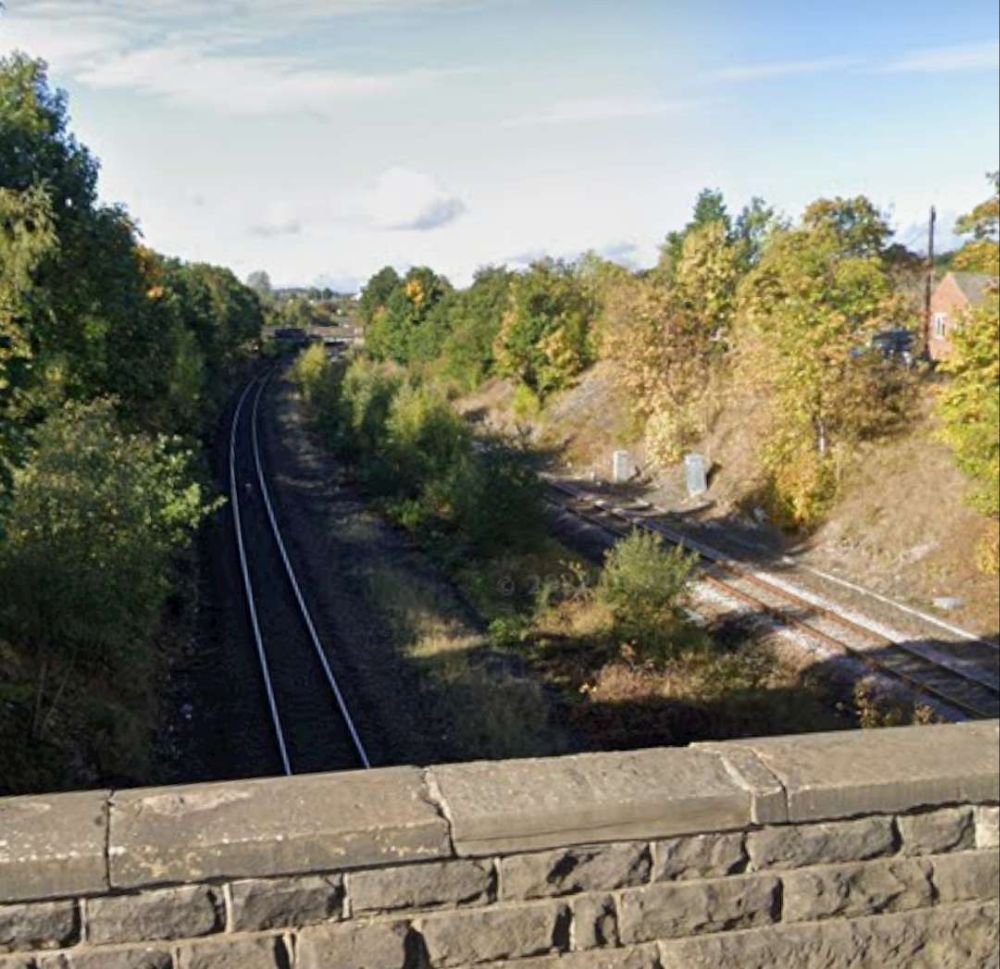
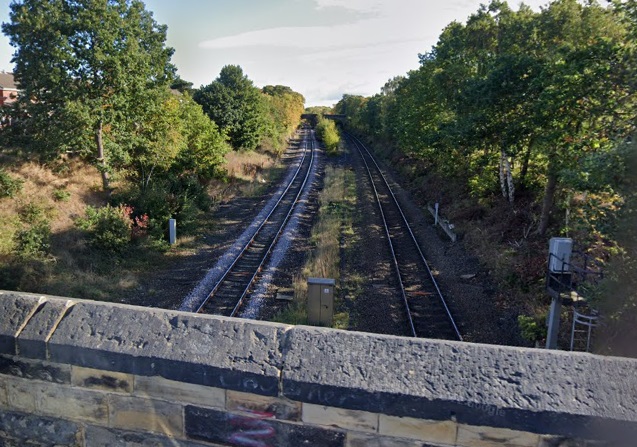
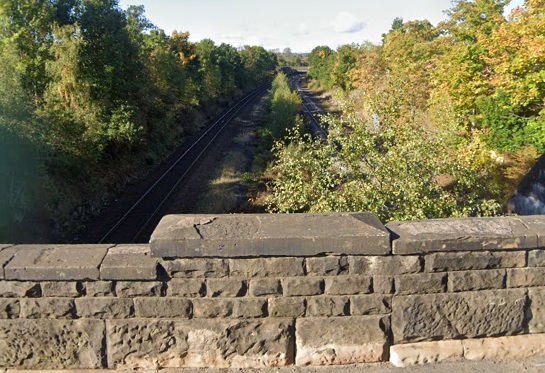
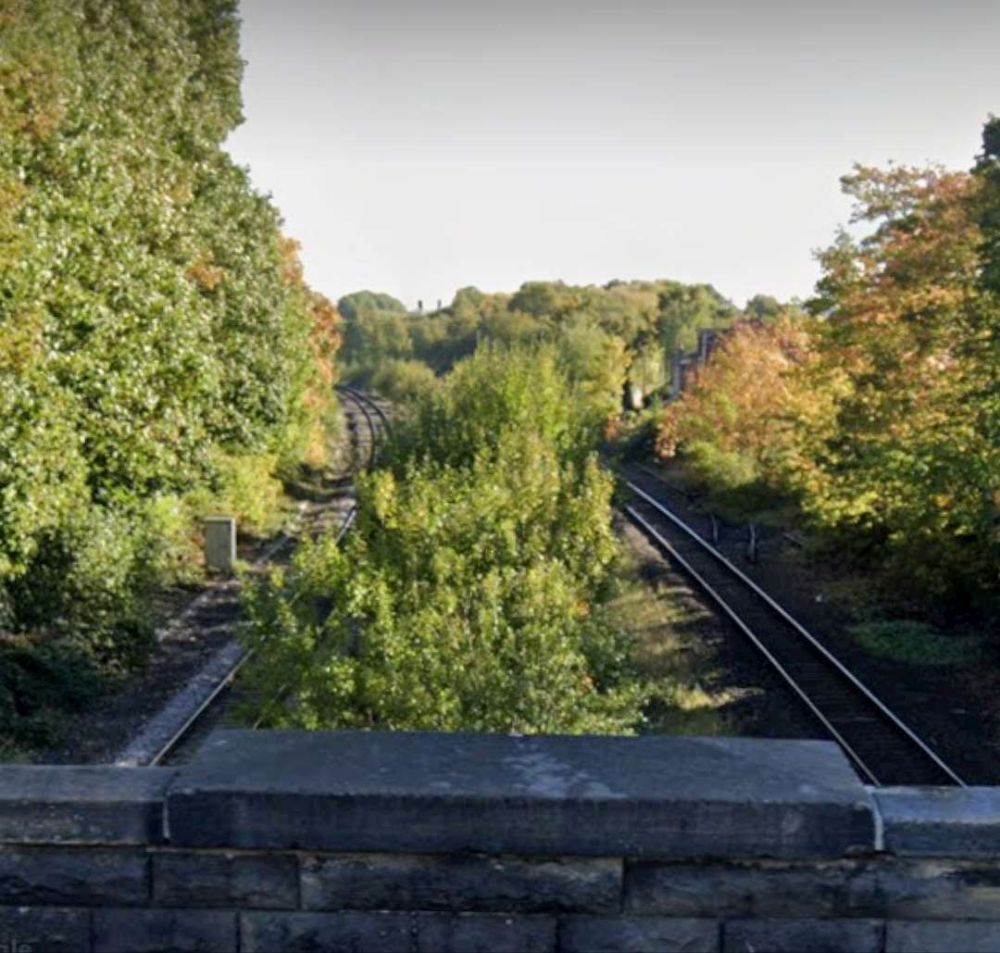
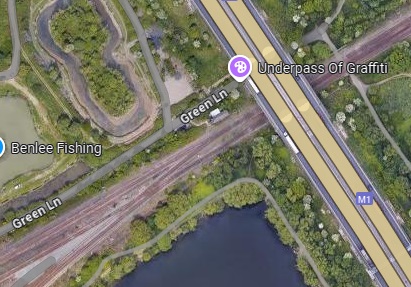
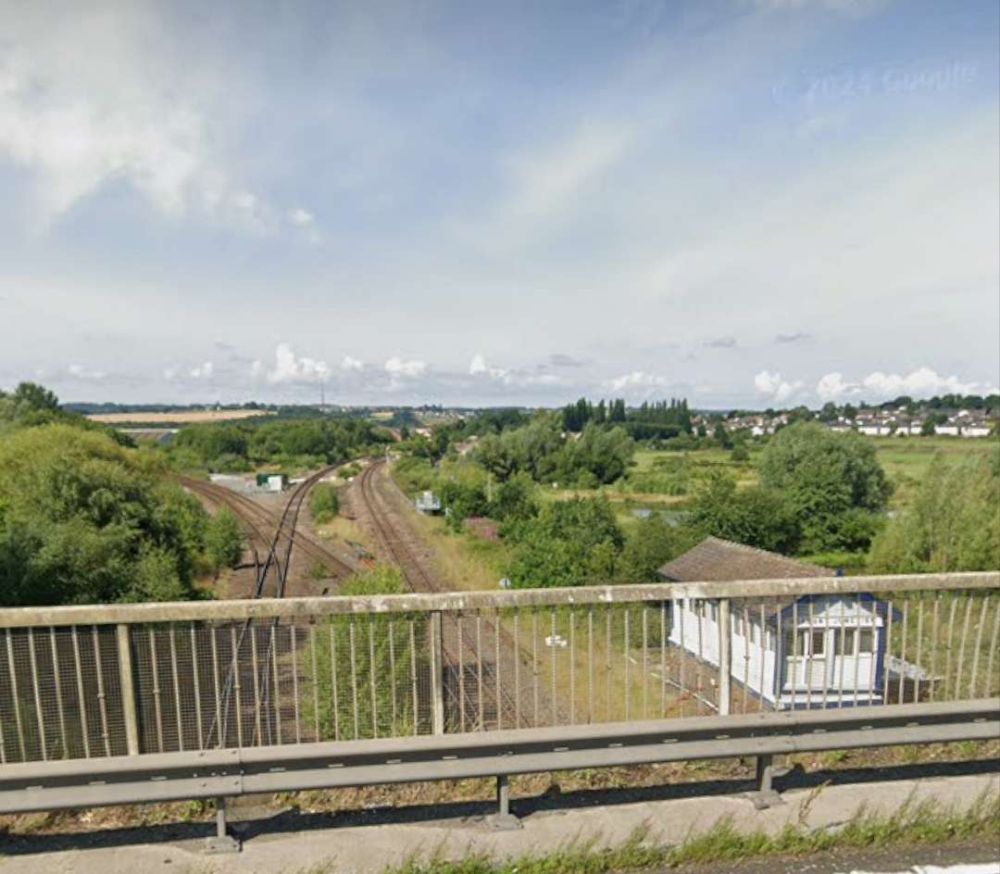
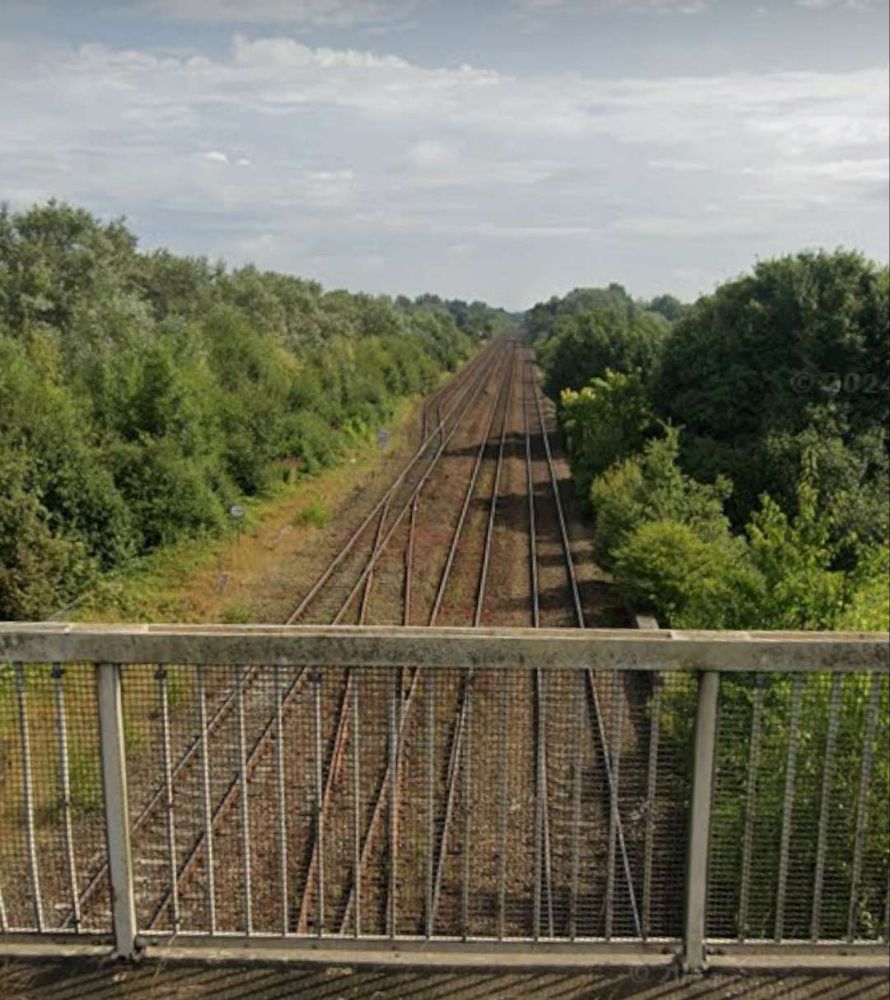
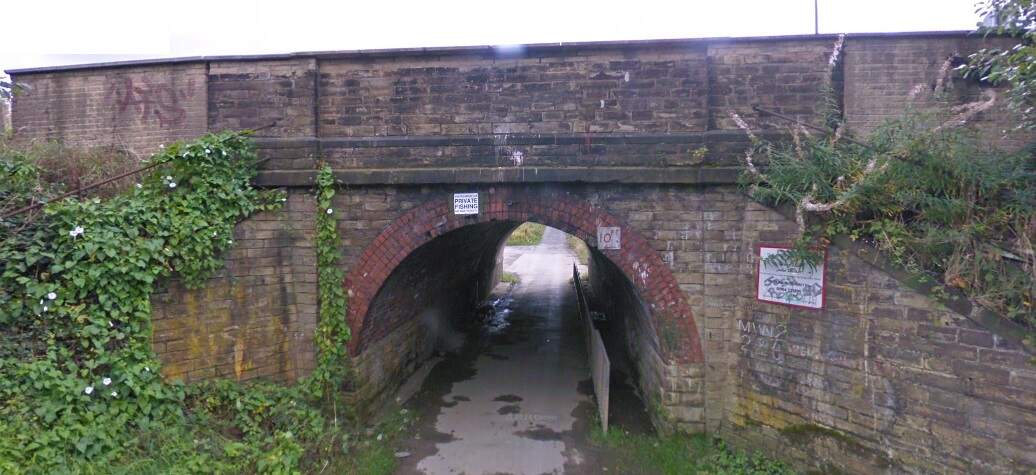
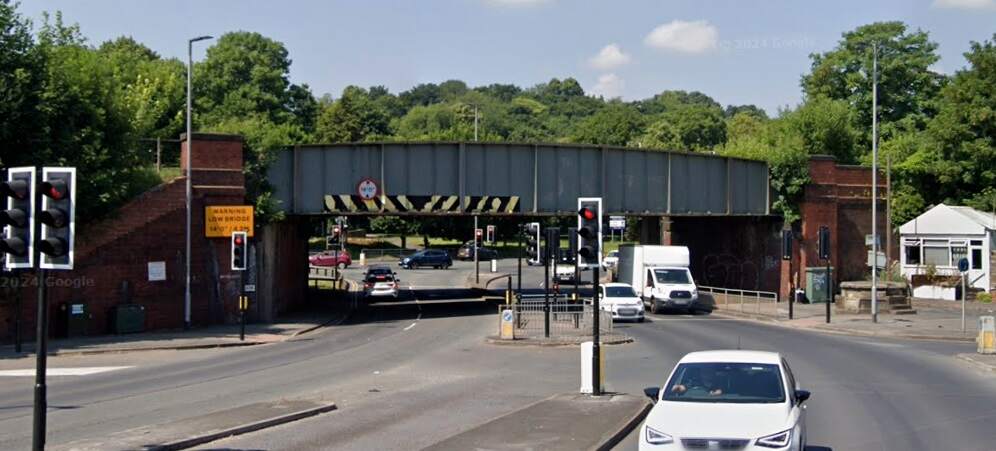
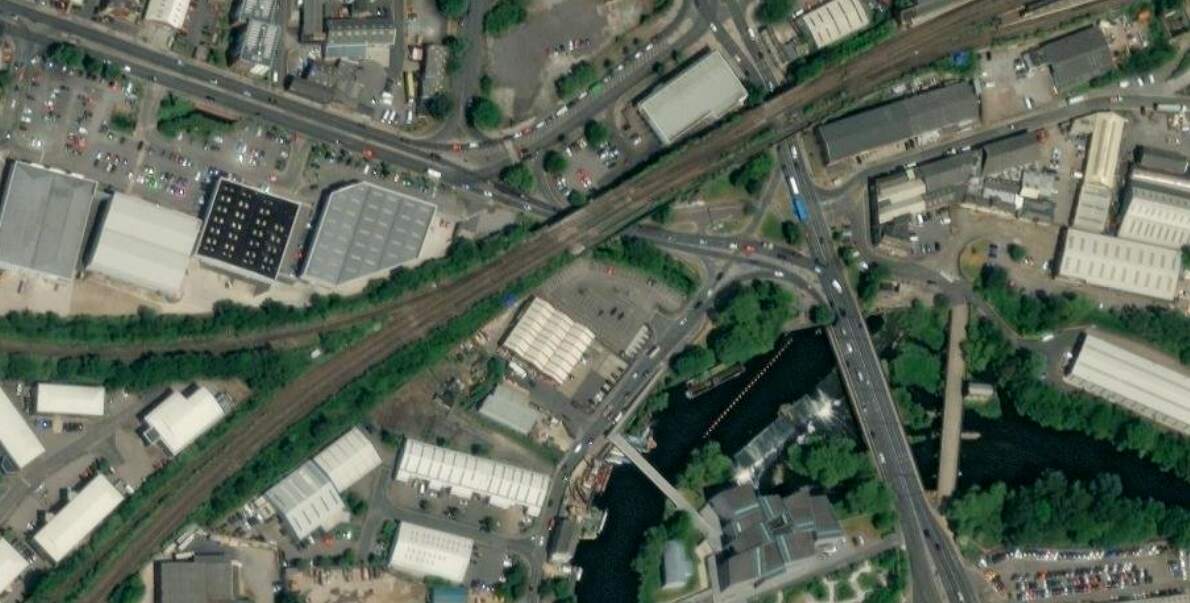
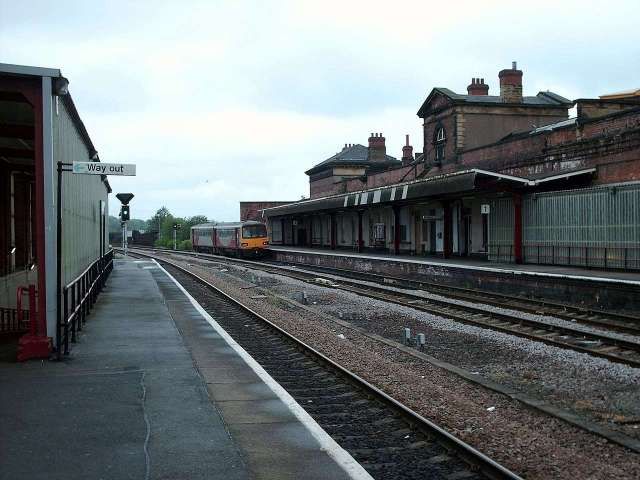
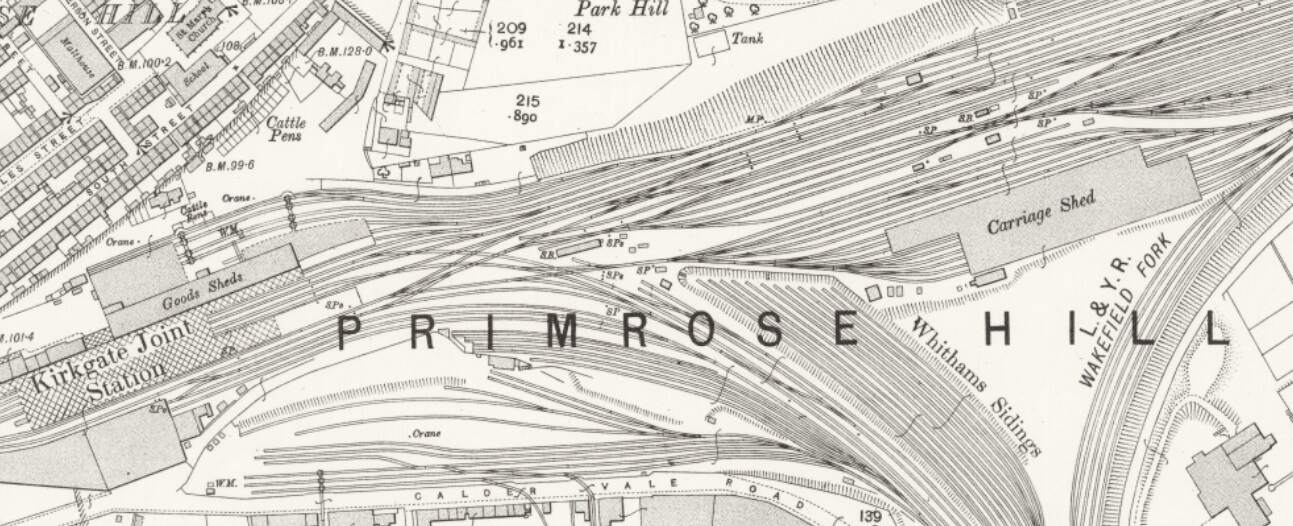
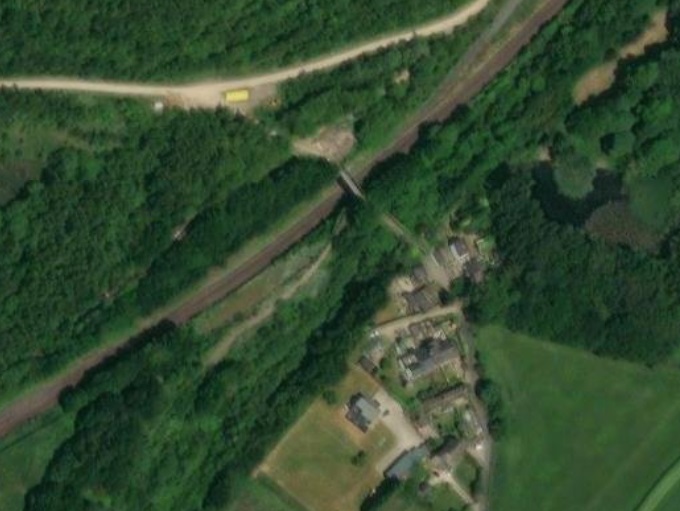
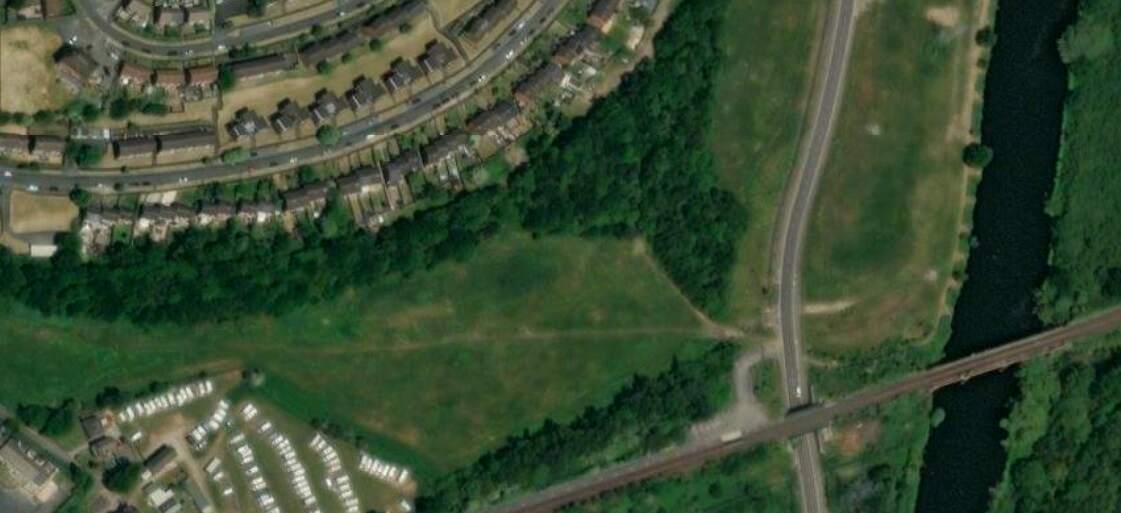
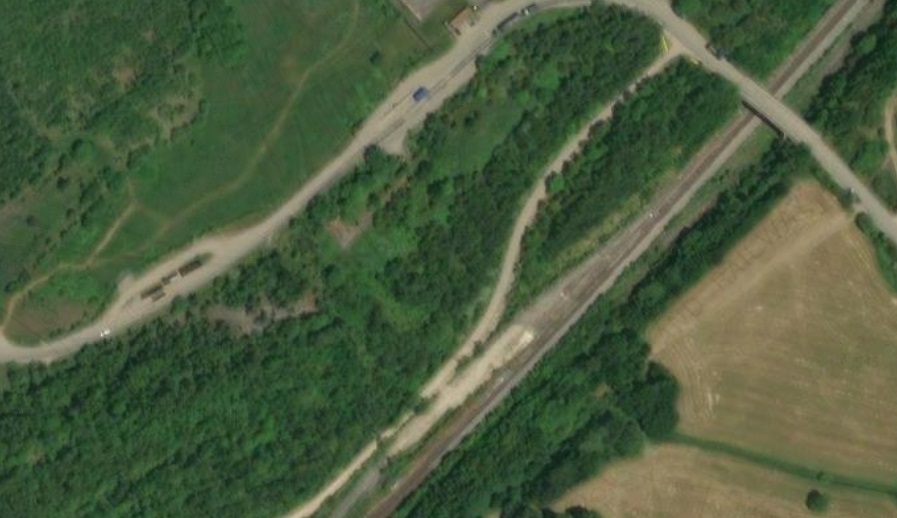
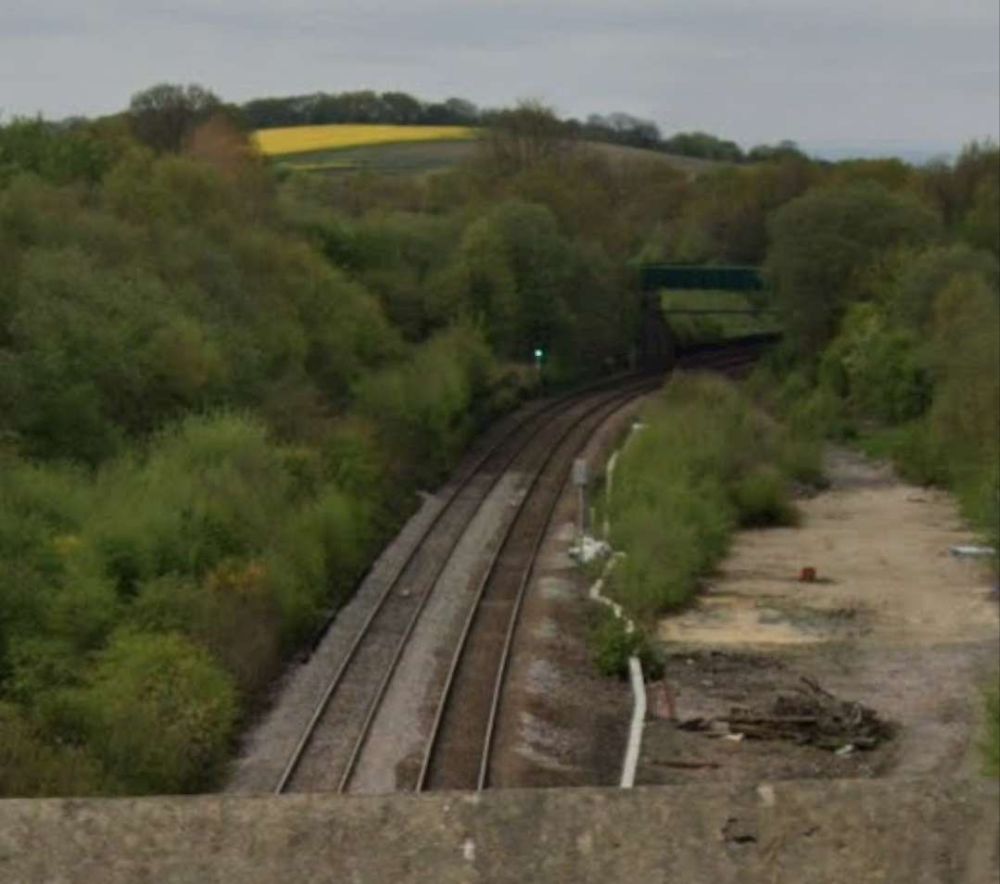
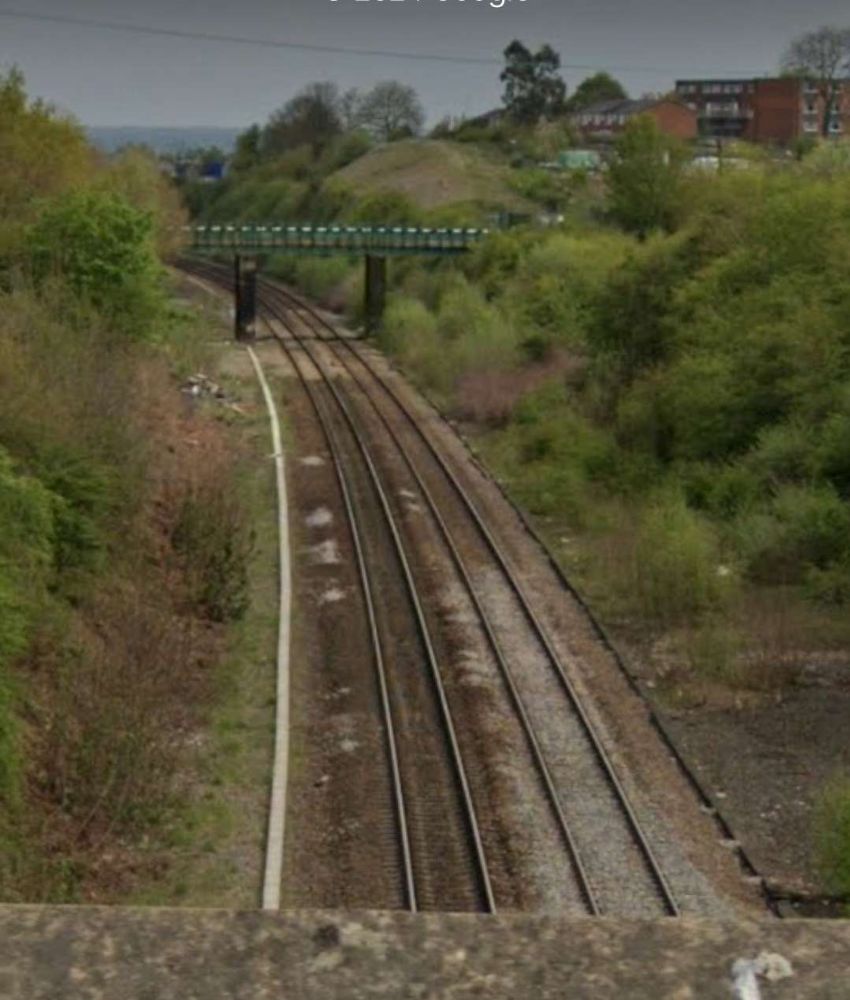
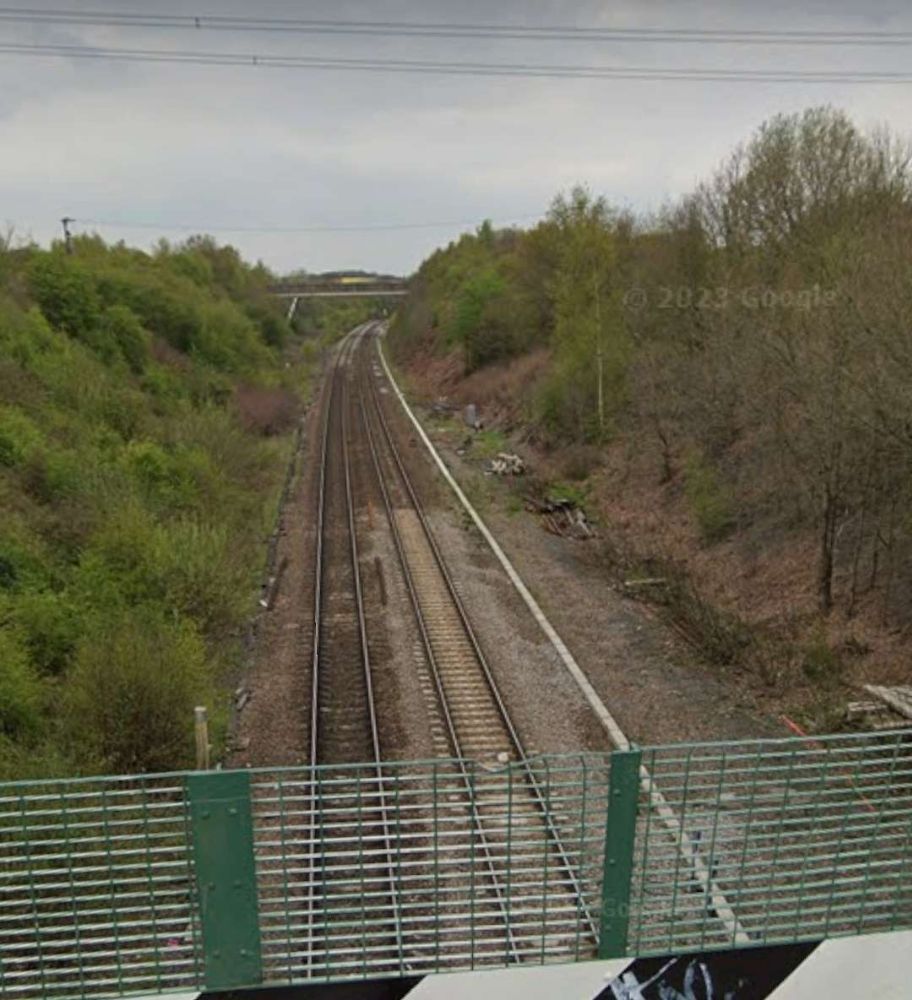
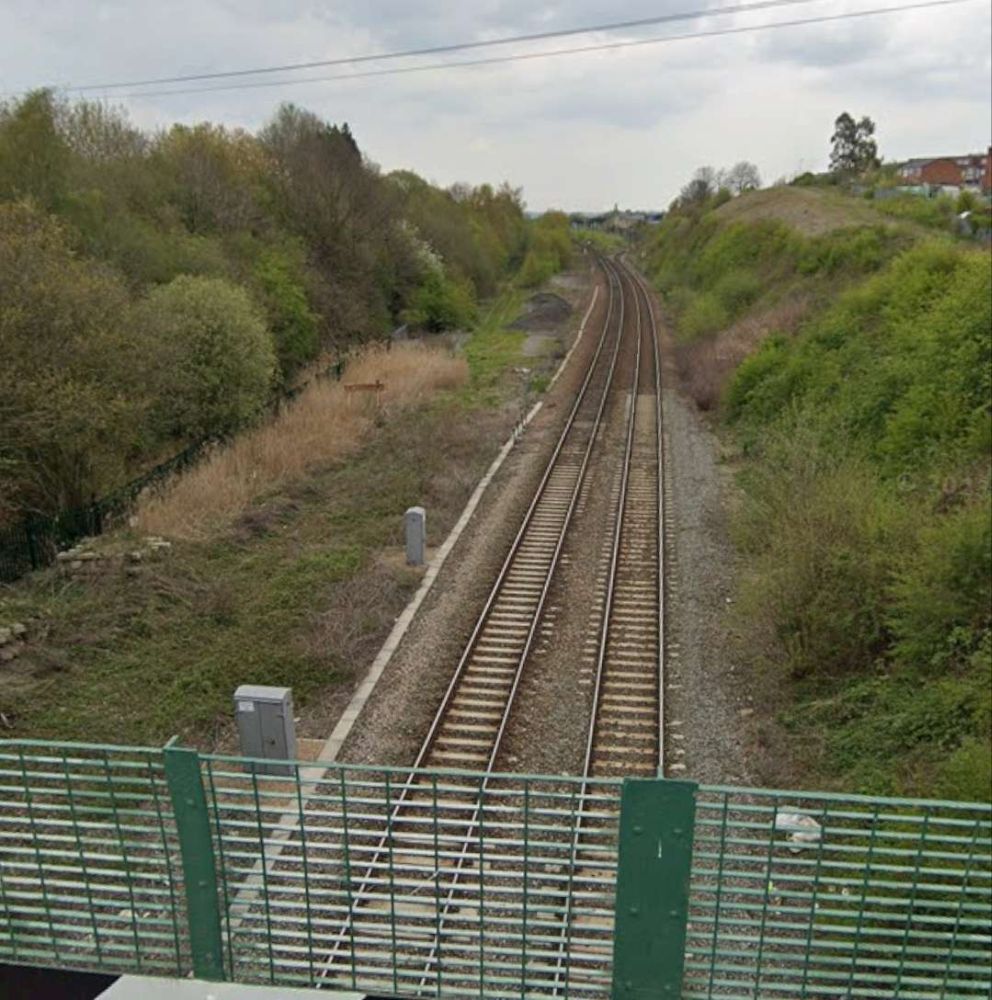
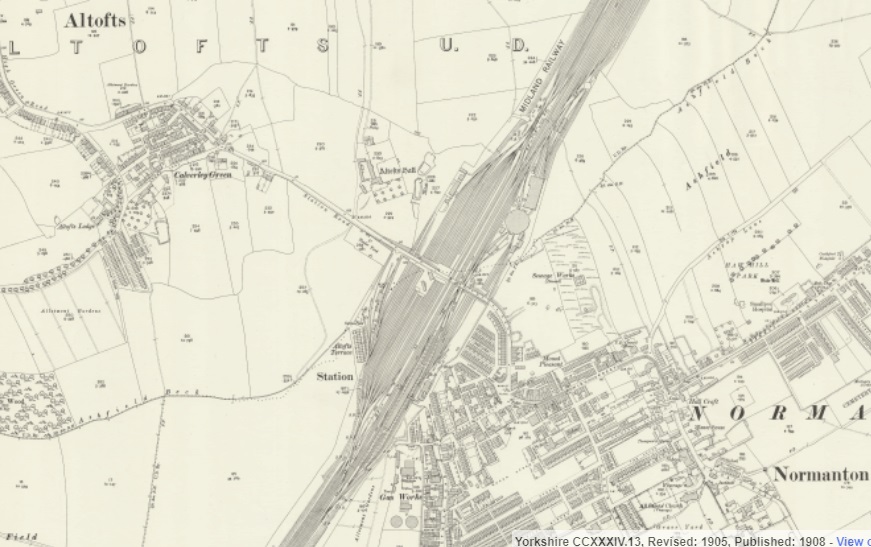
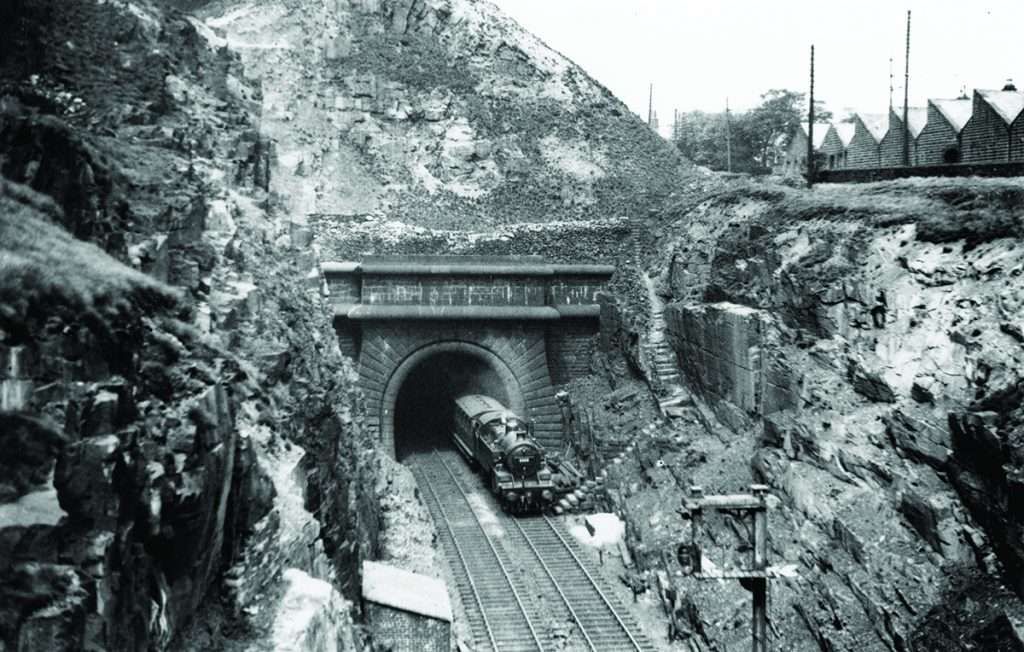
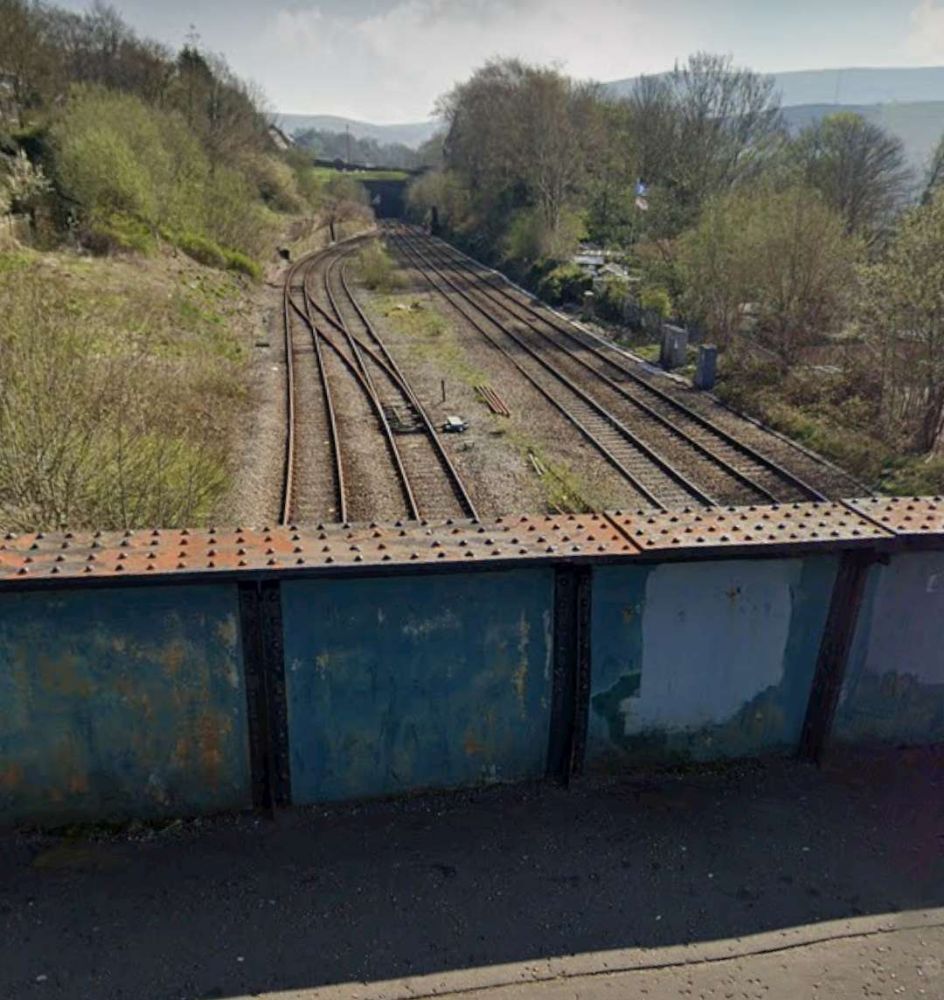
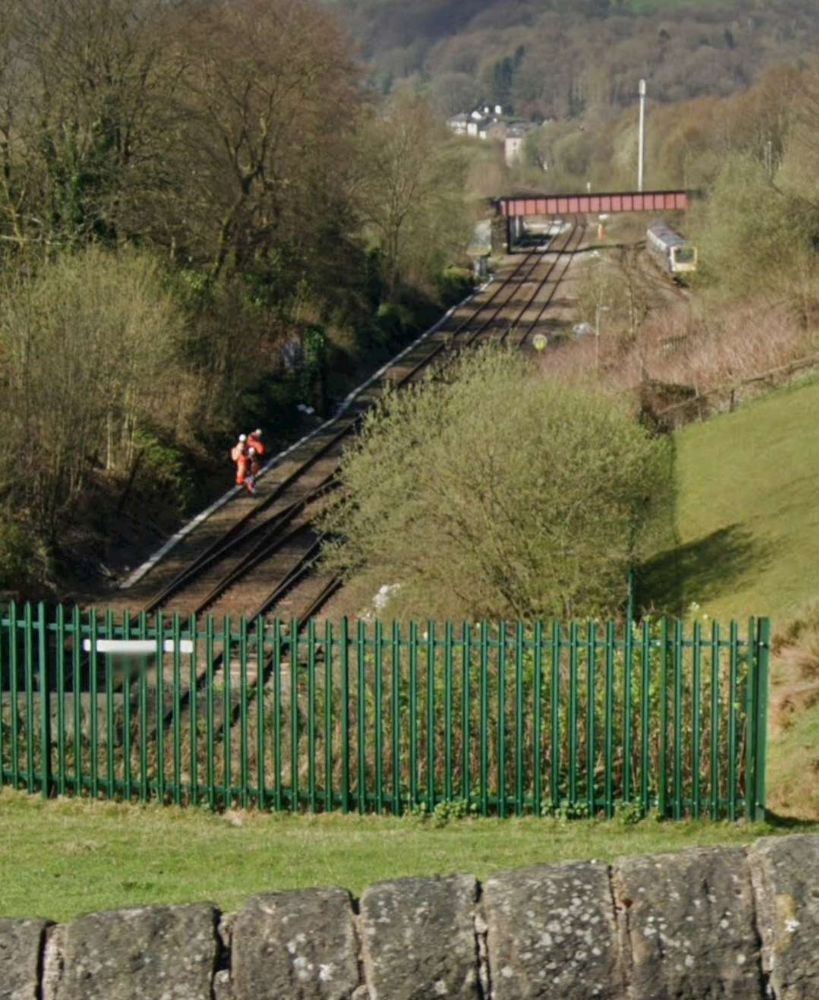
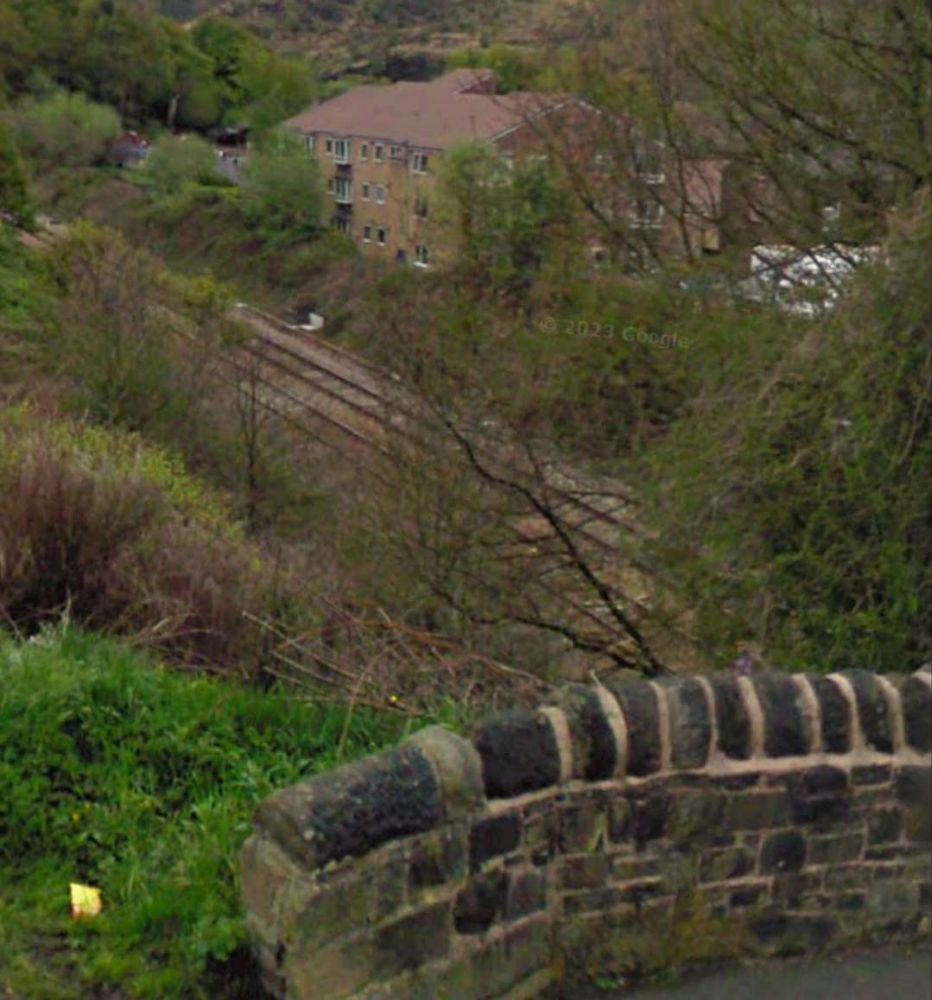
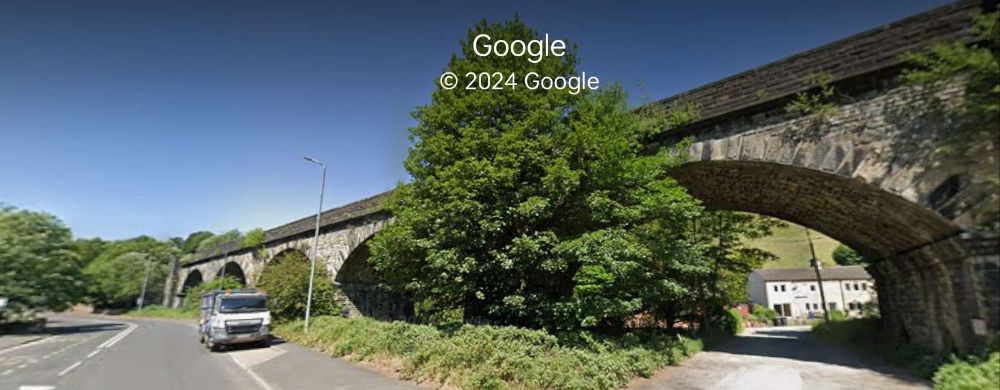
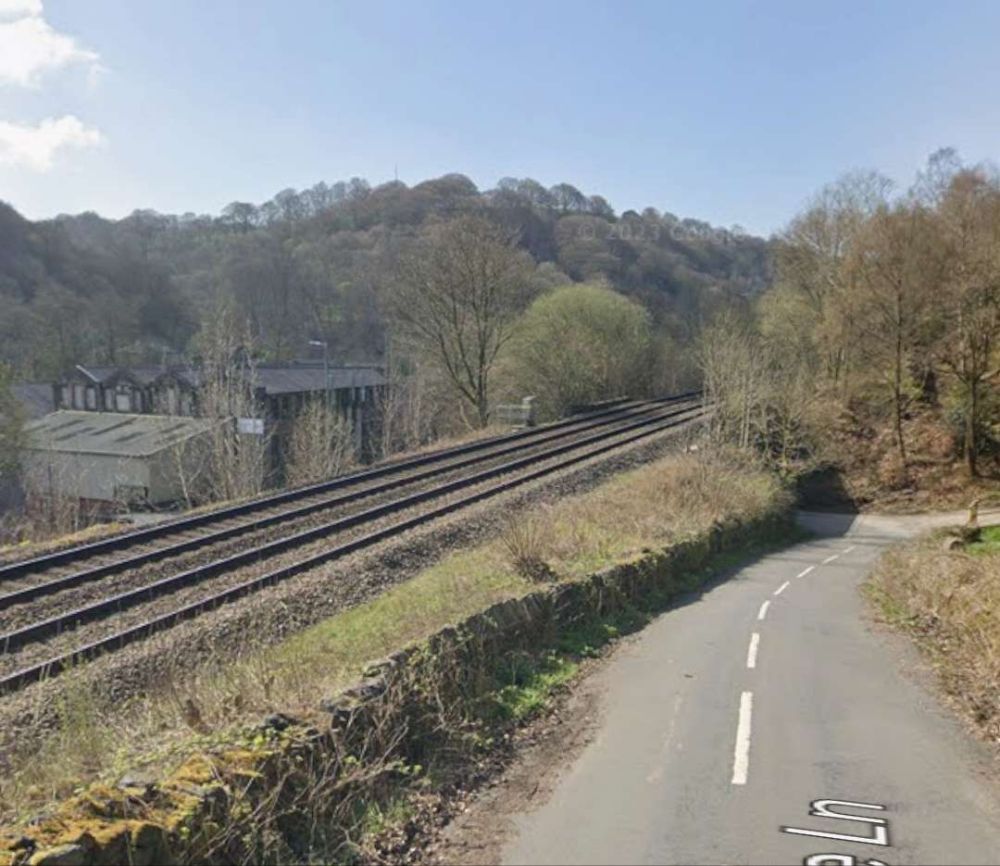
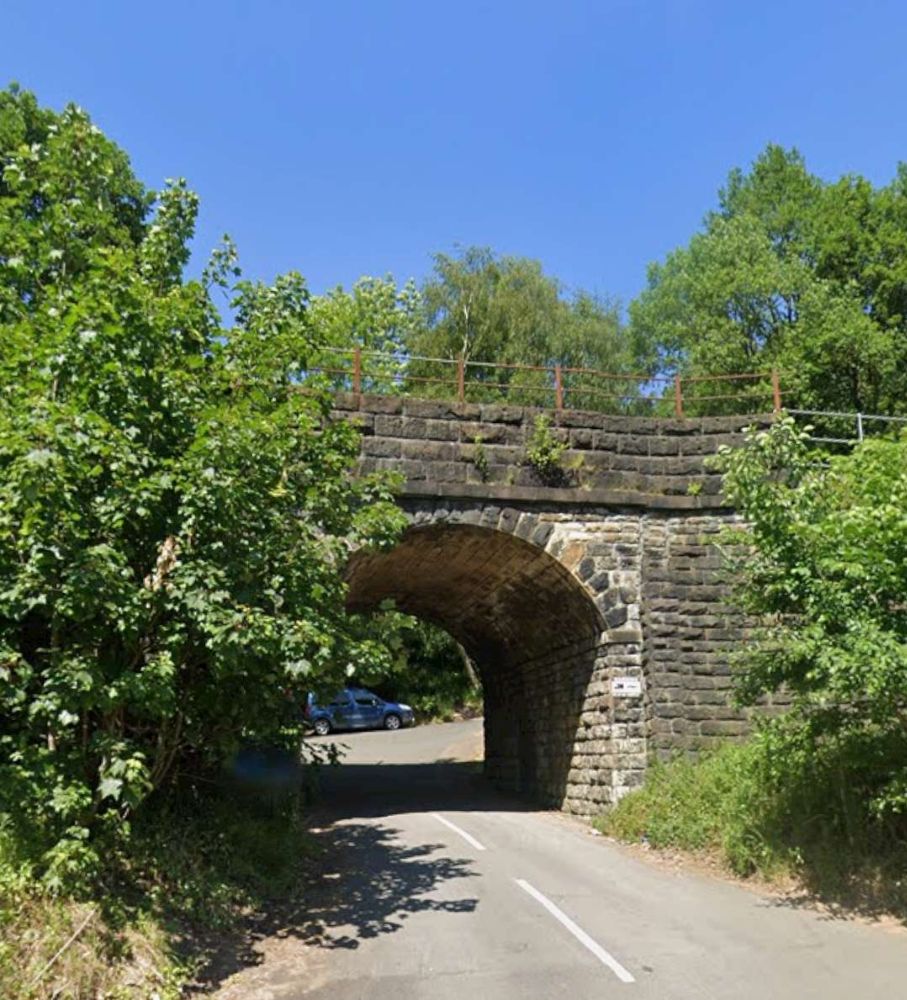
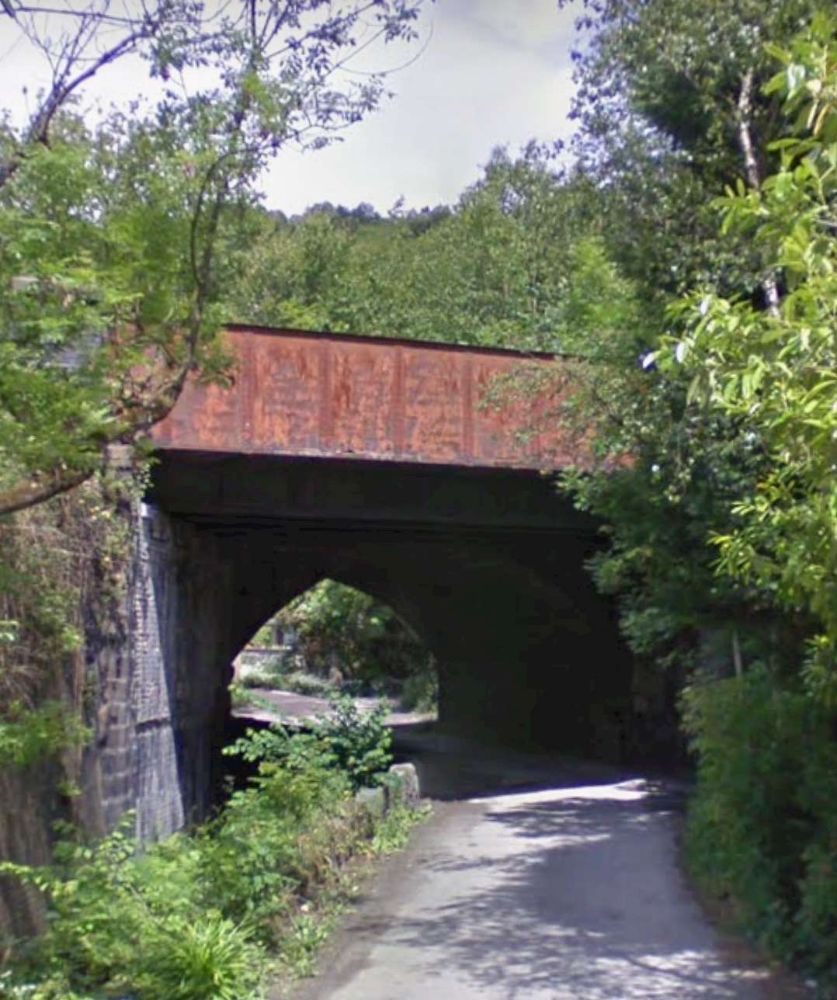
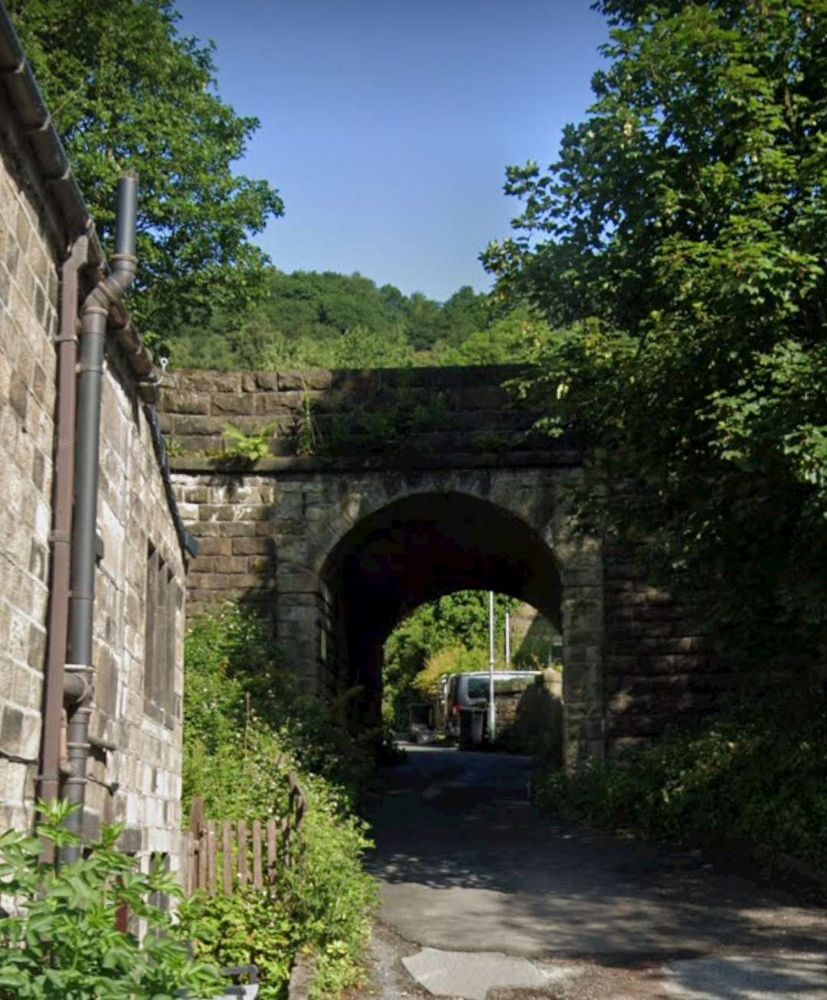
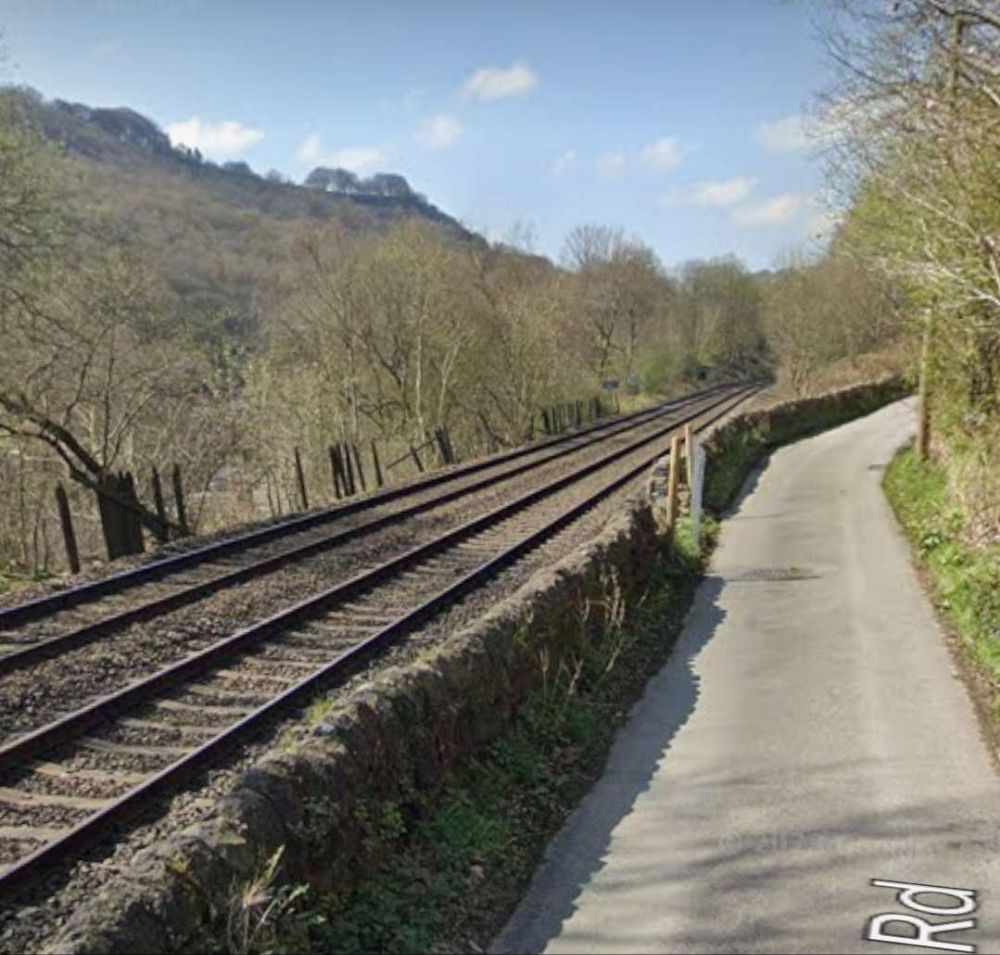
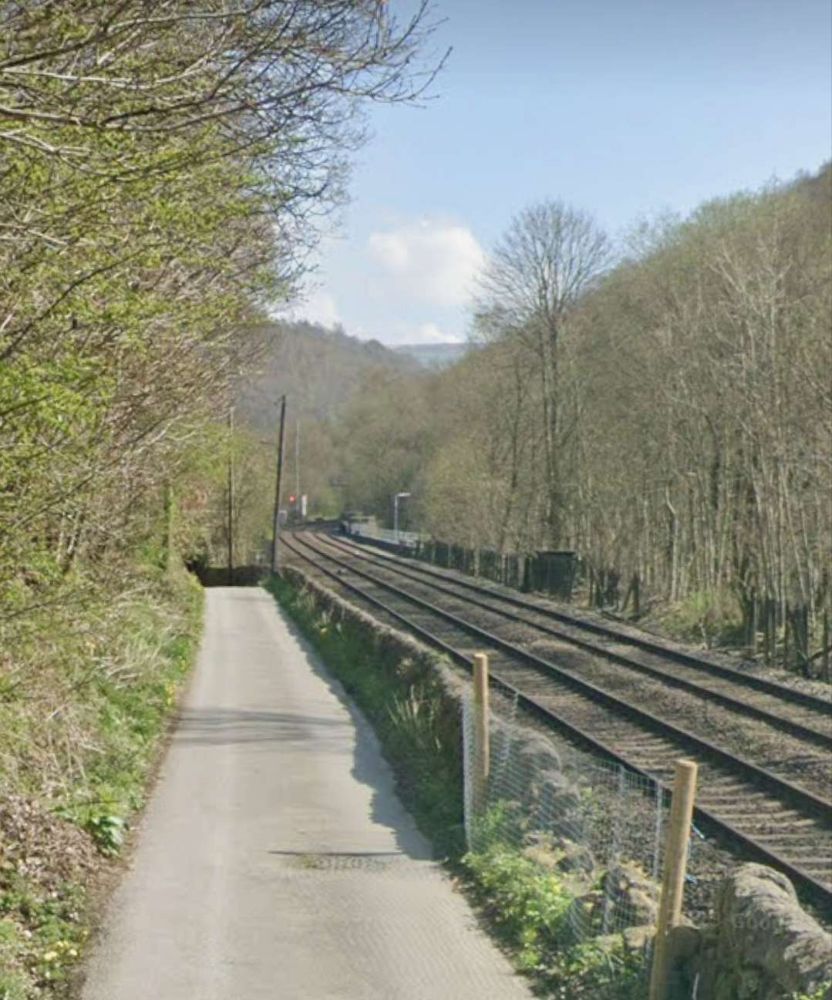
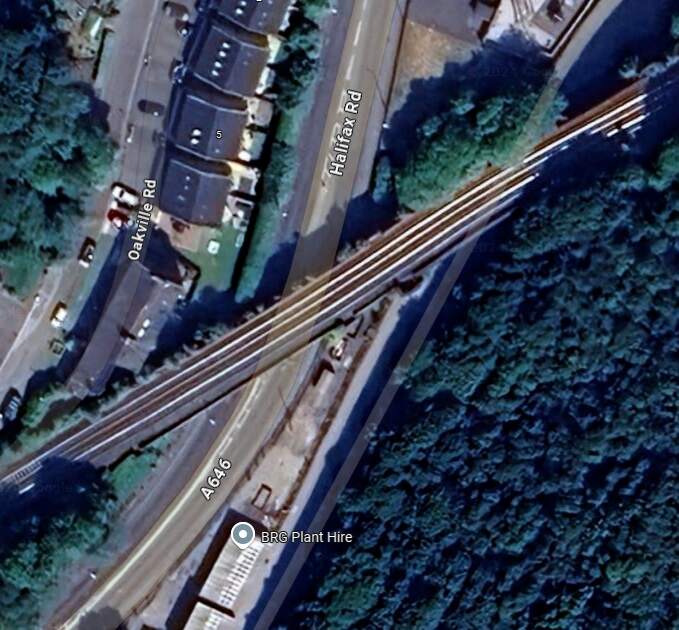
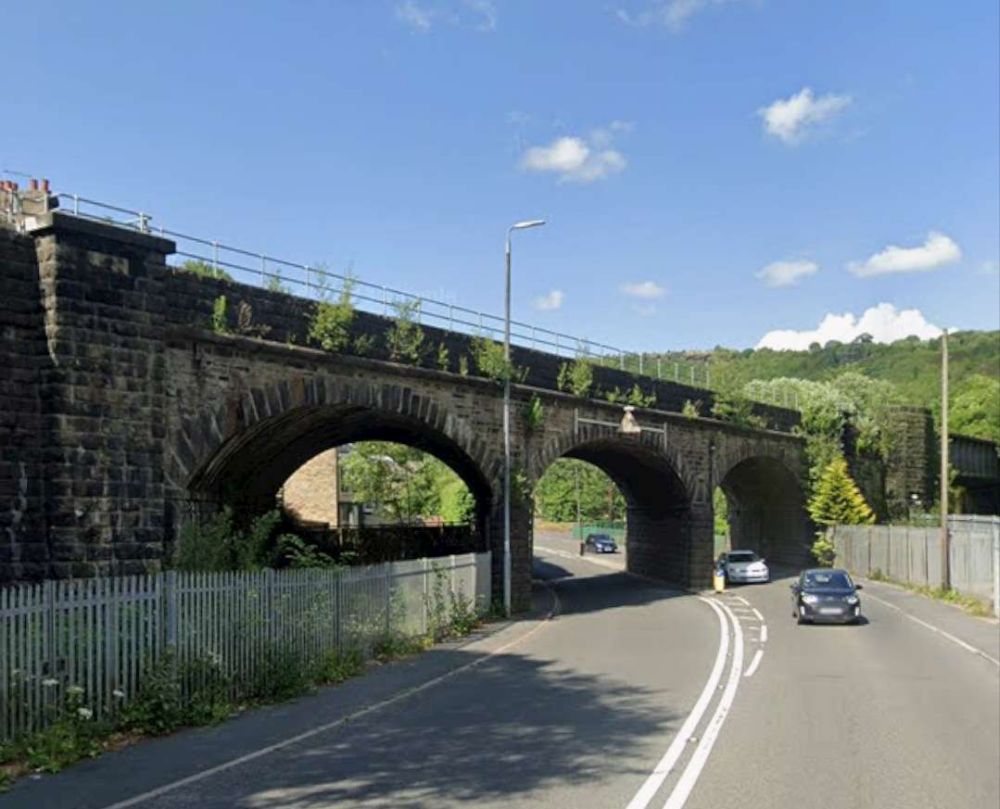
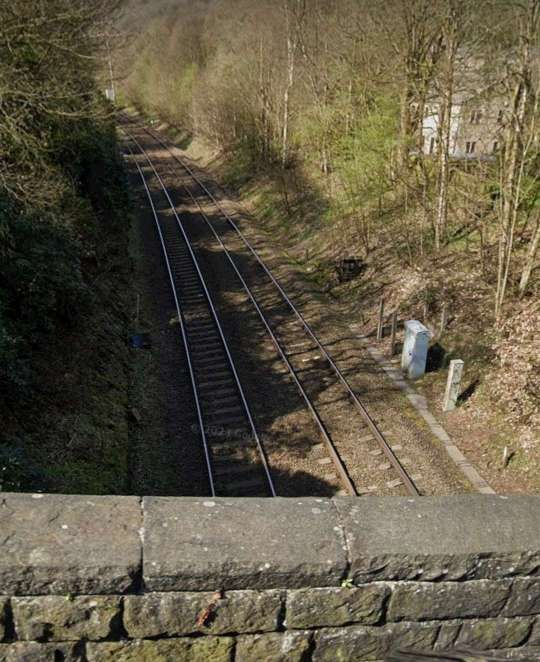
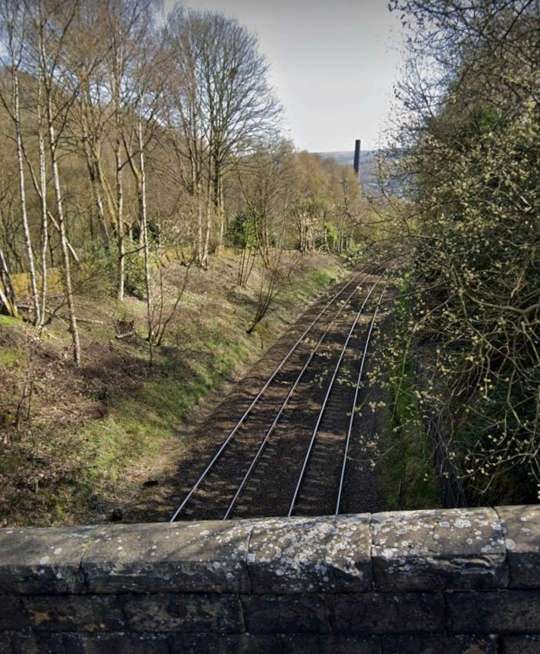
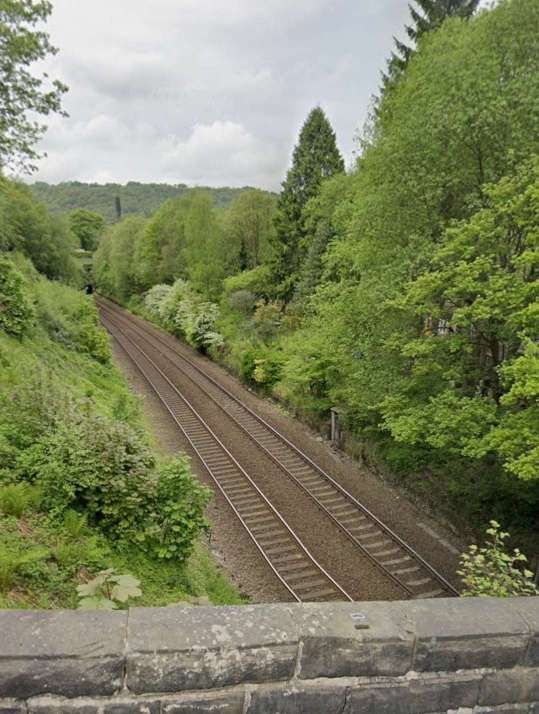
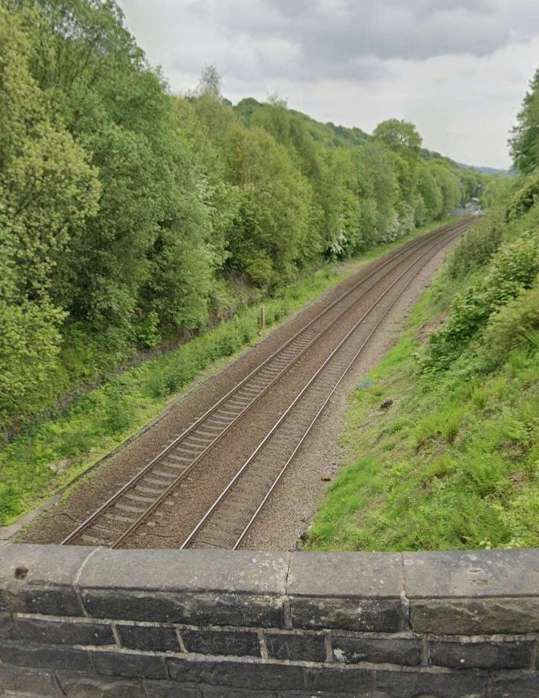
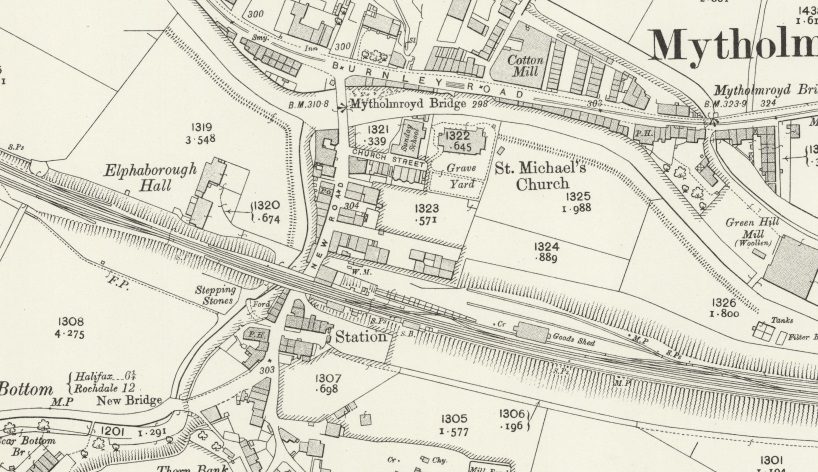
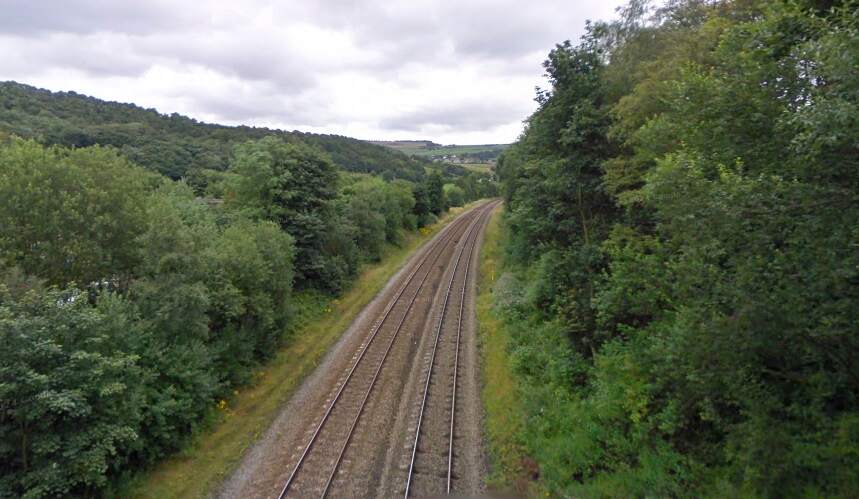
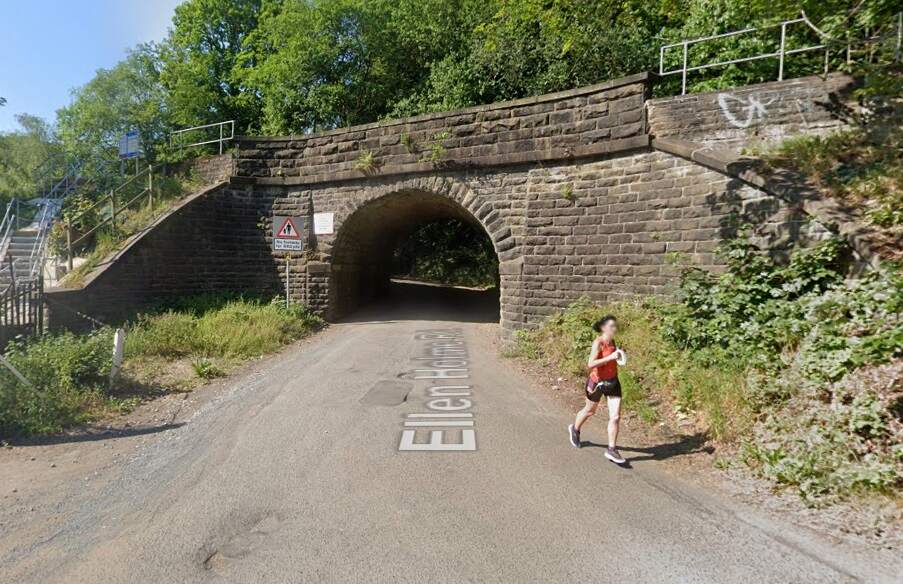
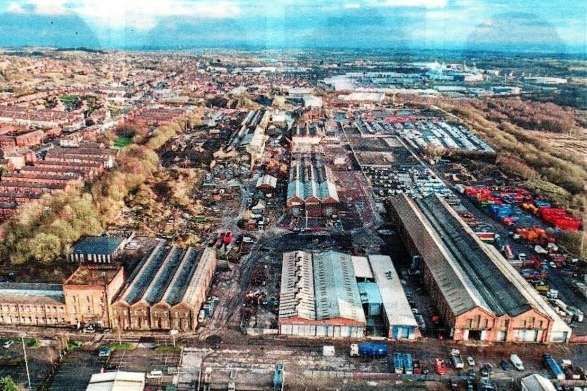
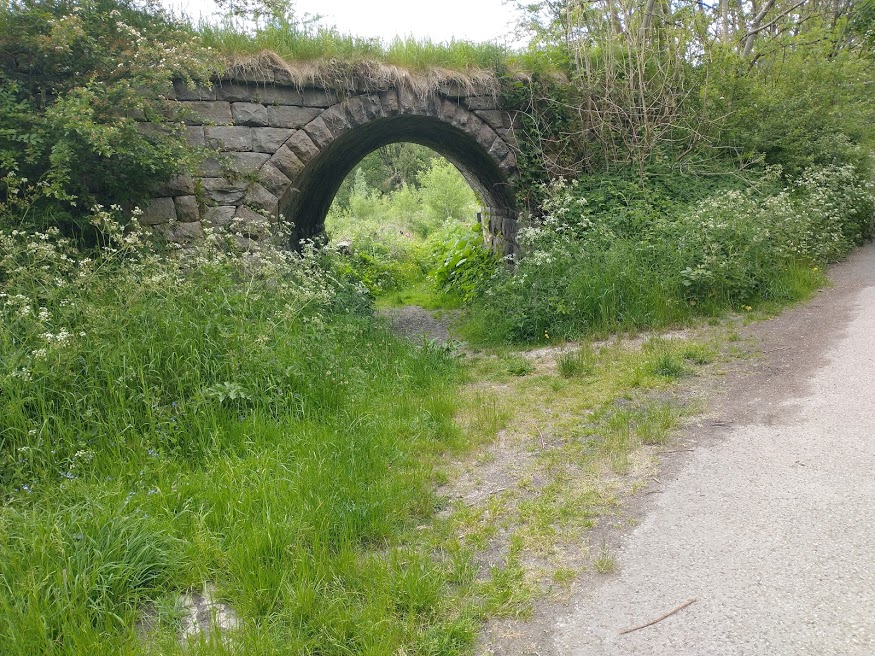
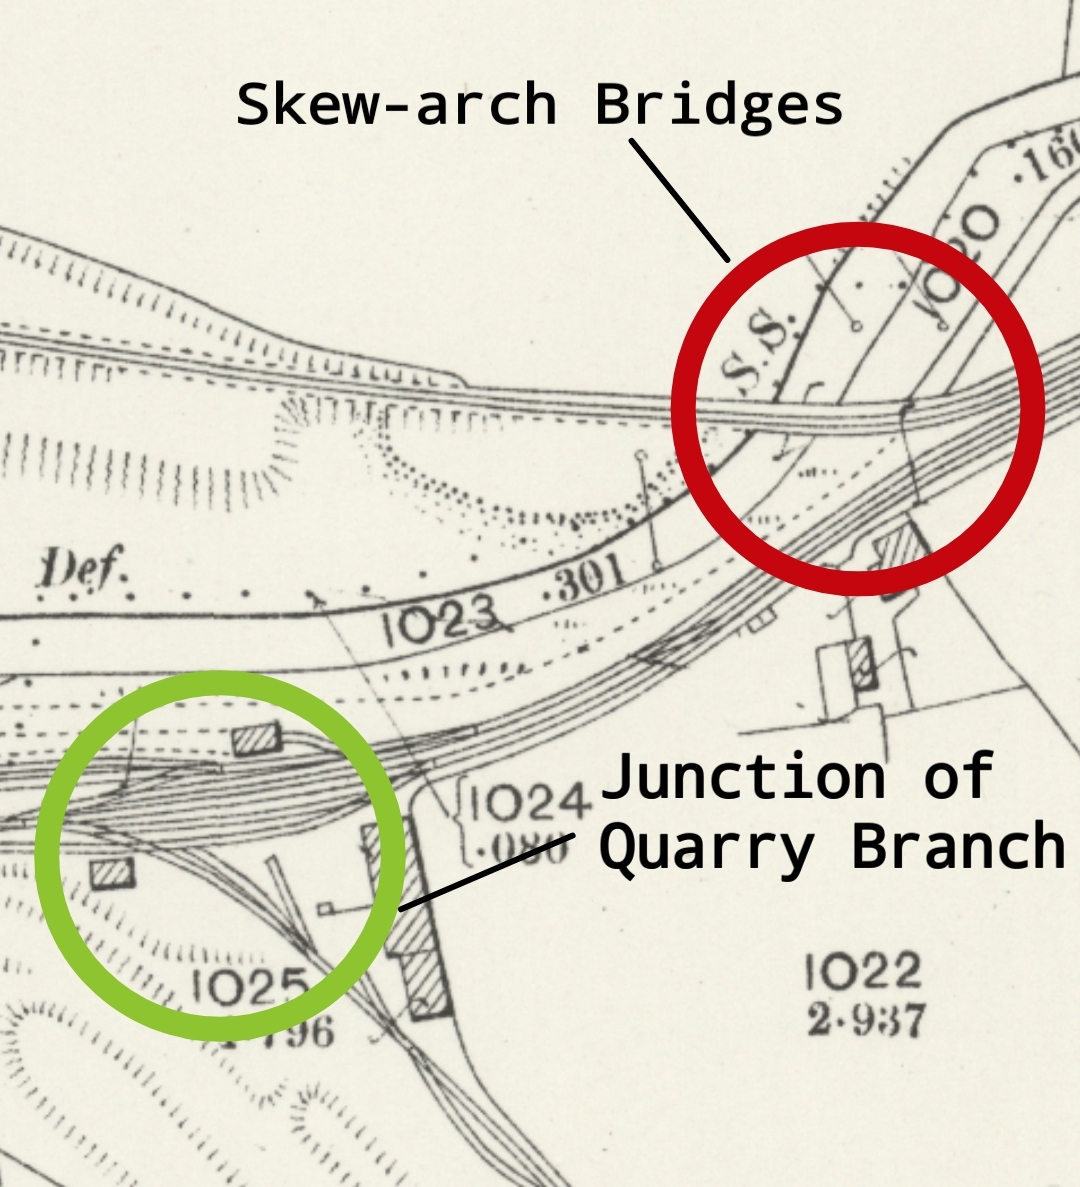
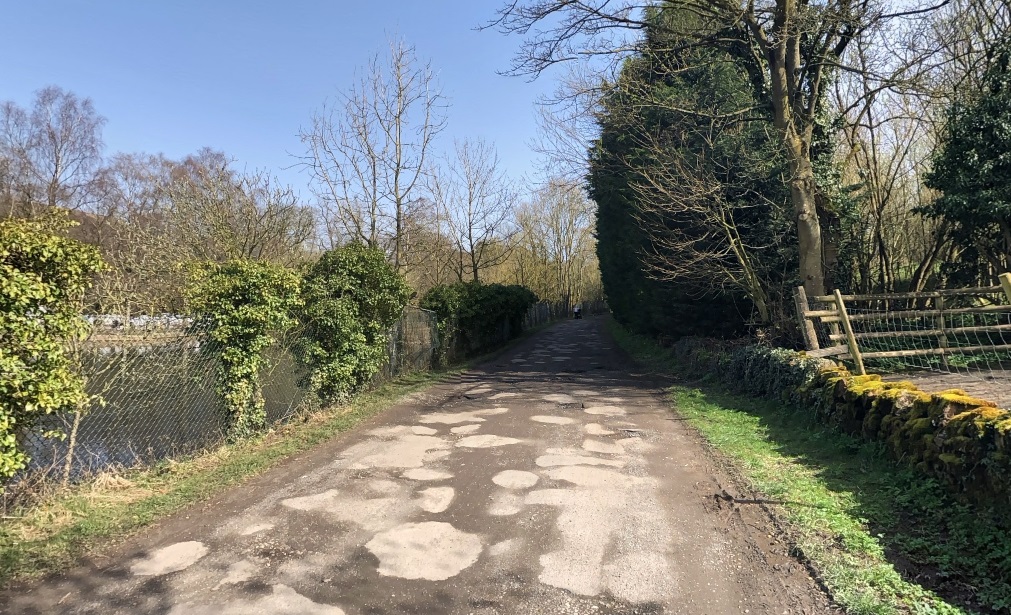
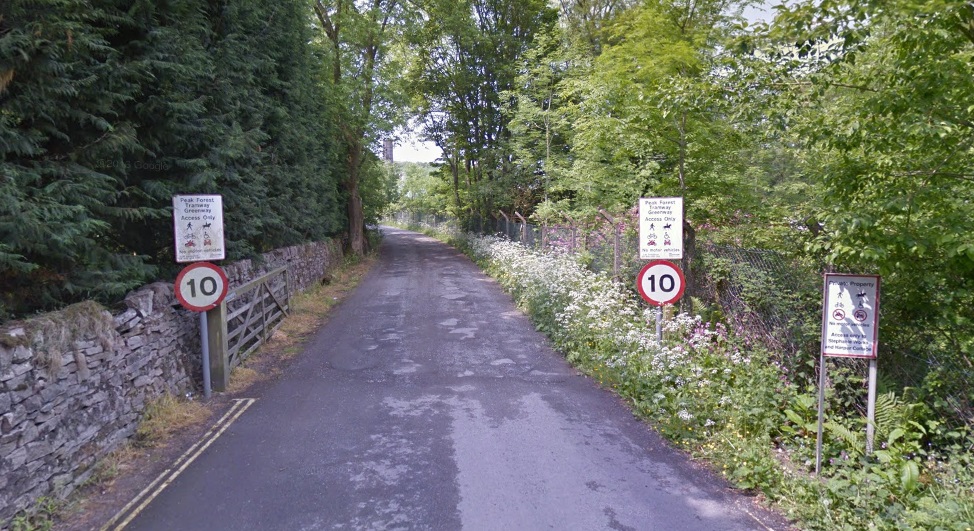
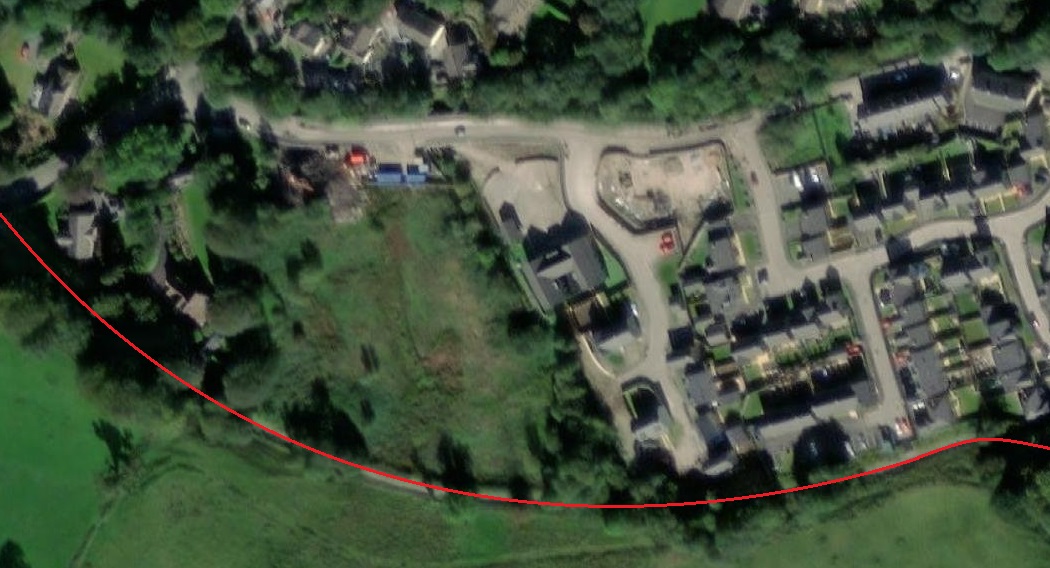
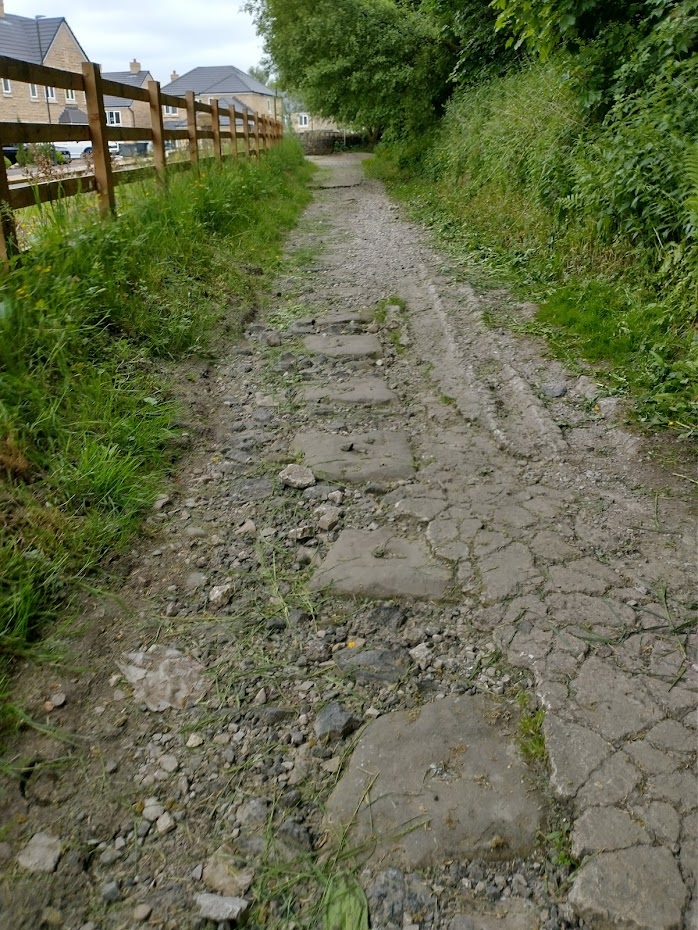
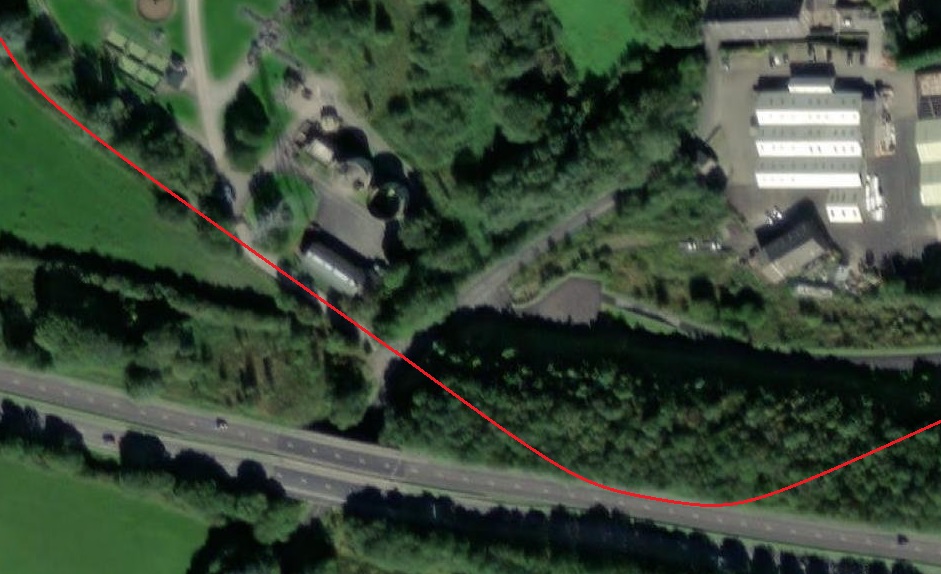
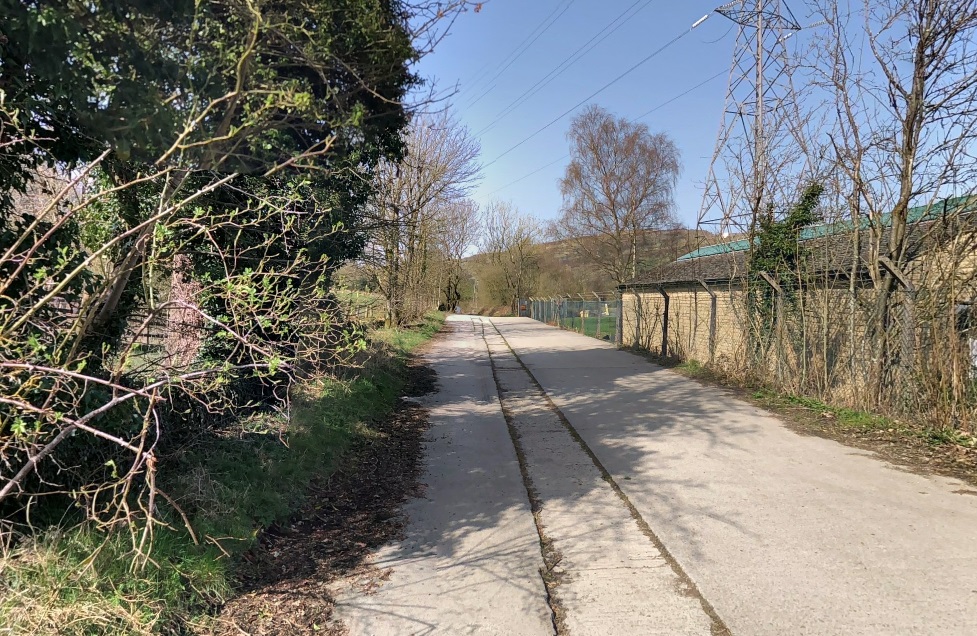
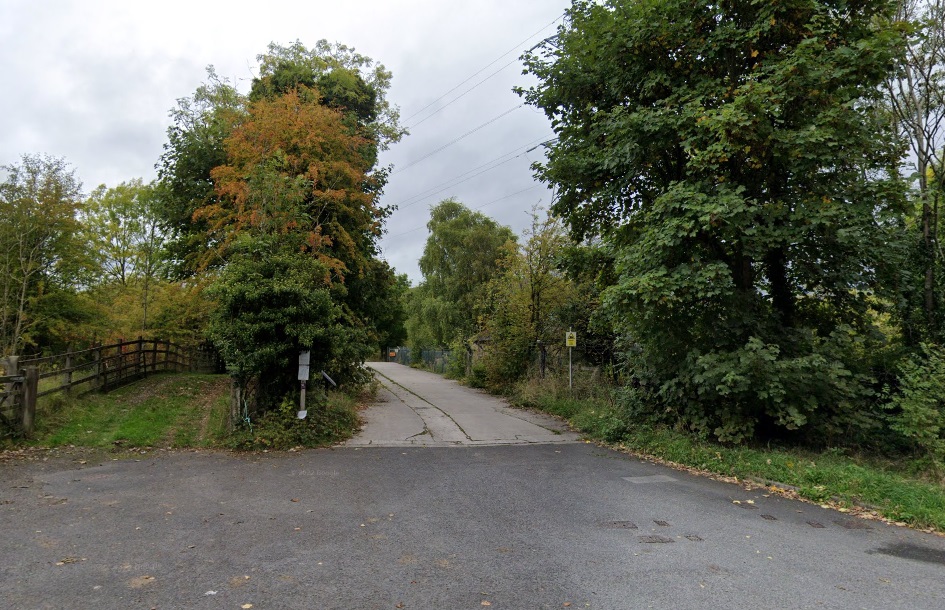
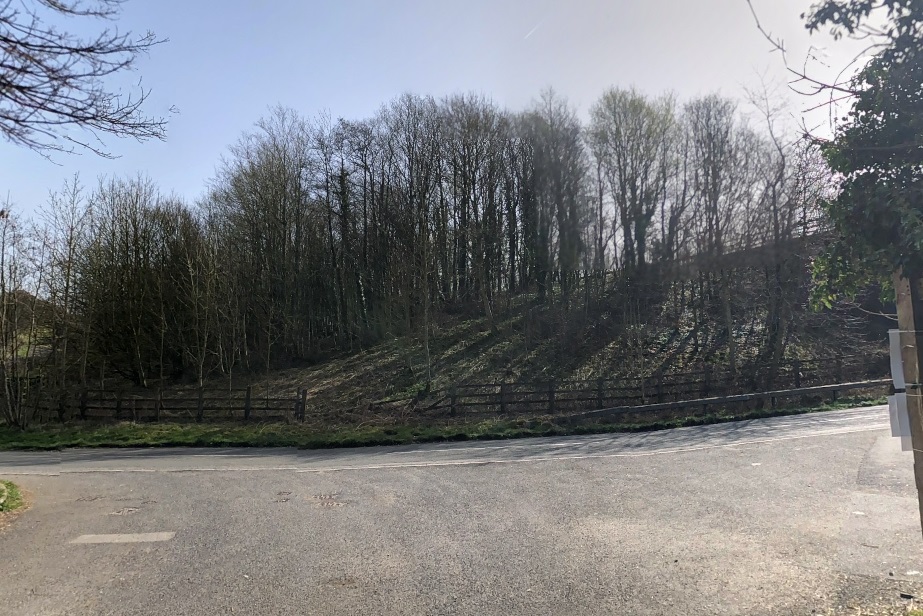
Transport for Greater Manchester (TfGM) has indicated that it is considering a plan to extending the already proposed East Finsbury to Stockport extension of the Metrolink tram network. The extension would utilise the underused railway line between Stockport and Denton.

Talk is of utilising tram-train technology on this possible new extension.

An extension to Metrolink could use the under-exploited Denton line, © Transport for Greater Manchester. [1]

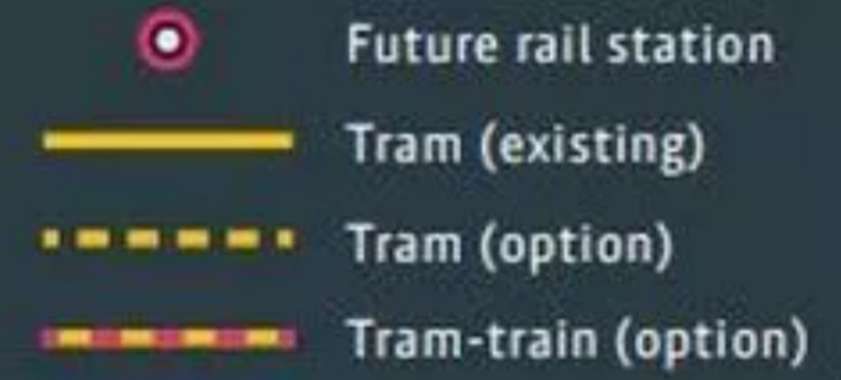
Should this proposal be approved it would link Stockport to Tameside and could also provide a link to Manchester Airport

The Mayor of Greater Manchester, Andy Burnham spoke of bold plans to deliver a decade of growth for Greater Manchester. He said that “developing the Bee Network and delivering better bus, tram and train connections will be fundamental to [that] growth story.” [2]

He continued: “For too long, Denton has been overlooked and by working up the tram-train option to connect Denton and the wider area to the Metrolink is a big step toward unlocking opportunities for local residents and businesses. … We’re committed to extending Metrolink to Stockport and beyond as part of our efforts to connect all our districts to the tram network and delivering a truly integrated transport network for everyone.” [2]

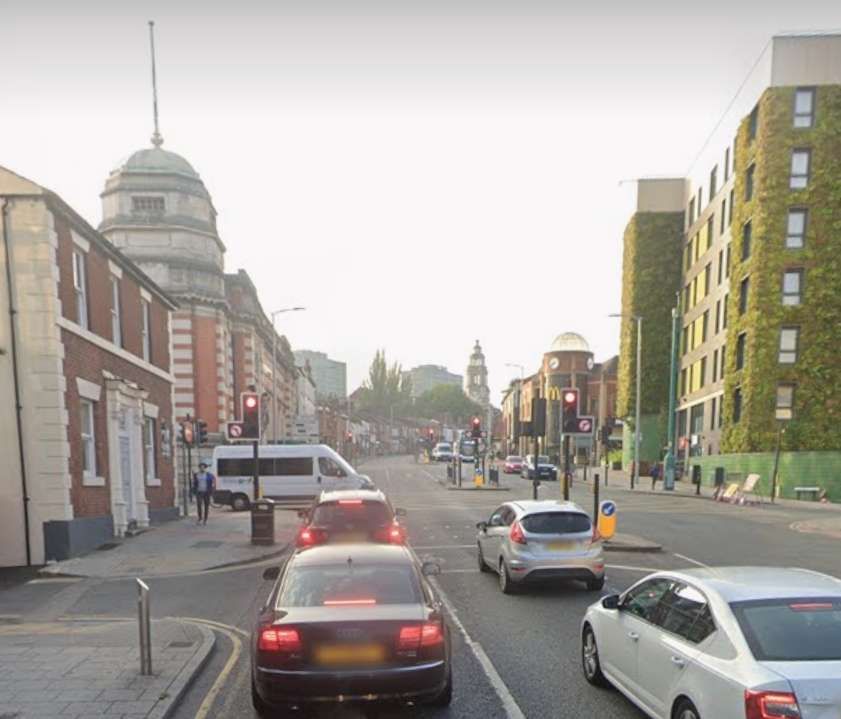
TfGM is already working with Stockport Council to develop a business case for bringing trams to Stockport. The Strategic Outline Case [4] – the first step in the process – is exploring a ‘core’ extension from the existing Metrolink stop at East Didsbury to Stockport town centre. The extension through Denton is not part of those ‘core’ proposals but, “as part of the work on the business case, TfGM is also considering how this may unlock future extensions. One option being worked up includes using tram-train technology – where services can run on both tram and train tracks – to run beyond Stockport town centre along the Denton rail line, connecting the area firmly into the wider Metrolink network including links to Tameside and Manchester Airport.” [2]

Good progress has been made on the first stage of the Stockport Metrolink extension business case, with TfGM now working to complete all required technical work ahead of submission to the Department for Transport in early 2026. Construction on the ‘core’ element of the project could begin by the end of the decade, if approvals and funding are acquired.

Andrew Gwynne, MP for Gorton & Denton, said: “For years I’ve campaigned, alongside the local community, for improved transport links to Denton and across the constituency. I’m delighted that as part of the Metrolink extension plans, TfGM are looking seriously at using the rail line as an option for tram-train services. … Improved connectivity is key to opening up opportunities for our people and communities, and supporting the growth ambitions across the city region.”

Navendu Mishra, MP for Stockport, said: “Since my election to the House of Commons in December 2019, I have been pushing the Government to fund the extension of Manchester’s Metrolink tram network into my constituency of Stockport, and I thank the Secretary of State for Transport, the Chancellor and Transport for Greater Manchester for backing the extension to our town centre. … This will be a significant boost for Stockport’s connectivity and local economy, helping people to get to work, school and healthcare appointments more easily and sustainably as well as unlocking new homes and jobs.” [2]

Leader of Tameside Council, Cllr Eleanor Wills, said: “The options being developed to utilise the Denton rail line to expand Metrolink and better connect Ashton to Manchester Airport via Stockport have the potential to be truly transformational. …  The Ashton Mayoral Development Zone is an exciting and vital opportunity to unlock Ashton’s potential, providing new homes and quality jobs. With even better transport links we can set ourselves up to for good growth for many years to come.” [2]

Leader of Stockport Council, Cllr Mark Roberts, said: “I’ve always said when it comes to MetroLink that it should be ‘Next Stop Stockport not Last Stop Stockport’ to the help deliver the ambition we have -the delivery of Metrolink and improving public transport connectivity across the borough and Greater Manchester is something we can all get behind.” [2]

TfGM says: “With Greater Manchester embarking on a decade of good growth, the city region is committed through the Greater Manchester Strategy to developing a transport system for a global city region – with 90% of people within a five-minute walk of a bus or tram that comes at least every 30 minutes.” [2]

In June 2025, the government awarded Greater Manchester £2.5 billion through Transport for the City Regions funding for a pipeline of projects including a tram line to Stockport and tram-train services connecting Oldham, Rochdale, Heywood and Bury, new Metrolink stops and modern new interchanges. … The £2.5 billion is part of a package of investment Greater Manchester is seeking to deliver its growth ambitions in full – with the city region seeking to work collaboratively with Government on exploring new funding models for major transport and other infrastructure projects. [3]
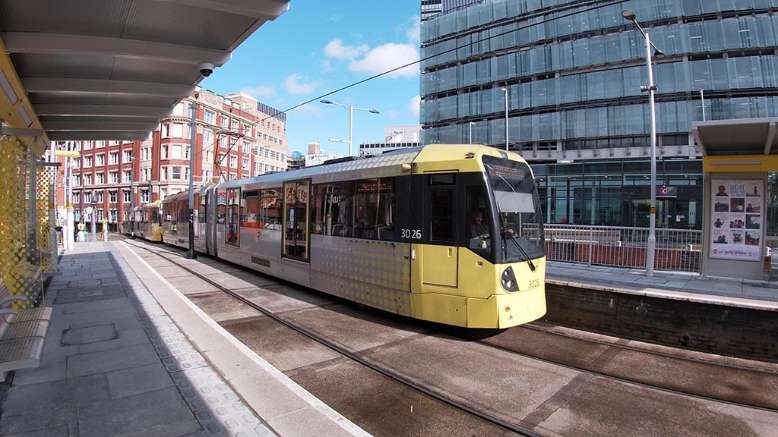
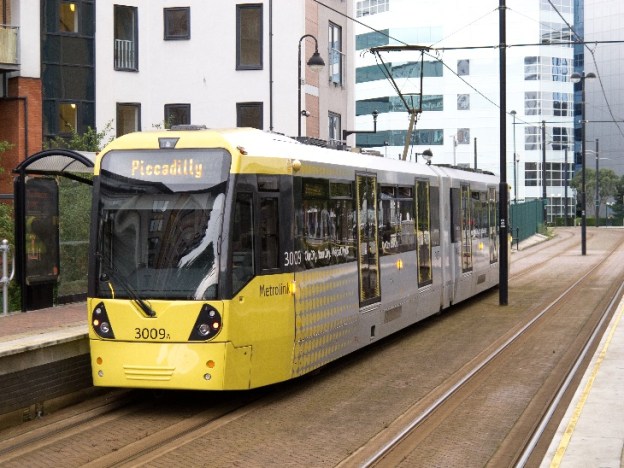
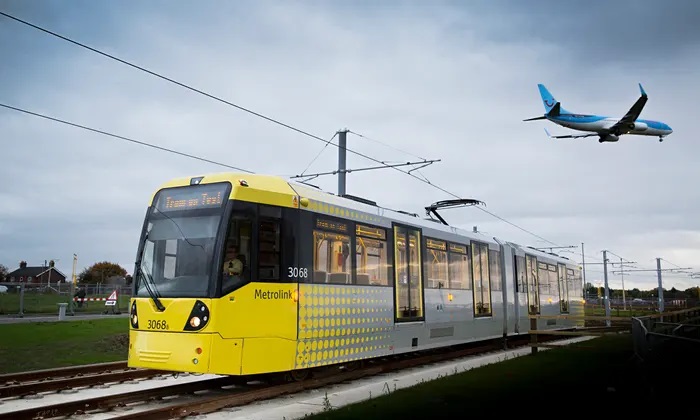
As of December 2025, Metrolink is the UK’s largest light rail network, with 99 stops connecting seven of the 10 boroughs of Greater Manchester. Record numbers of people are also getting onboard, with 45.6 million trips made in 2024 – up from 33.5m trips in 2022. [2]

The £2.5 billion investment for the Greater Manchester city-region is targetted at enabling the Bee network become fully-electric, zero-emission public transport system by 2030. Local rail lines will be brought into the Bee Network by 2030, fully integrated bike, bus, tram and train travel for the first time outside London. New electric buses, tram lines, tram stops and transport interchanges are among pipeline of projects which will deliver far-reaching benefits across Greater Manchester. Mayor Andy Burnham said that further progress on the next phase of the Bee Network will now be delivered at an unrelenting pace.

Greater Manchester will create an all-electric local public transport network:

“A thousand new EV buses will form a 100% electric fleet serving its communities. Alongside trams powered by renewable energy and e-bikes for hire, it will deliver an emission-free network. This will build on progress already made to cut CO2 emissions and improve air quality.” [3] (Image, © Transport for Greater Manchester.)

Greater Manchester will bring rail into the Bee Network. “Local rail lines will be integrated with the Bee Network, … the move will see major improvements to stations, including making more fully accessible, as well as capped fares.” [3]

Greater Manchester will deliver major projects to drive green growth. “A pipeline of transport projects – including a tram line to Stockport and tram-train services connecting Oldham, Rochdale, Heywood and Bury, new Metrolink stops and modern new interchanges – will support the delivery of thousands of new homes, skilled jobs and green growth.” [3]

Greater Manchester’s current transport strategy is made up of a number of documents, including:

  • Greater Manchester Transport Strategy 2040.
  • A Five-Year Transport Delivery Plan 2021-2026 (including 10 local implementation plans).
  • Several supporting sub-strategies that all contribute to meeting regional transport ambitions and building the Bee Network.

In 2025, Greater Manchester are currently working on a new strategy – the Greater Manchester Transport Strategy 2050 – that will replace the current documents. [5]

You can find out more about the Greater Manchester Transport Strategy 2040 using these links:

Download the Greater Manchester Transport Strategy 2040. [6]

Download the Greater Manchester Transport Strategy 2040: Executive Summary. [7]

The Greater Manchester Transport Strategy 2050 has been promoted by Mayor Andy Burnham. [8]

Plans for a subway network in the city centre could become reality by 2050 if Greater Manchester makes good on ambitions set out within its latest rail strategy. … The 48-page strategy sets out a roadmap for the city region’s rail network, which needs to expand to keep pace with a growing population. … Among the highlights is the intention to develop an underground network by 2050.” [8]

Starting at Piccadilly, where the city wishes to create a subterranean through-station as part of Northern Powerhouse Rail, the underground would provide increased network capacity without significant land take. … Taking Metrolink below ground [could] also minimise the disruption that would be caused if works were to take place at street level and push Manchester towards its target of doubling the number of intercity trips made by rail.” [8]

The ripple effects of taking the network underground include easing the pressure on the Castlefield Corridor, ‘one of the most overburdened rail routes in the country’, according to the strategy.” [8]

The underground plan is just one part of the strategy for the city-region strategy that also includes upgrading stations, introducing tram-train technology on existing rail lines to widen the Metrolink’s reach, and delivering the Northern Arc – a new line between Manchester and Liverpool that would ultimately form part of Northern Powerhouse Rail. Land around rail hubs in the city region, including a huge development opportunity at Piccadilly similar in scale to that at Kings Cross, could support the delivery 75,000 new homes and unlock £90bn in economic uplift across the North West by 2050.

According to Andy Burnham,  “Greater Manchester’s rail network plays a vital role in supporting [its] communities, powering [its] economy, and opening doors to opportunity – but for long has been held back from its true potential. … The way projects and services are planned and delivered is changing, with long needed reform giving the city-region a once-in-a-generation opportunity to reshape rail for Greater Manchester.” [8]

A year after the rail vision was unveiled a more simplified fare system on the Bee Network was announced. Andy Burnham said: “Simplifying rail fares is a key first step in making train travel easier and more accessible and the key to bringing local rail services into the Bee Network from December 2026. … Greater Manchester has a proud railway heritage, and our vision, developed with the industry, is about ensuring that everyone in our city-region can benefit from better connections, more reliable services, and a transport network that meets the needs of future generations.” [8]

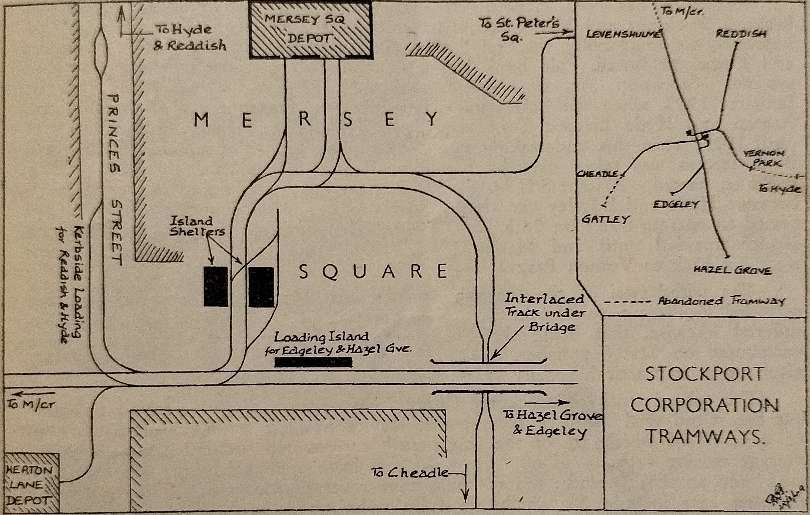
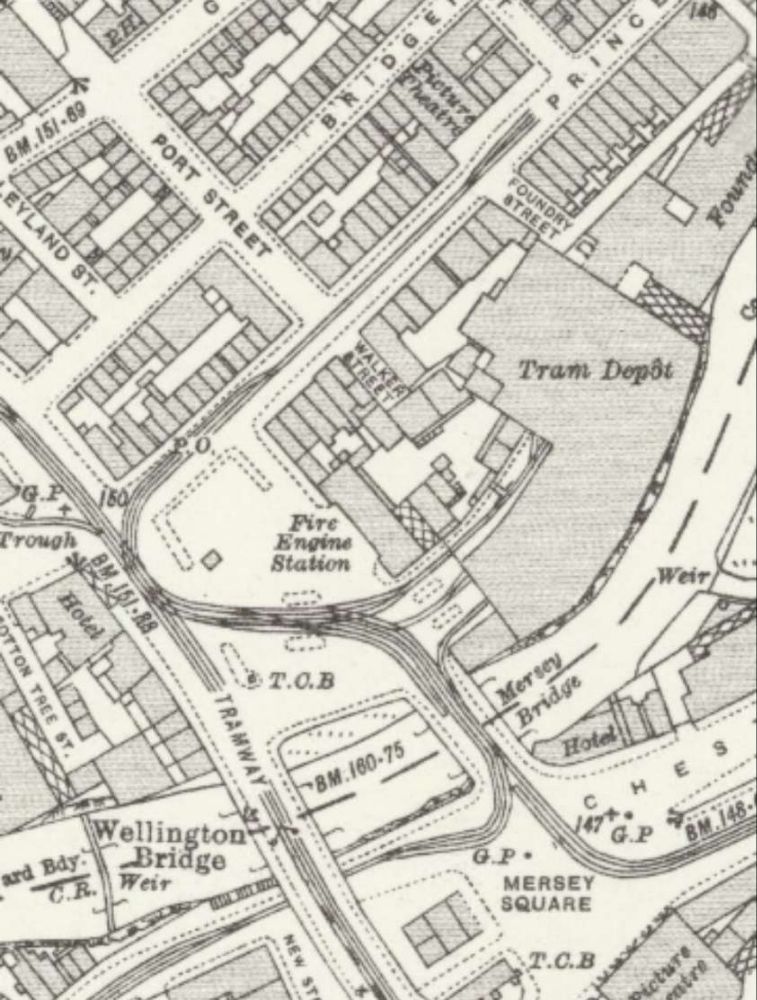
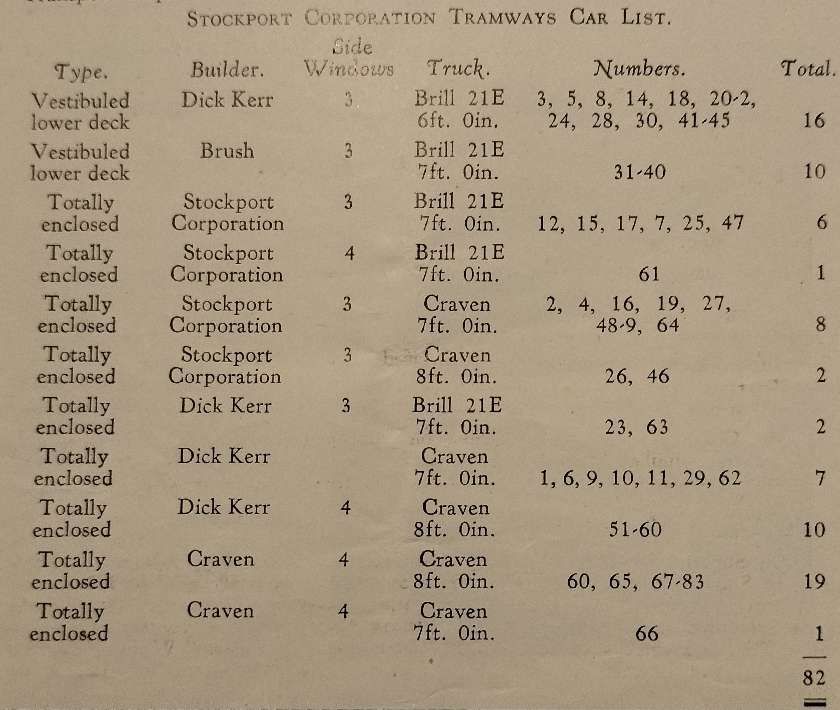
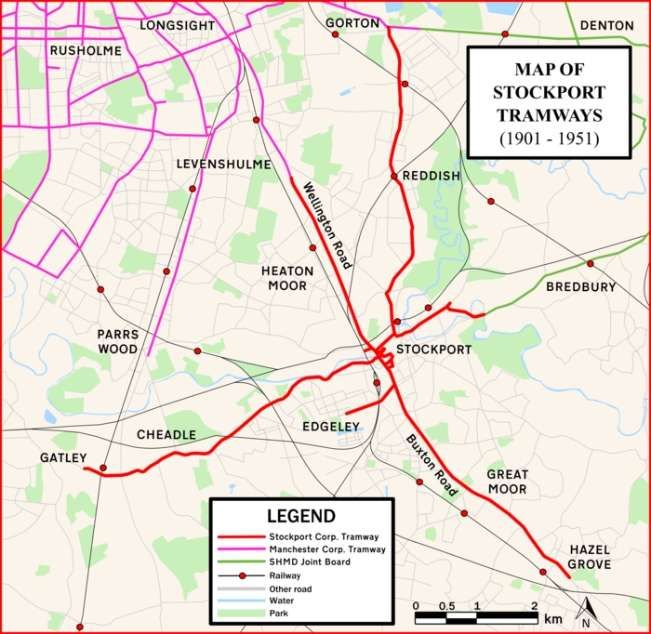
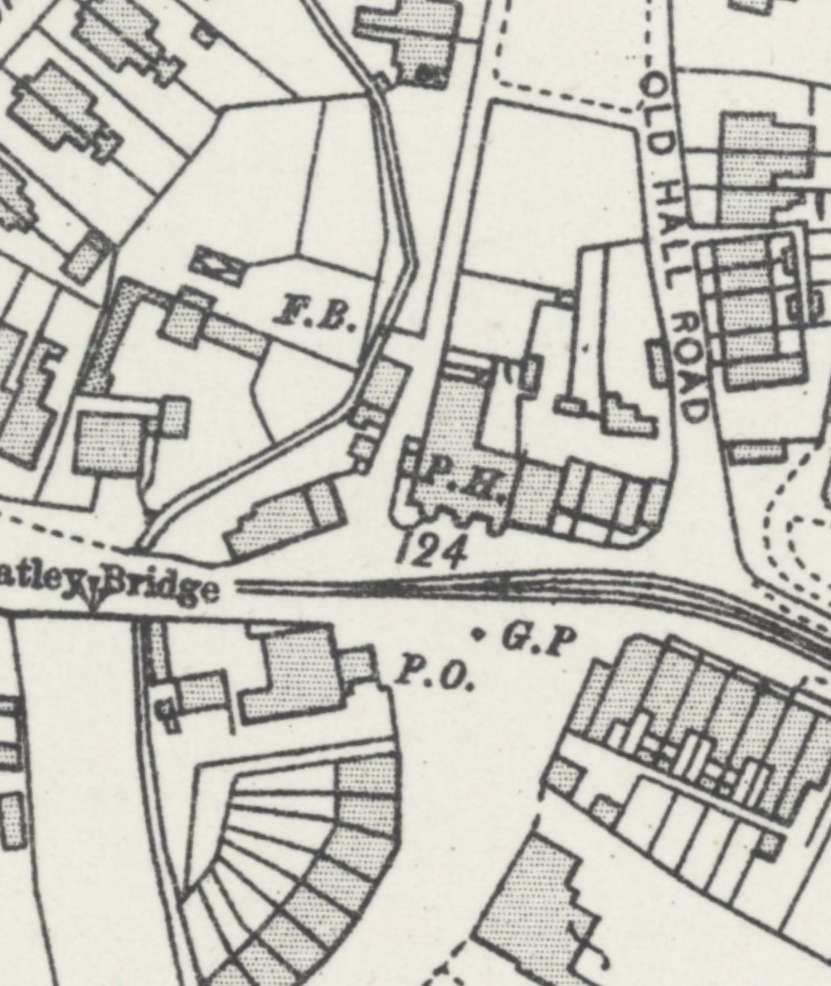
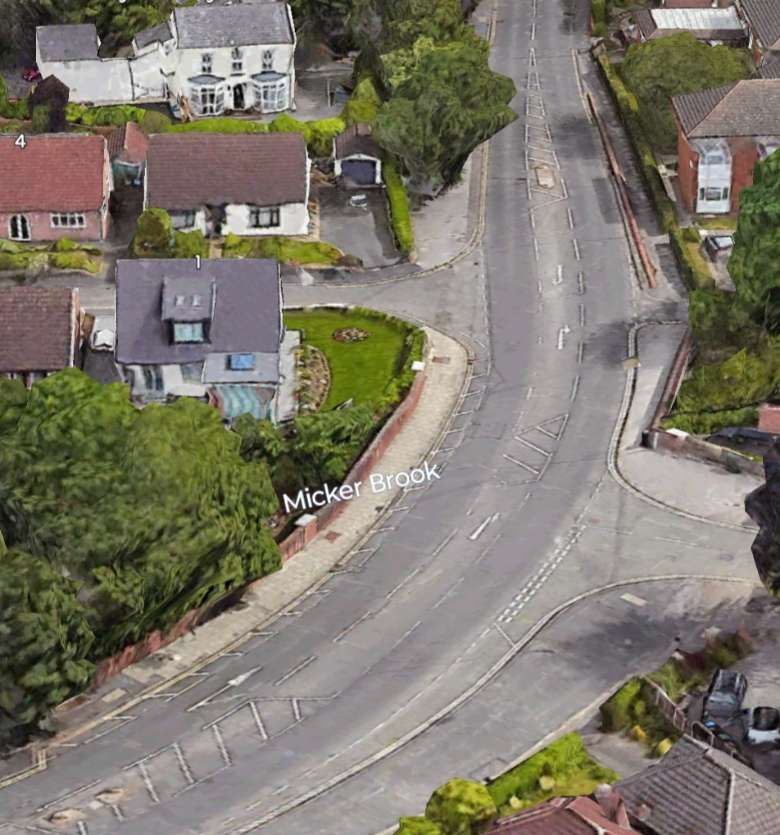
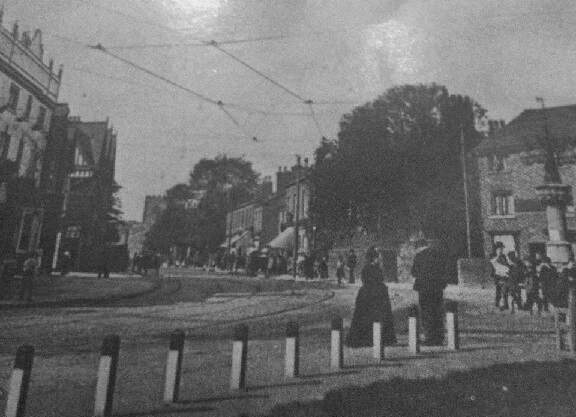
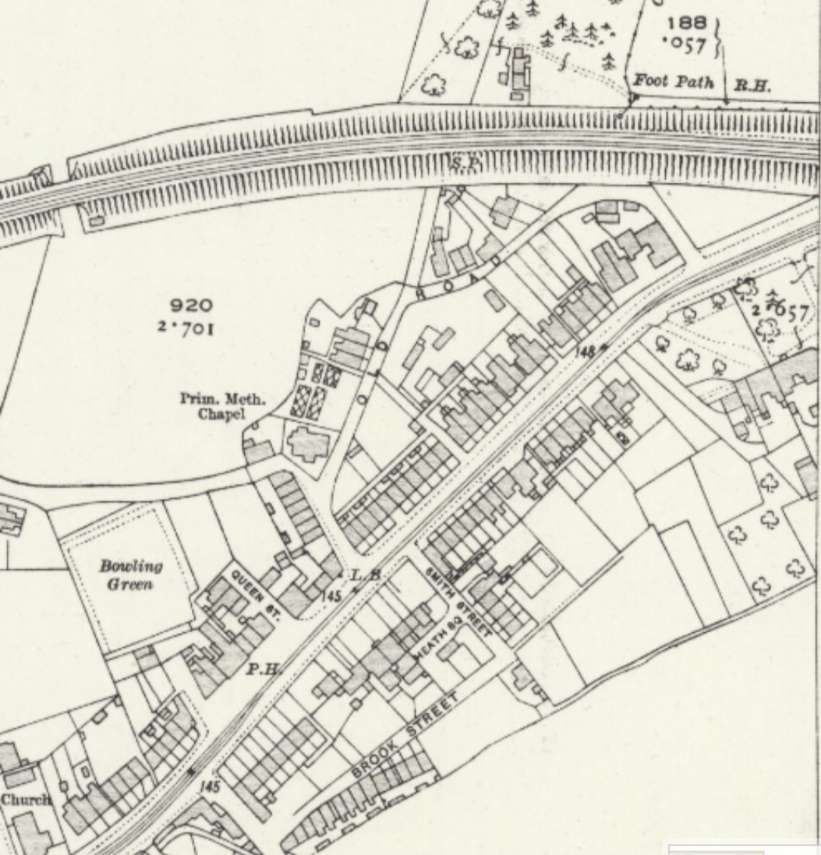
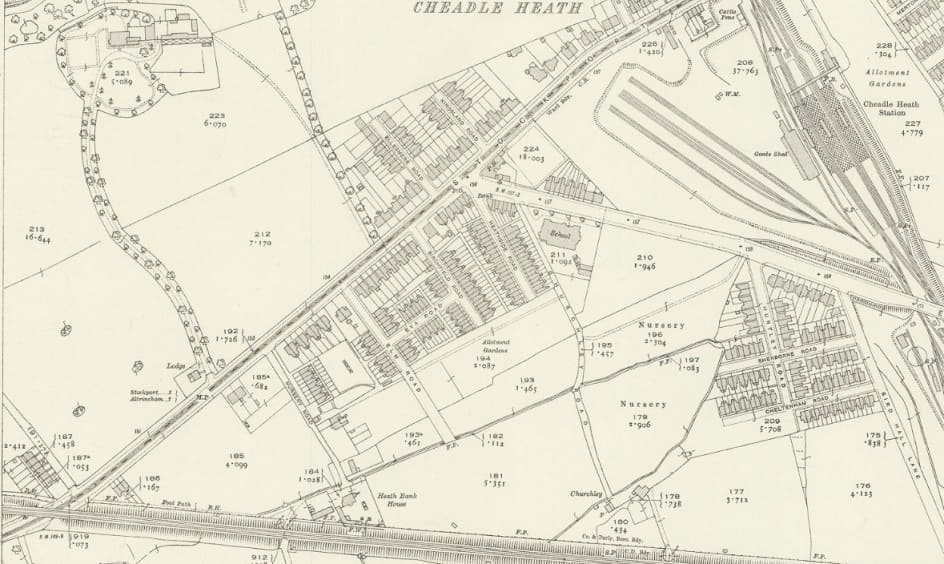
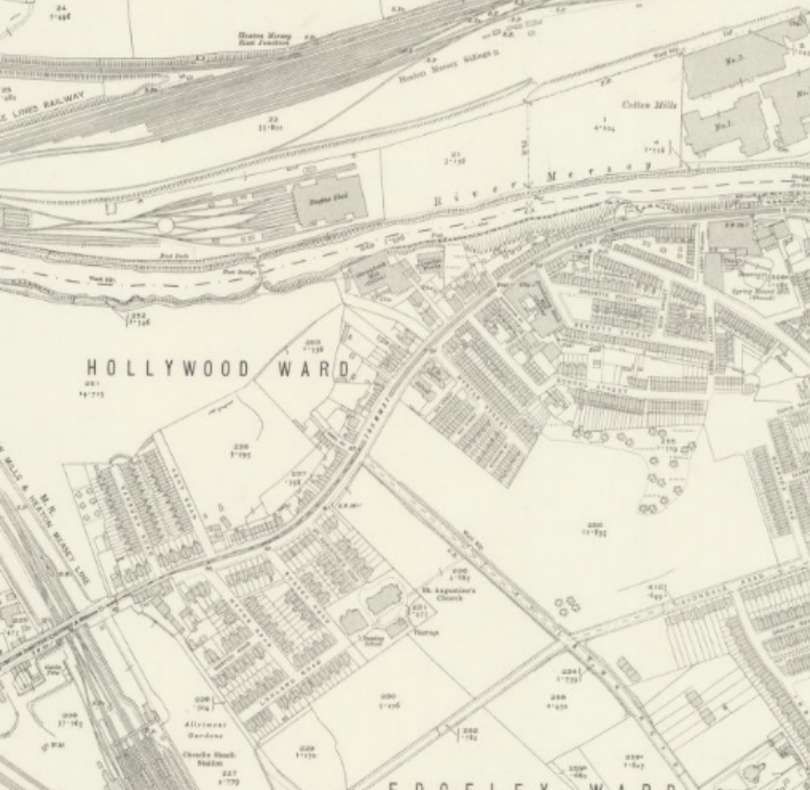
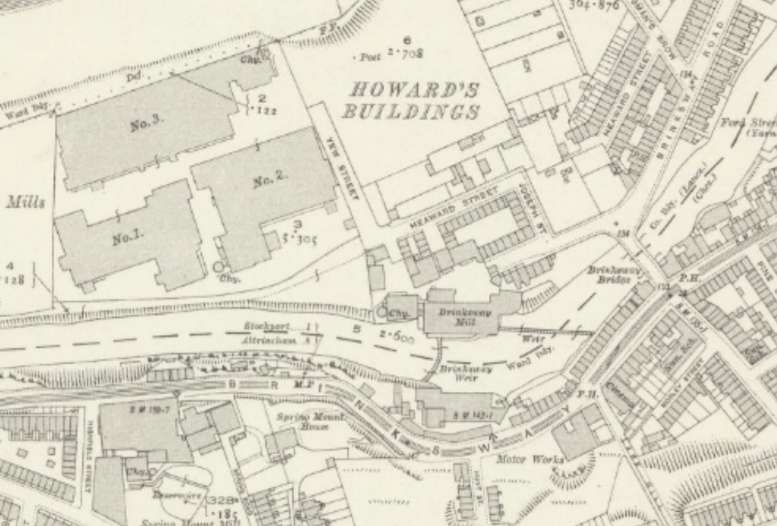
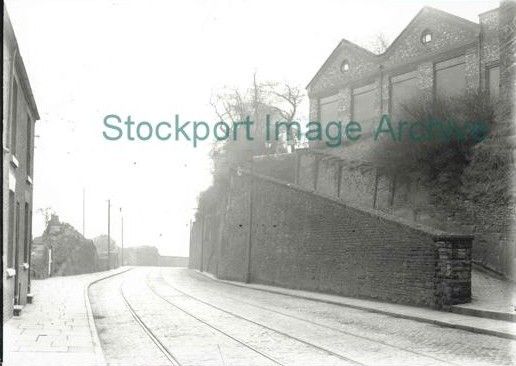
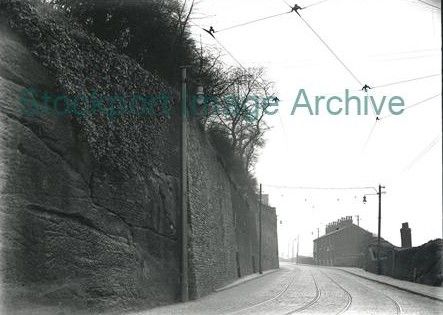
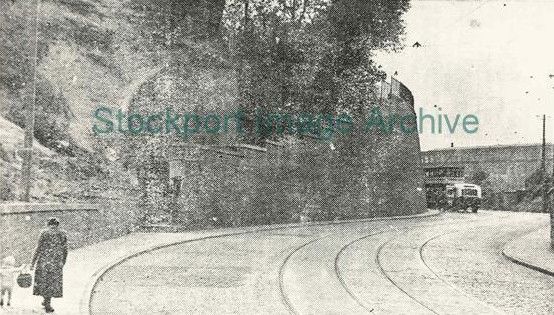
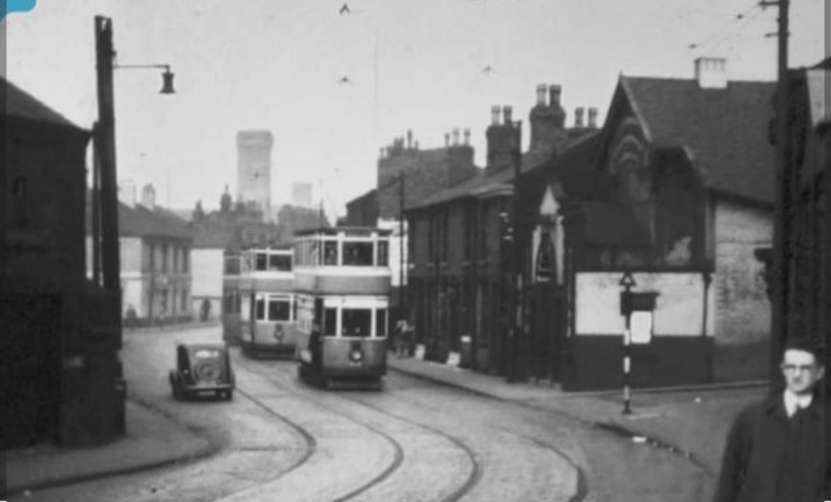
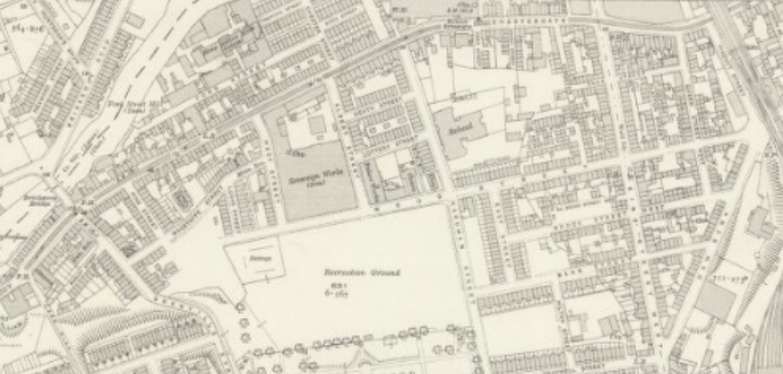
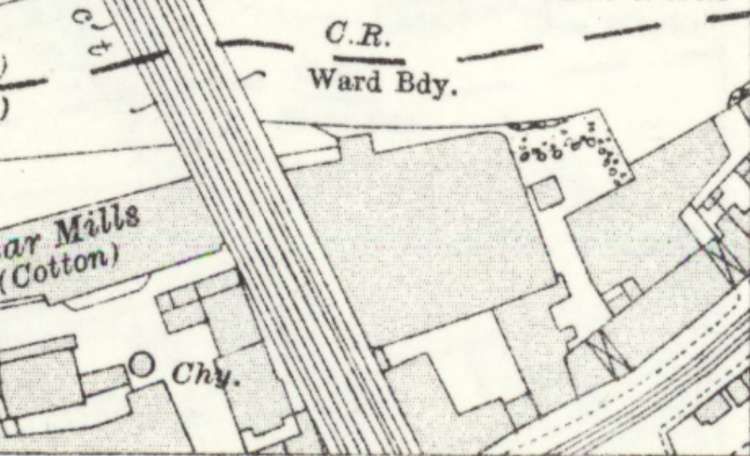
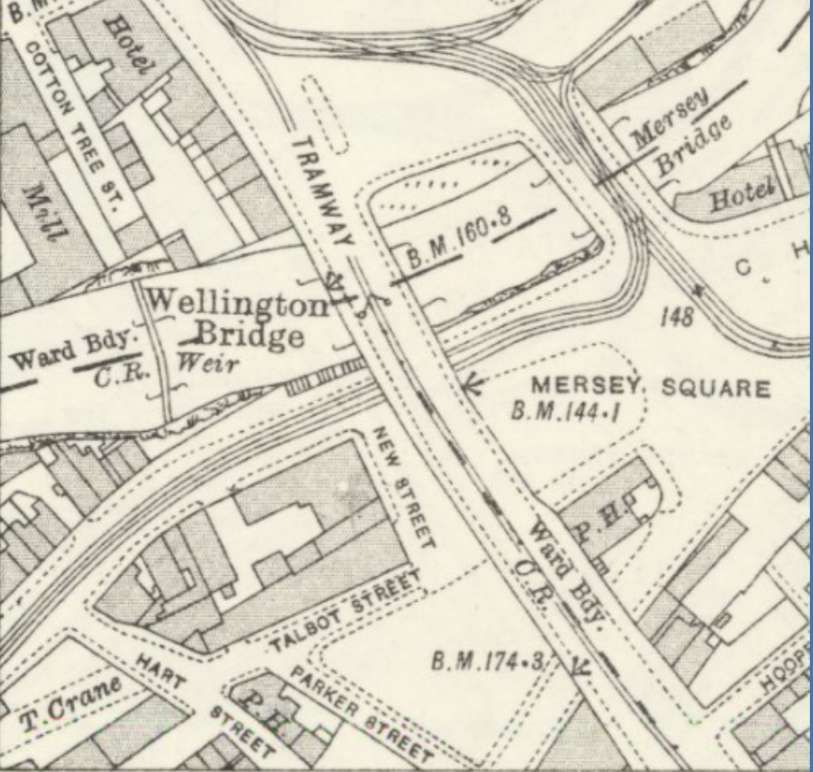
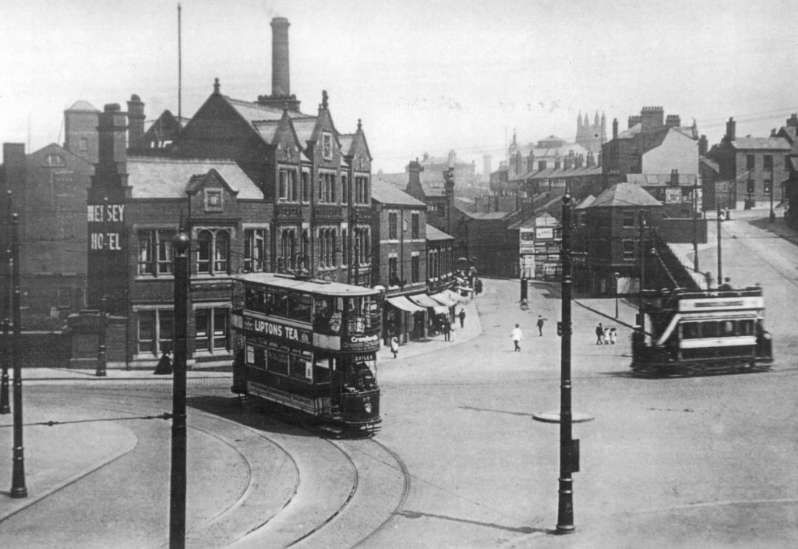
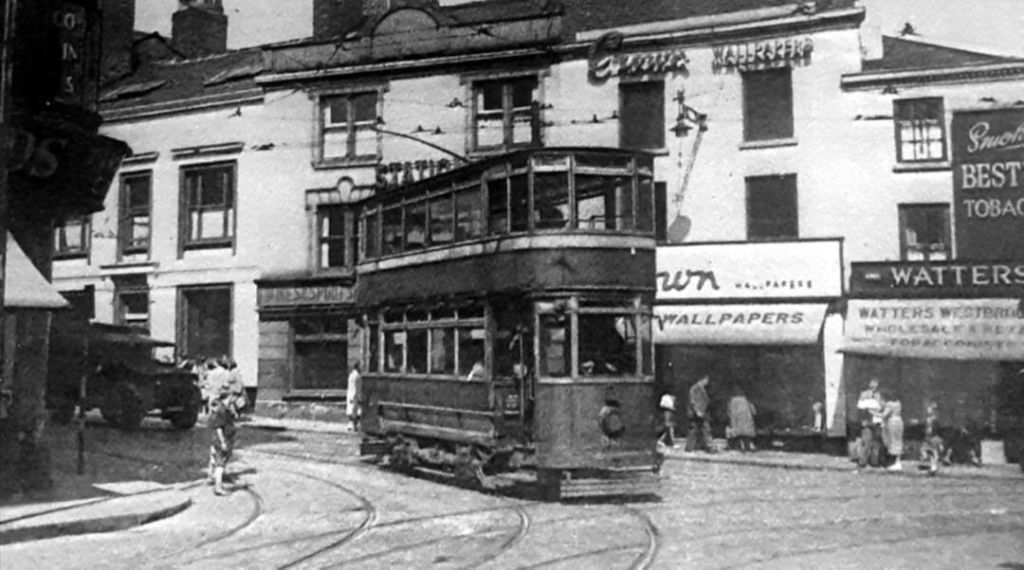
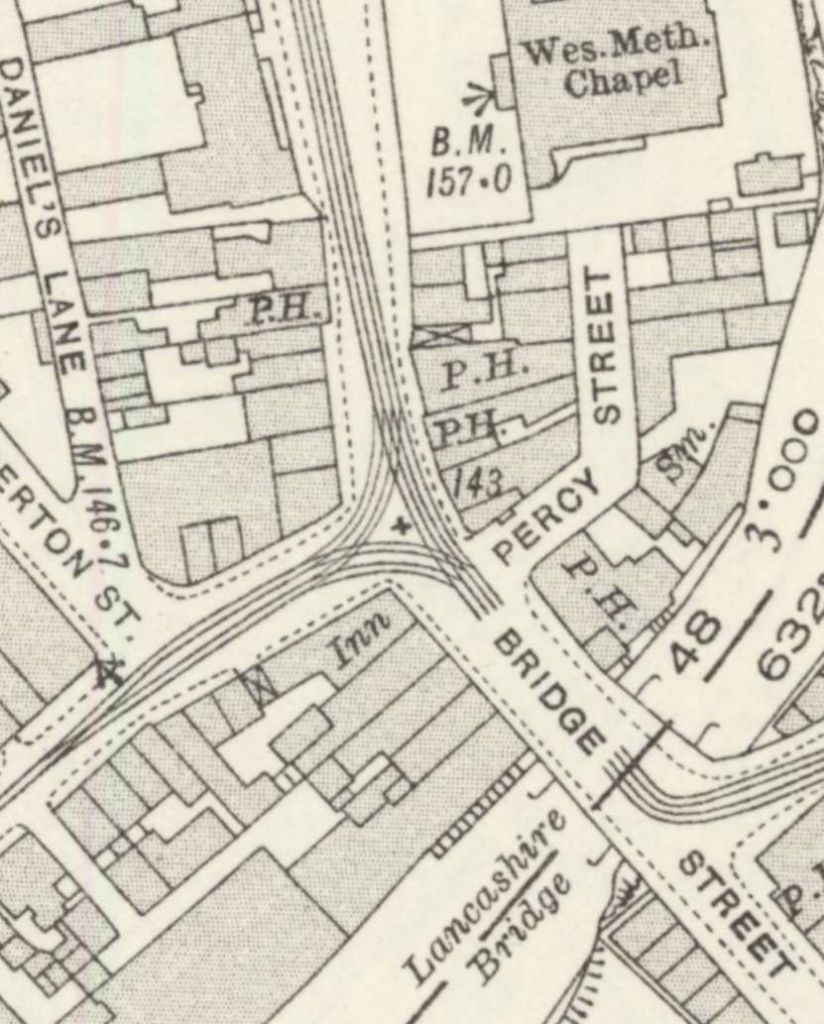
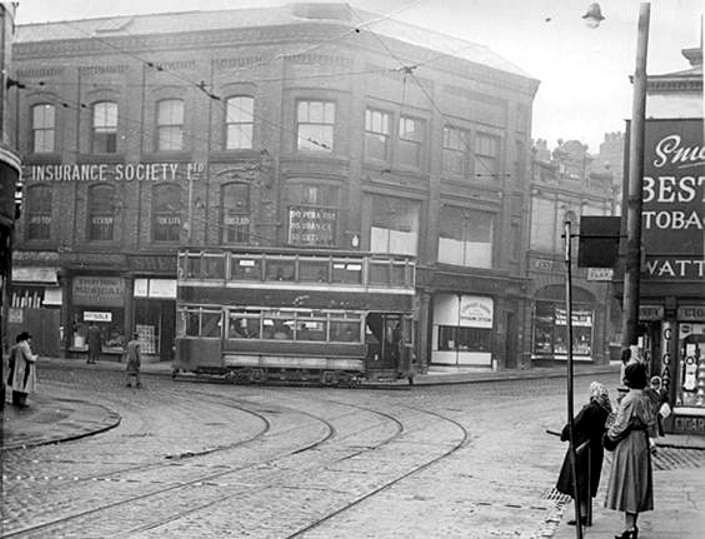
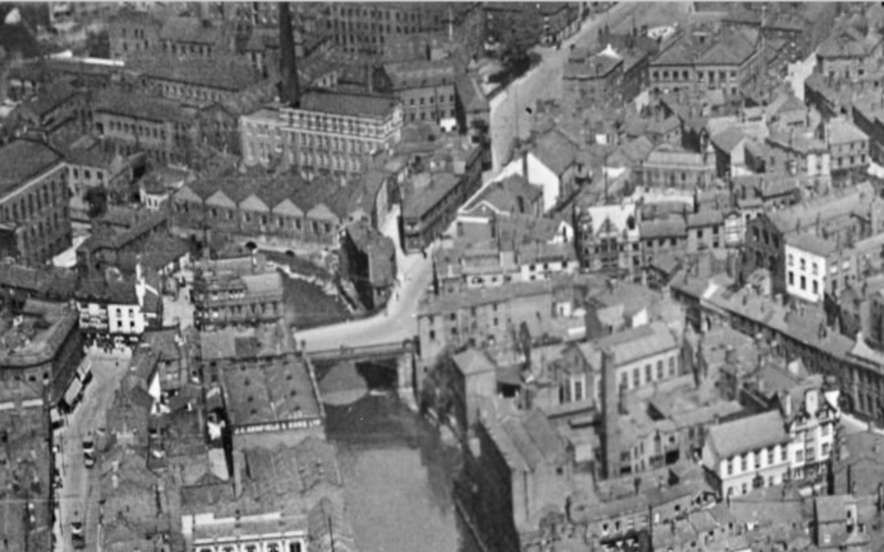
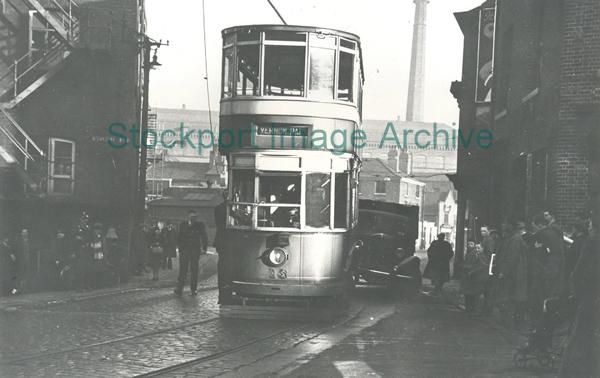
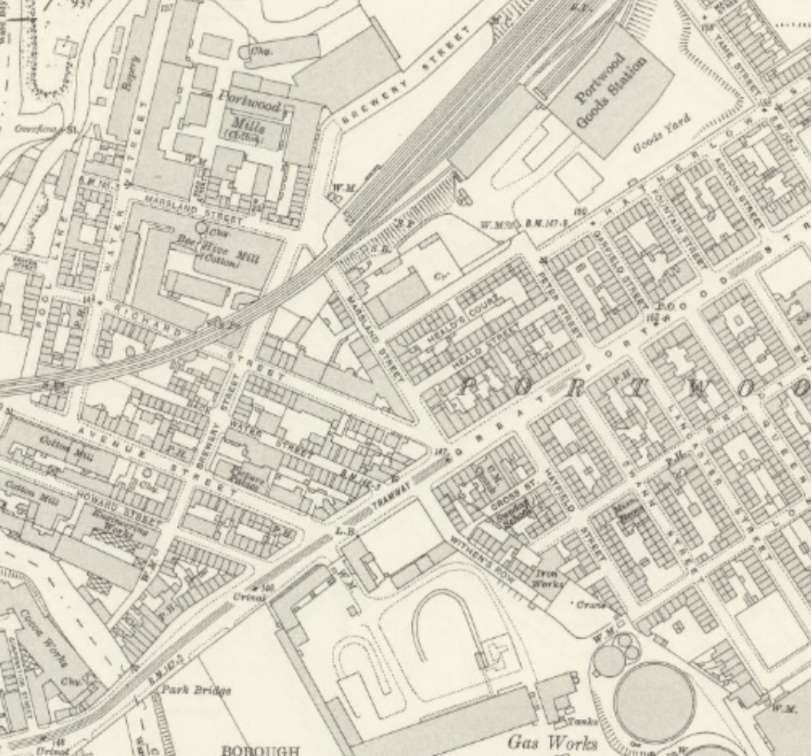
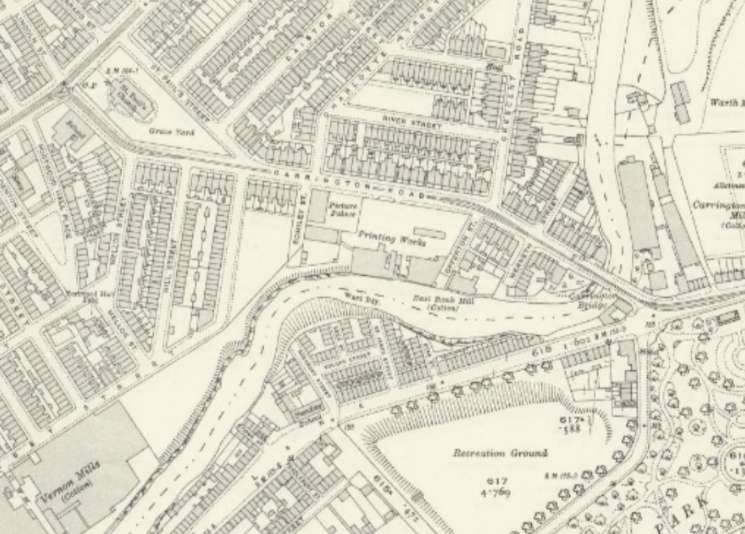
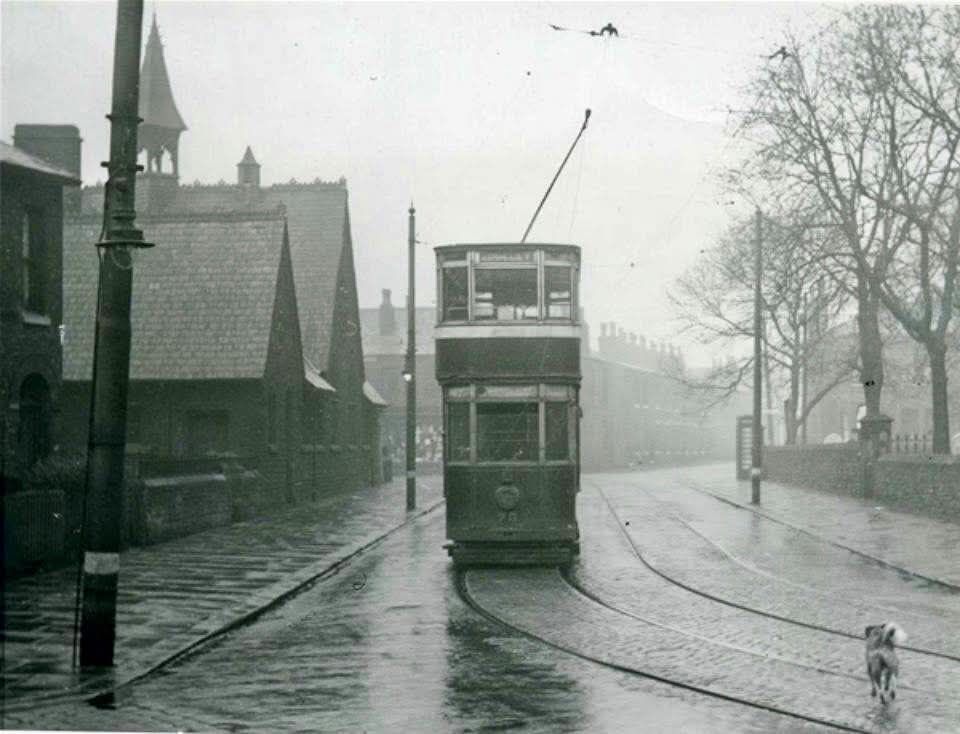
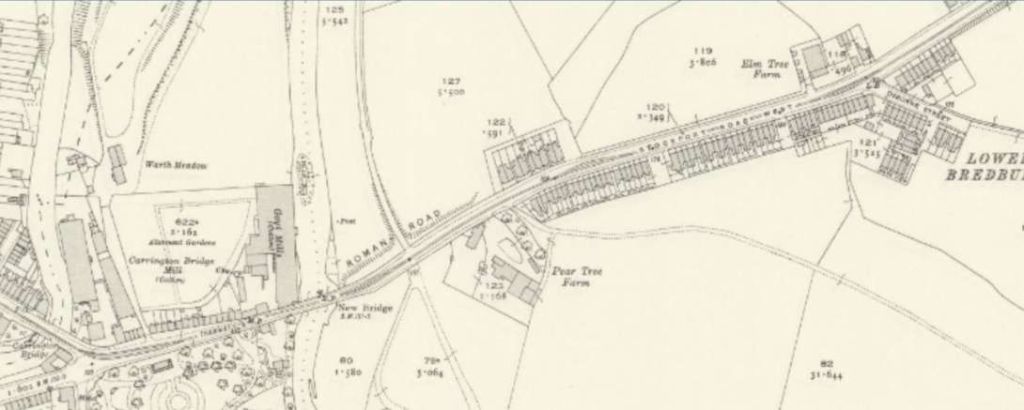
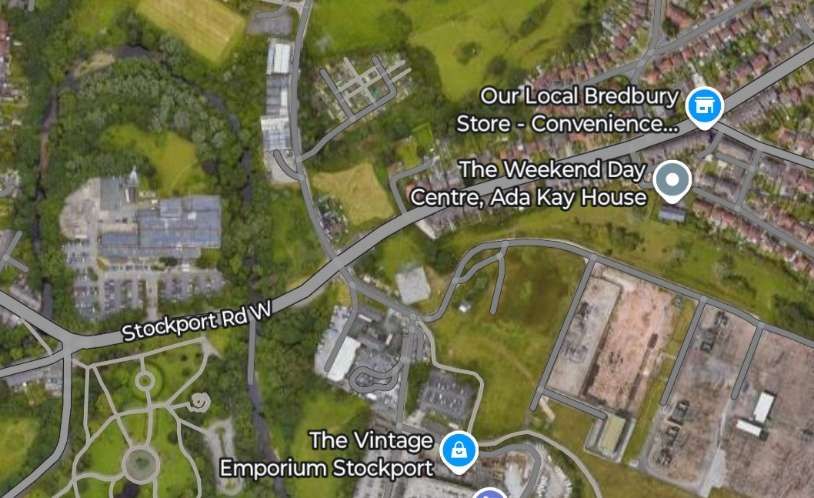
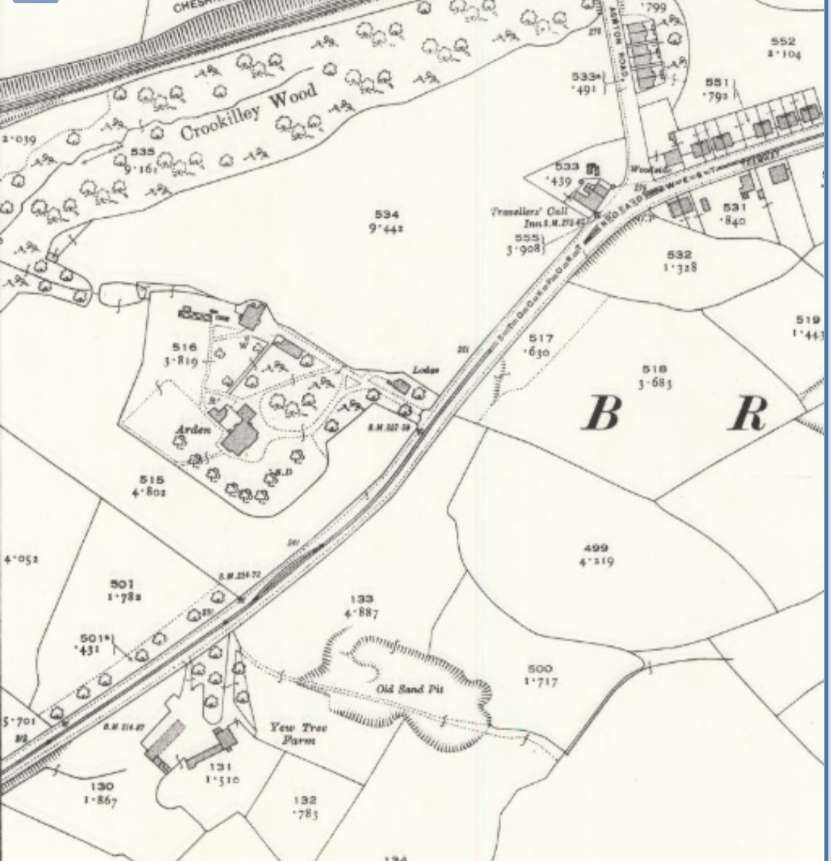
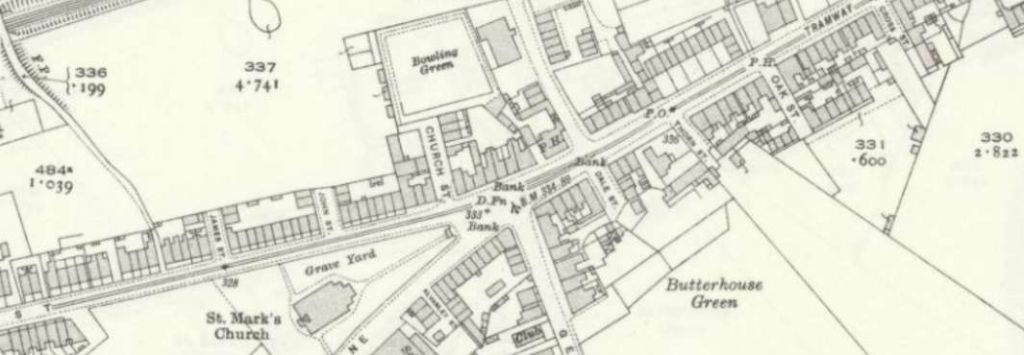
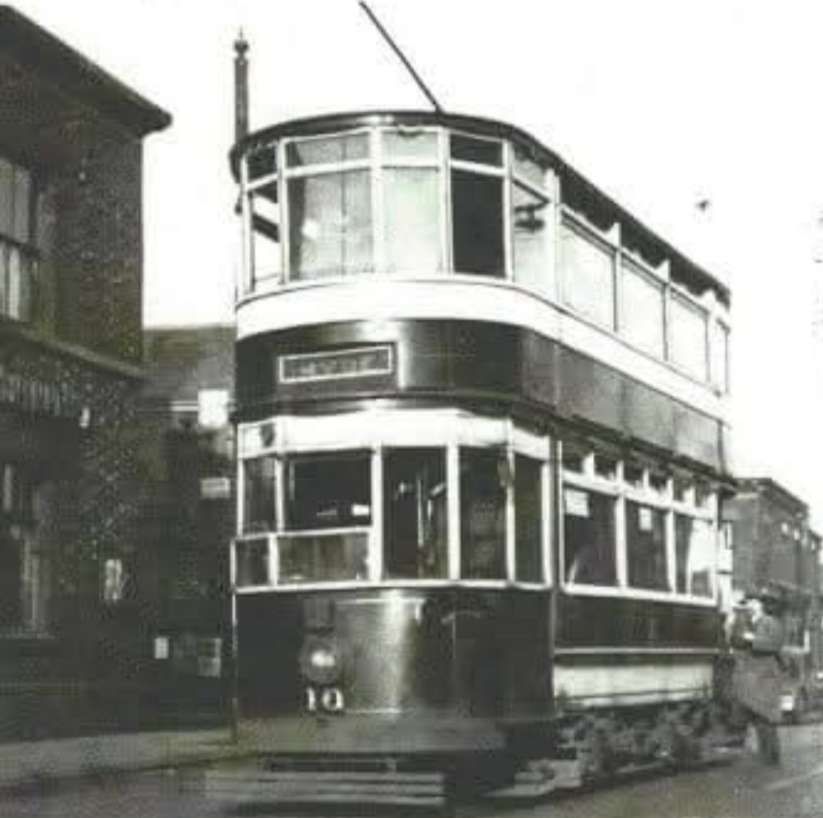
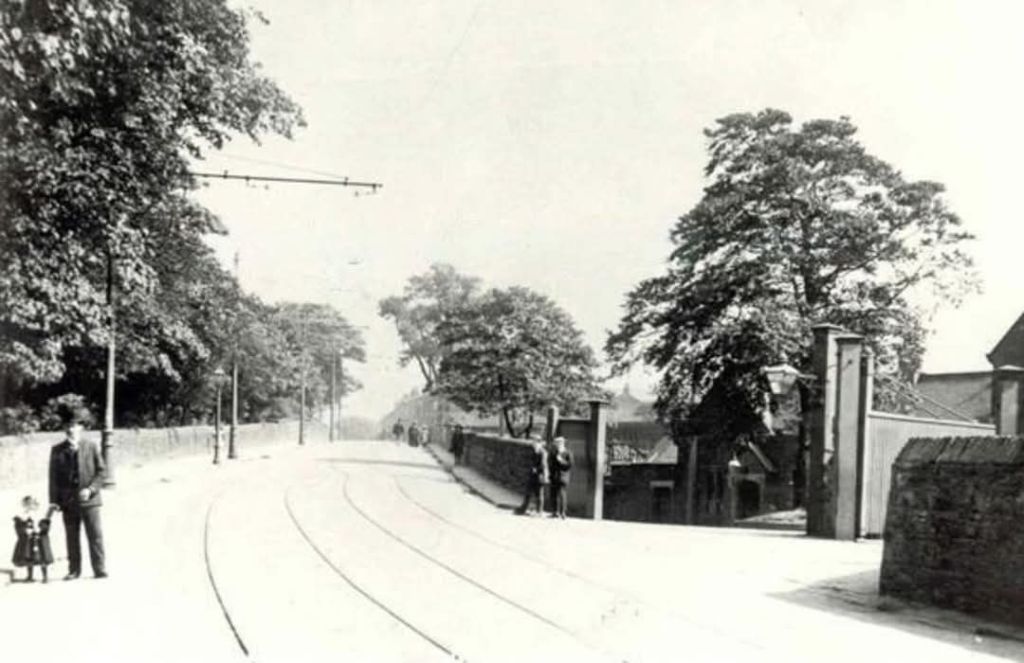
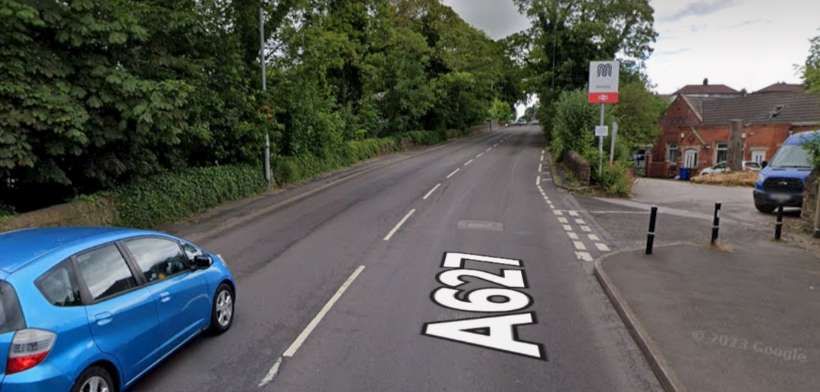
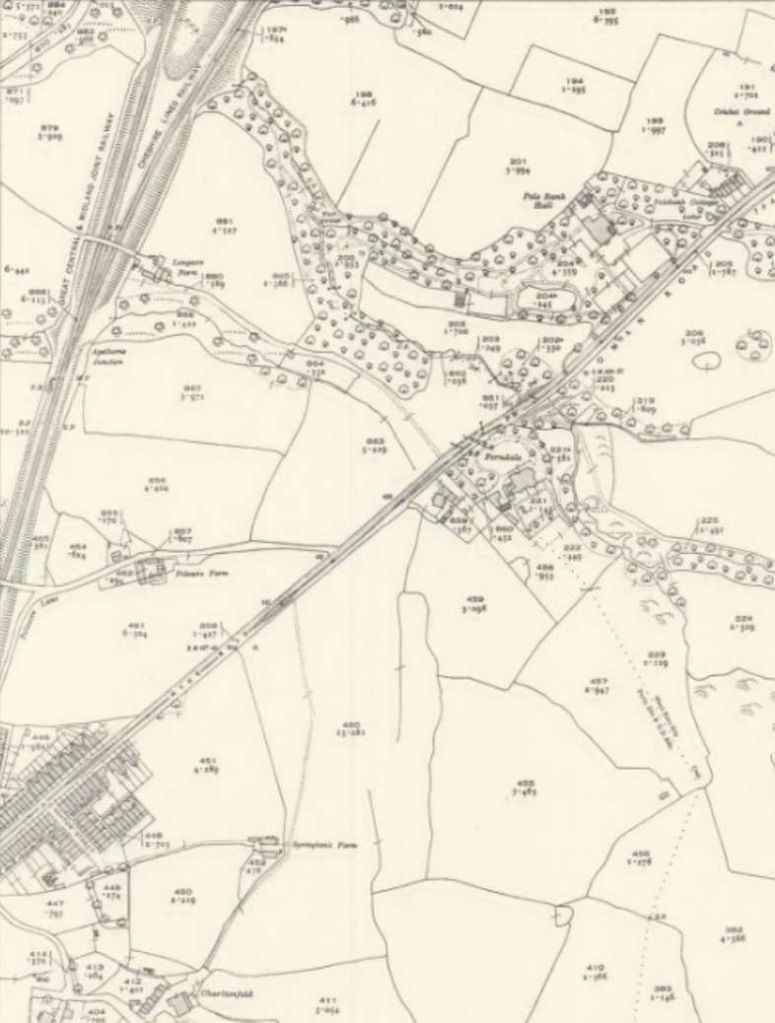
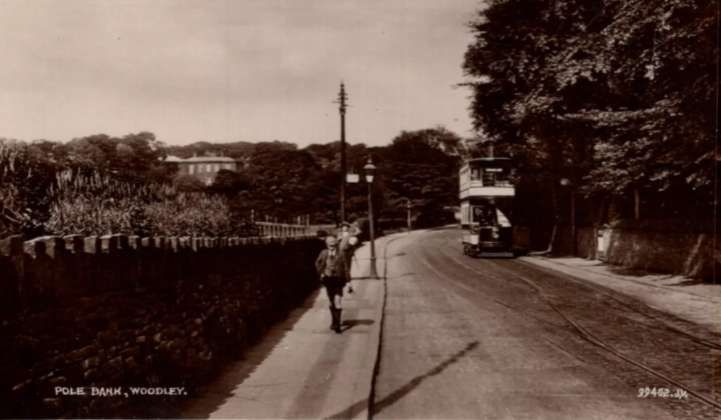
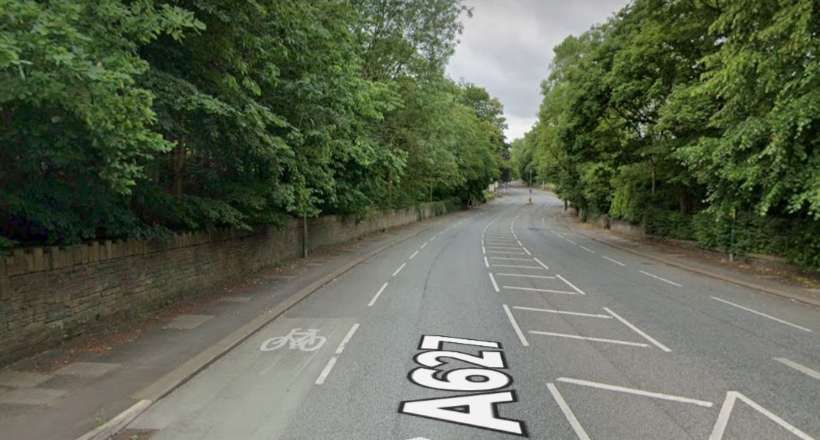
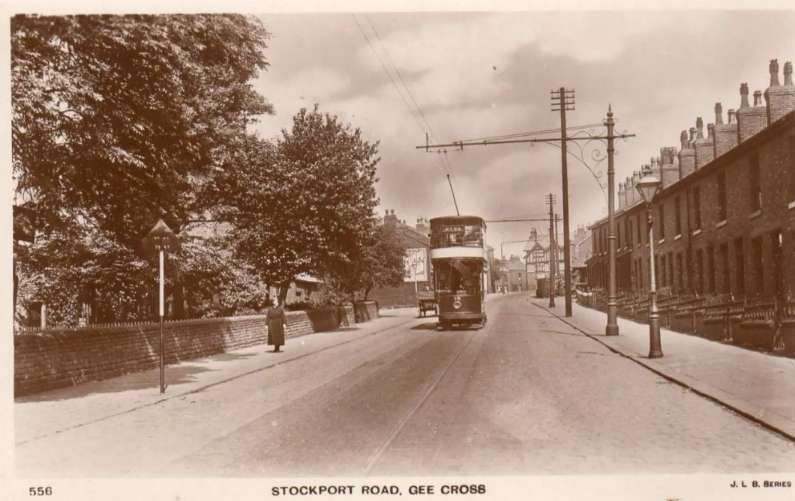
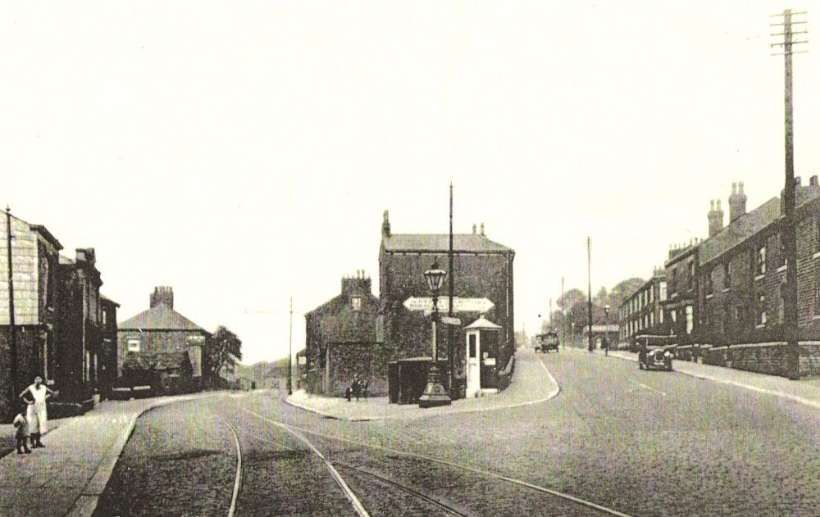
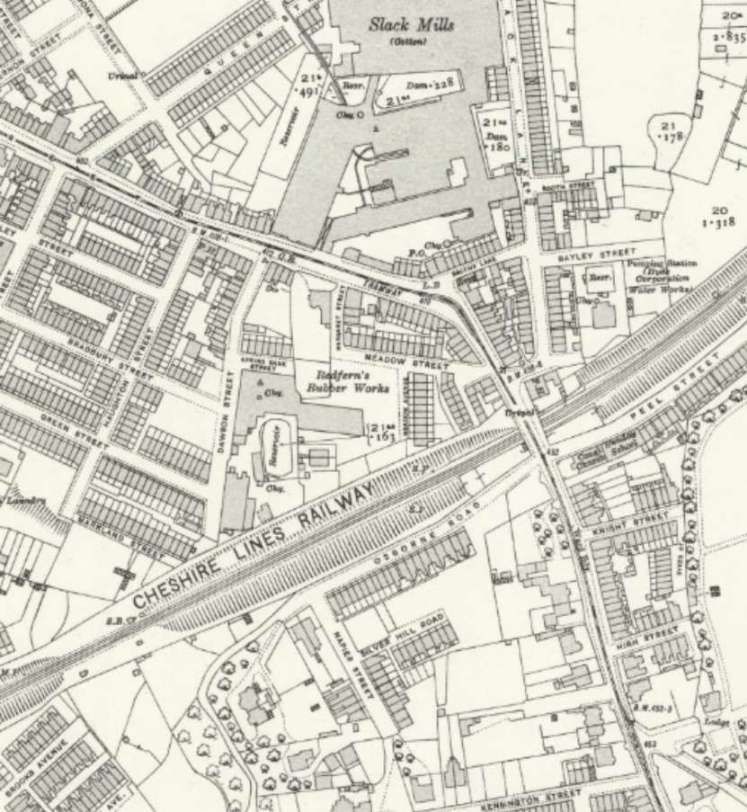
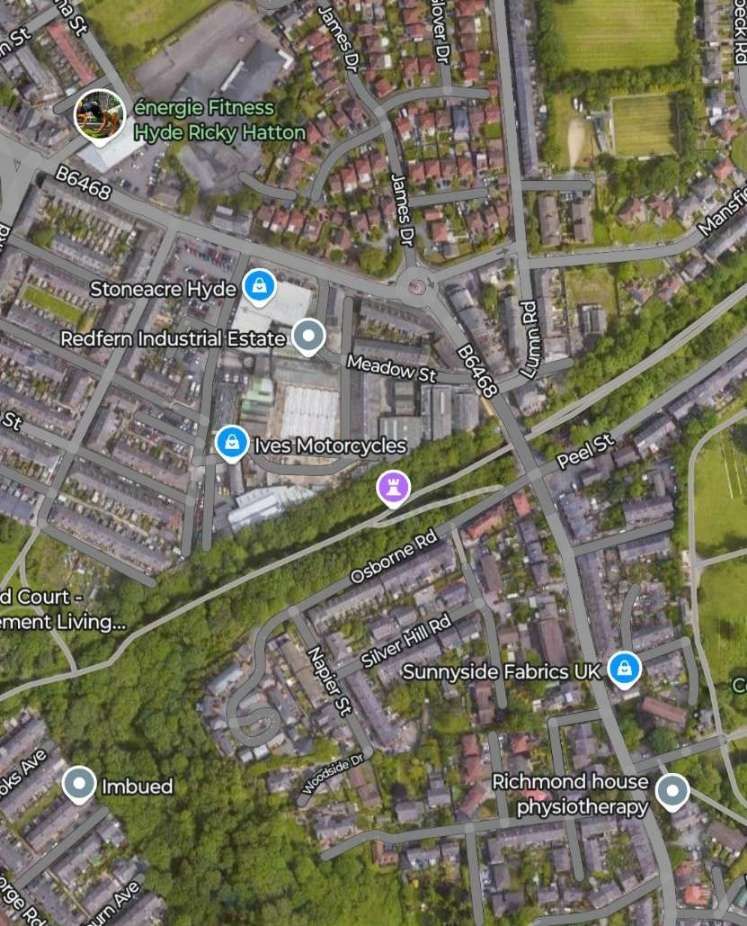
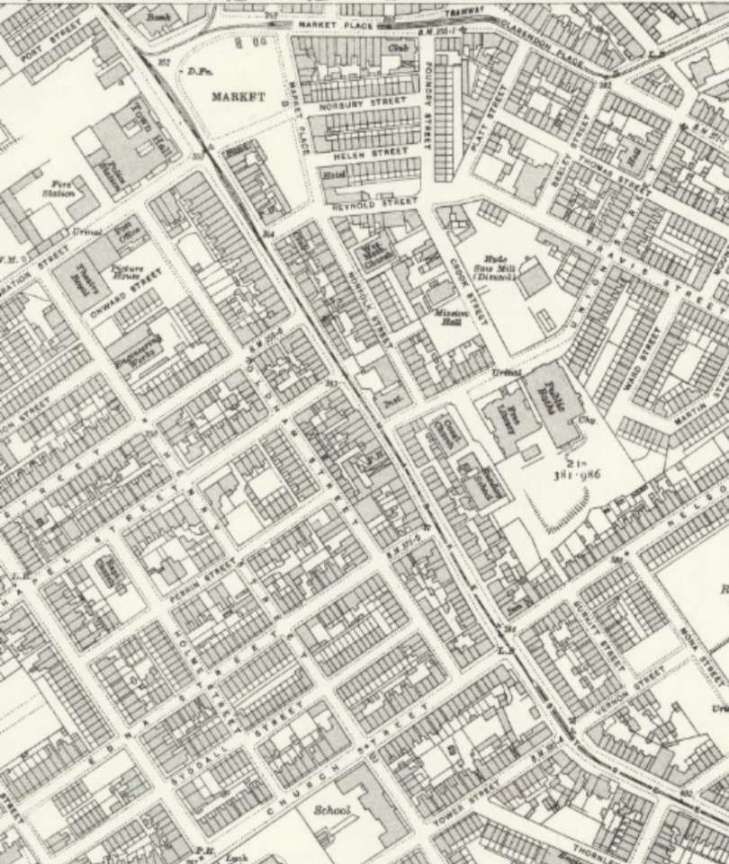
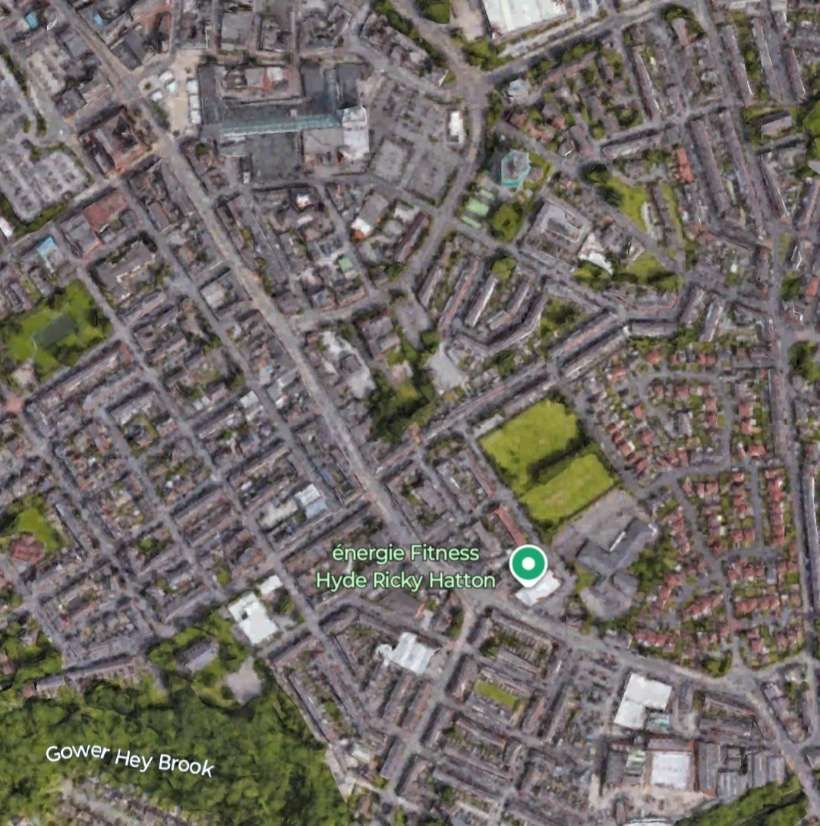
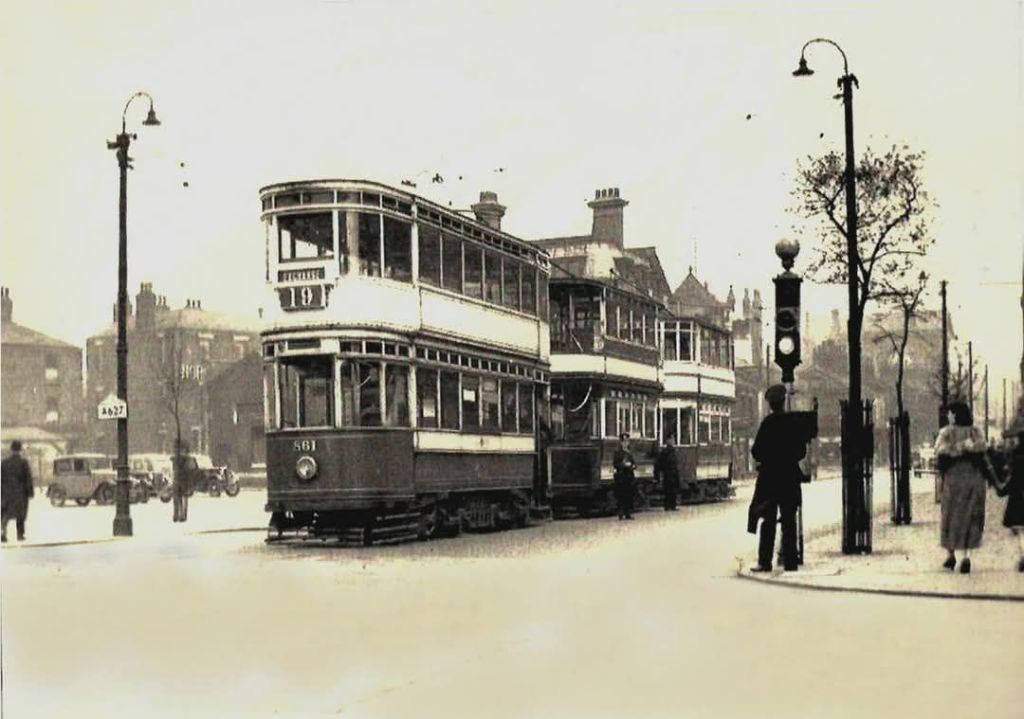
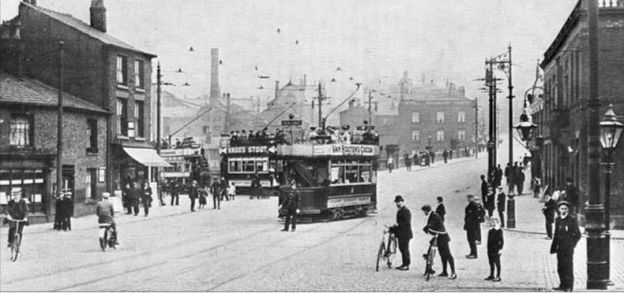
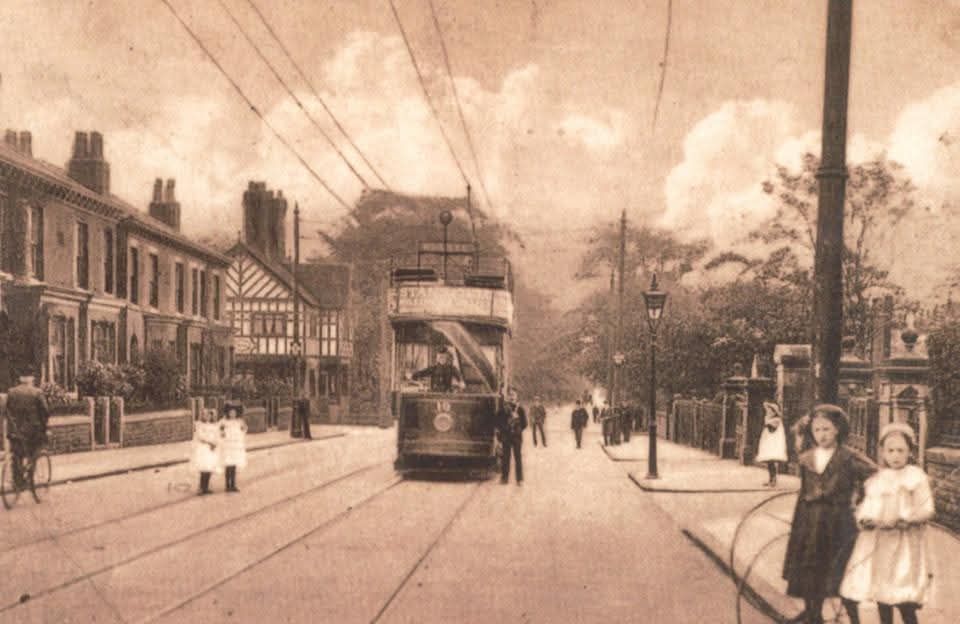
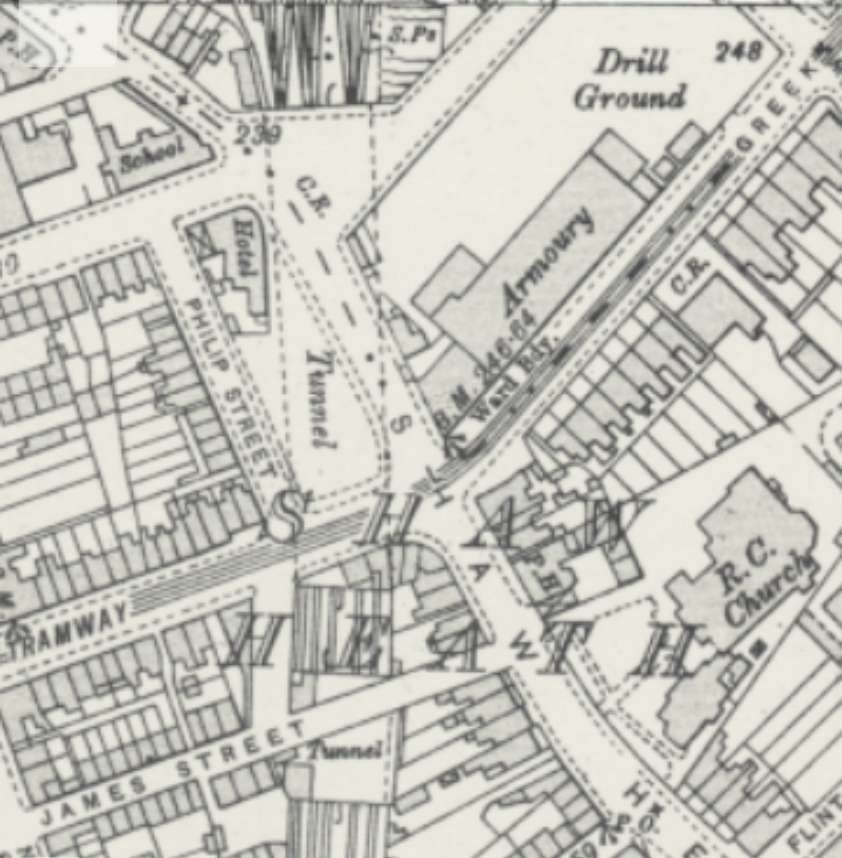
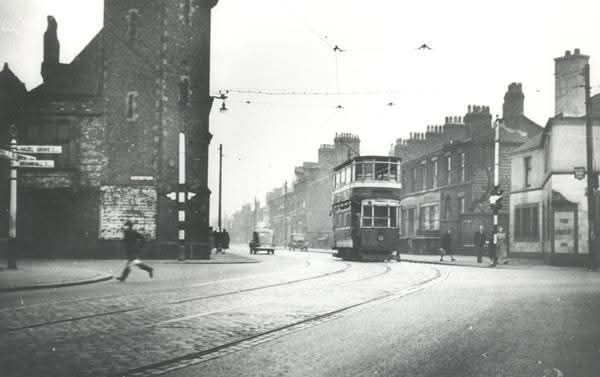
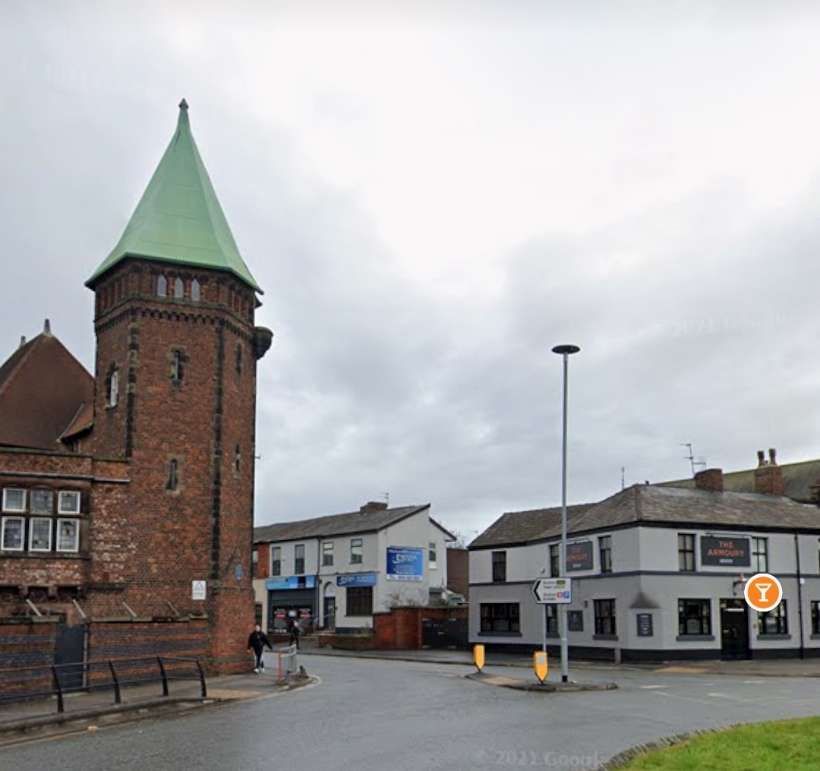
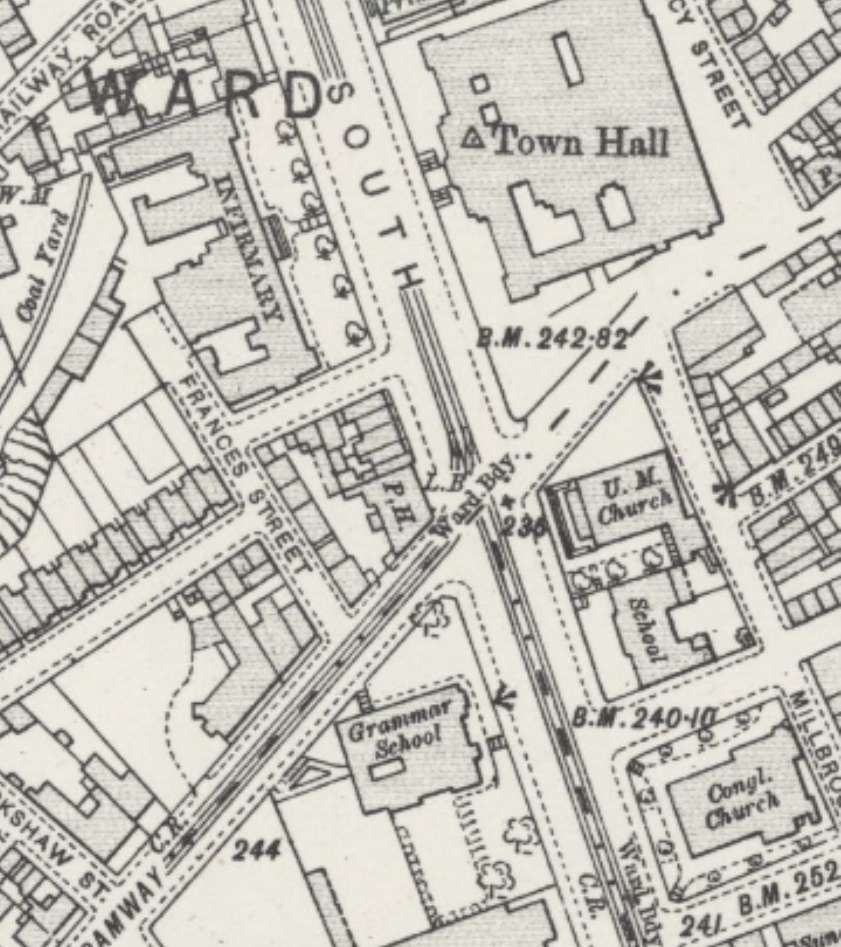
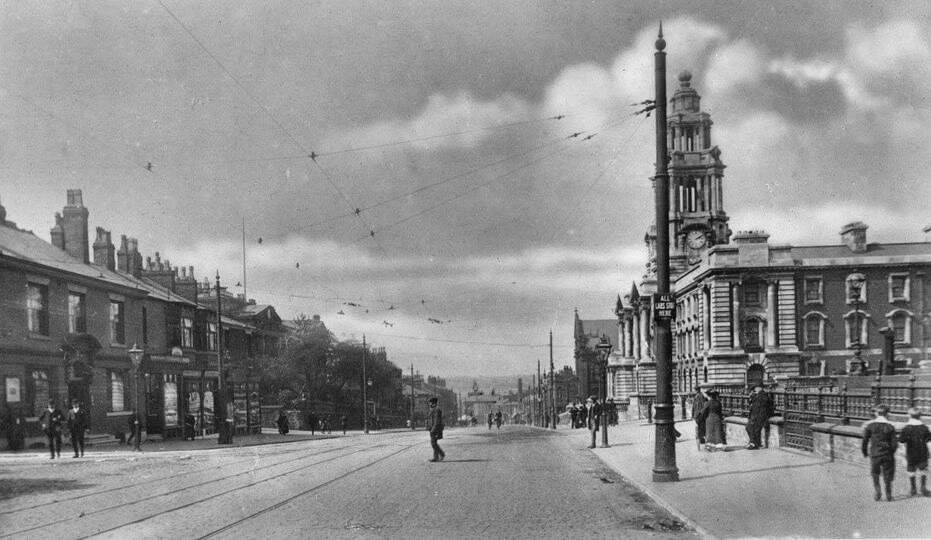
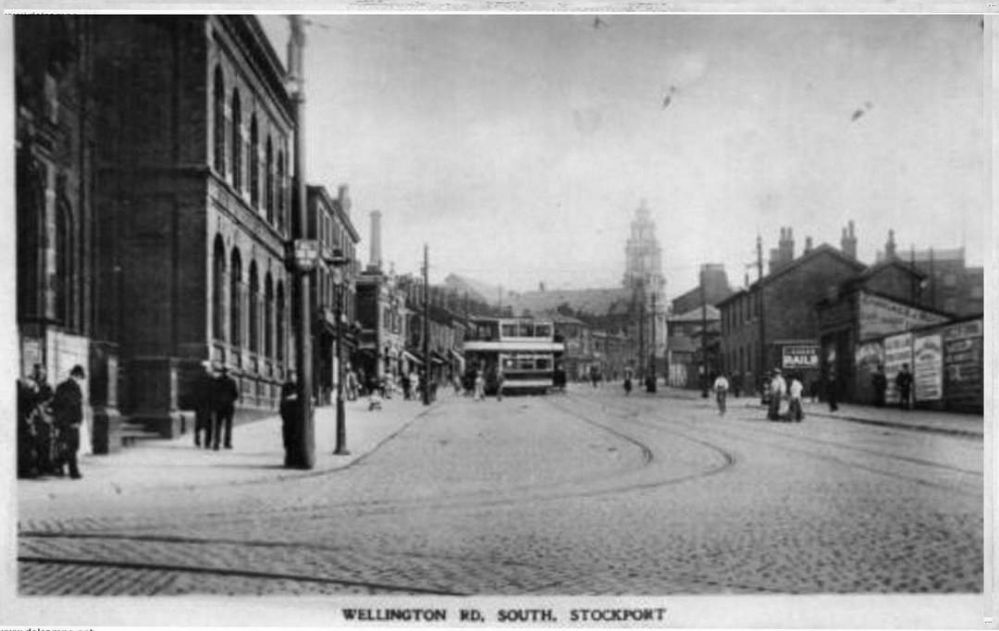
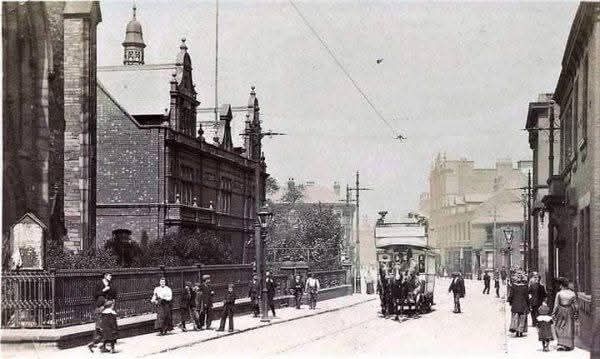
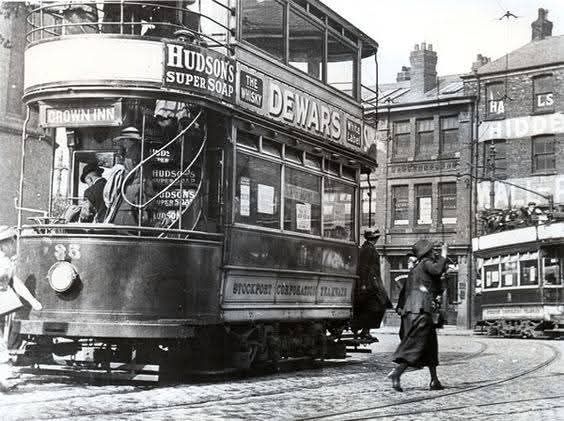
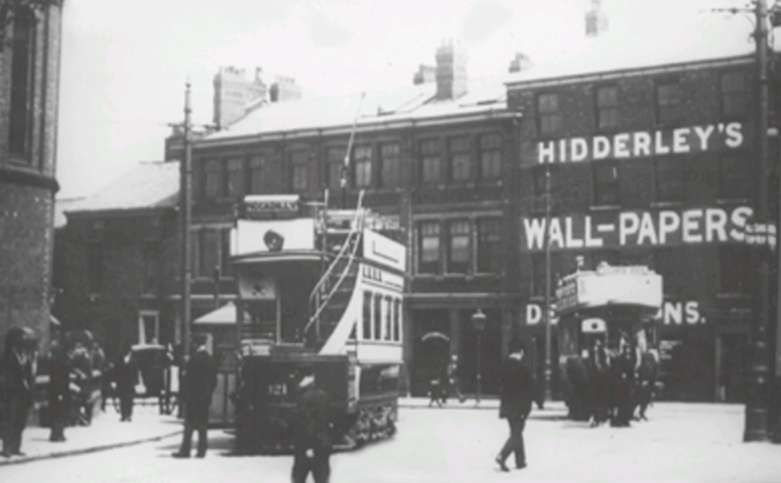
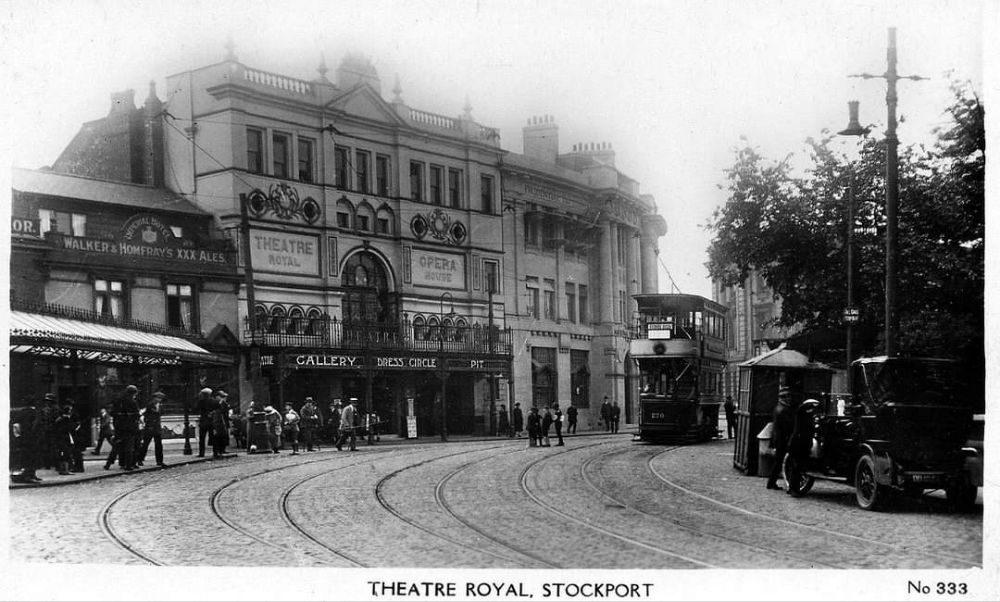
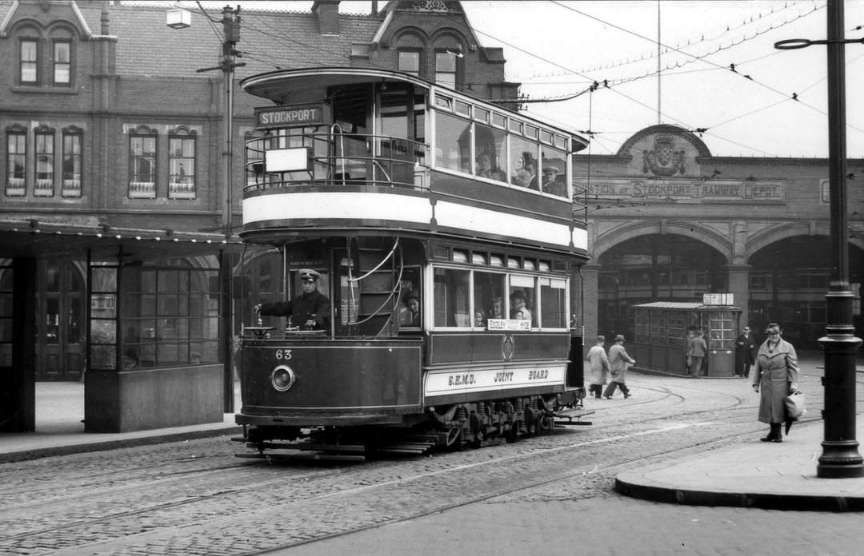
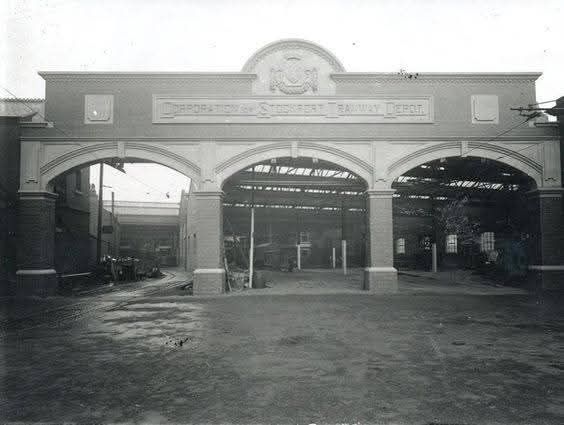
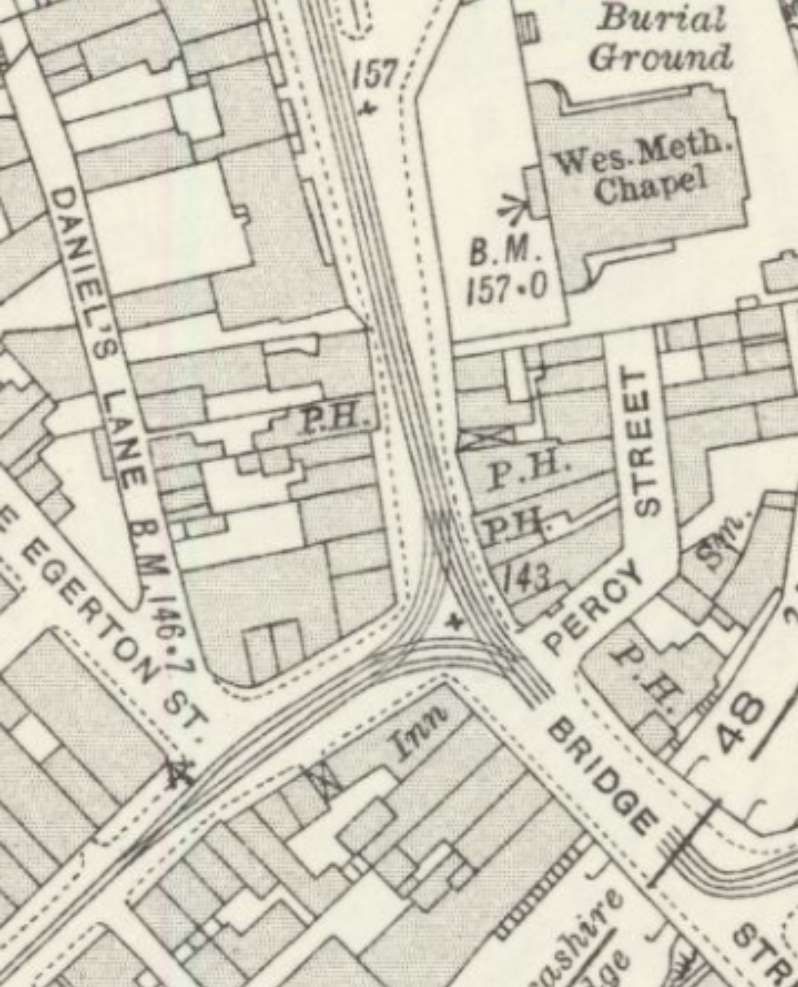
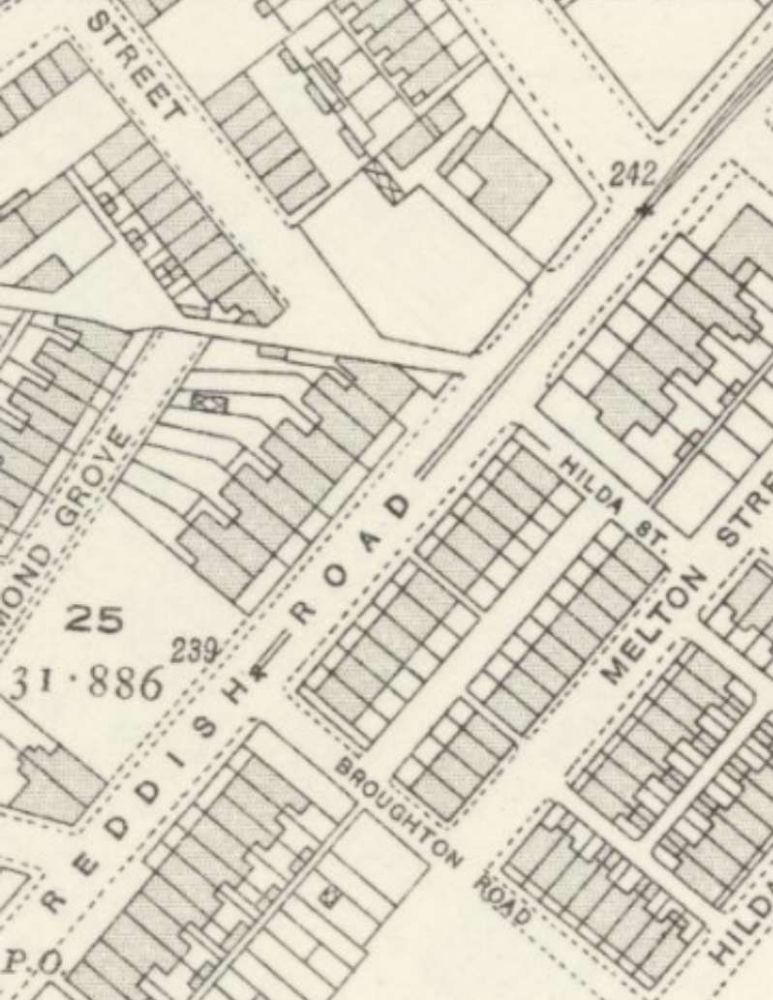
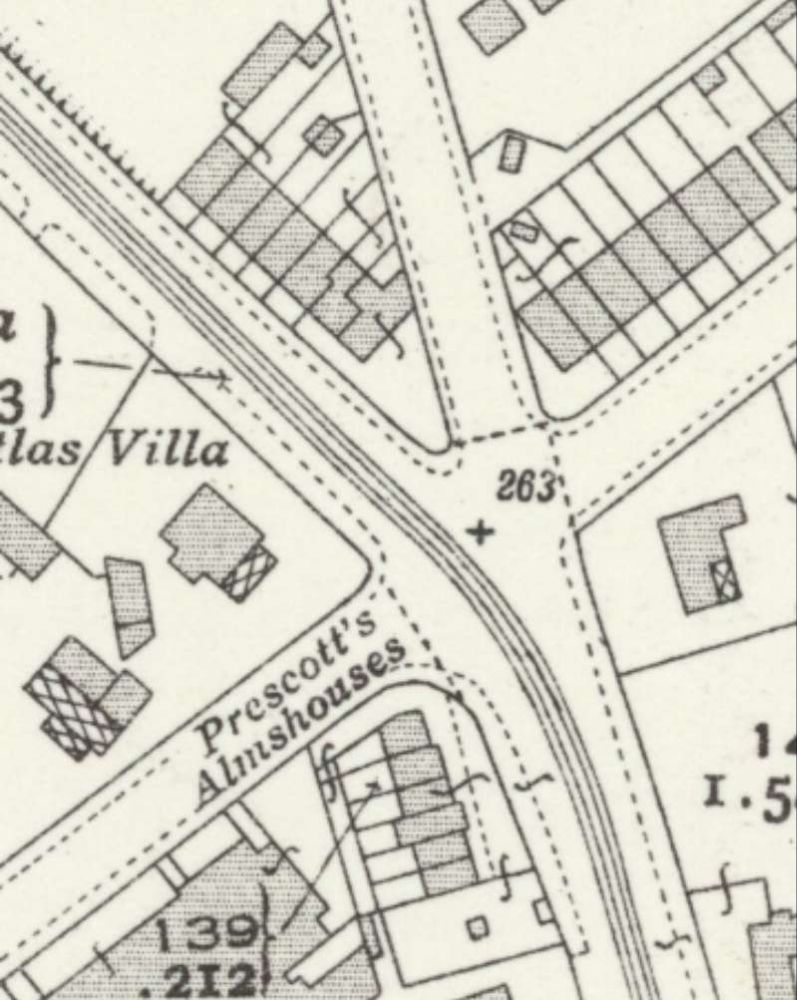
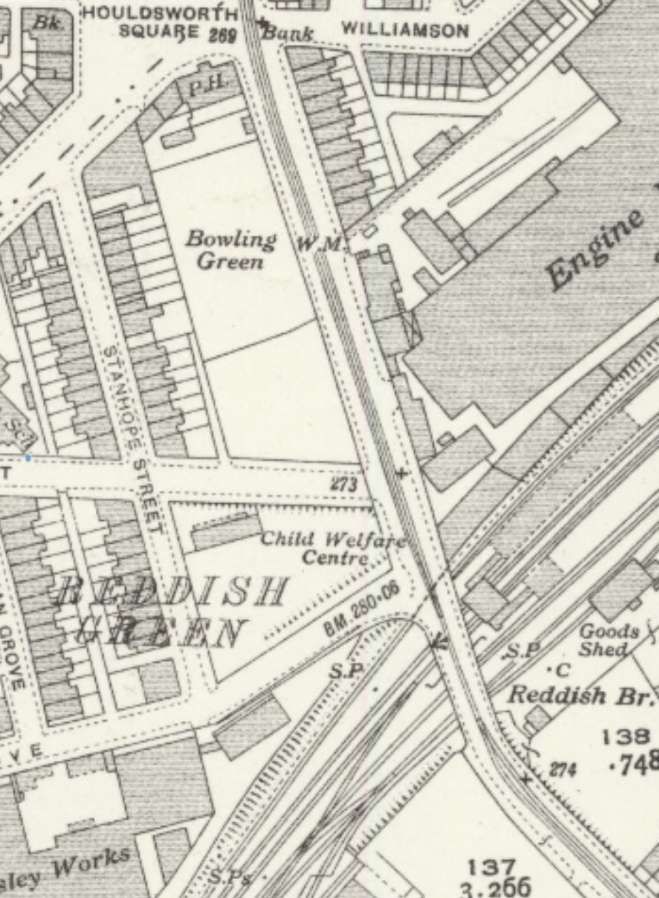
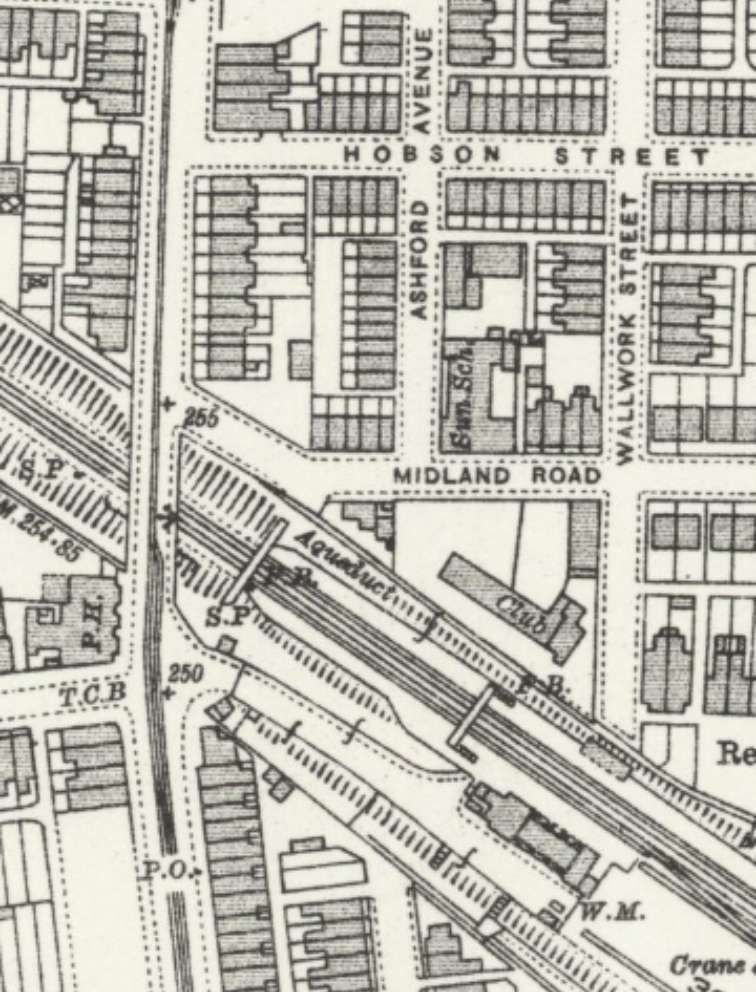
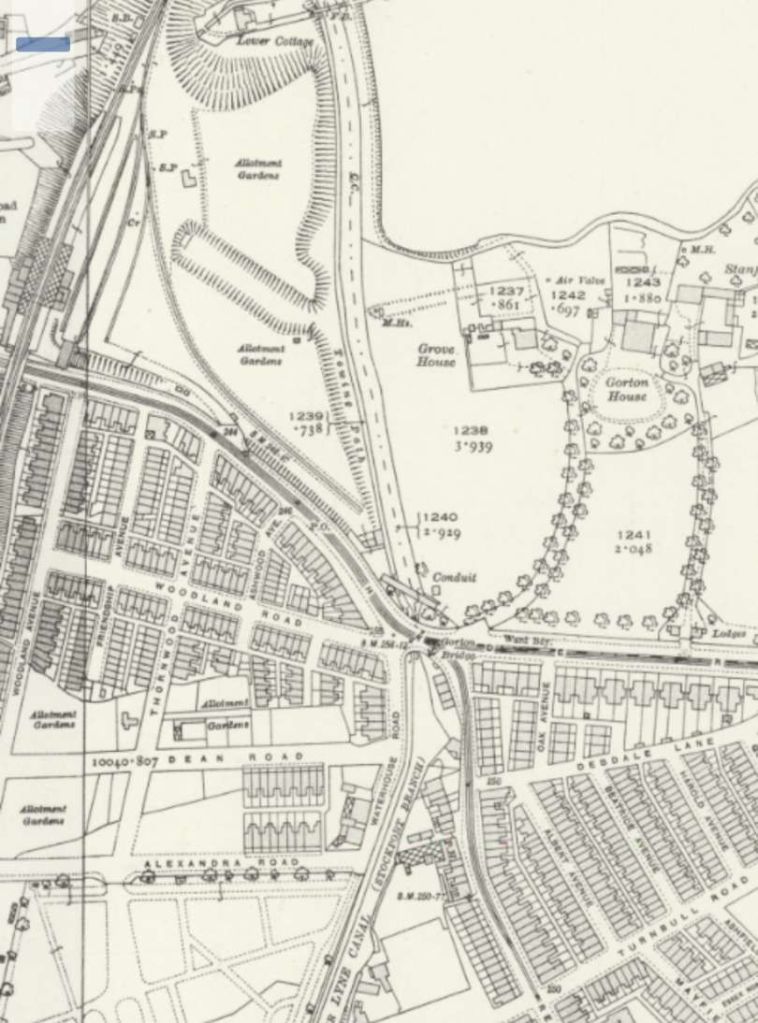
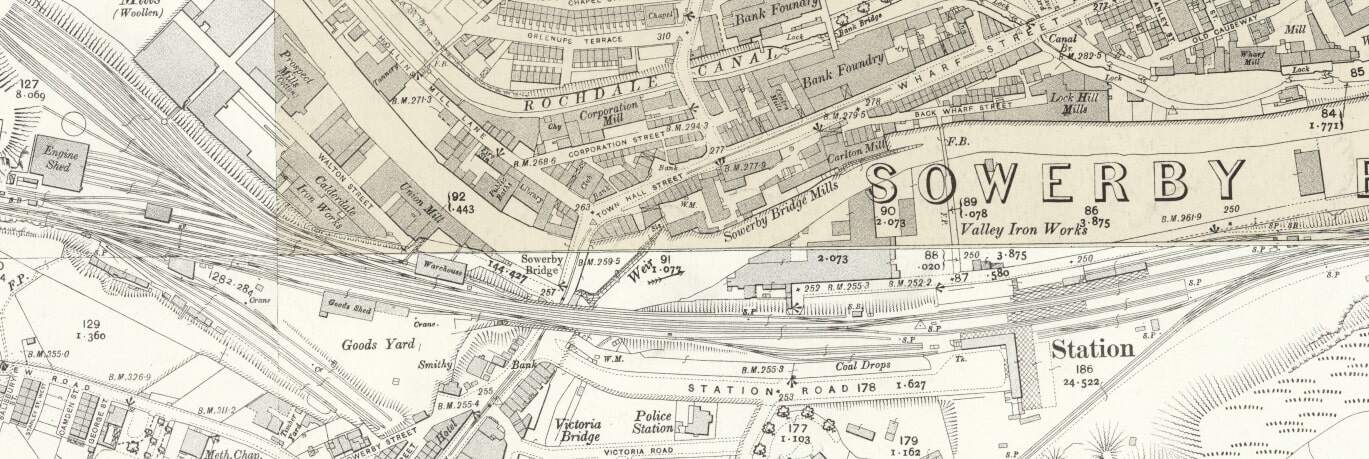
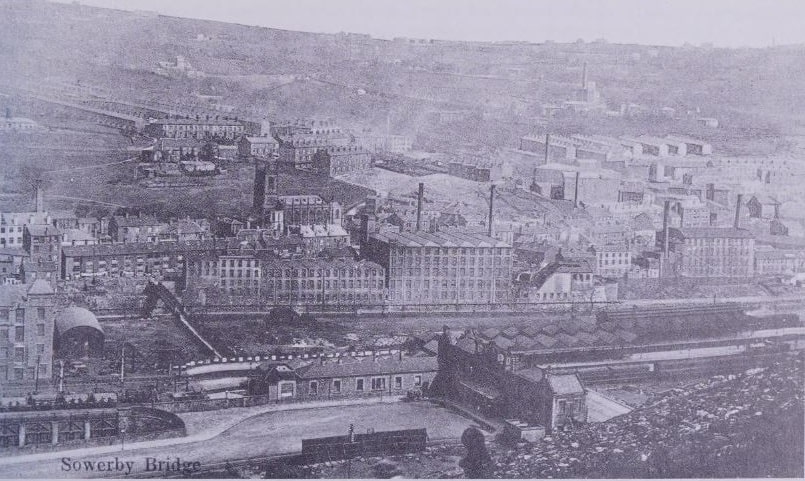
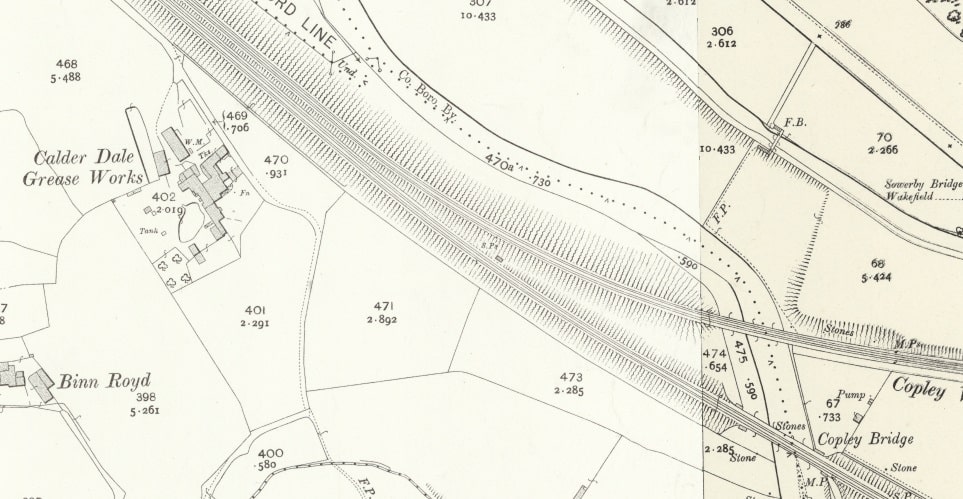
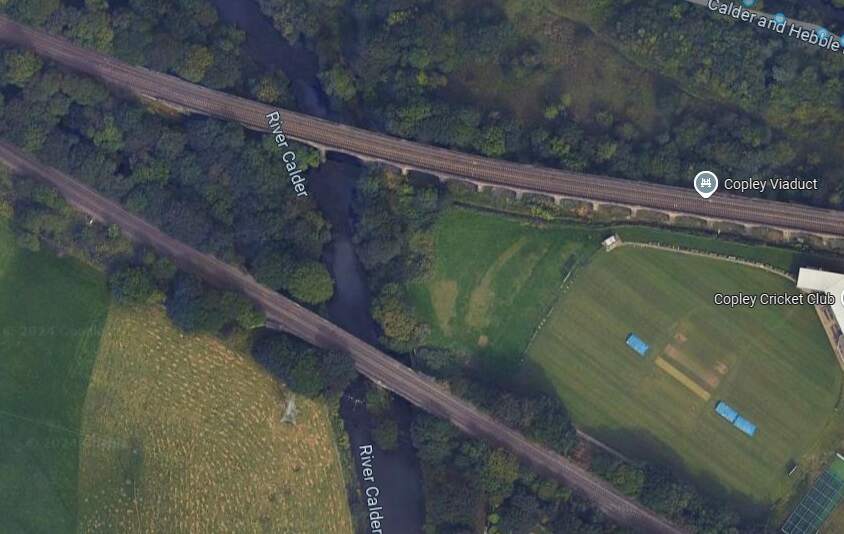
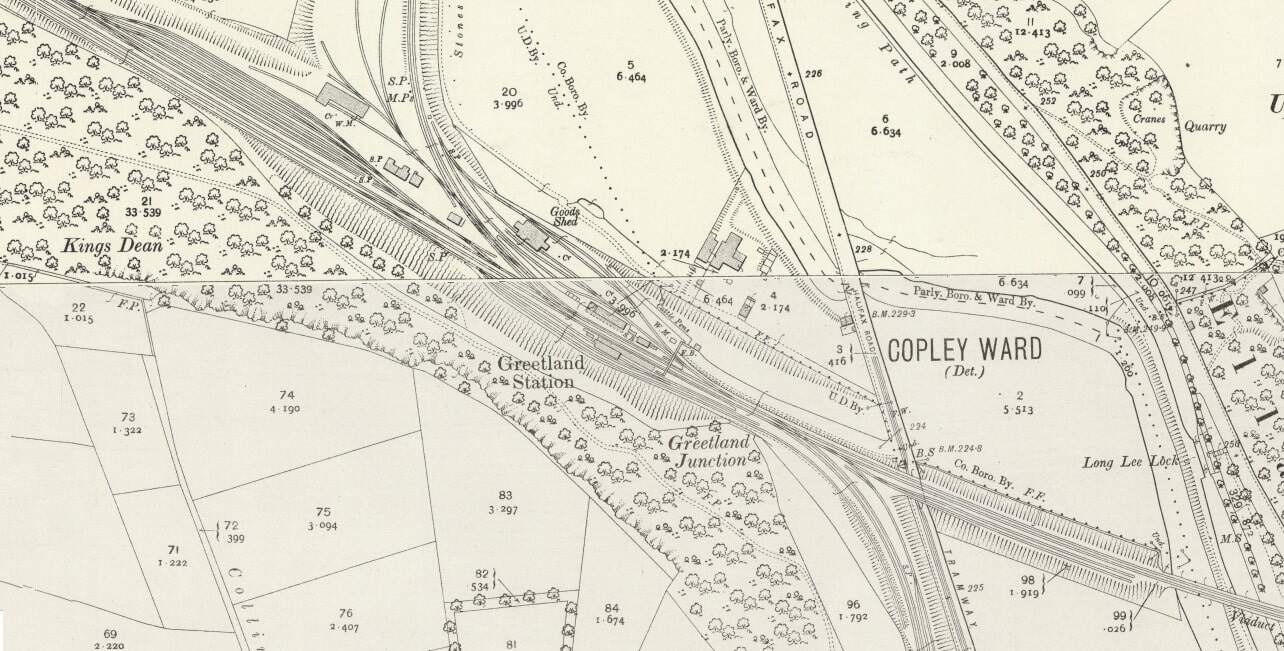
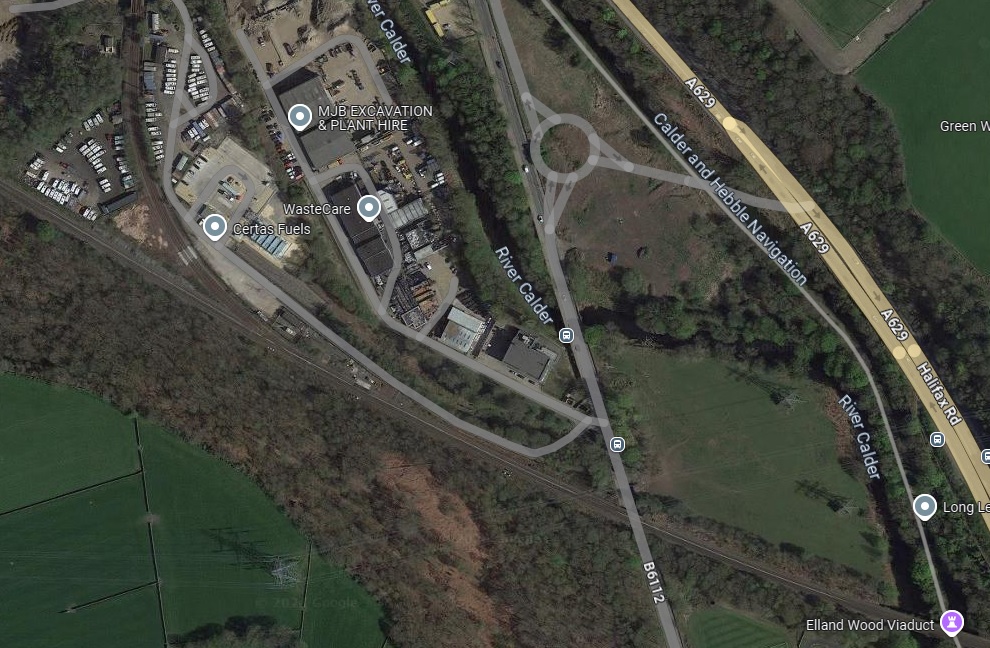
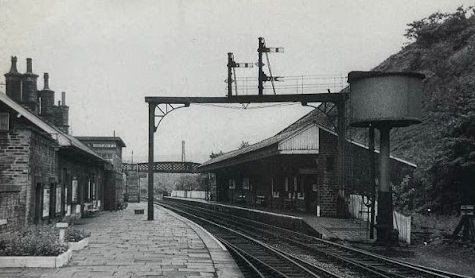
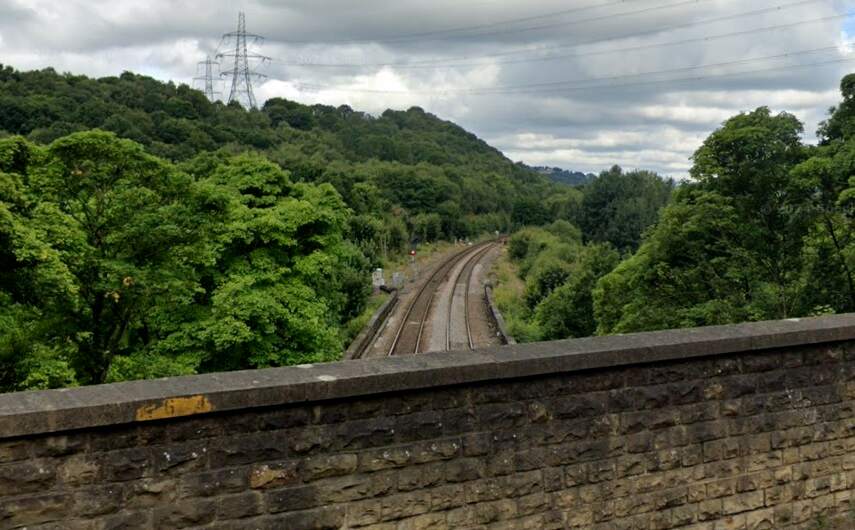
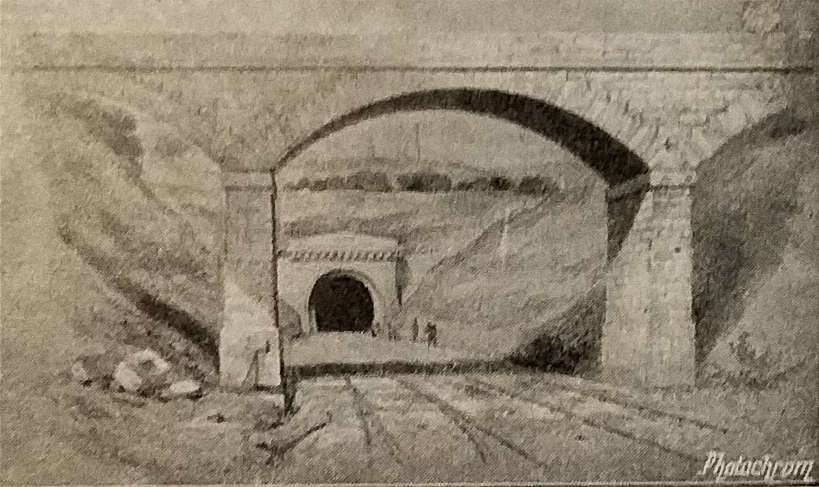
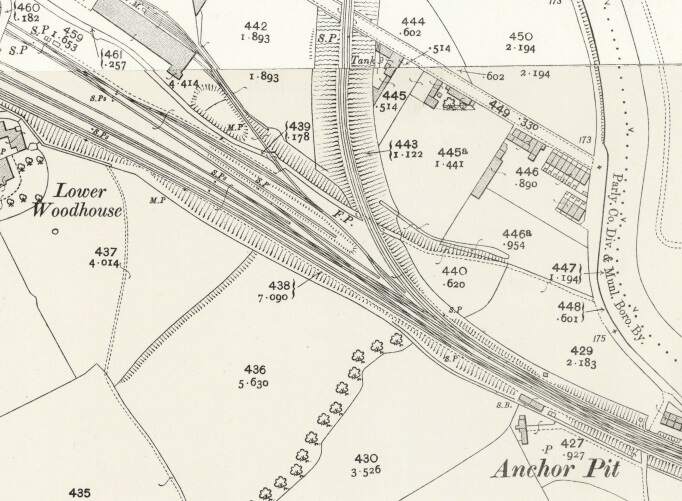
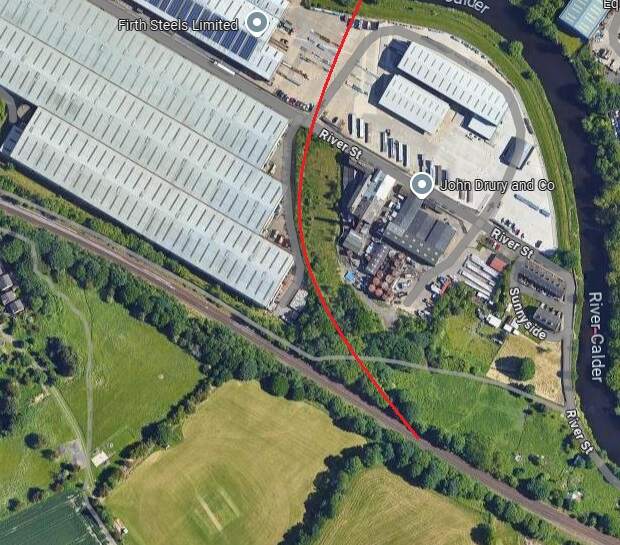
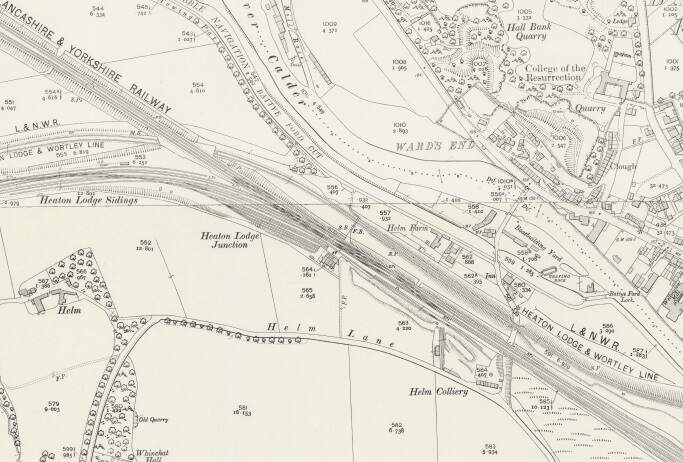
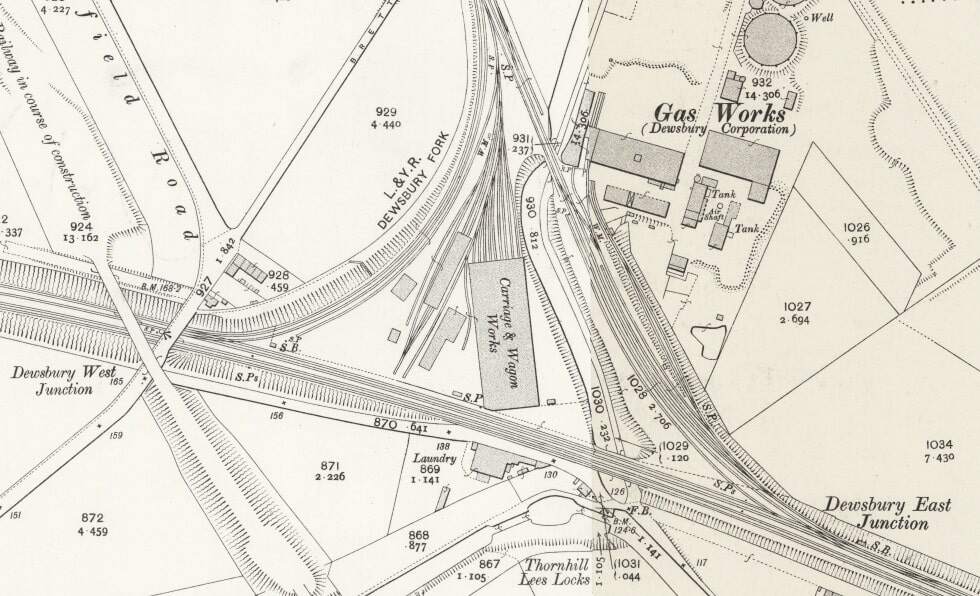
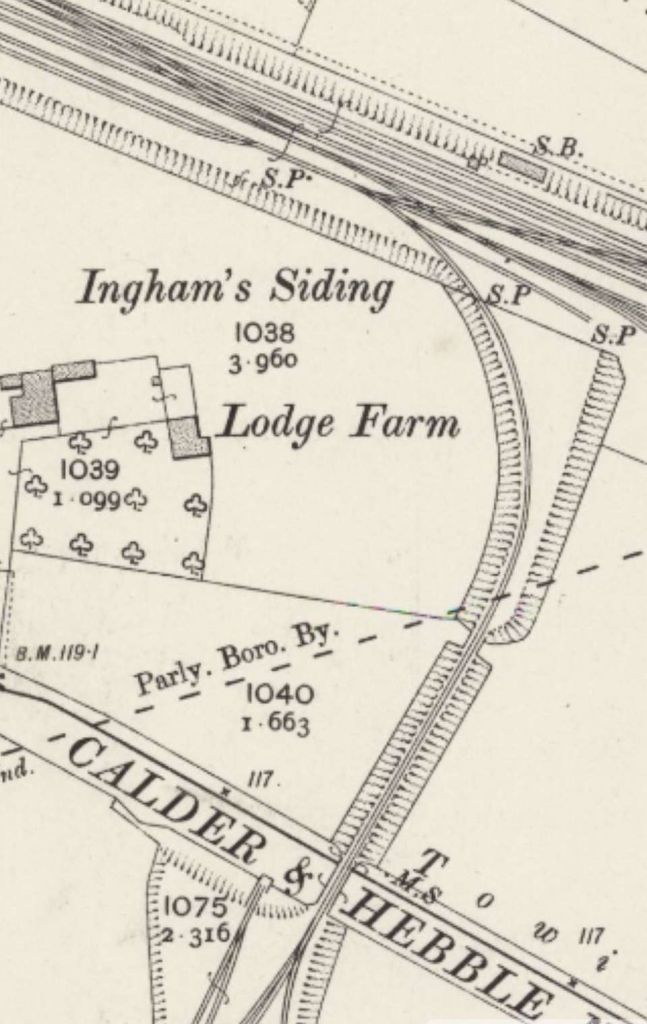
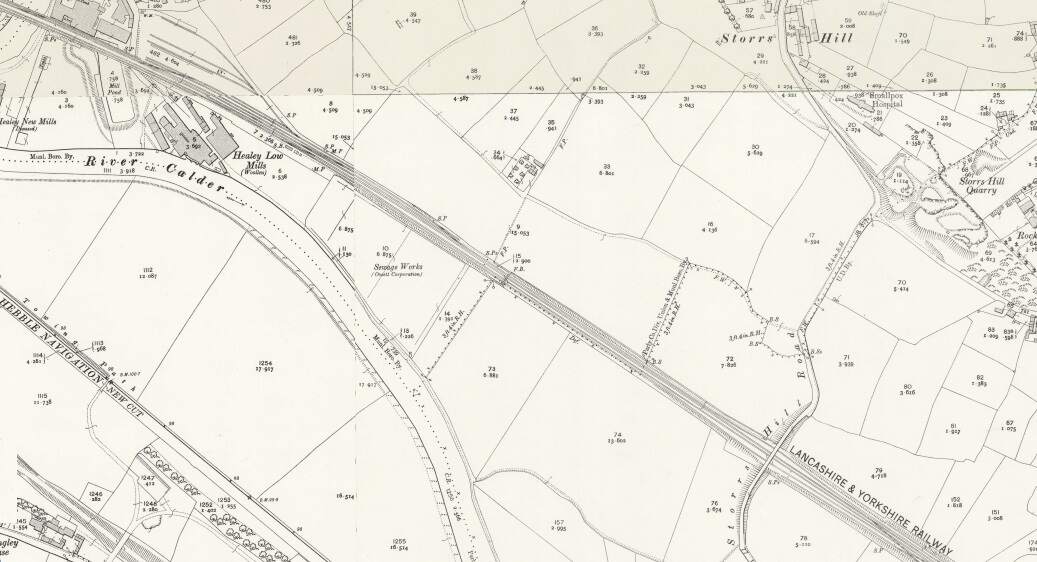
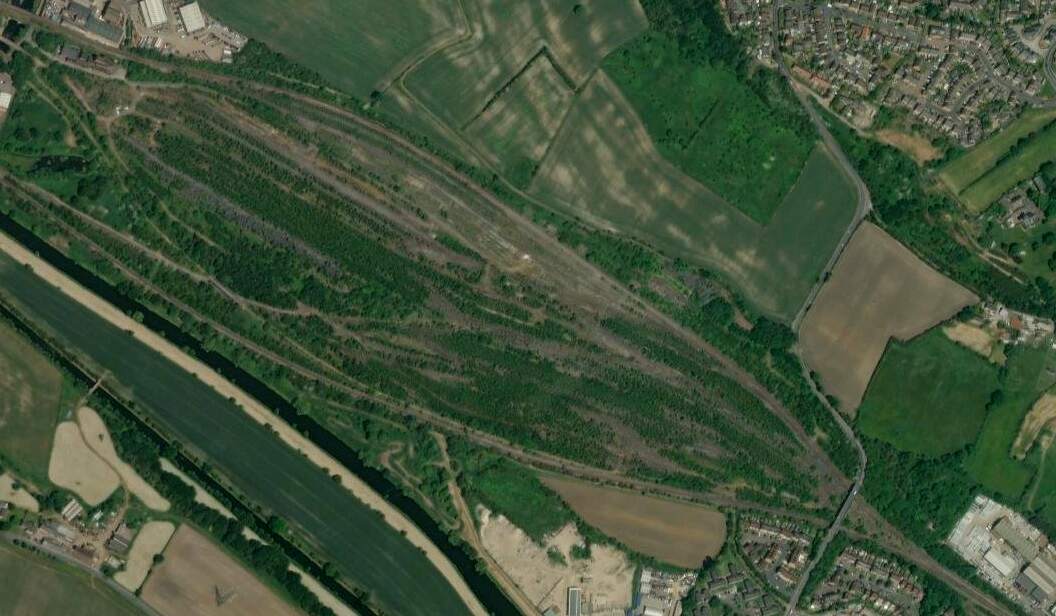
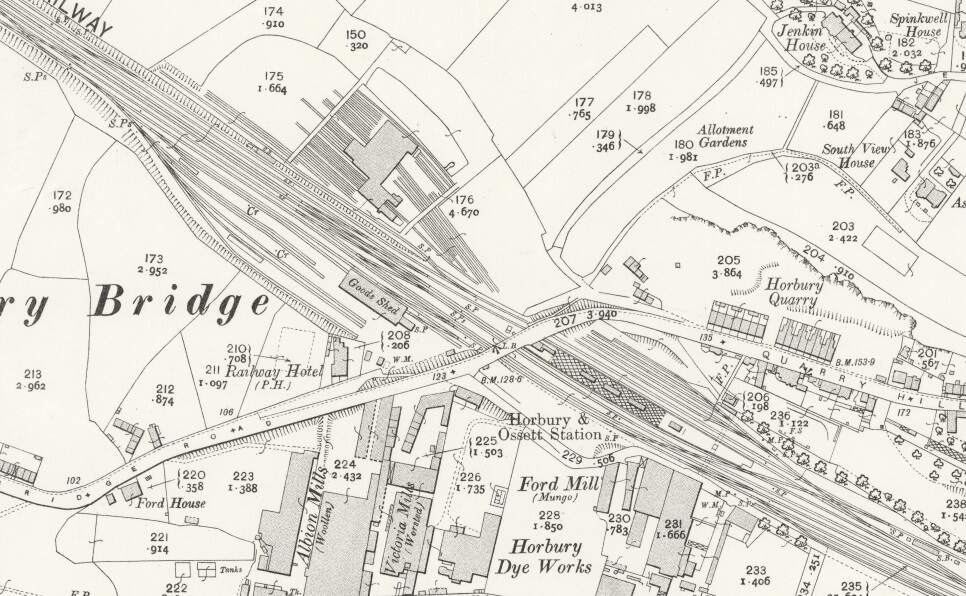
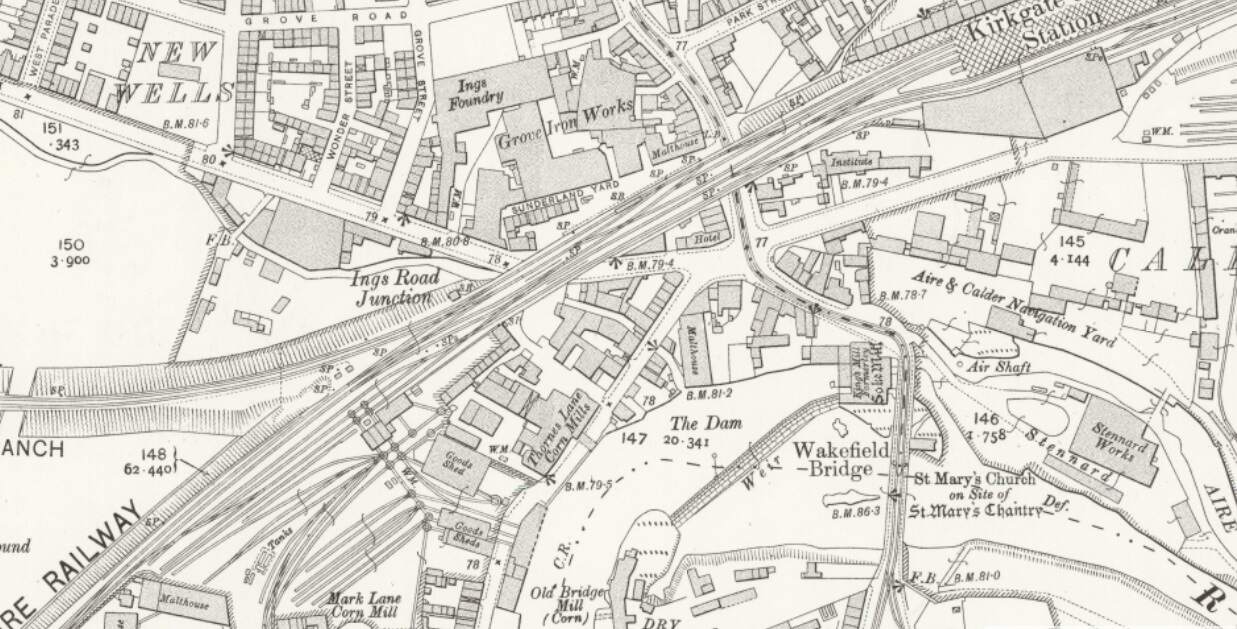
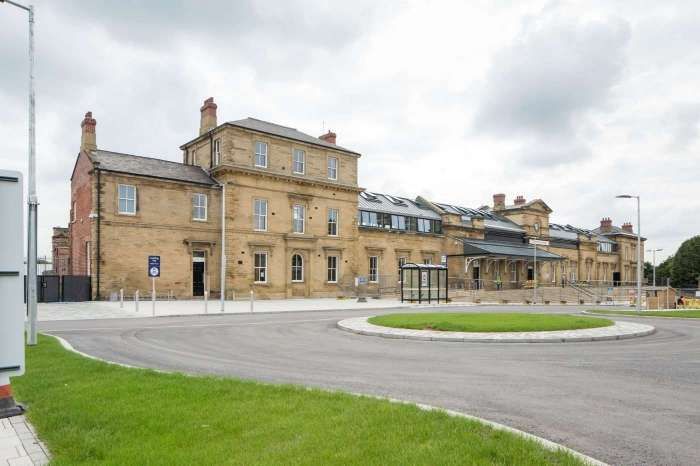
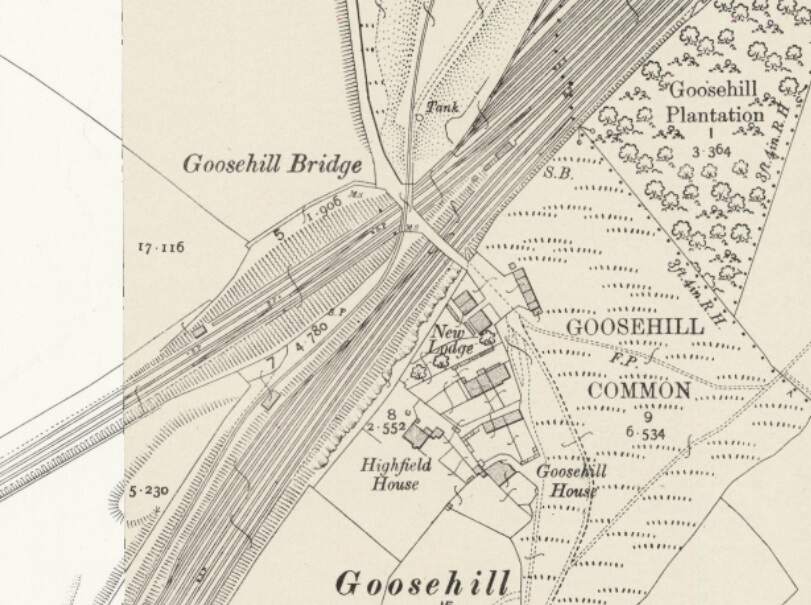
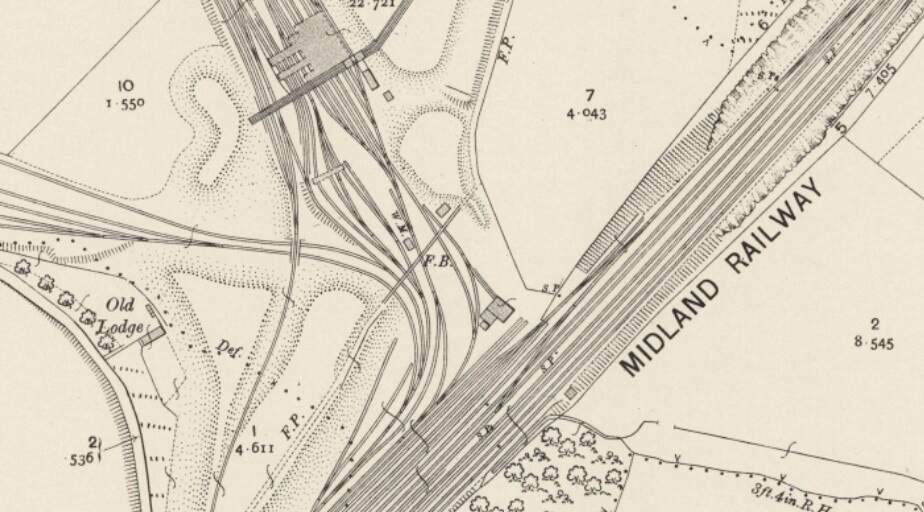
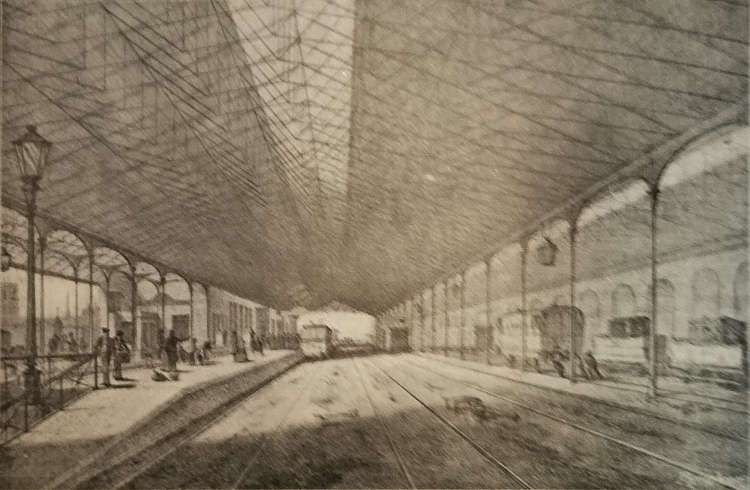
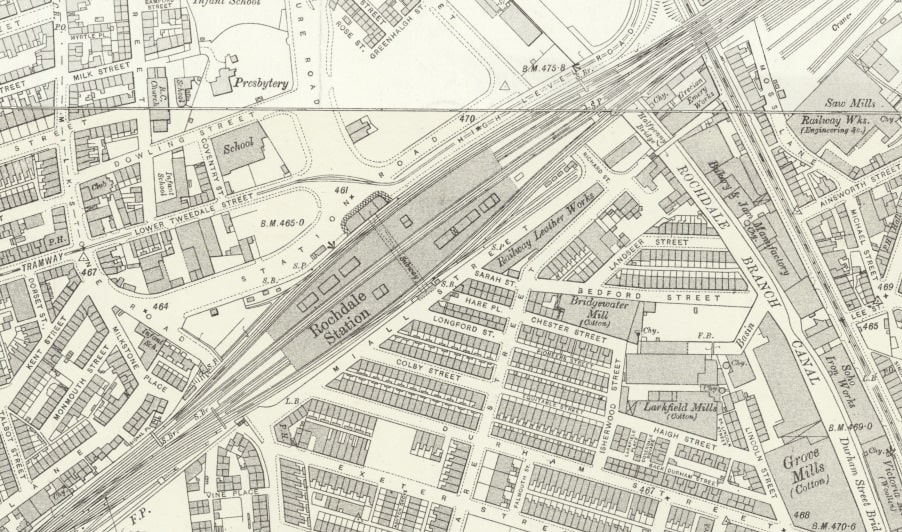
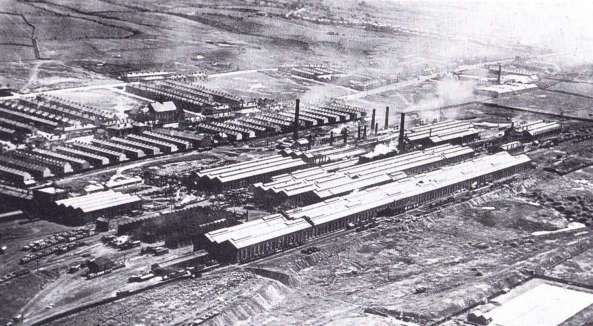
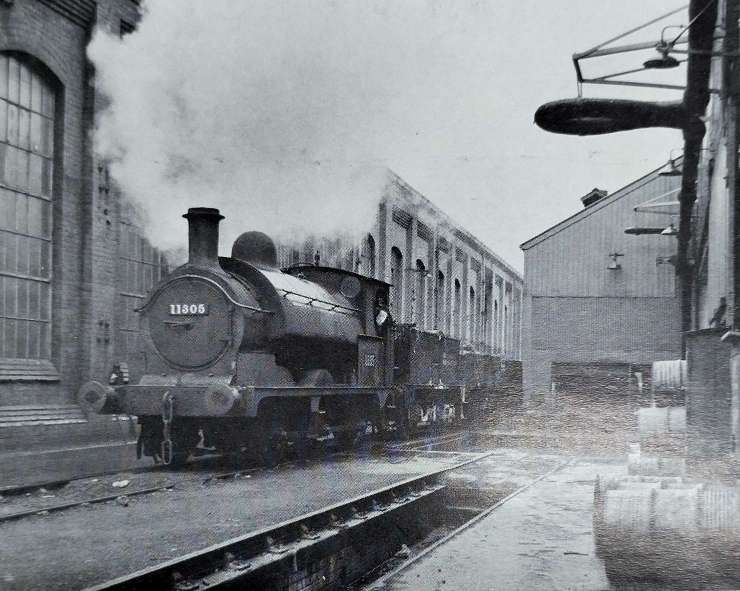
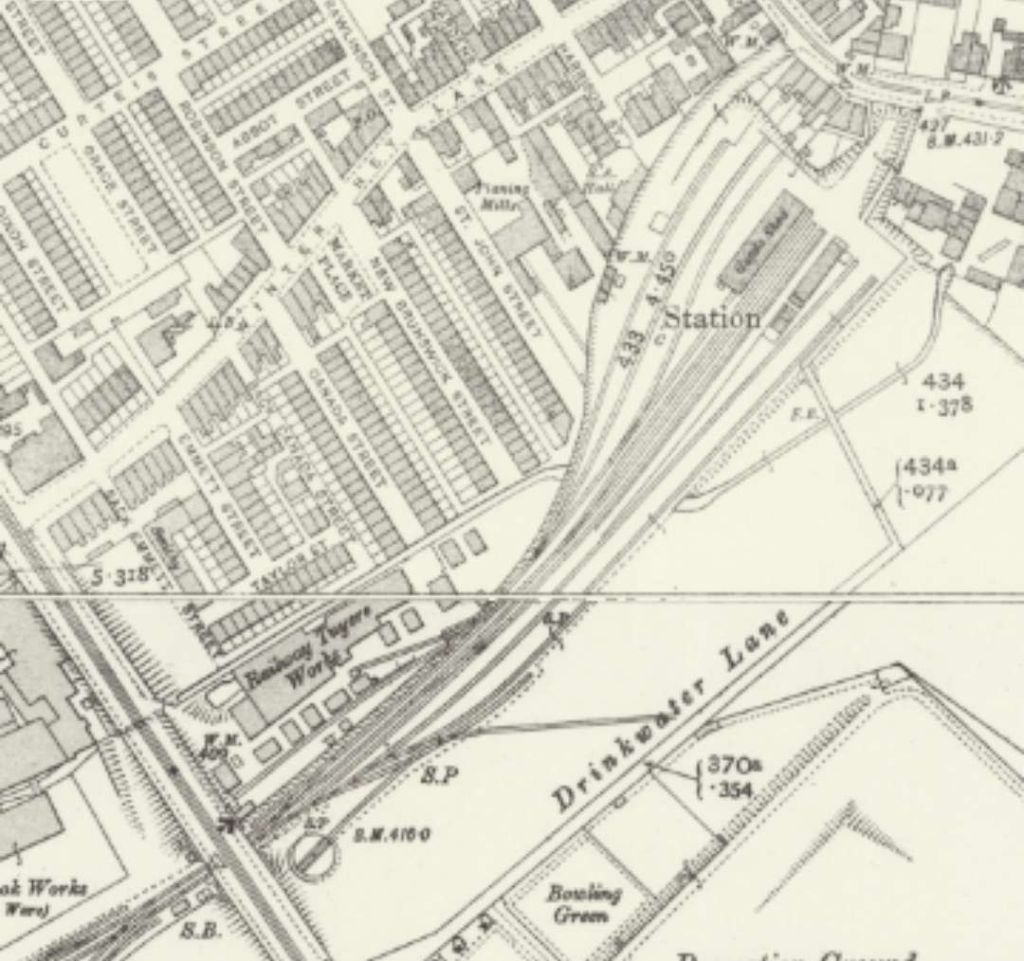
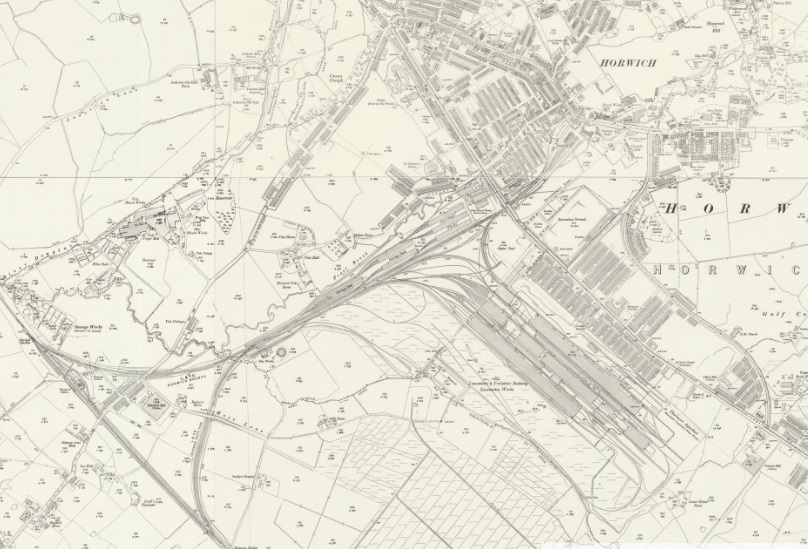
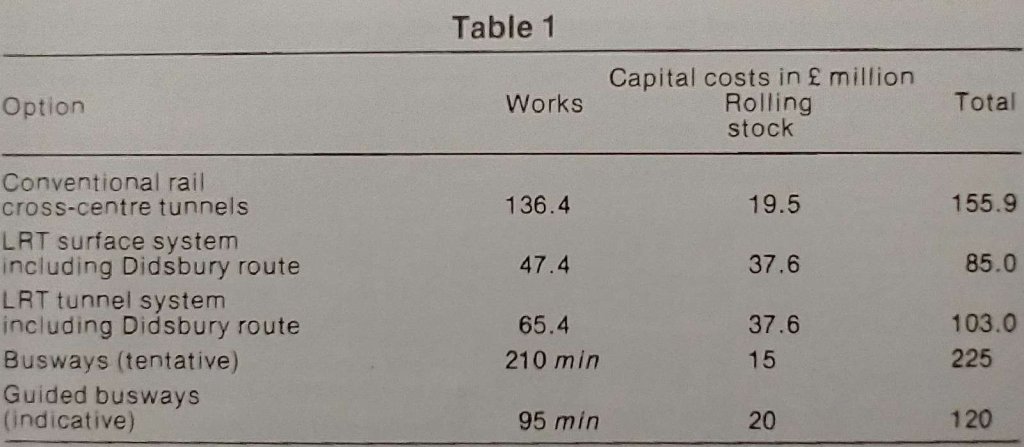
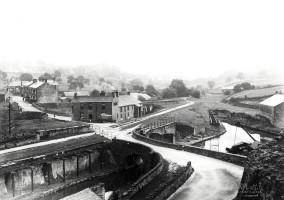
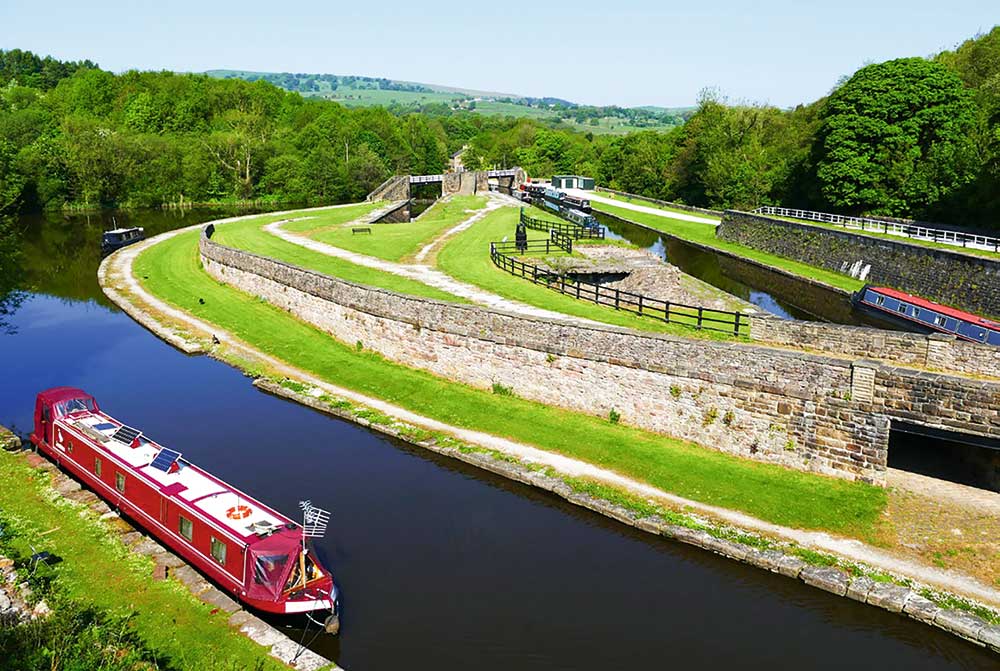
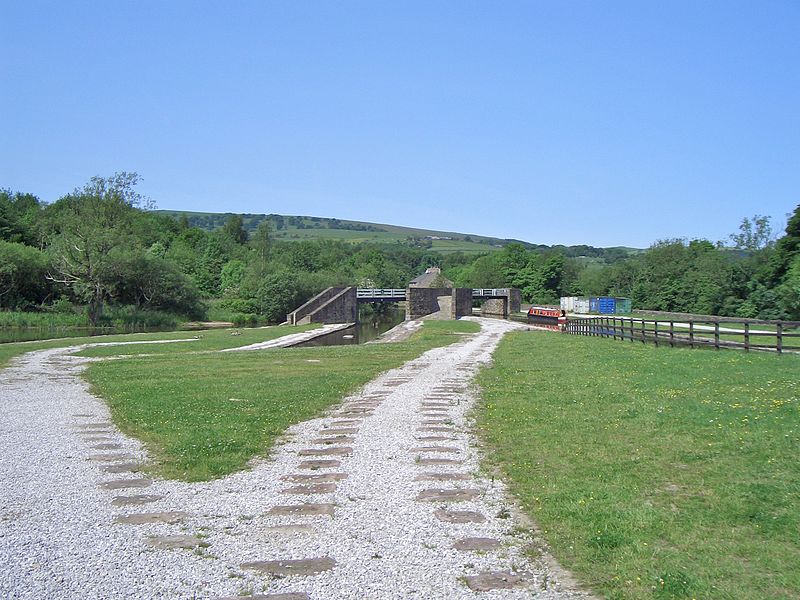
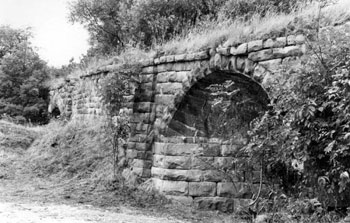
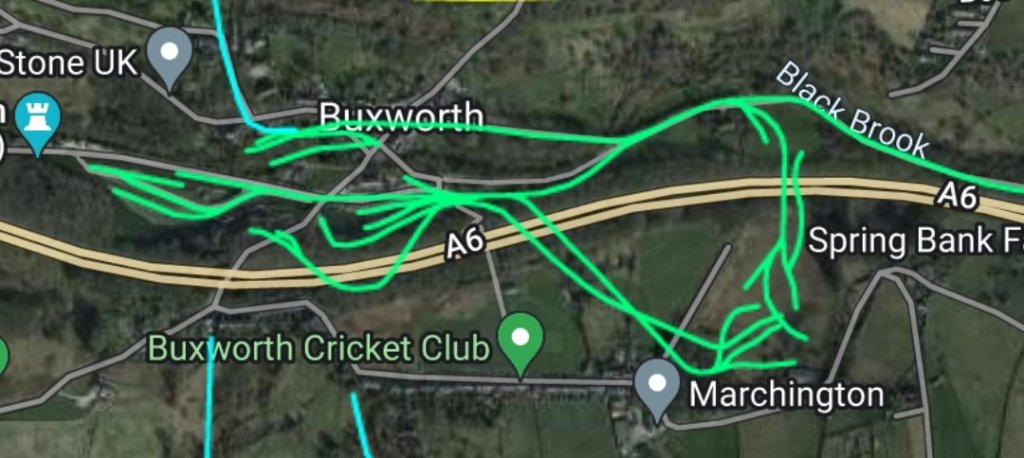
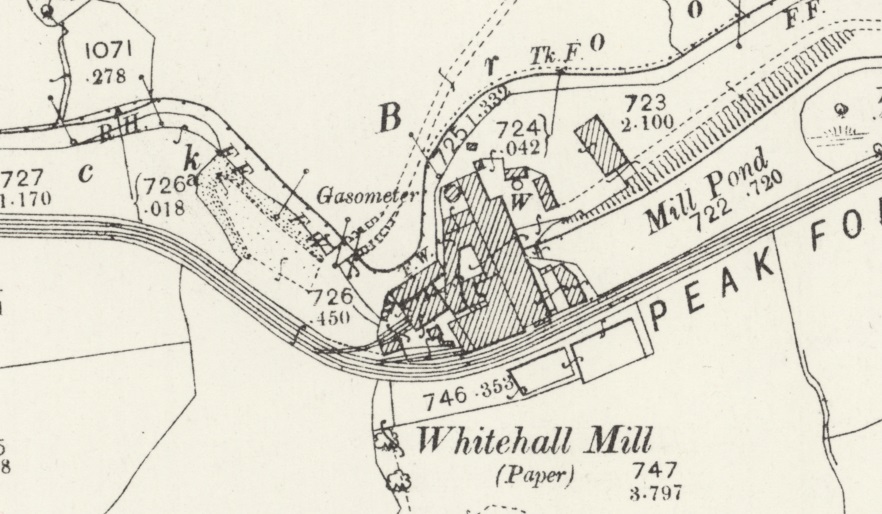
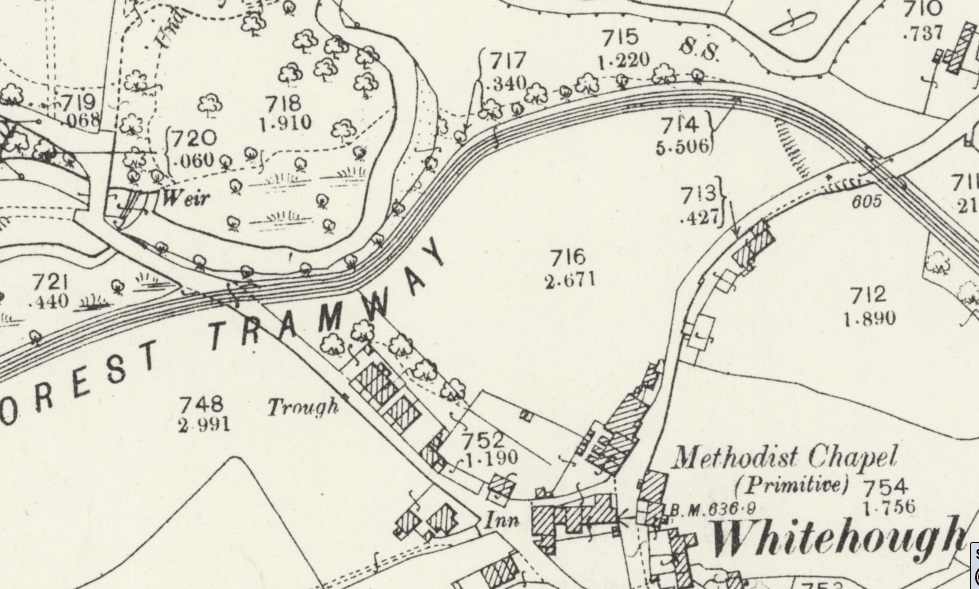
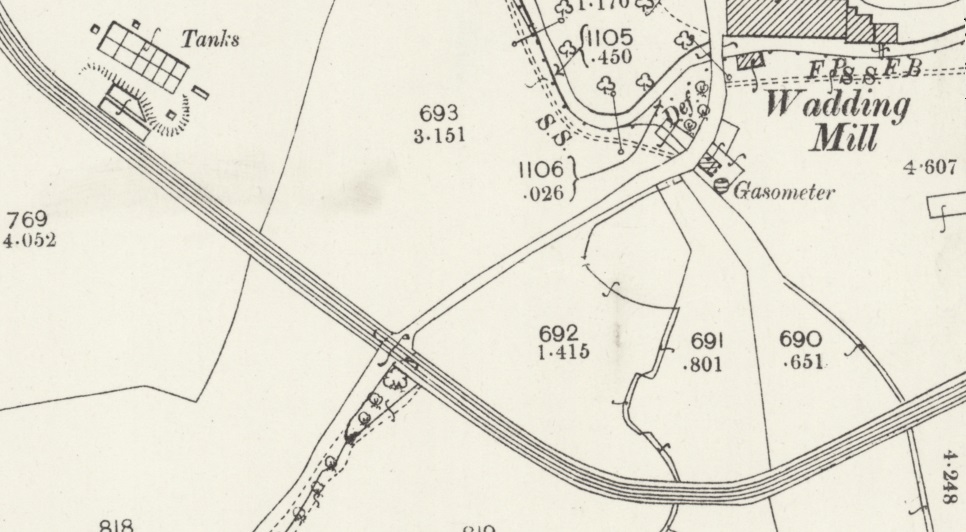
Sitting beneath the city-region strategy is the more local SEMMMS (South-East Manchester Multi-Modal Strategy) which was settled in 2001 and the much later SEMMMS Refresh (2018) which identified measures required to meet future transportation needs in the Southeast of the city region centred on Stockport. These measures included: Metrolink/tram-train routes to Marple, Stockport town centre, the airport and Hazel Grove; segregated bus routes and bus priority schemes; improved rail services and new/ improved rail stations; new roads e.g. A6 to M60 Relief Road; new and improved walking and cycling routes and facilities on and off the highway; improved public realm in the district and local centres; creation of connected neighbourhoods that encourage the use of more sustainable forms of transport; the provision of transportation infrastructure needed to be supported by the introduction of smarter choices to encourage the use of sustainable transport. [9][10][11]

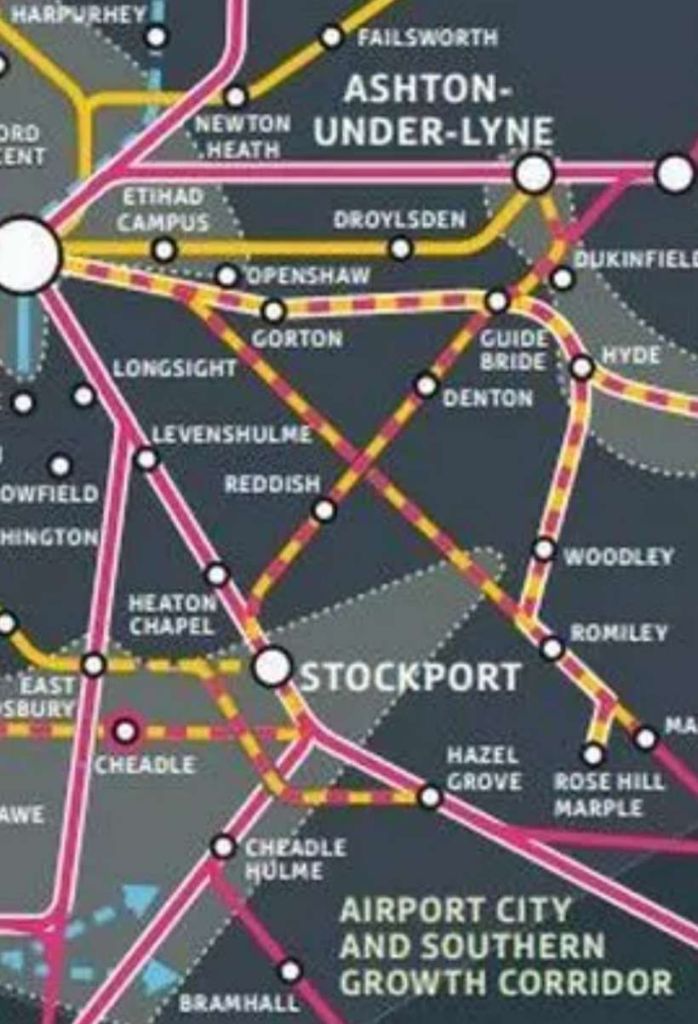
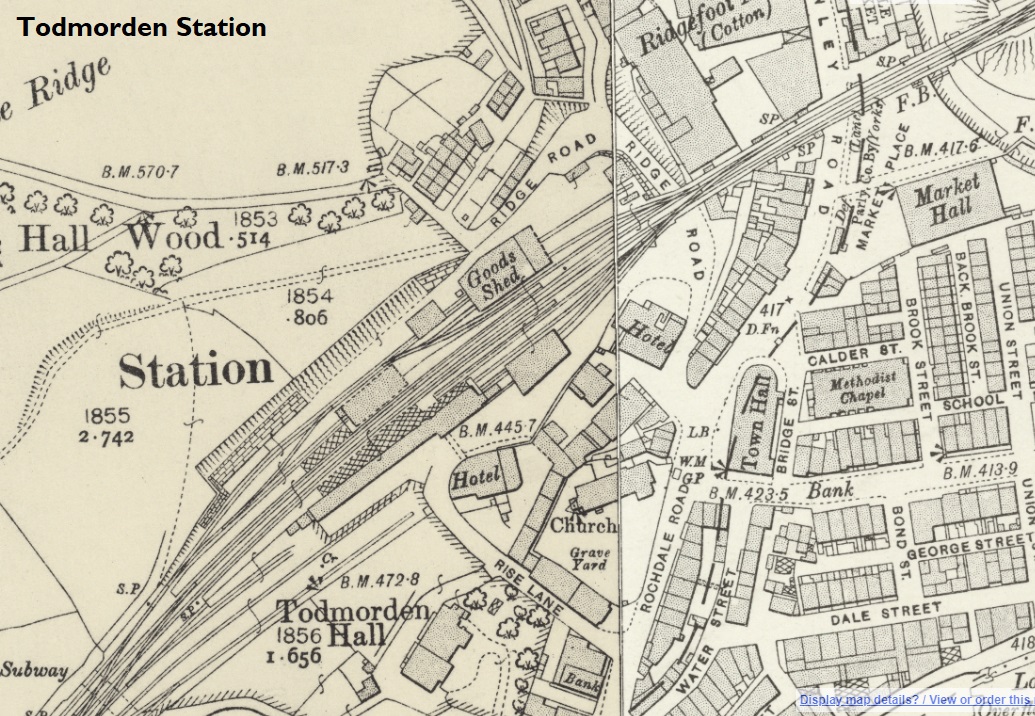
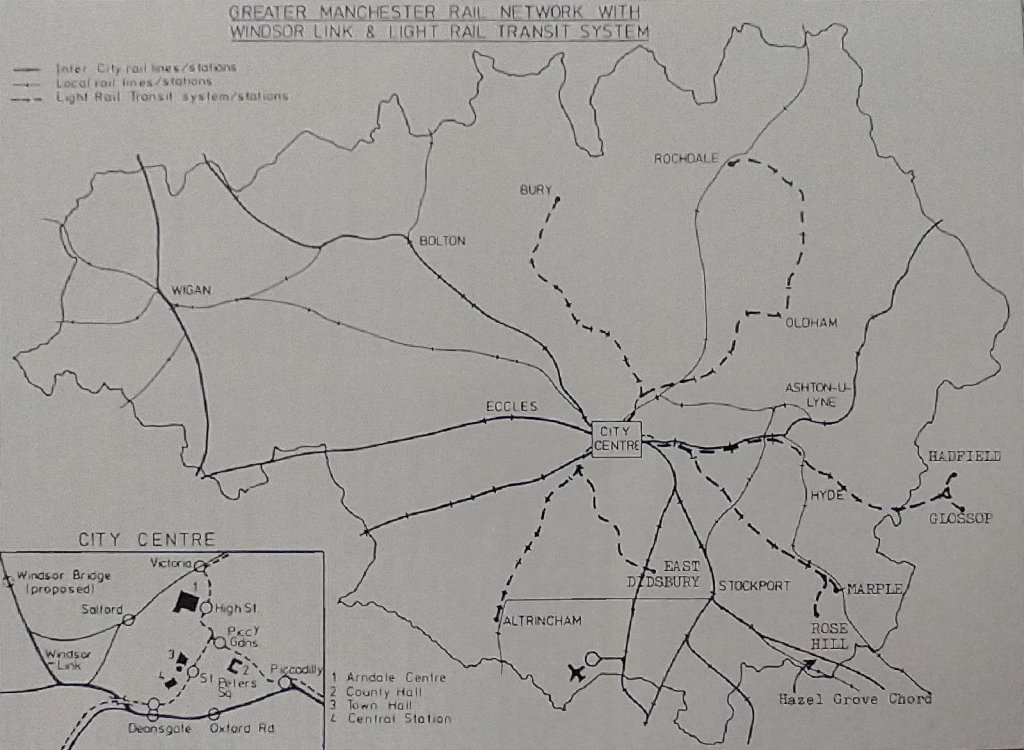
An extract from the TfGM plan for transport, looking forward towards 2040. It is intended that a tram-train service will run North from Stockport through Reddish, Denton and Guide Bridge to Ashton-under-Lyne. A similar service is planned to connect from Manchester Airport through Cheadle to Hazel Grove with a link North into Stockport to connect with the line through Denton. This schematic plan also shows the link from East Didsbury into Stockport. [12]

And finally …

Railway-News.com reported on 10th December 2025 that on 9th December 2025, TfGM Launched a Consultation on Future of Public Transport. The consultation invites people who live, work, travel, visit or study in Greater Manchester to help shape the future of the city region’s travel network by giving their views on the new GM Transport Strategy 2050, as well as the GM Transport Delivery Plan (2027-37). [13]

The proposed Plan will set out a framework “for how the Bee Network might be utilised to help Greater Manchester continue to become the growth capital of the UK through to 2050, whilst also addressing inequality and creating a greener city region.” [13]

The Consultation will run until 9th March 2026.

Backed by 2.5 billion GBP in government funding; TfGM’s plans “aim to deliver a number of transport projects through to the 2030s, resulting in what TfGM intends to be a world-class transport system. They will support both overall economic growth and the delivery of the new £1 billion Greater Manchester Good Growth Fund, which will in turn pump-prime a set of projects, drive growth and generation and ensure equal spending across the city region as a whole.” [13]

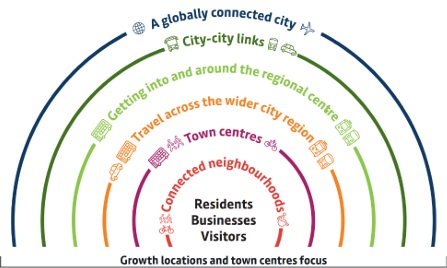
Additional development of the Bee Network, as well as a more reliable highways network, are set to underpin the new approach, which aims to better connect communities with locations, jobs and services. (Image, © Transport for Greater Manchester.) [13]

The Bee Network is set to begin incorporating rail services by 2028, with TfGM aiming to provide 90% of the city region with five-minute access to a bus or tram that arrives at least every 30 minutes.” [13]

GM transport strategy and delivery plans include keeping the local transport network safe and reliable via the renewal and maintenance of roads, Metrolink network and rail facilities; simplifying of fares, ticketing, bus services and introduction of new stops and services, as well as interchanges, Metrolink lines and expanded walking, wheeling and cycling networks; and the transformation of all local rail lines by incorporating them into the Bee Network.” [13]

A detailed delivery programme listing schemes is set out in the GM Transport Delivery Plan 2027 – 2037, which is split into three phases, along with works in the regional centre and a wider ongoing set of works across the city region.” [13]

In addition to online feedback; a series of face-to-face drop-in sessions are planned to take place across Greater Manchester. The documents which are available to read online through clicking on these links:

https://www.gmconsult.org/transport/transport2050/user_uploads/gm-transport-strategy-2050—–final-consultation-draft.pdf [14]

and

https://www.gmconsult.org/transport/transport2050/user_uploads/gm-transport-delivery-plan—–final-consultation-draft.pdf [15]

For an overview of both documents, please click here. [16]

TfGM want to hear from anyone with an interest in the future of transport in Greater Manchester. They outline how you can respond here. [17] The deadline for participation is 9th March 2026.

Returning to where this article started, this is what the consultation draft of the Greater Manchester Transport Strategy 2050 document says about Stockport:
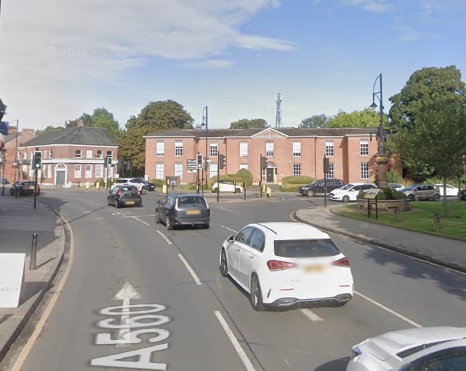
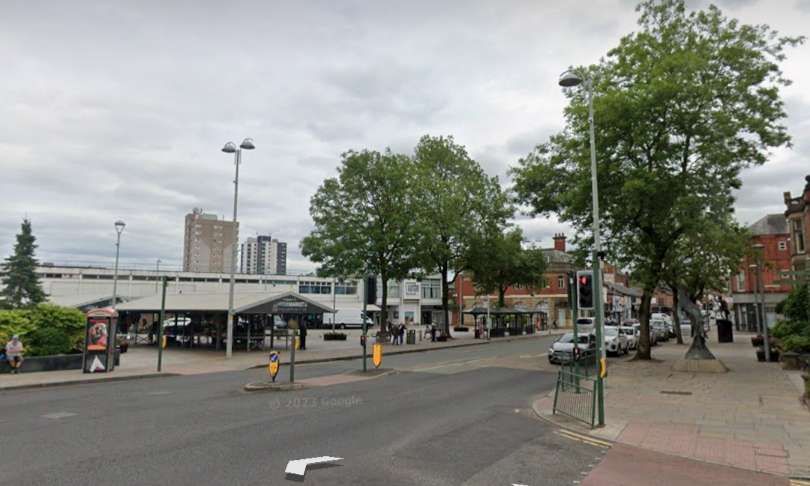
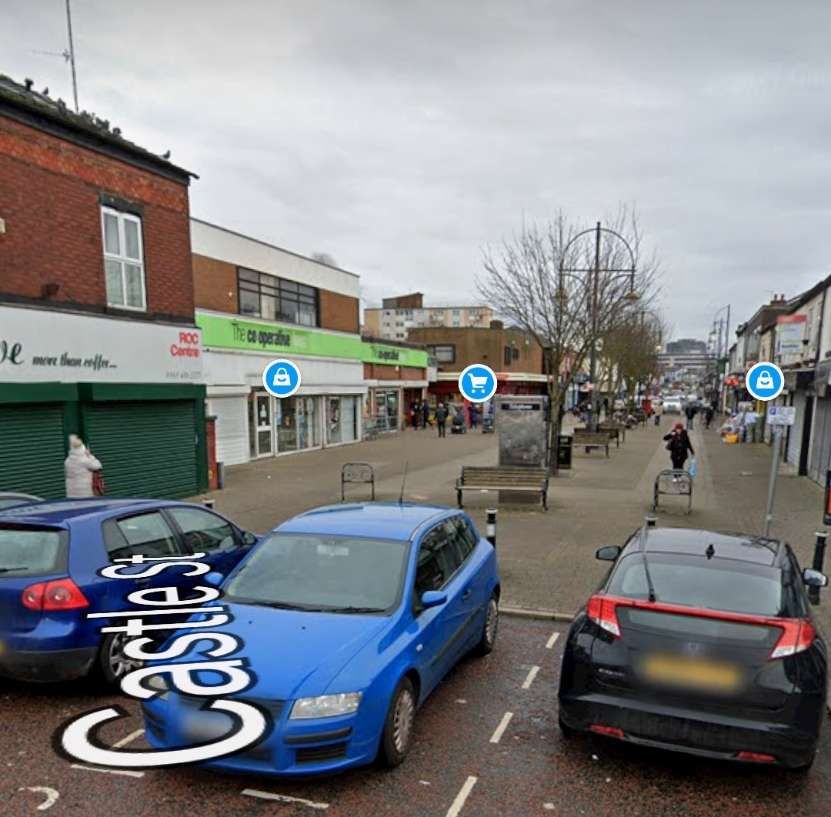
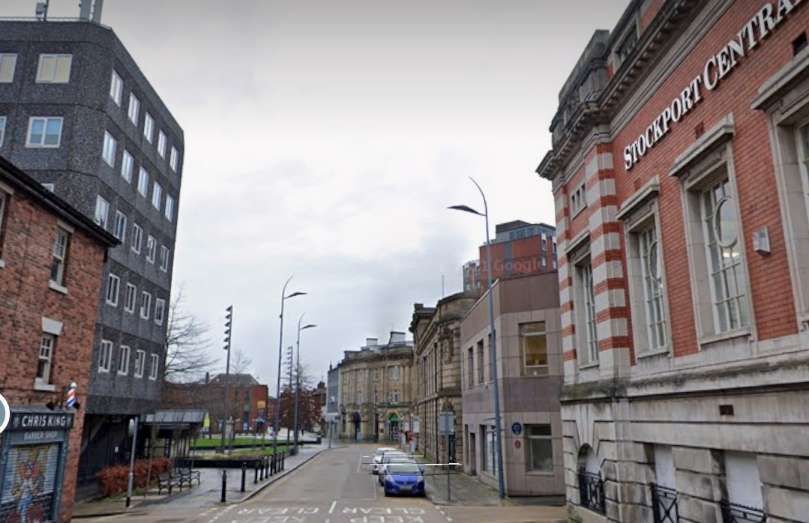
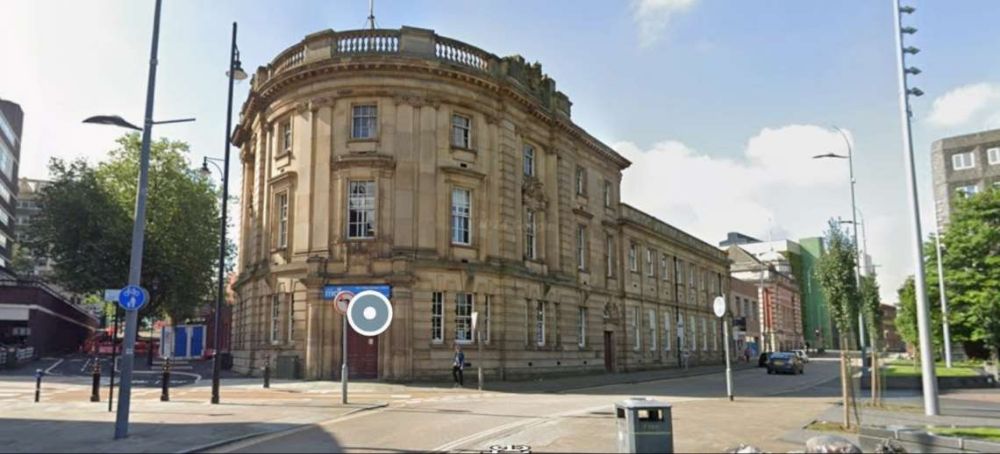
Stockport town centre: Over the last decade, Stockport Council has spearheaded a £1bn transformation of its town centre. One of the UK’s largest town centre regeneration programmes, it has enabled the town to buck the trend of decline, with successful schemes across leisure, commercial and residential uses. Since 2019 Stockport Mayoral Development Corporation (MDC) has played a powerful role in accelerating this transformation, delivering a residential led masterplan for Stockport Town Centre West. The MDC is a radical new approach to tackling future housing need and the changing role of town centres, delivered through a unique collaboration between the GM Mayor and Stockport Council. It brings together powers devolved to the Greater Manchester Mayor, combined with strong local leadership from Stockport Council and the long-term commitment of the government’s housing agency, Homes England, to deliver an ambitious vision for the future of Stockport town centre. Over the past 6 years in collaboration with its many partner organisations the MDC moved from innovative concept to proven delivery vehicle, with over 170,000 sq. ft. new Grade A offices at Stockport Exchange, 1,200 new homes completed or on site and a state-of-the-art new transport Interchange with two-acre rooftop park. Reflecting this success and the Council’s continued growth ambitions, in 2025 the Council and GMCA agreed to expand the boundary of the MDC to cover the whole of the town centre and doubling its housing target to 8,000 homes by 2040.” [14]

References

  1. https://railway-news.com/tfgm-exploring-plans-to-bring-trams-to-stockport, accessed on 4th December 2025.
  2. https://news.tfgm.com/press-releases/c956a710-e894-49ab-b1de-1b8fb97e7859/underused-denton-rail-line-being-considered-as-part-of-case-to-take-trams-to-stockport, accessed on 4th December 2025.
  3. news.tfgm.com/press-releases/897ce680-87a9-4349-a632-b477b1a8330f/greater-manchester-s-2-5-billion-funding-boost-to-unlock-uk-s-first-fully-integrated-zero-emission-public-transport-network, accessed on 4th December 2025.
  4. A Strategic Outline Case (SOC) is the first part of developing a business case for major infrastructure projects. The two further stages are the Outline Business Case (OBC) followed by the Full Business Case (FBC). In the case of extending Metrolink to Stockport approval is required from the Department for Transport (DfT) to progress through each stage.
  5. https://tfgm.com/strategy, accessed on 4th December 2025.
  6. https://assets.ctfassets.net/nv7y93idf4jq/01xbKQQNW0ZYLzYvcj1z7c/4b6804acd572f00d8d728194ef62bb89/Greater_Manchester_Transport_Strategy_2040_final.pdf, accessed on 4th December 2025.
  7. https://assets.ctfassets.net/nv7y93idf4jq/6tfus0lbLRvTlR64knc3g7/db49b54dc2e8f3dd29416ab560e1a6fe/21-0003_2040_Transport_Strategy_Exec_Summary.pdf, accessed on 4th December 2025.
  8. https://www.placenorthwest.co.uk/burnham-sets-target-of-2050-for-manchester-underground, accessed on 4th December 2025.
  9. http://www.semmms.info, accessed on 4th December 2025.
  10. https://consultation.stockport.gov.uk/policy-performance-and-reform/semmms/supporting_documents/SEMMMS%20Report.pdf, accessed on 4th December 2025.
  11. http://www.semmms.info/wp-content/uploads/SEMMMS-Consultation-Report.pdf, accessed on 4th December 2025.
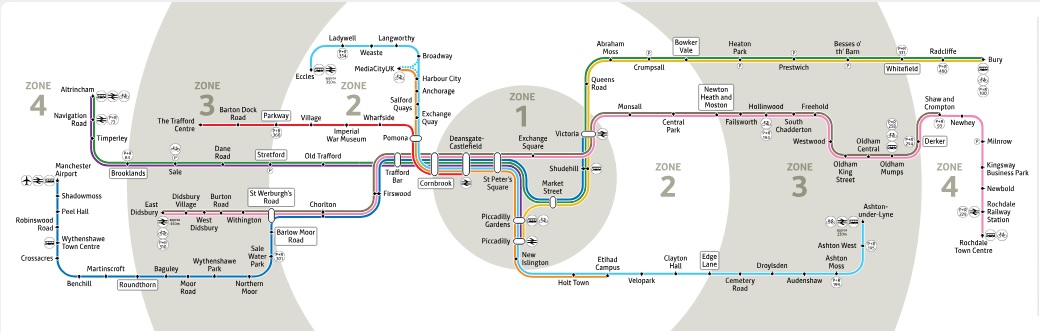
  12. https://www.manchestereveningnews.co.uk/news/greater-manchester-news/new-metrolink-map-tram-manchester-29510064, accessed on 6th December 2025.
  13. https://railway-news.com/tfgm-launches-consultation-on-future-of-public-transport/?dtt=&email_address=rogerfarnworth@aol.com&utm_source=newsletter&utm_medium=email&utm_campaign=RN-week50b-2025, accessed on 11th December 2025.
  14. https://www.gmconsult.org/transport/transport2050/user_uploads/gm-transport-strategy-2050—–final-consultation-draft.pdf, accessed on 11th December 2025.
  15. https://www.gmconsult.org/transport/transport2050/user_uploads/gm-transport-delivery-plan—–final-consultation-draft.pdf, accessed on 11th December 2025.
  16. https://www.gmconsult.org/transport/transport2050/user_uploads/gm-transport-strategy-and-delivery-plan-summary—consultation-draft.pdf, accessed on 11th December 2025.
  17. https://www.gmconsult.org/transport/transport2050, accessed on 11th December 2025.

Manchester Mayfield Railway Station

The featured image shows Longsight’s Stanier 2-6-0 Locomotive No. 42960 at Manchester Mayfield on 3rd September 1955 about to depart with a suburban service. This image was shared on the British Railways Steam 1948 – 1968 Facebook Group by Alex Lawson on 20th July 2022, © H. C. Casserley. [30]

Manchester Mayfield 3rd September 1955. Longsight’s Stanier 2-6-0 42960 is ready to depart with a suburban service.
Photo H C Casserley.

A short note about extensive alterations at Manchester London Road Station appeared in the December 1958 issue of The Railway Magazine. The major alterations were designed to accommodate the electrification of the line between Manchester and Crewe. [1]

The Railway Magazine reported that “The improvements include[d] the construction of three new platforms, the lengthening of the existing platforms, to accommodate 16-coach electric trains, and the widening of the concourse. The station [would] thus have 14 platforms, of which ten [would be devoted to main-line and local traffic on the former London & North Western line, and the remainder to trains on the Great Central route. When the alterations [were] completed, the adjoining terminus at Mayfield [would] cease to deal with passenger traffic. A new power signalbox [would] control the area extending to East Didsbury and Heaton Chapel, and will replace 13 manual boxes. Electric trains [would] not be an innovation at London Road, because the Altrincham line was electrified in 1931, and the Sheffield line in 1954.” [1]

The text in bold highlights the closure of Mayfield Station to passenger traffic. This article focuses on Mayfield Railway Station. ….

Mayfield Station had only ever been something of which I was vaguely aware despite having lived in the Manchester area for large parts of my life.

Manchester Mayfield Station was, “on the south side of Fairfield Street next to Manchester Piccadilly station, [Manchester London Road station, as it was in 1958]. Opened in 1910, Mayfield was constructed as a four-platform relief station adjacent to Piccadilly to alleviate overcrowding. In 1960, the station was closed to passengers and, in 1986, it was permanently closed to all services having seen further use as a parcels depot.” [2]

Manchester Mayfield Railway Station was on the South side of Fairfield Street. It was linked to Manchester London Road (later Piccadilly) Station by a footbridge over Fairfield Street. This is an extract from the 6″ Ordnance Survey of 1915, © Public Domain. [3]

Opened on 8th August 1910 by the London and North Western Railway, Manchester Mayfield was built alongside Manchester London Road station (later Piccadilly) to handle the increased number of trains and passengers following the opening of the Styal Line in 1909. [4][5: p7] The LNWR had considered constructing a new platform at London Road between the [Manchester, South Junction and Altrincham Railway’s] MSJAR’s platforms 1 and 2, which were renumbered 1 and 3 in anticipation, but this was abandoned in favour of the construction of Mayfield; the platforms nevertheless remained renumbered. [6: p167] Four platforms were provided and passengers could reach London Road via a high-level footbridge. [6: p167][7: p43] Mayfield suffered the effects of bombing during World War II, when it was hit by a parachute mine on 22nd December 1940.” [8: illustration 40] [2]

Manchester Mayfield Railway Station as it appears on the 25″ Ordnance Survey of 1914. [21]

Mayfield was a relief station, mainly used by extra trains and suburban services to the south of Manchester [6: p167] – places such as Cheadle Hulme, Buxton, Alderley Edge, Chelford and Stockport. [9: table 97] “In the London Midland timetable of September 1951, the Pines Express from Bournemouth West is shown as arriving at Mayfield at 4.30pm (16.30) on Mondays to Fridays. On Saturdays, this train used Piccadilly station, then known as London Road. [10: table 17] In the 1957-8 timetable, the Pines Express still arrived at Mayfield on Mondays to Fridays, now at the time of 4.45pm (16.45).” [11: table 21][2]

Manchester Mayfield Railway Station seen from the East in the last days of steam, This image was shared on the Disused Stations Facebook Group by Jordan Trevor on 17th October 2020, © Unknown. [27]

Further photographs, maps and information can be found on the Disused Stations Webpage, [22] and here, [29]

Manchester Mayfield Railway Station, as seen from Baring Street in 2020, © Rcsprinter123 and licenced for reuse under a Creative Commons Licence (CC BY 3.0). [2]
Another external view of Manchester Mayfield Railway Station in the very early 21st century, © Unknown. [24]
The derelict interior of Manchester Mayfield Railway Station in 2012, © True British Metal and licenced for reuse under a Creative Commons Licence (CC BY-SA 2.0). [25]
Another interior view of the derelict station building, this time in 2009, © philld and licenced for reuse under a Creative Commons Licence (CC BY-SA 2.0). [26]

For a brief period during the electrification and modernisation of London Road station, Mayfield Station was the Manchester terminus for many diverted services. [12: p86-87]  It was closed to passengers on 28th August 1960 with the completion of the electrification and modernisation works at Manchester London Road station. [13: p92]

The site was converted into a parcels depot, which opened on 6th July 1970. [4] Royal Mail constructed a sorting office on the opposite side of the main line and connected it to Mayfield with an overhead conveyor bridge, which crossed the throat of Piccadilly station.” [2]

Manchester Mayfield Railway Station once converted to a parcels depot. This image was shared on their Facebook Page by The Tourist Historian on the 23rd September 2023, © Unknown. [23]
The interior of Manchester Mayfield Railway Station as a Parcels Depot. This image was shared on their Facebook Page by The Tourist Historian on the 23rd September 2023, © Unknown. [28]

The depot closed in 1986, following the decision by Parcelforce, Royal Mail’s parcels division, to abandon rail transport in favour of road haulage. The tracks into Mayfield were removed in 1989, as part of the remodelling of the Piccadilly station layout. The parcels conveyor bridge was removed in 2003 with the Sorting Office being rebuilt as the Square One development, prestige offices used by Network Rail. [2]

The site of Mayfield station is the property of London and Continental Railways. [2] The interior of the station was used in Prime Suspect as a drug dealer’s haunt. [4] It was also used as a double for Sheffield railway station in The Last Train. The roadside building was gutted by a fire in 2005. [4]

Further photographs, maps and information can be found on the Disused Stations Webpage. [22]

There are, or have been, various plans for the use of the site of Mayfield station. These include:

Reopening as a station

A study was carried out by Mott MacDonald in 2000, which looked at possibilities of increasing capacity at the Piccadilly station. One solution put forward would see the track quadrupled between Slade Lane Junction and Piccadilly, with a pair of through platforms in the Mayfield goods yard to the south of Piccadilly’s platforms 13 and 14 linked to additional running lines to Ashburys station. This proposal was supported by the Greater Manchester Passenger Transport Executive as it would increase usable train paths through Piccadilly by between 33% and 50%; the extra track would, however, require an expensive extension to the Piccadilly – Deansgate viaduct carrying the track from Slade Lane. The location of the proposed platforms was also criticised, as it would entail ‘a long walk for passengers wishing to interchange with other terminating rail services at Manchester Piccadilly or access the city centre’.” [2]

Other options would have the station used again as a terminus, providing a rail link to Manchester Airport or, alternatively, the lines might be extended through Mayfield and connected to the existing line to Manchester Oxford Road railway station. [2][4]

Further proposals were put forward in 2009 by the Greater Manchester Integrated Transport Authority for reinstating Mayfield as an operational station, to alleviate capacity problems at Piccadilly Station. [14] However, as part of the Northern Hub railway development scheme across Northern England, Network Rail now plans to increase capacity on the existing Oxford Road-Piccadilly route by widening the viaducts and adding two additional platforms (15 and 16) to the south side of Piccadilly station. [15] There are no plans to re-open Mayfield station for public transport.” [2]

Commercial redevelopment

In 2008, an alternative scheme involving Manchester Mayfield was put forward. This proposal would see the station as part of a new 30-acre (120,000 m2) city centre district immediately adjacent to Piccadilly Station. That project would have created more than 6,000,000 square feet (560,000 m2) of offices contained in office blocks up to 12 storeys high, and would be completed over a period of 15 years. The scheme was led by “Mayfield Manchester”, a joint venture company between Ringset, part of the Wrather Group, and Panamint; the company owns around 90% of the land around the station as of 2008, but do not own the station itself. In April 2008,Manchester Mayfield were said in talks with its owners of the station site, BRB Residuary. [2]

Other schemes were also under consideration:

  • Conversion into a Coach station by National Express to replace their Charlton Street facility [2]
  • Government Offices – in May 2009, the site was earmarked for a development which would have housed 5,000 civil servants. It would have required the demolition of Mayfield station. This did not go ahead at the time but the idea was revived in 2015 as one of a number options for the site. [16] one of those options was for a very significant  redevelopment of the area around Piccadilly station and the Mayfield area, involving the demolition of both Mayfield station and Gateway House. [28][29] However the status of this is now unknown due to the cancellation of the HS2 Manchester leg. [2]
  • Entertainment Venue – in 2019, some of the site was converted into Depot Mayfield, a 10,000 capacity venue for culture located at Manchester’s historic former railway Mayfield as part of a £1 billion regeneration project. [17] It regularly hosts The Warehouse Project, a series of club nights. [2]

There is continued interest in the site as an urban regeneration area and it is proposed to replace the station with offices,  residential developments and a significant urban green space.

The new green space, ‘Mayfield Park’ opened in 2022. [18]

Manchester Mayfield Redevelopment and ‘Mayfield Park’. [19]

Mayfield will facilitate transformational change at the eastern gateway of the city centre close to Piccadilly Station. The 20 acre site provides the opportunity to create a distinctive and unique city centre district. The vision for Mayfield is for a distinctive, world class development delivering significant new commercial space, and up to 1500 new homes alongside a mix of retail and leisure facilities all centred on a new 6.5 acre city centre park.” [19]

Mayfield Strategic Redevelopment Framework (2016-2018) covers the work done and the work to be done on the site. [20]

References

  1. London Road Station, Manchester; in The Railway Magazine volume 104 No. 692, December 1958, p811.
  2. https://en.m.wikipedia.org/wiki/Manchester_Mayfield_railway_station, accessed on 7th July 2025.
  3. https://commons.m.wikimedia.org/wiki/File:Manchester_London_Road_and_Mayfield_map_1915_6inch.gif, accessed on 7th July 2025.
  4. http://www.disused-stations.org.uk/m/manchester_mayfield/index.shtml, accessed on 7th July 2025.
  5. C.R. Clinker; LNWR Chronology 1900-1960; David and Charles, Newton Abbot, 1961.
  6. Sydney Richards; Manchester and its Railways; in Railways: The Pictorial Railway Journal, Volume 8 No. 91, Railway World Ltd., London, November 1947.
  7. S. Hall; Rail Centres: Manchester; Ian Allan Publishing, 1995.
  8. E. M. Johnson; Scenes from the Past: No. 3, Manchester Railway Termini; Foxline, 1987.
  9. British Railways London Midland Region Passenger Services Timetable 16th September 1957 to 8th June 1958.
  10. British Railways London Midland Region Passenger Services Timetable, September 10th 1951 until further notice.
  11. British Railways London Midland Region Passenger Services Timetable 16th September 1957 to 8th June 1958.
  12. Oswald S. Nock; Britain’s New Railway; Ian Allan Publishing, 1966.
  13. C. R. Clinker; Clinker’s Register of Closed Passenger Stations and Goods Depots in England, Scotland and Wales 1830–1977; Avon-AngliA Publications & Services, Bristol, October 1978.
  14. https://web.archive.org/web/20150322202743/http://www.manchestereveningnews.co.uk/news/greater-manchester-news/forgotten-station-may-return-914371, accessed on 7th July 2025.
  15. Our plans: Manchester Piccadilly;  Network Rail, London; via https://web.archive.org/web/20140812210305/https://www.networkrail.co.uk/improvements/northern-hub/projects/manchester-oxford-road-piccadilly/manchester-piccadilly-station-proposals/?cd=1, accessed on 7th July 2025.
  16. https://www.manchestereveningnews.co.uk/business/whitehall-north-back-track-city-8638504, accessed on 7th July 2025.
  17. https://depotmayfield.com/about-us, accessed on 7th July 2025.
  18. https://www.burohappold.com/projects/mayfield-regeneration, accessed on 7th July 2025.
  19. https://www.manchester.gov.uk/info/500113/city_centre_growth_and_infrastructure/7900/city_centre_regeneration_areas/11, accessed on 7th July 2025.
  20. https://studioegretwest.com/places/mayfield, accessed on 9th July 2025.
  21. https://maps.nls.uk/geo/explore/#zoom=17.4&lat=53.47615&lon=-2.22646&layers=168&b=ESRIWorld&o=100, accessed on 9th July 2025.
  22. http://www.disused-stations.org.uk/m/manchester_mayfield, accessed on 9th July 2025.
  23. https://www.facebook.com/TheTouristHistorian/posts/pfbid0JxatgmDM5JonoS8pt3xpRAvZXXoCLdv8f8vt8wag23vtupQoRvfzu54QDzKpTJWKl, accessed on 10th July 2025.
  24. https://www.phaus.co.uk/mayfield-railway-station, accessed on 10th July 2025.
  25. https://www.flickr.com/photos/truebritishmetal, accessed on 10th July 2025.w
  26. https://www.geograph.org.uk/photo/1439304, accessed on 10th July 2025.
  27. https://www.facebook.com/photo?fbid=10157763618693716&set=pcb.5164305560250093, accessed on 10th July 2025.
  28. https://www.facebook.com/photo/?fbid=282698811318217&set=pcb.282719321316166, accessed on 10th July 2025.
  29. https://www.flickr.com/photos/26690797@N02/32466777506, accessed on 10th July 2025.
  30. https://www.facebook.com/share/p/15JeoHAF7S, accessed on 11th July 2025.

Stockport Corporation Tramways – Part 2 (Modern Tramway Vol. 12 No. 138, June 1949)

P.W. Gentry wrote about Stockport’s trams in the July 1949 issue of Modern Tramway.

He says: “Besides possessing several interesting features of its own, the Stockport system today commands added attention as the last last surviving member of that once network of standard gauge undertakings encircling Manchester. It is an unusually pleasing system by virtue of its compact and simple arrangement, its focal point being Mersey Square.” [1: p123]

The article in Modern Tramway caught my attention because for about 9 years I worked in Stockport as a highway engineer.

This is a second article looking at Stockport Corporations Tramways. The first article which looked at the history of the network and followed one axis of that network can be found here. [2]

Mersey Square was the main hub of Stockport’s tramway network and appeared as a schematic plan in Gentry’s article in The Modern Tramway. …

Mersey Square was the hub of the Stockport Corporation tramways. Mersey Square Depot and Heaton Lane Depot are shown clearly on this sketch plan drawn in 1949. The modern A6 runs left-right across the lower half of the plan. © P.W. Gentry, Public Domain. [1: p123]
An extract from Map: Lancashire CXII.9; Ordnance Survey, 25 inch to 1 mile; revised: 1934; published: 1936, showing Mersey Square as it was in 1934. The tram depot had, by this time, been enlarged and the additional depot on Heaton Lane constructed. Heaton lane Depot is accessed via the branch West off Wellington Road. [8]

Stockport Corporation’s Trams

Before looking at the remaining tram routes operated by Stockport Corporation it is worth noting the trams which Stockport Corporation used to operate the network. P.W. Gentry listed these as follows:

This table is taken from Gentry’s article. [1: p126]

Gentry provided basic details in his article, more details can be found here. [8] The same website provides a history of the network [9] and a Trolleybus/Bus Fleet List 1913-1969. [10]

Stockport’s Tram Routes

The Stockport Corporation Tramway Network (1901-1951), © Rcsprinter123 and licenced for reuse under a Creative Commons Licence (CC BY 3.0) [3]

Edgeley to Mersey Square and Mersey Square to Reddish and Gorton

This first axis of the network was covered in my first article about Stockport Corporation Trams, here. [2] Two further axes are worth our attention: the first, below, that between Gatley and Bredbury; the second that between Manchester and Hazel Grove.

Gatley to Mersey Square and Mersey Square towards Bredbury

We start with the tram terminus in Gatley.

Gatley Green and the terminus of the Stockport Corporation Tramway as shown on the 25′ Ordnance Survey of 1907, published in 1935. [11]
The same location in the 21st century. [Google Streetview, January 2025]
The Gatley tram terminus was outside the Horse and Farrier Pub. This view looks East from Gatley Bridge, © Public Domain. [5]
A similar view along the A560 in the 21st century, with the Horse and Farrier Pub on the left. [Google Streetview, August 2024]
A tram at the same location viewed from another angle, this time from the South, © Public Domain. [6]
A similar view from Church Road in the 21st century. [Google Streetview, August 2024]
To the East, the tramway passed under Gatley Road Railway Bridge. 25′ Ordnance Survey of 1907, published in 1935 the railway as being under construction but with the bridge in place. [11]
Gatley Road Railway Bridge seen from the West, looking East along the A560. [Google Streetview, August 2024]
This satellite image shows the length of the A560 from just West of Gatley Railway Bridge to just East of Greenhall Bridge. The dominant feature at the centre of the image is the A34, Kingsway, one of the main arterial routes on the South side of Manchsterer.  [Google Maps, January 2025]
Looking West towards Gatley Road Railway bridge in the 1910s with a tram heading for Stockport, © Public Domain. [16]
A similar location on Gatley Road in the 21st century. [Google Streetview, August 2024]
This extract from the 25′ Ordnance Survey of 1907, published in 1935, shows a location further to the East – Greenhall Bridge carried the road and tramway over Micker Brook. On this map the political boundary has taken precedence over the tramway. The tramway ran along the road from left to right. [11]
Looking East Long the A560 towards Cheadle. The bridge over Micker Brook was one which we needed to replace during the 1990s when I was responsible for the maintenance of highway bridges for Stockport MBC. [Google Streetview, August 2024]
It is somewhat easier to appreciate the layout of the bridge with 3D image. This bridge was rebuilt during my time at Stockport Council in the 1990s. [Google Earth (3D), January 2025]

Gatley Road ran through to the junction at the West end of the Cheadle High Street.

The tramway ran through from Gatley Road onto High Street, Cheadle as the 25′ Ordnance Survey of 1907, published in 1935, shows. [11]
The same junction in the 21st century. [Google Maps, January 2025]
Looking West along Gatley Road, Cheadle in 1908, from the West end of Cheadle High Street, © Public Domain. [7]
A very similar view looking West from Cheadle High Street in the 21st century. [Google Streetview, August 2024]
The tramway ran West to East along Cheadle High Street and on to Stockport Road. This extract is taken, again, from the 25″ Ordnance Survey, this sheet was surveyed in 1916 and published in 1922. [12]
Looking West along Cheadle High Street, © Public Domain. [15]
The same view in the 21st century. [Google Streetview, August 2024]
The junction of Cheadle High Street with Stockport Road and Manchester Road, looking West. The passing loop at the junction can be seen in this image, © Public Domain. [13]
A view of the same road junctionfrom Stockport Road in the 21st century. [Google Streetview, August 2024]
an early image looking East from the junction. The tram is heading for Stock port on Stockport Road, Cheadle Green is behind the tram, © Public Domain. [14]
A similar view in the 2020s. [Google Streetview, August 2024]
Further East on the same OS map sheet, the tramway can be seen continuing East on Stockport Road. [12]
The last section of Stockport Road on this particular OS map sheet shows the tramway and road running Northeast and approaching the railway bridge. [12]
The next 25″ Ordnance Survey sheet ( surveyed in 1916 and published in 1922) shows Stockport Road and the tramway heading Northeast under the railway bridge into Cheadle Heath. Top-right in this map extract is Cheadle Heath Railway Station. The junction with Edgeley Road is just above the centre of the image. [17]
Looking Southwest along Stockport Road Cheadle Heath with the railway bridge on the right side of the image. This image comes from Stockport Image Archive, © Public Domain. [20]
A similar view in the 2020s looking across the motorway slop road roundabout and under the railway bridge, West towards Cheadle. [Google Streetview, August 2024]
Laying the tram tracks at the junction of Stockport Road and Edgeley Road, Cheadle Heath in 1903. This image comes from the Stockport Image Archive and faces towards Stockport, © Public Domain. [21]
The same location in the 1940s, again facing towards Stockport. This is another image from the Stockport Image Archive, © Public Domain. [22]
The view along Stockport Road towards Stockport in the 2020s. [Google Streetview, August 2024]
Continuing Northeast, the road and tramway began the descent into the River Mersey valley. The road took the name Brinksway. [17]
The tramway followed Brinksway as it ran East on the South side of the River Mersey. One of Stockport’s road bridges over the river, Brinksway Bridge, can be seen towards the right of this map extract. [17]
Looking down Brinksway towards Stockport town centre. This image is held in the Stockport Image Archive, © Public Domain. [23]
A similar view in the 2020s. [Google Streetview, August 2024]
Looking up Brinksway to the location of the photograph above. The houses on the distance in this view are those on the left of the last image. This image is held in the Stockport Image Archive, © Public Domain. [24]
Approximately the same location on Brinksway, facing the same direction. [Google Streetview, August 2024]
Further East down Brinksway this view shows one of the significant rock outcrops. This view is held in the Stockport Image Archive, © Public Domain. [25]
A very similar location on Brinksway, facing in the same direction. [Google Streetview, August 2024]
An extract from Britain from Above image EPW036823, Brinksway and Brinksway Bridge in 1931, © Historic England. [26]
Trams on Brinksway.in 1931. This view looks towards Stockport town centre, © Public Domain. [26]
A similar location in n Brinksway, looking towards the town centre. [Google Streetview, August 2024]
Continuing East Brinksway became Chestergate as trams approached the centre of Stockport, passing under Stockport’s iconic viaduct which can be seen in the extreme top-right of the map extract. [17]
Just a very short length of Chestergate (and the tramway) intrudes into the next map sheet to the North (25″ Ordnance Survey of 1916, published in 2922). [18]
Trams then passed under the A6, Wellington Road South into Mersey Square (an extract from the 25″ Ordnance Survey of 1917, published in 1922). [19]
Looking East towards Mersey Square, a tram heads West towards Gatley/Cheadle, Public Domain. [4: p94]
Looking West-southwest under Wellington Road along Chestergate with the Beckwith Steps to the right. This image was shared on the Memories of Stockport Facebook Group by Dave Moran on 23rd April 2024 [28]
A tram turns out of Mersey Square onto Chestergate, heading for Cheadle/Gatley, while another, older trams heads towards St. Peter’s Square, © Public Domain. [31]

Tram services entered Mersey Square and crossed the Mersey. Services to the West of the town commenced here and ran along Princes Street to Bridge Street. That length of the network is covered in an earlier article which can be found here. [2]

We resume this article at the Northeast end of Princes Street and its junction with Bridge Street and then follow the route to Hyde.

A tram at the junction of Tiviot Dale, Princes Street and Bridge Street. Bridge Street runs off the picture to the right. This image was shared on the Memories of Stockport Facebook Group by Dave Moran on 24th August 2023, © Public Domain. [27]
A similar view from the end of Princes Street. [Google Streetview, August 2024]
The views above look Northeast from Princes Street, the two immediately below face Northwest from Bridge Street and the two further below face Southeast along Bridge Street. [35]
Looking back from Bridge Street to its junction with Princes Street ,(on the left) and Tiviot Dale (on the right). A tram is pictured on the corner of Tiviot Dale and Princes Street. Several shot fronts are pictured in the background including the Co-operative Insurance, Leonard Aaron, opthalmic opticians as well as shops selling musical instruments and a chemist. This image was shared by Dave Moran on the Memories of Stockport Facebook Group on 23rd April 2024, © Public Domain. [32]
The same location in the 2020s. [Google Streetview, August 2024]
Looking Southeast from the junction of Tiviot Dale, Princes Street and Bridge Street, a tram heads along Bridge Street towards the junction. The tram has just turned right onto Bridge Street from Warren Street. [33]
An earlier monochrome image from Stockport Image Archive which shows Tram No. 28 turning from Warren Street onto Bridge Street before crossing Lancashire Bridge. This image was shared by Marilyn Ann Cronshaw on the Memories of Stockport Facebook Group on 14th August 2015, © Public Domain. [44]
A similar view in the 21st century. [Google Streetview, August 2024]
An overhead view looking East across Lancashire Bridge and Warren Street This is an extract from image No. EPW013110, © Historic England. [36]
Warren Street cut across a peninsula of land between the River Goyt and the River Mersey with the confluence between the River Goyt and the River Tame to the North. [35]
An accident in the 1930s on Warren Street between a tram and a lorry, © Public Domain. [34]
Park Bridge is bottom left on this extract from the 25″ Ordnance Survey of 1917, published 1922. [35]
A shorter stretch of Great Portwood Street in the 21st century. [Google Maps, January 2025]
A tram passes the Queen’s Public House on Great Portwood Street on its way East. This image was shared on the Memories of Stockport Facebook Group by Julian Ryan on 20th November 2022, © Public Domain. [38]
The same location in the 2020s. [Google Streetview, August 2024]
Further Northeast along Great Portwood Street on the same OS Map sheet as the extract above. [35]
A similar length of Great Portwood Street. It now has one of the major M60 junctions.on the North side. [Google Streetview, January  2025]
The tramway turns Southeast onto Carrington Road and runs down to the River Goyt at Carrington Bridge before continuing West on Stockport Road West. [35]
A similar length of the road/tramway as appears on the map extract above. St. Paul’s School and Church at the junction of Great Portwood Street and Carrington Road are long gone and Carrington Road has been diverted to meet the large motorway roundabout. [Google Maps, January 2025]
St. Paul’s Church, Great Portwood Street, seen from the Southwest on Great Portwood Street. The junction with. Arrington Road is behind the tram. This image was shared on the Stockport Memories Facebook Group by Niall Dorsett on 24th November 2024, © Public Domain. [49]
This view looking West from Portwood Roundabout is from approximately the same location. Everything in the monochrome image above has gone. [Google Streetview, September 2023]
Carrington Road, Portwood, looking Northwest close to it junction with Great Portwood Street which is just at the far end of the St. Paul’s School site. The school is to the left of the tram. The churchyard is on the right with the church building just off the picture to the right, © Public Domain. [37]
Looking Northwest along what was Carrington Road. The wall beyond the lamp post is what was the churchyard boundary wall. The line of the road ran through the planted beds with the location of the Scholl to the left of the planting. [Google Streetview, September 2023]
This next extract from the 25″ Ordnance Survey takes the tramway to the West edge of the OS Sheet, over New Bridge, along Stockport Road West. [35]
The same length of Stockport Road West on modern satellite imagery. Notice the shortening of the loop in the River Goyt which was required to allow construction of the M60. [Google Maps, January 2025]
Stockport Road West as it appears on the 25″ Ordnance Survey of 1917, published in 1922. [39]
A very similar length of Stockport Road West which, rather than running through a rural landscape, now runs through a residential area. [Google Maps, January 2025]
Stockport Road East through Bredbury as it appeared on the 1917 Ordnance Survey. [39]
A short molar length of Stockport Road East in the 21st century. [Google Maps, February 2025]
An interesting arrangement of under and over bridges appears in the bottom-left of this next extract from the 25″ Ordnance Survey of 1917. Trams passed over the Cheshire Lines Committee (Great Central and Midland Joint Railway) from Bredbury Junction, and then under the same company’s lines through Bredbury Railway Station. Woodley village can be seen top-right and on the next map extract. [40]
St. Mark’s Woodley appears bottom-left in between Stockport Road East and Redhouse Lane. [40]
This image shows a similar length of the A560 as it appears towards the end of the first quarter of the 21st century. [Google Maps, February 2025]
Hyde Road Woodley looking Northeast from St. Mark’s Church. This image was shared on the Stockport Memories Facebook Group by Ian Scottson on 8th October 2024, © Public Domain. [50]
Looking Northeast along the A560 from adjacent to St. Mark’s Churchyard. Redhouse Lane joins the A560 from the right. [Google Streetview, April 2015]
Stockport Tram No.10 outside the Lowes Arms in Woodley in 1947, heading for Hyde. This image was shared on the Stockport Memories Facebook Group by Dave Eccles on 10th June 2024, © Public Domain. [48]
A similar view looking North from the A560 at the location of the Lowes Arms in Woodley. [Google Streetview, June 2023]
Woodley village continues Northeast along Hyde Road. [40]
Woodley Railway Station is in the upper-right quadrant of this extract from the 25″Ordnance Survey. Hyde Road runs bottom-left to top-right. [40]
A similar length of the A560/A627 as in the map extracts immediately above. Woodley Railway Station is at the top-right of the image. [Google Maps, February 2025]
An early 20th century photograph looking Northeast along Stockport Road, Woodley. The railway station is on the right with the railway passing under the road ahead. As can be seen here and on the map extract above, there was a passing loop which allowed trams to pass each other immediately outside Woodley Railway Station. This image was shared on the Stockport Memories Facebook Group by Ian Scottson on 5th October 2024, © Public Domain. [47]
Now the A627, Hyde Road runs past Woodley Railway Station. This view is from a similar location to the monochrome image above. [Google Streetview, June 2023]
Stockport Road/Hyde Road continues Northeast from Woodley towards Gee Cross. [41]
The same length of Hyde Road/Stockport Road in the 21st century
This view Southwest along Stockport Road shows a tram heading for Woodley along Pole Bank (Stockport Road, A560 in the 21st century), © Public Domain. [46]
The same view in the 21st century. [Google Streetview, June 2025]
The 25″ Ordnance Survey shows that trams turned East along Stockport Road towards Gee Cross. [41]
Dowson Road runs North and Stockport Road heads East at the junction on the left side of this satellite image. Trams turned East along Stockport Road. [Google Maps, February 2025.
Looking Northeast from the Gerrards, close to the left edge of the map extract and satellite image above, along Stockport Road towards Dawson Road in Gee Cross. In the middle distance trams heading for Hyde turned right on Stockport Road, © Public Domain. [30]
A view Northeast from a camera location closed to the location of the tram in the monochrome image above. [Google Streetview, June 2023]
In Gee Cross, the main road on which the trams were travelling (Stockport Road) gave way to Mottram Old Road – both now lengths of the A560. Trams branched off what is now the A560 along another length of Stockport Road. Today, this is the B6468.  [42]
A similar length of Stockport Road, Gee Cross. [Google Earth, February 2025]
This image shows a tram travelling along Stockport Road, Gee Cross at the very bottom of the map extract above, © Public Domain. [29]
A similar location in the 21st century looking Northeast. [Google Streetview, June 2023]
Probably dating from the 1920s, This photograph shows the tramlines running along Stockport Road towards Hyde. Mottram Old Road is on the right side of the image. There was a passing loop at the junction. The old sign post remains at the junction but has lost an arm. The lamp on the top of the pole remains. The houses behind it have gone leaving a grassy embankment. © Public Domain. [45]
A view Northeast from a similar location in the 2020s. The lamppost can easily be made out beyond the car turning onto the A560. [Google Streetview, June 2023]
This next extract from the 25″ Ordnance Survey shows the tram tracks running North along Stockport Road (B6468), bridging the Cheshire Lines Committee railway and then Northwest into Hyde along Market Street. [42]
A similar length of Stockport Road and Market Street in Hyde. The old railway in cutting is now a footpath/cycleway. A roundabout now marks the bend from Stockport Road into Market Street and a housing estate now sits on the site of the Slack Cotton Mills. [Google Maps, February 2025]
Trams from Stockport continued Northwest along Market Street, Hyde. Terminating close to the Market ground, seen here in the top-left of the extract from the 25″ Ordnance Survey of 1917, published 1922. [42]
The final length of the route covered by Stockport’s trams which reached as far as the Market ground which can be seen in the top-left of this satellite image [Google Earth, February 2025]
Market Street, Hyde in around 1930. A tram on the Stockport Edgeley service waits at the Town Hall terminus as a bus departs for Romiley from the Market. This image was shared on the Hyde Past and Present Facebook Group by Lee E. Brown 8th November 2024. © Public Domain. [51]
A tram on Market Street, Hyde, © Public Domain. [52]
A view Northwest along Market Street in the 21st century. [Google Streetview, June 2023]
A photograph from around 1930 of the tram terminus on Market Street outside the Town Hall. The leading tram is a Manchester Corporation car on the No 19 service to Manchester Exchange. In the centre is an SHMD car and at the far end is a Stockport car and going off the position of the poles, they are both on the Edgeley run. Across the market there is a rare glimpse of the Norfolk Hotel. The photographer was standing on the corner of Greenfield Street, looking across to the market ground. Market Street goes away behind the trams. The top of the Midland Bank is visible above the trams. This length of tramway may be unique in the UK being served by four different tram companies/services, SHMD, Ashton, Manchester and Stockport trams. This image was shared on the Hyde Past and Present Facebook Group by Lee E. Brown on 23rd November 2019. [53]
A view from a similar location in the 21st century. [Google Streetview, June 2023]

This completes the length of the tramway from Stockport to Hyde. The next article in this short series will cover the line from Manchester to Hazel Gri

References

  1. P.W. Gentry; Stockport Corporation Tramway; Modern Tramway, Vol. 12 No. 138, June 1949, p123-126.
  2. https://rogerfarnworth.com/2025/01/15/stockport-corporation-tramways-modern-tramway-vol-12-no-138-june-1949-part-1
  3. https://en.m.wikipedia.org/wiki/Stockport_Corporation_Tramways, accessed on 3rd January 2025.
  4. Harry Postlethwaite, John Senior & Bob Rowe; Super Prestige No. 14, Stockport Corporation; Venture Publications, Glossop, Derbyshire, 2008. This document is made freely available by MDS Books as a .pdf: https://www.mdsbooks.co.uk/media/wysiwyg/Stockport_Download_1.pdf, accessed on 14th January 2025.
  5. https://www.ebay.co.uk/itm/361890923297?mkcid=16&mkevt=1&mkrid=711-127632-2357-0&ssspo=ibGa9k_VTo6&sssrc=4429486&ssuid=&var=&widget_ver=artemis&media=COPY, accessed on 15th January 2025.
  6. https://www.ebay.co.uk/itm/361906909095?mkcid=16&mkevt=1&mkrid=711-127632-2357-0&ssspo=ibGa9k_VTo6&sssrc=4429486&ssuid=&var=&widget_ver=artemis&media=COPY, accessed on 15th January 2025.
  7. https://fr.m.wikipedia.org/wiki/Fichier:Gatley_Road,_Cheadle_1908.png, accessed on 15th January 2025.
  8. https://localtransporthistory.co.uk/fleetlists/stockport2, accessed on 16th January 2025.
  9. https://localtransporthistory.co.uk/fleetlists/stockport1, accessed on 16th January 2025.
  10. https://localtransporthistory.co.uk/fleetlists/stockport3, accessed on 16th January 2025.
  11. https://maps.nls.uk/view/114581923, accessed on 16th January 2025.
  12. https://maps.nls.uk/view/126523838, accessed on 19th January 2025.
  13. https://www.facebook.com/photo/?fbid=521382444623405&set=a.454578394637144&locale=eu_ES, accessed on 20th January 2025.
  14. https://www.facebook.com/photo/?fbid=521383347956648&set=a.454578394637144&locale=eu_ES, accessed on 20th January 2025.
  15. https://www.cheadlephotos.net/contents/en-uk/d2_1900s.html, accessed on 20th January 2025.
  16. https://www.cheadlephotos.net/contents/en-uk/d8_1910s.html, accessed on 20th January 2025.
  17. https://maps.nls.uk/view/126523844, accessed on 20th January 2025.
  18. https://maps.nls.uk/view/126523814, accessed on 20th January 2025.
  19. https://maps.nls.uk/view/126523904, accessed on 20th January 2025.
  20. https://imagearchive.stockport.gov.uk/Home/Photograph?accessionno=34735&searchString=Tram&searchOption=Title&searchArea=All&first=False&last=False, accessed on 20th January 2025.
  21. https://imagearchive.stockport.gov.uk/Home/Photograph?accessionno=10854&searchString=Tram&searchOption=Title&searchArea=All&first=False&last=False, accessed on 20th January 2025.
  22. https://imagearchive.stockport.gov.uk/Home/Photograph?accessionno=25483&searchString=stockport%20road&searchOption=Title&searchArea=9&first=False&last=False, accessed on 20th January 2025.
  23. https://imagearchive.stockport.gov.uk/Home/Photograph?accessionno=35263&searchString=Brinksway&searchOption=Title&searchArea=All&first=False&last=False, accessed on 20th January 2025.
  24. https://imagearchive.stockport.gov.uk/Home/Photograph?accessionno=42132&searchString=Brinksway&searchOption=Title&searchArea=All&first=False&last=False, accessed on 20th January 2025.
  25. https://imagearchive.stockport.gov.uk/Home/Photograph?accessionno=2201&searchString=Brinksway&searchOption=Title&searchArea=All&first=False&last=False, accessed on 20th January 2025.
  26. https://www.britainfromabove.org.uk/en/image/epw036823, accessed on 20th January 2025.
  27. https://www.facebook.com/share/p/14edX1aoxB, accessed on 20th January 2025.
  28. https://www.facebook.com/share/p/18R2xVHgGe, accessed on 20th January 2025.
  29. https://www.ebay.co.uk/itm/163654326560?mkcid=16&mkevt=1&mkrid=711-127632-2357-0&ssspo=7o9wvntyQeW&sssrc=4429486&ssuid=afQhrar7TGK&var=&widget_ver=artemis&media=COPY, accessed on 21st January 2025.
  30. https://images.app.goo.gl/PgmXAz92FPtaD7Qa9, accessed on 21st January 2025.
  31. https://stockportheritagetrust.co.uk/gallery, accessed on 21st January 2025.
  32. https://www.facebook.com/share/p/1GiD3aC5Ku, accessed on 21st January 2025.
  33. https://www.reddit.com/r/stockport/comments/1896toe/bridge_st_1900s/#lightbo, accessed on 21st January 2025.
  34. https://imagearchive.stockport.gov.uk/Home/Photograph?accessionno=35206&searchString=Tram&searchOption=Title&searchArea=All&classSearch=False, accessed on 21st January 2025.
  35. https://maps.nls.uk/view/126523904, accessed on 21st January 2025.
  36. https://www.britainfromabove.org.uk/image/EPW013110, accessed on 21st January 2025
  37. https://www.facebook.com/share/p/158MXnGX2o, accessed on 21st January 2025.
  38. https://www.facebook.com/share/p/1YU8yCcRz2, accessed on 21st January 2025.
  39. https://maps.nls.uk/view/114581242, accessed on 22nd January 2025.
  40. https://maps.nls.uk/view/126523886, accessed on 22nd January 2025.
  41. https://maps.nls.uk/view/126523892, accessed on 22nd January 2025.
  42. https://maps.nls.uk/view/126523865, accessed on 23rd January 2025.
  43. Not used.
  44. https://www.facebook.com/share/p/15sGQpHa5e, accessed on 23rd January 2025.
  45. https://oldhyde.blogspot.com/2008/01/tramlines-at-gee-cross.html?m=1, accessed on 31st January 2025.
  46. https://www.ebay.co.uk/itm/126400306855?mkcid=16&mkevt=1&mkrid=711-127632-2357-0&ssspo=IfOvO8v2Tu-&sssrc=4429486&ssuid=afQhrar7TGK&var=&widget_ver=artemis&media=COPY, accessed on 31st January 2025.
  47. https://www.facebook.com/share/p/19wVpLgfFs, accessed on 31st January 2025.
  48. https://www.facebook.com/share/p/15J8AoAWM5, accessed on 1st February 2025.
  49. https://www.facebook.com/share/p/19NgP1hLD7, accessed on 1st February 2025.
  50. https://www.facebook.com/share/p/18ABuv2goR, accessed on 2nd February 2025.
  51. https://www.facebook.com/share/p/19kyFJiqkS, accessed on 5th February 2025.
  52. https://www.ebay.co.uk/itm/394065476691?mkcid=16&mkevt=1&mkrid=711-127632-2357-0&ssspo=VG76xMQ6St6&sssrc=4429486&ssuid=afQhrar7TGK&var=&widget_ver=artemis&media=COPY, accessed on 5th February 2025.
  53. https://www.facebook.com/share/p/1E8S164umA, accessed on 5th February 2025.

The Micklehurst Loop – an update at the beginning of 2025

I am indebted to ‘David’ for an update on the Plevin owned railway land in Mossley. …

It is a few years since I wrote a series of articles about the Micklehurst Loop which can be found on this blog. Circumstances have since changed at what was the Plevin site. Plevin’s relocated in 2024 to another site and their yard has been gradually deteriorating since then.

The original series of articles can be found here. [1] Following the link takes you to the latest blog post on the theme (which will be this one), scrolling down the webpage will bring you to the start of the series. My articles about the line follow the line from Stalybridge to Diggle. You will note that there are a number of addenda to the main series of articles.

When we walked the line as exercise during COVID it was not possible to gain access to Plevin’s site. Plevin’s property was covered in the second of four substantive articles about the line which can be found here. [2]

This coloured version of the 25″ Ordnance Survey of 1890/1891 was published in 1894. It shows Mossley’s stations on the Micklehurst Loop. At the top of the image the passenger station stands on embankment with the station building a little to the South on the East side of the line. The goods station which primarily consisted of the large goods shed is towards the bottom of the map extract. The railway and yard sit high above the Huddersfield Narrow Canal. [4]
A closer satellite view of Plevin’s site in 2025 – this is the latest view of the site available on Google Maps. The lighter roof is that of the old goods shed the darker grey roofing is over later buildings built over the running lines of the Micklehurst Loop. [Google Maps, January 2025]
The same buildings but this time as seen on Google Earth 3D imagery seen from the South. This is the current view on Google Earth at the beginning of 2025. [Google Earth 3D, January 2025]

‘David”s report on 28dayslater.co.uk is a comprehensive look at the site and its history. That report can be found here. [3] ‘David’ kindly sent through some of his photographs, of which a selection appear below.

The old goods shed in Mossley which was in use by Plevin’s until 2024, there are three floors inside the building, © David and used by kind permission.
A view along one elevation of the structure, © David and used by kind permission.
The rear elevation of the goods shed forms one wall of the Weldem’s workshop behind the shed, © David and used by kind permission.
The interior of the Weldem’s workshop behind the goods shed, © David and used by kind permission.
Two more views of the goods shed from within the Weldem’s workshop, © David and used by kind permission.
Two interior shots of the goods shed after abandonment by Plevin’s, © David and used by kind permission.

‘David’ commented in January 2025 that the site is suffering some vandal damage now that no security is provided. A fuller impression of the site and its condition in 2025 can be gained by consulting David’s post on 28dayslater.co.uk.

References

  1. https://rogerfarnworth.com/category/railways-and-tramways-blog/british-isles-railways-and-tramways/greater-manchester-and-surrounding-areas/the-micklehurst-loop
  2. https://rogerfarnworth.com/2021/02/21/the-micklehurst-loop-part-2
  3. https://www.28dayslater.co.uk/threads/weldems-plevin-mossley-01-24.139375, accessed on 27th January 2025.
  4. https://maps.nls.uk/view/126521954, accessed on 29th January 2025.

Stockport Corporation Tramways – Modern Tramway Vol. 12 No. 138, June 1949 – Part 1

P.W. Gentry wrote about Stockport’s trams in the July 1949 issue of Modern Tramway.

He says: “Besides possessing several interesting features of its own, the Stockport system today commands added attention as the last last surviving member of that once network of standard gauge undertakings encircling Manchester. It is an unusually pleasing system by virtue of its compact and simple arrangement, its focal point being Mersey Square.” [1: p123]

This article in Modern Tramway caught my attention because for about 9 years I worked in Stockport as a highway engineer.

We know that tramways arrived in Stockport in the 1880’s from the Manchester direction when “the Manchester Tramways and Carriage Co, Ltd., [opened] a horse-car service into Mersey Square via Levenshulme.” [1: p123]

In 1889, the Stockport and Hazel Grove Carriage and Tramway Co. Ltd. was formed and “instituted horse car services southwards to Hazel Grove and Edgeley at Easter 1890.” [1: p123]

Stockport tramcar No. 5, dating from 1901, is preserved at the Heaton Park Tramway. The lower saloon of tramcar No. 5 was recovered from a field, where it had been used as a hen house, in 1971. It was restored by the ‘Stockport 5 Tramway Trust’. It now runs on the Heaton Park Tramway, a tramway museum in Heaton Park, Manchester. [2]

Stockport Corporation began tramway operations when, in 1890, “an Order under the Tramways Act was obtained for the construction and operation of electric tramways. Work commenced in Sandy Lane on 12th February 1901 and the three routes projected were opened in stages.” [1: p123]

Woodley Route: to Woodley Station by 26th August 1901; and Pole Bank by 30th May 1902.

Reddish Route: to Sandy Lane by 3rd September 1901; to Holdsworth Square by 30th May 1902; and to the Bull’s Head in Reddish by 25th November 1903.

Cheadle Route: to the Robin Hood on Brinksway by 23rd January 1902; to Cheadle Heath Bridge by 25th July 1903; to Cheadle Green by 5th May 1904; and to the Horse & Farrier, Gatley Green by 24th May 1904.

In parallel, negotiations secured the purchase of the horse tramways. First, the Levenshulme line (which was electrified by Manchester Corporation by 1903 and maintained by them). The Stockport & Hazel Grove undertaking was purchased in 1994 for £14,000 and electrified by 5th July 1905.

Tram service No. 35 was by then running from Manchester to Hazel Grove.

Mersey Square was the main hub of Stockport’s tramway network. …

Mersey Square was the hub of the Stockport Corporation tramways. Mersey Square Depot and Heaton Lane Depot are shown clearly on this sketch plan drawn in 1949. The modern A6 runs left-right across the lower half of the plan. © P.W. Gentry, Public Domain. [1: p123]

The National Library of Scotland retains three digital versions of the OS 25″ mapping:

An extract from Map: Cheshire X.15; Ordnance Survey, 25 inch to 1 mile; revised: 1907; published: 1932 which shows Mersey Square as it was in 1907. It seems as though publication of this map was delayed for 25 years! [6]
An extract from Map: Lancashire CXII.9; Ordnance Survey, 25 inch to 1 mile; revised: 1917; published: 1922, which shows Mersey Square as it was in 1917. [7]
An extract from Map: Lancashire CXII.9; Ordnance Survey, 25 inch to 1 mile; revised: 1934; published: 1936, showing Mersey Square as it was in 1934. The tram depot has been enlarged and the additional depot on Heaton Lane constructed. Heaton lane Depot is accessed via the branch West off Wellington Road. [8]

The sequence of extracts from the Ordnance Survey’s 25″ series of maps shows the development from 1907 to 1934. The most significant changes in that period were: the dualling of the trackwork on the A6 South of the Square; and the development of the Tram Depot. As can be seen from the map extracts, the main depot building was widened to reach the river bank and then extended Southwest towards Mersey Square. A surprising change appears in the latest extract – the conversion of the dual track work on Chestergate where it passes under the A6, Wellington Road to a stretch of single track.

Mersey Square in 1932, seen from the West. This image was shared on the Memories of Stockport Facebook Group on 19th January 2021 by Chris Paul. [13]

The 1930s to the 1970s saw major changes to the centre of Stockport. The River Mersey was culverted from Mersey Square, Northeast to Bridge Street and a dual carriageway road was created along the line of the River Mersey. This new road was not used by trams but it altered traffic arrangements at Mersey Square while it was in use.

The construction of Merseyway in the 1930s is nearing completion in this photograph which was shared on the Memories of Stockport Facebook Group on 18th October 2020 by Dave Moran. [12]
The view Southwest from Bridge Street, showing the dual carriageway over the River Mersey in the mid-20th century. This image was shared on the Memories of Stockport Facebook Group on 26th June 2020 by Julian Ryan. [9]
Merseyway was built on a series of reinforced concrete portal frames spanning the river. Given the positioning of the vehicles on the structure, this image probably comes from while the road was closed. The image was shared on the Memories of Stockport Facebook Group on 26th September 2018 by Marilyn Ann Cronshaw. [11]
Merseyway is seen from the Southwest, looking Northeast in the mid-20th century. The tram depot is on the left. This image was shared on the Memories of Stockport Facebook Group on 10th August 2020 by Keith Povey. [10]
A final view of Merseyway as a road across the roundabout at its Southwest end in Mersey Square. The photograph was taken from Wellington Road and it was shared on the Memories of Stockport Facebook Group on 6th October 2020 by Mark Lloyd. [14]
Mersey Square seen from the Southeast in 1948. The oddly shaped roundabout at the end of Merseyway is on the right with the old fire station above it. This image was shared on the Memories of Stockport Facebook Group on 28th August 2023 by Michael  Sidebottom. [15]
Traffic emerging from Mersey Square onto Wellington Road (A6). Manchester is away to the right, Hazel Grove to the left. Heaton Lane Tram Depot is beyond Wellington Road on the right of the image. This photograph was shared by Marilyn Ann Cronshaw on 24th June 2015. [16]
Mersey Square, Stockport in the 21st century. [Google Maps, January 2025]

By July 1905, the network was “in its final shape, with a total route mileage of 19.46. Of this, however 2.51 route miles (Vernon Park Pole Bank) was the property of Bradbury and Romiley Urban District Council, 1.64 miles (Cheadle Heath Bridge Gatley Green) belonged to Cheadle and Gatley U.D.C. and 0.88 miles to Hazel Grove and Bramhall U.D.C., all these sections being leased to Stockport Corporation for operating purposes. The total length of track over the system as a whole was 34.03 miles, and the cost of track construction averaged the modest figure of £7,227 per route mile.” [1: p124]

In addition to joint working with Manchester Corporation, a similar arrangement was made with “The Stalybridge, Hyde, Mossley and Dukinfield Transport and Electricity Board, Pole Bank being the point of connection between the two systems. Stockport cars were operated through to Hyde Town Hall from 1st January, 1903, when the Pole Bank Hyde line was the property of the Oldham, Ashton and Hyde Electric Tramways, Ltd., a B.E.T. subsidiary, but it was not until 1923, when this undertaking sold out to local authorities and the Hyde – Pole Bank section was taken over by the Joint Board, that mutual through running could be started. A joint S.H.M.D.-S.C.T. service was introduced in March 1925, between Hyde and Edgeley via Mersey Square and continued until the Joint Board ceased to operate trams on 26th May, 1945. Thereafter, Stockport maintained the service unaided until 2nd March, 1947, when buses took over and the trams were cut back to Vernon Park.” [1: p124]

The withdrawal of the through services into Manchester occurred in the late 1940s but, Gently says, “luckily, only one section of the purely local system [had] suffered likewise, that being the Cheadle-Gatley section, on which buses were substituted on 21st September 1931. An early trolleybus route to Offerton was given up as impracticable many years [earlier].” [1: p124]

Wikipedia tells us that the fleet of tramcars steadily increased, with the Corporation owning a total of 87 double-deck electric tramcars through the life of the system, [3] although the highest number at any one time was 85 [4] and numbers  settled down at 82, “all of which [were] of the single-truck top-covered vestibuled type with an average seating capacity of 60. Only 26 cars [had] open balconies, and these [were] used only at peak periods; ten of them [had] reversed staircases. The 56 totally enclosed cars [included] 30 which [were] fully upholstered on both decks, the seats being particularly deep and comfortable. The car [equipment comprised] Westinghouse, DK.30 or DK.35 motors and Dick, Kerr DB.1 (form K3) controllers, and hand-operated track brakes [were] fitted on account of the steep gradients. In 1944, the fleet numbering was re-arranged with the primary object of grouping together between 1 and 29 all those cars which, on account of a low bridge near Bredbury, had low-built top-covers, these being identified by a large H (denoting “Hyde,” the route concerned) on either side of the headlamp.” [1: p124] This was needed until abandonment of the lines beyond Vernon Park rendered this unnecessary. [5]

Three photographs of Stockport Corporation Trams. The first photograph shows Tram No. 35 at Cheadle Heath. The second, Tram No. 54 at Hazel Grove. The third shows Trams Nos. 59 and 60 at Cheadle Heath, © V. E. Burrows but very probably in the Public Domain. [1: p125]

Most of the network survived the Second World War but was progressively closed in 1950 and 1951, only surviving for a short while after the Modern Tramway article of 1949. … “The Crossley Road to Hazel Grove route was the first to go, on 14th January 1950, followed by the Edgeley to Vernon Park route on 3rd March 1951, the Cheadle route on 10th April 1951 and finally the Reddish line on 25th August 1951.” [3]

Wikipedia also explains that: “The Corporation also ran a small trolleybus line, using three vehicles which collected current from the overhead lines using the German Lloyd-Kohler system, the only use of this system in Britain. The route opened in 1913, but the onset of the First World War made obtaining spare parts from Germany impossible, and it ran intermittently, due to maintenance problems. It was replaced by motor buses in 1920.” [3]

It is interesting to note that the deals made with adjacent networks “allowed long journeys to be made by tram, with the route from Hazel Grove to Seaforth Sands near Liverpool being 51.5 miles (82.9 km). One lady is known to have travelled between Liverpool and Stockport for pleasure on several occasions, although it took almost a whole day to reach her destination.” [3]

Gentry noted that Stockport’s track was “double throughout on the Levenshulme, Cheadle Heath, Edgeley and Hazel Grove routes and mostly so on Reddish except between the top of Lancashire Hill and Clare Road; this latter section, together with Princes Street and most of the Vernon Park route [was] single-and-loop. The rail used [weighed] 101 lbs. per yard. The chief depot [was] located in Mersey Square, with a subsidiary depot nearby in Heaton Lane.” [1: p124]

Stockport’s Tram Routes

The Stockport Corporation Tramway Network (1901-1951), © Rcsprinter123 and licenced for reuse under a Creative Commons Licence (CC BY 3.0) [3]

Edgeley to Mersey Square and Mersey Square to Reddish and Gorton

The first axis that we will look at is tram movements from Edgeley through Mersey Square and then North from Mersey Square to Reddish and beyond.

The tram terminus in Edgeley was on Castle Street just East of Dale Street and opposite a small Mission Church and Institute. It is shown here on an extract from the 25″ Ordnance Survey of 1916 (published 1922). This length of Castle Street is part of the B5465. [19]
A tram at the terminus on Castle Street, Edgeley, Stockport. This image faces West and was shared on the Memories of Stockport Facebook Group on 26th March 2020 by Jim Rooney, © Public Domain. [18]
The same location on Castle Street in Edgeley (B5465). Looking West, as above, Dale Street is on the left, on the near side of the half-timbered building. [Google Streetview, August 2023]
Looking East from Castle Street’s junction with Caroline Street. The Wesleyan Chapel, seen on the left, has been demolished and the road pedestrianised. This image was shared by Marilyn Ann Cronshaw on the Memories of Stockport Facebook Group on 14th April 2018, © Public Domain. [22]
A similar view East along Castle Street in the 21st century. [Google Streetview, January 2021]
Castle Street, Greek Street and Shaw Heath junction with dual tram tracks running along Castle Street and Greek Street. This is an extract from the 25″ Ordnance Survey of 1934 (published in 1936). [20]
A tram running towards Edgeley leaves Greek Street and crosses Shaw Heath before running along Castle Street, Edgeley. This image was shared on the Memories of Stockport Facebook Group by Marilyn Ann Cronshaw on 25th May 2016, © Public Domain. [23]
The Castle Street, Greek Street and Shaw Heath junction is now a roundabout. The armoury building still stands. This view shows the location in the monochrome image above as it appears in the 21st century. [Google Streetview, January 2021]
The line from Edgeley met that from Hazel Grove at the junction between the A6 and Greek Street1907 (published 1932). [21]
Looking North from the junction of Greek Street and Wellington Road South. This image was shared by Barry Tasker on the Memories of Stockport Facebook Group on 11th January 2019, © Public Domain. [26]
The same view in the 21st century. [Google Streetview, September 2023]
Now further North, looking South along Wellington Road South from its junction with St. Petersgate. This image was shared on the Memories of Stockport Facebook Group by Barry Tasker on 14th May 2021. It is held in Stockport Image Archive, © Public Domain. [24]
Looking South on Wellington Road South from a similar location in the 21st century. [Google Streetview, September 2023]
Trams ran North up Wellington Road South, turned right into St. Petersgate, then right into St. Peter’s Square and down the ramp into Mersey Square. [21]
Wellington Road South (A6), St. Petersgate, St. Peter’s Square and Mersey Square in the centre of Stockport in the 21st century. The large disturbed area either side of the A6 is the construction site for the new transport interchange. [Google Earth, January 2025]
The view North down Wellington Road South from a point South of St. Petersgate. A then brand new Brush-built tramcar No. 38 purchased in 1905 for the new Edgeley and Hazel Grove routes is standing in Wellington Road South and facing towards Mersey Square. In the left hand middle distance the shape of the gasometer which would be demolished to make way for the Heaton Lane complex can just be discerned.  This car would be top covered two years later. [38: p21]
Looking Northeast along St. Petersgate with the Public Baths on the left. This image was shared on the Memories of Stockport Facebook Group by Marilyn Ann Cronshaw on 20th February 2019. [28]
A similar view Northeast on St. Petersgate in the 21st century. [Google Streetview, January 2021]
St. Peter’s Square looking Southwest along St. Petersgate towards Wellington Road South. Trams from Hazel Grove and Edgeley turned of Wellington Road South at St. Petersgate. Those travelling towards Hazel Grove and Edgeley turned left into Duke Street/Lord Street and then right into Wellington Street to find their way to Wellington Road South. This image was shared on the Memories of Stockport Facebook Group by Marilyn Ann Cronshaw on 31st May 2016, © Public Domain. [30]
A similar, ground-level view in the 21st century. [Google Streetview, July 2021]
Two trams pass at the junction of St. Petersgate and St. Peter’s Square. This image was shared on the Memories of Stockport Facebook Group by Keith Povey on 8th July 2020, © Public Domain. [29]
A very similar camera position shows an earlier view with a new Manchester electric tram passes a Hazel Grove-bound horse tram in St Peter’s Square. This photograph was taken in 1902 soon after Manchester’s electric cars reached the town, but it would be another 20 or so years before Stockport’s cars could reach Manchester due to the complicated boundaries and various leasing agreements pertaining at the time. [38: p13]
A similar view in the 21st century. [Google Streetview, July 2018]
The Theatre Royal on St. Petersgate with a tram about to turn North into St. Peter’s Square. The image was shared in the Memories of Stockport Facebook Group by David Henthorne on 25th June 2024, © Public Domain. [27]
One of the buildings at the centre of the monochrome image above, that on the left, has been replaced.  That on the right survives. [Google Streetview, July 2024]

Trams ran through St. Peter’s Square and down the ramp into Mersey Square. The tram stop was in the centre of the paved area with both the Tram Depot and the Fire Station close by.

Tram No. 63 on the service from Edgeley to Reddish is about to leave Mersey Square. The tram depot is behind on the right, the fire station behind on the left. The tram will leave the tram stop, turn right onto Wellington Road and immediately right again into Princes Street. This image was shared on the Memories of Stockport Facebook Group on 26th July 2023 by Dave Moran.  [17]
The location is vastly different today. The Tram Depot and fire station now replaced by Merseyway Shopping Centre. [Google Streetview, 2018]
The main entrance to the Tram Depot. This image was shared on the Memories of Stockport Facebook Group by Marilyn Ann Cronshaw on 22nd May 2016. [32]
The interior of Stockport Tram Depot, © Public Domain. [31]
An extract from an image earlier in this article. It shows the tram route out of Mersey Square onto Wellington Road and the route then taken by trams from Reddish and East of the town centre up Princes Street. We noted earlier that the image shows Mersey Square in 1932. The fire station and the main Tram Depot are at the top of the extract. The building which just transgresses on the image in the bottom left is Heaton Lane Tram Depot, © Public Domain. [13]
An early view South from Wellington Road North showing trams leaving/entering Mersey Square. The tram at the centre of the image is turning left into Princes Street. Mersey Square was enlarged by removing the buildings on the left of this image. [38: p18]
Also looking South along Wellington Road South from Wellington Road North. The entrance to Mersey Square is on the left. The town hall is in the far distance, © Public Domain. [25]
The same view in the 21st century. The Town Hall is just visible in the distance. [Google Streetview, September 2023]
Princes Street in the early 20th century, seen from Mersey Square/Wellington Road. This image was shared on the Memories of Stockport Facebook Group by Barry Tasker on 9th October 2024. [33]

The Northeast end of Princes Street. The 25″ Ordnance Survey of 1934 (published in 1936). [34]
The Northeast end of Princes Street. Bridge Street is to the right, Tiviot Dale to the left. Trams for Brinksway and the East side of Stockport turned right at the junction, those for Reddish and beyond turned up Tiviot Dale. This image was shared on the Memories of Stockport Facebook Group by Dave Moran on 14th April 2024, © Public Domain. [35]
The same view in the 21st century. [Google Streetview, January 2021]
Beyond Tiviot Dale trams ran up Lancashire Hill and then along Sandy Lane. This is the junction of Lancashire Hill and Sandy Lane as shown on the 25″Ordnance Survey of 1934. [34]
After running along Sandy Lane, trams headed Northeast on Reddish Road. The 25″ Ordnance Survey of 1934. [34]

Reddish Road then turns to the North and later to the Northwest.

Another extract from the 25″ Ordnance Survey of 1934 (this sheet published in 1935). The tram tracks turned with Reddish Road as the road ahead led to Reddish Station forecourt. [36]
As this next extract from the 25″ Ordnance Survey of 1934 shows, trams followed Reddish Road over the railway via Reddish Bridge and on to Holdsworth Square. [36]
North of Holdsworth Square trams ran North along Gorton Road crossing the LMS & LNER Joint Railway between Manchester and Hayfield adjacent to that line’s Reddish Station. The location is shown on this extract from the 1934 25″ Ordnance Survey. [37]

The next map extract and photograph show the terminus of the route we have been following from Mersey Square to Gorton. …

The tramway from Stockport enters this map extract from the South along Reddish Lane. The terminus was in Reddish Lane close to the junction with Hyde Road. [39]
The tram terminus on Reddish Lane, Gorton, © Public Domain. [40]

This first article has looked at the history of Stockport Corporation’s Tramways and has highlighted two of the tramway routes operated by Stockport Corporation. The line from Edgeley to Mersey Square and the line from Mersey Square to Gorton. Subsequent articles will look at other routes operated by the Corporation.

References

  1. P.W. Gentry; Stockport Corporation Tramway; Modern Tramway, Vol. 12 No. 138, June 1949, p123-126.
  2. https://en.m.wikipedia.org/wiki/Stockport_Corporation_Tramways#/media/File%3AStockport_Number_5%2C_Heaton_Park_Tramway_Museum_(Geograph-4167219-by-David-Dixon).jpg, accessed on 3rd January 2025.
  3. https://en.m.wikipedia.org/wiki/Stockport_Corporation_Tramways, accessed on 3rd January 2025.
  4. Modern Tramway, June 1943.
  5. Modern Tramway, June 1944.
  6. https://maps.nls.uk/view/114581263, accessed on 5th January 2025.
  7. https://maps.nls.uk/view/126523904, accessed on 5th January 2025.
  8. https://maps.nls.uk/view/126523907, accessed on 5th January 2025.
  9. https://www.facebook.com/share/p/15pVSz4uTy, accessed on 5th January 2025.
  10. https://www.facebook.com/share/p/18ZGQQZQZZ, accessed on 5th January 2025.
  11. https://www.facebook.com/share/p/1AfqEejxmr, accessed on 5th January 2025.
  12. https://www.facebook.com/share/p/1AfB1qbnNG, accessed on 5th January 2025.
  13. https://www.facebook.com/share/p/1B5P32GLvD, accessed on 5th January 2025.
  14. https://www.facebook.com/share/p/1H1x6AYNkX, accessed on 5th January 2025.
  15. https://www.facebook.com/share/p/1DUQnYgBCr, accessed on 5th January 2025.
  16. https://www.facebook.com/share/p/15jXGS5iBm, accessed on 5th January 2025.
  17. https://www.facebook.com/share/p/1UnsoASBSk, accessed on 5th January 2025.
  18. https://www.facebook.com/share/p/15BPGZntyH, accessed on 5th January 2025.
  19. https://maps.nls.uk/geo/explore/#zoom=17.7&lat=53.40069&lon=-2.17069&layers=168&b=ESRIWorld&o=100, accessed on 5th January 2025.
  20. https://maps.nls.uk/view/126523934, accessed on 6th January 2025.
  21. https://maps.nls.uk/view/114581263, accessed on 6th January 2025.
  22. https://www.facebook.com/share/p/1HC6JcC1R1, accessed on 6th January 2025.
  23. https://www.facebook.com/share/p/1Qt37wW3hZ, accessed on 7th January 2025.
  24. https://www.facebook.com/share/p/1ApajVt82q, accessed on 7th January 2025.
  25. https://www.prints-online.com/framed-prints/new-images-july-2023/stockport-wellington-road-probably-1930s-32362390.html, acceessed on 7th January 2025.
  26. https://www.facebook.com/share/p/12DgqRHQ9dt, accessed on 7th January 2025.
  27. https://www.facebook.com/share/p/1G5sDeVFFy, accessed on 8th January 2025.
  28. https://www.facebook.com/share/p/19e1r8C26L, accessed on 8th January 2025.
  29. https://www.facebook.com/share/p/18W4BiYa6P, accessed on 8th January 2025.
  30. https://www.facebook.com/share/p/1TwNeXjxWq, accessed on 9th January 2025.
  31. https://www.facebook.com/share/p/165N1bS3t4, accessed on 9th January 2025.
  32. https://www.facebook.com/share/p/1CqDfJmzea, accessed on 9th January 2025.
  33. https://www.facebook.com/share/p/15koactRA9, accessed on 9th January 2025.
  34. https://maps.nls.uk/view/126523907, accessed on 9th January 2025.
  35. https://www.facebook.com/share/p/15qvo1w4d6, accessed on 9th January 2025
  36. https://maps.nls.uk/view/126523880, accessed on 9th January 2025.
  37. https://maps.nls.uk/view/126523853, accessed on 9th January 2025.
  38. Harry Postlethwaite, John Senior & Bob Rowe; Super Prestige No. 14, Stockport Corporation; Venture Publications, Glossop, Derbyshire, 2008. This document is made freely available by MDS Books as a .pdf: https://www.mdsbooks.co.uk/media/wysiwyg/Stockport_Download_1.pdf, accessed on 14th January 2025.
  39. https://maps.nls.uk/view/126522992, accessed on 14th January 2025.
  40. https://www.ebay.co.uk/itm/186869629144?mkcid=16&mkevt=1&mkrid=711-127632-2357-0&ssspo=FqgD3SOfROO&sssrc=4429486&ssuid=&var=&widget_ver=artemis&media=COPY, accessed on 14th January 2025.

The Manchester and Leeds Railway – The Railway Magazine, December 1905 – Part 2

This is the second part of a short series about the Manchester and Leeds Railway. The first part can be found here. [66]

We re-commence our journey at Sowerby Bridge Railway Station. ….

Sowerby Bridge Railway Station – note the Ripponden Branch emerging from a tunnel and joining the Manchester and Leeds Railway at the East end of the Station. [15]
An early postcard image of Sowerby Bridge with the railway station in the foreground, © Public Domain. [23]
A colourised postcard view of the Station Forecourt at Sowerby Bridge around the turn of the 20th century. [60]
The main station building in Sowerby Bridge was demolished but the single storey building to the left of the postcard image above survives as can be seen in this image from 2016. [Google Streetview, 2016]
Sowerby Bridge Railway Station in 2006, (c) Ian Kirk and authorised for reuse under a Creative Commons Licence (CC BY 2.5). [24]
The area shown on this extract from Google Maps satellite imagery is a slightly enlarged area compared to the OS map extract above. It shows the area immediately around the railway station. [Google Maps, October 2024]

More images of Sowerby Bridge Railway Station can be found here [67] and here. [68]

Just beyond the eastern station limits Fall Lane bridges the line – two views from the bridge follow.

To the East of Sowerby Bridge the line crosses the River Calder again.

Another extract from the 25″ Ordnance Survey of 1905, published in 1907 shows Calder Dale Grease Works, Copley Bridge and Copley Viaduct. The Sowerby Bridge, Halifax and Bradford line leaves the main line at this point. [25]
The bridge and Viaduct as they appear on Google Maps satellite imagery in 2024. [Google Maps, October 2024]

An image of Copley Viaduct can be seen here. Just beneath the viaduct, at the left of the linked photograph, a train is crossing Copley Bridge on the line we are following. [61]

The Manchester and Leeds Railway then crosses the Calder once again and enters Greetland Station. The second arm of the Sowerby Bridge, Halifax and Bradford line joins the mainline just before (to the Northwest of) Greetland Station.

Greetland Station shown on the 25″ Ordnance Survey of 1905. Top-left the second arm of the triangular junction with the Sowerby Bridge, Halifax and Bradford line can be seen joining the Manchester and Leeds Railway. Bottom-right, the Stainland Branch leaves the main line just before the main line bridges the River Calder once again. [26]
The same location in the 21st century. Greetland Station is long gone and the branch South (the Stainland Branch has also been lifted. [Google Maps, October 2024]
Greetland Railway Station in 1962, just before closure. The camera is positioned at the Northwest end of the station. [28]

Greetland Railway Station “was originally opened as North Dean in July 1844. It was subsequently changed to North Dean and Greetland and then to Greetland in 1897. Situated near the junction of the main Calder Valley line and the steeply-graded branch towards Halifax (which opened at the same time as the station), it also served as the junction station for the Stainland Branch from its opening in 1875 until 1929. It was closed to passenger traffic on 8th September 1962.” [27]

Looking West from the A629, Halifax Road which sits over the line adjacent to the West Portal of Elland Tunnel. [Google Streetview, July 2024]

Rake says that the line then approaches “Elland Tunnel, 424 yards, in length, and, after leaving Elland Station, pass[es] through a deep cutting, from which a large quantity of stone for the building of the bridges was obtained.” [1: p471]

Rake says that this is the Eastern Portal of Elland Tunnel. Looking at the 25″ OS mapping it appears to be the Western Portal as Elland Station sits immediately to the East of the Eastern Portal. [1: p471]
Elland Tunnel and Elland Railway Station as they appear on the 1905 25″ Ordnance Survey. The Calder & Hebble Navigation and the River Calder also feature on the map extract. [29]
Elland Railway Station in 1964, seen from above the East Portal of Elland Tunnel, © Glock Wild & S. Chapman Collection. [30]

To the East of Elland Railway Station the railway is carried above the River Calder, passing Calder Fire Clay Works. Further East again, “the railway is carried across a steep and rugged acclivity, rising almost perpendicularly from the river. …  The viaduct consists of six arches of 45ft span each, and leads directly to Brighouse, originally the nearest station to Bradford.” [1: 472]

The view from the South of the bridge which carries the railway over Park Road (A6025), Elland. Elland Station stood above this location and to the left. [Google Streetview, July 2024]

From Elland, the line runs on through Brighouse

Brighouse Station and Goods Yard as shown on the 25″ Ordnance Survey of 1905. [31]
The view West from Gooder Lane Bridge towards Cliff Road Bridge Elland. [Google Streetview, May 2023]
The view East across Brighouse Railway Station from Gooder Lane. [Google Streetview, May 2023]
Brighouse Railway Station (originally called ‘Brighouse for Bradford’). [1: p472]
B1 61034 Chiru at Brighouse
Embedded link to Flickr. The image shows B1 No. 61034 Chiru at Brighouse Station on 2nd April 1964.
The locomotive is arriving at the station from the East with a local passenger train. The locomotive had only recently been transferred to Wakefield from Ardseley. It was withdrawn at the end of 1964. The photograph looks Southeast through the station. [32]
A much later photograph of Brighouse Railway Station (2006) which looks Northwest through the station from platform 1, (c) Ian Kirk and authorised for reuse under a Creative Commons Licence (CC BY 2.5). [33]

To the East of the passenger facilities at Brighouse there were a significant array of sidings. The first length of these can be seen on the OS Map above. Around 75% of the way along these sidings Woodhouse Bridge spanned the lines. Much of the area has been redeveloped by modern industry. The next four images relate to that bridge.

Leaving Brighouse Station, the railway is joined, from the North, by the Bailiff Bridge Branch (long gone in the 21st century).

Immediately to the East of Brighouse Station Goods Yards, the Bailiff Bridge Branch joined the Manchester and Leeds Railway. [62]
Approximately the same area in the 21st century as shown on the OS map extract above. The line of the old Bailiff Bridge Branch is superimposed on the satellite image. [Google Maps, October 2024]

A little further to the East, in the 21st century, the line passes under the M62 and enters a deep cutting before, at Bradley Wood Junction, the Bradley Wood Branch leaves the line to the South (still present in the 21st century).

Bradley Wood Junction as shown on the 25″ Ordnance Survey of 1905. [70]
Much the same area in the 21st century. [70]

Beyond [Bradley Wood Junction] the Calder is crossed by a viaduct of two arches of 76 ft. span each. this is succeeded by an embankment, along which the line continues down the valley. [It] again cross[es] the Calder by a viaduct similar to that just referred to.” [1: p472] The line was widened to the South side to create a four-track main line and single span girder bridges were positioned alongside the original structures.

At the first crossing of the River Calder mentioned immediately above, the original two arches of the stone viaduct can be seen beyond the more modern girder bridge in this photograph, (c) Uy Hoang. [Google Streetview, September 2022]
The same bridges as they appear on Google Maps satellite imagery in 2024. [Google Maps, October 2024]

In between the two bridges across the River Calder, was Cooper Bridge Station.

Cooper Bridge Station as it appears on the 1905 25″ Ordnance Survey. [34]
The Station at Cooper Bridge is long gone in the 2st century, but the bridges remain. The station sat over the road at this location with platform buildings between the rails of the left edge of this image. This photograph is taken from the North on Cooper Bridge Road. [Google Streetview, July 2024]
The second of the two crossings of the River Calder mentioned above. This photograph, taken from the Southwest, shows the girder bridge with the stone-arched 2-span bridge beyond, (c) Uy Hoang. [Google Streetview, September 2022]
This view from the North East and from under an adjacent footbridge shows the stone-arched 2-span structure, (c) Uy Hoang. [Google Streetview, September 2022]

Rake’s journey along the line seems not to focus so closely on the remaining length of the line. Various features and a number of stations seem to have been missed (particularly Cooper Bridge, Mirfield, Ravensthorpe, Thornhill, Horbury & Ossett). It also seems to suggest that the line goes through Dewsbury Station. Rather than rely on Rake’s commentary about the line, from this point on we will provide our own notes on the route.

At Heaton Lodge Junction, the LNWR Huddersfield & Manchester line joined the Manchester & Leeds line with the LNWR Heaton & Wortley line passing beneath. The Manchester & Leeds line ran on towards Mirfield Station passing the large engine shed before entering the station over a long viaduct which once again crossed the River Calder.

Heaton Lodge Junction as it appeared in 1905 on the 25″ Ordnance Survey. [71]
The same junction as it appears on the ESRI satellite imagery which is provided by the National Library of Scotland (NLS). [71]
The bridge carrying the Manchester and Leeds Railway over Wood Lane which can be made out to the right of the map extract and satellite images above. [Google Streetview, May 2023]
Mirfield Station and Engine Shed.
The view from the North of the viaduct carrying the line over the River Calder to the West of Mirfield Station. [Google Streetview, March 2021]
The same viaduct viewed from the Southwest. The original stone-arched viaduct was widened by metal spans on brick abutments and piers. [Google Streetview, March 2021]
Eastbound empties passing Mirfield Station behind BR 8F 2-8-0 Locomotive No. 48146. The photograph looks West from the central island platform and shows some of the Speed Signals – unusual in Britain – installed in 1932 on the exceptionally busy section of this dual trunk route between Heaton Lodge Junction and Thornhill Junction, which remained until 1969-70, (c) Ben Brooksbank and licenced for reuse under a Creative Commons Licence (CC BY-SA 2.0). [35]
Mirfield Railway Station in 2010 taken looking West from Platform three which was a later addition to the station and sits alongside what was the up slow line. The original island platform can be see to the right of this image, © Alexandra Lanes, Public Domain. [36]

Just to the East of Mirfield Station was Cleckheaton Junction and then Wheatley’s Bridge over the River Calder. A bridge then carries Sand Lane over the railway.

Looking West from Sands Lane Bridge back towards Mirfield. [Google Streetview, May 2023]
Looking East from Sands Lane Bridge. [Google Streetview, May 2023]

Soon after this the line encountered Dewsbury Junction which hosted Ravensthorpe (Ravensthorpe and Thornhill) Station.

Dewsbury Junction and Ravensthorpe Station. [39]
Looking West from Calder Road towards Mirfield. [Google Streetview, May 2023]
The view East from Calder Road showing Ravensthorpe Station with the Manchester & Leeds line heading away to the right of the picture. [Google Streetview, May 2023]

Thornhill Railway Station was a short distance further East just beyond the junction where the Ravensthorpe Branch met the main line at Thornfield Junction.

Thornfield Junction, Goods Yard and Station as shown on the 25″ Ordnance Survey of 1905. [40]
Thornhill Station opened with the Manchester & Leeds Railway and only closed on the last day of 1961, a short time before Beeching’s closure of of Dewsbury Central. [37]
The same station looking East towards Wakefield, Normanton etc. In the background is the bridge of the ex-Midland branch from Royston to Dewsbury (Savile Town), closed 18/12/50, (c) Ben Brooksbank and licenced for reuse under a Creative Commons Licence (CC BY-SA 2.0). [38]
The view West from Station Road in the 21st century, through what was Thornhill Railway Station. {Google Streetview, March 2023]
The view East from Station Road in the 21st century. The bridge ahead carries Headfield Road over the railway. [Google Streetview, March 2023]
The view West from Headfield Road Bridge towards the site of the erstwhile Thornhill Railway Station and Station Road. [Google Streetview, October 2022]
The view East from Headfield Road Bridge. [Google Streetview, October 2022]

East of Thornhill Station were Dewsbury West and Dewsbury East junctions which together with Headfield Junction formed a triangular access to Didsbury Market Place Station. This was a busy location which sat close to Dewsbury Gas Works, Thornhill Carriage and Wagon Works and Thornhill Lees Canal Locks and a canal branch.  Just off the North of the map extract below was a further junction giving access to the GNR’s Headfield Junction Branch, before the line crossed the River Calder and entered Dewsbury Market Place Station and Yard and terminated there.

This extract from the 25″ Ordnance Survey of 1905 shows the triangular junction which provided access to Dewsbury Market Place Station and a series of Goods Yards and Sheds. Headfield Road is on the left side of this image. [41]
A similar area in the 2st century as it appears on Google Maps satellite imagery. [Google Maps, October 2024]

Dewsbury was very well provided for by both passenger and freight facilities. In its railway heyday the Midland Railway, the London & North Western Railway, the Lancashire & Yorkshire Railway and the Great Northern Railway all had access to the town. A computer drawn map showing the different lines can be found here. [42]

Continuing along the line towards Wakefield and Normanton, the next feature of note is the junction for Combs Colliery’s Mineral Railway at Ingham’s Sidings. Nothing remains of this short branch line.

Ingham’s Siding ran South, crossing the Calder & Hebble Navigation to reach Comb’s Colliery. [43]

Further East the line continues in a straight line East-southeast to cross the River Calder once again. It then passes the Calder Vale and Healey Low Mills at Healey and runs Southeast to Horbury and Ossett Station.

The bridge over the River Calder adjacent to Calder Vale and Healey Low Mills. [Google Streetview, April 2023]
The bridge over the River Calder at Calder Vale and Healey Low Mills is in the top-left of this map extract from the 1905 25″ Ordnance Survey. This area was chosen by British Rail in the 1960s for a large marshalling yard. [46]
British Railways developed a large marshalling yard in the 1960s at Healey Mills. The yard was opened in 1963 and replaced several smaller yards in the area. It was part of the British Transport Commission’s Modernisation plan, and so was equipped with a hump to enable the efficient shunting and re-ordering of goods wagons. The yard lost its main reason for existence through the 1970s and 1980s when more trains on the British Rail system became block trains where their wagons required less, or more commonly, no shunting. Facilities at the site were progressively run down until it closed completely in 2012. [46][47]
Healey Mills Marshalling Yard in April 1982, (c) Martin Addison and licensed for reuse under a Creative Commons Licence (CC BY-SA 2.0). [48]
Looking Northwest from Storrs Hill Road Bridge in the 21st century. [Google Streetview, March 2023]
Looking Southeast from Storrs Hill Road Bridge in the 21st century through the throat of the old marshalling yard. [Google Streetview, March 2023]
Horbury & Ossett Railway Station. [44]
The site of Horbury & Ossett Railway Station in the 21st century. [Google Maps, October 2024]
Looking Northwest from Bridge Road, A642 towards Storrs Road Bridge. Horbury and Ossett Railway Station goods facilities were on the left. [Google Streetview, July 2024]
looking Southeast from Bridge Road. the passenger facilities were on the Southeast side of Bridge Road with the platform sat between the running lines. [Google Streetview, July 2024]

Horbury and Ossett railway station formerly served the town of Horbury. … The station was opened with the inauguration of the line in 1840, on the west of the Horbury Bridge Road, to the south-west of the town. Later a new, more substantial structure was built just to the east. … British Railways developed a large marshalling yard in the 1960s at Healey Mills immediately to the west of the original station. … [The station] closed in 1970. Almost all that remains is the old subway which ran under the tracks. Ossett is now the largest town in Yorkshire without a railway station. Proposals to open a new one are periodically canvassed, perhaps on part of the Healey Mills site.” [45]

A little further East is Horbury Fork Line Junction where a mineral railway runs South to Harley Bank Colliery and the Horbury & Crigglestone Loop leaves the Manchester to Leeds line.

Horbury Fork Line Junction on the 1905 25″ordnance Survey. The junction sat just to the West of Horbury Tunnel. That tunnel has since been removed. [49]
The same location in the 21st century. The tunnel sat to on the East side of the present footbridge which is just to the left of the centre of this image. This image is an extract from the NLS’ ESRI satellite imagery. [49]

These next few photographs show views of the line from a series of three overbridges to the East of Horbury Fork Line Junction.

The view West from Southfield Lane Bridge. [Google Streetview, October 2022]
The view East from Southfield Lane Bridge. [Google Streetview, October 2022]
The view West from Dudfleet Lane Bridge towards Southfield Lane Bridge. [Google Streetview, October 2022]
The view East from Dudfleet Lane Bridge towards Millfield Road Bridge. [Google Streetview, October 2022]
The view West from Millfield Road Bridge towards Dudfleet Lane Bridge. [Google Streetview, October 2022]
The view East from Millfield Road Bridge. [Google Streetview, October 2022]

The next significant location on the line is Horbury Junction.

Horbury Junction on the 1905 25″ordnance Survey. Horbury Junction Ironworks sat in-between the Manchester and Leeds Railway and the. There was a Wagon Works just off the South edge of this image. The line heading South from Horbury Junction was the L&YR line to Flockton Junction and beyond. [50]
The same location in the 21st century as shown on the ESRI satellite imagery provided by the NLS.. [50]

Industrialisation in the immediate area of Horbury Junction began “in the early 1870s with the construction of Millfield Mill, followed by the Horbury Ironworks Co. In 1873, Charles Roberts bought a site for a new factory at Horbury Junction and moved his wagon building business from Ings Road, Wakefield to Horbury Junction. Before that, the area of Horbury Junction was a quiet backwater with a corn mill and a ford across the Calder for farm traffic.” In reality, a beautiful pastoral area of countryside was changed forever with the coming of the Railway, Millfield Mill, the Wagon Works and the Ironworks.” [51]

In the 21st century, just beyond Horbury Junction, the line is crossed by the M1.

In the 21st century, just beyond Horbury Junction (on the left of this extract from Google Maps), the line is crossed by the M1. [Google Maps, October 2024.

Horbury Junction seen, looking Southwest from the M1. [Google Streetview, July 2024]
Looking Northeast from the M1. [Google Streetview, August 2024]
Green Lane Underpass seen from the North. This underpass sits just to the East of the modern M1. [Google Streetview, October 2008]

Following the line on to the Northeast, it next passes through Thornes.

The railway bridge at the centre of Thornes in 1905. [52]
The same location in the 21st century. The now quadruple line is carried by two separate bridges. [52]
Thorne Bridge seen from the South in June 2024. [Google Streetview, June 2024]

Northeast of Thornes, the Manchester and Leeds Railway ran at high level into Kirkgate Joint Station in Wakefield.

The bridge carrying the line over Kirkgate. [All three images from Google Streetview April 2023]
The Manchester and Leeds Railway enters this extract from the 1905 25″ Ordnance Survey bottom-left, To the North of it id the GNR Ings Road Branch. To the South of it is a Goods Yard with access to Wakefield’s Malthouses and Mark Lane Corn Mill. [53]
The same area in the 21st century. The rail lines remain approximately as on the map extract above. Wakefield Kirkgate Station (top-right) is somewhat reduced in size. Much of the built environment is different to that shown on the map above. This image is another extract from the ESRI satellite imagery. [53]

Wikipedia tells us that once it was opened by the Manchester and Leeds Railway in 1840, Kirkgate station was “the only station in Wakefield until Westgate was opened in 1867. The railway station building dates from 1854. … Some demolition work took place in 1972, removing buildings on the island platform and the roof with its original ironwork canopy which covered the whole station. A wall remains as evidence of these buildings. After this, Kirkgate was listed in 1979.” [72]

Kirkgate Station was refurbished in two phases between 2013 and 2015. [72]

The view westward on 29th July 1966, through Kirkgate Station towards Mirfield, The locomotive is LMS Fairburn class 4MT 2-6-4T No. 42196 (built 3/48, withdrawn 5/67), © Ben Brooksbank and licensed for reuse under a Creative Commons Licence (CC BY-SA 2.0). [74]

A series of modern images of Kirkgate Station are shared below

The images of Kirkgate Station above are:

  1. The support wall to the overall roof which was retained in the 1972 reordering and which has been refurbished in the 21st century, © Rept0n1x and licenced for reuse under a Creative Commons Licence (CC BY-SA 3.0). [72]
  2. The modern road approach to the station buildings, © Alan Murray-Rust and licensed for reuse under a Creative Commons Licence (CC BY-SA 2.0). [72]
  3. A Pacer DMU at Wakefield Kirkgate platform one in May 2006, (c) Ian Kirk and licenced for reuse under a Creative Commons Licence, (CC-By 2.5). [72]
  4. The recently refurbished front façade of Kirkgate Railway Station, © Groundwork Landscape Architects. [73]
East of Kirkgate Joint Station in 1905. The landscape in Primrose Hill is dominated by the railway. The line exiting to the South of this extract is the L&YR Oakenshaw Branch which crosses the River Calder and runs past the station’s Engine Sheds. [54]
the same area in the 21st century, much of the railway infrastructure has disappeared and is beginning to be taken over by nature. [54]

Just to the East of Wakefield Kirkgate Station were Park Hill Colliery Sidings.

Much the same area in the 21st century. The Midland’s lines South of Goosehill have gone, the footbridge remains but the large area of sidings to the Northeast of the Junction have also gone. [56]
Park Hill Colliery Sidings and the River Calder in 1913. [55]
The same location in the 21st century. [55]

And beyond those sidings a further crossing of the River Calder.

The three arched stone viaduct across the River Calder. This photograph is taken from Neil Fox Way and looks Southeast towards the bridge. [Google Streetview, June 2024]

Just a short distance further along the line, at Goosehill, the Manchester and Leeds Railway (by 1905, The Lancashire and Yorkshire Railway) joined the North Midland Railway (by 1905, The Midland Railway)

Goosehill Bridge and Junction witht he Midland Railway entering from the bottom of the extract and the Manchester 7 Leeds entering from the bottom-left. [56]
Immediately to the Northeast of the last extract from the 1905 25″ Ordnance Survey, the Midland’s lines can be seen heading Northeast with branches off to the North and West. The branch heading away to the West is the St. John’s Colliery line running to wharves at Stanley Ferry. That to the North runs through the screens and serves St. John’s Colliery itself. [57]
The same area in the 21st century. The roadway crossing the railway and heading off the satellite image to the West runs to a large opencast site. [57]
Looking Southwest from the bridge carrying the access road to the opencast site. [Google Streetview, May 2023]
Looking Northeast from the bridge carrying the access road to the opencast site. [Google Streetview, May 2023]
Looking Southwest from the Newlands Lane Bridge. [Google Streetview, May 2023]
Looking Northeast from Newlands Lane Bridge. [Google Streetview, May 2023]

From this point on the traffic from the Manchester and Leeds Railway ran on North Midland (later Midland) Railway metals, via Normanton Railway Station and then passing Silkstone and West Riding Collieries, and on towards Leeds, approaching Leeds from the Southeast. Normanton Station appears on the map extract below.

An smaller scale extract from the 25″ Ordnance Survey of 1905 which shows Normanton and its railway station. St. John’s Colliery and Gooshill Junction are just of the extract on the bottom left. [58]
Looking Southwest from Altofts Road Bridge through the site of Normanton Railway Station. [Google Streetview, April 2023]

Rake’s last words on a journey along the railway are these: “Just previous to reaching Wakefield, the railway is carried over a viaduct of 16 arches, and, quitting that station it enters a deep cutting, and crosses the Vale of Calder for the last time, a little to the east of Kirkthorpe. Here was the most important diversion of the Calder, by which the cost of building two bridges was saved. … The line terminated by a junction with the North Midland Railway, a mile to the north of which point was situated the Normanton Station, where the York and North Midland, and by its means, the Leeds and Selby and Hull and Selby Railways united with the former lines. The remainder of the journey to Leeds, 9 miles, was traversed on the North Midland Railway.” [1: p472]

Rake goes on to talk about the gradients of the railway which “were considered somewhat severe. Starting from Manchester, the line ascends to Rochdale, 10 miles, over a series of inclinations averaging about 1 in 155; from Rochdale to the summit level, 6½ miles, the ascent is 1 in 300; the total rise from Manchester being 351 ft. From the summit level plane, which extends for 1 mile 55 chains, to Wakefield, a distance of 30 miles, the line descends for the first six miles on a gradient of 1 in 182, after which it is continued by easy grades of an average inclination of 1 in 350. Below Wakefield a comparatively level course is maintained to the junction with the North Midland Railway, the total fall from the summit being 440 ft. The curves were laid out so as not to be of a less radius than 60 chains. The gauge adopted on the Manchester and Leeds Railway was 4 ft. 9 in., to allow a in. play on each side for the wheels. … The rails were of the single parallel form, in 15 ft. lengths, with 3 ft. bearings, and were set in chairs, to which they were secured by a ball and key, as on the North Midland Railway. The balls, (3/4  in. diameter), were of cast iron, and fitted into a socket formed in one side of the stem of the rail; the key, which was of wrought iron, was 8 in. long (and 5/8 in. wide at one end, from which it tapered to 3/8 in. at the other end). … Stone blocks were used where they could be obtained from the cuttings, and were placed diagonally, but sleepers of kyanised larch were used on the embankments, the ballasting being of burnt and broken stone.” [1: p472-473]

It is interesting to note that the tramway/tramroad practice of using stone blocks as sleepers was in use when this railway was first built!

Rake continues: “The Manchester terminal station was located between Lees Street and St. George’s Road, and was entirely elevated on arches. The passenger shed was covered with a wooden roof, in two spans, and the whole length of the station was 528 ft. The passenger platform was approached by a flight of 45 steps from the booking-office on the ground floor. [1: p473]

Early signals on the Manchester and Leeds.Railway which became part of the Lancashire & Yorkshire Railway network. [64]

The signals were of the horizontal double disc or spectacle form which, when revolved to the extent of a half circle, caused both discs to be invisible to the driver and indicated all right, the lamp above showing, when illuminated, green; the colour shown by the lamp when both discs were crosswise to the line being red.” [1: p473]

Rolling Stock

The carriages consisted of three classes, The first class, in three compartments, upholstered, and fitted with sash windows painted blue; second-class, in three compartments, but open at the sides and furnished with wooden sliding shutters painted yellow; and carriages termed  ‘mixed’, in which the middle compartment was for first-class, and each of the ends was for second-class passengers. There was also a carriage of novel construction, built according to the plan of the chairman of the company and used at the opening of the line. The under-framing was of the usual construction, but the body was unique. The floor was considerably wider than ordinary, and the sides curved outwards until they joined a semicircular roof, the greater part of which was fitted with wire gauze to give air, but capable of being instantaneously covered with waterproof material, by the action of an inside handle, so that sun and rain could be shaded out at pleasure. The sides were fitted throughout with plate glass, and ranges of seats occupied the floor, having passages on either side. Tents were also contrived in the sides which closed at will by spring action. The effect of the interior was said to resemble the interior of a conservatory! These carriages were in each case mounted on four wheels, with a perforated footboard of iron running the whole length of the body, in substitution for the lower tier of steps in use on other railways at the time.” [1: p473-474]

I have produced Rake’s description of this ‘unusual carriage’ as I have found it impossible to imagine what it looked like from Rake’s word-picture.

At the end of 1840, “an improved form of third-class carriage was constructed, in which each wheel was braked; the brake levers were attached to the axle-boxes and, consequently, when applied by the guard. who sat on the roof, did not bring the body of the carriage down on to the springs, The buffing springs were placed in front of the headstocks, and a flat iron bar attached to the buffer worked in brackets on the sole bar. The doors were fitted with latches on the outside, which were fastened by the guard when the passengers were inside.” [1: p474]

An improved third class carriage. Looking back from a 21st century perspective, these carriages seem to be not much better than the wagons used to carry livestock. This is borne out by Rake’s notes below. It was, however, a significant improvement on the open wagons, having a roof, glass windows and brakes. Contrary to what Rake appears to say below, Wells suggests that these covered third class wagons did have seating. [1: p474][75: p85]

The windows and the doors being fixed, no passenger could open the door until the guard had released the catch. Roof lamps were not provided in these coaches, which were painted green. … The third-class carriages. or rather, wagons, were provided with four entrances, to correspond with the “pens” into which they were sub-divided by means of a wooden bar down the centre, crossed by another bar intersecting the former at right angles in the middle of its length. There were no seats, and the number of passengers for which standing room could be found was limited solely to the to the bulk Stanhope or ‘Stan’ups’, as they were derisively termed. The contrivance of pens was said to be due to a determination to prevent respectably dressed individuals from availing themselves of the cheaper mode of conveyance, in which there was little to distinguish them, it was complained, ‘from the arrangements for the conveyance of brute beasts which perish’. The company’s servants were strictly enjoined “not to porter for wagon passengers‘!” [1: p474]

Rake’s illustration of an early Manchester and Leeds Railway first class coach. [1: p474]

Further details of Rolling Stock on the Railway can be found in Jeffrey Wells book about the line. [75: p81-85]

Locomotives

Rake tells us that the locomotives were all mounted on 6 wheels and purchased from Sharp, Roberts & Co., Robert Stephenson & Co., and Taylor & Co. They all had 14 in. diameter, 18 in. stroke cylinders and 5 ft. 6 in. diameter driving wheels. Jeffrey Wells provides a more comprehensive, tabulated, list of those early locomotives. [75: p79-80]

A typical 0-4-2 Locomotive of 1839/1840. [76]
An early (1834) R. Stephenson & Co. 0-4-2 locomotive of very similar design to those supplied to the Manchester and Leeds Railway 9c0 Public Domain. [77]

The first three 0-4-2s were made by Robert Stephenson & Co., and that company supplied plans and specifications for its locomotives which meant that The Manchester and Leeds Railway could have the same design manufactured by other firms of the Company’s choice. The first 12 locomotives built for the Manchester and Leeds in 1839 were all to Stephenson’s 0-4-2 design. Wells tells us that of these locomotives, the first three (Nos. 1 -3) were called Stanley, Kenyon and Stephenson and were built by R. Stephenson & Co. They were supplied to the Railway in April and May 1839. [75: p79]

The next three locomotives (Nos. 4-6) were supplied by Sharp Bros., Manchester. Lancashire and Junction were supplied in May 1839 and York in July 1839. Nos. 7, 9 and 10, named respectively, Rochdale (16th July), Bradford (6th September) and Hull (7th September)came from Naysmith & Co., Patricroft. Nos. 8, 11, 12 (Leeds, Scarborough and Harrogate) were supplied by Shepherd & Todd by September 1839. [75: p79]

Wells comments that No. 1, ‘Stanley’ “was named after Lord Stanley, Chairman of the House of Commons Committee who supported the Manchester and Leeds Railway Bill in 1836. … Other Stephenson designs followed: 19 engines, numbered 15 to 40, of the 2-2-2 wheel arrangement were delivered between October 1840 and April 1842. These were recommended by Stephenson to work the eastern section of the line, between Sowerby Bridge and Wakefield, thus gradually removing the [Manchester and Leeds Railway’s] reliance on North Midland Railway motive power which had at first prevailed from late in 1840.” [75: p80]

R. Stephenson patented 2-2-2 locomotive No. 123 ‘Harvey Combe’ built 1835, from Simm’s ‘Public Works of Great Britain’, 1838. This locomotive is of a very similar design to those supplied by various manufacturers to the Manchester and Leeds Railway in 1840-1842. These were given the Nos. 15-40 and were supplied by Charles Tayleur & Co., Rothwell & Co., Laird Kitson & Co., Sharp Bros., Naysmith & Co., and W. Fairburn & Co., (c) C. F. Cheffins, Public Domain. [78]

He continues: “Once again several manufacturers were involved in the supply of these locomotives. Goods engines were represented by a further batch of 0-4-2s; 13 were delivered (Nos 33 to 46) between April 1841 and June 1843, the three manufacturers involved being R. Stephenson & Co., Haigh Foundry, Wigan, and William Fairbairn & Co. of Manchester. … Three standard Bury-type 0-4-0s were the last engines to be delivered (Nos 47 to 49) the first two bearing the names West Riding Union and Cleckheaton respectively. All three were completed between November 1845 and January 1846 by the firm of Edward Bury of Liverpool.”

And finally. …

Rake concludes his article, the first to two about the line in The Railway Magazine (I currently only have access to this first article) with two short paragraphs. The first reflects on policing: “There were no police on the railway, the whole of the platelayers being constituted as constables on the completion of the first section of the line; and, we are afterwards told, that ‘the vigilance resulting from the pride these men take, in being thus placed in authority, had been found to supersede the necessity of any more expensive system of surveillance.'” [1: p474]

The second notes that: “The directors [were] very anxious to complete the railway as far as Rochdale, at the earliest possible time, and on the 4th July, 1839, it was opened through that town to Littleborough, a distance of about 14 miles, the event ‘exciting a most extraordinary degree of local interest and wonder’ we are told.” [1: p474]

References

  1. Herbert Rake; The Manchester and Leeds Railway: The Origin of the Lancashire and Yorkshire Railway; in The Railway Magazine, London, December 1905, p468-474
  2. https://www.geograph.org.uk/photo/820318, accessed on 23rd September 2024.
  3. https://premierconstructionnews.com/2016/04/14/summit-tunnel, accessed on 23rd September 2024.
  4. https://en.m.wikipedia.org/wiki/Summit_Tunnel, accessed on 23rd September 2024.
  5. https://commons.m.wikimedia.org/wiki/File:Gauxholme_Bridge,_Todmorden.jpg, accessed on 23rd September 2024.
  6. https://www.yorkshirepost.co.uk/news/opinion/columnists/trans-pennine-rail-in-the-age-of-victoria-1807452, accessed on 23rd September 2024.
  7. https://www.geograph.org.uk/photo/504379, accessed on 23rd September 2024.
  8. https://maps.nls.uk/geo/explore/#zoom=17.9&lat=53.71428&lon=-2.09924&layers=168&b=ESRIWorld&o=100, accessed on 23rd September 2024.
  9. https://maps.nls.uk/geo/explore/#zoom=18.9&lat=53.70635&lon=-2.10701&layers=168&b=ESRIWorld&o=100, accessed on 23rd September 2024.
  10. https://maps.nls.uk/geo/explore/#zoom=16.9&lat=53.71706&lon=-2.09298&layers=168&b=ESRIWorld&o=100, accessed on 23rd September 2024.
  11. https://maps.nls.uk/geo/explore/#zoom=17.1&lat=53.73968&lon=-2.03054&layers=168&b=ESRIWorld&o=100, accessed on 23rd September 2024.
  12. https://maps.nls.uk/geo/explore/#zoom=16.5&lat=53.73833&lon=-2.00992&layers=168&b=ESRIWorld&o=100, accessed on 23rd September 2024.
  13. https://maps.nls.uk/geo/explore/#zoom=16.1&lat=53.73044&lon=-1.98307&layers=168&b=ESRIWorld&o=100, accessed on 23rd September 2024.
  14. https://maps.nls.uk/geo/explore/#zoom=16.1&lat=53.72280&lon=-1.94806&layers=168&b=ESRIWorld&o=100, accessed on 23rd September 2024.
  15. https://maps.nls.uk/geo/explore/#zoom=16.8&lat=53.70808&lon=-1.91151&layers=168&b=ESRIWorld&o=100, accessed on 23rd September 2024
  16. https://commons.wikimedia.org/wiki/File:Mytholmroyd_3.jpg, accessed on 24th September 2024.
  17. https://en.wikipedia.org/wiki/Luddendenfoot_railway_station, accessed on 24th September 2024.
  18. https://www.geograph.org.uk/photo/4500324, accessed on 24th September 2024.
  19. https://en.wikipedia.org/wiki/Mytholmroyd_railway_station#/media/File:Mytholmroyd_railway_station,_November_2020.jpg, accessed on 24th September 2024.
  20. https://commons.wikimedia.org/wiki/File:Todmorden_station_p2.jpg, accessed on 24th September 2024.
  21. https://maps.nls.uk/geo/explore/#zoom=17.0&lat=53.61032&lon=-2.15338&layers=168&b=ESRIWorld&o=100, accessed on 24th September 2024.
  22. https://www.geograph.org.uk/photo/2160438, accessed on 24th September 2024.
  23. http://www.halifaxpeople.com/Sowerby-Bridge-Train-Station.html#google_vignette, accessed on 24th September 2024.
  24. https://commons.wikimedia.org/wiki/File:Sowerby_Bridge_stn.jpg, accessed on 24th September 2024.
  25. https://maps.nls.uk/geo/explore/#zoom=17.0&lat=53.70193&lon=-1.88141&layers=168&b=ESRIWorld&o=100, accessed on 24th September 2024.
  26. https://maps.nls.uk/geo/explore/#zoom=17.0&lat=53.69406&lon=-1.85773&layers=168&b=ESRIWorld&o=100, accessed on 24th September 2024.
  27. https://en.wikipedia.org/wiki/Greetland_railway_station, accessed on 24th September 2024.
  28. http://www.halifaxpeople.com/Historic-West-Vale.html, accessed on 24th September 2024.
  29. https://maps.nls.uk/geo/explore/#zoom=17.0&lat=53.69065&lon=-1.84016&layers=168&b=ESRIWorld&o=100, accessed on 24th September 2024.
  30. http://www.halifaxpeople.com/Historic-Elland.html, accessed on 24th September 2024.
  31. https://maps.nls.uk/geo/explore/#zoom=17.0&lat=53.69860&lon=-1.77905&layers=168&b=ESRIWorld&o=100, accessed on 24th September 2024.
  32. https://www.flickr.com/photos/tcs-pics/6805337658, accessed on 24th September 2024.
  33. https://commons.wikimedia.org/wiki/File:Brighouse_station.jpg, accessed on 24th September 2024.
  34. https://maps.nls.uk/geo/explore/#zoom=17.0&lat=53.68478&lon=-1.72933&layers=168&b=ESRIWorld&o=100, accessed on 24th September 2024.
  35. https://www.geograph.org.uk/photo/2151166, accessed on 24th September 2024.
  36. https://www.chiark.greenend.org.uk/~owend/interests/rail/stnpages/mirfield.html, accessed on 20th May 2010.
  37. https://en.wikipedia.org/wiki/Thornhill_railway_station, accessed on 24th September 2024.
  38. https://www.geograph.org.uk/photo/2146249, accessed on 24th September 2024.
  39. https://maps.nls.uk/geo/explore/#zoom=17.0&lat=53.67578&lon=-1.65453&layers=168&b=ESRIWorld&o=100, accessed on 24th September 2024.
  40. https://maps.nls.uk/geo/explore/#zoom=17.0&lat=53.67662&lon=-1.63870&layers=168&b=ESRIWorld&o=100, accessed on 24th September 2024.
  41. https://maps.nls.uk/geo/explore/#zoom=17.0&lat=53.67609&lon=-1.62408&layers=168&b=ESRIWorld&o=100, accessed on 24th September 2024.
  42. http://lostrailwayswestyorkshire.co.uk/Dewsbury.htm, accessed on 26th September 2024.
  43. https://maps.nls.uk/geo/explore/#zoom=17.0&lat=53.67145&lon=-1.61316&layers=168&b=ESRIWorld&o=100, accessed on 27th September 2024.
  44. https://maps.nls.uk/geo/explore/#zoom=17.0&lat=53.65930&lon=-1.56897&layers=168&b=ESRIWorld&o=100, accessed on 27th September 2024.
  45. https://en.wikipedia.org/wiki/Horbury_and_Ossett_railway_station, accessed on 27th September 2024.
  46. https://maps.nls.uk/geo/explore/#zoom=16.0&lat=53.66442&lon=-1.58084&layers=168&b=ESRIWorld&o=0, accessed on 27th September 2024.
  47. https://en.wikipedia.org/wiki/Healey_Mills_Marshalling_Yard, accessed onn 27th September 2024.
  48. https://www.geograph.org.uk/photo/864329, accessed on 27th September 2024.
  49. https://maps.nls.uk/geo/explore/#zoom=17.0&lat=53.65617&lon=-1.55890&layers=168&b=ESRIWorld&o=100, accessed on 27th September 2024.
  50. https://maps.nls.uk/geo/explore/#zoom=17.0&lat=53.65728&lon=-1.53700&layers=168&b=ESRIWorld&o=100, accessed on 30th September 2024.
  51. https://www.horburyhistory.org/Horbury-Junction/, accessed on 30th September 2024.
  52. https://maps.nls.uk/geo/explore/#zoom=17.0&lat=53.66955&lon=-1.50480&layers=168&b=ESRIWorld&o=100, accessed on 30th September 2024.
  53. https://maps.nls.uk/geo/explore/#zoom=17.4&lat=53.67749&lon=-1.49163&layers=168&b=ESRIWorld&o=100, accessed on 30th September 2024.
  54. https://maps.nls.uk/geo/explore/#zoom=17.4&lat=53.67943&lon=-1.48383&layers=168&b=ESRIWorld&o=100, accessed on 30th September 2024.
  55. https://maps.nls.uk/geo/explore/#zoom=17.4&lat=53.68334&lon=-1.47138&layers=168&b=ESRIWorld&o=100, accessed on 30th September 2024.
  56. https://maps.nls.uk/geo/explore/#zoom=17.4&lat=53.69000&lon=-1.43723&layers=168&b=ESRIWorld&o=100, accessed on 2nd October 2024.
  57. https://maps.nls.uk/geo/explore/#zoom=17.4&lat=53.69243&lon=-1.43590&layers=168&b=ESRIWorld&o=100, accessed on 2nd October 2024.
  58. https://maps.nls.uk/geo/explore/#zoom=15.4&lat=53.70320&lon=-1.42452&layers=168&b=ESRIWorld&o=100, accessed on 2nd October 2024.
  59. Embedded link: https://www.flickr.com/photos/neil_harvey_railway_photos/7834033734, accessed on 3rd October 2024.
  60. https://www.invaluable.com/auction-lot/two-albums-containing-300-cards-incl-yorkshire-ox-166-c-6fd4b7e9e0, accessed on 3rd October 2024.
  61. https://www.blipfoto.com/entry/3134415230512138681, accessed on 3rd October 2024.
  62. https://maps.nls.uk/geo/explore/#zoom=17.0&lat=53.69371&lon=-1.76350&layers=168&b=ESRIWorld&o=100, accessed on 3rd October 2024.
  63. https://maps.nls.uk/geo/explore/#zoom=15.0&lat=53.72852&lon=-2.05697&layers=168&b=ESRIWorld&o=100, accessed on 3rd October 2024.
  64. https://igg.org.uk/rail/3-sigs/sigs-1.htm, accessed on 5th October 2024.
  65. https://commons.wikimedia.org/wiki/File:L%26MR_engine_%27Victoria%27.jpg, accessed on 6th October 2024.
  66. https://rogerfarnworth.com/2024/10/06/the-manchester-and-leeds-railway-the-railway-magazine-december-1905-part-1/
  67. http://www.halifaxpeople.com/Sowerby-Bridge-Train-Station.html, accessed on 6th October 2024.
  68. http://www.calderdalecompanion.co.uk/ph796.html, accessed on 6th October 2024.
  69. https://maps.nls.uk/geo/explore/#zoom=17.0&lat=53.69483&lon=-1.76821&layers=168&b=ESRIWorld&o=100, accessed on 7th October 2024.
  70. https://maps.nls.uk/geo/explore/#zoom=17.0&lat=53.68967&lon=-1.74458&layers=168&b=ESRIWorld&o=100, accessed on 7th October 2024.
  71. https://maps.nls.uk/geo/explore/#zoom=16.0&lat=53.68030&lon=-1.71952&layers=168&b=ESRIWorld&o=100, accessed on 7th October 2024.
  72. https://en.m.wikipedia.org/wiki/Wakefield_Kirkgate_railway_station, accessed on 7th October 2024.
  73. https://groundworklandscapearchitects.org.uk/regions/yorkshire-and-the-humber/kirkgate-station, accessed on 7th October 2024.
  74. https://www.geograph.org.uk/photo/2043843, accessed on 8th October 2024.
  75. Jeffrey Wells; The Eleven Towns Railway: The Story of the Manchester and Leeds Main Line; Railway & Canal Historical Society, Keighley, West Yorkshire, 2000.
  76. https://picryl.com/topics/period+drawings+of+early+steam+locomotives, accessed on 9th October 2024.
  77. https://en.m.wikipedia.org/wiki/0-4-2#/media/File%3AStephenson_0-4-2.jpg, accessed on 9th October 2024.
  78. https://commons.wikimedia.org/wiki/File:Stephenson_Patentee_type_2-2-2_locomotive_no_123_%E2%80%9CHarvey_Combe%E2%80%9D_built_1835,_from_Simm%E2%80%99s_%E2%80%9CPublic_Works_of_Great_Britain%E2%80%9D_1838,_newly_engraved_%2B_reprinted_1927_%E2%80%93_No_caption,_black_and_white.jpg, accessed on 9th October 2024

The Manchester and Leeds Railway – The Railway Magazine, December 1905 – Part 1

An article in the Railway Magazine in December 1905 prompted a look at the Manchester and Leeds Railway. For a number of years my parents lived in sheltered housing in Mirfield which is on the line. Looking at the line as it appeared in 1905 and again in the 21st century seemed a worthwhile exercise! Part 1 of this short series provides a short history of the line and takes us from Manchester to Sowerby Bridge.

The featured image at the head of this article shows the Manchester & Leeds Railway locomotive ‘Victoria’, in about 1878-80. This locomotive was designed by Edward Bury and built at his works in Liverpool. It was one of a batch of 0-4-0 engines ordered in 1845, and later converted to an 0-4-2 wheel arrangement (c) Public Domain. [65]

In his first article in 1905, about the Manchester and Leeds Railway which was accompanied by a series of engravings included here, Herbert Rake wrote that on 11th September 1830 a committee tasked with improving communications between Leeds and Manchester, emboldened by the success of the Liverpool and Manchester Railway, decided to hold a meeting to form a new railway company.

On 18th October 1930, the decision was taken. A board of directors was appointed, a survey was authorised and work was undertaken to prepare for an application to Parliament. It was based on a junction with the Liverpool and Manchester Railway at Oldfield Lane, Salford and at St. George’s Road, Manchester.

The route from Manchester to Sowerby Bridge was easily agreed, that from Sowerby Bridge to Leeds was more difficult to agree. The Bill prepared for Parliament focused on the Manchester to Sowerby Bridge length of the planned line and was presented on 10th March 1831. Opposition from the Rochdale Canal Company and others and then the dissolution of Parliament halted the progress of the Bill.

Resubmission was agreed on 8th June 1830 but once again failed in its progress through Parliament. In the end, the project was revised, the company was reorganised, and the capital fixed at £800,000 in £100 shares in a meeting in October 1935.

Rake tells us that this “new project abandoned the Salford junction line, but embraced a deviated extension beyond Sowerby Bridge, along the lower portion of the Vale of Calder, past Dewsbury and Wakefield, to Normanton, thence to Leeds, in conjunction with the North Midland Railway. … [The line was] intended to form a central portion of a great main line running east and west between Liverpool and Hull.” [1: p469-470]

The prospectus noted a few important facts, particularly:

  • The population density with three miles either side of the proposed line was 1,847 persons per square mile. The average for England was 260 persons per square mile.
  • Within 10 miles of the line there were 29 market towns, twelve with a population greater than 20,000.
  • Within 20 miles of the line there were 48 market towns with more than 10,000 inhabitants.

Rake tells us that “The Act of Incorporation received the Royal Assent on the 4th July 1836, and authorised a joint stock capital to be raised of £1,000,000, with an additional amount by loan of £433,000.” [1: p470]

Construction commenced on 18th August 1837. On 14th February 1838 it was decided to apply to Parliament for an Act authorising branch lines to Oldham and Halifax.

Victoria Station, Manchester, was first known as Hunt’s Bank Station. [1: p468]
Part of the original station at Manchester Victoria, as it appeared in 1989. In around 1860, the single storey station building was extended by the addition of a second floor. The Lancashire and Yorkshire Railway sensitively incorporated the original building into the new 1904 facade of Victoria station, © Whatlep and authorised for reuse under a Creative Commons Licence (CC BY-SA 2.0). [2]

Late in 1838, “a modification of the original plan for effecting a junction of the Manchester and Leeds Railway with the Liverpool and Manchester Railway was proposed, by an extension of both to a joint terminus within 500 yards of the Manchester Exchange. … The Act of Parliament for this and other purposes received the Royal Assent on the 31st July 1839, authorising the sum of £866,000 to be raised for the purpose of constructing the Oldham and Halifax branches, for making a diversion in the railway at Kirkthorpe, for enlarging the station in Lees Street, and for constructing the line to join the Liverpool and Manchester extension.” [1: p470]

Rochdale railway Station as shown on the 25″ Ordnance Survey 0f 1908, published in 1910. [21]
View NE from south end of Rochdale Station. On the left, Hughes/Fowler 5P 4F 2-6-0 No. 42724 on the 11.58am Wakefield to Manchester; on the right, Stanier 4MT 2-6-4T No. 42653 on a local to Bolton, © Ben Brooksbank and licenced for reuse under a Creative Commons Licence (CC BY-SA 2.0). [22]

Rake explains that the railway ran through Miles Platting where the Ashton and Stalybridge branch diverges. At Middleton the Oldham branch connected to the main line. Mill Hills embankment (maximum height 75 feet) carries the line towards Blue Pits Station where the Heywood line joins the main line. The line runs on through Rochdale, Littleborough and Todmorden Vale before running in cutting (maximum depth 100 feet) to Summit Tunnel.

During construction, “Six contracts were awarded between the Manchester terminus and the Summit Tunnel and were progressing satisfactorily by August 1838.” [6]

The West Portal of Summit Tunnel is approached from Manchester through a deep cutting. [1: p469]
The same portal of Summit Tunnel in 20th century steam days. [3]

When built, Summit Tunnel was the longest in the world. It opened on 1st March 1841 by Sir John F. Sigismund-Smith.

The tunnel is just over 1.6 miles (2.6 km) long and carries two standard-gauge tracks in a single horseshoe-shaped tube, approximately 24 feet (7.2 m) wide and 22 feet (6.6 m) high. Summit Tunnel was designed by Thomas Longridge Gooch, assisted by Barnard Dickinson. Progress on its construction was slower than anticipated, largely because excavation was more difficult than anticipated. … It … cost £251,000 and 41 workers had died.” [4]

Rake noted that the tunnel is “14 shafts were necessary, and the strata of rock shale and clay was of so treacherous a character that the brick lining of the roof, which is semi circular, consists in places of no less than 10 concentric rings.” [1: p471] He also comments that: the tunnel entrance is if an imposing Moorish design; 1,000 men were employed with work continuing day and night.

Beyond the tunnel, the railway “entered a cutting in silt, which required piling to secure a foundation. Continuing onwards, we pass through the Winterbut Lee Tunnel, 420 yds. in length, and across a viaduct of 18 arches, one of which is of 60 ft. span we then proceed over the Rochdale Canal, on a cast iron skew bridge 102 ft. in span, at a height of 40 ft. above the surface of the water.” [1: p471]

A colourised engraving of the bridge over the Rochdale Canal by A.F. Tait. [6]
The Manchester and Leeds Railway’s castellated bridge over the Rochdale Canal to the South of Todmorden on 16th September 2007, © Tim Green and authorised for reuse under a Creative Commons Licence (CC BY 2.0 Generic). [5]
The railway bridge illustrated above as it appears on the 25″ Ordnance Survey of 1905, published in 1907. [9]

Tenders for work on the eastern section were advertised in 1838. … Contractors then worked fastidiously under the threat of heavy penalties should they over-run the set time limits. They were also forbidden to work on Sundays.” [6]

At Todmorden, “the railway is carried over almost the entire breadth of the valley by a noble viaduct of nine arches, seven of which are each of 60 ft. span, and two of 30 ft., at a height of 54 ft. above the level of the turnpike road.” [1: p471]

Todmorden Railway Station on the 25″ Ordnance Survey of 1905, published in 1907. The viaduct which spans Burnley Road to the East of the Railway Station appears top left on this map extract and below on a more modern photograph. [8]
Todmorden Railway Station, seen from Platform 2, in the 21st century, © Ian Kirk and licenced for reuse under a Creative Commons Licence (CC-BY 2.5). [20]
Todmorden – Railway Viaduct over Burnley Road: The railway viaduct reaching the station is a prominent feature and is here seen crossing Burnley Road with the bus station on one side of it and the local market on the other, © David Ward and licensed for reuse under a Creative Commons Licence (CC BY-SA 2.0). [7]
The junction with the Burnley Branch on the 25″ Ordnance Survey of 1905, published in 1907. [10]
Looking West from Hallroyd Road Bridge in 2023. Hallroyd Road Bridge overlooks Hall Road Junction close to the right side of the map extract above. [Google Streetview, April 2023]
Looking East from Hallroyd Road Bridge. [Google Streetview, April 2023]

Quitting Todmorden, where the Burnley branch diverges, the line enters Yorkshire, passes through Millwood Tunnel (225 yards), Castle Hill Tunnel (193 yards), and Horsefall Tunnel (424 yards) and then arrives at Eastwood Station. Some distance further on is Charlestown. Afterwards the railway “crosses river, road, and canal, by a skew bridge of three arches, the canal being separately spanned by an iron bridge.” [1: p471]

Looking back West from Cross Stone Road across the western portal of Millwood Tunnel. [Google Streetview, April 2023]
Looking East from the corner of Phoenix Street and Broadstone Street, above the eastern portal of Millwood Tunnel. [Google Streetview, April 2023]

These next few images give a flavour of the line as it travels towards Hebden Bridge.

Lobb Mill Viaduct sits alongside the A646, Halifax Road between Castle Hill Tunnel and Horsefall Tunnel. [Google Streetview, June 2023]
Looking Southwest along the line towards Todmorden from E. Lee Lane. [Google Streetview, April 2023]
A little to the Northeast, Duke Street passes under the railway. This view looks West from Halifax Road [Google Streetview, June 2023]
Eastwood Railway Station as it appears on the 1905 25″ Ordnance Survey. [63]
Thye approximate location of Eastwood Station as it appears on Google Maps satellite imagery in 2024. [Google Maps, October 2024]
A little further Northeast, this is the view Northwest along Jumble Hole Road under the railway. [Google Streetview, June 2011]
The view Northwest from he A646, Halifax Road along the Pennine Way Footpath which passes under the railway at this location. [Google Streetview, June 2023]
Again, looking Northwest from Halifax Road along Stony Lane which runs under the railway. [Google Streetview, June 2023]
The view Southwest along Oakville Road which runs next to the railway. [Google Streetview, April 2023]
The view Northeast from the same location on Oakville Road. [Google Streetview, April 2023]

A short distance Northeast, the railway “crosses river, road, and canal, by a skew bridge of three arches, the canal being separately spanned by an iron bridge.” [1: p471] The location is shown on the 25″ Ordnance Survey of 1905 below.

The bridge mentioned above, as it appears on the 25″ Ordnance Survey of 1905. [11]
The same location shown on Google Maps satellite imagery in 2024. [Google Maps, October 2024]
Looking Northeast along Halifax Road, the three arches of the viaduct are easily visible. Beyond it there is a girder bridge which Rake does not mention. [Google Streetview, June 2023]

A little further East Stubbing Brink crosses the railway.

Looking West along the railway from Stubbing Brink Bridge. [Google Streetview, April 2023]
The view East along the line from Stubbing Brink. [Google Streetview, April 2023]

The line next passes through a short short tunnel (Weasel Hall Tunnel (124 yards)) and arrives at Hebden Bridge Station.

Looking West-northwest from Shelf Road Bridge, it is just possible to make out the mouth of Weasel Hall Tunnel. [Google Streetview, April 2023]
The view East-southeast from Shelf Road Bridge towards Hebden Bridge Railway Station. [Google Streetview, April 2023]
This next extract from the 25″ Ordnance Survey shows Hebden Bridge Station. [12]
Platelayers at work at Hebden Bridge Station in 1840. [1: p470]
Hebden Bridge Railway Station (Platform 2) in the 21st century, © El Pollock and licenced for reuse under a Creative Commons Licence (CC BY-SA 2.0). [18]

After Hebden Bridge Station, the line proceeds along the South bank of the River Calder, through two small stations (Mytholmroyd and Luddenden Foot) and by a number of riverside mills.

Mytholmroyd Railway Station as it appeared on the 1905 25″ Ordnance Survey. The Station is still open in the 21st century. [13]
The original station building at Mytholmroyd, seen from the North in 2006, with the line crossing New Road at high level, © Ian Kirk and licenced for reuse under a Creative Commons Licence (CC By 2.5) . The building has since been renovated. [16]
Mytholmroyd Railway Station in the 21st century, © Rcsprinter123 and licenced for reuse under a Creative Commons Licence (CC BY 3.0,). [19]

East along the line towards Luddendenfoot, Brearley Lane bridges the line.

Looking West from Brearley Lane Bridge towards Mytholmroyd Station. [Google Streetview, July 2009]
Ahead to the East, the line curves round towards the location of Luddendenfoot Railway Station. [Google Streetview, July 2009]
Luddenden Foot Railway Station. The station closed on 10th September 1962. The site has been developed since 2007 and the northern half is now occupied by the Station Industrial Park, which is accessible via Old Station Road. Two gate pillars from the original station flank the entrance to the road. [14][17]
The location of the erstwhile Luddendenfoot Railway Station as seen from Willow Bank, (c) Matt Thornton. [Google Streetview, February 2021]
Looking Southeast from Willow Bank. The arch bridge visible ahead carries Jerry Fields Road over the line, (c) Matt Thornton. [Google Streetview, February 2021]

To the Southeast, Ellen Holme Road passes under the line.

Ellen Holme Road passess under the railway to the Southeast of the old Luddendenfoot Railway Station. [Google Streetview, June 2023]

Passing other mills and traversing a deep cutting the line enters Sowerby Tunnel, (645 yards) and reaches Sowerby Bridge Station.

Class 101 At Sowerby Bridge Tunnel.
This image is embedded her from Flickr. It shows a Class 101 DMU entering Sowerby Bridge Tunnel from the East while working 2M14 10:31hrs York to Southport service on 8th May 1987, (c) Neil Harvey 156. [59]
Sowerby Bridge Railway Station – note the Ripponden Branch emerging from a tunnel and joining the Manchester and Leeds Railway at the East end of the Station. [15]
An early postcard image of Sowerby Bridge with the railway station in the foreground, © Public Domain. [23]
A colourised postcard view of the Station Forecourt at Sowerby Bridge around the turn of the 20th century. [60]
Sowerby Bridge Railway Station in 2006, (c) Ian Kirk and authorised for reuse under a Creative Commons icence (CC BY 2.5). [24]

We complete this first part of the journey along the Manchester and Leeds Railway here at Sowerby Bridge Railway Station.

References

NB: These references relate to all the articles about the Manchester and Leeds Railway.

  1. Herbert Rake; The Manchester and Leeds Railway: The Origin of the Lancashire and Yorkshire Railway; in The Railway Magazine, London, December 1905, p468-474
  2. https://www.geograph.org.uk/photo/820318, accessed on 23rd September 2024.
  3. https://premierconstructionnews.com/2016/04/14/summit-tunnel, accessed on 23rd September 2024.
  4. https://en.m.wikipedia.org/wiki/Summit_Tunnel, accessed on 23rd September 2024.
  5. https://commons.m.wikimedia.org/wiki/File:Gauxholme_Bridge,_Todmorden.jpg, accessed on 23rd September 2024.
  6. https://www.yorkshirepost.co.uk/news/opinion/columnists/trans-pennine-rail-in-the-age-of-victoria-1807452, accessed on 23rd September 2024.
  7. https://www.geograph.org.uk/photo/504379, accessed on 23rd September 2024.
  8. https://maps.nls.uk/geo/explore/#zoom=17.9&lat=53.71428&lon=-2.09924&layers=168&b=ESRIWorld&o=100, accessed on 23rd September 2024.
  9. https://maps.nls.uk/geo/explore/#zoom=18.9&lat=53.70635&lon=-2.10701&layers=168&b=ESRIWorld&o=100, accessed on 23rd September 2024.
  10. https://maps.nls.uk/geo/explore/#zoom=16.9&lat=53.71706&lon=-2.09298&layers=168&b=ESRIWorld&o=100, accessed on 23rd September 2024.
  11. https://maps.nls.uk/geo/explore/#zoom=17.1&lat=53.73968&lon=-2.03054&layers=168&b=ESRIWorld&o=100, accessed on 23rd September 2024.
  12. https://maps.nls.uk/geo/explore/#zoom=16.5&lat=53.73833&lon=-2.00992&layers=168&b=ESRIWorld&o=100, accessed on 23rd September 2024.
  13. https://maps.nls.uk/geo/explore/#zoom=16.1&lat=53.73044&lon=-1.98307&layers=168&b=ESRIWorld&o=100, accessed on 23rd September 2024.
  14. https://maps.nls.uk/geo/explore/#zoom=16.1&lat=53.72280&lon=-1.94806&layers=168&b=ESRIWorld&o=100, accessed on 23rd September 2024.
  15. https://maps.nls.uk/geo/explore/#zoom=16.8&lat=53.70808&lon=-1.91151&layers=168&b=ESRIWorld&o=100, accessed on 23rd September 2024
  16. https://commons.wikimedia.org/wiki/File:Mytholmroyd_3.jpg, accessed on 24th September 2024.
  17. https://en.wikipedia.org/wiki/Luddendenfoot_railway_station, accessed on 24th September 2024.
  18. https://www.geograph.org.uk/photo/4500324, accessed on 24th September 2024.
  19. https://en.wikipedia.org/wiki/Mytholmroyd_railway_station#/media/File:Mytholmroyd_railway_station,_November_2020.jpg, accessed on 24th September 2024.
  20. https://commons.wikimedia.org/wiki/File:Todmorden_station_p2.jpg, accessed on 24th September 2024.
  21. https://maps.nls.uk/geo/explore/#zoom=17.0&lat=53.61032&lon=-2.15338&layers=168&b=ESRIWorld&o=100, accessed on 24th September 2024.
  22. https://www.geograph.org.uk/photo/2160438, accessed on 24th September 2024.
  23. http://www.halifaxpeople.com/Sowerby-Bridge-Train-Station.html#google_vignette, accessed on 24th September 2024.
  24. https://commons.wikimedia.org/wiki/File:Sowerby_Bridge_stn.jpg, accessed on 24th September 2024.
  25. https://maps.nls.uk/geo/explore/#zoom=17.0&lat=53.70193&lon=-1.88141&layers=168&b=ESRIWorld&o=100, accessed on 24th September 2024.
  26. https://maps.nls.uk/geo/explore/#zoom=17.0&lat=53.69406&lon=-1.85773&layers=168&b=ESRIWorld&o=100, accessed on 24th September 2024.
  27. https://en.wikipedia.org/wiki/Greetland_railway_station, accessed on 24th September 2024.
  28. http://www.halifaxpeople.com/Historic-West-Vale.html, accessed on 24th September 2024.
  29. https://maps.nls.uk/geo/explore/#zoom=17.0&lat=53.69065&lon=-1.84016&layers=168&b=ESRIWorld&o=100, accessed on 24th September 2024.
  30. http://www.halifaxpeople.com/Historic-Elland.html, accessed on 24th September 2024.
  31. https://maps.nls.uk/geo/explore/#zoom=17.0&lat=53.69860&lon=-1.77905&layers=168&b=ESRIWorld&o=100, accessed on 24th September 2024.
  32. https://www.flickr.com/photos/tcs-pics/6805337658, accessed on 24th September 2024.
  33. https://commons.wikimedia.org/wiki/File:Brighouse_station.jpg, accessed on 24th September 2024.
  34. https://maps.nls.uk/geo/explore/#zoom=17.0&lat=53.68478&lon=-1.72933&layers=168&b=ESRIWorld&o=100, accessed on 24th September 2024.
  35. https://www.geograph.org.uk/photo/2151166, accessed on 24th September 2024.
  36. https://www.chiark.greenend.org.uk/~owend/interests/rail/stnpages/mirfield.html, accessed on 20th May 2010.
  37. https://en.wikipedia.org/wiki/Thornhill_railway_station, accessed on 24th September 2024.
  38. https://www.geograph.org.uk/photo/2146249, accessed on 24th September 2024.
  39. https://maps.nls.uk/geo/explore/#zoom=17.0&lat=53.67578&lon=-1.65453&layers=168&b=ESRIWorld&o=100, accessed on 24th September 2024.
  40. https://maps.nls.uk/geo/explore/#zoom=17.0&lat=53.67662&lon=-1.63870&layers=168&b=ESRIWorld&o=100, accessed on 24th September 2024.
  41. https://maps.nls.uk/geo/explore/#zoom=17.0&lat=53.67609&lon=-1.62408&layers=168&b=ESRIWorld&o=100, accessed on 24th September 2024.
  42. http://lostrailwayswestyorkshire.co.uk/Dewsbury.htm, accessed on 26th September 2024.
  43. https://maps.nls.uk/geo/explore/#zoom=17.0&lat=53.67145&lon=-1.61316&layers=168&b=ESRIWorld&o=100, accessed on 27th September 2024.
  44. https://maps.nls.uk/geo/explore/#zoom=17.0&lat=53.65930&lon=-1.56897&layers=168&b=ESRIWorld&o=100, accessed on 27th September 2024.
  45. https://en.wikipedia.org/wiki/Horbury_and_Ossett_railway_station, accessed on 27th September 2024.
  46. https://maps.nls.uk/geo/explore/#zoom=16.0&lat=53.66442&lon=-1.58084&layers=168&b=ESRIWorld&o=0, accessed on 27th September 2024.
  47. https://en.wikipedia.org/wiki/Healey_Mills_Marshalling_Yard, accessed onn 27th September 2024.
  48. https://www.geograph.org.uk/photo/864329, accessed on 27th September 2024.
  49. https://maps.nls.uk/geo/explore/#zoom=17.0&lat=53.65617&lon=-1.55890&layers=168&b=ESRIWorld&o=100, accessed on 27th September 2024.
  50. https://maps.nls.uk/geo/explore/#zoom=17.0&lat=53.65728&lon=-1.53700&layers=168&b=ESRIWorld&o=100, accessed on 30th September 2024.
  51. https://www.horburyhistory.org/Horbury-Junction/, accessed on 30th September 2024.
  52. https://maps.nls.uk/geo/explore/#zoom=17.0&lat=53.66955&lon=-1.50480&layers=168&b=ESRIWorld&o=100, accessed on 30th September 2024.
  53. https://maps.nls.uk/geo/explore/#zoom=17.4&lat=53.67749&lon=-1.49163&layers=168&b=ESRIWorld&o=100, accessed on 30th September 2024.
  54. https://maps.nls.uk/geo/explore/#zoom=17.4&lat=53.67943&lon=-1.48383&layers=168&b=ESRIWorld&o=100, accessed on 30th September 2024.
  55. https://maps.nls.uk/geo/explore/#zoom=17.4&lat=53.68334&lon=-1.47138&layers=168&b=ESRIWorld&o=100, accessed on 30th September 2024.
  56. https://maps.nls.uk/geo/explore/#zoom=17.4&lat=53.69000&lon=-1.43723&layers=168&b=ESRIWorld&o=100, accessed on 2nd October 2024.
  57. https://maps.nls.uk/geo/explore/#zoom=17.4&lat=53.69243&lon=-1.43590&layers=168&b=ESRIWorld&o=100, accessed on 2nd October 2024.
  58. https://maps.nls.uk/geo/explore/#zoom=15.4&lat=53.70320&lon=-1.42452&layers=168&b=ESRIWorld&o=100, accessed on 2nd October 2024.
  59. Embedded link: https://www.flickr.com/photos/neil_harvey_railway_photos/7834033734, accessed on 3rd October 2024.
  60. https://www.invaluable.com/auction-lot/two-albums-containing-300-cards-incl-yorkshire-ox-166-c-6fd4b7e9e0, accessed on 3rd October 2024.
  61. https://www.blipfoto.com/entry/3134415230512138681, accessed on 3rd October 2024.
  62. https://maps.nls.uk/geo/explore/#zoom=17.0&lat=53.69371&lon=-1.76350&layers=168&b=ESRIWorld&o=100, accessed on 3rd October 2024.
  63. https://maps.nls.uk/geo/explore/#zoom=15.0&lat=53.72852&lon=-2.05697&layers=168&b=ESRIWorld&o=100, accessed on 3rd October 2024.
  64. https://igg.org.uk/rail/3-sigs/sigs-1.htm, accessed on 5th October 2024.
  65. https://commons.wikimedia.org/wiki/File:L%26MR_engine_%27Victoria%27.jpg, accessed on 6th October 2024.

Horwich Locomotive Works again. …..

Railway World magazine in early 1965 carried a two part article about Horwich Locomotive Works.

I always take note of articles about the Works when I find them as my paternal grandfather worked there in the early years of the 20th century, before the great depression when eventually he moved his family to Stapleford in the Derby/Nottingham area and where he took a job at the Loco Works in Derby as a blacksmith.

An article about the Works 18″ internal railway can be found here. [7]

The two-part article in Railway World was written by John Marshall and carried in the January and February copies of the magazine. This present article is substantively based on John Marshall’s work and sections of this article in “italics” come directly from Marshall’s article of 1965. [1]

Horwich Locomotive Works, © Public Domain. [4]

On 6th May 1964, Stanier 2-8-0 No. 48756 left Horwich works after a general overhaul, since when, the great works of the former Lancashire & Yorkshire Railway has been occupied entirely with rolling stock and road vehicles. The history of Horwich works goes back to 1884. When the main locomotive works of the L&YR opened under Sir John Hawkshaw in 1846, was on a very cramped and inconvenient site at Miles Platting, Manchester, almost surrounded by slums in the town.” [1: p22]

On 27th April 1873, “a serious fire caused considerable damage to the workshops but the pressure of work was such that the shops had to be rebuilt. It was during this period that ten Ramsbottom Newton class 2-4-0 engines were bought from the L.N.W.R. Repairs to locomotives were also carried out at the old East Lancashire Railway shops at Bury and smaller repairs were undertaken at several locomotive sheds, and it was therefore difficult to achieve any standardisation of work.” [1: p22]

During the 1870s, the L&YR was in a bad shape. “Train services were slow and unpunctual, and stations, carriages, services, goods and locomotive depots alike were some of the worst in the country. … The wretchedness of the railway was a popular theme upon which both counties of the roses were absolutely unanimous. By the early ‘eighties all this was being changed and it was now the turn of the locomotive works. Expansion at Miles Platting was not possible; a quarter of the machinery and other equipment there was out of date and ill-fitted to cope with work on the larger locomotives of W. Barton Wright. The obvious solution was to build a new works on a different site.” [1: p22]

After retiring because of ill health as Locomotive Superintendent of the LNWR in 1871, John Ramsbottom returned to railway work in 1883 and “became connected with the L&YR as a consulting engineer. At the L&YR directors’ meeting on 19th March 1884, he stated that locomotives could no longer be repaired satisfactorily at Miles Platting works and that it was essential to find a new site for the works. He recommended that in selecting a site the principal considerations should be the price of labour, a good supply of cheap water, cheap coal and a fairly central situation to avoid long runs by light engines. Various sites were suggested and Ramsbottom and Barton Wright were instructed to examine them and report back to the next meeting. Wright was also asked to ascertain the rates of wages in locomotive workshops in different parts of the country.” [1: p23]

Ex-L&YR 0-6-0ST numbered No. 11305 in BR days, shunting at Horwich Locomotive Works, © C.T. Gifford. [1: p22]

At the next board meeting on 21st May 1884 it was noted that an estate in Horwich was about to be auctioned. The board authorised a maximum spend of £65,000. The purchase was secured for £36,000.

The site “was centrally situated and within easy reach of Bolton and Manchester. On 14th February 1870, a branch railway had been opened into the town from Blackrod, on the Bolton to Preston line. Horwich, at the foot of Rivington Pike at the western extremity of the Pennines, had a population of 3,761 in 1881.” [1: p23]

On 26th September 1884, Ramsbottom submitted drawings showing ground levels and locations for various buildings/workshops. The question of a curved connection from the Bolton direction was raised. “Plans were prepared and the ‘Fork Line’ was authorised by Parliament on 16th July 1885.” [1: p23]

Horwich Railway Station was close to the centre of Norwich and only a short distance from the proposed location of the Loco Works. The 25″ Ordnance Survey from the turn of the 20th century. [2]

Work on the site required the legal closure or diversion of several footpaths. The Thirlmere Aqueduct, planned by Manchester Corporation,  had to be diverted at L&YR expense.

Ramsbottom’s plans of the locomotive and wagon works and offices “showed that the locomotive works would occupy nearly 20 acres and accommodate 112 engines; the wagon works would have occupied about 14 acres, for 1,008 wagons, but they were not in fact built. In January 1885 Wright’s detailed elevation of the office building was approved; this included a clock tower which was later omitted.” [1: p23]

Contractors began work on 9th March 1885; “a siding was constructed to bring materials onto the site and a powerful crane and locomotive were soon at work. By August the excavations for the foundations of the erecting shop were almost complete. The next stage involved the removal of a hill on “old Hart’s Farm” containing some 450,000 tons of earth. To carry out this job in one year meant the removal of 1,500 tons daily, and a force of 350 men and boys, two steam navvies, five locomotives and 130 tipping wagons were employed continuously; work continued at night under electric light. … The erecting shop … [was] a vast building 1,520ft long (well over a quarter of a mile) and 118ft wide with three bays running the whole length, the two outer ones being wider than the centre.” [1: p23-24]

A careful review of the equipment at the Miles Platting and Bury works was undertaken showing that only around 50% was suitable for the new works.

In September 1885, the disposal of surplus land to the northeast of the works began, “Some plots were … reserved, including sites for a hotel and a a bowling green but the rest was … sold for building. … Victoria Road and several streets leading from it were laid out by the company; the names chosen for the various streets … [included] Ramsbottom, Hawkshaw, Fairburn, Stephenson, Webb, Gooch, Brunel, Smeaton, Brindley, Telford, Armstrong and Siemens. … A letter was received the Bishop of Salford offering, one penny a square yard for a plot of land for a church, but the Company had already requested fourpence a square yard for a Wesleyan Chapel site.” [1: p24]

Work on the office block, the boiler shop, the smithy, forge and foundry, a large store shed and a large water tank. The new gasworks was erected at this time. … Work on the Horwich fork line began on 21st September! it was opened for goods traffic on 20th June 1887, and for passengers on 1st July with an improved service between Horwich and Bolton and Manchester.” [1: p24]

This extract from the 25″ Ordnance Survey from the turn of the 20th century shows the Horwich branch with both curves in place from the mainline and with the connection into the loco works evident as well. [2]

On W. Barton Wright’s retirement in October 1887, in his place came J.A.F. Aspinall from Inchicore in Ireland to become Chief Mechanical Engineer. At the time of his appointment Aspinall was only 35 years of age.

He persuaded the Company to introduce a premium apprentice scheme and to fund a Mechanics Institute at Horwich. He also urged the immediate purchase of locomotives as prices at the time were relatively low. Based on his assessment of average mileage per locomotive in various railway companies he demonstrated that the L&YR needed a stock of 1,114 locomotives against an existing complement of 963. The shortage of engines was resulting in over use, engines becoming neglected and breakdowns being too frequent.

As an emergency measure, “Aspinall ordered 30 6ft 4-4-0s of Barton Wright’s design, but with Joy’s valve gear, from Beyer Peacock and from the same firm he ordered two small locomotives, at £250 each, for the 18in gauge internal railway system at the works. A third, ordered in 1887, cost £300. Aspinall quickly showed his concern for the well-being of the workers at Horwich. He was dissatisfied with the way the houses were being built and arranged for better supervision of the work. He also arranged for a local doctor to attend to accidents in the works until a permanent arrangement could be made.” [1: p24]

Wren, one of the 18″ gauge locomotives at work at Horwich Loco Works, © Public Domain. [4]

As construction work on the fitting, painting  and erecting shops was nearing completion it was possible to “take in the first six locomotives for repair. They included the Barton Wright 4-4-0 No. 865 Prince of Wales, built by Dübs in 1885 and named in honour of a royal visit to Preston.” [1: p24]

A postcard view of the erecting shop in 1890, included here under a Creative Commons Licence (Attribution-Noncommercial-Share Alike 3.0). [6]
A high level view of the erecting shop at Horwich Locomotive Works. This photograph was taken in 1957, © Public Domain. [4]

The large office block, 323ft long and 58ft wide was brought into use on 19th February 1887 Beyer Peacock supplied two 18in gauge locos by 7th April and they were set to work in the erecting shop.

The foundry was completed next and work began here on 12th April. “The first castings were small engraved iron paper weights which were presented to the L&YR directors as a memento of the occasion. With the opening of the foundry Henry Albert Hoy, at that time manager at Miles Platting, was appointed works manager at Horwich and on Aspinall’s recommendation his salary was increased from £225 to £300, to become £400 in two years.” [1: p25]

Aspinall submitted further plans to the directors meeting on 27th September 1887, for a “further nine shops at an estimated cost of £26,738. For the whole of the work to be transferred from Miles Platting at an early date, it was necessary to start the brass foundry and copper shop at once and to cover in the space between the foundry and the forge to form the steel foundry. Of the shops proposed, the board sanctioned the erection of the tin and copper-smiths shop, the brass foundry, telegraph shop, steel foundry and an extension of the foundry for rail chairs.” [1: p25]

By the end of 1887, Miles Platting workshops were closed, “a few months later the shops at Bury were also closed, and all locomotive repair work was transferred to Horwich. The Miles Platting shops were converted into carriage sheds and the Bury shops used for stores.” [1: p25]

Horwich Locomotive Works as shown on the 25″ Ordnance Survey from the turn of the 20th century. [2]

In January 1888, “work was started on the first order for new locomotives. This consisted of 10 2-4-2 tank engines of Aspinall’s design, the famous “radials”; the first one No. 1008, left the works on 20th February 1889, the second following in about three weeks. Because the steel foundry was not ready, the wheels and tyres were obtained from Germany, but the other parts of the engines were built entirely at Horwich. The tenth was completed during the following August.” [1: p25]

Work began on the first of the numerous Aspinall 0-6-0s in January 1889. The first order was for 10 engines, the first being completed in September and the last on 27th March 1890. Marshall’s article lists “the building dates of … all batches of locomotives built at Horwich until locomotive work ceased. Between 1891 and 1900 Aspinall rebuilt 230 of Barton Wright’s 4ft 6in 0-6-0s into saddle tanks for shunting. This released an equal number of serviceable tenders, hence the large number of locomotives built without tenders during this period.” [1: p25]

A table showing the building dates of all the batches of locomotives built at Horwich. The table was provided by John Marshall in his article in Railway World. [1: p26]

The Mechanics Institute building was opened  in December 1888. Courses in electricity, mechanics, mathematics and machine drawing were introduced. There was a staff of 5 teachers with 90 students per week. “Fees were nominal, but if a student attended less than 21 classes in each subject, the charge was doubled.” [1: p26] The Institute was extended by the addition of a public hall to seat 900 people, a library, reading rooms and class rooms which were opened in October 1895.

By 1892 “the works were in full operation and by this time Horwich had become a fair-sized town, the census of 1891 recorded a population of 12,850, and this continued to grow. Social and recreational amenities were provided by the company including a large dining hall with accommodation for 1,100 men, and a large recreation ground laid out with two bowling greens, tennis courts, a cricket ground and a children’s playground. … A cottage hospital was built and accidents could thus be attended to promptly. To serve the new population the company had about 70 shops erected along Chorley New Road. On 13th April 1900, the Bolton Corporation electric tram service was extended to Horwich and on 19th May a route was opened via Victoria Road and through the main street of the old town, but this was closed in December 1907. There is no doubt that the trams were the cause of the later reduction in the train service to Horwich from Bolton.” [1: p26]

Marshall described the Works soon after they opened: … “The main entrance in Chorley New Road is attractively laid out with gardens and lawns, and beyond, at right angles to the road and the rest of the works, stands the office block. A wide corridor runs down the centre giving access to various offices including the drawing office. This is a long room occupying much of the north-west side of the building. Connected to the office at the far end and conveniently accessible by road and rail is the general store, 198ft long and 111ft wide, arranged on two storeys with a gallery round the four sides leaving the centre open to the roof.” [1: p62]

Marshall goes on to write about the 18in gauge internal railway which linked the stores with every part of the works, the length of track amounting to 74 miles. Eight 0-4-0 steam locomotives worked the system; Robin, Wren and Dot built in 1887, by Beyer Peacock and the others built at Horwich: Fly and Wasp in 1891, Midget and Mouse in 1899 and Bee in 1901. They had no works numbers and do not figure in the tabulated list of new engines above.. They had wheels of 16 in dia. and cylinders 5in dia. by 6in stroke.

He then returns to his description of the Works: … “The boiler shop is 439ft long and 111ft wide and its three bays are traversed by 12 ton and 20 ton capacity overhead cranes. For tapping stay holes Aspinall designed a multiple stay-tapping machine worked by ropes and pulleys. Boilers are rivetted up at the end of the shop in two Tweddle rivetting towers designed by Fielding and Platt. The whole of the machinery and equipment is arranged so that the progress of the work from the entry of the plates to completion proceeds step by step through the shop with no doubling-back or crossing to other machines. From the boiler shop we enter the boiler shop smithy, the same width and 120ft long. This is equipped with fires and hydraulic flanging presses for flanging firebox backs, tube plates, throat plates, ashpans and other pressings. The presses and rivetting towers use water at a pressure of 1,500 lb/sq in.” [1: p62]

Marshall’s narrative goes on to the next section of the building, the forge. It was the same width and 452ft long, and contained a series of Siemens regenerative furnaces for reheating. Among the machines were a 35 ton duplex hammer, one 8 ton and two 5 ton hammers. Beyond the forge, in the same row of buildings, was the steel foundry, 150ft long and 135ft wide, the iron foundry 212ft long and 111ft wide and the chair and plate foundry 124ft long and 128ft wide.

In 1899 two 2 ton Tropenas Converters were installed in the steel foundry which [was] fitted also with Siemens Martin regenerative melting furnaces and facilities for annealing steel castings. The iron foundry and the steel foundry form[ed] a continuous building in three bays traversed from end to end by overhead 12 ton electric cranes. The ground on the north side of the iron and chair and plate foundries [was] at a higher level and from here the melting furnaces and cupolas [were] charged. In the iron foundry [were] produced railway castings of every type.” [1: p62] 

The next row of buildings were narrower, only 47ft wide; “first [was] the tinsmith’s shop, 92ft long, next the motor shop, 153ft long, where electric motors and other equipment [were] maintained; the coppersmith’s shop, 89ft long and the brass foundry, 164ft long. … The central power station, next in the line, produce[d] electricity for the entire works and [was] 32ft long. The adjoining boiler house contain[ed] a battery of Lancashire Boilers, some fitted with underfeed mechanical stokers and Green’s Economisers, and others with forced draught grates for burning inferior fuel. In the fettling shop castings from the foundries [were] dressed. The carriage & wagon wheel shop, 200ft long, [was] equipped with lathes for turning and boring wheels, and presses for pressing tyres on to wheels for forcing wheels on to axles.” [1: p62]The middle row of buildings has a uniform width of 111ft. Opposite the stores is the paint shop, 234ft long, uniformly lit without glare by a north light type roof and maintained at an even temperature of 55 to 60 deg. F. by hot water

Plan of Horwich Locomotive Works in 1961. [5]

The middle row of buildings was uniformly 111ft wide: “Opposite the stores [was] the paint shop, 234ft long, uniformly lit without glare by a north light type roof and maintained at an even temperature of 55 to 60 deg. F. by hot water pipes laid along the engine pits. The shop accommodate[d] about 20 engines on six rows of pits 2ft deep, and include[d] a store from which all colours, oils, varnish and other materials [were] issued and a plant for mixing paints. It was the custom to spend about three weeks painting a new L&YR engine. After the filling and priming operations three coats of paint were applied followed by three coats of varnish.” [1: p62-63]

The testing shop occupied the next 27ft of the building. It was “equipped with a vertical 100 ton Buckton hydraulic testing machine using water at a pressure of 1,000 lb/sq in. Also working at the same pressure [was] a 100 ton horizontal chain testing machine. There [were] machines for preparing test specimens, a steam hammer and appliances for testing oil and springs. The chain smithy occupie[d] the last 28 ft of the building, and beyond it [was] a chain annealing furnace, Between this and the next shop, the yard [was] spanned by a large gantry used for handling boilers and other heavy items. … The millwright’s shop, 143ft long, maintain[ed] the various types of machines used on the railway. Adjoining this [was] the pattern makers’ and joiners’ shop, 164ft long, fully equipped with woodworking machinery and for saw maintenance.” [1: p63]

The fitting and machine shop sat at the centre of the Works. It was 508ft long. “Four 5 ton electric jib cranes travel[led] along the centre of the two outer bays and serve[d] the machines on each side. The end of the building [was] occupied by the points & crossings shop, 72ft long, and signal shop, 128ft long. … Some 150yd beyond the signal shop [was] the bolt shop, 60ft long, and the smithy, 212ft long. Among the equipment here [were] 11 double and 27 single hearths, steam hammers and drop stamps.” [1: p63]

The fourth row of buildings beg[an] with the engine shed, alongside the paint shop. The heavy machine shop, 360ft long and 48ft wide contain[ed] machines for straightening frame plates, and slotting, radial arm drilling machines and the means for making built-up crank axles. Beyond [was] the spring smithy, 153ft long, where spring plates [were] made. … Finally there [was] the enormous erecting shop … with room for 90 engines and 30 tenders. Access [was] by the ends and by two traversers 32ft wide. The shop [was] divided into five sections each equipped with four 40 ton capacity overhead travelling cranes, two on each side. The total area of the works [was] 81 acres of which the area covered by workshops [was] 17 acres.” [1: p63]

Aspinall was appointed General Manager of the L&YR in June 1899, by then, 677 locomotives had been built at Horwich. He was succeeded by H. A. Hoy, under whom a further 220 locos were built. Hoy was succeeded by George Hughes in 1904. Hughes was an internal appointment and he remained at Horwich until he retired in 1925. “The 1,000th locomotive to be built at Horwich. No. 15, one of the Hughes 0-4-0 Railmotor locomotives, Works No. 983, appeared in March 1907. … During the 1914-18 war Horwich works was engaged in manufacturing military equipment of all types. On 1st January 1922, the L&YR was amalgamated with the LNWR. and George Hughes became CME of the combined company. When the LMS was formed a year later, Hughes was appointed CME of the entire system. … For the next three years [Horwich] this became the CME’s headquarters for the whole of the LMS.” [1: p63]

Change occurred after Hughes retired in 1925. The LMS began centralising activities. “The telegraph shop, signal shop, points & crossings shop, forge, and steel foundry were closed and the work transferred elsewhere. The spring smithy was transferred to the general smithy and the original building became a tube and bar store. In about 1927, the high level boiler house was closed down. During the great depression in 1931, locomotive building was suspended after completion of a batch of 15 standard 0-6-0 tanks on 15th October and locomotive work was confined to repairs. From 1932, after the closure of Newton Heath carriage works, the electric multiple-unit trains on the Liverpool-Southport-Crossens and Manchester-Bury-Holcombe Brook services were taken to Horwich for repair, and occupied the north western end of the erecting shop, this section becoming known as the car shop.” [1: p63-64]


Part of the Works was used between 1939 & 1945 for the manufacture of armoured fighting vehicles and shells. “From May to November 1943, 33 American 2-8-0 engines passed through the erecting shop for some 30 modifications, chiefly the fitting of a Gresham & Craven combination injector and graduable steam brake valve, the overhaul of part of the motion and the fitting of hand brake gear to the tender. … In June 1943 locomotive building was resumed with a batch of Stanier 2-8-0s and tenders.” [1: p64]

The last steam locomotive to be built at Horwich was B.R. Standard Class 4 2-6-0 No. 76099 which left the works on 27th November 1957. On 20th August 1958 work began on a series of 350 h.p. 0-6-0 diesel shunting locomotives. The last of these, No. D4157, was completed on 28th December 1962.” [1: p64]

Marshall tells us that, “after the war a mechanised foundry was built in the shop which was originally the forge. The casting of chairs was transferred to the new foundry. A typical year’s work during this period included 20 new locomotives, 350 heavy repairs and 240 light repairs to locomotives, and repairs to 200 boilers and 90 electric vehicles, and the general production work of castings, etc. With the closure of Gorton works in 1963 the manufacture of points and crossings began again at Horwich. During 1963 the number of locomotives for repair declined and the erecting shop was invaded by wagons, many of them the result of the running down of Earlestown works, and the last locomotives entered the shop in April 1964.” [1: p64-65]

Altogether, some 50,000 locomotives [were] repaired in 76 years, an average of over 680 a year.” [1: p65]

Marshall concludes his articles by noting that Horwich Works were a place of training and development for a number of significant people in the history of railways in the UK: Sir Nigel Gresley, R.E.L. Maunsell, George Hughes and Sir Henry Fowler, and others of significance to railway history around the world, for instance J.P. Crouch, who became CME of the Argentine Central and Rupert Fawker, CME of the Sudanese Railways.

The Works were also an important place of employment for generations of people in Horwich. Inevitably, economic conditions varied over the years, families had to travel around the country to find other work when redundancies occurred.

My paternal grandfather and grandmother found alternative work and a new home in the Midlands. I guess that there were many like them, both in the 1930s and in subsequent generations right through to the eventual closure of the Works for whom redundancy brought family trauma, a loss of dignity and a sense of hopelessness. People who felt trapped in their circumstances, swept along by a tide of events over which they had little or no control. People who had to find a new route through life for themselves and their families and who showed the same courage and commitment in their own circumstances as those who were prime movers in the development of Horwich Locomotive works in the late 19th century.

An aerial view of Horwich Locomotive Works, seen from the Southeast. [4]
A closer aerial view of Horwich Locomotive Works, seen from the Northwest. [4]

Of additional interest relating to Horwich Locomotive Works is a short note in The Railway Magazine of September 1909 entitled “The Lancashire & Yorkshire Locomotive Stud.” …

The usual summer convention of the Institution of Mechanical Engineers which this year was held at Liverpool, after a long interval, will be remembered as a railway convention, particularly as a Lancashire and Yorkshire Railway one. Firstly, because Mr. J. A. F. Aspinall, the chairman of the meeting and president of the Institution, is the General Manager of the Lancashire and Yorkshire Railway; secondly, because the principal paper was contributed by Mr. Geo. Hughes, the Chief Mechanical Engineer of the Lancashire and Yorkshire Railway; and lastly, because of the visit paid to the Horwich Works.” [8]

Mr. George Hughes’ paper was entitled “Locomotives Designed and Built at Horwich, with some Results.” In it he stated that formerly there were in service on the Lancashire and Yorkshire Railway 29 types of passenger engines and 26 types of goods engines, the total stock being 353 passenger and 647 goods engines. There are now 1517 locomotives, of which 1,052 have been built at Horwich. About 1,100 are in steam daily. Mr. Aspinall, while chief mechanical engineer, had adopted the policy of reducing the number of types, introduced standardization, and, wherever possible, interchangeability. The number of types had now been considerably reduced. Experience with the Druitt-Halpin thermal storage tank had shown that where stopping places were frequent on rising gradients it led to distinct economy, the saving varying from 4 to 12 per cent. Experiments were now being carried out with a super-heater, the results of which would be communicated at a later date. The average life of boilers on the Lancashire and Yorkshire Railway for the three years ended December, 1908, was 14 years, representing an average mileage of 356,268. Copper fire-boxes ran from 150,000 to 275,000 miles, while over a period of 20 years it was found that the life of cylinders varied from 8 to 14 years. With the more severe modern conditions of service the solid type crank axle had been supplanted by the built-up pattern.” [8]

References

  1. John Marshall; Horwich Works – Parts 1 & 2; in Railway World, Ian Allan, January & February 1965.
  2. https://maps.nls.uk/geo/explore/#zoom=13.8&lat=53.59816&lon=-2.55472&layers=168&b=1&o=100, accessed on 7th July 2024.
  3. https://www.rivington-chase-horwich.co.uk/how-the-loco-works-transformed-a-town/#iLightbox[gallery1389]/0, accessed on 8th July 2024.
  4. https://www.theboltonnews.co.uk/news/17827041.loco-works-changed-horwich-sleepy-village-hive-industry/, accessed on 8th July 2024.
  5. https://www.ebay.co.uk/itm/134401504434?itmmeta=01J29FXDQ4GPYP215PRE0N39F4&hash=item1f4af434b2:g:UKsAAOSwDIhjuAQY&itmprp=enc%3AAQAJAAAA8FNo54t30Rd%2Btl1m%2ByAZZMpwRDAWscjnkRK6bHYqjrGvBGpfK9mly9U26cLrMARZPwDUAlA2UBgFUI%2Fc5asa02lj56eVZljw6L%2BcfSgmgab44UPVMvJ6wCrLdS4ANswjHHQLO8vfXMdOJlAbyisr8iBf%2FaDEk4tCxjLV0gRvRfAeRwrIDuoY5arXElpgW2%2BowLdJUPl168gsvIYII9wbeGjs%2BZOajGmYYkeHKD%2FxI%2FYv%2BfHSXv7xE4yFJIbDvegrL%2BgwtMsoe7zpnH%2BTB4idm2%2Fv1Exm2qalkdgLsN%2FW9k6BzP6rBmq34I1fykfcehmWMA%3D%3D%7Ctkp%3ABk9SR57c9a-SZA, accessed on 8th July 2024.
  6. https://archive.org/details/HorwichLocoWorksErectingShopsC1890, accessed on 8th July 2024.
  7. https://rogerfarnworth.com/2019/12/12/horwich-loco-works-18-gauge-railway-part-1
  8. The Lancashire and Yorkshire Locomotive Stud; in The Railway Magazine, September 1909, p256.

A Rail Strategy for Greater Manchester (1983). …

Reading the ‘Modern Tramway’ Journal of May 1983 in Autumn 2023, took me back to the time when I was working for Greater Manchester Council. The County Engineer was A.E. Naylor. I was working in the Engineer’s office in County Hall.

The ‘Modern Tramway’ carried an article by W.J. Wyse about the then recently released rail strategy for the conurbation. [1]

The report was released on 18th February 1983 and summarised the results of six months’ work by BR, the Greater Manchester Council (GMC) and the Greater Manchester PTE, assisted by consultants, ‘to develop an achievable long-term strategy for the maintenance and development of the local rail network, having regard to the likely development of the Intercity network’. It was a report which first made clear intentions for the building of a new ‘tram’-network for Greater Manchester.

Wyse writes:

“From the BR side, there was the important objective of improving Intercity services, so that these need no longer terminate at Manchester. An obvious example of such improvements would be to permit Anglo- Scottish expresses to run from London to Manchester on their way to Preston. The “Picc-Vic” scheme of the early 1970s had had to be abandoned because resources were not available. A later proposal for a low-cost Castlefield curve would have given only limited benefits in terms of improved central area access. Then, in 1980, BR published its proposals for the Windsor Link in Salford which, also using the link via Deansgate and Oxford Road, would enable through running between several interurban and local services. Coupled with the proposed Blackpool-Preston-Manchester electrification, this would also improve access to many Intercity services. Further improvements would follow from the Hazel Grove Chord, linking Hazel Grove with New Mills Central, to give better Intercity services to Sheffield.

The desire to improve the BR facilities in Manchester obviously brought up the possibility of electrifying the existing local rail system at 25 kV, coupling this with converting the 1500-volt lines to Hadfield and Glossop and the 1200-volt third-rail line to Bury all to 25 kV overhead supply. The problem here is that this would be a very expensive solution, so other strategies were considered and compared.

The current rail situation has five distinct areas which create problems that have to be solved in order to improve services. Some of these have already been mentioned, but setting them out in this way shows them in perspective.

1) Rolling stock obsolescence, especially of diesel railcar units.

2) Re-equipment of non-standard electric services now using de supply.

3) Renewal of obsolete signalling systems.

4) Separate north and south suburban railway networks, with lack of links and lack of penetration into and across central Manchester, making rail travel less attractive.

5) Two main Intercity stations, Piccadilly and Victoria, too far apart for easy interchange, and causing duplication of to be abandoned because resources were not facilities.

The GMC has committed itself to maintain the present basic pattern of rail services, and to improve the network to increase the use made of it. This includes better access to existing stations as well as possible new stations, and putting pressure on the government to authorise construction of new class-141 diesel railcar rolling stock.” [1: p146]

The Report proposed a number of alternative strategies.

BR’s intention to focus its Intercity services at Manchester Piccadilly retaining Victoria for provincial interurban and local services was made clear. This would mean a basic framework of Intercity services to Crewe, Macclesfield, Leeds, Preston and Liverpool, and beyond. Other interurban lines would serve Warrington, Chester and Bradford. These main programmes would then govern the re-equipment policies for the local services on these lines.

The rail strategy study concentrated on the lines which carry only local services, and indirect access into and across central Manchester.

The two main options were:

1) a comprehensive system of cross-city rail tunnels with electrification of the whole regional system to 25-kV mainline standards with ‘conventional’ rolling stock; or

2) non-conventional solutions using existing rail routes and a former rail route (to Charlton and Didsbury) with vehicles that could run on existing streets or in tunnels across the city centre to provide a comprehensive network that also would also allow for interchange with the Intercity network.

That second option was then further subdivided into two:

2a) a Light Rail Rapid Transit system using vehicle which were defined as “a cross between a rail vehicle and a tram”; and

2b) replacement of rail tracks by carriageways on which some form of express bus would run.

It was noted that (2b) might create problems for existing and proposed goods facilities.

Greater Manchester Rail Network with the Windsor Link and the Light Rail Transit System. It is interesting to see how much of this proposal has been implemented by 2023 and what additions have been made to the proposals as well. [1: p147]

The conventional rail solution would have meant a rail tunnel between Piccadilly and Victoria Stations with an intermediate stop at Piccadilly Gardens. Another tunnel would have run East-West, connecting the Altrincham line with the Piccadilly line with an intermediate station at Albert Square No reinstatement of the Chrolton-Didsbury line was included.

The non-conventional solutions would have to meet certain criteria:

“i) segregation from the conventional rail network except for grade crossings with limited movement of goods;

ii) routes compatible with development of the conventional rail network;

iii) existing or potential traffic must be sufficient; and

iv) the routes must make a logical network and, for the corridors they serve, give adequate interchange with the main BR network.

These criteria would be satisfied by the following lines; Bury, Rochdale via Oldham, Glossop/Hadfield, Marple/Rose Hill (assuming building of the Hazel Grove chord), Altrincham (with Chester services diverted via Stockport), and the former Midland line to Didsbury.

Interchange with conventional Intercity and local rail services would be given at Victoria, Piccadilly and Deansgate/Central stations. The cross-city routes would meet at Piccadilly Gardens with the equivalent of a triangular junction to provide good access to what they call “the core of the Regional Centre” by all permutations of through-running across the junction.

The routes for the surface link in the city centre [had] been worked out to minimise conflicts with general traffic; apart from the section between Piccadilly Gardens and High Street, the lines would not run through high pedestrian-activity areas. These routes, as shown in the map, have been worked out for a Light Rail solution, but the report indicates that they could be modified for a busway solution.

Alternatives to LRT that were considered include road-based systems (buses and trolleybuses) and dual-mode systems including busways on existing rail formations. The only systems they felt worth considering [were]: LRT, busways and guided buses. [1: p148]

The possible LRT system would require lower standards (in terms of alignment, stations, signalling and vehicle weight) than conventional rail systems. They would be able to run on streets and use existing rail routes at relatively minimal cost. This made them very attractive. Their capacity was stated as between 1,000 and 5,000 passengers per hour, with up to 10,000 in central areas. It was noted that phased development would be possible and that boarding and alighting might well be at close to normal pavement level.

Wyse continues:

“Changes would be needed to the proposed new layout of Piccadilly Gardens, and a number of changes to the road layout to accommodate LRT would have to balance the needs of LRT against other vehicles and pedestrians. An important change of attitude from the more usual approach is the opinion that installation of LRT need not lead to any significant decline in environmental standards, especially if overhead wires can be supported from wires attached to buildings rather than poles.

An LRT system could be extended on to other existing or former rail routes, or considered for other corridors where the roads are wide enough to allow construction. Indeed the wheel [had] now turned full circle, for the LRT could be extended “on-highway, right into the middle of major district centres”, in other words, as a conventional tramway. …

Both busway solutions [were] not … studied in the same detail as LRT solutions. They would require significantly higher capital expenditure for carriageways to replace existing rail tracks on some 90% of the proposed system, but only indicative costs [were] worked out for a carriageway width of 8 m with hard shoulders of 2.5 m. Whilst a guided busway would avoid the need for hard shoulders, there [were] issues of operational reliability and ‘on street’ use. A busway that [could] run on street without extra works or hardware could have advantages over LRT, and feeder services at the outer ends could also use existing roads. Further work would [have been] needed to establish whether capital costs could be reduced without sacrificing the operational and safety aspects. [1: p148-149]

A Comparison of Costs

This table gives an idea, at November 1982 prices, of the relative costs of the different options. The report’s authors noted that these figures do not include thing which were common to all the options, such as the Northwest electrification and the Windsor Link. [1: p149]

As can be seen in Table 1, LRT at surface level is the cheapest estimate by some margin. The report also considered what might be the costs of a first phase of work:

  • Re-electrifying the Bury line and constructing the Victoria-Piccadilly tunnel – £95 million;
  • LRT above ground – converting the Bury and Altrincham lines and building the complete city centre network – £38.5 million
  • LRT city centre network in tunnel, otherwise as the above ground scheme – £56.5 million.

Apparently, no work had yet been done “on assessing the operating costs of the alternative strategies, or on considering the effects of bus operating strategies. … While no assessment [had] been made of the benefits to passengers and the effects on other road users, all options [were] considered likely to give significant benefits compared with the ‘Do Nothing’ alternative.” [1: p149]

Cost comparisons were made with the Tyne & Wear and the London Docklands schemes with figures adjusted to November 1982 levels. Table 2 shows these prices.

This table shows just how significantly lower the estimated costs/mile of the Manchester LRT schemes were when compared with the Tyne & Wear Metro and the London Docklands schemes. The critical figures are in the right-hand column in the table. [1: p149]

Wyse commented that work so far undertaken indicated “that if the present rail network [was] to be retained, an LRT system using existing rail lines which do not carry BR interurban services would appear to offer a significantly cheaper solution than conventional heavy rail and ‘busway’ solutions.” [1: p150]

He also noted that, “Further work [was] needed to consider both the operating costs of the alternatives, with due allowance for revisions to bus services, and the likely order of benefits. … Aspects which need[ed] early consideration include[d]: confirmation of the feasibility of city centre LRT tunnels, the safeguarding of potential LRT and busway routes and facilities, the organisation and management of an LRT or busway system (a joint BR/PTE set up [was] suggested), and finally the opportunities to provide improved cross-conurbation services and connexions to Intercity services for major district centres such as Ashton-under-Lyne.” [1: p150]

Manchester’s Network in 2023

40 years on from thi9s report it is interesting to note how much of what was planned came to fruition. As we know the high cost solution of tunnelling under the city centre was not developed. A Light Rapid Transit solution was given the go-ahead and has met much of what was intended.

The network map can be found here [2].

The first line constructed was the Altrincham to Bury line through Victoria Station and the centre of the city. A link to Piccadilly Station was also installed in the early years. The following history is gleaned from Wikipedia [3].

Phase I opened in 1992. The original Market Street tram stop handled trams to Bury, with High Street tram stop handling trams from Bury. When Market Street was pedestrianised, High Street stop was closed, and Market Street stop was rebuilt to handle trams in both directions, opening in its new form in 1998.

Shudehill Interchange opened between Victoria station and Market Street in April 2003. The bus station complementing it opened on 29 January 2006.

Phase 2 provided a link with Salford Quays with a line running to Eccles. Cornbrook tram stop was opened in 1995 on the Altrincham line to provide an interchange with the new line to Eccles. There was initially no public access from the street, but this changed on 3 September 2005 when the original fire exit was opened as a public access route.

Two of the original stops; Mosley Street, and Woodlands Road were closed in 2013. The latter being replaced by two new stops (Abraham Moss and Queens Road) opened nearby.

By the mid-2000s, most of the track on the Bury and Altrincham routes was 40+ years old and in need of replacement. In 2006 it was decided that a £107 million programme to replace this worn track would take place in 2007.

Phase 3 entailed a significant expansion of the network. It turned into a series of different phases as different funding arrangements had to be made:

Phase 3a – created four new lines along key transport corridors in Greater Manchester: the Oldham and Rochdale Line (routed northeast to Oldham and Rochdale), the East Manchester Line (routed east to East Manchester and eventually to Ashton-under-Lyne), the South Manchester Line (routed southeast to Chorlton-cum-Hardy and eventually to East Didsbury), and eventually the Airport Line (routed south to Wythenshawe and Manchester Airport). A spur was also added to the network to link from the Eccles line to Media City. The link to Media City was opened in 2010. The Line to Chorlton opened in 2011. The other lines opened gradually between 2011 and 2013.

Phase 3b – Three lines mentioned in the paragraph above were extended from initially shorter lines. The construction of the East Manchester line extension from Droylsden to Ashton-under-Lyne, the East Didsbury extension from Chorlton and the Airport line via Wythenshawe, commenced in 2011 and all was complete by the end of 2014.

The link to Manchester Airport. [5]

Phase 2CC – Second City Centre Crossing – was completed in 2017.

Trafford Park [4] – The Trafford Park line linked the Trafford Centre to the network and opened in 2020.

References

  1. W.J. Wyse; A Rail Strategy for Greater Manchester; in Modern Tramway and Light Rail Transit, Volume 48 No. 545; Light Rail Transit Association and Ian Allan, Shepperton, London; May 1983, p146-150.
  2. https://images.ctfassets.net/nv7y93idf4jq/4RsbFDfzF2zVYfE67Njh8H/0018c0020be875e86e41b04e940433ab/23-0483_Metrolink_Map_-_Sept_2023.svg, accessed on 11th October 2023.
  3. https://en.wikipedia.org/wiki/History_of_Manchester_Metrolink, accessed on 11th October 2023. The featured image comes from this Wikipedia article.
  4. https://en.wikipedia.org/wiki/Trafford_Park_Line, accessed on 11th October 2023.
  5. https://www.theguardian.com/uk-news/2014/nov/02/manchester-metrolink-line-opens-ahead-schedule, accessed on 11th October 2023.

The Peak Forest Tramway – Part 1

Peter Clowes, in his article in the September 1963 edition of the Railway Magazine wrote: “Rolling down from the Derbyshire hills came the “gang” a train of perhaps 20 wagons, their rough iron bodies piled high with skilfully stacked lumps of grey limestone. They lurched and swayed on the flanged steel track and forced the brakeman in charge of the train to cling firmly to the leading wagon on which he perched. This is how the villagers of the High Peak remember the clattering, dusty Peak Forest Tramway, built by Benjamin Outram, that was part of the life of the district for 125 years.” [1]

He goes on to explain that the tramway was only ever used for goods, no passengers were carried except when company officials undertook tours of inspection. The line carried lime and limestone from Buxton’s quarries and kilns down to the Peak Forest Canal at Bugsworth for ongoing transport on barges to Lancashire and beyond.

Wikipedia provides a sketch map of the route of the tramway which is reproduced below.

Sketch Map of The Peak Forest Tramway. [2]
The Peak Forest Tramway. [18]

The next (adjacent) sketch map is more informative. It was included in a post about the line on the Peak and Northern Footpaths Society website. It shows the locations of a number of key features on the route of the tramway. [18]

Benjamin Outram’s original intentions  were to build a canal from Ashton-under-Lyne through to Chapel Milton, now a ‘suburb’ of Chapel-en-le-Frith. [4] He sought and received and Act of Parliament to this effect, dated  28th March 1794. That Act authorised the construction of the canal, which would have been 22 miles long, and the construction of a feeder tramway/plateway from the canal to Load’s Knowle (Dove Holes), near Buxton. Gradients between Chapel Milton and Buxton were severe and unsuited to canal construction.

However, Outram decided to reduce construction costs by terminating the Peak Forest Canal at Bugsworth and building his tramway for the whole of the remaining six miles to Dove Holes. Clowes tells us that, “The line was opened on August 31, 1796, and was an immediate success. Hundreds of tons of stone were brought down to Bugsworth every day. Sometimes there were as many as 20 barges – each with a capacity of 20 tons leaving the village for Lancashire.” [1]

Wikipedia tells us that “the tramway was initially single-track, on a 4 ft 2 in (1,270 mm) gauge, constructed of stone sleeper blocks and L-section cast-iron rails that were fastened directly onto the blocks, in the same manner as [Outram’s] Little Eaton Gangway built for the Derby Canal. The rails, known as gang rails or plates, were provided by Benjamin Outram and Company who also supplied the mineral wagons.” However, in 1803, the significant traffic volumes on the line required the single line to be “made double-track, with the exception of Stodart Tunnel and below Buxton Road Bridge, using the same method of fixing the rails.” [2]

When Outram’s Peak Forest Canal Company was building the Peak Forest Tramway, between 1794 and 1796, it cut into a bed of gritstone by the hamlet of Lower Crist, about 380 yards to the east of the terminus of the Peak Forest Canal at Bugsworth. The stone apparently “had good non-slip properties and was easy to cut because it had no grain. … This bed extended south of the main line of the tramway at Lower Crist and a branch line was made into it. The Company also discovered another deposit of the same stone adjoining the nearby hamlet of Barren Clough, which is situated between Lower Crist and the canal terminus. Consequently, they purchased land there as well but it was another 56 years before Barren Clough Quarry was opened.” [3]

Clowes comments that a considerable trade in this gritstone developed as it was located so close to the Tramway and Canal. “Thousands of 6 in. square setts for the cobbled streets of the country’s growing cities were carried … to the wharfs.” [1]

Bugsworth a sleepy little village, renamed Buxworth, … became a hive of industry.” [1] [5]

It was originally intended to extend the tramway to Buxton as and when demand for minerals grew. A further extension to Ashopton in the Hope Valley over the Rushup Moors by way of Sparrowpit , Mam Tor and Lose Hill was also planned. “These extensions never materialised and the plans were finally abandoned when the Cromford & High Peak Railway was built in 1830.” [1]

Clowes provided a vivid description of what travelling with the “gang” must have been like. A quite exhilarating experince! “Teams of horses pulled the loaded wagons from the Dove Holes quarries to the highest point of the line about a quarter of a mile away. Here the horses were unhitched. The brakeman gave the “gang” a push and then leaped onto the leading axle pin as the train of anything from 16 to 40 wagons gathered speed. At first the track curved gently through a long limestone cutting, then under the main Buxton to Chapel-en-le-Frith road by means of a stone arch bridge and down into the woods of Barmoor Clough between dry stone walls about 20ft. apart. This section of the line was closely followed by the London & North Western Railway when its spur was constructed from Stockport to Buxton, more than 50 years after the tramway was built. Until the tramway ceased operations in 1920, trains and “gangs” ran alongside each other separated only by a moss-covered wall.” [1]

As we will see in a future article about the line, “where the railway swings left into a tunnel, the tramway continued around the shoulder of a hill that shadows the birch and sycamore clad gorge which plunges down to Blackbrook. … The “gang” ran on down a steady 1-in-60 gradient to marshalling yards at the end of a 900-ft. ridge overlooking Chapel-en-le Frith. Here were workshops, stables, a permanent way store, and other buildings of the tramway company.” [1]

An inclined plane, 500 yd. long and worked by a wire rope that ran around an 18 ft.-wide wooden drum, controlled the descent of loaded wagons to the foot of the slope. The rope was 2 in. in diameter and weighed six tons. No more than eight wagons were allowed in a run on the incline. The loaded vehicles would be balanced with an appropriate number of empties whenever possible. The weight of the descending wagons pulled the empties up the slope. Sometimes horses were harnessed to the driving drum to provide additional power. If the weight of the wagons became too great and the train started to run away, a lever-operated brake would be applied in the wooden control cabin that stood on stilts just beyond the top of the 1-in-7 incline. Sometimes, however, this proved ineffective. With an ever-increasing roar the wagons would race downhill, then jump the rails and scatter their loads far and wide.” [1]

Clowes narrative continues from the small town of Chapel-en-le-Frith: “After negotiating the plane the “gangs” were reassembled in the Townend sidings and were started again on the journey to Bugsworth under their own momentum. Soon they were clattering across Bowden Lane and through a copse of oak and elm.” [1]

A mile west of Chapel was Stodhart Tunnel which the wagons entered through a steep sided cutting, the slopes of which were covered with ivy and rhododendron bushes. For 100 yards the “gangs” thundered in darkness. Then they were out into daylight and speeding along the fastest part of the track through Chapel Milton. There were sidings here across the road from the old Spread Eagle Inn-and two or three wagons of lime might be shunted off the main line to await the arrival of local farmers with horse and cart. The tramway continued through the pleasant fields of Bridgeholm, across the Whitehough road and along the banks of Black Brook to Bugsworth. The whole journey might take three hours, allowing for delays on the plane.” [1]

At Bugsworth, the tramway divided into extensive sidings and there were many loading berths. where limestone was tipped into large canal-side storage bays below the level of the track. Clowes tells us that “one of the most interesting features of this inland port was a simple yet ingenious tipping wheel which consisted of two vertical, spoked wheels about 16 ft. high attached to a frame which ran on a special rail track. The frame was pushed over a line of wagons which had been run on to a pier over the canal basin, and a hook was fastened to the end of each wagon in turn. A rope led from the hook over a drum which linked the two main wheels. A man would climb up the spokes of one of the vertical wheels, so making it turn like a human gin. This lifted one end of the wagon off the rails, its hinged end-plate swung open and the contents of the vehicle spilled into the hold of a barge below.” [1]

Bugsworth Basin was surrounded by merchants’ offices and warehouses. The offices housed a series of different merchants supplying limestone, lime, coal and general merchandise. Further buildings housed workshops for track and rolling-stock repair; and stables for a horses which were used to transport goods and wagons back up the line to Dove Holes.

Outram’s plateways used L-shaped flanged track on which the wagons ran. The rails were 4 ft. 2 in. apart and initially made of cast-iron. Each rail was 3 ft. long and weighed 56 lb. Clowes tells us that, “the inner flange was raised 2 in. above the 3 in. wide running surface on which the flat wheels of the wagons ground their way. The rails were secured at the joints by cast-iron chairs which sat on stone block sleepers, each one about 18 in. square. An iron spike with a tapering head was driven through the end of each rail into an oak plug seated inside the sleeper. The clatter of “gangs” passing over these primitive joints must have been fearful and, understandably enough, rail breakages were frequent.” [1]

It wasn’t until the five year period between 1865 and 1870 that the line was relaid with 9 ft. long steel rails. These were rolled at Gorton and fishplates, 1ft 6ins long were used to connect the rails.Between the stone sleeper blocks was laid a cobbled path which enabled the horses to get a firm grip. The cobbles were raised well above the level of the sleepers, in fact about an inch higher than the rail flange. This arrangement might have helped to guide wagon wheels back on to the track following derailments.” [1]

Clowes explains that wagons used on the tramway were very crudely constructed: “Each weighed between 16 and 20 cwt. when empty, and carried about 2 tons. Three sides of the body were sheets of cast iron held together by iron bands and two large wooden chocks. The fourth side was a hinged iron gate which swung open when the vehicle was tipped to unload its cargo. The body was bolted in farm-cart style to wooden axle beams. The wheels – some were cast iron, others were of wood with wrought-iron tyres – ran loose on iron pins projecting from the axle beams. They were secured by large washers and cotter pins. The “gangs” were coupled together by two short iron chains fastened at each end of the wagon beds. There was no proper braking system. Until the last days of working, the running wagons could be halted only by a perilous practice on the part of the brakeman. He would leap from his perch on the leading axle pin and thrust iron sprags into the spokes of the spinning wheels. This would lock the wheels and skid the “gang” to a stop.” [1]

The Route from Bugsworth to Dove Holes

Peter Clowes has given us a description of the journey from Dove Holes to Bugsworth. [1] As we have already noted, it would have been an exciting ride for the brakesman/ brakesmen in charge of the trams. The journey back up the gradient from Bugsworth to Dove Holes would have been much more of a toil and would have relied on horsepower. The route will be covered in greater detail, illustrated, where possible by contemporary plans and maps. In addition, as many modern photographs as is practical will be included and the journey will probably need to be divided into at least two articles.

Bugsworth Basin is shown below on an extract from the 1898 25″ OS Map which was surveyed in 1896. The concentration of tramway sidings is remarkable and suggests that, in the years before the turn of the 20th century, this was a very dynamic, busy and noisy place!

Bugsworth Basin, the terminus of the Peak Forest Canal, was surrounded by a myriad of tramway sidings. This extract from the 1898 25″ OS Map shows the main basin just to the South of the Navigation Inn. The tramway is shown exiting the extract at the third point down on the right side of the image. The tramway running South-east and leaving the extract in tunnel was the line providing access to the Barren Clough Quarry. That service the Lower Crist Quarry left the Tramway mainline a short distance to the East of the edge of this extract. [7]
Approximately the same area in the 21st century. The renovated canal basin is clearly visible. The dual-carriageway visible at the bottom of the satellite image is the A6 Whalley Bridge and Chapel-en-le-Frith by-pass. [8]

Starting in 1968, volunteers of the Inland Waterways Protection Society restored the canal and basins culminating in the re-opening to navigation in 2005. Now that restoration of navigation has been achieved, improvements and development continues” [9] under the auspices of the Bugsworth Basin Heritage Trust (BBHT). Their plan of the site is shown below.

The BBHT plan of the Bugsworth Basin site. Key: Ground Panel Locations are shown by green dots; Welcome Panels are shown by orange dots; Observation Panels are shown by mauve dots. [10]
A schematic model of the Bugsworth Basin at the East end of the Lower Basin. (My photograph, 11th June 2021.)
Bugsworth Basin from the East. [12]
Bugsworth Basin has been lovingly restored over a number of years. This image shows one of the information boards at the site and was taken in June 2021. The Lower Basin is a long thin canal arm on the North side of the Bugsworth site, to the West of the Navigation Inn. (My photograph, 11th June 2021.)
This ‘waggon’ was fabricated by the Bugsworth Basin Heritage Trust and sits on the island between the Lower Basin and The Wide. (My photograph, 11th June 2021)
The East end of the Wide in 2021. The bridge in the centre top of the image carries a public road over the access to the Upper Basin. The Navigation Inn can be seen in the top left of the image. (My photograph, 11th June 2021.)
Bugsworth Upper Basin from the West. Some of the trams are visible in the foreground of this image from around 1900. Also to the left of the goods warehouse on the left side of the canal arm a frame of one of the original tipplers can be made out. To the rear of the image there seem to be a very significant number of loaded trams sitting in the tramway sidings. [13]
Bugsworth Upper Basin again, some loaded trams on the right side of the picture and the mobile tippler is again visible on the left, standing on top of the loading wharf. [10]
The Upper Basin again, this time in 1920, a lot of empty trams appear in the foreground and the mobile tippler stands out well on the left of the picture. The view of the loading wharf structure that supported the tippler and carried it’s rails is much better in thus image than in the previous two, © J.R. Board. [16]
Bugsworth Basin at a later date. The mobile Tippler has now disappeared and there is no sign of the sidings beyond the end of the canal arm. [17]
Bugsworth Basin looking West. [14]
Bugsworth Basin also looking to the West and showing the Peninsula on the last picture. The stone blocks which secured the tramway plates are featured. [15]

Before heading east from Bugsworth Basin two particular things are worthy of note:

  • First, just beyond the Navigation Inn on the North side of the Upper Basin, there is a well-preserved example of a tramway wharf where goods were loaded and unloaded.
  • Second, the skew arch bridges which carry a branch tramway which served lime kilns.
The two skew-arch bridges which carrried the tramway branch to the lime kilns in 1976.  These bridges carried the tramway branch over the Black Brook and a medieval packhorse road. The road bridge is in the foreground the river bridge is beyond. [20]
The skew-arch bridge carrying the tramway branch to the limekilns over the old packhorse road. The skew-arch bridge over the Black brook is off to the left of the picture. The tramway mainline ran across the right foreground of the image. (My photograph, 11th June 2021.)
The relative locations of Barren Clough Quarry junction and the Skew-arch bridges. [21]

Leaving Bugworth Basin, the Tramway passed to the North of Lower Crist Quarry. Its branch tramway left the mainline to the East of the junction with the limekiln tramway branch as shown below.

25″ 1898 OS Map extract showning The Peak Forest Tramway to the East of Bugsworth Basin. Lower Crist Quarry and its tramways are shown on the South side of the Peak Forest Tramway.  Barron Clough Quarry was further to the South and was served by its own tramway which passed through a tunnel as it left Bugsworth Basin. Lower Crist Quarry is, in the 21st century bisected by the A6 dual-carriageway. Little of consequence now remains. [11]

Both the Barren Clough Quarry and the Crist Quarry (and the tunnel which gave access to the Barren Clough Quarry are covered in detail in an article by Peter J. Whitehead, “Crist and Barren Clough Quarries, High Peak, Derbyshire.” [19] It seems as though Barren Clough Quarry was not opened until the Company believed that Christ Quarry was close to exhaustion. Barren Clough was opened 56 years after Crust Quarry. It was served by a single-track tramway branch. The branch “commenced at a point 80 yards to the east of the terminus of the Peak Forest Canal. At a distance of 145 yards from the main line, it entered the tunnel before arriving on the quarry floor. Although the tunnel was relatively short, a vertical shaft was first sunk at a distance of 76 yards from the north portal (just under half way) to enable it to be excavated from four faces at once rather than at each end. When the tunnel was completed this shaft became an airshaft, although this feature was probably unnecessary for such a short tunnel.” [19]

The two quarry branch tramways are shown on the map extract below.

Barren Clough and Crist Quarries and their tramway branches. [11]
Tramway routes to the East of Bugsworth Basin, imposed on a recent satellite image. (Google Maps)
The location of Barren Clough and Crist Quarries in the 21st century, showing the A6 dual carriageway built in the later years of the 20th century. [Google Maps Satellite Image.]
This is how RailMapOnline shows the Tramroad and its various connections over the length we have been looking at. [20]

As the OS Map extract above shows, there was a group of cottages just to the West of the tramway access to Crist Quarry. Those cottages are still in use in 21st Century. The access route to them (shown on the OS Map) has been cut by the A6 Dual Carriageway. They can only now be accessed from Bugsworth Basin.

Further East, the Tramroad follows the South side of Black Brook….

The route is shown on the 6″ Ordnance Survey from the turn of the 20th century. [21]
The route of the old tramway is a well-paved/stoned footpath/bridleway for a distance to the East of Bugsworth Basin. [Google Maps]
The route continues on the 6″ Ordnance Survey. [22]
The route continued alongside Black Brook, although not following the meander around Harbour Cottage. [Google Maps]

Further along the line, it deviated South away from Black Brook so as to pass to the South side of Whitehall Mill.

Whitehall Mill is shown on this extract from the 25″ OS Map of 1898. It had its own tramway connection, with two separate accesses to the tramway. [22]
The same area, shown on modern ESRI satellite imagery as provided by the National Library of Scotland (NLS), the Mill has expanded significantly in size and is still in use. It’s site crosses the brook. [22]
Approaching Whitehall Mill from the West and looking along the old tramway route. [My photograph, 11th June 2021]
Continuing to approach Whitehall Mill from the West along the old tramway route. [My photograph, 11th June 2021]
Walking alongside Whitehall Mill from the West along the old tramway route. [My photograph, 11th June 2021]
Continuing alongside Whitehall Mill from the West along the old tramway route with part of the site screened from the path by a very tall Leylandii hedge! [My photograph, 11th June 2021]
Looking West-southwest back along the old tramway route towards Buxworth with the Whitehall Mill buildings screened by the Leylandii on the right. The Millpond is just off the image to the right. [Google Streetview, March 2021]
Looking East-northeast along the line of the old tramway with the Millpond which served Whitehall Mill on the left. [Google Streetview, March 2021]
The 25″ Ordnance Survey of 1898 shows the double track tramway continuing on the South side of Black Brook and curing round the village of Whitehough. [23]
The same area as shown on the OS map above, as it appears on the ESRI satellite imagery provided by the NLS. [23]
Looking West towards Whitehall Mill along the line of the old tramway. [Google Streetview, June 2016]
Looking East along the line of the old tramway from the same point as shown in the image above. [Google Streetview, June 2016]
The old tramway curved towards the Northeast for a short distance after crossing the minor road leading to Whitehough. [My photograph, 11th June 2021]
The old tramway then curved round towards the Southeast before crossing another minor road leading to Whitehough (Whitehough Head Lane). [My photograph, 11th June 2021]
Looking Southwest along Whitehough Head Lane towards Whitehough and showing the point at which the old tramway crossed the road at level. [Google Streetview, June 2011]
Looking Northeast along Whitehough Head Lane at the point where the old tramway crossed the road. [Google Streetview, June 2016]
This next extract from the 25″ OS mapping of 1898, shows the old tramway curving away from its crossing of Whitehough Head Lane. [24]
The same area on the ESRI satellite imagery in the 21st century. [24]

Along this length of the tramway the formation of the old tramway is exposed with some of the old stone blocks which secured the tramways rails in position visible. The next sequence of photographs show these blocks.

This sequence of photographs show exposed stone blocks which acted as sleepers for the tramway rails. The images are all taken facing along the tramroad towards Chapel-en-le-Frith. [My photographs, 11th June 2021]

The estate of new housing visible in these pictures is built on the site of Forge Mill. An information board provides details, although the protective Perspex cover to the board has begun to fog over the years.

The information board tells us that the stone blocks were quarried at Crist Quarry, near Bugsworth Basin. Originally, the basic L-shaped rails were laid directly onto the blocks as specified by Benjamin Outram, the engineer of the tramway, but rail breakages were a problem and so, by 1837 the tramway rails were relaid on iron saddles. This is shown in the picture at the bottom-left of the information board. [My photograph, 11th June 2021]

The site of Forge Mill appears on this next extract from the 25″ OS mapping. [27]
The same area as shown on the ESRI satellite imagery. [27]

Forge Mill has seen a variety of different uses over the years. The Derbyshire Historic Environment Record list these as:

BLEACH WORKS (Post Medieval – 1540 AD to 1900 AD)
MILL POND (Post Medieval – 1540 AD to 1900 AD)
WEIR (Post Medieval – 1540 AD to 1900 AD)
PAPER MILL (Post Medieval – 1540 AD to 1900 AD)
RAILWAY SIDING (Georgian to Victorian – 1800 AD? to 1900 AD) [25]

Information about the site was provided as part of the planning application for the new housing estate on the site of the Works . The document is available on High Peak Council’s website. [26] It confirms that the Forge Mill site was, before redevelopment, known as the Dorma Works. “The site was first developed in the early 1800’s as
a paper mill. By the 1900’s the site changed to the production of textiles, a dye and bleach works. The site was sold in the early 20th century to Dorma who produced bed linen and cotton prints
.” [26] After the site was purchased in 2005 it remained unoccupied and was largely demolished in 2010.

A siding was provided to link the mill to the tramway. This can be seen on the OS map above.

The 25″ Ordnance Survey of 1898 again. Beyond Forge Mill the route of the old tramway deviates Southward still following Black Brook. By the turn of the 20th century a Sewerage Farm had been constructed between the tramway and the brook. [28]
The same area as shown on the 25″OS map extract above. The Sewage Farm is of a more significant size in the 21st century. [28]
The next extract from the 25″ Ordnance Survey shows the tramway crossing Charley Lane on the level before beginning to curve back to the Northeast. [29]
The modern ESRI satellite imagery shows the A6 dual carriageway embankments crossing the line of the old tramway. [29]
The view back along the old tramway route towards Forge Mill. [Google Streetview, March 2021]
Another view back along the old tramway route. The camera is sitting in Charley Lane. [Google Streetview, October 2022]
The route of the old tramway to the East of Charley Lane now lies under the embankment of the A6 dual carriageway. [Google Streetview, March 2021]

This is a convenient point to finish the first part of our journey along the Peak Forest Tramway. There is, of course, much more to come, but this will need to wait for a future article.

Just to round off details of the old tramway’s history, we return first to Peter Clowes’ article in the Railway Magazine and then to other sources ….

The Gradual Demise of the Tramway

Fifty years after the line was opened, the owners leased the Peak Forest and Macclesfield Canals – and, of course, the tramway – in perpetuity to the Sheffield, Ashton-under Lyne & Manchester Railway. A Parliamentary Act of 1846 provided for an annuity of £9,325 to be paid to the Peak Forest Canal Company. The railway later became part of the Manchester, Sheffield & Lincolnshire Railway, and in 1883 the canals and tramway were transferred completely to the new owners. The old canal company was dissolved. The Manchester, Sheffield & Lincolnshire Railway became the Great Central Railway in 1897 and was absorbed into the London & North Eastern Railway in 1923.” [1]

A 1925 Act of Parliament led to the closure of both the Peak Forest Tramway and the canal basin at Bugsworth. Clause 54 of Act 15 & 16 George V cap 52, 31st July 1925 was entitled ‘Abandonment of Peak Forest Tramway’. The Act was to empower the London and North Eastern Railway to construct new railways, widening others and to acquire land. It extended the time for the completion of certain works and it permitted the compulsory purchase of certain lands. Clause 54 stated: “The Company may abandon and discontinue their Peak Forest Tramway extending from Chinley to Dove Holes and may hold, sell or dispose of, or apply to the purposes of their undertaking the site and soil of any part of the said tramway so abandoned and discontinued.” [6]

After closure in the mid-1920s, records “made at the Marple Toll Office show that between 17th April 1928 and 12th February 1931 there were 30 deliveries of scrap iron from Bugsworth Basin to Prince’s Dock on the Ashton Canal at Guide Bridge. The total quantity of scrap was 523¼ tons, which averaged 17½ tons per boatload. …. At Prince’s Dock the scrap was transhipped onto the railway and from there it was taken to Sheffield for subsequent melting down. The scrap merchant who dismantled the tramway was T W Ward Ltd of Sheffield and it was melted down by Edgar Allen & Co Ltd, steel manufacturers of Sheffield.” [6]

As we have seen above, it was not until 1968 that work really began on recovering the industrial archaeology of the site and bringing the basin and canal back into navigable use. [9] The BBHT are proud of the replica wagon that they have relatively recently completed.  The chassis of which “has been produced by members using traditional techniques, utilising timber cut from redundant oak lock gate balance beams, courtesy of the Canal & River Trust. The body steelwork has been produced by modern laser cutting, again from drawings by one of our volunteers. We have assembled this “kit” and mounted it onto the chassis.” [9] The replica wagon is now on display on the peninsula on the South side of the lower basin arm.

Further Reading

There is some excellent coverage of the Tramway and Bugsworth Basin available both online and in print form. This material includes:

  • Grahame Boyes and Brian Lamb; ‘The Peak Forest Canal and Railway; an Engineering and Business History’; The Railway & Canal Historical Society, 2012, (ISBN 948 0 901461 59 9). £30.00
  • The Industrial Archaeology of the Peak Forest Tramway; http://archive.bugsworthbasin.org/pages/tram.htm

References

  1. Peter Clowes; The Peak Forest Limestone Tramway; in The Railway Magazine, Volume 109, September 1963, p611-617. This article can be accessed via a subscription to The Railway Magazine archives which is available as an add-on to a regular subscription to the magazine.
  2. https://en.wikipedia.org/wiki/Peak_Forest_Tramway, accessed on 3rd June 2021.
  3. http://www.pittdixon.go-plus.net/quarries-gritstone/quarries-gritstone.htm, accessed on 3rd June 2021.
  4. https://en.wikipedia.org/wiki/Chapel_Milton, accessed on 3rd June 2021.
  5. https://en.wikipedia.org/wiki/Bugsworth_Basin, accessed on 3rd June 2021.
  6. http://www.pittdixon.go-plus.net/pft/$pft.htm, accessed on 3rd June 2021.
  7. https://maps.nls.uk/geo/explore/#zoom=17&lat=53.33580&lon=-1.96833&layers=168&b=1, accessed on 3rd June 2021.
  8. https://maps.nls.uk/geo/explore/#zoom=17&lat=53.33580&lon=-1.96833&layers=170&b=1, accessed on 3rd June 2021. This is an extract from the ESRI satellite imagery which forms the base layer over which various NLS OS Maps are overlaid.
  9. https://bugsworthbasin.org, accessed on 3rd June 2021.
  10. https://bugsworthbasin.org/the-basin, accessed on 3rd June 2021.
  11. https://maps.nls.uk/geo/explore/#zoom=17&lat=53.33559&lon=-1.95887&layers=168&b=1, accessed on 3rd June 2021.
  12. https://youtu.be/g91uwioVV4o, accessed on 3rd June 2021.
  13. https://narrowboatworld.com/7254-memories-of-bugsworth-basin, accessed on 3rd June 2021.
  14. https://www.countryimagesmagazine.co.uk/featured/bugsworth-canal-basin, accessed on 3rd June 2021.
  15. https://commons.wikimedia.org/wiki/File:Bugsworth_Basin_4.jpg, 3rd June 2021.
  16. https://www.wondersofthepeak.org.uk/facts/wanders-through-the-industrial-peak-bugsworth-basin, accessed on 3rd June 2021.
  17. https://collections.canalrivertrust.org.uk/themes/the-history-of-bugsworth-basin, accessed on 3rd June 2021.
  18. Ian Salvage (Publicity Officer) & Ian Edgar MBE (Chair of Bugworth Basin Heritage Trust); http://www.peakandnorthern.org.uk/newsletter/1702/07-peak-forest-tramway.htm, accessed on 3rd June 2021. (NB: the same sketch map can be found in: Peter J Whitehead; The Peak Forest Tramway, High Peak, Derbyshire (including a Walking Guide to the Tramway Trail); http://archive.bugsworthbasin.org/pages/pft.htm)
  19. http://archive.bugsworthbasin.org/pages/quarries/quarries.htm
  20. https://www.railmaponline.com/UKIEMap.php, accessed on 16th January 2023.
  21. https://maps.nls.uk/geo/explore/#zoom=16.8&lat=53.33623&lon=-1.95773&layers=6&b=1, accessed on 16th January 2023.
  22. https://maps.nls.uk/geo/explore/#zoom=16.8&lat=53.33602&lon=-1.95500&layers=6&b=1, accessed on 16th January 2023.
  23. https://maps.nls.uk/geo/explore/#zoom=18.0&lat=53.33658&lon=-1.94378&layers=168&b=1, accessed on 28th February 2023.
  24. https://maps.nls.uk/geo/explore/#zoom=18.0&lat=53.33604&lon=-1.93857&layers=168&b=1, accessed on 18th February 2023.
  25. https://her.derbyshire.gov.uk/Monument/MDR485, accessed on 28th February 2023.
  26. http://planning.highpeak.gov.uk/portal/servlets/AttachmentShowServlet?ImageName=145422, accessed on 28th February 2023.
  27. https://maps.nls.uk/geo/explore/#zoom=18.0&lat=53.33561&lon=-1.93349&layers=168&b=1, accessed on 28th February 2023.
  28. https://maps.nls.uk/geo/explore/#zoom=18.0&lat=53.33449&lon=-1.92832&layers=168&b=1, accessed on 28th February 2023.
  29. https://maps.nls.uk/geo/explore/#zoom=18.0&lat=53.33267&lon=-1.92589&layers=168&b=1, accessed on 28th February 2023.