Category Archives: Great Western Railway

A short-lived LNWR Interest in the Wenlock Railway and the Ultimate Takeover by the GWR

This is little more than a mildly interesting aside. Or perhaps an addendum to the short series about the Line between Wellington and Craven Arms. ….

The small companies that built the different lengths of the railway line between Wellington and Craven Arms struggled to manage their assets without support from the Great Western Railway. The GWR first began to operate the services on the line in the period after each section was opened, before gradually absorbing the companies that owned the different sections of the line.

Small railway companies reliant on a dominant partner often found that continued independence was not worthwhile.” [1][6]

The Wenlock Railway experienced problems completing their railway through to Marsh Farm Junction/Carven Arms. It was an agreement with the GWR that made completion possible.

In 1865 the GWR agreed to make an annual payment of £5,000 to the Wenlock Railway as a commuted payment for working the line between Wenlock and Presthope, and this cash inflow enabled the Wenlock Railway to resume construction. By the end of September 1867 the line on to Marsh Farm was thought to be ready, but Colonel Rich for the Board of Trade condemned the rail chairs of 21 lb. and 22 lb., saying they were too light and had to be replaced by 30 lb. chairs. This decision meant that the whole of the track between Presthope and Marsh Farm Junction had to be taken up and relaid at an extra cost of £2,244. On 9th December 1867 Colonel Rich approved of the line, and the entire line from Buildwas to Marsh Farm Junction was opened to passenger traffic on 16th December 1867.” [1][2: p57 & 252][3: p304][4: p112][5: p34]

The relationship between the Wenlock companies and the GWR was not smooth; the small companies resented the large proportion of income – 42.5% – that the GWR was retaining for working the line, and there were many detailed issues that became contentious. In 1861 the London and North Western Railway had opened its Coalport branch line, and the possibility arose of connecting the Wenlock lines to it, by-passing the GWR. In 1872 plans were prepared for a line from Lightmoor to the LNWR line near Madeley Court; incidentally the line would also link in furnaces at Stirchley, Hinkshay and Blists Hill.” [1]

There were some sound reasons for the line being considered. Had construction taken place the LNWR would have succeeded in gaining access to the full line through Much Wenlock to Craven Arms. The Coalbrookdale Company was, at first, supportive of the scheme. Its support was critical to the viability of the proposal.

The title and introduction to the Act of 21st July 1873. [7][8]

The Act allowed for the construction of two lengths of railway:

  • The first was four furlongs three chains and fifty decimals of a chain in length, commencing in the parish of Madeley by a junction with the Great Western Railway (Lightmoor to Coalbrookdale Branch) near Lightmoor, and terminating in the said parish of Madeley in a pasture field called Near Moors, numbered 201 on the tithe map of the said parish; [8]
  • The second was seven furlongs three chains and fifty-four decimals of a chain in length, commencing in the said parish of Madeley by a junction with the said intended railway No. 1 in a pasture field called Near Moors, numbered 201 on the tithe map of the said parish, and terminating in the parish of Stirchley by a junction with the Coalport Branch of the London and North Western Railway. [8]

The “Much Wenlock and Severn Junction (Lightmoor Extensions) Act, got the Royal Assent on 21st July 1873. … The Wenlock companies had relied on the Coalbrookdale Company subscribing a substantial sum to the construction, but now that Company said that the downturn in the Shropshire iron trade meant that they could not do so. There was now no possibility of making the new line.” [1][2: p65-66]

The Wellington and Severn Junction Railway had long been leased to the Great Western Railway, so that the smaller Company was simply a financial entity. In July 1892 it agreed terms with the GWR and was absorbed by it.” [1][6]

This left the [other] Wenlock companies in an uneasy relationship with the GWR. In December 1887 the GWR made new proposals for the payments it would make for working the line, but the smaller companies stalled. In fact, the working agreement with the GWR expired at the end of June 1893, but by the end of December 1893 agreement had still not been reached, and the GWR stated that it was not prepared to continue to work the line on the present terms. The GWR offered terms for purchasing the companies, but these were refused. In frustration the GWR threatened to cease working the line. The Wenlock Companies [ultimately had to accept] the GWR terms; the takeover was effective from October 1896.” [1][2: p53]

References

  1. https://en.wikipedia.org/wiki/Wellington_to_Craven_Arms_Railway#cite_ref-jones65_43-0, accessed on 19th September 2024.
  2. Ken Jones; The Wenlock Branch. Oakwood Press, 1998.
  3. Ernest F Carter; An Historical Geography of the Railways of the British Isles; Cassell, London, 1959.
  4. Rex Christiansen; A Regional History of the Railways of Great Britain: volume 13: Thames and Severn; David and Charles (Publishers) Limited, Newton Abbot, 1981.
  5. E T MacDermot, History of the Great Western Railway Volume 2: Great Western Railway, London, 1931.
  6. John M. Tolson; In the Tracks of the Iron Masters; in The Railway Magazine, London, July and August 1964.
  7. https://vlex.co.uk/vid/much-wenlock-and-severn-808157633, accessed on 19th September 2024.
  8. https://www.legislation.gov.uk/ukla/Vict/36-37/183/pdfs/ukla_18730183_en.pdf, accessed on 19th September 2024.

The Cornwall Minerals Railway – Part 2 – Par, its Harbour and St. Blazey Engine Shed

A first article about the Cornwall Minerals Railway can be found here:

https://rogerfarnworth.com/2020/05/17/the-cornwall-minerals-railway-part-1. [32]

In this second article we look at Par and its harbour, include some information about Treffry’s Tramway which transported goods to and from the Port and take note of St. Blazey Loco Shed. …

Par Harbour was built in 1829 by a local entrepreneur Joseph Thomas Treffry who was known as the “King of Mid Cornwall”. [1: p13]

The first ships used the port at Par in 1833 and it was finished in 1840. The breakwater enclosed 36 acres (15 hectares) of harbour and was capable of taking up to about 50 vessels of 200 tons each. The port is tidal so the vessels would sit on the bottom at low tide. Cornish granite was exported from Par in the early days for such famous landmarks as Waterloo Bridge in London, Chatham Docks, Gibraltar Docks & Glasgow Docks.” [33] As the china clay industry grew during the 19th century this became the main export through the port.

The first map below comes from the Ordnance Survey 1st series of the very early 19th century.

Par Harbour, OS First series, early 19th century. [5]
Old map of Par Harbour shared on the St. Blazey and Par Old Photos and Postcards Facebook Page on 18th June 2019. [6]

Coal needed to be imported from Wales to power Treffry’s mines, and copper, lead, and granite needed to be exported all over the country. Treffry, as a leading industrialist of the time, “had an urgent need for a harbour to serve his mines and quarries and the narrow streets of Fowey hampered the process when cargos could only be transported from the mines by mules and wagons. After he had completed his safe haven, up to fifty small sailing vessels of the time could be accommodated in the harbour, while larger ships lay at anchor in St Austell bay where their cargoes were loaded from barges. Other industries and businesses developed inside the port area such as ship repair, rope works, sail making, timber and coal merchants and brickworks.” [1: p13]

Hugh Howes notes that the new harbour “was a vital outlet for minerals particularly the expanding china clay industry and a rival to Fowey, Pentwan and Charlestown. [Teffry’s] Fowey Consols Mine was reaching its peak production in the late 1830s at 15,000 tons. The output at Par Consols Mine peaked a little later at nearly 8,500 tons. They were producing profitable amounts of copper at that time. … He had brought industrial success firstly with the copper mines in Tywardreath and St. Blazey, then with the granite workings at Luxulyan, and finally with china clay extraction to serve the fast developing ceramics industry in the Potteries.” [27: p48-49]

Canal and tramways in the Luxulyan Valley in 1835, © Copyright Afterbrunel and included here under a Creative Commons Attribution-ShareAlike 3.0 Unported (CC BY-SA 3.0) Licence. [7]

The Par Canal was built by Treffry to transport his minerals from Pontsmill to Par Harbour and was operational from 1833 [8][33], 1842 [1: p21] or 1844 [10], depending on which source you rely on. A number of tramway inclines were associated with it. One from Fowey Consols Mine to a location to the South of Pontsmill was in use by 1835. A second, was built a little to the South of the first, both seem to have served Fowey Consols Mine. A third tramway inclined plane was built between Par Consols Mine and Par Harbour. That inclined plane was working by 1841. [8] The Canal was closed in 1873. [10]

The Treffry Tramway was built in stages. The first length headed North from Pontsmill to Colcerrow Quarry and included an incline to lift the line out of Pontsmill. This line was extended to Molinnis near Bugle. To get there a large viaduct was needed, to cross the valley of the River Par (the Luxulyan Valley). The Teffry Viaduct, was 648 feet in length with ten arches, and was 98 feet high. It was the first large granite viaduct in Cornwall. This section of Treffry’s tramway opened in early 1844. [8]

Tramways in the Luxulyan Valley in 1855, © Copyright Afterbrunel and included here under a Creative Commons Attribution-ShareAlike 3.0 Unported (CC BY-SA 3.0) Licence. [7]

Construction of the Tramway continued from it’s planned Northern terminus at Newquay. There were delays as a result of Treffry’s death in 1850 but his work was eventually continued by his cousin who had the Hedra Incline operational by 1857 at the latest, possibly as much as five years earlier. [7]

Treffry’s Tramways by 1857, © Copyright Afterbrunel and included here under a Creative Commons Attribution-ShareAlike 3.0 Unported (CC BY-SA 3.0) Licence. [7]

The Fowey Consols Mine was geologically exhausted by 1865. It closed, as did the connecting tramway inclines. Copper extraction in the area was in steep decline, tin ore extraction proved commercially unsuccessful, but granite quarrying “enjoyed an upsurge, and new quarries opened on a small scale at Rock Mill Quarry and Orchard Quarry, above Pontsmill on the south-west side of the river. In 1870 a branch of the tramway was extended from near Pontsmill to serve the two quarries. The line was on the north-east side of the river, and it had two branches for the quarries; each of them crossed the river, and the Orchard Quarry line had an incline to reach the site. The tramway on the incline may have been narrow gauge and was probably gravity operated.” [7][12][14]

Joseph Treffry’s decision in 1844 to use horse-power meant that by the 1870s his tramways were becoming inefficient. Modernisation was essential but the Teffry Estate’s finances precluded that work being undertaken solely by the estate. [7]

In 1872 William Richardson Roebuck leased the tramways. He formed a limited company, the Cornwall Minerals Railway Limited and obtained “parliamentary authority on 21st July 1873 to acquire the lines, form a new railway to connect them, and to make an extension to Fowey, and to improve the original tramway sections so as to make them suitable for operation by steam locomotive.” [7][11][6][15]

The Cornwall Minerals Railway (CMR) took over Treffry’s lines and improved them. They quickly built the link between Hendra and Molinnis, and their new line to Fowey, and Treffry’s vision of a through line from Newquay to Fowey was realised when on 1 June 1874 the CMR opened the line throughout.” [7] The line required a “new route up the Luxulyan Valley so as to avoid the rope-worked Carmears Incline.” [7]

The new line in the Luxulyan Valley by-passed the Treffry Viaduct, but Colcerrow Quarry continued to be rail served. Traffic from the quarry reversed at the junction with the old main line at the Par end of the viaduct, and then crossed it, joining the new line at Luxulyan. This operation was horse worked, and the track was still the original Treffry stone-block type in 1933.” [7][17] By 1959 the Colcerrow route at Luxulyan had been shortened to a stub siding. [7][16: p21]

Passenger operation commenced in 1876. The GWR leased the lines from the CMR in 1877, and purchased them in 1896. “The East Wheal Rose branch remained a mineral section until the Great Western Railway (GWR) … built its line from Newquay to Perranporth and Chacewater, partly taking over the line of route.” [7]

The Treffry Tramways and the Par Canal warrant separate articles in this series which will be written in due course. …..

These next set of extracts from the Ordnance Survey belong together but cross the boundary between two OS Map sheets and come from the 1881 survey which was published in 1888. Treffry’s harbour is shown, as is the canal he built. The rail track shown running alongside the canal follows the route of the Treffry Tramway.

As well as the Treffry Tramway and the, already closed, Par Canal, there is a railway shown running roughly North to South on the first two map extracts. This was the Cornwall Railway, the railway company which built the majestic Royal Albert Bridge over the River Tamar. Because of the difficult terrain it traversed, it had a large number of viaducts, built as timber trestles because of the shortage of money. It was a 7 ft 1⁄4 in (2,140 mm) broad gauge railway from Plymouth in Devon to Falmouth in Cornwall, built in the second half of the nineteenth century. It was constantly beset with shortage of capital for the construction, and was eventually forced to sell its line to the Great Western Railway (GWR) in 1889, a little after the date of the 1881 Survey. [9]

On this map extract from the 1881 survey, the line of the Treffry Tramway is to the East of the Par Inn. It is followed closely, to its East, by the Par Canal and then by the River Par. Also visible is the Par Engine Shed which later became known as the St. Blazey Engine Shed. The engine shed is prominent on this map extract, it was built for the eighteen 0-6-0T locomotives that were built by Sharp Stewart in 1873 and 1874. These locos were intended to operate in pairs, back to back and each road in the engine shed was designed to accommodate one pair of locomotives. Traffic never warranted the paired use of these locomotives and only nine were put to use. What happened to the other nine locomotives is covered in the first article in this short series, (cf. [32]) [2][18][31]
St. Blazey Station and Engine Shed seen from the North in 1930. This image is an extract from EPW033131, the roundhouse is in the middle distance close to the centre of the image, © Historic England. [40]

Stephen Austin, in a May 2003 article in Steam Days, describes the workshops and depot this:

“At Par, the Cornwall Minerals Railway set up a new headquarters and engineering depot on a piece of flat ground between the river and the original valley side where once ships moored in front of the Sloop Inn.

It was fortunate that the Cornwall Railway line, at the south end of this site, was elevated on a viaduct, for its five arches now spanned the canal, the Cornwall Mineral Railways main line to Fowey, a branch into Par Harbour, the river, and a public road. At the north end the new line swung across the river on a sharp reverse curve to join the 1855 causeway. On this length from Par Bridge to Middleway Bridge the original railway between the river and canal was abandoned, and is today a public footpath where some of the sleeper blocks may still be seen.

The railway depot, finished by the end of 1873, had two main buildings. One was a wagon repair shed and the other contained a Signal & Telegraph repair shop, smithy, boiler room, water tank, a two-storey office suite, machine shop, and locomotive repair shop. Adjoining the latter was a locomotive running shed constructed in what was then a frequently-used layout – a segment of a circle-covering tracks which radiated from a turntable in the centre of the circle. This shed, which became known locally as ‘the roundhouse’, contained nine tracks, each with its own gable-ended roof, of which the middle three extended through the back wall into the repair shop.

The buildings at the depot were handsome, elegantly-proportioned brick structures. The whole workshop group cost £16,000 and was a huge development for the time and place of its construction, exceeding the Cornwall Railway Works at nearby Lostwithiel. … The reason for the nine roads in the running shed was that it was to accommodate the whole of the company’s locomotive fleet. They ordered eighteen 0-6-0Ts from Sharp Stewart & Company of Manchester. The design was attributed to Francis Trevithick, formerly of the L&NWR and a descendant of the great Richard Trevithick, and was conventional except that the cab had no back. The intention was to run the locomotives in pairs, coupled back to back, with one crew. This was because Robert Fairlie had recently created a sensation with his double-ended locomotive mounted on two power bogies, able to do the work of two smaller engines without the expense of two engine crews; the Cornwall Mineral Railways’ idea was to obtain this last benefit without having to pay royalties to Robert Fairlie.

The prospect of a driver having to leap from one footplate to another whenever a control needed adjusting is an alarming one, but in practice it was seldom, if ever, put to the test. Far from needing two locomotives to a train, one was ample, and half of the new fleet of locomotives was never used at all. The staple traffic on which the hopes of the firm were raised iron-ore from the Perran Iron Lode never appeared. All that was offered was stone, and the then-modest output of china-clay, and within a year it was clear that the railway was a financial failure.” [31: p279-280]

St. Blazey Shed in early BR days. This image was shared by Colin Bangs on the St. Blazey Roundhouse Facebook Group on 30th April 2024 © Unknown. [35]
All nine roads appear in this image which was shared on 24th August 2015 on the Old Cornwall in Pictures Facebook Page, © Unknown. [38]
This image of the roundhouse in use in the early 1969s was shared on the Didcot Railway Centre Facebook Page on 28th April 2016, © possibly HMRS or Colour Rail as the image is reproduced in Stephen Austin’s article with that attributation. [39] [31: p285]
On this extract from the 1881 Survey, the Cornwall Railway at Porth is shown to have connecting lines to Par’s dockyard area. [2]
This extract from the 1881 Survey is included for the sake of completeness. It shows the Par Canal, being crossed by two footbridges, the most southerly of which also appears on the next map extract. [3]
This extract from the 1881 6″ Ordnance Survey shows the tramway serving the quayside. Much of the harbour area was mud flats at low tide with just a narrow channel of water remaining. [3]

The next images show the area as recorded for the 25″ Ordnance Survey in 1905/1906 and published in 1907.

This extract from the 25″ Survey of 1905/1906 published in 1907, shows the Northern half of the area immediately around Par Harbour. St. Blazey Engine Shed is in the top-left quadrant. [19]
The view looking South in 1922 from St. Blazey Railway Station. The curve running away to the left is the link to what was the Cornwall Railway at Par Station. The wagon works are just to the right of centre. At the top of the image with the locomotive shed beyond and to the right. The down to Par Harbour runs ahead of the camera to the left of the wagon works; that to Fowey leaves the image bottom-left. The image is greatly enhanced by the two movements taking place. Immediately to the left of the wagon works what appears to be a saddle tank heads a train of, mixed empty and loaded general fright wagons and loaded and sheeted china clay wagons. To the right of the works, a pannier tank heads a train of china clay wagons within the sidings. Presumably the various wagons and brake vans in front of the wagon works are awaiting servicing or return to use on the railway, © Public Domain. [31: p281]
This next extract from the 25″ Survey of 1905/1906 published in 1907, shows the Southern half of the area immediately around Par Harbour. [20]

The next few images show a number of the areas in greater detail. All these extracts come from the 25″ OS mapping published in 1907.

The GWR Loop between St. Blazey Railway Station and Par Railway Station. [25]
St. Blazey Engine Shed and Par Green with the GWR Par Loop visible at the top of the map extract. [24]
The area North of the Quay including the Fowey branch on its causeway. [23]
The immediate area around the Quay. [22]
The area between Pembroke Mine and Porth on the North side of the mainline. [21]
Par Harbour, as it appears on the 1943 Admiralty Chart. [4]

Par Docks saw significant developments in the late 1940s. The image below is an aerial image of Par taken in 1950 for English China Clay.

An aerial image of Par Docks taken on 20th April 1950, shared under a Creative Commons Licence (Attribution-Share Alike 2.5 Generic (CC BY-SA 2.5)). [26]

Railway Bylines has at least two articles about Par Harbour. The first, a 10 page article about the history of the Harbour, appeared in Railway Bylines Volume 2 No. 5 of August/September 1997. The second, an article entitled ‘Cornish Cream’ with text and photography by Tom Heavyside, was included in Railway Bylines Volume 9 No. 12 of November 2004. [28] It focussed on the diminutive locomotives which served the port’s railways. … Alfred and Judy were still at Par in 1977 when Tom Heavyside visited. Judy was no longer in working order. Alfred was ‘in steam’ on Wednesday 15th June. Alfred was stood-down in August 1977 with its duties being undertaken by a tractor with the occasional use of a BR ’08’ shunter from St. Blazey depot as and when required. Both Alfred and Judy were subsequently removed from the site and saved for posterity.

Tom Heavyside comments: “Fortunately, Alfred and Judy we both saved for posterity. Initially, Alfred went to the Cornish Steam Locomotive Society depot at Bugle and Judy to the Wheal Martyn China Clay Museum near St.Austell. However, in 1987 Alfred moved to the Bodmin & Wenford Railway and in the autumn of 2002 Judy also moved to the Bodmin & Wenford. Fittingly, Alfred became something of a celebrity, not only at Bodmin but elsewhere; I well remember e it making a guest appearance at the Exeter Rail Fair in April/May 1994 when it mingled with a number of much larger steam locomotives including a couple of Bulleid Pacifics and a GWR King.” [28: p590]

Wikipedia tells us that: “Alfred and Judy are two 0-4-0 saddle tank steam locomotives. They were built by W. G. Bagnall for use at Par Docks in Cornwall, United Kingdom. The unusually low design was required to cope with extremely tight curves and a very low bridge under the Cornish Main Line. The locomotives are both preserved in operational condition on the nearby Bodmin and Wenford Railway and inspired the Reverend Wilbert Awdry to include them in The Railway Series of children’s books as Bill and Ben.” [29]

The bridge under the Cornish Mainline served the china clay works. It had a maximum headroom of 8ft. Operating curves in the Port were as tight as 70ft radius. The locomotives used in the Port needed to meet these stringent restrictions. A series of different locomotives were used over the years.  One of those locomotives was ‘Toby’, a low-profile Sentinel, which served the Port throughout much of the first half of the 20th century. By September 1937, demands on the older locomotives were such that a new locomotive was required to work alongside Toby.

W. G. Bagnall & Co. built a suitable locomotive which was delivered to Par in 1937. That locomotive was to be given the name ‘Judy’ in 1955. The locomotive was delivered at a cost of £1200 carrying the works number 2572. “By 1952, ‘Toby’ required replacement and an upturn in traffic meant an order was placed for another locomotive. In 1954, Alfred was delivered (named after the manager of the harbour Alfred Truscott). Whilst nominally the same, Alfred had some differences to Judy with different bunker style, tank and handrail alterations (such as a tank filler that opened in the opposite direction) and a different purchase price – this time £7500.” [30]

Par Docks in the 2020s. [Google Earth, January 2025]
Par Docks, Clay Dries in use in April 2003, © Tony Atkin and licenced for reuse under a Creative Commons Licence (CC BY-SA 2.0). [36]
Par Docks, Clay Dries in 2013, © Chris Gunn and licenced for reuse under a Creative Commons Licence (CC BY-SA 2.0). [37]

The Imerys Blueprint for Cornwall, published in 2003, provided information about the history of china clay production in Cornwall. It included information about the amount of china clay that was shipped out of Par Docks between 1858 and 2002:

1858 – 15,154 tons of china clay

1885 – 86,325 tons of china clay

1987 – 700,000 tons of china clay

2002 – 313,425 tons of china clay, 134,810 tons of aggregates.

Incidentally, the blueprint also noted: the sale of the harbour by the Teffry Estates to English China Clay (ECC) in 1964; the construction of dryers at the site in the 1950s and 1960s; and the closure of the port in 2007.

After closure the port was used as a Milling Centre and a Grade Dryer with all bins clay shipment being handled by Fowey Docks.

Stephen Austin notes the use of the locomotive shed over the years from the 1980s to the new millennium as follows:

“St Blazey depot, much diminished as it was, was still very much alive. It maintained a dedicated fleet of china-clay wagons introduced in 1954, and from 1970 a fixed cover for these wagons was designed and fitted in the Wagon Works, producing the distinctive ‘Clay Hood’. The staff was proud of their self-sufficiency, and when the Clay Hoods were replaced by the Type CDA hopper wagons in 1987 the fitters, on their own initiative, rebuilt the example which now stands as gate-guardian at the Wagon Works. Other freight business disappeared, and the Newquay line was reduced to a long siding on which a railcar shuttled desultorily, but following the break-up of British Rail in 1993 there was renewed optimism.

The depot was taken over by a company named English, Welsh & Scottish Railway Company … and St Blazey was that company’s only depot in Cornwall. It stabled and serviced the TPO coaches of the mail services which were tripped empty from and to Plymouth and Penzance every day, and wagons carrying cement to Blue Circle at Moorswater and products from Fitzgerald Lighting Ltd at Bodmin were staged through the yard. In 1995 some of the locomotives allocated in Cornwall were given names of local association. Among them was No. 37674 St Blaise Church 1445-1995, named after the nearby parish church and unveiled in the yard. In 1998 St Blazey began operating the new locomotives imported by EWSR (Class 66) on the china-clay trains.

On 11th August 1999, in its 125th anniversary year, St Blazey hosted perhaps the biggest assembly of preserved coaches ever gathered on the national network, and excursions brought people down to view the total eclipse of the sun. On 26th February 2000 diesel locomotive No 67008 arrived to begin the depot’s association with the Class 67 diesel then the fastest true self-contained locomotives running anywhere in the world, and worthy successors to those little Sharp Stewart tank engines. …

… The new millennium brought more uncertainty to St Blazey’s future. The last train conveying Fitzgerald Lighting’s wagons, the last consignment of any West Country manufacturer’s goods to be sent out by railway, left the yard on 25th July 2001. The remaining customers, the cement, china-clay, and the mails, made it clear that if the railway did not satisfy them on price and speed they would take to the roads. The only hope [lay] in the fact that … after 128 years of service, St Blazey is still very much a going concern.

Notwithstanding the unique nature of St Blazey Works, it received no attention at all from the enthusiasts in the fields of railways, architecture, or history, nor from the ‘official’ bodies paid to safeguard these things. The roundhouse building was divided up and rented by local traders, and the yard was a dump for rubbish and wrecked cars. However, even the tracks into the building remained intact, and apart from the demolition of the coaling stage nothing else was done until the summer of 2001 when the ownership changed hands, and plans were announced for new building on the site. Thus the original character of the Works, and the practicality of returning it to railway use, will finally be extinguished.” [31: p284, 286]

The news in 2024/2025 is that the anticipated removal of the St. Blazey roundhouse did not occur. St. Blazey Engine Shed has recently been restored as the base for MPower Kernow CIC (MPower), a new Cornish social enterprise company. [34]

The restored depot at St. Blazey. [34]

In April 2023, World of Railways reported that “the ongoing restoration of the turntable and the creation of a servicing facility for steam locomotives is expected to provide many and varied training opportunities for a broad cross section of the community and MPower is already working with local education and training organisations to provide hands-on experience in a range of skills, from woodwork to plumbing, electrics, construction and engineering.” [34]

Future articles?

It is, finally, worth noting that the Cornwall Minerals Railway had a total of 46 miles of track with “a main line from Fowey to Newquay … and branches from Bugle to Carbis, St Dennis Junction to Melangoose Mill and Newquay to East Wheal Rose. These connected clay works, quarries, mines and harbours (Newquay, Par and Fowey) in the area with the headquarters and works being sited at St Blazey (part of which is still in use).” [1: p21]

Other clay lines were built in later years, Bugle to Carbean Siding in 1893 and Trenance Junction (just West of St Austell on the main line), to Bojes Sidings in 1520 Two narrow gauge lines were also in use at various times. The Gothers Tramway of … from Pochin’s siding near St Dennis Junction to a clay works a Gothers opened in 1884 and closed in 1931.” [1: p22]

These lines will hopefully be covered in future articles.

References

  1. Pit to Port; The Cornish Steam Locomotive Preservation Society, 2009.
  2. https://maps.nls.uk/view/101438942, accessed on 20th January 2023.
  3. https://maps.nls.uk/view/101438954, accessed on 20th January 2023.
  4. Admiralty Chart Misc. 645, corrected 15th April 1943; https://www.ebay.co.uk/itm/274499586563?mkcid=16&mkevt=1&mkrid=711-127632-2357-0&ssspo=F5J0o5CiRha&sssrc=2349624&ssuid=afQhrar7TGK&var=&widget_ver=artemis&media=COPY; accessed on 20th January 2023.
  5. http://www.visionofbritain.org.uk/maps/series, accessed on 20th January 2023.
  6. https://m.facebook.com/story.php?story_fbid=pfbid0Py845Q675ooziPmV7A5PJqJVKMkFTs9xPnmrFARWQPpX7arVtvHGEMqosiKtEtXWl&id=171605006288707, accessed on 20th January 2023.
  7. https://commons.m.wikimedia.org/wiki/File:Lux_valley_1835.gif#mw-jump-to-license, accessed on 20th January 2023.
  8. https://en.wikipedia.org/wiki/Treffry_Tramways, accessed on 20th January 2023.
  9. https://en.wikipedia.org/wiki/Cornwall_Railway, accessed on 21st January 2023.
  10. https://www.cornwall-calling.co.uk/mines/tramways/par-canal.htm, accessed on 21st January 2023.
  11. John Vaughan; The Newquay Branch and its Branches; Haynes/Oxford Publishing Company, Sparkford, 1991.
  12. Martin Bodman; Inclined Planes in the South West; Twelveheads Press, Chacewater, 2012.
  13. E T MacDermot; History of the Great Western Railway, Vol II; the Great Western Railway, London, 1931.
  14. Cornwall Archaeological Unit; The Luxulyan Valley Project: an Archaeological and Historical Survey; Cornwall County Council, Truro, 1988.
  15. E F Carter; An Historical Geography of the Railways of the British Isles; Cassell, London, 1959.
  16. Maurice Dart; Images of Cornish Railways; Halsgrove House, Wellington, Somerset, 2007.
  17. D S Barrie and “Precursor”; Railway Relics in West Cornwall; Railway Magazine, December 1933.
  18. https://en.wikipedia.org/wiki/St_Blazey_engine_shed, accessed on 21st January 2023.
  19. https://maps.nls.uk/geo/explore/#zoom=16.0&lat=50.35131&lon=-4.70645&layers=168&b=1, accessed on 1st March 2023.
  20. https://maps.nls.uk/geo/explore/#zoom=16.0&lat=50.34419&lon=-4.70495&layers=168&b=1, accessed on 1st March 2023.
  21. https://maps.nls.uk/geo/explore/#zoom=17.0&lat=50.34387&lon=-4.71396&layers=168&b=1, accessed on 1st March 2023.
  22. https://maps.nls.uk/geo/explore/#zoom=17.0&lat=50.34528&lon=-4.70401&layers=168&b=1, accessed on 1st March 2023.
  23. https://maps.nls.uk/geo/explore/#zoom=17.0&lat=50.34883&lon=-4.70290&layers=168&b=1, accessed on 1st March 2023.
  24. https://maps.nls.uk/geo/explore/#zoom=17.0&lat=50.35257&lon=-4.70492&layers=168&b=1, accessed on 1st March.
  25. https://maps.nls.uk/geo/explore/#zoom=17.0&lat=50.35595&lon=-4.70647&layers=168&b=1, accessed on 1st March 2023.
  26. https://en.wikipedia.org/wiki/Par_Docks#/media/File:Par_Docks_ECC_Aerial_Photograph.jpg, accessed on 1st March 2023.
  27. Hugh Howes; The Struggle for the Cornwall Railway – Fated Decisions; Twelveheads Press, Truro, 2012.
  28. Tom Heavyside; Cornish Cream; in Railway Bylines Volume 9 No. 12, November 2004, p586-590.
  29. https://en.m.wikipedia.org/wiki/Bagnall_0-4-0ST_%22Alfred%22_and_%22Judy%22, accessed on 8th March 2024.
  30. https://rapidotrains.co.uk/port-of-par-bagnall-tanks, accessed on 8th March 2024.
  31. Stephen Austin; St. Blazey: At the Heart of West Country History; in Steam Days, May 2003, p278-286.
  32. https://rogerfarnworth.com/202y0/05/17/the-cornwall-minerals-railway-part-1.
  33. https://en.m.wikipedia.org/wiki/Par_Docks, accessed on 24th January 2025.
  34. https://www.world-of-railways.co.uk/news/st-blazeys-restored-turntable-set-for-scotsman-visit, accessed on 24th January 2025.
  35. https://www.facebook.com/share/p/15WHnYinBM, accessed on 24th January 2025.
  36. https://www.geograph.org.uk/photo/104676, accessed on 24th January 2025.
  37. https://www.geograph.org.uk/photo/3824704, accessed on 24th January 2025.
  38. https://www.facebook.com/share/14r1jXREEN, accessed on 25th January 2025.
  39. https://www.facebook.com/share/p/18VjPfoZGu, accessed on 25th January 2025.
  40. https://www.britainfromabove.org.uk/image/EPW033131, accessed on 25th January 2025.

GWR Steam Motor Road Vehicles

The Railway Magazine of December 1905 included a photograph of a road vehicle powered by steam. The picture in The Railway Magazine is the featured image for this short article.

The Railway Magazine entitled this image, “Great Western Railway Enterprise.” It shows a steam motor wagon and trailer which was used for collecting and delivering goods at Henwick. [1: p480]

It seems as though the editor of The Railway Magazine removed the background from a photograph to prepare it for the magazine. The original photograph is shown immediately below.

An archive image from the GW Trust archive of road motors at Didcot. It is clear that this is the original image from which The Railway Magazine took their illustration. [2]

An article about GWR Steam Road Motors was included in Going Loco, May 2022. [2]

The two photographs show the same vehicle, No. U 308, built by the Yorkshire Patent Steam Wagon Co of Leeds in 1905. “The novel double-ended transverse-mounted boiler was used to avoid problems on steep hills. With a horizontal boiler mounted fore and aft, skill is required to keep the inner firebox crown covered with water when descending a steep hill.” [2]

The same photo can be found on the Leeds Engine Builders webpage. [3]

The novel double-ended transverse-mounted boiler was used to avoid problems of tilting when climbing hills. Internally it resembled a locomotive or Fairlie boiler with a central firebox and multiple fire-tubes to each end. In the Yorkshire though, a second bank of fire-tubes above returned to a central smokebox and a single chimney. [9]
More typical of the steam road motors was this vehicle which Hattons identify as “a Sentinel Dropside Short-wheelbase Steam Wagon which Corgi have produced in GWR Livery in 1:50 scale.” [4] This is actually Corgi CC20204 – Foden C-Type Dropside Wagon. [10]
A model of a Foden K Steam Road Motor Lorry. [5]
The full size version of the Foden K Steam Road Motor Lorry. [6]
Series Two Foden Steam Traction Lorry – Okehampton 1929, © Public Domain. [7]
GWR 4 Ton Thornycroft Lorry, 1929. [8]

Further Reading

References

  1. The Railway Magazine, London, December 1905.
  2. https://didcotrailwaycentre.org.uk/article.php/514/going-loco-may-2022, accessed on 10th October 2024.
  3. https://www.leedsengine.info/leeds/gallery.asp?section=/leeds/images/Yorkshire%20PSWCo, accessed on 10th October 2024.
  4. https://www.hattons.co.uk/213735/corgi_cc20204_sentinel_dropside_steam_wagon_with_sack_load_in_gwr_livery/stockdetail, accessed on 10th October 2024.
  5. https://www.constructionscalemodels.com/en/foden-k-steam-wagon-south-eastern-finecast-sefte10, accessed on 10th October 2024.
  6. https://fortepan.hu/hu/photos/?id=228651, accessed on 10th October 2024.
  7. https://www.ebay.ph/itm/235633691321, accessed on 10th October 2024.
  8. https://www.steampicturelibrary.com/gwr-road-vehicles/road-motor-vehicles/gwr-4-ton-thornycroft-lorry-1929-536382.html, accessed on 10th October 2024.
  9. https://en.m.wikipedia.org/wiki/Yorkshire_Patent_Steam_Wagon_Co.#:~:text=The%20Yorkshire%20Patent%20Steam%20Wagon%20Co.&text=Their%20designs%20had%20a%20novel,was%20finally%20dissolved%20in%201993, accessed o. 10th October 2024.
  10. https://www.chezbois.com/corgi/modern_corgi/Model_97124.htm, accessed on 15th February 2025.

The Wenlock Branch from Harton Road Station to Marsh Farm Junction and Craven Arms

This article follows on from seven other articles which covered the Wellington to Severn Junction Railway and this line from Buildwas to Harton Road Station. The first three articles can be found by clicking on these links:

Wellington to Horsehay [8]

Horsehay to Lightmoor Junction [9]

Lightmoor Junction to Buildwas [10]

The most recent articles cover this line between Buildwas and Harton Road Station and can be found on these links:

Buildwas to Much Wenlock [11]

Much Wenlock to Presthope [12]

Presthope to Longville-in-the-Dale [13]

Longville Railway Station to Harton Road Railway Station [14]

We noted in the last three articles that from the commencement of the building of the line between Buildwas and Much Wenlock, the directors hoped that the line could be extended to Craven Arms via Presthope on Wenlock Edge (linking with the limestone quarries/works at that location).

The directors of the Wellington & Severn Junction Railway were, however, fully occupied with the line from Wellington to Buildwas. Another company was set up to build the ‘Wenlock & Craven Arms and Coalbrookdale Extension Railway‘. The bill went through the parliamentary process unopposed and authorised the ‘Wenlock Railway Company‘ to construct the line. Work started on 23rd October 1861.

By 5th December 1864, the line was open from Much Wenlock to Presthope. (That length is covered in the last but one online article listed above.) At this time, because it was a freight-only line, the Board of Trade saw no need for an inspection of the line. It had already been agreed at a meeting held on 4th December 1863 not to proceed with the line from Presthope to Craven Arms for the time being. It was to be three years after the line reached Presthope before the connection to the Shrewsbury & Hereford Railway close to Craven Arms was completed. It was finally opened on 16th December 1867.

Harton Road Station to Craven Arms

Harton Road Station to Marsh Farm Junction as shown on the Ordnance Survey Landranger Series mapping. [20]

We start our onward journey at Harton Road Station which is now a private dwelling. The station building and platform were on the North side of the line. There was a loop to the West of the passenger facilities which could act as an unloading/loading point for goods or even, possibly, as a passing loop if required.

Harton Road station building and platform. [6]
An enlarged extract from the 6″ Ordnance Survey of 1882 9published 1883. [15]
An extract from the precontract plans held at the Shrewsbury Archive shows the original road alignment at this location, lined in red, before the advent of the railway and its necessary diversion to accommodate the railway. These precontract plans were orientated in respect to the North point so as to get the greatest possible length of the proposed railway onto each sheet, © Shropshire Archives Ref. No. 6008/26 copyright reserved, used by kind permission. [5][My photograph of the plan, 5th August 2022]

Ken Jones deals with much of the length towards Marsh Farm Junction by telling us that, “Shortly after leaving Harton Road there [was] a long straight stretch across Henley Common, this was once part of the common field system attached to the small hamlet of Henley. Across the common and into a tree-lined deep cutting; as the train weaves in and out of the trees and cuttings between Harton Road and Marsh Farm Junction brief glimpses can be seen of a tower rising well above the trees to the left of the line; this is the well known Shropshire landmark Flounders Folly, a mid-19th century folly. After negotiating its stone staircase tourists would be rewarded with commanding views of the surrounding Shropshire and Border countryside.” [1: p109]

After leaving Harton Road Station trains for Craven Arms ran West towards Marsh Farm Junction across Henley Common. This extract comes from the 25″ Ordnance Survey of 1901. [16]
A very similar area as it appears on the railmaponline.com satellite imagery. [3]
Just a short distance West along the line from Harton Road Station and looking West on 12th April 2016, © Richard Webb and licensed for reuse under a Creative Commons Licence (CC BY-SA 2.0). [7]
Looking back towards Harton Road Station from a couple of hundred metres East along the route of the old railway where a public footpath crosses the line of the Wenlock Branch. The chimney of the station building can just be seen beyond the barn in the distance. [My photograph, 13th August 2024]
Some distance further West along the line of the old railway and looking West. [My photograph, 13th August 2024]
Looking West from the point a second footpath crosses the old railway. [My photograph, 13th August 2024]
At the location of the tree in the centre of the image above a permanent fence crosses the line. This is the view West from that fence line. [My photograph, 13th August 2024]

From this point on, the line crosses private land and for some distance the formation has been ploughed into the fields. After some distance, to the South side of the line there is a large Solar Farm. The access track to the solar farm runs West from the farm towards the A49.

Continuing West the line crossed a farm access track and stream in close proximity. An enlarged extract from this 25″ Ordnance Survey is shown below. [17]
A similar length of the line as shown on railmaponline.com satellite imagery. Note the solar farm at the bottom left of this image. East of the solar farm the route of the old railway runs over private land. West of the solar farm its access track follows the route of the old railway. [3]
The old line crossing a stream and an access track! This enlarged extract shows an area about the third point in from the right side of the Ordnance Survey above. [17]
The same location as shown on the pre-contract drawings, © Shropshire Archives Ref. No. 6008/26 copyright reserved, used by kind permission. [5][My photograph of the plan, 5th August 2022]
The remaining length of the line to Marsh Farm Junction. 25″ Ordnance Survey of 1901. [18]
A similar area to that shown on the 25″ OS map extract above, as it appears on the railmaponline.com satellite imagery. [3]
The access track to the solar farm follows the old railway line seen from close to its western end. [My photograph, 13th August 2024]
Looking West towards the bridge carrying Henley Lane over the Wenlock Branch. [My photograph, 13th August 2024]
The route of the old line continues to be marked by the lines of trees, nearing March Farm Junction. [Google Maps, August 2024]
The view East from Henley Lane Bridge, back along the old line towards Harton Road Station. [My photograph, 13th August 2024]
Looking West from Henley Lane Bridge along the old line to Marsh Farm Junction. [My photograph, 13th August 2024]
Looking East towards Henley Lane Bridge. [My photograph, 13th August 2024]
Henley Lane Bridge as shown on the pre-contract drawings, © Shropshire Archives Ref. No. 6008/26 copyright reserved, used by kind permission. [5][My photograph of the plan, 5th August 2022]
The next length of the line which crossed the main Shrewsbury to Hereford road as shown on the pre-contract drawings, © Shropshire Archives Ref. No. 6008/26 copyright reserved, used by kind permission. [5][My photograph of the plan, 5th August 2022]
Looking West towards the A49 along the line. [My photograph, 13th August 2024]
The approach to the Shrewsbury to Hereford main line at what was Marsh Farm Junction. The Wenlock Branch is again marked by the line of trees which enters top right. The line brushed the Shrewsbury to Hereford road as it approached Marsh Farm Junction. [Google Maps, August 2024]
The view South along the A49 close to Marsh Farm at the point where the Wenlock Branch bridged the road. An abutment remains on the East side of the road. The Shrewsbury to Hereford main line is just off to the right, © Jeremy Bolwell and licensed for reuse under a Creative Commons Licence (CC BY-SA 2.0) [23]
The view North along the A49 showing the same abutment. [Google Streetview, June 2024]
The length of the line between the Shrewsbury to Hereford road an the junction with the Shrewsbury to Hereford main line, as shown on the pre-contract drawings, © Shropshire Archives Ref. No. 6008/26 copyright reserved, used by kind permission. [5][My photograph of the plan, 5th August 2022]
Marsh Farm Junction as shown on the 25″ Ordnance Survey of 1901. [19]
A modern satellite image showing the main line over the length of the junction and to the South.  [Google Maps, August 2024]
The next length of the main line as shown on the 25″ OD map of 1901. [21]
The next length of the main line as it appears on modern satellite imagery. [Google Maps, August 2024]
The first significant structure South of March Farm Junction. This girder bridge carries the main line over the road between the A49 and Bushmoor. This photo shows the West elevation of the structure with the A49 beyond. [My photograph, 13th August 2024]
The view North from Gates Lane Bridge. [My photograph, 13th August 2024]
The view South from Gates Lane Bridge. [My photograph, 13th August 2024]
Gates Lane crossing the Shrewsbury to Hereford main line. [Google Streetview, May 2024]
The next length of the main line running past Wistanstow. [22]

 Not long after joining the main line branch trains stopped at Wistanstow Halt, the village being to the West of the Halt.

In 1901, there is no sign of Wistanstow Halt. The Halt opened in 1934 and closed in 1956. [26]
The bridge over the main line on the minor road between the A49 and Wistanstow, seen from the West. The Halt was on the Northside of the bridge on the length of track visible to the left of this image. [Google Streetview, September 2021]
This is the only picture of the halt that I have been able to find. It is unattributed in John Hodge’s second volume about the North & West Route. [27: p66]
Just South of Wistanstow the line crosses the A489 very close to its junction with the A49. [Google Maps, August 2024]
The same location as it appeared on the 25″ Ordnance Survey of 1901. [28]
The A489 passes under the line from Shrewsbury to Hereford close to Craven Arms. [Google Streetview, May 2024]

Before entering Craven Arms station, on the right was Stretford Bridge Junction, for the Bishop’s Castle Railway. In the early 1930s the Wenlock branch train could be brought to a stand here, whilst a Bishop’s Castle Railway mixed train was allowed to pass, with its former GWR ‘517’ class engine and its chain-braked ex-LNWR four-wheeled coaching stock, an open-planked wagon, a cattle truck and a Bishop’s Castle brake van.

Within a very short distance the line crosses the River Onny, ran on through what was once the junction for the Bishop’s Castle Railway (Stretfordbridge Junction and under and [29]
The same area on Google Maps. Earthworks associated with the Bishop’s Castle Railway are visible at the West side of the line. [Google Maps, August 2024]
The view from the West along the minor road which crosses the railway at the bottom of the extract from Google Maps above. {Google Streetview. May 2024]

After passing Stretford Junction, the line crossed Watling Street, the old roman road at an oblique angle.

The railway crosses Watling Street. The 25″ Ordnance Survey of 1901. [30]
The railway crosses Watling Street. [Google Maps, August 2024]
Long Lane Crossing. 25″ Ordnance Survey of 1901. [31]
Long Lane Crossing in 2024. [Google Maps, August 2024]
The crossing-keeper’s cottage at Long Lane Crossing just North of Craven Arms Railway Station in 1979, © John Mann Collection, used by kind permission of Nick Catford. [33]
Long Lane Crossing seen from the West [Google Streetview, June 2024]

After passing Stretford Junction, Watling Street and Long Lane Crossing, to the right was the carriage and engine shed, and to the left the goods shed and yard.

Looking North from the footbridge at Craven Arms. The crossover which allows access to the Heart of Wales Line is seen in the centre of the view. The much reduced station yard is on the left and Long Lane Crossing is in the distance before the line can be seen curving to the East, © John Lucas and licensed for reuse under a Creative Commons Licence, (CC BY-SA 2.0). [24]

The train pulled in on the down platform at Craven Arms, and after taking water the engine ran round the two coaches, and backed into the bay at the north end of the platform, this also being used by the Bishop’s Castle trains.

Craven Arms and Stokesay Station in 1901 as shown on the 25″ Ordnance Survey. [32]
Craven Arms Railway Station. [Google Maps, August 2024]
The bay and the down platform road are marked on this enlarged extract from the 25″Ordnance Survey. [32]
The view North from the station footbridge at Craven Arms Station in June 1979. Much of the station track work had been removed by 1979. The platform on the left is the down platform with the bay to its left, © John Mann Collection, used by kind permission of Nick Catford. [33]
Craven Arms & Stokesay Station in August 1949: ex-LNWR 1P 2-4-2T No.46727 used for local work sits in the goods yard. View Southwest, towards Hereford, Knighton and the Central Wales Line, © Copyright Ben Brooksbank and licensed for reuse under a Creative Commons Licence, (CC BY-SA 2.0). [35]
The bay platform used by Much Wenlock and Bishop’s Castle trains in 1910. A goods train can be seen travelling South on the main line, © John Mann collection, used by kind permission of Nick Catford. [33]
Craven Arms station looking north from the up platform c. 1950s. The bay platform is on the left beyond the footbridge, protected by a short section of ridge-and-furrow canopy at its south end. Note the lengthy running-in board, © John Mann collection, used by kind permission of Nick Catford. [33]

Craven Arms owes its existence to the coming of the Shrewsbury and Hereford Railway in 1852. It is truly a railway town created out of the hamlet of Newton. The S&H line passed through the Onny Valley, its route taking it past Shropshire’s famous beauty spot Stokesay Castle, and past a coaching inn named after the Lord of Manor the Earl of Craven, prompting the S&H to give the station the name of Craven Arms. The station was opened for traffic on 20th April, 1852. The parish name of Stokesay was added to the station’s name a little later.

The importance of Craven Arms as a railway centre was given added impetus by the opening of the Knighton Railway in 1861. Although only a branch it was in reality to be the embryo of the LNWR’s march upon Swansea. Various small companies were involved in the construction of the line between Craven Arms and Swansea, these later being absorbed into the LNWR or operated jointly by the LNWR and GWR.

On 1st July, 1862 Craven Arms station came under the joint ownership of the LNWR, GWR and West Midland Railway. The station consisted of up and down main line platforms, with booking office, general and ladies waiting room, together with refreshment rooms on the down side. Also on the downside was the station master’s house. The up side consisted of general and ladies’ waiting rooms only. The north and south end bays were on the down side. The North [1: p109] end bay was utilised by the Bishop’s Castle and Wenlock branch trains. [1: p114]

An aerial photograph from the South of Craven Arms and Stokesay Railway Station in 1948. Found on eBay on 12th August 2024. [25]
Craven Arms in the 21st century is much reduced. [34]

This brings us to the end of our journey from Wellington to Craven Arms along the Wenlock Branch.

References

  1. Ken Jones; The Wenlock Branch; The Oakwood Press, Usk, Monmouthshire, 1998.
  2. The photographs of the pre-contract drawings for the line were taken by myself and show extracts from the construction plans held in the Shropshire Archive. There is a standard charge of £10 per visit for taking photographs of their records.
  3. https://railmaponline.com/UKIEMap.php, 2nd July 2024
  4. Adrian Knowles; The Wellington, Much Wenlock & Craven Arms Railway; Lightmoor Press, Lydney, Gloucestershire, 2022.
  5. The photographs of the pre-contract drawings for the line were taken by myself and show extracts from the construction plans held in the Shropshire Archive. There is a standard charge of £10 per visit for taking photographs of their records.
  6. https://housesforsaletorent.co.uk/houses/to-rent/shropshire/harton.html, accessed on 17th July 2024.
  7. https://www.geograph.org.uk/photo/5209903, accessed on 17th July 2024.
  8. https://rogerfarnworth.com/2022/07/07/the-railways-of-telford-the-wellington-to-severn-junction-railway-wsjr-part-1-wellington-to-horsehay
  9. https://rogerfarnworth.com/2022/07/12/the-railways-of-telford-the-wellington-to-severn-junction-railway-wsjr-part-2-horsehay-to-lightmoor-junction
  10. https://rogerfarnworth.com/2022/07/18/the-railways-of-telford-the-wellington-to-severn-junction-railway-wsjr-part-3-lightmoor-junction-to-buildwas
  11. https://rogerfarnworth.com/2023/10/19/the-railways-of-east-shropshire-and-telford-the-much-wenlock-and-severn-junction-railway-buildwas-to-much-wenlock
  12. https://rogerfarnworth.com/2024/01/13/the-wenlock-branch-from-much-wenlock-to-presthope/
  13. https://rogerfarnworth.com/2024/06/27/the-wenlock-branch-from-presthope-to-craven-arms/
  14. https://rogerfarnworth.com/2024/07/25/the-wenlock-branch-from-longville-in-the-dale-to-marsh-farm-junction-and-craven-arms/
  15. https://maps.nls.uk/geo/explore/#zoom=16.0&lat=52.49958&lon=-2.76636&layers=257&b=1&o=100, accessed on 25th July 2024.
  16. https://maps.nls.uk/geo/explore/#zoom=16.0&lat=52.49768&lon=-2.77032&layers=168&b=1&o=100, accessed on 25th July 2024.
  17. https://maps.nls.uk/geo/explore/#zoom=16.0&lat=52.49402&lon=-2.79190&layers=168&b=1&o=100, accessed on 25th July 2024.
  18. https://maps.nls.uk/geo/explore/#zoom=16.0&lat=52.49025&lon=-2.81301&layers=168&b=1&o=100, accessed on 26th July 2024.
  19. https://maps.nls.uk/geo/explore/#zoom=16.0&lat=52.48445&lon=-2.81728&layers=168&b=1&o=100, accessed on 14th August 2024.
  20. https://www.geograph.org.uk/showmap.php?gridref=SO4386, accessed on 12th August 2024.
  21. https://maps.nls.uk/geo/explore/#zoom=16.0&lat=52.47950&lon=-2.82157&layers=168&b=1&o=100, accessed on 14th August 2024.
  22. https://maps.nls.uk/geo/explore/#zoom=15.0&lat=52.47054&lon=-2.82915&layers=168&b=1&o=100, accessed on 12th August 2024.
  23. https://www.geograph.org.uk/photo/6466763, accessed of 12th August 2024.
  24. https://www.geograph.org.uk/photo/4787720, accessed on 12th August 2024.
  25. https://www.ebay.co.uk/itm/195647213680?mkcid=16&mkevt=1&mkrid=711-127632-2357-0&ssspo=xRk1_MAMSum&sssrc=4429486&ssuid=afQhrar7TGK&var=&widget_ver=artemis&media=COPY, accessed on 12th August 2024.
  26. https://maps.nls.uk/geo/explore/#zoom=16.0&lat=52.46474&lon=-2.83404&layers=168&b=1&o=100, accessed on 14th August 2024.
  27. John Hodge; The North and West Route, Volume 2 – Shrewsbury and Hereford; Wild Swan Publications, Didcot, 2008.
  28. https://maps.nls.uk/geo/explore/#zoom=18.0&lat=52.45831&lon=-2.83692&layers=168&b=1&o=100, accessed on 14th August 2024.
  29. https://maps.nls.uk/geo/explore/#zoom=17.0&lat=52.45628&lon=-2.83934&layers=168&b=1&o=100, accessed on 14th August 2024.
  30. https://maps.nls.uk/geo/explore/#zoom=18.0&lat=52.45053&lon=-2.84005&layers=168&b=1&o=100, accessed on 14th August 2024.
  31. https://maps.nls.uk/geo/explore/#zoom=17.0&lat=52.44778&lon=-2.83949&layers=168&b=1&o=100, accessed on 14th August 2024.
  32. https://maps.nls.uk/geo/explore/#zoom=17.0&lat=52.44313&lon=-2.83870&layers=168&b=1&o=100, accessed on 14th August 2024.
  33. http://www.disused-stations.org.uk/c/craven_arms, accessed on 14th August 2024.
  34. https://railways-of-britain.fandom.com/wiki/Craven_Arms_railway_station?file=Craven_Arms.jpg, accessed on 15th August 2024.
  35. https://www.geograph.org.uk/photo/2211737, accessed on 29th September 2024.

The Wenlock Branch from Longville-in-the-Dale to Harton Road Station

This article follows on from six other articles which covered the Wellington to Severn Junction Railway and this line from Buildwas to Longville-in-the-Dale. The first three articles can be found on these links:

https://rogerfarnworth.com/2022/07/07/the-railways-of-telford-the-wellington-to-severn-junction-railway-wsjr-part-1-wellington-to-horsehay

https://rogerfarnworth.com/2022/07/12/the-railways-of-telford-the-wellington-to-severn-junction-railway-wsjr-part-2-horsehay-to-lightmoor-junction

https://rogerfarnworth.com/2022/07/18/the-railways-of-telford-the-wellington-to-severn-junction-railway-wsjr-part-3-lightmoor-junction-to-buildwas

The most recent articles cover this line between Buildwas and Longville and can be found on these links:

The Railways of East Shropshire (and Telford) – the Much Wenlock and Severn Junction Railway, Buildwas to Much Wenlock.

The Wenlock Branch from Much Wenlock to Presthope

The Wenlock Branch from Presthope to Longville

As we noted in the last two articles, from the commencement of the building of the line between Buildwas and Much Wenlock, the directors hoped that the line could be extended to Craven Arms via Presthope on Wenlock Edge (linking with the limestone quarries/works at that location).

The directors of the Wellington & Severn Junction Railway were, however, fully occupied with the line from Wellington to Buildwas. Another company was set up to build the ‘Wenlock & Craven Arms and Coalbrookdale Extension Railway‘. The bill went through the parliamentary process unopposed and authorised the ‘Wenlock Railway Company‘ to construct the line. Work started on 23rd October 1861.

By 5th December 1864, the line was open from Much Wenlock to Presthope. (That length is covered in the last but one online article listed above.) At this time, because it was a freight-only line, the Board of Trade saw no need for an inspection of the line. It had already been agreed at a meeting held on 4th December 1863 not to proceed with the line from Presthope to Craven Arms for the time being. It was to be three years after the line reached Presthope before the connection to the Shrewsbury & Hereford Railway close to Craven Arms was completed. It was finally opened on 16th December 1867.

Longville in the Dale to Harton Road Station

We begin this article at Longville Railway Station and travel towards Craven Arms, we complete this part of the journey at Harton Road Station.

Longville Station had a single platform with a red and yellow brick booking office and waiting room. Ken Jones tells us that it “served a few cottages, a farm, an Inn, and the nearby Lutwyche Hall, the home of the Benson family, who did so much to promote the building of the line between Much Wenlock and Craven Arms. The station also served the villages of Cardington, Holdgate, Shipton and Stanton Long. The platform was on the up side, and the station buildings consisted of a general waiting room, ladies’ waiting room of brick and goods warehouse lock-up. There were two sidings, and a horse landing for two horse boxes, and a cattle landing for two wagons. There was no signal box, Longville being an intermediate station on the Presthope to Rushbury staff section. There were east and west ground frames, access to both being obtained by a key on the Presthope-Rushbury staff.” [1: p105]

Two photographs of Longville Station when still in use. The second is probably closer to closure than the first, when Longville was only used as a goods terminus. These two photographs were shared on the Memories of Shropshire Facebook Group by Ronnie Honeywell on 5th July 2014 and are used here by kind permission. [11]
The view from the road bridge at the Southwestern end of Longville station in 1991, © David Harris. This photograph was shared by David Harris on the Disused Stations Facebook Group on 8th March 2022 and is included here by kind permission. [10]
This view, looking Southwest from the platform at Longville station shows the arched bridge which carries the B4371 over the old railway, © David Harris. This photograph was shared by David Harris on the Disused Stations Facebook Group on 8th March 2022 and is included here by kind permission. [10]
The road bridge at the Southwest end of the station site shows up well in this photograph taken from the location of the old platform at Longville station. The bridge comprises a brick arch with stone spandrels and parapets. This photograph was taken by Colin Pickett and shared by him on the Memories of Shropshire Facebook Group on 19th July 2019. It is shared here by kind permission. [11]
Looking East along the B4371 across the road bridge at the Southern end of the Longville station site. [Google Streetview, August 2023]
Longville railway station building in 2012, seen from the road bridge which once spanned the old railway. It closed to passengers in 1951 and finally in 1963. It was a private house when this image was taken.
View northeast towards Presthope and Buildwas. The local settlement is “Longville-in-the-Dale” but the station name was shorter, © Copyright Nigel Thompson and licensed for reuse under a Creative Commons Licence (CC BY-SA 2.0). [15]
The length of the Wenlock Branch from Longville Station to the next road over-bridge, as it appears on the 1901 25″ Ordnance Survey. Initially, close to Longville the railway was in cutting. By the time the next bridge was reached, the road had to be lifted to cross the line. [5]
The next length of the line on the 25″ Ordnance Survey. The formation of the railway was either level with its surroundings or on a slight embankment for much of the way to the next station at Rushbury. [6]
The same length of the line as shown on the two map extracts above. This image comes from the satellite imagery of railmaponline.com and represents the route of the line as it runs through the 21st century landscape around Wenlock Edge. The Farm marked with a blue flag is Wenlock Edge Farm which has a farm shop. Very kindly, the owners allowed me to park in the shop car park and generously phoned land owners in the area to get permission for me to walk the line to Rushbury Station. The footpath from Wenlock Edge Farm to the line of the old railway can be made out crossing the fields to the South of the farm. [3]
The first significant location to the Southwest of Longville Station is shown here. The girder bridge which carries a minor road over the Wenlock Branch is at the centre of this extract from the Ordnance Survey Explorer series map No. 217, under the green diamond. © Crown copyright. Access to the track bed between Longville Station as this location was not possible. The area around the bridge could only be viewed from road level. [9]
The road approach from the South to the girder bridge over the old railway. [Google Streetview, August 2021]
Looking back along the line of the old railway in 2024. Access to the land beneath the bridge was not feasible. [My photograph, 1st June 2024]
Looking forward, to the Southwest, along the line of the old railway in 2024. Beyond the distant hedge the boundaries of what was railway land are still delineated by hedges and trees. [My photograph, 1st June 2024]

After passing under the minor road the line ran Southwest towards Coates Crossing.

I was able to access the line from Northeast of Coates Crossing (via a footpath from Wenlock Edge Farm) to Rushbury Station with permission from local landowners. From here to Rushbury Station the original railway boundaries are predominantly fenced and gated with significant hedgerows and trees.

Looking Northeast along the line of the Wenlock Branch toward the minor road bridge above. [My photograph, 3rd July 2024]
Looking Southwest along the line of the old railway towards Rushbury Station, for a distance of around 100 metres the route of the line is not protected by hedging. [My photograph, 3rd July 2024]
A couple of hundred metres to the Southwest, another view looking Southwest along the line of the old railway. [My photograph, 3rd July 2024]
This extract from the 25″ Ordinance Survey, together with the extract immediately below, cover the length of the line to Rushbury Station. [7]
Rushbury Station appears in the bottom-left of this extract from the 25″Ordnance Survey. [8]
This next railmaponline.com satellite image covers the same length of the line as the two map extracts above. Wenlock Edge Farm appears in the top-right, Rushbury Station in the bottom-left. [3]
Approaching, and looking towards, the location of Coates Crossing which is about 200 metres ahead. [My photograph, 3rd July 2024]

Coates Crossing’s keeper’s cottage was from its construction “occupied by the Rushbury station master, and it was the duty of the station master’s wife to operate the crossing gates as and when a farm cart from the nearby Coates Farm required to go into the fields under Coates Wood. Later, after the abolition of the Rushbury SM’s post, it became the duty of the Longville station master’s wife.” [1: p105]

An enlarged extract from the 25″ Ordnance Survey shows Coates Crossing. [7]
The location of Coates Crossing. The building shown is larger than the original crossing-keepers cottage which for a good while doubled up as the Rushbury Stationmaster’s house. [Google Maps, July 2024]
250 metres or so to the Southwest of the location of Coates Crossing, looking Southwest. [My photograph, 3rd July 2024]
Just under halfway from Coates Crossing to Rushbury Station the old formation becomes overgrown and is being used by the landowner for muck storage. [My photograph, 3rd July 2024]
Beyond the piles of muck a gate is closed across the line of the old railway. Access along the line required turning to the last and walking through the field immediately alongside the line until it was possible to get back onto the line 100metres or so ahead. [My photograph, 3rd July 2024]
Having regained the line of the old railway it is noticeable that the route is not as heavily used in the 21st century as the length already covered. [My photograph, 3rd July 2024]
The ‘green lane’ continues. [My photograph, 3rd July 2024]
Much closer now to the site of Rushbury Station a gate marks a change in ownership. [My photograph, 3rd July 2024]
The modern complex of buildings on the Rushbury station site appears on the horizon, flanked by various fir trees. [My photograph, 3rd July 2024]
The occasional railway sleeper can be seen. This photo was taken towards the Eastern end of the Rushbury Station site. [My photograph, 3rd July 2024]
The modern track diverts away from the line of the old railway once within the boundaries of the station site. The trees to the left run alongside the route taken by the line through the station. The roof of the old station building can just be made out at the centre-top of this image. The concrete post and railings are what remains of the cattle loading pens. [My photograph, 3rd July 2024]
Rushbury Station: the remains of the cattle loading pens. [My photograph, 3rd July 2024]
The site of the old station, viewed from the North. [My photograph, 3rd July 2024]
The road approach to Rushbury Station, seen from the Northeast. [My photograph, 3rd July 2024]

About the length just walked and about Rushbury and its station, Ken Jones writes: “The line has now levelled out into Ape Dale, and soon enters Rushbury station with its avenue of fir trees on either side, the station in every respect being similar to that of Longville. … The station served the villages of Rushbury and Munslow. The signal box was at the north end of the platform, the box containing the locking frame only, the electric train staff instruments being situated in the booking office. The station was not a crossing place. The station buildings consisted of a booking office, general and ladies’ waiting room, and a lamp room. The staff were just the station master and a signalman, the latter being required to assist with station duties.” [1: p105]

A further ground frame was situated at the Northeast end of the station, “and gave access to two sidings, a horse landing and cattle pens. In the station yard there was a cart weighbridge. At the Craven Arms end of the platform there was a water column.” [1: p105]

An enlarged extract from the 25″ Ordnance Survey showing Rushbury Station at the turn of the 20th century. The village was less than a kilometre to the North of the Station. [8]
Another extract from the precontract plans held at the Shrewsbury Archive. These precontract plans were orientated in respect to the North point so as to get the greatest possible length of the proposed railway onto each sheet, © Shropshire Archives Ref. No. 6008/26 copyright reserved, used by kind permission. [16][My photograph of the plan, 5th August 2022]
The view looking Southwest through Rushbury Station in the years after the closure of this length of the Wenlock Branch, with the road bridge marking the limit of the station site. By the time this photo was taken the rails had been lifted. Colin Middleton shared this newspaper cutting on the Memories of Shropshire Facebook Group on 30th September 2021. The station building remains as a private dwelling. The modern equivalent of this view could only be obtained by intruding on private space. [12]
Jigsaw painting by Don Breckon of Rushbury Station when the passenger service was still operating. Locomotive No. 4406, a 2-6-2T Small Prairie, is just arriving at the station with a two-coach train for Craven Arms. [26]
The view from the road bridge at the Southwest end of the station site, looking Northeast towards Longville. The station building is not the only part of the site which remains. Look carefully between the station building and the small signal cabin and you will be able to see the cattle pen which sat on the cattle dock. The cattle pen can still be seen on site in the 21st century. This image was shared on the Memories of Shropshire Facebook Group on 18th June 2020. It is used here with his kind permission. The modern equivalent of this view is shown below. [13]
In the 21st century, the view from the road bridge onto the station site is blocked by trees. [My photograph, 3rd July 2024]
Looking Southeast across the road bridge. [My photograph, 3rd July 2024]
Looking Northwest across the road bridge. [My photograph, 3rd July 2024]
The view Southwest along the formation of the old railway. [My photograph, 3rd July 2024]
Rushbury Station can be seen in the right half of this aerial image which looks Eastward across the station site. The Wenlock Branch runs from centre-top to bottom-right. Rushbury village is shown in the left half of the photo. A short distance West of the station another overbridge can be seen crossing the old railway. Kevin McLean shared this image, alongside other aerial images of the area around Rushbury, on the Memories of Shropshire Facebook Group on 12th September 2015. [14]
The 25″ Ordnance Survey again. This extract covers the length of the Wenlock Branch immediately to the Southwest of Rushbury Station. [17]
This next extract takes the Wenlock Branch as far as the gates of Eaton Manor. The railway crossed the Ticklerton to Eaton Manor road by means of a bridge. [18]
This satellite image from railmaponline.com shows the same length of the old railway as the two map extracts above. The location of Rushbury Station is top-right and that of the bridge near Eaton Manor, bottom-left. [3]
Looking East along the line of the branch from the accommodation bridge which spanned the line about 300 metres West of Rushbury Station. [My photograph, 17th July 2024]
The road approach to the over-bridge from the North. [My photograph, 17th July 2024]
The view from the South across the over-bridge. [My photograph, 17th July 2024]
The view to the West from the same bridge. [17th July 2024]
The view from the trackbed to the East of the overbridge. [My photograph, 17th July 2024]
The view from the trackbed to the West of the overbridge. [My photograph, 17th July 2024]
Another extract from the precontract plans held at the Shrewsbury Archive. This extract shows the location of the bridge in the images immediately above. These precontract plans were orientated in respect to the North point so as to get the greatest possible length of the proposed railway onto each sheet, © Shropshire Archives Ref. No. 6008/26 copyright reserved, used by kind permission. [16][My photograph of the plan, 5th August 2022]
Around 100 metres West of the over-bridge, a view West along the trackbed. [My photograph, 17th July 2024]
A further 200 metres to the West, the track bed is gated, presumably at a change in land ownership. [My photograph, 17th July 2024]
The length of the railway formation beyond the gate in the last image has seen greater use as a farm access road. [My photograph, 17th July 2024]
A further 200 metres to the West of the last image. [My photograph, 17th July 2024]
A short distance further along the old railway the farm accessed road slips off the old railway embankment to the North. For a distance of around 300 metres the railway formation becomes overgrown and inaccessible. [My photograph, 17th July 2024]
A ‘cattle-creep’ just a short distance ahead provides access between fields on either side of the old railway. This view looks through the stone and brick-arched structure from the North. [My photograph, 17th July 2024]
The same structure viewed from the South. [My photograph, 17th July 2024]

At this point on the Wenlock Branch it was necessary to leave the line of the old railway. A short detour along a field boundary and then along Darby Lane led to another access point to the old railway line.

The diversion necessary from the line of the railway is shown on this satellite image as a red-dashed line. The route followed a farm track heading Northwest before joining Darby Lane as it converged on the boundary of railway land close to the bottom of this image. An open gateway permitted access back onto the line and it was then possible to walk back along the line to the Northeast. [19]
Looking back East along the old railway formation towards the cattle-creep/underpass. [My photograph, 17th July 2024]
Looking West at the same location. [My photograph, 17th July 2024]
200 metres further to the West looking West again. [My photograph, 17th July 2024]
Again looking West, close to the gate providing access to the old railway formation. [My photograph, 17th July 2024]
Just a short distance to the West of the picture above, the line of the railway is obstructed once more, requiring a return to Darby Lane. [My photograph, 17th July 2024]
The next field gate was open as well and was possible to look ahead, West, along the line towards a private dwelling built over the route of the old railway line. That building can be seen from above in the first satellite image below.  [My photograph, 17th July 2024]
An enlarged extract from the 25″ Ordnance Survey showing the bridge near Eaton Manor. [18]
Approximately the same area as shown on the enlarged map extract above. The line of the old railway has been built over to the Northeast of the bridge location shown below. [Google Maps, July 2024]
The view from the southeast along the road from Eaton Manor in August 2021. The stone bridge abutments and pilasters remain but the bridge deck has been removed. [Google Streetview, August 2021]
The view from the Northwest. [Google Streetview, August 2021]
Another extract from the precontract plans held at the Shrewsbury Archive. This shows the original road alignment at this location before the advent of the railway and its necessary diversion to accommodate  the railway. These precontract plans were orientated in respect to the North point so as to get the greatest possible length of the proposed railway onto each sheet, © Shropshire Archives Ref. No. 6008/26 copyright reserved, used by kind permission. [16][My photograph of the plan, 5th August 2022]

To the West of this location the line of the old railway is now in private hands. Access to the line is limited to that possible on public footpaths/roads which cross the line. A diversion to the South of the line was necessary to reach the first point of access.

The next length of line from close to Eaton Cottage to Hartonroad Station. An extract from the 25″ Ordnance Survey mapping of 1882/1883. [21]
The same area as that shown on the OS map extract above. [21]
The route of the old railway is again shown in green, the necessary diversion by a red-dashed line. At the East edge of this image there are a series of private properties built over the line of the old railway. These are shown immediately below.

At the West edge of this image the footpath marked by the red-dashed line crossed the line of the old railway. In both directions from the footpath the old line is now in private ownership. [20]
A series of four photographs look North from the public highway into the properties built over the line of the old railway. [My photographs, 17th July 2024]
A further 200 metres to the Southwest on the road to the hamlet of Harton, this photo shows an open field between the road and the treeline which marks the line of the Wenlock Branch. [My photograph, 17th July 2023]
Looking East at the point where the footpath crossed the old railway. [17th July 2024]
Looking West at the same location. [My photograph, 17th July 2024]
Using a telephoto lens, this is the line of the old railway heading West. [My photograph, 17th July 2024]
A view from the South through the location of the bridge carrying the Wenlock Branch over the road adjacent to Hartonroad Railway Station. [My photograph, 17th July 2024]
A view from the North through the location of the bridge carrying the Wenlock Branch over the road adjacent to Hartonroad Railway Station. [My photograph, 17th July 2024]

Writing of the length of the line between Rushbury and Harton Road stations, Ken Jones says: “On leaving [Rushbury] station the train passes under the roadway which formed part of the Roman road, with a steep rise from the station leading on to Roman Bank and over Wenlock Edge into the Corve Dale. Still passing under the densely wooded Edge Wood, to the left, and nestling under the wood, can be seen the small hamlet of Eaton-under-Heywood, and the embattled tower of the 12th century church of St Edith; the hamlet consists of one farm, the rectory and one cottage. Soon the train enters Harton Road station, the last on the branch. The station is as isolated as the hamlet of Eaton, all that can be seen from the train is a farm, and the station master’s house. Harton Road served the hamlets of Ticklerton, Halton, Soudley, Eaton, Westhope and Burwood, most of these (in 1922) each having a population of 50 people, Eaton and Burwood having only 40. The station consisted of the usual buildings: booking office, general and ladies’ waiting room and a lamp room. The staff consisted of the station master and one gate woman, she being employed at Wolverton Crossing, which was situated between Harton Road and Marsh Farm [Junction]. There was one double-ended siding which held 10 wagons, access to which was from either the east or west ground frames. The ground frames were controlled by the key on the Rushbury to Marsh Farm [Junction] staff. Also in the sidings was a cattle pen, which held one wagon and a horse landing for three horse boxes. One scene of activity that could be witnessed at the station was when the local estate farmers conveyed coal from the yard to the home of the local Lord of the Manor, as part of their statutory estate duty.” [1: p105 & 109]

An enlarged extract from the 25″ Ordnance Survey of 1881/1882 centred on Hartonroad Station. The bridge location shown in the images above is at the right-hand side of this extract. [22]
An enlarged extract from the ESRI satellite imagery provided by the National Library of Scotland centred on the location of Hartonroad Station [22]
Looking from the Northeast towards the Wenlock Branch. The track to the right is the Hartonroad Station approach road. The tarmac road drops down to pass under a now demolished railway bridge. [Google Streetview, August 2023]
A short distance along the station approach, this view shows the original station building which is in private hands. This picture was posted on the Geograph website, © Copyright Nigel Thompson and licensed for reuse under a Creative Commons Licence (CC BY-SA 2.0). [23]
A better view of the station building and platform. [24]
Another extract from the precontract plans held at the Shrewsbury Archive shows the original road alignment at this location, lined in red, before the advent of the railway and its necessary diversion to accommodate the railway. These precontract plans were orientated in respect to the North point so as to get the greatest possible length of the proposed railway onto each sheet, © Shropshire Archives Ref. No. 6008/26 copyright reserved, used by kind permission. [16][My photograph of the plan, 5th August 2022]

References

  1. Ken Jones; The Wenlock Branch; The Oakwood Press, Usk, Monmouthshire, 1998.
  2. The photographs of the pre-contract drawings for the line were taken by myself and show extracts from the construction plans held in the Shropshire Archive. There is a standard charge of £10 per visit for taking photographs of their records.
  3. https://railmaponline.com/UKIEMap.php, 2nd July 2024
  4. Adrian Knowles; The Wellington, Much Wenlock & Craven Arms Railway; Lightmoor Press, Lydney, Gloucestershire, 2022.
  5. https://maps.nls.uk/geo/explore/#zoom=16.0&lat=52.53723&lon=-2.67934&layers=168&b=1&o=100, accessed on 2nd July 2024.
  6. https://maps.nls.uk/geo/explore/#zoom=16.0&lat=52.52989&lon=-2.68767&layers=168&b=1&o=100, accessed on 2nd July 2024.
  7. https://maps.nls.uk/geo/explore/#zoom=16.0&lat=52.52396&lon=-2.70003&layers=168&b=1&o=100, accessed on 2nd July 2024.
  8. https://maps.nls.uk/geo/explore/#zoom=16.0&lat=52.51967&lon=-2.71281&layers=168&b=1&o=100, accessed on 2nd July 2024.
  9. OS Explorer No. 217, revised August 2018.
  10. https://www.facebook.com/share/p/S5PDjUKFJmP7GhAd, accessed on 3rd July 2024.
  11. https://www.facebook.com/share/p/29GLutDqQZ6MSK4F, accessed on 3rd July 2024.
  12. https://www.facebook.com/share/p/vKmokDfTDtHmqD6W, accessed on 3rd July 2024.
  13. https://www.facebook.com/share/p/JNoYPmh5bcKK3KjK, accessed on 3rd July 2024.
  14. https://www.facebook.com/share/p/HhWT6tfX13QFEKn7, accessed on 3rd July 2024.
  15. https://www.geograph.org.uk/photo/4354492, accessed on 24th June 2024.
  16. The photographs of the pre-contract drawings for the line were taken by myself and show extracts from the construction plans held in the Shropshire Archive. There is a standard charge of £10 per visit for taking photographs of their records.
  17. https://maps.nls.uk/geo/explore/#zoom=16.0&lat=52.51562&lon=-2.72436&layers=168&b=1&o=100, accessed on 9th July 2024.
  18. https://maps.nls.uk/geo/explore/#zoom=16.0&lat=52.50904&lon=-2.74275&layers=168&b=1&o=100, accessed on 9th July 2024.
  19. https://maps.nls.uk/geo/explore/#zoom=16.0&lat=52.51139&lon=-2.73946&layers=257&b=1&o=8, accessed on 17th July 2024.
  20. https://maps.nls.uk/geo/explore/#zoom=16.0&lat=52.50448&lon=-2.74994&layers=257&b=1&o=8, accessed on 17th July 2024.
  21. https://maps.nls.uk/geo/explore/#zoom=15.0&lat=52.50294&lon=-2.75844&layers=257&b=1&o=100, accessed on 17th July 2024.
  22. https://maps.nls.uk/geo/explore/#zoom=18.0&lat=52.49969&lon=-2.76300&layers=257&b=1&o=100, accessed on 17th July 2024.
  23. https://www.geograph.org.uk/photo/4354526, accessed on 17th July 2024.
  24. https://housesforsaletorent.co.uk/houses/to-rent/shropshire/harton.html, accessed on 17th July 2024.
  25. https://www.geograph.org.uk/photo/5209903, accessed on 17th July 2024.
  26. https://dabhandpuzzles.uk/product/calling-at-rushbury-jigsaw-1000-piece-used-2, accessed on 14th August 2024.

The Wenlock Branch from Presthope to Longville

This article follows on from five other articles which covered the Wellington to Severn Junction Railway and this line from Buildwas to Presthope. The first three articles can be found on these links:

https://rogerfarnworth.com/2022/07/07/the-railways-of-telford-the-wellington-to-severn-junction-railway-wsjr-part-1-wellington-to-horsehay

https://rogerfarnworth.com/2022/07/12/the-railways-of-telford-the-wellington-to-severn-junction-railway-wsjr-part-2-horsehay-to-lightmoor-junction

https://rogerfarnworth.com/2022/07/18/the-railways-of-telford-the-wellington-to-severn-junction-railway-wsjr-part-3-lightmoor-junction-to-buildwas

The most recent articles cover this line between Buildwas and Presthope and can be found on these links:

The Railways of East Shropshire (and Telford) – the Much Wenlock and Severn Junction Railway, Buildwas to Much Wenlock.

The Wenlock Branch from Much Wenlock to Presthope

Much Wenlock to Presthope and on towards Craven Arms

From the commencement of the building of the line between Buildwas and Much Wenlock, the directors hoped that the line could be extended to Craven Arms via Presthope on Wenlock Edge (linking with the limestone quarries/works at that location).

The directors of the Wellington & Severn Junction Railway were, however, fully occupied with the line from Wellington to Buildwas. Another company was set up to build the ‘Wenlock & Craven Arms and Coalbrookdale Extension Railway‘. The bill went through the parliamentary process unopposed and authorised the ‘Wenlock Railway Company‘ to construct the line. Work started on 23rd October 1861.

By 5th December 1864, the line was open from Much Wenlock to Presthope. (That length is covered in the last online article listed above.) At this time, because it was a freight-only line, the Board of Trade saw no need for an inspection of the line. It had already been agreed at a meeting held on 4th December 1863 not to proceed with the line from Presthope to Craven Arms for the time being. It was to be three years after the line reached Presthope before the connection to the Shrewsbury & Hereford Railway close to Craven Arms was completed. It was finally opened on 16th December 1867.

Presthope to Longville

We begin this article at Presthope Railway Station and travel towards Craven Arms, as far as the village of Longville in the Dale. …….

Ken Jones comments: “On arrival at Presthope station … its complete isolation is striking, the only sign of habitation being the station master’s house standing on a ridge above the station. Although isolated, its importance is magnified by the number of sidings (a mini-marshalling yard on a branch line), because of the extensive quarrying formerly carried out by the Lilleshall Company in this area. A siding [1.5] miles long ran from the station sidings into the Lilleshall quarries. Prior to World War I a special train left Presthope each day for the Lilleshall Company’s furnaces at Priors Lee. However, by the early 1920s the company had ceased quarrying operations in the Presthope.” [1: p97]

The limestone quarry on Moses Benson’s land was the prime reason for the railway reaching Presthope. It was “developed by the Lilleshall Company, the line being opened to this point in 1864 solely for mineral traffic.” [15: p134]

Knowles comments: “The Wenlock Railway Bill stipulated that ‘The Company at their own expense shall make a proper and convenient siding at Presthope at the eastern end of the proposed tunnel, and at their own expense maintain this siding for the exclusive use of Moses George Benson.’ … The Benson family owned the Lutwyche Estate which included much of the land south west of Much Wenlock over which the Craven Arms extension would pass. Extensive limestone quarrying was carried out in the area and the Bensons had accrued wealth by leasing land for limestone extraction. The new railway would facilitate transport of the stone, a benefit to Moses Benson who became a strong advocate of the railway. In 1862 he leased the site of the limestone quarry at Presthope to the Earl of Granville who was acting on behalf of the Lilleshall Company. … The Wenlock Railway duly installed a 50-yard siding which was soon extended right into the quarry by the Lilleshall Company, ready for the start of mineral traffic from Presthope over the Wenlock Railway in 1864.” [15: p53]

An extract from the 25″ Ordnance Survey of 1901. This extract focuses on Presthope Station which sat just to the South of the B4371 accessed by a dedicated approach road. [4]
This next extract from the railmaponline.com satellite imagery shows Presthope Grange Campsite and Residential Park sitting over the route of the old Wenlock Branch on the site of Presthope Station. The branch from Presthope Station into what were Presthope quarries is illustrated leaving the main running line as it continues to climb toward the short tunnel close to the top of Wenlock Edge. [3]
A marginally better (closer) map extract from the 25″ Ordnance Survey of 1901. Presthope Station was relatively remote from any centre of population. It’s main function was a junction station for the Lilleshall Company’s Mineral Railway. That branch line left the station site to the South of the main line heading for Craven Arms. Because of that status it had more than its fair share of facilities! The station buildings are at the centre of this map extract. A dedicated access road led from the B4371 to the station. The station Master’s House was alongside that road, with the signal box adjacent to it. [13]
This is a first extract, in this article, from the pre-contract plans of the Much Wenlock line which are held in the Shropshire Archives in Shrewsbury. It shows the full length of the station facilities at Presthope. These precontract plans were orientated in respect to the North point so as to get the greatest possible length of the proposed railway onto each sheet, © Shropshire Archives Ref. No. 6008/26 copyright reserved, used by kind permission. [34][My photograph of the plan, 5th August 2022]
The 18.00 hrs Craven Arms – Much Wenlock – Wellington train leaving Presthope Station on 21st April 1951, heading for Much Wenlock. This image was shared on the Telford Memories Facebook Group by Metsa Vaim EdOrg on 8th October 2019. [6]
The architect Joseph Fogarty prepared designs for all the station buildings on the branch. The Presthope Station building was a mirror image of his standard design of ‘permanent’ station building. This image is an electronically reversed extract from his standard drawings which are held in The British Rail Paddington Archive. The unreversed image can be found in Adrian Knowles book about the line. [15: p57]
Presthope Station after the removal of the passenger facilities. This photograph was taken by J. Langford in April 1962, the signal box and presumably the station master’s house remain. This image was shared on the Much Wenlock Memories Facebook Group by Judith Goodman on 9th February 2023. [7]
A view North across Presthope Grange Residential Park which sits on the site of Presthope Railway Station. [8]
This next extract from the 1901 25″ Ordnance Survey shows the tunnel under the B4371 and the top of Wenlock Edge, in its entirety. The Western Portal is just visible on the left of the map extract. It also shows the quarry branch leaving Presthope Station and running along the Southeast side of the Edge. The hamlet pf Presthope is evident on this extract: a row of cottages called Five Chimneys sat alongside the main road and the Plough Inn was accessed via a side road which crossed the Lilleshall Company line at a level crossing.  [5]
Both the quarry branch and the main Much Wenlock to Craven Arms line can be seen on this next extract from the railmaponline.com satellite imagery. The tunnel at the high point of the Wenlock Branch passed under the B4371. The original side road leading down to The Plough Inn is now encompassed within a small industrial estate and the road has been diverted to the West [3]
The translucent image illustrates the changes in the immediate area very effectively. Five Chimneys are top-right, the original road alignment meets the B4371 close to them. It curved round to the West to the location of The Plough Inn which sat over what is now the new alignment of the minor road. Once the Lilleshall Company’s branch had been lifted it became possible to significantly improve the road alignment, which runs almost East to West across the lower half of the modern image. [14]

The Lilleshall Company Mineral Railway at Presthope

The limestone found on Wenlock Edge is a relatively hard and resistant rock, grey/blue in colour. Its thickness varies from around 35 metres to more than 135 metres. It “has been used from the earliest days as a building stone locally as can be seen in the remaining Priory Walls and the Corn Exchange in Wenlock Town. More significantly, the limestone was used for lime mortar, especially as can be seen in the Roman City of Viriconium, Wroxeter.” [16: p229-230] Historically it was also used as a fertiliser, as a flux in blast furnaces, as a road stone, as bricks and slabs and in the manufacture of artificial stone.

This versatility made the limestone from Wenlock Edge a valuable resource and so very attractive to the Lilleshall Company. It was its use in their industrial processes which made it so important.

As we have already noted, the first 50 yards of the Mineral Railway were built by the railway company under the provisions of the Wenlock Railway Bill. Knowles comments that, “this was then continued by the Lilleshall Company for almost a mile and a half, linking to a network of moveable tramways which extended into the far reaches of the quarry.” [15: p134-135]

Prior to the construction of the Wenlock Branch and the Lilleshall Company Mineral Railway there was a quarry close to what became the tunnel mouth of the extension towards Craven Arms. Associated with that limestone quarry we’re Limekilns which can be seen on the OS map extract above – a series of four circles on the South side of the main line close to the tunnel portal.

The Lilleshall Company worked their quarry until just before WW1. When no longer needed the mineral railway was closed and lifted. “Knowle Lime Works took over part of the site and reopened [the] older working almost adjacent to Presthope Tunnel.” [15: p135]

The 50 yard length of siding provided by the railway company was still in place and Knowle Lime Works provided their own tramway and wharf alongside the original siding for the transhipment of goods for onward transport.

This is an extract from the modern OS Explorer Map as reproduced in the Much Wenlock Neighbourhood Plan with the area of the Lilleshall Company quarries shaded lilac. [19]

The next three extracts from the 25″ Ordnance Survey of 1883 show the length of the Lilleshall Company line from the Inn to their quarries.

Two extracts from the 25″ Ordnance Survey Sheet Shropshire L. 14 of 1883. [17]
This map extract comes from the Ordnance Survey Sheet immediately to the South of Shropshire L. 14, Shropshire LVII.2 of 1883. [18]
The quarry area and its internal tramways as recorded on the 25″ Ordnance Survey of 1902. [20]
The two lines (Quarry Railway and Much Wenlock Branch) continued in Southwesterly directions across this next satellite image, the mineral railway is the more southerly of the two lines shown. The railmaponline.com satellite imagery shows the end of the quarry branch (in the bottom-left of the image), while the line to Craven Arms continues on the Northwest side of Wenlock Edge heading down a relatively gentle incline by following the line of the Edge. [3]
Looking Northeast towards Presthope along the line of the Mineral Railway. [Google Streetview, May 2011]
Looking Southwest into the site of the Lilleshall Company quarry. [Google Streetview, May 2011]

Presthope Tunnel and the line to the West

Ken Jones comments: “Leaving Presthope Station, to the left of the train was a large outcrop of limestone rock on which were three limekilns, this outcrop with its kilns forming a most dramatic entrance to the 207 yds-long Presthope tunnel driven through the limestone rock.” [1: p97]

Another extract from the precontract plans plans of the Much Wenlock line which are held in the Shropshire Archives in Shrewsbury. It shows the full length of the tunnel at Presthope, © Shropshire Archives Ref. No. 6008/26 copyright reserved, used by kind permission. [34][My photograph of the plan, 5th August 2022]
The Northeastern Portal of Presthope Tunnel. This image was shared on the ‘Shrewsbury from Where You Are Not’ Blog by Steve R. Bishop on 24th April 2019 – https://shrewsburyfromwhereyouarenot.blogspot.com/2019/04/presthope-tunnel.html. [9]
The B4371 looking Southwest across the line of the tunnel. [Google Streetview, August 2023]
An image from 1927 showing the Southwest portal of Presthope Tunnel. This is a much earlier view than the one immediately below. [10]
Looking Northeast along the line of the Wenlock Branch towards the disused railway tunnel at Presthope. The tunnel was constructed sometime between 1864-1867. This photograph was taken on 7th April 2023 by Mat Fascione and licensed for reuse under a Creative Commons Licence (CC BY-SA 2.0 DEED). [11]
A view looking Northeast towards the Southwest portal of the Presthope tunnel. [My photograph, 24th May 2024]
A view looking Southwest along the line of the old railway from a point around 100 metres Southwest of the last image. [My photograph, 24th May 2024]
The minor road on the North side of Wenlock Edge just to the West of its junction with the B4371 and just to the North of the Southwest portal of the tunnel. [Google Streetview, July 2023]
The Wenlock Branch to the West of Presthope as it appears on the 25″ Ordnance Survey of 1901. Presthope Tunnel can be seen at the top-right of the extract. The road which became the B4371 runs diagonally from the top-right to approximately the third point of the bottom of the image. The road shown to the North of the railway is a narrow lane in the 21st century. This map extract covers the top-right quarter of the railmaponline.com extract above. [21]

Ken Jones says: “On emergence from the tunnel the passenger is rewarded with a panoramic view of the beautiful Ape Dale with its irregular field patterns and isolated farms with the gently rising backcloth of the Stretton Hills in the distance. A sight never to be forgotten on a winter’s morning with the snowcapped hills dominating the Vale.” [1: p97]

The views which Ken Jones mentions above are, in the 21st century, hidden first by the embankment walls close to the tunnel mouth and then by the dense woodland which surrounds the old railway.

We were able to walk the length of the formation of the old railway between Presthope tunnel and Easthope Halt on 24th May 2024. The length walked is covered by the next three extracts from the 1901 25″ Ordnance Survey

This next extract from the 1901 25″ Ordnance Survey covers the bottom-left quarter of the railmaponline.com image above. [22]
A further length of the line as it appears on the 1901 25″ Ordnance Survey. Together with the extract below, the length of the line shown on the railmaponline.com extract below is covered. [23]
The next length of the line. Easthope Halt was sited just to the West of the lane which passed under the line in the bottom-left corner of this extract. [24]
The same length of the line as covered on the two map extracts immediately above. Easthope Halt was located tight into the bottom-left corner of this image, just to the West of the lane which passed under the railway. [3]

These next images come from our walk on 24th May 2024. They show the formation of the old railway at regular intervals. It is now primarily in use as a logging road by the National Trust. There is about 250 metres between each image.

Looking Southwest. at a point around 250 metres from the tunnel. [My photograph, 24th May 2024]
The first signs of logging activity, looking Southwest, 250 metres further along the line. [My photograph, 24th May 2024].
Looking back Northeast along the line of the old railway from a point just beyond the log pile in tha last image. The footpath coming up the hill to join the old railway route is the Shropshire Way. [My photograph, 24th May 2024]
Looking Southwest , a further 250 metres or so along the old line. [My photograph, 24th May 2024]
Looking Southwest, a further 250 metres or so along the old line. We have now reached the bridge over the lane which heralded a train’s approach to Easthope Halt. [My photograph, 24th May 2024]
The view South under the bridge which carried the old railway over the lane mentioned above. [Google Streetview, August 2021]
The view North under the bridge which carried the old railway over the lane mentioned above. [Google Streetview, August 2021]
The South parapet of the bridge over the narrow lane. [My photograph, 24th May 2024]
The North parapet of the bridge over the narrow lane. [My photograph, 24th May 2024]
The bridge location as shown on the precontract plans for the Wenlock branch. Easthope Halt was just to the Southwest of the bridge, in roughly the centre of this image. As already noted, the precontract plans were oriented so as to maximise the length of line shown on each sheet of the plans, © Shropshire Archives Ref. No. 6008/26 copyright reserved, used by kind permission. [34][My photograph of the plan, 5th August 2022]
The view Southwest along the old railway formation towards the location of Easthope Halt which was around 100 metres or so beyond the Fiat Doblo in the photo. [My photograph, 24th May 2024]
The view Northeast along the formation of the old railway across the bridge shown above towards Presthope tunnel. [Google Streetview, October 2020]
The view Southwest along the formation of the old railway through the site of Easthope Halt. The platform would have been to the left of the line on the inside of the curve. [My photograph, 24th May 2024]

Easthope Halt. This image was shared on the Much Wenlock History Facebook Group by Judith Goodman on 9th December 2020. It looks Northeast towards Presthope Tunnel. The Halt was opened on 4th April 1936 and closed on 31st December 1951. [12]

A similar view to the monochrome image immediately above, showing the location of Easthope Halt, looking back towards Presthope. [My photograph, 11th June 2024]
The site of Easthope Halt was just to the Southwest of under bridge in the top-right of this enlarged extract from the 1901 25″ Ordnance Survey. [25]
This series of four extracts from the 1901 25″ Ordnance Survey take us around 85% of the distance from Easthope Halt to Longville in the Dale Railway Station. [26][27][28][29]
The same length of the line as covered on the four map extracts immediately above as shown on railmaponline.com’s satellite imagery. [3]
Facing Southwest and perhaps 200 metres Southwest of the location of Easthope Halt. [My photograph, 11th June 2024]
Around 200 metres further to the Southwest, looking Southwest along the formation of the Wenlock Branch. [My photograph, 11th June 2024]
Walking Southwest from the location of Easthope Halt, the next significant structure is the bridge over the back road to Longville in the Dale. This view looks Southwest over the bridge. [My photograph, 11th June 2024]
The southeast parapet of the bridge. [My photograph, 11th June 2024]
The Northwest parapet. [My photograph, 11th June 2024]
The view from the Southeast, looking along the road under the bridge. [My photograph, 11th June 2024]
The view from the Northwest, looking along the road under the bridge. [My photograph, 11th June 2024]
The bridge location as shown on the precontract plans for the Wenlock branch, © Shropshire Archives Ref. No. 6008/26 copyright reserved, used by kind permission. [34][My photograph of the plan, 5th August 2022]
The view Southwest along the formation of the old railway from 100 metres or so to the Southwest of the bridge. [My photograph, 11th June 2024]
Some distance further Southwest. [My photograph, 11th June 2024]
The next visible structure on the route was a cattle-creep under the old railway. [My photograph, 11th June 2024]
The Southeast parapet of the small structure. One arm of the Shropshire Way leaves the old railway to follow a track South from this structure. [My photograph, 11th June 2024]
The view from the footpath of the Southeast elevation of the structure which consists of steel beams on masonry abutments. [My photograph, 11th June 2024]
The Northwest parapet of the same structure.  [My photograph, 11th June 2024]
A short distance beyond the small structure a sign indicates that the boundary of National Trust owned land is approaching. [My photograph, 11th June 2024]
The public footpath heads away to the South. [My photograph, 11th June 2024]
Before reaching gates across the line which indicate the boundary of the private land, another structure carried the line over a farm access. [My photograph, 11th June 2024]
The access to the passage under the line from Southeast has been churned up. [My photograph, 11th June 2024]
At the location of the same structure, the view Northwest into the fields which have by this point replaced the woods on that side of the line. [My photograph, 11th June 2024]

The remaining four photographs in this sequence show the line as far as the gated section on the approach to Longville in the Dale.

The four photographs above complete the length of the old railway within National Trust owned land. Careful inspection of the route of the old line in the last of these photos shows gates across the old line as it approached the site of Longville Railway Station. [My photographs, 11th June 2024]
An extract from the 25″ Ordnance Survey of 1901 centred on the railway station at Longville in the Dale. [30]
An enlarged version of the 25″ Ordnance Survey centred on Longville Railway Station. [30]
Longville Station as shown on the precontract plans for the Wenlock branch. The alignment of the road which was to become the B4371 was to be diverted as part of the construction work, © Shropshire Archives Ref. No. 6008/26 copyright reserved, used by kind permission. [34][My photograph of the plan, 5th August 2022]
Longville Station in the years prior to closure. This image was shared by Derek Sheedy in the comments made against Ian Stone’s post on the Much Wenlock Facebook Group on 30th January 2023. [35]
Longhope Railway Station in 1969 or thereabouts, seen from the road bridge at the Southwest end of the station. [33]
Longville railway station building in 2012, seen from the road bridge which once spanned the old railway. It closed to passengers in 1951 and finally in 1963. It was a private house when this image was taken.
View northeast towards Presthope and Buildwas. The local settlement is “Longville-in-the-Dale” but the station name was shorter, © Copyright Nigel Thompson and licensed for reuse under a Creative Commons Licence (CC BY-SA 2.0). [31]
The station approach in the 21st century. The railway line and platform were at the far side of the building. [32]
Longville Railway Station in the 21stcentury landscape. [3]

References

  1. Ken Jones; The Wenlock Branch; The Oakwood Press, Usk, Monmouthshire, 1998.
  2. The photographs of the pre-contract drawings for the line were taken by myself and show extracts from the construction plans held in the Shropshire Archive. There is a standard charge of £10 per visit for taking photographs of their records.
  3. https://railmaponline.com/UKIEMap.php, 14th October 2023.
  4. https://maps.nls.uk/geo/explore/#zoom=15.9&lat=52.57594&lon=-2.61148&layers=168&b=1, accessed on 2nd January 2024.
  5. https://maps.nls.uk/geo/explore/#zoom=15.9&lat=52.57503&lon=-2.61667&layers=168&b=1, accessed on 2nd January 2024.
  6. https://scontent.fbhx4-2.fna.fbcdn.net/v/t1.6435-9/72309512_205899980403678_7031472482779398144_n.jpg?_nc_cat=106&ccb=1-7&_nc_sid=3ba11c&_nc_ohc=emwNw6dTtOEAX98lstF&_nc_oc=AQltLJN6CydIE1iwVeZIhsh7FebhgpjYSXj4bSzrDzZFN1GkxA9MgvTWDIpb8u77FAIVOOqJDbVO3NSZWciOhtxl&_nc_ht=scontent.fbhx4-2.fna&oh=00_AfBnQj18_fNuJPC8cc8S55O0uoHKcfFj4B4xt0r1e4TwTA&oe=65BB609F, accessed on 2nd January 2024.
  7. https://www.facebook.com/photo/?fbid=10219517828553747&set=a.10201009954868472, accessed on 13th January 2024.
  8. https://fb.watch/pjIctGeJKI/, accessed on 2nd January 2024.
  9. https://shrewsburyfromwhereyouarenot.blogspot.com/2019/04/presthope-tunnel.html, accessed on 2nd January 2024.
  10. http://www.forgottenrelics.org/wp-content/uploads/2023/03/image12-13.jpg, accessed on 2nd January 2024.
  11. https://www.geograph.org.uk/photo/7528025, accessed on 2nd January 2024.
  12. https://scontent.fbhx4-2.fna.fbcdn.net/v/t1.6435-9/130806261_10215880699507794_568202711039527339_n.jpg?_nc_cat=100&ccb=1-7&_nc_sid=dd63ad&_nc_ohc=B9oxO_7KUbkAX-jiszp&_nc_ht=scontent.fbhx4-2.fna&oh=00_AfDIDRthYH8opZV2yeseiXA7OQw3tO9k-f3ihDb0PPYjyA&oe=65BB61E2, accessed on 2nd January 2024.
  13. https://maps.nls.uk/geo/explore/#zoom=17.9&lat=52.57478&lon=-2.61128&layers=168&b=1, accessed on 14th January 2024.
  14. https://maps.nls.uk/geo/explore/#zoom=17.9&lat=52.57269&lon=-2.61846&layers=168&b=1, accessed on 14th January 2024.
  15. Adrian Knowles; The Wellington, Much Wenlock & Craven Arms Railway; Lightmoor Press, Lydney, Gloucestershire, 2022.
  16. https://etheses.bham.ac.uk/id/eprint/8836/1/Galloway18PhD.pdf, accessed on 15th January 2024.
  17. https://maps.nls.uk/view/121151387, accessed on 20th March 2024.
  18. https://maps.nls.uk/view/121151957, accessed on 20th March 2024.
  19. https://shropshire.gov.uk/committee-services/documents/s3227/21%20much-wenlock-neighbourhood-plan-referendum-version-april-2014.pdf, p42, accessed on 20th March 2024.
  20. https://maps.nls.uk/geo/explore/#zoom=17.0&lat=52.56679&lon=-2.62743&layers=168&b=1&o=100, accessed on 20th March 2024.
  21. https://maps.nls.uk/geo/explore/#zoom=17.0&lat=52.57247&lon=-2.62270&layers=168&b=1&o=100, accessed on 20th March 2024.
  22. https://maps.nls.uk/geo/explore/#zoom=17.0&lat=52.56923&lon=-2.62993&layers=168&b=1&o=100, accessed on 21st March 2024.
  23. https://maps.nls.uk/geo/explore/#zoom=17.0&lat=52.56498&lon=-2.63906&layers=168&b=1&o=100, accessed on 21st March 2024.
  24. https://maps.nls.uk/geo/explore/#zoom=17.0&lat=52.56043&lon=-2.64475&layers=168&b=1&o=100, accessed on 21st March 2024.
  25. https://maps.nls.uk/geo/explore/#zoom=17.1&lat=52.55938&lon=-2.64670&layers=168&b=1&o=100, accessed on 24th June 2024.
  26. https://maps.nls.uk/geo/explore/#zoom=15.9&lat=52.55842&lon=-2.64913&layers=168&b=1&o=100, accessed on 24th June 2024.
  27. https://maps.nls.uk/geo/explore/#zoom=15.9&lat=52.55628&lon=-2.65233&layers=168&b=1&o=100, accessed on 24th June 2024.
  28. https://maps.nls.uk/geo/explore/#zoom=15.9&lat=52.55353&lon=-2.65634&layers=168&b=1&o=100, accessed on 24th June 2024.
  29. https://maps.nls.uk/geo/explore/#zoom=15.9&lat=52.54942&lon=-2.66191&layers=168&b=1&o=100, accessed on 24th June 2024.
  30. https://maps.nls.uk/geo/explore/#zoom=15.9&lat=52.54138&lon=-2.67459&layers=168&b=1&o=100, accessed on 24th June 2024.
  31. https://www.geograph.org.uk/photo/4354492, accessed on 24th June 2024.
  32. https://greatenglishwalk.wordpress.com/the-walk/cleehill-longville-in-the-dale, accessed on 24th June 2024.
  33. https://www.ebay.co.uk/itm/275818118280?mkcid=16&mkevt=1&mkrid=711-127632-2357-0&ssspo=yXJFhbJMSuC&sssrc=4429486&ssuid=afQhrar7TGK&var=&widget_ver=artemis&media=COPY, accessed on 24th June 2024.
  34. The photographs of the pre-contract drawings for the line were taken by myself and show extracts from the construction plans held in the Shropshire Archive. There is a standard charge of £10 per visit for taking photographs of their records.
  35. https://www.facebook.com/share/p/wSXm1vbeFXgDD6Cs, accessed on 27th June 2024

The Wenlock Branch from Much Wenlock to Presthope

The featured image shows Presthope Station with the 18.00 hrs Craven Arms – Much Wenlock – Wellington train is leaving on 21st April 1951, heading for Much Wenlock. [30]

This article follows on from four other articles which covered the Wellington to Severn Junction Railway and this line from Buildwas to Much Wenlock. The first three articles can be found on these links:

https://rogerfarnworth.com/2022/07/07/the-railways-of-telford-the-wellington-to-severn-junction-railway-wsjr-part-1-wellington-to-horsehay

https://rogerfarnworth.com/2022/07/12/the-railways-of-telford-the-wellington-to-severn-junction-railway-wsjr-part-2-horsehay-to-lightmoor-junction

https://rogerfarnworth.com/2022/07/18/the-railways-of-telford-the-wellington-to-severn-junction-railway-wsjr-part-3-lightmoor-junction-to-buildwas

The most recent article covers this line between Buildwas and Much Wenlock and can be found here:

The Railways of East Shropshire (and Telford) – the Much Wenlock and Severn Junction Railway, Buildwas to Much Wenlock.

Much Wenlock to Presthope and on to Craven Arms

From the commencement of the building of the line between Buildwas and Much Wenlock, the directors hoped that the line could be extended to Craven Arms via Presthope on Wenlock Edge (linking with the limestone quarries/works at that location).

The directors of the Wellington & Severn Junction Railway were, however, fully occupied with the line from Wellington to Buildwas. Another company was set up to build the ‘Wenlock & Craven Arms and Coalbrookdale Extension Railway‘. The bill went through the parliamentary process unopposed and authorised the ‘Wenlock Railway Company‘ to construct the line. Work started on 23rd October 1861.

By 5th December 1864, the line was open from Much Wenlock to Presthope. At this time, because it was a freight-only line, the Board of Trade saw no need for an inspection of the line. It had already been agreed at a meeting held on 4th December 1863 not to proceed with the line from Presthope to Craven Arms for the time being. It was to be three years after the line reached Presthope before the connection to the Shrewsbury & Hereford Railway close to Craven Arms was completed. It was finally opened on 16th December 1867.

Much Wenlock to Presthope

This article focusses on the length of the line which was completed in December 1864 – Much Wenlock to Presthope. Another article will follow the line to the West of Presthope.

We start at Much Wenlock Railway Station.

The forecourt of Much Wenlock station in the early 1960s. The building was designed by Joseph Fogerty © R.S. Carpenter. [1: p100]
The Wenlock Branch ran across the Northwest side of the town. The railway station was due North of the town centre and was accessed from a loop off  Sheinton Road. Station Road leading up to the Station from close to the railway bridge. [4]
The 25″ Ordnance Survey of 1901 shows Much Wenlock Station with its platform on the Northwest side of the running line and a passing-loop to the Southeast. Partially off the left of the map extract is the town brewery. [5]

Much Wenlock Railway Station had a single platform adjacent to the main running line. A passing loop was provided opposing the platform, and beyond it there was a rockery garden, “large limestone boulders [were] interspersed with shrubs and alpine plants flanked by a row of rhododendron bushes. In the centre of the rockery was a fountain.” [1: p97]

Much Wenlock Railway Station in the very early 20th century. The passing-loop and the adjacent rockery garden are on the right of the image. The photograph looks Northeast through the station. [7]
The photographer is standing on the running line a few steps further to the Southwest. This photo was taken on 12th July 1969 by David Hillas and is used here under a Creative Commons Licence (CC BY-SA 2.0 DEED). [8]
The length of the station site as shown on Railmaponline.com. The running line is shown in green with a single line indicating the location of the Goods Yard. [12]
This is a first extract, in this article, from the pre-contract plans of the Much Wenlock line which are held in the Shropshire Archives in Shrewsbury. It shows the full length of the station facilities (passenger and goods) at Much Wenlock. It shows approximately the same length as the RailMapOnline image above. The Station building was on the West side of the line and North of the bridge which carried the line over what became the A4169. The goods yard was South of the bridge on the East side of the line. … As we have noted in the article about the line between Buildwas and Much Wenlock, these precontract plans were orientated in respect to the North point so as to get the greatest possible length of the proposed railway onto each sheet,, © Shropshire Archives Ref. No. 6008/26 copyright reserved, used by kind permission. [9][My photograph of the plan, 5th August 2022]

Trains leaving for Craven Arms crossed Sheinton Road/Street Bridge and passed the goods shed and yard on the left and then the engine shed. When the line terminated at Much Wenlock, the goods facilities used until the final closure of the line were the temporary railway station.

A view Northwest along Sheinton Street taken outside number 19 Sheinton St. It is included here for the view of the railway bridge over the road and was taken in the first half of the 1960s. This image was shared on the Much Wenlock Memories Facebook Group by Lynne Steele on 10th April 2021. [10]
A view Southeast along Sheinton Street showing one of the carnival walks in Much Wenlock probably in the mid-60s. It is included here for the view of the railway bridge which span the road. This image was shared on the Much Wenlock Memories Facebook Group by Colin Onions on 2nd February 2015. [11]
Looking Northeast along the line of the old railway towards the passenger Station from the approximate location of the second abutment of the railway bridge. Just the one abutment remains, the other having been removed to facilitate a road realignment. The road from Buildwas (Sheinton Street) becomes New Road at this point with Sheinton Street heading away to the right of the image. [Google Streetview, August 2023]
This is the view when the camera is turned through 180°. The approximate line of the old railway is marked, in this case, by the red line. New Road and the route of the railway diverged and provided space for what became the Goods Yard and for a coal depot which, in the early 21st century is occupied by a builders merchant (Travis Perkins). [Google Streetview, August 2023]
Looking Southwest along Southfield Road. The hedge line on the left of this image is approximately on the line of the old railway. [Google Streetview, 2009]
Much Wenlock Goods Yard. Centre-left are the cattle pens and grain store. The grain store is attached to the good shed. On the right is the engine shed with the water tank. The water tank was fed by a reservoir further Southwest along the line – about halfway to the next halt, Westwood Halt, © Shropshire Museum Service [1: p101]
The goods yard, viewed from the Southwest the line in the foreground is the main running line which claims along the flank of Wenlock Edge. The good yard was, for a short time, the terminus of the line after the partial opening on 1st February 1862 © Pat Garland. [1: p101]

Trains began the climb towards Wenlock Edge. The pictures above show the climb had already begun alongside the goods yard. Neither the goods shed nor the engine shed remain in the 21st century.

This aerial view is taken looking North across Much Wenlock (EAW046197 © Heritage England). The station goods yard is prominent approximately at the centre of the image, with Sheinton Street and the railway bridge separating the yard from the passenger facilities in the top-right of the image, and the bridge carrying Bridge Road over the line at the bottom-left. [3]
This extract from an aerial image (EAW046196 © Heritage England) shows the full length of the station facilities at Much Wenlock. The passenger Station building is visible top-right, the goods yard and engine stabling facilities, bottom-left. Between the two Sheinton Street passed under the railway. [2]
New Road ran along the Southeast side of the Goods Yard. The Goods Shed and the Engine Shared appear on this additional extract from the 25″ Ordnance Survey of 1901. A coal depot sat between the road and the sidings in the yard. The road bridge is at the top-right of the map extract. Bottom-left as the running line leaves the map extract it passes under Bridge Road. The bridge here was simply-supported cast iron beams on masonry abutments. [6]
Another extract from the same aerial image centres on the goods yard with the running line to the left and passing under the cast iron bridge carrying Bridge Road. New Road runs down the right side of the picture. [2]
A closer view of the cast iron bridge carrying Bridge Road over the railway. This is an enlargement from the same aerial image. [2]
Looking Southwest from Southfield Road. The main structure of the bridge is still evident in the early 21st century. [Google Streetview, 2009]
Looking Southeast at the other elevation of the cast-iron bridge. The partial infill is much closer to the soffit on this side of the bridge. [Google Streetview, 2009]
Looking North over the bridge parapet from Bridge Road. The old railway ran parallel to Southfield Road in the grass area at the centre of the image. [Google Streetview, 2009]
Looking West over the bridge parapet from Bridge Road. The old railway ran parallel to Southfield Road in the grass area at the centre of the image. [Google Streetview, 2009]
Southwest of Bridge Road, Southfield Road ran parallel to the old railway as it climbed along the Northwest side of the town. Victoria Road can be seen at the bottom of this image. [2]
The line continued in a southwesterly direction. Southfield Road ran alongside it. Victoria Road can be seen at the bottom of this image. It passed under the railway a short distance beyond the edge of the aerial image which is also the left edge of this extract. [2]
The next length of the railway appears on this extract from the 25″Ordnance Survey of 1901. Bridge Road bridge is top-right and the road to Shrewsbury runs East-West across the bottom half of the image. In 1901, this was known as ‘The Causeway’. It became the A458, Victoria Road. [14]
Approximately the same length of the railway as shown in the map extract above, but now on the satellite imagery from ralmaponline.com. The primrose yellow line shows the route of the A458, Victoria Road. [12]
Looking back Northeast towards Much Wenlock Railway Station from High Causeway. Southfield Road is on the left. The housing estate has been built over the Goods Yard. [Google Streetview, 2009]
Looking Southwest along the line of the old railway. Southfield Road is on the right. The railway
This and the next three OS map extracts cover the first part of the climb out of Much Wenlock the bridge over the A458 is at the top-right of this map extract. [15]
The bridge over what is now the A458 in the midst of its demolition at the end of the 1960s. This image looks Northeast along the railway formation towards Much Wenlock Station and Goods Yard. It was shared on the Much Wenlock History Facebook Group by Linda West on 2nd April 2020. [18]
The remaining abutment of the bridge which carried the Wenlock Branch over Victoria Road (A458), © Richard Webb and licenced for use under a Creative Commons Licence (CC BY-SA 2.0 DEED). [20]
These two images are extracts from the pre-contract drawings of the Wenlock Branch. The girder bridge which spanned the road at this location was almost exactly 4 miles from Buildwas Junction and fell, in these drawings at the edges of two drawings. Both are reproduced here because they have something to contribute to local information. Perhaps of greatest significance for the railway was the fact that the bridge was constructed allowing for the possibility of providing an additional line, if traffic volumes made it worthwhile. These pre-contract plans were orientated in respect to the North point so as to get the greatest possible length of the proposed railway onto each sheet, © Shropshire Archives Ref. No. 6008/26 copyright reserved, used by kind permission. [9][My photograph of the plan, 5th August 2022]
The next length of the line continued in a Southwesterly direction. After passing under an accommodation bridge, it began to turn to the South. [13]
The reservoir which appears on this OS map extract on the East side of the line was used to provide water for the column at Much Wenlock Station. [1: p97] [16]
The reservoir which supplied the water column at Much Wenlock Station was around half a mile beyond the bridge over the A458. These pre-contract plans were orientated in respect to the North point so as to get the greatest possible length of the proposed railway onto each sheet, © Shropshire Archives Ref. No. 6008/26 copyright reserved, used by kind permission. [9][My photograph of the plan, 5th August 2022]
The reservoir as it appears in the 21st century. It has been extended and has varying levels over time suggesting that it may be used as a balancing pond to moderate the flow on the stream which follows the old railway line and which appears to now follow the old railways route in an improved channel to the Southwest of the reservoir. The track shown in this extract from Google Maps continues a short distance to the South before crossing both the stream and the old railway route.A footpath continues alongside the old line to the East. [Google Maps, 13th January 2024]
Curving round again towards the Southwest, the line passed Grange Cottages. [17]
This railmaponline.com satellite image covers the same length of line as the last four OS Map extracts. [12]
The first road overbridge to the West of Much Wenlock. This view looks Southwest along the line of the old railway. The bridge carries a track which leaves the B4371, Stretton Road in a southerly direction and provides access in the 21st century to the Cuan Wildlife Centre. [My photograph, 12th January 2024]
The view Northeast from the overbridge. The old railway route is now followed by a line of conifers on its North side. [My photograph, 12th January 2024]
The view Southwest over the parapet of the same bridge. The warehouse is built over the old railway line. [My photograph, 12th January 2024]
Looking Northeast again for a point beyond the warehouse in the last picture. The warehouse sits over the line of the old railway which continued Southwest to the left of the green palisade fencing on the left side of this image. The track in the centre of the image runs parallel to and to the South of the line of the railway. [My photograph, 12th January 2024]
Looking back Northeast along the route of the old railway. The gate towards the back of this photo straddles the centre-line. The gardens associated with Grange Cottages now extend across the line of the railway. [My photograph, 12th January 2024]
Looking Southwest along the line of the old railway from the fence line of Grange Cottages garden. The gate across the line of the old railway indicates that the next length is also in private hands. A public footpath runs to the left of the tree line
This next extract from the OS mapping of 1901 takes the line as far as the location of Westwood Halt which was at the location marked by the blue flag above. [21]
A closer view of the location of the Halt in 1925. The 25″ OS mapping indicates that the Halt was not built by 1925. [22]
The length of the old railway between Grange Cottages and Westwood Halt as shown on the satellite imagery from railmaponline.com. [12]

That length is in private hands with a significant length in use as a paddock for horses and a small holding.

Westwood Halt in around 1960 – seen from the East. The single platform sat on the North side of the line immediately to the East of Westwood Crossing. It was not until 7th December 1935 that the Halt opened. It closed to passenger traffic on 31st December 1951. This picture was shared on the Much Wenlock Memories Facebook Group by Judith Goodman on 8th December 2020. The photographer is not known and the image is used under a Creative Commons Licence (CC BY-SA 4.0). [19]
Google Maps image of the site of Westwood Halt. [Google Maps, 12th January 2024]
Westwood Crossing seen from the North. The red line marks the approximate centre-line of the old railway. The Halt would have been off to the left of this image. [Google Streetview, 2009]
Looking Northwest from Westwood Crossing towards the B4371. [My photograph, 12th January 2024]
Looking Southeast from the location of Westwood Crossing. It is not possible to follow the route of the old railway to the West of this location as it is in private hands. To continue following the route requires a diversion along the footpath ahead, across one field to join another track and then heading back Northwest towards the olod line. [My photograph, 12th January 2024]
The line leaving Westwood Crossing and heading towards Presthope. [My photograph, 12th January 2024]
Westwood Crossing to the next overbridge, as shown on the 25″ Ordnance Survey of 1901. [22]
Within a couple of hundred yards, trains passed Westwood Sidings. The sidings served Westwood Quarry. There were ground frames controlling access at each end of the siding. [23]

When the Wenlock Branch opened “limestone was being extracted [at Westwood Quarry] for use in the Madeley Wood Company’s furnaces. Horse-drawn tramways ran from the quarry on to a loading ramp above the sidings.” [1: p97]

The immediate vicinity of the line close to Westwood Quarry. A tramway track ran from the quarry to the old railway. A sharp 90° turn took horse-drawn trams alongside the old railway to a wharf/loading ramp alongside the siding, © Shropshire Archives Ref. No. 6008/26 copyright reserved, used by kind permission. [9][My photograph of the plan, 5th August 2022]
Westwood Sidings as they appear on the pre-contract drawings for the construction of the Wenlock Branch, the tramway serving the Quarry ran alongside the Wenlock Branch from East to West, © Shropshire Archives Ref. No. 6008/26 copyright reserved, used by kind permission. [9][My photograph of the plan, 5th August 2022]
This extract from the 1901 25″ Ordnance Survey shows the length of the old railway immediately to the West of Westwood Sidings. [25]
And a little further to the Southwest. [26]
The 25″Ordnance Survey of 1901 again. Close to Lea Farm the B4371 and the Wenlock Branch run close to each other. [27]
This extract from the pre-contract drawings covers the same length of the Wenlock Branch as the three OS map extracts above, © Shropshire Archives Ref. No. 6008/26 copyright reserved, used by kind permission. [9][My photograph of the plan, 5th August 2022]
The immediate vicinity of the old Westwood Sidings as shown on modern Ordnance Survey mapping (OS Explorer No. 217). The route of the old railway can easily be picked out entering top-right and running across the North side of Lower Farm, a public footpath follows the line as far as the location of Westwood Crossing. The route of the old line is then crossed by an unmetalled track (which, on the North side of the line, was once a horse-drawn tramway) before it encounters the bridge illustrated below which, in the 21st century, is crossed by a metalled track. Westwood Sidings sat between these two tracks. Continuing Southwest, the route of the old line encounters quarry workings which postdated the closure of the railway and which in the 21st century are now flooded. [24]
The length of the old line from Westwood Crossing to the Eastern edge of the flooded workings of Lea Quarry which straddle the old rail route. [12]
Looking back towards Westwood Crossing from the first overbridge to the West. [My photograph 12th January 2024]
The bridge viewed from the top of the cutting to the West of the bridge. [My photograph, 12th January 2024]
The view from the Southeast along the track over the bridge. Westwood Sidings were along the old railway to the left. A tramroad climbed the track in front of the camera towards Wenlock Edge and the B4371. Thetramway served Westwood Quarries which were between the railway and the B4371. [My photograph, 12th January 2024]
The old railway ran ahead towards Presthope in cutting towards the next overbridge. [My photograph, 12th January 2023]
The next accommodation bridge which spanned the line was just a little further to the West, beyond of the Westwood Sidings. This photograph looks South along the road over the bridge. [Google Streetview, August 2021]
The same bridge which This photograph looks South along the road over the bridge. [Google Streetview, August 2021]
Looking back towards Westwood Halt from the next overbridge. Heavy winter rain means that the cutting floor is flooded. Westwood Sidings were between the last overbridge and this one. [My photograph, 12th January 2024]
Each of the bridges on the old line are numbered. It is probably sometime since the stenciled numbers were renewed. Is this Bridge No. 16?
The view to the Southwest from the bridge. A small caravan site occupies the formation here. Immediately beyond the conifers ahead are the flooded workings of Lea Quarry. [My photograph, 12th January 2024]
Lea Quarry was only a short distance from the location of Westwood Quarry. Lea Quarry’s flooded workings appear in full on this extract from the railmaponline.com satellite imagery. The flooded workings to the North of the B4371 sit where once Lea Farm would have been found. It is not obvious when travelling along the road that it is effect on a causeway between two lakes! Edge Renewables was founded in 2011 and is active in the part of Lea Quarry to the North side of the road.[12]
Another extract from the 25″ Ordnance Survey of 1901. This extract focuses on Presthope Station which sat just to the South of the B4371 accessed by a dedicated approach road. [28]
This next extract from the railmaponline.com satellite imagery shows Presthope Grange Campsite and Residential Park sitting over the route of the old Wenlock Branch on the site of Presthope Station. The branch from Presthope Station into what were Presthope quarries is illustrated leaving the main running line as it continues to climb toward the short tunnel close to the top of Wenlock Edge. [12]
The 18.00 hrs Craven Arms – Much Wenlock – Wellington train leaving Presthope Station on 21st April 1951, heading for Much Wenlock. This image was shared on the Telford memories Facebook Group by Metsa Vaim EdOrg on 8th October 2019. [30]
Presthope Station after the removal of the passenger facilities. This photograph was taken by J. Langford in April 1962, the signal box and presumably the station master’s house remain. This image was shared on the Much Wenlock Memories Facebook Group by Judith Goodman on 9th February 2023. [31]
A view North across Presthope Grange Residential Park which sits on the site of Presthope Railway Station. [32]

References

  1. Ken Jones; The Wenlock Branch; The Oakwood Press, Usk, Monmouthshire, 1998.
  2. https://www.britainfromabove.org.uk/image/EAW046196, accessed on 1st November 2023
  3. https://www.britainfromabove.org.uk/image/EAW046197, accessed on 1st November 2023.
  4. https://www.british-history.ac.uk/vch/salop/vol10/pp399-447, accessed on 25th December 2023.
  5. https://maps.nls.uk/geo/explore/#zoom=17.5&lat=52.59954&lon=-2.55716&layers=168&b=1, accessed on 25th December 2023.
  6. https://maps.nls.uk/geo/explore/#zoom=16.9&lat=52.59775&lon=-2.56049&layers=168&b=1, accessed on 25th December 2023.
  7. https://en.m.wikipedia.org/wiki/Much_Wenlock_railway_station, accessed on 25th December 2023.
  8. https://www.geograph.org.uk/photo/2268995, accessed on 25th December 2023.
  9. The photographs of the pre-contract drawings for the line were taken by myself and show extracts from the construction plans held in the Shropshire Archive. There is a standard charge of £10 per visit for taking photographs of their records.
  10. https://www.facebook.com/photo?fbid=871714362892537&set=pcb.1583276891885898, accessed on 13th October 2023.
  11. https://en.m.wikipedia.org/wiki/File:Much_Wenlock_railway_station.jpg, accessed on 14th October 2023.
  12. https://railmaponline.com/UKIEMap.php, 14th October 2023.
  13. https://maps.nls.uk/geo/explore/#zoom=16.5&lat=52.59360&lon=-2.57210&layers=168&b=1, accessed on 27th December 2023.
  14. https://maps.nls.uk/geo/explore/#zoom=16.5&lat=52.59611&lon=-2.56444&layers=168&b=1, accessed on 27th December 2023.
  15. https://maps.nls.uk/geo/explore/#zoom=16.5&lat=52.59513&lon=-2.56857&layers=168&b=1, accessed on 27th December 2023.
  16. https://maps.nls.uk/geo/explore/#zoom=16.5&lat=52.59146&lon=-2.57500&layers=168&b=1, accessed on 27th December 2023.
  17. https://maps.nls.uk/geo/explore/#zoom=16.5&lat=52.58847&lon=-2.57795&layers=168&b=1, accessed on 27th December 2023.
  18. https://www.facebook.com/groups/1532191000361509/permalink/2624088597838405/?app=fbl, accessed on 27th December 2023.
  19. https://m.facebook.com/groups/1470137459866509/permalink/3158174324396139, accessed on 27th December 2023; and https://commons.m.wikimedia.org/wiki/File:Westwood_halt.jpg, accessed on 28th December 2023.
  20. https://www.geograph.org.uk/photo/6220870, accessed on 27th December 2023.
  21. https://maps.nls.uk/geo/explore/#zoom=15.5&lat=52.58777&lon=-2.58269&layers=168&b=1&marker=52.58420,-2.58663, accessed on 28th December 2023.
  22. https://maps.nls.uk/view/121151366, accessed on 28th December 2023.
  23. https://maps.nls.uk/geo/explore/#zoom=16.2&lat=52.58321&lon=-2.59431&layers=168&b=1, accessed on 28th December 2023.
  24. Ordnance Survey Explorer Map No. 217.
  25. https://maps.nls.uk/geo/explore/#zoom=16.4&lat=52.58031&lon=-2.59601&layers=168&b=1, accessed on 30th December 2023.
  26. https://maps.nls.uk/geo/explore/#zoom=16.4&lat=52.57873&lon=-2.60143&layers=168&b=1, accessed on 30th December 2023.
  27. https://maps.nls.uk/geo/explore/#zoom=16.4&lat=52.57772&lon=-2.60633&layers=168&b=1, accessed on 30th December 2023.
  28. https://maps.nls.uk/geo/explore/#zoom=15.9&lat=52.57594&lon=-2.61148&layers=168&b=1, accessed on 2nd January 2024.
  29. https://maps.nls.uk/geo/explore/#zoom=15.9&lat=52.57503&lon=-2.61667&layers=168&b=1, accessed on 2nd January 2024.
  30. https://scontent.fbhx4-2.fna.fbcdn.net/v/t1.6435-9/72309512_205899980403678_7031472482779398144_n.jpg?_nc_cat=106&ccb=1-7&_nc_sid=3ba11c&_nc_ohc=emwNw6dTtOEAX98lstF&_nc_oc=AQltLJN6CydIE1iwVeZIhsh7FebhgpjYSXj4bSzrDzZFN1GkxA9MgvTWDIpb8u77FAIVOOqJDbVO3NSZWciOhtxl&_nc_ht=scontent.fbhx4-2.fna&oh=00_AfBnQj18_fNuJPC8cc8S55O0uoHKcfFj4B4xt0r1e4TwTA&oe=65BB609F, accessed on 2nd January 2024.
  31. https://www.facebook.com/photo/?fbid=10219517828553747&set=a.10201009954868472, accessed on 13th January 2024.
  32. https://fb.watch/pjIctGeJKI/, accessed on 2nd January 2024.

The Railways of Telford – the Wellington to Severn Junction Railway (W&SJR) – Part 3 – Lightmoor Junction to Buildwas

The featured image, from 1957, was shared by Metsa Vaim EdOrg on the Telford Memories Facebook Group on 8th November 2020 with the following comments: “Coalbrookdale in 1957 with the 12.48pm Ketley – Much Wenlock ‘mixed’ train. … I watched this train at Lawley station or from our garden a few times when I was a child.”

Introduction – An introduction to the W&SJR was provided in the first article about the line which covered the length from Wellington to Horsehay & Dawley Station:

https://wordpress.com/post/rogerfarnworth.com/34425

The length of the line from Horsehay & Dawley station to Lightmoor Junction Station was covered in a second post:

https://rogerfarnworth.com/2022/07/12/the-railways-of-telford-the-wellington-to-severn-junction-railway-wsjr-part-2-horsehay-to-lightmoor-junction

Lightmoor Press have produced an excellent book about the line from Wellington through Much Wenlock to Craven Arms, “The Wellington, Much Wenlock and Craven Arms Railway.” The author is Adrian Knowles. [1]

Before continuing our journey along the line, we note that it was built between 1857 and 1861 and in the section we are looking at, passed through the following stations: Lightmoor Platform (Junction), Green Bank Halt and Coalbrookdale, before arriving at Buildwas.

For completeness, the images below, which were included in the first two posts about the line, show the developing standard-gauge rail network around the River Severn. By 1957 the W&SJR linked Ketley Junction to Lightmoor. It was a little longer before the line made a connection with the Severn Valley Railway and eventually the route through to Craven Arms opened.

Ketley Junction to Lightmoor was open by 1857. [2]
The Severn Valley line was open by the time covered by this map. [2]
The complete route of the Wellington, Much Wenlock & Craven Arms Railway was in use by 1867. [2]
The railways in the area around what was the Wellington & Severn Junction Railway (W&SJR) as shown on the OpeRailwayMap. OpenRailwayMap (previously called “Bahnkarte”) is a detailed online map of the world’s railway infrastructure, built on OpenStreetMap data. It has been available since mid-2013 at OpenRailwayMap.org [17]

For the sake of completeness, it is worth noting (as was the case in part 2 of this short series), that there was a very significant network of plateways/tramroads in the immediate area of the line. These were essentially a private system belonging to the Coalbrookdale Company. The network from 1881 onwards is discussed in an earlier article about the East Staffordshire Tramroads owned by the Coalbrookdale Company:

https://wordpress.com/post/rogerfarnworth.com/32514

It is also worth noting again the 21st century plans of Telford Steam Railway to extend its preservation line to the site of what was Ironbridge Power Station at Buildwas. Their plans and progress can be followed here. They have called their plans ‘Steaming to Ironbridge‘.

In essence this will be a phased process and one which will have been significantly affected by the Covid19 pandemic. The first phase was to reach Doseley Halt through renewing exiting sub-standard trackwork. The next step will be to receive planning permission for a new bridge to cross the A4169 and to construct the line to Lightmoor. It will require two level crossings as well as the bridge. The bridge deck has already been supplied by Network Rail and is stored at Horsehay Yard.

Telford Steam Railway already leases the signal box at Lightmoor Junction from the rail authorities for future use, when operating the extended railway.

The main goal of ‘Steaming to Ironbridge’ is to create a Park and Ride steam service to serve the Ironbridge Gorge.

The Route – Lightmoor Junction Station to Buildwas

Lightmoor Platform as it is referred to in some sources, Lightmoor Station in others is shown on the first OS Map extract below:

This 25″ OS Map extract was included in the second article about the W&SJR. It is from the 25″ 1925 edition which was published in 1927. The double track provision from the junction towards the West is clear. The station (above the word ‘Branch’) and the first signal Box on the south side of the line opposite the goods yard can easily be picked out. The later replacement signal box was sited just to the east of the road-bridge at the east end of the station and was on the North side of the line [18]

Two images shared on the last post about the W&SJR are worth sharing again here as they show the Lightmoor Brick and Tileworks site in the early 20th century.

This picture shows part of Lightmoor Brick and Tile Works in around 1910. As we have noted the Works sat on the North side of the W&SJR very close to Lightmoor Station. There is a works tramroad evident in the image. The picture was shared on the Telford Memories Facebook Group by Paul Mower on 2nd April 2018. [19]
This image also shows the Brick and Tile Works and gives a much better indication of the preponderance of tramroad rails around the site. It was shared by Thomas Cooper on 17th March 2017 on the Telford Memories Facebook Group. [20]
This very grainy image is an extract from a picture first carried in the Shropshire Star and showing Woodside Estate in Madeley. The photo was taken in 1971 when much of the housing in Woodside was new. The two railway routes which meet at Lightmoor Junction can be made out entering the image from the right. The image from which this extract has been taken was shared on the Telford Memories Facebook Group on 10th February 2017 by Lin Keska. [14]
This image was shared towards the end of the previous article about this line which brought us to Lightmoor down the W&SJR. It shows the works in the condition pictured in the colour image above. The image is dated in 1967and was shared on the Telford Memories Facebook Group by Metsa Vaim EdOrg on 28th February 2020, (c) G.F. Bannister. [21]
Between the Lightmoor Brick and Tile Works and the Cherry Tree Hill Brick & Tile Works there was a network of tramways/tramroads which served the two establishments and the Shutfield Brick & Tile Works a little further to the North. These were all part of the Coalbrookdale Company and the tramroads were their private network. The Tramroad ‘mainline’ to Coalbrookdale Works passed under the standard-gauge line in between Cherry Tree Hill Works and the Lightmoor Brick & Tile Works. This extract from the 6″ OS Map of 1901/2 shows the tramroad passing under the railway to the West of the Lightmoor Works. [15]
The tramroad ‘mainline’ alignment has been superimposed on this ESRI World Image extract provided by the National Library of Scotland (NLS). The Railway is marked by the red line, the tramroad by the ochre line. [22]
A Stanier 8F 2-8-0 48035 climbs out of Coalbrookdale towards Lightmoor with empty coal wagons from Ironbridge Power Station in 1967. This image was shared by Metsa Vaim EdOrg on the Telford Memories Facebook Group on 28th Febriary 2020, (c) G.F. Bannister. [35]
A steam railmotor recorded on the line in 1906.The photo was shared by Metsa Vaim EdOrg on the Telford Memories Facebook Group on 3rd July 2019. [26]
This extract from the 1901/2 6″ OS Map shows the railway and tramway following each other relatively closely and running South of the Cherry Tree Works. Immediately to the South of the Works the two sets of rails are separated by ‘New Pool’ which shows up more clearly on the 1881/2 Map extract below. [15]
The 1881/82 6″ OS Map has the water features coloured blue which makes it much easier to see the extent of ‘New Pool’. When the railway was built the pool had to be drained to allow the construction of a significant retaining wall. [23]
The same area as it appears on the 25″ OS Map of 1925 (Published in 1927) Cherry Tree Hill Brickworks has now been closed and its buildings removed. The New Pool appears to be of a smaller size. Note the two footpaths shown crossing the line on this an other images. The first is East of New Pool, the second, West of New Pool. [24]
This satellite image shows the footpath to the East of New Pool. [Google Earth, 4th April 2021]
The footpath crossing the line at the location above. The phot was taken on Sunday 12th July 2015 © Copyright Gareth James and licensed for reuse under a Creative Commons Licence. (CC BY-SA 2.0) [38]
This photo shows the view along the line looking East towards Lightmoor from the public footpath crossing above on Sunday 12th July 2015 © Copyright Gareth James and licensed for reuse under a Creative Commons Licence. (CC BY-SA 2.0) [36]
This photo shows the view along the line looking West towards Coalbrookdale from the public footpath crossing above on Sunday 12th July 2015 © Copyright Gareth James and licensed for reuse under a Creative Commons Licence. (CC BY-SA 2.0) [37]
The footpath at the West end of New Pool crosses the railway on a footbridge. New Pool appears to have been restored to its earlier extent. [Google Earth, 4th April 2021]
The footbridge from the South next to New Pool. [My picture, 18th July 2022]
New Pool. [My photograph, 18th July 2022]
The view East towards Lightmoor from the footbridge above on Sunday 12th July 2015 © Copyright Gareth James and licensed for reuse under a Creative Commons Licence. (CC BY-SA 2.0) [39]
The view West from the footbridge towards Coalbrookdale on Sunday 12th July 2015 © Copyright Gareth James and licensed for reuse under a Creative Commons Licence. (CC BY-SA 2.0) [40]
The same location in 2022. [My photograph, 18th July 2022]
The railway under construction. The retaining wall is that shown on the colour image below. The houses above the retaining wall, can be seen on the 6″ OS Map above. Knowles draws attention to the contractor’s wagons which sit on temporary rails on top of the earthworks. He also points out the tall building next to the chimney stack which housed a beam engine known as the ‘Old Wind’. The Works which appear to the right-hand side of the photograph might be Cherry Tree Hill Brick & Tile Works, although they appear too distant on the photograph. Could they be Lightmoor Brick & Tile Works?

Although it cannot be seen in the image, the Coalbrookdale Company’s tramroad must run nearer to the camera than the picket fence in the foreground or possibly even behind the photographer. That Tramroad passed under the line of the new railway to the East of Cherry Tree Hill Works and then rose up to meet a tramroad branch which linked Cherry Tree Hill Works to the Lightmoor Brick & Tile Works and the Lightmoor Ironworks further up the valley to the right. This image is included by kind permission ©Copyright Ironbridge Gorge Museum Trust (Ref. No. 1984.4138).
An extract from the 25″ OS Map from the turn of the 20th century showing the immediate area of the monochrome photograph above. The ‘Old Wind’ is top-left on the map extract. The photograph is a little confusing, there seems to be significant foreshortening in the photograph which appears to bring the engine house much closer to the properties in view. This may suggest either that the photograph is taken from the lane close to the houses at the bottom-left of this map extract, or that the buildings behind the houses in the photograph are actually those immediately to the North of Cherry Tree Hill marked ‘Well’ on the OS Map. There was an inclined plane, constructed at the end of the 18th century which linked the Coalbrookdale arm of the Shropshire Canal with the Coalbrookdale Ironworks. The ‘Old Wind’ was the engine house for the incline which was operated from the engine house. The route of the incline seems to have been at the left-hand edge of this map extract. [16][1: p160]
The descent to Coalbrookdale in March 2010. There is considerably less vegetation in this picture than the earlier one taken by Gareth James. This means that the parapet of the bridge as the line crosses Cherry Tree Hill can just be made out, ©Copyright Row17 and licensed for reuse under a Creative Commons Licence (CC BY-SA 2.0)[10]
Cherry Tree Hill Bridge viewed from Cherry Tree Hill looking West toward Coalbrookdale on 12th July 2015, © Copyright Gareth James and licensed for reuse under a Creative Commons Licence. (CC BY-SA 2.0) [41]
Cherry Tree Hill Railway Bridge viewed form the East. [My photograph, 18th July 2022]
Cherry Tree Hill Railway Bridge viewed form the Southwest. [My photograph, 18th July 2022]
18th February 1967…………Green Bank Halt, This view was shared by Carole Anne Huselbee on the Telford Memories Facebook Group on 14th September 2014. It looks southwest approximately one half mile west of Lightmoor Junction. The bridge girders just after the halt carry the railway line over Jigger’s Bank. [29]
This extract from the 1901/2 OS Map shows the Coalbrookdale Viaduct snaking through the village and Works. Towards the top of the extract both Cherry Tree Hill Bridge and Jigger’s Bank Bridge can be seen. Not marked on the extract but between the two bridges was the short-lived Green Bank Halt which is shown above. [15]
Jigger’s Bank Road Bridge viewed from the South, Coalbrookdale, from http://www.geoffspages.co.uk, ©Copyright G.A. Cryer. Included here under the terms specified on http://www.geoffspages.co.uk. [13]
The same bridge in December 2020, more easily seen as vegetation does not crowd the picture as much ion the winter, © Copyright Shropshire Star, 18th December 2020. [42]
Jigger’s Bank Bridge from the South. [My photograph, 18th July 2022]
Jigger’s Bank Bridge from the North. [My photograph, 18th July 2022]
Coalbrookdale and its Viaduct in 1992. This image was shared by Metsa Vaim EdOrg on the Telford Memories Facebook Group on 29th March 2019. [28]
The Coalbrookdale Viaduct. This image was carried by the Shropshire Star on 22nd April 2019. [3]
Coalbrookdale Railway Viaduct crossing Upper Furnace Pool in 2015 © Copyright Gareth James and licensed for reuse under a Creative Commons Licence (CC BY-SA 2.0) [8]
Coalbrookdale Railway Viaduct at rail level looking North © Copyright Row17 and licensed for reuse under a Creative Commons Licence (CC BY-SA 2.0) [9]
Coalbrookdale Viaduct from the Southeast on Coach Road. [My photograph, 18th July 2022]
Coalbrookdale Viaduct from the Southwest. It is interesting to note the change, in both these two pictures, of the level of the capping stones above the second arch from the camera. [My photograph, 18th July 2022]
This railcar has just crossed Coalbrookdale Viaduct travelling South in 1962. This picture was shared by Metsa Vaim EdOrg on the Telford Memories Facebook Group on 5th September 2020. [25]
This 19th century view of the viaduct was shared by Marcus Keane on the Telford Memories Facebook Group on 18th February 2014. He comments: “Railway viaduct crossing the Coalbrookdale Works. An early photograph from the 1870s.” [30]
This photo was taken in 1962 and shows a two coach passenger train travelling South alongside the Coalbrookdale Works. It was shared by Metsa Vaim EdOrg on the Telford Memories Facebook Group on 3rd July 2019. [26]
An aerial view (EPW034486) looking South over Coalbrookdale Works in 1930, ©Copyright Historic England. [12]
This extract is from the 6″ OS Survey of 1901/2. Station Road runs on the Western side of the W&SJR, between Captain’s Coppice and the old railway. [15]

The next series of photographs are all taken in or around the site of Coalbrookdale Railway Station. In sequence, the camera location generally runs from Northeast to Southwest.

Coalbrookdale Railway Station in 1983 from along the tracks, © Copyright Ben Brooksbank and licensed for reuse under a Creative Commons Licence … (CC BY-SA 2.0). [6]
Coalbrookdale Railway Station in 1919. Colourised postcard photograph, held by Wikipedia under a Creative Commons licence. [4]
The Station building can be seen in this panorama which was photographed on 18th July 2022 from a position on Station Road. [My photograph]
This picture was taken through the trees a little further South West down Station Road. [My photograph, 18th July 2022]
Metsa Vaim EdOrg shared this image from 1957 on the Telford Memories Facebook Group on 8th November 2020 with the following comments: “Coalbrookdale in 1957 with the 12.48pm Ketley – Much Wenlock ‘mixed’ train. … I watched this train at Lawley station or from our garden a few times when I was a child.” [27]

Two photographs from a similar location to the colourised postcard above: …………..

This image from 1910, the photograph was shared by Metsa Vaim EdOrg on the Telford Memories Facebook Group on 7th July 2020. [34]
A merry-go-round train of hoppers bound for Ironbridge power station in the mid- to late-20th century. Coalbrookdale Station Building looks forlorn and in poor repair. Shared on the Telford Memories Facebook Group on 11th April 2018 by Lin Keska [32]
The Coalbrookdale Railway Station site in September 2011. At that time, the remaining single track freight line was to the right of the wooden shed, © Copyright Nigel Thompson and licensed for reuse under a Creative Commons Licence … (CC BY-SA 2.0) [5]
A platform-side view of the former Coalbrookdale station building, albeit rather overgrown with scrub. The line is now disused since Ironbridge power station was decommissioned, and the coal trains no longer make the journey down into The Gorge, © Copyright Richard Law and licensed for reuse under a Creative Commons Licence. (CC BY-SA 2.0) [11]
Looking Southwest towards Buildwas, this picture was shared on the Telford Memories Facebook Group by Metsa Vaim EdOrg on 13th October 2020. It shows Stanier British Rail Class 8F No.48720 heading a train of empties from Ironbridge power station to Kemberton colliery in 1967. [31]
a 19th century view from the road above Coalbrookdale Station. The viaduct on the Severn Valley Railway is visible beyond Dale End and the River Severn. This picture was shared by Graham Hickman on the Memories of Coalbrookdale Iron Foundry Facebook Group on 24th November 2017. [33]
Small Woods Association national office and the Green Wood Centre are both based on the old station site. These sign boards are at the entrance to the station site off Station Road. [My photograph, 18th July 2022]

The Small Woods Association is based on the site of the old Coalbrookdale Railway Station. The Association are the UK organisation for woodland owners, workers, supporters, and social foresters. They “stand for living, sustainable woodlands alive with wildlife, people and work. Managed and used well, small woodlands are vital to thriving local economies, wildlife, and the health and wellbeing of local communities, as well as hugely valuable in the fight against climate change.” [43]

Alongside the Association offices on the station site is the Green Wood Centre. It promotes “sustainable living through a wood-based economy by running courses and events in sustainable woodland management, coppicing, crafts and related activities. … Activities at the Centre include woodland volunteering projects, fun family sessions and woody events for the whole community.” [44]

There is also an independently run café on the site, the Green Wood Café. The café is associated with Coffee With Soul and Gorge Grub. It is part of J Grant Catering Ltd; a family-run business in Shropshire. [45]

The old station site at Coalbrookdale which has been significantly repurposed by the Small Woods Association. [My photograph, 18th July 2022]
A wider view of the station site showing the various buildings on the site in the 21st century. The old station building is visible on the right side of this image. [My photograph, 18th July 2022]
Southwest of the railway station, the line turns to the West, crossing Station Road by means of a four-ring brick arch bridge. Almost immediately, it crosses, at level, a lane which led to an old Gravel Pit. These locations are pictured below. This is another extract from the 1901/2 OS Map. [15]
This satellite image shows the immediate vicinity of Station Road, Buildwas Road and Strethill Road. It shows the railway line crossing both Station Road and Strethill Road as shown in the photos below. [Google Maps]
Station Road Bridge from the Northeast on Station Road. [My photograph, 18th June 2022]
Station Road Bridge from the South on Station Road. [My photograph, 18th June 2022]
The level-crossing on Strethill Road, just to the North of Buildwas Road. [Google Streetview, 2011]

Apart from the location of the level-crossing on Strethill Road the railway remains on a relatively high embankment after leaving Coalbrookdale Railway Station. It turns first to the West as shown on the map extract above and then back towards the Sothwest as it heads for the River Severn.

Another OS Map extract from the 1901/2 6″ survey shows the railway crossing the River Severn on the Albert Edward Bridge. Immediately to the Northeast of the Albert Edward Bridge, the line crosses the Buildwas Road on a skew-span girder bridge as pictured below. Immediately to the Southwest of the Severn the line turned relatively sharply to the right crossing an accommodation bridge before joining the GWR Severn Valley Railway at Buildwas Junction. [15]
The skew span girder bridge which carries the railway over the Buildwas Road, looking West towards Buidlwas. [My photograph, 18th July 2022]
The same bridge viewed, this time, from the West, looking back towards Coalbrookdale and Ironbridge. [My photograph, 18th July 2022]
The Albert Edward Bridge, viewed from the Northwest. It was opened on 1st November 1864 and named after the Prince of Wales (later Edward VII), its design is almost identical to Victoria Bridge which carries the Severn Valley Railway over the Severn between Upper Arley and Bewdley in Worcestershire.

It was designed by John Fowler, its 200 feet (61 m) span cast-iron arch has four ribs, each of nine parts bolted together. The patterns for the radiused beam castings for the bridge were prepared by Thomas Parker at the Coalbrookdale Iron Company. Originally it was built to carry the Wenlock, Craven Arms and Lightmoor Extension Railway of the Wellington and Severn Junction Railway across the river.

Until the closure of Ironbridge power station it carried coal traffic as part of the line between Lightmoor Junction and Ironbridge Power Station. The bridge’s timber and wrought iron deck was replaced by a structural steel deck in 1933. It may be one of the last large cast iron railway bridges to have been built. Due to its age and the condition of the ironwork, traffic over the bridge is restricted to a 5 miles per hour (8.0 km/h) speed limit to minimise stress. Although it carries two tracks only the one on the downstream side was still in use to supply the Ironbridge Power Station site. The line was mothballed in 2016 after the closure of the power station.

The bridge is a Grade II Listed Building, one half by Shropshire Council, the other by Telford and Wrekin District Council as the boundary is mid-span. Telford Steam Railway have aspirations to run trains over the bridge using the presently unused track as part of their southern extension to Buildwas. [46] This photograph has been released into the public domain by its author, D4nnyt. [47]
A colourised postcard view from 1912 of the Albert Edward Bridge. The postcard recognises that by this time the Prince of Wales had become King. This image was shared on the Telford Memories Facebook Group by Gwyn Thunderwing Hartley on 10th June 2014. [55]
Another extract from the 1901/2 6″ OS Map. For a short distance the double-track line from Coalbrookdale ran parallel to the Severn Valley line. The junction was immediately to the East of an under-bridge which allowed rail access to a Pumping Station on the riverbank. [15]
Buildwas Junction Station was on the South side of the River Severn and the Village of Buildwas was on the North side of the river. The Station was a relatively busy junction The Severn Valley line was met by the line from Wellington and the line via Much Wenlock to Craven Arms. A short goods line left the station to serve a pumping station on the South bank of the Severn. This extract is from the 1901/2 6″ OS Map. [15]
The 25″ Map provides greater clarity. [48]
The site is unrecogniseable in 21st century. The power stations on the site have both been consigned to history at different times. This ESRI satellite image as supplied by the National Library of Scotland (NLS) does show remnants of the railway still in place. [49]
Buildwas Junction Railway Station in 1962. This view looks East towards Bridgnorth on the Severn Valley line. The junction for services to Wellington via Coalbrookdale was a few hundred metres beyond the station in this view. The line to Much Wenlock is indicated by the platform name board which can be seen just to the left of the water tower on the right of the image. This picture was shared on the Telford Memories Facebook Group on 11th May 2017 by Paul Wheeler. He comments: “The station was closed on 9/9/63 on closure of the Severn Valley line. Passenger services from Craven Arms had ceased on 31/12/51, from Much Wenlock and from Wellington on 23/7/62, but the line to Buildwas remained open from Longville for freight until 4/12/63 and from Ketley on the Wellington line until 6/7/64. However, coal traffic for Ironbridge Power Station (B Station built on site of Buildwas railway station) … continued from Madeley Junction, on the main line between Shifnal and Telford Central” until 2016. The Power Station in this photograph was Ironbridge A. This image is reproduced under a Creative Commons Licence [Some Rights Reserved] © Copyright Ben Brooksbank and licensed for reuse (CC BY-SA 2.0). [50]
A service for Much Wenlock sits at the station platform in 1957 in the capable hands of 0-6-0PT No 7744 . The line to Much Welock went through the combined station at a higher level than the Severn Valley line. Buildwas Junction Station was overshadowed by the Ironbridge ‘A’ power station.
Note the ‘fire-devil’ next to the water column to the left of the picture, in front of the water tower. The Fire Devil is the container with a long chimney which is beneath the water tower. It is used in freezing conditions to prevent the water column from freezing. This picture was shared on the Telford Memories Facebook Group by Metsa Vaim EdOrg on 17th October 2020, © G.F. Bannister. [51]
A similar view from 1954, this time with a service for Wellington at the branch platform. This was shared by Metsa Vaim EdOrg on the Telford Memories Facebook Group on 2nd March 2020, (c) G.F. Bannister. [52]
This image of Buidwas Railway Station comes from 1961. This time the image shows the Severn Valley lines. The photographer has chosen to focus tightly on the railway station which avoids including the power station in the image. This picture was shared on the Telford Memories Facebook Group by Marcus Keane on 20th May 2019. [53]
This image from 1959 was shared by Metsa Vaim EdOrg on the Telford Memories Facebook Group on 24th February 2020. It shows an ex-GWR railcar in the East-bound platform on the Severn Valley line and a service for Wellington arriving from Much Wenlock on the branch. The relative levels of the platforms can easily be seen in this image. [54]
This image from 1932 was shared by Metsa Vaim EdOrg on the Telford Memories Facebook Group on 24th February 2020. [56]
This aerial image is embedded from Historic England’s Britain from Above site. It shows the construction of Ironbridge Power Station. It was taken in 1930. Buildwas Station can be seen on the left of the image which has been taken facing West. [57]

Our journey along the Wellington & Severn Junction Railway finishes here at Buildwas Junction Station.

References

  1. Adrian Knowles; The Wellington, Much Wenlock and Craven Arms Railway; Lightmoor Press, Lydney, Gloucestershire, 2022.
  2. https://hyperleap.com/topic/Wellington_and_Severn_Junction_Railway, accessed on 26th June 2022.
  3. https://www.shropshirestar.com/news/nostalgia/telford-nostalgia/2019/04/22/trains-to-ride-again-on-ironbridge-line, accessed on 28th June 2022.
  4. https://commons.m.wikimedia.org/wiki/File:Coalbrookdale_Station.JPG, accessed on 28th June 2022.
  5. https://www.geograph.org.uk/photo/4354447, accessed on 28th June 2022.
  6. https://en.m.wikipedia.org/wiki/Coalbrookdale_railway_station#/media/File%3ACoalbrookdale_station_geograph-3086185-by-Ben-Brooksbank.jpg, accessed on 28th June 2022.
  7. https://www.shropshire-guide.co.uk/places/coalbrookdale-museum-of-iron, accessed on 28th June 2022.
  8. https://www.geograph.org.uk/photo/4570568, 28th June 2022.
  9. https://www.geograph.org.uk/photo/1758588, accessed on 28th June 2022.
  10. https://m.geograph.org.uk/photo/1758603, accessed on 28th June 2022.
  11. https://www.geograph.org.uk/photo/5686348, accessed on 28th June 2022.
  12. https://britainfromabove.org.uk/en/image/EPW034486, accessed on 29th June 2022.
  13. http://www.geoffspages.co.uk./raildiary/ironbridge.htm, accessed on 29th June 2022.
  14. https://www.facebook.com/photo?fbid=1392645214113245&set=gm.1531667340184597, accessed on 14th July 2022.
  15. https://maps.nls.uk/view/101594479, accessed on 30th June 2022.
  16. https://maps.nls.uk/geo/explore/#zoom=16.560351011060174&lat=52.64292&lon=-2.48610&layers=168&b=1, accessed on 1st July 2022.
  17. https://www.openrailwaymap.org, accessed on 7th July 2022.
  18. https://maps.nls.uk/view/121150832, accessed on 12th July 2022.
  19. https://www.facebook.com/photo/?fbid=1001865753312225&set=pcb.2086719181346074, accessed on 13th July 2022.
  20. https://www.facebook.com/photo?fbid=271605153296996&set=gm.1584784474872883, accessed on 13th July 2022.
  21. https://www.facebook.com/photo/?fbid=253945282265814&set=pcb.3778964578788184, accessed on 13th July 2022.
  22. https://maps.nls.uk/geo/explore/#zoom=17&lat=52.64213&lon=-2.47906&layers=6&b=1, accessed on 14th July 2022.
  23. https://maps.nls.uk/view/101594482, accessed on 13th July 2022.
  24. https://maps.nls.uk/view/121150832, accessed on 15th July 2022.
  25. https://www.facebook.com/photo?fbid=379950376331970&set=gm.4580649128619721, accessed on 15th July 2022.
  26. https://www.facebook.com/photo/?fbid=186475769012766&set=pcb.3025171540834162, accessed on 15th July 2022.
  27. https://www.facebook.com/photo?fbid=426914011635606&set=gm.4890971834254114, accessed on 15th July 2022.
  28. https://www.facebook.com/photo?fbid=164899301170413&set=pcb.2785824028102249, accessed on 15th July 2022.
  29. https://www.facebook.com/photo/?fbid=350258421818867&set=gm.846139445404060, accessed on 16th July 2022.
  30. https://www.facebook.com/photo/?fbid=3955054490340&set=gm.731803100171029, accessed on 16th July 2022.
  31. https://www.facebook.com/photo?fbid=407288646931476&set=gm.4780570431960922, accessed on 16th July 2022.
  32. https://www.facebook.com/photo?fbid=1861017023942726&set=pcb.2099311816753477, accessed on 17th July 2022.
  33. https://www.facebook.com/photo/?fbid=1019404258230974&set=gm.1932652786763912, accessed on 17th July 2022.
  34. https://www.facebook.com/photo/?fbid=337295787264096&set=pcb.4285870451430925, accessed on 17th July 2022.
  35. https://www.facebook.com/photo/?fbid=253946312265711&set=gm.3778970538787588, accessed on 17th July 2022.
  36. https://www.geograph.org.uk/photo/4570606, accessed on 17th July 2022.
  37. https://www.geograph.org.uk/photo/4570608, accessed on 17th July 2022.
  38. https://www.geograph.org.uk/photo/4570602, accessed on 17th July 2022.
  39. https://www.geograph.org.uk/photo/4570589, accessed on 18th July 2022.
  40. https://www.geograph.org.uk/photo/4570586, accessed on 18th July 2022.
  41. https://www.geograph.org.uk/photo/4570593, accessed on 18th July 2022.
  42. https://www.shropshirestar.com/news/local-hubs/telford/2020/12/18/councillors-hear-of-concerns-over-bridge-strikes/, accessed on 18th July 2022.
  43. https://www.smallwoods.org.uk, accessed on 18th July 2022.
  44. https://www.smallwoods.org.uk/en/the-green-wood-centre/about, accessed on 18th July 2022.
  45. https://www.thegreenwoodcoffeelodge.com/#location, accessed on 18th July 2022.
  46. https://en.wikipedia.org/wiki/Albert_Edward_Bridge, accessed on 18th July 2022.
  47. https://commons.wikimedia.org/wiki/File:Albert_Edward_Bridge.JPG, accessed on 18th July 2022.
  48. https://maps.nls.uk/view/121150853, accessed on 18th July 2022.
  49. https://maps.nls.uk/geo/explore/#zoom=17&lat=52.63304&lon=-2.51557&layers=168&b=1, accessed on 18th July 2022.
  50. https://www.facebook.com/photo/?fbid=1844651349192200&set=gm.1655719937779336, accessed on 18th July 2022.
  51. https://www.facebook.com/photo/?fbid=409683050025369&set=gm.4793839370634028, accessed on 18th July 2022.
  52. https://www.facebook.com/photo/?fbid=255663442093998&set=gm.3788208897863752, accessed on 18th July 2022.
  53. https://www.facebook.com/photo?fbid=10205802893027076&set=gm.2905708482780469, accessed on 18th July 2022.
  54. https://www.facebook.com/photo/?fbid=251261995867476&set=gm.3765229570161685, accessed on 18th July 2022.
  55. https://www.facebook.com/photo/?fbid=10152157360478862&set=gm.792564120761593, accessed on 18th July 2022.
  56. https://www.facebook.com/photo/?fbid=251261115867564&set=gm.3765224093495566, accessed on 18th July 2022.
  57. https://www.britainfromabove.org.uk/en/image/EPW034013, accessed on 18th July 2022.

The Railways of Telford – the Wellington to Severn Junction Railway (W&SJR) – Part 2 – Horsehay to Lightmoor Junction

The featured image shows large Prairie Class 2-6-2T No. 4178 on the final passenger service along the W&SJR on 21st June 1962 heading North across Holly Road into Doseley Halt. This picture was shared by Marcus Keane on the Telford Memories Facebook Group on 29th April 2014.

Introduction – An introduction to the W&SJR was provided in the first article about the line:

https://wordpress.com/post/rogerfarnworth.com/34425

Lightmoor Press have produced an excellent book about the line from Wellington through Much Wenlock to Craven Arms, “The Wellington, Much Wenlock and Craven Arms Railway.” The author is Adrian Knowles. [1]

Before continuing our journey along the line, we note that it was built between 1857 and 1861 and in the section we are looking at, passed through the following stations: Horsehay and Dawley, Doseley Halt, and Lightmoor Platform (Lightmoor Station or Halt).

For completeness, the images below show the developing standard-gauge rail network around the River Severn. By 1857 the W&SJR linked Ketley Junction to Lightmoor. It was a little longer before the line made a connection with the Severn Valley Railway and eventually the route through to Craven Arms opened.

Ketley Junction to Lightmoor was open by 1857. [2]
The Severn Valley line was open by the time covered by this map. [2]
The complete route of the Wellington, Much Wenlock & Craven Arms Railway was in use by 1867. [2]
The railways in the area around what was the Wellington & Severn Junction Railway (W&SJR) as shown on the OpeRailwayMap. OpenRailwayMap (previously called “Bahnkarte”) is a detailed online map of the world’s railway infrastructure, built on OpenStreetMap data. It has been available since mid-2013 at OpenRailwayMap.org [17]

It is worth noting as a significant aside, that there was a very significant network of plateways/tramroads in the immediate area of the line. These were essentially a private system belonging to the Coalbrookdale Company. The network from 1881 onwards is discussed in an earlier article about the East Staffordshire Tramways Owned by the Coalbrookdale Company:

https://wordpress.com/post/rogerfarnworth.com/32514

Searching on line, I found the following image which shows two forms of horsepower at work in the Horsehay Works in the early part of the 20th century. It also illustrates three different trams/waggons in use before the site was converted to standard-gauge!

Tramways/plateways at Horsehay Works in the early part of the 20th century. Shared on the Telford Memories Facebook Group by Lin Keska on 23rd February 2017, courtesy of the Ironbridge Gorge Museum Trust Archives. [20]

It is also worth noting the 21st century plans of Telford Steam Railway to extend its preservation line to Ironbridge Power Station at Buildwas. Their plans and progress can be followed here. They have called their plans ‘Steaming to Ironbridge‘.

In essence this will be a phased process and one which will have been significantly affected by the Covid19 pandemic. The first phase was to reach Doseley Halt through renewing exiting sub-standard trackwork. The next step will be to receive planning permission for a new bridge to cross the A4169 and to construct the line to Lightmoor. It will require two level crossings as well as the bridge. The bridge deck has already been supplied by Network Rail and is stored at Horsehay Yard.

Telford Steam Railway already leases the signal box at Lightmoor Junction from the rail authorities for future use, when operating the extended railway.

The main goal of ‘Steaming to Ironbridge’ is to create a Park and Ride steam service to serve the Ironbridge Gorge.

The Route – Horsehay & Dawley Railway Station to Buildwas

A very early photograph taken at Horsehay & Dawley Station. The landscape is apparently treeless and the various huts alongside the higher level goods yard and the steps linking the station with the yard can easily be seen. The image was shared by Marcus Keane on the Telford Memories Facebook Group on 20th January 2014. [23]
Horsehay & Dawley Station on the W&SJR looking South towards Doseley in the middle of the 20th century. The station appears to have been well kept. All the buildings were demolished after the closure of the line and Telford Steam Railway has built a replacement platform building. The access footpath visible above the roof of the signal box is still in use. This photograph was shared on the Telford Memories Facebook Group on 5th November 2018 by Metsa Vaim EdOrg. [21]
Looking South towards Doseley from the platform at Horsehay & Dawley Railway Station under the road bridge which carries Station Road/Bridge Road. This image is a 21st century photograph embedded from the Trip Advisor website, the photographer is not recorded on that website. [18]
Looking North through Station Road Bridge. Peckett No. 1722 ‘Rocket’ sits alongside the station platform in 2014, (c) Copyright WaltTFB, authorised for reuse under a Creative Commons Licence (CC BY 3.0). [27]
An extract from the 1881/82 6″ OS Mapping. [19]
An extract from the 6″ 1901/02 OS Map. Horsehay & Dawley Railway Station still sits on the North side of Station Road/Bridge Road. As we have already noted in the last post about this line, there was a significant transshipment shed which is now known as the ‘Old Loco Shed’. This is the building shown on the map just to the left of the ‘h’. Goods from what was once a very significant network of tramways were transferred to standard-gauge wagons for distribution to the wider world. More information about the Coalbrookdale Company’s network of tramways can be found here. These two map extracts illustrate the changes going on at the end of the 19th century as Horsehay Works moved from being primarily served by plateways to having an internal network of standard-gauge lines. [14]
The area immediately around Horsehay and Dawley Railway Station is it appears on satellite images in 2021. [Google Earth, 4th April 2021]
The line to Doseley Halt and Lightmoor as it leaves Horsehay & Dawley Station. looking Southeast from Station Road Bridge. The line in this direction is already constructed for much of the way to Doseley Halt, as it was required for works trains to remove spoil from the northern extension to Lawley Common which we saw in the first article about the W&SJR. However, in the direction to Doseley Halt, the track it is not yet up to the standard required to run passenger services. Going beyond the halt to Lightmoor, requires legal powers to cross a public road, and of course the money to finance the extension, © Copyright P.L. Chadwick and licensed for reuse under a Creative Commons Licence (CC BY_SA 2.0). [24]
The line Southeast of Horsehay and Dawley Station as it appears on Google Earth. A larger scale image of the track at this location appears in an image further below. [Google Earth, 4th April 2021]
After curving round to the Southeast the line swings back closer to a South-southeast direction. [Google Earth, 4th April 2021]
Shared by Rob Turner on the Telford Memories Facebook Group on 14th January 2019. In July 2022, Rob Turner says, ‘This 9photograph) was taken just past the curve onto long straight towards Doseley during an authorized track walk while I was a volunteer at the TSR. The track you see here has now been lifted with hopes to start relaying it to a passenger carrying standard soon.’ (c) Rob Turner. [22]

The line currently has been taken back to a point between the two curves South of Horsehay & Dawley Station. Work on the extension has, as of mid-July 2022, still to start.

Looking Northwest from the footpath which crosses the old railway. Horsehay & Dawley Station is around the curve ahead. [My photograph, 11th July 2022]
A larger scale view of the current extent of the preservation line’s rails. [Google Earth, 4th April 2021]
The track-formation Southeast of the public footpath shown above. [My photograph, 11th July 2022]
The curve continues. [My photograph, 11th July 2022.
This photo is taken at roughly the same location as the January 2019 image above. [My photograph, 11th July 2022]
The 1901/2 6″ OS Map again. The long straight crossed Doseley Railway Bridge. [14]
The length to Doseley Bridge as seen on the Google Earth satellite imagery. [Google Earth, 4th April 2021]
Metal parapet rails at Doseley Bridge, seen from the North. [My photograph, 11th July 2022]
This view of the parapet railings is taken from the South, [My photograph, 11th July 2022]
Doseley Bridge taken from the South East on 31st March 2016 by Ian S. Reuse is permitted under a Creative Commons Licence (CC BY-SA 2.0). [26]
Doseley Railway Bridge from the North East. [My photograph, 6th July 2022]
Doseley Railway Bridge taken from the South West in 2016. The photographer comments: “Leaving St Lukes Road in Doseley, the minor road heads for Dawley under a bridge that currently marks the southern end of the Telford Steam Railway Trust’s line and operations. It was built around 1858, and originally served a track from Ketley down to Lightmoor as part of the Wellington & Severn Junction Railway. Grade II listed.” © Copyright Richard Law and licensed for reuse under a Creative Commons Licence (CC BY-SA 2.0). [28]
The same view on 6th July 2022. [My photograph]
The line continues in a South-southeast direction after crossing Doseley Bridge. [Google Earth, 4th April 2021]
Another extract from the 1901/2 6″ OS Map. The join between two OS 6″ Map sheets is at almost the same location as Doseley Halt. At the Halt, level-crossing gates protected the line from traffic on a three-way road-junction. Note the lane which crosses the line at an oblique angle towards the top of this extract. The lane is still in use as a footpath. [14][15]
Looking North-northwest at the point where the lane shown on the map extract above crossed the ole railway. The railway route is illustrated by the red line, the footpath, by the ochre line. [My photograph, 11th July 2022]
The location mentioned above, shown this time on the next satellite image from 21st century following the line to the South. [Google Earth]
This 25″ OS Map of 1902 shows the location of the level crossing. A Signal Box (S.B.) is clearly marked on th West side of the line. The crossing-keepers cottage is the building to the East of the line and immediately adjacent to the level-crossing. Doseley Halt was placed here in the mid-1930s. [25]
The same area on the satellite imagery provided by the NLS in the 21st Century. The blue line approximates to the centre-line of the Canal, the red line to the old railway route. The different roads are visible among the trees. [25]
Doseley Halt viewed from Holly Road verge next to the crossing gates. The signal box is off-picture to the left and the crossing-keeper’s cottage is off-picture to the right. This is an old postcard view embedded from the Dawley History website. [29]
The ‘signal box’ at Doseley Halt was actually a ground frame for the level-crossing. This view is also taken looking North-northwest. [29]
At one time Doseley Halt boasted its own waiting shelter. This view looks South-southeast and shows all the major features of the site. The loco entering crossing onto the site appears to be a 2MT British Railways locomotive. [29]
Doseley Halt and Holly Road Level Crossing with the gates closed protecting the line. This picture was shared by Paul Wheeler on the Telford Memories Facebook Group 20th June 2018. [12]
Large Prairie Class 2-6-2T No. 4178 on the final passenger service along the W&SJR on 21st June 1962 heading North across Holly Road into Doseley Halt. This picture was shared by Marcus Keane on the Telford Memories Facebook Group on 29th April 2014. [13]
GWR Pannier Tank No. 3732 standing at Doseley Halt on a Southbound service. The Halt was originally opened to address competition from Midland Red buses. This picture was shared on the Telford Memories Facebook Group by Metsa Vaim EdOrg on 27th February 2020, (c) G.F. Bannister. [14]

Searching online I have located 4 images of Doseley Halt which are copyright protected by Lens of Sutton. Two of which are included in the book about the line by Knowles. [1: p166] … Lens of Sutton’s reference numbers for these images are:

57060 GWR Doseley Halt General view, circa 1960s, showing the single platform and level crossing.
57071 GWR Doseley Halt General view, circa 1960s, showing the single platform and level crossing.
57072 GWR Doseley Halt General view, circa 1960s, showing the single platform and ground frame.
57180 GWR Doseley Halt General view showing the single platform, circa 1960s.

On 11th July 2022, I walked down the line from the end of the preservation section , over Doseley Bridge and down to a point about 200 metres South of what was Doseley Halt and the level-crossing on Holly Road. I was delighted to find one small remnant of the railway at the level-crossing in the tarmac of Holly Road.

A length of the old rails remains within the carriageway of Holly Road. The view ahead is impeded by vegetation and the route of the line cannot be followed immediately. [My photograph, 11th July 2022]
Looking back to the North, the line curves very gently through the station site. [My photograph, 11th July 2022]

For perhaps 150 to 200 metres, the line South threads a narrow space between Holly Road and Gravel Leasowes. It initially at on a low embankment, but very soon, as the lane levels rise, the route is in cutting. Following Gravel Leasowes, I was able to find a footpath connection between the two roads at the point that Gravel Leasowes turned away from the line. That point is at the very top of the first map extract below.

This was the point at which my wander on 11th July 2022 ceased as I recognised the location from an earlier walk on 21st April 2022.

Another extract from the 6″ OS Map of 1901/2 which is centred on the level-crossing at Lightmoor Road. [15]
The next length of the line from the level-crossing at Holly Road as it appears on modern satellite imagery. Holly Road is to the East of the Line, Gravel Leasowes to the West. The short footpath mentioned in the text can be seen in the bottom right of this image. [Google Earth, 4th April 2021]
The approximate line of the old railway is shown again by the red-line on this satellite image. [Google Earth, 4th April 2021]
Large Prairie No. 4178 again, this time on the climb towards Doseley Halt from Lightmoor. The gradient along this length was approximately 1 in 40. The image was shared by Metsa Vaim EdOrg on the Telford Memories Facebook Group on 8th October 2019. [40]
Looking back to the North at the point where embankment turns to cutting. [My photograph, 21st April 2022]
The Lightmoor Road Level-crossing appears on this next satellite image. There was at one time a tramroad on the East side of Lightmoor Road which linked The Lightmoor Ironworks with Dawley Parva Colliery and the old canal which were both to the North of the W&SJR. That tramway appears on the extract from the 6″ OS Map of 1881/82 below. [Google Earth, 4th April 2021]
Looking North once agin not long before the location of the Lightmoor Road Level-crossing is encountered. [My photograph, 21st April 2022]
Looking North across Lightmoor Road at the location of the level-crossing. [My photograph, 21st April 2022]
Looking ahead down the line to the Southeast at Lightmoor Road Level-crossing. [Google Streetview, May 2019]
An extract from the 6″ OS Map of 1881/82 shows Lightmoor Road running from the centre-top of the image to the Bottom-left. A tramroad runs on the East side of the road and crosses under the railway. It has a branch to Lightmoor Colliery and continues to serve Lightmoor Ironworks which were still operational in 1881. Interestingly, a short standard-gauge branch is shown leaving the W&SJR just to the Southeast of the point that it crossed Lightmoor Road. That short branch served Lightmoor Ironworks which are just off the bottom edge of the extract. The branch had been lifted by the time of the 1901/2 survey. [30]

Lightmoor Colliery

Lightmoor Colliery appears on the Hudson Institute of Mineralogy Mindat.org register as owned by the Coalbrookdale Company and as being active between 1855 and 1885. [33] It should, incidentally, not be confused with the colliery of the same name in the Forest of Dean!

Lightmoor Iron Works

The information about the Lightmoor Iron Works is distilled from the Discovering Shropshire’s History website. [34] Little is known about the the Iron Works, but there were a number of structures (which appear on the 1901 Ordnance Survey extract above) to the east of the location of the furnaces. These were thought to initially be part of the industrial complex of the ironworks, later converted to domestic use. ln 1984 the lronbridge Gorge Museum Archaeology Unit excavated parts of the Lightmoor Ironworks site in advance of its destruction by the Ironbridge By Pass. Trenches were dug to examine the wall footings of that group of buildings to the east of the furnaces. These buildings had been constructed directly onto coarse pit waste, and stood until recently. The area was badly disturbed after their destruction, which obliterated all traces of floor levels. Nothing was found which would have enabled the different usages thought to have applied to be confirmed.

After the level-crossing at Lightmoor Road, the line began to swing round to the South. [Google Earth, 4th April 2021]
There was a significant network of tramroads in the immediate vicinity of Lightmoor Junction. This 6″ Map extract from 1901/02 shows the situation at the turn of the 20th century. There was a goods transshipment facility at the Junction which connected the Coalbrookdale Co. Tramroads to the wider world! The large factory complex to the North of the Junction is the Lightmoor Brick and Tile Works. [15]

Lightmoor Brick & Tile Works

The information about the Lightmoor Brick & Tile Works below comes from the Discovering Shropshire’s History website. [35] Lightmoor Brickworks was first mentioned in 1779, when it was owned by John Davies … Its initial base of production was bricks, made by the semi-dry process. This was followed by other basic wares of the early 19th century, including flooring bricks, draining pipes, chimney pots, and lightweight roofing tile During the 1860s the diversity of products began to escalate. The next decade heralded a phase of moulded decorative terracotta… Which continued until the turn of the century, and the works turned back to brick manufactures. From the 1900s to the closure of the Coalbrookdale Co in 1933, Lightmoor Brickworks supplied them with all the firebrick shapes for their solid fuel appliances. In the fifty years from 1933 to the late 1980s Lightmoor continued to survive on brick manufacture.

The site of the Brick and Tile Works is now a housing estate on the South side of the A4169 (Queensway) as shown on one of the satellite images below.

This earlier 6″ Map extract from 1881/2 is probably a little clearer than the 1901/2 extract above. [30]
This extract from the 6″ Map series on 1925 which was published in 1928 clearly shows the location of the Railway Station. [31]
Greater clarity is provided by the 25″ Map Series from Ordnance Survey. This extract is from the 25″ 1925 edition which was published in 1927. The double track provision from the junction towards the West is clear. The station (above the word ‘Branch’) and Signal Box on the south side of the line opposite the goods yard can easily be picked out. [32]
This satellite image shows the relative locations of the W&SJR, the old Coalbrookdale Co. Tramroad and the Lightmoor Ironworks as well as the modern A4169. Telford Steam Rail;way will, if their planned extension is to be built, need to cross this road on a bridge. [Google Earth, 4th April 2021]
The old railway now turned relatively sharply to the Southwest and was joined by what was once the Shrewsbury & Birmingham Railway Madeley Branch. That line remained open throughout the 20th century as was used to supply coal to Ironbridge Power Station. It closed, eventually, in around 2015 with the closure of the power station. [Google Earth, 4th April 2021]
This picture shows part of Lightmoor Brick and Tile Works in around 1910. As we have noted the Works sat on the North side of the W&SJR very close to Lightmoor Station. There is a works tramroad evident in the image. The picture was shared on the Telford Memories Facebook Group by Paul Mower on 2nd April 2018. [41]
This image also shows the Brick and Tile Works and gives a much better indication of the preponderance of tramroad rails around the site. It was shared by Thomas Cooper on 17th March 2017 on the Telford Memories Facebook Group. [42]
Looking East along Queensway (A4169). The red line shows the route f the old railway which, South of the road follows a gated track. [Google Streetview, June 2022]
The location of Lightmoor Junction. The line entering from the left is the old Madeley branch of the Shrewsbury & Birmingham Railway which continued in use as a goods line until 2015 or thereabouts. The Junction is shown on OS Map extracts and satellite images above. [My photograph, 12th July 2022]
The junction at Lightmoor brought together the Madeley Branch, on which we see a coal train serving Ironbridge Power Station, and the W&SJR. The lvel difference which can be seen on this photograph is marked and can be explained by the 1:40 gradient falling from Doseley Halt to Lightmoor Junction. [4]
The modern signal box which replaced that shown on the OS Map extracts above. The photo looks Northwest. [My photo, 12th July 2022]
The signal box again, this time looking Northeast. [My photo, 12th July 2022]

It appears that the signal box shown on the OS Map extracts above was positioned to control both the goods yard and the junction. Once the goods yard was closed, the replacement box could be positioned to have the best visibility along running lines. Ultimately it only controlled the change between the single track Madeley branch and the double track line through Coalbrookdale. When the line through Coalbrookdale was singled in 2006, the signal box became surplus to requirements. It is now leased from the railway authorities by the Telford Steam Railway, evidence of their serious intent to extend their line through this location. [37]

My pictures above show a significant amount of graffiti on the signal box. This has appeared since refurbishment after vandalism in 2008. When that refurbishment was completed the box was as shown below.

The line is currently mothballed keeping alive hopes that it might one day be reopened.

Lightmoor Junction signal box on 17th May 2009. the photographer wrote in 2009: “Lightmoor Junction The left fork here has been taken up. Further north, along its line, is the Horsehay Steam Trust. The right fork leads to Madeley Junction, a real junction this time, on the Wolverhampton to Shrewsbury line. Only goods trains; long lines of coal trucks heading to & from the Ironbridge Gorge Power Station; pass along this line now.” (c) Mike White, authorised for reuse under a Creative Commons Licence CC BY-SA 2.0 [3]

Wikipedia tells us that the line to Wellington via Ketley was only finally fully closed in 1981, although passenger services halted much earlier. “Lightmoor Junction Signal Box was retained to control the connection between the double-track section towards Ironbridge Power Station and the single-track section towards Madeley Junction. The signal box closed on 23 October 2006, when the line towards Ironbridge Power Station was singled, with new signalling controlled from Madeley Junction Signal Box [36] (since 2011 transferred to West Midlands Signalling Centre).” [38]

Knowles tells us that from 1875 the junction was controlled by a timber McKenzie & Holland signal box on the south side of the line, but this was replaced in 1951 with a new box on the north side. This was a modern design, classified by the Signalling Record Society as ‘Type 15’, which was the Western Region’s first attempt at a ‘modern image’ box. Similar in some ways to the ARP wartime signal boxes, this had an overhanging flat roof in an ineffective attempt to keep the sun off the large windows. The design was current between 1949 and 1954, although relatively few were built.” [1: p166]

Immediately West of the Signal Box above, the line crossed a single lane road. Pictures at the location are shown below. Sadly, to date, I have not been able to find out full details of the original bridge. As can be seen from the pictures a modern bridge now sits on the older abutments which used to support a double-track structure.

The location of the under-bridge taken at track level looking East towards what was Lightmoor Junction. Its location is marked by the deviation in the track alignment. [My photograph, 12th July 2022]
The view West across the road-under-bridge and through the old Station towards Coalbrookdale. [My photograph, 12th July 2022]
The view from the South through the railway bridge which spans Brick Kiln Bank. [My photograph, 12th July 2022]
The view from the North through the railway bridge spanning Brick Kiln Bank. [My photograph, 12th July 2022]

The road bridge was immediately followed by Lightmoor Station (or Lightmoor Platform (its earlier name)) which is shown below. The station was opened in 1907 and closed in 1962. It was of timber construction with a GWR Pagoda style waiting shelter on each platform. A search online led to a video about the Madeley branch on YouTube which included this image of the station. … [5]

This photograph from the 1920s shows Lightmoor Station, also known as Lightmoor Platform or Lightmoor Halt. [4] A very similar photograph can be seen on PicClick as well. [8]
This image is embedded from the Transport Treasury Website. It shows a view from a train looking East through Lightmoor Halt on 23rd May 1960. The modern signal box can be seen in the middle distance. The photographer was James Harrold [7]
Another view, this time facing East, was shared by Metsa Vaim EdOrg on the Telford Memories Facebook Group on 3rd November 2018. It was part of a short pamphlet found in an Oxfam Shop. [9]

The next two pictures are separated by 67 years, the first was taken in 1900, the second in 1967. …

This and the next picture were taken from approximately the same location on the South side of the line and focus on the site of Lightmoor Station. This image is from 1900. (c) The Ironbridge Gorge Museum Trust and included here by kind permission of the Archivist. [39]
This image is dated 1967. Both were shared on the Telford Memories Facebook Group by Metsa Vaim EdOrg on 28th February 2020, (c) G.F. Bannister. [39]
The immediate site of the Station as shown on the 25 ” OS Map of the mid-1920s. Pedestrian access to the station was via ramps and steps from Brick Kiln Bank. I was unable to find these on my short visit on 12th July 2022. [16]
The location of Lightmoor Station shown on the modern satellite images provided by the National Library of Scotland. [6]
The view looking West through the site of the Station towards Coalbrookdale which will make up the third part of this story! [My photograph, 12th July 2022]

References

  1. Adrian Knowles; The Wellington, Much Wenlock and Craven Arms Railway; Lightmoor Press, Lydney, Gloucestershire, 2022.
  2. https://hyperleap.com/topic/Wellington_and_Severn_Junction_Railway, accessed on 26th June 2022.
  3. https://upload.wikimedia.org/wikipedia/commons/7/75/Lightmoor_Junction_-geograph.org.uk-_1306889.jpg, accessed on 13th July 2022.
  4. https://www.youtube.com/watch?v=E8Ln_xKS1rs, accessed on 13th July 2022.
  5. M.E. Quick; Railway passenger stations in England, Scotland and Wales – a chronology; The Railway and Canal Historical Society, Richmond, 2022, p 264.
  6. https://maps.nls.uk/geo/explore/#zoom=17&lat=52.64265&lon=-2.47528&layers=168&b=1, accessed on 13th July 2022.
  7. https://thetransportlibrary.co.uk/index.php?route=product/product&product_id=166517&search=Welshpool+Light+Railway&page=3, accessed on 13th July 2022.
  8. https://picclick.co.uk/Lightmoor-Railway-Station-Photo-Coalbrookdale-to-Horsehay-and-251656443717.html, accessed on 13th July 2022.
  9. https://www.facebook.com/photo/?fbid=118347129158964&set=pcb.2472367969447858, accessed on 13th July 2022.
  10. https://books.google.co.uk/books?id=DZk5DAAAQBAJ&pg=PT186&lpg=PT186&dq=Lightmoor+Platform&source=bl&ots=Kf07E0ImOy&sig=ACfU3U1kF9SCtBCtIdHL41HUHUyTvPQG1w&hl=en&sa=X&ved=2ahUKEwi0vfSThfb4AhUSTMAKHSlnD48Q6AF6BAgcEAM#v=onepage&q=Lightmoor%20Platform&f=false, accessed on 13th July 2022.
  11. David Clarke; The Railways of Telford; Crowood Press, Marlborough, Wiltshire.
  12. https://www.facebook.com/photo/?fbid=2082077232116276&set=gm.2202364713114853, accessed on 13th July 2022.
  13. https://www.facebook.com/photo/?fbid=4209532492131&set=gm.768508263167179, accessed on 13th July 2022.
  14. https://www.facebook.com/photo/?fbid=253268022333540&set=gm.3775370475814261, accessed on 13th July 2022.
  15. https://maps.nls.uk/view/101594479, accessed on 30th June 2022.
  16. https://maps.nls.uk/view/121150832, accessed on 13th July 2022.
  17. https://www.openrailwaymap.org, accessed on 7th July 2022.
  18. https://media-cdn.tripadvisor.com/media/photo-s/13/d0/4d/11/20180722-121709-largejpg.jpg, accessed on 8th July 2022.
  19. https://maps.nls.uk/view/101594458, accessed on 8th July 2022.
  20. https://www.facebook.com/photo/?fbid=1404924826218617&set=pcb.1546650862019578, accessed on 8th July 2022.
  21. https://www.facebook.com/photo/?fbid=119428015717542&set=pcb.2476630165688305, accessed on 8th July 2022.
  22. https://www.facebook.com/photo/?fbid=10219269211828042&set=gm.2617110968306890, accessed on 8th July 2022.
  23. https://www.facebook.com/photo/?fbid=3854962388100&set=gm.715668985117774, accessed on 8th July 2022.
  24. https://www.geograph.org.uk/photo/2055534, accessed on 8th July 2022.
  25. https://maps.nls.uk/geo/explore/#zoom=18&lat=52.65277&lon=-2.47592&layers=168&b=1, accessed on 9th July 2022.
  26. https://commons.m.wikimedia.org/wiki/File:Railway_bridge_over_Doseley_Road.jpg, accessed on 9th July 2022.
  27. https://en.m.wikipedia.org/wiki/Telford_Steam_Railway#/media/File%3APeckett_no_1722.JPG, accessed on 9th July 2022.
  28. https://www.geograph.org.uk/photo/4921288, accessed on 10th July 2022.
  29. http://dawleyhistory.com/Postcards/Doseley.html, accessed on 11th July 2022.
  30. https://maps.nls.uk/view/101594482, accessed on 12th July 2022.
  31. https://maps.nls.uk/view/101594476, accessed on 12th July 2022.
  32. https://maps.nls.uk/view/121150832, accessed on 12th July 2022.
  33. http://search.shropshirehistory.org.uk/collections/getrecord/CCS_MSA23530, accessed on 19th April 2022.
  34. https://zh.mindat.org/loc-379098.html, accessed on 19th April 2022.
  35. http://search.shropshirehistory.org.uk/collections/getrecord/CCS_MSA3858, accessed on 19th April 2022.
  36. http://news.bbc.co.uk/1/hi/england/shropshire/4806558.stm, accessed on 12th July 2022.
  37. Allen Jackson, A Contemporary Perspective on GWR Signalling: Semaphore Swansong; Marlborough, Wiltshire: The Crowood Press, 2015.
  38. https://en.wikipedia.org/wiki/Lightmoor_Junction, accessed on 12th July 2022.
  39. https://www.facebook.com/photo/?fbid=253945282265814&set=pcb.3778964578788184, accessed on 13th July 2022.
  40. https://www.facebook.com/photo/?fbid=205899673737042&set=pcb.3296383353712978, accessed on 13th July 2022.
  41. https://www.facebook.com/photo/?fbid=1001865753312225&set=pcb.2086719181346074, accessed on 13th July 2022.
  42. https://www.facebook.com/photo?fbid=271605153296996&set=gm.1584784474872883, accessed on 13th July 2022.

The Railways of Telford – the Wellington to Severn Junction Railway (W&SJR) – Part 1 – Wellington to Horsehay

The featured image shows a 1950 service to Much Wenlock and Craven Arms entering Horsehay and Dawley Railway Station. Details of the photograph are given towards the end of this article.

“The Wellington and Severn Junction Railway … was built between 1857 [and] 1861 and formed part of the Wellington to Craven Arms Railway. For much of its working life, it was operated by the Great Western Railway and subsequently the Western Region of British Railways.” [1]

Wikipedia tells us that “Its route included the following stations: – Wellington, Ketley, Horsehay and Dawley, Doseley Halt, Lightmoor Platform and Coalbrookdale.” [1] That list on Wikipedia is not exhaustive: Ketley Town Halt was opened by the GWR in March 1936 a little to the South of the Sinclair Iron Foundry; [17] New Dale Halt opened in 1934 to serve Newdale; [18] Lawley Bank Station was set in a relatively rural area; [19] Green Bank Halt (close to Jigger’s Bank, between the bridge over Jigger’s Bank and that over Cherry Tree Hill) opened in 1934 and closed in 1962. [16]

The necessary Act of Parliament, the Wellington and Severn Junction Railway Act, was promulgated in 1853. [3]

The images below show the developing standard-gauge rail network around the River Severn. By 1957 the W&SJR linked Ketley Junction to Lightmoor. It was a little longer before the line made a connection with the Severn Valley Railway and eventually the route through to Craven Arms opened.

Ketley Junction to Lightmoor was open by 1857. [4]
The Severn Valley line was open by the time covered by this map. [4]
The complete route of the Wellington, Much Wenlock & Craven Arms Railway was in use by 1867. [4]
The railways in the area around what was the Wellington & Severn Junction Railway (W&SJR) as shown on the OpeRailwayMap. OpenRailwayMap (previously called “Bahnkarte”) is a detailed online map of the world’s railway infrastructure, built on OpenStreetMap data. It has been available since mid-2013 at OpenRailwayMap.org [40]

Adrian Knowles [2] tells us that it was always intended that there would be a standard-gauge railway serving “the western side of the coalfield – particularly the ironworks at Ketley and Horsehay – and indeed the main Coalbrookdale Company works following the cutback of the original Shrewsbury & Birmingham (S&B) scheme to Lightmoor in 1851.” [2: p19]

In 1851/52, Dickson & Co. built a short line from Waterloo sidings on the Shrewsbury & Birmingham Railway close to Wellington to the Ironworks at Ketley. The Coalbrookdale Co. became major backers of an initiative to extend that short line down into the Severn Gorge.

Knowles tells us that “the route was surveyed during 1852 by John Barber of Wellington and initial plans were drawn up by John Mackenzie.” [2: p19]

In an effort to keep the LNWR out of the area around Coalbrookdale the S&B board granted running rights over their line between Wellington and Ketley and part-funded the parliamentary process required to allow the line to progress.

The Act received Royal Assent on 20th August 1853, the same day as the Severn Valley Railway Act. [2: p20] It “dictated that the S&B, LNWR and SUR should allow free passage to all traffic to and from the W&SJR and that the W&SJR should reciprocate in accommodating traffic from those companies.” [2: p20]

Knowles tells us that the estimated cost of the new railway was £60,000. The share uptake was slow but enough was raised to make headway on purchase of land. Nothing was spent on construction until all the land had been acquired. By mid-1855 funds were still inadequate to allow a start on construction along the full length of the line. The board decided to start work on the heaviest engineering works, which began on 25th August 1855. [2: p20] A start was made on the length of the line between Ketley Junction and Horsehay which included Horsehay Tunnel.

By 1st May 1857 the line between Ketley Junction, including Heath Hill Tunnel, was ready to open for goods and mineral traffic. [2: p22-23] It is interesting that because the branch “was being used largely to serve Horsehay Works, and the GWR was withholding any revenue payments pending a formalised working agreement which would set the amount, the Coalbrookdale Company sympathised with W&SJR shareholders who were receiving no returns on their money. The Coalbrookdale Company therefore agreed to pay a five per cent annual dividend while negotiations with the GWR over operating the line continued. The first such payment was made to shareholders on 1st July 1958.” [2: p24]

Steady progress was being made on the remainder of the line to Lightmoor. “During the winter of 1857-8, £5,732 was spent on the work, all subscribed by the Coalbrookdale Company which by this time had a 75% stake in the W&SJR.” [2: p24]

Knowles goes on to mention arrangements made at Lightmoor to cope temporarily with the unfinished connection to the GWR (Shrewsbury & Birmingham) Madeley Branch. “All trains passing from the W&SJR to the GWR and vice versa had to reverse at Lightmoor.” [2: p 24]

Passenger services between Wellington, Lightmoor and Shifnal eventually started operating on 2nd May 1859.

Soon after the opening of the W&SJR proposals were developed by the Wenlock Railway to pass through Coalbrookdale and Brosley and led to a significant enhancement in the value of the W&SJR as it would become part of a through route. [2: p25]

“Almost as soon as the Wenlock Railway Bill received Royal Assent in July 1861 the GWR, now eager not only to have control of the railways to Coalbrookdale, but also to ensure that a line was actually built, offered to assume responsibility for construction of the Lightmoor-Coalbrookdale section. With the blessing of the Wenlock Railway the GWR gained powers for this by including the line in their next ‘omnibus’ Bill later in 1861.” [2: p26]

It seems reasonable to include the line through Coalbrookdale in our review of the W&SJR. It was about 1.5 miles in length and gave the GWR direct access to Coalbrookdale. It included the cutting of a ledge from the steep hillside and a 26-arch brick viaduct which carried the line through the Coalbrookdale Company’s works and over Upper Furnace Pool. Knowles says that the biggest obstacle was “‘New Pool’ at the head of Coalbrookdale. There was no alternative but to drain the pool temporarily and build a massive retaining wall to hold back the water, after which the new track-bed was laid on the strip of reclaimed land.” [2: p65]

The line from Lightmoor Junction onwards was double-track and generally fell at 1:50 towards the River Severn.

The Route

Wellington Railway Station was the junction station for the Coalbrookdale line (W&SjR). The bay platform on the South side of the station site was shared with the Coalport branch passenger services – the 6″ OS Survey of 1881/82, published in 1888. [5]
Approximately the same area as it appears on the 25″ OS Map of 1901, published in 1902. The station is on a relatively confined site and little has changed in the twenty years between 1881 and 1901. [6]
The same area in the 21st century as shown on the ESRI World Mapping provided by the National Library of Scotland. The station layout is much rationalised. The Goods yard is a casualty of progress and development! A single bay platform line remains. [7]
The immediate station area as it appears on Google Maps in 2022. The bay platform can more easily be seen on this image. Platform 3, the bay platform, is now out of regular use following the withdrawal of the Wellington to Walsall local service and its subsequent replacement with through Shrewsbury to Birmingham New Street local services. Traces of another defunct platform face (the outer side of the old up island platform) can be seen from the car park behind platform 1. [Google Maps][13]
Wellington Railway Station in June 2022, (c) Kylxa, authorised for reuse under a Creative Commons Licence (CC BY-SA 4.0) [13]
The bay platforms at Wellington Railway Station in July 1950. Small Prairie No. 4406 is about to work the 4.30pm to Much Wenlock running down the W&SJR. The loco to its right is LNWR 0-6-2 No. 58904 with the 3.53 to Coalport (east) using the LNWR Coalport Branch. [14]
Wellington Railway Station in July 2018, looking West from the overbridge. [Google Streetview, July 2018]
Looking East from the same overbridge in July 2018. The arched-bridge ahead is King Street Bridge. [Google Streetview, July 2018]
The view West, back towards Wellington Railway Station from King Street Bridge. [Google Streetview, May 2021]
The view East from King Street Bridge. The bridge in the distance is Junction Bridge and it marks the Western extent of Wellington Junction. In the 2st century that bridge carries Mill Lane. [Google Streetview, May 2021]
The length of the line between King Street Bridge and Wellington Junction on the 6″ 1881/82 OS Map. [5]
Wellington Junction in 1881/82 on the 6″ OS Map. [5]
Wellington Junction in 1901 on the 25″ OS Map [8]
The same area in the 21st century [Google Maps]
The view East from Mill Lane Bridge in 2011. The railway junction has been rationalised with only a single line following the old LNWR Shropshire Union Railway Line. The old Shrewsbury and Birmingham Line (GWR) remains as a double-track mainline. [Google Streetview, March 2011]
The line passed to the South of Haybridge Iron Works, 1881/82 on the 6″ OS Map. [5]
Ketley Junction followed after the mainline crossed Ketley Brook, 1881/82 on the 6″ OS Map. [5]
Trains for the W&SJR left the mainline and followed the single line round to the South before entering Ketley Station, 1881/82 on the 6″ OS Map. [5]
As we are now on the W&SJR route, the line of the railway is shown approximately on this modern satellite image. Ketley Station was just to the South of what was once the A5 but is now the B5061, Holyhead Road. The line can be seen on the OS Map above passing under an accommodation bridge on the curve round towards Ketley Station. That bridge remains in the 21st century carrying an extension to Copper Beech Road. [Google Maps, 2022]
The refurbished accommodation bridge seen from Copper Beech Road. [Google Streetview, June 2015]
The view Northwest from the accommodation bridge. A red line shows the route of the railway. [Google Streetview, May 2011]
The view Southeast from the accommodation bridge. The route of the line is much more easily picked out than on the photograph above! However, by 2022 the grass route close to the accomodation bridge had become overgrown. A narrow footpath leads down the embankment on the East side of the bridge to track level. [Google Streetview, May 2011]
The track-bed of the W&SJR about 100 metres South of the accommodation bridge above. [My photograph, 2nd July 2022]
A short distance further south a stepped path from Copper Beech Road leads down to the old track bed which is maintained as a Greenway. [My photograph, 2nd July 2022]
Just a little further to the South, this image shows the old railway line in cutting alongside a footpath which leads off Copper Beech Road to the old level-crossing at what was once A5. [Google Streetview, June 2015]
The route of the railway approaching the old A5. [My photograph, 2nd July 2022]
The view North from Station Road, Ketley looking back along the route of the railway which was in cutting to a point relatively close to the road. [Google Streetview, September 2021]
The Ketley Station site in 1901 as shown on the 25″ OS Map. [11]
Postcard view of Ketley Railway Station from the West. The Methodist Chapel is visible in the distance on the left. Shared on the Telford Memories Facebook Group by Marcus Keane. [21]
Ketley Station viewed from the Northwest in May 1957. Shared on the Telford Memories Facebook Group by Metsa Vaim EdOrg. [22]
Ketley Station from the Southwest. Shared on the Telford Memories Facebook Group by Peter Wheeler. [23]
A view from the South along the platform at Ketley Station with crossing gates closed to allow traffic through on the A5 on 18th February 1967. Shared on the Telford Memories Facebook Group by Carol Anne Huselbee. [24]
The view South through Ketley Railway Station site from Station Road in September 2021. The redline gives the approximate alignment of the railway. [Google Streetview]
The remains of Ketley station platform and trackbed, looking due south toward Horsehay in May 2008. The photographer comments that the trackbed is now a public footpath and the picture is taken from the former site of a level crossing across what in railway days was the A5 trunk road, © Copyright Peter Whatley and licensed for reuse under this Creative Commons Licence (CC BY-SA 2.0). [12]
Looking back North from the location of Ketley Station towards what was once the level crossing. [My photograph, 2nd July 2022]
The 6″ OS Map 1881/82 survey as published in 1888, shows Ketley Station and the line continuing to the South. [5]
Approximately the same area on the modern satellite images provided by the National Library of Scotland. There is no need to highlight the route with a red line as the route is tree-lined and runs down the centre of the image. [27]
The 25″ OS Map as revised in 1937 shows private sidings to the Iron Foundry and Ketley Town Halt which can be seen to the South of Sinclair Gardens. [25]
Ketley Town Halt in 1936. Shared on the Telford Memories Facebook Group by Metsa Vaim EdOrg. [26]
Looking South through the location of Ketley Town Halt. [My photograph, 2nd July 2022]
Looking North through the location of Ketley Town Halt. [My photograph, 2nd July 2022]
The 6″ OS Map shows the line continuing to the South. Ketley Town Halt was at the point where the signal post is shown on this extract. The modern M54 is shown on the satellite image below, it crosses the line travelling East-West at approximately the ‘GT’ of ‘ WELLINGTON’. [5]
The route of the old line continues to be delineated by woodland as it approaches and crosses the M54. [28]
The footpath following the W&SJR diverts away from the line South of the location of the Halt. This view looks South down the alignment of the W&SJR towards the modern M54. [My photograph, 2nd July 2022]

The M54 forms a significant barrier if one intends to follow the line. Walking North to South, the route requires one to head Northeast from the old railway along Sinclair Gardens passed Littlefords Garden Centre to Waterloo Road and then turn South to pass under the M54. Just beyond the motorway a footpath leaves Waterloo Road heading West to meet the route of the old railway again.

South of the motorway, there is no need again to highlight the line of the old railway as once again trees line the route. [Google Earth]
The line of the W&SJR regained. [My photograph, 9th June 2022]
Pannier Tank no. 3732 in charge of a short pick-up goods service between Ketley and Lawley Bank in 1953. This photograph was shared by Metsa Vaim EdOrg on the Telford Memories Facebook Group in March 2020. [37]
Further South, close to the location of New Dale Halt. [My photograph, 9th June 2022]
The W&SJR continues South passed Newdale. A small settlement that has now disappeared. The road shown crossing the line at that point is also the line of an old tramway. Just to the West of the line is an old two arch tramway bridge crossing Ketley Dingle. (Details of the bridge can be found here.) [5]
New Dale Halt in the 1930s. Shared by Metsa Vaim EdOrg on the Telford Memories Facebook Group. The halt served the hamlet of Newdale and was located a little to the North of the point where the old tramway route crossed the W&SJR. [26]
New Dale Halt is shown on the 25″ OS Map as revised in 1937. [25]
Just beyond the location of the Halt, the way-marker post marks the location of the path down to the tramway bridge and therefore the point where the W&SJR crossed the older tramway. [My photograph, 9th June 2022]
Newdale Tramway Bridge in the middle of the 20th century, shared on the Telford Memories Facebook Group by Metsa Vaim EdOrg. [29]
South of Newdale, this is the next length of the line on the 6″ OS Map of 1881/82. We are now on the next map sheet (No. 101594458). [9]
Looking back to the North along the W&SJR towards Newdale. [My photograph, 9th June 2022]
Looking forward to the South along the line of the W&SJR. Its approximate line is highlighted by the red line. [My photograph, 9th June 2022]
Looking ahead, once again with the approximate line of the W&SJR highlighted. [My photograph, 9th June 2022]
Looking back to the North over open ground with the route of the old line highlighted. [My photograph, 9th June 2022]
Facing South once again, a footpath follows the old line. [My photograph, 9th June 2022]
And again, looking South. [My photograph, 9th June 2022]
Much of the landscape has changed dramatically over the years. Much of the development in the area has occurred since the millennium. We are approaching the location of what was once Lawley Bank Railway Station. [My photograph, 9th June 2022]

South of New Dale Halt, the next station was ‘Lawley Bank’. Major development has taken place in recent years. New housing and a shopping area have replaced open fields. The site of the station is covered by new development.

The satellite image from the National Library of Scotland of the northern approach to of what was Lawley Bank Station. The approximate line of the W&SJR is shown by the red line. [31]
Modern housing dominates the route of the old line.[My photograph, 13th June 2022]
Lawley Village Day Nursery straddles the line of the old railway. [My photograph, 13th June 2022]
Looking back to the North along the line of the old railway from the car park of Morrison’s Supermarket. [My photograph, 13th June 2022]
Morrison’s Supermarket also straddles the line of the old railway. [My photograph, 13th June 2022]
The South side of Morrison’s Supermarket, the old line ran to the left hand side of this picture. [My photograph, 13th June 2022]

At the time that the 1881/82 maps were drawn, this was a relatively rural area. The 6″ 1881/82 survey is immediately below. It shows very little detail close to the railway station. The later 1901 6″ survey follows below and appears to show the remnants of a tramway running on the West side of the W&SJR. This would need further investigation, particularly since it does not appear on the 1881/82 survey.

The satellite image which follows the two 6″ maps shows the position of the station overlaid on the modern satellite image of the location provided by the National Library of Scotland.
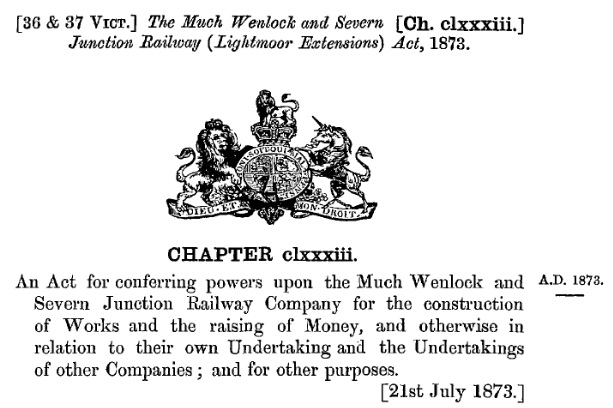
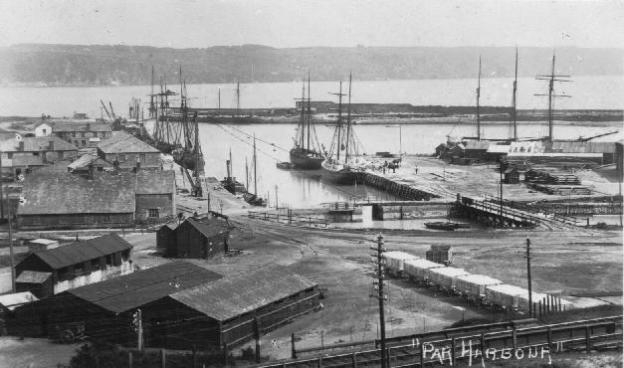
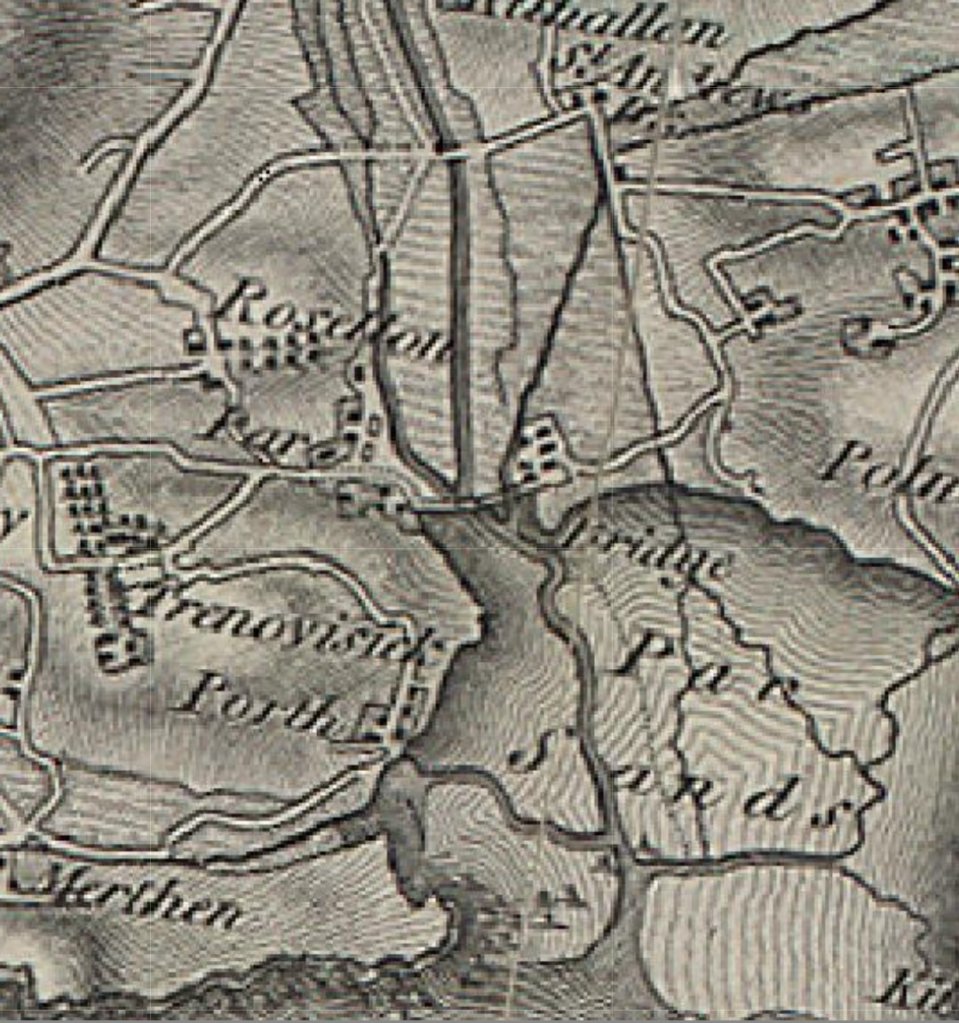
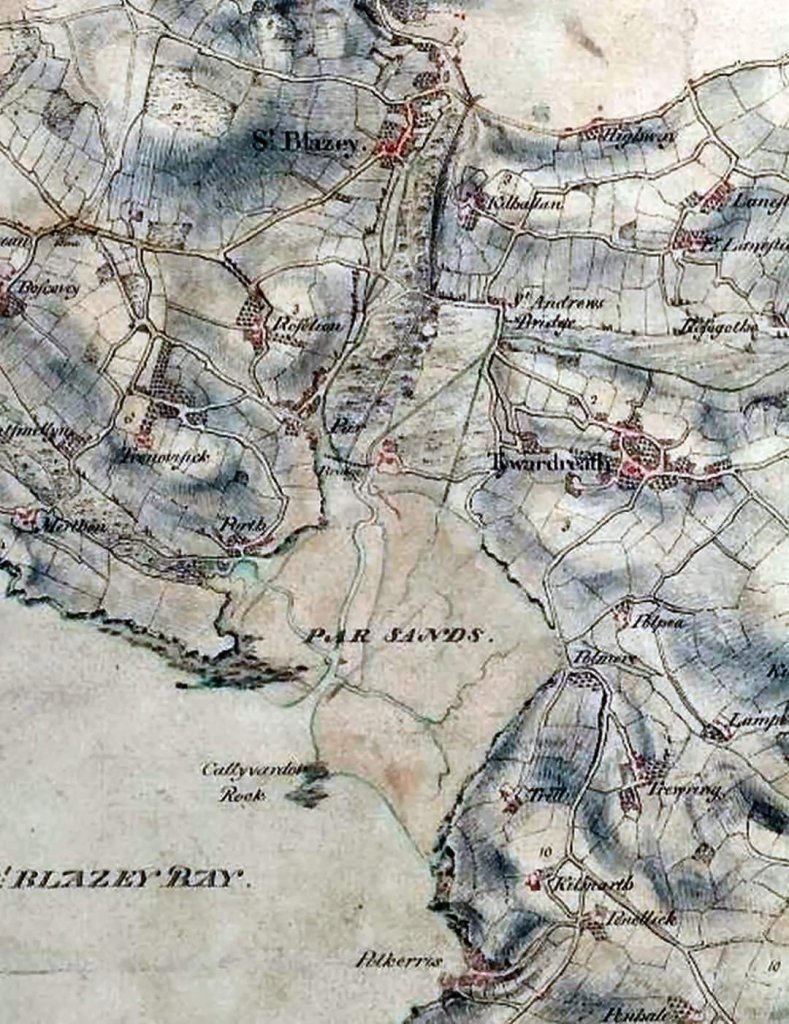
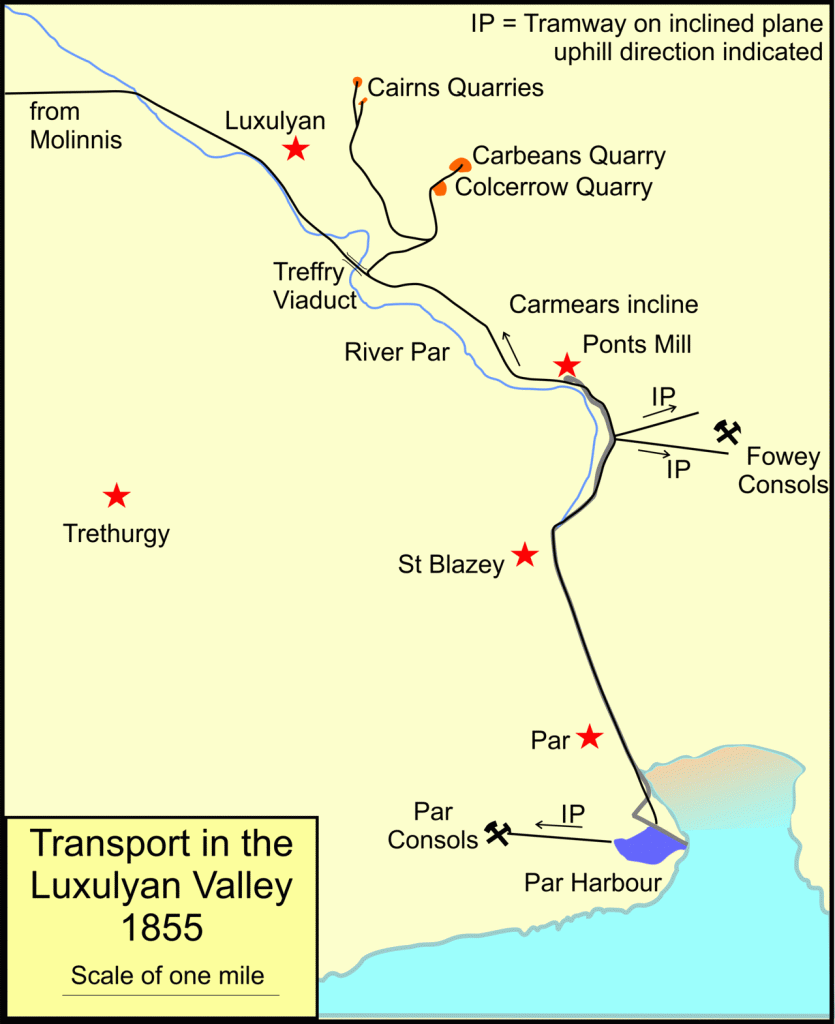
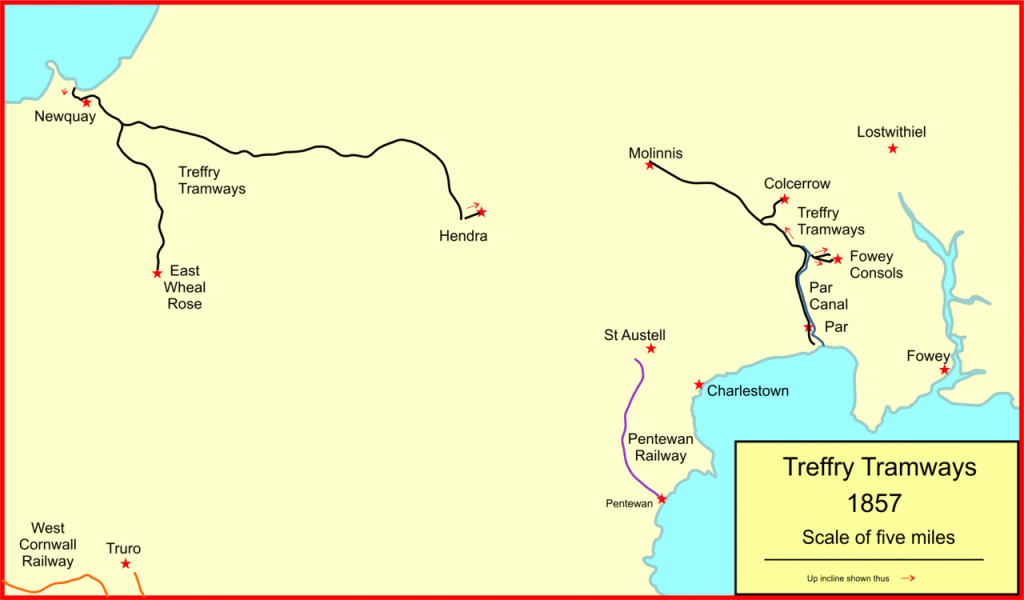
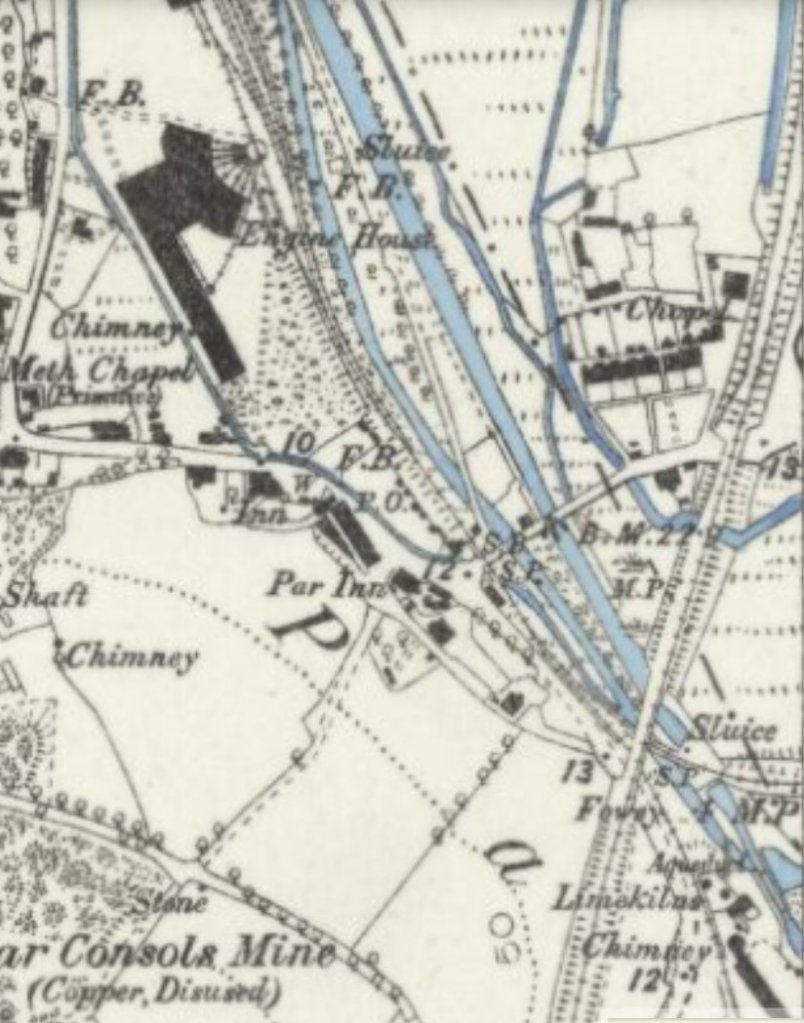
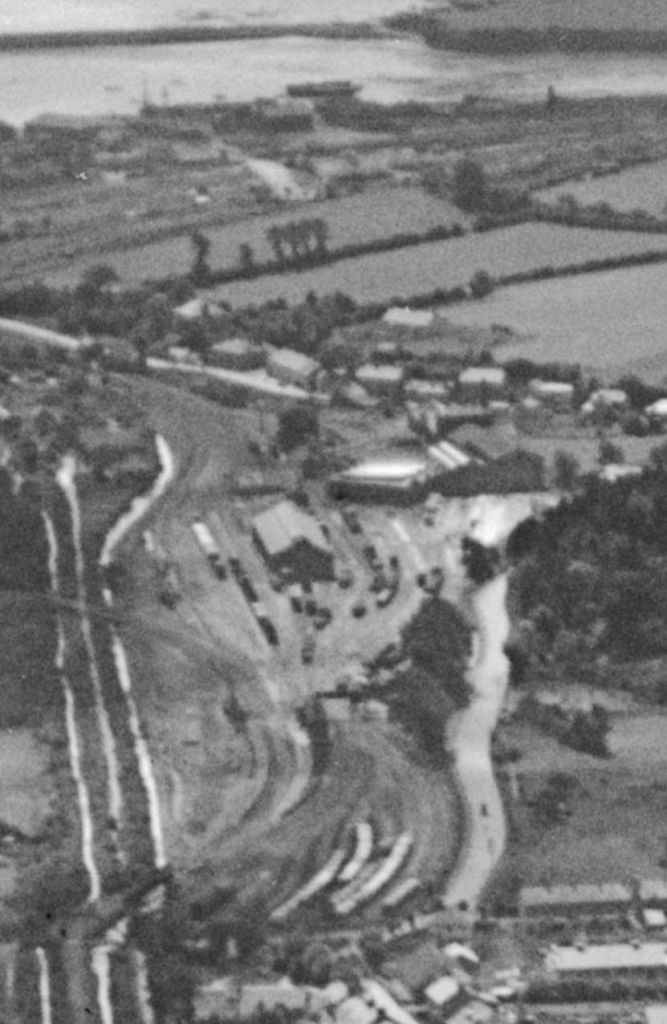
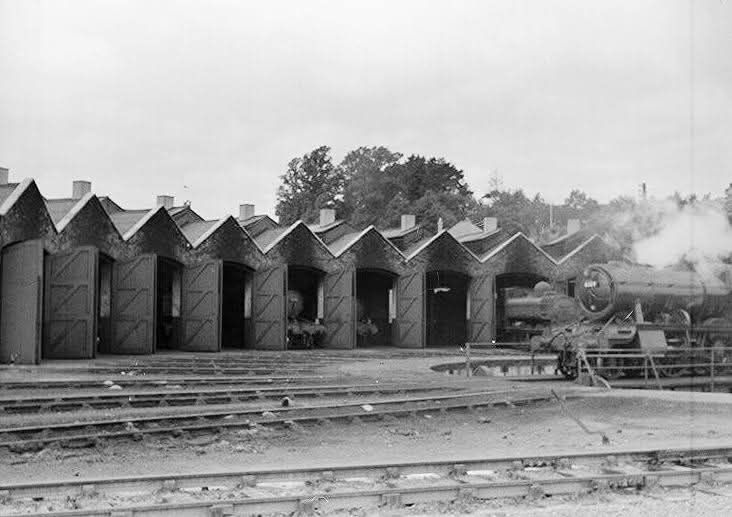
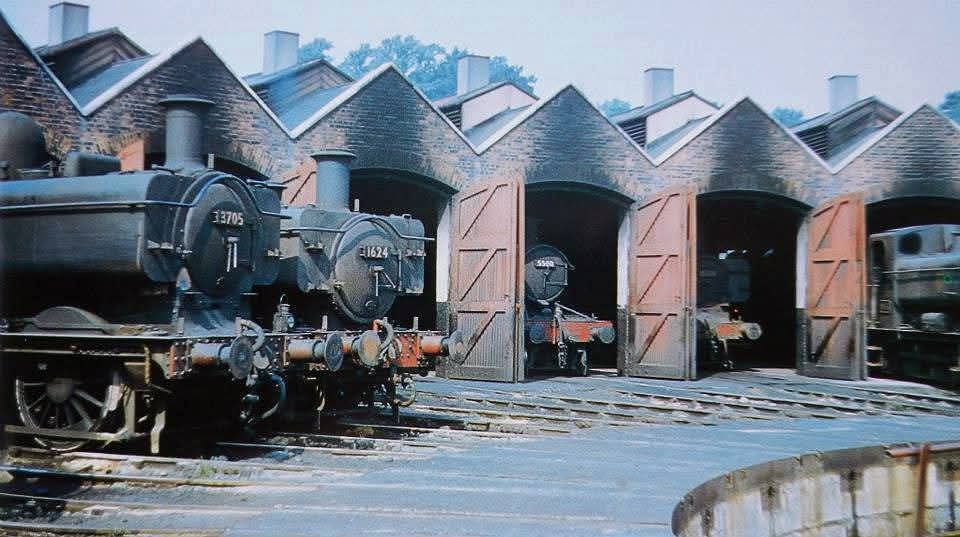
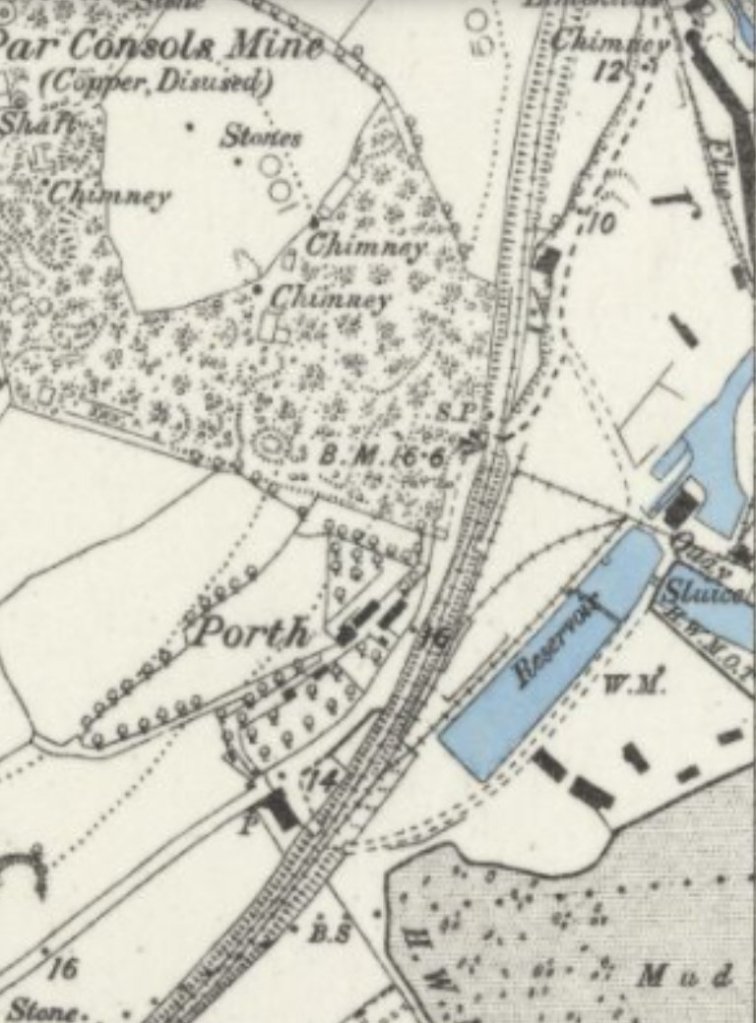
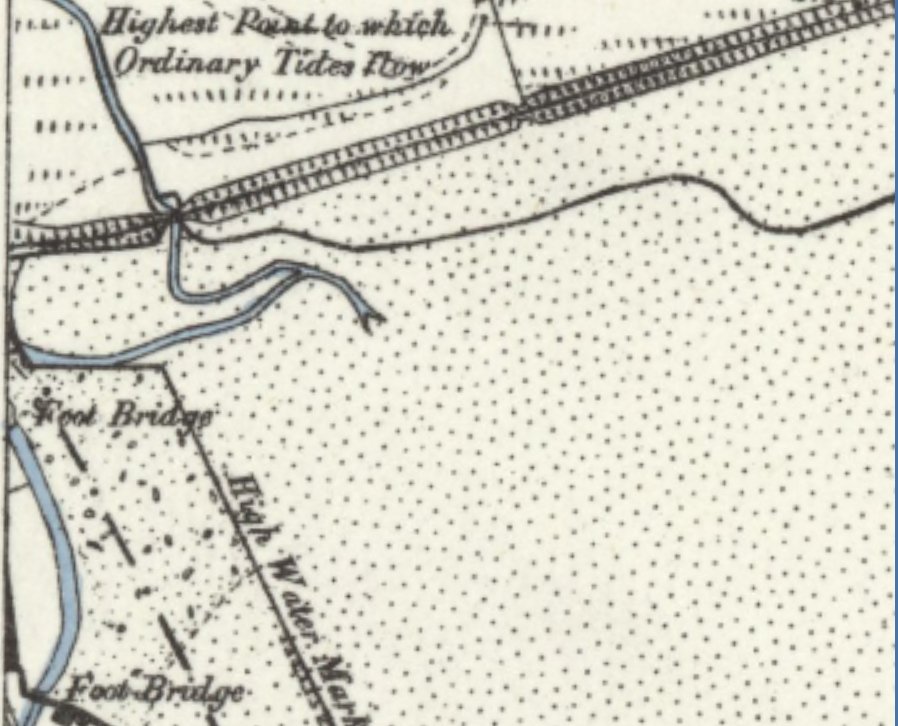
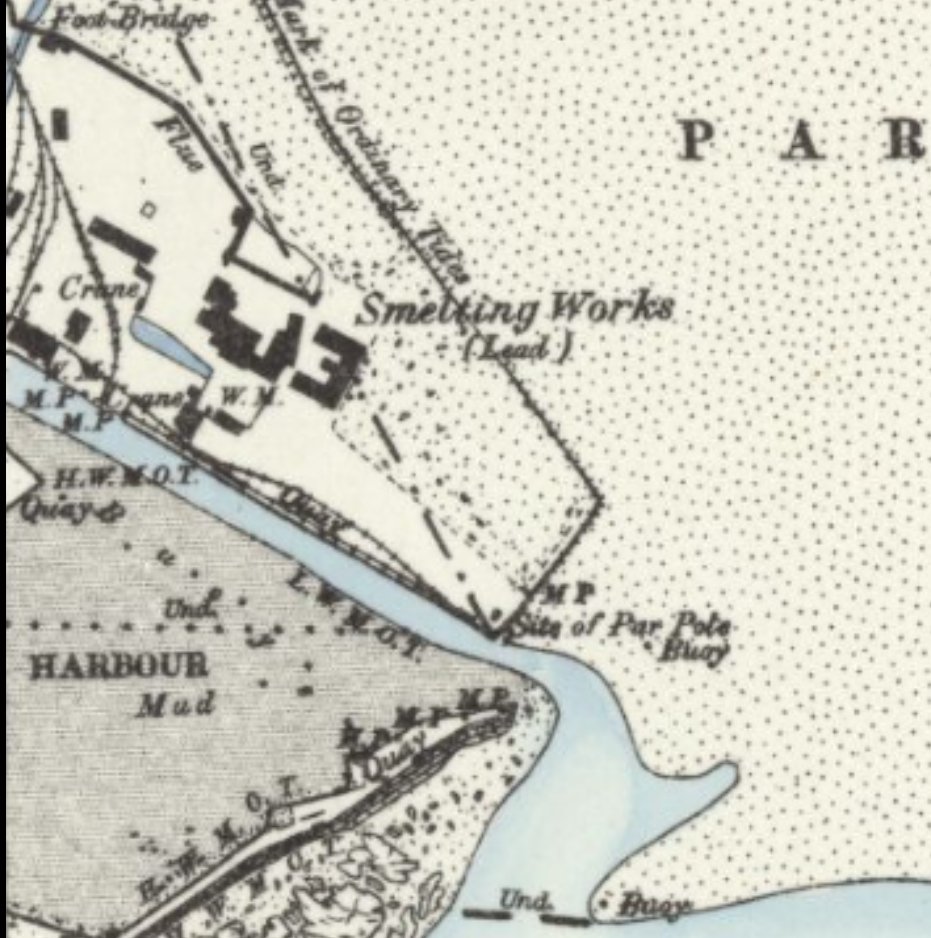
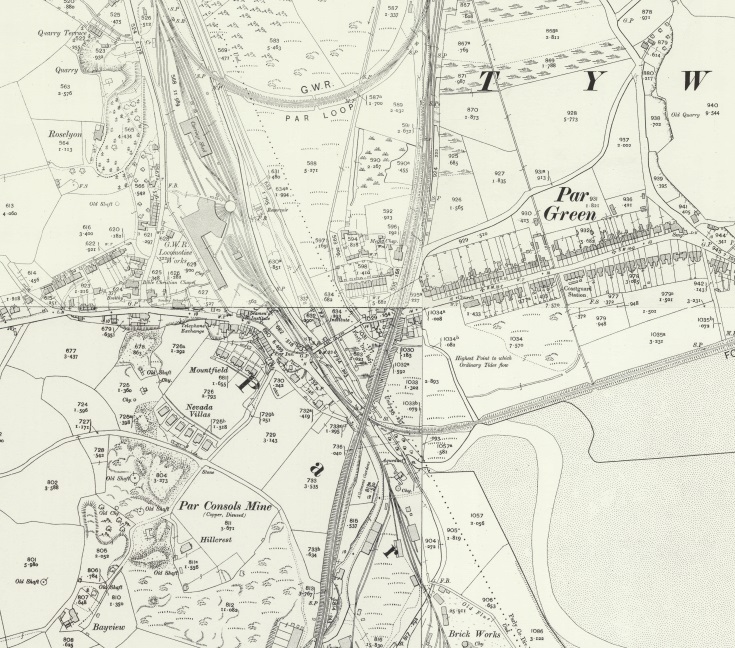
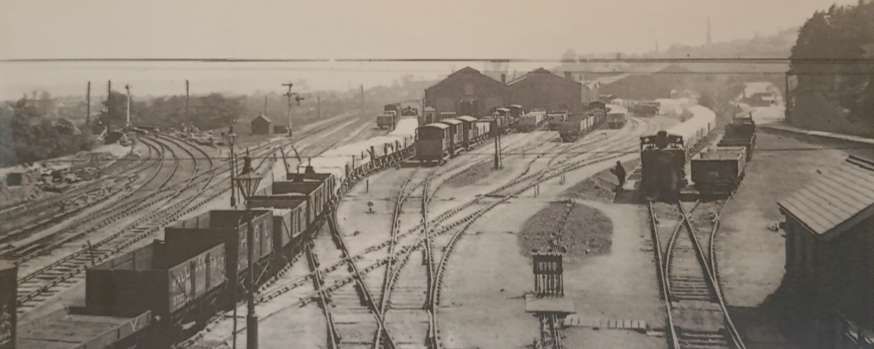
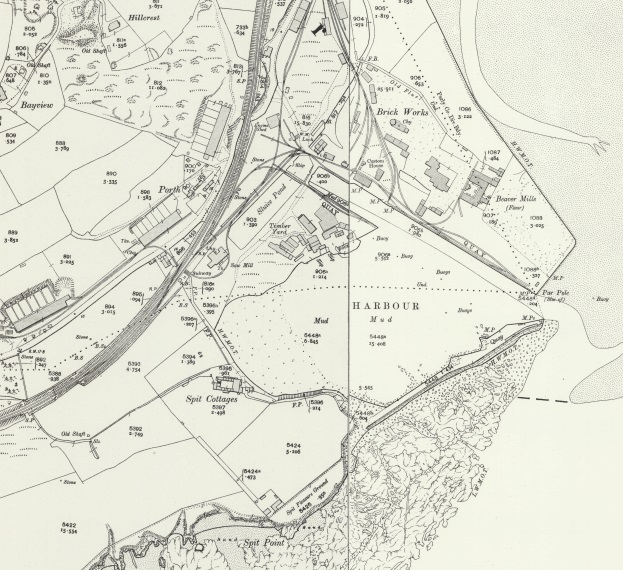
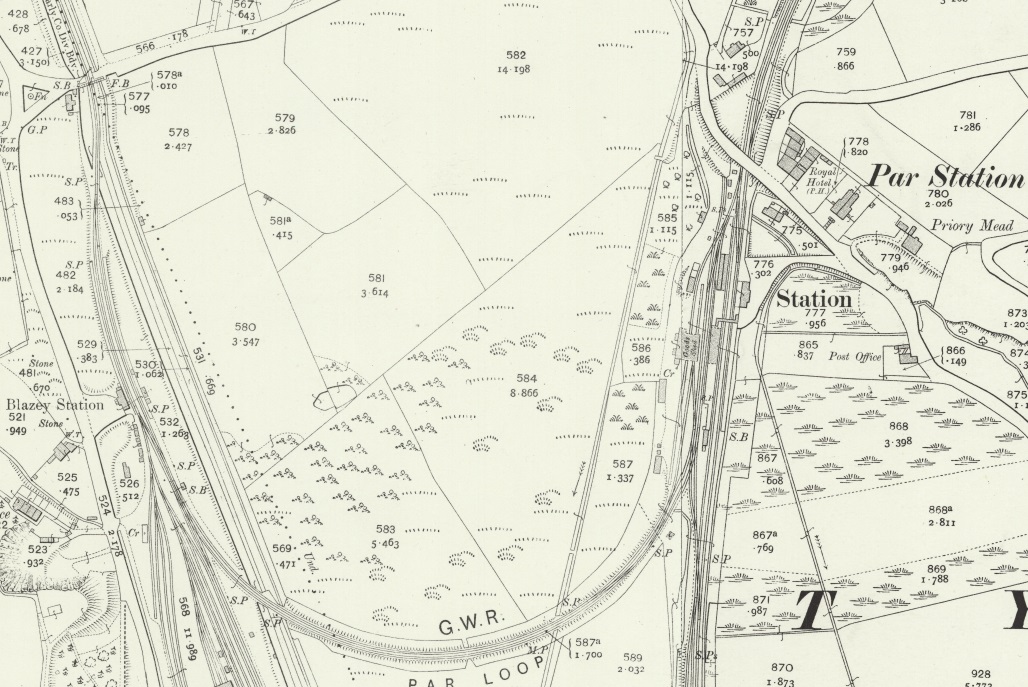
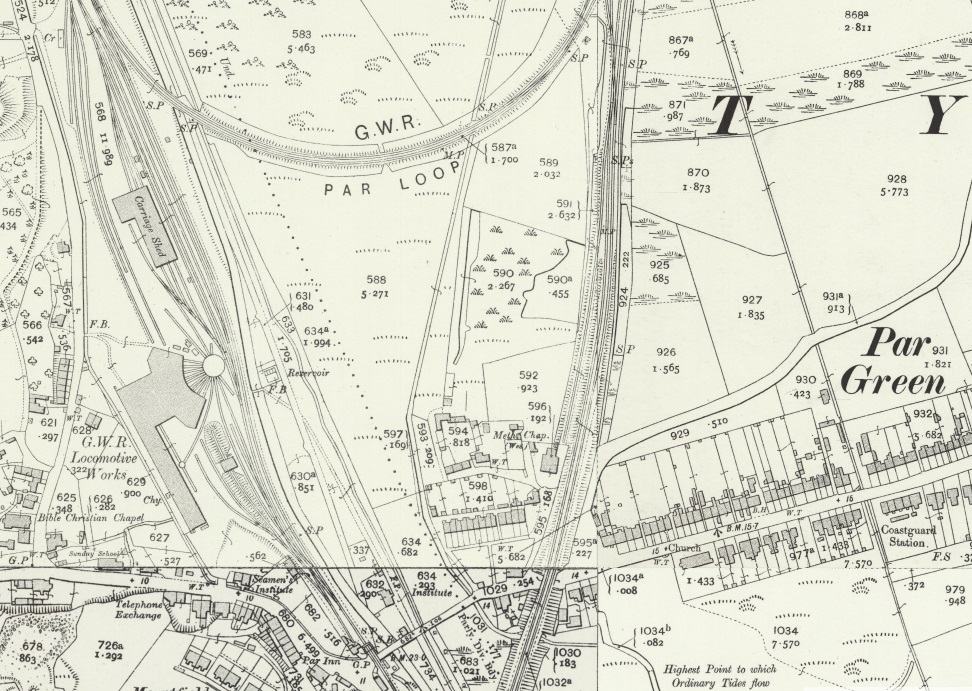
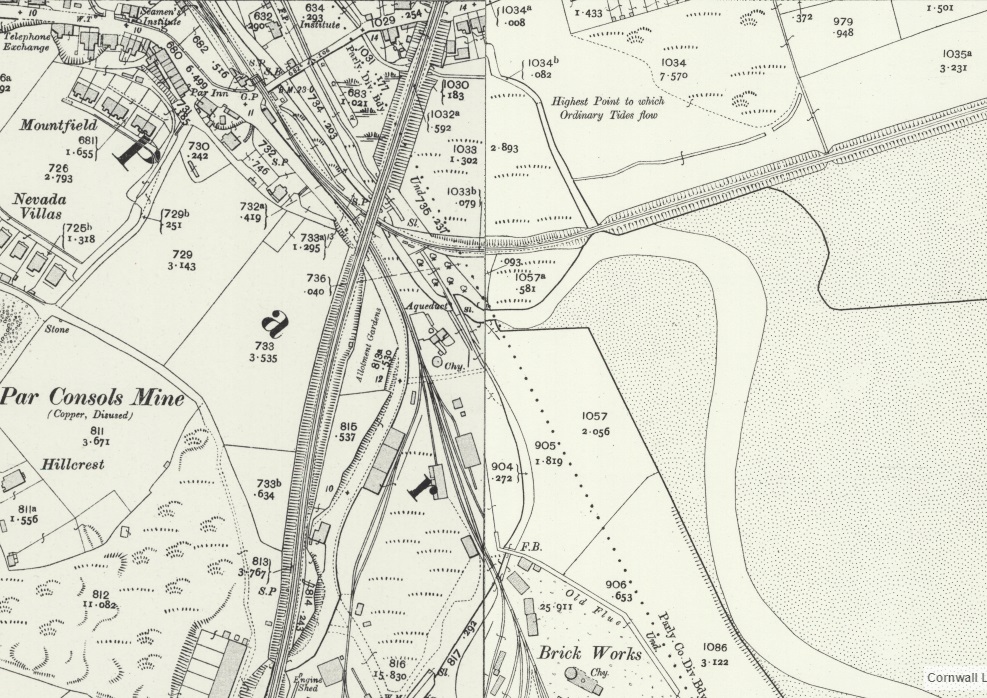
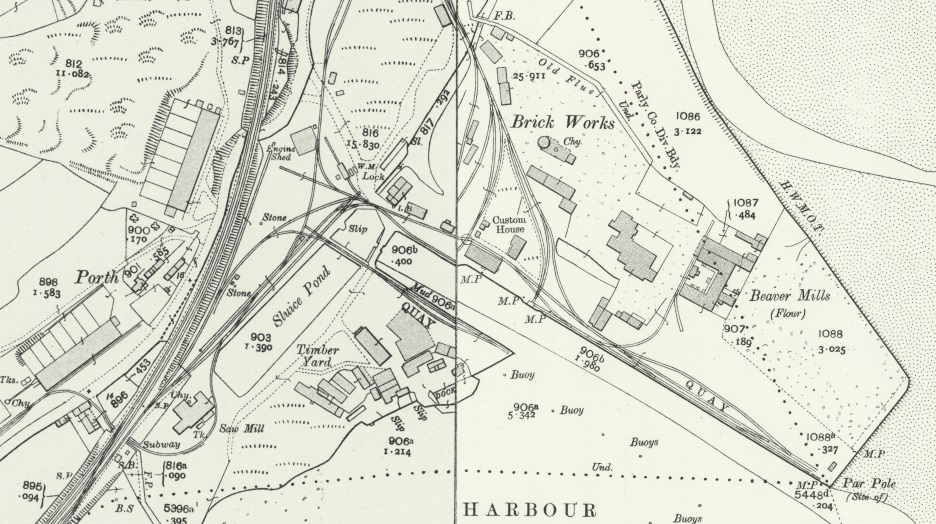
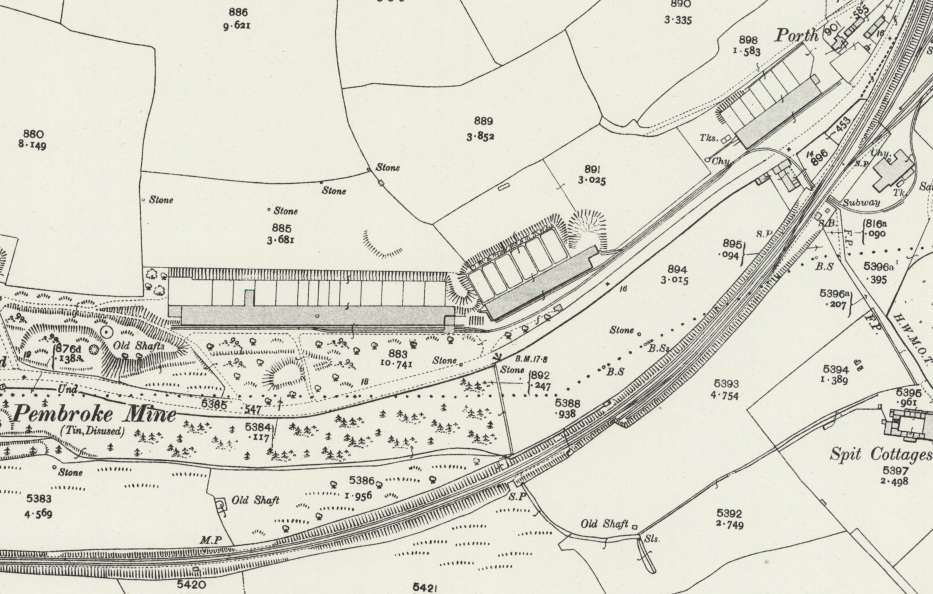
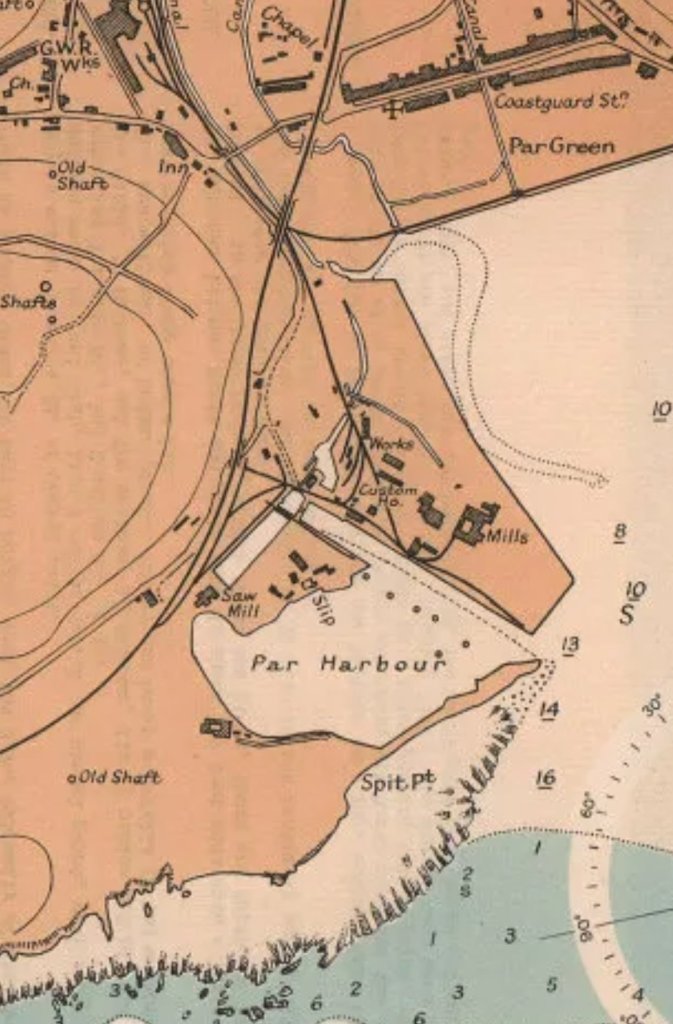
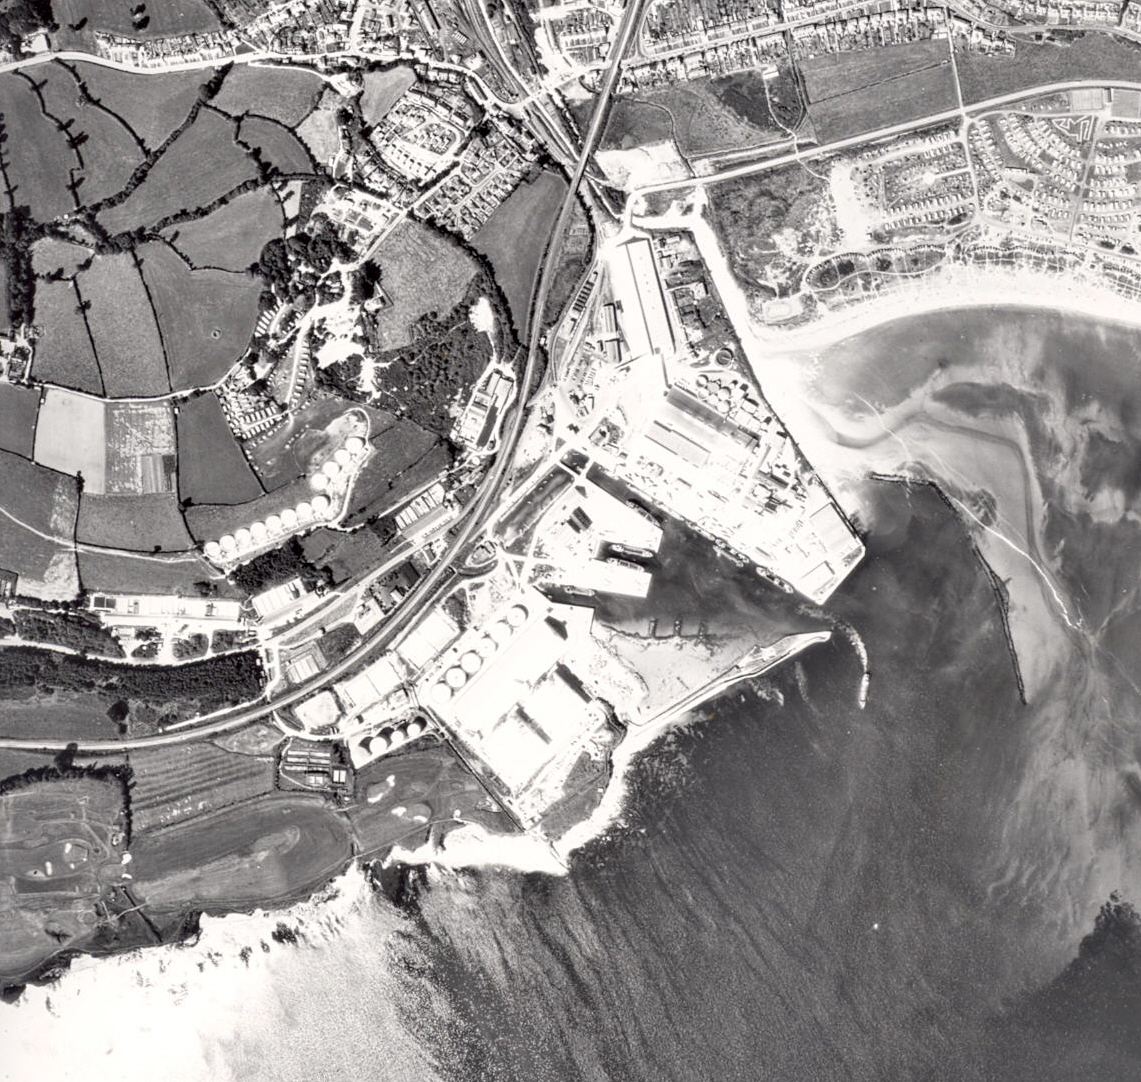
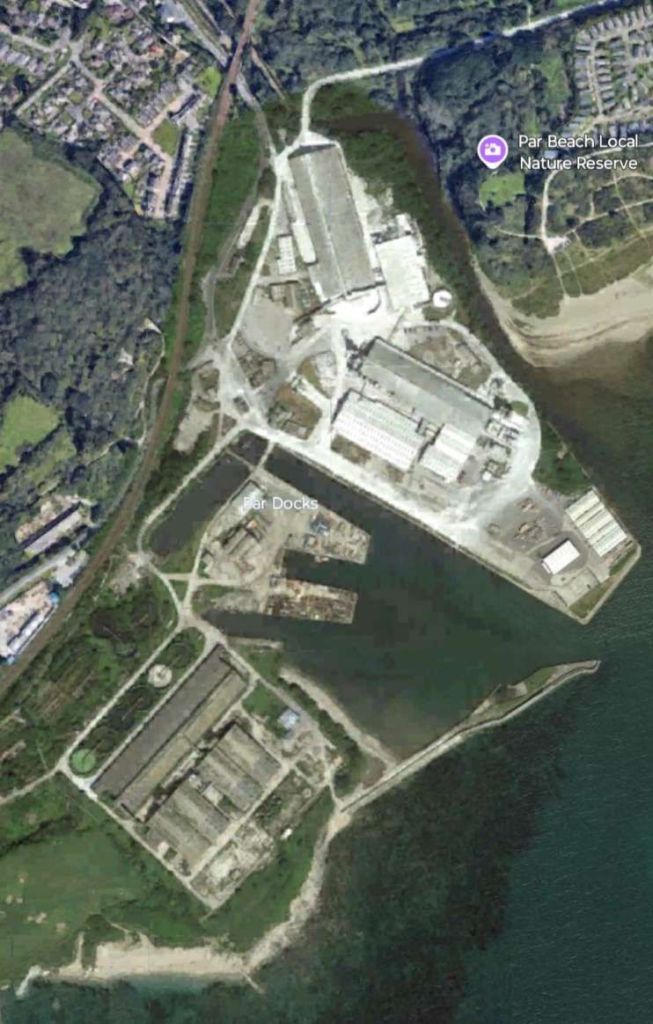
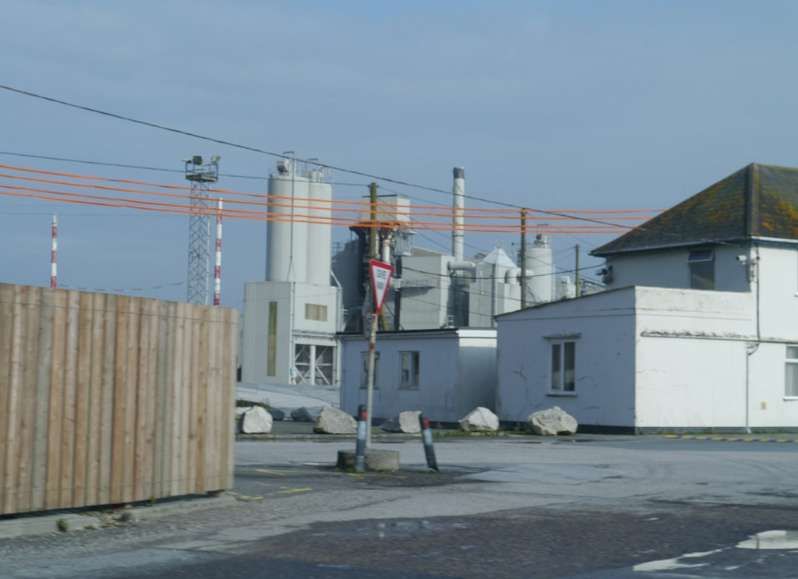
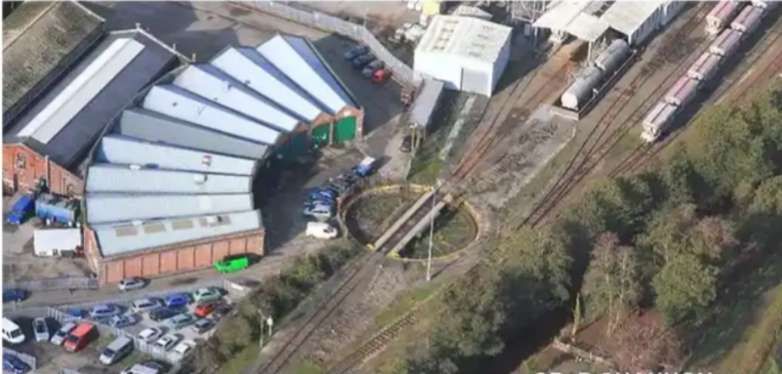
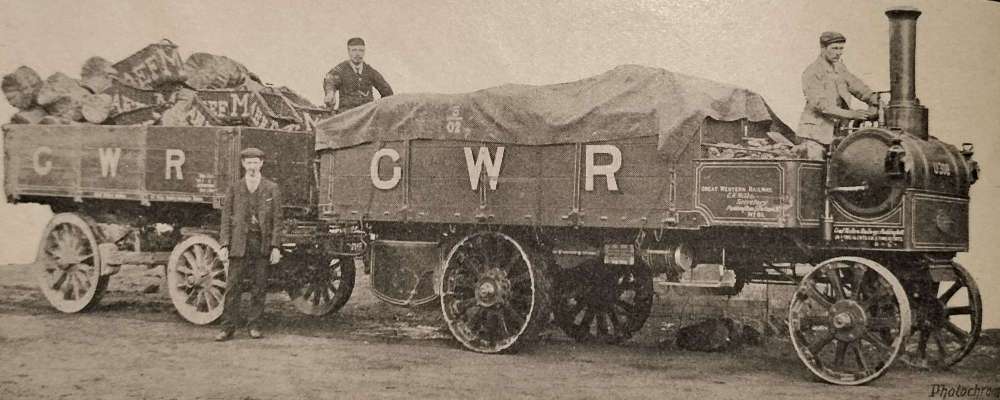
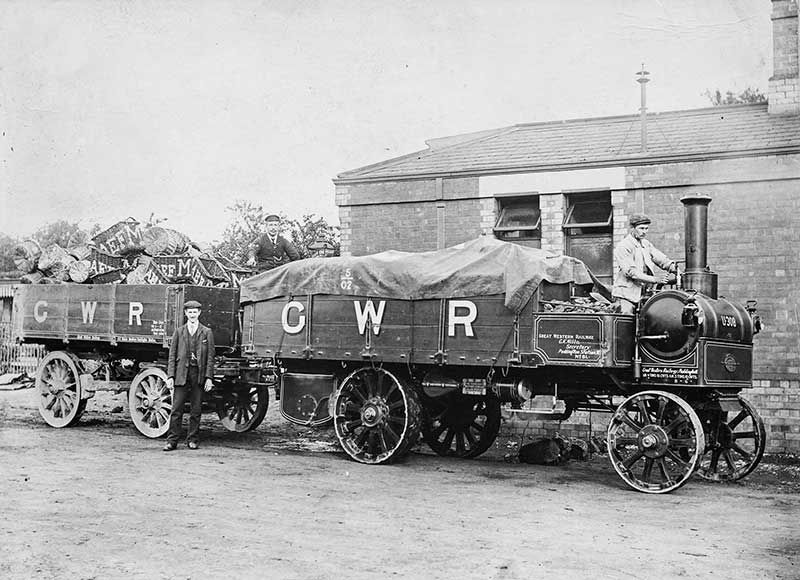
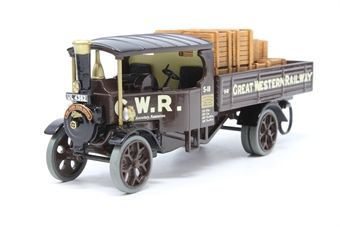
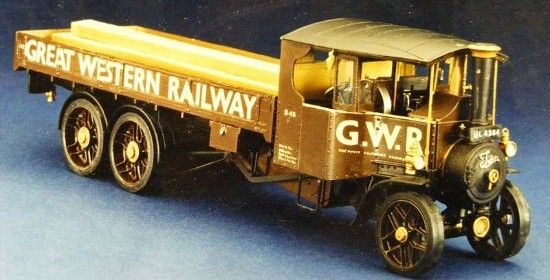
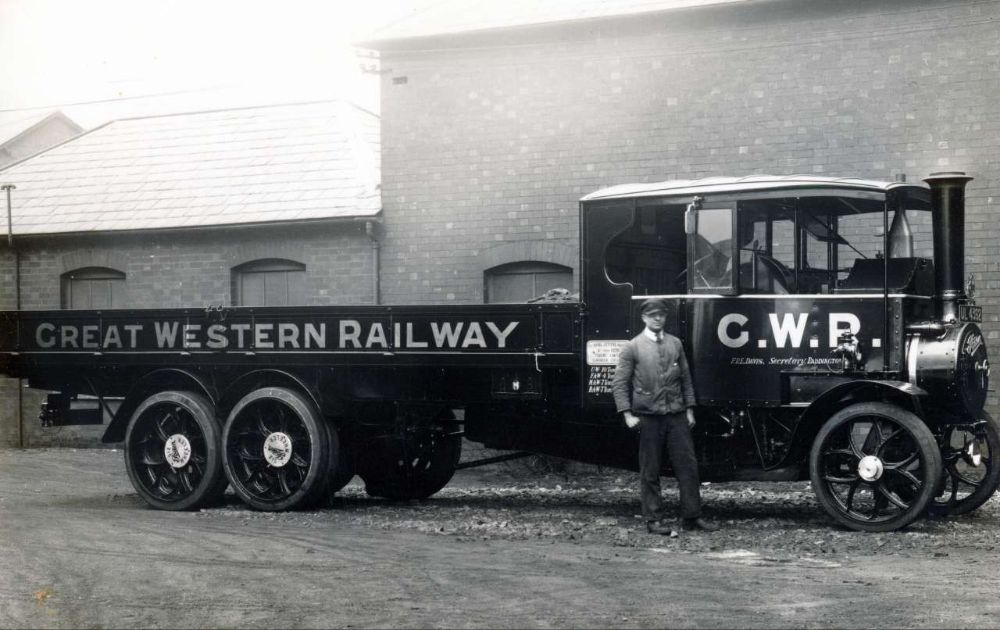
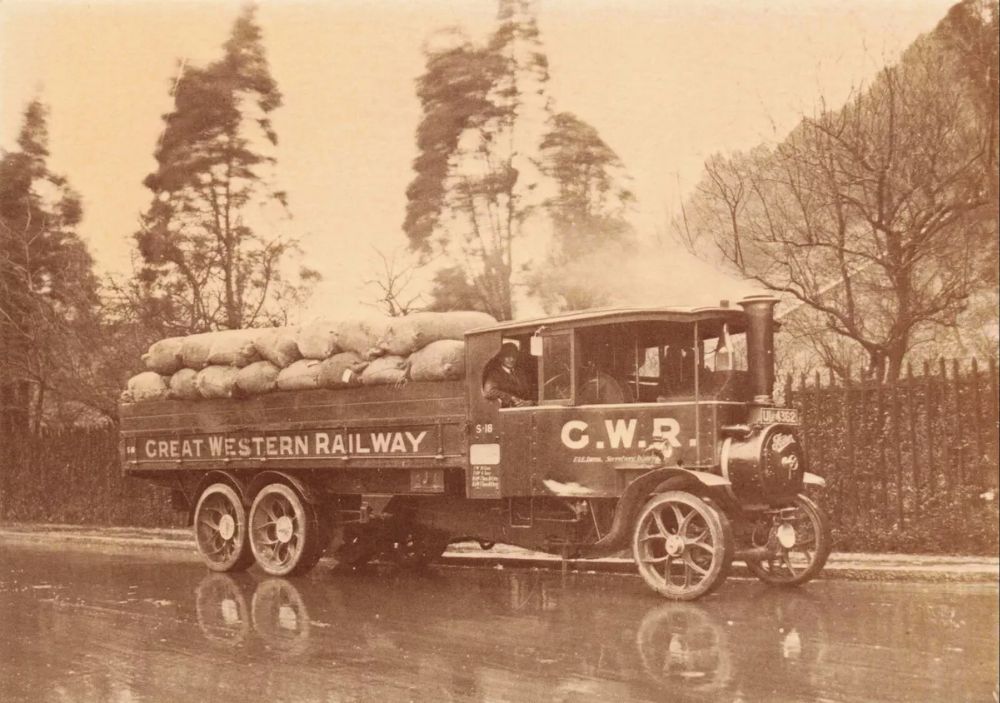
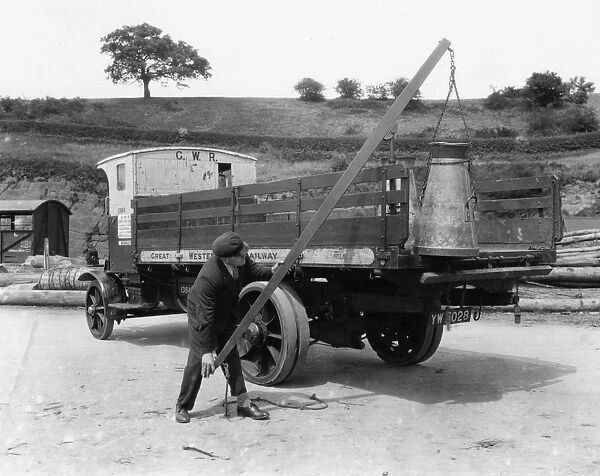
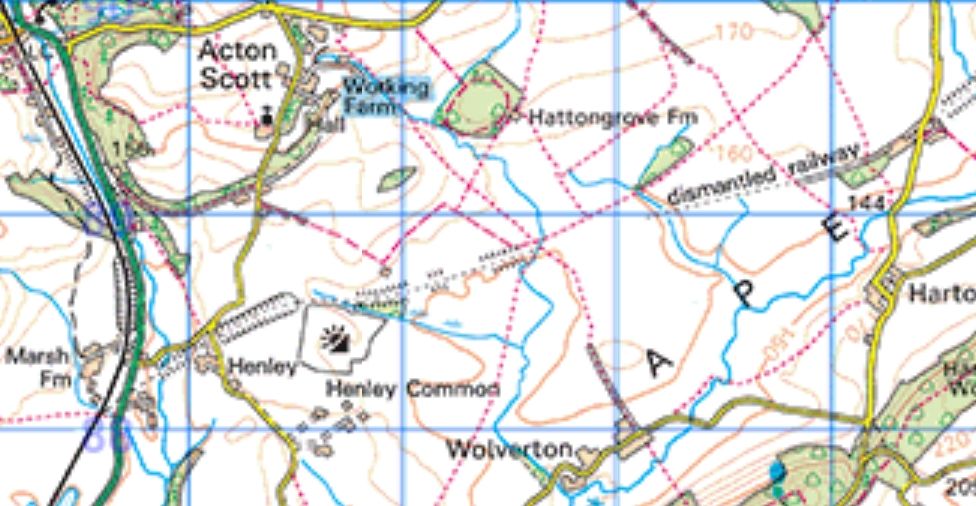
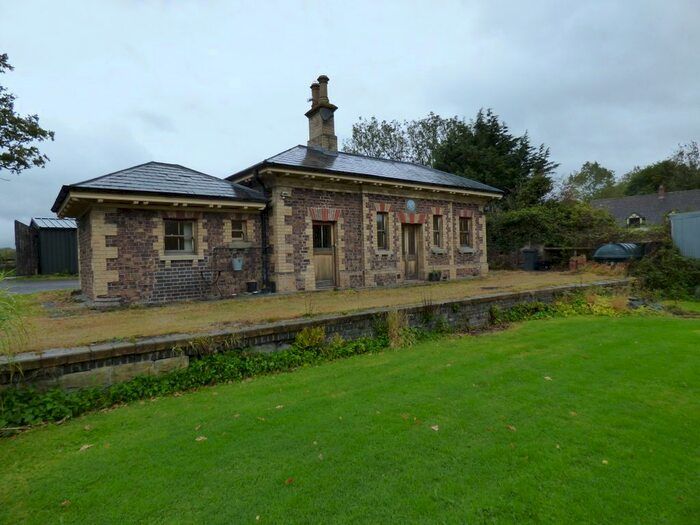
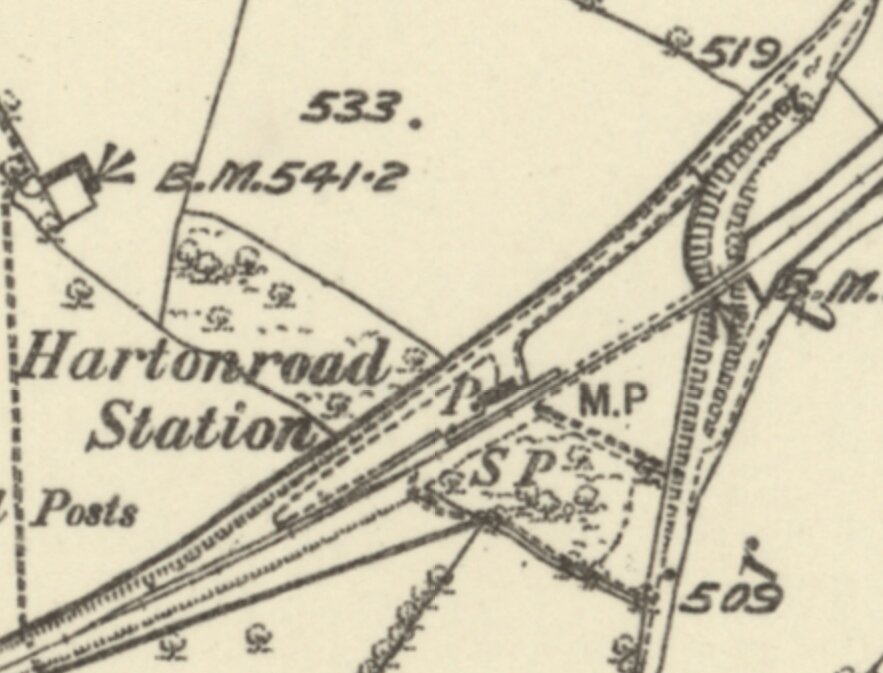
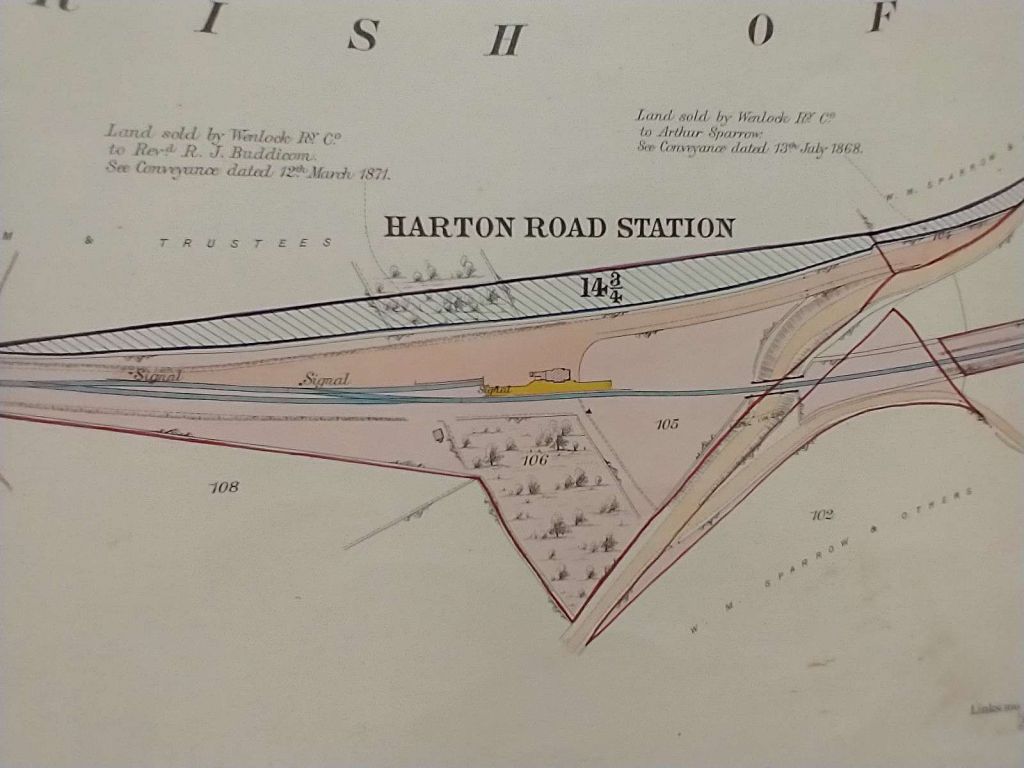
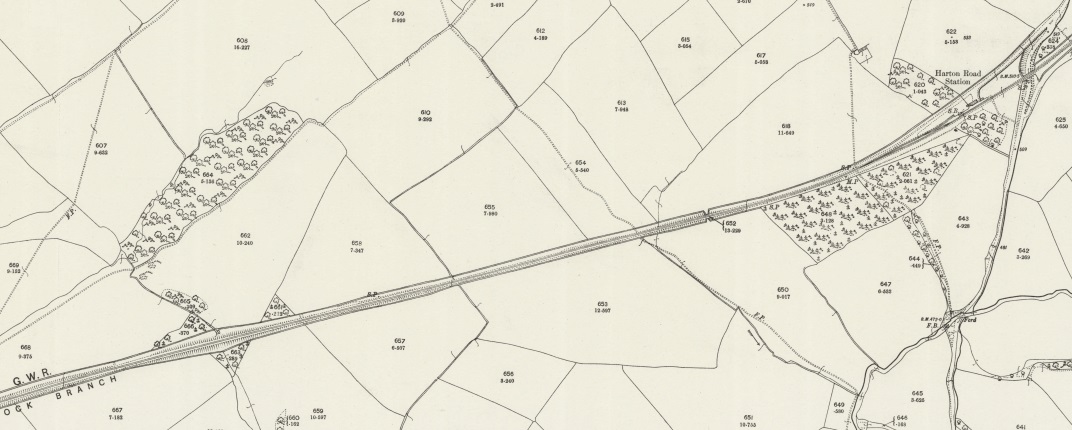
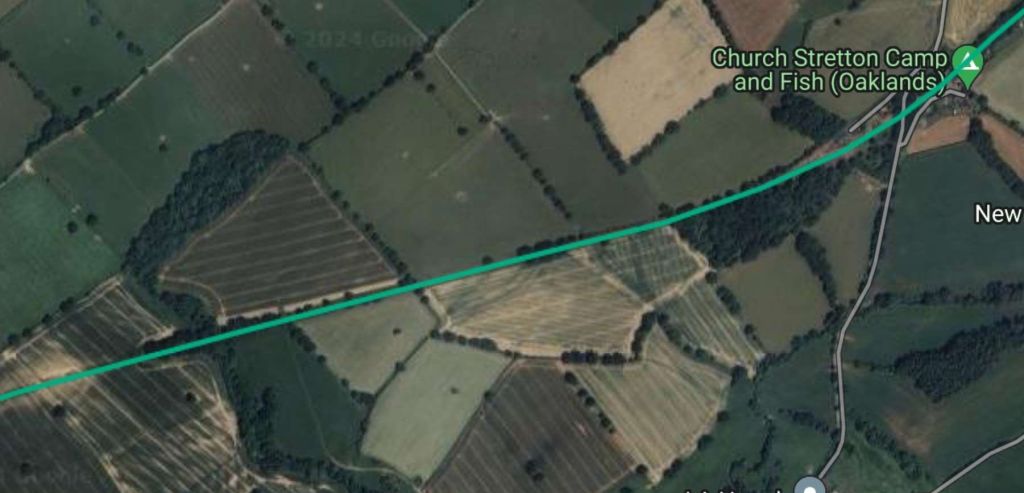
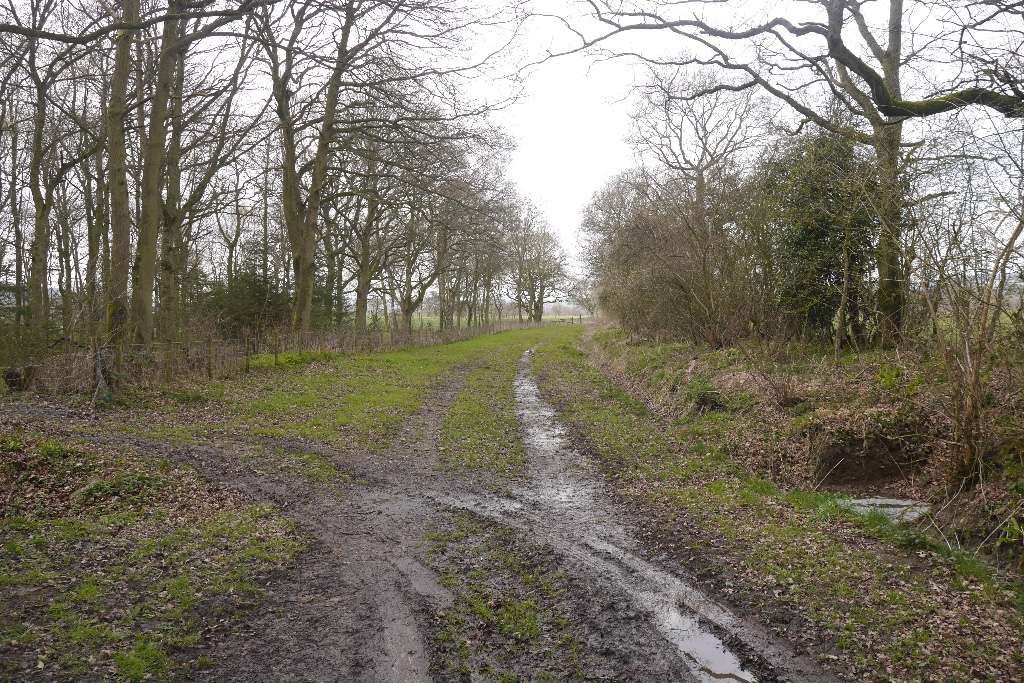
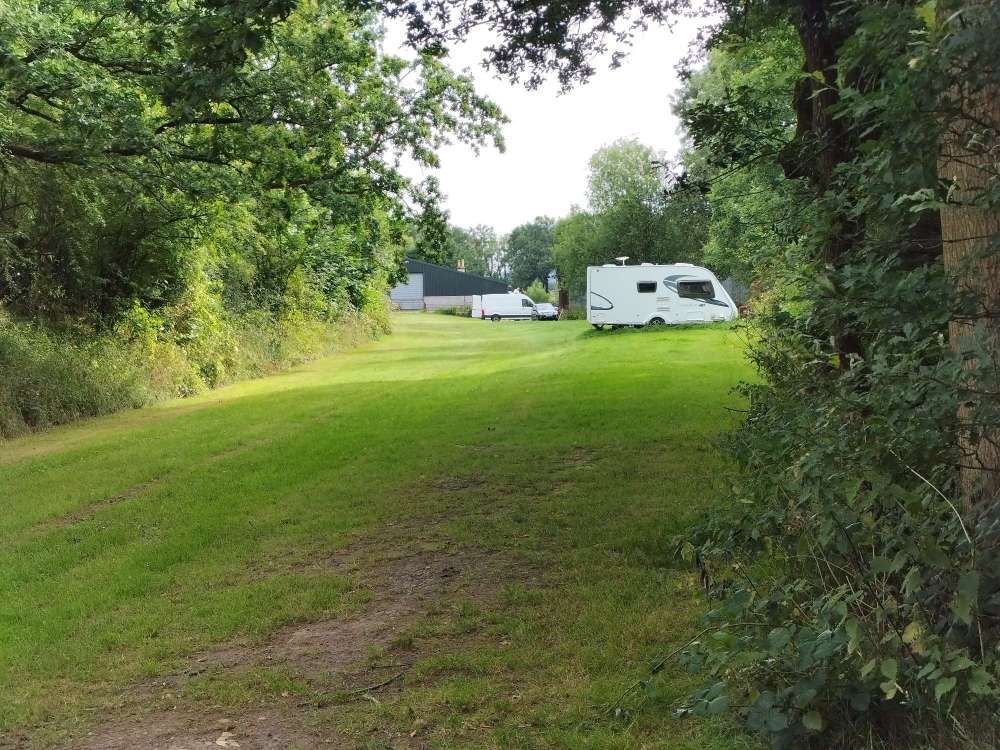
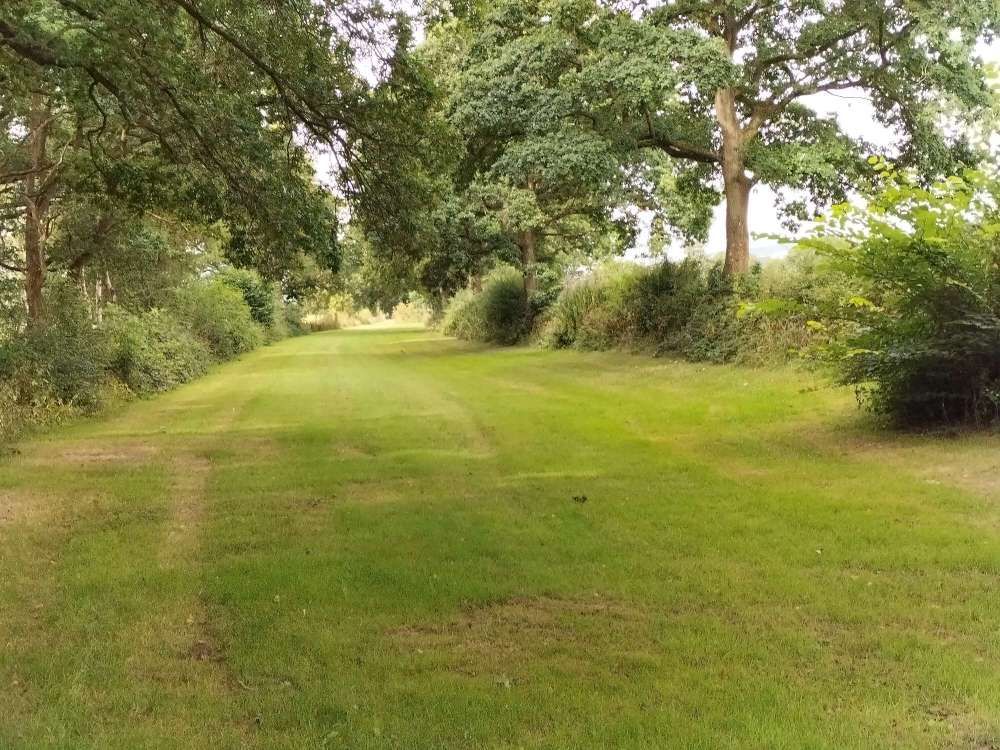
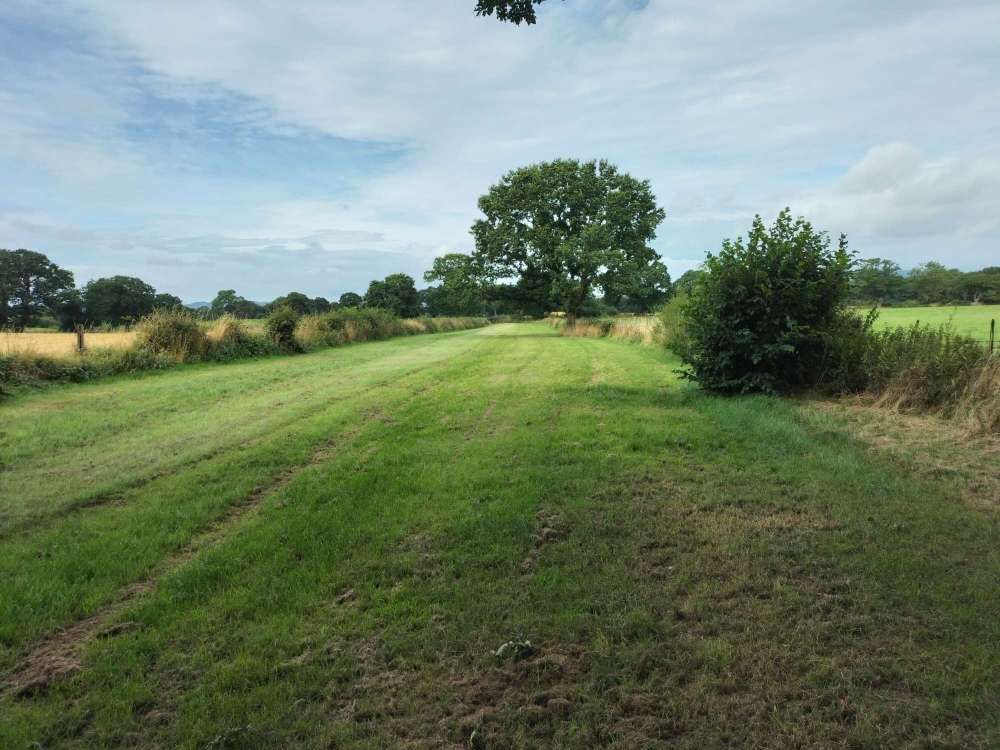
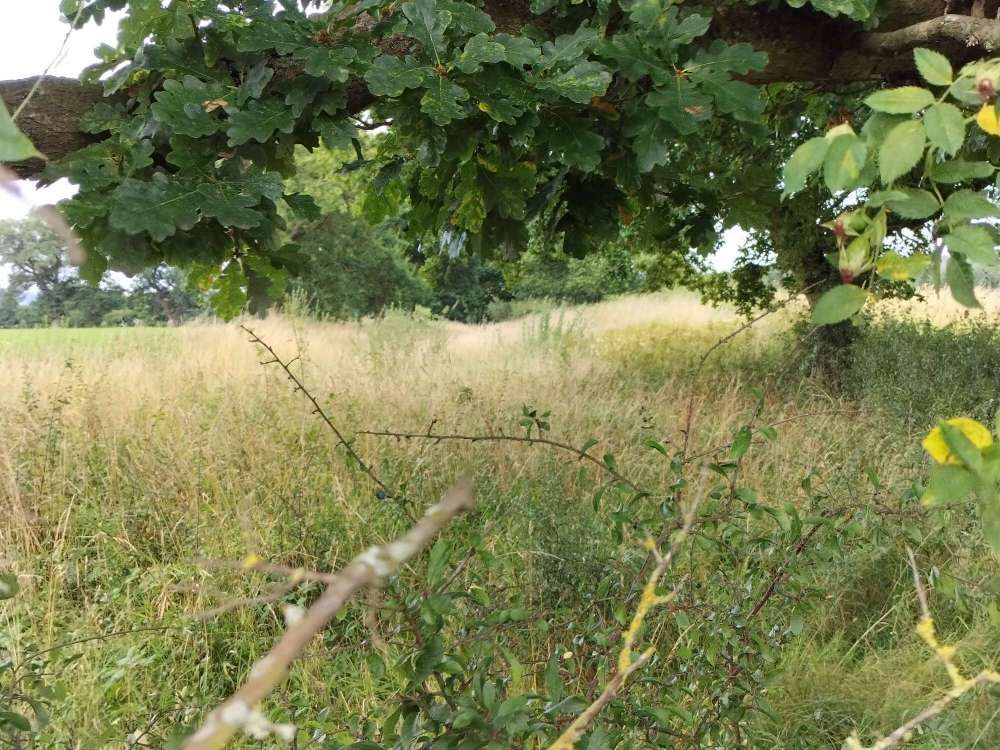
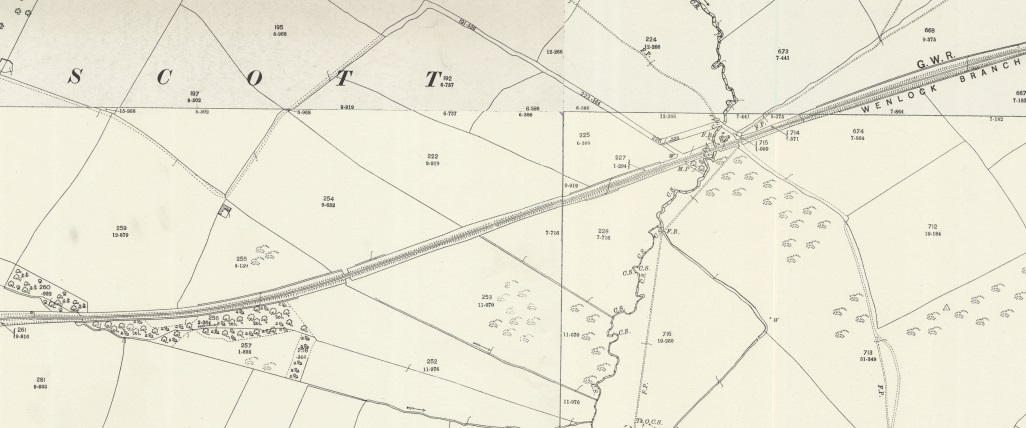
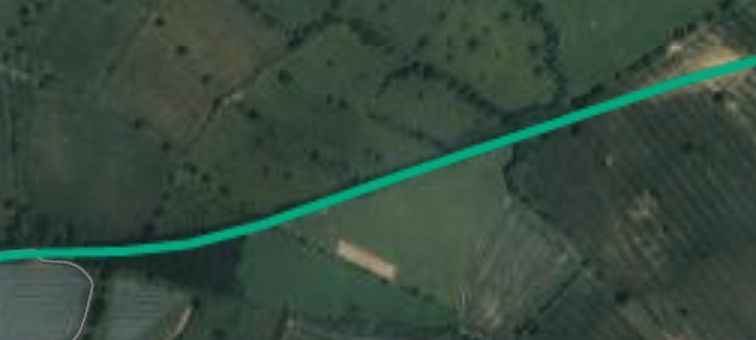
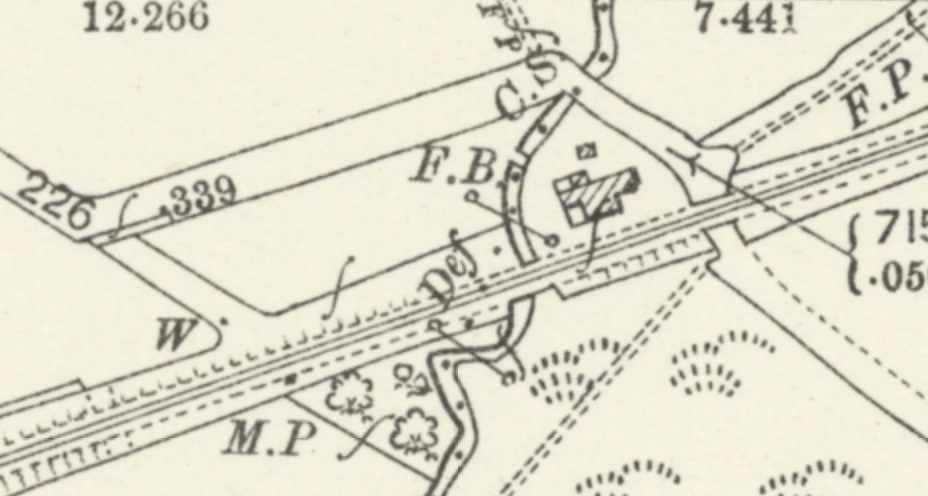
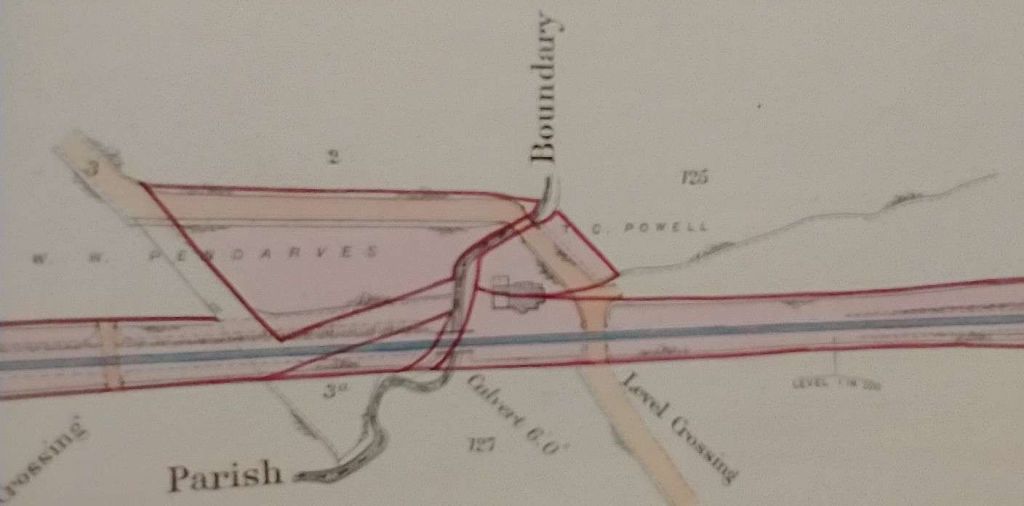
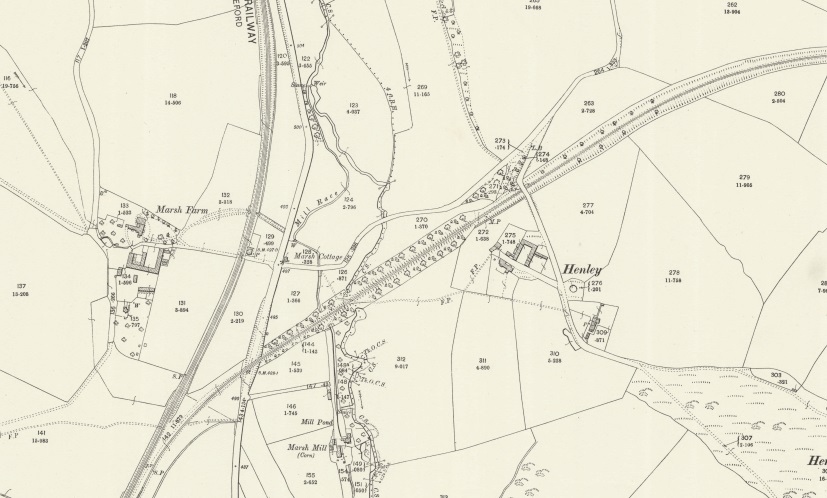
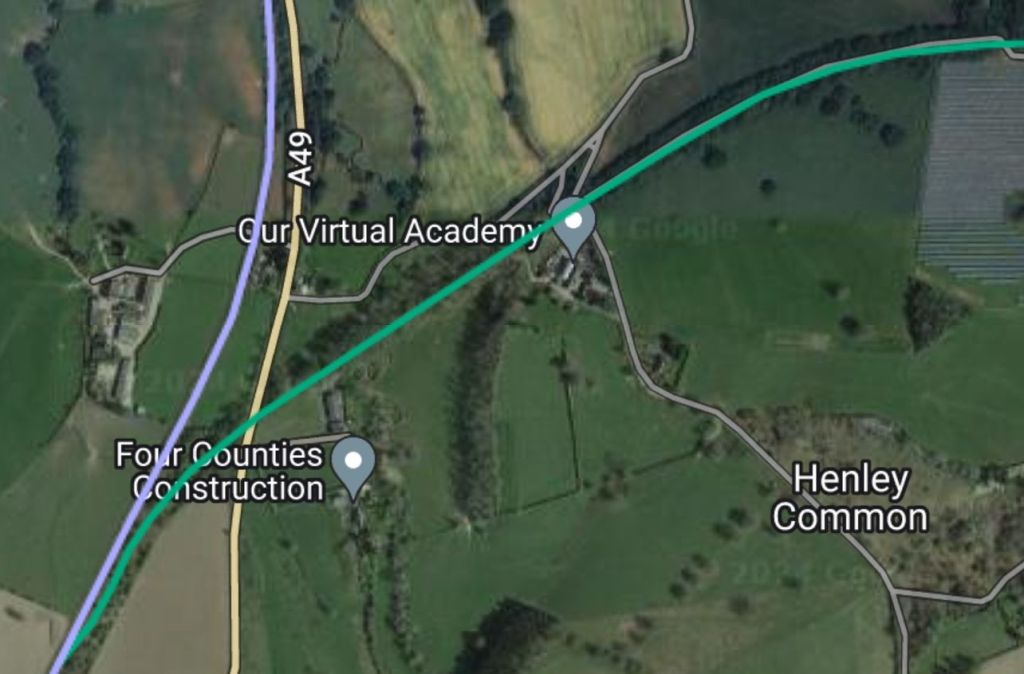
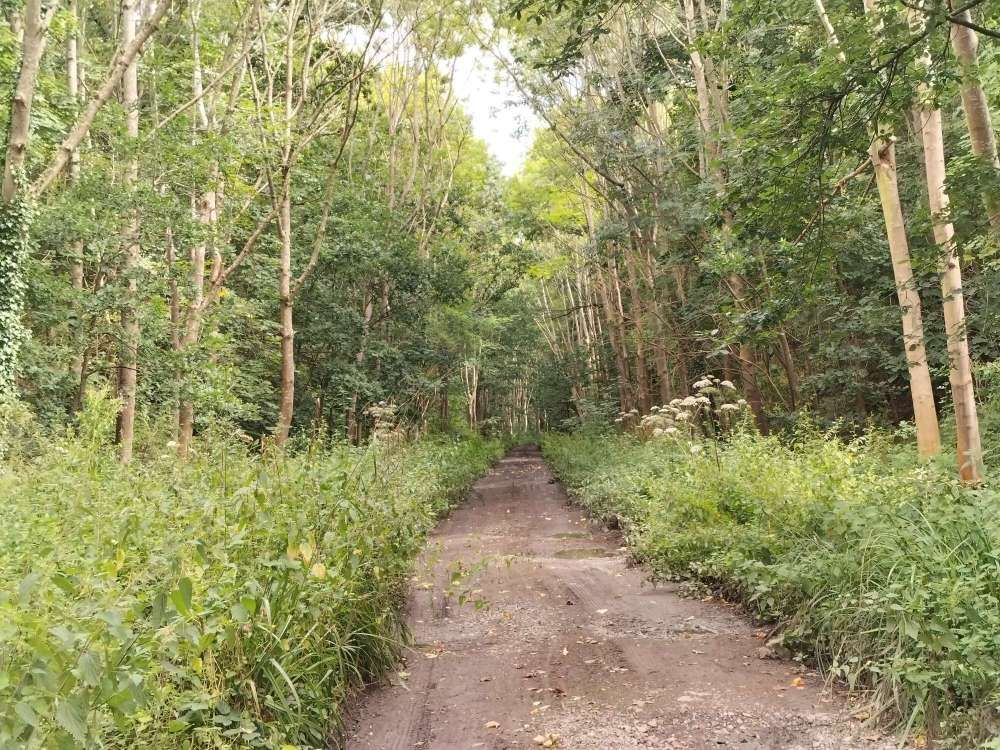
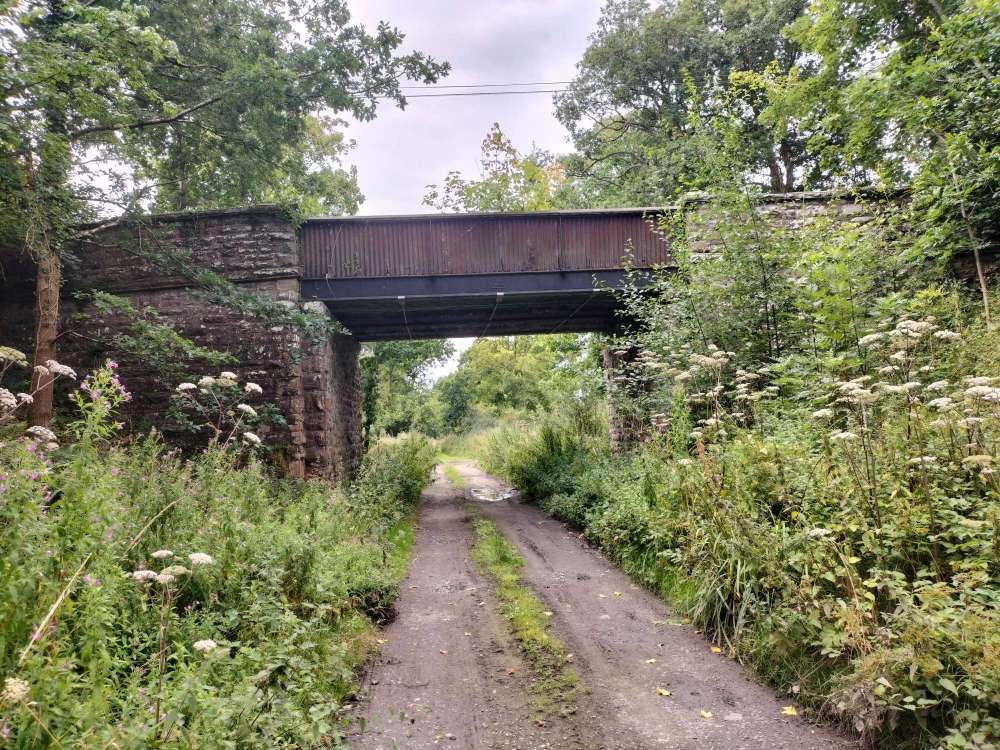
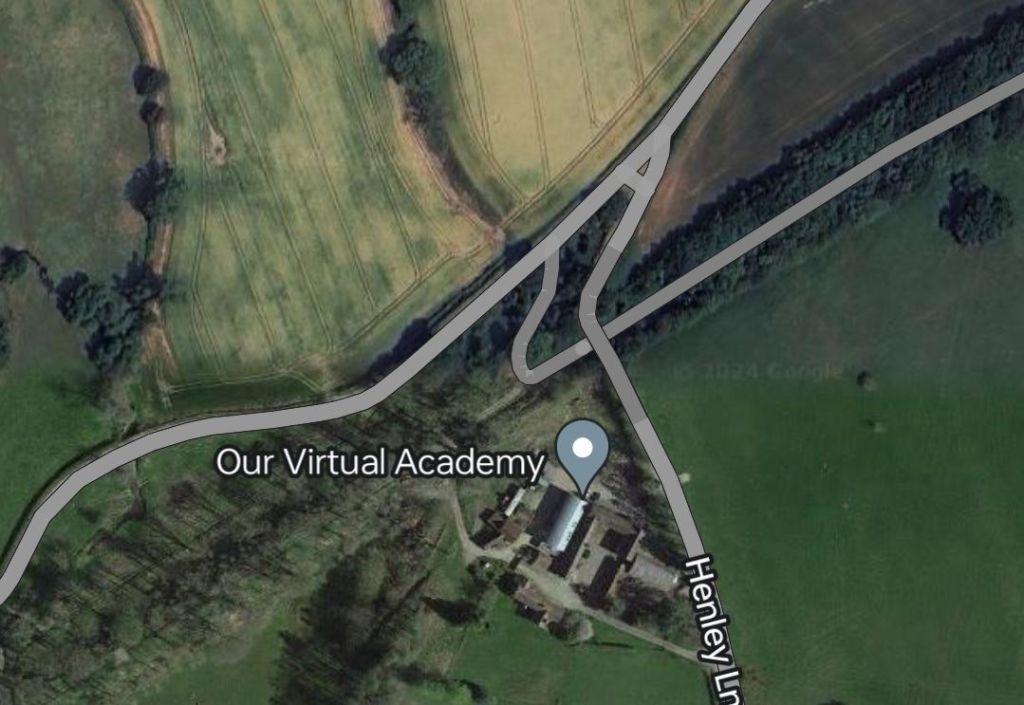
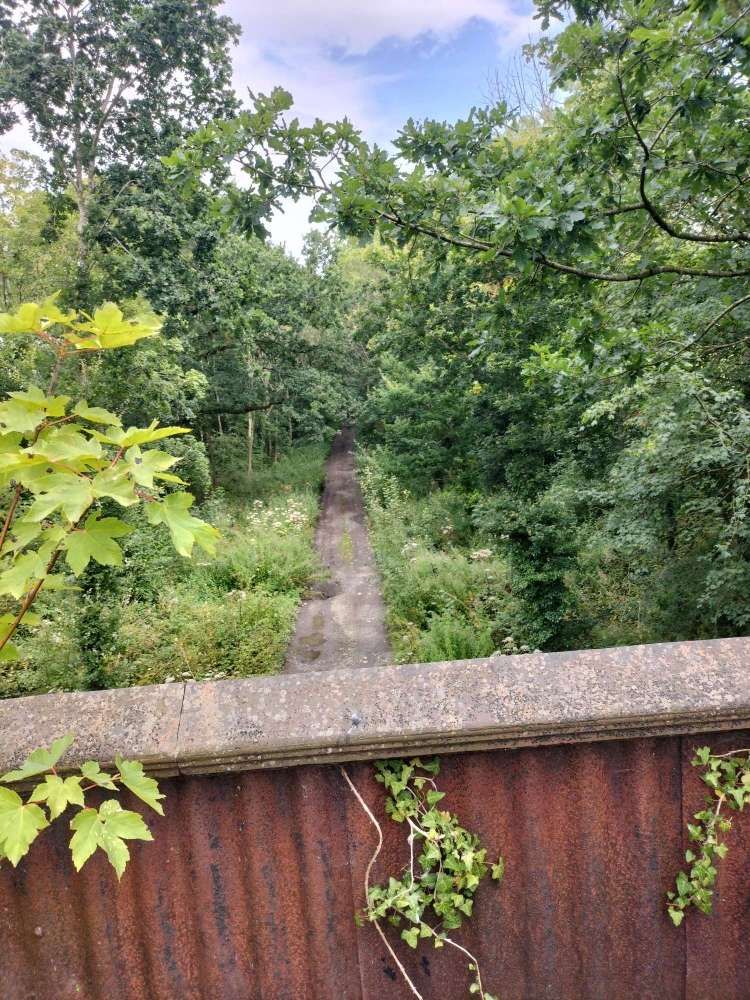
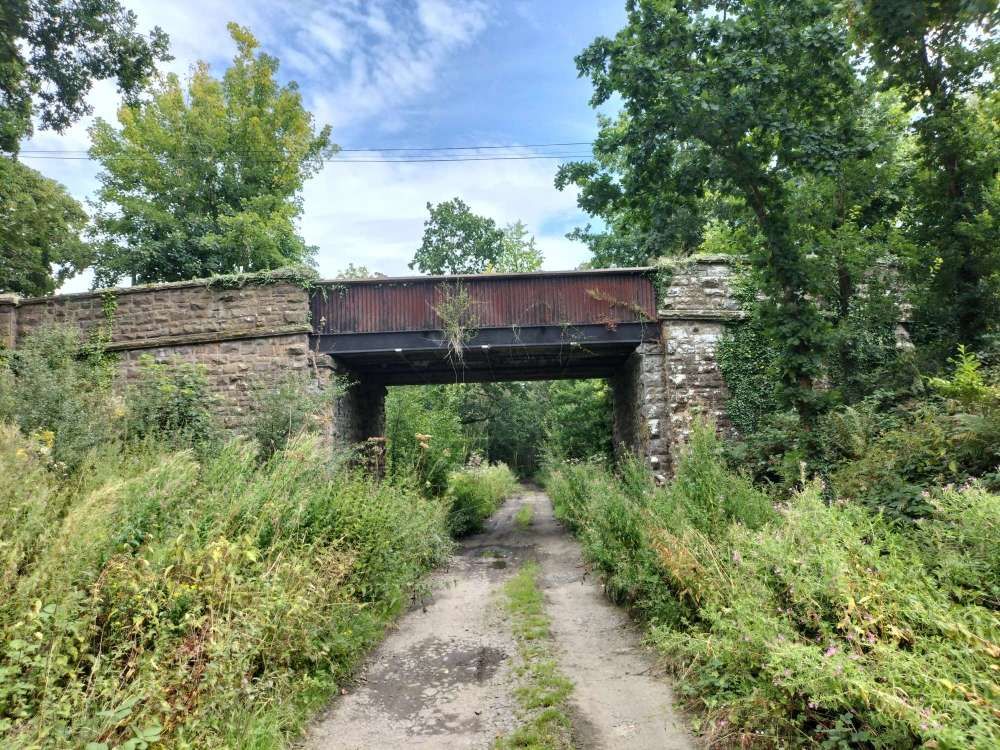
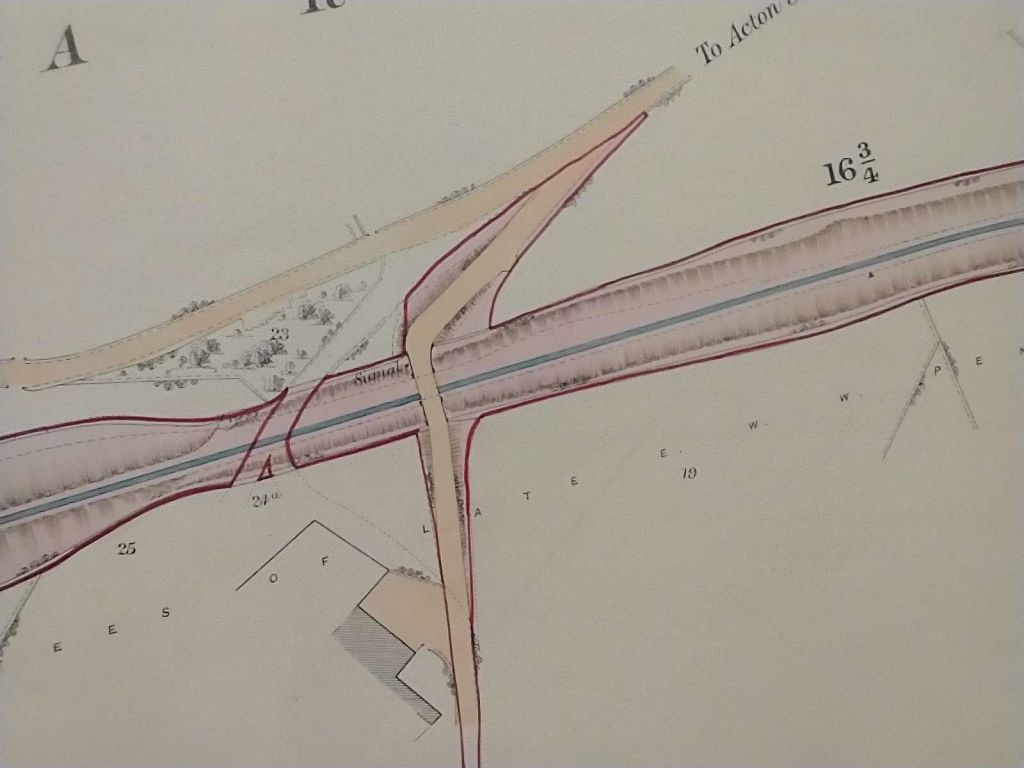
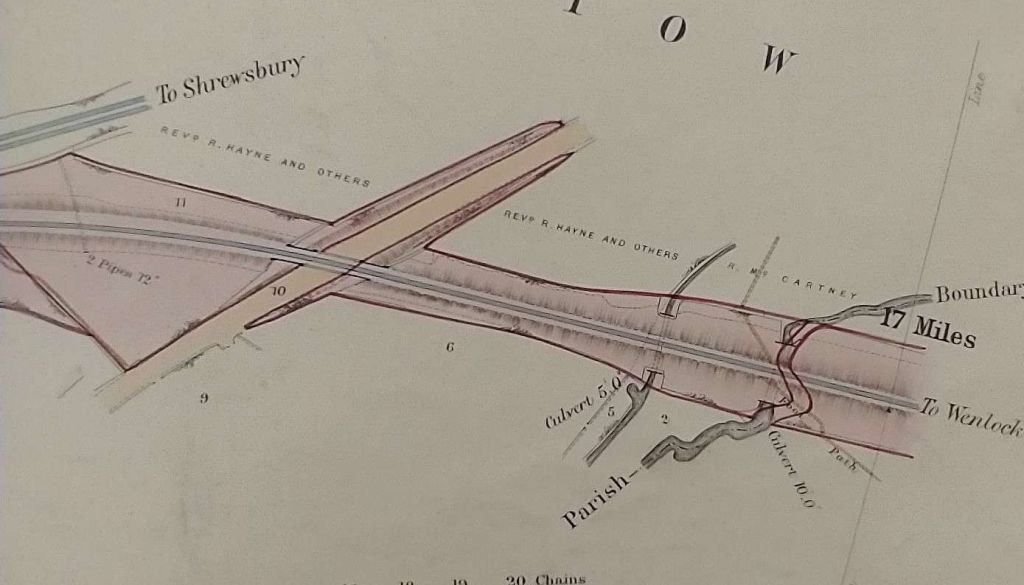
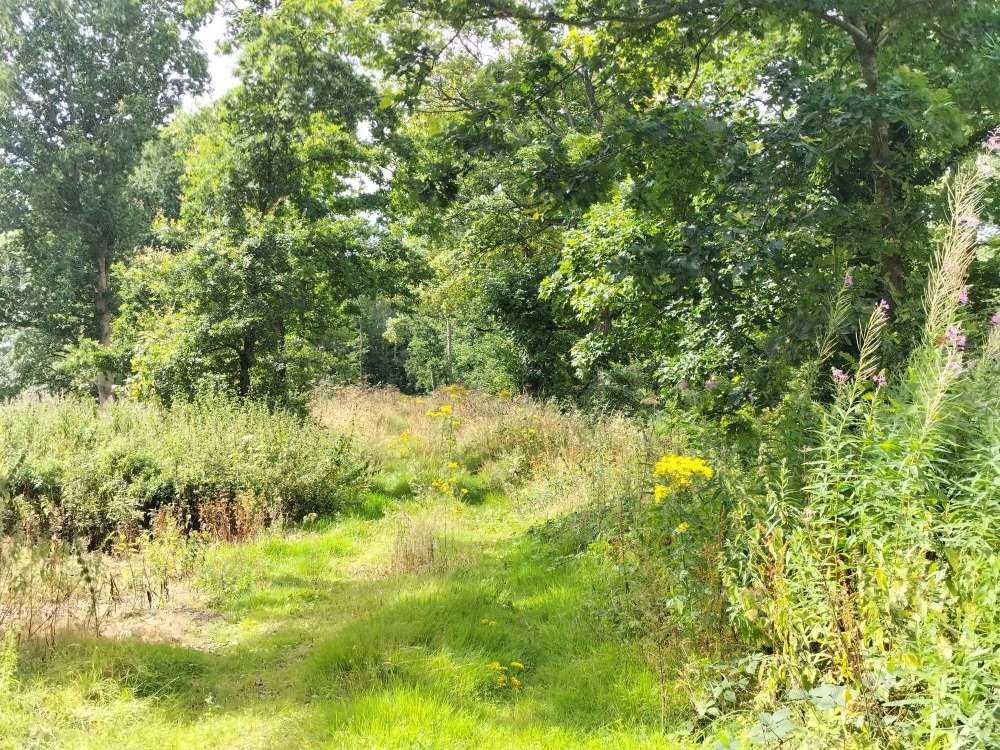
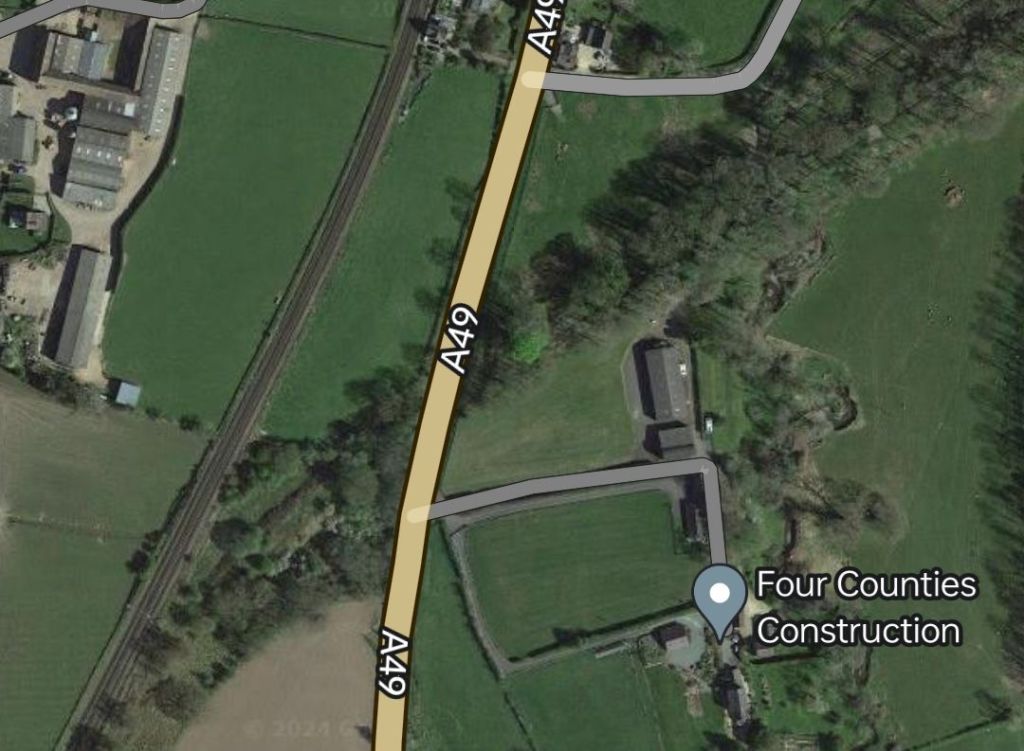
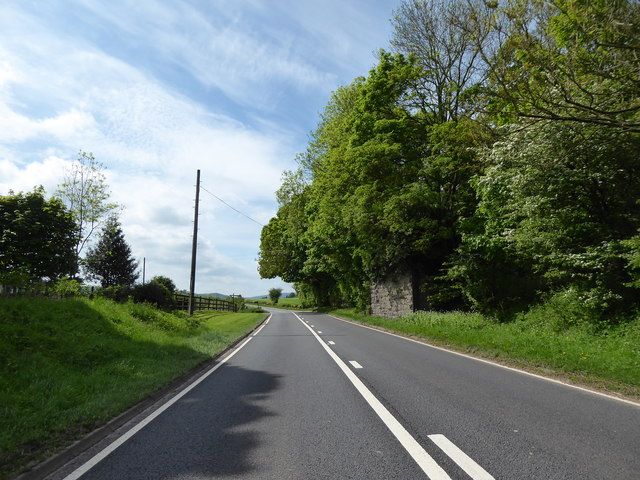
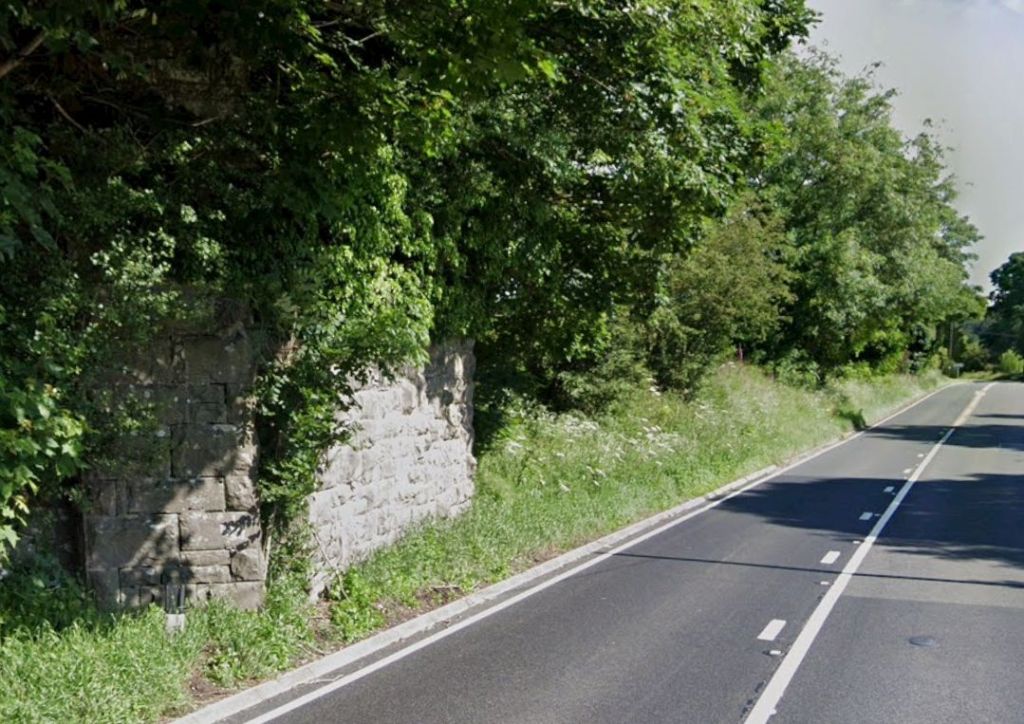
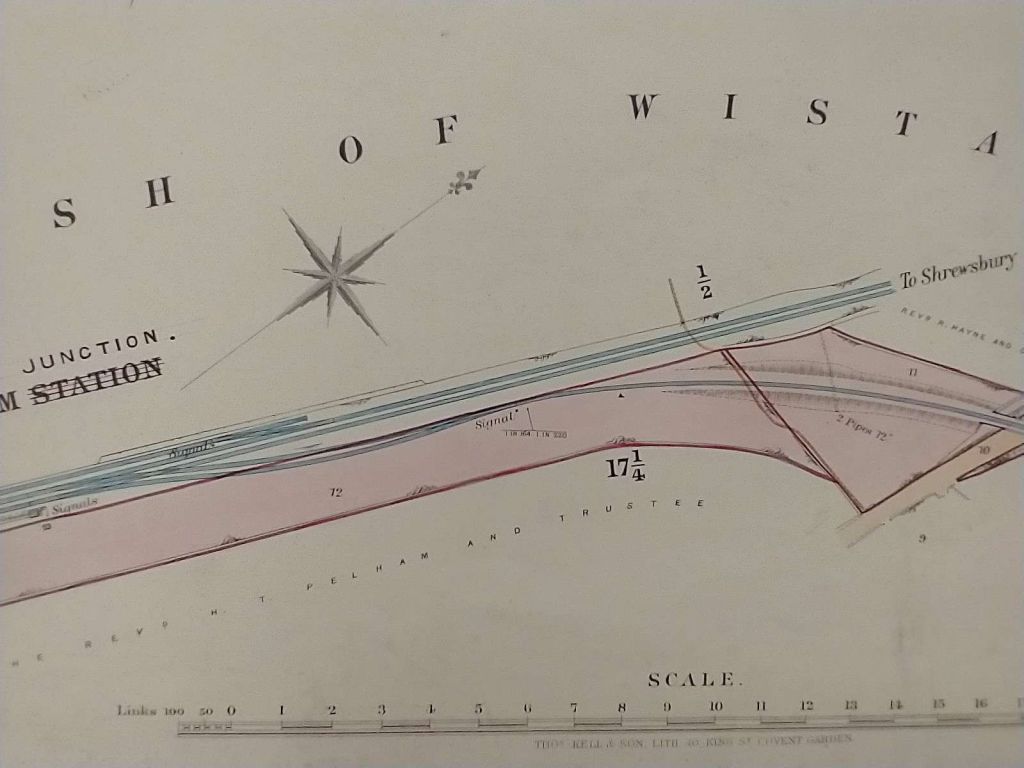
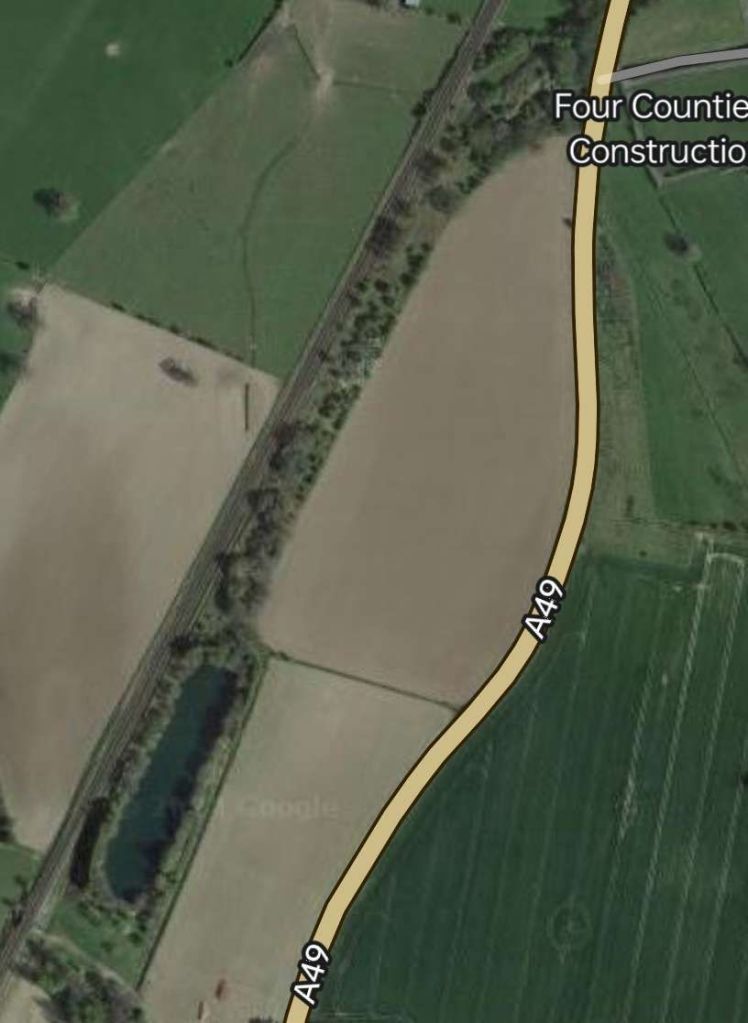
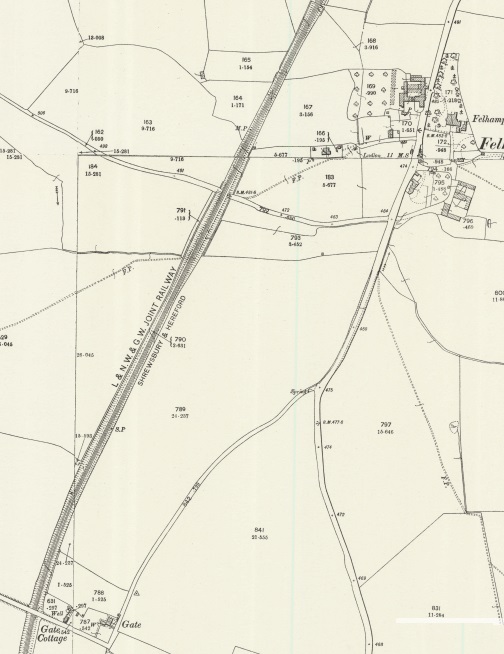
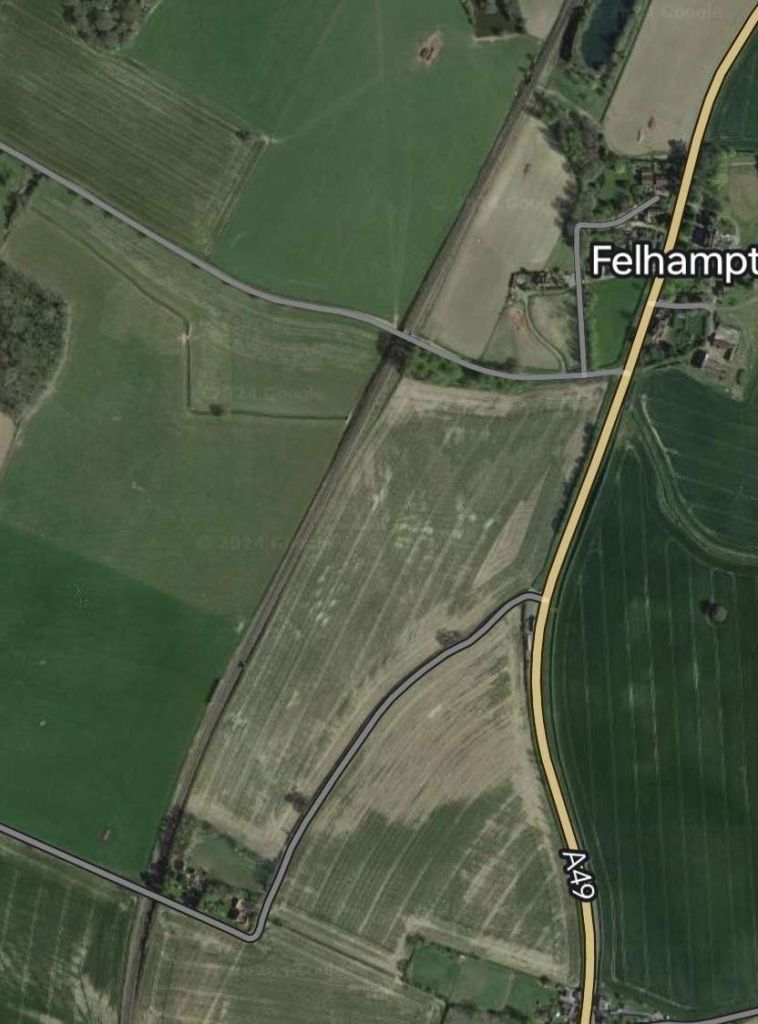
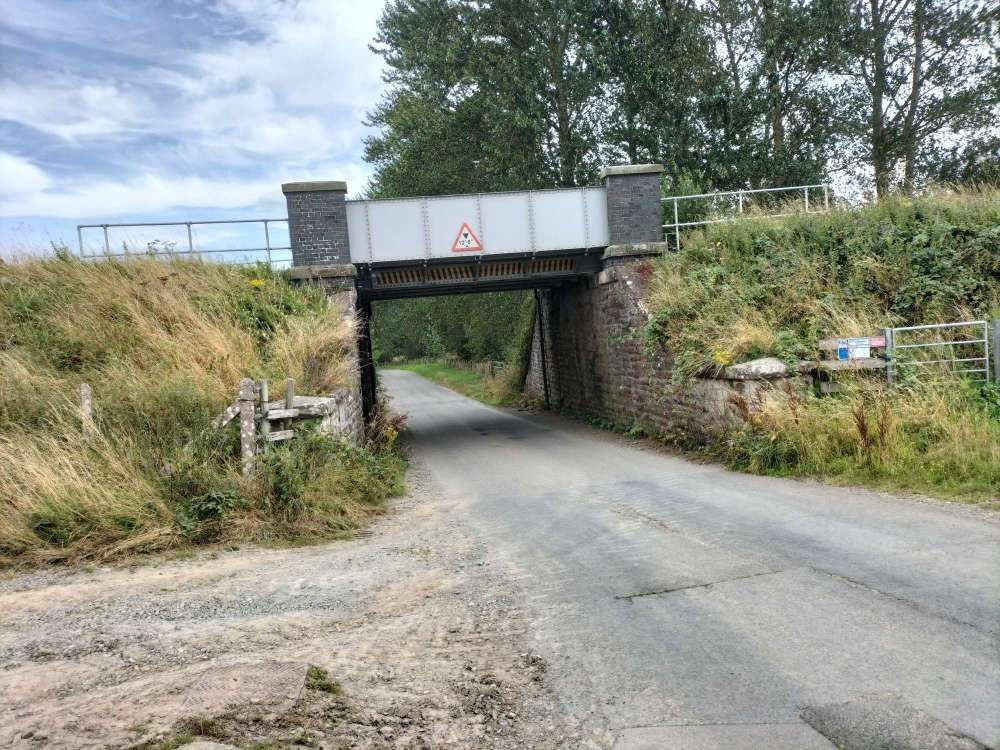
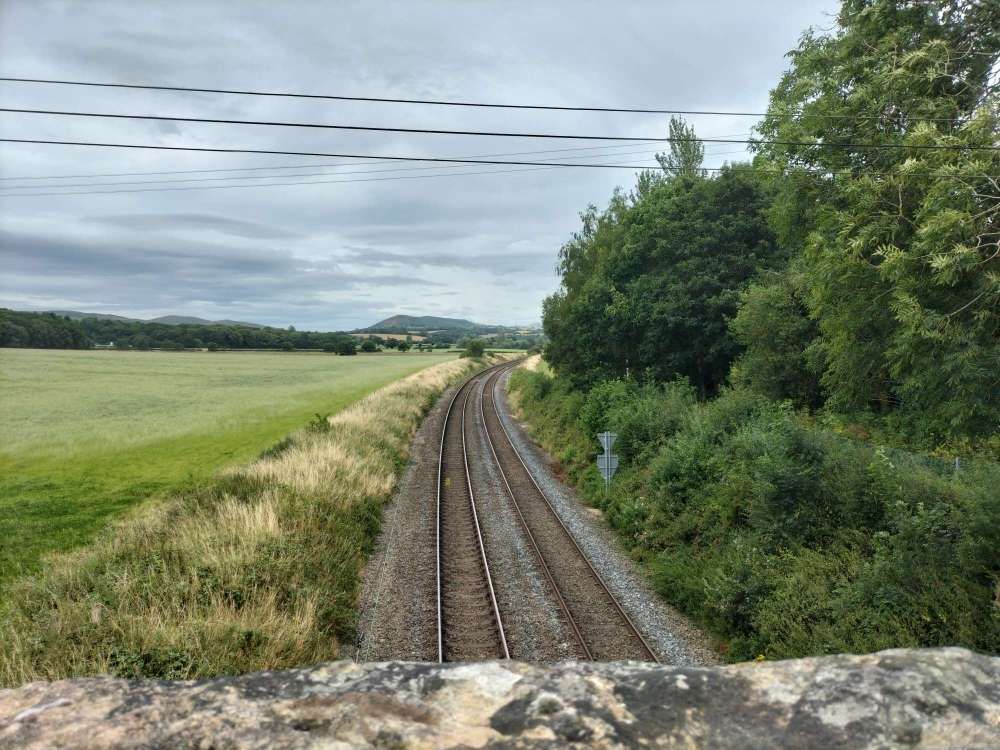
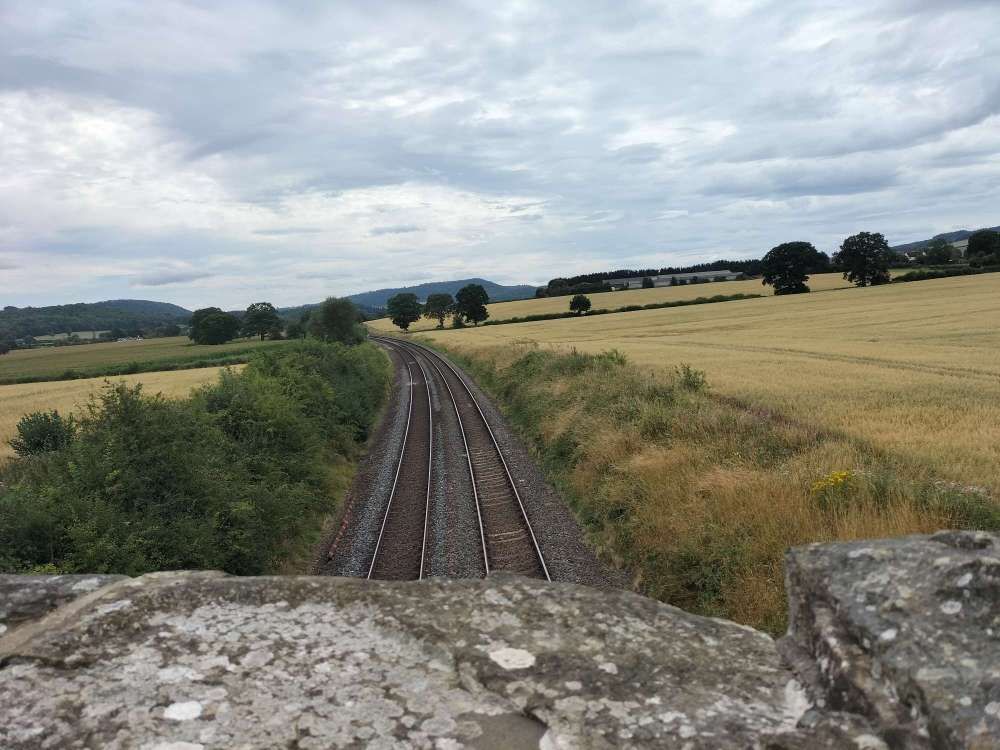
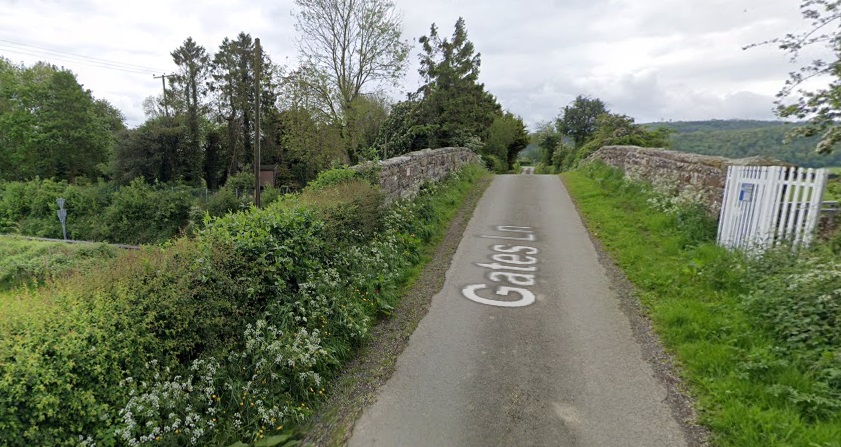
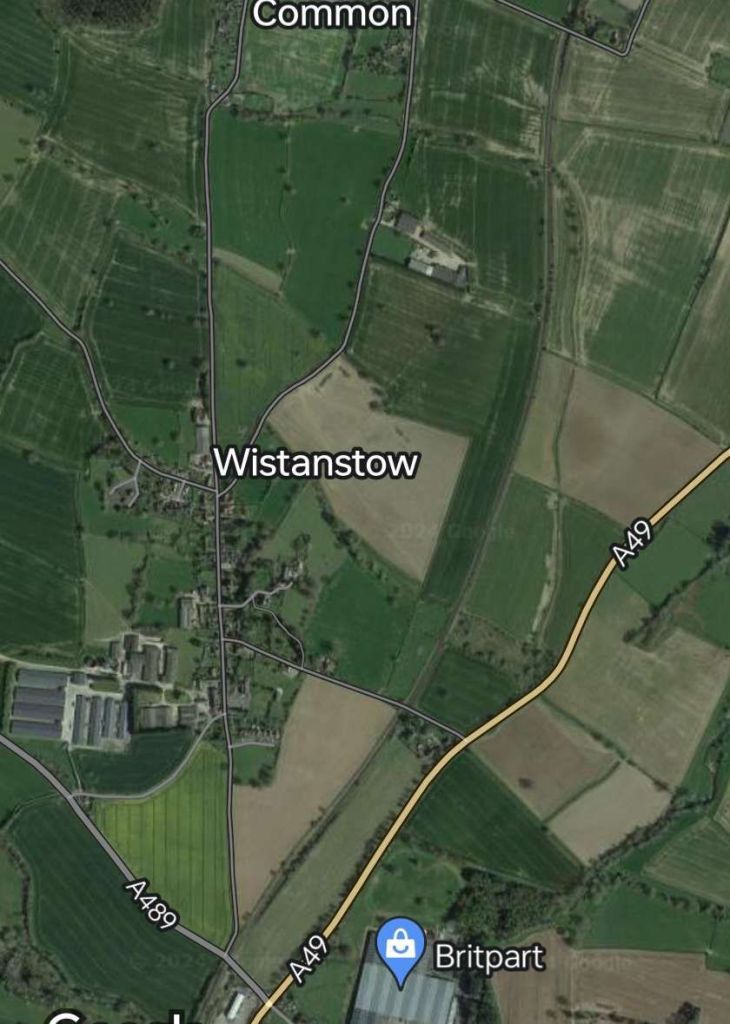
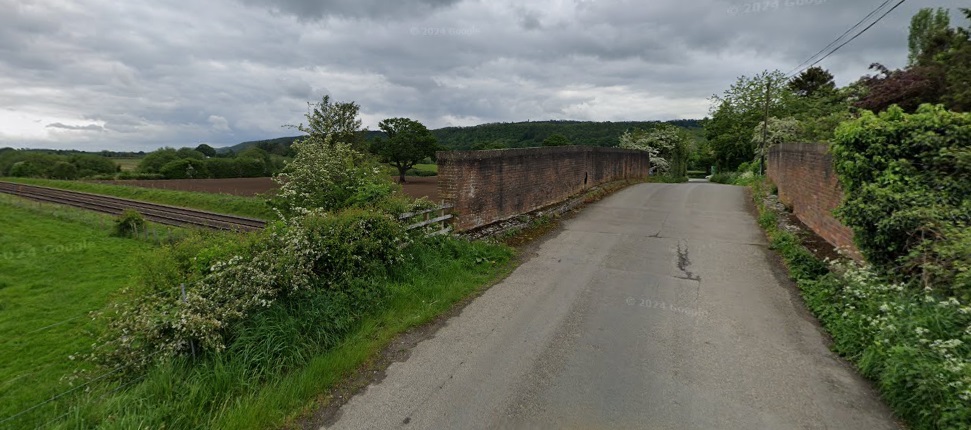
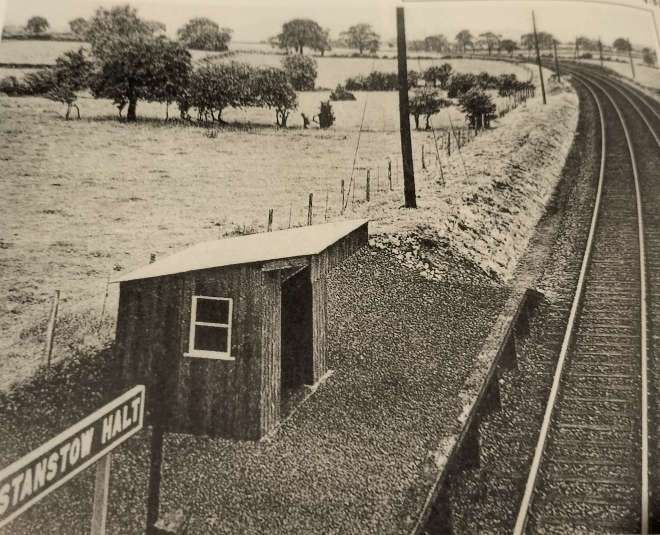
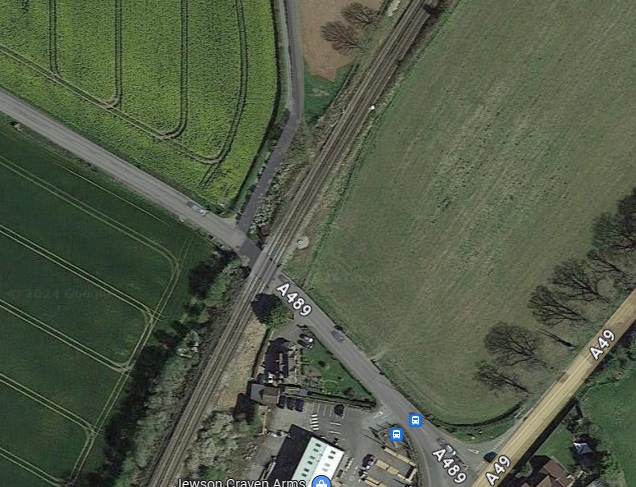
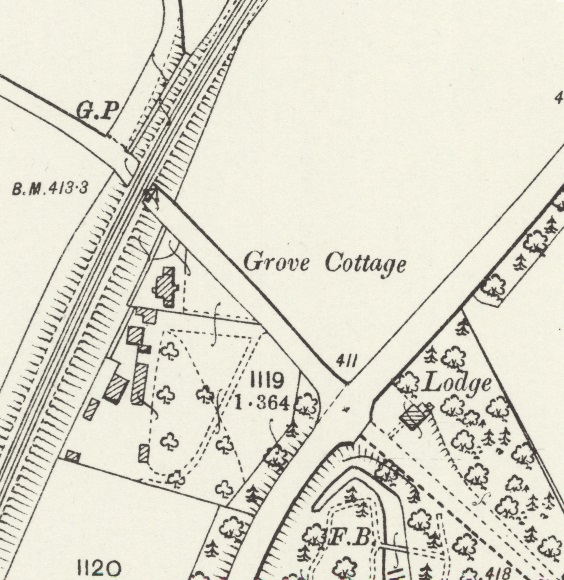
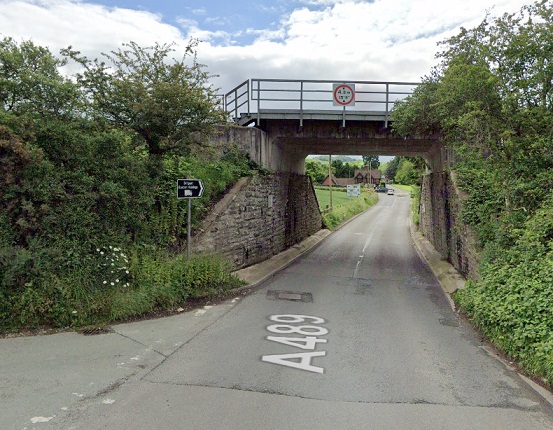
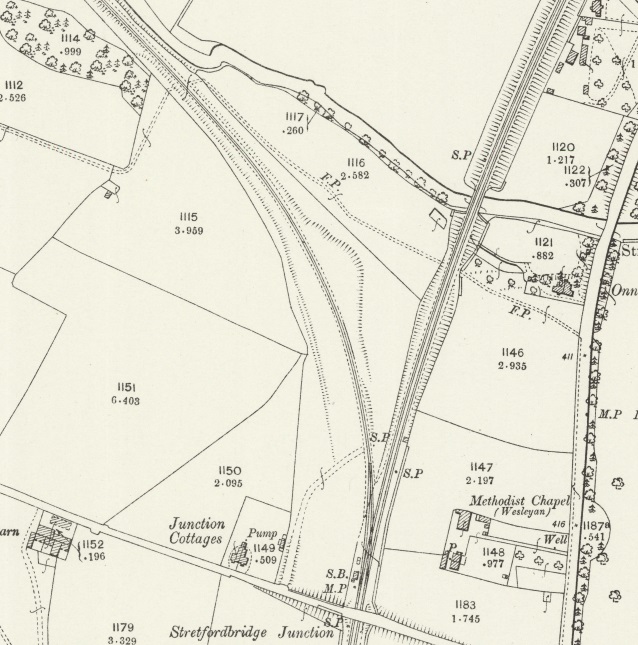
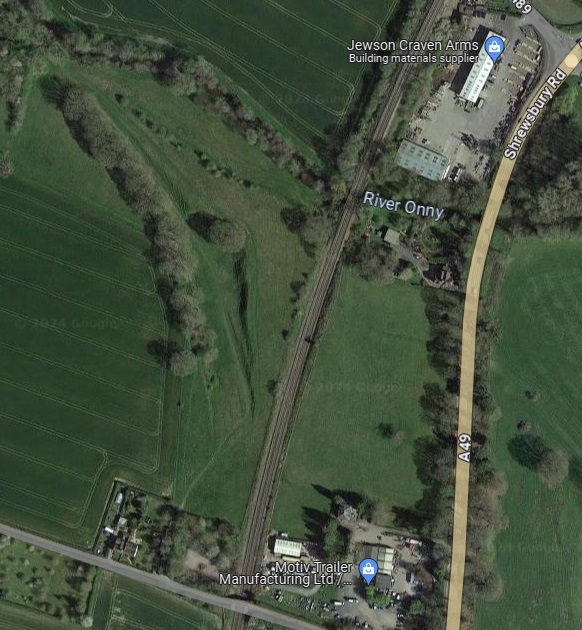
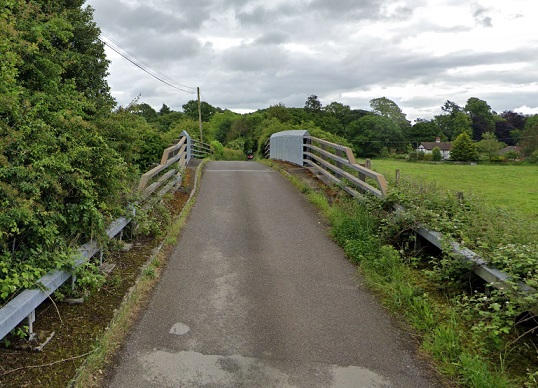
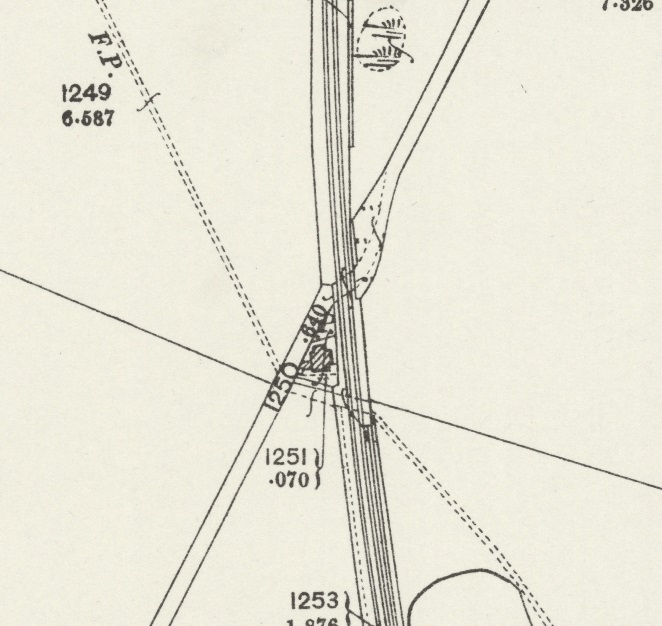
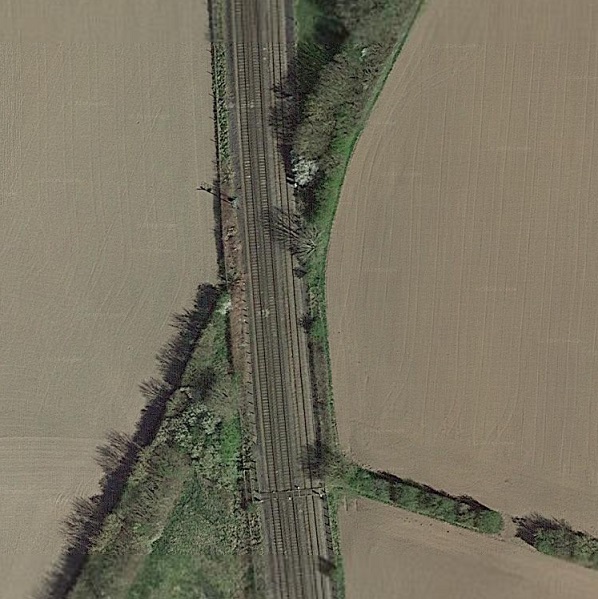
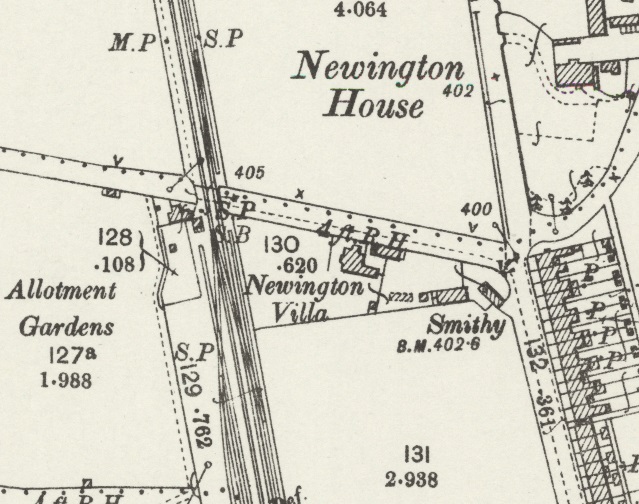
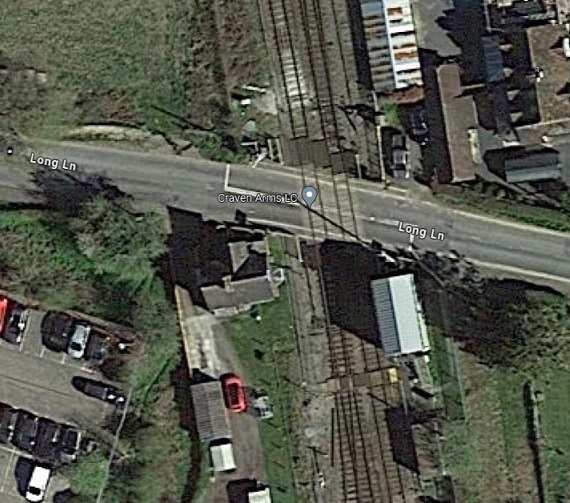
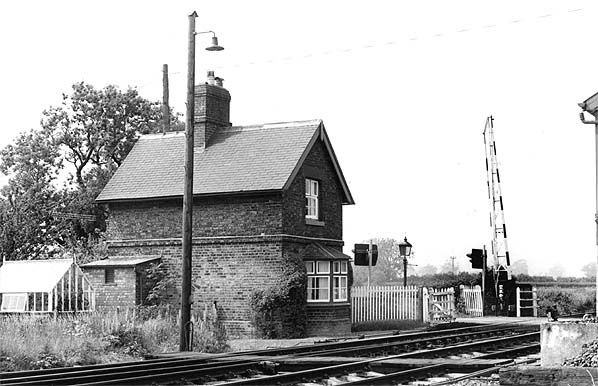
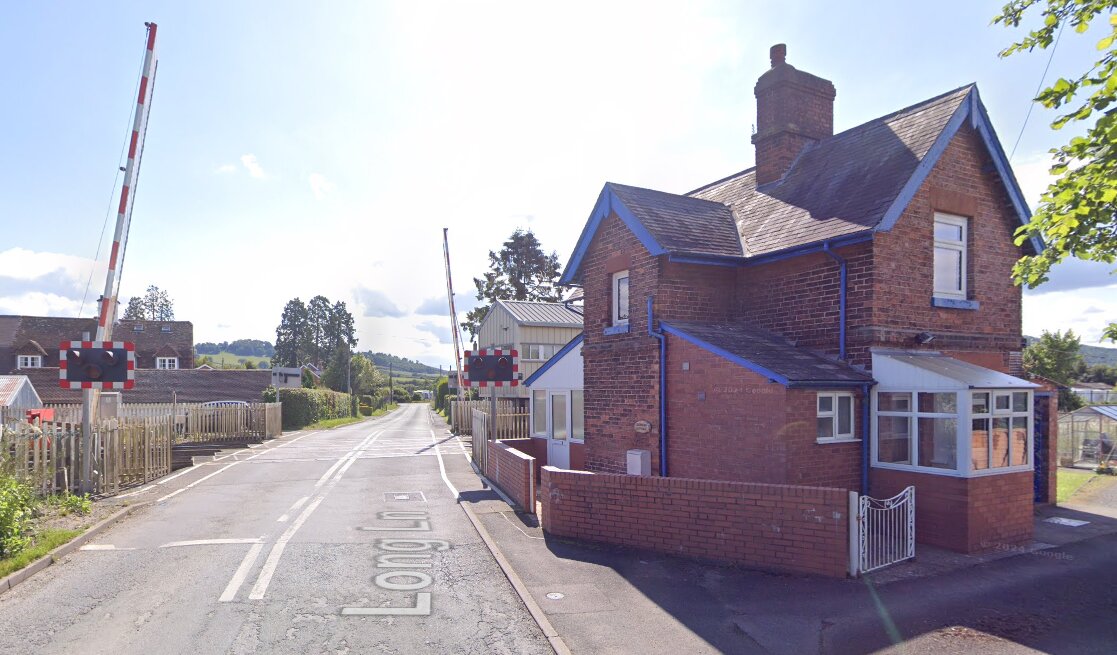
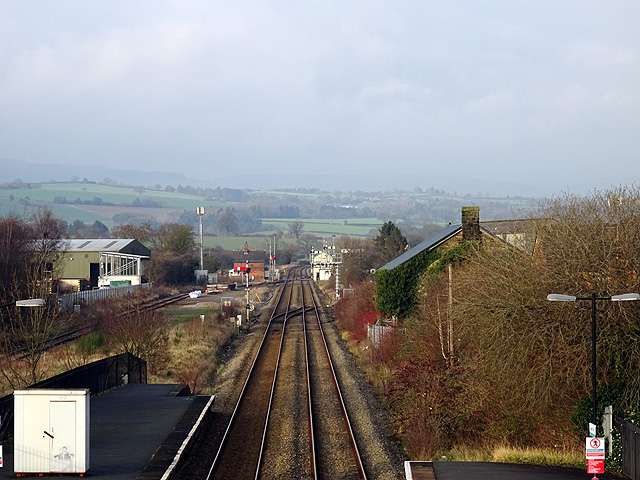
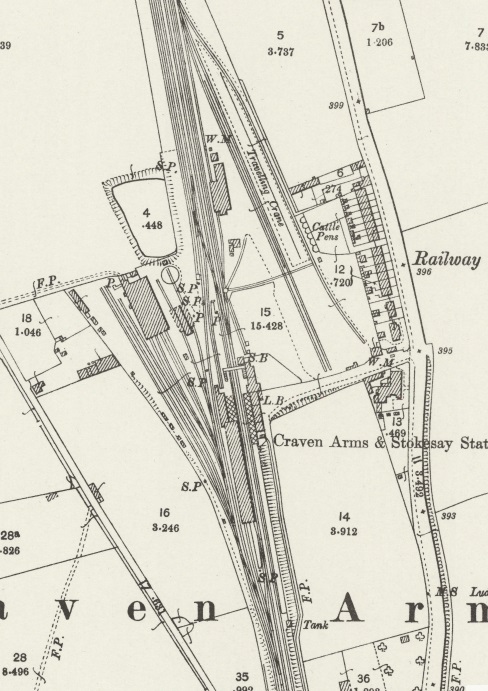
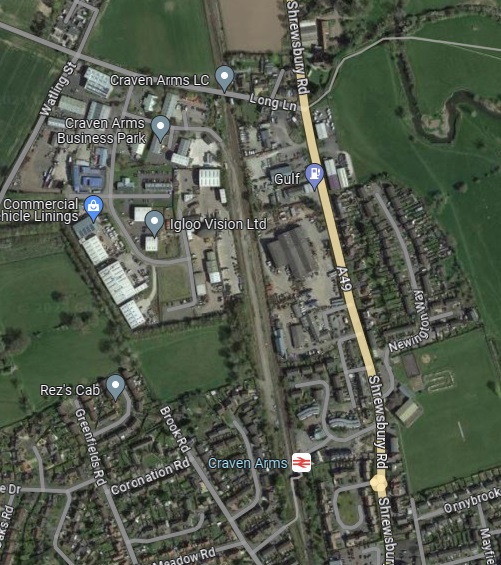
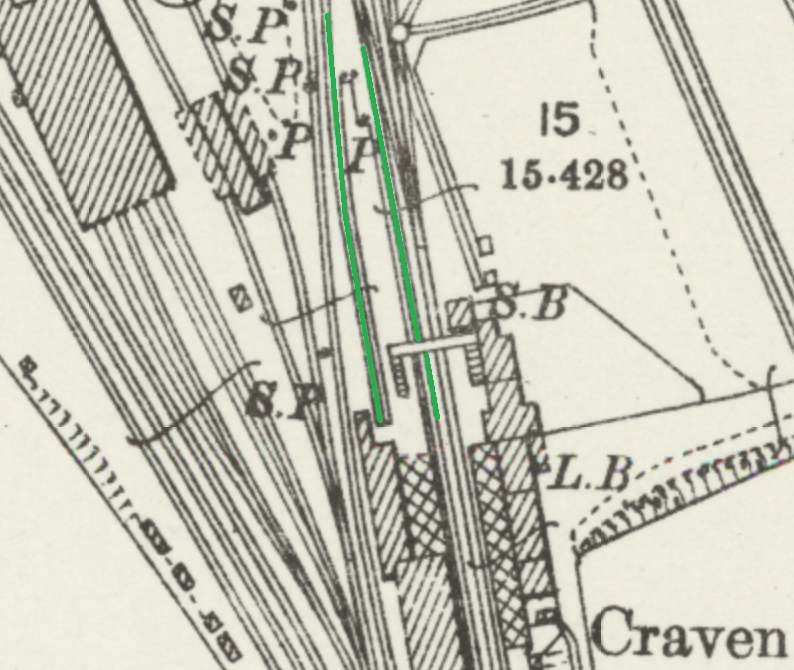
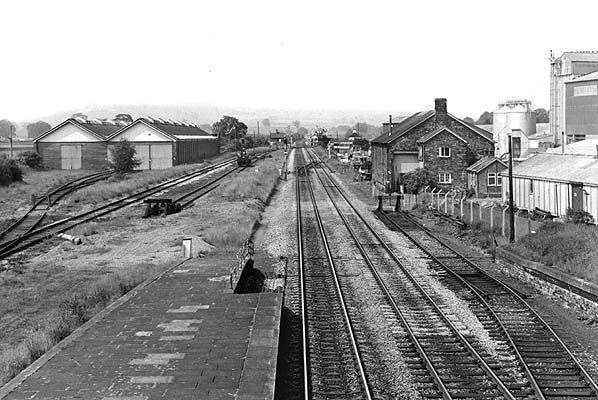
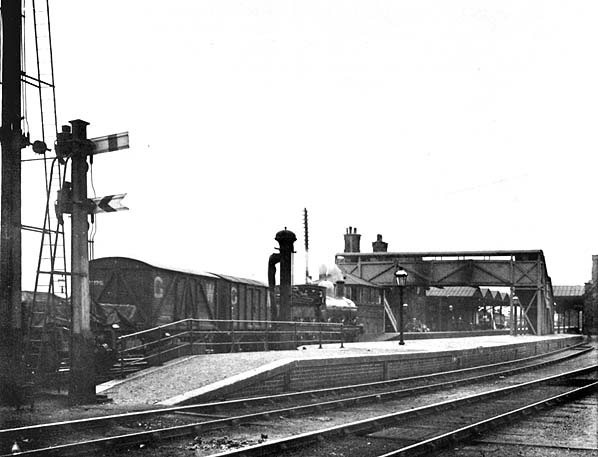
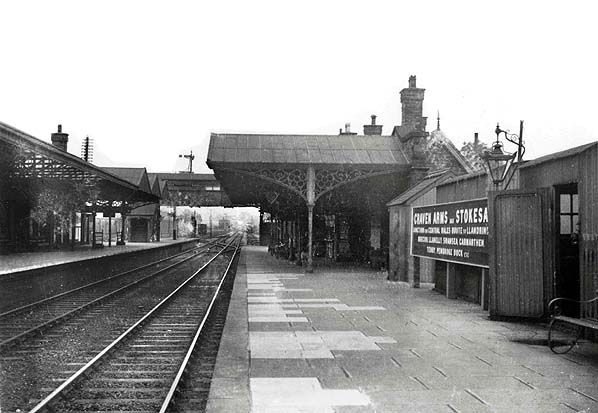
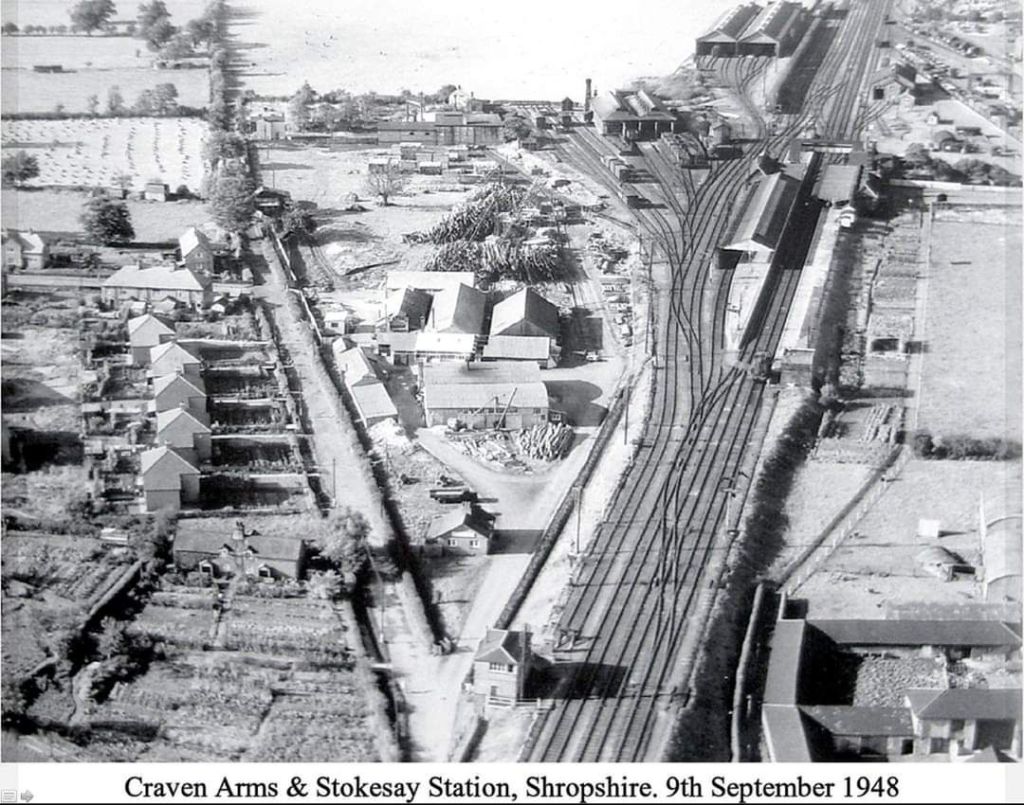
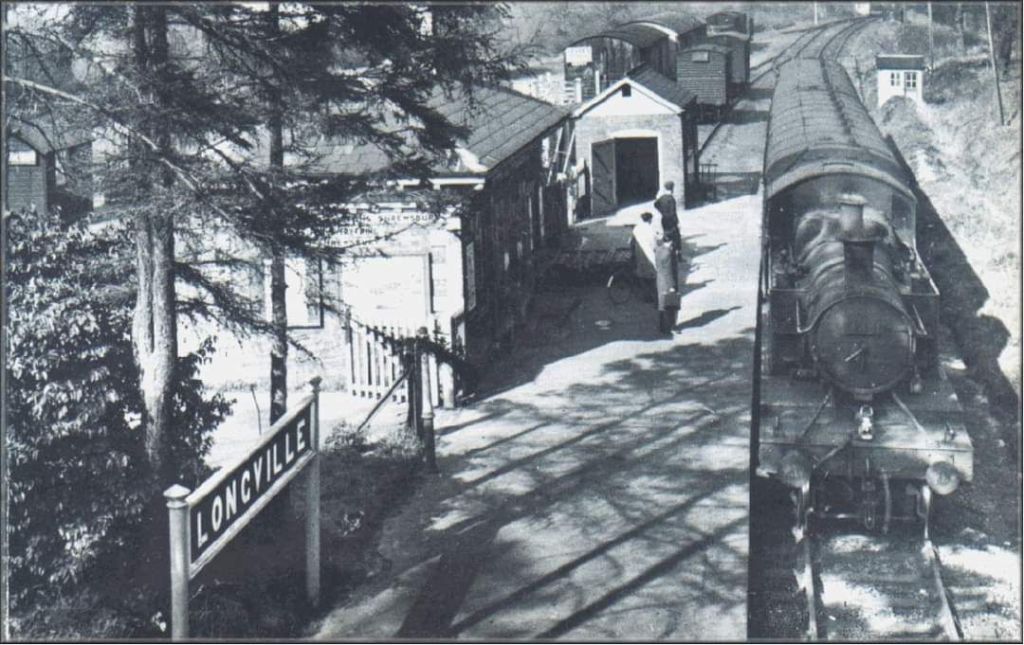
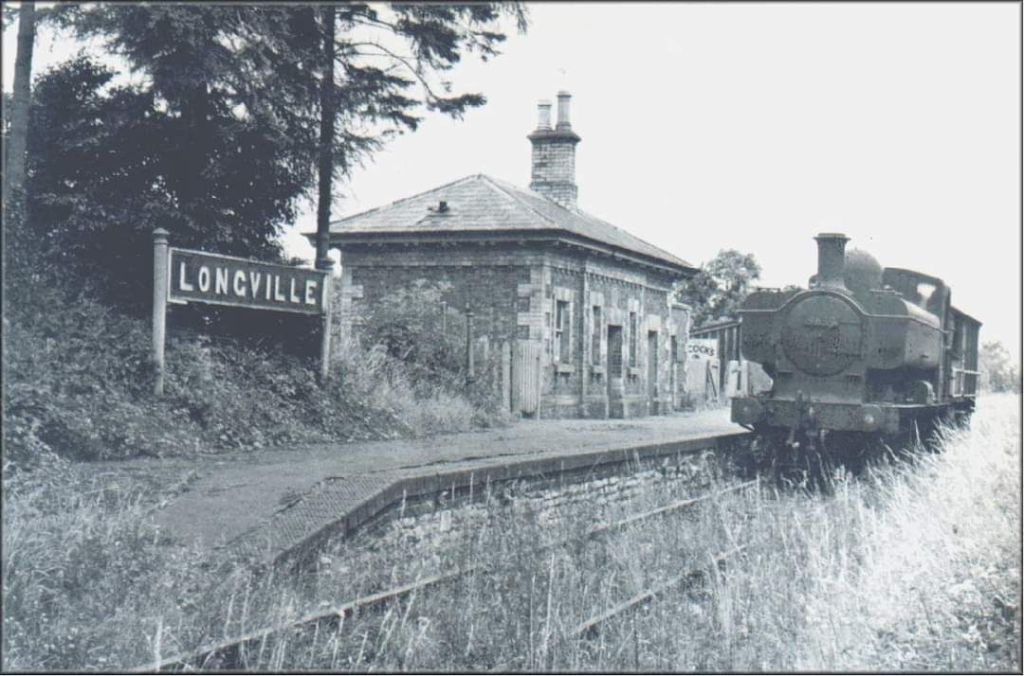
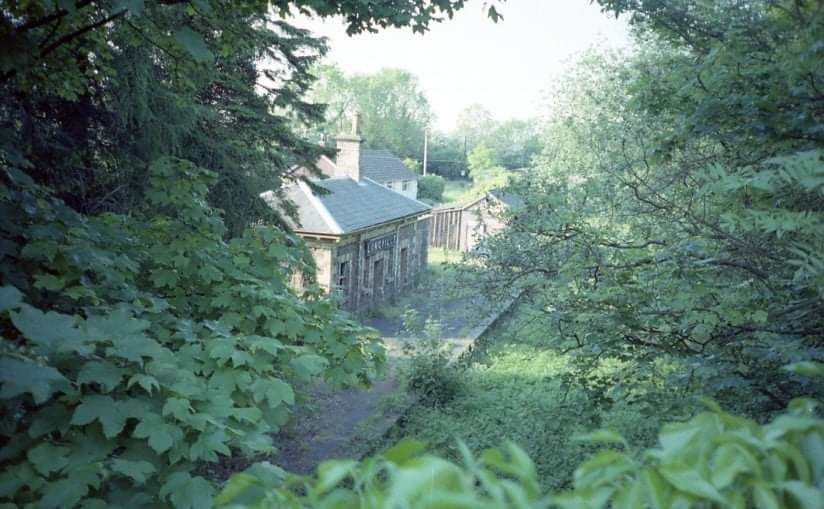
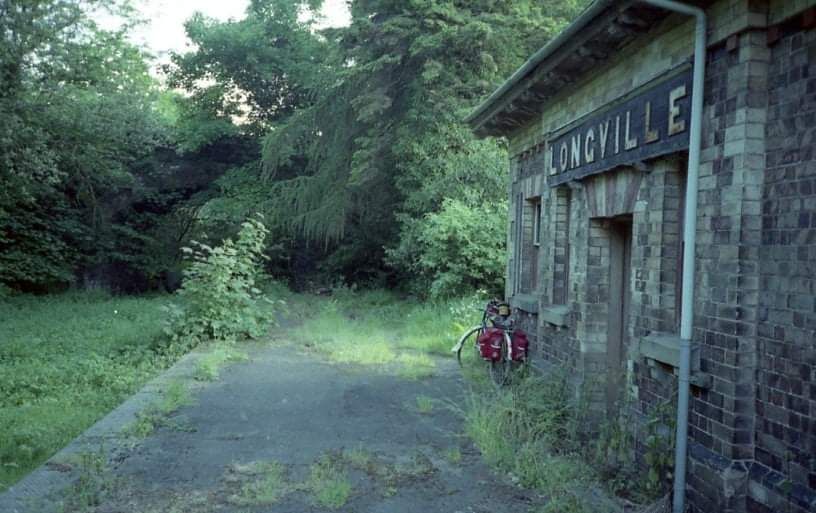
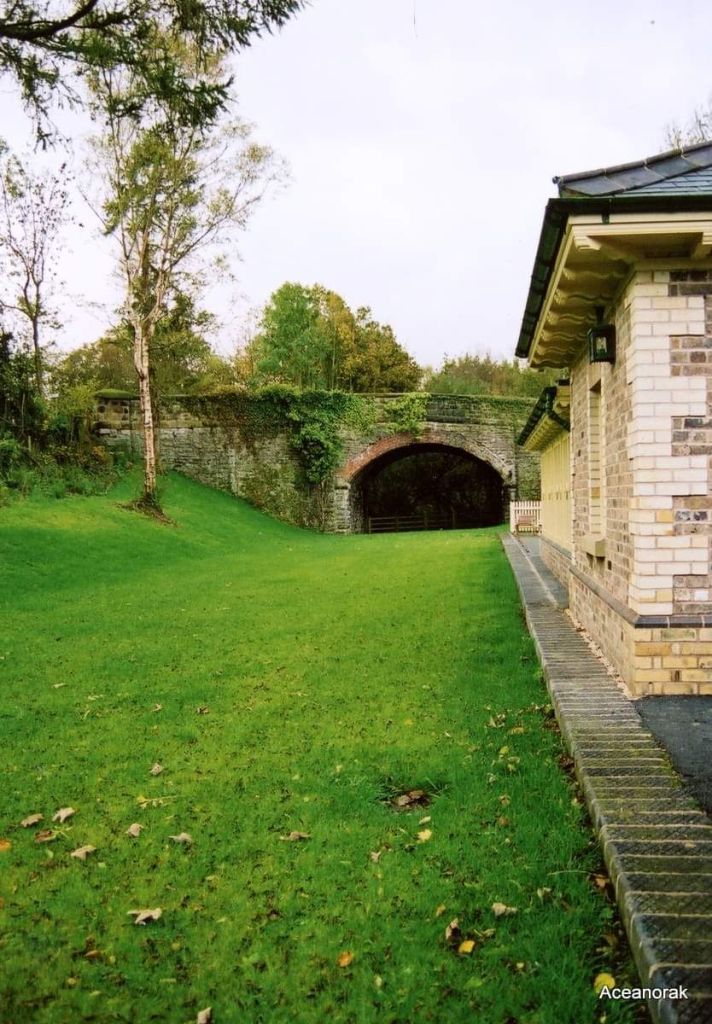
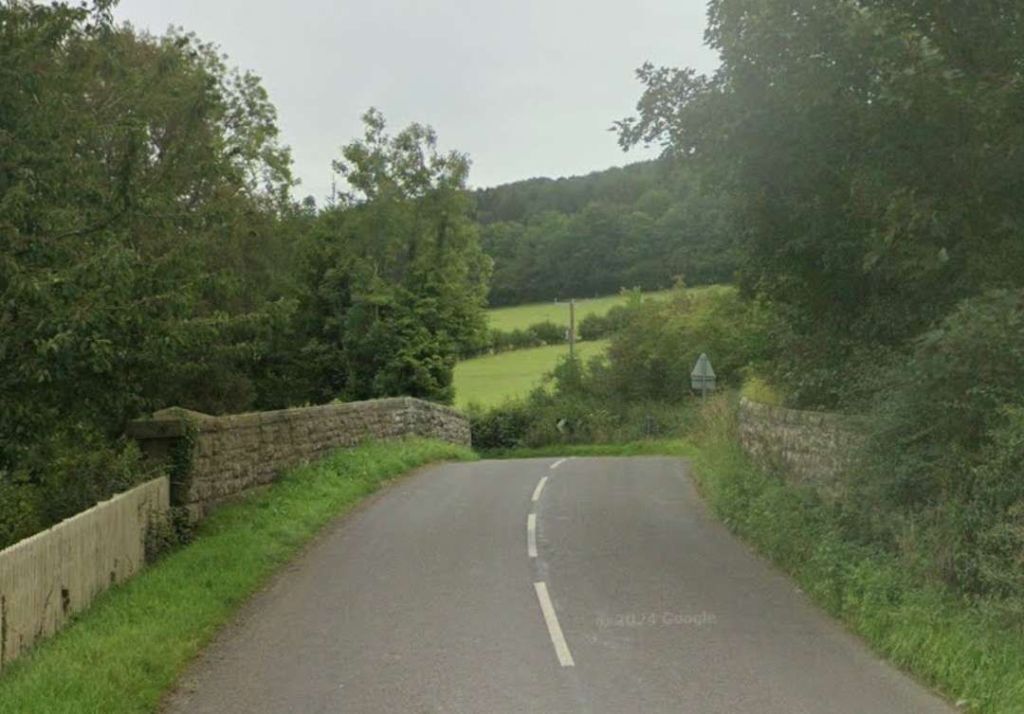
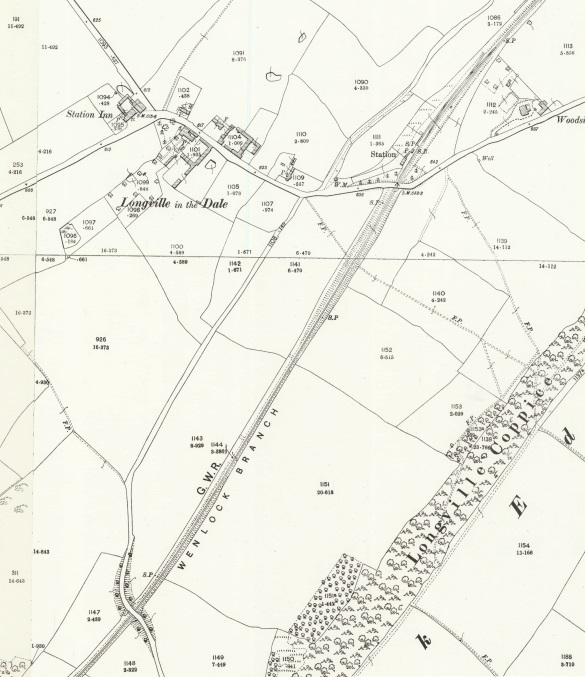
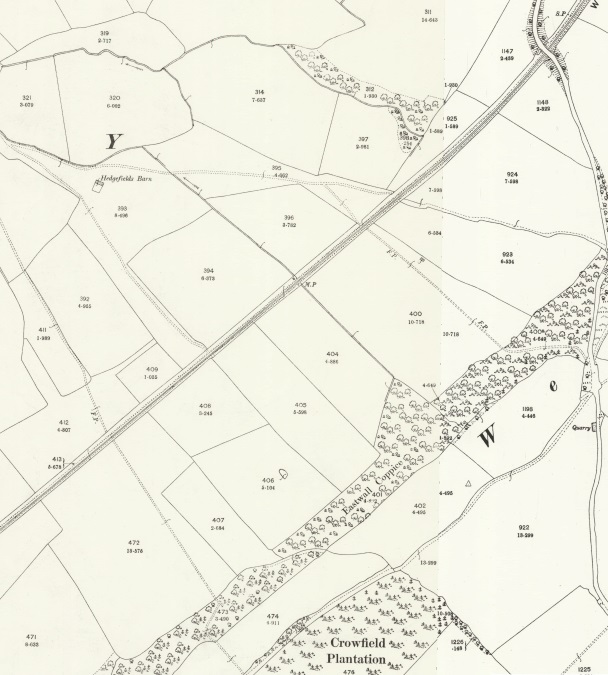
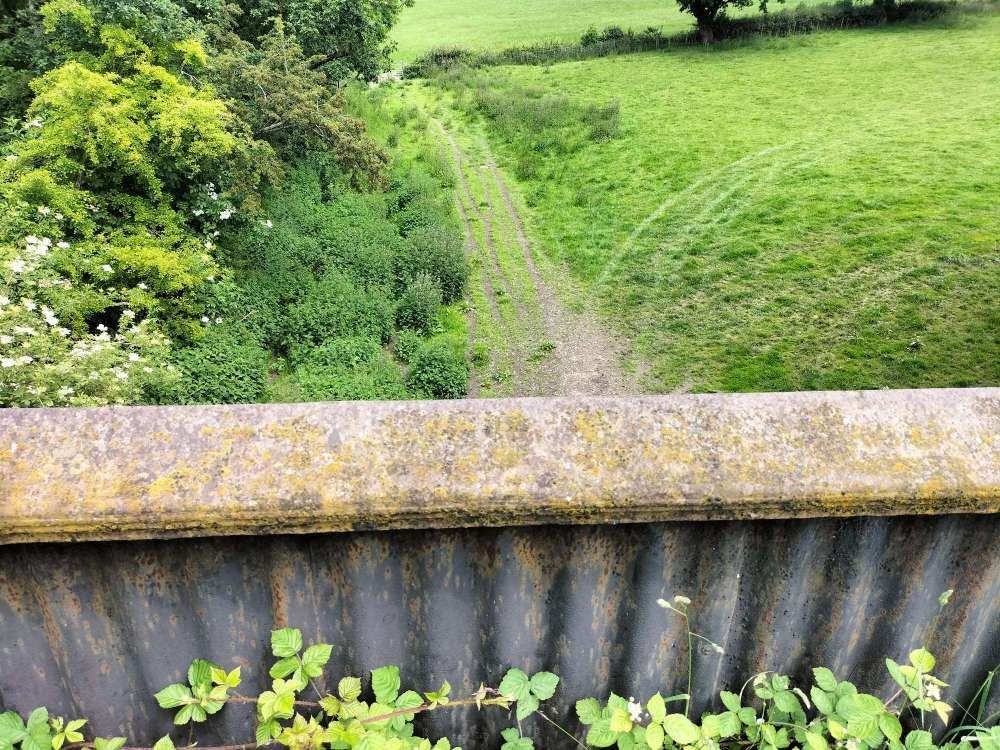
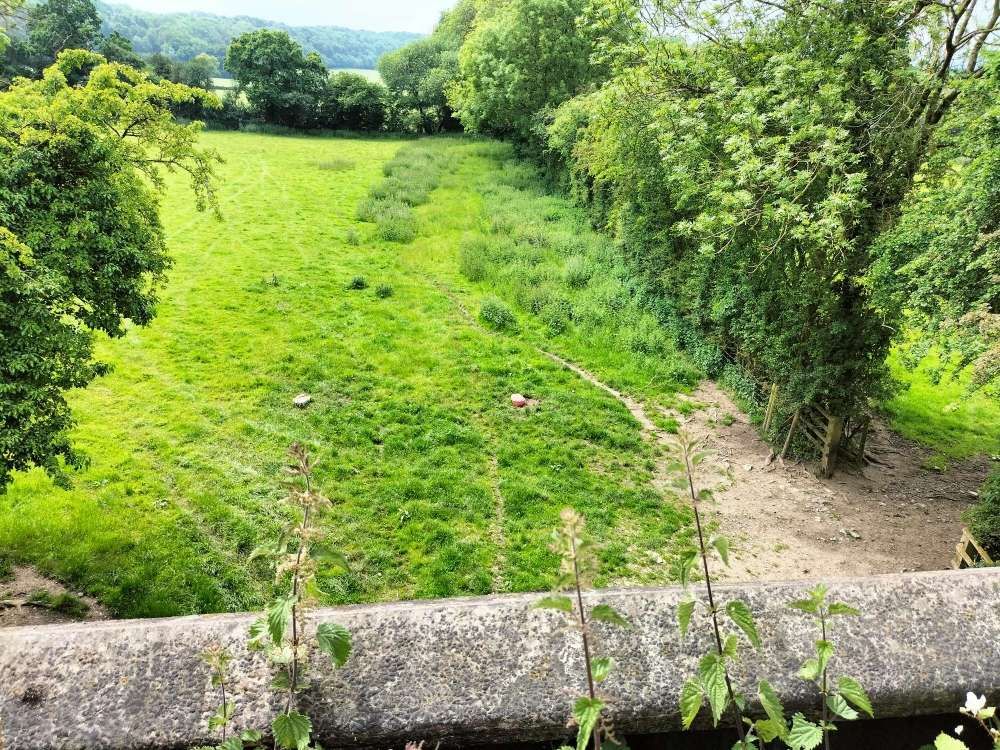
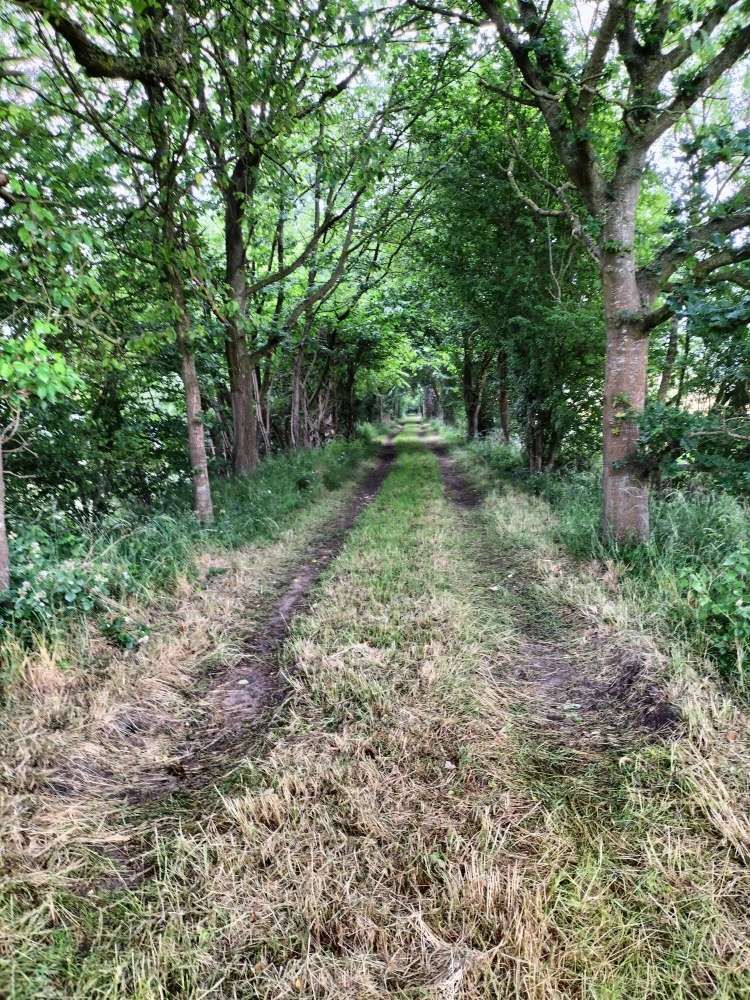
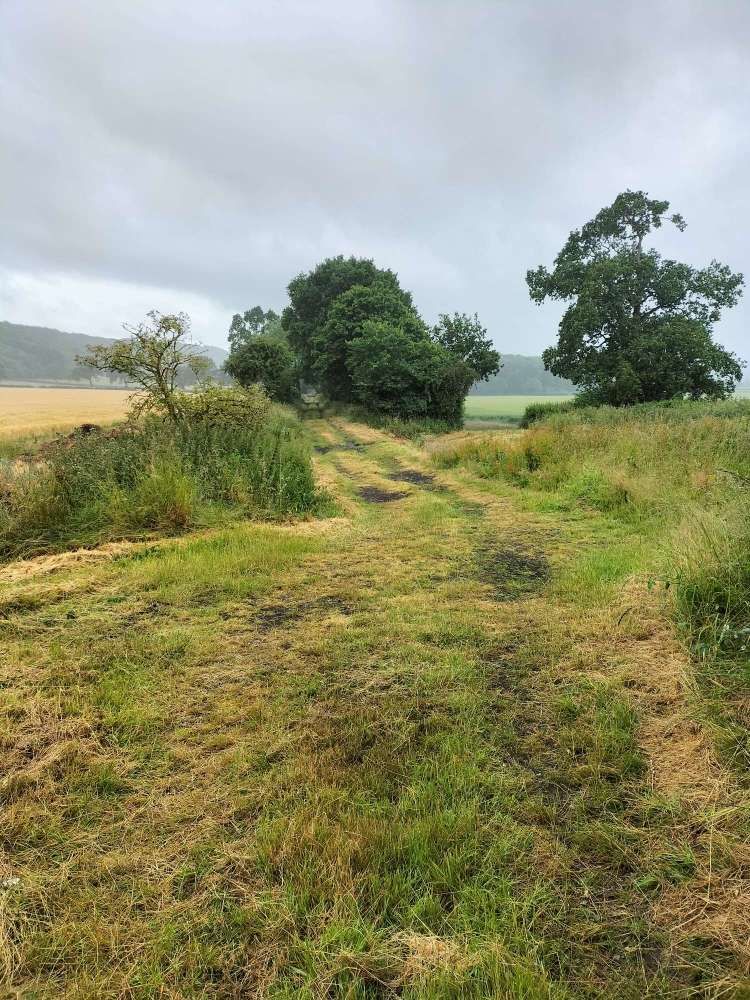
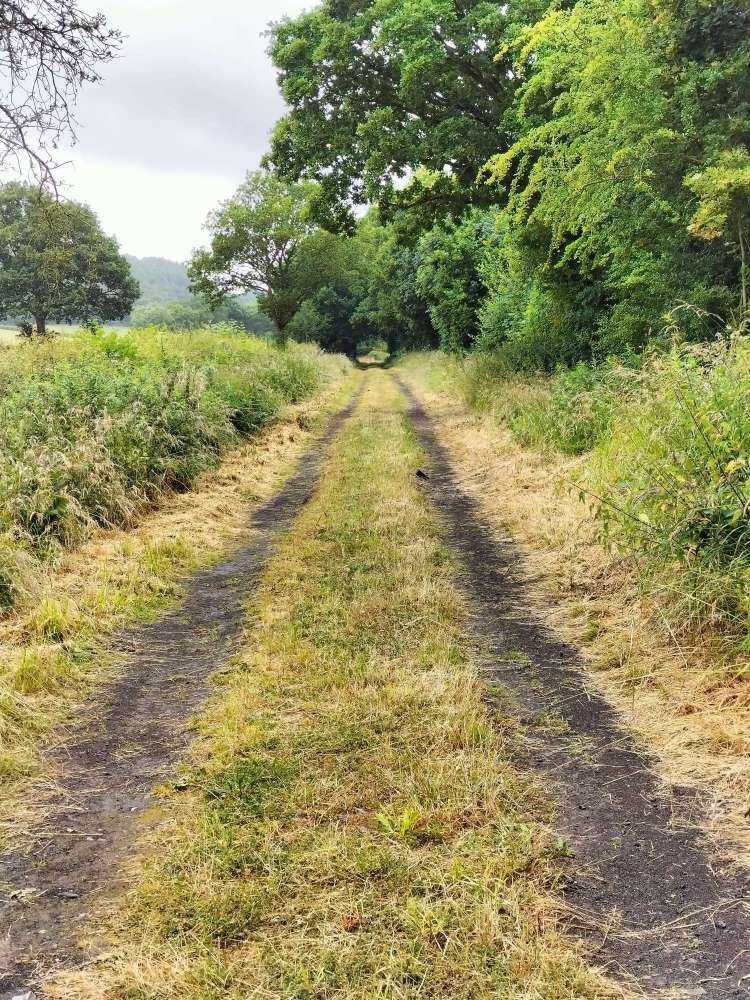
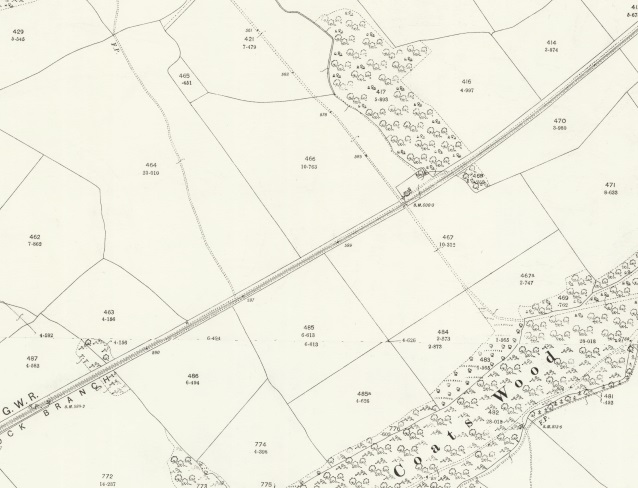
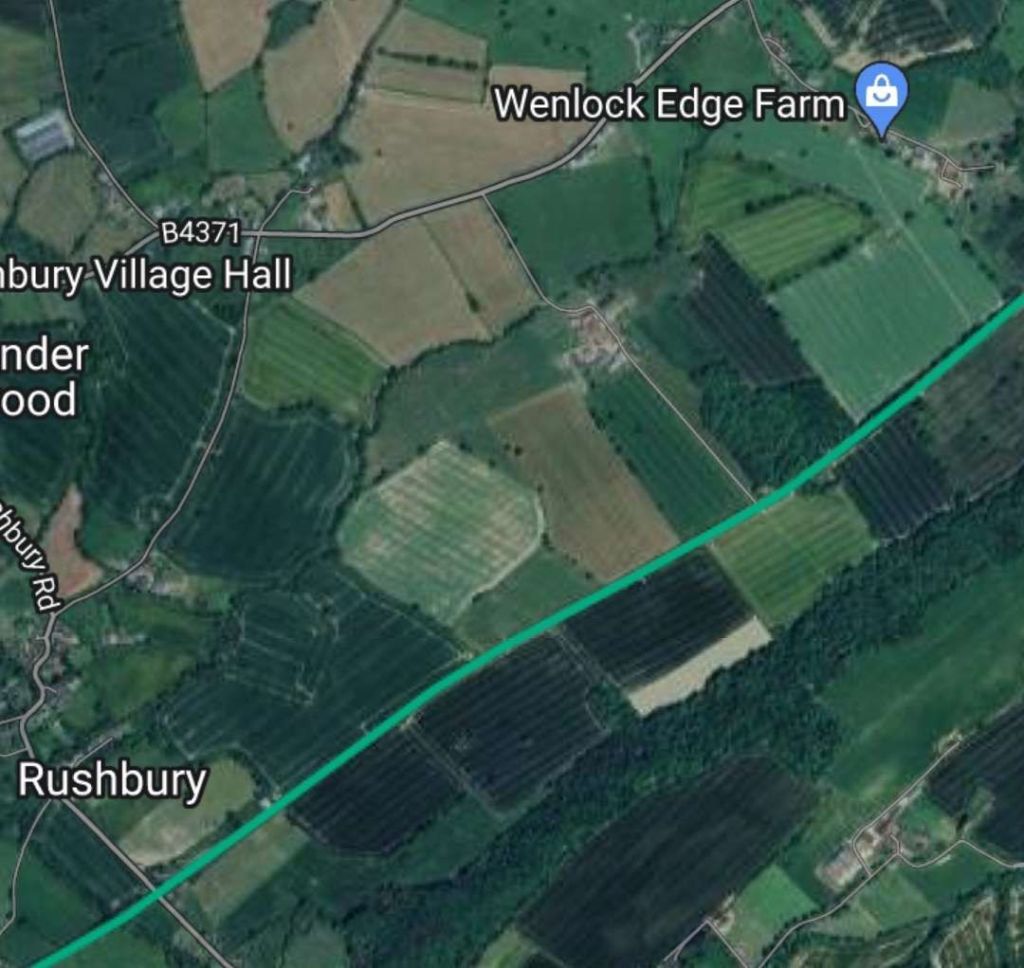
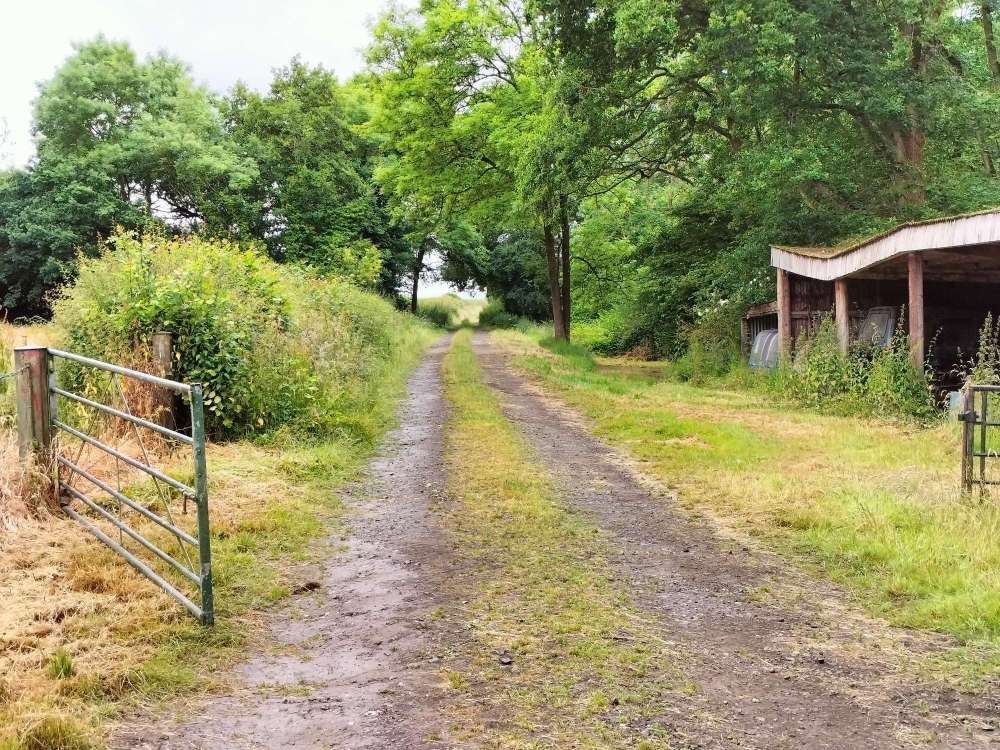
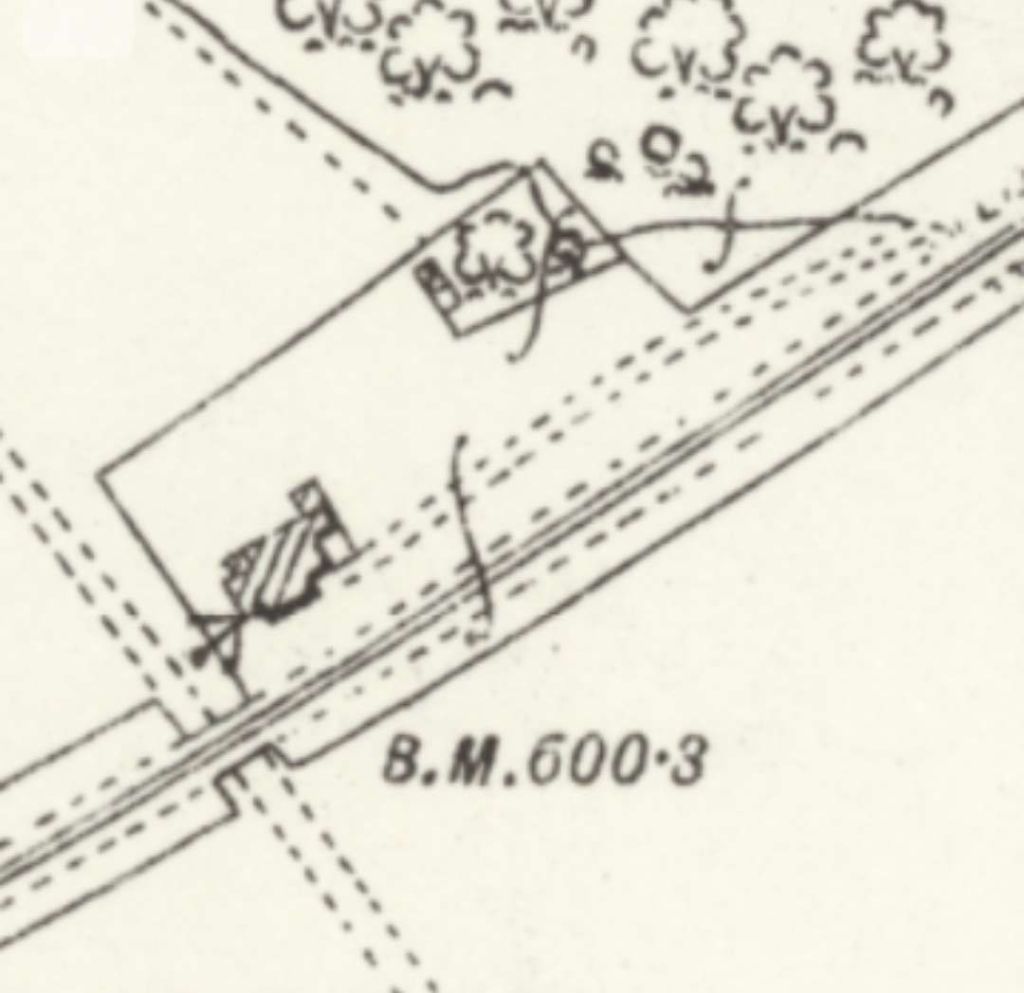
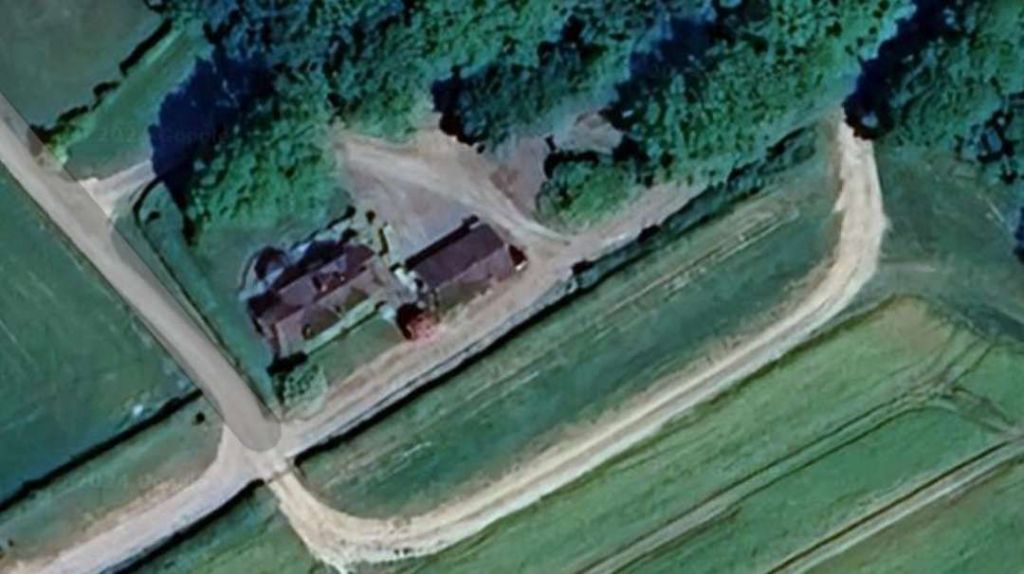
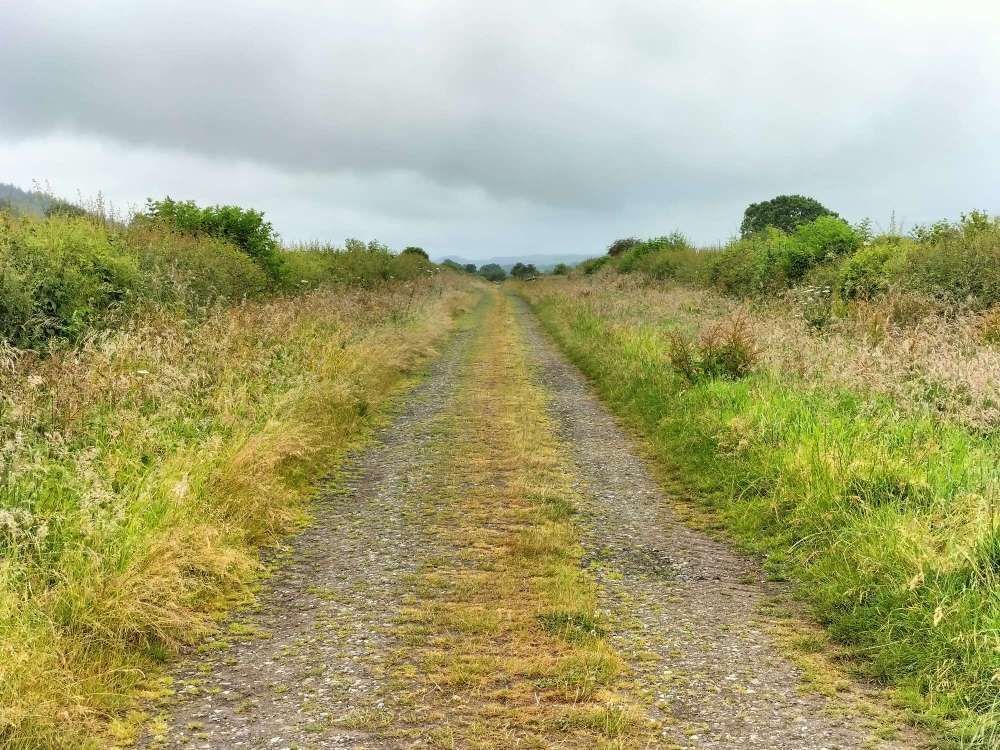
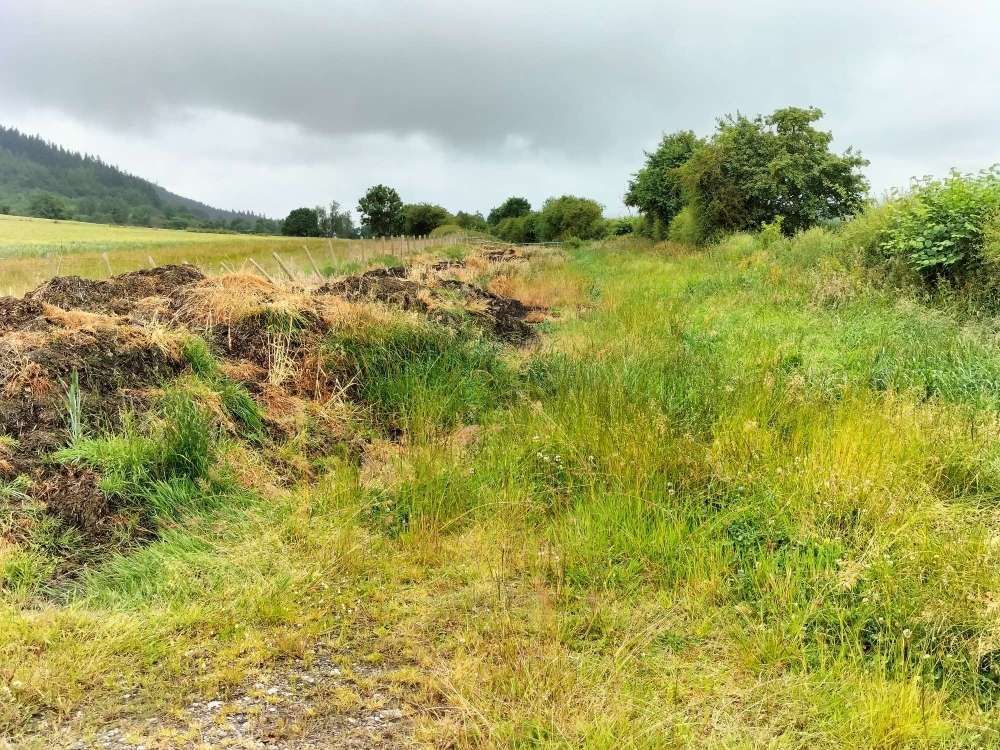
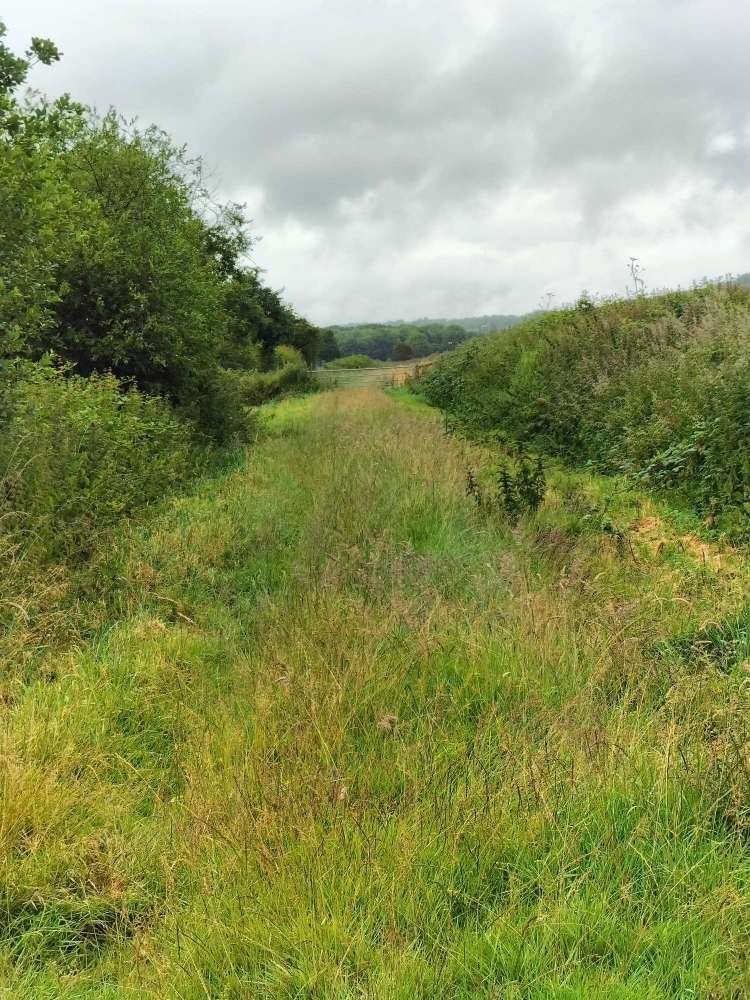
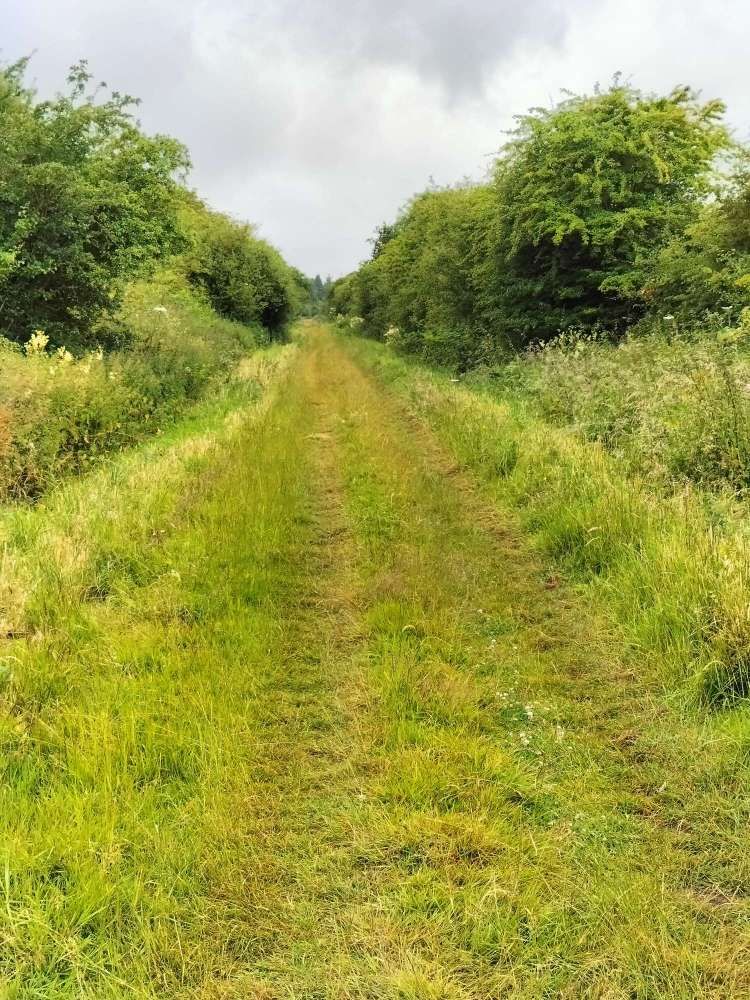
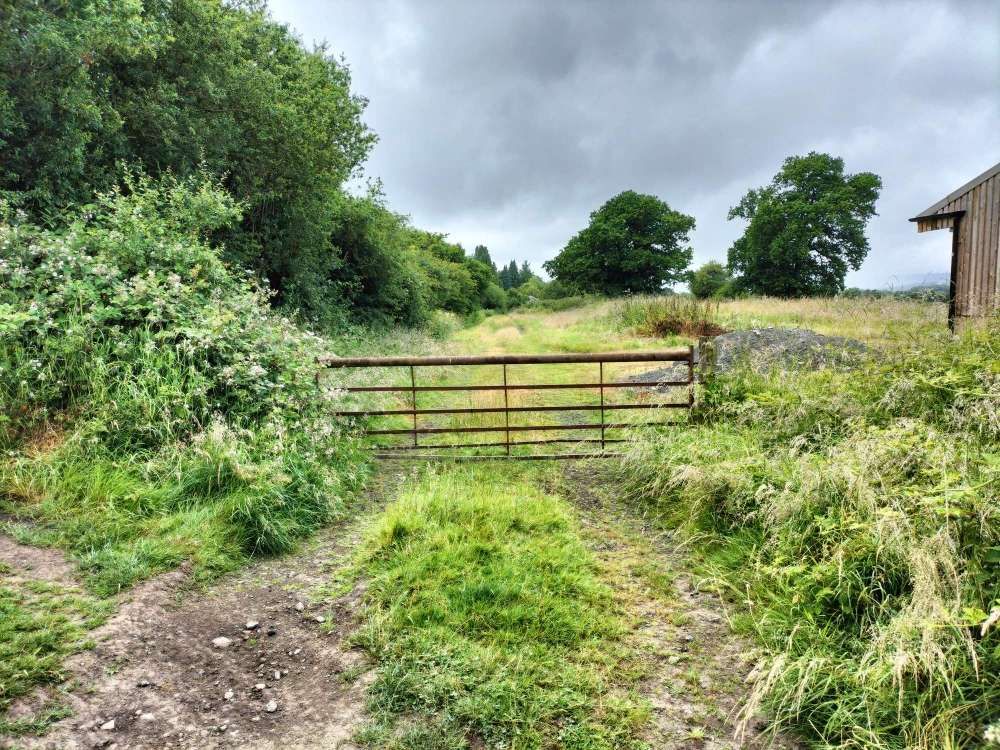
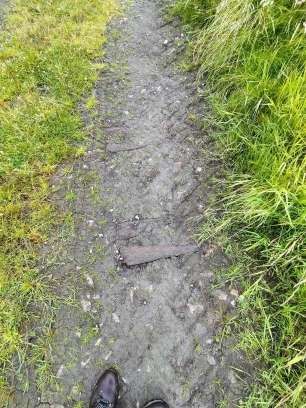
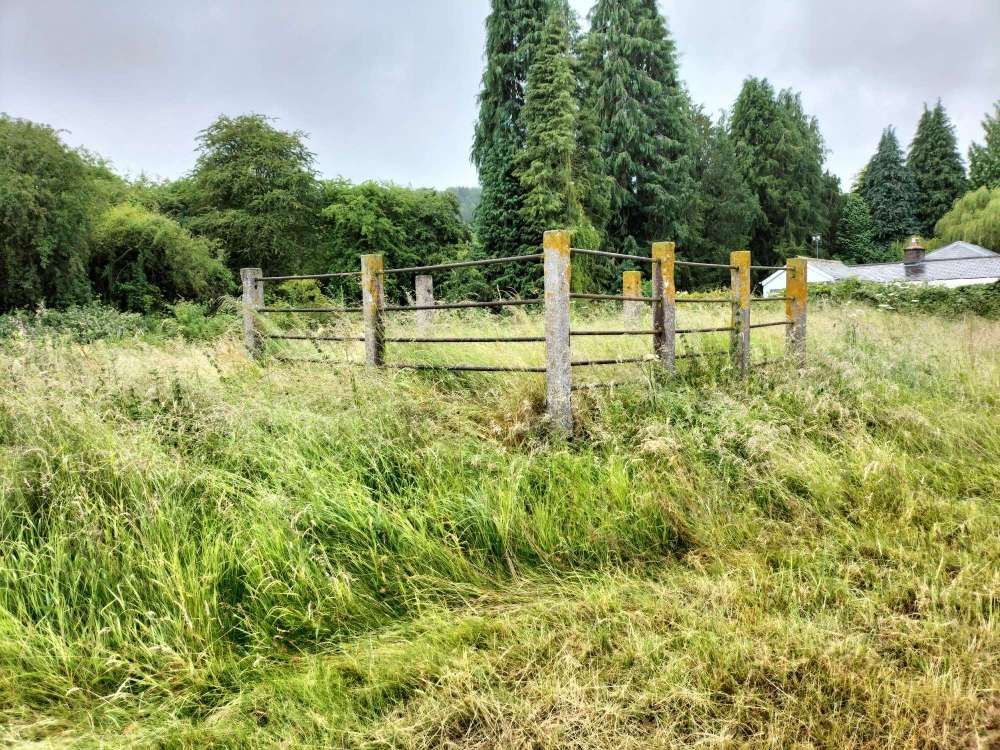
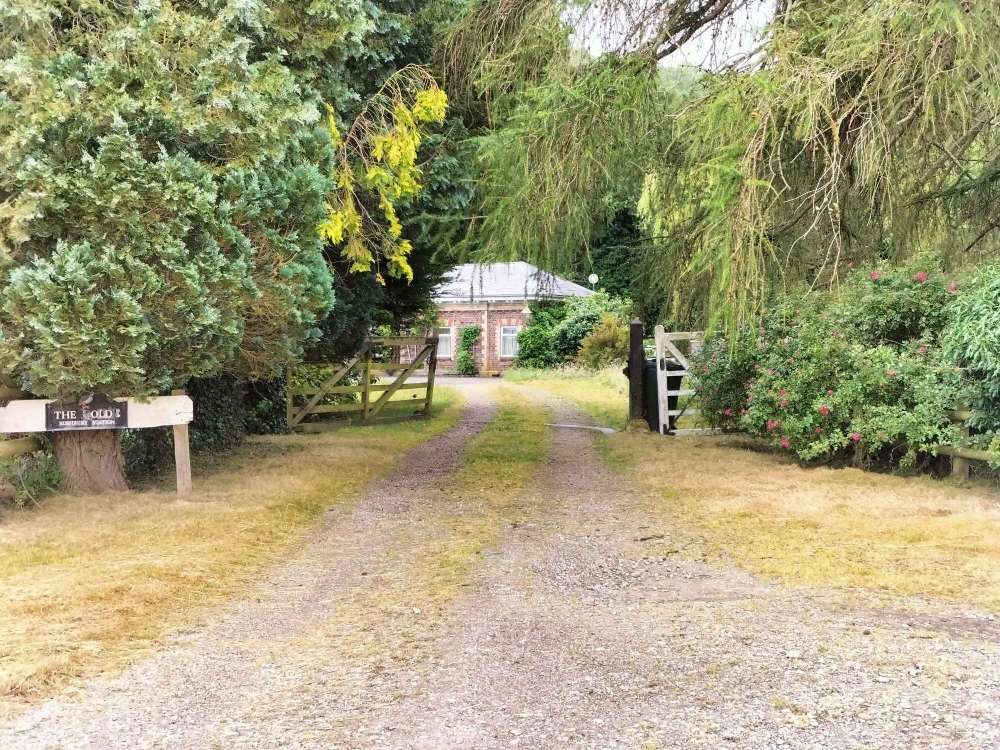
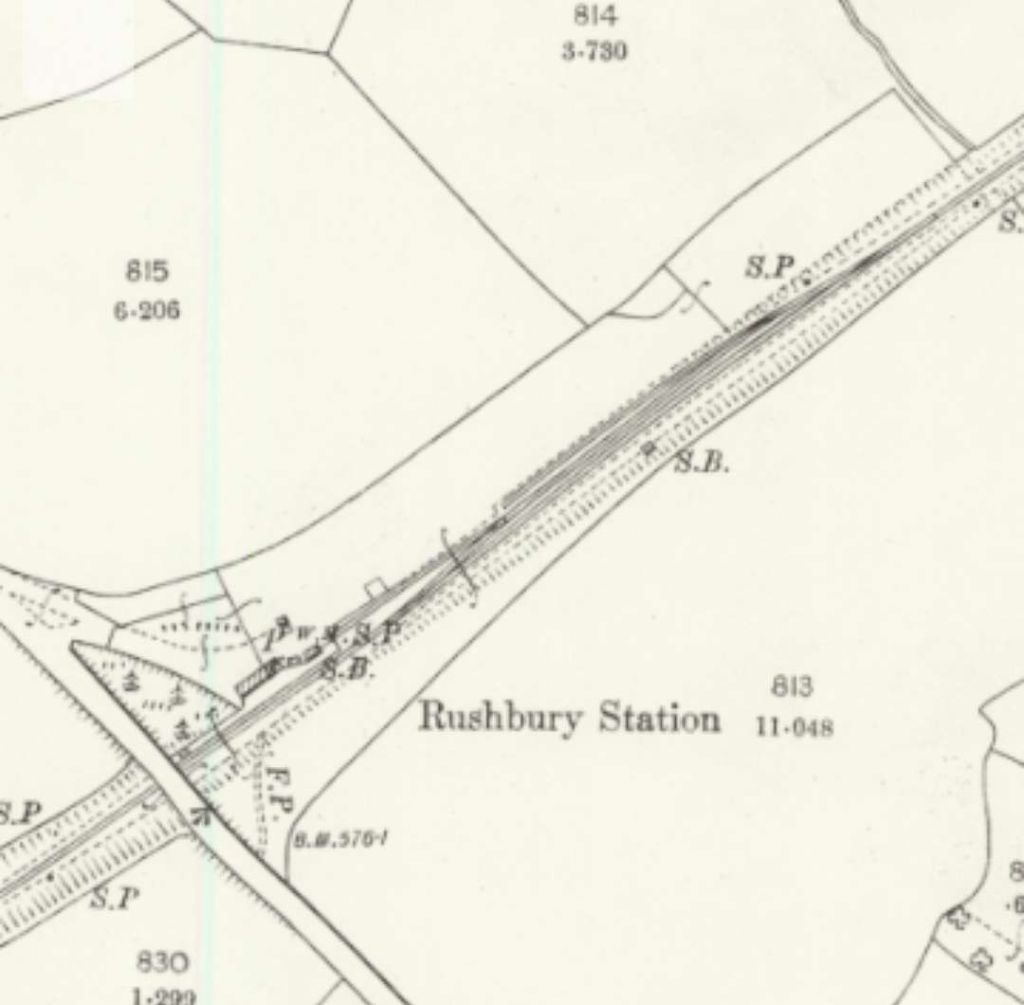
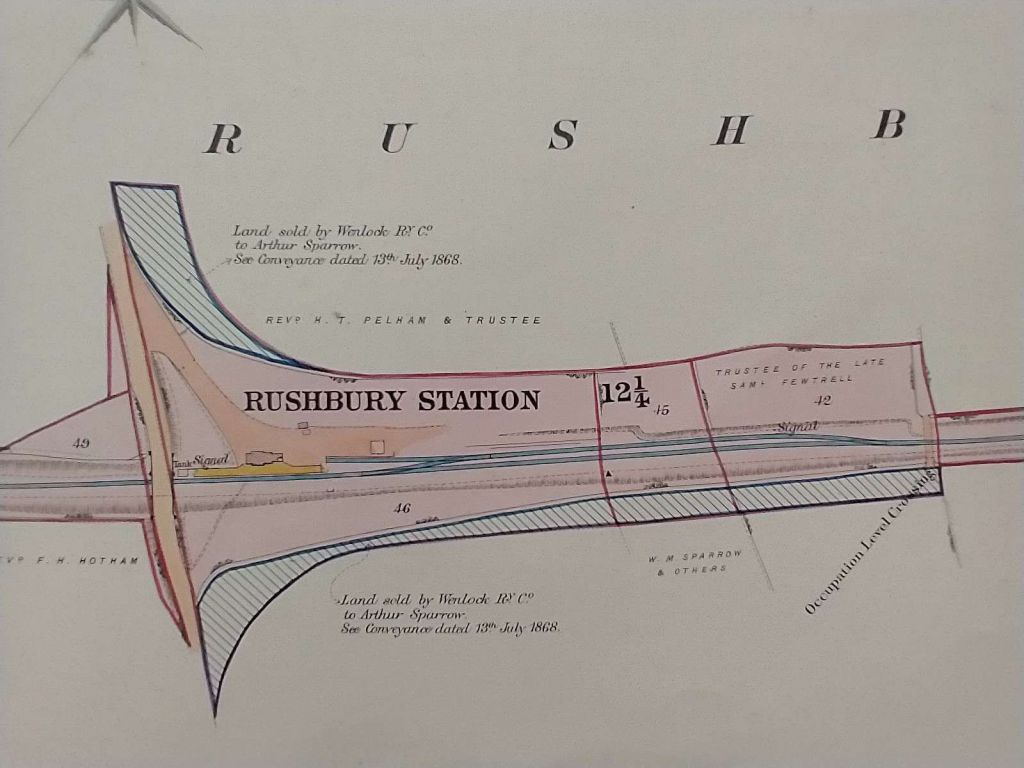
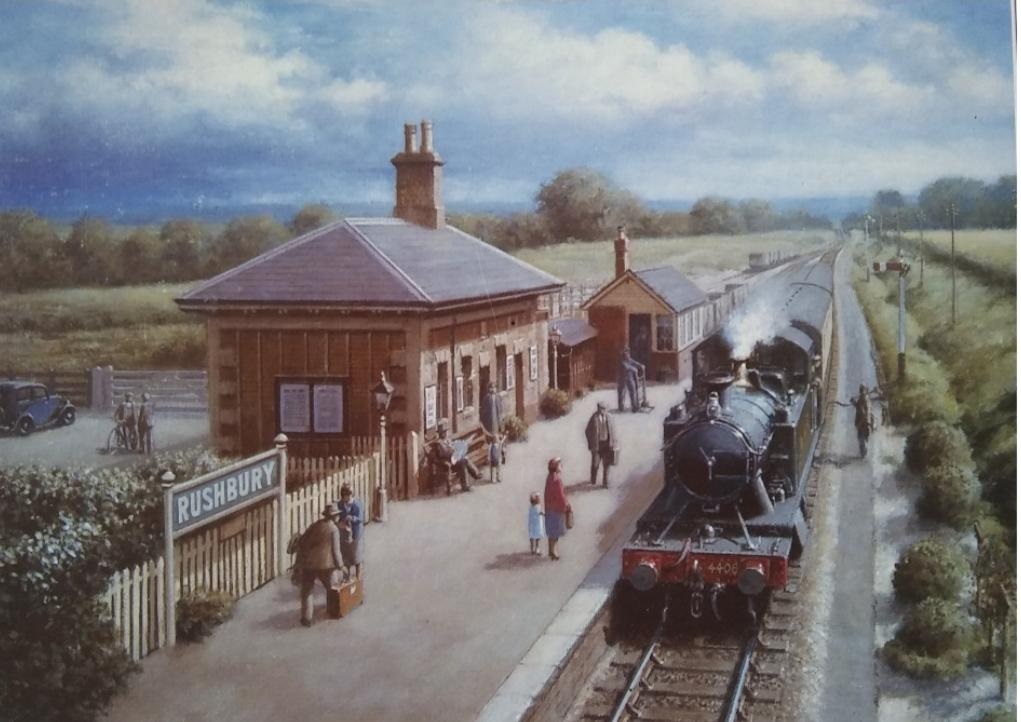
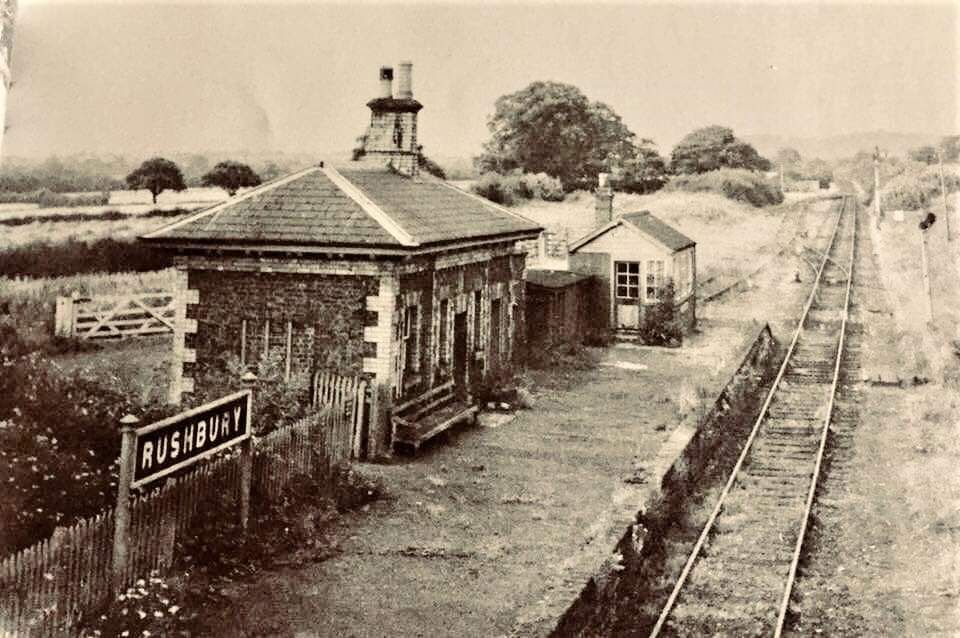
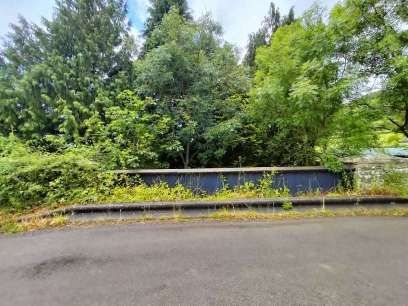
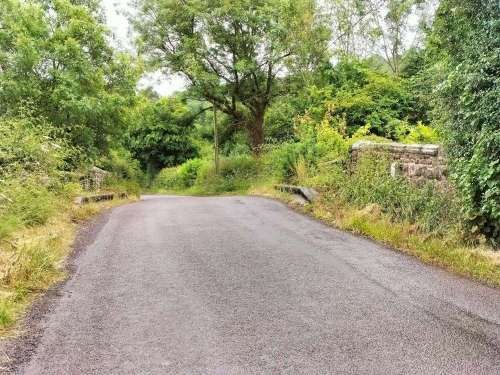
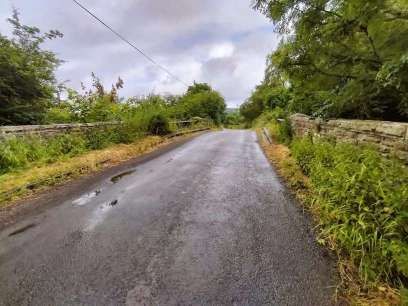
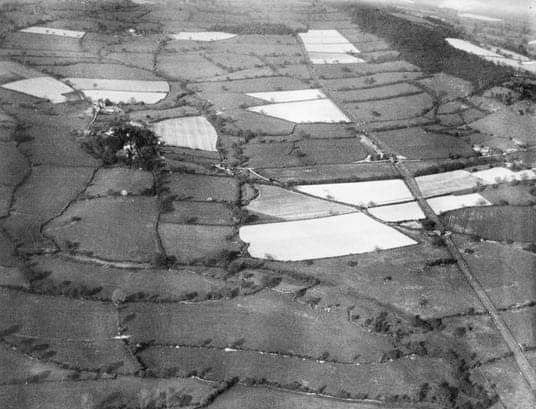
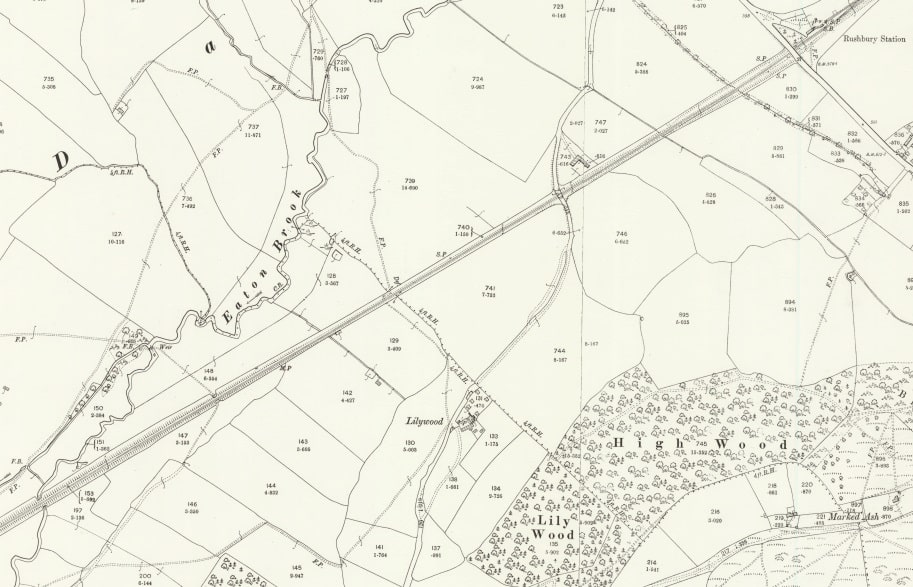
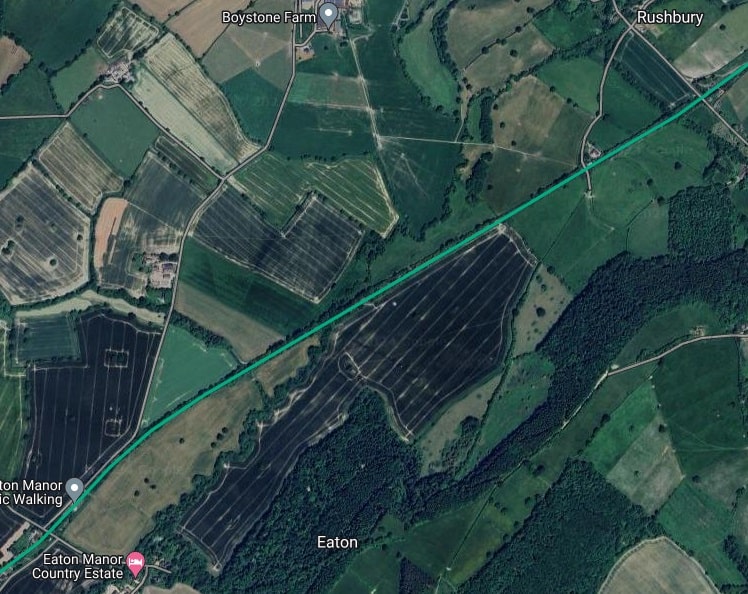
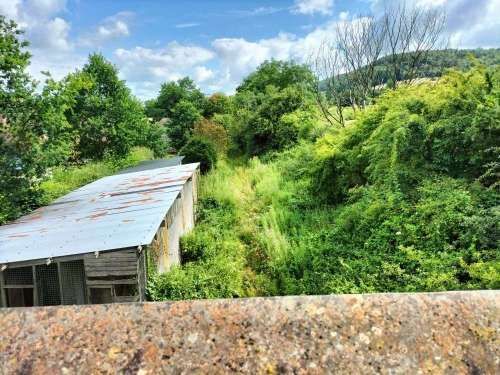
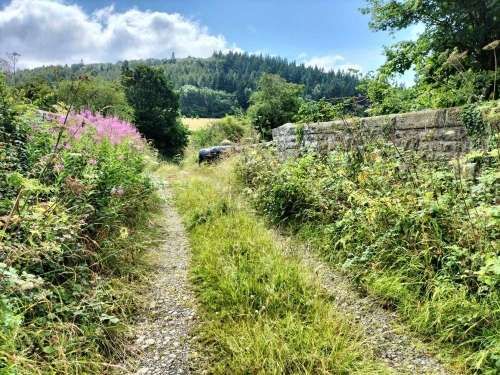
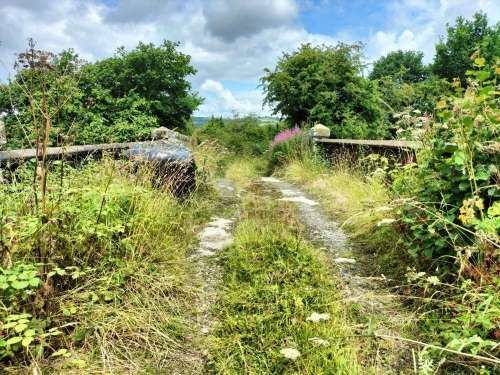
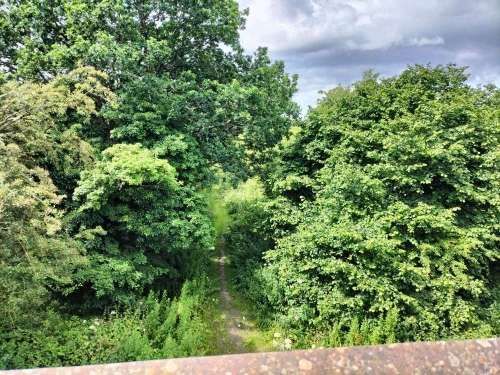
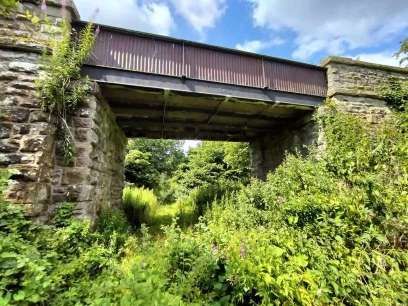
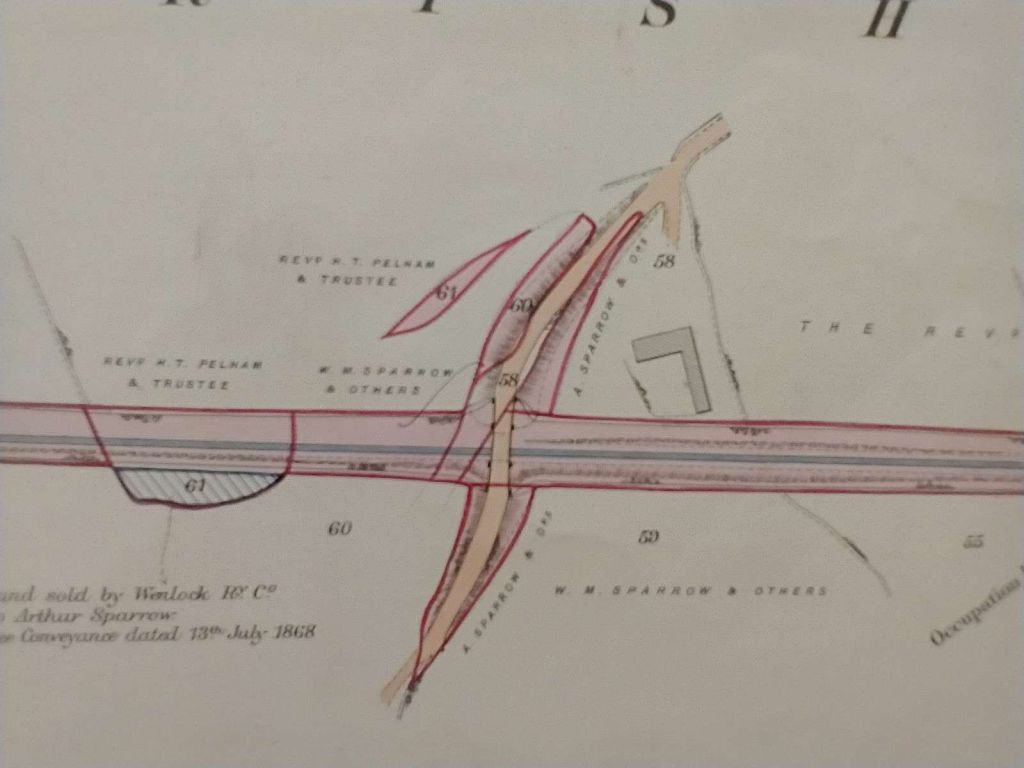
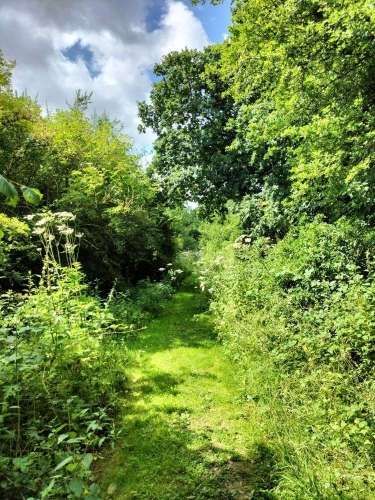
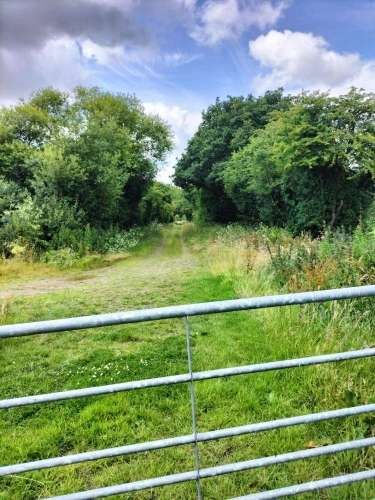
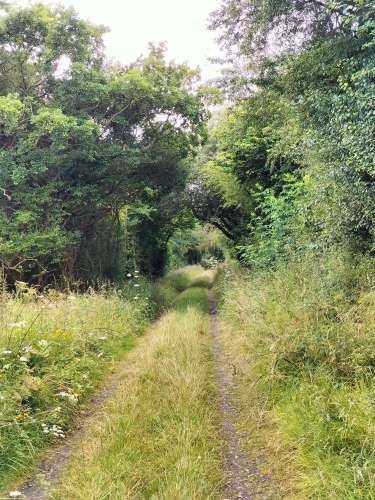
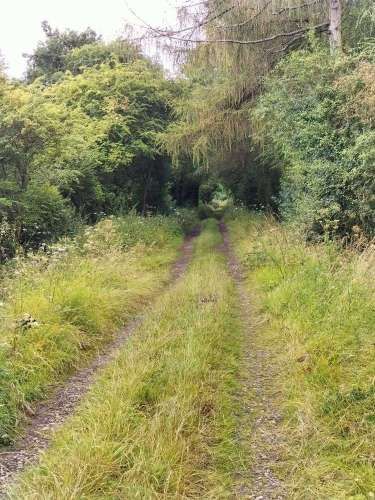
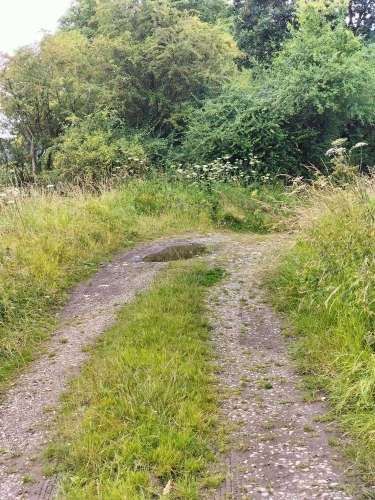
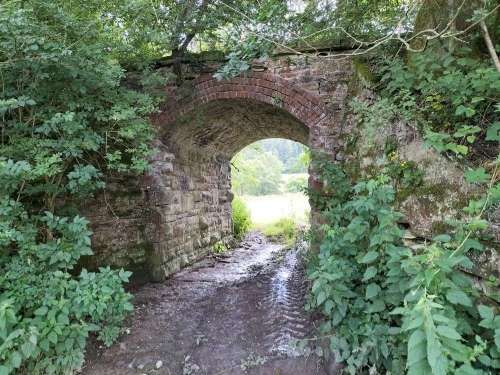
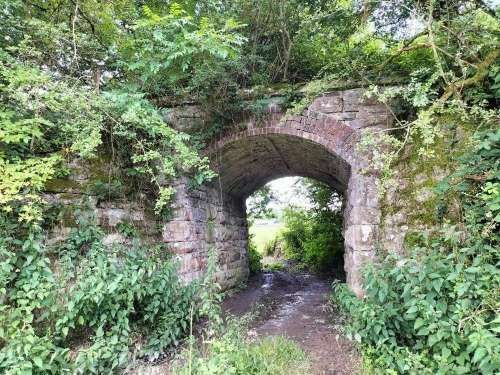
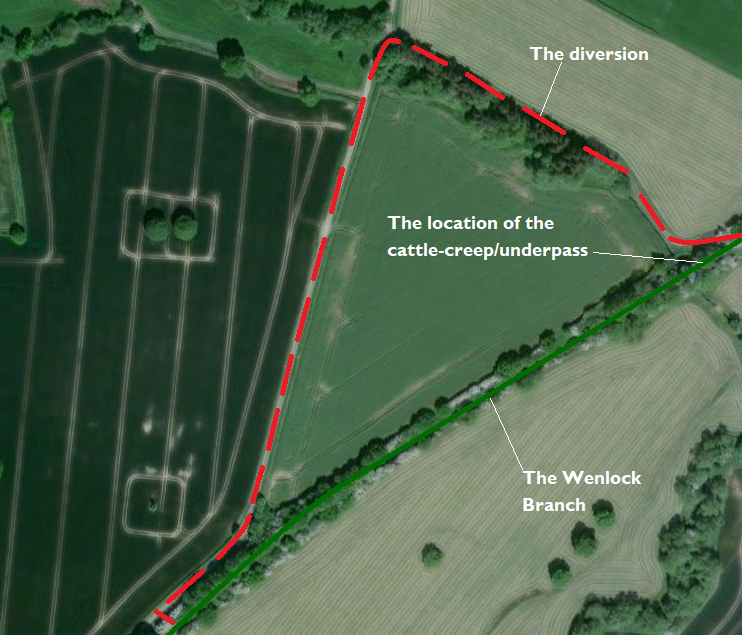
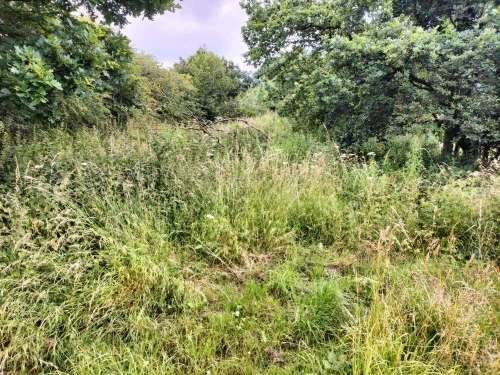
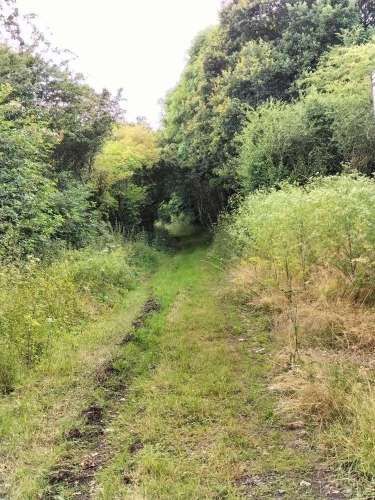
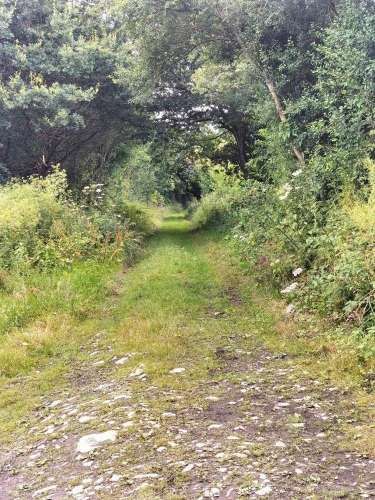
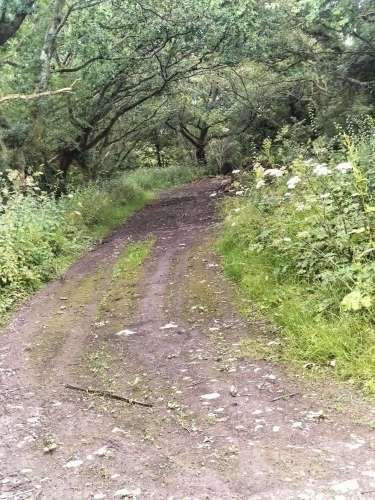
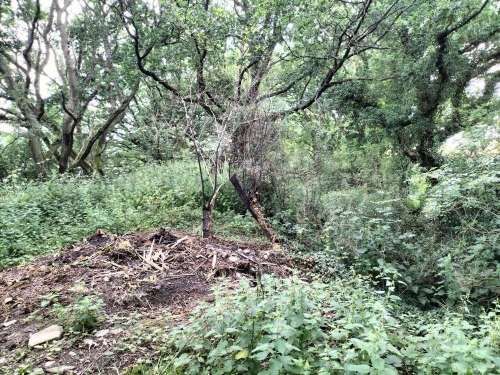
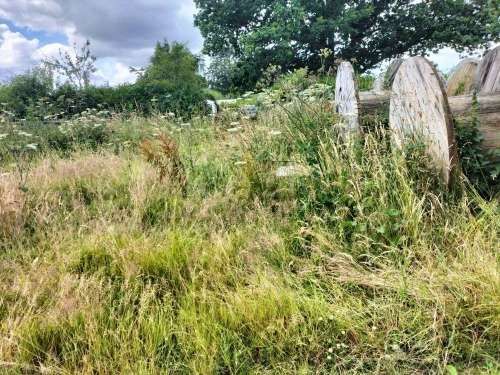
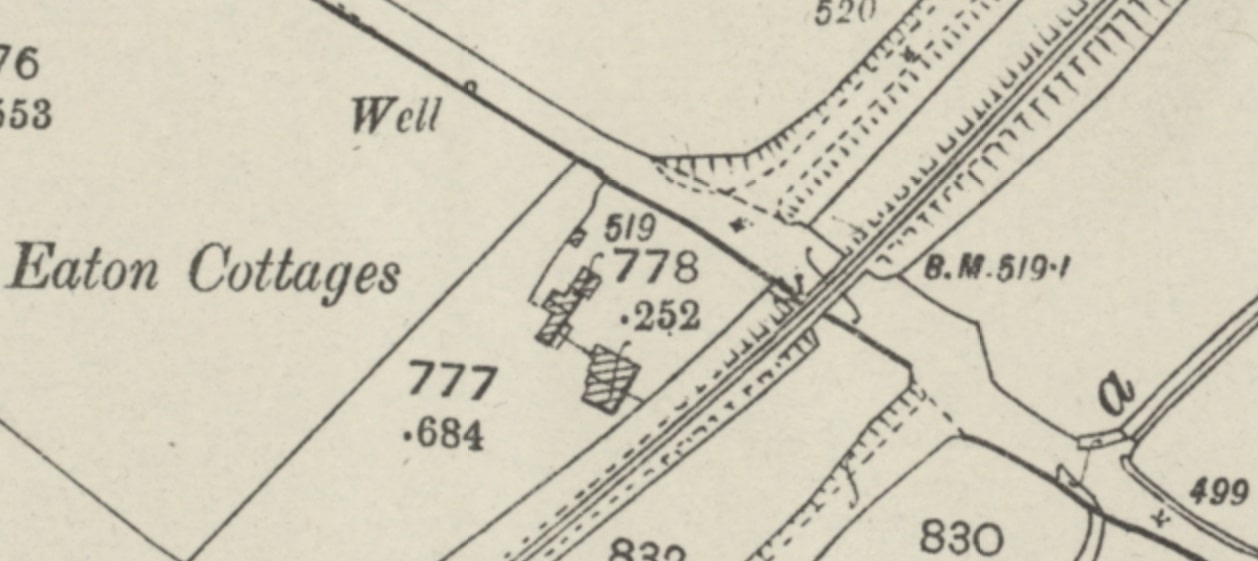
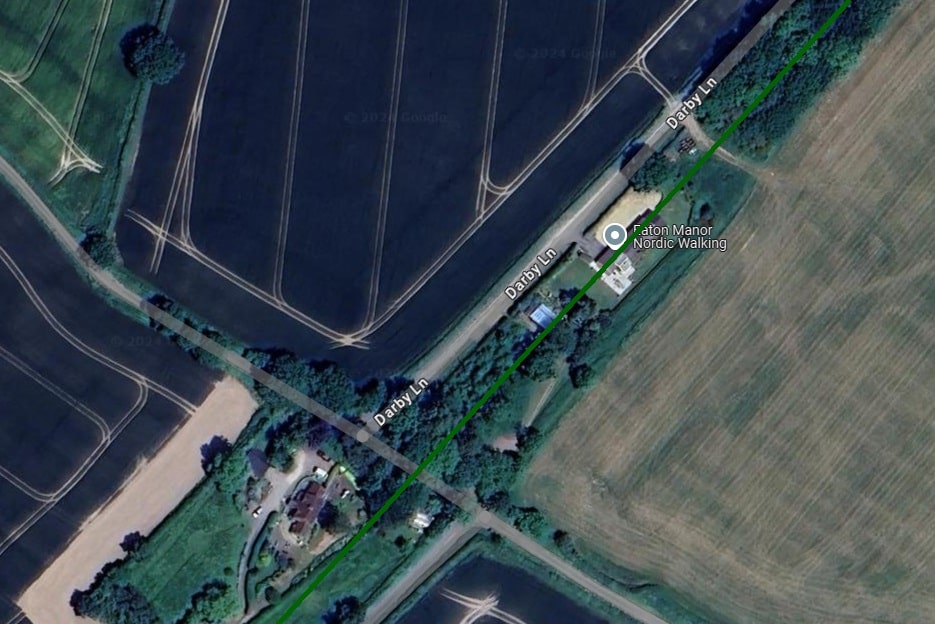
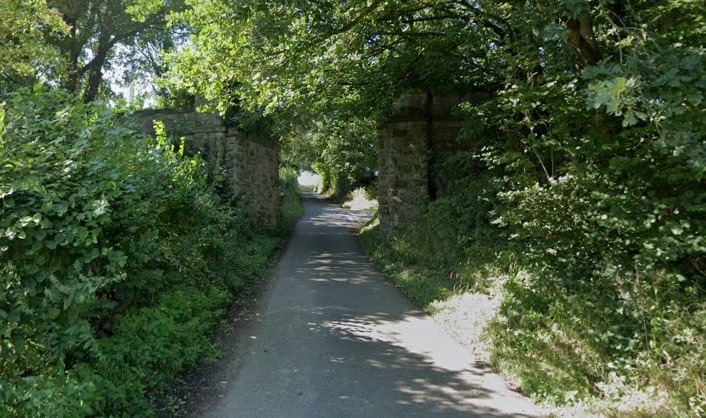
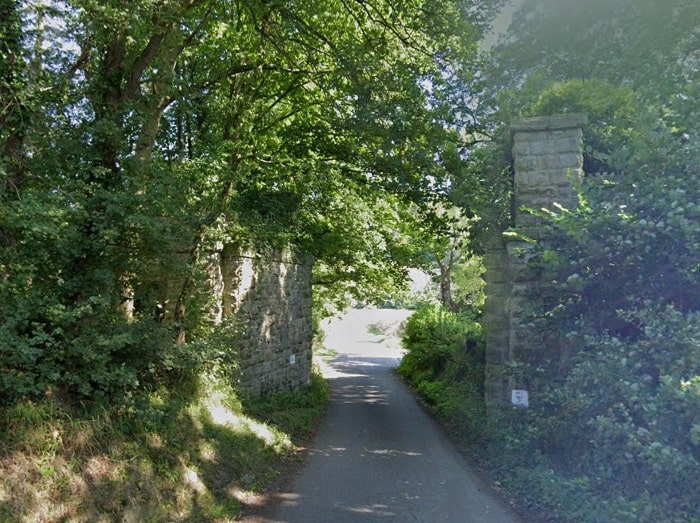
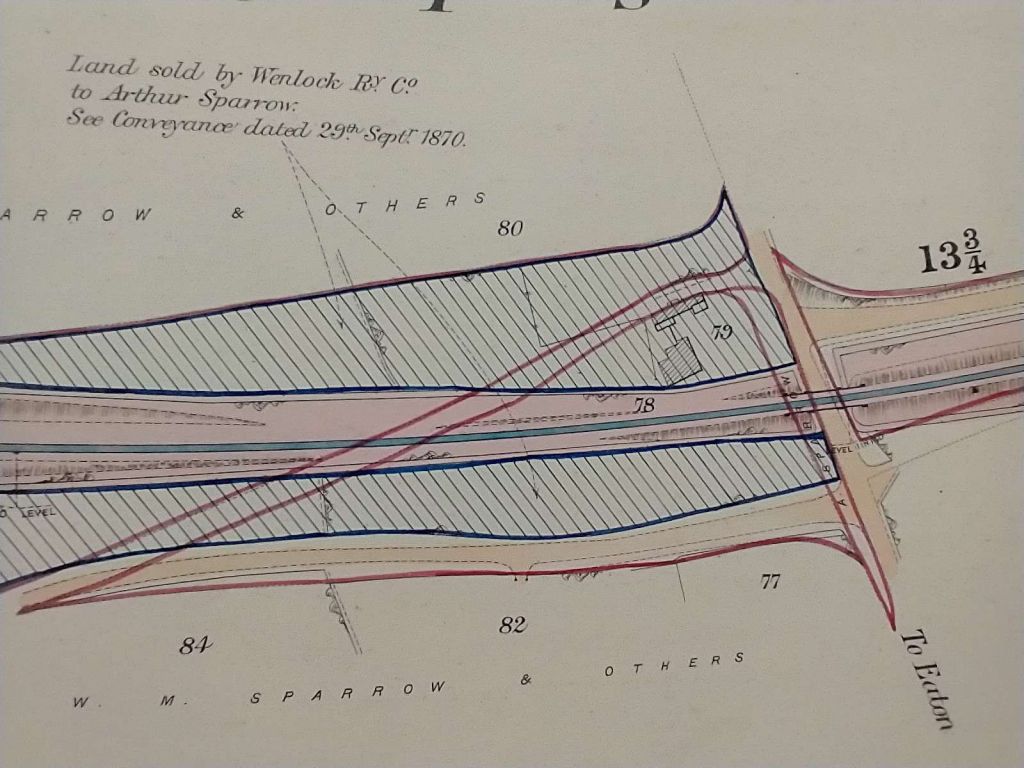
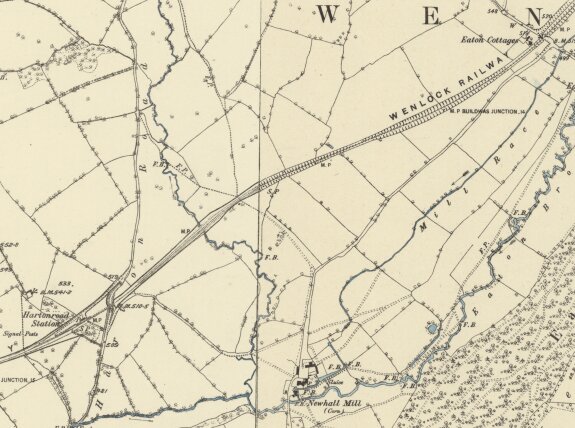
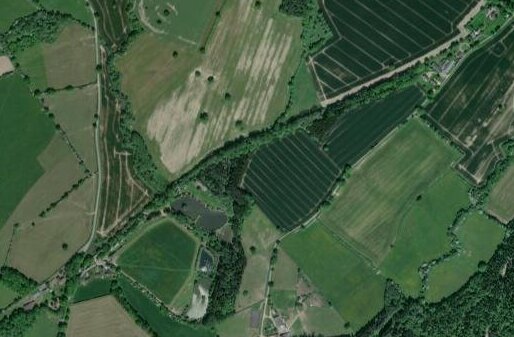
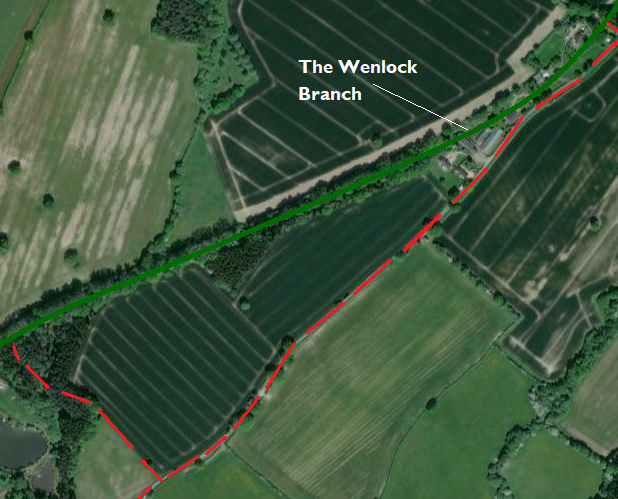
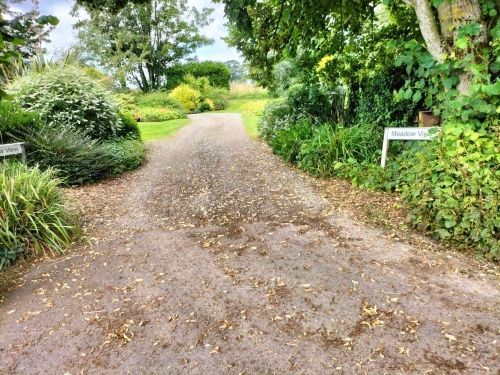
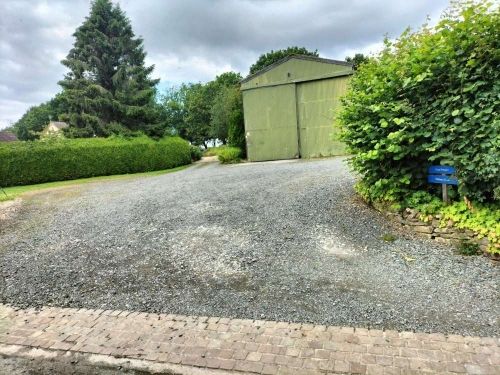
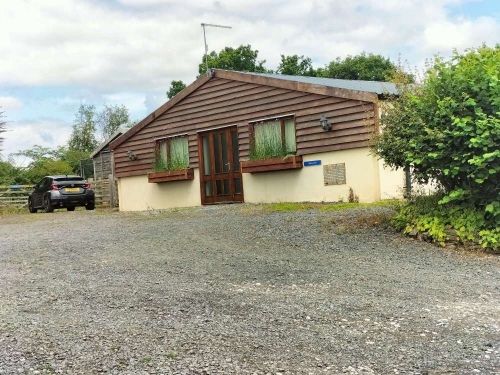
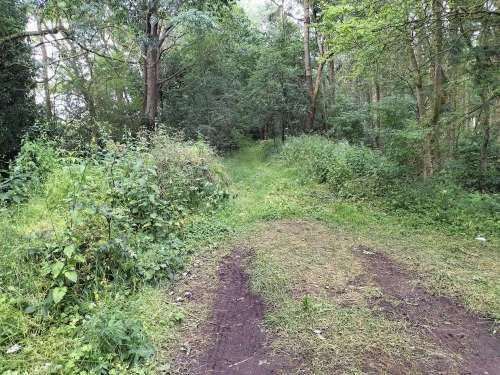
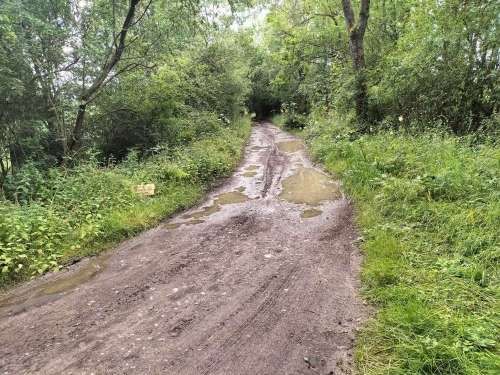
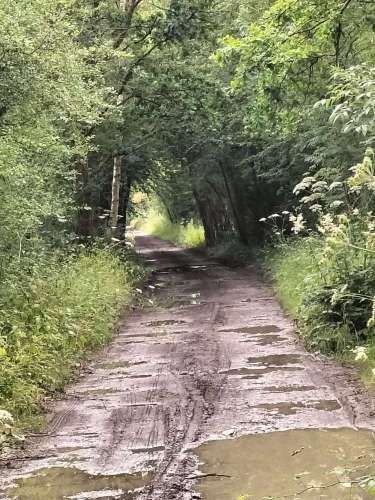
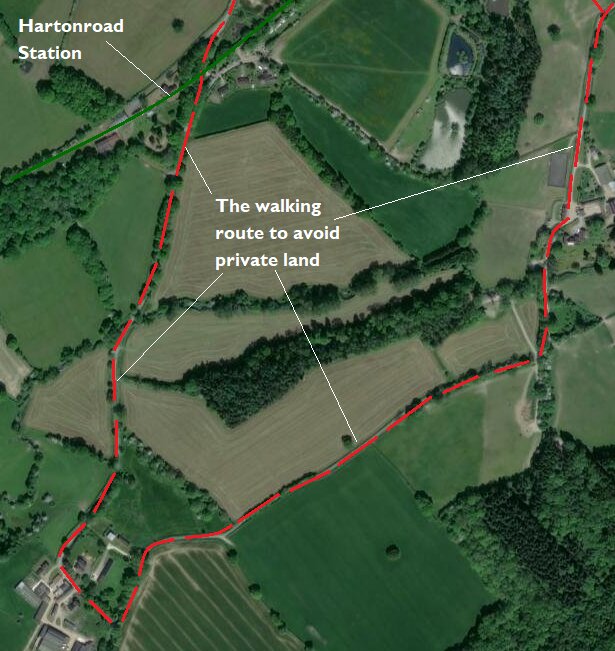
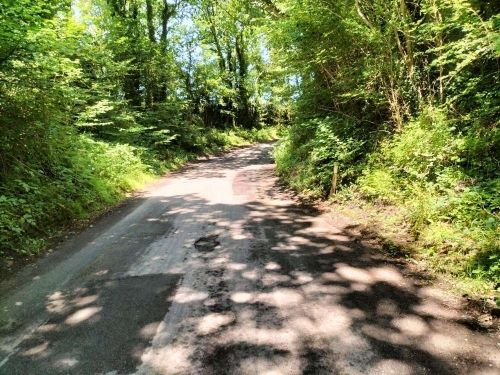
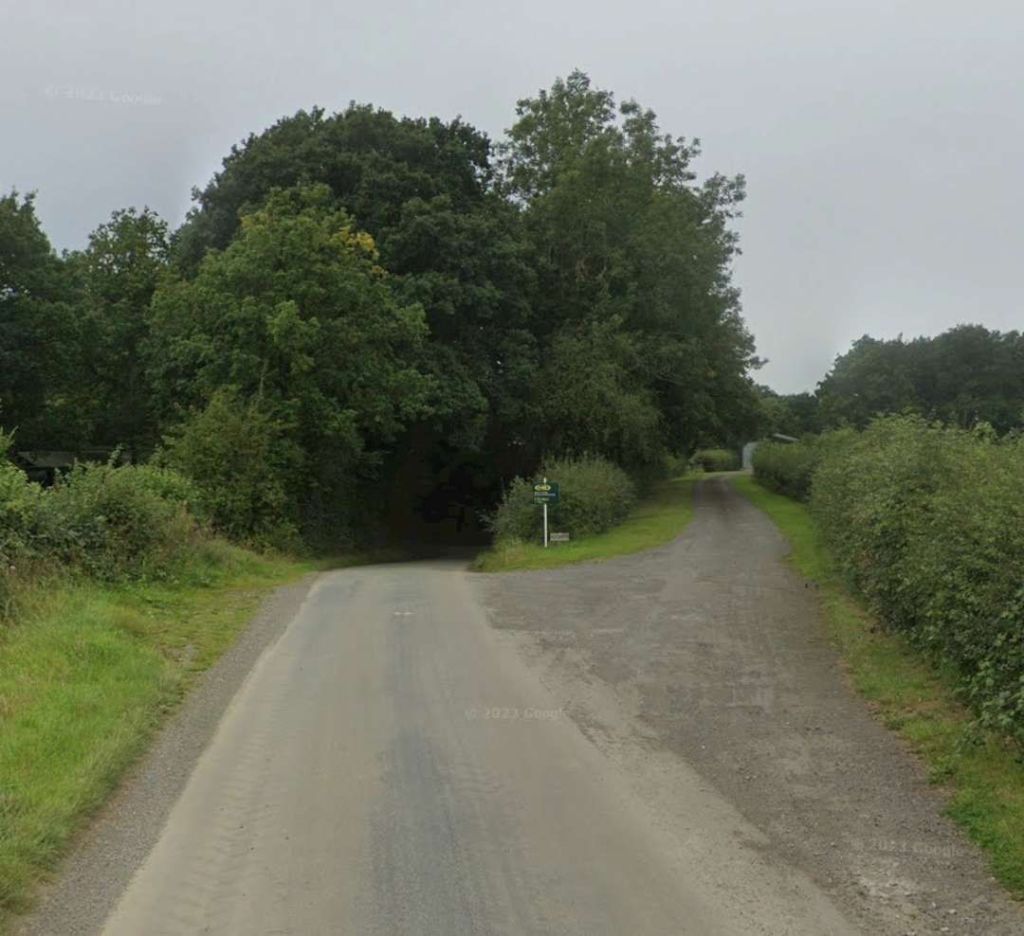
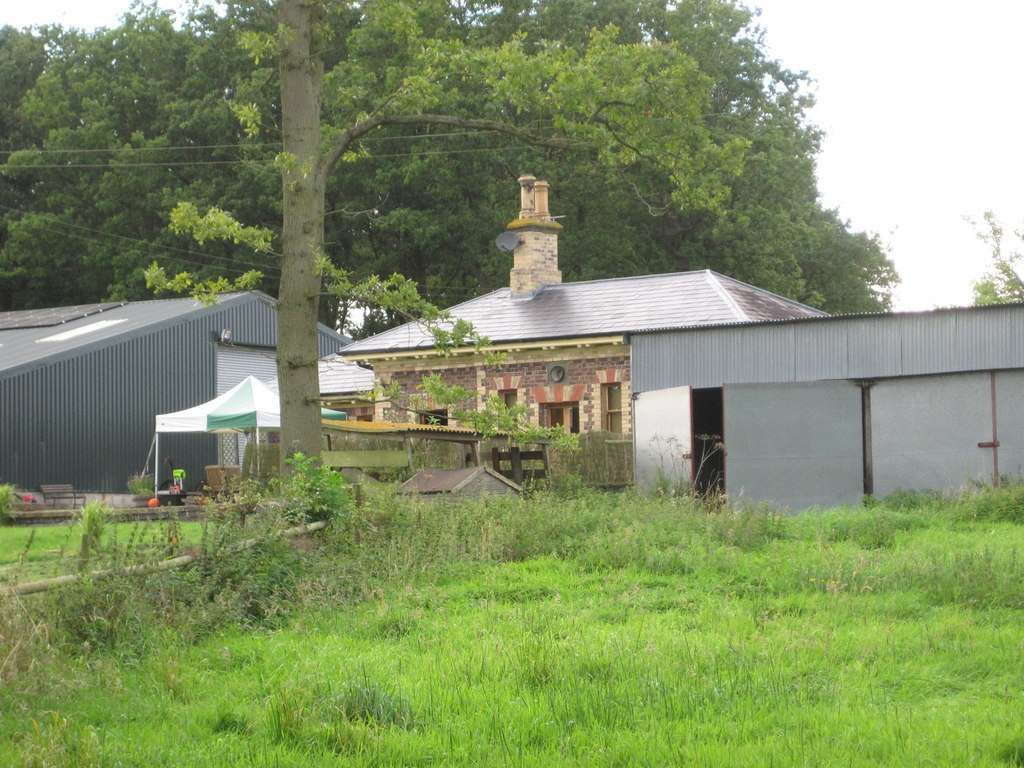
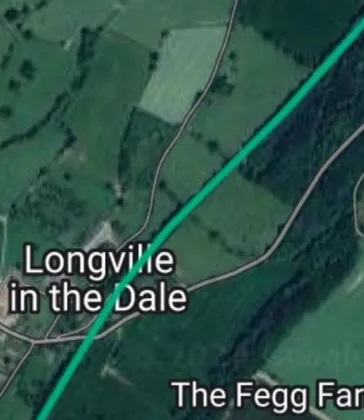
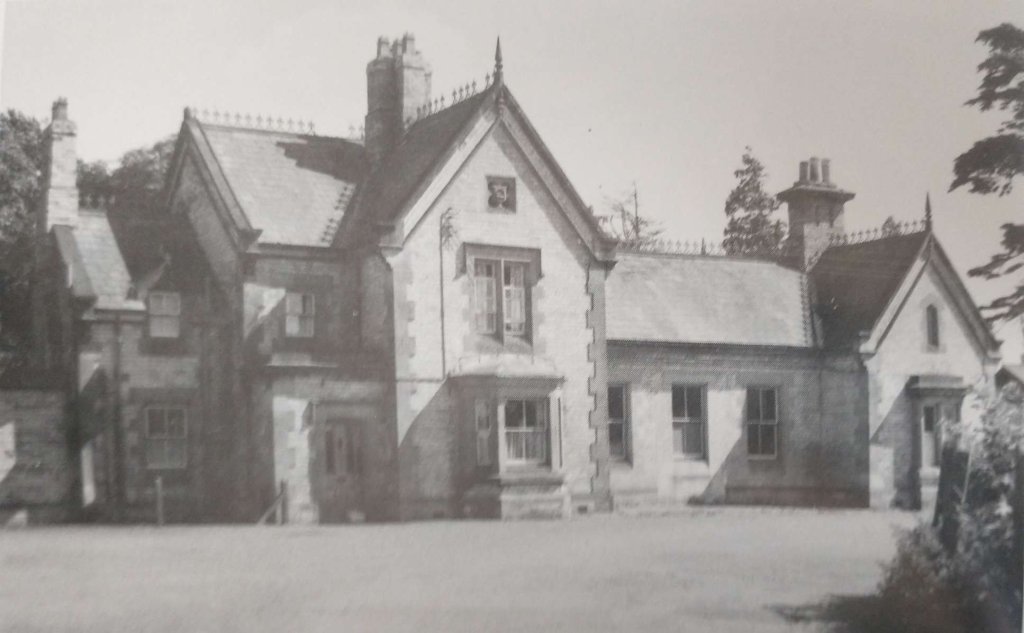
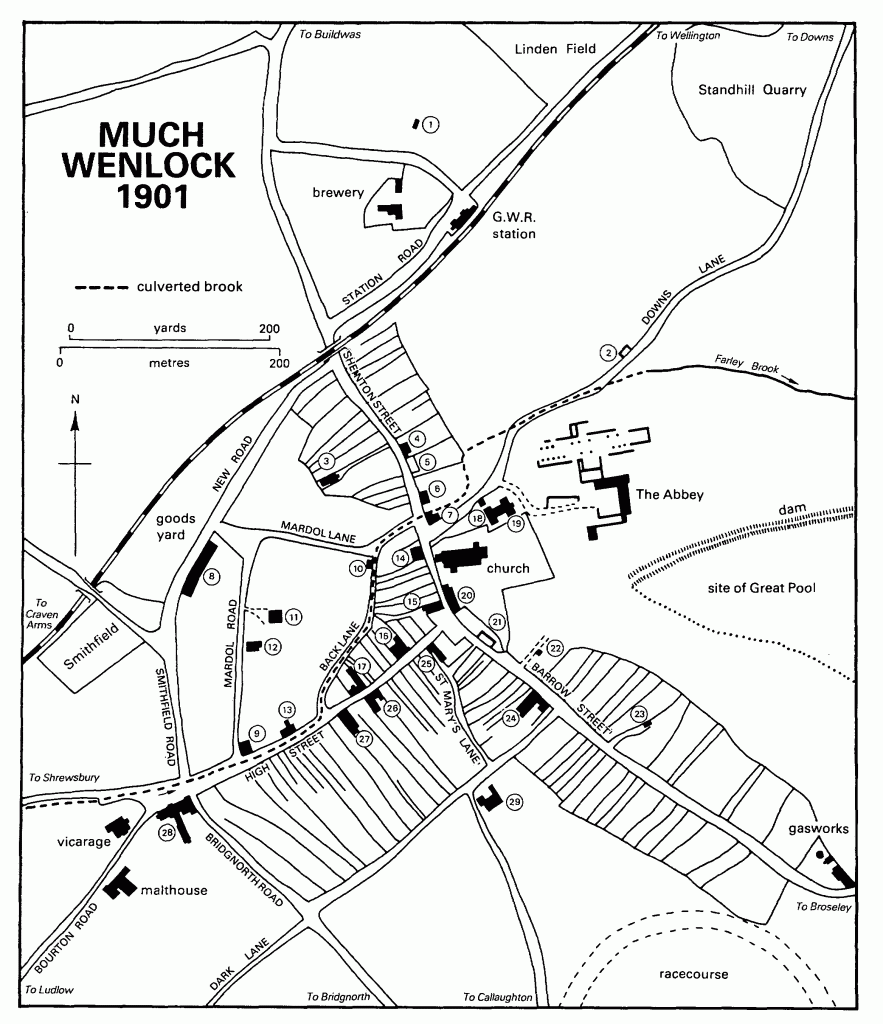
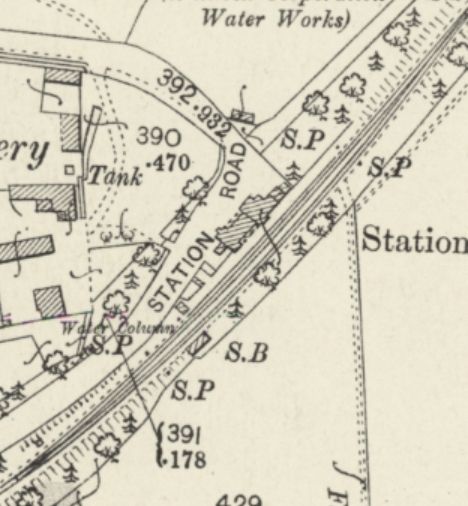
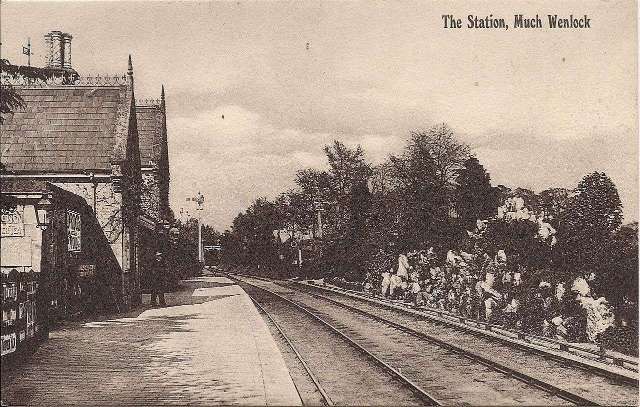
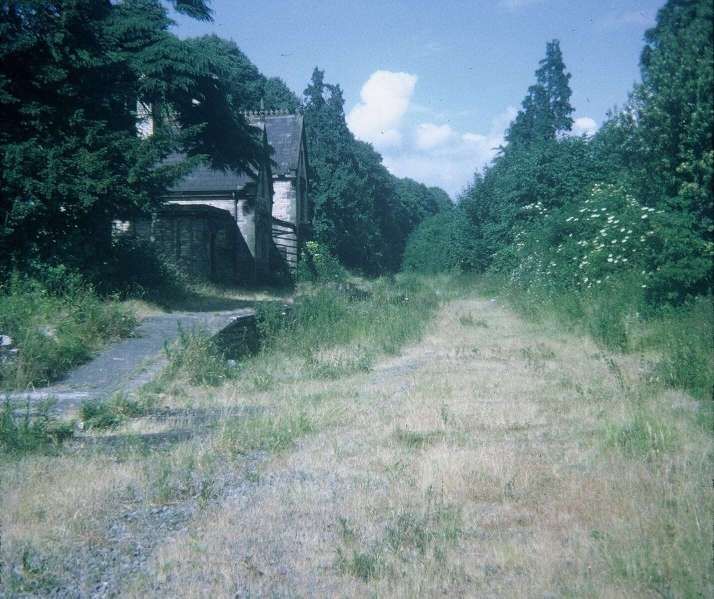
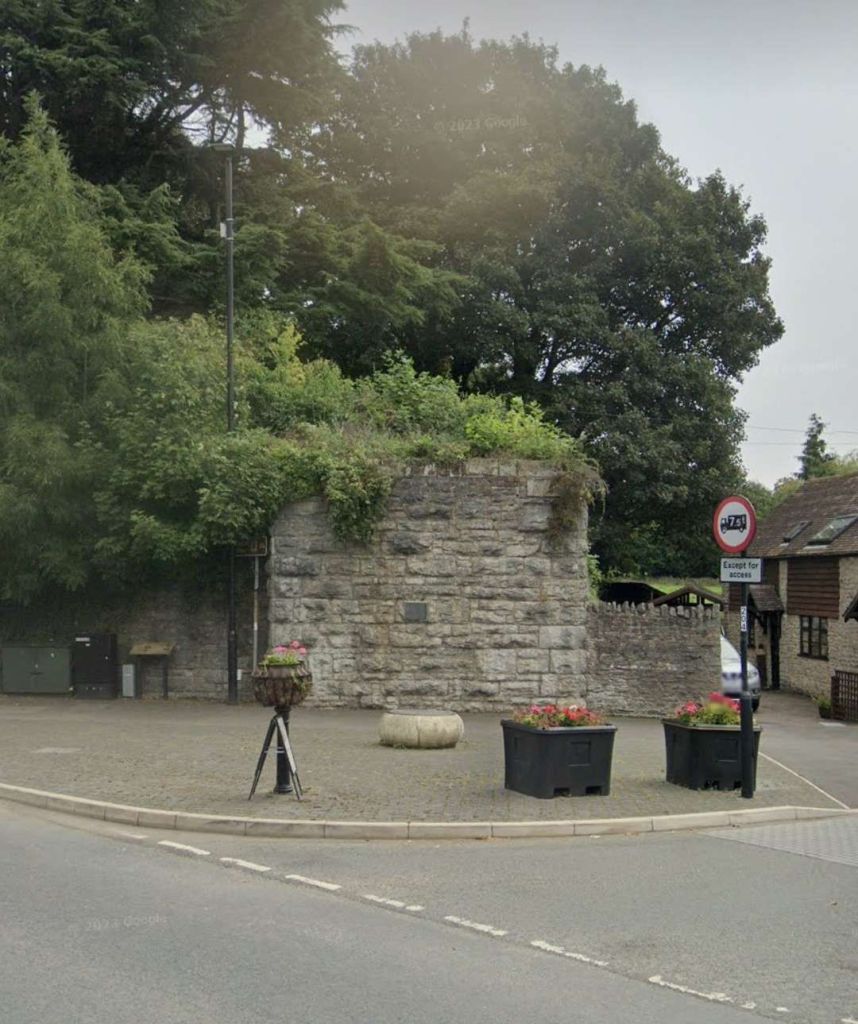
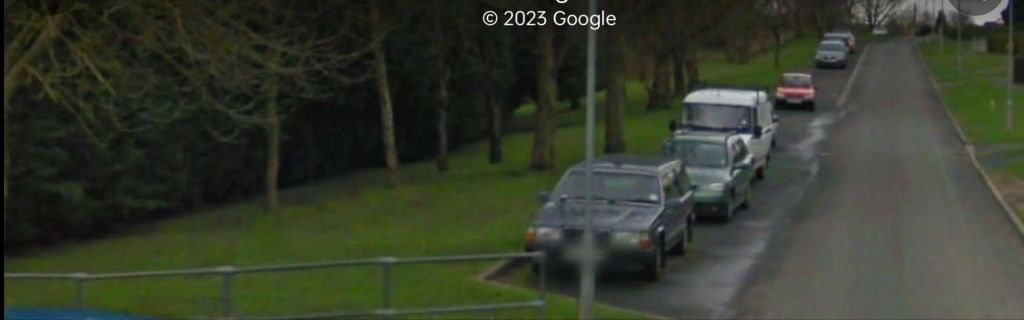
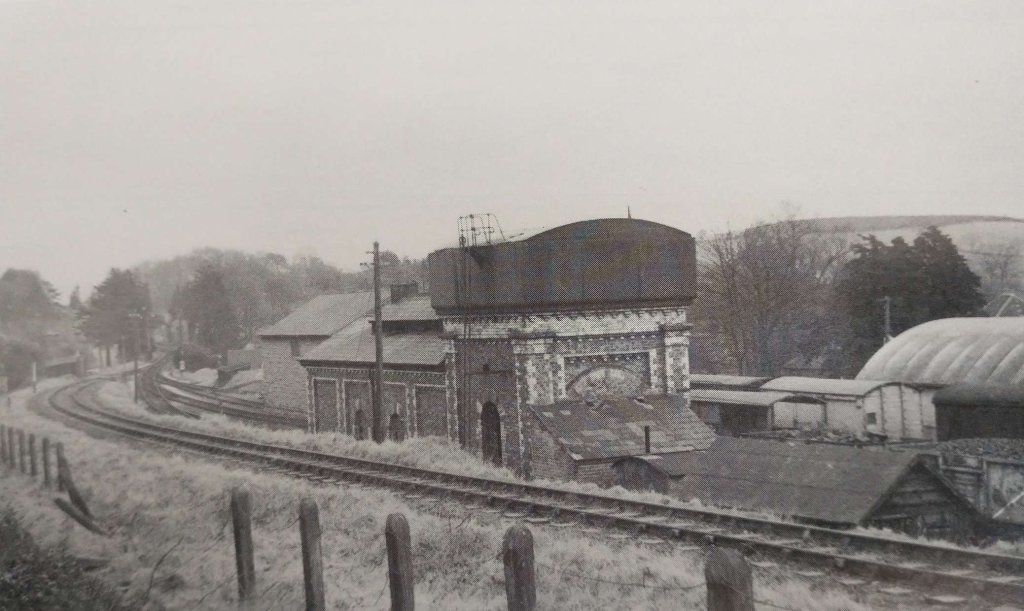
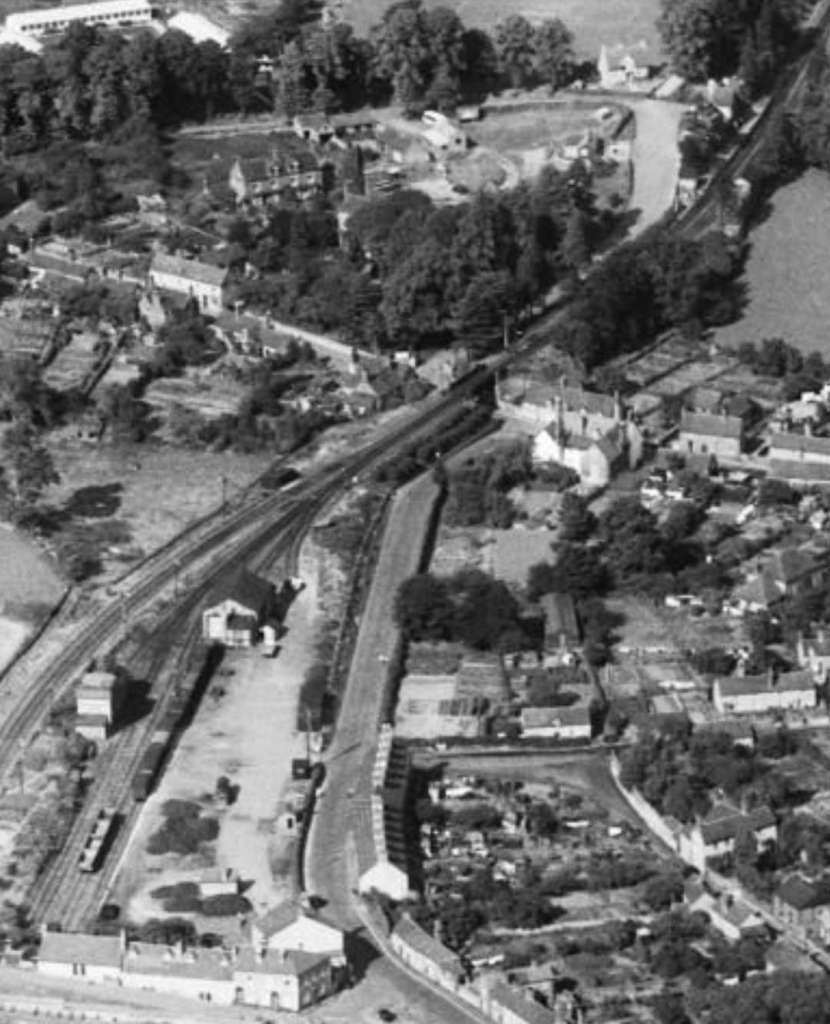
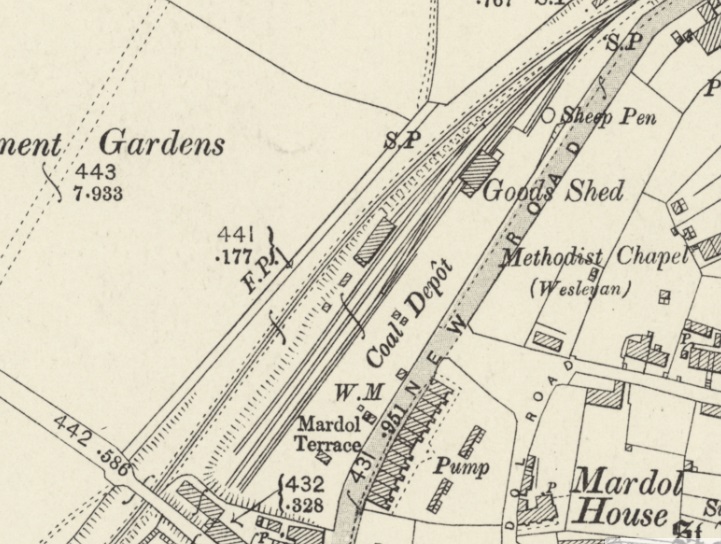
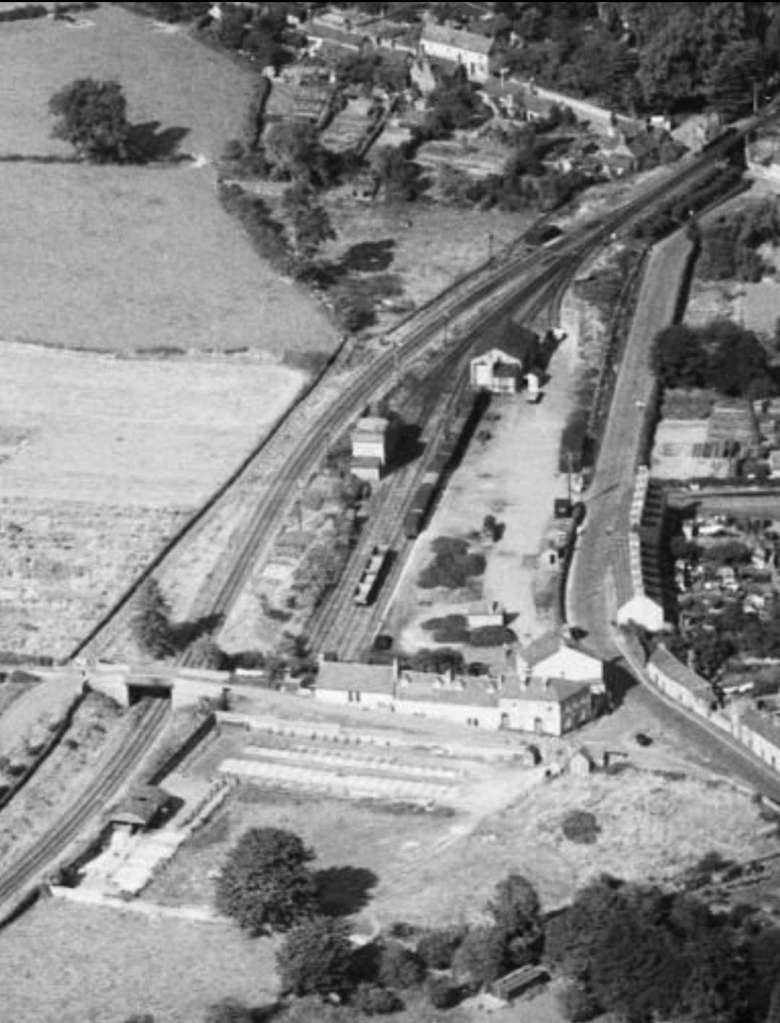
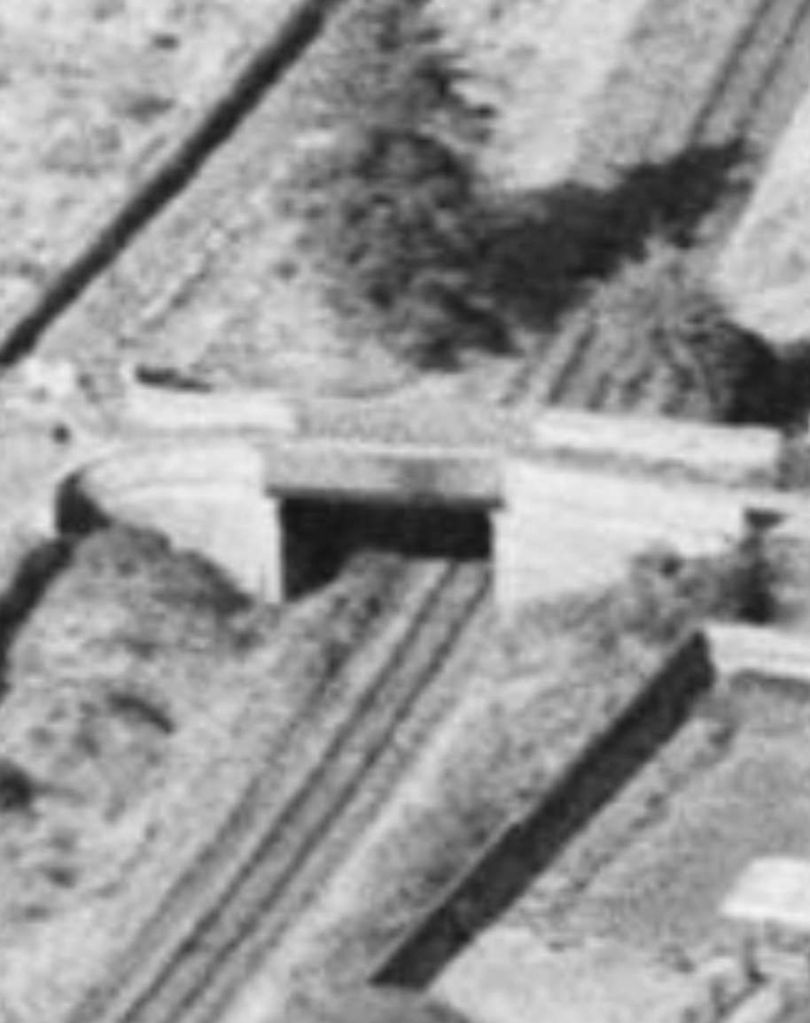
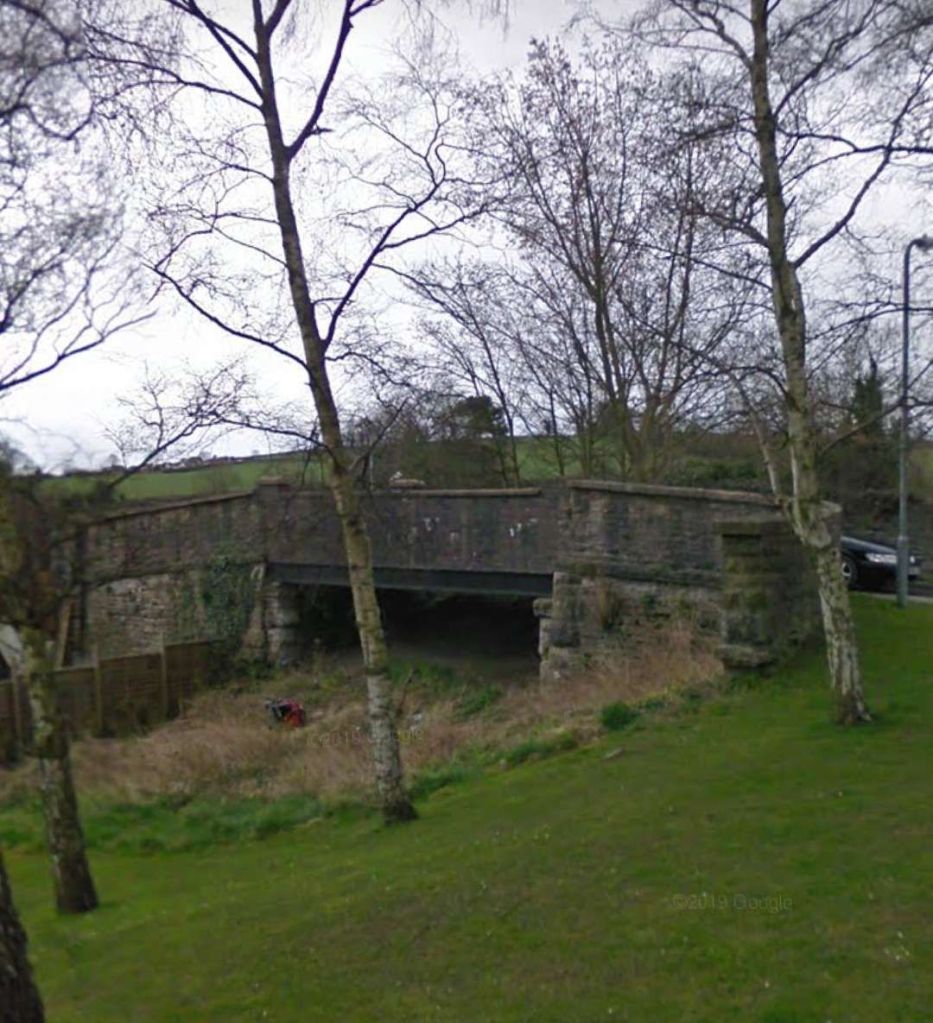
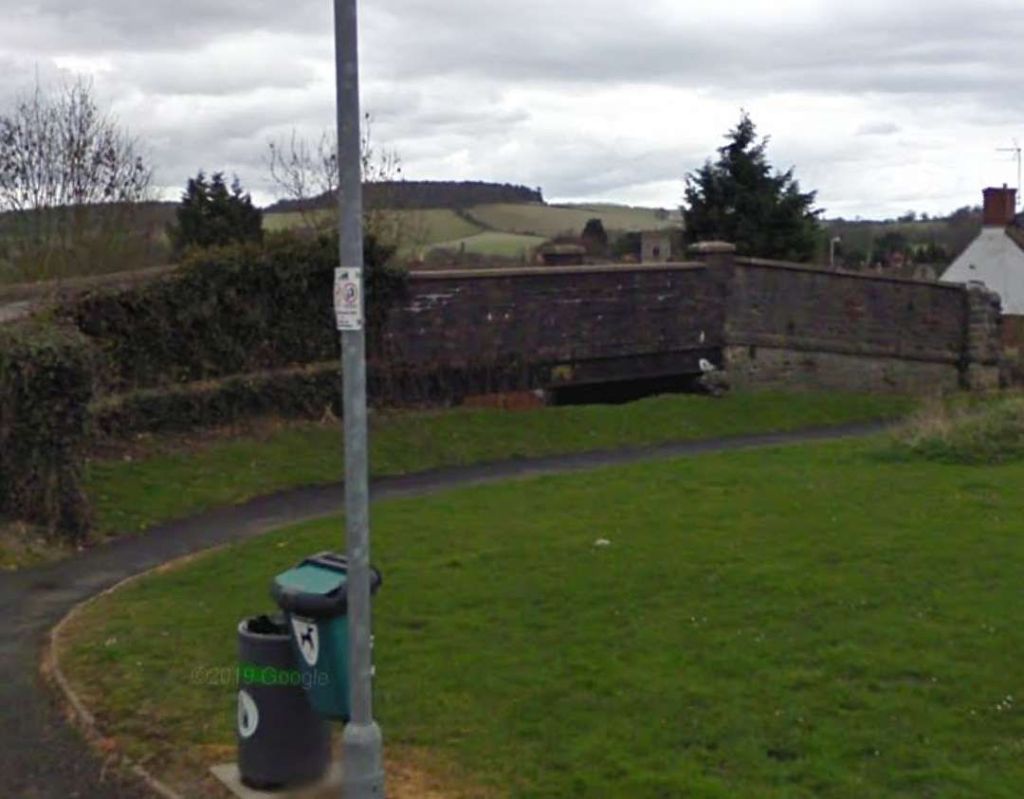
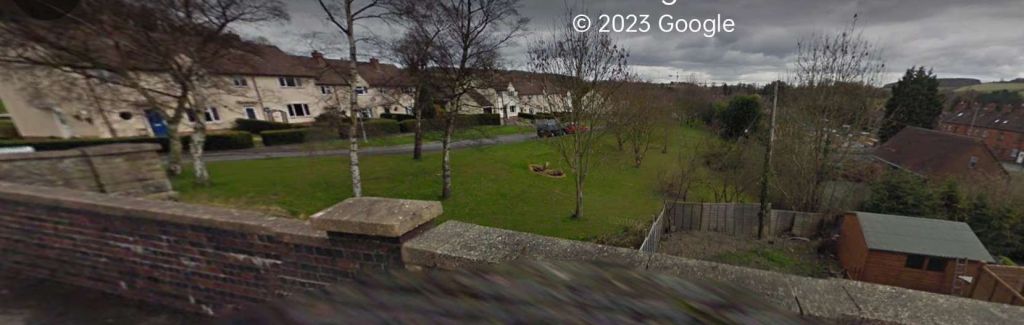
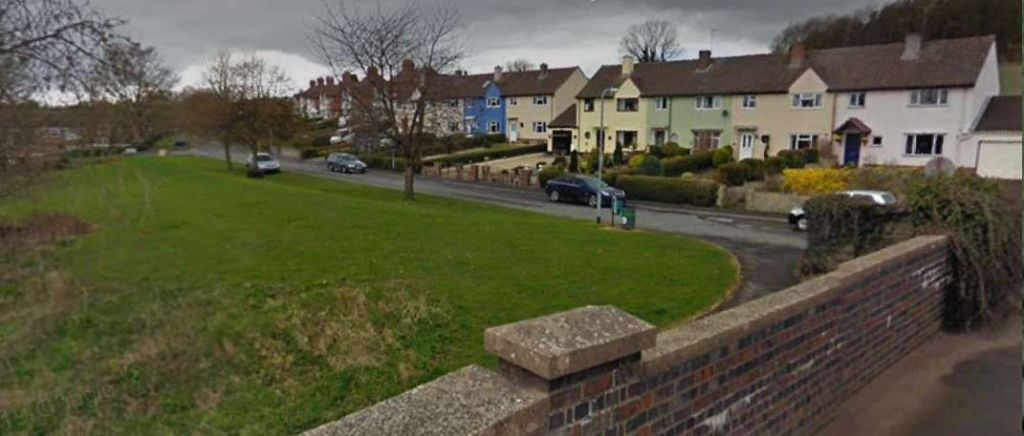
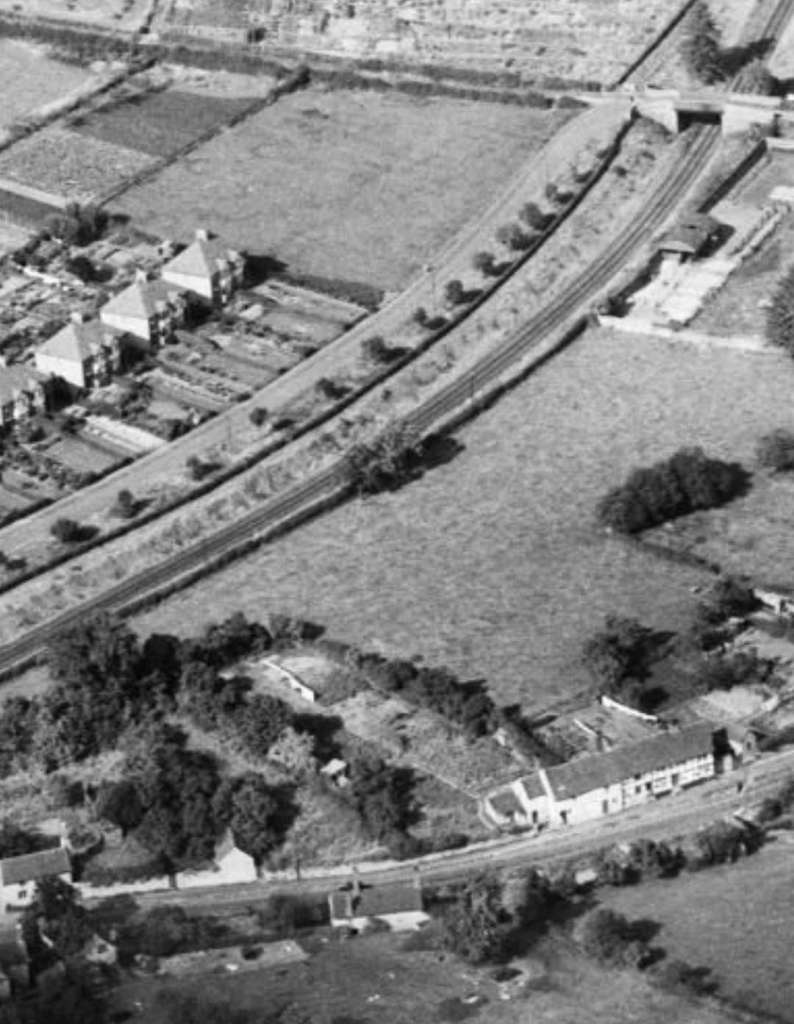
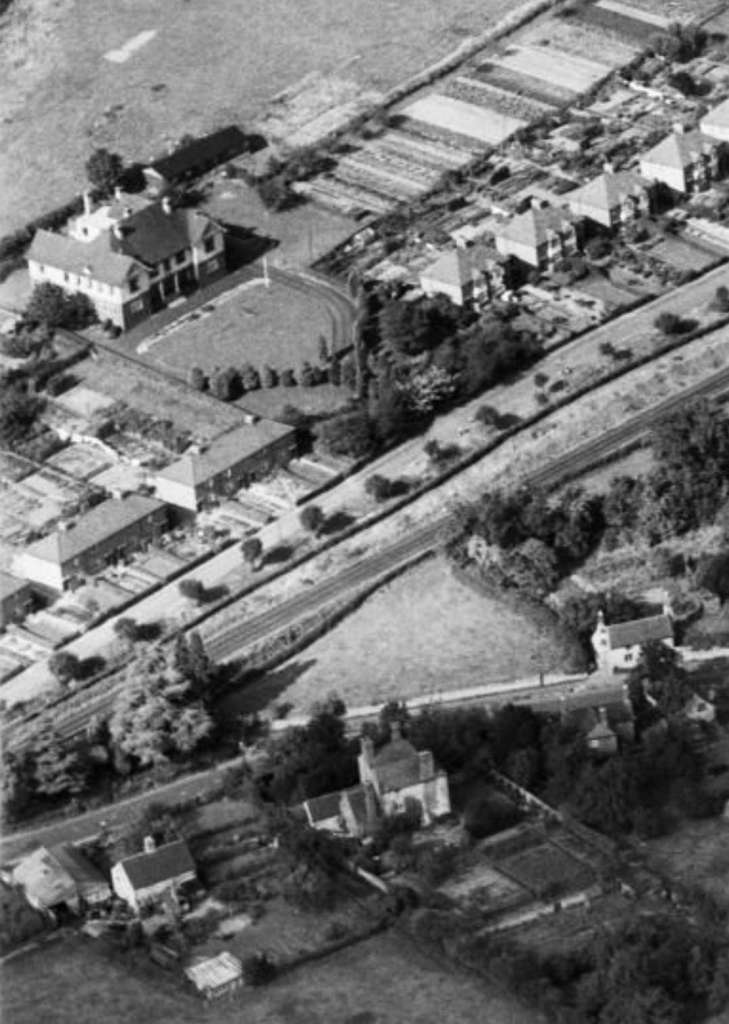
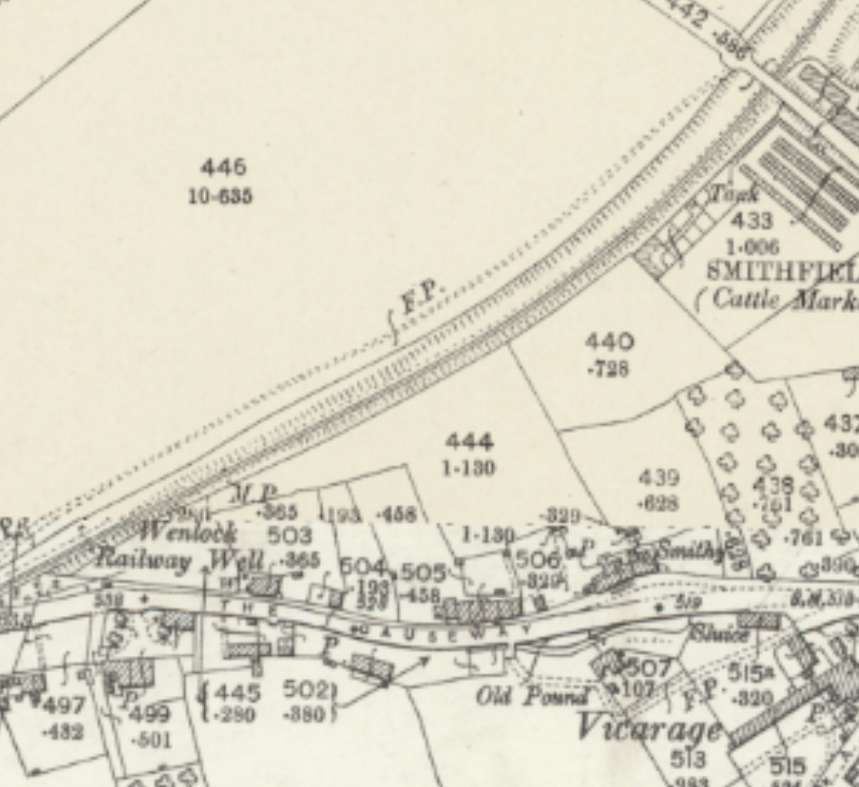
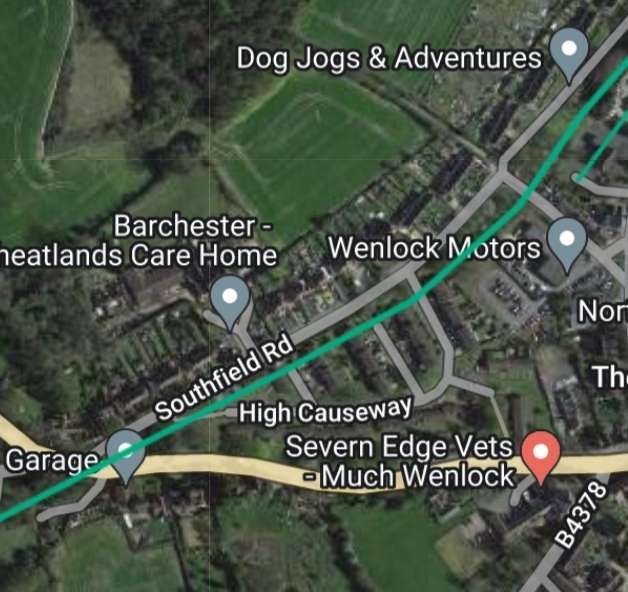
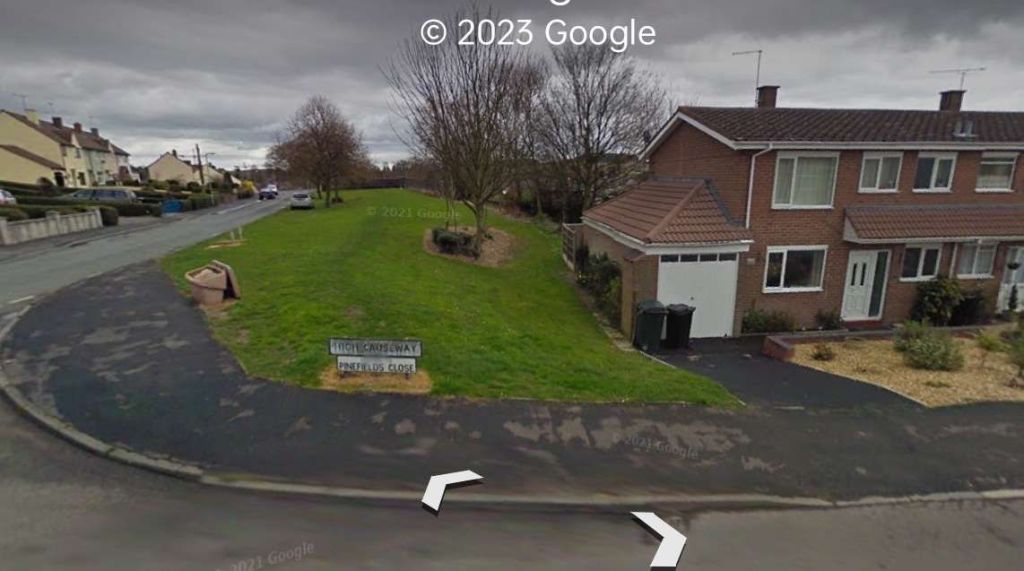
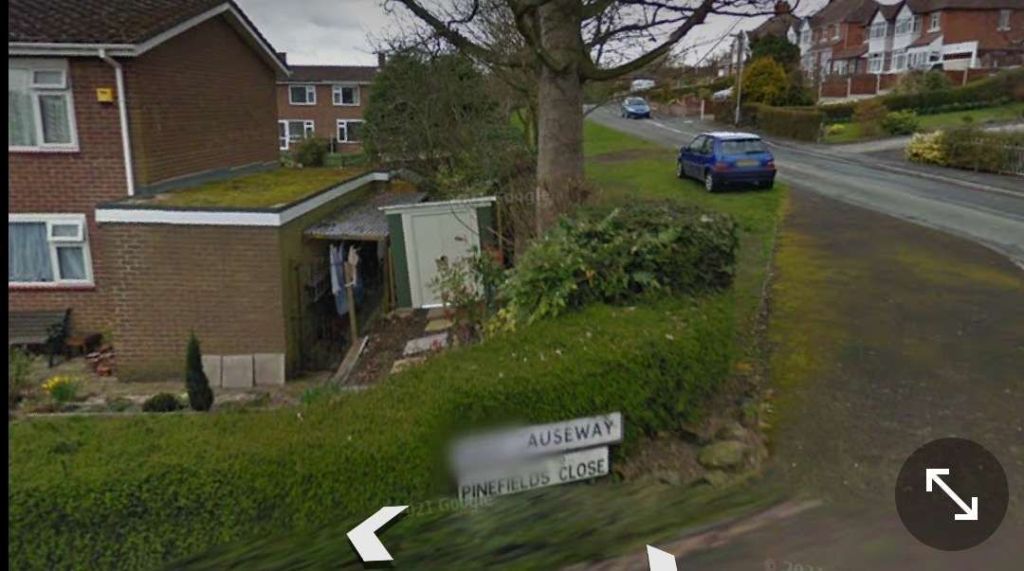
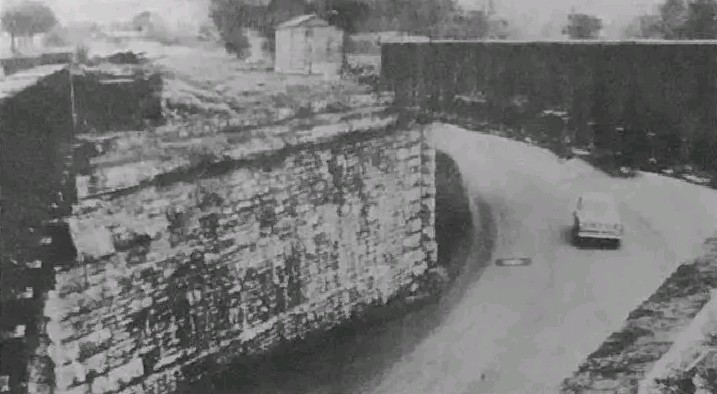
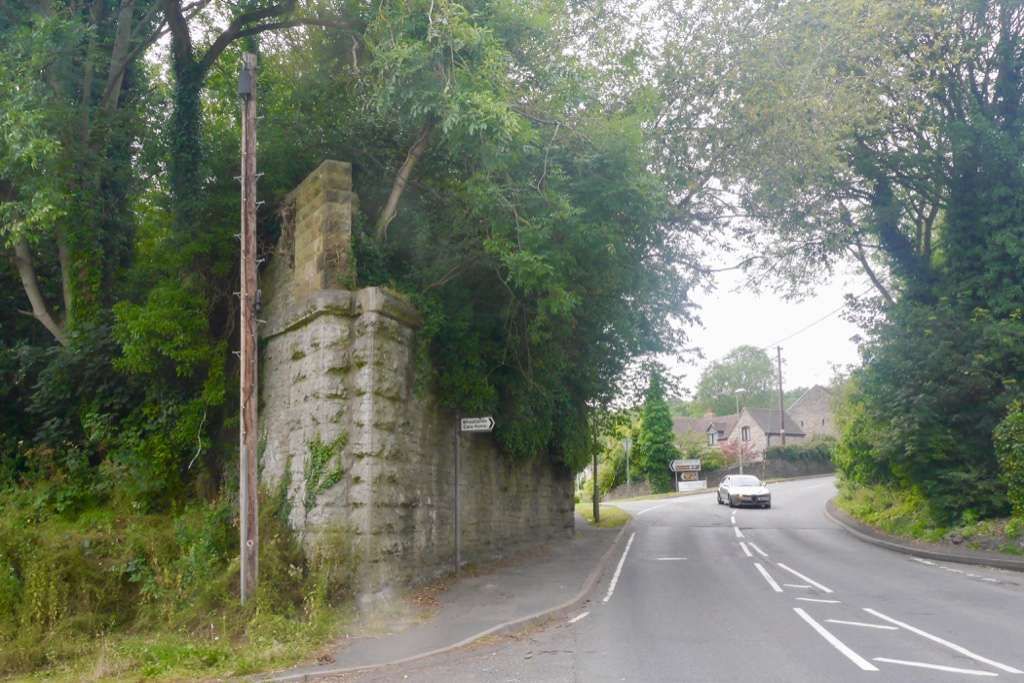
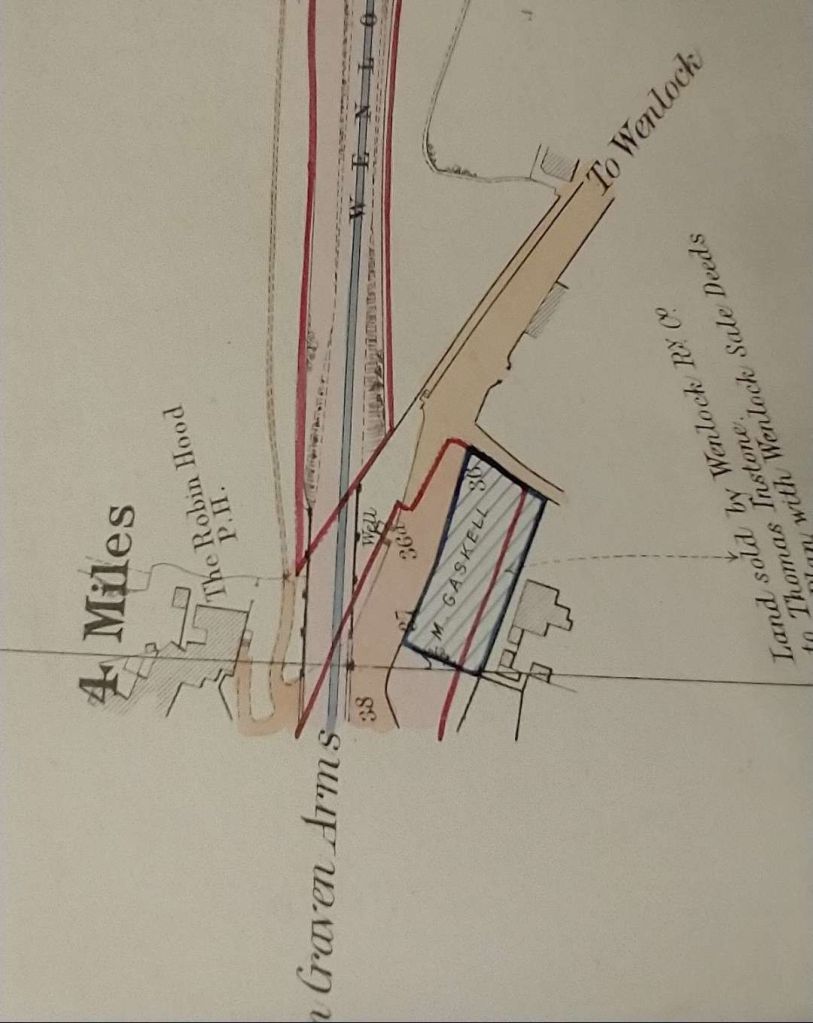
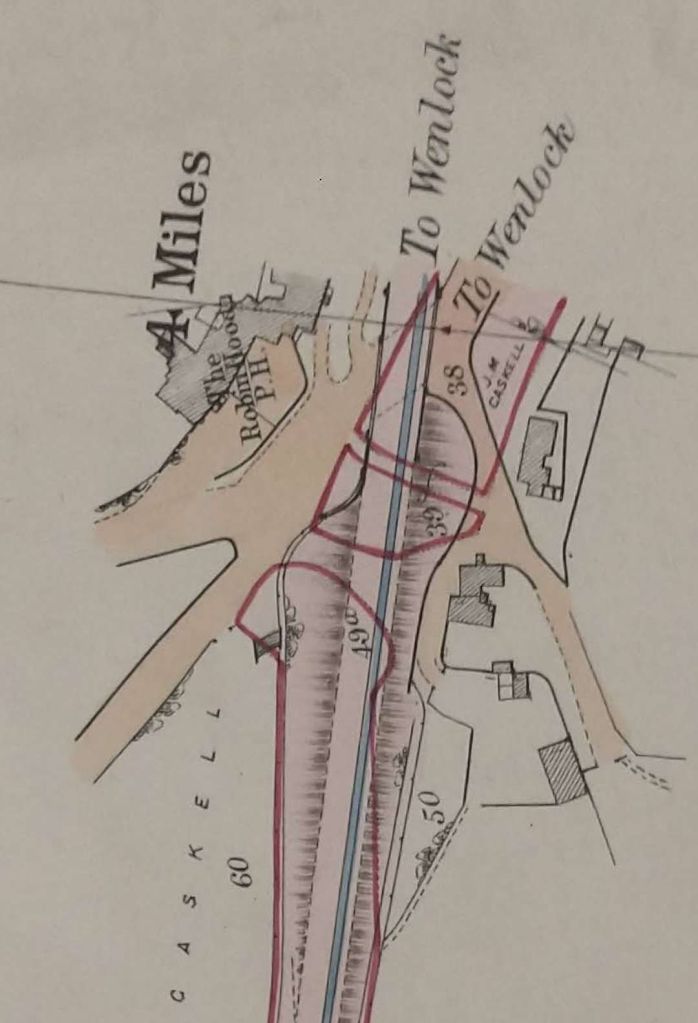
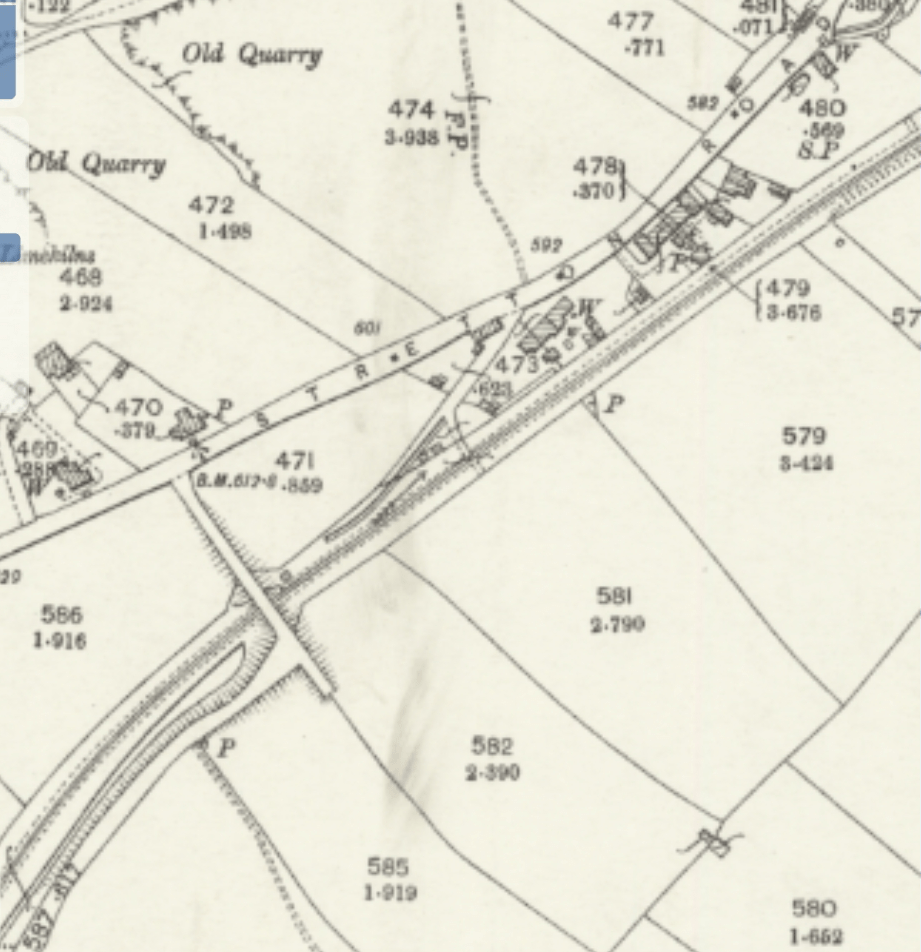
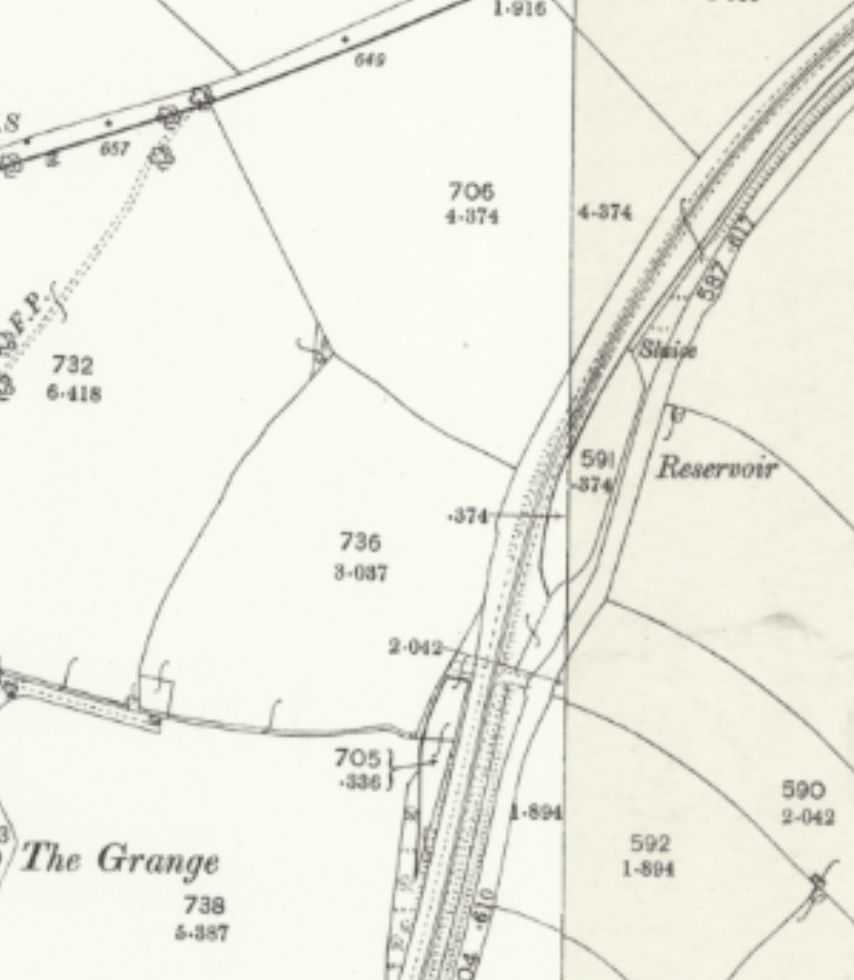
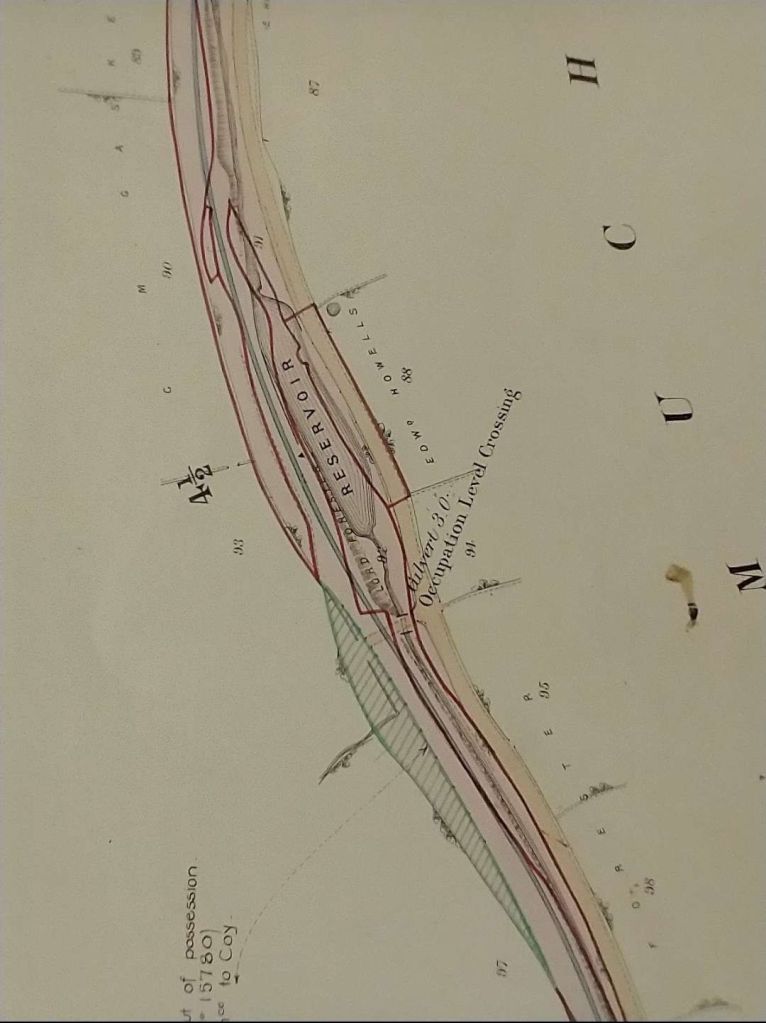
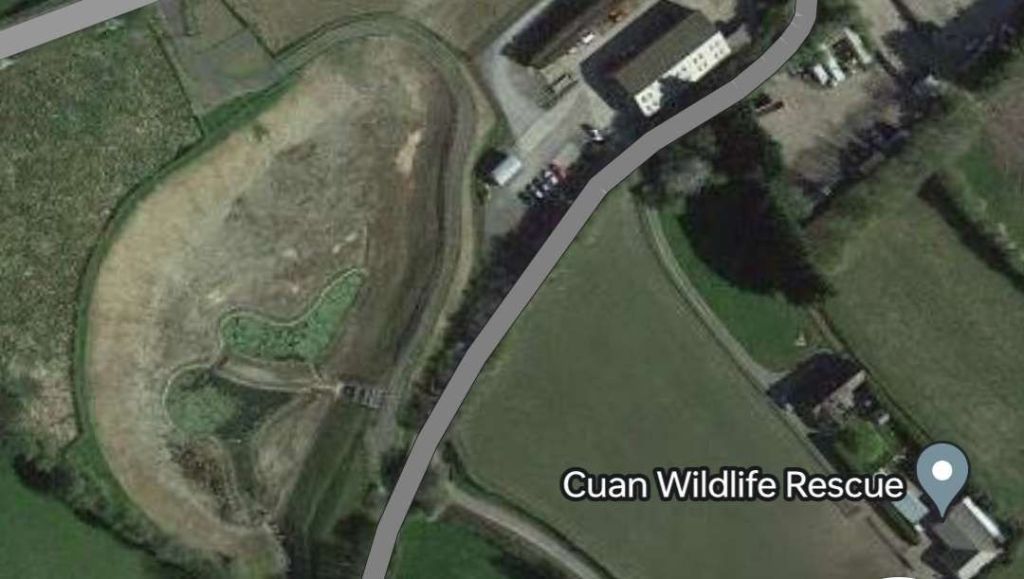
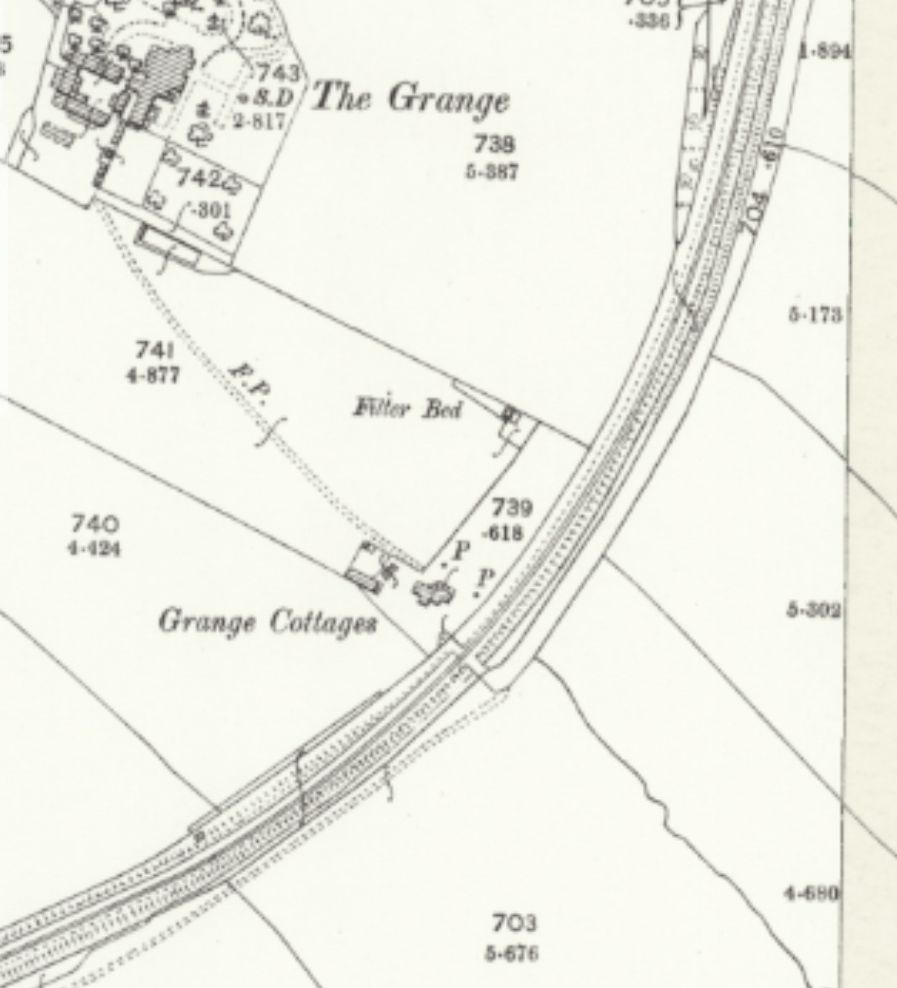
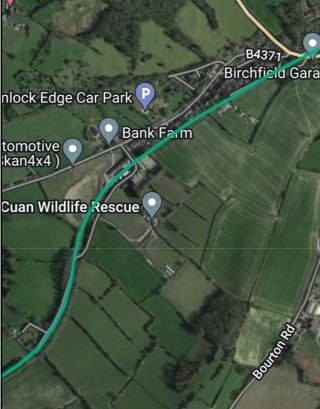
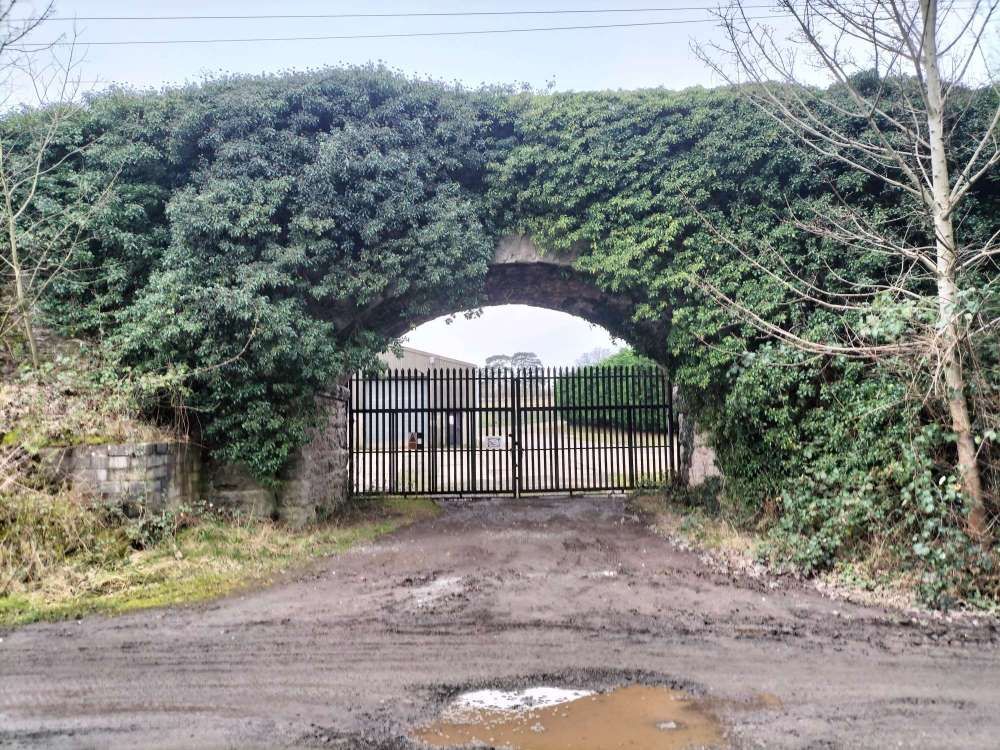
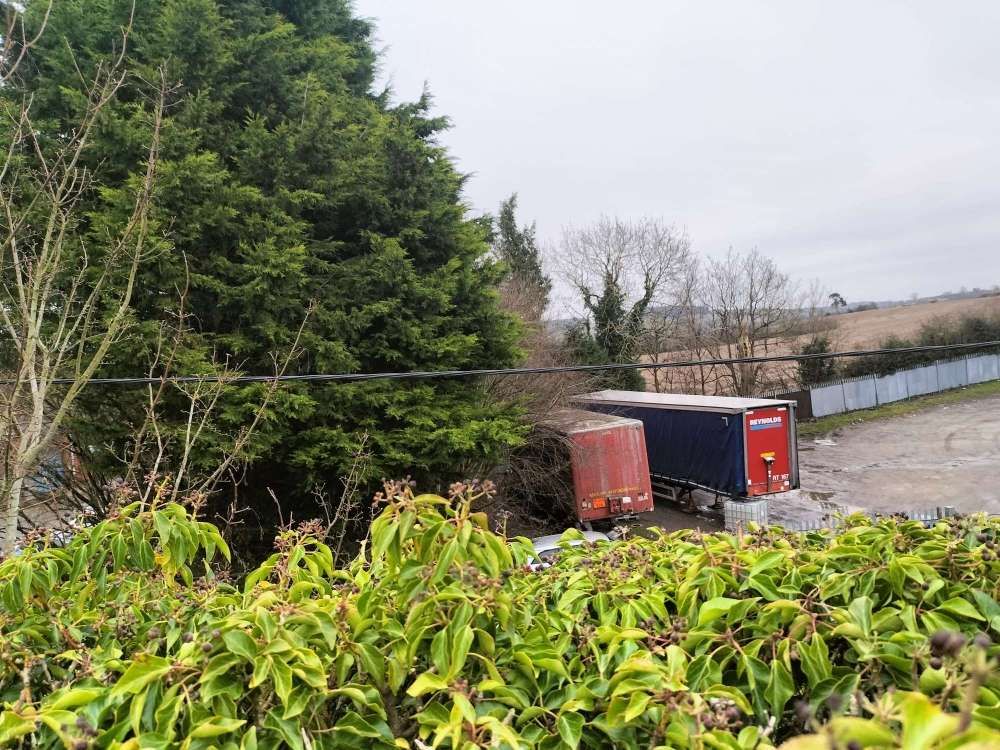
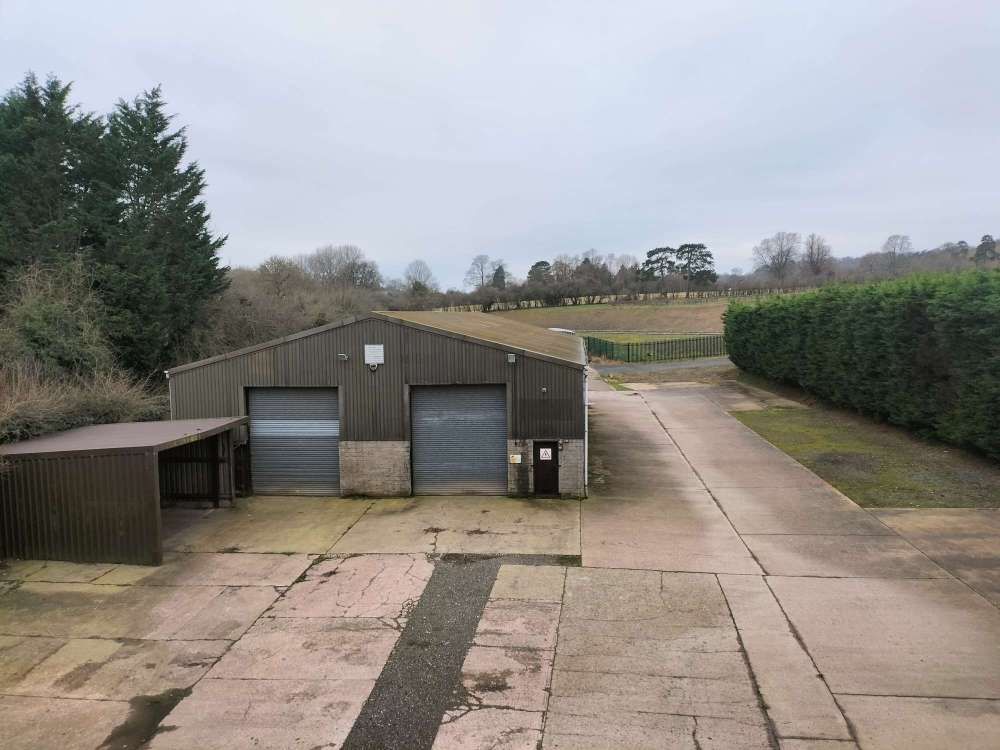
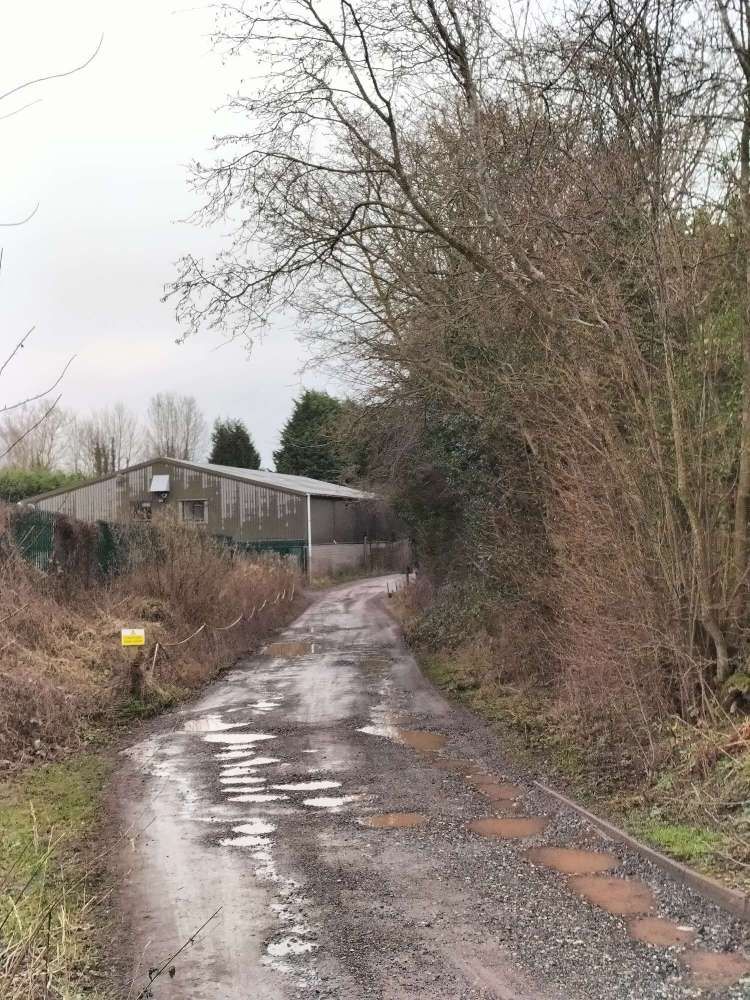
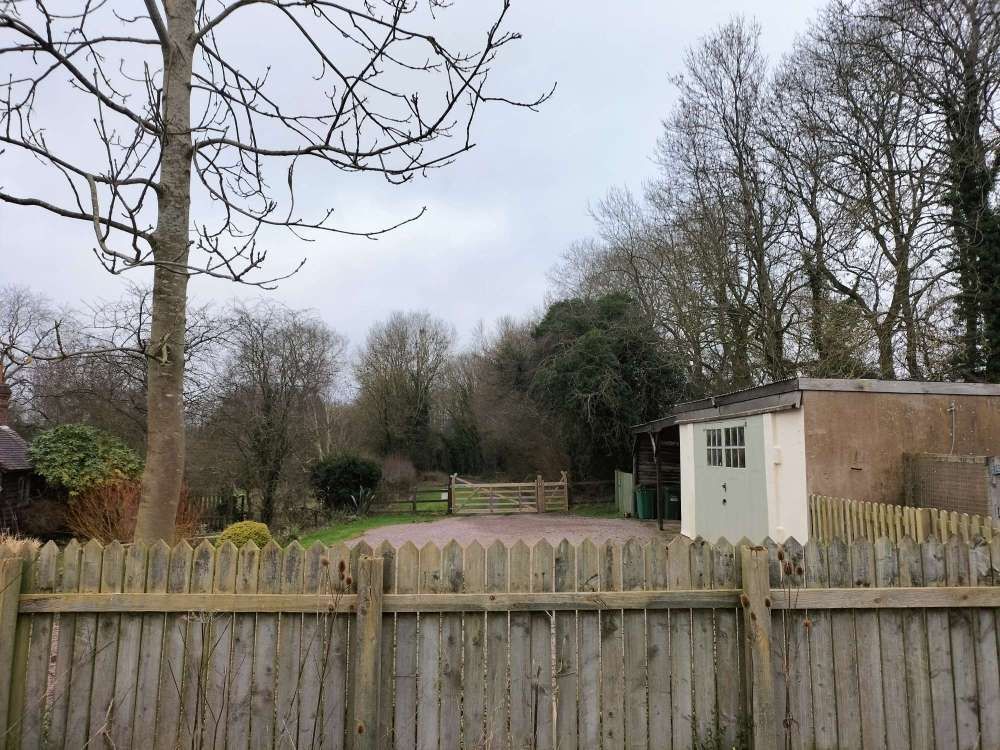
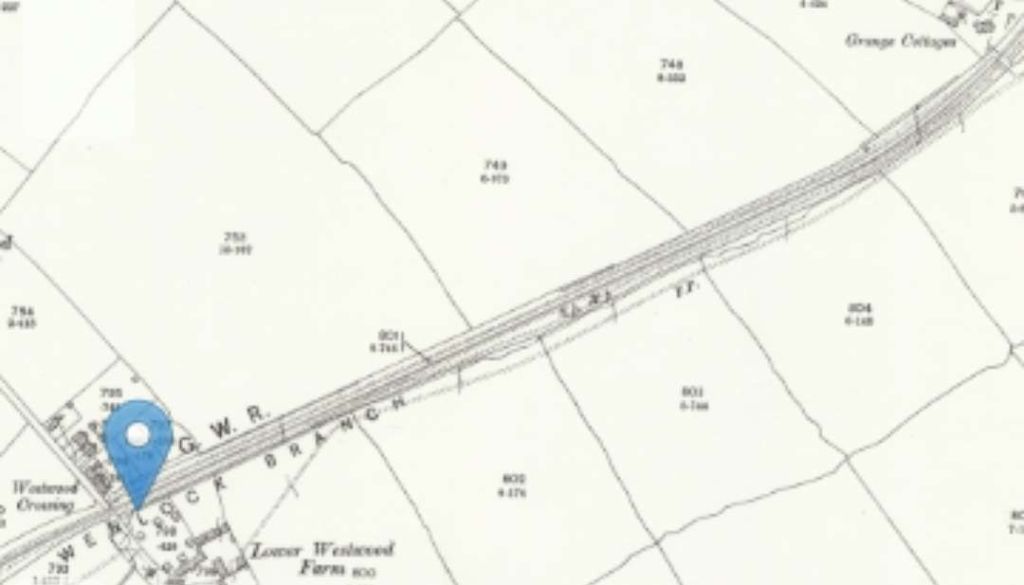
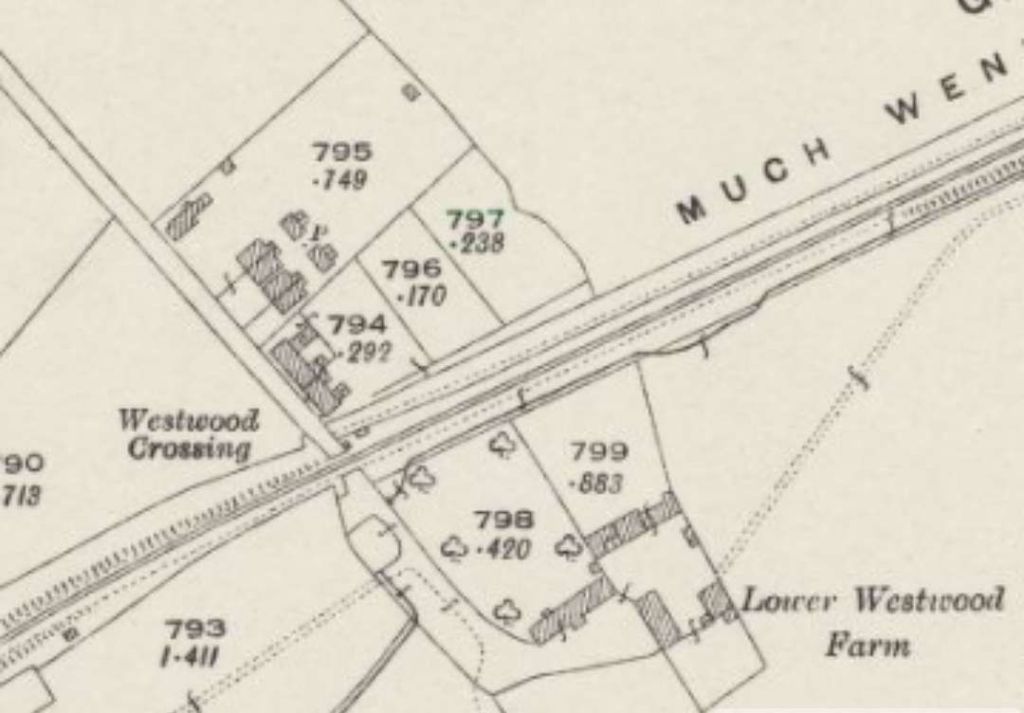
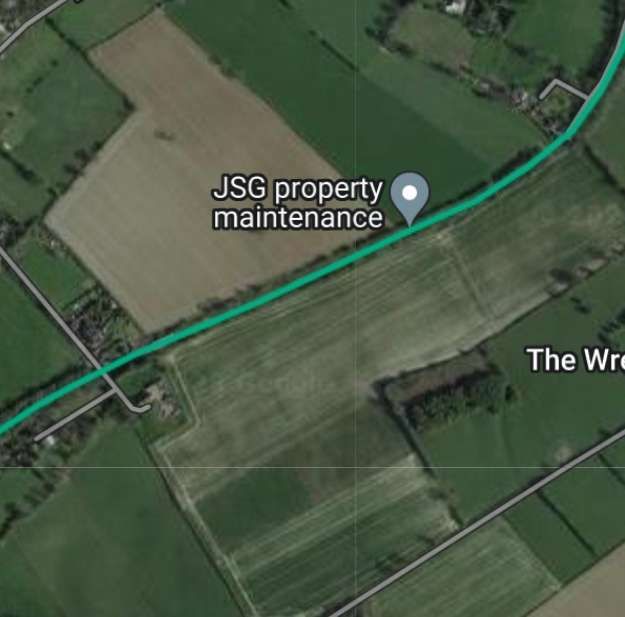
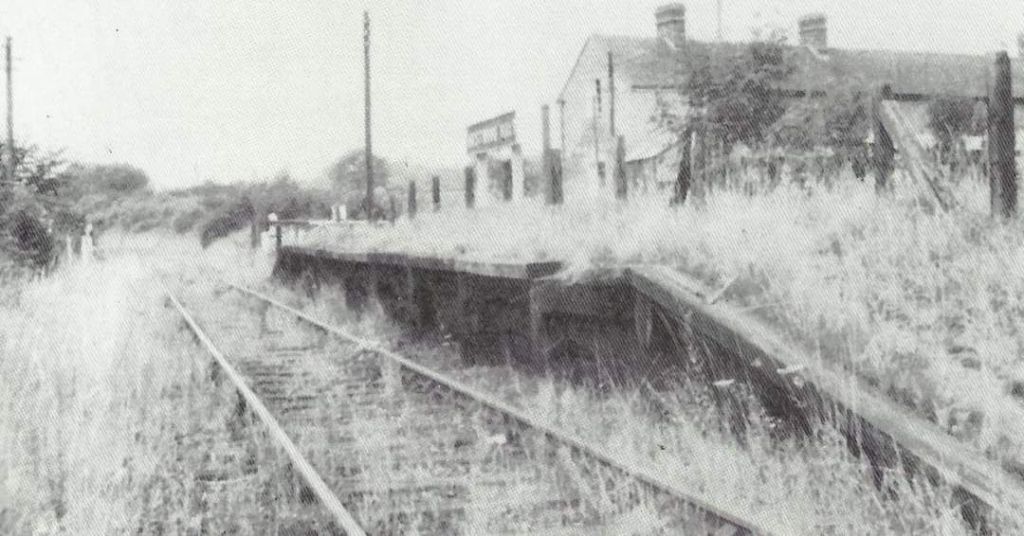
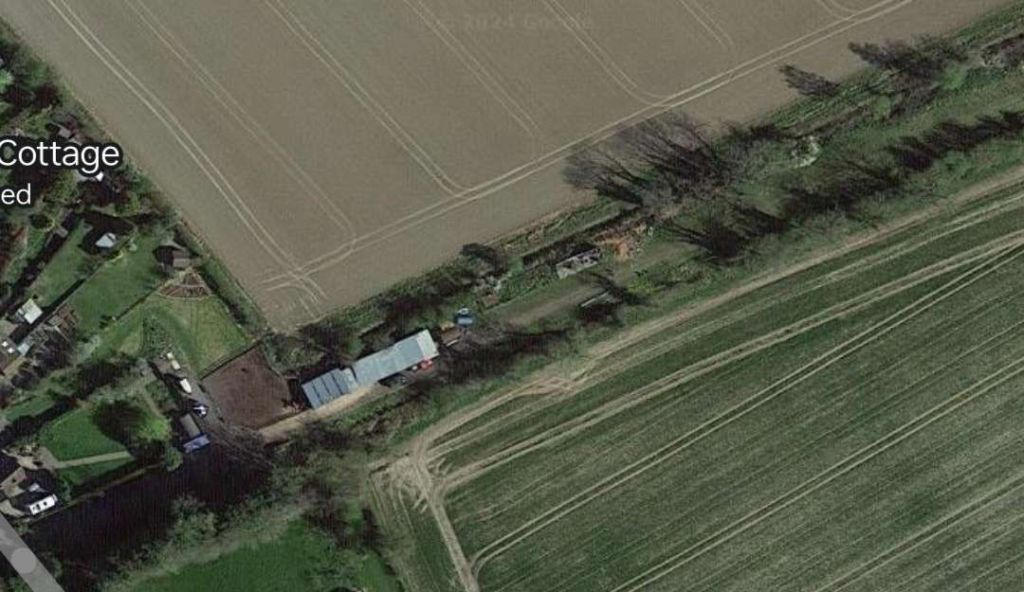
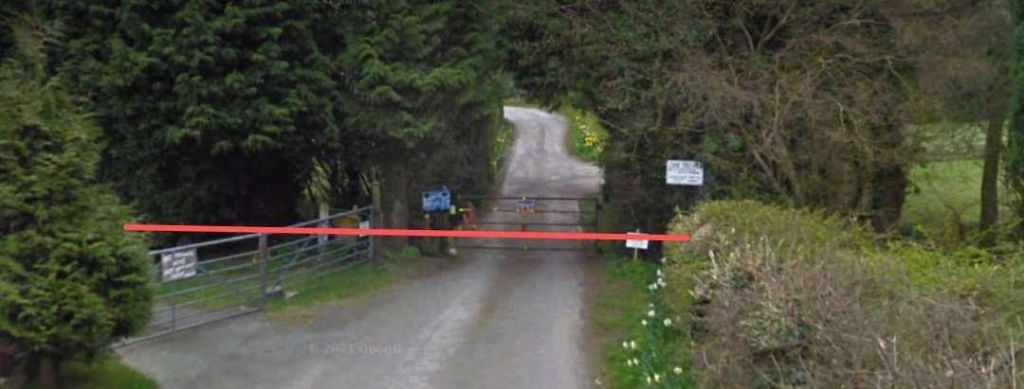
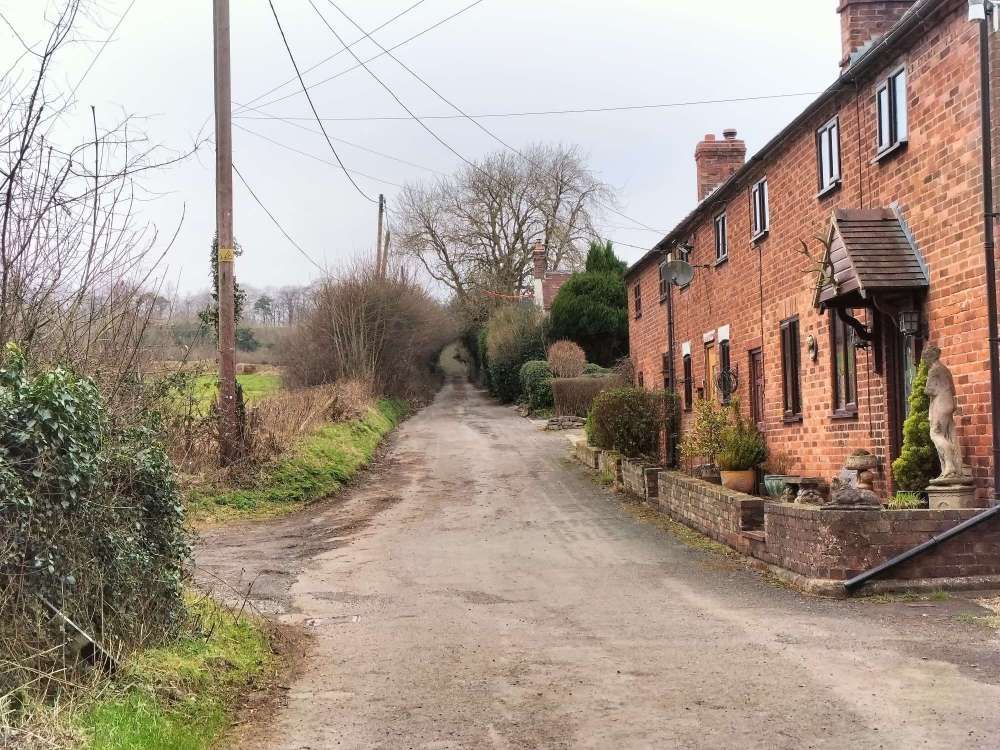
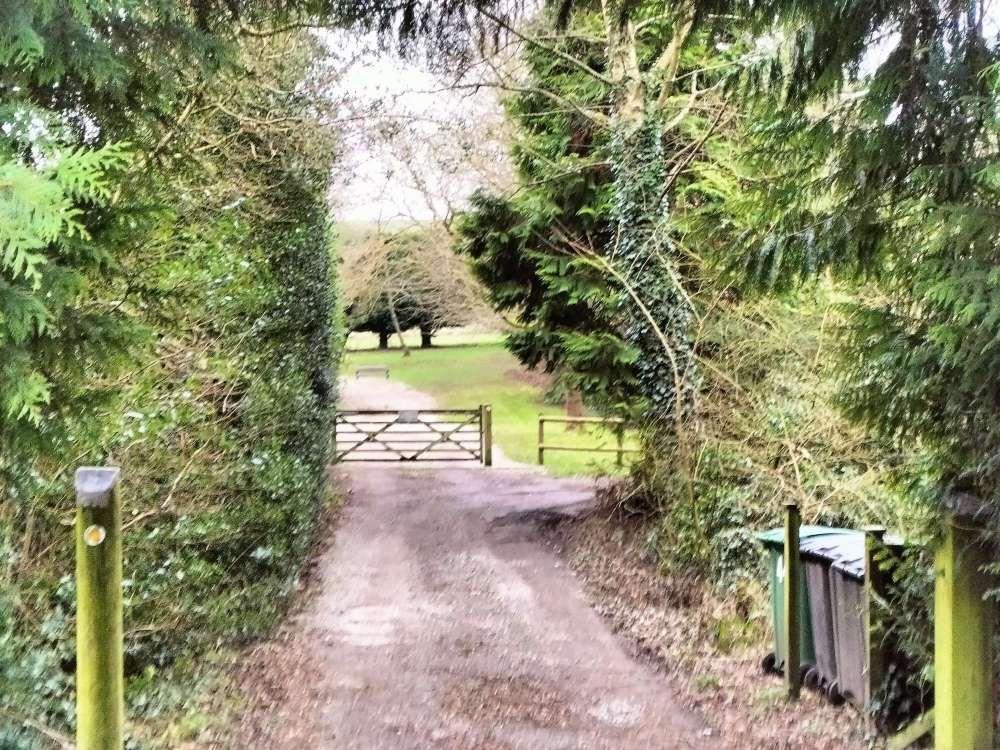
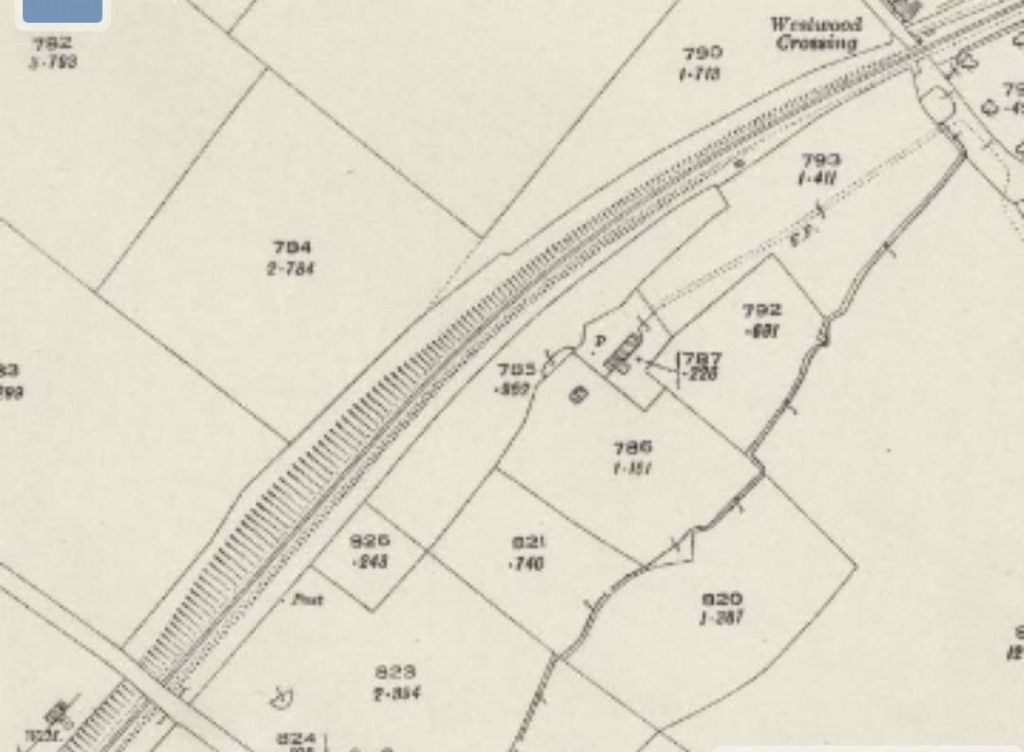
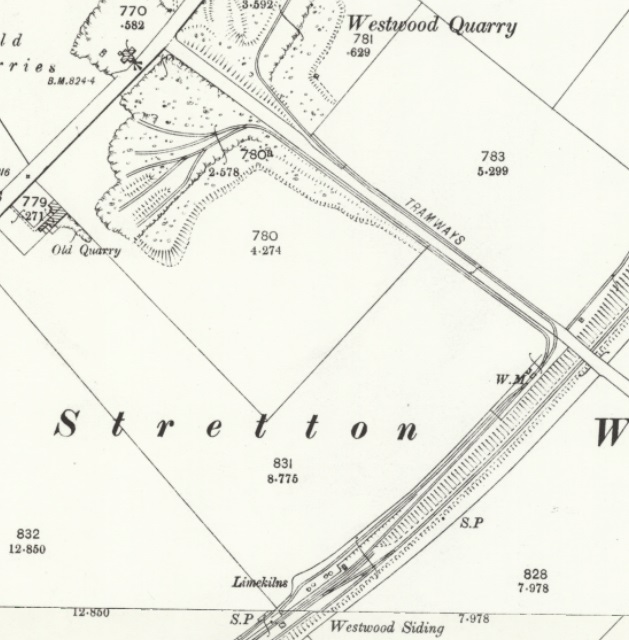
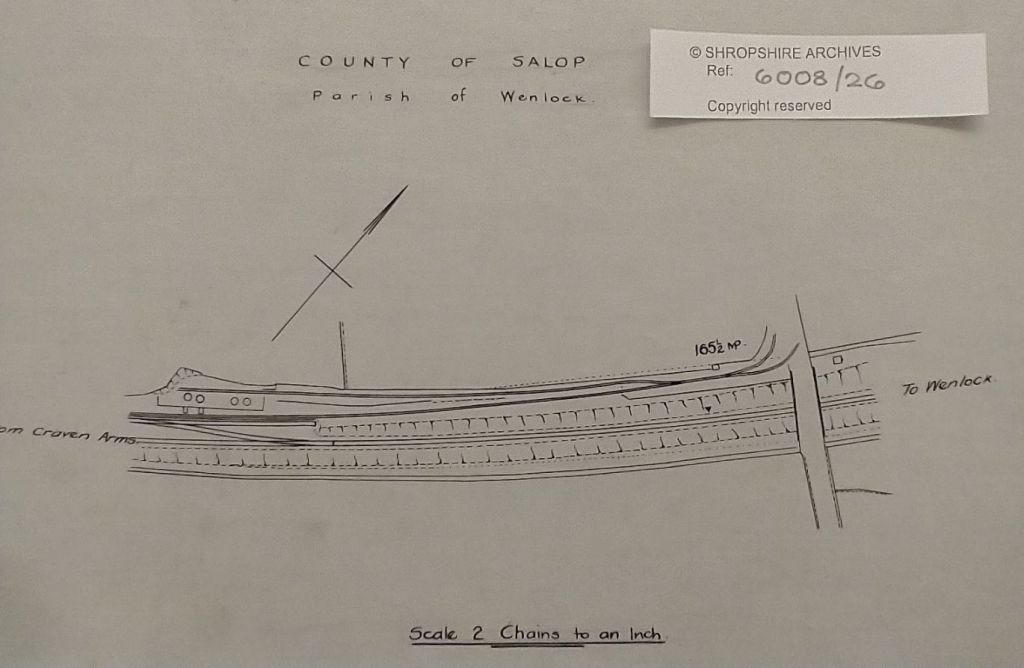
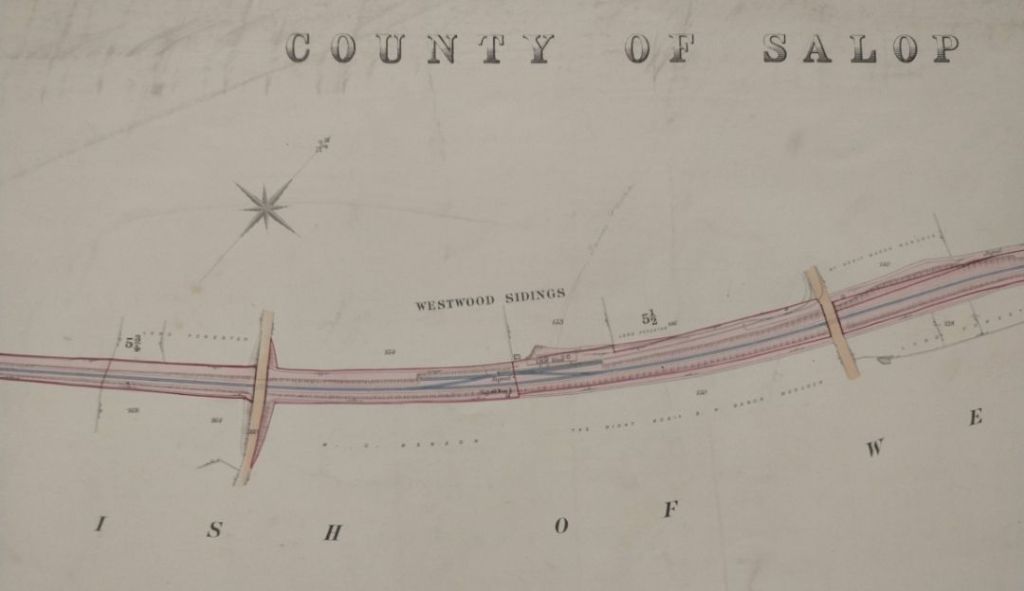
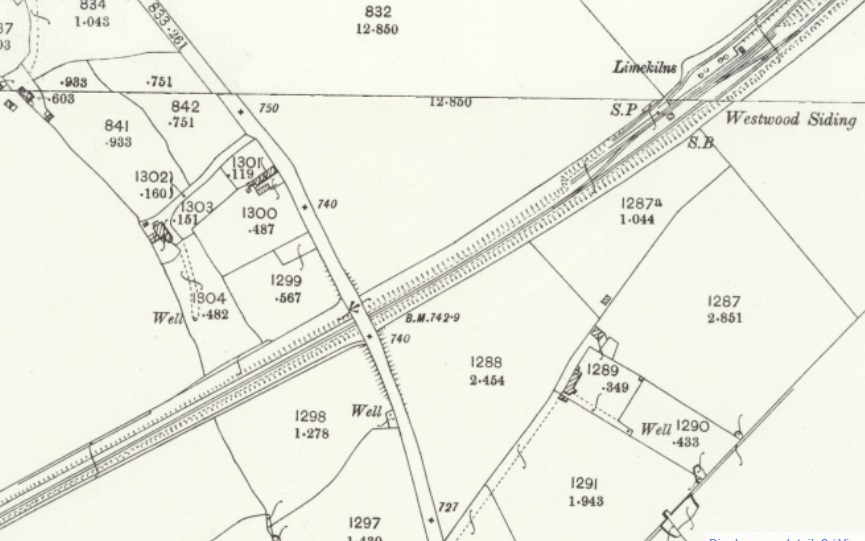
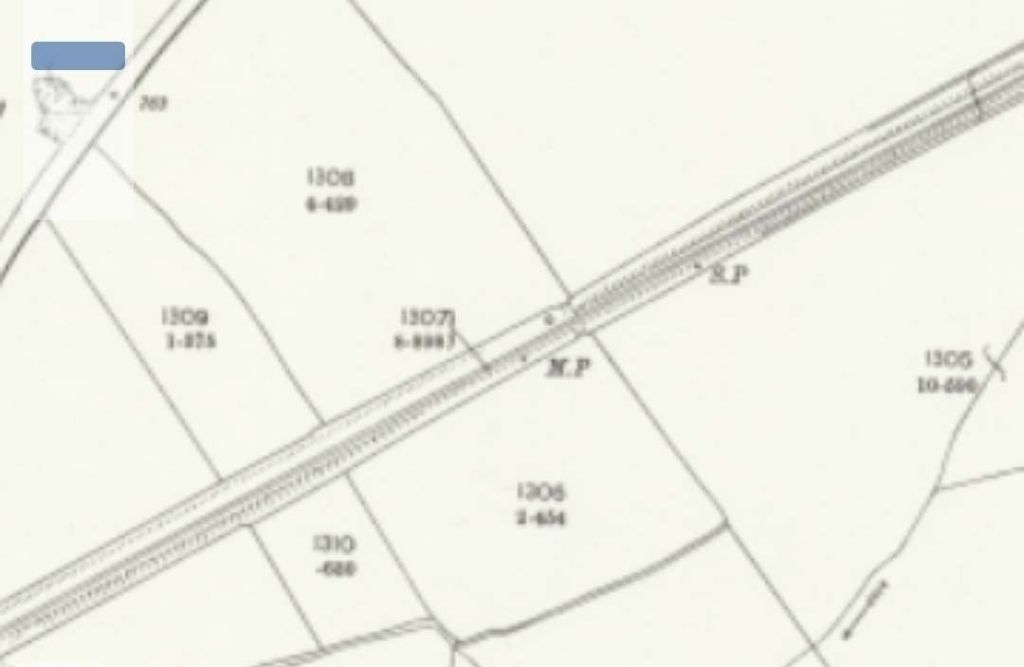
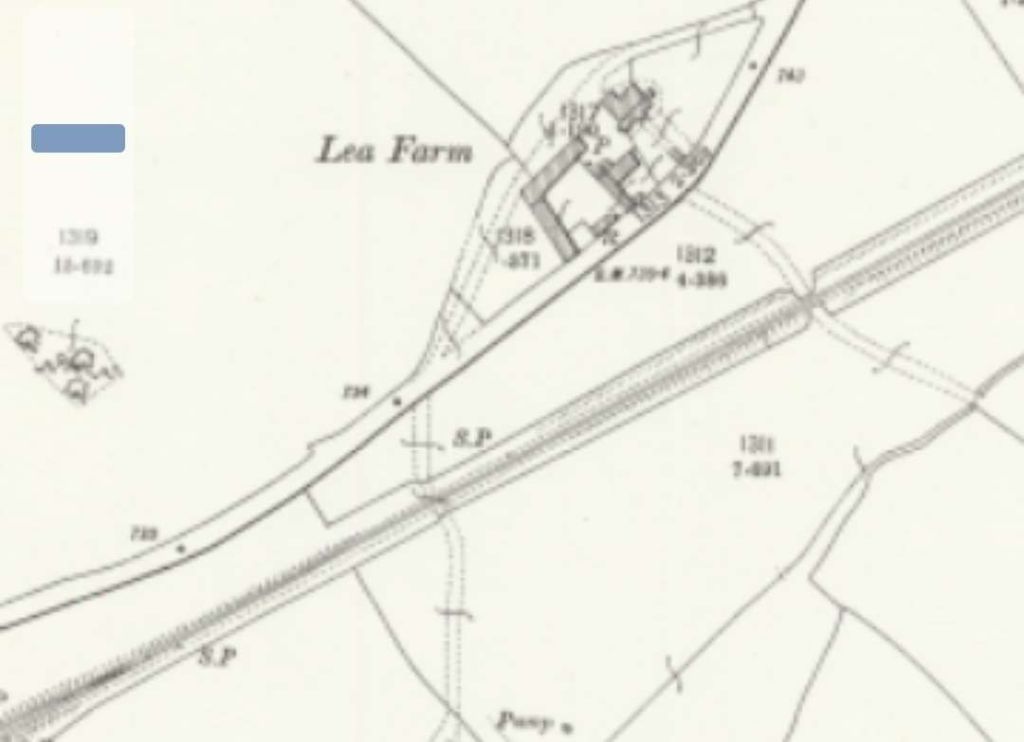
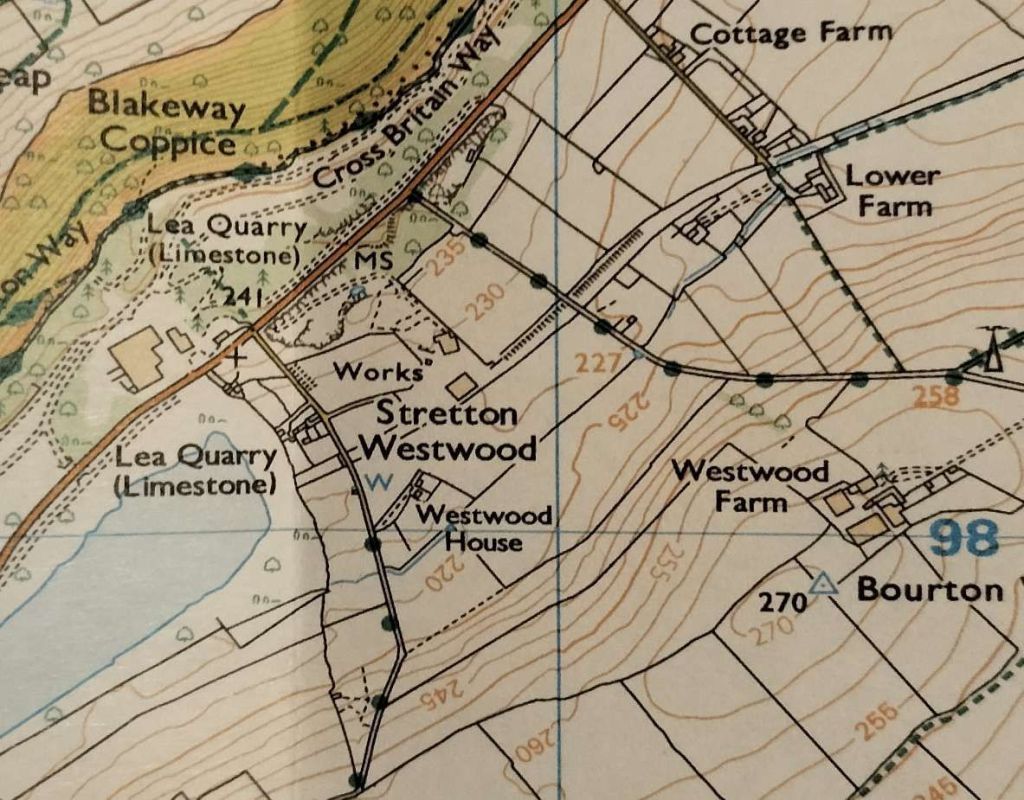
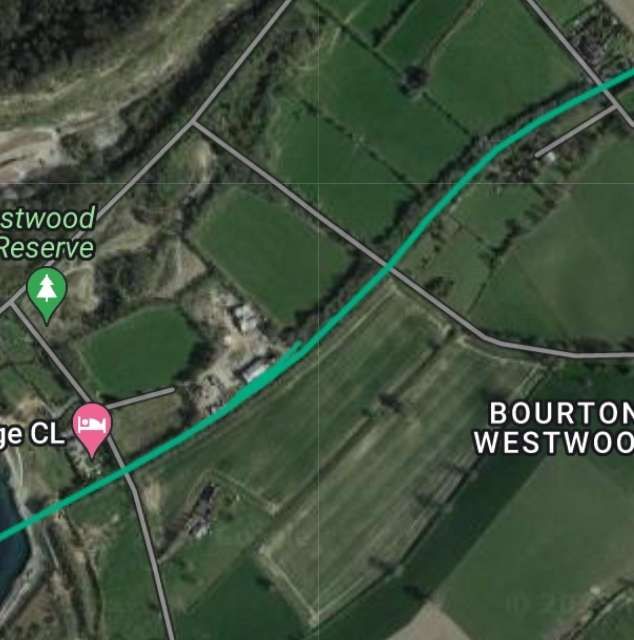
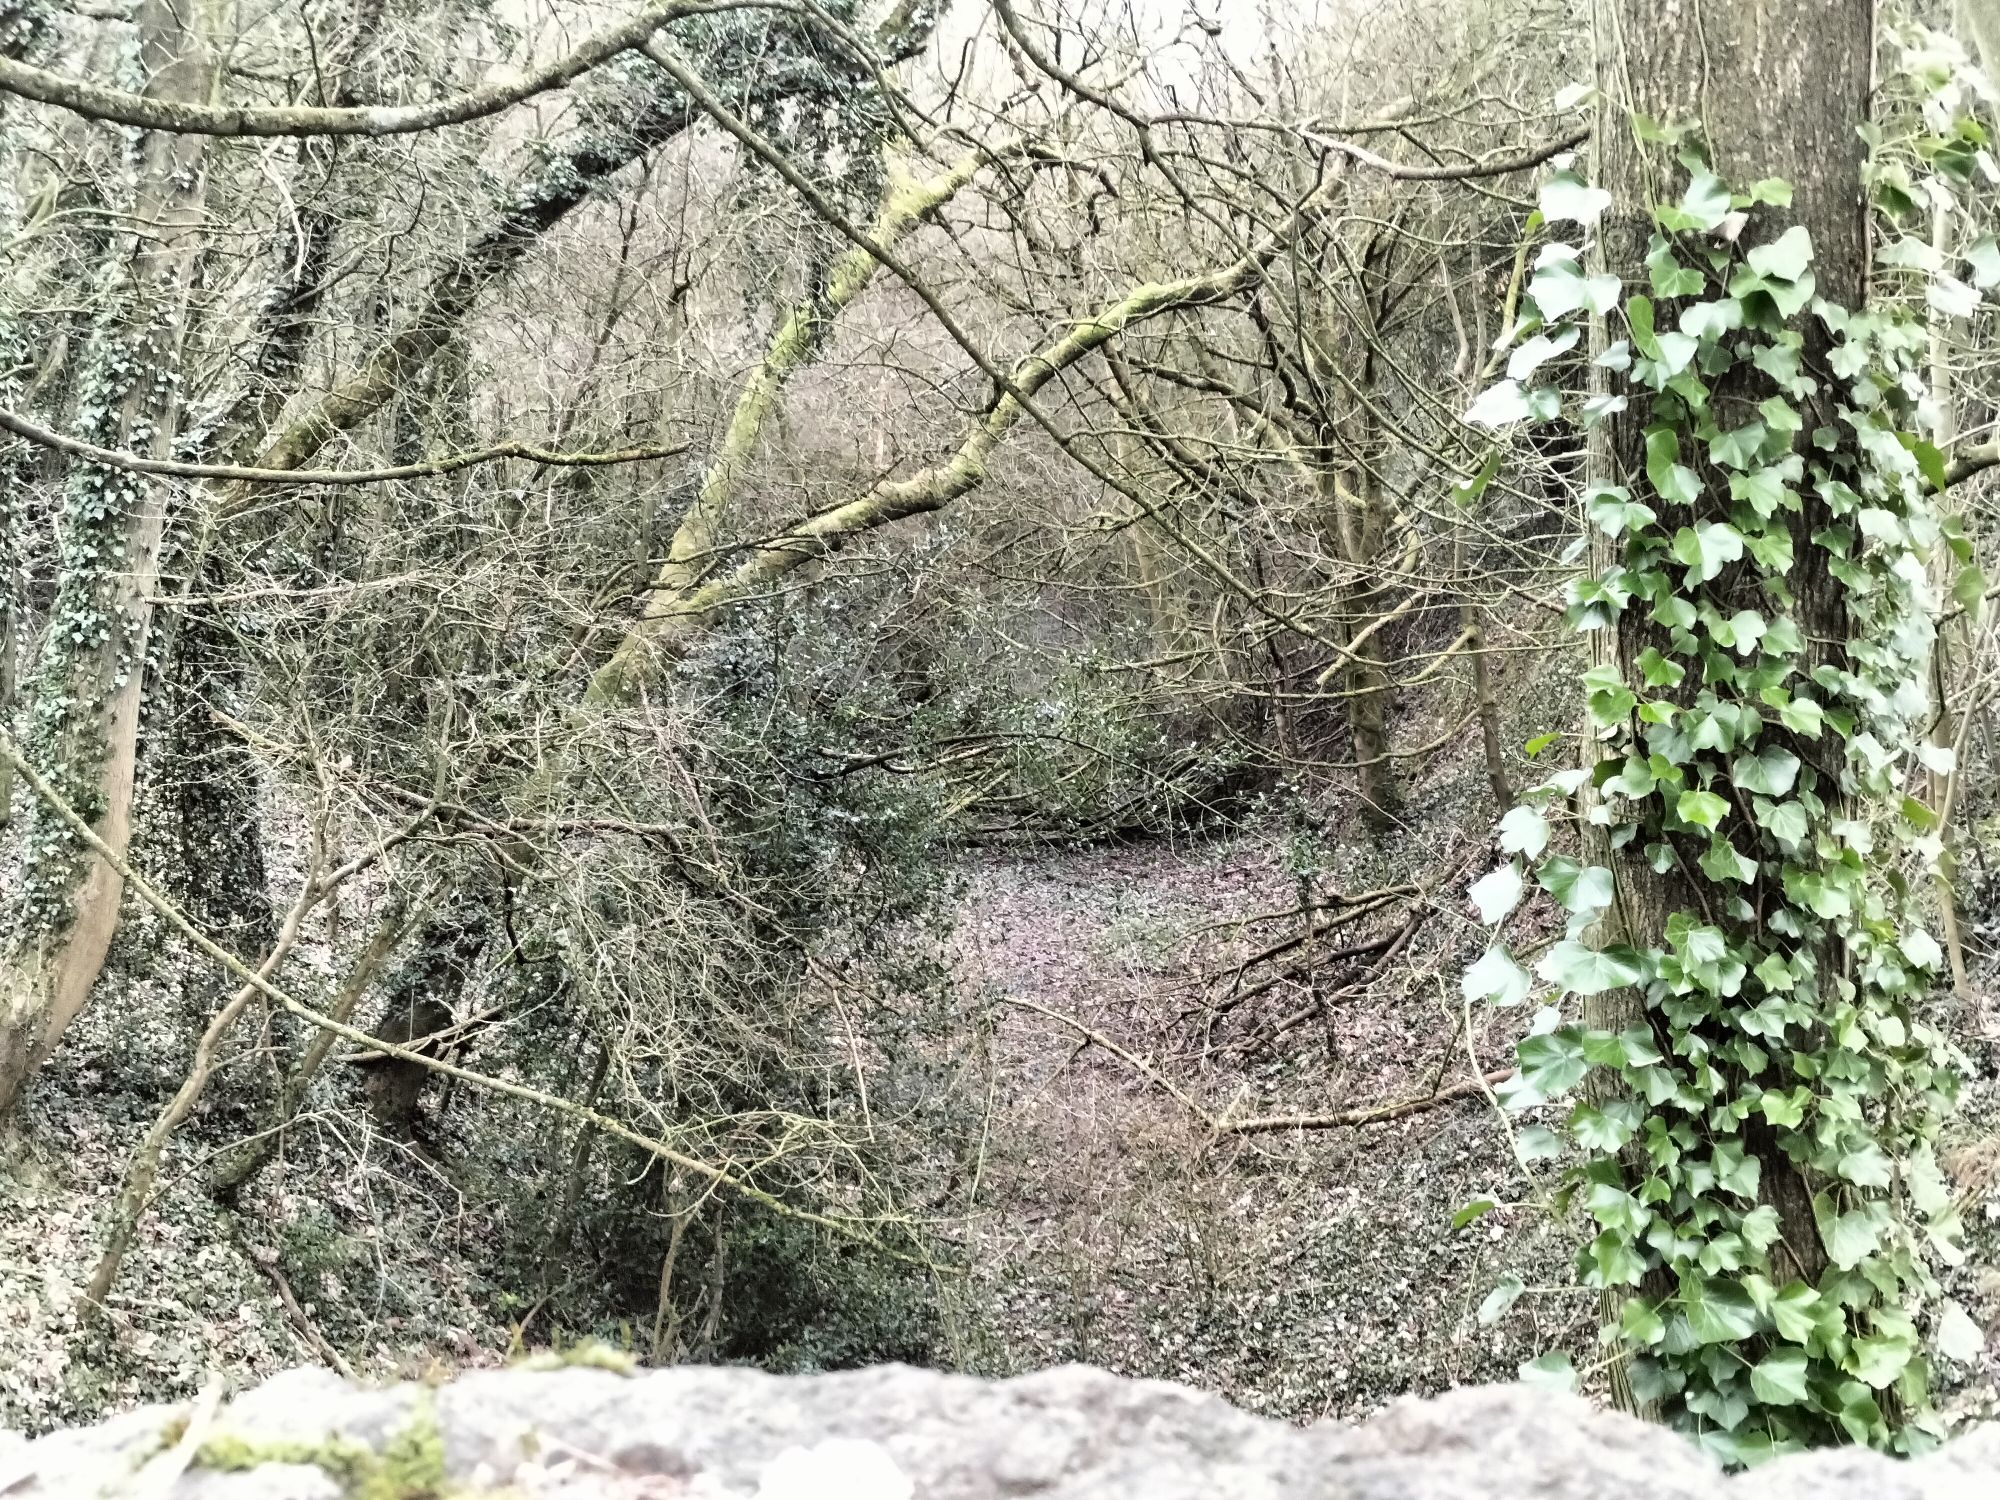
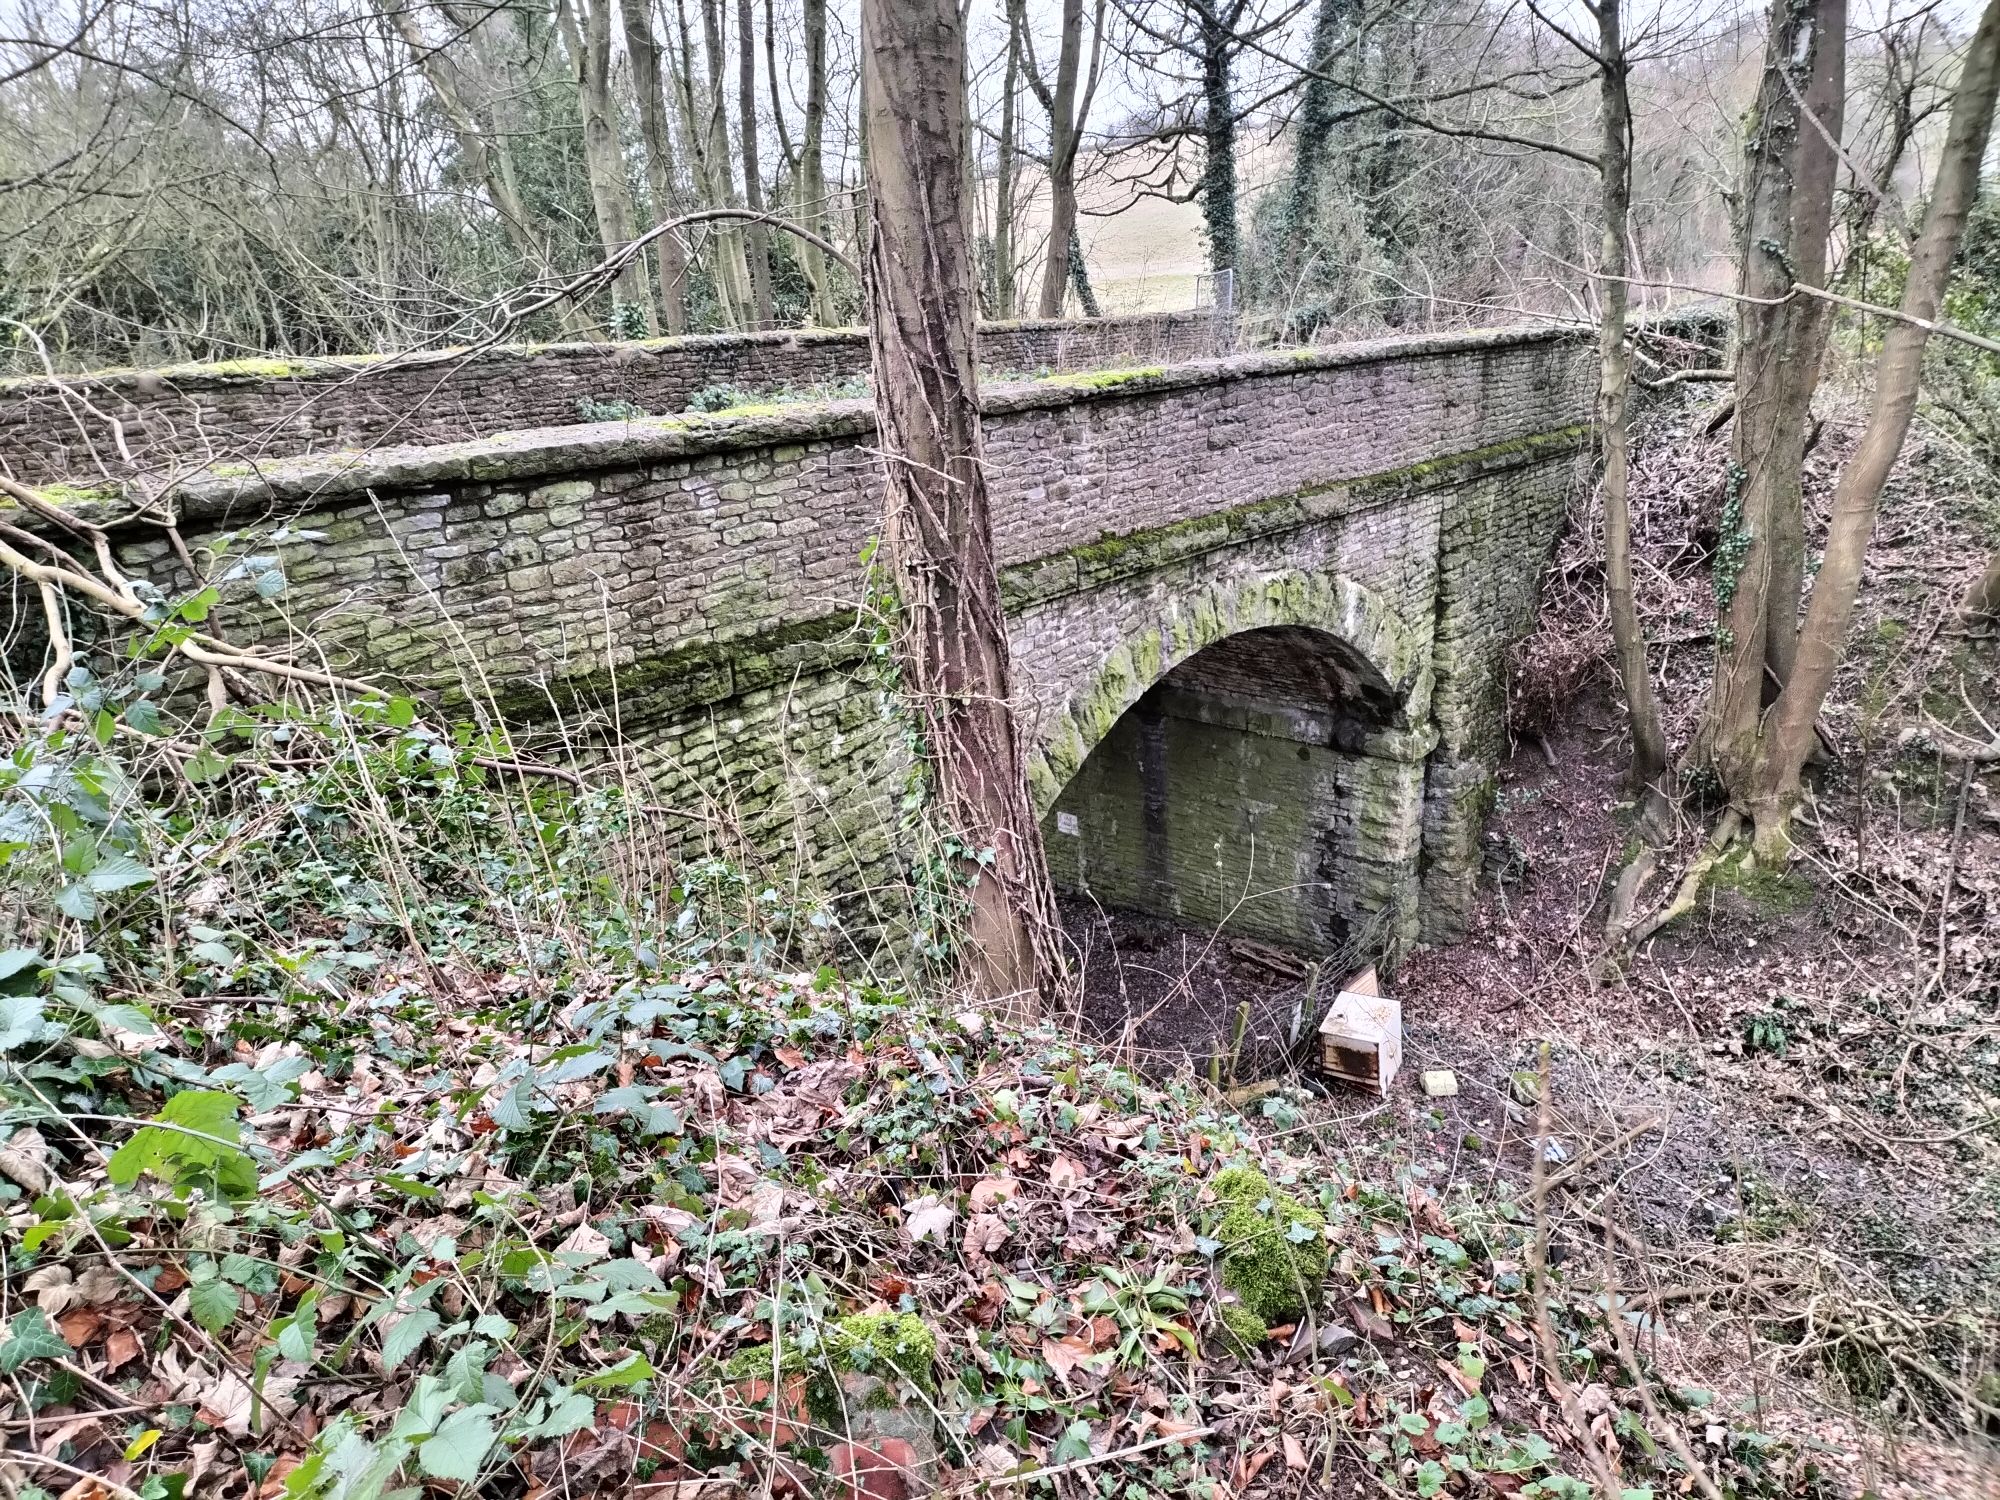
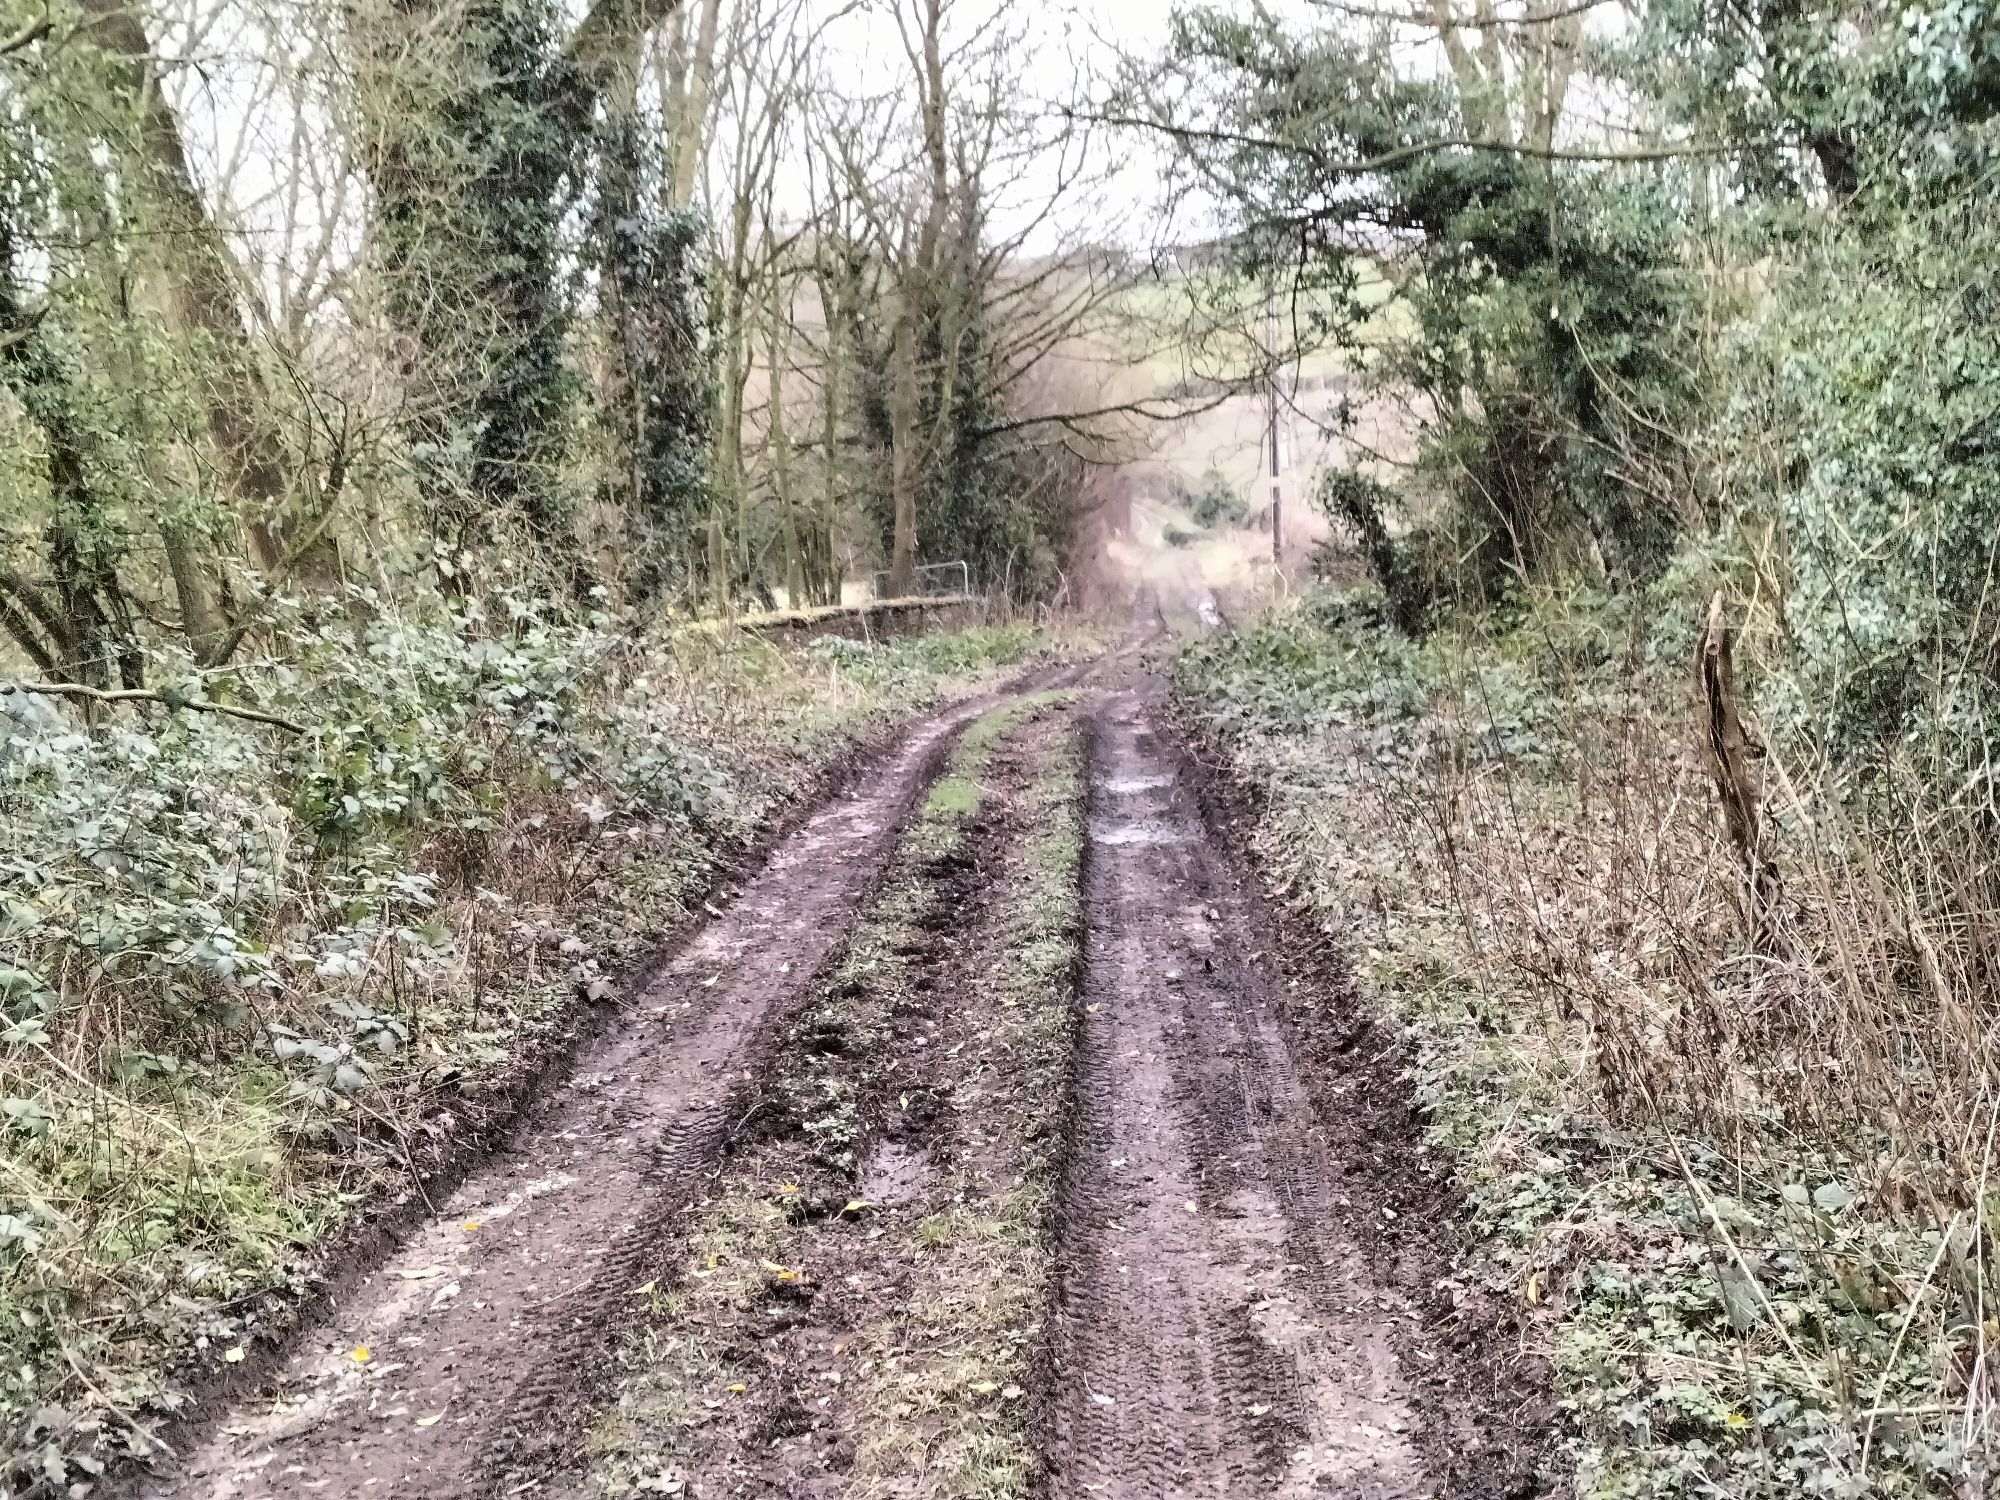
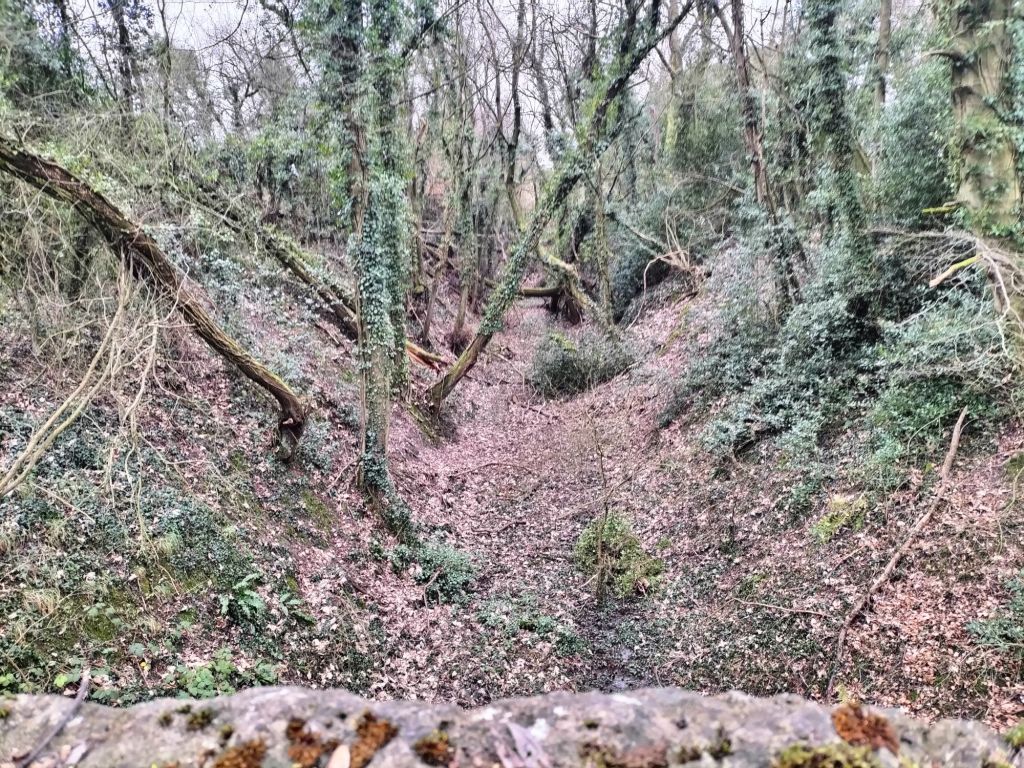
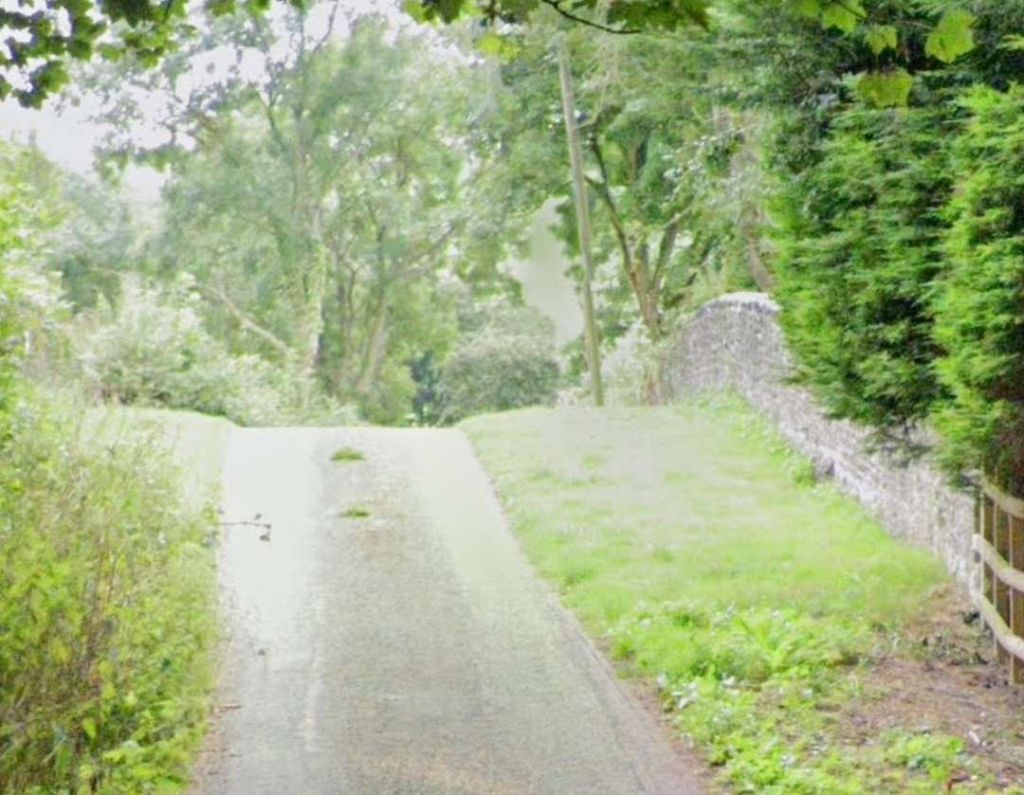
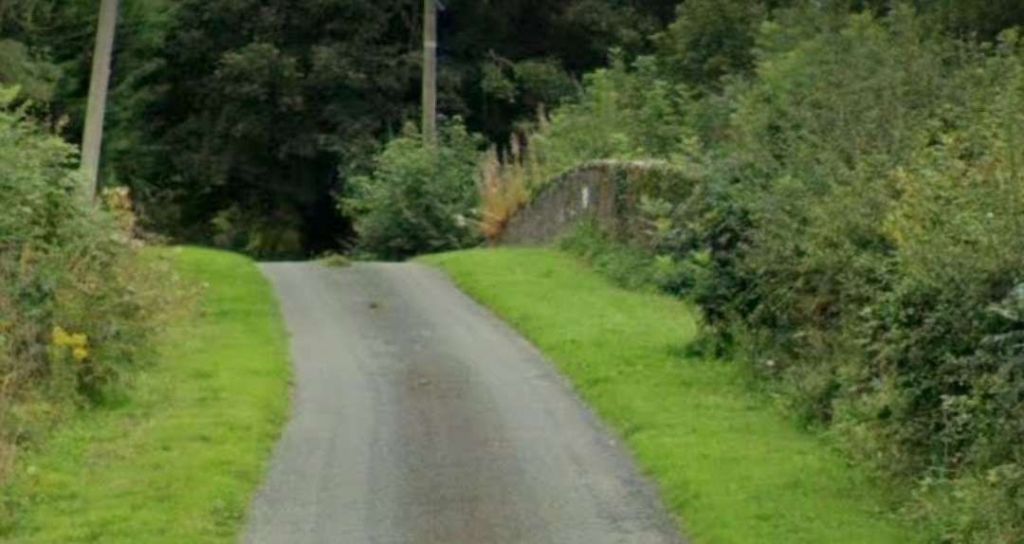
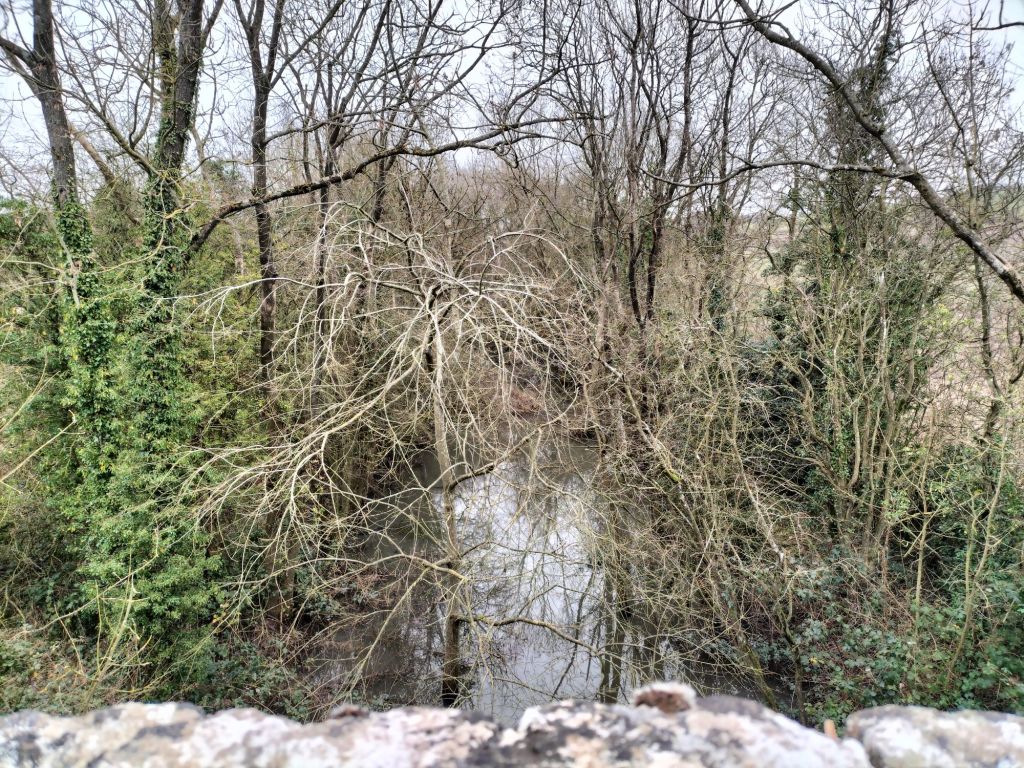
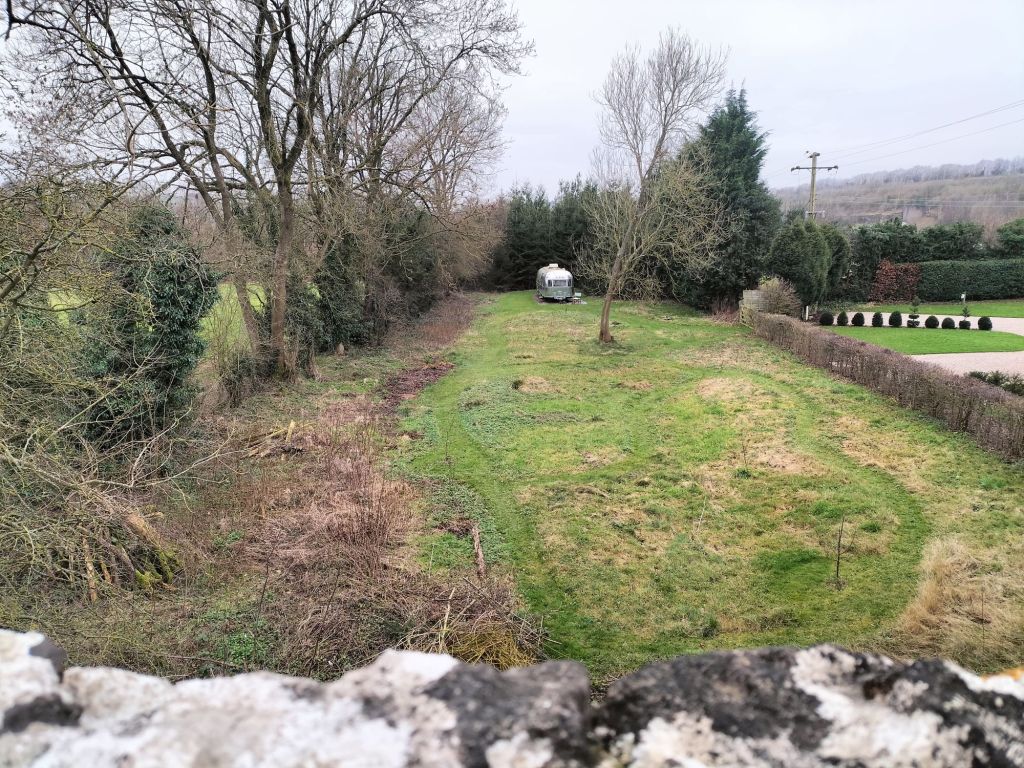
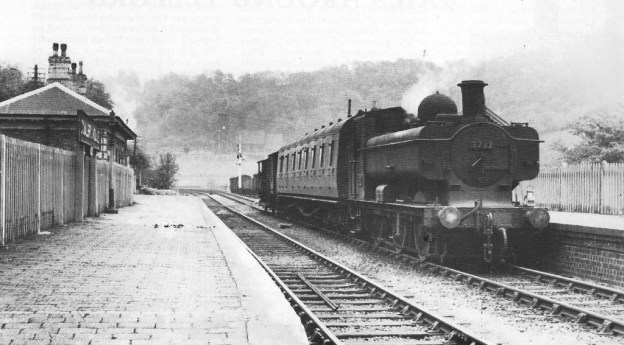
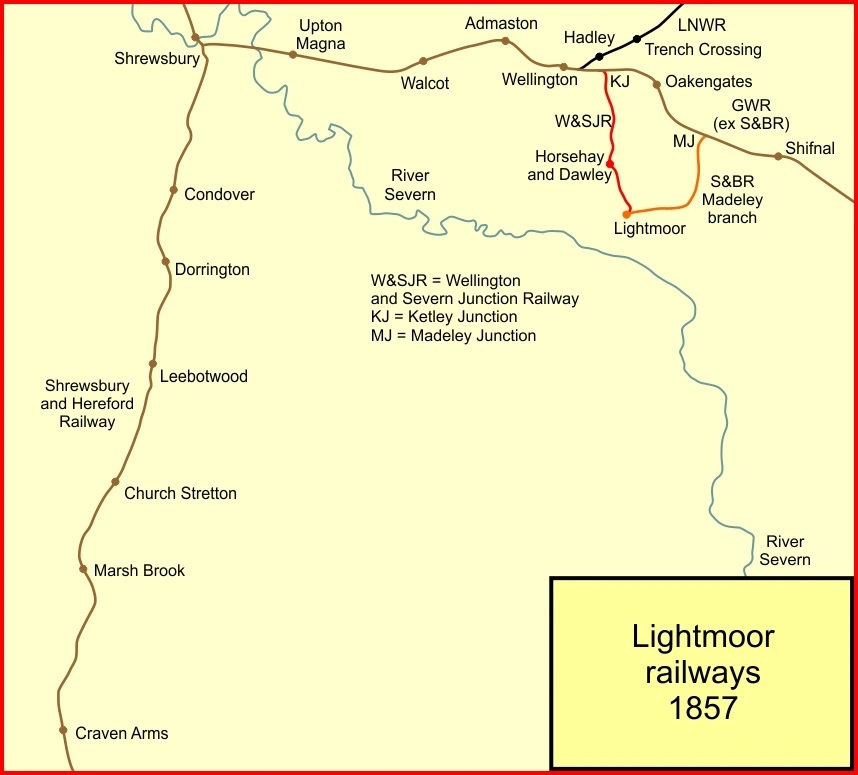
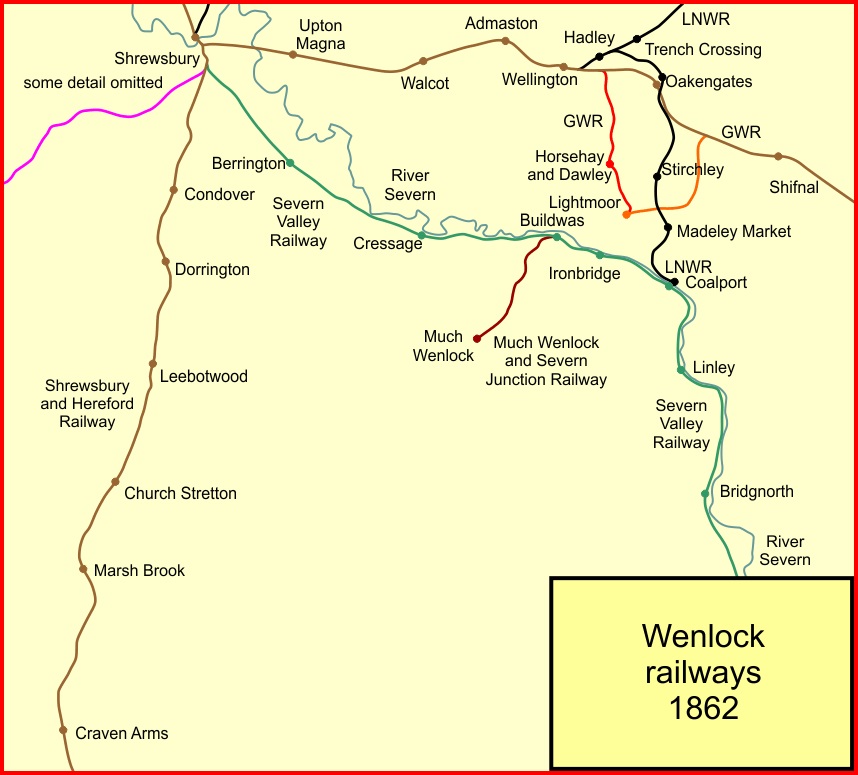
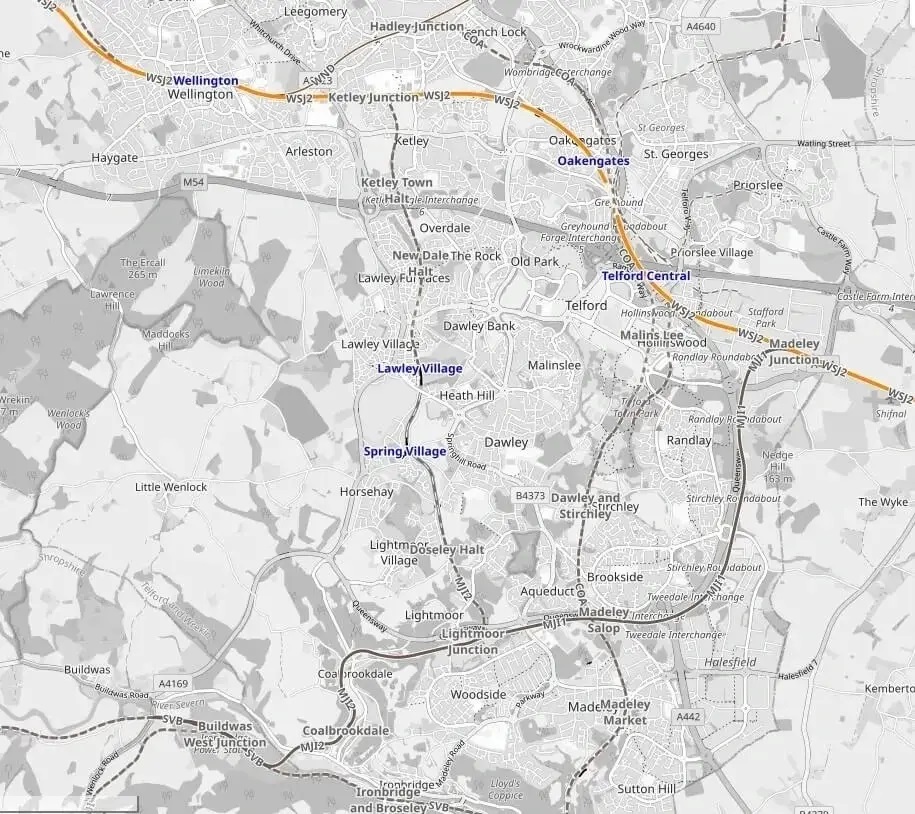
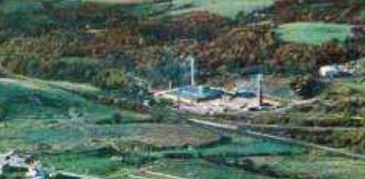
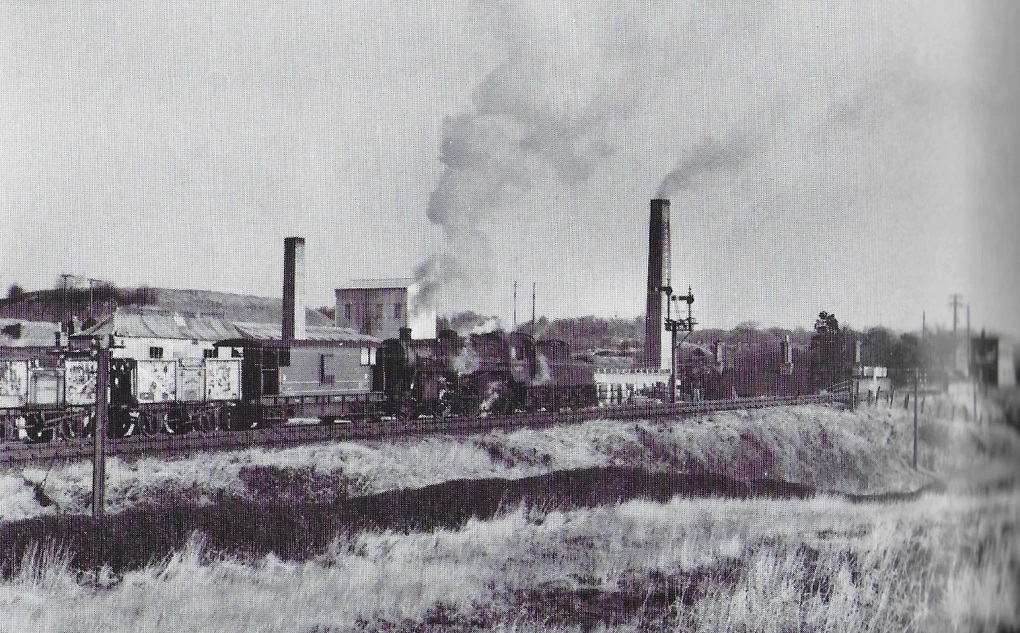
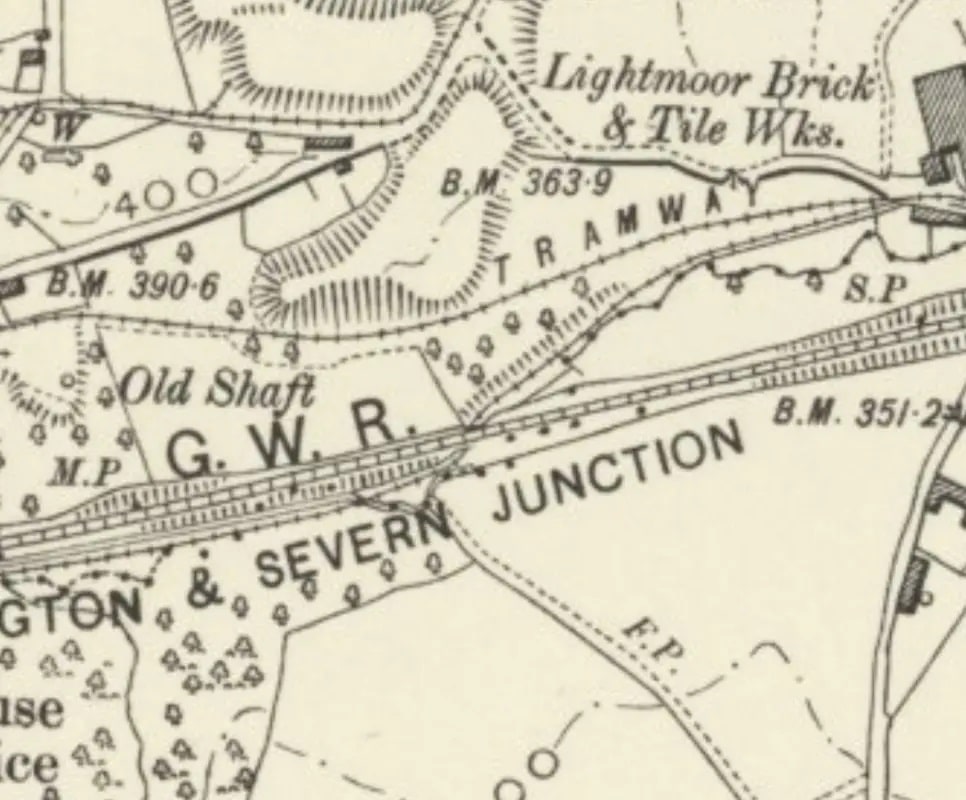
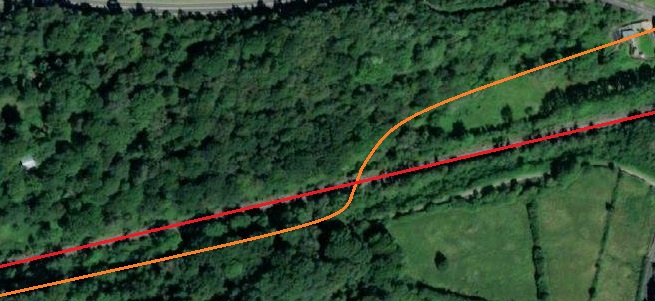
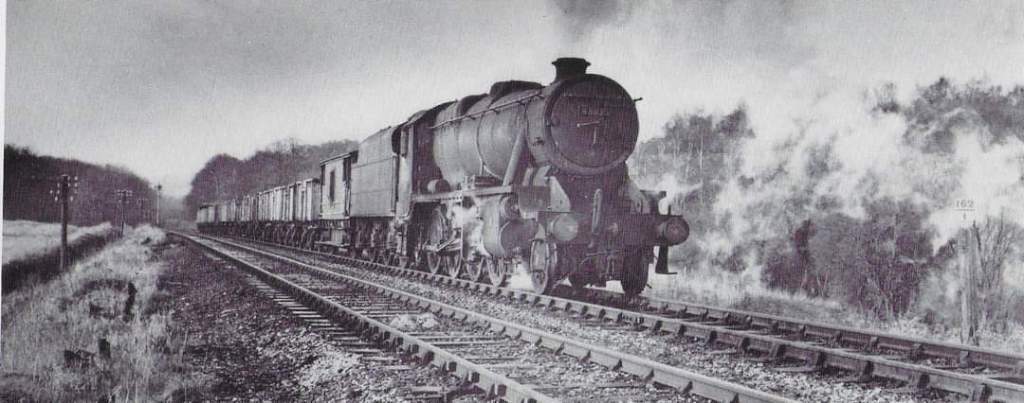
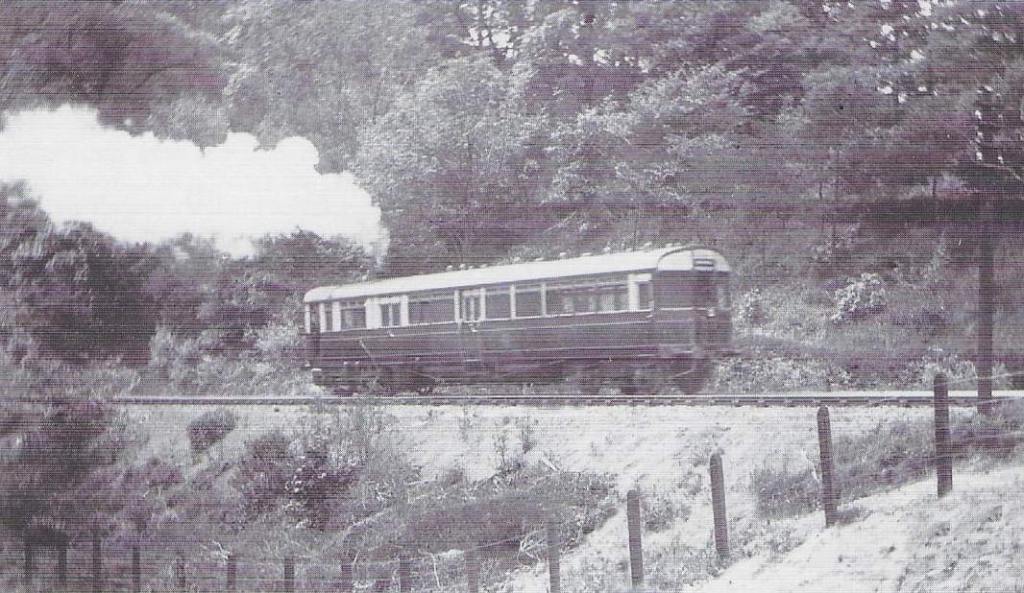
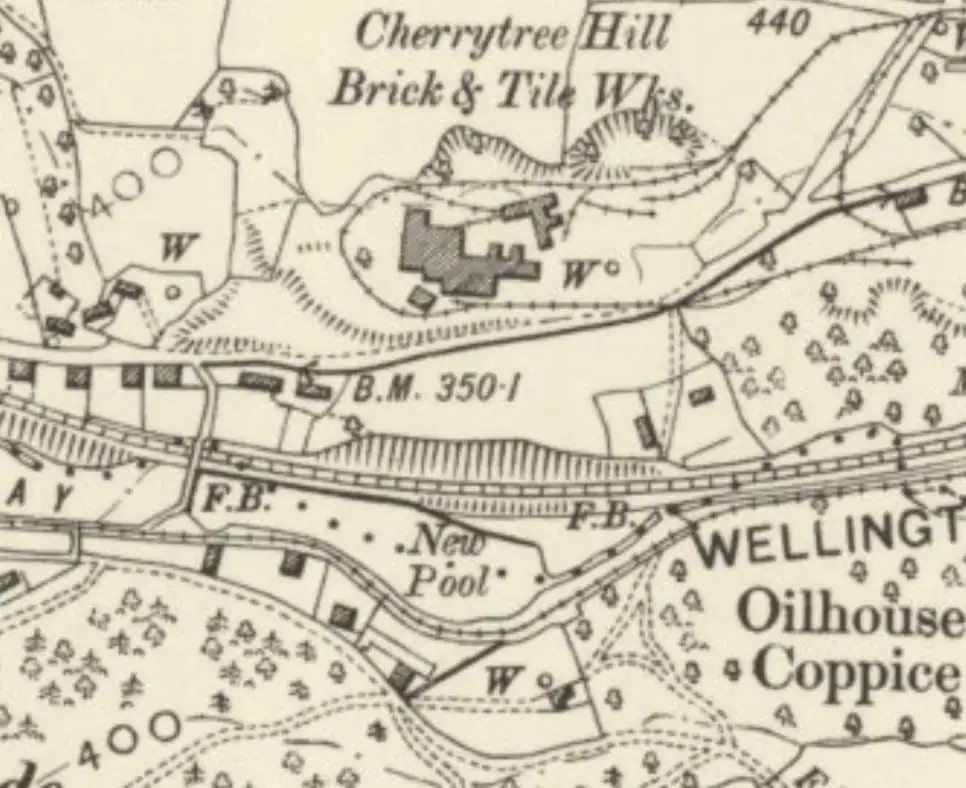
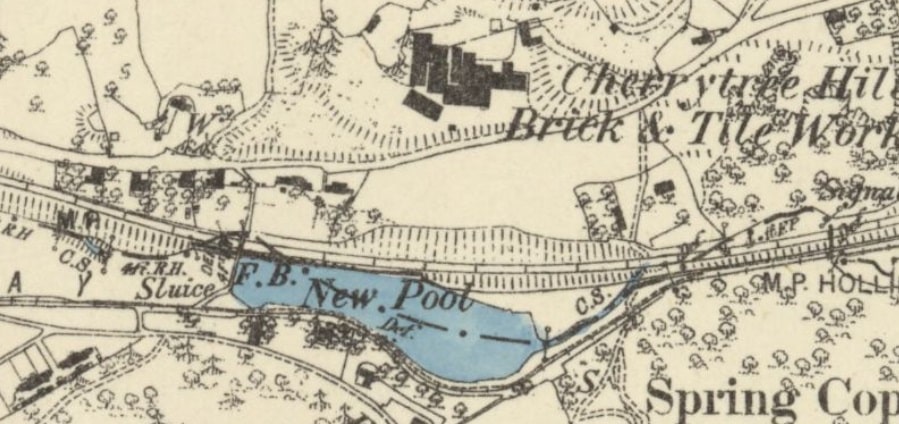
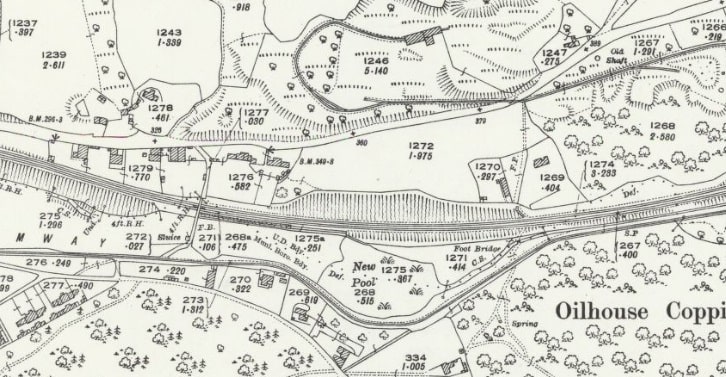
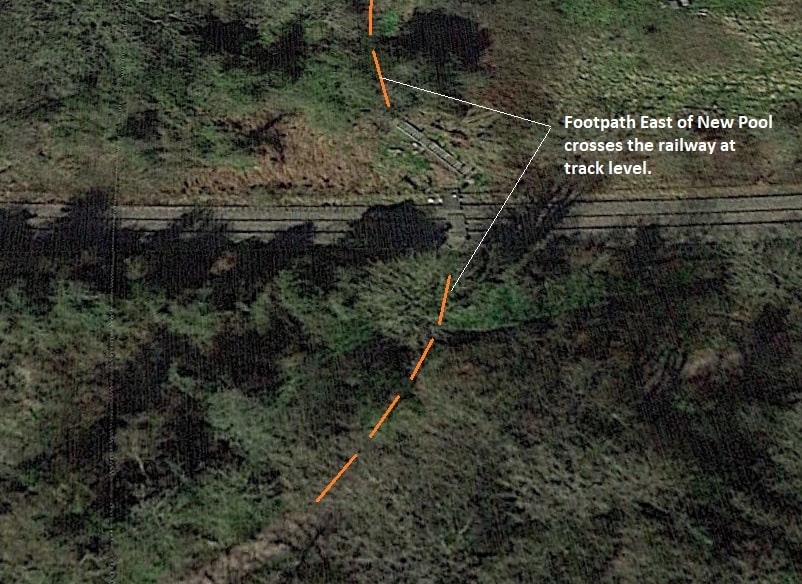
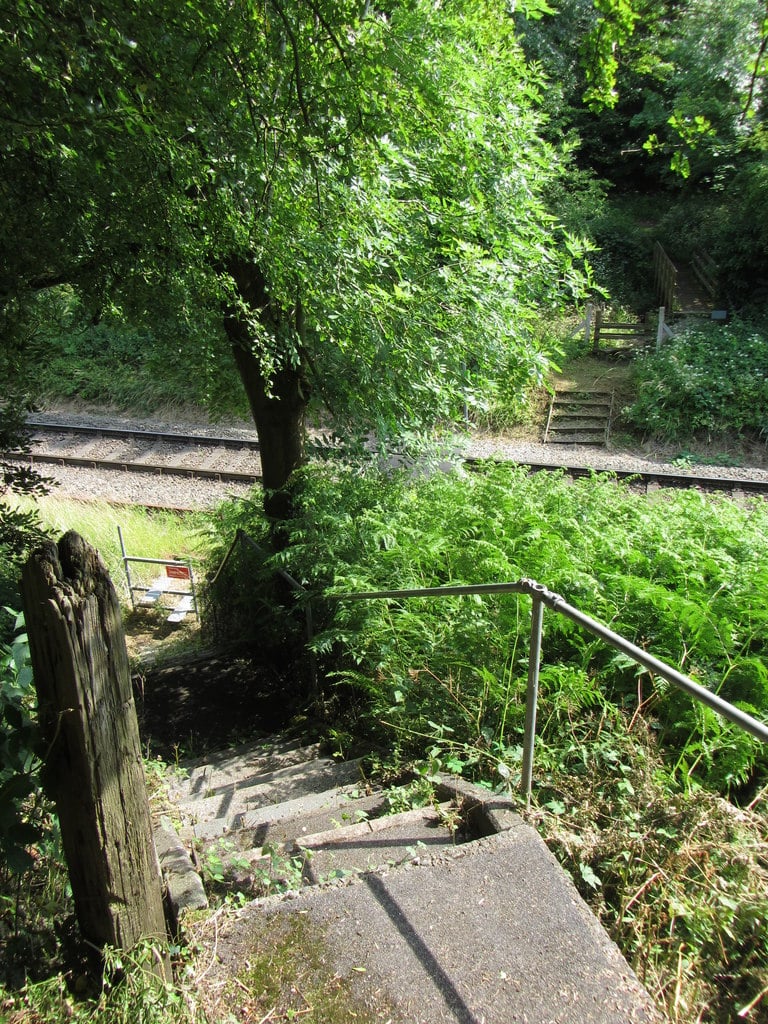
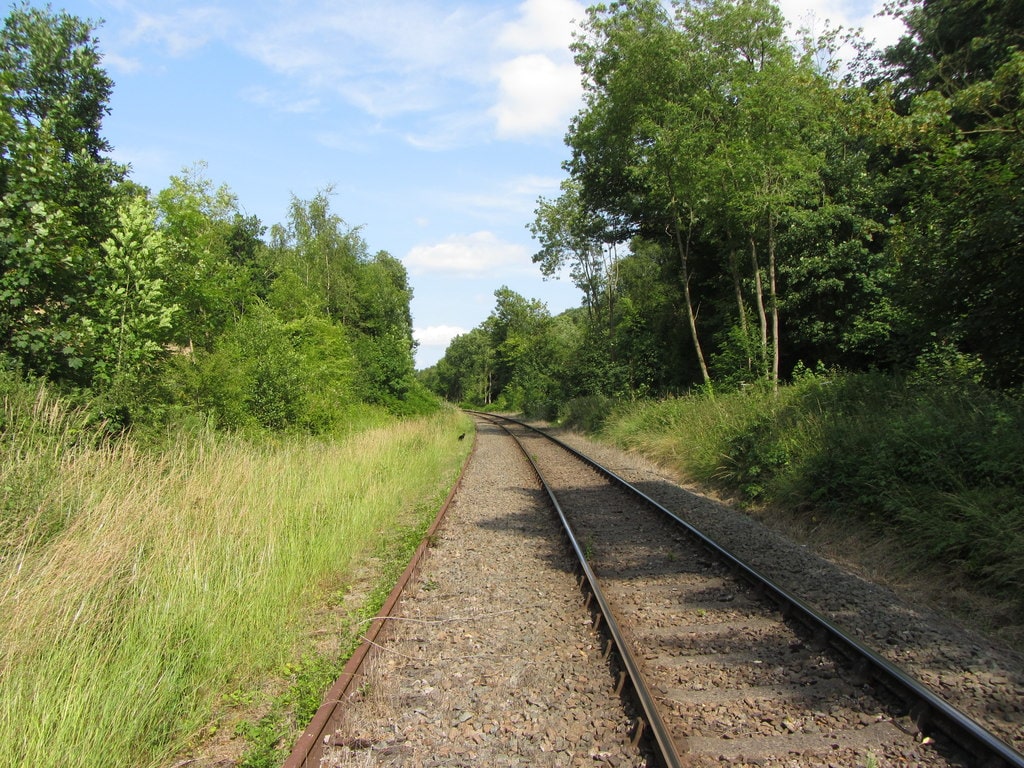
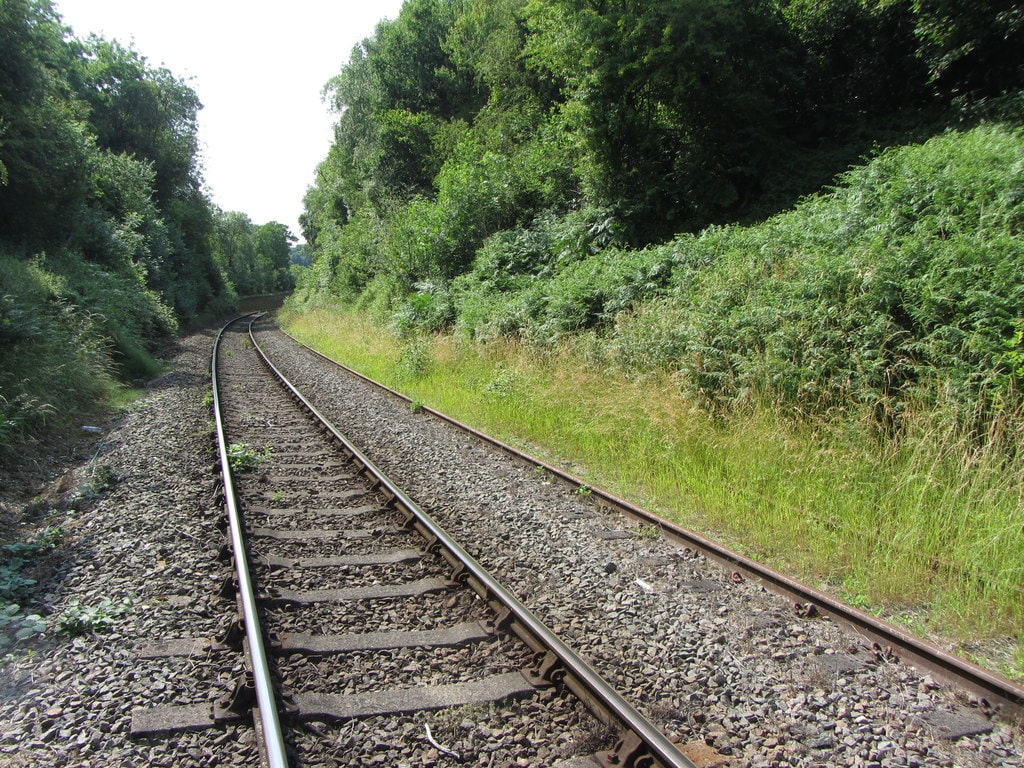
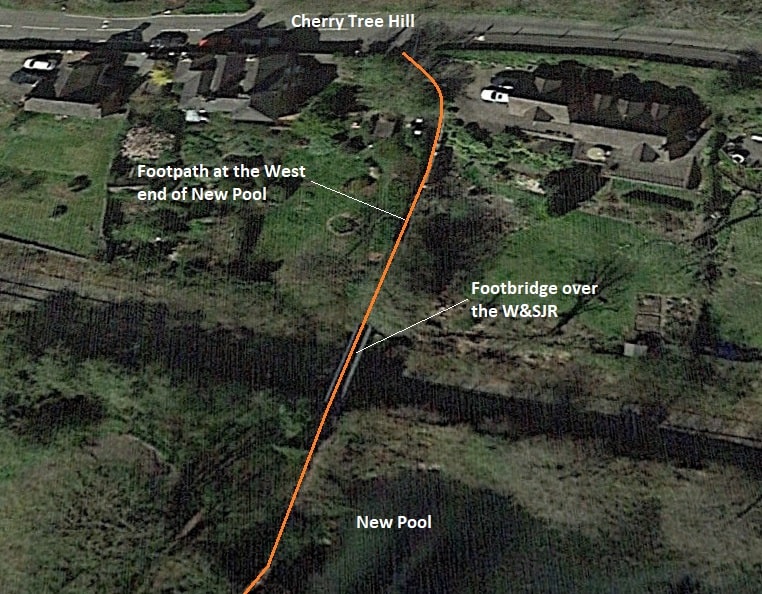
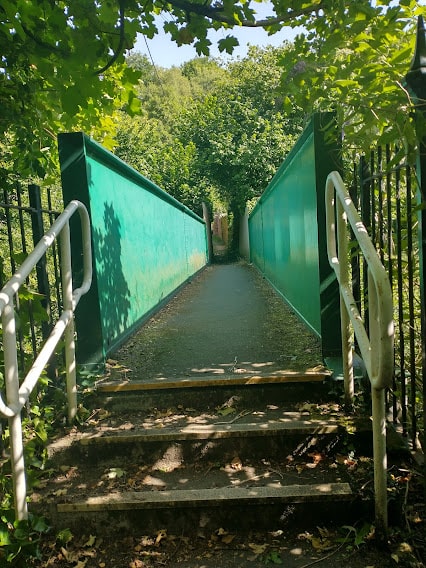
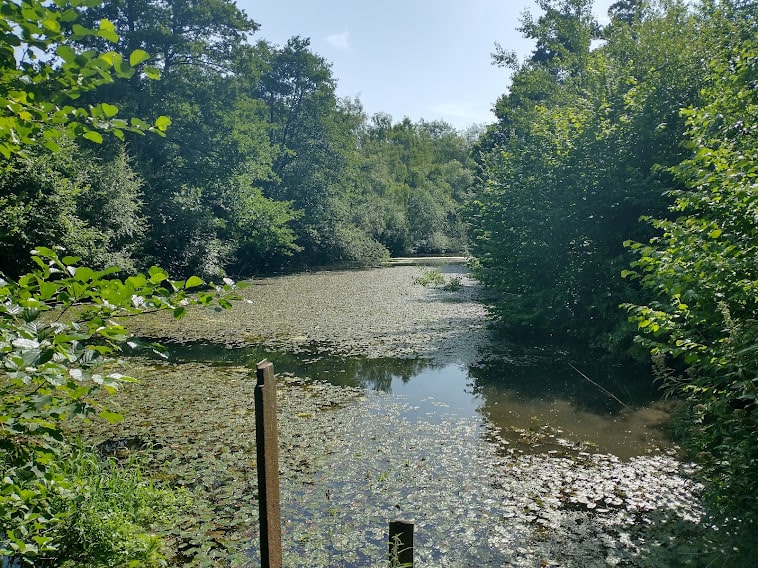
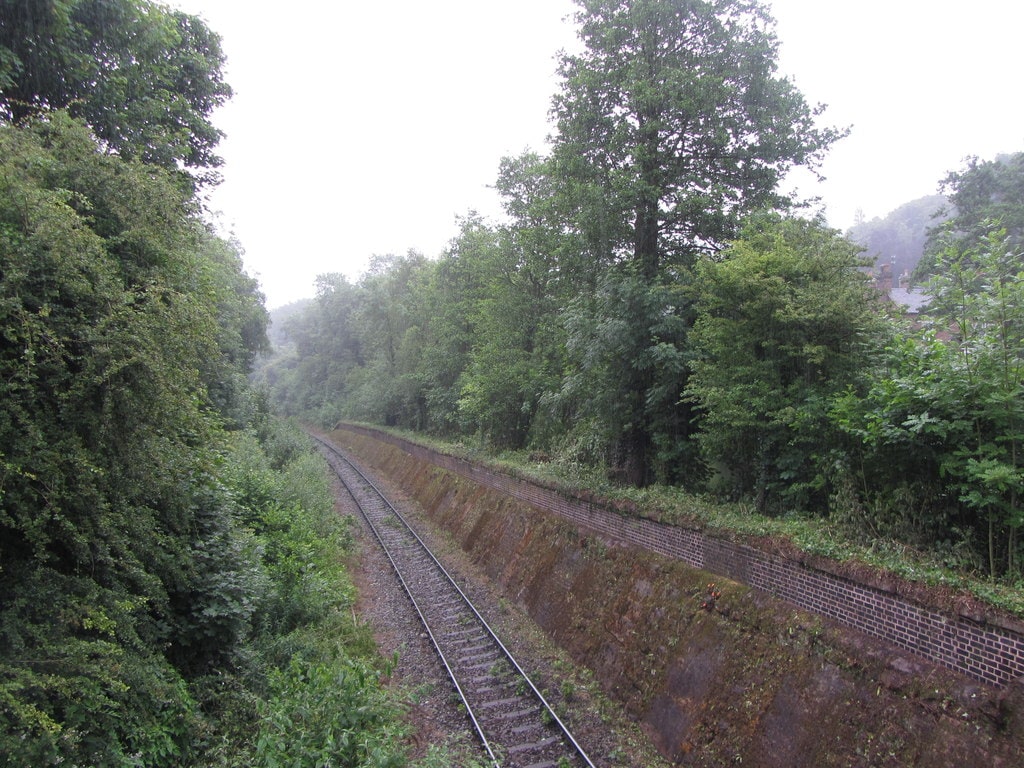
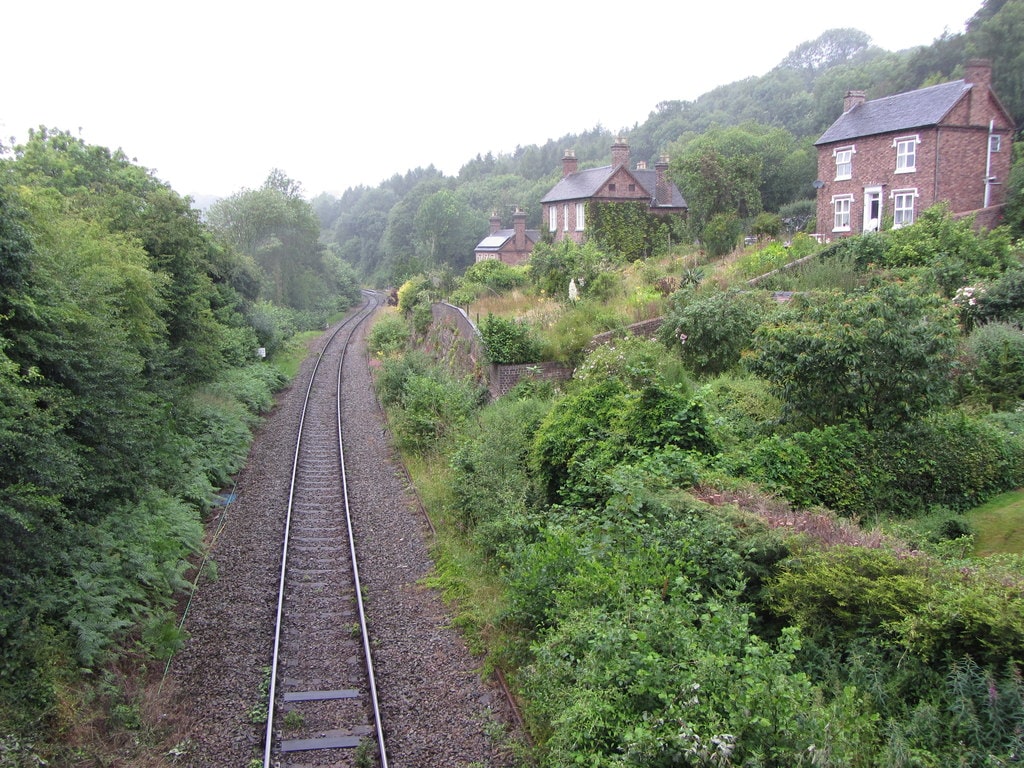
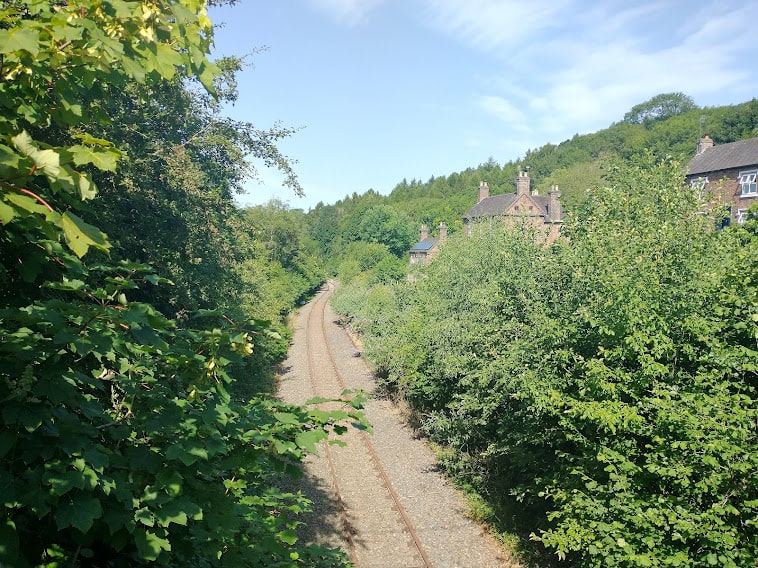
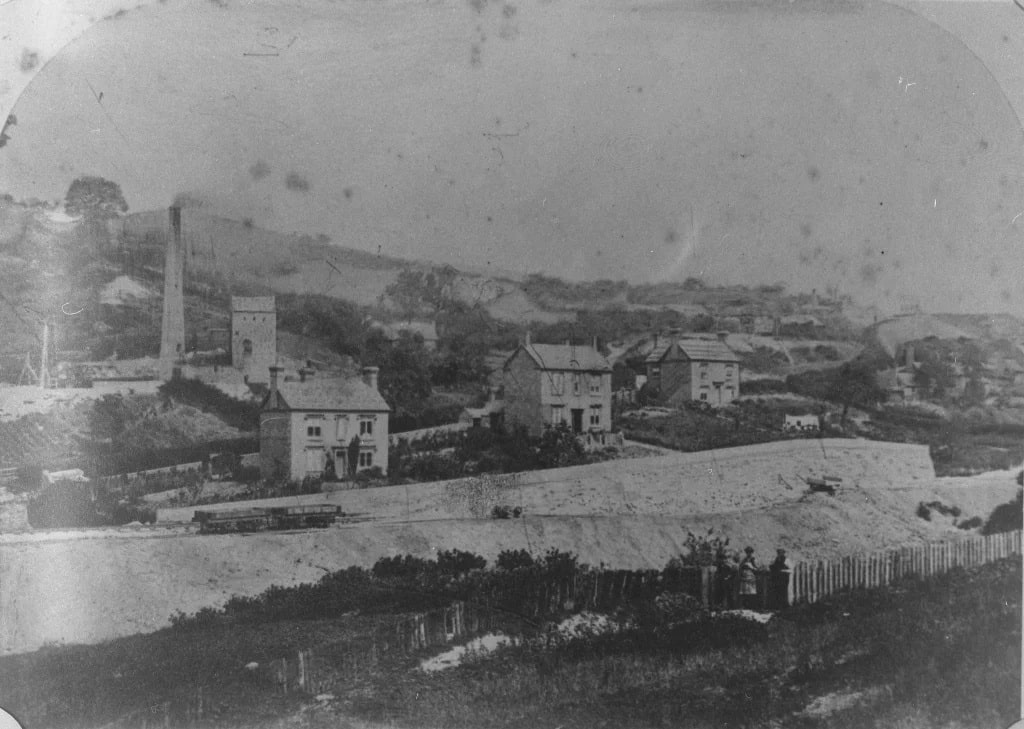
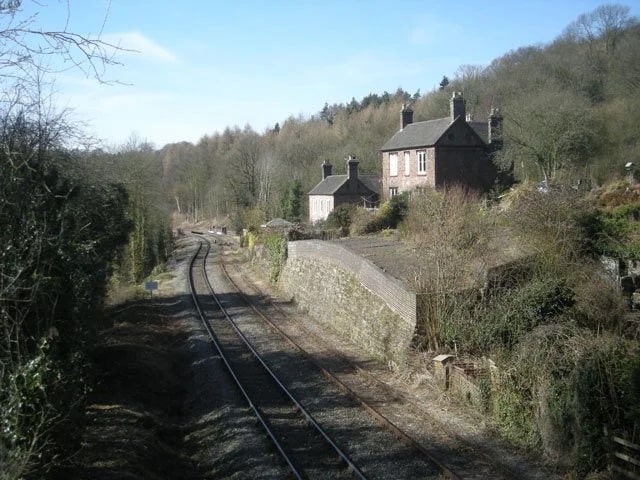
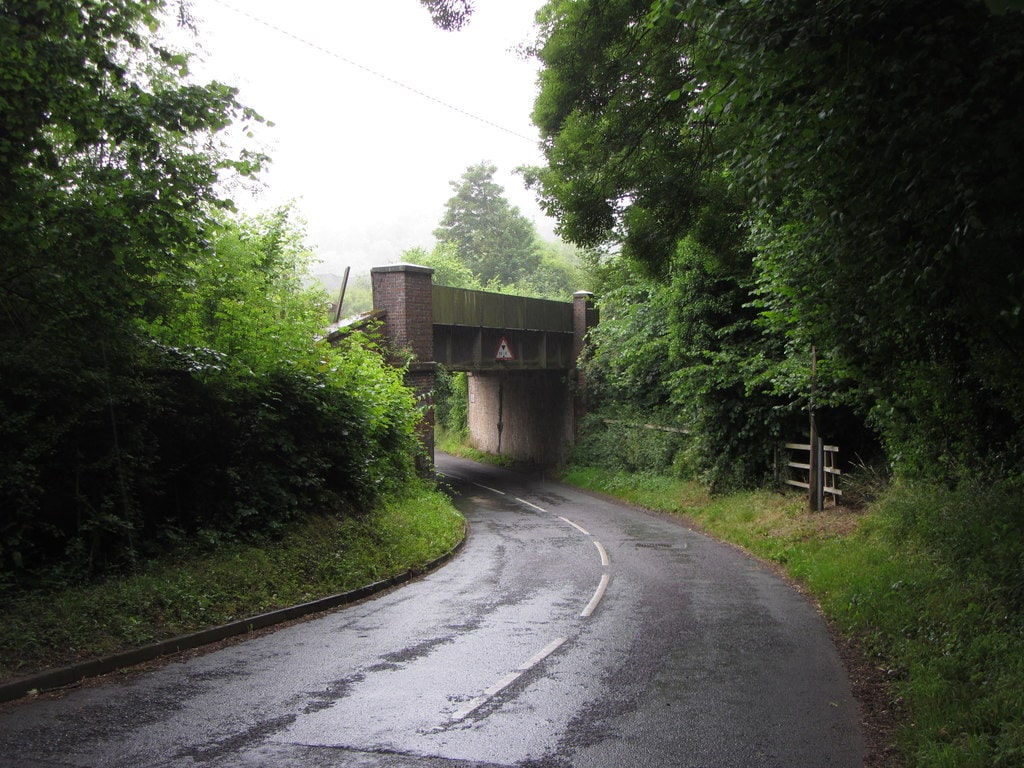
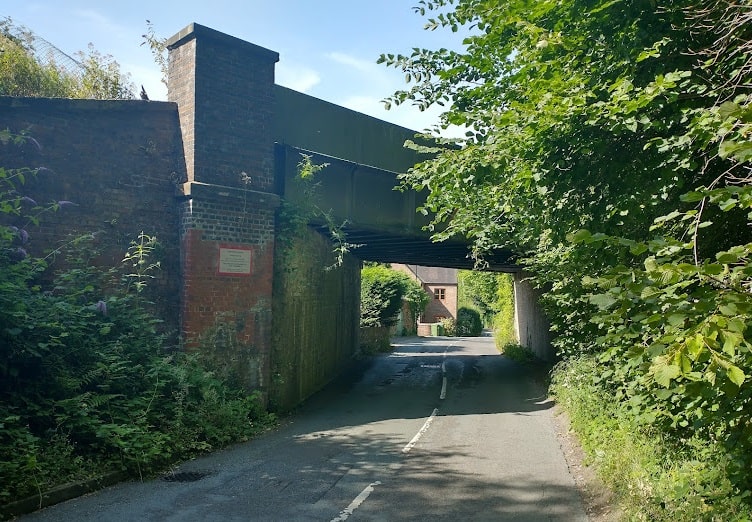
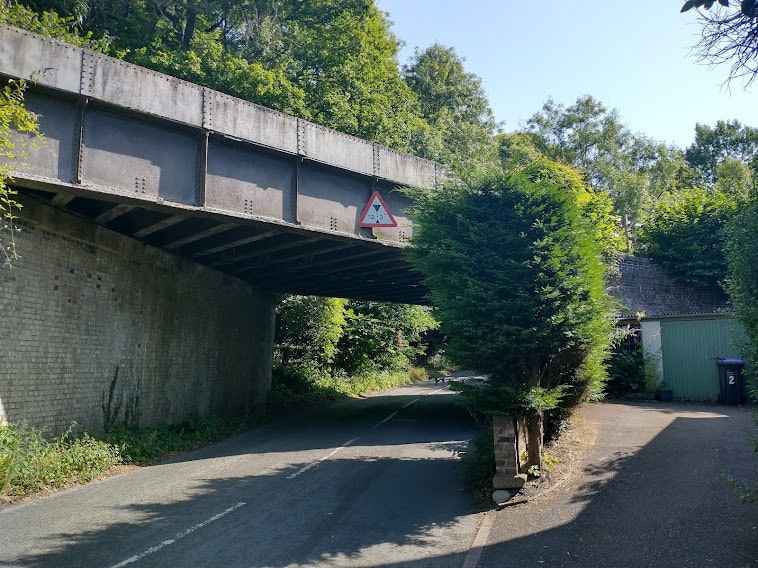
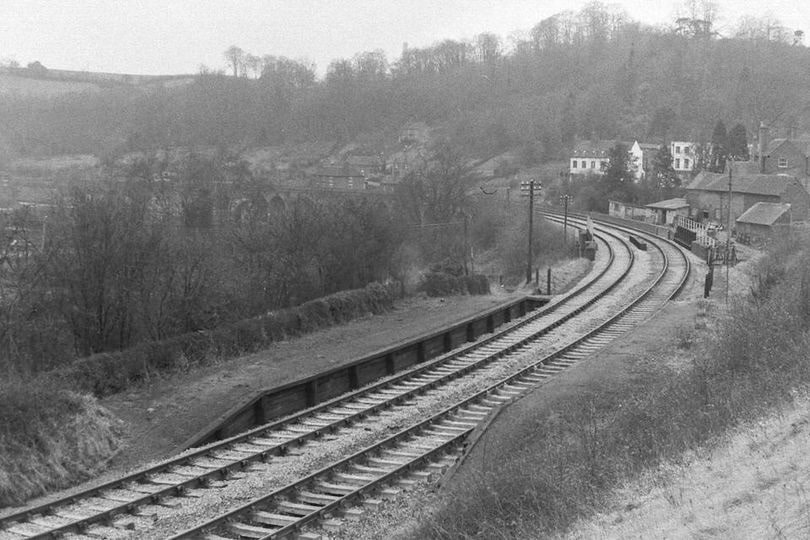
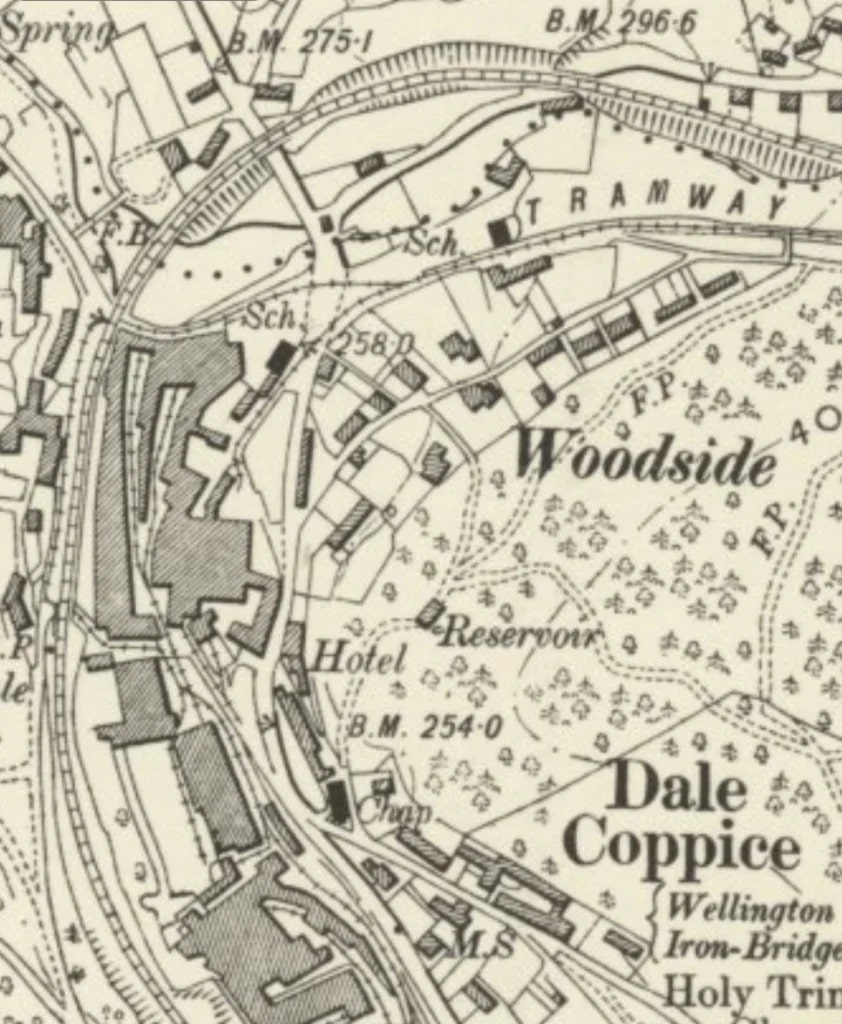
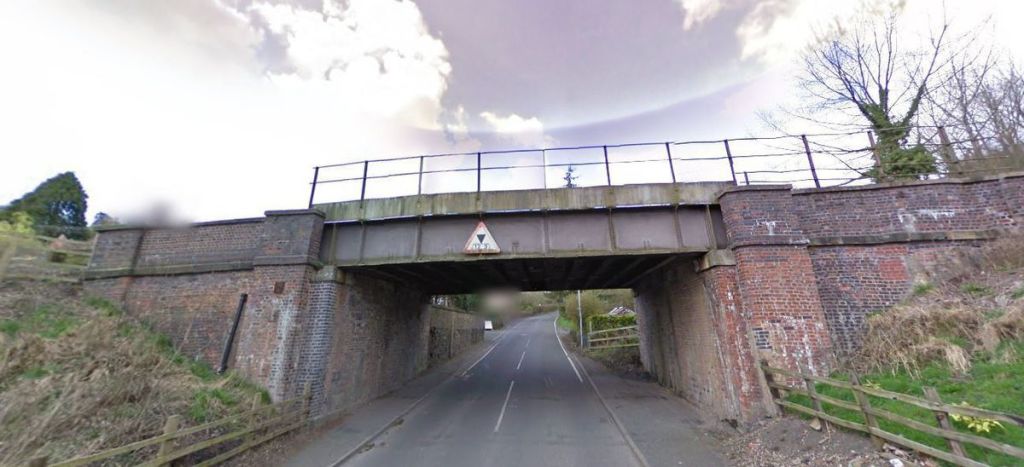
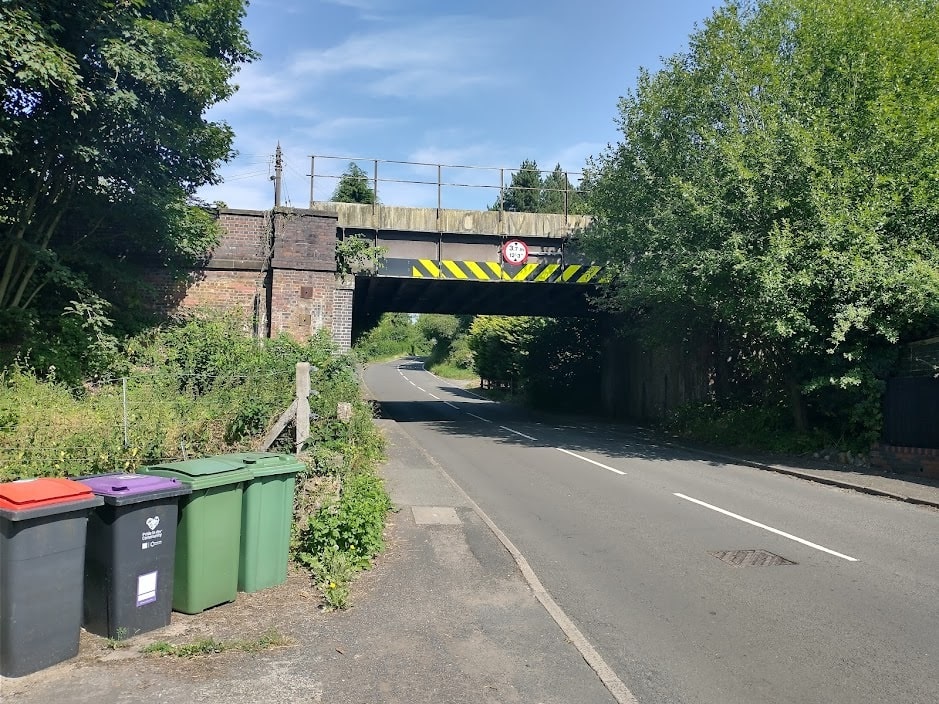
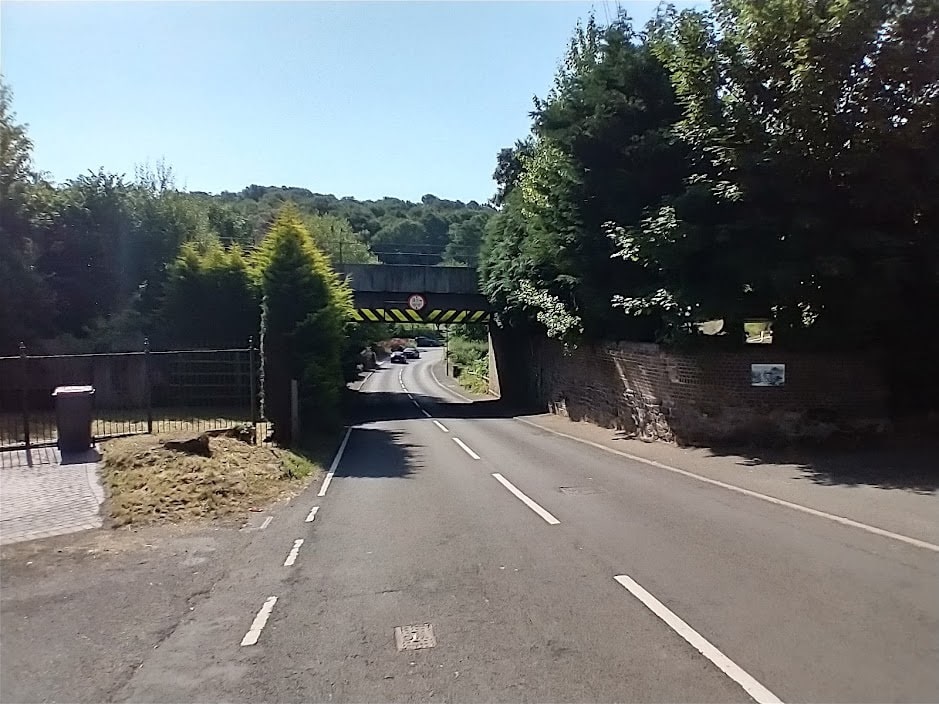
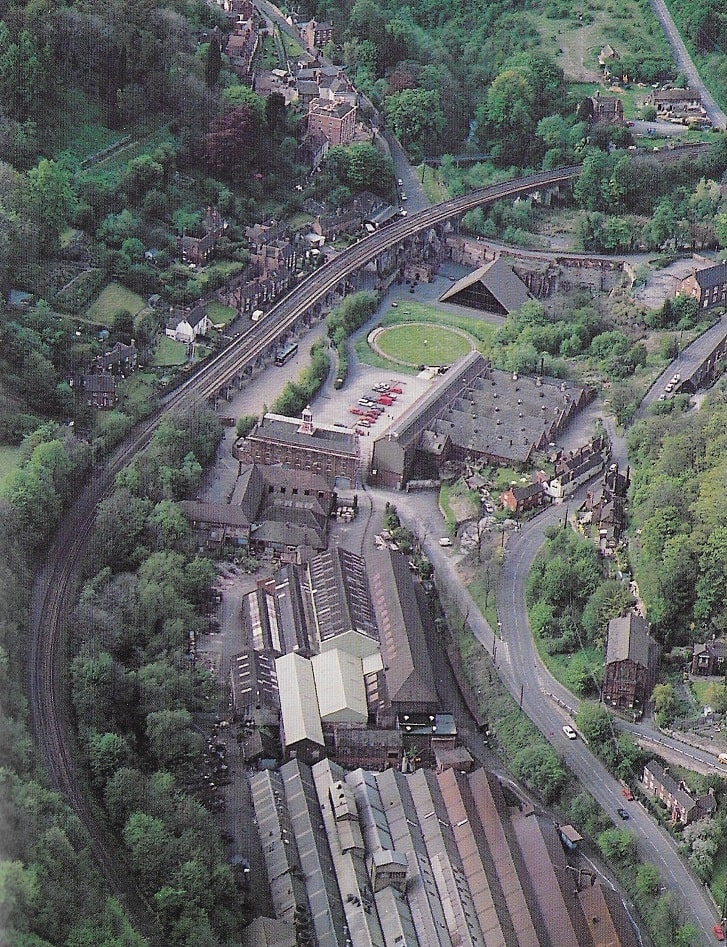
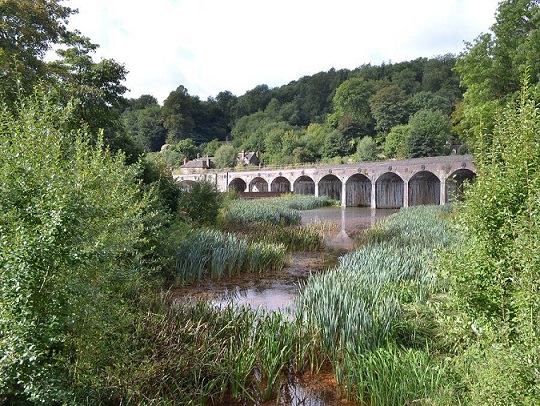
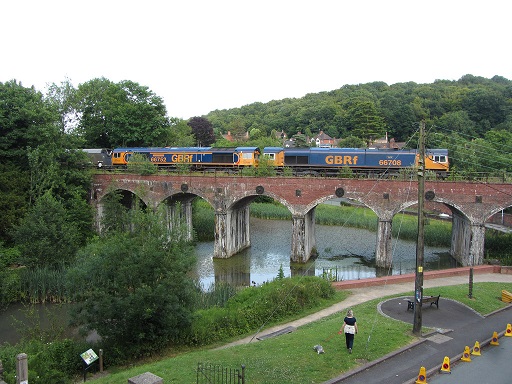
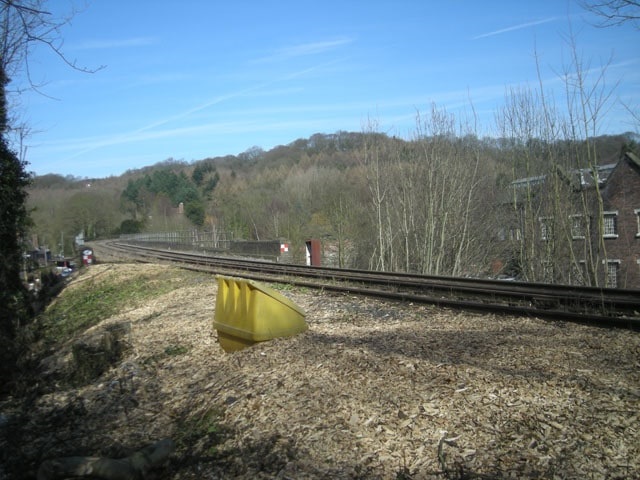
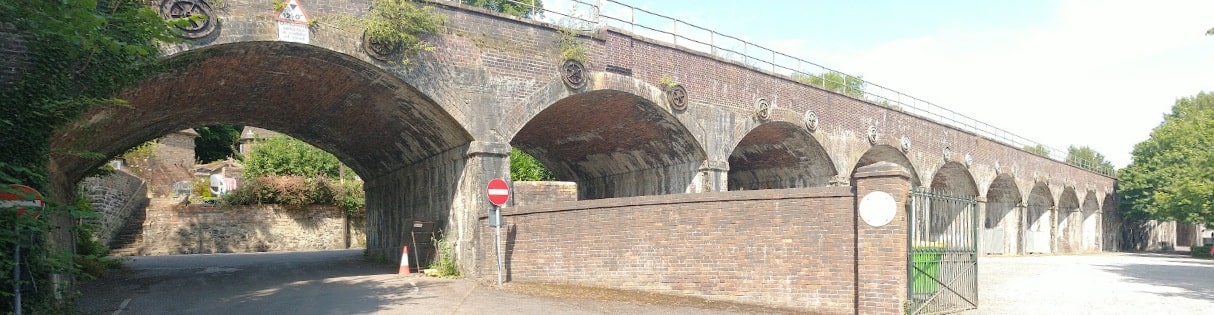
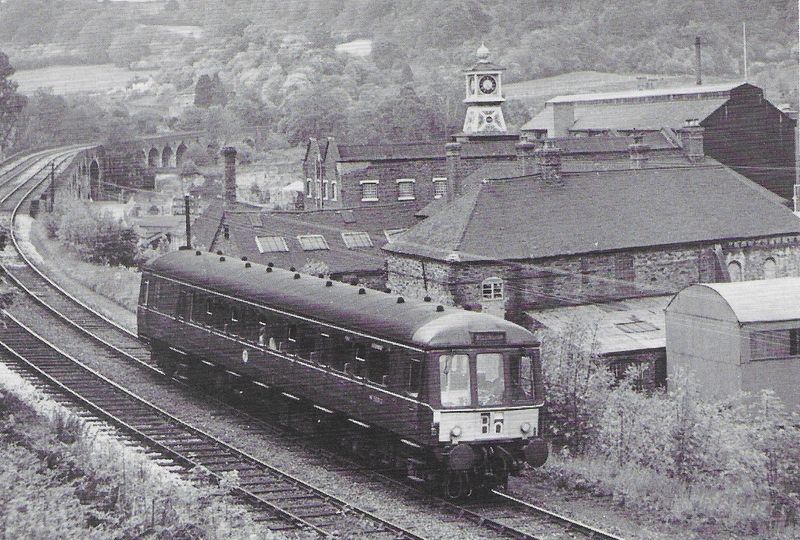
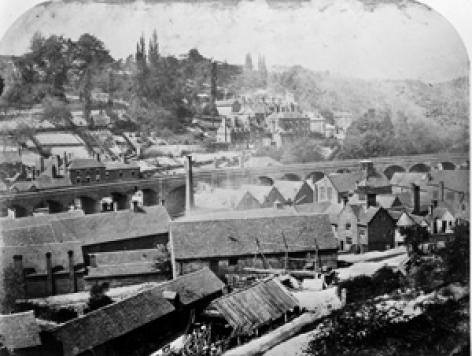
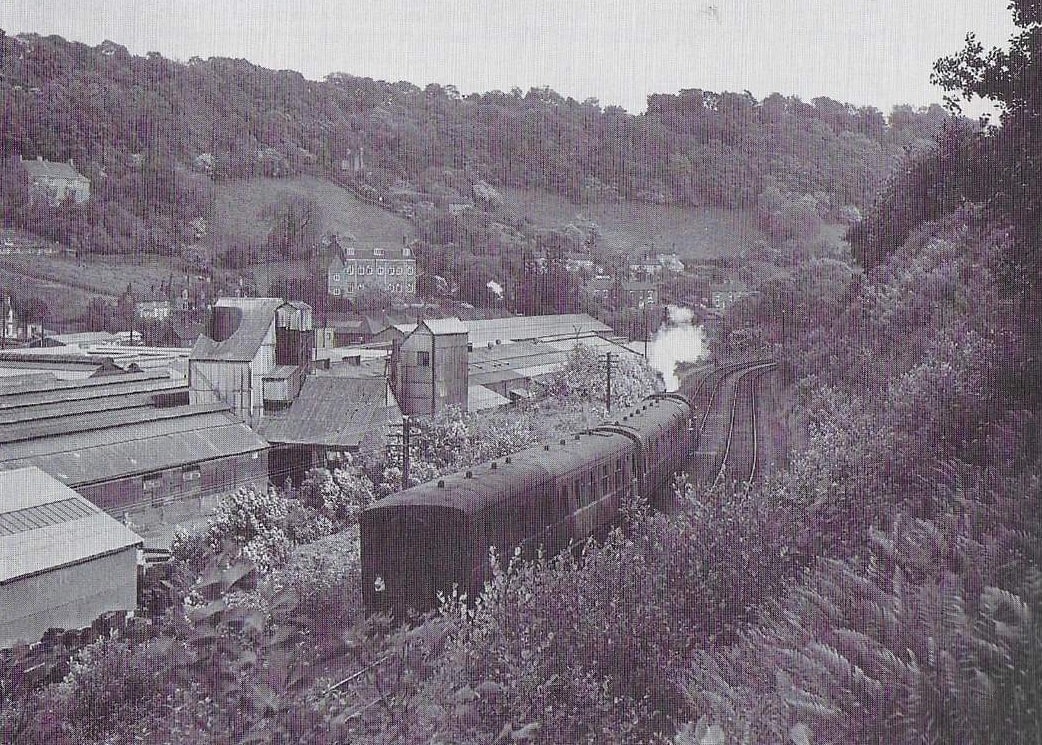
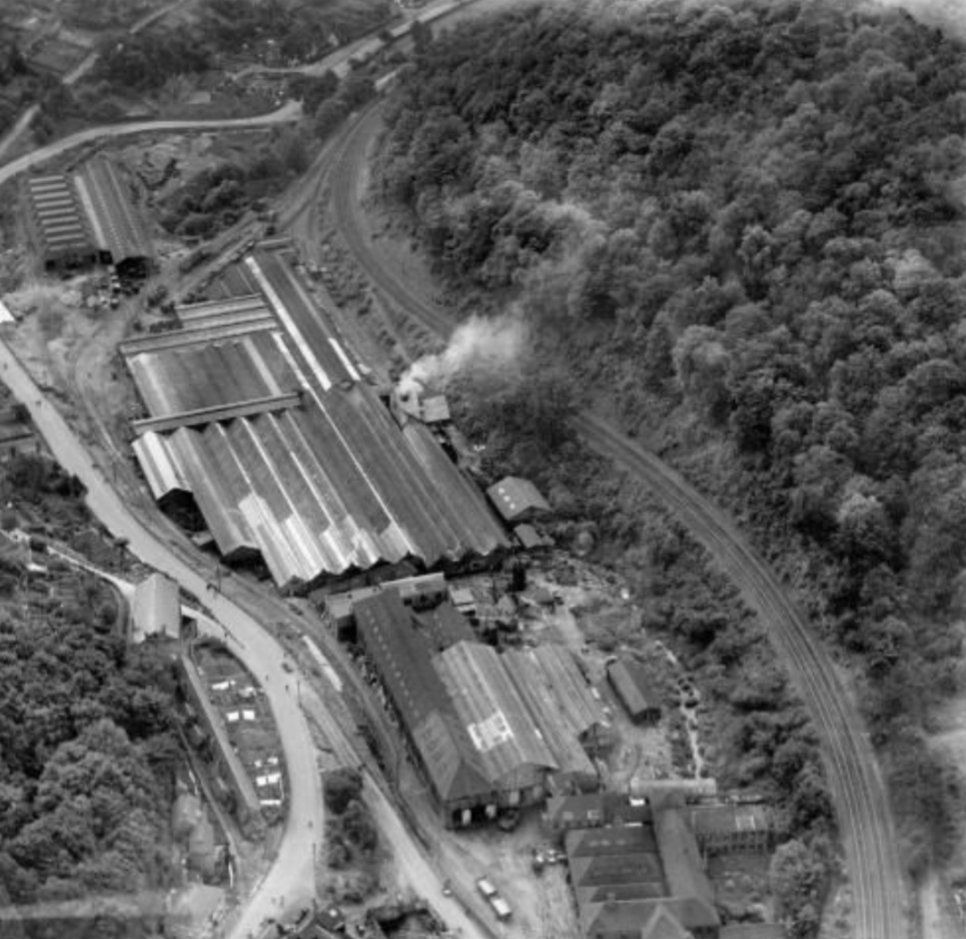
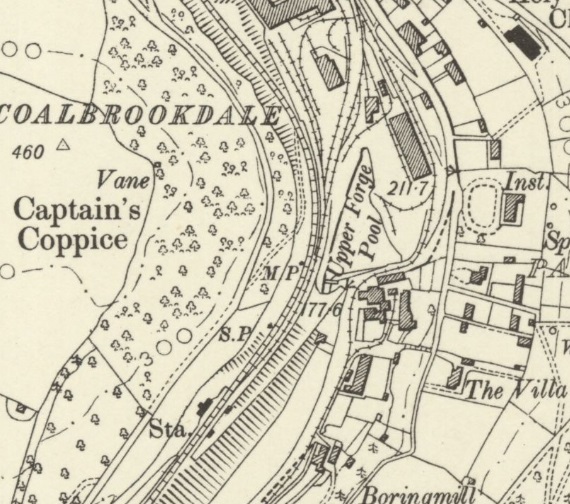
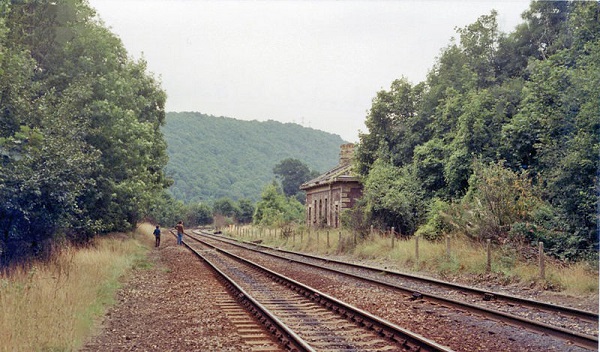
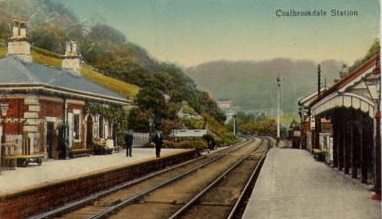
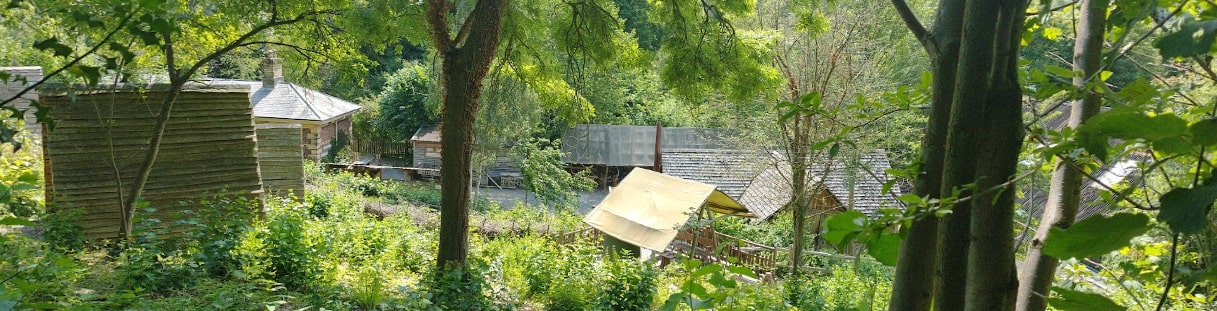
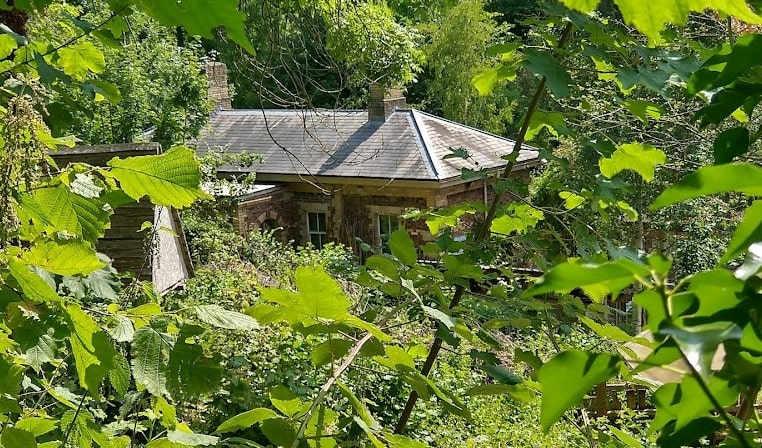
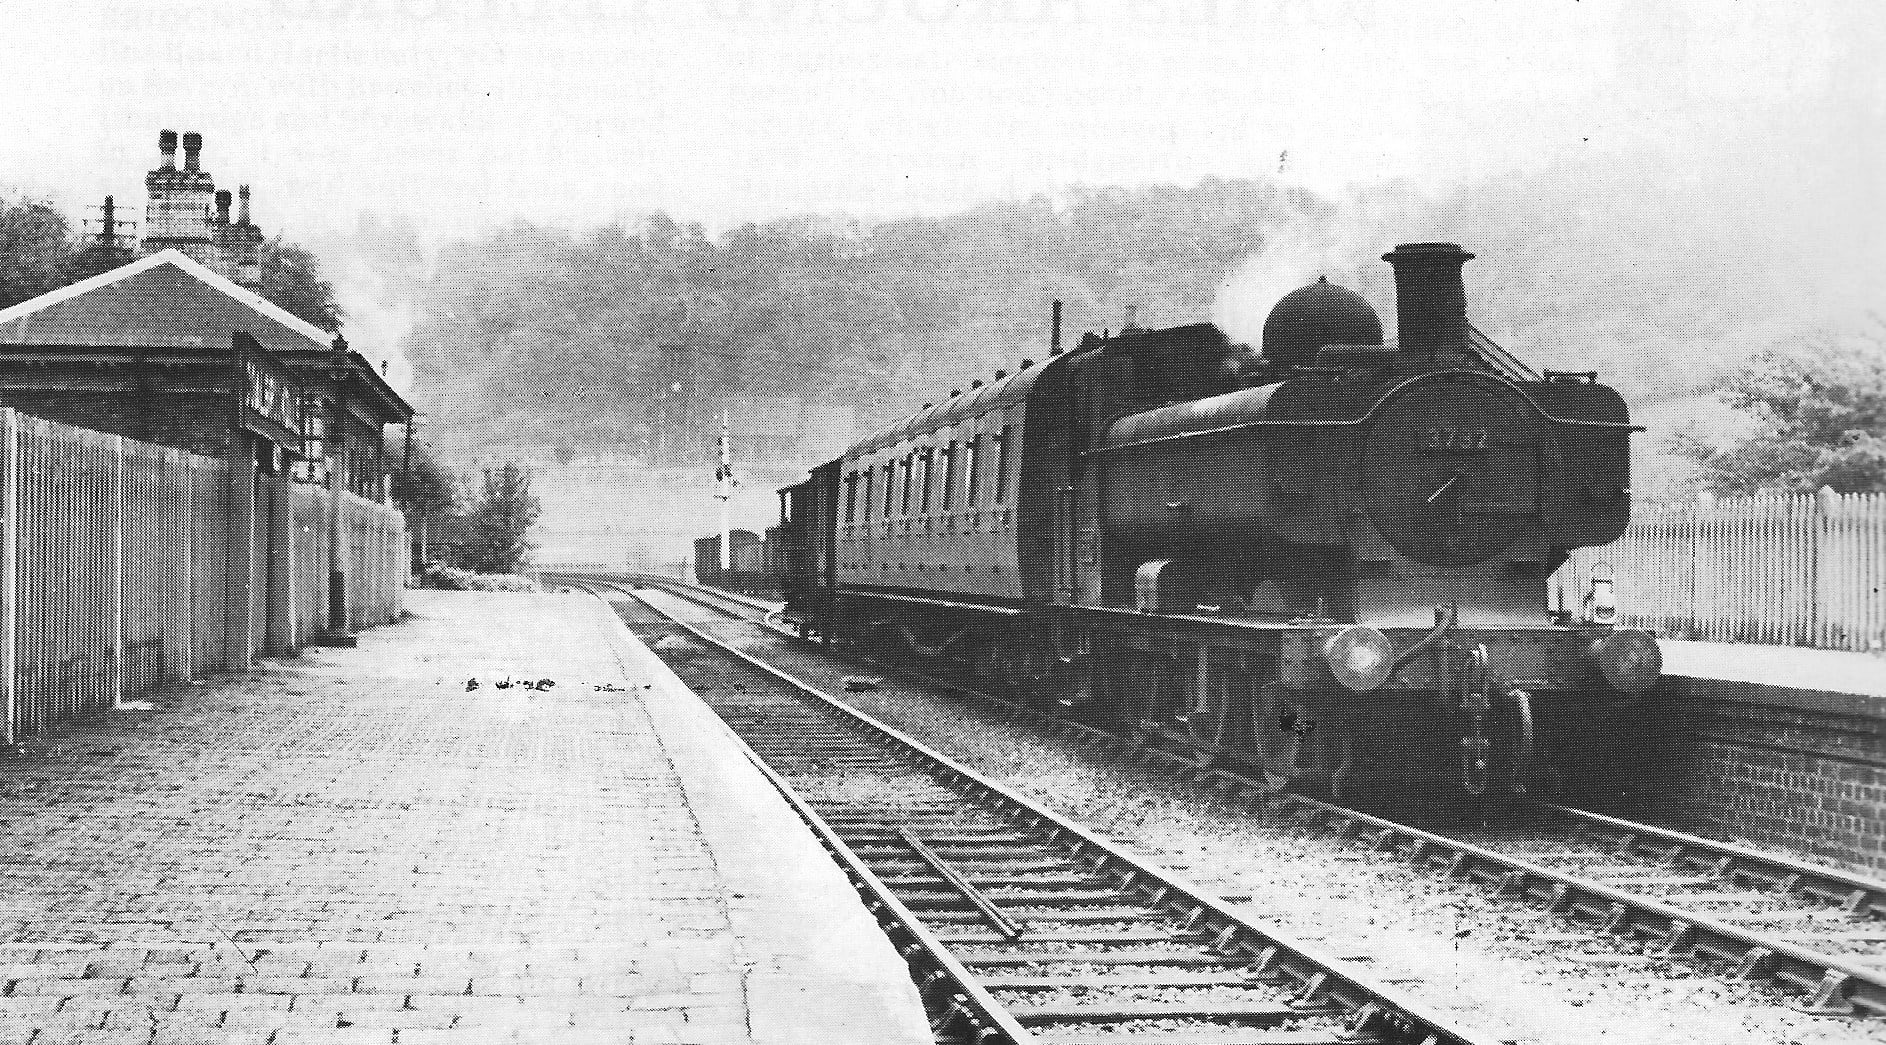
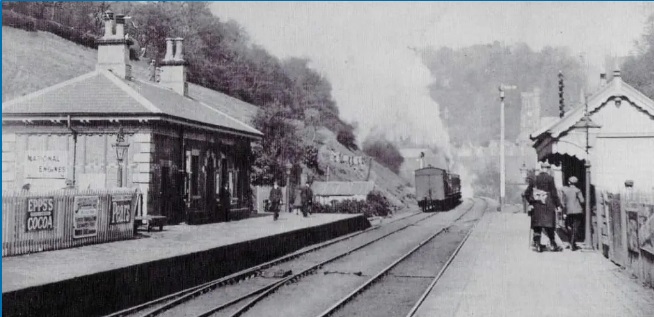
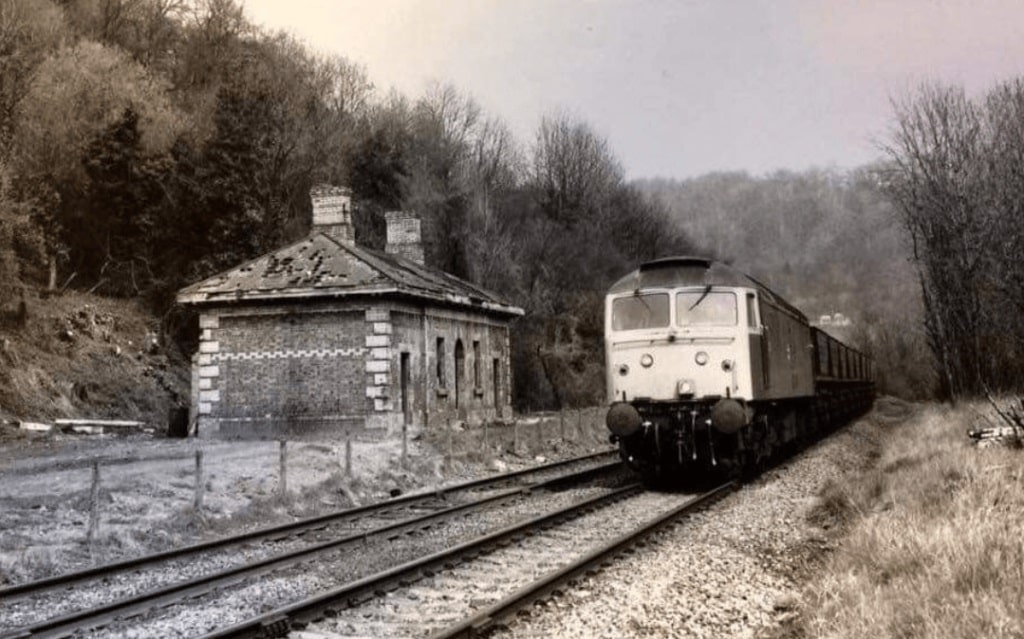
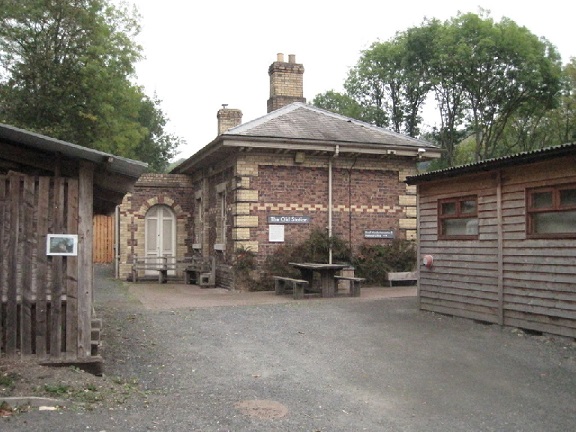
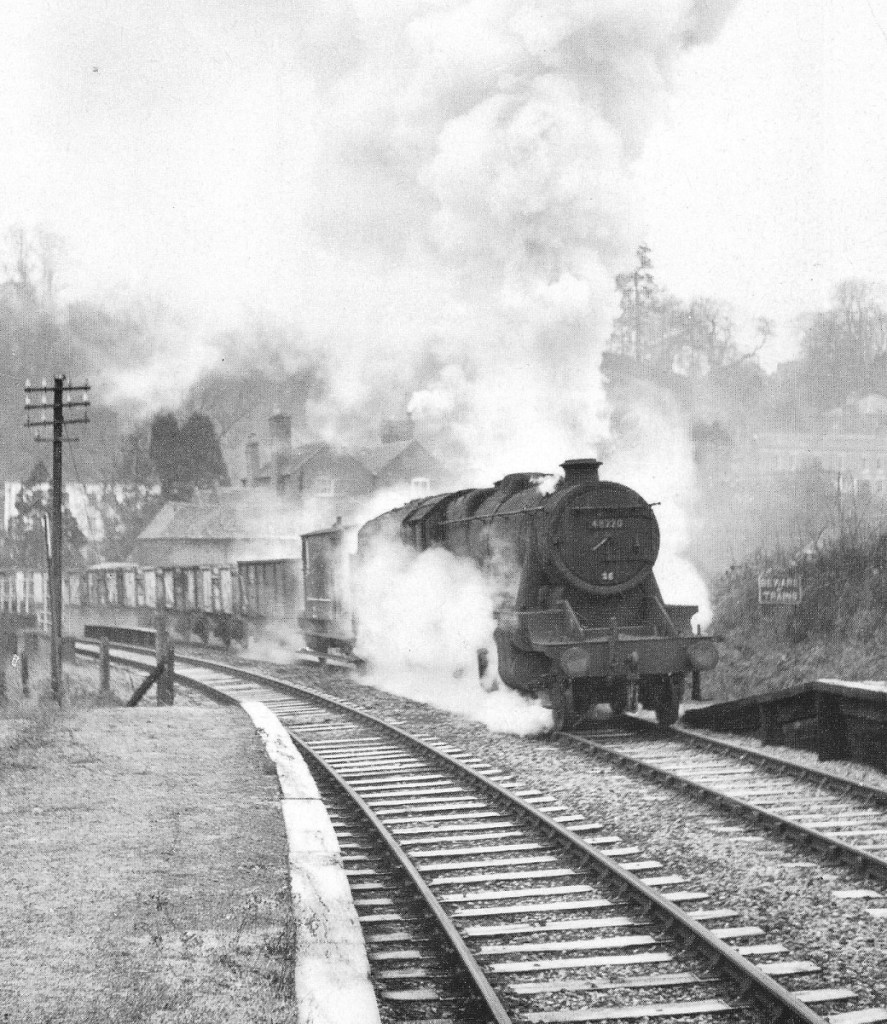
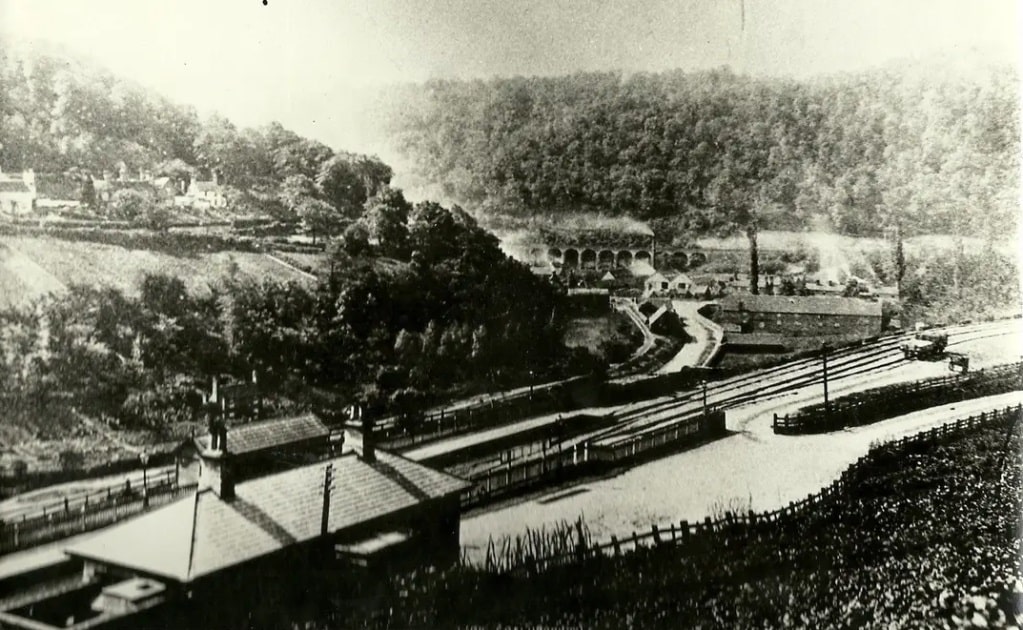
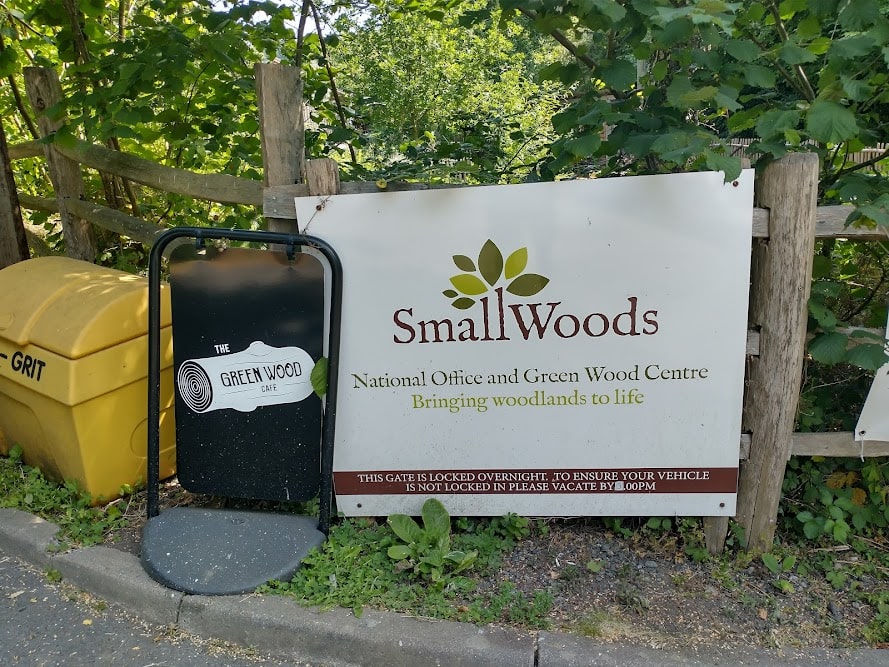
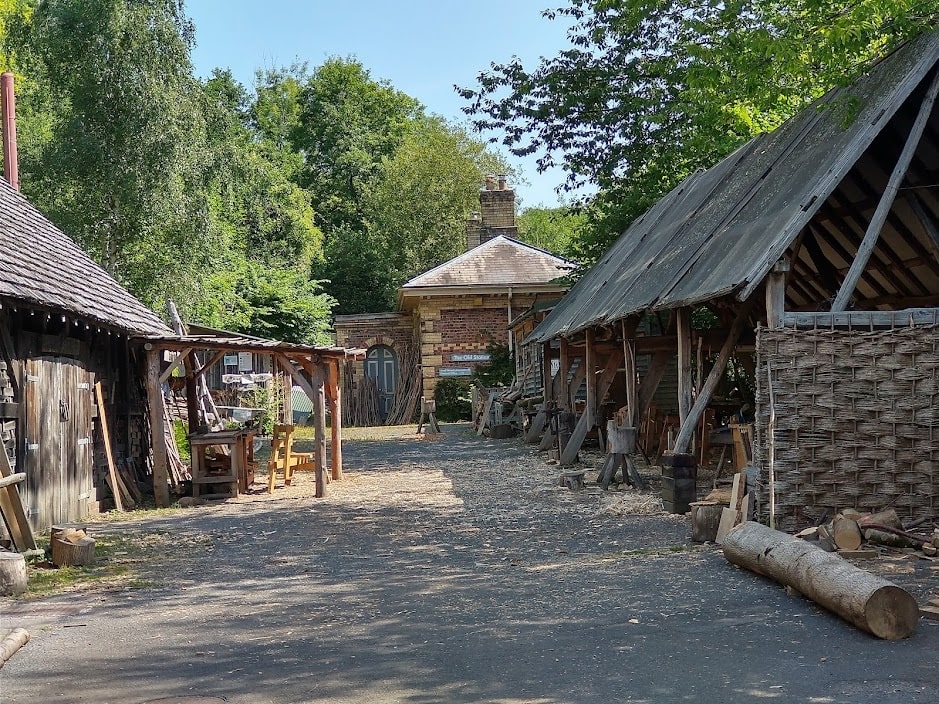
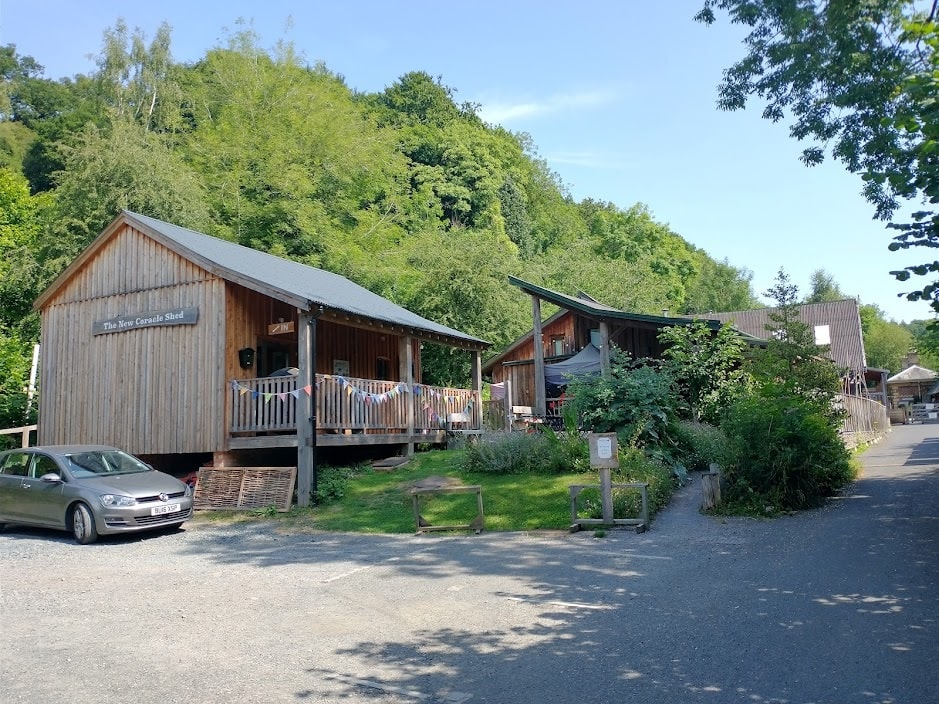
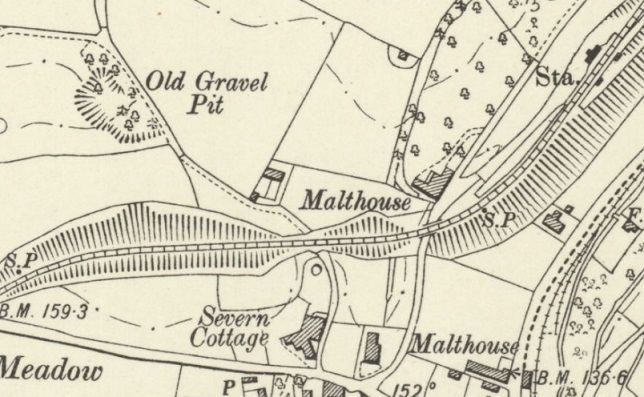
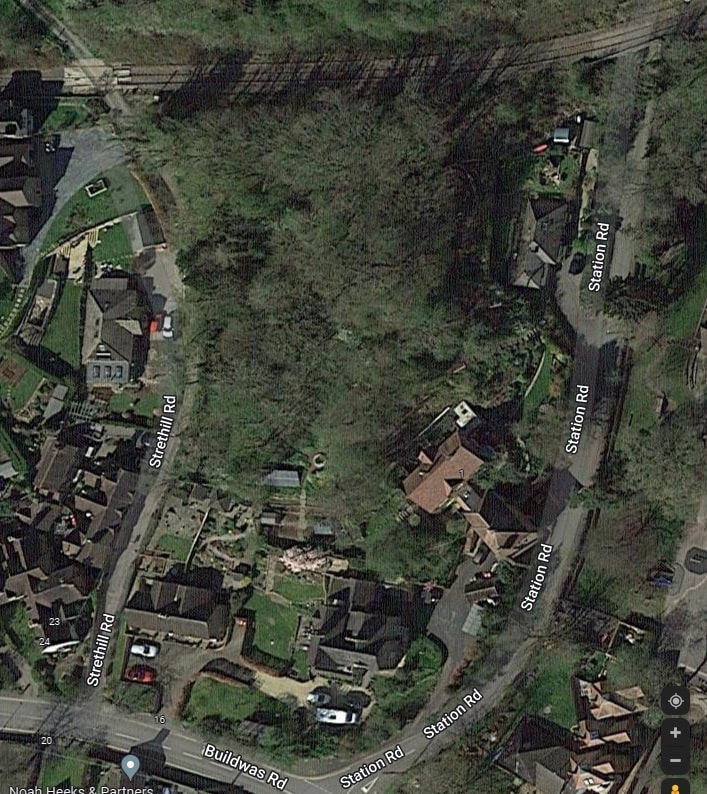
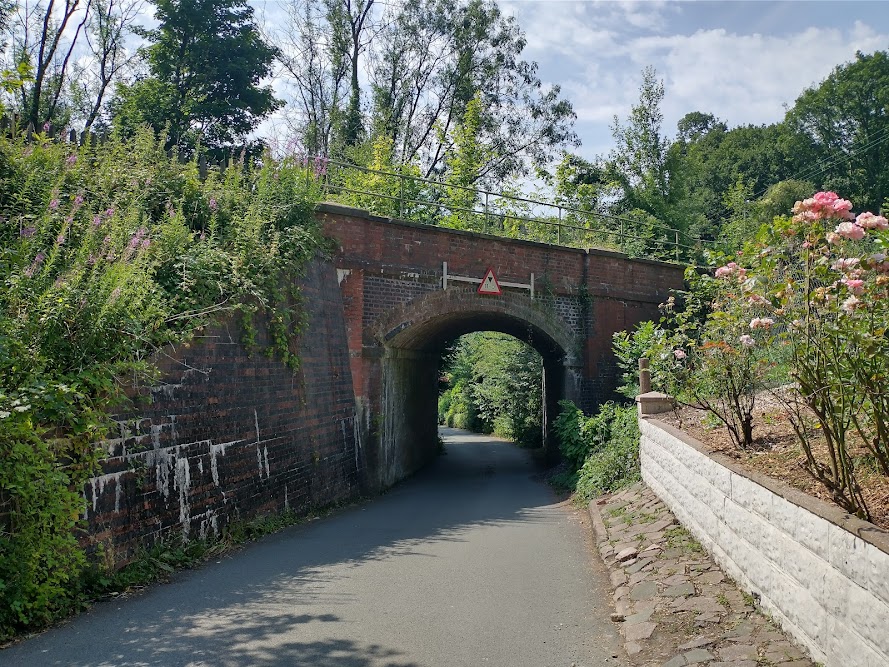
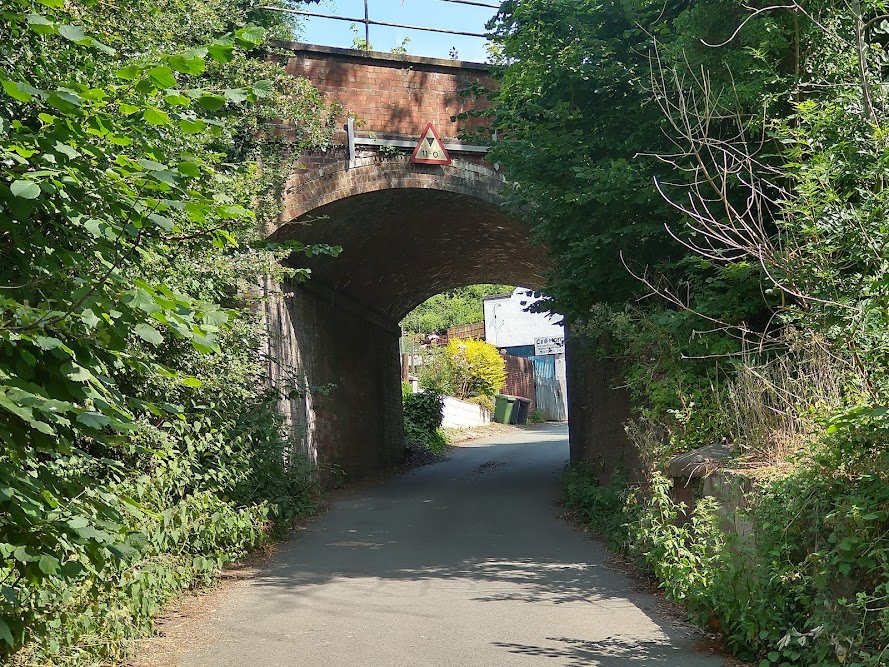
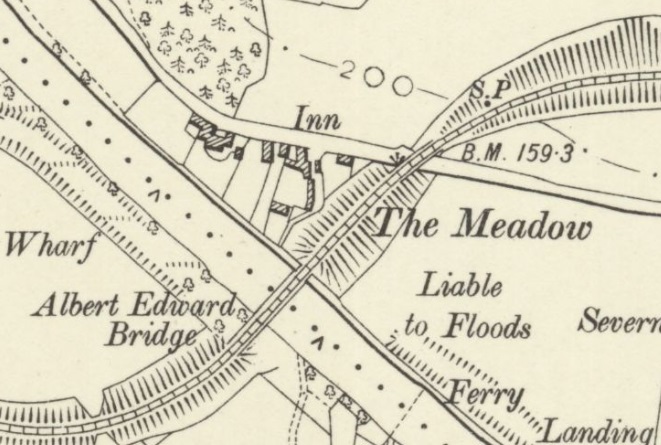
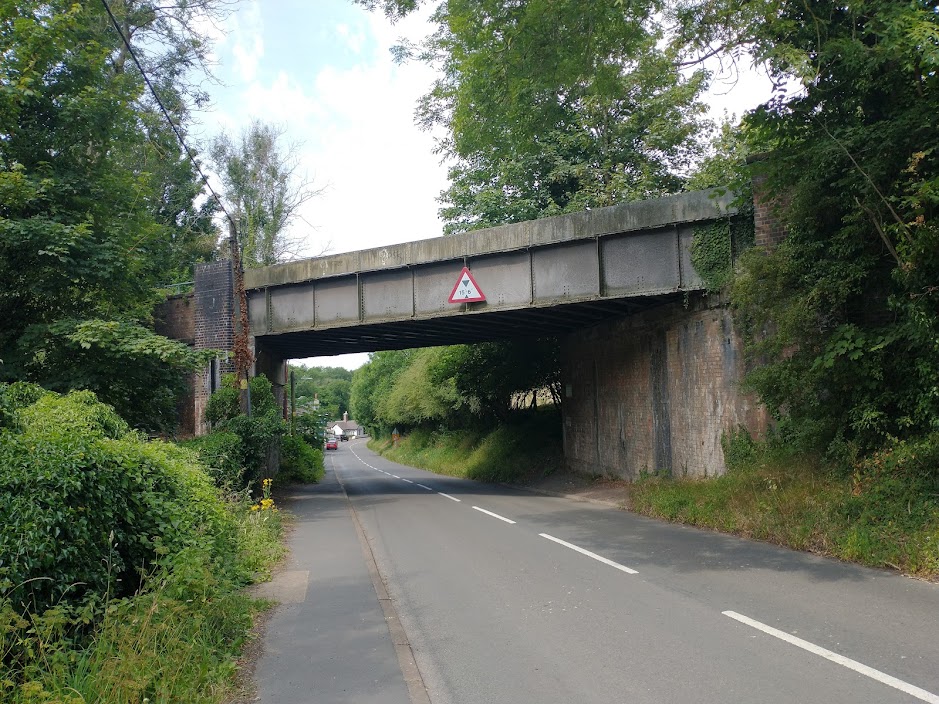
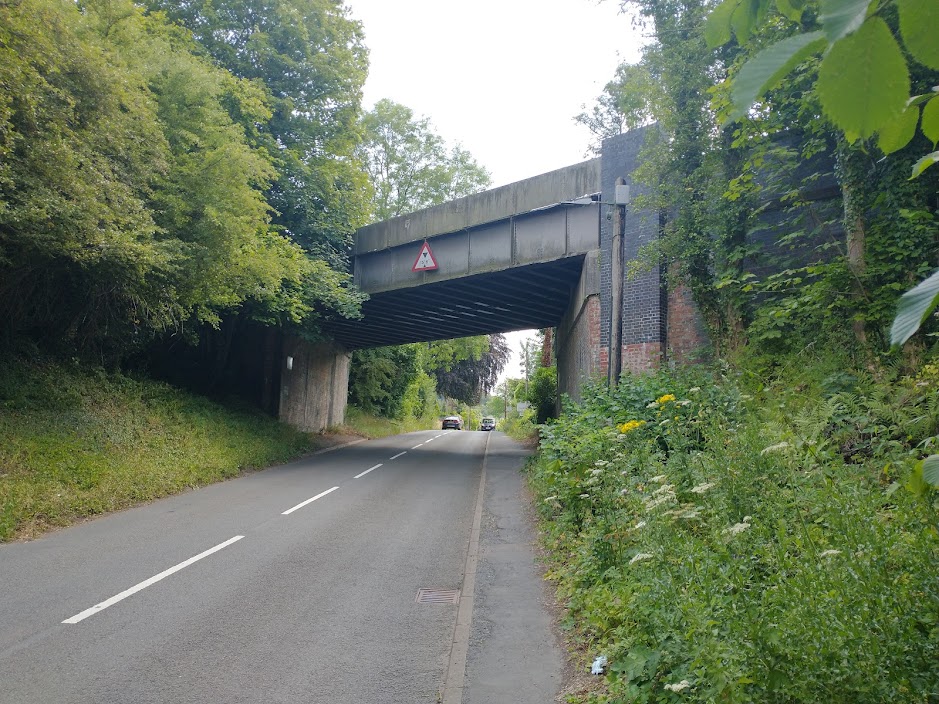
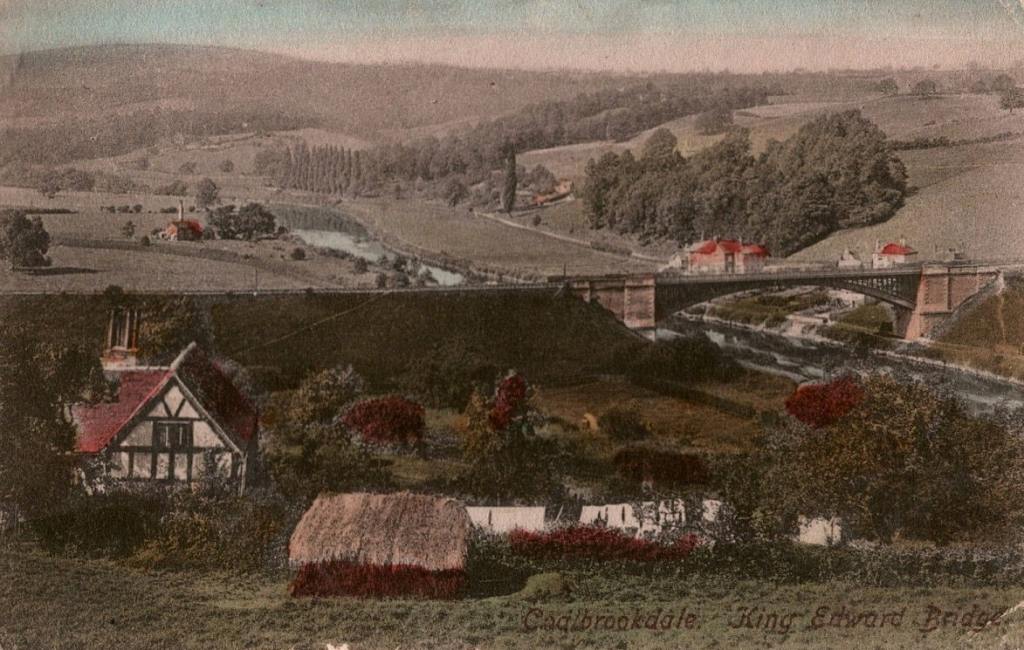
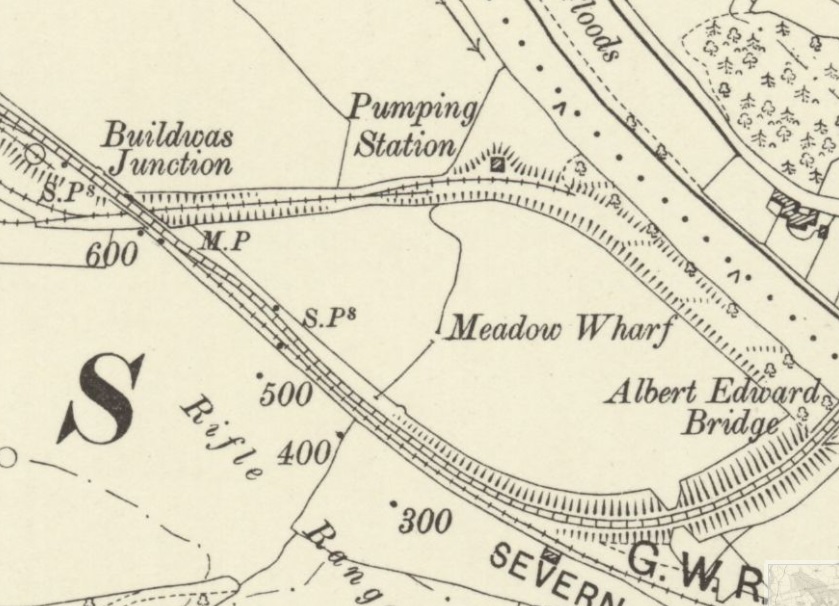
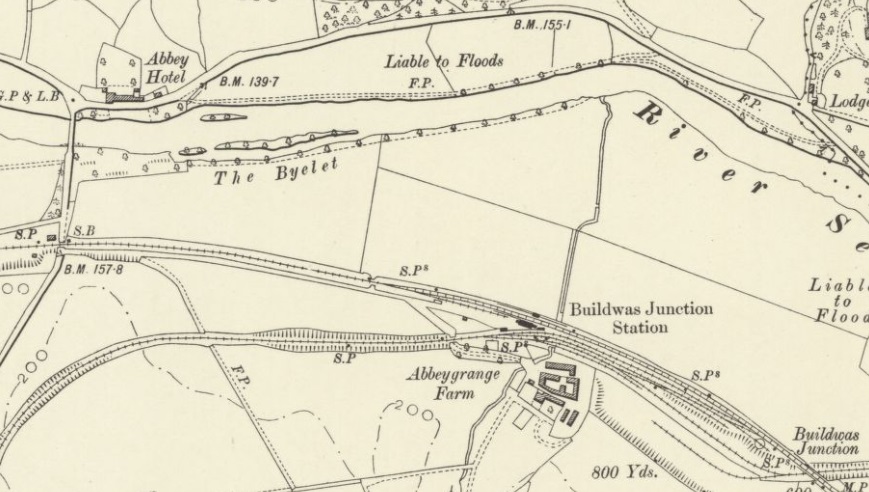
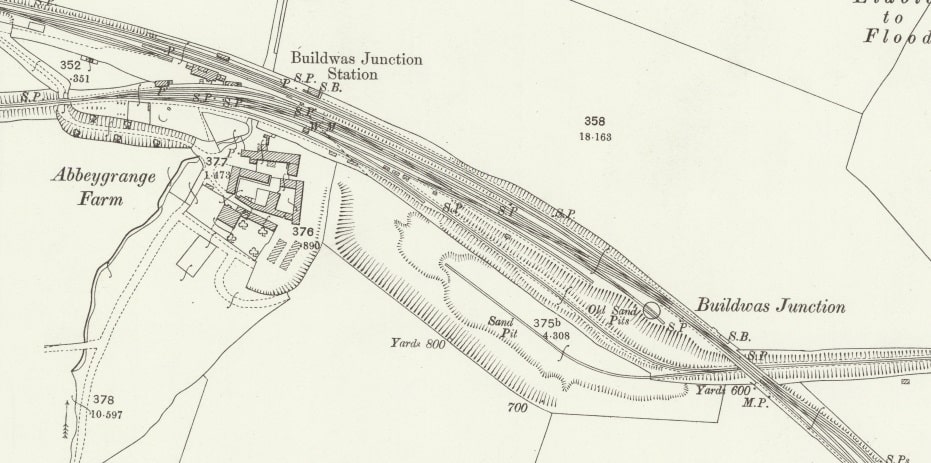
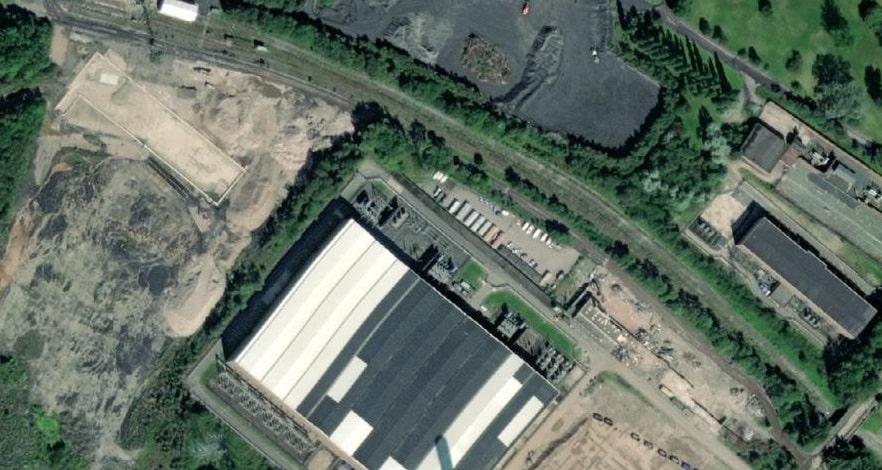
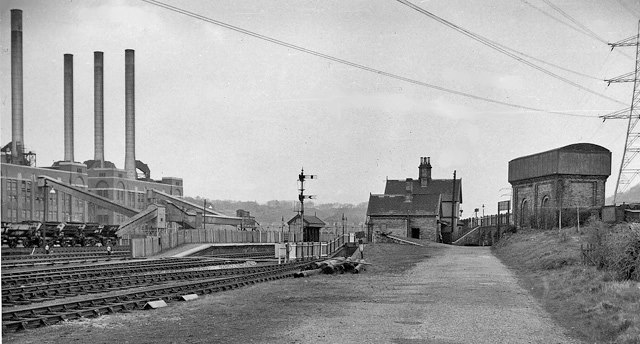
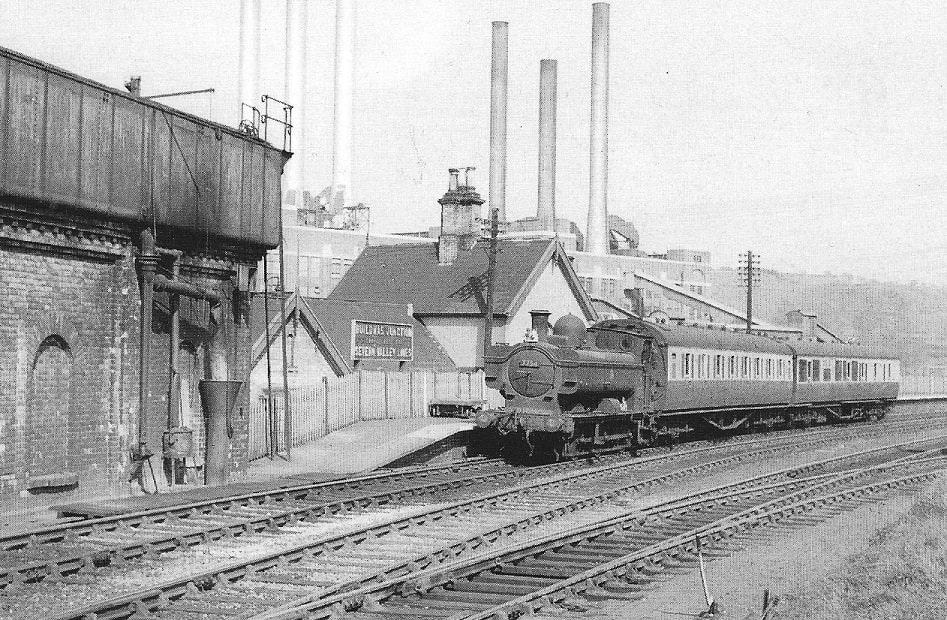
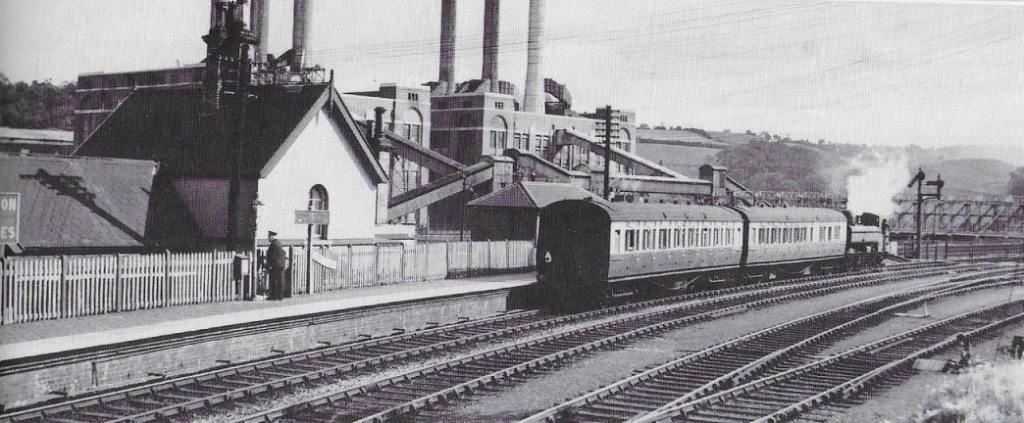
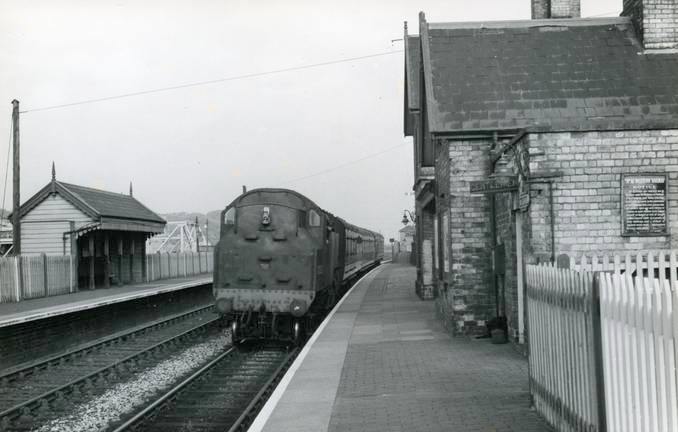
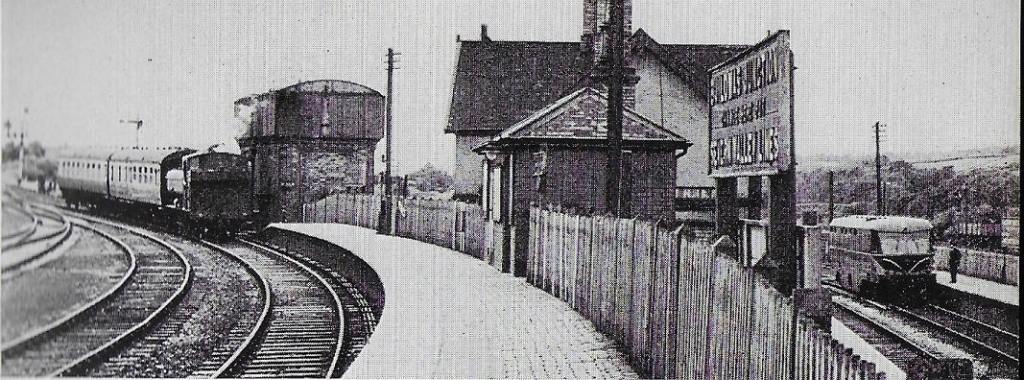
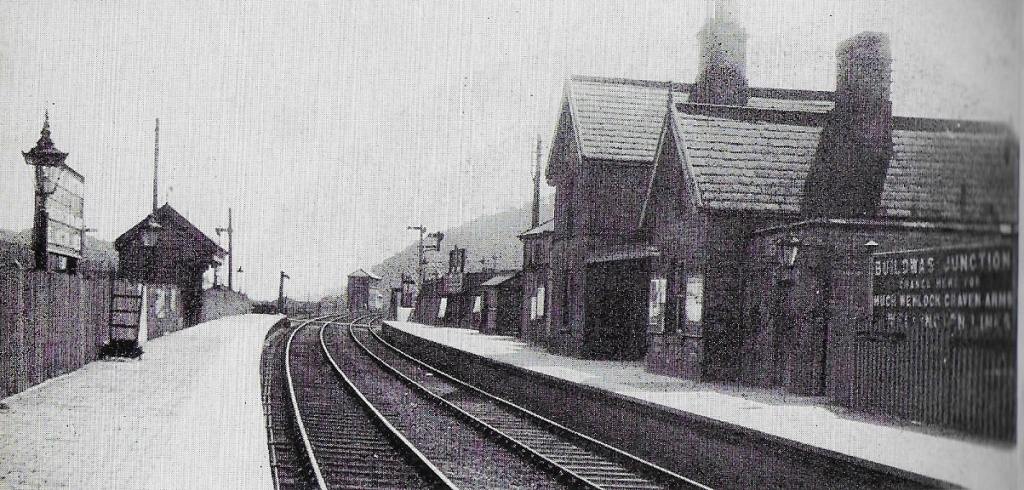
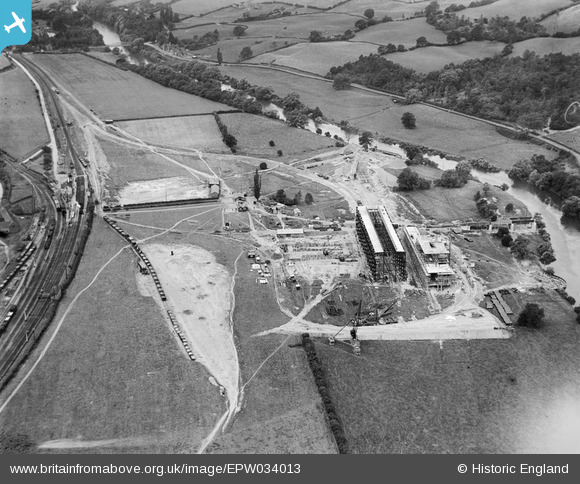
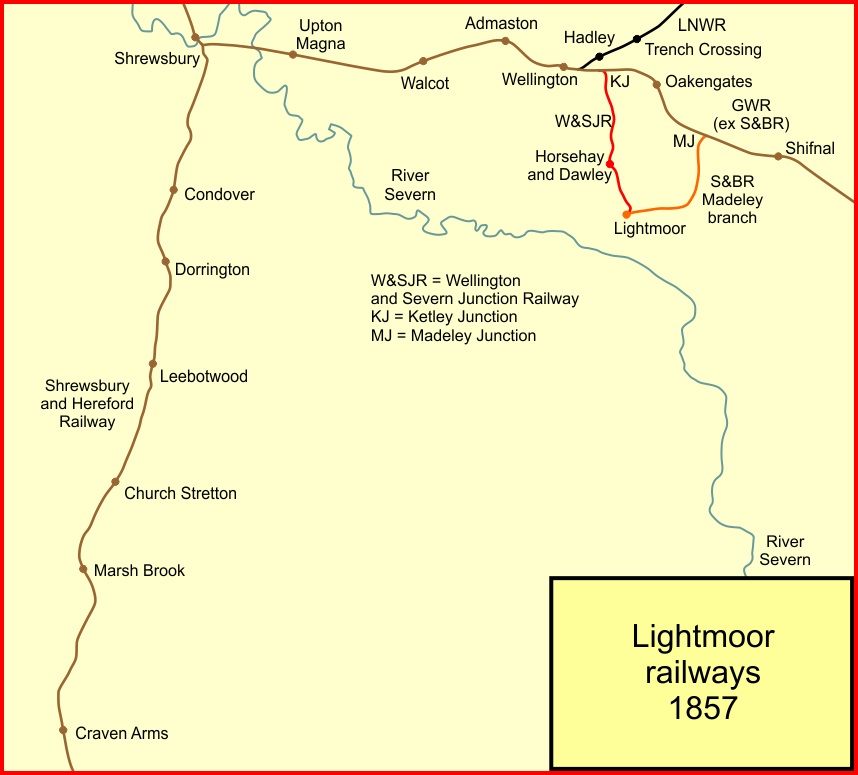
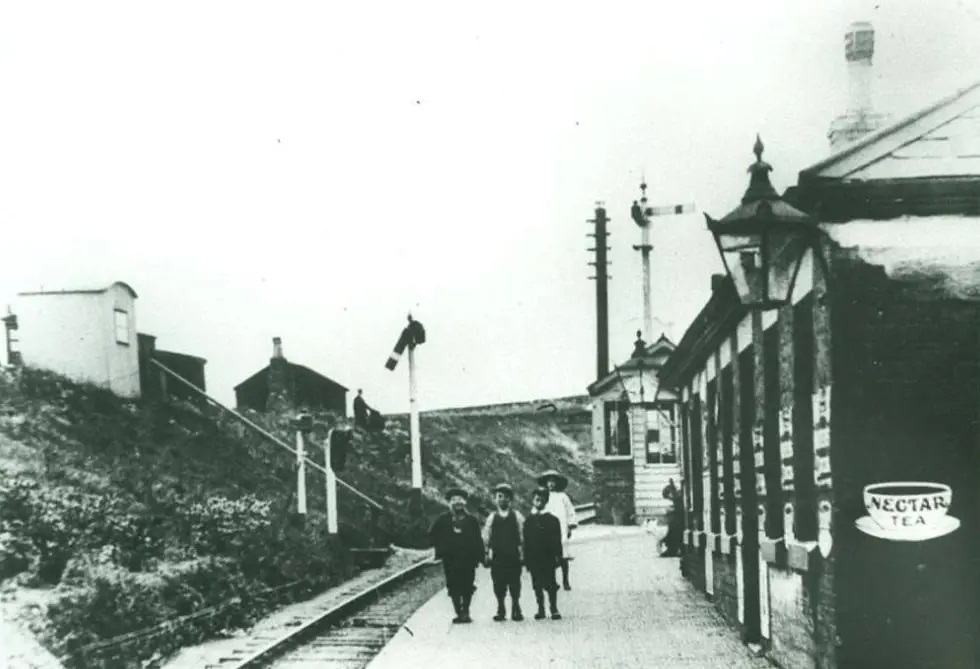
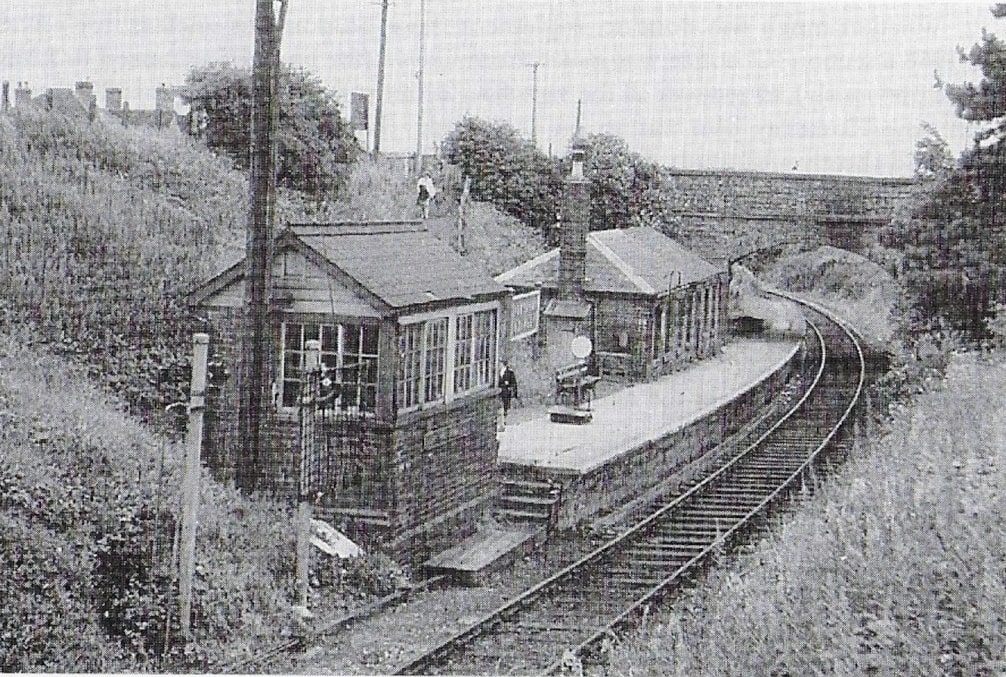
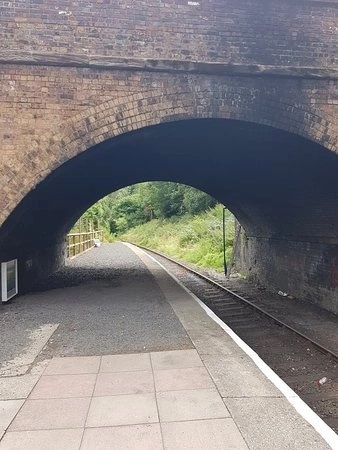
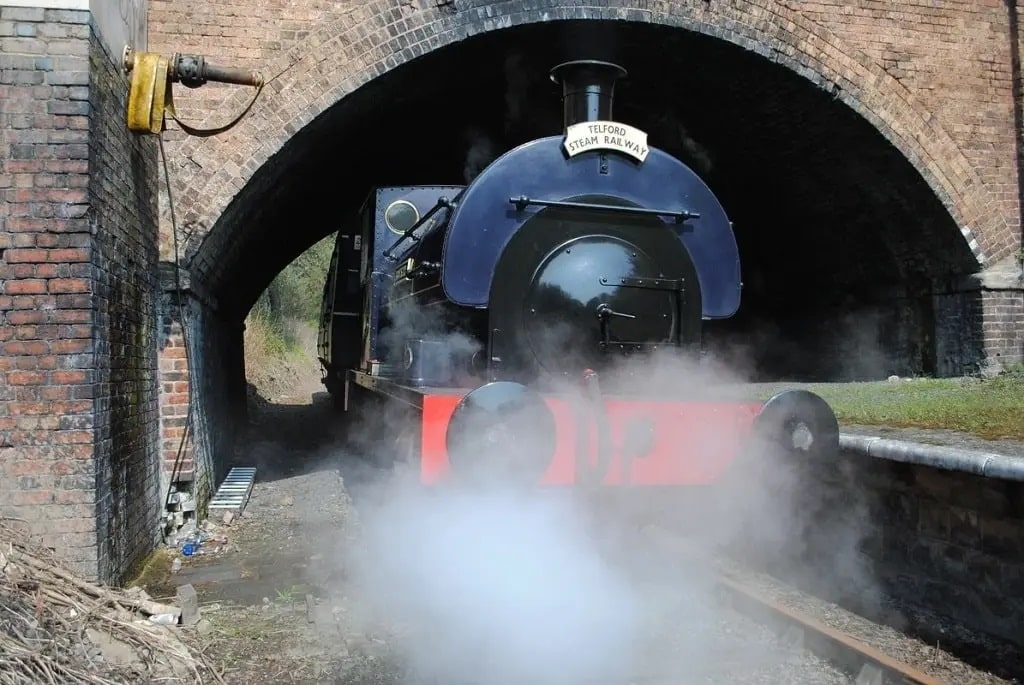
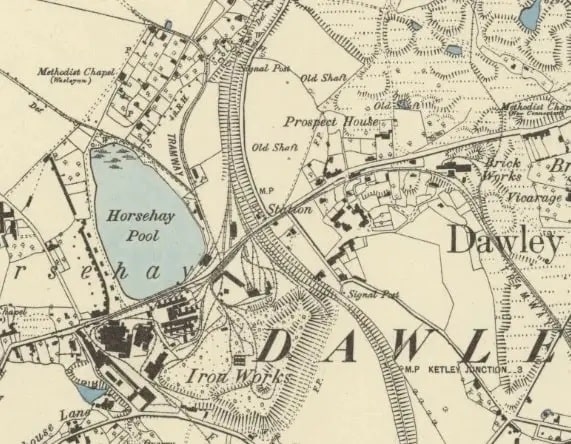
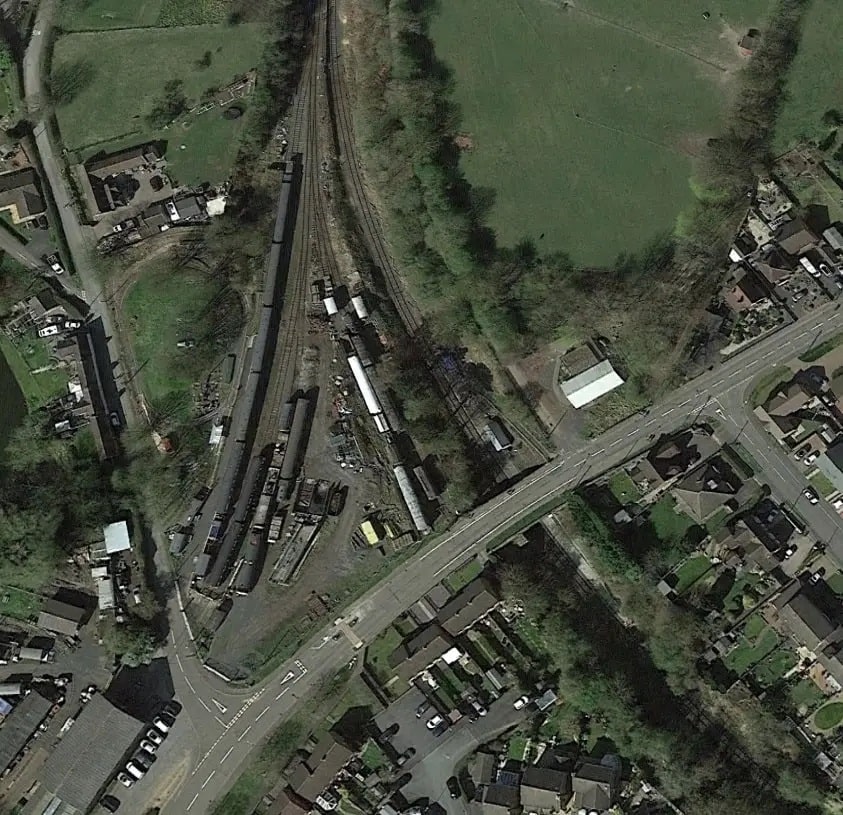
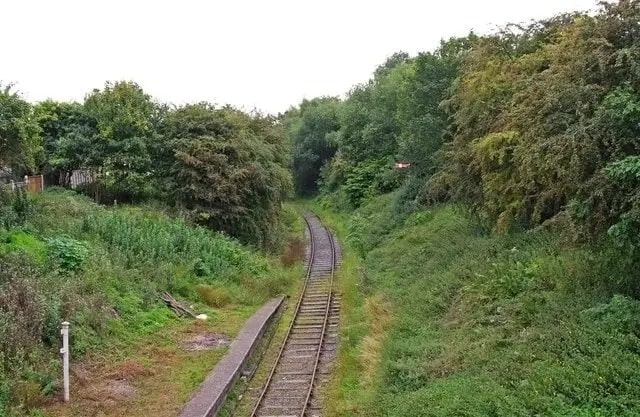
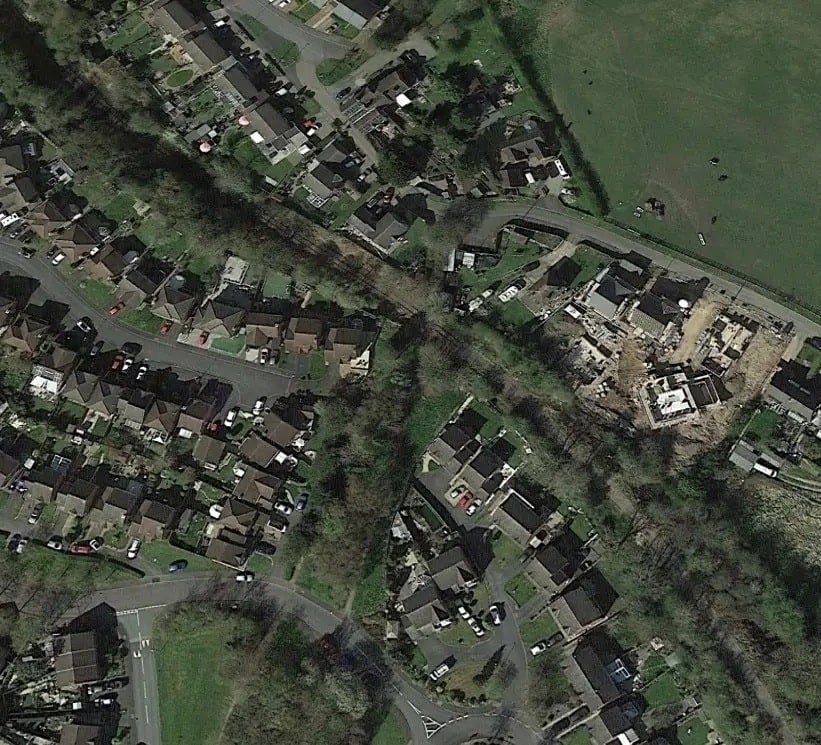
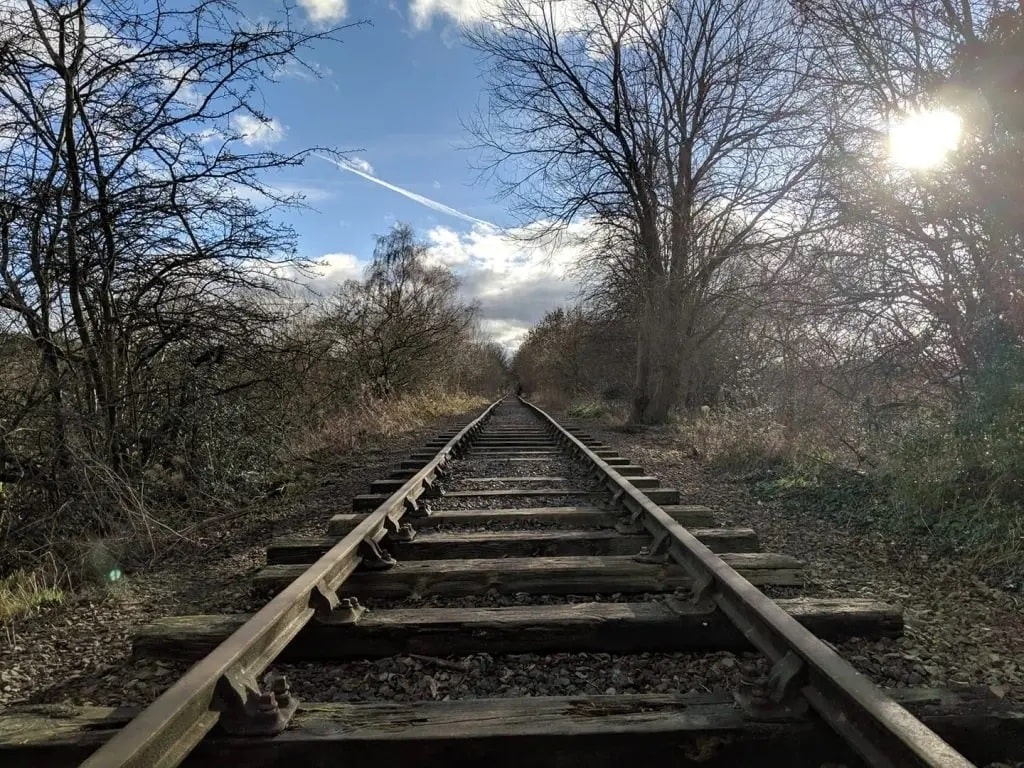
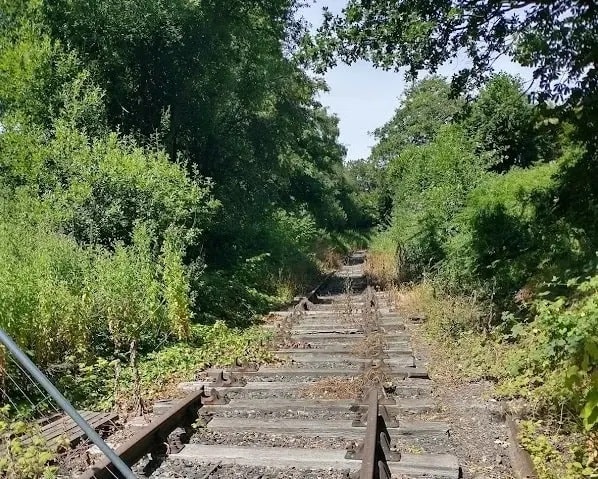
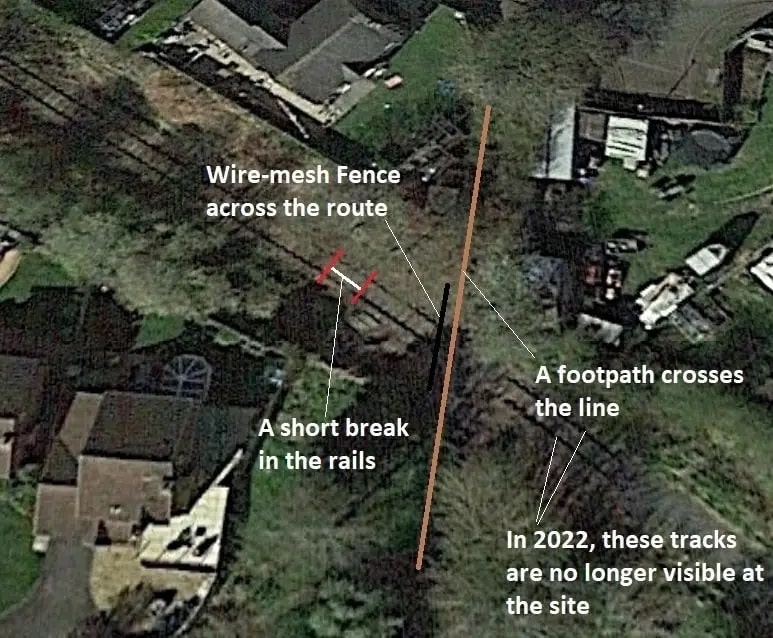
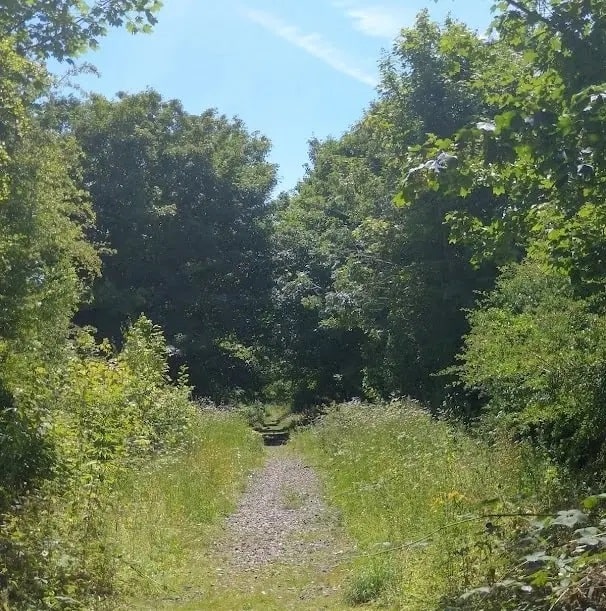
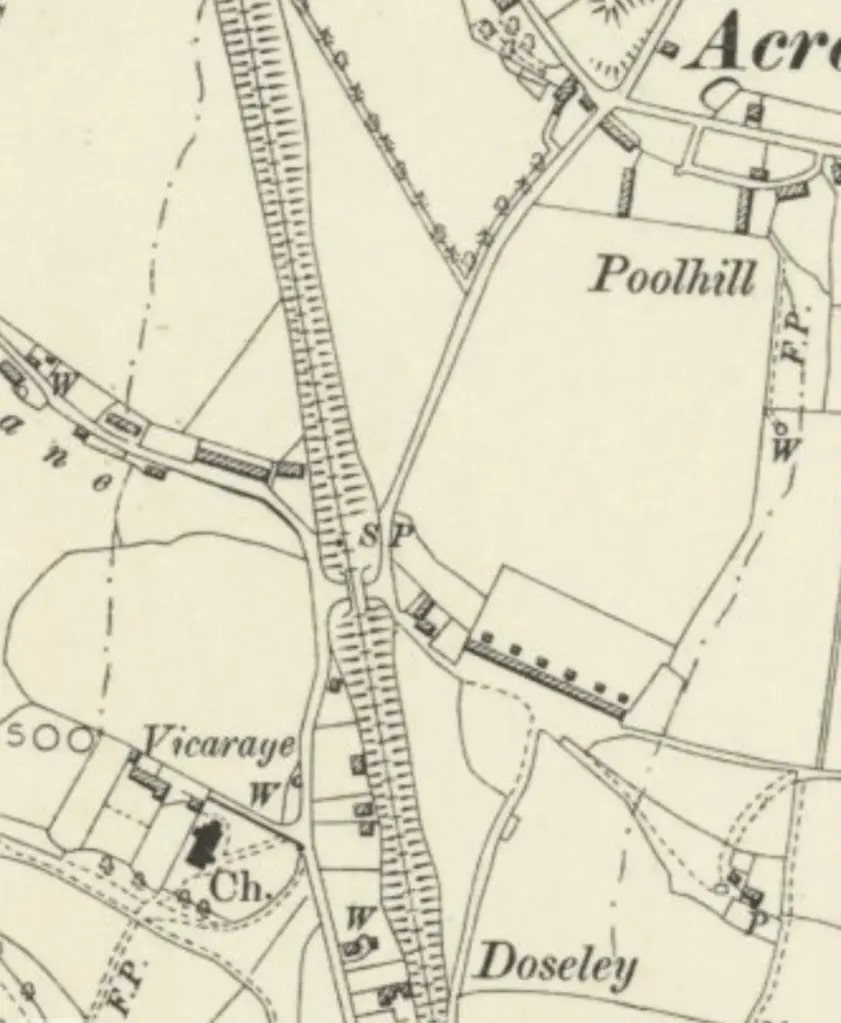
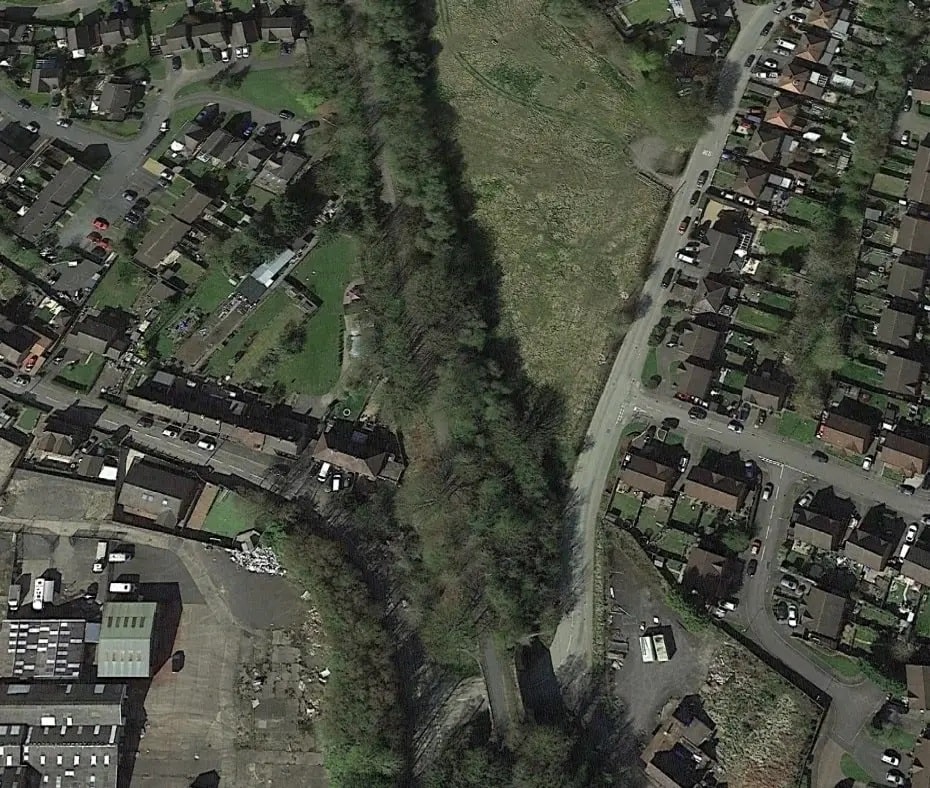
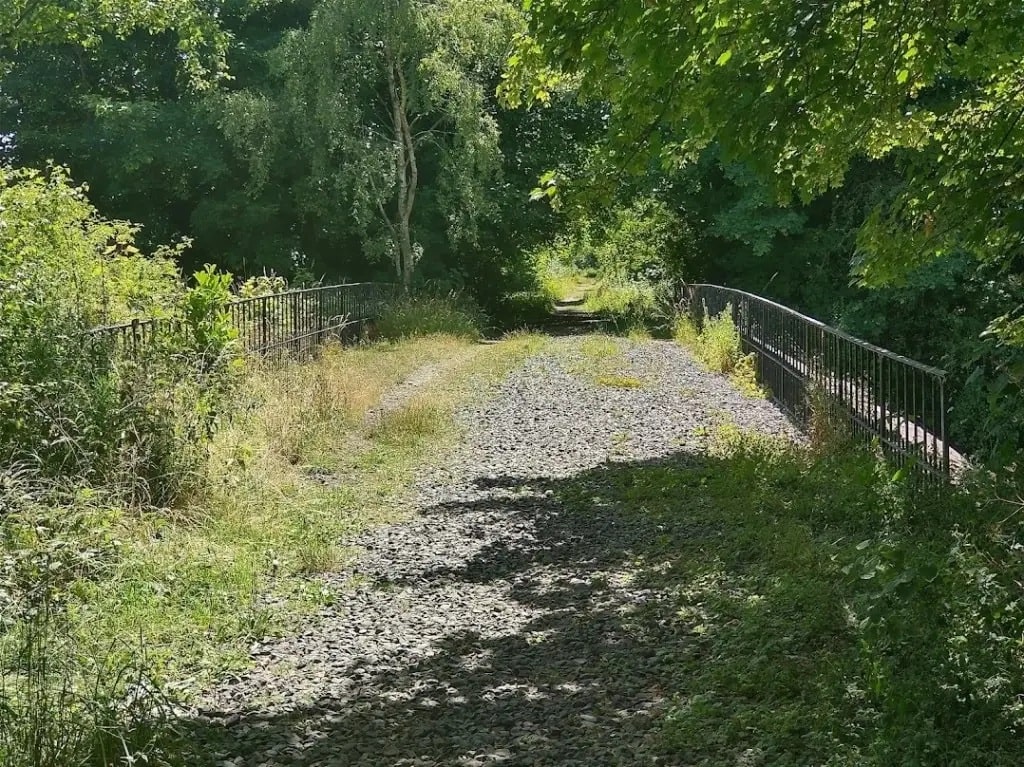
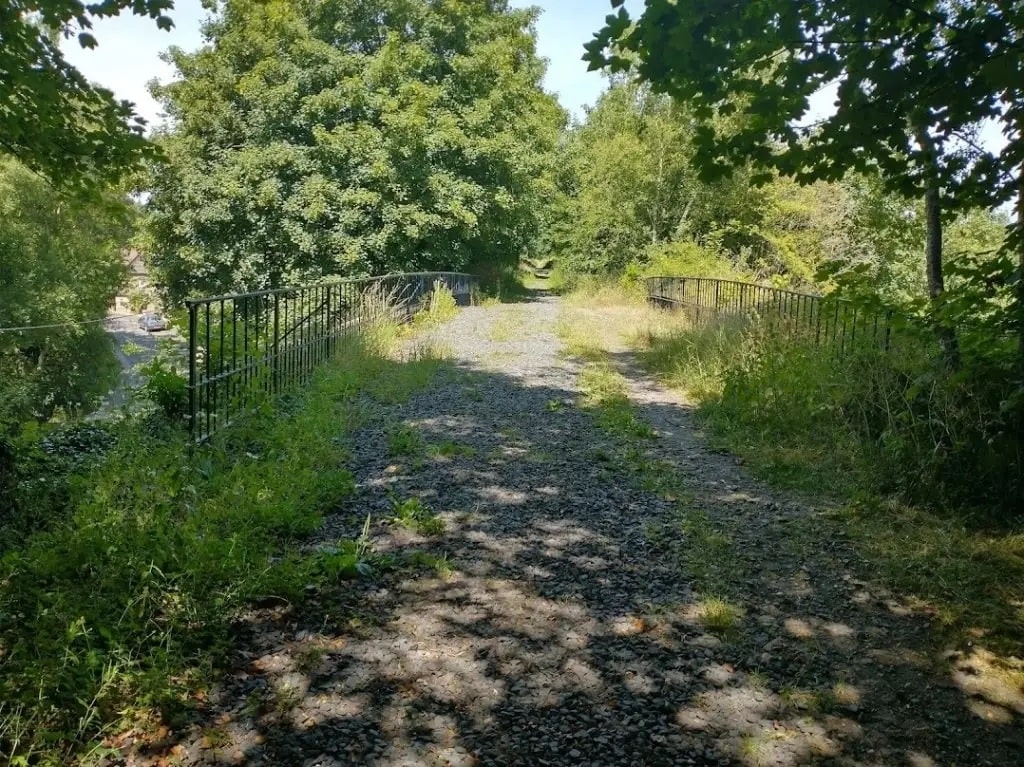
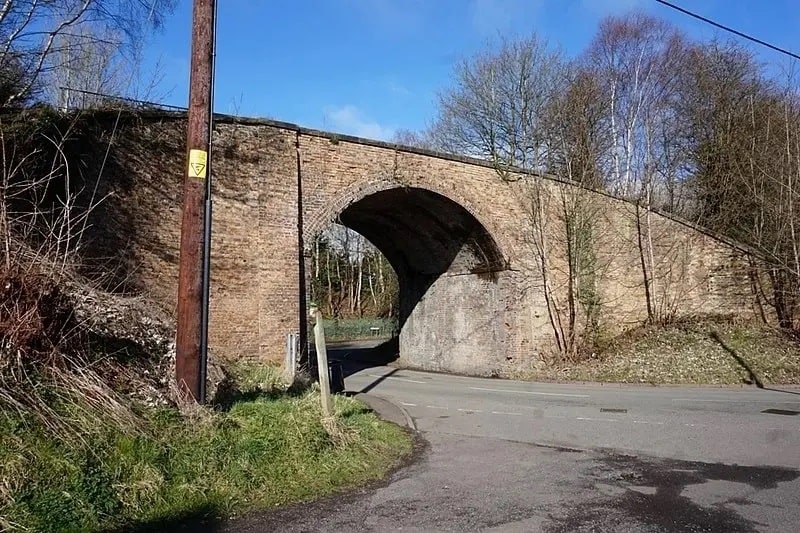
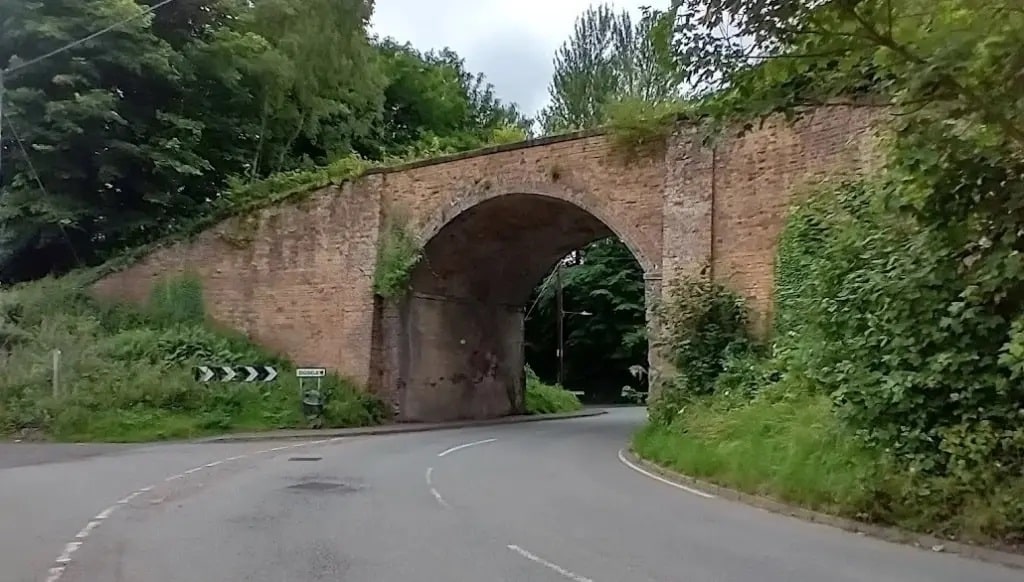
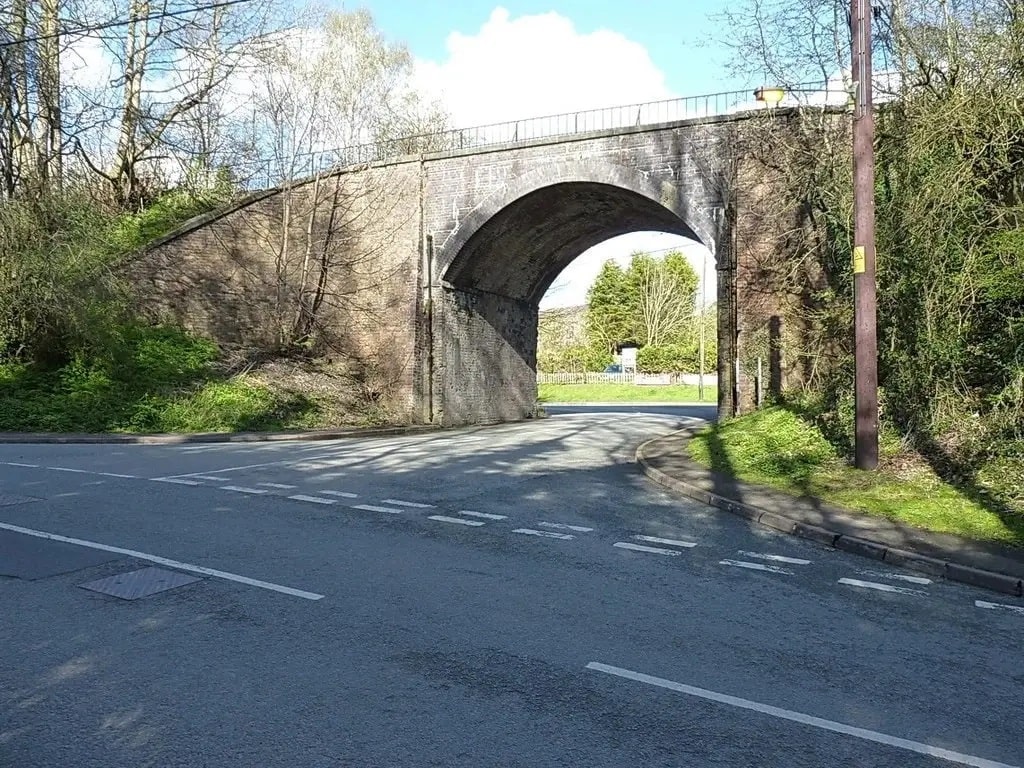
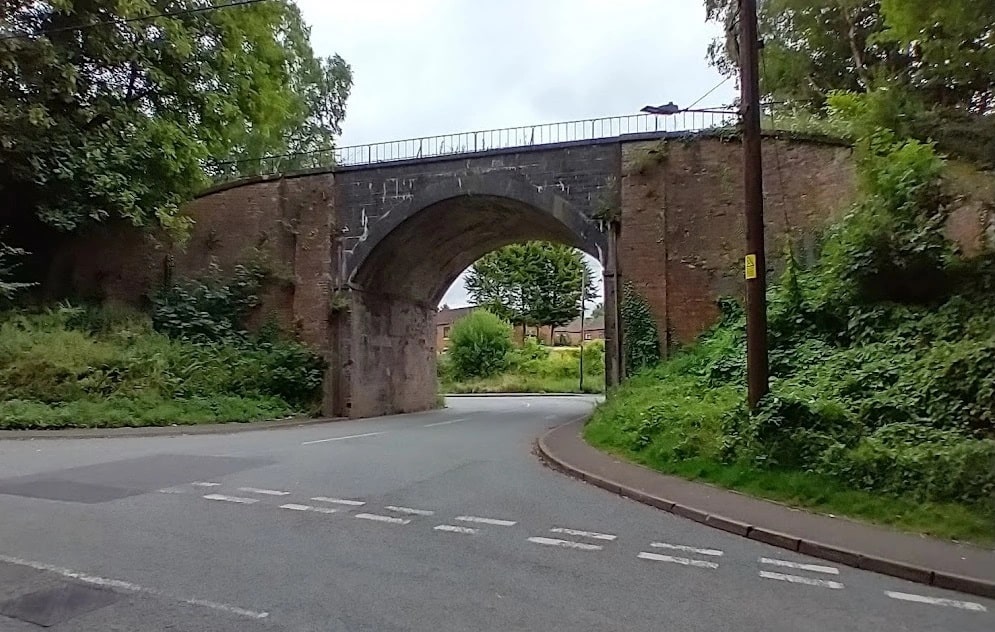
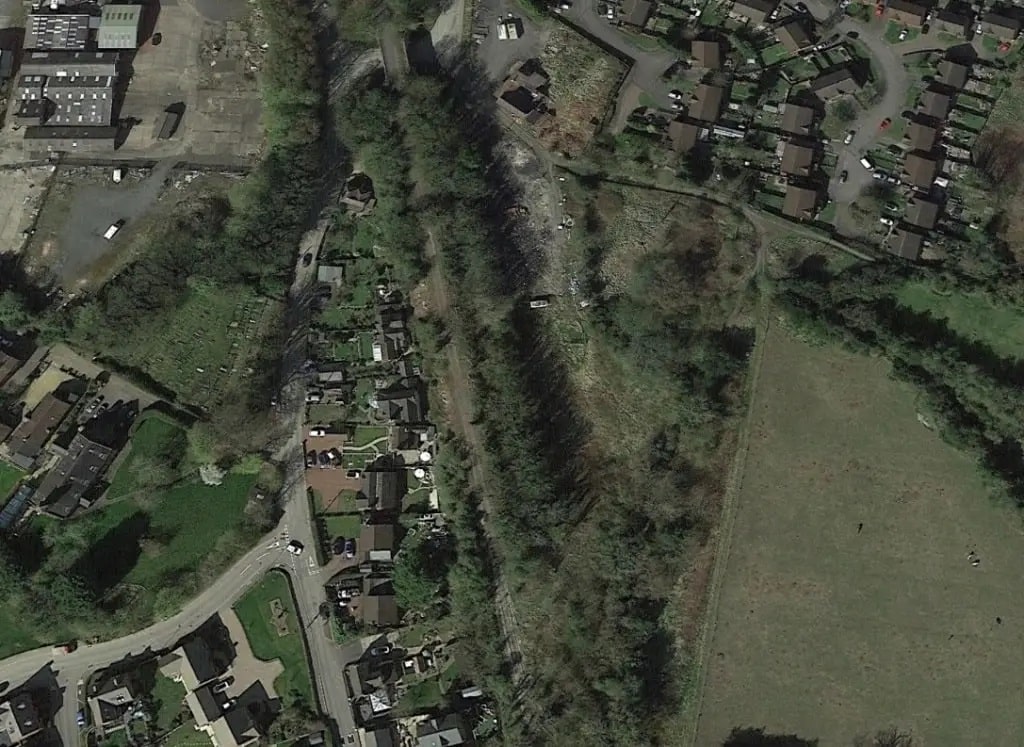
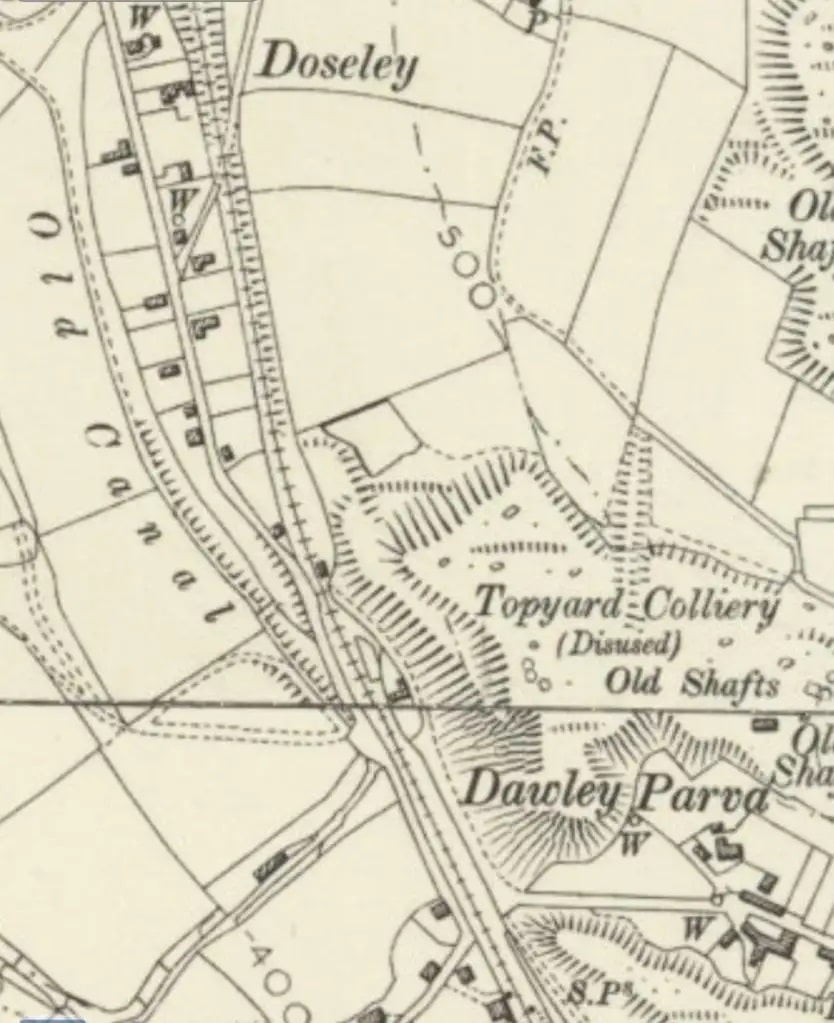
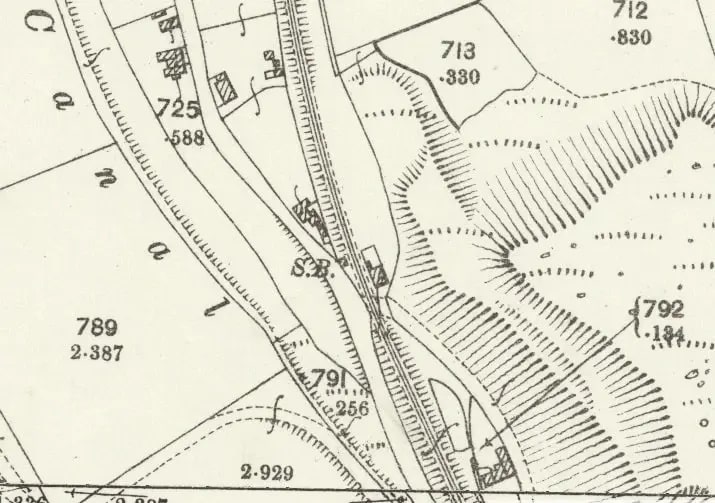
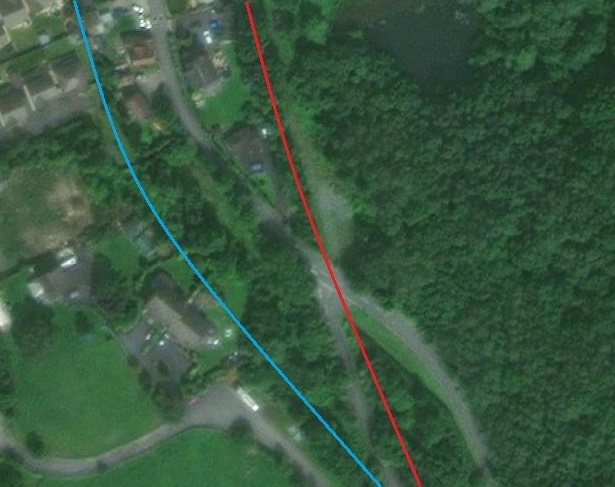
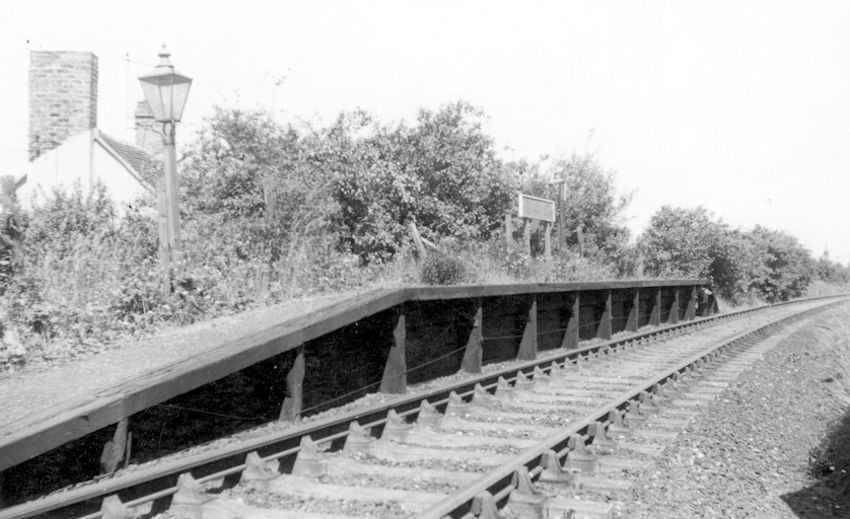
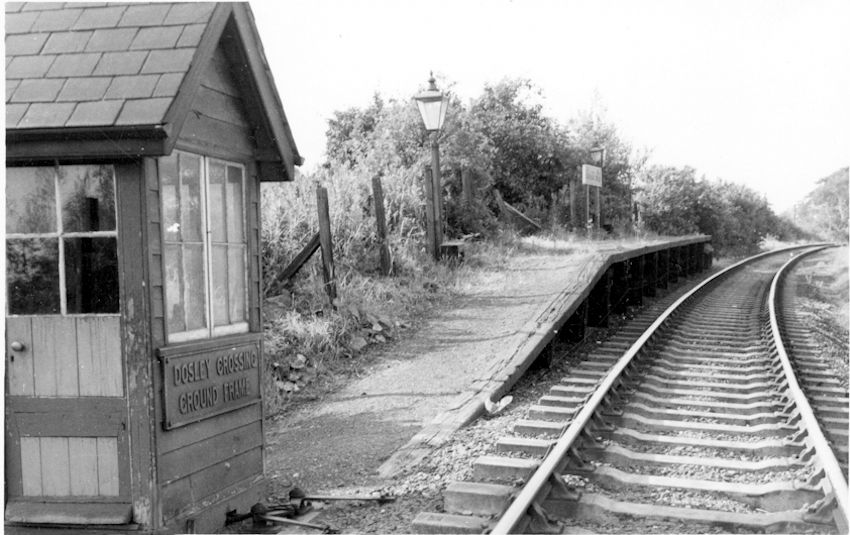
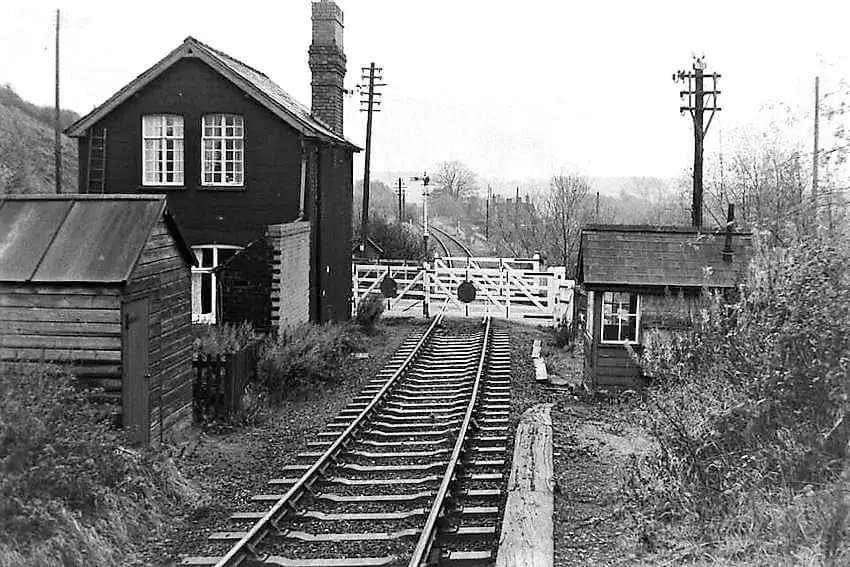
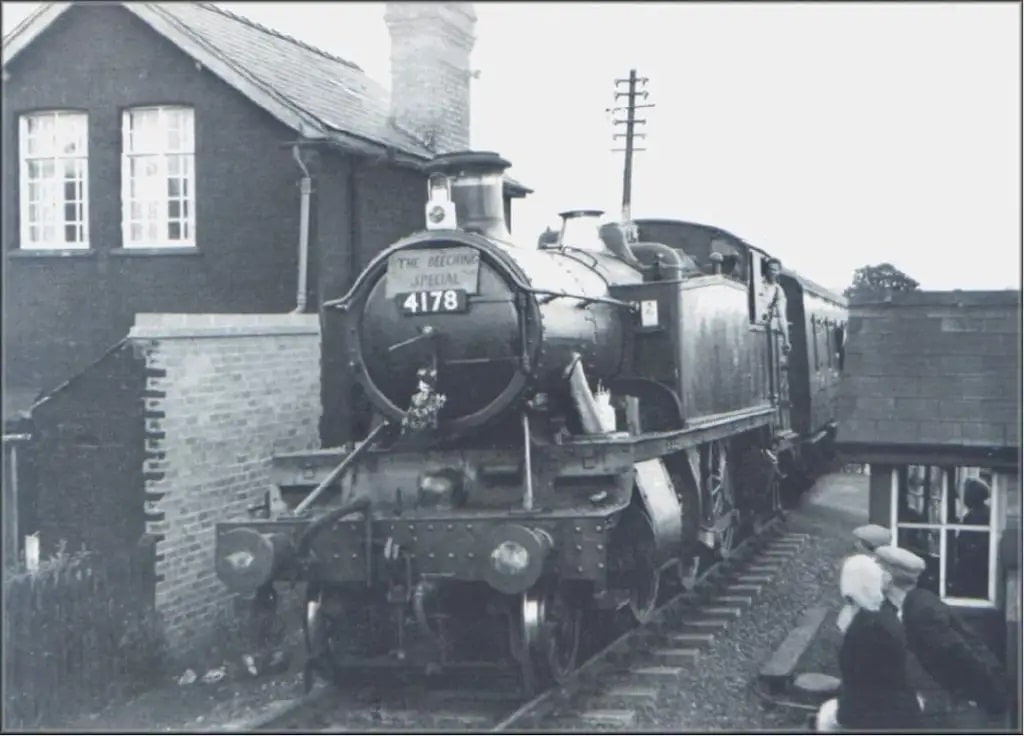
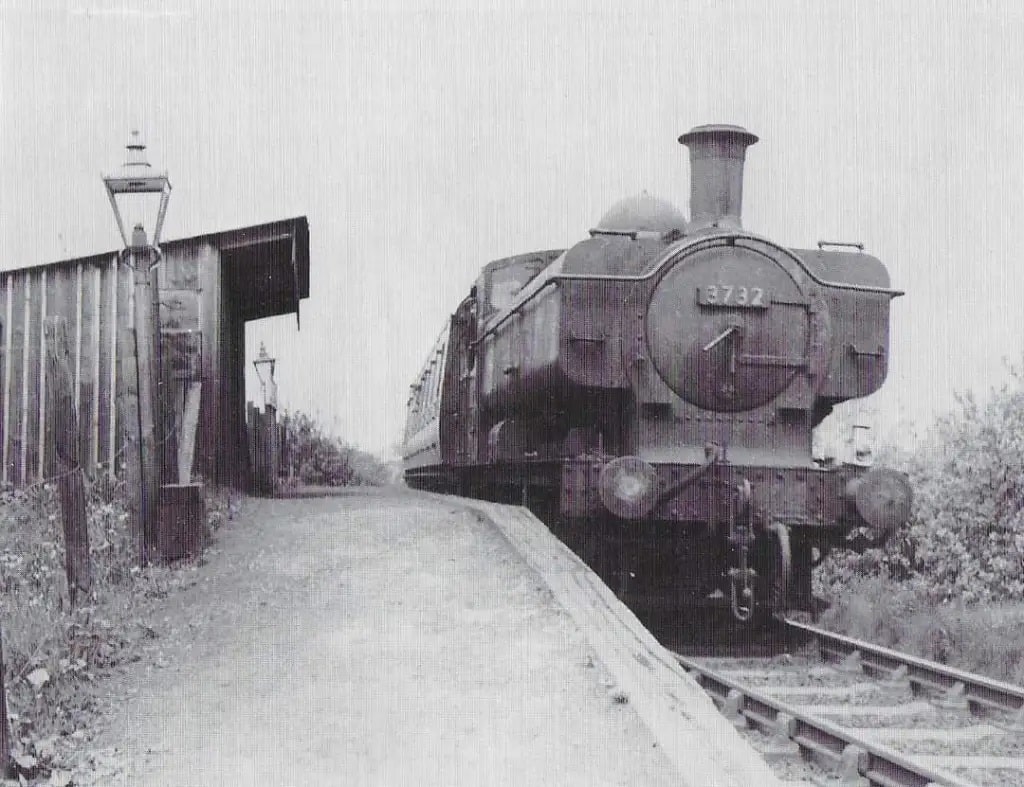
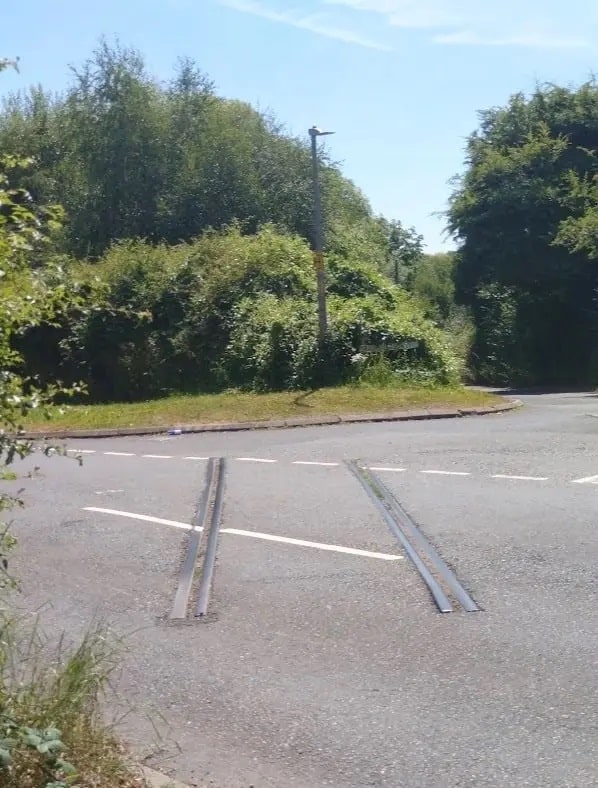
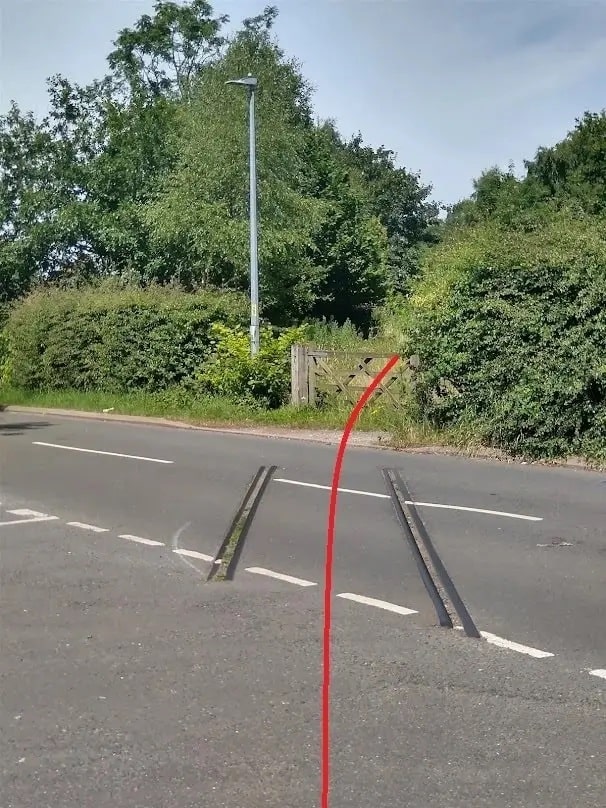
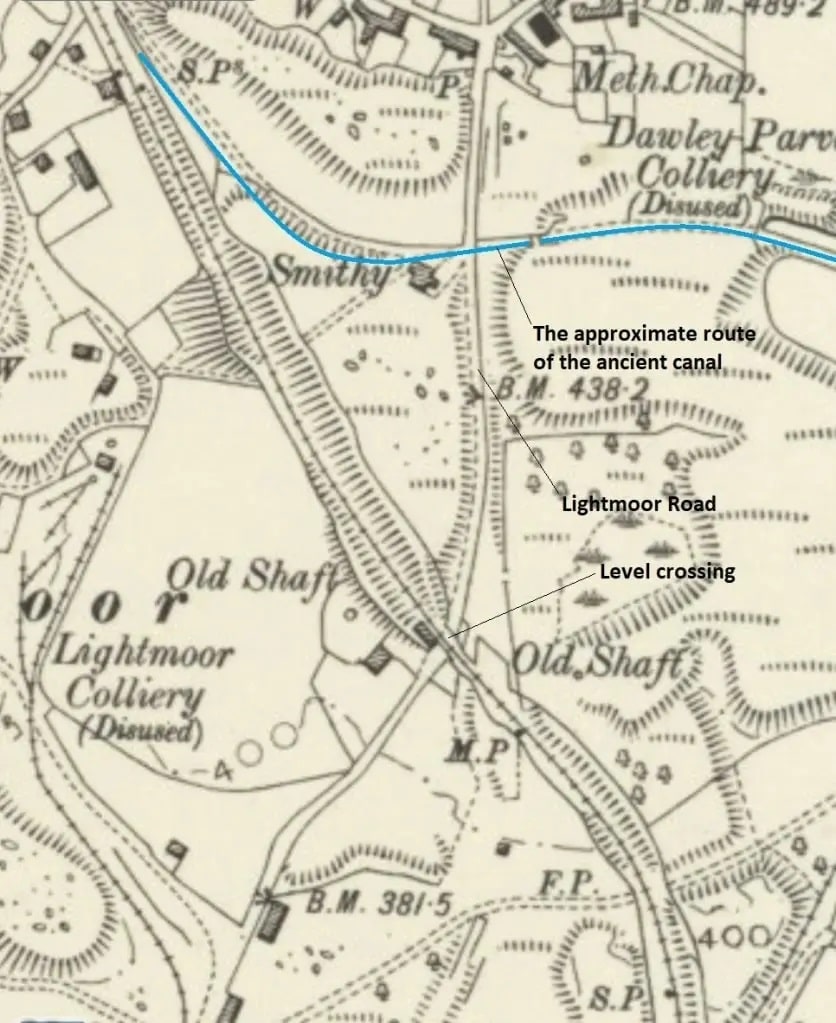
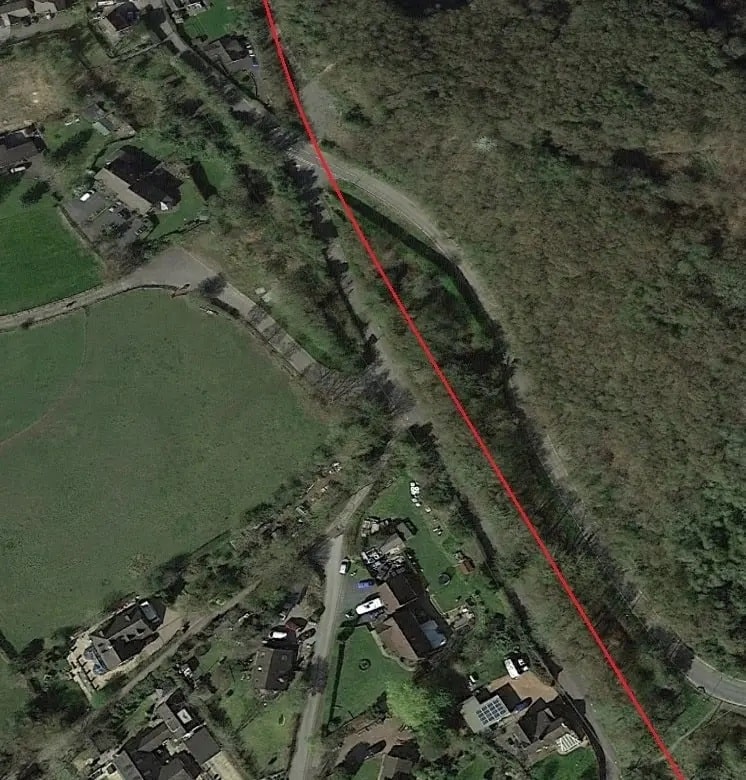
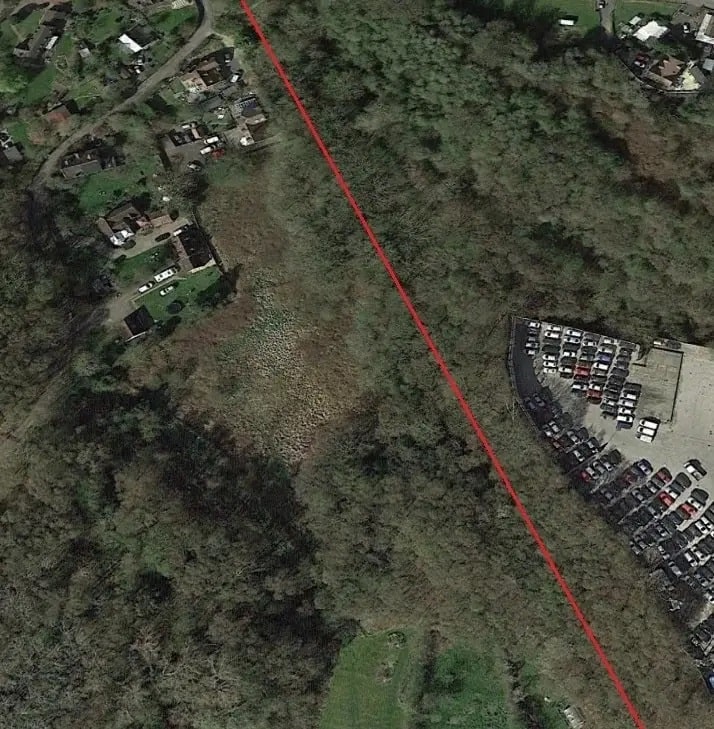
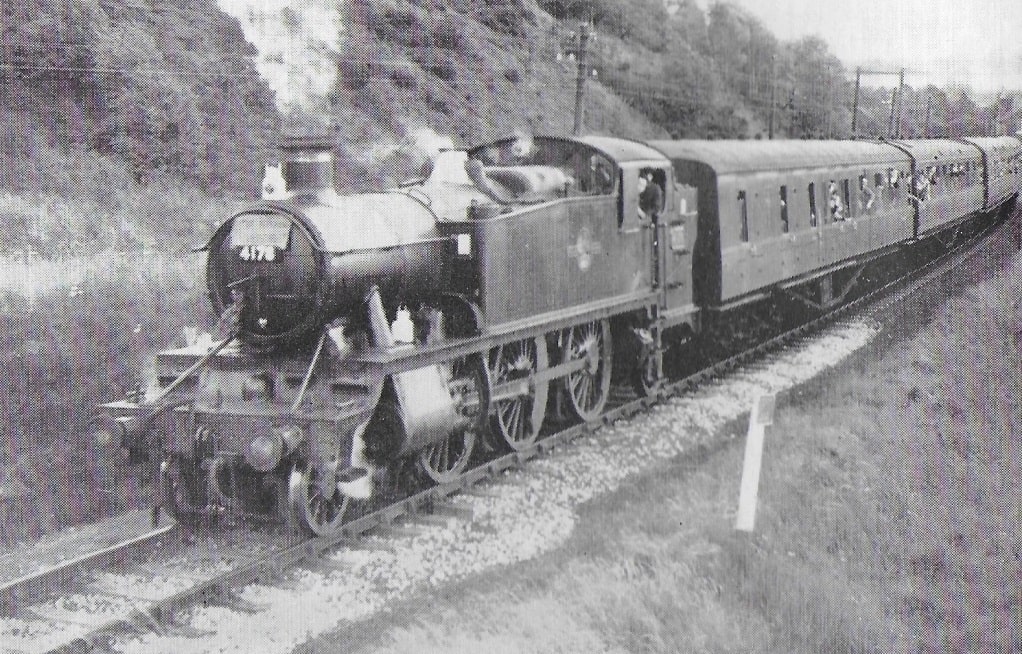
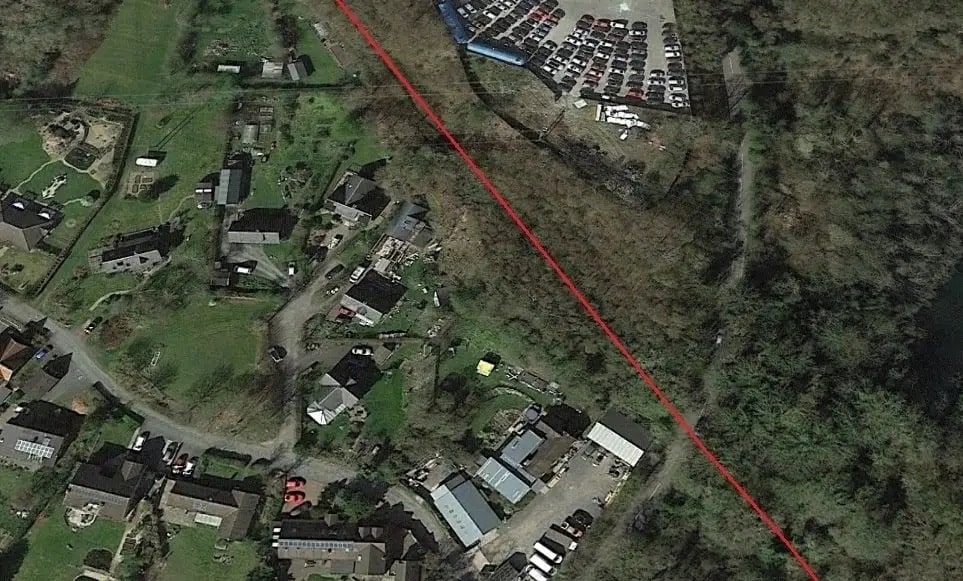
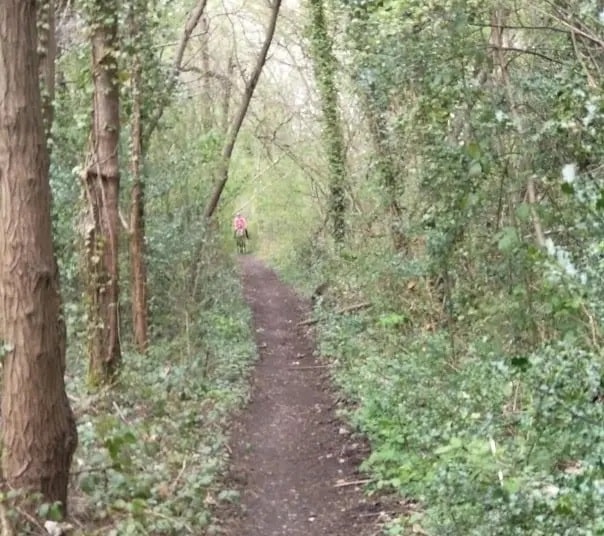
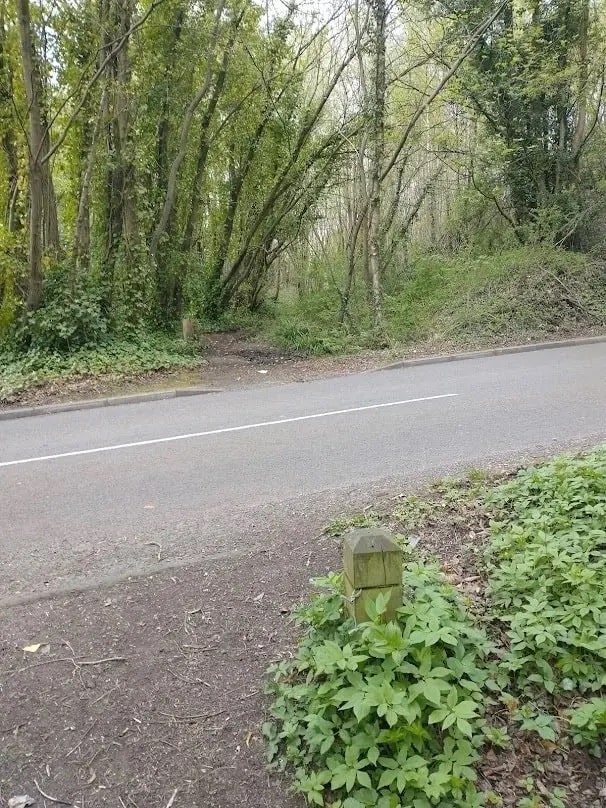
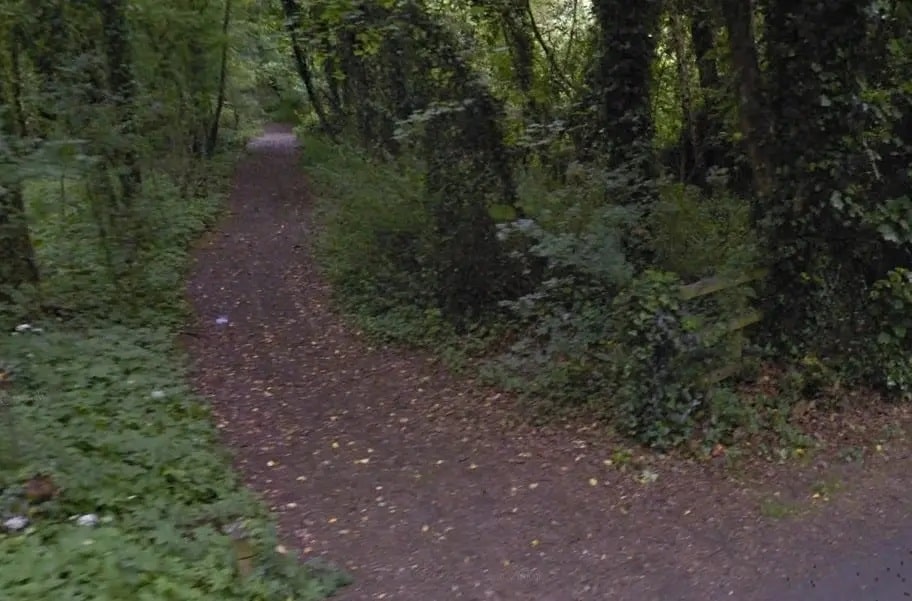
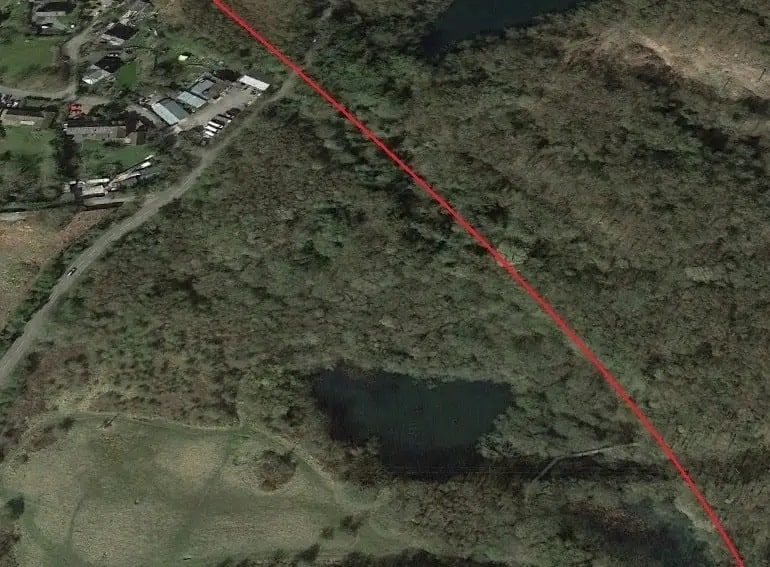
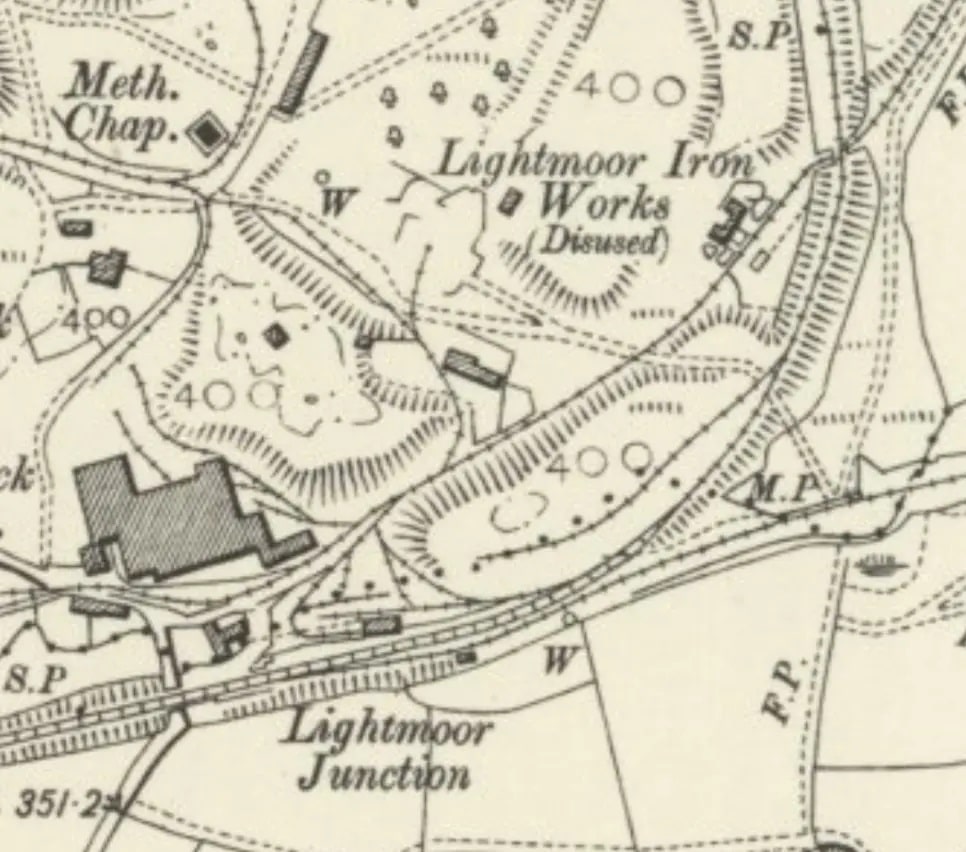
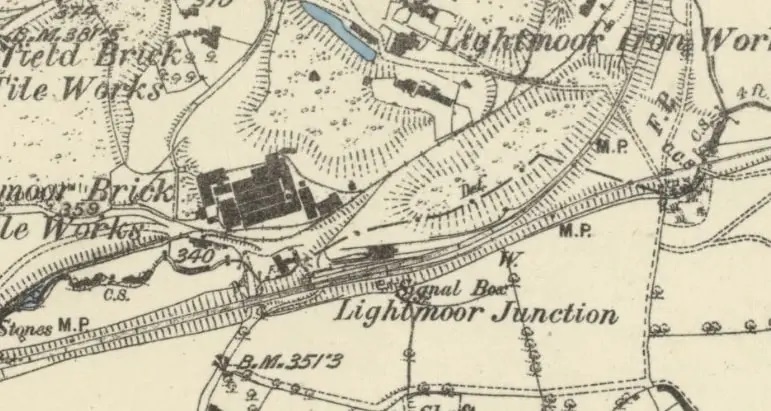
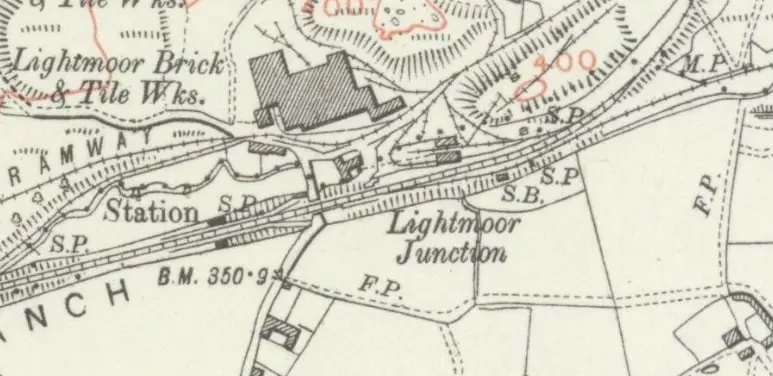
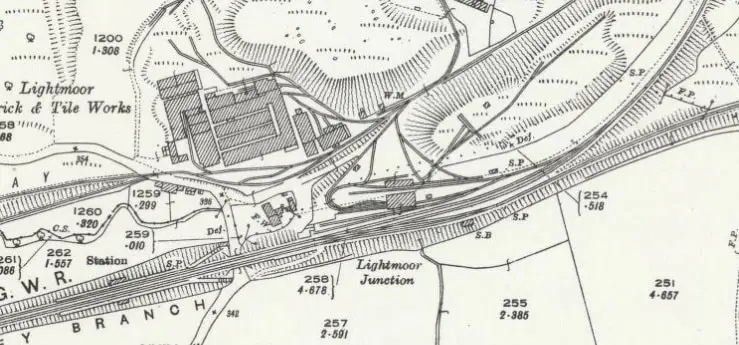
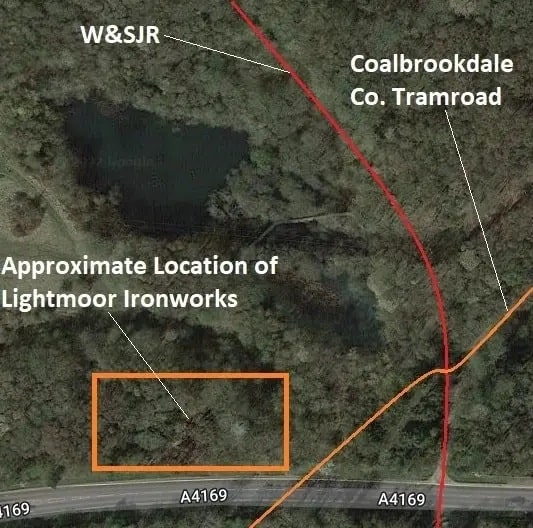
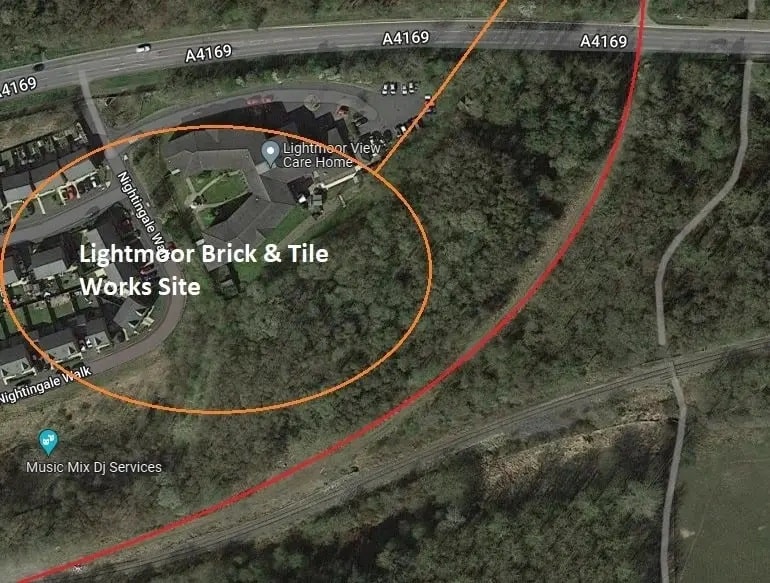
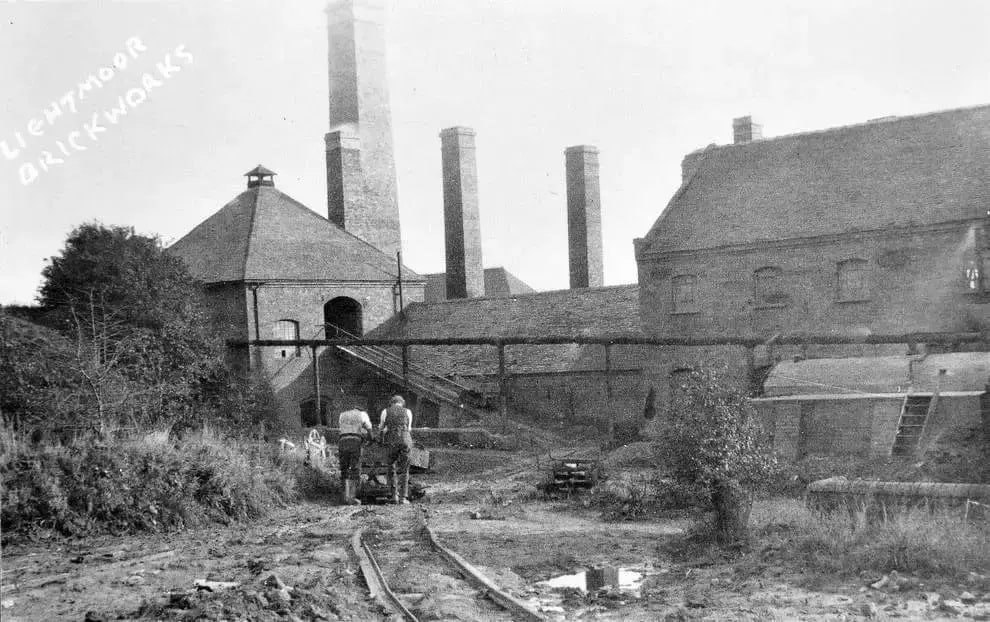
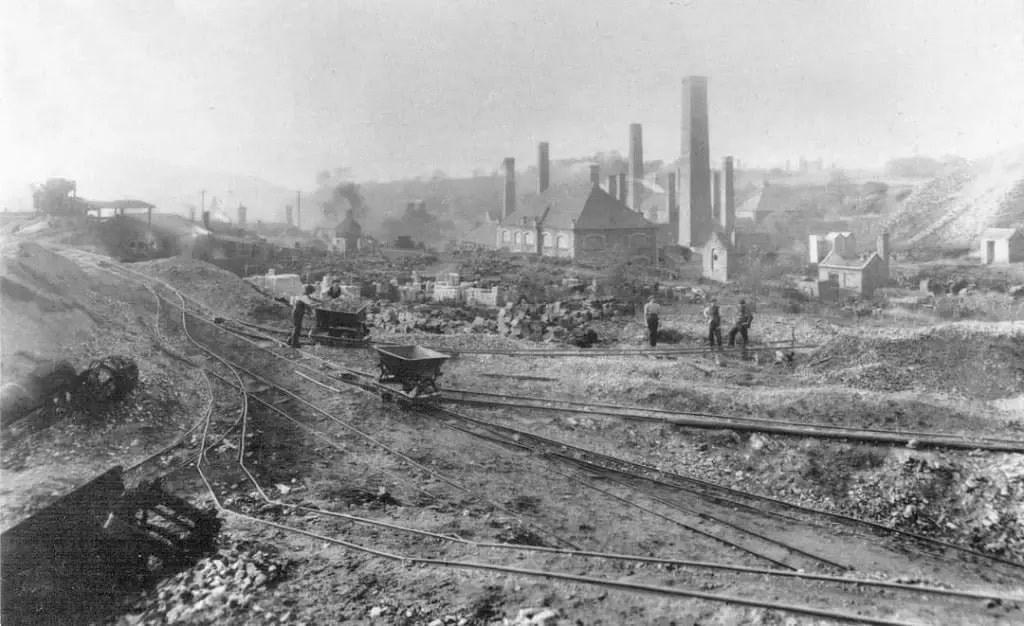
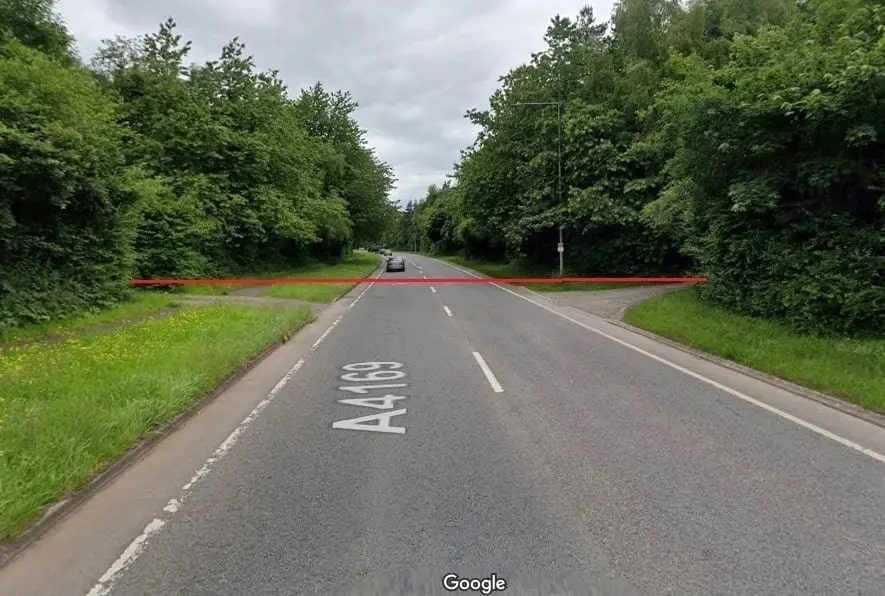
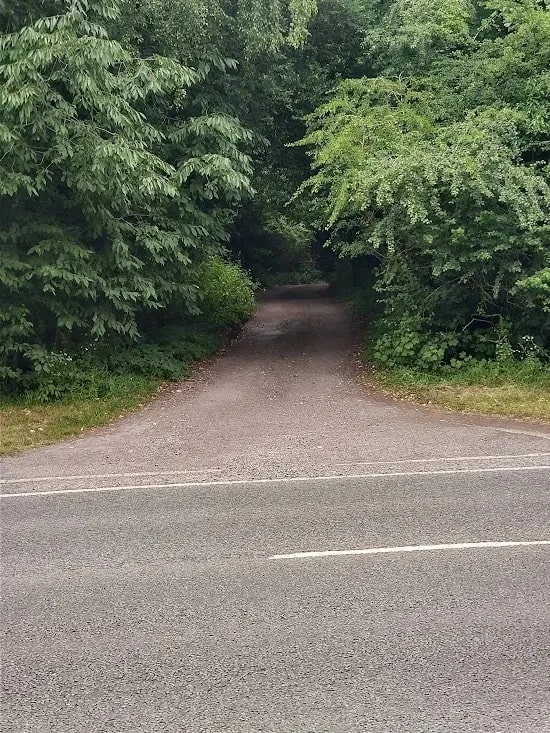
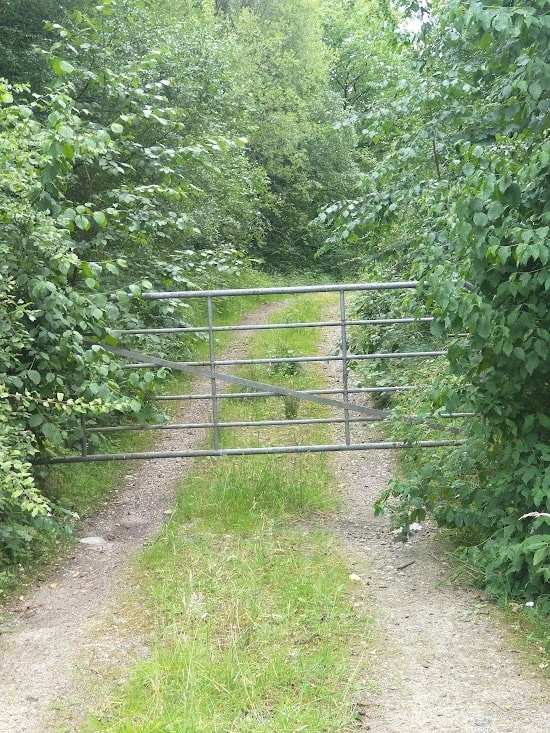
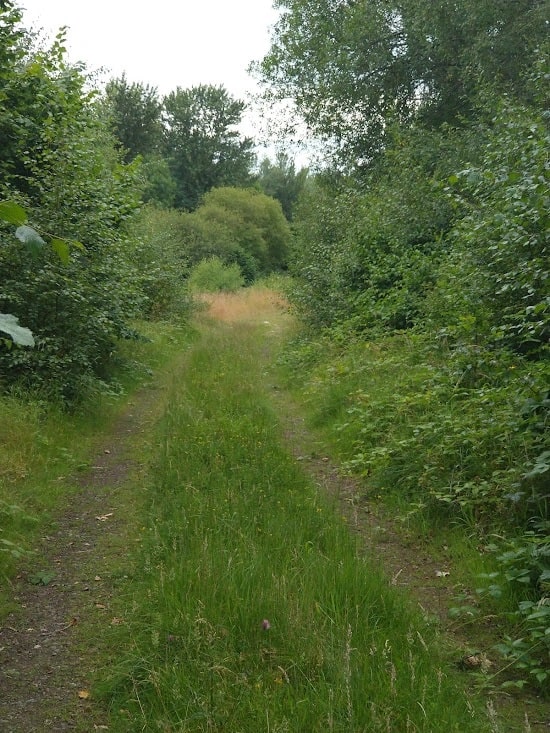
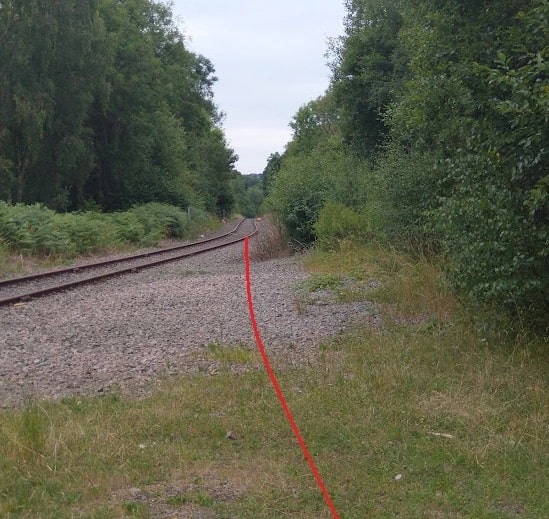
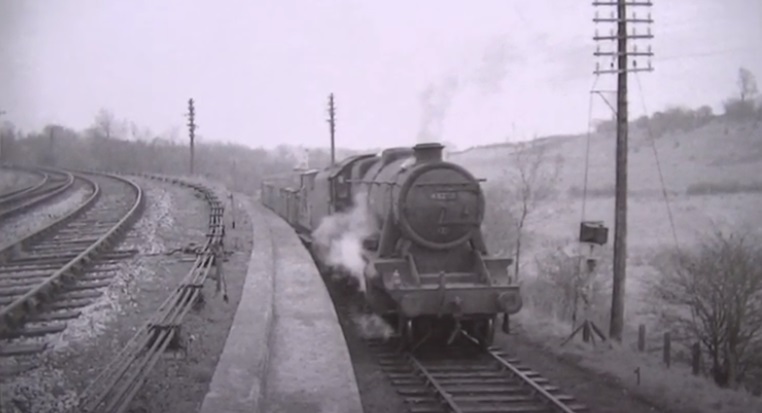
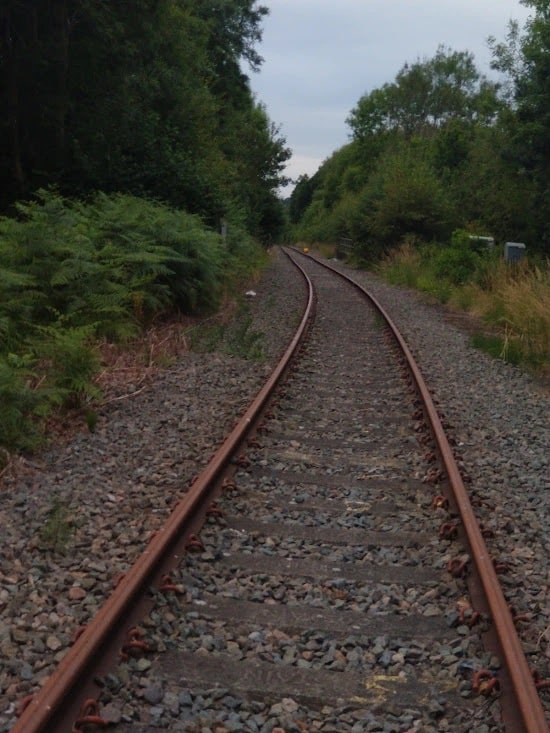
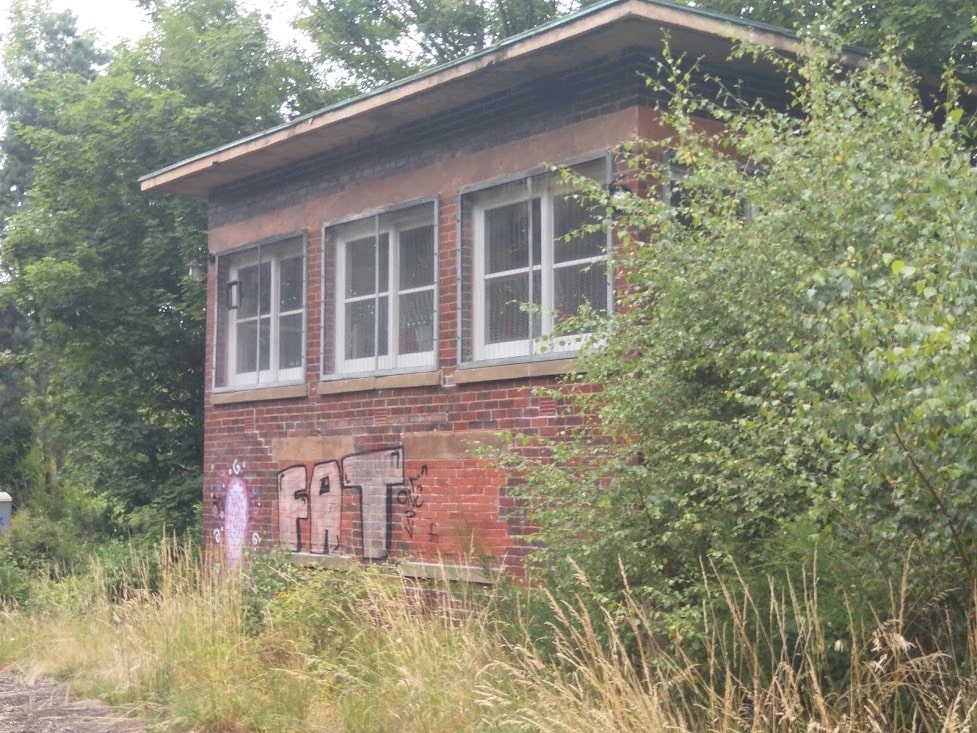
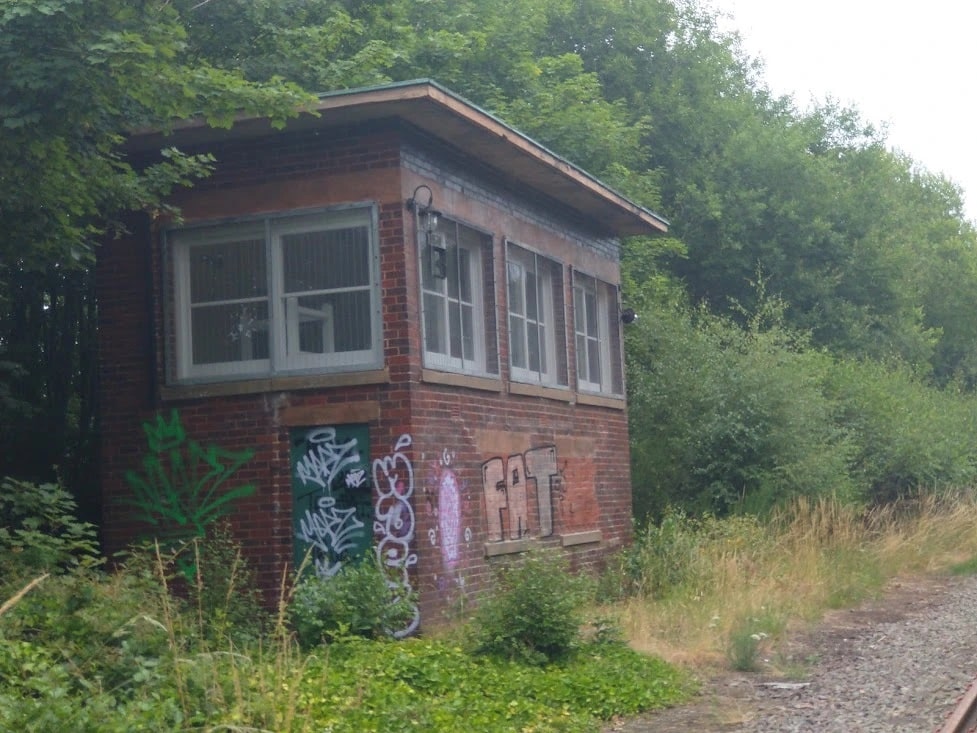
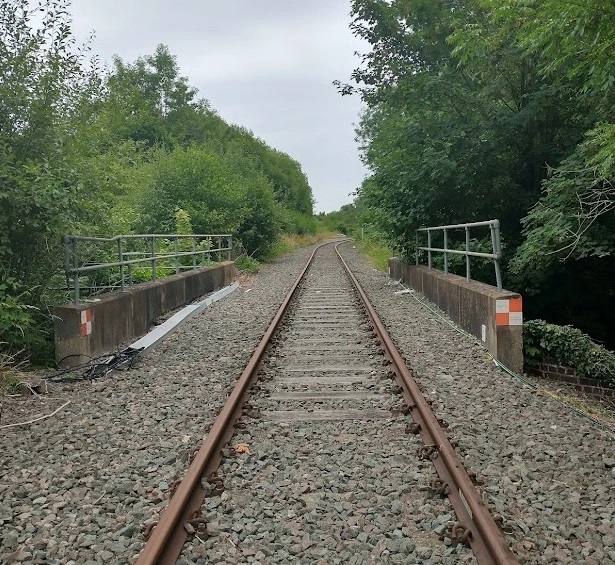
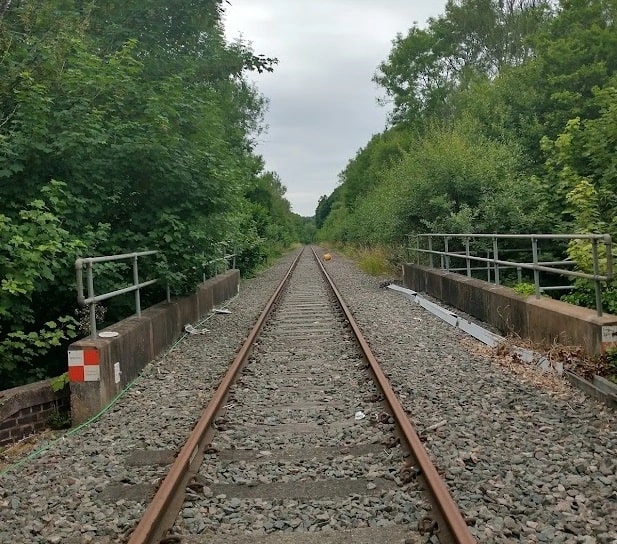
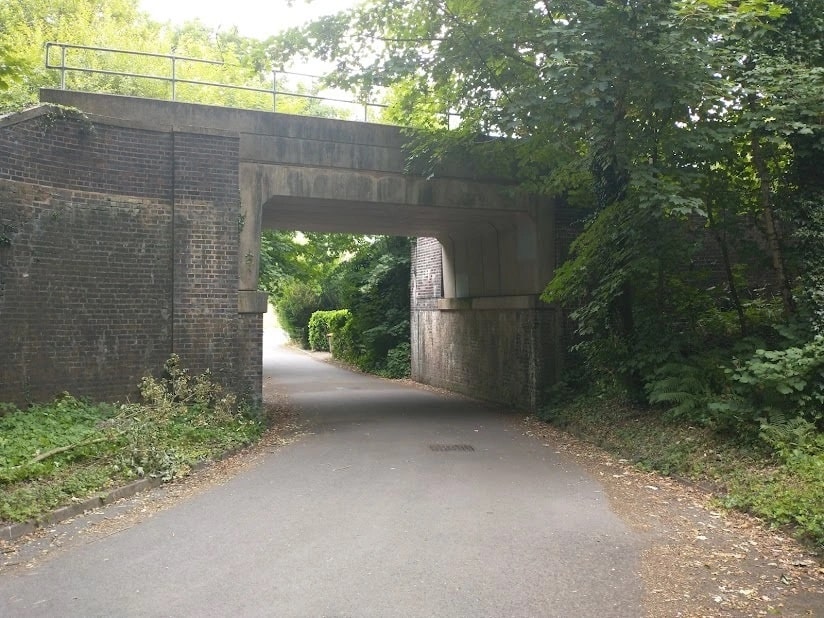
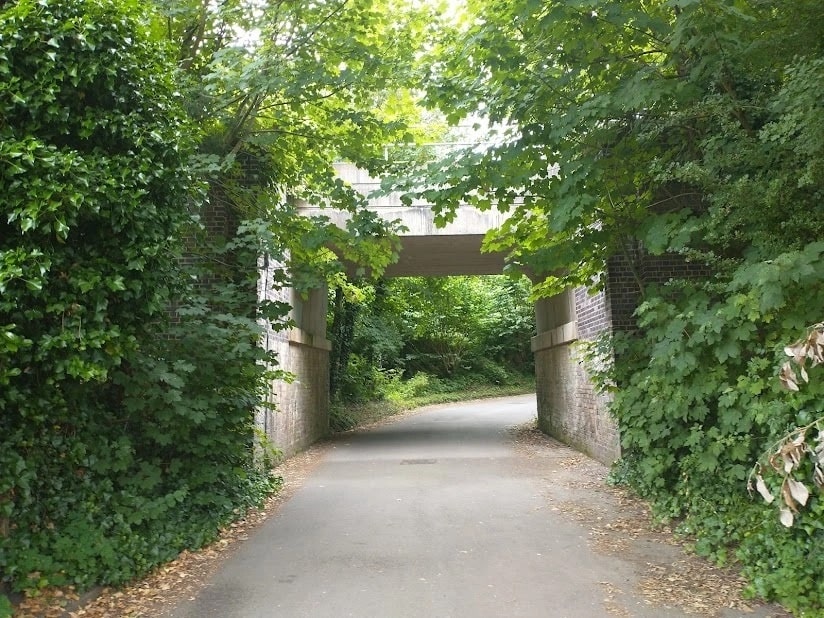
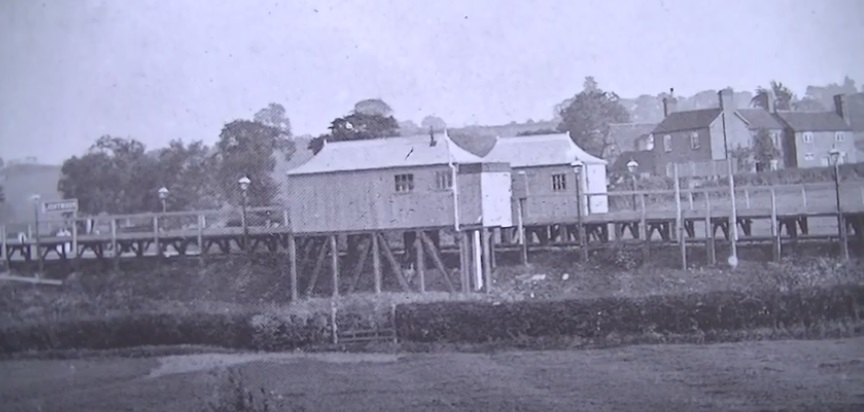
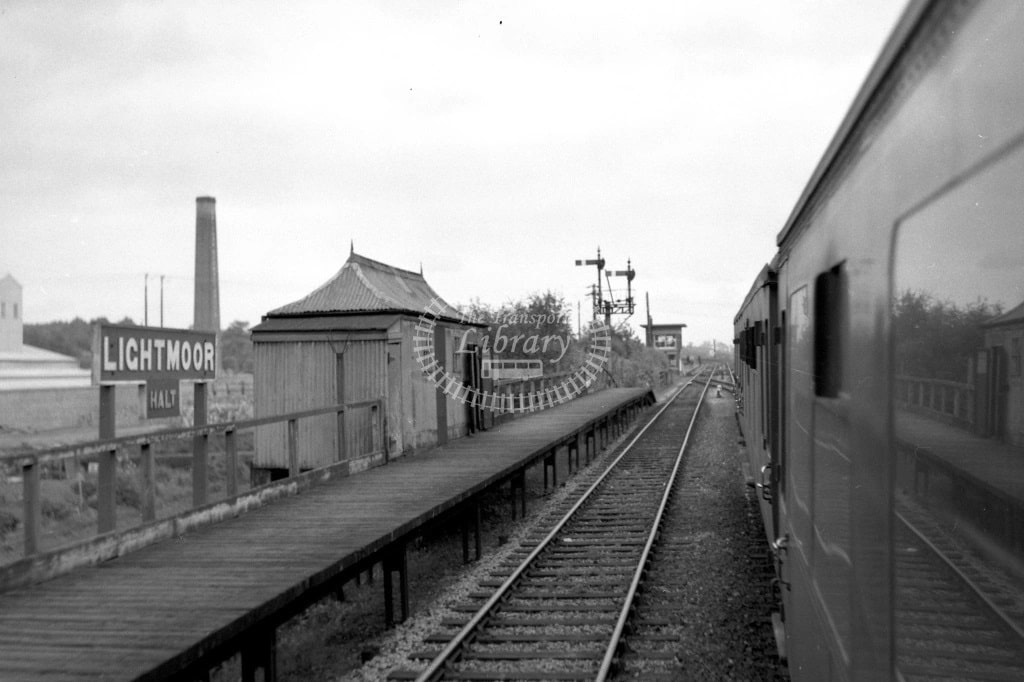
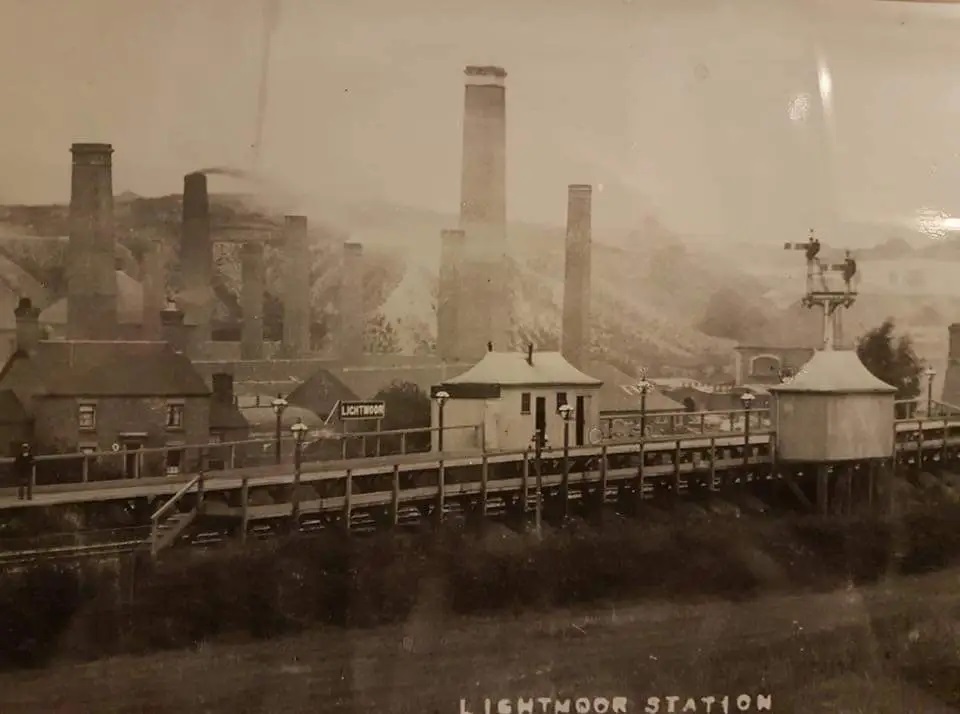
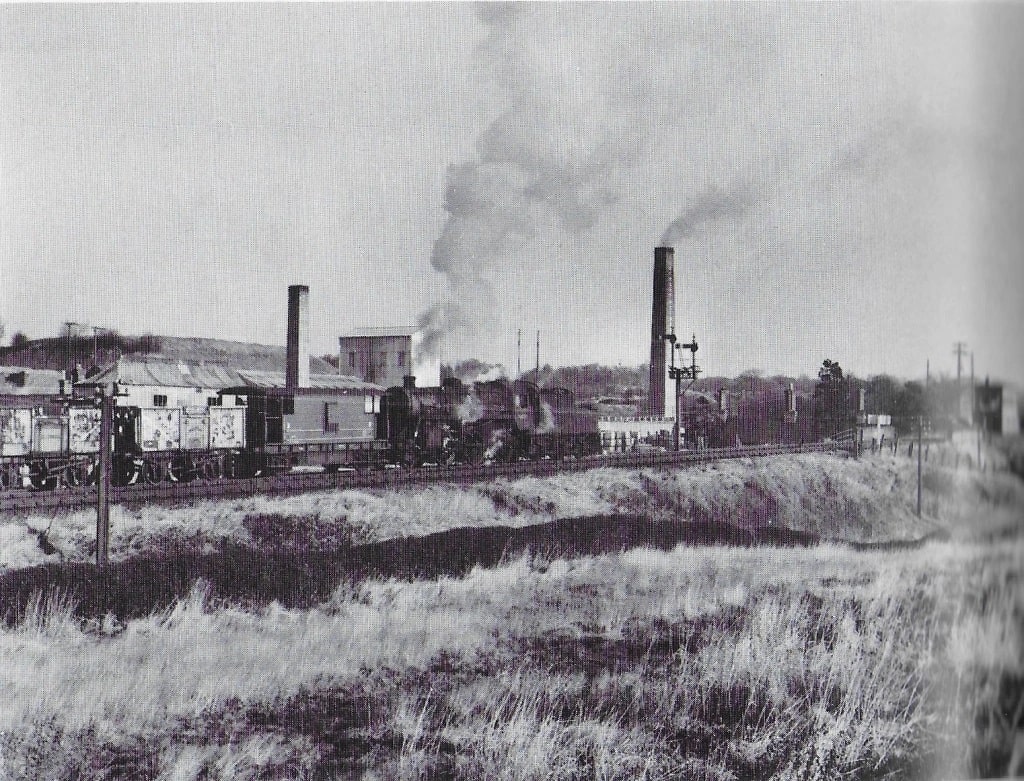
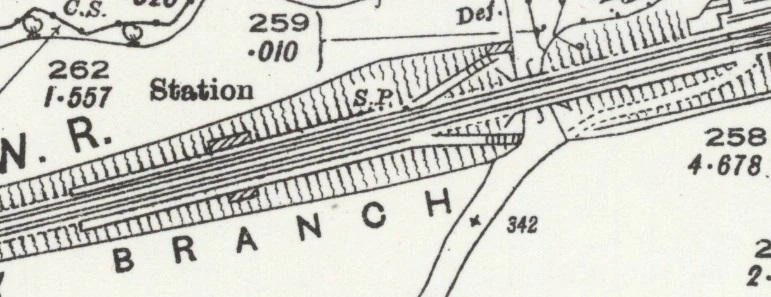
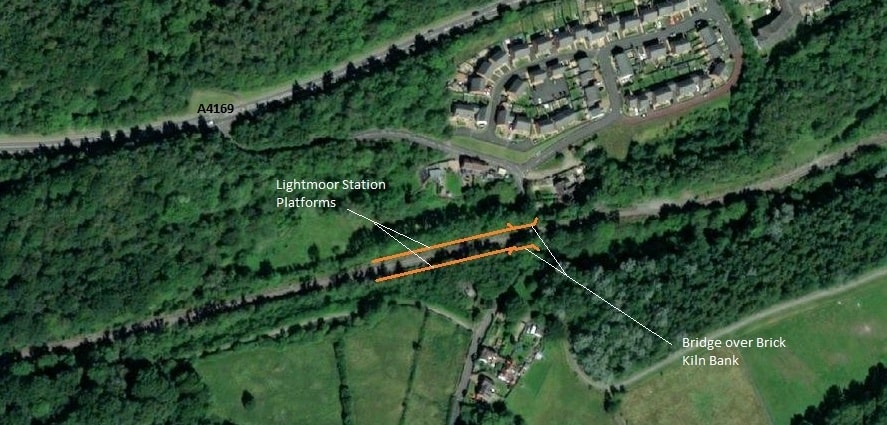
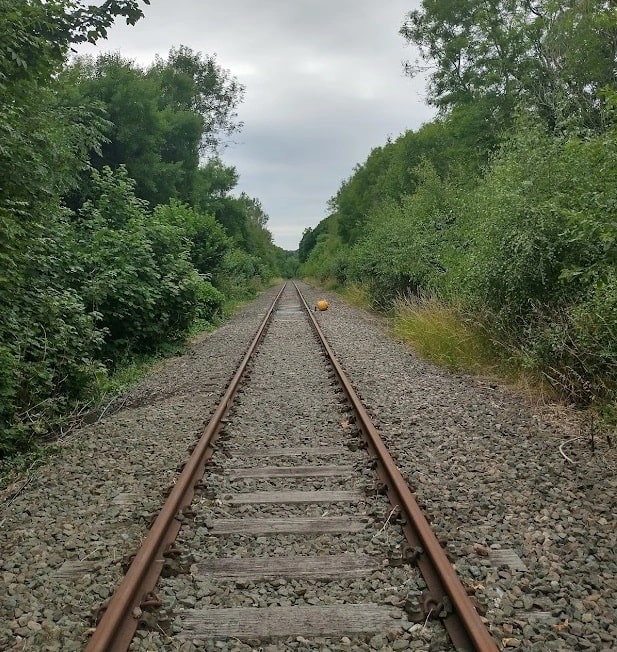
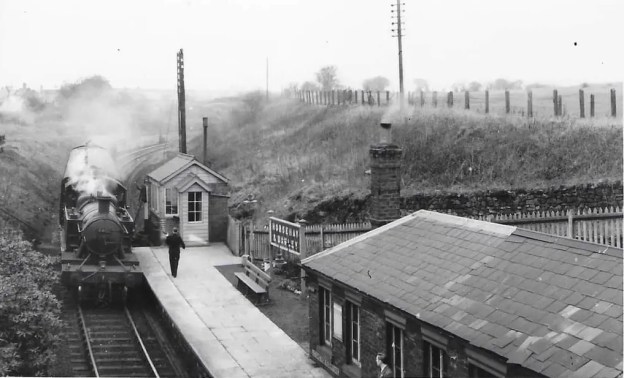
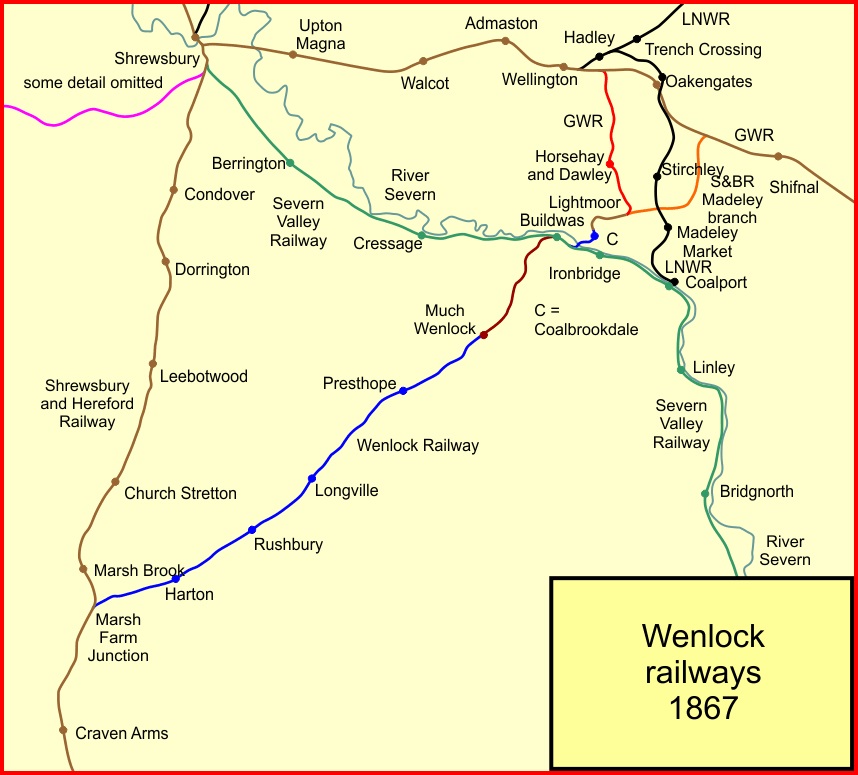
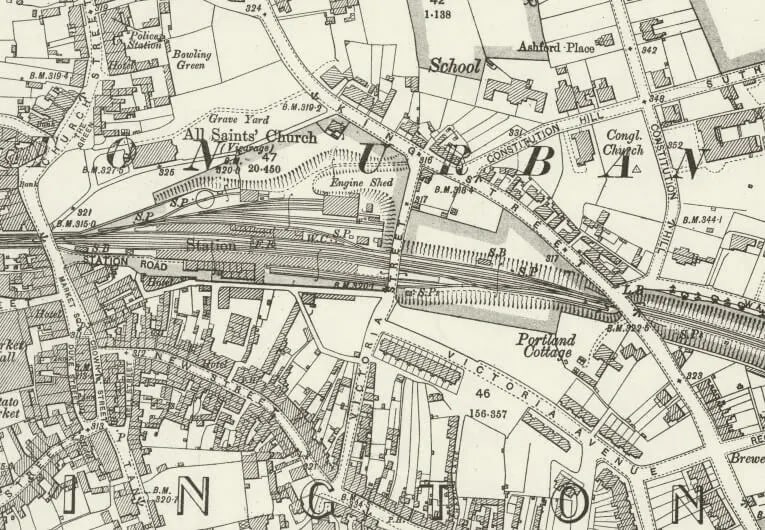
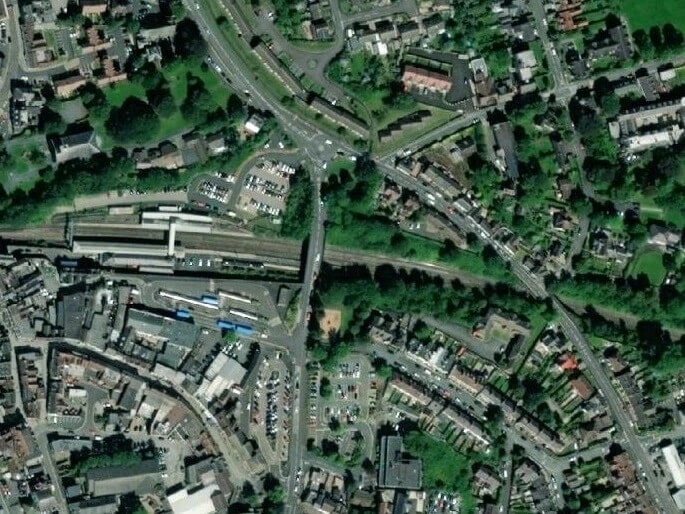
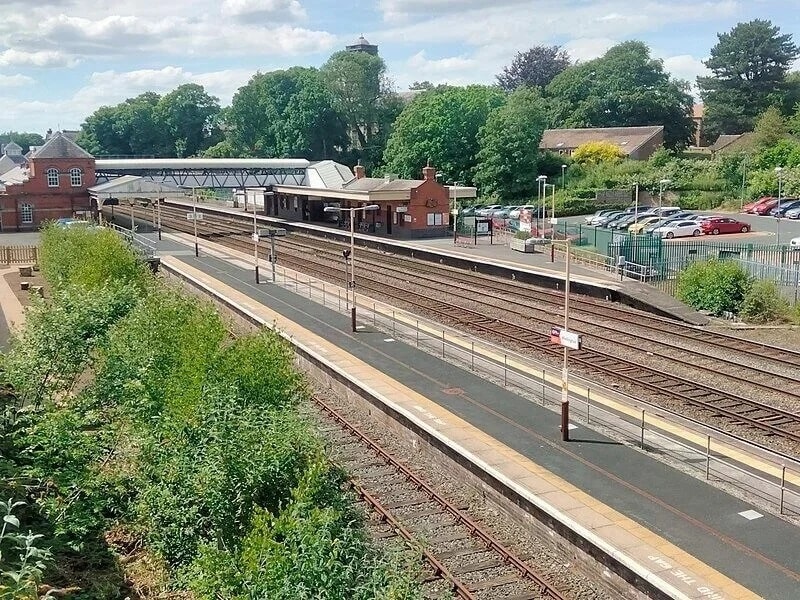
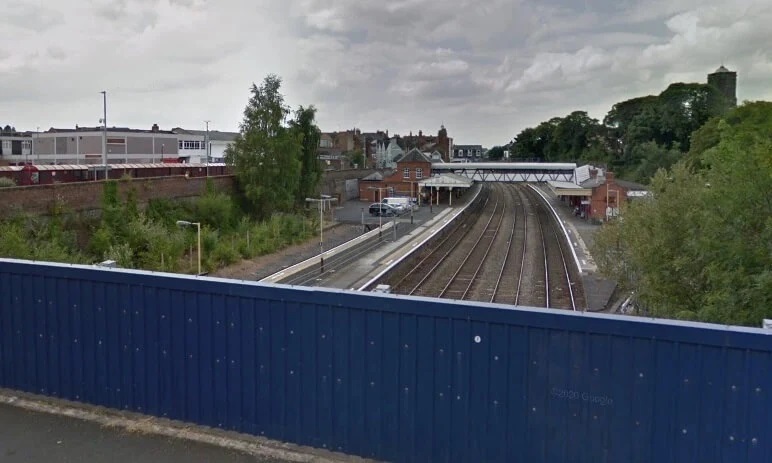
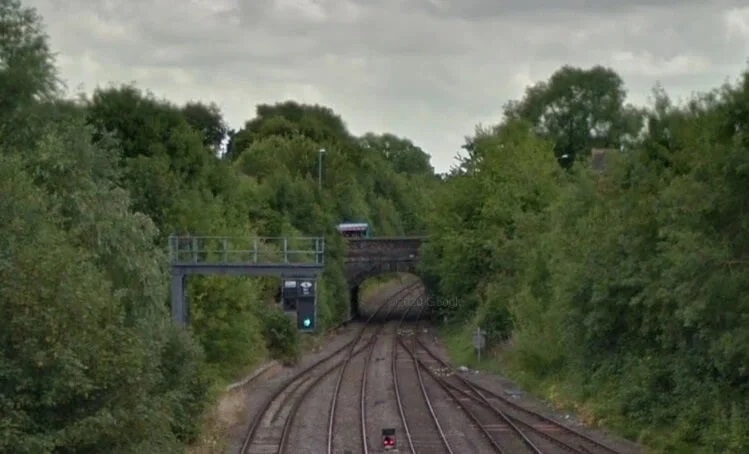
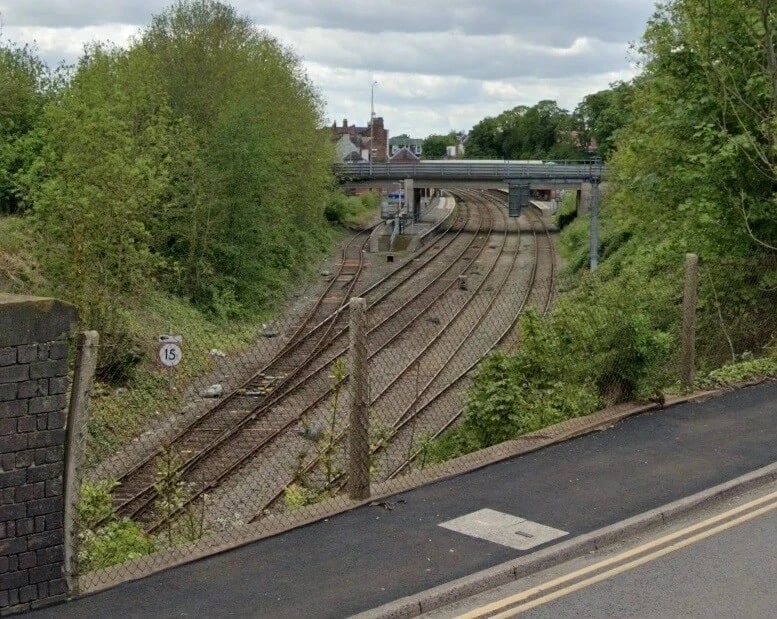
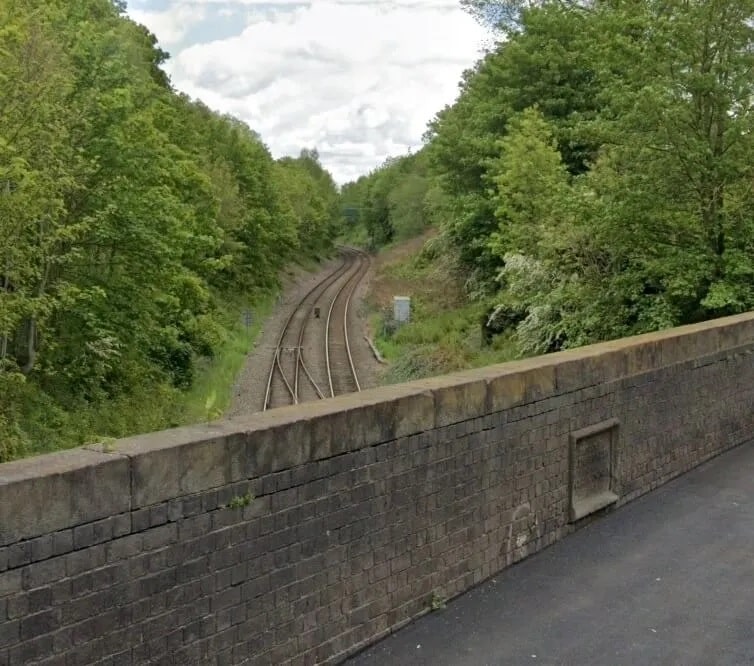
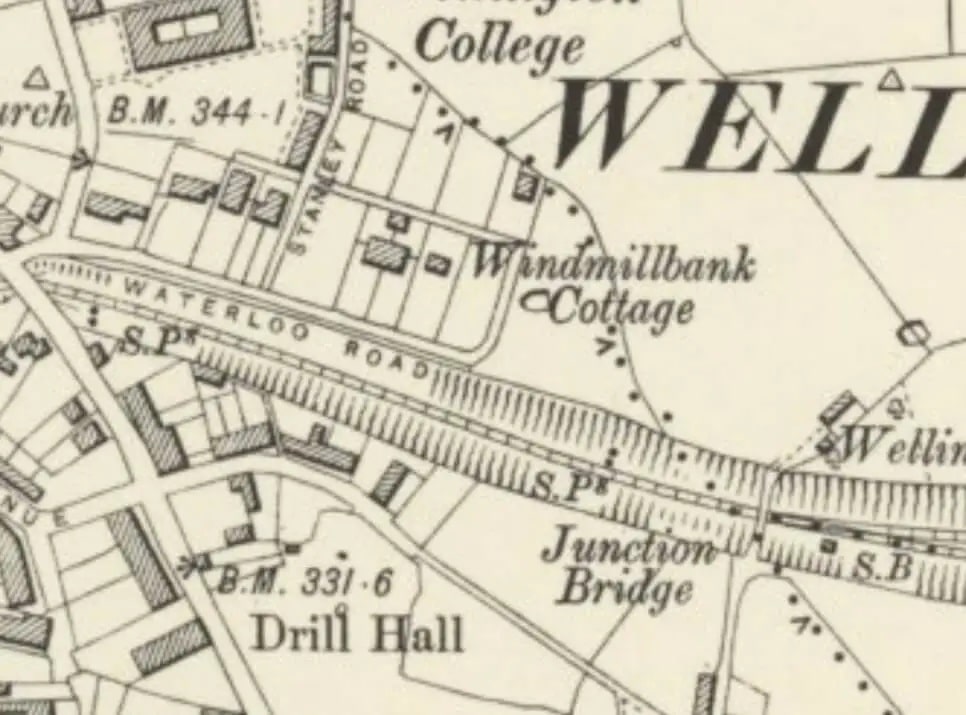
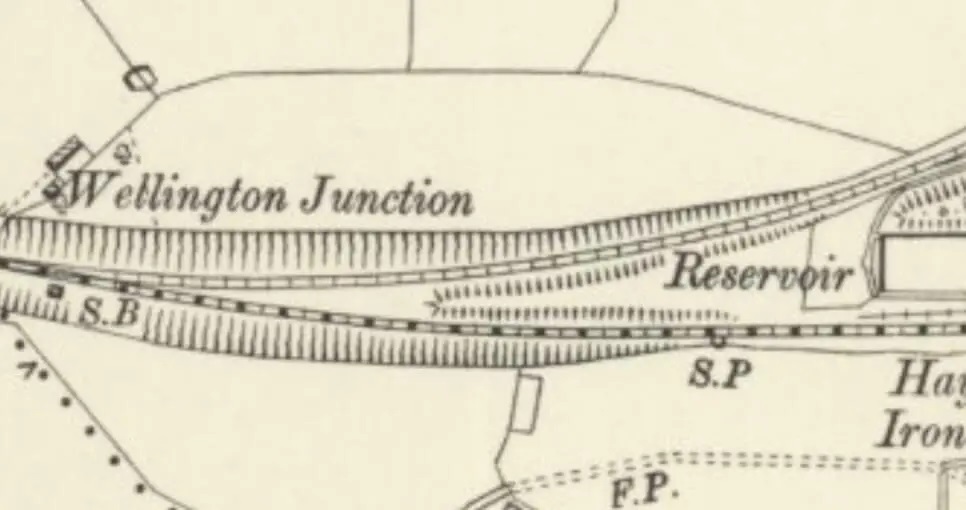
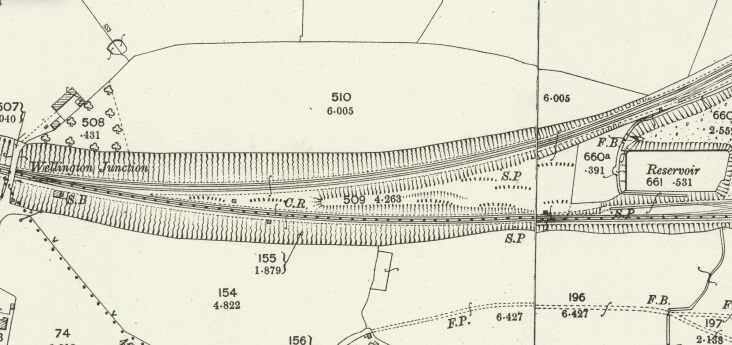
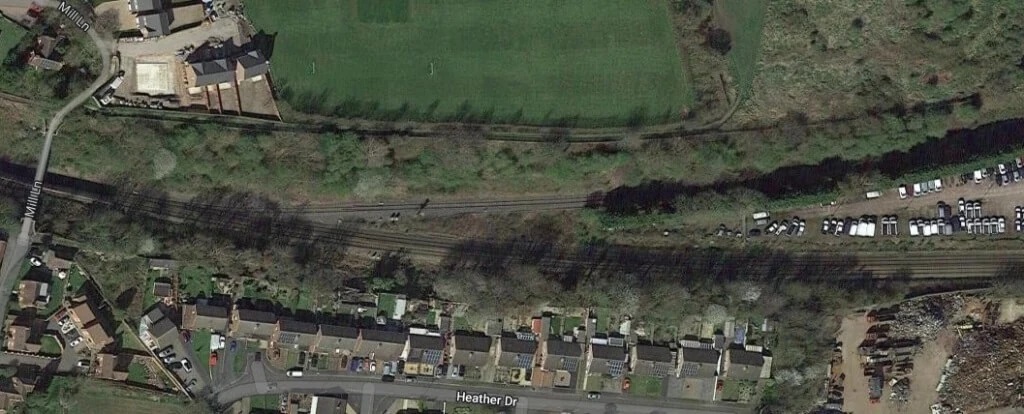
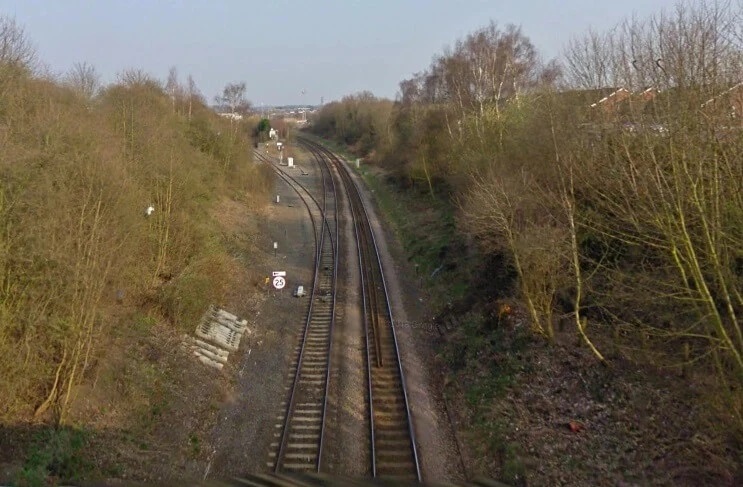
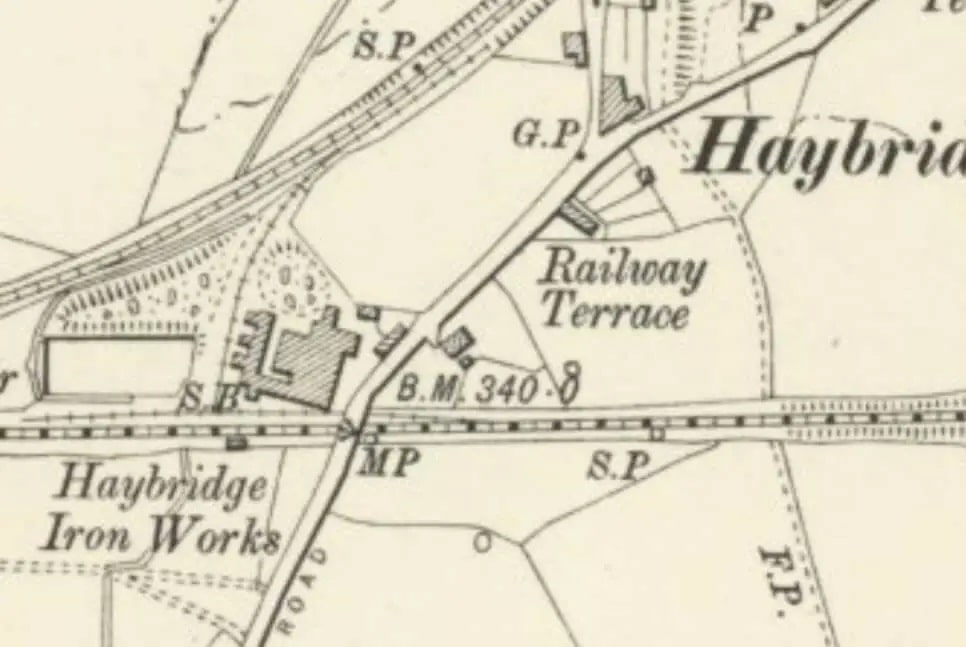
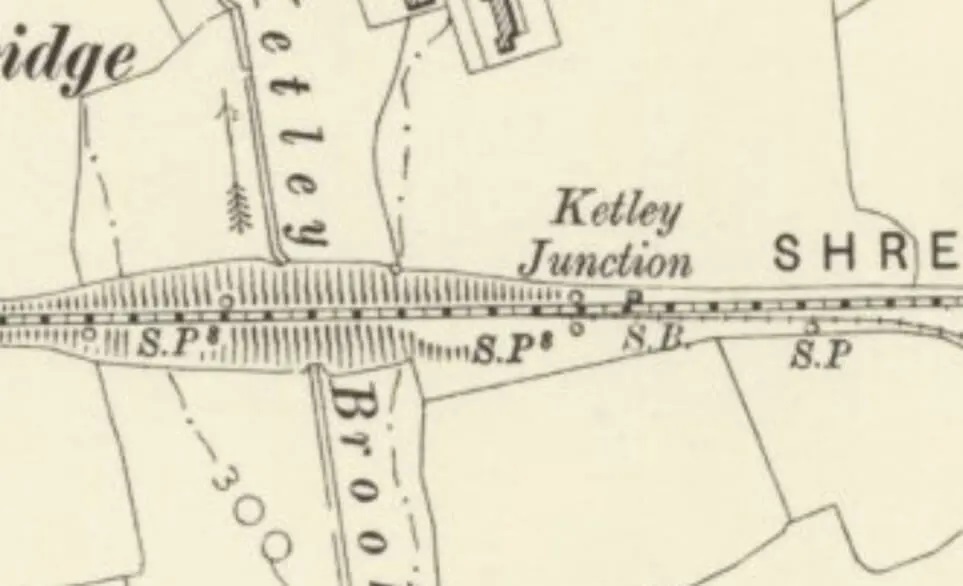
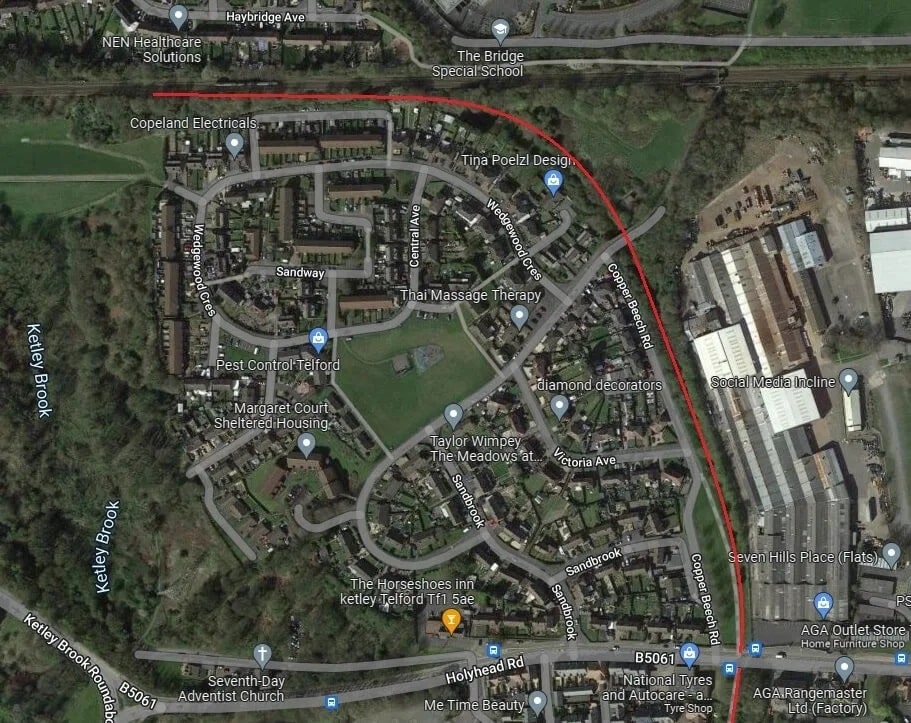
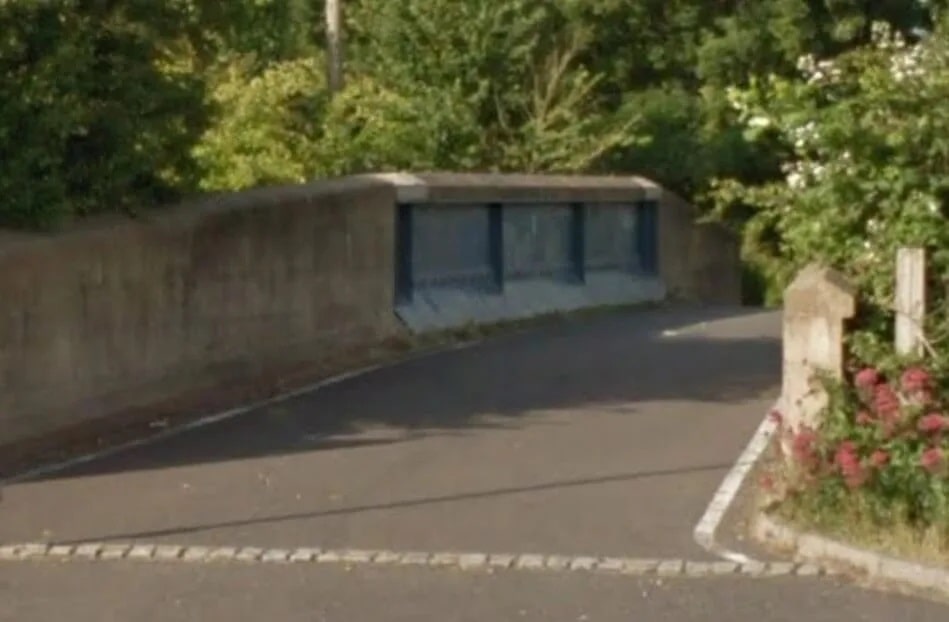
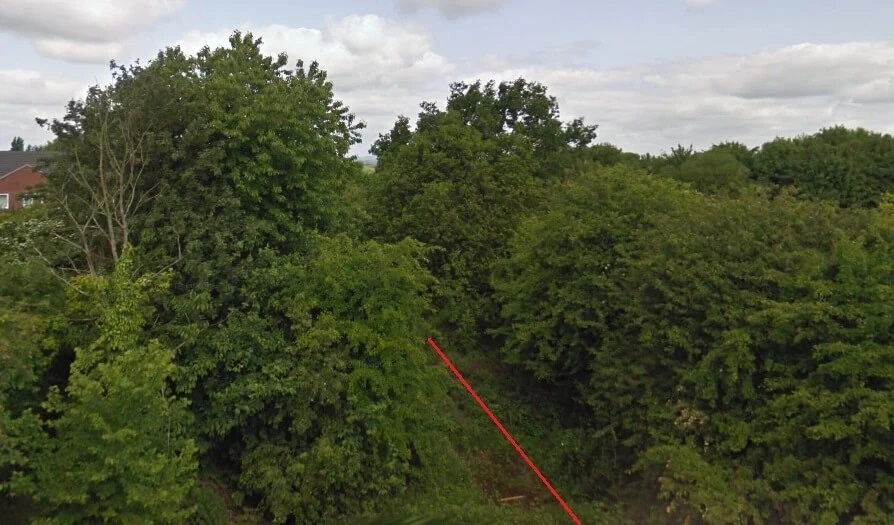
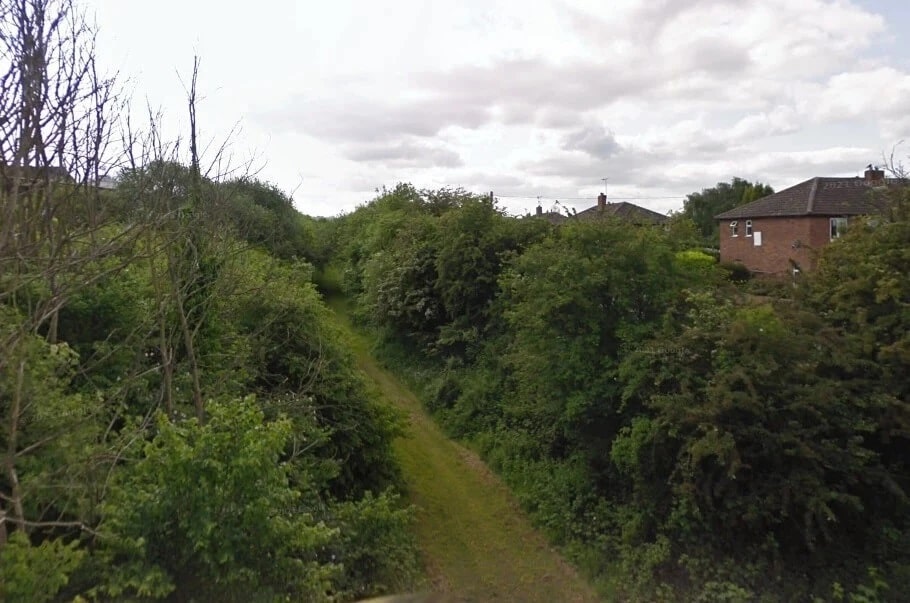
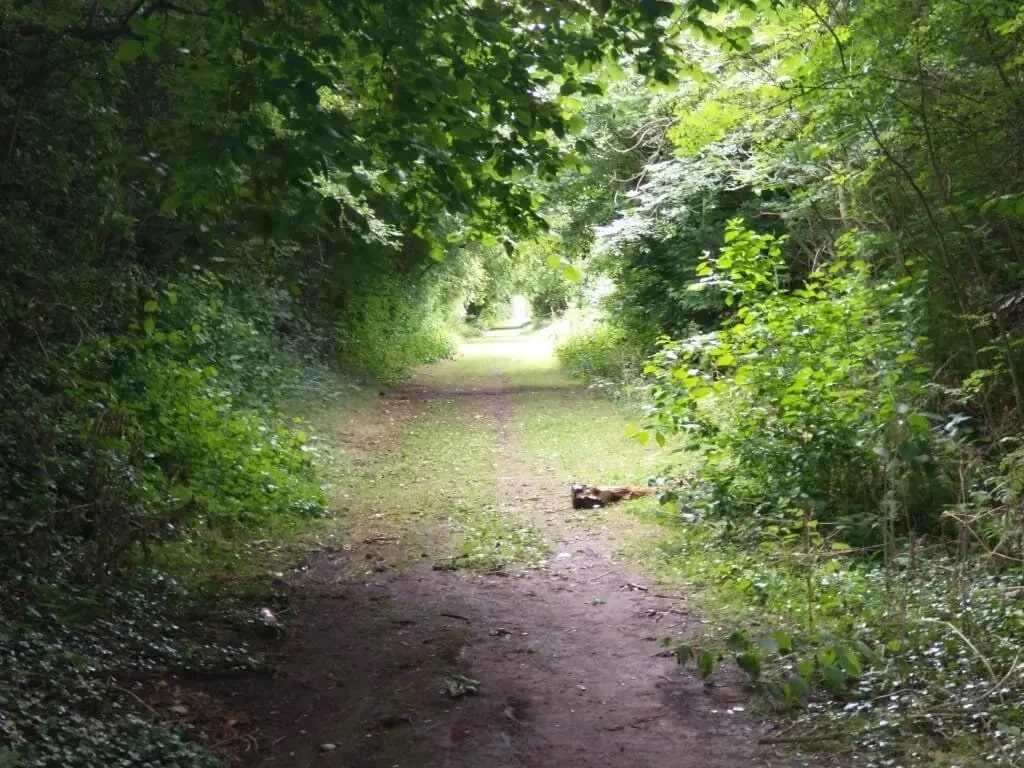
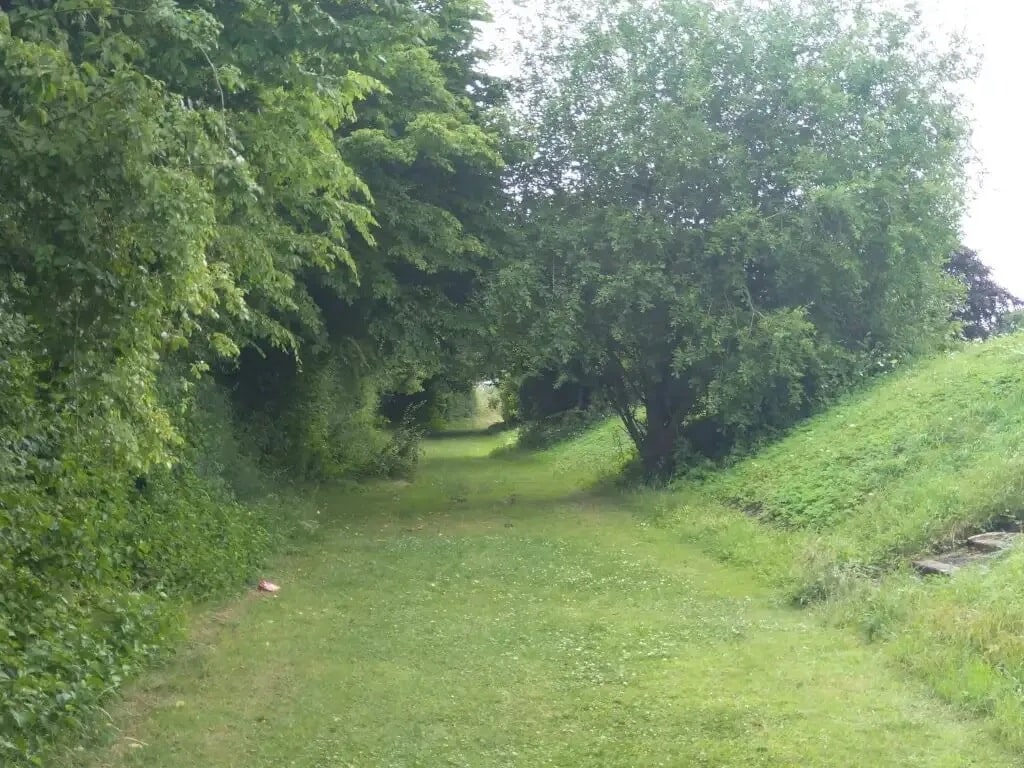
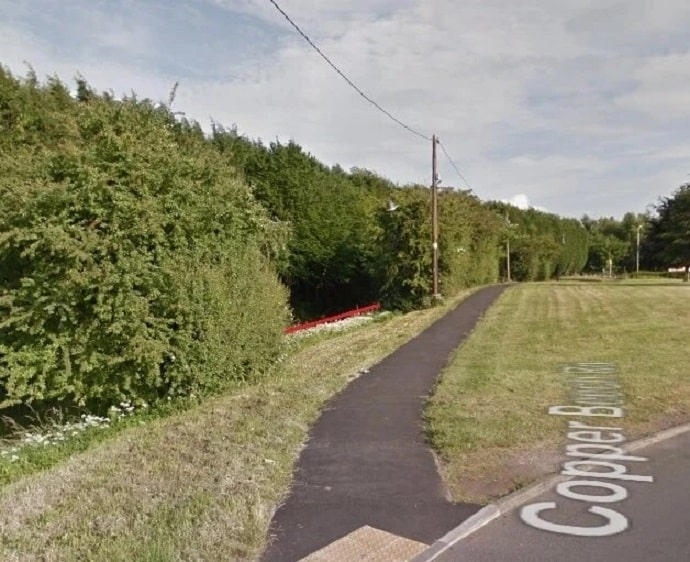
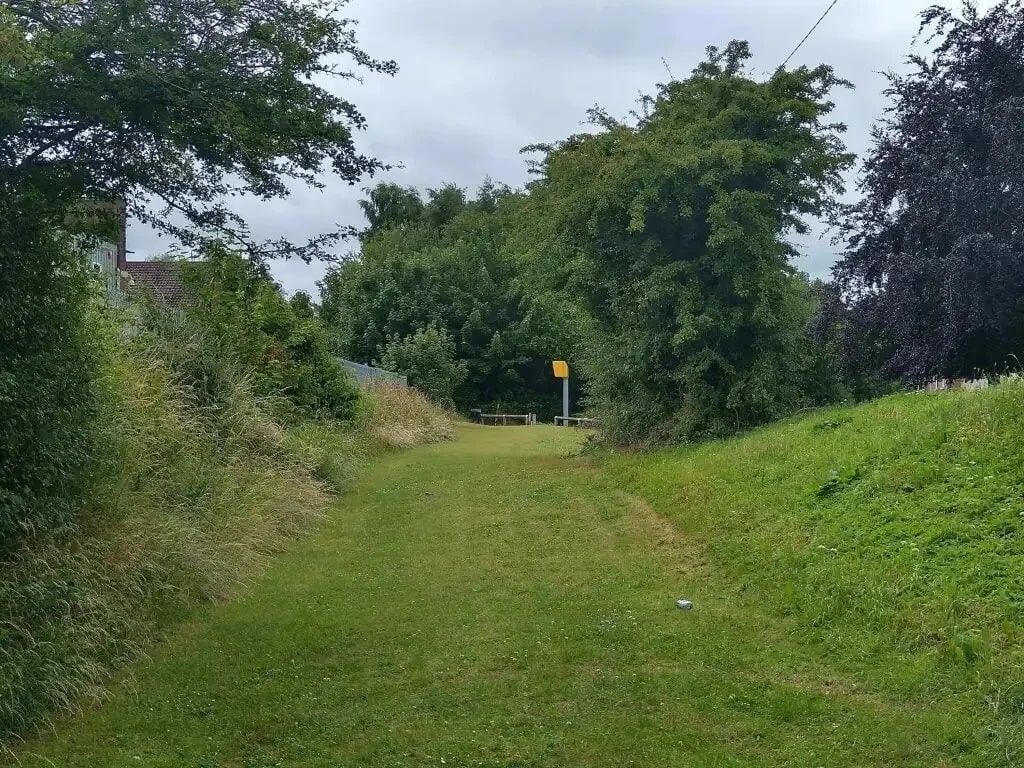
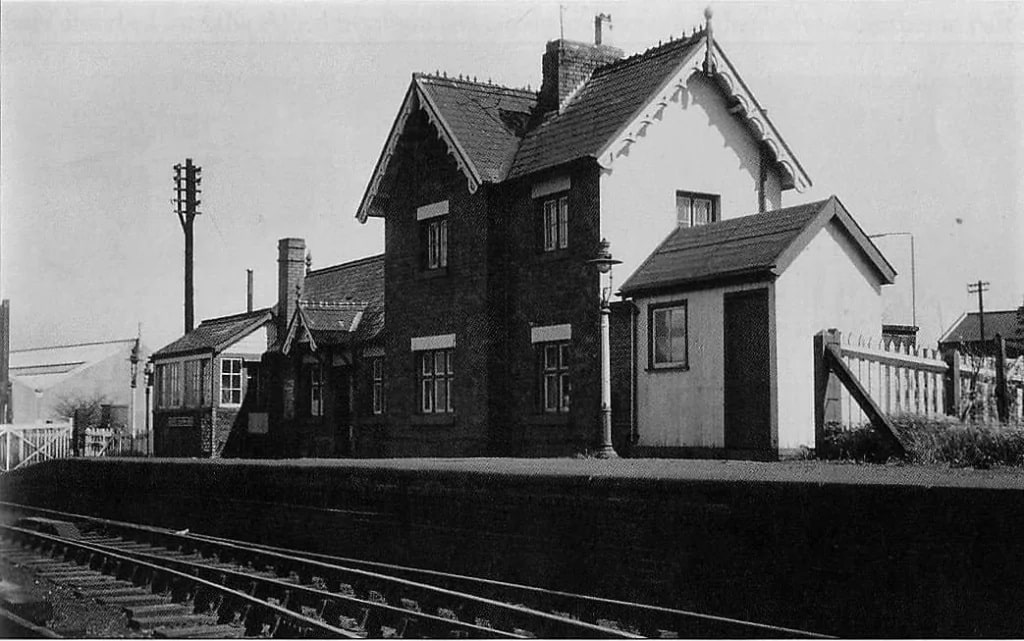
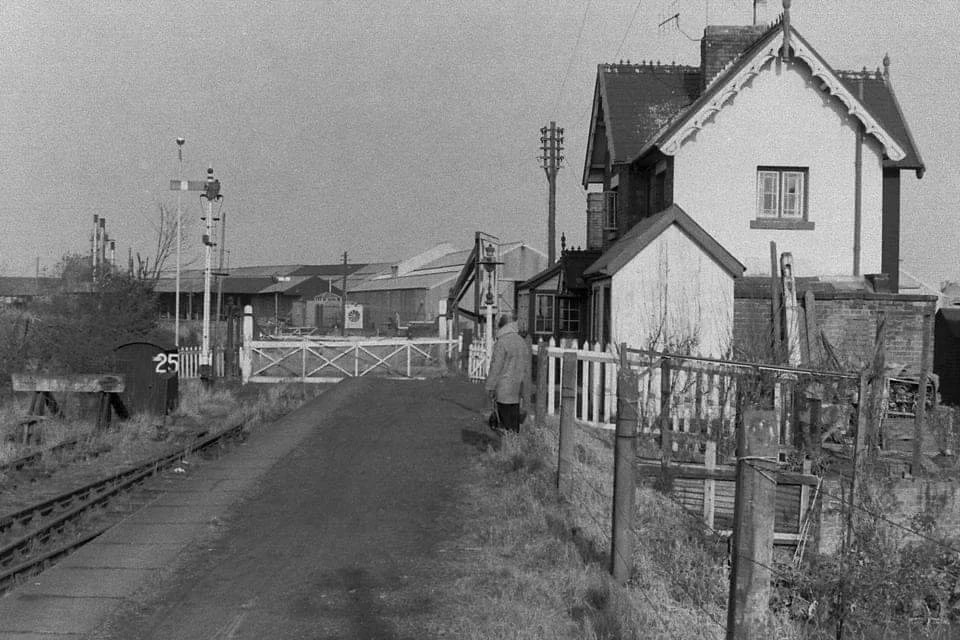
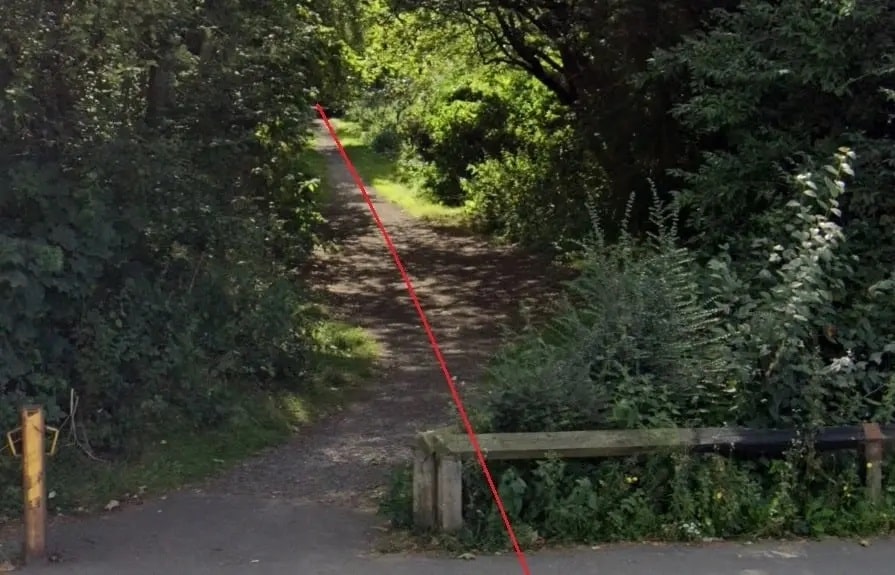
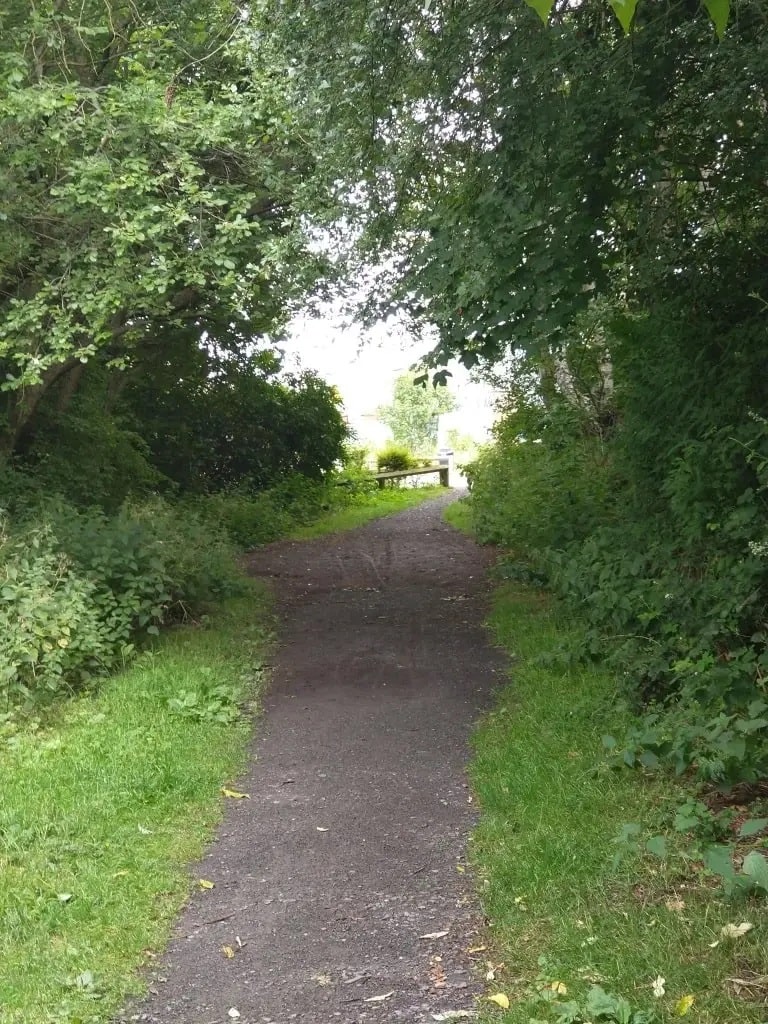
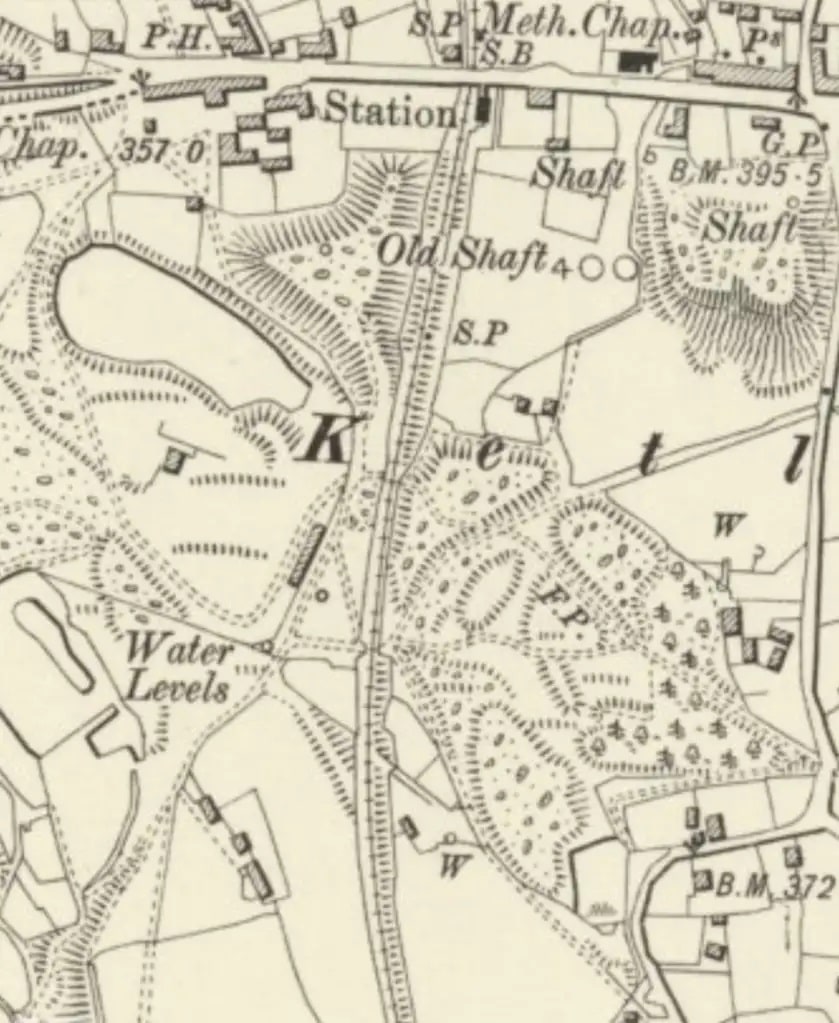
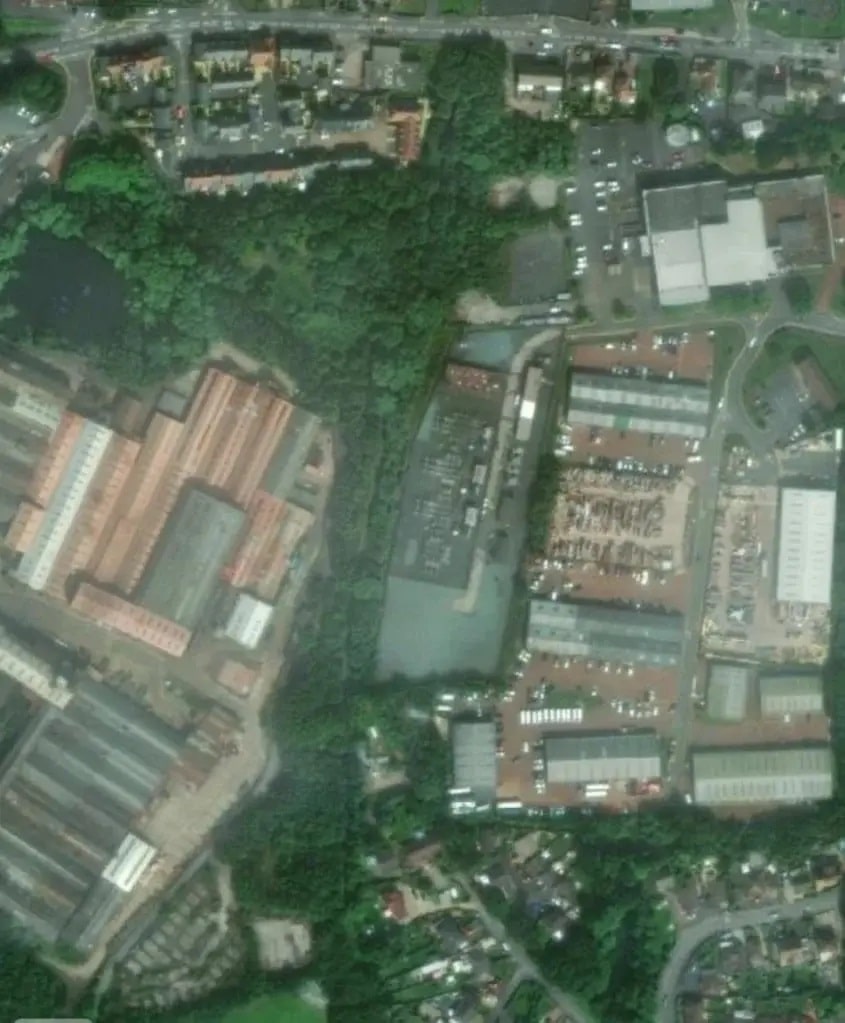
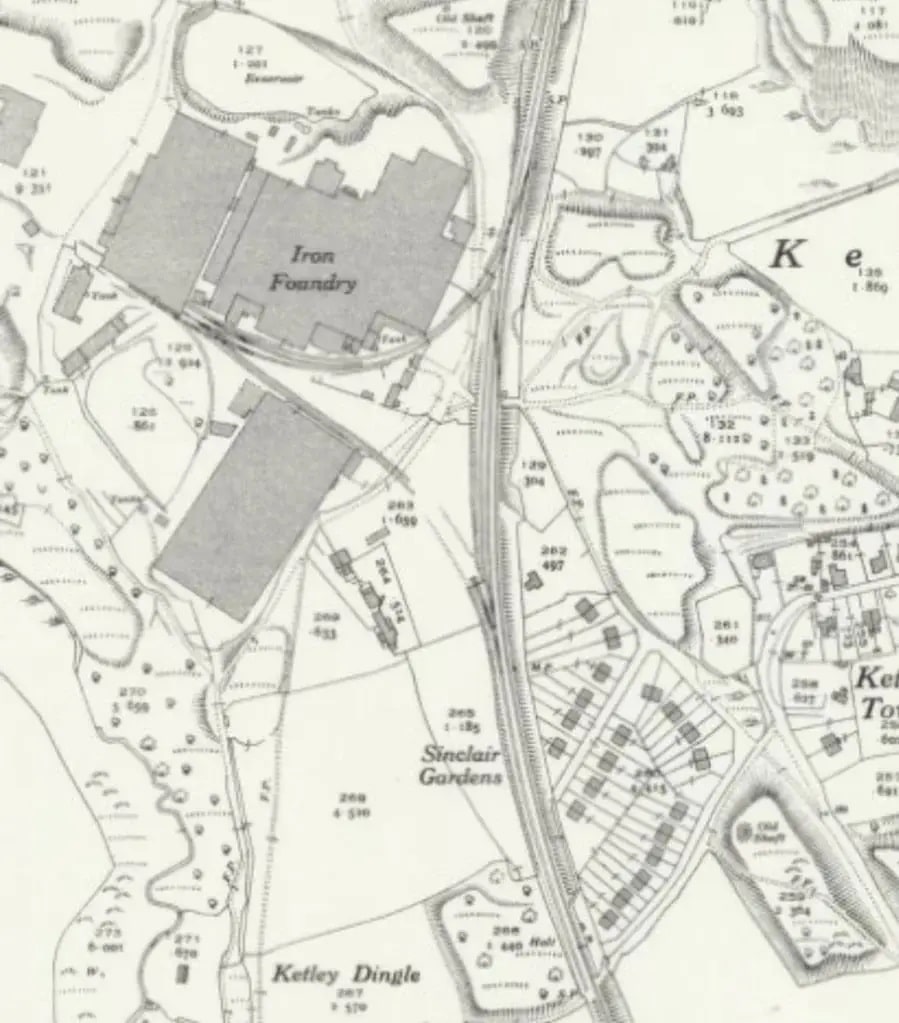
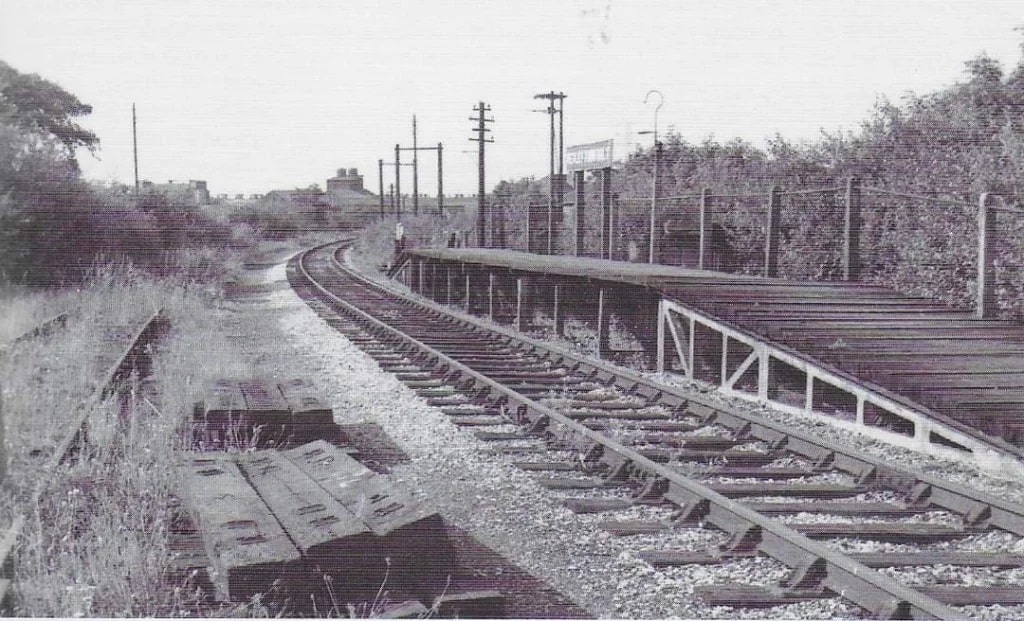
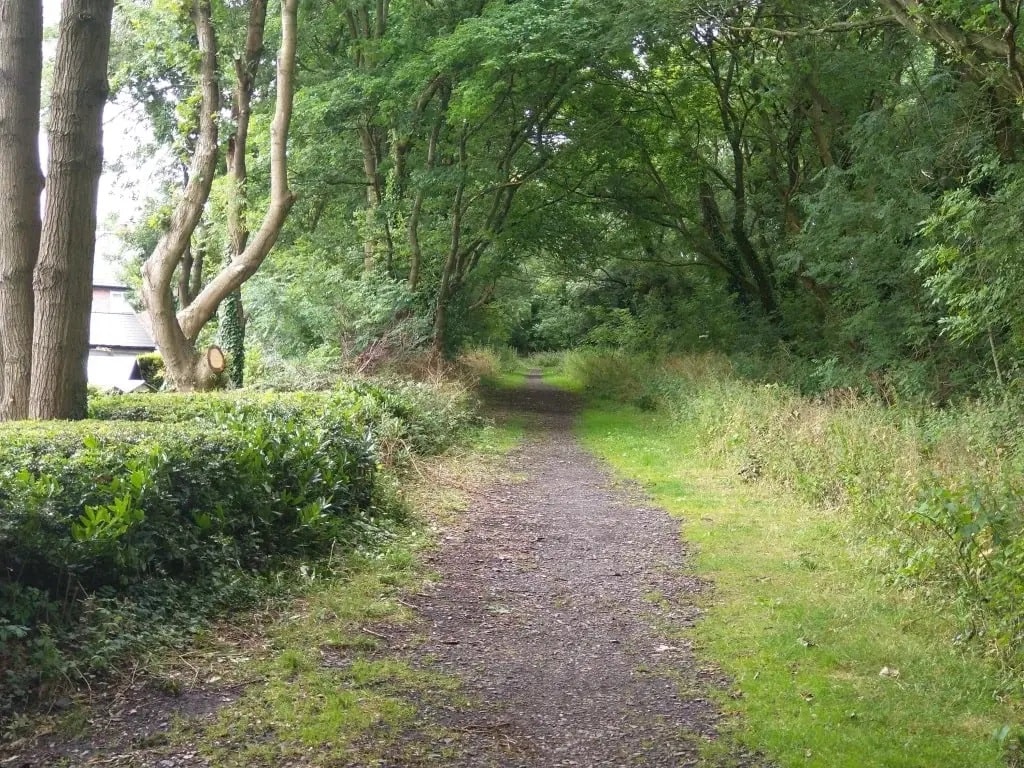
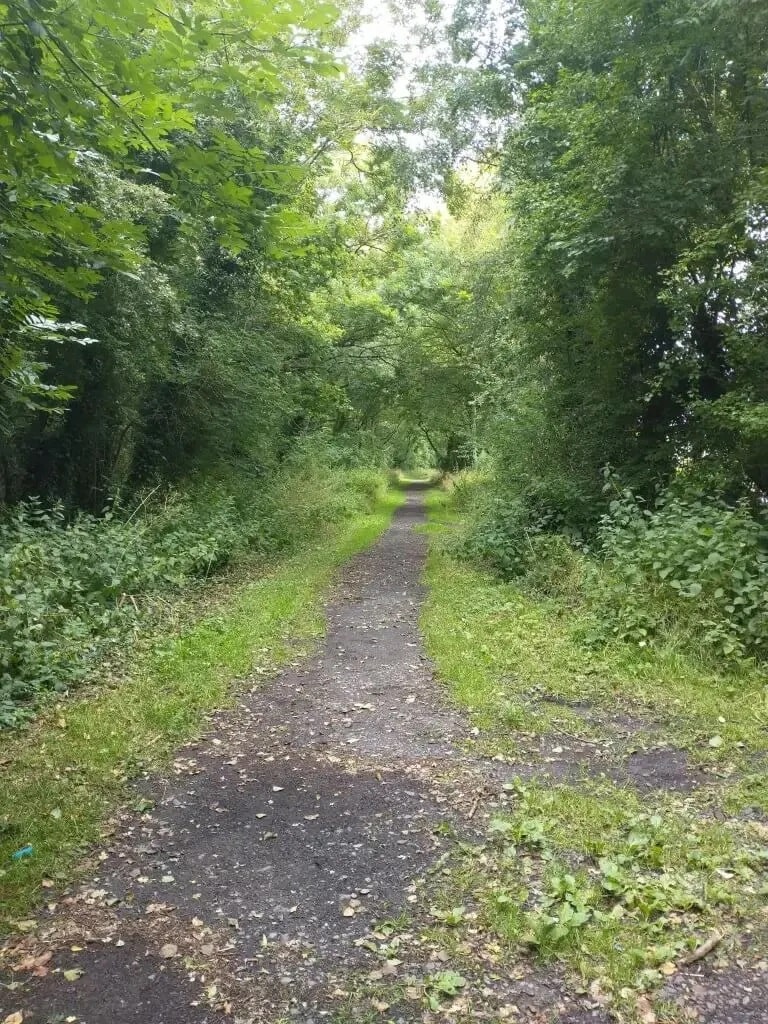
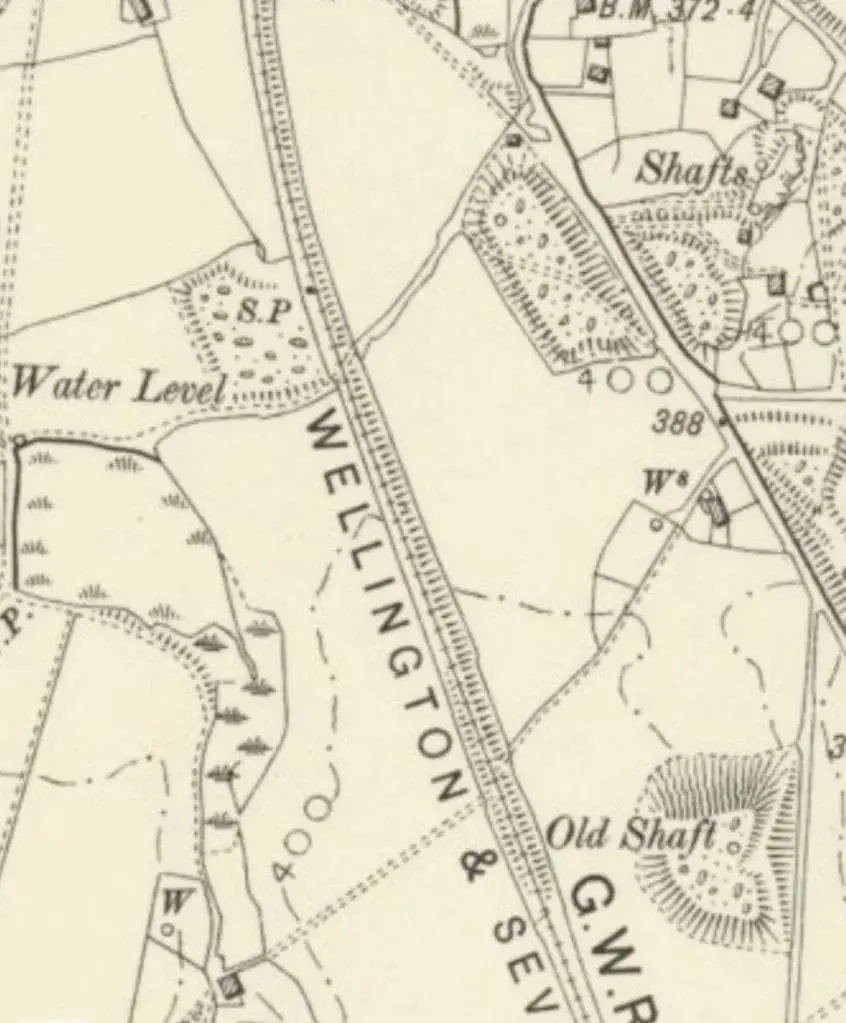
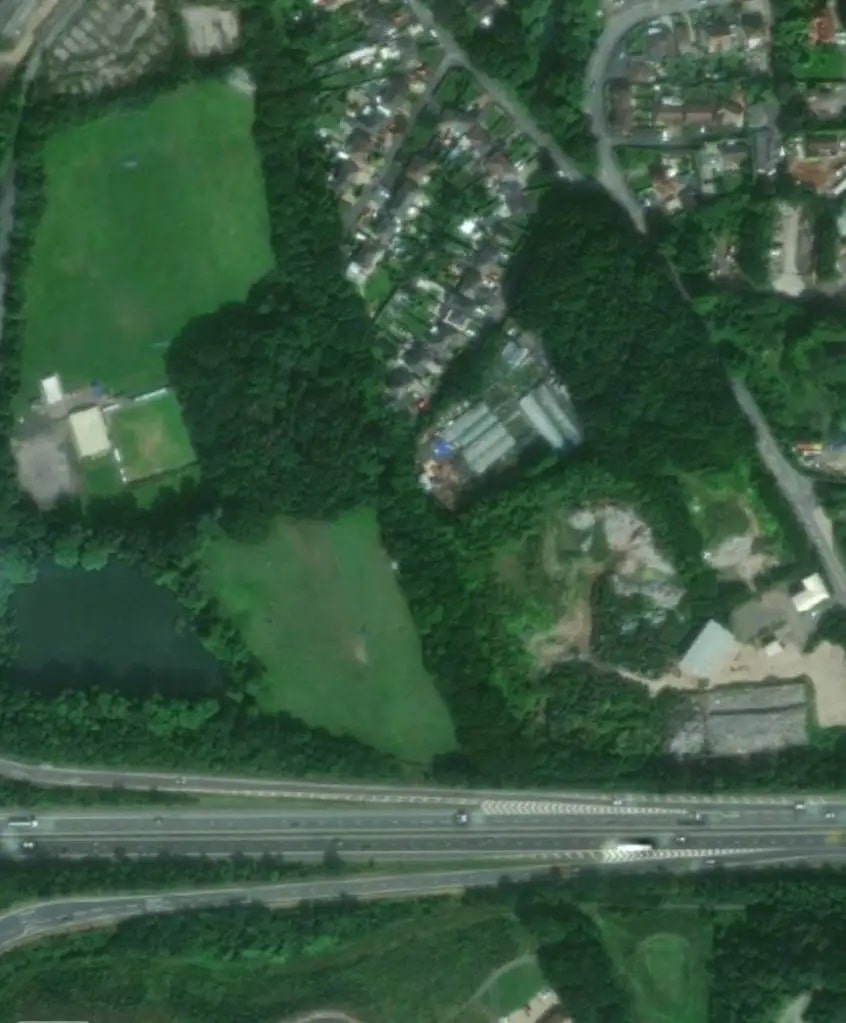
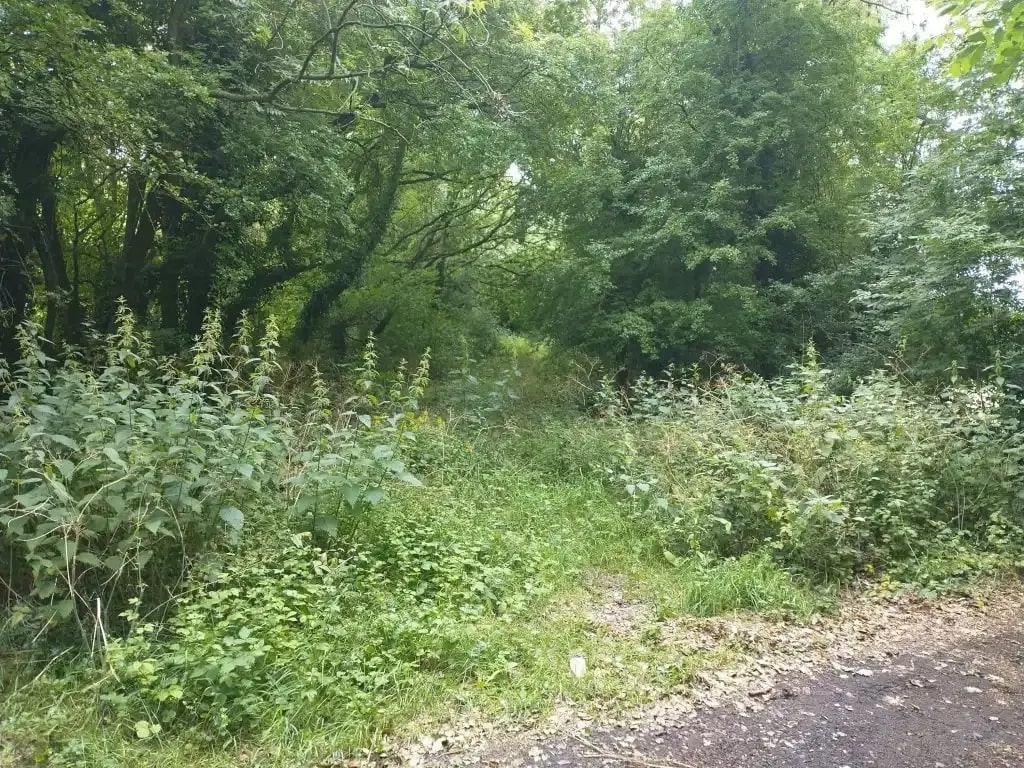
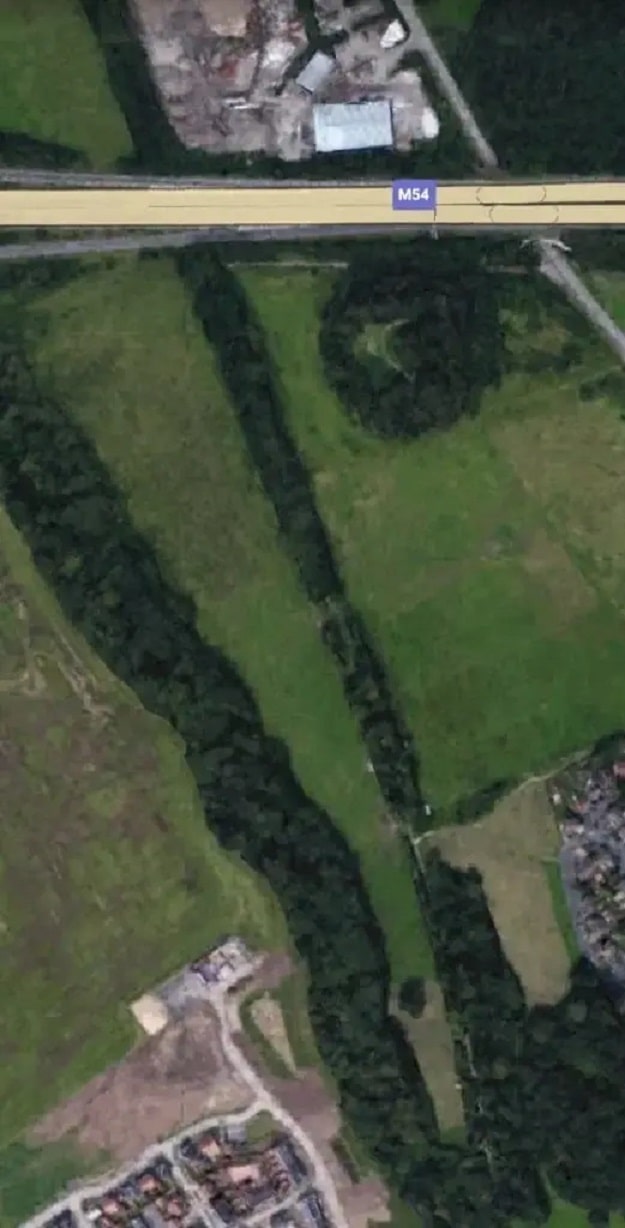
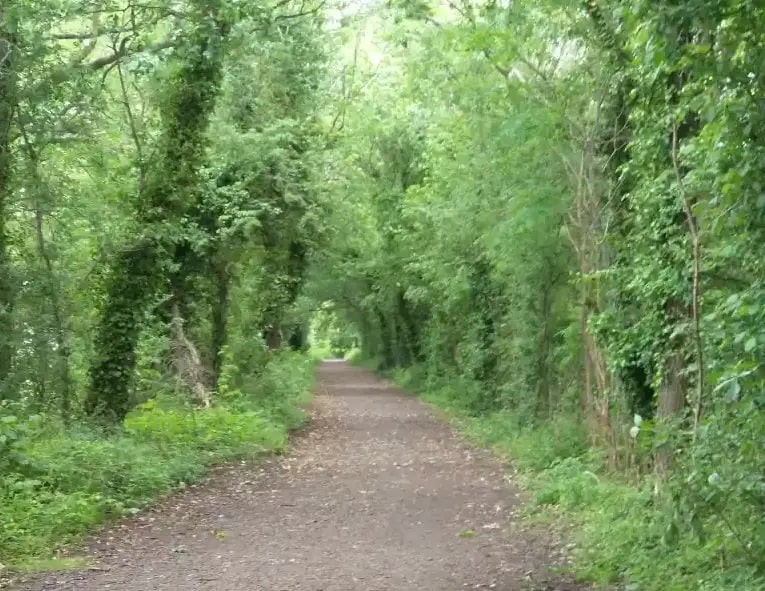
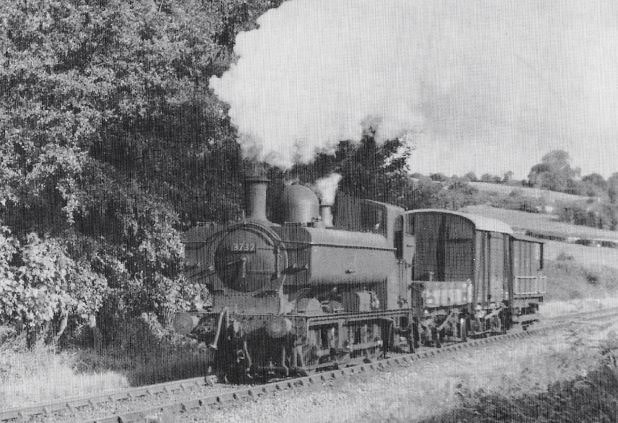
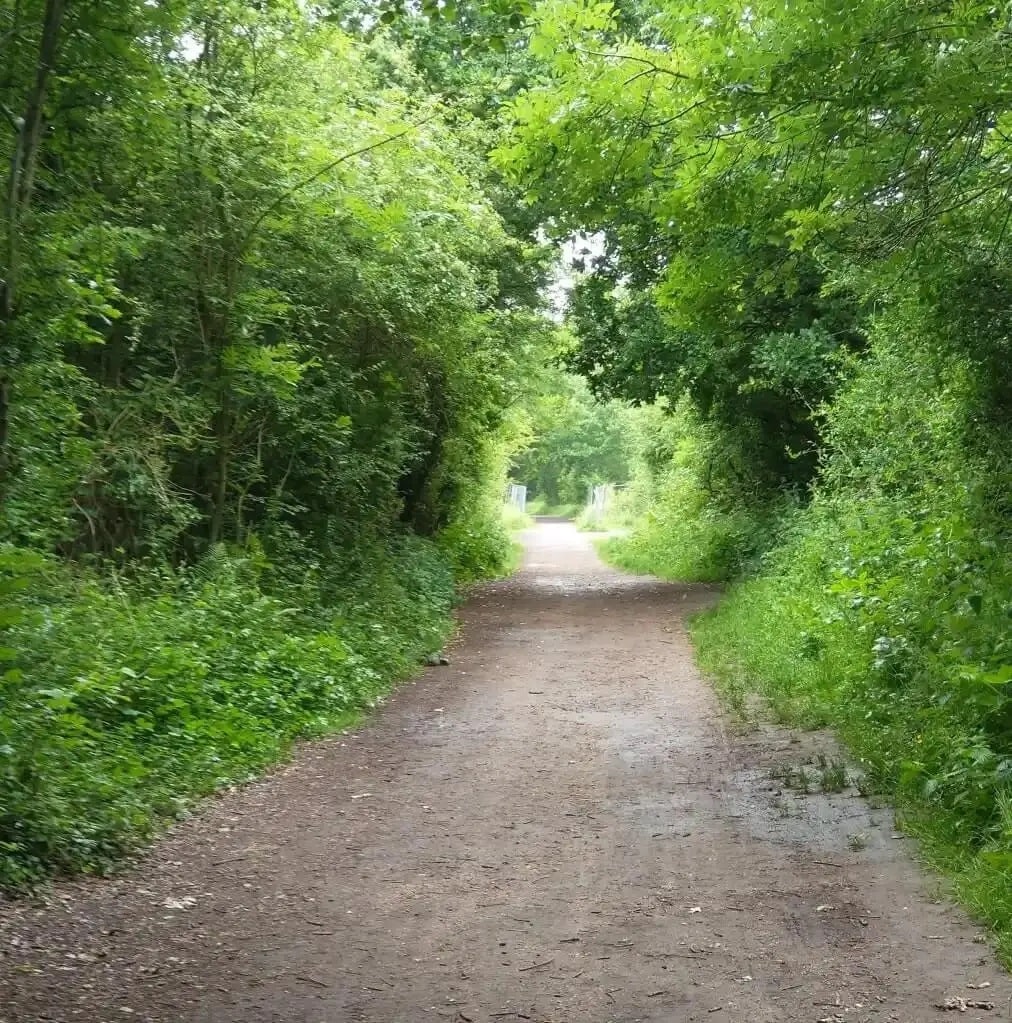
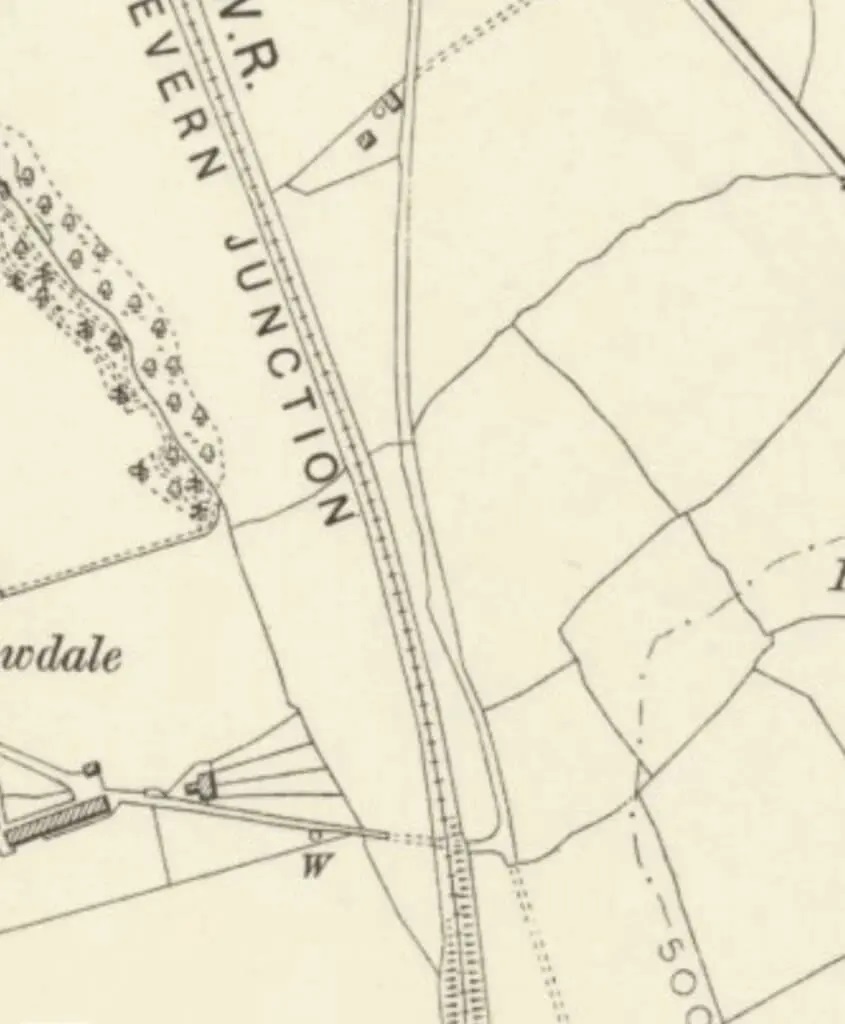
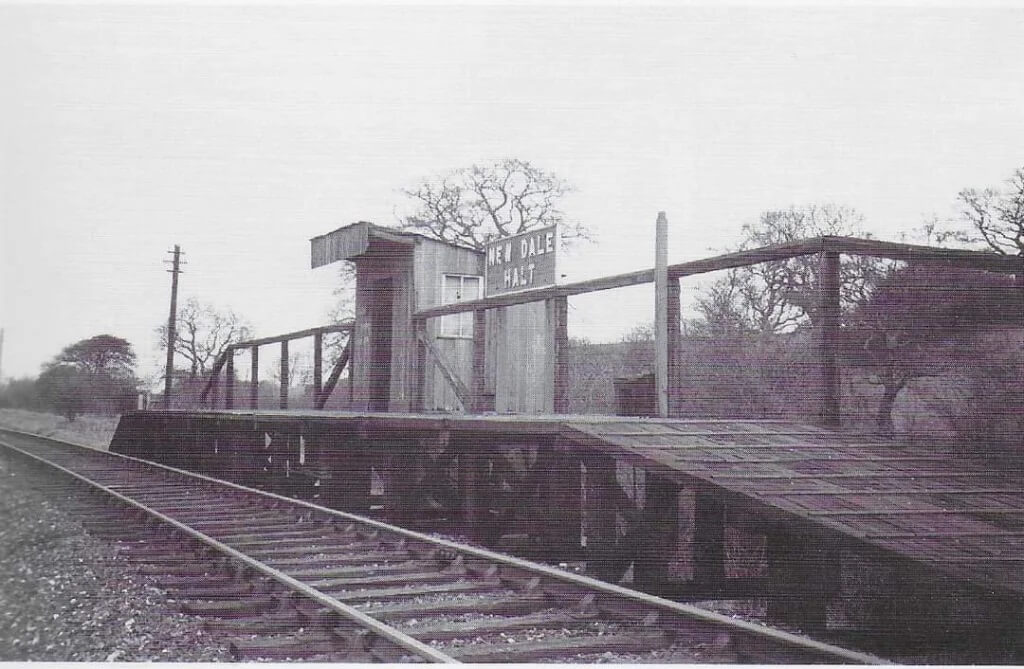
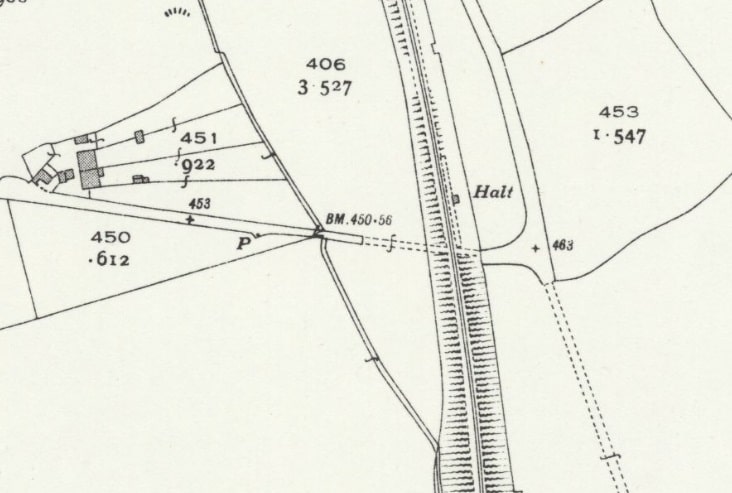
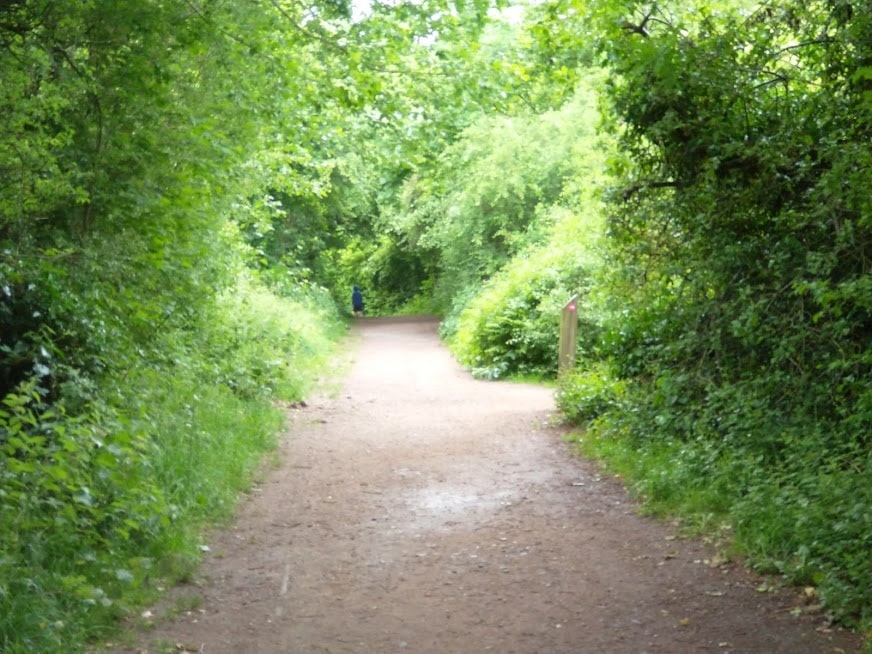
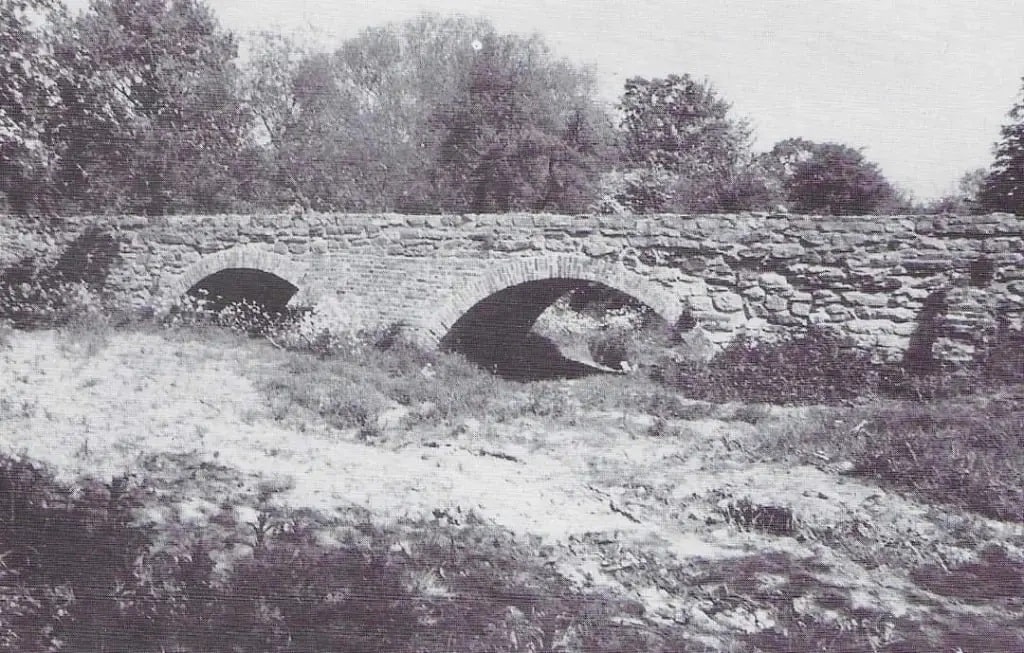
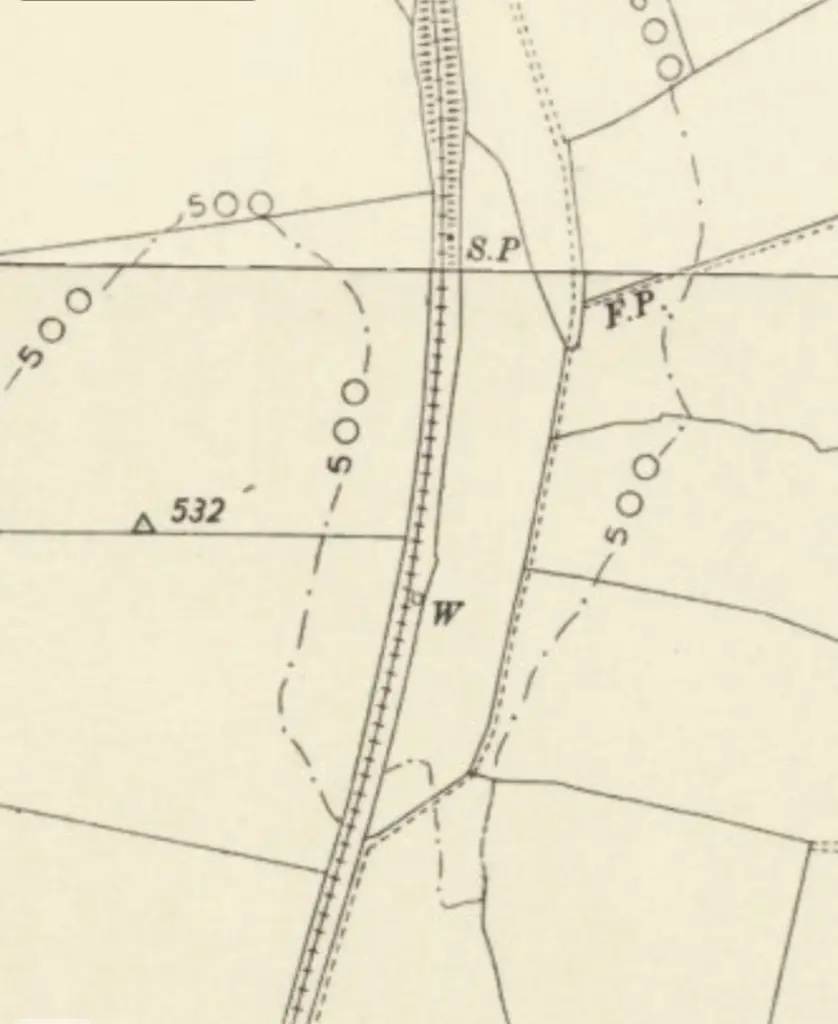
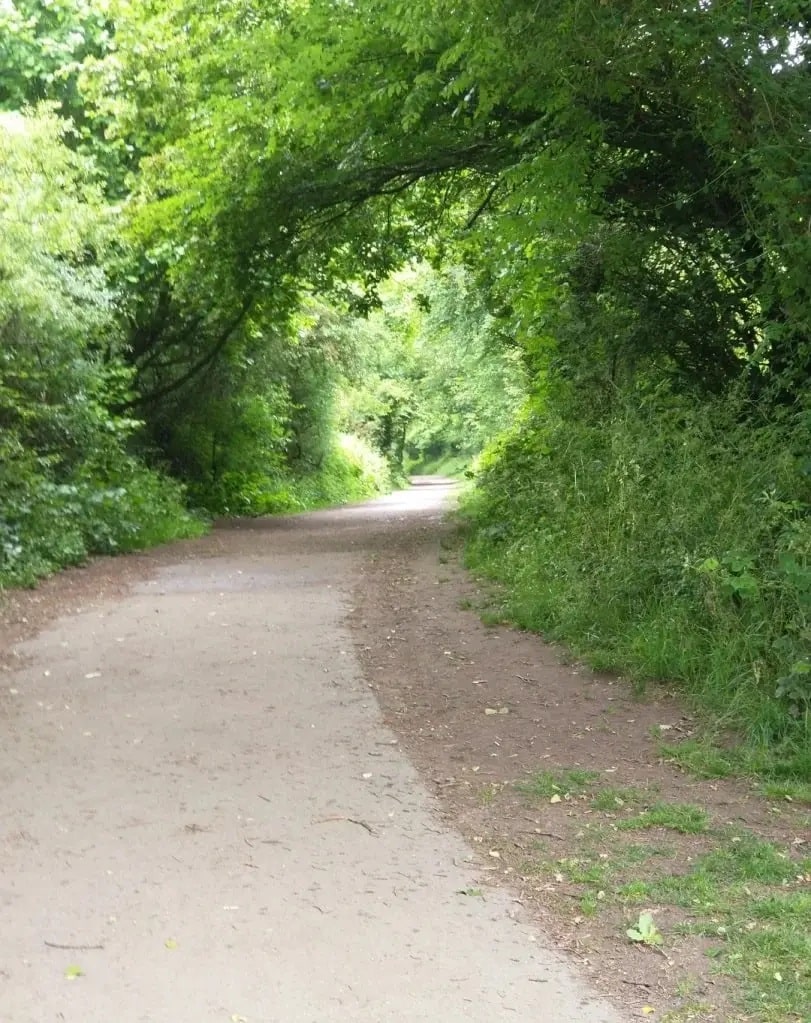
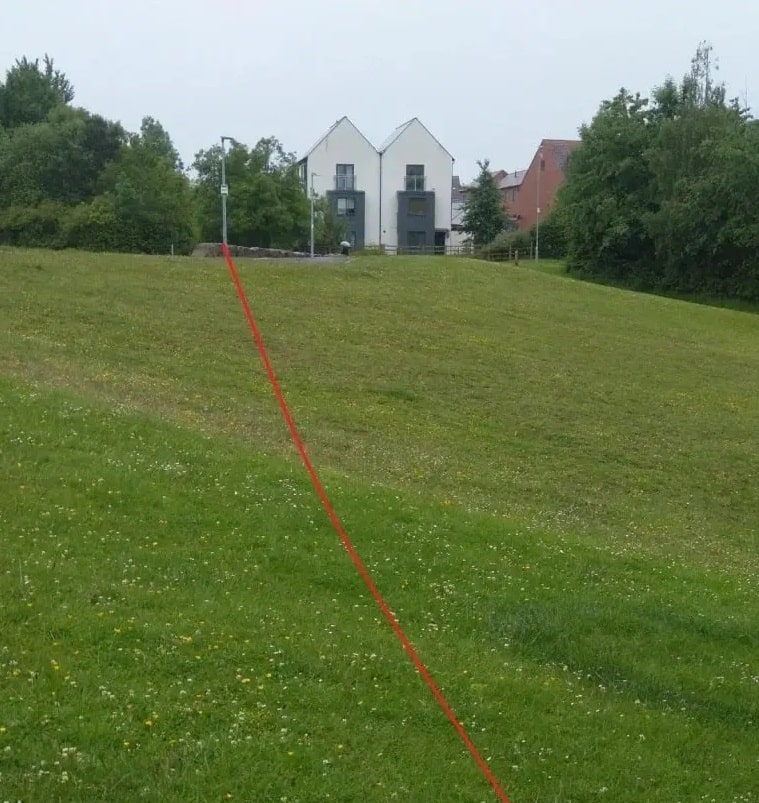
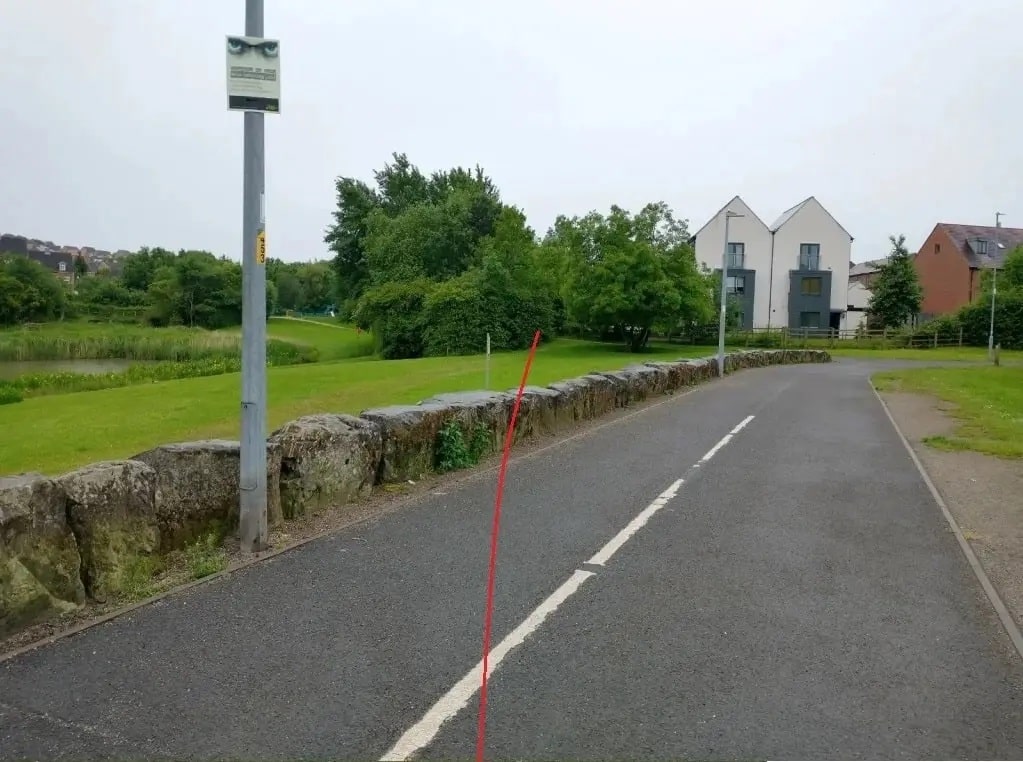
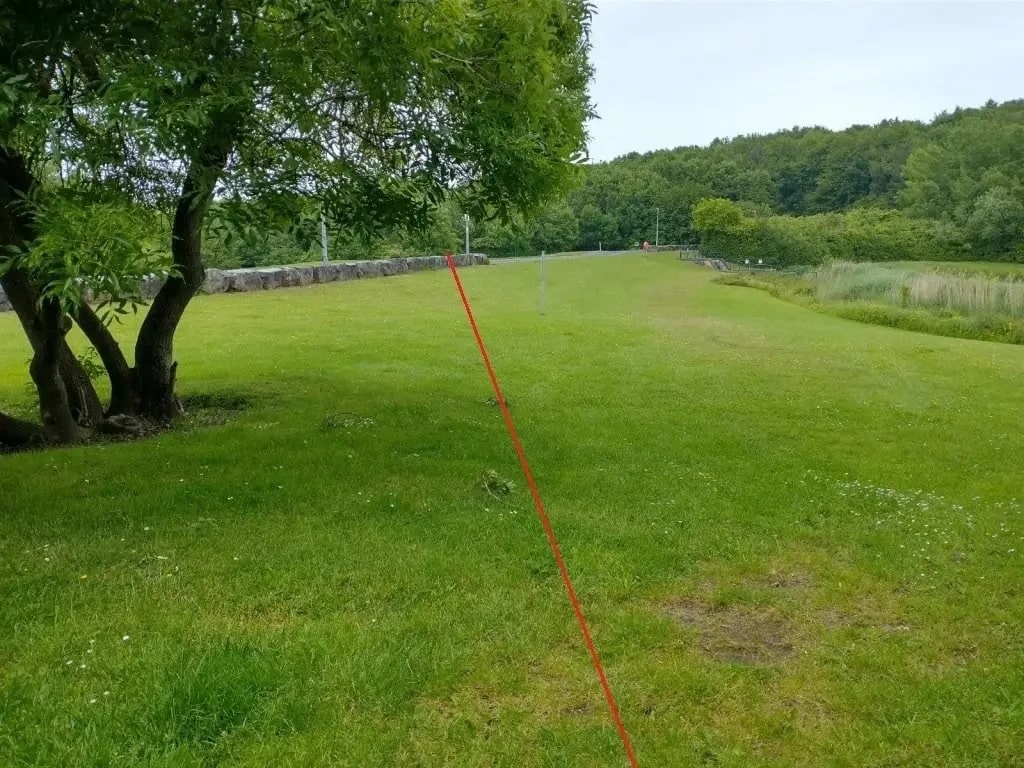
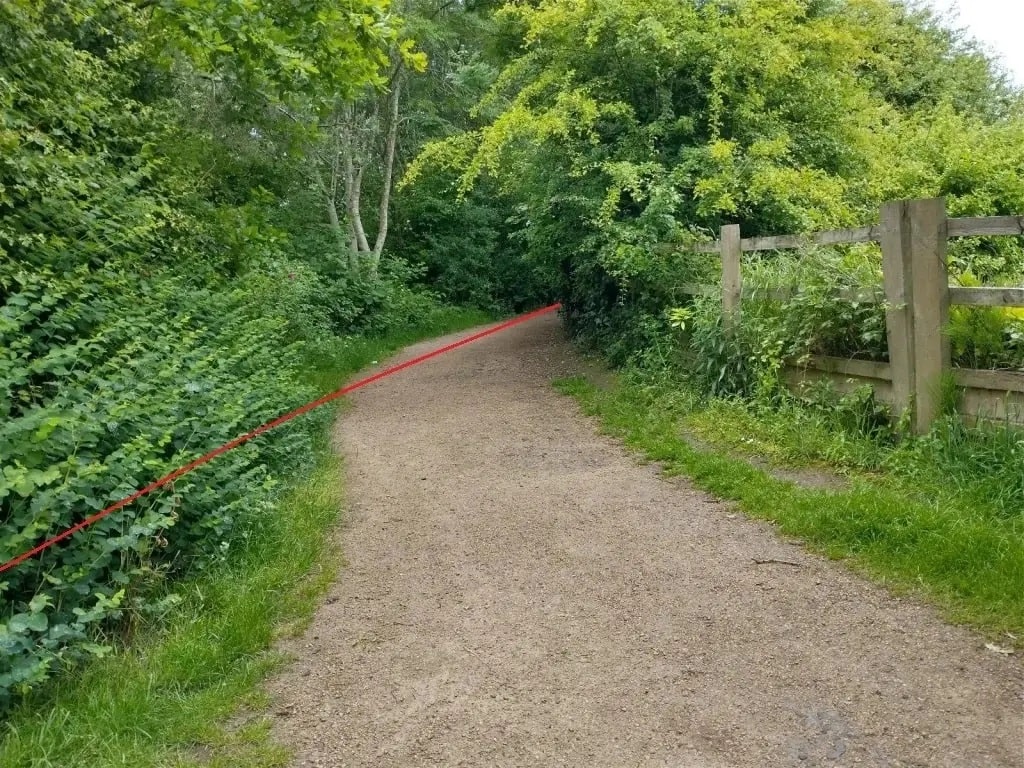
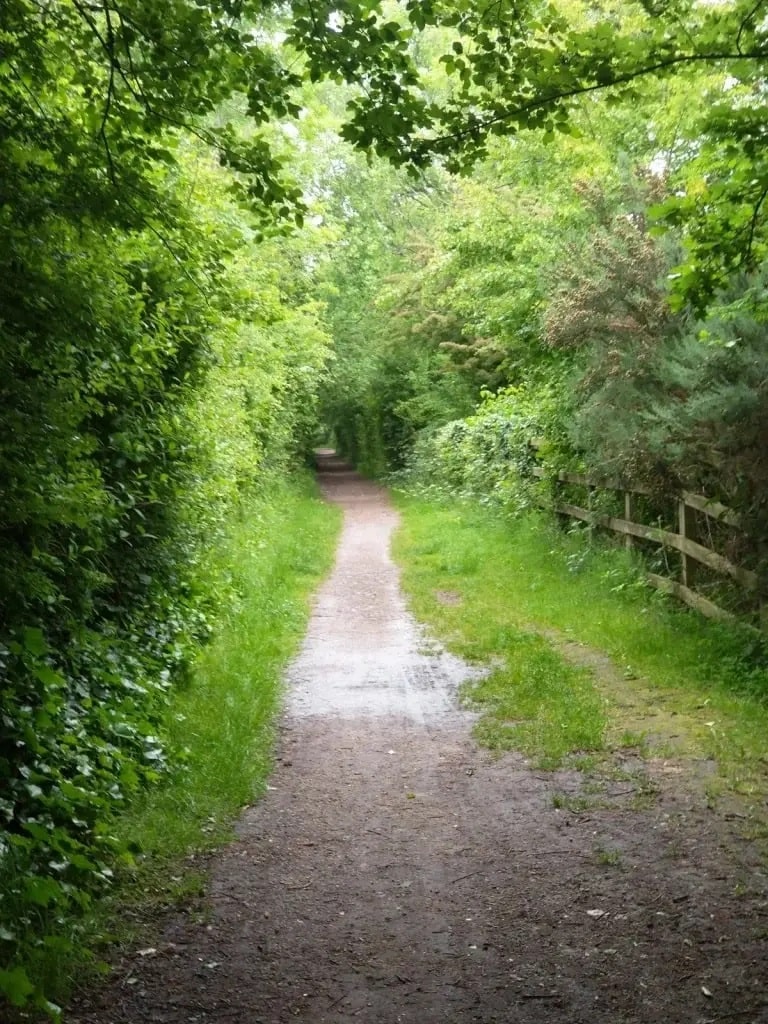
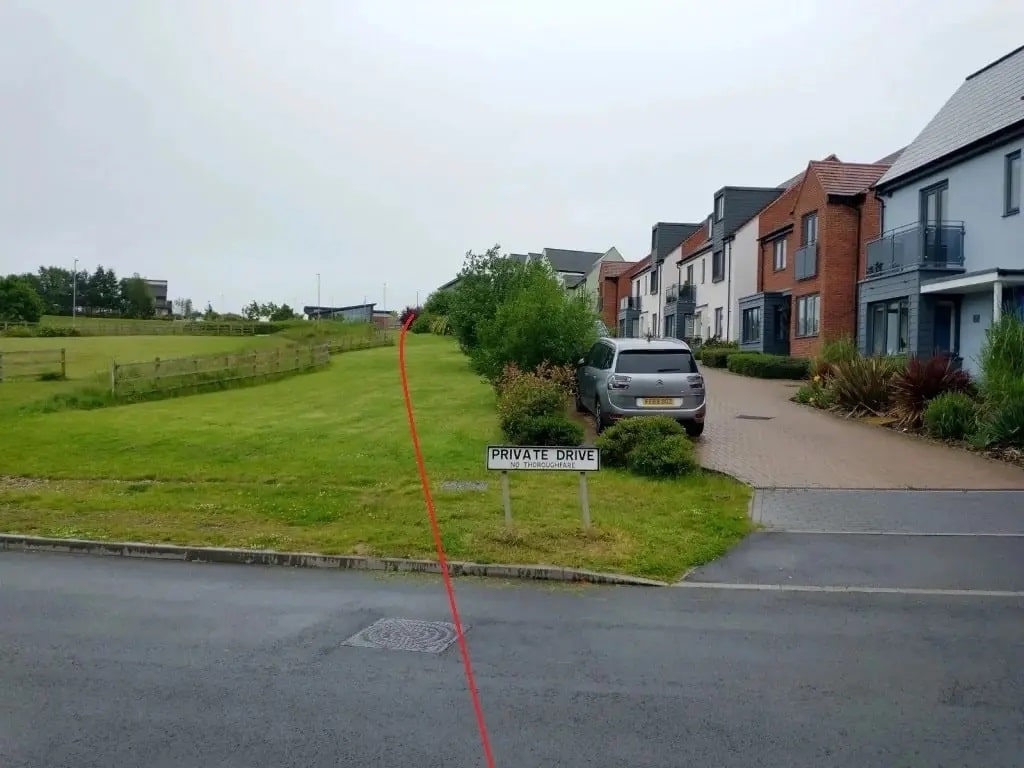
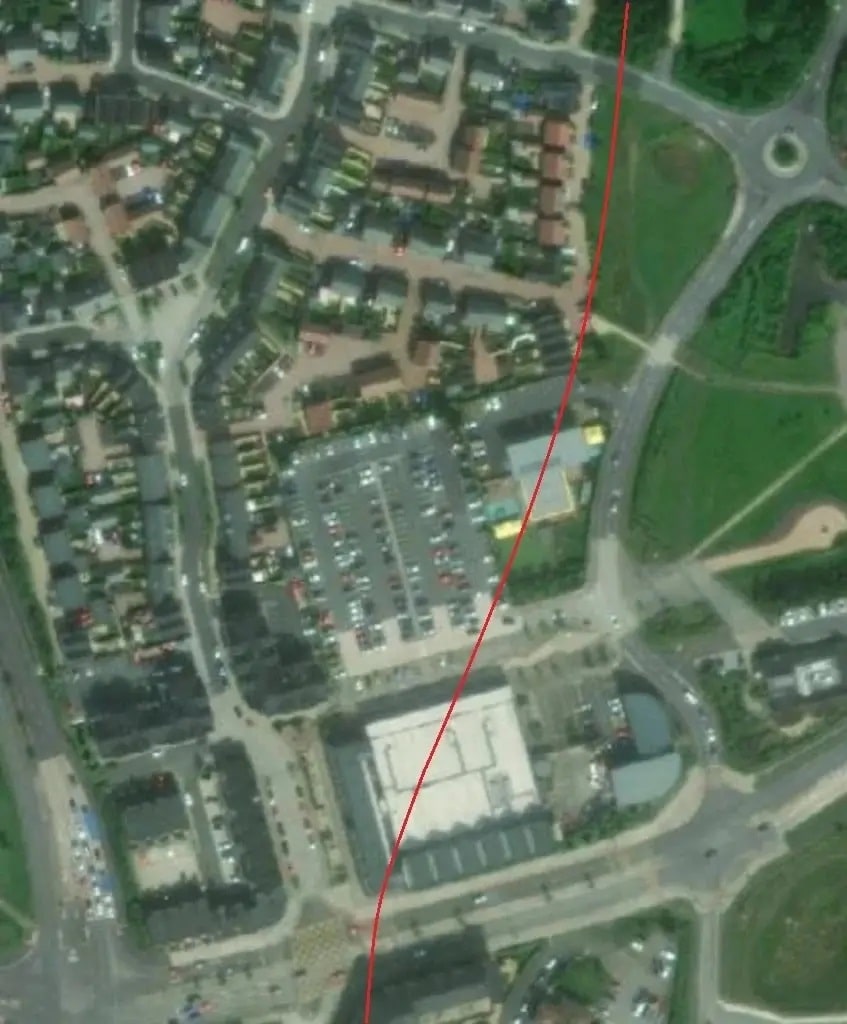
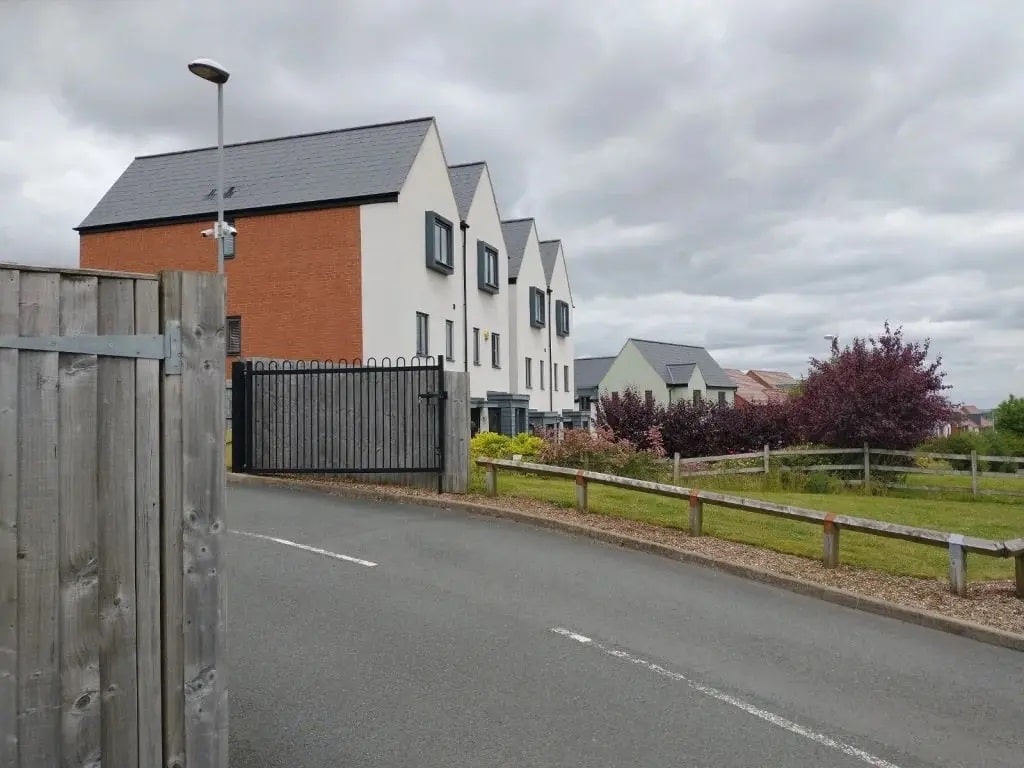
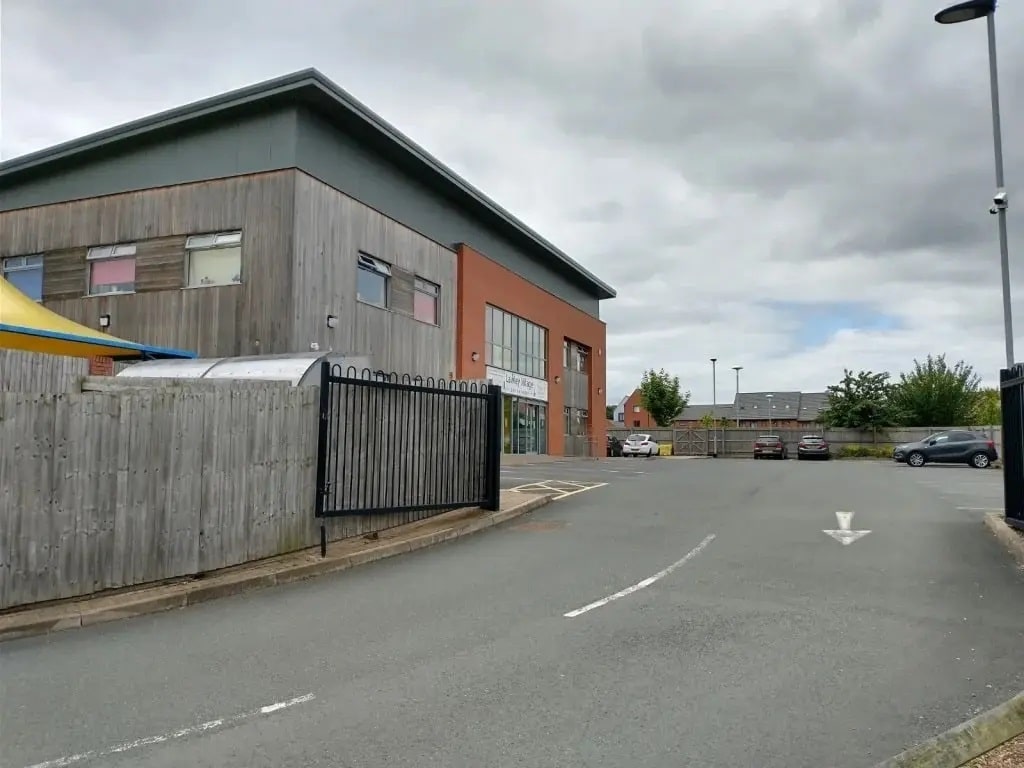
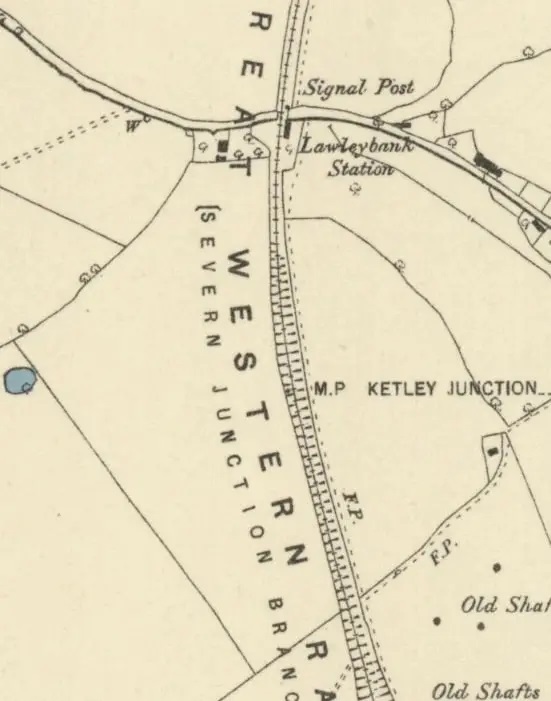
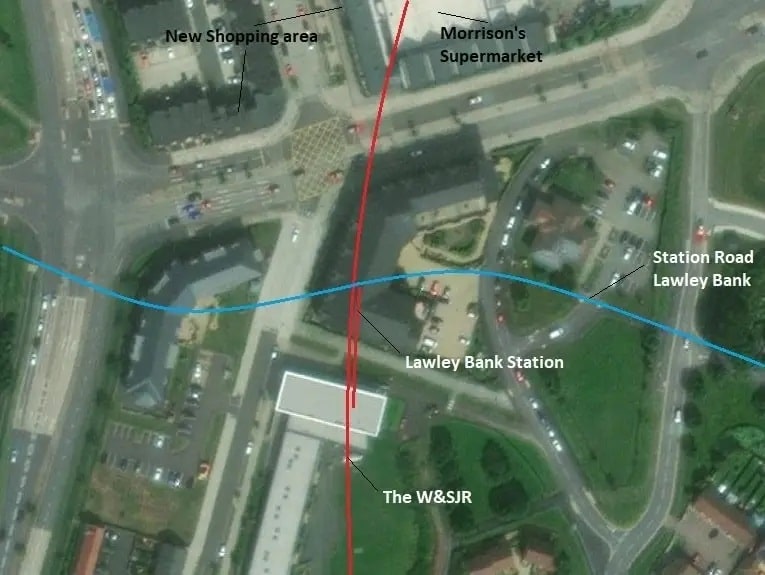
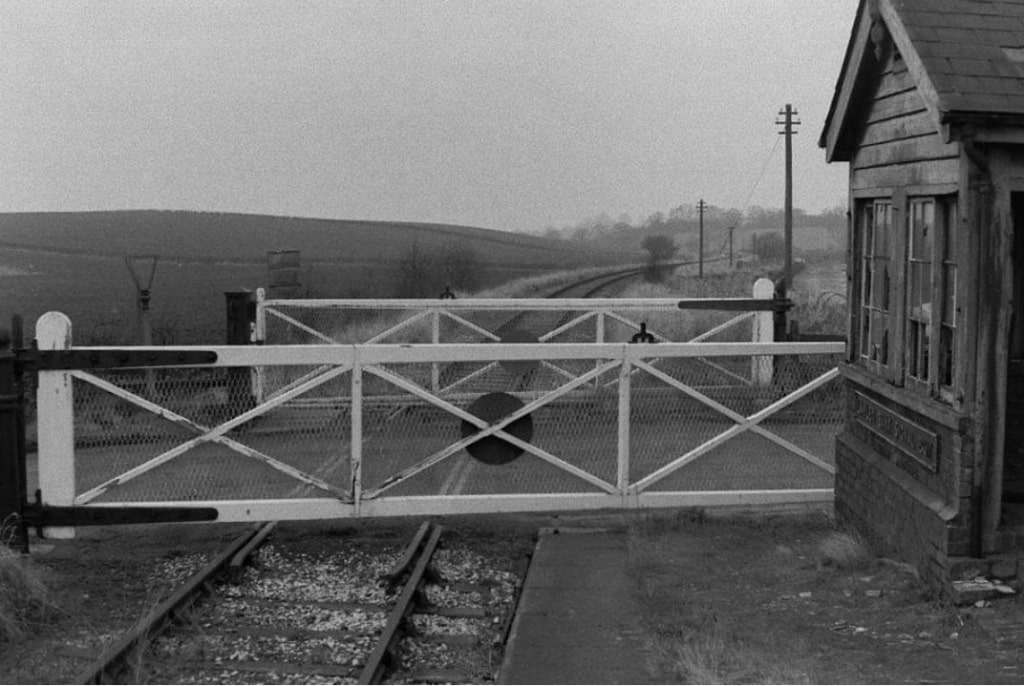
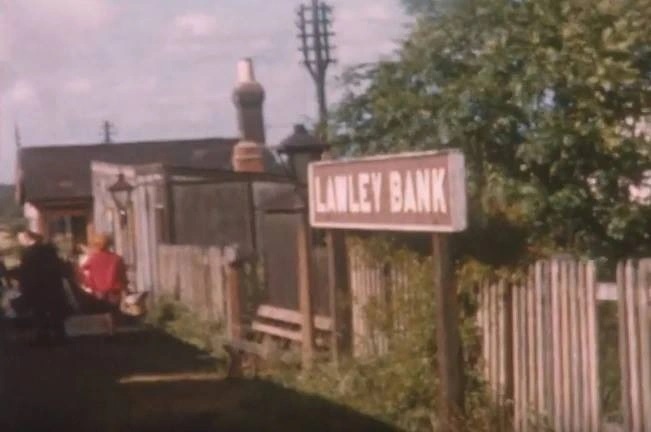
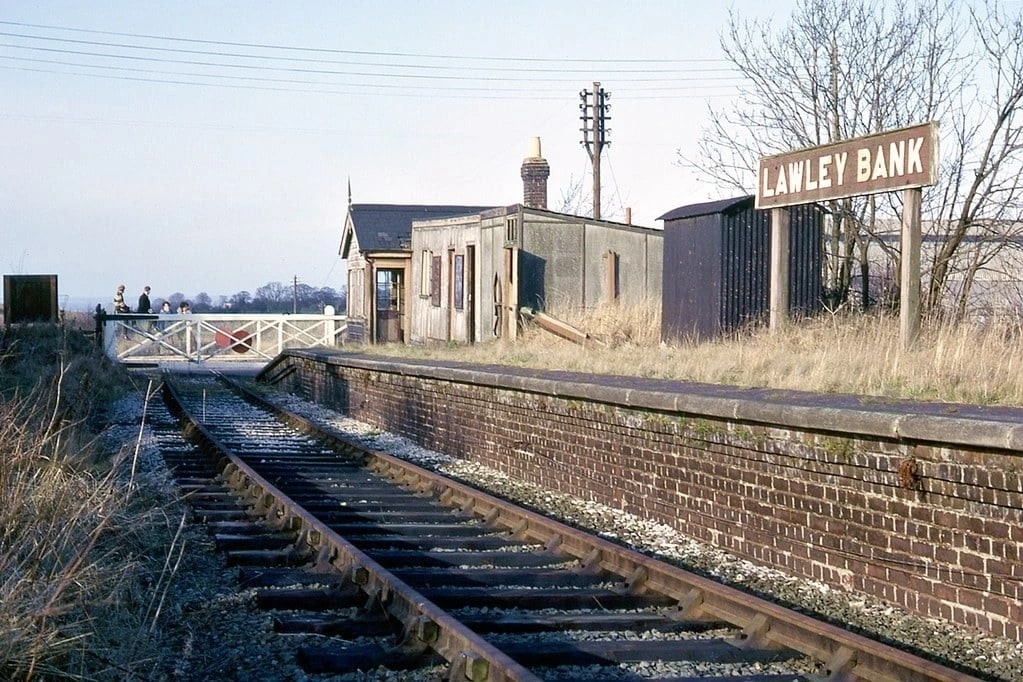
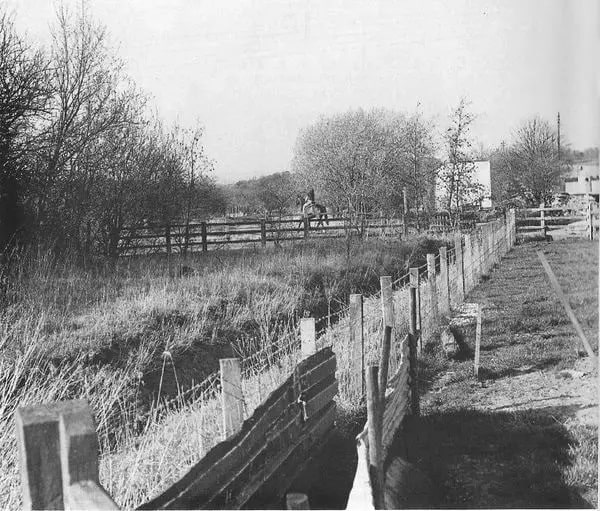
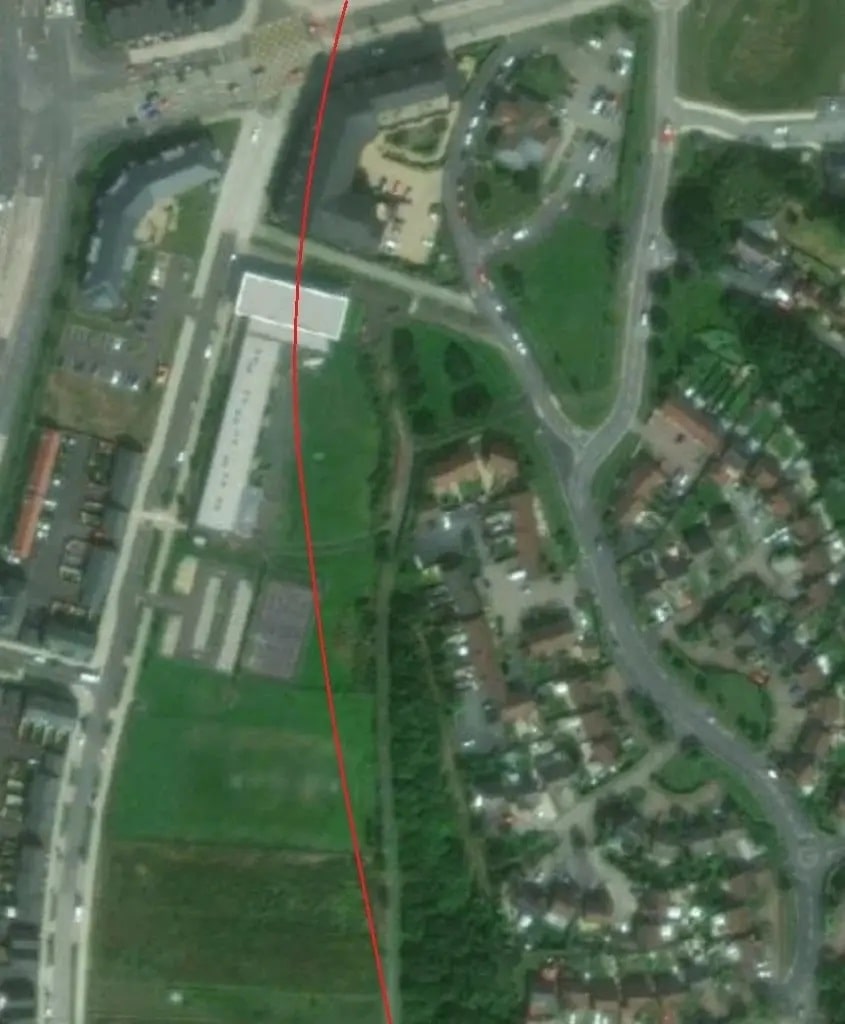
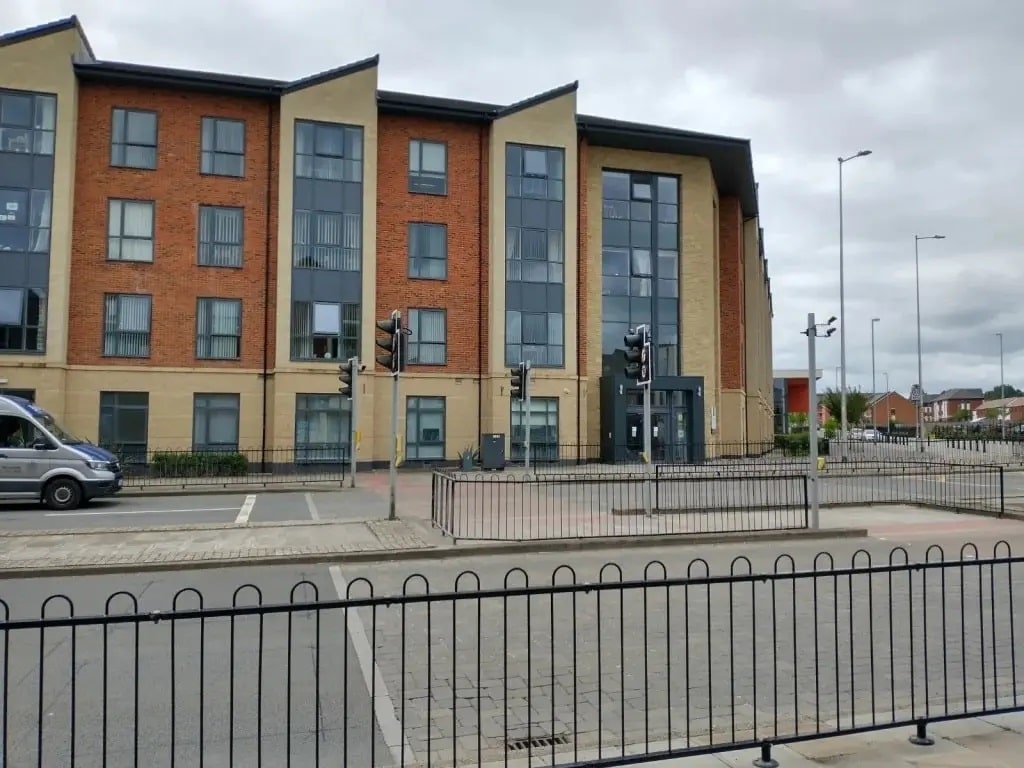
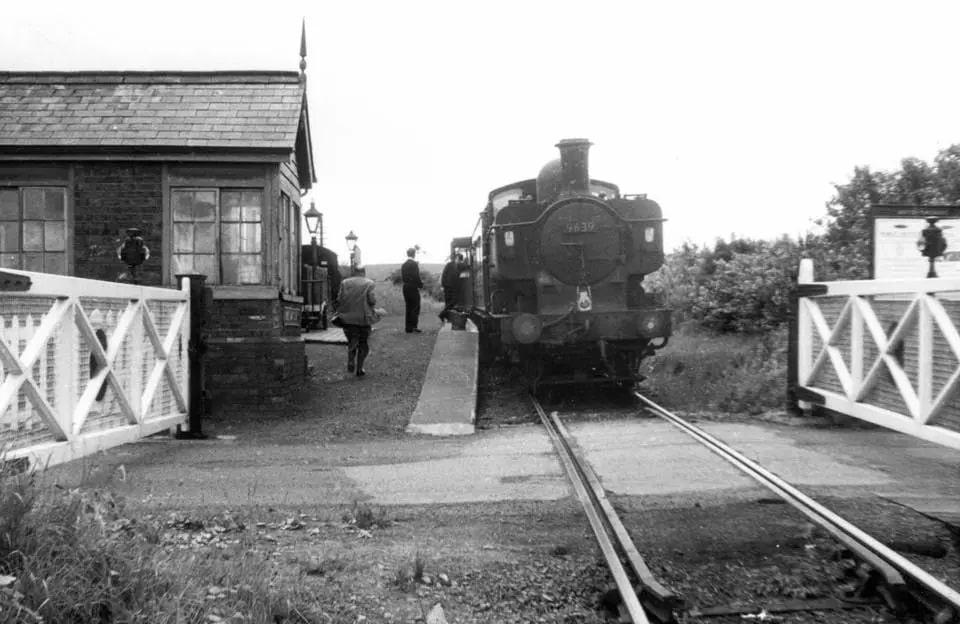
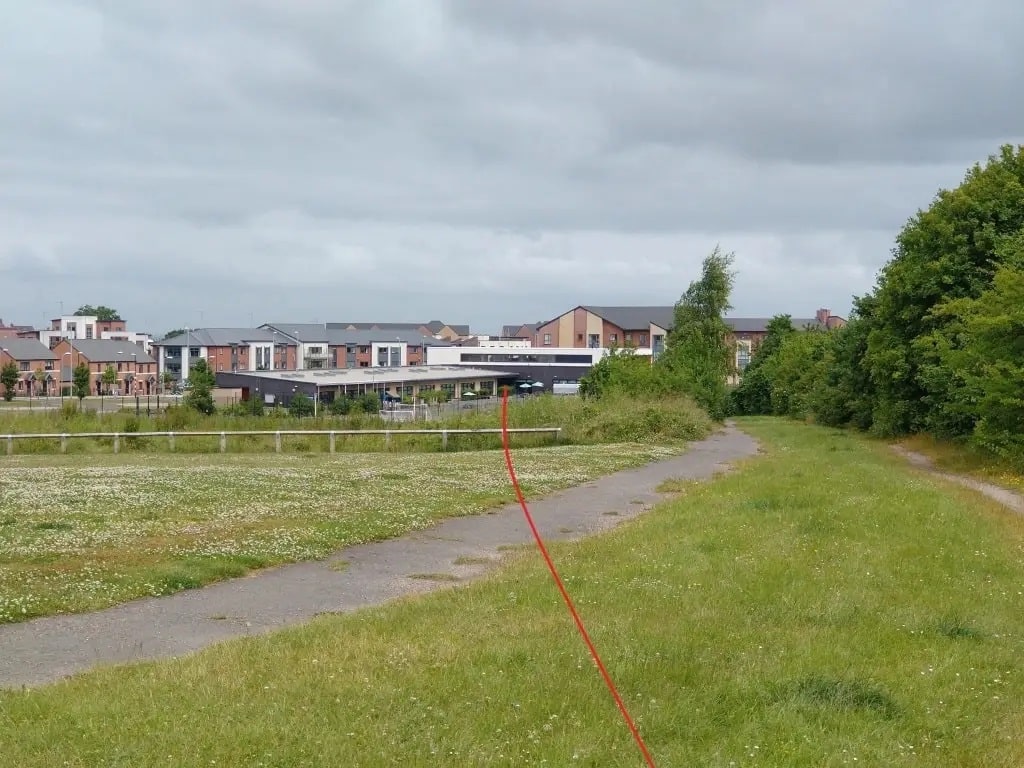
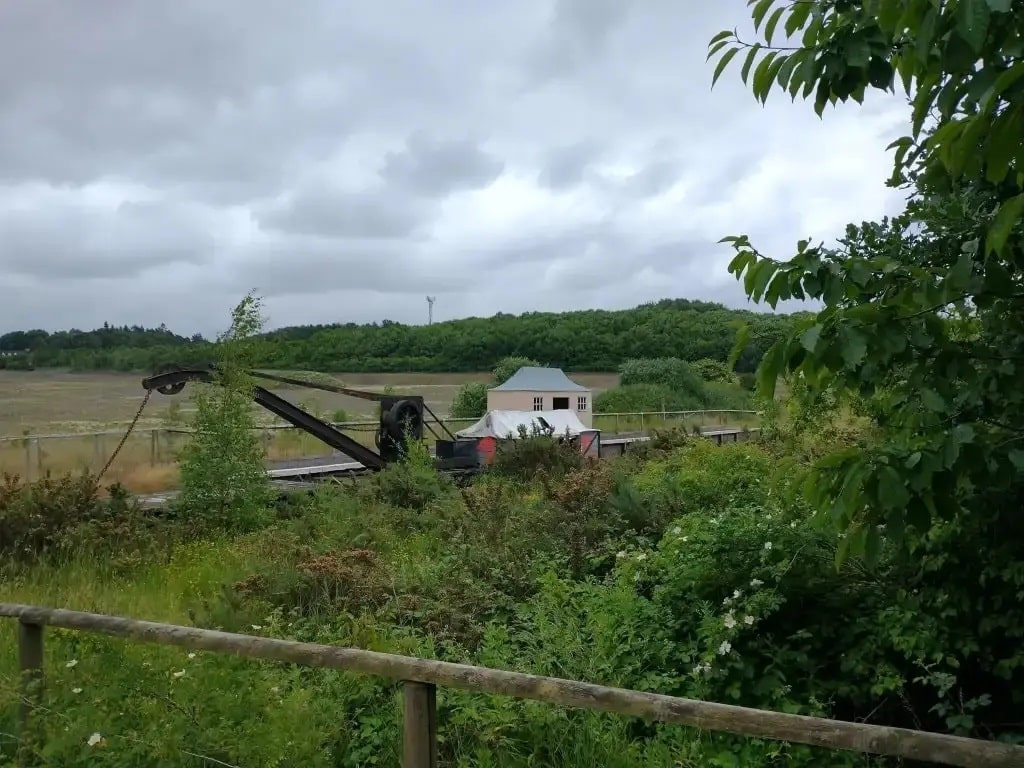
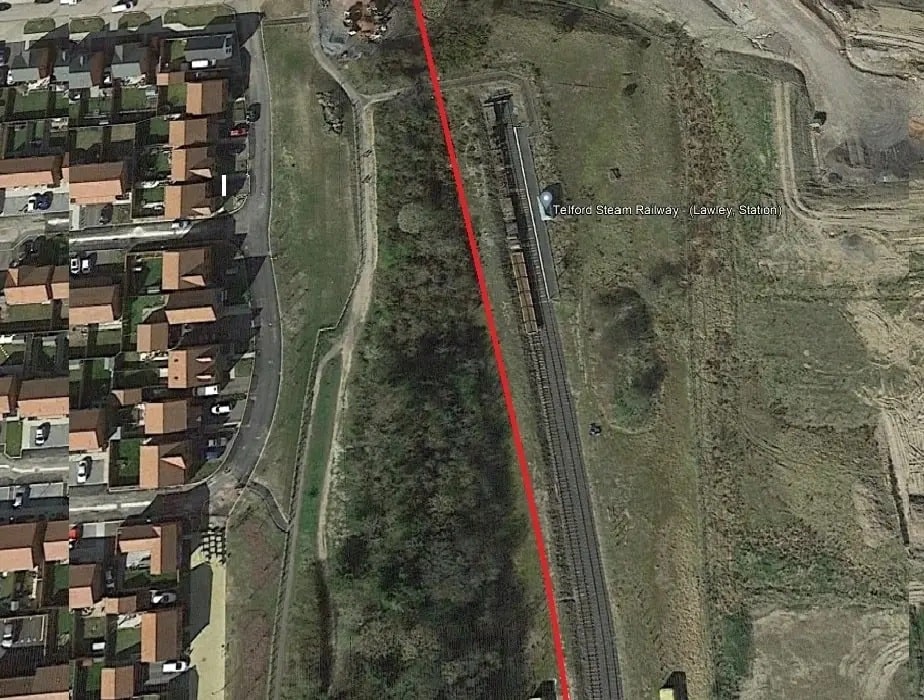
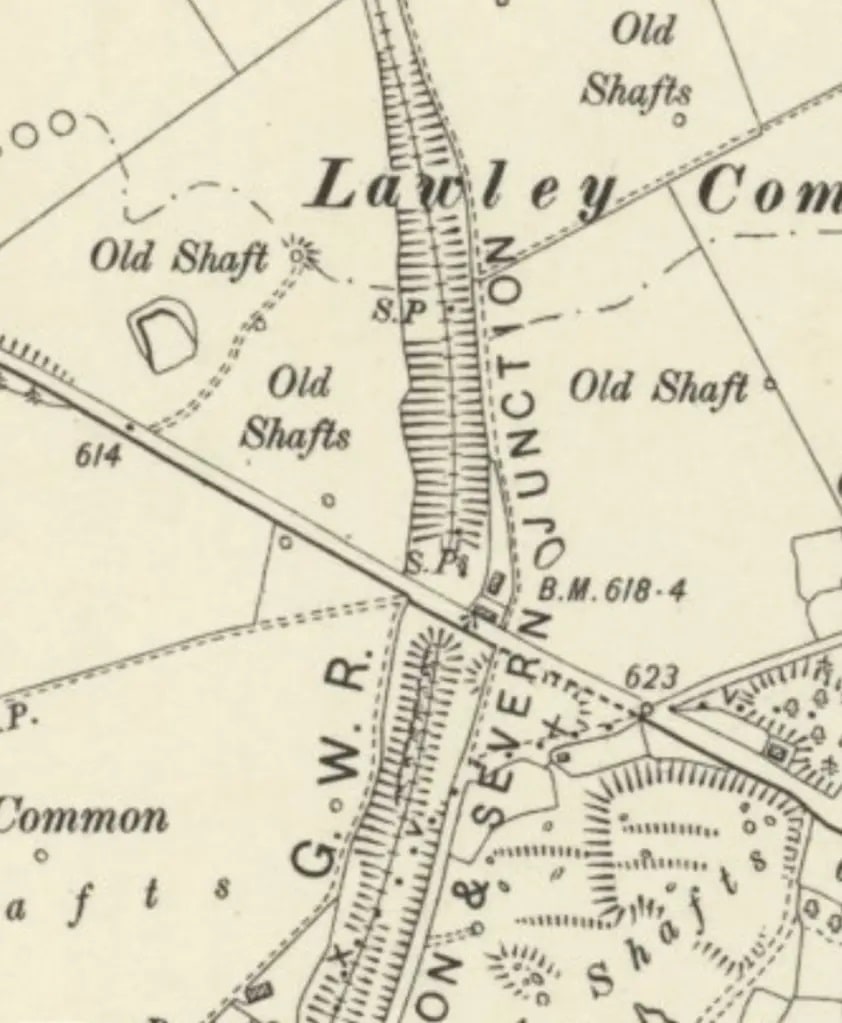
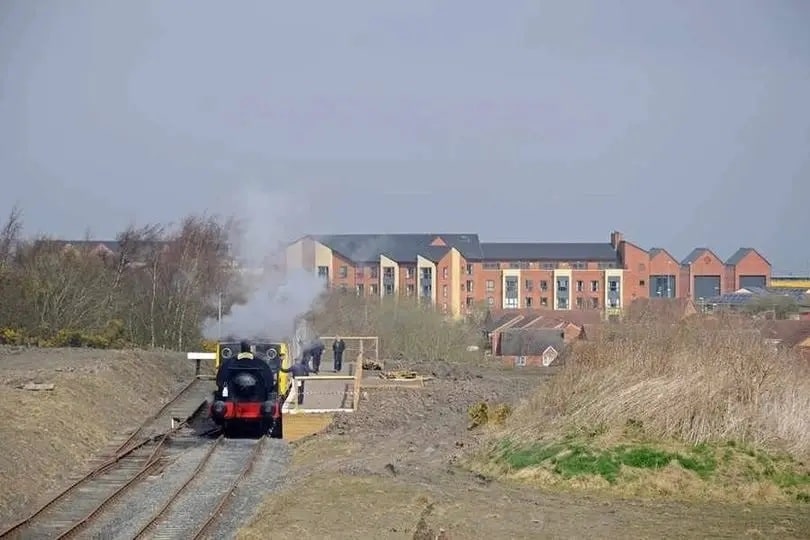
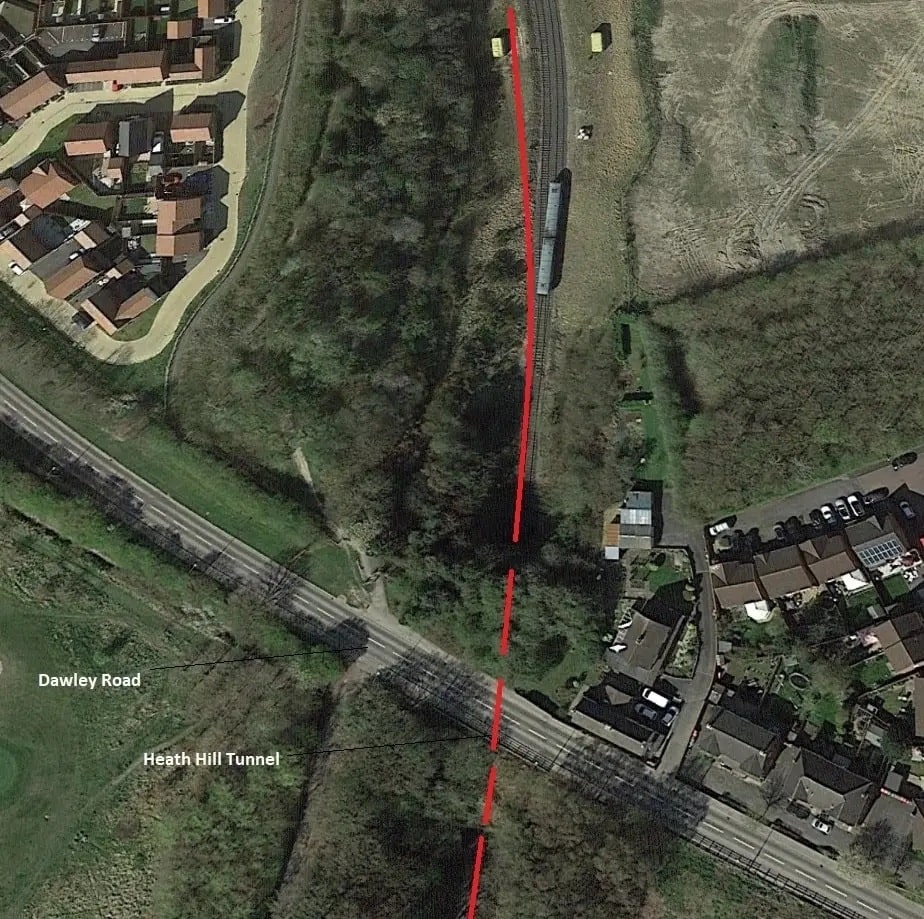
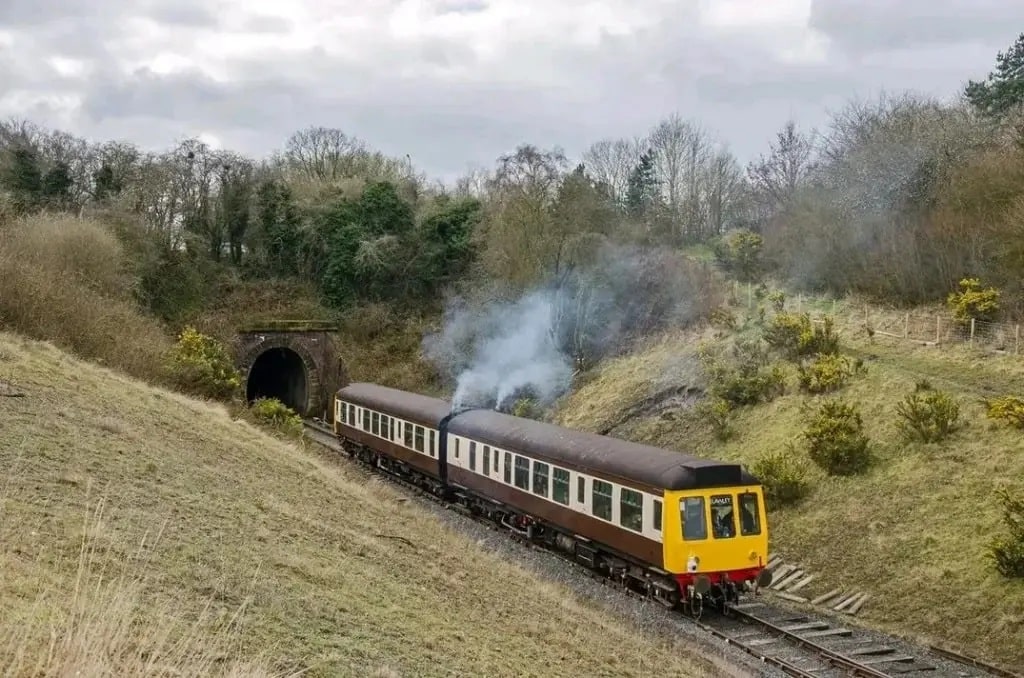
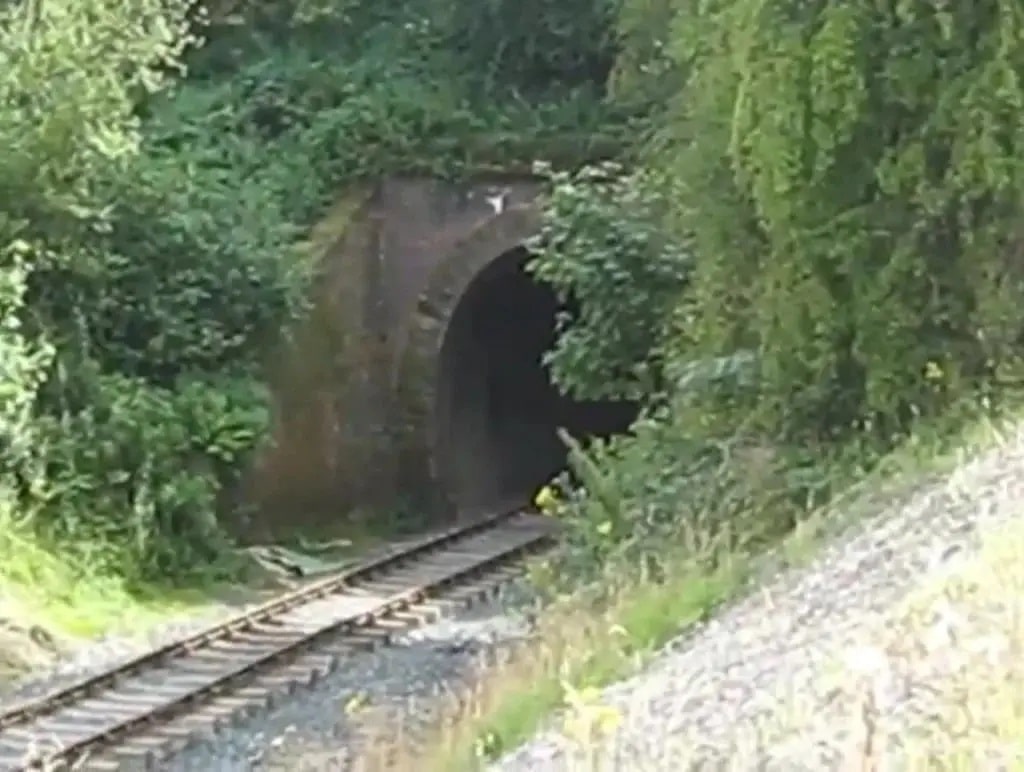
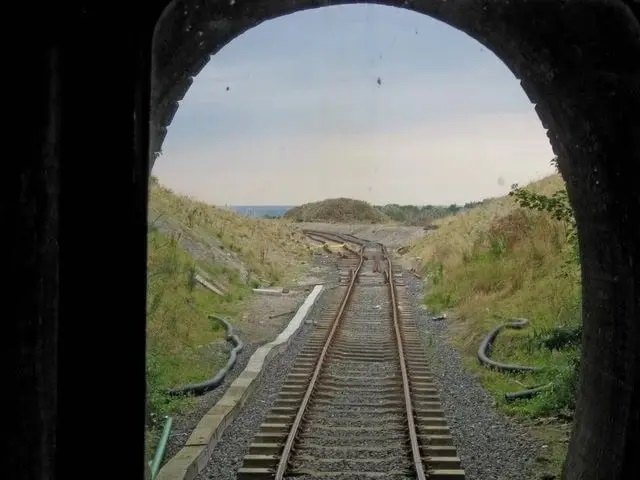
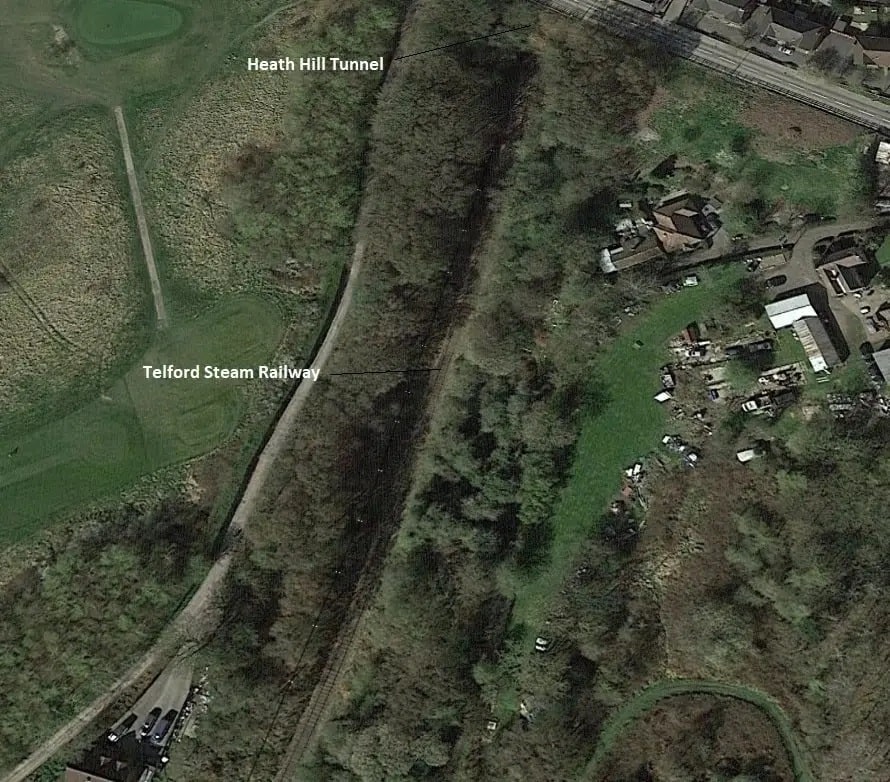
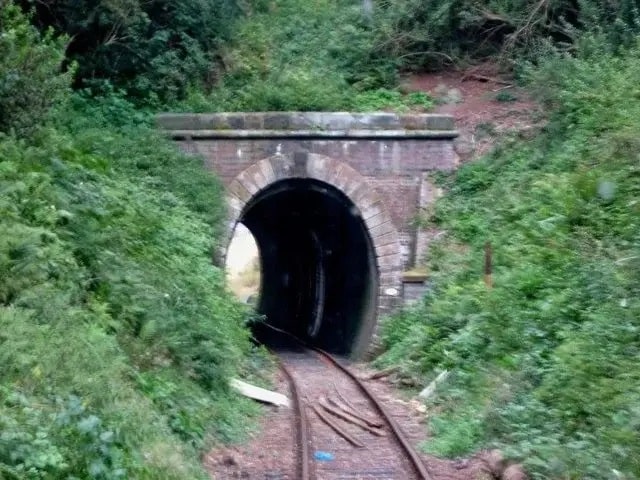
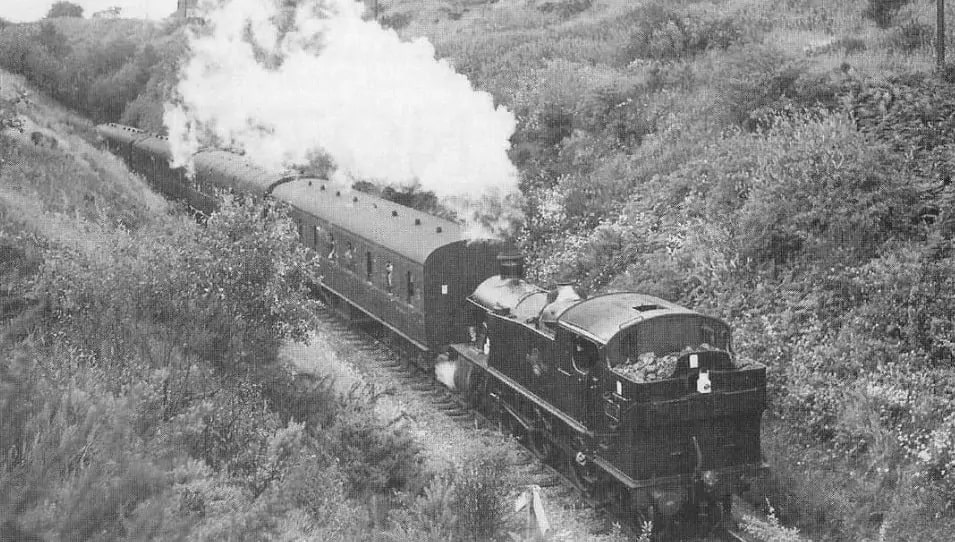
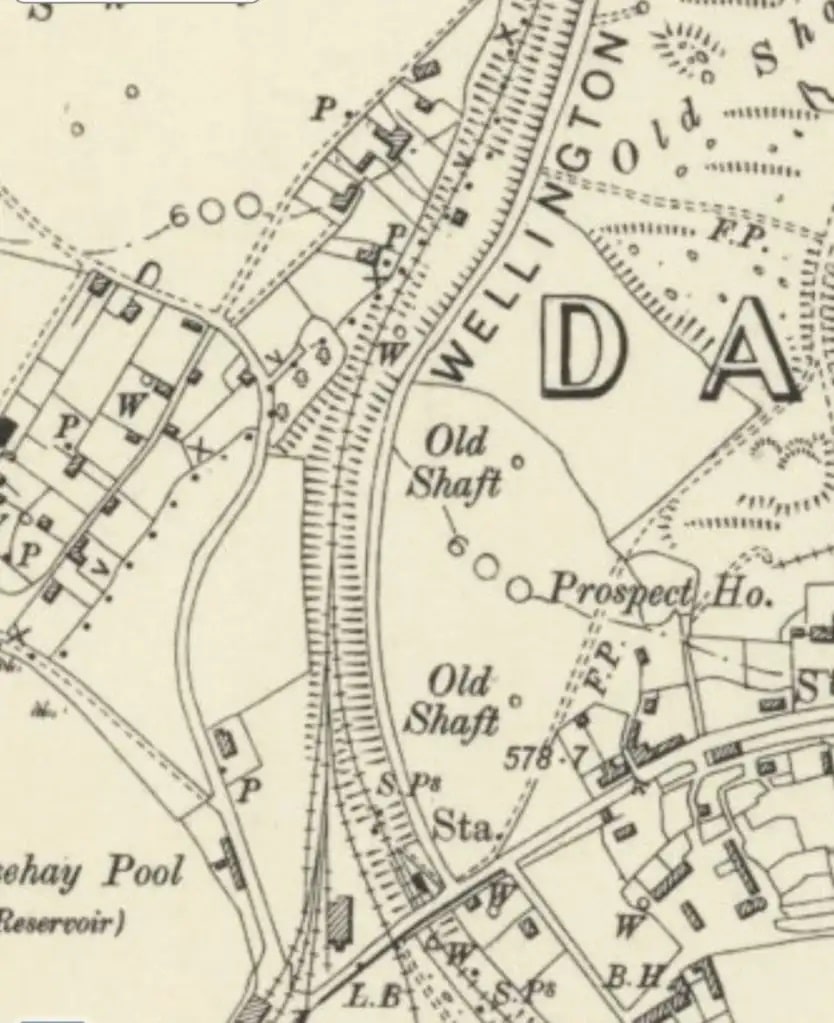
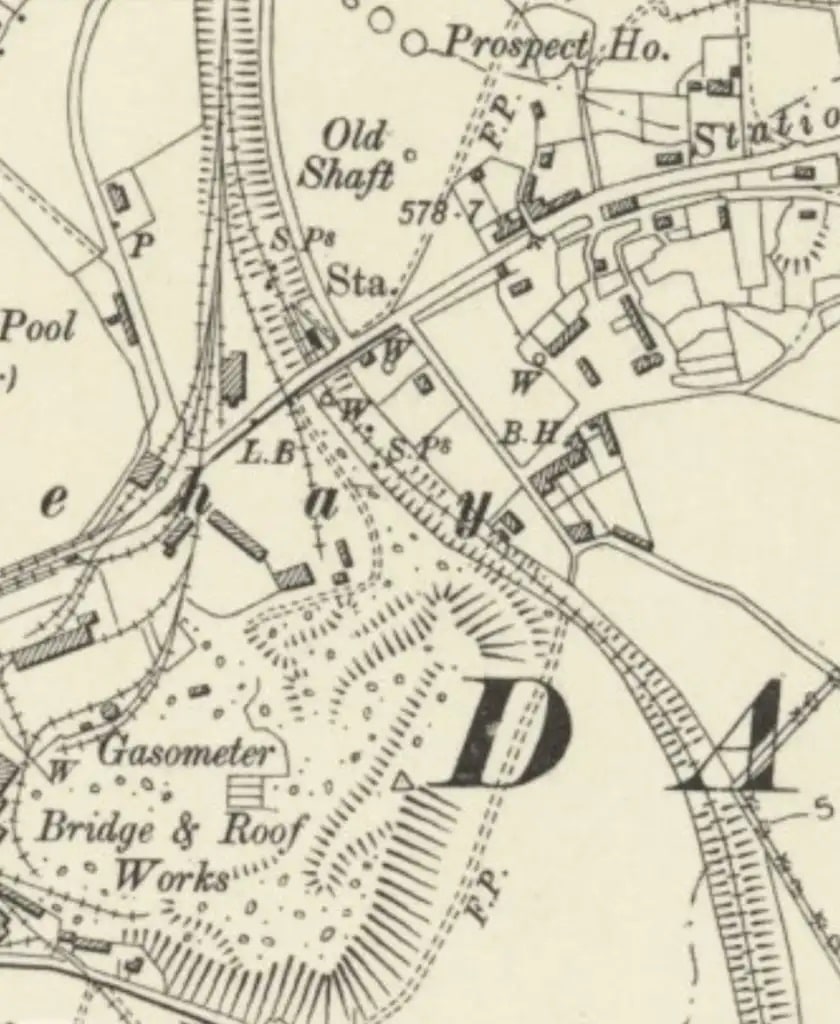
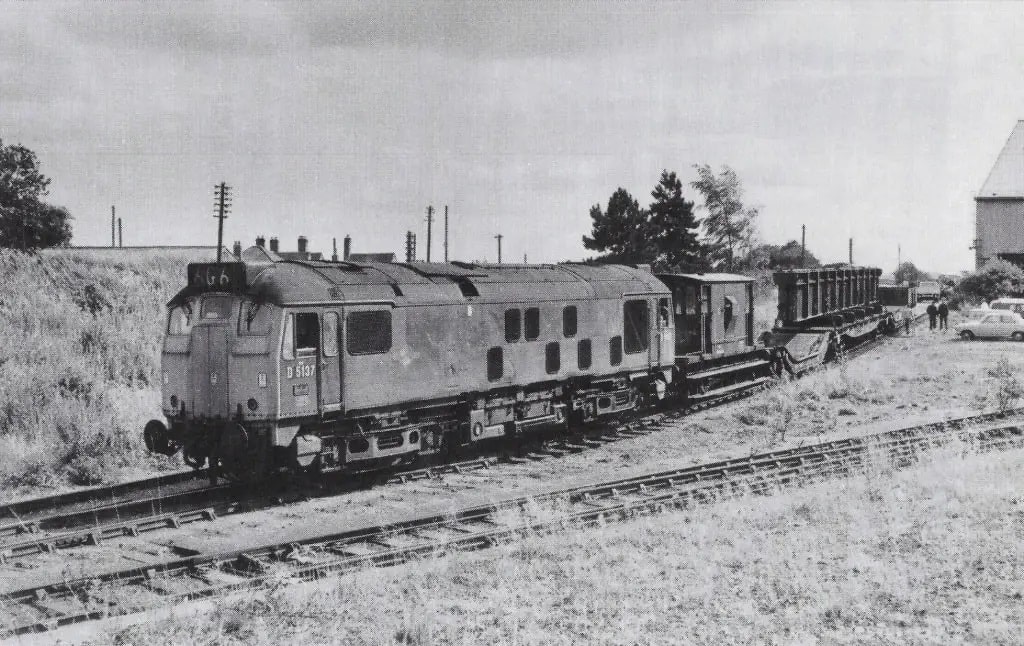
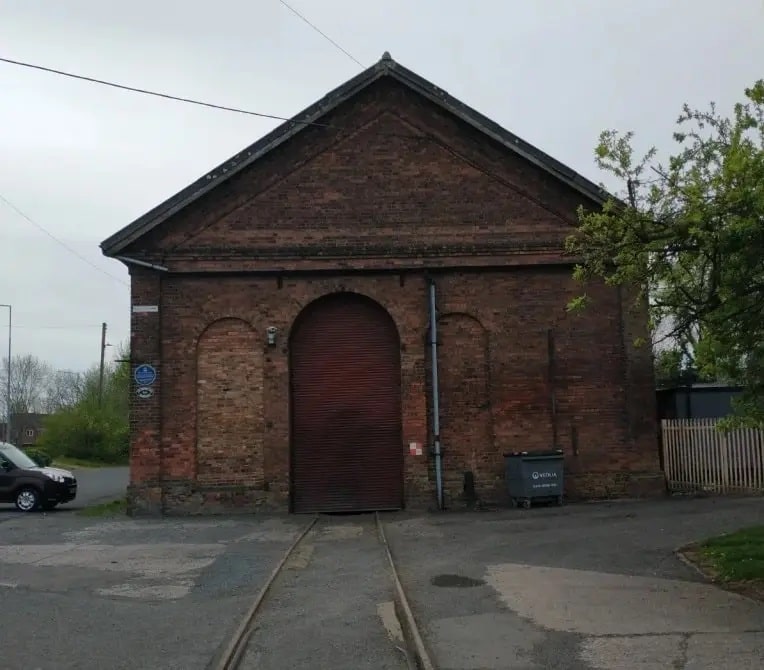
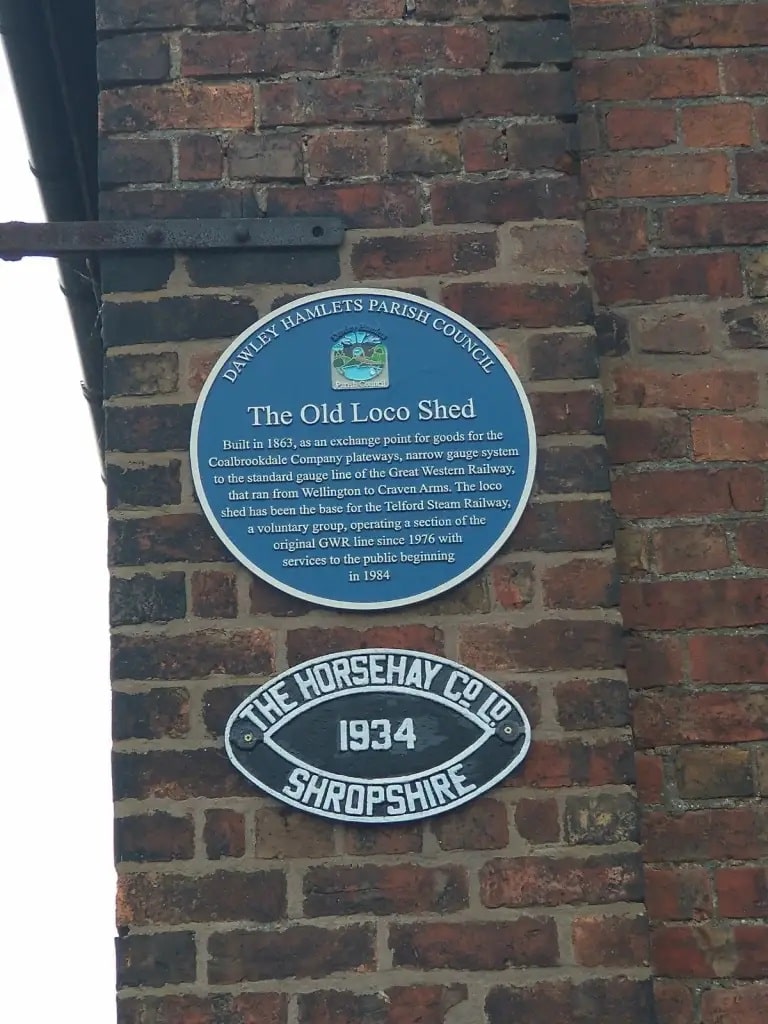
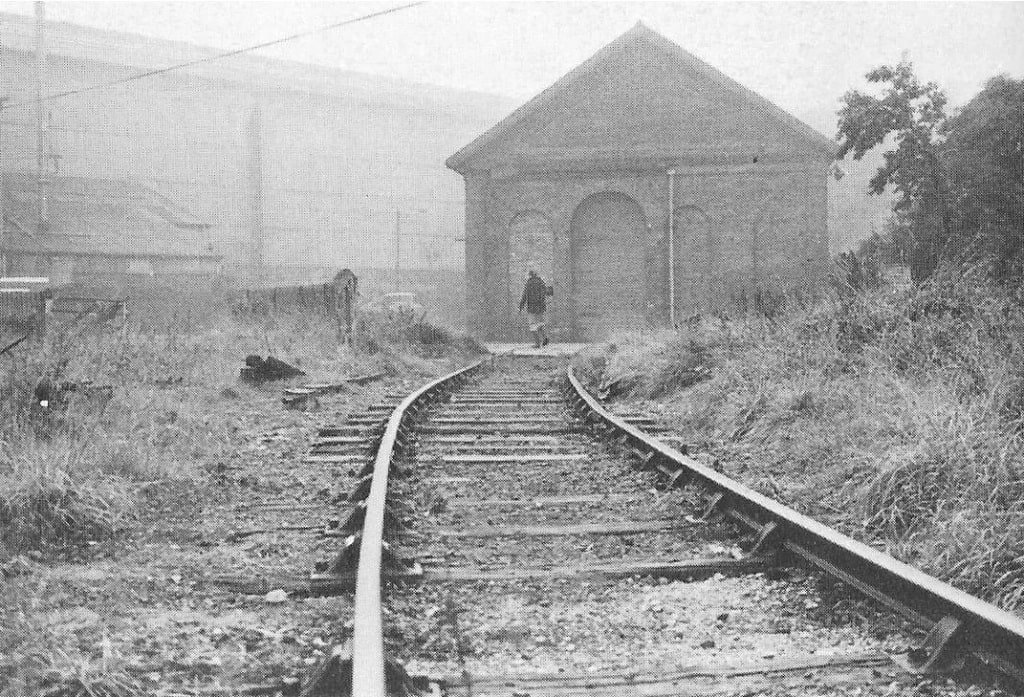
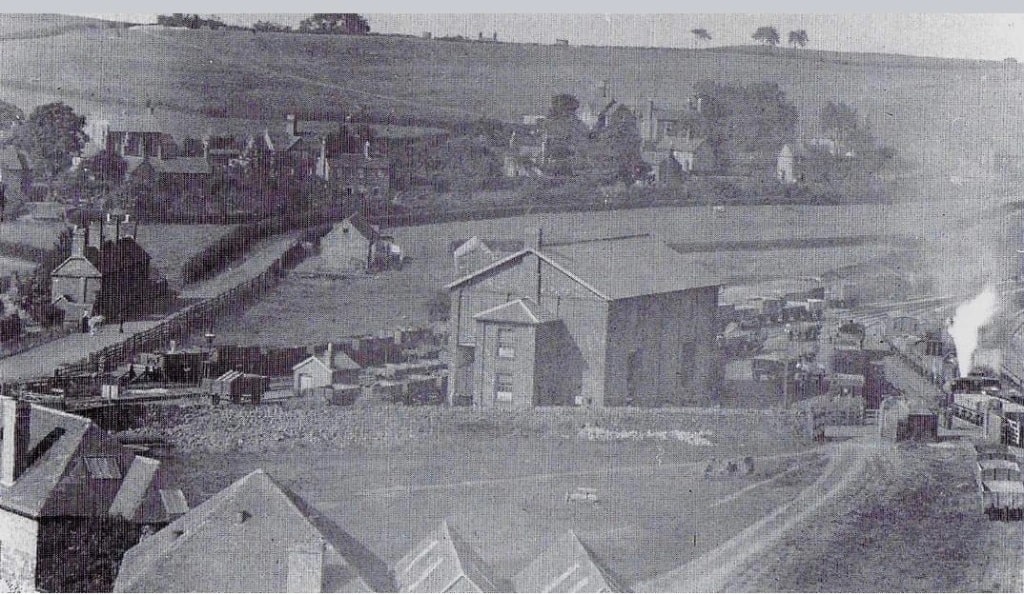
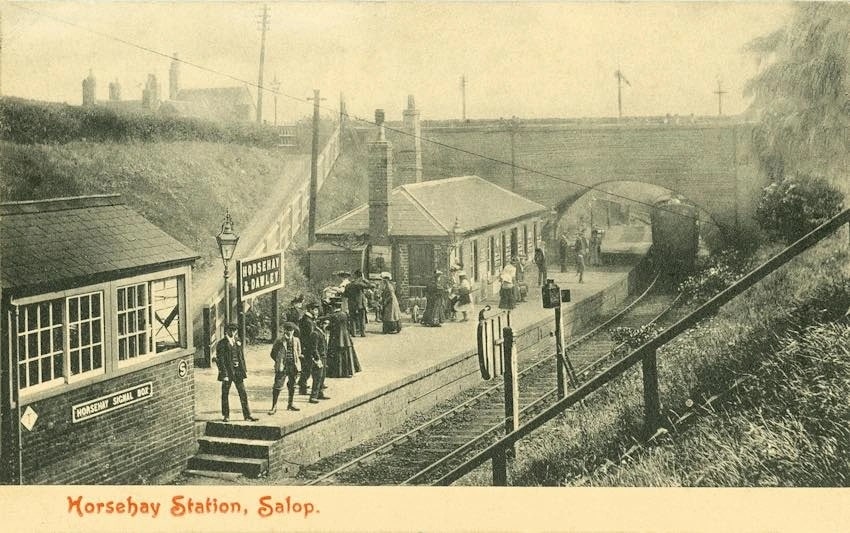
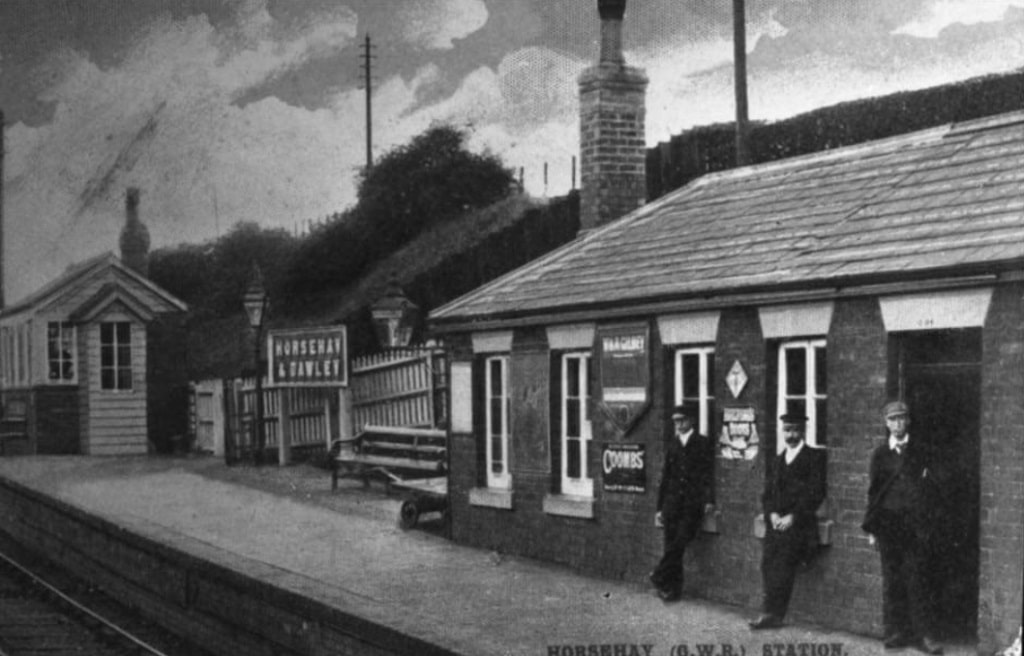
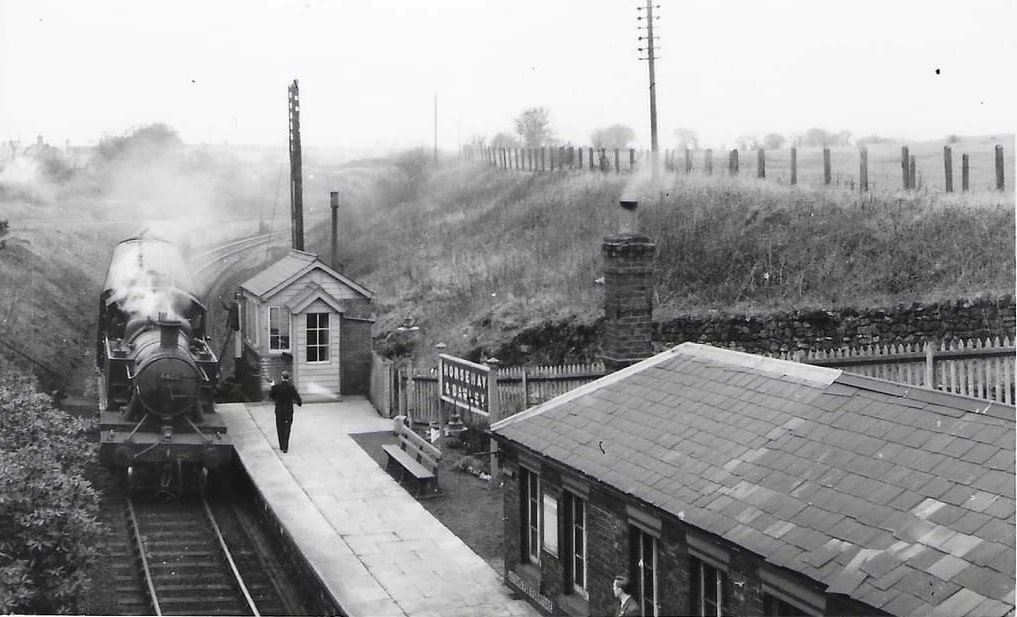
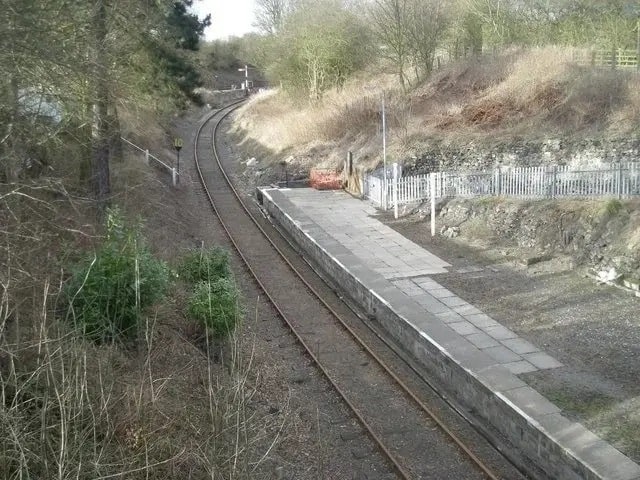
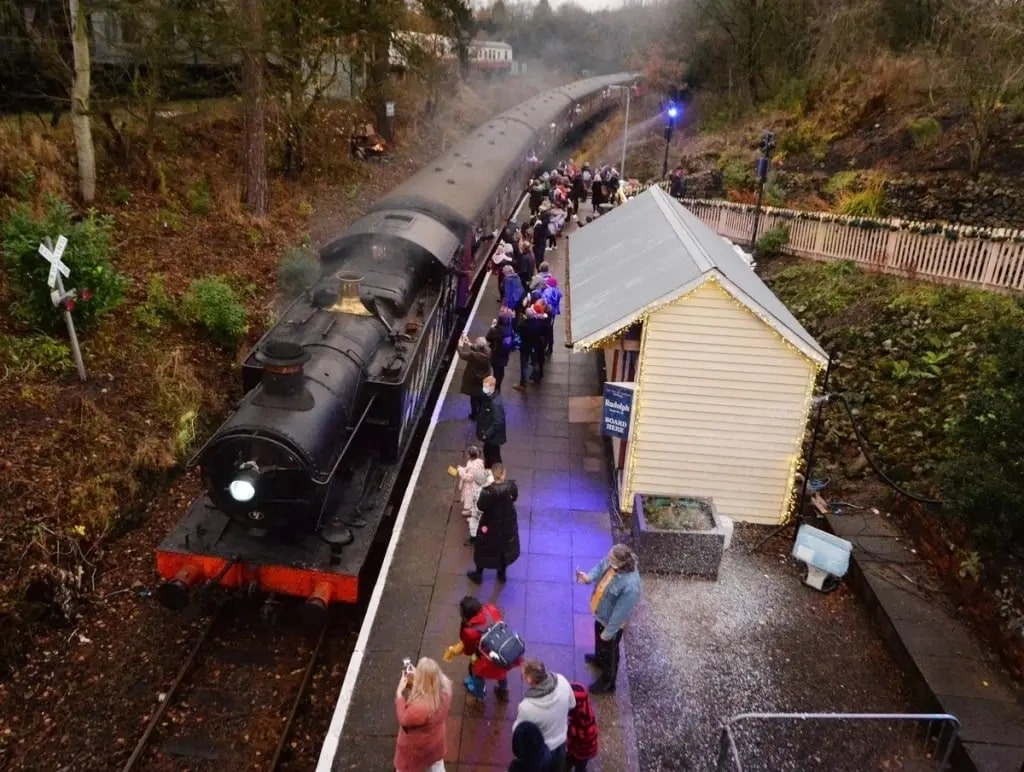
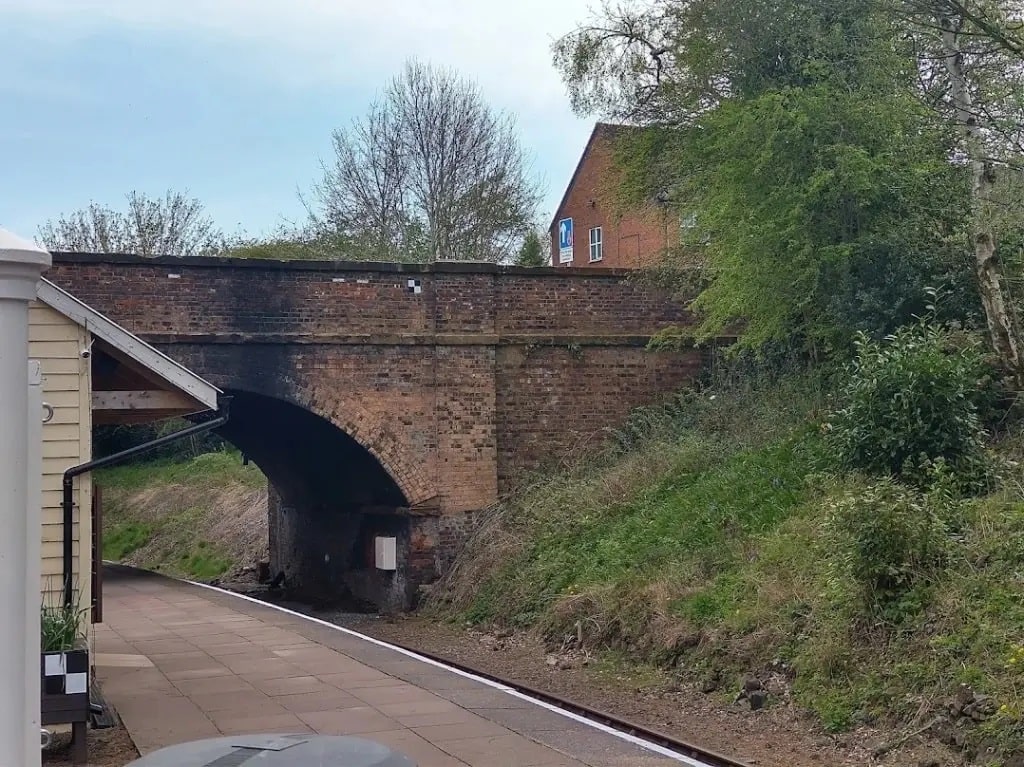
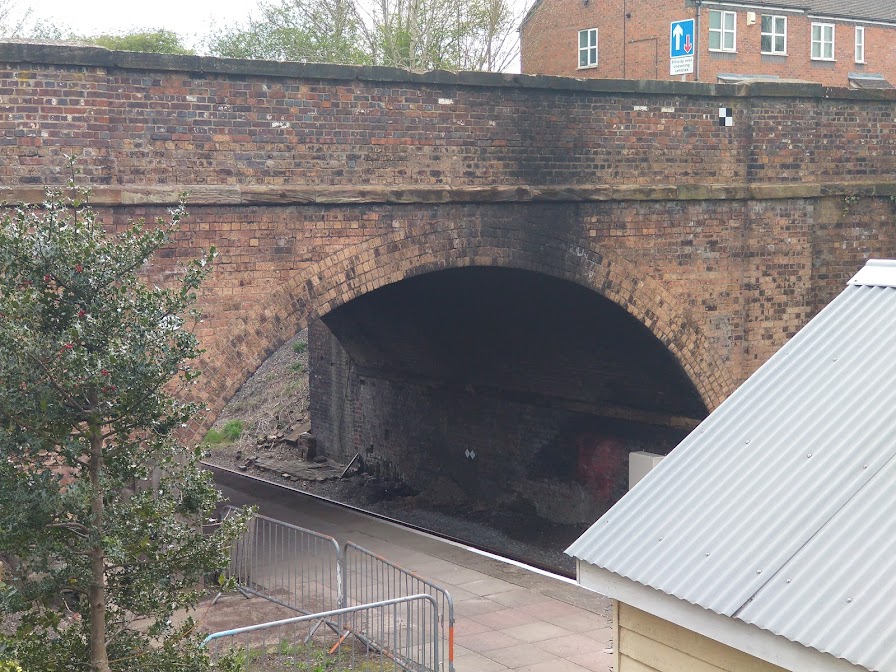
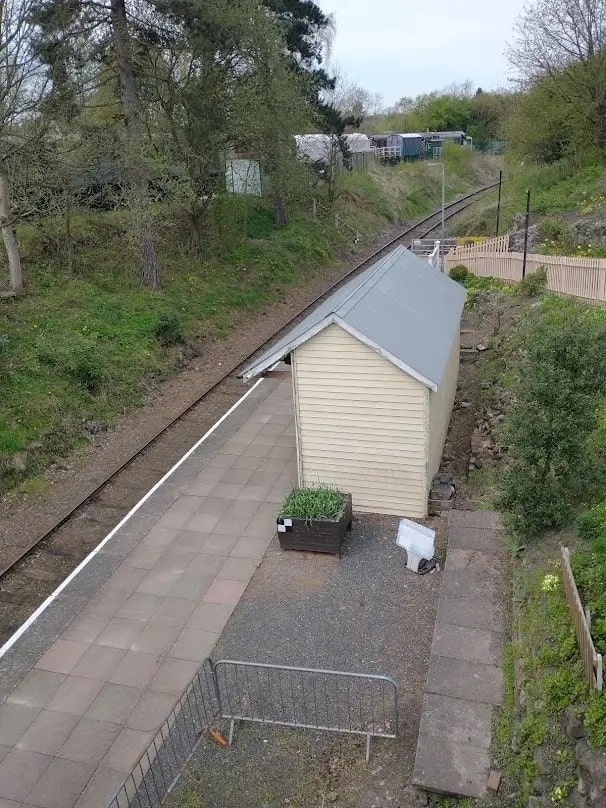
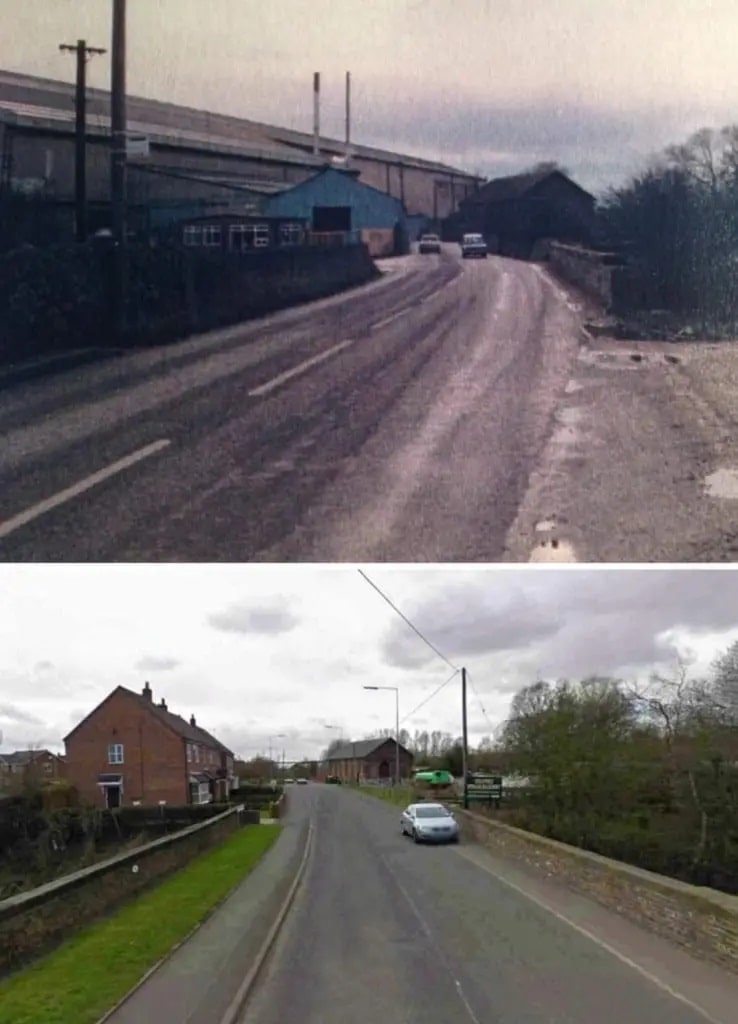
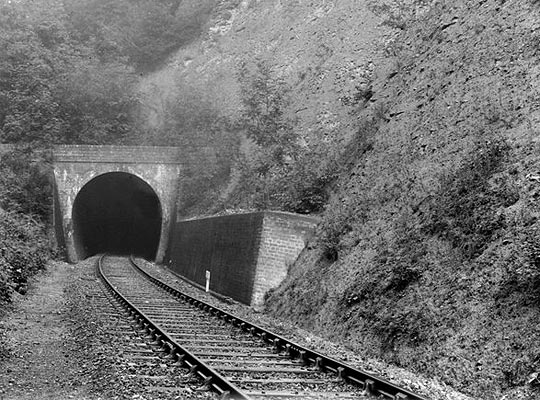
Lawley Bank Station on the 6″ OS Map of 1881/82. Again, the surroundings either side of the line were, at that time, essentially rural. [9]
The 25″ OS Map from 1901 showing the location directly around Lawley Bank Station. An interesting feature is the shepherd’s crook to the West of the line which is very suggestive of a tramway. It may not be a tramway, but it certainly will warrant further investigation. It is worth noting that it does not appear on the 1881/82 6″ Survey and that it is not marked on this extract as a tramway. [30]
The area around the site of Lawley Bank Station has been radically altered by new development. [30]
Looking North through the crossing gates at Lawley Bank Station on 18th February 1967. The rural nature of the surrounding landscape is evident. This image was shared on the Telford Memories Facebook Group by Carole Anne Huselbee in September 2014. [36]
Lawley Bank Station in 1962 taken from a train standing at the platform. This image was shared by Stuart Geoffrey Davis on the Memories of Shropshire Facebook Group in September 2018, (c) Stuart Geoffrey Davis. [33]
Lawley Bank Station again, taken from a Southwesterly direction, a wider angle taken from track level, shared by Metsa Vaim EdOrg on the Telford Memories Facebook Group on 22nd February 2021. [34]
The location of Lawley Bank Station in 1987. This view looks North across Station Road. It was shared by Metsa Vaim EdOrg on the Telford Memories Facebook Group in November 2020. Metsa comments: “The railway route has more or less vanished in 1987. Probably the last time I walked the line with my mum’s dog. The stream is now a trickle, that once flowed faster and deeper from Horsehay Common. Gone are the Hares, Curlews, Green Plover, Grey Partridge, Skylarks and Snipe from the fields either side of the track. Gone are the fruit trees, especially a large pear tree that was hidden behind some Silver Birches, a field away from our house. Gone are the dragonflies that patrolled through the Horsehair Ferns either side of the track-bed.” [35]
The approximate line of the railway South of Lawley Bank Station is shown on this NLS satellite image. The rectangular white building straddling the old line in both these last two images is Lawley Village Primary Academy. [32]
Standing in front of Morrison’s Supermarket on the North side of West Centre Way looking South along what was the route of the old railway. [My photograph, 13th June 2022]
Lawley Village Primary Academy sits over the line of the old railway. This photograph looks along the side of the building parallel to the line of the railway, North, towards the location of the erstwhile Lawley Bank Station. [My photograph, 13th June 2022]
Turning through close to 180°, this photograph looks along the side of the school again but this time to the South. At this point, the old railway route runs at the back of the school building. [My photograph, 13th June 2022]
Looking South across the level crossing at Lawley Bank Station with a service for Wellington at the station platform. This image was shared by Lin Keska on the Telford Memories Facebook Group on 12th February 2017. [42]
Looking North from the area of the School car park. Morrison’s Supermarket can be seen in the distance. The School is the white and grey building on the left of the image. The approximate line of the old railway is marked by the red line imposed on the photograph. [My photograph, 13th June 2022]
Looking South from the fence-line at the edge of the School carpark. The red line approximates to the line of the old railway. [My photograph, 13th June 2022]
Looking back to the North from adjacent to the housing in the [picture immediately above. Lawley Village Primary Academy is in the centre of the image and the approximate line of the railway is, again, shown as a red line. [My photograph, 13th June 2022]
This satellite image provided by the NLS (National Library of Scotland) had been edited to show the line of the railway as a red line. At the bottom edge of the image on the East side of the redline the current extent of the preservation line ‘Telford Steam Railway can be seen. [38]
Looking South from the location of the photograph above, the old line entered a cutting. The tree growth is in that cutting. [My photograph, 13th June 2022]
The surrounding land is rising and the cutting is deeper as the line heads South, the red line at the left of this image shows its route. A contractors compound is just evident on the right skyline in this picture. [My photograph, 13th June 2022]
This image shows a view from the estate road looking East towards what was the route of the railway. The red line to the right side of this image provides an indication of the railway alignment, which was East of the fenced compound. [My photograph, 13th June 2022]
Around 100 metres to the South the new Lawley Station on the Telford Steam Railway’s preservation line. A typical GWR ‘pagoda’ platform shelter has been erected on the relatively new platform. [My photograph, 13th June 2022]
This Google Earth Satellite image shows the old railway alignment just a few metres to the West of the alignment of the preservation line and its Lawley Station. Railway rolling-stock can be seen stored on one of the two tracks at the station. [Google Earth]
Heath Hill Tunnel is the next location to note. This is the 1881/82 6″ OS Map. It passes under the line of Dawley Road. [9]
An photograph of Lawley Station while it was being built. The pagoda platform building has still to be constructed. This image was shared on the Telford Memories Facebook Group by Marcus Keane. There appears to be significant foreshortening which has the effect of bringing buildings to the North much closer to the station. This suggests that the picture was probably taken from close to the northern portal of Heath Hill Tunnel. More about Telford Steam Railway can be found on their website. [39]
Google Earth shows a DMU either setting off from or arriving at Lawley Station. [Google Earth]
Class 108 DMU North of Heath Hill Tunnel on Telford Steam Railway. [46]
The northern portal of Heath Hill Tunnel as it appears in a video on YouTube. [44]
Looking North from the northern portal of Heath Hill Tunnel on 5th September 2010. The new line and Lawley Station are not yet open, © Copyright L.S. Wilson and licensed for reuse under a Creative Commons Licence (CC BY-SA 2.0). [43]
South of Heath Hill Tunnel, the modern preservation line of Telford Steam Railway follows the route of the W&SJR. As it leaves the tunnel it is in relatively deep cutting. [Google Earth]
A relatively grainy photograph of the Southern portal of Heath Hill tunnel after clearance work was completed by Telford Steam Railway, taken on 5th September 2010, © Copyright L.S. Wilson and licensed for reuse under a Creative Commons Licence (CC BY-SA 2.0).. [41]
The cutting between Heath Hill Tunnel and Horsehay & Dawley Station. Shared on the Telford Memories Facebook Group by Metsa Vaim EdOrg.  [20]
The 6″ OS Map from 1881/82 shows the tightly curved approach to Horsehay & Dawley Station from the North. [9]
The 1881/82 OS Map gives some sense of the industrial lines associated with the Horsehay Works. More details can be found in an article about the Coalbrookdale Tramroads. Both the old goods shed and the Coalbrookdale Company’s transshipment shed appear on this map extract. Both are on the North side of Station Road. The transshipment shed is the more westerly of the two. It is known locally as the ‘Old Loco Shed’. [9]
Shared on the Telford Memories Facebook Group by Metsa Vaim EdOrg, who comments: “The station yard, Horsehay in 1971. Now the site of Horsehay Steam Trust, this was the site we played, or trespassed on in the sixties. Above the loco is the roof of the Cub/Scout Hut on Fence Road, and further to the right was the derelict rolling stock and the large two storey building that we played football in. On the first floor avoiding the holes in the floor. Horsehay Works is also to the right. The picture shows a ‘Horsehay Special’ load on its way to Scotland via Lightmoor and Madeley Junctions,” © G.F. Bannister. [54]
The Old Loco Shed. [My photograph, 20th April 2022]
Dawley Hamlets Parish Council erected this blue plaque on ‘The Old Loco Shed’. It reads ‘Built in 1863, as an exchange point for good for the Coalbrookdale Company plateways, narrow gauge system to the standard gauge line of the Great Western Railway, that ran from Wellington to Craven Arms. The loco shed has been the base for the Telford Steam Railway, a voluntary group, operating a section of the GWR line since 1976 with services to the public beginning in 1984. [My photograph, 20th April 2022]
The Old Loco Shed. The base of the Telford (Horsehay) Steam Trust. The picture was taken in 1978. Shared by Metsa Vaim EdOrg on the Telford Memories Facebook Group on 10th May 2021. Metsa writes:
“The Horsehay locomotive shed has the Adamson-Butterley engineering works in the background.
The number of times I walked my mother’s dog down these tracks – probably trespassing at some time. The other shed is to the left out of shot – I think. In the late sixties and seventies this line to Lawley Bank was alive to the birdsong of warblers, linnets, yellowhammers and the like. [47]
Horsehay & Dawley Good Shed, now demolished. The lines to the left head for the ‘Old Loco Shed’ which was the transshipemtn shed for the Coalbrookdale Company, and towards the main Horsehay Works. This image was shared by Lin Keska and Tom Cooper on the Telford memories Facebook Group on 13th February 2017. [48]
The Horsehay and Dawley Station looking South towards the road over-bridge early in the 20th century. This image was shared by Lin Keska and Tom Cooper on the Telford memories Facebook Group on 13th February 2017. {53]
Horsehay & Dawley Railway Station in the early 20th century, shared on the Telford Memories Facebook Group by Metsa Vaim EdOrg on 12th December 2020. [49]
Horsehay and Dawley railway Station in 1950. The photograph was taken from the over-bridge looking to the Northwest. Shared by Metsa Vaim EdOrg on the Telford Memories Facebook Group on 7th July 2022. [50]
Horsehay and Dawley station on 5th May 1957. Shared by Metsa Vaim EdOrg on the Telford memories Facebook Group on 25th July 2021. Metsa writes: “When the trains were no more, the perfect walk with the dog. From Lawley Bank, under the tunnel, past the smouldering coal seams under the heather, past numerous singing warblers, past the back of Kevin Rollins’s house to the Horsehay station. Through the goods yard, around the pool, up unto Horsehay Common, across to New Works wood. Down to the Forge pools, along the path to the Newdale packhorse bridge. Along the track back to Lawley station and back alongside the stream that emanated on Horsehay Common. Good job the Steam Trust now operates otherwise they probably would have concreted over/filled in the Heath Hill Tunnel by now. I will always treasure those walks with my mothers collie in the late 60’s and early seventies,” © G.F. Bannister. [51]
Horsehay & Dawley station. The signal in the middle distance marks the junction of the spur into Spring Village station and the yard, which is to the left. Refurbishment is incomplete. The station sign board still has to be fixed to its supporting uprights. The station building still have to be built. [45]
Horsehay & Dawley Railway Station with the now very popular Polar Express which the preservation company puts on in the Winter each year, and has done so since 2016, embedded from an article on the Shropshire Star’s website. The station is in its finished form with the new platform building. [55]
The view from the station access path, looking to the South and the road bridge at Horsehay and Dawley Station. [My photograph, 20th April 2022]
A view of the road bridge from behind the station building at Horsehay and Dawley Station. [My photograph, 20th April 2022]
The view North from the road bridge with the station building in the foreground and the Telford Steam Railway Yard (the old Goods yard) in the background. [My photograph, 20th April 2022]
These two pictures are a ‘then & now’ study. They are both taken looking West across the road bridge across the W&SJR at Horsehay. The first picture shows the old works which were Adamson Alliance Works before becoming home to AB Cranes. The second is after the demolition of the main factory buildings. These two pictures were shared on the Telford Memories Facebook Group by Andy Rose on 21st December 2021. [52]

References

  1. https://en.m.wikipedia.org/wiki/Wellington_and_Severn_Junction_Railway, a ceased on 26th June 2022.
  2. Adrian Knowles; The Wellington, Much Wenlock and Craven Arms Railway; Lightmoor Press, Lydney, Gloucestershire, 2022.
  3. https://vlex.co.uk/vid/wellington-and-severn-junction-808032237, accessed on 26th June 2022.
  4. https://hyperleap.com/topic/Wellington_and_Severn_Junction_Railway, accessed on 26th June 2022.
  5. https://maps.nls.uk/view/101594296, accessed on 29th June 2022.
  6. https://maps.nls.uk/geo/explore/#zoom=17&lat=52.70121&lon=-2.51629&layers=168&b=1, accessed on 30th June 2022.
  7. https://maps.nls.uk/geo/explore/#zoom=17&lat=52.70121&lon=-2.51629&layers=6&b=1, accessed on 30th June 2022.
  8. https://maps.nls.uk/geo/explore/#zoom=17&lat=52.70036&lon=-2.50296&layers=168&b=1, accessed on 30th June 2022.
  9. https://maps.nls.uk/view/101594458, accessed on 30th June 2022.
  10. https://maps.nls.uk/view/101594482, accessed on 30th June 2022.
  11. https://maps.nls.uk/geo/explore/#zoom=18&lat=52.69612&lon=-2.48378&layers=168&b=1, accessed on 30th June 2022.
  12. https://www.geograph.org.uk/photo/804810, accessed on 30th June 2022.
  13. https://en.m.wikipedia.org/wiki/Wellington_railway_station_(Shropshire), accessed on 30th June 2022.
  14. https://www.shropshirestar.com/news/features/2020/06/01/new-queens-stay-in-deepest-south-shropshire, accessed on 30th June 2022.
  15. https://maps.nls.uk/geo/explore/#zoom=16.560351011060174&lat=52.64292&lon=-2.48610&layers=168&b=1, accessed on 1st July 2022.
  16. https://www.wikiwand.com/en/Green_Bank_Halt_railway_station, accessed on 1st July 2022.
  17. https://www.wikiwand.com/en/Ketley_Town_Halt_railway_station, accessed on 1st July 2022.
  18. https://en.m.wikipedia.org/wiki/New_Dale_Halt_railway_station, accessed on 1st July 2022.
  19. https://en.m.wikipedia.org/wiki/Lawley_Bank_railway_station, accessed on 1st July 2022.
  20. https://www.facebook.com/groups/674238619260811/permalink/5358295114188448, accessed on 1st July 2022.
  21. https://m.facebook.com/groups/674238619260811/permalink/2905700199447964, accessed on 1st July 2022.
  22. https://m.facebook.com/groups/674238619260811/permalink/6120237234660895, accessed on 2nd July 2022.
  23. https://m.facebook.com/groups/674238619260811/permalink/1658359617515368, accessed on 2nd July 2022.
  24. https://m.facebook.com/groups/674238619260811/permalink/846348998716438, accessed on 2nd July 2022.
  25. https://maps.nls.uk/view/121150310, accessed on 2nd July 2022.
  26. https://m.facebook.com/groups/674238619260811/permalink/3024958504188799, accessed on 2nd July 2022.
  27. https://maps.nls.uk/geo/explore/#zoom=16.478660506218784&lat=52.69402&lon=-2.48370&layers=6&b=1, accessed on 2nd July 2022.
  28. https://maps.nls.uk/geo/explore/#zoom=17&lat=52.69048&lon=-2.48447&layers=168&b=1, accessed on 2nd July 2022.
  29. https://m.facebook.com/groups/674238619260811/permalink/3023720624312587, accessed on 3rd July 2022.
  30. https://maps.nls.uk/geo/explore/#zoom=17&lat=52.67576&lon=-2.48151&layers=168&b=1, accessed on 5th July 2022.
  31. https://maps.nls.uk/geo/explore/#zoom=17&lat=52.67816&lon=-2.48176&layers=168&b=1, accessed on 5th July 2022.
  32. https://maps.nls.uk/geo/explore/#zoom=17&lat=52.67474&lon=-2.48158&layers=168&b=1, accessed on 5th July 2022.
  33. https://www.facebook.com/photo/?fbid=2208000166151460&set=pcb.1648058645323490, accessed on 6th July 2022.
  34. https://www.facebook.com/photo/?fbid=492524151741258&set=pcb.5358300260854600, accessed on 6th July 2022.
  35. https://www.facebook.com/photo/?fbid=431533454506995&set=gm.4918250424859588, accessed on 3rd July 2022.
  36. https://www.facebook.com/photo/?fbid=350926448418731&set=gm.846919291992742, accessed on 6th July 2022.
  37. https://www.facebook.com/photo/?fbid=255763268750682&set=gm.3788716084479700, accessed on 3rd July 2022.
  38. https://maps.nls.uk/geo/explore/#zoom=17&lat=52.67249&lon=-2.48130&layers=168&b=1, accessed on 7th July 2022.
  39. https://www.facebook.com/photo/?fbid=10201031066934406&set=gm.1060353237316012&cft[0]=AZV_yliKbIqlO8QzxgHLhCOGNDzl2q0JXz5sxj3DqnQvD0DDaeoXaxNVv24KosDWAQnnbtiDfyZQc7ou1TSNLtuS1FE-av5agWpNMlHyZuJmcYpbHRH7WTRyA0vgoRPmmhQdfbqbQrowrwZIZcePiFpL&tn=EH-R, accessed on 7th July 2022.
  40. https://www.openrailwaymap.org, accessed on 7th July 2022.
  41. https://www.geograph.org.uk/photo/2055888, accessed on 7th July 2022.
  42. https://www.facebook.com/photo/?fbid=1394210450623388&set=pcb.1533300770021254, accessed on 7th July 2022.
  43. https://www.geograph.org.uk/photo/2055924, accessed on 7th July 2022.
  44. https://youtu.be/TFCnvUg91hc, accessed on 7th July 2022.
  45. https://upload.wikimedia.org/wikipedia/commons/8/85/Horsehay_%26_Dawley_station_on_the_Telford_Steam_Railway.jpg, accessed on 7th July 2022.
  46. https://www.facebook.com/455639901281038/posts/pfbid0zgjgUvUWoXJz5CUVxNaLCT9JU3uaadGceZ6CYWGLwJ3kjQKMthg3XmH9MsyUYKMwl/?app=fbl, accessed on 7th July 2022.
  47. https://www.facebook.com/photo/?fbid=536113694048970&set=gm.5750220041662618, accessed on 7th July 2022.
  48. https://www.facebook.com/photo/?fbid=1394447547266345&set=pcb.1533901016627896, accessed on 7th July 2022.
  49. https://www.facebook.com/photo/?fbid=451145022545838&set=pcb.5046193635398599, accessed on 7th July 2022.
  50. https://www.facebook.com/photo?fbid=792862381707432&set=gm.7989826267701973, accessed on 7th July 2022.
  51. https://www.facebook.com/photo/?fbid=580770409583298&set=gm.6120294991321786, accessed on 7th July 2022.
  52. https://www.facebook.com/photo?fbid=3069342153301946&set=gm.6951096261574984, accessed on 7th July 2022.
  53. https://www.facebook.com/photo/?fbid=1394447307266369&set=pcb.1533901016627896, accessed on 7th July 2022.
  54. https://www.facebook.com/photo/?fbid=253270635666612&set=gm.3775392372478738, accessed on 7th July 2022.
  55. https://www.shropshirestar.com/news/local-hubs/telford/2021/12/16/telford-steam-railways-polar-express-experience-brings-christmas-magic-to-telford, accessed on 7th July 2022.