The featured image above shows Newdale Bridge after some path work improvements were undertaken. [1]
The location of Newdale Bridge on Google Maps.
Newdale Bridge is one extant remnant of the old tramway which probably ran between Ketley and Horsehay. The images below show its location. The bridge is recorded by Historic England as a Grade II listed structure (No. 1025096). It was listed on 8th April 1983. [5]
The Wrekin Local Studies Forum records this bridge in these words: “An extensive network of tramways was built, with horses pulling small waggons laden with coal, firclay and other minerals, connecting various mines to foundry sites. Pioneered by Abraham Darby II, Newdale Tram Bridge, crossing over Ketley Dingle, was built in 1759 around the same time [as] Darby’s revolutionary idea for the first purpose-built workers’ village, New Dale, with a small foundry, various cottages and the impressive long row consisting of 17 back-to-back dwellings.” [6]
Newdale Village has long-gone but the tramway bridge has been retained.
This first image shows the immediate vicinity of the Bridge in the 21st century. The blue line represents the line of the tramway. The redline represents the Wellington to Severn Junction Branch of the GWR which is now a part of the Ironbridge Way public footpath. Newdale Bridge is sited just to the West of the route of the old railway. It is clear that the tramway ran across the line of the old railway, perhaps going under a low bridge, although it did predate the railway and may have been cut by the construction work for the standard-gauge line. [2] An extract from the 6″ OS Mapping of 1882 which was published in 1887. Newdale Bridge crossed the stream just to the West of the standard-gauge line and to the East of Newdale. Without further research it is difficult to be sure of the tramway alignment away from the immediate vicinity of the Bridge. The mapping suggests that the tramway and the road on the East side of Newdale was cut by the building of the railway. In all probability the tramway used to run North-South alongside what was to be the route of the new railway as shown below. However, by the time of the 1882 survey the tramway rails had been lifted. [3]21st century housing to the West of Newdale Bridge. [My photograph, 9th June 2022]Ironbridge Way, the old Wellington to Severn Junction Railway, looking North from close to Newdale Bridge towards the M54. [My photograph, 9th June 2022]Ironbridge Way, the old Wellington to Severn Junction Railway, looking South from close to Newdale Bridge towards Morrison’s Supermarket which has been built over the line of the old railway. [My photograph, 9th June 2022]Looking West from the Ironbridge Way over Newdale Bridge. [My photograph, 9th June 2022]Looking East along the spandrel walls of the two arched Newdale Bridge. [My photographs, 9th June 2022]Looking West at low level along the spandrel walls of Newdale Bridge. [My photograph, 9th June 2022]Looking South towards Newdale Bridge from the adjacent footpath. [My photograph, 9th June 2022]Looking East at low level along the spandrel walls of Newdale Bridge. You will note that all the low level pictures of the bridge are taken from the North side. The southern side is inaccessible because of thick undergrowth. [My photograph, 9th June 2022]
Around 100 yards from our home in Telford there was once, many years ago, a colliery that was served by a tramway/waggonway.
Little Eyton Colliery was already disused by the time the survey was undertaken in 1881/1882 for the 6″ OS Maps published in 1888. The tramway had not yet been lifted, so it appears on the map extract below.
The Mindat.org website tells us that the colliery was owned in 1890 by the Haybridge Iron Co. It was in the ownership of the Stirchley Coal & Iron Co. from 1895 to 1896 and was back in the hands of the Haybridge Iron Co. by 1900. [3]
The Dawley History Website tells us that the Chartermaster in 1869 was Edward Bailey. [4]
There was a mining accident in 1869 at the Little Eyton Pit. … The Wellington Journal on Saturday 17th April 1869 carried this report:
The Late Fatal Accident. – On Saturday last an inquest was held at the Bull’s Head Inn, Lawley-bank, before J. Bidlake, Esq., on the body of Joseph Oliver, aged 37 years, whose death we recorded in last week’s Journal, when the following evidence was adduced:– John Oliver, son of deceased, deposed : My father worked at the Little Eyton Pit. Edward Bailey is chartermaster. It was a coal pit. I have worked at the pit a month. I have been driving. On Thursday morning, about nine o’clock, I was taking a draught of coal to the bottom of the shaft. I saw my father lying at the bottom with the basket on him. There was a lid on the basket, and another lid lying by the side of him. I ran off and told James Poole. I had seen my father about ten minutes before at the bottom. There was no one with him. He did not speak to me when I found him under the basket. I saw that his head was cut on the top, and also behind. He was lying on his back. One end of the basket was sticking up against the shaft, the other end on his stomach. The lids are about 2 ft. long. The lids on being sent down are tied under the tackler. – James Poole said : I work at the Little Eyton Pit. The last witness came and told me that his father was under the basket at the bottom of the shaft. I went there and found him. The deceased was lying at the bottom, with his head in the shaft, and not in the road. There was one lid in the basket not fastened, and one by him. He was about a yard from the side of the shaft. Three or four lids are generally sent down at a time. They are not usually lashed. There was no lasher round the basket when I saw the deceased. The lids are about three quarters of a yard. The pit is 200 yards. The hooker-on generally calls for lids. He had called for some that morning. I told him to do so, and he told me that he had done so. This was about half an hour before I found him. – John Perks said : I am banksman at the Little Eyton Pit. On Thursday morning deceased shouted for some trees and lids. I sent some down. I remember sending the last two lids down. It would be about half-past eight. I shouted “Joe” when I sent them down, but I got no answer. They were put under the tackler between the squares. We lash the trees. I have known of lids falling out before. I did not hear this drop or the skip catch. The Jury returned a verdict of “Accidentally killed.” [4]
Little Eyton Colliery as surveyed in 1881/82 for the 6″ OS Maps of 1888. The tramway leaving the map extract at the bottom right runs from the colliery towards the Wellington to Coalport Branch of the LNWR (later LMS). Before the coming of the railway, the tramway will have had wharves on the Coalport Branch of the Shropshire Canal. The railway company made use of the route of the Canal but as we will see, the horizontal.alignment of the canal was not always suitable for the railway. There is also a length of tramway running from the pit head out onto the slag heap. It leaves the map extract to the North of the other line. [1]
By the time of the next OS survey of Malinslee, just after the turn of the 20th century, all traces of the tramways at the colliery site have disappeared.
Little Eyton Colliery site at the turn of the 20th century. No tramway infrastructure remains at the site. The colliery slag heap remains and will continue to be a feature of the local landscape into the 21st century. [2]The same area in the 21st century as it appears on the ESRI World Image, Background map as provided by the National Library of Scotland. The large green sward of land surrounded by mature trees is the old colliery site and slag heap. The land remains significantly higher than the immediate locality and has been ‘rewilded’ to provide s pleasant meadowland and wooded area. [2]
The next few photographs show the Little Eyton Colliery site in the 21st century.
Three photographs of the Little Eyton Colliery and Slag Heap site in the 21st century. [My photographs, 15th June 2022]
Leaving the colliery, the tramway followed the route of what is now Matlock Avenue.
Matlock Avenue alongside the old Little Eyton Colliery. The old tramroad followed the line of the road. [My photograph, 15th June 2022]The 6″ OS Map shows the area before anyone conceived of the housing developments of the mid-to-late 20th century which swallowed up Langley Farm. [6]As the tramway ran Southeast it served Langley Brickworks and Langleyfield Colliery. Both sites had private sidings, those for the Pit were more extensive than those at the brickworks. It was followed, on the journey, by the road linking Little Eyton with the White Hart Inn which was known locally as the ‘Jerry Inn’. [6]Looking Southeast along Matlock Avenue. The route of the old tramway ran approximately under the car in the foreground before passing to the left of the lamppost and litter bin Under the tree in the centre-top of the image and heading down a ginnel between two different housing developments ahead. [My photograph, 15th June 2022]Looking South east along the line of the old tramway. The footpath runs between two housing estates and provides access to Telford Town Park. [My photograph, 15th June 2022]The area around Matlock Avenue and the route of the old tramway as it appears on Satellite images from April 2021. [Google Earth]Looking Southwest at the corner of the Brickworks site. [My photograph, 15th June 2022]The Brickworks Site looking Southwest onto the site from the line of the old tramway. The trees ahead have been allowed to grow across the site of Lawley field Colliery and its Slag Heap. The old tramway ran down the line of a modern footpath off to the left of this image. [My photograph, 15th June 2022]Details of the surveyed tram tracks at the Brickworks. The extract comes from the 6″ OS Map above. [6]Two images from the site of Langleyfield Colliery which has been allowed to revert to nature. [My photographs, 15th June 2022]The tramways serving the Langleyfield Colliery site. The extract comes from the 6″ OS Map above. [6]Looking Northwest along the line of the old tramway towards Matlock Avenue. The route continues to be a surfaced footpath running along the western edge of Telford Town Park. [My photograph, 15th June 2022]The same footpath, this time looking to the Southeast. The railings ahead are at Hinkshay Road. [My photograph, 15th June 2022]
The Dawley History website provides the following information about the Langleyfield site:
Langleyfield Collieries Ownership:
Coalbrookdale Company 1803 – 1826 Langley Field Company 1826 – 1856 Beriah Botfield 1856 – 1872 Haybridge Company 1872 – 1885 The site records the pit(s) having been sunk in ca. 1803 and closed ca. 1885. [7]
The website quotes Malcolm Peel, in his book, ‘The Pit Mounds of Dawley’ says that at Langleyfield: “There were at least ten shafts working at various times between 1803 and 1885, and they produced coal and ironstone. This large colliery was originally owned by the Coalbrookdale Company and in 1826 was sold to the Langley Field Company in which George Bishton and Adam Wright were partners. The colliery, ironworks and brick yard established here by Bishton and Wright were bought by Beriah Botfield in 1856, and after the breakup of the Botfield Empire the colliery was owned by the Haybridge Company.[7][8]
In addition the Dawley History site highlights a short article in the Shrewsbury Chronicle on Friday 25th March 1836 advertising an auction of property at the Jerningham Arms Inn, Shiffnal, on Tuesday, 12th April, 1836, “at four o’clock in the afternoon, in one or more lots, or shares, and subject to such conditions as shall be determined on at the time of sale.” [7]
The sale included, freehold, around 30 acres of land and “two dwelling houses, with nine Cottages for workmen, Warehouses, Shops, Stables, Outbuildings, Yards, and Gardens, and several pieces or parcels of Land thereto belonging, situate at Langley Field, in the parish of Dawley Magna, in the county of Salop, … with the Mining works thereon erected, and the valuable Mines of coal, and iron-stone, clay, and other minerals under the same.” [7]
Also for sale were “two blast furnaces, one bridge house, two casting houses, one blast engine sixty horse power with four boilers complete, three cupolas (one at work as a foundry, and has a good casting house and stove, and the fires are blown from the blast engine), one steam engine to wind materials to the top of the furnaces, a blacksmith’s shop, an air furnace for heating boiler plates, and a punching engine, three machines for weighing coals and stone, three field winding engines, several shafts down to the mine, two stoves, one oven, one kiln for making bricks, and a mill for grinding fire clay, and every other possible convenience for carrying on the mines and works in full vigour.” [7]
According to Eddowes’s Journal, and General Advertiser for Shropshire, and the Principality of Wales – Wednesday 21st August 1844, the site was up for sale once again.
Of interest to us, in addition to a glowing and detailed description of the site and items for sale, is the following paragraph:
“The property is intersected with tram roads in every requisite direction, and is admirably arranged for carrying on the works at as little expense as possible, and contains within itself every convenience required for making superior iron, and the whole of the works may be put into full operation in a very short space of time, at a comparatively trifling outlay.” [7]
Elsewhere, the Dawley History site notes that the tramway was in use in the early 19th century. It was “known locally as the Jerry Rails. The now demolished nearby public house, The White Hart, was referred to in the 1861 census as the ‘Tom & Jerry’, called locally the ‘Jerry’. The name was obviously associated with the tramway and other features in the area.” [5]
The junction of Hinkshay Road and the public road from Little Eyton. The now demolished White Hart In dominates the junction which was also a significant tramway junction. The line we have been following enters the extract from the top left and encounters a trailing connection with the lines serving Langleyfield Colliery. Two lines leave our tramway route at the road junction. One of these, runs Northeast towards what is now Telford Town Park. Another runs Southwest for a short distance. A passing loop can be seen on this line just before it exits the map extract. Our line continues in a Southeast direction. [6]Approximately the same area as in the map extract above but this time from April 2021 rather than the 19th centuryThe view across Hinkshay Road from the North. The ginnel ahead is the route of the tramway that we are following. Tramways branched right and left from this location along Hinkshay Road. [My photograph, 15th June 2022]Looking back across Hinkshay Road from the South. The footpath following the line of the old tramway is protected by metal gates. [My photograph, 15th June 2022]Looking along Hinkshay Road from the West across the location of the tramway junction. [My photograph, 15th June 2022]Looking West along Hinkshay Road. One of the tramway branches ran on the North (left) side of the road for a short distance. [My photograph, 15th June 2022]Looking West a little further along Hinkshay Road. The tramway once ran directly in front of these cottages before running off to the left. [My photograph, 15th June 2022]On the 6″ OS Maps the tramway can be seen curving away to the North of Hinkshay Road at this point. It seems to terminate in the vicinity of a church but probably served the collieries which stood on the North side of Hinkshay Road at this point. [My photograph, 15th June 2022]
We have explored the branch tramway which ran to the East on Hinkshay Road, we return no to look at the branch which runs to the West.
Looking to the West, towards Dawley on Hinkshay Road. The branch tramway ran, as far as I can ascertain, on the North (right) side of the road as far as the most distant houses that can be seen in this picture. [Google Streetview, May 2019]The tramway remained on the North side of Hinkshay road until taking a sharp left to run South towards an Ironworks. The route South is just beyond the low wooden rails on the grass area to the left of the road in this view. [Google Streetview, May 2019]Looking back North across Hinkshay Road from the route of the old tramway. [My photograph, 15th June 2022]Another extract from the 6″ OS Map. Hinkshay Road runs across the top left corner of the extract. The old tramway branch terminated at what was, in the 1880s, a disused Ironworks (Jerry Furnaces). It appears that the works were served, probably at two different levels from the North and the East. We will look at the tramway from the East a little later in this article. [6]
Returning to the junction on Hinkshay Road we continue our journey along the route of the tramway from Little Eyton Colliery.
The old tramway route from Hinkshay Road runs along the metalled access to the modern car park at Hinkshay Pools. This view looks along the route from a point just South of Hinkshay Road. [My photograph, 15th June 2022]Close to the modern carpark we reach the point of another tramway junction. [My photograph, 15th June 2022]This extract from the 6″ OS Map surveyed in the early 1880s Shows the tramway crossing. The Ironworks that we have just encountered above (Jerry Furnaces) appear on the left of this image. South of those Works a tramroad runs Southeast past Hinkshay Pools which are given a blue wash on the map. In the bottom right of the extract, the line of the Coalport Branch of the Shropshire Canal is just visible. Our tramway route crossed the Canal on a bridge. The tramway running from the Ironworks on the left of the extract and crossing our route is a tramway which served Stirchley Ironworks. We will come back to this tramway in another article. [6]Looking West towards the location of the Ironworks. [My photograph, 15th June 2022]Looking East along the line of the tramway towards Stirchley Ironworks. [My photograph, 15th June 2022]This satellite image from early 2022 shows the approximate alignment of tramways in the vicinity of Hinkshay Pools as they are known locally (despite Google Maps calling them Stirchley Pools). Worthy of note is the green line which represents the standard-gauge Coalport Branch of what was the LNWR. The wharves alongside that railway were the terminus of the tramway that we have been following. Wharves were provided at a level above the Coalport Branch to allow easy loading of materials. The blue line shows the alignment of the Coalport Branch of the Shropshire Canal. The canal, at this location, can still be picked out as an elongated pool running close to the Hinkshay Pools. Also of interest is the name given to the estate road in the top left of this image. As we have already noted, the tramways in this vicinity were know as ‘Jerry rails’. [Google Maps]
We continue heading Southeast from the tramway ‘crossroad’ in the 6″ extract following the line between the Hinkshay Pools.
The access road swings to the right to enter the car park. The tramway ran ahead probably just to the left of the road as it disappears around the vegetation. [My photograph, 15th June 2022]Looking North from the Southern edge of the car park at Hinkshay Pools. The approximate line of the tramway is marked by the red line on the right side of the image. [My photograph, 15th June 2022]In this image we are facing Southeast at the same location as the image immediately above. The tramway followed the unsurfaced path round to the left. One of the Hinkshay pools is visible on the right of the image. [My photograph, 15th June 2022]The display board at Hinkshay Pools. [My photograph, 15th June 2022]The reference on the top right of the display board to the Coalport Branch of the Shropshire Canal is important as the canal ran along the East side of the Pools. [My photograph, 15th June 2022]One of the Hinkshay Pools. [My photograph, 15th June 2022]A remnant of the Coalport Branch of the Shropshire Canal. [My photograph, 15th June 2022]The tramway was carried over the line of the canal on an arched culvert which at least permitted ongoing drainage. Originally wharves would have existed along the side of the canal but once the railway was built the canal and its wharves would no longer have been required. [My photograph, 15th June 2022]This is the location of the Hinkshay Pools as drawn on a map of tramways taken from research undertaken by R.F. Savage & L.D.W. Smith and kindly made available by the Ironbridge Gorge Museum Trust Archive Office. It suggests that there was an additional tramway branch which ran out between two of the Pools. [9: p164] Savage and Smith say that the Lawleyfield Colliery had a wharf at this location in the early 1800s and that the lower pool was originally a canal wharf. [9: p166]Looking South-southwest along the line of the Canal. [My photograph, 15th June 2022]The remnant of the Canal on the North-northeast side of the tramway/footpath. [My photograph, 15th June 2022]
Immediately to the West of the Canal the tramway we have been following divided in two to access a wharf/wharves alongside the Coalport Branch of the LNWR.
A siding, accessible from both ends, was provided along side the Coalport Branch as can be seen in this extract from the 6″ OS Maps of 18888 (surveyed in 1881/82). The rail-side tramway track would have been at a height above the railway siding which allowed easy offloading of the waggons, probably by hand. [6]Looking back to the West from the line of the Coalport branch along the tramway alignment. [My photograph, 15th June 2022]
In Part 2 of this review of tramways in the Malinslee area, after wandering South down the Coalport Branch to the site of Stirchley and Dawley Railway Station we will return along the ‘Jerry Rails’ past the Hinkshay Pools on their Southern side, past the Hinkshay Ironworks and then on round to the Stirchley Ironworks site and then follow where they lead.
Malcolm Peel; The Pit Mounds of Dawley; Dawley Heritage.
R.F. Savage & L.D.W. Smith; The Waggon-ways and Plateways of East Shropshire; Birmingham School of Architecture, 1965. Original document is held by the Archive Office of the Ironbridge Gorge Museum Trust.
Moving the layout of Hereford from Ashton-under-Lyne to Telford required some careful planning. I was particularly concerned about the safe transport of locomotive and rolling-stock. I decided that I would move the layout and stock myself rather than ask the removal company to transport them. This proved to be a wise decision and I managed to get my employers to cover the cost of a few journeys between Ashton-under-Lyne and Telford as this was cheaper than using a removal company.
Some research resulted in the purchase of one stock box from Ten Commandments. [1]
Ten Commandments’ stock storage boxes for N Gauge are based on two boxes from the ‘Really Useful Box Company‘ [2] – a 4-litre box (£22.00) and a 9-litre box (£37.00).
I purchased the smaller of the two. It came with two foam inserts with pre-cut storage slots. The top layer had 9 crossways slots, each 195mm long. The lower layer had 5 length-wise slots each 310mm long. The slots were 25mm wide and 25mm deep. Each foam tray also had a cover layer/lid of foam.
I have a large amount of stock and would have needed to buy a significant number of the stock boxes. At £22.00 or £37.00 per box. I was going to be spending a lot of money.
The 9-litre Really Useful Boxes cost around £6.00 each (depending on where they were bought this varied from £4.50 to £10.00, with a manufacturer’s retail price of £7.55 plus postage. With a significant amount of stock it made sense to buy in bulk – 9 No. 9-litre boxes cost a total of £45 at Rymans (£5 each) and I found a few for a little less than this in sales at various retailers.
I researched available plastic packing-foam and realised that I could purchase reasonably large sheets on-line. I ordered two different thicknesses of foam in nominal 25mm and 10 mm sizes. The actual thickness of each sheet was marginally below the nominal sizes.
I tried using a variety of different glues before decided that strong double-sided tape would be the best for the job. This was purchased on-line at reasonable prices.
Each tray was made up of a bottom sheet of 10mm foam with cut pieces of 25mm foam stuck to it. The construction of the trays is illustrated by a series of pictures below. Please bear in mind that perfection was not required, just trays that would protect stock in the move to Telford.
The trays varied in thickness depending on what stock I intended to place in them. …
Base layer of nominal 10mm foam.The base layer of foam with two end-pieces 25mm deep.Double-sided tape in place at one end of the base sheet of foam.Two end-pieces of foam stuck in place and double-sided tape almost ready to accept the side-pieces of foam.The process continues.A finished tray – definitely not perfect but perfectly serviceable!A couple of examples of my finished trays followed by the two foam trays which came with the original purchase from Ten Commandments.Stock being placed in storage boxes in the loft layout-room
As this process seemed to have gone well. Rather than buying a lot more ‘Really Useful Boxes’ I decided to try an alternative system for a significant amount of my stock. This system made use of the 25mm thick foam as well as the 10 mm foam.
At the time, I purchased a set of storage drawers as shown below for, I think £12.00. The prices as I write in June 2022 is now £18.00. I imagined that these drawers wolw hold a significant amount of stock and that I would also be able to accommodate some larger items which I had on display in the Vicarage.
The process followed was the same with the exception of a need to provide some reinforcement for the trays as they were larger and the foam was not fully rigid. Trays were shaped to fit the drawers as can be seen below. …
The first layer of foam in one of the plastic drawers.The first tray in this drawer was used for road vehicles.
I had some very large items – O-Gauge models made by my father-in-law and some buidlings from the layout which needed larger boxes. The method used was the same but the thicker foam was more suitable for these boxes. …
Midland/LMS Steam Railmotor in O-Gauge together with a brake van and a mineral wagon.One of Hereford’s large goods sheds being packed away carefullyHereford Station Building also being stored away carefully. Both these models were made for me by my father-in-law from card. Superb!
I mentioned in my last post that the staging in my layout room had been built and my library was close to being sorted out.
Just a few more pictures. These show the layout room with the completed staging and one layout board being worked on…..
The staging uses IKEA “Ivar” to create bookcases on which the layout sits/will sit. The uprights are 1.2 metres high which means that there is good shelving space beneath, and room for a desk and computer.
It has been a while since I posted about my layout.
We have now moved to Telford and the powers that be have generously allocated a relatively large bedroom for the layout. Some compromises are inevitable as the space is smaller than the loft in the Vicarage in Ashton-under-Lyne.
Staging has been built and my library is close to being sorted out. I will need one new fiddle yard, the electrics will need connecting board to board for the layout and some damage will need to be rectified.
Completing the staging is a good step forward!
Just a few pictures …..
The wiring above is new connections from the board I am supposed to be working on which will connect sections which originally relied only on the track connection across the board joints!
This is a first look at the Ketley area just a few miles from where we live in Malinslee.
This was a short walk which encompassed a variety of industrial remains. The route taken is shown by the red line on the image below which comes from the Ketley Paddock Mound website. ……
Ketley Paddock Mound. [26]
I parked close to the church of St. Mary the Virgin in Red Lake and walked North up Shepherd’s Lane, turning left into Hill Top. Hill Top becomes Red Lees. The route of Red Lees was crossed by a high-level tramway which probably linked a colliery to what is now called Ketley Paddock Mound and was a colliery slag heap. the extract from the 1882 25″ OS Map below shows the location.
Tramway Bridge abutments or piers shown on the 1882 25″ OS Map. [1]
It seems to me to be unlikely that the tramway which used this bridge was directly associated with a larger network of tramways in the area. The map extract shows other short sections of tramway immediately at the colliery location and is seems highly likely that there was a need to cross Red Lees at high-level to reach the large slag heap to the North of the lane.
The view Northwest on Red Lees on 2nd June 2022. The shaping of the stonework to the right of this image suggests that it was a pier and that the bridge was therefore a two span structure. [My Photograph]The view Southeast along Red Lees on 2nd June 2022. [My photograph]
Recently, reading ‘A Ketley Mon’ by Terry Low, I came across an older photograph at this location. It was taken in 1906 and shows the pier probably at its fullest height. It seems as though it was originally built in masonry and, at a later date, extended upwards in brick. Whilst it is impossible to be sure what this means, it suggests that there was a need at some stage to lift the line of the tramway. An obvious explanation for this would be the growth of the slag heap which is to the right of the picture below.
Red Lees in 1906, looking Northwest. The old colliery was to the left of this image, the slag heap to the right. In all probability a timber deack was used to carry the tramway rails. Each span would have been made up of a horizontal deck supported at third points by raking timber props. [Photographer not known – Alan Harper collection][2: p27] The image also appears on the Historic Ketley website. [5]
Walking Northwest from the location of the tramway bridge, it was apparent that this section of Red Lees followed a straight course. Possible explanations for this include:
the development of the colliery and the slag heap required an established right of way to be redrawn to accommodate the work. I cannot find maps early enough to look at what predated the industry at this location; or
Red Lees itself, may have been part of the route of a tramway.
It would be interesting to be able to test these ‘theories’, if earlier detailed maps were available.
Red Lees to the Northwest of the tramway bridge remains looking to the Northwest on 2nd June 2022. [My photograph]
We know from early maps that the Ketley Canal once crossed Red Lees to the East of Ketley Hall.
A extract from a hand drawn map which was posted on The Ketley History Group on Facebook. The Ketley Canal is shown in blue on the sketch map and crosses Red Lees immediately adjacent to Ketley Hall which appears far-left on this extract.[3]This image appeaars on the website of the Friends of Ketley Paddock Mound. It also shows the canal route passing under Red Lees just East of Ketley Hall. [4]In this image taken from the National Library of Scotland’s website the 25″ OS Map, published in 1902, is placed immediately alongside precisely the same area on modern satellite imagery. The canal arm is central to the image. The wider area at the western end of the remaining canal (in 1902) was a wharf. [6]This image shows the two images above superimposed on each other. The old wharf can be seen to be under the site of modern housing on the North side of Red Lees. The Hall was to the South. According to the earlier images, the canal continued down the East side of the Hall. It then probably ran West on the South side of the Hall. [7]This picture shows a map of Ketley Paddock Mound which is on display on the South side of the nature reserve. The blue dotted line, superimposed on the image, shows the approximate line of the canal as it passes under Red Lees. The present length of the canal arm is shown in light blue on the original sign board. The Friends of Ketley Paddock Mound’s website can be found here. [My photograph, 2nd June 2022]A view from Red Lees footpath looking Northwest to where it widens out to become a road. There is a slight rise in the road surface just in front of where the pedestrian is walking. This is the most likely location for what would have been an arched bridge, now buried and inaccessible. [My photograph, 2nd June 2022]
I followed Red Lees down to the junction with the B5061, before walking back along Red Lees following what probably was a tramway route which then drifted away from Red Lees to the Northeast as shown on tthe sketch map at the head of this article. The Ketley History website says the following: “Behind the Victorian school building that is now Ketley Community Centre, there is a footpath that leads down to Red Lees and this is also the line of a tramway, probably to serve the coal wharf that was situated on Ketley Canal where School Lane meets Red Lees now.” [5]
The view Northwest towards the junction with the B5061. [My photograph]The view from Red Lees along the line of the probable tramway. [My photograph]The view Northeast along the line of the tramway. [My photograph]Further along the tramway route with what was Ketley primary school in sight. [My photograph]Looking along the route of the tramway to what was the Canal Wharf area. The old school buildings are on the left. [My photograph]
I turned to the left and walked along School Lane to the B5061, which, incidentally was the A5 and so was Thomas Telford’s trunk road to North Wales, and so it carries the name ‘Holyhead Road’.
The Ketley Canal
TheKetley Canal was about 1.5 miles (2.4km) long. It linked the Shropshire Canal, in the small town of Oakengates, with Ketley Iron Works. It was built in the late 18th century (around 1788) and required the construction of an inclined plane to lower and raise tub-boats a little over 70ft between the level of the Works and the higher ground that it travelled over from Oakengates. [8]
The inclined plane was the first effective inclined plane in the UK. [9]
The canal predominantly carried coal and ironstone in horse-drawn tub-boats. These tub-boats where in use across Shropshire and beyond. They “were rectangular in plan, 19 feet 9 inches long x 6 feet 2 inches wide made of wrought-iron plates rivetted together. An inclined plane consisted of two rails laid parallel to each other, on each of which ran a cradle raised or lowered by a wire rope and capable of carrying one tub boat at a time. The descending cradle assisted in balancing the weight of the ascending one and the extra power required was supplied by a stationary winding engine. A boat descending an inclined plane entered a chamber where it was manoeuvred over a submerged cradle. Once in place, the boat was secured to the cradle in readiness for its journey down the plane. The cradle was then hauled up over a sill and onto the plane, at which point it was still inside the chamber. When everything was ready it commenced its descent, which required just a few minutes, and a small number of workmen were able to complete the whole operation.” [12]
The inclined plane lasted in service until 1816, closing with Ketley Iron Works. The length of canal between Ketley and Oakengates remained open for more than 60 more years until the 1880s.
“One tub-boat is preserved in the Blists Hill Victorian Town museum. It was rescued from a farm in 1972, where it was in use as a water tank. Before its discovery, it was thought that all tub boats on the Shropshire Canal were made of wood.” [13]
This tub-boat is on display at Blists Hill Museum near Ironbridge in Shropshire.
The canal ran on the north side of Holyhead Road. A few hundred yards to the West of Shepherd’s Lane the canal passed under the Holyhead Road. It “clung to the southern side of the main road for a few hundred yards … but then it moved away from the road, heading westward at the backs of what are now gardens on Holyhead Road until it reached Shepherd’s Lane.” [9]
The Eastern portal of Shepherd’s Lane Tunnel is still visible in a private garden. [4]
The canal entered a short tunnel under Shepherd’s Lane and emerged into Ketley Paddock Mound (as it is now called). The length of canal which is preserved in the nature reserve can be reached from a number of directions.
The route I took was to walk East along Holyhead Road to the bus stop adjacent to one entrance to Ketley Paddock Mound. The bus stop is a delight! It was painted in 2018 by Fran O’Boyle and funded by the Ketley Parish Council and the Friends of Ketley Paddock Mound. [10][11]
The bus stop which is owned by Ketley Parish Council is outside Ketley Paddock Mound was decorated in 2018. It was created by Fran O’Boyle and funded by the Parish and the Friends of Ketley Paddock Mound. [10][11]
And I then entered the nature reserve through the gate visible in the photograph above. Immediately inside the gate is another public information board. The image below is an extract from my photograph of the board. …
Entering the nature reserve from adjacent to the Bus Stop on Holyhead Road, the path climbs through open meadow and paddock. It curves round a small pond before the remaining section of the Ketley Canal is reached. [15]
This next sequence of photos shows the walk up to the remaining section of the Ketley Canal as highlighted on the map extract immediately above.
The path from Holyhead Raod. [My photograph]Buttercups in flower in the paddock to the East of the footpath. [My photograph]The footpath winds gently up hill to the old canal. [My photograph]The Ketley Canal. This remaining section of the tub-boat canal is now given over to nature. Just before taking this picture I watched a Kingfisher fly along the length of the water. Behind the camera is the cutting which led to the tunnel under Shepherd’s Lane. [My photograph, 2nd June 2022]
The walk back to my car took me over the top of the Paddock Mound which was the slag-heap made up of arisings from local pits and mines.
The featured image above shows Fintona Railway Station from Main Street, Fintona in June 1957, (c) Wilson Adams. The image is used here under the Creative Commons Attribution-Share Alike 2.0 Generic license (CC BY-SA 2.0). [7]
The Londonderry and Enniskillen Railway [2] opened the railway station in Fintona on 5th June 1853. A short time after the Londonderry to Enniskillen Railway completed its mainline to Enniskillen (in 1854 [2]). mainline services were withdrawn from Fintona (in 1856 [1]), and the link to Fintona became a branch from the mainline at Fintona Junction railway station. [3] Most passenger services on this branch line were then provided by a horse-drawn tram car. [1] Since the line’s closure, the tram has been preserved at the Ulster Folk and Transport Museum at Cultra, County Down. [2]
Wikipedia notes that the branch line to Fintona was taken over by the Great Northern Railway (Ireland) in 1883 when it took control of the Londonderry and Enniskillen Railway. [1]
The branch-line and the station at Fintona were closed on 1 October 1957. [1] The whole area comprising the Fintona Train station is now a car park and public toilet. [4]
As we have noted, “Passenger services on the half mile Fintona branch were worked by horse traction throughout the 104 years of its existence up to closure in 1957.” [4]
Timetables were worked out on what a horse could reasonably be expected to achieve. This meant that rail authorities “allowed 10 minutes for the slightly downhill trip to Fintona, and 15 minutes for the return working. Seven trips per day were scheduled in summer 1951.” [5]
The tramcar which was used for the majority of the life of the service, “entered service in 1883, had longitudinal seating, back to back on the upper deck and with seats facing each other on the lower deck. Originally the latter was divided into 1st and 2nd class, and the top deck was 3rd class. The car is estimated to have covered 125,000 miles in its ambulation’s on the branch.” [5]
“Goods wagons for Fintona were worked by a steam engine which, in later years at least, made a return trip in the morning before passenger services started.” [5]
The Line between Fintona and Fintona Junction
The first image below shows the route of the line on an extract from the GSGS maps of 1941-1943 produced by the British War Office at a scale of 1″ to 1 mile. [6] The second picture is a matching 21st century satellite image which shows how little of both the mainline and the branch remain in the 21st century.
The Fintona Branch: a map extract from the British War Office (G.S.G.S 4136) 1″ to the mile survey published 1941-1943. [6]The location of the Fintona Branch on modern satellite imagery. [6]A similar area on the Satellite imagery with the route of the mainline (The Londonderry and Enniskillen Railway) and the alignment of the Fintona Branch illustrated by redlines. [6])
Fintona Junction
The next image below shows the approach road to what was Fintona Junction Railway Station from the B46. Immediately to the right of this road was a level-crossing which took the mainline across the B46. The Londonderry and Enniskillen Railway ran under the location of the bungalow on the right, parallel to the station approach road.
The access road shown above now only provides access to a farm. At one time it was the public access to the junction station.
Fintona Junction Station site. The line of the railway to Enniskillin can be seen crossing the B46, Dromore Road in the bottom left of this satellite image. The line to Fintona is indicative rather then accurate. [Google Maps]Fintona Junction: GNR 4-4-0 goods engine No.73 of Class ‘P’ stands in the bay, having shunted its train to await the passing of the two passenger trains of the evening of August Bank Holiday Saturday, 1954. [12]A Still image from a 1950s cinefilm which shows the signal box, station sign and porters trolleys at Fintona Junction, (c) The Huntley Archives, Film No.96367. [13]
The line
AS we have already noted, the journey from Fintona Junction to Fintona Railway Station was timetabled as just a 10 minute journey. The tram was usually waiting for connections at Fintona Junction as in the first picture below.
The view from the mainline of Fintona Junction Station. The tram is waiting to offer a connection for the train arriving from Londonderry, (c) J.W. Armstrong/ARPT – this link is to the image as held on Ernie’s Railway Archive on Flickr. [8]The tram for Fintona with horse”Dick” (apparently all the horses used on the service were called ‘Dick’) waiting with the branch connection at Fintona Junction, while PPs class 4-4-0 No.44 arrives with 1.45pm Omagh – Enniskillen local train (c) L.King,5th July 1955. [4]Fintona Junction Railway Station in April 1964 (c) Roger Joanes. The image is included here under a creative Commons Licence, Attribution-NonCommercial-NoDerivs 2.0 Generic (CC BY-NC-ND 2.0). [9]
In the picture above the line can be seen to be in a shallow cutting soon after leaving the railway station. As can be seen below, this was a very shallow and short cutting.
Lookin ahead down the line from Fintona Junction in the 1950s, (c) The Huntley Film Archive Film No. 96367. [13]The tram transporting military personnel leaves Fintona Junction and runs along the section of track being inspected in the image above, (c) Mr Gallagher c1941-45. [4]Now just beyond the cutting mentioned above. The line continues to curve towards Fintona, (c) The Huntley Film Archive Film No. 96367. [13]Leaning out of the tram window, we can see the line continuing to curve westwards, just ahead, shrubs are beginning to encroach on the line, (c) The Huntley Film Archive Film No. 96367. [13]This satellite image shows the current landscape around the next section of the old railway linejust south of the junction station. [Google Maps]A hazy view from the top deck of the tram looking back along the line towards Fintona junction, (c) The Huntley Film Archive Film No. 96367. [13]Postcard View circa 1930 which shows the tram rounding the curve after leaving Fintona Junction Station on the way to Fintona. It is in the midst of the shrubs mentioned above, (c) Public Domain. [1]A little further ahead along the line is again in a shallow cutting, (c) The Huntley Film Archive Film No. 96367. [13]The next length of the line sees the old railway leave the curve and straighten up heading for Fintona in a southeasterly direction. [Google Maps]Over this next length of the old railway it is much more difficult to determine the precise alignment of the line. The redline cannot be taken as accurate in anyway. The vast majority of the buildings shown to the southwest of the line all postdate the removal of the old railway. [Google Maps]The north end of Sherwood Close. The old railway probably ran approximately on the line of the green fence between the two properties shown here. [Google Streetview]A view from the north on Ashfield Gardens. The farm access track referred to on the image appears in the bottom right of the satellite image above. It can also be seen at the top left of the satellite image below. [Google Streetview]This final satellite image shows the approximate line of the railway as it enters the station throat and runs through to the terminus buffer stops. The station used to front onto Main Street. The area is now the premises of Lisdergan Butchery (https://lisderganbutchery.com), Eurospar and the town car park. The building which fronts onto Main Street being Fintona’s public toilets. [Google Maps]A short distance further along the line, the land has dropped away once again and the station at Fintona is in sight, (c) The Huntley Film Archive Film No. 96367. [13]
The view Southeast towards Fintona Station from along the line. The permanent way between the two rails is filled with earth up to sleeper level or just above to create a suitable surface for the horse. Notice how, at the point ahead, hoof marks show that the horse has avoided crossing the switch rail until the last possible moment, (c) Ernie’s Railway Archive – this link is to the image as held on Ernie’s Railway Archive on Flickr. [8]Arriving at Fintona. The tram is a few yards closer to the station than it was in the image above, (c) David Bradley, September 1957. [4]Closer again to the station platform now. Do not be deceived by the platform visible close to the camera, this was a goods loading point which is described on the plan below as ‘The Beach’, (c) The Huntley Film Archive Film No. 96367. [13]We are now close-in to the covered station platform at Fintona. This a picture of the Railway Station in April 1964 a good few years after the closure of the line, (c) Roger Joanes. The image is included here under a creative Commons Licence, Attribution-NonCommercial-NoDerivs 2.0 Generic (CC BY-NC-ND 2.0). [9]A similar image to the Roger Joanes’ photograph above, this time in colour. As the vegetation encroachment is greater on this image it is probably a summer-time image. [Public Domain] [11] A plan of Fintona Railway Station as shown on the Irish Railway Modellers Forum. It is taken from from Norman Johnston’s book on the Tram, “The Fintona Horse Tram.” [10]Fintona Railway Station as shown at the head of this article, (c) Wlison Adams. The image is included here under The image is included here under a creative Commons Licence (CC BY-SA 2.0). [14]This is approximately the same view but taken in 2007. (c) Kenneth Allen. The image is included here under The image is included here under a creative Commons Licence (CC BY-SA 2.0). [15]Approximately the same location but this time in June 2021. The toilet block has been replaced with something which looks a little more as though it belongs in the heart of Fintona. [Google Streetview]
The Return Journey to Fintona Junction
Just a few photographs now which show the return journey to Fintona Junction.
The line’s horse stands in Fintona station ready to depat with a baggage truck and the tramcar in 1926. This consist does not appear in any other images but it is how the tram is displayed in the Museum at Cultra, (c )the Tramway and Light Railway Society. The image was seen on the Tramway Badges and Buttons website. [16]“Dick” leaving Fintona with the 4.14pm to Fintona Junction, (c) N.W.Sprinks taken on 25th June 1952. [4]
The journey back from Fintona to Fintona Junction on 26th June 1952 (c) Ernie’s Railway Archive. This link is to the image as held on Ernie’s Railway Archive on Flickr. [8]
And finally. …
After closure of the line, Fintona’s tram was preserved and now sits in Ulster Transport Museum, Cultra.
Fintona’s tram on display in Ulster Transport Museum, Cultra. [11]
The featured image above is a 1946 photo of War Department steam locomotive No. 2807 (later Sudan Railways No. 243) at Abu Hamed Railway Station. [44]
Wikipedia tells us that “Sudan has 4,725 kilometres of narrow-gauge, single-track railways. The main line runs from Wadi Halfa on the Egyptian border to Khartoum and southwest to El-Obeid via Sannar and Kosti, Sudan, with extensions to Nyala in Southern Darfur and Wau in Western Bahr al Ghazal, South Sudan. Other lines connect Atbarah and Sannar with Port Sudan, and Sannar with Ad Damazin. A 1,400-kilometre line serves the al Gezira cotton-growing region. There are plans to rehabilitate rail transport to reverse decades of neglect and declining efficiency. Service on some lines may be interrupted during the rainy season.” [7]
It seems as though much of the network still exists although it is in need of major maintenance work. In July 2021, Global Construction Review informed us that Sudan was planning a $640m scheme to bring its rail network back into use. [8]
The African Development Bank (ADB) offered a $75m grant towards the cost, and China State Construction Engineering and several Gulf firms were interested in becoming involved with the project. The first action will be to undertake around $17m of emergency repairs to lines that are in use. This would then be followed by renewing abandoned lines, most of which are in the south of the country. The intention would be to reconnect the cities of Madani, Kosti and Sennar, as well as Nyala in Darfur. It will also establish a cross-border connection to Wau in the Republic of South Sudan. [8]
Sudan’s railway network. [7]
However, Sudan already had a fleet of modern train-sets. A service was started which linked Port Sudan to Khartoum in 2014 using sleek new modern units. The Nile Train runs between Port Sudan, Atbara and the capital, Khartoum. China lent Sudan nearly $1.1 billion toward the $1.5 billion project. [9] These new trains run on the old 3ft 6in (1067mm) gauge rails which have been improved where required.
In 2014 Sudan inaugurated a new train service from Port Sudan via Atbara to Khartoum. These trains also now run on a number of other lines throughout the country. The train to Nyala, in what was war-torn Darfur, goes every two weeks, while another makes a weekly trip north of Atbara to Wadi Halfa near the Egyptian border. [9][11]
A new standard gauge railway between Addis Ababa, Ethiopia and Khartoum is planned said the International Rail Journal (IRJ). In 2020, the African Development Bank (ADB) awarded a $US 1.2m grant to the government of Ethiopia, covering 34% of the study’s $US 3.4m cost. The NEPAD Infrastructure Project Preparation Facility (Nepad-IPPF) will provide $US 2m with the governments of Ethiopia and Sudan each set provide $US 100,000 to cover the remaining cost. [10]
The agreed route between the two capitals includes a branch to Port Sudan on the Red Sea. The study will assess the project’s technical, economic, environmental and social viability as well as possible alternative financing arrangements, including the use of public-private partnerships (PPP). [10]
The first railway in Sudan
There was a number of false dawns in the bringing of steam power (both river and rail) to Sudan. [12: p1-1] The appointment of Sir John Fowler as engineering consultant to Khedive Isma’il was probably highly significant. It was Fowler who, in a report about surmounting the First Cataract on the Nile in 1873, first recommended the 3ft 6in gauge (1067mm) for railways in Sudan. [12: p11] Fowler was appointed consulting engineer for the railway. His work began in Egypt, addressing the surmounting of the First Cataract by constructing an incline to carry ships past the obstruction. As part of the construction work he built a section of railway which he expected would become part of a much longer system. That section of railway was built “in 1874 from the foreshore at Aswan to el-Shellal, a distance of 14.5 kilometres. … Work on the building of a railway depot and track began at ‘Anqash, a site slightly north of the old village of Wadi Halfa, in 1870.” [12: p12] More about this section of line later. …
The Sudan Railway was inaugurated on 15th February 1875 in the midst of a dust storm at Wadi Halfa, just south of the present border between Egypt and Sudan. [12: p12] By 10th April 1875, 8 kilometres of embankment had been built and railway headquarters buildings were completed. Administrative and financial difficulties meant that the railhead reached Saras, only 54 kilometres from Wadi Halfa, with the preliminary works of embankments and cuttings a further 47 kilometres ahead before General Gordon was appointed Govenor General of Sudan. [12: p12-13]
The first railway headquarters at Wadi Halfa [12: Plate 3]
Gordon disliked the railway because the cost burden primarily fell on Sudan. He suggested alternatives which were considerably cheaper. [12: p14]
Ultimately, this short section of railway was a commercial failure. “With its southern terminus at Saras hemmed in by the cataracts of Hannik and Kajbar it scarcely skimmed the Nile Valley traffic between Egypt and the Dongola and Kordofan Provinces. The ‘Ababda contractors continued to carry the bulk of the Sudan Nile Valley traffic over the Korosko-Berber desert road until the fall of Berber in 1884 to the Mahdist forces.” [12: p16] Heavy troop movements in connection with the Mahdist revolt produced only paper credits and, by 1883, Mahdist raids ultimately meant that any movement outside the defended perimeter of Halfa Camp ceased and revenue dropped to nothing. [12: p17]
The Railway Depot at Wadi Halfa in 1887. [12: Plate 4]
The next development was the construction of a military railway which consisted of “the original Wadi Halfa-Saras line of 1875 with two extensions: the first from Saras to ‘AKasha in 1884-85, and the second from ‘Akasha to Kerma in 1896-97.” [12: p18] This work extended the length of the line to 327 kilometres. Given that it was the only transport link available, the authorities ran a public service until 1905 when the line was abandoned. Writing in 1965, Hill said that the only traces remaining of the railway were “some of the sand embankments, some cuttings through the granite rock, a few stone bridge abutments and some lengths of twisted rail.” [12: p18]
During this time, much thought was given to possible future arrangements, and particularly to the gauge of the line. There was a debate about the various benefits of metre-gauge against the 3ft 6 in gauge. Kitchener favoured the 3ft 6in gauge. His biographers suggest that this was because he wanted to support the Cape-to-Cairo project. More prosaically, his position on gauge related to the availability of rolling stock at ‘Akasha. [12: p20-21]
The second of the two extensions above was well-planned and construction saw the railhead extending at a rate of over a kilometre a day! [12: p22]
Returning to that 14.5 kilometres of line which John Fowler built close to the First Cateract. Although Fowler advocated a 3ft 6 in line for the route along the Nile, Hill says that he built that short section to standard-gauge. [12: p23] In 1881, it was converted to dual gauge ” by the simple expedient of laying a third rail to enable engines borrowed from the 3ft 6ins gauge railway at Wadi Halfa to draw standard gauge wagons.” [12: p23]
The short section of dual gauge track was replaced by 3ft. 6in track when the Upper Egyptian Railway reached Aswan in 1895. But was relaid again in 1926 when the Upper Egyptian Railway was converted to standard-gauge as far as Aswan. [12: p23]
Kitchener eventually decided a route for his military railway which ran directly across the desert from Wadi Halfa to Abu Hamad – at this time the route along the Nile was abandoned. [12: p24] The ‘direct’ line was laid under miltary protection and “at the utmost possible speed and with the utmost economy of means.” [12: p24] The summit of the line was reached in July (166 kilometres from Wadi Halfa) and by November the line was back by the Nile at Abu Hamad. The next stretch to the mouth of the Atbara river was completed by July 1898. [12: p25]
In October 1898, after the battle of Omdurman, the railway crossed the river Atbara, initially by means of a temporary bridge which was replaced within a matter of months by a permanent structure. The railhead reached Shendi in June 1899 and arrived at the Blue Nile opposite Khartoum at the end of 1899. This was the location of the terminus and has become known as Khartoum North Station.
As an aside, Hill also relates the tale of the Suakin-Berber Railway (running East-West from the Red Sea) which had been considered for many years but only saw a serious attempt at its construction when the Mahdist revolution occurred. In June 1884 the British Government took some preliminary steps to facilitate the construction of the railway. Some minor work was undertaken and worked commenced and then ceased on an 18in. gauge line. In 1885, the British War Office decided to pursue the construction of the line. Initially a metre-gauge line was considered. This was adapted in favour of a standard-gauge line. [12: p34-38]
The contractors worked on supplying the planned works and a large amount of materials were on site at Suakin on the Red Sea coast by the end of the first quarter of 1885. By 20th March the line had crossed the causeway from the depot to the mainland and was nearing the outer fortifications. Despite regulars Mahdist raids, by mid-April the railhead was progressing at around a mile a day and 8 miles of mainline had been constructed. Logistics became a serious problem as the railhead move forward. Raids became more frequent and it became increasingly difficult to defend the line. In the end, it was pressures elsewhere in the world which meant that the British Government needed the troops for other campaigns and on 22nd April 1885 it decided to halt all work on the line. It was not until 2nd May 1885, when the railway had reached Otao, that work finally ceased. General Graham inspected the work and commented that it was roughly laid and the first shower would destroy large sections of it. The coming of the rains proved him right. [12: p41-44] The whole endeavour was ill-conceived and badly managed.
The Suakin-Berber Railway: The first train to reach Handoub Station on the ill-fated line to Otao. (Sketch by Walter Paget) [12: Plate 22]
Khartoum North
The line to Khartoum North took a number of years to turn a profit (1913 was the first year in which receipts exceeded expenditure). In 1906 railway headquarters and workshops were transferred from Wadi Halfa to Atbara. The growing Sudanese economy revealed that existing rolling stock and track was unequal to demand. As the railway network was expanding, opportunities were taken to lay heavier duty rails (75lb rail began to be used) and parts of the original line to Kahtoum had 50ib rail replaced with 75lb rail.
A postcard view of Khartoum North Railway Station from the North. [15]
Another view from the North of Khartoum North Station. [18]A view of the inside of the train shed at Khartoum North Station, the terminus of the line, in 1904. [12: Plate 26] The modern railway station serving Khartoum North is no longer on the site of the first terminus.
Early in the life of the line, the journey from Wadi Halfa to Khartoum took 55 hours. This was improved to 34 hours. By 1912, two express luxury trains were running twice-weekly between the two terminals. [12: p50-53]
On the whole, the railway map between Wadi Hailfa and Khartoum has changed little over the years. A section of track which was troubled by drifting sand was re-laid closer to the Nile in 1902 (close to the Fifth Cateract). [12: p57] And, as we have noted above, Khartoum North Railway Station is long-gone. A replacement station has been provided on the line running South to the Blue Nile Bridge (Bahri Railway Station).
The Red Sea Railway and the founding of Port Sudan
The economic development of the Sudan was hindered at every turn by the tortuous routing of its imports and exports. Goods consigned by rail from an Egyptian port to Khartoum required no less than four transshipments on the way: at the port of entry, at Luxor and el-Shellal and again at Wadi Halfa. ” [12: p67]
Initially the British Government thought that Suakin was the solution to these and other problems and started to work on the basis of a line which led from there into the interior. Just 50 km down the coast, there was a far superior location for a harbour. In time this was realised to be the better option. The preliminary construction work and depot at Suakin was to have a significant and valuable role in the construction of a new line, but that line was first planned to run along the coast to Mersa Shaykh which was to be come Port Sudan and from there inland through Sinkat to join the Sudan Military Railway at Atbara. That route was not used either. Surveyor eventually recommended a route which ran through the Kamob Sanha Gorge and Tehamiyam to Atbara. It had the easiest gradients of the options considered did not require tunneling and only had one particular section which was difficult for construction (a cutting through 1,000 metres of granite at Kamob Sanha). Added benefits were the ease of making a connection to Kassala and a juction on the Nile Valley line closer to Khartoum. [12: p70]
Railways at Suakin [12: p35]
The first train from Khartoum steamed into Suakin on 16th October 1905 to a new terminus at Graham’s Point. By the end of the year a connection had been completed to the site of what was to be Port Sudan. [12: p71]
A view of the railhead camp on the Red Sea Railway in 1905. [12: Plate 39]
Back to Khartoum …
First an early plan from 1905, showing the 3ft 6in gauge line and its terminus on the North bank of the Blue Nile. …
Khartoum in 1905 [14]
Next a plan showing Khartoum in 1910. …
In 1910, the railway line from the North is being extended round the South of the city to a new station. A line is being built to the Southeast of that new station and a line is projected beyond the new Station to the West, heading Northwest. [41]
Next, a plan from 1914 showing the enlarged network of 3ft 6in gauge railways in the city. At this time Khartoum North Station is still in use. …
A map of Khartoum and Omdurman dated 1914, very kindly provided by Iain Logie. The line providing access to the Central Station left the old military line North of the city and crossed the Blue Nile on the Blue Nile Bridge which can be seen in pictures below. The line to the West of Central Station has been extended towards the Blue Nile and that to the Southeast has been extended beyond the confines of the city and tracks the Blue Nile to the Southeast. [42]An enlarged extract showing the 3’6″ railways of Khartoum North. The terminus station is immediately above the ‘E’ of ‘BLUE’. the line leaving the top of this extract through the ‘K’ of Khartum was a branchline to Omdurman Station which was on the East bank of the Nile, opposite that city. [From the plan provided by Iain Logie above]Khartoum in 1914, showing the location of the Central Station. [From the plan provide by Iain Logie above]A mid-20th century map of Khartoum on which the railways feature prominently. It would appear that, by the time this map was drafted, Khartoum North was no longer in used as a railway station. It is not visible on the map on the North side of the Blue Nile. It is also wroth noting that Central station has a railway junction at each end of the site. [16]
Khartoum Central Station
We will start our ‘then & now’ review of the railway lines in Khartoum with a look at Central Station. …
A map of the central area of Khartoum which shows Khartoum Central Station and the route of the railway line. [Mapcarta][6]
Some very early images of Khartoum Central Station. Each image is embedded and links directly to the site from which it was sourced. …
Khartoum Central Station. [1]Khartoum Central Station. [2]Khartoum Central Station. [3]Khartoum Central Station. [4]
These next images show the route of the line between Central Station and the Blue Nile Bridge. All the satellite images are extracts from Google Earth. The line runs Northeast towards the Blue Nile.
This next sequence of three extracts from Google Earth takes us North to the Blue Nile Bridge. [Google Earth]The railway bridge over Gamma Avenue – University Subway. The bridge can be seen on the satellite images immediately above, at the top of the central image and the bottom of the righthand image. [24]
Blue Nile Bridge
Satellite images from 28th January 2021 showing the two end spans of the Blue Nile Bridge. The North end is on the left and the image shows the lifting section of the bridge. The South end is on the right. This clearly shows the 3’6″ gauge railway which runs on the East side of the road carriageway. [Google Maps]The Blue Nile Bridge, apparently under construction in 1910. [17]A postcard view of the Blue Nile Bridge from the West. [5]Blue Nile Road and Railway Bridge – Ministry of Oil and Gas barge on the Blue Nile river – view from Nile Avenue towards North Khartoum. [13]Looking North along the footway which cantilevers out from the West side of Blue Nile Bridge. [25]Looking North along Blue Nile Bridge. [26]Looking North along the railway track on the East side of the Blue Nile Bridge, (c) Tariq Al-Khaleel, March 2020. [28]The route of the railway between the Blue Nile Bridge and Bahri Railway Station. [Google Earth]
Bahri Station (Khartoum North)
Bahri Station (Khartoum North) [27]Bahri Railway Station Platform in 2016, (c) Mohamed Gaafar. [29]Bahri Railway Station Platform in 2017, (c) Siedahmed Abdallah. [29]
Bahri Railway Station Building seen from the station Yard. [30]The main station buildings at Bahri Station. The station yard runs North alongside Al-Inqaz Street. to the next road junction and beyond [Google Maps]The next length of the yard travelling North [Google Maps]And again, further to the North. [Google Maps]And, once more, further to the North. [Google Maps]
North towards Atbara
Bahri Railway Station (Khartoum North) was, in 2014, the terminus for the new Nile Train service. The service runs from Port Sudan to Khartoum by way of Atbara and is provided by four-car DMU trainsets. I have struggled to date to identify technical details for these units. They are supplied by Chinese manufacturers. The first sets arrived in 2014, further sets arrived in 2018. [31]
North of Bahri Railway Station the 3ft 6in gauge line travels North towards Atbara. Train speeds are low and the journey as far as Atbara takes about twice the time a bus needs to complete the journey, but trains are comfortable, safe, air-conditioned and cheaper than the buses. … “Every Nile Train service is almost full with an average passenger load of around 280. … Passenger Hannah Ali Mohammed, 35, said, ‘I think most people travelling between Khartoum and Atbara will stop using buses and change to this … train.’ … Student Ahmed Al-Haj Omer, 23, said … ‘It’s safer. There are a lot of bus accidents on the road between Khartoum and Atbara.’ … A bus ticket also costs about 50 per cent more than the £4 train trip. [32]
The condition of the rails is not necessarily as good as might be hoped, and there is little to no segregation between the trakcs and the wider world. This satellite image illustrates the kind of problems which have still, in 2022, to be addressed. The mainline can be made out running close to and parallel with Ai-Inqaz Street. The northern access to the goods yard at Bahri Station runs a little further to the east. Both are crowded by other uses at this location. [Google Maps]Suburban Railway Station in Khartoum North. [Google Maps]A further suburban station alongside Al-Inqaz Street, this time at its junction with Al Baraha Street. [Google Maps]The next suburban station is close to Ibrahim Shams Aldeen Mosque. [Google Maps]Slightly more significant facilities appear at Alkadroo [Google Maps]Centred on the smae location as the satellite image above. This image shows that we are running parallel to the Rive Nile, perhaps about 3 km from the main stream. The modern railway still runs on the formation of the British Military line which secured the territory after the Mahdist revolution. [Google Maps]Both road and rail need to bridge dry river beds which flow fast when it rains. [Google Maps]The next station is at El-Kabashi. We are now running about 1.5km to the East of the River Nile. [Google Earth]Another station, this time on the East side of the town of Al-Sagai. [Google Maps]
Further stations follow on the journey North. El-Gaili is the last before open desert. Further north the station buildings which remain are older, for example that at Ed Dowyab, as shown below.
The old station at Ed Dowyab, Shendi. [Google Maps]
Shendi is reached just a little further along the banks of the Nile.
Shendi Railway Station is more modern and sits at the heart of the conurbation. The Nile can be seen in the top left corner of this satellite image. The station site runs from middle-bottom to top-right of the image. [Google Maps]
Given that our focus is meant to be on the railways of Khartoum. it is at this point, just over 200km from Khartoum, that we leave the line heading North to Atbara.
Lines South from Khartoum Central Station
Historically there were junctions at either end of Khartoum Central Station. At the East End a line branched away to the Southeast following the West bank of the Blue Nile to Wadi Madani and beyond. The route of that line is shown below by a thin red line. In the 21st century, its route is beneath one of the main arterial roads into and out of Khartoum (Africa Street).
South and Central Khartoum in the 2st century. [Google Earth]
The ‘live’ line which leave Khartoum Central Station heading South West along side the White Nile, eventually crosses the southern suburbs of the city to rejoin the line heading Southeast close to the Blue Nile. This line can be seen marked on the satellite image above.
The Blue Nile Bridge was built when General Sir Francis Wingate [34] was Governor-General of Sudan. It was decided to “bring the railway over the Blue Nile … and to build it along the West Bank of the river to Sennar. Here the line would turn West, cross the White Nile at Qoz Abu Jum’a and head for el-Obeid. … The Sudan Government signed a contract with the Cleveland Bridge& Engineering Com[pany … for the building of a bridge to carry road and rail together … with a rollinglift span for the passage of river craft and seven spans of 218ft each. … Work on the bridge began in 1907. … Passenger and goods stations, a locomotive and carriage and wagon depot and marshalling yards were laid out at what were then the southern limits of the city, and opened in 1910.” [12: p79]
Hill stated in 1965, that it was “only recently that Khartoum Central [had] become a through station. In 1964, the section of the Gezira line between Khartoum Centra; and Soba via the airport was pulled up releasing valuable land for urban development.” [12: p80] Trains from the South now run along a line built from the West end of Khartoum Central through the marshalling yard South to Shagara Station and eastward to Soba.
Hill notes that the Cleveland Bridge Company also constructed the bridge over the White Nile at Qoz Abu Jum’a. The railhead rached that bridge in 1910 and the first train crossed the White Nile at that location on 24th December 1910. [12: p80] This line allowed the economic potential of the Gezira (cotton) and Kordofan (gum arabic) to be exploited.
Consideration of this line and others in the South will have to be left for a future article. … We return to looking at the railways on the South side of Khartoum City Centre. The plan immediately below schematically represents the key elements of the network as it was at the end of the Second World War. Two short lines ran from the West end of the Station, to Abu Se’id on the West side of the White Nile and beyond El Lamab on the East bank of the White Nile.
An extract from a British Survey of Sudan from 1945 which shows lines leaving the West end of Central Station, one leading down the White Nile to just beyond El Lamab, the other crossing the White Nile to Abu Se’id. [33]This satellite image shows Khartoum Central Station and the engine, carriage and wagon works/depot to the West. [Google Earth]The Sunday Railways maintenance depot and marshalling yard to the West of Khartoum Central Station. [Google Earth]A closer view of the maintenance facilities. [Google Earth]A modern goods train at the West end of the Central Station site. A signal box and semaphor signals can be seen in the distance. The picture is taken looking East, (c) Sameh Fathi. [37]
The line to Abu Se’id
The short line to Abu Se’id which is shown on the extract from the British Survey of Sudan from 1945 suggests that the line crossed the White Nile but was not extended any further. Looking back through available maps we can see that the line from Central station had been extended to the vicinity of the Blue Nile close to the confluence of the two rivers.
Khartoum and Omdurman in 1914. The 3’6″ gauge line has been extended round the West of Khartoum towards the Blue Nile. This map also shows the line of a steam tramway which will feature in a future article. That line is shown running from Morgan Point (where it connected with a ferry service to Omdurman), through Mongera and on into the centre of Khartoum closer to the Blue Nile than Central Station. [42]
The Old White Nile Bridge (also known as the Redemption Bridge or the Omdurman Bridge) is a steel truss bridge in Sudan on the road connecting Khartoum on the White Nile to Omdurman. The bridge was built between 1924 and 1926 by Dorman Long from Teesside, England: it is 613 metres long and is supported by seven pairs of round columns. [43] If the 1945 map extract is to be believed the 3’6″ line was extended from its position on the map immediately above this paragraph to cross the White Nile at the bridge.
However, we already know that provision was made for an electric tramway to replace an earlier steam railway and that this new electric system was in use in the 1930s. It seems as though the line shown on the 1945 map is probably a minor cartographical error. Please see later articles about Khartoum’s railways and trams.
We do know that later in the 20th century the route of the 3’6″ railway Northwest of Central Station was revised and even later abandoned. In the next image, the area is shown on a 1950s map of Khartoum. …
Khartoum in the 1950s. The line Northwest from Central Station is seen terminating just short of the Blue Nile but at a pint further West from that shown in the 1914 map above. Interestingly a connection is shown from this line to what is most probably the 3’6″ electric tramway running parallel to the river, through a series of sidings at the river side. At present, I can only speculate as to the purpose of these sidings. [16]The thin red line imposed on this satellite image shows the route of the railway Northwest of Central Station. That route is now occupied by one of Khartoum’s major roads – Army Road which leads to Nile Street by the Blue Nile. A further new road has been constructed which leads from Army Road to the new Victory Bridge over the White Nile [Google Earth]The White Nile Bridge at Khartoum/Omdurman in the 1930s looking along its full length and showing (if my reasoning is correct) the electric tramway tracks crossing the bridge. This is supported by evidence of a catenary system above the tramway tracks. [38]The Old White Nile Bridge (Omdurman Bridge) seen from the river bank. It is possible that the image shows the catenary for the electric tramway and so cannot be dated before the 1930s. [39]The Old White Nile Bridge in the 21st century (c) Khalid Hassan [40]
The line to the White Nile beyond El Lamab
Satellite imagery bears little resemblance to the 1945 British Survey of Sudan. The large island in the White Nile which features so prominently in the 1945 survey does not exist. The only place name similar to ‘El Lamab’ is Al Lamab which is an area to the East of the Airport close to ten Blue Nile.
Logic would suggest that the current railway follows the route shown in 1945. An estimation of the distances involved would place the point where the present railway turns to the East in the vicinity of the end of the railway drawn on the 1945 map. The satellite image below suggests that the line used to terminate on the South side of Wad Ageeb which appears on the East bank of the White Nile close to the bottom of the image.
A satellite image of the area South of the Centre of Khartoum which is now heavily urbanised. The railway which is still in use is shown by a grey line on the image. {Google Earth]This enlarged satellite view gives no further clue as to the location of the railhead shown on the 1945 survey. [Google Maps]
Final Comments
We have looked at all of the 3ft 6in gauge railway lines in Khartoum as best we can. There are a number of things which would benefit from further investigation.
The line north to Egypt and the line to Port Sudan (both 3’6″ gauge)
Lines to the South of Khartoum (3’6″ gauge)
the Steam Trams in Khartoum in the early 20th century (narrow gauge)
the Electric Tram network of the 1930s (3’6″ gauge)
Industrial lines in Sudan which probably include the lines noted on the South bank of the Blue Nile close to its confluence with the White Nile, but definitely do include a narrow gauge railway serving the cotton industry to the Southwest of Khartoum in Gezira (narrow gauge)
the motive power and rolling-stock on Sudan’s Railways.
The Elan Valley Railway was built to make the construction of the Birmingham Water Corporation Dams in the Elan Valley possible. It transported equipment, materials and men to the different dam sites. It was also used by visitors from Birmingham and it carried King Edward VII and Queen Alexandra for the official opening of the dams on 21st July 1904.
Work on the construction of the line began in 1893 and was completed in 1896. It was built to standard gauge in four separate stages.
The four separate sections of the railway were numbered 1 to 4.
Railway No. 1 extended from Elan Valley Junction, the junction with the Cambrian Railway Southwest of Rhayader, just beyond Rhayader Tunnel, to what is now the Elan Valley Visitor Centre. These buildings were then the location of workshops and sheds of the contractor and sat below the site of the proposed Caban-Coch Dam.
Railway No. 2 left Railway No. 1 close to the Baptist Church in Elan Village and followed a higher alignment on the North side of the Elan Valley. It passed above the site of the Caban Dam and on westward to the site of the Careg-Ddu Dam
Railway No. 3 ran from Careg-Ddu Northeast to Pen-y-Gareg Dam.
Railway No. 4 travel North from a junction to the Southeast of Pen-y- Gareg Dam to Craig-Goch Dam
This post provides an introduction to the railway and covers the route of Railway No. 1.
The sharp ruling radius of the tracks required short wheelbase locomotives. “The locomotives were all named after rivers and streams on the Estate. The first two were acquired in April 1894 and were named Elan and Claerwen. These were joined by Nant Gwyllt and Methan in October 1894 and Rhiwnant and Calettwr in 1895. … By 1898 the steep 1:33 gradients of some sections of the railway had taken their toll on the original locomotives, so Coel and Marchnant were bought.” [1]
The Elan Valley Railway Branch Line was inspected and passed by a Board of Trade Inspector in July 1894 and the Elan Valley Railway branch was available for use from that date. Railway No. 4 took the route to the furthest away Craig-Goch Dam. Blasting the cutting mid-way along this route held up the construction by 3 months. This resulted in the cutting being given the name, ‘The Devil’s Gulch’!
At its fullest extent, the railway had approximately 53 kilometres (33 miles) of track. In all, 17 coaches were used for transporting men to the work sites. In addition to the steam locomotives operating in the Elan Valley, steam-powered cranes, power drills and crushers were also in use. To facilitate the works arrangements had to be made to accommodate around 1000 tons of materials being moved every day!
The line was only provided for construction work and in 1906 the Birmingham Corporation Water Works locomotives were sold. In 1908, the junction with the Cambrian Railway was removed. However complete closure of the railway occurred as late as 1916. [1]
Before looking at the route of the railways in detail, it is interesting to note that In 2004, to mark the centenary of the opening of the dams, the only surviving locomotive (Rhiwnant) was brought back to the Elan Valley from a private owner in South East England. [1]
It is also worth noting that there is a detailed treatment of the railways in the Elan Valley in a book by C. W. Judge; ‘The Elan Valley Railway’, published by Oakwood Press. [2] The route is described in detail in the fourth chapter of Judge’s book. [2: p79-111]
Rhayader Railway Station
A panoramic colourised postcard view of Rhayader Railway Station in its prime. [36]
The Cambrian Railway through mid-Wales was a single-track line with passing loops. Rhayader Station sat between the stations of Moat Lane Junction and Brecon on the Cambrian mainline. Llanidloes was to the North of Rhayader and Builth Wells to the South.
Rhayader Railway Station was opened in 1864 in Cwmdauddwr, a village on the opposite bank of the River Wye. The line, which took over 5 years to build, was closed in 1962 and dismantled within months. [3]
Rhayader and Its Railway Station – The Railway Station was on the West side of the River Wye with the town on the East side of the river. This extract comes from the 6″ OS Maps published just after the turn of the 20th century. [4]This extract comes from the earlier 6″ OS Mapping released in 1888. [37]
The station site in the 21st Century is a Highways Depot for Powys Council. It is access along the station approach road which is in the same location in the 21st century as that shown above. The station building on the above map is fully shaded and sits close to the words ‘Corn Mill’, the goods shed which is on the West side of the mainline, is shown hatched.
The same location is shown immediately below on Google Earth’s satellite imagery in the 21st century. The station approach is also shown below in an image from Google Streetview…
Immediately to the South of the station, the Mid-Wales line crossed the road which led up the Elan Valley. Google Streetview shows the embankment beyond the bridge location to the South. Pivoting round through 180 degrees to look towards the Railway Station, does not provide a productive image. ….
Looking South from the Elan Valley Road (B4518). The over-bridge and its abutments are long gone, the railway embankment is still visible. Alongside it, to the left of this image is the start of the Elan Valley Trail, which for a couple of hundred yards runs parallel to the old railway, climbing gradually to a summit above the Rhayader Tunnel further to the South. [Google Streetview]
My wife and I walked the Elan Valley Trail in August 2021. Some of the photos which follow were taken on that walk. The first photograph below shows the start of the Trail. …. From that point the footpath climbs slowly alongside the old railway embankment before rising above the old line which was in cutting as it approached the northern portal of Rhayader Tunnel. The second picture below shows the Northern Portal.
The entrance to the Elam Valley Trail [My Photograph – 9th August 2021]Rhayader Tunnel: North Portal (c) Chris Parker. [5]
A small nature reserve sits on the land immediately above Rhayader Tunnel which the footpath crosses and the South Portal of the tunnel can be glimpsed to the right of the path through the undergrowth. (The nature reserve is intended to protect the different species of bats which have made the tunnel their home.)
A better view of the closed South Portal can be seen at track level. The picture below is taken from the track-bed approximately at the location of the first point of the Elan Valley Junction.
The Rhayader Tunnel and the Elan Valley Junction as shown on the OS 6″ series of maps dated 1905. On this map, the junction is shown as a single junction. The map is dated after the completion of the main work on the dams. During the period of construction traffic was such that a double junction was provided at this location. [7][8]
C. W. Judge provides a copy of Birmingham Corporation Waterworks’ drawing of the double junction with a note indication that the double junction was provided at the insistence of the Board of Trade. [2: p81] He also provides an extract from c. 1900 Ordnance Survey which shows the double junction in place. [2: p84]
The signal box at the Elan Valley Railway junction in around 1900. The private Elan Valley Railway, can just be made out behind the signal box steps on the righthand side of the image. The railwayman on the right is holding the token for entering the single line track system. This image is a copy of the image held by the People’s Collection, Wales and is reproduced here under their Creative Archive Licence (see Reference 11, below) which permits its use on a Non-Commercial basis. [12] Judge also provides a copy of this image which has a slightly better contrast which means that the Elan Valley line can also be made out much more clearly heading away from the mainline behind and to the left of the signal box. [2: p85] Judge has another, much better, view of the junction and signal box [2: p83] but I have not been able to find that image available to share on the internet.
Within a very short distance from the Elan Valley Junction the branch line was provided with storage/exchange sidings. Some of these sidings are clearly shown on the map extract below. Judge refers to these sidings as the Down Noyadd Sidings. the Up Sidings which are evident on the OS Map c. 1900 [2: p84] are no longer shown on the 1905 extract.
Travelling on along the line, the next point of interest is that shown on the map extract below. At the turn of the century the line passed over a narrow lane leading to a ford in the Afon Elan at Rhyd Wen.
The first of these two images is an extract from the 6″ OS Maps from the turn of the 20th century. [13] The second is a satellite image of the same location in the 21st century. The most obvious significant difference is that a bridge has been constructed over the river. However, when the railway was active the road down to the ford was spanned by a masonry arch bridge. [2: p85-86, Plates No. 32 & 33] As the view below shows that bridge is long-gone. [Google Maps]The view across the river from the Southeast showing the modern Bailey Bridge which has replaced the ford across the River Elan. As can be seen here, there is no longer a railway bridge spanning the road. [Google Streetview]The view from the Northwest shows that one of the bridge abutments remains in position. [Google Streetview]
Continuing in a Southwest direction the railway and the road ran immediately next to each other with the Afan Elan slightly to the South. There is little of note on the next few extracts from the 6″ OS Map.
The old railway and the adjacent road ran passed Coed-y-mynach, Ty’n-y-coed, Llanfadog Lower and the Elan Valley Hotel. [14][15][16]The only point worth noting is that there has been significant development at the site of the Elan Valley Hotel. [16]The route of the old line continues beyond the Elan Valley Hotel with little worth noting until it approaches Elan Village. [17]The police station and the Bethany Chapel suggest that we are now very close to Elan Village. [18]The satellite images show significant developments from the time of the 6″ OS Map above. The first significant building which appears relatively close to the top right of this image is the Baptist Chapel. Once there was only one road here which led to a suspension bridge over the river. That road has been widened to provide access to the Elan Valley Visitor Centre another road follows the formation of the higher branch of the railway – the two roads while running parallel to each other diverge significantly in height. [18]The Baptist Chapel (Bethania Baptist Chapel), viewed from the access road looking across the embankment which carried the railway. The red line clarifies its route. [Google Streetview] This length of the old railway is shown in Plate 35 of Judge’s book about the line. [2: p87Looking Southwest toward Caban Coch Dam. The line of the railway is marked by the red line. The properties in this picture were built after the railway had been dismantled and their gardens extend across the line of the old railway to the highway boundary. [Google Streetview]This photograph was taken from a point a little further to the Southwest. On the extreme left of the image, the boundary fence or the properties visible in the last picture can be seen. The old railway alignment is marked, once again, by the red line. The wall at the top of the embankment to the left supports a series of rectangular pools, some of which were visible on the 6″ OS Map. These are on the line of the aqueduct which supplies Eden Valley water to the Birmingham conurbation. They are part of the Water Treatment Works which ensure the quality of the water passing through the Aqueduct. [Google Streetview]View from the footpath on the line of the old railway. The structures associated with the Water Works can be seen more easily. [My photograph – 9th August 2021]
Sadly, the 6″ OS Maps from the turn of the 20th century that we have been using do not give us a good impression of the railway network in the Elan Valley during the construction of the dams. They do show the main line of the railway as it was in around 1902 when the survey for the maps published in 1905 took place.
During the construction period, access to the construction village was over the suspension bridge shown above. “The navvies village can be seen on the far side of the river to the left, and the accident hospital is to the right of the bridge. The road on this side of the river leads to Rhayader to the left” and further up the Elan Valley to the right. [34]
The current suspension bridge (the third on the site) “is no longer safe, and modern traffic entering Elan Village now crosses the river by a rather more functional bridge alongside.” [34]
The now unsafe suspension bridge which provided access to Elan Village before the adjacent Baily Bridge was built. [My photograph – 9th August 2021]The modern Bailey Bridge which sits just downstream of the suspension bridge. [My photograph – 9th August 2021]The contractor’s main-line (which was to be designated ‘Railway 2’) continued at a high level. The lower level line is not in evidence. [20]The modern satellite imagery shows the visitor centre on the right of this image and the dam and river protection and training works in the bottom left. The road at high level continues to mark the line of the old railway. [20]
Caban-Coch Dam, the first dam encountered in a journey up the Elan Valley, was the first at which construction work commenced. The digging and blasting of the foundations for the dam started in August 1894, and work on the masonry structure of the dam itself began in 1896. [29]
The 6″ OS Map from the turn of the 20th century shows the construction of the masonry structure well underway.
The Elan Valley website tells us that building work began in 1893. “100 occupants of the Elan Valley had to move, only landowners received compensation payments. Many buildings were demolished, 3 manor houses, 18 farms, a school and a church (which was replaced by the corporation as the Nantgwyllt Church). … A village of wooden huts was purpose-built to house most of the workers on the site of the present Elan Village.” [30]
“New workers spent a night in the dosshouse to be deloused and examined for infectious diseases, only then were they allowed across the river to the village. Single men lived in groups of eight in a terrace house shared with a man and his wife. A school was provided for those under 11, after this they were expected to work. The village employed a guard to look out for illegal importation of liquor and unauthorised visitors. There was a hospital for injuries and an isolation hospital. A bath house which the men could use up to 3 times a week but the women only once! The pub was for men only. Other facilities included a library, public hall, shop and canteen. There was even street lighting (powered by hydroelectric generators).” [30]
The dams were built in two phases, firstly construction in the Elan Valley and later the Claerwen. The foundations of Dol y Mynach Dam were laid in phase one as the site would have flooded once Caban-Coch had filled up.” [30]
It is clear that local rock was not of a suitable quality for dressing the external faces of the dams. It was used as structural fill inside of the dams. The hand-chiselled facing stones were transported from Glamorgan. [30]
“The Caban Coch dam contributes to the supply of water to Birmingham when water levels are normal, but it also provides compensation water to ensure that adequate flow is maintained in the Elan and the Wye downstream from the dams.” [29]
I have asked for permission from the Oakwood Press to reproduce sections of the fold out map at the rear of Colin Judge-s book (see below) as these illustrate the density of the rail facilities at the construction site of the Caban Coch Dam. I await their response with interest.
We have cover Railway No. 1. The next article in this series will begin at the junction between Railway No. 1 and Railway No. 2 a little to the East of Caban Coch Dam.
Further Reading
As we noted much earlier in this post, the accepted authority on all things associated with the Elan Valley Railway is Colin Judge. Anyone with any interest in this railway should regard the purchase of Judge’s book as a good investment. Second-hand copies are relatively easy to come by. It is important, when buying a copy, to check whether the fold-out map (referred to above) which was attached to the back cover of the book is still present. My copy is the latest reprint of the book, as shown below, which was published in 2001 and has a sticker on the front marking the centenary of the formal opening of the reservoirs which was celebrated in 2004. [2]
Towards the end of its life the Port Carlisle Branch was served by two Sentinel Steam Railmotors, ‘Nettle’ and ‘Flower of Yarrow’. The featured image above is part of the Bruce McCartney Collection. It shows a Sentiel Steam Railcar calling at Burgh-by-Sands on a service to Port Carlisle in around 1930. Station Master Walter Tait is posing alongside the railcar on the platform. Bruce McCartney comments: “The Sentinel is thought to be No. 31 ‘Flower of Yarrow’ which was built in 1928 and operated on the Port Carlisle Branch up to the time the branch was closed from Drum burgh in 1932, although, being on the ‘main-line’ Burgh-by-Sands kept going until 1964.” (c) the Bruce McCartney Collection, used by kind permission. [1]
‘Nettle’ and ‘Flower of Yarrow’
After 50 or so years being served by a horse-drawn Dandy. Port Carlisle was given a replacement steam service in 1914. It was envisaged that providing a good reliable service from Carlisle, the village of Port Carlisle would develop as a seaside resort.
In 1914, Port Carlisle was once again given its own steam service to Carlisle. [2]
Sadly the hoped for development did not occur and Port Carlisle remained a backwater, but one with a significant history as a port where ocean-going vessels could dock. For a time it was a ‘ferry’ terminal and a place where goods could be transshipped onto smaller craft heading up the canal to Carlisle. Later the canal was replaced by a railway and for a time a reasonable flow of goods passed through the port. However, by 1863, goods services on the Port Carlisle branch were terminated and for a time passengers were served by a horse-drawn Dandy.
As the early 20th century unfolded the steam service was unable to pay its way and eventually, hoping against hope, that some service could be retained to Port Carlisle steam engines and carriages were replace by a pair of Sentinel Steam Rail Cars, No. 31 ‘Flower of Yarrow’ (Sentinel Diagram No. 96) and No. 35 ‘Nettle’ (originally, LNER No. 2133 – Sentinel Diagram no. 93). [3]
‘Nettle’ was built in 1928 and originally carried the LNER number 2133 which was later changed to 35. ‘Flower of Yarrow’ was a slightly later build by Sentinel and only ever carried the LNER number 31.
‘Nettle’ at Port Carlisle [3][4]Flower of Yarrow at St. Margaret’s Shed, Edinburgh. [3]Sentinel Railcar ‘Nettle’ at Carlisle, probably on the service to Port Carlisle. It appears to be running with at least another carriage attached. Photographer not known. [5]‘Flower of Yarrow’ also at Carlisle. Photographer not known. [6]
These railmotors/railcars saw out the remaining years of the passenger service on the line to Port Carlisle and were moved elsewhere when it closed between Drumburgh and Port Carlisle in 1932.

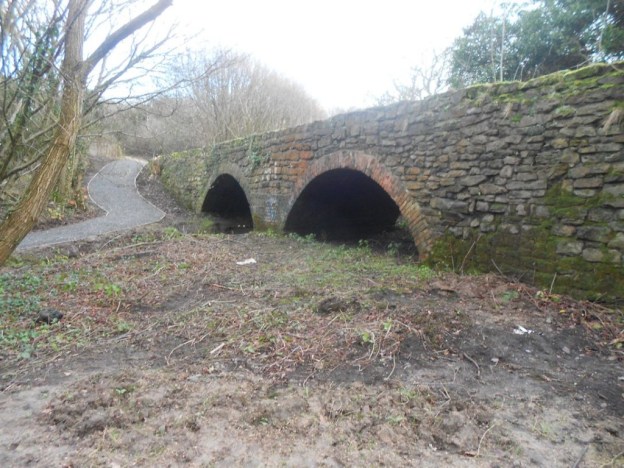


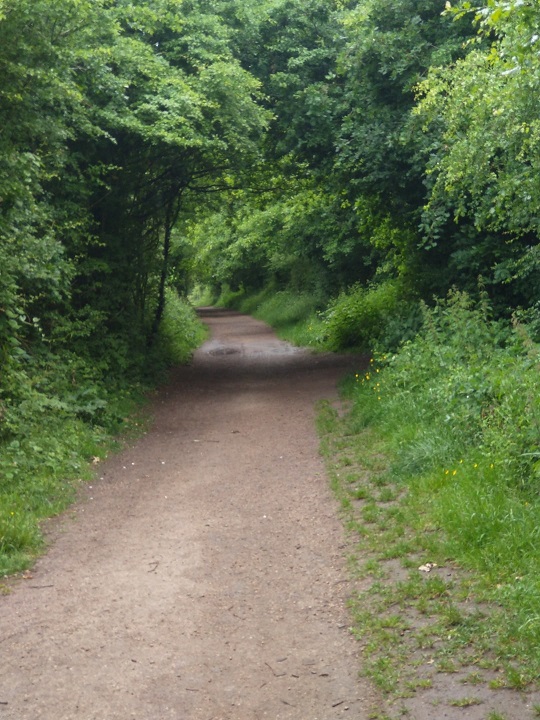
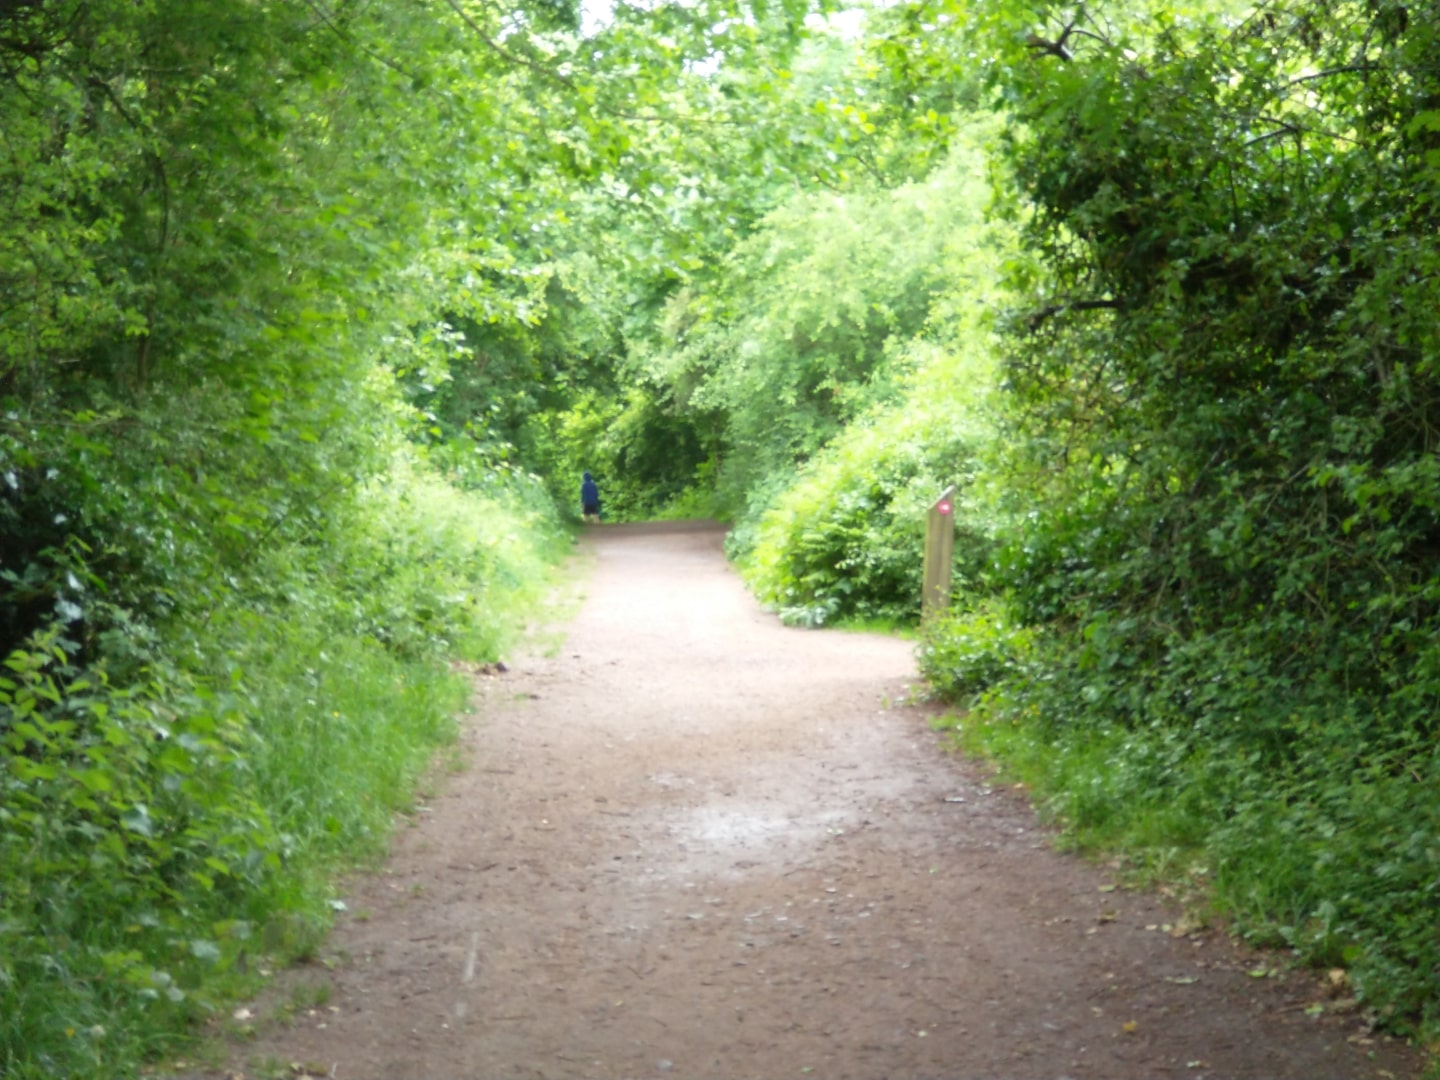


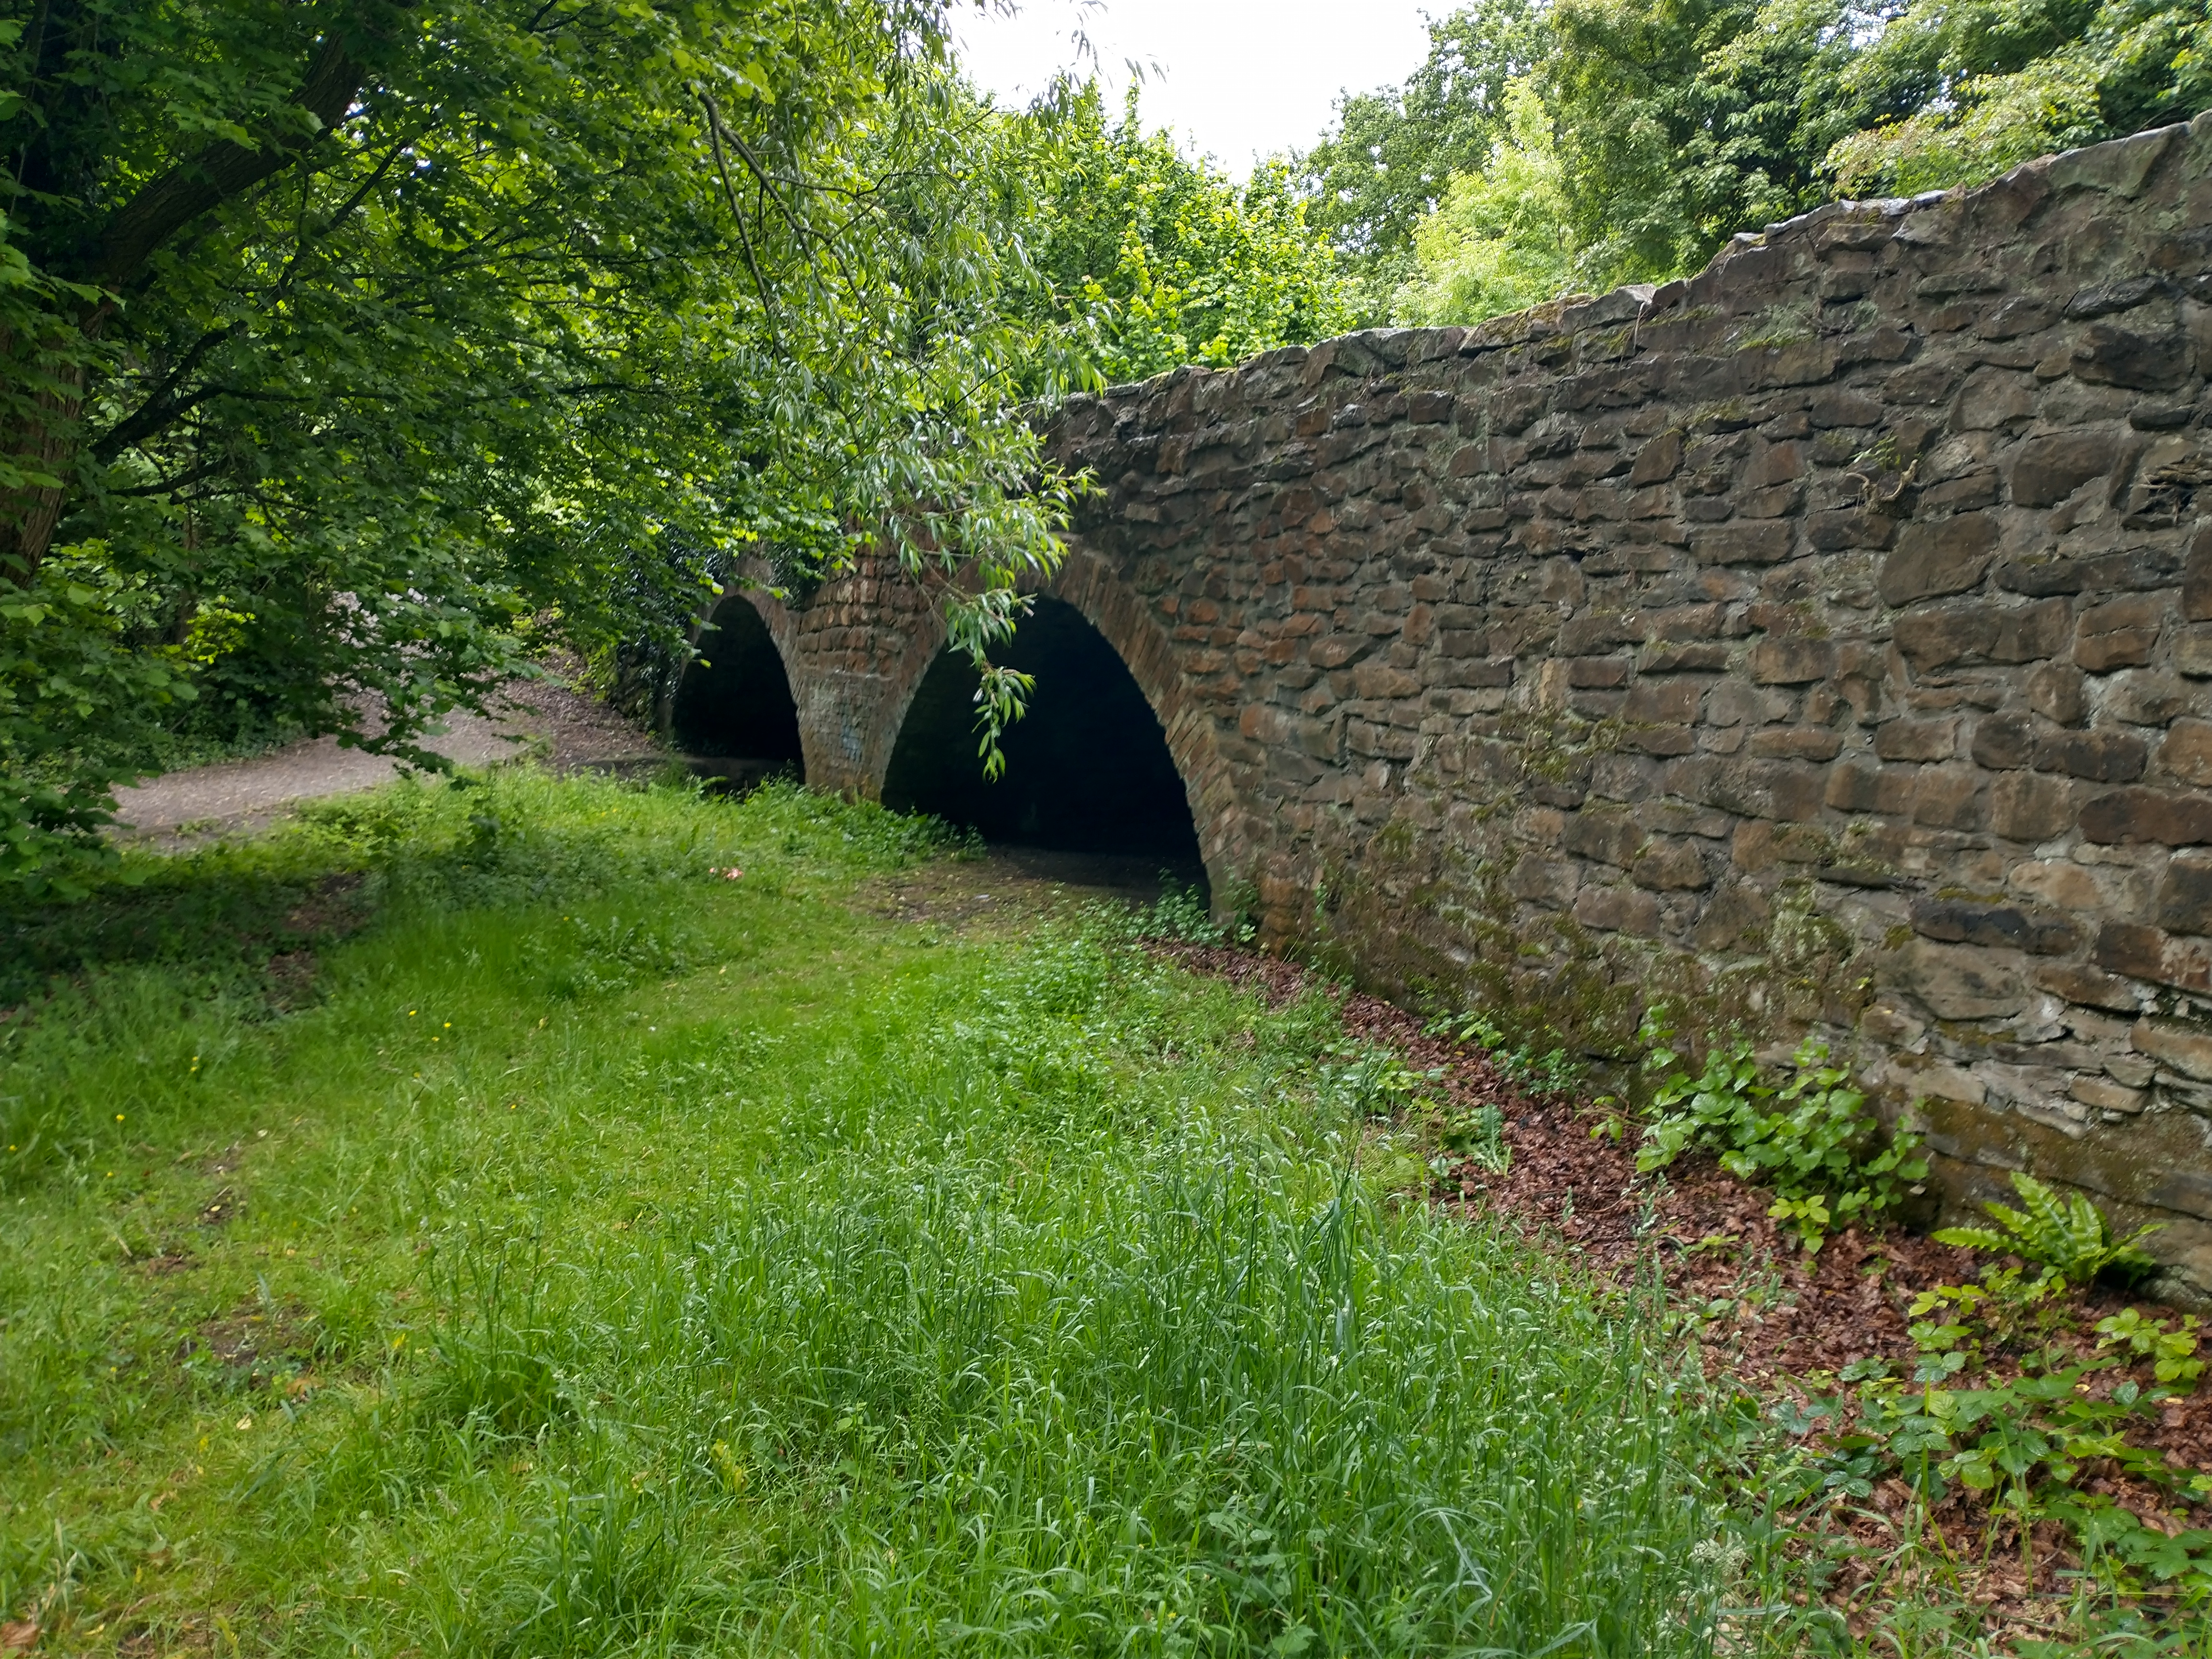

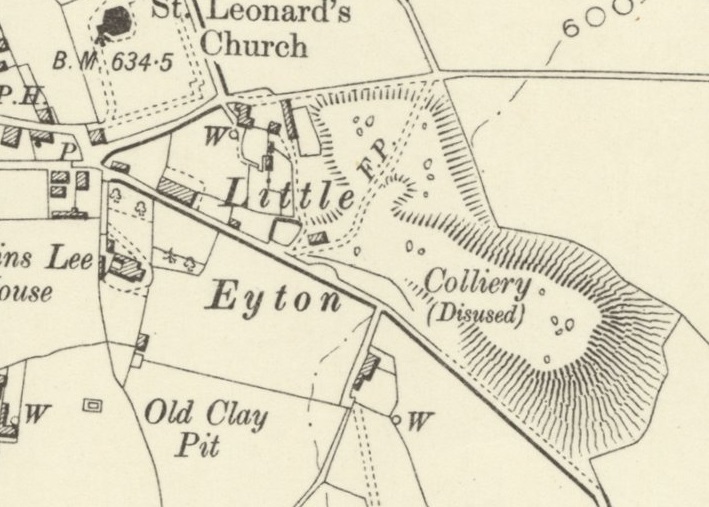

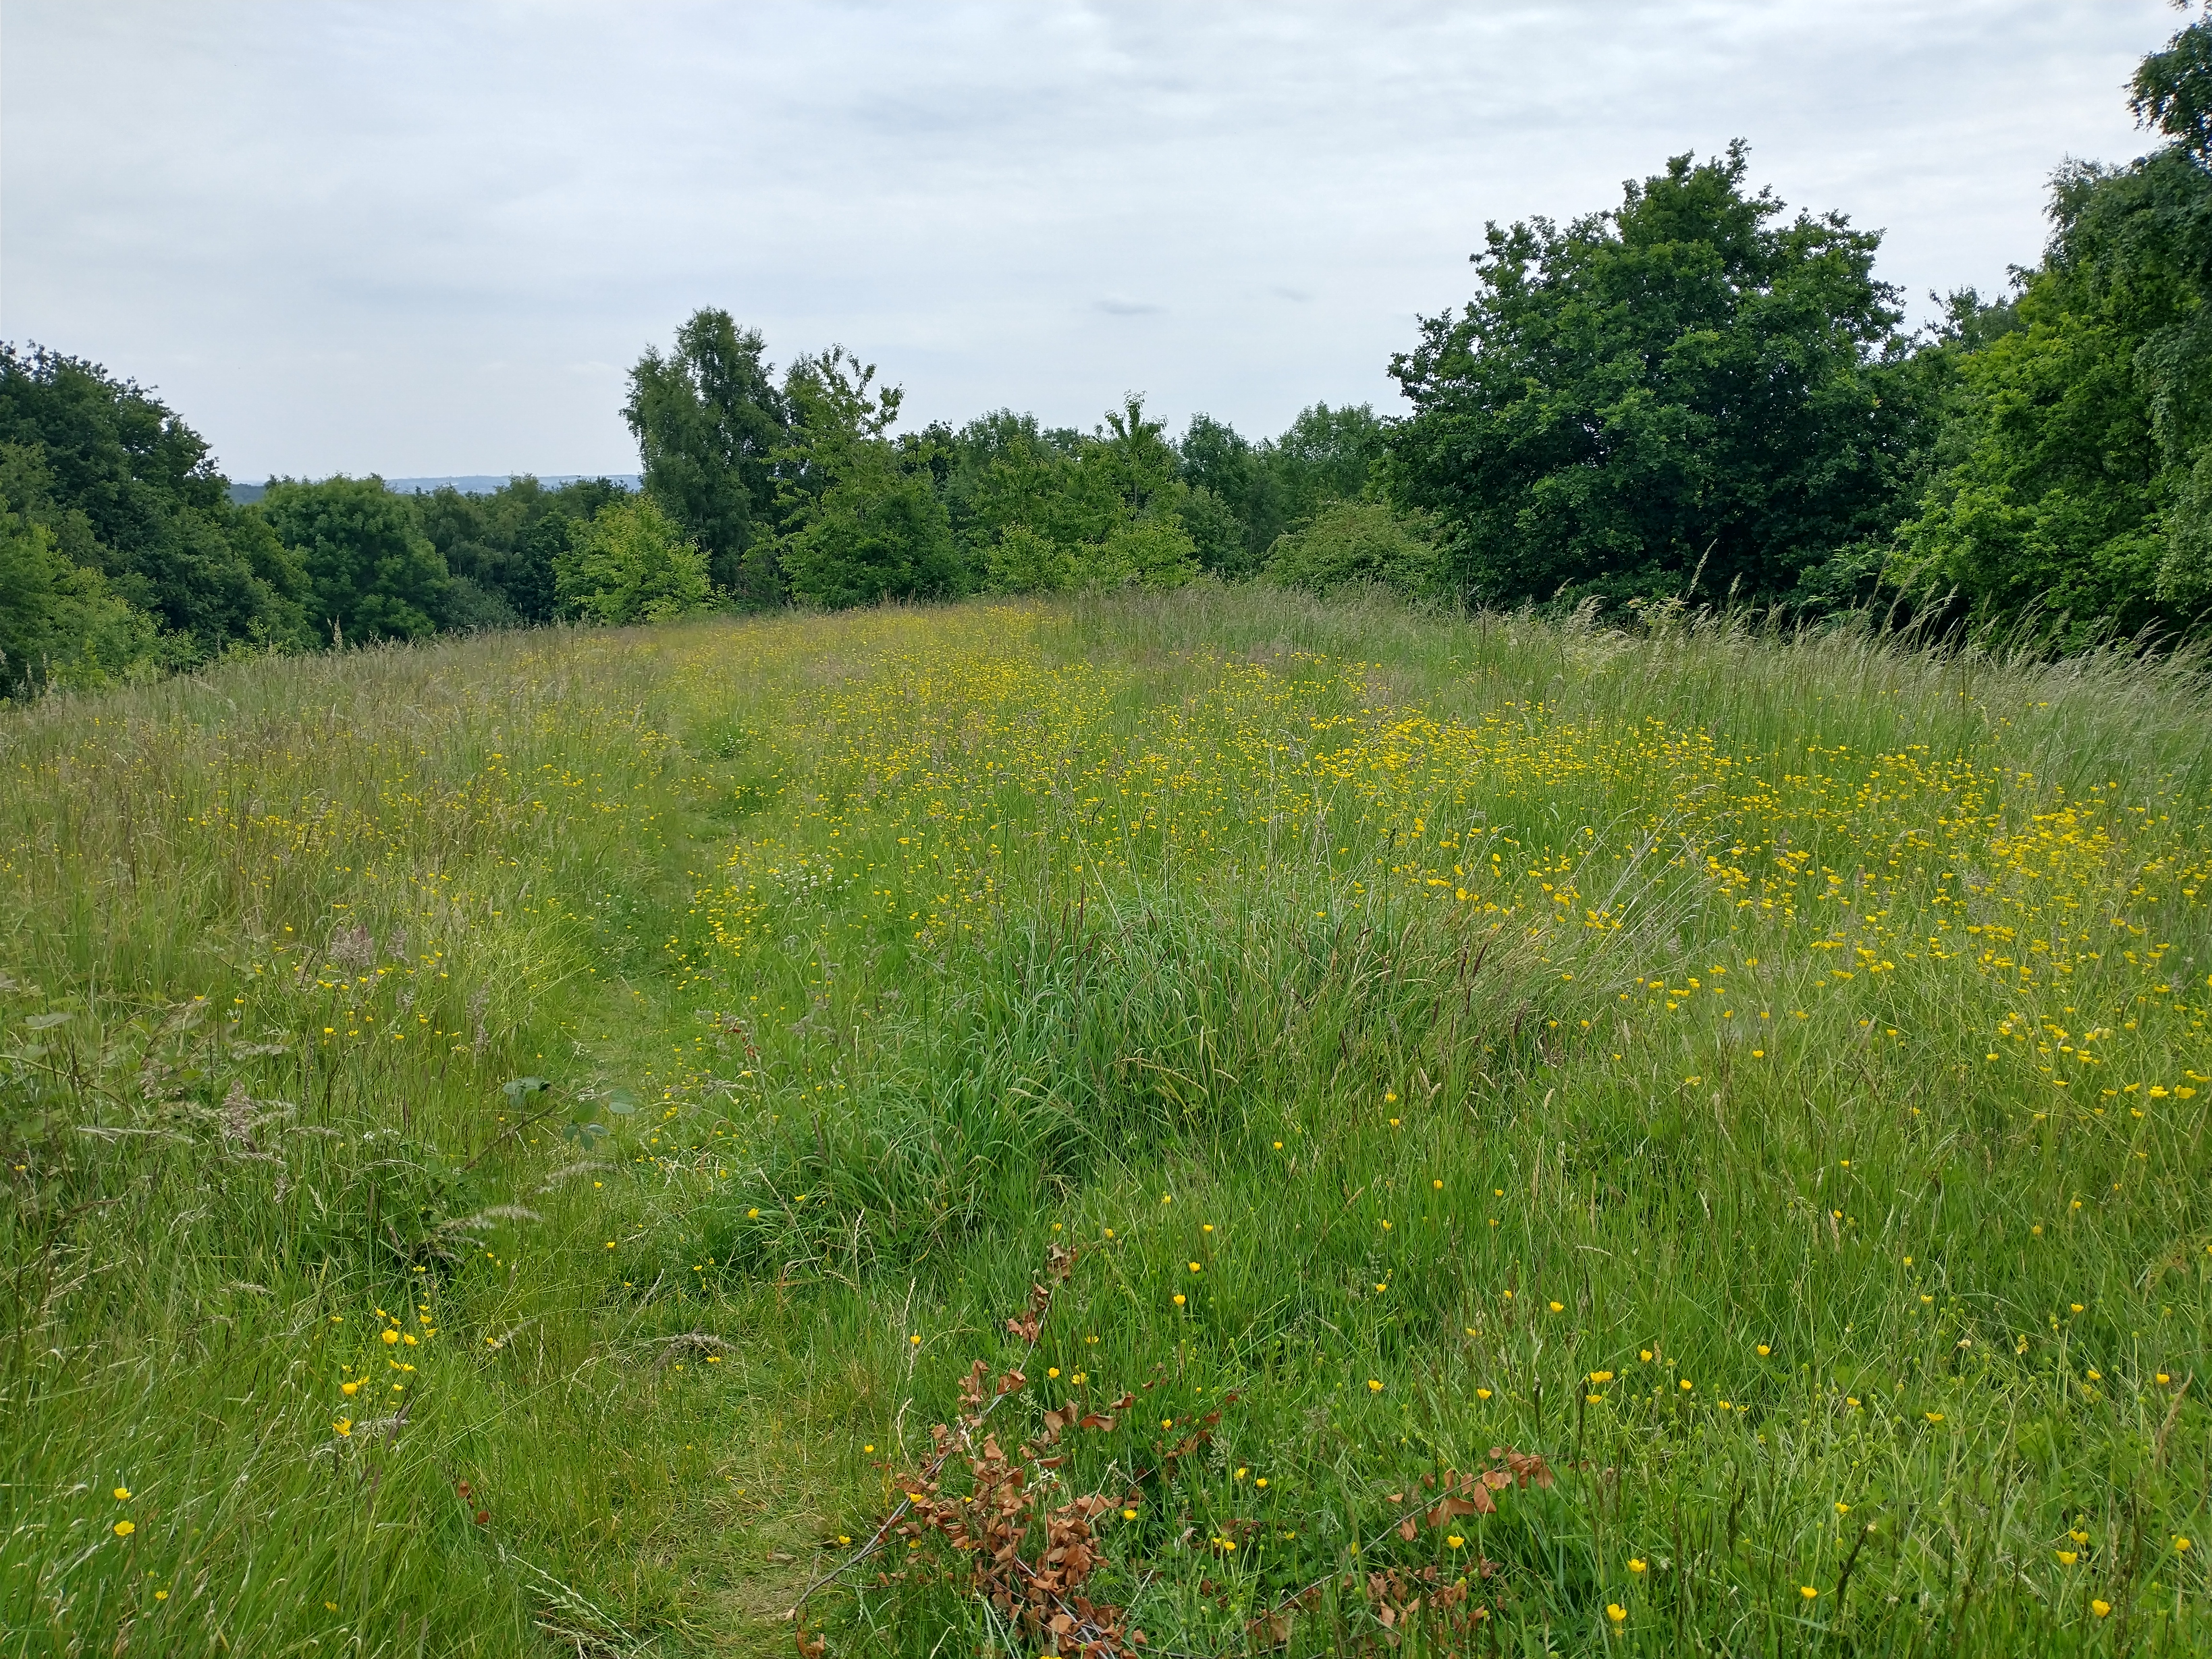

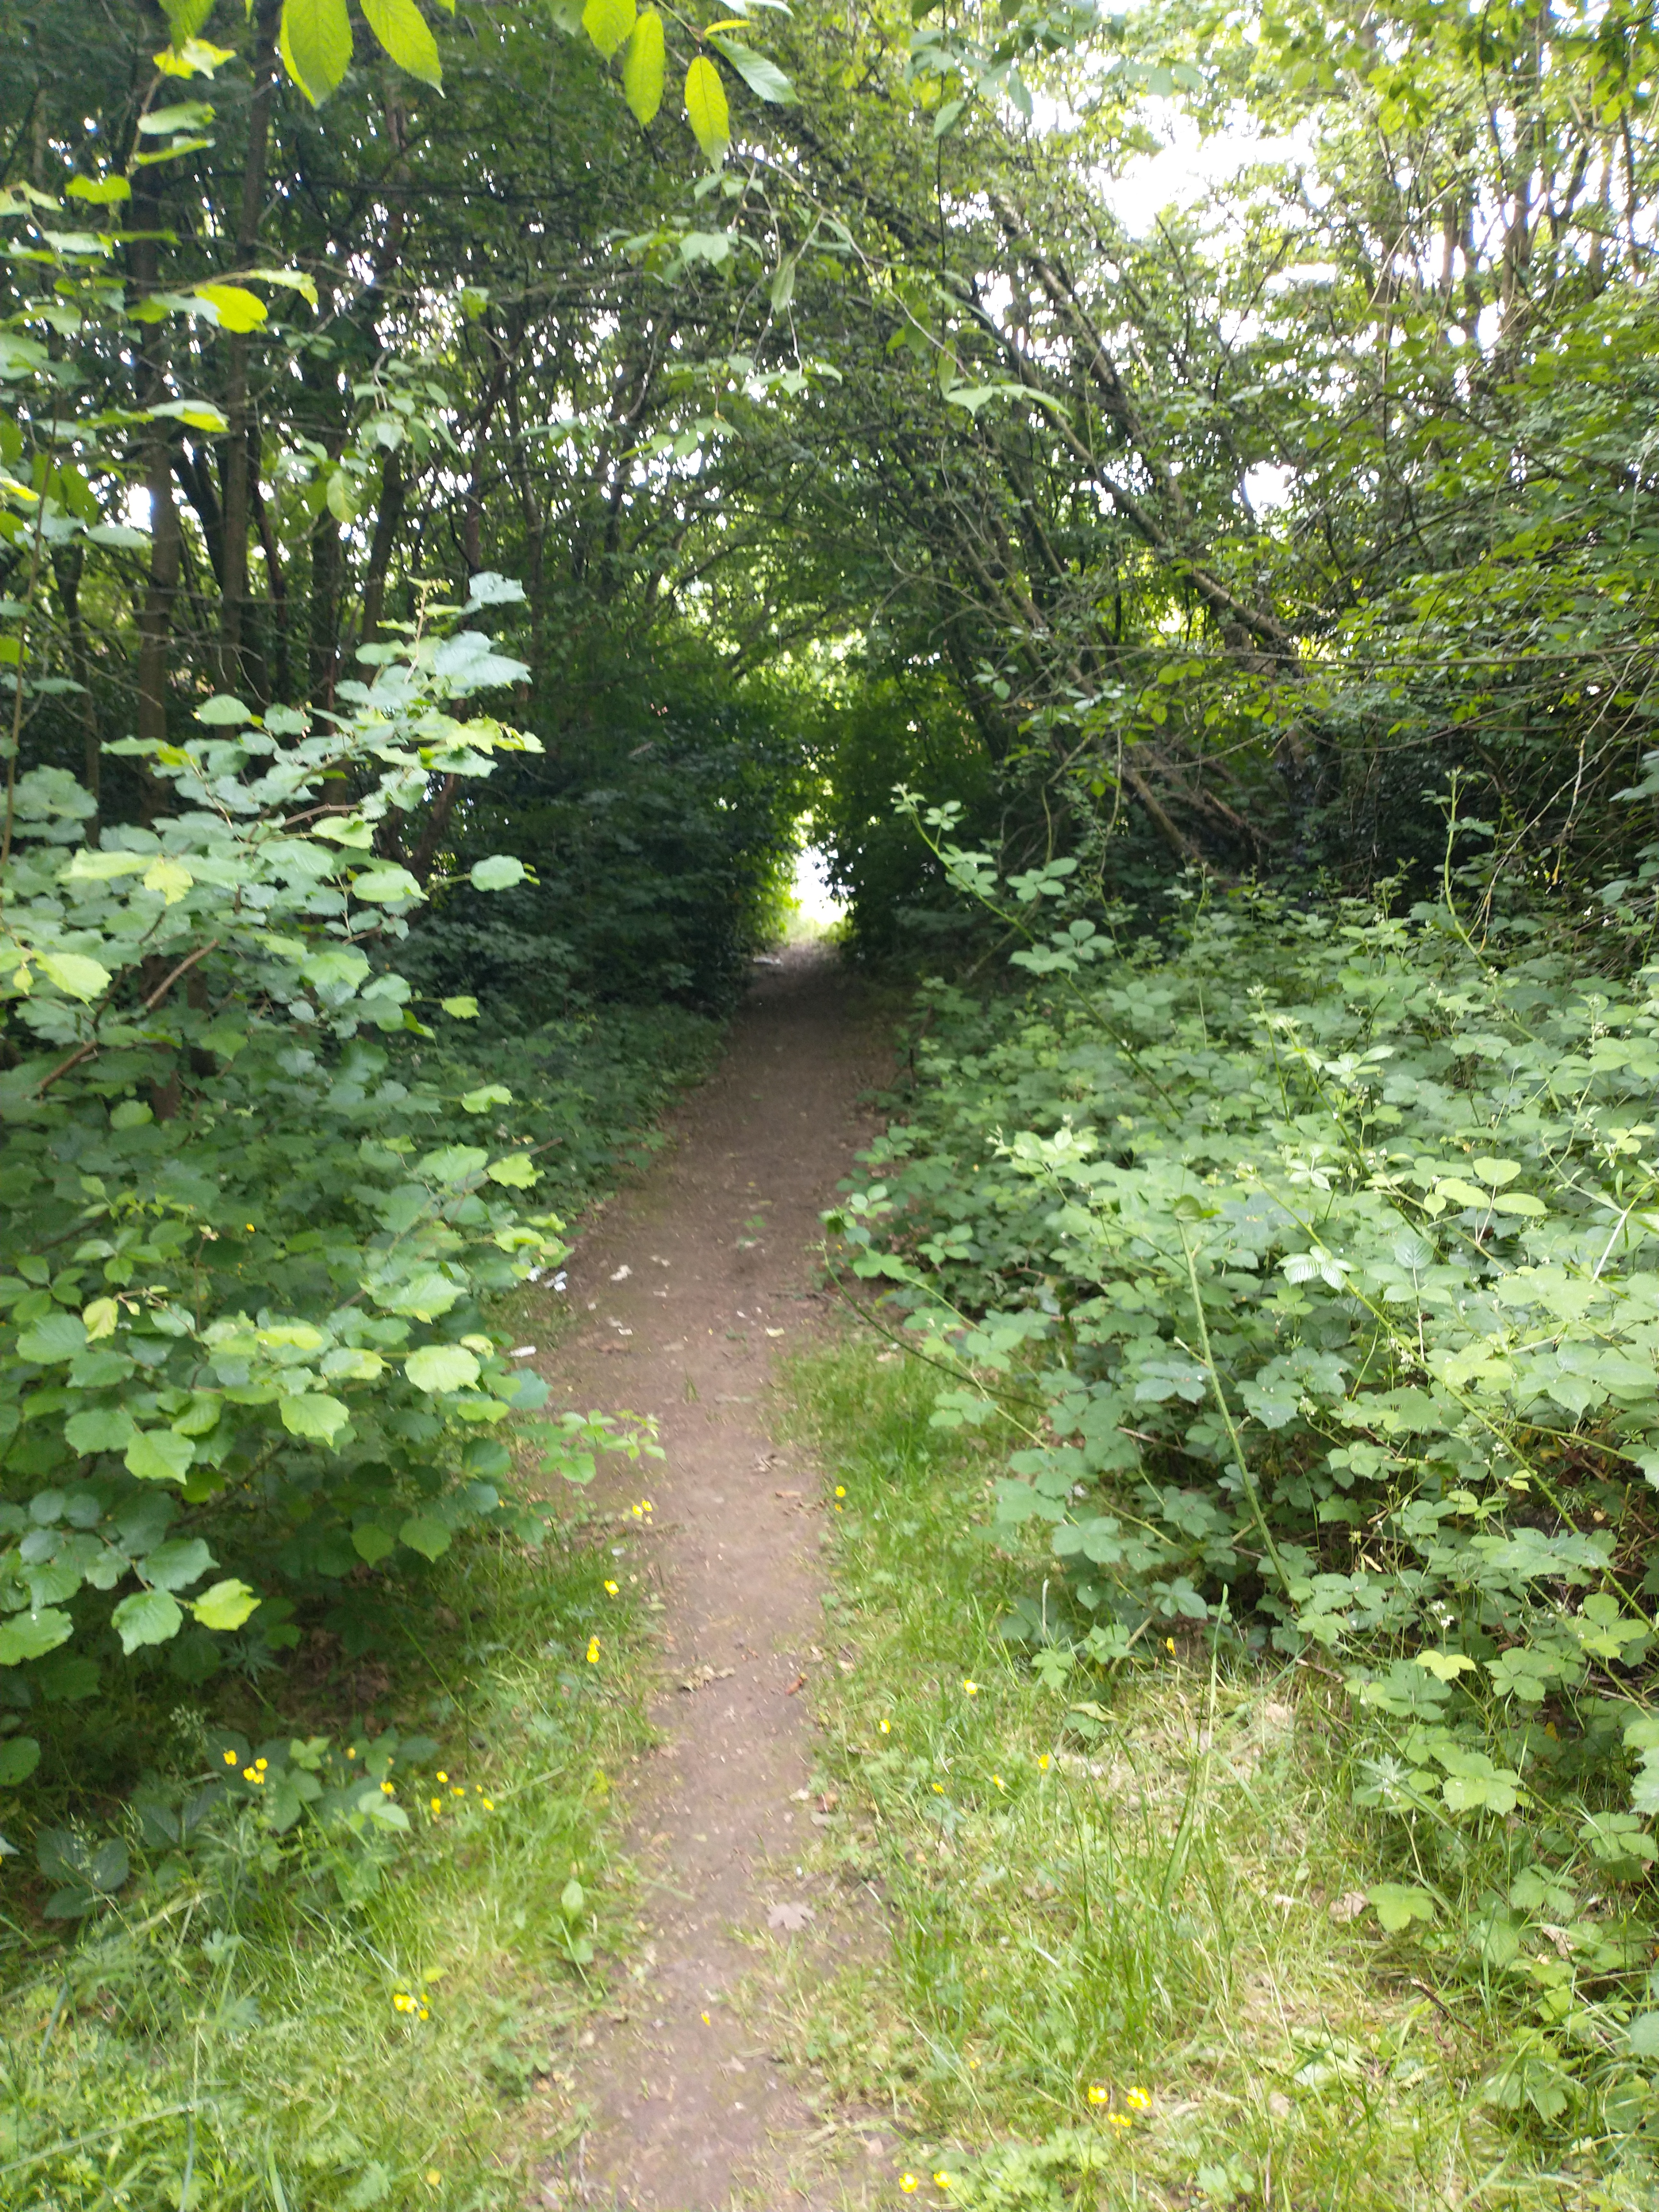
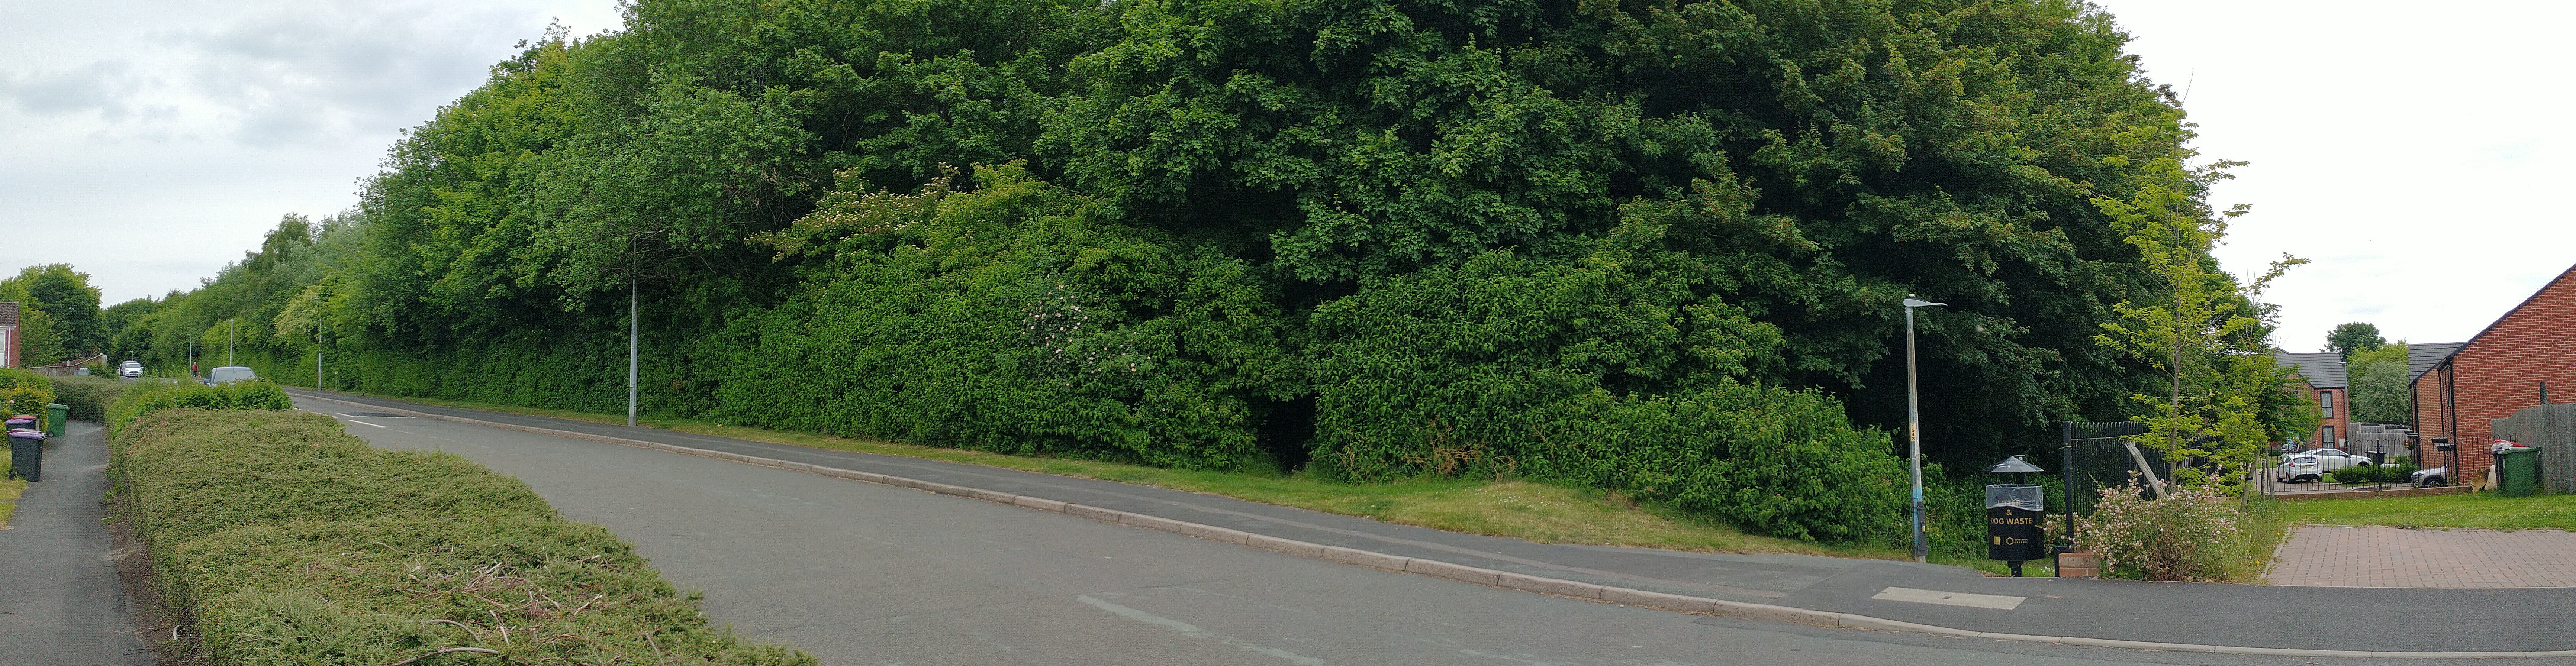
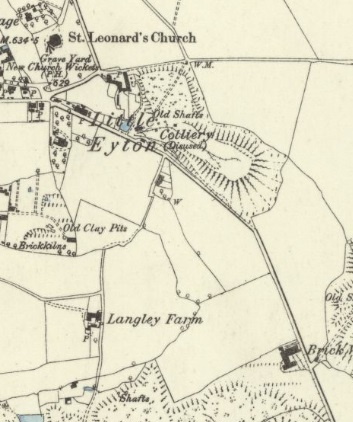


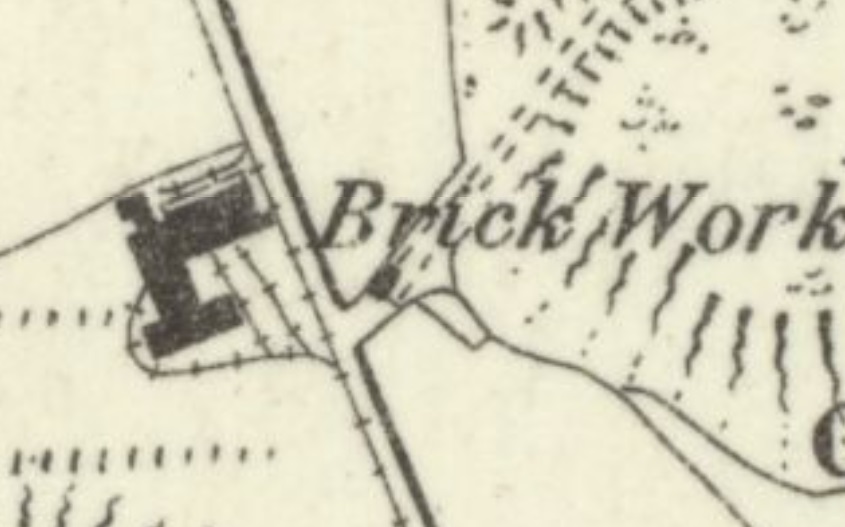

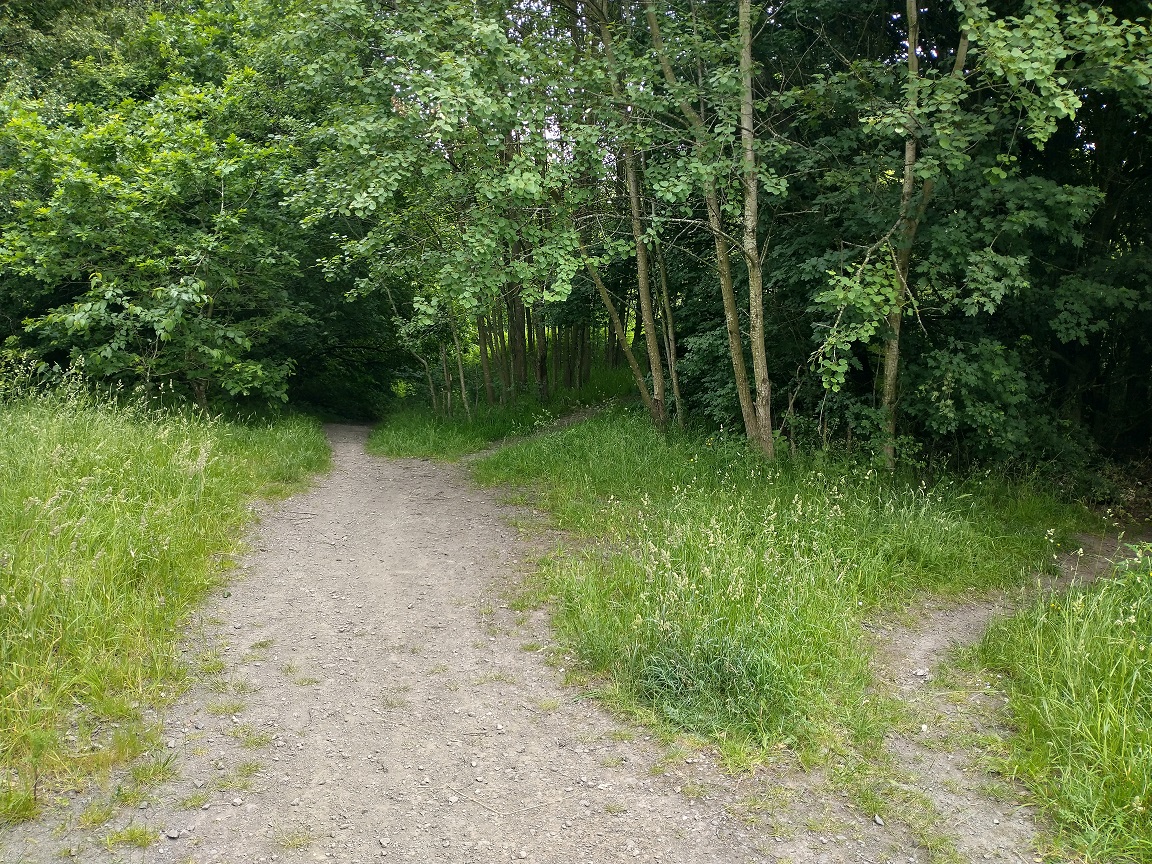


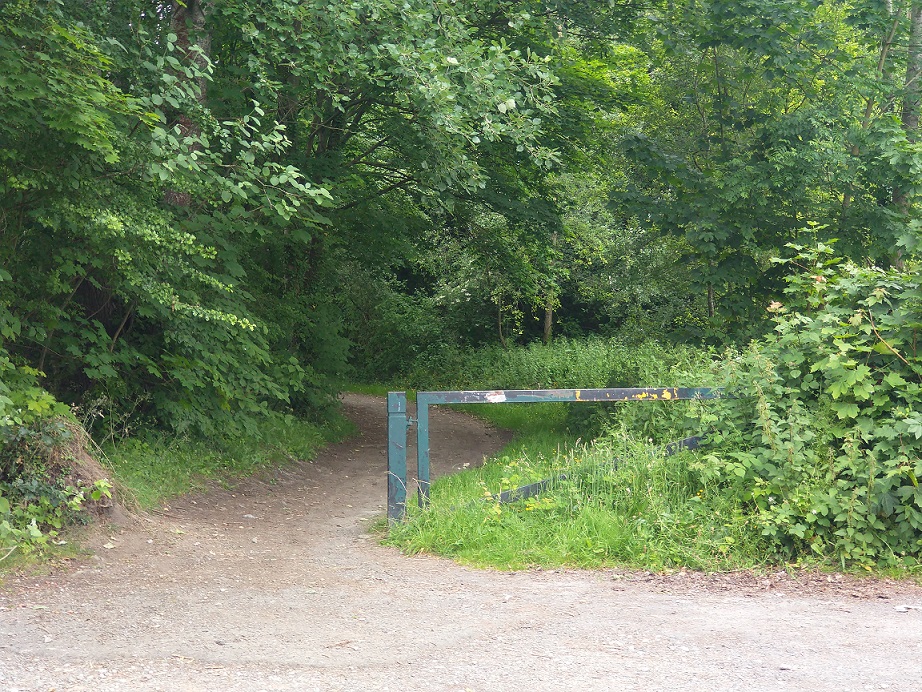

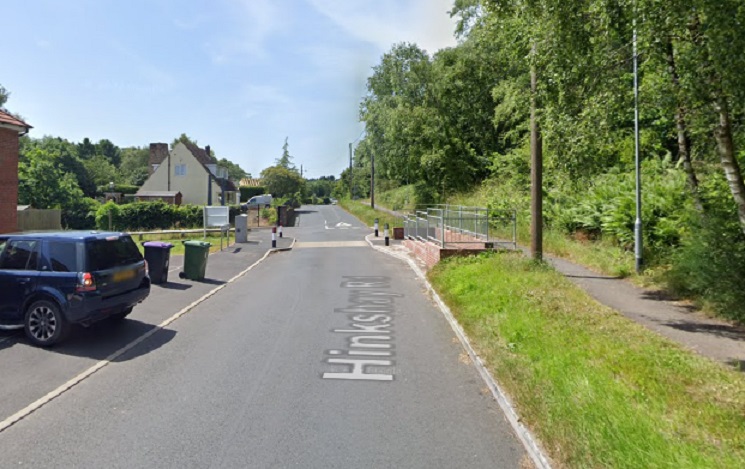


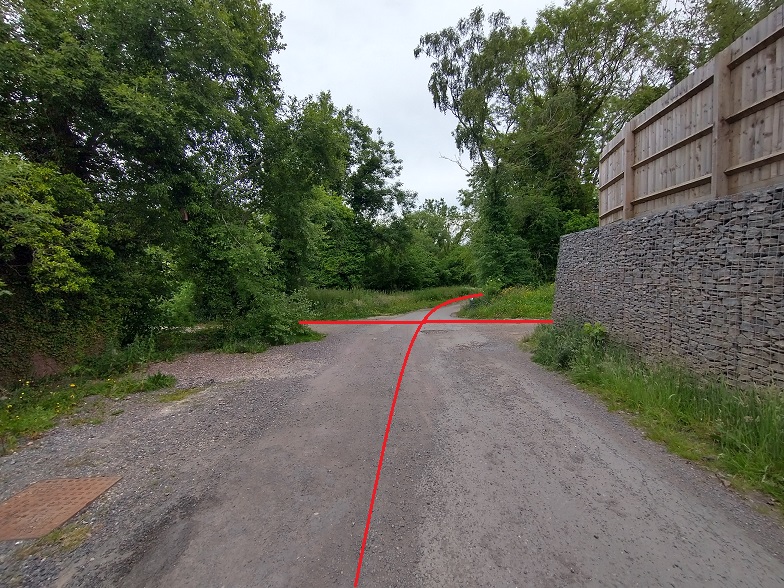
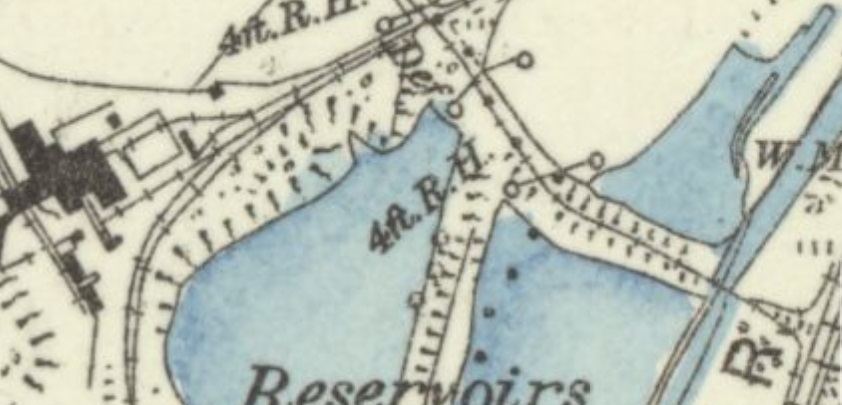


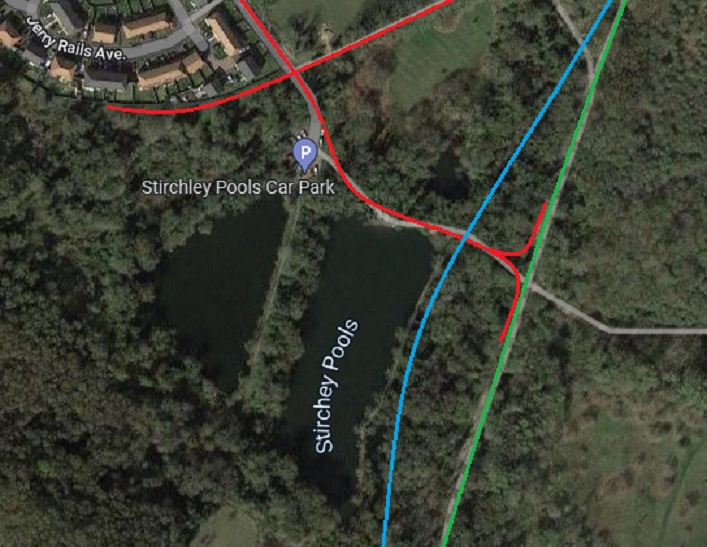


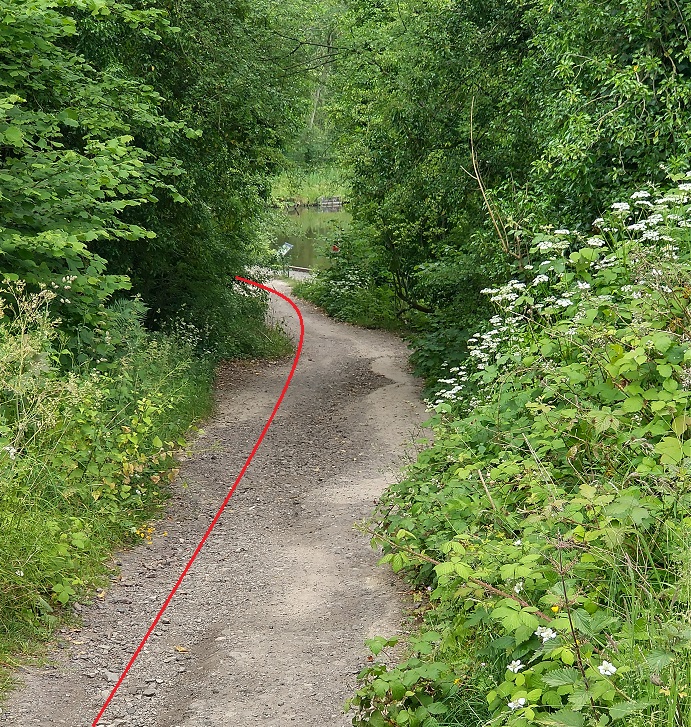


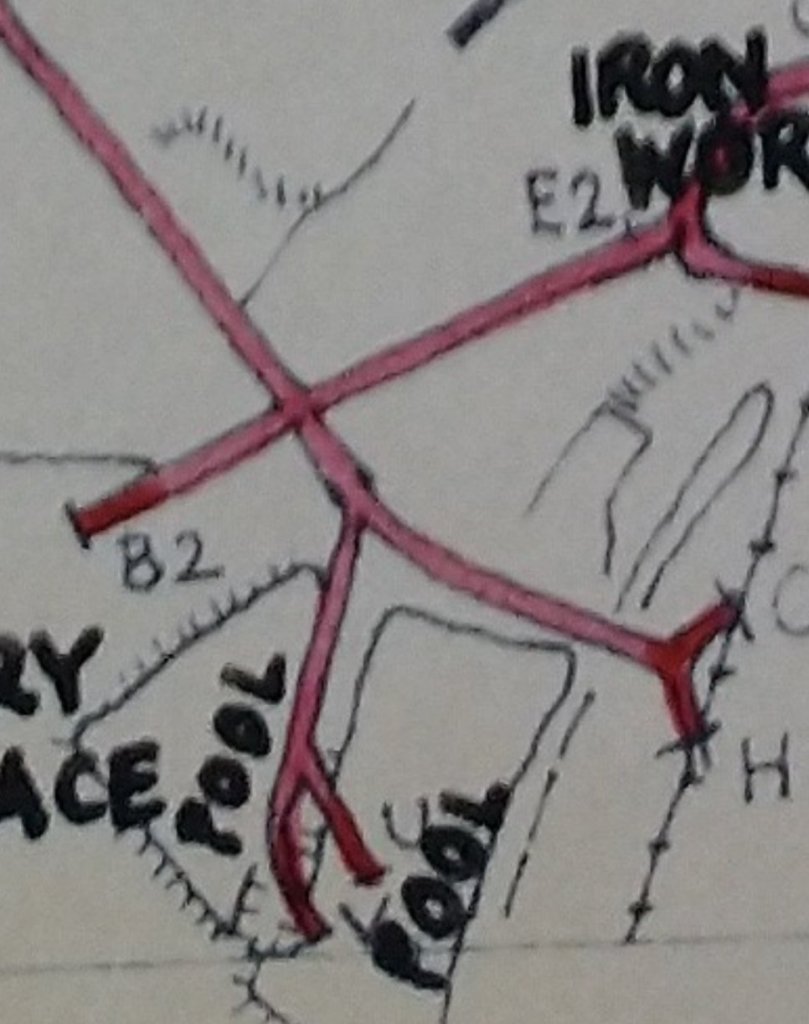

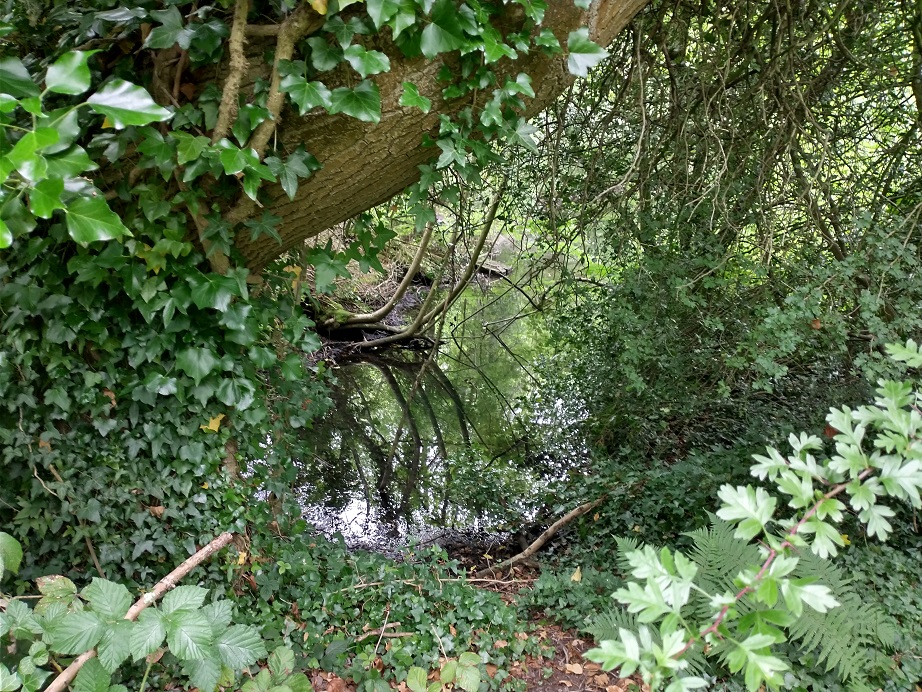


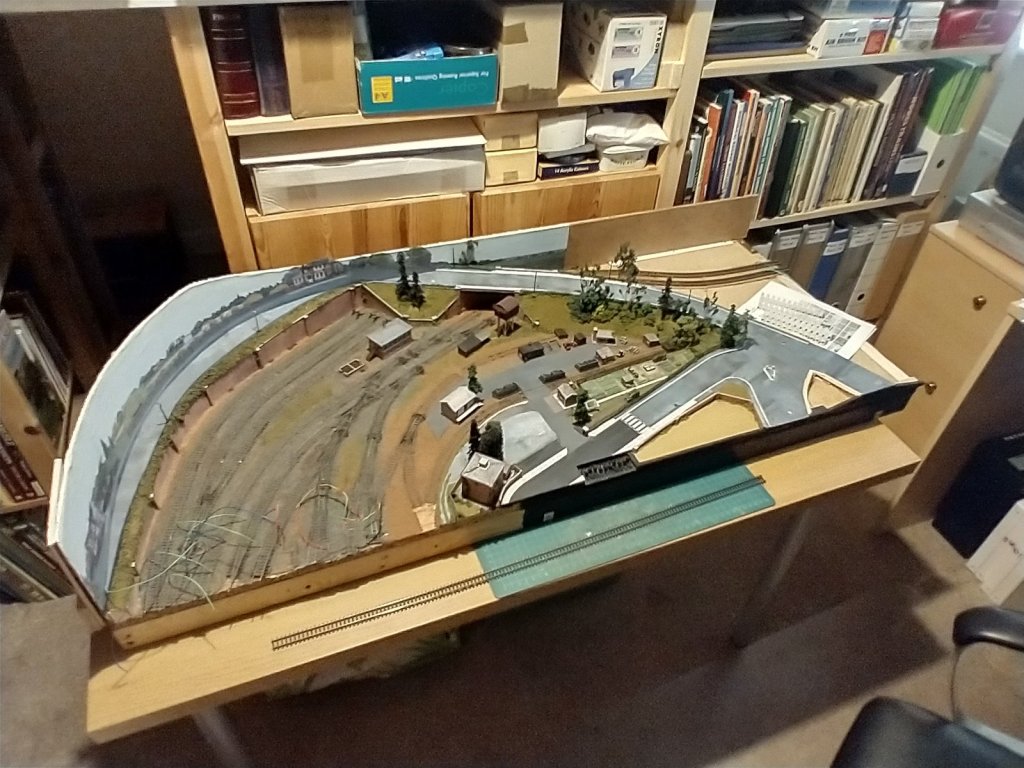
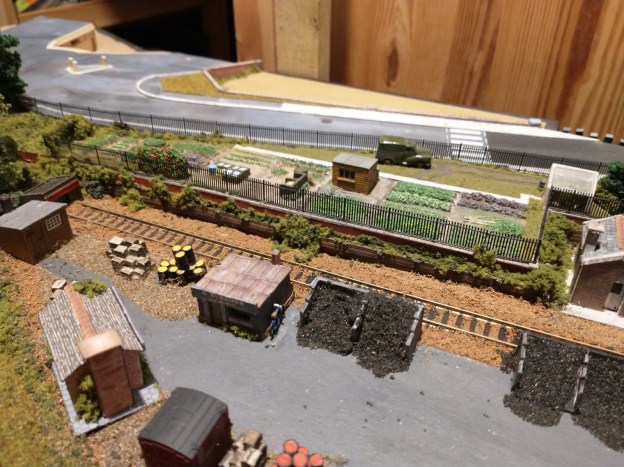
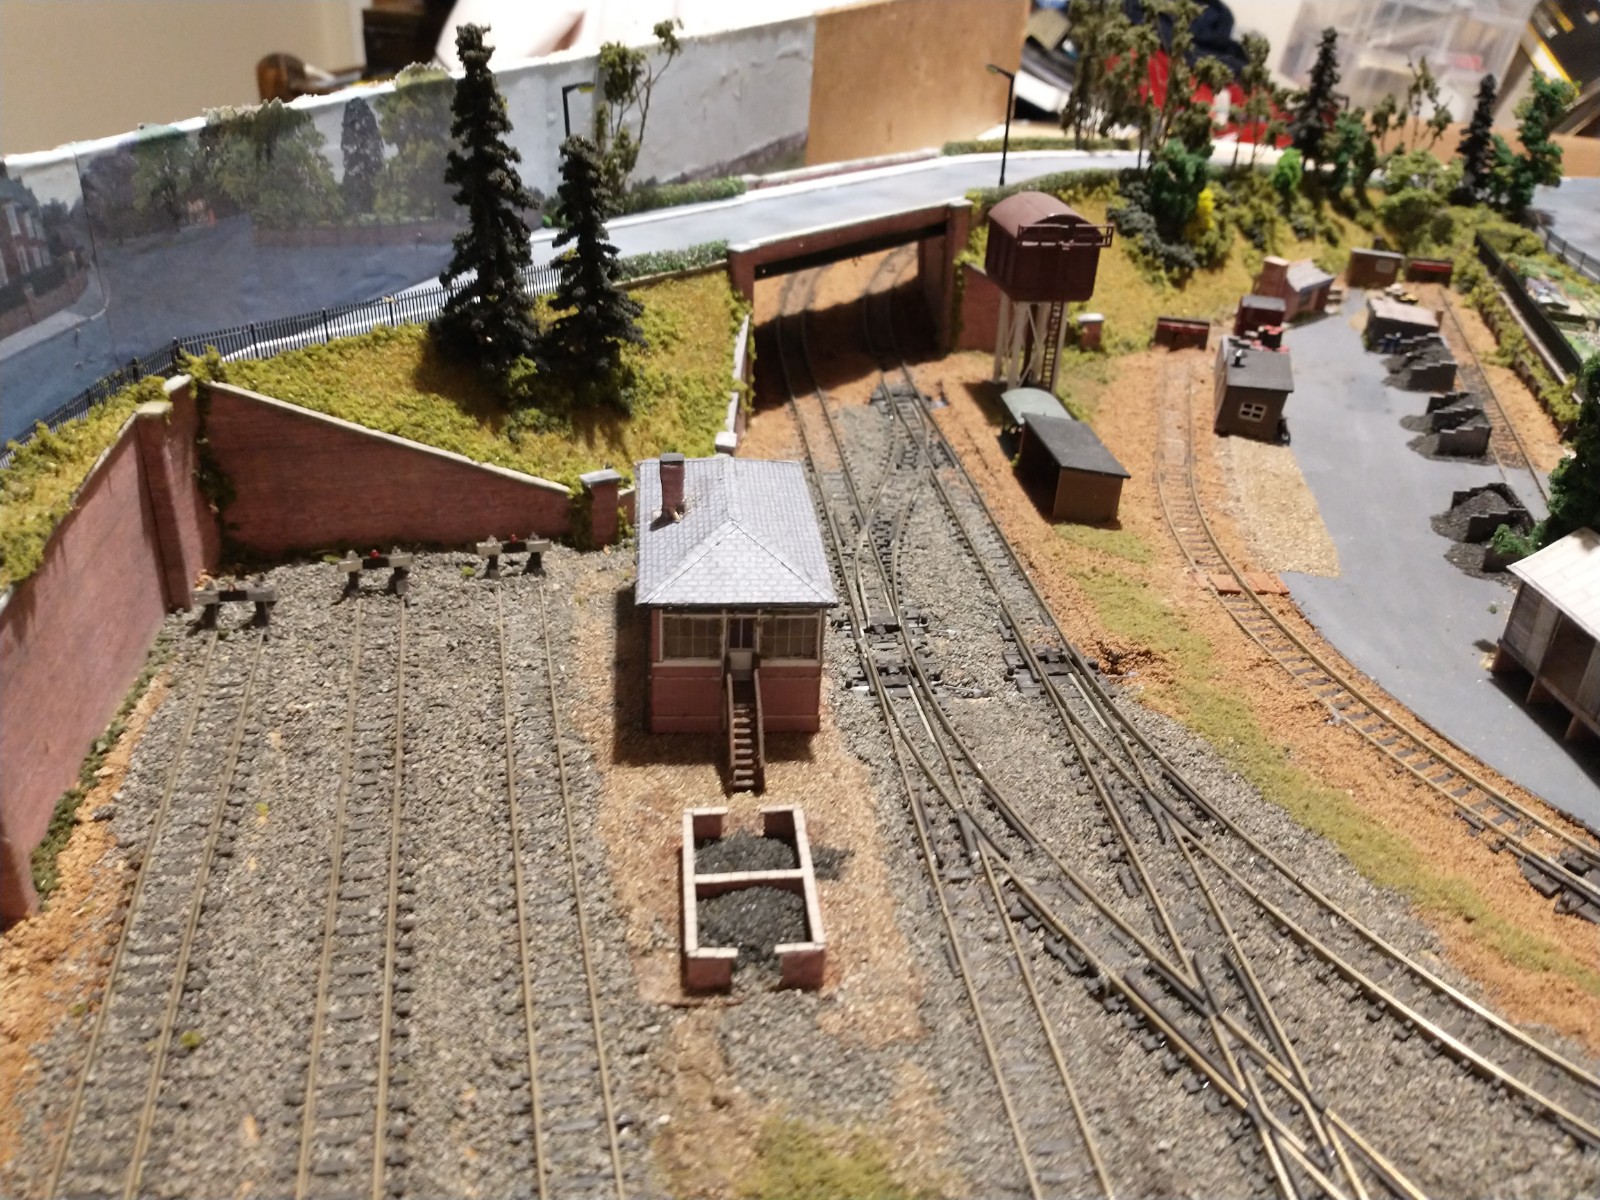
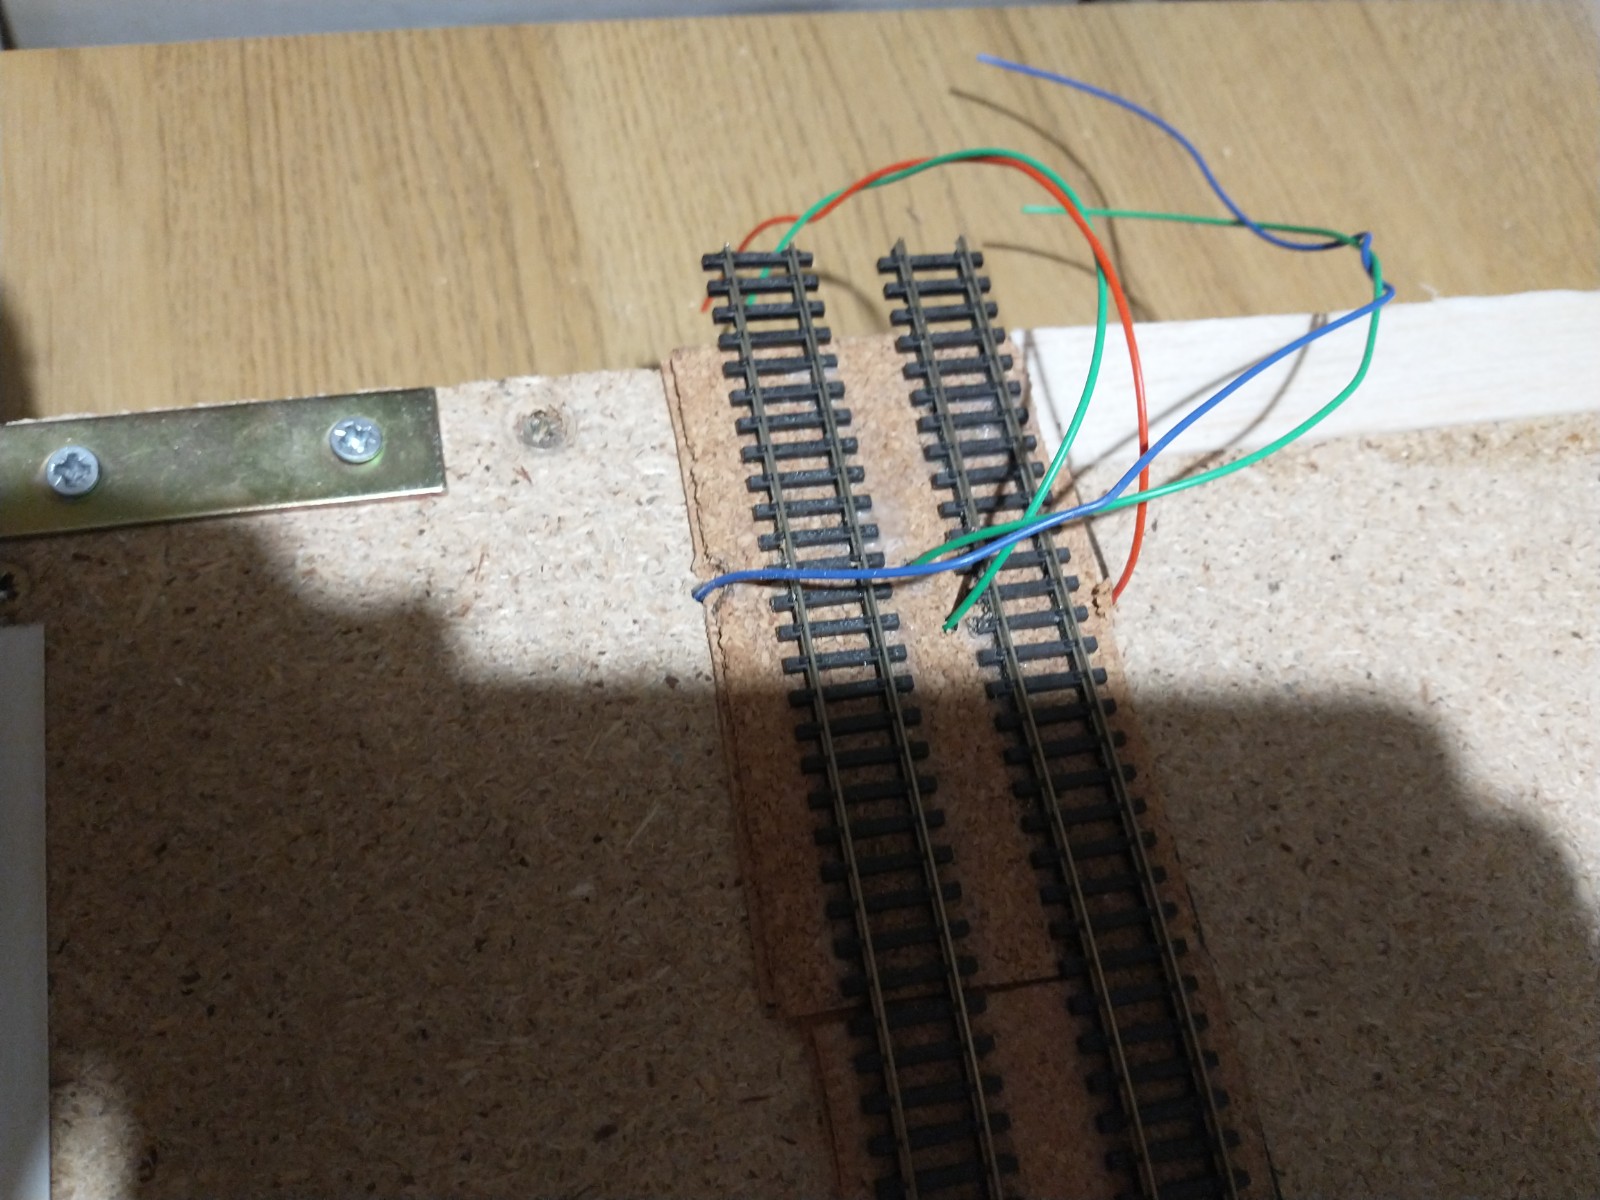
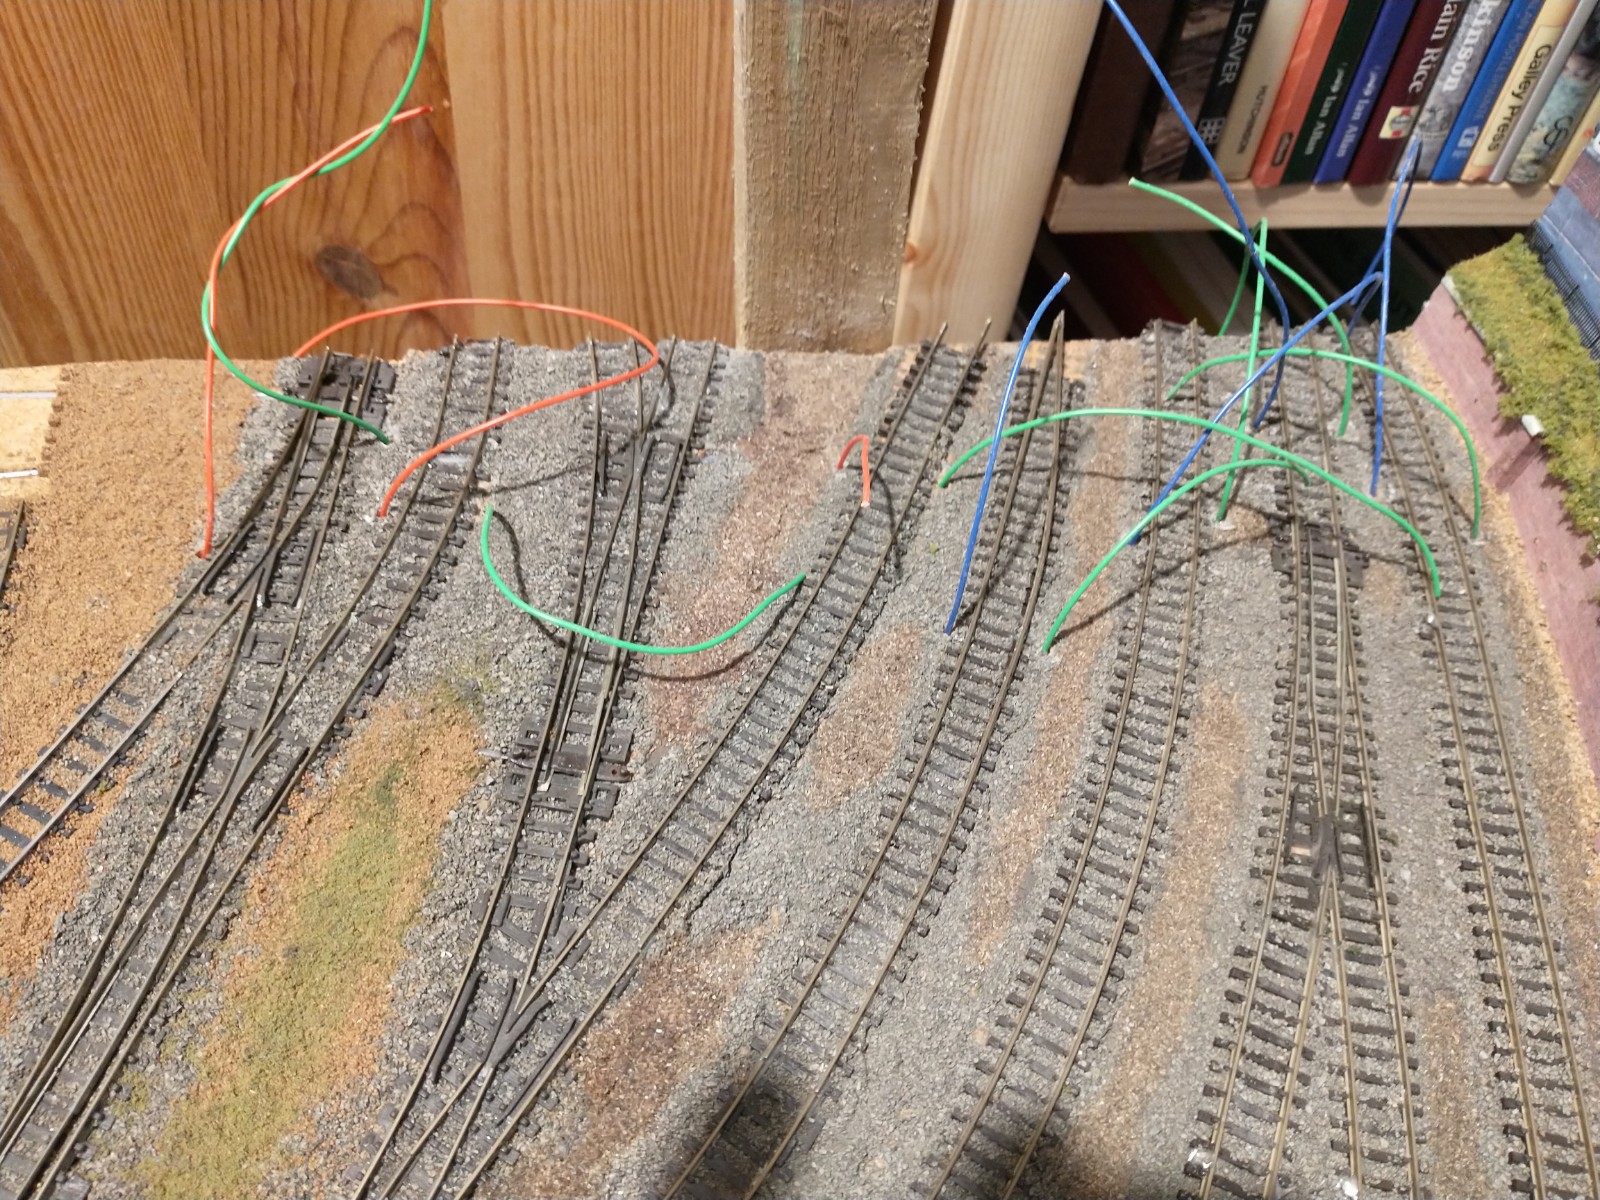
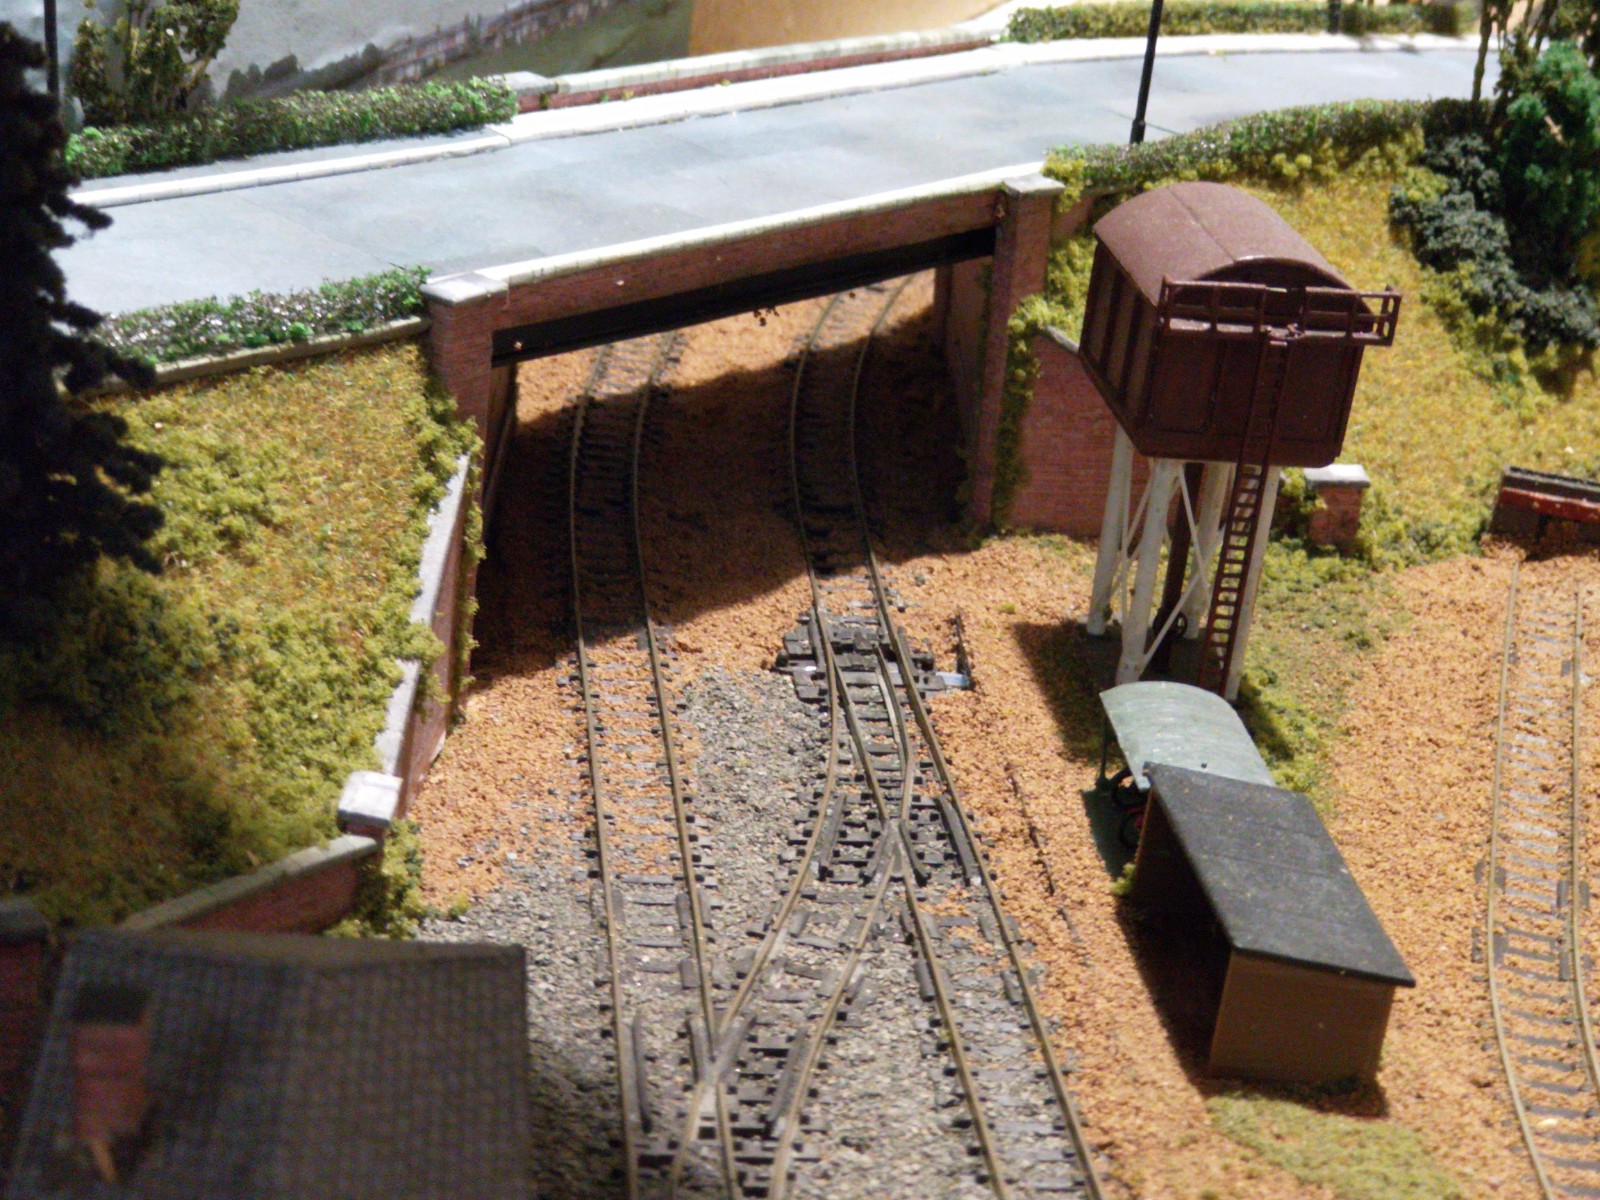
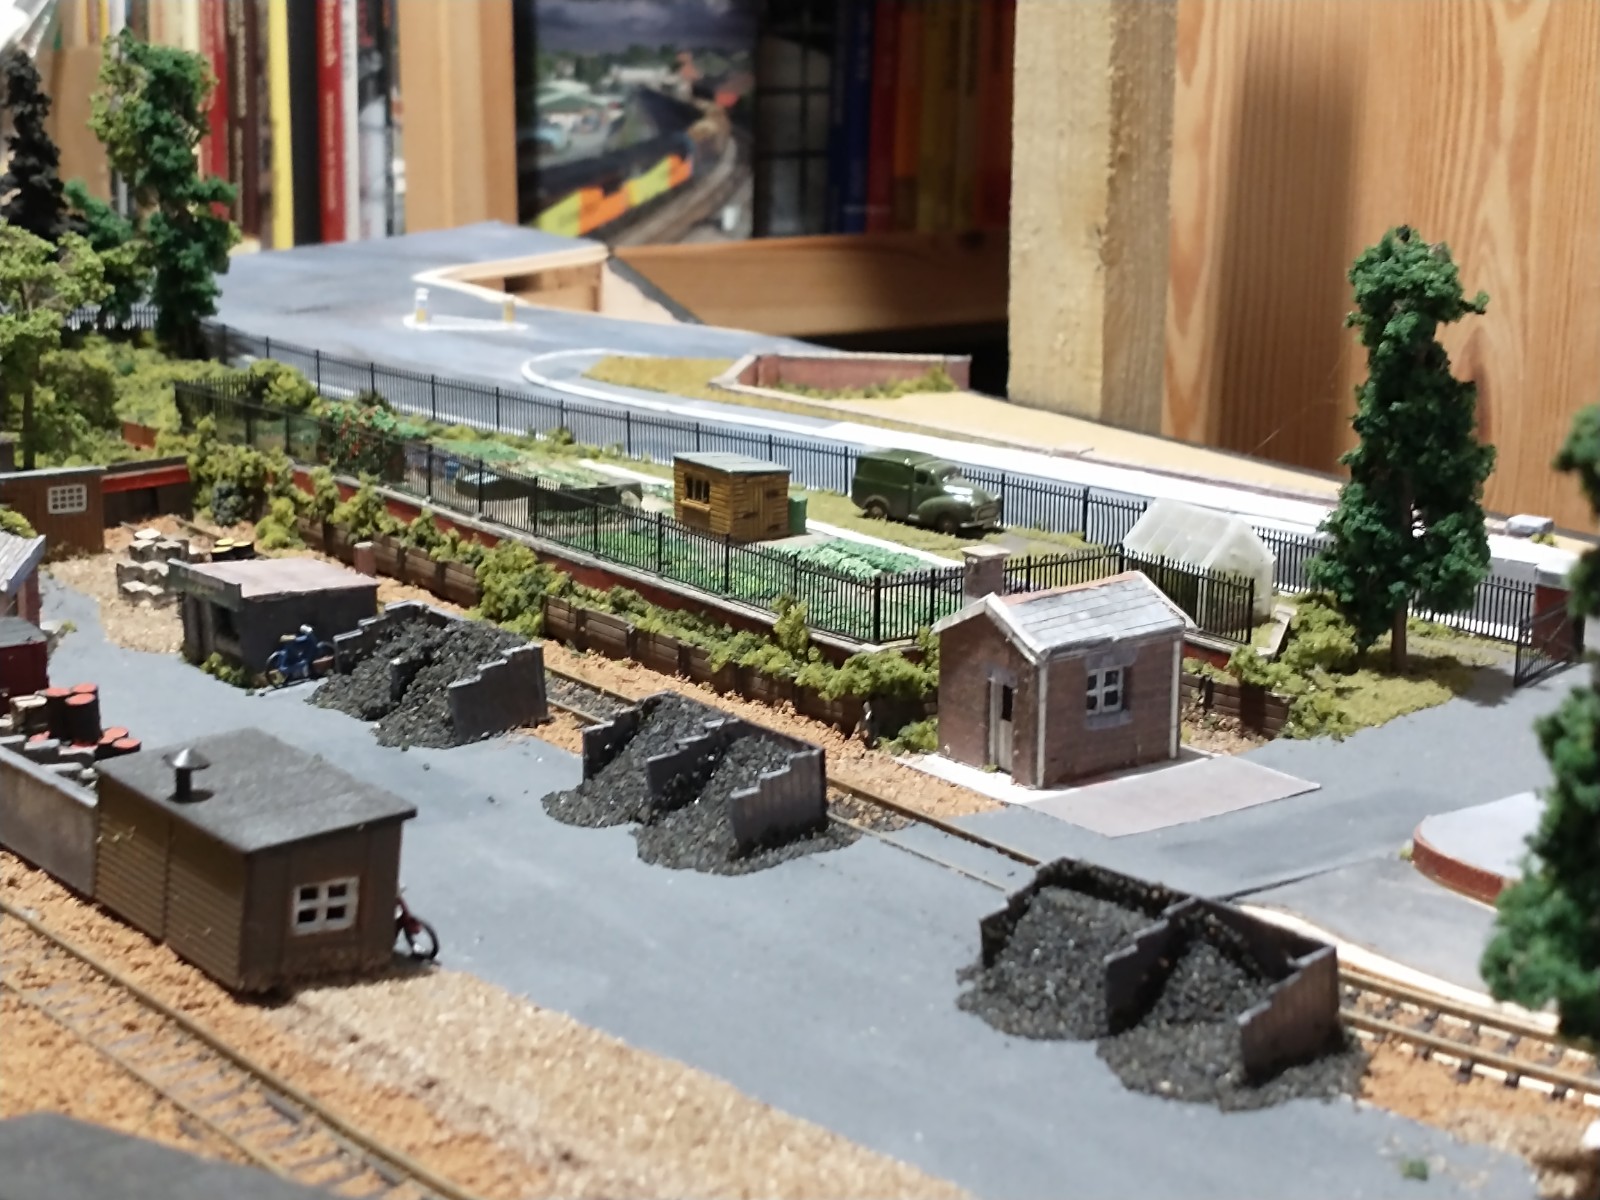


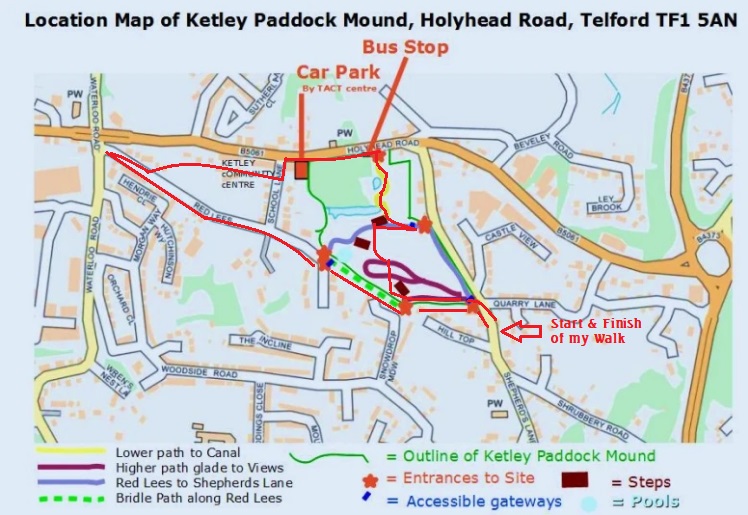
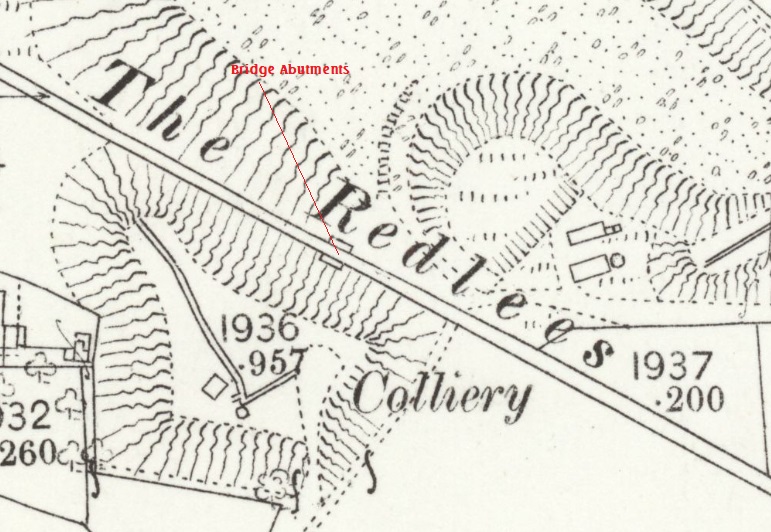


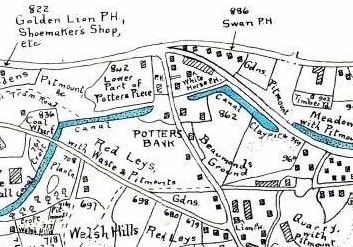

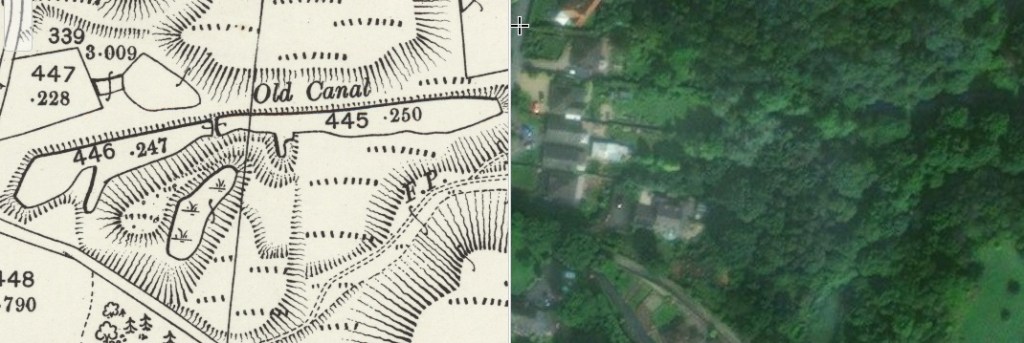


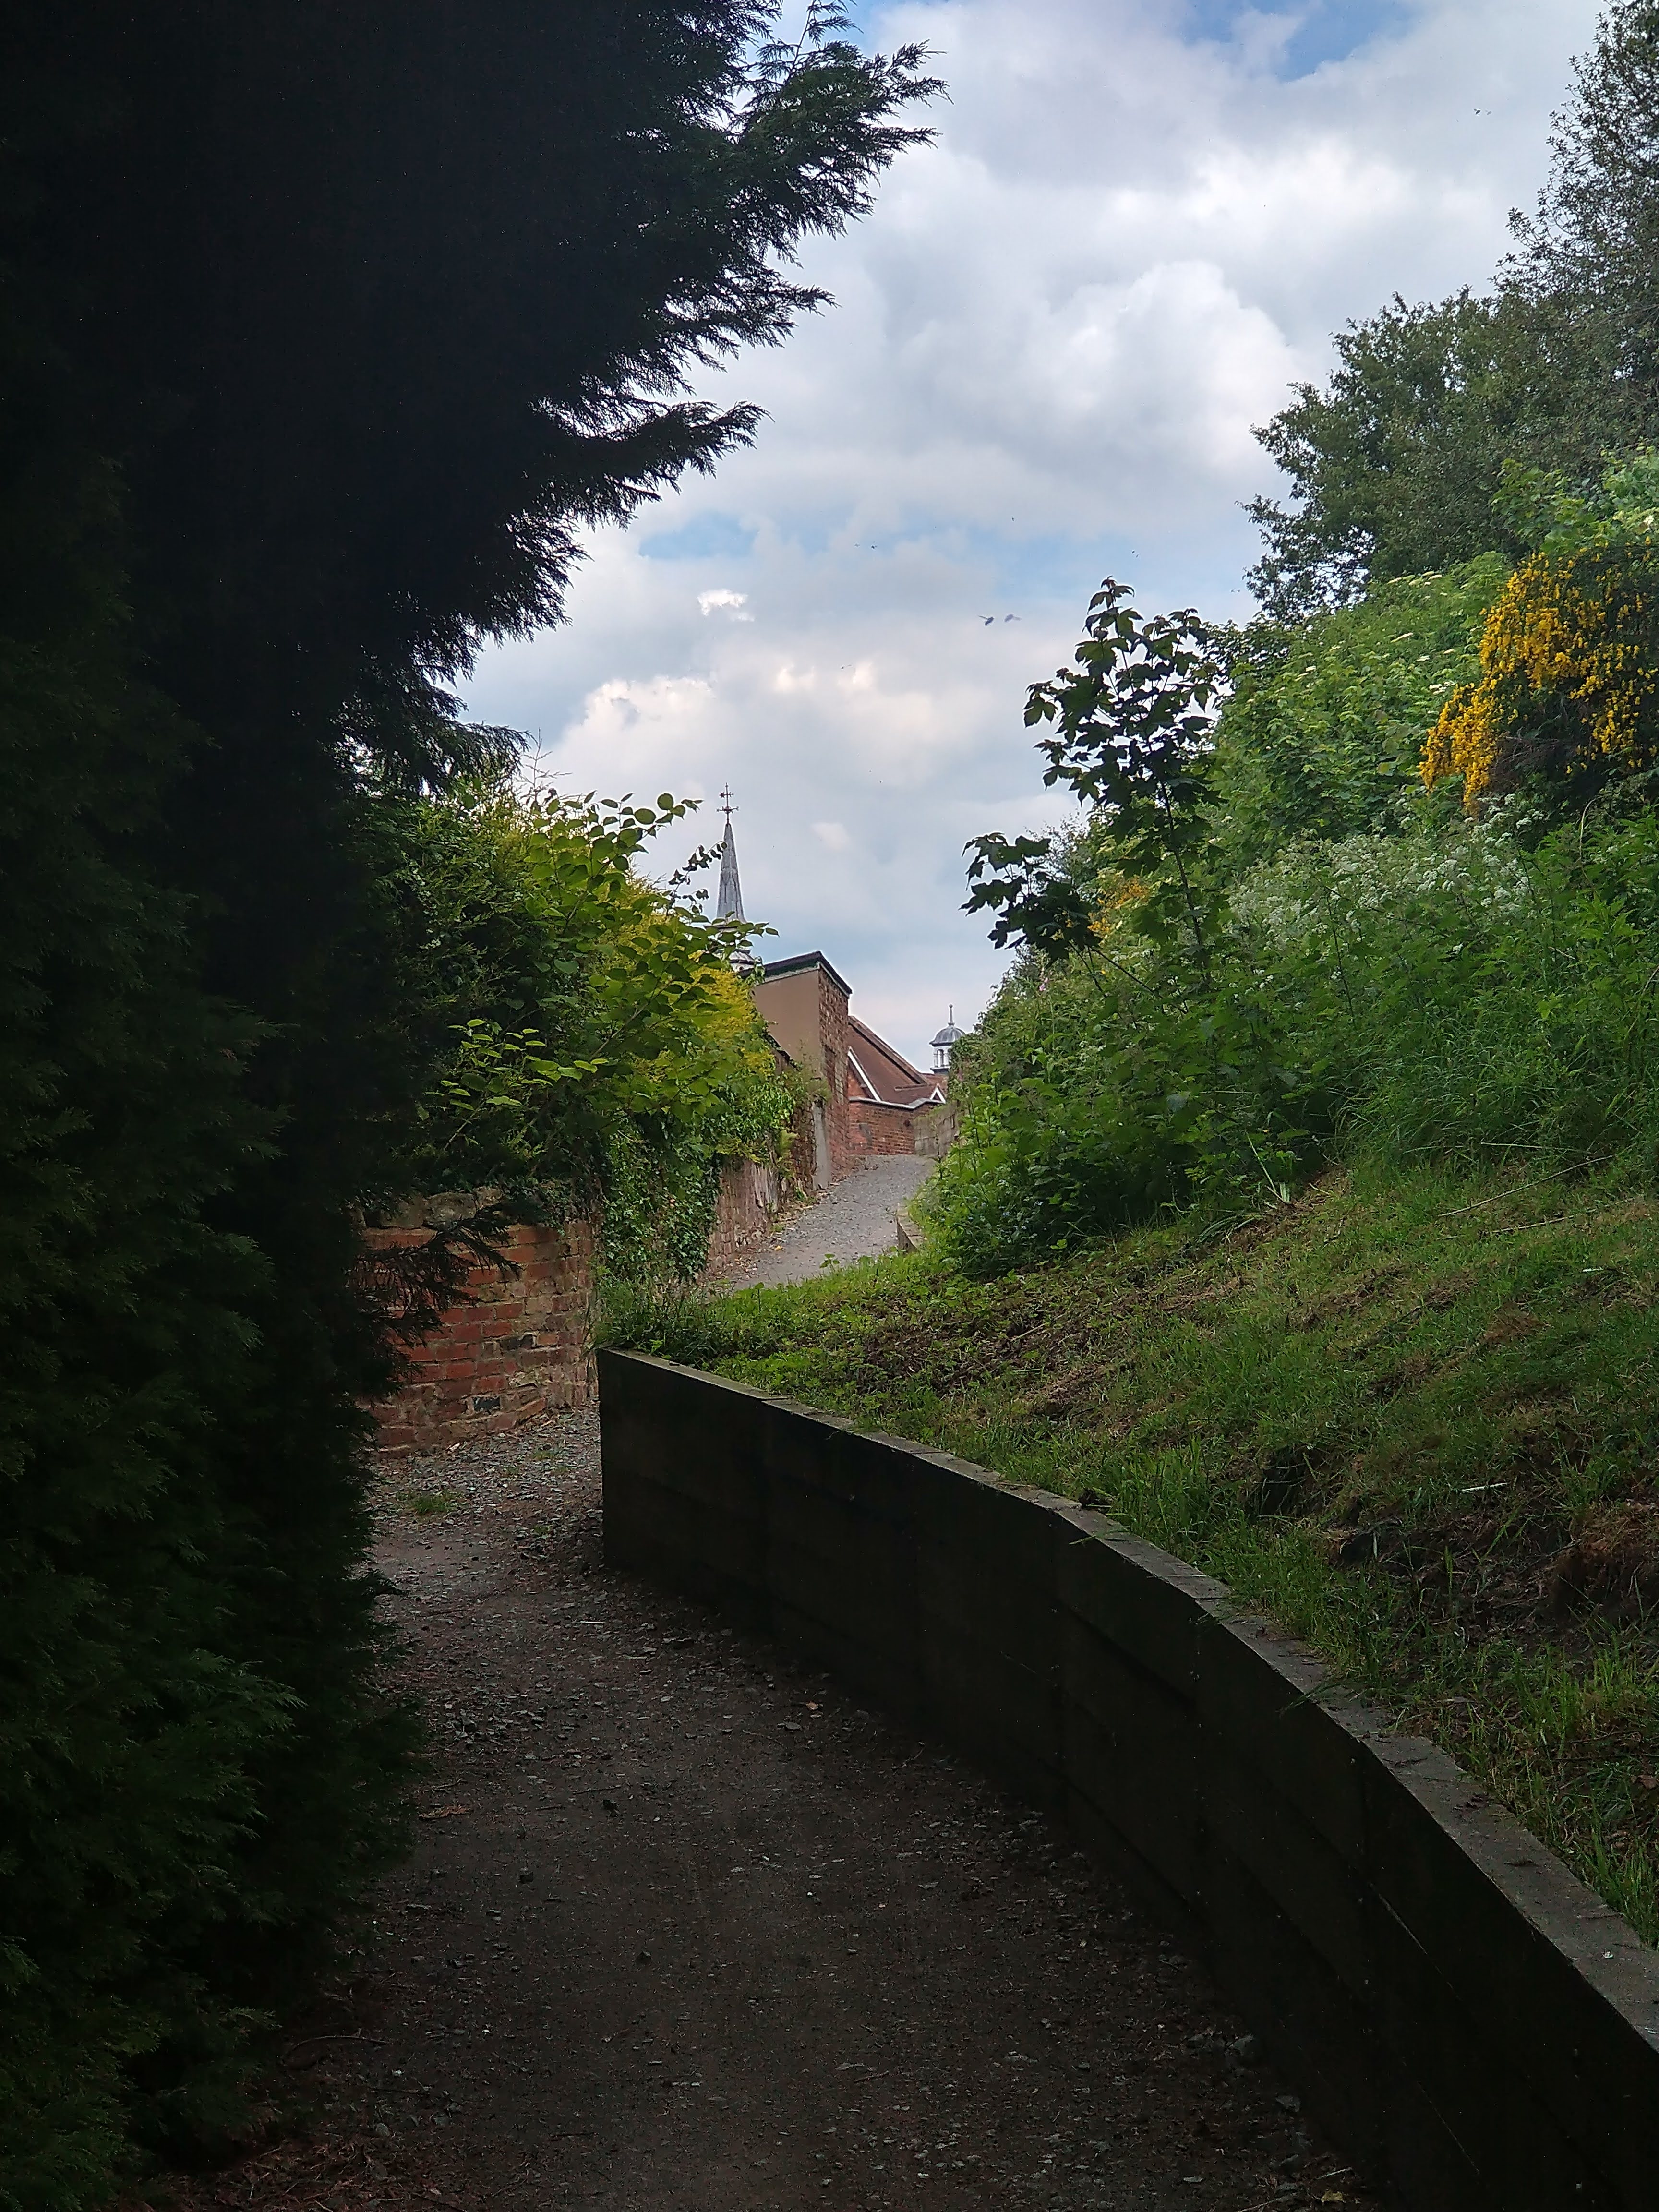
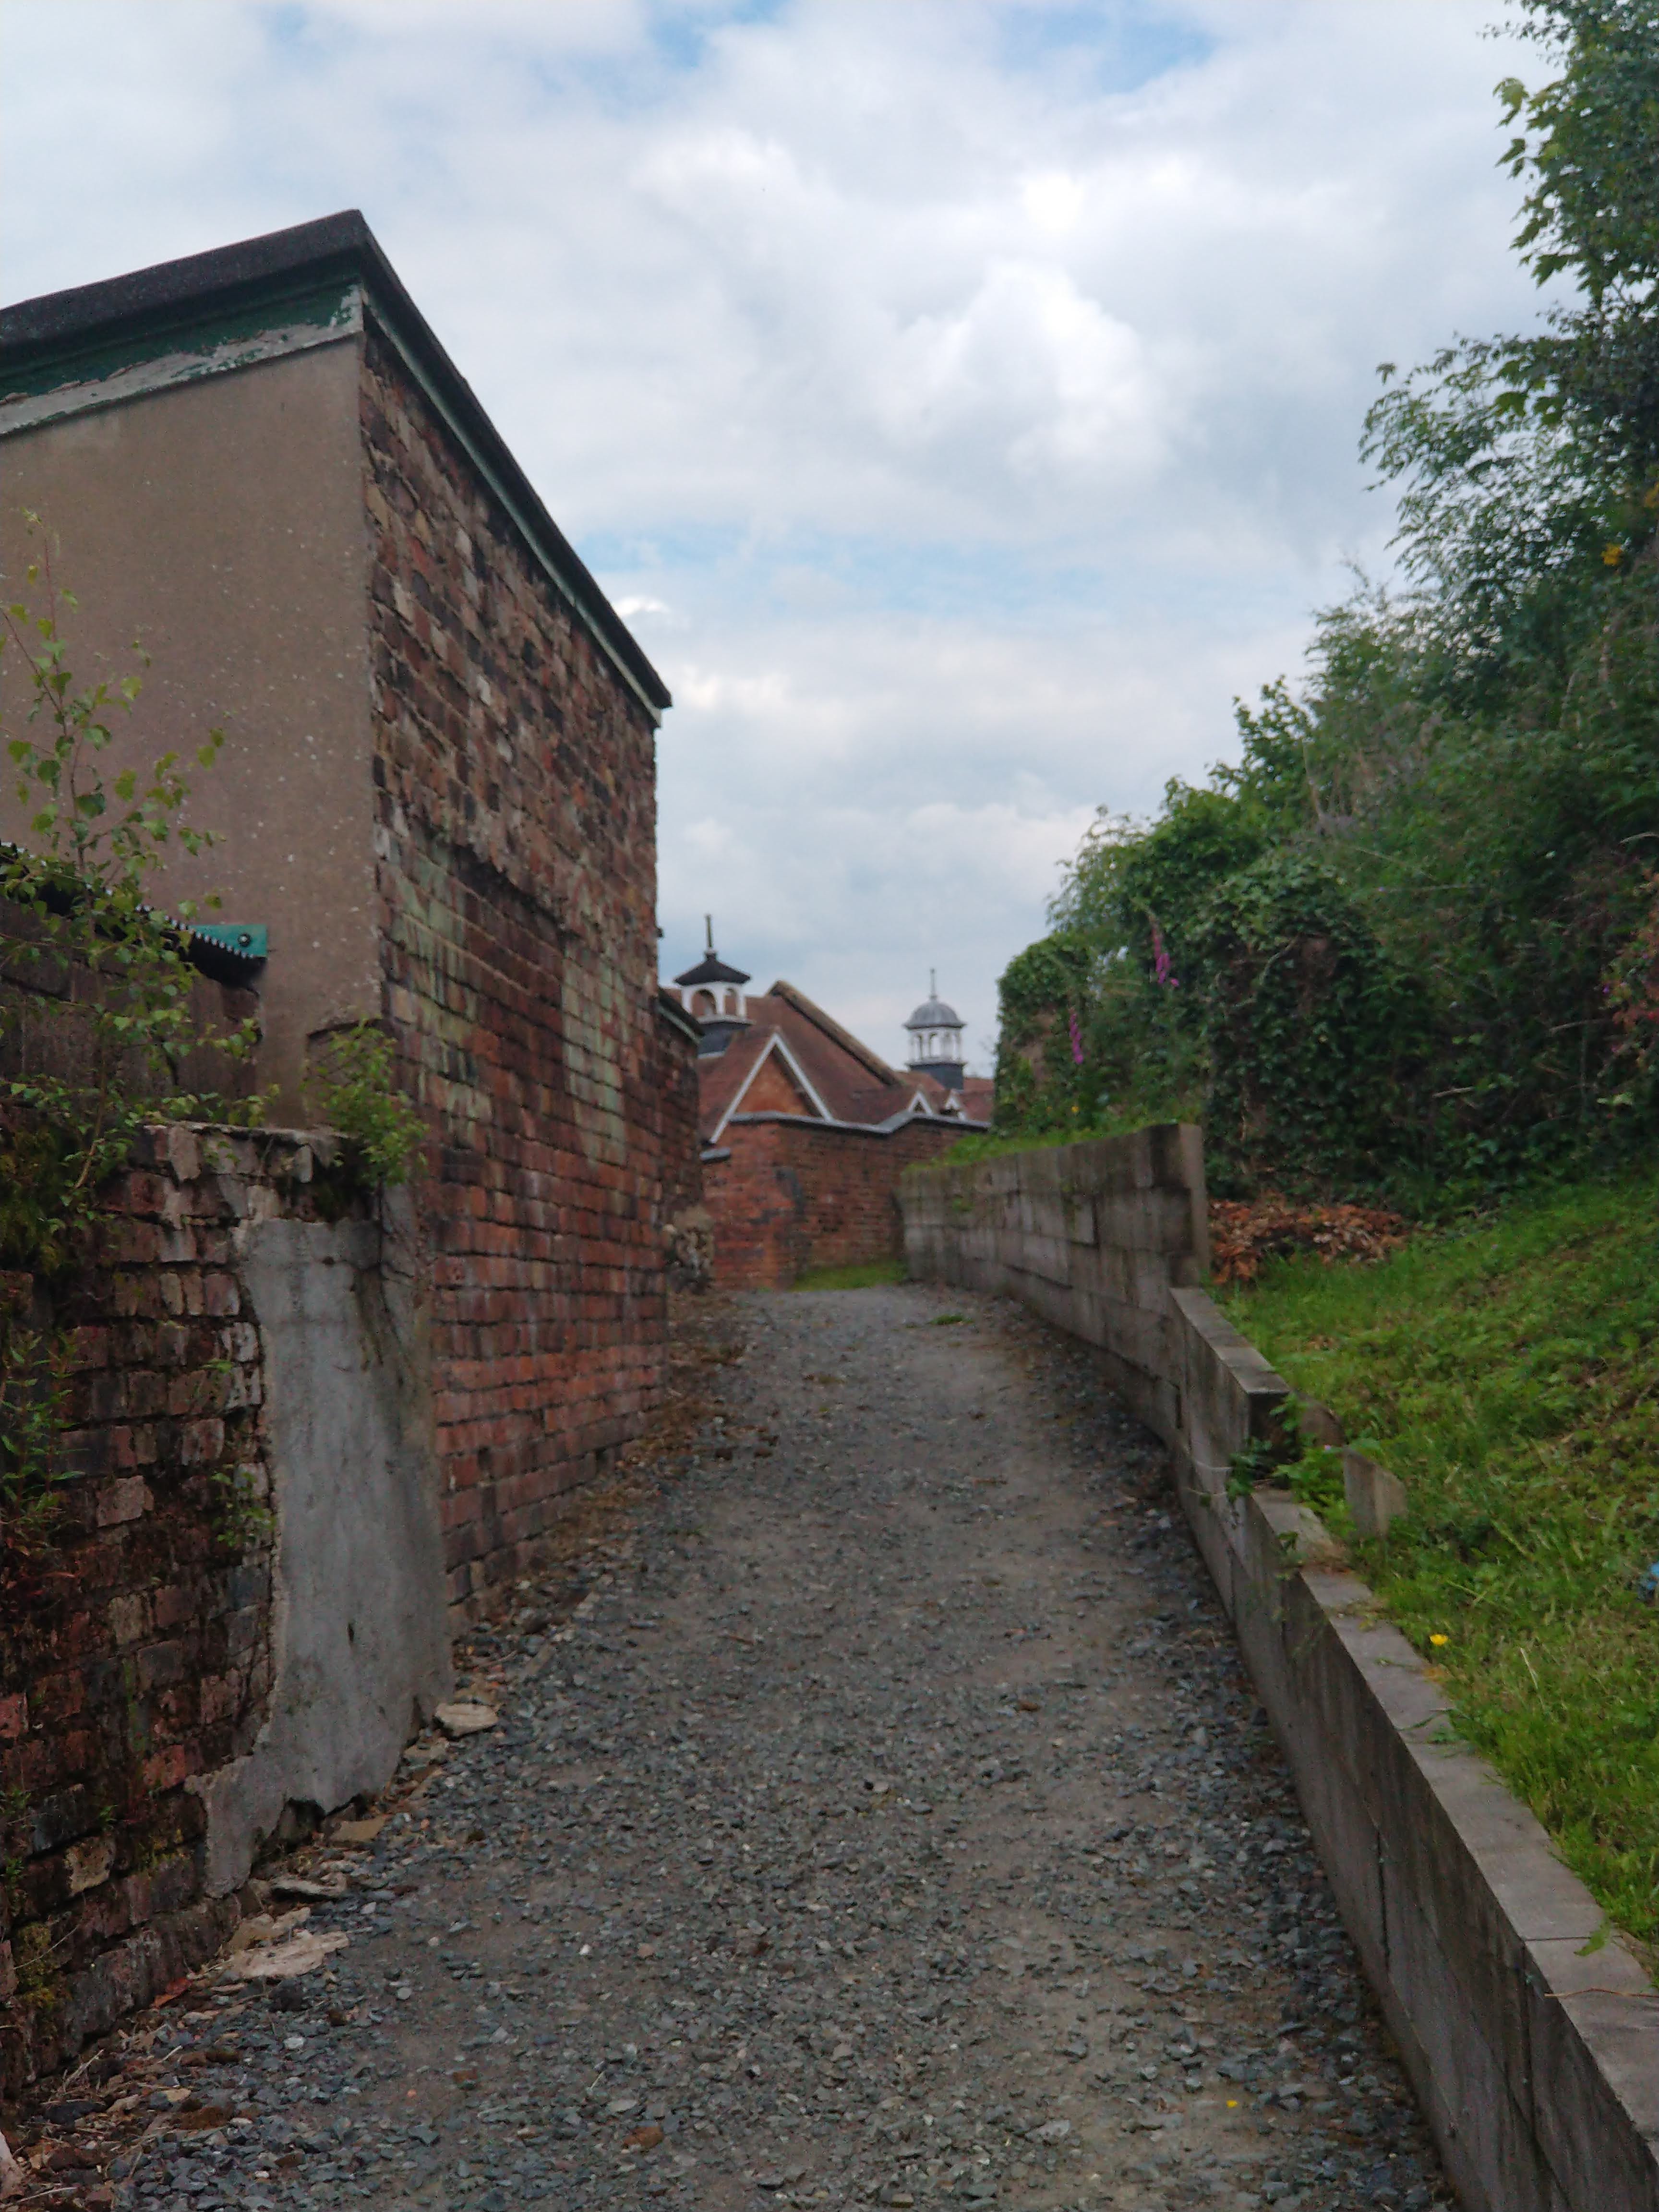

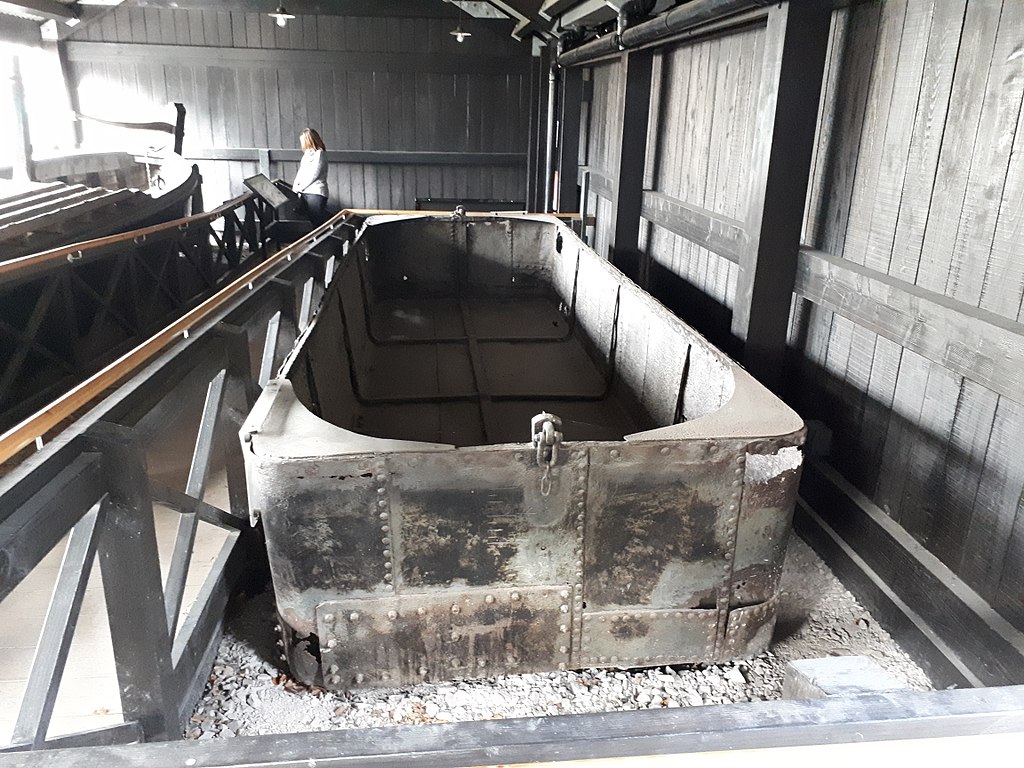


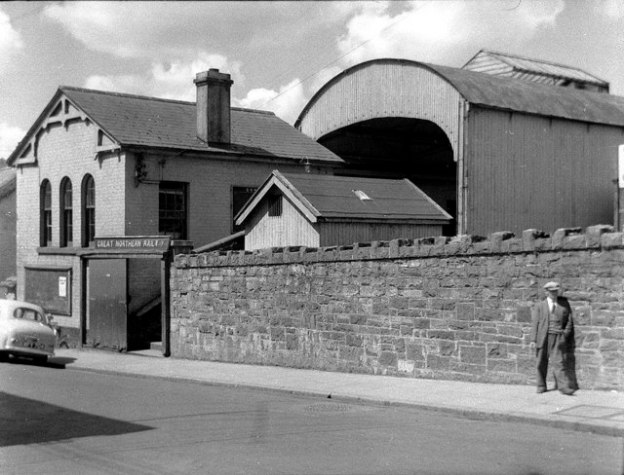
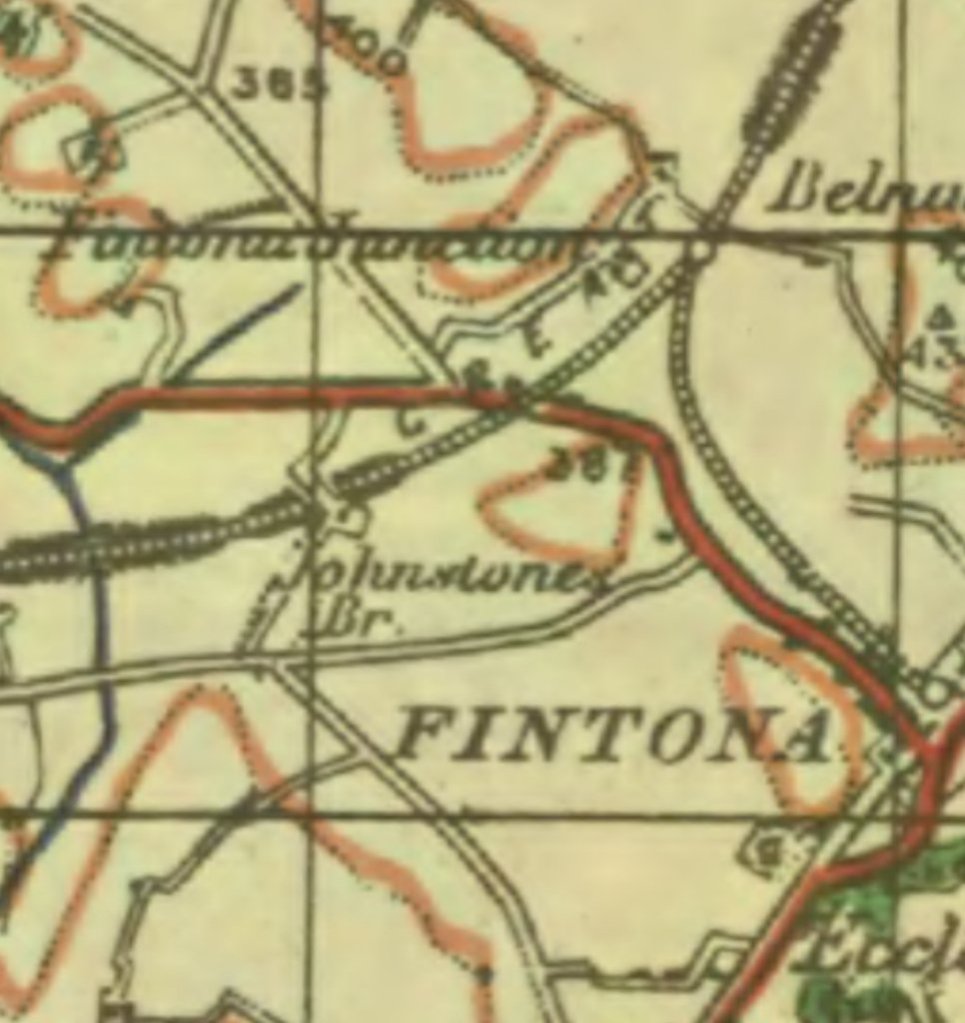
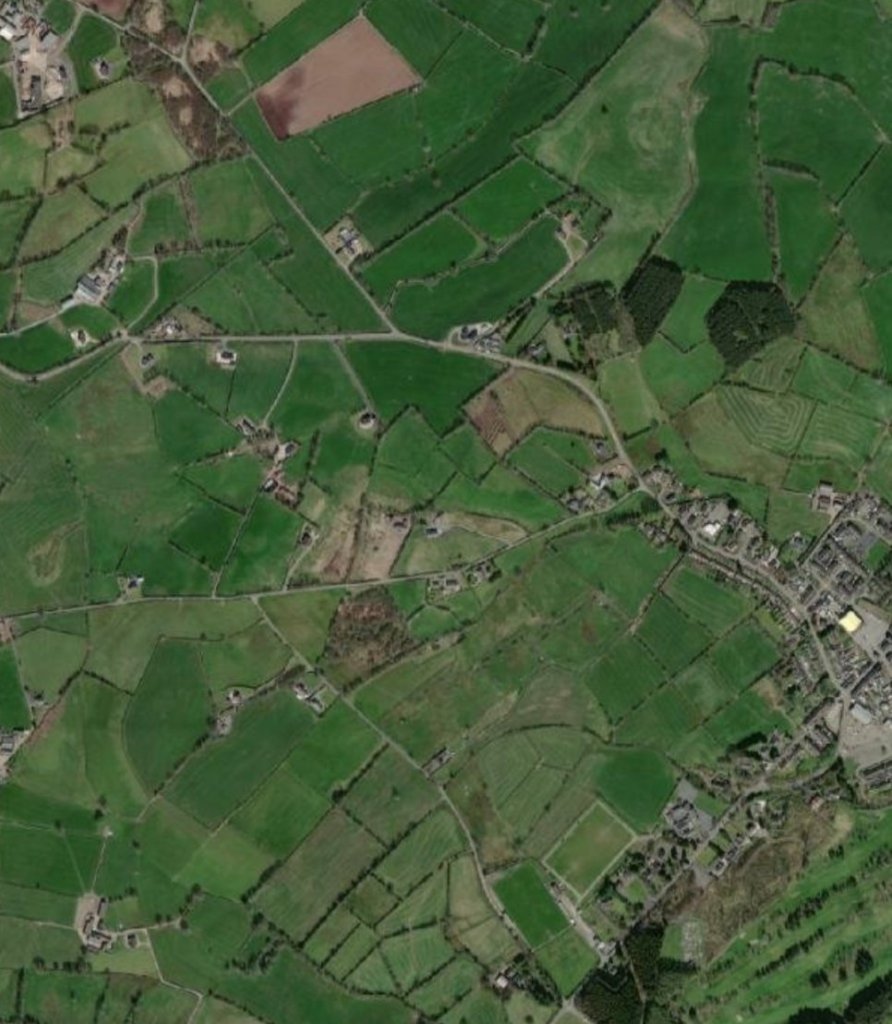
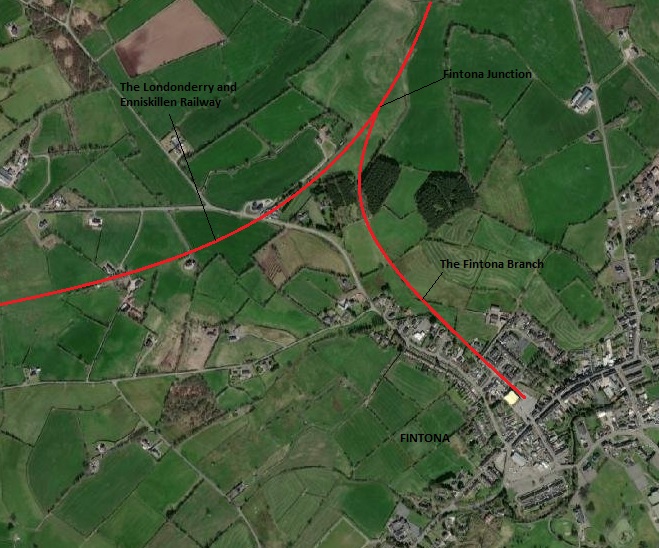
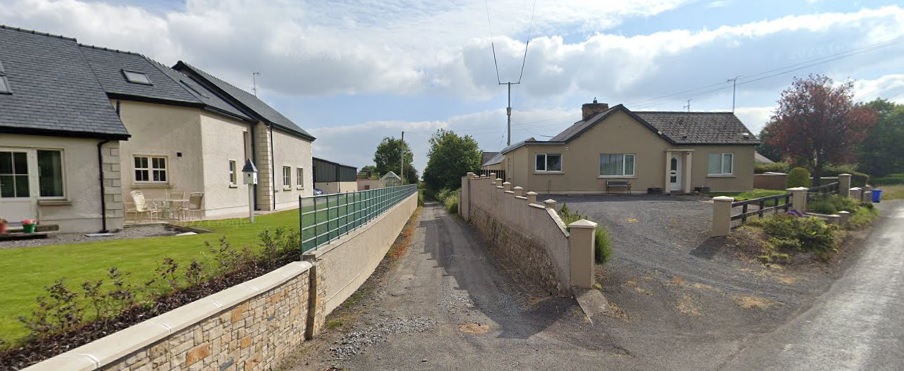

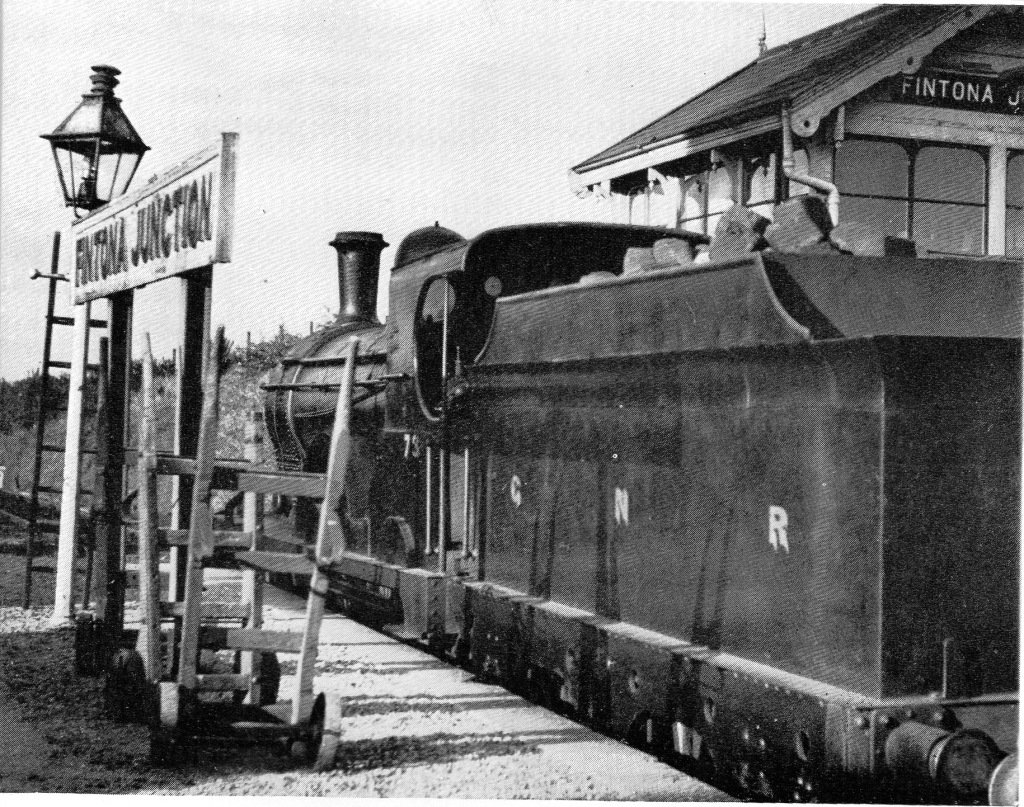
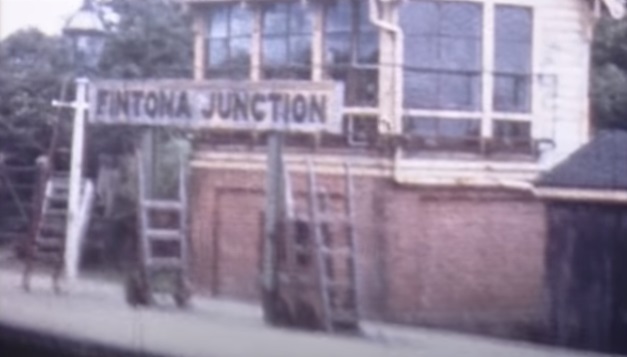

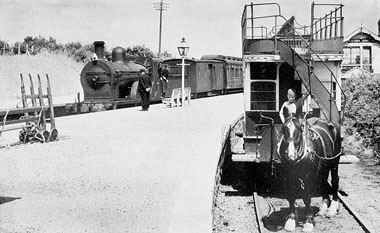
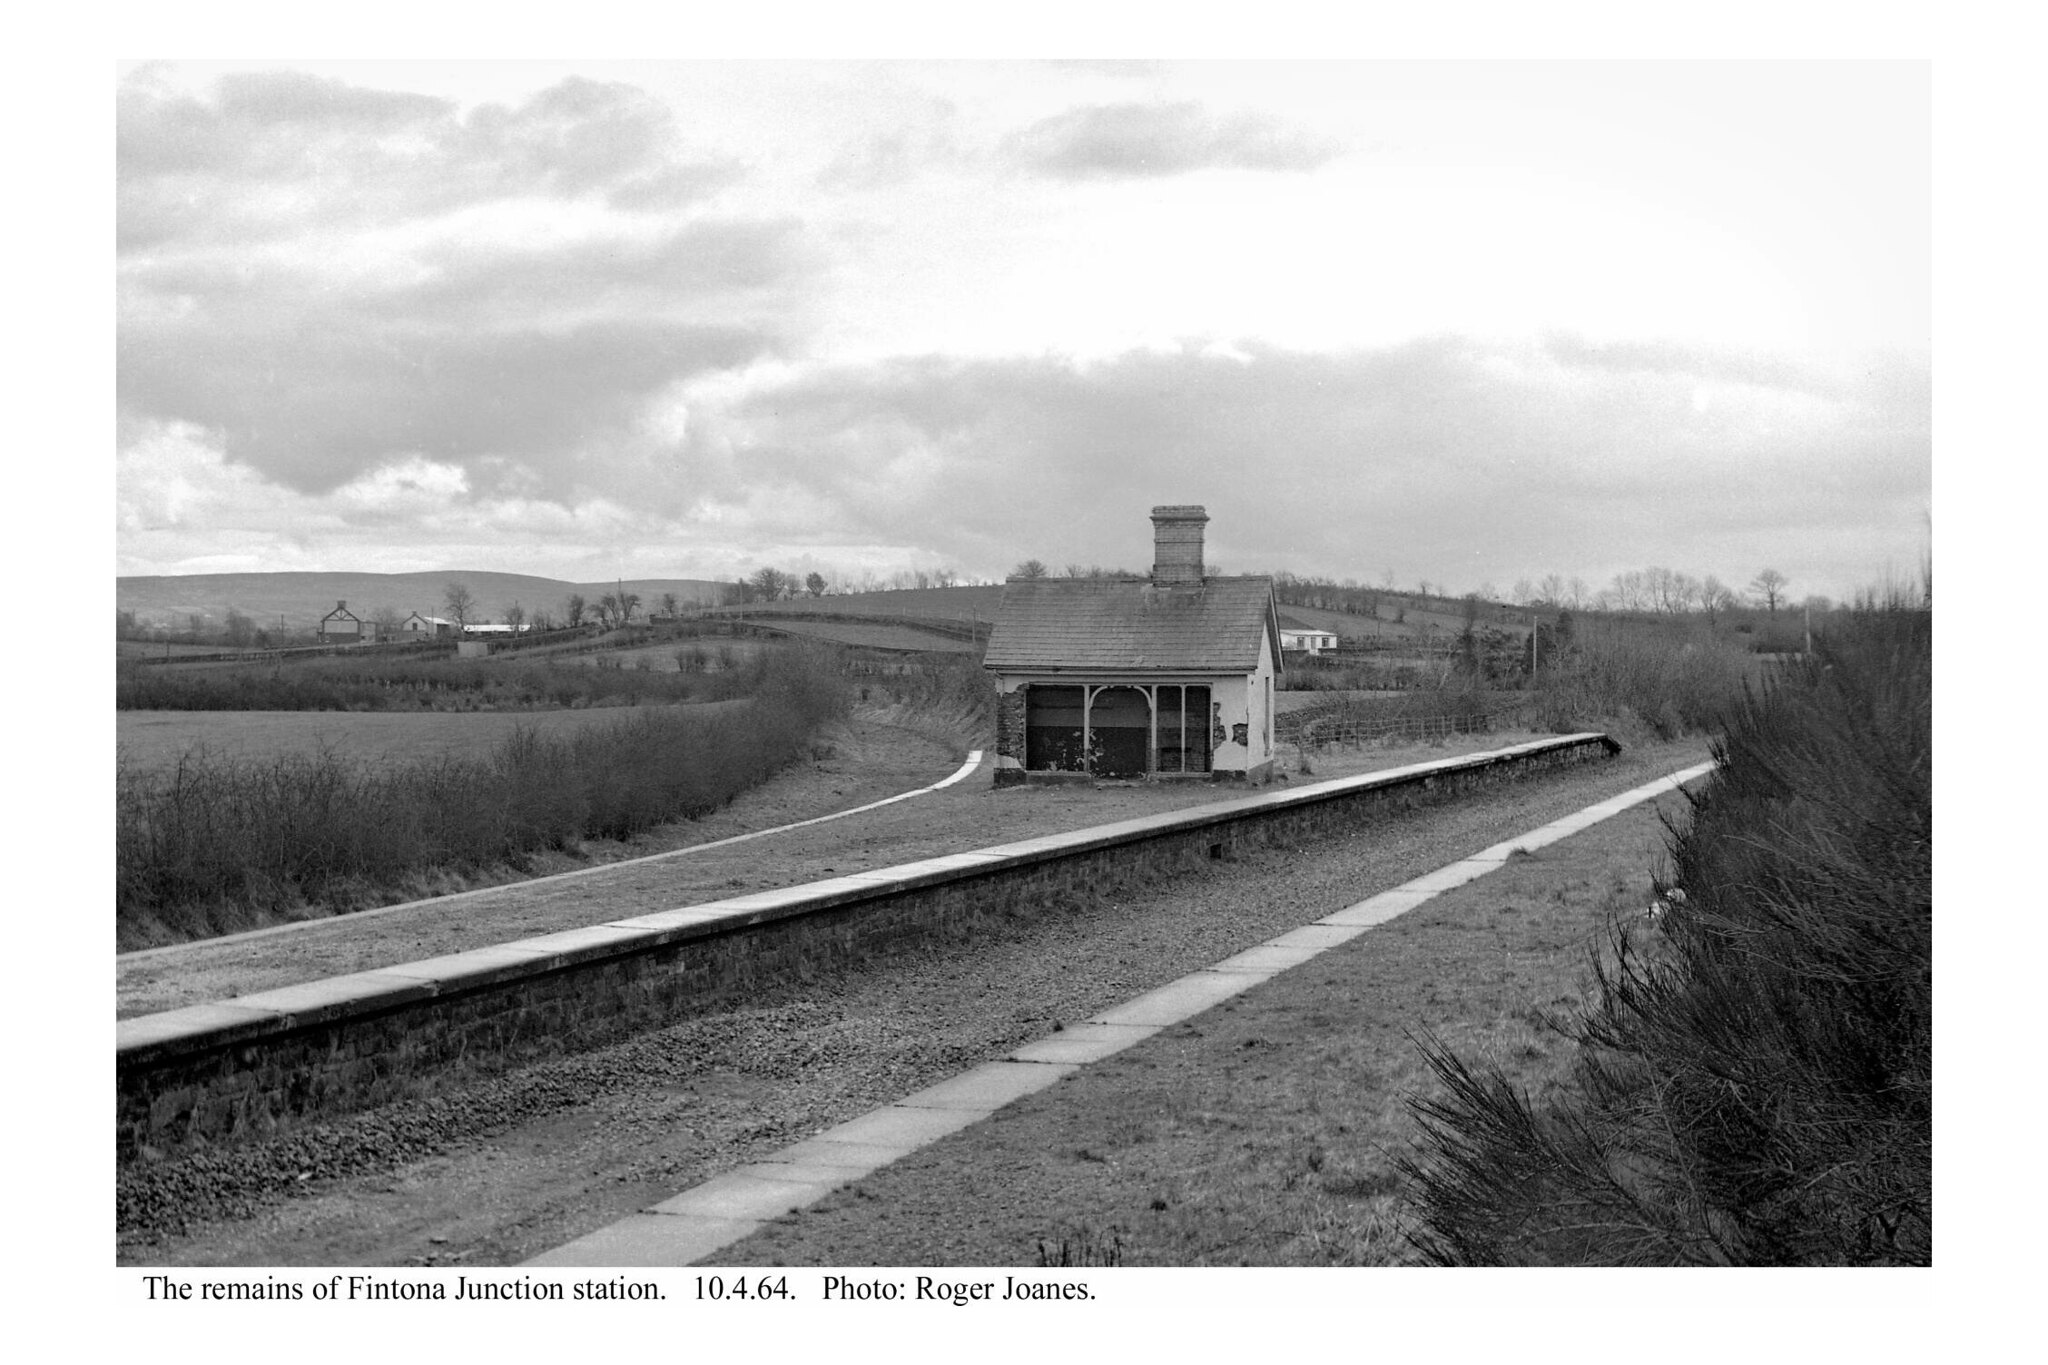
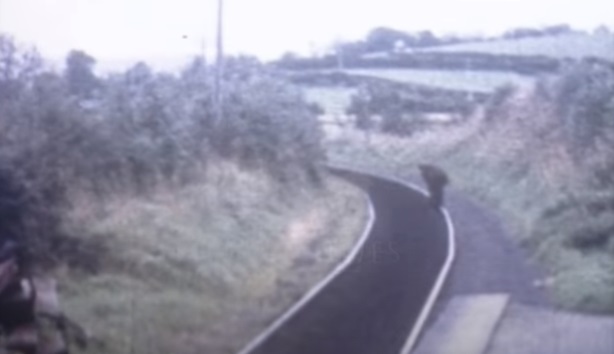
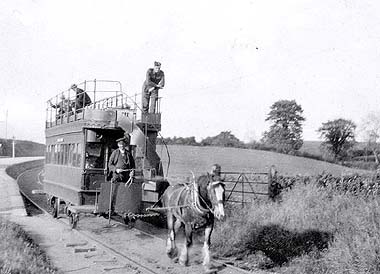

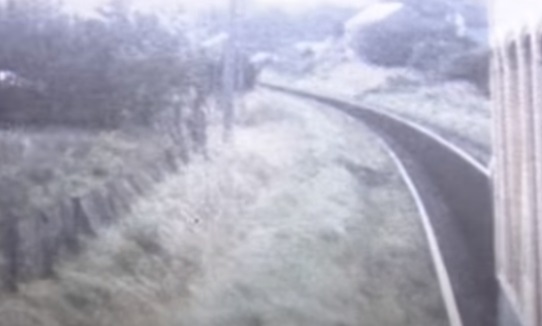
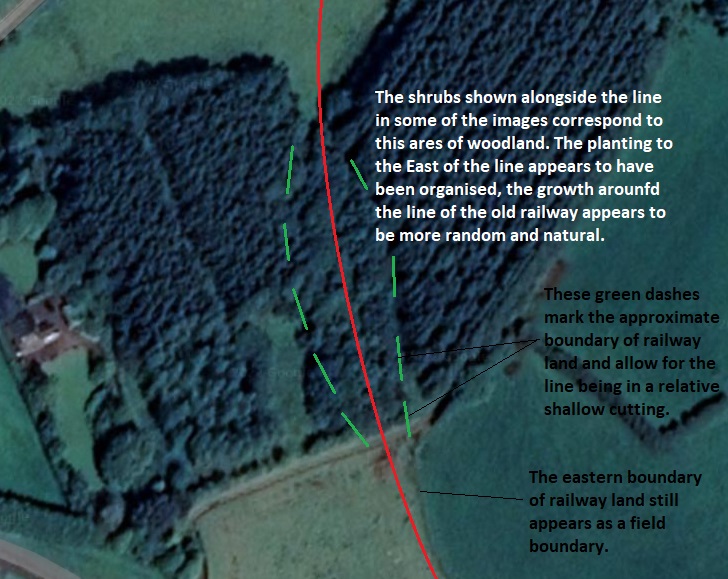
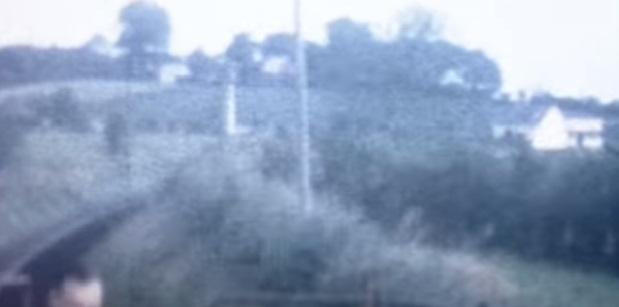

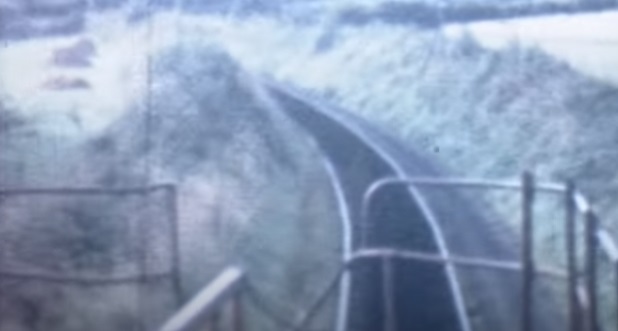
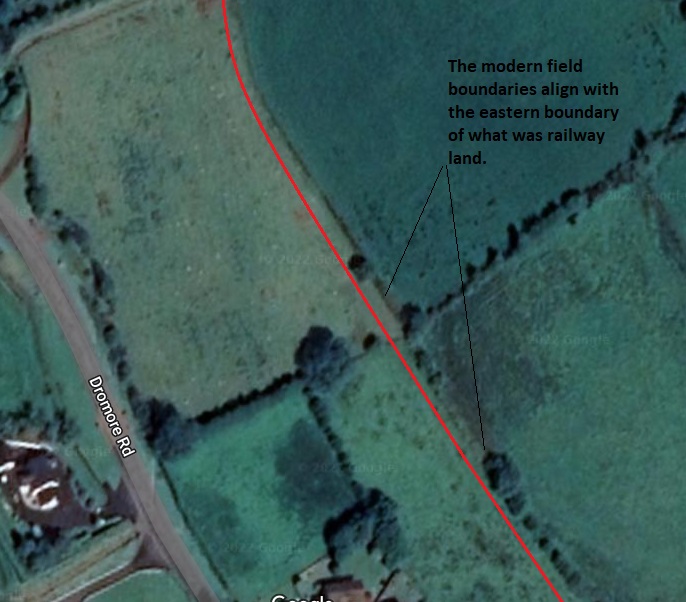
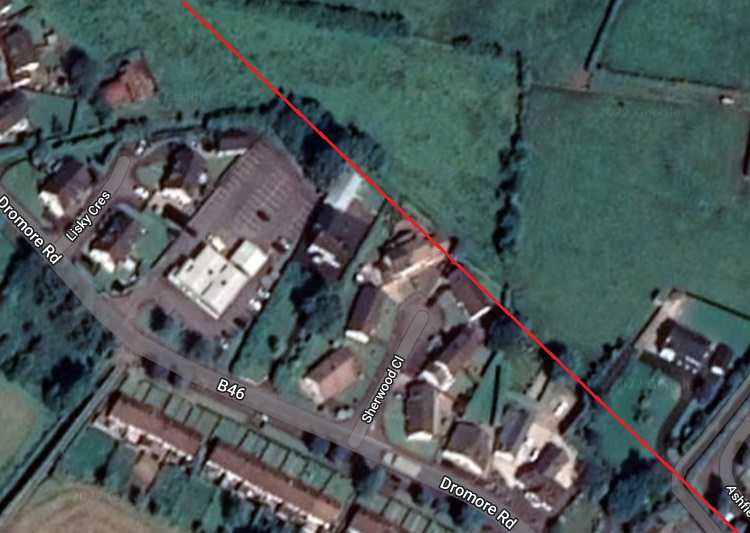
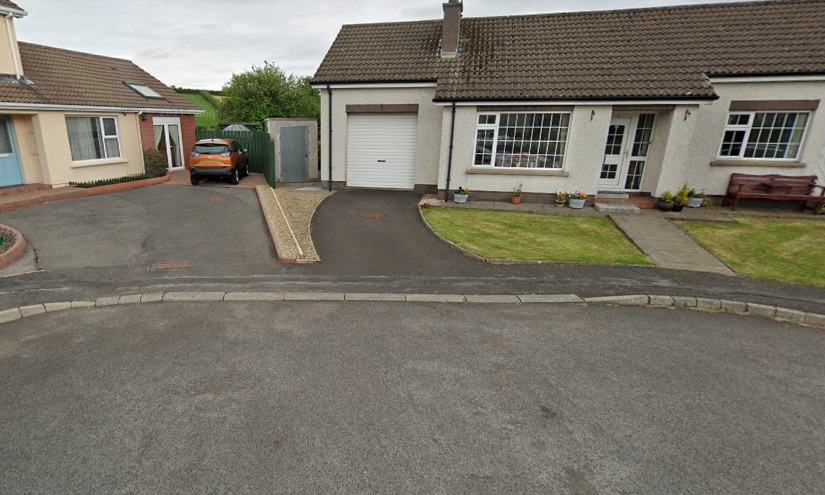
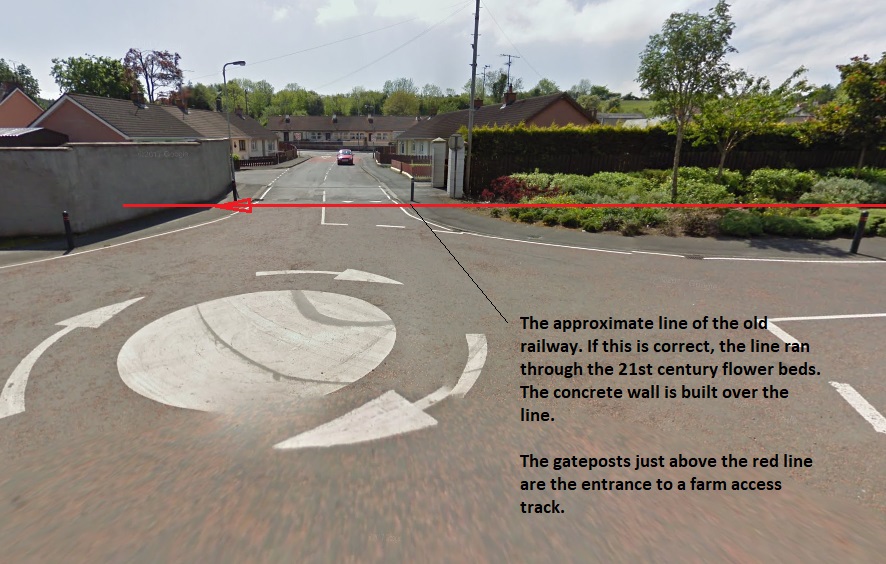
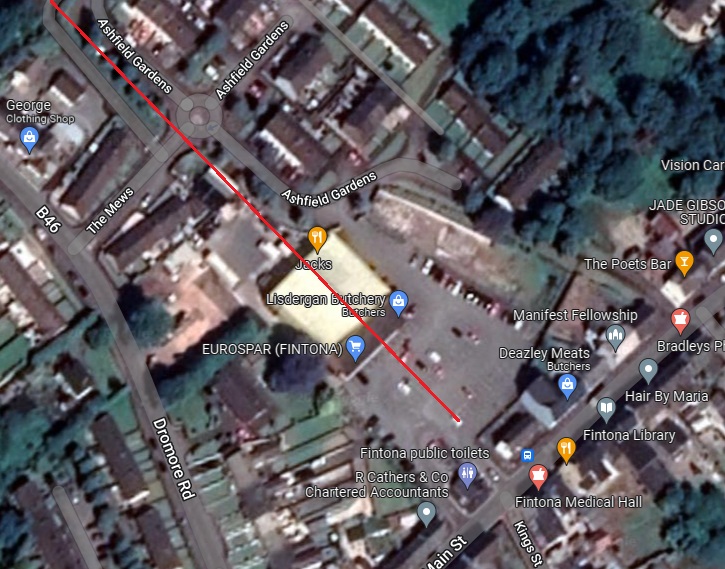
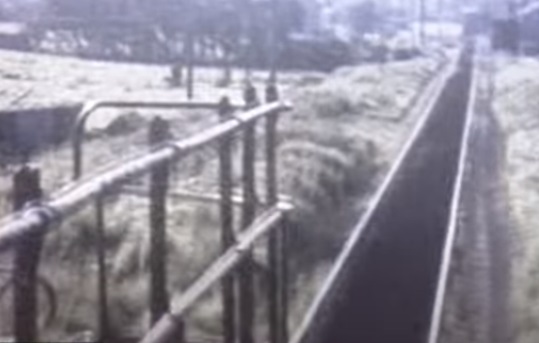
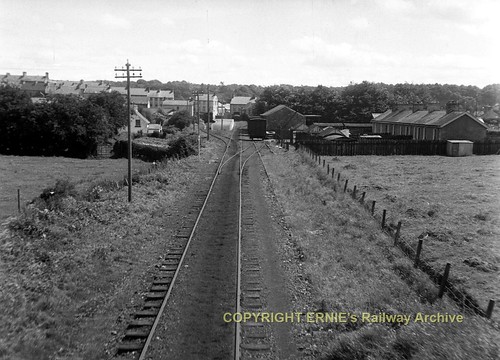
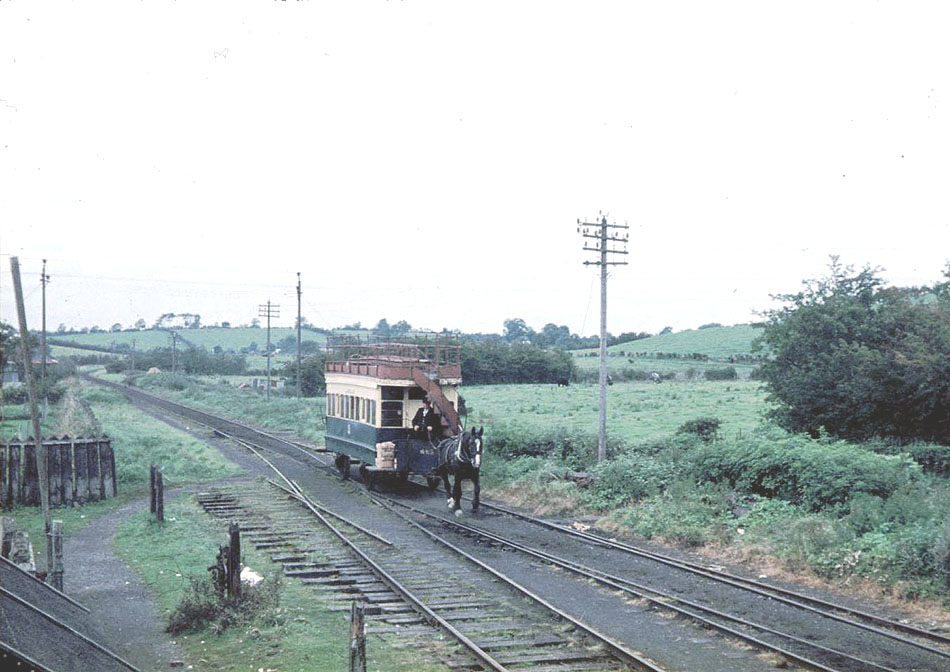
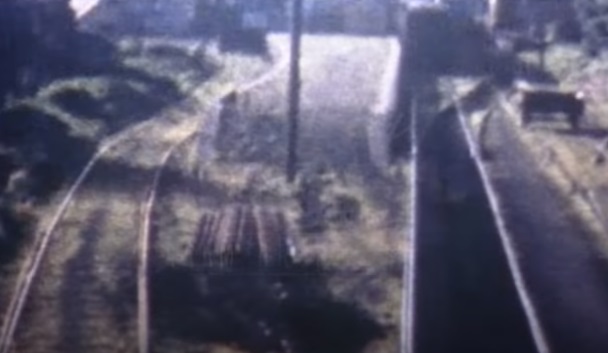
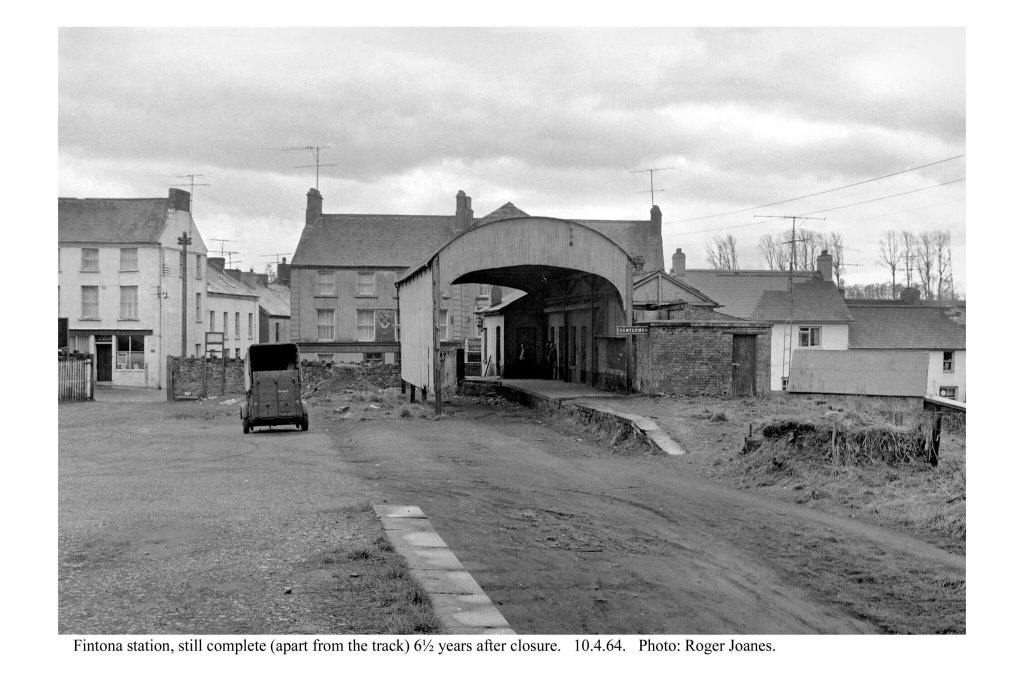


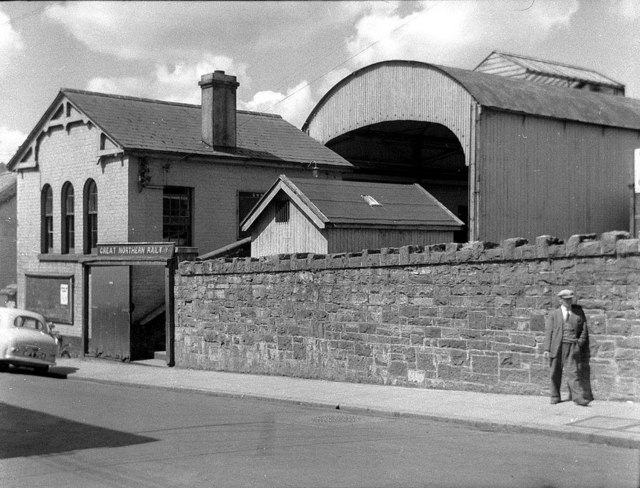
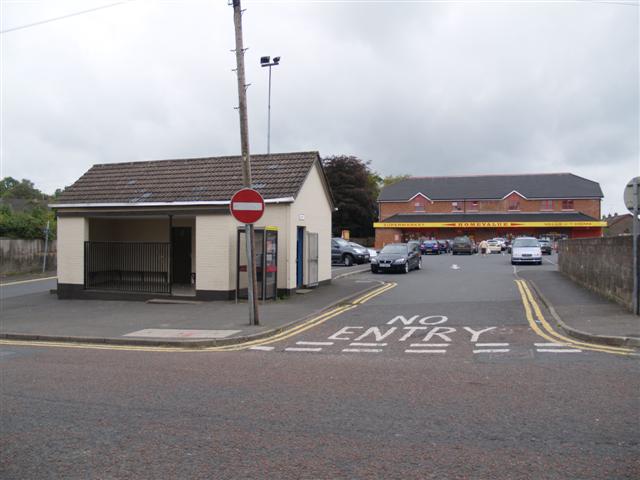
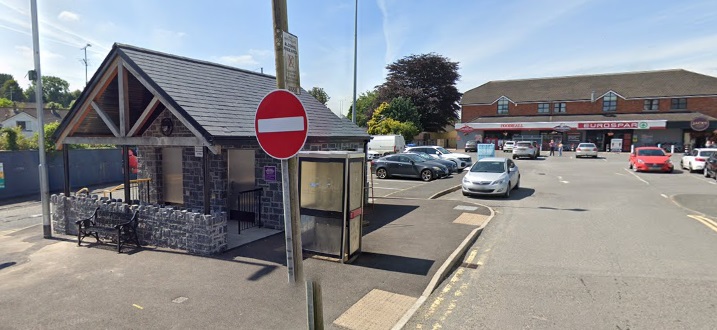
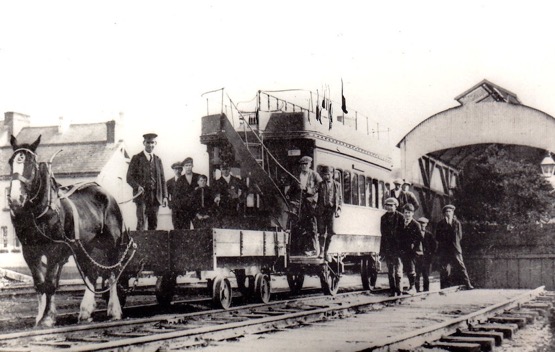
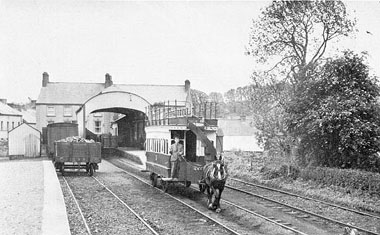
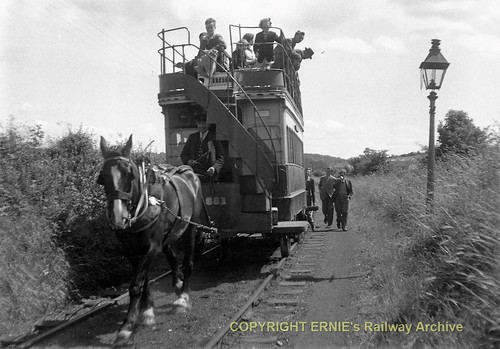

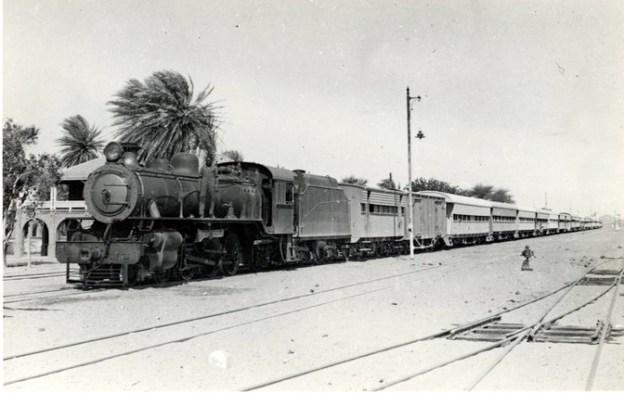
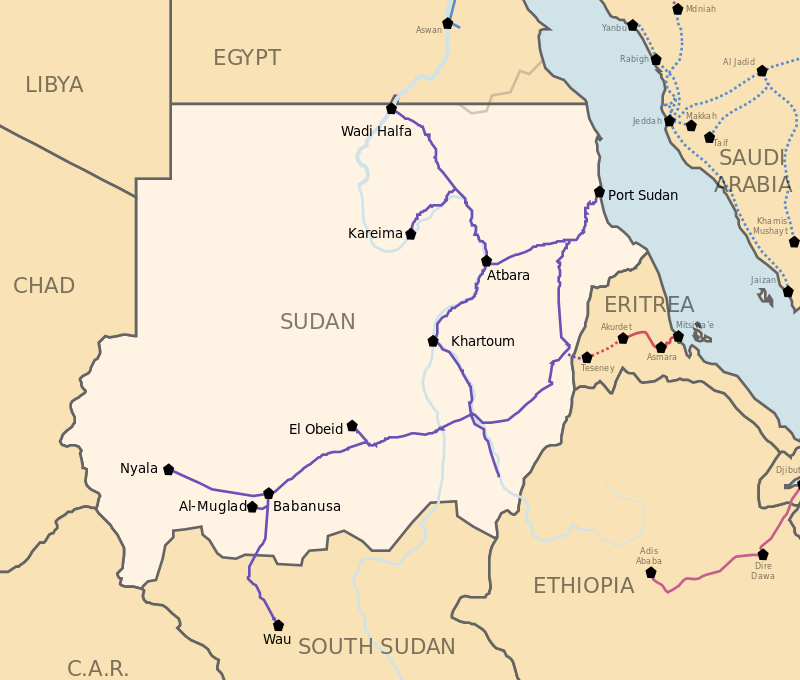
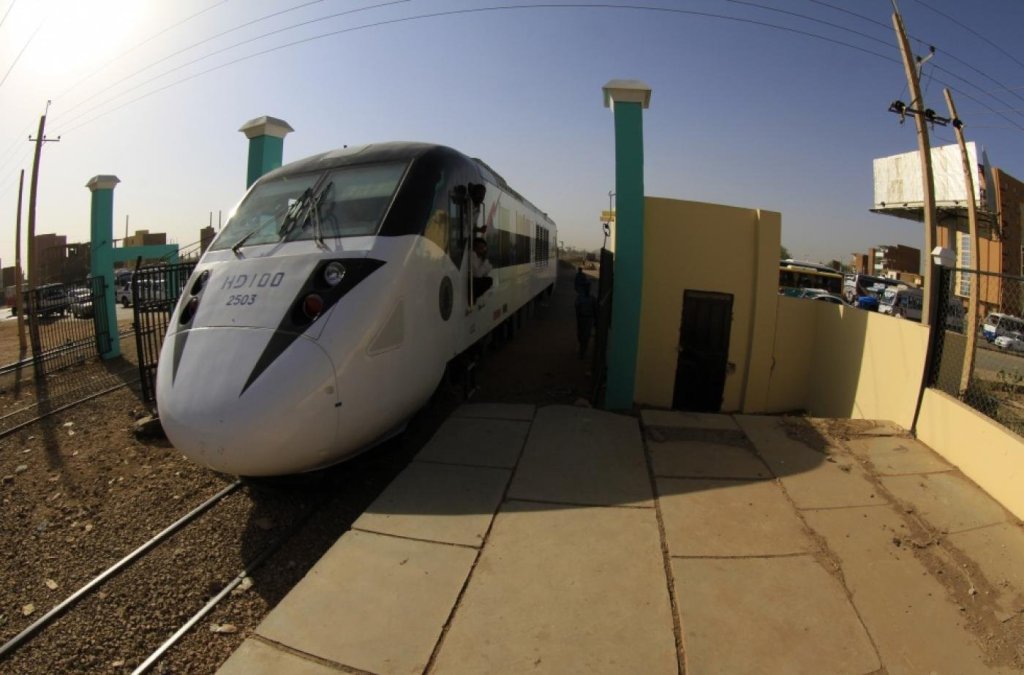

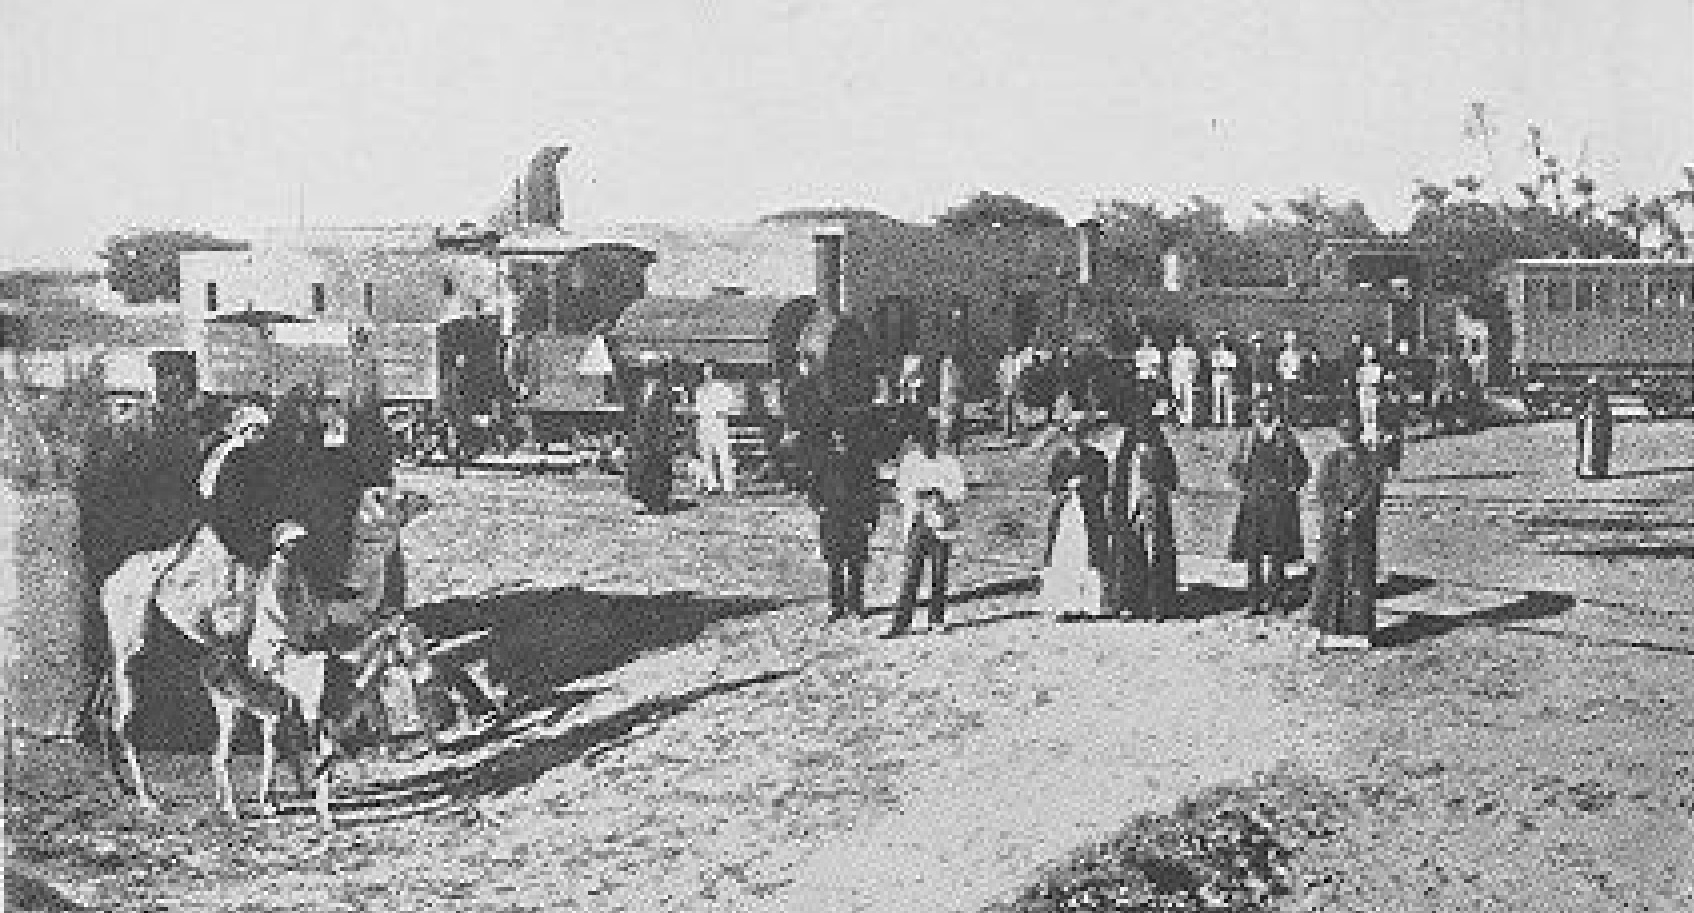


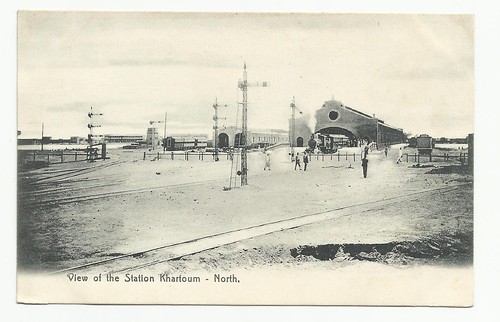
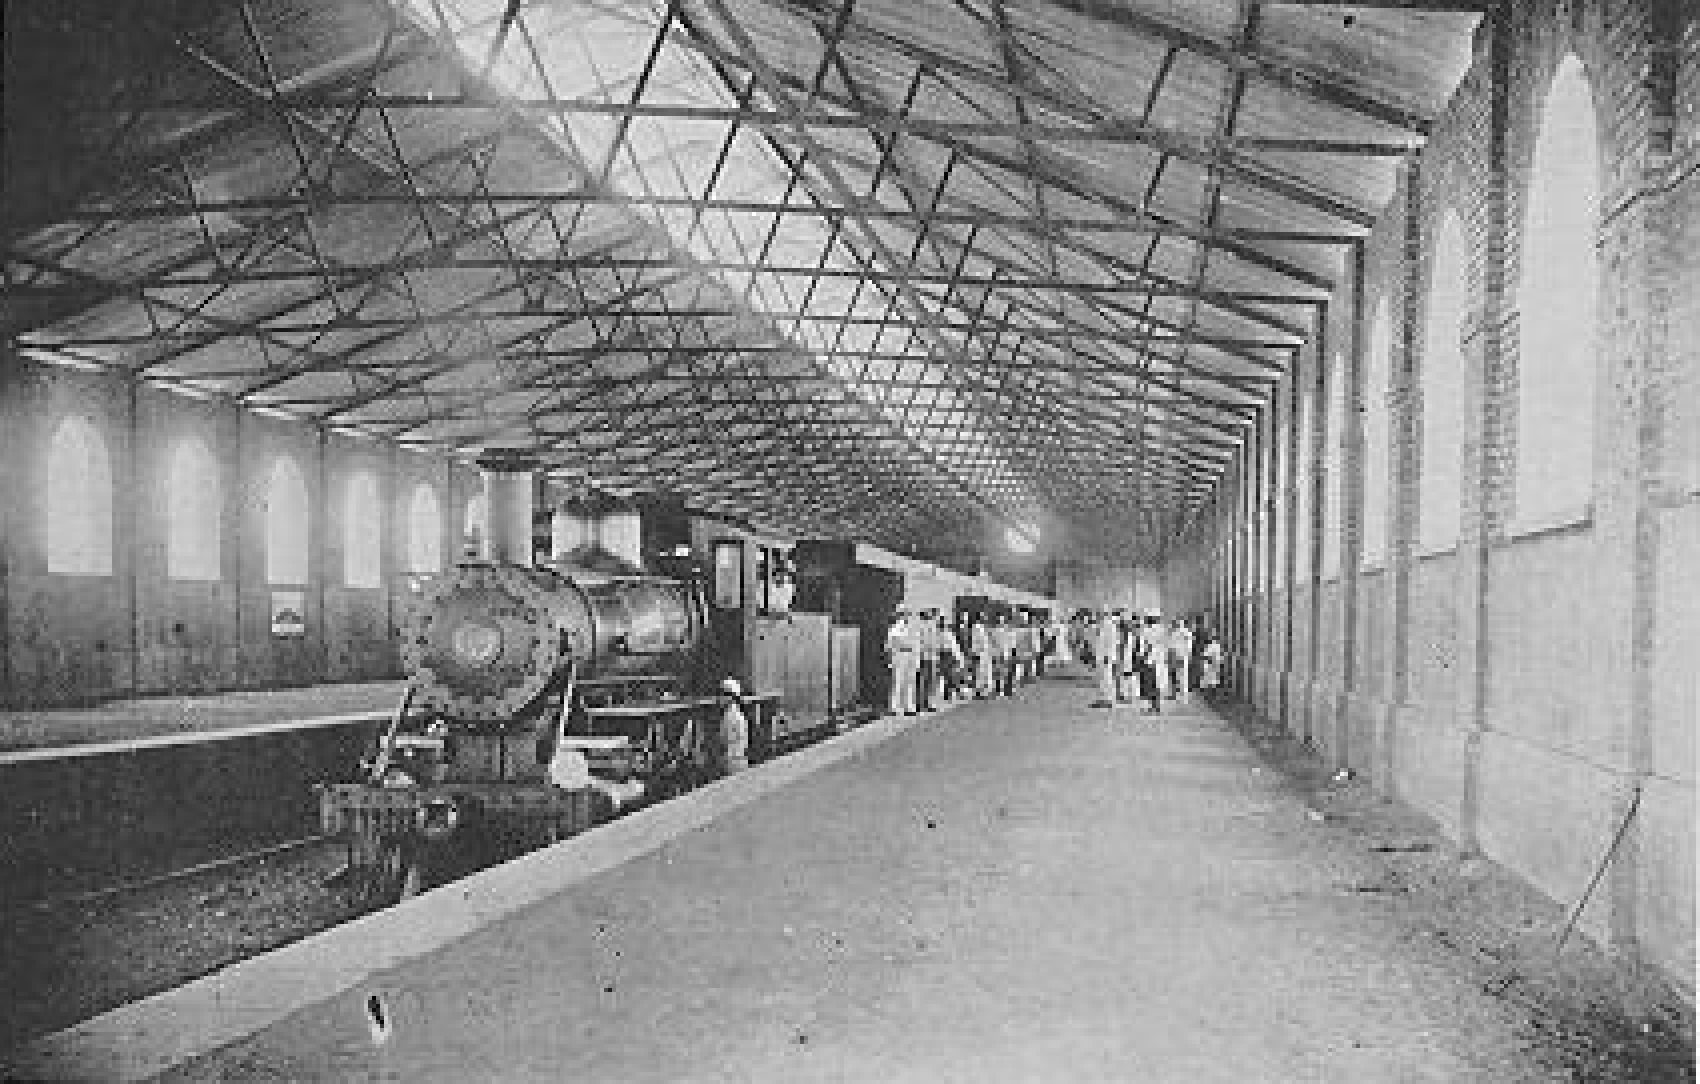
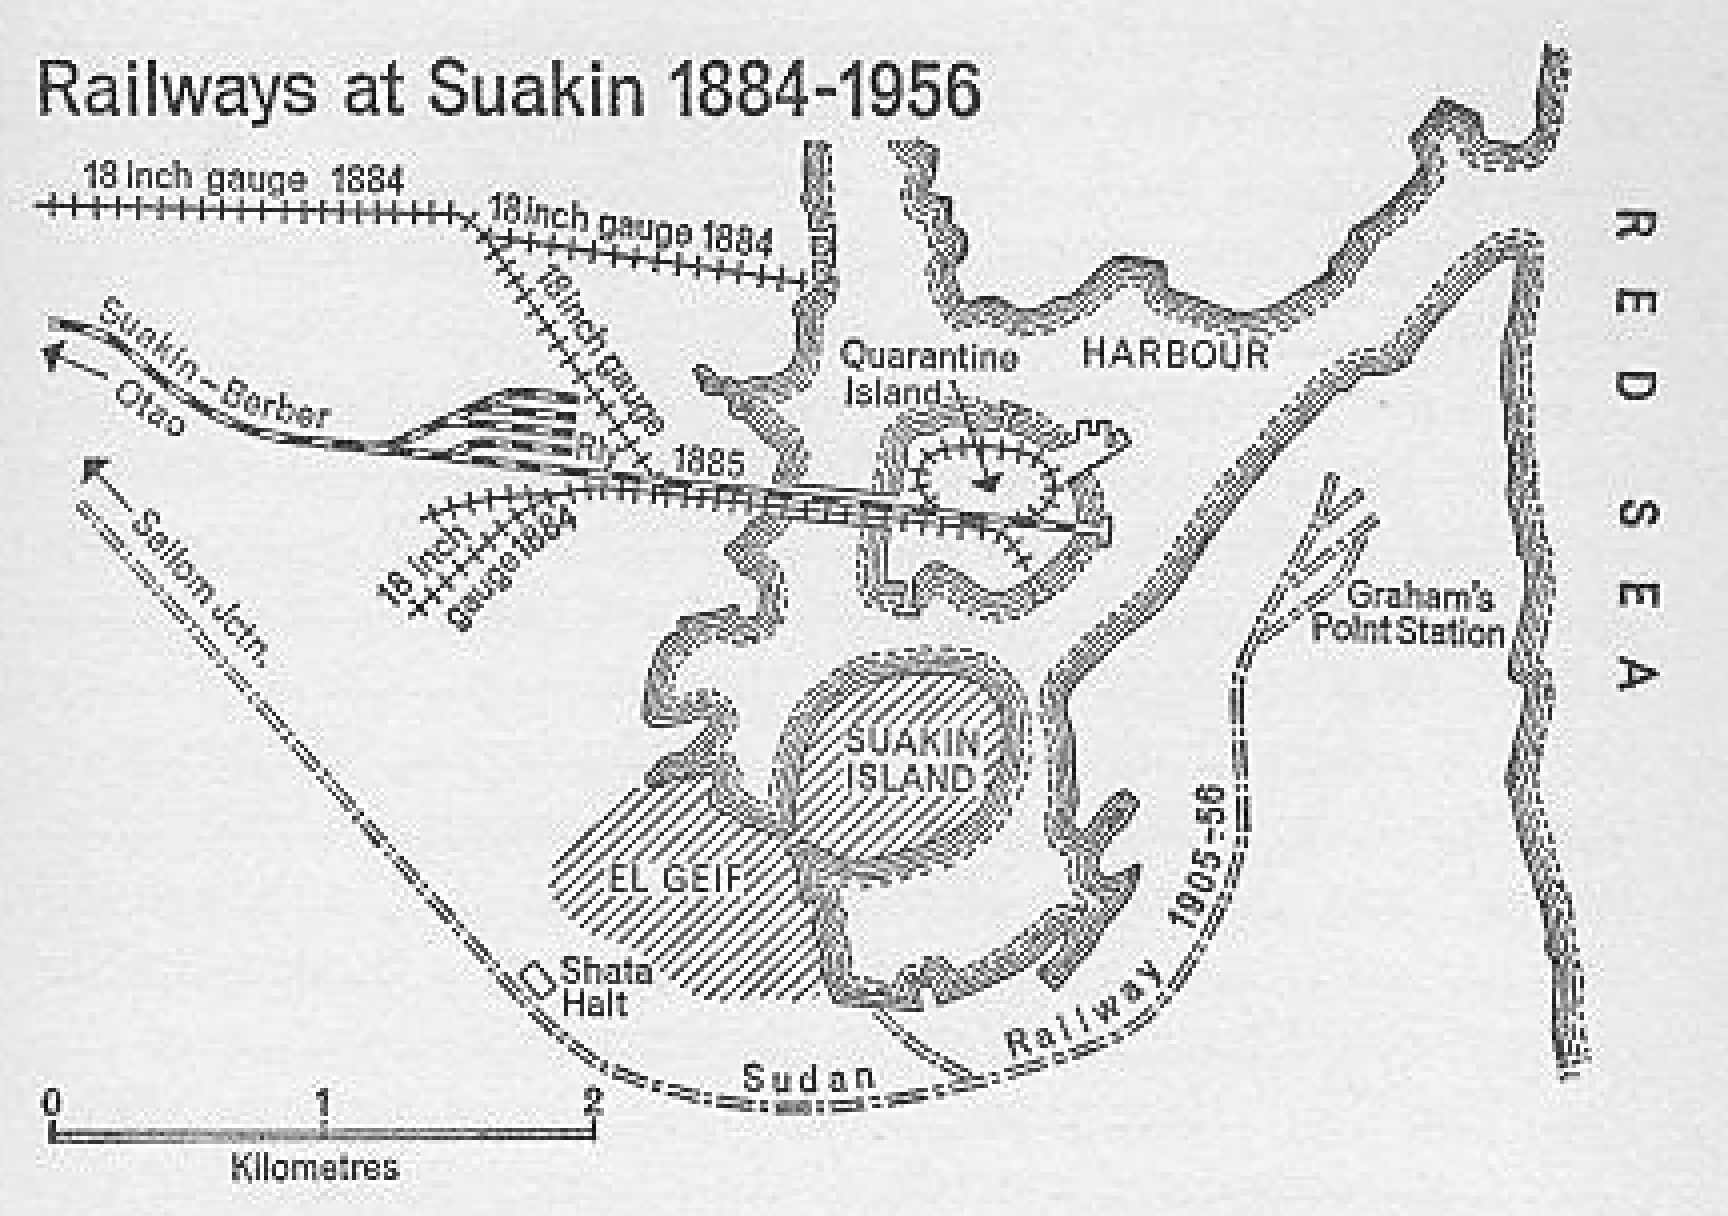
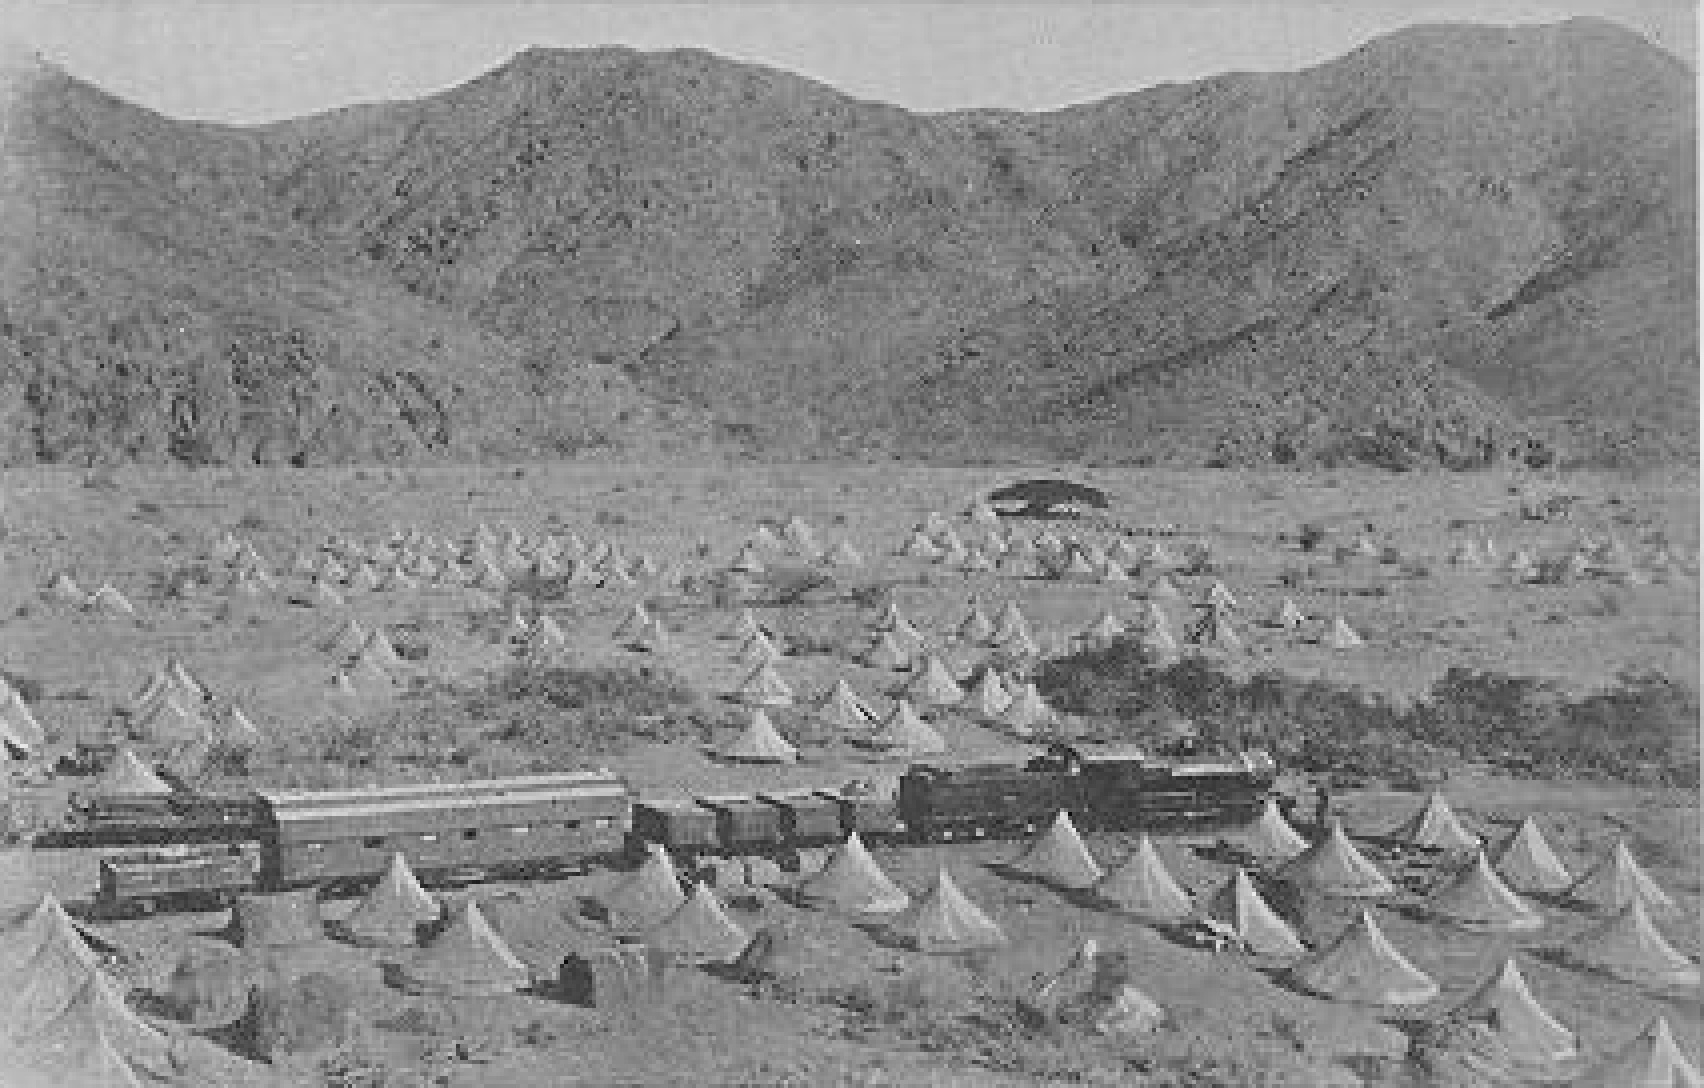

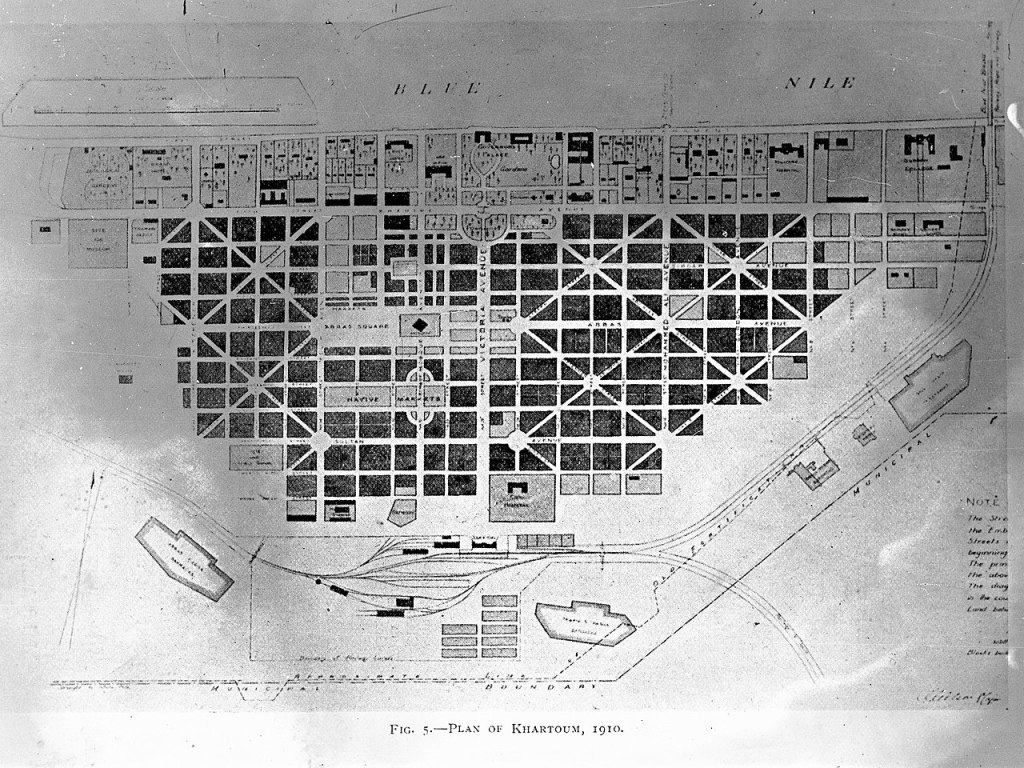
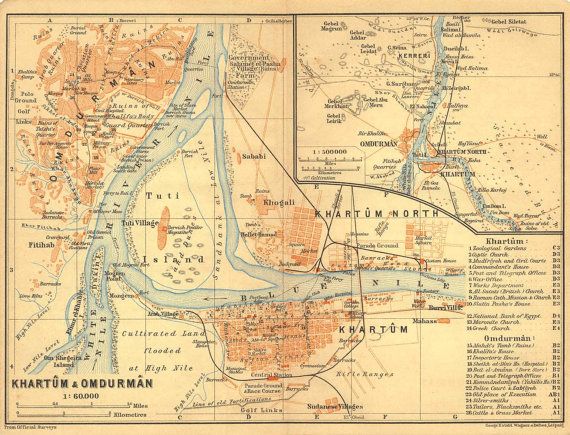
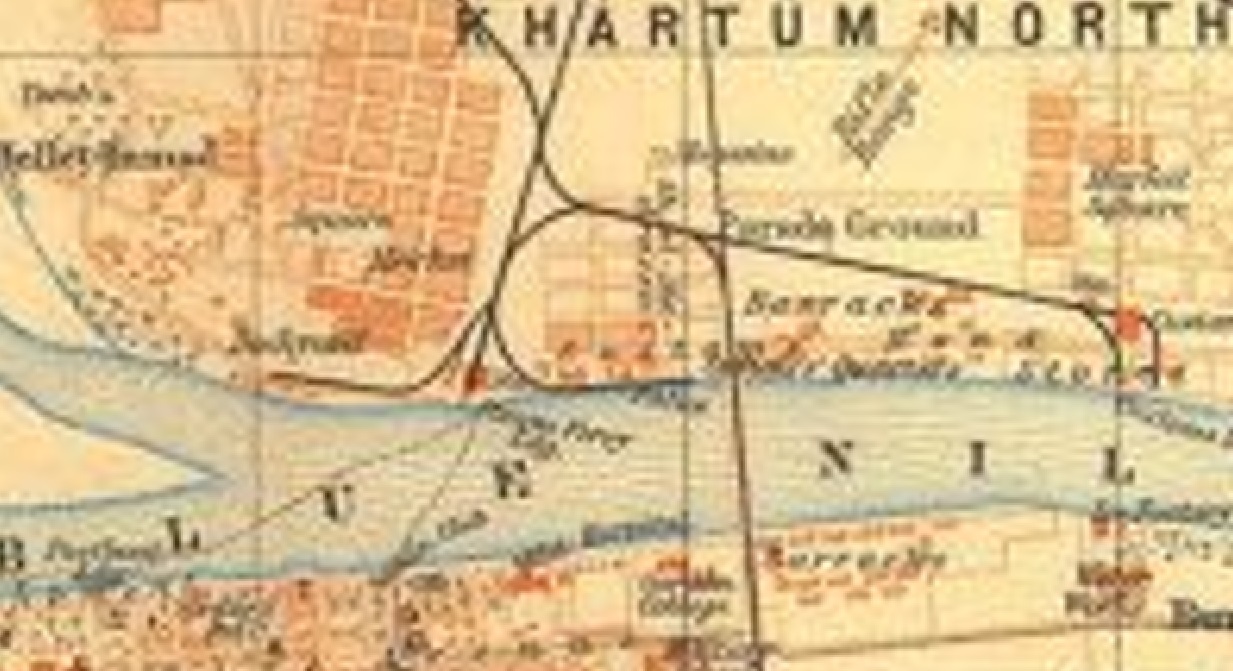
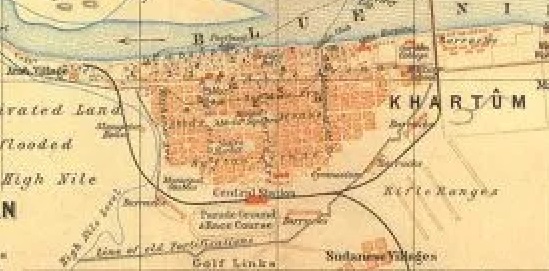
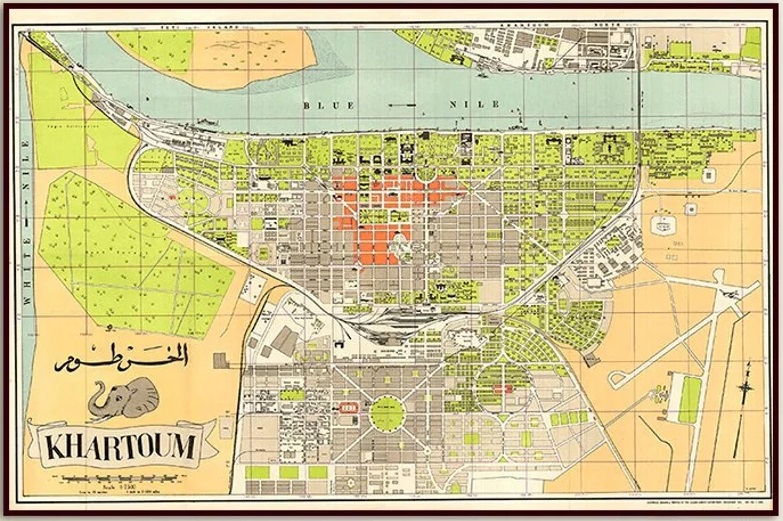
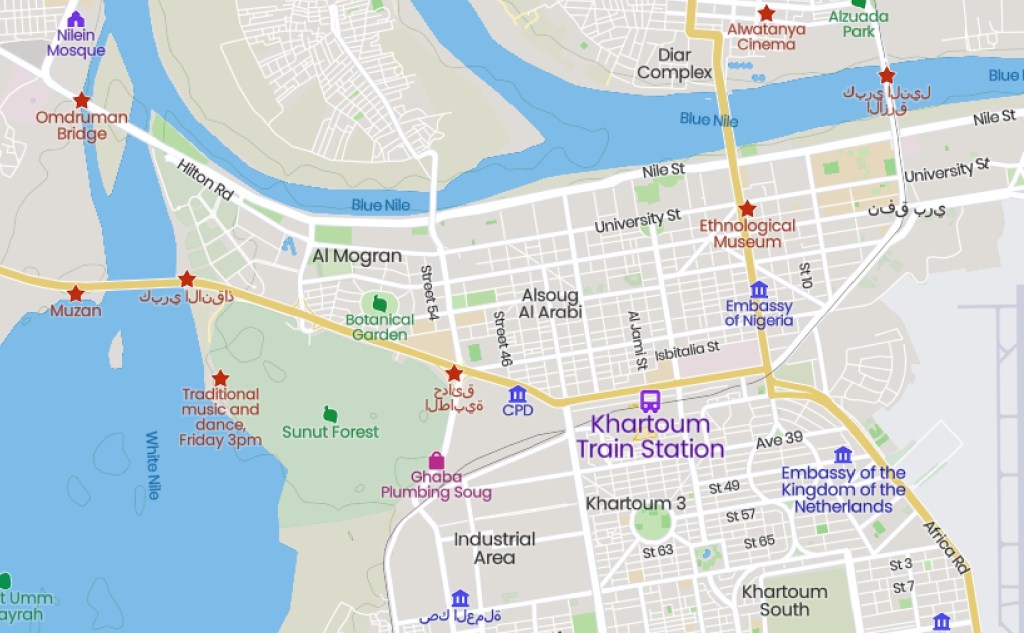
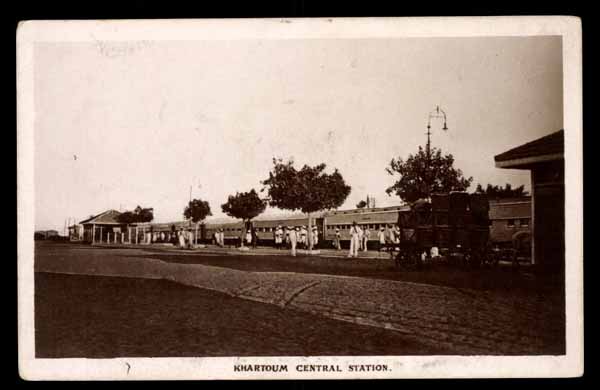
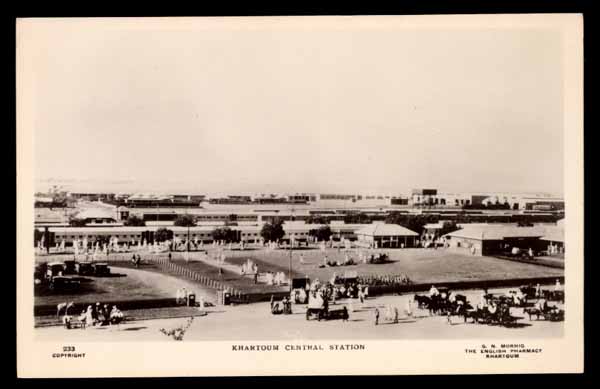
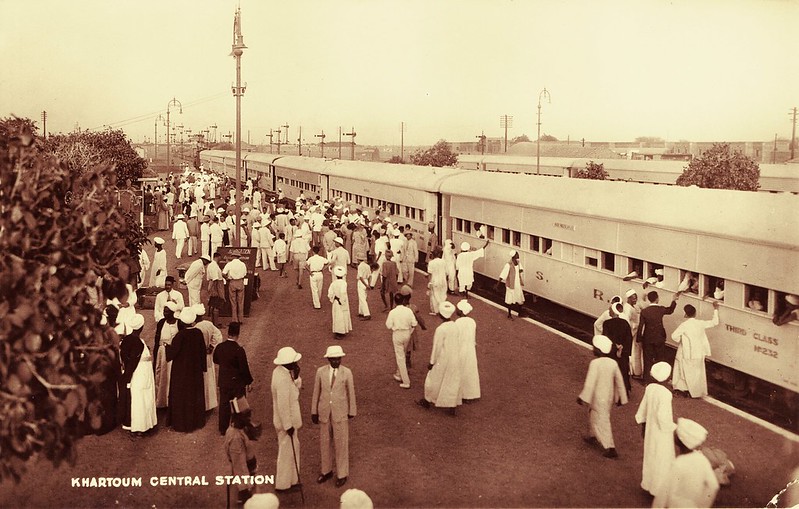
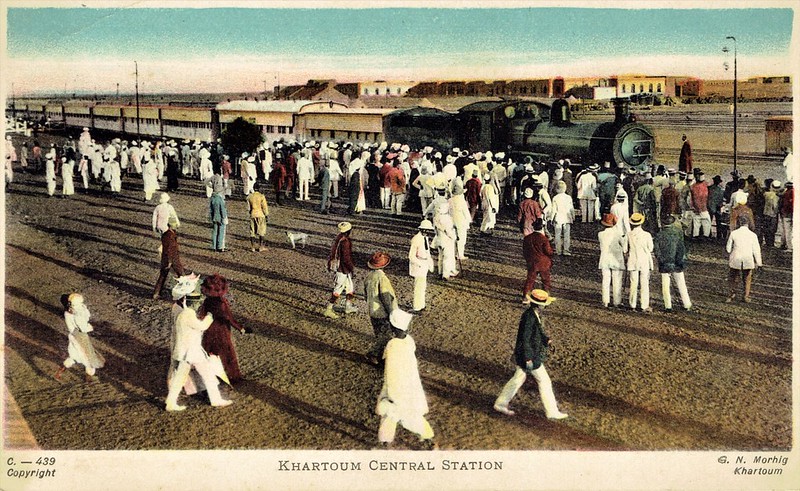
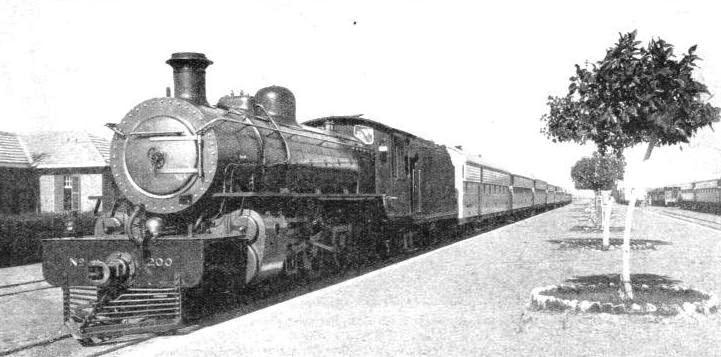
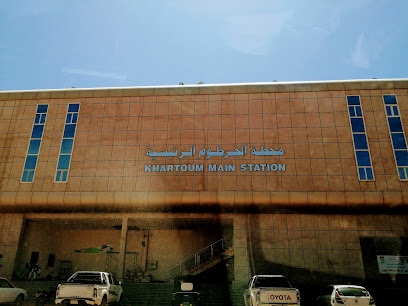
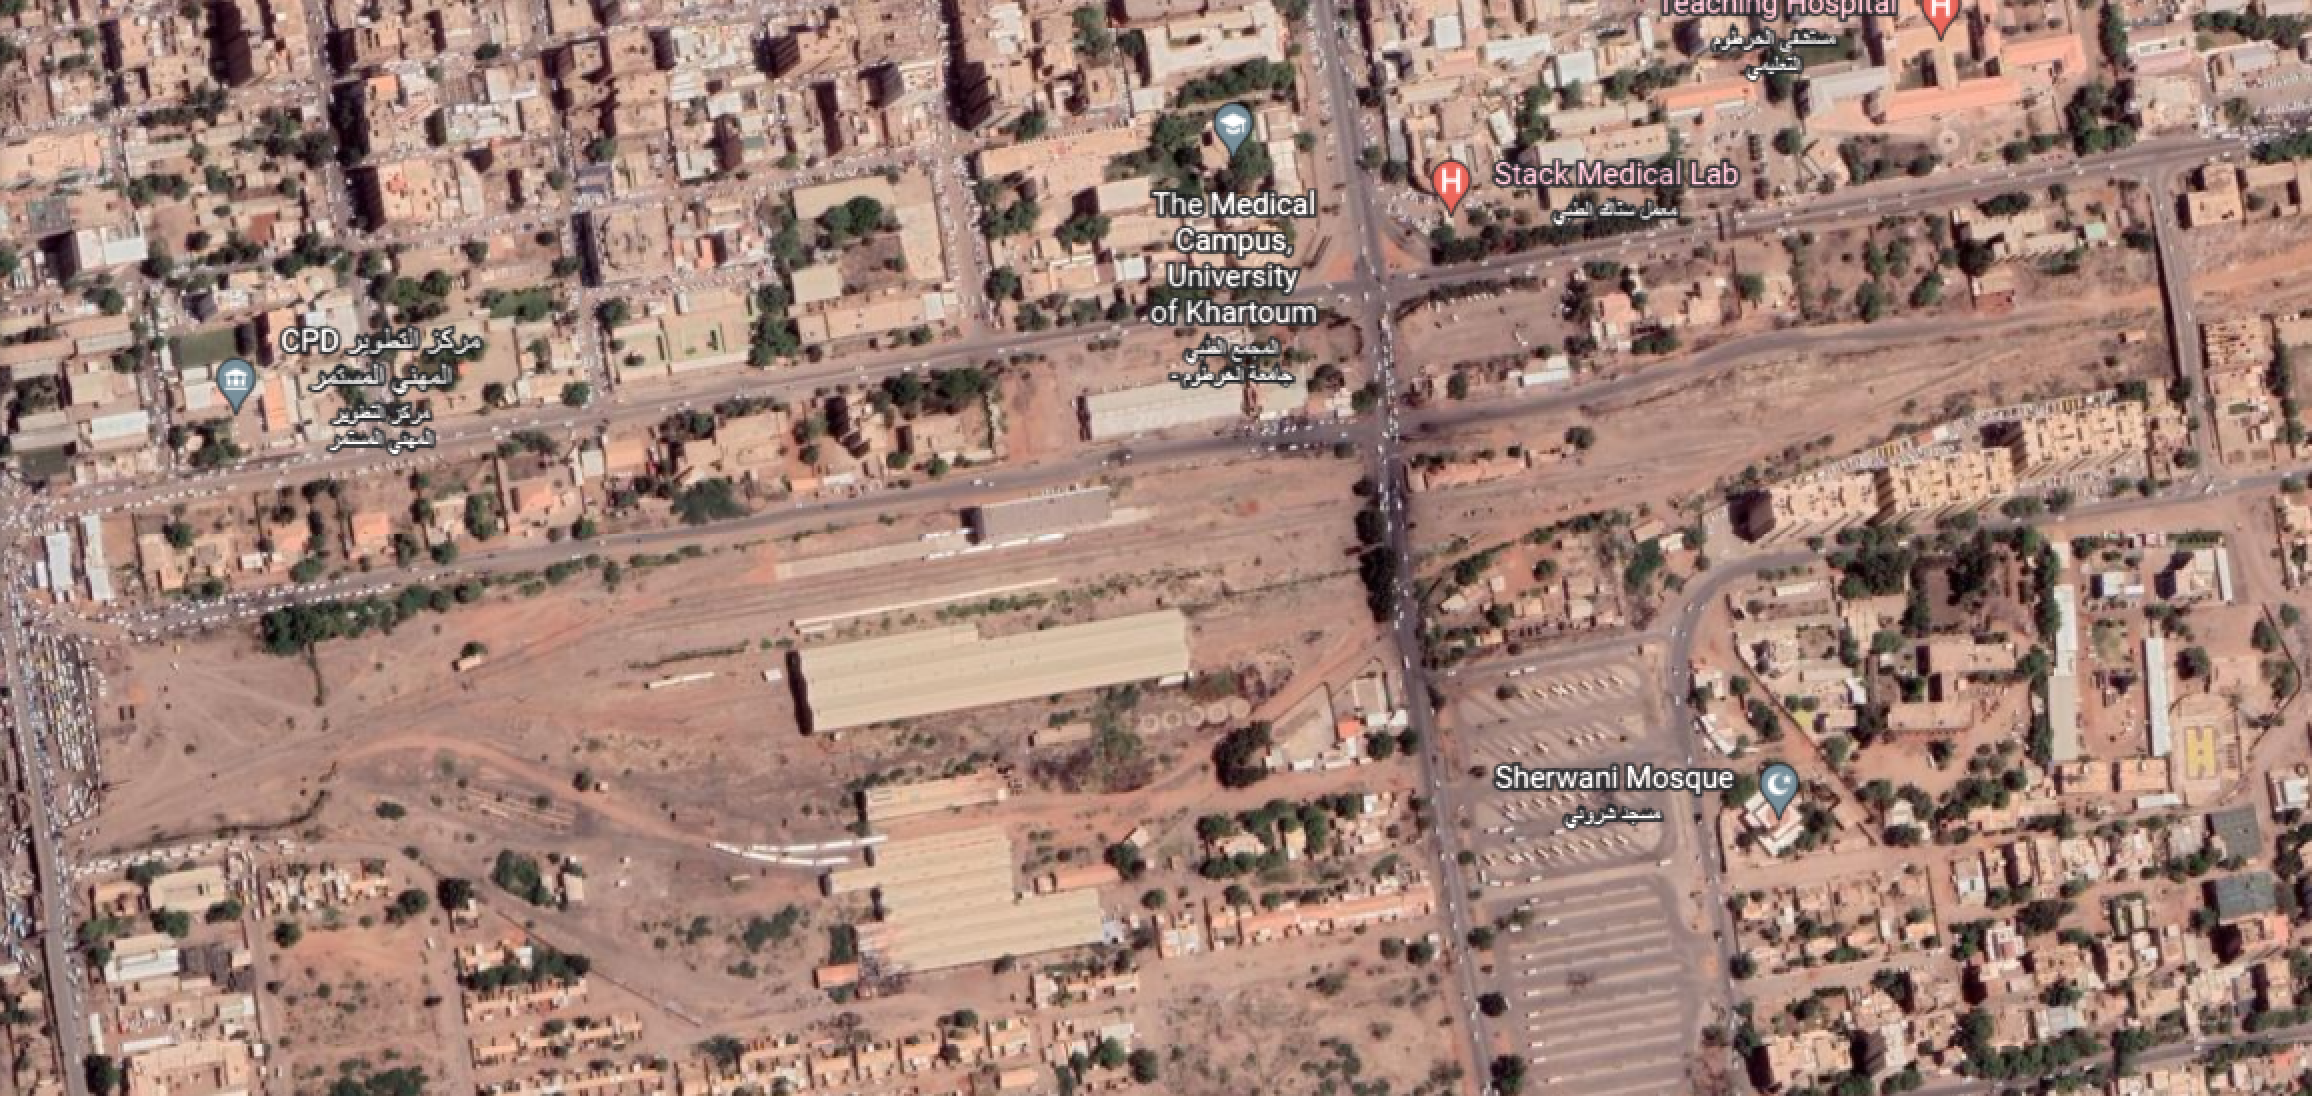
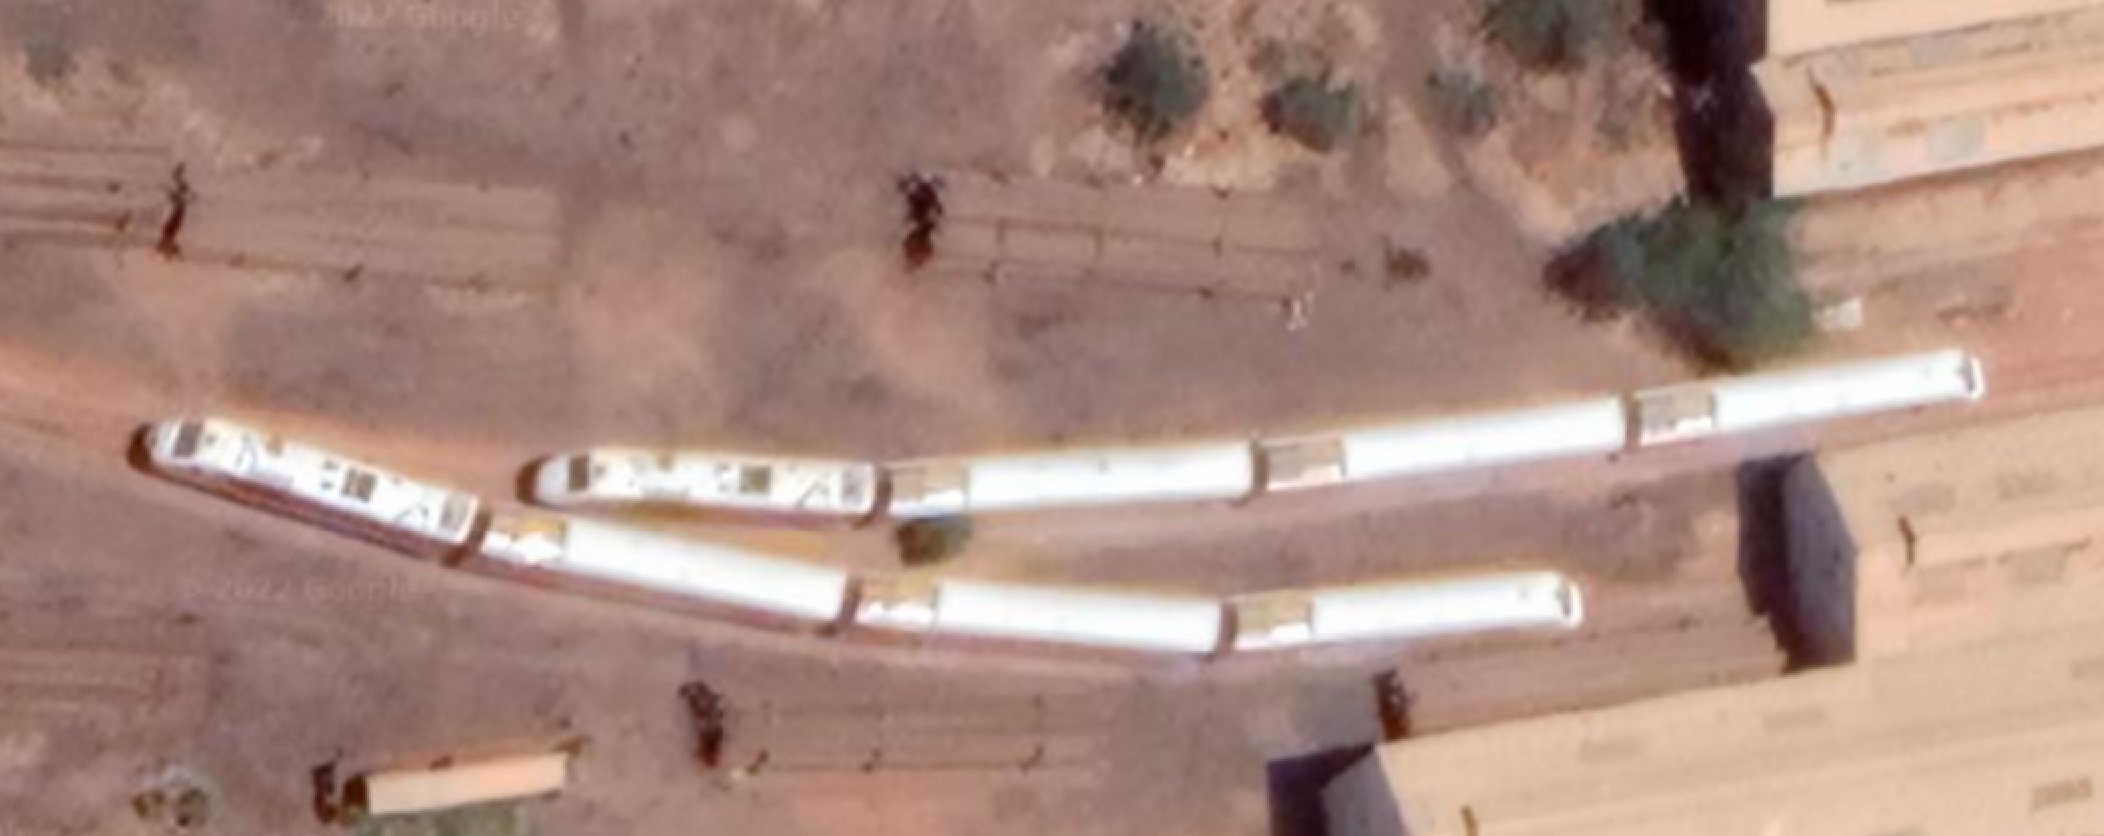
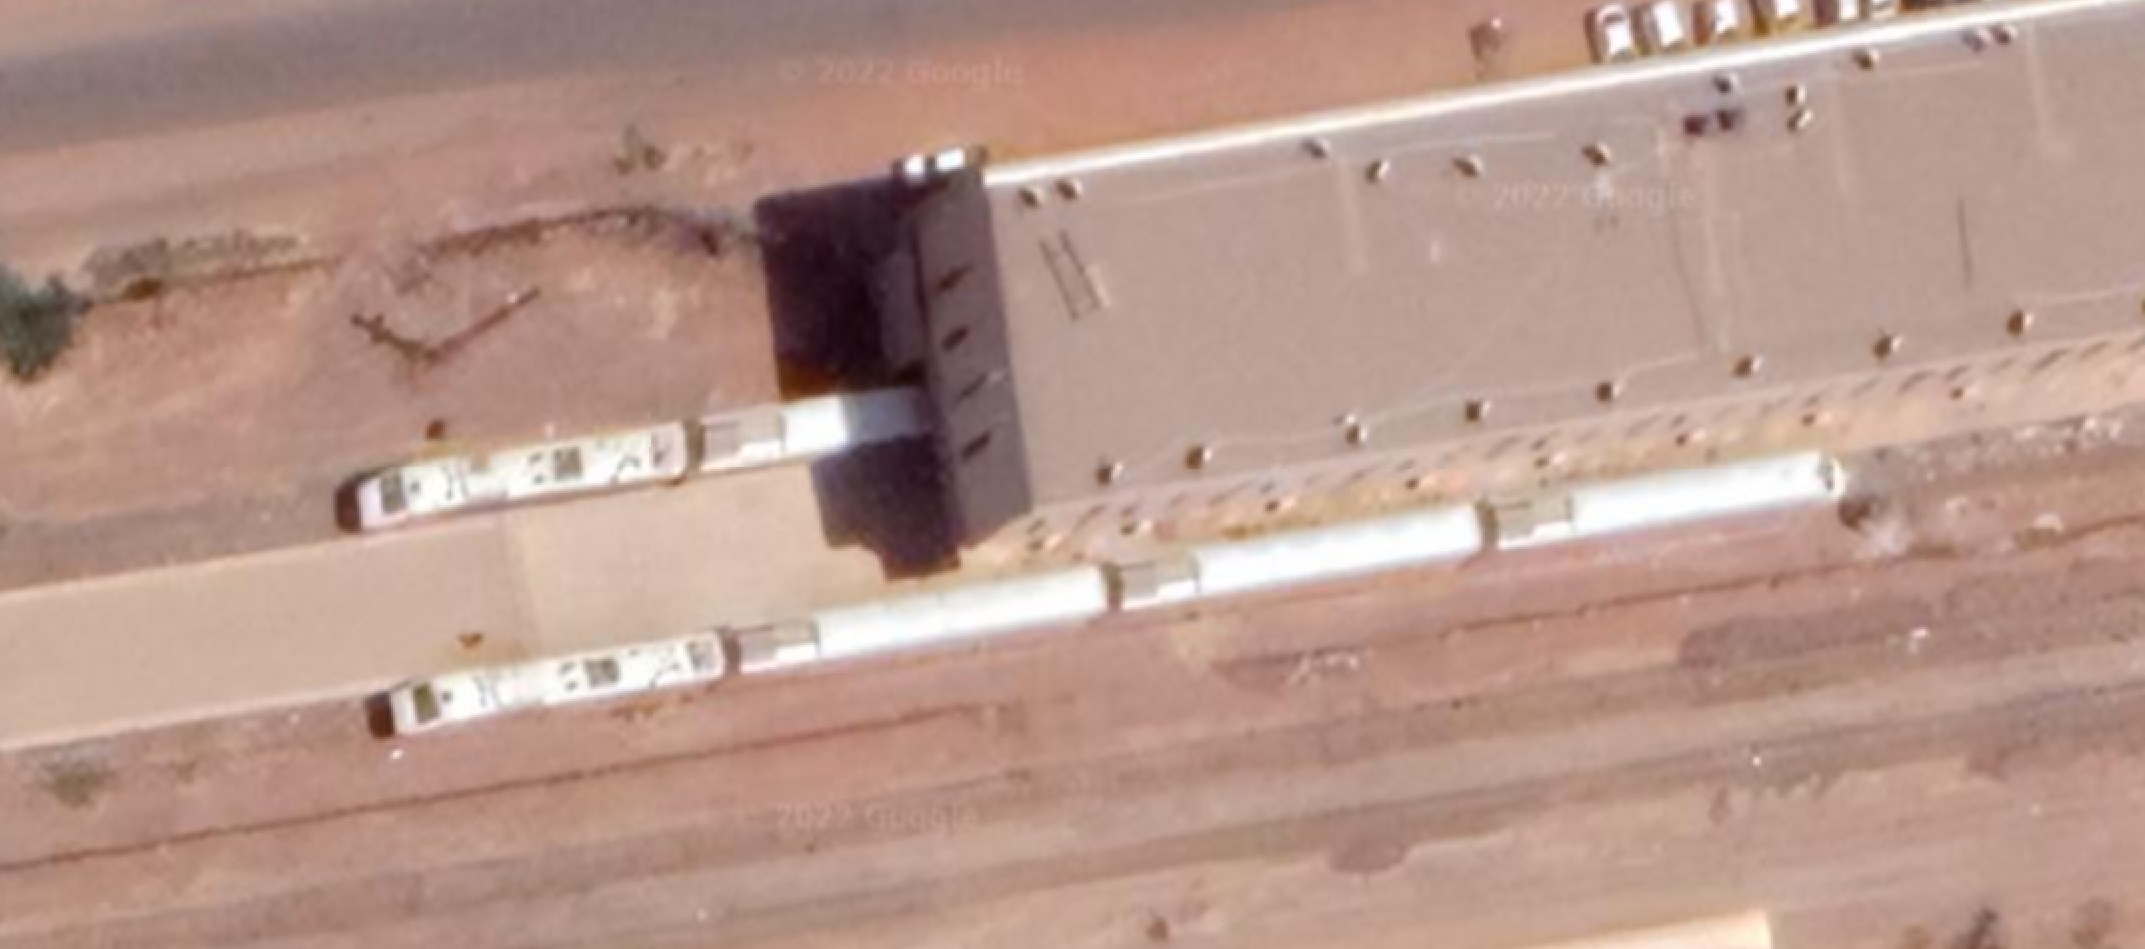
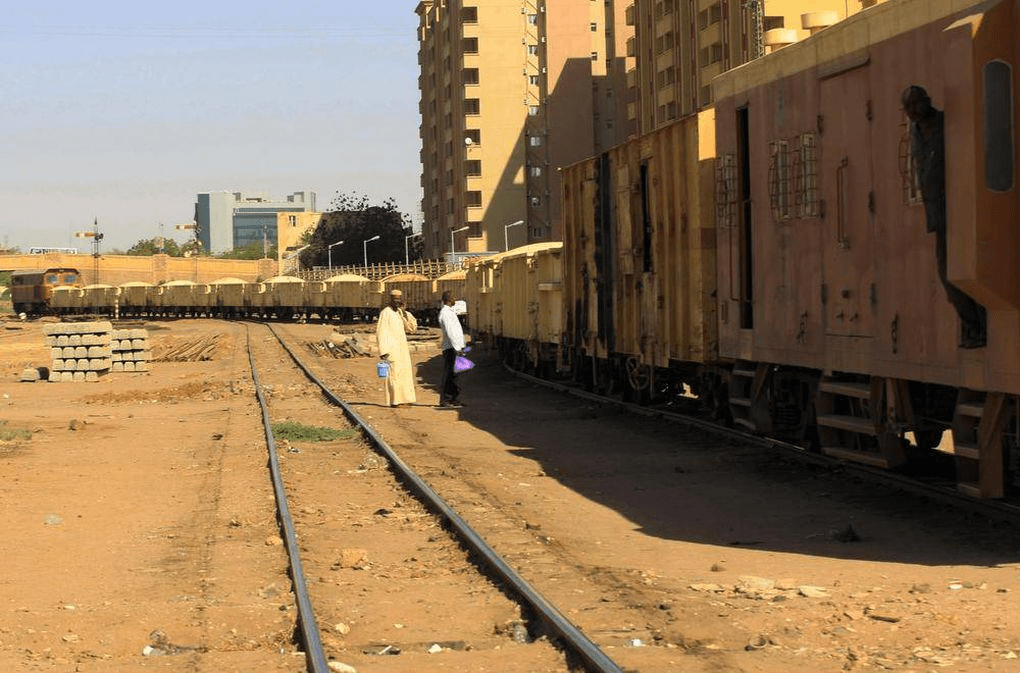


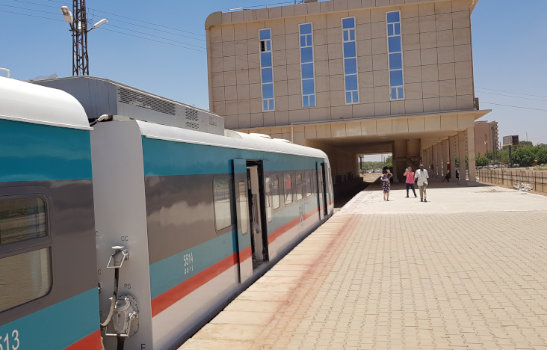


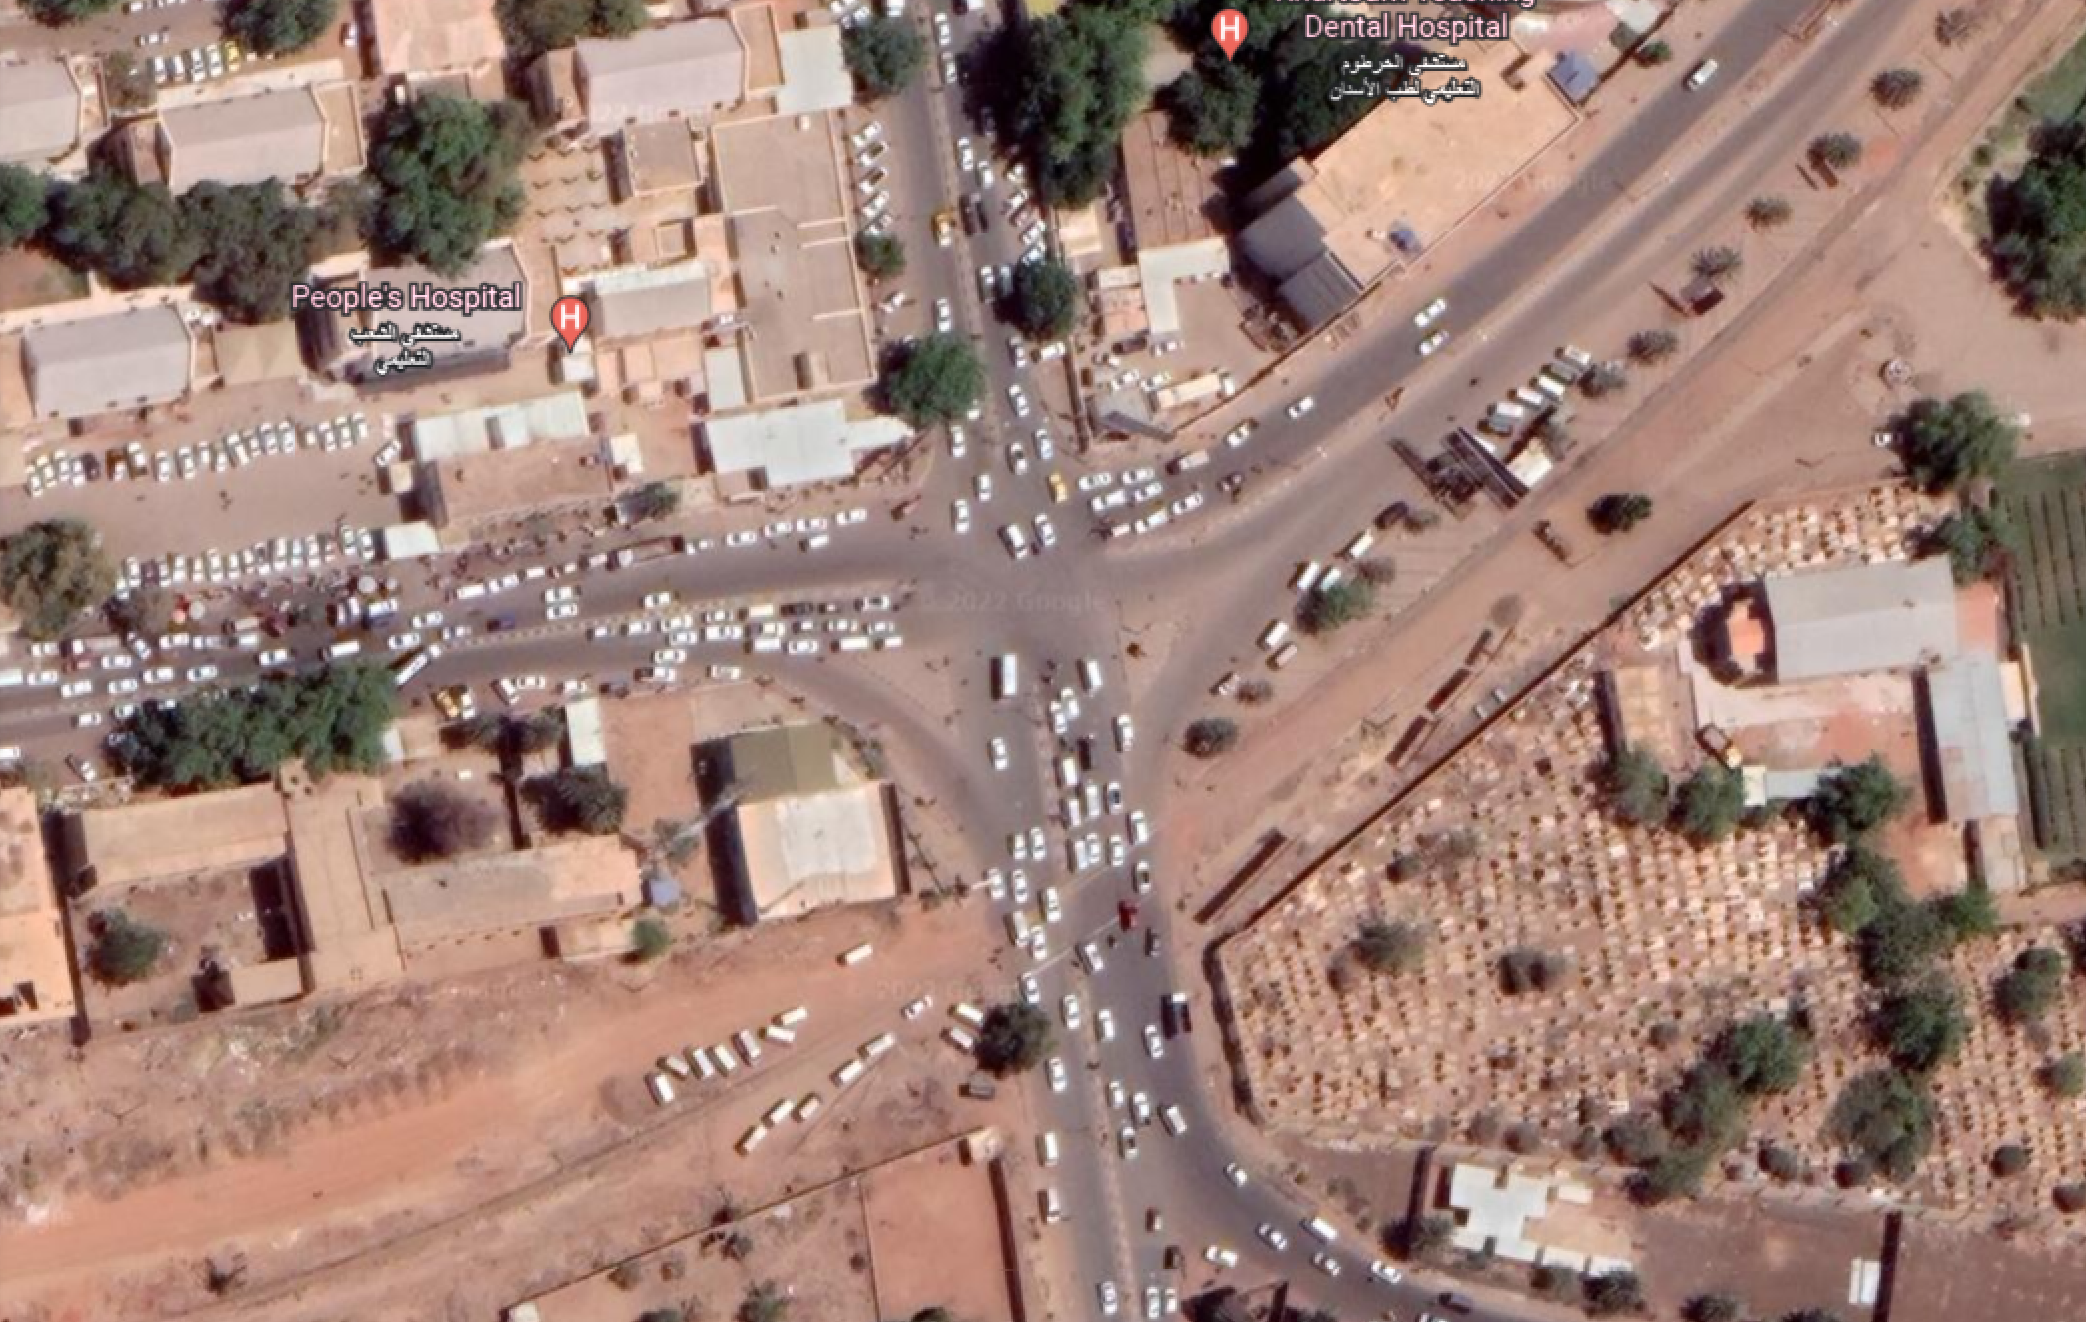
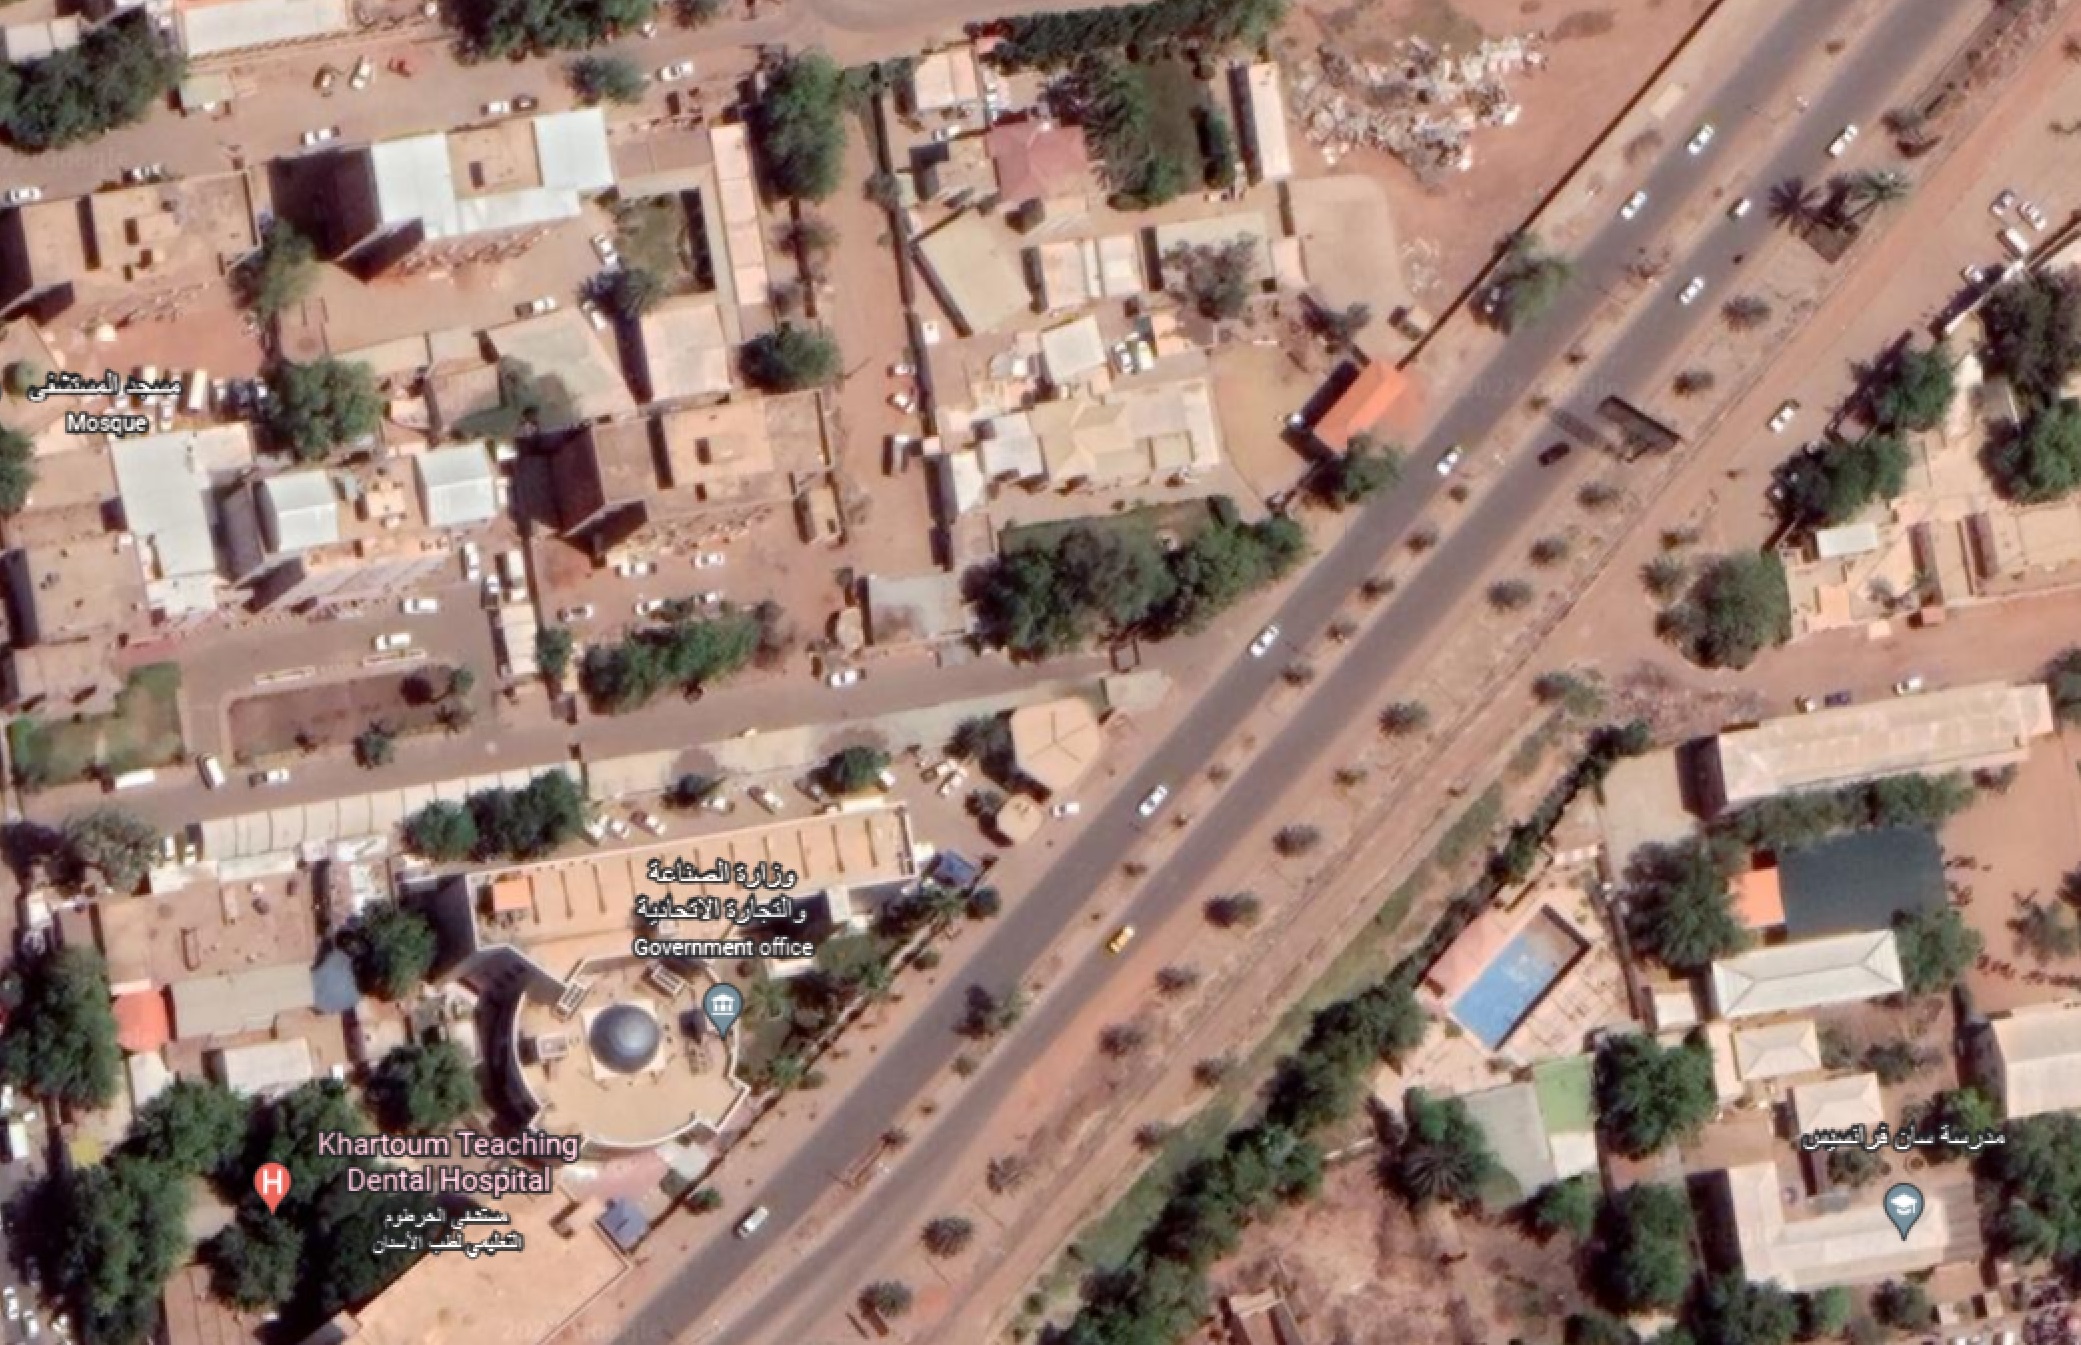
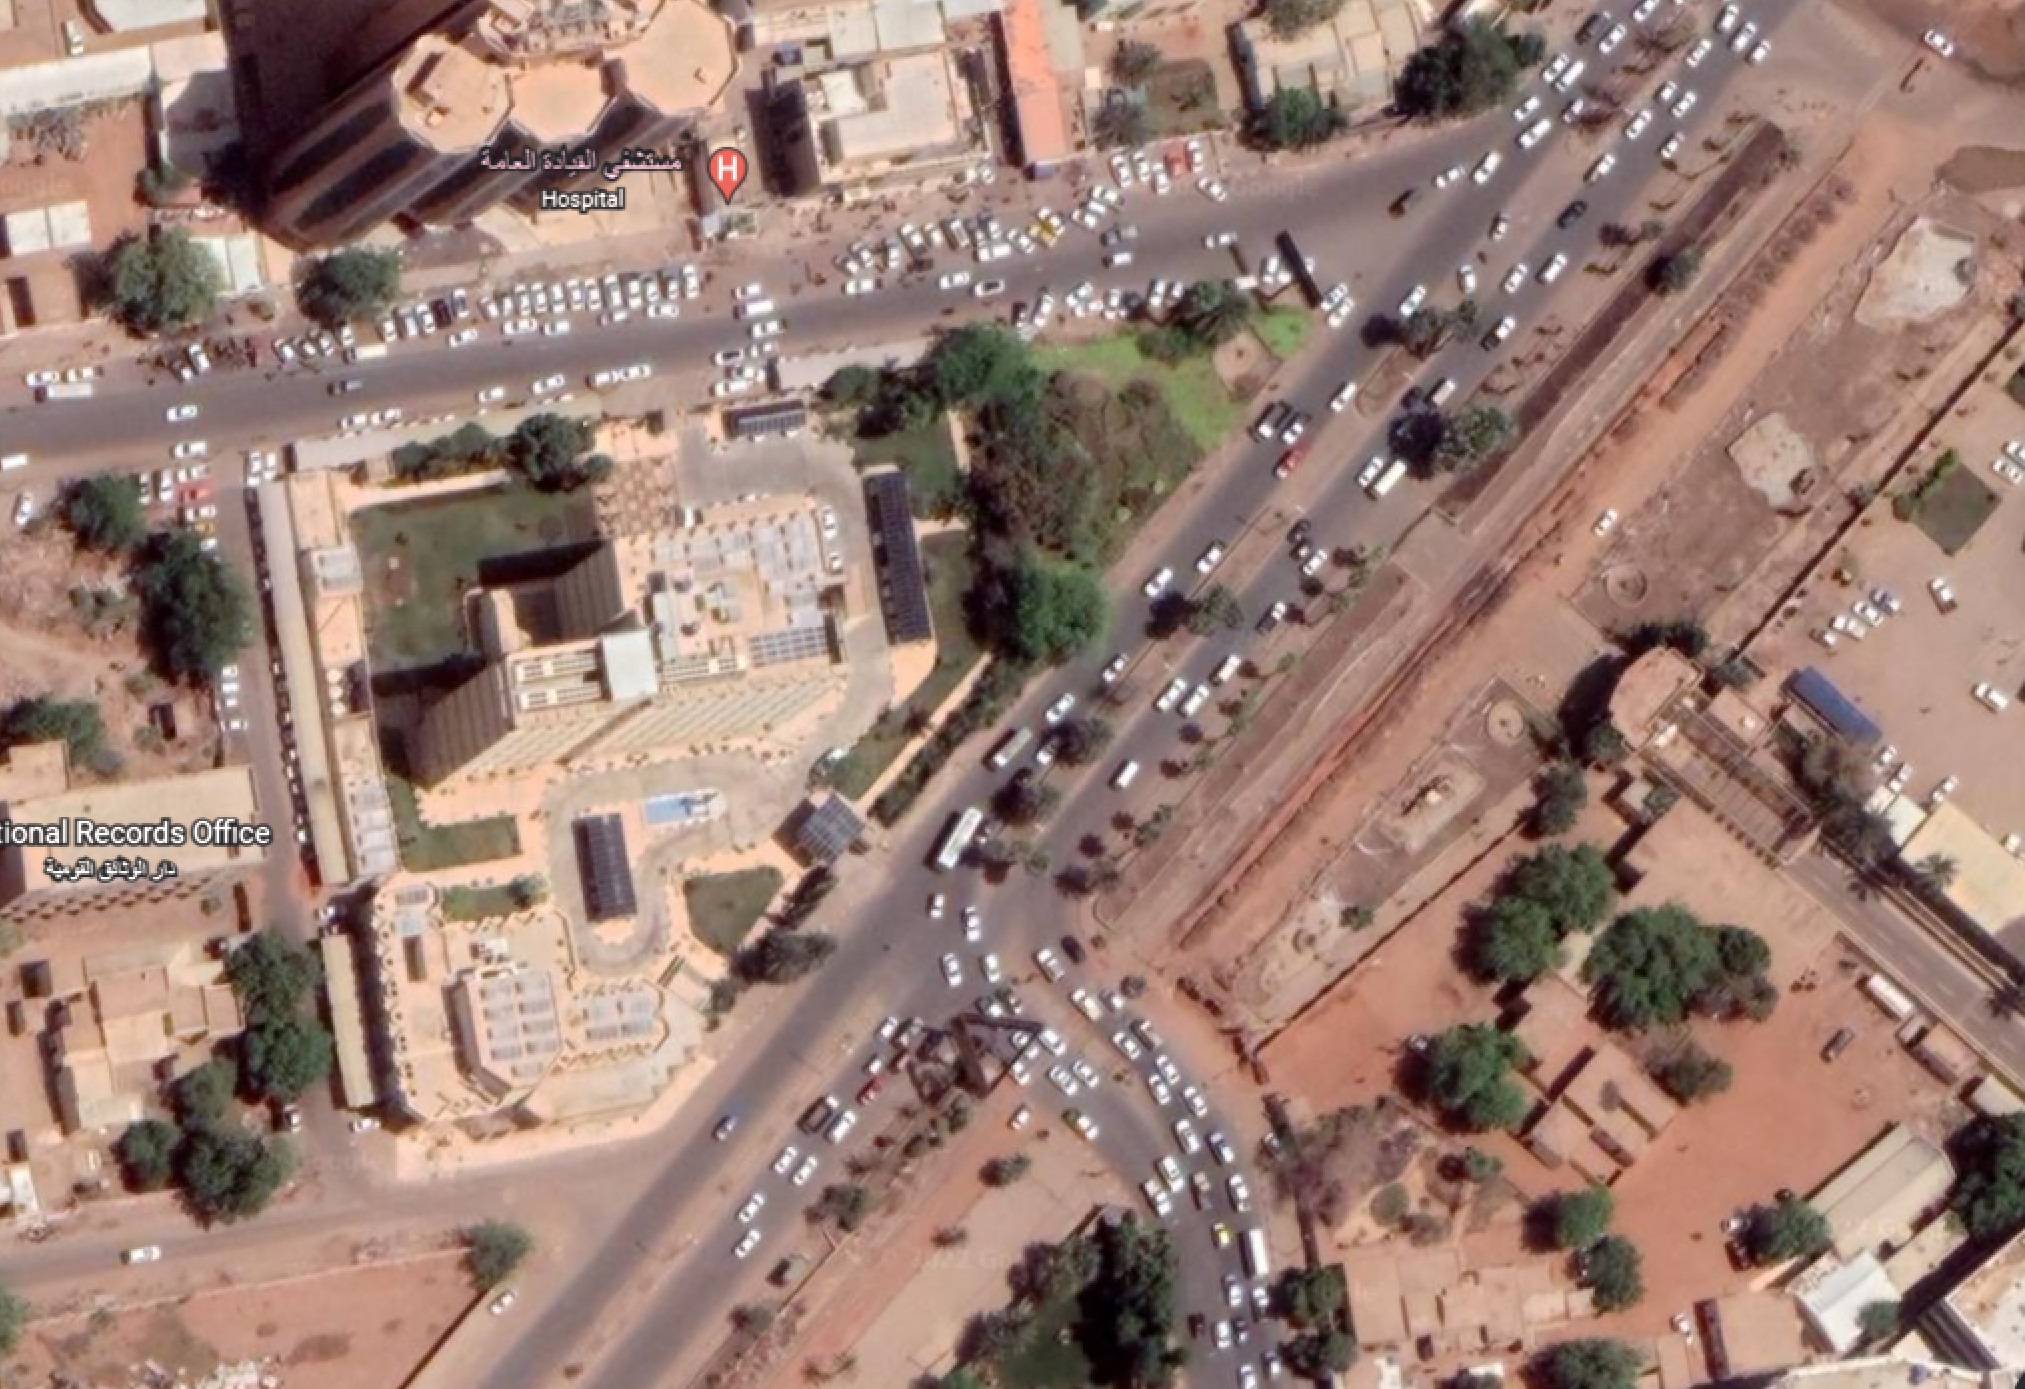
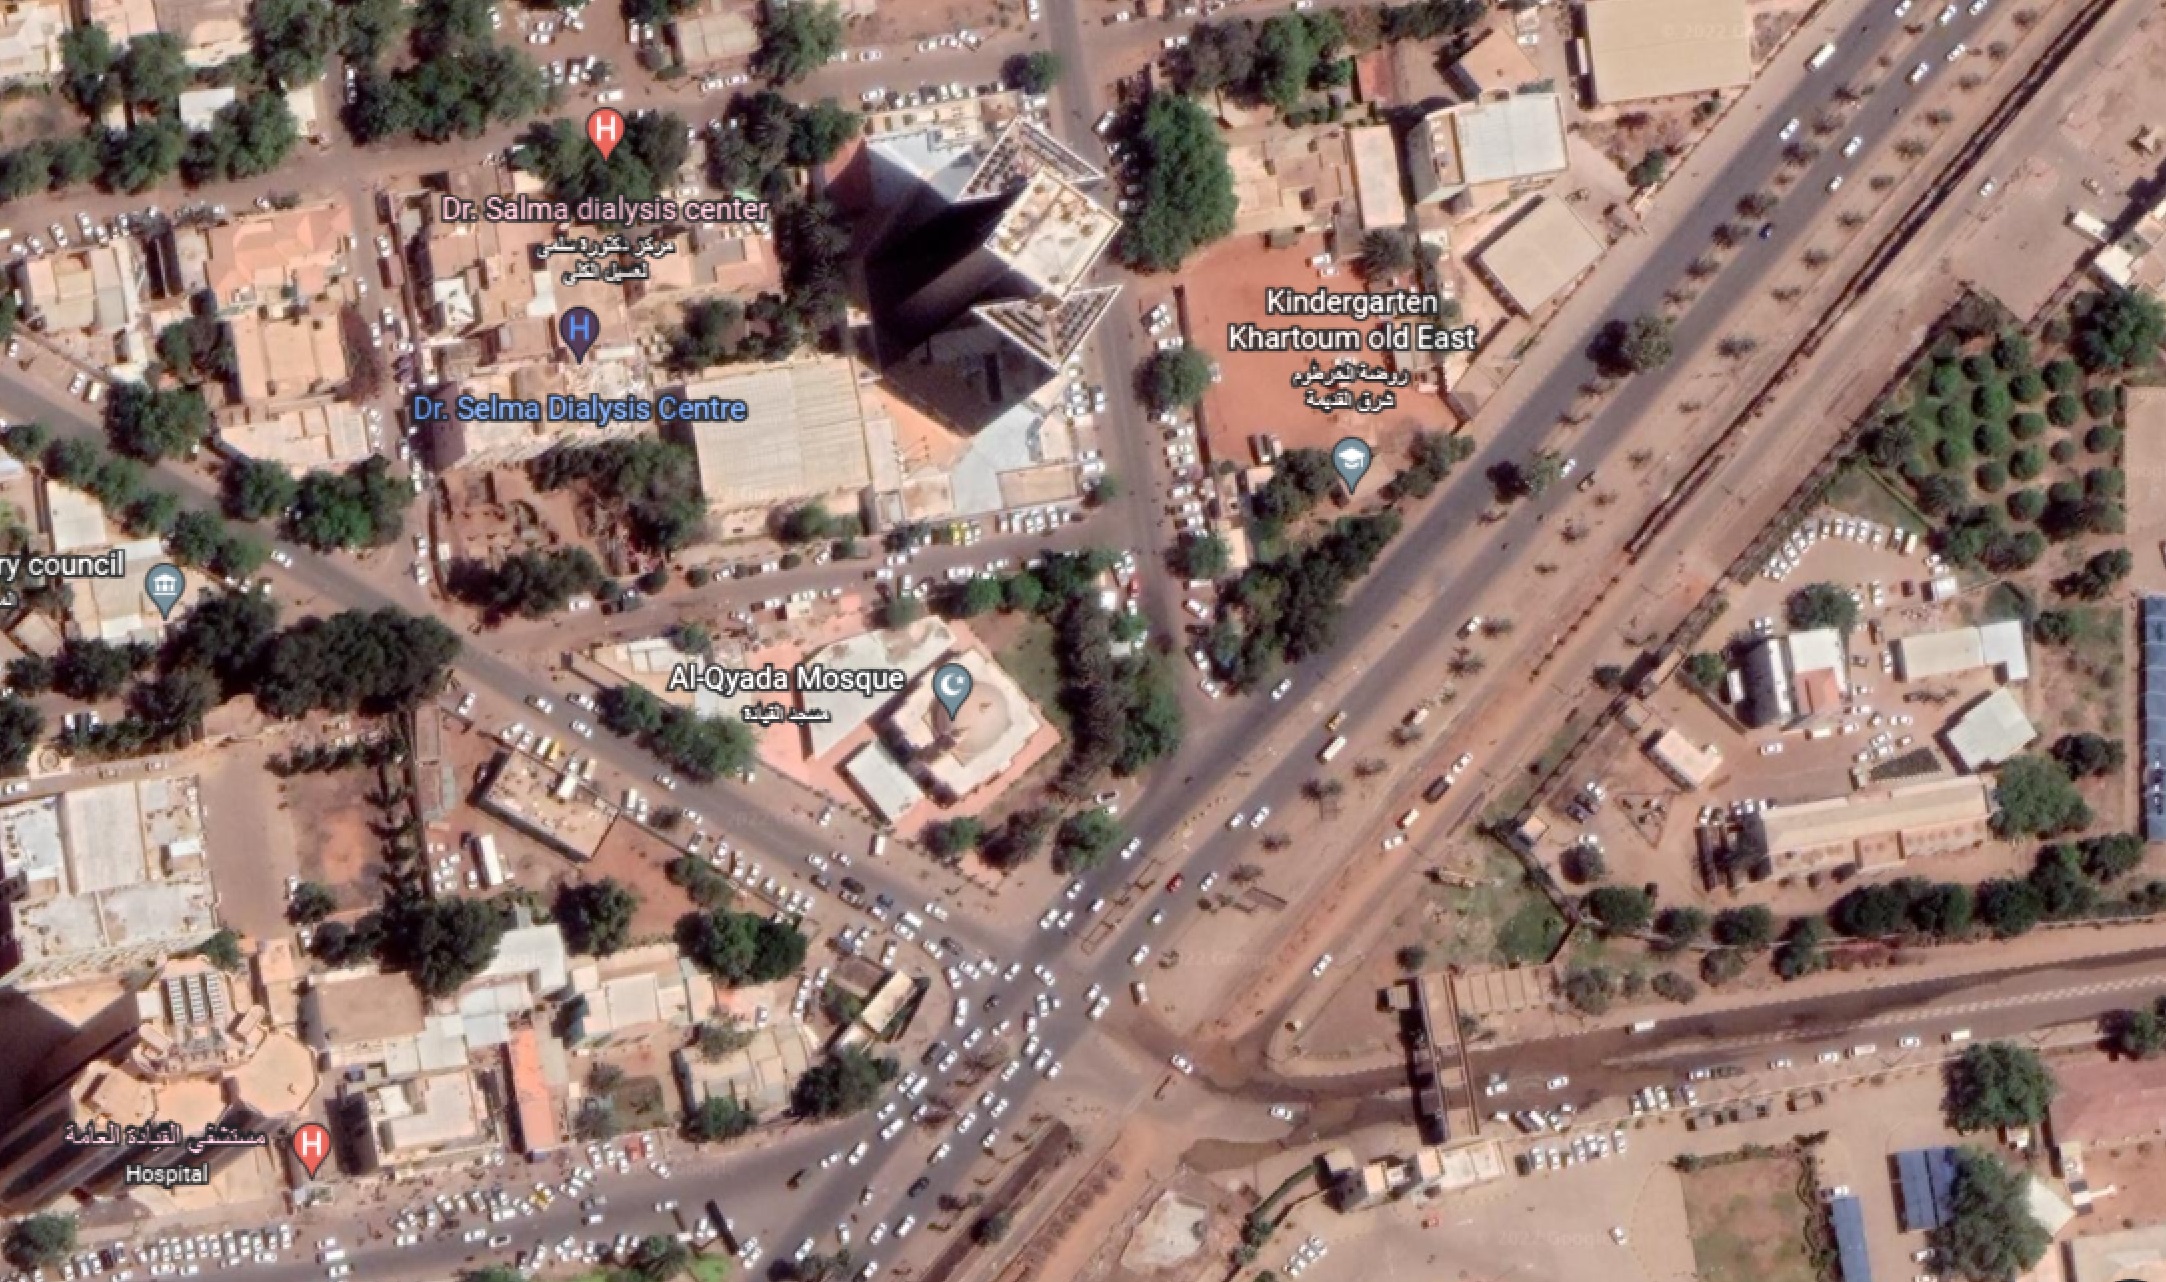
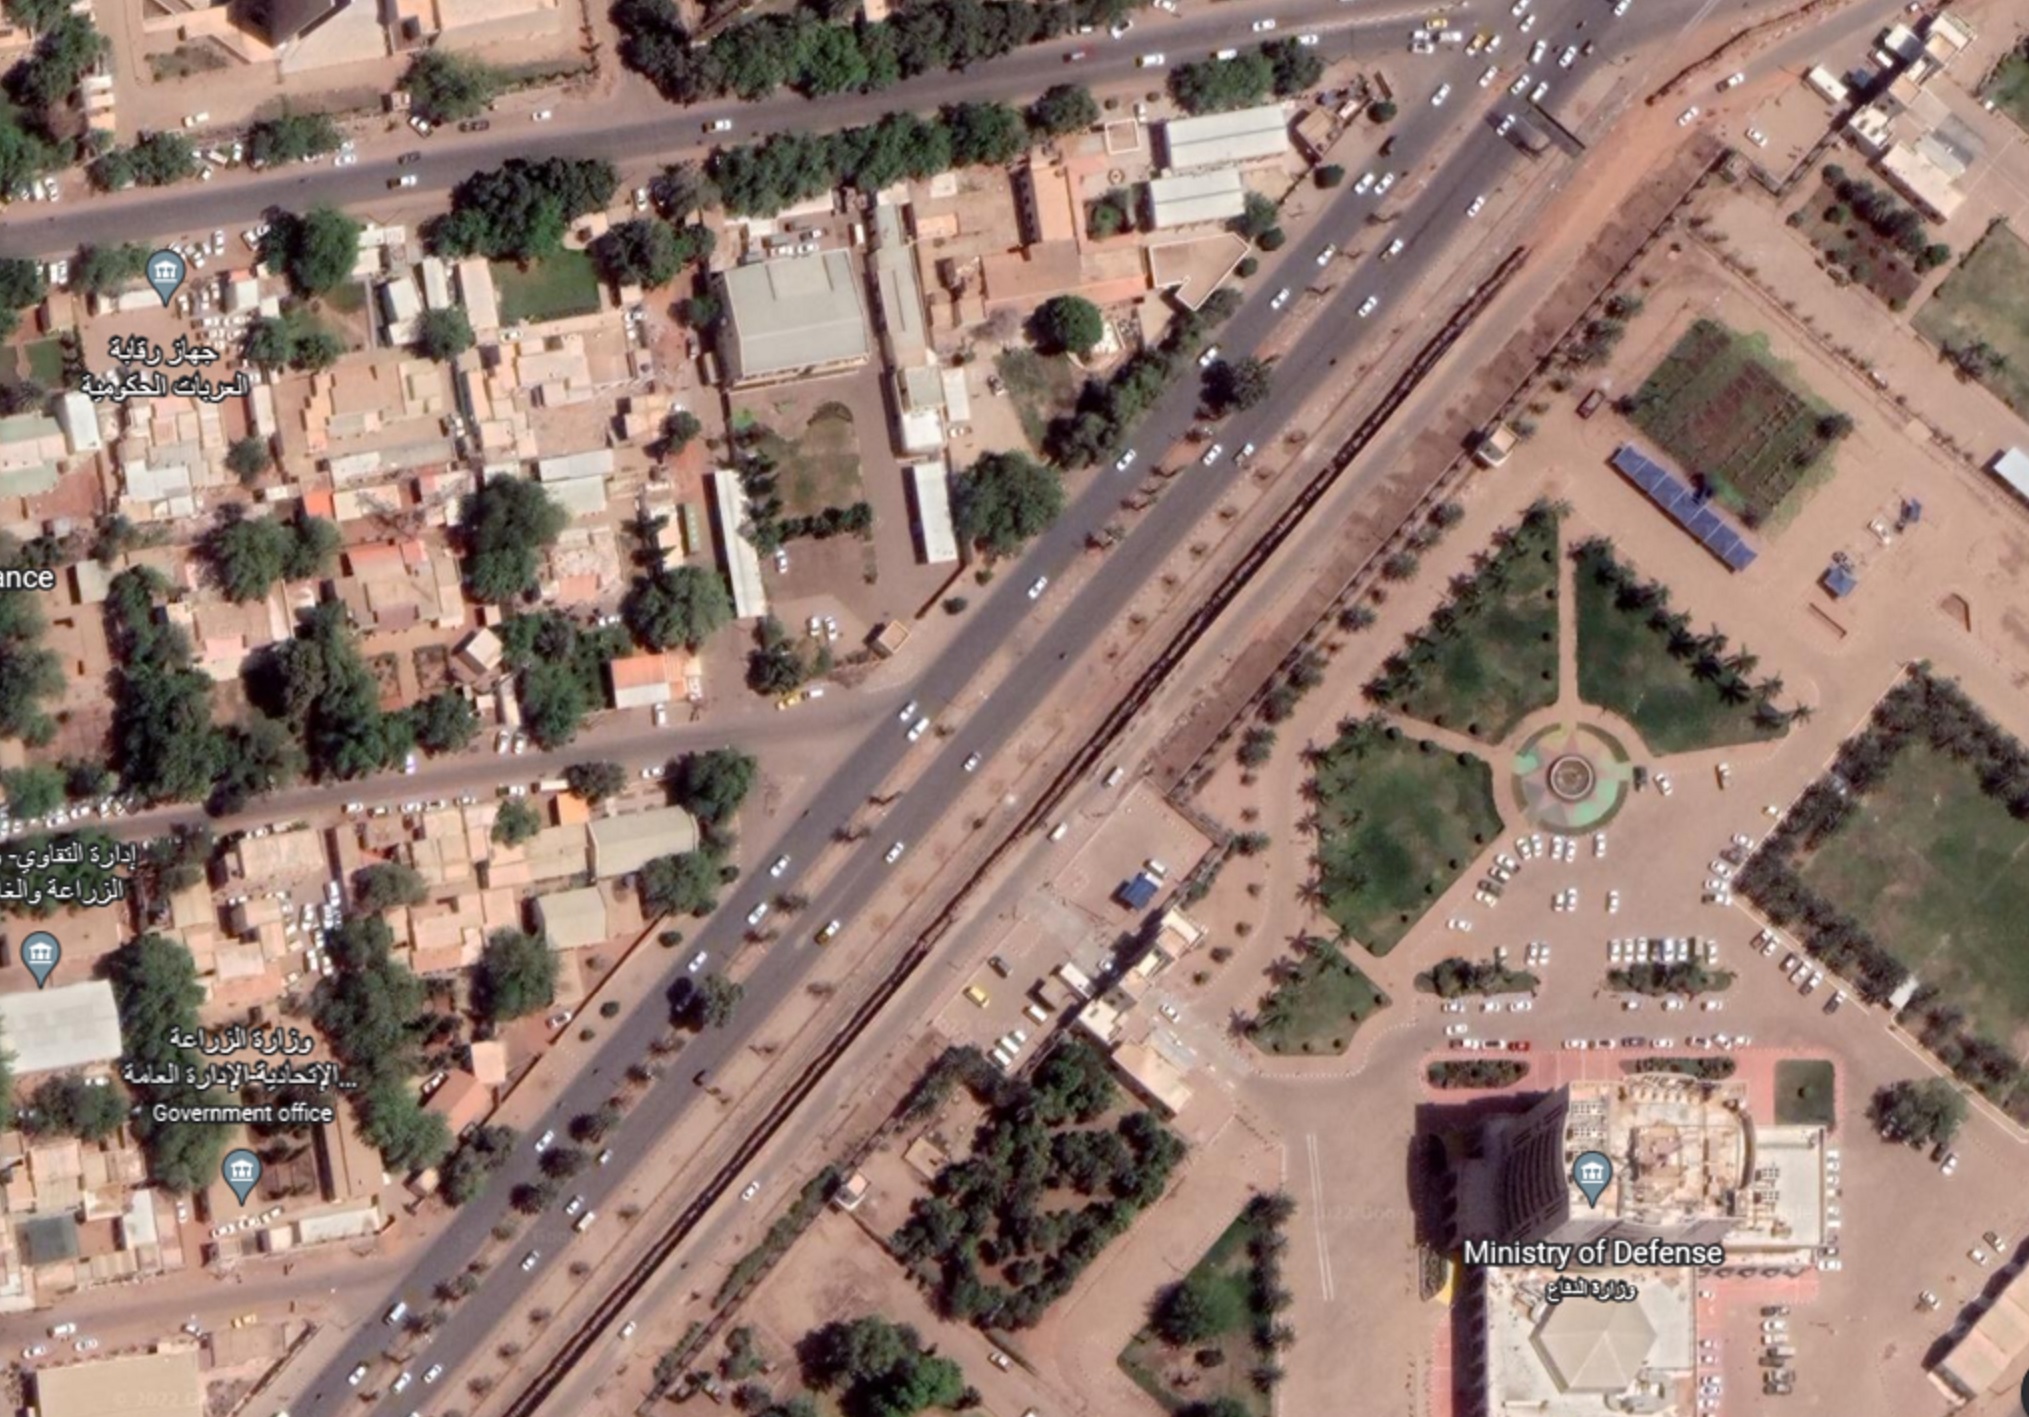
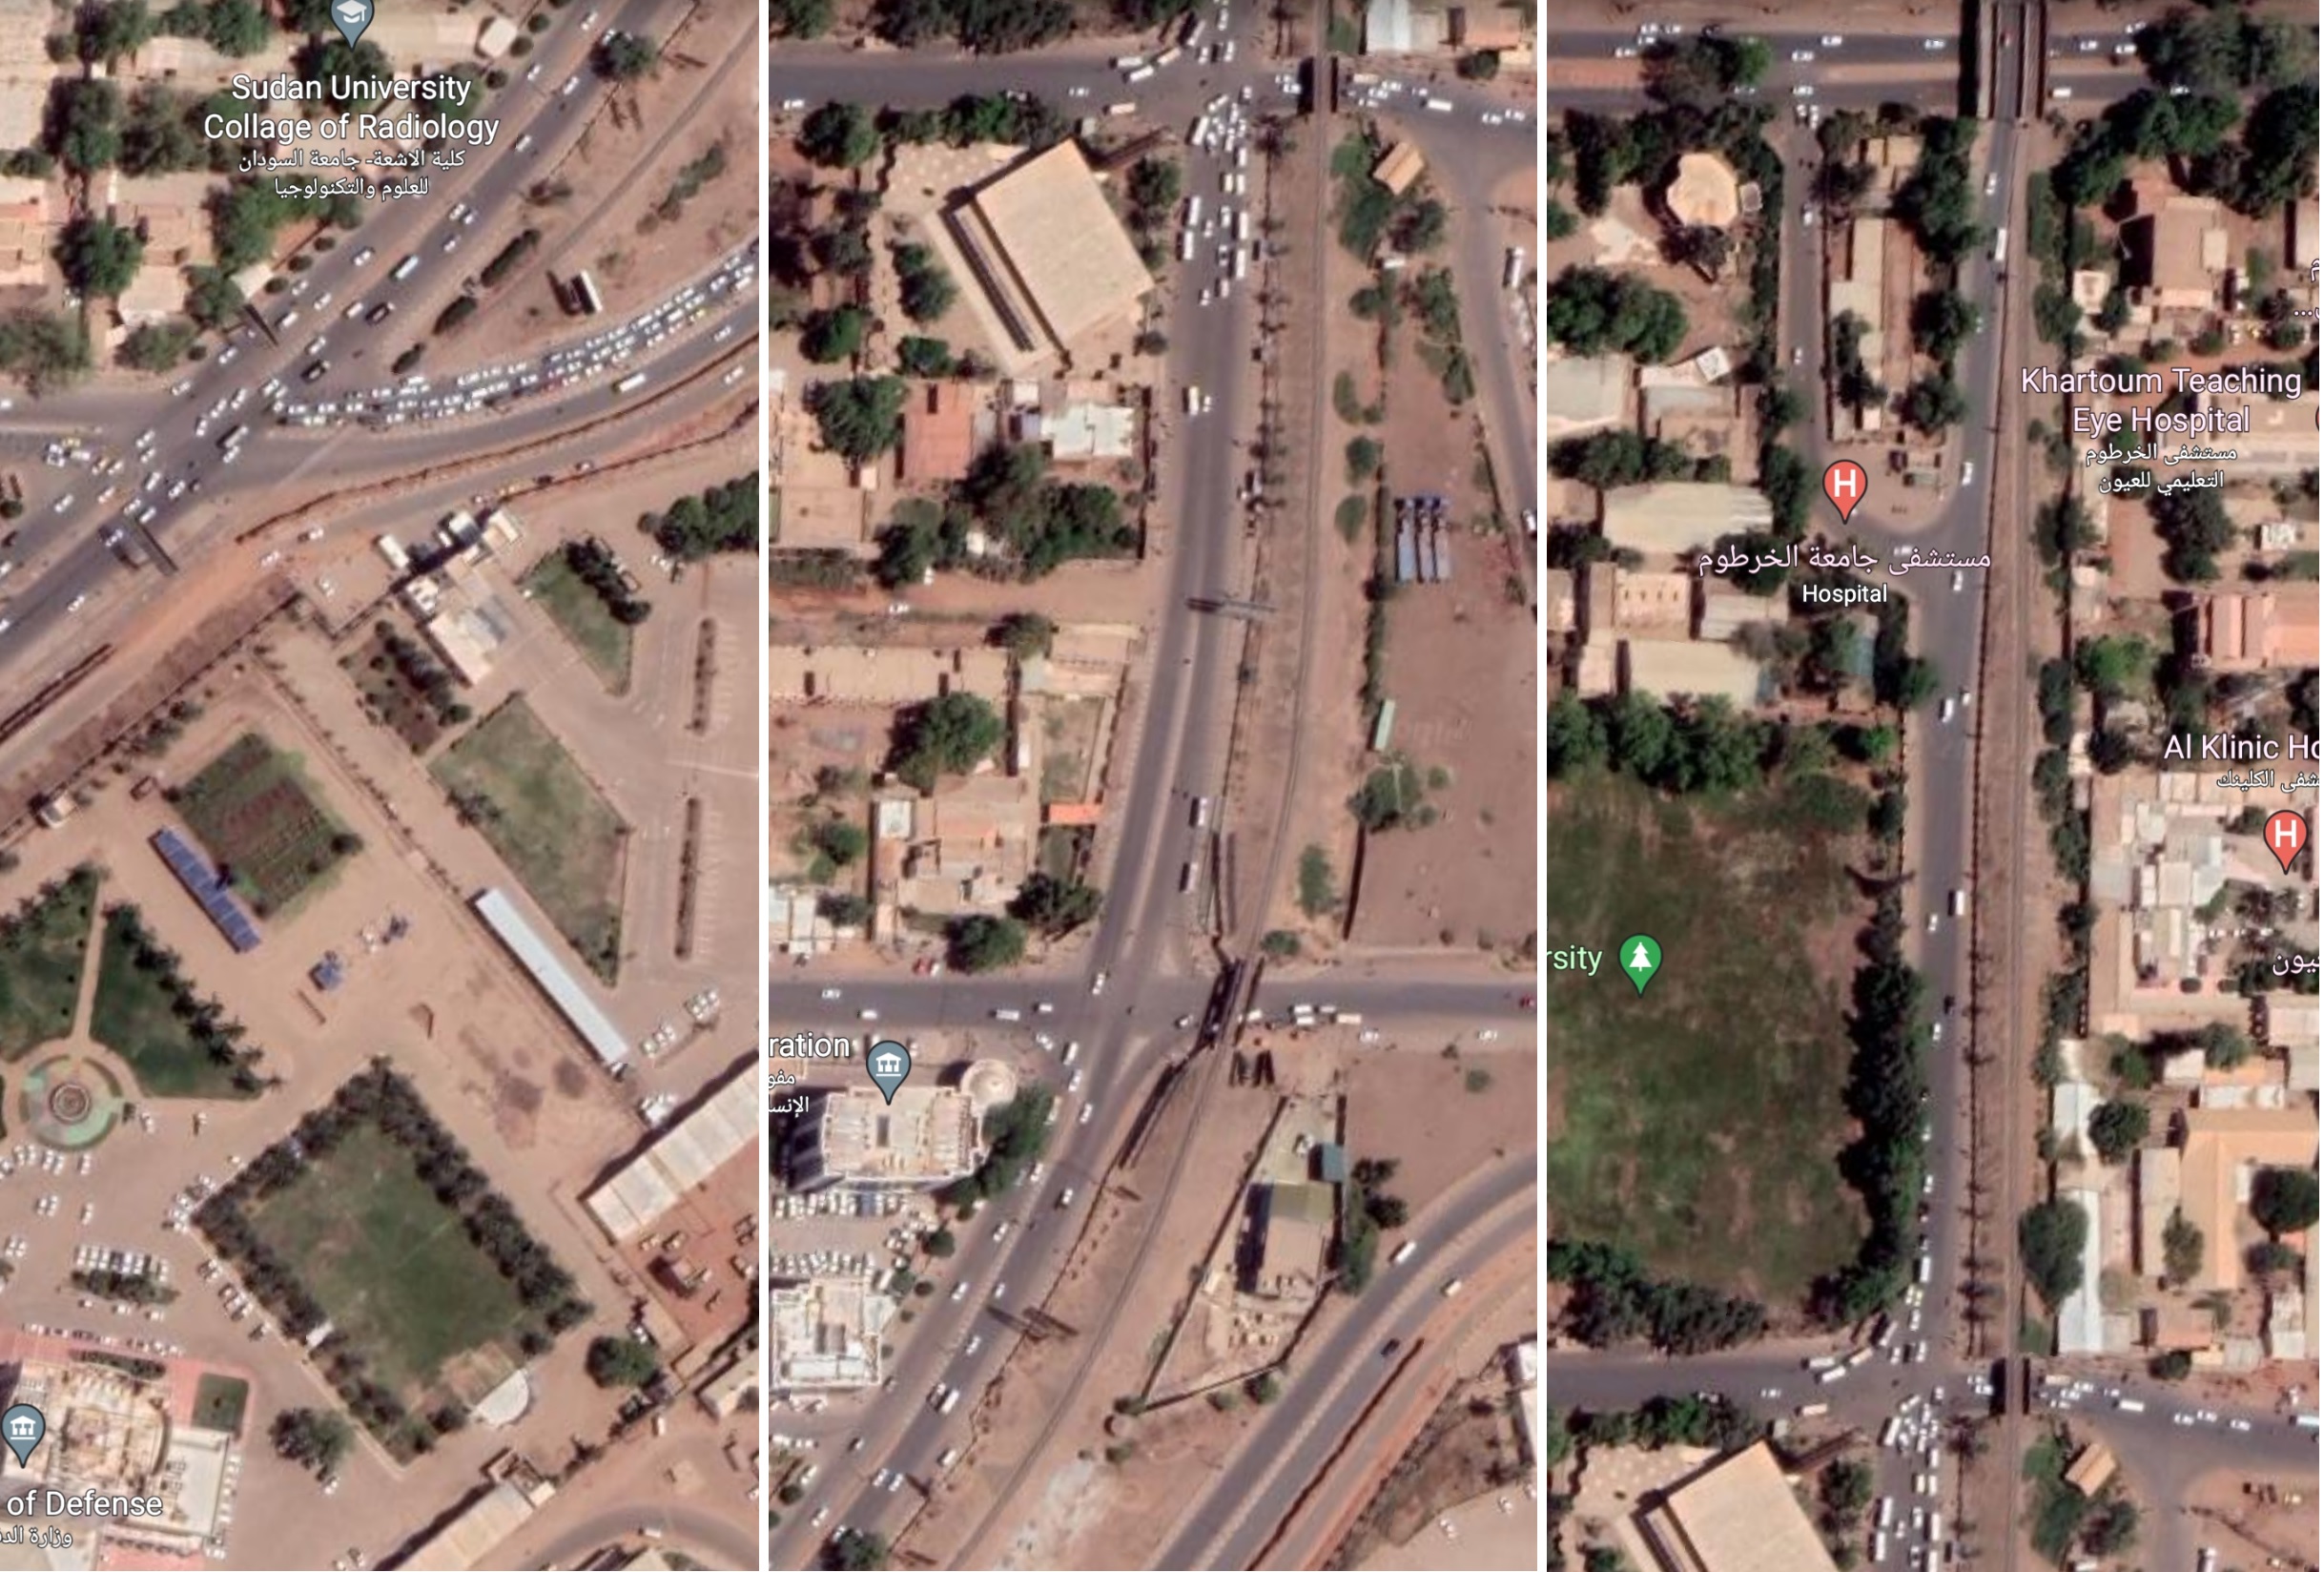
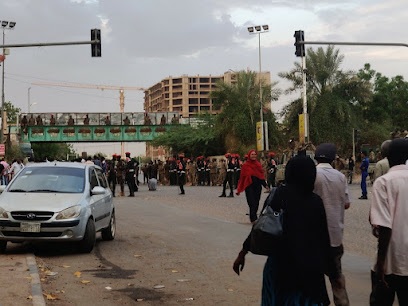
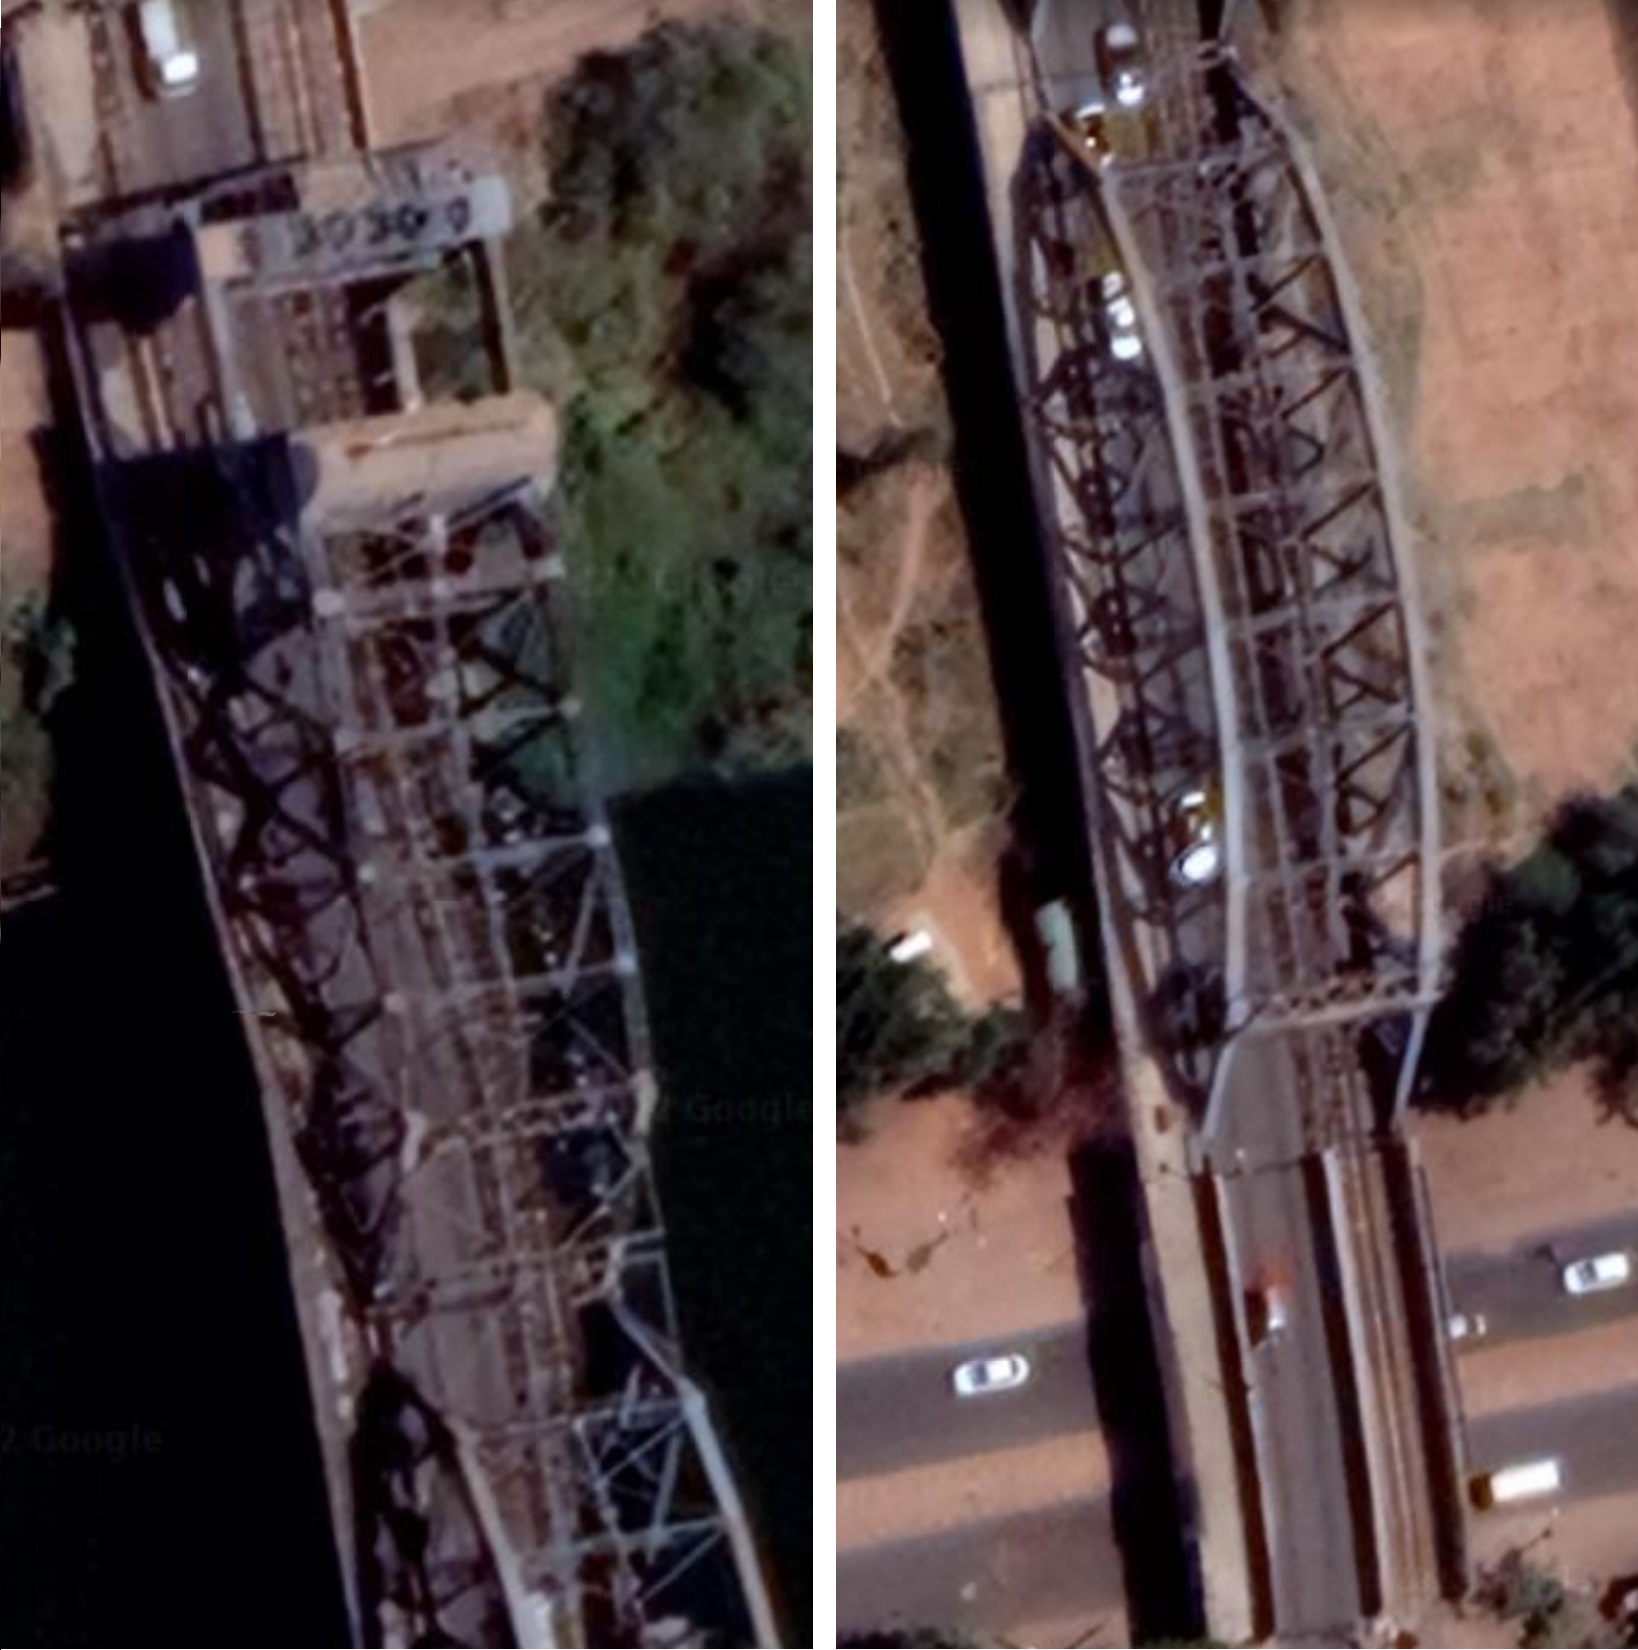
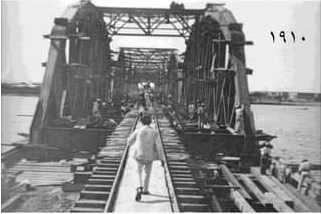
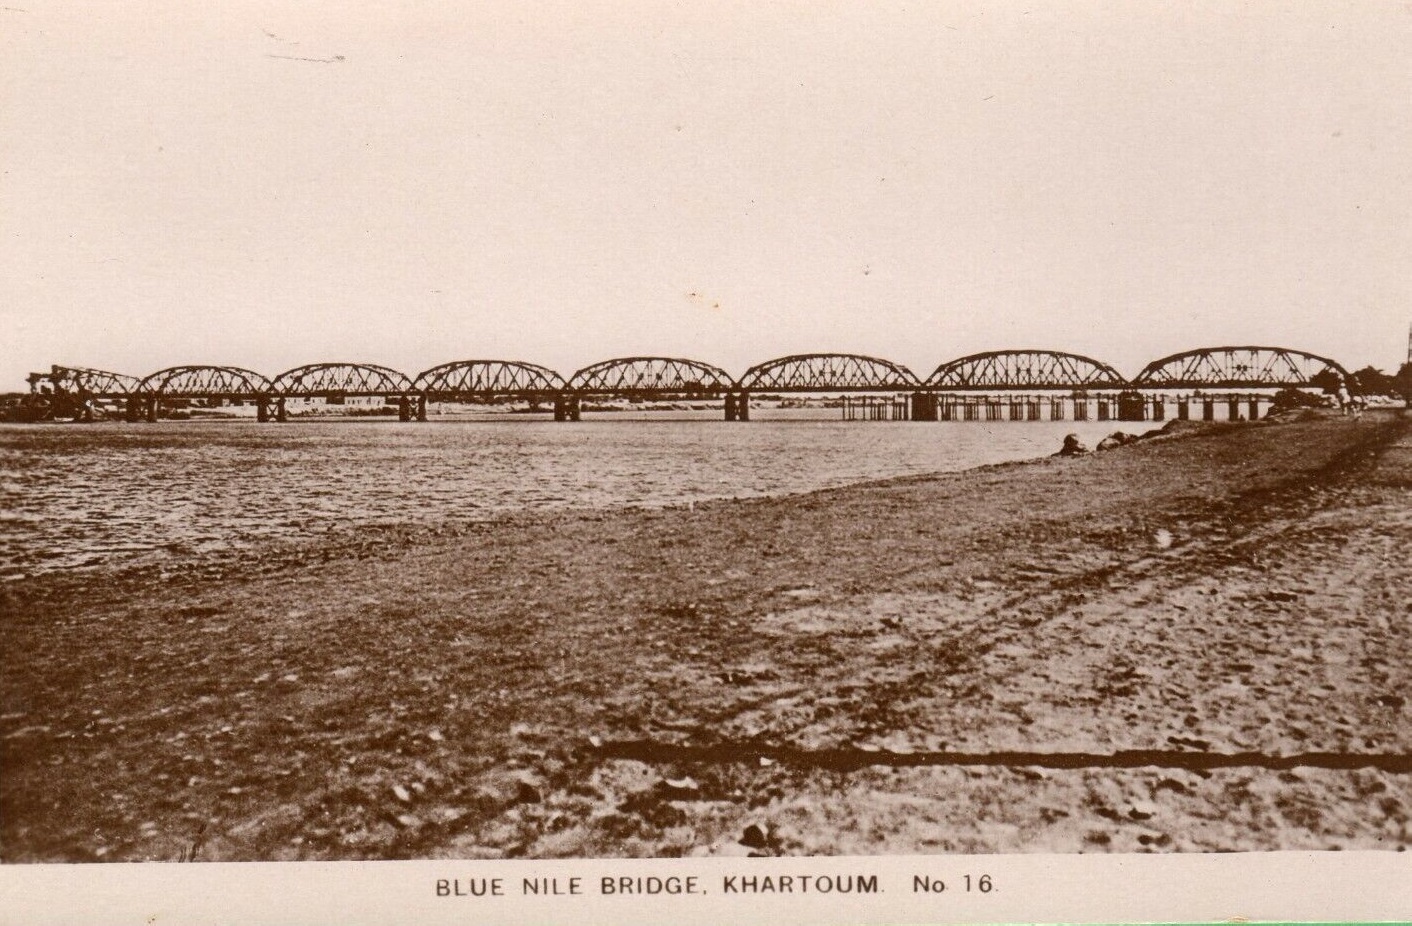
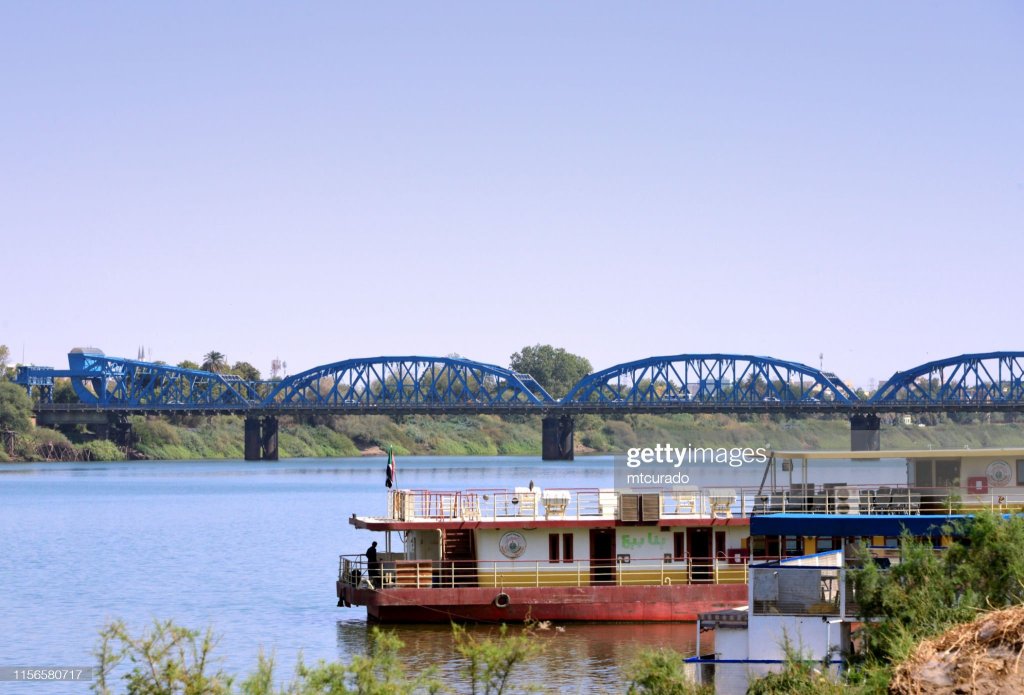
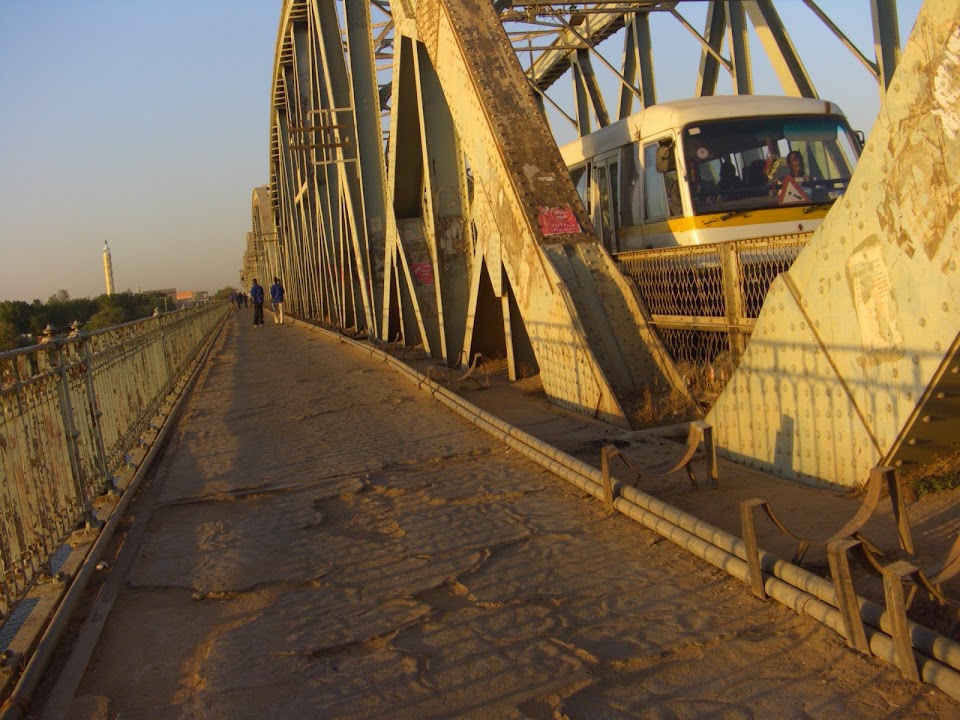
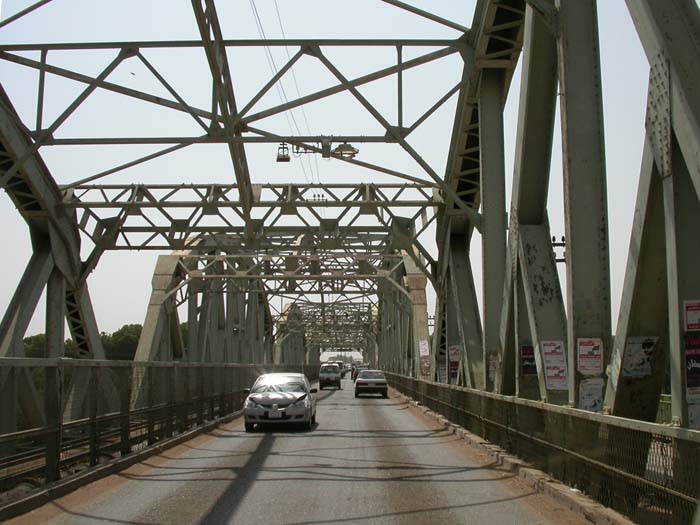
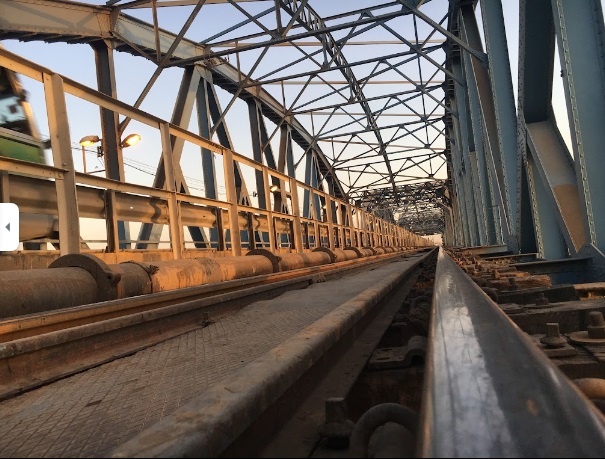
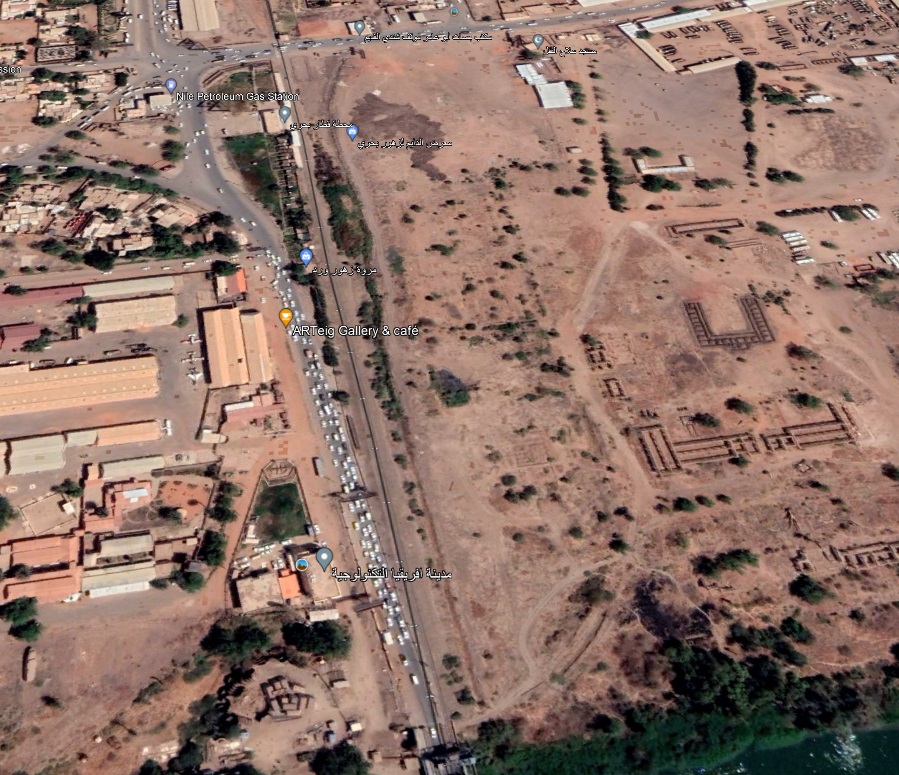
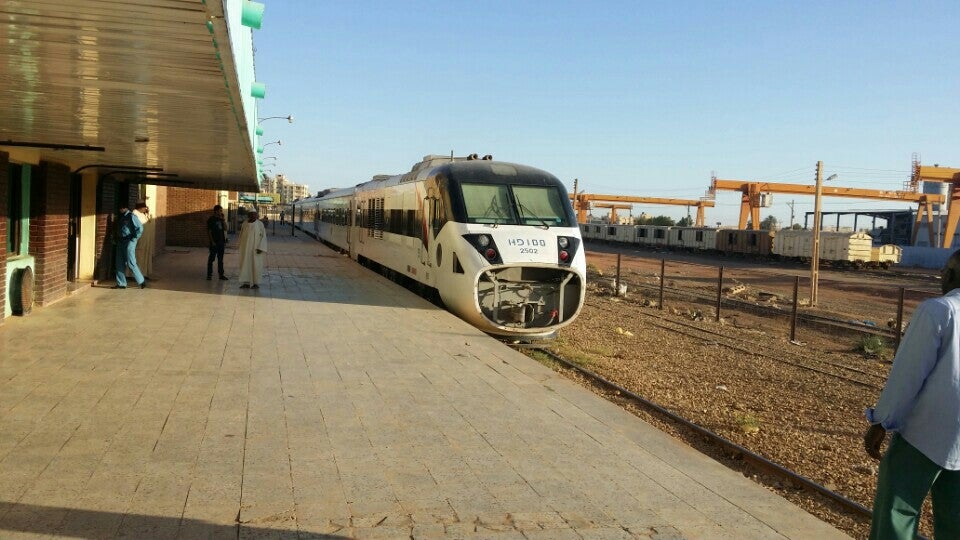
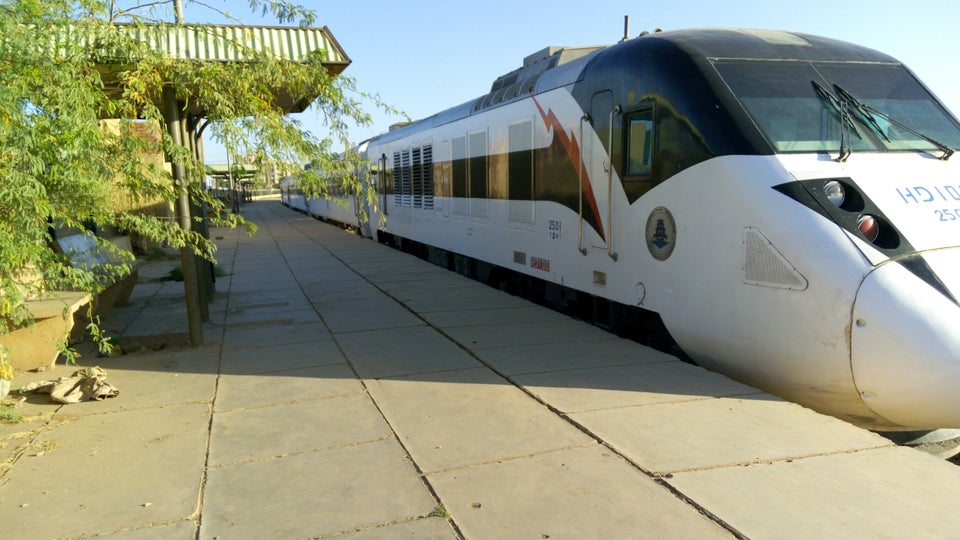
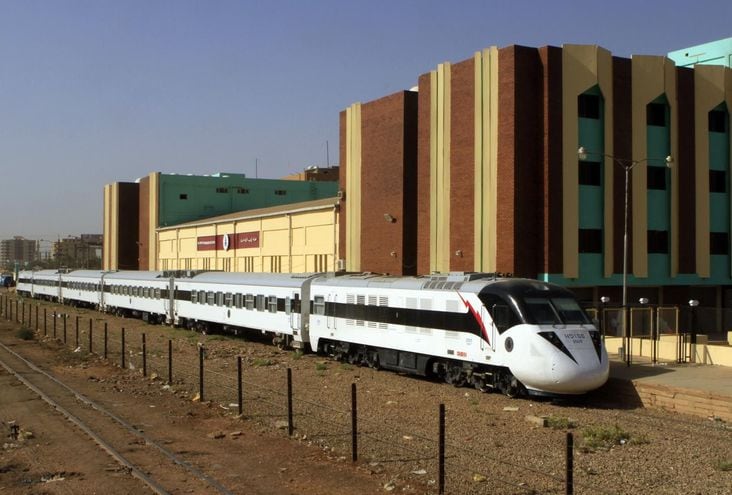
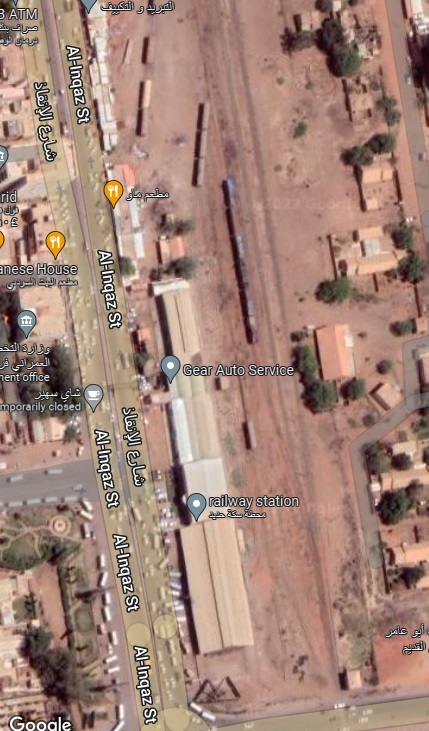
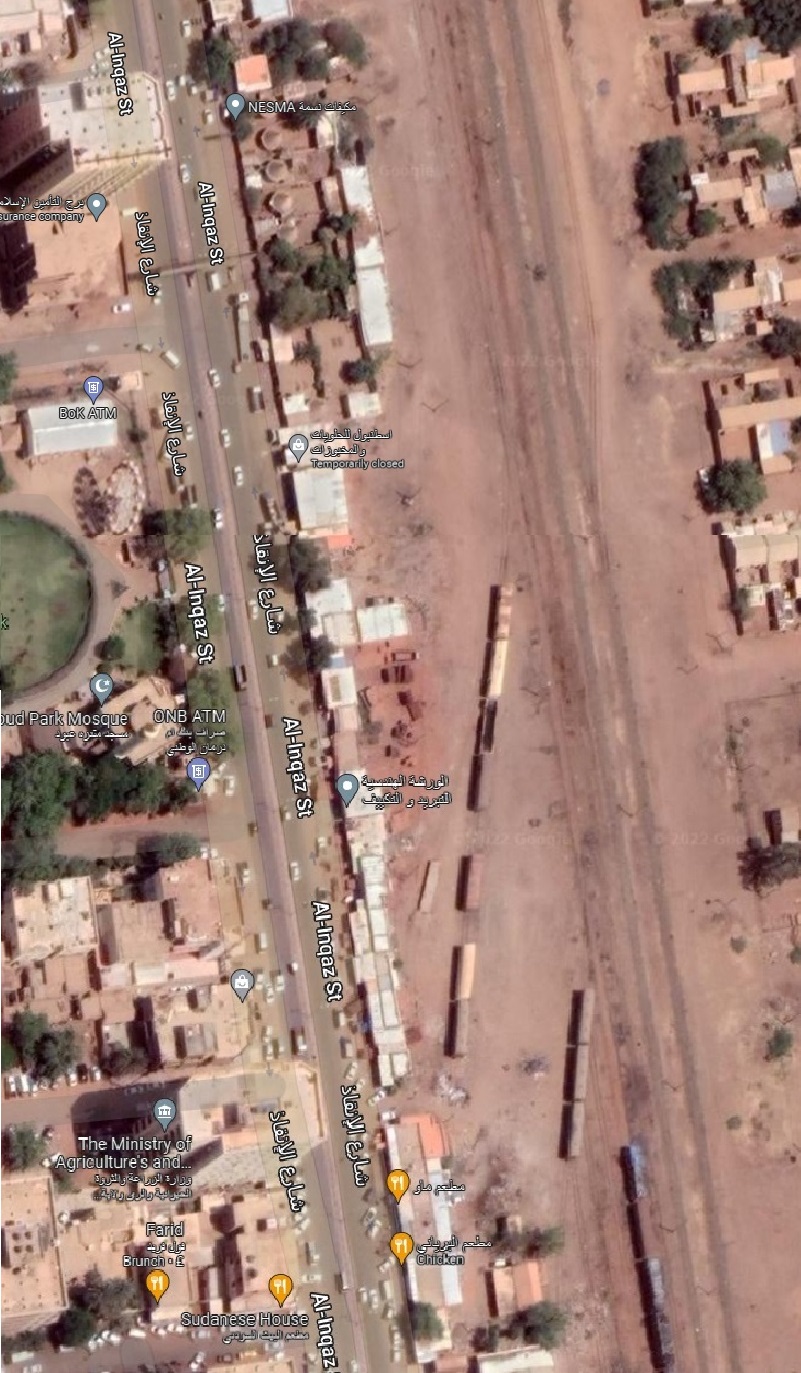
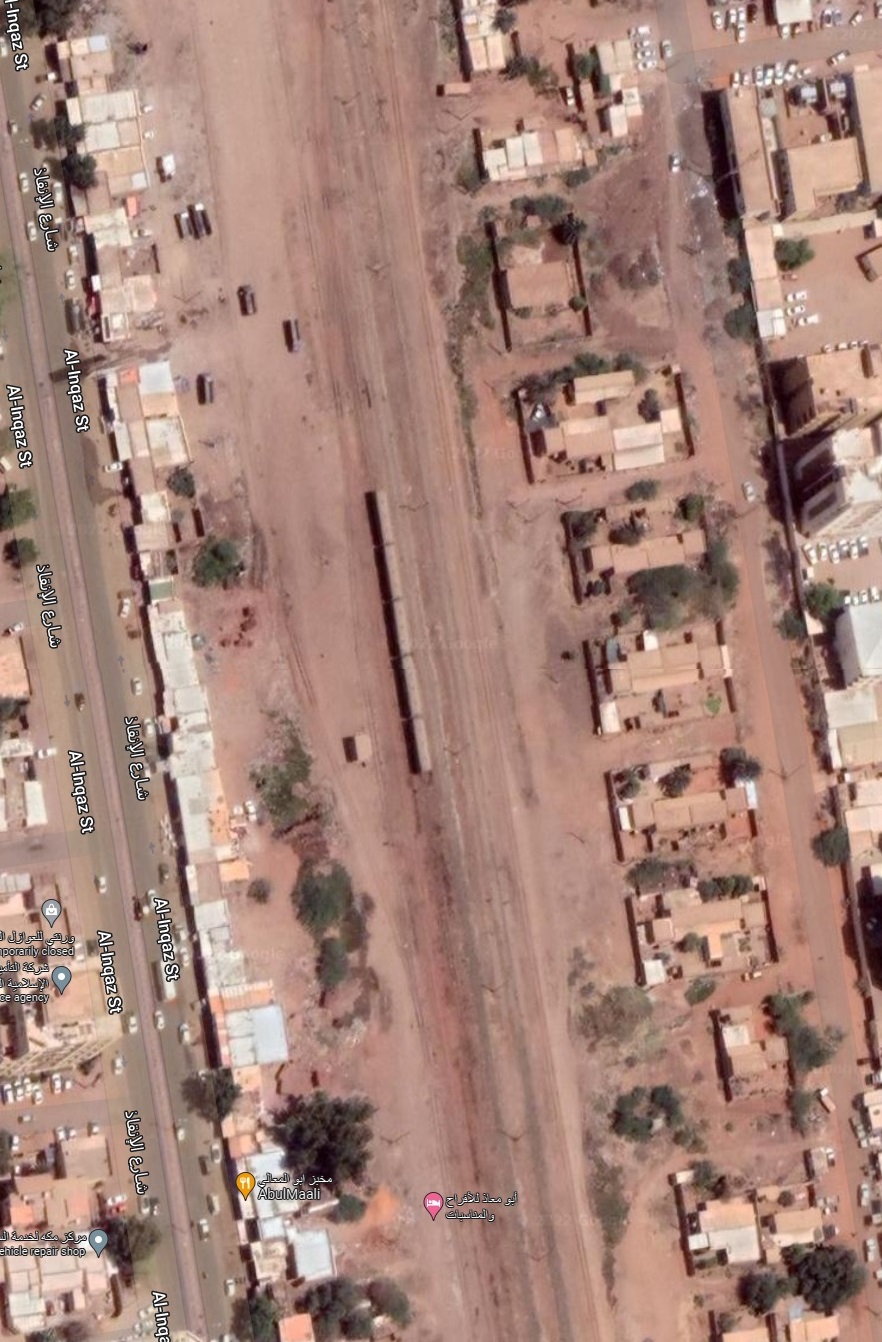
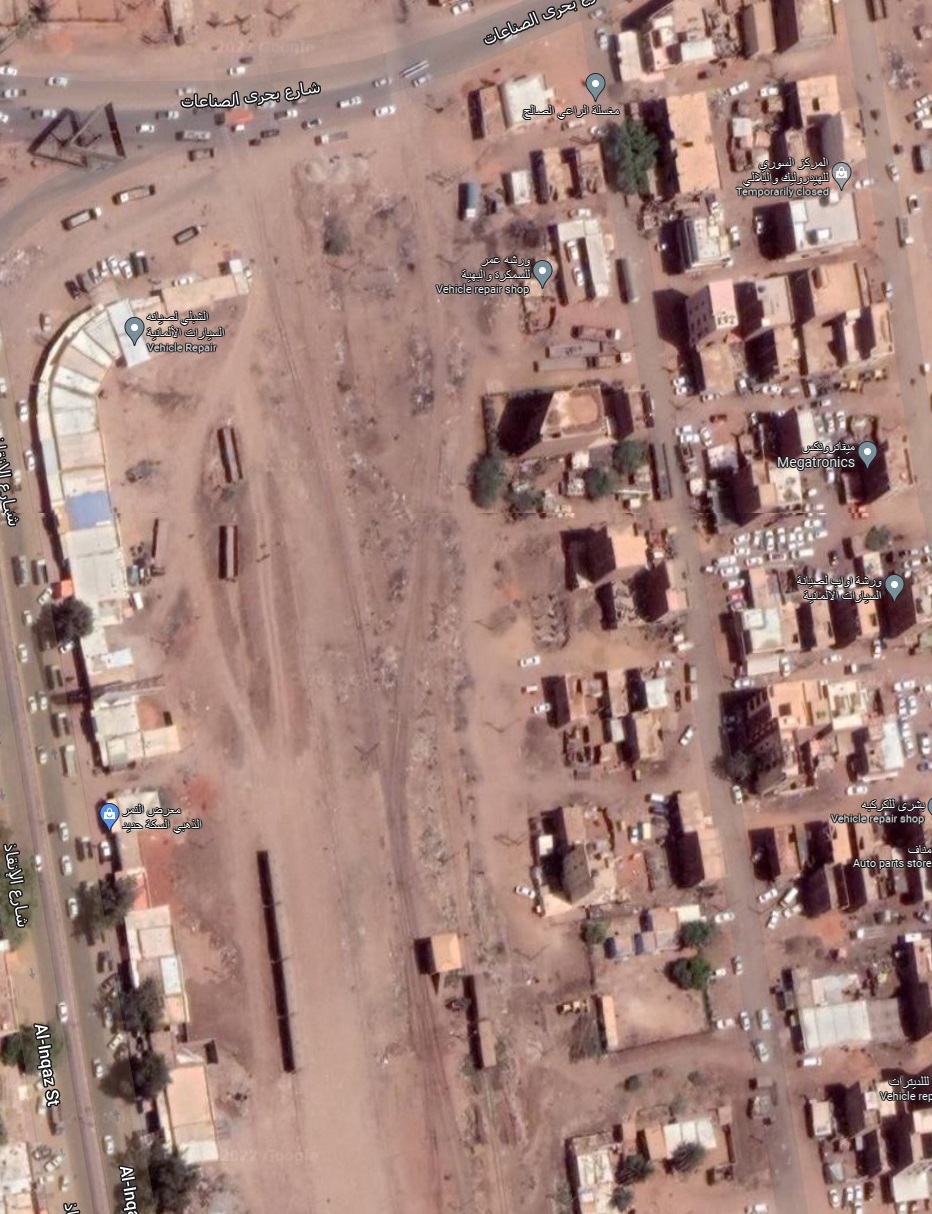
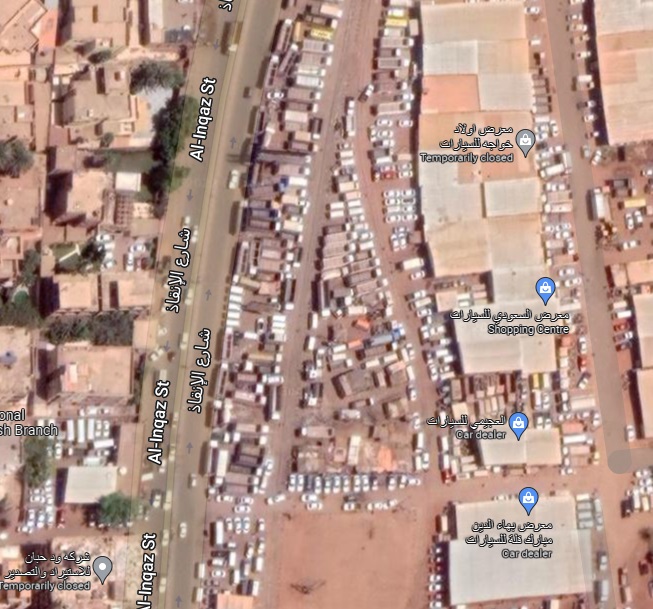
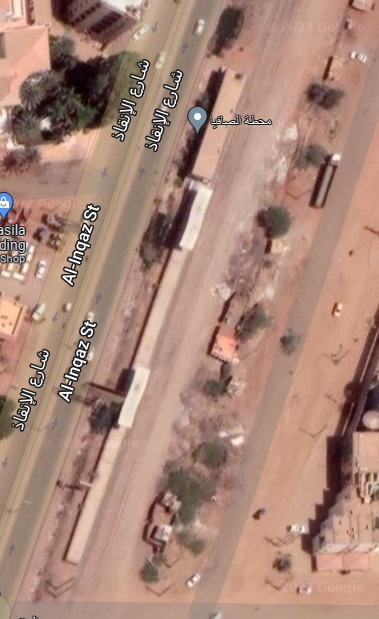
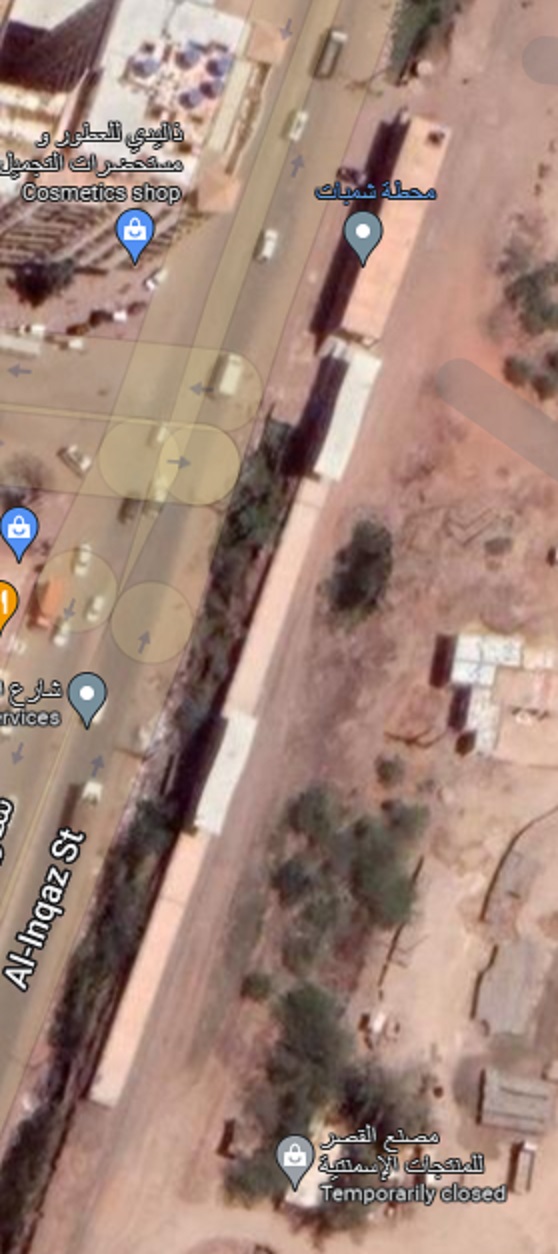
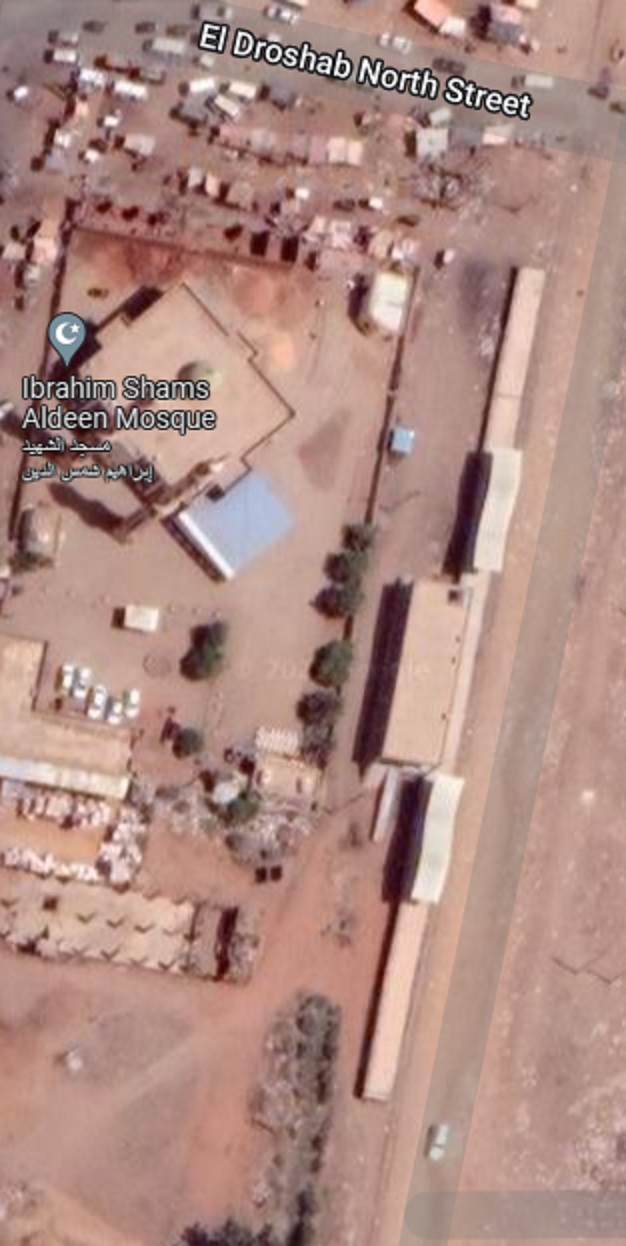
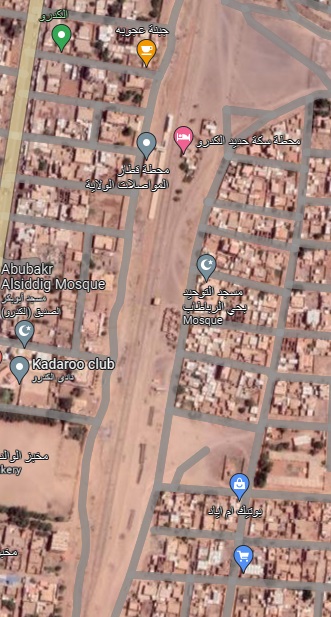
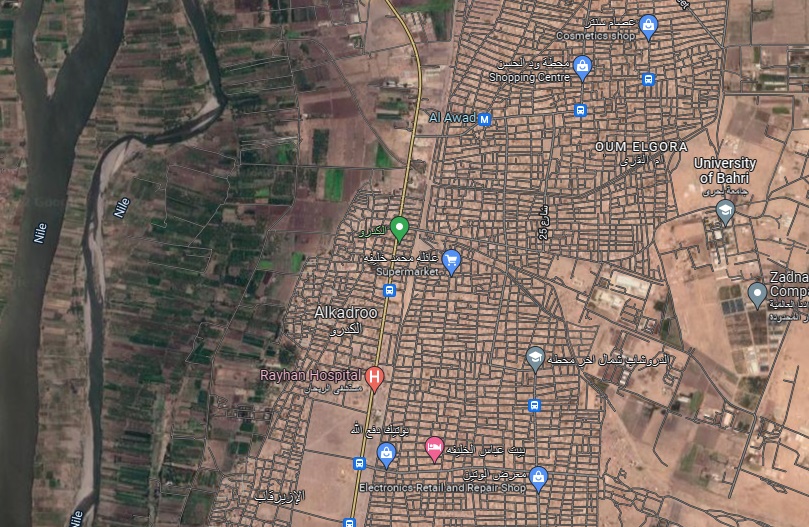
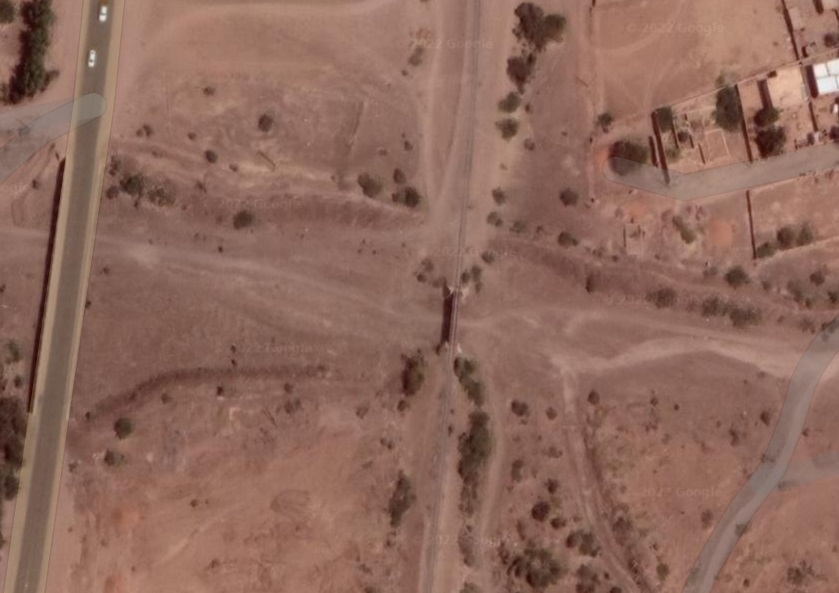
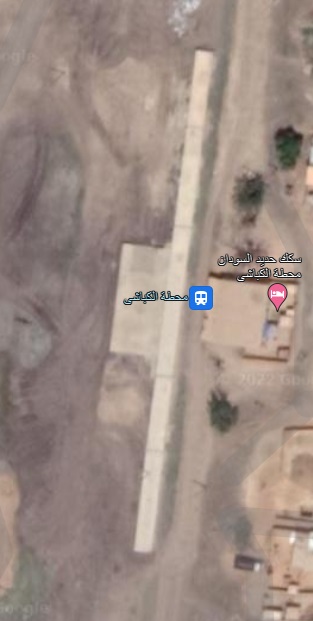
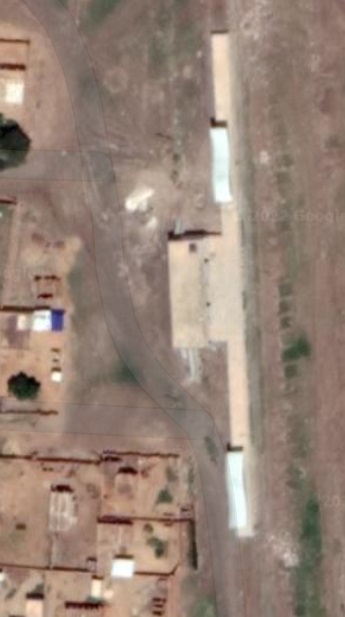


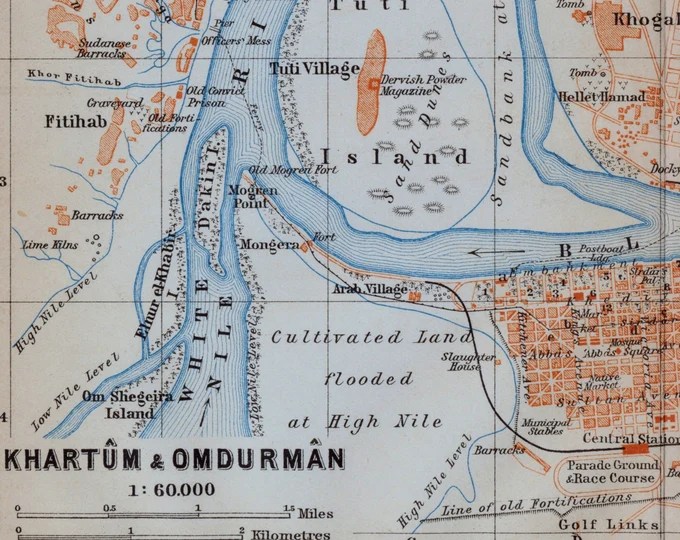


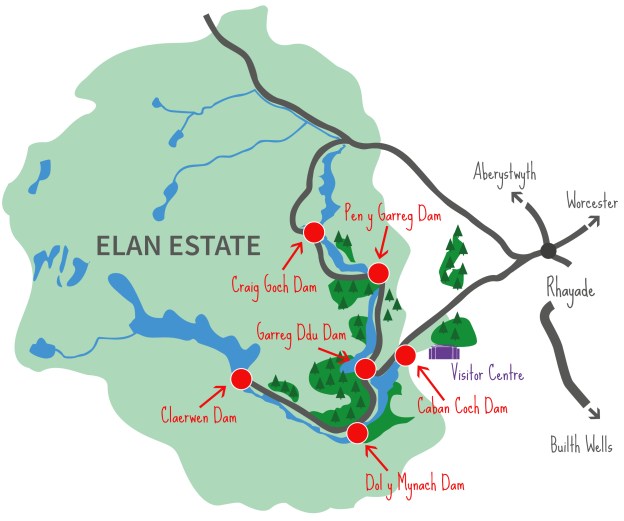
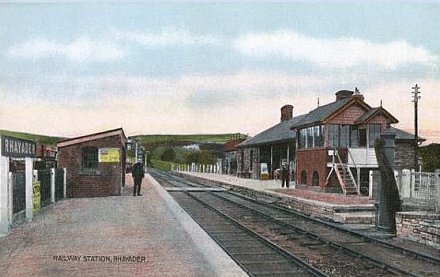
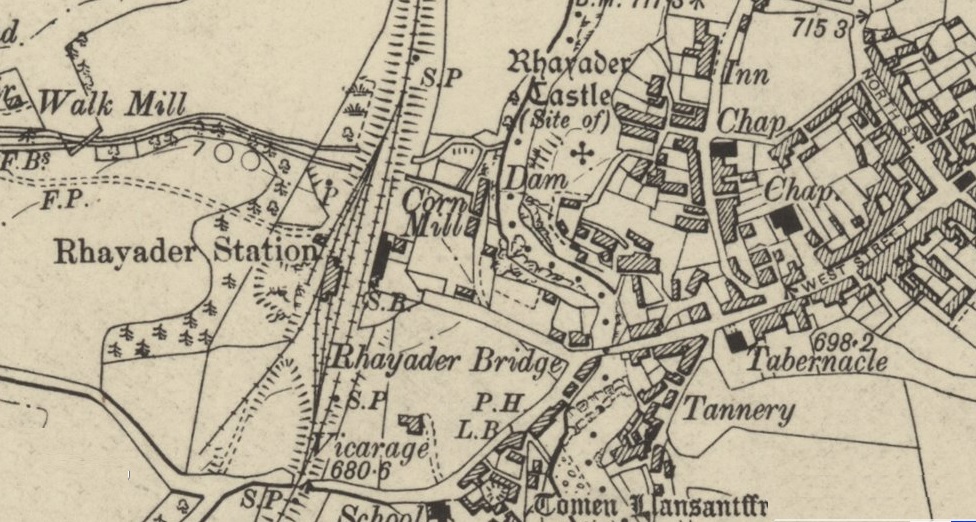
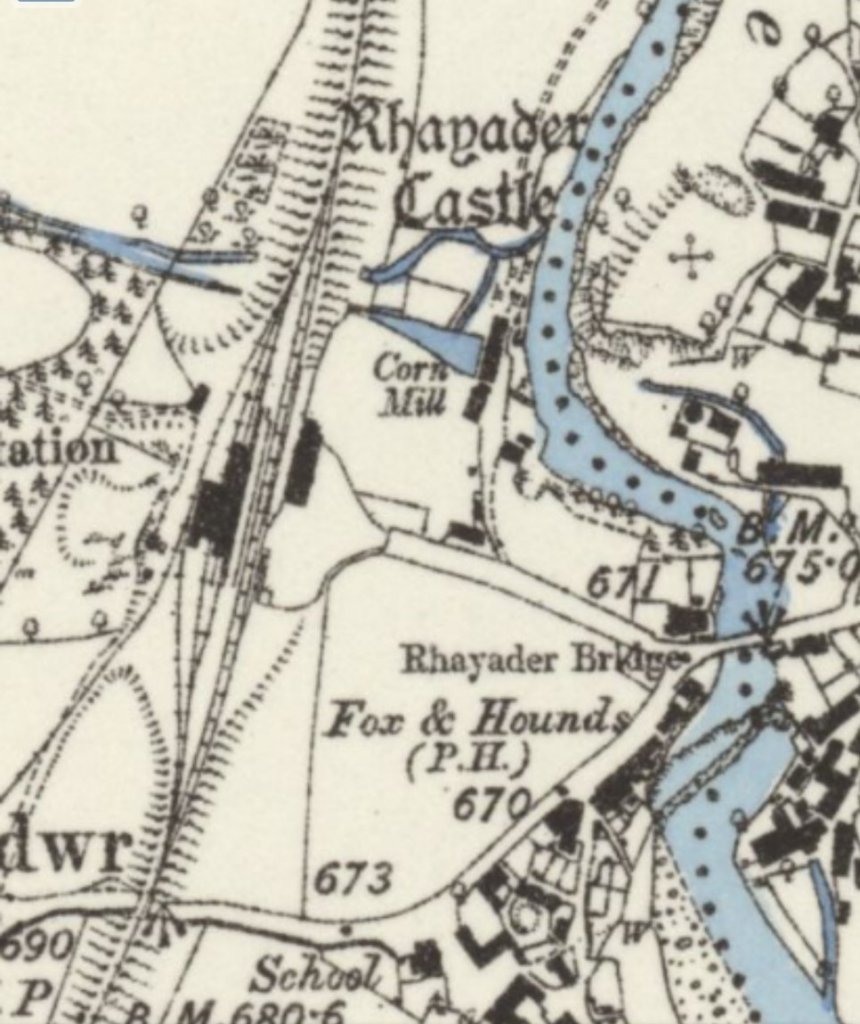
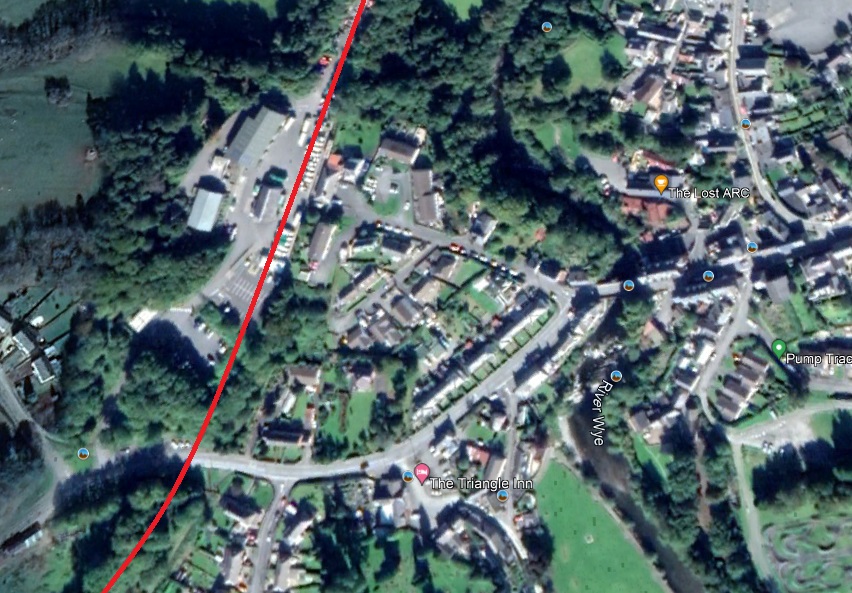
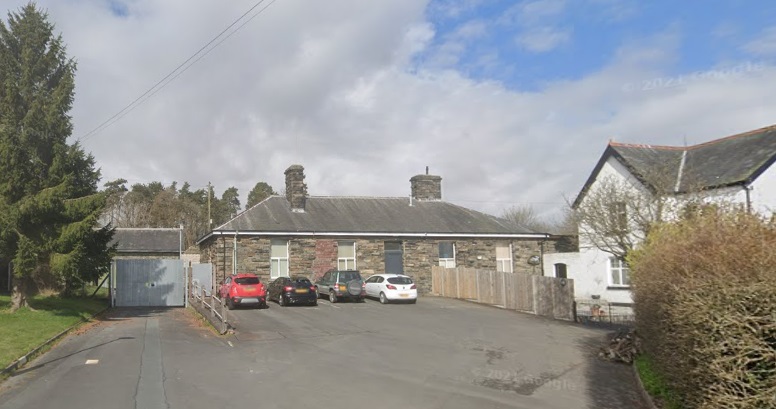
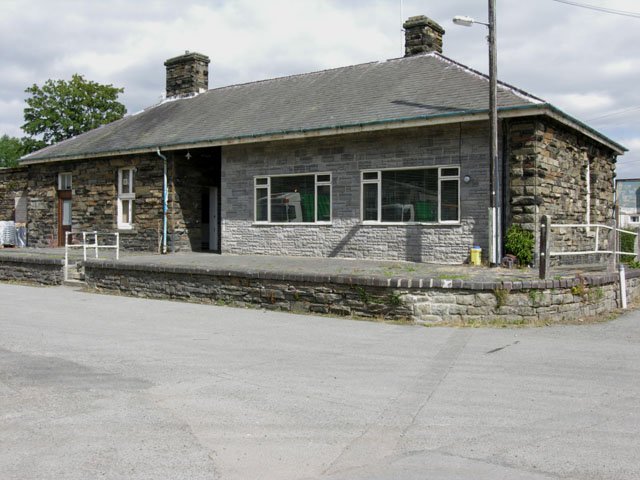
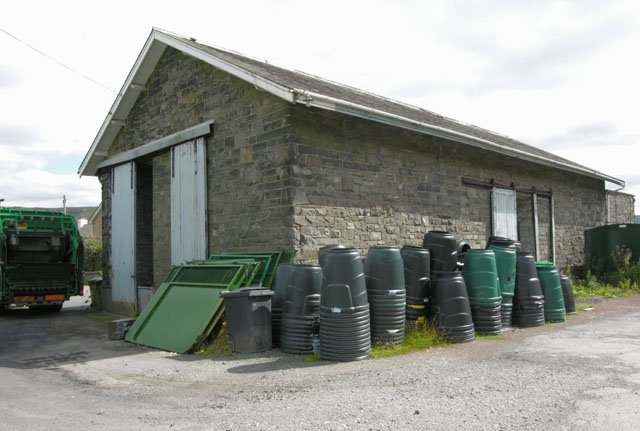
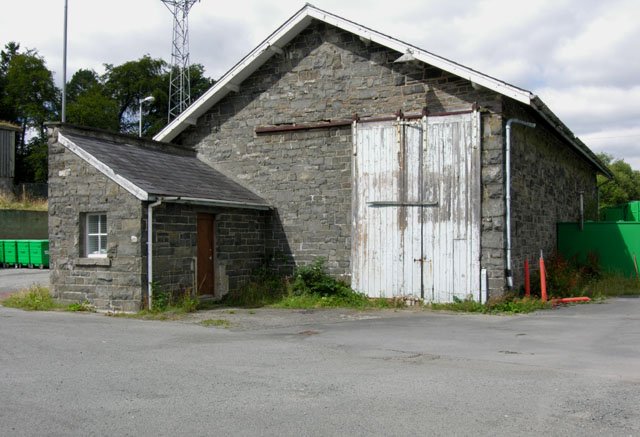
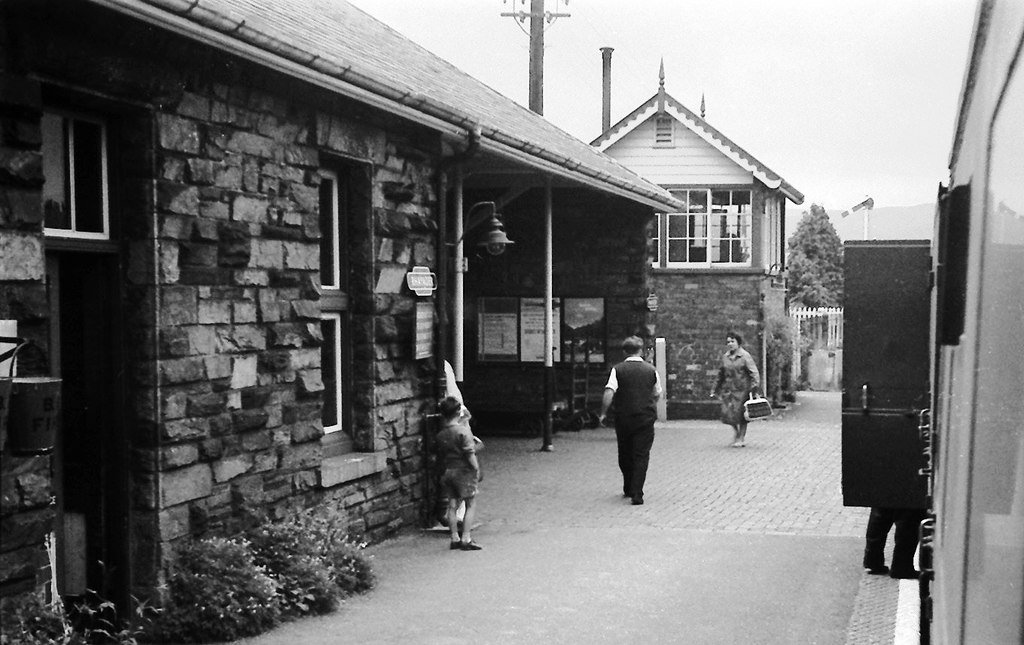
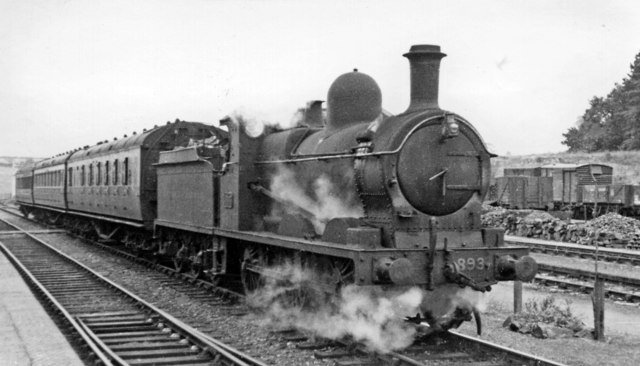
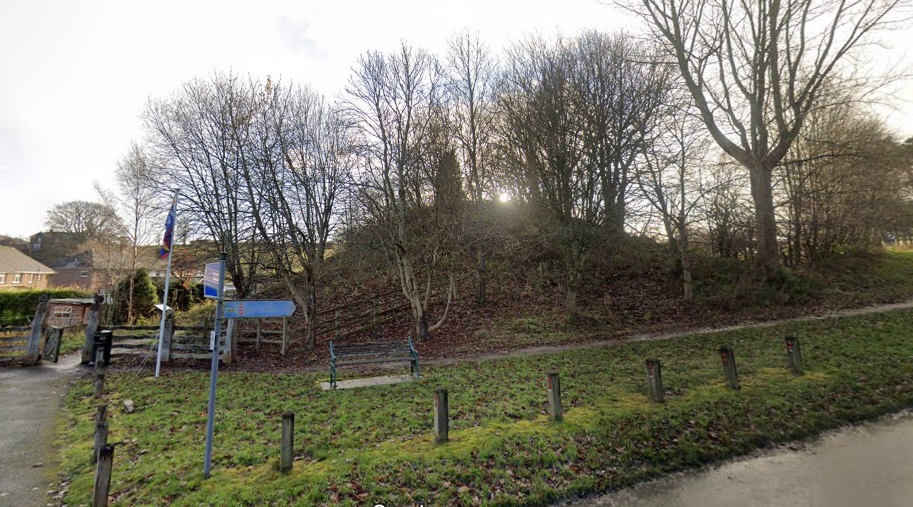
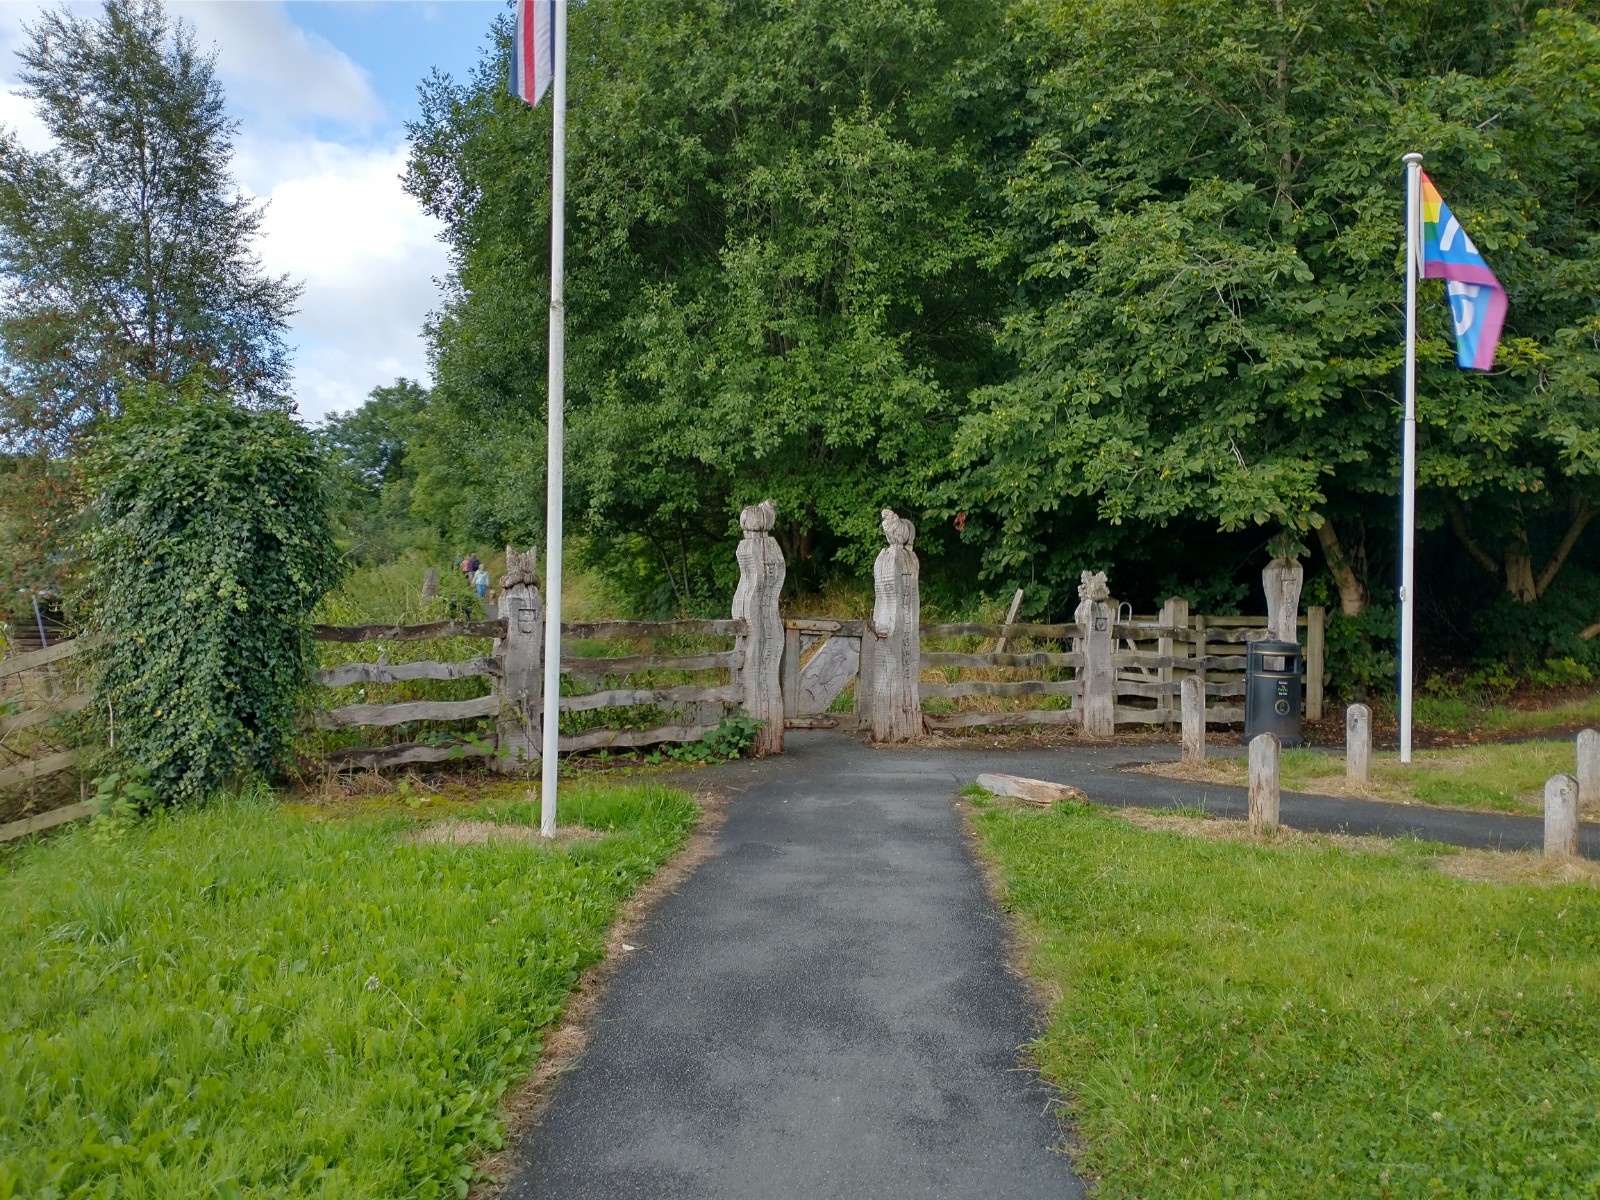
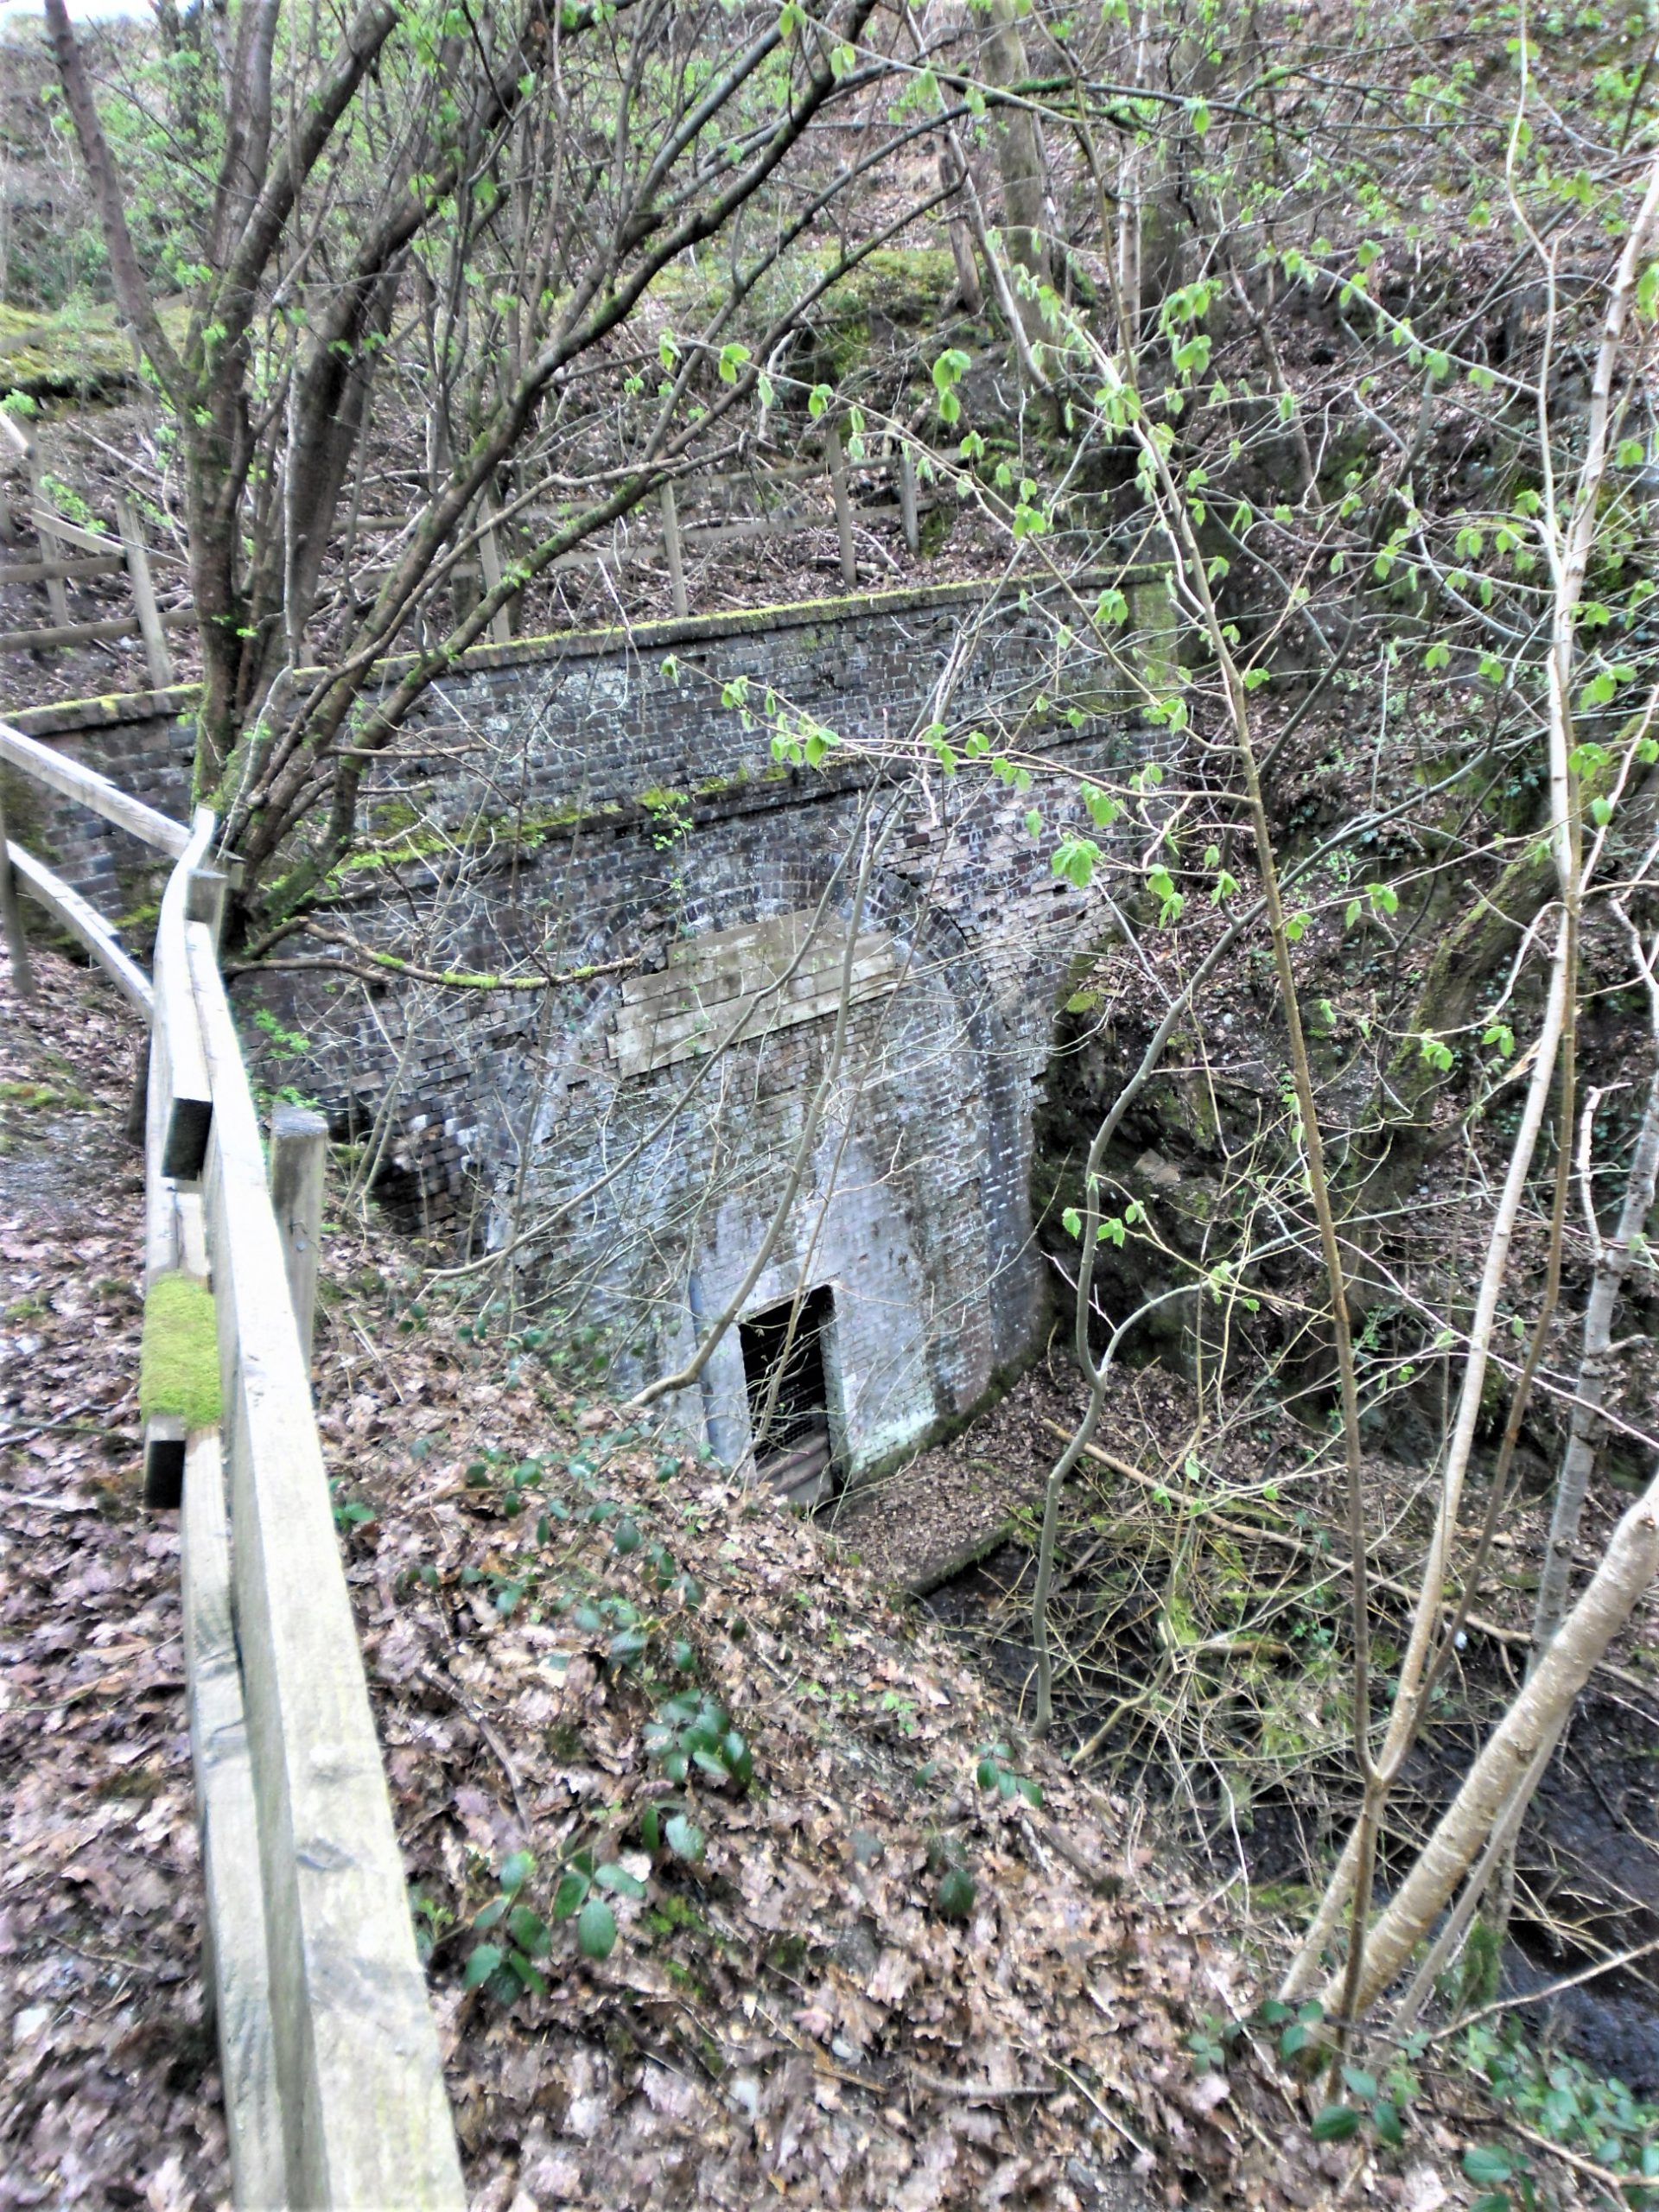
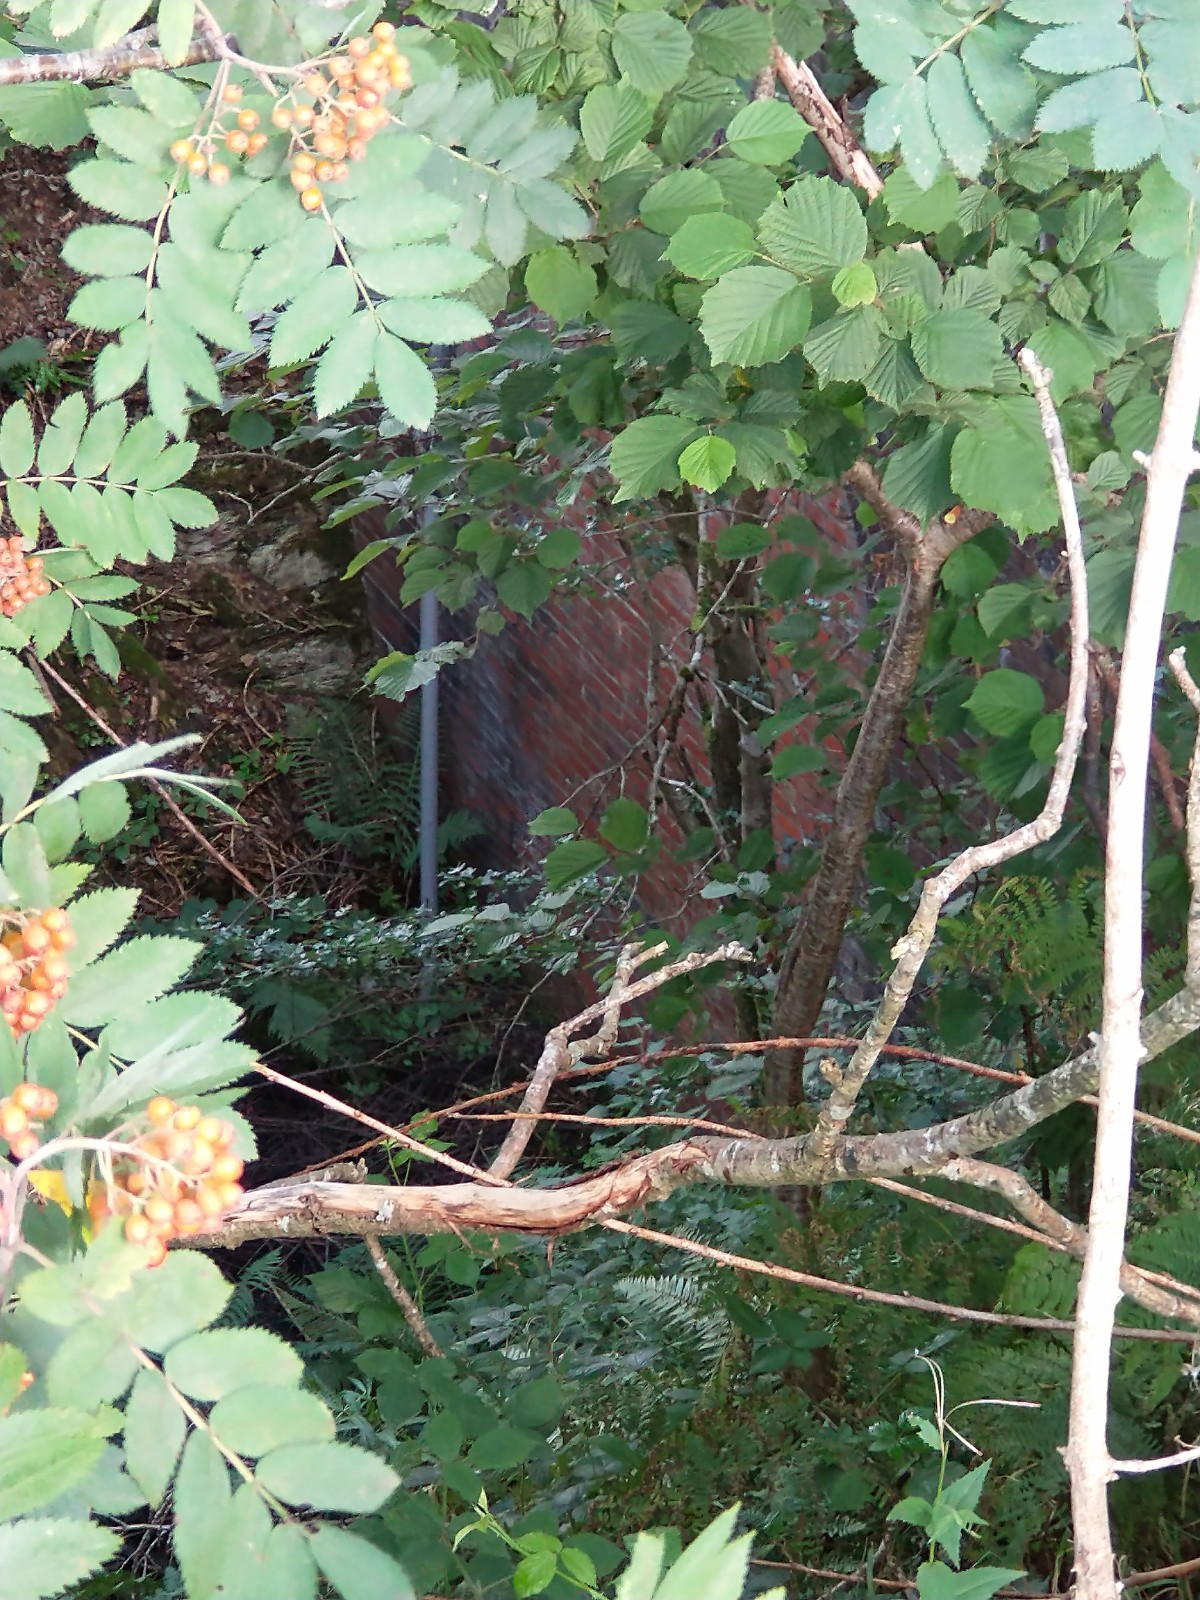
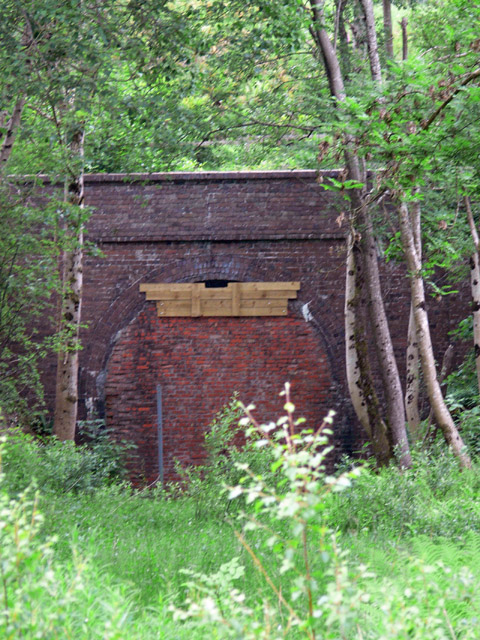
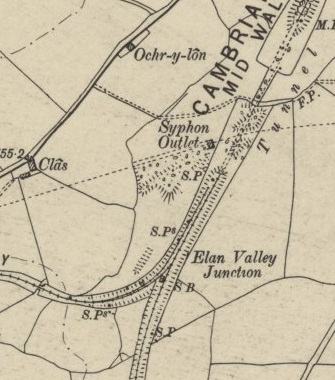
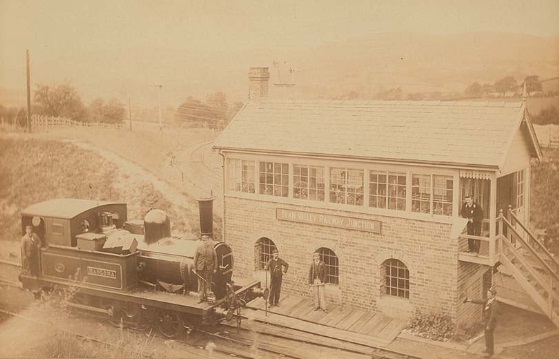

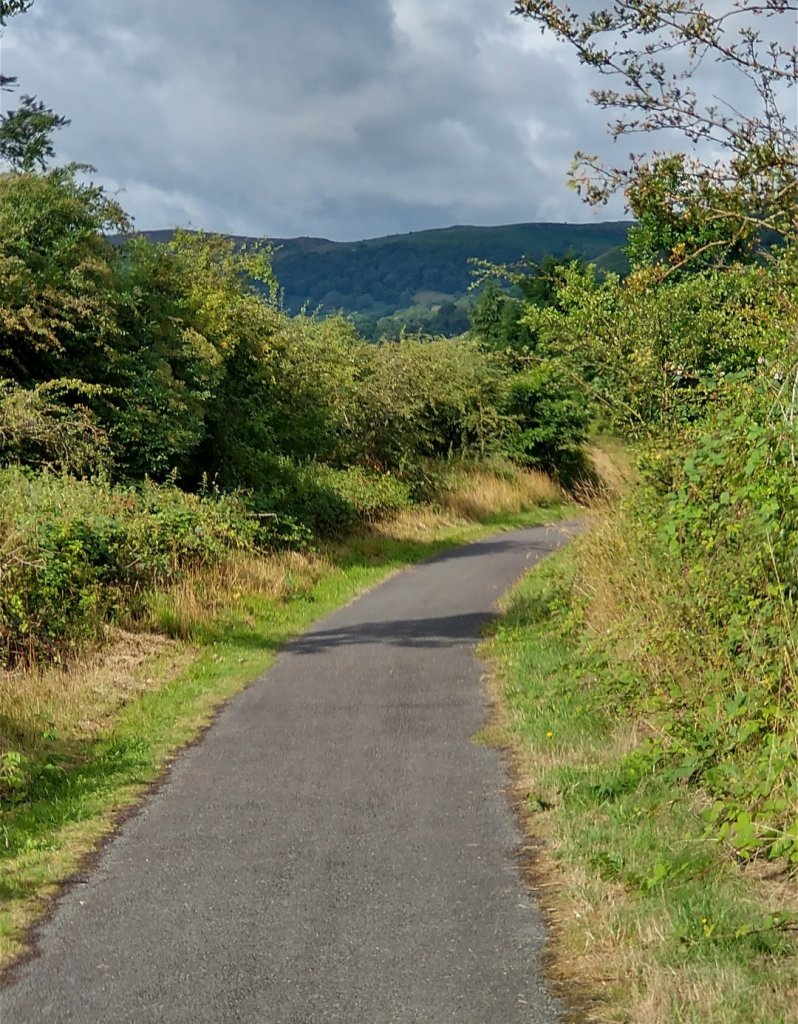
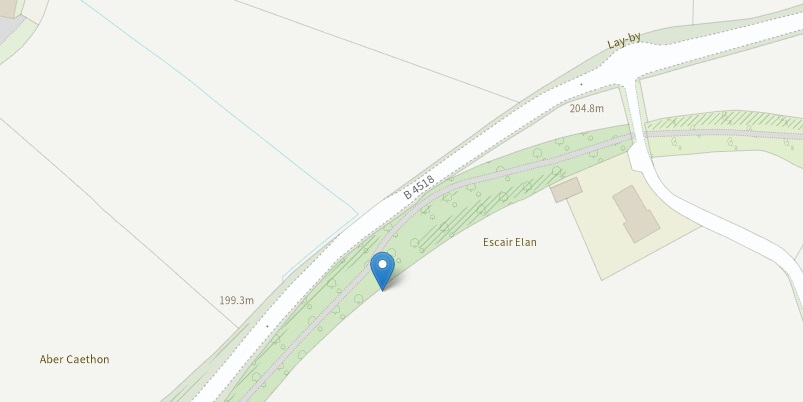

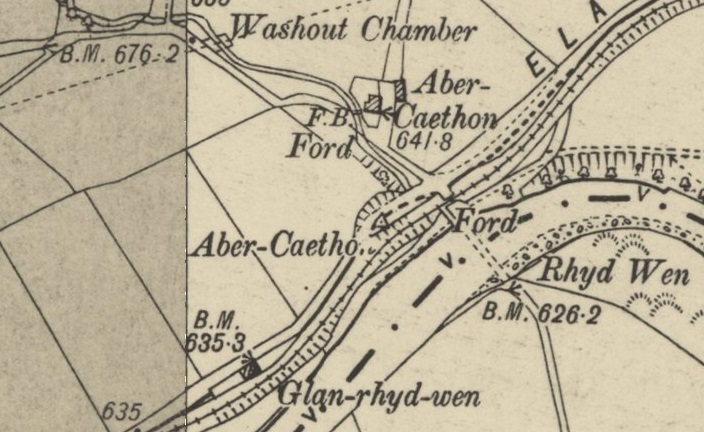
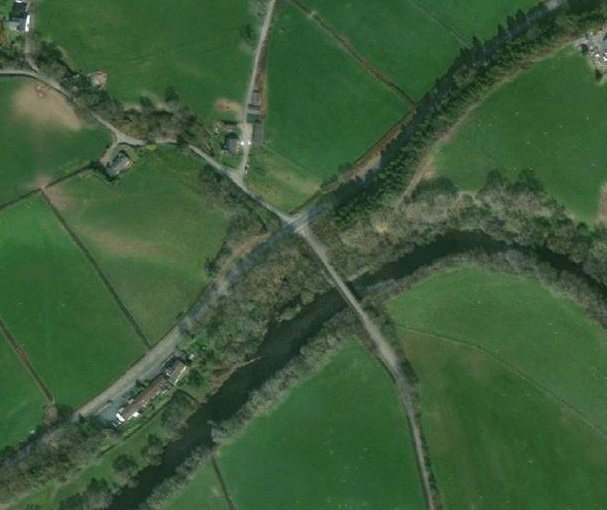
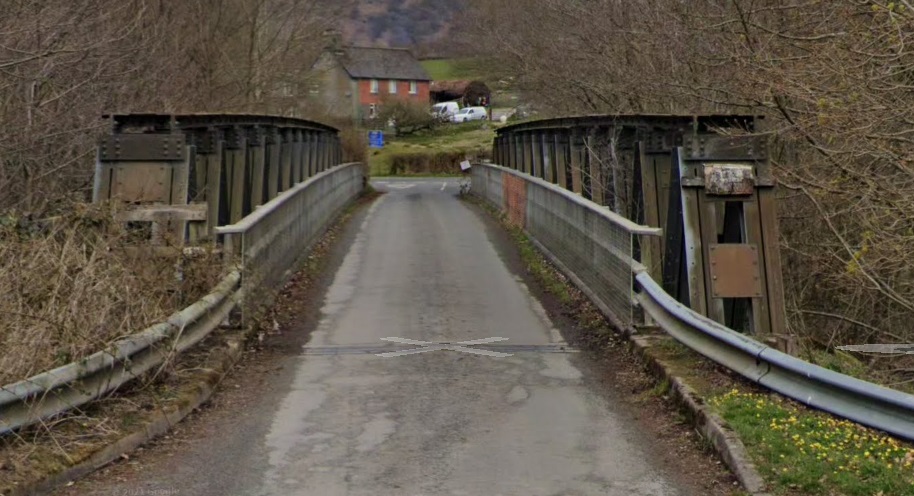
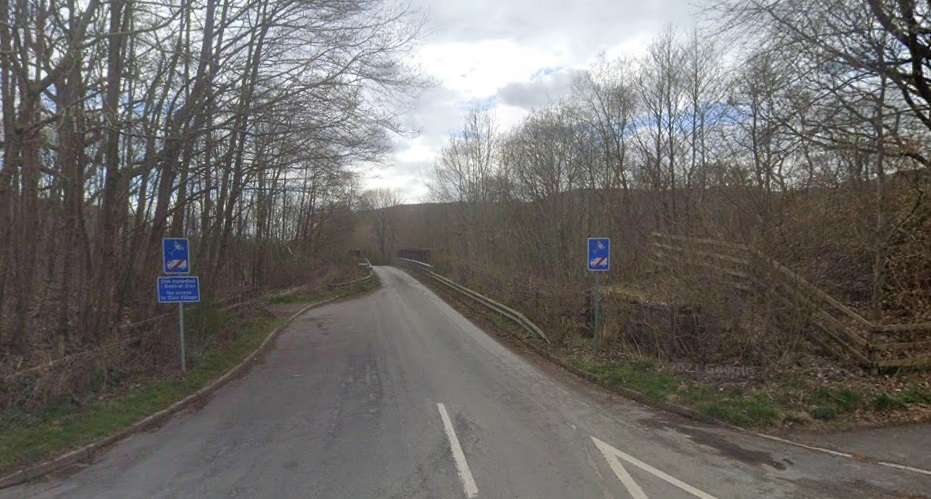
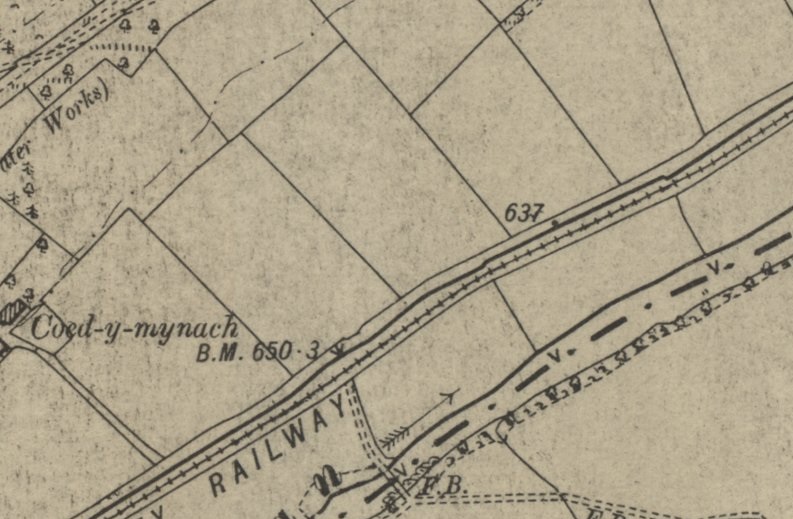
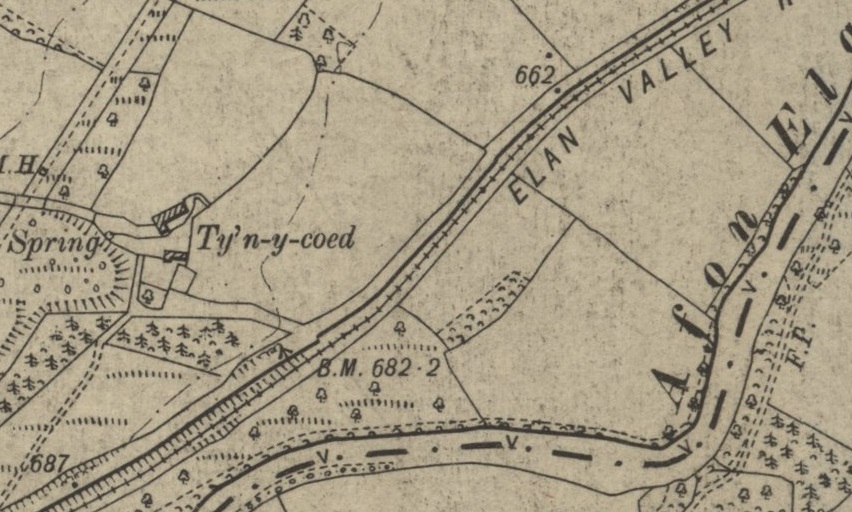
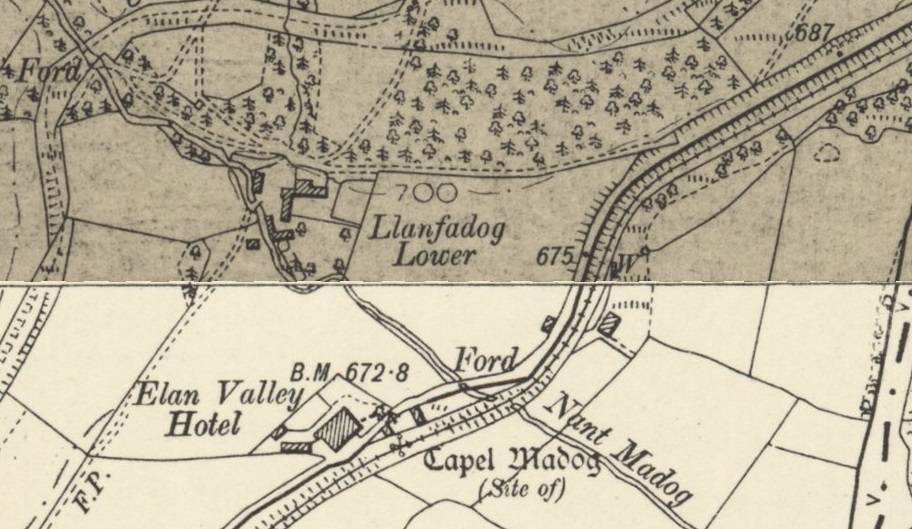

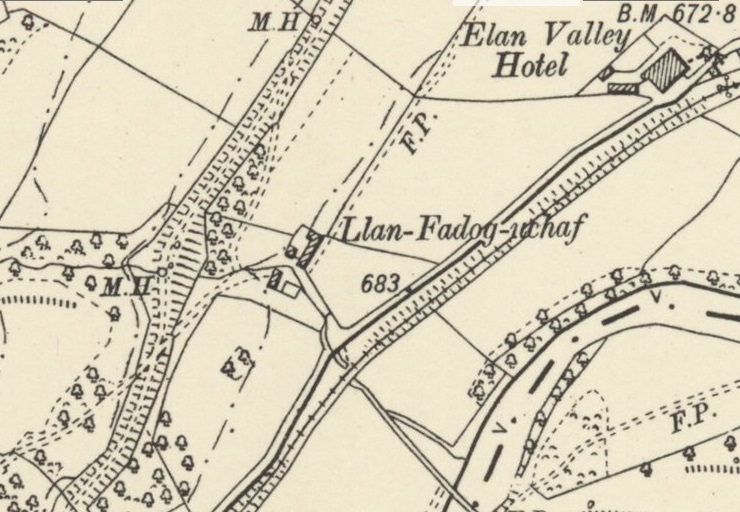
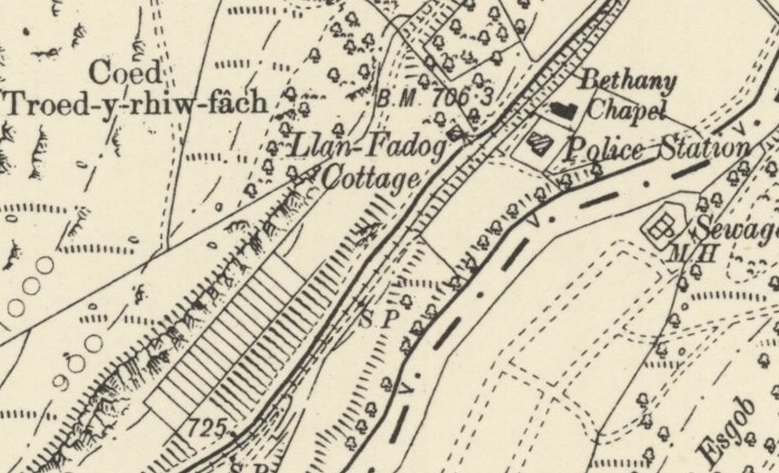
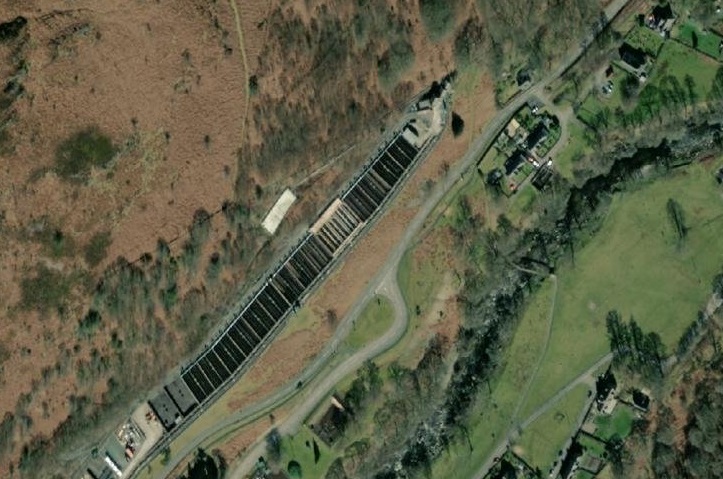
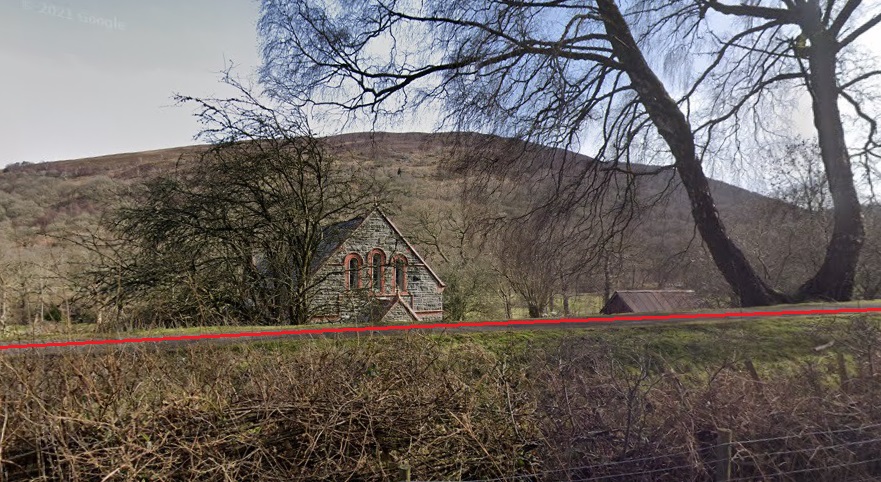
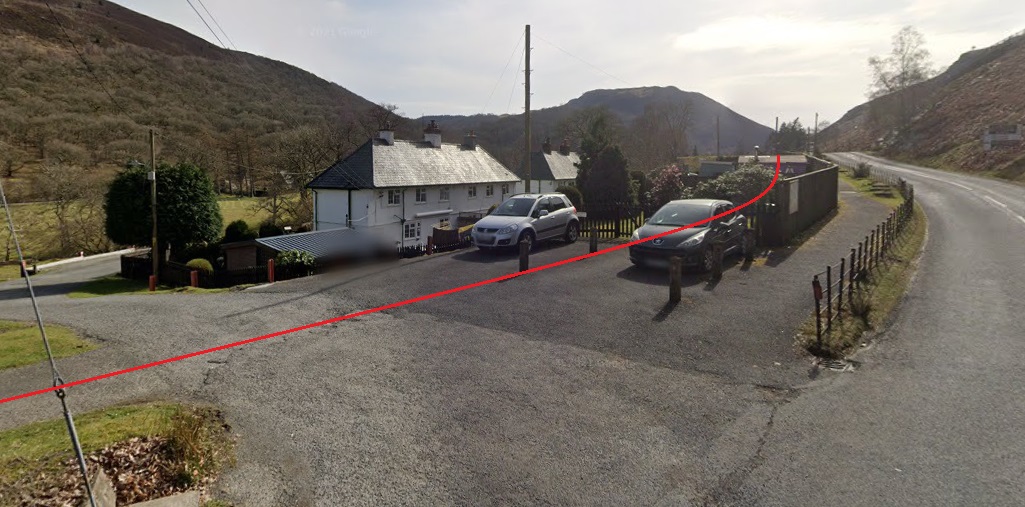

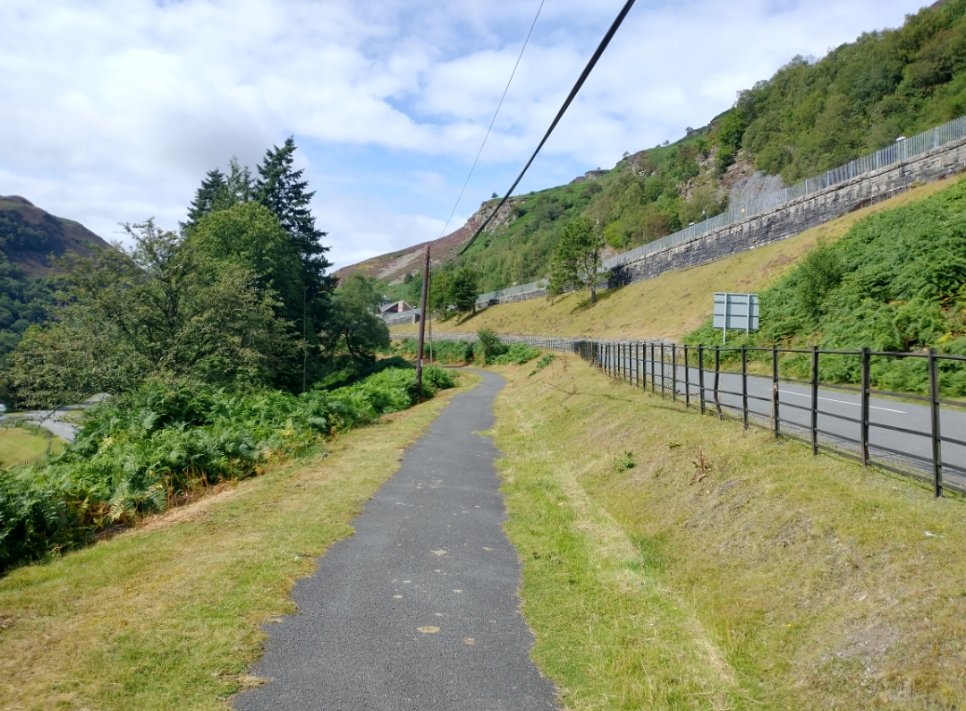
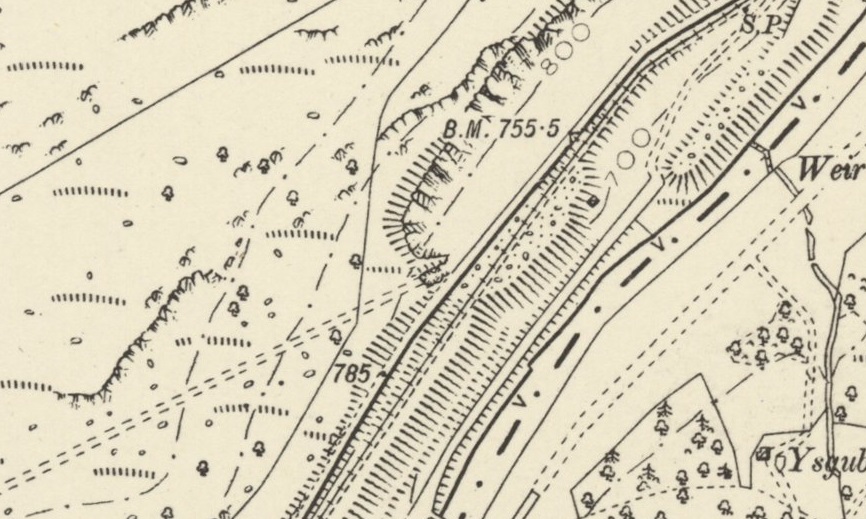
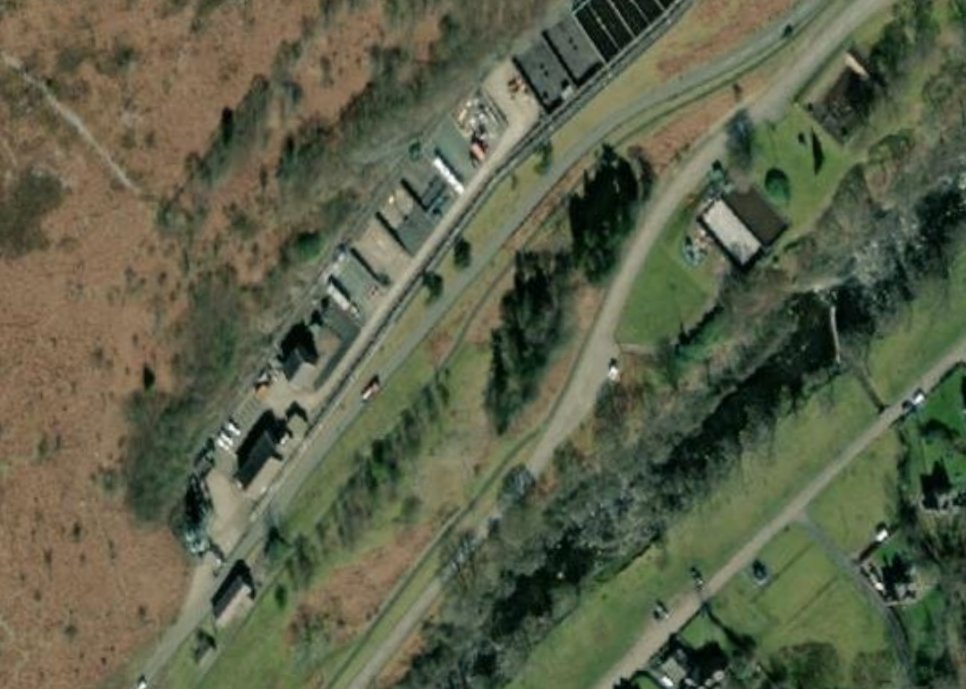
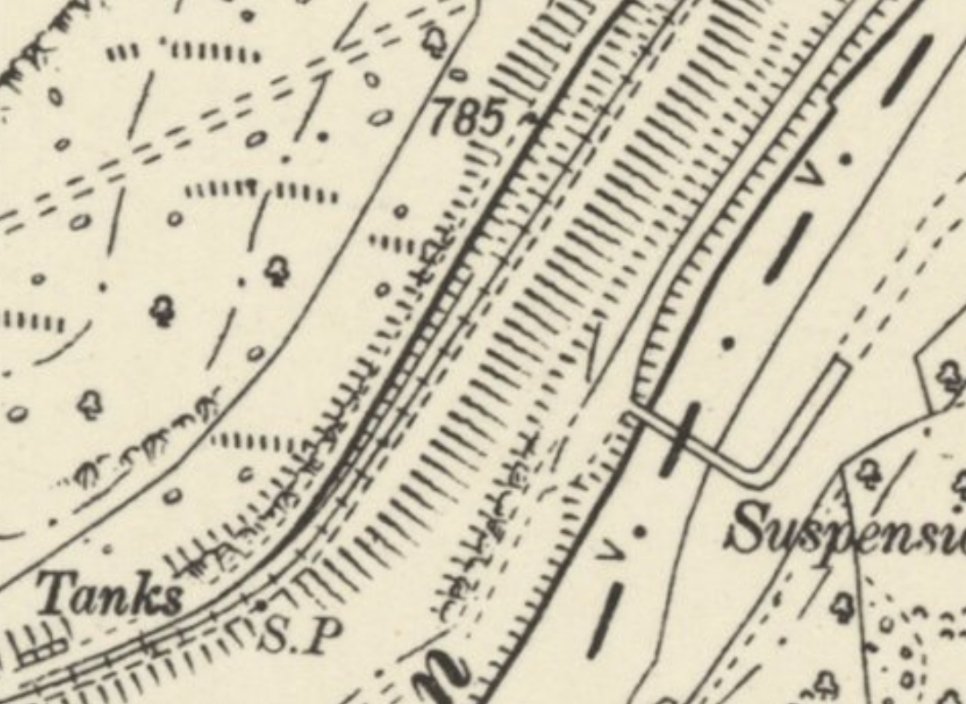
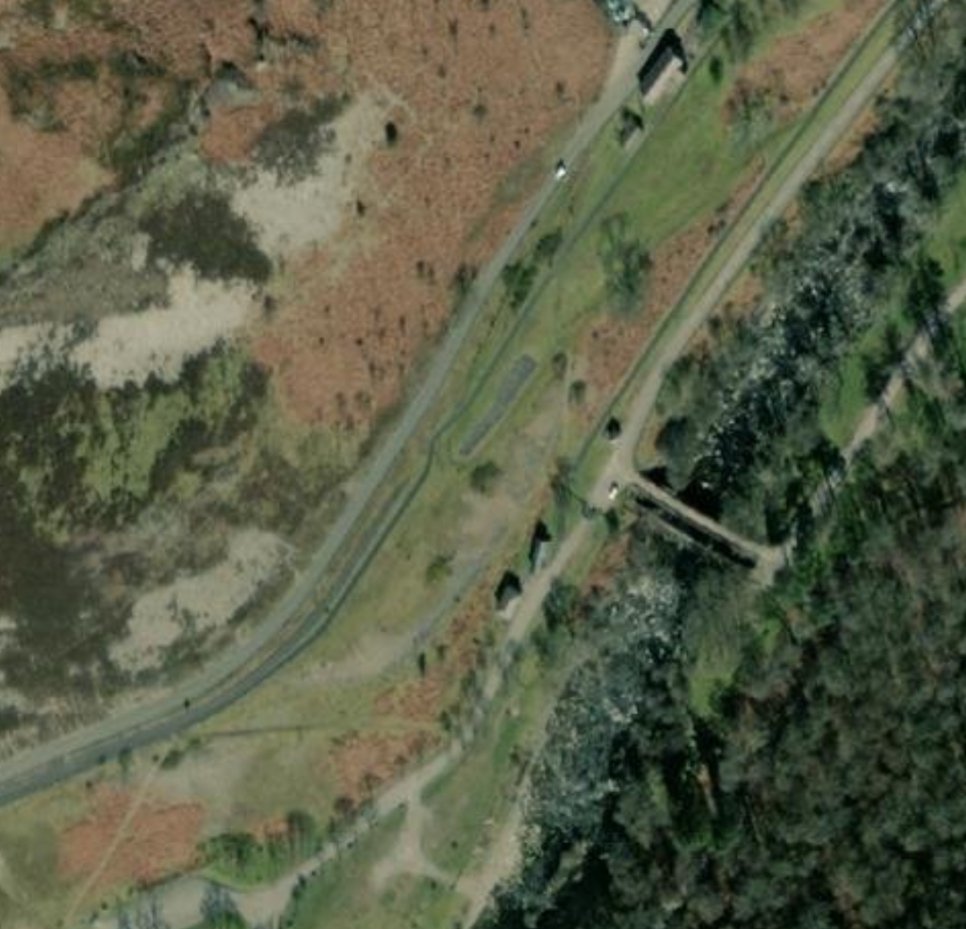

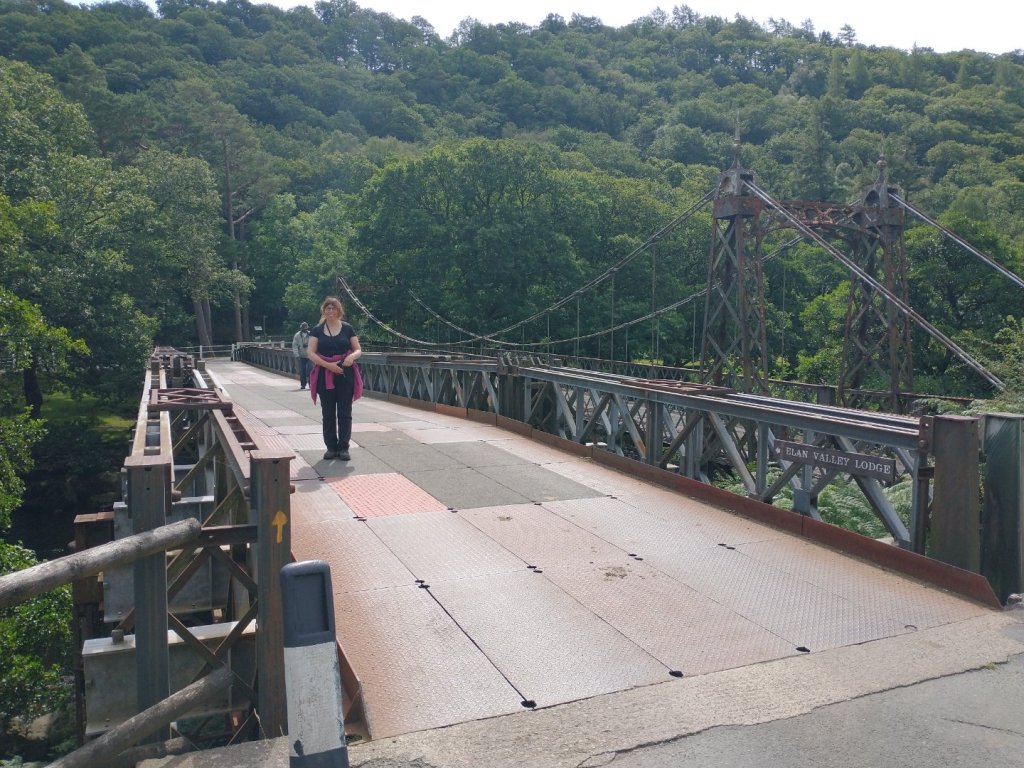
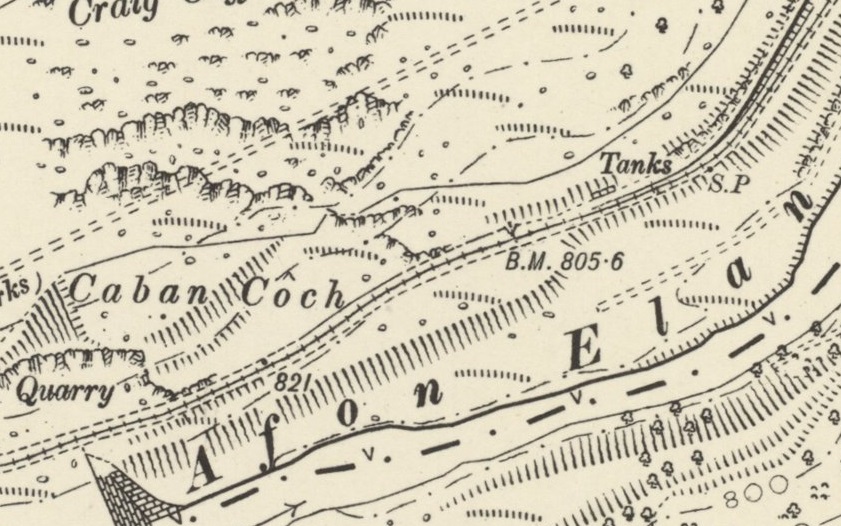

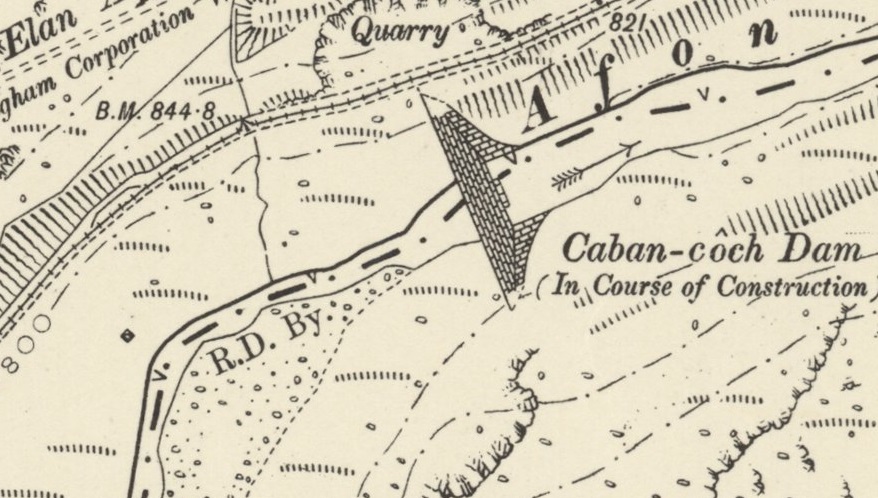
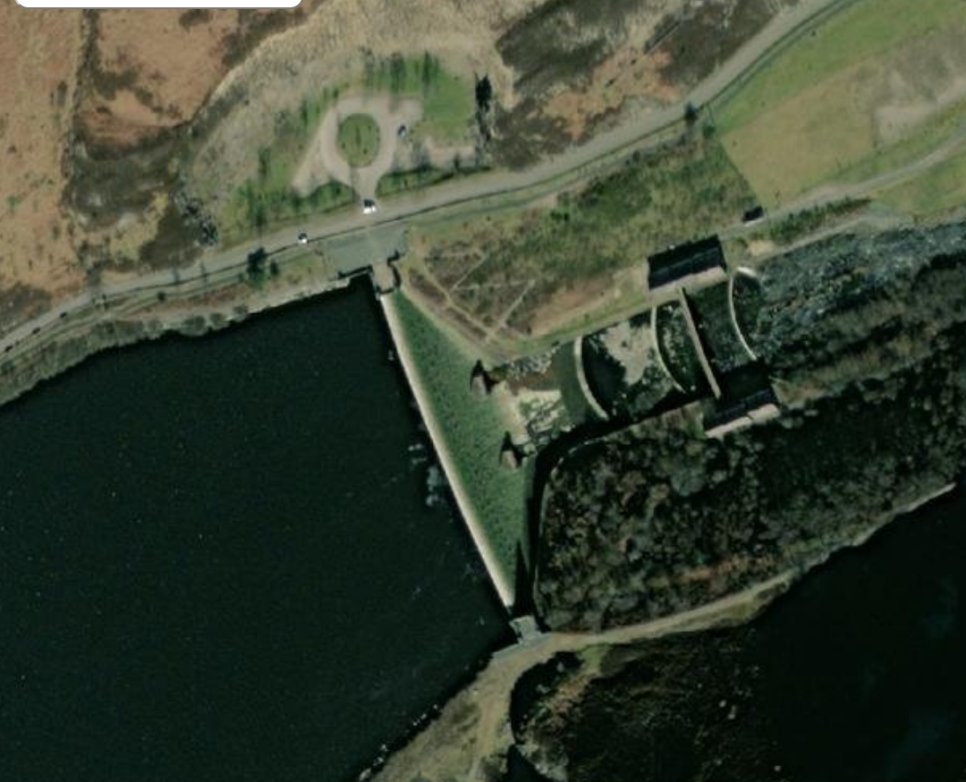
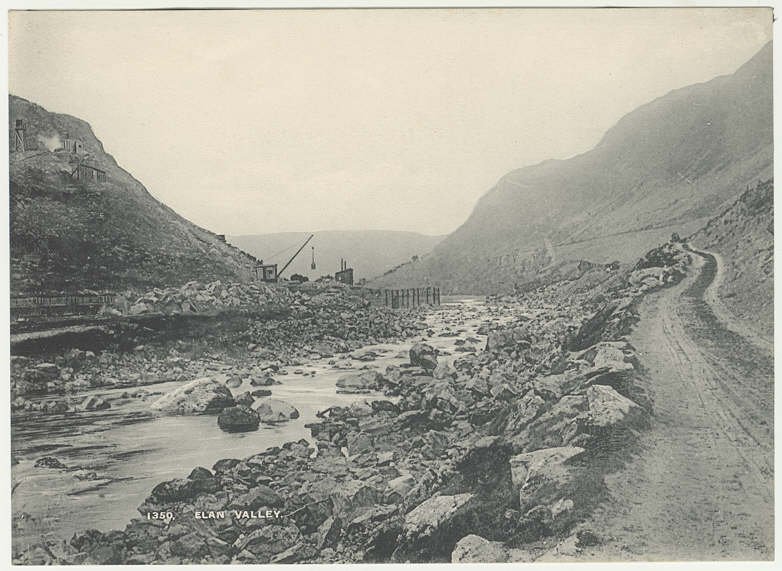
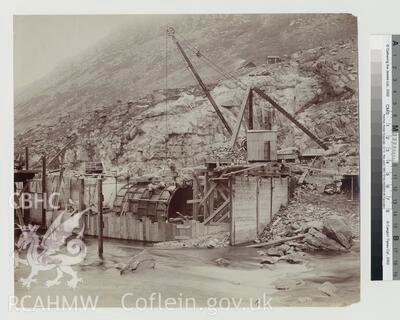


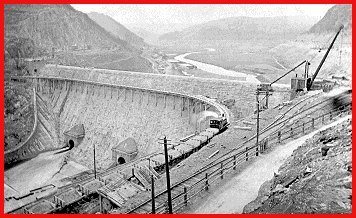
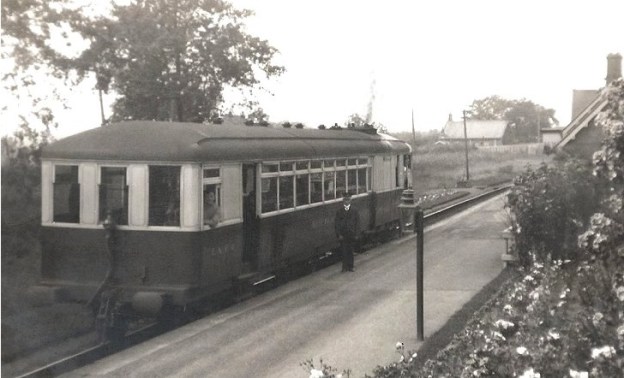
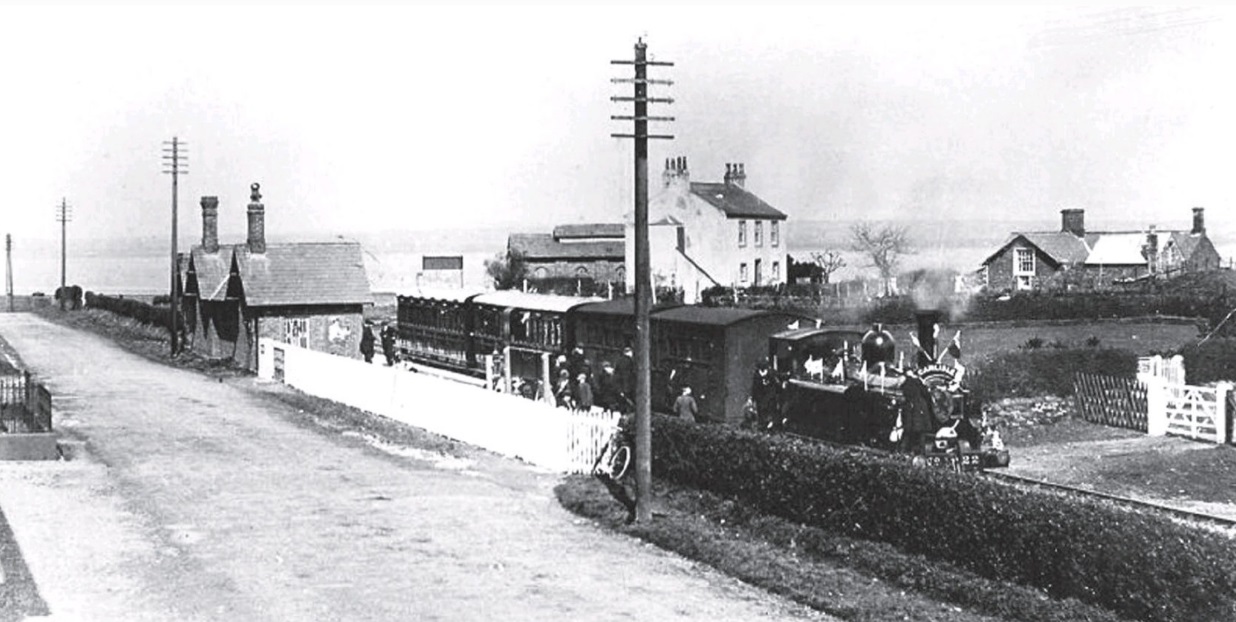
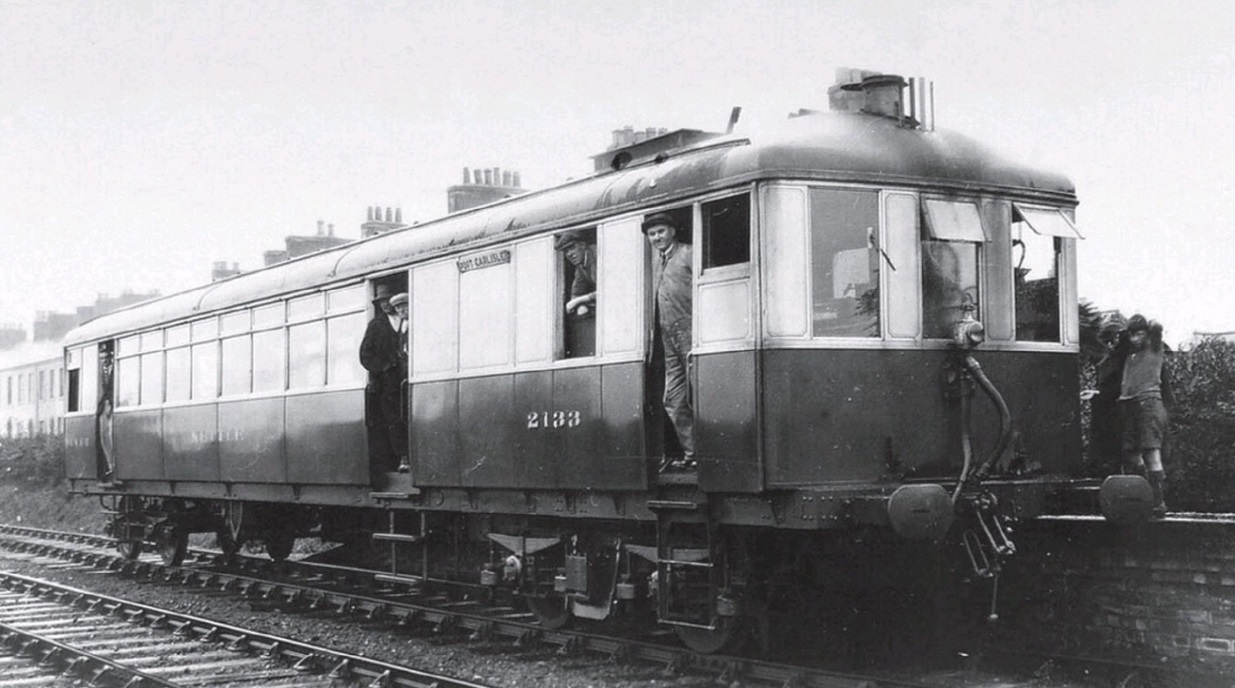
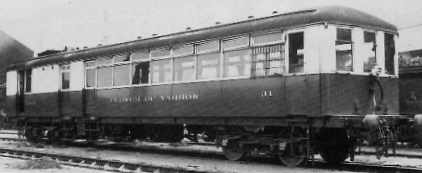
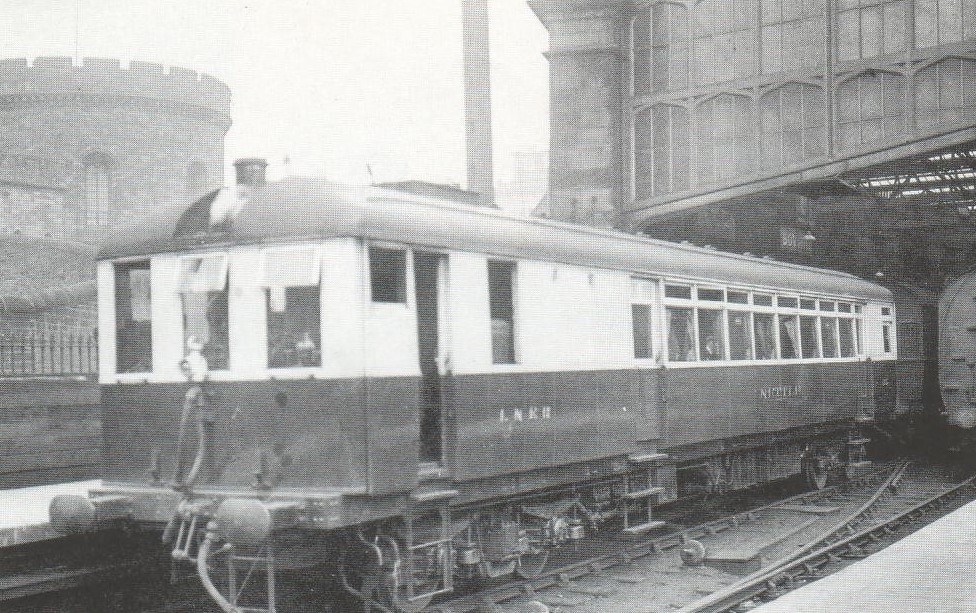
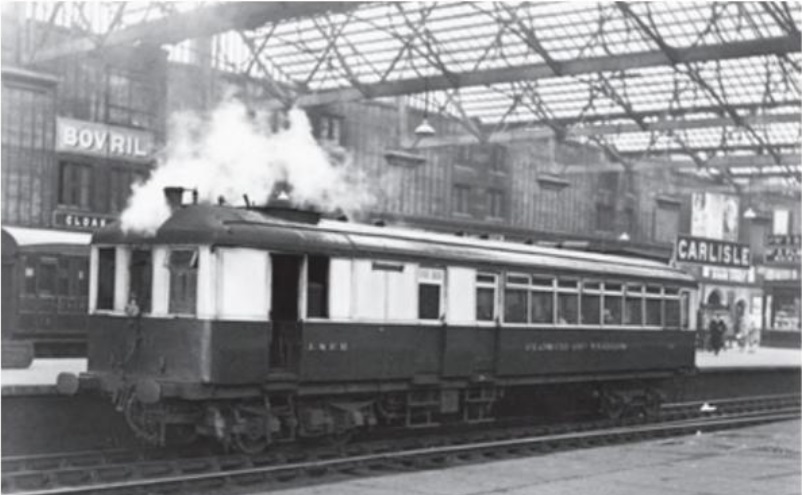

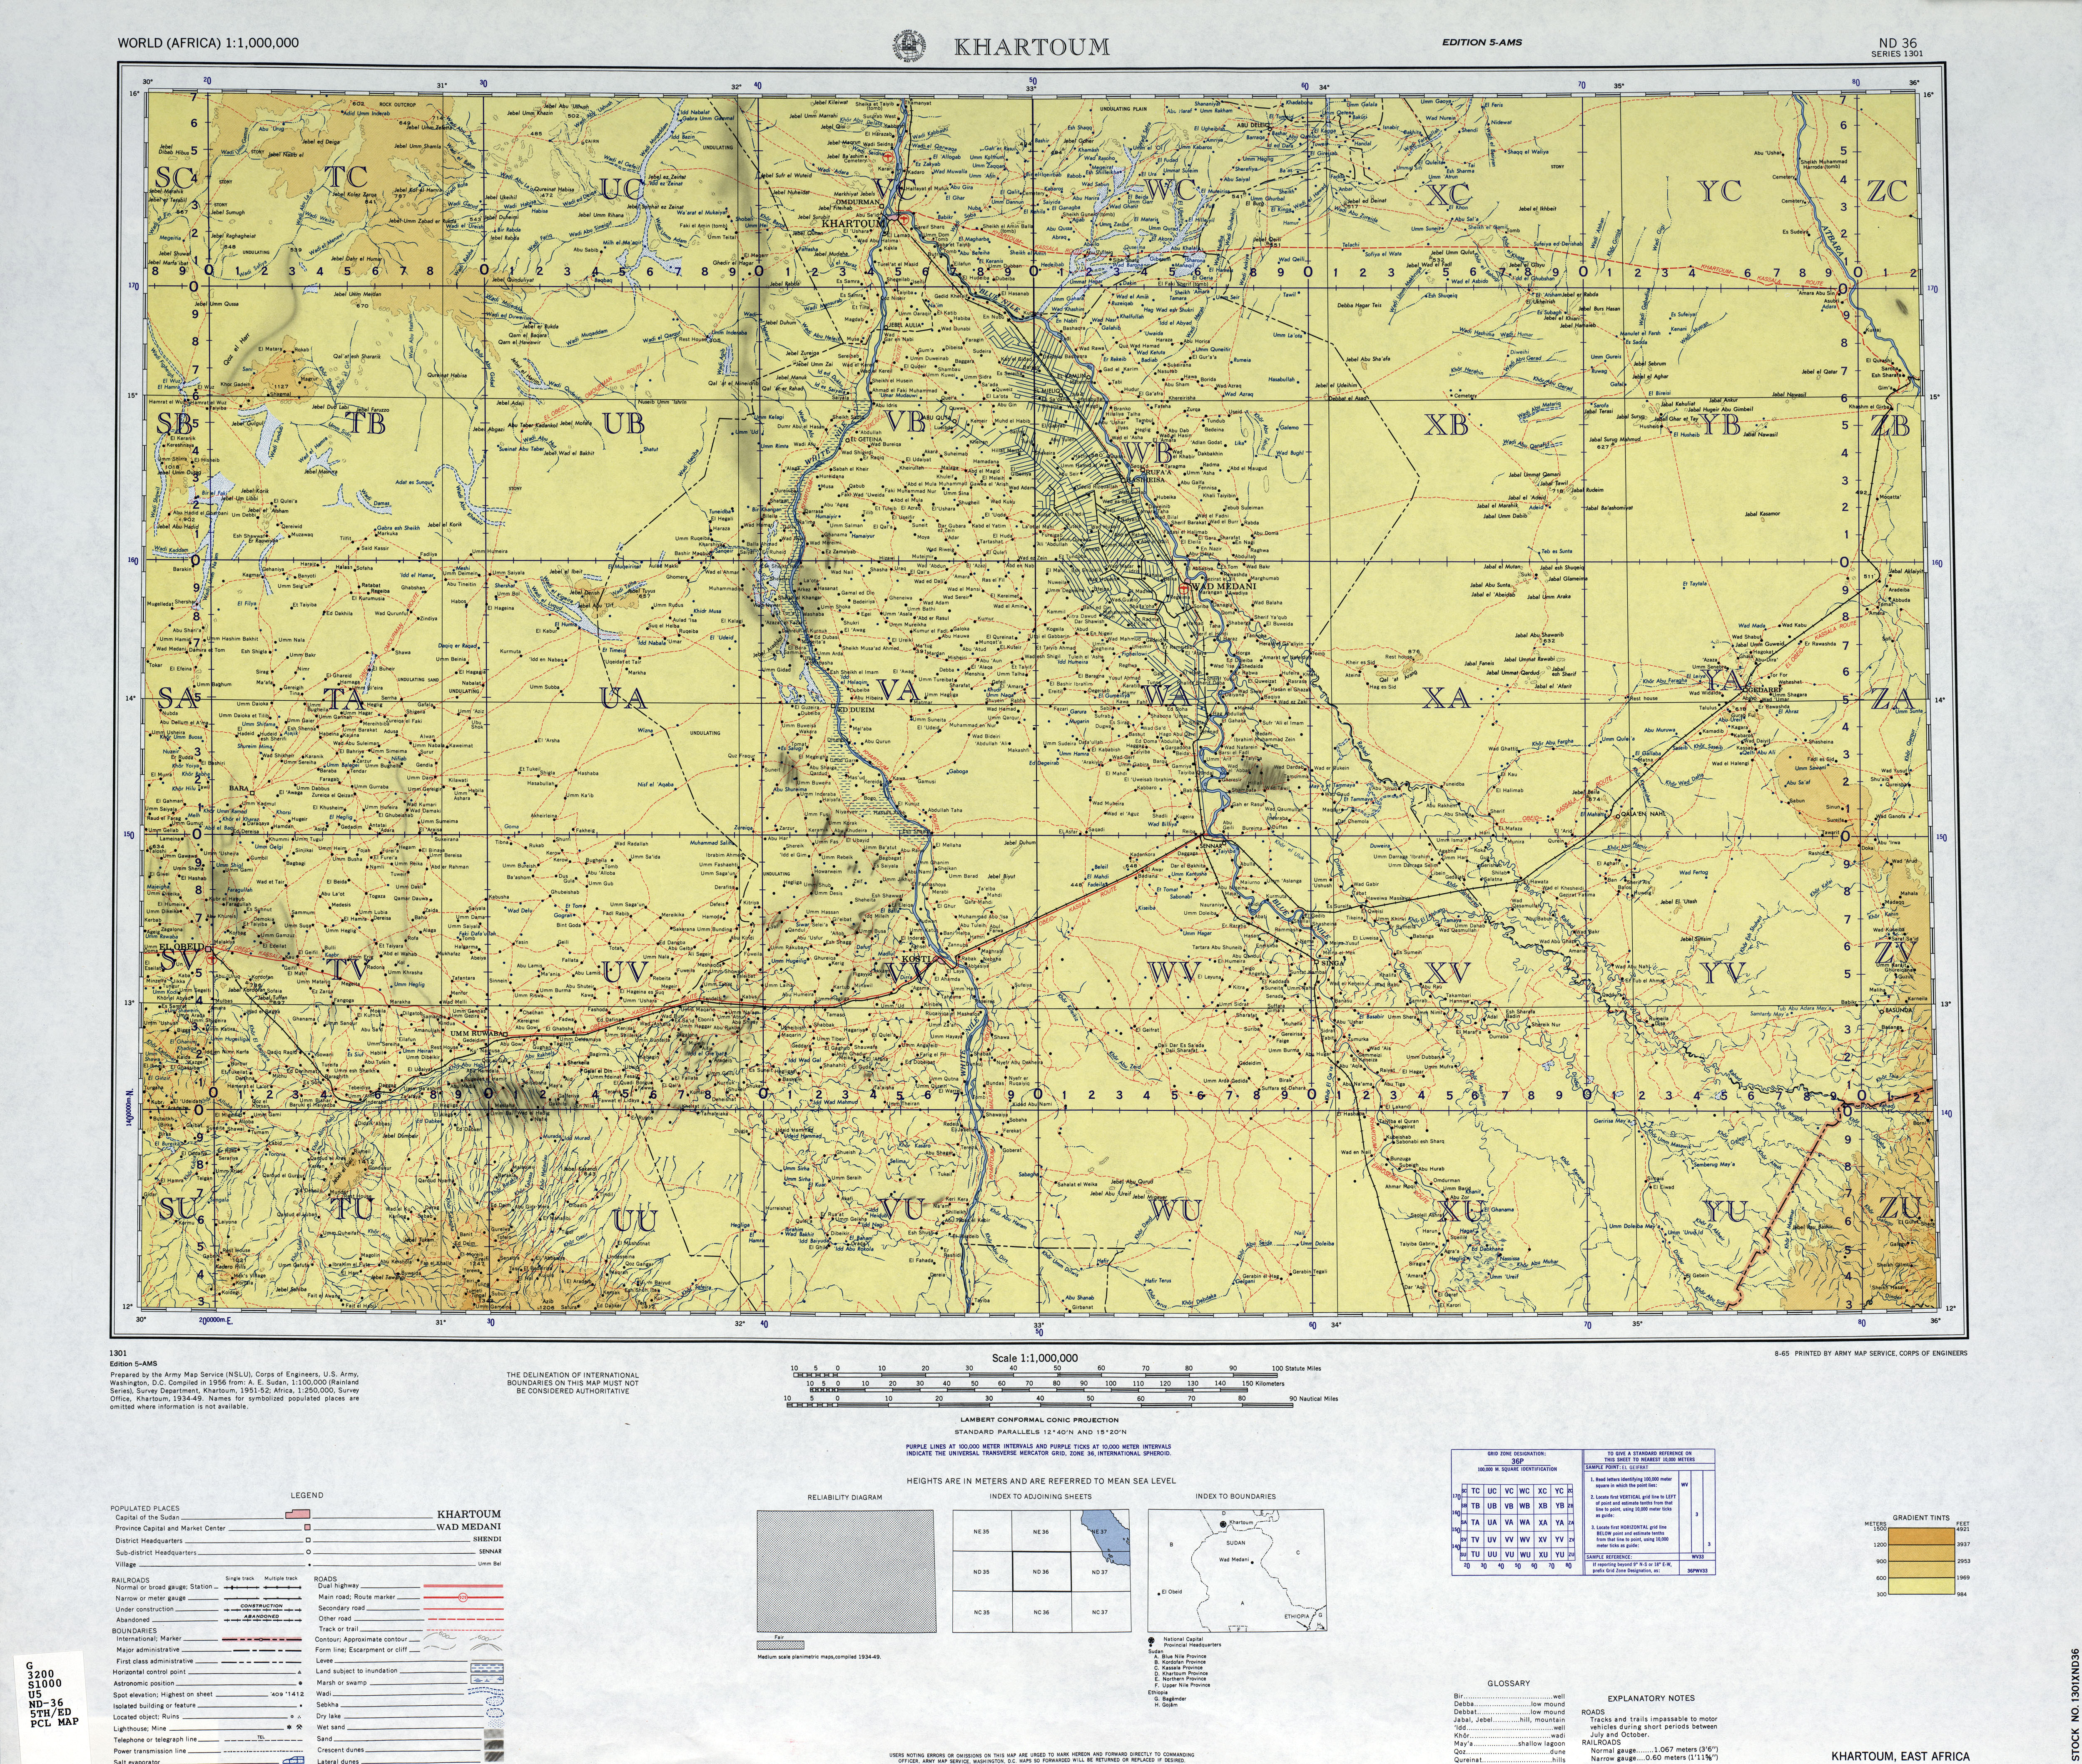
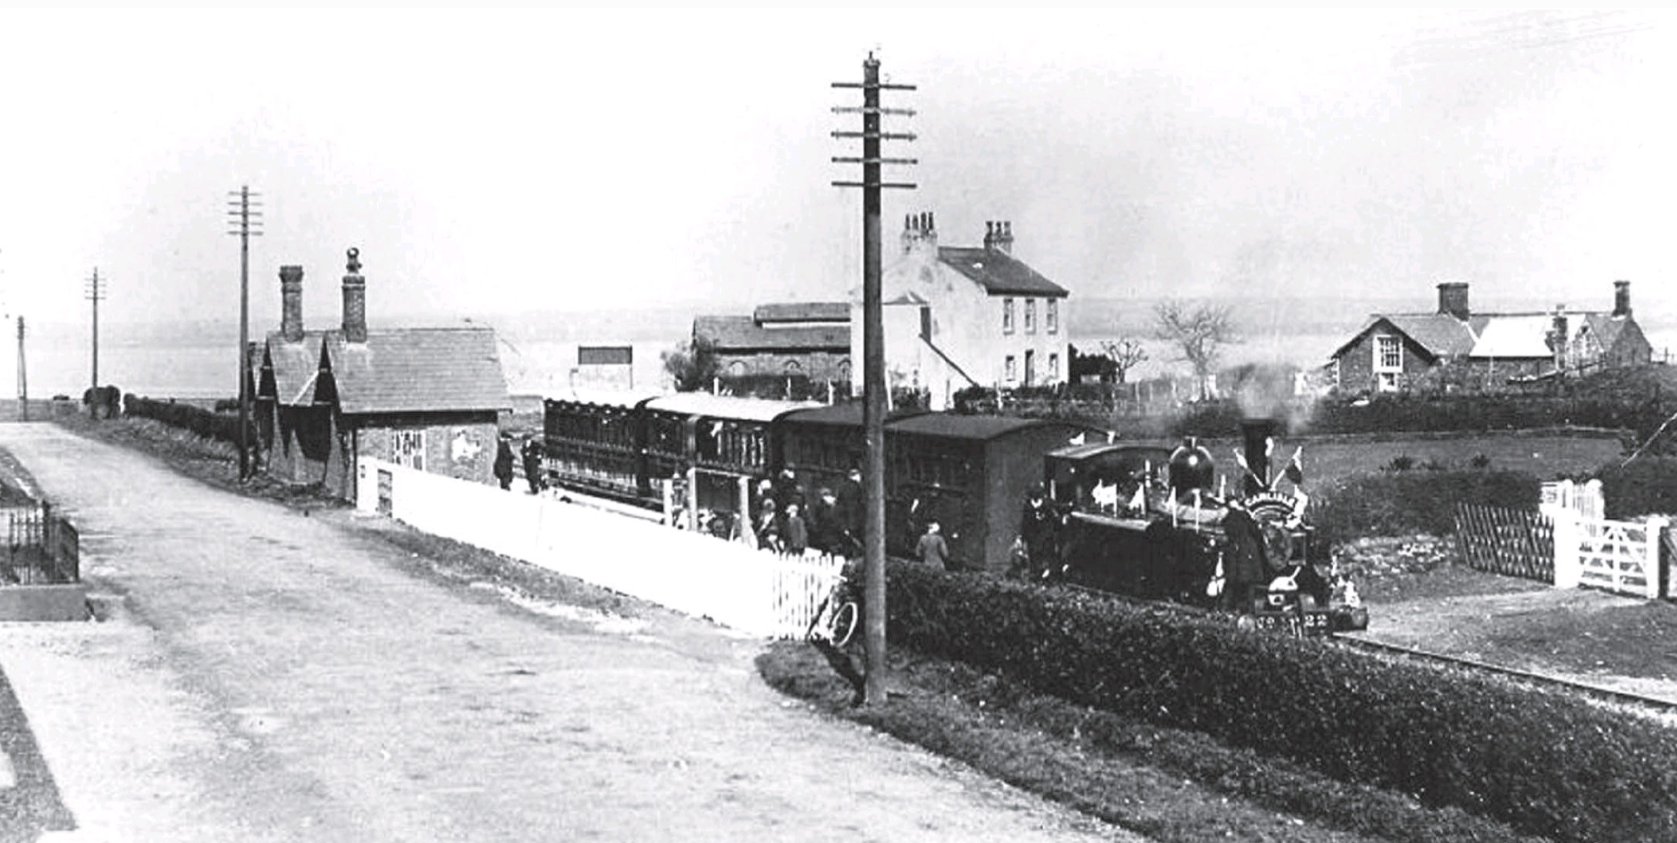
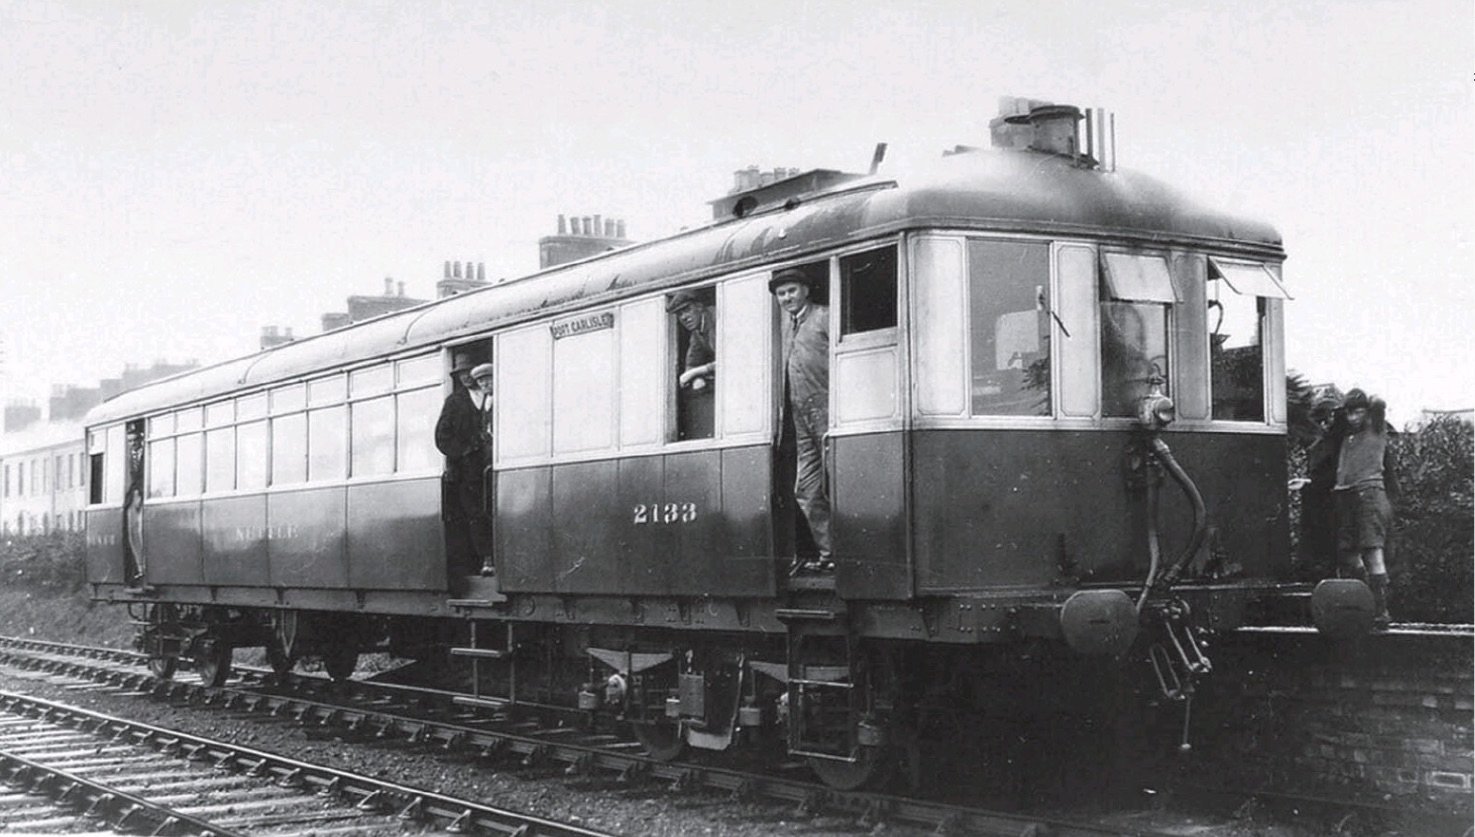