Looking through a number of 1964 Model Railway News magazines, I came across drawings of Sharp, Stewart & Co. 2-4-0, built in 1870 for the Furness Railway Co. and numbered 58 on their roster.
Side elevation and half plan of Locomotive No. 58 [1]Front elevation. [1]Tender, front and back half-elevations. [1]
Originally conceived as a mineral railway, the Furness Railway later played a major role in the development of the town of Barrow-in-Furness, and in the development of the Lake District Tourist industry. It was formed in 1846 and survived as an independent, viable concern until the Grouping of 1923. [4]
The Furness Railway contracted out the building of its locomotives until Pettigrew became Chief Locomotive Engineer in 1897. He put his first locomotive on the line in 1898.
2-4-0 Locomotive No. 58 had inside cylinders (16 in by 20 in), 5 ft 6 in diameter coupled wheels. It operated with a boiler pressure of 120 lb and weighed 30 tons 5 cwt. Its tender was 4-wheeled with a 1,200 gallon water capacity.
The locomotive, as designed, had no brake blocks, the only brake being a clasp type on the tender.
This relatively small locomotive was one of a series of 19 locos built to the same design. The class fulfilled the needs of the Furness Railway as passenger locomotives. The class was given the designation ‘E1’ by Bob Rush in his books about the Furness Railway. Rush’s classification was his own not that of the Furness Railway, but has become accepted generally. [2]
A photograph of one of this class can be found by clicking on the link immediately below. No. 44 was built in 1882 by Sharp Stewart & Co., Works No.3086. It was rebuilt in 1898, presumably in the Furness Railway works. Renumbered 44A in 1920, it became LMS No. 10002 – but was withdrawn in April 1925. [5]
Later, seven of the class were converted to J1-class 2-4-2 tank engines in 1891. [3]
References
T.A. Lindsay; Furness Railway Locomotive No. 58; in Model Railway News, Volume 40, No. 480, December 1964, p608-609. (Permission to copy granted for any non-commercial purpose.)
Towards the end of March 2024, I stumbled across a number of journals of the New Zealand Model Railway Guild. One of these, the March 2021 edition, included a pictorial article about J1211 North British 4-8-2 Locomotive No. 24534 of 1939. [6] The June 2021 issue included a history of the class [7: p13-15] and General Arrangement plans as originally carried in the Railway Gazette in 1940. [7: p22-24] Also in that journal are four photographs of J1211 in service between 1960 and 1970. [8]
40 No 4-8-2 locomotives which were built in 1939 by the North British Locomotive Company and became the New Zealand Railways (NZR) J class.
They were designed to provide a mixed traffic locomotive suitable for running on the lighter secondary lines of the NZR network, and for express passenger trains in major routes.
“The J class incorporated roller bearing axles, hydrostatic lubrication and twin Westinghouse brake pumps. … They had bar frames instead of plate frames and were equipped with Baker Valve-gear. The locomotives were attached to Vanderbilt tenders and were outshopped with distinctive bullet-nosed streamlining.” [1] The streamlining also encompassed the full length of the top of the boiler between the cab and the smoke box door and the area immediately beneath the smoke box door.
The J Class locos were out shopped with a distinctive streamlining from the cab to the top of the smoke box door and with a bullet-nosed smoke box door. [2]
New Zealand’s North Island benefitted from the first thirty of the class placed into service. The South Island hosted the remaining ten locomotives which apparently were used “The first 30 of the class in service were allocated to the North Island, with the remaining ten locomotives allocated to the South Island where they were used “on the hilly section between Dunedin and Oamaru. They were immediately placed into service on the main trunk routes in both islands in order to help move wartime traffic during the Second Word War. Although used on freight trains as well, the class was well suited to high-speed running on the passenger trains of the era.” [1]
Apparently, the streamlining became “burdensome for maintenance and the skyline casing, which was open at the top proved to be a trap for soot from the locomotive’s exhaust. After a time, the skyline casing started to be removed from some examples of the class leaving them with just the bullet nose.” [1]
Ultimately the bullet nose was also removed from the majority of these locomotives.
The locomotives of the class had their streamlining removed in the war years. [2]
Members of the class “were generally considered to be a very reliable engine and well suited to their task. … They were capable of speeds of over 60 mph with a 300-ton express train. …. However, today surviving engines being used to haul excursion trains are restricted to 80 kph. … On favourable grades a single J could move a 1000-ton train.” [7: p14]
“The design was successful enough that NZR opted to build an improved variant … in its own Hillside workshops from 1946.” [1] These ‘Ja’ class locomotives were numbered 1240 to 1274 and became “the mainstay of the South Island rail services. Meanwhile North British were commissioned to build another 16, numbered from 1275 to 1290, also classified ‘Ja’, but they were oil fired and to be based in the North Island. … The sixteen ‘Ja’ from North British were the last steam locomotives to enter service with the NZR.” [7: p15]
Three J Class 4-8-2 are noted by Trainweb [2] as having been preserved:
J 1234, North British #24557/1939. For some time based at Glenbrook Vintage Railway, Auckland.. This locomotive is owned by Steam Incorporated of Paekakariki, and was leased to the Glenbrook Vintage Railway in 1998. The locomotive was returned to Paekakariki in June 2015. [4] It is now in storage awaiting a 2nd restoration at Paekakariki. [5]
J 1211 “Gloria”, North British #24534/1939. Mainline Steam Heritage Trust, Auckland (Operational). [3]
J 1236, North British #24559/1939. Mainline Steam Heritage Trust, Auckland (Being Restored). [2]
The 950mm-gauge line from Massawa on the coast, inland to Agordot, was built during colonial occupation by the Italians with some steep gradients which meant that Mallets were considered to be suitable motive power.
The line should not be confused with the metre-gauge line running from Djibouti to Addis Ababa. A metre-gauge railway that was originally built by the French from 1894 to 1917 which has since been replaced by a Chinese built standard-gauge line. [5]
In 1907, Maffei built three 0-4-4-0T locomotives for the Massawa to Agerdot line.
Ansaldo the “supplied twenty five further engines of the same class between 1911 and 1915, and in 1931 and 1939 Asmara shops assembled a nominal three new engines from d components of earlier withdrawn engines. All these were standard European narrow-gauge Mallet tanks, saturated, slide-valved and with inside frames.” [1: p64]
In the mid-1930s, a series of fifteen larger 0-4-4-0T locomotives were built. These were “built to a superheated, simple expansion design, of which ten had piston valves and Walschearts gear and the other five, Caprotti poppet valves driven from outside cardan shafts.” [1: p65] A later series of “eight engines built by Analdo in 1938 reverted to compound expansion, retaining the superheater and piston valve features.” [1: p65]
The last of the Eritrean Mallets was built in their own shops in 1963, making it the last Mallet built in the world. [6]
The line closed in 1975. Eritrea was occupied by Ethiopia for many years. After gaining independence in 1993, some of the former railway staff started to rebuild their totally destroyed railway. Some of the Mallets, built by Ansaldo (Italy) in 1938, were brought back to life. Also one of the small Breda built shunters, two diesel locos and two diesel railcars (one from 1935) were put back into working order. [7]
A section of the line, between Massawa, on the coast, and Asmara, was reopened in 2003 and has offered an opportunity for Mallet locomotives to be seen in operation in East Africa. Indeed, an internet search using Google brings to light a list of videos of locomotives heading tourist trains in the Eritrean landscape.
Wikipedia notes that the line has a track-gauge of 950mm and that locomotives operate over a 118 km section of the old line. Italian law from 1879 officially determined track gauges, specifying the use of 1,500 mm (4 ft 11 1⁄16 in) and 1,000 mm (3 ft 3 3⁄8 in) gauge track measured from the centre of the rails, or 1,445 mm (4 ft 8 7⁄8 in) and 950 mm (3 ft 1 3⁄8 in), respectively, on the inside faces. [4]
Between Arbaroba and Asmara in November 2008, a single coach is headed by one of the surviving Mallet locomotives. This is an extract from an image on Wikimedia Commons (public domain). [13]
Steam operation on the line is over, no regular services are provided but occasional tours still take place with plenty of caveats about the availability of any form of propulsion. An example is a German-speaking tour planned (as of 24th March 2024) for November 2024. [8]
Tanzania (Tanganyika)
The metre-gauge line inland from Dar-es-Salaam was built by the Ost Afrika Eisenbahn Gesellschaft (East African Railway Co.). A.E. Durrant tells us that its first main line power “was a class of typical German lokalbahn 0-4-4-0T Mallets, built by Henschel in 1905-7. These were supplemented in 1908 by four larger 2-4-4-0Ts from the same builder, after which the railway turned to straight eight-coupled tank and tender engines.” [1: p67]
R. Ramaer notes that the first locomotives used by the Usambara Eissenbahn (UE) on the Tanga Line were five 0-4-2 locos which arrived on the line in 1893. Rising traffic loads led the UE “To look for something more substantial and in 1900, Jung supplied five compound Mallet 0-4-4-0T’s as numbers 1-5, later renumbered 6-10. … To provide enough space for the firebox and ashpan, the rigid high-pressure part, comprising the third and fourth axles, had outside frames, whereas the low-pressure part had inside frames.” [9: p19]
UE engine No. 1 (0-4-4-0T – supplied by Jung) with an early passenger train ready for departure at Tanga station in 1890. This image was posted on the Urithi Tanga Museum Facebook Page [10] and is also reproduced in R. Ramaer’s book. [9: p19]UE Mallet 0-4-4-0T No. 8 heading a passenger train at Mombo. This image was shared in error on the Old Asmara Eritrea Facebook Page. [11] It also appears in R. Ramaer’s book. [9: p20]
On the Central Line (Ost Afrikanische Eisenbahn Gesellschaft – or OAEG) which ran inland from Dar-es-Salaam, construction work started in 1905 and the first locomotives used by the OAEG were four 0-4-0T engines built by Henschel, a further four of these locomotives were supplied in 1909. These small engines had a surprisingly long life. Mallets were first supplied in 1905 by Henschel and were suitable for both coal and oil firing. These were 0-4-4-0T locos (four supplied in 1905 and one supplied in 1907). “The problem with this type of engine was the restricted tractive effort and running was not satisfactory because of the lack of a leading pony truck. … Therefore Henschel supplied a second batch of four locomotives in 1908 as 2-4-4-0Ts with larger boilers and cylinders. They also had a higher working pressure of 14 atmospheres (200lb/sq in) in comparison to 12 atmospheres (170lb/sq in) for the earlier engines, while the bunker capacity had been increased from 1.2 to 2.2 tonnes of coal. (Oil fuel had been discarded).” [9: p21-23]
OAEG 2-4-4-0T No. 27, in the last Mallet class to be built for German East Africa. This locomotive appears in the Wikipedia list of Henschel steam locomotives. [12] It also appears in R. Ramaer’s book [9: p23] and A.E. Durrant’s book. [1: p66]
Kenya-Uganda
An ‘MT’ class locomotive in ex-Works condition at the Queen’s Park works of the North British Locomotive Co. [1: p66]
Mallets were the first articulated locomotives to operate in East Africa. Mallets were introduced on the Uganda Railway in 1913. A.E. Durrant notes that they consisted of “a batch of eighteen 0-6-6-0 compound Mallets to what was the North British Locomotive Co’s standard metre-gauge design, as supplied also to India, Burma, and Spain. They had wide Belpaire fireboxes, inside frames and piston valves for the high pressure cylinders only. Built at Queens Park works in 1912-1913, these locomotives entered service in 1913-14 and remained at work until 1929-30, when they were replaced by the EC2 and EC2 Garratts.” [1: p66]
North British Class ‘MT’ Mallets arrived in Kenya just before the start of WW1. [2]
These locomotives were given the classification ‘MT’ within the Uganda Railway fleet. Disappointing performance and high maintenance costs led to them being relegated to secondary duties and eventually being scrapped in the late 1920s as the Beyer Garratt locomotives began to arrive. [2] Their presence on the system was heralded by, “Railway Wonders of the World,” with the picture shown below. [3]
An ‘MT’ class Uganda Railway locomotive as illustrated in ‘Railway Wonders of the World’. [3]
References
A.E. Durrant; The Mallet Locomotive; David & Charles, Newton Abbot, Devon, 1974.
Kevin Patience; Steam in East Africa; Heinemann Educational Books (E.A.) Ltd., Nairobi, 1976.
Uganda has begun restoring a disused branch of a railway line built under the British Empire, which it hopes will offer a cheaper way to transport goods to neighbouring countries. … Work has begun to restore nearly 400 kilometres of the tracks between Tororo in eastern Uganda, near the border with Kenya, and Gulu in the north, near South Sudan.
“Our ambition is to move all long-distance bulk cargo transportation onto rail from roads in a few years because rail is cheaper in terms of cost and time,” a spokesperson for for state-run Uganda Railways Corporation, John Linnon Sengendo, told Reuters news agency.
Uganda decided to revamp the old network after plans to build a separate, modern line failed to secure funding from China.
The government cancelled its contract with a Chinese firm earlier this year and is now seeking a new contractor for the project, which would see the construction of a standard gauge railway linking the Ugandan capital Kampala to the Kenyan border, where it would join up with Kenya’s modern lines.
Another Chinese contractor, China Road and Bridge Corporation, will repair the old line over two years at a cost of 200 billion shillings (50.6 million euros) to the Ugandan government, Sengendo said.
Uganda’s railway network fell into disrepair during the country’s economic collapse in 1970s and early ’80s.
Ugandan officials hope once the link is restored, rail will replace trucks in shipping transit goods to South Sudan and north-eastern Democratic Republic of Congo.
Under its East African Railway Master Plan, the East African Community regional bloc is aiming to revive lines serving Tanzania, Kenya, Uganda and extend them to Rwanda and Burundi. Ultimately it hopes to add South Sudan and Ethiopia to the network too.
A recently relaid section of metre-gauge track in Kampala, (c) Sylvia Katushabe
Uganda’s planned overhaul of the metre gauge railway to cut transport costs on the Northern Corridor and improve trade competitiveness has entered its final stages, even as the country faces a shortage of equipment, wagons, and trains.
The EastAfrican has learnt [that] Spanish firm Imathia Construction has completed replacing steel sleepers with concrete beams on the Namanve-Kampala section of the line, which is expected to be handed over this month, Uganda Railways Corporation (URC) publicist John Lenon Sengendo said, adding that the contractor will then embark on the final section, Namanve-Mukono.
This will be the second section of the track to be completed after rehabilitation of the Tororo-Namanve line, including the line to Jinja Pier, which was completed a year ago. While the Malaba-Namanve metre gauge track is now in fair condition, importers, exporters, and shippers remain sceptical about switching to rail, citing a shortage of rolling stock and inefficiency, which has resulted in 90 percent of traffic on the Northern Corridor being carried by road and only about seven percent is carried by rail because of the poor state of rail infrastructure.
As a result, transport costs are comparatively high on the Northern Corridor, ranging from 20 cents to 25 cents per tonne per kilometre for road transport, while the cost for rail transport ranges from US cents 6 to US cent 12 per tonne per kilometre, depending on the type of cargo.
The shortage of rolling stock is partly blamed on URC. A June 2022 Uganda’s Auditor General after reviewing URC’s asset register, had 521 wagons located in different parts of Kenya.
But only 128 wagons exist, leaving a balance of 393 wagons unaccounted for, raising fears of a possibility of URC overstating its asset values in the financial statements.
[A] URC accounting officer explained that “there were many wagons left in Kenya by RVR (U) Ltd upon concession termination. A repatriation exercise to return these assets to Uganda commenced in July 2021 and by December 2021, a total of 243 wagons had been brought back.”
Under this project, Uganda is to buy 3,000 horsepower locomotives by 2026. The number of Uganda government-owned wagon ferries is also expected to increase from the current two to four, a development set to help URC meet the growing traffic demand on Lake Victoria.
The other financiers are the African Development Bank, which will provide $233.2 million, and the African Development Fund to provide $100.7 million – both concessional loans to finance the construction and purchase of rolling stock, which includes locomotives, wagons and coaches.
URC’s target is to move cargo from road to rail, and we expect to be moving six million tonnes a year.
In its efforts to revamp the metre gauge railway, Uganda is also reviving the route from Tororo in Eastern Uganda to Gulu City in the north. The line is currently under construction. Significantly, the city also hosts the Gulu Logistics Hub, whose phase one is also under construction. … The hub – which will be rail-linked – was planned as a strategic location connecting to the growing markets of Congo and South Sudan.
Kenyan government to spend $731m on new trains, SGR revamp
An SGR cargo train at the Naivasha Inland Container Depot in Kenya. Kenya’s National Treasury report shows Transport ministry will receive $714.7 million for the “Development of Standard Gauge Railway” between July this year and June 2026. [2]
The government of Kenya has stepped up expenditure on the Nairobi-Mombasa standard gauge railway (SGR) with a plan to hit Ksh100 billion ($731.53 million) in the next three years to revamp the line, build new sidings and buy more locomotives and cargo wagons.
A report by Kenya’s National Treasury shows that the country’s Transport ministry will receive an additional Ksh97.7 billion ($714.7 million) for the “Development of Standard Gauge Railway” between July this year and June 2026.
This reverses a trend where the previous government had cut allocations to the SGR and will push the spending related to this line beyond KSh780 billion ($5.7 billion) by June 2026.
Beginning July, the Kenyan government has allocated Ksh37.4 billion ($275.79 million) from the Railway Development Levy Fund (RDLF) for the Nairobi-Mombasa SGR.
A Mombasa-bound SGR passenger train on the extended viaduct in the ‘Maneaters Area’. The line is set at high level to allow the safe passage of wildlife, (c) Wachira Mwangi. [2]
The bulk of the allocation, according to the breakdown shared with the Business Daily from transport, has been earmarked for the acquisition of additional locomotives and freight wagons at a cost of Ksh11.9 billion ($87.1 million).
Kenya last bought its 1,620 locomotives and wagons from China in 2018.
State had no plans for extension – The allocations to transport ministry show that the government had no plans to extend the SGR beyond Naivasha to Kisumu and finally Malaba in the next three years.
The rest of the funds, which have been allocated under the “Mombasa to Nairobi SGR” vote will largely be used to build new feeder lines and rehabilitate the old metre gauge railway (MGR) lines.
Charged at the rate of two percent, the Railway Development Fund (RDF) is levied on all goods imported into the country for home use.
“The purpose of the levy shall be to provide funds for the construction of a standard gauge railway network in order to facilitate the transportation of goods,” reads part of the Miscellaneous Fees and Levies Act which establishes the kitty.
Budgetary allocations for the acquisition of locomotives and wagons are projected to increase to Ksh16 billion ($117 million) in Financial Year 2024/25 and Ksh22.2 billion ($162.4 million) in the Financial Year 2025/26 taking the total allocations for the three years to Ksh50.1 billion ($366.5 million).
Another Ksh5.9 billion ($43.16 million) will be spent on the rehabilitation, remanufacturing or overhaul of locomotives, wagons and coaches, according to a breakdown of the Ksh37.4 billion ($273.6 million) allocation.
The new feeder lines will link some of the sections of the modern railway such as the Mombasa SGR Terminus to critical urban centres.
This includes Ksh4.48 billion ($32.77 million) for the construction of the Riruta-Lenana-Ngong Railway Line and Ksh2.96 billion ($21.65 million) for the construction of a Railway Metro Line linking Embakasi Station and Ruai town.
In the next 12 months, the government will also build a new 2.8-kilometre Metre Gauge Railway (MGR) link from Mombasa SGR Terminus to Mombasa MGR station at a cost of Ksh2.5 billion ($18.29 million).
These funds will also be used to construct a railway bridge across the Makupa causeway that links Mombasa Island to the Kenyan mainland.
New MGR line – A new Metre Gauge Railway (MGR) line linking the Naivasha Inland Container Depot to the existing Longonot Railway Station has been allocated Ksh1.6 billion ($11.7 million) in the next financial calendar.
The construction of a Railway Metro Line connecting Athi River Station to the East African Portland Cement has been allocated Ksh400 million ($2.93 million).
This is projected to rise to Ksh1.17 billion ($8.56 million) in the Financial Year starting July next year and Sh1.36 billion in Financial Year 2025/26.
Another Railway Metro Line connecting Athi River Station to NSSF and Mavoko will absorb Ksh450 million ($3.3 million), a figure that is set to increase to Ksh1.56 billion ($11.4 million) and Ksh1.89 billion ($13.83 million) in 2024/25 and 2025/26.
The money will also be used to rehabilitate the line between Longonot and the Western border town of Malaba, which is aimed at facilitating the movement of cargo from the port city of Mombasa to Uganda.
Also in this border town, which is prone to congestion, the State plans to build Malaba Cargo Handling Yard. Around Ksh474 million ($3.45 million) has been set aside for this project.
Other spending items will be the acquisition of plant and equipment, which shall take up Ksh3.8 billion ($27.8 million) in the next fiscal year, Sh1.1 billion in Financial Year 2024/25 and Ksh600 million ($4.4 million) in the Financial Year 2025/26.
Logistics Hub – A logistics hub is planned for Athi River with the state putting aside Ksh1.125 billion ($8.23 million).
The allocation for this planned logistics hub will reduce to Ksh375 million ($2.74 million) in the year ending June 2025.
Initial plans were to extend the SGR to Uganda; however, this has since stalled with the Treasury not getting funds for the extension to Kisumu and finally to Malaba.
Murkomen at the beginning of this year said the Kenya Kwanza administration in partnership with the Chinese government is keen on extending the SGR from Naivasha’s Mai Mahiu to the border of Uganda through a five-year plan that will see the multibillion-dollar railway line run through Narok, Bomet, Nyamira, Kisumu, and Malaba.
“In the long run, we would like to complete the connection of the SGR from Suswa to Kisumu through Bomet, Nyamira, parts of Kisii and later to Malaba. Later, we can think of upgrading the existing MGR via Nakuru to Kisumu and via Eldoret to Malaba,” he said on December 15, 2022.
With the additional expenditure, the government hopes the country’s most expensive piece of infrastructure will help to grow the economy and improve the standard of living for Kenyans.
The administration of former President Uhuru Kenyatta borrowed Ksh656.1 billion ($4.8 billion) in three tranches for the construction of the two phases of the SGR, contributing to a major build-up of Kenya’s stock of debt.
Kenya will use Ksh11.9 billion ($87 million) to acquire rolling stock that will be used to ferry cargo on the SGR from Mombasa to Naivasha.
Grand $15 billion plan to expand Kenya SGR to Kisumu, Malaba, Isiolo
The standard gauge railway line at the Naivasha Inland Container Depot, a transhipment hub for Kenya’s SGR from Mombasa, which is to extend to the proposed Malaba railway line in Uganda. [3]
Kenya has set sights on a Ksh2.1 trillion ($15.3 billion) plan to extend the standard gauge railway (SGR) to Kisumu, Malaba and Isiolo by the end of June 2027, a government document seen by the Business Daily shows.
According to the plan, the State Department of Transport will build another 2,746 kilometres of the SGR at $15.3 billion, a move that will push the total spend on the modern railway to more than Ksh2.75 trillion ($20 billion).
The plan, lifted from the Jubilee Government’s grand scheme on SGR (so far Kenya’s most expensive project), is part of the Ksh3.42 trillion ($24.9 billion) Lamu Port South Sudan-Ethiopia Transport (Lapsset).
Lapsset is aimed at opening up northern Kenya and revamping the northern corridor by spurring movement within Kenya, South Sudan and Ethiopia.
It is an ambitious scheme that will not only see the modern railway reach the border town of Malaba via Kisumu, as it was initially envisioned, but also Isiolo, Moyale and the island of Lamu.
The line will move from Mariakani in Mombasa County to Lamu to Isiolo. From Isiolo, the SGR will be connected to the northeastern town of Moyale which borders Ethiopia.
From Isiolo, the government will extend the SGR to Nairobi, connecting the country’s capital city and commercial hub to northern Kenya and finally to Ethiopia.
From Naivasha, the SGR is extended to Malaba through Kisumu.
The bulk of the financing for these additional kilometres of the SGR, around Ksh1.8 trillion ($13 billion), will be from external financiers that the document has not revealed while the rest will come from the Kenyan government.
So far, the SGR from Mombasa to Naivasha has been financed by the Chinese at a total cost of Ksh656.1 billion ($4.7 billion)
The longest stretch of the planned SGR, 753.2 kilometres, will be from Isiolo to Nakodok, a small town near the border between Kenya and South Sudan.
The Transport Ministry, headed by Kipchumba Murkomen, has cost this phase of the SGR at Ksh443.2 billion ($3.2 billion).
From Lamu to Isiolo, a distance of 544.4 kilometres, the Ruto administration plans to build the rail line at Ksh348.7 billion ($2.5 billion).
From Isiolo to Moyale, a distance of 475.9 kilometres, the country is expected to use Ksh317.8 billion ($2.3 billion) to build a new SGR line.
The line connecting Mariakani to Lamu of 325.3 kilometres will cost Ksh257.3 billion ($1.8 billion).
Locations on Kenya’s planned SGR network. [3]
There will be another line of 278 kilometres connecting Nairobi to Isiolo that will consume Ksh239.2 billion ($1.7 billion).
Phase 2B of the SGR from Naivasha to the lakeside city of Kisumu will cost Sh380 billion while the last leg, 2C, from Kisumu to Malaba bordering Uganda will take another Ksh122.9 billion ($896 million).
The document from the State Department of Transport reveals what appears like a near-impossible feat of the government wanting to complete the entire transport circuit in four years from 2023 to 2027.
Although the ministry’s document indicates that construction of these railway lines is to begin at the start of July this year, no budgetary allocation has been made for the SGR for the next three financial years.
In 2014, the government entered into a tripartite agreement with the governments of Rwanda and Uganda to construct a standard gauge railway from Mombasa through Kampala to Kigali, Rwanda.
However, the SGR ended abruptly in Naivasha with China reportedly declining to finance the last leg of the modern railway after failing to strike an agreement with Uganda.
The new administration of President Ruto has rekindled plans to complete the SGR.
Through a partnership with the Chinese government, Mr Murkomen said earlier this year the government wanted to extend the SGR from Naivasha’s Mai Mahiu to the border of Uganda through a five-year plan that will see the multibillion-dollar railway line run through Narok, Bomet, Nyamira, Kisumu, and finally Malaba.
“In the long run, we would like to complete the connection of the SGR from Suswa to Kisumu through Bomet, Nyamira, parts of Kisii and later to Malaba. Later, we can think of upgrading the existing MGR via Nakuru to Kisumu and via Eldoret to Malaba,” the CS said in a statement on December 15 last year.
The Transport Ministry has been allocated Ksh100 billion ($729 million) from the Railway Development Levy Fund (RDLF) for the next three years to revamp the existing SGR line from Mombasa to Naivasha via Nairobi and build new sidings.
The money will also be used to buy more locomotives and cargo wagons, which are aimed at improving the freight capacity of the modern railway which is still facing cut-throat competition from trucks.
Plans to revamp the SGR involve mostly building new metre gauge railway (MGR) or rehabilitating them.
New Concrete Sleepers for the Metre-Gauge in Uganda
New Vision reported that, on 1st September 2023, President Yoweri Museveni opened a new Concrete sleeper making facility at Kawolo, Buikwe District, Kampala. The sleepers are to be used in the rehabilitation of the metre-gauge railway line.
The traditional steel sleepers are no longer in favour. Thefts and vandalism mean that alternatives have had to be sought. [6]
The old steel sleepers on the right. The new concrete sleepers in ballast on the left. [7]
The sleepers are being used on the Kampala to Namanve line before being rolled out to other projects. The construction of the factory valued at over 19 million Euros (about 76 billion Uganda Shillings) started in June 2020.
On-going work on the Kampala to Namanve line. [8]
The use of concrete sleepers on the suburban lines will be supplemented by the procurement of diesel multiple units and additional coaches.
“In August 2020, URC said the Government had secured funding from the Spanish government and African Development Bank (AfDB) to the tune of shillings 1.3 trillion to revamp the Metre Gauge Railway by rehabilitating about 250 kilometres from Malaba to Kampala.” [6]
On 1st February 2024, work on the Kampala to Namanve line was close to completion and a predicted opening in March 2024. [9]
Kenya Railways puts proposed Lapsset SGR costs at $16 billion: bulk on Isiolo-Nakodok line
Kenya will need at least Ksh 2.4 trillion ($16 billion) to construct a proposed Standard Gauge Railway (SGR) on the Lamu Port-South Sudan-Ethiopia-Transport (Lapsset) corridor, according to projections by the Kenya Railways Corporation.
According to the parastatal, it would cost Ksh 523.05 billion ($3.49 billion) to build a 544.4 km SGR link to connect Lamu and Isiolo and a further Ksh 476.7 billion ($3.178 billion) to extend the line from Isiolo to Moyale over a distance of 475.9 km.
The largest spending would be on constructing the SGR line from Isiolo to Nakodok town on the border between Kenya and South Sudan over a distance of 753.2 km at a cost of Ksh664.65 billion ($4.431 billion).
Kenya Railways has estimated that a further Ksh 358.8 billion ($2.392 billion) will be required to link Isiolo and Nairobi via SGR over a distance of 278.6 km and a further Ksh 385.95 billion ($2.573 billion) for the 325.35 km stretch between Lamu and Mariakani.
The entire stretch will cover a total of 2,377.45 km, translating into a cost of Ksh 1 billion ($6.667 million) for every kilometre of the SGR.
But the cost of undertaking such a colossal venture, which would be by far the most expensive in Kenya’s history, will be far higher than Kenya Railways’ estimates considering the company did the costing at an exchange of Ksh150/US dollar.
The parastatal has nonetheless expressed confidence in raising Ksh275.9 billion ($1.84 billion) or 11.4 percent of the total project cost by the financial year 2027/28 through funding from the government, collections from the Railway Development Levy Fund (RDLF) and loans.
Kenya in 2014 began construction of Phase 1 of the SGR line between Mombasa and Nairobi covering 472km. Phase 2A Nairobi-Naivasha (120km) was constructed in 2017. The project was funded by a $5.08 billion loan from China.
“The SGR line has led to expansion of the Inland Container Depot (ICD) in Nairobi at Embakasi, and construction of the ICD – Naivasha at Mai Mahiu,” said Kenya Railways.
The firm added: “This has contributed to decongestion of the seaport of Mombasa and facilitated seamless transit of goods destined to Western Kenya and neighbouring countries.”
Already, two studies have been undertaken to explore the feasibility of a Lapsset corridor railway by Japan Port Consultants in 2009 and China Civil Engineering Construction Company (2015). The latter study estimated the cost of the project at $10.4 billion with a financial rate of return of between nine percent and 12 percent.
The proposal to build an SGR line along the Lapsset corridor is however not feasible yet as the Lapsset project has failed to take off due to lack of funding as well as insecurity. Kenya is also facing a huge debt pile which has been worsened by the rapid depreciation of the Kenyan shilling leading to a surge in foreign currency external loans.
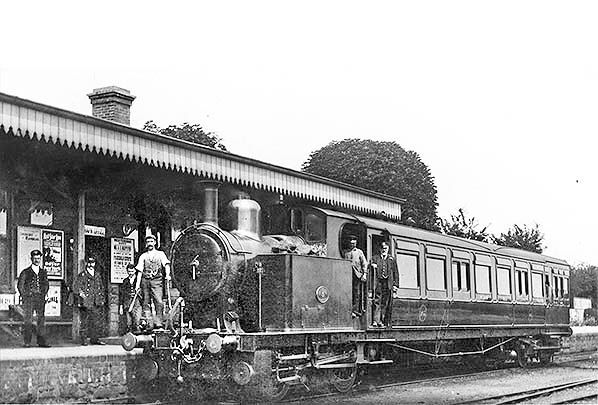
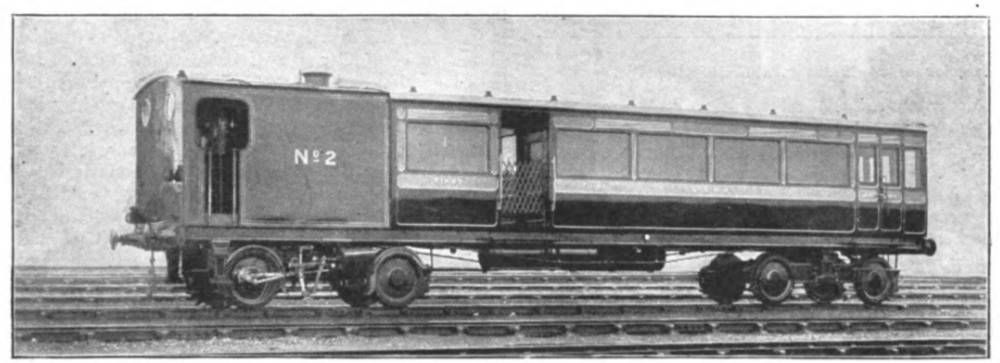
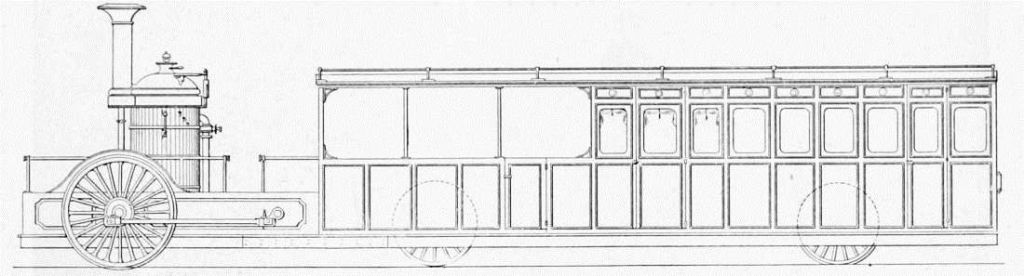
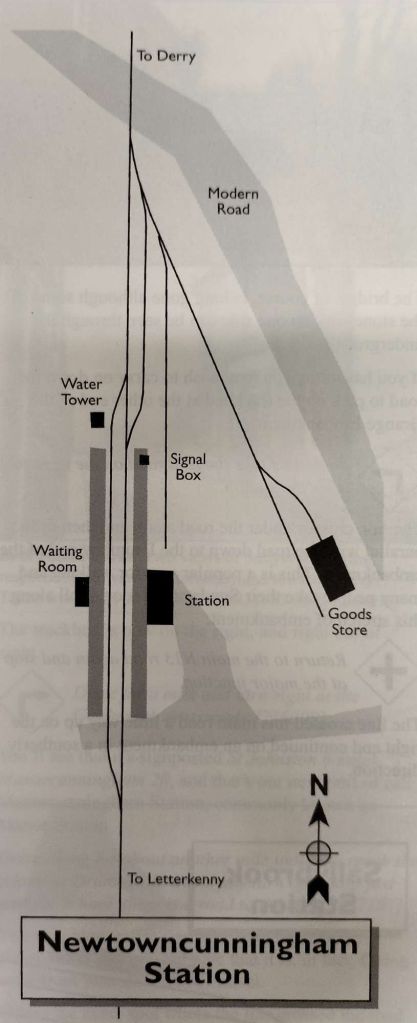
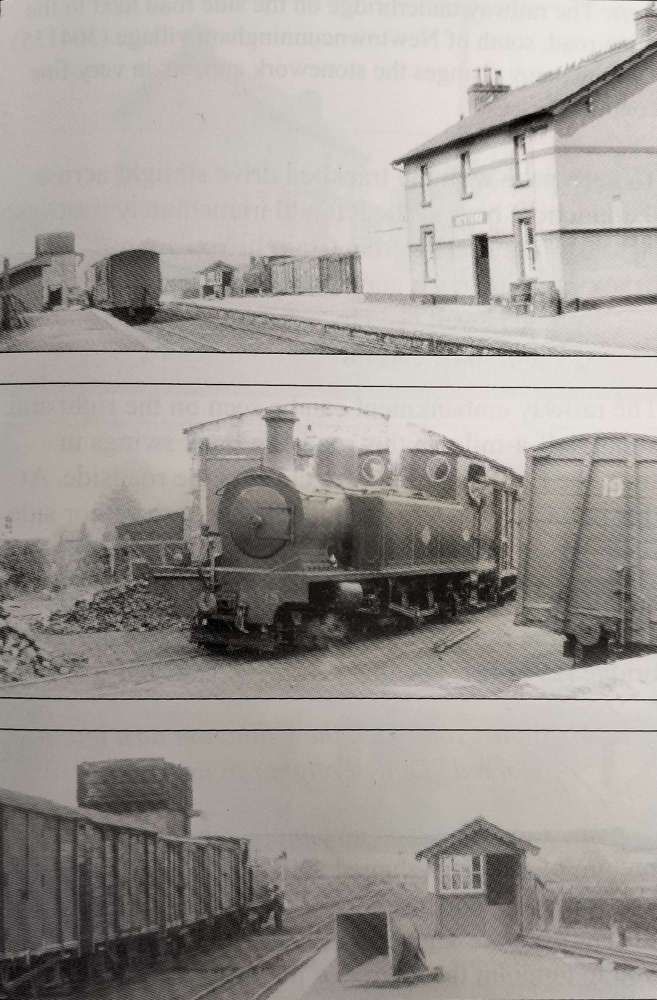
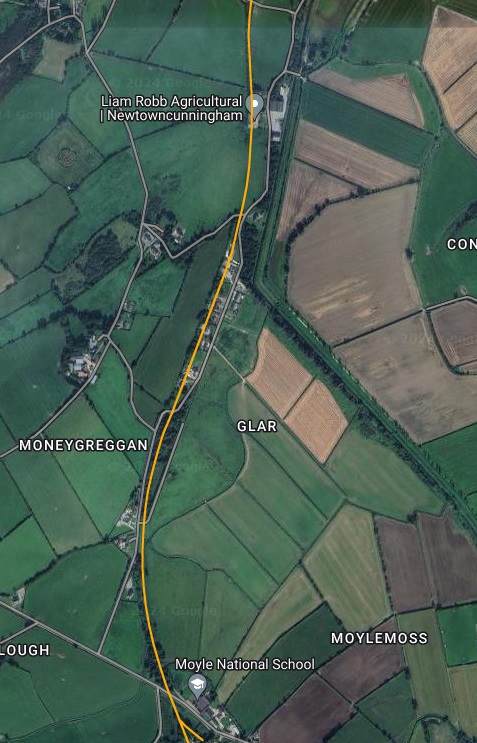
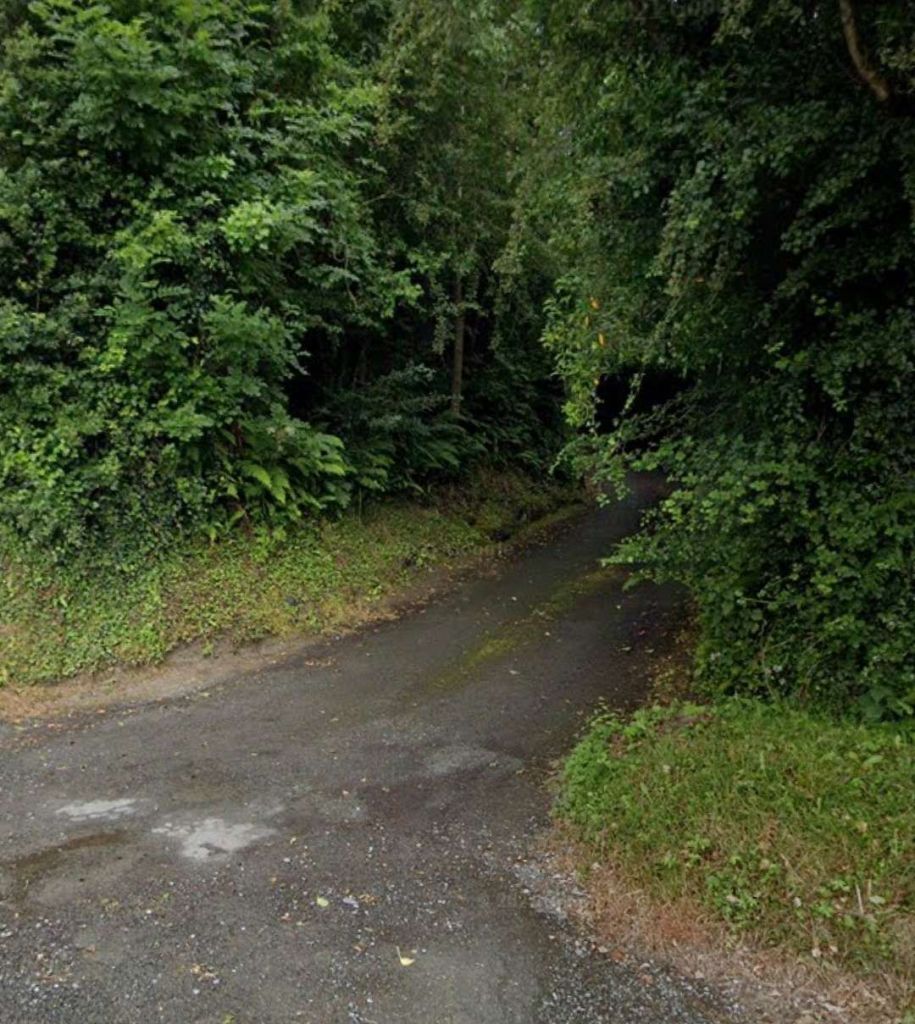
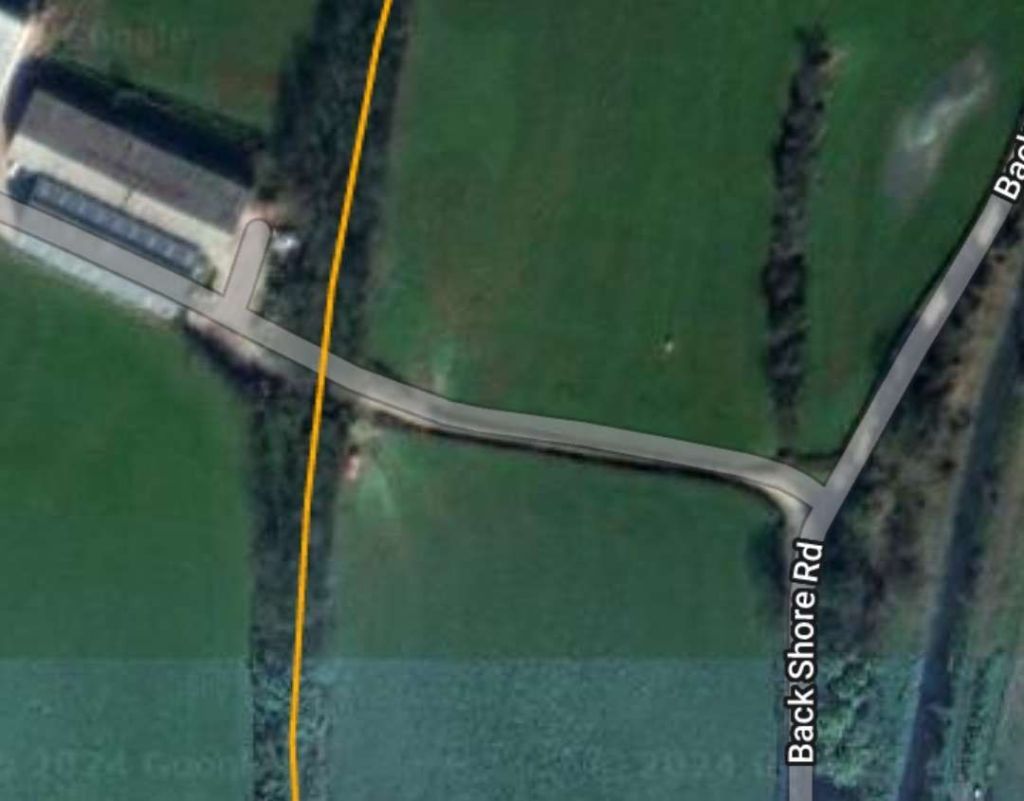
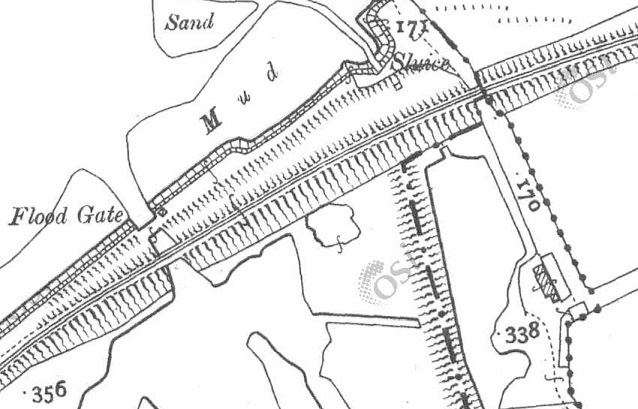
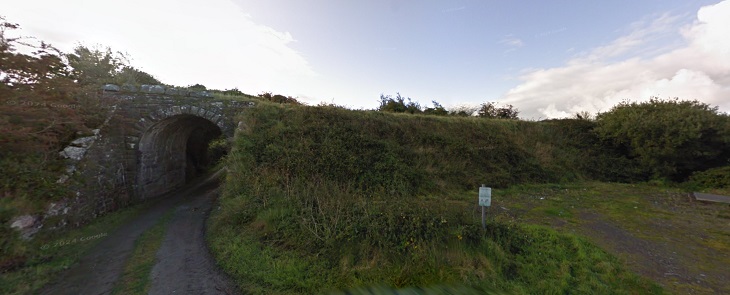
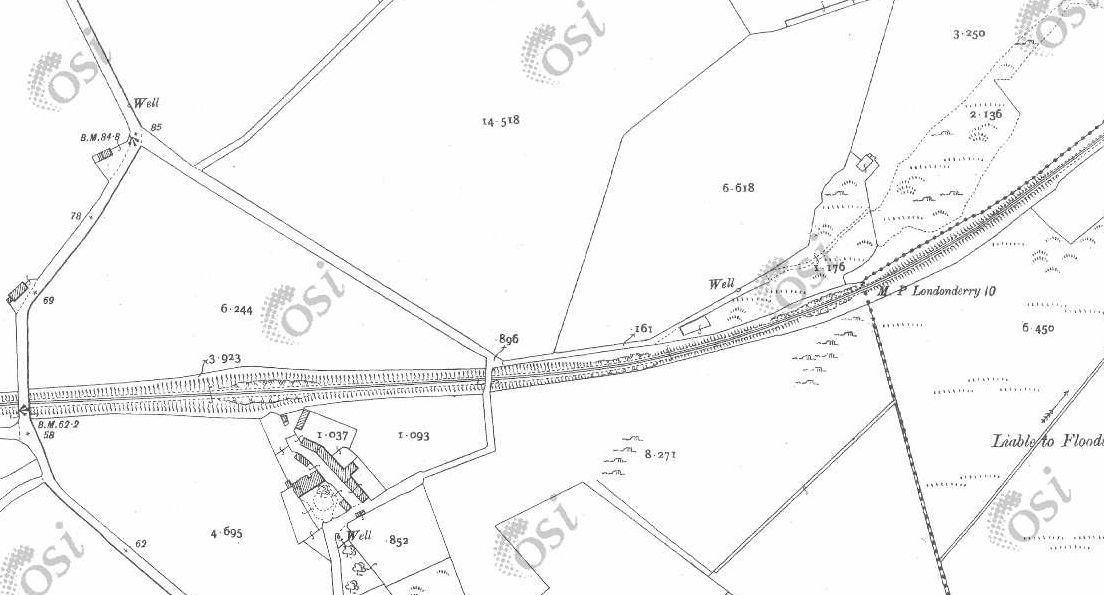
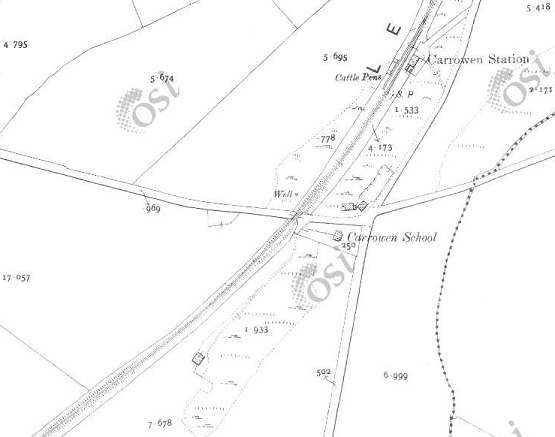
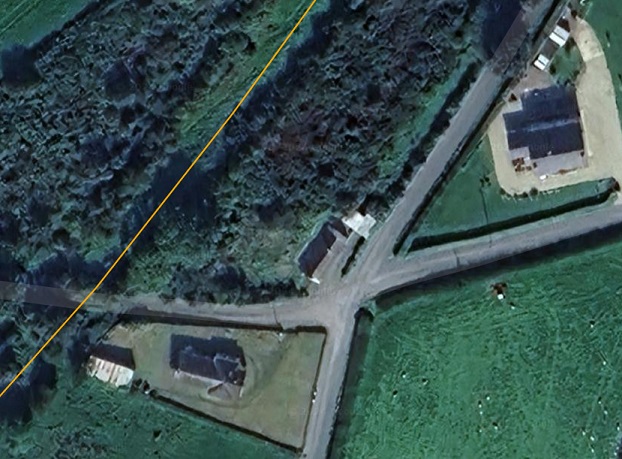
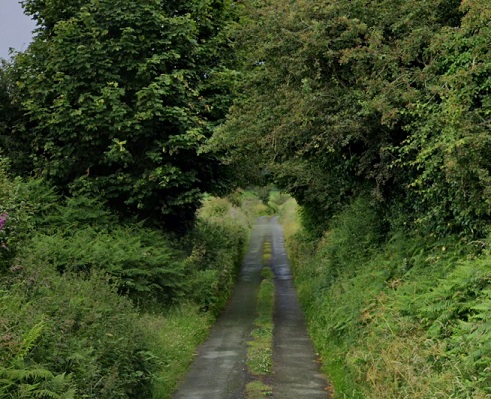
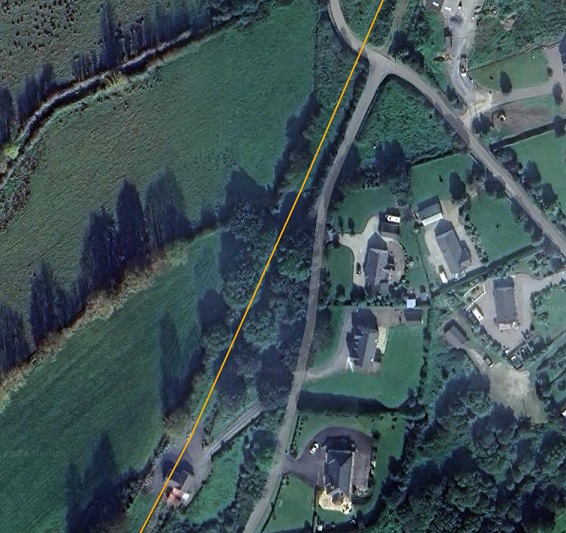
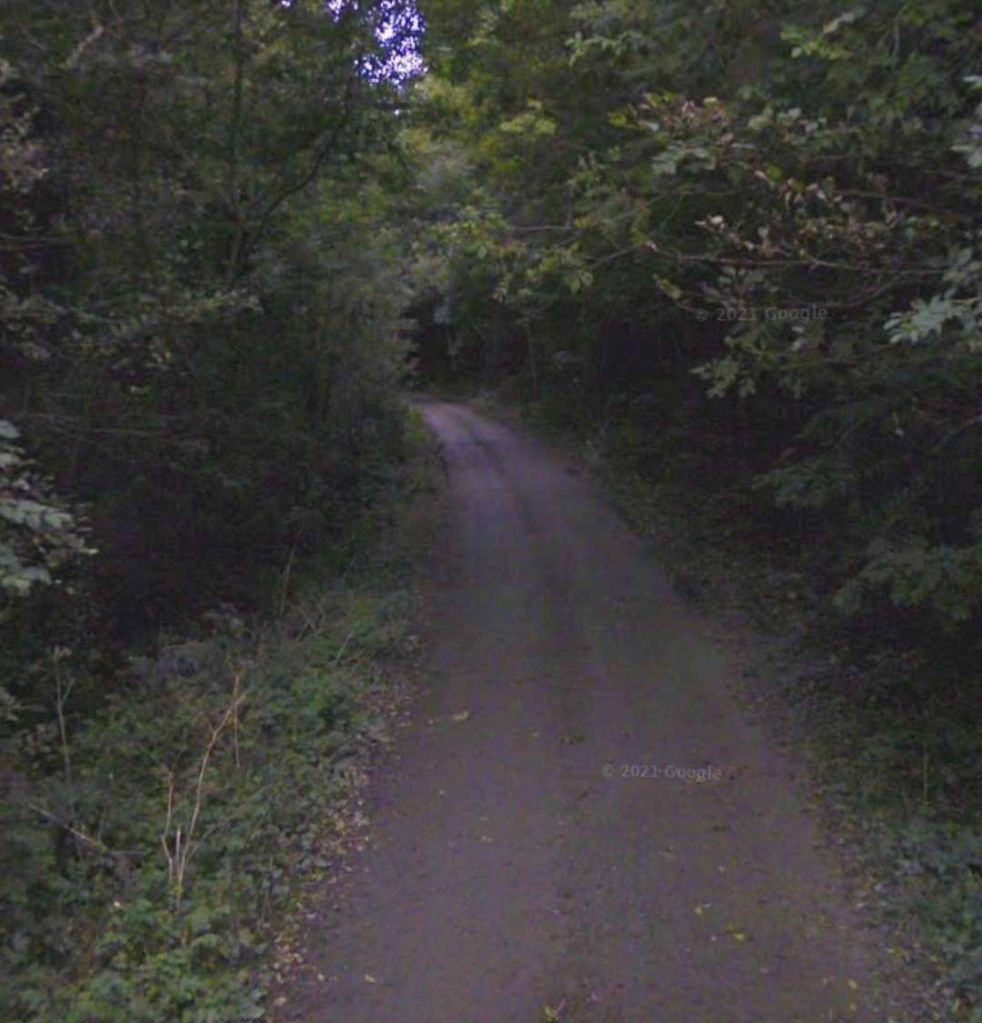
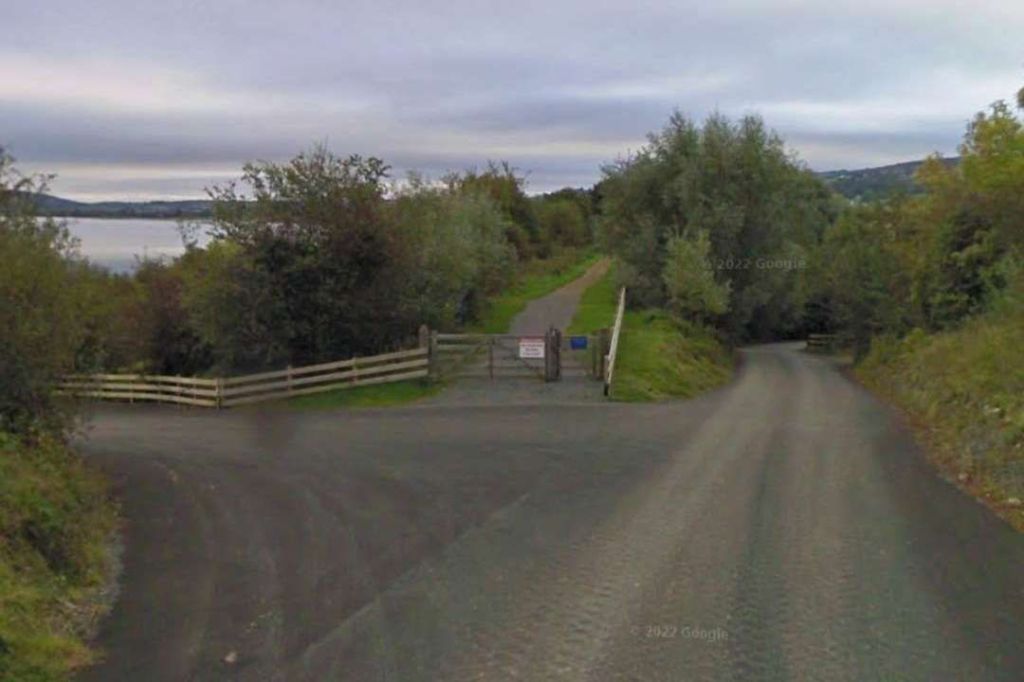
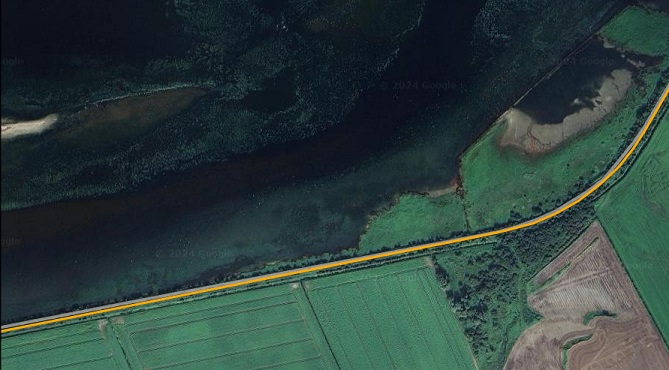
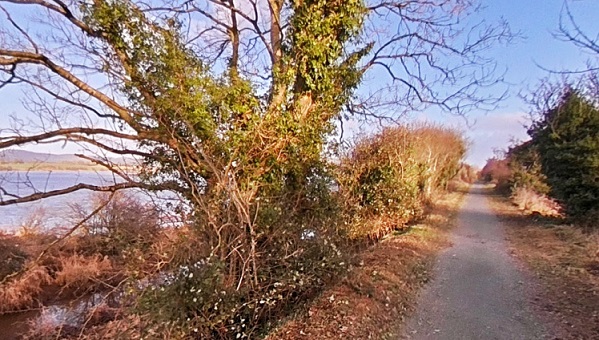
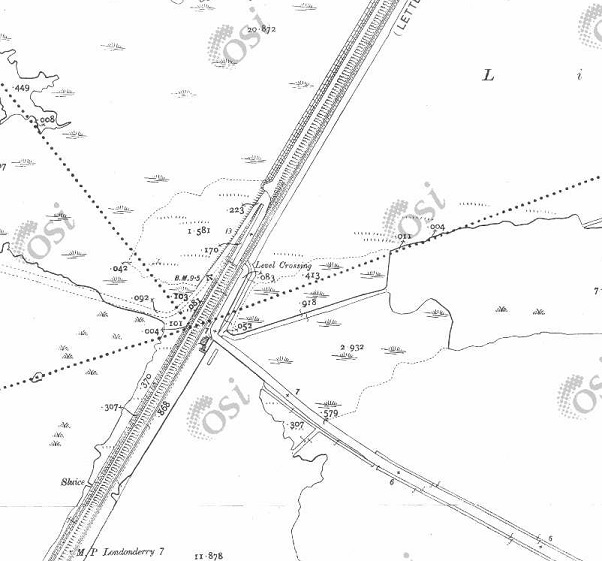
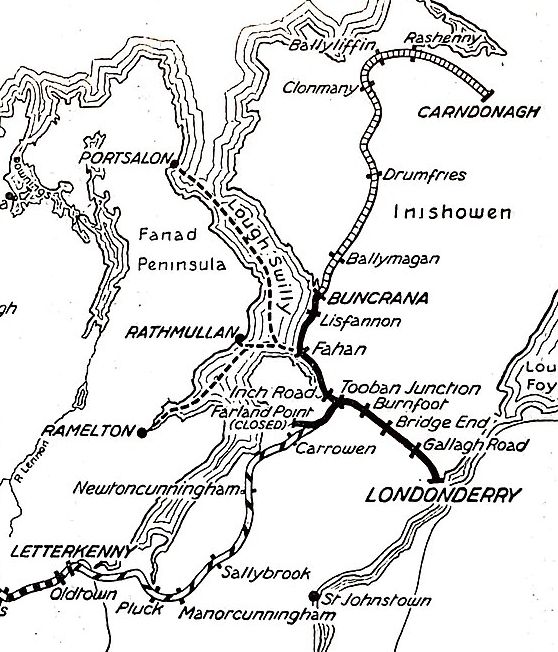
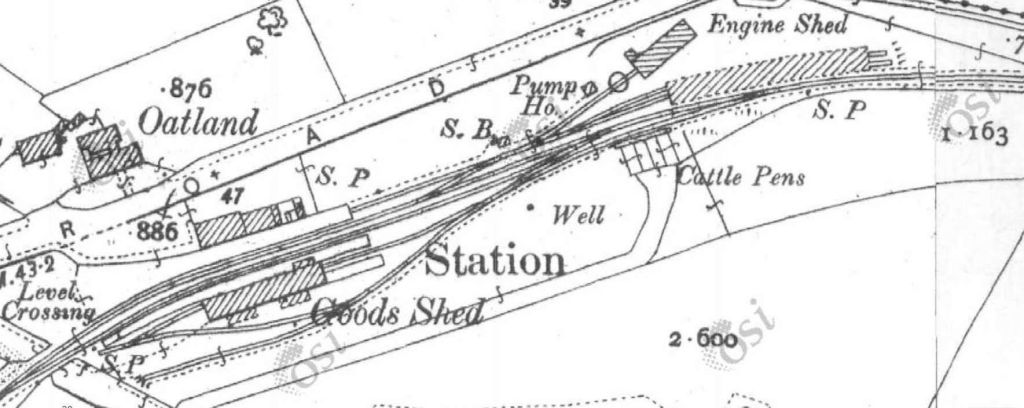
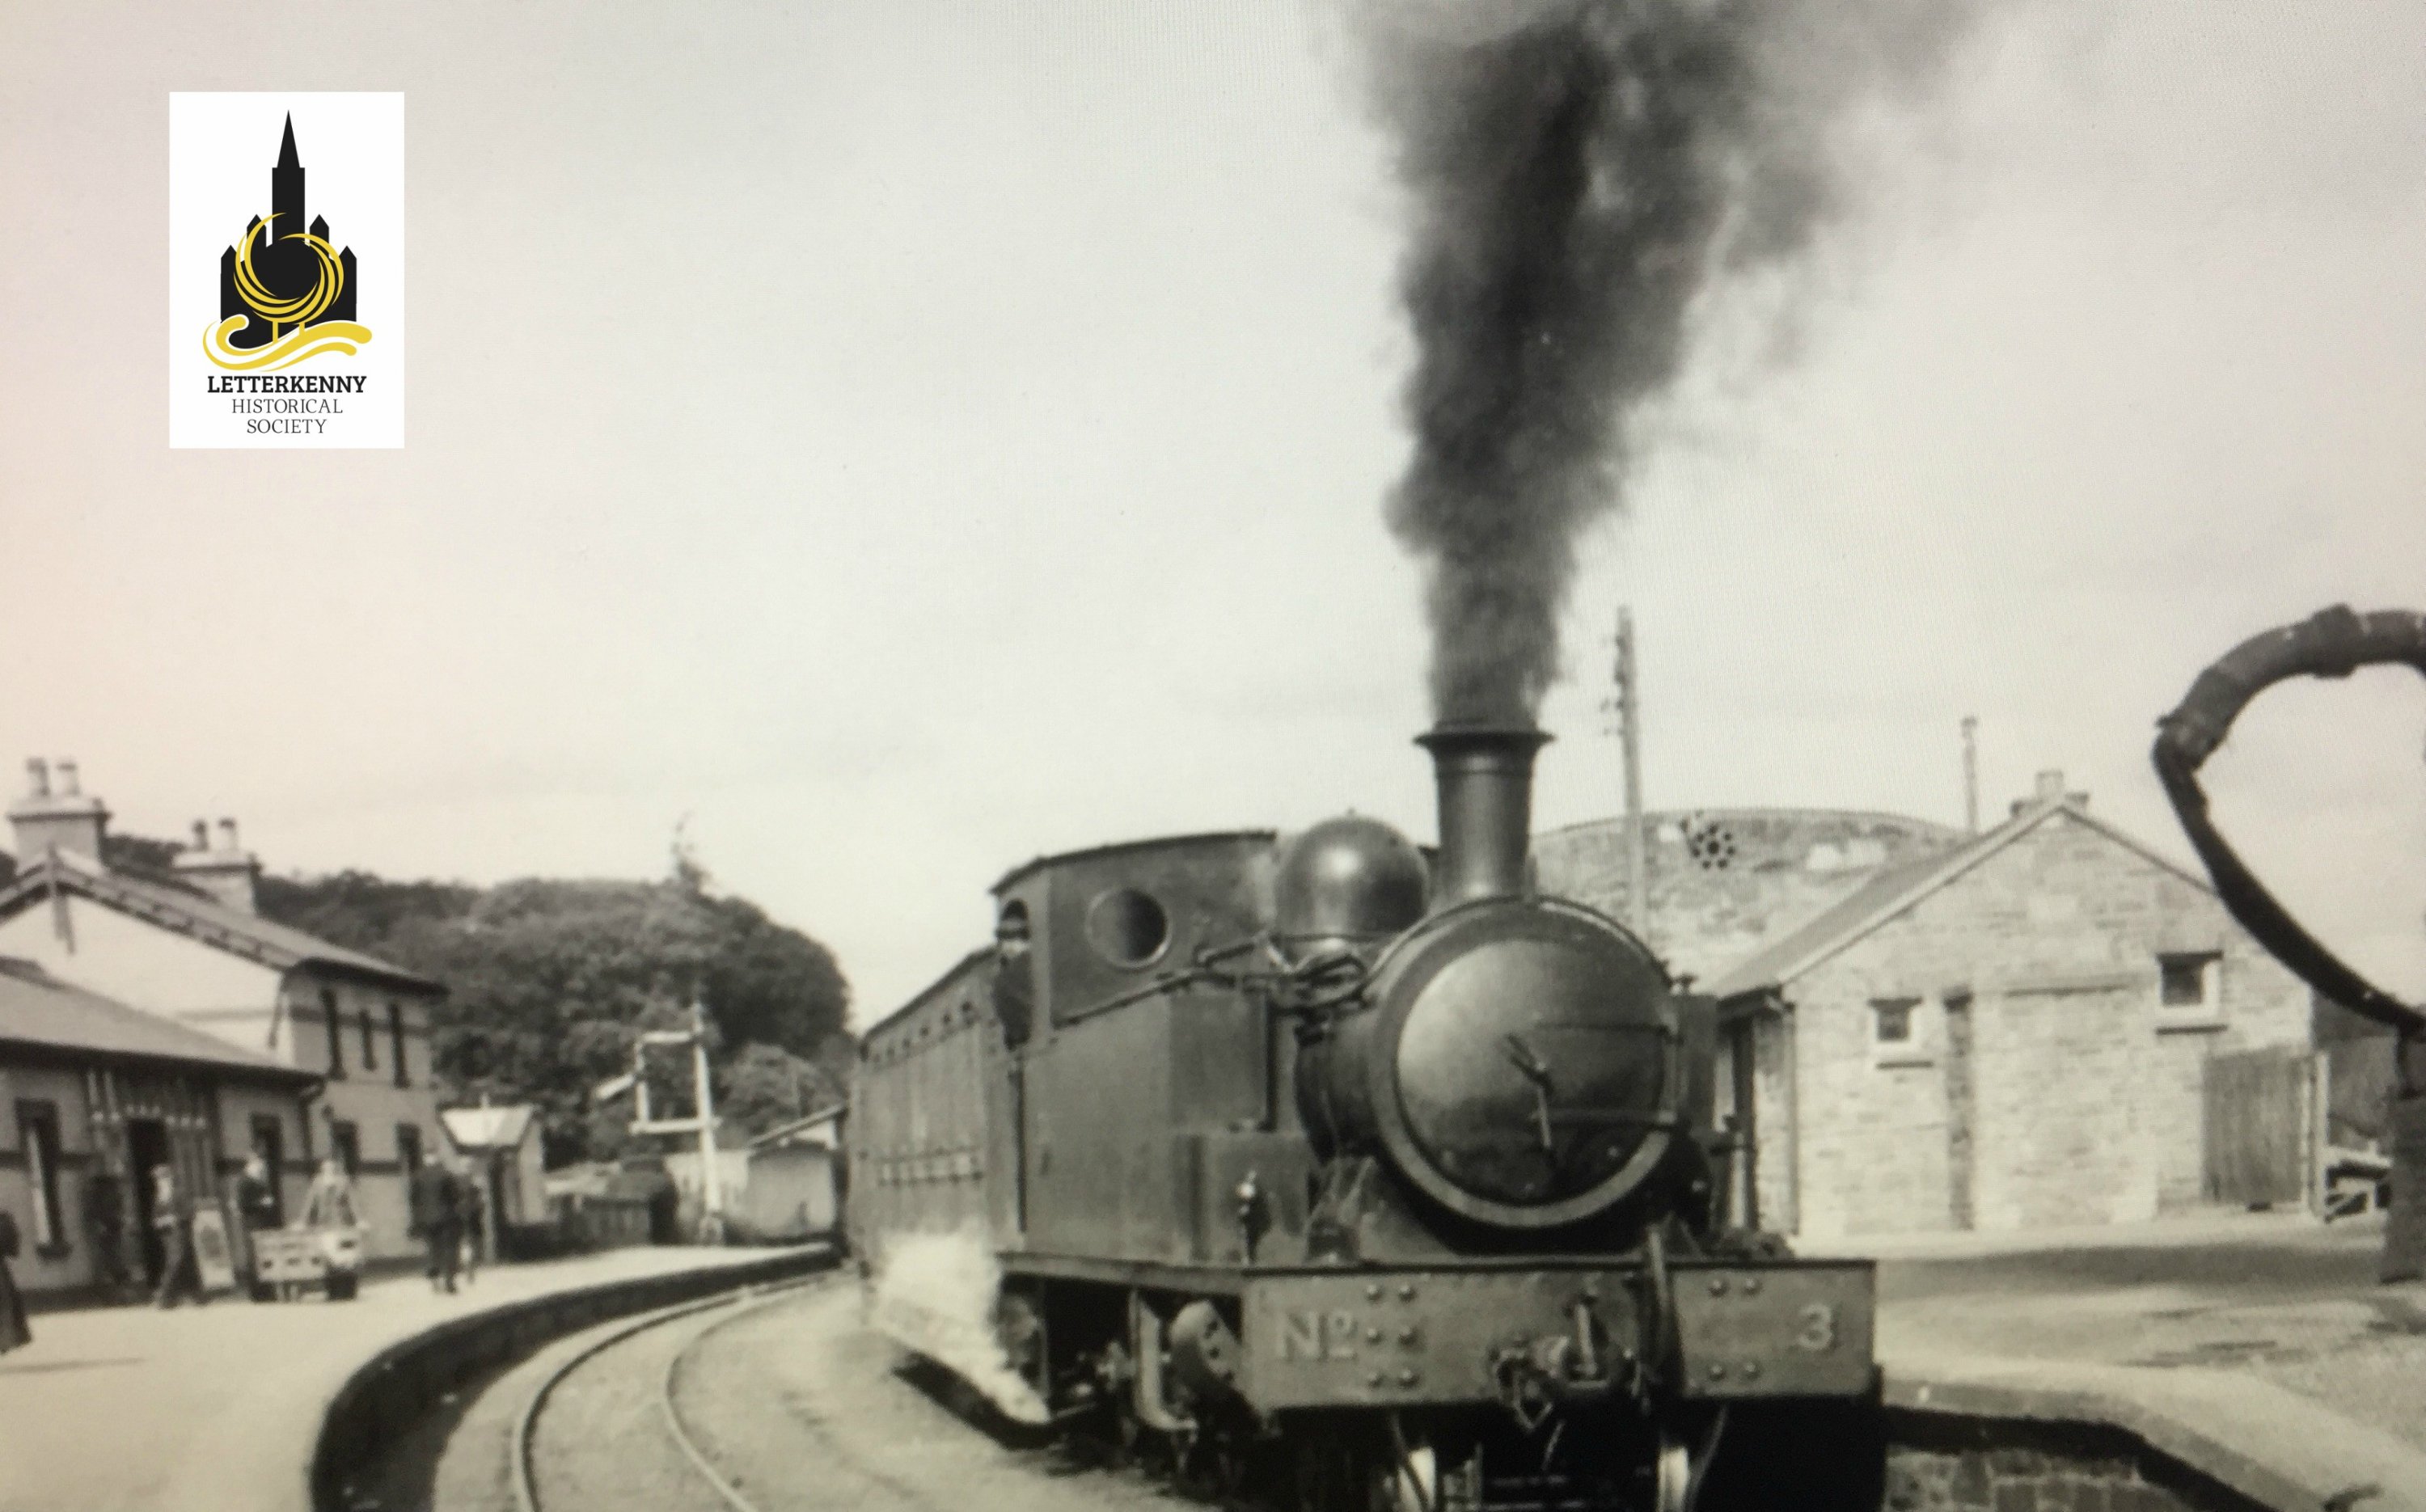
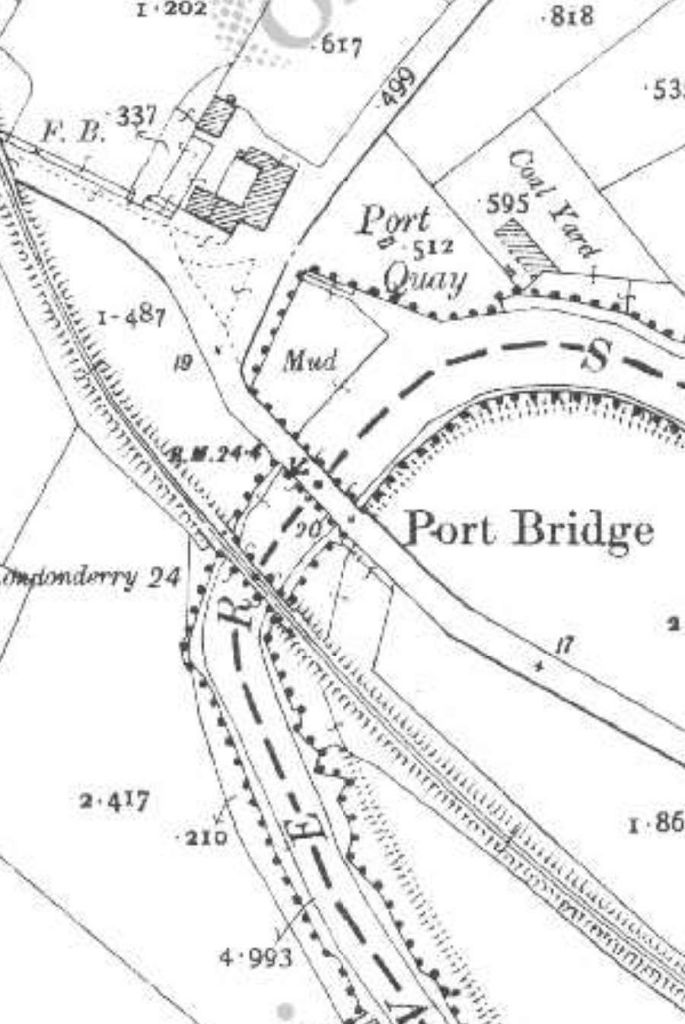
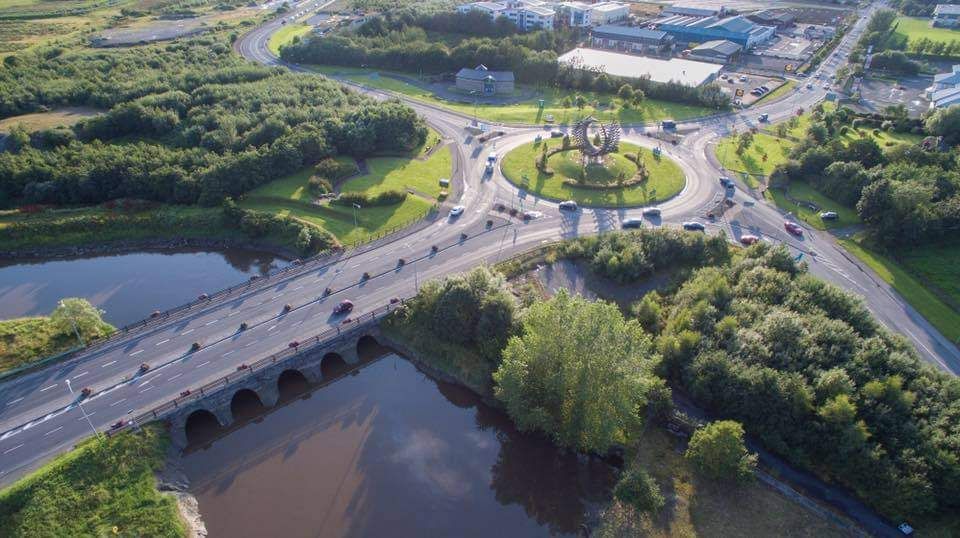
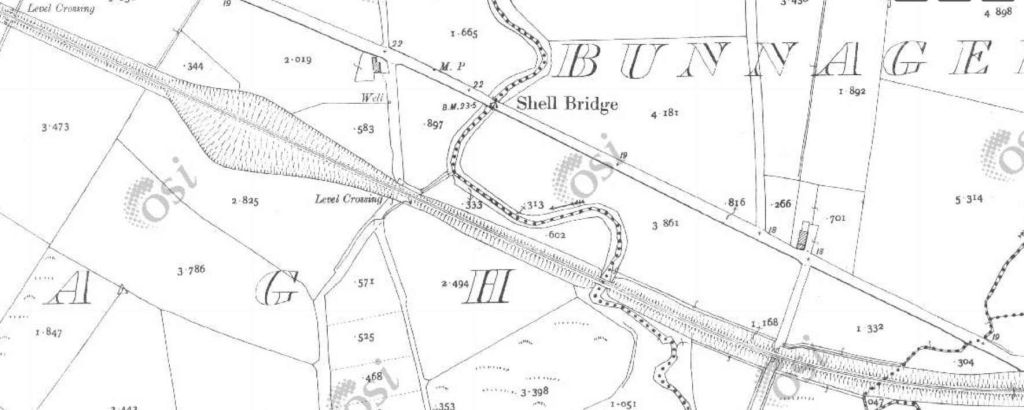
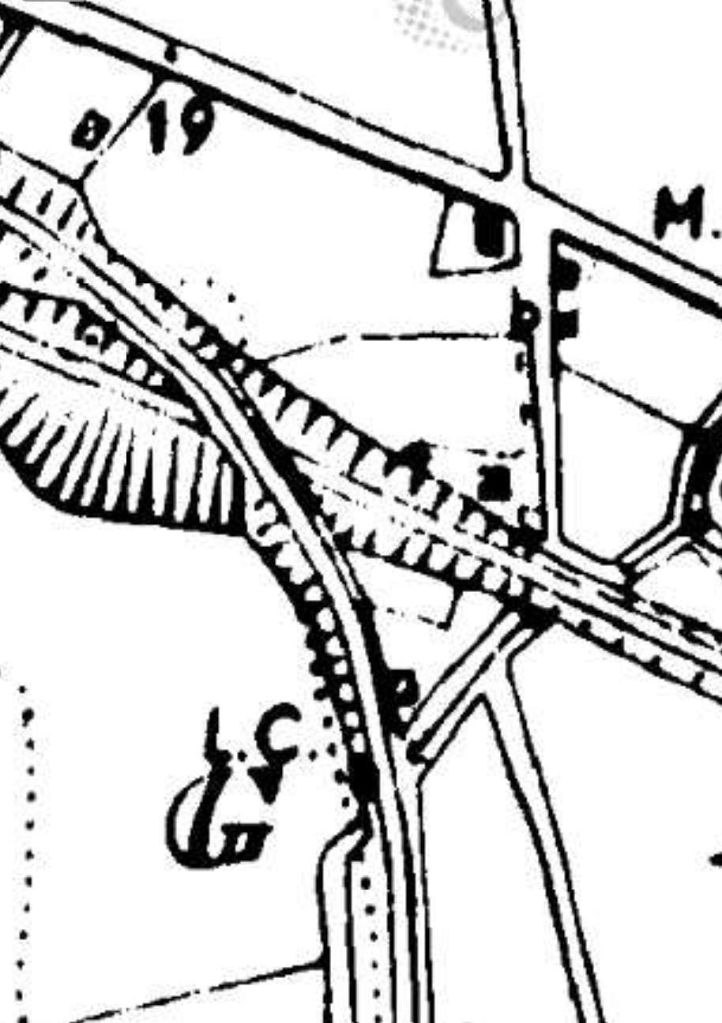
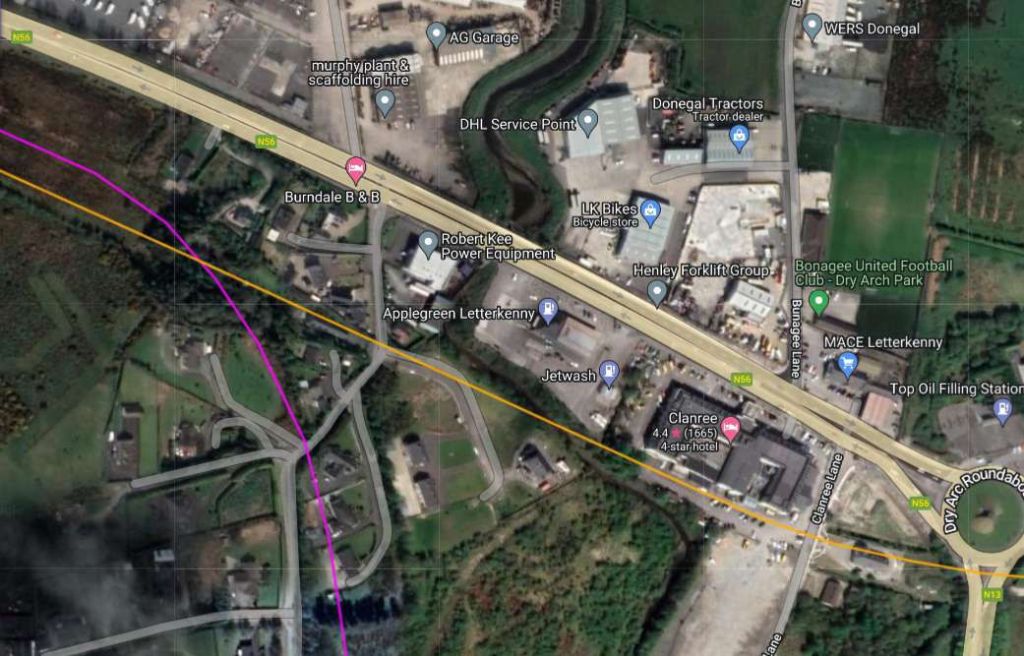
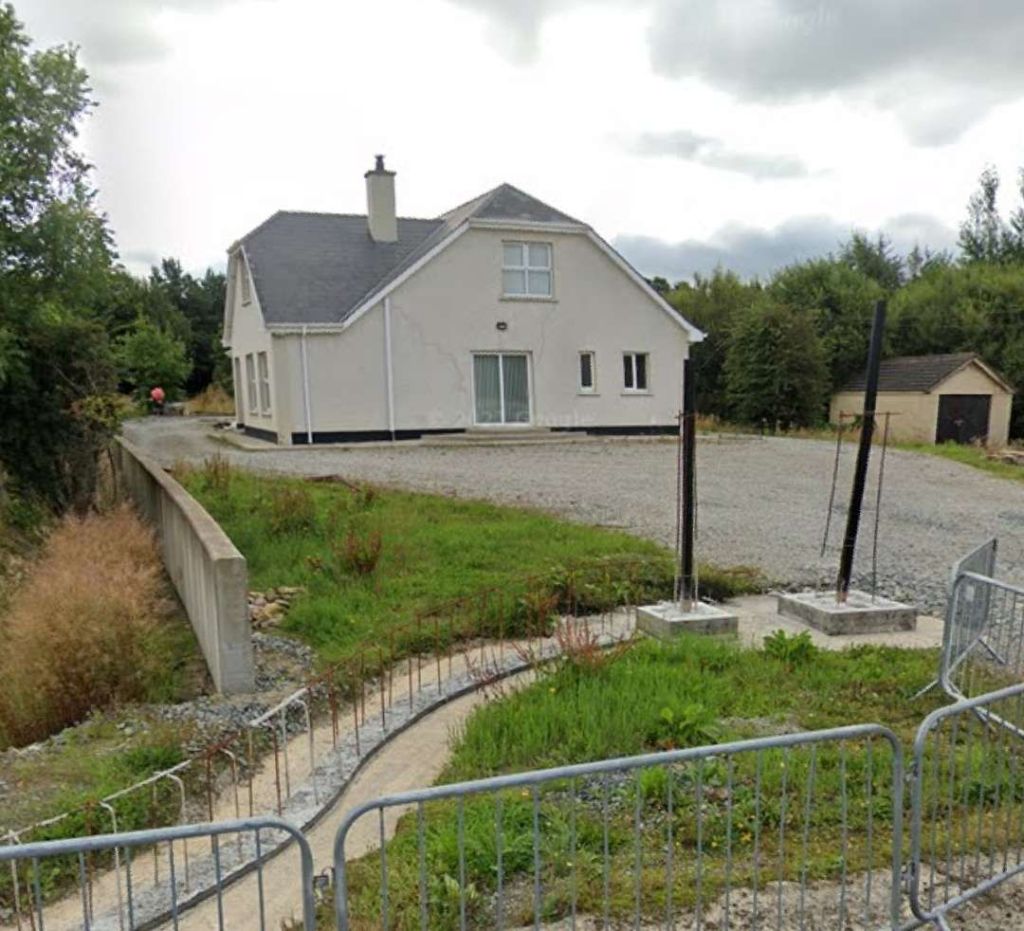
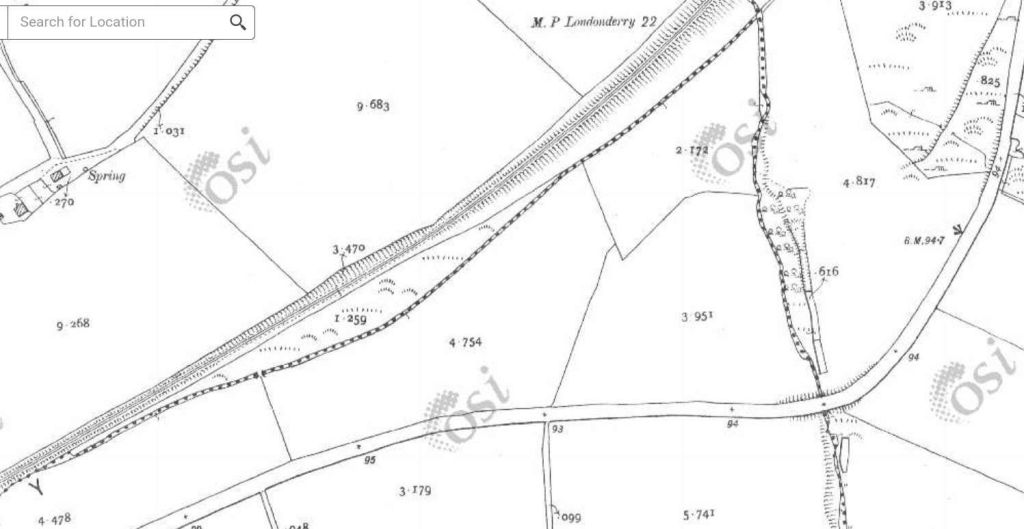
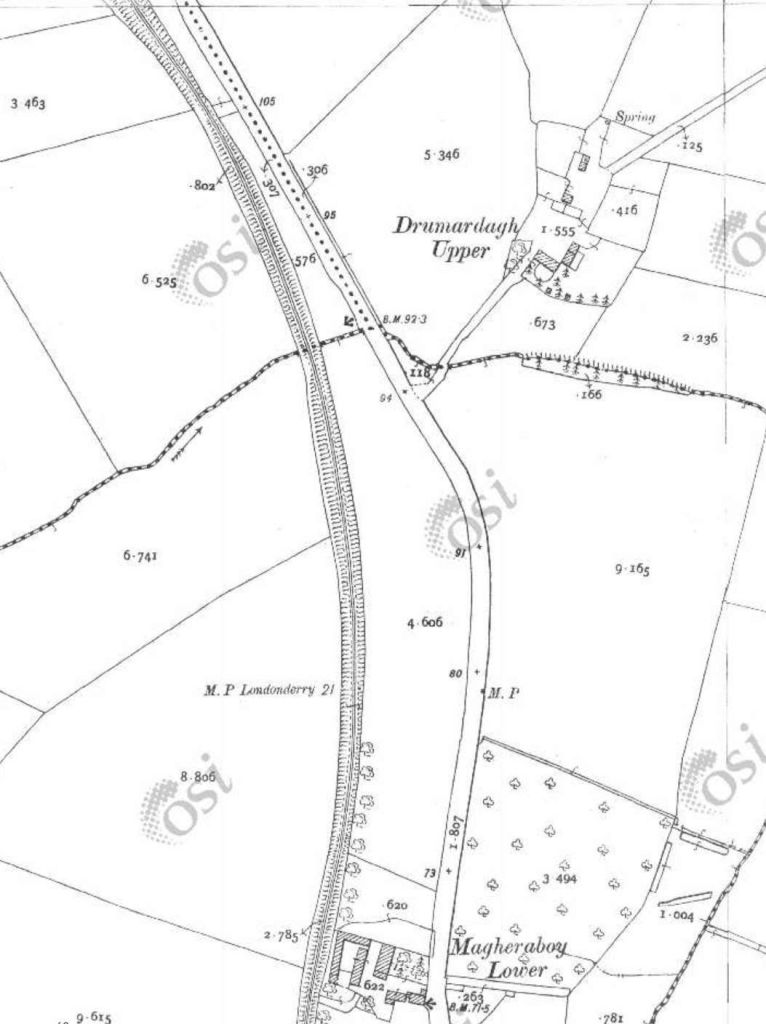
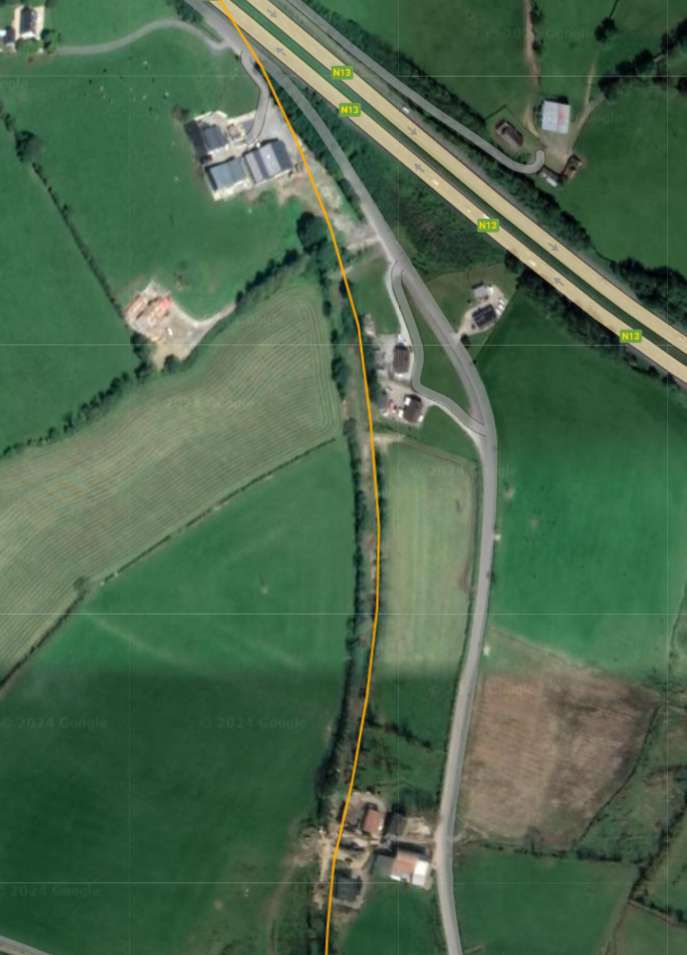
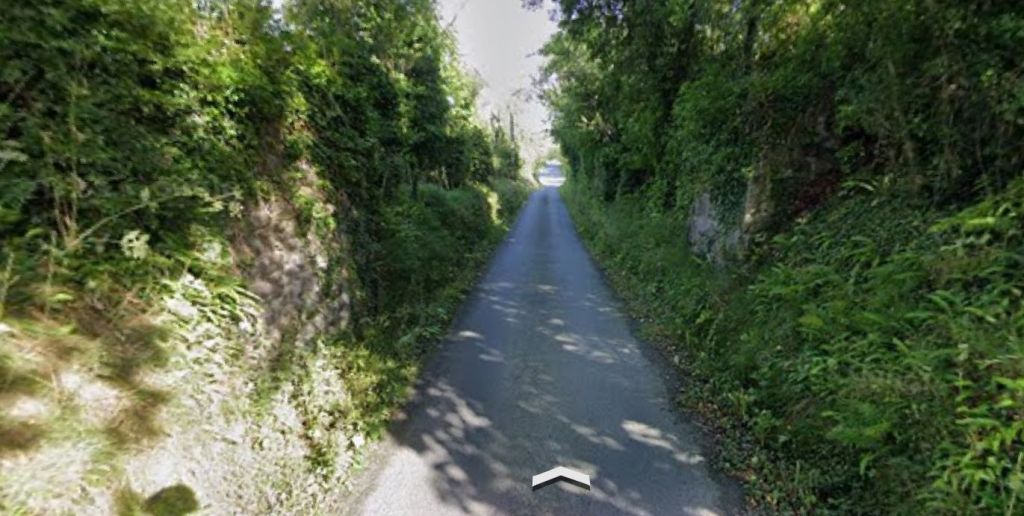
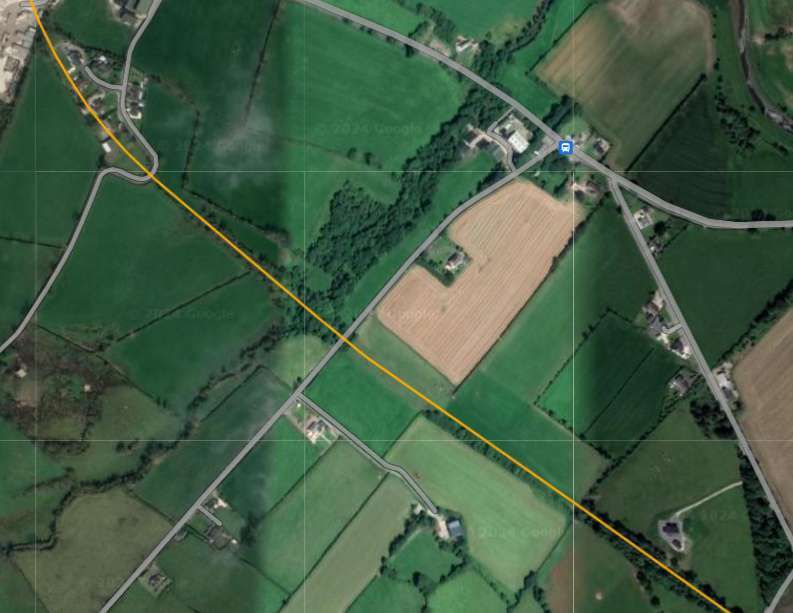
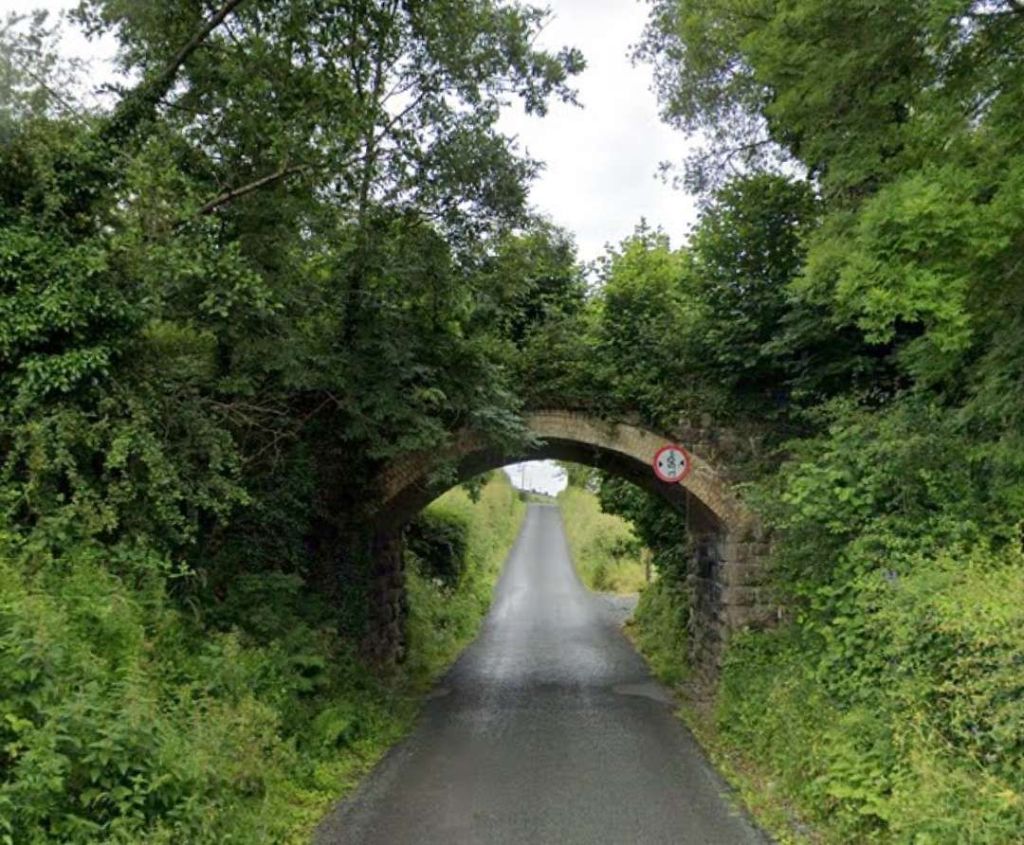
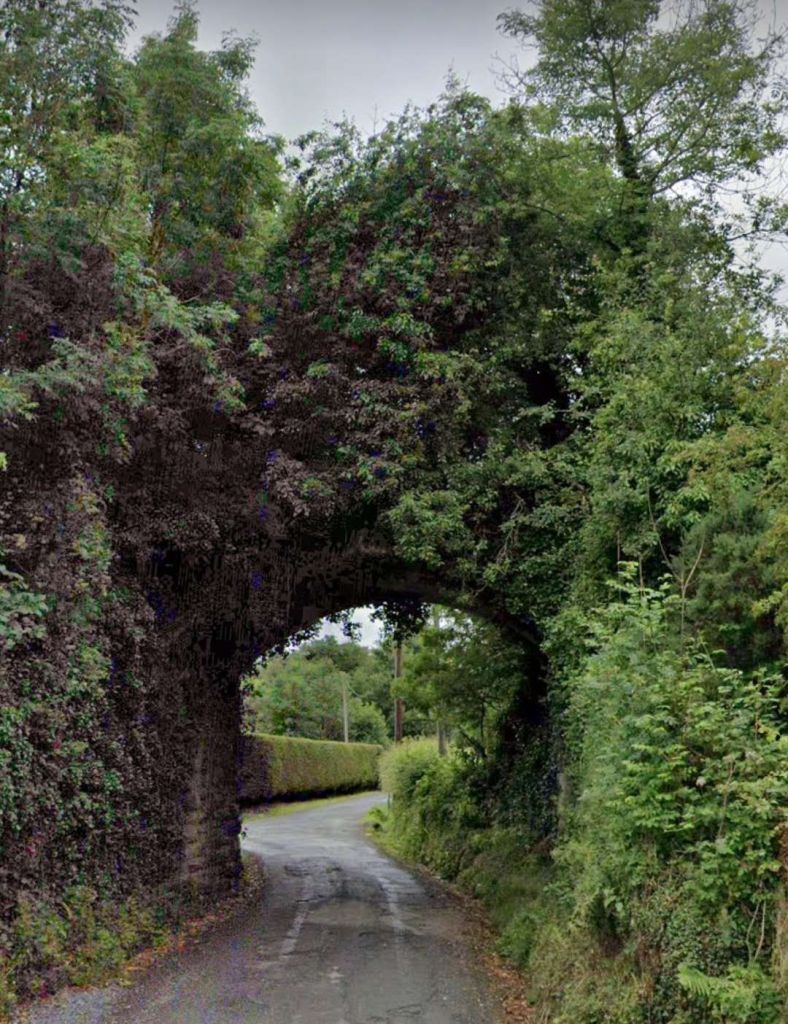
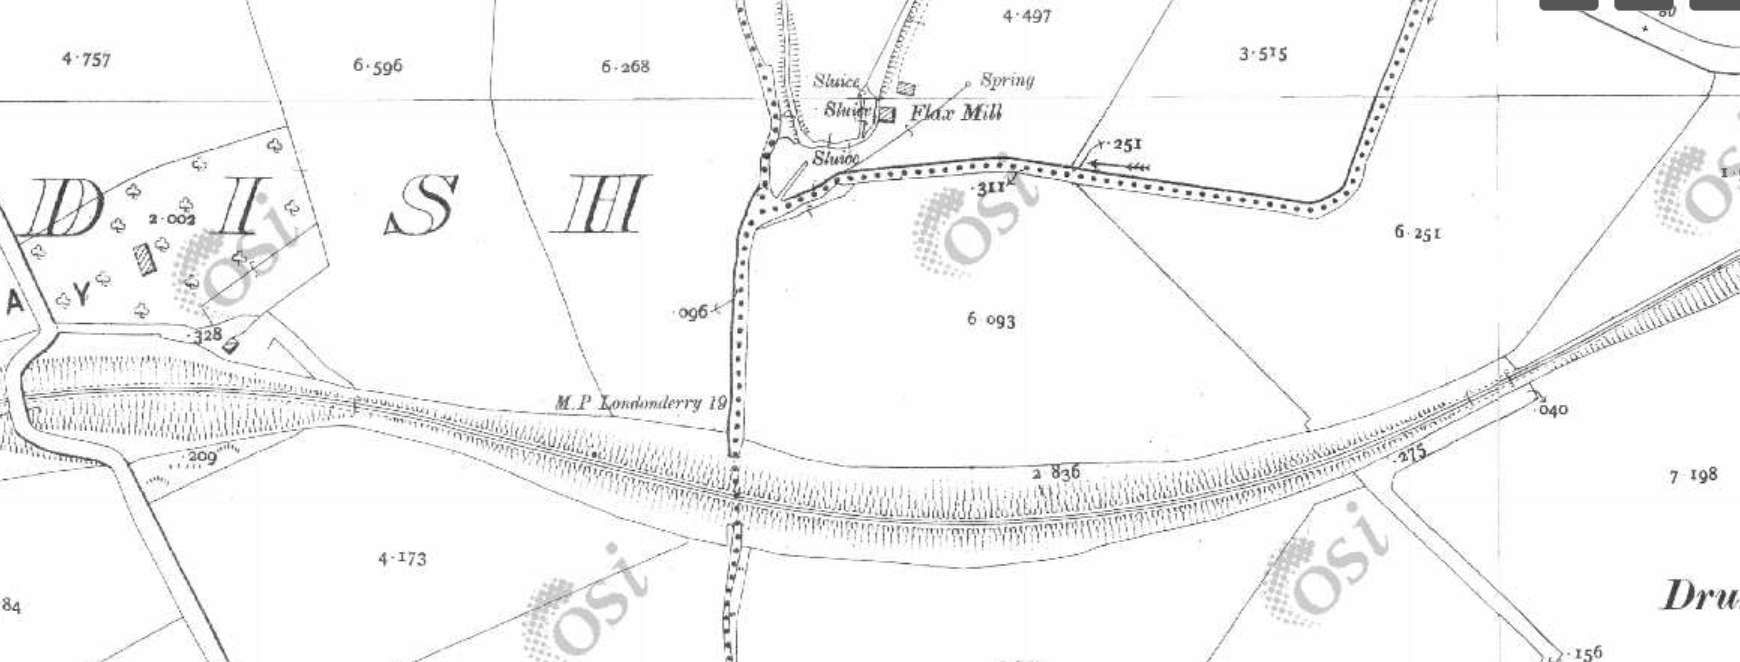
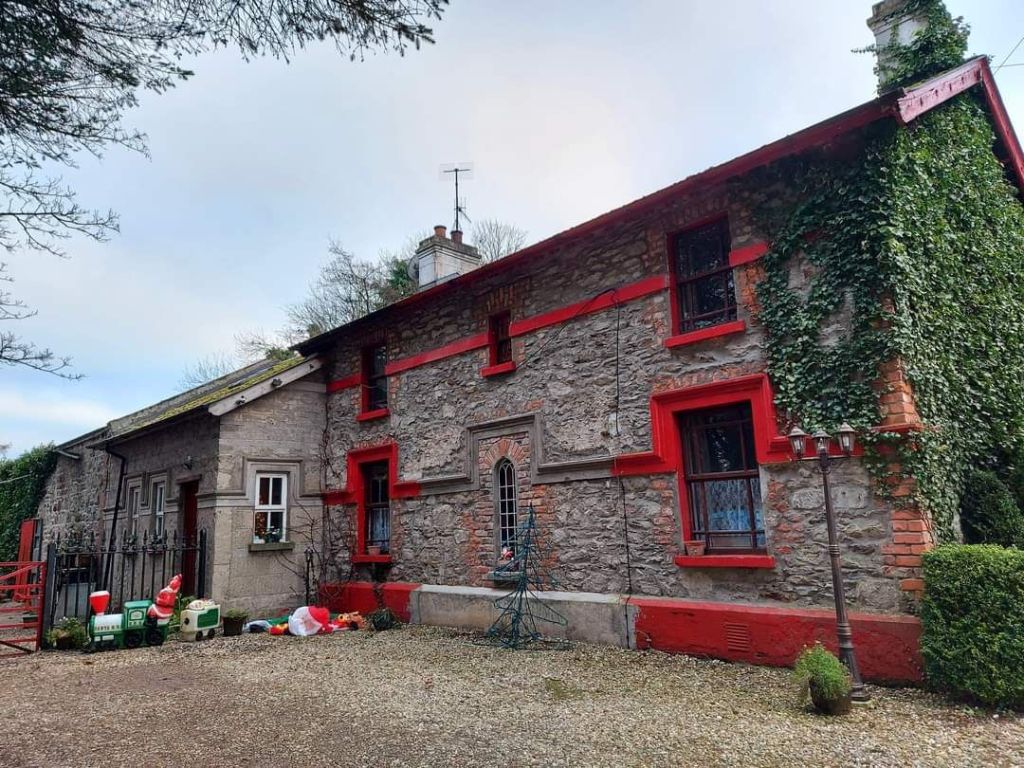
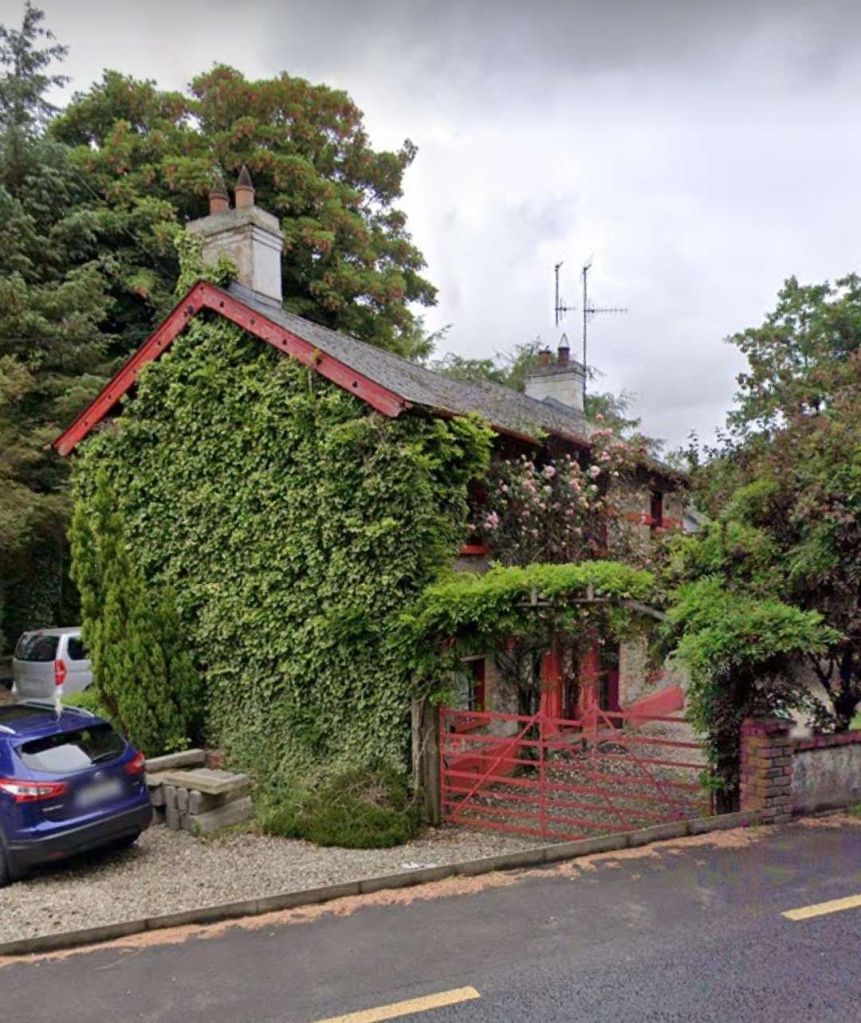
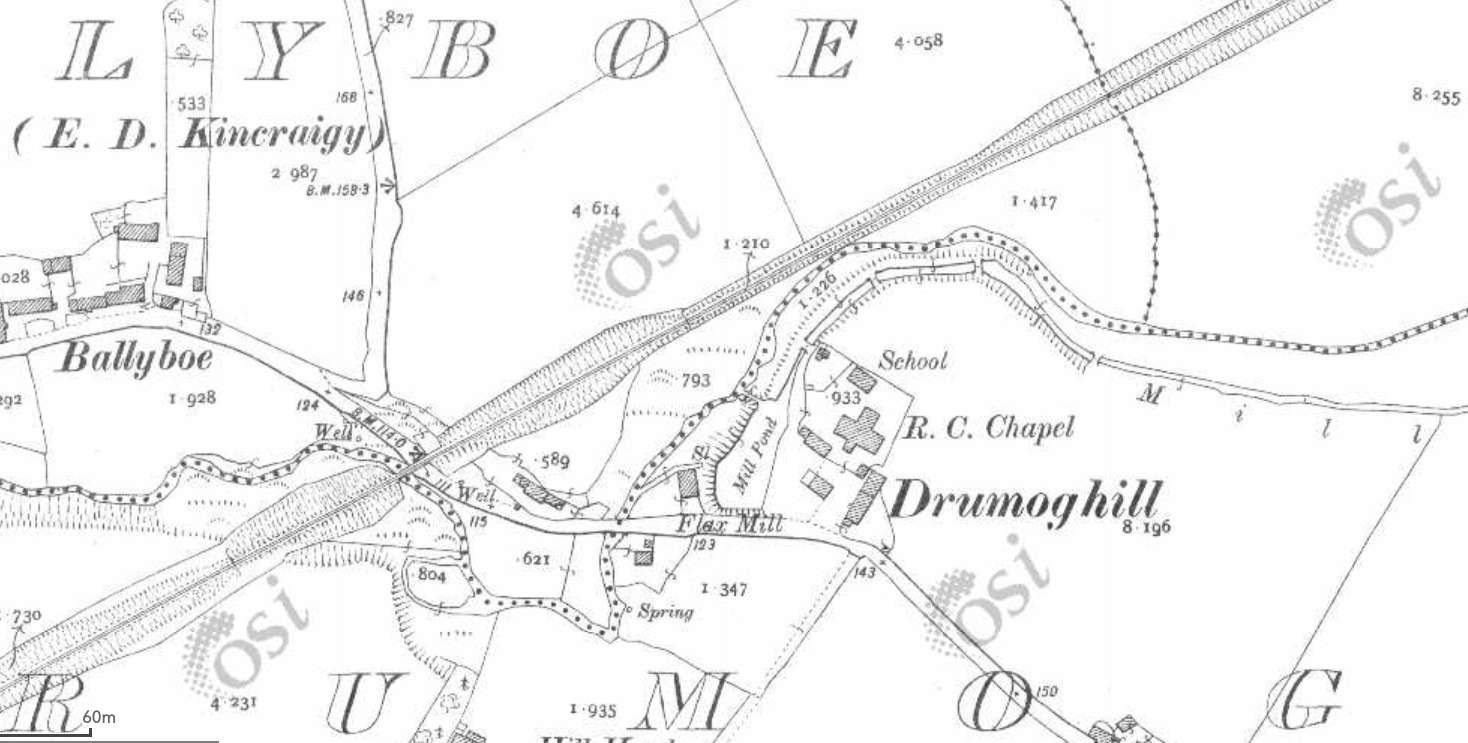
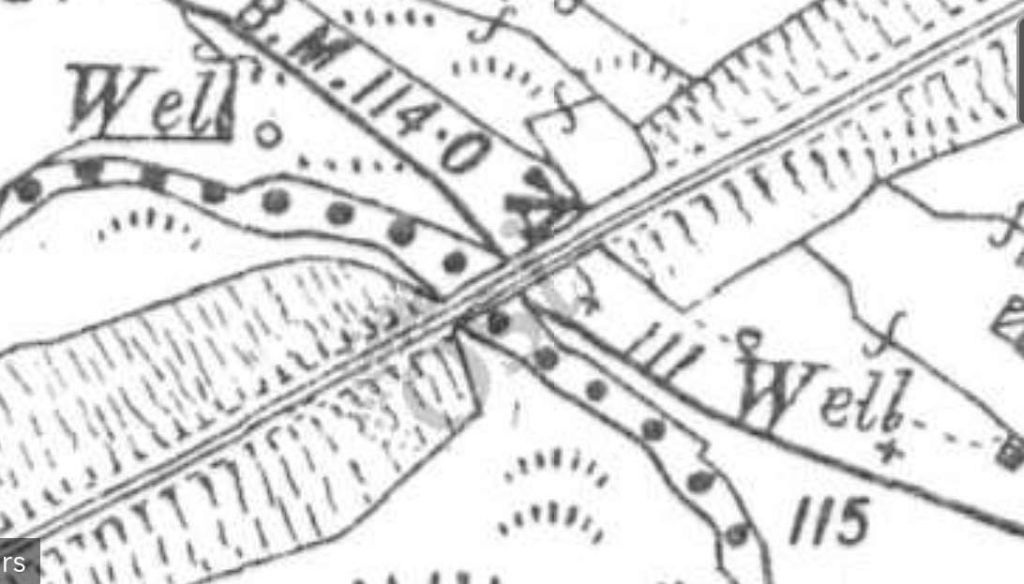
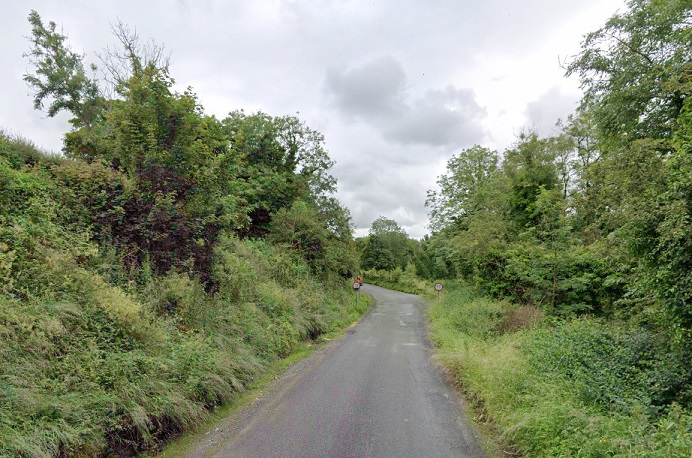
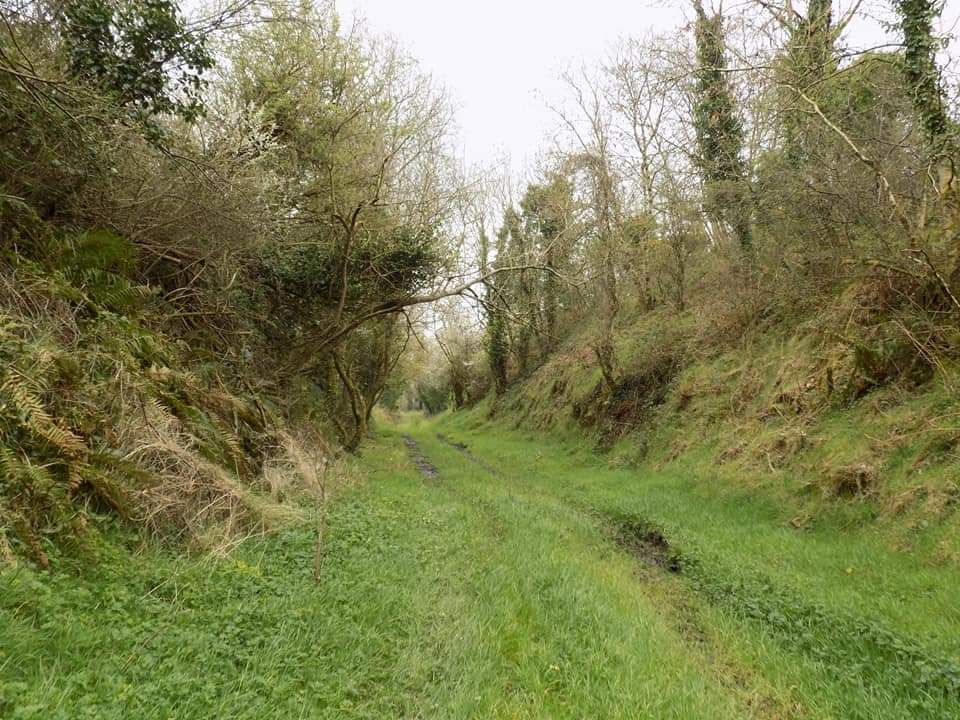
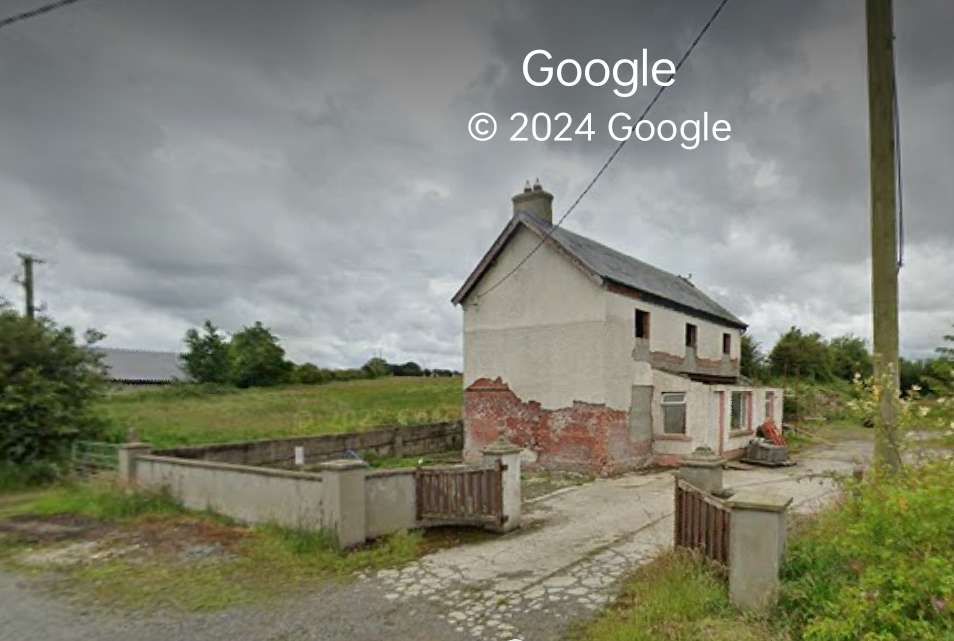
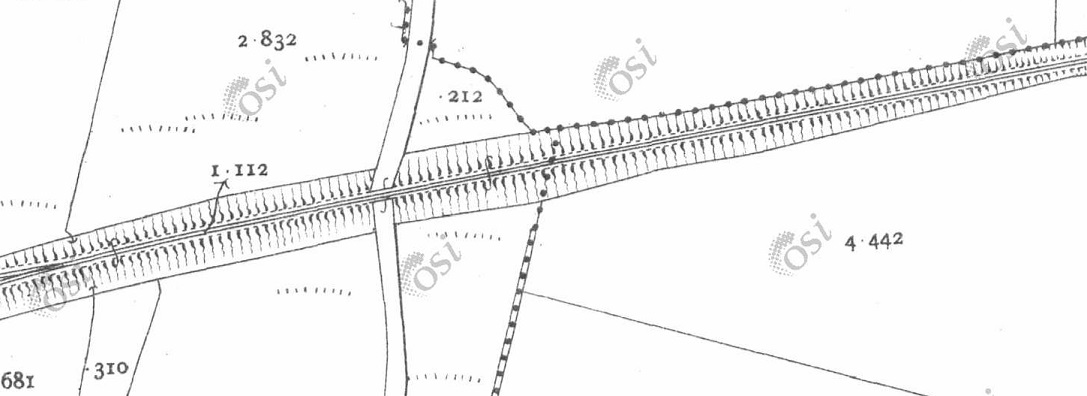
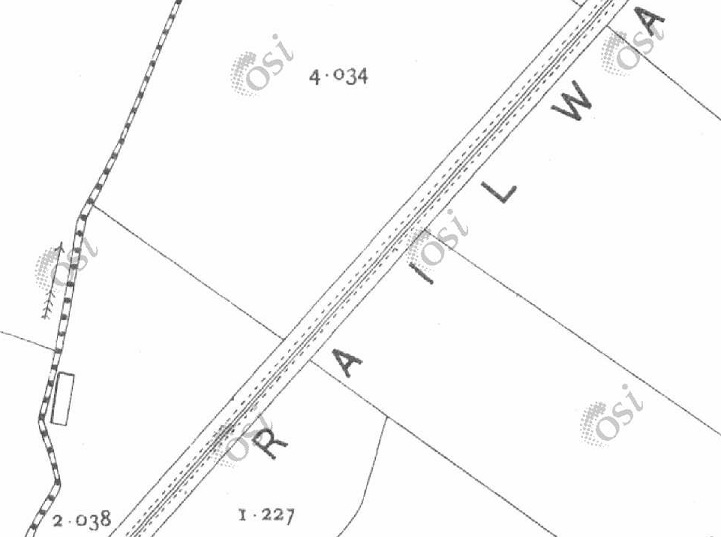
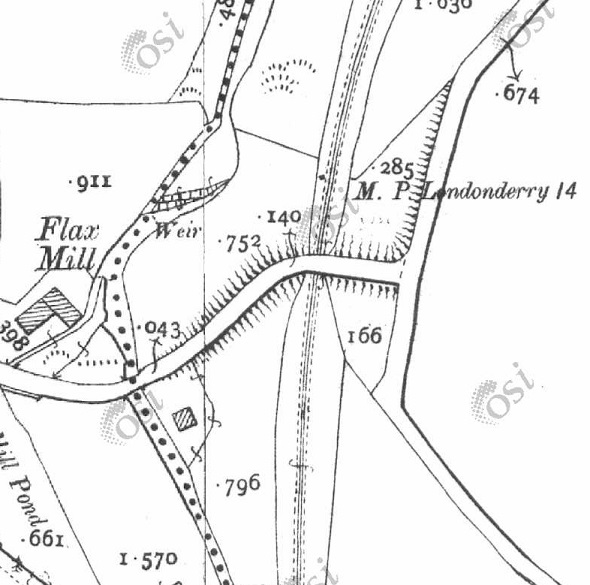
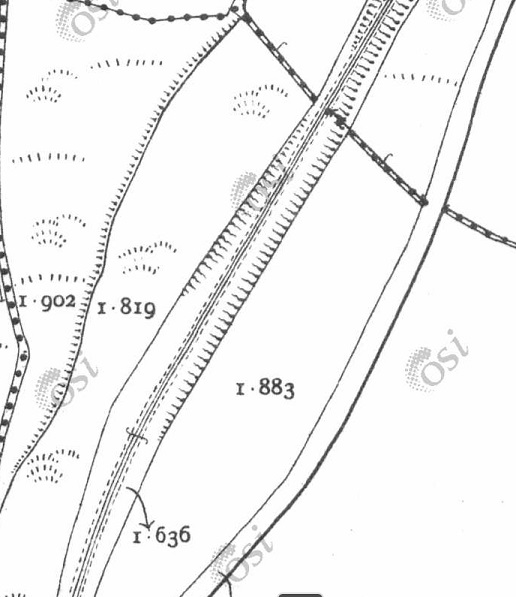
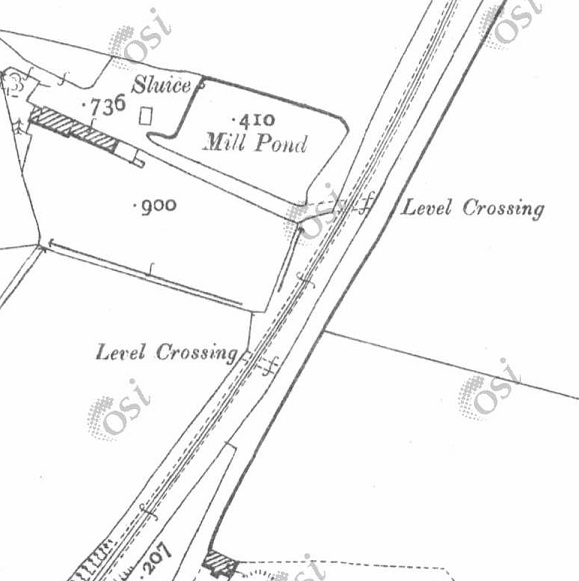
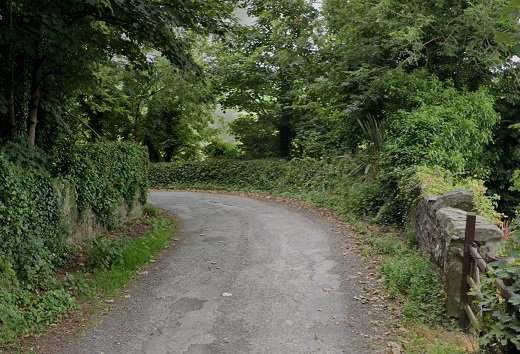
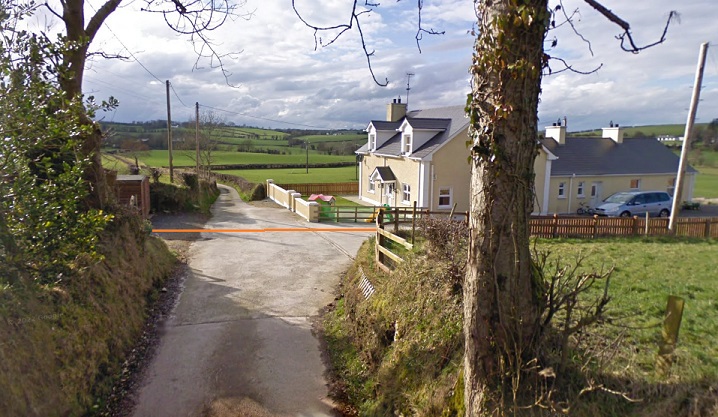
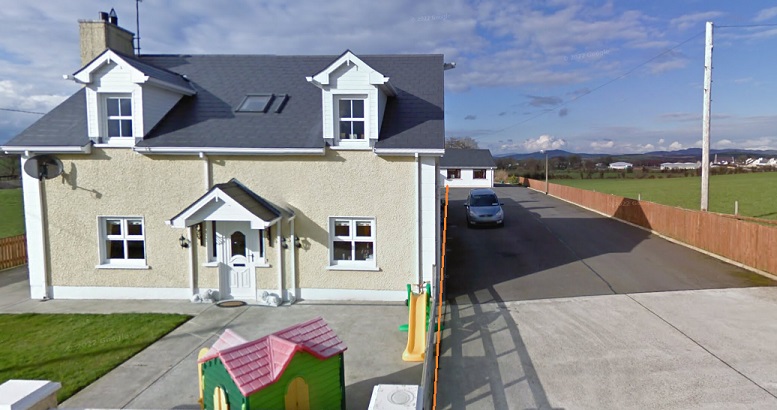
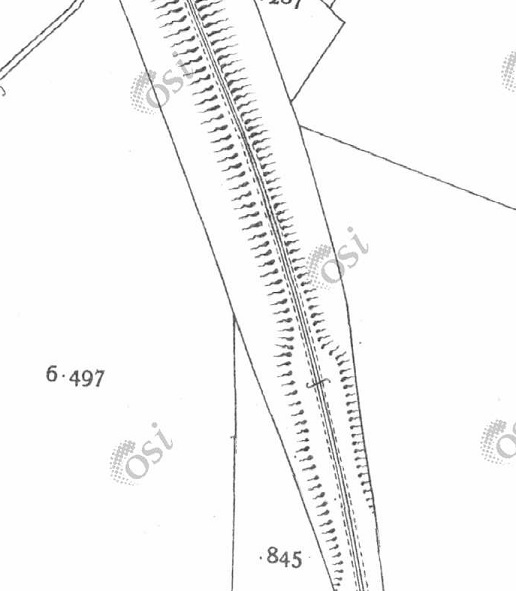
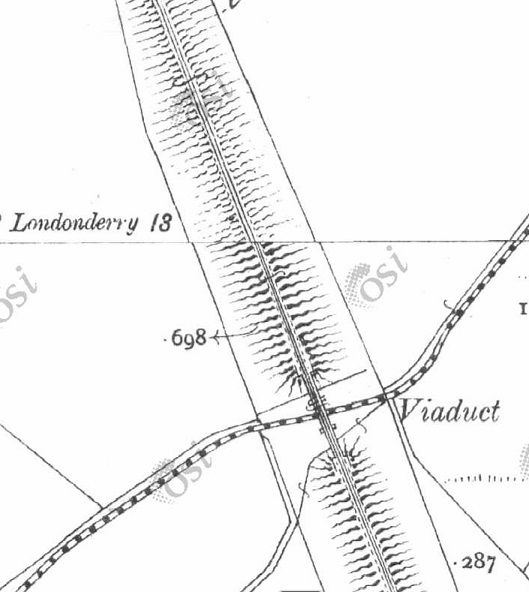
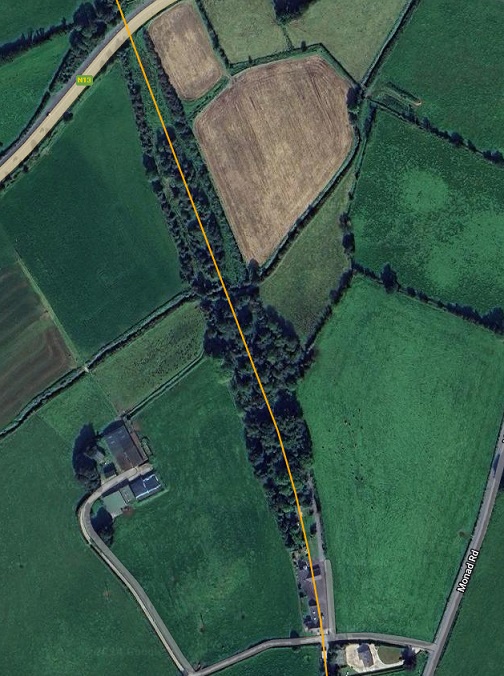
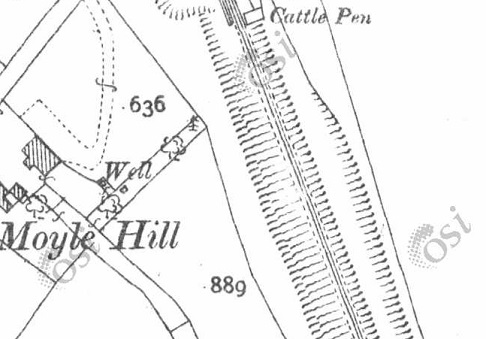
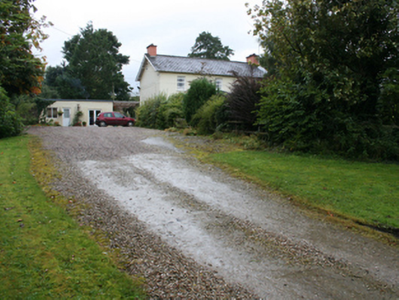
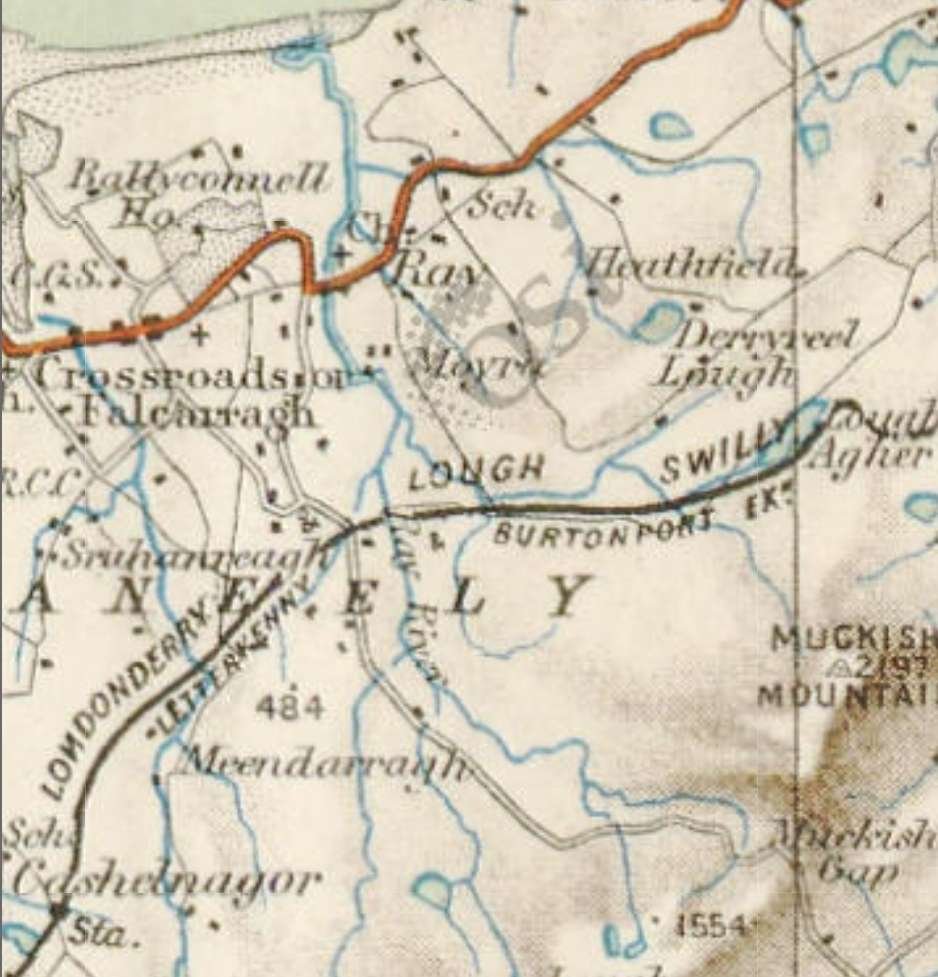
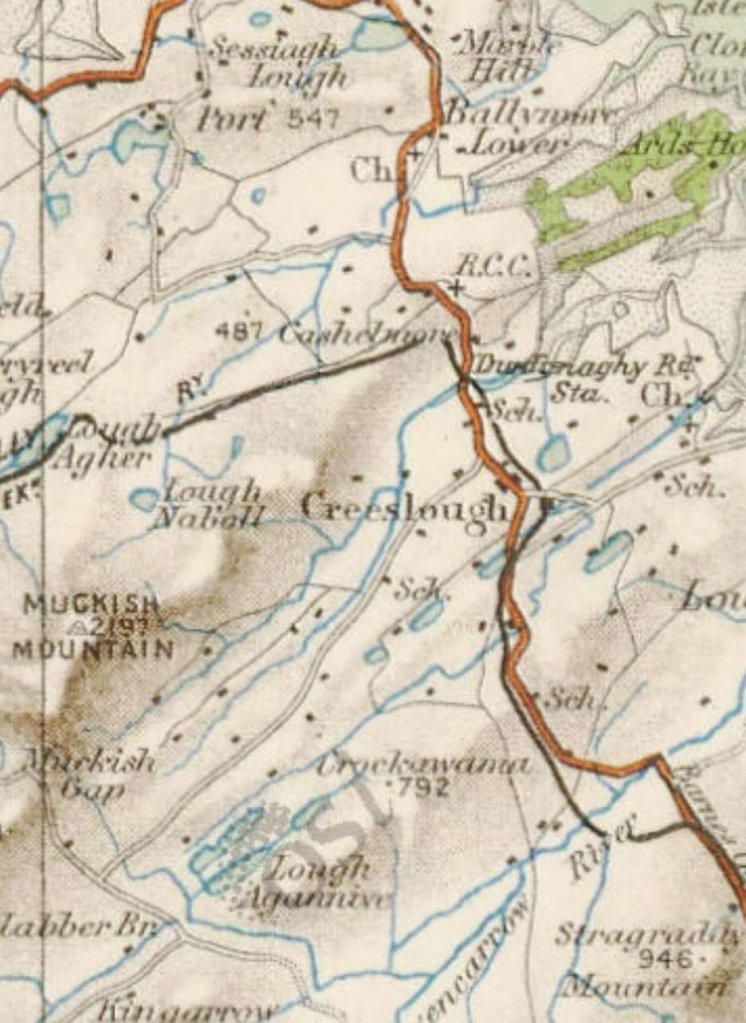
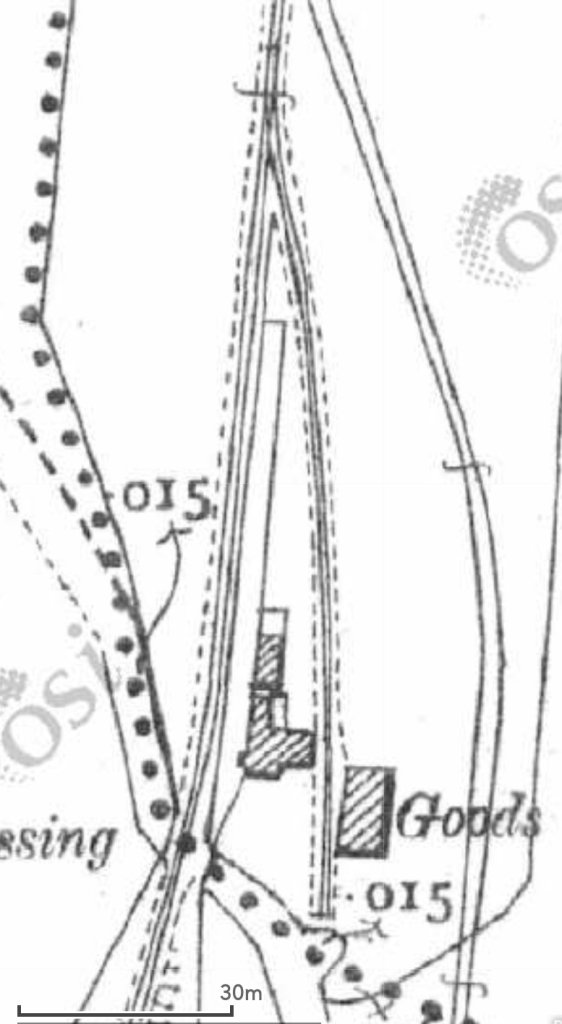
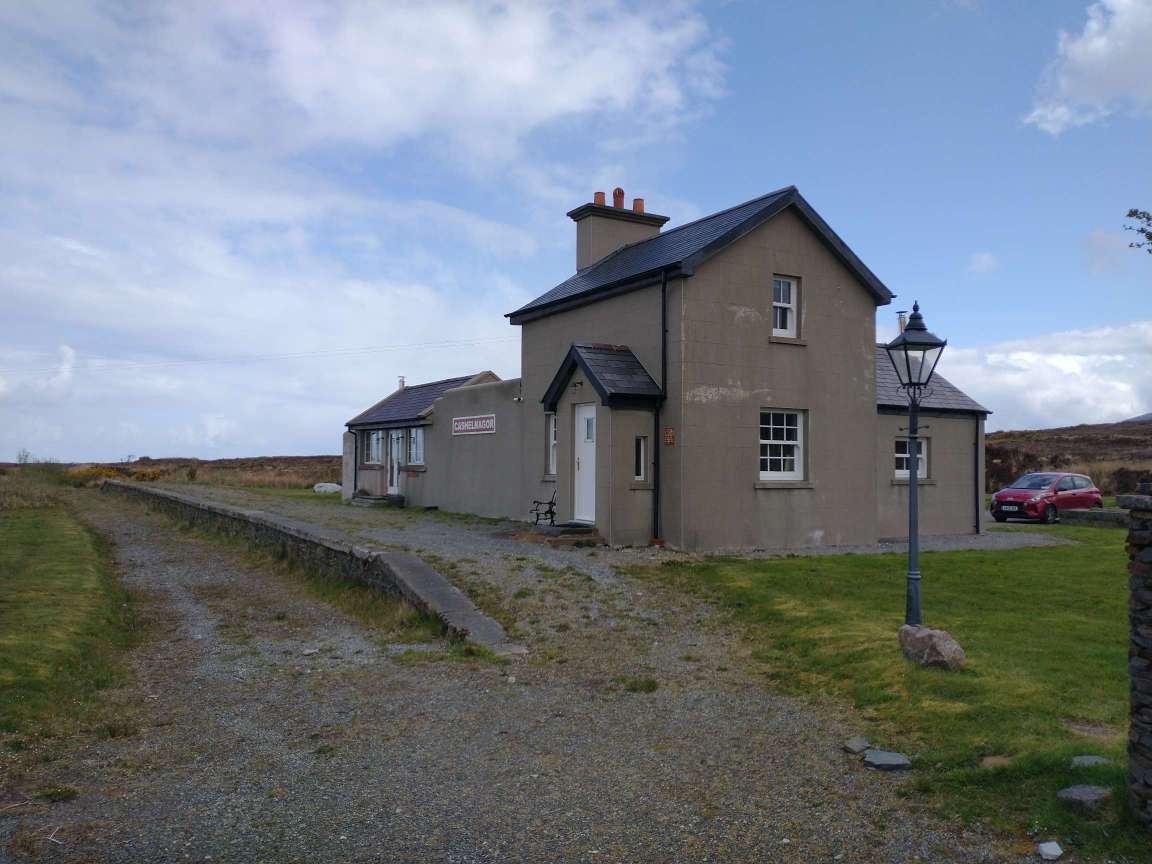
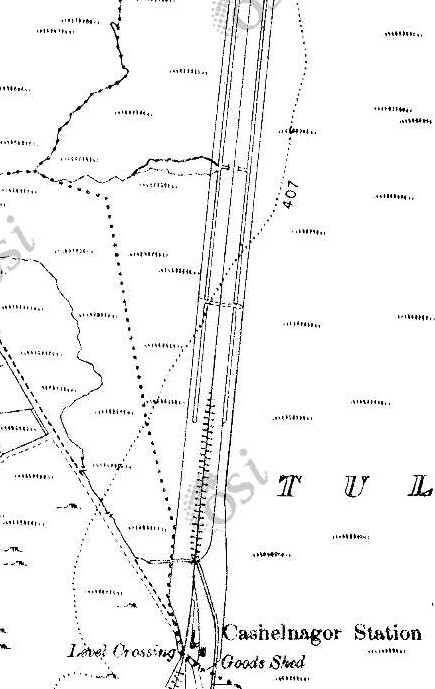
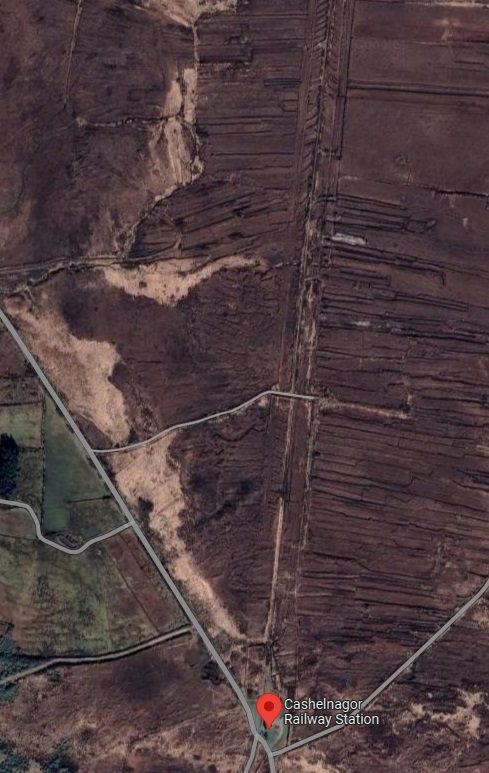
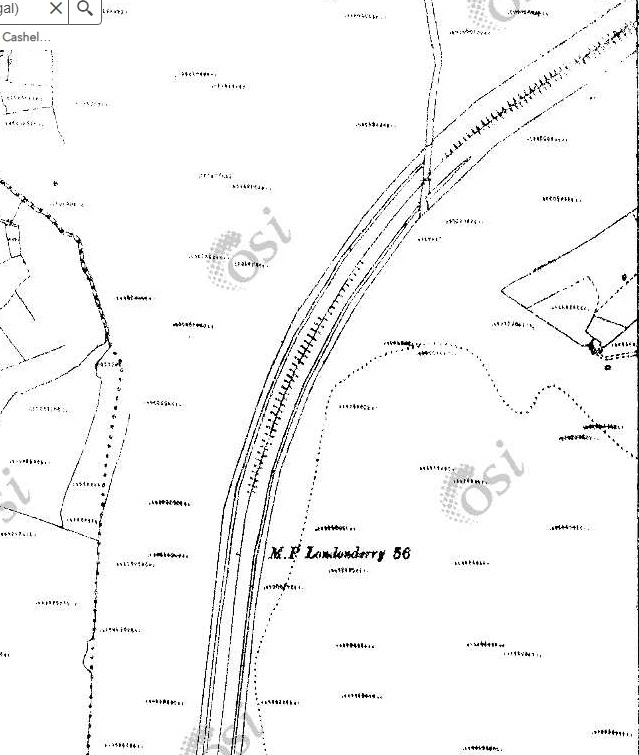
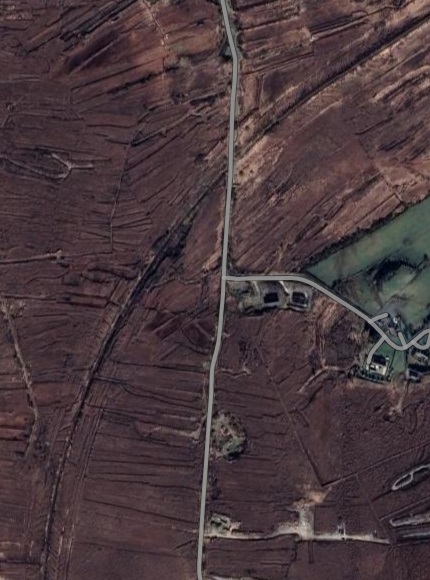
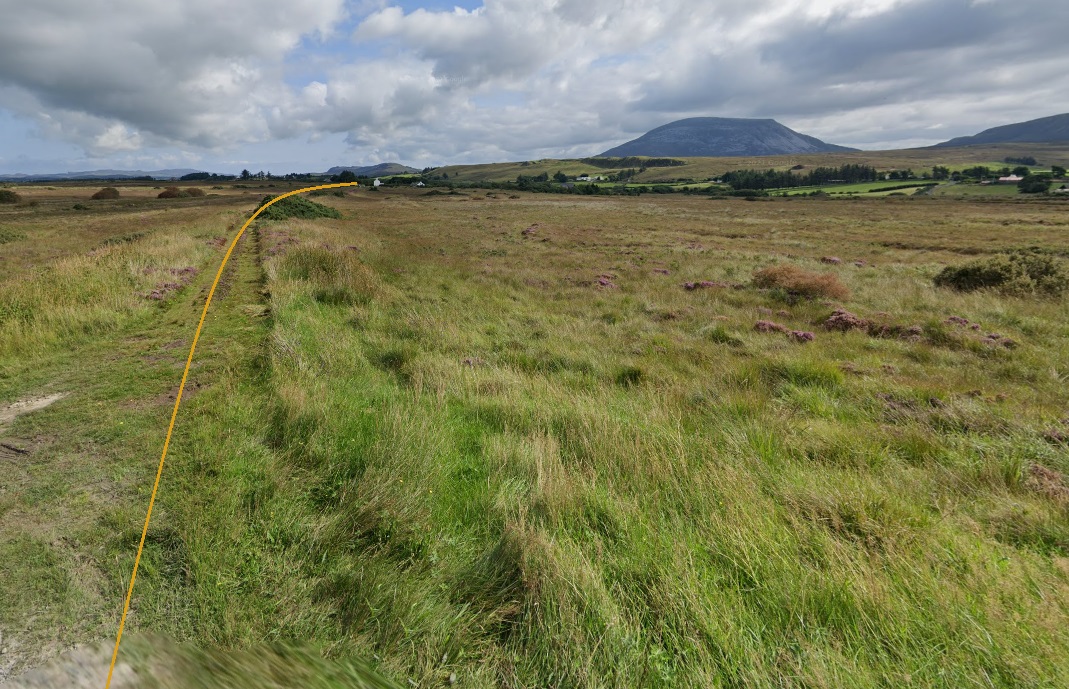
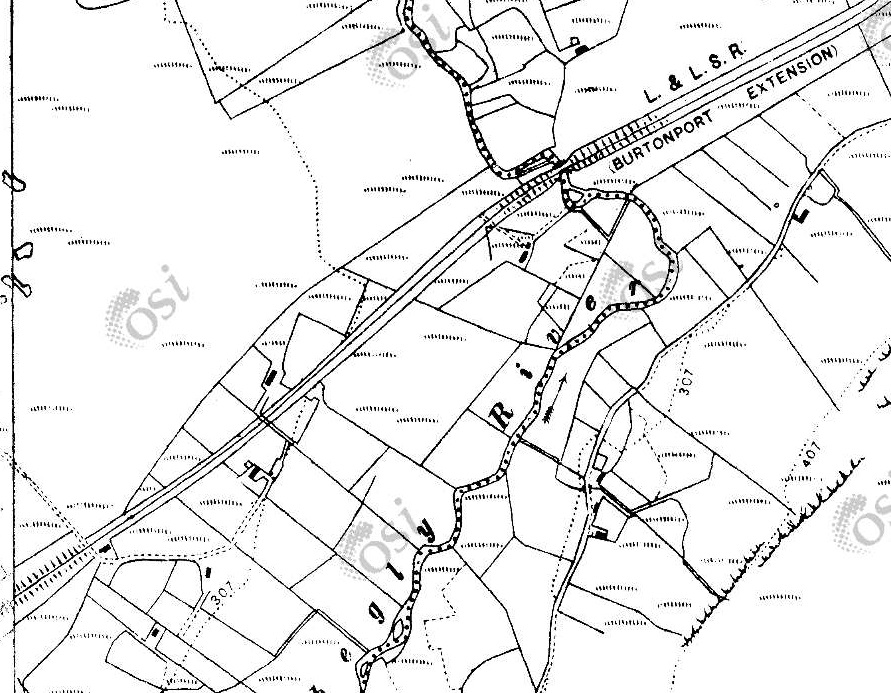
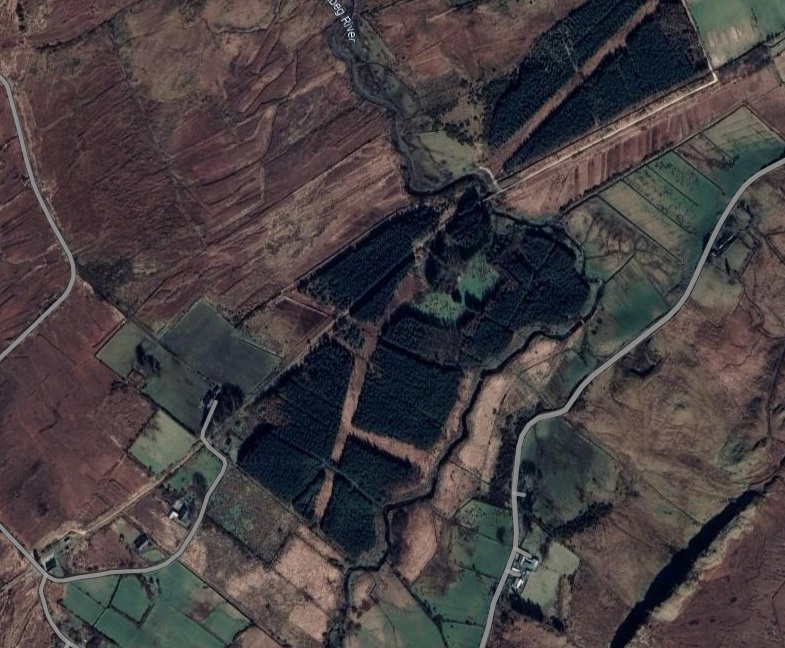
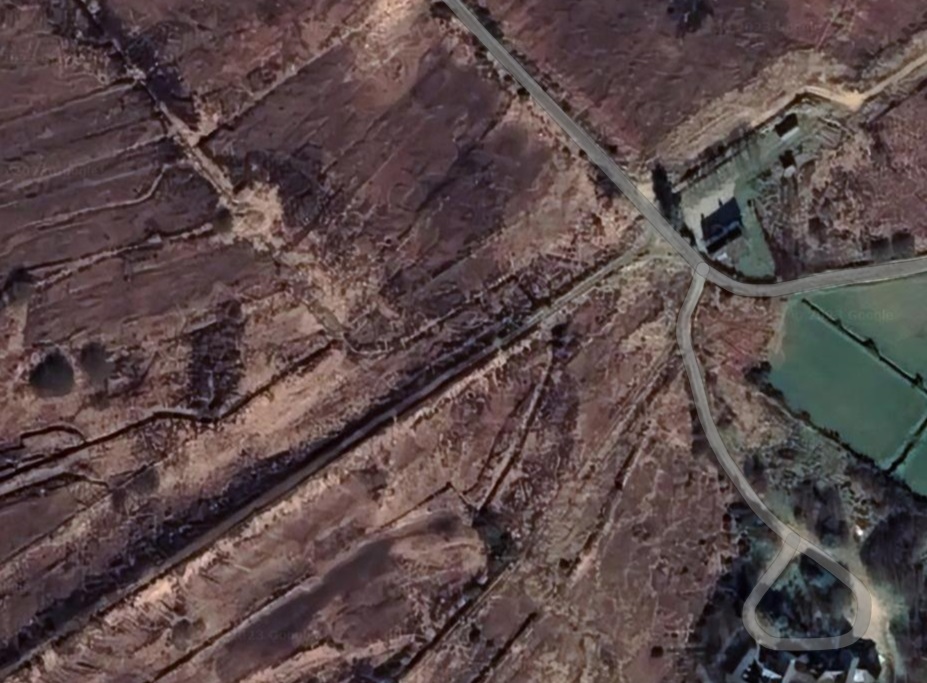
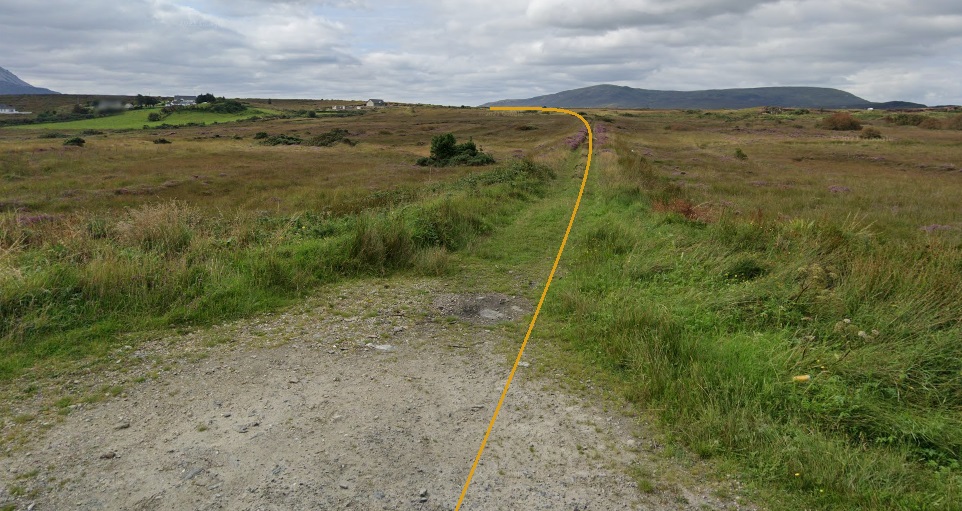
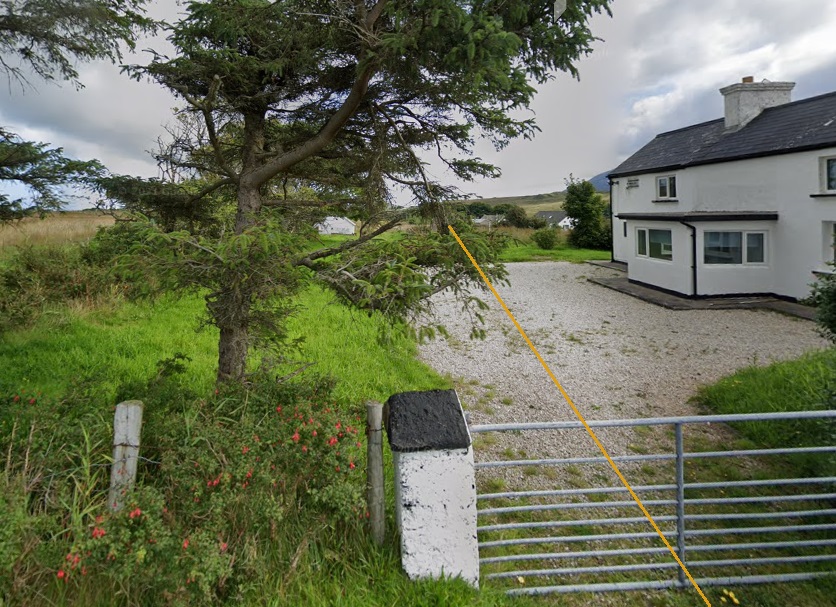
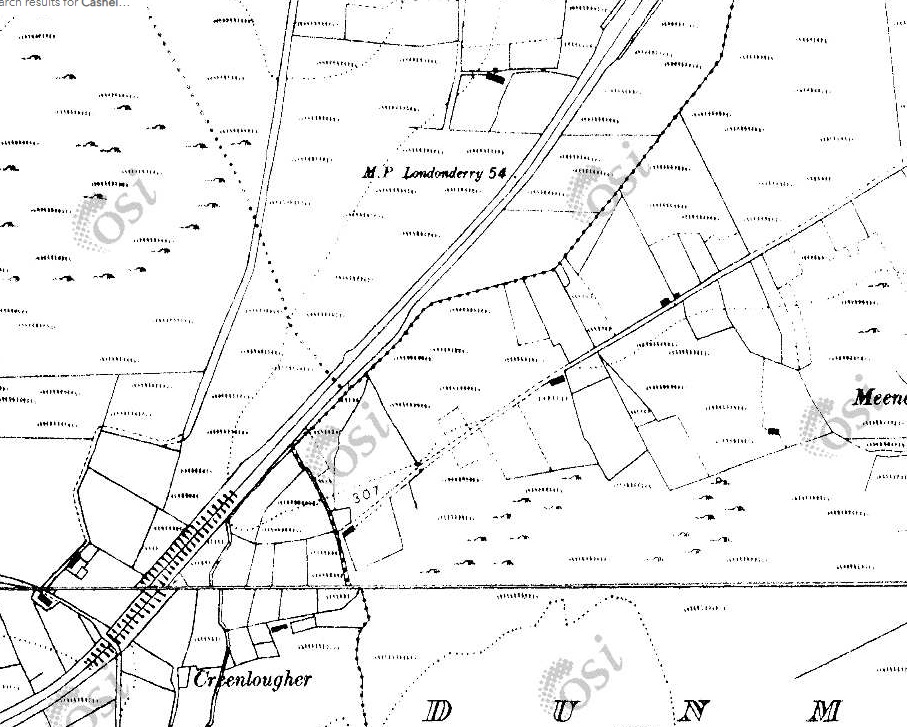
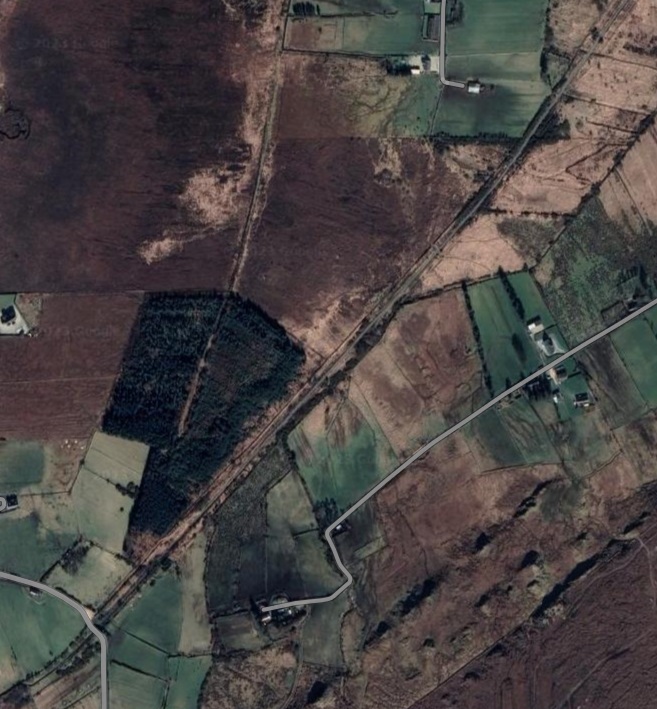
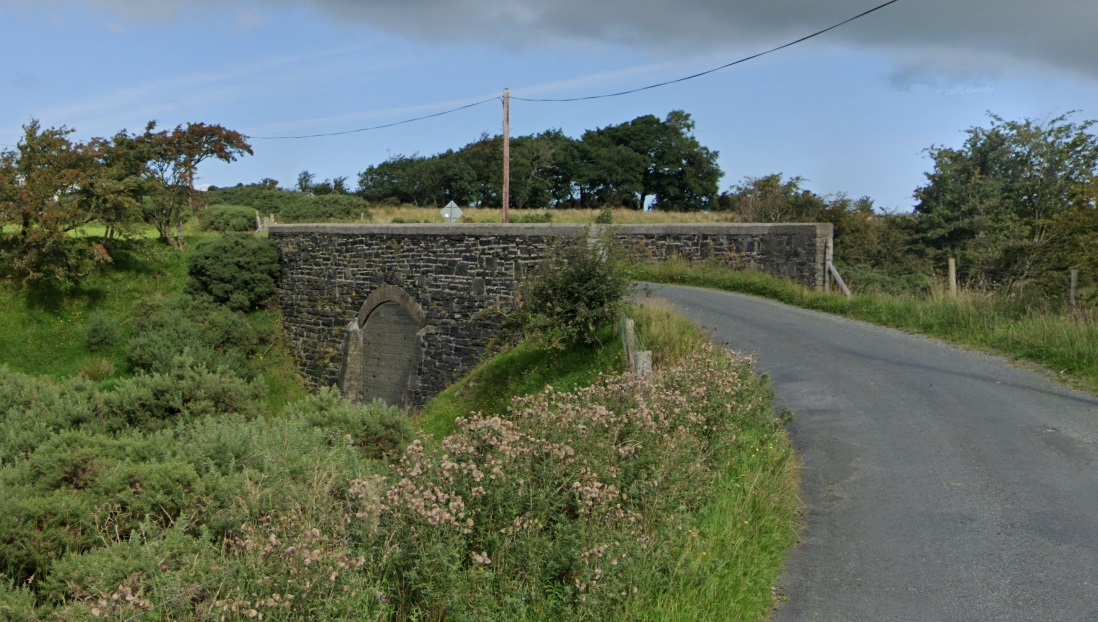
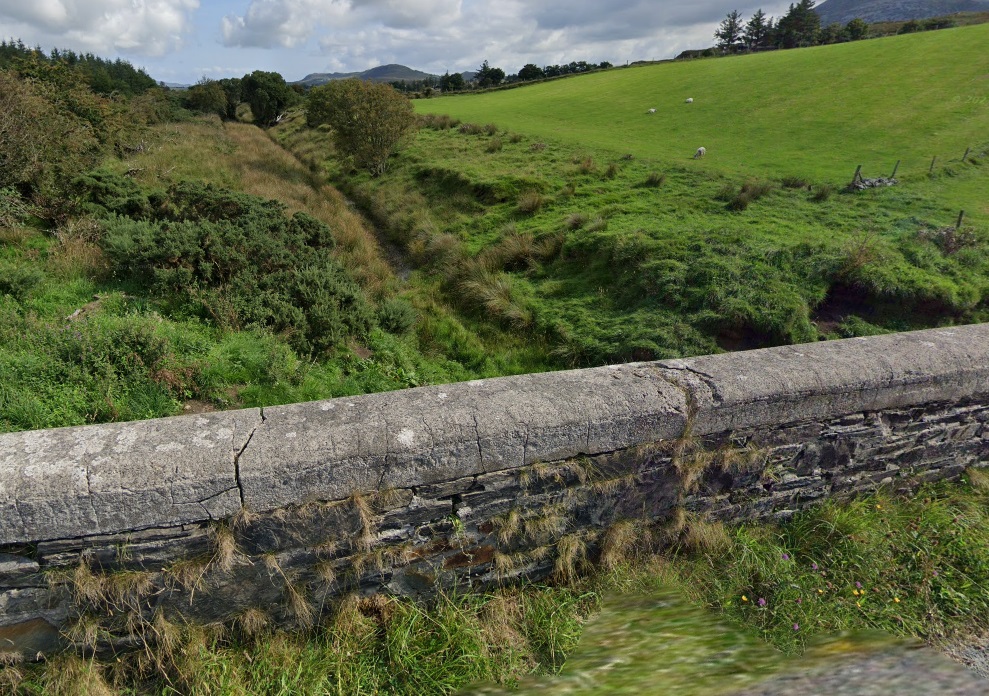
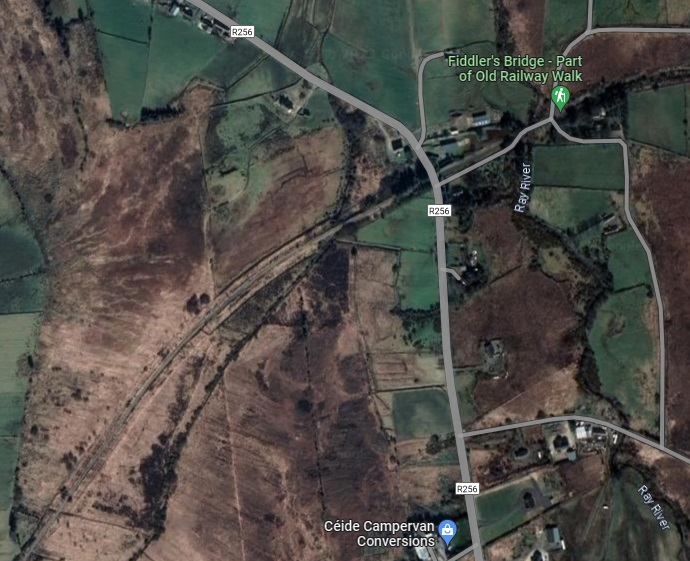
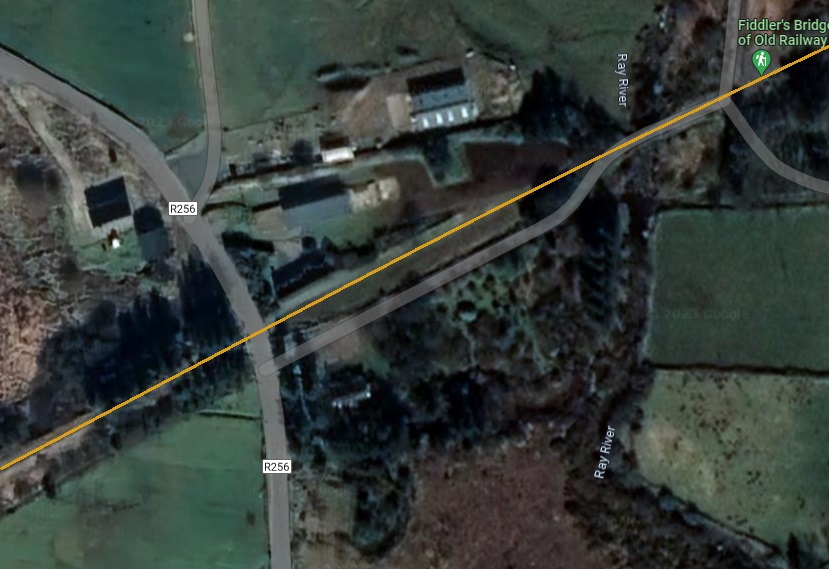
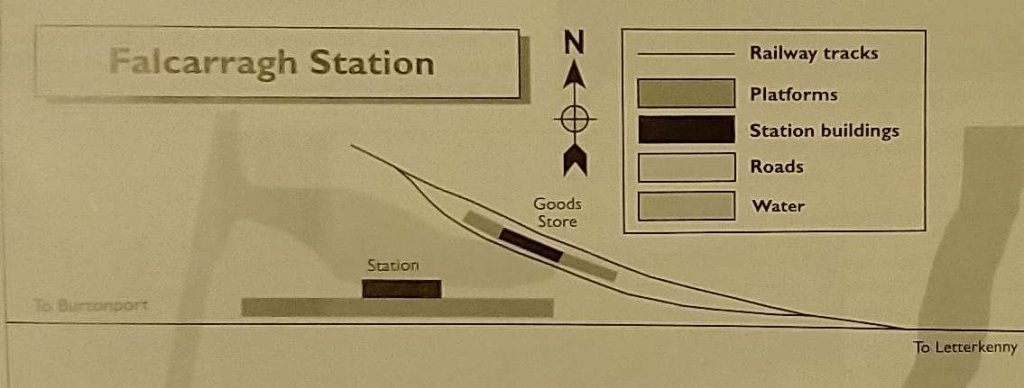
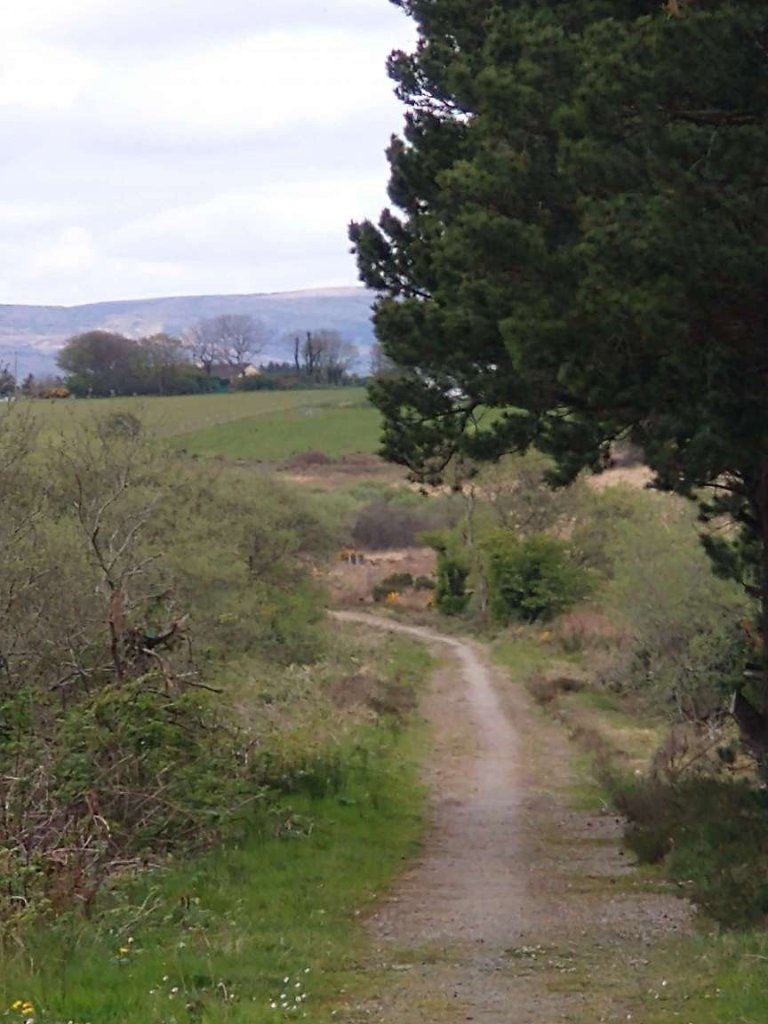
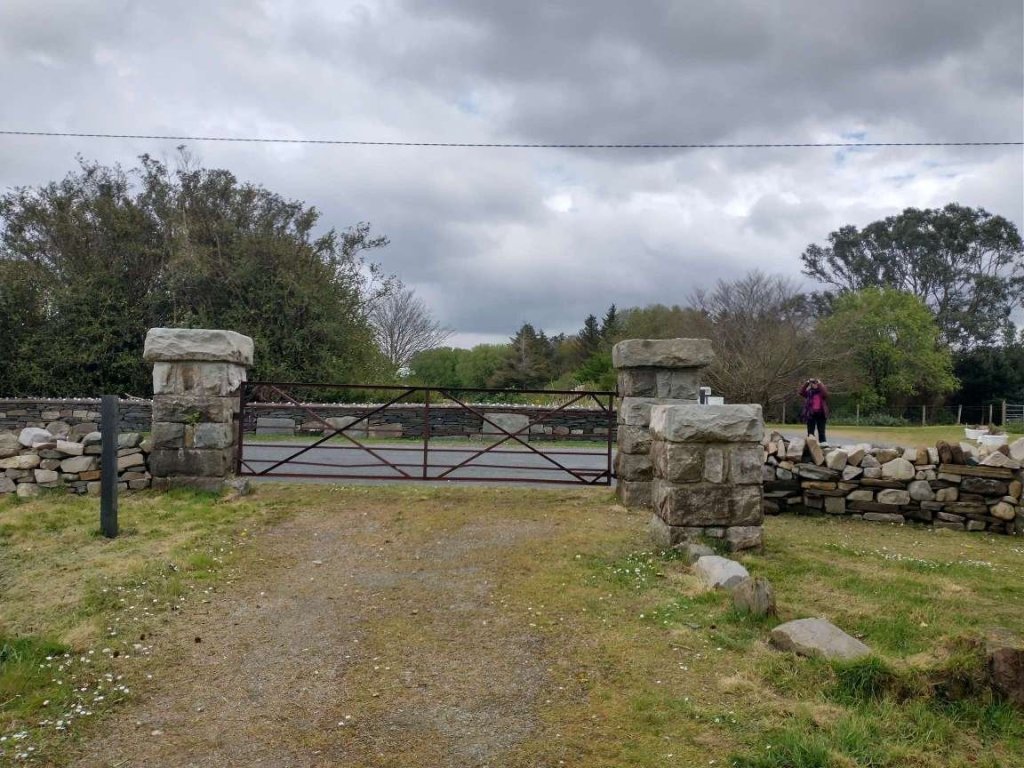
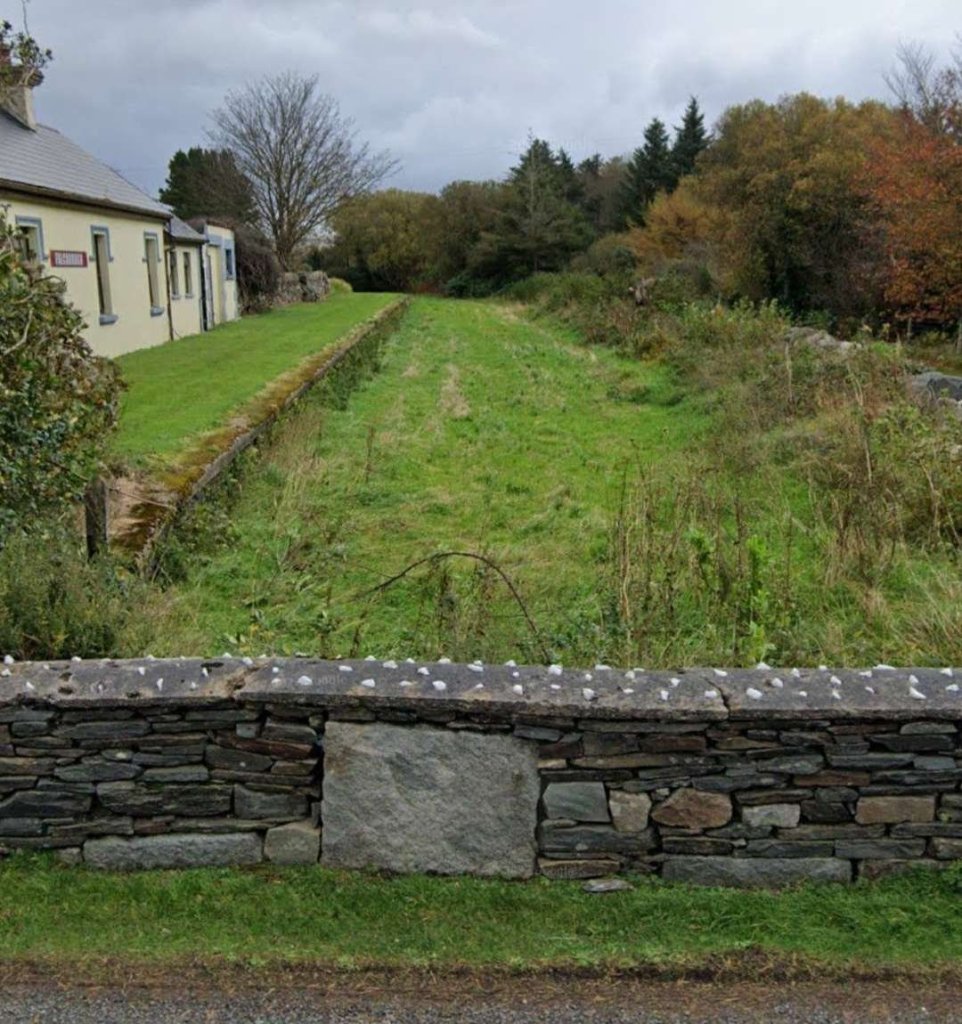
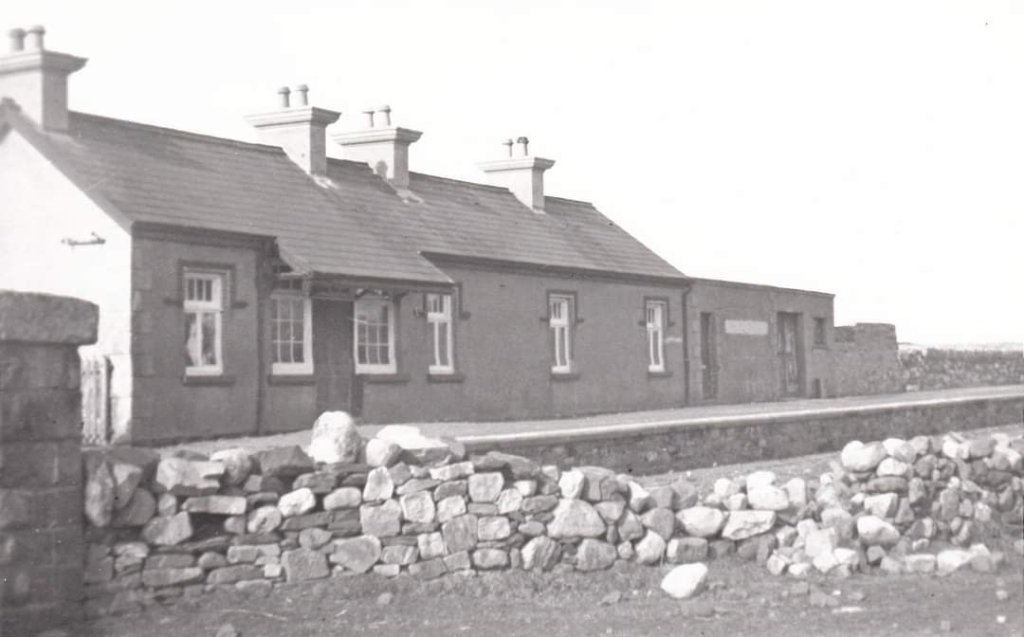
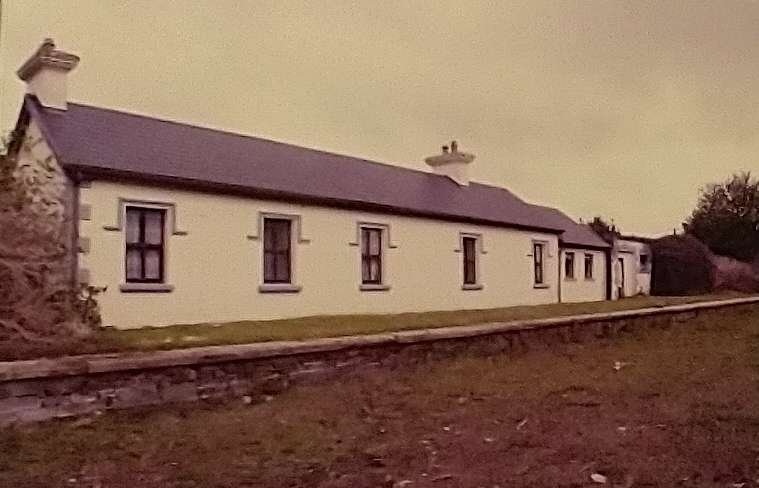
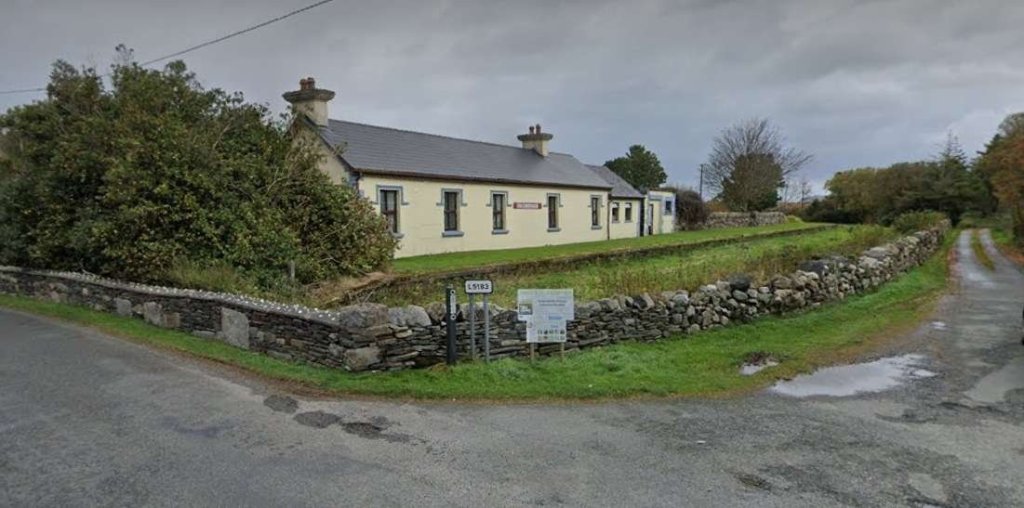
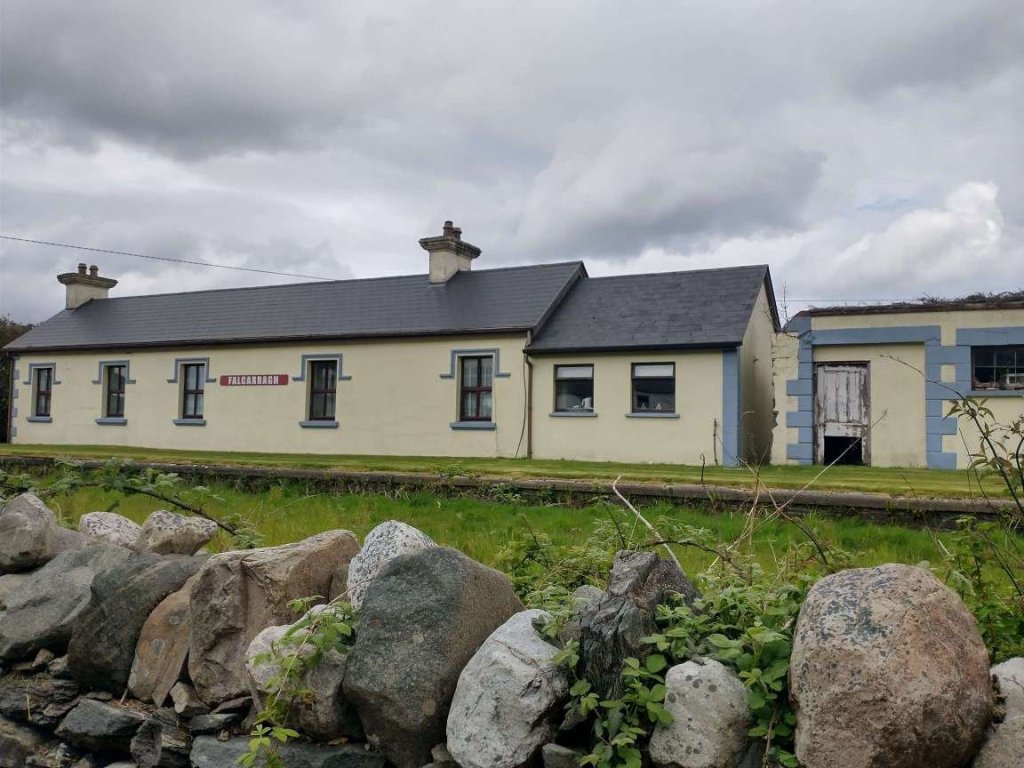
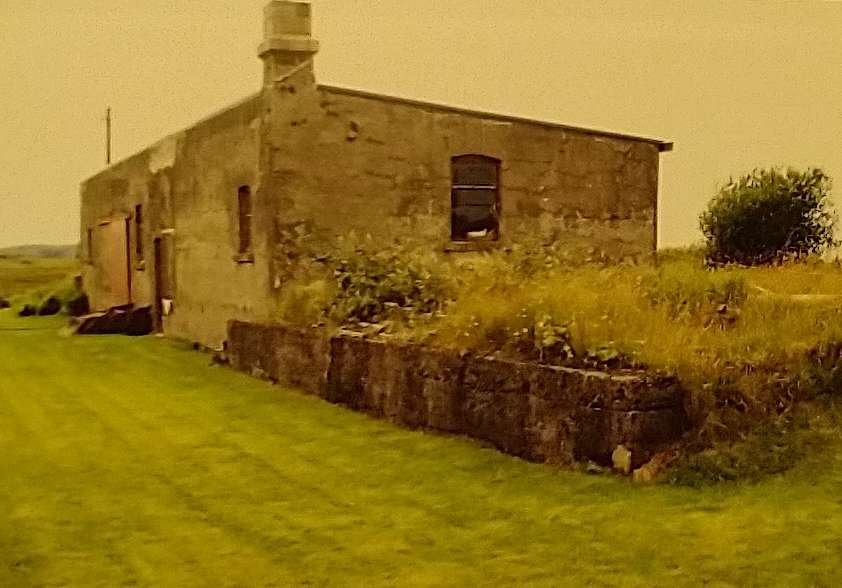
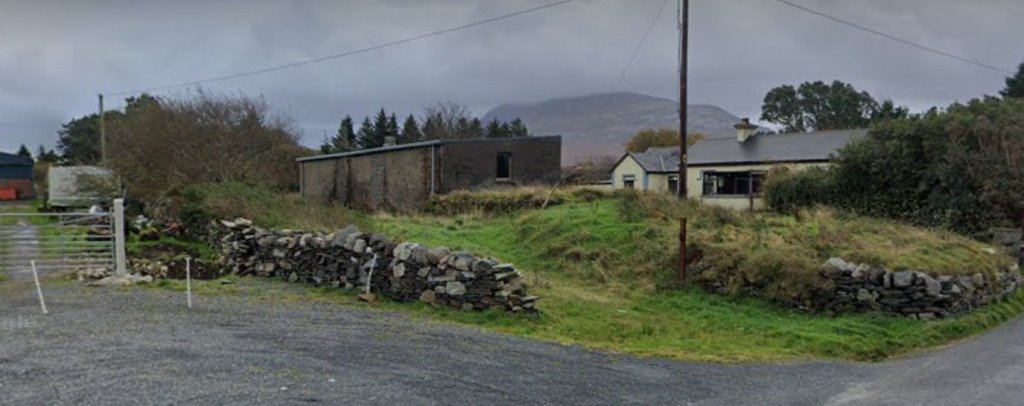
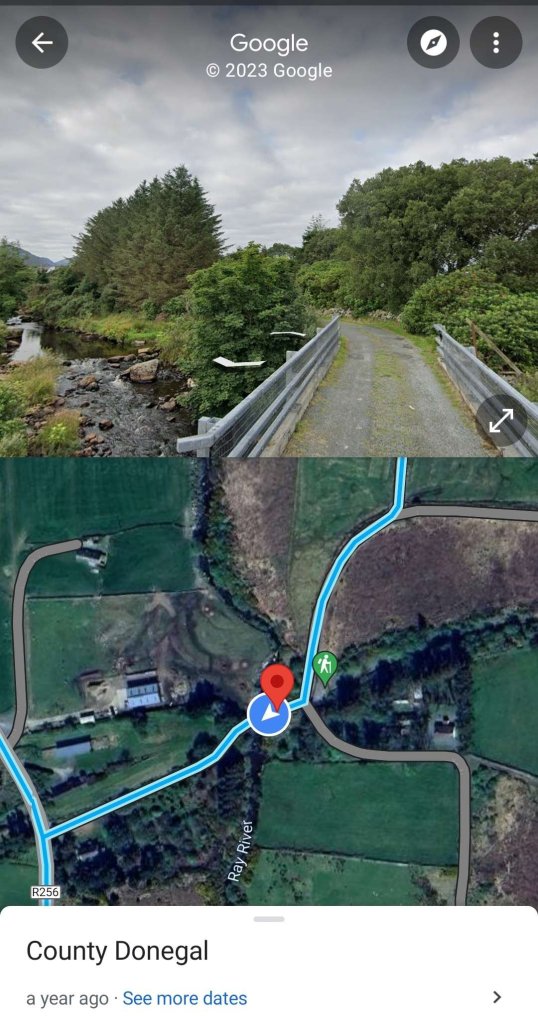
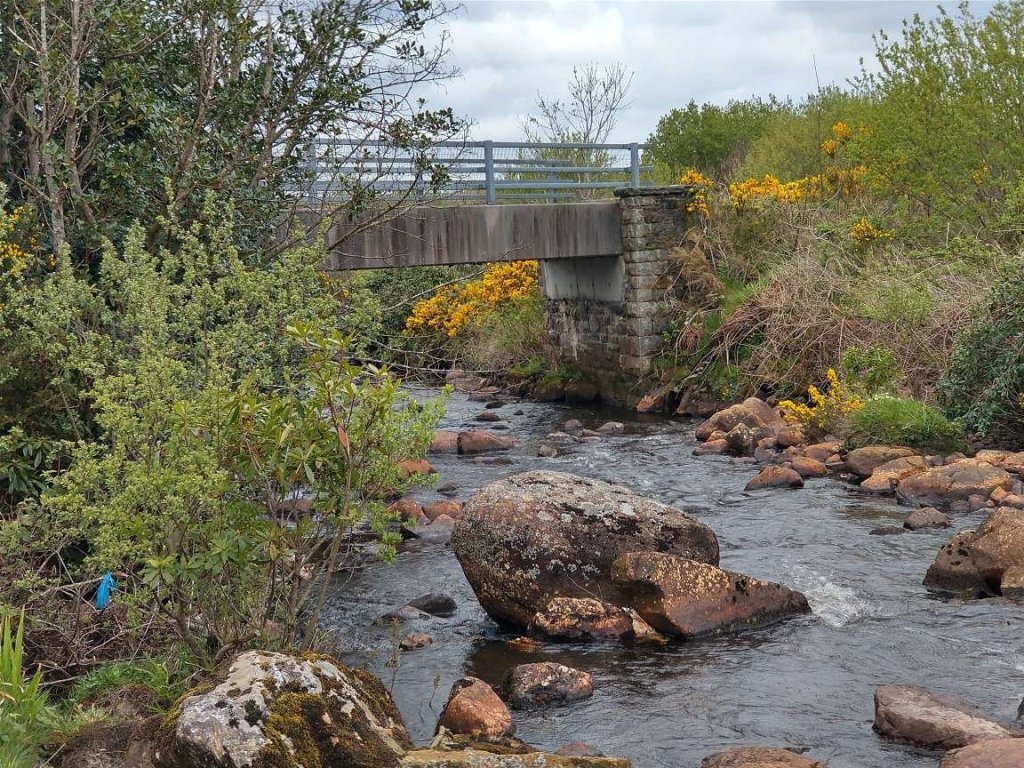
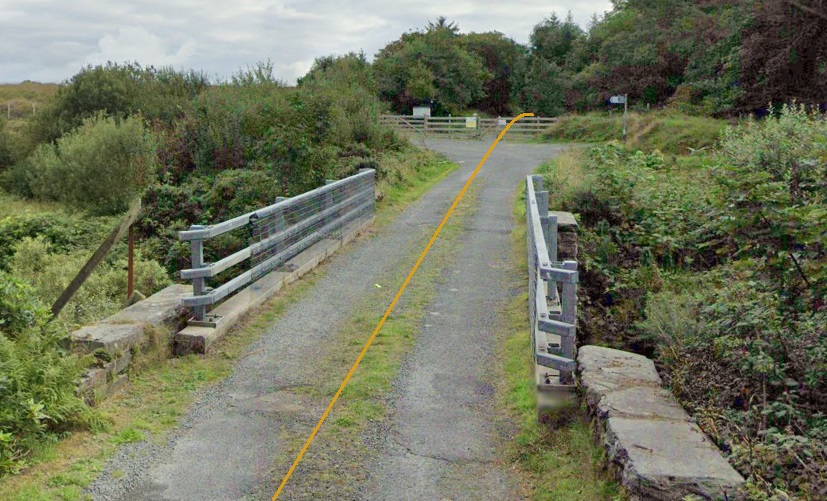
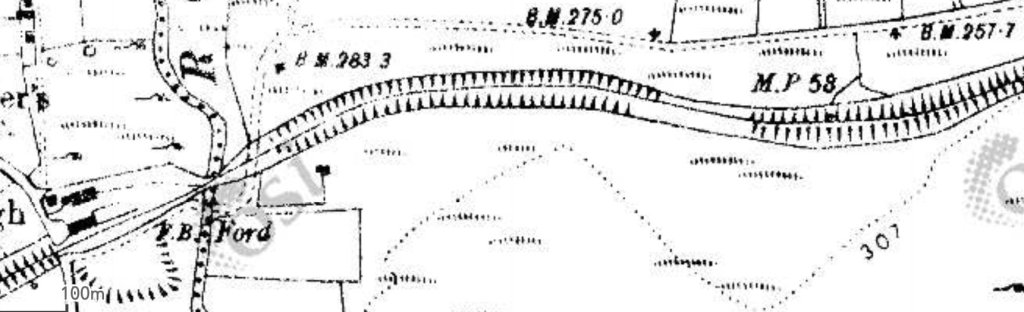
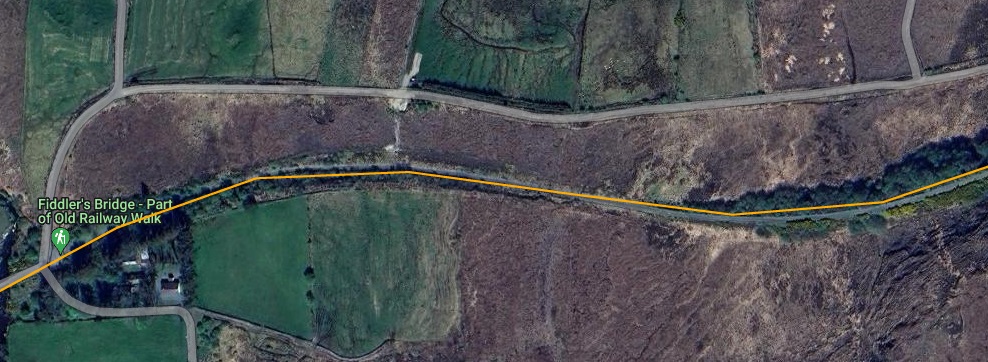
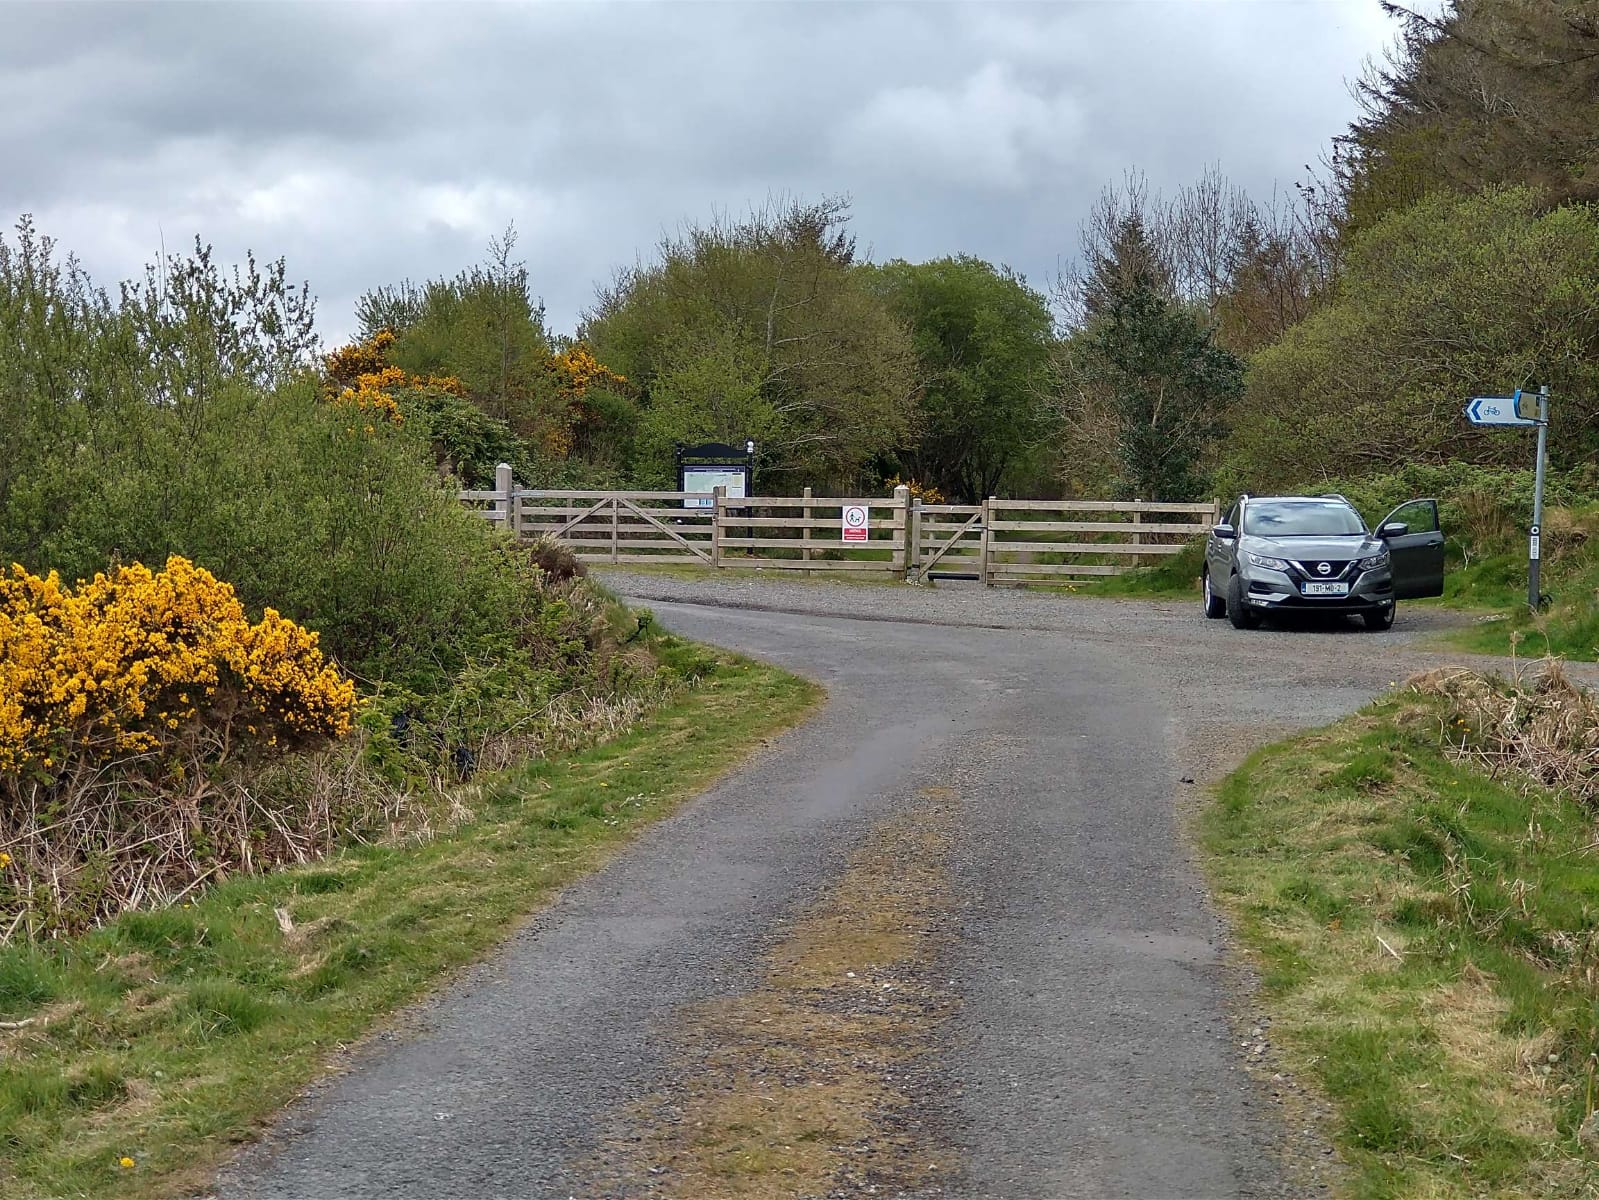
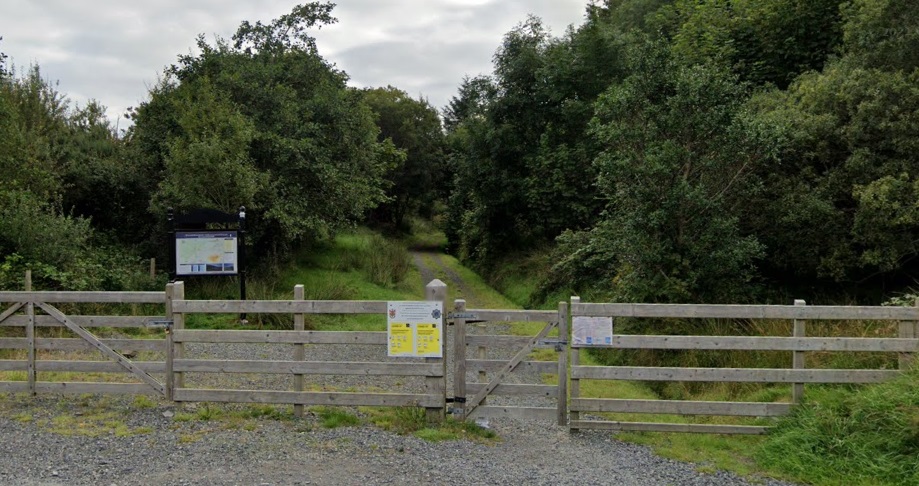
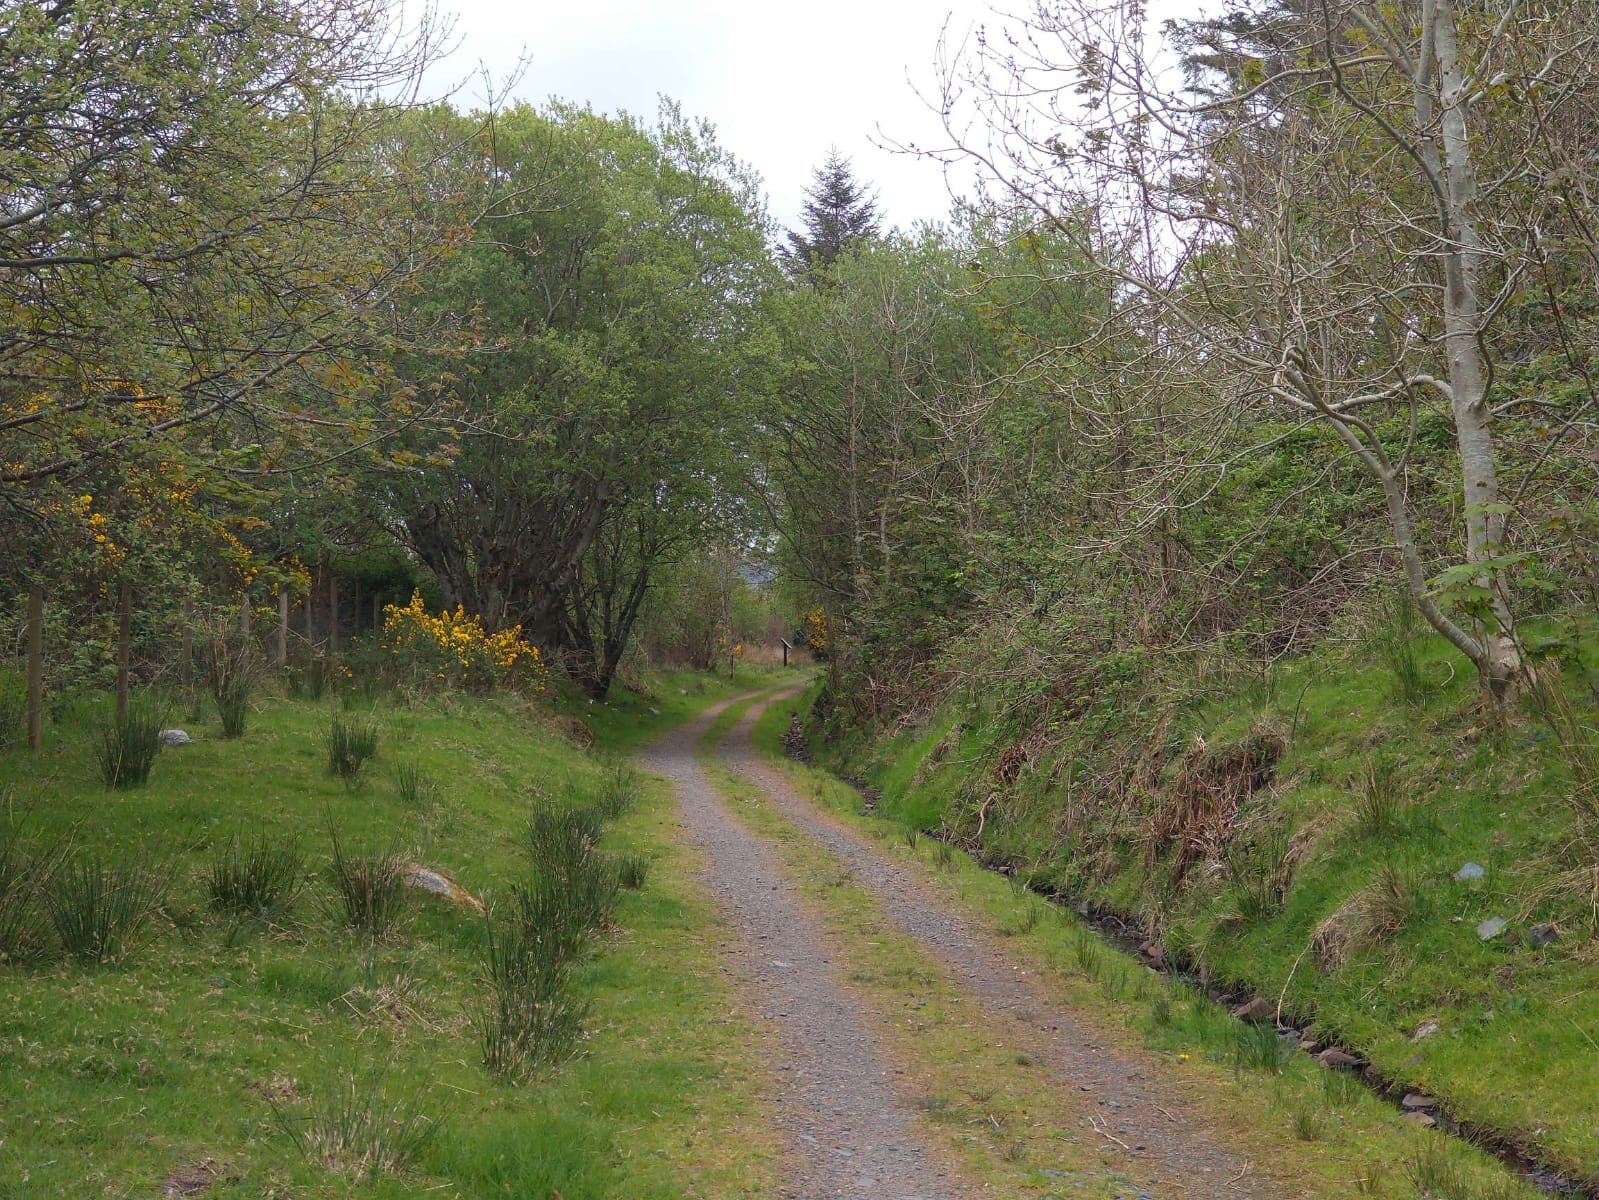
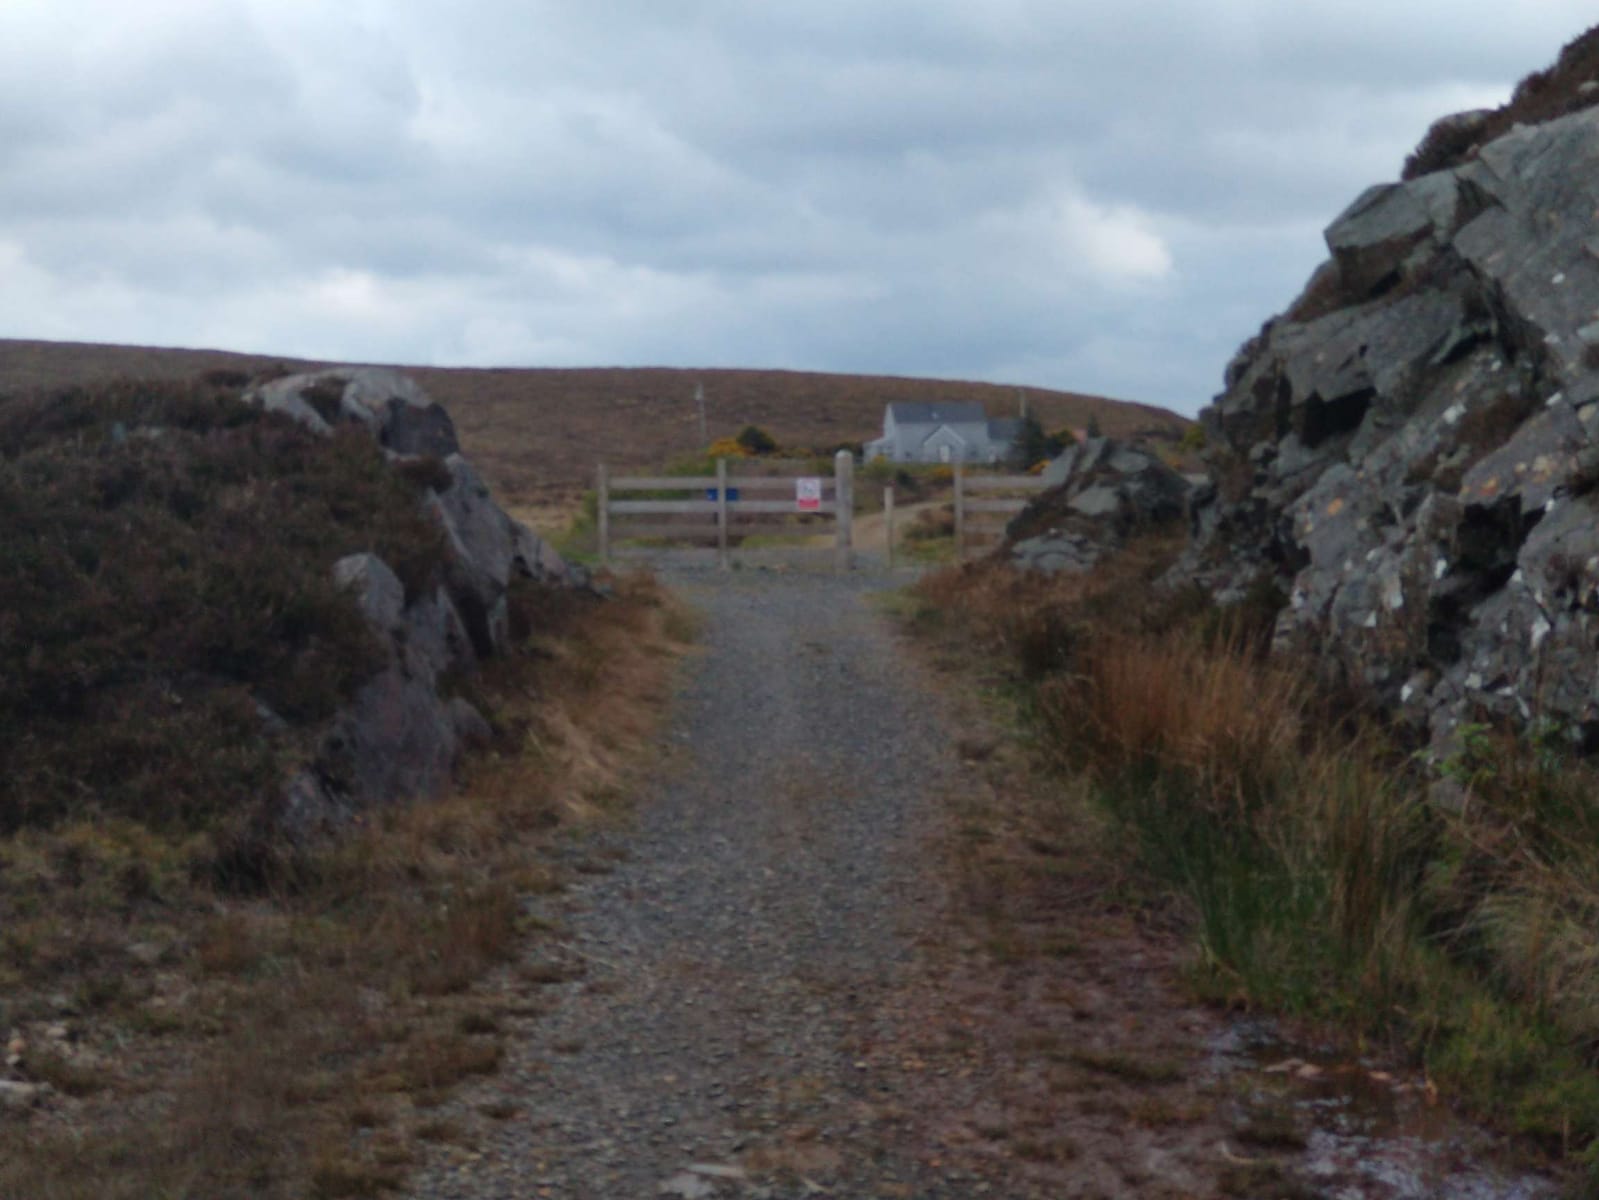
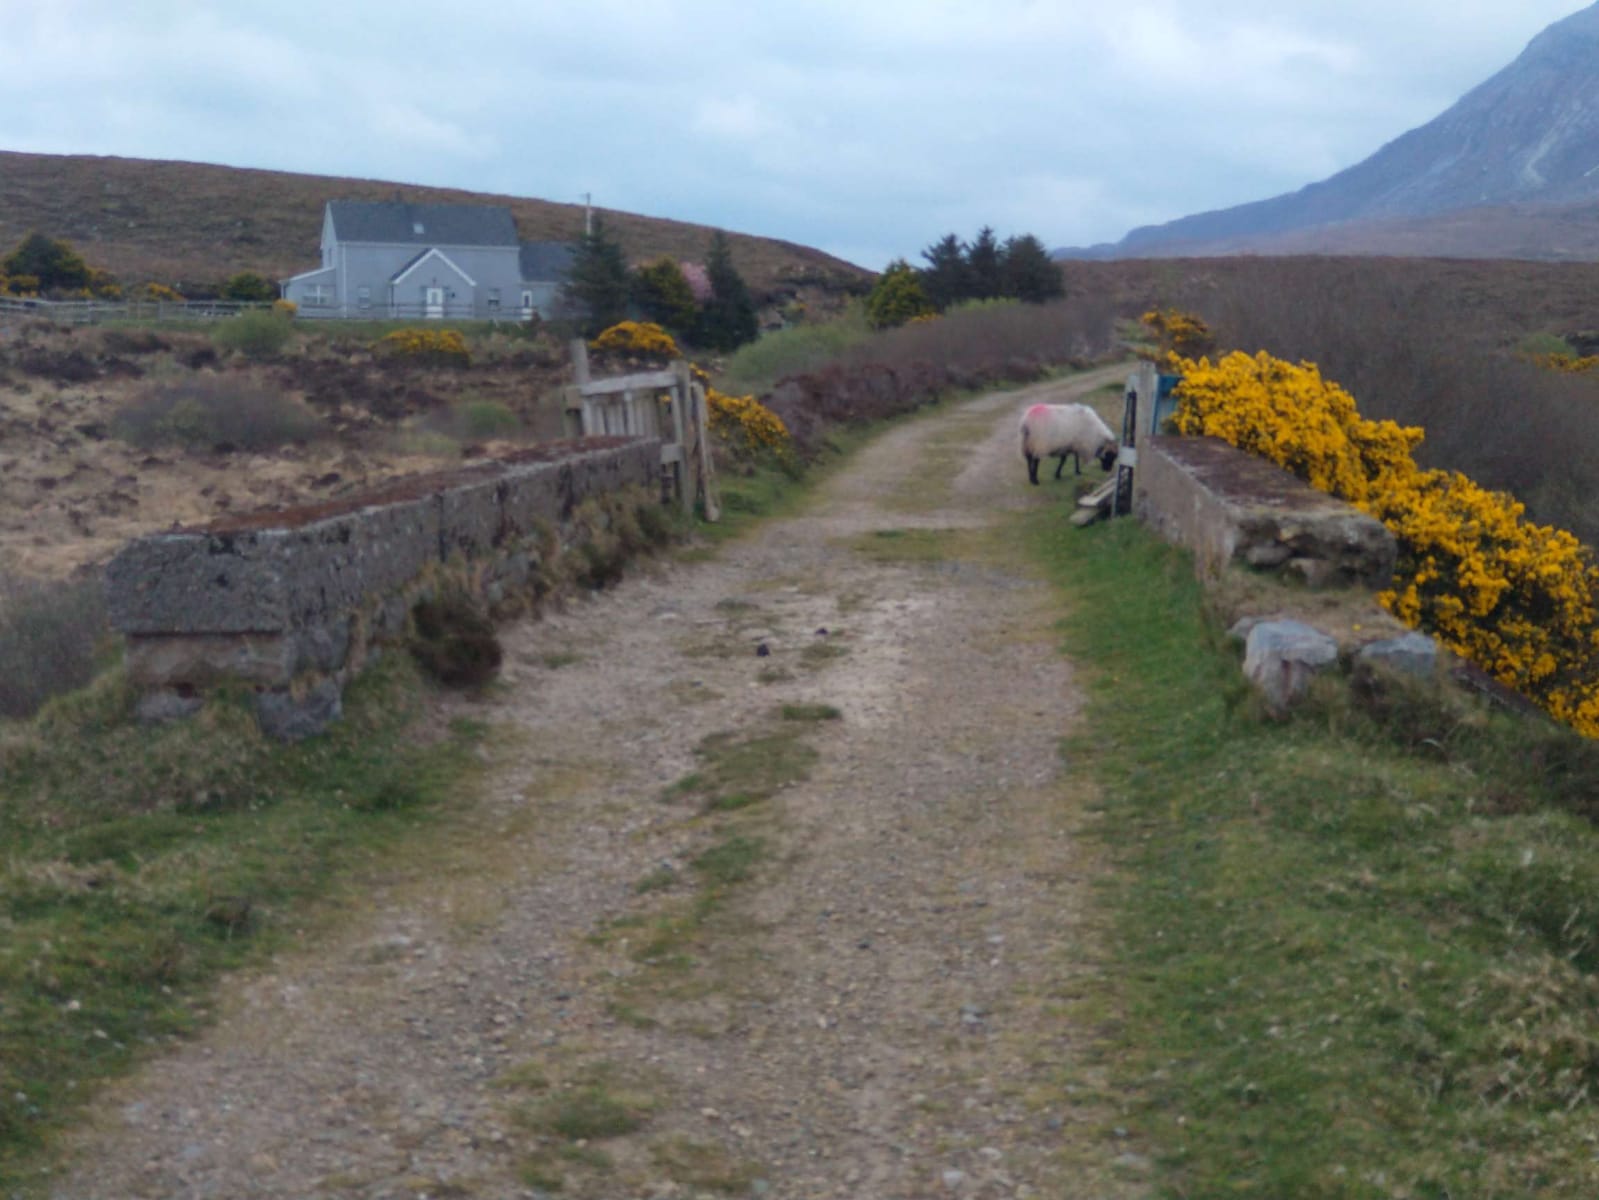
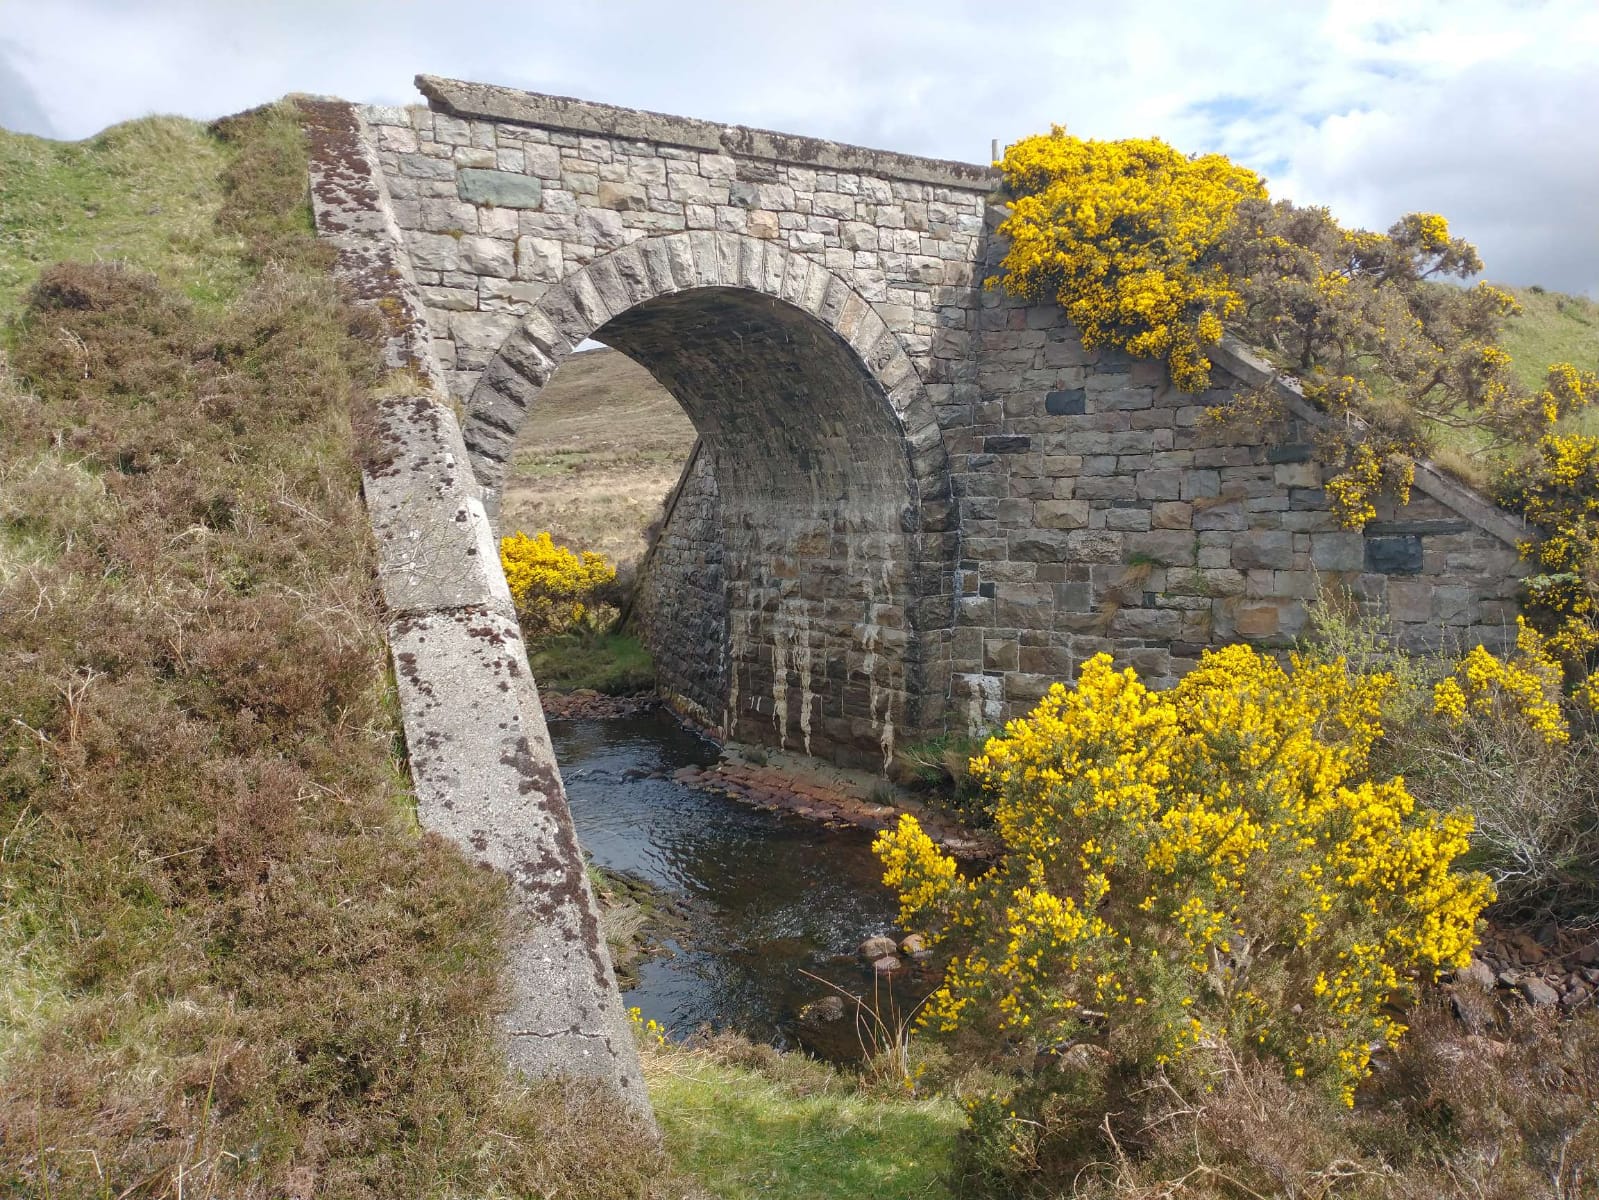
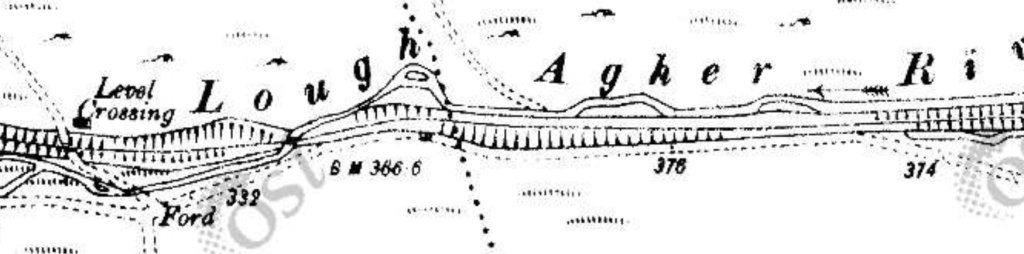
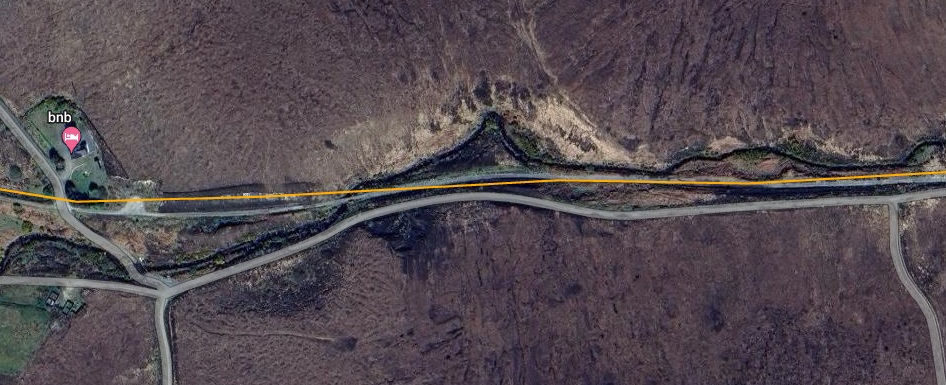
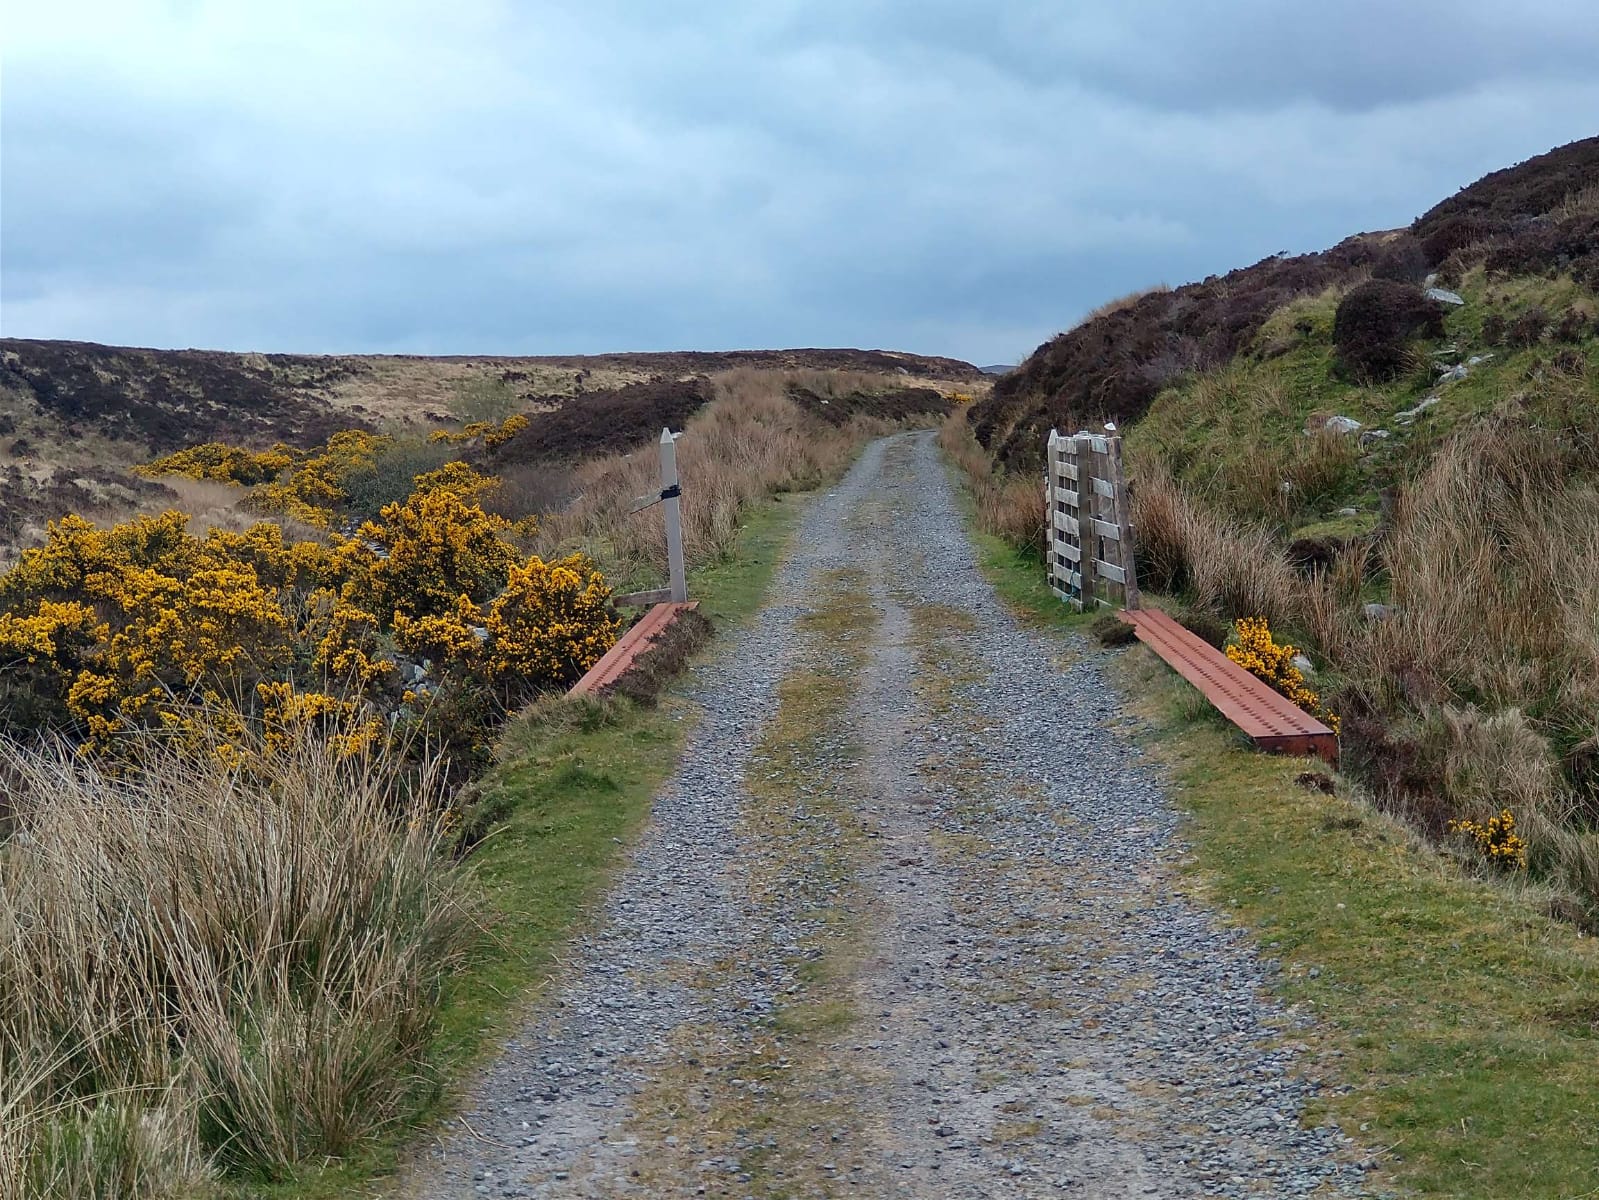
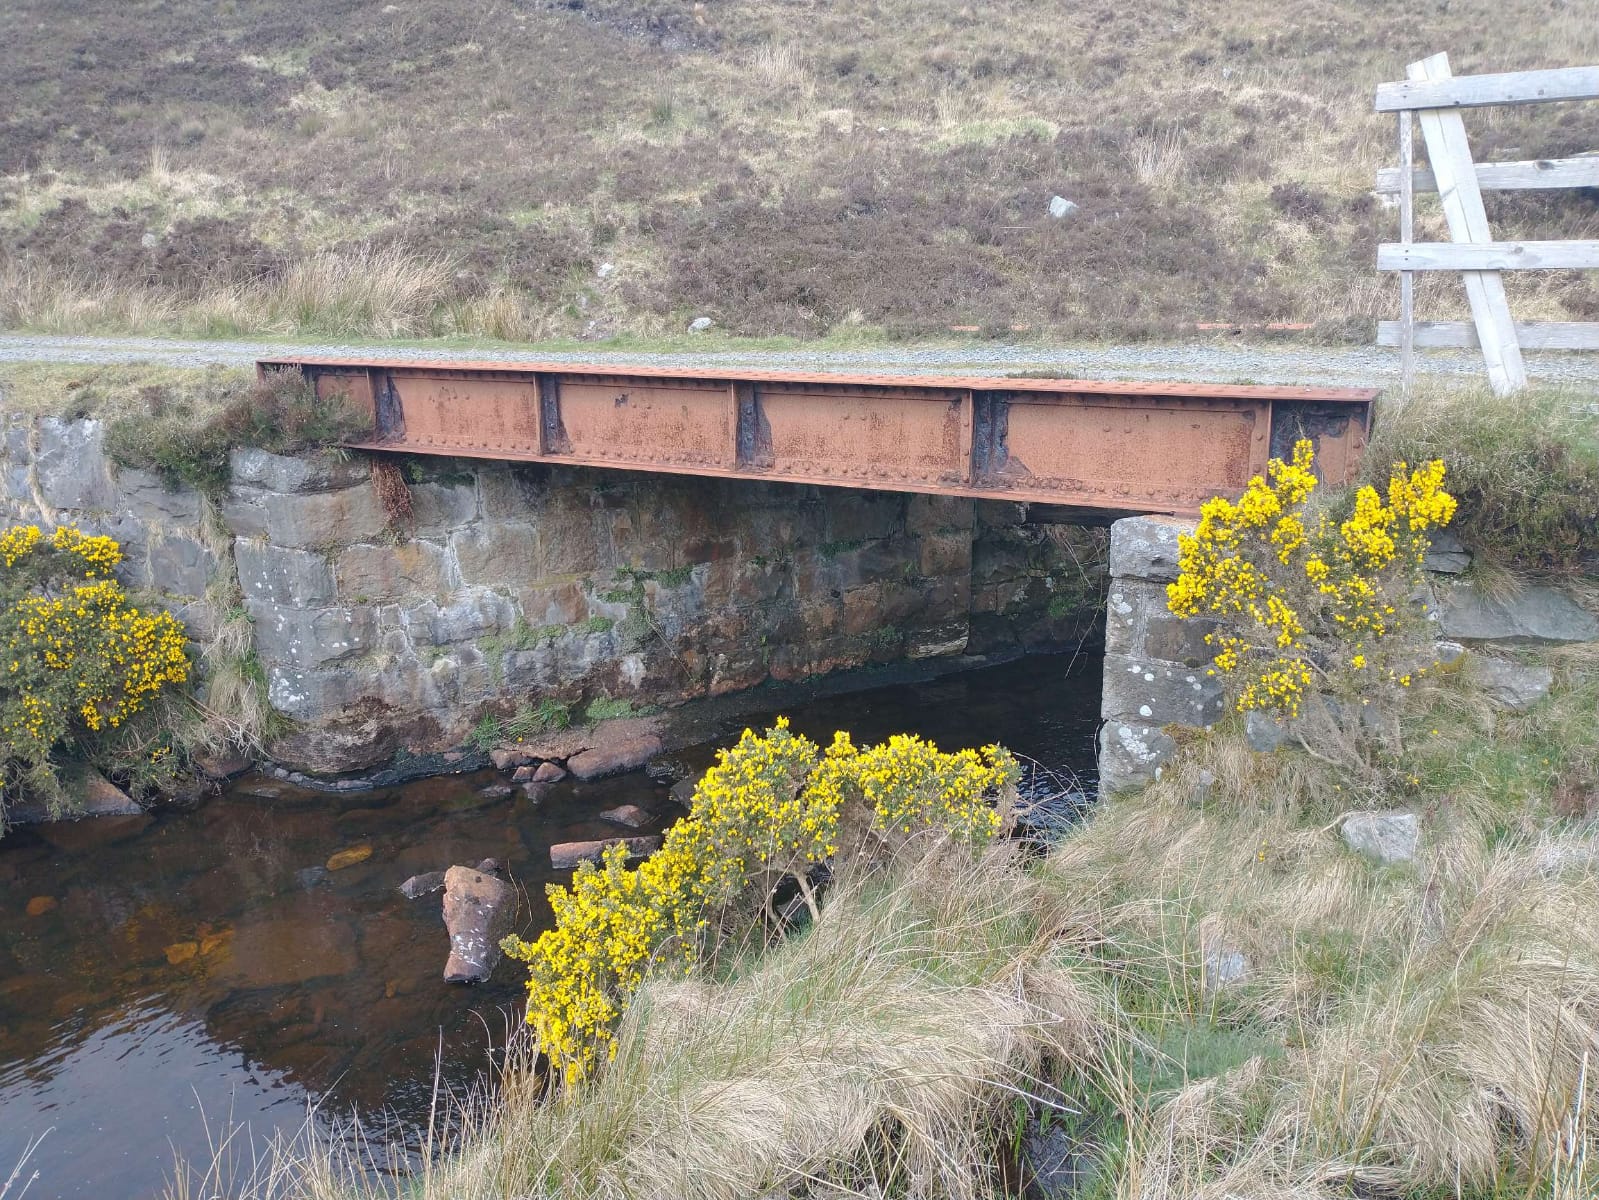
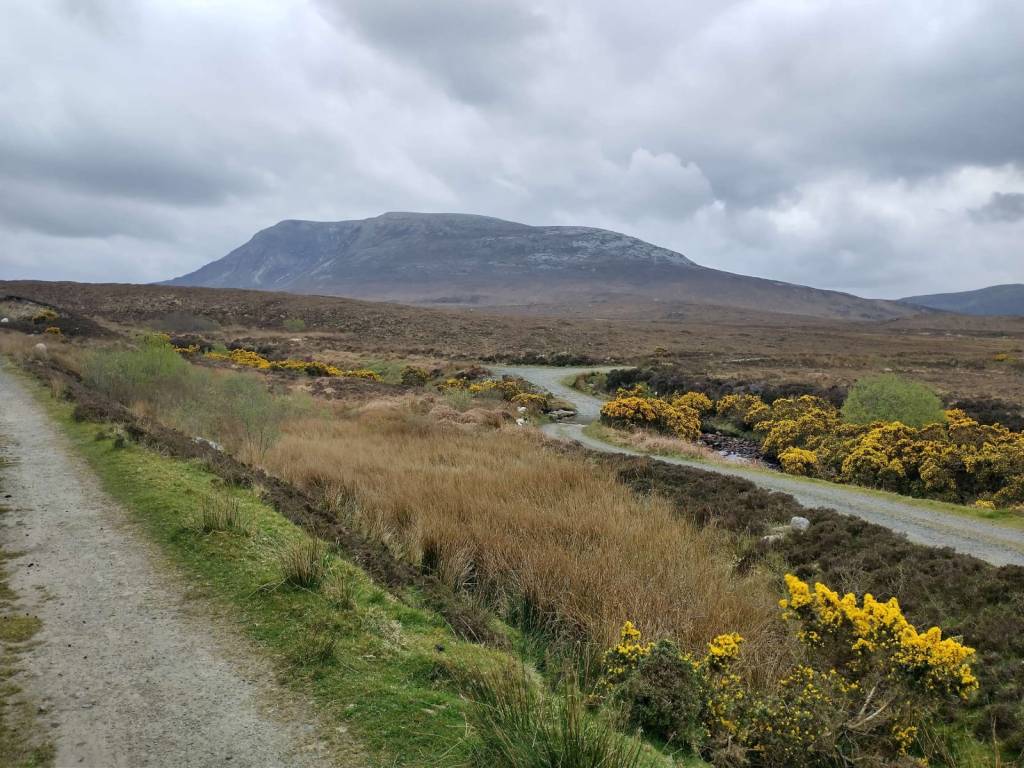
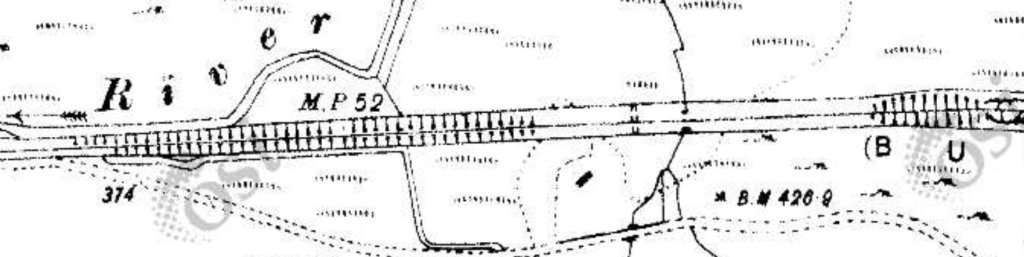
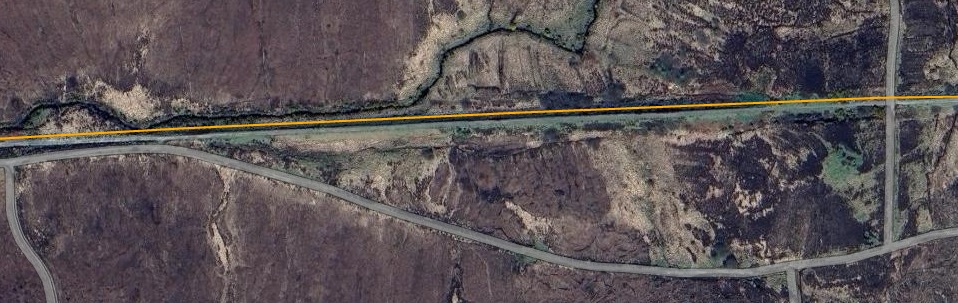
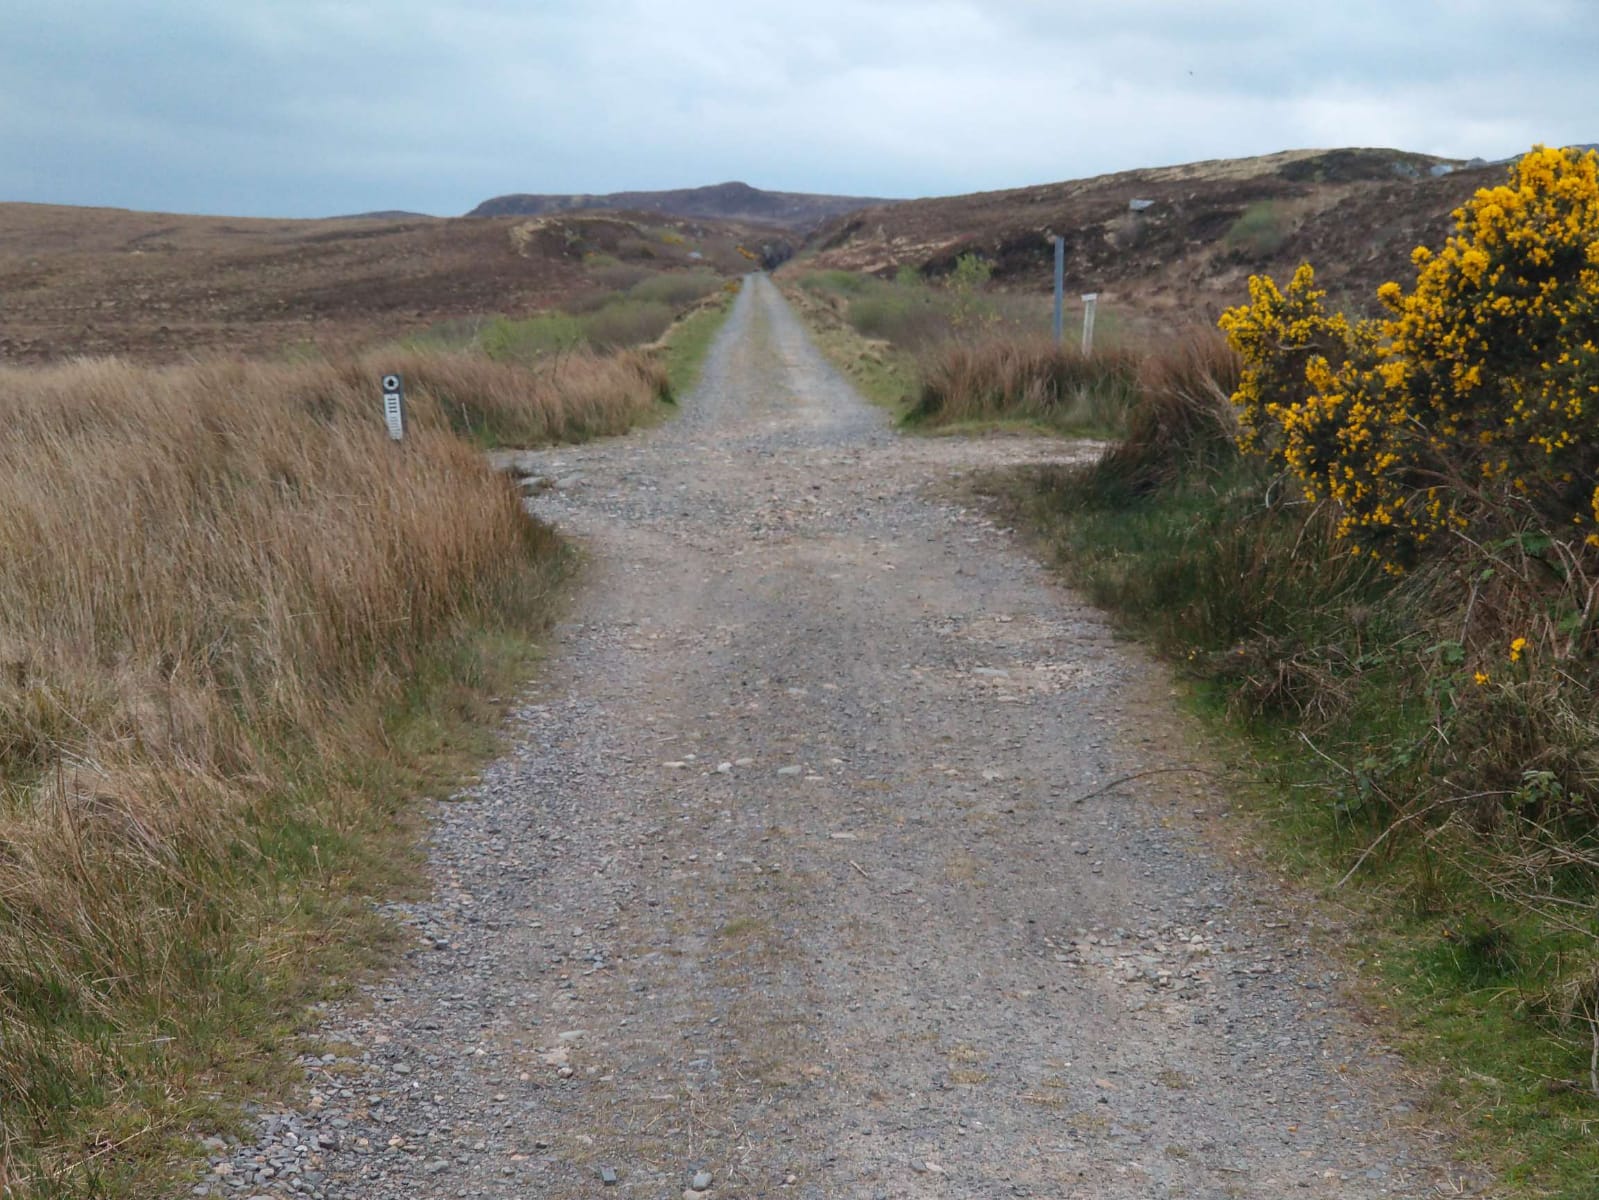
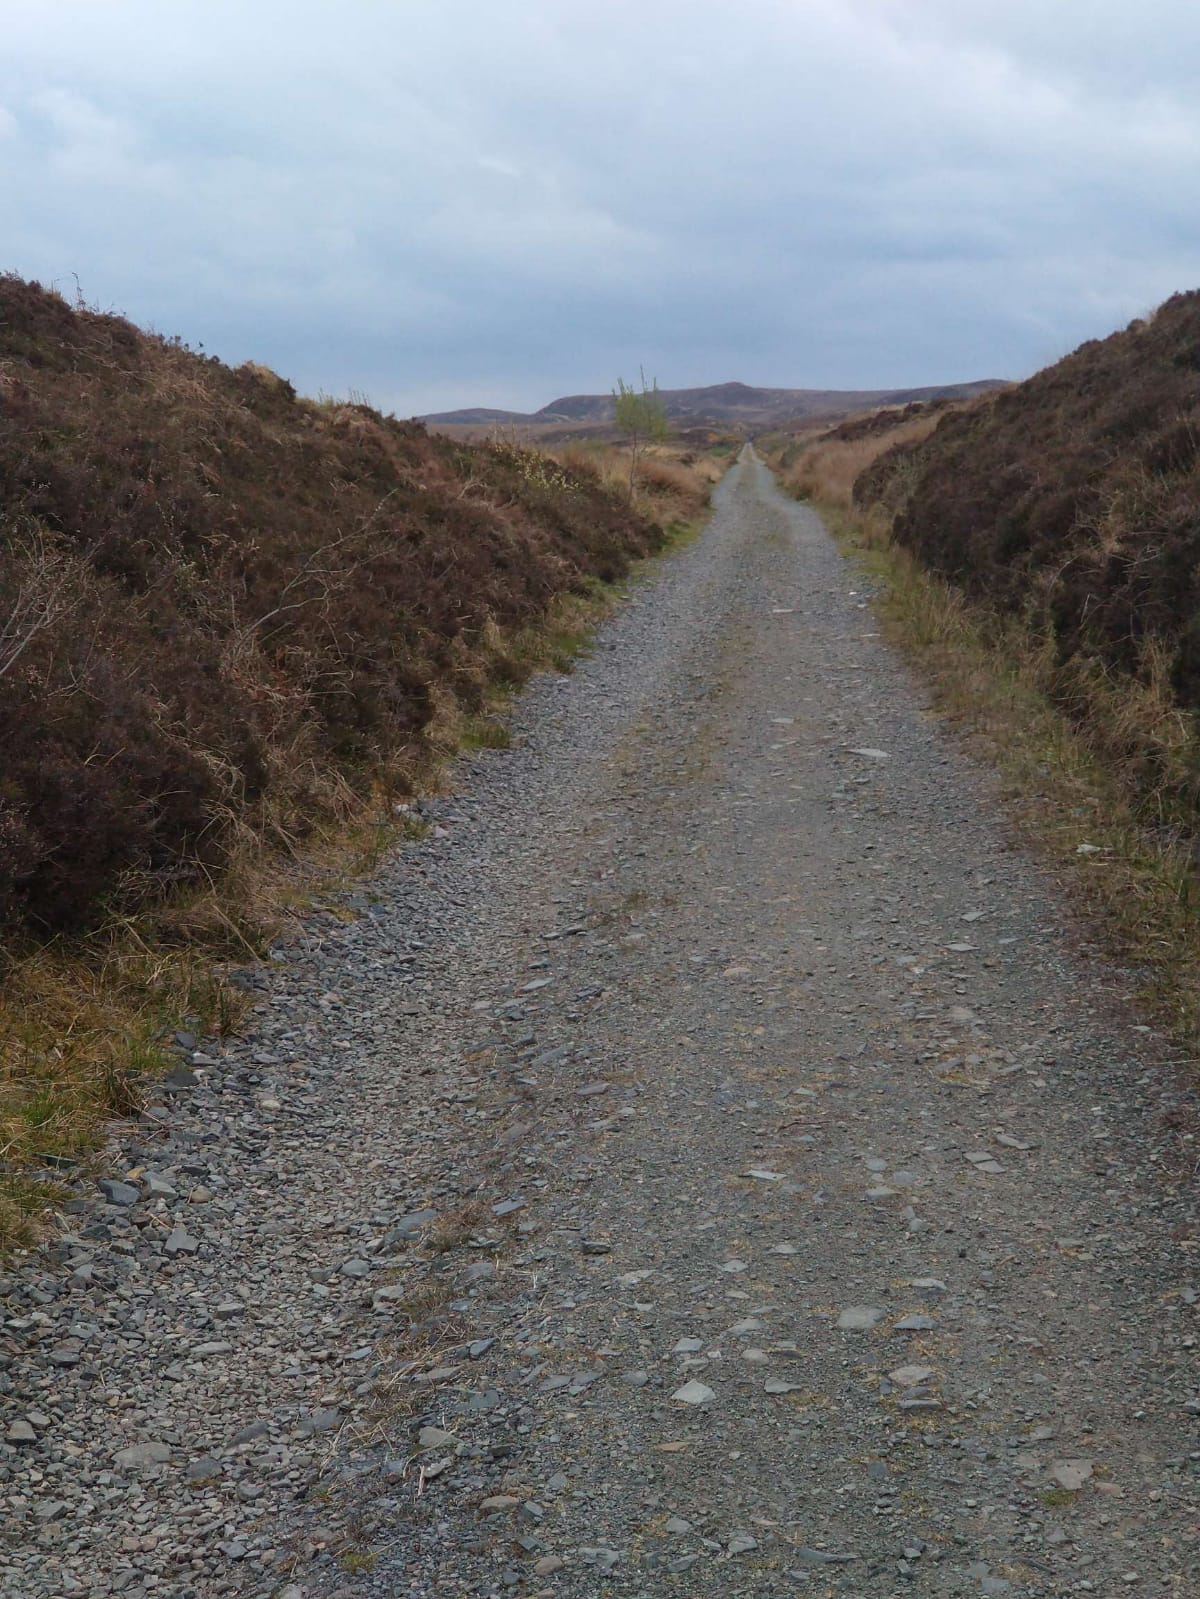
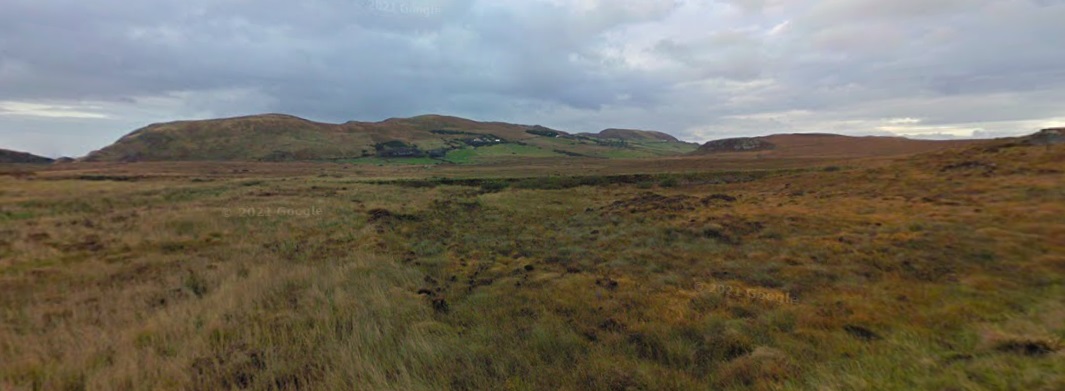
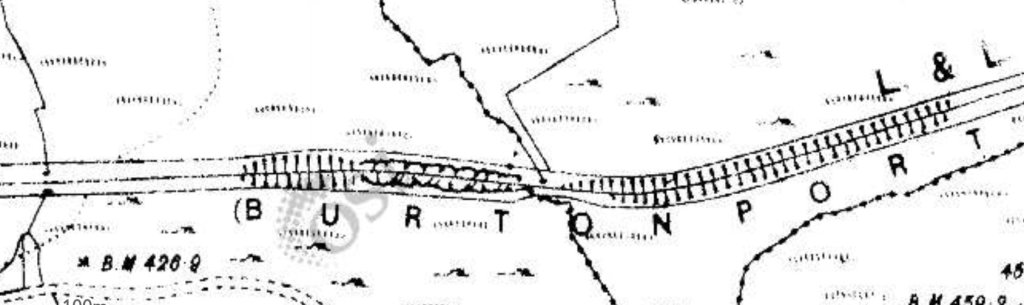
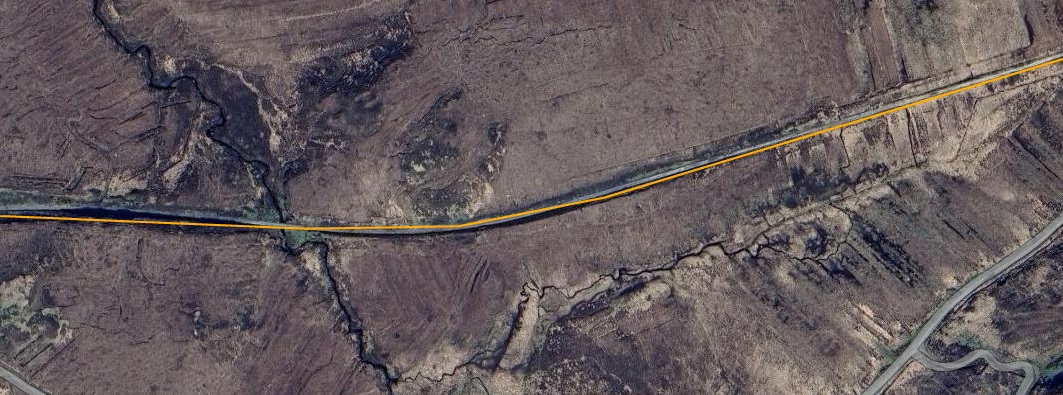
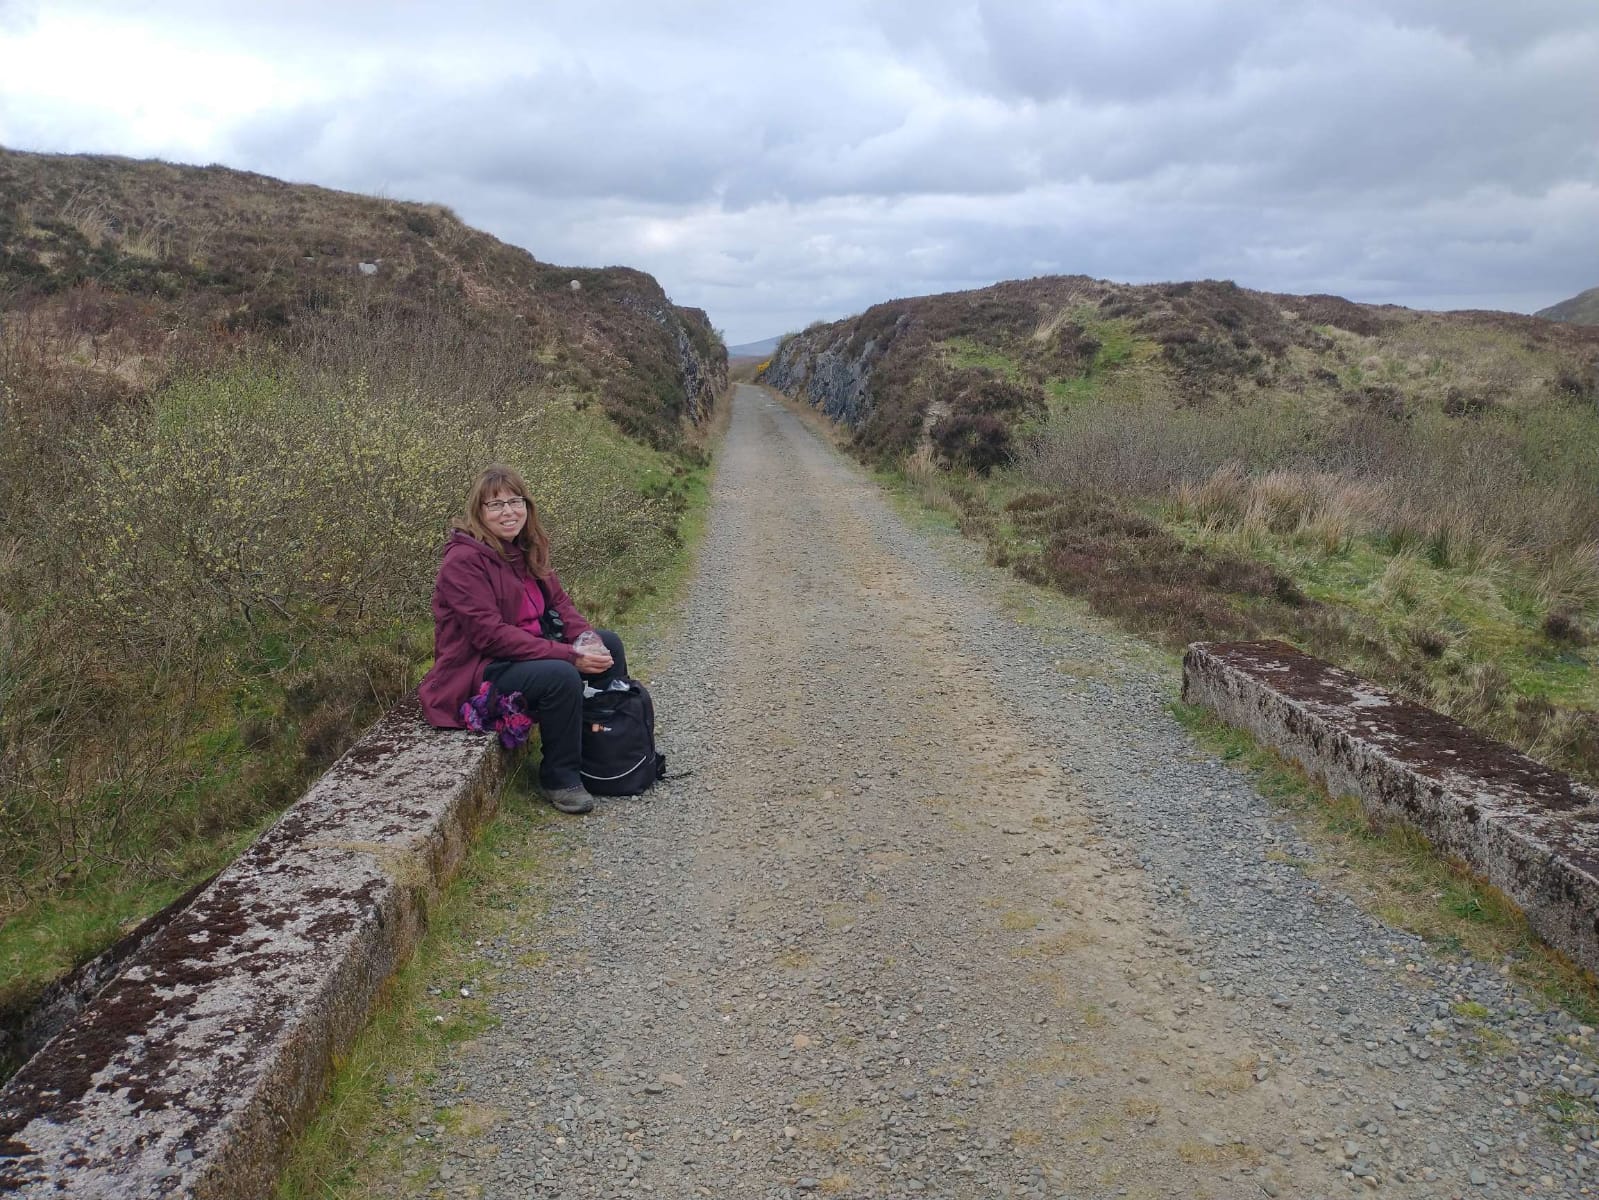
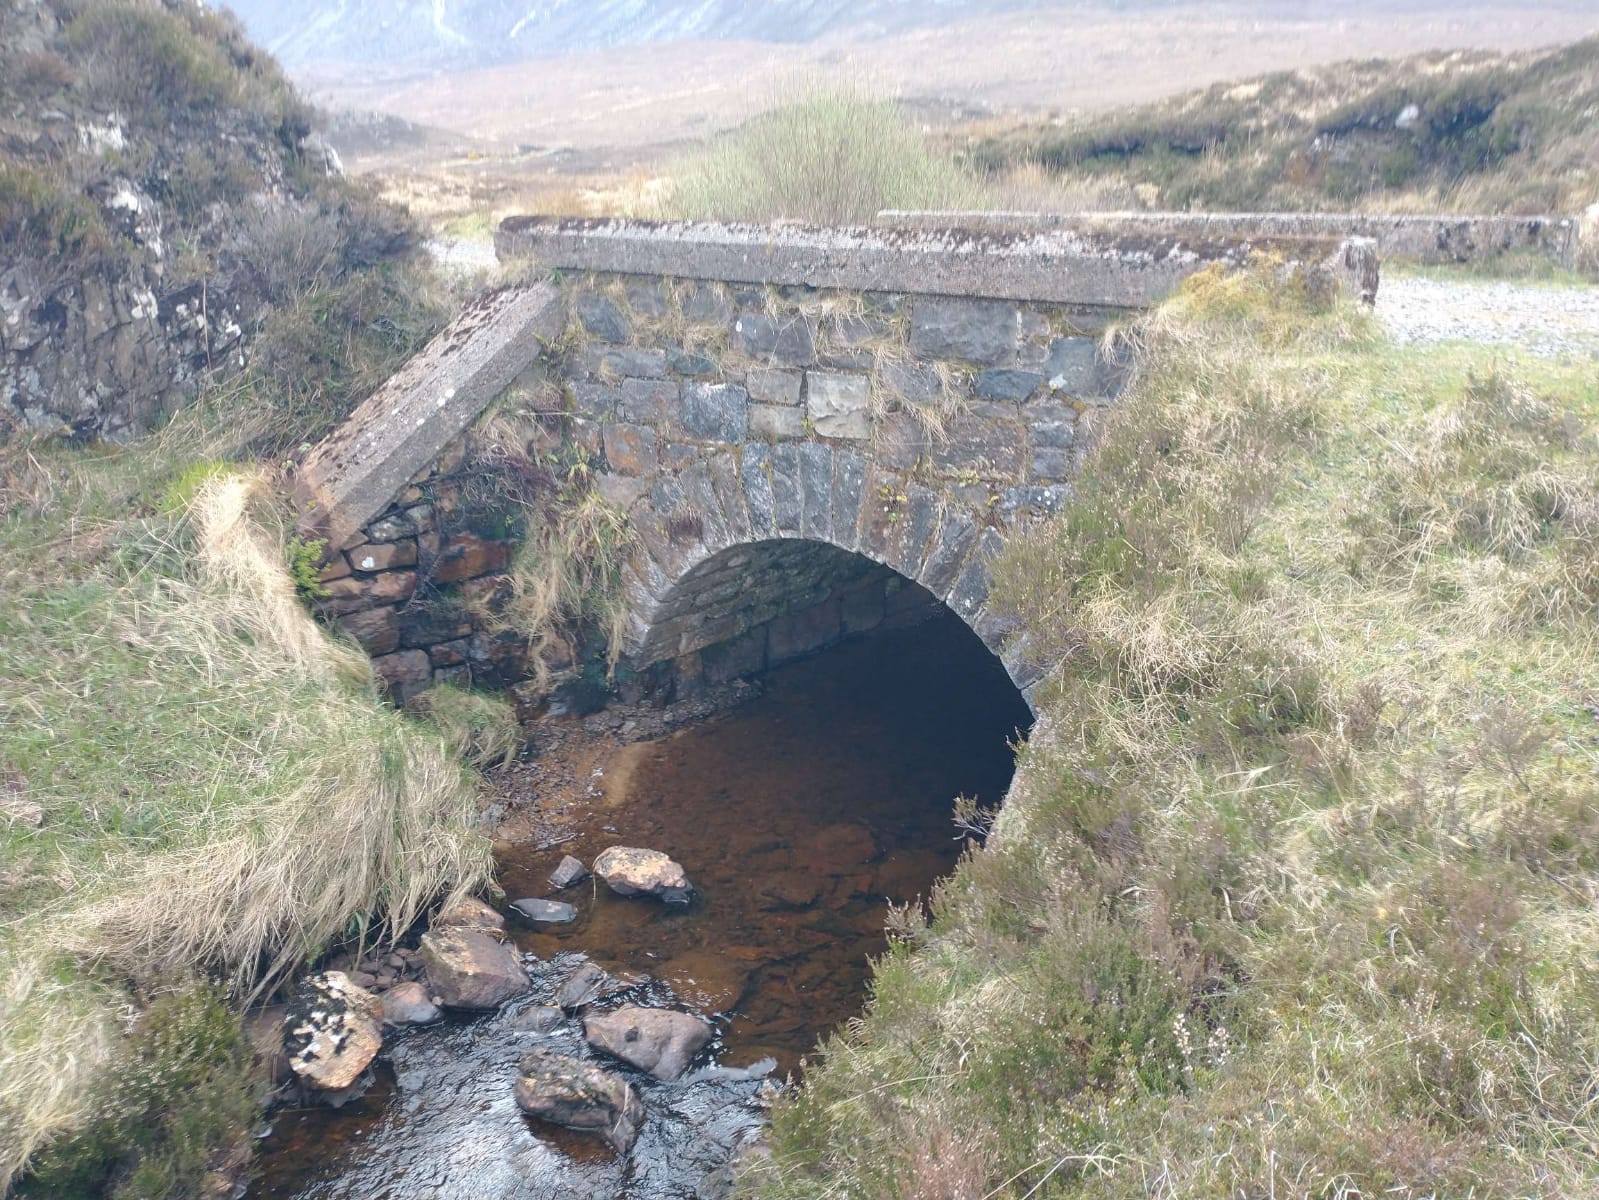
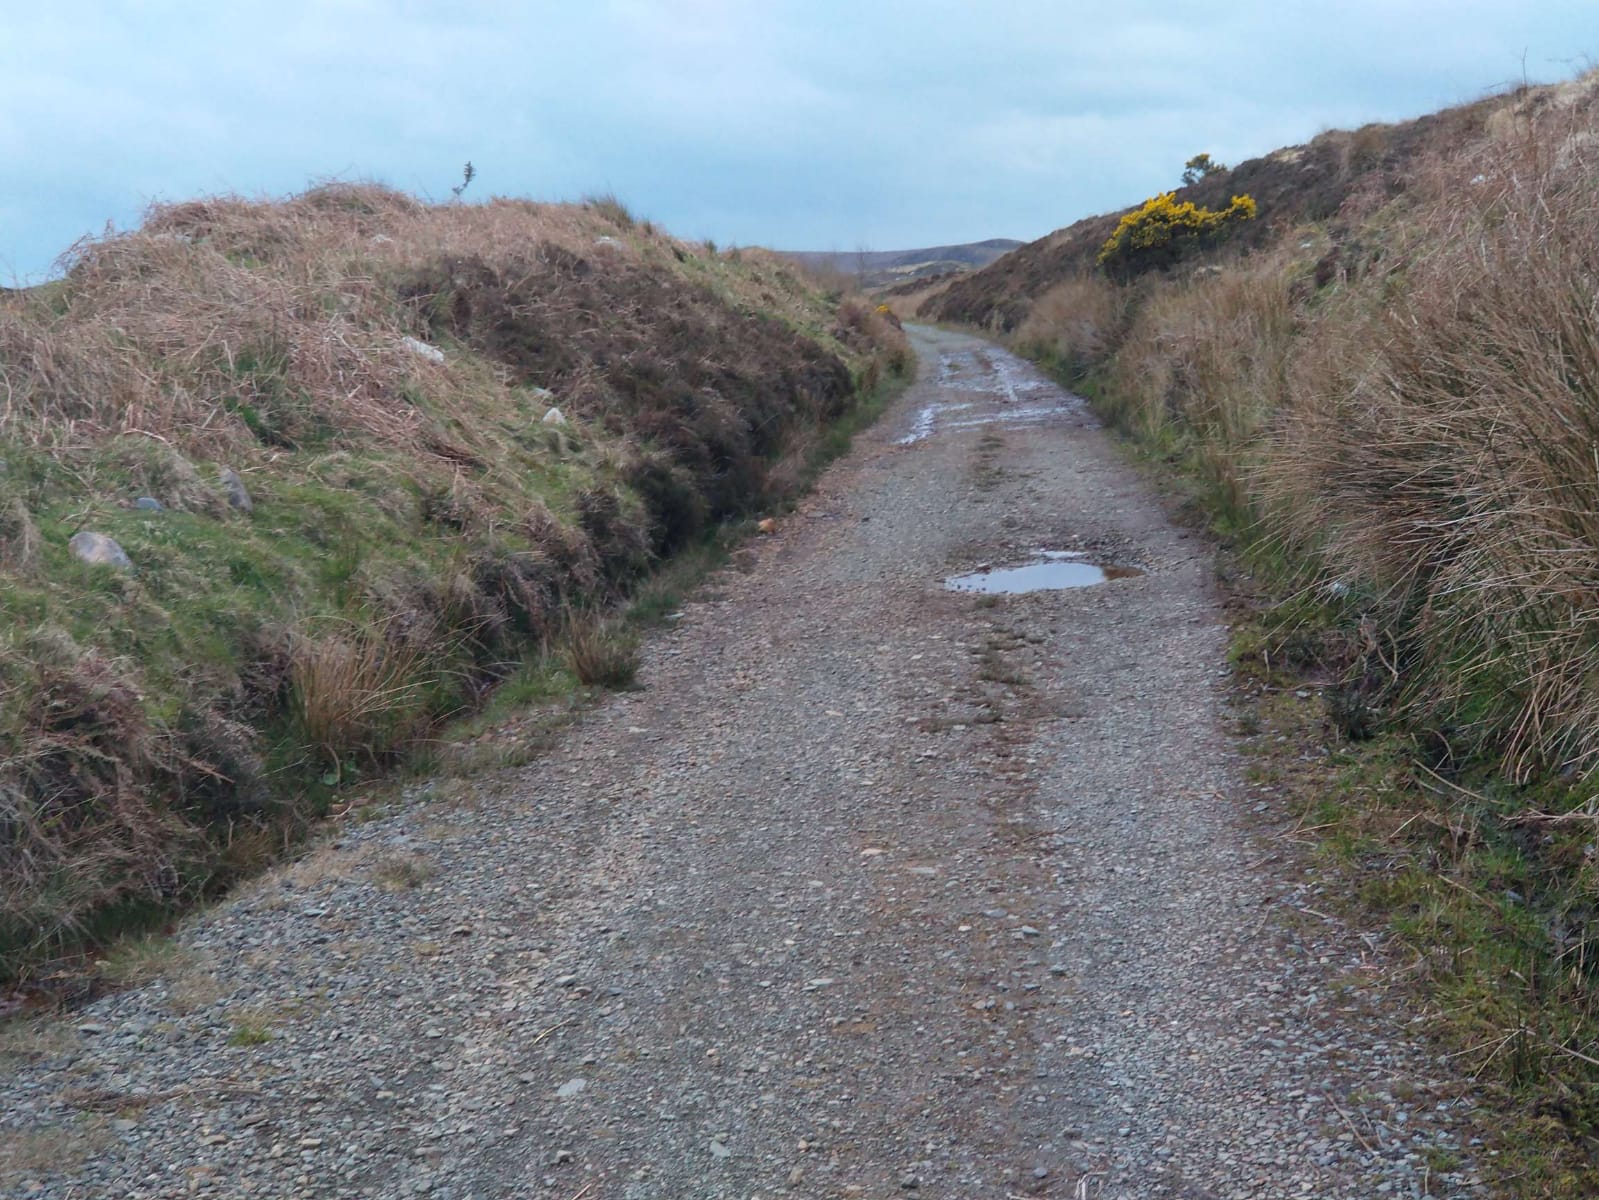
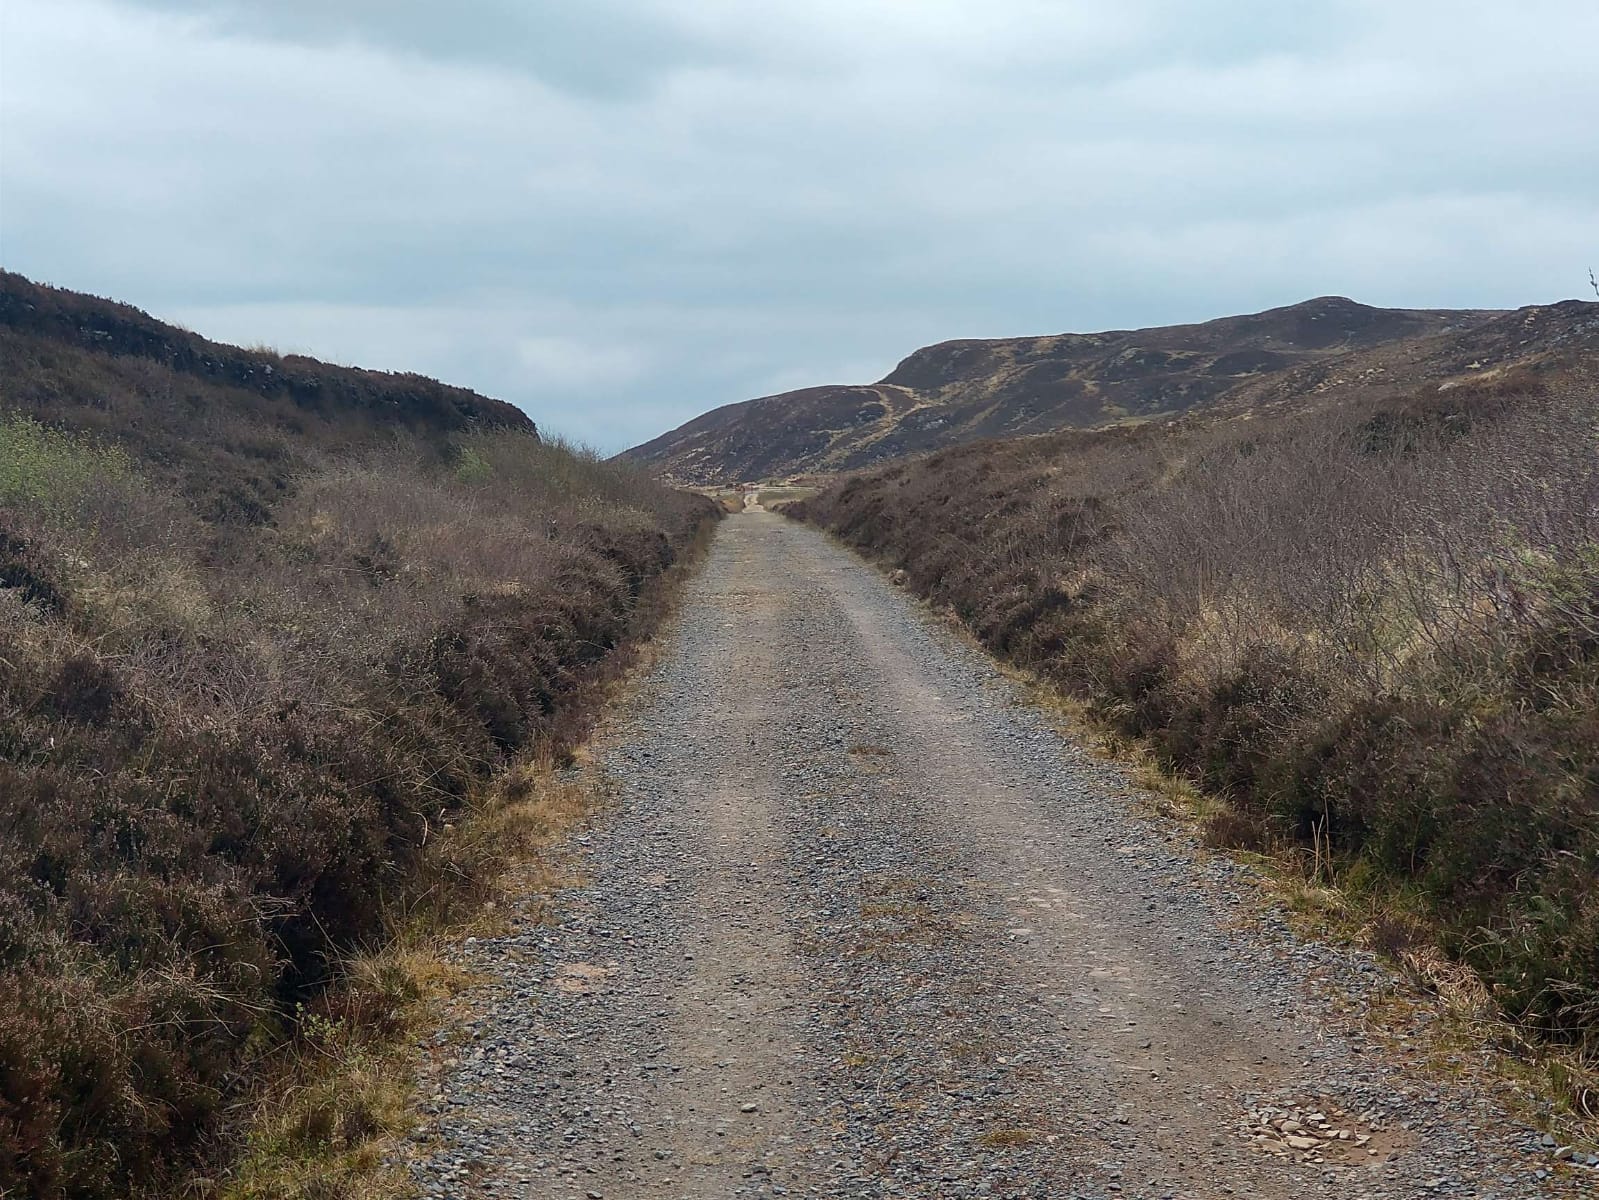
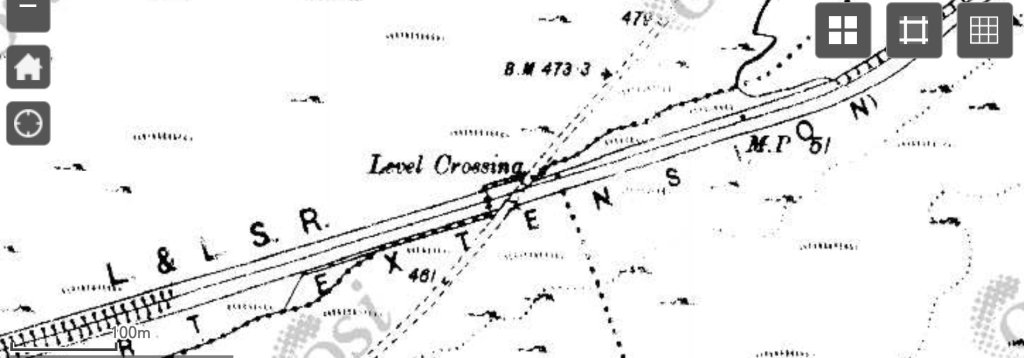
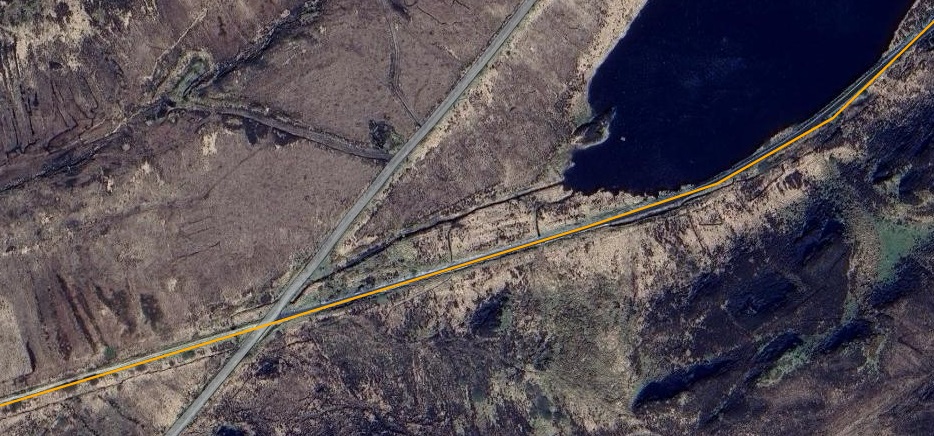
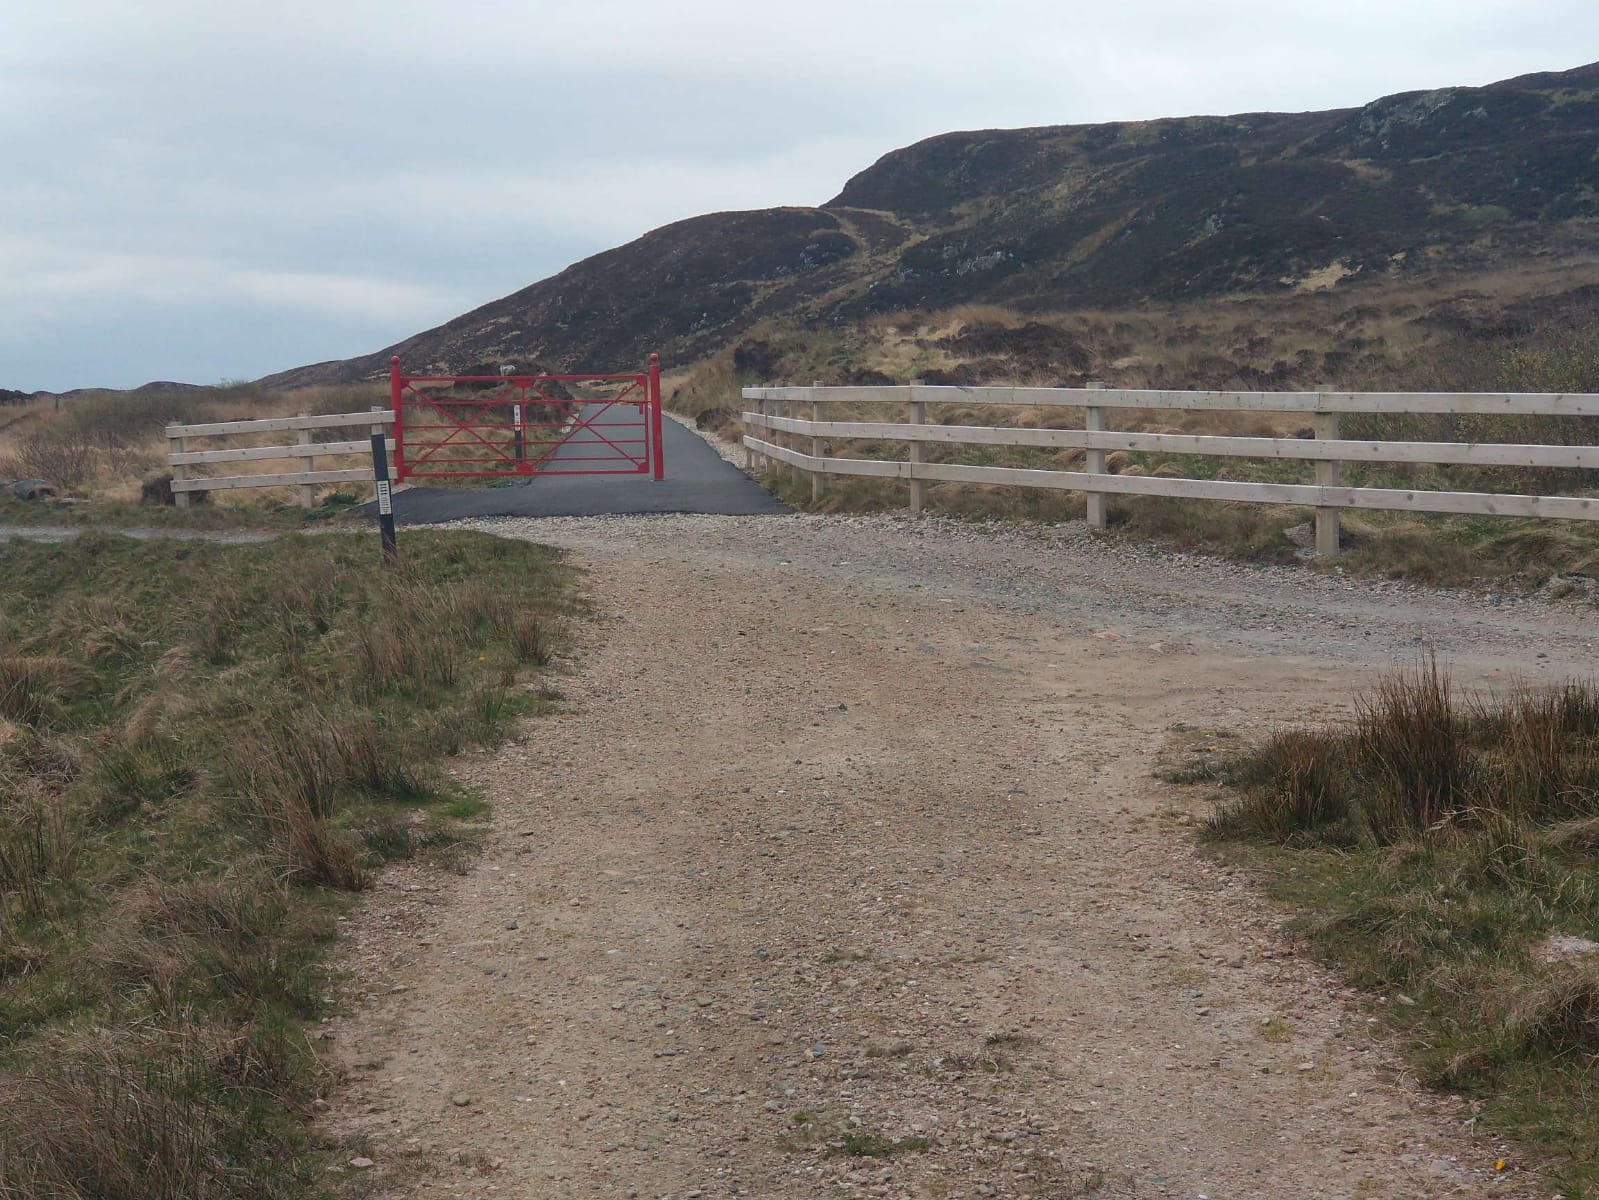
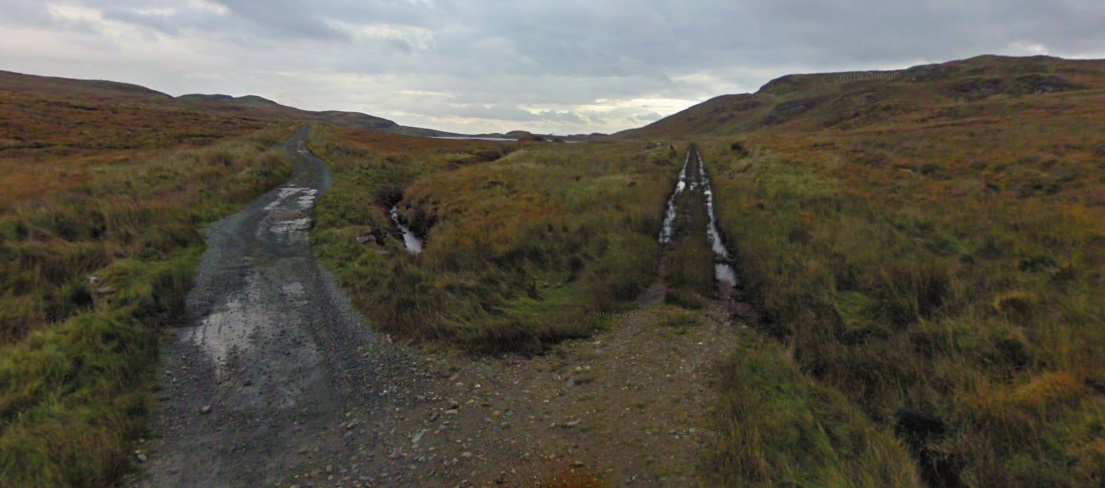
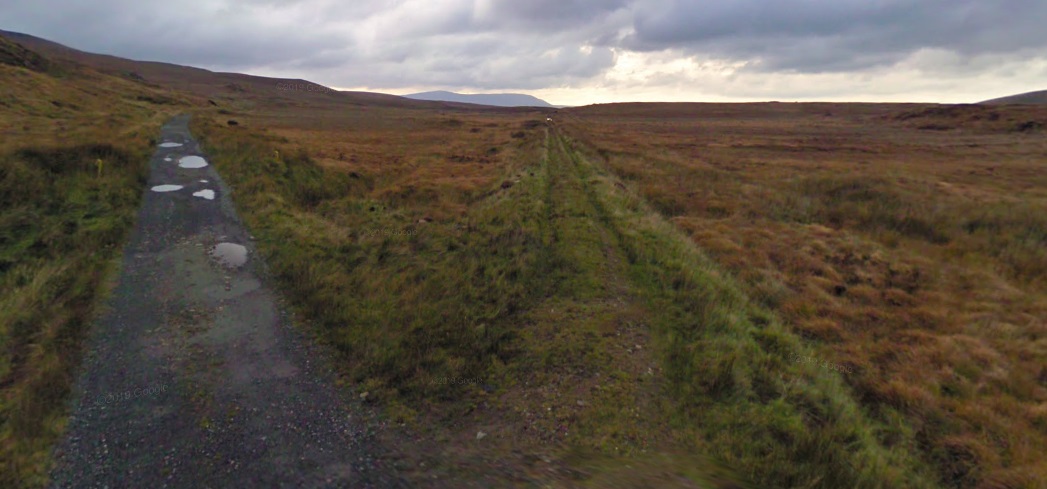
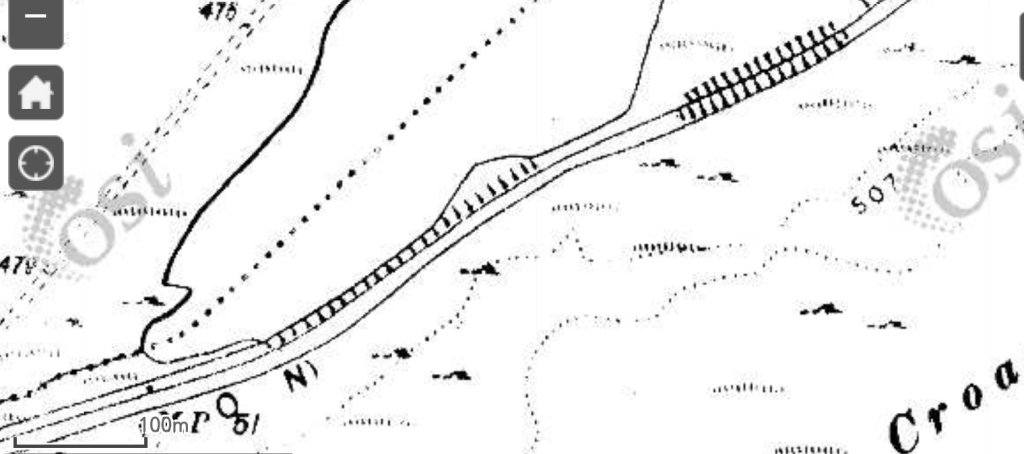
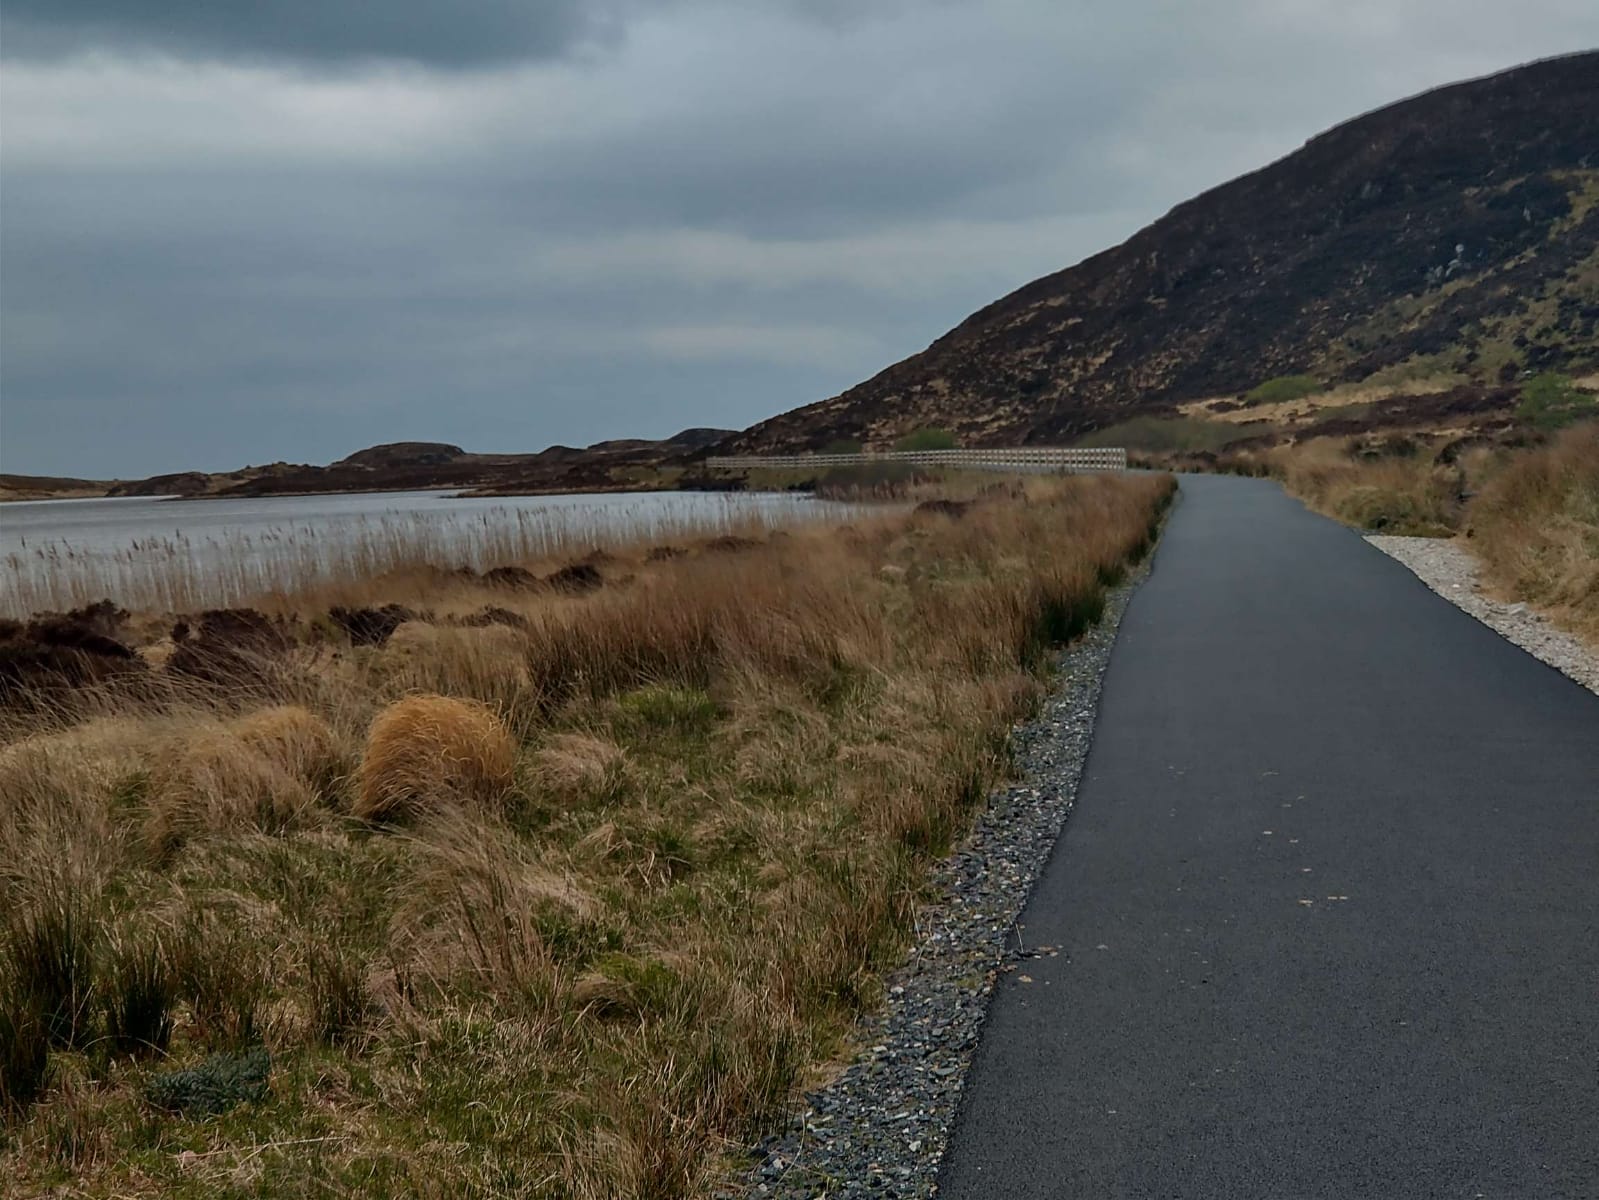
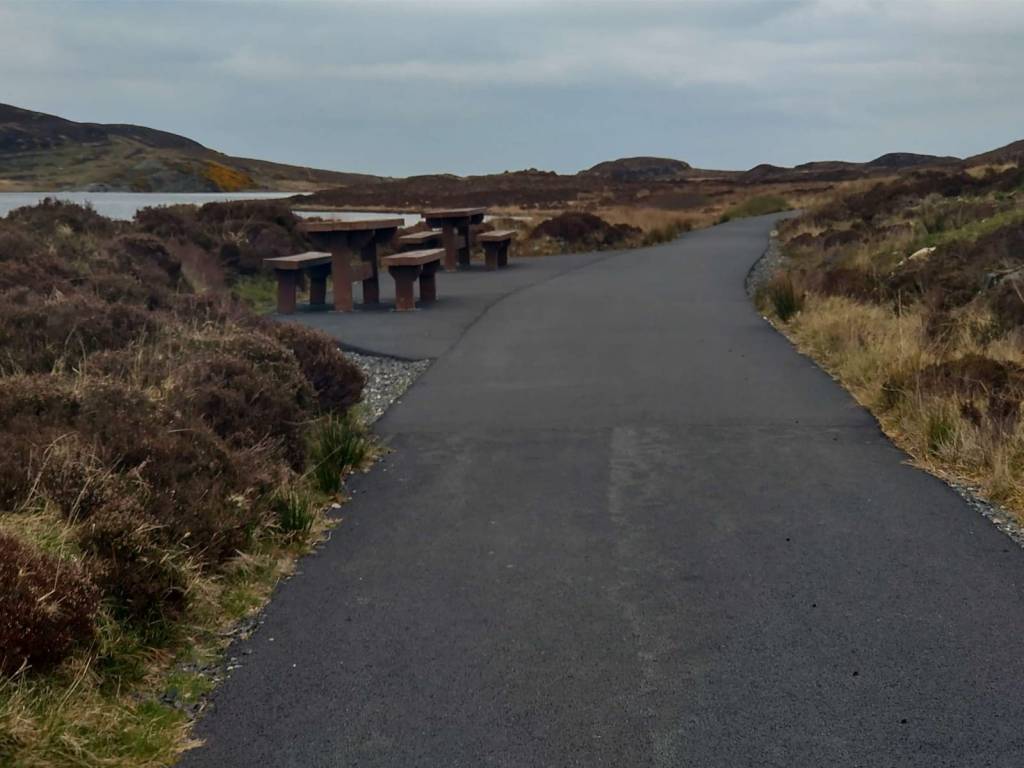
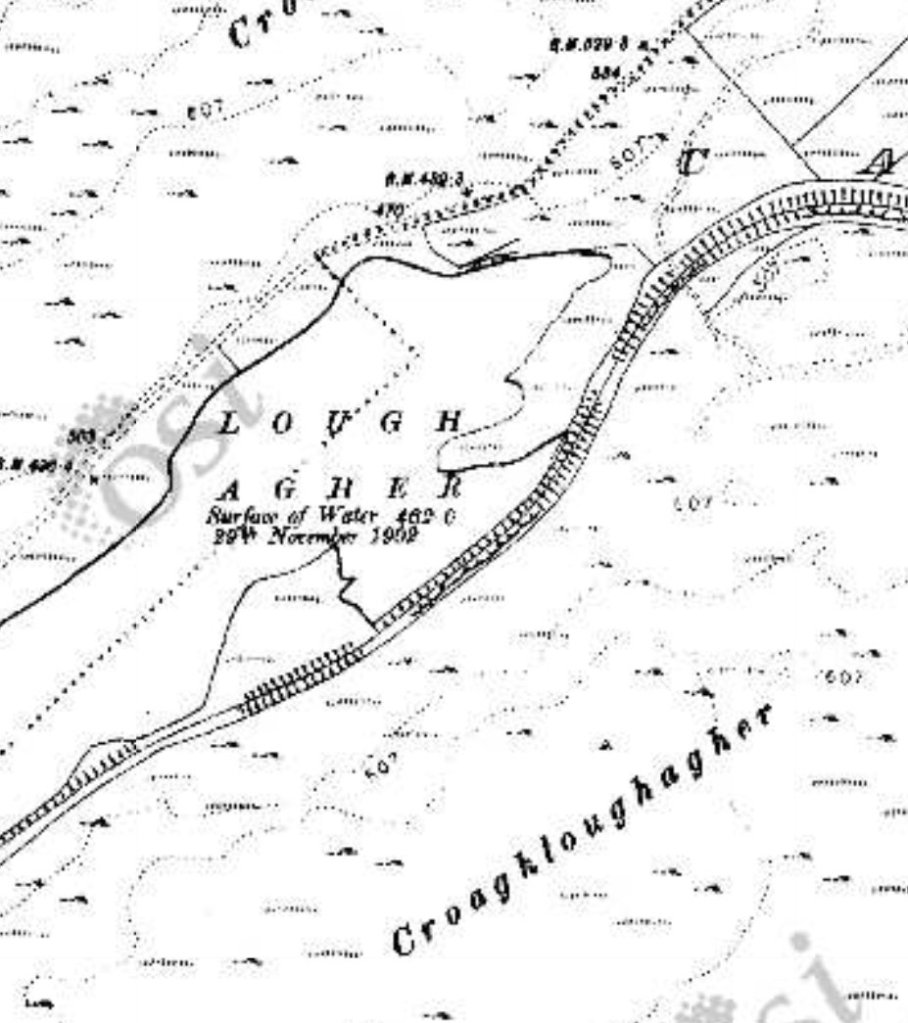
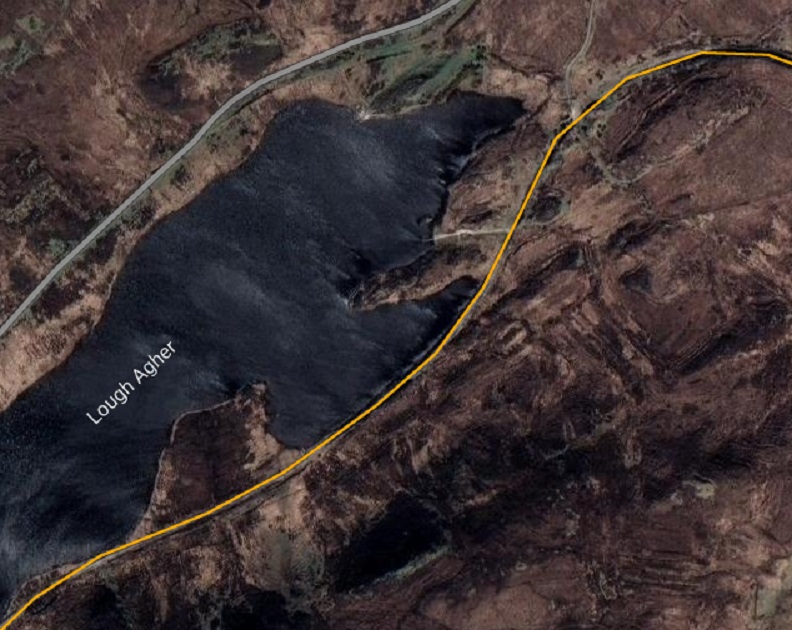
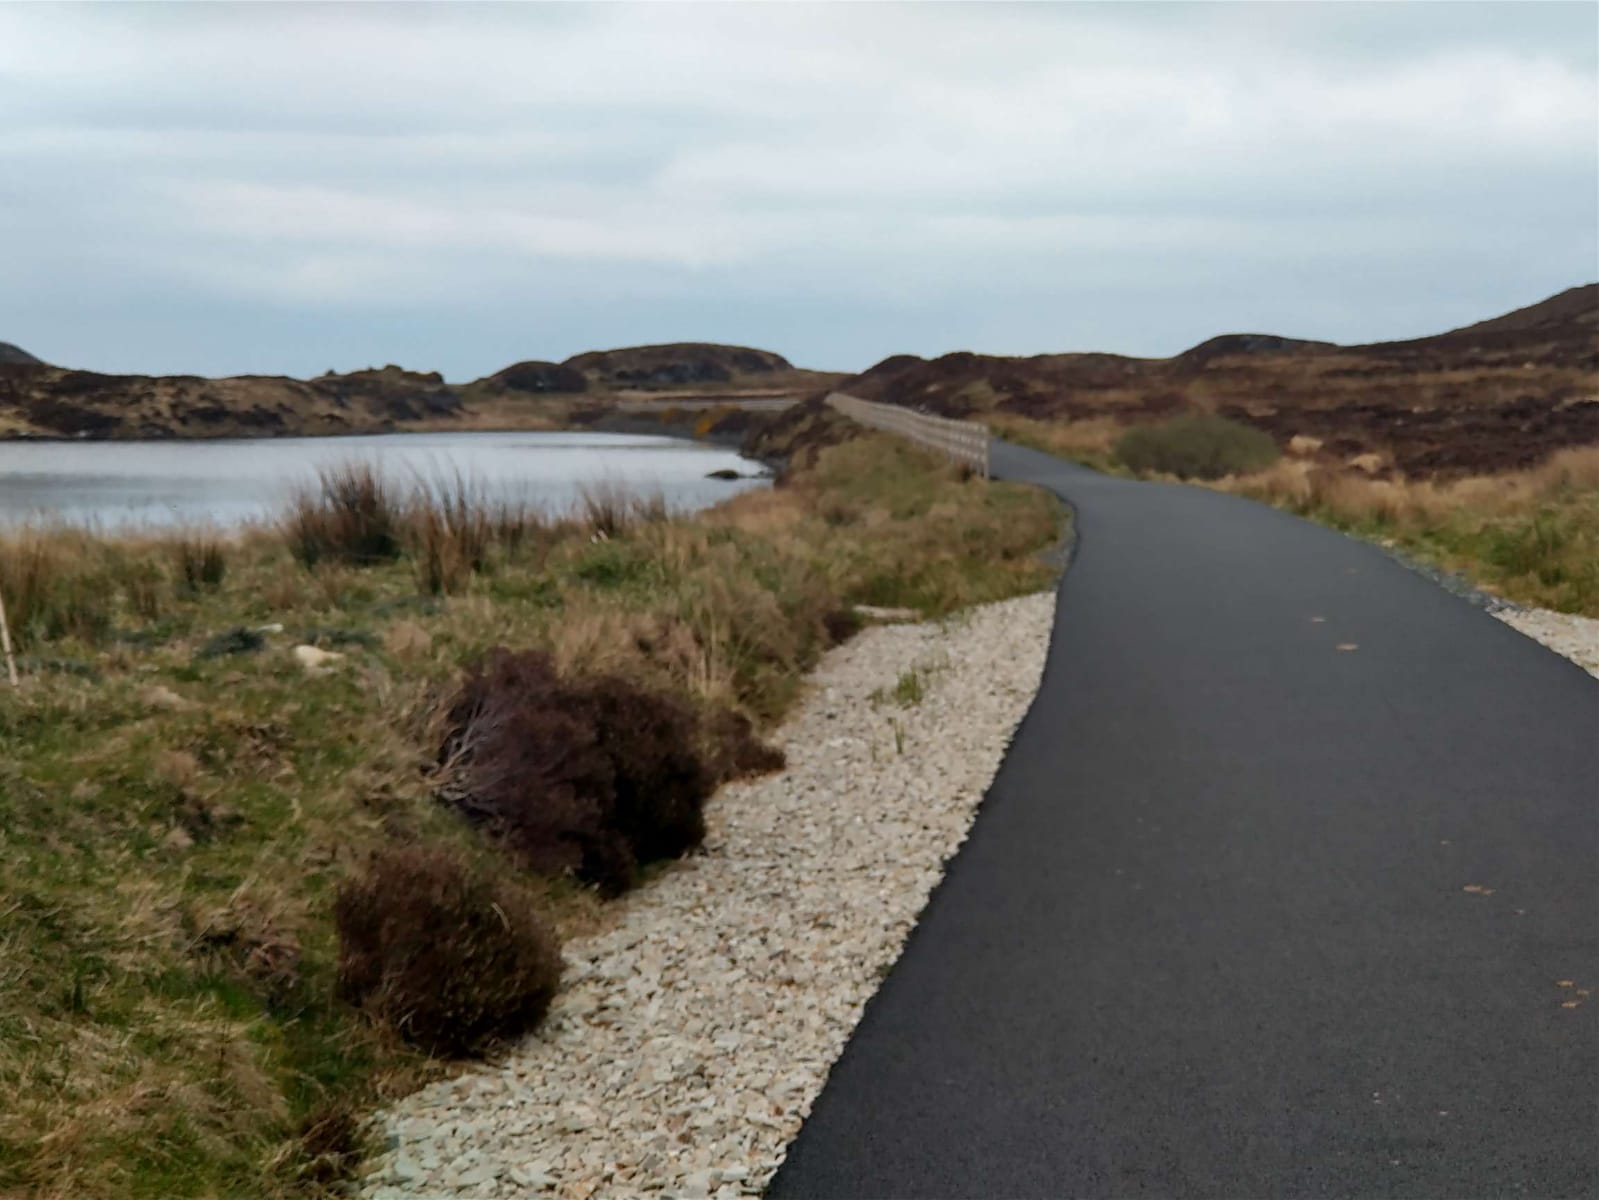
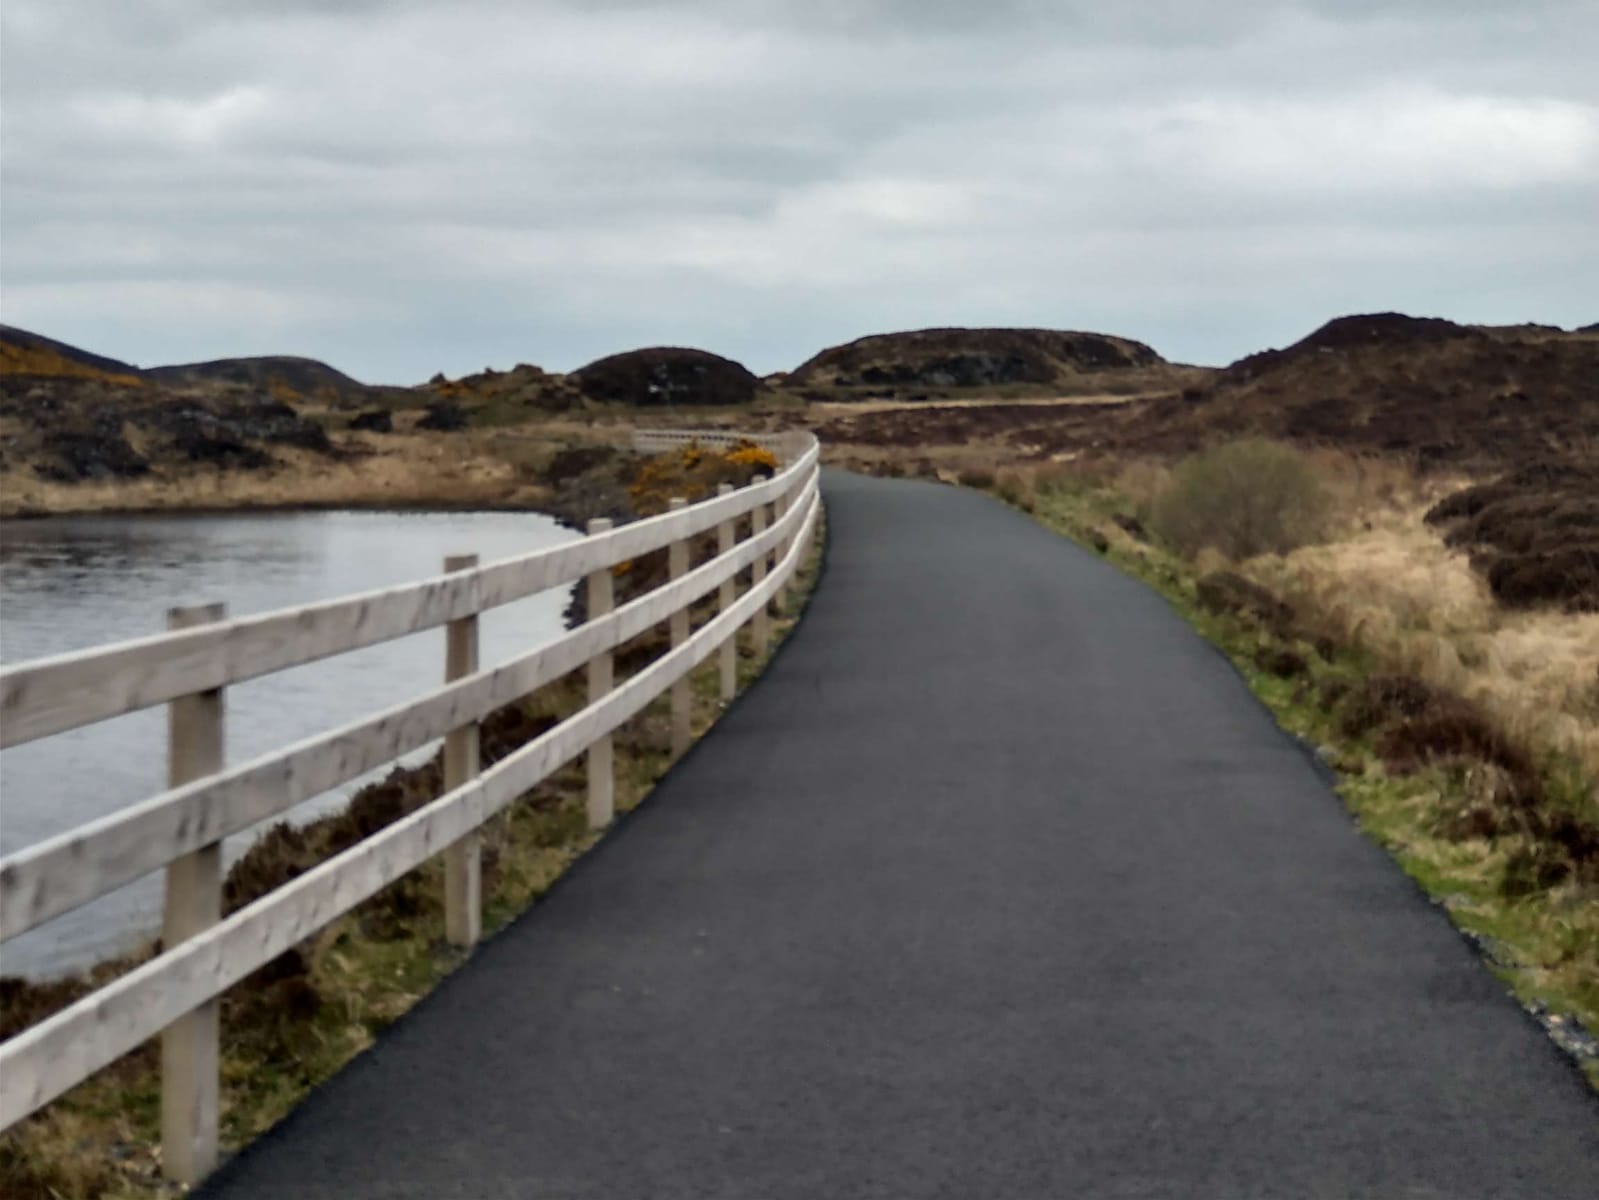
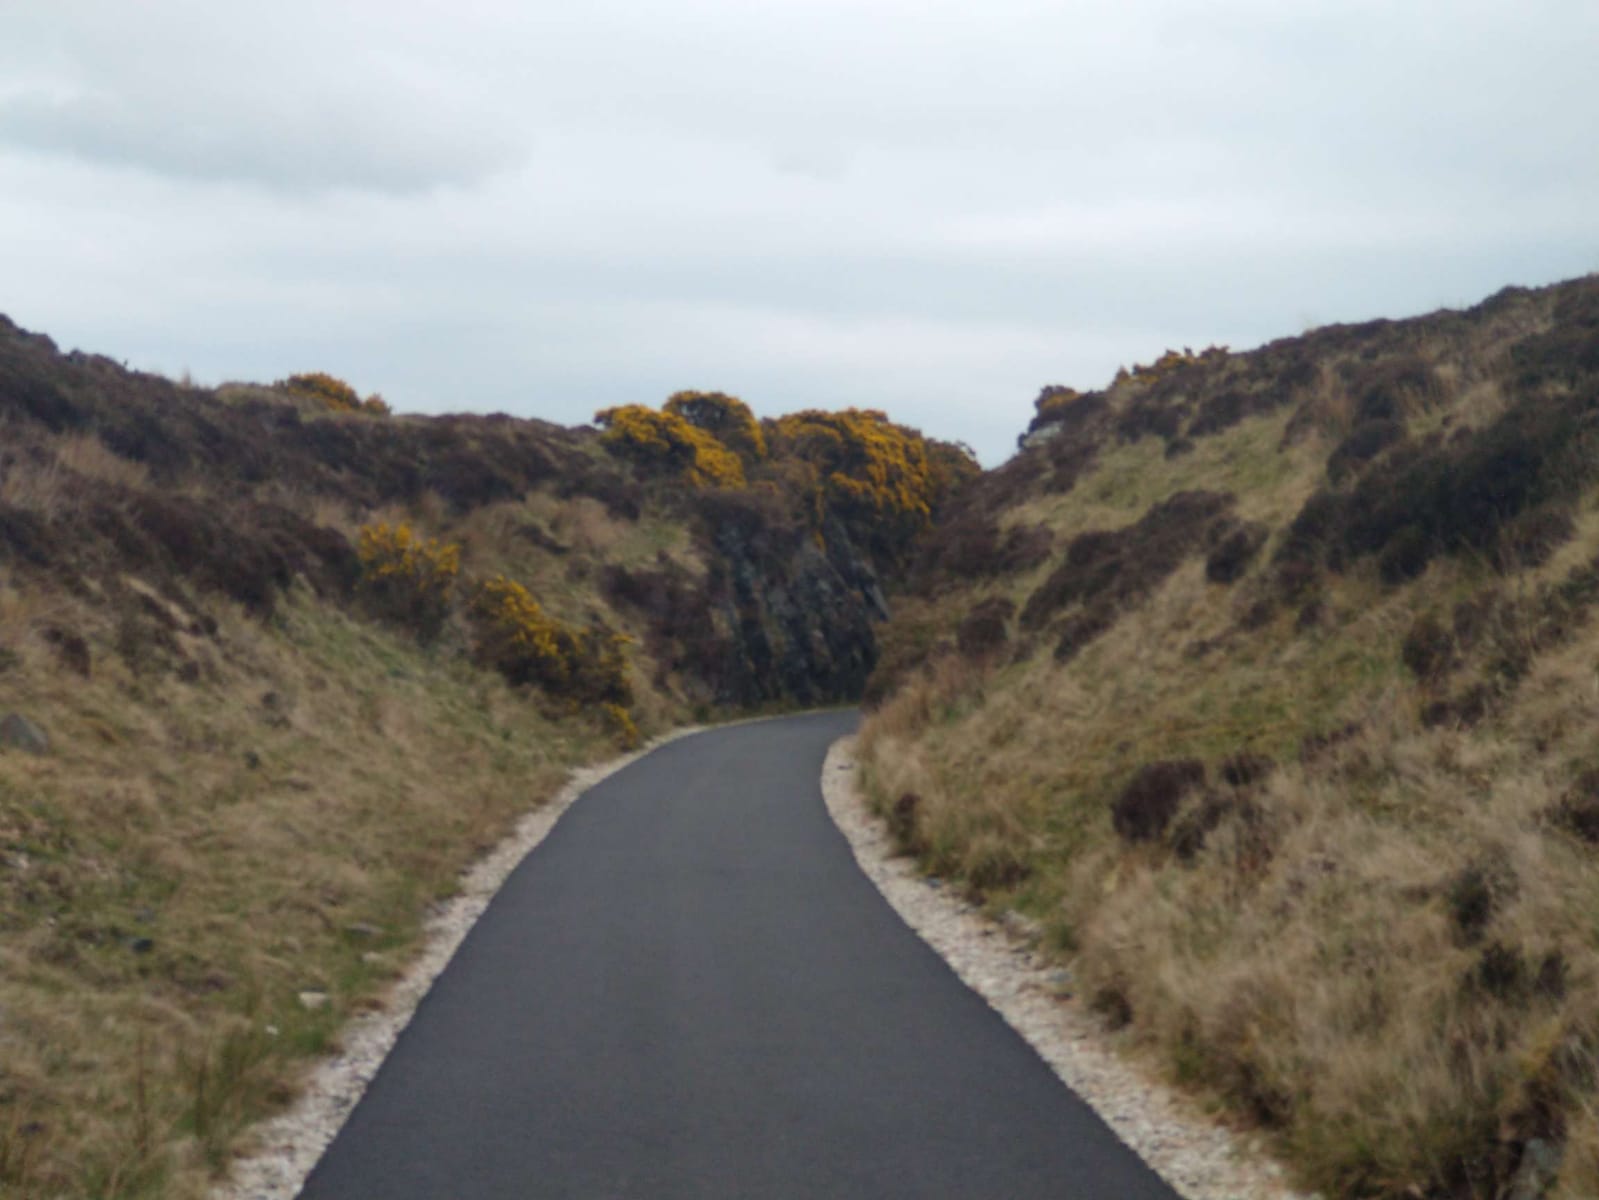
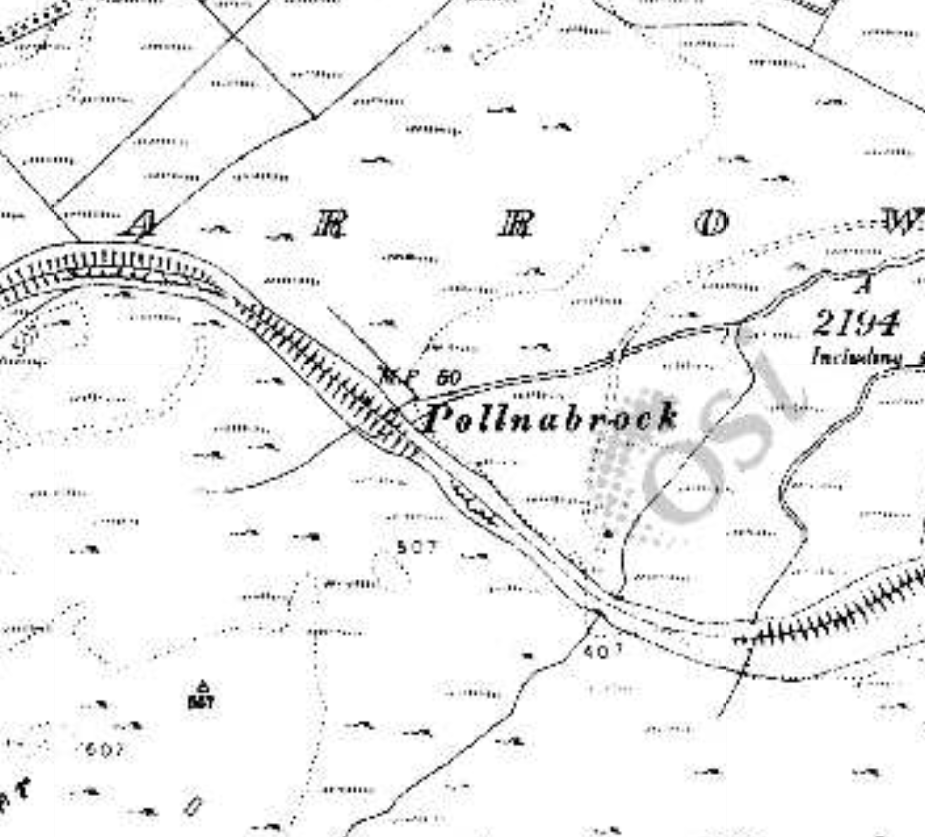
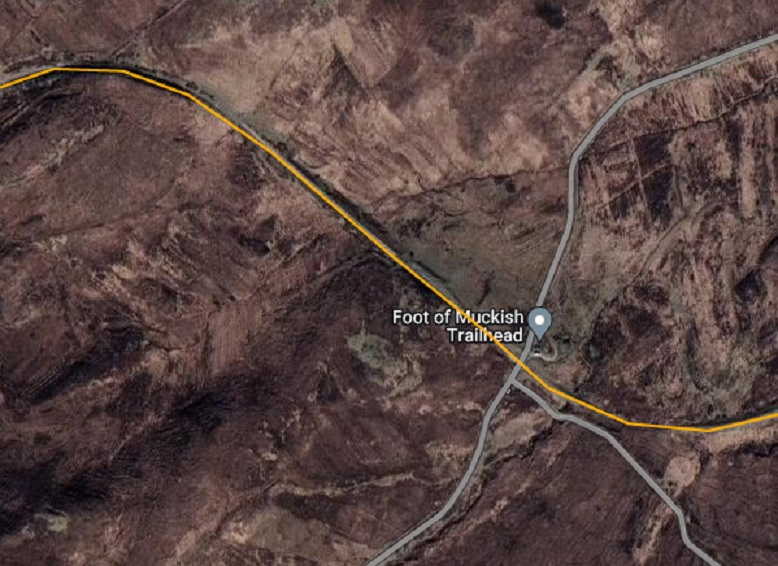
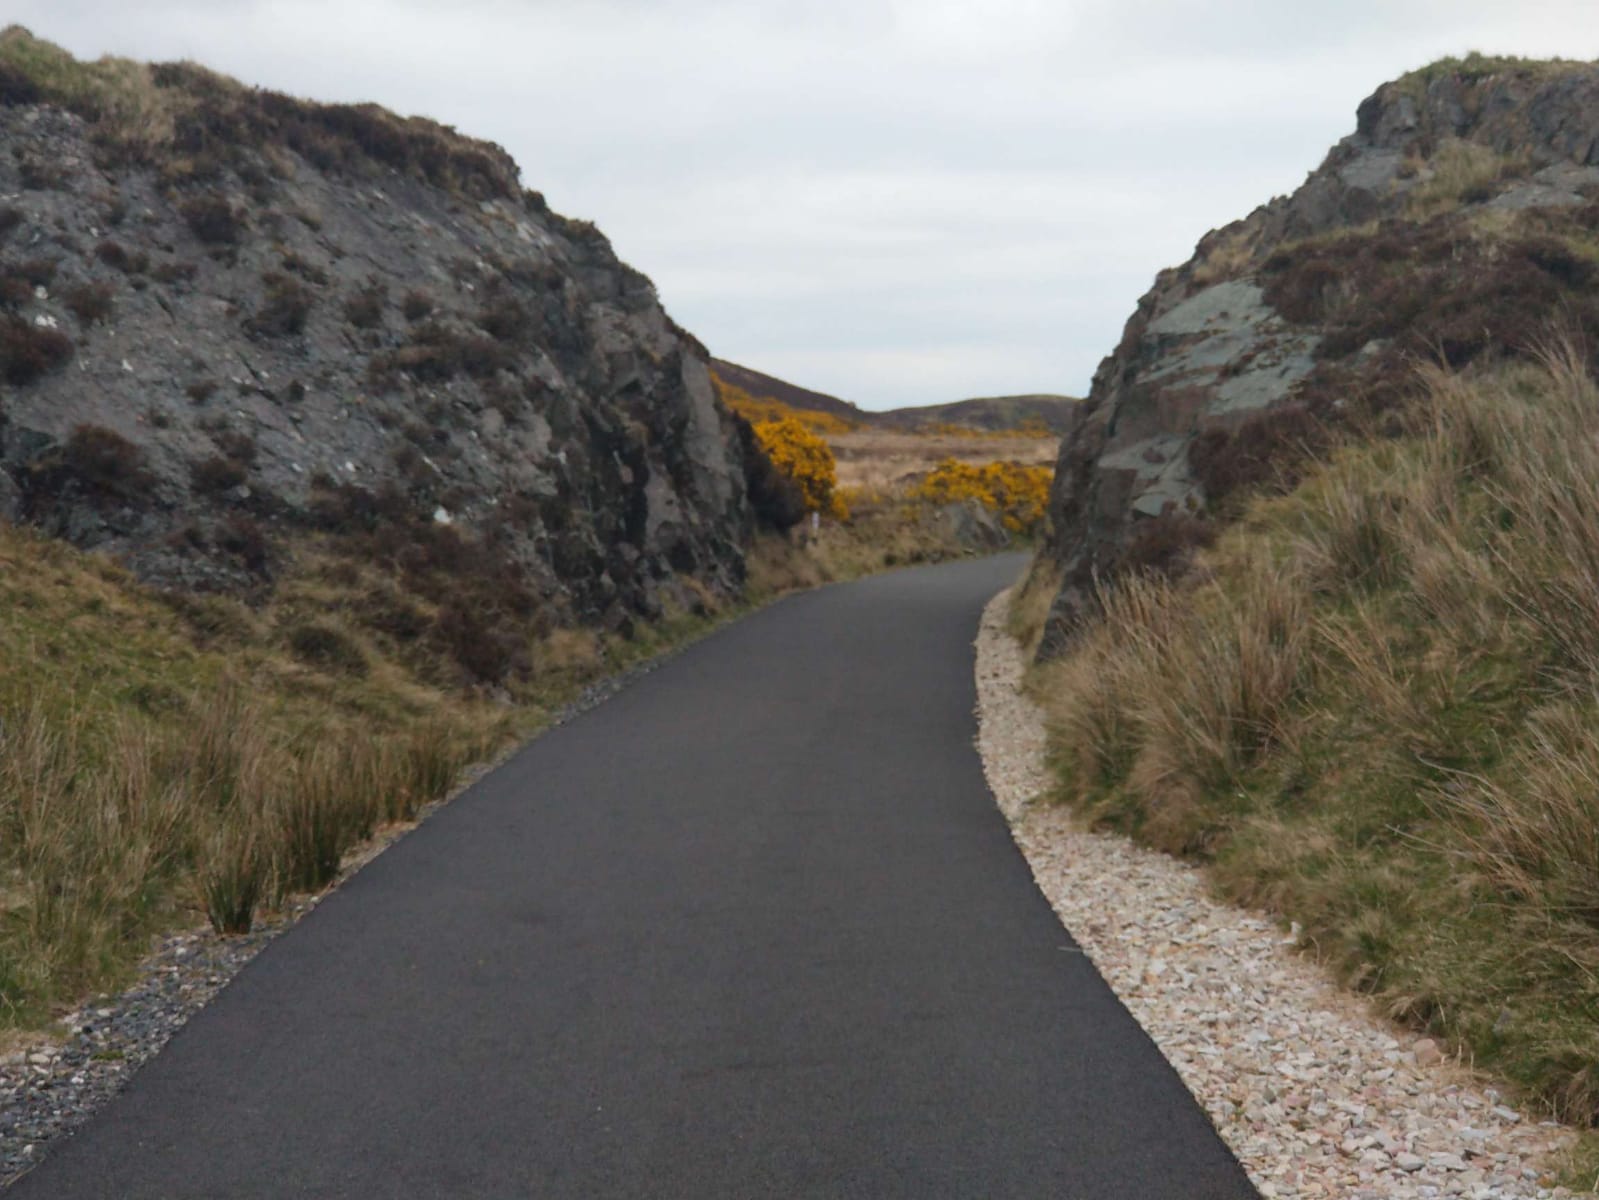
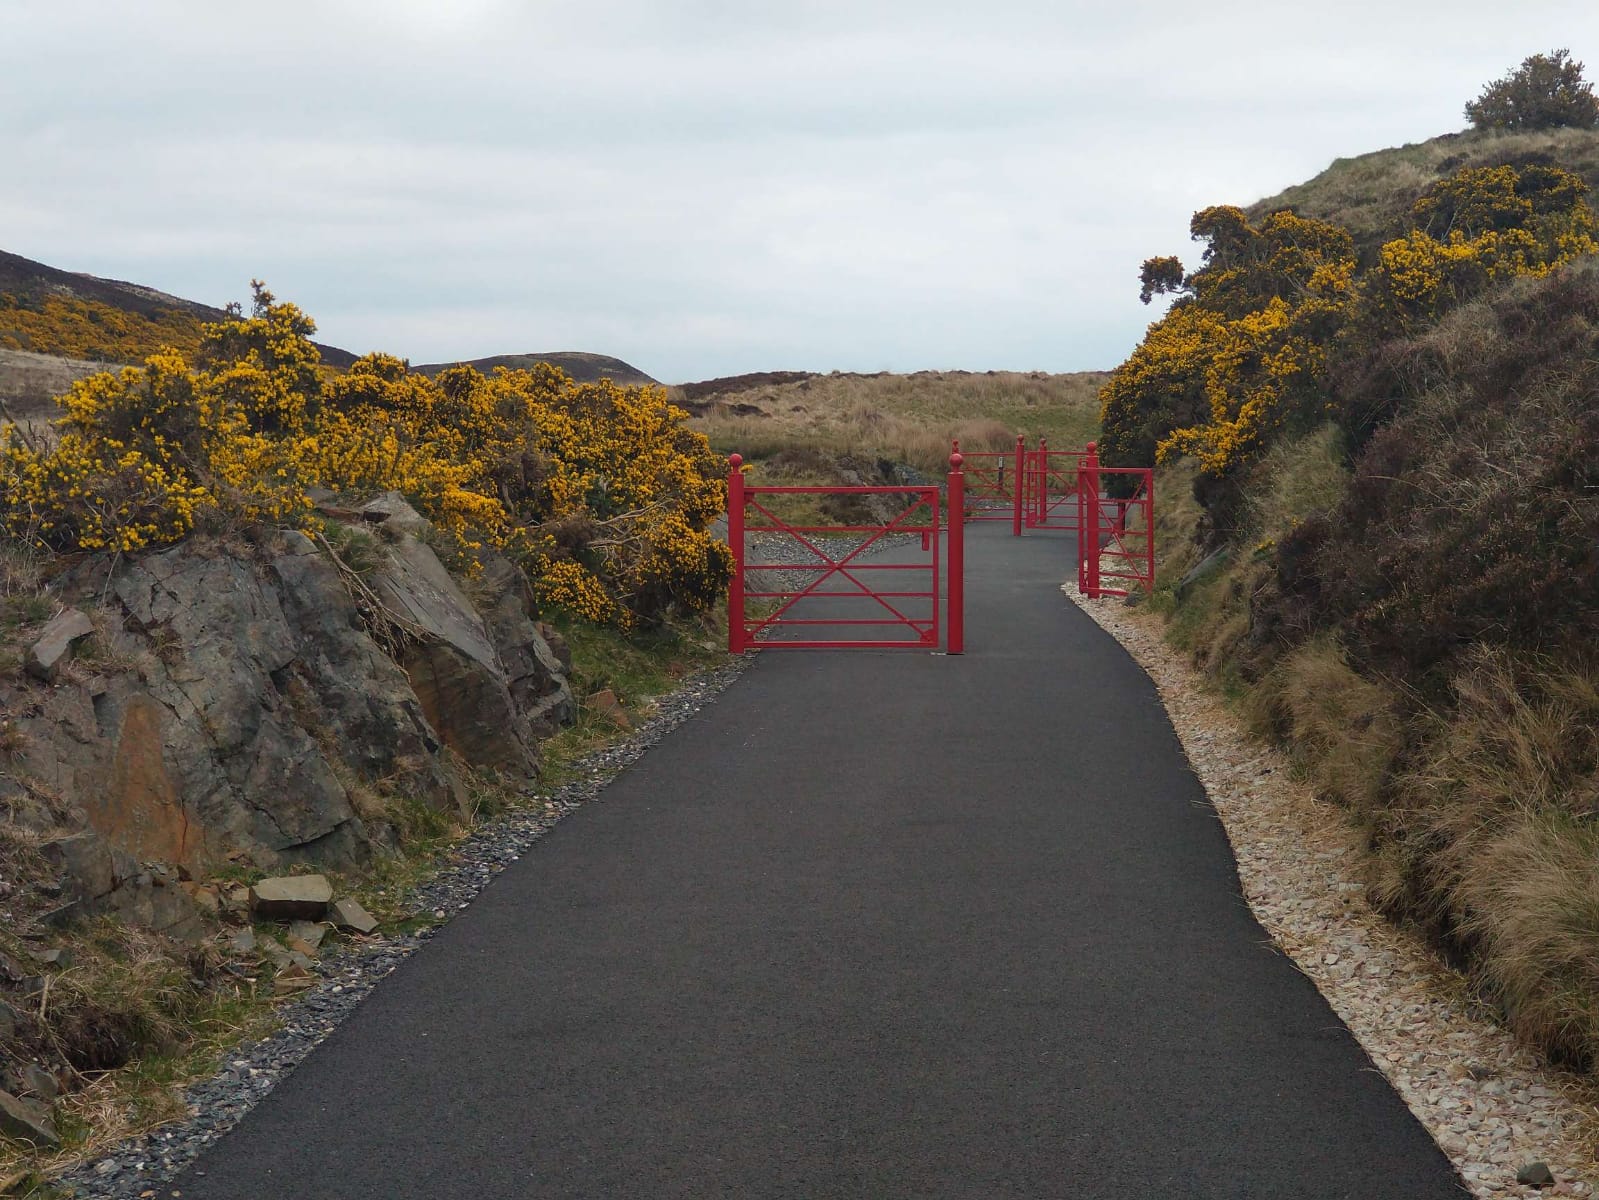
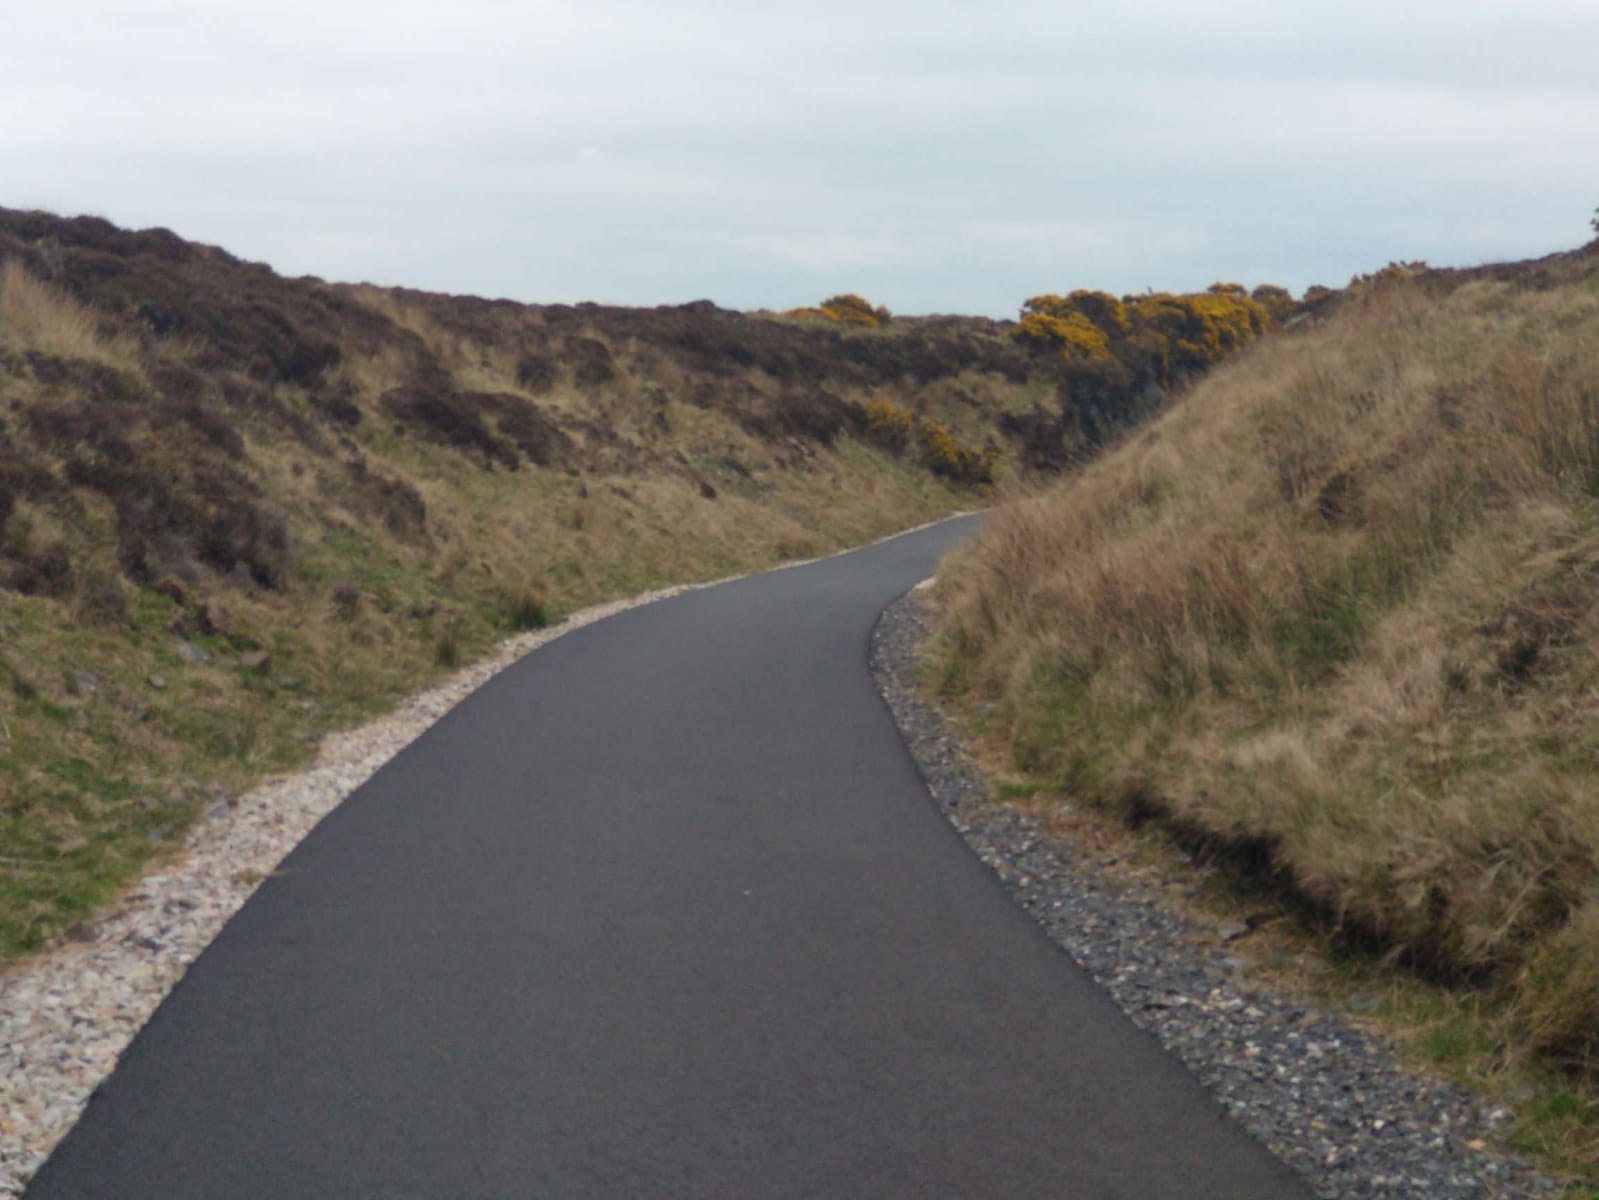
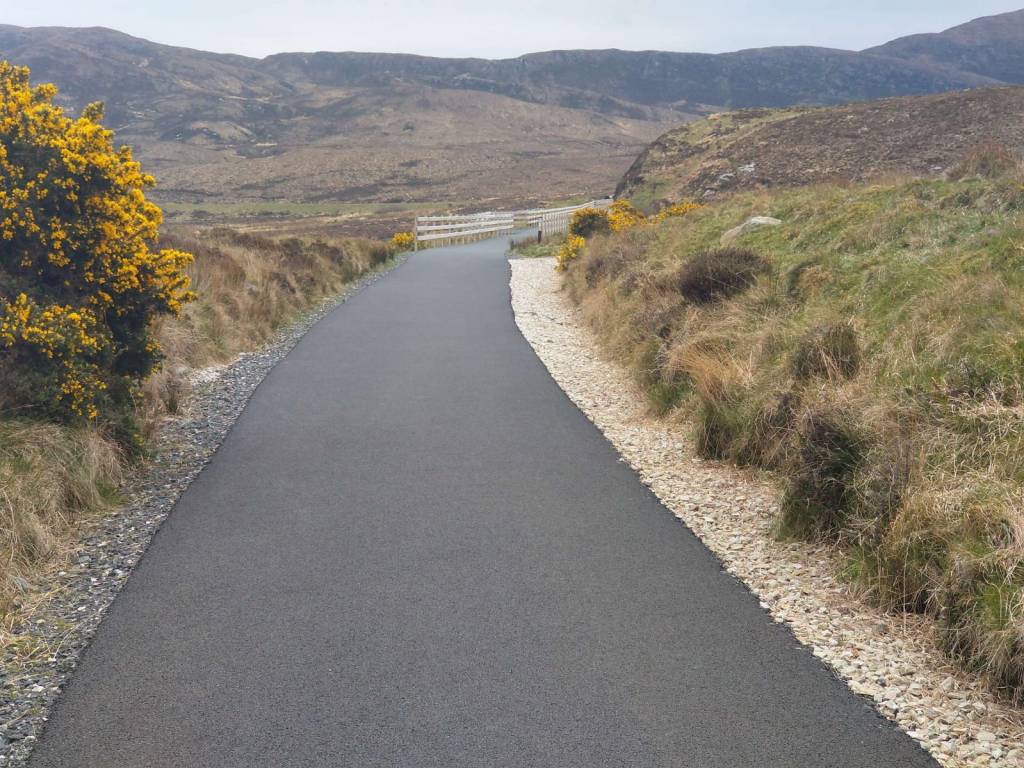
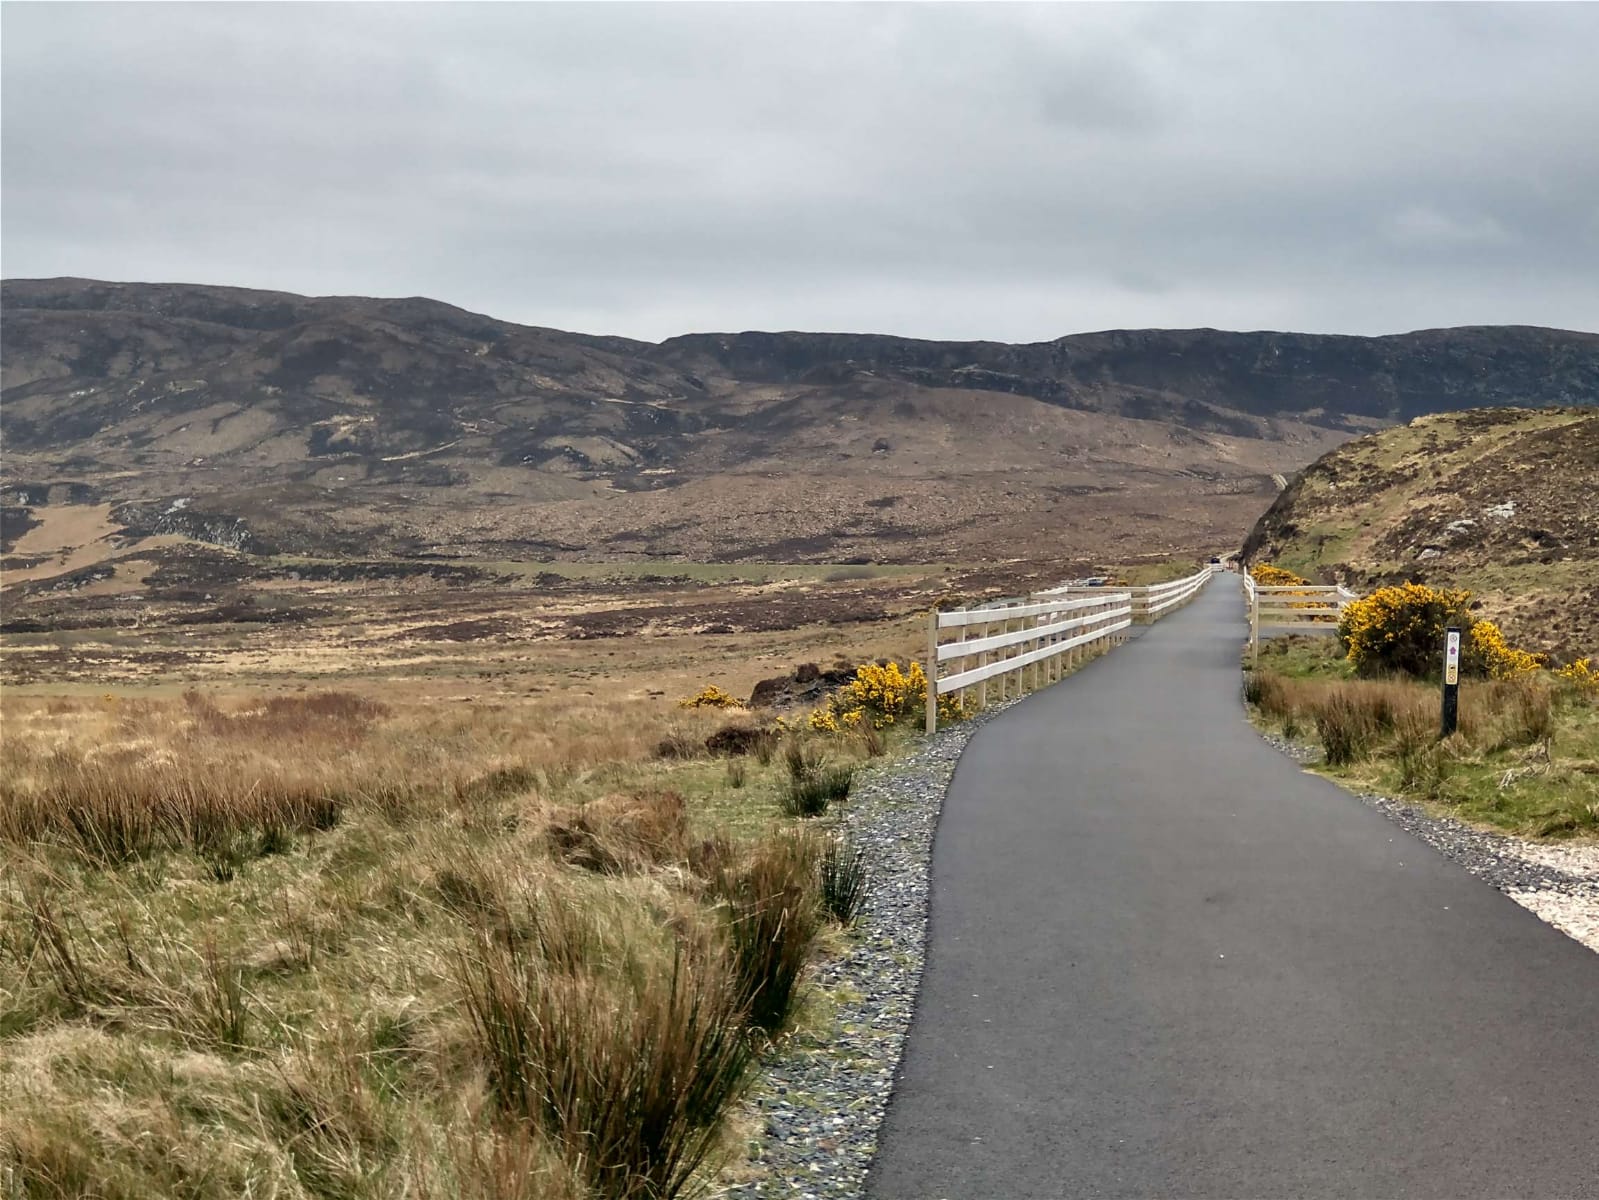
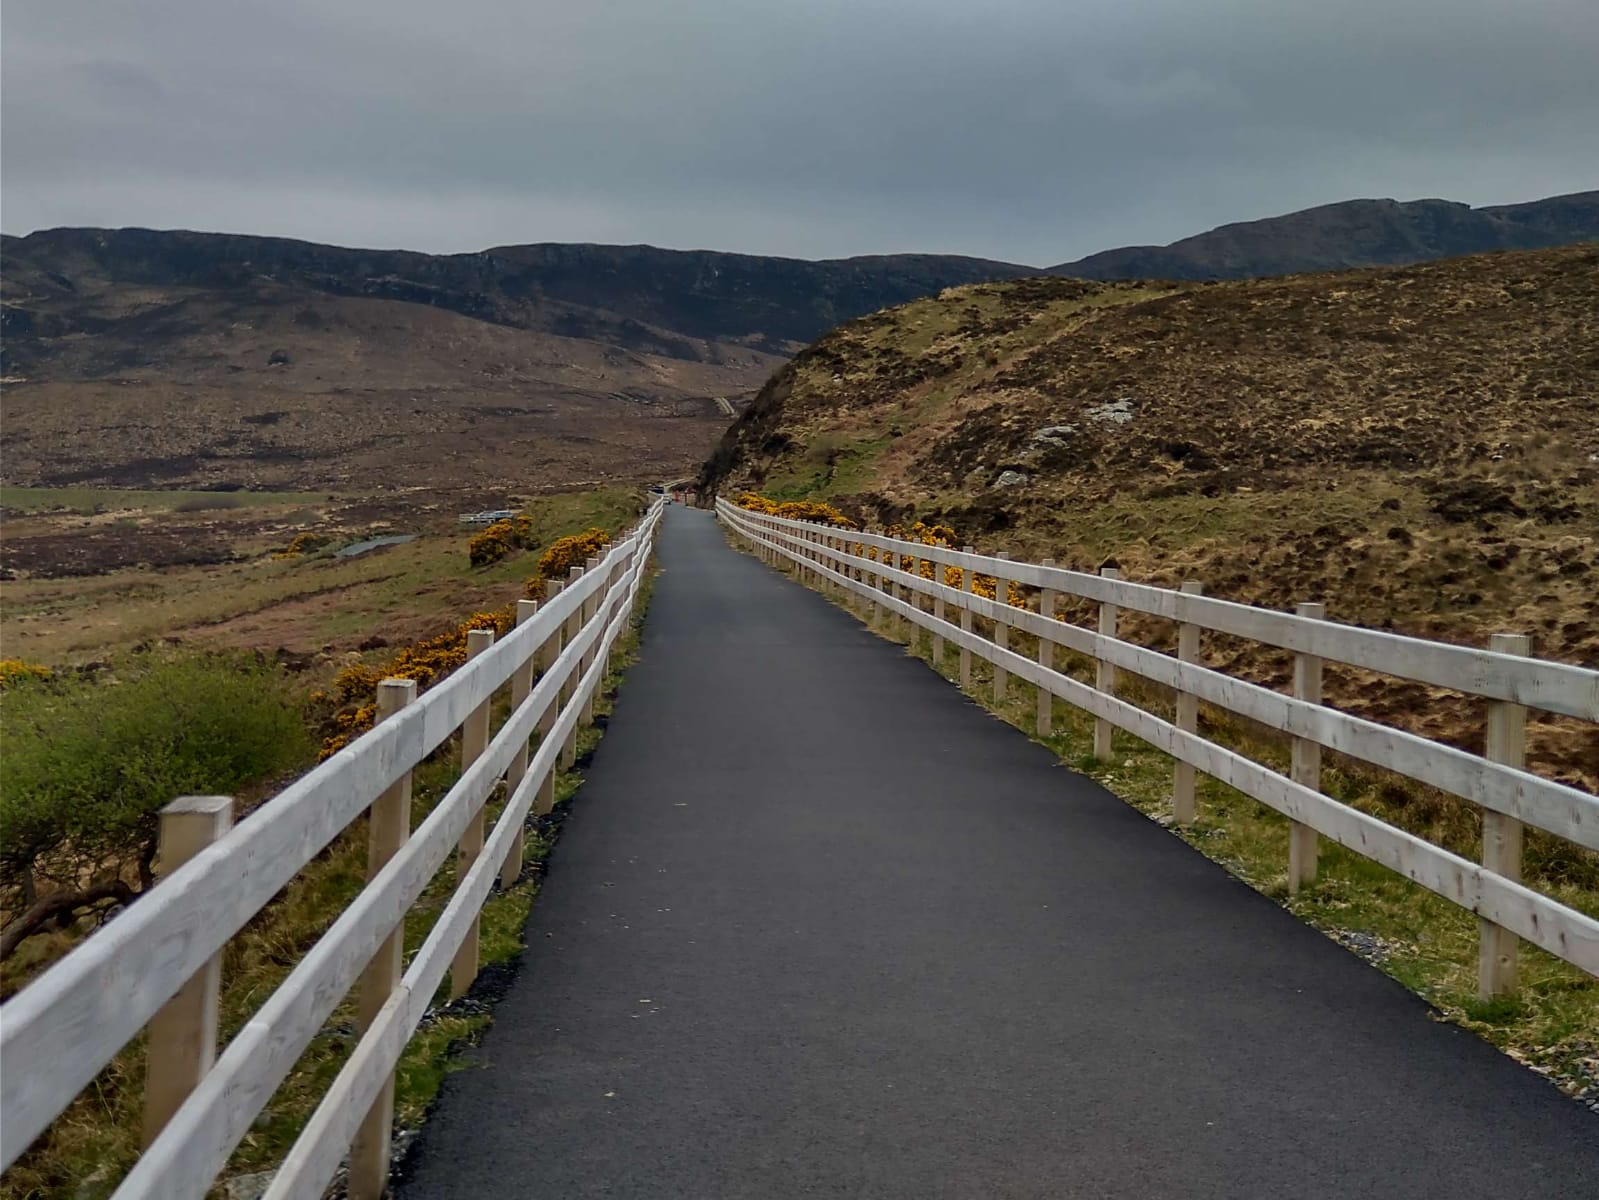
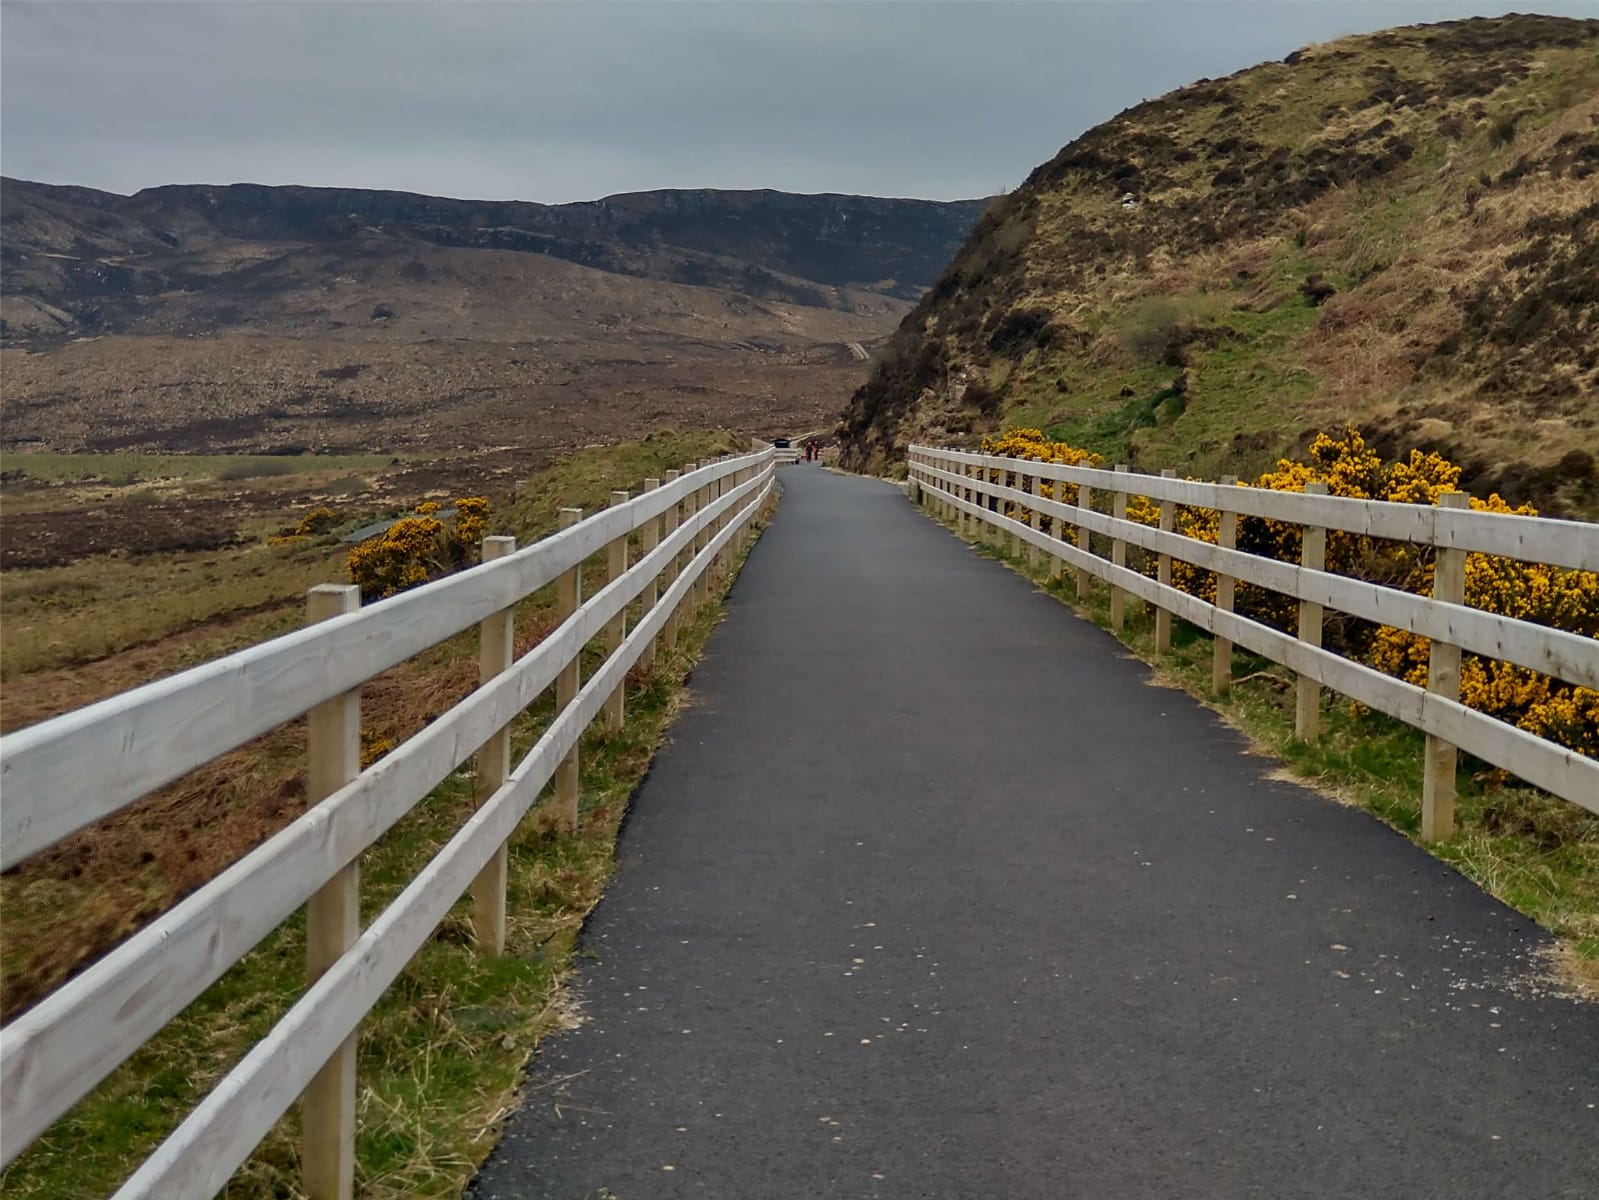
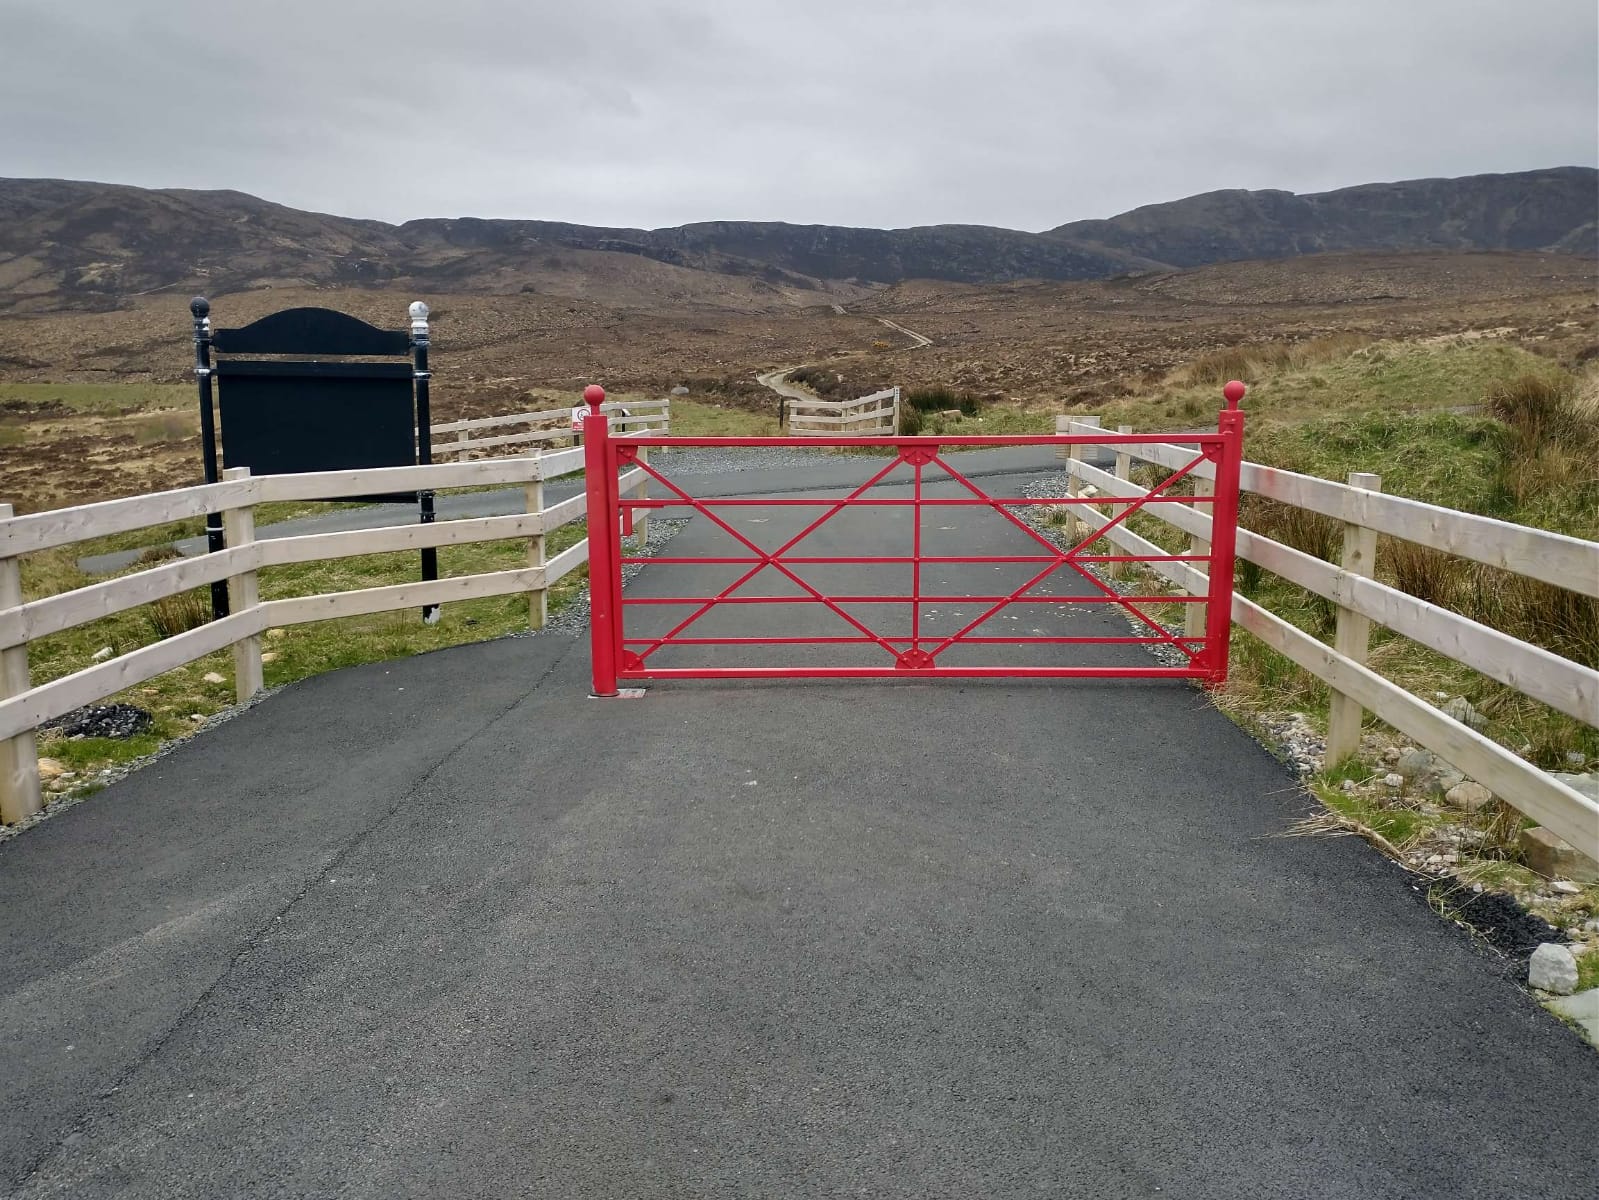
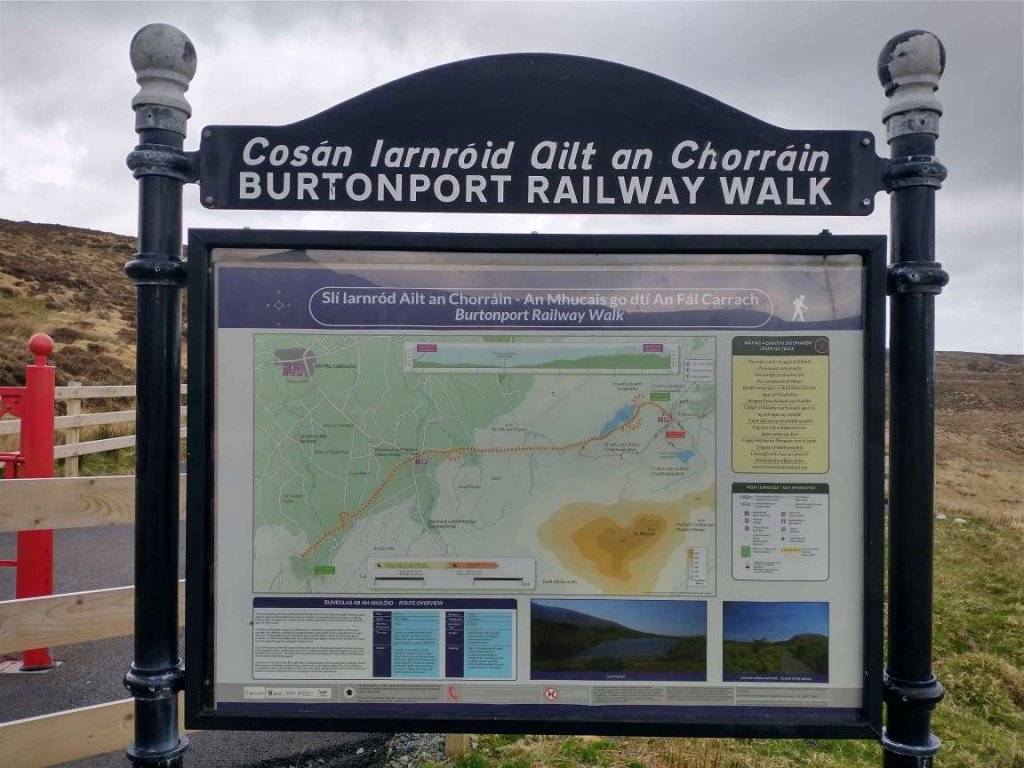
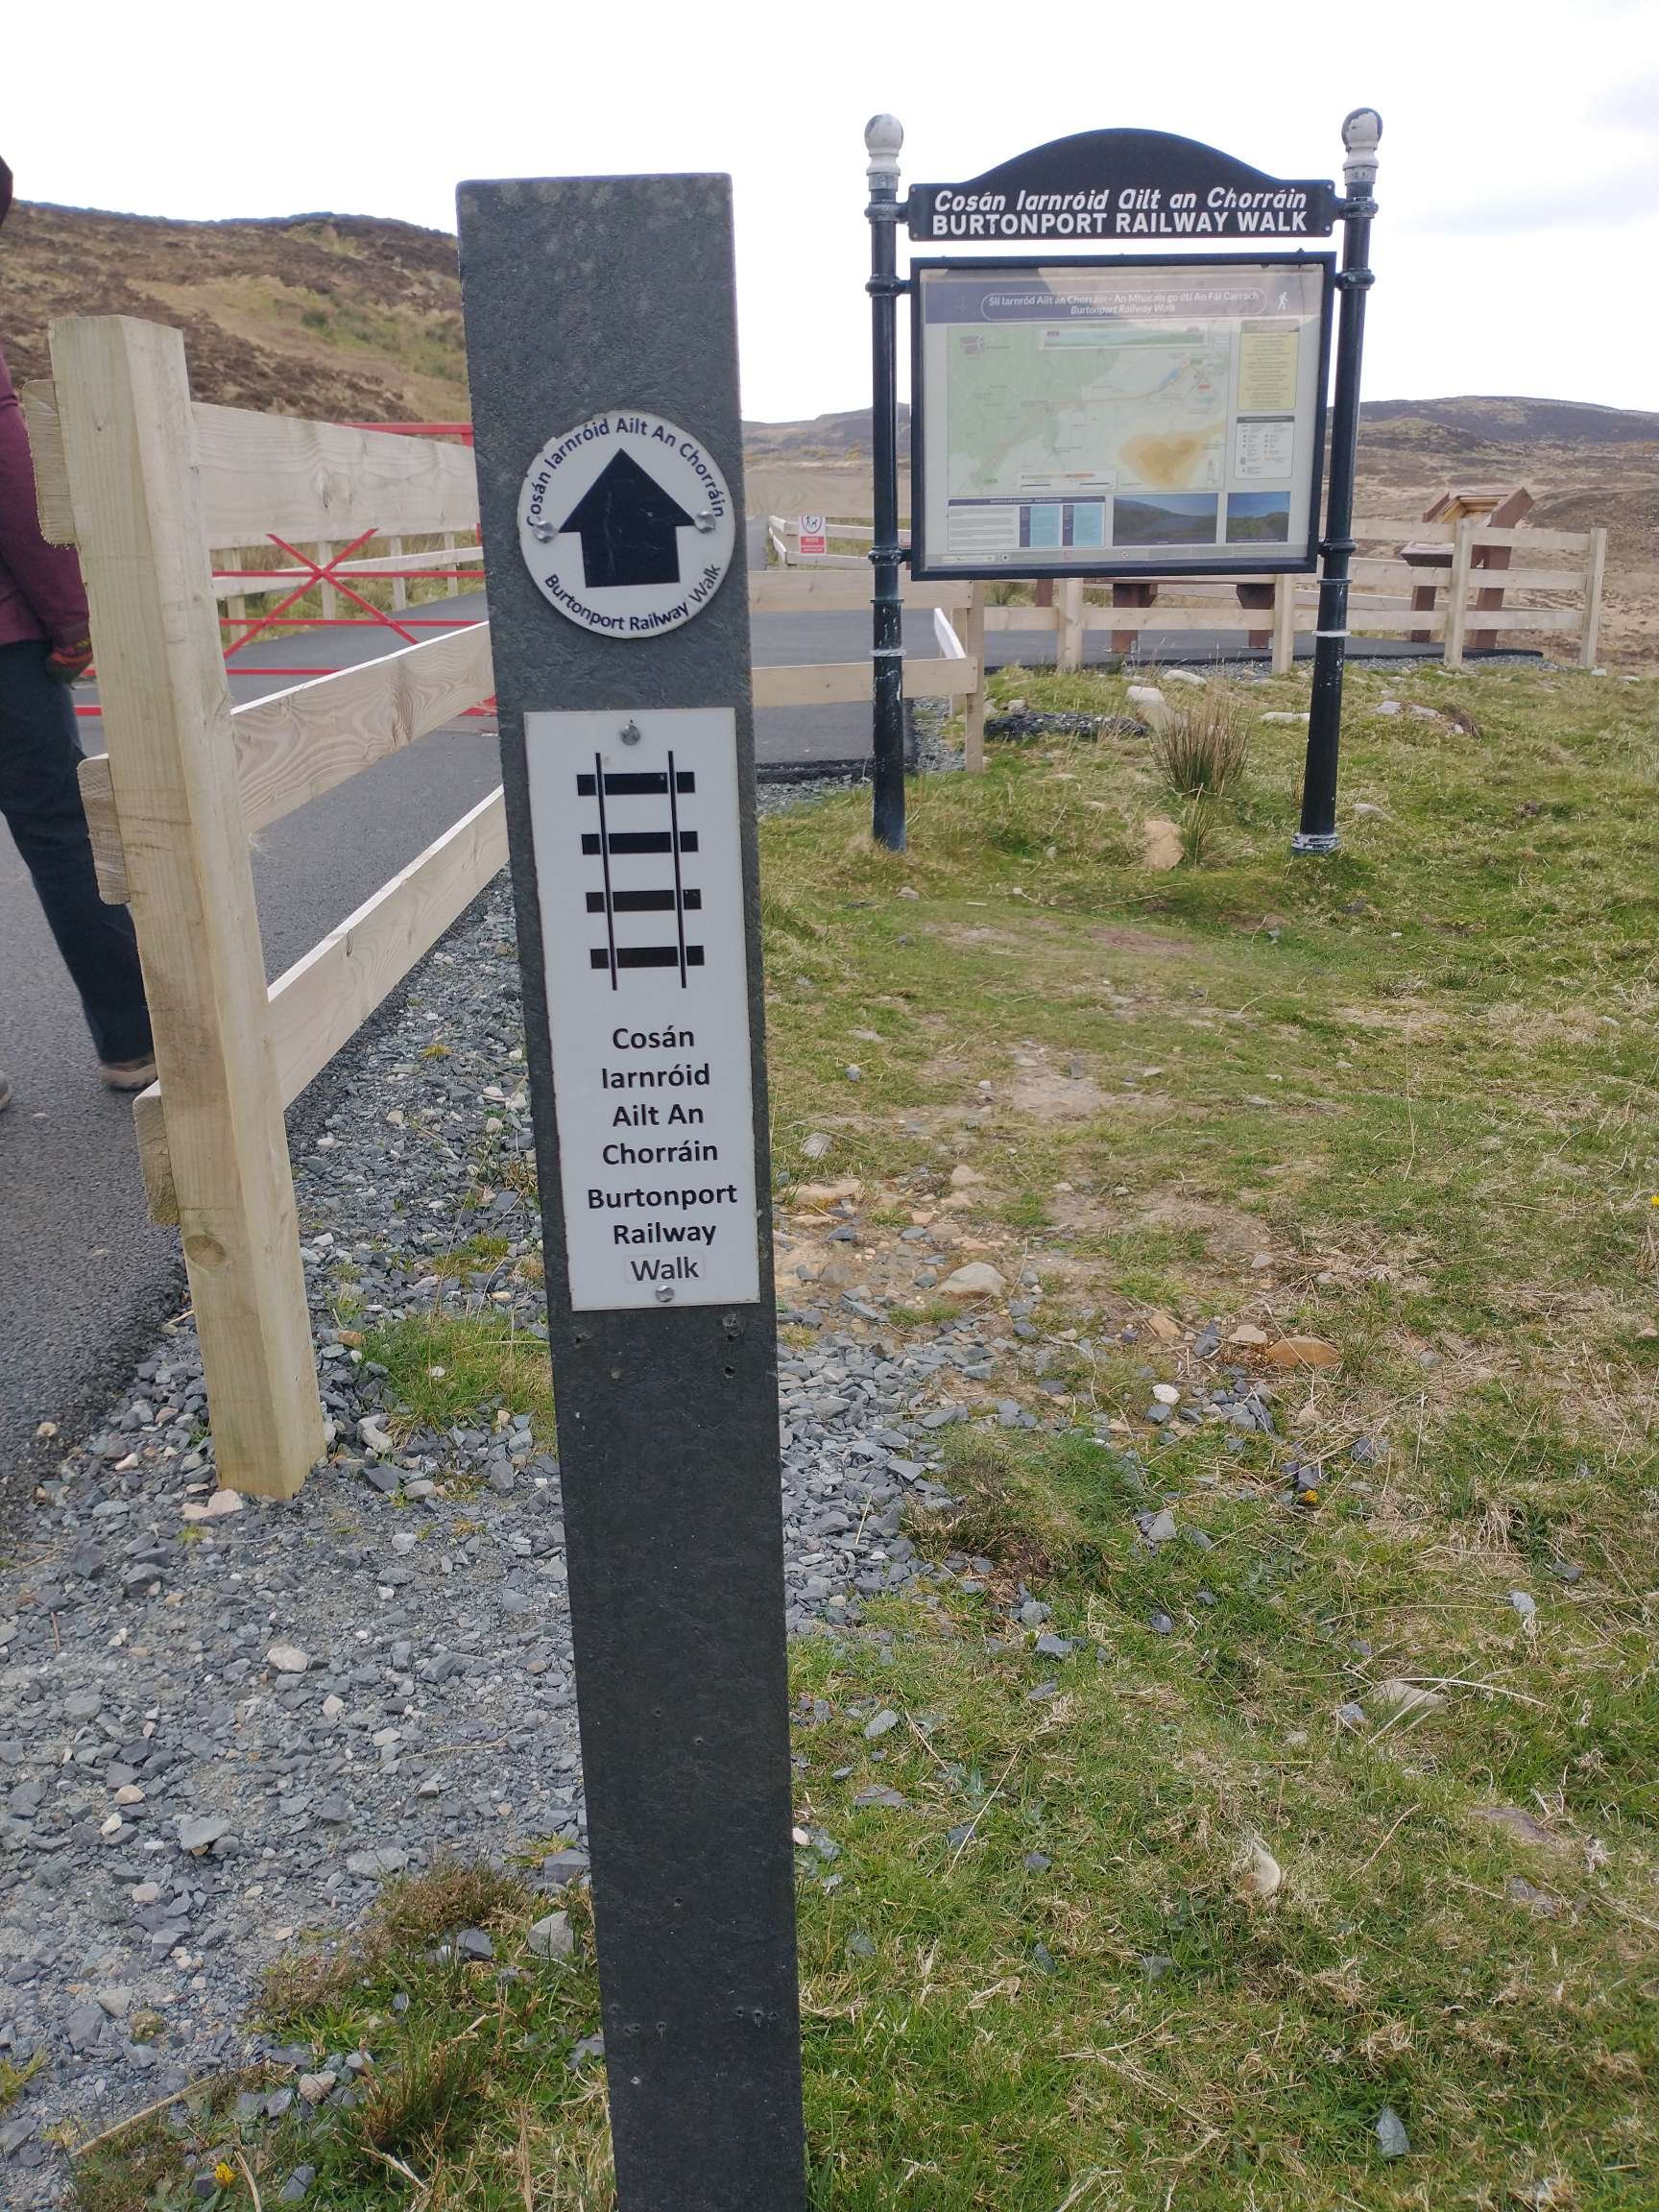
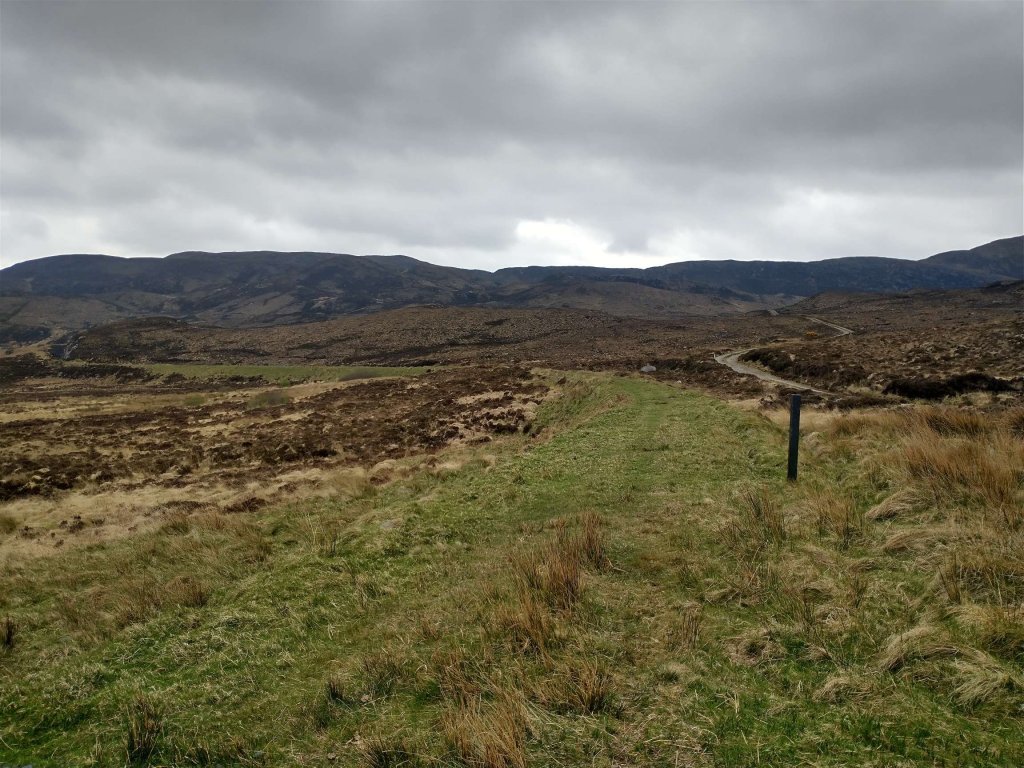
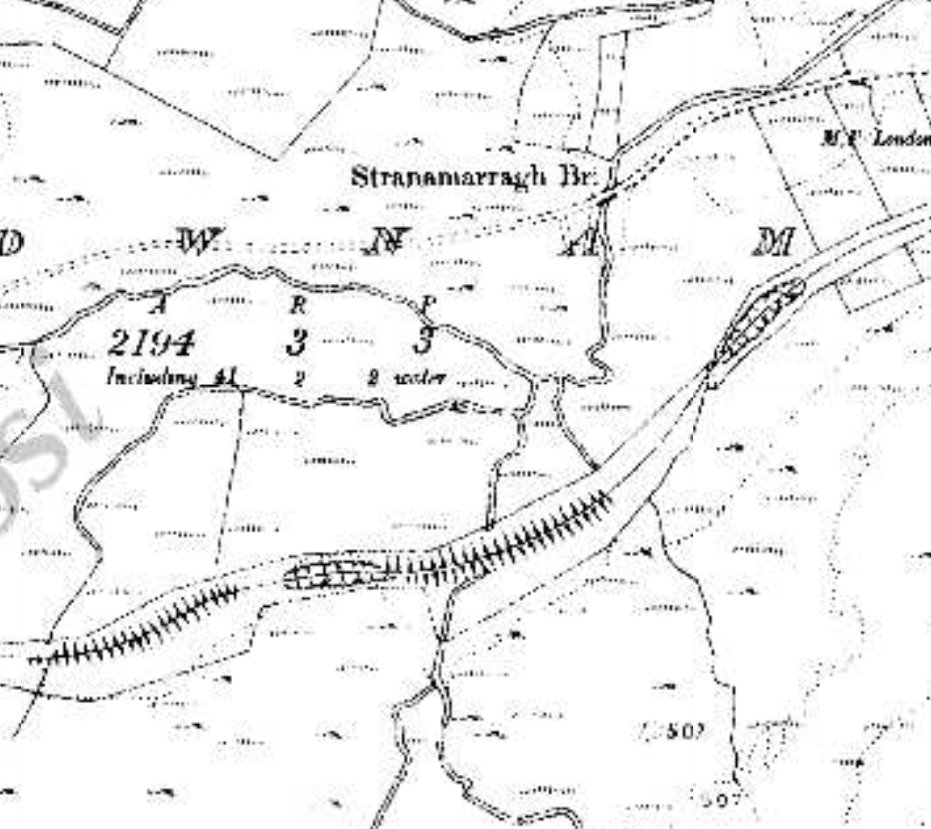
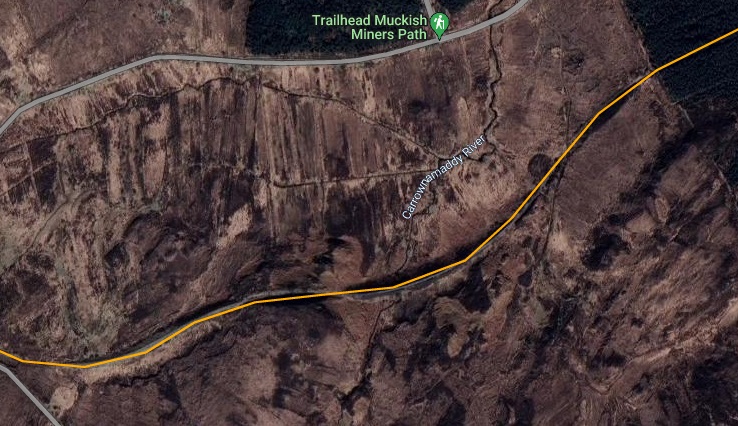
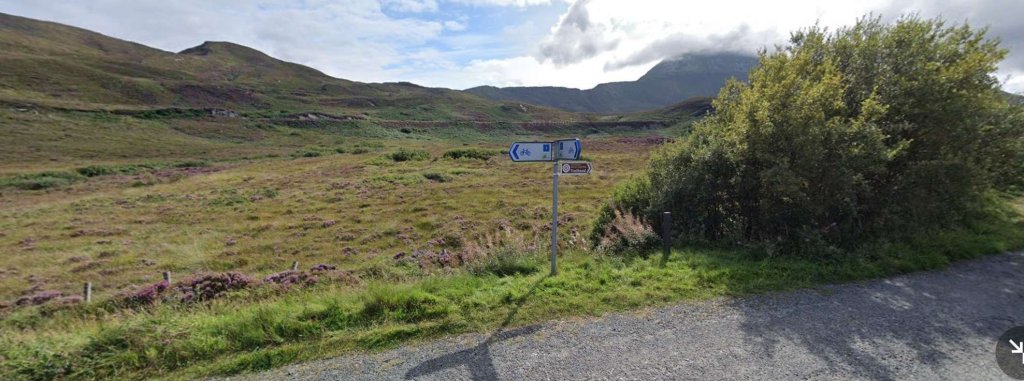
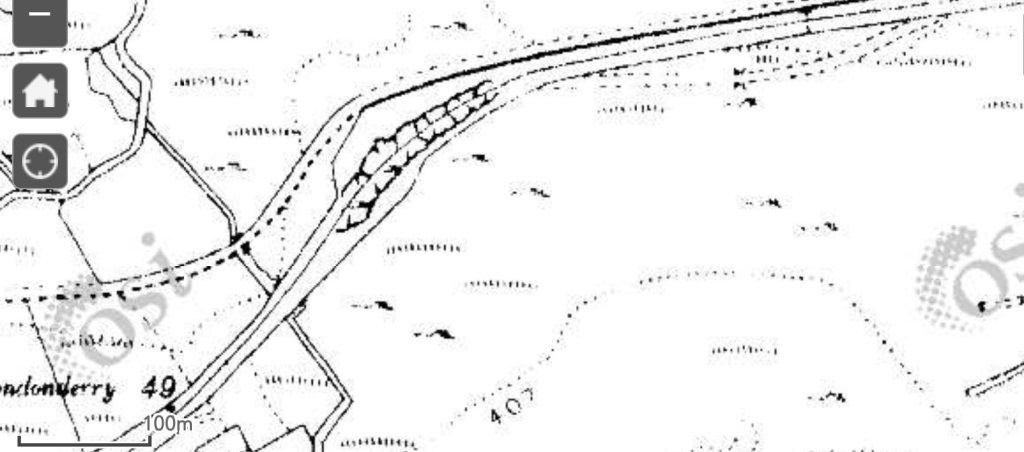
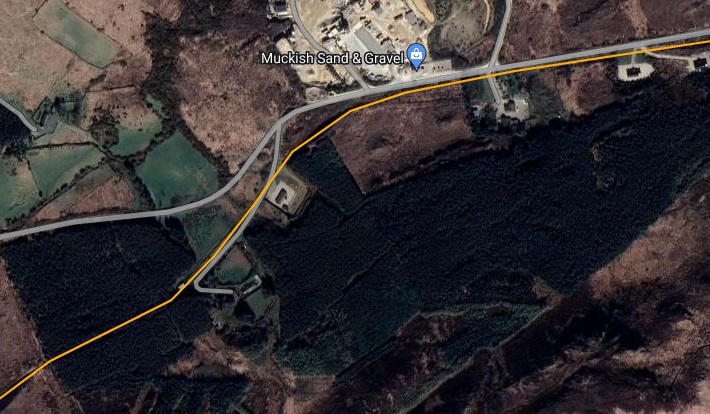
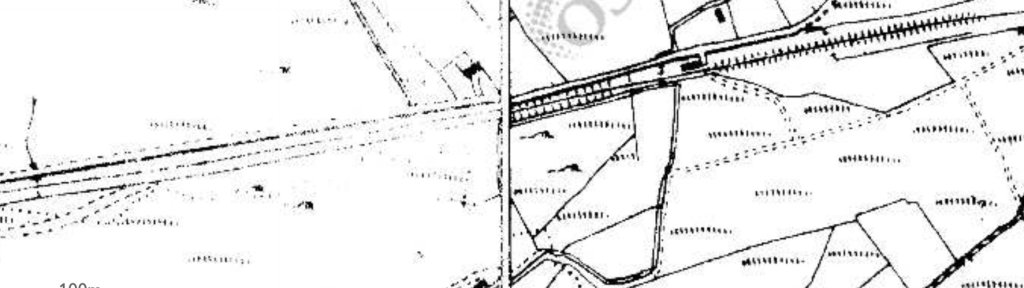
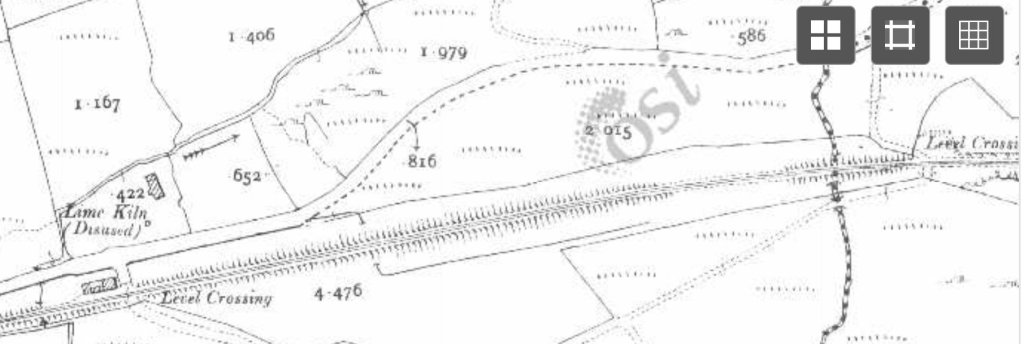
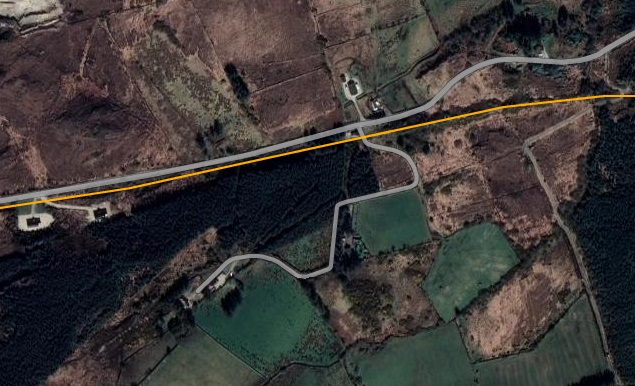
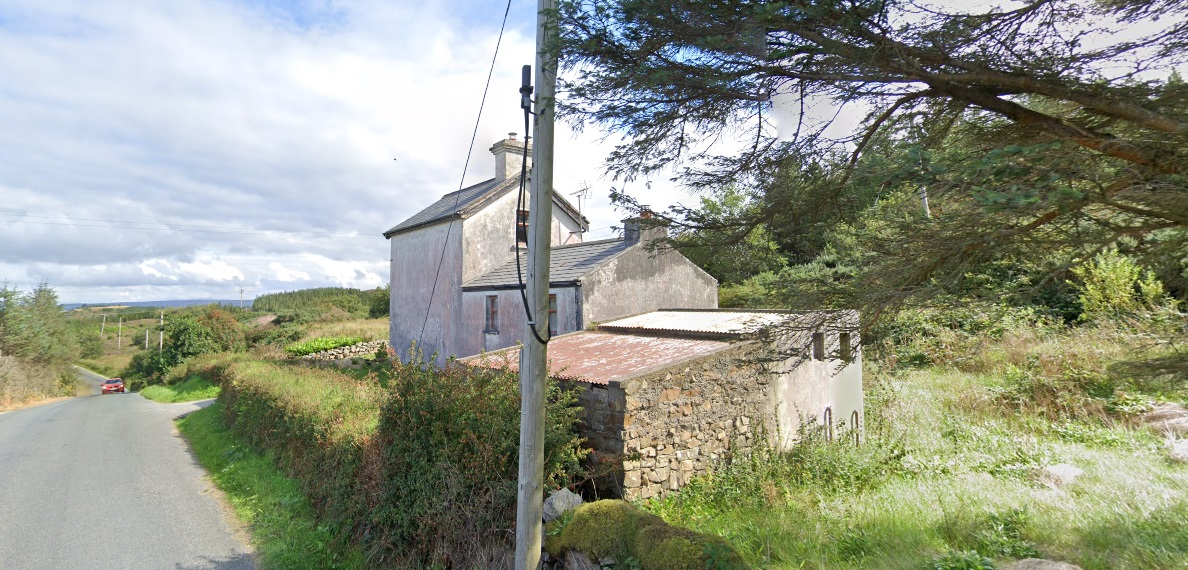
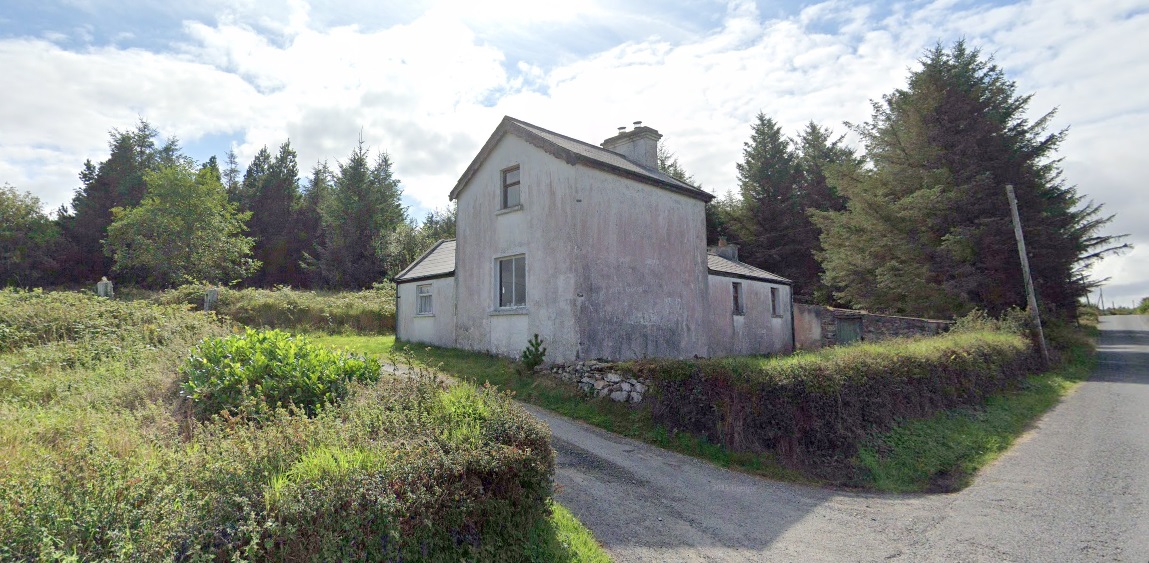
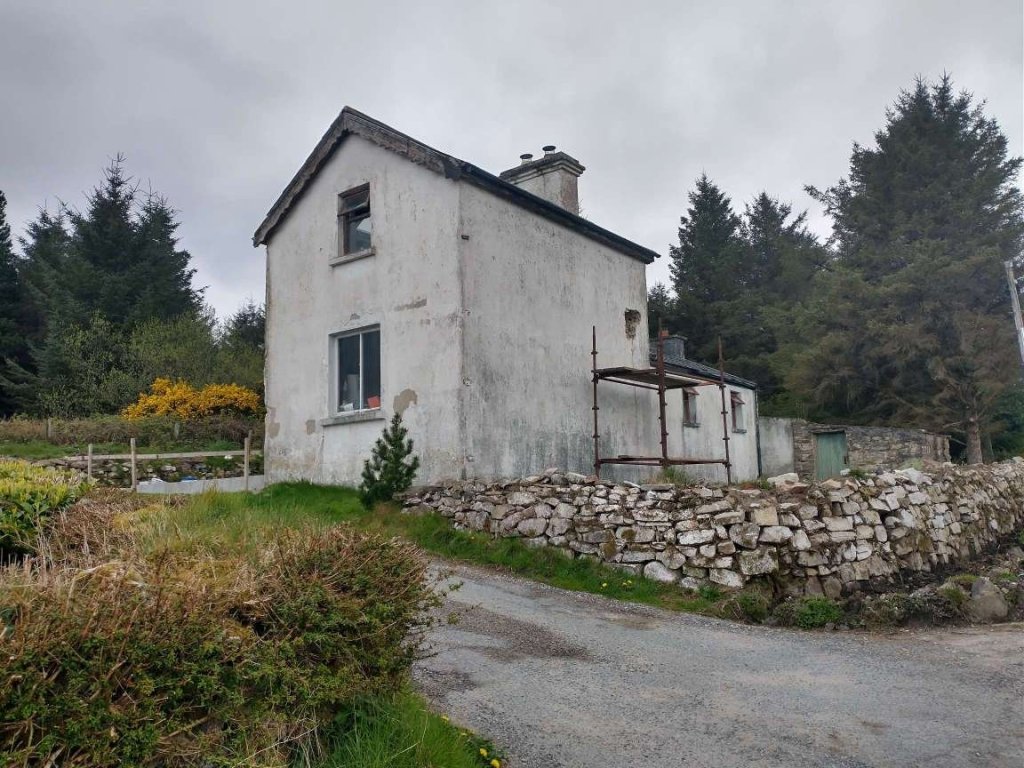
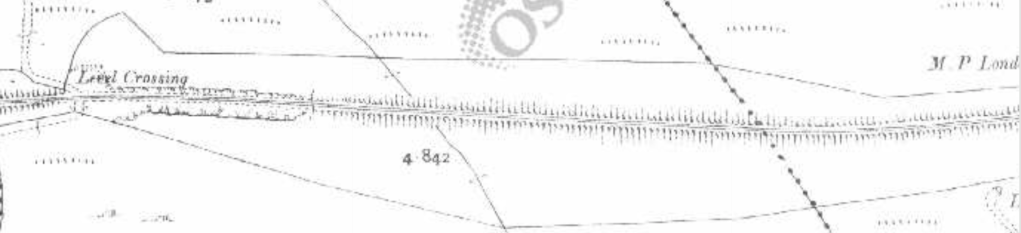
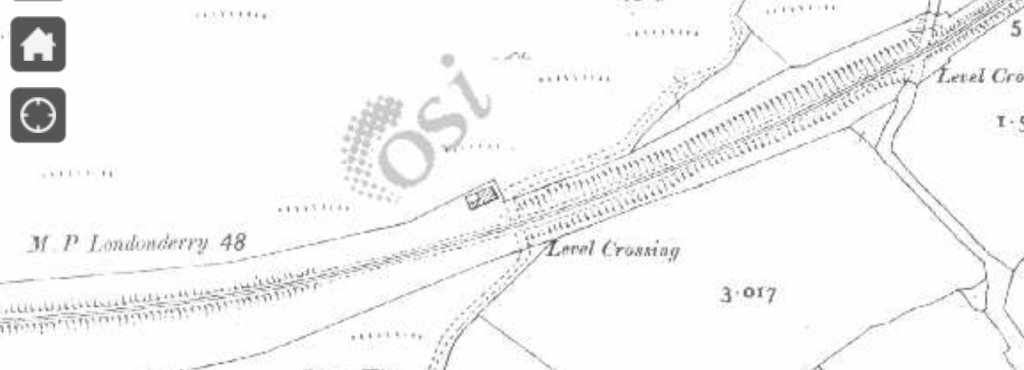
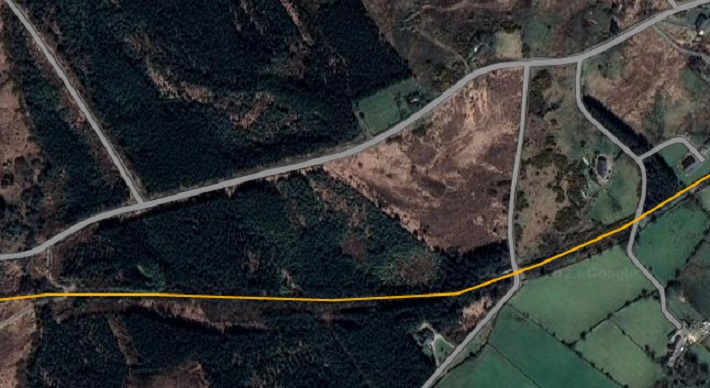
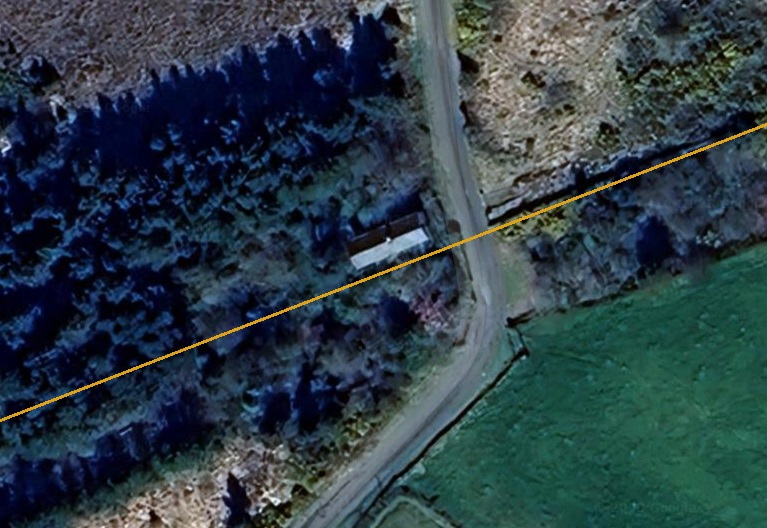
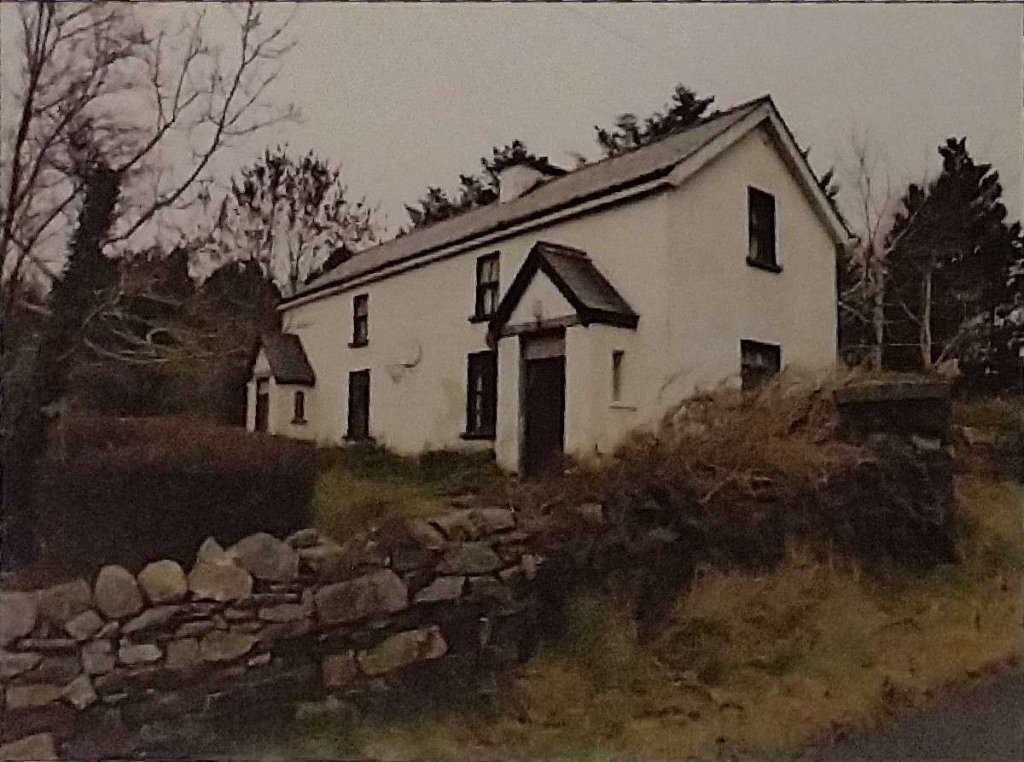
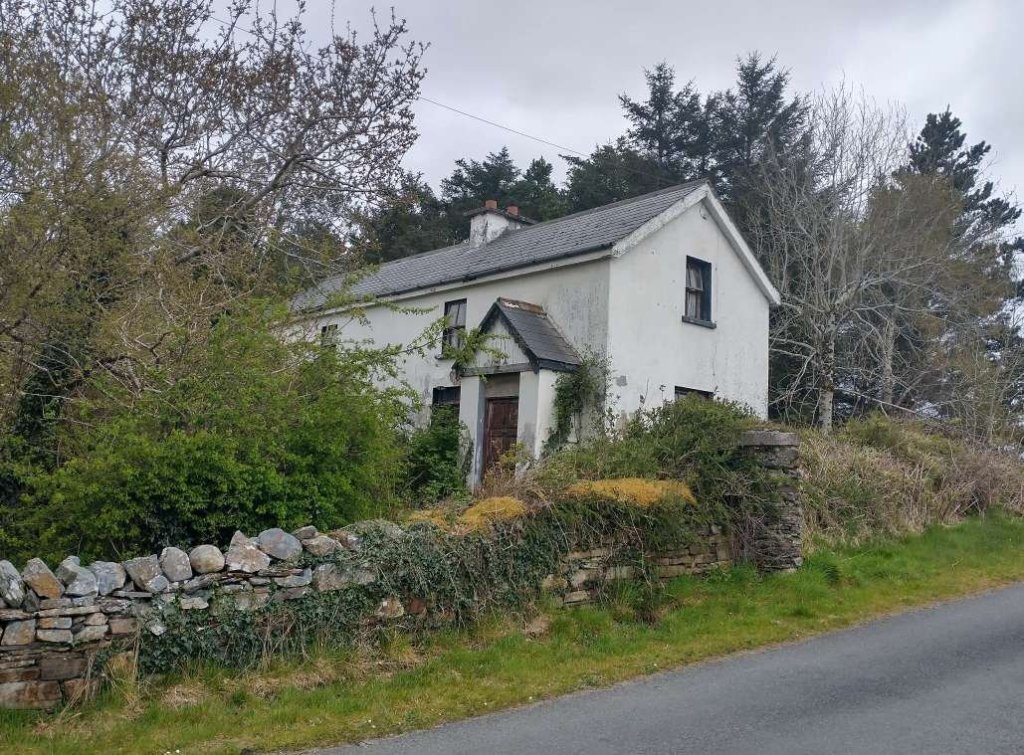
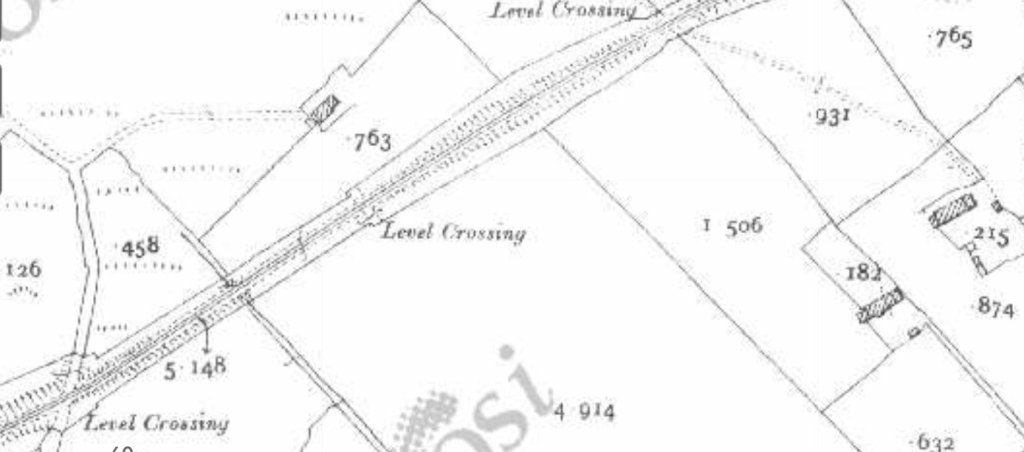
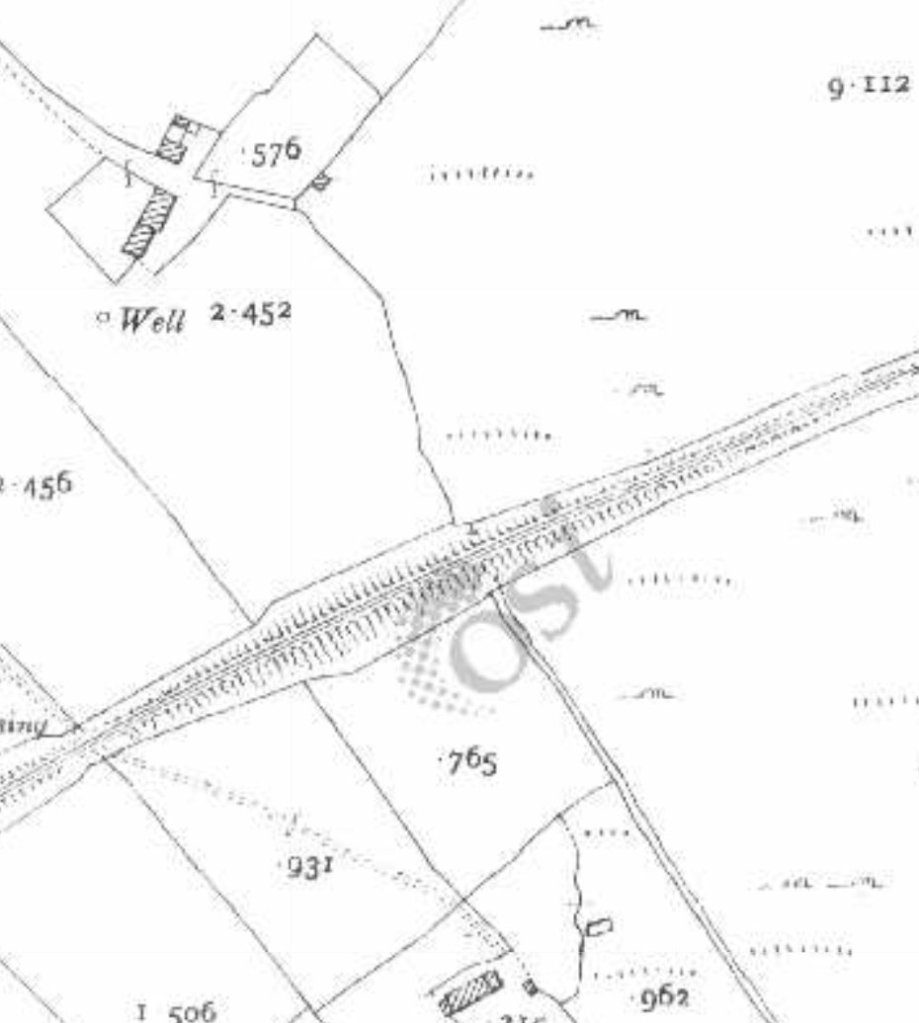
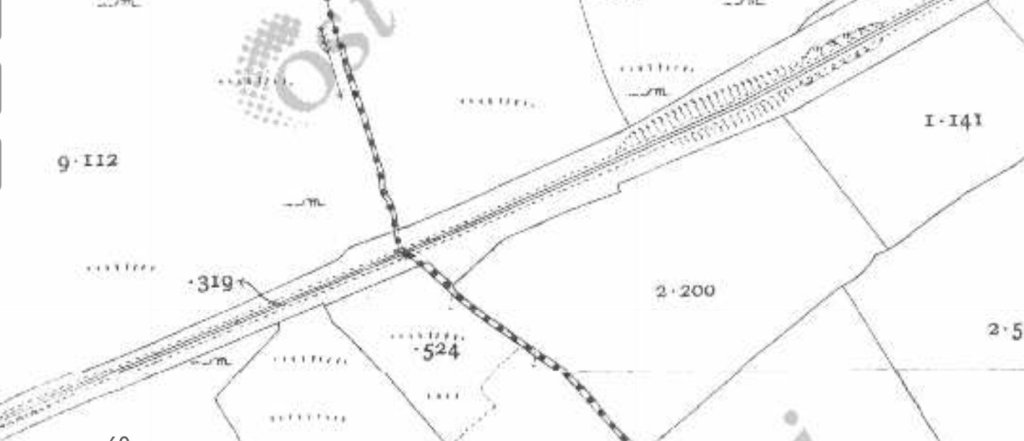
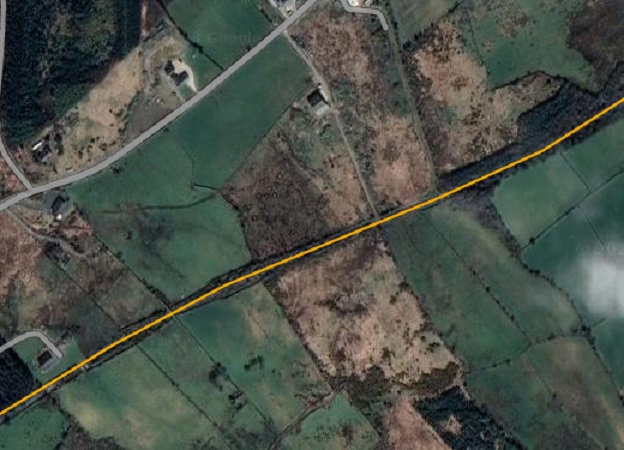
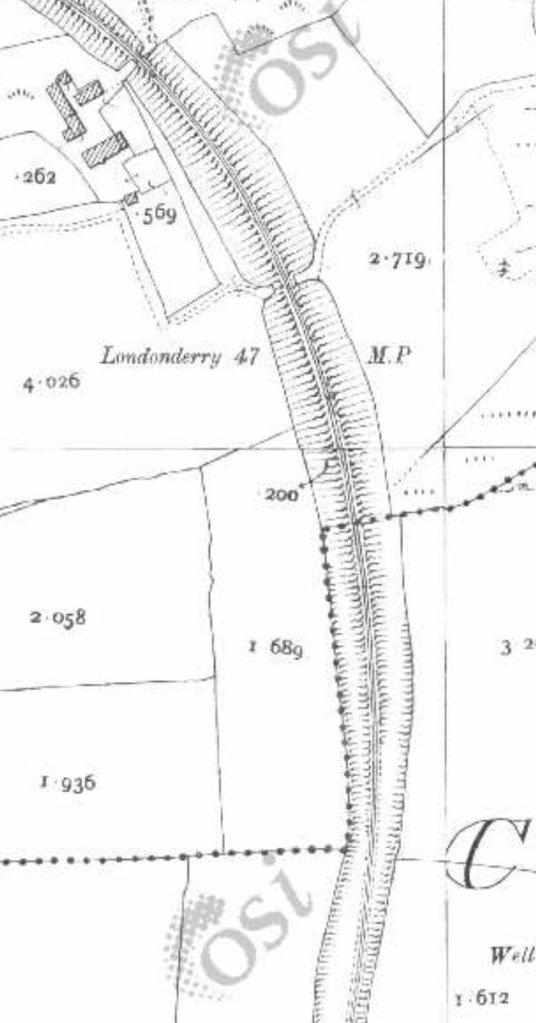
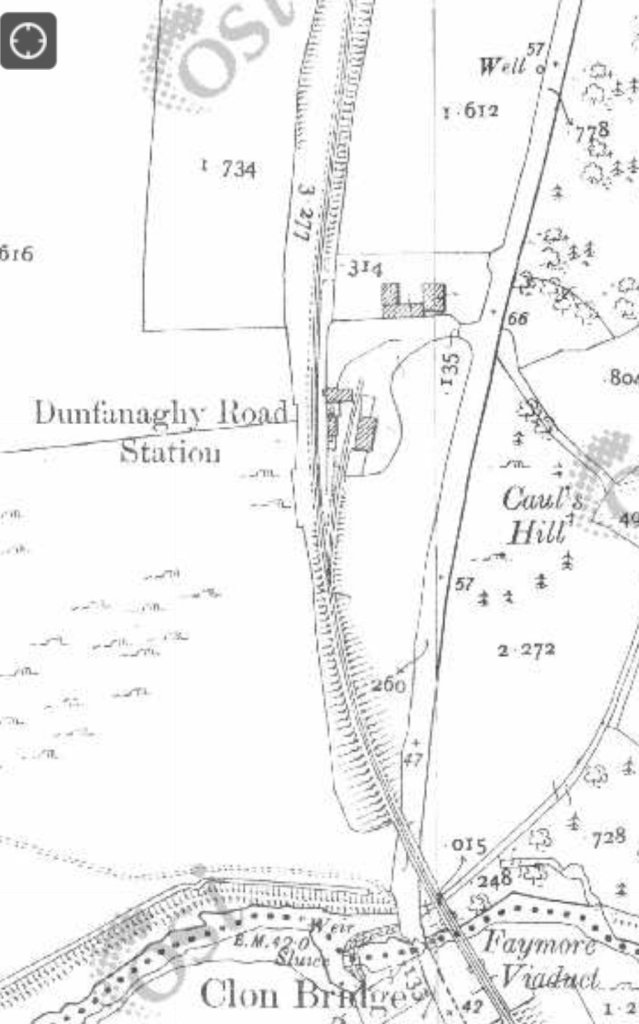
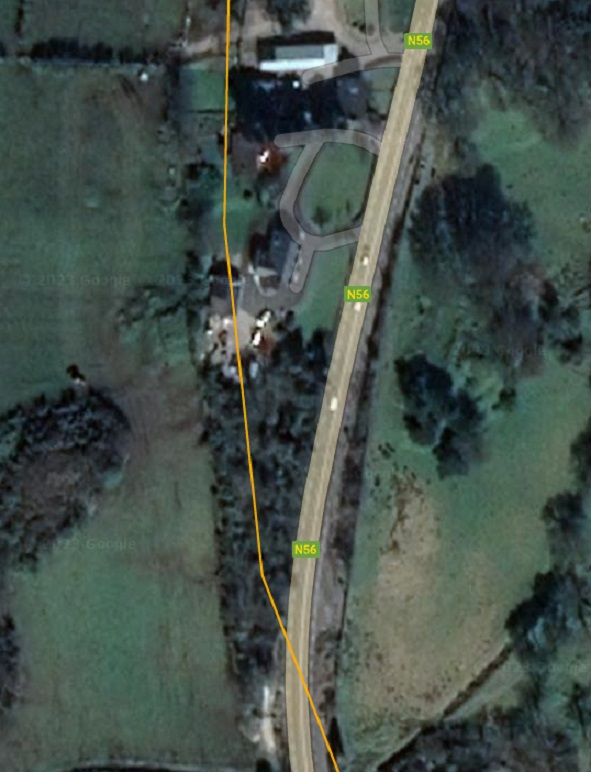
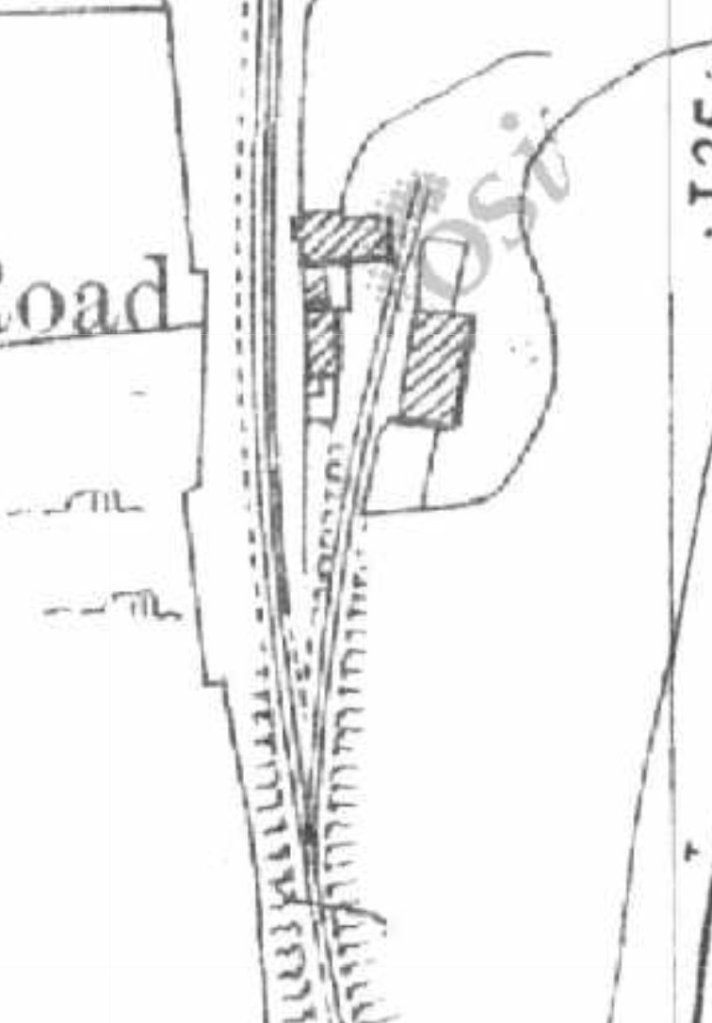
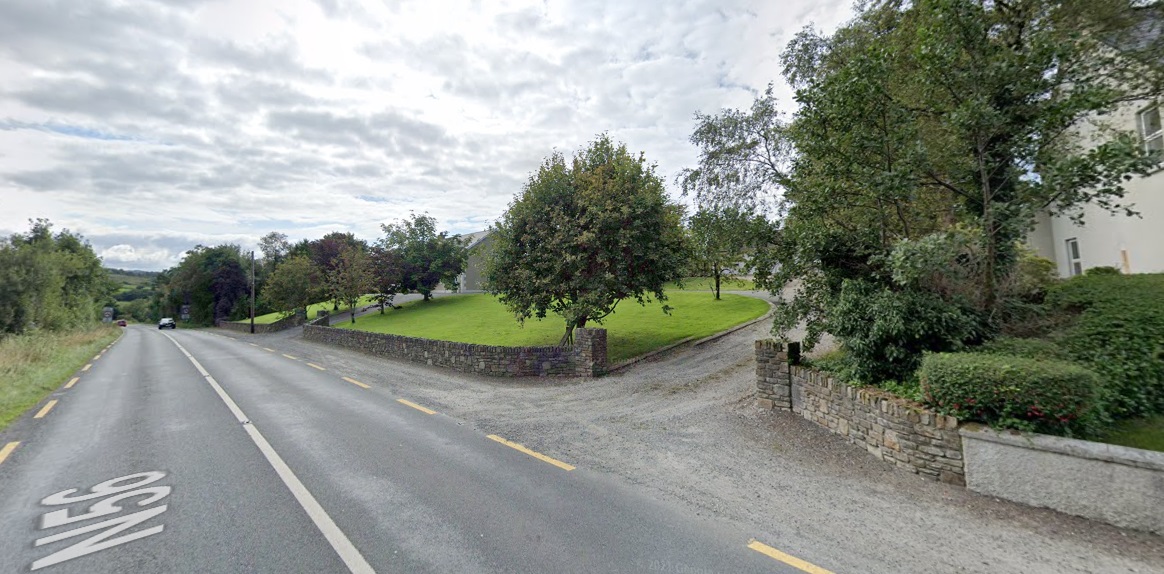
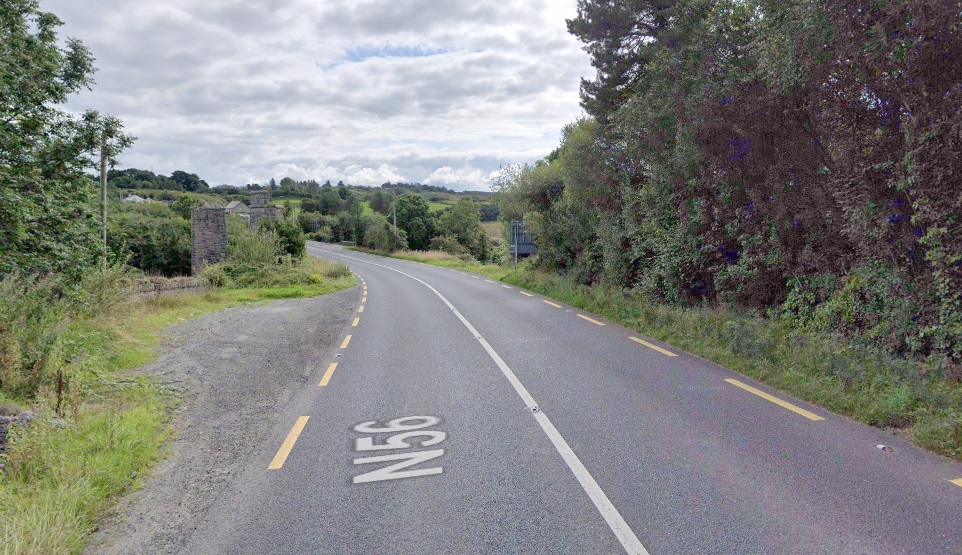
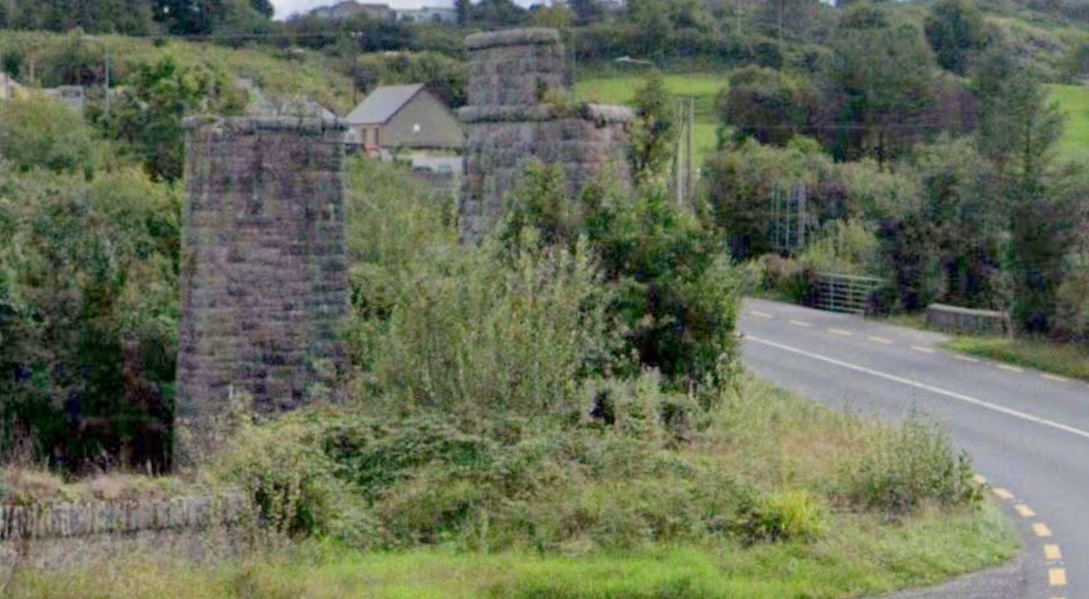
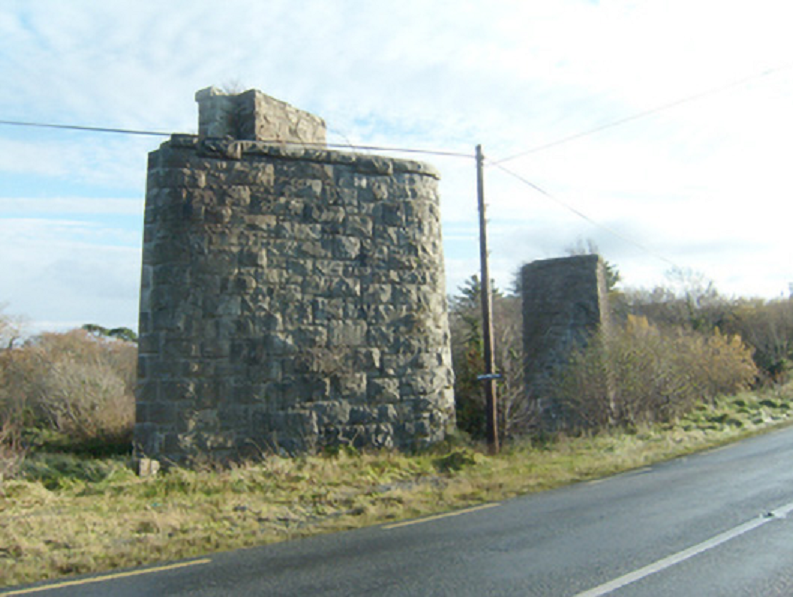
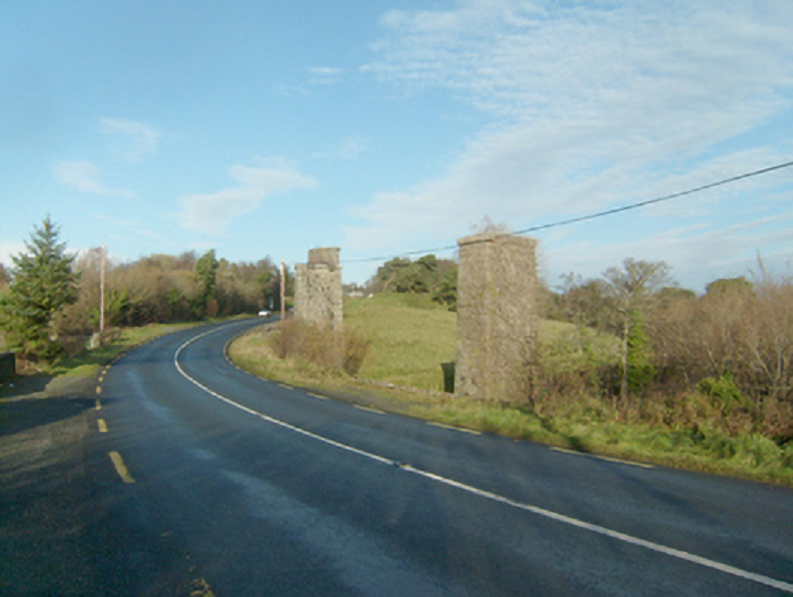
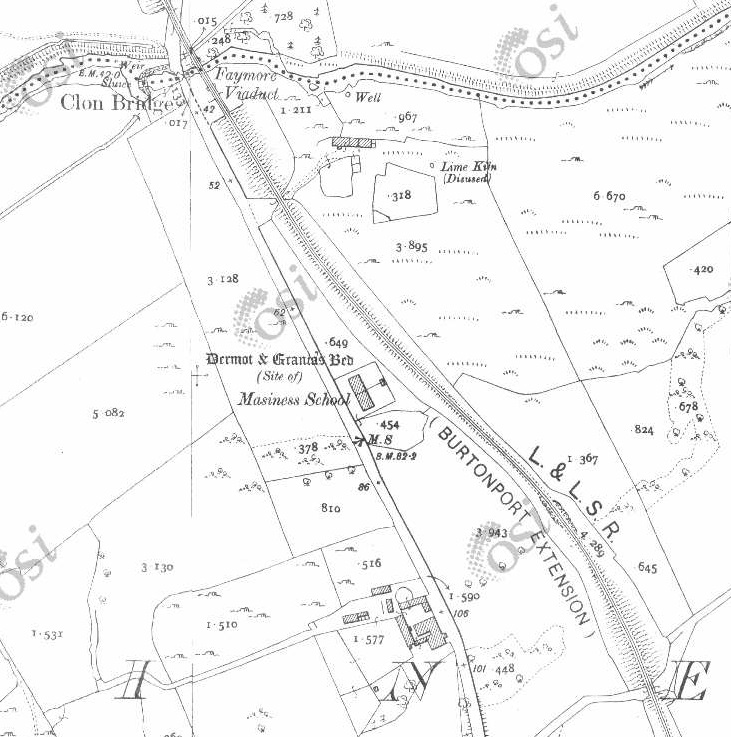
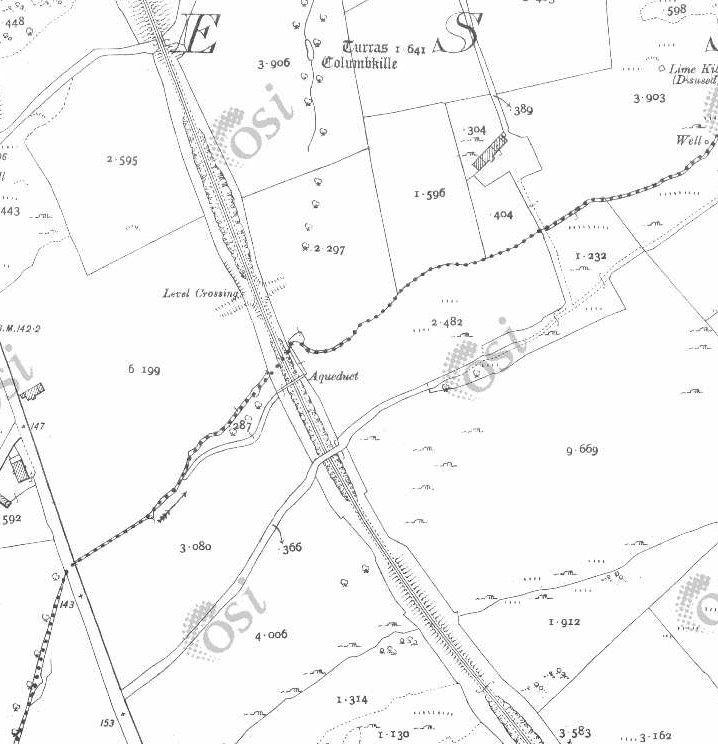
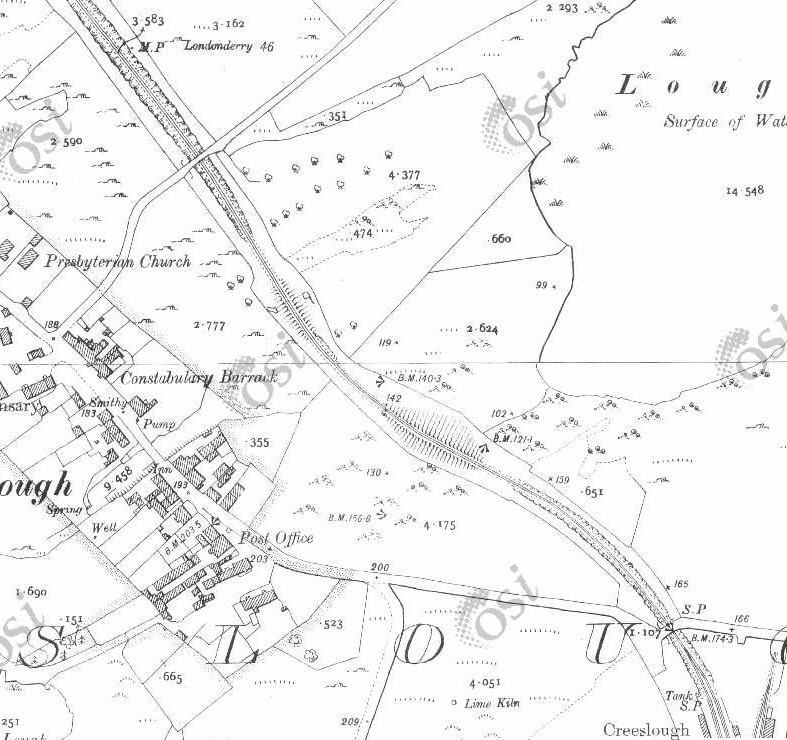
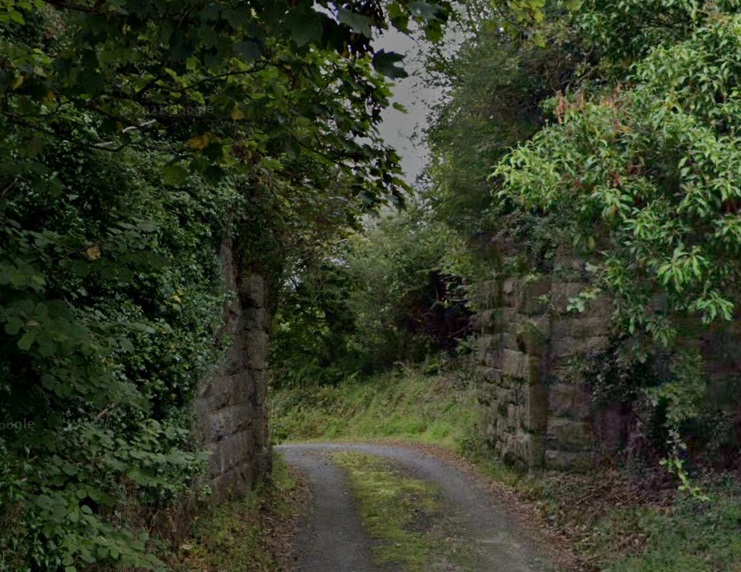
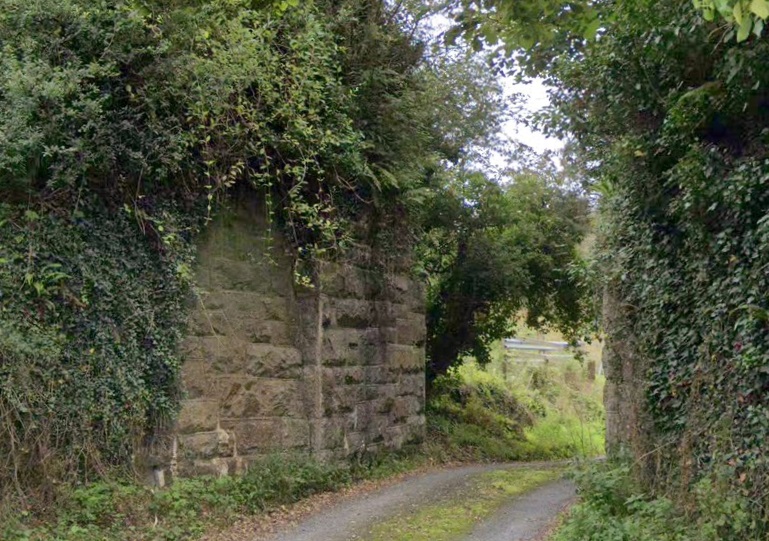
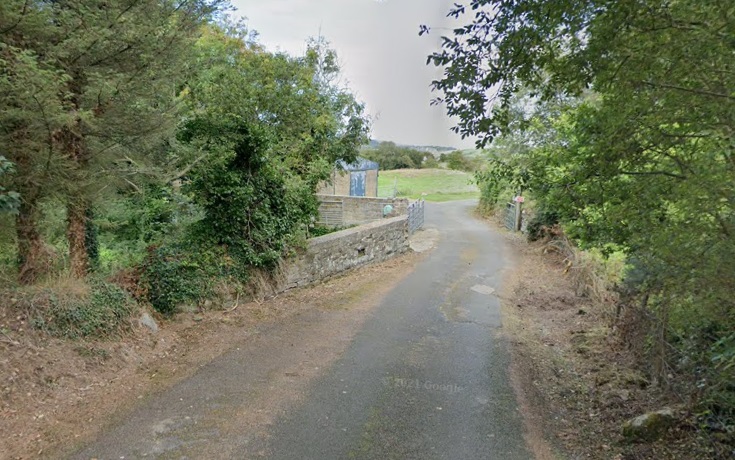
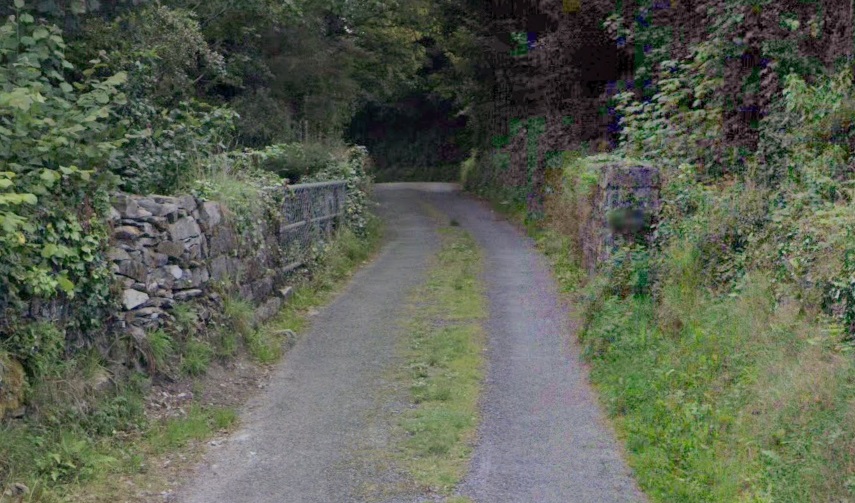
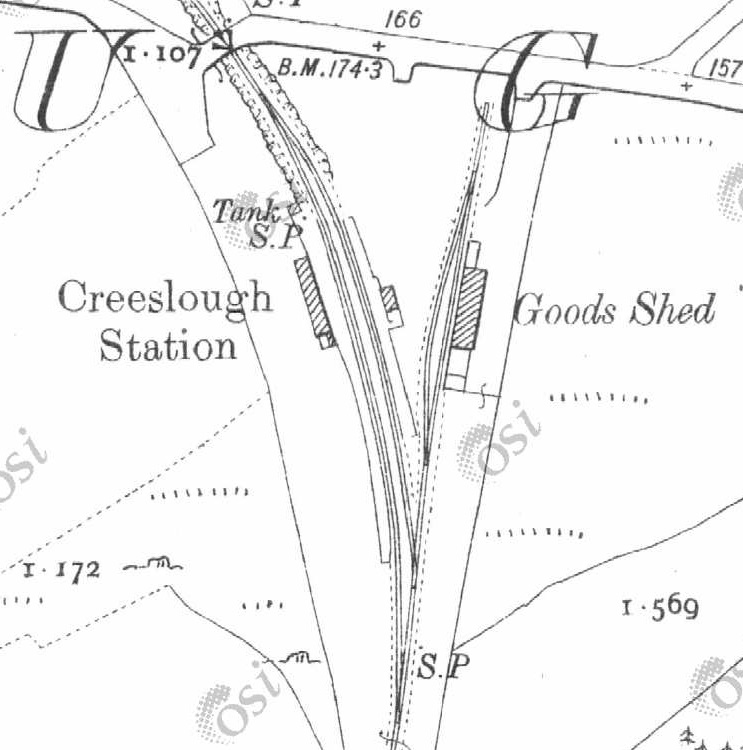
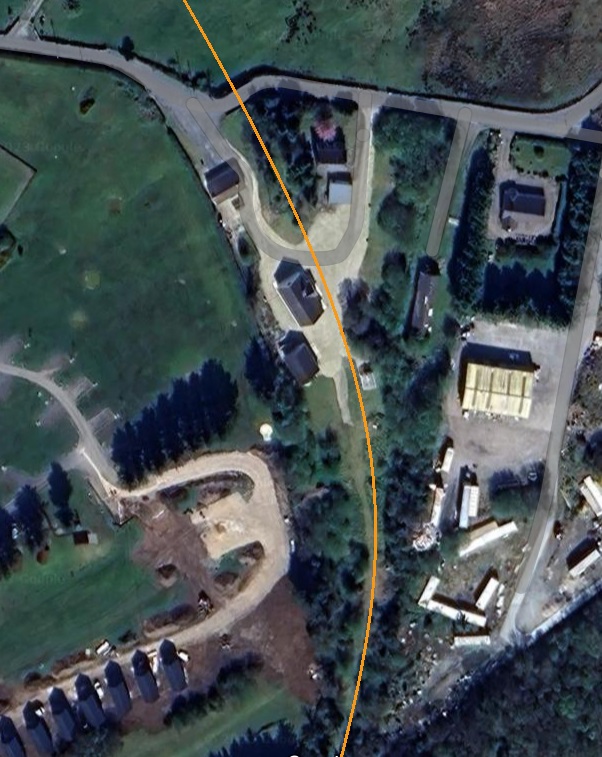
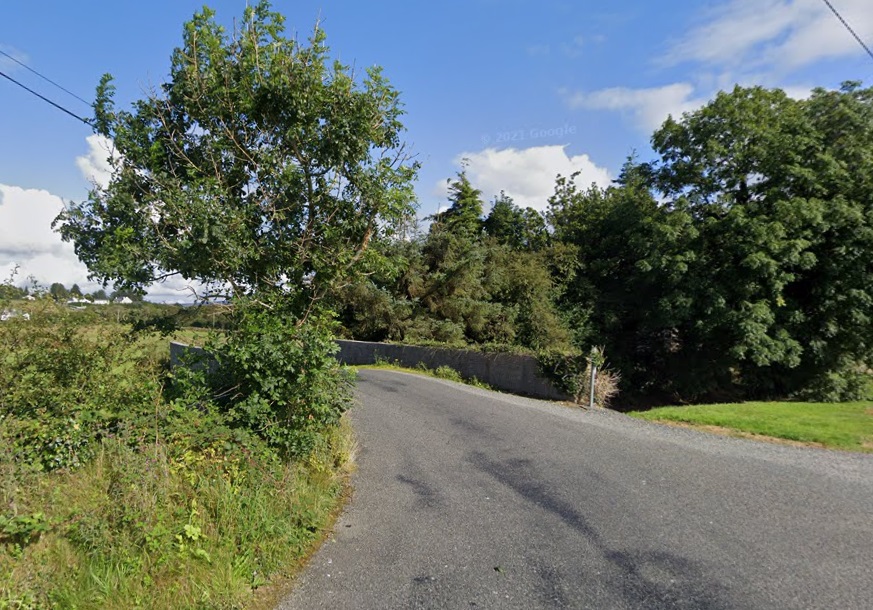
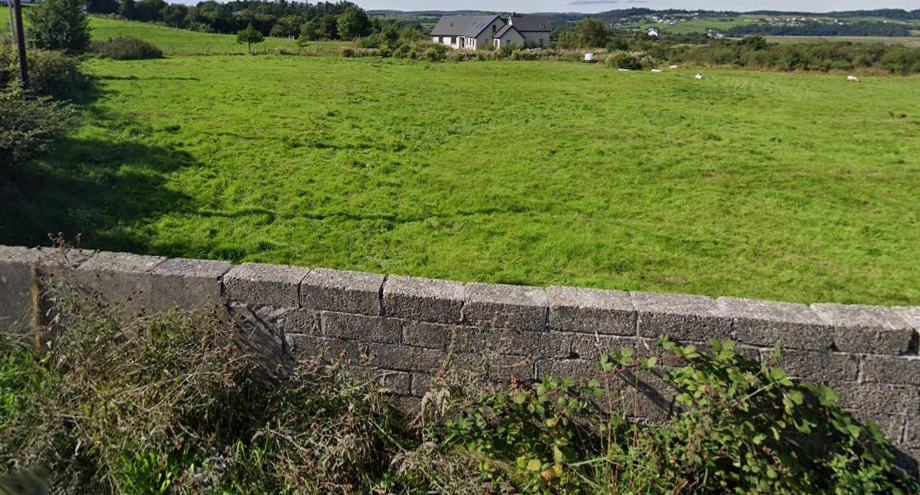
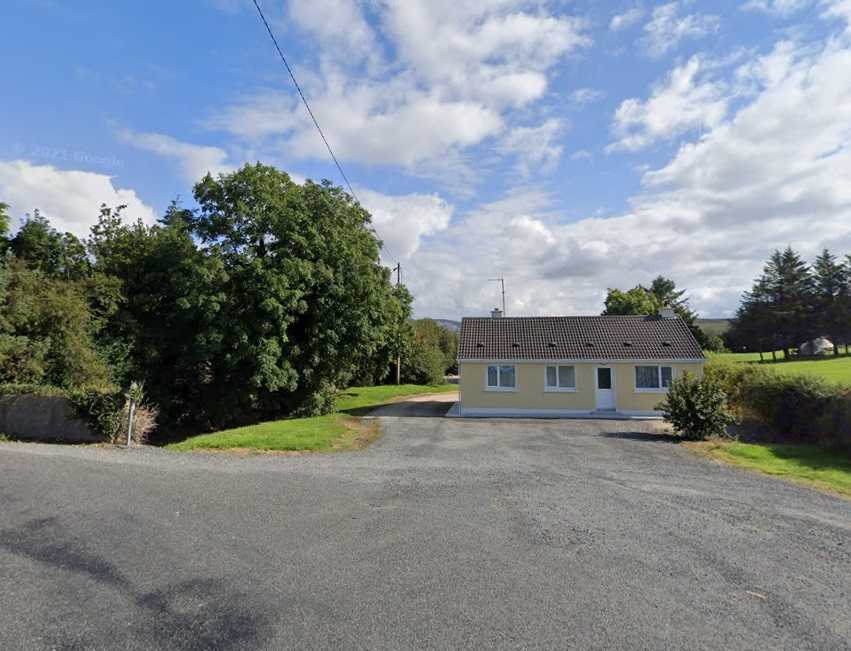
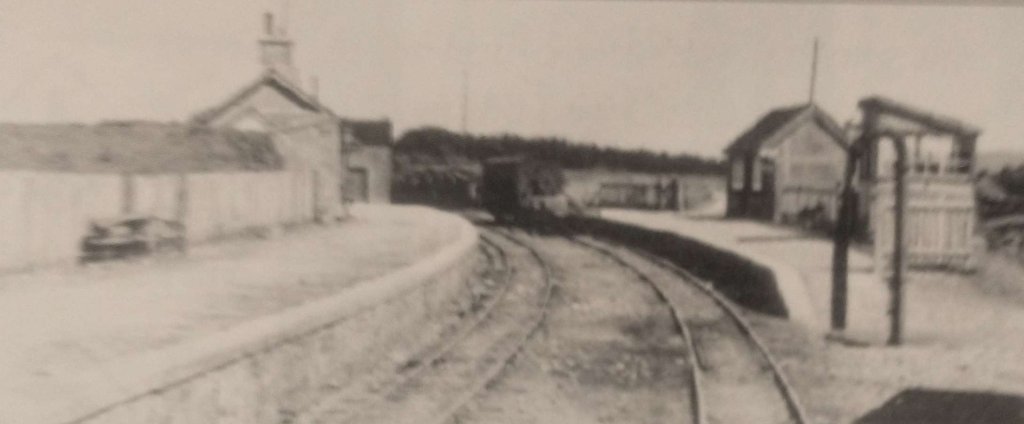
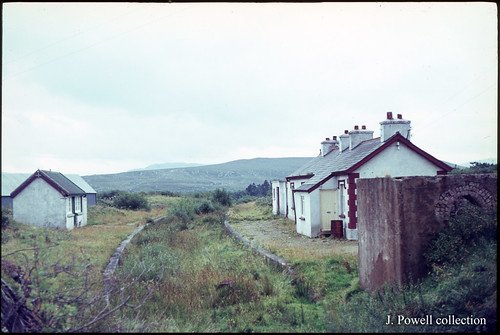
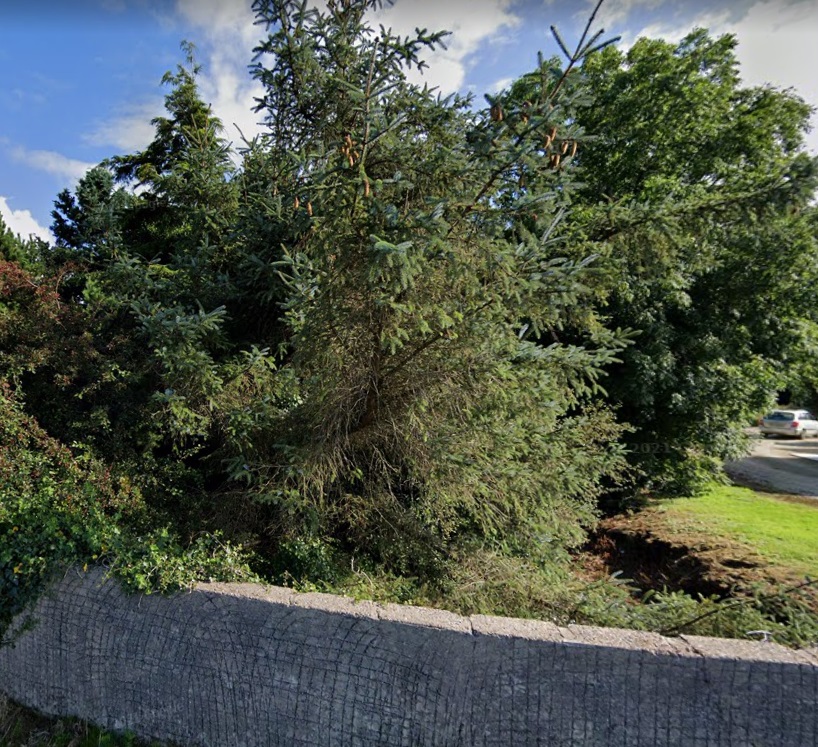
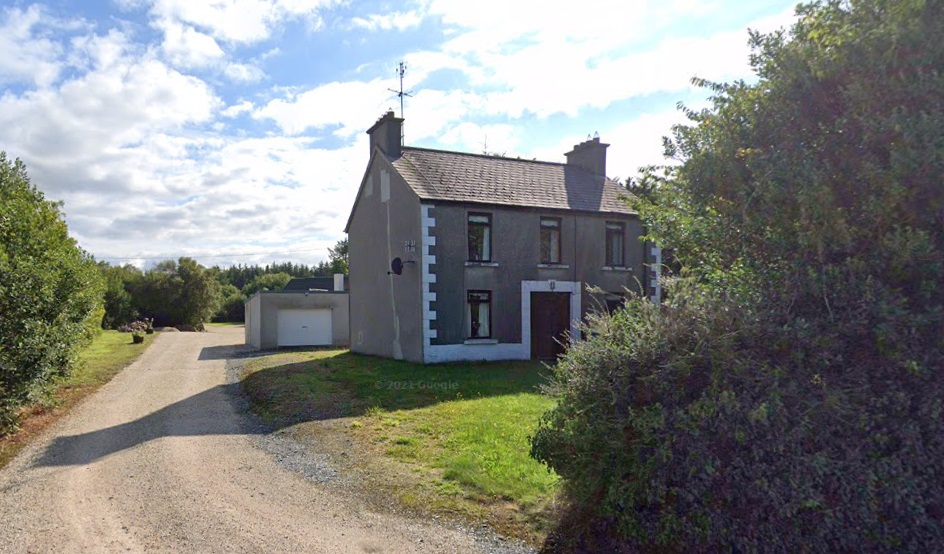
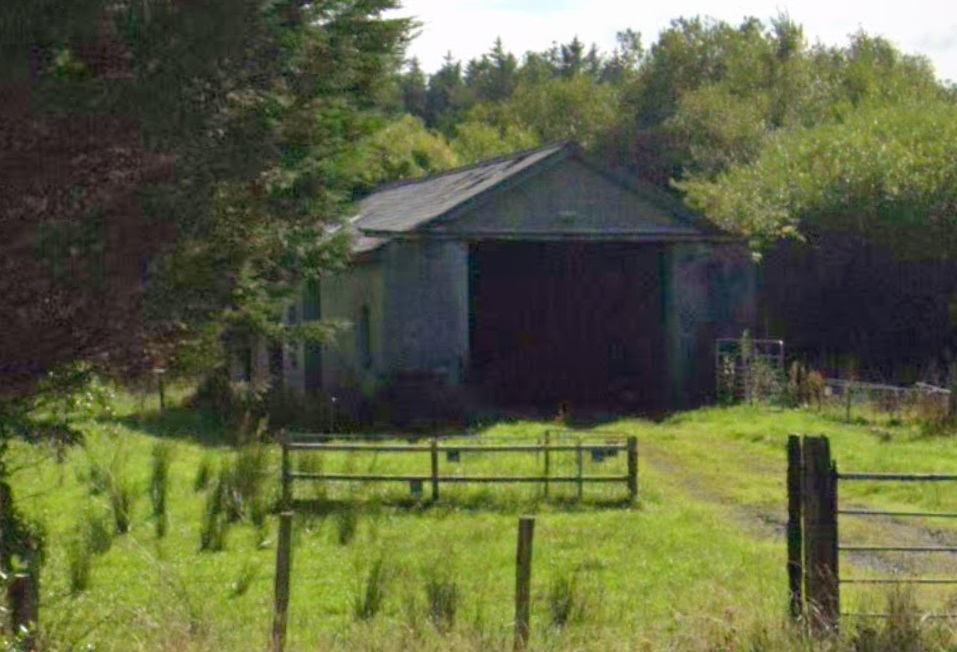
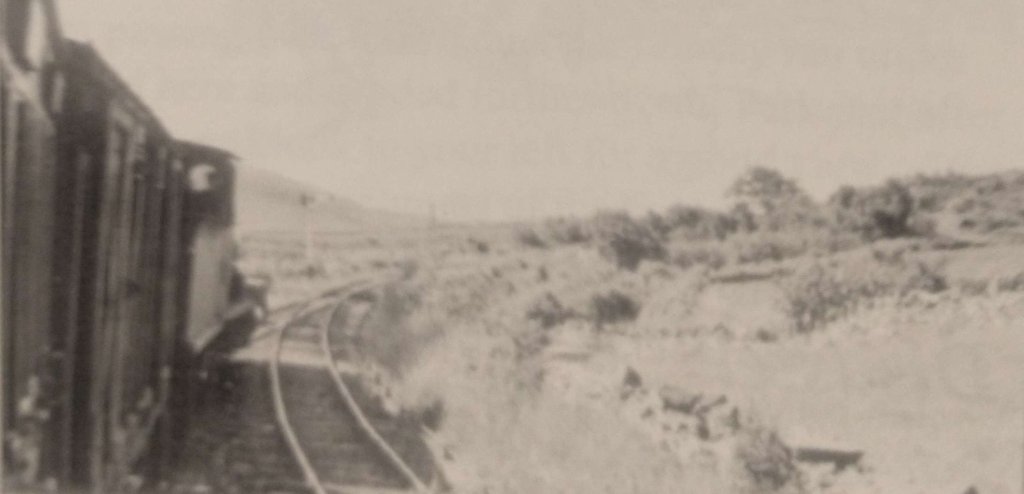
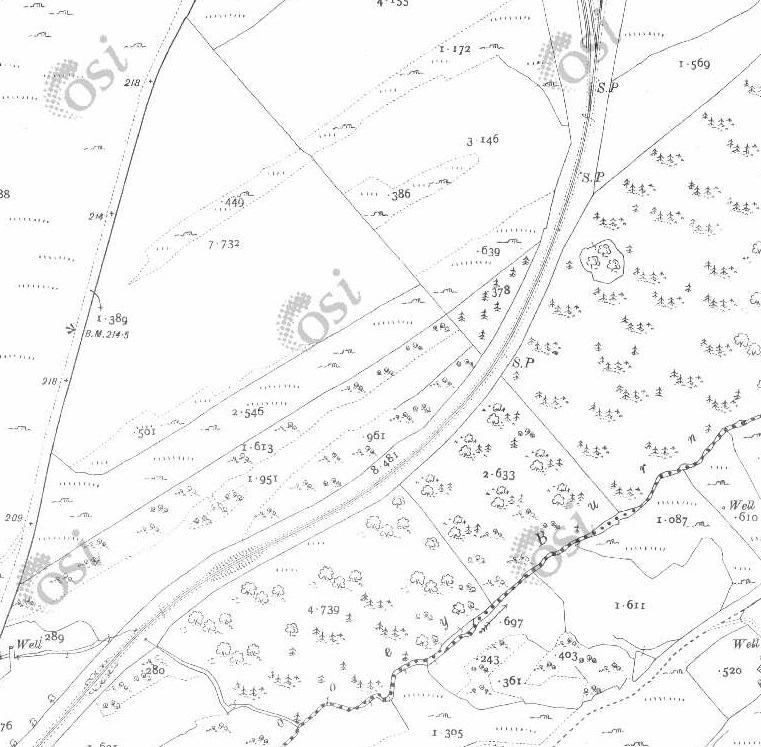
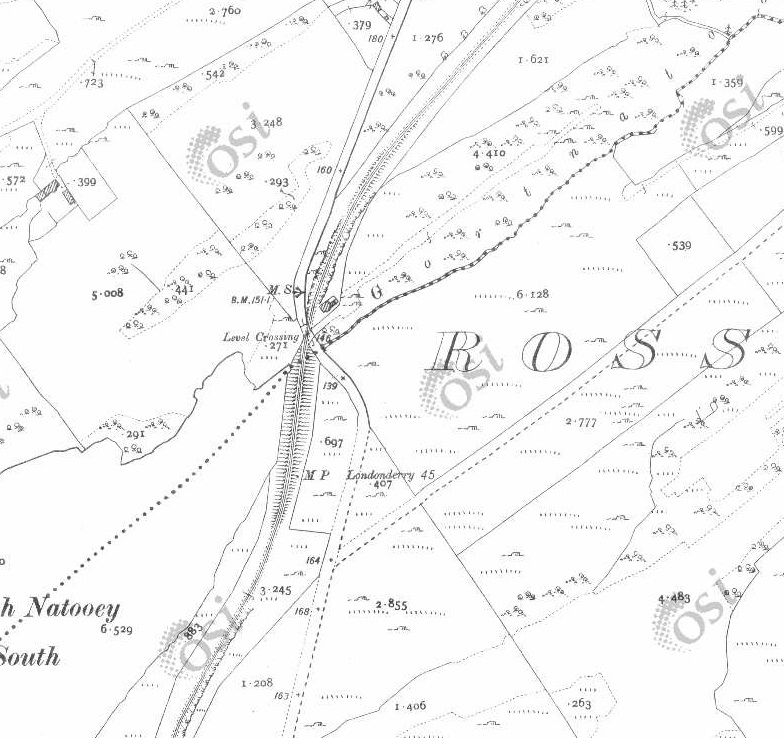
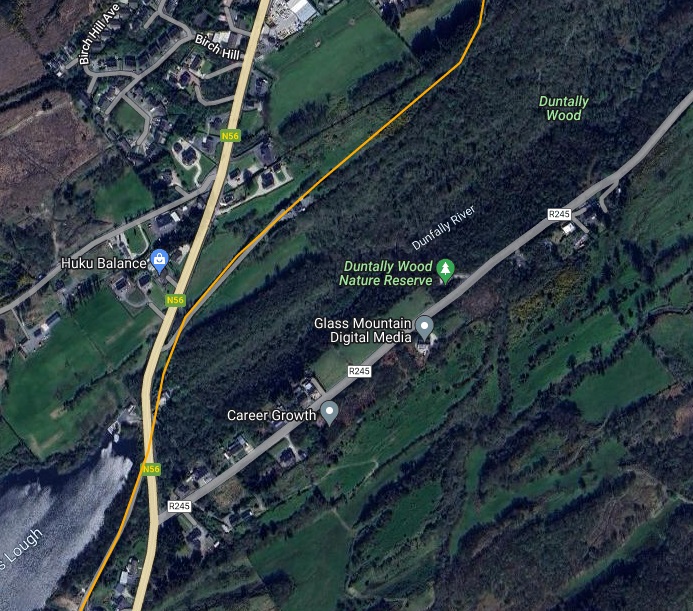
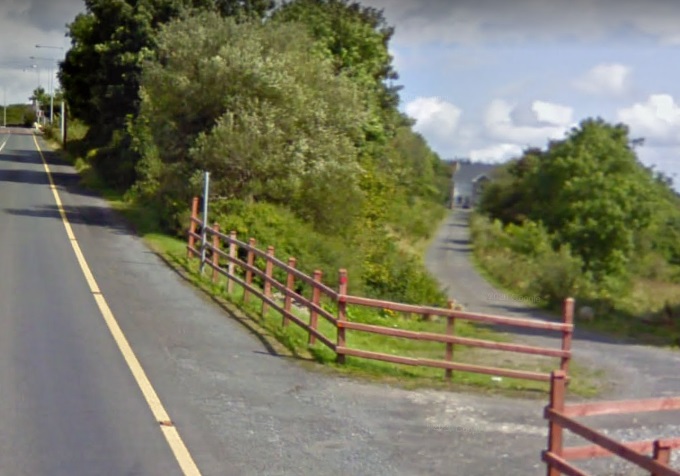
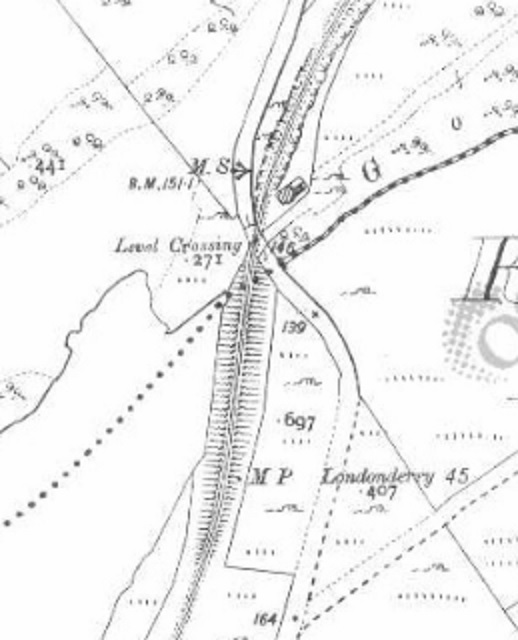
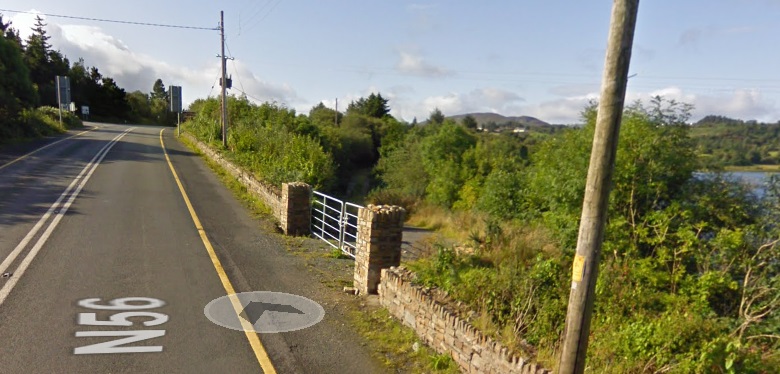
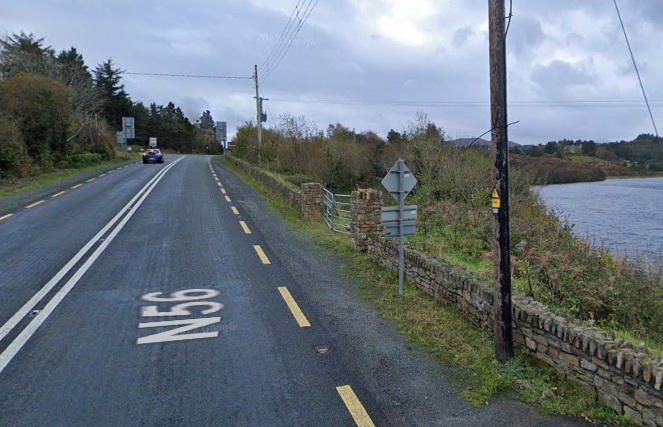
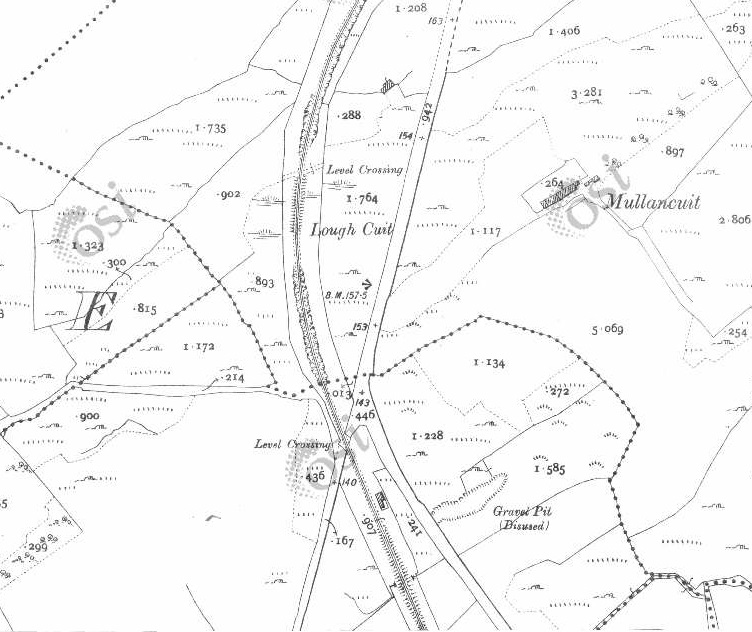
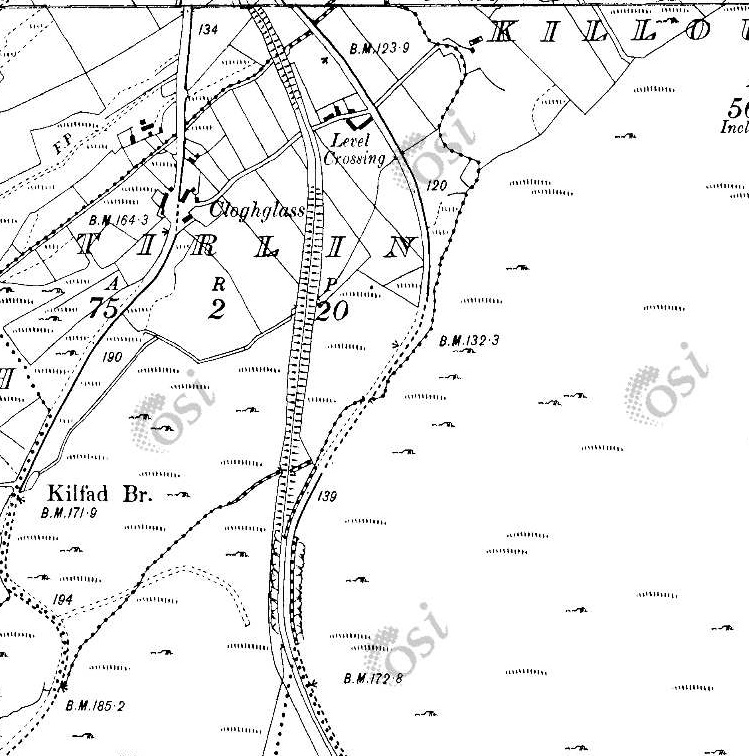
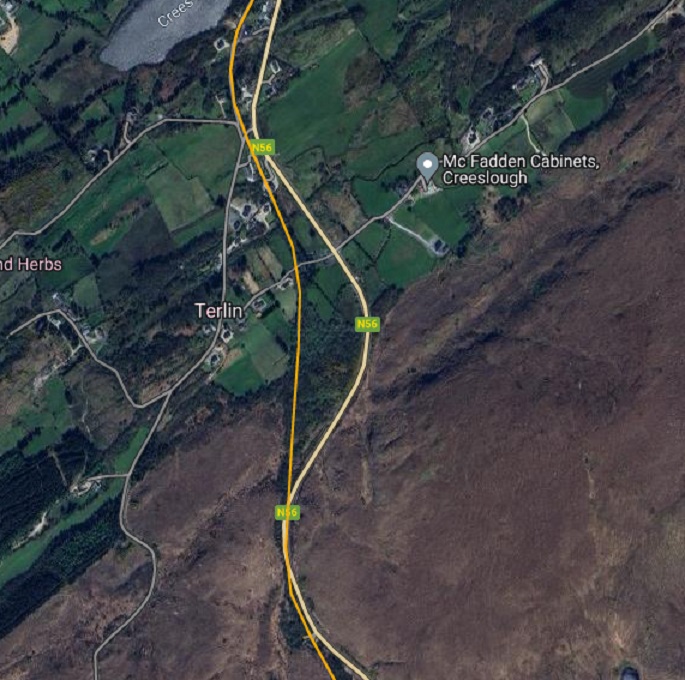
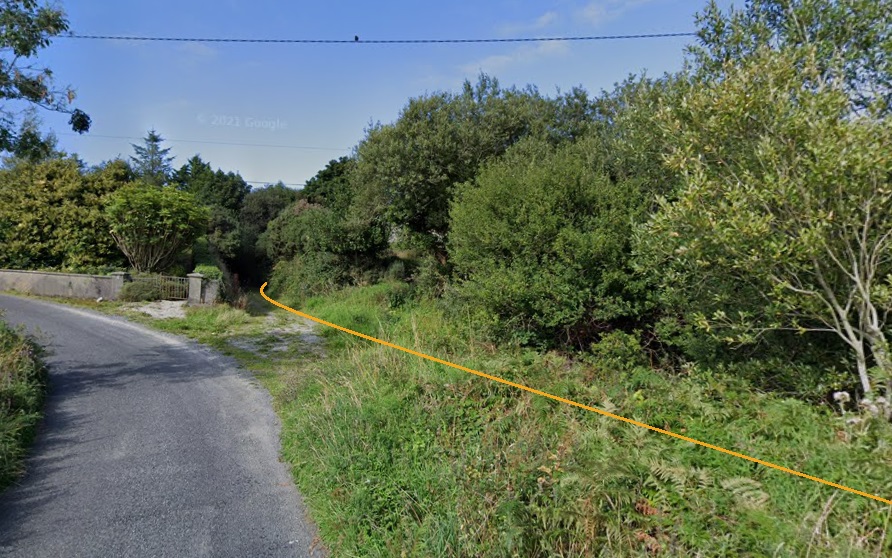
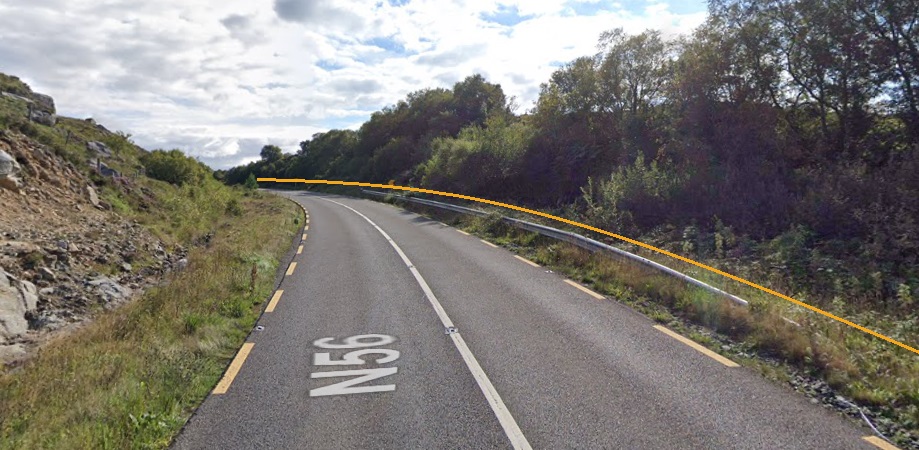
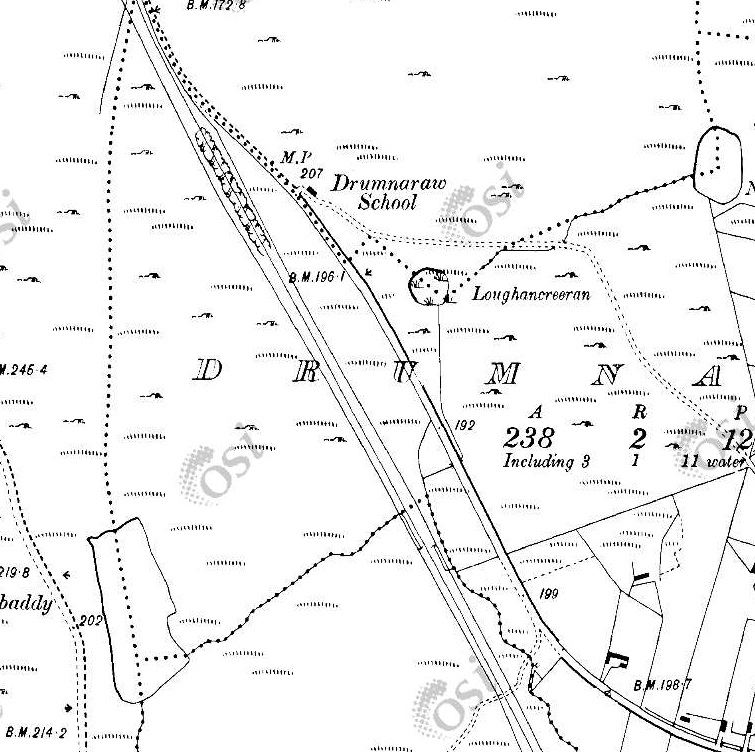
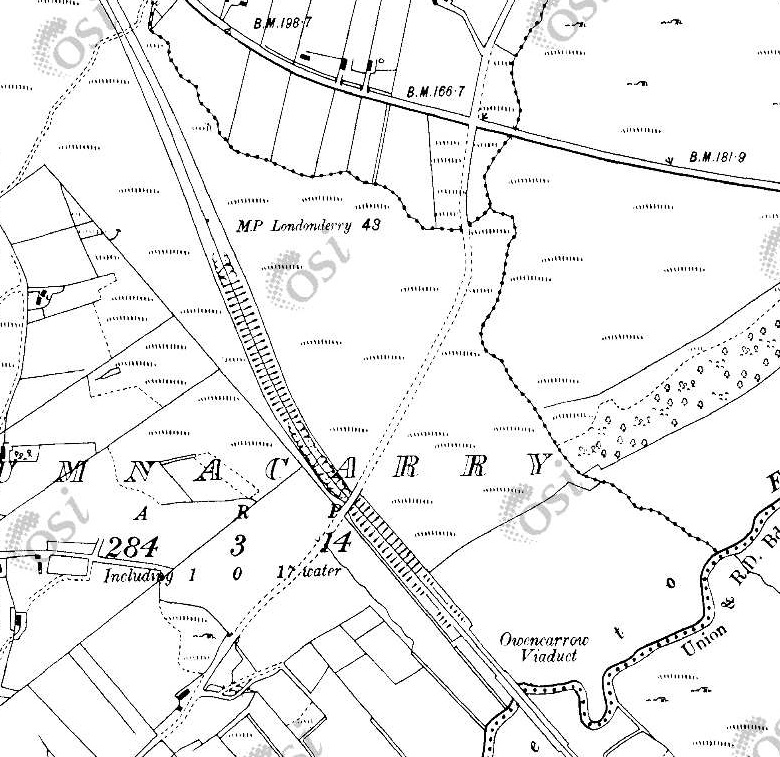
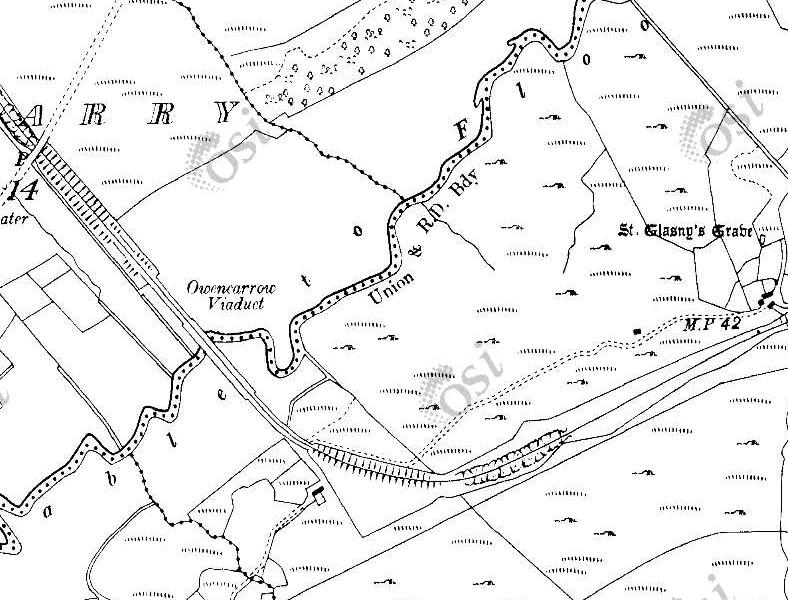
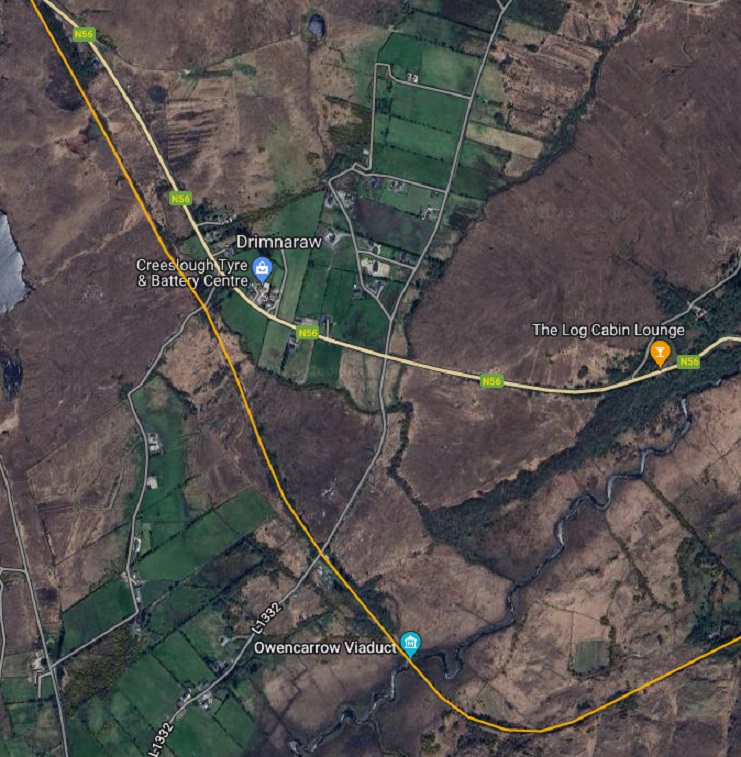
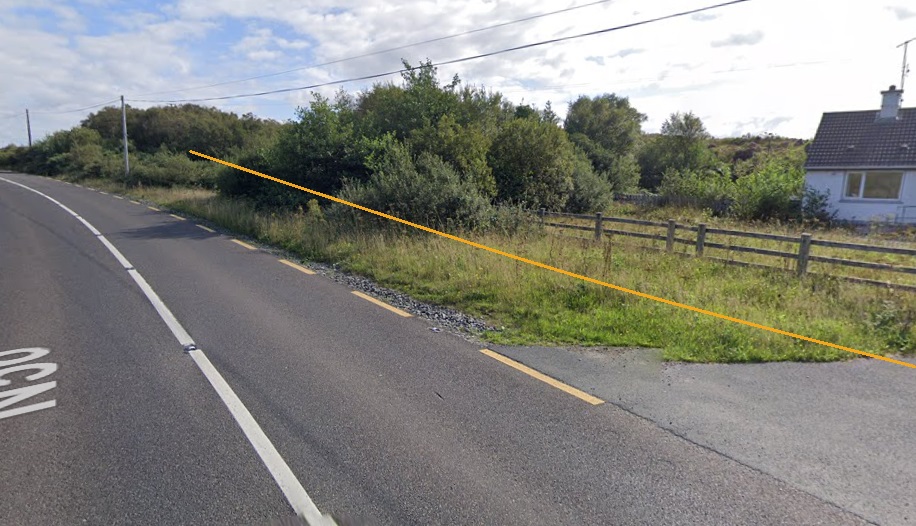
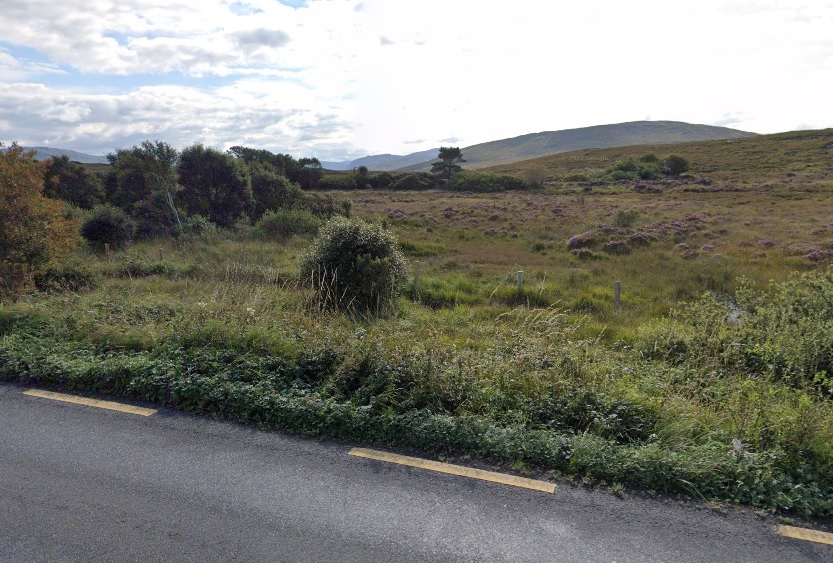
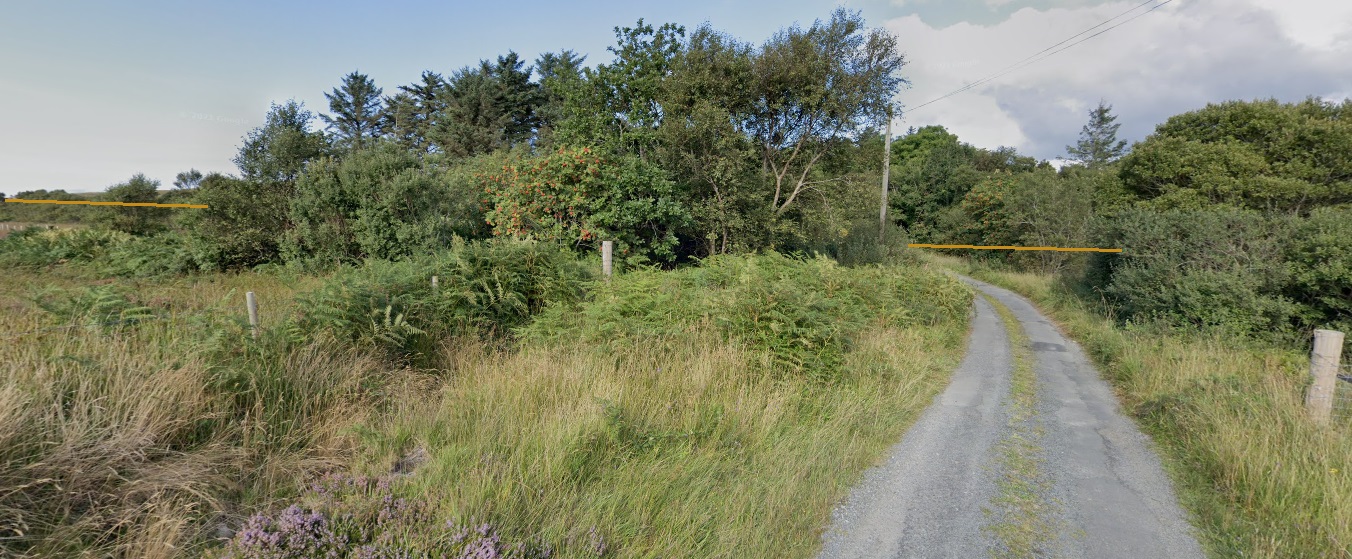
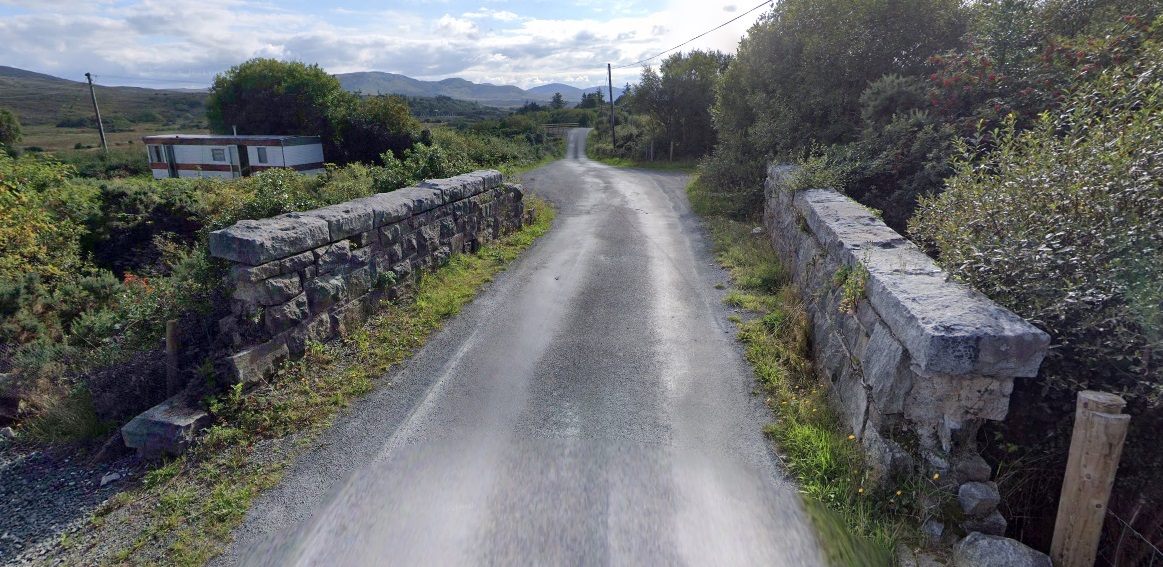
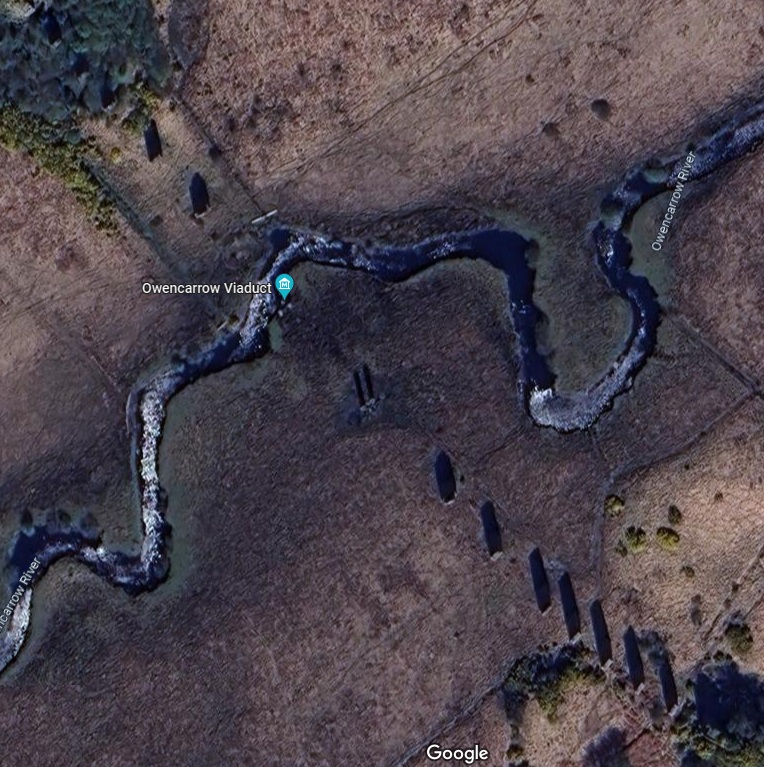
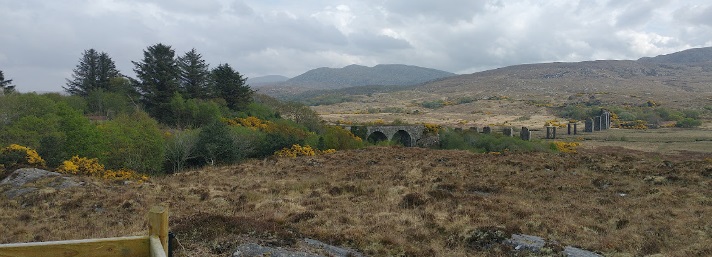
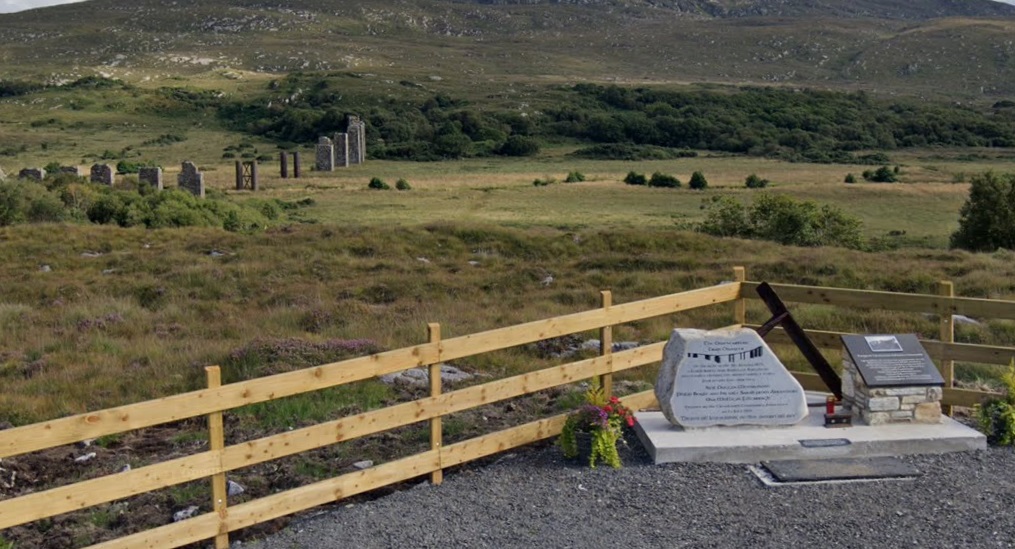
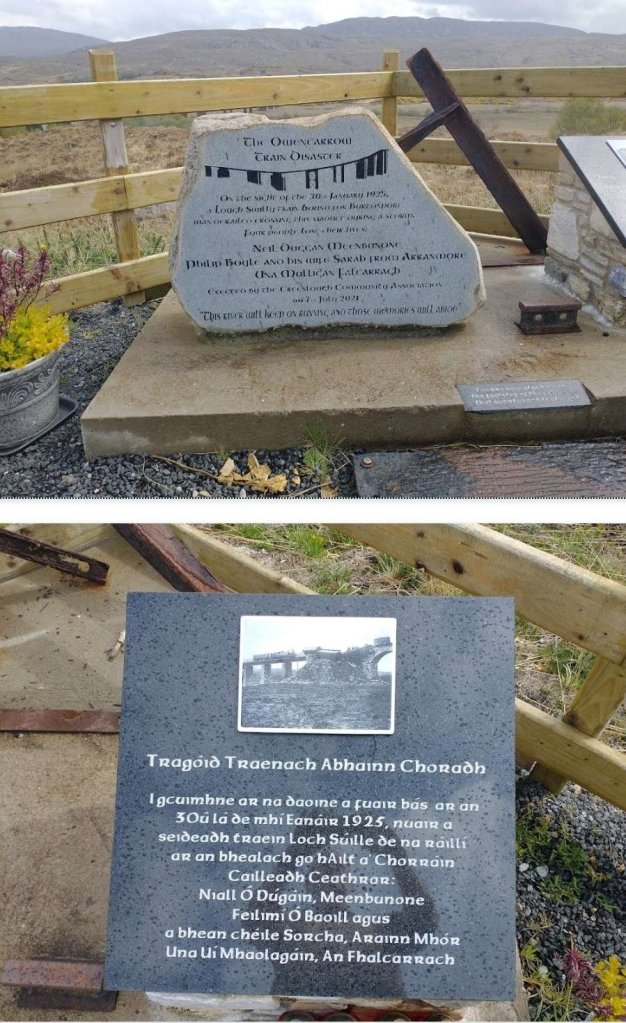
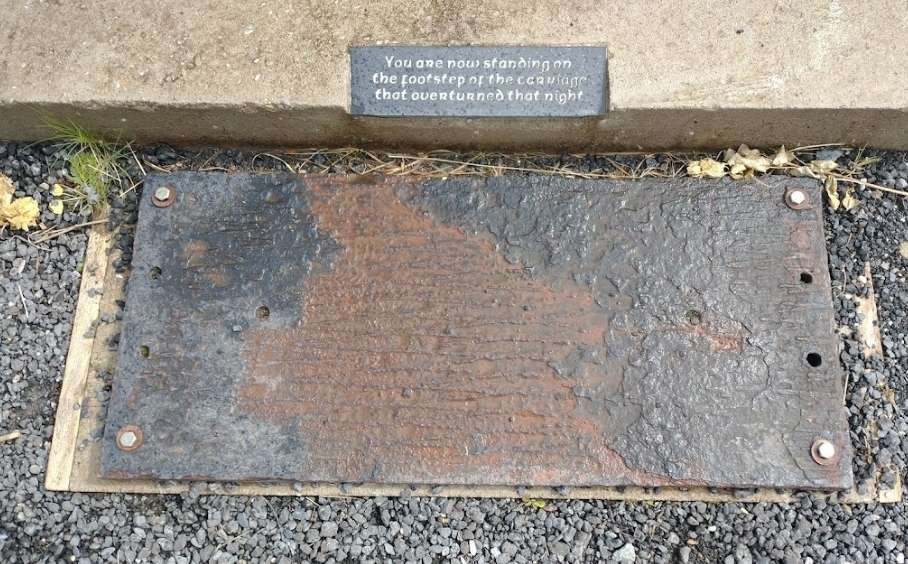
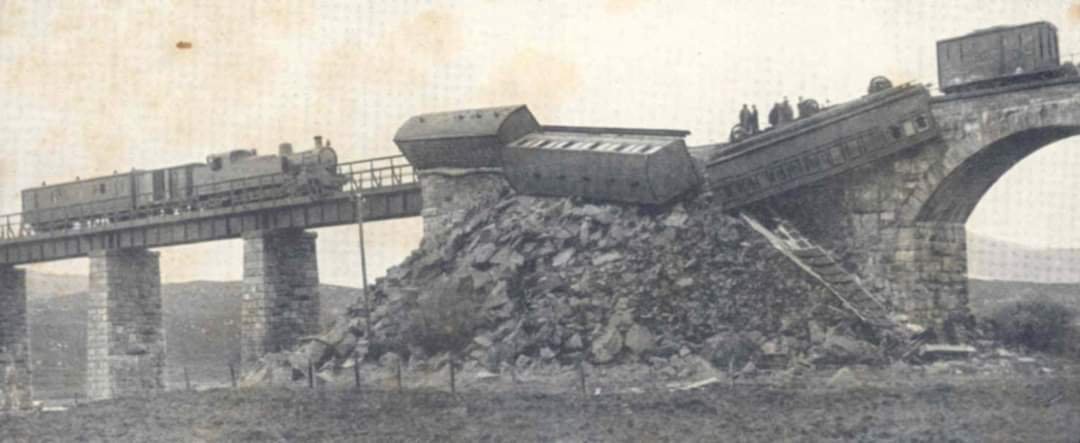
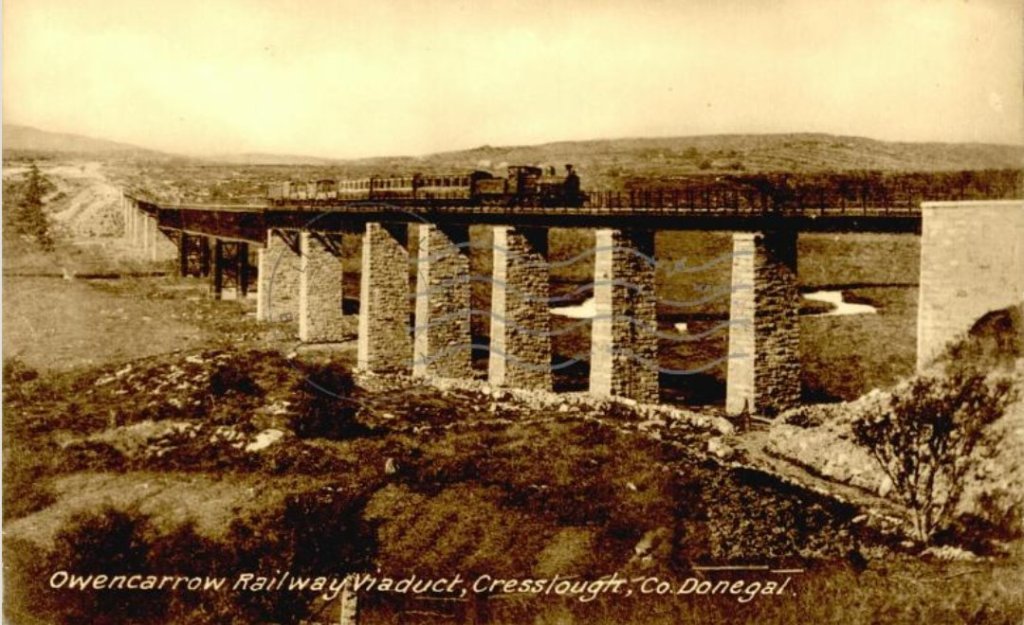
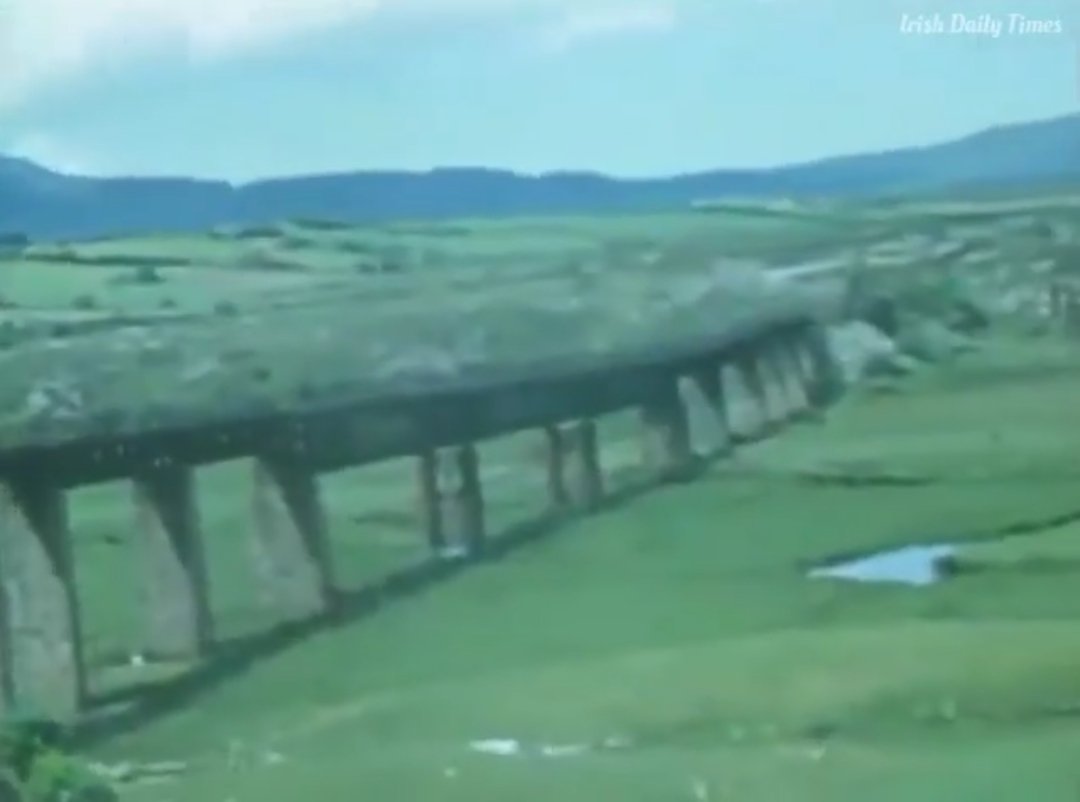
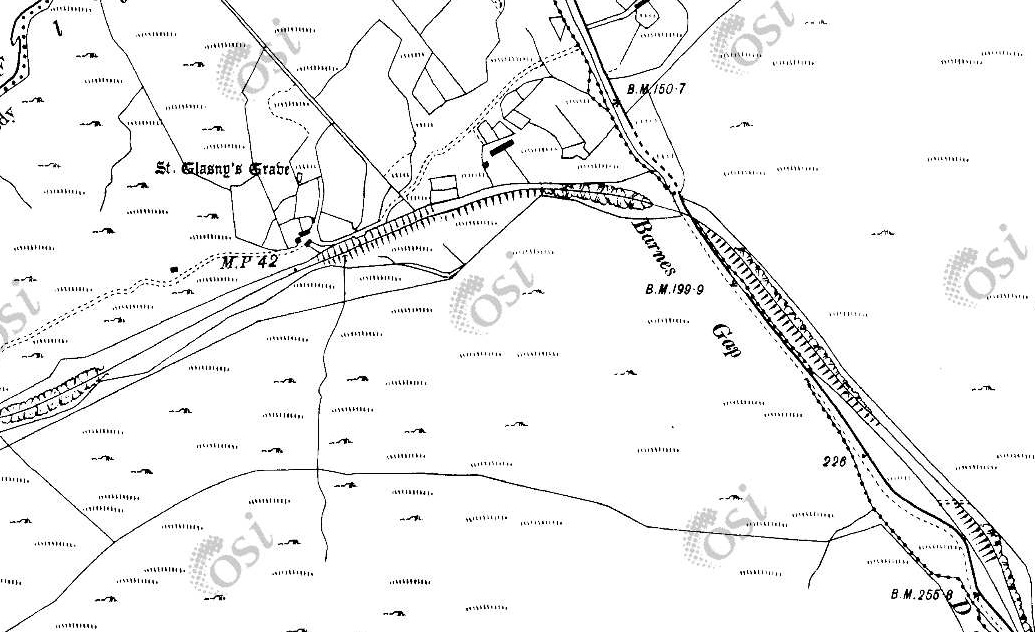
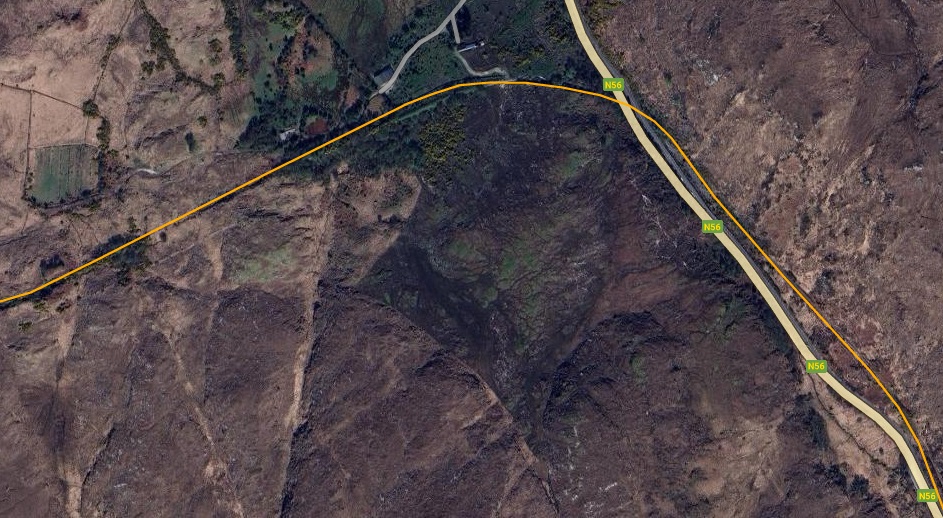
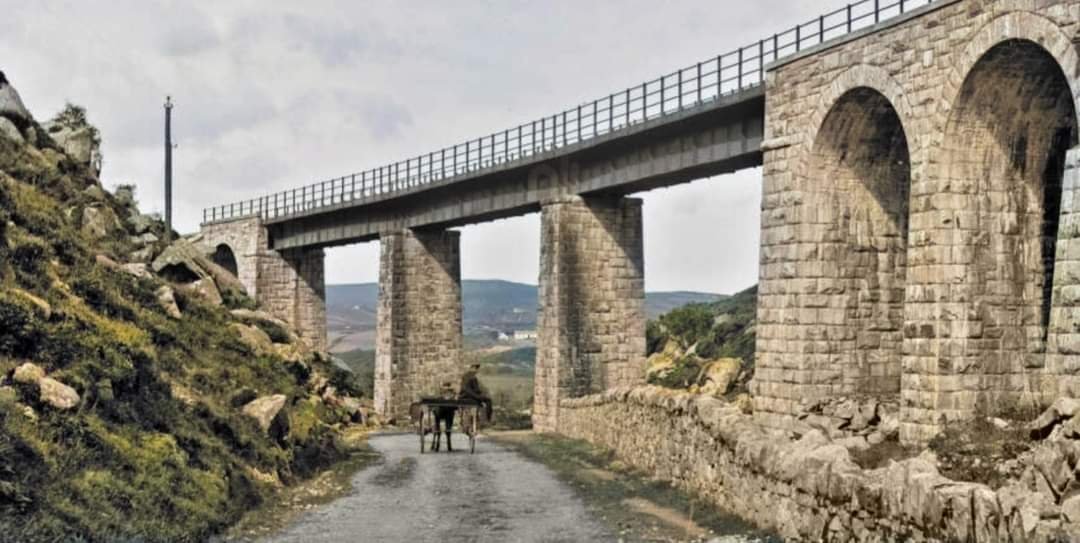
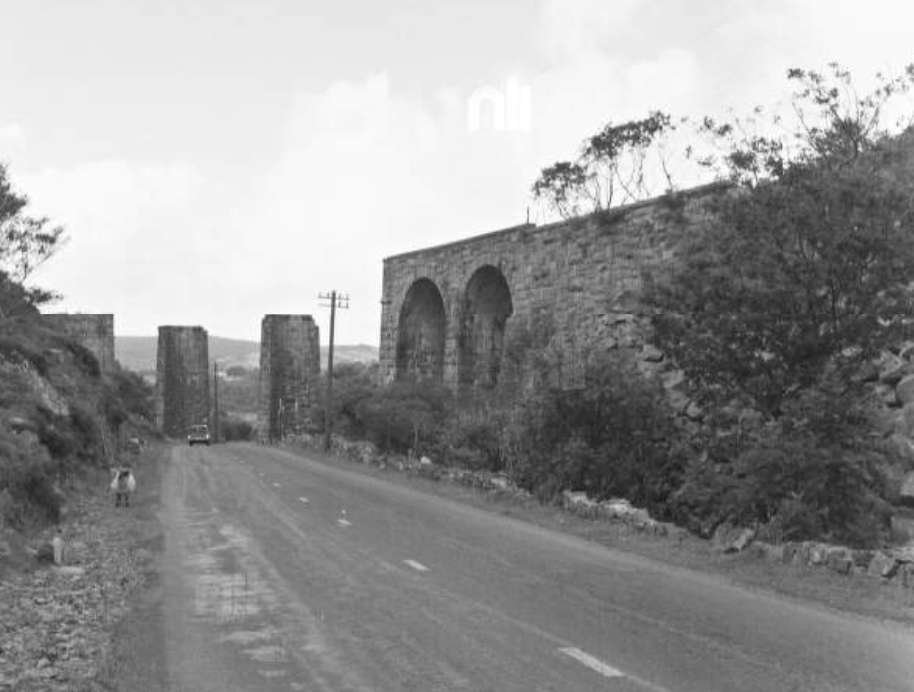
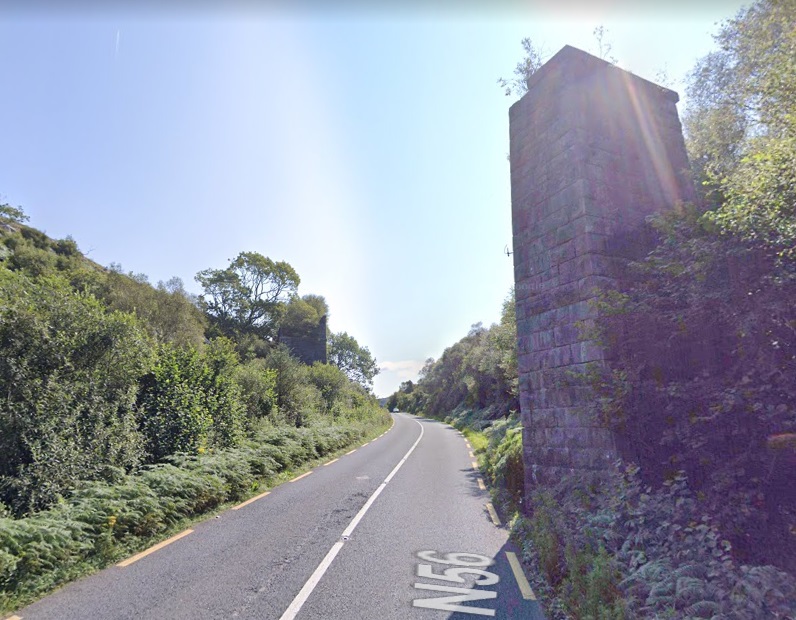
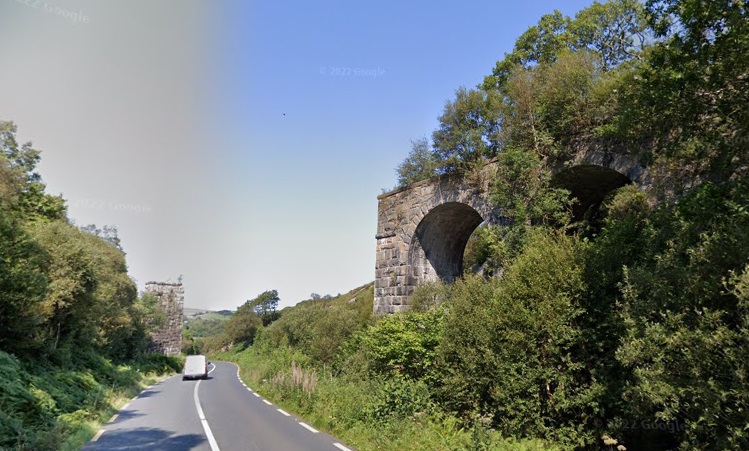
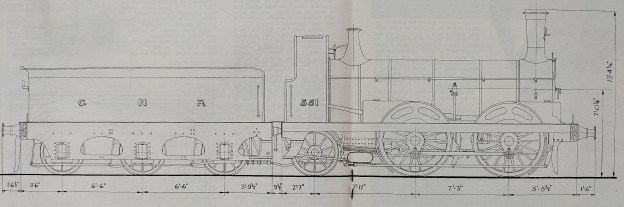
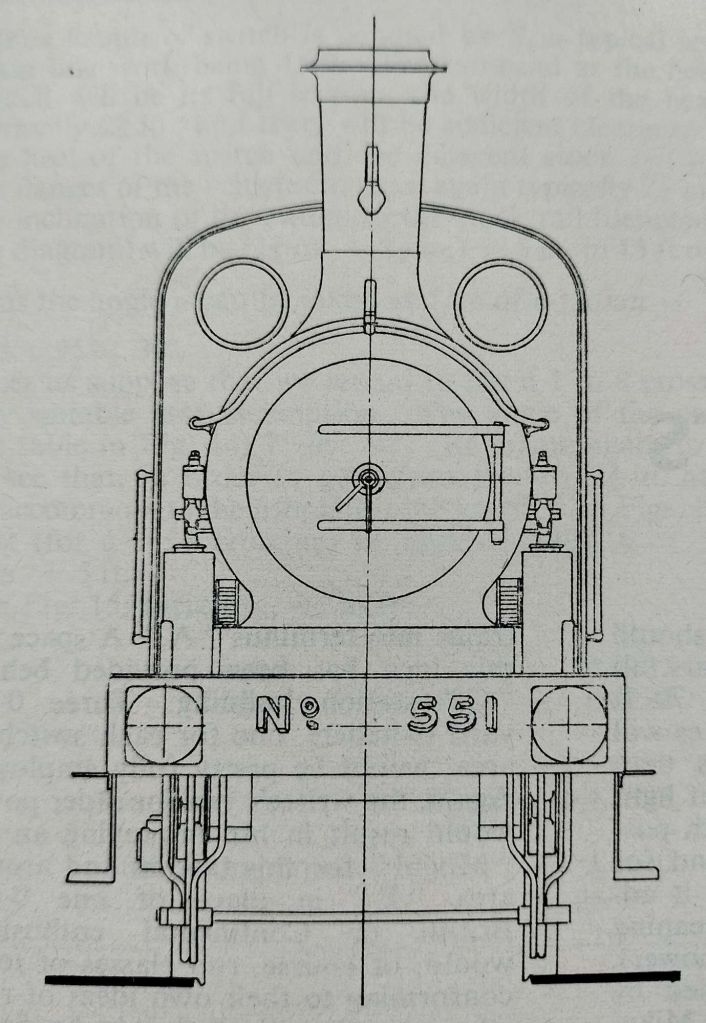
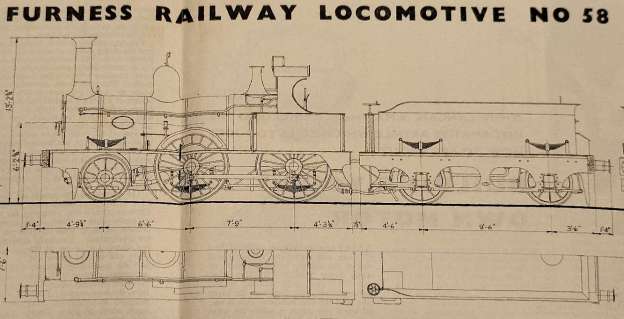
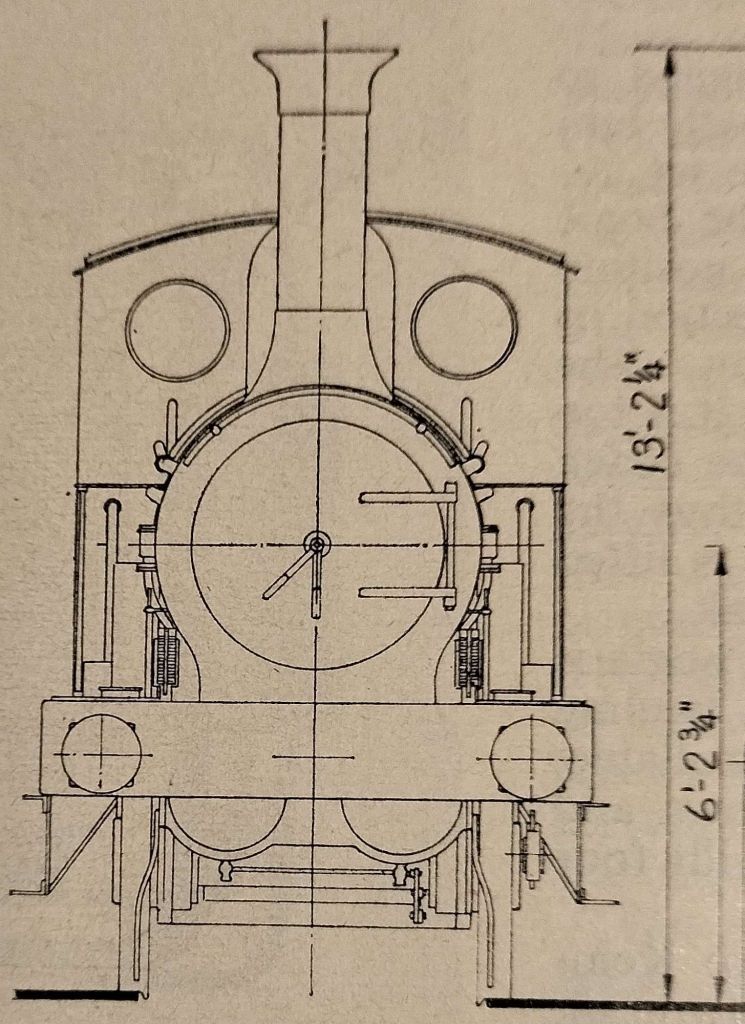
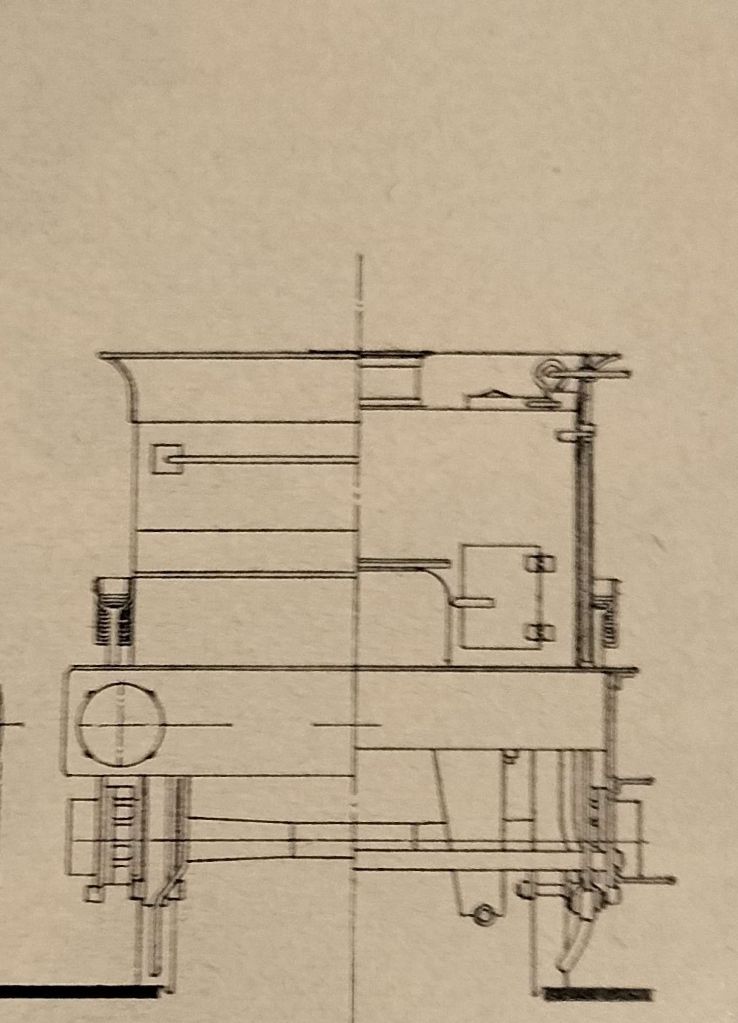
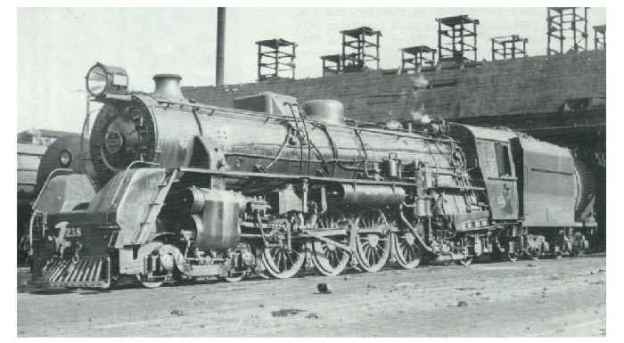
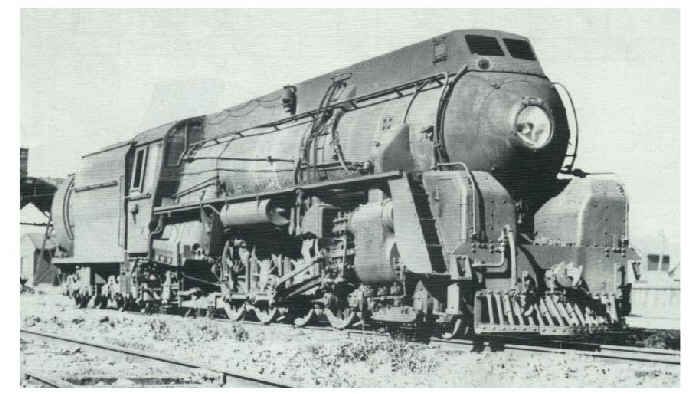
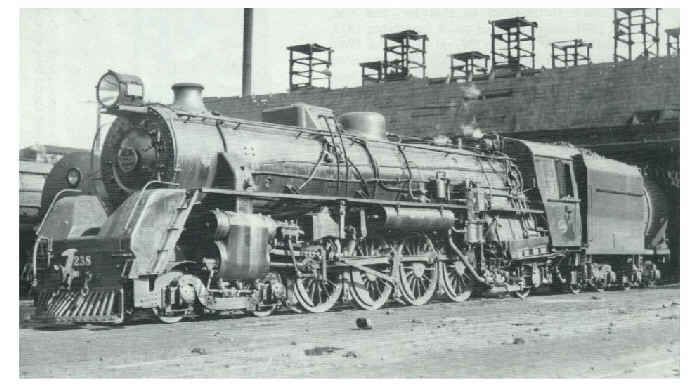
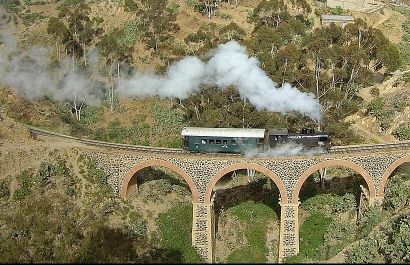
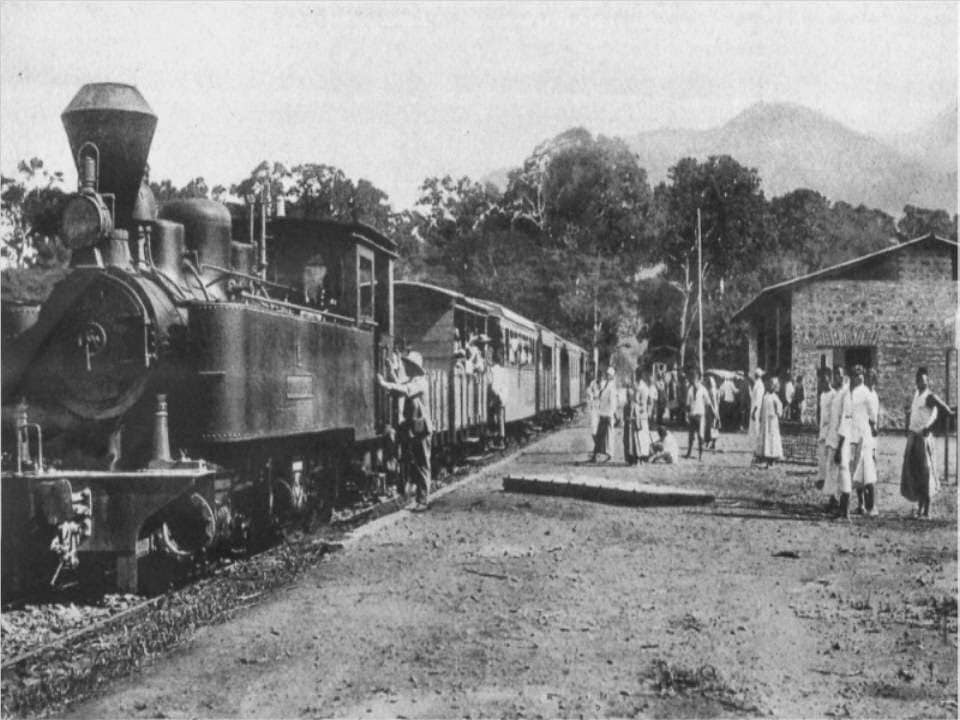
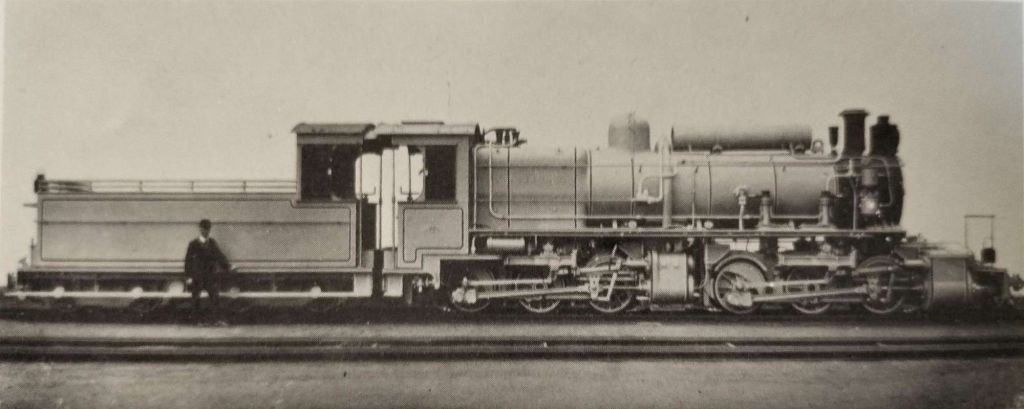
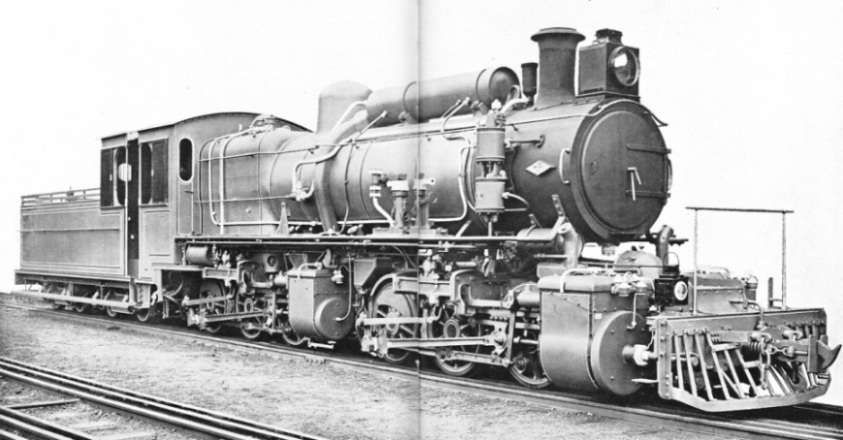
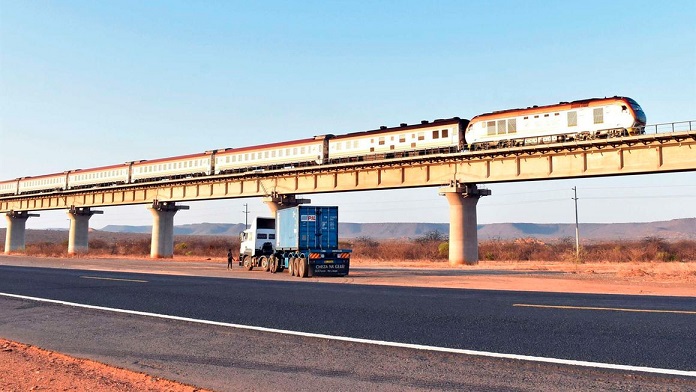
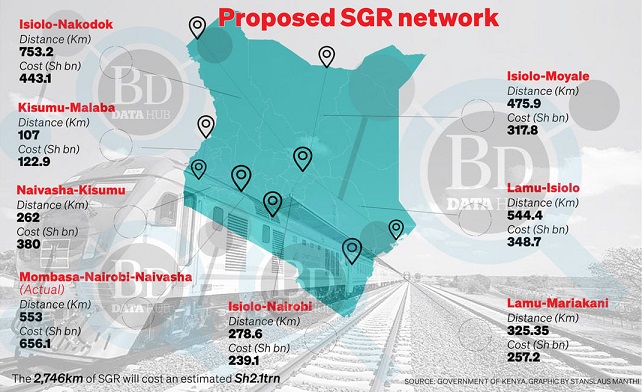
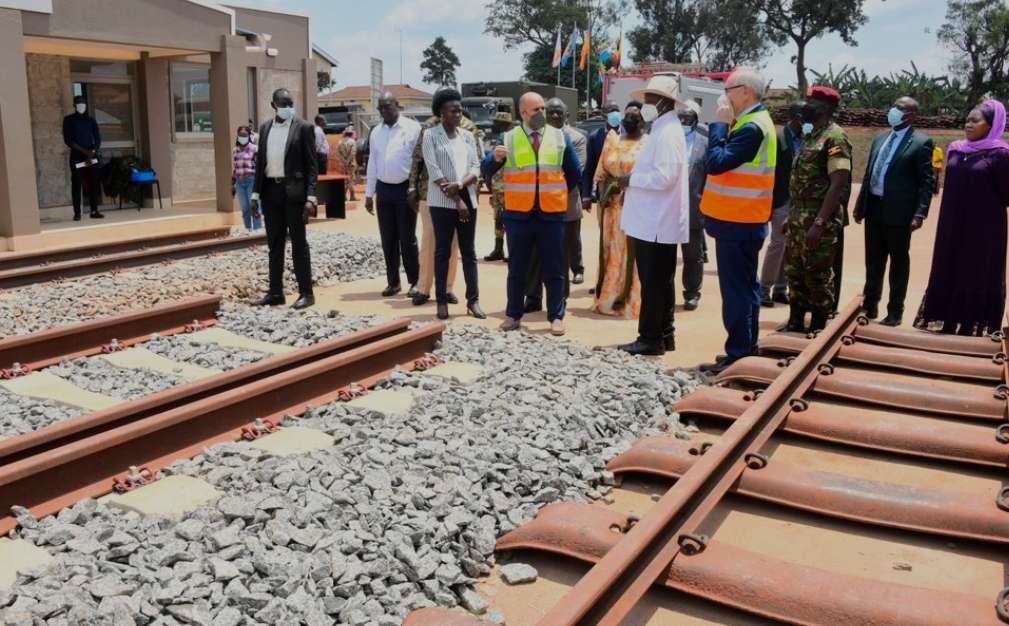
Significant elements of thisarticle depend on an article by David Bradshaw & Stanley C. Jenkins; Rails around Oakengates; in Steam Days, March 2013. [1] Their work is used here with the kind permission of David Bradshaw who is a native of Oakengates. In addition, I have gathered together everything that I have found which relates directly to the railways which passed through Oakengates. In March 2024, I gave a talk to the Oakengates History Group which was culled from what is included in this article.
The monochrome photographs included in this article were taken by a number of different photographers. Where possible, permission has been sought to include those photographs in this article. Particularly, there are a significant number of photographs taken by A.J.B. Dodd which appear here. These were first found on various Facebook Groups. A number were also supplied direct by Mike Dodd, A.J.B. Dodd’s son, who curates the photographs taken by his father. Particular thanks are expressed to Mike Dodd for entering into email correspondence about all of these photographs and for his generous permission to use them in this article. [174]
This article can be read here on this blog or can be downloaded as a .pdf file.
East Shropshire is well known as the ‘cradle of the Industrial Revolution’ with iron works, coal mines and furnaces all well established by 1760. Oakengates is a small town situated in the former Shropshire industrial area, and is roughly midway between Shrewsbury and Wolverhampton, which has now been subsumed into the new town of Telford. Prior to absorption into Telford, the town had a population of around 11,500, which made it the third largest settlement in the county after Shrewsbury and Wellington.
This extract from the Railway Clearing House Maps shows the immediate area around Oakengates prior to the Grouping in the 1920s. The red railways and London & Northwestern railways, the yellow are those controlled at that time by the Great Western Railway. Those dashed yellow and red are those which were in joint ownership. The Lilleshall Company network is not shown. This might help to understand the area covered by this article. We include the GWR mainline between Hollinswood Goods and Wellington, the Coalport Branch from Hadley to Malinslee, and the private railways of the Lilleshall Company. [1: p165]This extract from a drawing held on the Miners Way website may help in our understanding of the area covered. The Mineral Line used 200 mainline and 250 internal wagons. The company also bought some industrial locomotives from Barclay and Peckett. Through the years 22 locomotives were used on the line, 6 of these were built by The Lilleshall Company itself. The company also built a further 34 locomotives for their customers. [131]A little over three miles east of Wellington, and about 158½ miles from London (Paddington) via Oxford, former Great Western Railway ‘2800’ class 2-8-0 No 2897 climbs through Oakengates (West) station on a southbound (Up) freight, the gradient being 1 in 220 through the station, and this continues through the town’s nearby eponymous tunnel and nearly as far as Hollinswood sidings. The station here was opened in 1849 by the Shrewsbury & Birmingham Railway to serve Shropshire’s third largest town, a community that grew with the industrial revolution, the raw materials for the ironmasters of the late 18th century all being close at hand, and thus modern transportation was embraced at the earliest opportunity, significantly canals and then railways. A.J.B. Dodd/Colour-Rail.com [1: p165]
The transport of goods in the Oakengates area had been revolutionised by the construction of the Shropshire Canal, which was authorised in June 1788 and was completed throughout its 7.75 mile length by 1794. It ran virtually due south through Oakengates and connected with the earlier Donnington Wood, Ketley, and Wombridge canals to provide a link to and from the navigable River Severn, albeit 453ft of height had to be gained to achieve this.
The Shropshire Canal’s primary objective was the conveyance of coal, iron and lime from the Oakengates area to the River Severn at Coalport, and there was also a 2.75 mile canal branch that diverged south of Stirchley tunnel to serve Horsehay, and Coalbrookdale. This short, but quite busy extension to the local waterway system incorporated three tunnels, and there were four inclined planes (rather than flights of closely spaced locks), these being sited at Trench, Wrockwardine Wood, The Windmill and The Hay. There was a fifth inclined plane at Ketley, but this closed in 1816 when the ironworks to which it was connected was closed.
The GWR Shrewsbury to Birmingham Main Line
The Great Western Railway (GWR) took over the Shrewsbury & Birmingham Railway (S&BR) in 1854.
Apart from industrial tramways this was the first public railway to impinge on the Oakengates area. It was promoted during the ‘Railway Mania’ years of the mid-1840s as a line between Birmingham, Wolverhampton and Shrewsbury. The project was supported by the London & Birmingham Railway, which viewed the S&BR scheme as the first section of a much longer line to Liverpool and the north, in opposition to its bitter rival, the Grand Junction Railway (GJR).
The Shrewsbury & Birmingham scheme was rejected by Parliament in 1844, while in 1845 a substantially similar Bill failed to pass Standing Orders. Undeterred by these initial setbacks, the Shrewsbury promoters submitted a third Bill in November 1845, seeking Parliamentary consent for the making and maintenance of a railway commencing ‘at or near the Shrewsbury Canal Wharf, in the Parish of St. Mary, in the Borough of Shrewsbury, in the County of Salop, and terminating by a junction with the London & Birmingham Railway, near the Passenger Station of the said last-mentioned railway, in the township of Duddeston-cum-Nechells, in the Parish of Aston-juxta-Birmingham, in the County of Warwick’.
Meanwhile, the Grand Junction Railway had submitted an alternative scheme, known as ‘the Shrewsbury, Wolverhampton & South Staffordshire Junction Railway’, which would have followed more or less the same route as the Shrewsbury & Birmingham line. However, at that juncture, the London & Birmingham Railway agreed to join forces with the Grand Junction and the Manchester & Birmingham railways to form a new organisation known as ‘The London & North Western Railway’. This sudden and unexpected development had obvious ramifications for the Shrewsbury & Birmingham scheme, which was, in consequence, cut down to 29½ miles of line between Shrewsbury and Wolverhampton, access to Birmingham being obtained via the projected Stour Valley line.
The London & North Western Railway (LNWR) was formed by Act of Parliament on 16th July 1846 and, a little over two weeks later, on 3rd August 1849, the ‘Act for Making a Railway from Shrewsbury to Wolverhampton … to be called the Shrewsbury and Birmingham Railway’ received the Royal Assent. The resulting Act stipulated ten miles of line between Shrewsbury and Wellington would be shared with the Shropshire Union Railways & Canal Company, while the Shrewsbury & Birmingham Railway was granted running powers and a quarter share in the Stour Valley line. The S&BR was also permitted to construct a branch from Shifnal to the ironworks at Dawley.
The land required for the S&BR line between Shrewsbury and Wellington had been purchased by 19th September 1846, and the work of construction was soon underway, the Engineer being William Baker (1817-78). In engineering terms, there were few major obstacles, other than the two bridges across the River Severn and a 471-yard long tunnel at Oakengates.
The line running between Shrewsbury and Wellington was examined by the Board of Trade Inspector on 2nd May 1849, and he reported that ‘the railway is so far advanced that it can be used with safety by the public, but the stations will require a few days to complete’. Eastwards, a further four miles of line between Wellington and Oakengates required a second inspection, after delays in completing an overbridge at Wellington, but when this short section had been approved by the Board of Trade, the first portion of the S&BR line was opened on 1st June 1849, when trains began running between Shrewsbury, Wellington and Oakengates.
The initial timetable provided four trains each way, with Up services from Shrewsbury at 6.45am, 9.35am, 4.15pm and 6.45pm, and corresponding Down workings starting from Oakengates at 8.45am, 2.15pm, 5.15pm and 8.15pm. The first Up and last Down trains were first class only, whereas the remainder conveyed all classes. The Sunday service comprised just two trains each way.
Construction of the eastern section of line was delayed due to some difficulties involving Oakengates tunnel, while the work of the navvies had also been impeded by the abysmally wet summer of 1848. However, the railway was finally opened throughout on Monday, 12th November 1849, with the inaugural train of fifty carriages hauled by two locomotives, Wrekin and Salopian. Passengers wishing to reach Birmingham had to travel via Wednesfield Heath station and the former Grand Junction line as the Stour Valley route from Wolverhampton’s High Level station was as yet incomplete. The frequency of the service was increased to nine trains each way daily, but any access to the Stour Valley line was not granted until 4th February 1854.
The LNWR – a giant among railway companies and a huge undertaking by mid-Victorian standards – was able to exert unyielding commercial pressure on the Shrewsbury & Birmingham Railway and its ally, the Shrewsbury & Chester Railway with a view to eventual takeover. For example, although the Stour Valley line was opened on 1st July 1852, connections with Shrewsbury & Birmingham trains at Wolverhampton were arranged to be as inconvenient as possible, and the ‘North Western’ company refused to accept through bookings to and from the S&BR. However, the LNWR failed completely in its attempt to intimidate the Shrewsbury companies, and in 1854 the Shrewsbury & Birmingham and the Shrewsbury & Chester railways opted instead for an outright amalgamation with the Great Western Railway. Thus, on 1st September 1854, the line from Wolverhampton to Shrewsbury and thence to Chester became an integral part of the GWR system – albeit with a jointly owned section of line between Wellington and Shrewsbury.
In later years, the line through Oakengates became part of a much longer route extending from London (Paddington) to Birmingham (Snow Hill), Shrewsbury, Chester, and ultimately Birkenhead (Woodside) – the latter point becoming the northernmost extremity of the GWR main line passenger network.
In 1910, local services outlined in the April Bradshaw show fourteen trains to Wellington (and some beyond) stopping at Oakengates with nine in the opposite (Wolverhampton) direction. The Sunday services, as would be expected, were much more sparce, with three trains in the Wolverhampton direction and four to Wellington.
The British Railways (Western Region) timetable for Summer 1953 provides a post-Nationalisation but pre-dieselisation picture, with a frequent weekday (Monday to Saturday) service to both Wellington (Northbound/Down) and Wolverhampton (Southbound/Up), with some of these trains originating from Shrewsbury and Birmingham respectively, and two trains each way continuing on to London (Paddington) or working through to Chester (General). It is worth noting that between 18th June 1951 and 10th June 1956 the former GWR station in Oakengates was known as Oakengates (West), to differentiate it from Oakengates (Market Street) station on the former LNWR/LMS Coalport branch, and this is how it appears in timetables of the period.
At this time, the first Down train called at Oakengates (West) at 7.00am en route to Chester, although generally trains calling in this direction terminated at Wellington. Later trains called at 7.35am, 7.52am (ex-Birmingham, Snow Hill), 8.35am, 10.00am (Snow Hill to Chester), 12.01pm, 1.07pm, 1.54pm (ex-Snow Hill), 2.50pm, 3.57pm, 5.19pm, 6.10pm (to Shrewsbury), 7.11pm (Snow Hill to Shrewsbury), 9.04pm (to Shrewsbury), 10.25pm and 11.40pm.
The pattern of services for Up trains was broadly similar, with passenger trains generally terminating at Wolverhampton (Low Level). Calls at Oakengates (West) were at 6.50am and 7.13am (both to Snow Hill), then 7.52am (the 7.30am Shrewsbury-Paddington service), 8.38am, 9.31am, 10.16am, and 11.51am. Afternoon calls were at 1.39pm, 3.03pm, 3.58pm, 5.45pm (to Snow Hill), 7.15pm, 8.48pm and 10.47pm (the 10.15pm Shrewsbury to Paddington service that terminated in London at 5.05am on the following morning).
In early British Railways’ days, former GWR Churchward Mogul No 5381 heads a southbound passenger train past Hollinswood sidings, the massive yards established a little way from the southern portal of Oakengates tunnel to exchange traffic with the Lilleshall system. The distant chimneys and slag heaps are those of the Priorslee Furnaces, one of the principal Lilleshall Company establishments – and David Bradshaw says, these slag heaps proved to be great terrain for playing Cowboys & Indians in the early to mid-1950s. As an aside, the Wolverhampton-bound passenger train is effectively passing through the site of what is now Telford Central station, the impressive but arguably ugly industrial scene that I recall now landscaped to provide a modern road system serving the 1980s-built station and industrial estates, the area also being bridges by the M54. A.J.B. Dodd/Colour-Rail.com. [1: p167]
The summer of 1957 brought about the dieselisation of the stopping services at Oakengates as part of a Wellington to Lapworth service, Lapworth being the end of the four-track section of the former GWR main line south from Birmingham (Snow Hill), so it was a convenient terminating point. At the same time, Birmingham (Moor Street) to Leamington Spa services also went over to diesel-multiple-units. However, the dieselisation was not total, as some peak hour stopping services were still regularly steam-hauled through Oakengates, and it was status quo, unchallenged steam power, on stopping services between Wellington and Shrewsbury.
Between Wellington and Wolverhampton, however, steam locomotives were almost exclusively on goods and parcels duties as ‘Western’, ‘Warship’ and ‘Hymek’ diesel- hydraulics had taken over most of the expresses, and these thundered through Oakengates station. A particularly interesting working was the Bournemouth (West) to Birkenhead (Woodside) Inter-Regional duty and its corresponding Birkenhead to Bournemouth service, with Southern Region green-liveried coaches in use either on the northbound or southbound leg.
The BR (Western Region) public timetable for 12th September 1960 to 11th June 1961 lists the duty as ‘Week Days Only’, with the one train leaving Birkenhead at 9.20am, while that from Bournemouth departed at 9.30am, hence the need for two rakes, the two trains passing each other near Fenny Compton; Wellington was an 11.40am call on the Up duty, and 3.20pm on the Down service. However, the summer 1962 timetable saw the service cut-back to Wolverhampton (Low Level) on Mondays to Fridays, leaving the through service between Bournemouth and Birkenhead as a Saturdays- only option.
For many years the local services between Wolverhampton (Low Level) and Wellington were in the hands of Tyseley or Wellington-allocated Class ‘5101’ 2-6-2Ts on suburban stock, as illustrated by No. 4130 arriving from Wolverhampton at journey’s end. For the most part, passengers from Oakengates wishing to travel beyond Wellington would have to change trains here, and interestingly the local services between Wellington and Shrewsbury were actually Stafford line trains that worked through. However, these would never be dieselised. Instead the remaining intermediate stations between Stafford and Wellington, and onwards to Shrewsbury, would cease to be served from 7th September 1964. A.J.B. Dodd/Colour-Rail.com [1: p167]
The shake-up in Inter-Regional duties that was instigated with the introduction of the winter 1962/63 timetable, which significantly diverted the traditional Somerset & Dorset routed trains via Oxford, also brought about the end of the Bournemouth to Birkenhead duty, so Saturday, 9th September 1962 was the last day it ran. Interestingly, as part of the ongoing West Coast main line electrification, the Up and Down ‘Pines Express’ was also diverted away from Birmingham (New Street), so it now served Snow Hill, Wolverhampton (Low Level), and Wellington, then diverged to travel via Market Drayton to Crewe and Manchester. From an Oakengates perspective, this brought an English Electric ‘Type 4’ diesel through the station – the timetable ‘path’ for this train south of Wellington was that once used by the Birkenhead service.
At this stage, duties generally continued to operate to traditional timings, and a glance at the 1963 timetable provides an example. In the Down direction these were the 12.15am, 8.20am, 9.10am, 11.10am – ‘Cambrian Coast Express’, 12.10pm, 1.10pm, 2.10pm, 4.10pm, 6.10pm and 7.10pm from Paddington. The return journeys were at 6.30am, 7.40am, 8.55am, 11.40am, 2.45pm, 4.30pm and 8.55pm from Birkenhead, 2.30pm from Chester, and the 7.10am, 7.30am and 5.10pm from Shrewsbury.
There was a regional boundary change from 9th September 1963, with the Western Region retreating to Bromsgrove, but even with the new London Midland Region broom there were not yet enough diesels, locomotives or multiple-units, to exclude steam locomotive use on peak hour passenger duties, even into 1964. David Bradshaw remembers this well as in the 1963/64 period his girlfriend Margaret (now his wife), frequently caught the 5.10pm local service to Oakengates from the bay platform at Shrewsbury; it was generally hauled by a Shrewsbury-allocated ‘County’ or ‘Hall’, and the guard would always ensure that she caught it, often holding the train beyond its departure time. If she missed this, the next train was a Shrewsbury to Stafford service, with a change to a diesel-multiple-unit at Wellington.
Stafford Junction, just to the east of Wellington station, was the meeting point of the Shrewsbury & Birmingham Railway and Shropshire Union Railway & Canal Co, this opening on 1st June 1849, which was a pivotal day as inaugural S&BR services began between Shrewsbury and Oakengates and likewise the LNWR-operated Shrewsbury to Stafford services started, the latter diverging here; the junction was ‘Joint’ property, as was the line West from here to Shrewsbury. This view is looking east on 9th August 1932, the Stafford line branching left, while the line straight ahead is for Oakengates, although the next nearest railway infrastructure of note is Ketley Junction, just 52 chains away, where trains from Wellington for Much Wenlock diverged as they travelled ’round The Wrekin’. Mowat Collection.
The Shropshire Union Railways & Canal Co.
The Shropshire Union Railways & Canal Co. was created in 1846 as an amalgam of a number of canal and railway schemes. Railways were, at that time, starting to pose a serious threat to the local canal companies, and it was for this reason that the Shropshire Union company was formed, the idea being that a combined railway and waterway undertaking would be able to hold its own in competition with purely railway-orientated companies such as the London & North Western Railway.
The Shropshire Union worked a number of existing waterways, including the Ellesmere & Chester Canal (which had already absorbed the Birmingham & Liverpool Junction company), and it also obtained powers for a network of connecting railway lines, one of which would have run from Nantwich to Wolverhampton, while others would extend from Crewe to Newton and from Stafford to Shrewsbury. In total, it was envisaged that the Shropshire Union would encompass no less than 155 miles of railway, much of this system being converted from the Shropshire Union’s existing canals.
Having secured Parliamentary consent for their ambitious scheme, the Shropshire Union supporters looked forward to a prosperer future. However, their plans were perhaps far too ambitious, and the Shropshire Union company inevitably attracted the attention of rival railway companies, notably the rapidly expanding LNWR. In 1847, the Shropshire Union Railways & Canal Company was leased in perpetuity to the LNWR, and by this means the original Shropshire Union plans were effectively thwarted. The Nantwich to Wolverhampton and Crewe to Newton lines were abandoned, although, happily, the main canal routes remained in operation under London & North Western auspices.
It was also agreed that the proposed railway from Stafford to Shrewsbury would be constructed, with the proviso that the western section between Wellington and Shrewsbury would be vested jointly in the Shrewsbury & Birmingham and Shropshire Union companies. As we have seen, the line from Shrewsbury to Wellington was opened on 1st June 1849, and the connecting line between Stafford and Wellington was also opened on the same day, this eastern section being worked as a purely LNWR branch, whereas the Wellington to Shrewsbury line was jointly-owned with the S&BR. Trains worked on a Stafford to Shrewsbury axis, calling at Gnosall (64 miles), Newport (11½ miles), Hadley (17½ miles), Wellington (18¾ miles), and then intermediate stations to Shrewsbury (29¼ miles).
The LNWR Coalport Branch
Along with discussion of all the other railways in and around Oakengates (including the Lilleshall Co. private railways), David Bradshaw and Stanley C. Jenkins looked at the Wellington to Coalport Branch.
These paragraphs come first from the parts of the Steam Days article which relate to the Wellington to Coalport Branch, [1: p168-170, 175, 176-177] but are supplemented by my own research into the route of the line.
Wikipedia provides this schematic map of the Coalport Branch which highlights the key stations and sidings. [37]
The Great Western Railway had taken over the Shrewsbury & Birmingham Railway (S&BR) in 1854, and this may have prompted the LNWR to consider a scheme for converting the Shropshire Canal into a railway. This busy waterway was experiencing severe problems in terms of subsidence and water supply, and there was a major flooding incident in July 1855 when Snedshill tunnel collapsed. It was thought that the cost of repairs would probably exceed £30,000 and, faced with this heavy expenditure, the London & North Western Railway (LNWR) decided that the money would be better spent on the construction of a replacement railway from Hadley, near Wellington, to Coalport, which would utilise, as much as possible, parts of the troublesome canal.
It was then estimated that the proposed Coalport branch line would cost about £80,000, including £62,500 for the purchase of the waterway. Accordingly, in November 1856, notice was given that an application would be made to Parliament in the ensuing session for leave to bring in a Bill for the purchase and sale of the Shropshire Canal and the ‘Conversion of Portions thereof to Railway Purposes, and Construction of a Railway in connection therewith’.
The proposed line was described as a railway, with all proper stations, works, and conveniences connected therewith, commencing by a junction with the Shrewsbury and Stafford Railway of the Shropshire Union Company in the township of Hadley and parish of Wellington, in the county of Salop. at a point about two hundred yards westward of the mile post on the said railway denoting twelve miles from Shrewsbury’, and it terminated in the parish of Sutton Maddock, in the county of Salop, at a point ten chains or thereabouts to the east of the terminus of the Shropshire Canal at Coalport’.
The railway would pass through various specified parishes, townships, or other places, including Wellington, Hadley, Donnington Wood, Wrockwardine, Wombridge, Oakengates, Stirchley, Malins Lee, Dawley, Snedshill, Madeley, and Coalport, ‘occupying in the course thereof portions of the site of the Shropshire Canal’. Having passed through all stages of the complex Parliamentary process, the actual ‘Act for Authorising the Conversion of parts of the Shropshire Canal to Purposes of a Railway’ received the Royal Assent on 27th July 1857.
The canal was closed between Wrockwardine Wood and the bottom of the Windmill Hill inclined plane on 1st June 1858, although isolated sections of the waterway remained in use for many years thereafter. The work of conversion was soon underway, and on Thursday, 30th May 1861 The Birmingham Daily Post announced that the Coalport and Hadley line of railway would be opened on ‘Monday next’, implying that the first trains would run on 3rd May. In the event, this prediction was slightly optimistic, and on 12th June the same newspaper reported that, ‘in accordance with the arrangements arrested’. previously announced’, the Coalport branch had been opened for passenger traffic on Monday, 10th June 1861.
As usual in those days, Opening Day was treated as a public holiday, and a large number of spectators had assembled at Coalport station to witness this historic event. ‘At the appointed time, the first engine, and train of first, second and third class carriages, moved off from the station, having a respectable number of passengers’.
The newly opened railway commenced at Hadley Junction, on the Stafford to Wellington line, and it climbed south-eastwards on a ruling gradient of 1 in 50 towards Oakengates (3.25 miles from Wellington), which thereby acquired its second station. Beyond, the route continued southwards, with intermediate stations at Dawley (6 miles) and Madeley Market (7½ miles), to its terminus at Coalport, some 9½ miles from Wellington. The final two miles of line included a continuous 1 in 40 descent towards the River Severn. An additional station was opened to serve Malins Lee, between Oakengates and Dawley, on 7th July 1862.
Wellington Railway Station to Hadley Railway Station
Wellington Railway Station was the junction station for the Coalport Branch passenger services. The bay platform on the South side of the Wellington Station site was shared with the GWR Coalbrookdale line (Wellington & Severn Junction Railway). The station and the line to its East are covered in the link below:
Coalport East trains left the Shrewsbury to Birmingham line and for a short distance, to Hadley Junction, travelled along the line from Wellington to Stafford. After passing through Hadley Railway Station trains took to the Branch which curved away to the South of the main line.
Hadley Railway Station to Wombridge (Goods)
Experience shows that it is very difficult to plot a line on the ground when significant development has taken place. For the first section of this line the redevelopment from the 1960s into the 21st century has been very significant. In this article I have relied on modern satellite images provided by railmaponline.com. [4] As usual, historic mapping comes from the NLS (National Library of Scotland).
Hadley Railway Station appears on the left of this extract from the 25″ Ordnance Survey of 1901, published in 1902. The trackwork associated with the junction and with Castle Car Works can be seen at the top right of the extract. [12]The same area in the 21st century as shown on the ESRI satellite imagery provided by the NLS. [12]An enlarged extract from the 25″ Ordnance Survey which shows the area immediately around Hadley Station. [14]The same area on the modern satellite imagery of Google Maps. [15]Caren Craft shared the photograph of modern Hadley taking shape on the Hadley History Facebook Group on 26th June 2022. The photo was carried by the Shropshire Star on 15th August 2011. Both of the two railway bridges can be seen on the left of the image carrying the new single track railway line. [13]
Hadley Railway Station served the former Stafford to Shrewsbury Line and was the start of the branch to Coalport. The station was opened in 1849 and closed in 1964. The line through Hadley was closed from 1964, with the last remaining stretches of track being taken up in 1991. In the late 2000s a stretch of track was re-laid to the Telford International Railfreight Park for freight purposes only. [16]
Telford International Railfreight Park (known as TIRFP) is rail freight depot and construction development site located in Donnington to the north of Telford, on the former route of the Stafford to Shrewsbury Line. The terminal was opened in 2009. [17]
Wombridge Priory was a small Augustinian monastery established in the early 12th century, it was supported by a network of minor nobility and was never a large community. Despite generally good financial management, it fell within the scope of the Suppression of Religious Houses Act 1535 and was dissolved in the following year. [82]
The priory was dedicated to St Leonard. St Leonard was particularly popular in the 12th century following the release of Bohemond I of Antioch, a captured crusader – a circumstance which he seems to have attributed to the saint’s intercession. White Ladies Priory, another Shropshire Augustinian house, was also dedicated to St Leonard, as was the parish church at Bridgnorth, [82] and at a later date, Malinslee Parish Church. Remains of the priory buildings remained visible until the 19th century but are now hidden beneath the churchyard and other development. They were excavated in the 1930s and again in 2011 and 2012. [82]
The church was designated to St. Mary and St. Leonard and was built in 1869 by George Bidlake. It is the fourth church on the site of the Priory.
An aerial view of Wombridge Church with some of the remains of the Priory evident. This photograph was shared on the Telford – The Ultimate Guide Facebook Group by Steve Bowers on 27th February 2023. [47]
The bridge which carried the Coalport Branch over what was once Wombridge Road was demolished to make way for the A442 Queensway.
This photograph was taken during the demolition of the bridge. It is the only photo I have been able to find of the old railway bridge. It appears to have been taken from the South. Headroom would have been quite limited. The photograph was shared by Paul Wheeler on the Telford Memories Facebook Group on 23rd November 2017. [48]
We continue on our journey along the old Coalport Branch with a ground-level shot along the A442 showing the line of the old railway.
Looking Southeast along the A442, Queensway from the Northwest-bound off slip road. The A442 was built over the line of the Coalport branch which was curving along the length ahead towards the Southeast. [Google Streeetview, June 2022]The 25″ Ordnance Survey from the turn of the 20th century again. The important feature on this length of the Coalport Branch was the bridge which carried Stafford Road over the line. [49]Once again, this satellite image covers approximately the same area as that covered by the OS map extract above. The purple line is the route of the Coalport Branch as recorded on railmaponline.com. [33]An image from the Southbound carriageway of the A442 from a position at the top-left of the satellite image above. [Google Streetview, June 2022]From the same Southbound carriageway, the bridge which carries Stafford road over the A442 is visible in the distance. The Coalport Branch followed a tighter curve than the modern road, passing under Stafford Road to the South of the modern bridge over the A442. [Google Streetview, June 2022]A Brown’s Sentinel bus crosses the Stafford Road bridge in Oakengates in March 1963. For much of his married life, Ron Dean was in the driving seat. And his wife Greta was his conductor. The camera is pointing towards the South. [50]Stafford Road Bridge again, sometime in the 1960s before the A442, Queensway dual carriageway was built. This was probably taken at the time that a footbridge was being installed alongside the road bridge. The photo is taken facing South along the Brach line. It was shared on the Telford memories Facebook Group by Bear Yeomans on 7th February 2016. [51]Looking North from Stafford Road Bridge along the Coalport Branch towards Hadley Junction. This image was shared on the Oakengates History Facebook Group by Gwyn Thunderwing Hartley on 23rd May 2020. [52]Looking North under Stafford Road Bridge along the Coalport Branch. This image was shared on the Oakengates History Facebook Group by Gwyn Thunderwing Hartley on 30th July 2018. [53]This aerial photo of Oakengates was taken in November 1970. Just to the right of the top-centre of the image, Stafford Road bridge can be seen with the footbridge alongside it. The A442 is not evident, but the Coalport Branch cutting can be followed from the road bridge to the right. This image was shared on the Telford Memories Facebook Group by Marcus Keane on 22nd March 2022. [54]An enlarged extract from the picture immediately above showing Stafford Road bridge in the top-left. [54]This next length of the line takes us through Oakengates Market Street Railway Station and Goods yard. The 25″ Ordnance Survey of 1901, published in 1902 shows the station and goods yard to full advantage. [55]The railmaponline.com satellite image of the same area as in the map extract above. This begins to show how congested the area around Oakengates was with a variety of railway lines and sidings. [33]
The OS image above shows the length of the Coalport branch as it passes through Oakengates (Market) station and goods yard. We will return to look at the station later. Two images looking North through the station will suffice at this juncture.
Aview looking North from the boundary fence, through Oakemgates (Market) Station. The line was much less busy on this occasion. The image was shared on the Telford Memories Facebook Group by Paul Wheeler on 16th August 2017. An equivalent modern view from Canongate is not feasible because the industrial site is now screened by trees. [3]Looking North through the area that was Oakengates Market Street Station Goods yard from the Eastern end of Commercial Way. The purple line shows the approximate route of the Coalport Branch. The white building at the centre of this image is the old goods shed now put to a different use! [Google Streetview, June 2022]Looking Southeast from the same location. The mainline of the Coalport Branch would have run along the treeline behind the industrial units. [Google Streetview, June 2022]The view from the Southeast on Canongate. The purple line shows the approximate location of the Coalport Branch which passed under the road by means of a bridge. [Google Streetview, June 2022]Canongate Railway Bridge was a brick-arched structure. It is seen here infilled to support the road above. This image was posted by BruceS on Waymarking.com on 2nd June 2015. [60]Looking North under Canongate Bridge towards Oakengates Market Street Station. This picture was shared on the Oakengates History Facebook Group by Gwyn Thunderwing Hartley on 12th October 2017. [61]An aerial image looking North along the line of the Coalport Branch in 1948. Canongate bridge is in the centre of the image, the Station is towards the top of the image beyond the goods yard, (c) Historic England, Britain from Above (EAW013748). [62]An extract from the above image which shows Canongate, the Goods Yard and the Station in greater detail, (c) Historic England, Britain from Above (EAW013748). [62]The next length of the Coalport Branch took it passed Snedshill Iron Works and into a tight corridor which included the GWR Shrewsbury to Birmingham railway Line, the Coalport Branch and a Mineral Railway. This area is again shown on the 25″ Ordnance Survey of 1901, published in 1902. [63]Railmaponline.com’s satellite imagery shows the same area as in the OS map above as it appears in the 21st century. All the lines mentioned above are included in the overlay to the satellite imagery. [33]Another extract from the aerial image of 1948 which showed Canongate Bridge, this shows the area to the South of Canongate. Snedshill Iron Works are on the right of the image. In the centre of the image are John Maddock and Co.’s works for whom the aerial photographs were taken. Those works do not feature on either the 1901 Ordnance Survey or the modern satellite imagery. [62]Looking North from the A5 bridge over the Coalport branch. Snedshill Ironworks are on the right of the image. The bridge at the centre of the image is the same one that appears at the bottom of the aerial image immediately above. This photograph was shared on the Telford Memories Facebook Group by Paul Wheeler on 18th March 2018. [64]Almost extactly the same location, also looking North, the connection was one of the busier connections from the Coalport line. As we have noted, our vantage point is the Holyhead Road overbridge, the old A5 trunk road. This view shows the Coalport branch in the cutting on the left, while the lines on the right connect to the former Snedshill Iron Works; a Hawksworth ‘9400’ pannier tank is seen shunting the siding in the mid-1950s. This was initially one of the connections to the Lilleshall network but in about 1938 the Lilleshall Company sold the Snedshill Iron Works to John Maddock’s & Son, an Oakenshaw-based engineering firm that was outgrowing its premises near the GWR station. Subsequent development saw the distant building become one of the most modem casting foundries in Europe, and post-war, pipe fittings became the principal activity. (c) A.J.B. Dodd [1: p170]Looking Northwest along Reynolds Drive, Oakengates. The Coalport Branch was in cutting at this location. The purple line gives an idea of its Route. Its route crosses Hawkshaw Close a 100 yards or so to the left, as shown below. [Google Streetview, June 2022]Looking South along Hawkshaw Close, Oakengates with the line of the Coalport Branch shown. As noted above the line was in relatively deep cutting at this location. Google Streetview, June 2022]Looking North from Newlands Road, Oakengates, towards Oakengates Market Street Station. At this point on the line we are a little to the North of the accommodation bridge shown on the 1948 aerial image above. The approximate route of the line is again shown by the purple line. The line was, however, in deep cutting at this location. [Google Streetview, June 2022]Looking South from Newlands Road, Oakengates, along the line of the Coalport Branch which was in deep cutting at this location. The road to the right of this image is Station Road which once ran immediately alongside the old railway line a little further to the South.[Google Streetview, June 2022]Looking North along Station Road across the line of the old railway. Station Road was diverted when the new roundabout (immediately behind the camers) was constructed. The next two monochrome images focus on this location as it was in 1948. [Google Streetview, June 2022]The same length of line, but this time as shown in an aerial image from the Northwest, also taken in 1948. The image features John Maddock’s works with Snedshill Iron Works beyond, (c) Historic England, Britain from Above (EAW013752). [65]A closer view of the top-right of the above image with the Coalport branch heading away to the South. This area saw significant alterations in the later years of the 20th century. The significant bridge carries what is designated the B5061 in the 21st century, but was the A5 Trunk Road. The works immediately beyond the bridge and alongside the A5 are the Lilleshall Company’s Snedshill Brickworks, (c) Historic England, Britain from Above (EAW013752). [65]The 1″ OS Map of 1898, published 1899, shows the location of the bridge. The immediate area is now under the Greyhound Roundabout which sits alongside the A442. [66]Looking Southeast along the A5 towards the Lilleshall works at Priorslee. The dominant building with the curved roof on the left of this image is the Lilleshall Company’s Snedshill Brickworks. The Coalport Branch passed under the bridge at the centre of the image. This phot was shared on the Telford Memories Facebook Group on 23rd February 2014 by Vince Allen. [67]Looking down into the cutting of the Coalport Branch from the East in 1973. The road running across the image is the A5. The arch bridge is the Greyhound Bridge which is eventually replaced by the Greyhound Roundabout. The picture was shared on the Oakengates History Facebook Group by Gwyn Thunderwing Hartley on 14th May 2019. [68]A local collapse of parapet walling alongside the bridge occurred in 1966. The bridge is off to the left of the photograph, the running line of the Coalport Branch just below the image. This press cutting was shared on the Telford Memories Facebook Group by Paul Johnson on 1st March 2014. [69]In this postcard aerial view of Snedshill Brickworks from the West, the Mineral Railway adjacent to the Coalport Branch is visible, crossing the A5 at the bottom edge of the image. The Coalport Branch is just off the bottom of the picture. [70]Snedshill Brickworks again, this time in the 1950s and viewed from the East. The A5 runs away to the right of the image. The cutting of the Coalport Branch runs across from middle-right to middle-left. The A5 bridge over the line is hidden by the Works buildings. This picture was shared on the Telford Memories Facebook Group by Marcus Keane on 26th March 2014. [71]From a similar angle to the last picture but taken from the Lilleshall Brickworks buildings in 1974, this image was carried by the Shropshire Star at the time. The A5 runs diagonally across the shot with the dwarf wall above the arched Greyhound Bridge visible to its right. The cutting of the Coalport Branch runs left to right across the centre of the image. The picture was shared on the Oakengates History Facebook Group on 22nd October 2020 by Gwyn Thunderwing Hartley. [72]
This photo does not have the best of definition, but it is worth including as it shows the view South across the Brickworks before redevelopment work in the area. The Shrewsbury to Birmingham line curves away to the East. The A5 bridge over the Coalport Branch is visible at the bottom of the image. [33]
From this point South the A442 now occupies the space which once was used by the Coalport Branch. The Northbound slip road from the A442 can be seen following the line of the old railway on the Railmaponlin.com satellite image below.
The 25″ Ordance Survey of 1901, published 1902, shows the Coalport Branch passing over the GWR Shrewsbury to Birmingham main line. The GWR line passed under the area in a deep tunnel with the Coalport Branch above it also in a relative deep cutting. The two lines ran approximately parallel for a short distance. [74]Railmaponline.com shows the same area with the local lines overlaid on the satellite imagery from Google Maps. [33]The view North, back towards Oakengates from the northbound slip road of the A442. [Google Streetview, June 2022]The view South from the same location showing the approximate route of the Coalport Branch. [Google Streetview, June 2022]A little further South along the A442 with the approximate line of the Coalport Branch marked once again. [Google Streetview, June 2022]Further South again, this time the camera is on the southbound carriageway. The Coalport Branch ran approximately along the modern treeline. Beyond the horizon the A442 curves back over the formation of the old line. [Google Streetview, June 2022]Further South again the A442 crosses the line of the Coalport Branch. The next Railmaponline.com satellite image shows that the footbridge in this view is very close to the point where the A442 leaves the formation of the Coalport branch. [Google Streetview, June 2022]This next extract from the 25″ Ordnance Survey of 1902 shows the Shrewsbury to Birmingham line to the East of the Coalport branch and running parallel to it. Both pass under the road leading Northeast out of Hollinswood. The Coalport branch remains in cutting along much of its length on this map extract. [75]The same area on the satellite imagery provided by Railmaponline.com. The purple line shows the route of the Coalport Branch which, from close to the top-left of the image ran along a route immediately adjacent to the modern A442. Hollinswood Road has been replaced by a footbridge over the A442 and the Shrewsbury to Birmingham main line. It is further cut to the Southwest by the M54 and its junction arrangement, just off this image to the bottom-left. [33]Looking North towards Oakengates from the cycle track on the West side of the A442. The approximate route of the Coalport Brnach is indicated by the purple line. [My photograph, 13th March 2023]Looking Southeast from the cycleway alongside the A442. [My photograph, 13th March 2023]Another view looking North, but this time taken from the Footbridge/Cycleway bridge over the A442. [My photograph, 13th March 2023]Looking South from the same bridge with the route of the old railway indicated by the purple line. The bridge ahead carries the M54 over the A442. [My photograph, 13th March 2023]Looking South again, this time from the cycleway/footpath which runs under the M54 bridge over the A442. [My photograph, 13th March 2023]This is now the view South towards the Telford Station footbridge. My photograph, 13th March 2023]A few steps ahead and turning a half-circle, this is the view looking North under the M54 Bridge with the old railway route marked by the same purple line. [My photograph, 13th March 2023]The view South once more showing the line of the old railway. [My photograph, 13th March 2023]Looking North-northwest on Rampart Way under the footbridge leading to Telford Railway Station. The approximate line of the Coalport Branch is shown by the purple line. The M54 runs parallel to and beyond the purple line [Google Streetview, June 2022]Looking to the Southwest under the Station Footbridge with the line of the Old Coalport Branch shown in purple. [Google Streetview, June 2022]Old Dark Lane Colliery and Brickworks appear at the top of the next extract from the 25″ Ordnance Survey of 1901, published in 1902. Dark Lane Village is at the bottom of the image. Dark Lane village was lost as part of the development of Telford. The Branch has turned away from the Shrewsbury to Birmingham line towards the South. [76]The same area on the satellite imagery provided by Railmaponline.com. The route of the old line cuts across the West side of the A442 interchange and then South through housing and across Dale Acre Way. [33]Looking South across Hollinswood Interchange along the line of the Coalport Branch. [Google Streetview, June 2022]Looking East along the northern arm of Dunsheath. The line of the old railway crosses the housing development immediately this side of the black car and the van (approximately)! [Google Streetview, June 2022]Looking East along the southern arm of Dunsheath. The line of the old railway crosses the housing development as shown by the purple line. [Google Streetview, June 2022]
Old Darklane Colliery and Brickworks
The Colliery was opened in 1855 and closed finally in 1885. The owners were: Beriah Botfield (1855-1860]; Leighton and Grenfell (1869-1870); and Haybridge Iron Co. Ltd (1875-1885). [77]
Dark Lane Village
Dark Lane Village was lost in its entirety to the redevelopment which produced Telford. Dark Lane Row and the Methodist Chapel appear at the bottom of the OS map extract above. The remainder of the village features at the top of the OS Map extract below. Malins Lee Station was on the South side of the village. Little Dark Lane Colliery to the West. There were three long rows of cottages which were known locally as: Long Row (about 550ft long and containing 20 houses); Bottom Row (a little over 500ft long and containing 25 houses); and Short Row (nine houses built by the Botfield family in around 1825). A full description of the village and pictures of the buildings can be found on the Dawleyhistory.com website. [78]
The last extract on the Coalport Branch from the 1901 25″ Ordnance Survey shows Dark Lane village and Malins Lee Railway Station. [79]The same area on the satellite imagery provided by Railmaponline.com. After crossing Dale Acre Way, the route of the old line heads South-southwest across open ground and then over land used for housing development. [33]Looking West on Dale Acre Way. the approximate location of the old railway is shown by the purple line. [Google Streetview, June 2022]The view West in the 1960s along Dark Lane the GWR mineral railway was hidden in the dip. The road then rose relatively steeply to cross over the Coalport Branch. The bridge can be seen middle-left of this image. [80]This Streetview image is taken from approximately the same location as the picture immediately above. [Google Streetview, June 2022]This bucolic colour image shows the road featured in the image above but this time from a location adjacent to Bottoms Row, Dark Lane. The bridge over the Coalport Branch can be seen again on the horizon. This photo was shared on the Telford memories Facebook Group by Marcus Keane on 28th February 2023. It was colourised by Simon Alun Hark. [81]This image is taken from the same geographical location as the one immediately above, facing in the same direction. The light blue line indicates the alignment of the old Dark Lane. [Google Streetview, June 2022]This postcard view shows Bottom Row with the Methodist Chapel beyond. The bridge on the right of the image carried Dark Lane over the Coalport Branch. Malins Lee Station was beyond the bridge to the right of the image. A matching modern image is not practical as the camera location is now in the midst of a copse of trees close to the boundary of the exhibition centre car park. [82]
‘The Miner’s Walk‘ website provides more information about the area around Dark Lane village. [83] It includes a hand-drawn overlay of modern roads over the Ordnance Survey of the 1880s.
The hand drawn overlay showing modern roads as they relate to Dark Lane village and Malins Lee Railway Station. [83]Malins Lee Station as in appeared in 1932.The photograph seems to have been taken facing South from the bridge which carried Dark Lane over the line. The passenger facilities at the station seem to be a little different to others on the Coalport Branch. The station was closed for two years during WW1 as an economy measure and finally closed in 1952 with the line remaining open for goods traffic for more than a decade. Just to the South of the station was a single siding which served immediately local industries. This picture was shared by Lin Keska on the Telford Memories Facebook Group on 15th August 2018. [84]Marcus Keane shared this composite image on the Telford Memories Facebook Group on 20th July 2014 which shows the location of Malins Lee Station in relation to the modern blocks of flats in Hollinswood. [85]Malins Lee Station once again. This photo seems to have been taken from the filed opposite the station. The tall chimney behind the station was probably that of Dark Lane Foundry. This photograph was shared by Marcus Keane on the Telford memories Facebook Group on 24th January 2018, (c) Ray Farlow, circa 1907. [86]Malins Lee Station passenger facilities. The photograph was shared on Telford Memories Facebook Group by Marcus Keane on 20th September 2017. [87]Malins Lee Station had been closed to passengers for 12 years when this photograph was taken of a goods service on the Coalport Branch. The picture was shared on the Telford memories Facebook Group by Lin Keska on 15th August 2018. [88]
The Coalport branch line was, from its inception, geared towards freight traffic rather than passengers, and there were numerous private sidings linked to nearby factories within the Oakengates Urban District. One of these sidings, known as Wombridge Goods, served Wombridge Iron Works, which had a connection with a surviving section of the Shropshire Canal. There was also Wombridge ballast siding and Wombridge Old Quarry siding, while other sidings served the iron foundry of John Maddocks & Son, and also the Lilleshall Company’s steel works at Snedshill.
Successive editions of The Railway Clearing House Handbook of Stations reveal further private sidings on the Coalport branch, including, in 1938, the Exley & Son siding and the Nuway Manufacturing Co siding at Coalport, and at Madeley Market there was the Messrs Legge & Sons’ siding and the Madeley Wood Cold Blast Slag Co siding.
The original train service consisted of three passenger trains in each direction between Wellington and Coalport, with a similar number of goods workings. This modest service persisted for many years, although an additional Thursdays-only train was subsequently provided in response to the increased demand on Wellington market days. In 1888 the branch was served by four passenger trains each way, together with five Up and three Down goods workings. By the summer of 1922 there were five Up and five Down passenger trains, with an additional short-distance service from Wellington to Oakengates and return on Saturdays-only.
In the final years of passenger operation, the timetable comprised five trains each way. In July 1947, for example, there were Up services from Coalport at 6.22am, 8.50am, 11.57am, 4.40pm and 7.40pm, with corresponding Down workings from Wellington at 8.04am, 10.02am, 1.40pm, 6.30pm and 9.15pm; a slightly different service pertained on Thursdays and Saturdays. The final branch passenger service in 1952. consisted of four Up and four Down trains, increasing to five each way on Thursdays and six on Saturdays.
The Oakengates (West) Route
This excellent aerial image looking North shows Oakengates (West) Station on the left and Oakengates (Market) Station top-right. The image was shared by Darren Minshall on the Telford Memories Facebook Group on 26th February 2021. it allows to see just how close the two lines were South of the centre of Oakengates. [41]
In order to explain the layout of the railway system in and around Oakengates, it would be useful to visualise the route taken by the present-day trains on the Shrewsbury & Birmingham main line as they proceed north-westwards from Wolverhampton, via Bilbrook, Codsall, Albrighton, Cosford, and Shifnal. Beyond Shifnal, Madeley Junction – 156 miles 21 chains from Paddington via Oxford and Birmingham (Snow Hill) – is where the former Madeley branch diverges south for Lightmoor and continues as the Ketley branch to Coalbrookdale, this route was still used early in the 21st century to serve the Ironbridge power station. From Madeley Junction the main line turns on to a north-north-easterly heading, soon passing the once extensive sidings at Hollinswood (157 miles 25 chains). Here the Lilleshall system was accessed from the Great Western network on the Up side, while a little known line ran from Hollinswood Down sidings to Stirchley to serve a concentration of local industry. The 1¼ mile line was opened by the Great Western in 1908 and it closed in 1959 – in later days there were three workings a week.
This extract from the 25″ Ordnance Survey of 1901, published in 1902,shows Hollinswood Junction on the GWR/BR mainline between Shrewsbury and Wolverhampton. [91]This extract from the NLS provided ETSI satellite imagery shows the same are in the 21st century. The only thing which remains from 1901 is the double track mainline railway! The platforms of Telford Central Railway Station can be made out in the top-left corner of this image. [91]A view looking Southeast from Hollinswood Signal Box as Collett ‘Hall’ class 4-6-0 No. 5912 Queen’s Hall heads a Down passenger train towards Oakengates tunnel, its next likely stop being Wellington. Using GWR terminology, the line on the far right is the Stirchley branch, but it was also known as the Old Park branch or Botfields siding. Opened in 1908, despite its length of little more than a mile, over the years it served Grange Colliery, Wrekin Chemical Works, Old Park Iron Works, and Haybridge Colliery, among other locations, but officially the end of the line upon its 2nd February 1959 decommissioning was a Tarmac siding in Stirchley; sadly there is no date recorded for this view, so the link to Stirchley may already be out of use, the long term allocation of the passing ‘Hall’ to Tyseley shed giving no tangible clues. Of note is the massive water tank at the cutting to the east end of the sidings, an Up-facing freight is in the Down goods loop, and the LMS-pattern brake van on the far left is in the sidings from the former Lilleshall Company’s Priorslee site. A.J.B. Dodd/Colour-Rail.com [1: p171]Almost exactly the same view on Easter Monday 1948. This image was shared by Marcus Keane on the Telford Memories Facebook Group on 19th April 2020. [123]A view looking Northwest across Hollinswood sidings. David Bradshaw says that he used to play Cowboys and Indians on the steelworks slag heaps here. The locomotive is a Great Western Churchward 2-6-0 – mixed traffic (passenger and freight) built Swindon Works 14/6/1920 withdrawn from service 1/9/1959 having covered 1,266,196 miles – still with original design cylinders. This image was shared by David Bradshaw on the Oakengates History Group Facebook Group on 4th December 2016. [100] This image is also included in David Bradshaw and Stanley Jenkins article. In that article these notes are alongside the image: “In early British Railways’ days, former GWR Churchward Mogul No 5381 heads a southbound passenger train past Hollinswood sidings, the massive yards established a little way from the southern portal of Oakengates tunnel to exchange traffic with the Lilleshall system. The distant chimneys and slag heaps are those of the Priorslee Furnaces, one of the principal Lilleshall Company establishments – and David Bradshaw says, these slag heaps proved to be great terrain for playing Cowboys & Indians in the early to mid-1950s. As an aside, the Wolverhampton-bound passenger train is effectively passing through the site of what is now Telford Central station, the impressive but arguably ugly industrial scene that I recall now landscaped to provide a modern road system serving the 1980s-built station and industrial estates, the area also being bridges by the M54. A.J.B. Dodd.” [1: p167]Loco. No. 48516 heading through Hollinswood Junction with its train of coal wagons in 1965. This image was shared on the Telford Memories Facebook Group by Lin Keska on 4th April 2018. [114]This image was also shared on the Telford Memories Facebook Group by Lin Keska on 4th April 2018. [114]: The signal box diagram for Hollinswood shows the box sited at the end of the Stirchley branch, on the Down side of the main line with the signalman facing north as he works the frame, overlooking five through lines as well as other additional through sidings. This diagram is to an extent the tip of the iceberg, as it only shows equipment – signals, ground signals, points and related locking equipment – that is worked from the box itself, so clearly any hand-worked points at the extremities of the yards are not shown, so this explains the mysterious lines petering out from the Up yard into the Lilleshall network, which was of course the lifeblood of this location. Signalling Record Society. [1: p171]In this image Hollinswood sits beside the mainline as construction work for the new road interchange continues around it. This image was shared by Steve Bowers on the Oakengates History Group Facebook Group on 3rd July 2021. [113]
In modern times, a new station, Telford Central (157 miles 40 chains) has appeared between the site of the yards at Hollinswood and the 471-yard long Oakengates tunnel.
The modern M54 crosses the railway to the Northwest of Telford Central Station and the railway then is in steep cutting before plunging into Oakengates Tunnel.
This tunnel is the longest on the Shrewsbury to Wolverhampton line, as well as being the longest of three railway tunnels presently in use in Shropshire. The tunnel passed beneath the summit level of the Shropshire Canal, and it was the scene of a disaster in 1855, when a breach from the canal occurred. The entire summit level emptied into the tunnel, causing flooding in the town, although there were no reports of personal injuries. It is interesting to note that the S&BR Directors decided that the tunnel should be made wide enough to accommodate two broad gauge lines, although in actual fact the Shrewsbury & Birmingham Railway was constructed and opened as a standard gauge route.
Emerging into daylight once again, trains pass through a deep cutting before coming to rest in the still-extant station at Oakengates (158 miles 32 chains), which was of course known as Oakengates (West) for a while, its reversion to ‘Oakengates’ coming after the passenger closure of the Coalport line.
Up and Down platforms are provided at Oakengates, the main station building (now a dental practice) being on the Up (southbound) side. The Down platform was formerly equipped with a subsidiary waiting room, but just simple waiting shelters are now provided on both platforms at this unstaffed stopping place. The platforms are linked by a standard Great Western lattice girder footbridge, while a public footpath is carried across the line on a plate girder footbridge at the Hollinswood end of the station.
The main station building was designed by Edward Banks, one of Wolverhampton’s leading architects, who had been appointed to design and oversee the erection of the S&BR’s buildings. It was a typical Banks’ design, of red brick construction, in the Italianate style, with an open-fronted loggia for the benefit of waiting passengers. The latter has now been removed, but the main, two-storey hip-roofed building still remains intact.
An early photograph of the North end of the platforms at Oakengates Railway Station illustrating the proximity of the goods shed to the platforms. This image was shared on the Oakengates History Group Facebook Group by Gwyn Thunderwing Hartley on 29th February 2020. [99]This slightly wider view of the North end of Oakengate Station was shared by Gwyn Thunderwing Hartley on the Oakengate History Group Facebook Group on 23rd September 2023. [103]An early photograph of Oakengates Railway Station and footbridge. This image was shared on the Oakengates History Group Facebook Group by Gwyn Thunderwing Hartley on 29th February 2020. [99]
Prior to rationalisation, the station had been equipped with sidings on both sides of the running lines, the main goods yard, with half-a-dozen sidings, being to the north of the platforms on the Up side; one of these sidings crossed over Lion Street and ended a short distance from the LNWR ‘timber siding’. Two additional sidings were also available on the opposite side, and one of these served the cattle loading dock, where on dry days the local trainspotting fraternity would gather. The 1938 Handbook of Stations reveals that Oakengates was able to handle a full range of goods traffic, including coal, livestock, vehicles, horse boxes and general merchandise. There was a large, brick-built goods shed, and a six-ton yard crane. The station was signalled from a gable-roofed signal cabin that was sited near the entrance to the goods yard, on the Up side of the running lines.
While the image above clearly shows the relationship between the station building and the goods shed, this is a much better view of the main station building as it was in 1967. The image was shared on the Telford Memories Facebook Group by Nick Nandan on 14th April 2014. [5]A more distant view of the main station building as it was in April 1968. The image was shared on the Telford Memories Facebook Group by Marcus Keane on 20th February 2016. [11]The Station Building in the mid-1980s. This image was shared by Jeff Williams on the Telford Memories Facebook Group on 15th July 2014. [9]The Goodsyard adjacent to the passenger station building at Oakengates became the site of a Cement Silo belonging to Tunnel Cement. The passenger station building can be glimpsed behind the first coach on the train. The plant was at one time rail-served but this is no longer the case by the time this photograph was taken. The locomotive is a Class 47 diesel, I believe. This 1980s image was shared on the Oakengates History Group Facebook Group on 11th September 2016 by Stephen Tripp. [104]An earlier image of the same plant. This view was shared by Marcus Keane on the Telford Memories Facebook Group on 24th November 2017. [105]This photograph was taken by Richard Foxcroft and comes from his website about Telford’s railways. These are his comments: “There used to be extensive sidings (and a coal yard?) here, but now it is an unmanned station at which only the most-stopping trains call. The former station building has become a dental surgery. The fine bridge at the bottom or Market Street, Oakengates is an original Shrewsbury & Birmingham Railway bridge which bears a cast iron plate ‘Lilleshall Company Fect. 1848’. The goods yard in Oakengates had two sidings for Castle Cement until very recent years I can’t remember when they were closed but certainly they were still there when the ‘Donnington Farewell’ ran on 6.7.91.” [112]
Restarting from Oakengates (West) station, Bennetts or Padmores siding was sited on the Down side, and beyond Wombridge level crossing (159 miles 5 chains) was New Hadley Halt (159 miles 43 chains). This basic stopping place was opened on 3 November 1934.
Oakengates Railway Station as it appeared on the 25″ Ordnance Survey of 1901. At this time there was a significant goods yard which appears to have been kept relatively busy. In the top-left of this map extract the bridge over Bridge Street is visible. [106]In the 21st century the station platforms and the passenger station building remain. Substantial development has occurred around the vicinity of the station and the goods yard is long-gone. This is another extract from the ESRI satellite imagery provided by the NLS. [106]Looking through the Railway Bridge up Market Street, Oakengates, circa 1967. The Coffee Palace building to the left was demolished by Telford Development Corporation in 1975, This image was shared on the Oakengates History Group Facebook Group by Gwyn Thunderwing Hartley on 18th September 2020. [107]A, J.W Jones, of St Georges Bus at Bridge St. Oakengates in 1963. In view are the Coalport Tavern & Woods Grocery (now the Bridge Street Dentists) as well as the bridge carrying the GWR/BR mainline. (c) Roy Marshall. This image was shared on the Oakengates History Group Facebook Group by Gwyn Thunderwing Hartley on 31st March 2023. [110]Oakengates Railway bridge seen from the West with Market Street beyond. [Google Streetview, Jun 2022]This colourised postcard view shows the railway bridge from the opposite direction. This image was shared on the Oakengates History Group Facebook Group by David Lowe on 8th February 2014. [111]Oakengates Railway Bridge seen from the East. Market Street is behind the camera. [Google Streetview, May 2019]
Just a little further to the West the railway crossed/crosses Hadley Road.
the 1901 25″ Ordnance Survey shows the railway passing over Hadley Road. [115]The Railway Bridge over Hadley Road seen from the Southeast in June 2022. [Google Streetview, June 2022]
Proceeding in a westerly direction towards Wellington, there was a halt at New Hadley from 1934. Richard Foxcroft had a friend who remembered trains stopping at Hadley Halt as late as 1978-80, and Dave Cromarty was on the last train to stop there on 13th May, 1985 – despite which nothing remains of it. [112]
The southbound platform of New Hadley Halt, a basic timber-built structure on the western side of Oakengates. This mid-1960s scene shows the running-in board near the Up platform shelter, and the facilities on the Down platform were equally basic, a foot crossing at the Ketley Junction end of the halt being provided to cross the line. Opened in 1934, this stopping pace would go on to serve the people of Hadley for over fifty years. Tony Harden Collection. [200]
Beyond here, Ketley Junction (160 miles 22 chains) was where the Ketley branch trailed in on the Down side this was a through route that at its south end joined the Madeley branch at Lightmoor, its passenger duties generally starting at Wellington and working through Coalbrookdale and Buildwas to reach Much Wenlock.
Concluding our run along the Great Western Railway’s main line, Stafford Junction (160 miles 75 chains) was the meeting point of the LNWR/LMS-owned Shropshire Union line from Stafford, and Wellington station was sited 161 miles 27 chains from Paddington.
The Coalport line diverged from the Wellington to Stafford route at Hadley Junction, and ran south-eastwards via Wombridge goods station, at which point various private sidings branched out to serve Hadley Lodge Brickworks and other industrial concerns. We have followed the route through Oakengates already but we have not looked directly at the station. It seems right to preserve the structure of David Bradshaw & Stanley C. Jenkins’ article, and so we look at Oakengates (Market Street) Station here.
Oakengates, the largest station on the Coalport branch, was a short distance further on. The former LNWR and LMS station was renamed Oakengates (Market Street) on 18th June 1951, to prevent confusion with the nearby GWR station, which was thereafter known as Oakengates (West). The town’s Coalport line station was orientated on an approximate north-to-south alignment, and its layout included Up and Down platforms for passenger traffic, with a level crossing immediately to the north of the platform ramps.
The crossing adjacent to Oakengates (Market Street) Station on Station Hill. This image was shared on the Telford Memories Facebook Group by Paul Wheeler on 8th March 2018. [2]Looking South in 1963 across the level-crossing, the small signal cabin is on the left, the passenger facilities to the right and, it seems, a full goods yard beyond. Thus image was shared by Gwyn Thunderwing Hartley on the Oakengates History Group Facebook Group on 12th August 2020. [108]Taken from a point a little further up Station Hill, the station building can be seen with the enclosed loggia between the two single-storey flat-roofed brick-built rooms. The single-storey building, contained the booking office and waiting room facilities. The single-storey portion faced on to the platform, and it featured the two rectangular bays and a central loggia, which was fully enclosed by a wood and glass screen to form a covered waiting area. This image was shared on the Telford Memories Facebook Group by Paul Wheeler on 16th August 2017. [3]A view from almost exactly the same location in 2022. The police station site is on the left of the image, the modern railings in the same location as on the image above. The A442, Queensway, overbridge now dominates the scene. [Google Streetview, June 2022]
The main station building was on the Up (northbound) platform, while the diminutive signal box was situated on the Down platform, in convenient proximity to the level crossing. The cabin was a standard LNWR gable-roofed box, albeit of the smallest size.
Greetings from Oakengates. A commercial postcard, franked in October 1905, shows the station forecourt area of the LNWR station in Oakengates. The view is looking east up Station Hill, and the Methodist Chapel on the right was where David Bradshaw and his sister went to Sunday School in the late 1940s and early 1950s. Halfway up the hill, the Lilleshall Company main line crossed at road level and the disused canal passed under the road. The crossing featuring in the pictures above is on the left side of this image. David Bradshaw Collection. [1: p175]
This photograph is taken from a point just off the left of the above image and also looks East up Station Hill across the railway line, which was by the time the picture was taken, closed. The image was shared on the Telford memories Facebook Group by Marcus Keane on 13th November 2016. [56]
The main station building, which was similar to that at Coalport, was a typical LNWR design, incorporating a one-and-a-half-storey Stationmaster’s house at the rear, and an attached single-storey building, which contained the booking office and waiting room facilities. The single-storey portion faced on to the platform, and it featured two rectangular bays and a central loggia, which was fully enclosed by a wood and glass screen to form a covered waiting area. The residential block sported a steeply pitched slate-covered roof, whereas the booking office portion had a flat roof. The building was of local brick construction, with tall chimneys and slightly arched window apertures. This distinctive structure was erected, as were all the others on the line, by local builder Christopher Bugaley of Madeley. There was a detached gentlemens’ convenience on the Up platform, while facilities for waiting travellers on the Down platform comprised a small waiting room.
Looking West into Oakengates after the removal of the passenger facilities at Oakengates Market Street Station. Rails remain in the road. It is possible that this photograph was taken in the late 1950s or the very early 1960s. It was shared on the Oakengates History Facebook Group by Gwyn Thunderwing Hartley on 10th March 2017. [57]This little tableau of three images (one above and two below) were shared on the Oakengates History Facebook Group on 16th July 2019 by Gwyn Thunderwing Hartley. Two of the pictures show the work going on to deal with a derailment of a Pannier Tank. The photographs of the derailment were sent to the Group by John Wood (c) A.J.B. Dodd Dodd. Gwyn Thunderwing Hartley writes: A “derailment at Oakengates Crossing sometime before 1958. This is the LNWR LMS Rail line Market Street/Station Hill. Pic 3 shows where the then disused Line cuts across the Station Hill Road (the line ran between the Building and the Bus Stop traveling in the direction of Wellington), the building is the old Whitefoots Showroom, this was formerly a Pub, the building you can see the back of in the derailment pic is this same as in Pic 3. Much of this info is from John Wood.” The first picture shows the level crossing gates in the background and was taken looking Southeast with the Goods Yard and erstwhile Station Buildings beyond the Crossing gates to the South. The first of the two pictures below is taken looking North from the crossing gates. [58]Looking South from the level-crossing at the bottom of Station Hill and the top of Market Street. Oakengates (Market) Railway Station buildings were off the image on the right. The station platform edge can be seen through the crossing gates. The line curves round passed the Goods Yard, under Canongate Bridge and on towards the A5 at Greyhound Bridge. The photo was shared by Gwyn Thunderwing Hartley on the Oakengates History Facebook Group on 9th November 2019. [59]
Two dead-end goods sidings at Oakengates were provided on the Down side, while the Up side sported a sizeable goods yard and a substantial goods shed. There was also a timber yard siding and an additional goods shed that was used by Millington’s, a local company. The 1927 Ordnance Survey map suggests that the timber siding ran to within a few yards of the local (Oakengates & District) Co-operative Society Depot, and it was hardly a stone’s throw from a connection from the GWR station. For a time David Bradshaw attended the Sunday School at the Methodist Chapel halfway up Station Hill and was a regular at the classic Grosvenor Cinema, which was close to Market Street station. Halfway up Station Hill, the old canal and Lilleshall Company lines ran under and across the road respectively.
This photograph was taken in 1982 and shows the old goods facilities at Oakengates (Market) Railway Station. The view is taken looking North. By 1982, these buildings were in use by G.H.Ellam. This picture was shared by Gwyn Thunderwing Hartley on the Oakengates History Facebook Group on 18th May 2019. [109]
Motive Power on the Great Western Route
The Shrewsbury & Birmingham line was classified as a ‘Red’ route under the GWR system of locomotive weight restrictions and, as such, it was worked by a wide range of locomotive classes, including ‘Castle’, ‘Star’, Hall’, ‘Grange’, and ‘County’ class 4-6-0s. The impressive ‘4700’ class 2-8-0s were employed on overnight freights, while the ‘Kings’ made occasional appearances in the late 1950s on the ‘Cambrian Coast Express’. One London-bound express stopped at Oakengates, but passenger traffic was generally covered by Wellington to Wolverhampton local services.
In the 1950s, regular engines seen included the surviving ‘Star’ class 4-6-0s based at Wolverhampton or Shrewsbury, and Chester- allocated ‘Saints’. Wolverhampton was also home to the unique ‘Star/Castle’ conversion, No 4000 North Star, together with No 4079 Pendennis Castle and No 4061 Glastonbury Abbey – one of only three surviving ‘Stars’ at the time. Shrewsbury shed had Nos 5050 Earl of Saint Germans, 5073 Blenheim, and 5097 Sarum Castle. The ‘Stars’ were replaced at Wolverhampton, and later at Shrewsbury and Chester, by the Hawksworth ‘Counties’; the following ‘Counties’ were noted on the main line through Oakengates between 1953 and 1962 Nos 1000/03/08, 1013/16/17, and 1022/24/25/26. Shrewsbury shed obtained very good work from them, particularly in their modified form.
The prestige train on the route was the daily ‘Cambrian Coast Express’, and this train invariably had a recently overhauled Old Oak Common ‘Castle’ for its arduous out-and-home run – it was widely considered to be one of the London shed’s hardest footplate duties. Notable performers on this job were three veterans Nos 4090 Dorchester Castle, 5084 Reading Abbey and 7013 Bristol Castle – all built between 1922 and 1924 and recently rebuilt with double-chimneys and four-row superheaters, but standard ‘Castles’ such as No 5082 Gladiator were also employed. On Summer Saturdays, the ‘Cambrian Coast Express’ changed engines at Wolverhampton rather than at Shrewsbury, producing a mixture of ‘Manors’, ’43XX’ Moguls, ‘2251’ 0-6-0s, and ‘Dukedogs’ – very often double-headed. There was also the weekdays-only Bournemouth (West)-Birkenhead (Woodside) train with its alternate rakes of BR maroon or Southern Region green-liveried coaches, these duties being hauled by Oxford-allocated ‘Castles’ and ‘Modified Halls’, or by Chester ‘Counties’.
In 1958 Chester passed into London Midland Region control, and the Jubilee’ class 4-6-0s, including No 45632 Tonga, began appearing on express turns, in place of the ‘Castles’ and ‘Counties’. There were also irregular visits from engines that were running-in after overhaul at Wolverhampton Works. One of the two surviving ‘Bulldogs’, No 3454 Seagull in fact was noted on a Wolverhampton-bound freight shortly before its withdrawal in November 1951, while the BR Standard ‘Clan’ Pacific No 72006 Clan Mackenzie turned up one Sunday with a troop train.
Local passenger workings were generally handled by Wellington or Tyseley-allocated ‘5101’ class 2-6-2Ts until the appearance of diesel-multiple-units in 1957, although even then there was still some passenger work for the local tank engine fleet to cover. During 1958 BR Standard Class ‘3MT’ 2-6-2Ts first arrived at Wellington shed, and Nos 82004, 82006 and 82009 all saw service locally, although they were gone by February 1960. On rare occasions pannier tanks also saw use on these trains. Pannier tank No 7754, now preserved at Llangollen, was allocated to Wellington shed, and it was noted shunting in the yard at Oakengates.
There was always a significant amount of through freight traffic, and in this capacity a variety of locomotives appeared, including Grange’ and ‘Castle’ 4-6-0s, and Churchward 43XX class 2-6-0s, such as Nos 6346, 7313 and 9302. On a less regular basis, ‘Aberdare’ class 2-6-0s were sometimes recorded on freight duties, with occasional sightings of 56XX class 0-6-2Ts. Stanier ‘Black Five’ 4-6-0s became regular performers during the 1940s, together with the ROD Robinson-designed 04′ class (30XX) 2-8-0s, ’28XX’ class 2-8-0s and War Department ‘Austerity’ 2-8-0s, while in the late 1950s and early 1960s freight traffic was increasingly being handled by newly-built BR Standard ‘9F’ class 2-10-0s, and Stanier ‘8F’ class 2-8-0s.
Perhaps the most interesting heavy freight locomotives seen on the Wolverhampton to Shrewsbury route during the 1940s were the massive ’72XX’ class 2-8-2Ts, which had been introduced in 1934 as ‘stretched’ versions of the ’42XX’ class 2-8-0Ts. They were in many ways tank engine versions of the ’28XX’ class 2-8-0s, and they were used on similar heavy-duty freight work. Nos 7226 and 7227 were both stationed at Wolverhampton’s Oxley shed in 1938, but they were used on the S&BR line in much greater numbers after 1947, by which time Oxley’s allocation comprised Nos 7207, 7222, 7226, 7227, 7230, 7236, 7238, 7240, 7243 and 7248. Thereafter, these heavy freight tanks became familiar sights, their usual duties being the haulage of through goods workings to and from Wolverhampton. On occasions, the 2-8-2Ts were pressed into service on passenger workings. For example on 4th July 1947 No 7226 was noted at Wellington at the head of a local passenger train, following the failure of the diagrammed locomotive.
In earlier years, the GWR had employed large numbers of six-coupled saddle tanks for local freight and shunting work, the ‘1501’ class 0-6-0STs being produced in large numbers for use in the company’s Northern Division. These engines were associated with the Oakengates area for many years, together with the visually-similar ‘645’ and ‘655’ classes; in later years they were rebuilt with Belpaire boilers, and this led to the introduction of the pannier tanks to avoid the difficulty of fitting saddle tanks over the raised firebox casings.
The rebuilt 0-6-OPTs formed, in effect, a single class of large panniers, and numerous examples were allocated to Wellington shed at various times. Some typical examples during the 1930s include Nos 1527, 1536, 1554, 1706, 1748, 1758, 1787 and 1808, the last survivors being former ‘655’ class engine No 1748, and ‘1854’ series 0-6-0PT No 1706, both of which were still at Wellington in 1946. Another pannier tank class seen in and around Oakengates was the ’27XX’ series, which dated back to 1896, while there were also a number of ‘850’ class and ‘2021’ class small panniers for local shunting work.
The ubiquitous Great Western Collett ’57XX’ class 0-6-0PTs were introduced in 1929 as replacements for the earlier ‘1501’ and ’27XX’ classes. Several of the ’57XX’ class 0-6-0PTs were stationed at Wellington for local goods work, and No’s 3752, 3744, 3749, 3755, 5758, 7754, 9624, 9630 and 9639 all appeared on the S&BR line at different times.
Motive Power on the Coalport Branch
The Coalport branch was, typically, worked by Webb ‘Coal Tank’ 0-6-2Ts, together with Webb 2-4-2Ts and ‘Cauliflower’ 0-6-0s.
In earlier years the route had also been worked by LNWR 0-6-0 saddle tanks such as No 3093, which was recorded on the line in 1895. The London & North Western Railway ‘Coal Tanks’, which included the still-extant No 58926 (seen on the Coalport line as late as 21st October 1950), enjoyed a long association with the route, but at the end of the LMS era these veteran locomotives were replaced by Shrewsbury-allocated Fowler class ‘3MT’ 2-6-2Ts, such as Nos 40005, 40008, 40048 and 40058. The goods trains, meanwhile, were worked by a range of ex-LMS locomotive types, including Fowler Class ‘3F’ 0-6-0s, ‘4F’ 0-6-0s, and also the occasional ex-LNWR ‘Super D’ 0-8-0.
The passenger services, known locally as the ‘Coalport Dodger’ were poorly supported – except on market days in Oakengates and Wellington, and for the locally renowned Oakengates Wakes (Pat Collins Fair) – hence their early demise, particularly as the rival ex-GWR route to Wellington was more convenient. World War II staved-off closure for a few years, but in the early months of 1952 it was announced that passenger services would be withdrawn with effect from 2nd June 1952, and as this was a Monday the last trains ran on Saturday, 31st May. Fowler Class ‘3MT’ 2-6-2T No 40058 worked the final trains, its smokebox adorned with black flags, a wreath and the chalked letters ‘RIP’.
Motive power on the line after the cessation of passenger services was often provided by Hawksworth ’94XX’ class 0-6-0PTs, such as Nos 9470 and 9472 (complete with broken front numberplate), or less frequently, by ’57XX’ class 0-6-0PTs. There was an incident when a ’57XX’ was derailed on the catch points just outside Oakengates station, although details are elusive. Wellington shed’s sole ‘1600’ class 0-6-0PT, No 1663, shunted the GKN Sankey sidings near the junction of the Stafford and Coalport lines and it is believed to have ventured up the branch on occasion.
A goods working which appeared at Oakengates after mid-day invariably featured an LMS Burton-based Class ‘3F’ or ‘4F’ 0-6-0, although on one unforgettable occasion, on 14th August 1957, Bath (Green Park)-allocated Stanier ‘Black Five’ class 4-6-0 No 44917, in ex-Works condition, turned up on this humble working. This train had apparently started life as a light-engine working that had left Shrewsbury (Coleham) at 5.10am and, on then reaching Shrewsbury (Abbey Foregate) at 5.35am, it picked up a goods working and eventually arrived at Priors Lee sidings, just outside Oakengates, at 2.20pm.
In the period from July to the end of October 1957, the following locomotives appeared on what local trainspotters called ‘the mid-day goods’ (although it actually arrived in the early afternoon) – Class ‘3F’ 0-6-0s Nos 43709 and 43809, Class ‘4F’ 0-6-0s Nos 43948, 43976, 43986, 44124 and 44434, and of course ‘Black Five’ No 44917.
It is interesting to note that excursion trains continued to run from Coalport after the withdrawal of the regular passenger services. On one occasion, around 1956, there were two excursions to the North Wales Coast on the same day, both of which were hauled by Class ‘5MT’ 4-6-0s. Only one of these workings stopped to pick-up at Oakengates, as the other ran straight through Oakengates station – it must have been one of the few examples of a ‘non-stop’ passenger working in the life of the line? On 23rd April 1955 the Locomotive Club of Great Britain joined forces with the Manchester Locomotive Society to run a ‘Shropshire Rail Tour’, which left Shrewsbury at 2.30pm behind ‘Dean Goods’ 0-6-0 No 2516 on a tour of local branch lines, which included the Minsterley and Coalport routes, the fare for this interesting excursion being 15s 6d.
A year or two later, on 2nd September 1959, the Stephenson Locomotive Society arranged a further tour of West Midland branch lines, including the Womborne, Minsterley and Coalport routes, a Swindon three-car Cross Country diesel-multiple-unit being provided instead of a steam-hauled train, ostensibly to ‘improve timings’.
Another of David Bradshaw’s abiding memories is of an excursion, believed to have been arranged by the late Cyril Poole, a teacher from Madeley Modern School, which departed behind a Hughes/Fowler ‘Crab’ class 2-6-0 and returned in a tropical storm behind a ‘Super D’ 0-8-0, running tender-first. The train was made up to ten coaches and it took at least twenty minutes to surmount the 1 in 50 bank into Oakengates. Steaming was not an issue, but there were adhesion difficulties as the engine slithered and slipped up the bank – the noise level was something never to be forgotten!
The Lilleshall Company in Oakengates
The Lilleshall Company had a major presence in the Oakengates area, owning a significant number of brickworks, iron works, steel works, coke ovens, general engineering works, a concrete works, asphalt works, a coal distillation plant and at least twelve mines, which produced a mixture of coal, ironstone and fireclay. All but one of these locations appears to have been rail-connected, in some cases via tramways, and in others by a standard gauge railway system that connected with the LNWR/LMS system at Donnington exchange sidings (on the Wellington to Stafford line), at Oakengates on the Coalport branch, and at Hollinswood exchange sidings on the Great Western system. [1]
The Mineral Line used 200 mainline and 250 internal wagons. The company also bought some industrial locomotives from Barclay and Peckett. Through the years 22 locomotives were used on the line, 6 of these were built by The Lilleshall Company itself. The company also built a further 34 locomotives for their customers. [131]
Wikipedia tells us that the Lilleshall Company’s “origins date back to 1764 when Earl Gower formed a company to construct the Donnington Wood Canal on his estate. In 1802 the Lilleshall Company was founded by the Marquess of Stafford in partnership with four local capitalists. … In 1862 the company exhibited a 2-2-2 express passenger locomotive at the 1862 International Exhibition in London. In 1880 it became a Public company. In 1951 the Lilleshall Iron and Steel Co was nationalised under the Iron and Steel Act but then sold back to Lilleshall Co. under the provisions of the Iron and Steel Act 1953. The Lilleshall Company Railways closed in 1959. In 1961, the company were described as ‘structural and mechanical engineers, manufacturers of rolled steel products, glazed bricks, sanitaryware, Spectra-Glaze and concrete products’, with 750 employees. … The company began to decline during the 1960s. Many of its artefacts and archives are preserved by the Ironbridge Gorge Museum Trust.” [128]
Roger Brian, commenting on the Company’s railways, writes:
“I recall the Lilleshall railway which I explored in 1955-56. My uncle was at the time working for the company and rented a company house at Cappoquin Wrockwardine Wood. This was a very convenient base for exploration, as the railway ran past the garden gate and the engine shed was just opposite. I thinkI followed the entire railway to all its various branches. According to my cousin, who visited in recent years, the house is still there but a look at the latest OS Map suggests that the area has changed greatly.
Northwards, the line led to the junctions for Grange colliery and Granville colliery. At the Granville junction there was an engine shed for the NCB locos. I cannot say now whether this was of recent construction but it seems strange that there should be two old-established sheds so close together. I suspect this one was provided by the NCB on nationalisation. I would imagine that the coal required by the Lilleshall Company’s furnaces would have passed directly to them from Granville and Grange until then, but at the time I knew the line the practice was to bring the coal for the furnaces up to the loop that was clearly newly constructed about halfway between the NCB Engine shed and Cappoquin. The wagons would be left there for the Lilleshall Company’s engines to pick up.
Also in the area of the loop was a spur southwards to the Hoffman kiln which was still in existence at that time, but derelict. I think that the track had been lifted. Grange had also closed by that time and was rather derelict, but I cannot now recall whether the track was still in place. I think it had been removed. There were futher spurs to the north from the engine shed and these were used for NCB wagon storage though there were some dead Lilleshall ones there as well.
At that time Granville was still in operation, and the loaded wagons were brought down from there to the shed. Here a reversal took place and the wagons were then taken a line which ran northwards for about half a mile to where there had been another colliery long gone (?Waxhill Barracks?) Here there was another reversing station and from there the line descended to the Wellington-Stafford line at Donnington. This was the main outlet for the colliery.
The Lilleshall Company’s sheds were adjacent to their fabrication plant (St Georges?)and there were numerous overgrown sidings filled with abandoned wagons of the company. I recall a Peckett saddle tank in use and there was a large side tank as well, I think by Barclay, which I rode on.
There were further sidings about a mile further up the line beyond a level crossing and these were similarly occupied. It was possible from here to see the former LNWR line to Coalport. Beyond a further crossing (A5) was the company’s main site at Priorslee. Just beyond the crossing on the north side engines had been dumped, including Constance which the company had built themselves, and a sister engine of similar design.
The Priorslee operation was a pickle.I believe that at one time it had been integrated butsome of the processes had been discontinued. What was left were the blast furnaces producing pig iron in mediaeval conditions. I am not sure what happened to the pigs but the company did not then use them.
Adjacent to the blast furnaces were reheating furnaces for steel blooms produced elsewhere. Once heated these were transferred to the rolling mill and rolled to size suitable for use in the manufacture of prefabricated industrial buildings. These were then taken back to the fabrication plant, mostly by rail, but I suspect road was also used as well for the longer pieces.
Beyond the furnaces and the rolling mill was a small mountain of blast furnace slag with abandoned ladles – the whole area was extremely hazarous to walk on. Beyond that were further sidings, one of which led down to the GWR line.
The railway sytem continued to further collieries. I think that they were the Stafford and the Lawn. There were lots of overgrown sidings and abandoned wagons, and the whole of that part of the system was no longer in use. A further spur crossed the what was then the A464 again and continued to Woodhouse Colliery. This had been abandoned, but some of the buildings were still there.
I believe the railway system was run by a chap called Hughes but I never met him. I believe that it closed in 1959.
Sadly, summer 1956 was my last visit as my uncle left the company. This was probably just as well. My cousin told me recently that his father said that the directors were drunk most of the time, but I cannot vouch for this. So, a company and operations that had seen better days, but for me a new experience and a treasured memory.” [129]
The Lilleshall ‘main line’ ran south from Donnington through to Oakengates, where the links to the two main line railways were accessed from exchange sidings that acted as a hub for the nearby steel works at Snedshill, and for the facilities at Priors Lee (on the north side of the Hollinswood yards of the GWR/BR). Hollinswood exchange sidings was at the southern point of the same system, it being where the Lilleshall trains were handed over to GWR/BR locomotives – outgoing traffic from the system was in the form of pig-iron, bricks, concrete products and tiles, as well as coal.
Incoming traffic destined for the Priors Lee furnaces constituted coke and limestone, the latter being brought in from the Lilleshall Company’s quarries at Presthope on the Wellington to Craven Arms line.
Trains from Presthope for Hollinswood and the Lilleshall system appear to have followed different routes on occasion, with some travelling via Madeley Junction and some diverging at Lightmoor Junction for Ketley Junction (Wellington); Lightmoor was where the lines to Madeley Junction and Wellington diverged. Incidentally, Madeley’s GWR station opened on 2nd May 1859 as Madeley Court, and it was the only intermediate station between Lightmoor and Madeley Junction. Renamed Madeley (Salop) in June 1897, it was closed to passengers from 22nd March 1915, but briefly reopened to passengers from 13th July 1925 until 21st September 1915 – so the Madeley branch was virtually freight-only from 1915, and it was still part of the Network Rail system in the early 21st century. In addition, Lilleshall Co.-bound iron ore for smelting was brought in by rail. Iron ore arrived from Spain and Sierra Leone, with low grade domestic ironstone brought in from the Banbury area.
On careful inspection it can be seen that this 1953 Ordnance Survey map shows the Lilleshall system as a through route, albeit the line north from Granville to Donnington was by this time under NCB ownership. Dealing with public railways first, the ex-GWR main line passes from Wellington, through Oakengates and its tunnel, then Hollinswood, as it makes for Madeley Junction (bottom right) and Wolverhampton. The line heading north-east from the edge of Wellington is the former LMS route to Stafford, and off this is the by then freight-only Coalport branch, while north of Hadley Junction and Trench is Donnington exchange sidings, the northern outpost of the ex-Lilleshall system. The mineral line is in the shape of a reversed ‘S’, with Hollinswood’s BR connection to the south, Snedshill and The Nabb south of the curves near Wrockwardine Wood, and then there is a trailing spur south to the locomotive shed and engineering works. Thereafter, it is NCB territory, so after 1958 the coal traffic headed north for a convoluted journey via Donnington, Wellington (reverse), and Madeley Junction (reverse) to reach Ironbridge power station. Crown copyright. [1: p178]
Coal from the Lilleshall pits was despatched via Hollinswood to the Ironbridge power. station, which opened in 1932, and this traffic flow continued through to 1958, when the Lilleshall railway system was cut back. Coal was still being mined in the area under National Coal Board auspices, so with the former through route unavailable, the trains for Ironbridge power station were thereafter taken from Granville Colliery, by now combined with the Grange Colliery workings, to Donnington exchange sidings. From there they were hauled to Wellington, where a run-round and reversal was undertaken at the station. Unfortunately, the most direct route via Ketley to Ironbridge was not suitable for such heavy trains. Ketley Junction to Ketley would be taken out of use anyway in July 1962, so the route for the loaded coal trains was then from Wellington, through Oakengates station to reach Madeley Junction, where another reversal was necessary to access the line to the power station.
The dotted lines on this sketch map are private railways. The Lilleshall Company’s main line ran from The Humber Arm via Donnington Sidings (which are off the top of this map) via Granville and Grange Collieries in the top-right of the sketch map via Old Lodge Ironworks and Priorslee Furnaces down to Hollinswood. This sketch map was included on the Miner’s Walk website which provides information about the local area. [131]Bob Yate provides a sketch of the whole of the Lilleshall Company’s network of railways. This extract from the sketch map shows themost northerly length of their railways The locations shown are those from Tate’s sketch map and its key. Those on this extract are: 8. The Humber Arm Railway; 9. Lubstree Wharf; 10. The Donnington (LNWR) exchange sidings and the Midland Ironworks. [142: p38]
The most northerly point on the Lilleshall Company’s Railways/Tramways was the Wharf at the southern end of the Humber Arm. The 25″ Ordnance Survey map extract below shows the original tramway sidings at the transfer wharf. The Humber Arm was a short branch canal from the Shropshire Union Canal Newport Branch.
An extract from the 25″ Ordnance Survey of 1882 which shows the southern end of the Humber Arm and the tramway terminus along side the Canal. [132]
South of what is in the 21st century a Ministry of Defence site, the old tramway/railway encountered the LNWR route to Newport and beyond. Passing under the LNWR main line, the route of the Lilleshall Company’s tramway and the later standard gauge line diverged as shown on the map extract below.
This extract from the 1882 25″ Ordnance Survey shows the point at which the LNWR bridged the Lilleshall Company’s tramway/railway. It also shows the old tramway route continuing to the South-southeast and the laterstandard-gauge mineral railway curving round to the Northeast to run parallel to the LNWR main line.[133]This final RailMapOnline satellite image shows the features noted on map extract above and shows the dramatic changes which have occurred in the immediate vicinity of the old tramway. The tramway route is not followed by RailMapOnline South-southeast of Wellington Road. [134]
The tramway ran Southwest from this location finding its own way to Old Lodge Furnaces. The standard-gauge line turned to run parallel to the LNWR main line for a short distance before entering Donnington Wharf/Sidings.
The mineral railway curve round to run parallel to the LNWR mainline. [133]At a smaller scale here but still the 25″ Ordnance Survey of 1882, this map extract shows the length of the mineral railway as it curves away from the LNWR mainline. There were some exchange sidings at this location and lines which accessed a Timber Yard and the Midland Ironworks site, both on the East side of the LNWR mainline. This short length of the line appears at the Southeast corner of the relevant OS map sheet. [132]This RailMapOnline satellite image shows that the route of the old mineral railway ties in with the modern field boundary. [134]On the curve on Donnington Sidings looking East. This is the same train as shown on the next picture. This image was shared by Carole Anne Huselbee on the Telford Memories Facebook Group on 14th September 2014. [135]Donnington Sidings looking Northwest. A rake of empties setting off for Granville Colliery. Wellington Road Crossing is a short distance ahead of the locomotive. This photograph was shared by Carole Anne Huselbee on the Telford Memories Facebook Group on 5th October 2014. [136]Wellington Road Crossing. This picture was shared by Carole Anne Huselbee on the Telford Memories Facebook Group on 5th October 2014. [137]This next extract from the 25″Ordnance Survey of 1882 shows the mineral railway heading Southeast and crossing, first, what is now Wellington Road, and then running parallel to the modern Donnington Wood Way and crossing. [133]The route of the old mineral railway runs parallel to Donnington Wood Way, approximately on the line of the footpath shown on this Google Maps extract. The red flag marker highlights its route. The diversion of Wellington Road away to the North of the old level-crossing can be seen in the top-left of this image. [Google Maps, July 2023]
The old mineral railway route runs alongside the modern Donnington Wood Way. The red flag on the extract from Google Maps above marks the line of the modern footpath which follows the centre-line of the Lilleshall Company’s railway.
To the South of Waxhill Barracks Colliery the line passed the site of Barn Colliery before arriving at Old Lodge Furnaces.
Barn Colliery as shown on the 25″ Ordnance Survey of 1881/1882. [140]
Once the ‘by-pass’ line had been installed trains were able to run direct from Donnington to the Lodge Bank Sidings as shown below.
By 1970, this was the layout of the lines between the mainline at Donnington and the Colliery. This hand-drawn image appears in Bob Yate’s book. [142: p119]Granville Colliery’s Diesel Loco (NCB No. 2D?) en-route between Donnington Wharf/Sidings and Old Lodge and Granville Colliery in NCB days with a train of empty hopper wagons. This photo was shared on the Telford Memories Facebook Group by Carole Anne Huselbee on on 15th September 2014. [146]In earler NCB days, an 0-6-0ST locomotive pulls is train of hopper wagons up the more direct route from Coal Wharf (Donnington) to Granville Pit (not going via the location of Muxton Bridge Pit) .This image was shared on the Granville Colliery Facebook Group on 10th March 2020 by John Wood. [141]
Old Lodge Furnaces
These two extracts from the 1881/1882 25″ Ordnance Survey are, together, a plan of the Old Lodge Furnaces. Together, they give an excellent view of the area around the furnaces. In the lower of the two extracts the line running off the extract to the East heads towards Granville Colliery. The line running off the extract to the South runs to Dawes Bower and Grange Colliery. Of the lines exiting the extract to the West, one, running Northwest (at the top corner of the lower image) is the old tramway link to Lubstree Wharf. There are also two lines leaving the bottom-left corner of the lower image, the lower line runs towards collieries/shafts local to the furnaces and is probably a tramway at a higher level than the upper of the two lines which is in cutting and is the connection from Old Lodge Furnaces into the wider Mineral Railway network belonging to the Lilleshall Company to the South and West of this location. [143]Lodge Furnaces Donnington/Lilleshall Company 1882. The image was shared by Jeff Williams on the Telford Memories Facebook Group on 8th May 2017. [116]Lodge Furnaces Donnington/Lilleshall Company. The image was shared by Marcus Keane on the Telford Memories Facebook Group on 16th June 2022. Marcus Keane comments: “The Lodge Arm was built in 1822 to serve two Iron Smelters build by the mighty Lilleshall Company to supplement its works at Donnington Wood. This site was expanded in 1846 and again in 1859 till finally five furnaces were operating on the site, all fed by coal brought in on small tub boats. Of course, the site is on the original level of the canal, but we did have the last laugh. The furnaces were blown out in 1888 but the display board shows a cheerful picture of traditional canal boats “put, put, putting” in and out of the basin. This is wrong on so many levels: It was a tub boat canal so no full length boats could pass through the inclined planes, the locks and bridges were limited to 6ft 7inches which is narrower than normal craft and crucially, the furnaces closed at least 30 years before the first spluttering Bollinders were employed in commercial carrying. But not withstanding all that, its a nice scene and a watery oasis in a sea of industrial decay.” [126]A view of Old Lodge Furnaces from the East. (This image was first produced in the ‘London Trade Exchange’ of 2nd January 1875. Some of the tramways are visible, as are the coke ovens in the distance, and the engine house on the right, although the engraver has omitted the chimney beside the engine house.) [142: p11]
The Friends of Granville Country Park’s website provides a general introduction to the history of the Old Lodge Furnaces: … [144]
“In 1824 the [Lilleshall] Company brought into blast two new furnaces near the site of the Old Lodge. They were named the Old Lodge furnaces because of their proximity to the site of an old hunting lodge which was demolished in 1820. In March 1825 the Lilleshall Company paid the Coalbrookdale Company £2392 for (presumably) a Blast Engine. George Roden, a stonemason from the Nabb, was paid £425 in 1825 and £777 and 5 shillings in 1826 for erecting loading ramps and the retaining walls. In 1830 the Donnington Wood and the Old Lodge ironworks together produced 15,110 tons. A third furnace was added in 1846 and two more in 1859.
New blast beam engines, manufactured by the Lilleshall Company, were installed in 1862 and the height of the furnaces was increased from 50 to 71 feet at about the same time. Limestone came, via the canal, from the Lilleshall quarries and the coal (coke) and iron stone from the local pits via an extensive system of tramways, some of which, were later converted to standard gauge railways. The 1882 map show this series of transport plateways to transport the materials to the top of the furnace, and remove pig iron the furnace bottom.
The Old Lodge Furnaces produced cold-blast pig iron of the finest quality, but eventually it could not compete with cheaper iron made elsewhere and in 1888 the last of the Old Lodge furnaces was blown out 1888. The furnaces were demolished in 1905 by Thomas Molineaux Jnr, including a tall chimney 140 feet high by 13 feet diameter, known locally as “The Lodge Stack”. In 1956 the stone was reused for St Mathew’s Church. Thereafter the company concentrated all its iron and steel making at Priorslee.
All that remains of the furnace after extensive dismantling and site restoration involving raising of the ground levels, are parts of the brickwork of the first three furnaces. … The high walls behind the furnaces are the remains of the furnace loading ramps. On the right of the ramp walls hidden in the trees is a retaining wall in front which was the blowing house. Behind the loading ramps were calcining kilns which were added in 1870 to improve the quality of the iron ore” [144]
Dr. Mike Nevill in a relatively recent article entitled ‘Seasonal Archaeology: the Old Lodge Ironworks in the Snow‘ [145] highlights the remains of the Old Lodge Furnaces. They are a superb example of the way in which old industrial sites can become considerably more visible when the leaves are not on the trees. He writes:
“The large stone and brick ruins, in place 10m high, were the remains of the Old Lodge Furnaces on the north-eastern outskirts of modern Telford in Shropshire. These furnaces were built by the Lilleshall Company in 1825-8 and form part of a wider 18th and 19th century industrial landscape encompassing two collieries and accessed via a late 18th century canal. The complex now sits within Granville Country Park and is managed by the Shropshire Wildlife Trust. The park itself was designed as one of the green open spaces for the new town of Telford in the mid- to late 20th century. Now, this industrial landscape has reverted to semi-natural woodland and parkland, the industrial archaeology of the area appearing suddenly out of the overgrowth.” [145]
Nevill wrote this article on 19th December 2022. He goes on to say:
“In the 21st century, the circular brick bases of three of the five furnaces run in front of the high stone walls, this stone terracing, which formed the furnace loading ramps, framing these features. Standing within the ruins of a once hot and noisy furnace complex on one of the coldest mornings of the year had a certain irony. Instead of the sound of men working the furnaces and tapping the pig iron, sweating in the heat, there was only the chirp of robins defending their woodland territory and the crunch of frozen snow under foot.” [145]
These next few photos focus on the area that used to be occupied by Old Lodge Furnaces and which in the mid-20th century provided a marshalling yard for Granville Colliery.
In NCB days, Granville Colliery’s Diesel Loco (NCB No. 2D?) manoeuvring a rake of empty coal hopper wagons in the sidings to the West of the colliery, in the area which Old Lodge Furnaces used to occupy. This photo was shared on the Telford Memories Facebook Group by Carole Anne Huselbee on 5th October 2014. [147]This view from a location on the spoil heap to the South of the last image shows the later engine shed, built by the NCB, and two locomotives in steam marshalling wagons. The wagons closest to the camera appear to be empties which will probably be pushed towards the colliery screens which are a distance off to the right of this image. The photograph was shared on the Telford Memories Facebook Group by Paul Wheeler on 25th May 2018. [148]A view of the NCB-built engine shed built on the site of an earlier Lilleshall Company engine shed. After the NCB took over the collieries owned by the Company, Granville Colliery supplied coal to Buildwas Power Station and the coal trains were worked by a range of locos down the 1.5 miles to Donnington. Granville Colliery had a decent sized shed and in later years used Austerity 0-6-0 tanks but in Lilleshall Company days the bigger engines were the ex-TVR and Barry railway engines. This image and the accompanying text were shared by Marcus Keane on the Telford Memories Facebook Group on 15th September 2015. [119]Granville Colliery’s No 3 Holly Bank, Hunslet Engine Co Ltd 0-6-0ST Works No. 1451 of 1924, is at the head of a train of hopper wagons at the colliery on 14th October 1966. The wagons on the left are part of the, by now, National Coal Board-owned internal system, the former Lilleshall Co Ltd-owned collieries becoming national assets upon the creation of the NCB on New Year’s Day 1947. The engine shed seen above is just off the right of the photograph. This is probably not the best location to park a Vauxhall Victor ‘F’ series for its longevity, especially as they were somewhat vulnerable to the elements! W. Potter/Kidderminster Railway Museum. [1: p178]
Granville Colliery was close to, and to the East of the site of Old Lodge Furnaces. The extract from the 25″ Ordnance Survey of 1881/1882 below shows both the colliery site and the short line which served it.
This extract from the 25″ Ordnance Survey of 1881/1882 shows the full length of the Mineral Railway branch from the East side of the map extracts above (which show Old Lodge Furnaces). It is worth noting the loop which allowed locomotives to run round their trains just to the West of the Colliery site. [143]
Bob Yate tells us that the sinking of the main shaft at Granville Colliery started in 1860, to a depth of 409 yards. By 1950, this had reached 444 yards. It was linked to Grange Colliery underground in 1952 and finally closed in 1979. He continues: “The most prolific of the collieries, [Granville Colliery] supplied the LNWR, GWR and Cambrian Railways with locomotive coal, and latterly also to Ironbridge ‘B’ Power Station. In 1896, there were 177 underground and 67 surface workers. Later the pit had a fairly consistent workforce of around 300 men, but after the closure of the nearby Kemberton colliery in 1967, this grew to 900 men, but shrank again to around 600 in the early 1970s. Meanwhile, the annual output had grown from around 300-350,000 tons to 600,000 tons in the late 1960s.” [142: p16]
The Lilleshall Company Main Line South and West of Granville and Grange Collieries
The sketch map below is repeated to show the remainder of the Lilleshall Company network.
Continuing on from Granville Colliery, the network served Grange Colliery, Donnington Brick & Tile Works, New Yard Works, Snedshill Ironworks, Snedshill Brick & Tile Works, Priorslee Furnaces/Ironworks, Lawn Colliery, Dark Lane Colliery, Woodhouse Colliery, Stafford Colliery and Hollinswood Sidings. [131]This and the next extract from the 25″ Ordnance Survey of 1901 show the approach to and the area of Grange Colliery. This shows what appear to be the screens, or at least a loading point where output from Grange Colliery was loaded into Lilleshall Company wagons. The disconnect between the main network and the local lines can be seen at Dawes Bower. [151]Grange Colliery as it appears on the 25″ Ordnance Survey of 1901, published in 1902. The railway lines shown in the immediate area of the shafts and slag heaps were internal lines unconnected to the wider Lilleshall Company network. [150]The same area as shown on the OS map extract above. This image comes from the RailMapOnline.com website. What appears to be a caravan park on the site of the old colliery is Telford Naturist Club. The buildings to the top-right of the image are the Cottage Boarding Kennels and Cattery. [134]This extract from the 25″ Ordnance Survey of 1901 shows the point where the branch-line to Grange Colliery met the main Lilleshall line. The line from Grange Colliery enters bottom-right. At the top-right of this extract two sets of lines are shown. The upper lines run towards Donnington sidings, the lower lines connect to Granville Colliery. The lines leaving the top of the extract are local lines serving the area immediately around what were Old Lodge Furnaces. The line leaving the west (left) edge of the extract is the Lilleshall Company mainline to Priorslee and Hollinswood. As can be seen at the centre of the extract, a loco brining wagons from Grange Colliery would need to cross the mainline before reversing its wagons onto the mainline and, depending on its destination, then head for Donnington or Hollinswood. The sidings shown on this extract were also used for storing wagons before onward transit to their ultimate destination. [152]Again, a similar area to that shown on the OS map extract above. The purple lines are those provided by RailMapOnline.com. The Lilleshall Company Mainline curves from the top-right of this image to exit below the mid-point on the left side. [132]The next significant feature on the Lilleshall Company’s network was a triangular junction providing bi-directional access to Donnington Wood Brick & Tile Works [153]Again, a very similar area to that covered by the 25″ OS Map above. One arm of the triangular junction service Donnington Wood Brickworks can be seen on this image as providing the access route for vehicles to the old brickworks site. Redhill Way is the A4640 and it warrants a grade separated junction with the local roads. [132]Donnington Wood Brick & Tile Works were conveniently sited next to reserves of Clay. The Works had their own internal railway with a Self-acting Inclined Plane. [154]Donnington Wood Brick & Tile Works seen from the air, from the Northeast. This image was shared on the Telford Memories Facebook Group by Marcus Keane on 27th March 2019. [155]
The Lilleshall Company main line continued across Moss Road/Gower Street on a simply-supported girder bridge and then on past New Yard Engineering Works.
New Yard Engineering Works was situated on the West side of Gower Street.
The Lilleshall Company, New Yard, Engine Sheds, Gower Street, St Georges. … Urban Terrace can be seen in background. The line to the right of the image runs round behind the engine shed and workshop to serve the Works. This picture was taken by Frank Meeson and shared on the Oakengates History Group including surrounding areas Facebook Group on 15th June 2021 by Gwyn Thunderwing Hartley. [158]New Yard Engineering Works. Gower Street runs North-South on the right of the map extract New Works buildings faced East onto the road. The locomotive shed can be seen to the top-left of the image. The worskshops which stood alongside it were not built by the time of this Ordnance Survey (1901). The line to the left of the Engine Shed connected to the Lilleshall Company main line a little to the North of the map extract. [159]A postcard image of New Yard Engineering Works, this time the camera is to the Southeast of the Works and as a result shows, at the top-right, the Engine Shed and Workshop. Gower Street runs from the bottom edge of the image towards the centre-right. This image was shared on the Oakengates History Group Facebook Group by Gwyn Thunderwing Hartley on 17th February 2019. [160]The Lilleshall Company mainline curves to the South through the area known as ‘The Nabb’. Two bridges are shown. The one just visible top-right is the ‘Tin Bridge. Prior to the construction of the standard gauge mineral railway a horse-drawn tramway ran North-South through this location, running down the side of the terraced housing adjacent to the bridge. The second bridge appears bottom-left. It was a more substantial structure. [162]
This image covers the same area as the map extract and comes from railmaponline.com’s satellite imagery. Two bridges appear on the 25″ OS map extract above. That visible top-right on the map extract was adjacent to the set of terraced houses which appear at the top-tight of this image. Prior to the construction of the standard gauge mineral railway a horse-drawn tramway ran North-South through this location, it is flagged on this image and given the local name ‘pig-rails’. The location of the second bridge is centre-left on this image. [132]
The second bridge at the Nabb was just a couple of hundred metres to the Southwest.
This is the second of the two bridges which crossed the Lilleshall Main Line in ‘The Nabb’.The picture looks to the Southwest and comes from the Howard Williams Collection and was shared on the Oakengates History Group including surrounding areas Facebook Group on 27th February 2014 by Frank Meeson. The girder visible in the pictures above would have been the parapet girder on the far face of the bridge. [165]One of the bridge girders remains in the ground at this location. The mineral railway used to pass in cutting from left to right under the bridge. [My photograph, 4th January 2024]This close view of the information board at the site of the old bridge marks its location with a yellow triangle. The green area running Northeast, and marked with the number ‘3’, is the cutting of the old mineral railway. To the South of the yellow triangle, the route of old line ran behind the houses now on the East side of Willows Road. [My photograph, 11th December 2023]
The next significant feature on the Lilleshall Company main line was the level-crossing at Station Hill. While the railway crossed Station Hill on the level the earlier adjacent canal passed under the road. By the time of the 1901 Ordnance Survey that underbridge had been filled in.
The Lilleshall Company operated a number of steam engines which it picked up from various sources and some of which it built itself. The remainder of this article is no more than a glimpse of these locomotives on the Lilleshall Company’s network. The authoritative treatment of the motive power on the Lilleshall Company network is the book by Bob Yate, “The Railways and Locos of the Lilleshall Company.” [142]
Yate tells us that, because the Lilleshall Company’s network was extensive, it needed a considerable number of locomotives to operate it. He continues: “Much of the traffic was heavy, so it comes as no surprise to find that the company turned to acquiring former main line company locomotives for some of their more arduous duties. The total number of locomotives rose from four during the mid-1850s to eight by 1870, down to five by 1875, then six by 1886, increasing to nine in 1900 until 1920 when there were eleven. By the 1930s the number was back down to nine.” [142: p67] After WW2, numbers were reduced to five, and once closure was approaching all five were scrapped and two other locomotives were purchased.
It is interesting to note that the Lilleshall Company was itself a manufacturer of locomotives, and at least five of these were used within the home fleet. The company even designed and built a 2-2-2 express passenger locomotive in 1867 and exhibited it at the Paris Exhibition. It had 6ft 11in driving wheels and the locomotive was similar in appearance to James Stirling’s Great Northern Railway Single. Sadly, no buyer was found, and so it was rebuilt as an 0-6-0ST in 1873 and sold to Cannock & Rugeley Collieries, Rawnsley; it was finally withdrawn in 1962, after a life of 89 years!
The most modern Lilleshall-built engine used in the home fleet seems to have been No 2, an inside cylinder 0-6-0ST that is thought to have served between 1886 and around 1948. Over the years, 22 locomotives are known to have been used by the company, and at least four locomotives were active on the growing system by 1860. The fleet was made up of nine 0-4-0 tank engines, side and saddle tanks, one 0-4-4T, nine 0-6-0 side and saddle tanks, one 0-6-0PT, and three 0-6-2Ts. The makers represented included Andrew Barclay, Sons & Co Ltd, Manning, Wardle & Co Ltd, Neilson & Co Ltd, Peckett & Sons Ltd, Robert Stephenson & Co Ltd, and Hudswell, Clarke & Co Ltd.
There were, in addition, four ex-Great Western Railway engines that had been purchased over a number of years. No 1 – acquired by the Lilleshall Company in 1932 – was GWR No 581, a former Taff Vale Railway ‘O’ class 0-6-2T; No 3 – acquired in 1932 was GWR No 589, an ex-Taff Vale Railway ‘U’ class 0-6-2T; No 5 – acquired in July 1934 – was GWR No 251, an ex-Barry Railway ‘B1’ class 0-6-2T; and No 12 – acquired in 1949 – was Dean 0-6-0PT No 2794; it still carried its GWR number plate, and it was (by some way) the last survivor of its class. The main running shed was at the New Yard Works in Oakengates, where many of these locomotives were cut-up after withdrawal.
The line was closed in 1958, with the final rail tour taking place on 26th September, just before the end of the system. Had the line remained open for a few more years, the opportunity to preserve at least some of the more interesting engines would have presented itself. The final closure of the, by then truncated, Coalport Branch took place less than six years later, in July 1964, and much of this industrial infrastructure has since been swept away.
Modern Times
Today, the railway through Oakengates is a double-track main line without a single set of points. The 1960s ‘new town of Telford was finally provided with a station of its own upon the opening of Telford (Central) station on 12th May 1986, New Handle Halt being closed at the same time. Boasting ‘parkway’ facilities, passenger numbers at the modern station were 991,000 during 2010/2011, while ‘ Oakengates for Telford’, just 71 chains away on the other side of Oakengates tunnel was recorded as serving just 41,152 passengers in the same period. In 2013, services on the route were provided by London Midland and Arriva Trains Wales, although the latter company’s trains do not call at the unstaffed Oakengates station.
References
D. Bradshaw and S.C. Jenkins; Rails around Oakengates; in Steam Days No. 283, March 2013, p165-179.
B & R Video Productions produce a series of DVDs which have primarily been created by converting cine-film. One part of their library is the Jim Clemens Collection. These stills from the video are shared here with permission from Michael Clemens who holds the copyright on his father’s work. Michael is an author in his own right and maintains a website: https://www.michaelclemensrailways.co.uk. On that website there are details of all of the books he has published together with quite a bit of downloadable material including working timetables. His most relevant publication to this current article is: Michael Clemens; The Last Years of Steam in Shropshire and the Severn Valley; Fonthill Media Ltd, Stroud, Gloucestershire, 2017. That book contains two photographs which are similar to images shown above (p67).
Many of the photographs taken by A.J.B. Dodd which appear in this article were first found on various Facebook Groups. A number of others were supplied direct by Mike Dodd, A.J.B. Dodd’s son who curates the photographs taken by his father. Particular thanks are expressed to Mike Dodd for entering into email correspondence about all of these photographs and for his generous permission to use them in this article.
My worst in church was being called up to help with the chalice at Communion in my church in Didsbury in the early 1990s and tripping over the steps on the way up to the altar. I fell flat on my face in front of everyone and then found everyone sniggering as I gave them the cup. How did I feel? … I wished that the ground would open and swallow me up!
The bridegroom in John 2:1-11 was in just such an embarrassing predicament. This was supposed to be his special time. He & his new wife had been escorted through the streets with burning torches, lighting their way to their new home. They weren’t going away on a honeymoon, but would keep open house for an entire week for people to come along and celebrate the occasion. This was Jewish custom, and the celebrations and showing hospitality to guests were a sacred duty. And what has happened, but the wine has run out! Not because his guests have been over-indulging. Apparently, he’s just been to stingy – he’s not bought enough.
Perhaps he’d underestimated how much wine he’d need. Perhaps he didn’t have the money to buy enough wine, even the cheapest available, to meet his needs. But there was no room for excuses – it was his duty to pay for the celebration. Deeply embarrassed, perhaps red in the face, getting hot, wanting a hole to open up and swallow him, he waited for the complaints from his guests to roll in. Can you imagine his prayer, “Why does this always happen to me? … Please Lord don’t let anyone notice.”
But one guest did notice. Mary saw and she told Jesus. And Jesus quietly set to work. He gets the servants to fill the six water pots with water, the water is turned into wine and the bridegroom’s embarrassment turns to amazement and joy. The equivalent of over 700 bottles of wine, the finest wine appears from nowhere. No longer does the bridegroom face shame and humiliation.
The reading concludes: “Jesus performed this first miracle…… there he revealed his glory
and his disciples believed in him.” Those who were with Jesus knew that this was an act of divine power – an act in which the personal situation of the bridegroom was transformed. This miracle revealed the nature of Jesus’ ministry: Jesus, the provider of joy, transforming sadness and embarrassment into experiences of gladness and rejoicing. Jesus, the one who can overcome our mistakes/failings, bringing good out of seeming disaster.
The good news of the Gospel is that this is what God is like. If Jesus transformed one situation, then God can transform the situations that we find ourselves in today.
Perhaps we’ve made mistakes – like the bridegroom without enough wine. We may look back over our lives, and think “if only I’d not done or said that.” There may be things that have happened in the last few days – we’ve done or said something we regret. These things can linger with us, leaving us feeling embarrassed, ashamed, and not knowing what to do.
Perhaps we are low in resources – like the bridegroom who couldn’t provide adequately for his guests? There are times when we feel spiritually dry, we struggle to pray, we wonder where God is. Or we feel physically weak, no energy to do what matters. Or emotionally drained, with no motivation to sustain relationships or get on with our work.
Perhaps life is full of sadness – like the bridegroom who sees his joyful day disappearing before his eyes. We see others around who are happy, but find it hard to be like them. We know that others think we should be smiling, but it’s not as easy as all that…..
Whether trivial or significant, God in Jesus is ready to transform these situations. He can, and does break into our lives. We think or feel that we are defined by the past, by our mistakes and failings. But God says, “No!” Just as Jesus transformed the bridegroom’s day from failure to joy, God can transform our lives bringing good out of the mess we see in our lives.
Not only is God ready to transform situations, he is even at work when we cannot ask him ourselves. The bridegroom wasn’t actually aware that Jesus was working to help him until the steward announced that there was more, and even better, wine on offer. It was someone else, Mary, who noticed the need, and asked Jesus to act. When we are unable to pray, or don’t know what to pray for – we don’t need to worry that we’ll be left helpless. God will act.
God can act unilaterally, but more often than not it is through others around us. Those who notice the way things are and do something. … Action isn’t always appropriate. When we see our friends or family members struggling – we can follow Mary’s example. We can talk quietly to Jesus, in the background, and we can have confidence that we have done the right thing. For we have given their situation to God. And God is able to work for good in any situation.
And when Jesus acts, when God acts, we may be amazed at what happens – the bridegroom didn’t just receive enough wine to get by on. He got good, fine wine – more than he needed, better than he needed. The generosity of God was overwhelming at the wedding in Cana. And when Jesus acts to transform our situations, our lives, we can expect this same generosity. However, with Jesus, it’s not about quick fixes that solve the problem for the moment. No, God’s work in our lives will often be quiet, often over the longer term. We may experience setbacks, but God will not give up.
We can experience transformation, and as Jesus works in our lives the glory of God will be revealed – just as it was at Cana. And we can be part of that transformation in the lives of others by taking the mess and muddle that we see to God, by asking God to break in a bring hope and transformation.
Lord Jesus, just as you transformed the situation of the bridegroom at Cana, may you work in our lives, transforming our embarrassments, our inadequacies, our sadnesses, our mistakes, into experiences of gladness and joy, to the glory of your name. Amen.
The featured image shows Presthope Station with the 18.00 hrs Craven Arms – Much Wenlock – Wellington train is leaving on 21st April 1951, heading for Much Wenlock. [30]
This article follows on from four other articles which covered the Wellington to Severn Junction Railway and this line from Buildwas to Much Wenlock. The first three articles can be found on these links:
From the commencement of the building of the line between Buildwas and Much Wenlock, the directors hoped that the line could be extended to Craven Arms via Presthope on Wenlock Edge (linking with the limestone quarries/works at that location).
The directors of the Wellington & Severn Junction Railway were, however, fully occupied with the line from Wellington to Buildwas. Another company was set up to build the ‘Wenlock & Craven Arms and Coalbrookdale Extension Railway‘. The bill went through the parliamentary process unopposed and authorised the ‘Wenlock Railway Company‘ to construct the line. Work started on 23rd October 1861.
By 5th December 1864, the line was open from Much Wenlock to Presthope. At this time, because it was a freight-only line, the Board of Trade saw no need for an inspection of the line. It had already been agreed at a meeting held on 4th December 1863 not to proceed with the line from Presthope to Craven Arms for the time being. It was to be three years after the line reached Presthope before the connection to the Shrewsbury & Hereford Railway close to Craven Arms was completed. It was finally opened on 16th December 1867.
Much Wenlock to Presthope
This article focusses on the length of the line which was completed in December 1864 – Much Wenlock to Presthope. Another article will follow the line to the West of Presthope.
Much Wenlock Railway Station had a single platform adjacent to the main running line. A passing loop was provided opposing the platform, and beyond it there was a rockery garden, “large limestone boulders [were] interspersed with shrubs and alpine plants flanked by a row of rhododendron bushes. In the centre of the rockery was a fountain.” [1: p97]
Trains leaving for Craven Arms crossed Sheinton Road/Street Bridge and passed the goods shed and yard on the left and then the engine shed. When the line terminated at Much Wenlock, the goods facilities used until the final closure of the line were the temporary railway station.
Trains began the climb towards Wenlock Edge. The pictures above show the climb had already begun alongside the goods yard. Neither the goods shed nor the engine shed remain in the 21st century.
That length is in private hands with a significant length in use as a paddock for horses and a small holding.
Westwood Halt in around 1960 – seen from the East. The single platform sat on the North side of the line immediately to the East of Westwood Crossing. It was not until 7th December 1935 that the Halt opened. It closed to passenger traffic on 31st December 1951. This picture was shared on the Much Wenlock Memories Facebook Group by Judith Goodman on 8th December 2020. The photographer is not known and the image is used under a Creative Commons Licence (CC BY-SA 4.0). [19]Google Maps image of the site of Westwood Halt. [Google Maps, 12th January 2024]Westwood Crossing seen from the North. The red line marks the approximate centre-line of the old railway. The Halt would have been off to the left of this image. [Google Streetview, 2009]Looking Northwest from Westwood Crossing towards the B4371. [My photograph, 12th January 2024]Looking Southeast from the location of Westwood Crossing. It is not possible to follow the route of the old railway to the West of this location as it is in private hands. To continue following the route requires a diversion along the footpath ahead, across one field to join another track and then heading back Northwest towards the olod line. [My photograph, 12th January 2024]The line leaving Westwood Crossing and heading towards Presthope. [My photograph, 12th January 2024]Westwood Crossing to the next overbridge, as shown on the 25″ Ordnance Survey of 1901. [22]Within a couple of hundred yards, trains passed Westwood Sidings. The sidings served Westwood Quarry. There were ground frames controlling access at each end of the siding. [23]
When the Wenlock Branch opened “limestone was being extracted [at Westwood Quarry] for use in the Madeley Wood Company’s furnaces. Horse-drawn tramways ran from the quarry on to a loading ramp above the sidings.” [1: p97]
The photographs of the pre-contract drawings for the line were taken by myself and show extracts from the construction plans held in the Shropshire Archive. There is a standard charge of £10 per visit for taking photographs of their records.
The dotted lines on this sketch map are private railways. The Lilleshall Company’s main line runs from Granville and Grange Collieries in the top-right of the sketch map via Old Lodge Ironworks and Priorslee Furnaces down to Hollinswood. This sketch map was included on the Miner’s Walk website which provides information about the local area. [4]
The monochrome photographs included in this article were taken by a number of different photographers. Where possible permission has been sought to include those photographs in this article. Particularly, there are a significant number of photographs taken by A.J.B. Dodd which appear here which were first found on various Facebook Groups. A number were supplied direct by Mike Dodd, A.J.B. Dodd’s son, who curates the photographs taken by his father. Particular thanks are expressed to Mike Dodd for entering into email correspondence about all of these photographs and for his generous permission to use them in this article. [72]
The remaining maps in this article follow the Lilleshall Company’s mainline as far as Hollinswood Sidings. Those sidings sat alongside the GWR mainline from Shrewsbury to Wolverhampton and Birmingham.
Another extract from the 1901 25″ Ordnance Survey. South of the A5 the Snedshill Ironworks sidings merge with the Coalport Branch although they do so after a line leaves heading away to the Southeast, passing to the East of the tunnel portal at the bottom of the map extract.. The Coalport Branch runs to the West of the tunnel portal of the GWR/BR mainline between Shrewsbury and Wolverhampton. The Lilleshall Company mainline curves round to run parallel to the spur closest to the tunnel portal. [21]The main line of the Lilleshall System continued in a South-southeast direction, curving gradually round towards the Southeast. [25]
Photographs taken while looking at the older tramway which predated the standard gauge network can be found in the later part of my article about the old tramway from Sutton Wharf to Oakengates. Those pictures illustrate the approximate route of the standard gauge line as well as the older tramway. To access that article, please click here (https://wordpress.com/post/rogerfarnworth.com/32520). That article also shows modern photographs of the area Southeast of this location on the Lilleshall Company’s network, including the area of Priorslee Furnaces and Hollingswood Sidings as it appears in the 21st century.
This extract is a little further to the Southeast. The Coalport Branch is on the left. The GWR mainline is in cutting running from the top-left of the image to the bottom-centre. The spur from the Snedshill Sidings meets the Lilleshall Company’s mainline just right of the centre point of the image. The line curving back towards the GWR mainline but terminating just above the bottom edge of the image, was originally a tramroad through Hollinswood to Malinslee. Links to articles about the tramroads in this area can be found below.[22]A similar area as covered by the 1901 25″ Ordnance Survey extract above. This extract from the Railmaponline.com satellite imagery shows the modern A442 following the route of the LNWR Coalport Branch with the GWR mainline to the East of it. The complex arrangement of the Lilleshall Company’s railways shows that we are close to what was Priorslee Furnaces. As noted above, the line which curves away to the South from the Company’s railways is a former tramroad which fed into a network of tramroads in the Hollinswood and Malinslee area of what is now Telford. Those tramroads are covered in the linked articles immediately below. [25]Priorslee Furnaces as shown on the 1882 25″ Ordnance Survey. [51]A very similar area to that shown in the extract above, this map extract comes from the 1901 25″ Ordnance Survey. There have been some significant changes to the buildings on the site in the period from 1882 to 1901. Alterations to the railway sidings on the site either accommodate the new structures or are relatively minor in nature. [52]This railmaponline satellite image covers much the same area as the two OS Map extracts above. The sidings shown on this image are indicative rather than definitive but do give a good idea of the area covered by Priorslee Furnaces. The road which runs down through the image is a diverted version of Hollinswood Road which then becomes a footpath. It crosses the GWR Mainline using a bridge which was built at the time the railway was constructed, and then a modern footbridge over the A442. [25]
Much of the area to the Southeast of Oakengates, including Priorslee is also covered in this article:
The tramroads in the Hollinswood/Malinslee area are covered in earlier articles about the Malinslee area (below) and are illustrated in the hand-drawn map from Savage and Smith’s research which appears below:
The Lilleshall Company operated a number of steam engines which it picked up from various sources and some of which it built itself. The remainder of this article is no more than a glimpse of these locomotives on the Lilleshall Company’s network. The authoritative treatment of the motive power on the Lilleshall Company network is the book by Bob Yate, “The Railways and Locos of the Lilleshall Company.” [59]
Yate tells us that, because the Lilleshall Company’s network was extensive, it needed a considerable number of locomotives to operate it. He continues: “Much of the traffic was heavy, so it comes as no surprise to find that the company turned to acquiring former main line company locomotives for some of their more arduous duties. The total number of locomotives rose from four during the mid-1850s to eight by 1870, down to five by 1875, then six by 1886, increasing to nine in 1900 until 1920 when there were eleven. By the 1930s the number was back down to nine.” [59: p67] After WW2, numbers were reduced to five, and once closure was approaching all five were scrapped and two other locomotives were purchased.
R.F. Savage & L.D.W. Smith; The Waggon-ways and Plateways of East Shropshire; Birmingham School of Architecture, 1965. Original document is held by the Archive Office of the Ironbridge Gorge Museum Trust.
Many of the photographs taken by A.J.B. Dodd which appear in this article were first found on various Facebook Groups. A number were supplied direct by Mike Dodd, A.J.B. Dodd’s son who curates the photographs taken by his father. Particular thanks are expressed to Mike Dodd for entering into email correspondence about all of these photographs and for his generous permission to use them in this article.
This article looks at two tramway routes which were built. The first ran from Nice to Bendejun via Pont de Peille and Contes. The second branched of the first at Pont de Peille and ran to along the valley of the Paillon de Peille to La Grave de Peille. It also covers a proposed tramway to l’Escarene which was not constructed.
Nice to Contes and Bendejun
This line was approximately 18.6 km long. The first part of the route (from Nice Place Garibaldi as far as La Trinite Victor) ran along the same rails as the urban service – a length of around 6.5km.Just over 9 km of line (which was deemed to be part of the coastal (littoral) network) brought trams to Contes. The final length of the line was regarded as part of the TNLs ‘departemental’ network and took trams to the terminus at Bendejun.
Only approximately 0.5 km of the line and (as far as Contes) was on the level. The remainder of the line was set at varying gradients with the steepest being 55mm/m. The line rose from 12 metres above sea-level at Place Garibaldi to 189 metres above sea-level at Contes, and 260 metres above sea-level at Bendejun.
The following notes on the significant dates associated with the line are gleaned from Jose Banaudo’s book. [1: p70] …
The line from Garibaldi to Abbatoirs opened to the public on 21st February 1900. On 2nd June of the same year, the line opened from Abbatoirs to Contes. Goods were carried on this section of the line from 1st October 1900.
It was not until 1st February 1909 that passengers could travel between Contes and Bendejun and no goods were carried along that length of the line until 1st January 1911.
After just over a year, in February 1912, subsidence closed the length of the line between Contes and Bendejun. The line opened again in March. During the winter of 1916-1917, the line was closed by snow and landslides.
On 1st January 1923 tram services were given new numbers: Nice to La Trinite or Drap became No. 26; Nice to Contes or Bendejun, No. 27.
Sadly, after further problems with landslides, the line between Contes and Bendejun was permanently closed from 18th November 1926.
On 8th October 1934 renumbering led to the line to La Trinite being numbered 36 and the Nice to Contes service, 37.
A landslide affected the line between the cement works and Contes. It was closed from November 1934 to March 1935.
Late in 1935, the Nice terminus of these services was moved from Place Garibaldi to Rue Geoffredo.
After damage to the electricity substation adjacent to Pont-de-Peille on 12th February 1938, the passenger service from Drap to Contes was curtailed and the No. 37 service was replaced by buses.
There was opposition to the bus service being provided by a single company. This saw a reopening of the tram service on Ligne 37 on 15th March 1938. There followed a period between 3rd August 1938 and December 1944 when tramway services were interrupted relatively frequently for a variety of reasons which included damage during WW2.
On 23rd December 1944 the tram service resumed from Nice to Pont-de-Peille with a bus service covering the remainder of the route to the North.
On 17th January 1945, goods transport between Contes and Nice resumed and, on 20th January 1945, passenger trams returned to Contes.
In the winter of 1948-1949 bad weather saw the interruption of services North of La Pointe de Contes.
January 1950 saw the closure of the line to passenger services with buses used to replace that service on a permanent basis. In May 1950, the goods service was also closed permanently.
The line to Bendejun followed the left bank of the River Paillon between the centre of Nice and its terminus in Bendejun. Its terminus in Nice was at the Northwest corner of Place Garibaldi, where a wooden kiosk served as its station building. It used the same tracks as the urban services through Abattoirs to La Trinité-Victor.
For a short distance trams ran on the verge of Route Nationale No. 204. Stops at Roma and Random (which had a passing loop) were followed by the stop in the village of Drap which was adjacent to the bridge to Cantaron.
The Route Nationale in Drap. Tram tracks can be seen in the centre of the road. This old postcard view was shared on the Comte de Nice et son Histoire Facebook Group by Alain Nissim on 18th May 2022. [4]Drap again, this image shows La Place des Ecoles and the Route Nationale. A tram can be seen on the road at the extreme right of the picture. This old postcard view was shared on the Comte de Nice et son Histoire Facebook Group by Alain Nissim on 18th May 2022. [4]La Place des Ecoles viewed from almost the same location as in the monochrome postcard image above. In the 21st century the Plane trees have gone and cars have taken over from the park that made up much of the square. [Google Streetview, November 2022]Turning just a little to the right and wandering a little further along the Route Nationale, this image shows the passing loop at the tram stop in Drap. It was shared on the Comte de Nice et son Histoire Facebook Group by Jean-Paul Bascoul on 22nd February 2019, and comes from his private collection. [5] The same photograph appears in José Banaudo’s book. [1: p68]Approximately the same location as seen in the 21st century. The school on the left has seen its roof raised by the addition of another floor. [Google Streetview, November 2022]
It appears that as late as 1955, the tram track was visible in the road surface in the centre of Drap. The two parallel images from the IGN website show it present on Avenue de General de Gaulle when the map on the left was surveyed in 1955.
The Place des Ecoles in the centre of Drap. The ‘cross’ on the older map on the left is superimposed over the line of the tramway which was in the centre of the road. [11]A little further North the tramway can be seen leaving the centre of the road in the 1955 map extract. Presumably it ran along the verge between the road and the River Paillon. It might already have been lifted by 1955. The map is of little help with establishing its presence immediately North of this location. [12]
Leaving the centre of Drap, trams then passed under the PLM line between Nice and Cuneo for the third time at Pont des Vernes which also spanned the River Paillon. Trams ran between the river and the road.
Pont des Vernes in the 21st century. What was the old Route Nationale still passes under the most Easterly span of the truss girder viaduct which also spans the River Paillon. [Google Streetview, 2011]
The confluence of two arms of the River Paillon lay shortly beyond the railway bridge (Paillon de Contes and Paillon de L’Escarène). The Paillon de L’Escarène flowed in from the Southeast from the heights of Peillon, L’Escarène and Lucéram. It was spanned by a five-arched viaduct, some 140 metres in length which carried both the Route Nationale and the tramway. The construction of the bridge was started in the last years of the 18th century. While the bridge may well have been completed within a few years, the construction of the road of which it was a part, between Turin and Nice, was interrupted by conflict and was not completed until 1838. [1: p67]
A postcard view from the Southwest looking towards Pont de Peillon. The old road bridge (and its five arches) sits at the centre of the view. [7]A modern view looking Northeast along the D2204 where it crosses the Paillon de L’Escarene. [Google Streetview, April 2023]The same bridge, viewed from Chemin du Fontanil de Croves to the Southeast of the bridge. [Google Streetview, May 2019]This next extract from the parallel imagery provided by the IGN shows the tramway returning to the centre of the Route National as it crossed the bridge in 1955. It might be inferred from this that from Drap to this point it was still present on the West side of the highway. Again, however, the map extracts cannot be seen as conclusive proof of this. At the centre-top of the 1955 map extract the tramway appears to leave the road carriageway for a short distance for a tram stop and passing loop, which is mentioned in the text below. However Jose Banaudo has a photograph of the location in his book which seems to show the tramway remaining in the carriageway with an electricity substation just beyond it. [1: p69] There is now a roundabout at the junction between the road to Contes/Bendejun and the road East to La-Grave-de-Peille. [13]
Trams faced gradients on either side of the central arch of the bridge – 41mm/m and 34mm/m. Very soon after crossing the bridge in a northbound direction, trams encountered the stop at Pont-de-Peille, “where an electrical substation was located and from which the La-Grave-de-Peille line branched off to the east.” [1: p67]
A 21st century view North from the bridge. [Google Streetview, April 2023]The hamlet of La Pointe-de-Contes was beyond the North end of the bridge over the Paillon de L’Escarene. [3]
Beyond the hamlet of La Pointe-de-Contes, the line crossed the Ruisseau de la Garde (a tributary to Le Paillon de Contes) on a single-span bridge.
This next extract from the parallel mapping of the IGN shows the highway bridge over the Ruisseau de la Garde. The bridge sits in the bottom half of the two map extracts. The 1955 mapping appears to show tram tracks over the bridge at the centre line of the road. To the South of the bridge, it seems that the tramway was on the West verge of the road. North of the bridge it appears to switch to the East side verge of the carriageway. Only a short distance further North the tramway appears to cross back to the West side of the road. Road realignments in this area have resulted in a roundabout at the location of the old bridge. [14]The bridge over the Ruisseau de la Garde at La Pointe de Contes in 1953. The image was shared by Pierre Richert in the Comte de Nice et son Histoire Facebook Group on 31st October 2017 [15]A similar view in the 21st century. [Google Streetview, April 2023.
Banaudo says that the road junction adjacent to the bridge was the point at which the L’Escarene tram line would have branched off the line to Contes. Work on that line wasn’t completed. [1: p67]
From this bridge, the line to Contes and Bendejun followed RN15 (now D15) North past the Lafarge lime and cement factory. “This, which was the main reason for the line’s existence, was served by two branches allowing the reception of fuel and the shipment of its products to Nice and its port.” [1: p67]
The location of the Lafarge factory. The 1955 map seems to show the tramway on the West side of the road. There also appear to be at least two sidings on the East side of the road. [15]An aerial image of the Lafarge Cement Works at Contes. The River Paillon de Contes is in the background. [10]
About a kilometre further North, the Contes station was located in the La Grave district adjacent to the footbridge leading to Châteauneuf.
Another extract from the parallel imagery provided by the IGN. The tramway can be seen, in the 1955 map extract on the left, following the verge of the road and immediately adjacent to the river channel. The bridge shown crossing The river at this point provided access to Chateauneuf which sat above the valley to the West. The tram stop was close to the bridge and a little to the Northwest of it. [17]
At Contes, the tramway had a small building and a siding by the river beneath the perched village.
Contes Gendarmerie and tram stop. This image was shared by Pierre Richert on the Comte de Nice et son Histoire Facebook Group on 30th October 2017 as part of an extensive album of postcard views of Contes. [3]A view from a similar position in the 21st century. The construction site is on the land once occupied by the Gendarmerie. [Google Streetview, April 2023]This image from the Jean-Henri Manara collection was colourised and shared by Demian West on the Comte de Nice et son Histoire Facebook Group on 13th December 2022. This original image was included in the comments attached to the colourised image on the Facebook group by Demian West. [16]A similar view in the 21st century. [Google Streetview, April 2023]The tram terminus at Contes. This postcard view was shared by Jean-Paul Bascoul on the Comte de Nice et son Histoire Facebook Group on 21st January 2017. It comes from the private collection of Jean-Paul Bascoul. [9]
From there, the line continued up the left bank of the Paillon. Banaudo tells us that there was only one further passing-loop which was in the district of Roccaya, near the Rémaurian footbridge. “The Bendéjun terminus was in the Moulins district, in a steep site where the road crosses the Paillon and definitively leaves the bottom of the valley to rise in bends towards this village and that of Coaraze.” [1: p67]
The Bendejun terminus of the tramway was in the valley floor close to the mills and alongside the river. There was a bridge just beyond the tram terminus which took the road over the Paillon de Contes and a series of hairpin bends lifted the road quickly up the valley side. This is another extract from the IGN parallel mapping. The map on the left was published in 1955. [18]The tram terminus at Bendejun, beyond this point the road turns sharply to the left to cross the river and then climbs through a series of hairpin bends to Bendejun and on to Coaraze. This image was shared on the Comte de Nice et son Histoire Facebook Group by Roland Coccoli on 30th May 2023. [19]A view from a little further South in the 21st century. The properties on either side of the road both remain. That on the East of the road now appears to be rendered. Of interest in this view are what appear to be tram rails in the right foreground. [Google Streetview, April 2023]
We have already noted that the tramway service North of Pont-de-Peille was frequently interrupted by landslides, subsidence and weather events. Banaudo also writes of significant problems with the trailers used for goods services which were often in poor condition or overloaded and as a result caused damage to the relatively light-weight rails of the tramway. [1: p71]
Pont de Peille to La Grave de Peille
Two branch-lines from the tramway to Contes were planned, the first was a line to La Grave de Peille. When built it had a total length of just short of 6.6 km. Its maximum gradient was 39 mm/m and only 360m of the route was on the level. The line ran from 112 m above sea-level to 195 m above sea-level at La Grave de Peille.
The concession for the operation of the line to La Grave de Peille was given to the TNL in June 1904. The line opened to passengers and freight on 12th June 1911. The route was numbered 28 on 1st January 1923 and saw construction traffic for the Nice-Cuneo Railway between 1923 and 1928. The cement works at La Grave was established in 1924.
At the end of 1926 the service was interrupted by a landslide. Work was undertaken between 1926 and 1927 to improve the electrical supply and September 1928 saw the official inauguration of the freight service associated with the cement works.
The Bridges and Roads Authority undertook paving work along the line in the winter of 1928-29. In August 1929, a landslide disrupted the service once again and a deviation was put in place.
On 8th October 1934, the line was renumbered, Ligne 38. The service was interrupted, once again, in November 1934. This time it was by a landslide at Châteauvieux.
The terminus in Nice was moved, along with that of the line to Contes and Bendejun, from Place Garibaldi to Rue Geoffredo in November 1935 and another landslide interrupted the service at Ste. Thecla between December 1935 and December 1936.
This tale of woe continued throughout the next decade with closures due to landslides, floods, the failure of bridges, or deterioration of trackwork. Banaudo provides a full list of these events. [1: p75]Such an unreliable service maintained at significant cost was of little use to users (passengers and goods). Closure became inevitable and it occurred on 1st April 1947.
The route started immediately to the North of the Pont de Peille stop on the line to Contes. Banaudo describes this connection as “une aiguille en rebroussement” (literally, ‘a turning needle’). [1: p72] In context, this appears to be a point which allowed access to the branch-line from the North. Trams from Nice would stop at Pont de Peille and then execute a reversal just to the North of the stop to gain access to the branch. This presumably involved a powered car running round its trailer at the tram stop and then reversing towards Contes. Banaudo provides one photograph of the manoeuvre taking place. [1: p72]
Such an unreliable service maintained at significant cost was of little use to users (passengers and goods). Closure became inevitable and it occurred on 1st April 1947.
The route between Pont de Peille and La Grave de Peille started immediately to the North of the Pont de Peille stop on the line to Contes. Banaudo describes this connection as “une aiguille en rebroussement” (literally, ‘a turning needle’). [1: p72] In context, this appears to be a point which allowed access to the branch-line from the North. Trams from Nice would stop at Pont de Peille and then execute a reversal just to the North of the stop to gain access to the branch. This presumably involved a powered car running round its trailer at the tram stop and then reversing towards Contes. Banaudo provides one photograph of the manoeuvre taking place. [1: p72]
The junction of the D21 and the D15 is shown on the right of these two parallel IGN images. The reverse curve, mentioned in the text about the tramway above, appears to be shown on the image on the left. The cross marks its location. The tramway appears to have run on the South side of the road.[20]The road to La-Grave-de-Peille and L’Escarene. Tge tramway ran along the verge of the old road or within the width of the carriageway over much of the journey to La-Grave-de-Peille. [Google Streetview, April 2023]
The branch-line followed the valley of the River Paillon de L’Escarène valley, a route also used by the PLM Nice-Cuneo line. Banaudo tells us that “the tram first took the right bank, sometimes on the shoulder and sometimes on the roadway of Route Nationale No. 21 (now departemental road No. 21). It passed through the hamlet of Borghéas, then entered the Châteauvieux gorge where a three-arch bridge brought the road and the track over to the left bank. After passing the pumping station of a spring which supplied part of the city of Nice with drinking water, trams reached the hamlet of Ste. Thecla.” [1: p72]
The location of the three-arched bridge which is mentioned by Banaudo in the quoted text above. [21]The same location as seen on Google Earth in 21st century. [Google Earth, 18th October 2022]A 21st century view, looking Northeast across the bridge carrying the D21 over the Paillon de L’Escarene. [Google Streetview, March 2023]The village of Ste. Thecle sits in the valley floor adjacent to the Paillon de l’Escarene. It hosts a railway station which is named Peillon-Ste. Thecle which serves the two villages. Paillon is high above, and to the East of the village of Thecle. [22]A view of Sainte Thecle, the mills and Peillon which shows the tramway alongside the road. The view looks Eastnortheast towards Paeillon. Note the kerb marking the limits of the highway. Peillon can be seen high above Ste. Thecle in this photograph. The River Paillon de l’Escarene is below the road and tramway to the left. This old postcard image was shared by Jean-Paul Bascoul on the Comte de Nice et son Histoire Facebook Group on 5th October 2023 and comes from the private collection of Jean-Paul Bascoul. The location of this photograph is difficult to confirm in 21st century. The relative positions of Peillon and the rock outcrops behind make it clear that the location is in Ste. Thecle but changes in the buildings in Ste.Thecle make ascertaining the location difficult. No doubt someone with local knowledge might be able to firm up the position of the camera! [6]The tram stop at Les Moulins de Peillon seems to be marked on the 1955 map extract on the left. However, it is worth noting Banaudo’s comments below which seem to suggest that the tramway was on the East side of the road. The tramway is perhaps marked by the single line on the East side of the road. The location is named on the modern map extract to the right. The valley has, by this time, turned to the North. Access to the village of Peillon is via the steep road with hairpin bends in the top right of each map extract. [23]The village of Peillon sits high above the valley floor. It is a car free mediaeval perched village. [24]
The next stop was in the valley closer to Peillon and set among the mills. This stop provided a passing loop, the only one on the line. Banaudo continues: “On the right, the picturesque village of Peillon stands at 376 m at the top of a rocky spur in a site worthy of a postcard. Immediately afterwards, the valley narrows once again and forms the narrow Bausset gorge where the tramway line was established over 567 m on its own site overlooking the road, finding it again to cross the Paillon on a single-arch bridge.” [1: p72]
These comments from Banaudo suggest that the line was on the East side of the road, perhaps indicated by the single black line on the 1955 map extract above which crosses the side road to Peillon only a few meters to the East of the main road. It seems that North of this point the tramway was very close to the road but held above it by a retaining wall. Road and tramway came together again at the next bridge over the Paillon de l’Escarene. That bridge is marked on both of the map extracts (1955 and 2023) above. The bridge used by the old road and tramway is marked in grey on the modern map.
Looking East off the modern road bridge, the single masonry arch of the old bridge can be seen in a collapsed state. A modern road realignment at this location removed some dangerous bends and improved traffic flow. [Google Streetview, April 2023]
Beyond this point, with the tramway and the D21 now on the West bank of the river, the valley opens out and the route of the old tramway passes through Novaines before reaching the location of its terminus at La Grave-de-Peille.
The tramway ran along the old Route Nationale No. 21 to La Grave de Peille. As the road turned to re-cross the River Paillon de L’Escarene, the tramway continued for only a short distance to serve a cement works on the West bank of the river. [25]The terminus of the passenger service at La Grave de Peille. This image was shared on the Comte de Nice et son Histoire Facebook Group by Roland Coccoli on 2nd December 2018. [8]
The terminus of the route was sited at the meeting point of the boundaries of three communes, Peillon, Peille and Blausasc, adjacent to a cement works which was operating from the mid-1920s and had its own branch-line from the tramway. The cement works became particularly significant in the life of the branch-line once the PLM opened its line between Nice and Cuneo in the late-1920s. Passengers deserted the trams as a much quicker journey to and from Nice was offered by the PLM from its two stations, Peillon-Ste. Thecle and Peille.
The railway station at Peille with the cement works visible in the distance on the right side of the image. This colourised monochrome postcard image was taken with the camera facing towards the Southwest. Trams ran along the valley from/to the lefthand edge of this image as far as the cement works. [26]
Banaudo highlights a particular problem with the line to La Grave de Peille. [1: p74] The tramway was built with minimal investment – just enough to reach its terminus. Rails were the lightest possible; the TNL used existing bridges not designed for the loads imposed by trams and trailers; road carriageway widths were decreased to provide space for the trams, (ather than setting the rails in the roads).
Local protests began as early as 1908, but issues becameore acute after the Great War because of the increased traffic on both the road and the tramway resulting from the construction of the Nice-Cuneo railway and the opening of the cement plant at La Grave. “Neither the road nor the railway were able to withstand this additional load. On 21st November 1928, the municipal council of Peillon reported that the Bausset bridge was in a lamentable state and, for lack of urgent measures, serious misfortunes occurred during the winter of 1928-29. Despite the protests of the TNL company which rightly feared for the sustainability of its rails, the Bridges and Roads Authority covered the rails with macadam to widen the roadway accessible to cars. What was predictable happened: insufficiently drained under this coating and tired by high tonnages, the rails were too weak and the already tired sleepers soon began to disintegrate.” [1: p74]
In 1937 proper maintenance was undertaken between Borghéas and Châteauvieux, “but the alarming state of the track, the insufficient electricity supply and the shortage of wagons led the TNL to provide its passenger service by bus” [1: p74] The cement factory also began to use road vehicles.
WW2 resulted in traffic (both goods and passengers) returning to the rails in the summer of 1940, but by the beginning of 1941 the track had deteriorated to such an extent that all tramway traffic had to be suspended.
Sufficient maintenance was undertaken to allow goods services to resume within a few weeks but the condition of the bridge at Bausset meant that the line North of the bridge could not be used by trams. Lime and cement, “went down by truck to the Peillon stop (Les Moulins), where it was transhipped on a train of two wagons limited to 6 km/h to Pont-de-Peille… The end-to-end service resumed on 7th July 1941, but it was again interrupted in September 1943 by the destruction of the Pont de Peille then at the end of August 1944 by that of the Pont de Bausset bridge.” [1: p74]
A temporary structure of steel beams and a wooden deck was quickly provided but “the track formed such tight curves on either side of the structure that derailments were not rare.” [1: p74]
Early 1945 saw the reintroduction of passenger and freight services but the following winter saw heavy flooding which destabilised the temporary bridge at Bausset and the line was again closed, this time for two and a half months. Ultimately the increasingly erratic service on the line resulted in its final closure in the spring of 1947.
La Pointe de Contes to l’Escarene
Sadly, this line was never used in earnest. Much was done to create the line but circumstances combined to mean the work done did not come to fruition. Initially, l’Escarene was chosen as the final destination for the tramway from Pont de Peille via La Grave de Peille in 1904. The concession for the line between La Grave and L’Escarene was awarded on 26th June 1904, but it was rescinded early in 1906.
Banaudo tells us that, “after several decades of procrastination, the construction of a Nice-Cuneo railway line had been approved by an international convention, granted to the PLM and made public. As the route of this line was established by the Paillon de L’Escarène valley which the tramway should have taken.” [1: p76]
The result of that decision was the truncation of the route from Pont de Peille to La Grave de Peille and L’Escarène at La Grave.
Banaudo goes on to explain that “the idea of connecting L’Escarène to the tram network was not abandoned, especially since some were still considering extending a line as far as Luceram and even Peirs Cava, at an altitude of 1400 m.” [1: p76]
In 1910 the Bridges and Roads Authority commenced discussions with the TNL. The steep Gradients likely to be required saw the TNL propose an option of a rack system.
It was not until 1913 that the route from La Pointe de Contes was confirmed. Work began in January 1914. The Great War saw work come to a standstill.
It was 1919, before rearranged contracts saw work recommence on the line. Ok about was in short supply and priority was given to the construction of the PLM line between Nice and Cuneo. In the end, the Departement suspended work on the line in 1926 because costs of materials had risen dramatically.
In 1928, Banaudo tells us, “at the request of the municipality of Blausan, the general council took the decision to develop the length of the tramway formation which was remote from the existing road, from Fuont-de-Jarrier to the Col de Nice which became the departmental road 321.” [1: p76] The planned tramway to L’Escarène was finally abandoned/decommissioned on 29th June 1933.
Had it been built, the total length of the tramway would have been just under 7.6 km with a maximum gradient of 55mm/m. It would have risen from a height of 131m above sea-level at La Pointe de Contes to around 410 m above sea-level at the Col de Nice.
The route was to have been served entirely by a single-track tramway leaving the line to Contes at La Pointe de Contes.
The red line shown on these map extracts provided by the IGN shows the route of the planned tramway as it left the route to Contes and Bendejun. A road now follows that line and appears on the modern mapping on the right. The road is named ‘Chemin du Tram’. The main road towards L’ Escarène leaves both extracts at the top right. [27]Looking North along the main road towards Contes. Behind the camera the road to L’Escarène heads away to the East. The tram stop for La Pointe de Contes was along this length of road. Just to the North of the tram stop was the point where the tramway to L’Escarène would have set off to the East. [Google Streetview, March 2023]The tramway to Contes and Bendejun ran ahead along what is now the D15. The route to L’Escarène would have run off to the right at what is now a road junction. [Google Streetview, March 2023]The route of the planned tramway followed what is now called ‘Chemin du Tram’ which runs directly ahead of the camera. It is the road to the left of the trees at the centre of this image. [Google Streetview, March 2023]A little further East along what would have been the route of the tramway. [Google Streetview, March 2023]The planned route ran to the right of the retaining wall before joining the D2204. [Google Streetview, March 2023]Looking back towards the D15 from the D2204. The tram route followed the retaining wall running away from the camera on the right side of the photograph, and then curved round between the two buildings seen beyond the parked vehicles. [Google Streetview, April 2023]
Initially, it would have followed the Route Nationale No. 204 (now the D2204) up the valley of the Ruisseau de la Garde.
Parallel map extracts, once again, provided by the IGN. The main features, which can be seen on both the 1955 extract and the 21st century extract, are the bridges which carried the road over the Ruisseau de la Garde. [28]The location of the first of the two bridges. There is little at road level to indicate that it is crossing the stream which passes some metres below the road. [Google Streetview, April 2023]The location of the second bridge is easier to make out. The modern road has been straightened and a new bridge constructed. The old road which would have been followed by the tramway bears away to the left with the new bridge directly ahead. [Google Streetview, April 2023]The view from the new bridge across the Ruisseau de la Garde of the old road. [Google Streetview, April 2023]The view Southwest along the D2204 in the 21st century. The old road can be seen on the right of the picture. [Google Streetview, April 2023]Further Northeast on the D2204 the verge of which would have carried the proposed tramway. [Google Streetview, April 2023]Again, further Northeast on the D2204 the verge of which would have carried the proposed tramway. [Google Streetview, April 2023]
At the hamlet of La Fuont-de-Jarrier, the tramway left the road and the valley to embark on a dedicated length of almost 4 km. Banaudo tells us that the route ran through “a landscape of arid hills where only pines managed to grow on ridges of gray marl. The only locality encountered was the village of Blausasc, below which a stopping point was to be established. The line continued northwards, passing through a small tunnel at a place called La Blancarde, to join the road approaching the Col de Nice.” [1: p76]
La Fuont-de-Jarrier was the point at which the proposed tramway diverted from the highway. The formation intended for the tramway became the base for the new CD 321. The new road is that shown leaving the established road to the right on the 1955 IGN map extract. [29]The junction between the D2204 and the CD321 in the 21st century. The CD321 follows the formation of the intended tramway to L’Escarène. [Google Streetview, April 2023]The next length of the CD321. [30]Over the first few kilometres, the carriageway was wide enough for two full lanes of traffic. [Google Streetview, March 2023]A further length of the CD321 with Blausasc above the road to the East. [31]The CD321 continues to follow the planned route of the tramway. This rock cutting was cut for the tramway. The location is at the bottom of the twin maps above. [Google Streetview, March 2023]The tramway route (CD321) runs ahead and bears to the right. The road which crosses the route at this location is the D221. [Google Streetview, March 2023]The red line marks the route of the CD321 which is built on the formation of the proposed tramway. The road crossing it at the staggered junction seen here is the D221 which linked Blausasc to the Route de la Col de Nice. [Google Earth, December 2023]Looking North-northwest along the CD321 towards the top of the twin map extracts above. [Google Streetview, March 2023]This next set of two parallel map extracts from the IGN show the Route de la Col de Nice marked by two heavy bold lines and the CD321 above it to the East. [32]
This next sequence of photographs show the road (CD321) running from the bottom of the twin extracts above towards the tunnel which can just about be picked out on the modern map extract above.
This sequence of four images shows the CD321 in the 21st century. Over this length, no attempt to widen the formation built for the intended tramway has been made. Retaining walls, where they exist, will most probably be those constructed by the contractors developing the tramway route. [Google Streetview, March 2023]An enlarged dual map extract of the area at the top-left of the last twin map extracts from the IGN. Both this, and the last pair of extracts show, on the right-hand, modern extract, the tunnel bored for, but never used by, the planned tramway which is, however, now used by the CD 321 in the 21st century. [34]
This next sequence of three photographs show the CD321 in the vicinity of the tunnel built for the planned tramway.
These three photographs show the Route de Blausasc (the CD321) passing through the old tramway tunnel. [Google Streetview, March 2023]Another set of twin map extracts from 1955 and the 21st century provided by the IGN. This pair of images provides the reason for the separation of the planned tramway route from the older Route de la Col de Nice. The hairpin-bends shown centre left on each of the images meant that the road would have been completely unsuitable for use by trams. Track curvature and gradient would have been insurmountable obstacles. To the North of the hairpin-bends, both routes converge. [33]The Col de Nice was the high point in the proposed tramway. The Route de la Col de Nice and the planned tramway met just to the South of the Col de Nice. [35]
North of the tramway tunnel, the last kilometre or so of the CD321 and hence the last length of the independent tramway formation required the construction of a series of retaining walls. These next few photographs illustrate the size of the task undertaken by the contractors in the early 20th century. The four photos follow the Route de Blausasc North towards its junction with the Route de la Col de Nice.
These four photos follow the CD321 North, each shows the size of the retaining structures built for the tramway. [Google Streetview, April 2023]
A few hundred metres before its junction with the D2204, the CD321 runs parallel to it with the two roads gradually reaching the same height above sea level.
The D2204 and the CD321 run parallel with no more than a few metres height difference. [Google Streetview, April 2023]The planned tramway, now the Route de Blausasc (CD321) meets the D2204 just short of the Col de Nice. [Google Streetview, April 2023]The Col de Nice in the 21st century. [Google Streetview, April 2023]
Banaudo talks of the tramway running in a cutting below and to the right of the road and then reaching L’Escarène at the end of a steep descent. [1: p76]
This final example of the parallel imagery provided by the IGN shows the D2204 (Rue de Chateau) running down into L’Escarène.
In the first instance, the tramway would have been within the width of the modern highway, but as shown below it did run below and to the right of the road on its way down into L’Escarène.
The view along Rue du Chateau, L’Escarène from the Col de Nice. The tramway formation ran on the right side of the road. [Google Streetview, April 2023]Heading down into L’Escarène evidence can be seen of the prepared tramway route to the right of, and just below, the highway. [Google Streetview, March 2023]The separated tramway route, metalled, runs to the right of, and below, the Rue du Chateau much of the way down into the centre of L’Escarène. [Google Streetview, March 2023]Closing in on the centre of L’Escarène, the proper tramway would have been within the width of the modern highway. [Google Streetview, March 2023]
I have not been able to establish the location in L’Escarène planned for the terminus of the tramway.
This article completes a series of articles about the early 20th century metre-gauge tramways and railways of Nice and its hinterland. Perhaps the next series of articles centred on Nice will look at the standard-gauge line between Nice and Cuneo? ……
References
Jose Banaudo; Nice au fil du Tram: Volume 2: Les Hommes et Les Techniques; Les Editions du Cabri, 2005.
The TNL (Tramways de Nice et du Littoral) had four lines which ran some distance inland from the coast. Three ran out from Nice, serving: Levens, Bendejun, and La-Grave-de-Peille. All followed valleys of the Paillon and its tributaries. As well as the line to La-Grave-de-Peille, the line to Contes and Bendejun was to have had another Branch to l’Escarene. Major work was undertaken on that line but it was never brought into use.
The fourth significant line operated by the TNL ran from Menton to Sospel. This line required some significant feats of engineering. The featured image above (public domain) shows one of the structures on this line.
You will find earlier articles about two of these lines on this website. They can be found by following these links:
Levens
Two earlier articles, the second of which involves some flights of fancy on my part – looking at a possible alternative routes for the tramway. As we will see below, those thoughts are not without merit given the discussions which took place around the best way for the tram network to serve Levens village.
Bendejun and La-Grave-de-Peille will be covered in a future article. This article focusses on updating earlier articles about the tramways between Nice and Levens, and between Menton and Sospel. ……
Further notes on the Nice to Levens Tramway
The full length of the line from Place Masséna to Levens was just over 23 km of which a little less than 6km were part of Nice’s urban network (between Place Masséna and St. André).
Apart from the articles mentioned above, the first 6 km are covered in another, recent article (which also covers a number of lines which were part of Nice’s urban network), and can be read by following this link:
These new notes are based around a section of José Banaudo’s French text: ‘Nice au fils de Tram, Volume 2: Les Hommes, Les Techniques‘ [1] Direct quotes are referenced.
In the main, the length of the line covered here is that from St. André to Levens (as built), and a section just over 1km in length which would have served the centre of Levens, Levens-Village but which was not completed because of the advent of WW1.
There was, however, a short length of tramway used by the Levens trams which did not follow the route of the urban trams to St. André. This detour followed the left bank of the River Paillon through Place Garibaldi, Rue de la République then Rue Barla and the Barla bridge, before rejoining the urban line of St. André on the right bank.
In addition, we need to note the significant impact of bad weather in the construction of the line in the area now known as ‘Pasteur’. Banaudo speaks of very significant storms during the winter 1907-1908. In particular, storms occurred on: 29th September; 3rd, 15th and 30th October; 3rd November; 10th and 27th December. Eventually work could recommence on 20th January and was finished on 27th March. Banaudo comments that “The additional work and necessary consolidations of the Paillon embankment ultimately increased the cost of the first construction contract for the Nice – Levens line by a third, compared to initial forecasts.” [1: p66]
Banaudo tells us that the maximum gradient on the whole line was 63mm/m and that less than 2 km of the line were level, having no gradient. At Place Masséna the line was only 9 metres above sea level, at Levens it reached 538 metres above sea level. [1: p62]
The St. André tram stop was the terminus of urban services. Banaudo tells us that “Beyond St. André, the tramway went up the valley of the Banquière or Gahre, right bank tributary of Paillon. It passed several caves and two mills nestled at the bottom of deep gorges between the heights of Falicon and L’Ahadie. Upstream of the Tinon bridge, the pass became so narrow that the tramway, hitherto on the shoulder, had to be embedded in the roadway with which it crossed the valley on several occasions. After the place called Les Clues, the valley widened a little and a tram stop served the hamlet of Moulin-de-Tourrette.” [1: p62]
Les Gorges de St. André de la Roche looking South towards Nice. The tramway can be seen on the right of the road. This image was shared on the Comte de Nice et son Histoire Facebook Group by Roland Coccoli on 26th September 2023. [6]The tight Gorges de St. André looking towards Tourrette-Levens. The tramway is on the left of the road. This image was shared on the Comte de Nice et son Histoire Facebook Group by Alain Nissim on 3rd October 2022. [7]
From this point trams followed their own route a little removed from the main road for about 3 km, “punctuated by the curved Rio-Sec Viaduct and a short tunnel. The route overlooked the road, moved away from it, then finally rejoined it at the foot of the old village of Tourrette-Levens, renowned for its ancient castle. This locality, the most important encountered on the route. was served by a station established in the Quartier du Plan,” [1: p62] at the foot of the road serving the old village.
As noted above, a sequence of photographs of this separated tram route can be found here. [5]
Beyond Tourrette Levens, trams continued to climb through the Western slopes of the Mont Ferion range, “the line encountered two other passing places: at a place called Lava where a siding allowed wood to be loaded, and at the hamlet of Ste. Claire. The highest point of the line was reached on the plateau which forms the Grands Prés de Levens where festivals, sporting events and horse races are organized. The Levens terminus was located at a place called Les Traverses, where a wooden building housed a buffet enjoyed by travellers before the final climb on foot” [1: p62] to the village of Levens which is perched on a hillock at an altitude of 570 m above sea-level. “A superb site with both a Mediterranean and alpine appearance with the high peaks of the Vésubie valley in the background. In order to get closer to the center, a steep ramp extension including a curved line on its own site was undertaken to reach the current Lov Roux esplanade at the entrance to the village. Unfortunately, the war interrupted the work and this extension was never put into service.” [1: p62] Some further notes about the planned extension can be found after the review of key structures on the route.
Structures on the route included:
A. the Garibaldi and Barla bridges over the River Paillon (each made up of three cast iron arches);
This anonymous photograph (perhaps by Jean Walburg de Bray, 1839-1901), shows the Garibaldi Bridge and the right bank of the River Paillon. The view looks from southeast to northwest and is dated 1877. [2]
Three views of Pont Barla over the River Paillon in Nice, one even has a tram travelling over it! [3]
15th April 1912 – the line from Villa Caserta to Sospel was opened to passengers and the short branch to the PLM Station in Menton was closed.
B. the Tinon, Falicon and Clues bridges over the River Banquière (each a single masonry arch);
This extract from Google Maps shows the length of the M19 (Route de Levens) as it appears in November 2023. This area has experienced what might be termed some ‘remodeling’ as the quarrying works have expanded. The numbers superimposed on the satellite image are: 1: the location of an old road bridge across the River Banquière which also carried the tramway, referred to by José Banaudo as the bridge at Falicon; 2: the location of another old bridge spanning the river which, I believe, is that referred to by Banaudo as the bridge at Les Cles; 3: the present route of the M19 which appears to have once been the line of the old tramway; the line of the M19 before quarrying work expanded. The locations ‘1’ and ‘2’ are down in more detail below. The routes of the M19 denoted ‘3’ and ‘4’ are further illustrated by the map immediately below. [Google Maps, November 2023]An extract from the mapping of http://www.mapsof.net. Location ‘1’ on the satellite image is bottom-right in this image. A narrow older road is shown and the bridge over the Banquière is hidden by the symbol for the Grottoes de Saint Andre de la Roche. The old tram route then followed the north bank of the river along the route indicated by grey/white dashes. It appears that the M19 ran to the North of this as shown and rejoined the valley of the river via two hairpin bends. The second bridge is at the top-left under the ‘M19’ indicator. [4]A closer view on Google Maps of the location of the Falicon Bridge Location ‘1’ above. The new road bridge can easily be made out. The older bridge sits to the right of the Route de Levens close to the word ‘Services’. [Google Maps, November 2023]Looking Southeast from the abutment of the new bridge at the location of the old structure. [Google Streetview, November 2022]This is location ‘2’ above. One of the hairpin bends on the older M19 stands guard over the arch bridge which carried the older road over the River Banquière. The modern bridge is to its left. I think this is the bridge referred to by Banaudo as the bridge at Les Cles. [Google Maps, November 2023]Looking from the hairpin bend in the image above across the old arch bridge. [Google Streetview, October 2022]The next section of the M19 heading North. It crosses the River Banquière close to ‘A’ at the bottom of this extract from Google Maps, and again at D’. At location ‘A’ there is an older bridge across the Banquière which is probably the bridge referred to by Banaudo as the Tinon Bridge. This location is shown below.
Banaudo tells us that the tramway was remote from the main road on its own formation over this length for around 3 km “punctuated by the curved Rio-Sec Viaduct and a short tunnel.” [1: p62] That length of tramway commences at ‘C’ and continues through ‘E’ and onwards to Tourette-Levens. Some details of that length appear below but a fuller series of photographs can be found at https://rogerfarnworth.com/2018/03/20/the-nice-to-levens-tramway-part-1-chemins-de-fer-de-provence-54.Location ‘A’ showing the modern M19 and the older road bridge over the Banquière. [Google Streetview, April 2023]At location ‘C’ the tramway separated from the road and followed its own route to ‘E’. [Google Streetview, April 2023]Looking South at ‘E’ the old tramway rejoined the M19 but only for a very short distance. [Google Streetview, April 2023]
C. the Rio-Sec Viaduct (a single curved masonry arch) and the Moulins tunnel (40 m) which were on an independent formation a short distance to the East of the M19;
The Rio-Sec Viaduct curves round the East side of the area marked ‘P’ for Parking. The Tunnel des Moulins is the shaded length of road to the North of the parking area. [Google Maps, 2018]Almost as soon as trams began running alongside the road again, they separated onto their own route once more. This dedicated formation took trams over the Viaduc de Rio-Sec and through the Moulins tunnel. [Google Streetview, April 2023]The Rio-Sec Viaduct, seen from the East. [Google Streetview, 2018The Tramway formation over the Rio-Sec Viaduct. [Google Streetview]The approach to the Moulins tunnel over the Rio-Sec Viaduct. [Google Streetview, 2018]The Moulins Tunnel South portal. [Google Streetview, 2018]
D. the Levens tunnel (95 m, on the section built but not opened and now in use as a vehicular route into the centre of the village).
Some further observations ……..
Banaudo tells us that the process of agreeing the TNL tramway route serving Levens was different than for other routes (which were primarily dictated by the terrain and the orientation of the valleys). Early studies led to some elected officials recommending “linking Nice to St. Martin-Vésubie via the traditional stagecoach route via Tourrette, Levens, Duranus and St. Jean-la-Rivière.” [1: p66] When the project took shape in 1904, three routes were considered:
One extended the Cimiez line in the direction of Rimiez, L’Aire St. Michel, and Gairaut, from where it skirted the Mont Chauve massif to the west to serve the hilltop villages of Aspremont, Castagniers and St. Blaise, before arriving at Levens. This extremely picturesque cornice route would have served a well-populated area, but the travel time to Levens would have been prohibitive.
Another left the Paillon valley in St. André and climbed in switchbacks to the village of Falicon, then it joined the previous route in Gairaut. This route would have been even longer and more tortuous!
The last also left from St. André, but it went up the Gorges de la Banquière towards Tourrette, Ste. Claire and Levens. It served a smaller population than the previous ones, but had the advantage of being more direct route.
The third option was chosen and built between 1907 and 1909!
Banaudo continues to explain that the Compagnie du Sud [which ran the TAM tram network] applied for the concession of the Nice – Levens line, in the hope that, should an extension from Levens to St. Jean-la-Rivière be built it would connect with its own line in the Vésubie valley. But the chief engineer of bridges and roads decided to allocate the route to the TNL. His decision meant that the usage figures for the TNL network were reduced by this lightly populated route and as a result greater the line attracted greater subsidies from the State. [1: p66]
After the completion of construction in 1909, the commune of Levens lobbied for an extension into the village. Banaudo tells us that a route had already been considered by the Bridges and Roads Department which took the form of a long loop to keep gradients as low as possible. Initially a sizeable cutting was proposed which ultimately was superseded by a tunnel. [1: p66]
A contract was awarded and work started early in 1914. Work continued through to 1916-1917 slowed by the shortage of labour during the War. After the war, work restarted but disagreements over the financing of station facilities held up the works. Finally, the general council decided in 1926 to postpone the completion of the line and then, in 1929, proposed converting the route into a motorable road. It is in use as a road under traffic-light control in the 21st century. [1: p66]
Further notes on the Menton to Sospel line
Banaudo tells us that the total length of this line was close to 17.4 km of which the TNL saw the length from Place St. Roch along Rue Partouneaux to Villa-Caserta (2.4 km) and the short stub to Menton Railway Station (0.15 km) as part of its coastal network. The remaining length from Villa Caserta to Sospel (14.9 km) was deemed part of their departmental network. [1: p77]
This Baedeker map of Menton in the early 20th century (1902) has been annotated to show tram routes in red. The line from Monaco to Menton ran along Avenue Carno and Avenue Felix Faure. At Place St. Roch the line to Sospel left the coastal route and ran along Rue Partouneaux as far as Avenue de la Gare and then Northwest alongside the River Carei. A short branch left the line to serve the Railway Station, but was only in use for a few years. [21]
The line originated in Place Saint Roch and ran first along Rue Partouneaux.
Avenue Felix-Faure/Place St. Roch, Menton, looking Northeast. On the left we can see the waiting kiosk of the TNL tram urban lines. There is a tram waiting at the stop which will leave along Rue Partouneaux to the Careï valley which exits the photograph to the left. It will possibly stop at the Villa Caserta terminus, or it will continue towards Monti, Castllon, the valley of Bévéra and the Sospel terminus. This image was shared by Jean-Paul Bascul on the Monaco4Ever Facebook Group on 28th September 2023 (Collection privée J-Paul Bascoul). [15]Looking into Rur Partouneaux from Place St. Roch. The Hotel des Postes is visible at the first junction down Rue Partouneaux. Note that it has an extra storey in the modern image. [Google Streetview, April 2023] This view is surprisingly similar to an early 20th century view which can be found on the Maonaco4Ever Facebook page on this link: https://www.facebook.com/MentonDuPasseAuPresent/photos/a.635924896587645/904791879700944/?__cft__[0]=AZX5F8XW__jQPAyygfwvR03xmeAlwW_69beRs7RwlwE6xsjQfZ63F76O9fVpVPdM1BJs7Sko4cCH399fbkWwRbZM3L9NxeGF889CfcQ1_7n1krmUaygG3KAdo2h7ZHbuHUUryowX6X5bDwpFxz0OAGE5IBIgQ4UTuX_U-hOLi7R9JLmGRwSgl8bz-28sshkfnjk&__tn__=EH-R . [20]The view from close to Place St. Roch along Rue Partouneaux. The Hotel des Postes et Telegraphes is seen on the corner of the next junction. A tram travelling towards Les Jardins Biovès is seen immediately outside the building. [17]A similar view in April 2023. The building has the additional storey noted above. [Google Streetview, April 2023]Further Northwest along Rue Partouneaux. This old postcard view shows the road as it runs toward Les Jardins Biovès. The trees on the right of the road were Orange Trees. [18]This is the same location in the 21st century. Rue Partouneaux runs towards what were Les Jardins Biovès. [Google Streetview, October 2022]A tram leaving Rue Partnouneaux and about to turn North alongside Les Jardins Biovès. [19: p5]The same location in the 21st century. Rue Partouneaux is directly ahead of the camera. The old tramway curved round to the North. Its route approximated to the curved line of bollards. [Google Streetview, March 2023]
The maximum gradient on the line was 68mm/m, only 0.144 km of the line was on a level formation. The line started in Place St. Roch at 3 metres above sea level and reached a maximum altitude of 572 metres above sea level at the Castillon tunnel. In all, trams had to negotiate 482 curves as they travelled the line of which 143 had a radius less than 40m. [1: p77]
Over 75% of the route was independent of the road between Menton and Sospel, now the D2566/D2566A. With its tight curves, “its imposing structures and its stations with spacious buildings, the Menton – Sospel line appeared much like a real mountain railway. In this way, it was more similar to the daring branches of the TAM network than to the other TNL lines in the Nice hinterland which retained the appearance of urban tramways.” [1: p77]
Banaudo tells us that “the line was entirely single track. It met the coastal artery at a triangular connection on Place St. Roch, at the entrance to the old town of Menton. The tram left from the western branch of the triangle, along which a wooden kiosk housed travelers and company agents. Via Rue Partouneaux, trams accessed the Biovès public garden which occupies an esplanade created by covering the River Careï. At the top of Avenue de la Gare (today Verdun) there was a short branch of 147 m on a ramp of 40 mm/m which ended in a dead end at the entrance to the courtyard of Menton PLM station. [That branch] served as a terminus for urban shuttles from Place St. Roch.” [1: p77] The branch lineline was brief both in length and life since, “after only operating from 1903 to 1912, it was abandoned during the First World War.” [1: p77]
Immediately beyond the station branch, the tramway passed under the bridge of the PLM Nice – Ventimiglia line then continued up the right bank of the River Careï where there was a goods station. Banaudo says that, “the line passed at the foot of the L’Annonciade Hill, where a funicular served a hotel and a monastery.” [1: p77]
The Funiculaire de L’Annonciate served a hotel and Monetary at the summit of L’Annonciade Hill in 1919. The funicular railway opened in 1914 and closed circa. 1939. [8]
Continuing North, three passing-loops were provided at “Villa-Beau-Séjour, at the Gioan-Bosio property Ans at l’Octroi-due Careï. Soon after, “the Villa-Caserta tram stop marked the terminus of urban services. Upstream and downstream of this point, two dedicated branch lines allowed the Mercier and Gianotti companies to load materials to be sent to Sospel for the construction of the PLM Nice – Cuneo line.” [1: p77]
The route continued North along what is now the D2566 avoiding one tight bend by following its own course for approximately 450 metres. The hamlet of Monti had its own tram stop and was the location of a reinforced concrete viaduct which spanned both a ravine and the road. Pictures of this structure can be seen further down this article.
The tramstop and passing loop at Monti. [16]A similar location in 2023. Both views look South from a point just to the South of Viaduc de Monti. [Google Streetview, March 2023]
Now running on its own formation, the tramway climbed above the road for 2.3 km. Banaudo explains that the road climbed to meet the tramway “at the Ubac-Foran forest house. Arriving at a point where the valley narrows sharply and where the gradient becomes steeper, the track ran again on its own formation to span the road and the River Careï on the curved Careï viaduct, with five masonry arches.” [1:p77]
Over the River Careï the tramway continued climbing steeply in a Southeasterly direction to the location of the Caramel viaduct, “whose bold silhouette had already been visible for several minutes standing out against the mountainside. This major [structure] on the line had thirteen arches with a total length of 120 m, which were part of an omega-shaped loop below the road.” [1: p77] To the Northwest of the Viaduct, two dead-end tracks were provided, one to serve a quarry, the other to stop trams whose brakes had failed before they ran out onto the viaduct.
Continuing its ascent, the tramway again left the road and approached the bottom of the valley where the Castillon tram stop was located. “It was in a damp and isolated site below the village and the pass of the same name. A substation incorporated into the station building provided the line’s electrical supply. This was also the location of the southern portal of the 763 m tunnel under the Col de Castillon, the longest structure of this type drilled for a tramway in the Alpes-Maritimes.” [1: p77]
At its Northern portal, the tunnel opened into the green valley of Merlanson at an altitude of 572 m, the highest point on the TNL network. “From there, the line descended on its own formation for 4900 m on the right bank of the river. To the west stands Mount Barbonnet crowned with a fort while in the background, at the foot of the amphitheater formed by the mountains of the Authion massif, the Bévéra valley widens to form the basin where the town of Sospel is located.” [1: p77]
Approaching Sospel, the tramway ran under the embankment of the PLM Nice – Cuneo line then ended its journey at the entrance to the town where a station was built with a passenger and goods facilities and a motor shed. Banaudo tells us that during the years of construction of the PLM railway, “the track extended to the platform of the future PLM station, where the materials could be supplied by the Mercier and Gianotti companies.” [1:p77]
Sospel showing the tram stop/station centre-left and the PLM station top-right. This is an enlarged part of a photograph taken after the completion of the construction of the PLM railway line. It was shared on the Comte de Nice et son Histoire Facebook Group on 15th March 2017 by Pierre Richert. [12]Sospel tram station. This image was shared on the Comte de Nice et son Histoire Facebook Group by Roland Ciccoli on 11th September 2017. [13]TNL Tram No. 13 is heavily laden with bags of cement and in charge of a long load affixed to two short, flat wagons. The photograph is taken close to Sospel with the works underway on the PLM Nice to Cuneo line. [19: p6]
Key Dates
Banaudo provides details of dates relating to the life of the whole line. [1: p78] The more significant of these are: 1903 (the line between Place St. Roch and the PLM Railway Station was opened to traffic); 1911 (the route between Avenue de la Gare, Menton and Villa Caserta was opened); 1912 (a courier service between Menton and Sospel was opened); 1913 (the goods service between Menton and Sospel was inaugurated); 1923 (the new numbering system was put in place: No. 45 was given to the urban service between Menton and Villa Caserta; No. 46 TP the interurban service Menton to Sospel); 1927 (the urban service (No. 45) was extended to Route-de-Monti); 1931 (trams on Ligne No. 46 were replaced by buses and the tram service (Ligne No. 45) between Villa Caserta and Route de Monti ceased); January 1932 (trams on Ligne No 45 between Avenue de la Gare and Villa Caserta were replaced by a bus service); March 1932 (the remaining length of the line between Place St. Roch and Avenue de la Gare was closed). In the summer of 1933 the full length of the line was decommissioned.
The full service between Menton and Sospel was active for less than 20 years!
The Main Structures on the Line
These were: the Peïrola Ravine Bridge; the Monti Viaduct (1 concrete arch of 36 m, total length 79 m); the Ture Ravine bridge; the Pian Ravine Bridge; the Careï Viaduct (5 arches of 8 m); the Caramel viaduct (13 arches of 8 m, length 120 m); and the Castillon Tunnel (763 m).
Structurae.net provides a number of photographs of the Viaduc de Monti which remains standing in the 21st century. These images can be found here. [9]
Viaduc de Monti in the early 20th century, probably 1910. [10] Banaudo tells us that this was chosen from five design submissions. The structure was designed by François Hennebique was selected in 1907 by the deputy chief engineer Amaud who judged it to be the most economical (38,000 francs), the most advantageous and the most satisfactory in appearance. [1: p81]The Viaduc du Monti again. One of the very few times that steam was seen on TNL lines. We see the same consist at Viaduc du Caramel a little further down this article. [19: p7]A tram crosses Viaduc de Careï having run down the gradient from the Viaduct du Caramel which can be seen in the distance. The tramway can be seen running below the road on the left of this image.Viaduc de Careï seen from the hillside to the South. In the 21st century the viaduct looks very different as the D2566 has been widened and realigned. [11]A photograph from a similar location showing the way in which the valley has been remodelled, realigning and lifting the road, so that the piers of the viaduct seem much shorter. [Google Streetview, April 2023]This is an evocative photograph which pictures a small steam engine travelling up the Menton to Sospel tramway. The location is the Viaduc du Caramel and the photo is taken from the carriageway of what will become the D2566. The 0-6-0T locomotive is in-steam but the tram (TNL No. 13, which we have seen in an image earlier in this article) also has it supply pole raised and in contact with the overhead lines. It is positioned behind the locomotive presumably to give some tractive effort and perhaps also as a fail-safe needed because of the gradient of the line. The locomotive is being moved to work on the PLM railway line between Nice and Cuneo (Nice – Sospel – Breil-sur-Roya – Cuneo). [19: p4]A view of the Viaduc du Caramel in March 2023, taken from a similar position as the monochrome image above. [Google Streetview, March 2023]The approach to the Castillon Tunnel from the South in around 1920 with a tram heading for Menton. The hamlet of Castillon sits more than 130 metres above the tram stop. This image was shared on the Comte de Nice et son Histoire Facebook Group on 6th August 2021 by Alain Nissim. [14]A modern view of the old tramway tunnel. The original bore is on the right. The new bore is on the left. The modern road is the D2566A which follows the line of the old tramway. The works underway in March 2023 were still being undertaken in November 2023 when we followed the route by car on the way from Sospel to Nice. [Google Streetview, March 2023]The southern portal of Tunnel de Castillon (public domain). [22]A closer view of the southern portal of the old tunnel in 2023. [Google Streetview, March 2023]The northern portals of the two tunnels in 2023. [Google Streetview, March 2023.
The Tunnel de Castillon was an essential element of the scheme, the additional climb to the village would have required a significant series of loops either side of the pass and severe gradients. Structurae.net provides a number of photographs of the Tunnel which remains standing in the 21st century and is in use as a road tunnel. These images can be found here. [24]
Steep Gradients on the Menton to Sospel Tramwayand the wider tram network
Banaudo’s book has a short feature relating to the exceptional gradients on the Menton to Sospel line and throughout the TNL and TAM networks. [1: p81]
99% of the Monton to Sospel tramway was on a gradient. The average gradient between Menton and the summit of the line at the North end of the Tunnel de Castillon was 46mm/m over almost 12.4 km. This was unique in the Alpes-Maritimes and “assez exceptionelles (quite exceptional) en France.” [1: p81]
Over 7.7 km was graded between 46mm/m and 60 mm/m. 60 mm/m was specified as the steepest grade permitted, but during construction it became obvious that complying with the specification would unduly lengthen the line. Ultimately, the Department of Bridges and Roads permitted over 4.1 km to be built with steeper grades (between 61 and 68 mm/m), mainly in the Careï valley.
Banaudo points out that at “the same time, in Switzerland, Italy and Austria, such lines were put into service with vehicles equipped with specifically adapted traction and braking mechanisms, the Departement des Alpes-Maritimes and concessionaires (the TNL on Menton-Sospel and the Sud-France on the entire TAM network) did not seem to appreciate the level of risk involved in such operations.” [1: p81]
The TNL had been successfully running 168 hp bogie trams equipped with compressed air brakes on the Contes and Levens lines. However, trials on the Menton-Sospel line demonstrated that their electrical equipment could not sustain the stresses imposed by such long and steep gradients. “As soon as sustained effort was required, the entire circuit was at best overheated, the circuit breaker tripped and the fuses blew, the wheels of the trolleys could melt, the controller would start to smoke, and soldered connections could melt and cables ignite. It was therefore decided to modify these trams and equip them with more powerful motors. But pressure from the Departement to put the Sospel line into service, meant that the service was opened in the spring of 1912 with two standard type T2 passenger trams and one self-propelled goods van. These two-axle vehicles only had a power limit of 70 and 84 hp which did not even allow for the lightest of wagons to be towed. The handbrake was supplemented by (un freinage rheostatique) rheostaic braking. No air-brake was provided!” [1: p81]
Banaudo goes on to explain that, “The inadequacy of this equipment was tragically brought to light on 11th September 1912, when a train carrying gravel for finishing work on the line ran down the steepest slope: The handbrake was unable to hold it and the power pole separated from the overhead supply, rendering rheostatic braking inoperative. The convoy ended up derailing and crashing at the foot of the Monti viaduct, killing the driver and the conductor.” [1: p81]
Sadly, just two weeks later the first of the modified bogie power cars Nos. 214 to 216 entered service (on 23rd September 1912). These were equipped with “hand, air and rheostatic brakes, developing a power of 240 hp, these tramcars proved to be better adapted and could tow two passenger trailers or three goods wagons on the steepest slopes. In June 1913, two self-propelled goods vehicles were modified in the same way and moved to the Sospel line, which ensured regular freight traffic from summer onwards. A third ‘tracteur’ of a similar design was put into service the following year.” [1: p81]
In the meantime a derailment of a train on the TAM line between Cagnes-sur-Mer and Grasse occurred on 17th September 1913 at the Viaduc de Cloteirol near Villeneuve-Loubet. “This disaster caused many deaths and the commission formed following this accident to improve the safety of the departmental network covered all the lines, including that of Sospel on 29th January 1914. Following its conclusions, the Department of Bridges & Roads limited tram speeds to 16 km/h uphill and 12 km/h downhill as well as when crossing viaducts. Four safety stops were established for descending convoys at points located at the top of steep slopes: above the Viaduc du Caramel viaduct, at l’Ubac-Foran, above the Pont de Monti and at km 3,350 between this hamlet and the stop at Villa Caserta. The first two stops, where the tramway could leave and pick up passengers, were equipped with a point directing an out-of-control convoy into a dead-end siding with a strong contrary slope. … In Villa-Caserta, a similar device was provided to stop any runaway of vehicles parked at the terminus of the urban service.” [1:p81]
References
José Banaudo; Nice au fil de Tram, Volume 2: Les Hommes, Les Techniques; Les Editions de Cabri, Breil-sur-Roya, France, 2005.