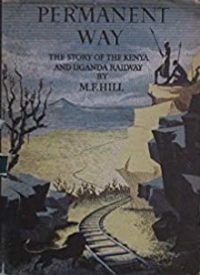
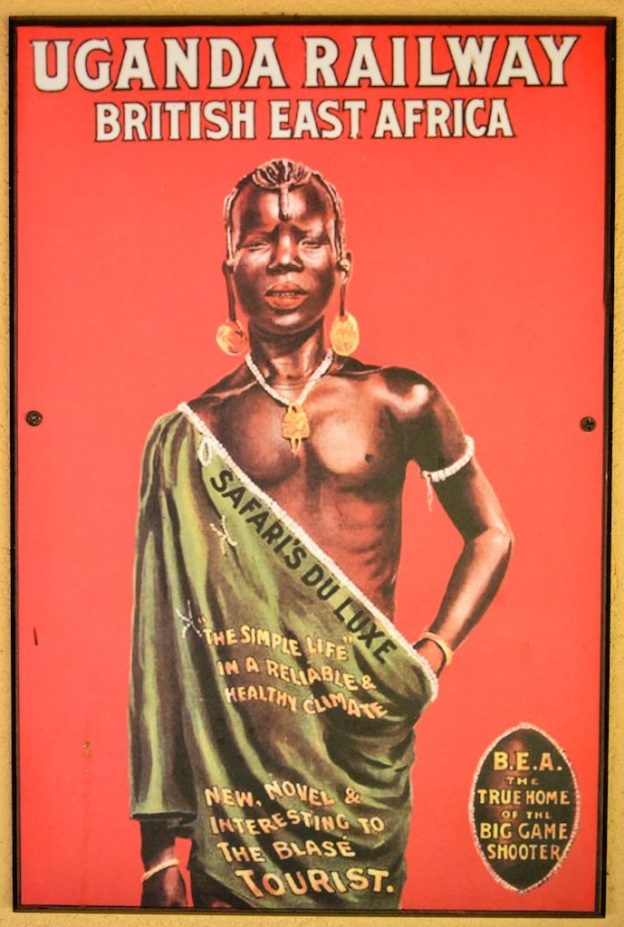
 I recently picked up a copy of each of the two volumes of ‘Permanent Way‘ written by M.F. Hill and published in 1949. The first volume [1] is a history of ‘The Uganda Railway’ written in the 1940s when the railway company was known as ‘The Kenya and Uganda Railways and Harbours’ and published at the end of that decade under the jurisdiction of the new ‘East African Railways and Harbours’ which was formed to formally include the infrastructure in the modern country of Tanzania.
Hill’s first volume provides a detailed history of the Uganda Railway until just after the end of World War II. This article covers the period between WW1 and WW2.
In the years immediately after WW1, further European settlement was encouraged and ‘European’ electoral areas were set up. By 1921, the Census revealed the European population of the EAP to be 9,651 and the Indian population to be 22,822. [1: p379]
No effective provision was made in the 1919 Ordinance which established the European franchise, for Indian elected representatives. This was a cause of Indian resentment [1: p379f] Changes in India led to a greater Indian interest in politics in what, in 1920, became the Kenya Colony. The annexation of the EAP took place in June 2020, only the area lease from the Sultan of Zanzibar were excluded (a 10 mile wide costal strip).
In addition to the Indian issue, political turmoil/controversy revolved round issues which had an ill-effect on the new colony’s economy. These included:
- the virtual bankruptcy of The Uganda Railway;
- the need for drastic reorganisation;
- the lack of aboriginal contribution to the colony’s economy – the native population was producing little of value on world markets;
- the Indian community had yet to make a net contribution to the economy of the Colony.
The number of ex-pat European farmers was only 1,339, most in financial difficulty because of lack of experience, falling prices and a “disastrous currency conversion.” [1: p381] …… The rising value of the Indian Rupee against the pound resulted in a dramatic increase in the sterling value of all local services and commodities. The European settler in 1919 received 850 rupees for £100 instead of the rate before the War of 1500 Rupees for £100. If the £3 million loan first discussed in 1913 had been raised in 1919 its value would have been a third less than in 1913. The farmer also received far fewer Rupees for his sterling exports – he had to sell twice as much produce to meet his liabilities. [1: p382]
After much debate and extensive negotiation the sterling value of the East African Rupee was fixed at 2 Shillings. This was relative parity with the Indian Rupee at the time, but within 6 months the exchange rate in India settled back to historic levels of around 15 Rupees to the pound. [2: p384f]
Settlers costs were as a result fixed at a very high level, their income was held down and then they had to watch as Government salaries were increased by 50% to maintain the value of salaries at an equivalent sterling value. All government related costs charged to settlers where increased by more than 50%. [1: p385f]
Pressure to revert to a conversion rate of 15 Rupees to the pound was resisted by HM Government, the 2 Shilling (Florin) of the Rupee was maintained. However, a local review highlighted a need to create a lower standard denomination and this was eventually accepted. The order came into force on 1sr January 1922 and the Shilling became the standard currency its value set at 20 Shillings to one pound sterling. [1: p388]
The new currency maintained the high exchange rate and as a result local costs had to be reduced. Native labour lost 33% of the increase which came from the high exchange rate although, in practice, this meant that their buying power returned to historic levels.
Hill comments that another effect was the greater pressure placed on the aboriginal/indigenous populations in the reserves to take up paid employment outside the reserves. The terms on which this occured were seen by Mission Societies and the Aboriginal Protection Society. Hill says that this was an ill-informed response, however the parallel scheme in Uganda was more onorous. “In Uganda a native could be called out to work, by compulsion and with no pay, for thirty days a year,band for a greater variety of communal purposes than in Kenya.” [1: p392]
Hill says that by 1920, Kenya was planning to extend the line across the Uasin-Gishu Plateau towards Uganda and the Thika Line to Nyeri. The lack of local labour resulted in the Kenyan authorities it arrangements for forced labour into line with Uganda which inevitably drew more criticism. [1: p392]
Hill tells of a significant debate over the relative merits of the settler’s need for labour and the protection of the rights of indigenous labourers. By 1921, Winston Churchill, who had just inherited the role of Secretary of State ensured that the Kenyan Government would only use forced labour when it was absolutely necessary. In 1922, this became a statute at the time when it also became a requirement to seek HM Government approval for the use of compulsory labour. In 1923, Uganda followed suit. [1: p393]
Between 1919 and 1939, compulsory labour was only once called upon to work for the State. “In 1925 the Secretary of State agreed that compulsory labour should be employed on the extension of the Uasin Gishu Railway and on the line from Thika to Nyeri. In each case the need was urgent, because construction was severely retarded – with heavy financial loss – by a lack of labour. The largest number of compulsory labour employed in any one month was 1,500 on the Uasin Gishu line and 1,300 on the Thika-Nyeri line.” [1: p394]
Hill notes that as of the end of March 1920 the outstanding grant and loan balances available to improve the railway were £1,301,033. The settlement of the rupee-shilling conversion in 1921 enabled the colony to raise a loan of £5 million of which over £4.2 million was designated for use on the railway.
In May 1921 it was decided at a meeting in London that the financial year of the Kenya Colony should become the same as the calendar year.
Over the next few years, the recall of the Military Governor, Sir Edward Northey, led to a significant change in direction for the colony. Northey had worked to the dictum that European interests were paramount and that Indian interests should not be ignored [1: p397ff] The new commitment of HM Government is described by Hill, quoting from the Devonshire White Paper: [2]
“The general policy underlying any decision that may be taken on the questions at issue must first be determined. It is a matter for satisfaction that, however irreconcilable the views of the European and Indian communities in Kenya on many points may be, there is one point on which both are agreed, namely, the importance of safeguarding the interests of the African natives. …” [1: p399]
 This policy change was significant. Hill says that HM Government now regarded “themselves as exercising a trust on behalf of the African population, … the object of which may be defined as the protection and advancement of the native races.” [1: p400]
Whether Hill interprets the situation correctly may be open to interpretation, certainly the Wikipedia article about the White Paper suggests a slightly different motivation. [2] However, it does seem to be the case that the net result was Kenya avoiding the route that was pursued in South Africa and Southern Rhodesia. [2]
Returning to focus more directly on The Uganda Railway. … The Working Profit of the Railway, even when enhanced by some creative accounting was much lower immediately after WW1 than in earlier years. The figures from within Hill’s account are:
1919-1920 £62,582 [1: p402]
1920-1921 £155,916 [1: p404]
1921 £15,883 [1: p407] – only 9 months and in the midst of a worldwide depression.
1922 £56,785 [1: p436]
1923 £300,910 [1: p439]
34 No. ‘G’ Class locomotives were delivered by the North British Locomotive Co. and 17 of these were in service by the end of March 1920. At that time, two more were on order from Nasmyth, Wilson & Co. Ltd. A daily service once again became possible along the full line. However, of the 36 new locomotives, 21 were intended for the Magadi Line traffic. [1: p402]
It was as late as 1st April 1921 that the Secretary of State finally rules that the working profit of the railway was no longer to be regarded as available for general colonial revenue purposes and that any surplus generated was to be used:
- first, for renewals, upkeep and betterment of the railway;
- second, for meeting loan charges on future development costs;
- third, for a reduction in railway rates. [1: p404]
 Hill notes that the general improvement in the economy brought significant pressure to bear on the railway – the numbers of engines, carriages and goods wagons available for use was short, it seemed, on what demand required. Despite night-shift working in the maintenance facilities, 24 engines were in the year awaiting overhaul in August 1920. [1: p405] These problems were mitigated by using 17 locomotives and 108 covered wagons intended for the Magadi Line, as anticipated traffic did not arise from the Soda Works until 1921. [1: p406]
At the end of 1920, Lieut.-Colonel F.D. Hammond was appointed by the Secretary of State as Special Commissioner for Railways, Eastern Africa. He arrived in Kenya on 20th January 2021 and left on 24th August 2021 after completing his tour of investigation. His report brought about a new era in the history of The Uganda Railway [1: p409,410]
Meanwhile, Hill writes, there was a significant debate being played out over the route of the Uasin0Gishu Line. An argument had been put forward for a revised alignment which left the existing main line on the Mau Plateau rather than at Nakuru. There would have been significant initial cost savings if proponents of this route were to prevail. However, given the increasing levels of traffic from Uganda, major improvements on the existing line between Nakuru and Mau Summit would inevitably be necessary in the relative near future. The ruling grade would have needed to be improved from 2% to 1.5% and concomitant improvements to structures would also be required if transportation costs were to be kept as low as possible. The originally surveyed route from Nakuru would, while costing more initially, would result in lower transportation costs. [1: p410-414]
Hill comments: “There is no doubt that the conclusion reached … in favour of the Nakuru route was sound, although much of the financial argument could not be sustained. … The line took far longer to build than was expected, it proved exceedingly expensive and, during the building, there was persistent friction between … the Chief Engineer … and the senior representative in Kenya of the contractors.! [1: p141]
Hammond, says Hill, reported in May 1921 that he was in full agreement with the Nakuru route “being economically the proper one to choose.” [1: p415] He strongly urged acceptance of that route. Hill goes on to say that while this debate was raging, “Hammond was devising a plan for the complete reorganisation of the railway.” [1: p415]
A new ‘Inter-Colonial Railway Council’ was set up with terms of reference provided by Lord Milner, the Secretary of State, which made that Council the effective administration authroity for the railway and all auxiliary services. Hill says that they were “to be administered as a single instrument for the benefit of Kenya and Uganda by a body of men who, with the expection of the Chairman (Hammond was in the Chair at first) were unlikely to have much experience of railway policy or practice.” [1: p419]
When Hammond left Kenya in August 1921 the position of General Manager of the railway was decreed by the Secretary of State as including the role of Chair of the Council. [1: p422]
Hill goes on to discuss the Hammond report – the main points raised were that there:
- had been gross inefficiencies in freight transport – goods from Kisumu to Mombasa were taking close to 8 days to travel a distance for which the working timetables allowed 2.5 days. Goods from Mombasa to Nairobi were taking as much as 12.5 days to cover the scheduled running time of 1.33 days. Hammond estimated that the efficient running of the network would result in an 11% surplus capacity with the existing availability of goods wagons at the heaviest envisaged traffic levels (including for Magadi’s output). [1: p422-423]
- was a need for a marked improvement of the telegraph system to ensure safe operating of the railway; [1: p 423]
- was a need a better cleaning regime, particularly of passenger stock; [1: p 423]
- was too much centralisation of maintenance and no progress in developing maintenance facilities, particularly for locomotives; [1: p 423-424]
- were huge stocks of coal; [1: p 424]
- was major work required to maintain/replace machinery in teh worskshops; [1: p 424]
- were ineffective financial controls in the workshops and in the Chief Mechanical Engineer’s Department; [1: p 424]
- was a major need for investment in replacement of time served timber buildings; [1: p 424-425]
- was undue pressure on the General Manager from the Protectorate Government to minimise expenditure on the railway; [1: p 425]
- was no programme for replacement of railway structures. Although properly maintained, structures would not be adequate for the axle loads of the next generation of locomotives; [1: p 426]
- was an over-provision of steamers on the Lakes with no possibility of sale to others; [1: p 426]
- was no possibility of improving the capacity of Lakes steamers as Kisumu Port could not be developed to accommodate ships with a greater draught; [1: p 426-427]
- were significant losses on the Busoga Railway and the Port Bell-Kampala line caused by a failure of the Railway to properly credit income to those lines. Thos losses were then being born by the Uganda Government; [1: p 427]
- was a need to focus on generating traffic from Uganda and the Belgian Congo [1: p427]
- was work to do to address expensive, slow and cumbersome systems in the Stores and Accounts Departments.
- were too many staff drawn from India rather than from a wider pool and very little intention to employ local staff to do anything other than manual roles. [1: p427] This meant that the railway was entirely dependent on the economic and political circumstances which might arise in India. [1: p428]
- had been a failure over 20 years to train local technical staff especially when compared to the situation pertaining in Tanganyika which had been in the German sphere of influence. [1: p428]
Hammond placed the highest priority for action on creating a comprehensive technical training scheme for local staff. He proposed the diversion of capital from the £300,000 fund set aside for the provision of additional rolling stock.
He instituted, with Railway Council agreement, a new goods tarrif system which focussed on maximising revenue. It had a tapering system of rates dependent on volumes carried and a far simpler classification of goods. The system was uniform across the network and ensured that “no transport be done at less than cost price.”[1: p429]
He also insisted that the General Manager should place a high priority on public relations and must “be directly represented on Chambers of Commerce and other local associations.” [1: p429]
Hammond estimated that the required annual contribution to a Renewals Fund should be around £280,000 and that there should also be:
- a three-year programme to replace worn out plant/machinery at a cost of about £24,000/annum; and
- a five-year programme of building replacement costing £112,000/annum. [1: p 430]
He emphasised the paramount importance of separating colony and railway finances, and suggested that capital costs for the development of the railway were for the colony to bear, withe the railway being tasked with the operating of the network. [1: p431]
Hammond also stipulated that, to ensure fair-dealing with Uganda, Kenya and Uganda should be placed under one Governor-General or High Commissioner to whom the railway would be responsible. [1: p432]
As a final matter, he looked into the status of the Voi-Kahe branch built during WW1. His recommendation was that “the last 57 miles of track at the Modi end of the Tanga line be picked up and used for the betterment of the costal section [in Tanganyika] and that the Voi-Kahe line be retained, regraded and realigned. He considered that the cost of the reconstruction of the Voi-Kahe line should fall upon Tanganyika as the chief benefactor, and he devised a financial arrangement whereby the Territory would bear all loss and collect all profit derived from the line. [1: p433]
Implementation of Hammond’s report was delayed by political issues. There was major controversy over the probable impact of his recommendations and implementation was delayed “pending further negotiations and discussions.” [1: p434]
The railway concentrated on reform of its own administration. The Railway Council pressed for urgent action where economies could be immediately effected. [1: p434-435]
In January 1922, the Council considered the reduction of coal stocks. It decided that the General Manager had acted in the best interests of the railway in purchasing the coal but considered that the information given to him “as to the state of the home markets at the time in question left much to be desired.” [1: p435] It was resolved to sell surplus coal stocks at the best prices obtainable.
At the end of 1922, a new General Manager was appointed. Within 3weeks or arriving, C. L. N. Felling, ” had devised a scheme for the control of the railway. It was discussed for nearly two years, but the eventual Order in Council differed little from Felling’s original draft. [1: p435]
After considerable debate, a final decision over the Voi- Moshi line was made. It was resolved to keep the line open. [1: p437-439] “Within a few years the line was paying its way, and it later became the first section of any railway in British Africa where the engines were driven by Africans, who also provided the bulk of the signal and station staff.” [1: p439]
At the end of 1923, the General Manager’s report announced a significant programme of new construction which included the extension of the Uasin-Gishu line to meet the Busoga Railway in Uganda. “Considerable extensions and improvements to the mechanical workshops were carried out during the year and the repair of locomotives … was up to date. During 1823, thirty-seven engines were thoroughly overhauled, five were scrapped, … and twenty new engines were erected.” [1: p441]
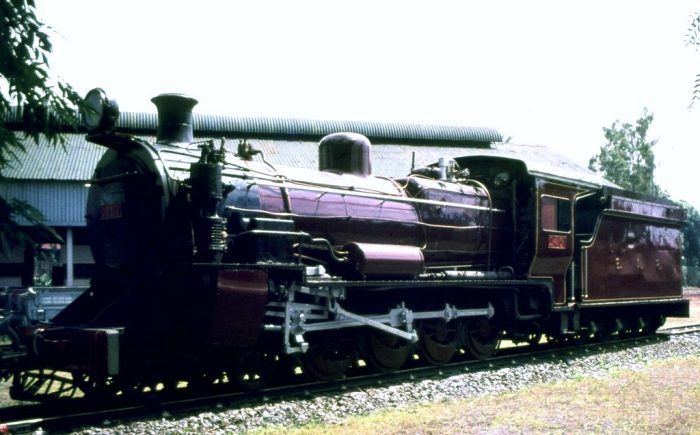
A Uganda Railway GD Class 4-8-0 Locomotive. The first of these was built in 1923 by the Vulcan Foundry of Nasmyth, Wilson and Co. They were numbered 162 to 217 and layer became Class 24 Locomotives as The Uganda Railway developed. [6]
Hill comments: “Within a year, Christian Felling had created an amazing improvement in the working of the railway. The financial position and prospect had changed for the better beyond the most optimistic prediction. It was only the start of great achievement: in the next 4 years he was to transform the railway and it’s finances.” [1: p442]
References
- M.F. Hill; Permanent Way – The Story of the Kenya and Uganda Railway – Volume 1; Hazel, Watson & Viney Ltd, Aylesbury & London, 1949.
- Wikipedia notes: This document was intended to create “a compromise between Indian interests and those of the Europeans, despite its affirmation of African paramountcy. [3] Nevertheless, the Paper allowed for the (slow) improvement of African conditions, such as the establishment of technical schools for Africans by a 1924 Education Ordinance, as well as the appointment of Eliud Mathu to the Legislative Council, the first African to hold a seat. It also allowed for the formation of an African party, the Kikuyu Central Association, which presented African grievances to the colonial government. Although the Indians were prevented from settling in the White Highlands, they were granted five seats on the Legislative Council and immigration restrictions imposed on them by the white settlers were removed. [4] The White Paper was used by the British government to retain control over the Kenya Colony, and is cited as one reason why Kenya did not develop as a white minority ruled country, as South Africa and Southern Rhodesia did.” [5] https://en.wikipedia.org/wiki/Devonshire_White_Paper; accessed on 3rd January 2021.
- Robert M. Maxon; The Devonshire Declaration: The Myth of Missionary Intervention; History in Africa Volume 18,1991, p259–270.
- History and Government Form 2 Teachers Guide. East African Publishers. p91–92
- Robert M. Maxon; Struggle for Kenya: The Loss and Reassertion of Imperial Initiative, 1912-1923. Fairleigh Dickinson Univ Press, 1993, p270–279.
- https://en.m.wikipedia.org/wiki/UR_GD_class, accessed on 8th January 2021.


 By meeting with Christ, we begin to understand God as Father, Son and Holy Spirit – but more than that – we are challenged to move out with hope into our world, believing that God’s kingdom in Jesus is all that other’s really need, looking to bring that kingdom into being, looking for the signs of God’s presence in the world around us. Longing to serve our Lord, longing to be changed still more. Longing to be Transfigured in our encounter with Jesus.
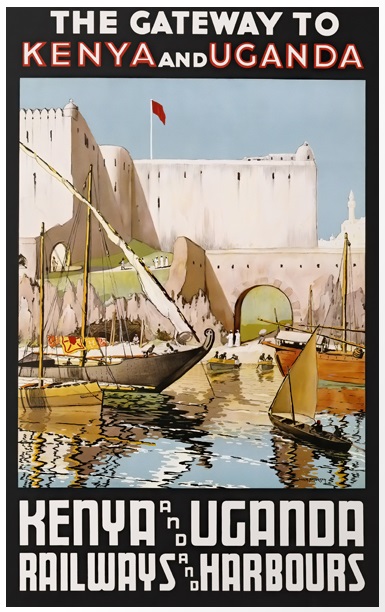


kur.gif)


