
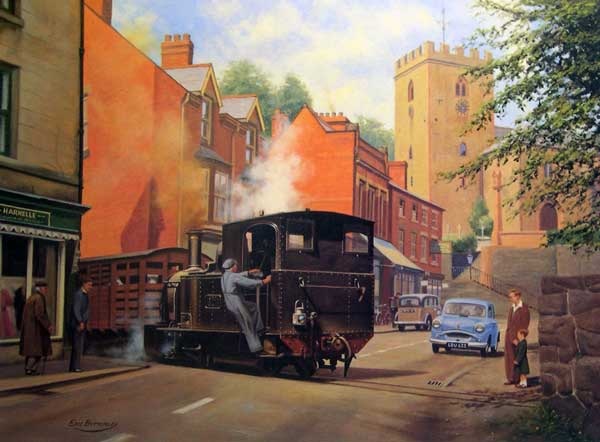
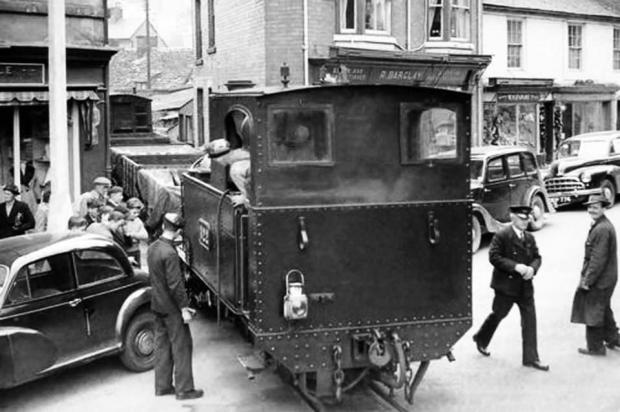
The featured image above is of a painting by Eric Bottomley. The artist comments: “Nearing the end of BR operations in 1956, Beyer Peacock 0-6-0T No. 823 (The Countess) crosses Church Street, Welshpool with a cattle train.” A print can be purchased here. [7]
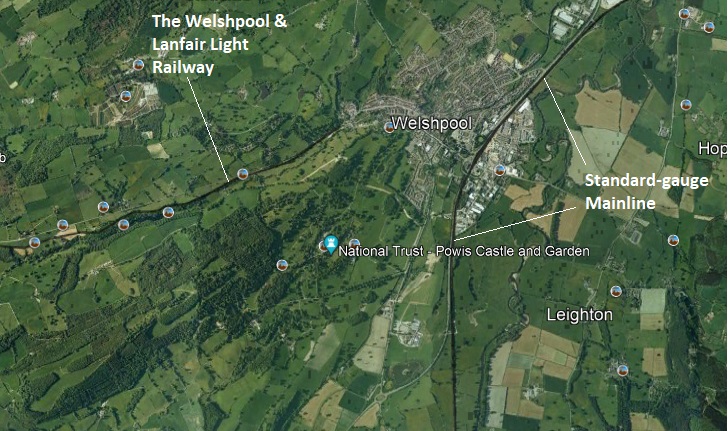
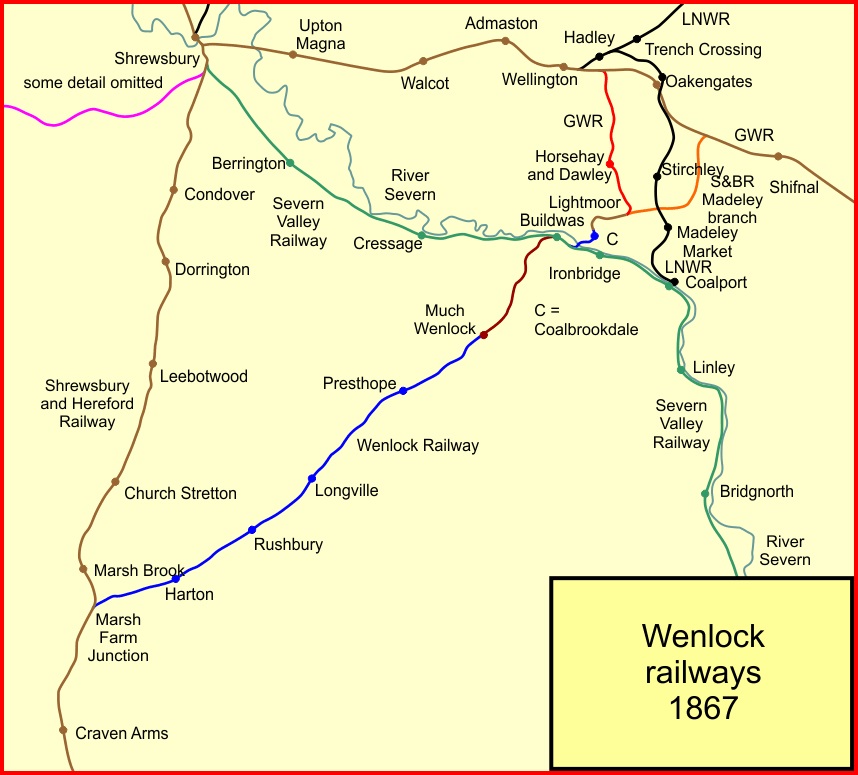
The Welshpool & Llanfair Light Railway (W&LLR) [1] is a 2 ft 6 in (762 mm) narrow gauge heritage railway in Powys, Wales. The line is about 8.5 miles (13.7 km) long and runs eastwards from the village of Llanfair Caereinion via Castle Caereinion to the town of Welshpool. The headquarters of the line are at Llanfair Caereinion. [2]
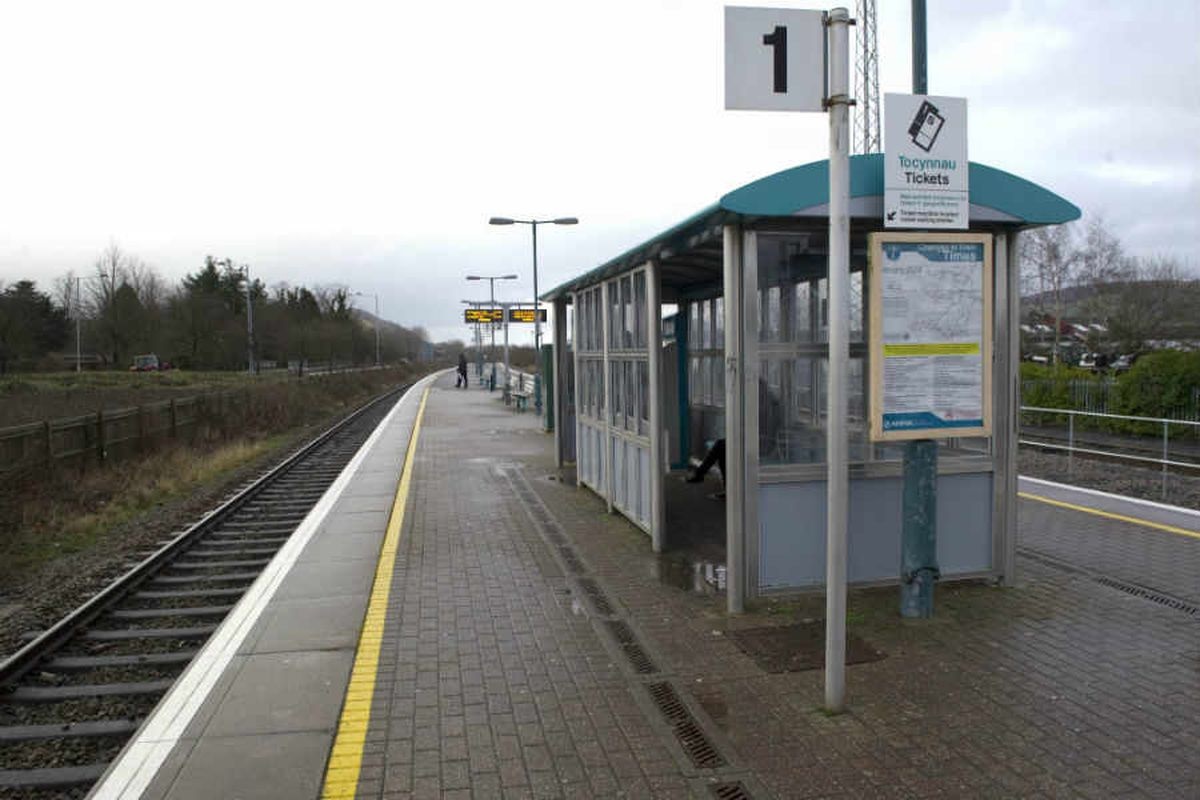
The heritage line is a very significant part of the former/original light railway. The original line entered the town of Welshpool running through the streets of the town to meet the Cambrian Railway mainline linking Whitchurch to Aberystwyth at the old Welshpool Railway Station. [4] This post focusses on that abandoned length of railway.

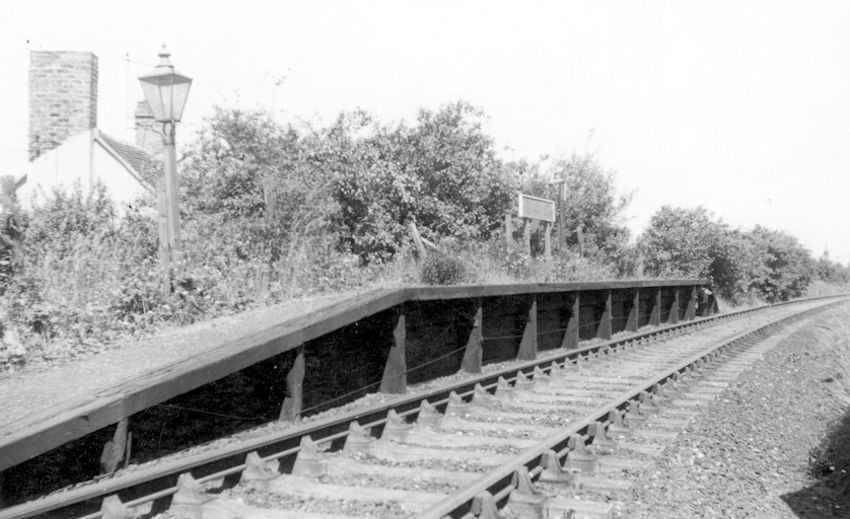
The W&LLR opened in 1903 (4th April 1903) it was worked by the Cambrian. A platform was provided to the north of the original station on the west side of the line at the south-east end of the goods yard. Transhipment facilities were also built in the goods yard so that goods could be exchanged between standard and narrow gauge trains. [4]
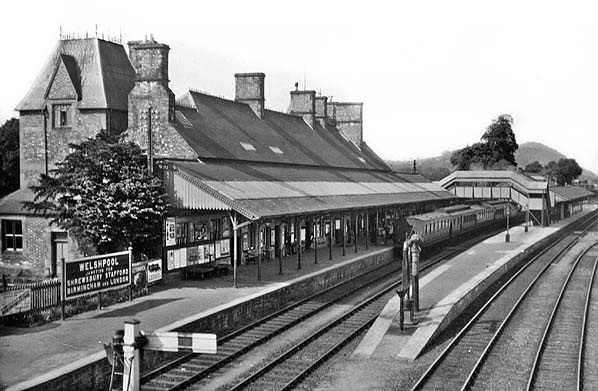
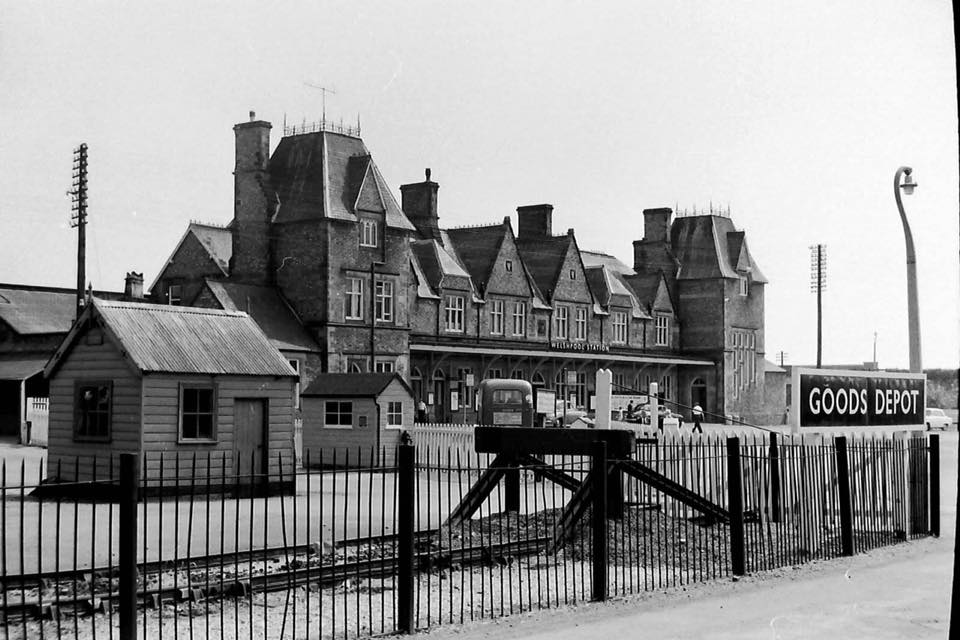
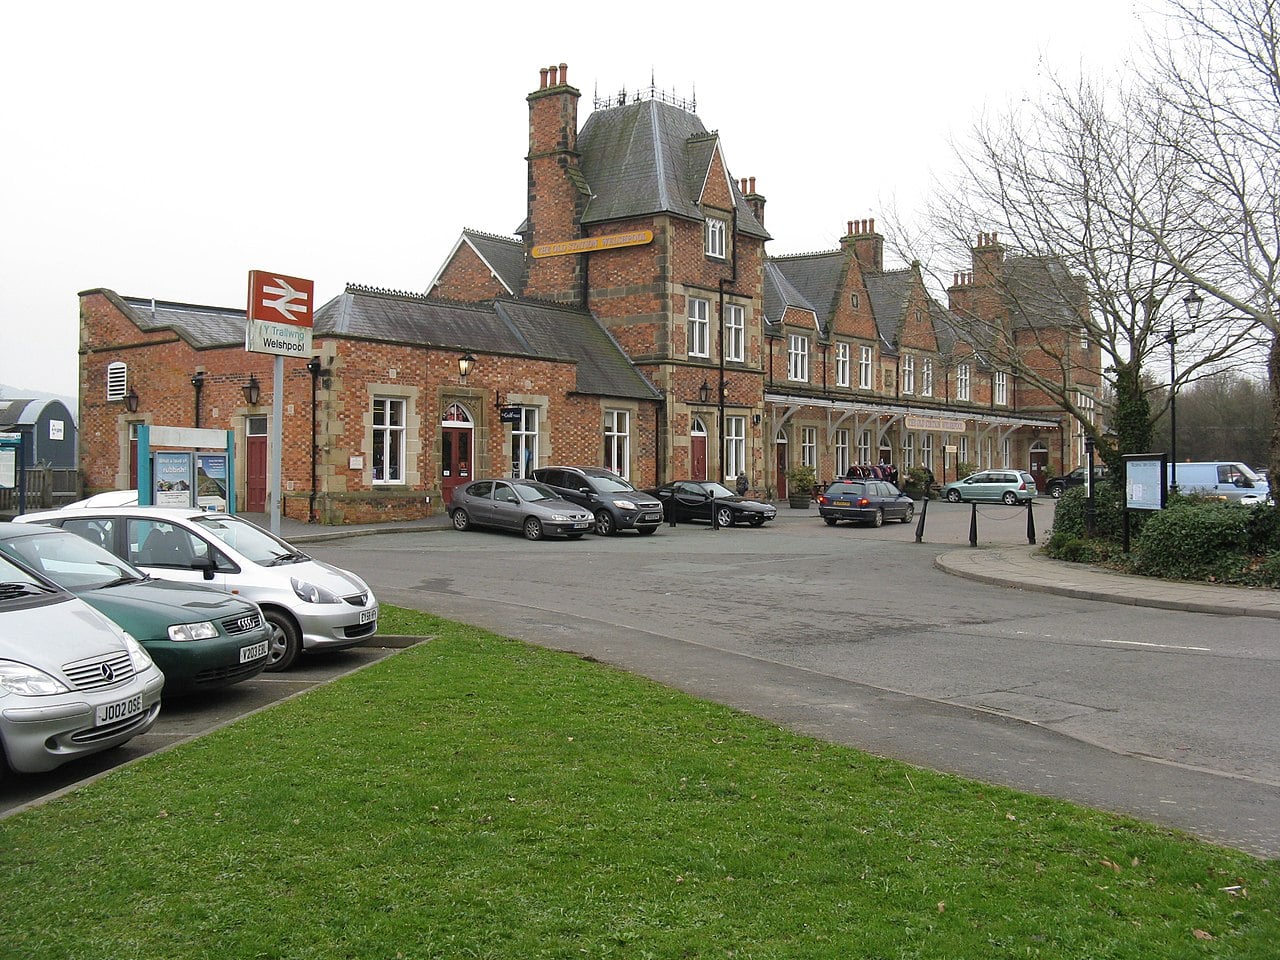
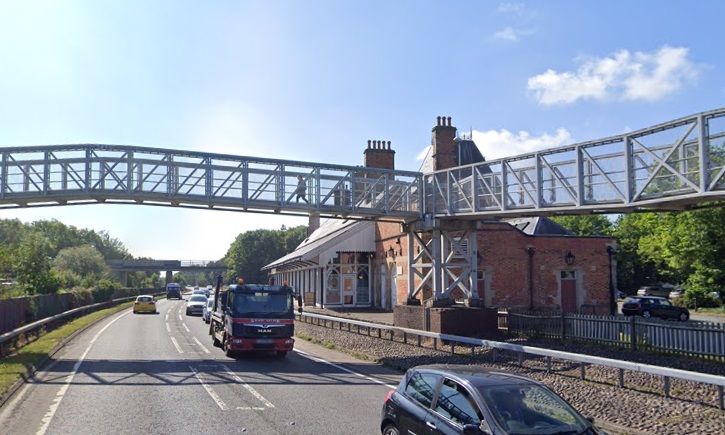
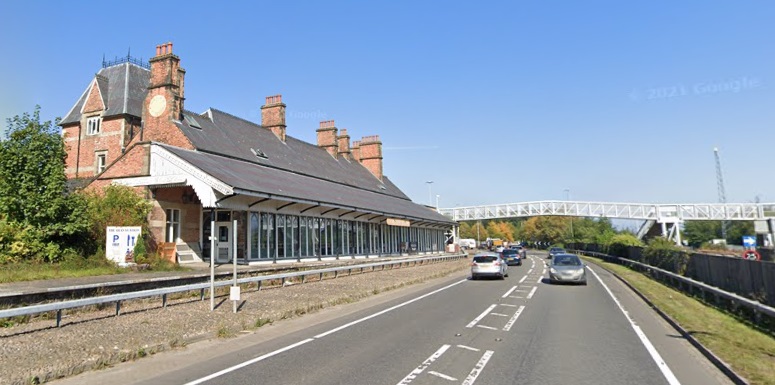
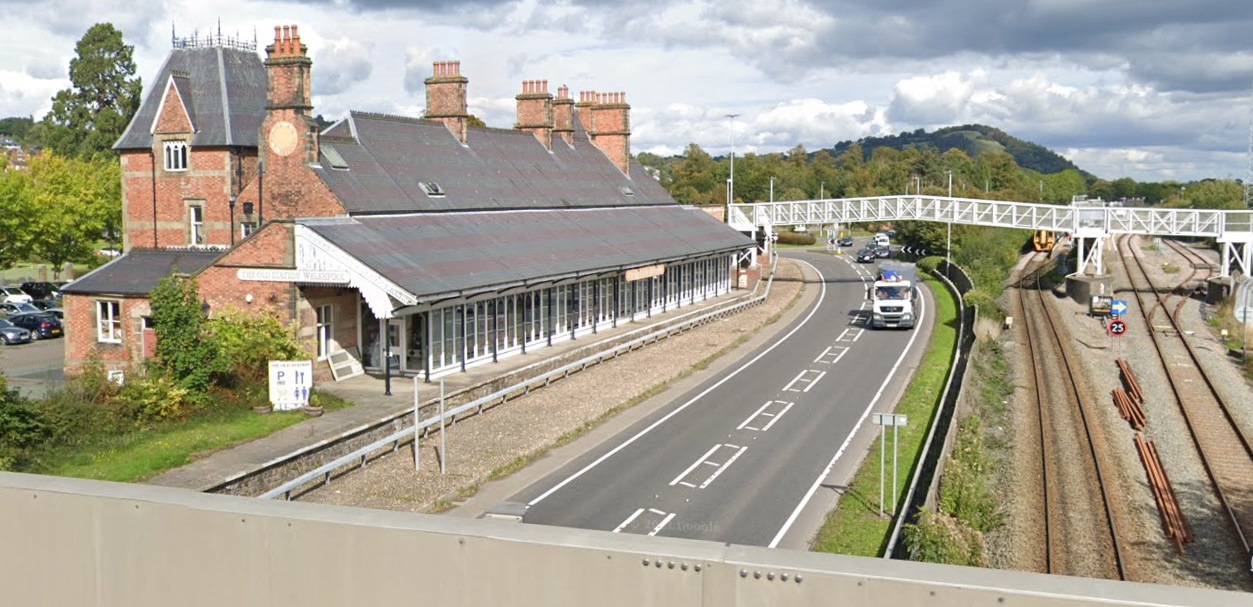
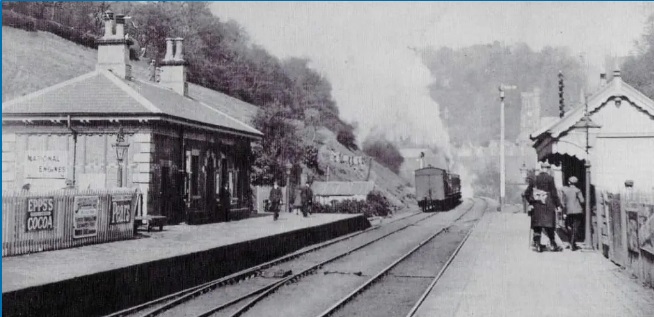
Interestingly, that station was originally built by the Oswestry & Newtown Railway, its original station opened on 14th August 1860. [3] The line was initially operated by the London & North Western Railway before being absorbed by the Cambrian Railways, which became part of the Great Western Railway at the grouping on 1st January 1923. [4]
The next three images are embedded from the Science Museum Picture Library, they all focus on the W&LLR facilities adjacent to the mainline railway station in Welshpool.

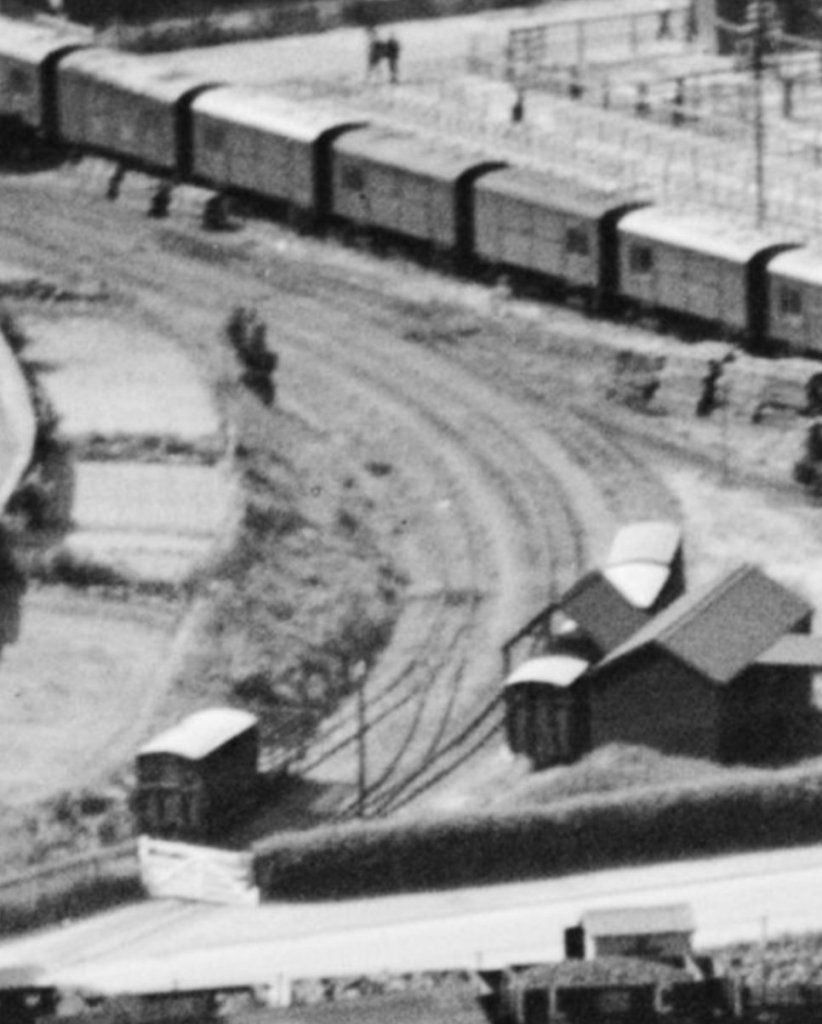
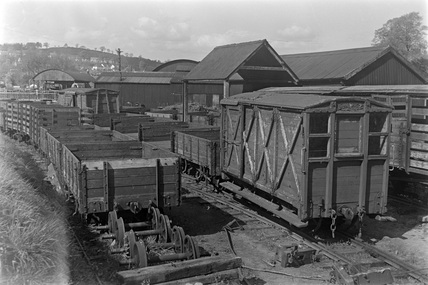
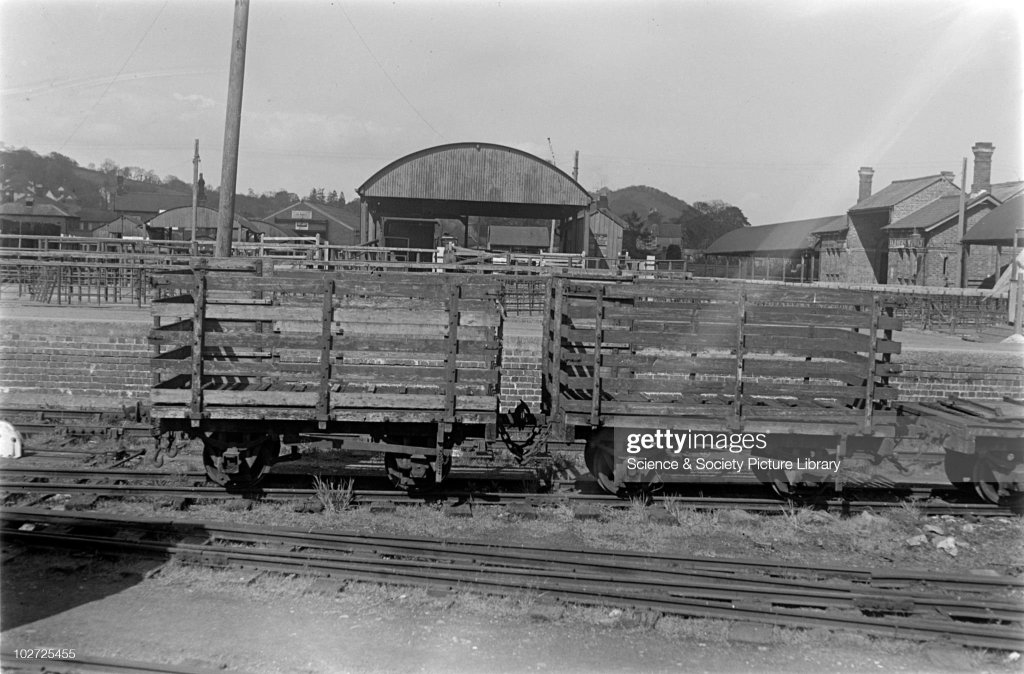
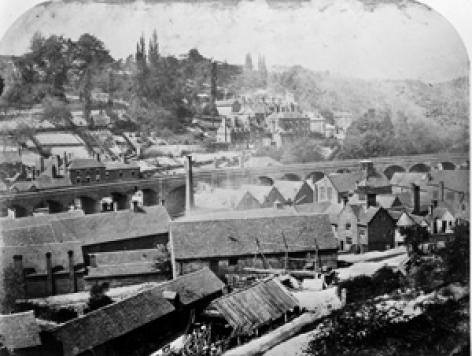
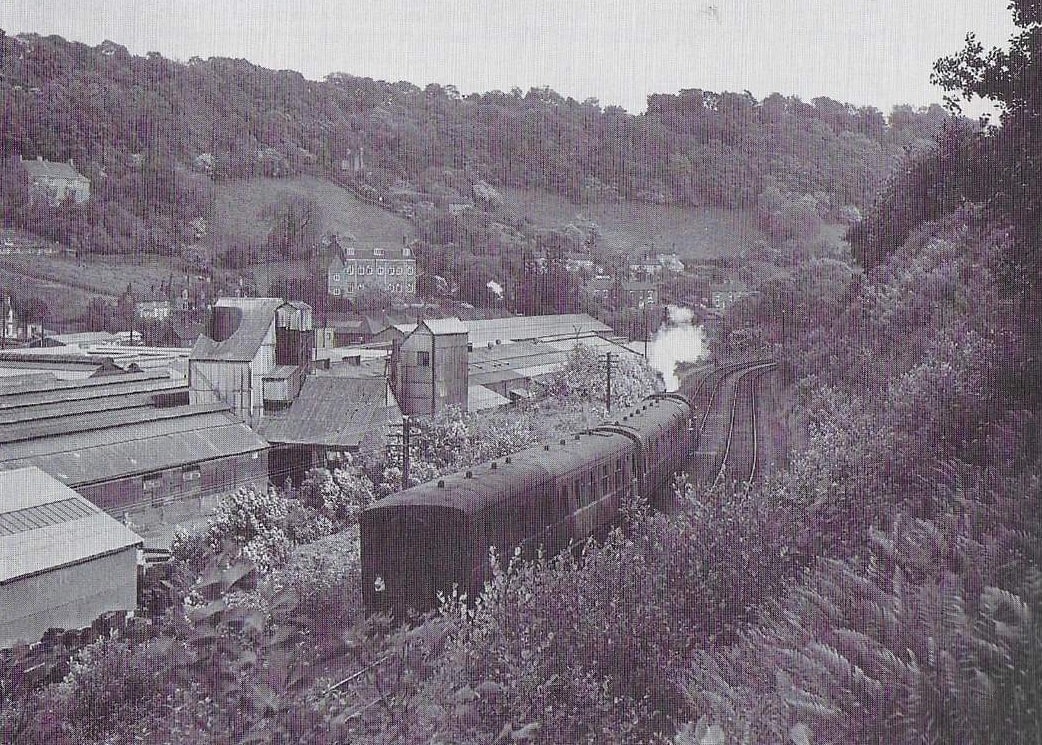
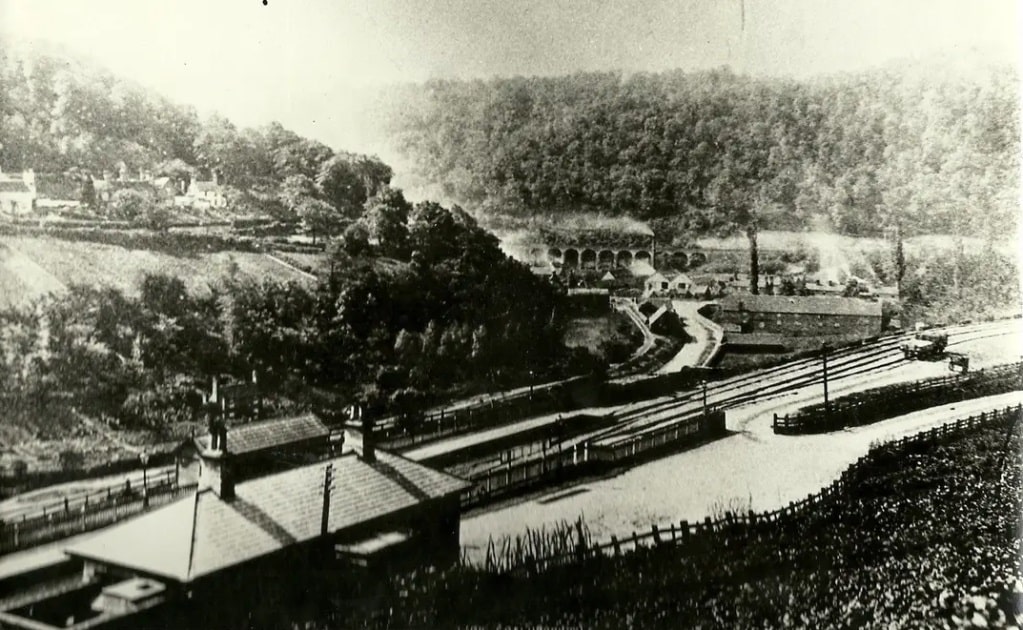
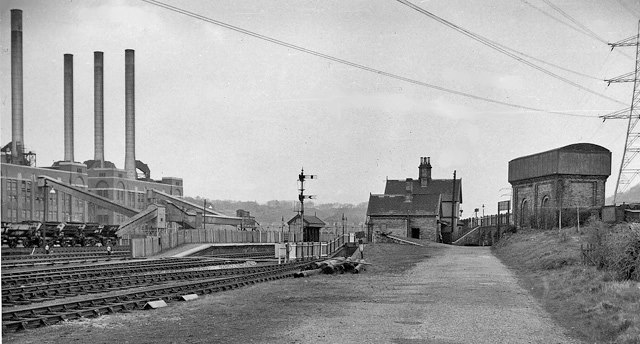
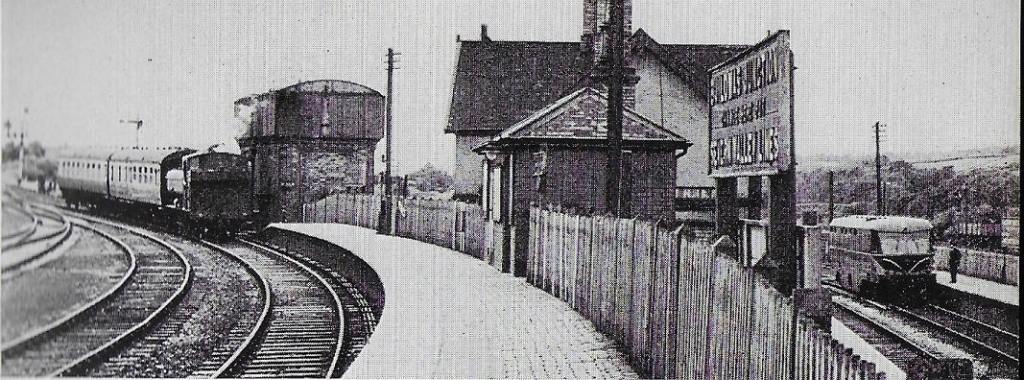
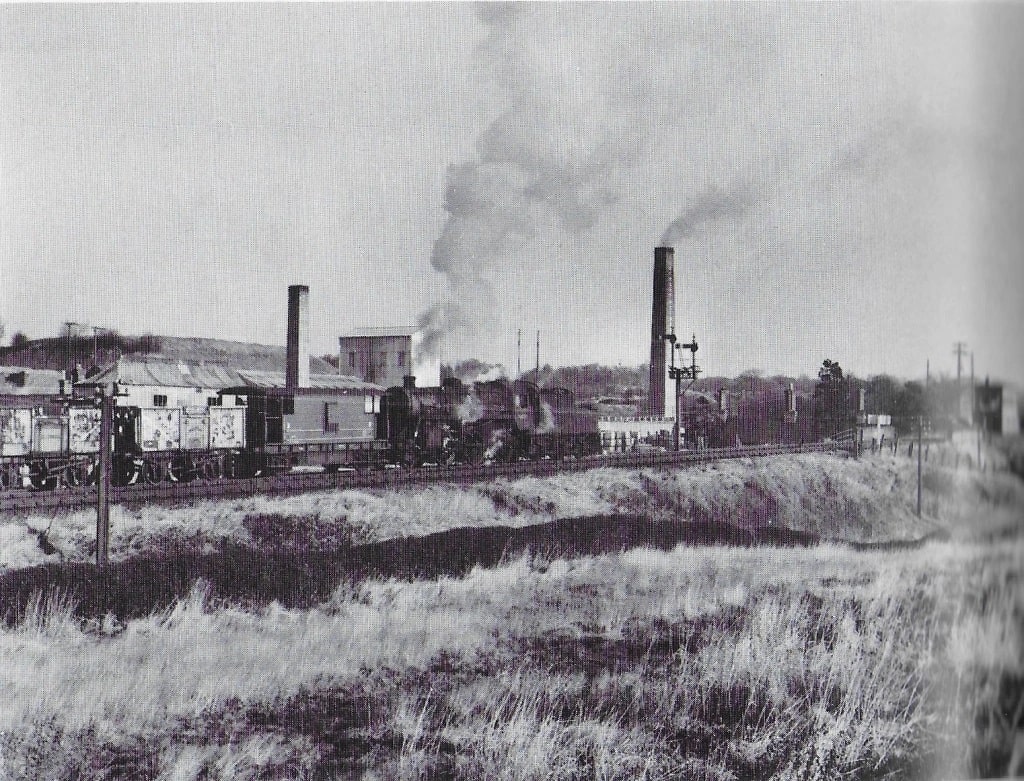
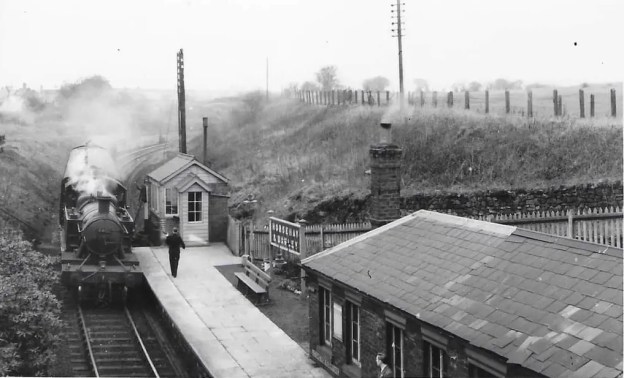
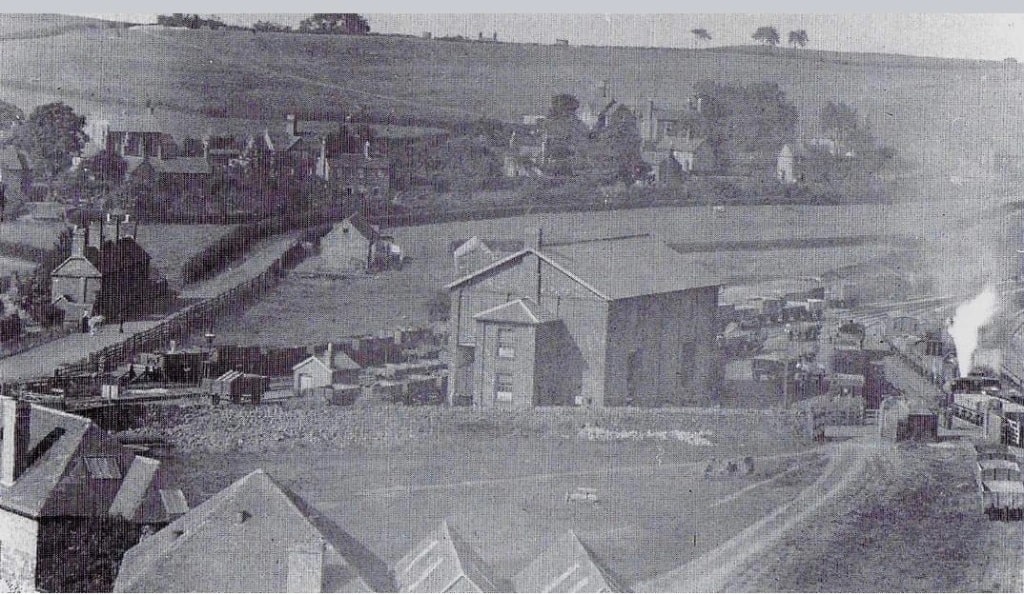
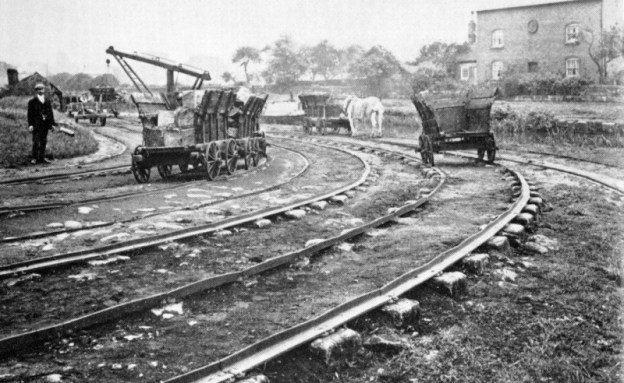
Looking across the W&LLR sidings at Welshpool from the West. The cattle market and its siding are at the top-left of the image. The tracks in the foreground curve round to the right. A splendid variety of wagons can bee seen on the nearest track. This image is also embedded from the Science Museum’s Picture Library, © National Railway Museum / Science & Society Picture Library. [12]
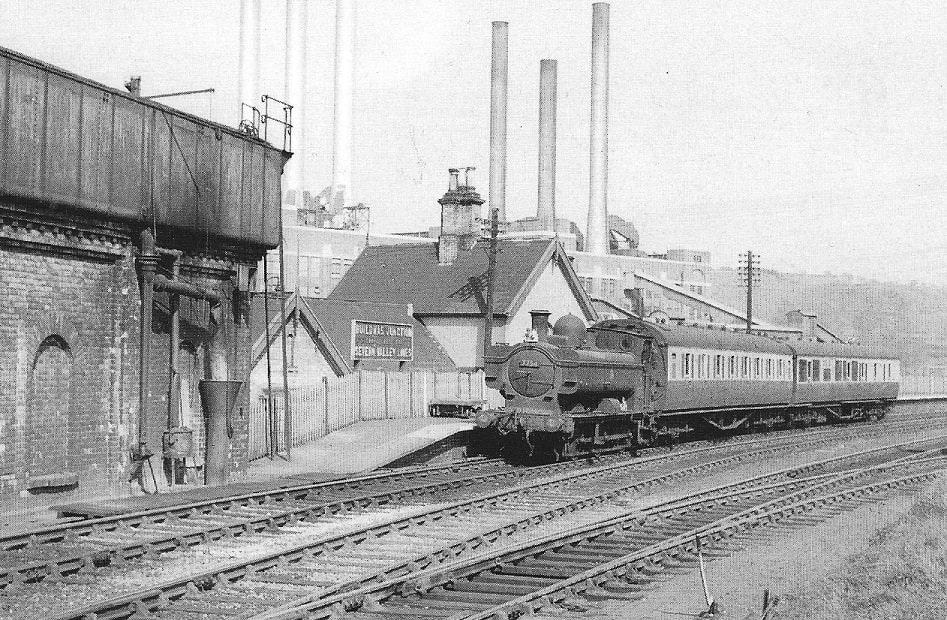
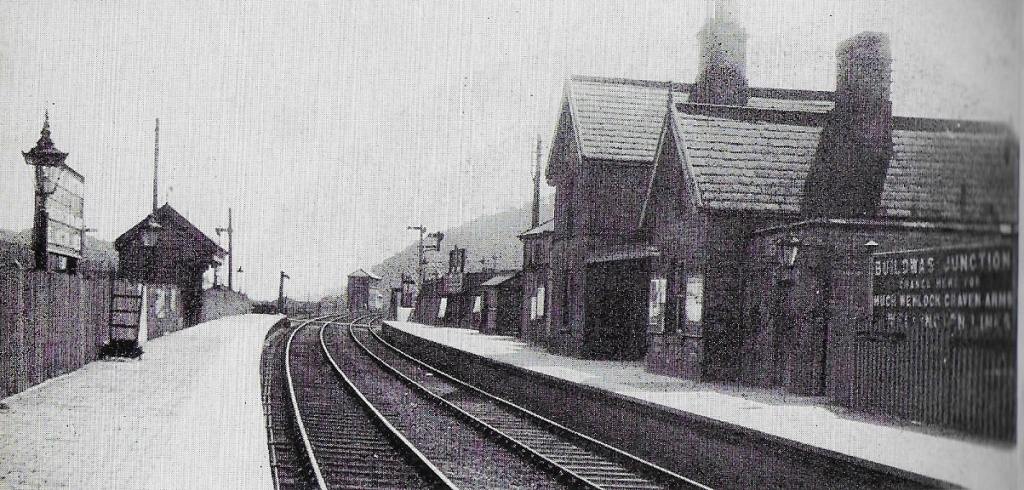
This photograph appears to have been taken from Smithfield Road looking Northeast along the W&LLR sidings at Welshpool. The cattle market is in the background. This image is also embedded from the Science Museum’s Picture Library, © National Railway Museum / Science & Society Picture Library. [13]
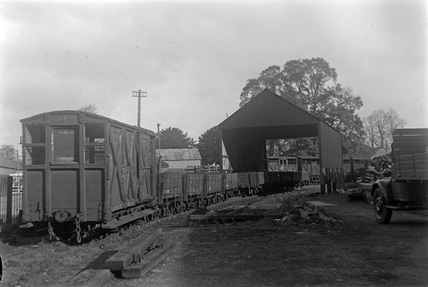
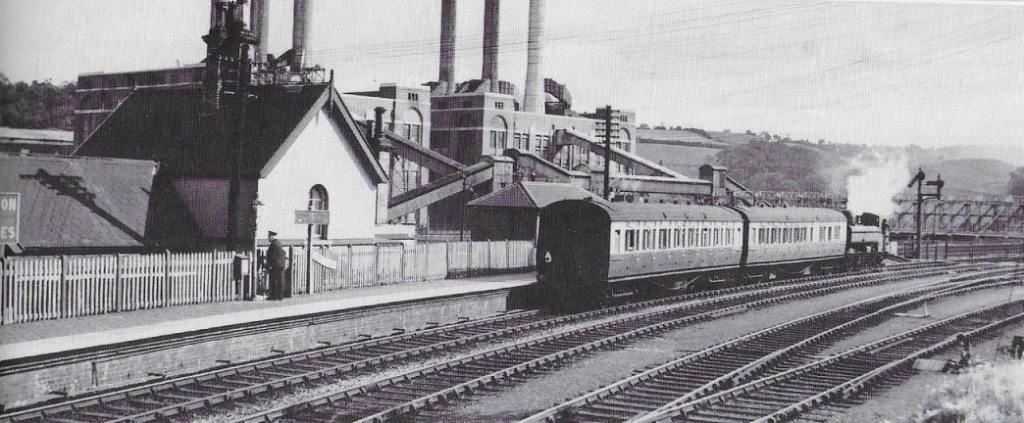
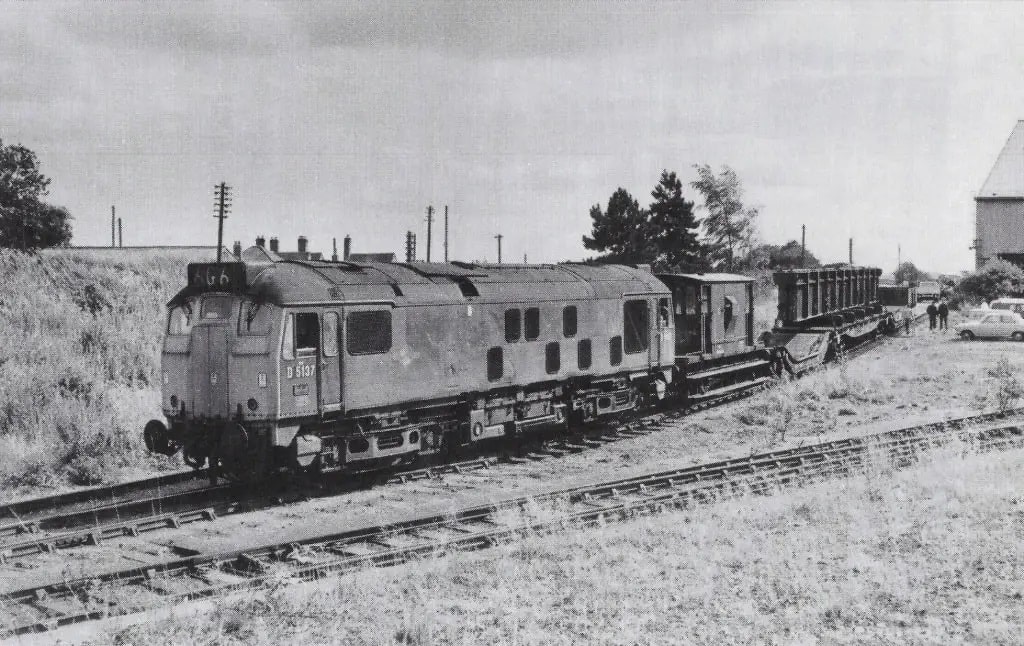
This image shows a brake van and coal wagons at the transshipment shed in Welshpool. This image is again embedded from the Science Museum’s Picture Library, © National Railway Museum / Science & Society Picture Library. [14]

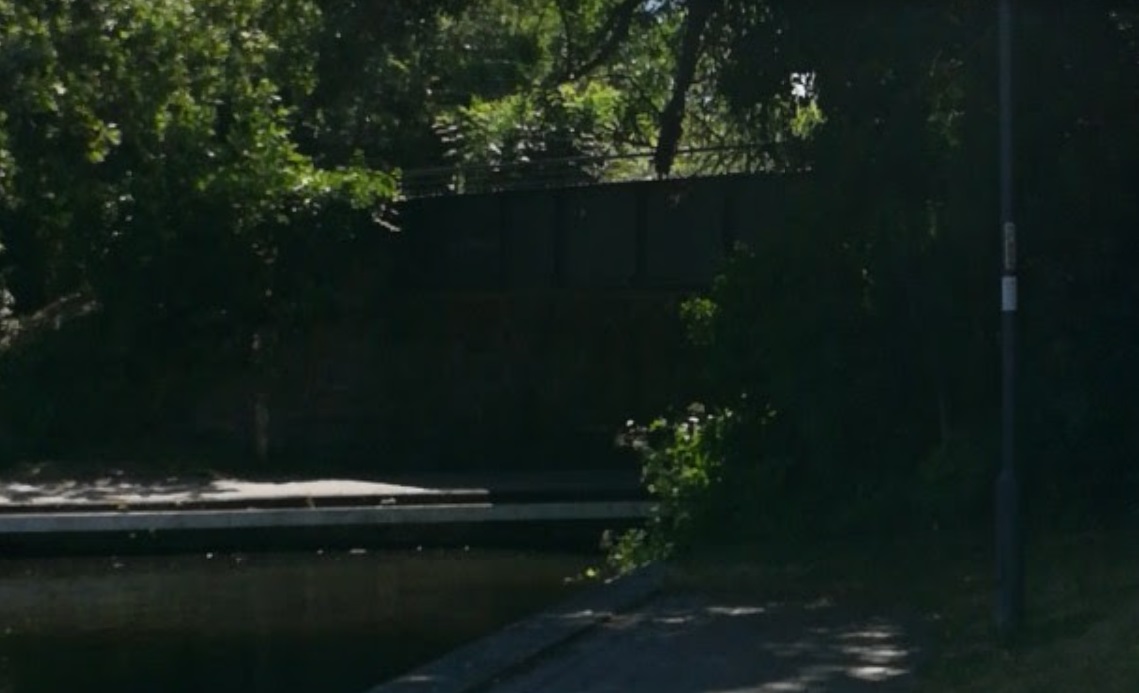
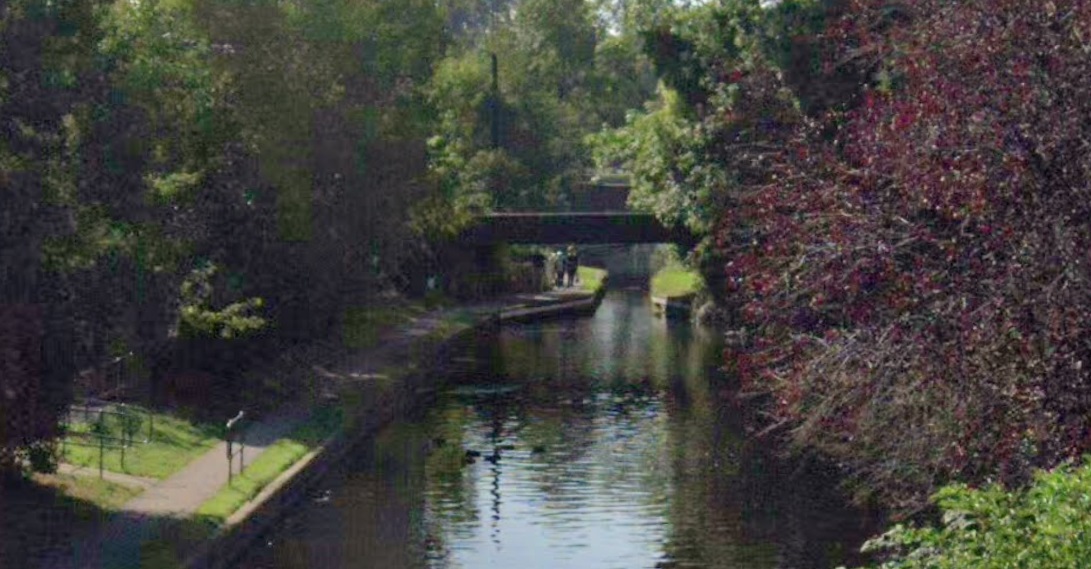
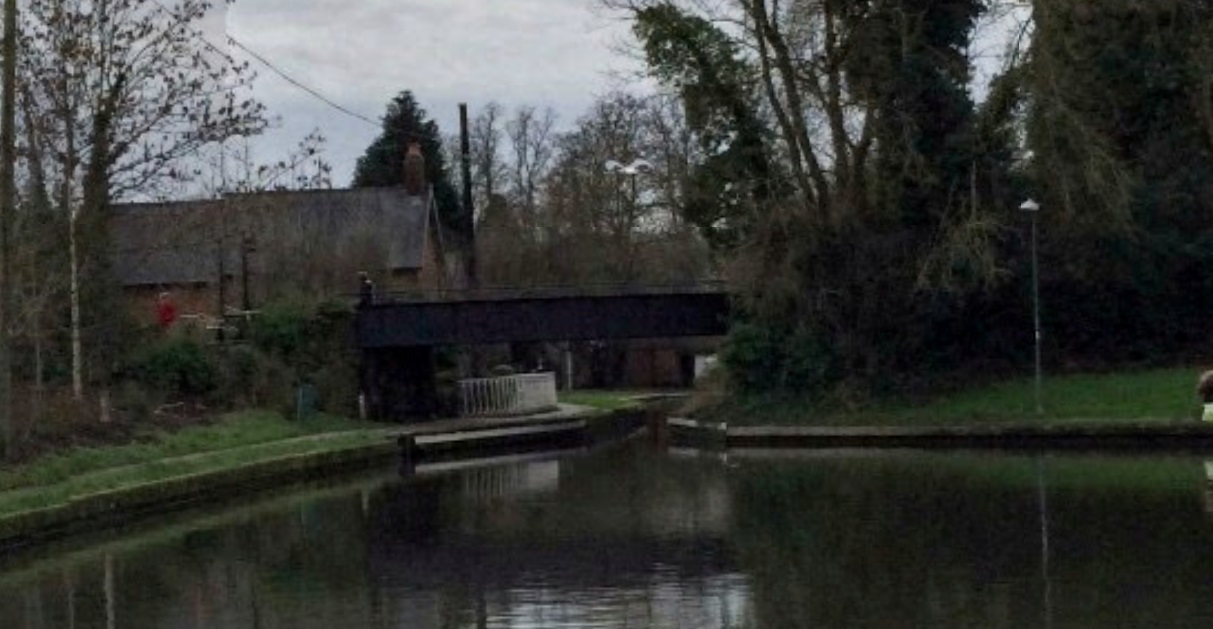
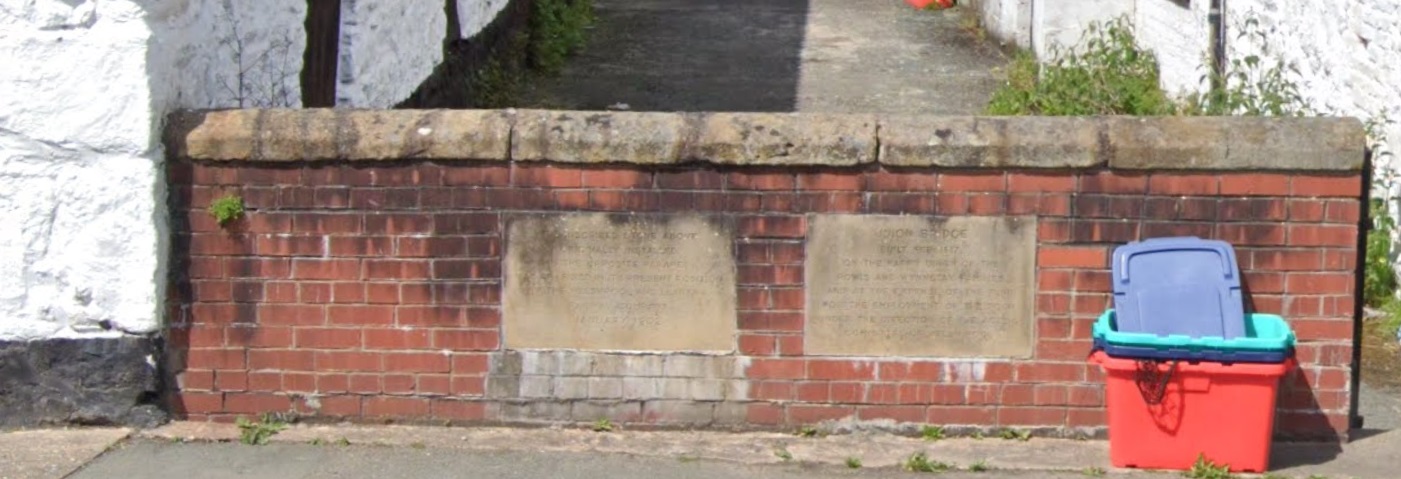
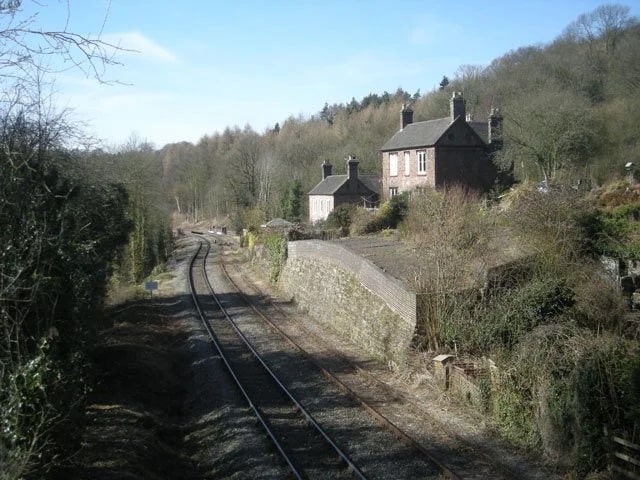
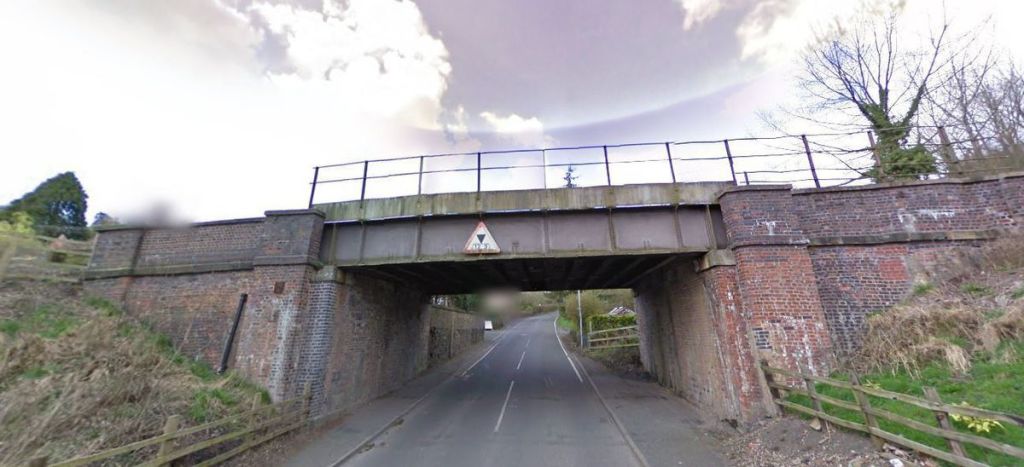
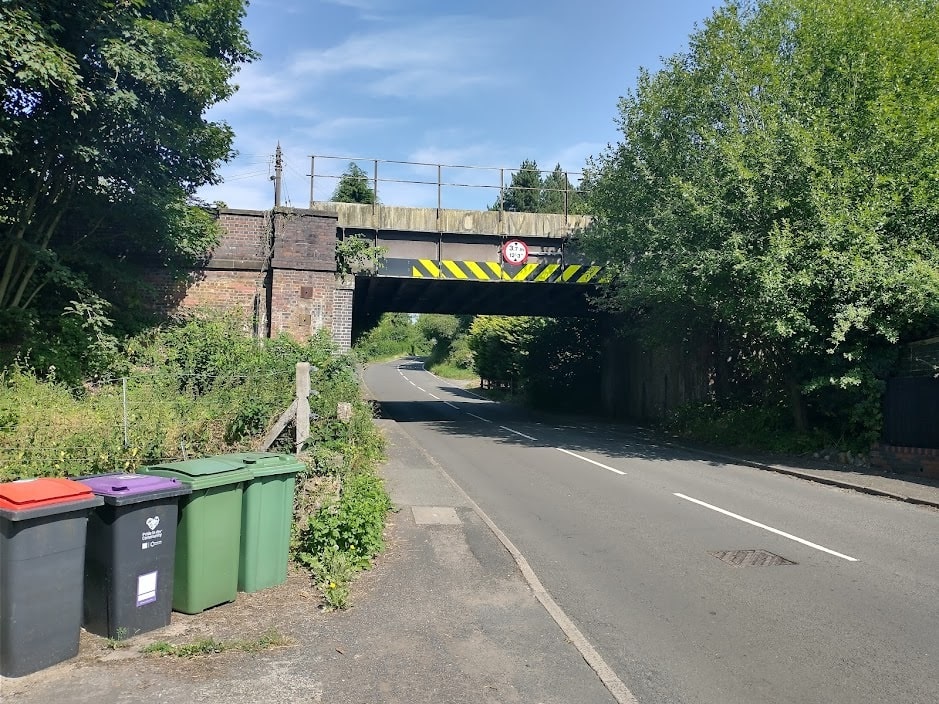
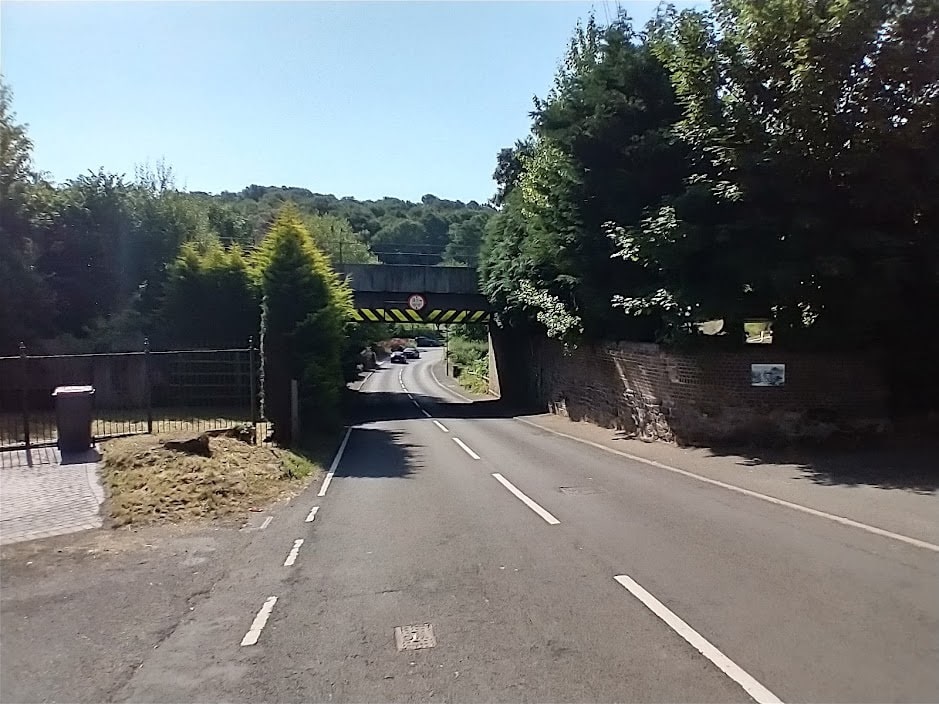
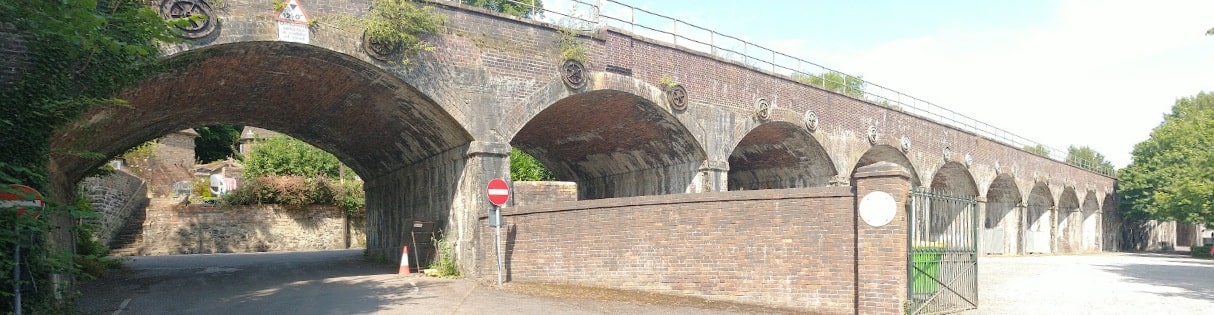
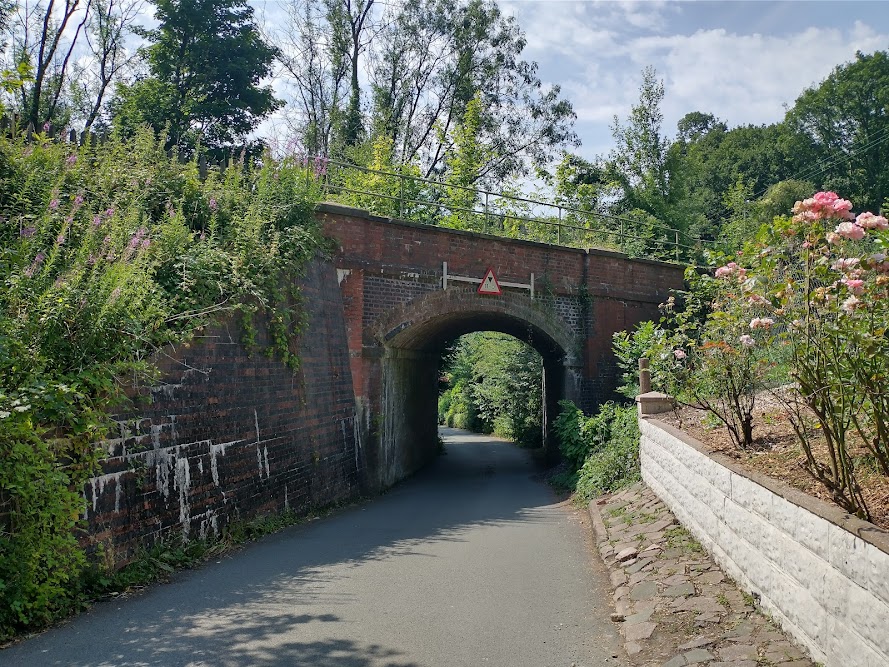
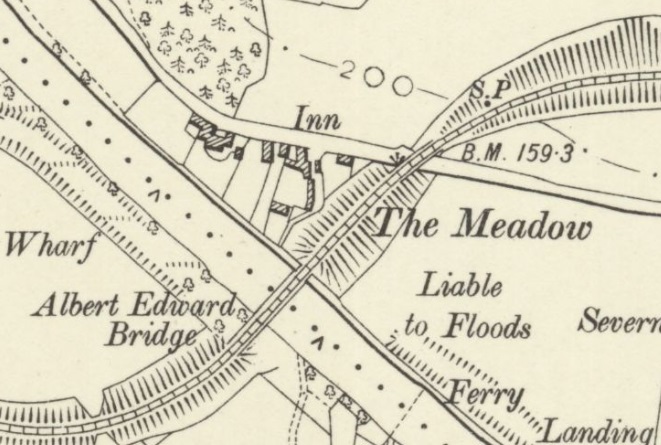
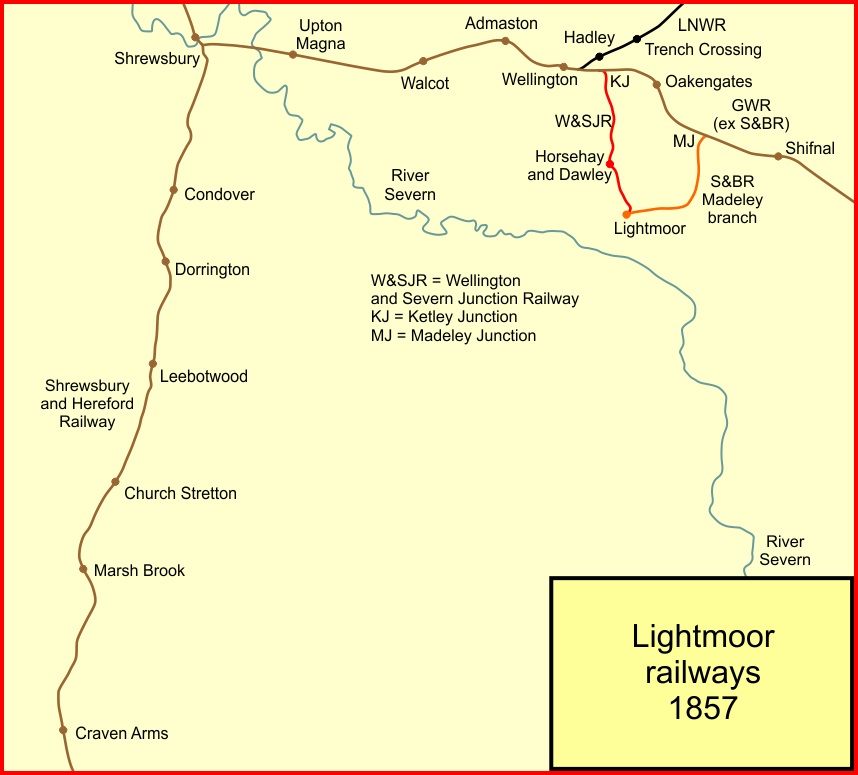
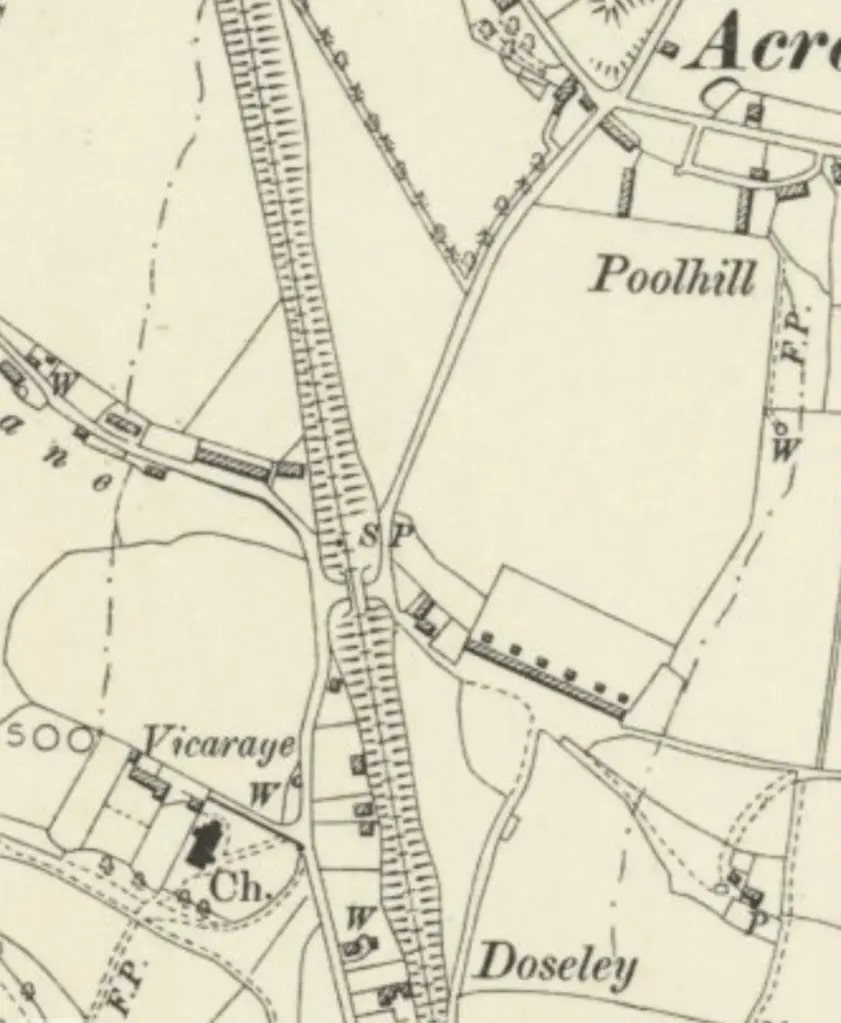
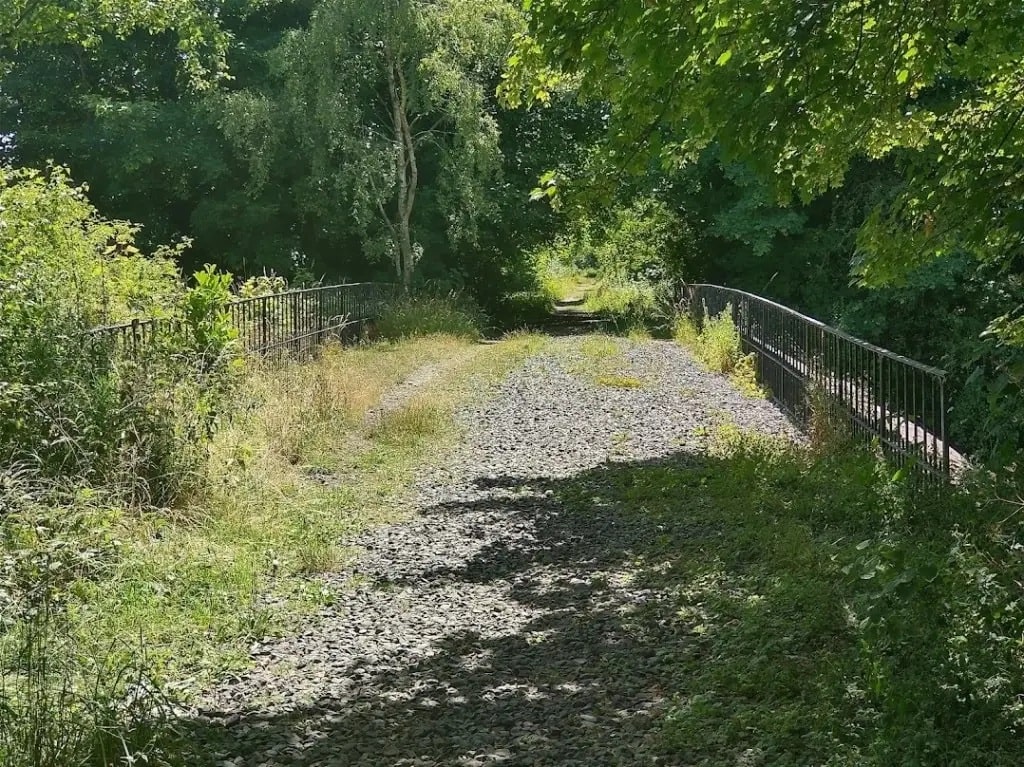
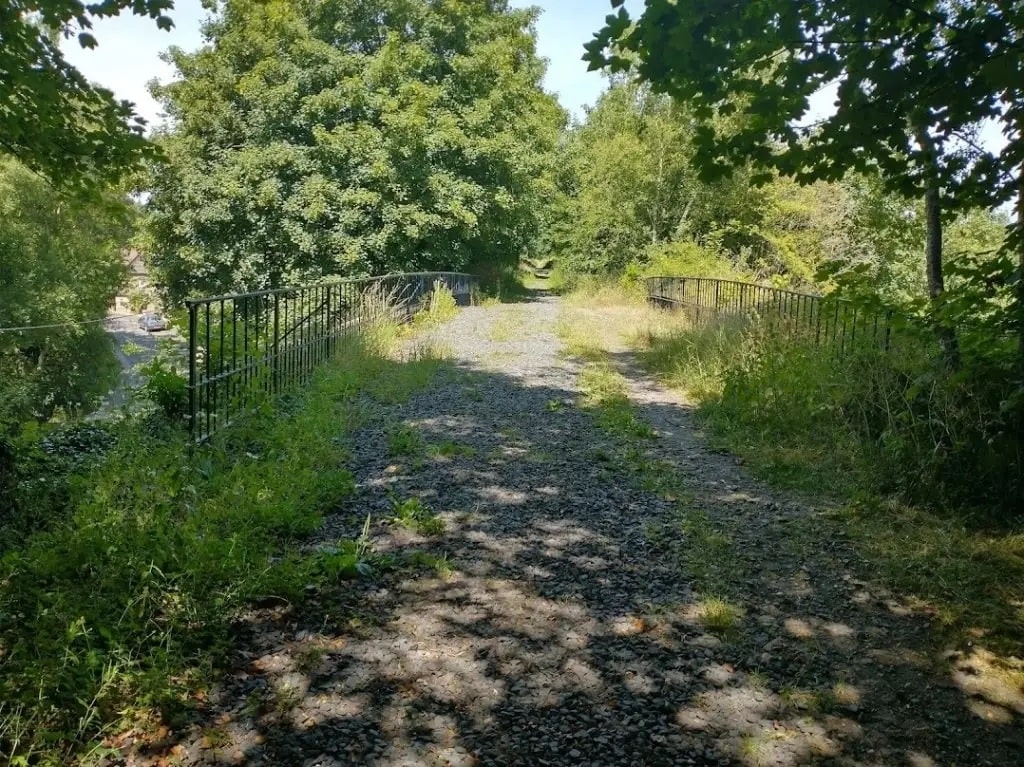
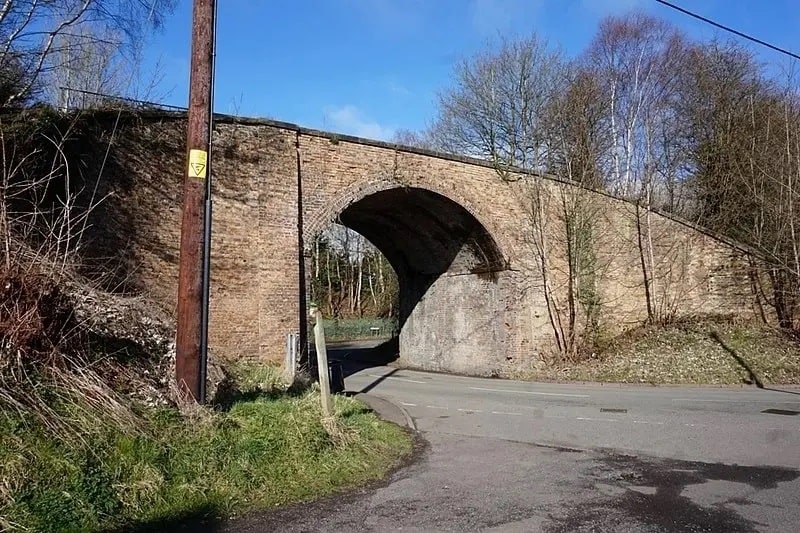
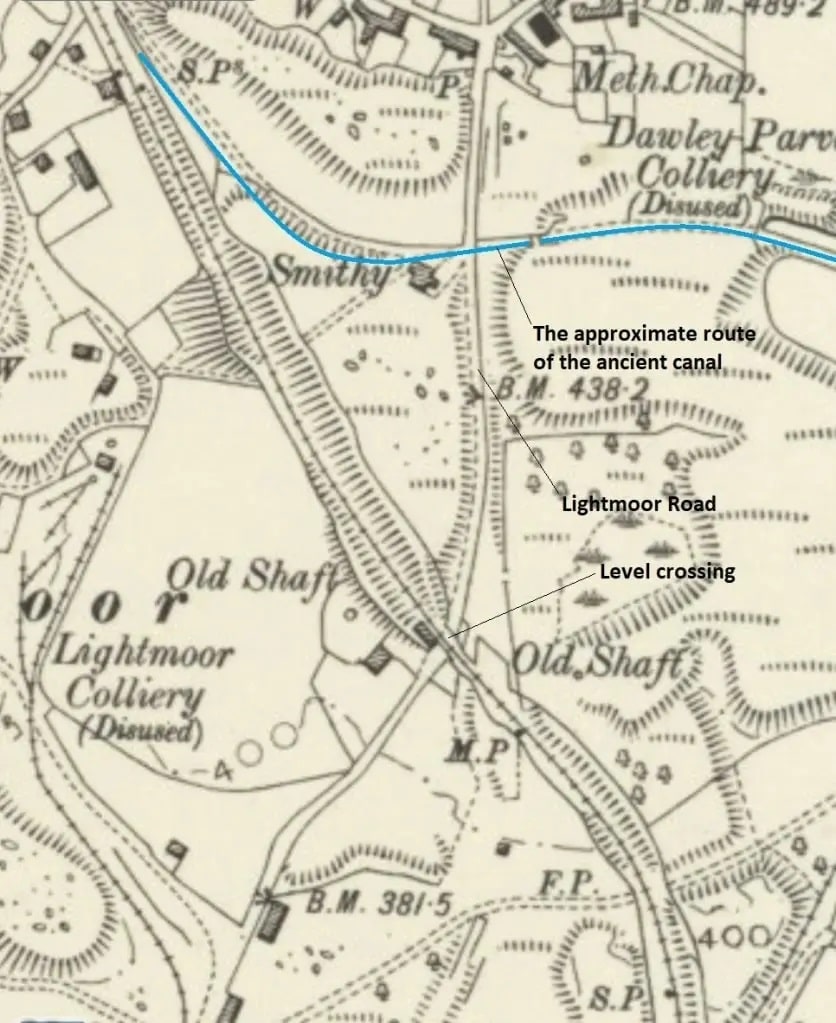
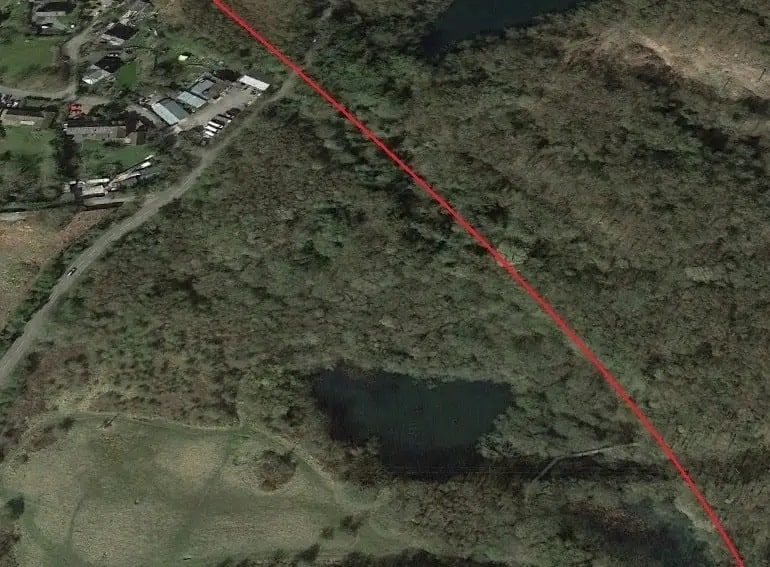
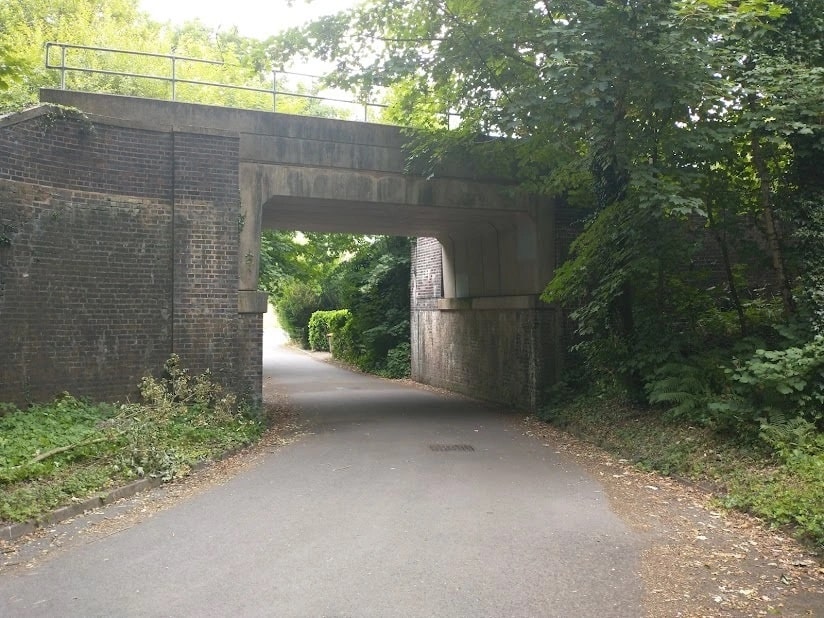
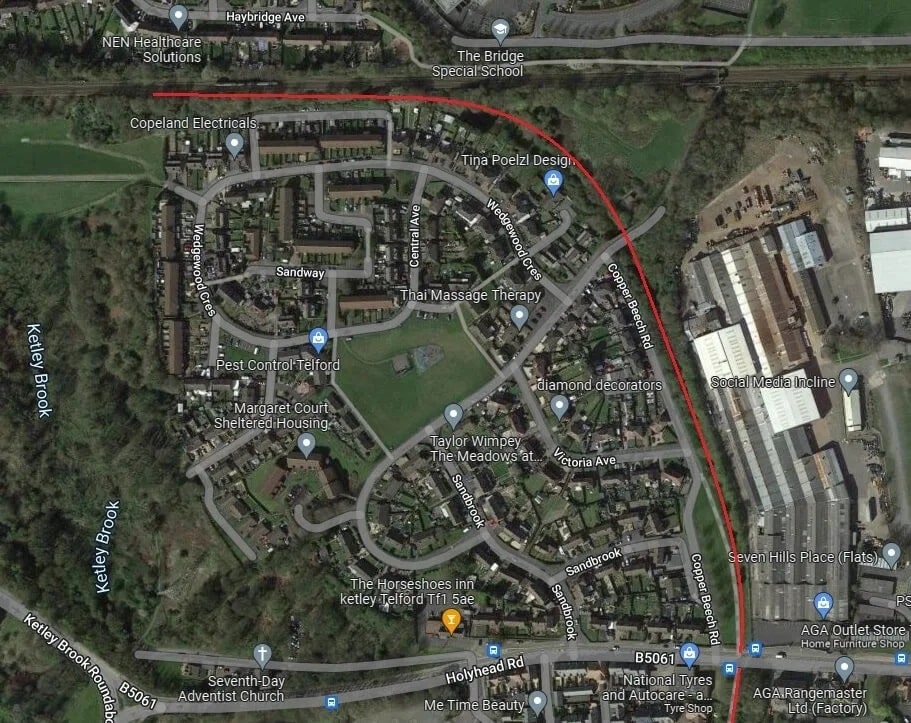
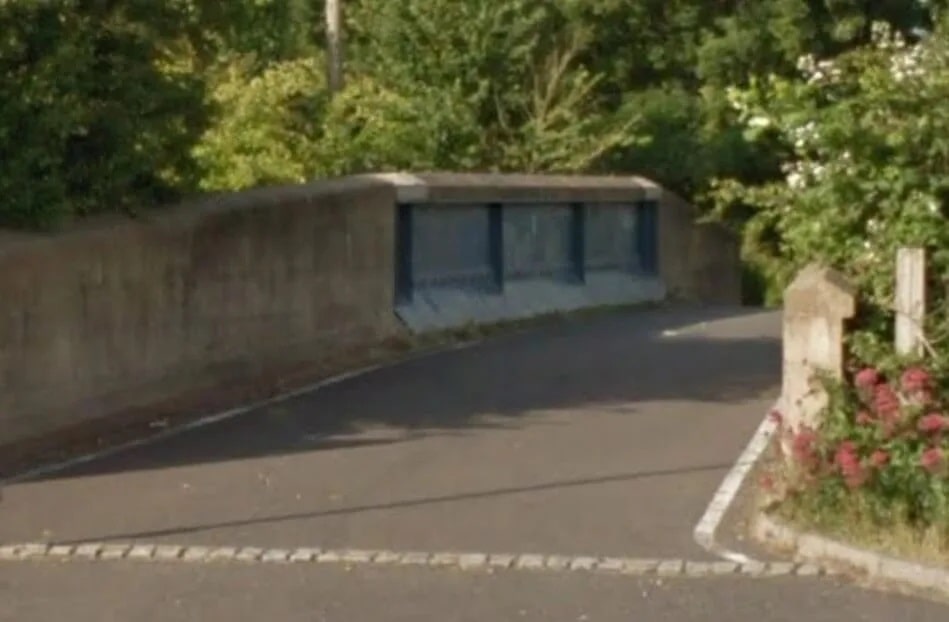
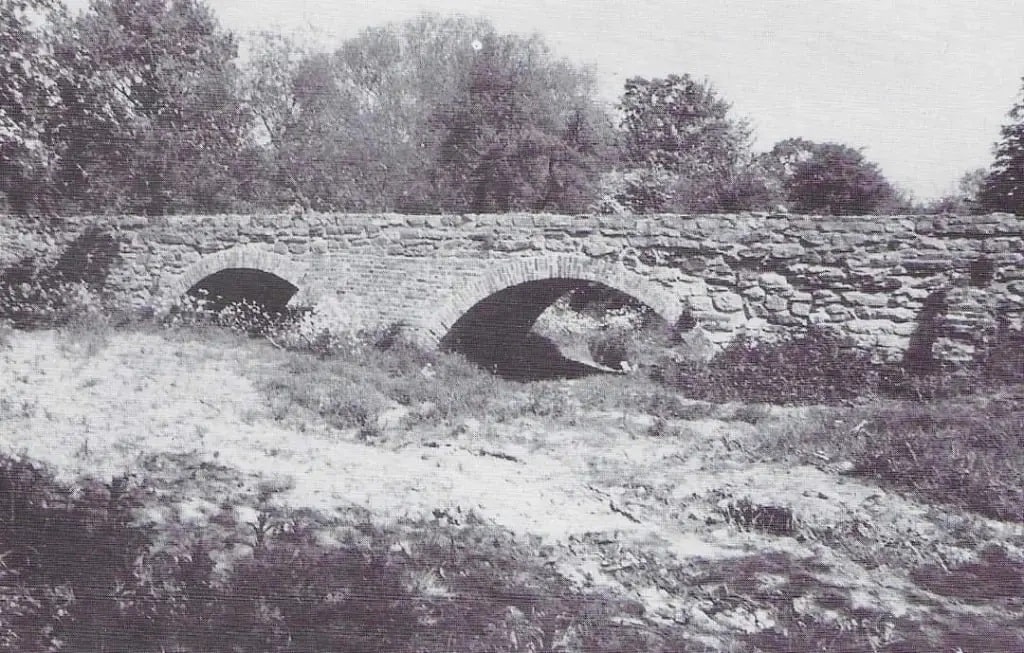
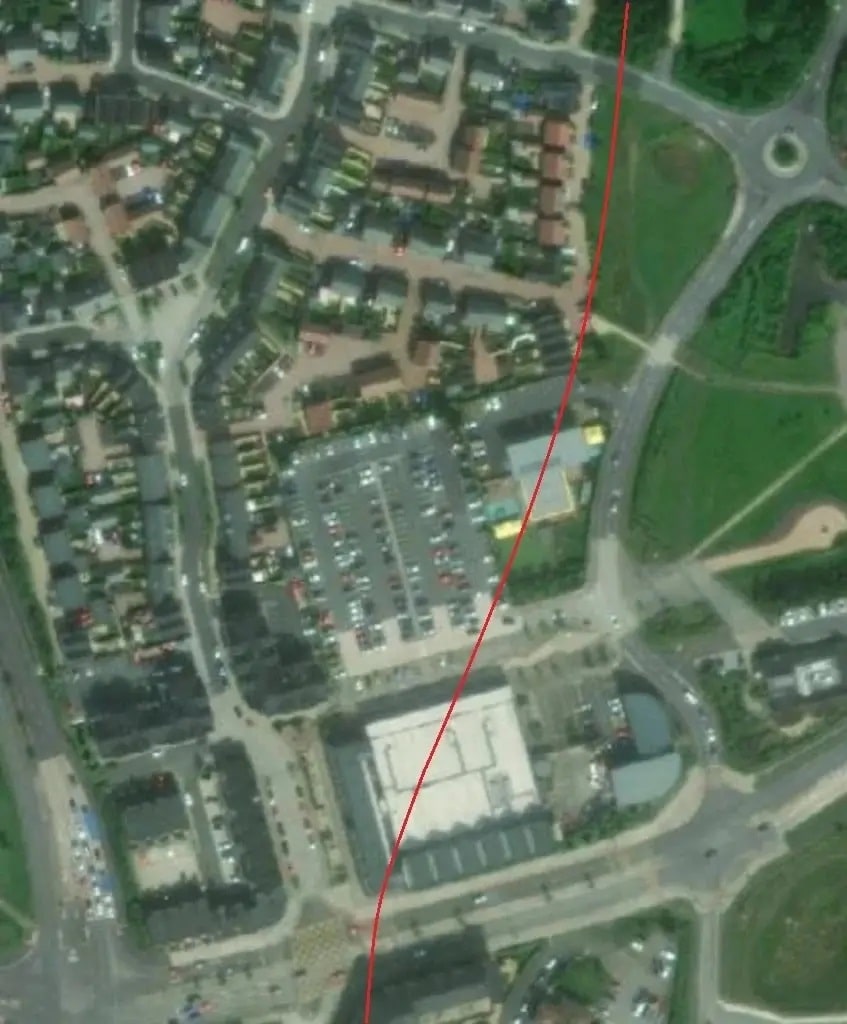
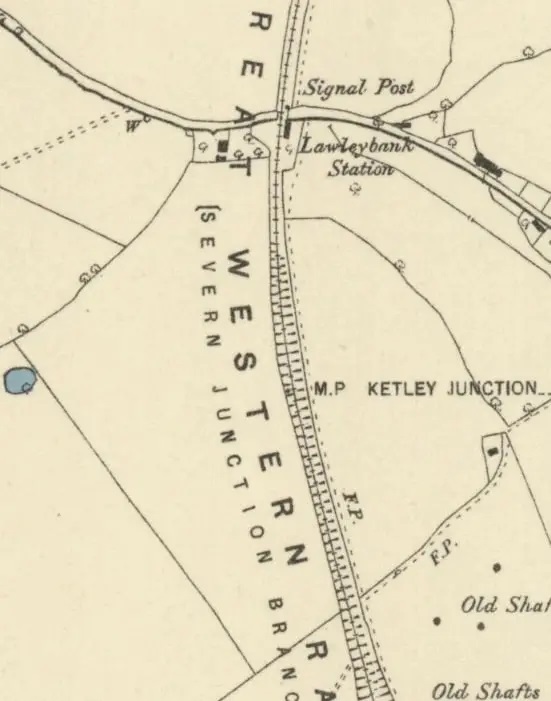
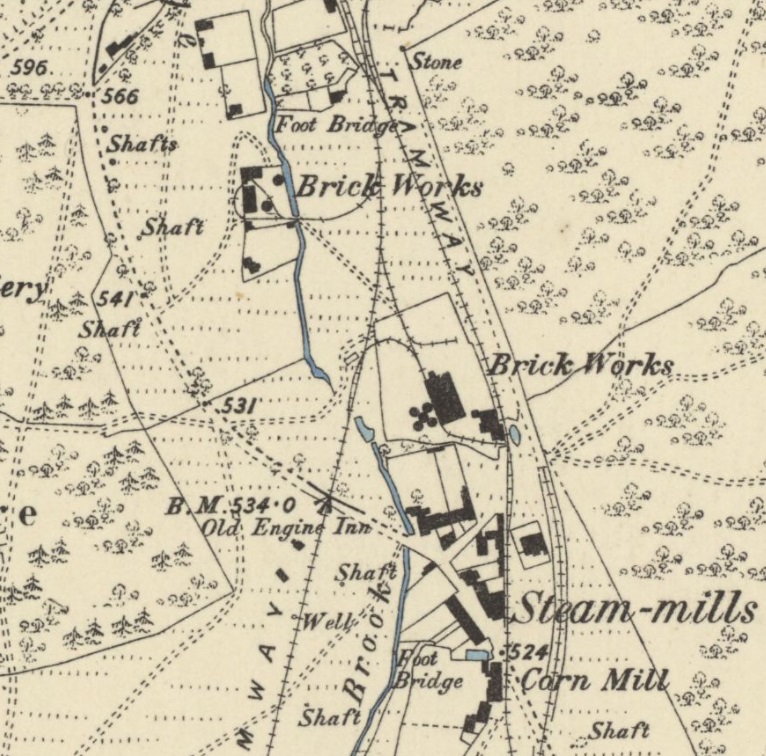
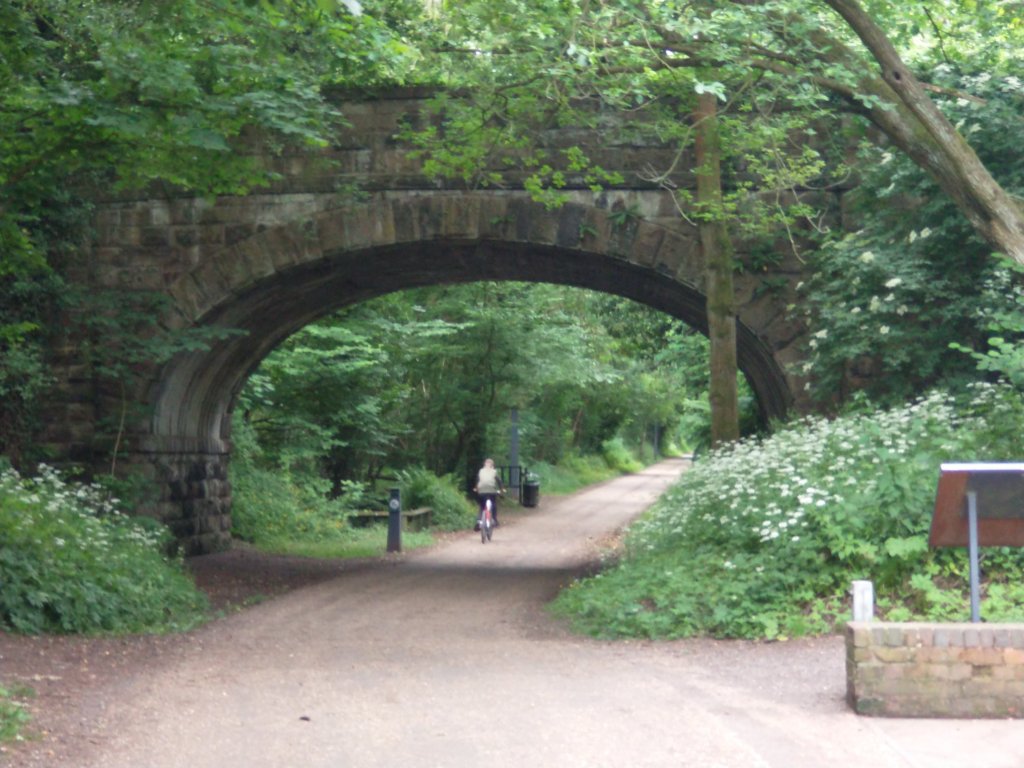
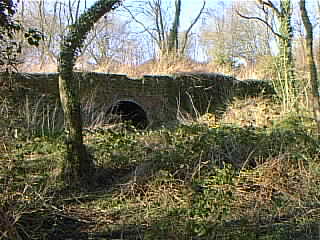
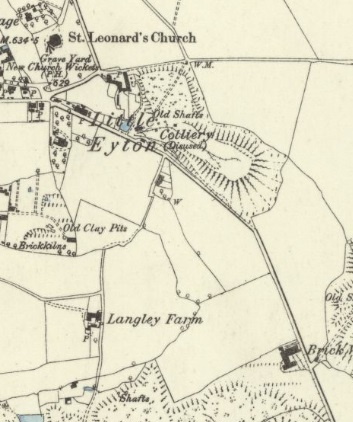
When the train shown in the image above set off for Llanfair Caereinion it crossed Smithfield Road in the foreground and traversed the W&LLR goods yard before heading just North of West towards the town centre. It ran jut to the North of the Lledan Brook which threaded its way through the town. On its journey the train would have crossed the Shropshire Union Canal on a girder bridge which is still in existence in the 21st century. The location is shown centre-left of the map extract immediately below.
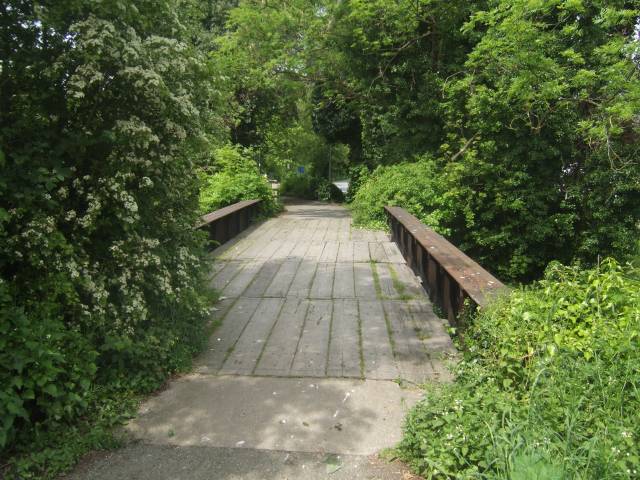
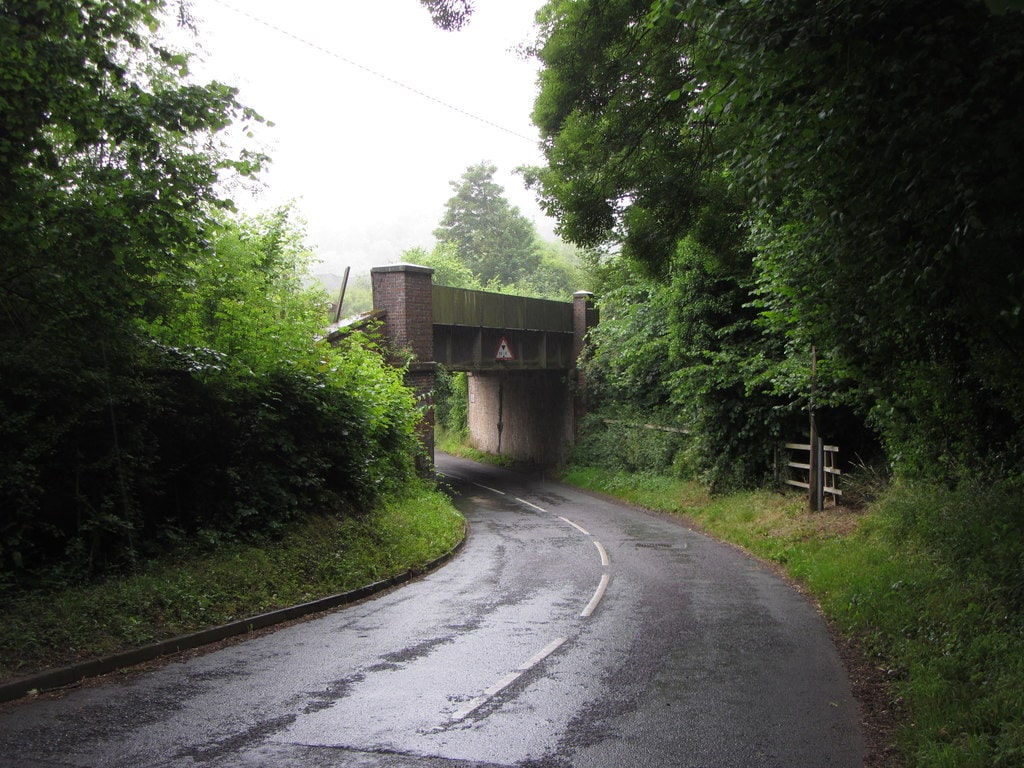
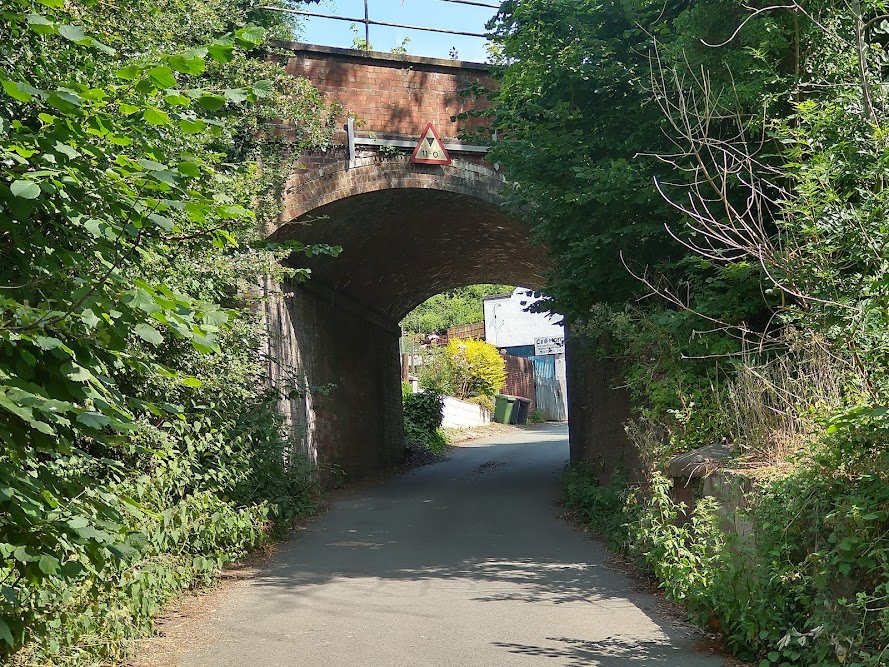
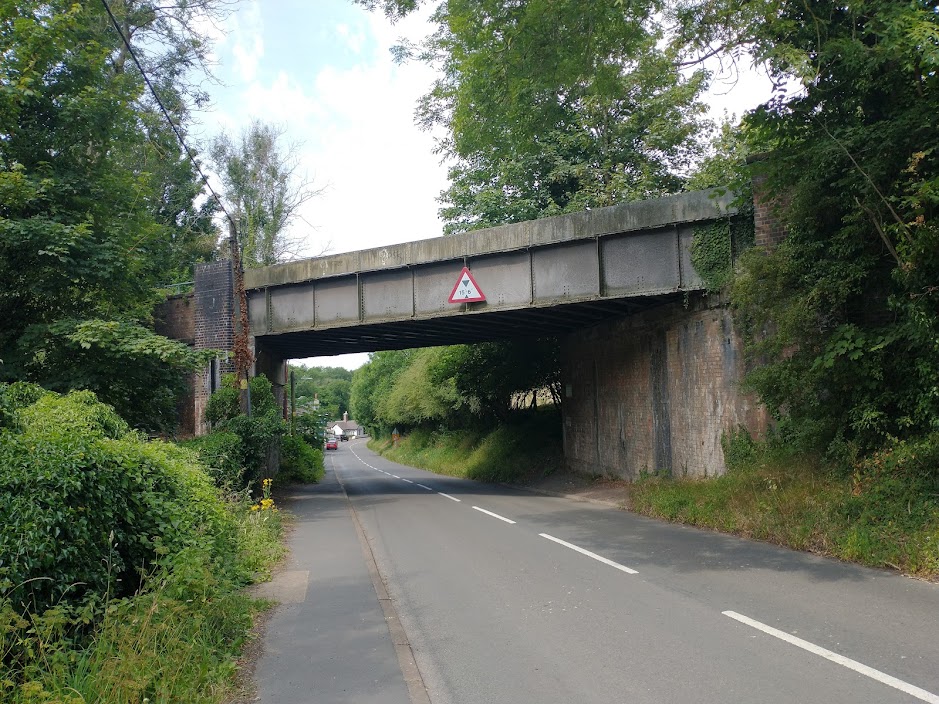
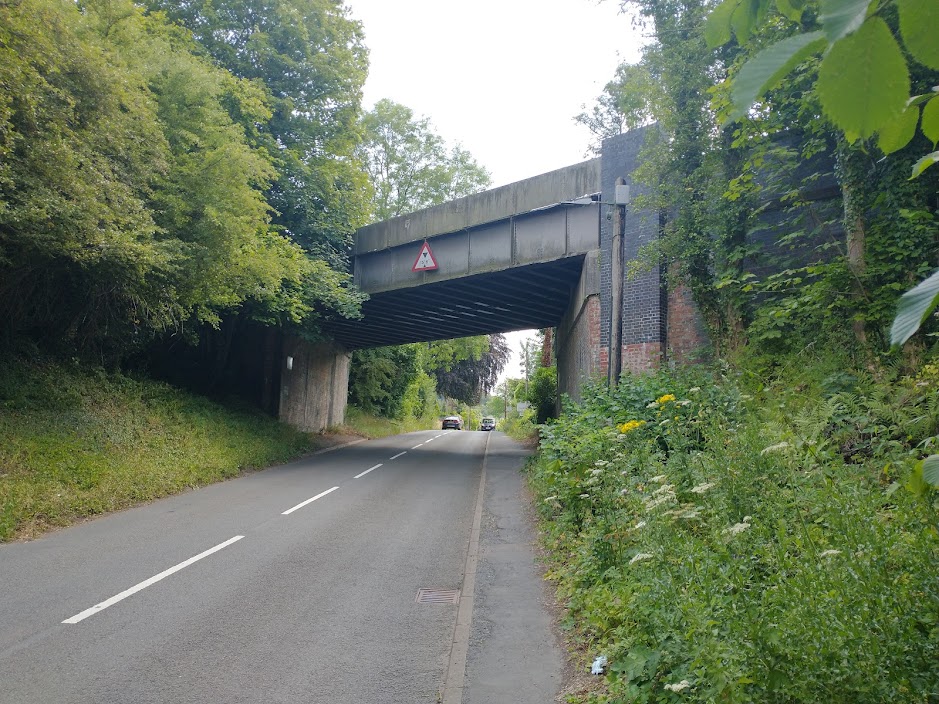
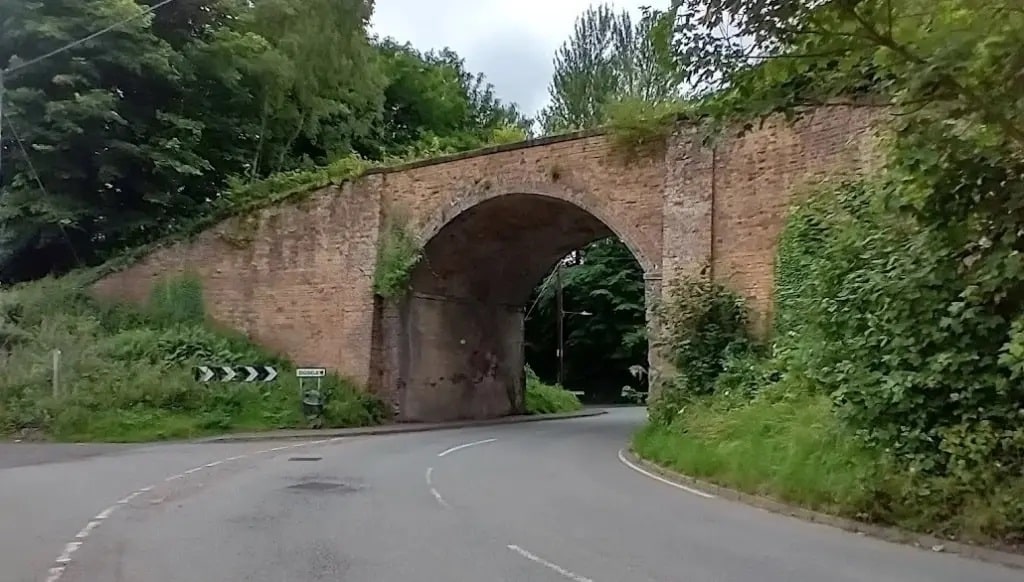
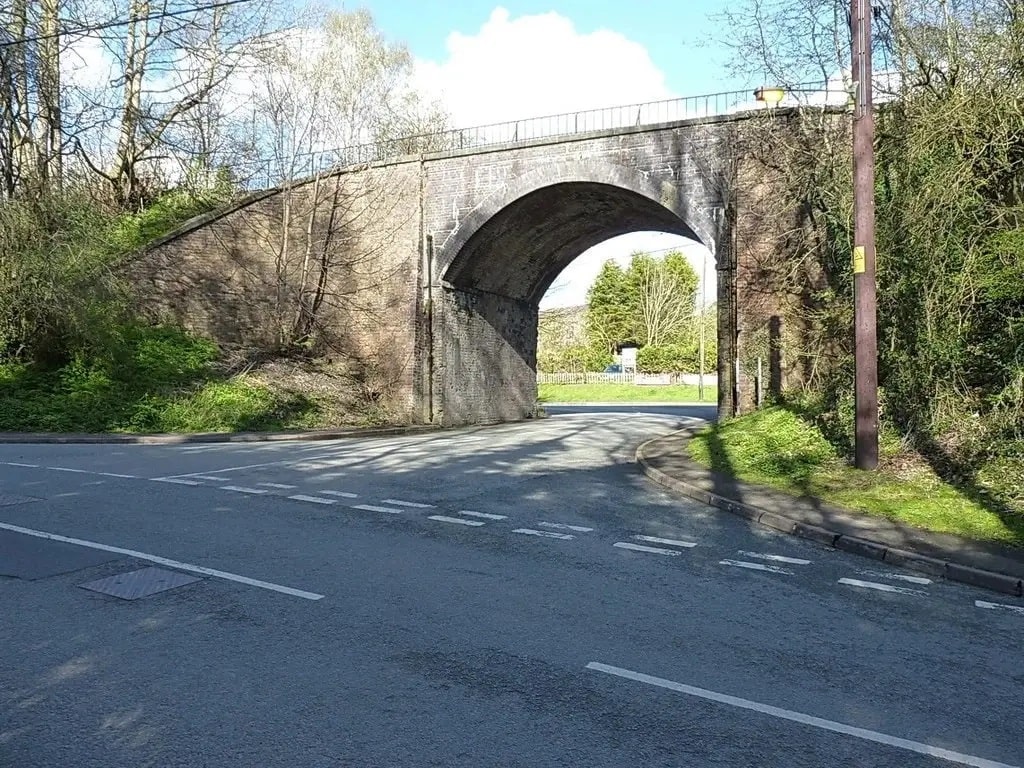
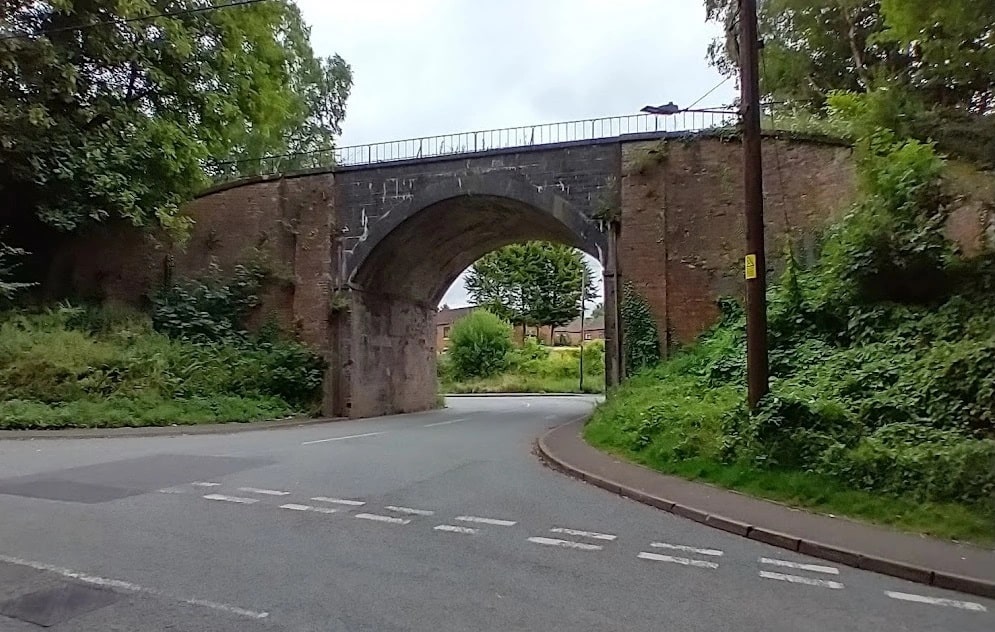
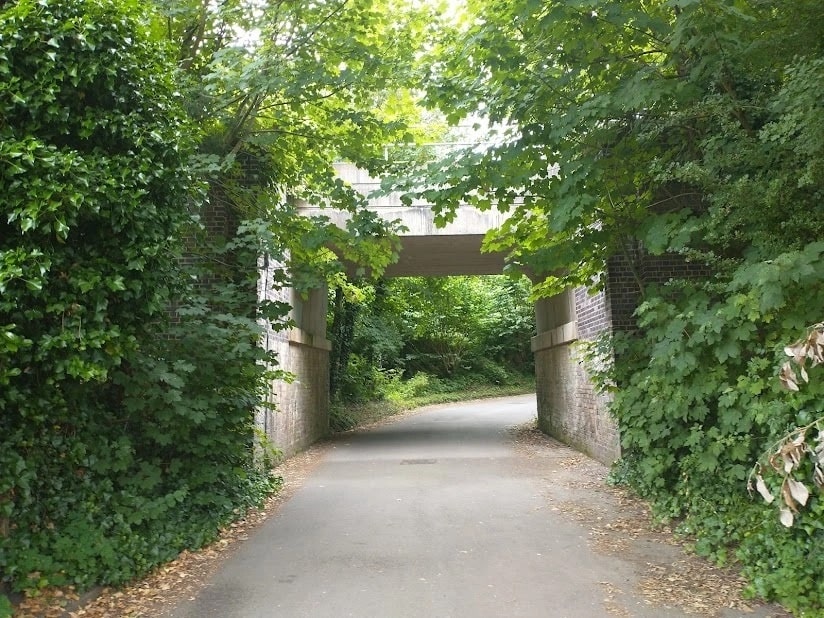
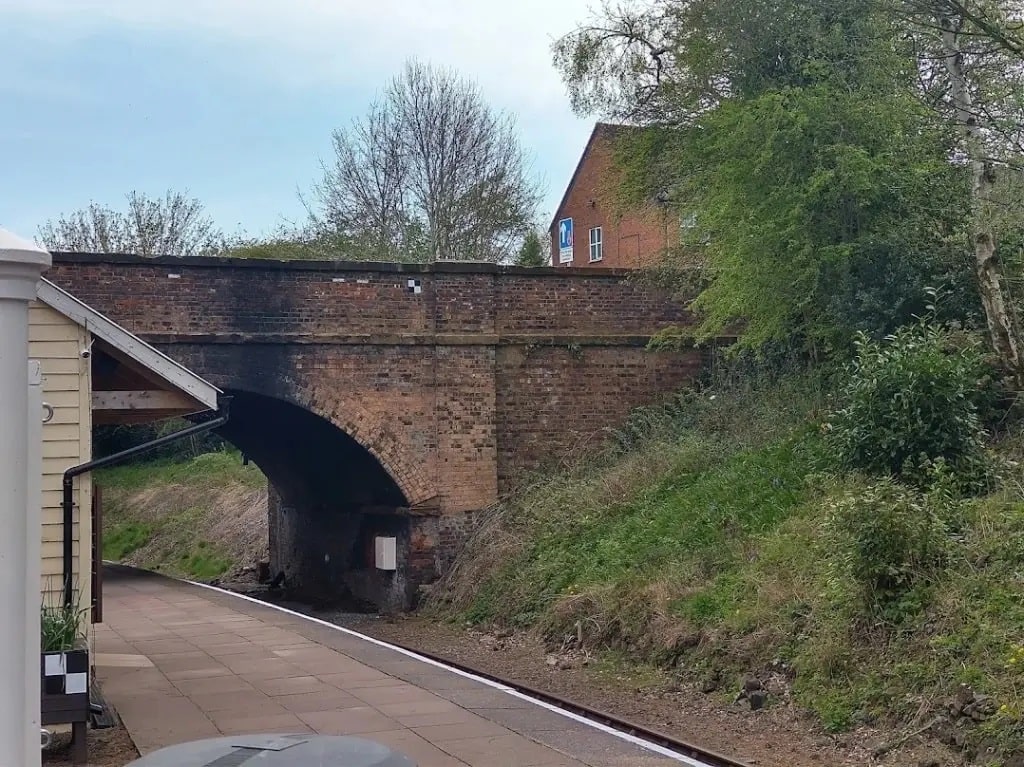
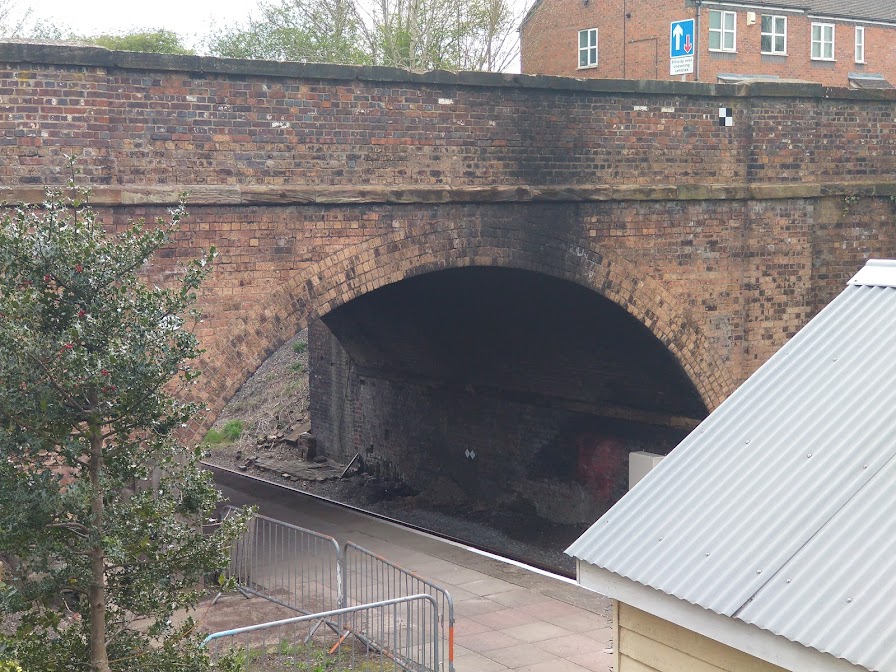
The bridge originally carried the Welshpool and Llanfair Light Railway, © Copyright John M and licensed for reuse under a Creative Commons Licence (CC BY-SA 2.0). [20]
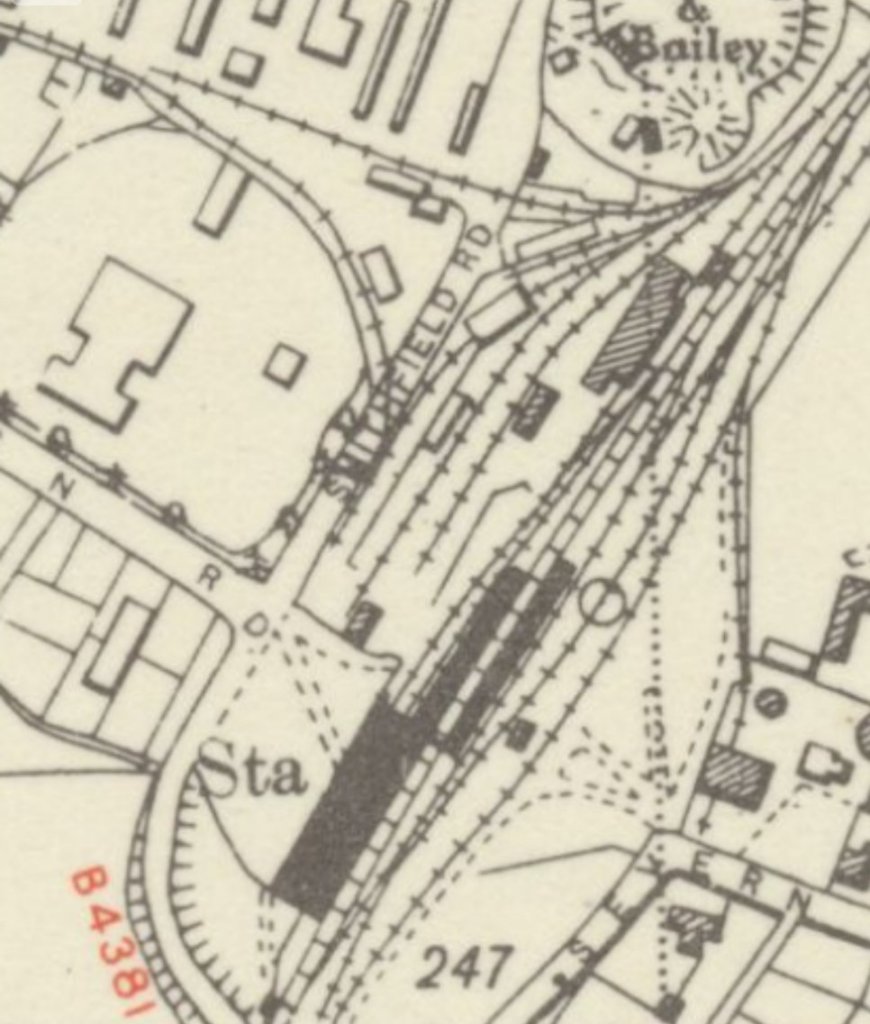
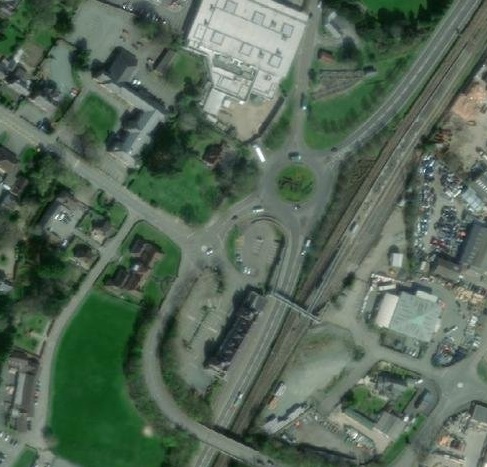
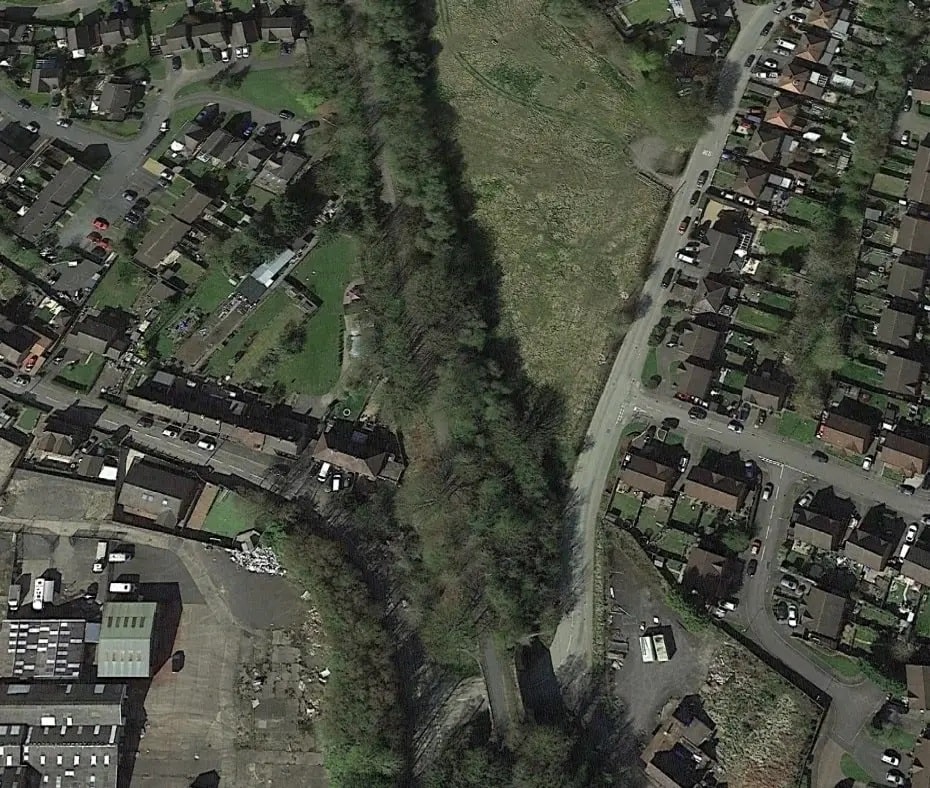
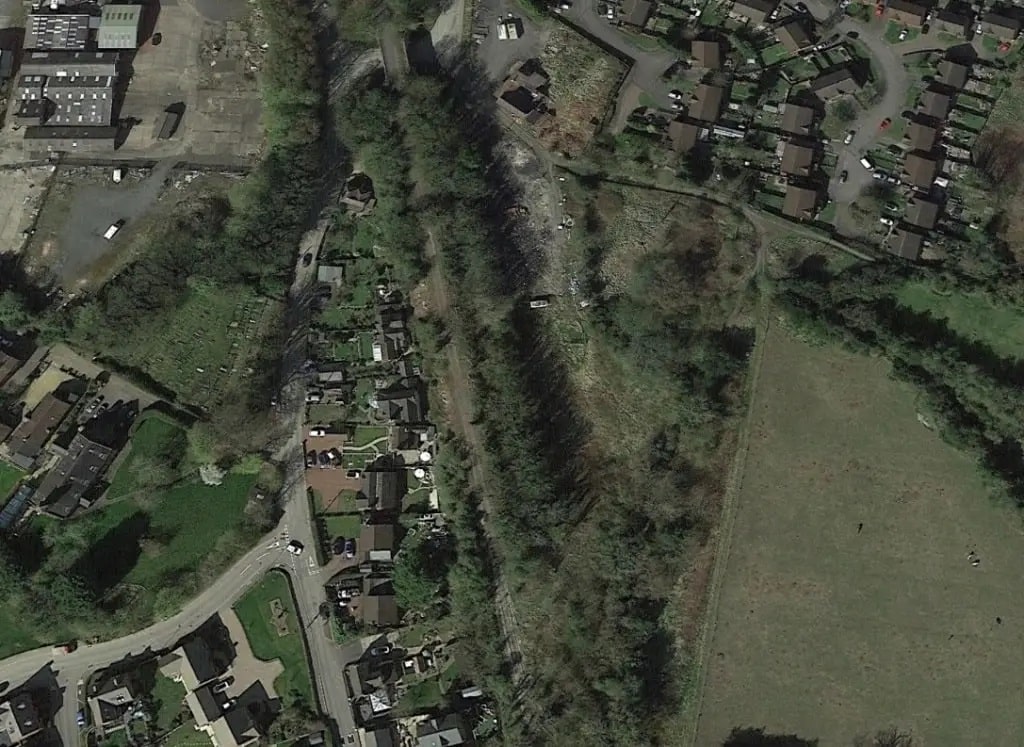
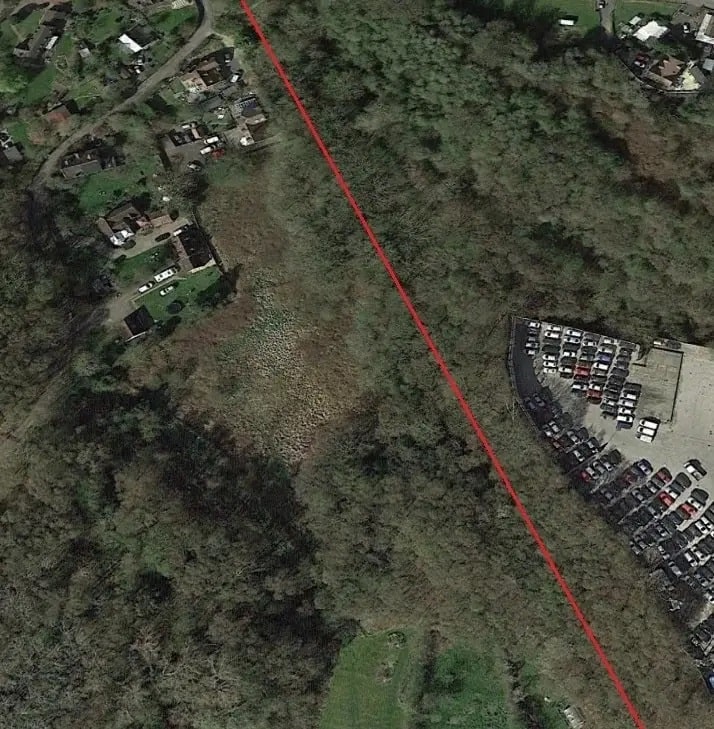
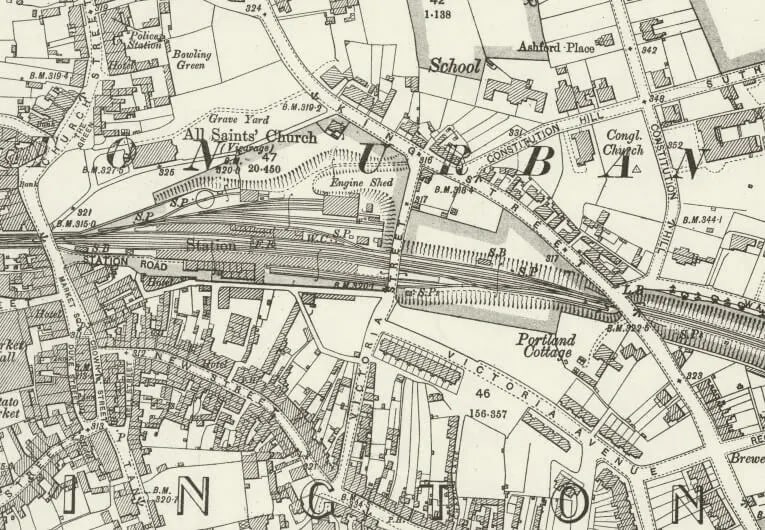
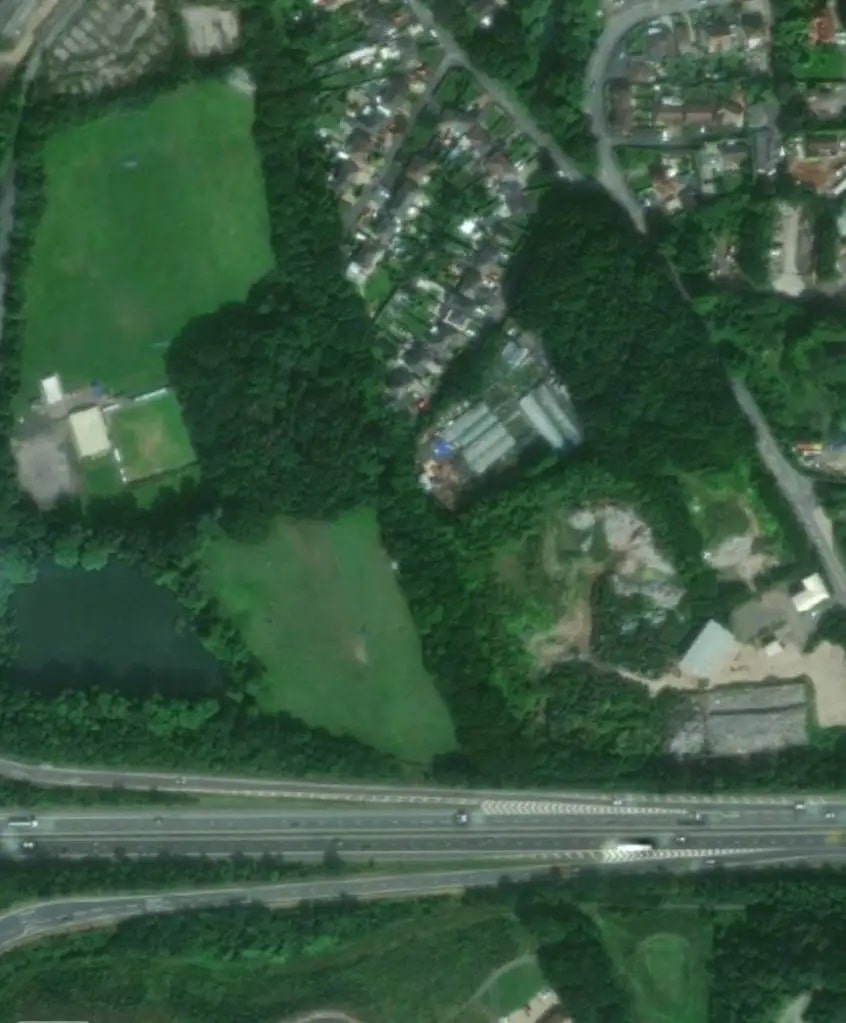
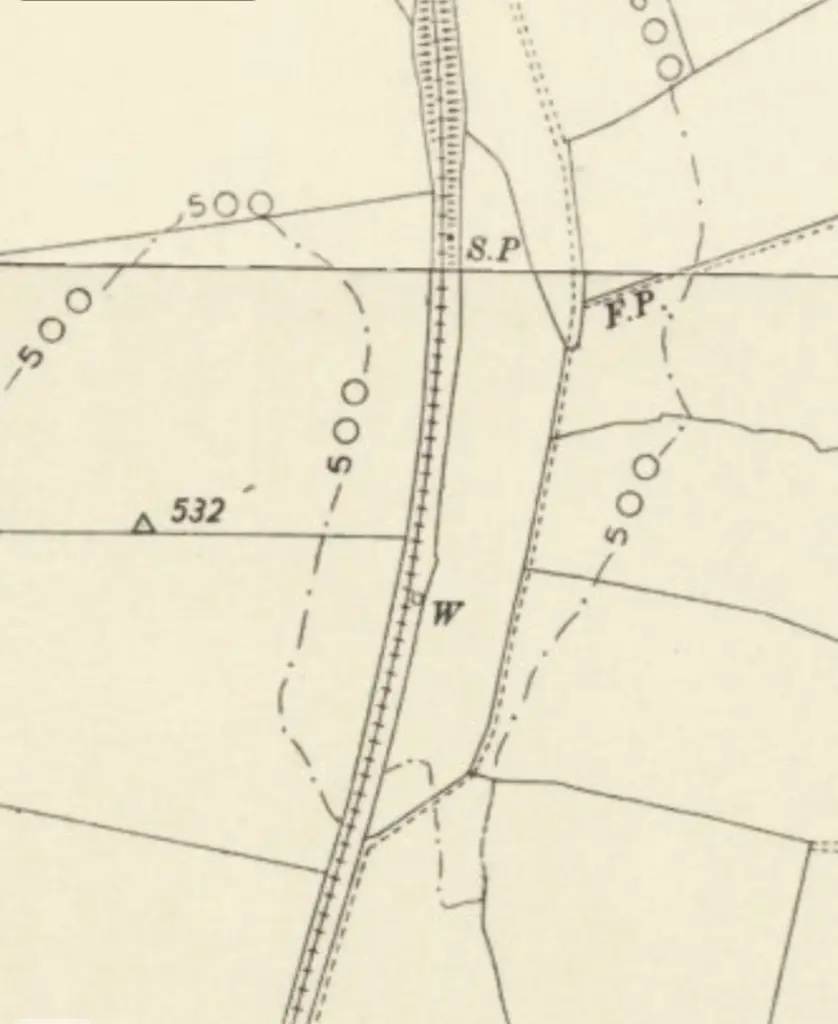
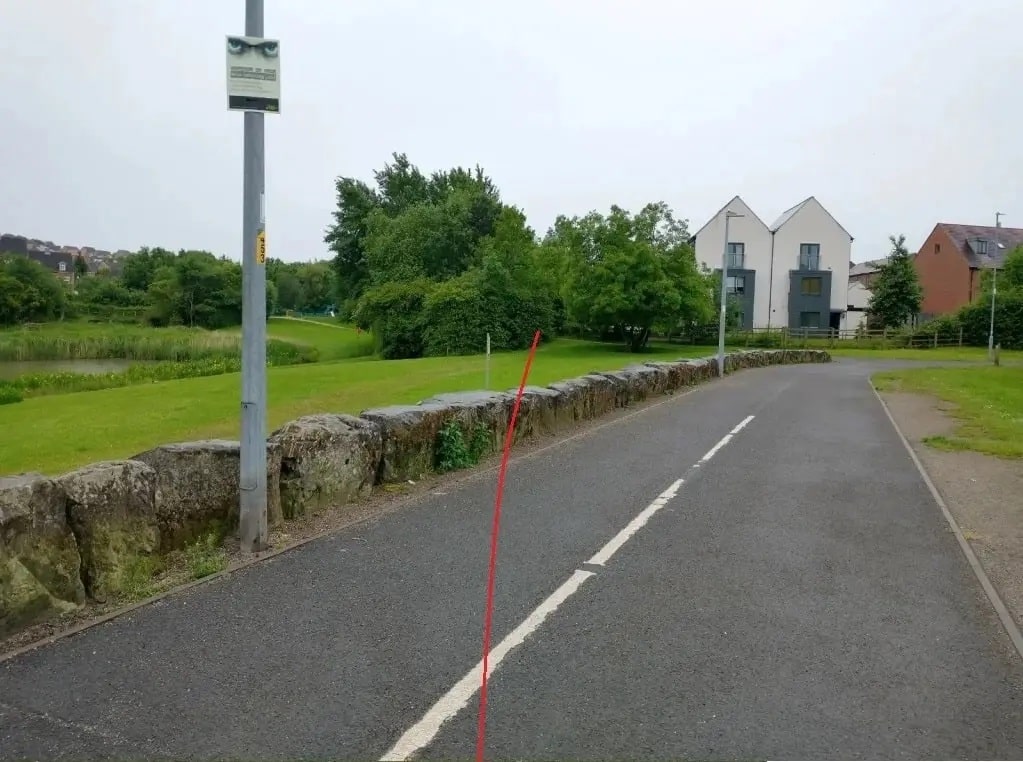
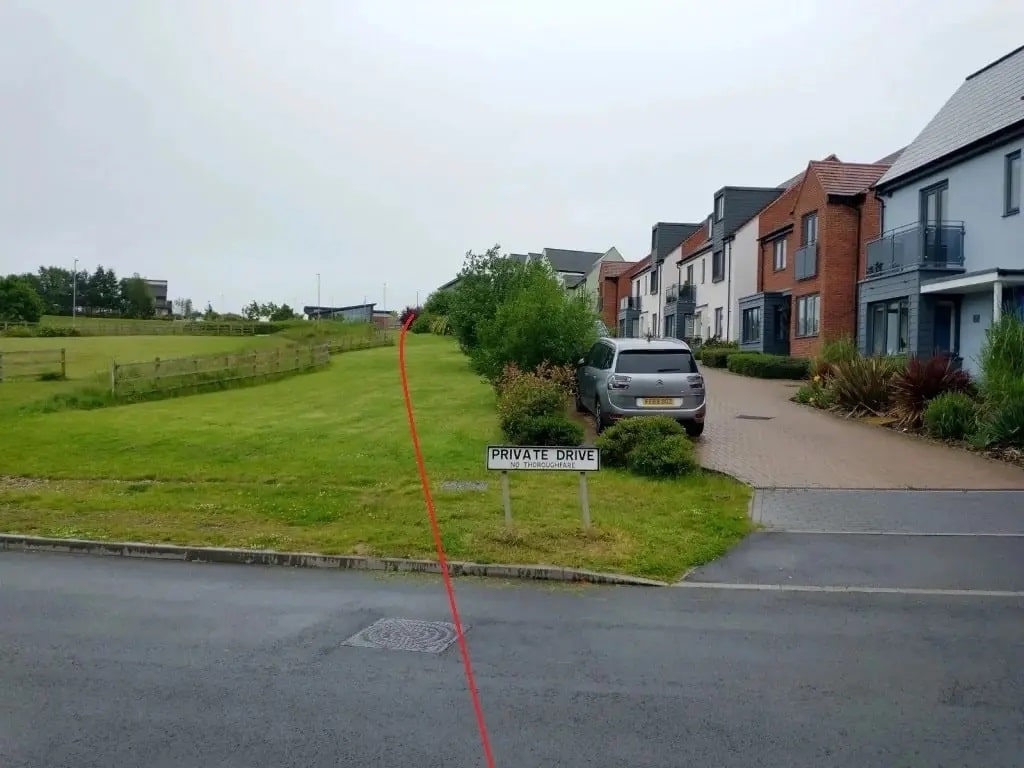
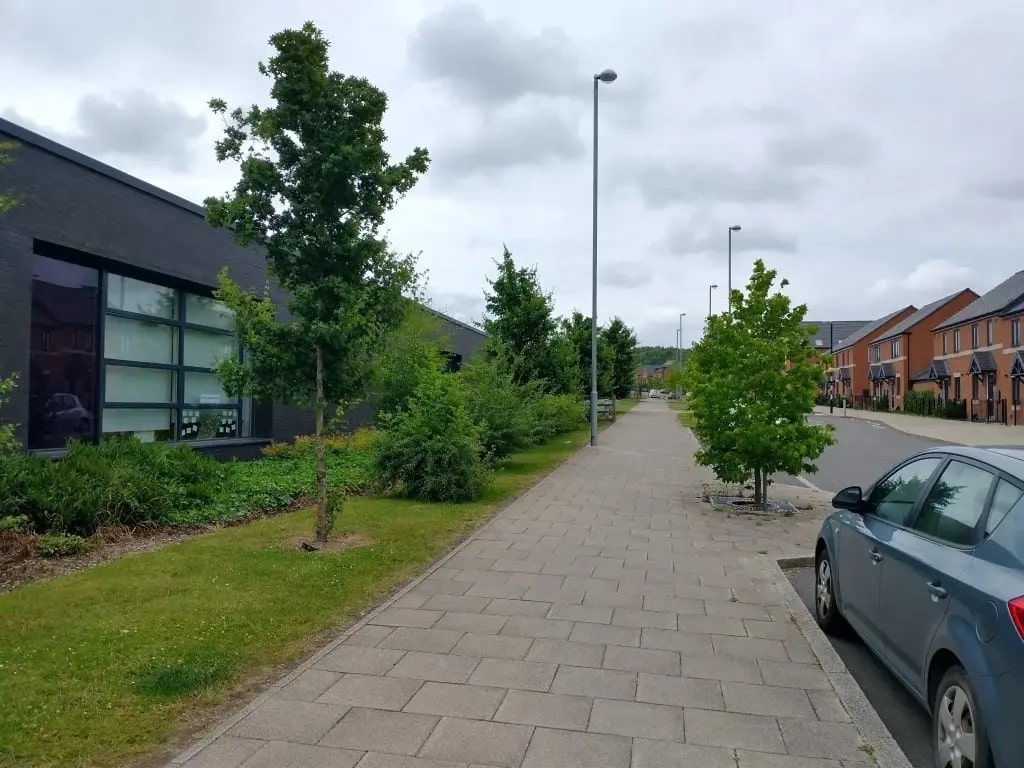
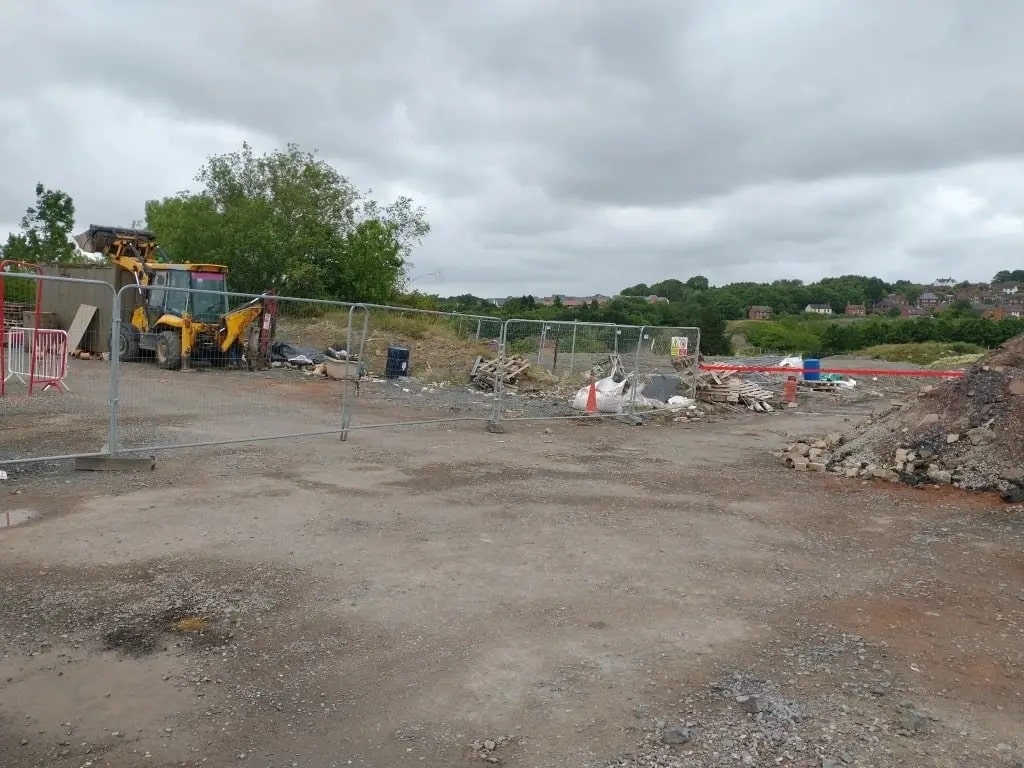
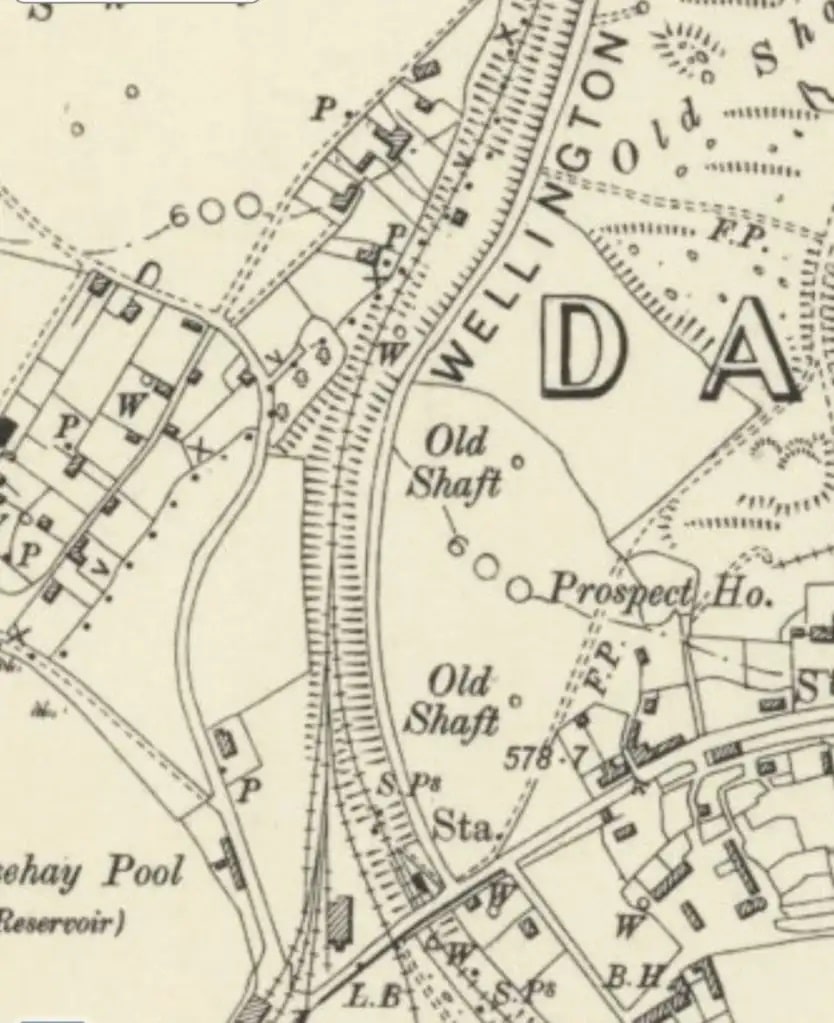
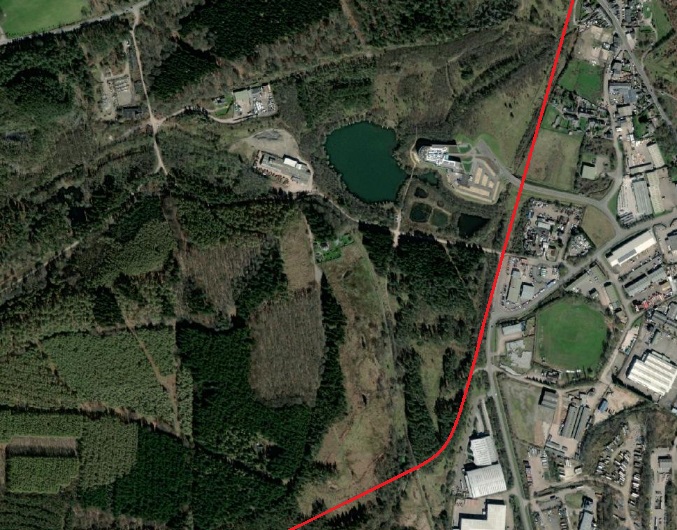
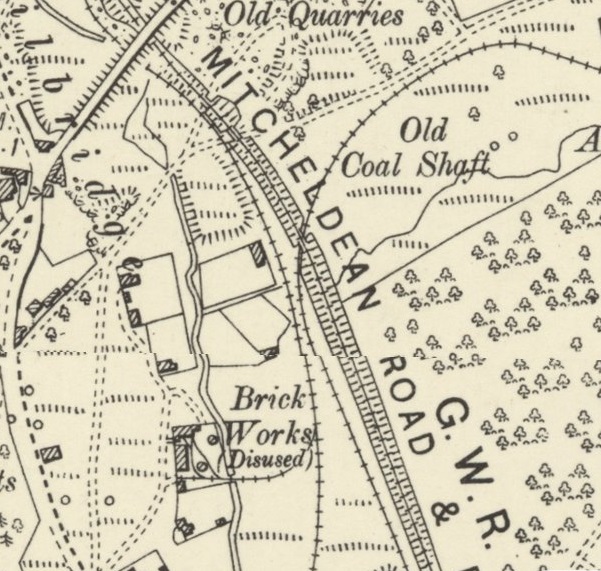
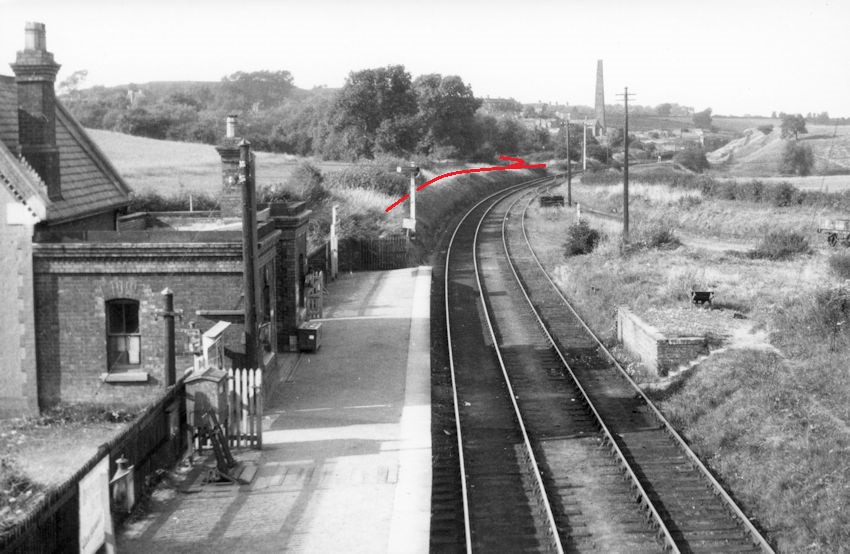
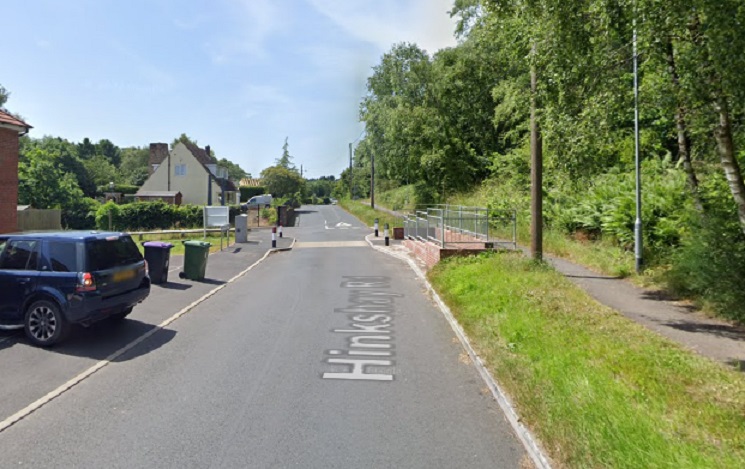
Much of Welshpool town centre has been redeveloped and roads have been significantly realigned and a gyratory added for traffic on the A458, Salop Road. The bottom arm of the gyratory can be seen entering the image above from the right and heading away from the camera at the centre of the image. This location appears on the next 6″ OS Map extract below.
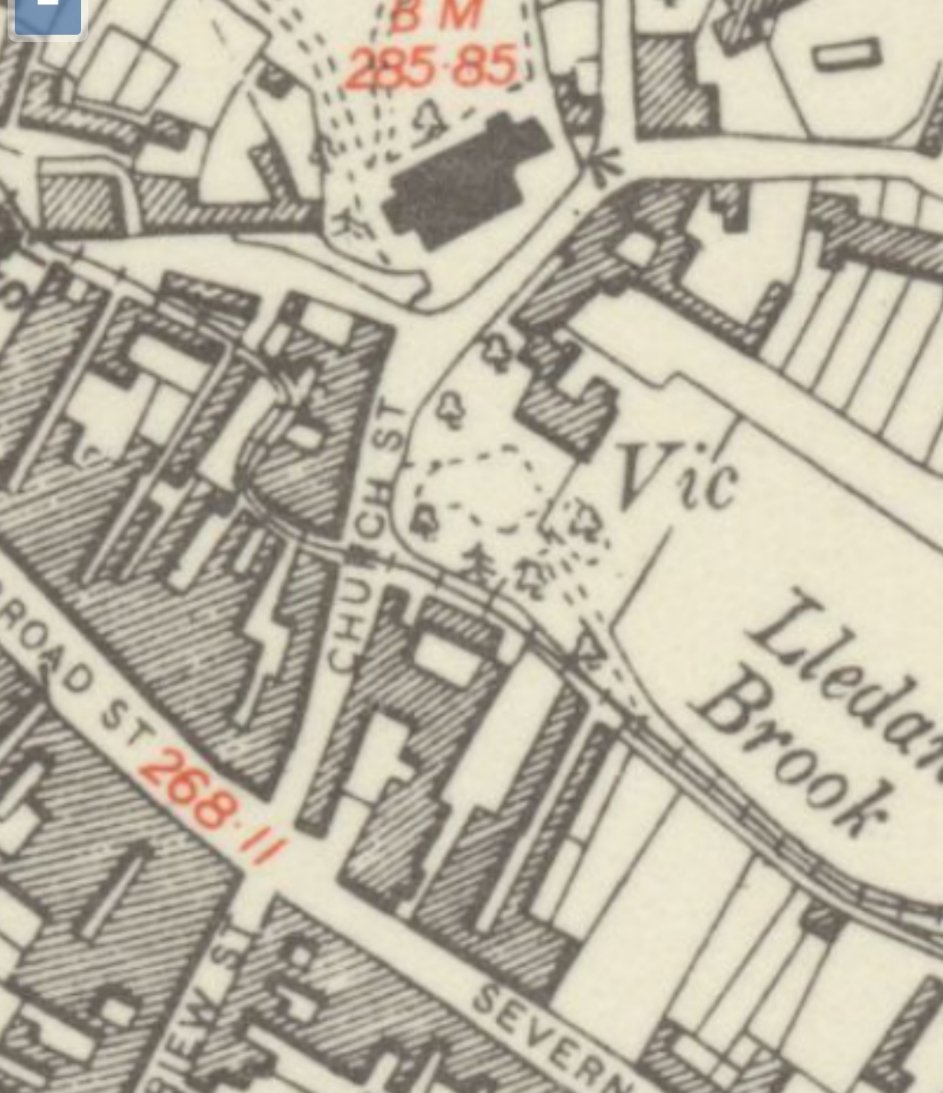

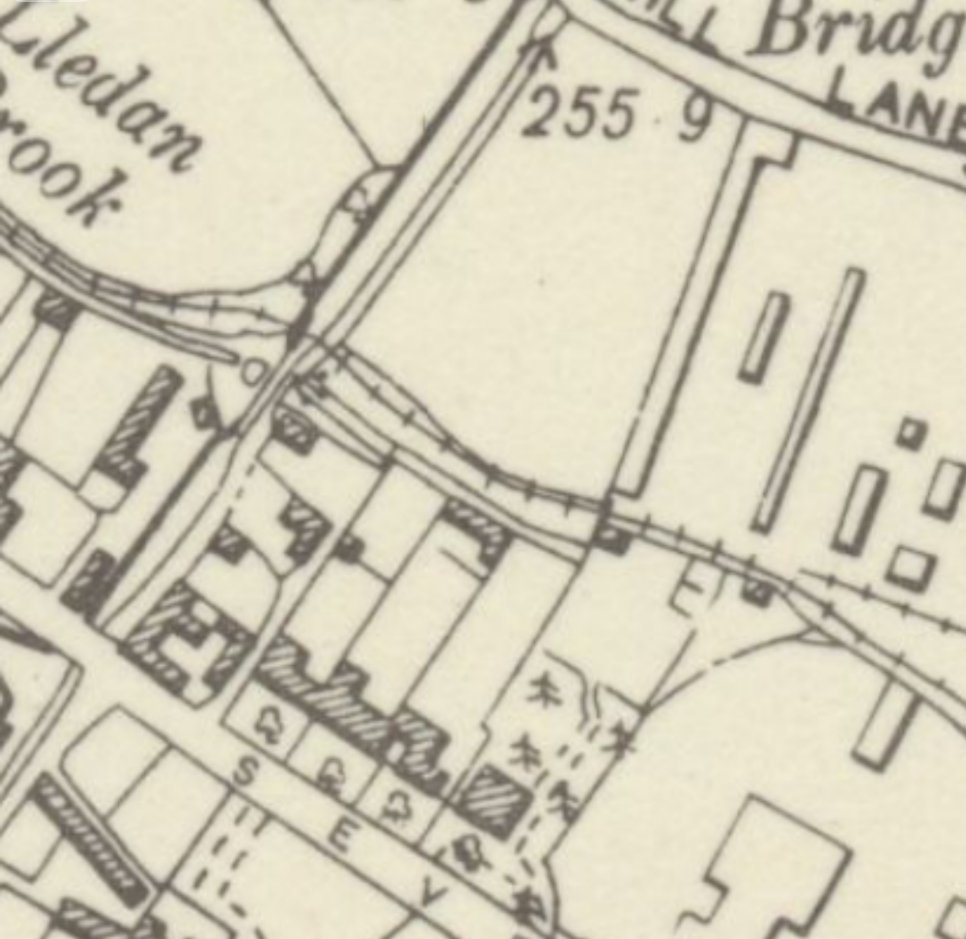
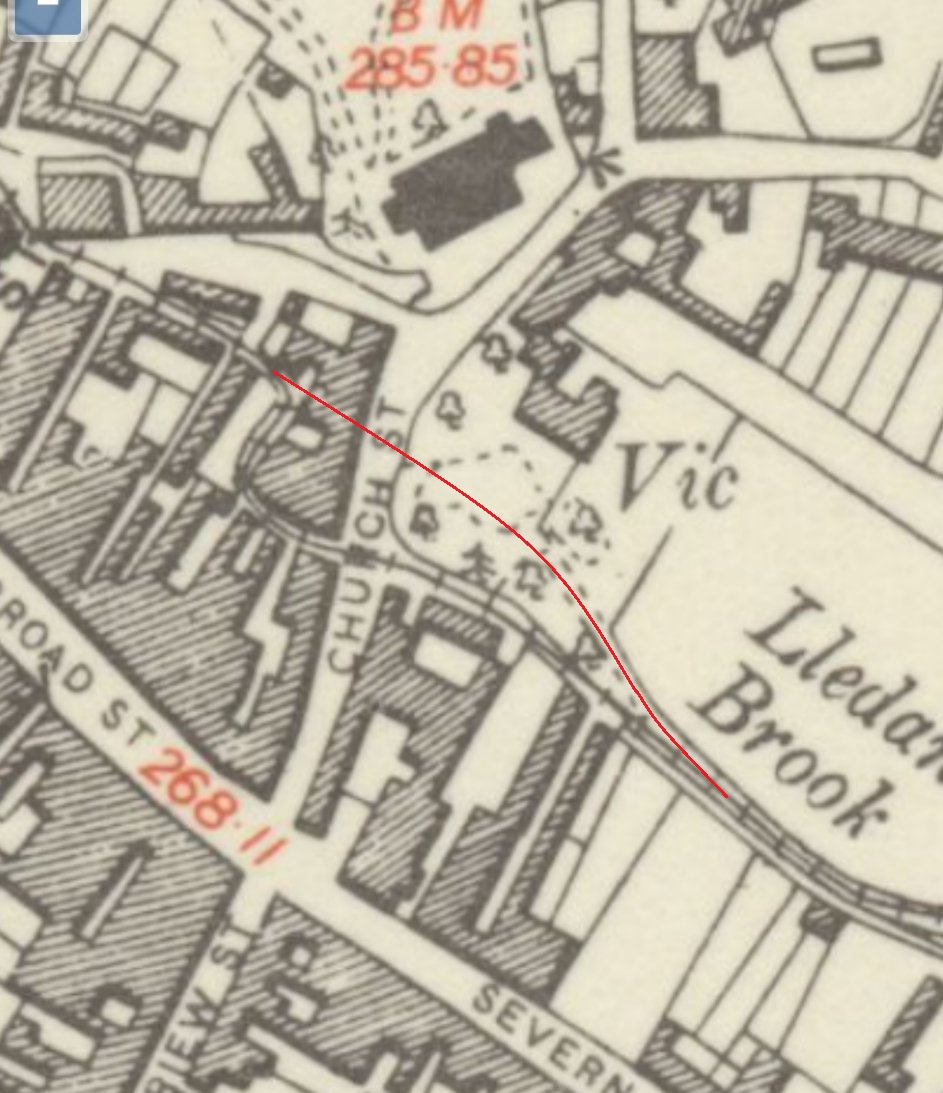
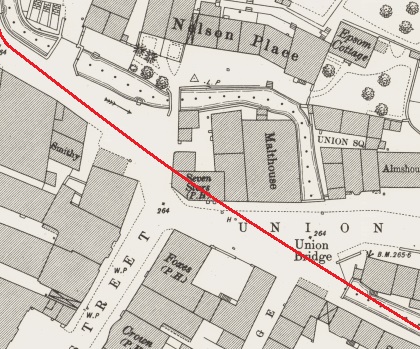
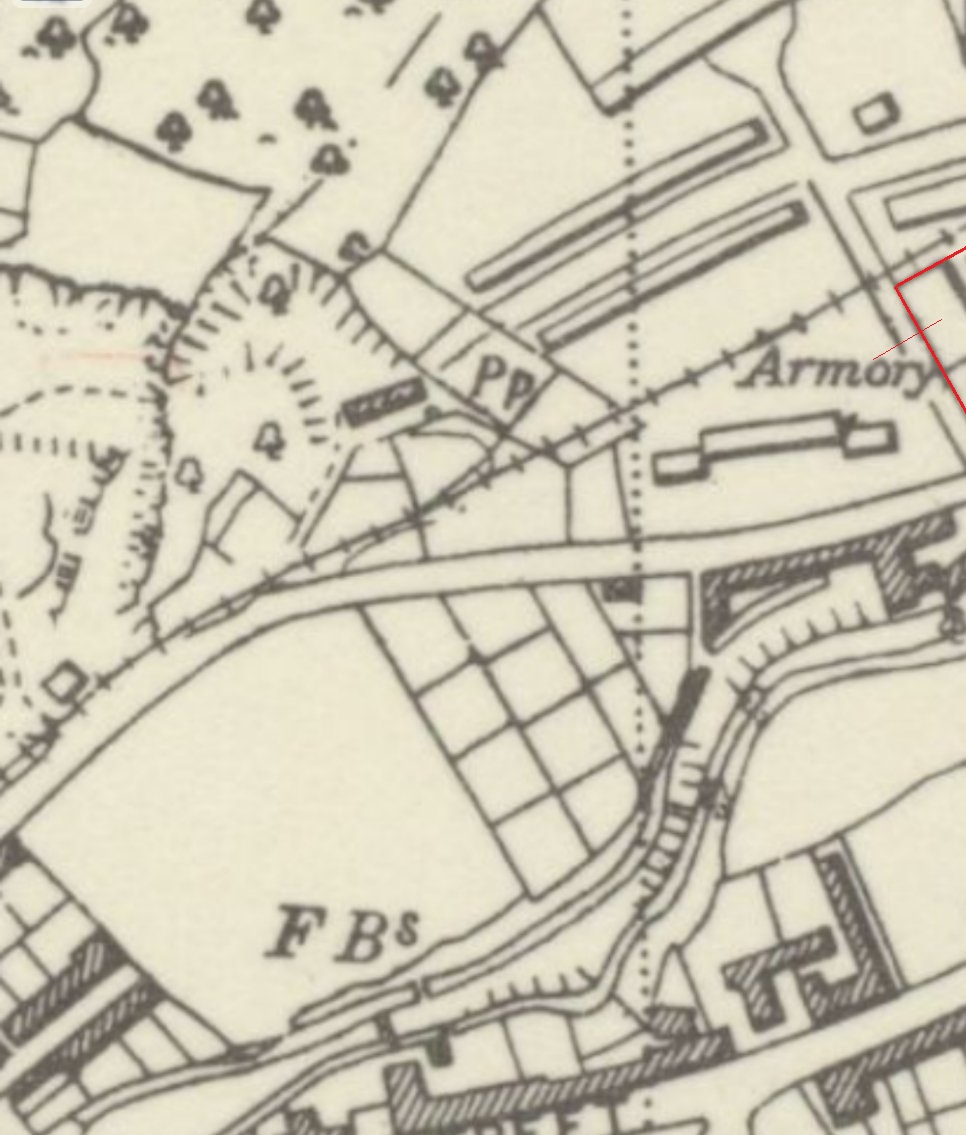
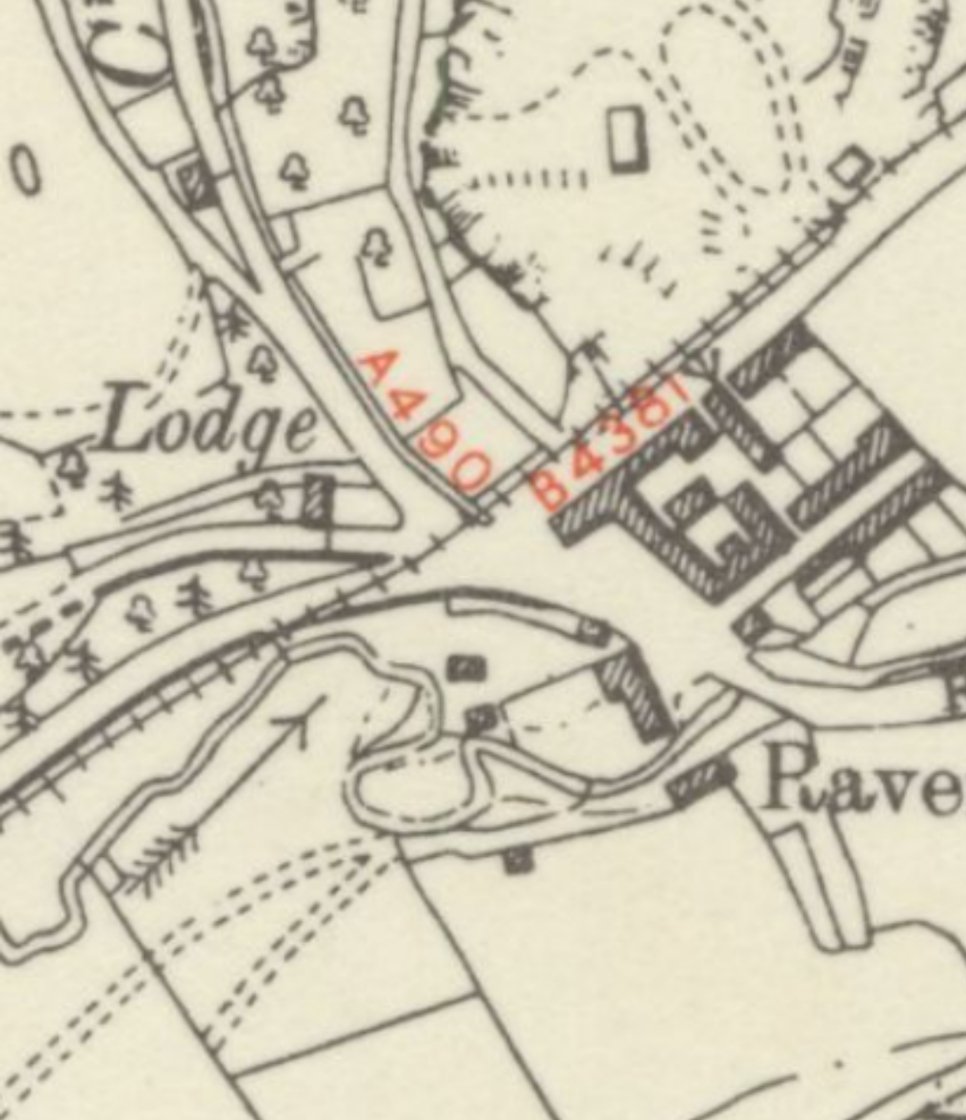
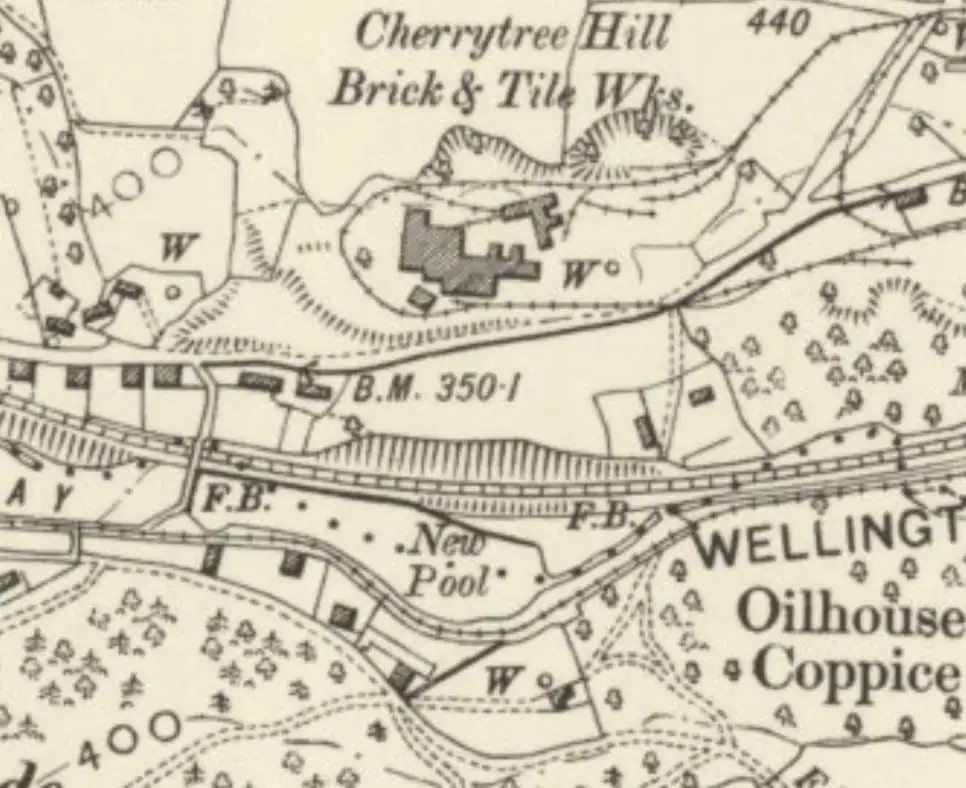
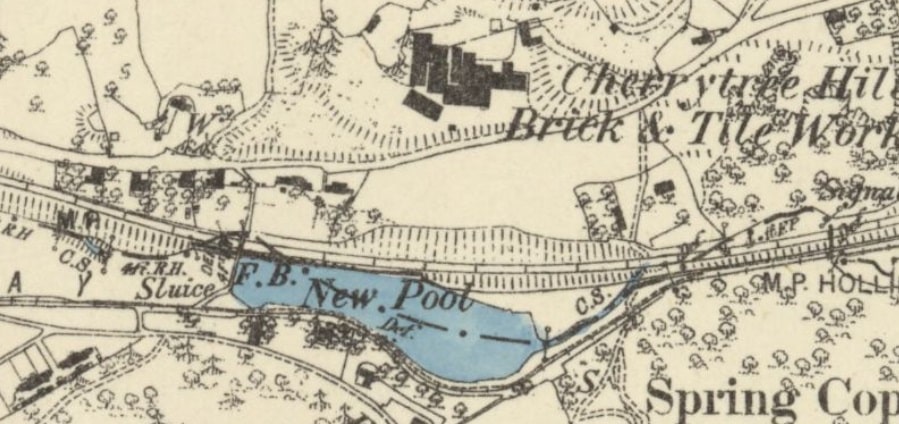
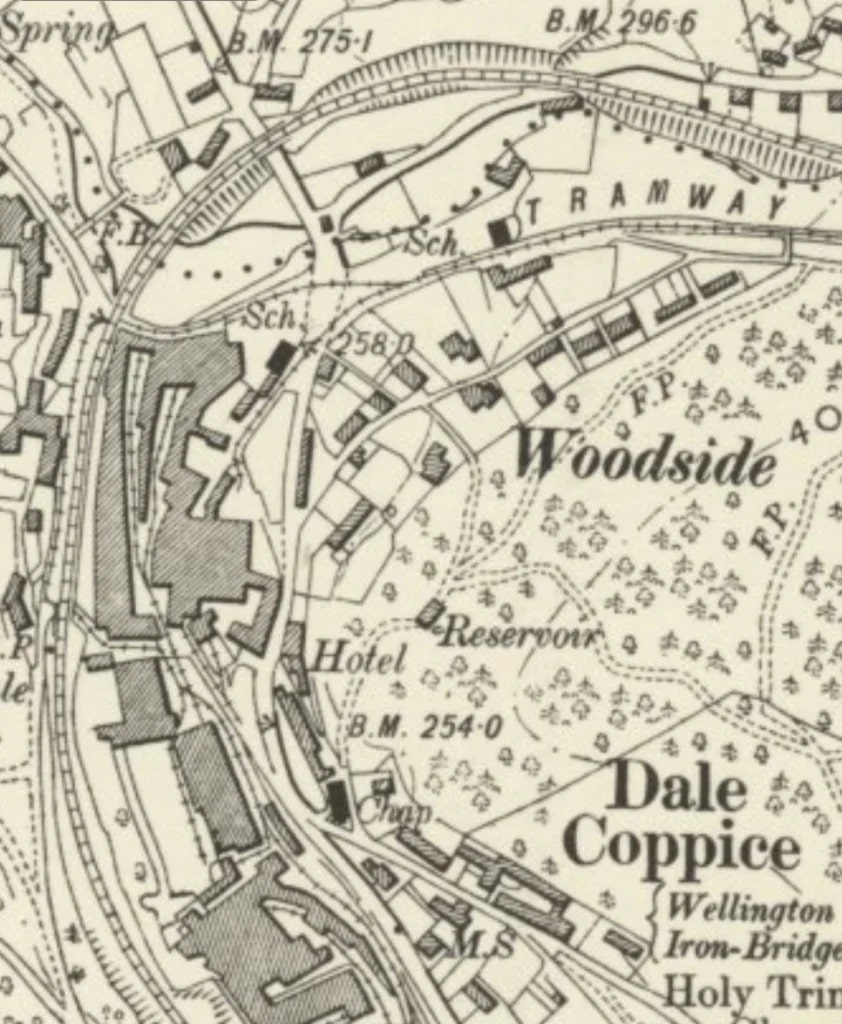
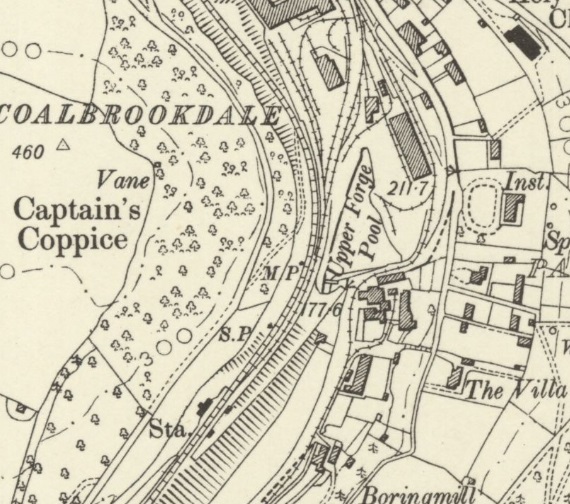
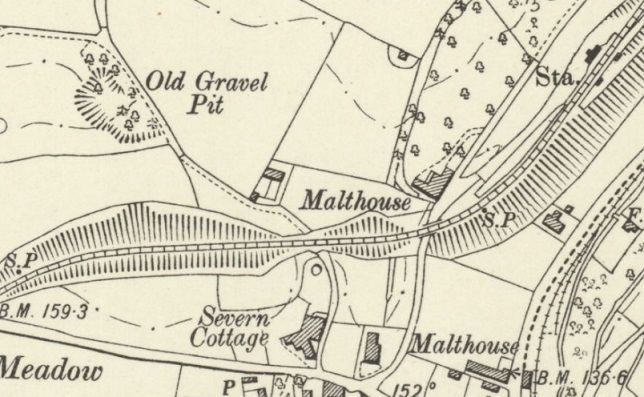
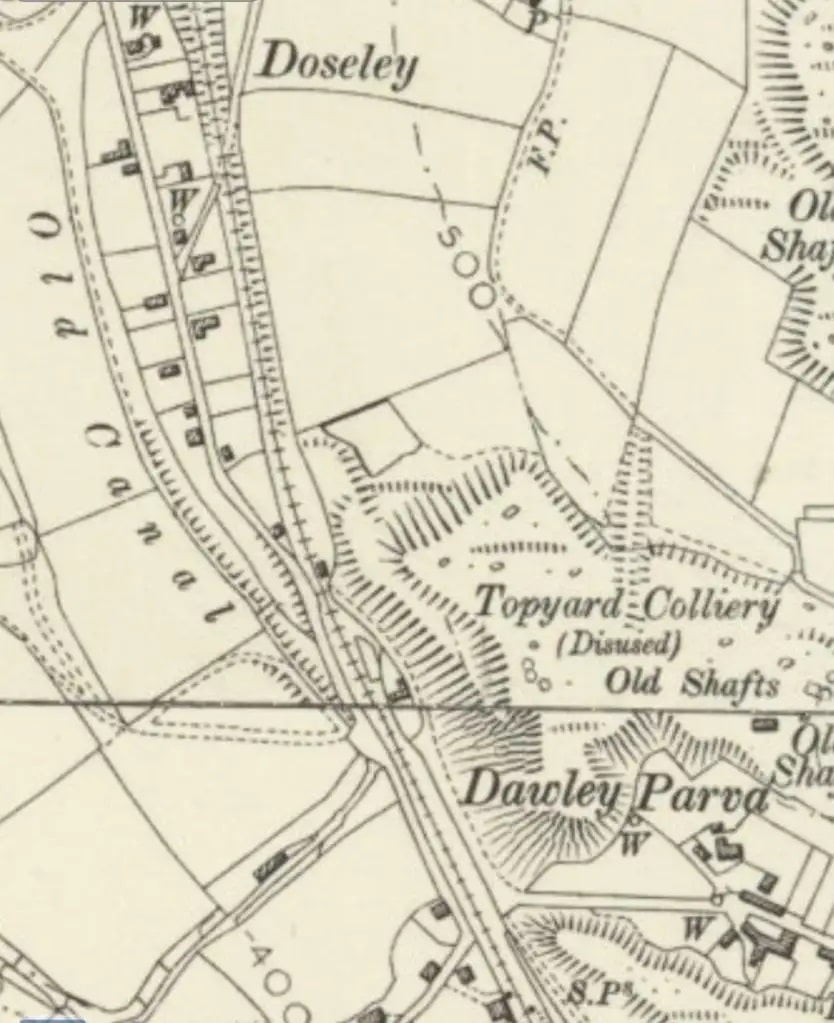
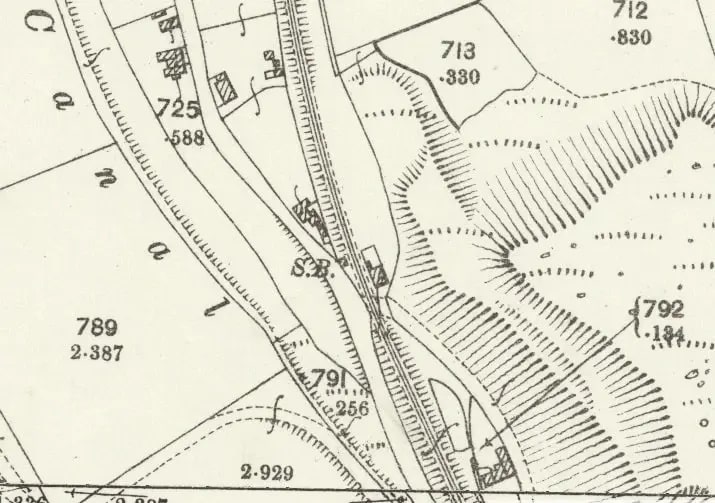
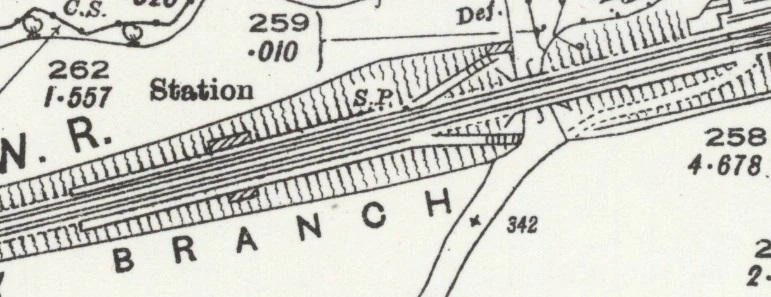
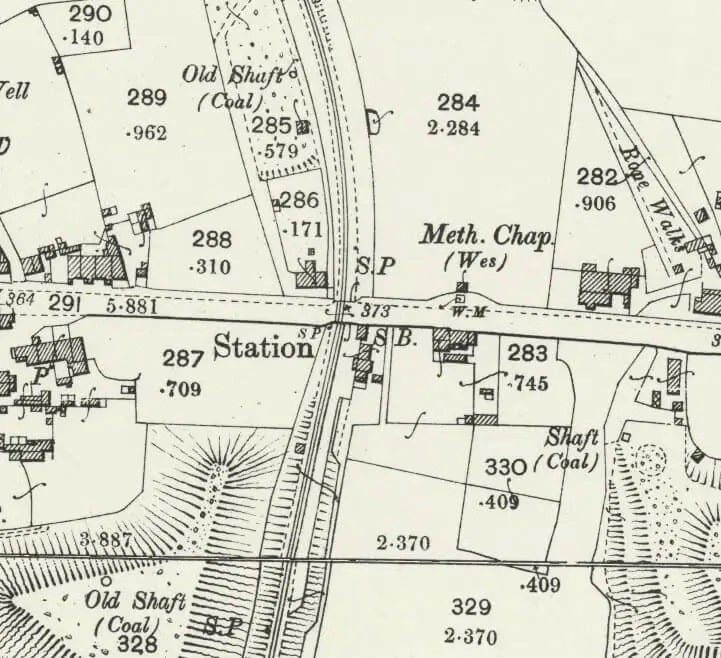
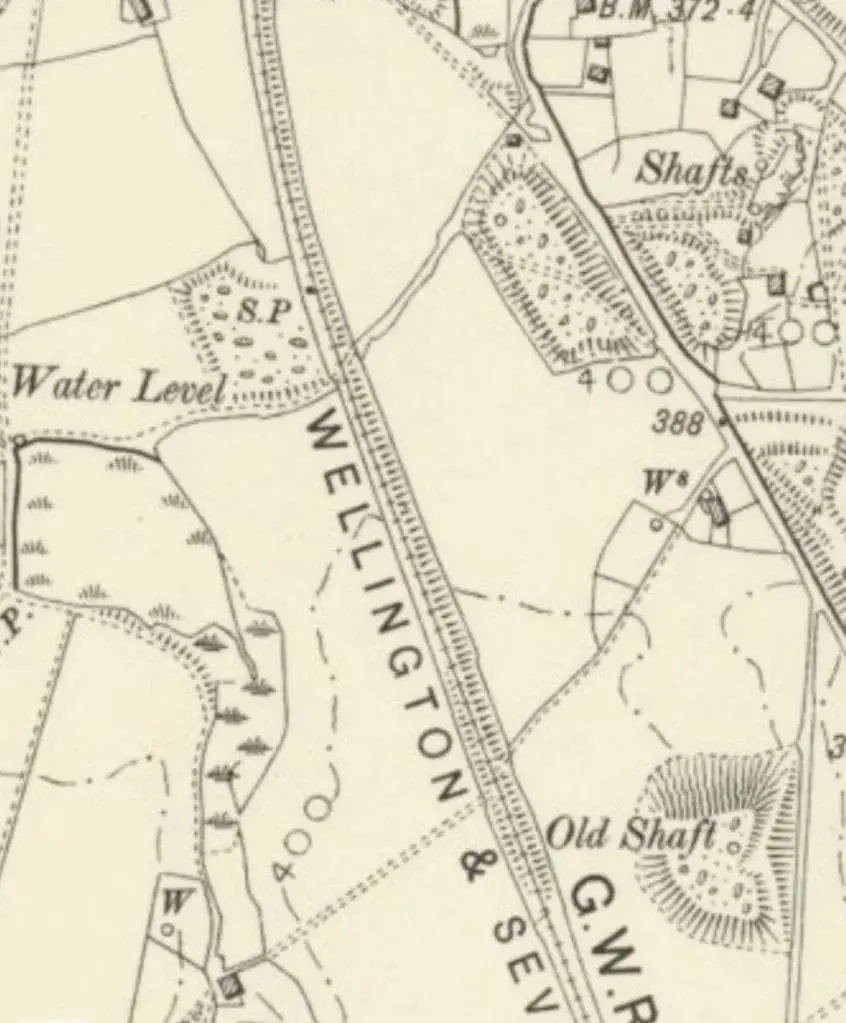
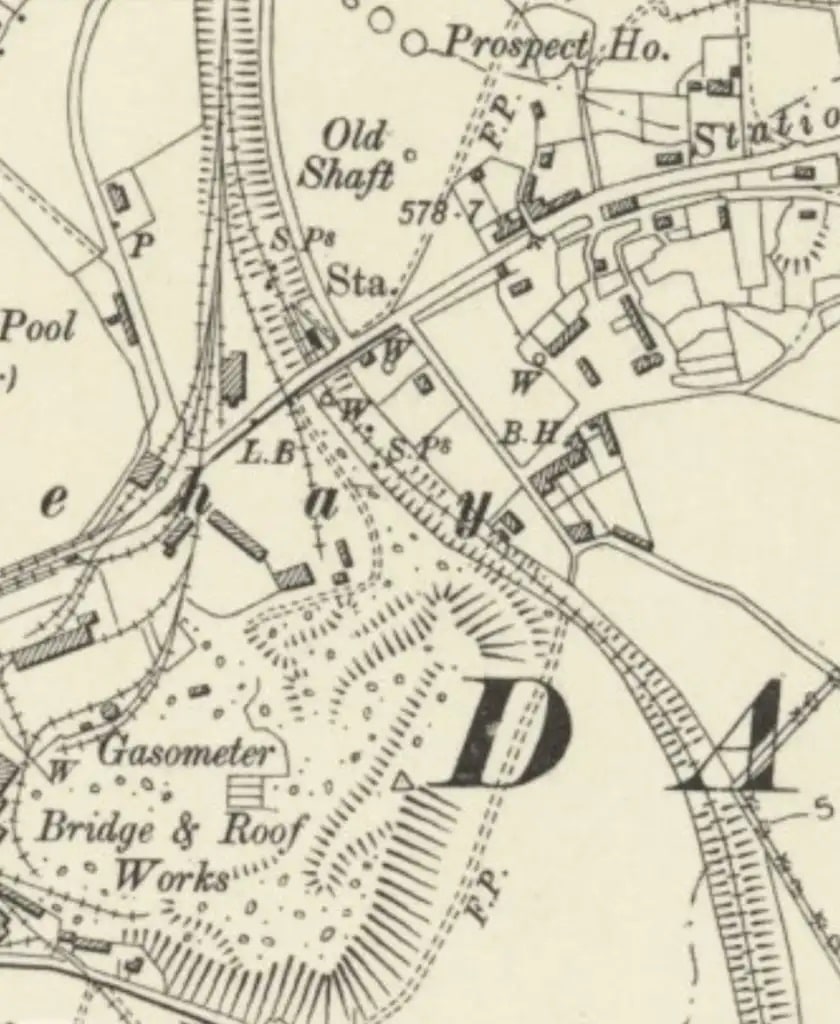
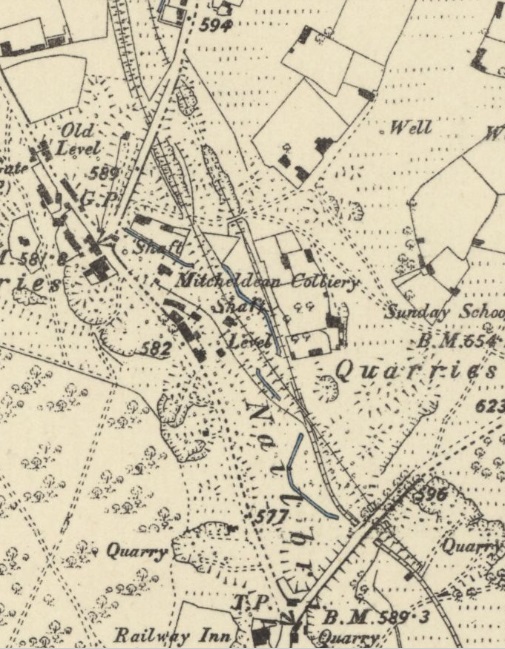
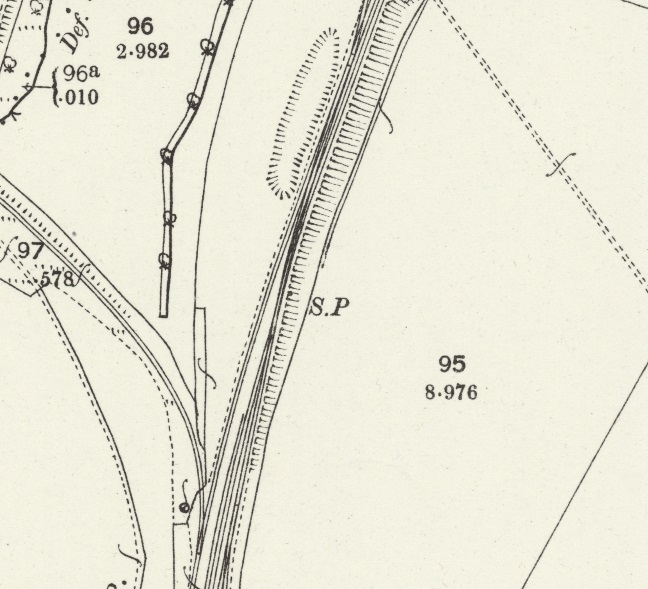
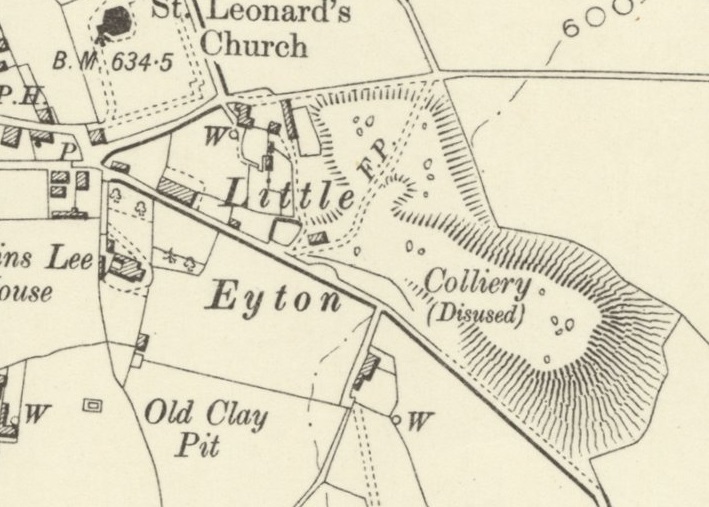
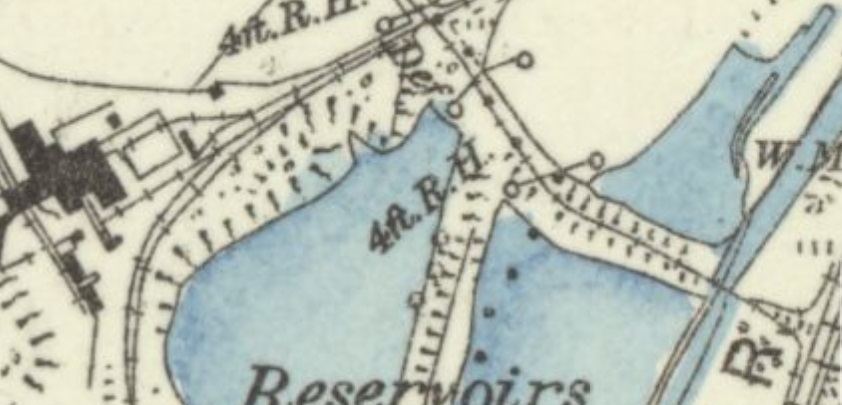
It is worth pausing for a moment. I am not usually one for calling to question OS Mapping, but it appears that in this case the cartographers have followed the route of the brook, rather than the route of the railway when they drew the railway onto the 6″ OS Maps of 1949. Interestingly the line does not appear on earlier versions of the 6″ OS Maps. I have reproduced the 1938 revision below. It seems as though the brook was culverted from point ‘A’ to point ‘B’ as marked on the plan.
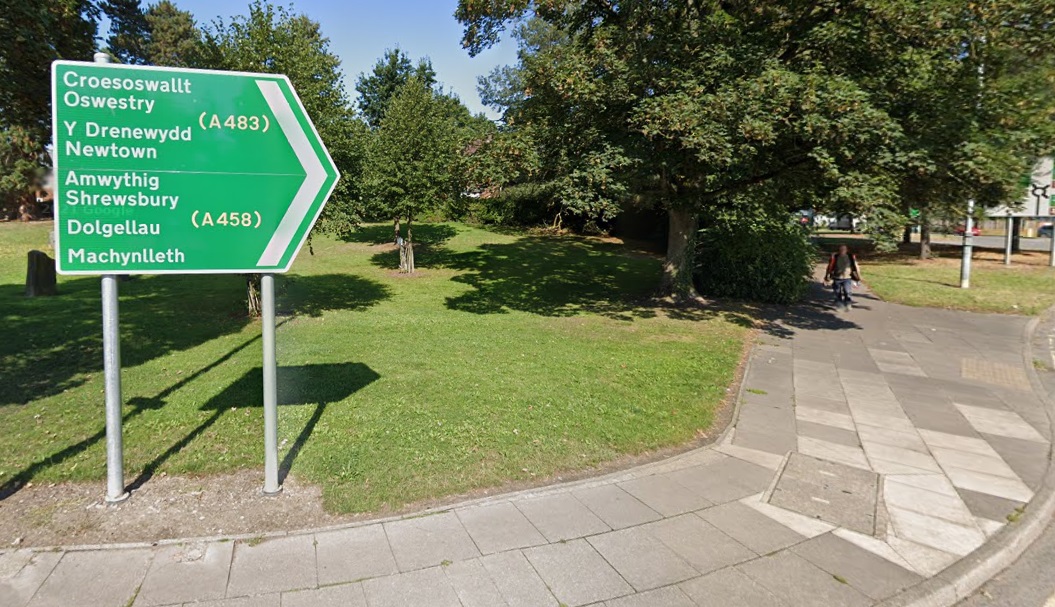
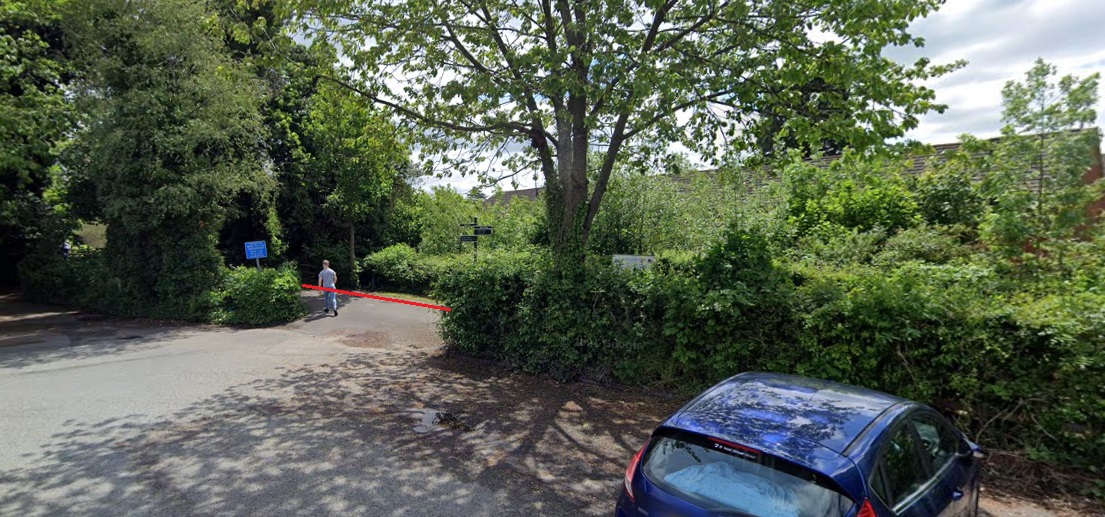
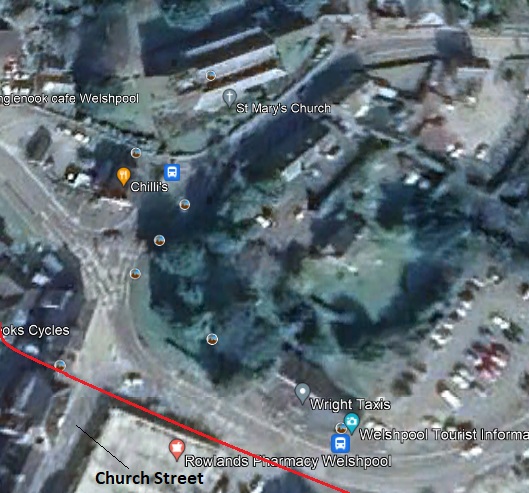
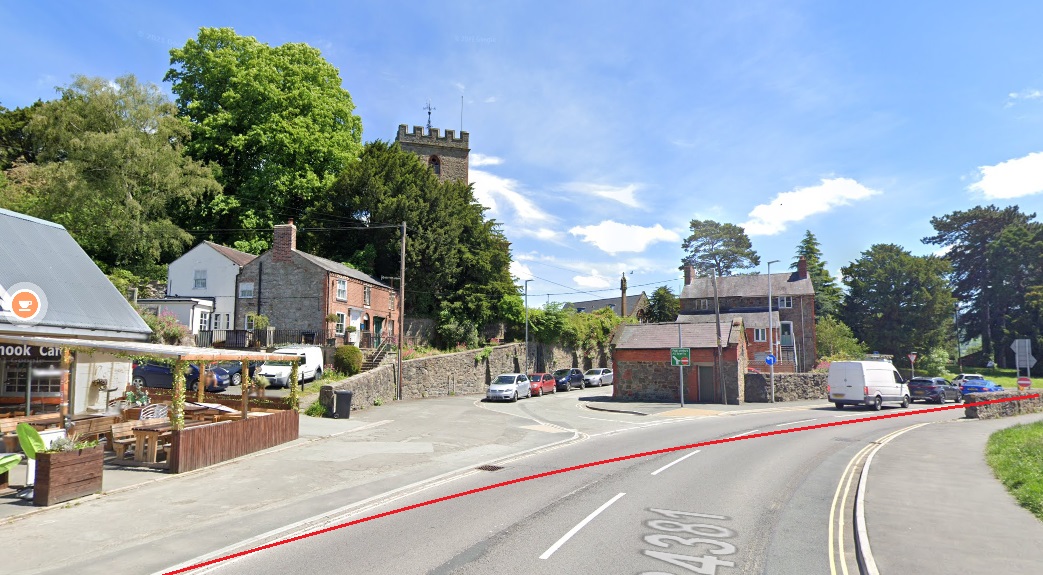
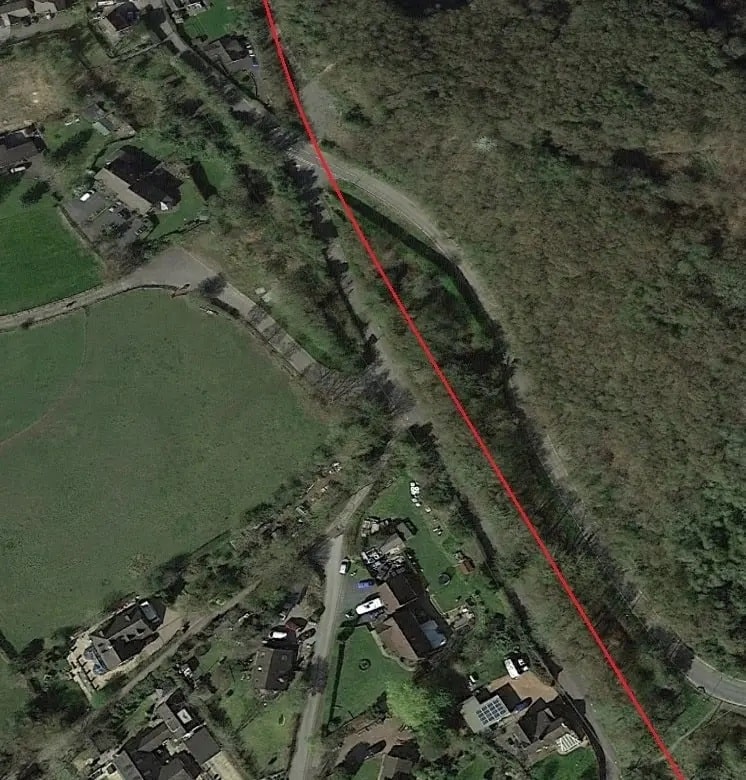
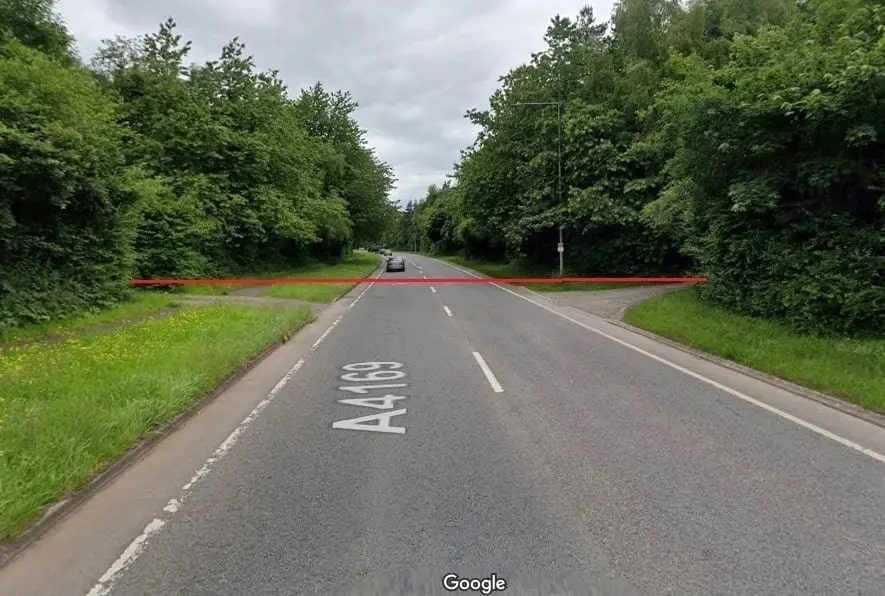
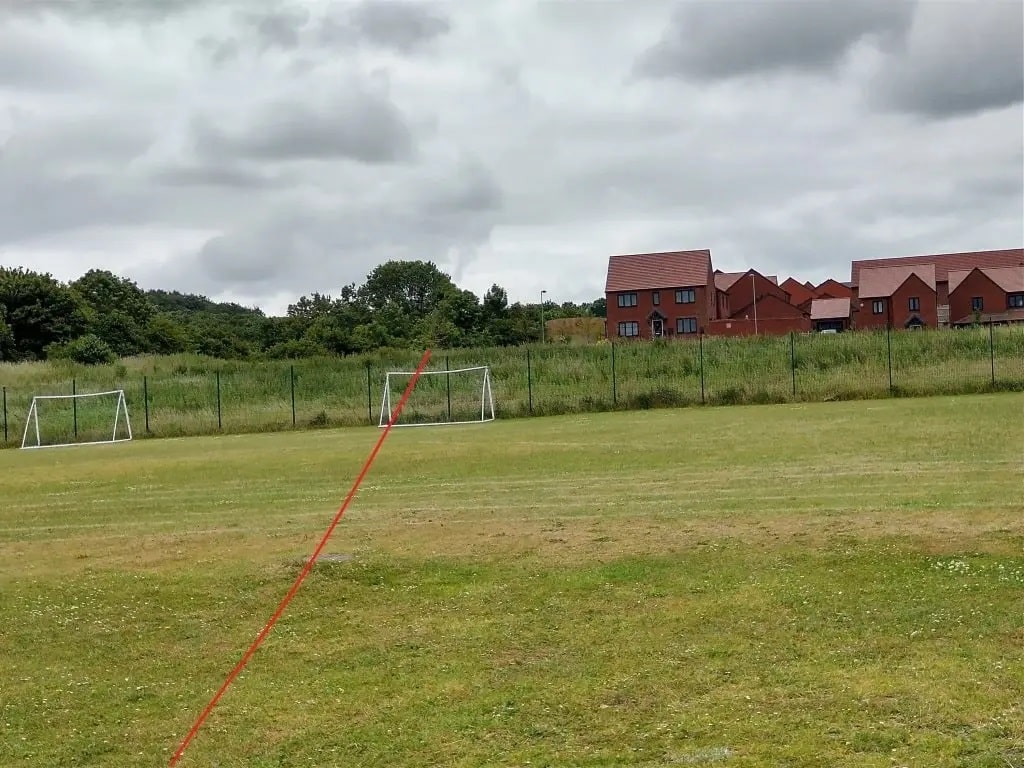
The railway followed a slightly more northerly line than the brook reaching Church Street halfway between the old alignment of Union Street and the brook.

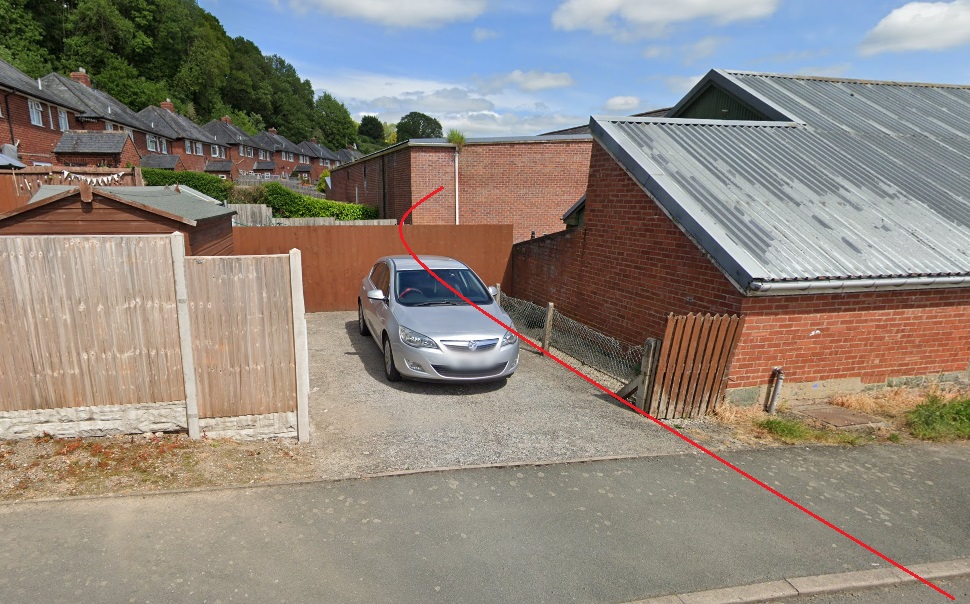
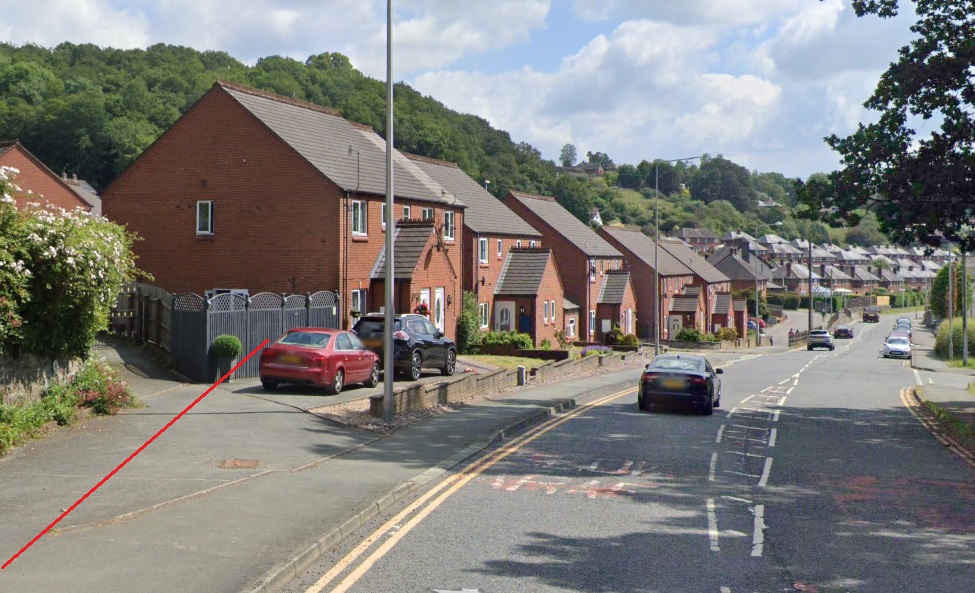
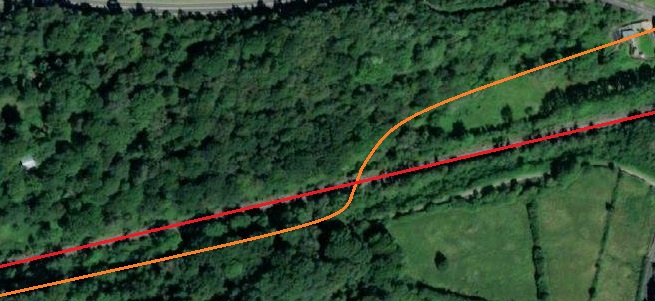
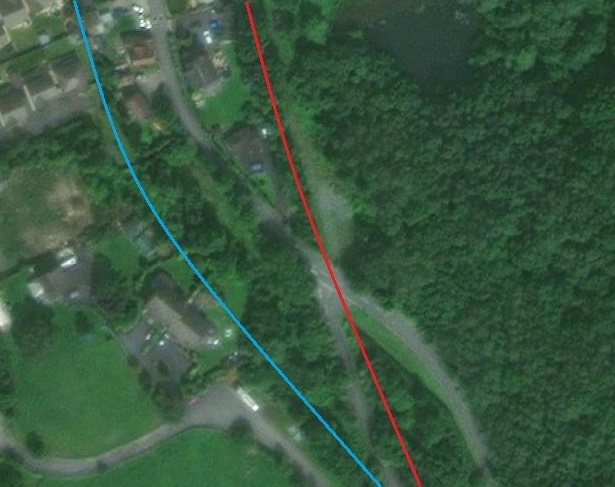
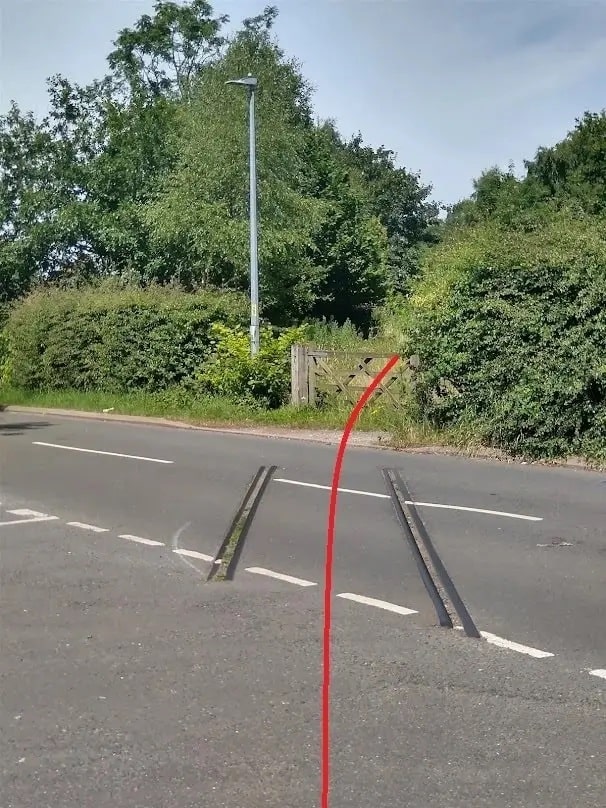
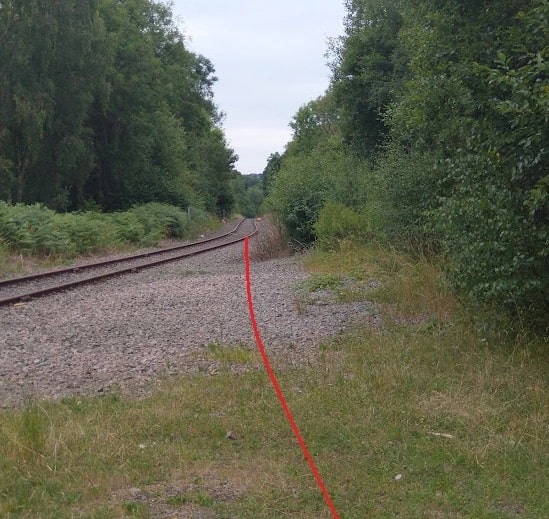
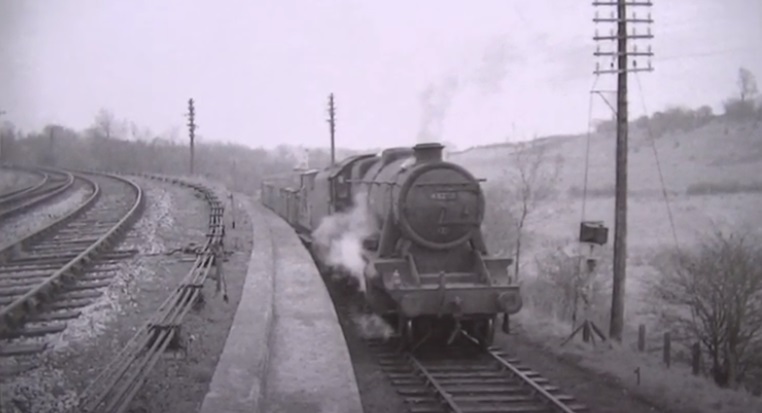
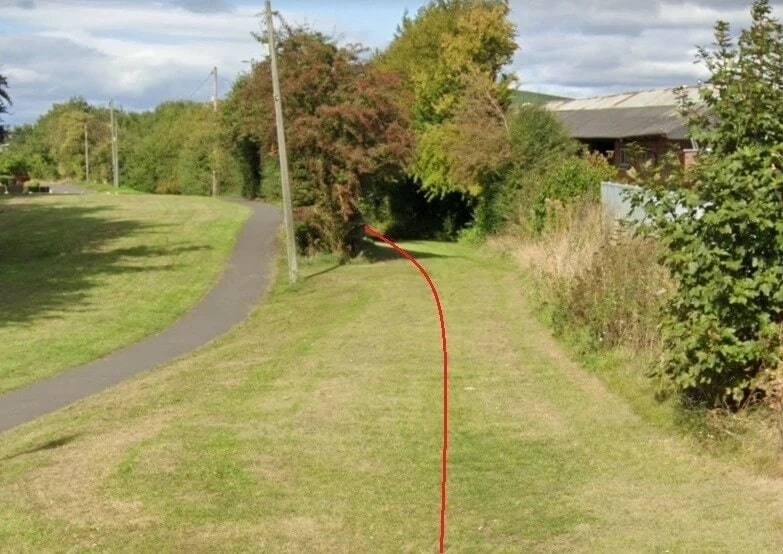
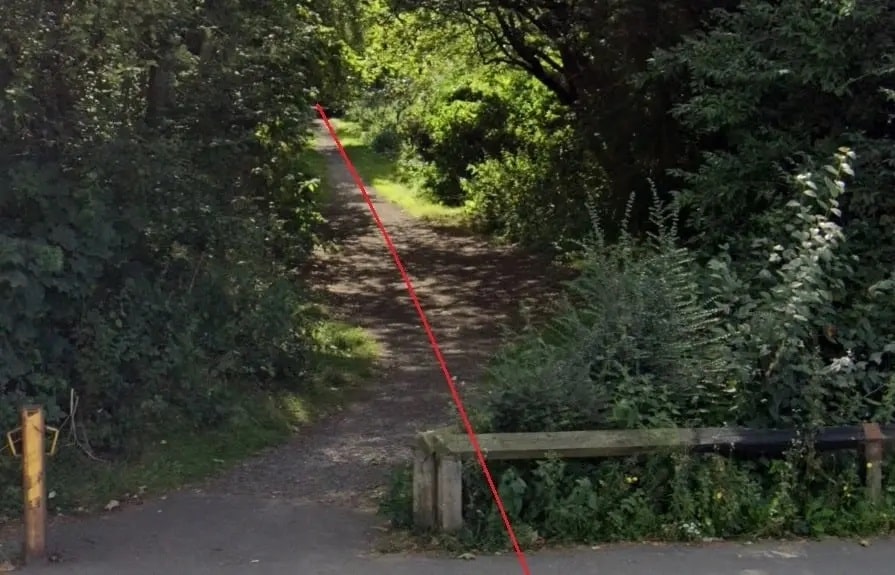
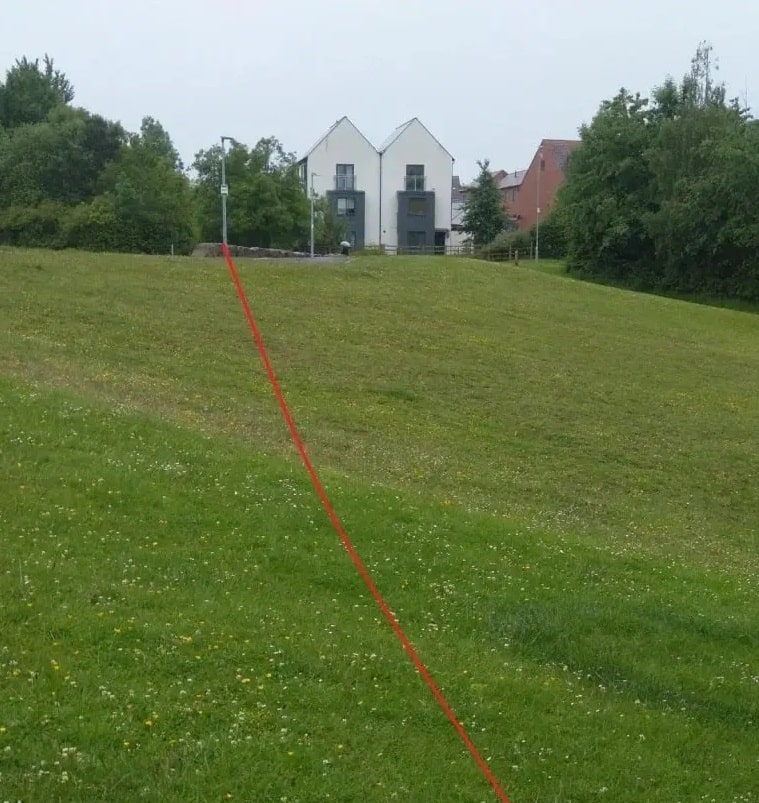
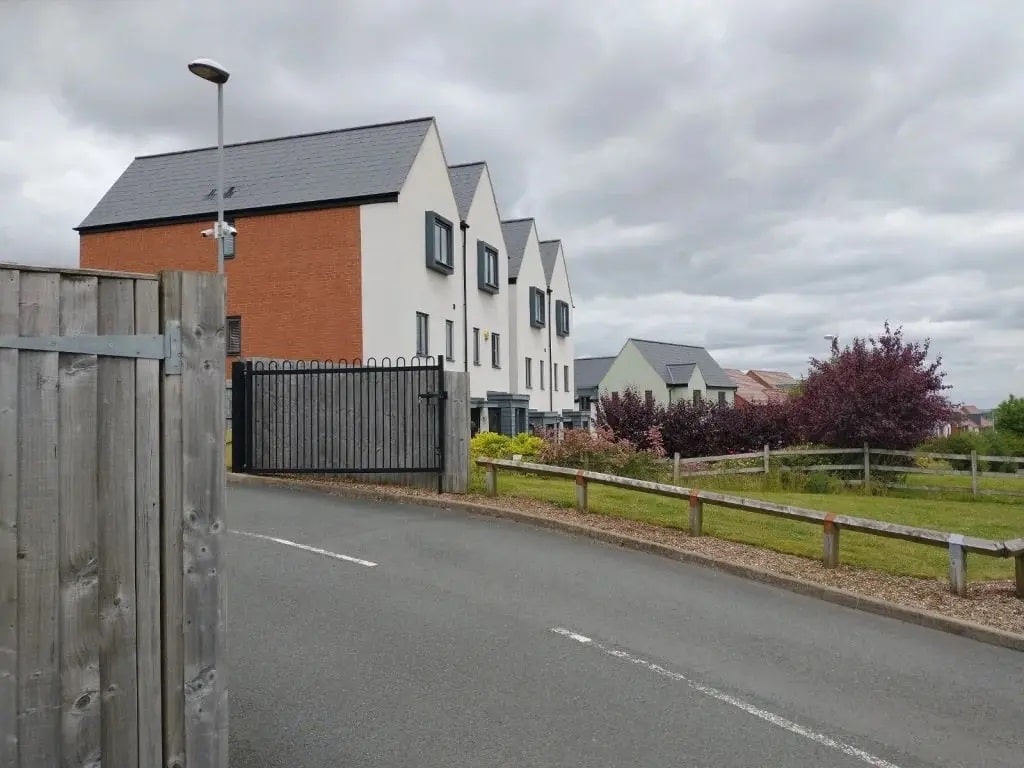
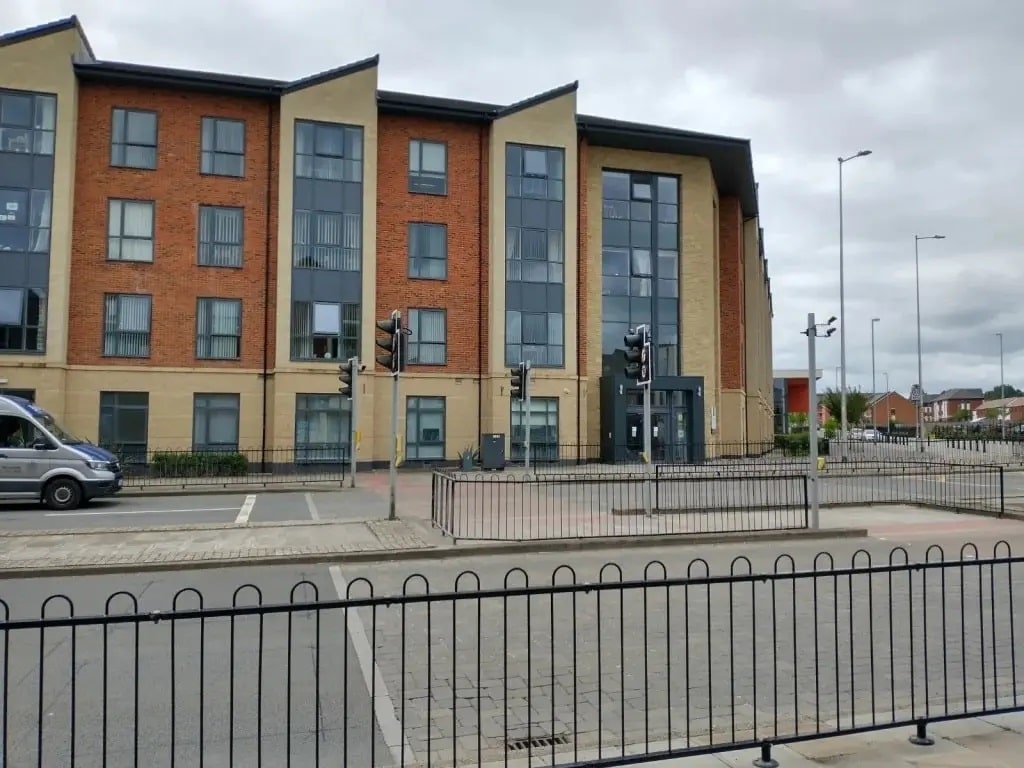
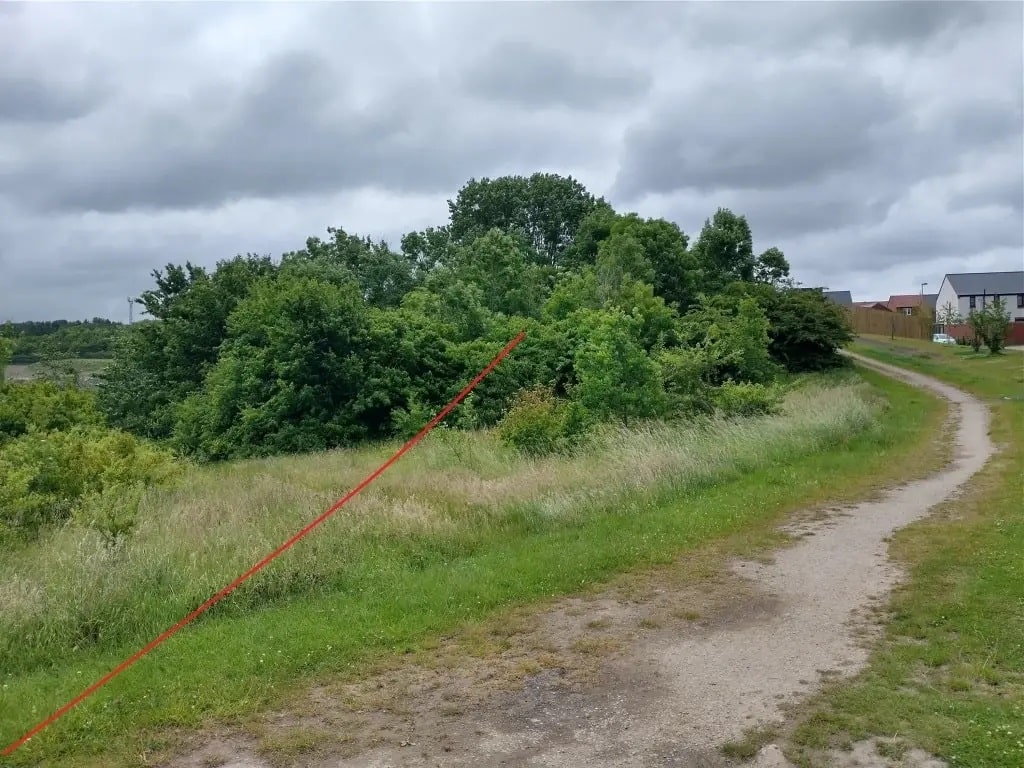
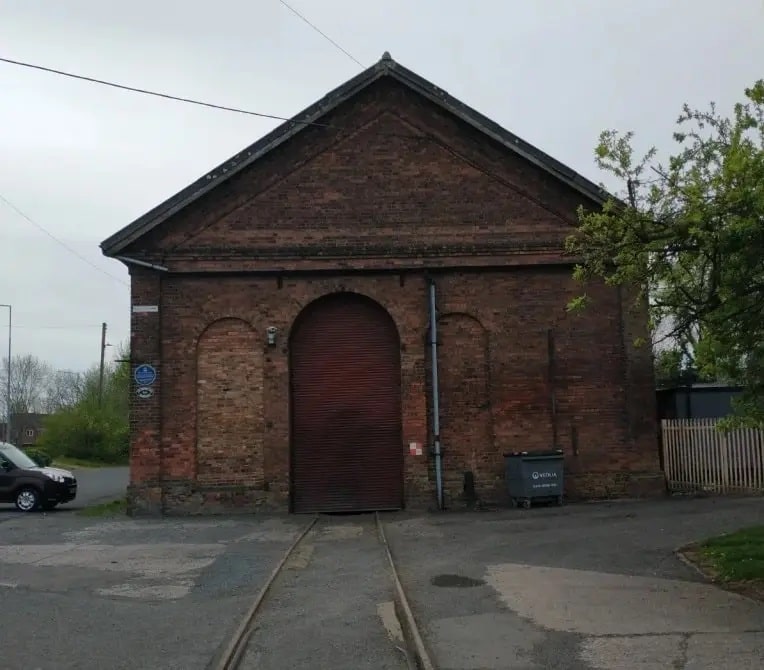
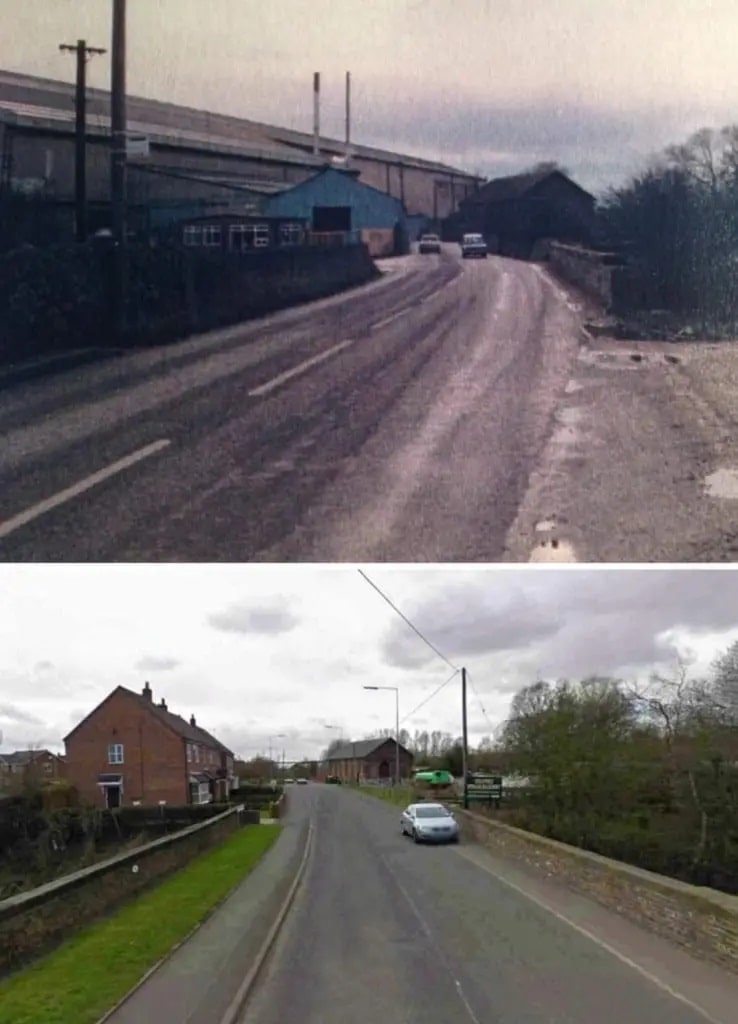
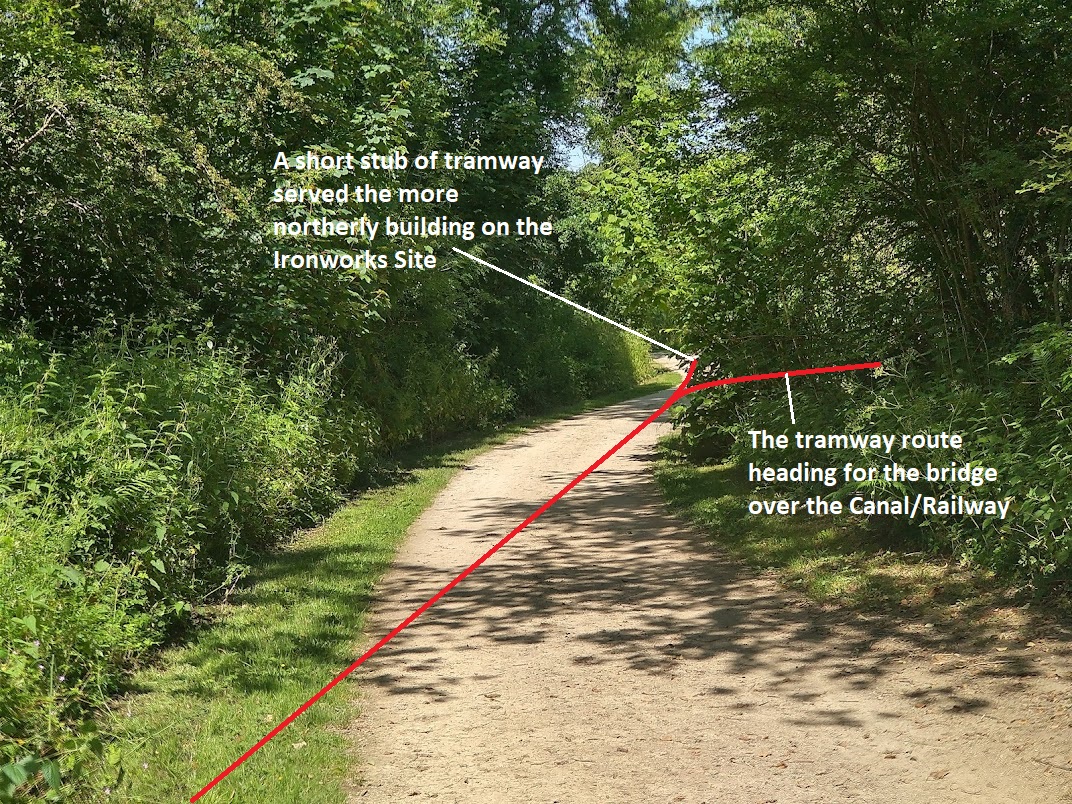
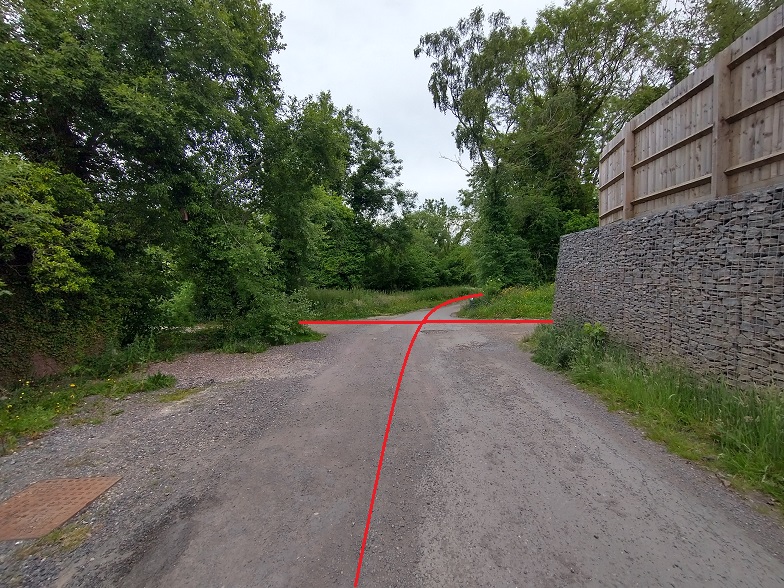
The red line drawn on the Google Streetview image above is supported by a number of things. The first being the building to the left of the line in the monochrome image immediately below.


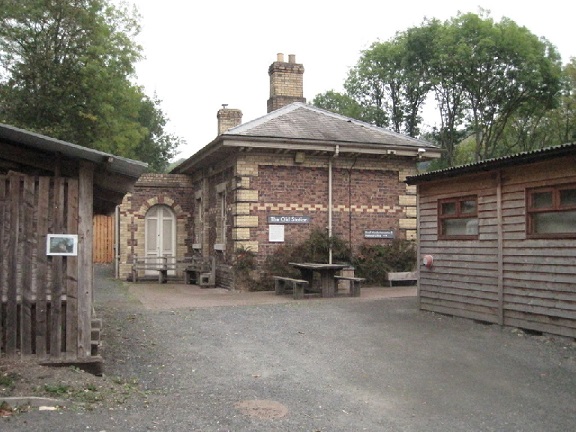
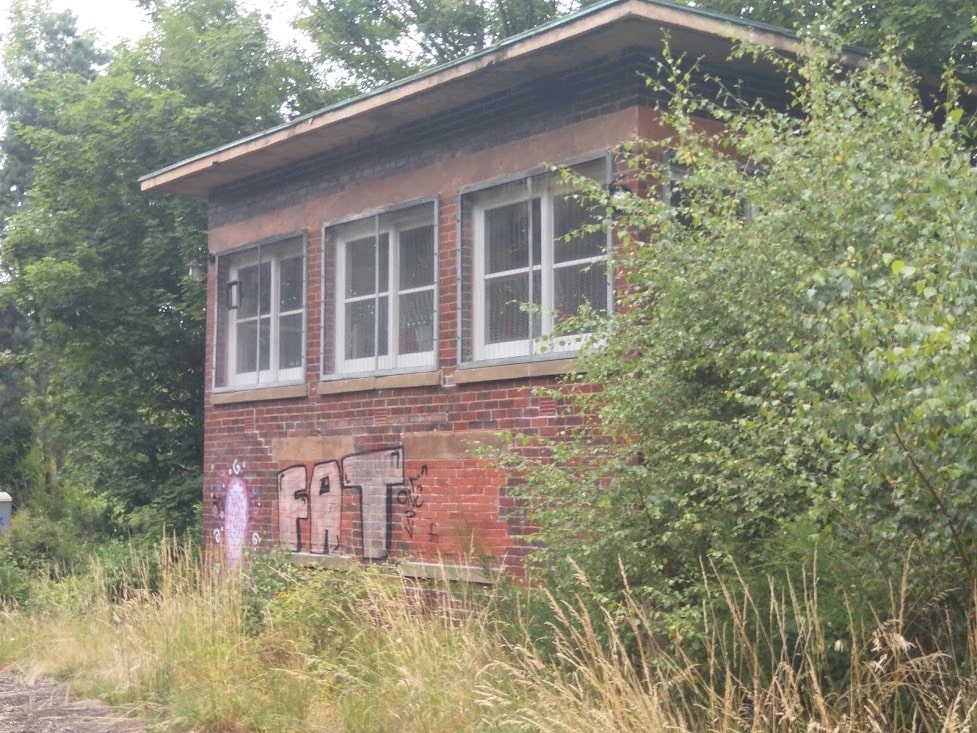
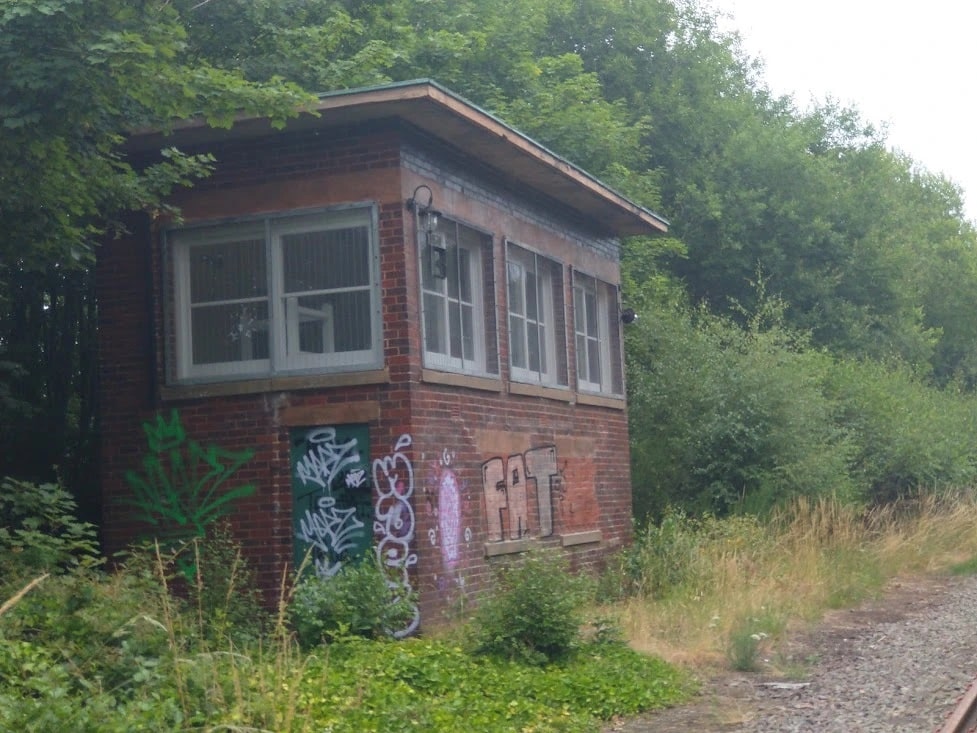
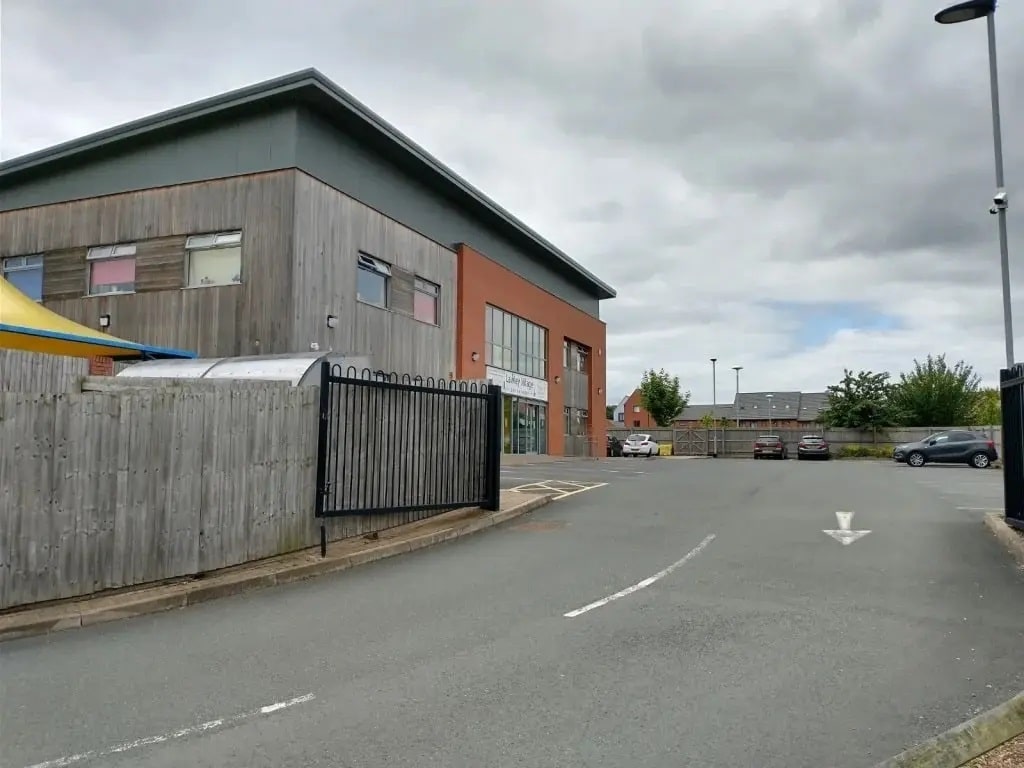
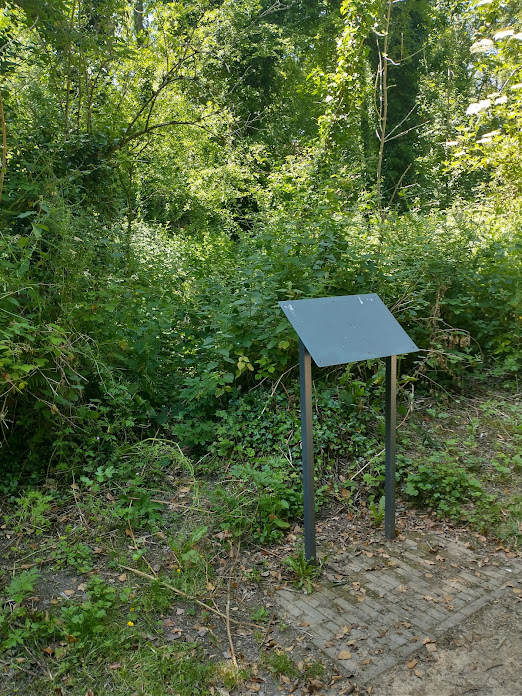
It seems reasonable to assert that the building shown is the same one in each image. This is further supported by the W&LLR Town Trail which has a display board and mural on the end wall of this building. This is shown below.
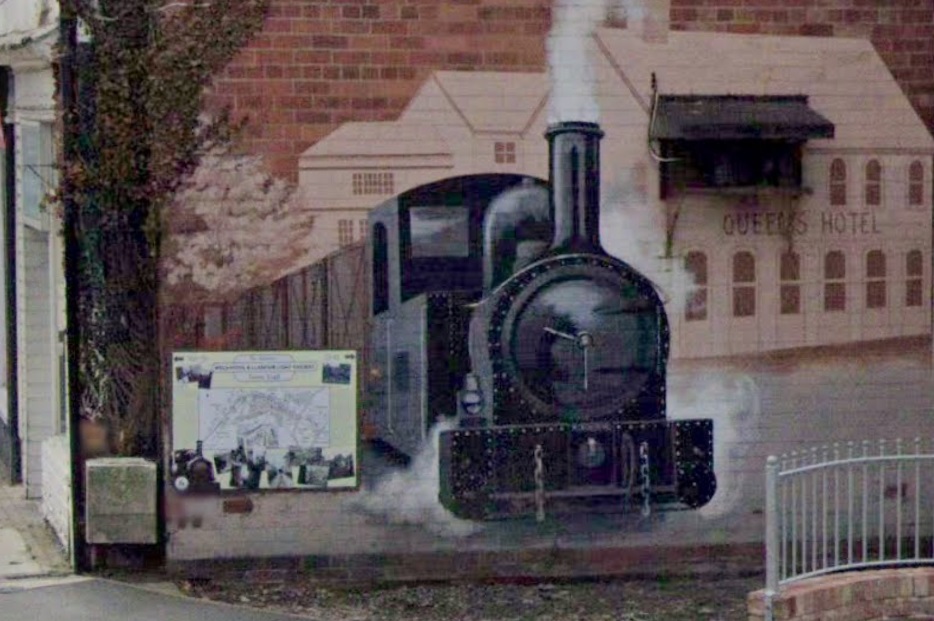
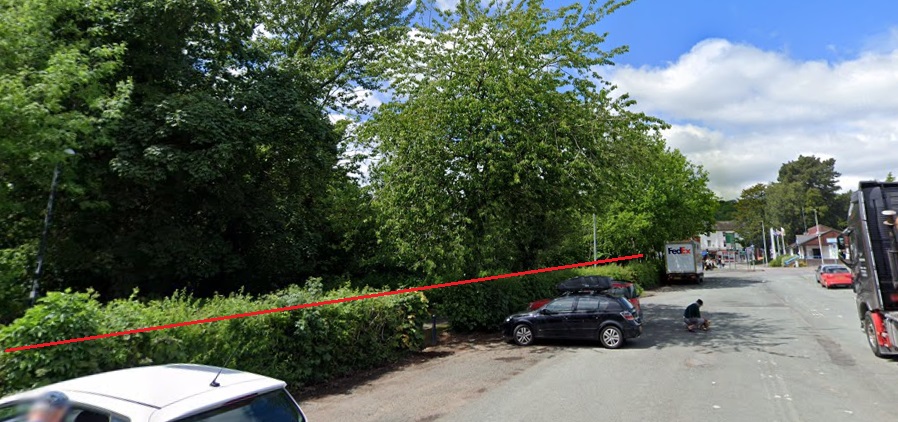
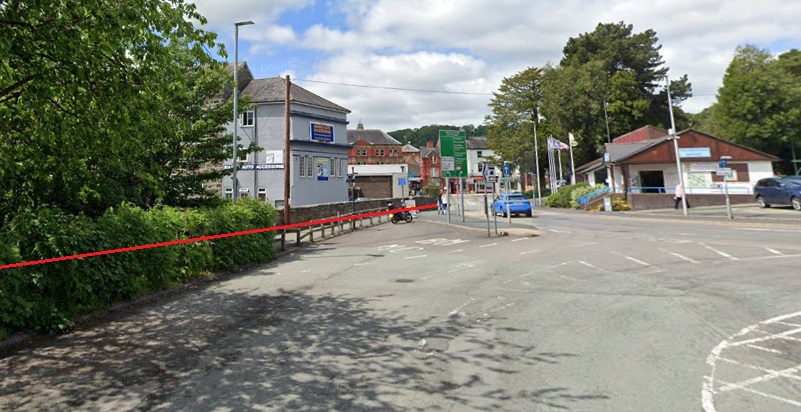
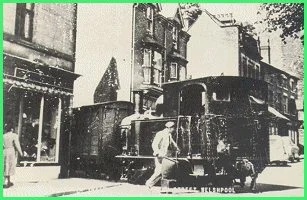
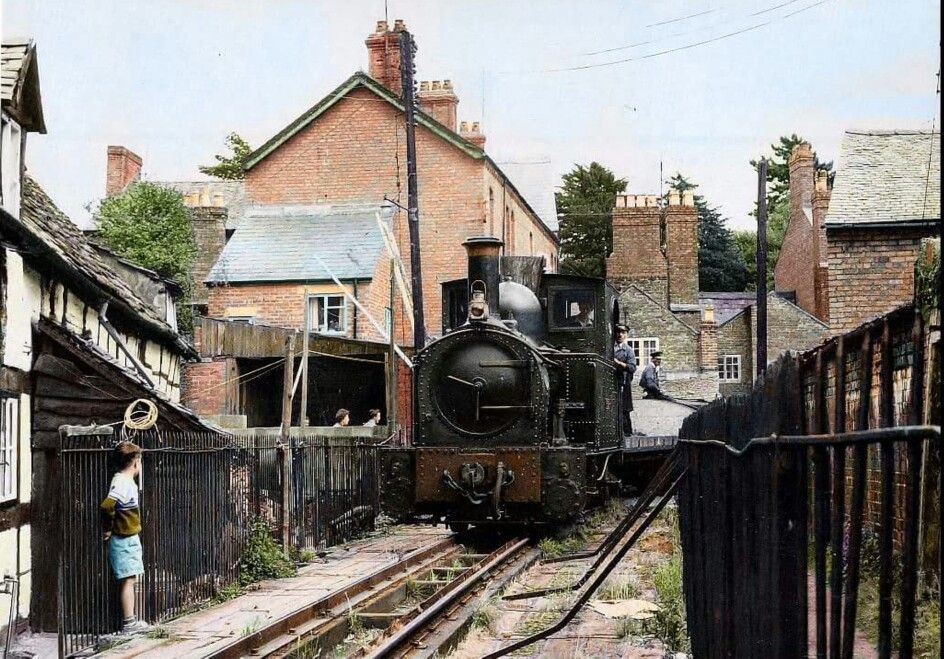
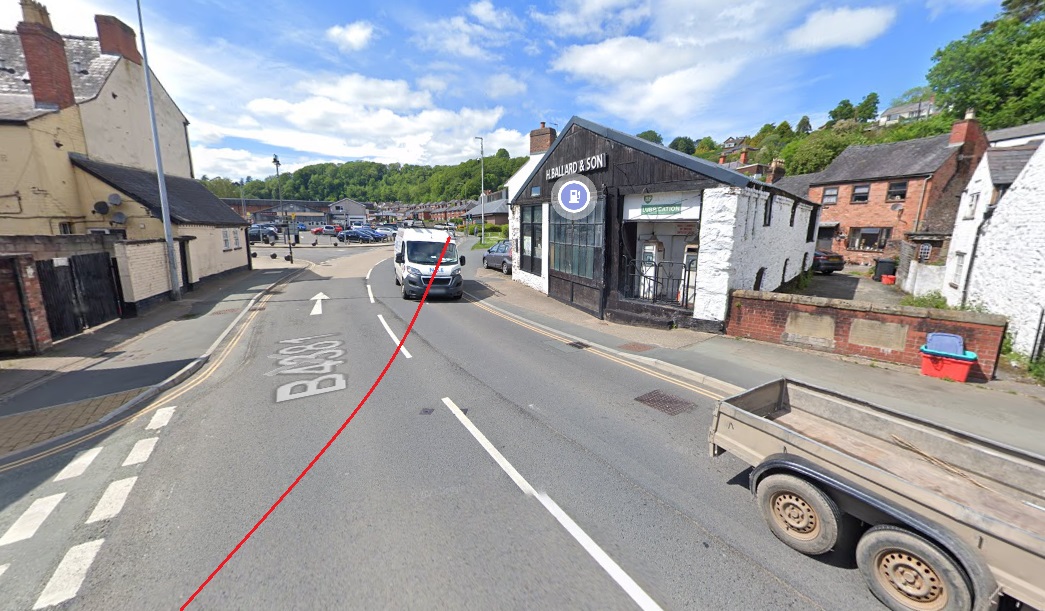
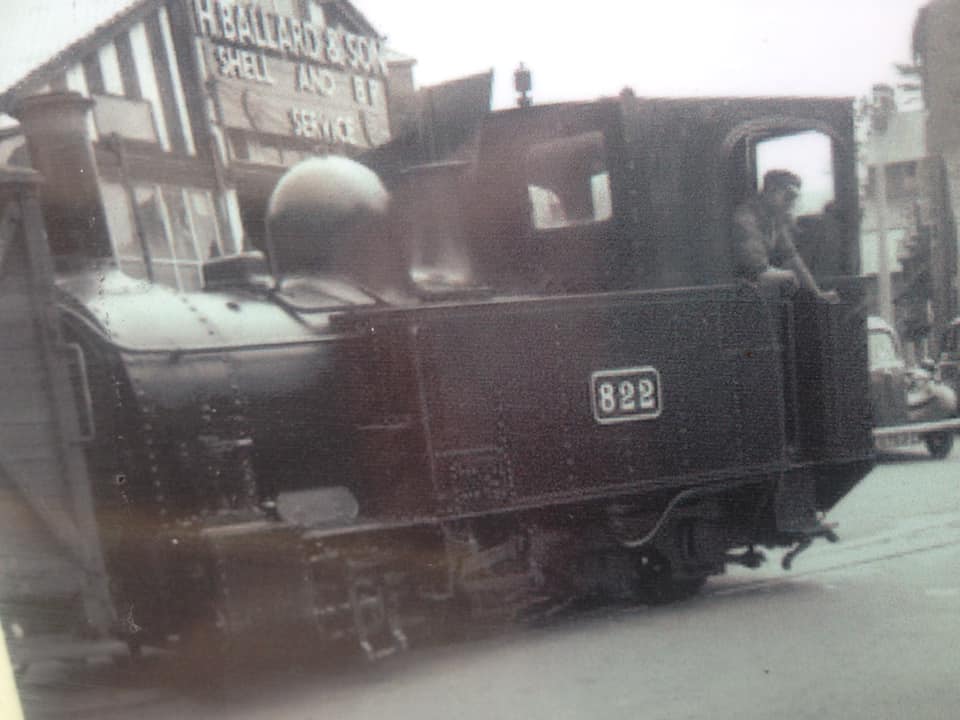
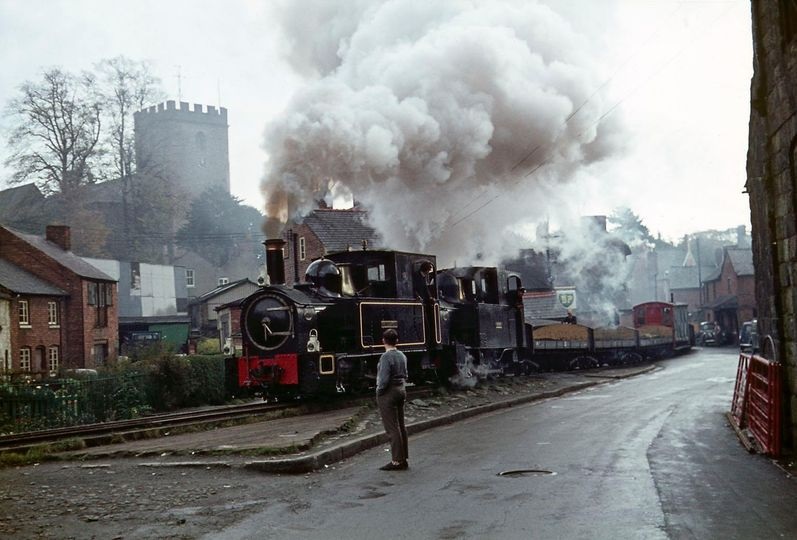
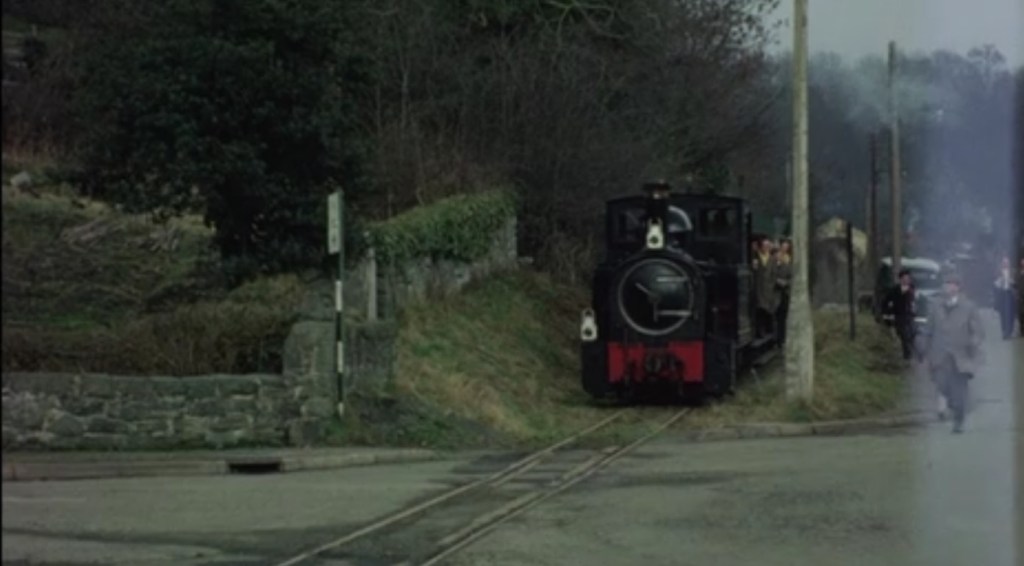
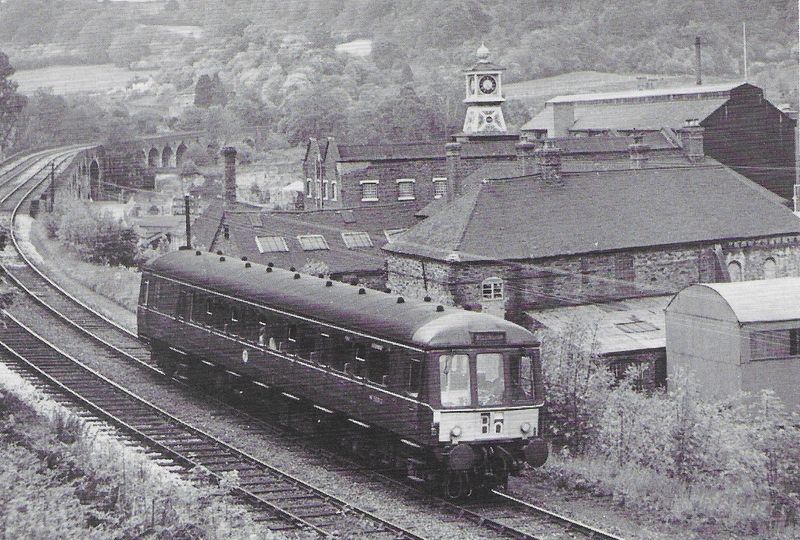
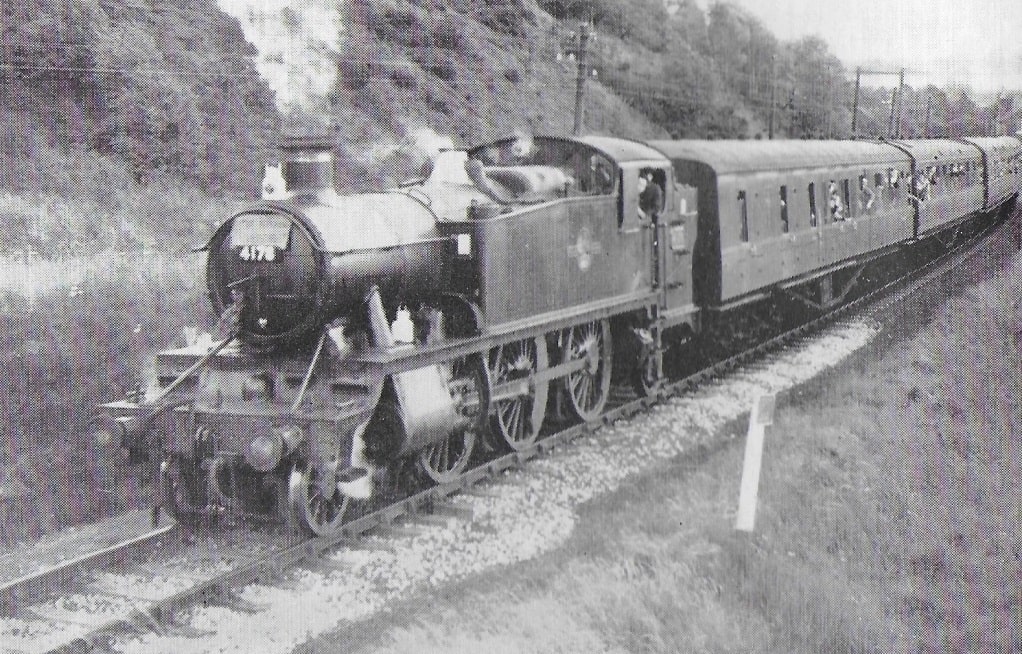
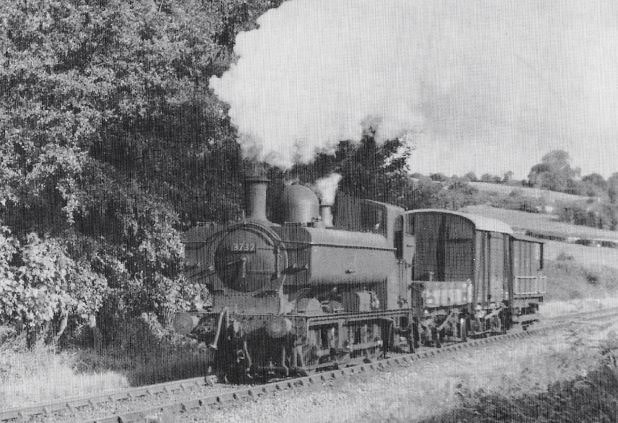
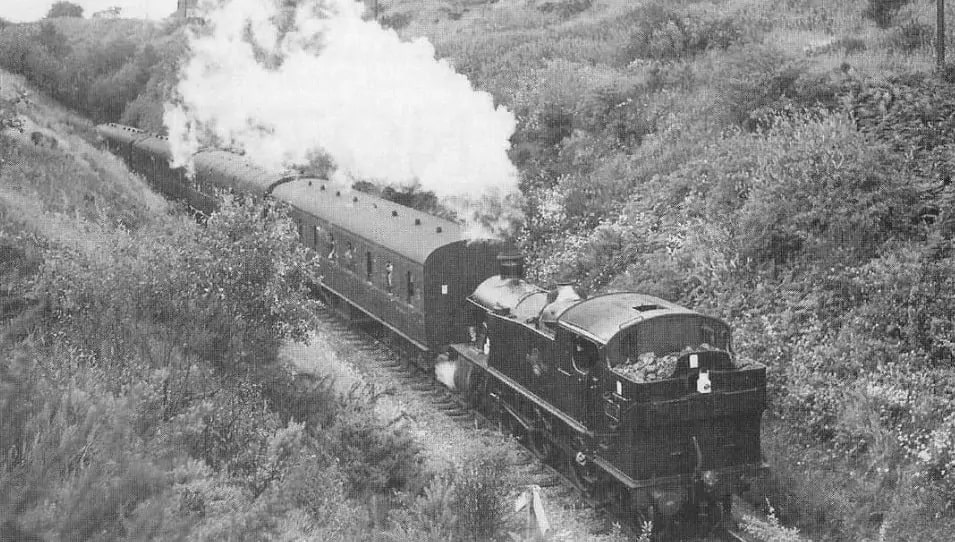
Further support for this can be seen in the next two images. The first of which is taken from a locomotive travelling along the line towards the railway station in Welshpool in the mid-20th century. The second is a Google Streetview image which includes both the mural and in the background the Queens Hotel.
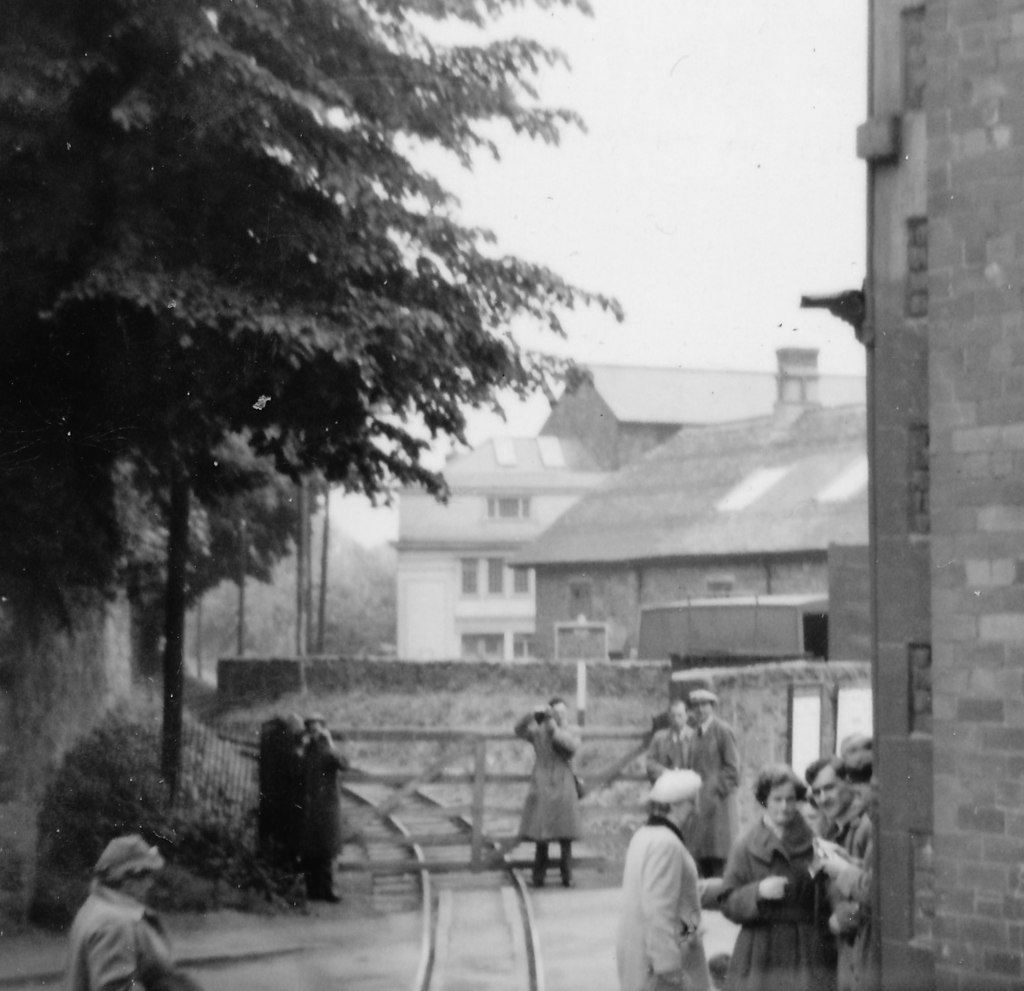
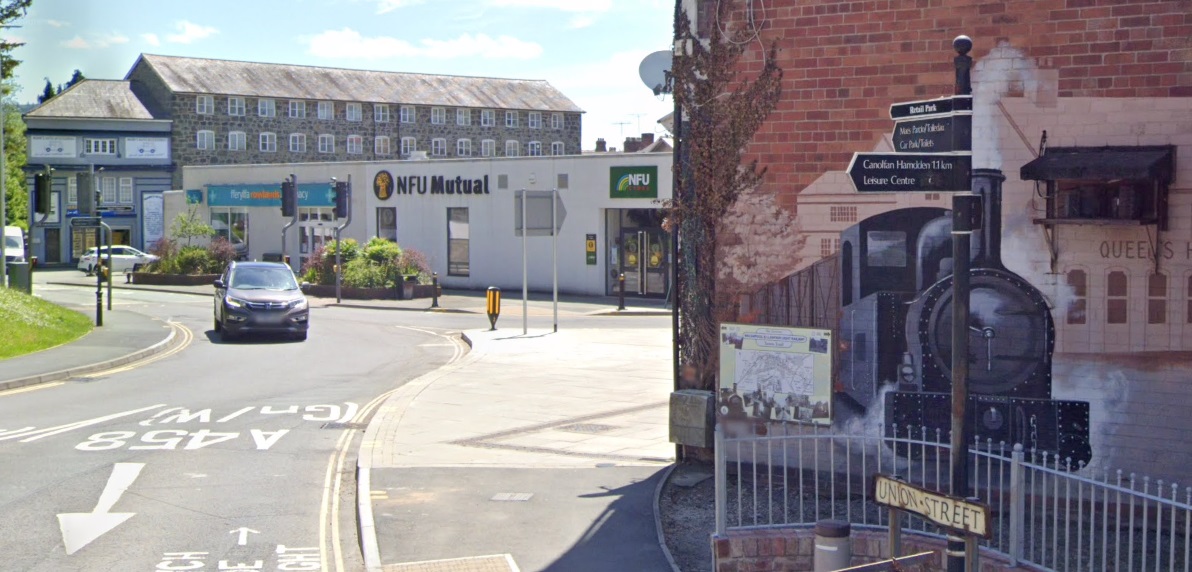
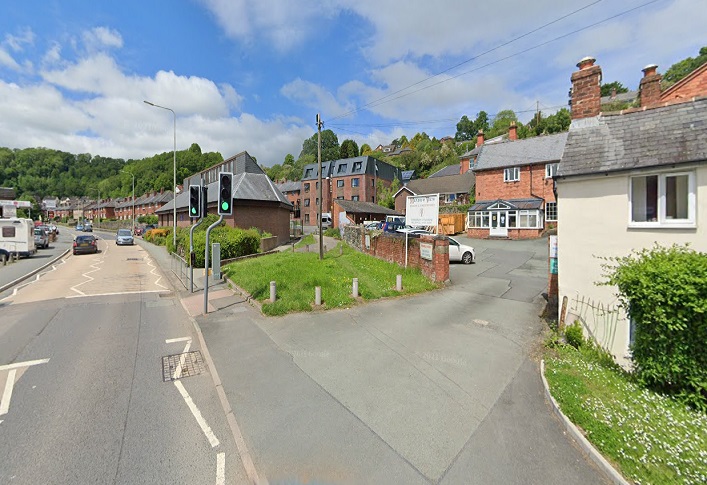
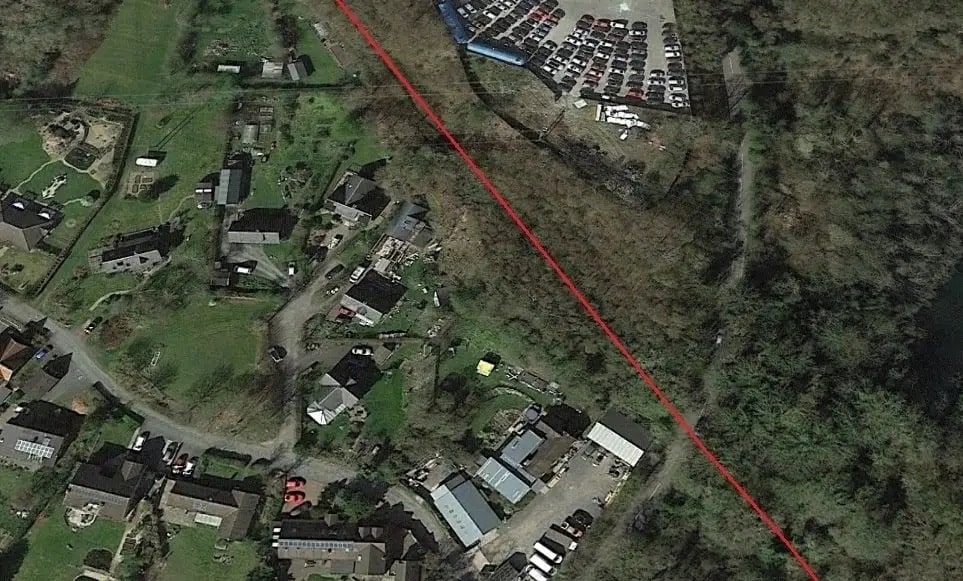
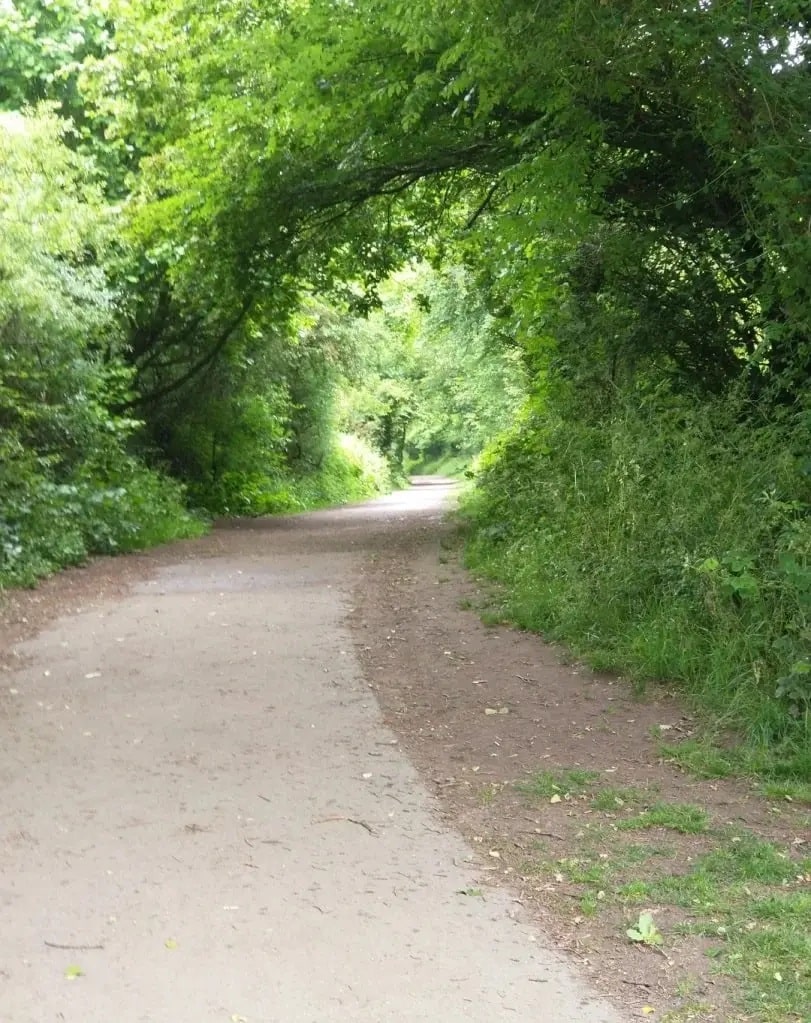
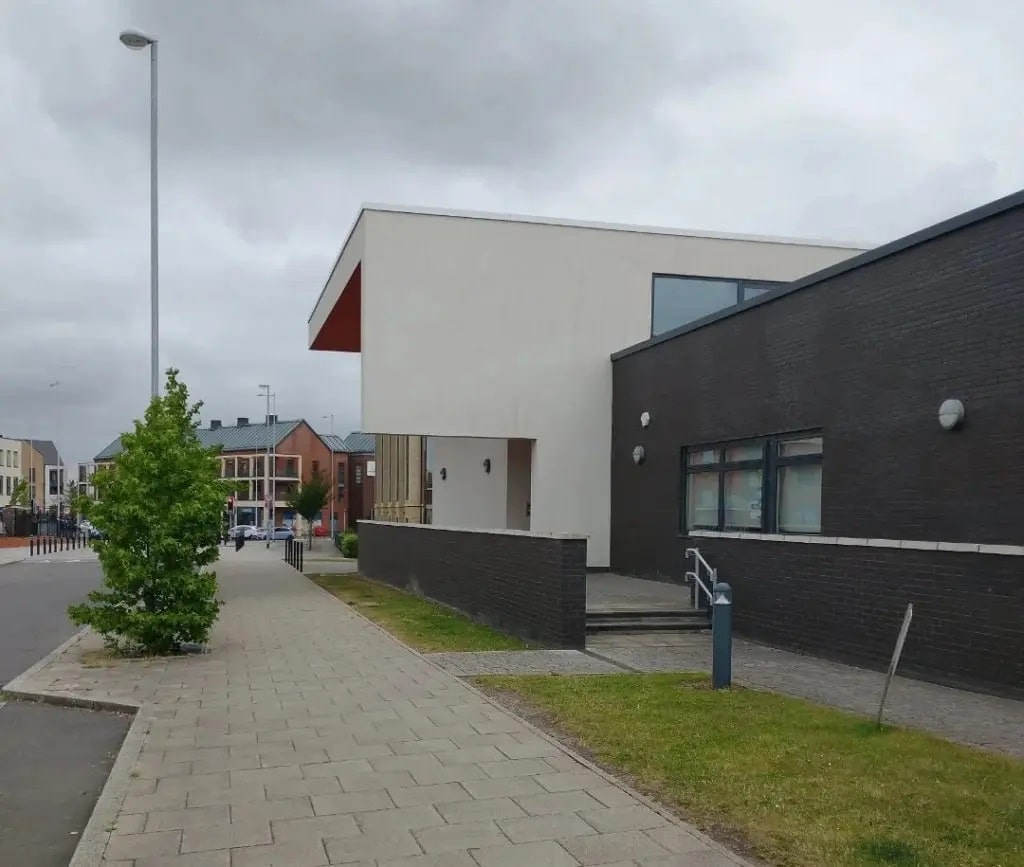
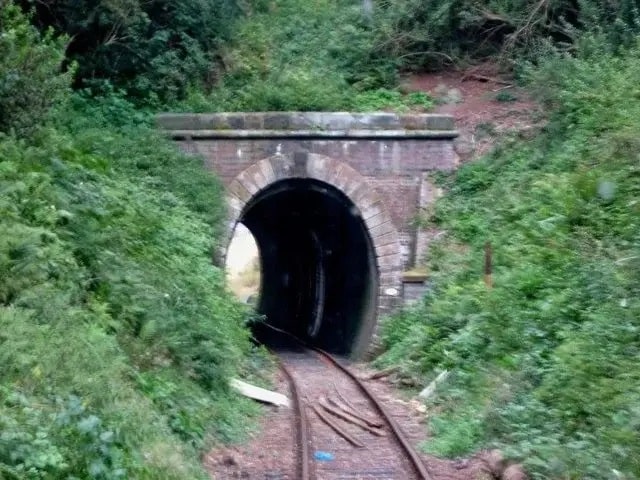
Since the gyratory has been built the immediate area has changed considerably. At this location trains crossed Church Street and disappeared into a narrow ginnel.
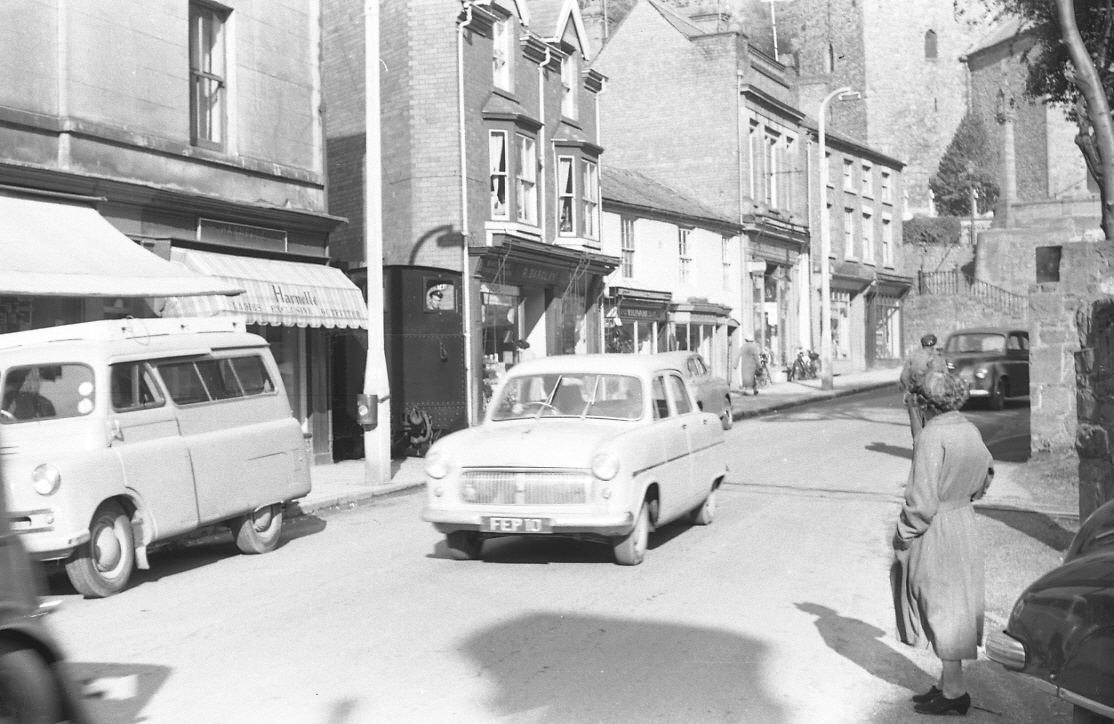
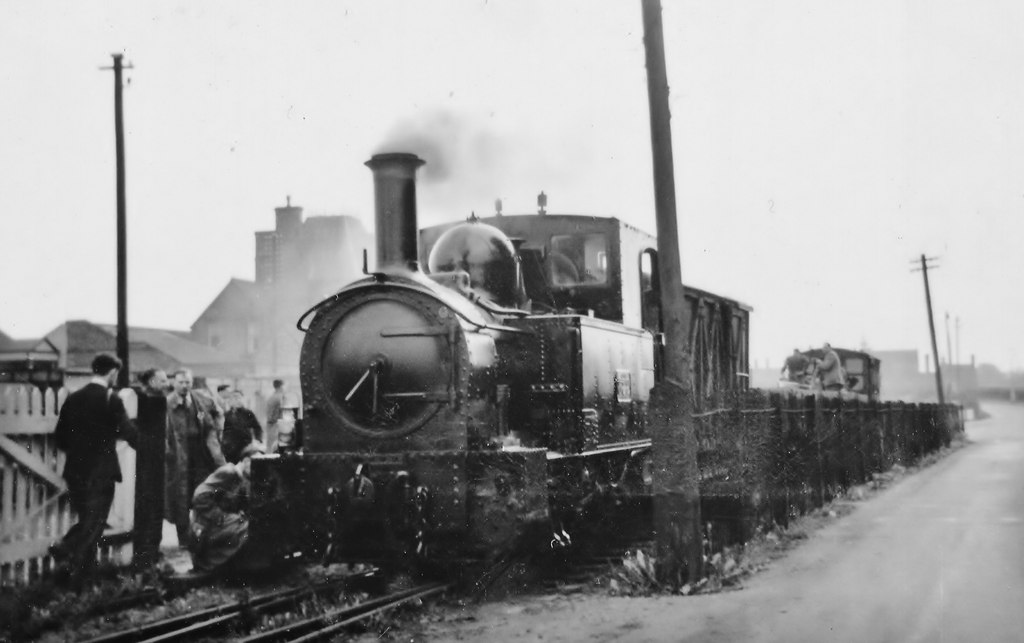
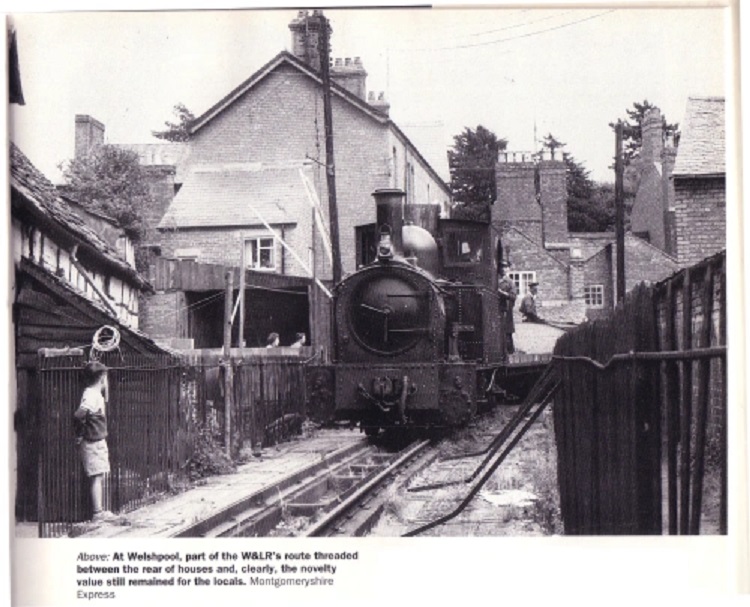
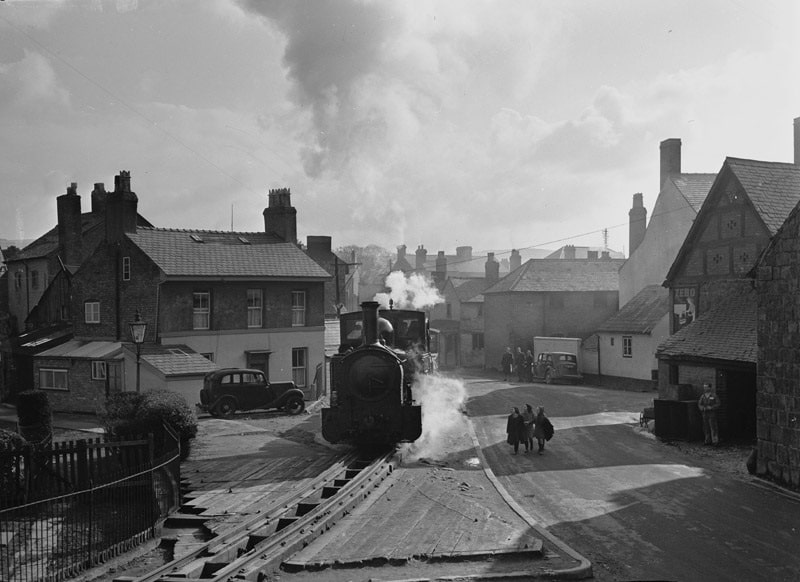
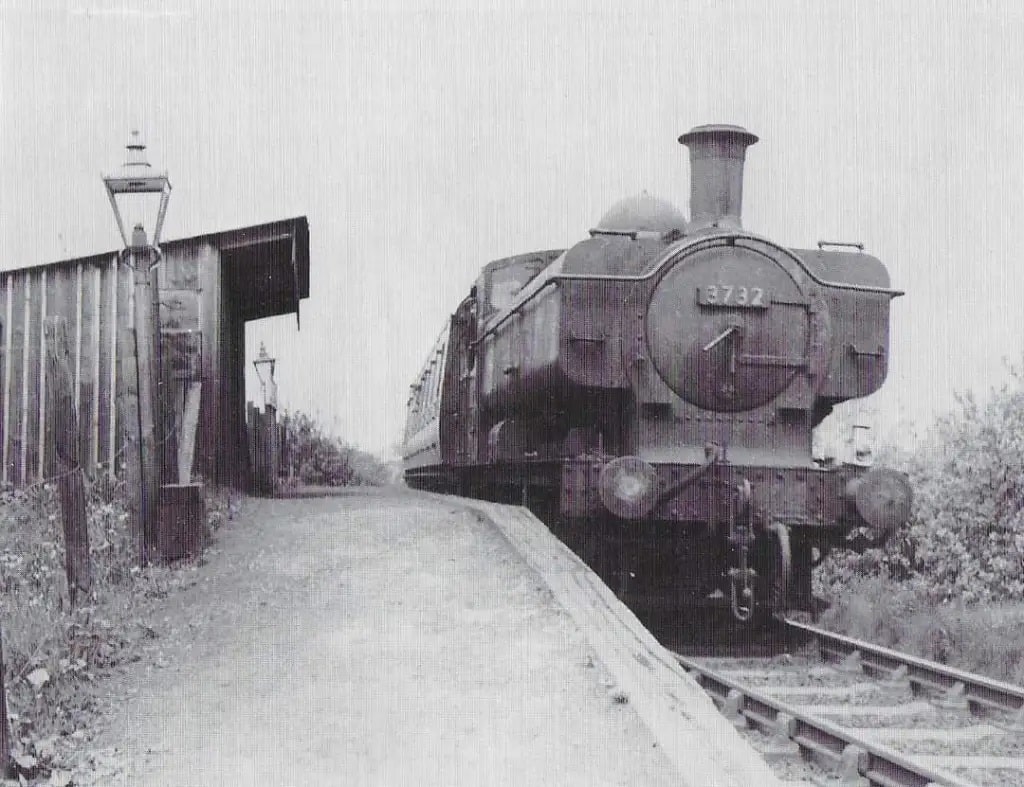
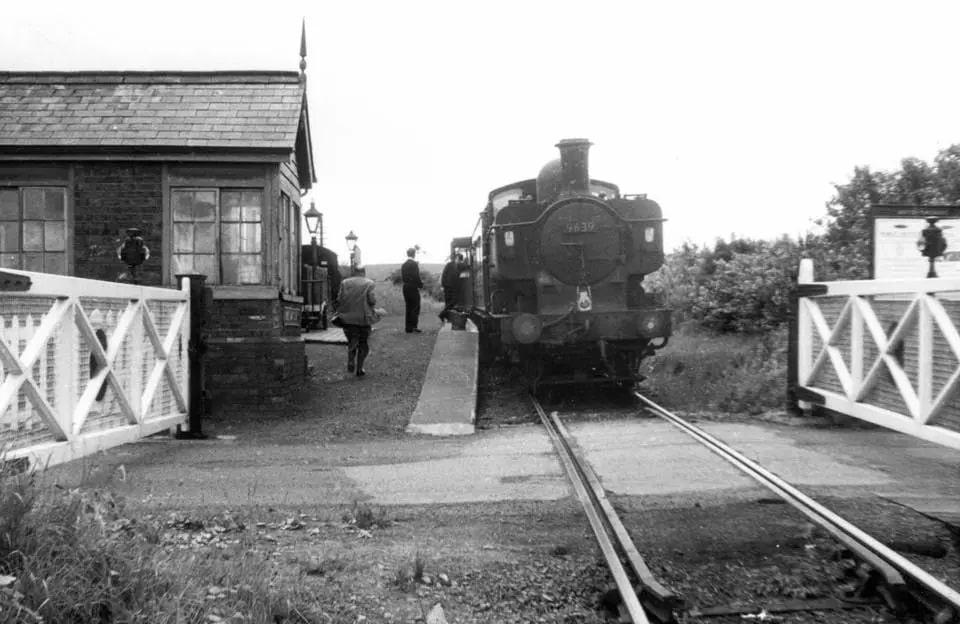
One of the W&LLR’s two steam locomotives brings a train through the narrow ginnel onto Church Street on its way down to Welshpool Station. The shop front that we noticed above appears again on this photograph from the mid-20th century. [15]
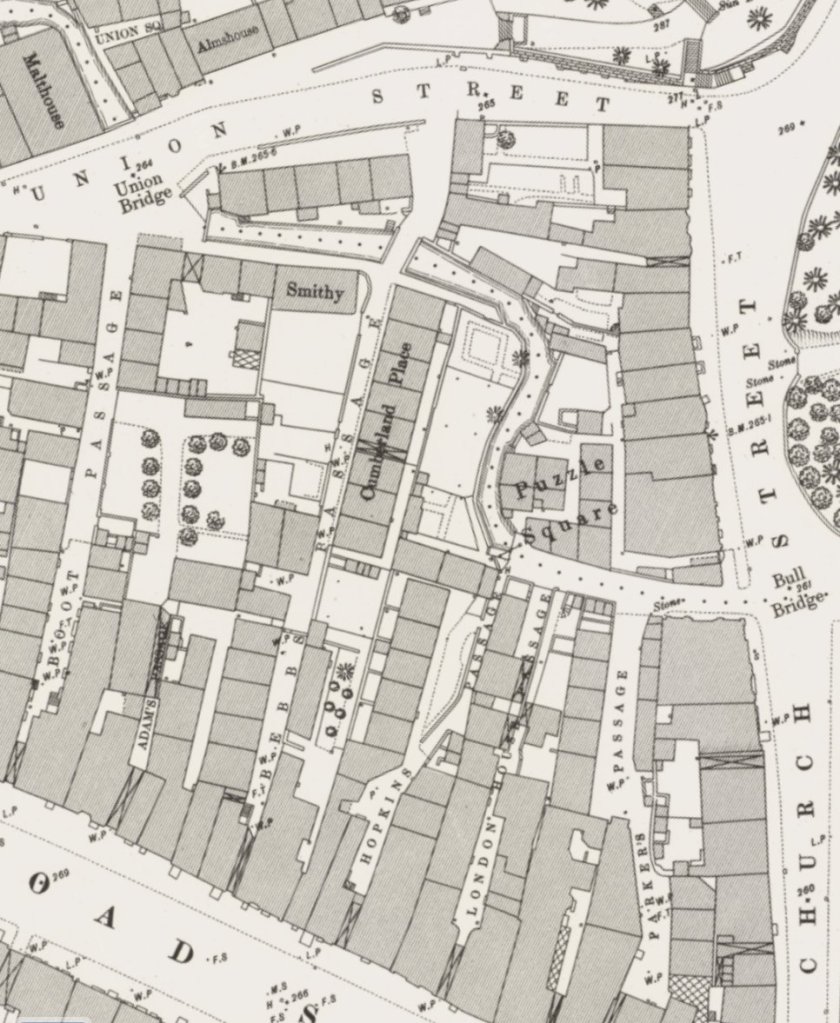
A counter-argument about the alignment is recorded in Peter Johnson’s book about the W&LLR. He says that the application to the Light Railway Commissioners on 17th April 1897 described the route as follows, the route would “commence near the Welshpool railway station, at the junction of Smithfield and Severn Roads. … It would run along the easterly side of Smithfield Road for 200ft and the proceed in a Westerly direction, crossing the Shropshire Union Canal at the northern end if the aqueduct before following the course of the Lledan brook at the side of the vicarage grounds to Church Street, which it would cross, continuing to follow the brook before crossing Union Street and the Back Road near their junctions with Hall Street, taking in the property known as the ‘Seven Stars’. It would then run at the back of the houses on Back Road and behind the Armoury to Raven Square.” [30, p51]
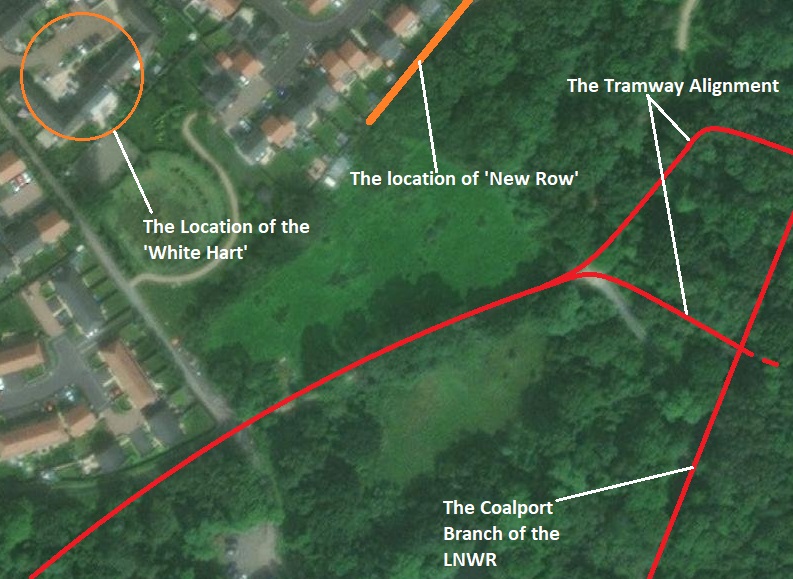
The passage in bold italics suggests that the proposed railway would follow the edge of the vicarage garden and remain close to the Lledan Brook. This was the route chosen for the much earlier tramroad which connected Standard Quarry with the Shropshire Union Canal to the East of the town centre. The red route shown above runs through what was the vicarage garden and does not remain close to the brook.
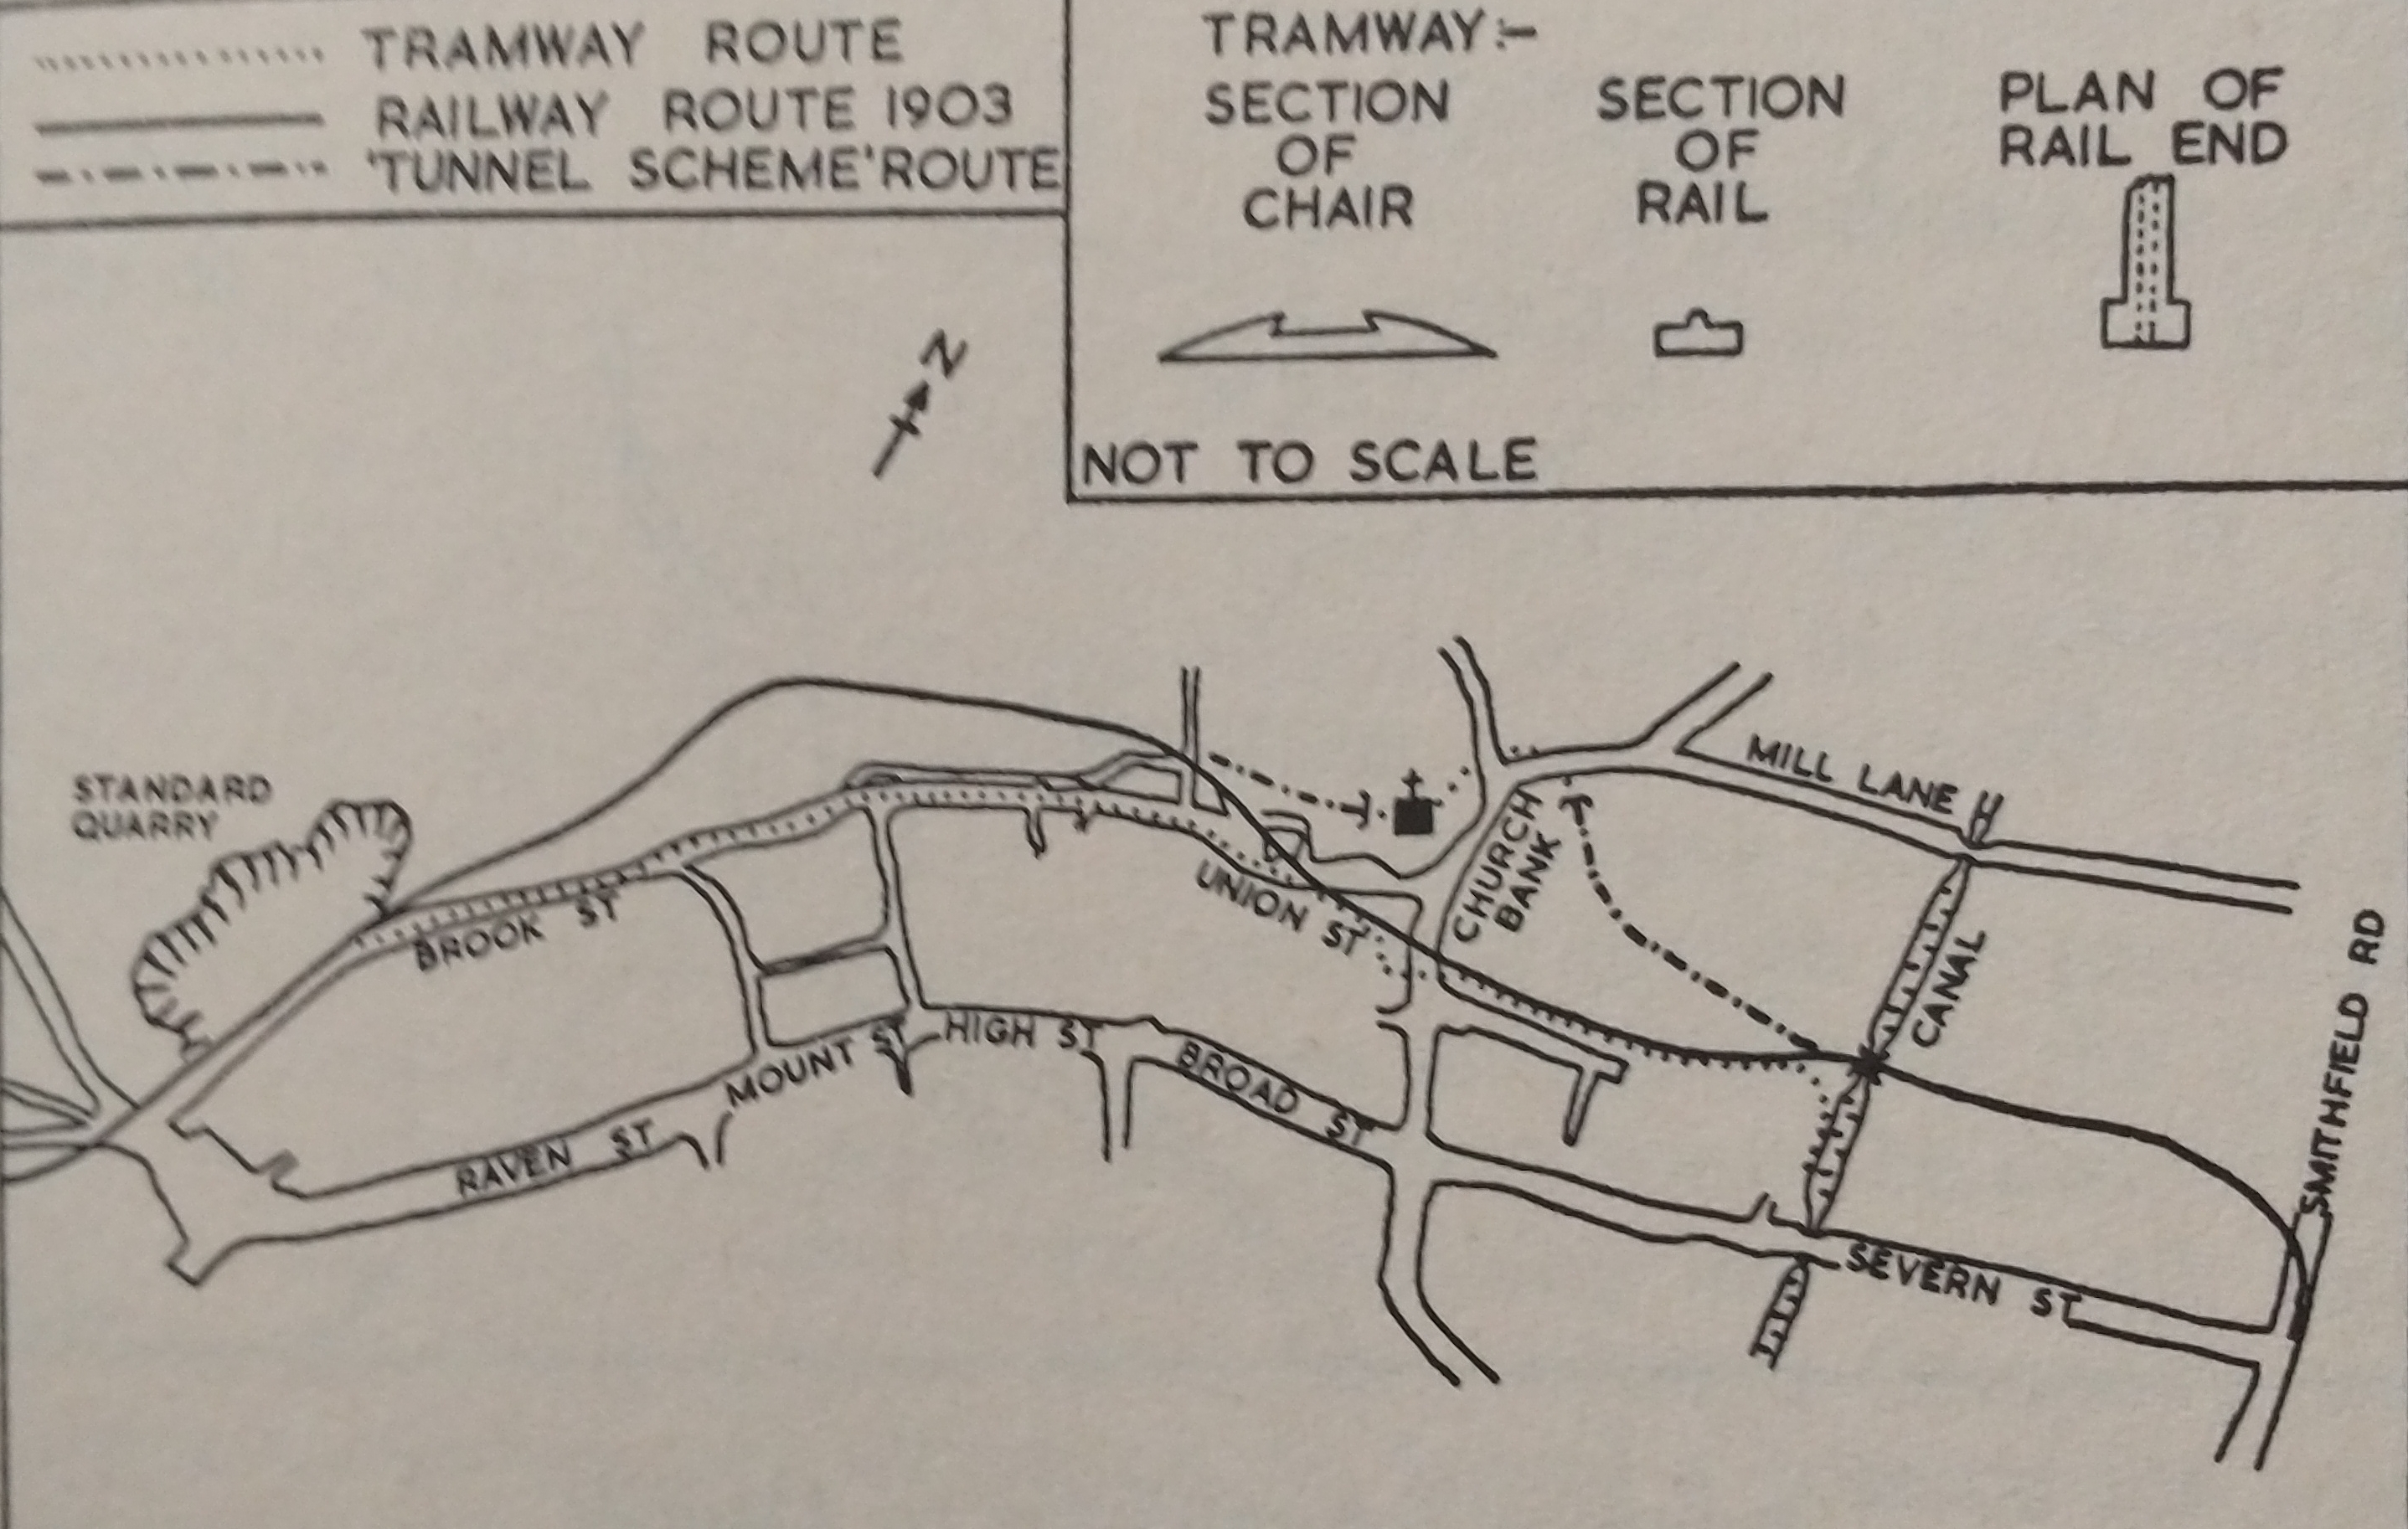
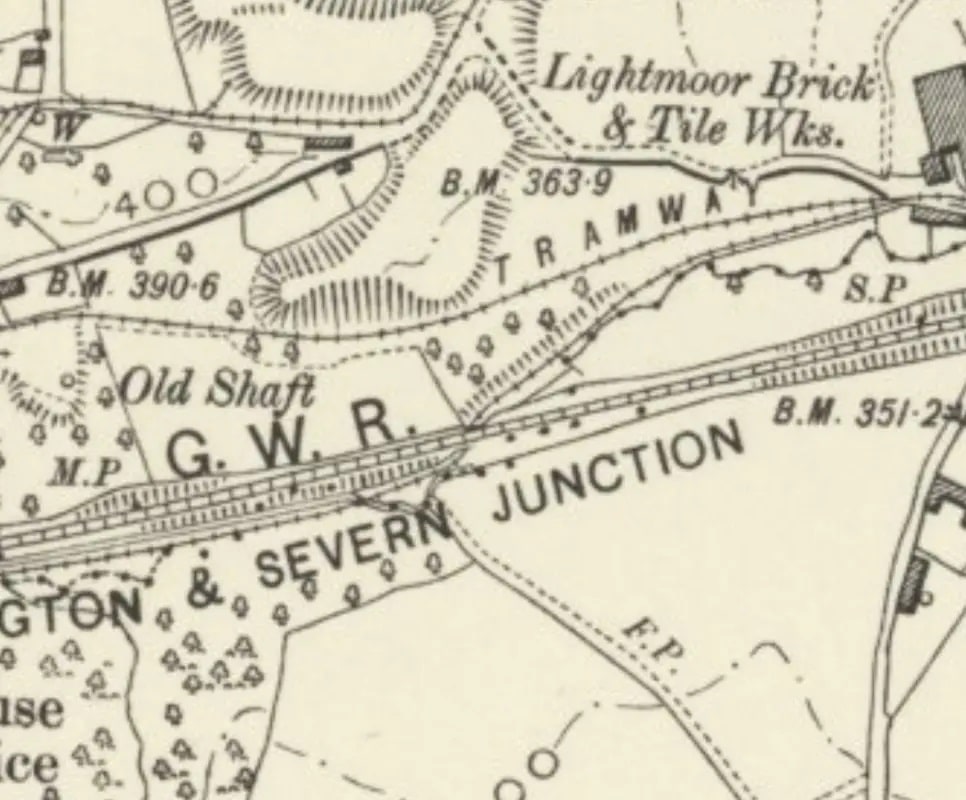
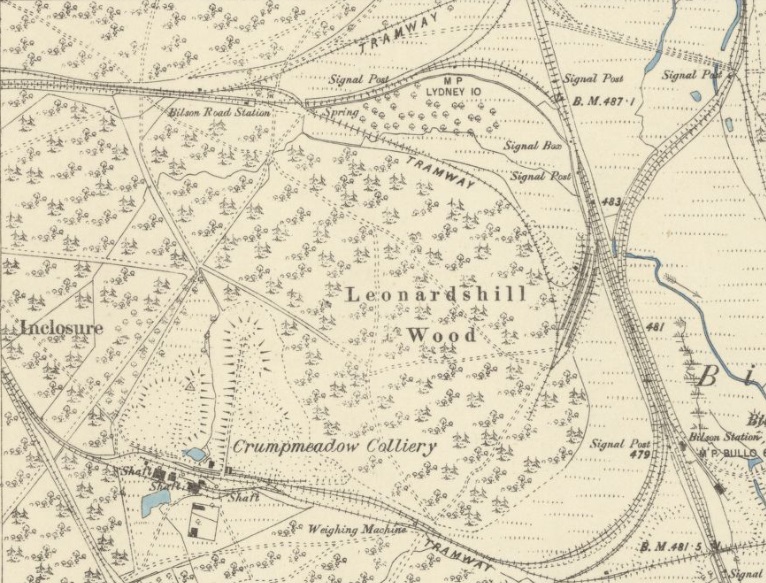
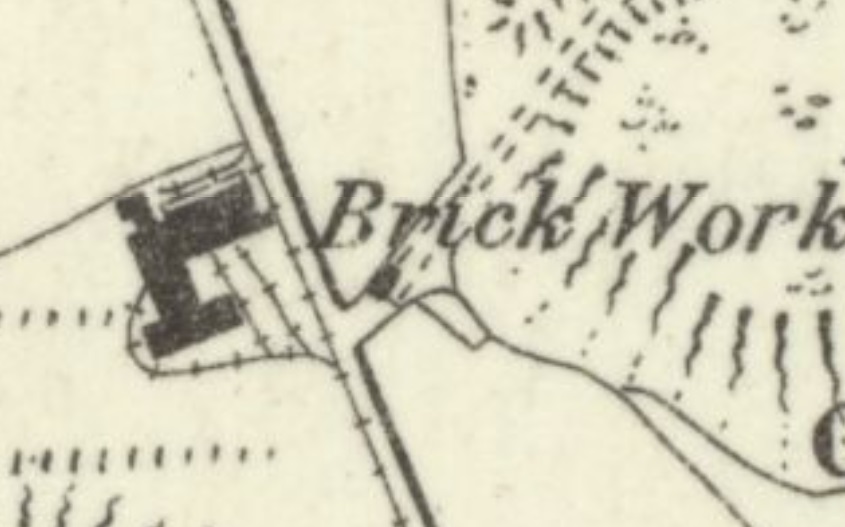
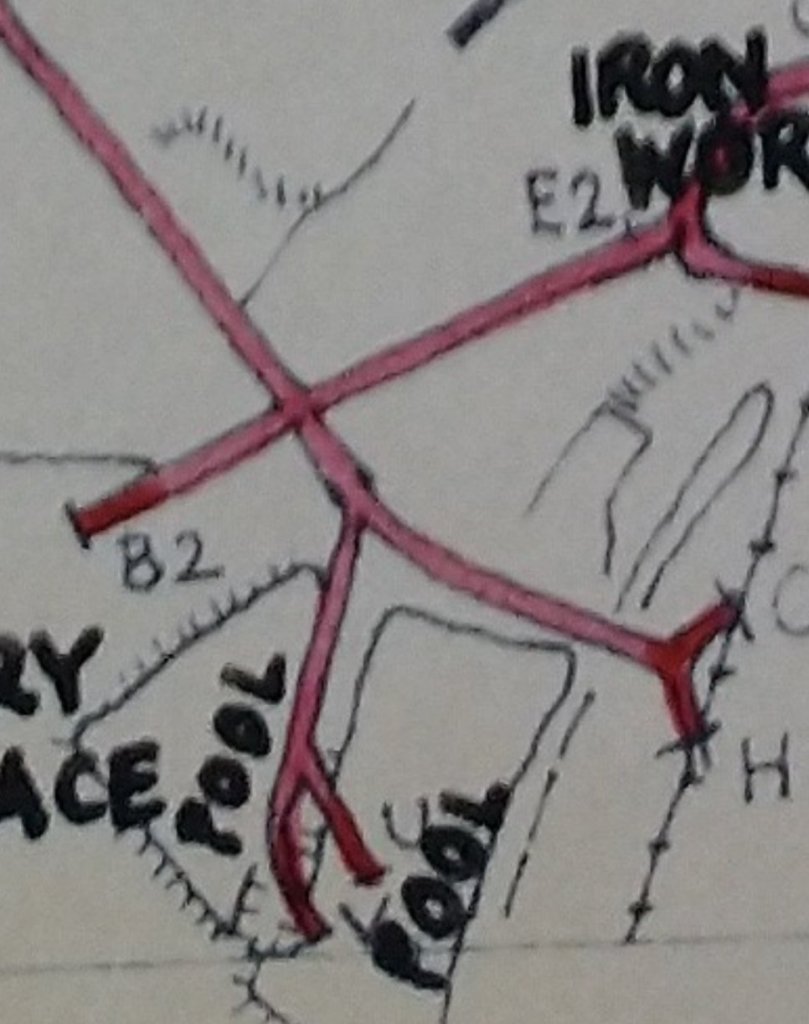
The old tramroad route is illustrated by Cartwright & Russell on a plan of routes through the town centre which is shown immediately below. [41: p21]
Of incidental interest is Cartwright & Russell’s assertion that the tramway through the centre of Welshpool was the first railway anywhere to use chaired track. [41: p16] It was one of a series of tramroads owned by the Earl of Powys. There were five such tramroads which were built under the provisions of the Ellesmere and Montgomeryshire Canal Acts of 1793/94. Those Acts granted the building of rail feeders up to three miles in length to connect with the new waterway. Cartwright & Russell tell us that five such lines were laid in the area between Welshpool and Llynclys (south of Oswestry). [41: p14] The shirt tramroad through the centre of Welshpool was constructed in 1817 to carry granite quarried from the Standard Quarry and survived for just over thirty years. [41: p16]
The route finally chosen for the railway was varied to run through the vicarage garden but remained within the Limit of Deviation allowed for in the Order for the scheme. The extremely tight turns shown on the 1949 survey and suggested on Cartwright & Russel’s plan of the tramroad route seem impractical for steam-powered transport and photo evidence suggests the line ran closer to Union Street.
Johnson includes a plan drafted by A.J. Collin in 1901 showing the route of the line from Church Street through buildings and along the line of the brook but which shows it avoiding the sharp s-bend in the brook by cutting through existing properties on Church Street to the North of the brook and seemingly necessitating the demolition of frontages on Church Street and some ancillary buildings behind them. [30: p84]
It appears from the photographic evidence that demolition of only one frontage to Church Street was ultimately required, although Cartwright & Russell show three being demolished and a single property being built to fill the void left by the demolition. [41: p33]
Johnson notes [30: p88] that the vicarage boundary wall was realigned to accommodate the railway which suggests that the actual route was not as shown on the 1949 6″ Ordnance Survey.
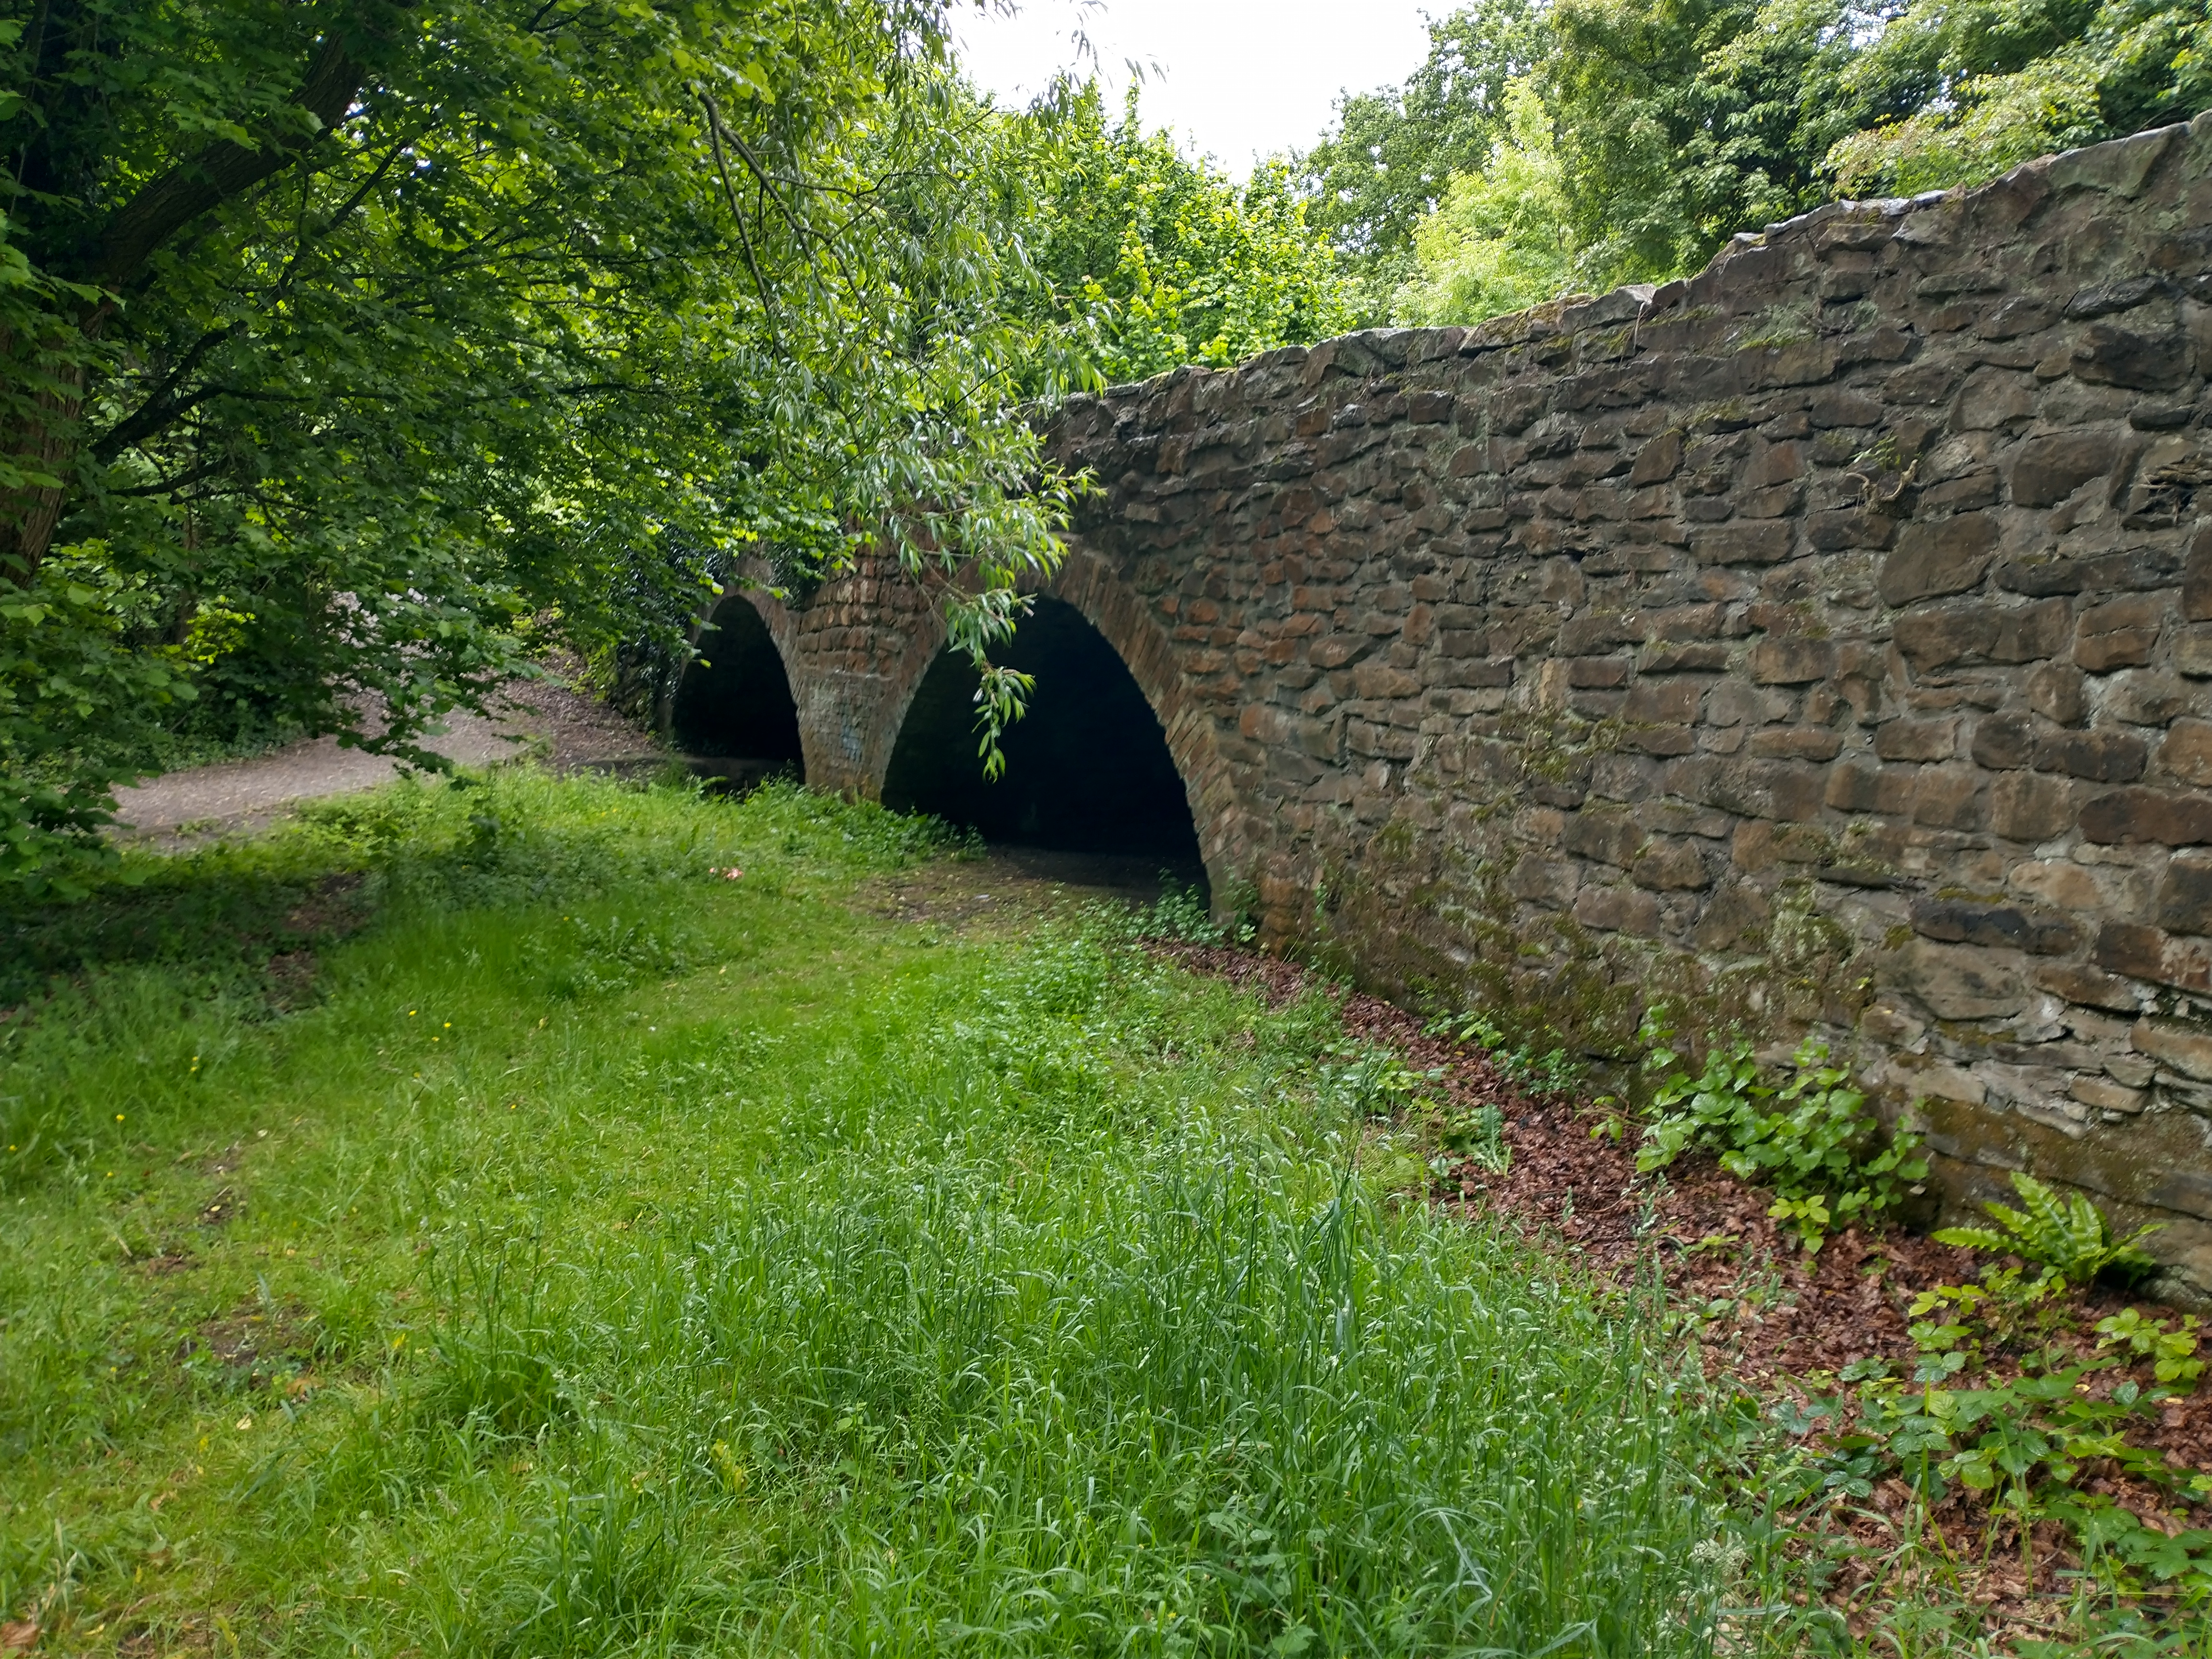
Johnson also comments that there were “three viaducts over the Lledon brook, the line being carried directly along the course of the brook for some little distance by means of longitudinal rail beams supported by cross girders (rolled joists) which in turn rested on the masonry sides of the stream. There were about forty-five of these joists of varying span, the longest being 17ft 3in. There were two culverts, of 3ft and 4ft diameter.” [30: p99]
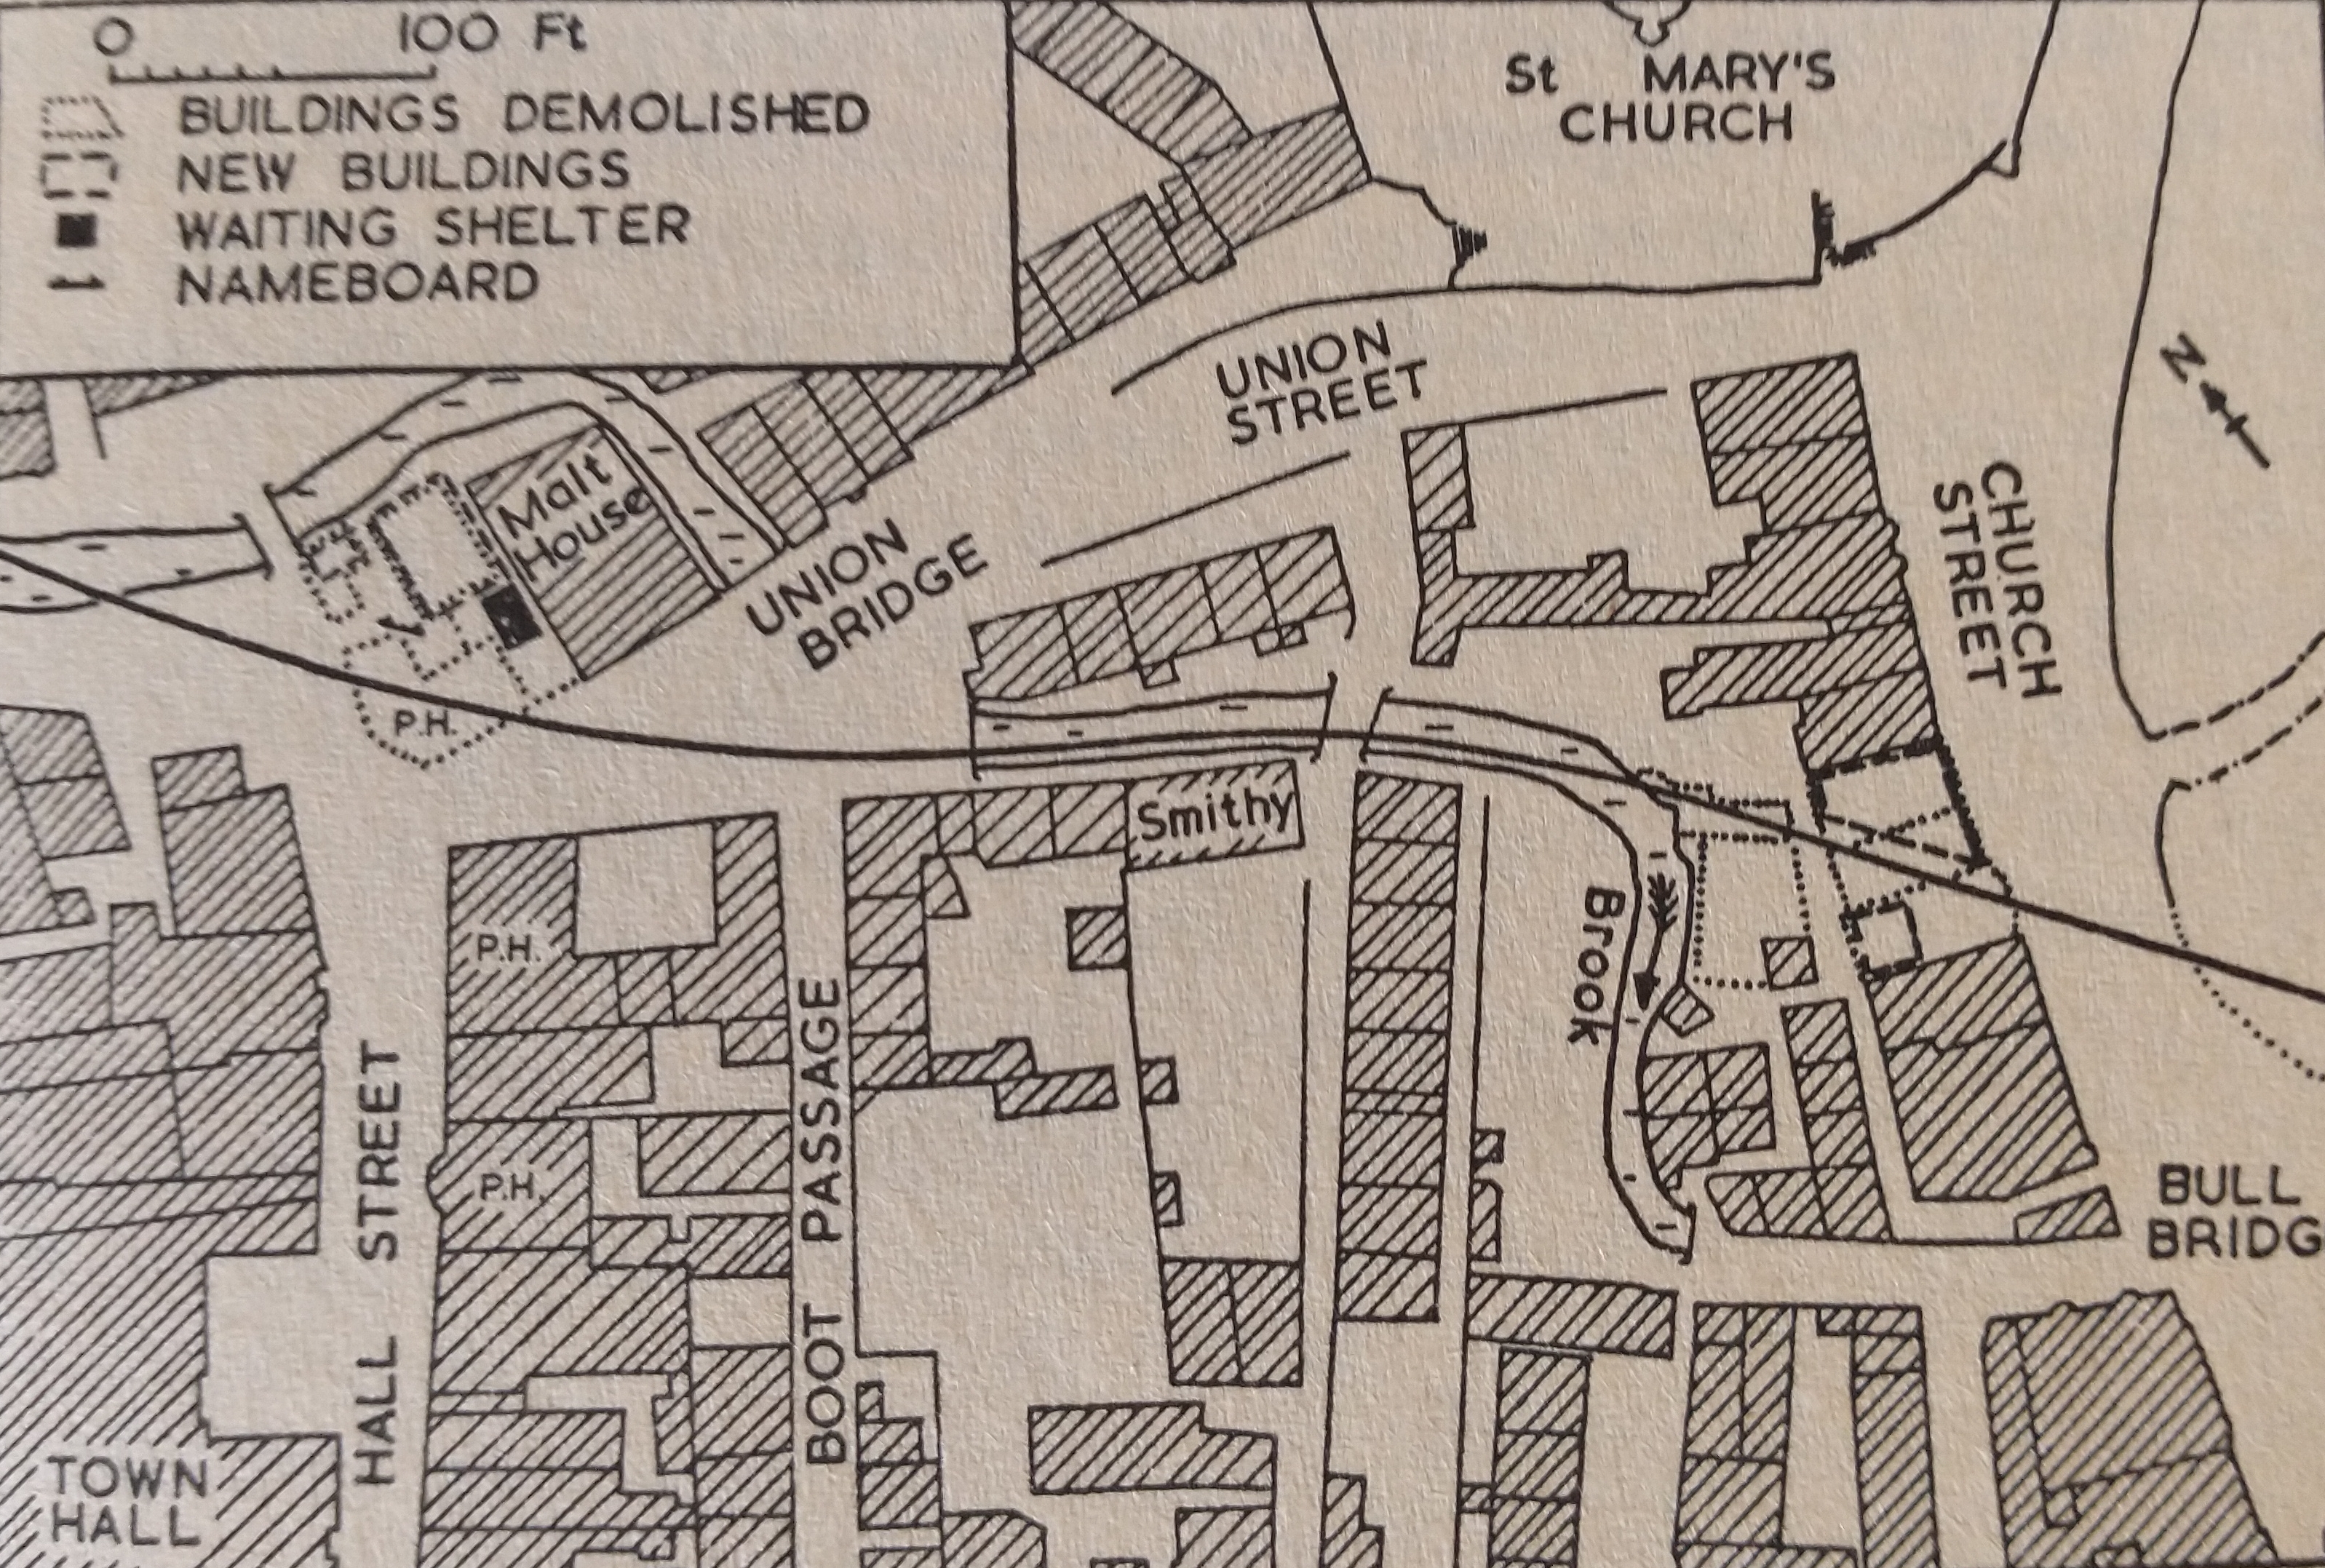
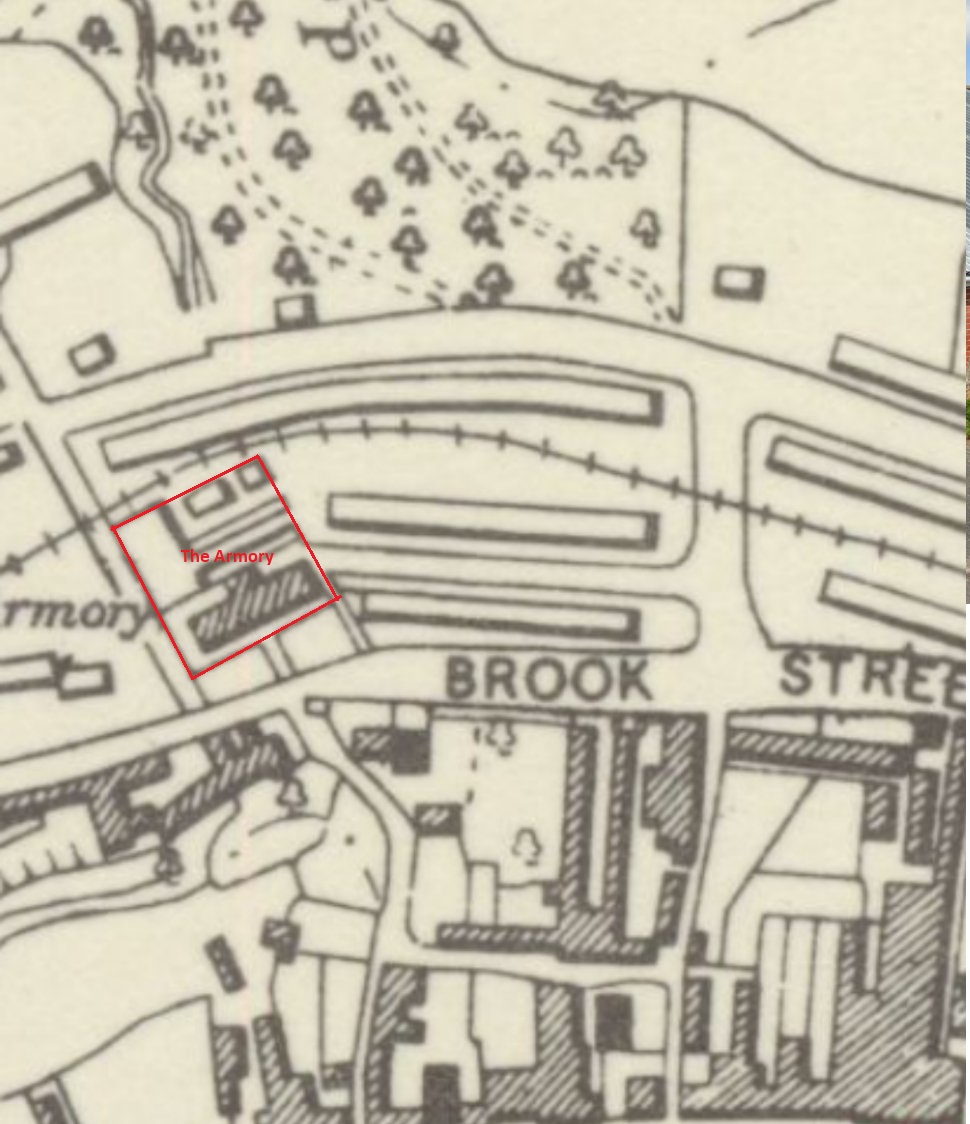
To bring this discussion to a conclusion, the line shown in red on the plan below is most probably the line taken by the W&LLR. The block of properties to the West of Church Street clearly should have been shown as two separate blocks with an alley (or ginnel) between.


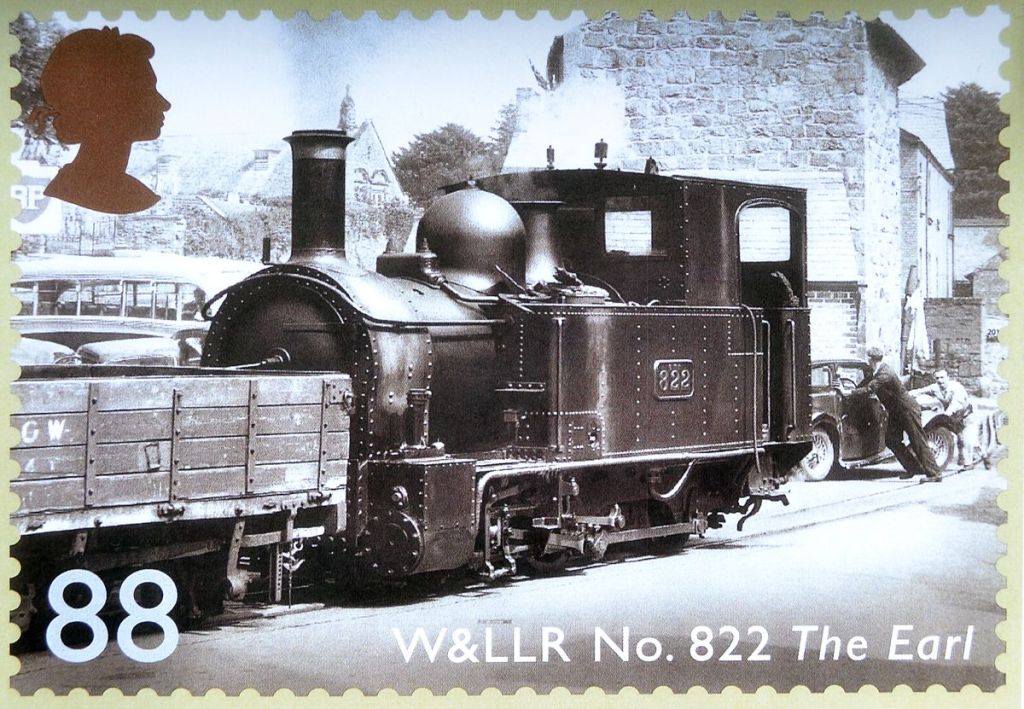
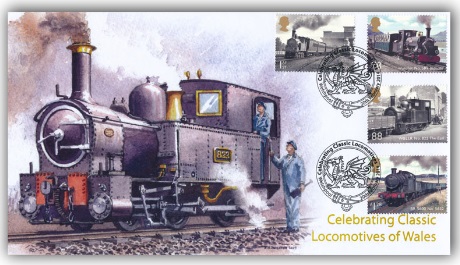
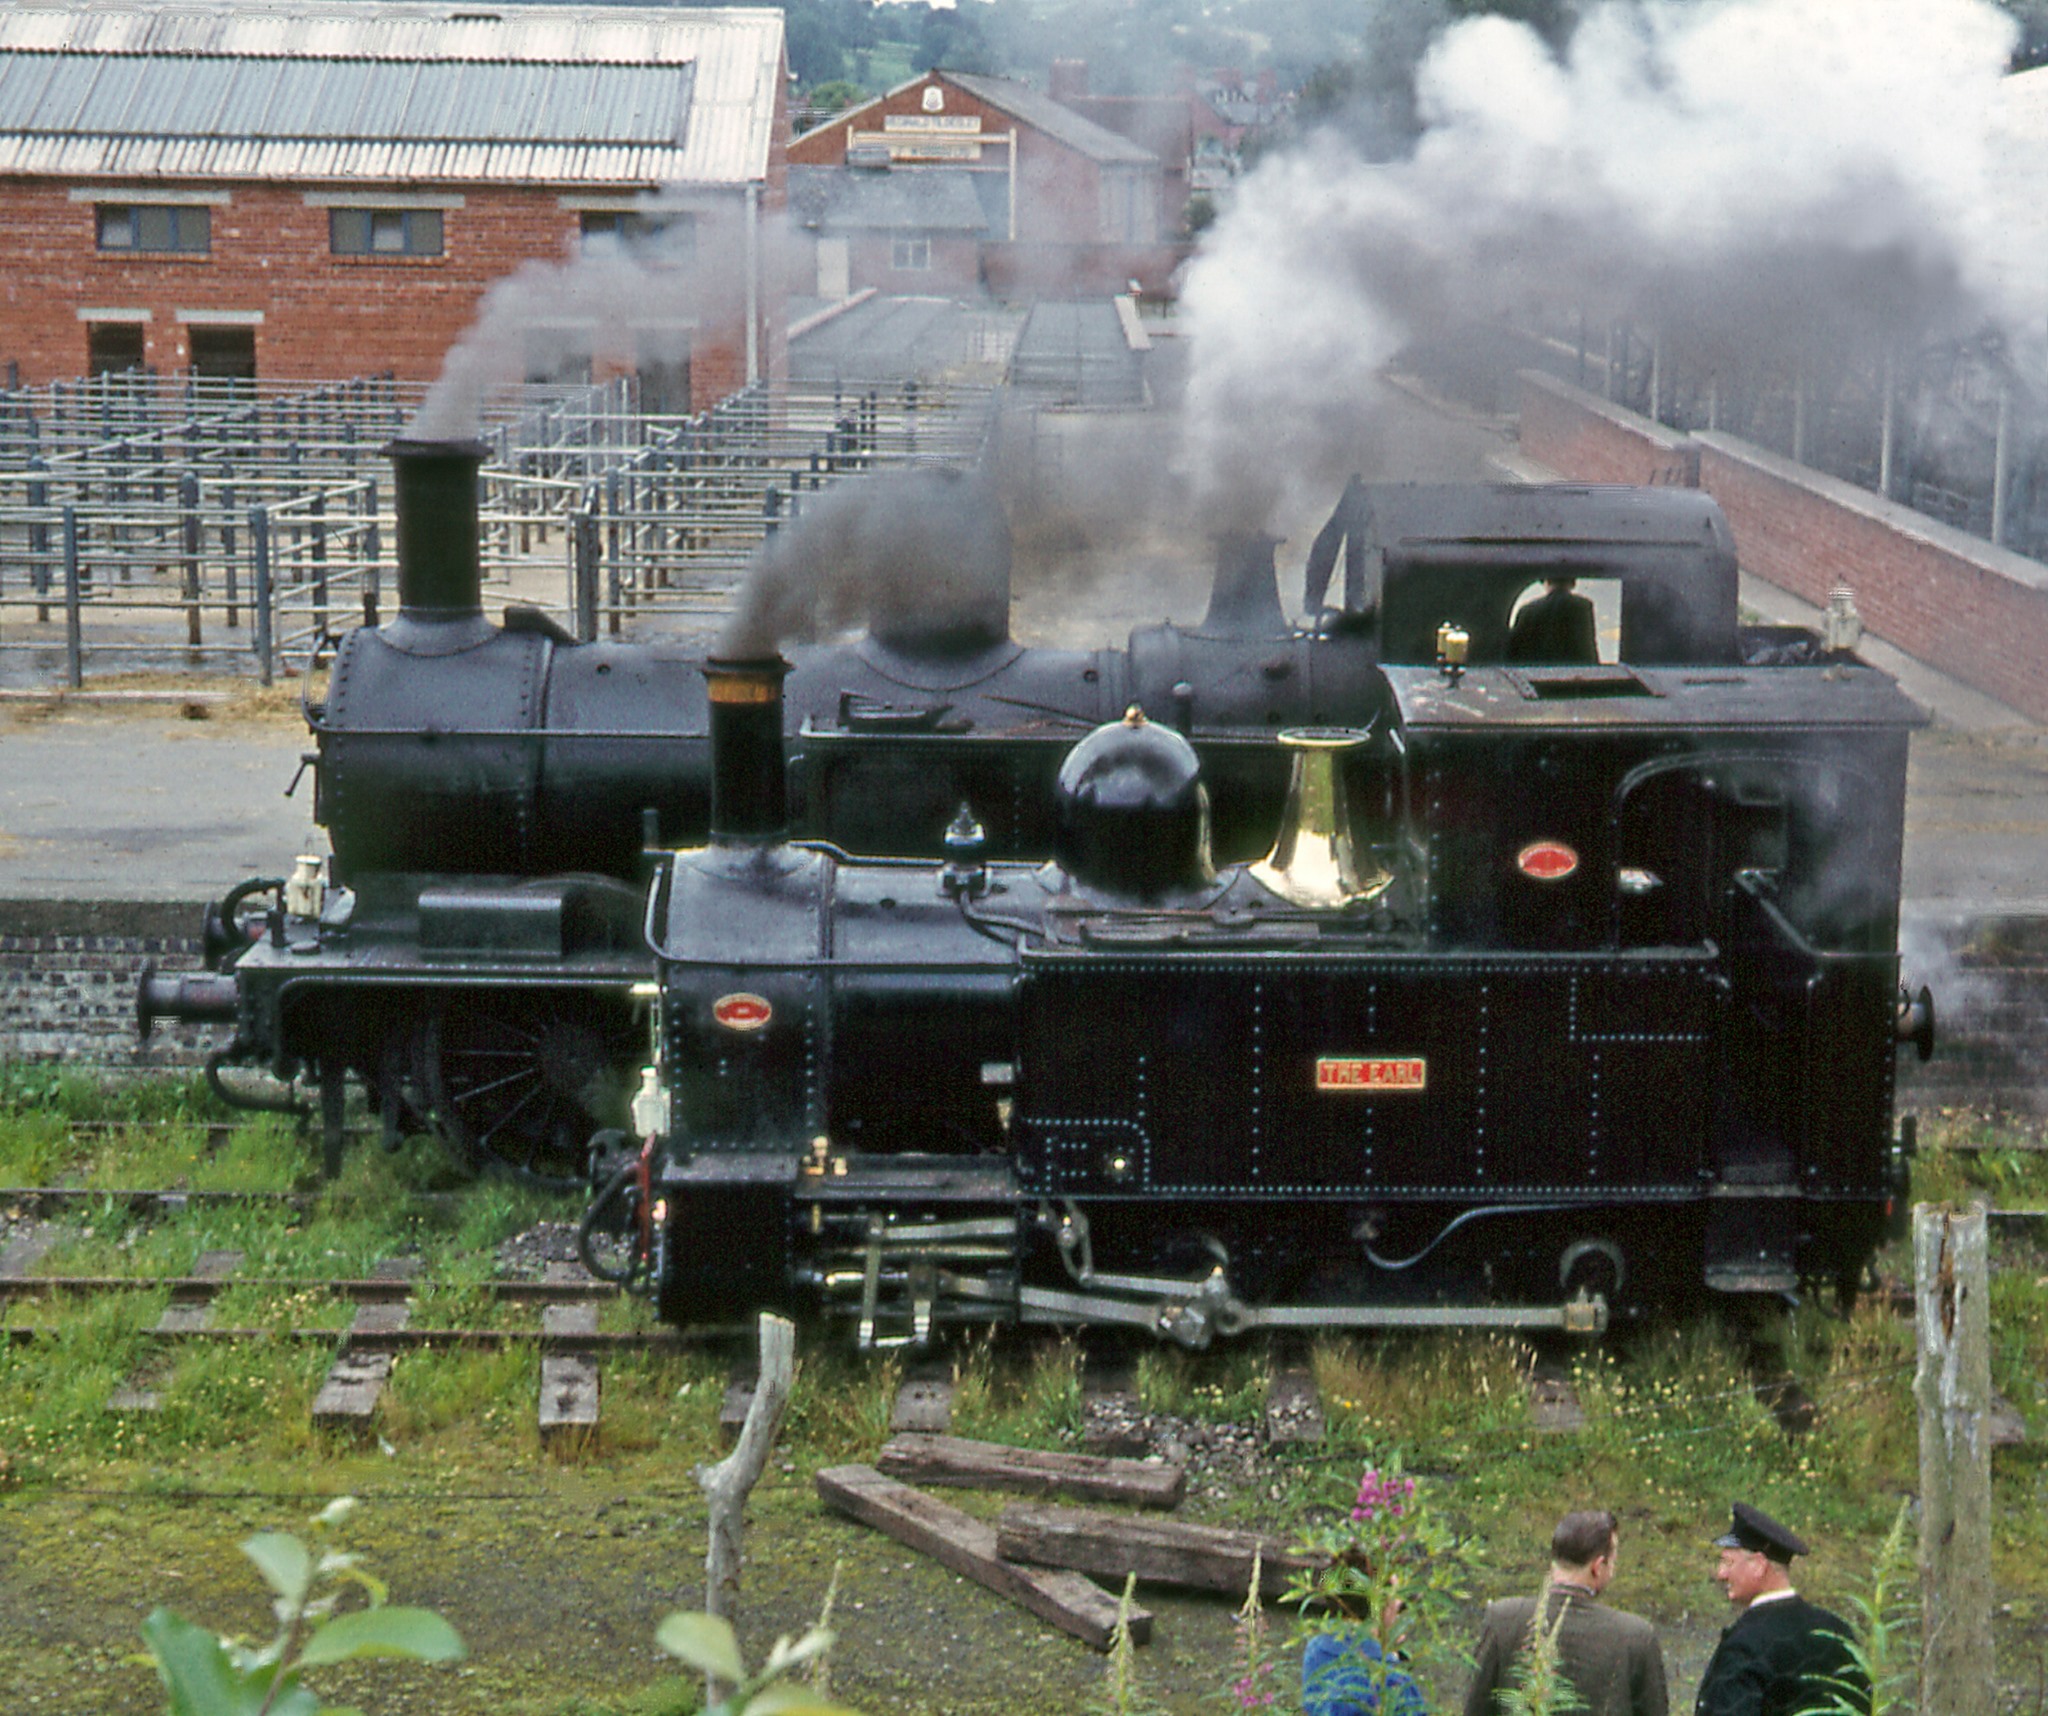
‘The Earl’ on the First Day Cover for stamps produced in 2014.
The first day cover for the series of stamps to which the stamp shown above belongs. The stamps were listed as ‘Classic Locos of Wales’. [31]

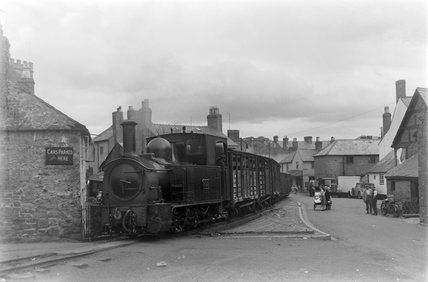
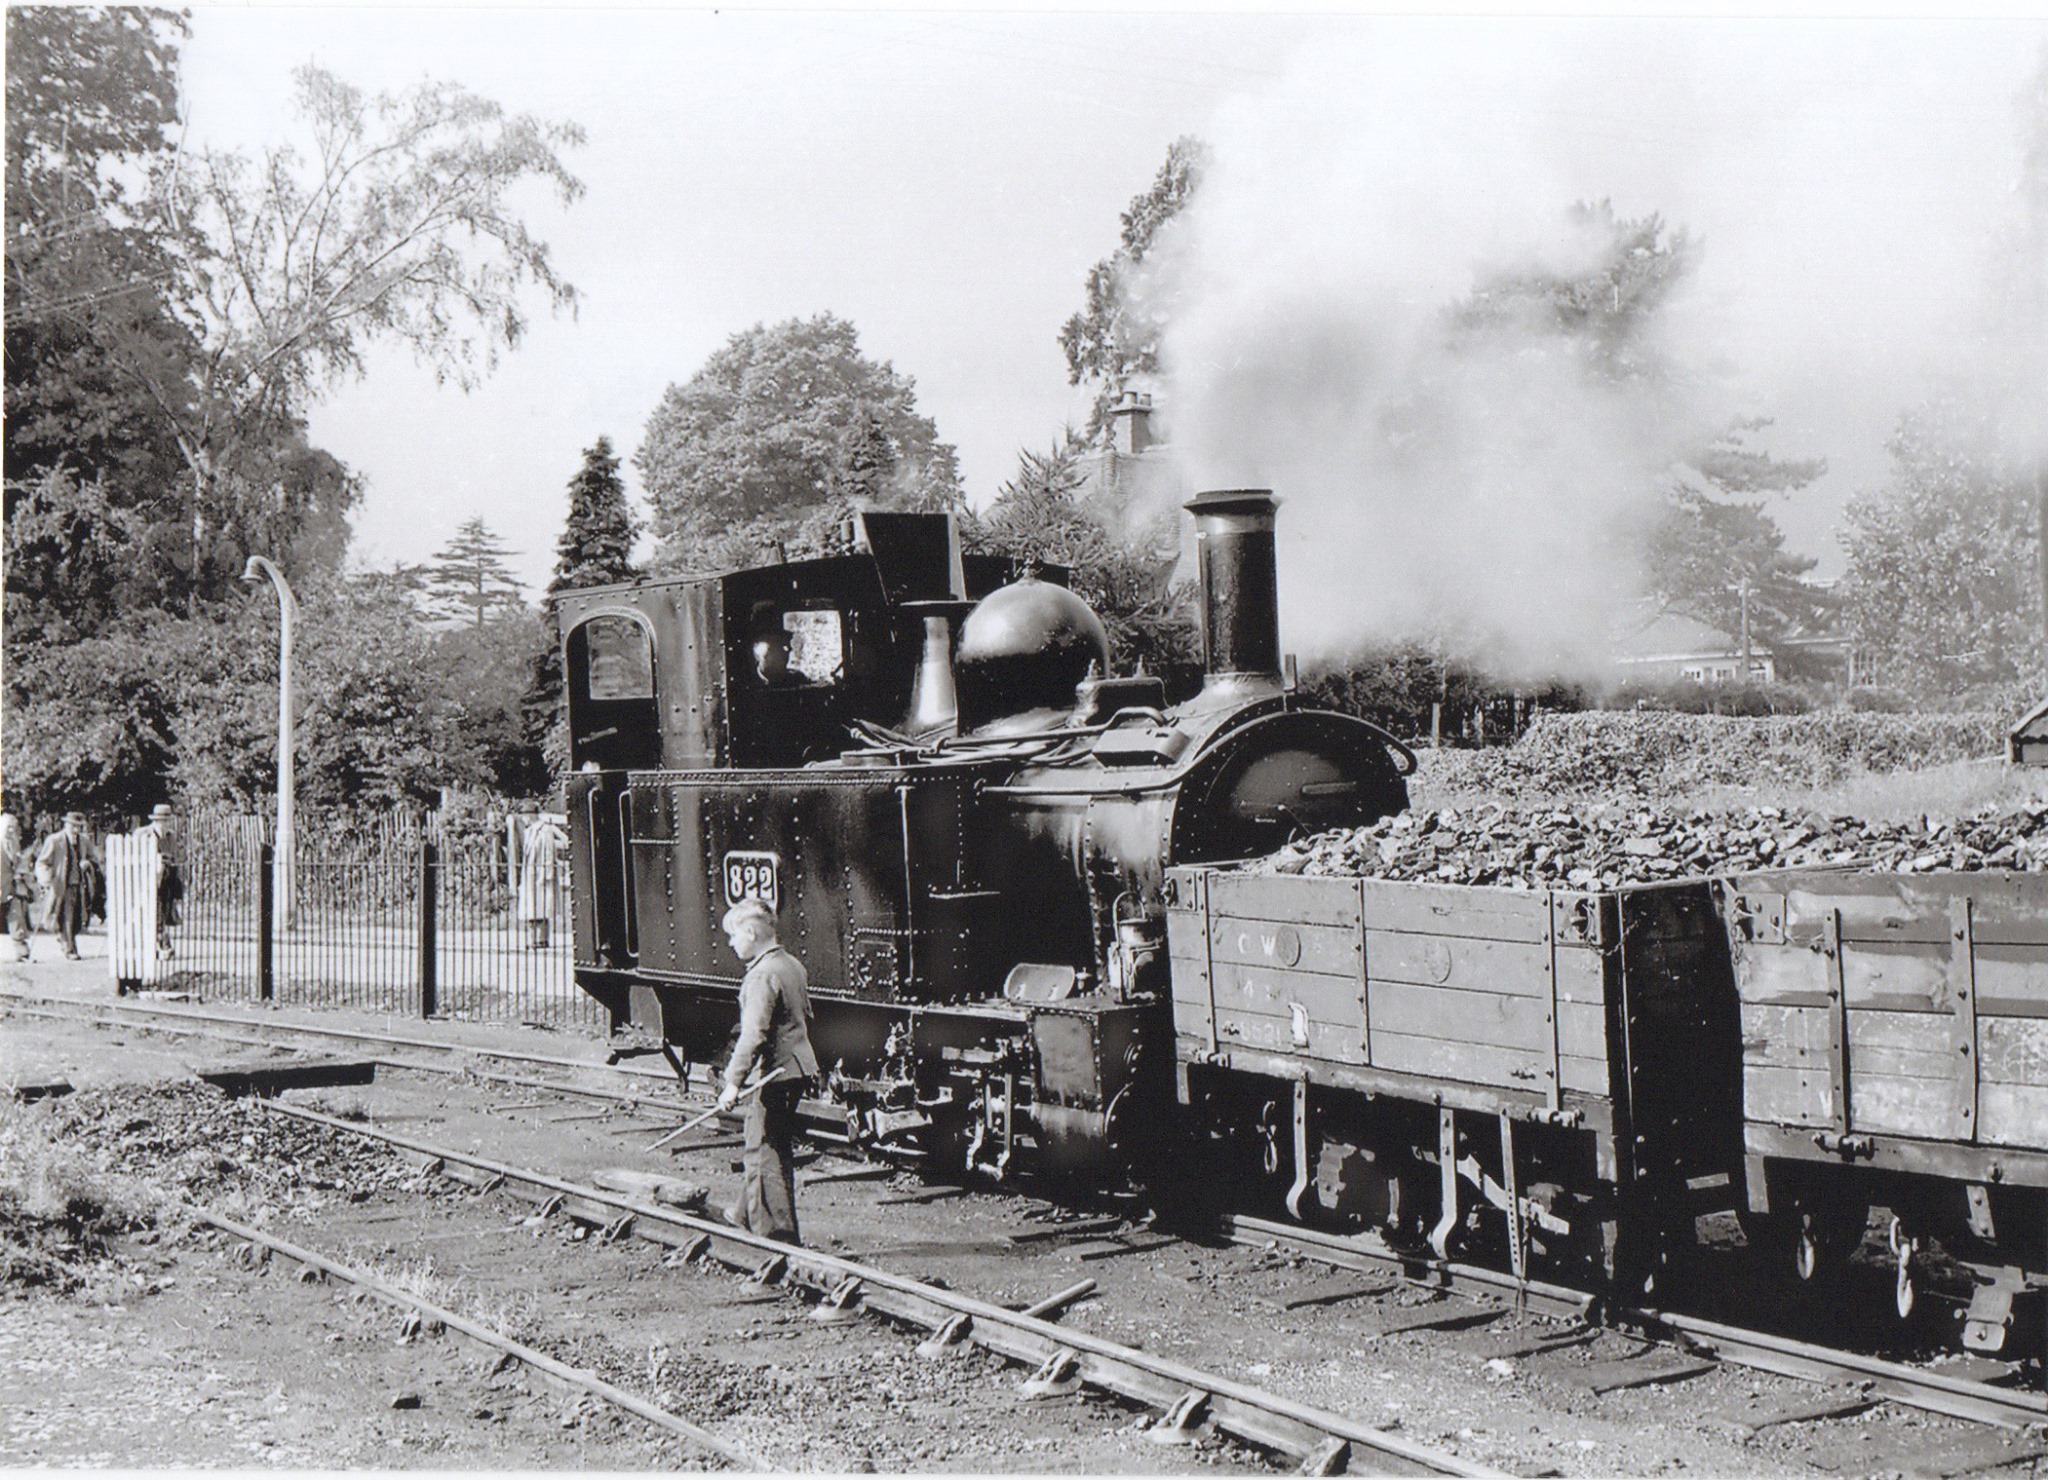
At the same location as in the above image, Locomotive No. 822, ‘The Earl’. is in charge of a cattle train on its way West out of Welshpool. This image is embedded from the Science Museum’s Picture Library, © National Railway Museum / Science & Society Picture Library. [11]
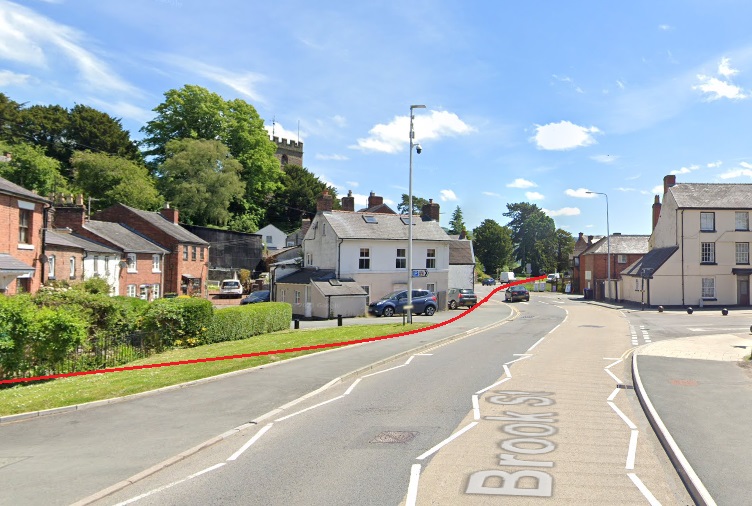


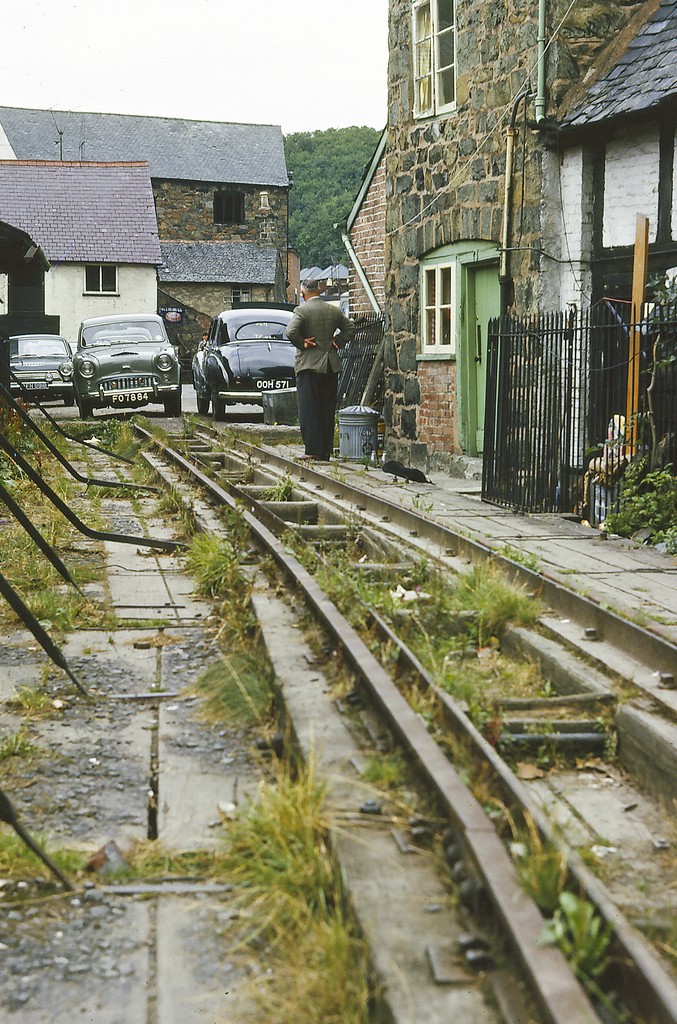
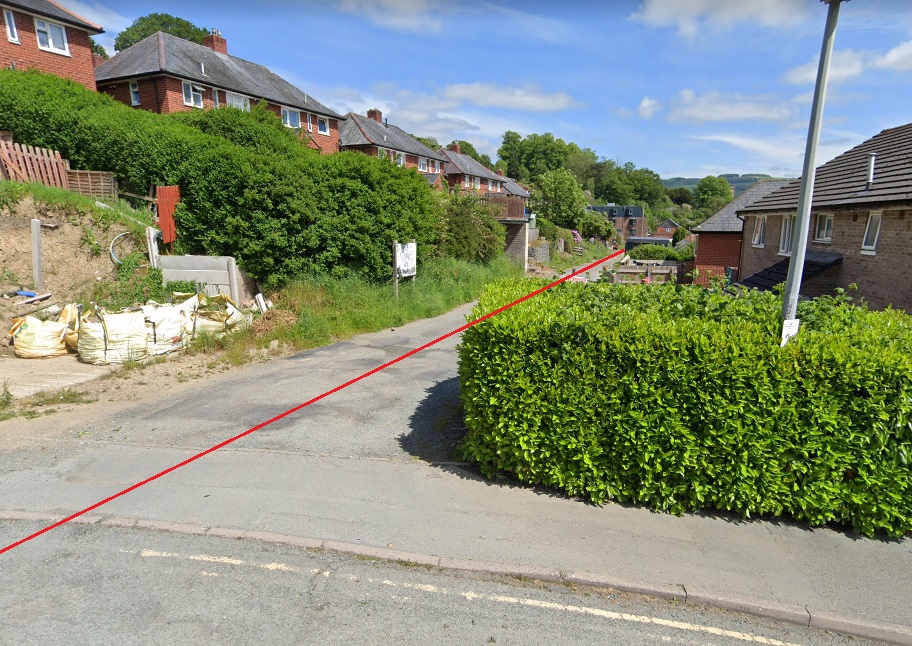
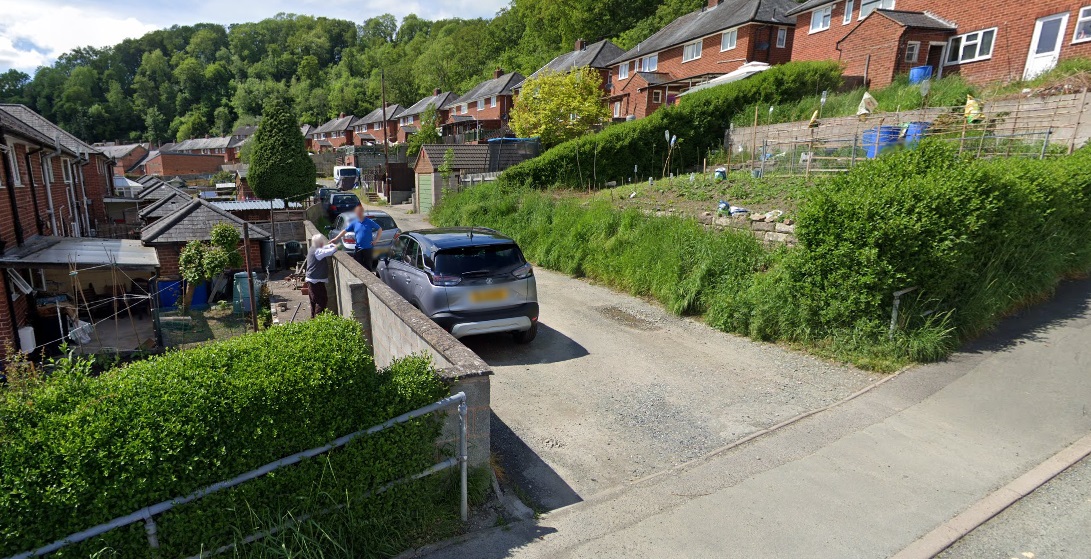
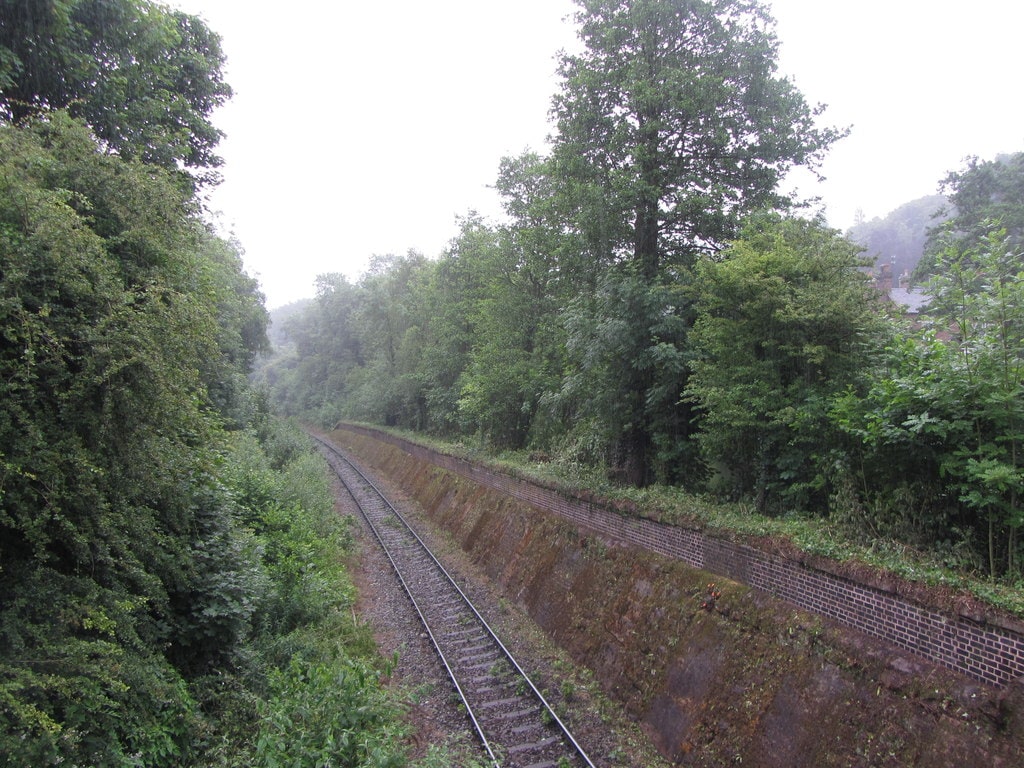
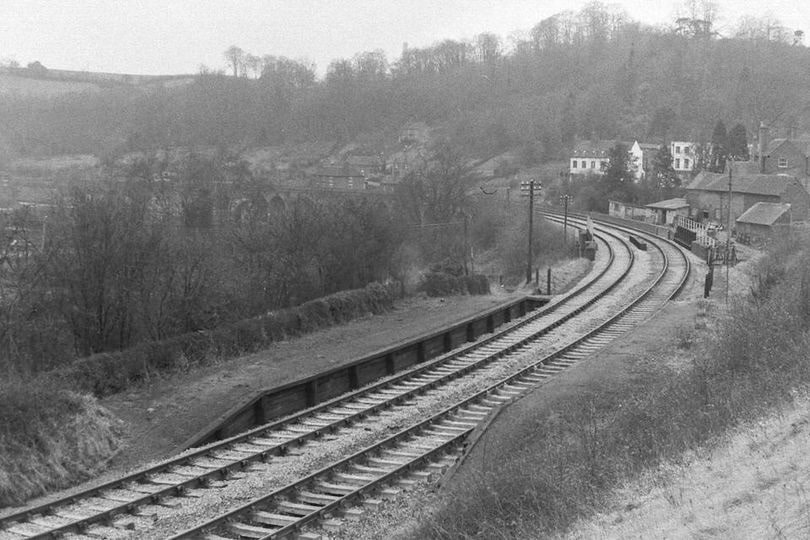
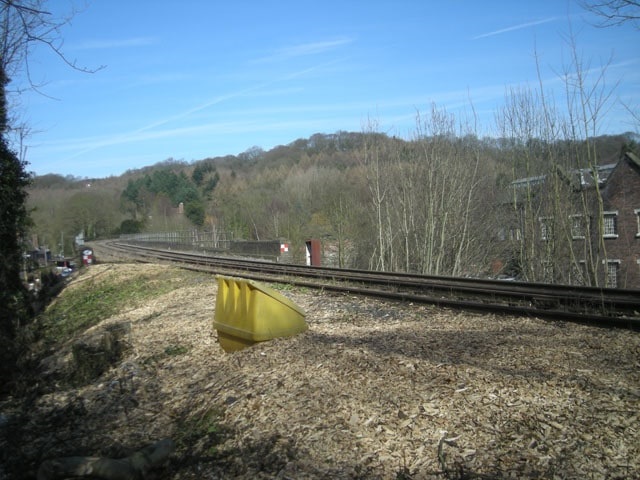
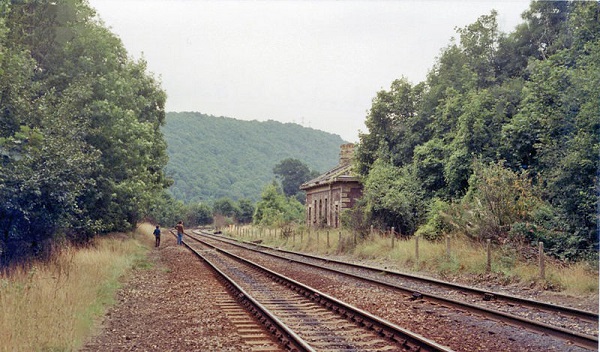
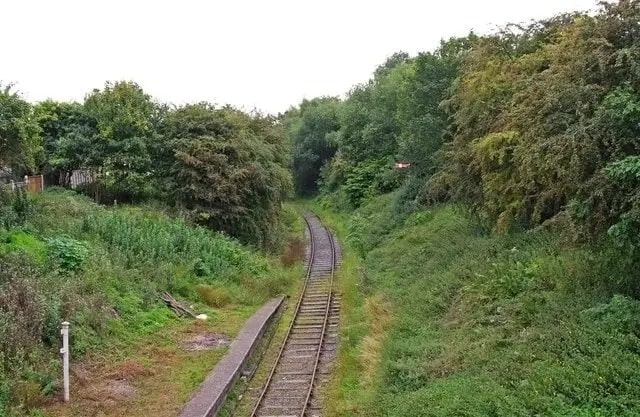
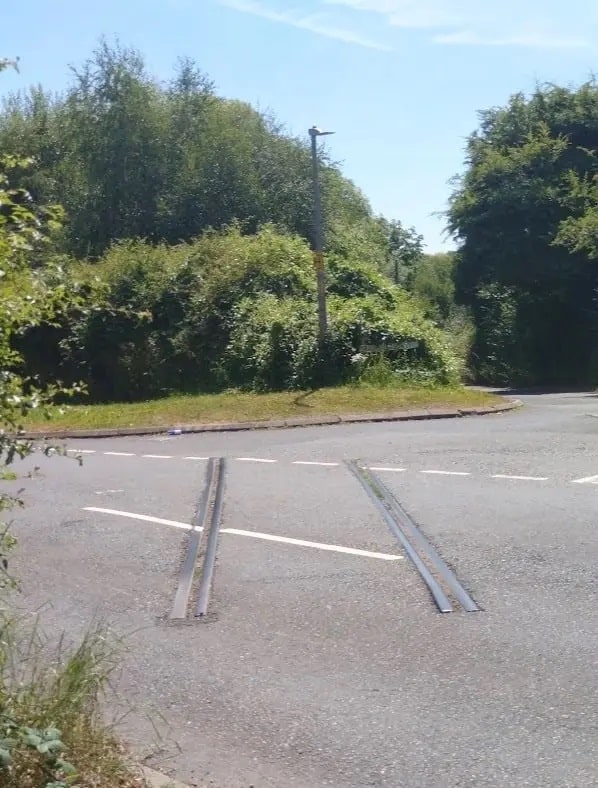
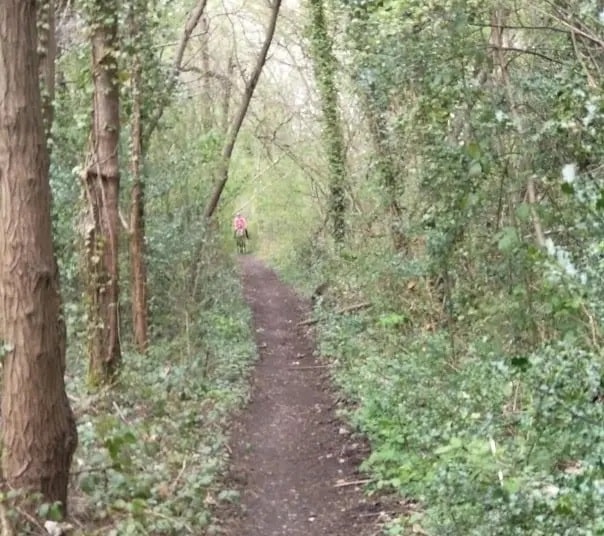
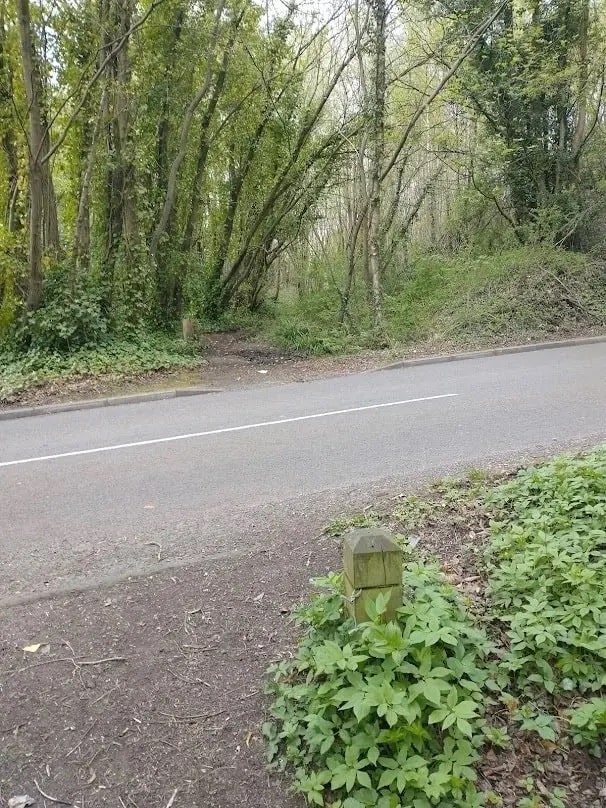
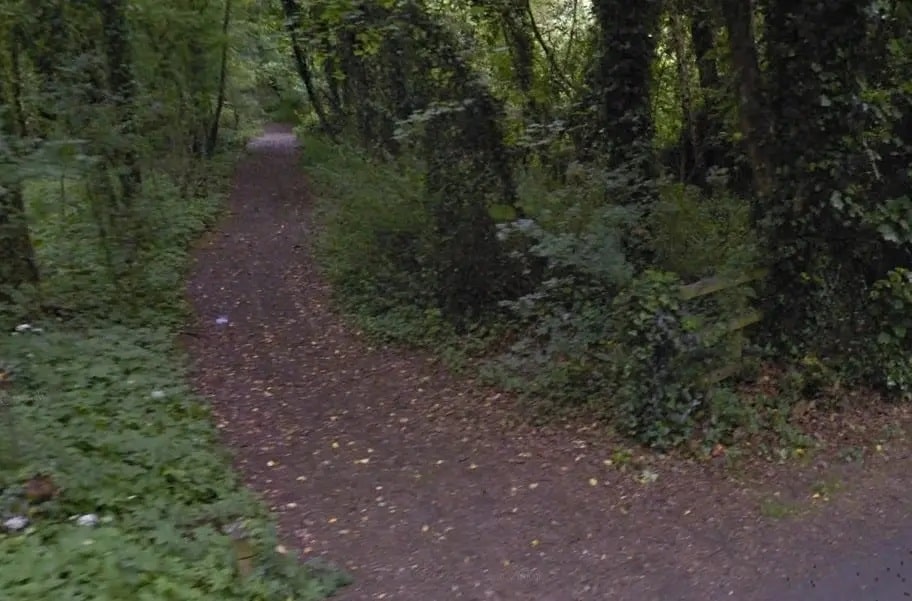
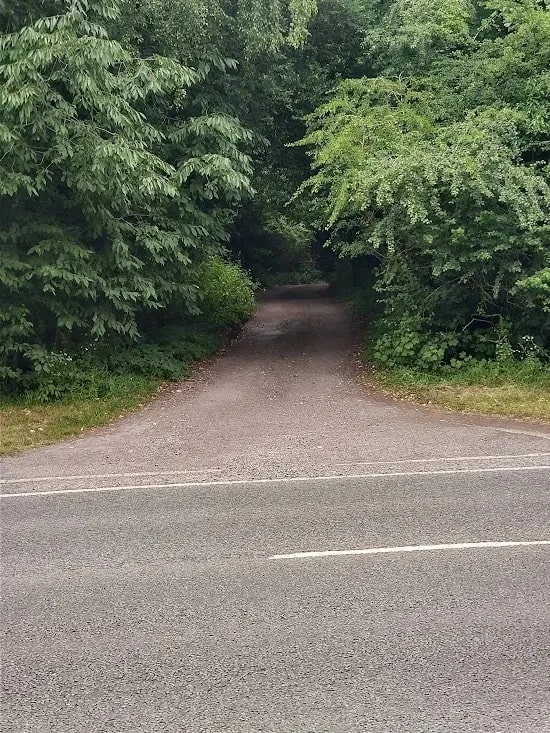
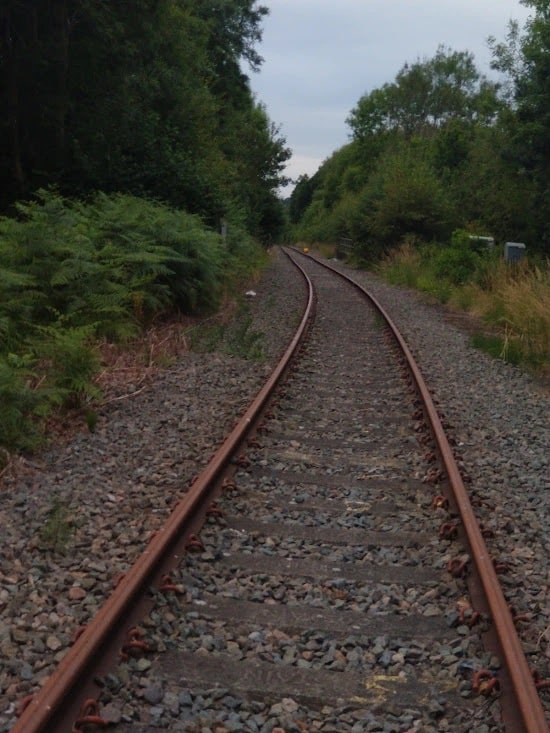
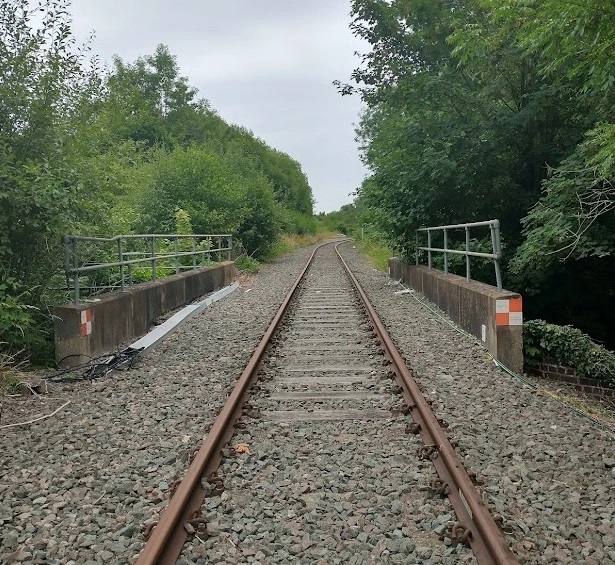
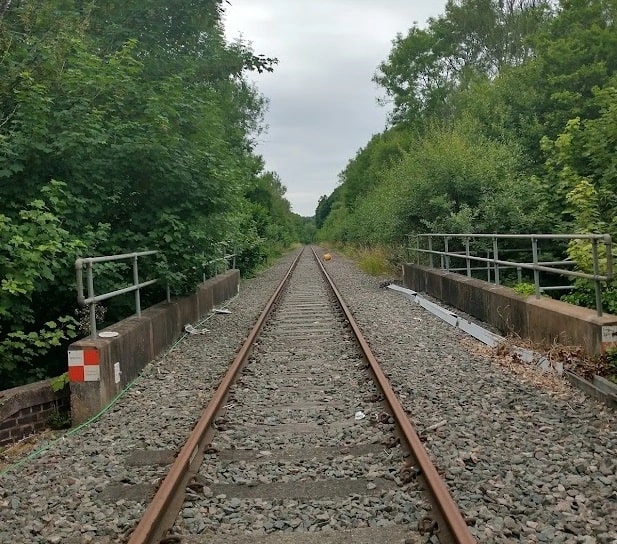
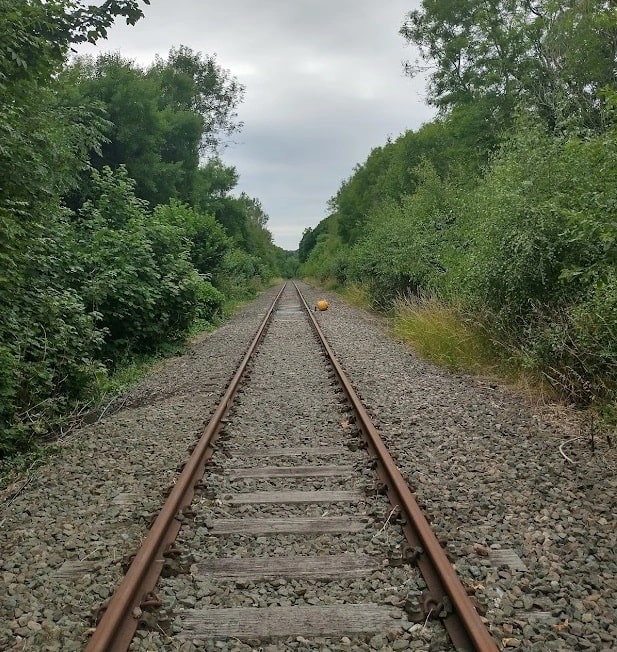
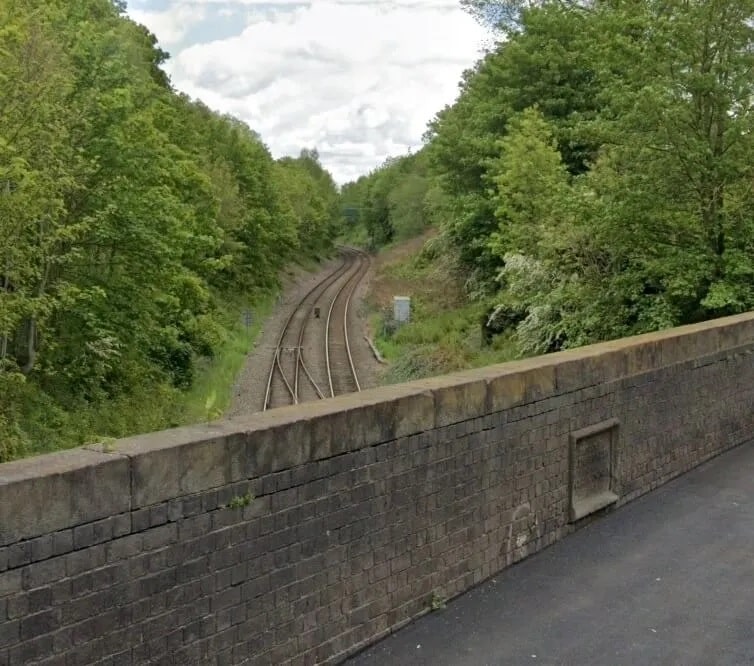
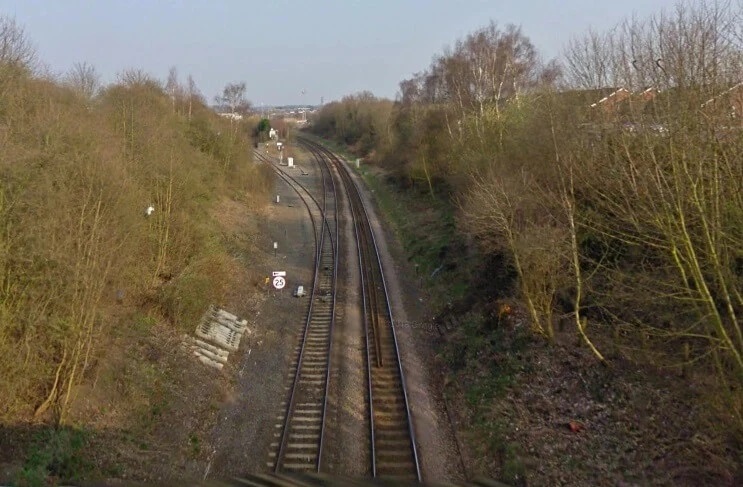
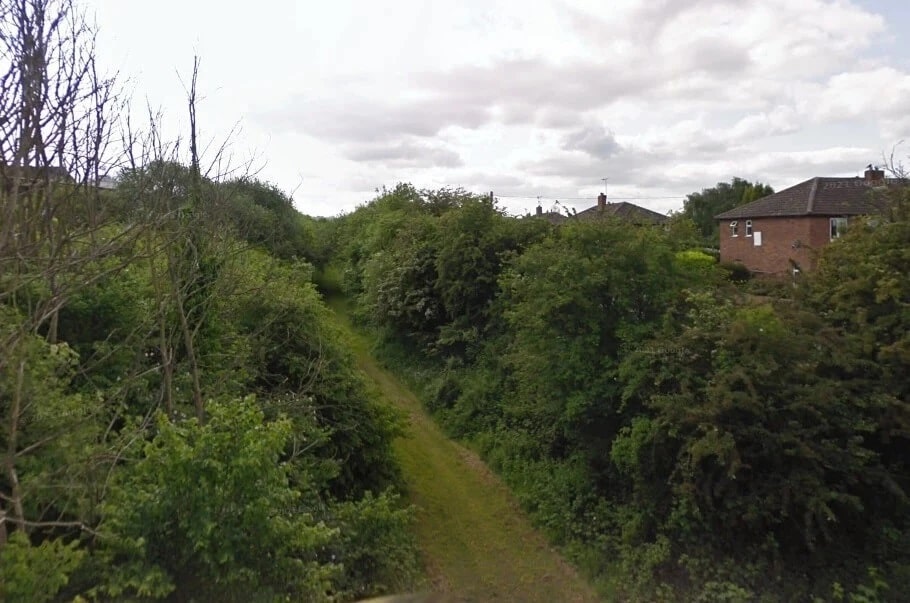
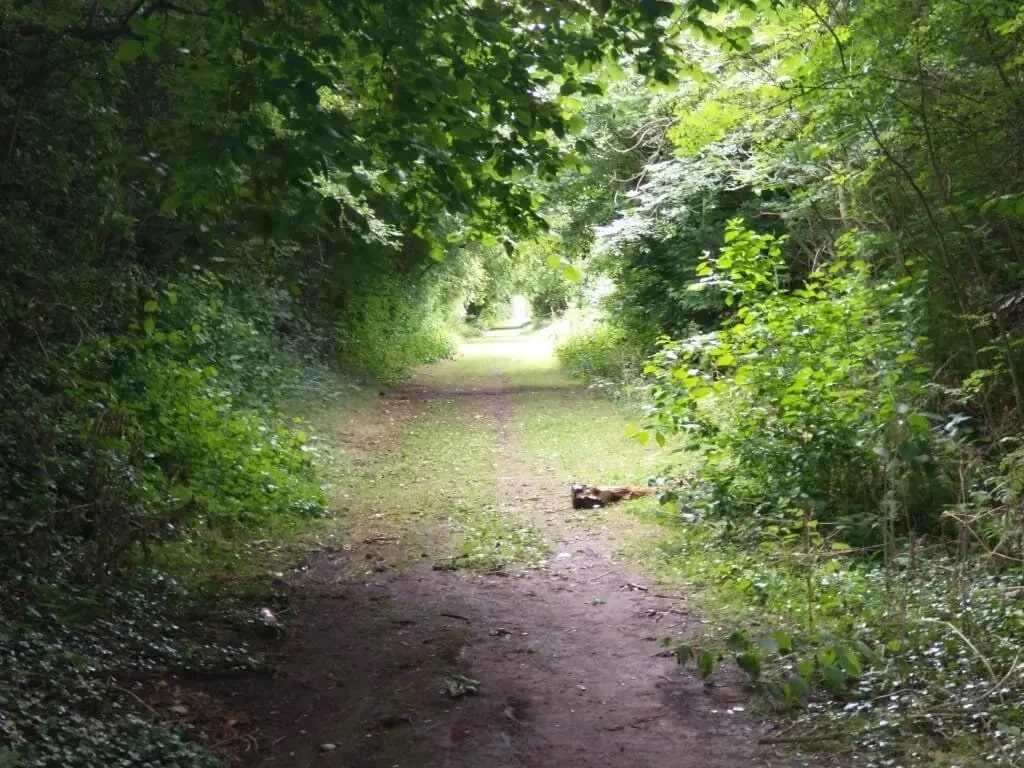
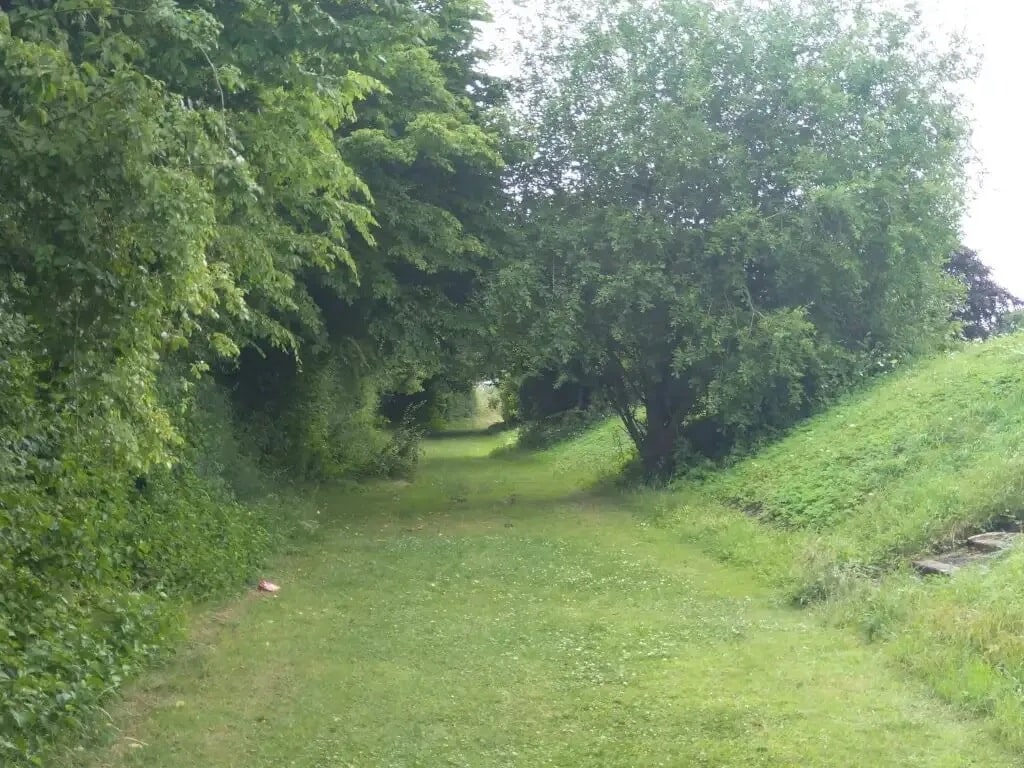
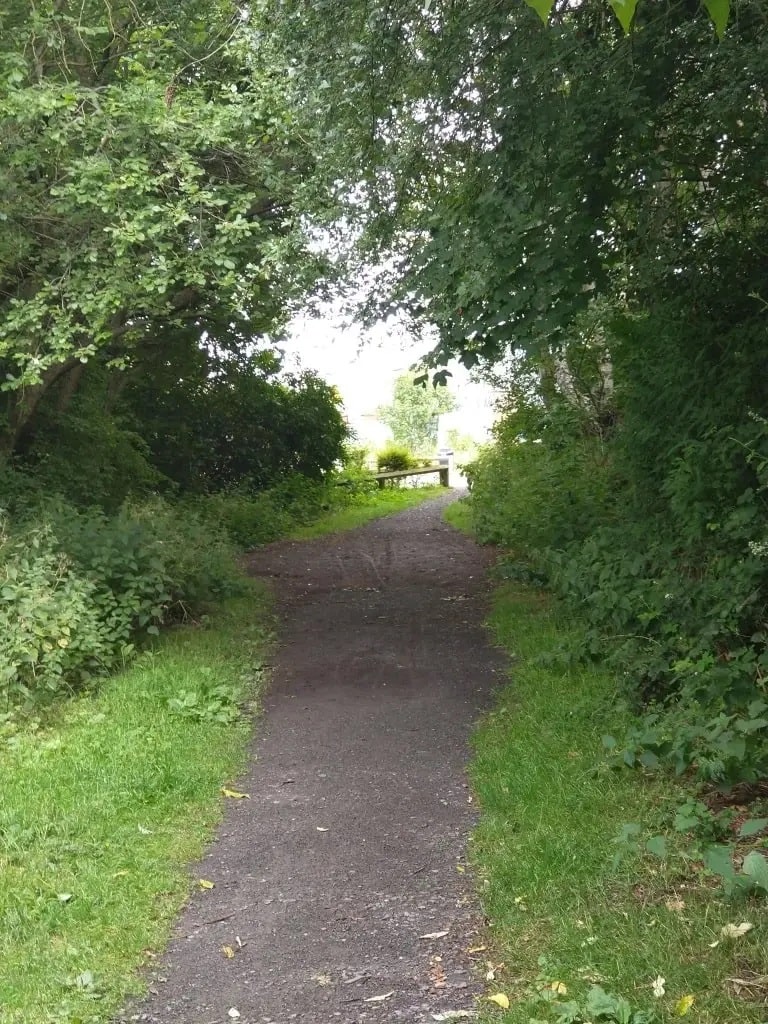
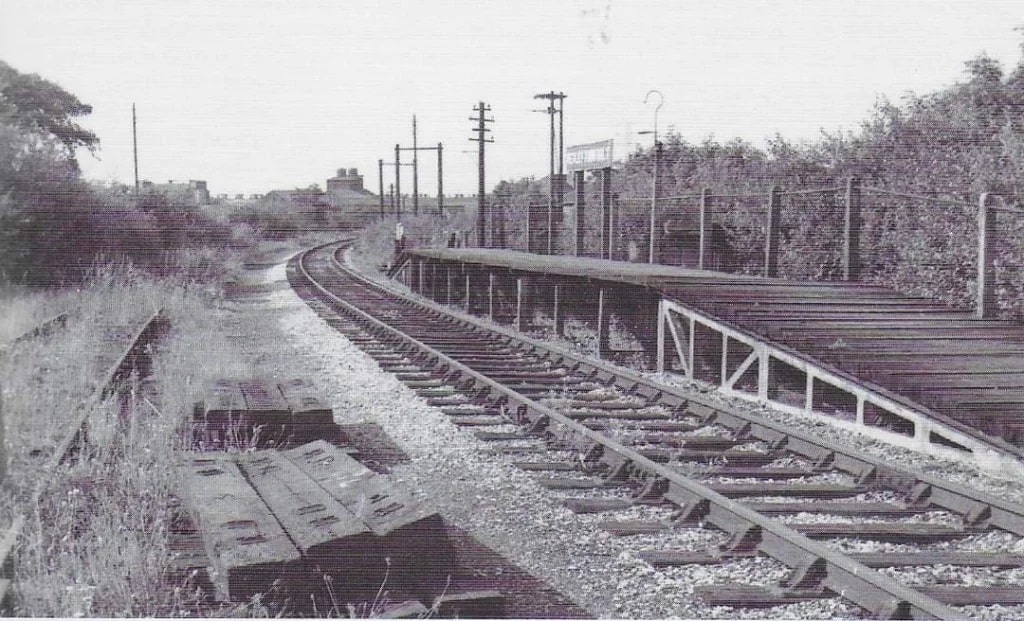
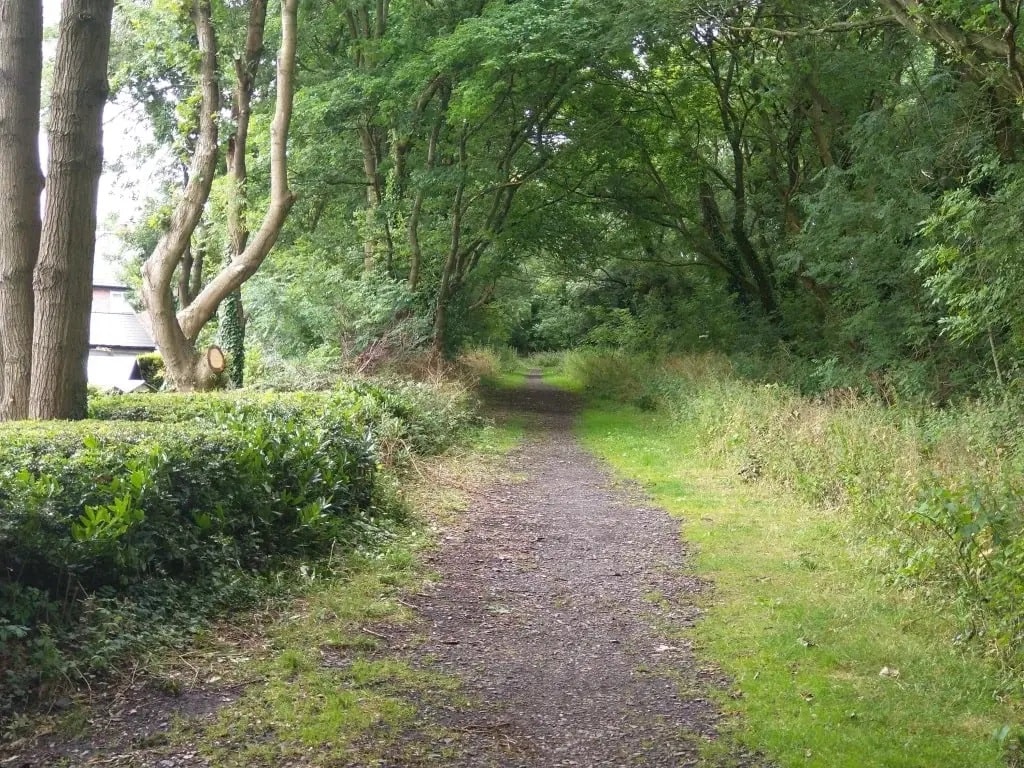
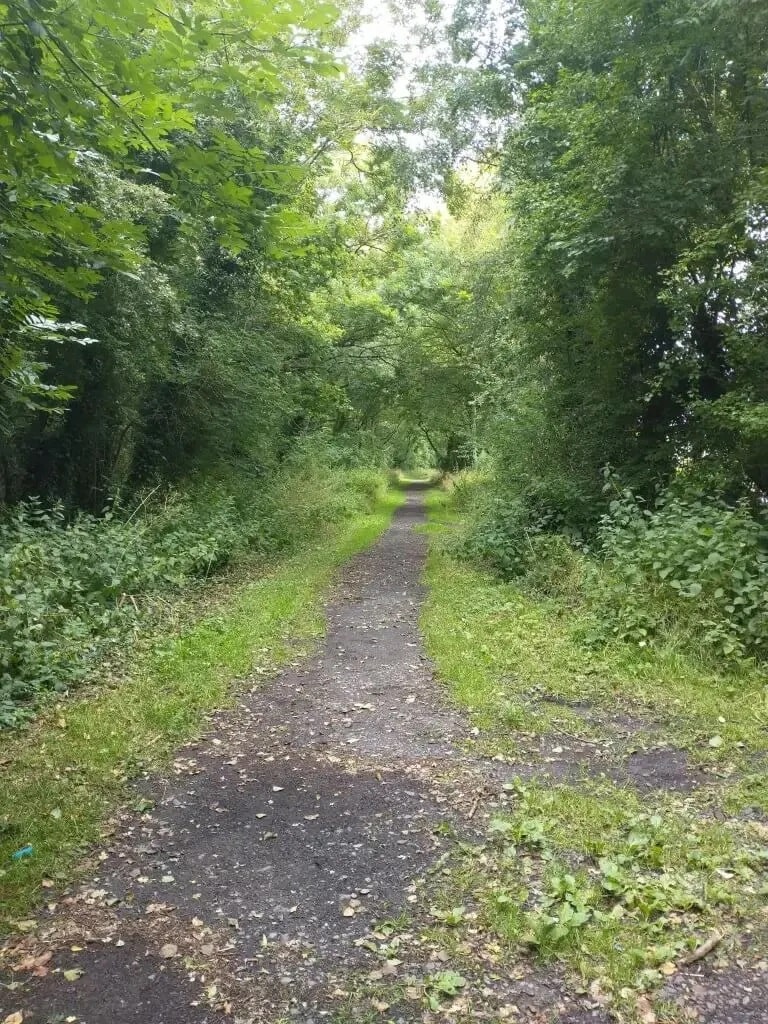
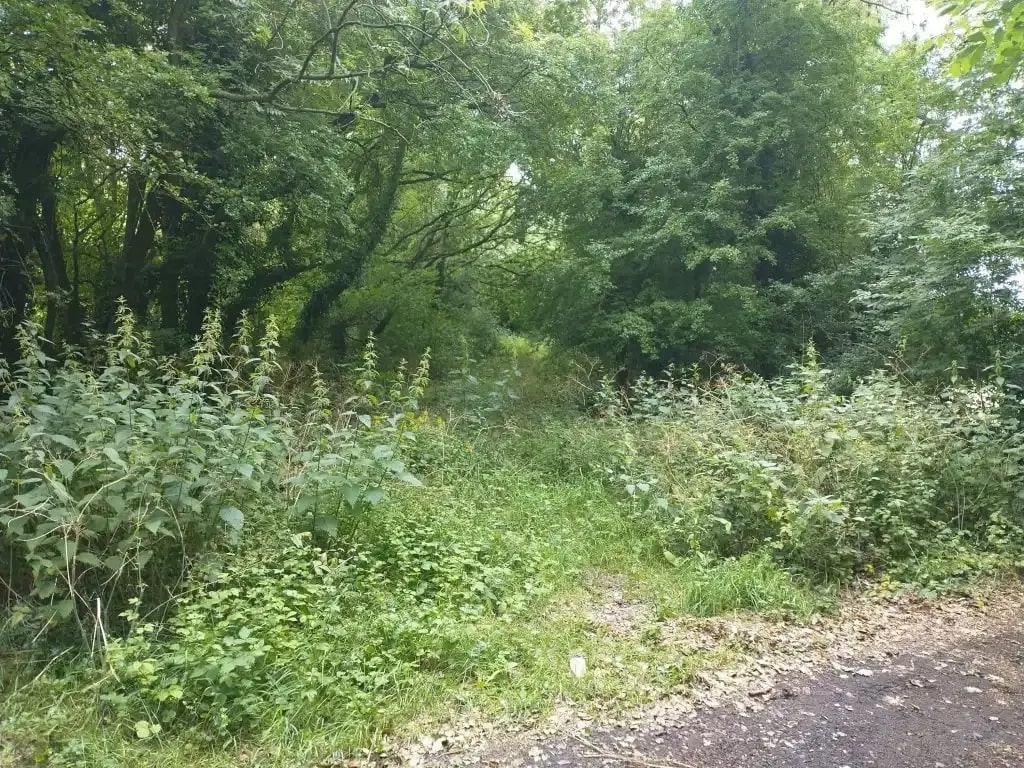
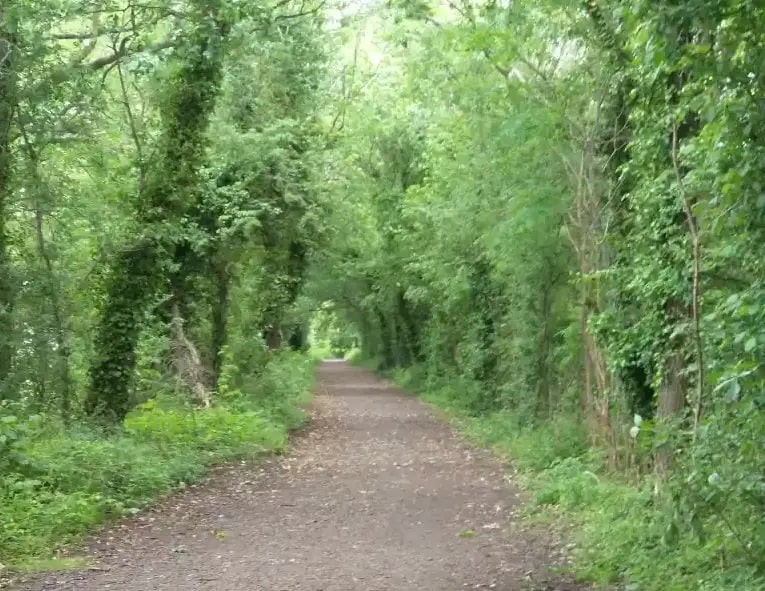
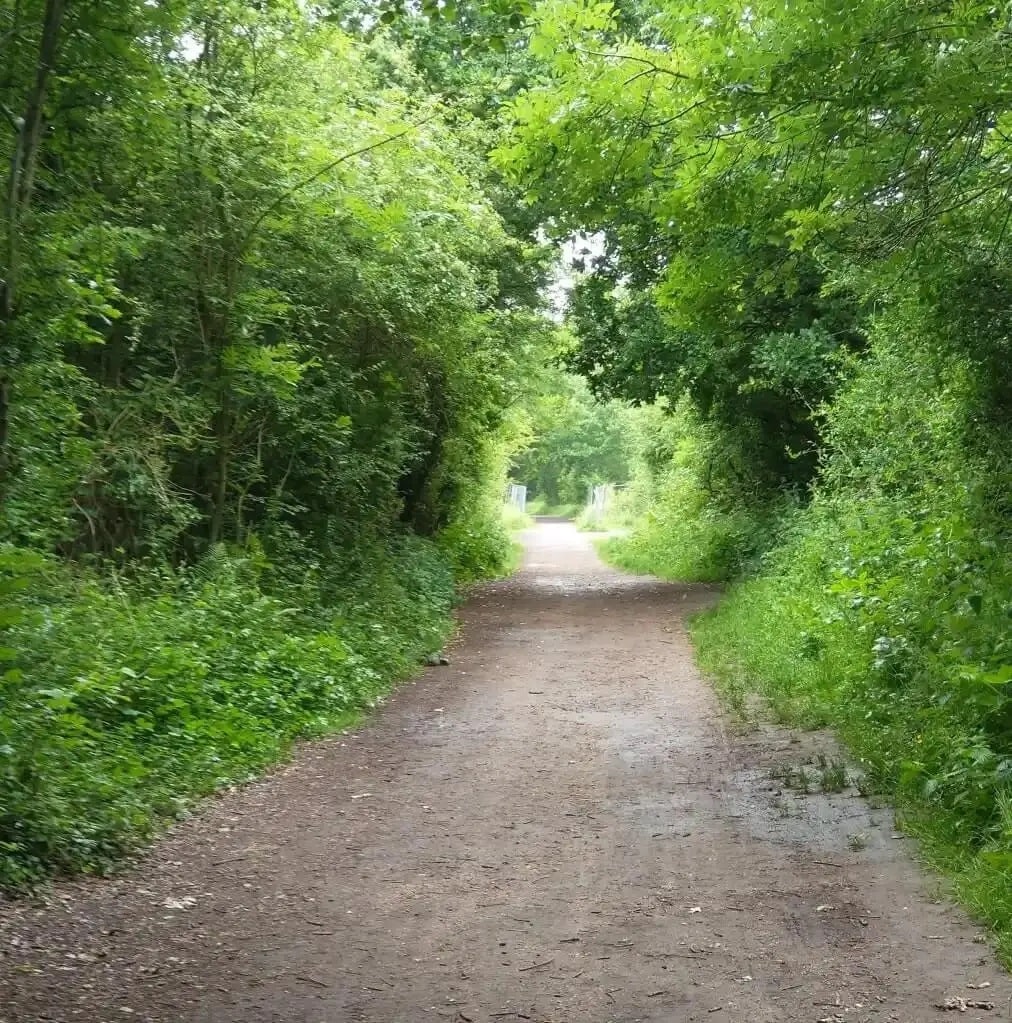
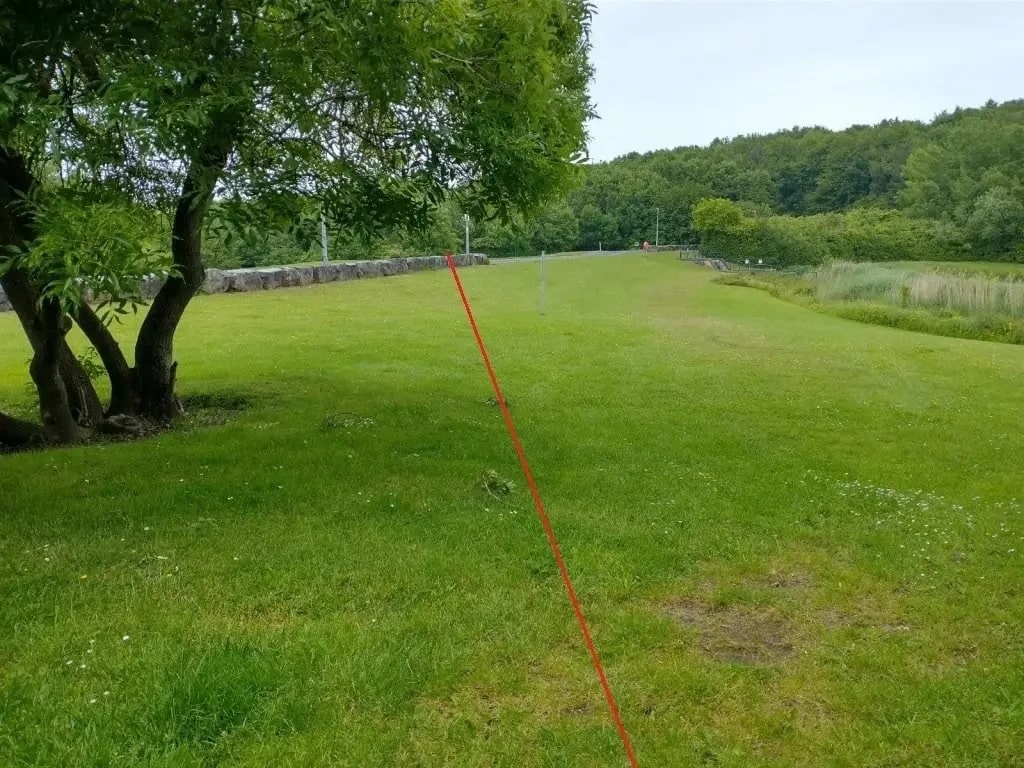
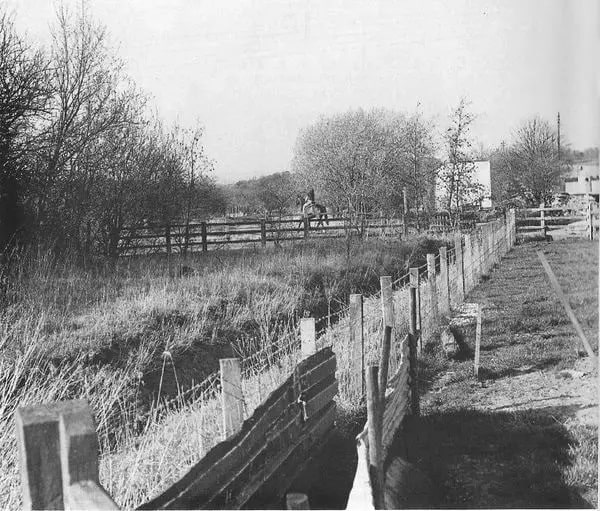
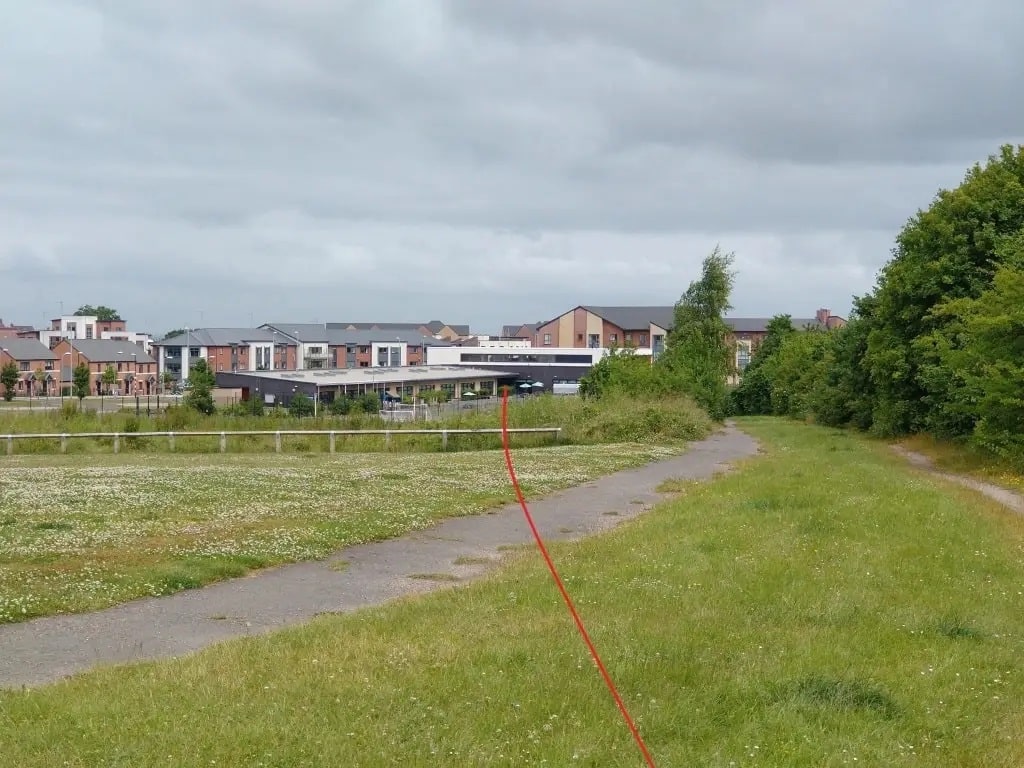
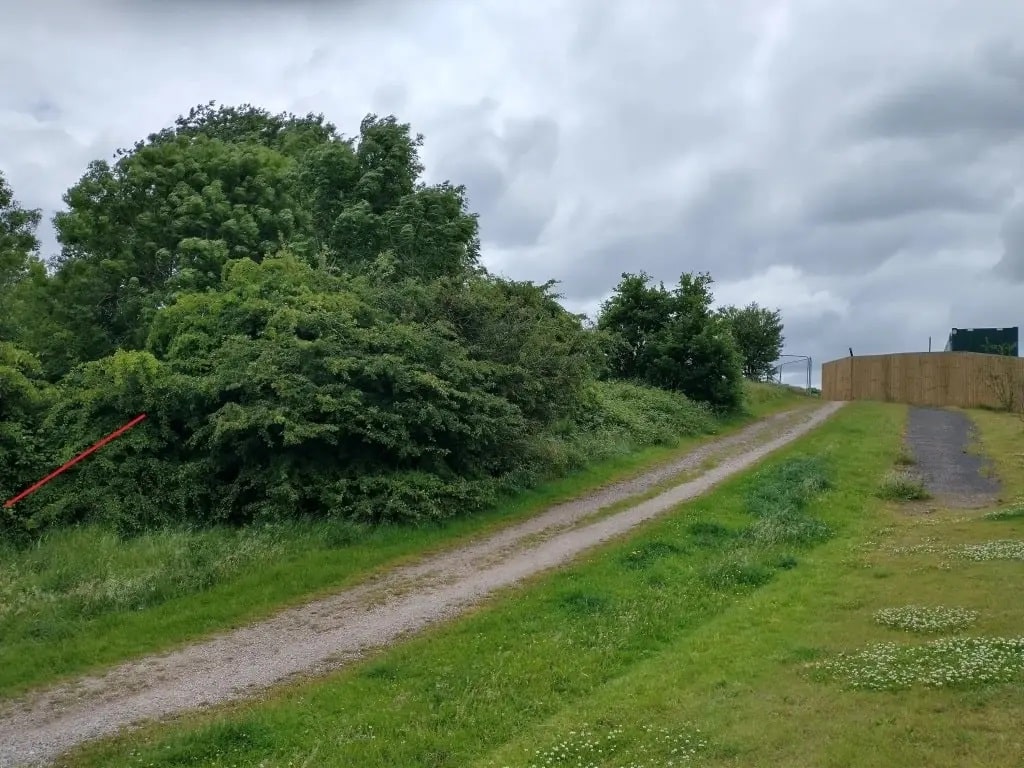
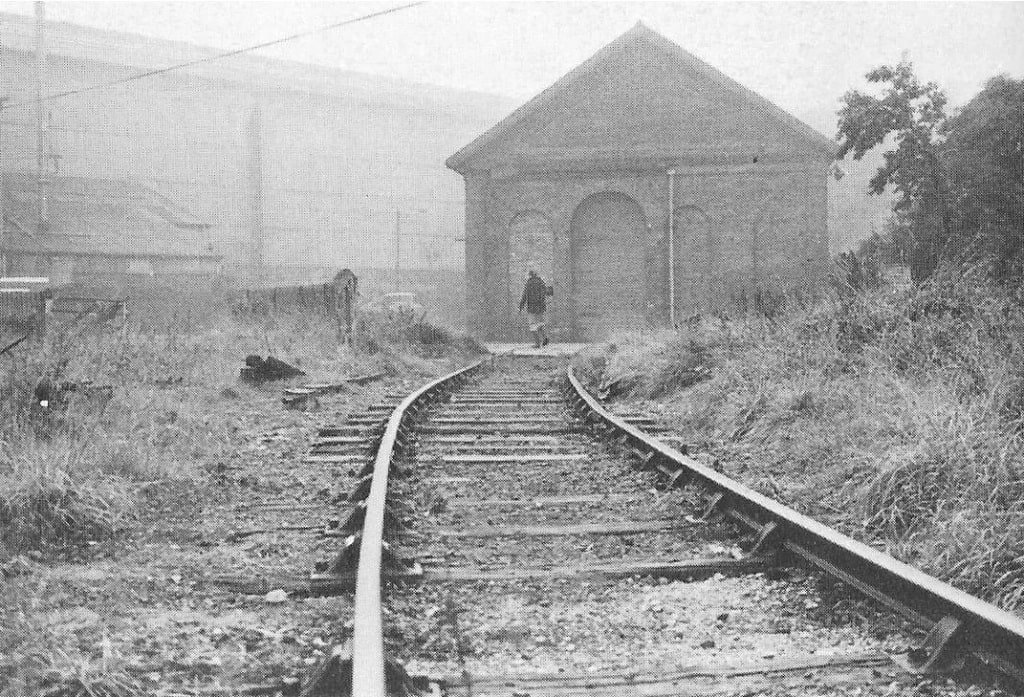
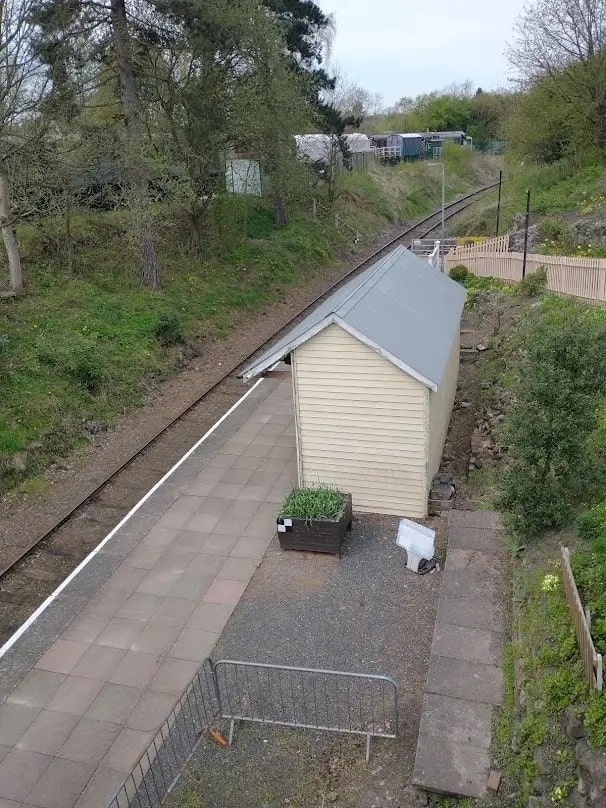
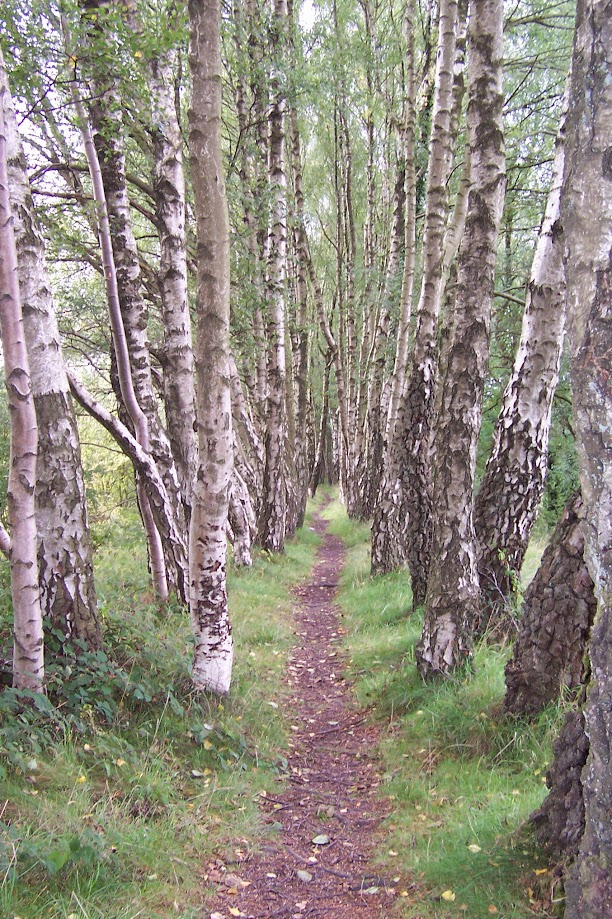
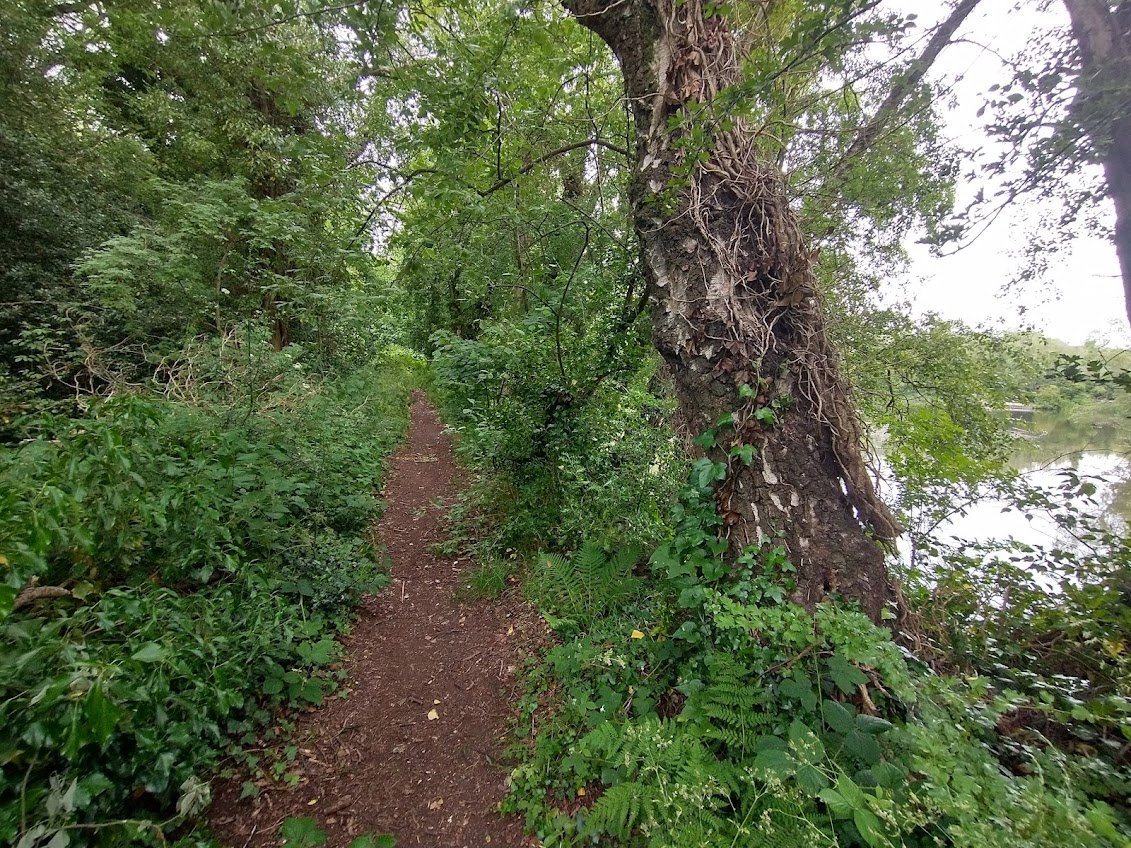
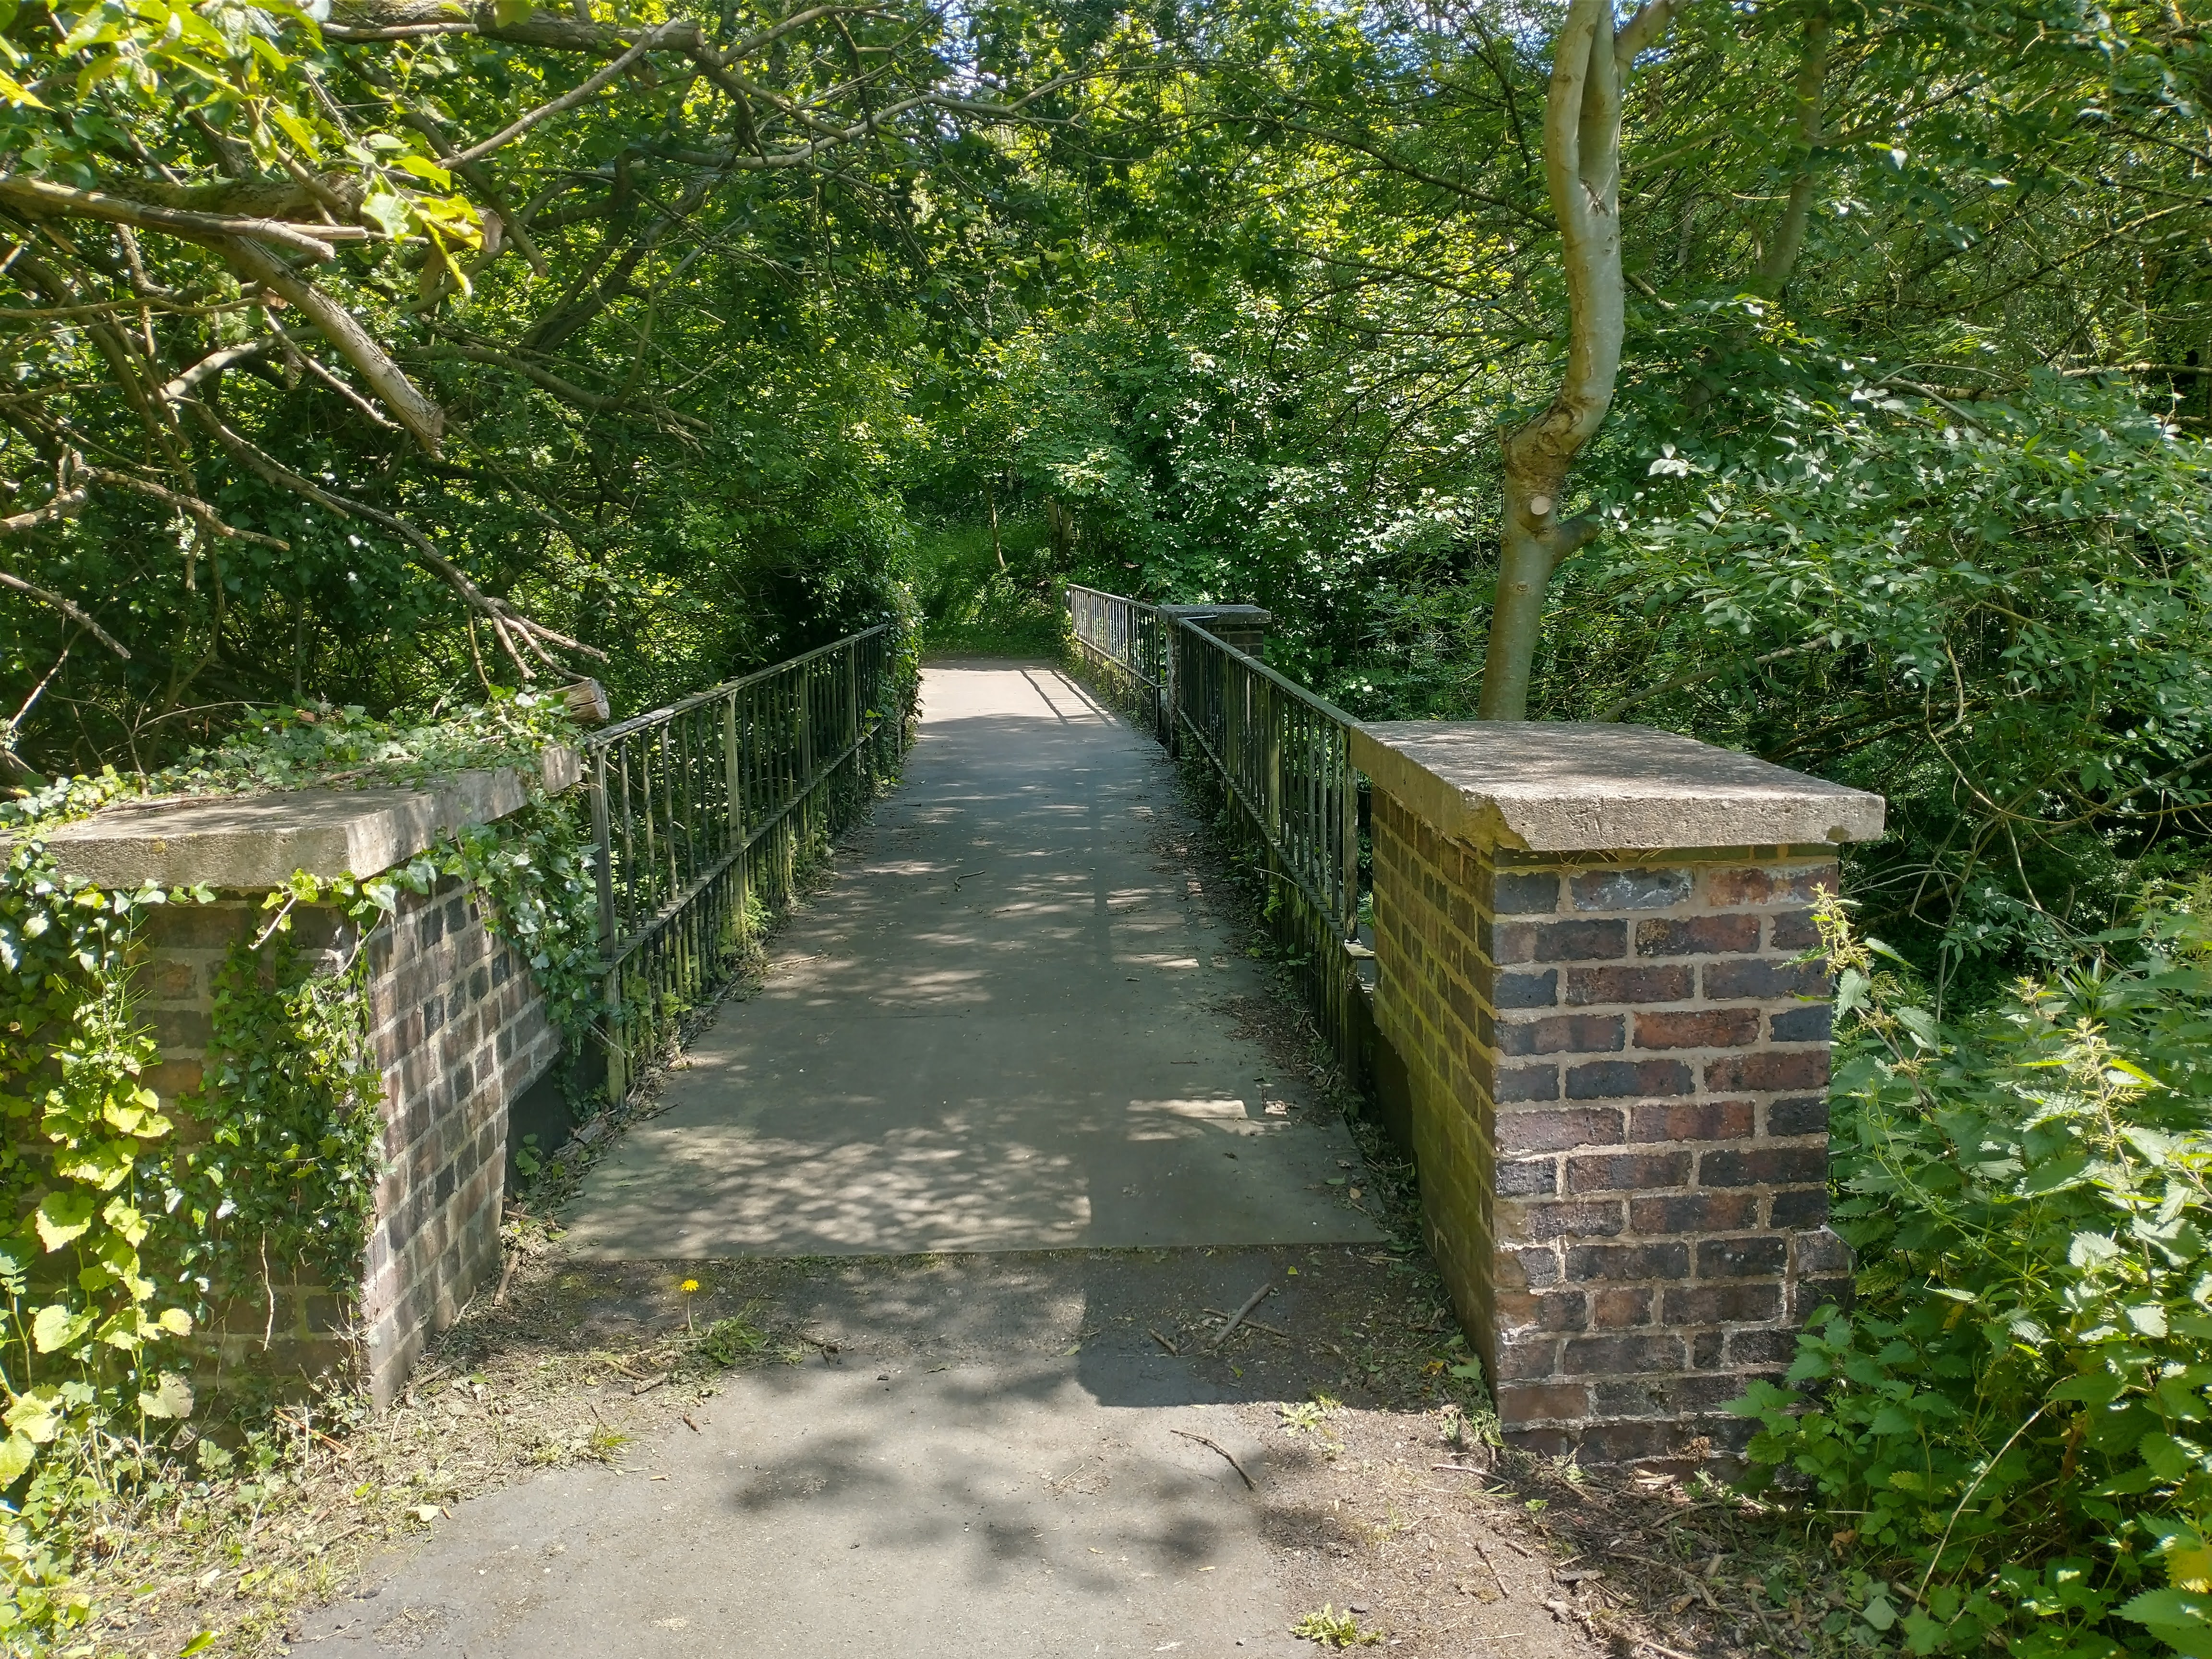
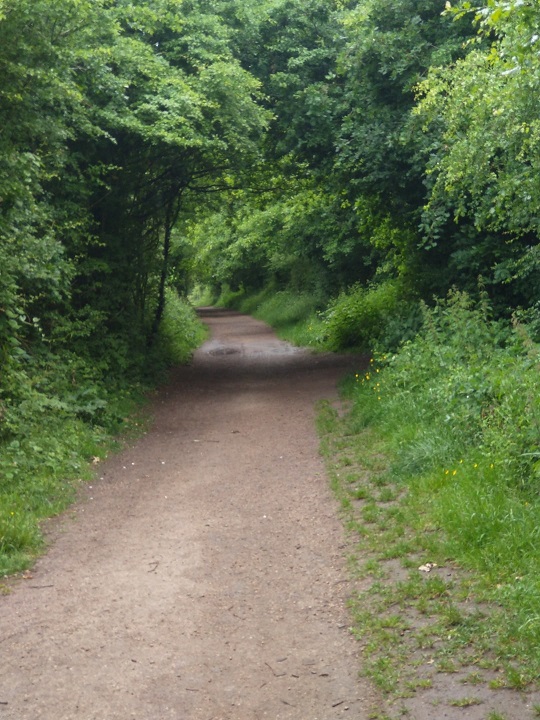
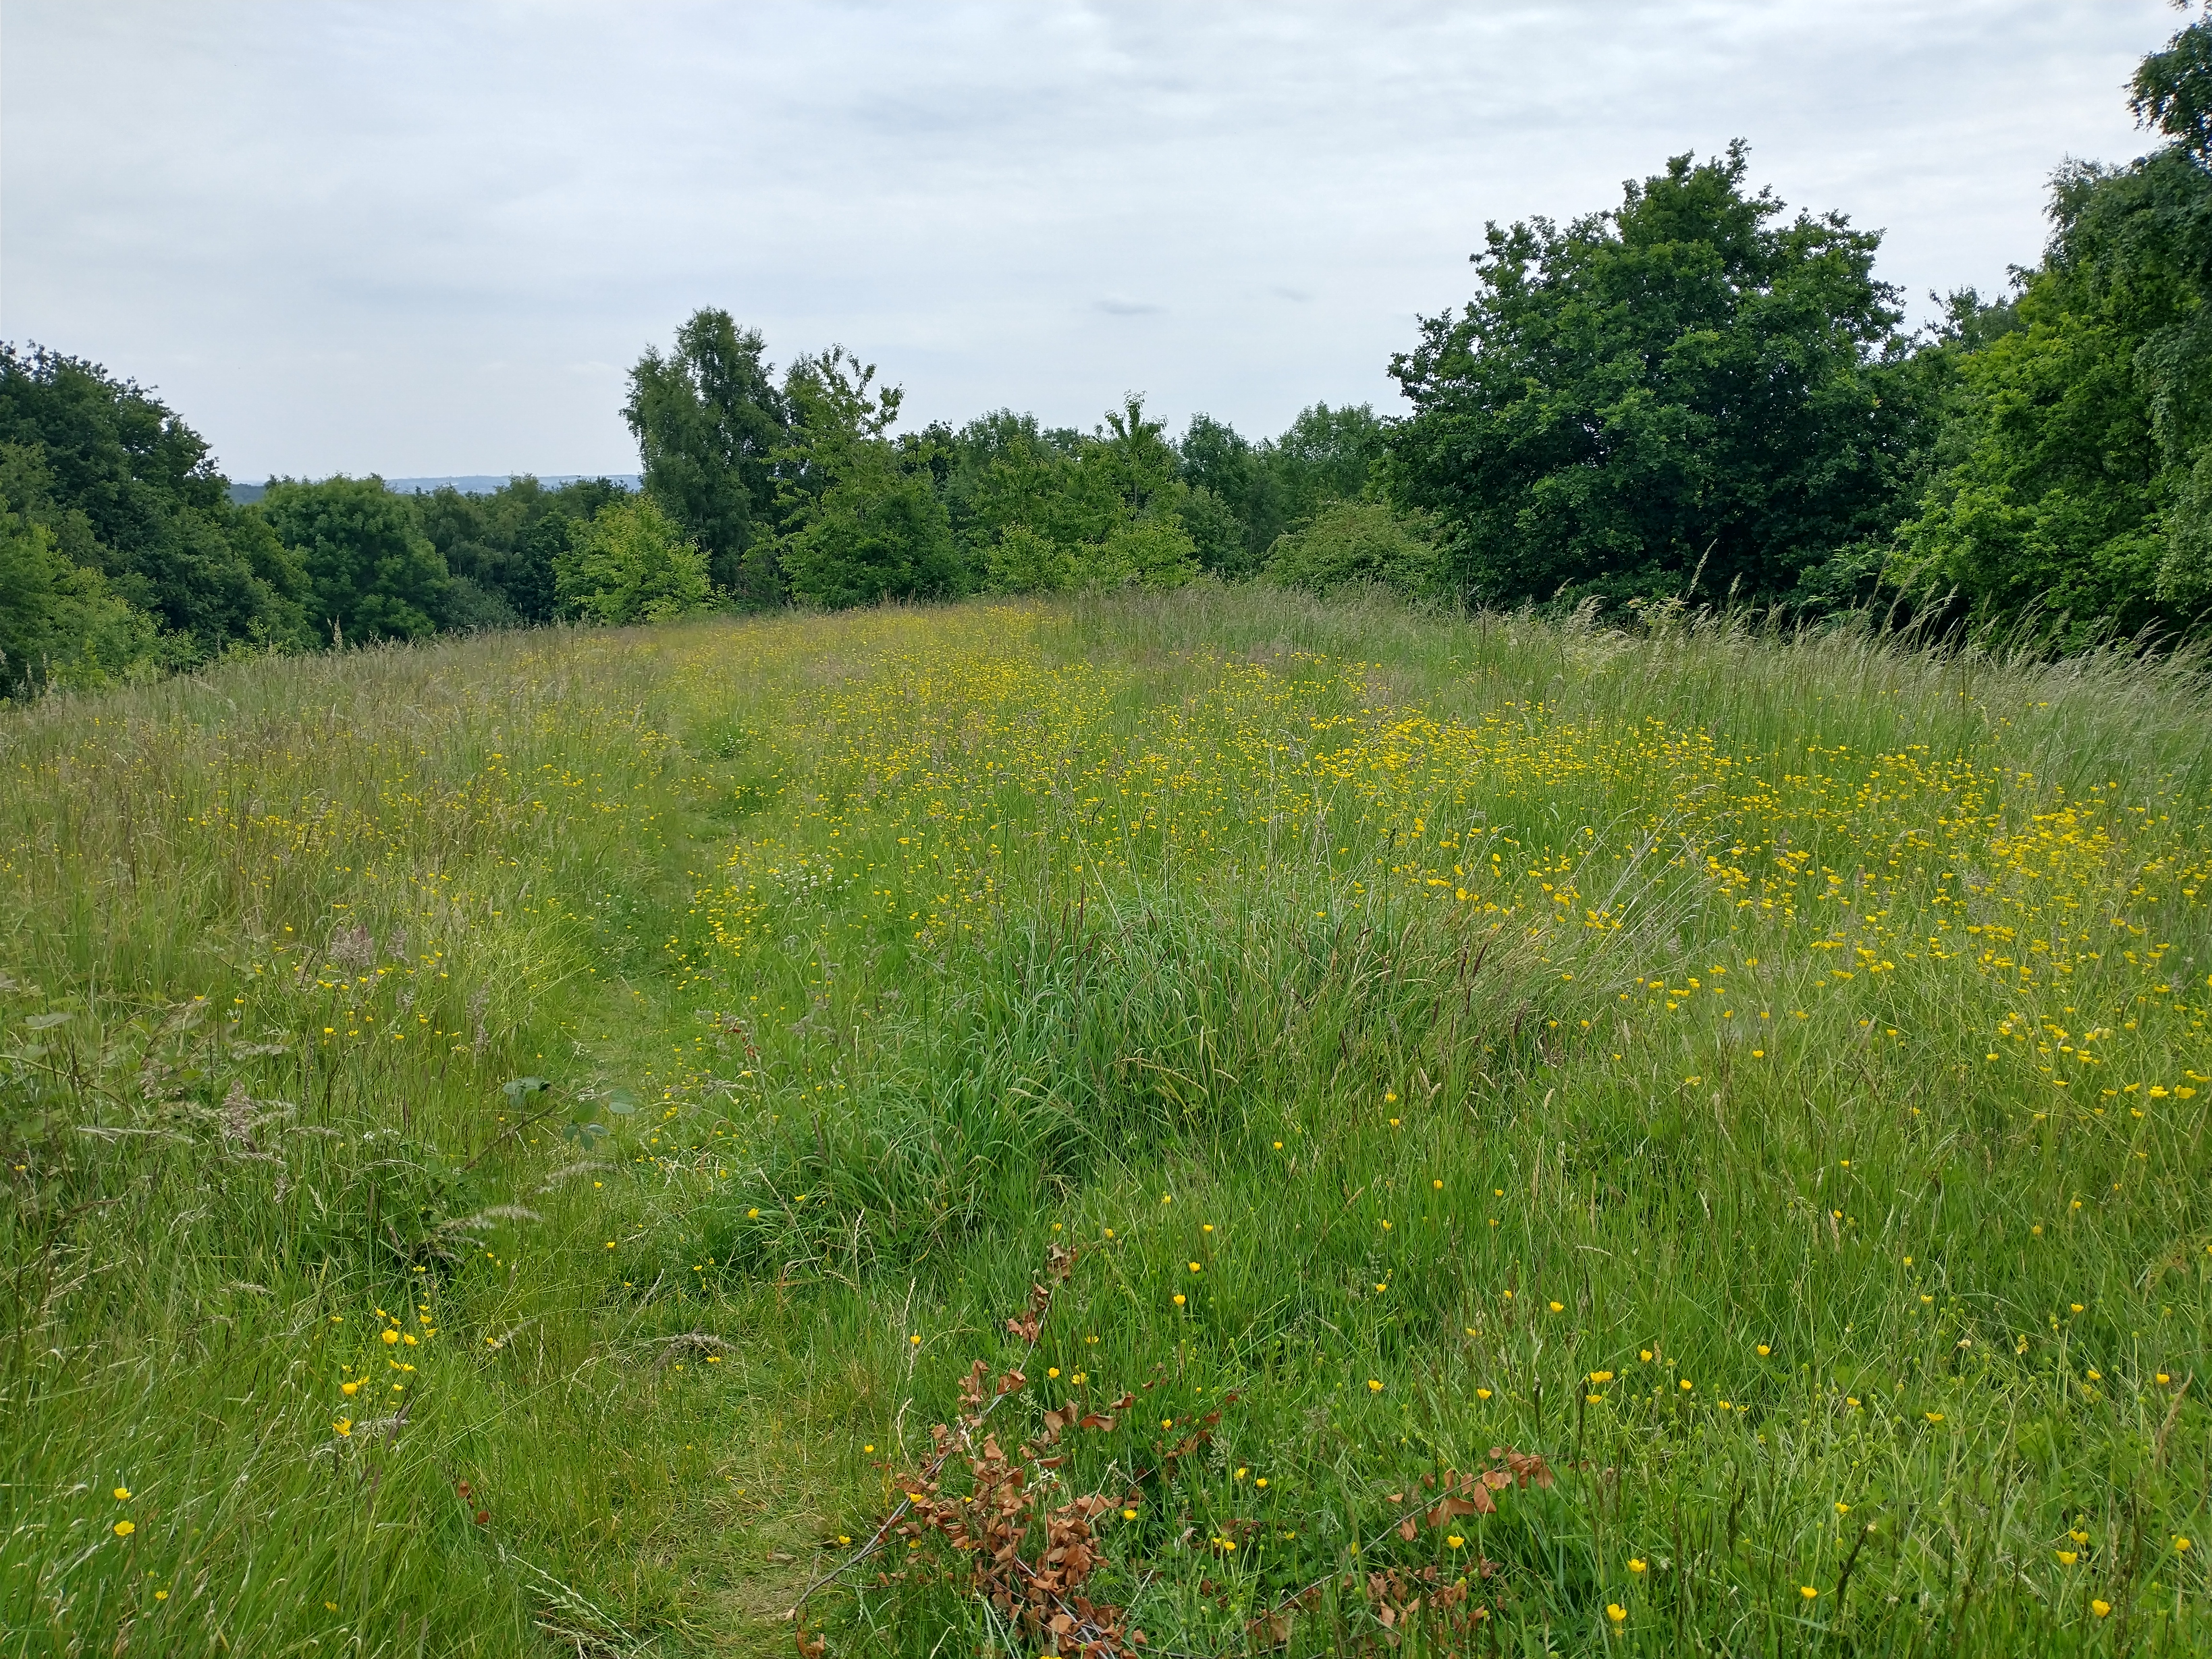
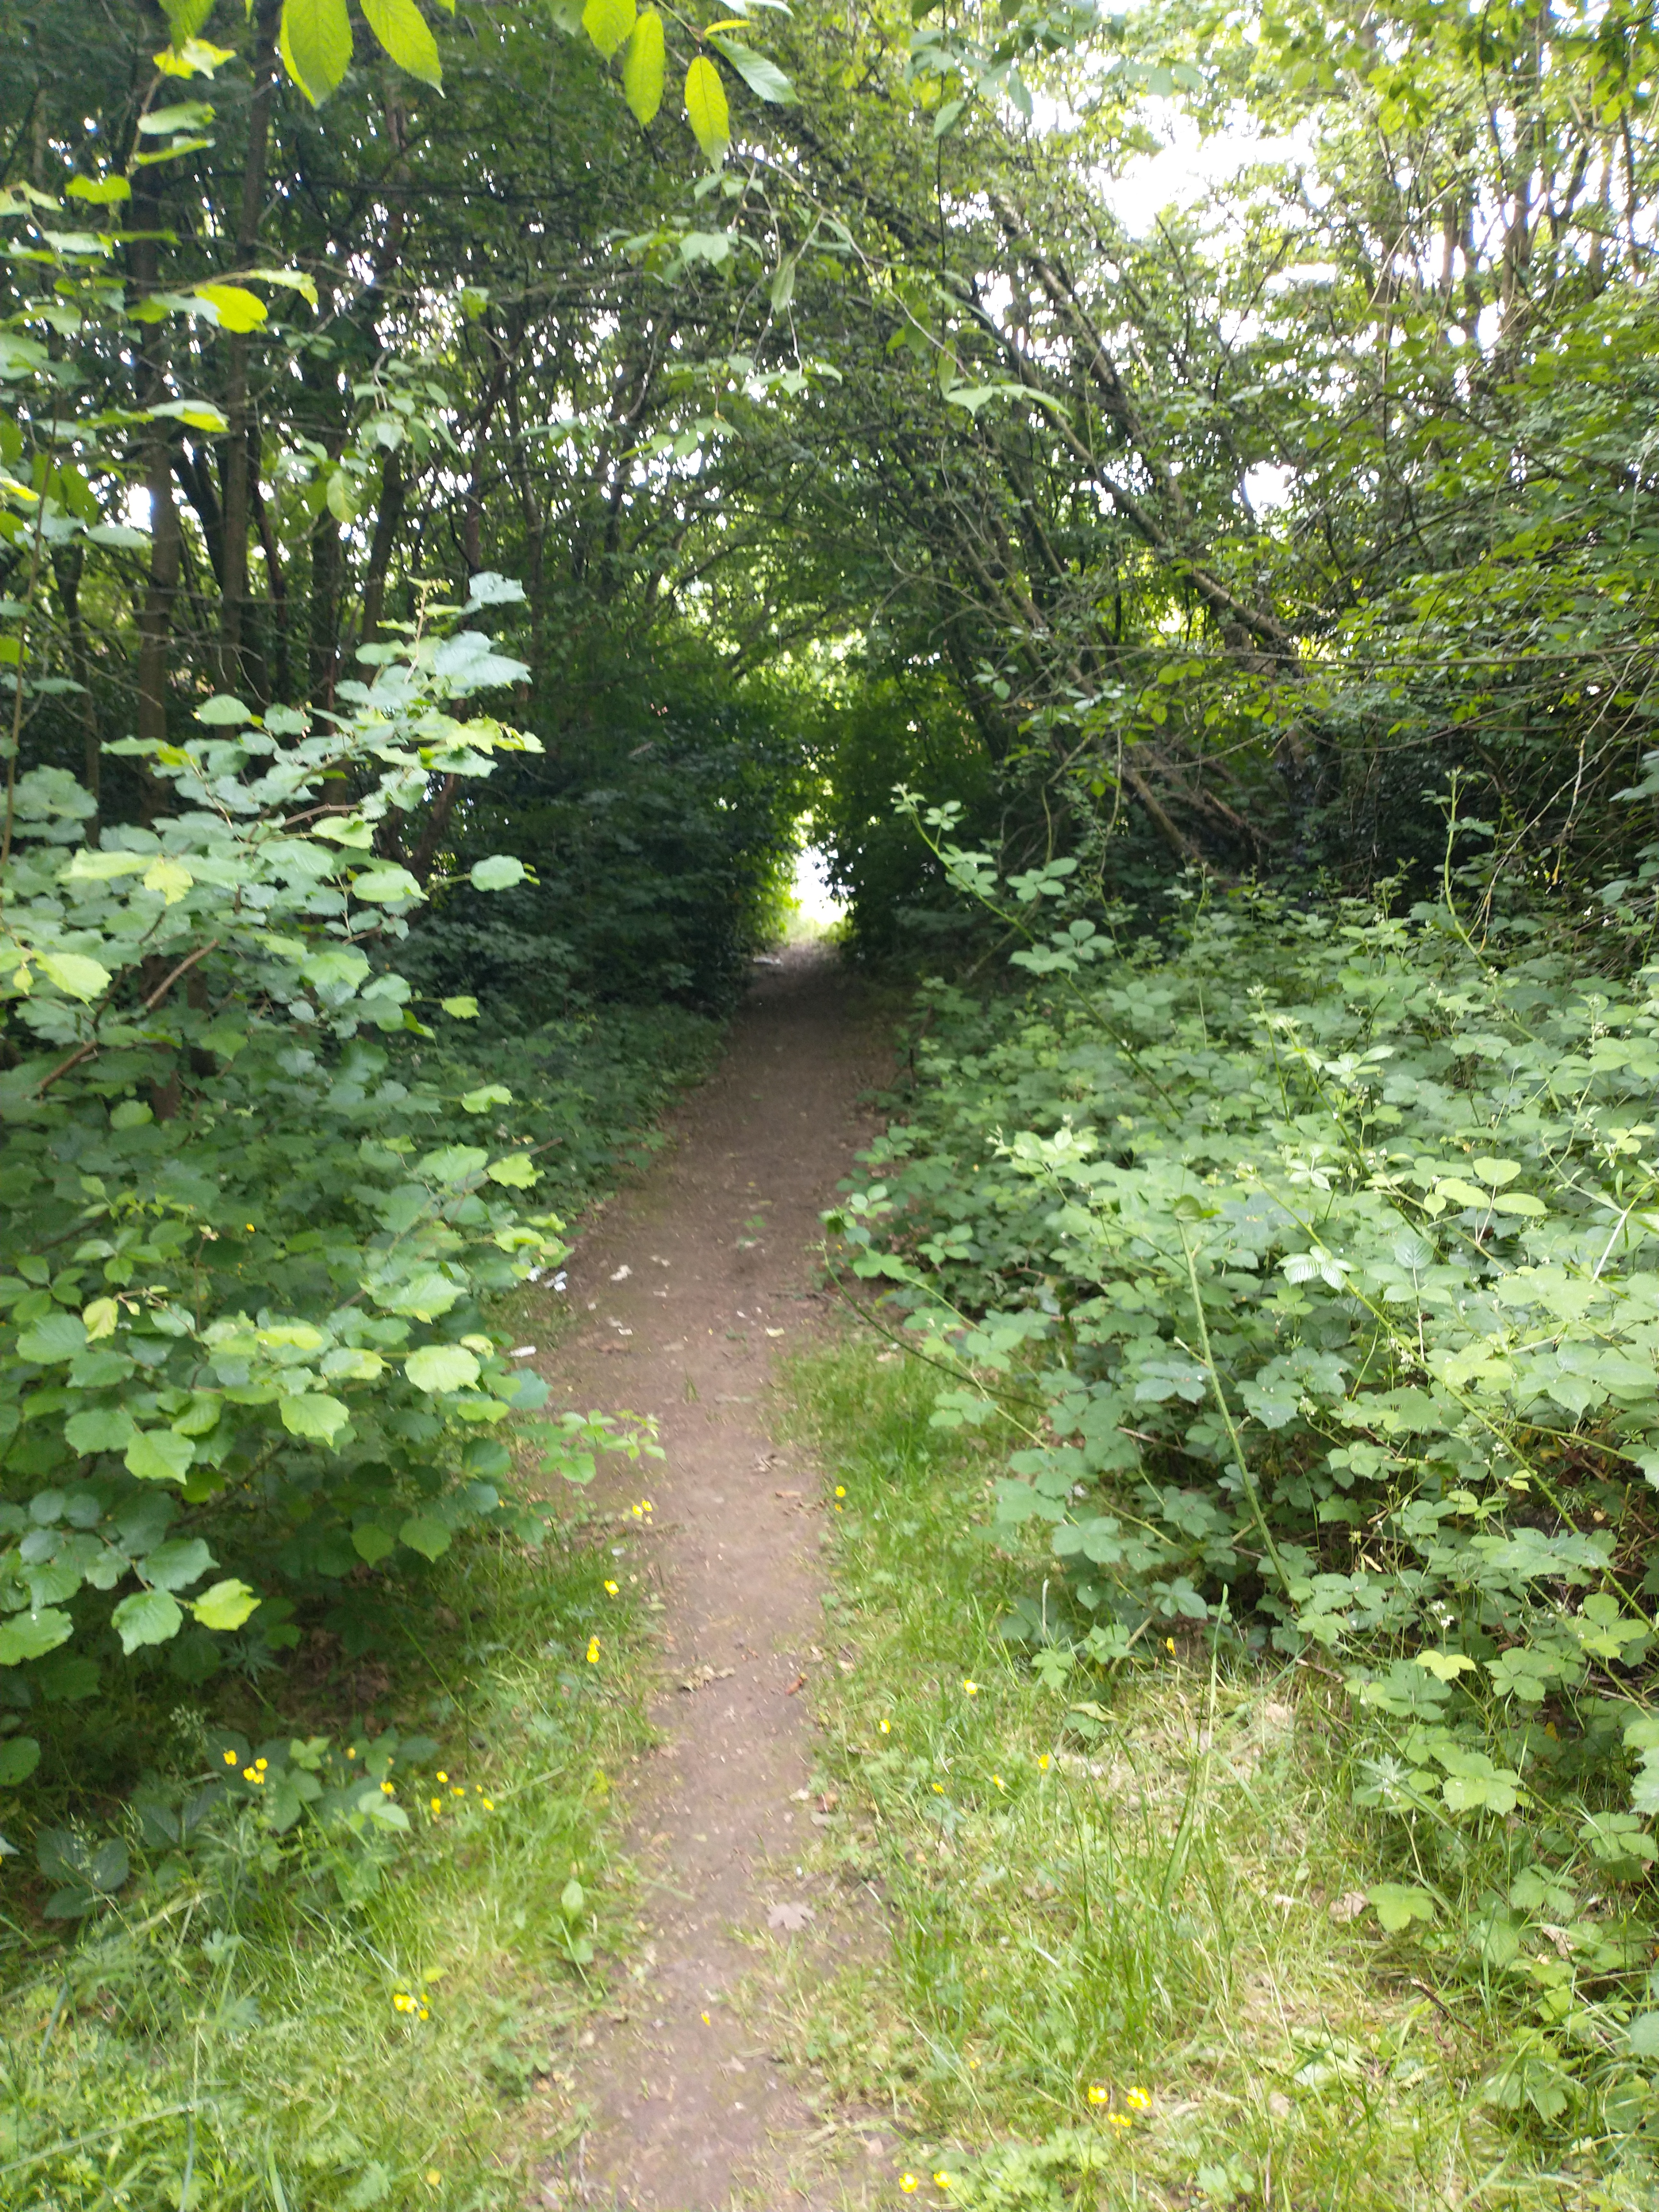
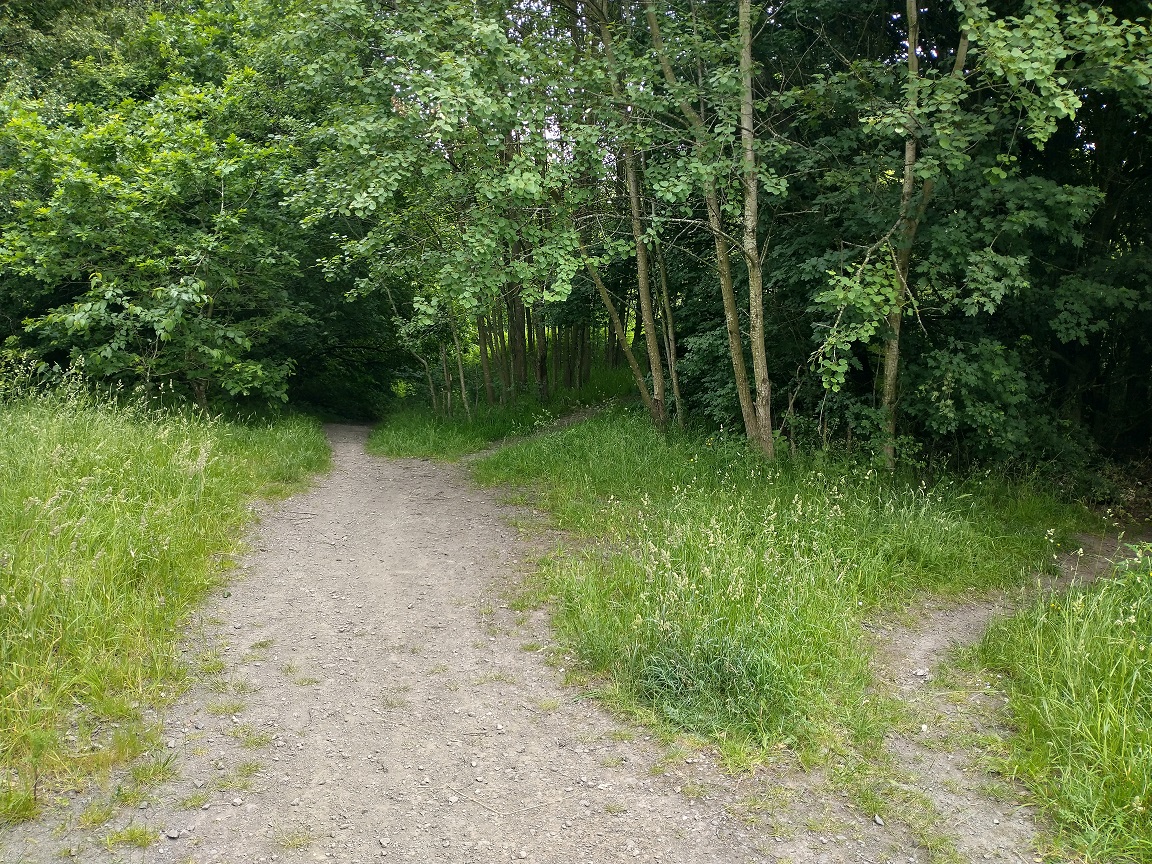
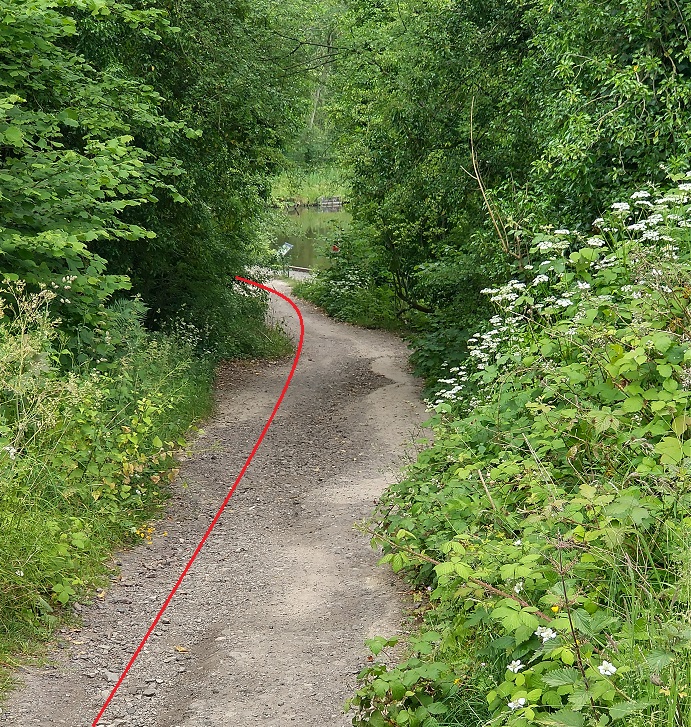
The line curved northwards away from Brook Street and then turned back westwards to run along the backs of houses fronting onto the North side of Brook Street. The 1949 6″ OS Map has the alignment correct along this length. The photograph below looks back East along the old railway.

Cartwright & Russell describe the route that we have followed like this: “There now existed a 2ft 6in gauge railway starting from a point in Welshpool’s Road and close to the Cambrian Railways’ goods and passenger station (240ft above sea level). It was 9 miles 5 chains long, station to station; later spurs at Welshpool added another 7 chains of track. At this terminus, there was a gravel ‘platform’ and a waiting room with a booking office complete with awning. A short siding swung away into the Cambrian Railways’ yard to the tranship shed, while the main line of the new narrow gauge construction curved off from Smithfield Road. Entering enclosed property, it passed the run round loop on the left and the three sidings on the right which formed single roads into the goods shed, the engine shed and the longer carriage shed adjoining. The Shropshire Union canal was crossed by a steel plate girder bridge with a single span of 33ft 4in. A siding to the canal suggested earlier but rejected in 1899 had eventually been agreed in July 1902, but was never constructed.” [41: p51]
They continue: “Crossing Church Street (later A483) on the level, the track dived through the newly opened gap between the buildings to reach the Lledan Brook. Above the watercourse, the rails were borne on longitudinal bearers supported by steel cross girders to enable the railway to reach and cross Union Street, where the Seven Stars Public House and adjoining Malthouse had had to be demolished and where trains would make a stop for passengers. Disappearing behind the cottages with two more stretches of viaduct, the route lay behind the Armoury to pass by the Standard granite quarry, where a siding was soon to be connected, and so to Raven Square. On the town side of the intersection, a line-side gravelled area marked the third station.” [41: p52]
The intention behind this article was to follow the route of the now closed town-section of the W&LLR. The remainder of the line is preserved can be followed on modern maps and can be travelled behind one of the original locomotives bought to serve the line.

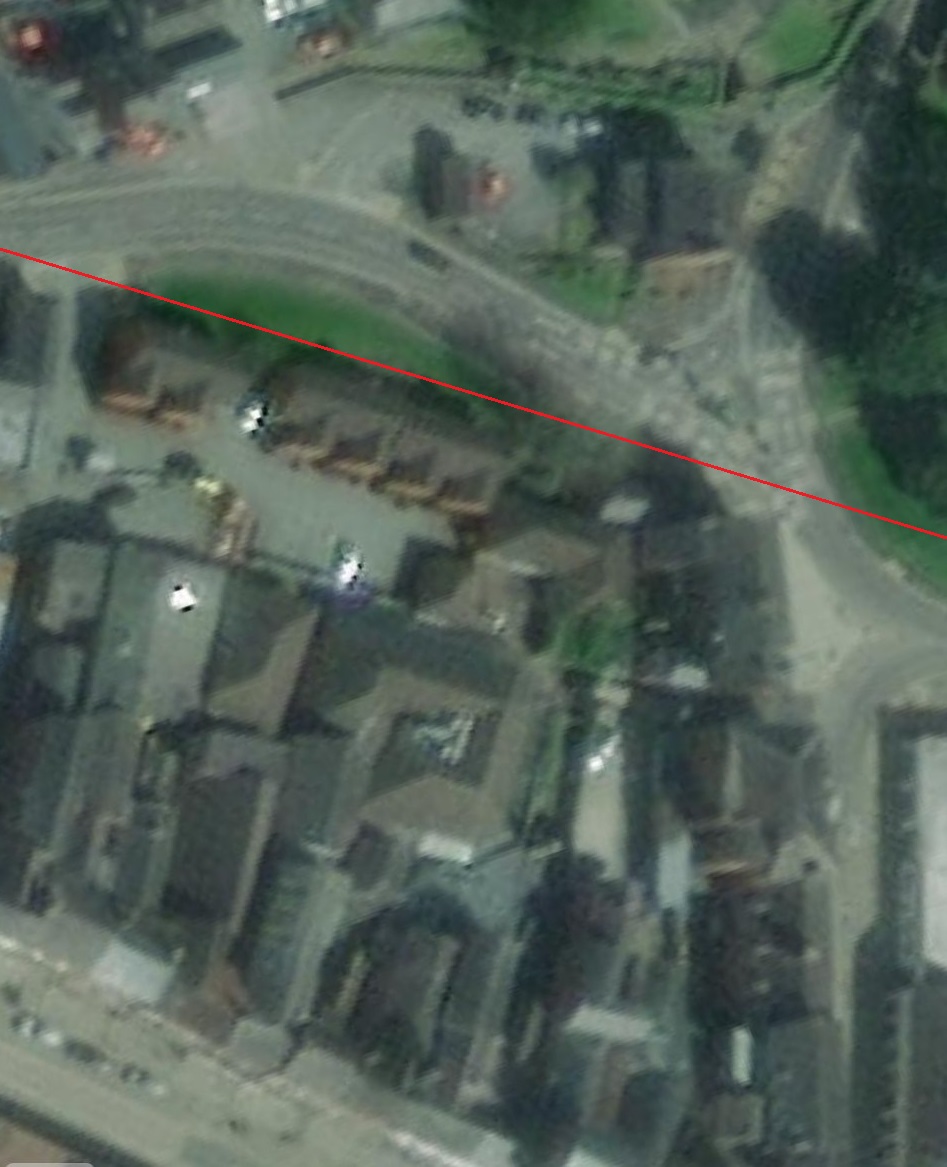
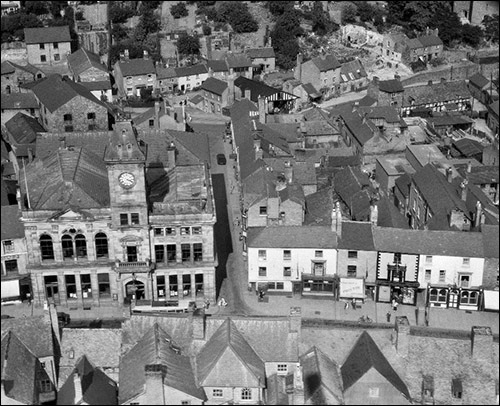
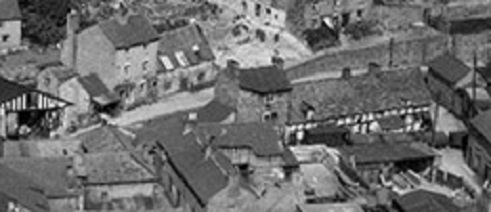
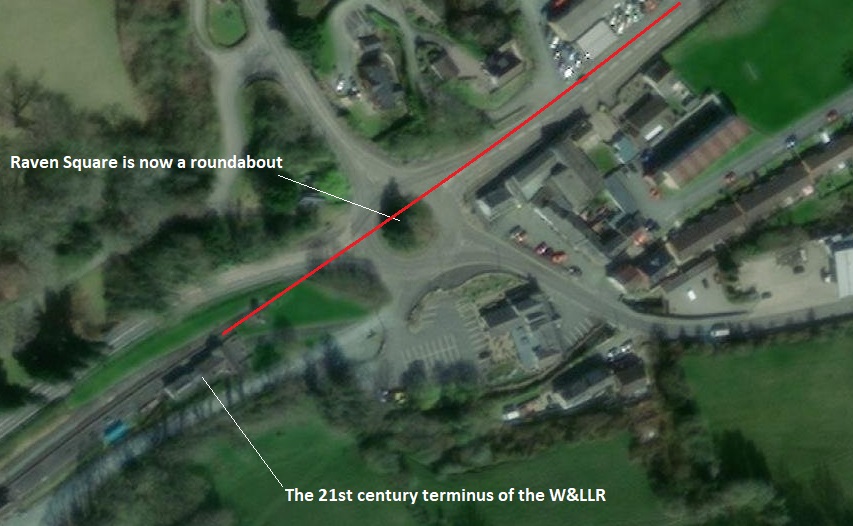
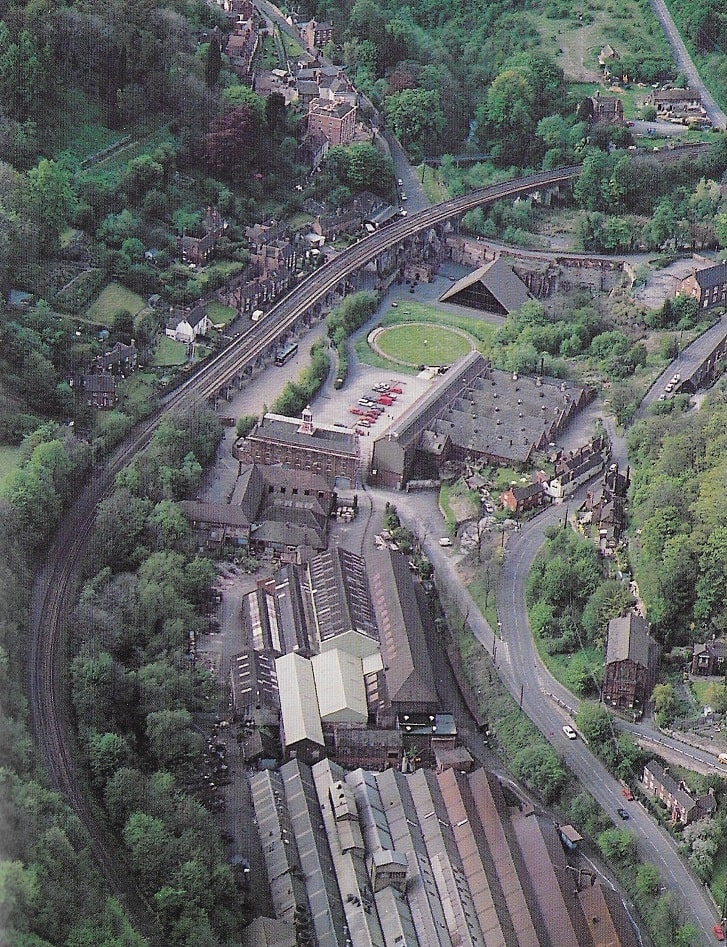
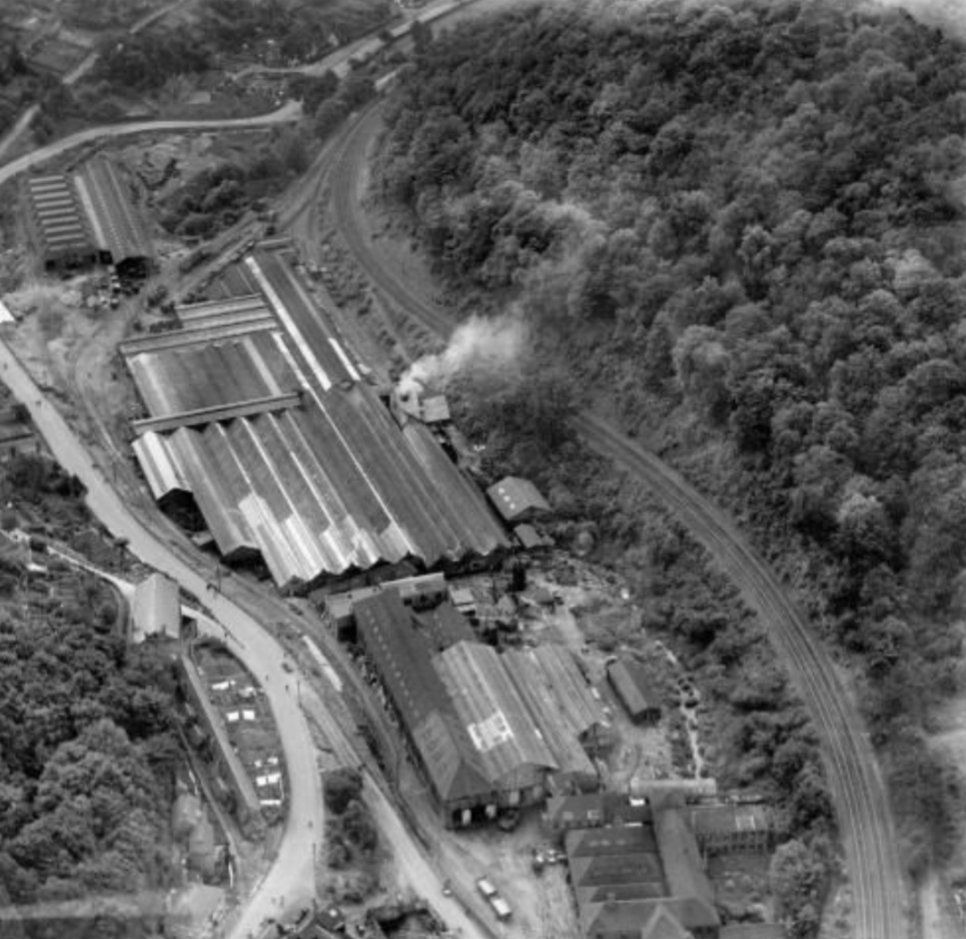
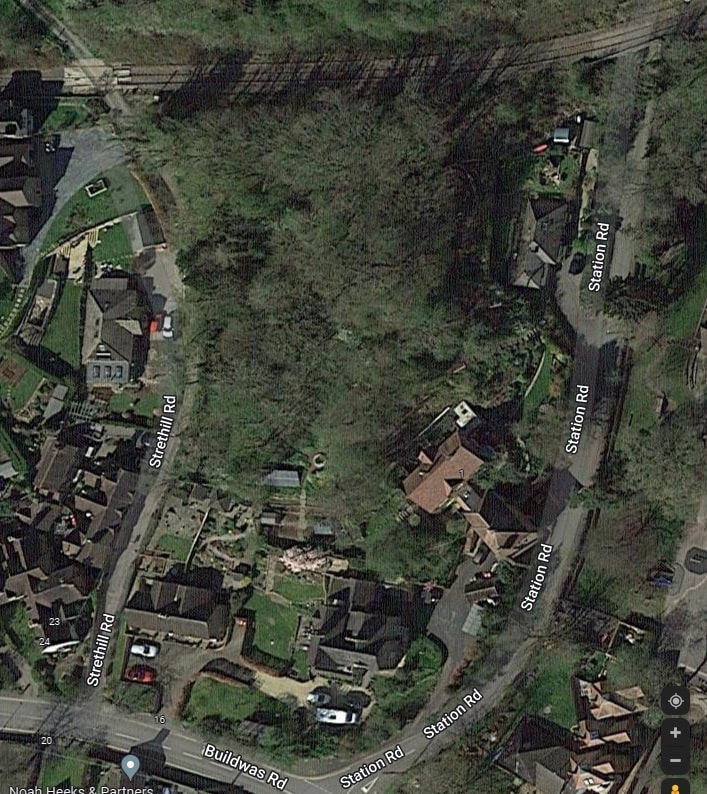
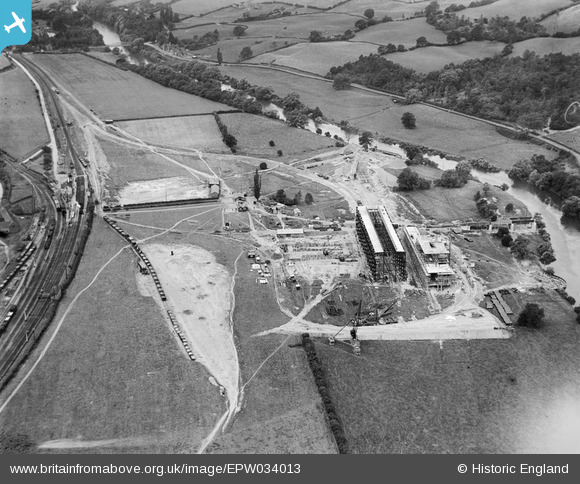
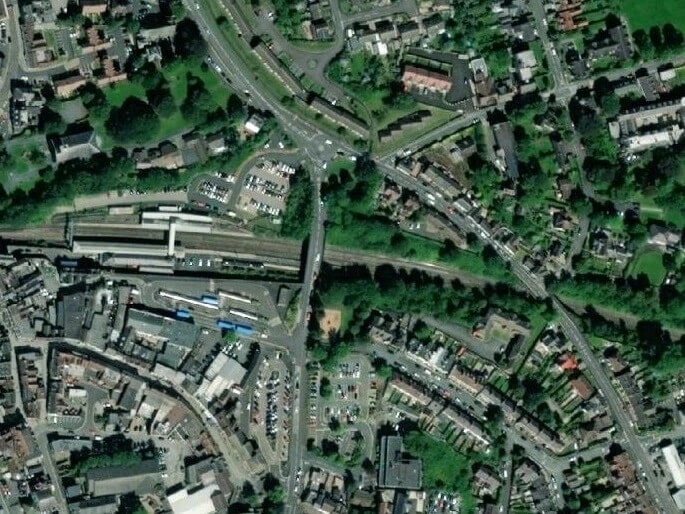
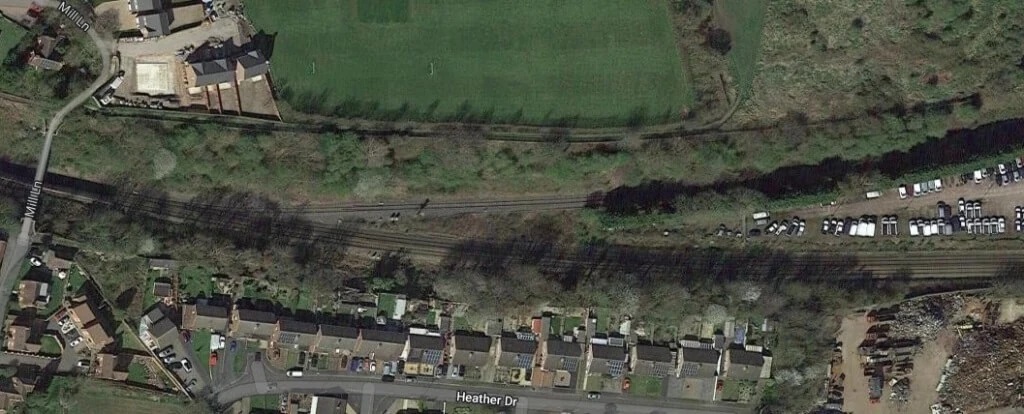
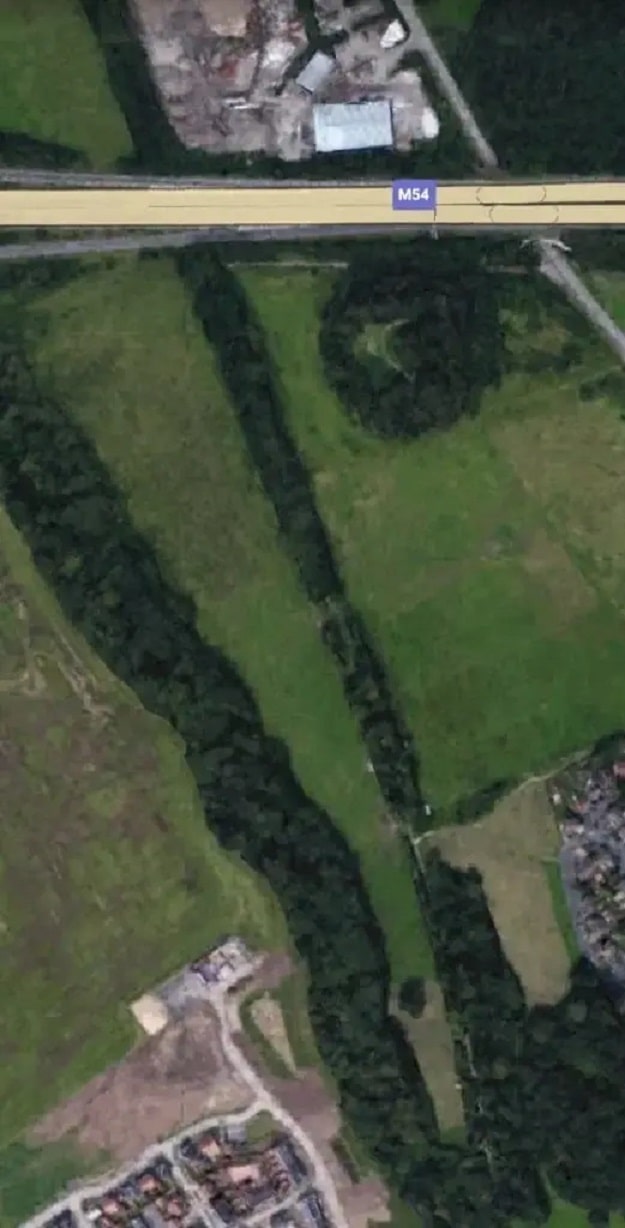
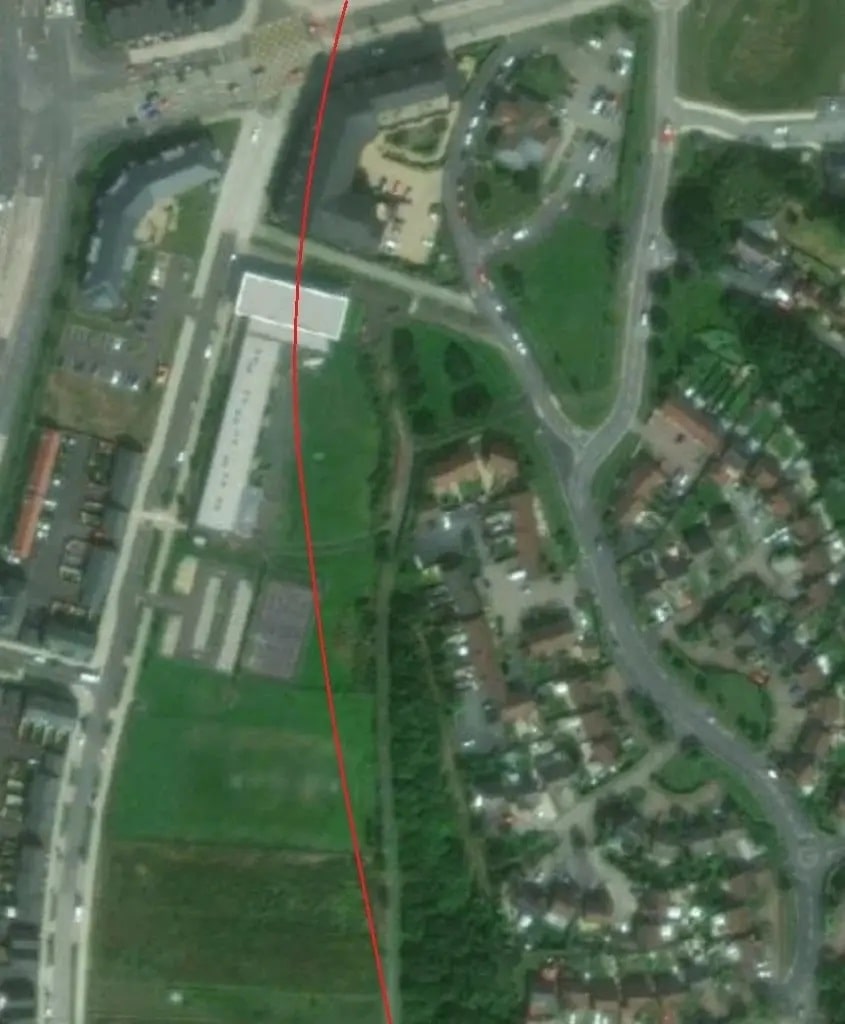
To finish this article, here is a modern aerial view of Welshpool looking Southeast along the line of Broad Street/Severn Road. The old station buildings are at the top-right of the image. The approximate line of the W&LLR through the town is shown by the thin black line which has been imposed on the image. When seen in this light the line seems to take a relatively straightforward route through the town! [44]
References
- The Welsh name is: Rheilffordd y Trallwng a Llanfair Caereinion.
- https://en.m.wikipedia.org/wiki/Welshpool_and_Llanfair_Light_Railway, accessed on 21st July 2022.
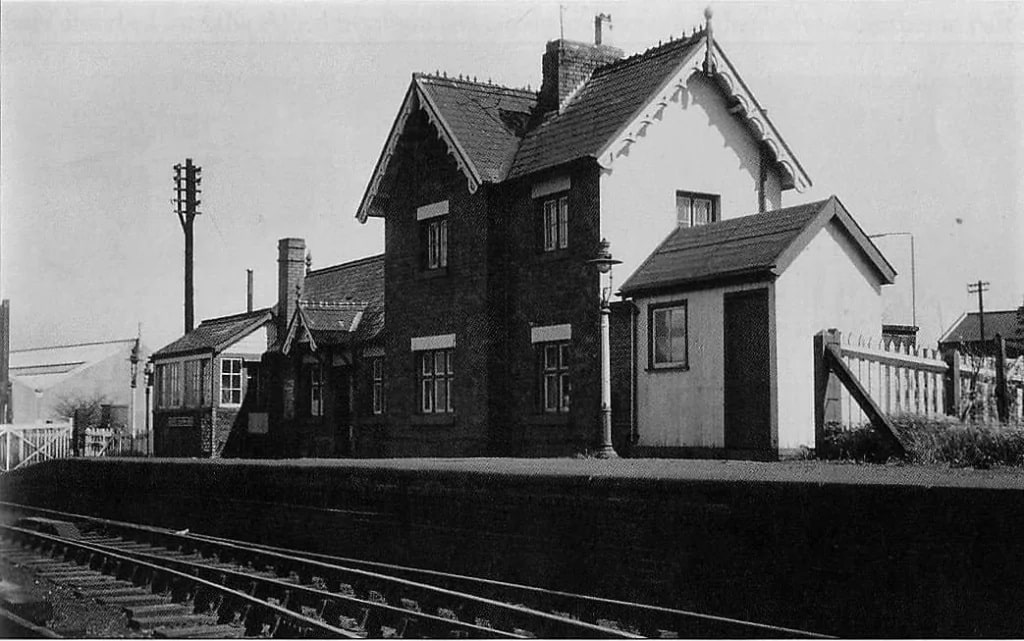
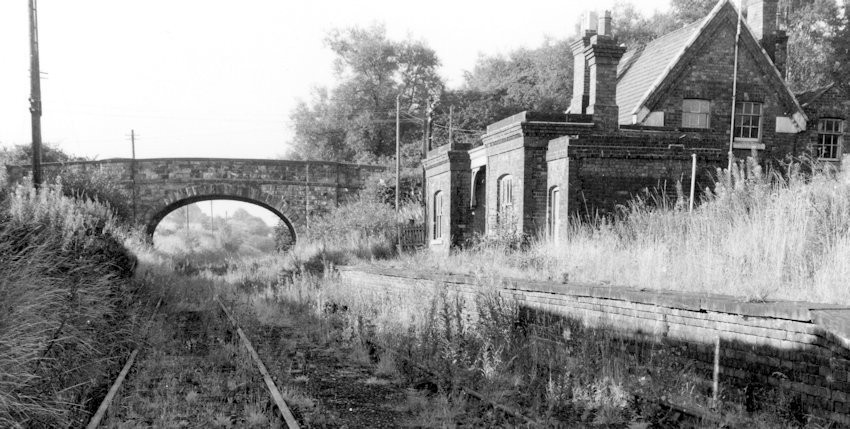
- http://www.disused-stations.org.uk/w/welshpool_1st/index.shtml, accessed on 22st July 2022.
- https://en.m.wikipedia.org/wiki/Welshpool_railway_station, accessed on 21st July 2022.
- https://maps.nls.uk/view/102187064, accessed on 21st July 2022.
- https://www.britainfromabove.org.uk/en/image/WPW061717, accessed on 21st July 2022.
- https://www.picturethisgallery.co.uk/prints/llanfair-train-welshpool, accessed on 22nd July 2022.
- https://www.flickr.com/photos/trainsandstuff/16658979348, accessed on 22nd July 2022.
- https://www.flickr.com/photos/train-pix/21568402576, accessed on 22nd July 2022.
- https://en.m.wikipedia.org/wiki/Welshpool_and_Llanfair_Light_Railway#/media/File%3AWelshpool_to_Llanfair_Caereinion_railway_line_(12989519473).jpg, accessed on 22nd July 2022.
- https://www.ssplprints.com/image/372451/welshpool-and-llanfair-railway-locomotive-no-822-welshpool-uk, accessed on 22nd July 2022.
- https://www.ssplprints.com/image/372440/welshpool-and-llanfair-railway-welshpool-wales, accessed on 22nd July 2022.
- https://www.ssplprints.com/image/372456/welshpool-and-llanfair-railway-welshpool-wales, accessed on 22nd July 2022.
- https://www.ssplprints.com/image/372455/welshpool-and-llanfair-railway-welshpool-uk, accessed on 22nd July 2022.
- http://history.powys.org.uk/school1/welshpool/intown.shtml, accessed on 22nd July 2022.
- https://www.shropshirestar.com/news/features/2022/02/23/dave-on-track-of-welshpool-railway-mystery-man, accessed on 22nd July 2022.
- https://www.geograph.org.uk/photo/4397501, accessed on 22nd July 2022.
- https://www.geograph.org.uk/photo/4397508, accessed on 22nd July 2022.
- https://www.geograph.org.uk/photo/3921716, accessed on 22nd July 2022.
- https://www.geograph.org.uk/photo/1342944, accessed on 22nd July 2022.
- https://www.geograph.org.uk/photo/3025286, accessed on 22nd July 2022.
- https://www.gettyimages.co.uk/detail/news-photo/welshpool-and-llanfair-railway-welshpool-wales-two-sheep-news-photo/102725455?adppopup=true#:~:text=%3Ca%20id%3D%27N2m9h5UeRdx,8%27%20async%3E%3C/script%3E, accessed on 24th July 2022.
- https://maps.nls.uk/geo/explore/#zoom=17&lat=52.65750&lon=-3.14141&layers=6&b=1, accessed on 25th July 2022.
- https://www.shropshirestar.com/news/2015/03/28/new-car-park-planned-for-welshpool-train-station, accessed on 25th July 2022.
- https://www.pinterest.co.uk/pin/846747167417641611, accessed on 25th July 2022.
- https://commons.wikimedia.org/wiki/File:The_old_station_at_Welshpool_(geograph_2299927).jpg, accessed on 25th July 2022.
- https://youtu.be/ahPjCldSGvE, accessed on 25th July 2022.
- https://youtu.be/rXbv2crjjuU, accessed on 25th July 2022.
- https://maps.nls.uk/geo/explore/#zoom=19&lat=52.66052&lon=-3.14730&layers=117746211&b=1, accessed on 21st July 2022.
- Peter Johnson; The Welshpool & Llanfair Light Railway – the story of a Welsh rural byway; Pen & Sword, Barnsley, South Yorkshire, 2020.
- https://www.buckinghamcovers.com/products/view/2924-classic-locos-of-wales-wampllr-no822-the-earl.php, accessed on 26th July 2022.
- https://maps.nls.uk/geo/explore/#zoom=18&lat=52.66043&lon=-3.15894&layers=6&b=1, accessed on 26th July 2022.
- https://www.facebook.com/photo.php?fbid=1232007437149890&set=p.1232007437149890&type=3, accessed on 26th June 2022.
- https://www.facebook.com/WelshpoolSteamRailway, accessed on 26th June 2022.
- https://www.facebook.com/WelshpoolSteamRailway/photos/a.110370089171833/1850128878529270, accessed on 26th July 2022.
- https://www.facebook.com/WelshpoolSteamRailway/photos/a.110370089171833/1353599861515510, accessed on 26th July 2022.
- https://www.facebook.com/WelshpoolSteamRailway/photos/a.110370089171833/1341521439390019, accessed on 26th July 2022.
- https://www.facebook.com/WelshpoolSteamRailway/photos/a.110370089171833/955870671288433, accessed on 26th July 2022.
- https://www.facebook.com/WelshpoolSteamRailway/photos/a.110370089171833/1376414509234045, accessed on 26th July 2022.
- https://scontent-lcy1-1.xx.fbcdn.net/v/t1.6435-9/96082599_2891028177653904_4880530853530173440_n.jpg?_nc_cat=108&ccb=1-7&_nc_sid=dbeb18&_nc_ohc=4FaLiok7sX8AX-gk2RI&_nc_ht=scontent-lcy1-1.xx&oh=00_AT9HwRiVzL2VjreFLtTvE6HOUmo-SJVvGKDC7sAARoFzaQ&oe=630758CF, accessed on 26th July 2022.
- R. Cartwright & R.T. Russell; Welshpool and Llanfair Light Railway; David & Charles, Newton Abbot, Devon,1972.
- https://historypoints.org/index.php?page=welshpool-town-hall, accessed on 27th July 2022.
- https://www.countytimes.co.uk/news/19741352.step-back-time-powys-micropub-opens-doors, accessed on 27th July 2022.
- https://cpat.org.uk/ycom/wpool/wplhis.htm, accessed on 27th July 2022.
- https://www.pressreader.com/uk/steam-railway-uk/20161104/282428463749841, accessed on 27th July 2022.
- https://i.pinimg.com/originals/bf/6e/43/bf6e4328fd98b89cab65213b04ce828c.jpg, accessed on 27th July 2022.
- https://i.pinimg.com/originals/87/b8/72/87b872f10aefd5ec1dda8f6d863c0cb3.jpg, accessed on 27th July 2022.
- https://www.facebook.com/WelshpoolSteamRailway/photos/a.110370089171833/1353614011514095, accessed on 28th July 2022.
- https://chasewaterstuff.wordpress.com/2010/12/15/some-early-lines-welshpool-llanfair-light-railway, accessed on 28th July 2022.
- https://www.pinterest.co.uk/pin/488429522080149108, accessed on 28th July 2022.
- https://player.bfi.org.uk/free/film/watch-camwell-personal-film-no-62-welshpool-raven-square-railway-1963-online, accessed on 28th July 2022.


.jpg)
.jpg)