The featured image above comes from the London Day at the East Anglian Transport Museum it shows a London trams running alongside one of the trolleybuses that ran alongside them and along with RT buses replaced them. [6]
‘TheModern Tramway‘ was the title of the journal of the Light Railway Transport League.
I picked up a small batch of copies of The Modern Tramway Journal which included volumes from the 1950s, 1960s and 1980s and have begun reading through them. The first Journal that I have is dated 15th July 1953. At the time of writing it is 70 years old.
Volume 16 No. 187 of July 1953 starts with an item entitled, “Tramways and the Press.” Starting with a specific instance of dubious reporting by the national dailies about tram parts being sent to Egypt, the article bemoans the way that tramways were increasingly being seen by the public, led by the press, as an outmoded form of transport.
It concludes with these words:
“In working for the retention and extension of tramways, The Modern Tramway has to cope, not only with ignorance, which is to some extent forgivable, but with interests far more difficult and involved; vested interests which care not for the economy of the country or the pocket of the citizen. We believe that tramways can not only give a better, cheaper, healthier service to the public than any other form of road passenger transport, but that they will materially contribute to the economic wellbeing of the nation as a whole. We believe this is worth striving for.” [1: p132]
In the intervening years, the UK saw the removal of almost every tramway network in favour of trolley buses and ultimately in favour of bus networks which were, at the time, seen both as a more modern and a more flexible solution to local transport needs.
There are a good number of examples on the continent of places which did not chose to follow a similar path.
In the light of development at the end of the 20th century and on into the 21st century, it is interesting, if not salutary, to consider the wisdom of the quote from July 1953, particularly in the light of the approaching 70th anniversary of that particular edition of the Journal.
“Tramways can not only give a better, cheaper, healthier service to the public than any other form of road passenger transport, but that they will materially contribute to the economic wellbeing of the nation as a whole. We believe this is worth striving for.” [1: p132]
We have discovered how valuable Light Rapid Transit options are within our larger conurbations and perhaps it is worth reflecting on, and appreciating, some of the prophet voices of the past!
Where would we be now if the debate which saw the removal of most of our trams had included more clearly the environmental benefits associated with those and future trams?
Also of interest on the same page of the Journal is an item about a visit by Councillor Hayward, a member of the London County Council, to Vienna for an international local government conference. Councillor Hayward praised Vienna’s local government, “with the exception of the city’s antiquated tramway system.”
‘Better left unsaid‘ was the title given to the editorial comment on the conference comments by the Councillor:
“We wonder how a Viennese visitor to London, standing in a rush-hour queue, would describe our inefficient bus service? The Vienna tramways, although not among the most wealthy, do their job well and efficiently; the tracks are in good condition, and if ancient open-ended trailers do appear on the streets in rush hours, this is at least the sign of an honest attempt to cater for the rush hour passenger who receives such a raw deal in London. Vienna received no new tramcars between 1930 and 1944, but a start has now been made on new construction; apart from 42 modern bogie cars from the Third Avenue Transit System of New York, post-war fleet additions include 50 4-wheel motor trams and 90 trailers, and the 1953 plan envisaged 36 modern bogie cars (18 motors and 18 trailers.). In addition, 217 older cars are to be completely reconstructed and modernised.” [1: p132]
A quick look at the tramway network which still serves Vienna, illustrates how valuable the historic network has become.
The trams in Vienna “are a vital part of the public transport system in Vienna. … In operation since 1865, with the completion of a 2 km (1.2 mi) route to industrial estates near Simmering, it reached its maximum extent of 292 km (181.4 mi) in 1942. In February 2015, … it was the fifth largest tram network in the world, at about 176.9 kilometres (109.9 mi) in total length and 1,071 stations.” [3]
References
Tramways and the Press; in The Modern Tramway, Volume 16 No. 187, July 1953.
At the end of a fortnight’s holiday in Co. Donegal my wife and I had 3 nights staying close to Dublin. We chose to stay in Howth as it was at the Northern end of the DART, but perhaps also because of its history and particularly for the Hill of Howth Tramway, or to give it it’s formal title, “The Sutton and Howth Electric Tramway.” The tramway should not be confused with the Clontaff and Hill of Howth Tramroad.
The Tramway served Howth Head, near Dublin. The termini were at Sutton railway station, by the entrance to the peninsula, and Howth railway station by the village and harbour of Howth.
The tramway operated from 17th June 1901 to 31st May 1959 and was run by the Great Northern Railway (Ireland) (GNR(I)), which viewed it as a way to bring more customers to its railway stations at Sutton and Howth. The tramway replaced a horse bus service, which had run since 1867. [1][2]
When it opened, “the Hill of Howth Tramway had eight trams, open-top 67-seaters built by Brush of Loughborough. … Traction current at 550 volts dc was drawn from the overhead wires by conventional trolleypoles. … In 1902, two further trams … were obtained. Nos. 9 and 10 were 73 seaters built by Milnes, the firm which also supplied Dublin’s first electric trams in 1896. There were 41 seats upstairs and 32 inside seats.” [9]
“The tramway also had a freight and engineering car, No. 11, built in 1903. This … had a cab at each end, with a wagon body between. No. 11 also had a maintenance tower and at least in its later years was fitted with a telephone which could be connected into the wires along the line.” [9]
“Around 1918, the original crimson lake and ivory livery gave way to varnished grained teak. When the colours changed again around 1930 to blue and cream, Nos. 9 and 10, being used so seldom, remained in teak. Reasons for their lack of use included [an] awkward seating layout and a tendency to derail because the motors were outside the wheelbase. Furthermore, cross springs were not fitted between the bogies: when these were added in the fifties, their performance improved. By then these two cars were in constant demand and the invariable choice of the many enthusiast groups visiting the line in its twilight years.” [9]
“No. 9 was the last tram to run in public service on the Hill of Howth on 31st May 1959, and thus the last to operate anywhere in Ireland. Following the closure, No. 10 was sent to Britain’s National Tramway Museum at Crich in Derbyshire, while No. 2 went to California and No. 4 to Belfast. Due to vandalism and apathy, No. 9 was the only survivor of three cars set aside for inclusion in a future museum” [9] at the National Transport Museum at Howth Desmesne.
“On 1 October 1958, Córas Iompair Éireann (CIÉ) took over GNR(I)’s operations in the Republic of Ireland, including the Howth Tram. [7: p32] A year later, the tramway was closed down. It was initially replaced by two CIÉ bus routes – numbers 87 (Sutton to Ceanchor Road) and 88 (Howth to Windgate Road). [8] Two routes were necessary, as several narrow hill curves were not passable by the buses used. Eventually, sections of the disused tram route between the Baily post office and the Summit were expanded to form an extension of Carrickbrack Road; this enabled a single bus route (number 88) to be used.” [1]
The area was then served by the 31, 31a and 31b bus routes, which operated from Abbey Street in the city centre. In winter, icy roads on the hill occasionally cause the bus service to be suspended, unlike the tram, which ran in all weather conditions. A public footpath now follows the tram route between Howth station and the Summit.
It is important not to confuse the Hill of Howth Tramway with the Clontarf and Hill of Howth Tramroad, a completely different company which ran trams from Dublin to Howth.
The Clontarf and Hill of Howth Tramroad Company (C&HoHT) “operated a tram service from central Dublin via Dollymount in Clontarf to Howth Harbour in the Dublin area of Ireland from 1900 to 1941. Formed in the 1880s, it was a separate entity from the other Dublin tramways, notably the Dublin United Tramways Company (DUTC), but worked closely with the latter, who owned the line as far as Dollymount, for most of its operating existence.” [5]
A horse-drawn or steam tram service for the Howth area was first proposed in 1883, by the Great Northern Railway (Ireland) (GNR), to bring more passengers to Howth and/or Sutton railway stations. The Clontarf and Hill of Howth Tramroad Company (C&HofHT) raised the idea of a circular line around Howth Hill. “Neither idea progressed, not least because the slopes of the hill were too steep to be safe for horses, or practical for steam power, though a line may have been considered using a viaduct over Balscadden Bay, just beyond Howth village, to keep gradients within the range of steam propulsion.” [5]
In 1890, the C&HofHT sought an Order in Council to allow it to build a tram line from Howth Harbour to Dublin’s fish market. It was intended that the line should have “a gauge of 3 feet, with lines running from Mary’s Lane past Halston Street to Capel Street, and then along Parnell Street and Summerhill, through Ballybough, Fairview, Killester and Raheny, then along the coast through the fields of Kilbarrack to Sutton and Howth. While this matter did not proceed, the company developed two new proposals after the DUTC received permission to electrify its lines. The proposed lines, at a gauge of 5 feet 3 inches, were from the DUTC’s terminus in the Clontarf area, via the hamlet of Raheny-on-the-Strand and Sutton, to Howth Harbour, and from the Summit on Howth Hill down past Howth Station and the Howth Estate to the gates of Claremont. The GNR made a two-part counter proposal, seeking to electrify their railway line from Amiens Street Station to either Sutton or Howth, and to provide a circular tram line, with connections at Sutton Cross and Howth, and with the trams able to move all the way to Dublin’s centre. The C&HofHT added a third element to their proposal, for a tram line from Sutton Cross to the Summit, and the GNR then objected to the whole package, and won. The GNR then received permission for its proposed circular line, which became the Hill of Howth Tramway, and dropped the idea of electrification from the peninsula to Amiens St., and so of trams through-running around Howth and to the city centre.”
The C&HofHT eventually received “permission for a line from the DUTC’s depot at what had become Dollymount in Clontarf to Howth Harbour, and this was enshrined in a Private Local Act of 1898, The Clontarf and Hill of Howth Tramroad Bill, 61 & 62 Victoria I, cap. clxxxii. This Act had its Second Reading on 3 March, and on 18 July was the subject of debate about the possible insertion of a clause requiring the purchase of rolling stock from England, the promoters having expressed a preference for buying from the DUTC, or failing that, from the United States. The bill was returned to the House of Lords on 26 July, and later completed its passage.” [5][6]
Construction costs ultimately came to £71,624. Much of the work was “straightforward, allowing for the challenges of building at the water’s edge, but there were difficulties with Lord Ardilaun, the Guinness heir, whose estate of St. Anne’s ran to the coast where the line was to be laid. At the time, there was no coastal road, and Lord Ardilaun sought multiple conditions in return for removing objections to the project. He received most of what he sought, including the provision that the trams would not stop along the margin of his property, and line construction proceeded. The line opened on 26 July 1900.” [5]
The company purchased twelve large tram cars (larger than those of the DUTC) “for its operations, each seating 74 passengers, 29 inside and 45 on the upper deck. The enclosed lower deck had a driver’s cab, and separate areas for each of First, Second and Third Class. The journey from Nelson’s Pillar to Howth took 45 minutes, and the price for much of the operating period was 2 shillings and 6 pence.” [5]
The C&HofHT approached Howth on the main road across the isthmus, ran close to St. Mary’s Church and to the railway station, under the viaduct which carried the actual Hill of Howth Tramway, before running along the Harbour wall. [10]A C&HofHT approaching the terminus at Howth on the main road and passing under the viaduct carrying the Sutton and Howth Electric Tramway just as a tram is crossing that viaduct. This photograph was shared on the Old Howth Photos Facebook Group on 7th March 2021 by Liam McLoughlin. [28]The terminus of the C&HofHT was at the East end of Harbour Road close to the Martello Tower at the landward end of the East Pier. [10]Looking East along the harbour wall towards the terminus of the C&HofHT. This image was shared by Hugh Walsh on the Old Howth Photos Facebook Group on 22nd February 2023. [14]A C&HofHT tram standing at the terminus at the landward end of the East Pier at Howth. This photograph was shared on the Old Howth Photos Facebook Group on 12th October 2020 by Liam McLoughlin. [31]Another C&HofHT tram standing at the terminus. This photograph was shared on the Old Howth Photos Facebook Group on 13th March 2020 by Liam McLoughlin. [33]
“During the 1930s, the line became unprofitable, and when the GNR put forward a proposal to run a competing bus service on the Howth Road, and launch a bus to Malahide, the Board of the C&HofHT offered to end their service if the GNR agreed not to run a bus to Malahide. The line ceased operation on 29th March 1941, with the last tram to Howth, No. 294, departing Nelson’s Pillar at 11.45 pm, driven by Dick Ward. The company was wound-up on 1st July 1941, and the remaining tram cars were transferred to the DUTC’s Dalkey route, where they served until that line closed in 1949.” [5]
As we have noted already the Hill of Howth Tramway was more correctly called the ‘Sutton and Howth Electric Tramway‘. It was GNR(I) owned but made little or no profit for the Company. When Córas Iompair Éireann (CIÉ) took over GNR(I)’s operations in the Republic of Ireland, it reviewed all of the lines (including this tramway) over which it took control and the Howth Tram was replaced by buses within 8 months. It’s removal opened the way for the construction of a housing estate over a length of the route from Howth to the Summit Station. As we will see, this makes it difficult to be precise about the course of the line over that length. Much of the rest of the line can be followed relatively easily, either on foot or in a car.
The Routeof the Hill of Howth Tramway
The Ordnance Survey of Ireland (OSi) have relatively recently released both a 6″ and a 25″ national survey from the early 20th century. We will follow the route of the tramway as shown on the 25″ beginning at Howth and finishing at Sutton.
On this 25″ OSi map extract the ‘headshunt’ of the Hill of Howth Tramway can be seen running alongside the GNR(I) lines from the Claremont Hotel into Howth Railway Station. The C&HofHT can be seen as a single track tramway with a passing loop on the bed to the East of the Manse. [10]That headshunt was long, seemingly much longer than necessary. It certainly provided some storage space for the trams owned by the Tramway. This is a second extract showing the Tramway from the 25″ OSi mapping. [10]This next extract from the 25″ OSi mapping shows the terminus of the GNR(I) line. The Hill of Howth Tramway can be seen running to the rear of the railway station platform and then turning away onto the viaduct which took it over the Harbour Road. [10]A very similar area as shown on Google Maps satellite imagery in 2023. [Google Maps, 8th May 2023]
The photograph above shows Tram No. 3 about to leave Howth Station for Sutton via Summit Halt. This image is embedded here from David Bradley’s webpages with his kind permission. [13]
Looking West from the end of the platform at Howth Station. a single tramway line ran parallel to the main GNR(I) lines for some distance beyond the Signal Box before it was lifted with the rest of the tramway tracks. [My photograph, 8th May 2023]This view of the GNR(I) station at Howth from close to the signal Box, looking East, shows the tram stop backing onto the platform. This photograph was shared on the Old Howth Photos Facebook Group on 22nd December 2020 by Shay Larkin. [27]A view from adjacent to the Signal Box in 2023, looking East along what was once the tram line. [My photograph, 8th May 2023]Tram No. 2 and a sister tram at Howth Station. This image was shared by Liam McLoughlin on the Old Howth Photos Facebook Group on 6th October 2015. [18]Tram No. 4 at Howth Station. This image was shared by Hugh Walsh on the Old Howth Photos Facebook Group on 22nd February 2023. [19]A particularly crisp image of Tram No. 6 at Howth (c) Eamon J. Martin and shared by him on the Old Howth photos Facebook Group on 28th December 2021 [20]Howth Station with the tram stop backing onto the GNR(I) platform. This photo was shared by Liam McLoughlin in the Old Howth Photos Facebook Group on 22nd August 2020. [24]A similar view of Howth Station, this time in colour. This picture was shared by Liam McLoughlin on the Old Howth Photos Facebook Group on 4th October 2015. [25]Tram No. 6 at Howth Station. The Signal Box beyond the tram faces out onto the platform of the GNR(I) Station at Howth. This photo was shared by Liam McLoughlin on the Old Howth Photos Facebook Group on 8th April 2020. [26]Tram No. 7 leaving Howth Station with a service for Sutton via the Summit of the Hill of Howth. This photo was shared by Liam McLoughlin on the Old Howth Photos Facebook Group on 4th October 2015. [25]Tram No. 3 arriving at Howth Station just having crossed the viaduct. This photo was shared by Lorenzo Caira on the Old Howth Photos Facebook Group on 4th October 2015. [36]Tram No. 1 comes off the viaduct on its way to the terminus at Howth Station. This picture was shared on the Old Howth Photos Facebook Group by Liam McLoughlin on 25th August 2020. [34]Looking along the viaduct at Howth from the GNR(I) Railway Station. This photo was shared by Lorenzo Caira on the Old Howth Photos Facebook Group on 4th October 2015. [35]The Hill of Howth Tramway Viaduct facing West towards Sutton. This photograph was taken in 1902 early in the life of the tramway. [11]The Hill and of Howth Tramway Viaduct facing East towards the Harbour. This photograph was taken in March 1959 shortly before the closure of the line. It is in the public domain and is held by the National Library of Ireland and shared by them on Flickr [12]Given the vehicle visble under the viaduct this photo dates from the era when only trams No. 9 and No. 10 remained in the teak livery mentioned above. This probably means that the tram on the viaduct is No. 9 or No. 10. This photo was shared by Liam McLoughlin on the Old Howth Photos Facebook Group on 17th June 2021. It was also shared by Gary Hitchcock on the same Group on 1st March 2019, he dates the photo as being taken sometime in 1959. [37]Looking East under the viaduct in the 1950s. This photograph was shared by Liam McLoughlin on the old Howth Photos Facebook Group on 7th January 2016. [38]The viaduct, looking West. This must have been taken very early in a morning as there is no sign of any road or tramway users/vehicles. This photo was shared by Liam McLoughlin on the Old Howth Photos Facebook Group on 17th June 2021. [39]Looking across the R105 along the line of the old viaduct (from the South). [My photograph, 8th May 2023]The abutment of the viaduct hidden by the advertising hoarding. [My photograph, 8th May 2023]This extract from the 25″ OSi mapping shows the old tramway running away to the South after crossing the Viaduct. [10]Google Maps staellite imagery for the same area shows a footpath on the alignment of the old tramway. The length of the footpath which follows this length of the tramway is shown in photographs below. [Google Maps, 8th May 2023]After a short steep length of footpath from the R105 the footpath joins the formation of the old tramway which curves away to the South.[My photograph, 8th May 2023]These two photographs show that curve which brings the tramway onto a southerly path. [My photographs, 8th May 2023]The old tramway route heading South, viewed from the North. [My photograph, 8th May 2023] The footpath continues South. [My photograph, 8th May 2023]And again, looking South. [My photograph, 8th May 2023]A view back along the tramway looking North. The fencing is the boundary of Howth Deer Park. [My photograph, 8th May 2023]Looking South once again, with the Deer Park on the right. [My photograph, 8th May 2023]And again, further South and looking South. [My photograph, 8th May 2023]This view looks Southeast alongside the line of the tramway which at this point has begun to curve to the East through the back gardens of properties built after its demise which are on the left of this image behind the trees. The footpath leaves the tramway at this point. A housing estate has been built over the line of the old tramway from this point. [My photograph, 8th May 2023]Looking back along the old tramway route as it begins to curve to the East. Behind the camera, the footpath heads South away from the tramway, which at this point is approximately under the hedging to the right of the photograph. [My photograph, 8th May 2023]The 25″ OSI mapping shows the tramway curving first to the East and then back to the Southwest. [10]The satellite imagery from RialMapOnline.com becomes very useful from this point on as it maps the old tramway over the satellite image of the 1960s estate. The footpath, in grey, can be seen diverting away South from the line of the tramway as it turns East. [4]Tram No. 6 heads North towards the Howth terminus. The deer park is behind the trees to the left. The tram is just about to enter the straight length of line which bordered the deer park. This image was shared by Liam McLoughlin on the Old Howth Photos Facebook Group on 6th October 2015. [21]Tram No. 4 in the final livery version is heading North towards the camera and Howth Station. The passing loop seen here is not shown on the early OSi 25″ mapping that is available. The school in this image also postdates the mapping. This image was shared by Liam McLoughlin on the Old Howth Photos Facebook Group on 8th April 2020. [16]Looking Northeast on Grace O’Malley Drive with the school on the right. The green line superimposed on the photograph illustrates the line of the tramway. [Google Streetview, July 2019]This photo is taken looking down the line towards Howth. The low white wall prominent in this image can be seen beyond Tram No. 4 in the photograph of that tram in the last but one image. This image was shared by Liam McLoughlin on the Old Howth Photos Facebook Group on 22nd August 2020. [22]The 25″ OSi mapping then shows another sharp curve which swept the old line back again towards the East. [10]The same area in the 21st century. The Deer Park is to the left of the image. [4}Looking Northeast on another length of Grace O’Malley Drive. The green line superimposed on the photograph illustrates the line of the tramway. [Google Streetview, July 2019]Tram No. 6 in its earliest livery climbing through the curves on its way to the Summit. It is probably travelling along what became Balkill Park. This image was shared by Liam McLoughlin on the Old Howth Photos Facebook Group on 8th April 2020. [17]Looking North on Balkill Park. The old tramway route seems to skirt the left side of the end of terrace above, continuing to bear right through its garden and the properties on Grace O’Malley Drive behind. [Google Streetview, July 2019]Turning through 180° to look South, Balkill Park follows the line of the old tramway. [Google Streetview, July 2019]This next extract from the 25″ OSi mapping shows the tramway crossing Balglass Road at a level crossing. [10]The same area as shown on the map extract above as it appears on RailMapOnline.com. [4]Looking East-southeast from Balkill Park across Balglass Road/Balkill Road. at the junction the route of the old tramway heads East-southeast. [Google Streetview, July 2019]An unidentified tram crossing Basglass on 31st May 1959, (c) Barry Lacy. This image was shared on the Old Howth Photos Facebook Group by Kevin Rickard on 27th September 2020. [15]Very approximately the same view as the monochrome image above but in the 21st century. The route of the old tramway is indicated by the green line. [Google Streetview, July 2019]Looking ahead to the Southeast along the route of the old tramway from the junction of Balkill Park with Balglass Road/Balkill Road. [My photograph, 7th May 2023]Looking back towards Howth along the line of the old tramway with Balkill Park ahead. [My photograph, 7th May 2023]The 25″ OSi mapping shows that the next passing point on the line was Dungriffan Halt which was situated to the North of Dungriffin Road between Cliff House and Boggeen Lane. [10]The same area in the 21st century shows a similar road layout and the footpath following the route of the old tramway. [4]Looking Southwest towards what was the location of Dungriffan Road Halt. [My photograph, 7th May 2023]Trams passing each other at the next halt on the route, Dungriffan Road Halt. This photo was shared on the Old Howth Photos Facebook Group by Lorenzo Caira on 9th January 2022. [23]Tram No. 7 seems to be leaving Dungriffan Road Halt heading South towards the Summit Inn. This photo was shared on the Old Howth Photos Facebook Group on 6th October 2015 by Liam McLoughlin. [43]Looking Southeast into the site of what was Dungriffan Road Halt. [My photograph, 7th May 2023]The location of Dungriffan Road Halt as it appears in the 21st century. This view looks Southeast from the centre of the Halt towards Dungriffin Road. [My photograph, 7th May 2023]Looking South across Dungriffin Road. [My photograph, 7th May 2023]Looking back North across Dungriffin Road. [My photograph, 7th May 2023]The view South from Dungriffin Road in 2019. [Google Streetview, July 2019]This image shows an unidentified tram heading South towards the Summit Inn from Howth. It was shared on the Old Howth Photos Facebook Group by Lorenzo Caira on 4th October 2015. [44]This view looks back towards Howth. Another unidentified tram heads towards the Summit Inn. This photo was shared on the Old Howth Photos Facebook Group by Lorenzo Caira on 4th October 2015. [40]This view looks North down this length of tramway and appears to show Tram No. 6 heading South towards the Summit of Howth Hill. This photo was shared on the Old Howth Photos Facebook Group by Liam McLoughlin on 6th October 2015. [41]The view South along the line of the old tramway between Dungriffin Road and Grey’s Lane. [My photograph, 7th May 2023]Looking South across Grey’s Lane. [My photograph, 7th May 2023]The view Northwest along Grey’s Lane across the line of the old tramway. [Google Streetview, July 2019]Looking North across Grey’s Lane. [My photograph, 7th May 2023]The next length of the tramway Southeast from Grey’s Lane as shown on the 25″ OSi mapping. [10]The same area as shown by RailMapOnline.com. [4]Looking South along the line of the old tramway a 100 metres or so from Grey’s Lane. [My photograph, 7th May 2023]Looking South along the line of the old tramway a 100 metres or so further from Grey’s Lane. [My photograph, 7th May 2023]In this extract from the OSi mapping the old tramway first crosses Kitestown Road and then turns to cross what was Lighthouse Road and in the 21st century is called Balkill Road. The Summit was reached after crossing Lighthouse Road. [10]The same area as shown on the map extract above as it appears on RailMapOnline.com. The new road is the route of the R105, Carrickbrack Road, which from this point follows the line of the old tramway. [4]Looking North along the line of the old tramway across Kitestown Road. [My photograph, 7th May 2023]Looking Southeast along Kitestown Road across the line of the old tramway. [Google Streetview, July 2019]Looking Southeast from Kitestown Road along the line of the old tramway. [Google Streetview, July 2019]Looking North along the line of the old tramway from the junction of Balkill Road and Carrickbrack Road. [My photograph, 7th May 2023]The view Southwest along Carrickbrack Road (R105). The green line marks the route of the old tramway. [Google Streetview, July 2019]The Summit Cafe. This photo was shared on the Old Howth Photos Facebook Group by Liam McLoughlin on 6th October 2015. [42]The Summit Inn in the 21st century. [Google Streetview, July 2019]Two trams pass at the Summit. Tram No. 3 is heading for Howth and Tram No. 4 for Sutton. This picture was shared on the Old Howth Photos Facebook Group on 7th September 2016 by Liam McLoughlin. [49]In this image it is trams Nos. 6 and 7 passing at Summit Station with No. 6 heading for Howth and No. 7 for Sutton. This photo was shared on the Old Howth Photos Facebook Group on 4th October 2015 by Lorenzo Caira. [47]Tram No. 10 at the Summit Station. This picture was shared by Dermot Kane on the Old Howth Photos Facebook Group on 2nd June 2020. It looks Northeast along Carrickbrack Road. The Summit Inn is visible on the right of the picture. (R105). [50]A similar view at the Summit in the 2020s. The Summit Inn is visible on the right of both this and the colour photograph above. The single storey building near the centre of this image can be seen behind the tram in the last image. [Google Streetview, March 2023]What looks like Tram No. 6 at the Summit Station heading for Sutton with two unidentifiable trams behind. This image was shared on the Old Howth Photos Facebook Group on 4th October 2015 by Lorenzo Caira. [46]Looking Northeast again at the Summit with Tram No. 1 in the foreground, heading for Howth and an unidentifiable sister tram beyond, heading for Sutton. This photo was shared on the Old Howth Photos Facebook Group by Lorenzo Caira on 4th October 2015. [45]Looking Northeast at the Summit Station with Tram No. 10 waiting to set off for Howth. This photograph was shared on the Old Howth Photos Facebook Group on 6th October 2015 by Liam McLoughlin. [48]
The Summit was the usual tourist stop and was accessed either from Howth or from Sutton. Having reached the Summit from Howth, we now start the journey down to Sutton.
Trams left Summit Station in a Southerly direction. The road to the East of the line is Thormanby Road which was not suitable for the bus service which replaced the trams on the closure of the line. [10]The same area as that covered on the map extract above. This time as it appears on the satellite imagery on RailMapOnline.com. This length of Carrickbrack Road was constructed after the closure of the line. [4]This next extract from the 25″ OSi mapping shows the line continuing South. [10]The same area in 21st century. Carrickbrack Road continues to follow the route of the old tramway. [4]This next extract from the 25″ OSi mapping shows the next passing point on the line which was at the point the line met Thormanby Road. [10]The same area as it appears on RailMapOnline.com’s satellite imagery. [4]The confluence of the old tramway and Thormanby Road. The passing point on the OSi mapping is just off the image to the left. The picture was shared on the Old Howth Photos Facebook Group by Lorenzo Caira on 4th October 2015. [56]Tram No. 3 at the same location. The passing loop is just visible beyond the tram. The building on the right appears on the postcard image above. This image was shared on the Old Howth Photos Facebook Group on 9th October 2019 by Padraig Druimeanach. [55]The same location again, after the lifting of the tramway tracks and before the construction of Carrickbrack Road. This image was shared on the Old Howth Photos Facebook Group on 25th February 2020. [53]The Tramroad continues in a westerly direction towards the Stella Maris Convent, as shown on the 25″ OSi mapping. [10]The same area on RailMapOnline.com. [4]The same location in the 21st century, Carrickbrack Road (R105) eventually replaced the old tramway. [Google Streetview, March 2023]Stella Maris Convent (Glenavena) owned land on both sides of the old tramway. The tramway was carried over the driveway on a stone arch bridge with retaining walls extending upwards on each side. [10]Approximately the same area as portrayed in the map extract above. [4]The tramway leaving Thormanby Road/Carrickbrack Road and crossing the stone arch bridge over the driveway.Tram No. 7 travelling to the Summit from Sutton is about to cross Thormanby Road/Old Carrickbrack Road. This image was shared by John Maguire on the Old Howth Photos Facebook Group on 22nd January 2021. John tells me that the wall still has the hinges in place for the gate that can be seen in this image. [82]Looking West on Carrickbrack Road, the high wall on the left behind the speed limit sign is the same wall as shown in the monochrome images above. [Google Streetview, March 2023]About 100 metres West of the last photograph, this is the route the tramway was followed, alongside the high wall. [Google Streetview, March 2023]The full height wall and bridge carrying the tramway. The tram in this image is in almost exactly the same position as the one in the monochrome image above. This image was shared on the Old Howth Photos Facebook Group by Shay Larkin on 3rd March 2017. [51]The next length of the tramway on the 25″ OSi mapping. [10]And a further length of the tramway on the 25″ OSi mapping. [10]RailMapOnline.com shows the area covered by the two map extracts above. [4]Looking West along Carrickbrack Road towards the location of Baily’s Post Office Halt which was sited just beyond the location of the bend ahead. [Google Streetview, March 2023]The next passing loop at Baily Post Office Halt. [10]The new Carrickbrack Road somewhat smooths out the tramway alignment through the site of Baily’s Post Office Halt. [4]Tram No. 9 at the Baily Post Office Halt. This image was taken facing Southeast and was shared on the Old Howth Photos Facebook Group by Liam McLoughlin on 23rd October 2018. [52]Tram No. 1 at Baily’s Post Office Halt. This picture is taken facing West through the location of the Halt and was shared on the Old Howth Photos Facebook Group on 3rd March 2017 by Shay Larkin. [54]Looking West through the location of Baily’s Post Office Halt in 2023. [Google Streetview, March 2023]Looking East through the location of Baily’s Post Office Halt in 2010. [Google Streetview, July 2010]The tramway continued Northwest from Baily’s Post Office Halt. The 25″OSi map extract shows that from this point the old Carrickbrack Road ran alongside the old tramway, with the tramway on its South side. [10]The tramway continues Northwest on its way towards Sutton. [10]This RailMapOnline.com satellite image shows the length of the old Tramroad covered by the two map extracts above. [4]Looking Northwest from the location of Baily’s Post Office Halt along Carrickbrack Road in 2010. [Google Streetview, July 2010]And again, further to the Northwest. A passing loop can be seen to the Northwest of Rockfell. This was the Barren Hill Halt. [10]This extract from RailMapOnline.com’s satellite imagery shows much the same area as that in the map extract above. [4]Two trams pass at Barren Hill Halt. The nearest tram appears to be No. 6, the tram heading towards the camera is either No. 9 or No. 10 ( both of which retained the teak livery through to the closure of the line. The picture was shared on the Old Howth Photos Facebook Group on 15th October 2020 by Phil Hanlon. [57]The view Northwest through the site of Barren Hill Halt in the 21st century. [Google Streetview, March 2023]The 25″ OSi mapping continues to show the tramway heading Northwest for Sutton, at this point, before curving round to a northerly trajectory. [10]The next passing loop was just to the North of St. Fintan’s Well. [10]This extract from RailMapOnline.com covers the combined length of the two map extracts above, from Barren Hill Halt to the location of St. Fintan’s Halt. [4]Tram No. 3 at St. Fintan’s Halt, looking South. This photo was shared on the Old Howth Photos Facebook Group on 6th October 2015 by Liam McLoughlin. [58]The tramway continued Northwest running alongside St. Fintan’s Graveyard. Another passing loop can be seen at the top of this extract from the 25″ OSi mapping. [10]Tram No. 4 in the passing loop mentioned in the notes to the OSi map extract above, heading for Howth. This photo was shared on the Old Howth Photos Facebook Group on 9th October 2015 by Liam McLoughlin. [59]The tramway continues heading Northwest. [10]And again, the tramway runs on towards Sutton in a northwesterly direction. [10]This extract from RailMapOnline.com covers the same length of the old line as the two map extracts above. [4]This next extract from the 25″OSi mapping shows the passing loop adjacent to Strand Road. [10]This RailMapOnline image shows the ame area as the 25″ OSi map extract above. The Strand Halt is in the bottomright corner of each image. [4]Tram No. 10 sits at the Strand Road Halt on its way Southeast towards the Summit of the Hill of Howth. This image was shared on the Old Howth Photos Facebook Group on 22nd February 2023 by Hugh Walsh [61]The tram in this picture is just to the Northwest of the Strand Road Halt. It is difficult to make out whether it is travelling towards Howth (ahead via the Summit of the Hill of Howth) or Sutton (behind the camera). The photo was shared on the Old Howth Photos Facebook Group on 6th October 2015 by Liam McLoughlin. [62]This image is not clear enough to be able to give the tram number. The tram pictured has just left the Strand Halt heading for Sutton. The image was shared on the Old Howth Photos Facebook Group on 18th December 2015 by Liam McLoughlin. [60]Bus No. 31 heading for Sutton at a similar location after the closure of the tramway. This image was shared on the Old Howth Photos Facebook Group on 9th April 2017 by Liam McLoughlin. [63]The tramway ran Northwest along the South side of Carrickbrack Road with the water on its left. [10]it continued alongside the road heading towards the Strand Hotel. Both these map extracts are from the 25″ OSi mapping. [10]This extract from the satellite imagery on RailMapOnline.com shows the length of the tramway route covered in the two map extracts above. [4]Sutton Cross as shown on the 15″ OSi mapping. Its tramway halt was immediately to the Northwest of the junction. It can be seen on the top-left of this extract. [10]A similar area on RailMapOnline.com. As throughout this article the green line represents the Hill of Howth Tramway, the yellow line indicates the route of the Clontaff and Hill of Howth Tramroad. [4]Looking through Sutton Cross junction from the Southeast. The halt can be seen ahead. This image was shared on the Old Howth Photos Facebook Group on 18th December 2015 by Liam McLoughlin. [64]A tram crosses the main road at Sutton Cross. The road to Howth is ahead of the camera. This photo was shared on the Old Howth Photos Facebook Group by Liam McLoughlin on 12th October 2016. [67]The view along the R105 towards Howth taken from a similar location to the photograph above. [Google Streetview, November 2022]Tram No. 3 just setting off from the Sutton Cross Halt. It appears to have just met and passed another tram heading towards Sutton Railway Station. That tram can be seen in the distance on its way to the terminus. This photo was shared on the Old Howth Photos Facebook Group by Liam McLoughlin on 28th August 2017. [65]The site of Sutton Cross Halt in the 21st century. This view looks along Station Road from the junction at Sutton Cross. [Google Streetview, May 2021]A tram has just crossed the main road at Sutton Cross and is entering the Halt on its way to Sutton Railway Station. This photo was shared on the Old Howth Photos Facebook Group by Liam McLoughlin on 3rd December 2018. [69]Tram No. 1 is just leaving Suttion Cross Halt and will cross the main raod before heading for the Hill of Howth. This photo was shared on the Old Howth Photos Facebook Group by Lorenzo Caira on 4th October 2015 [70]Tram No. 5 sits in the loop at Sutton Cross Halt. Given the height of the photographer it is likely that they are at the front of the top deck of another tram which has left Sutton Railway Station on its way to the Hill of Howth and eventually to the Howth terminus of the line. This photo was shared on the Old Howth Photos Facebook Group by Liam McLoughlin on 21st March 2018. [66]Tram No. 3 at Sutton Cross Halt heading towards Howth via the Hill of Howth. This image looks to have been taken from the top deck of another tram waiting in the loop at Sutton Cross, looking toward the terminus at Sutton Railway Station. It was shared on the Old Howth Photos Facebook Group by Hugh Walsh on 22nd February 2023. [68]This extract from the 25″ OSI mapping shows the final approach to the terminus at Sutton Railway Station. [10]A similar length of Station Road Sutton as it is shown on Google Maps in 21st century. The tramway ran along the South side of the road. [Google Maps, May 2023]The view Northwest on Station Road in 2023. [Google Streetview, March 2023]The end of the line, or the beginning of the line, depending on your perspective! This last extract from the 25″ OSi mapping shows the GNR(I) railway station at Sutton, the Tramway Depot and the Electricity Generating Station built for the Tramway. [10] The same area in the 21st century. [Google Streetview, May 2023]Thye approach to Sutton Station from the Southeast on Station Road (R106). The tramway lines are represented by the green line superimposed onto the photo. The station building is much as it was when trams were running. The road is probably a little wider. The signal box is still present (in dark green on the left of this image). [Google Streetview, March 2023]
The photograph above shows a tram running parallel to Station Road with Sutton Cross 200 yards to the right and Sutton Station 25 yards to the left on the opposite side of the road. This photo is embedded here from David Bradley’s webpageswith his kind permission. [29]
Looking Southeast from close to the point where trams would swing to their right to cross Station Road and enter the tram terminus which sat directly alongside the GNR(I) Railway Station at Sutton. Sutton Cross is some distance ahead of the camera. The photo was shared on the Old Howth Photos Facebook Group by Phil Hanlon on 15th December 2020. [76]Tram No. 6 or No.8 is just setting off from the Sutton terminus towards Sutton Cross. This photo was shared on the Old Howth Photos Facebook Group by Liam McLoughlin on 5th August 2019. [75]Sutton Railway Station with a tram approaching on the Sutton and Howth Electric Tramway. This photograph looks East from what is now the R106. The photo was taken in 1902. [30]The view of the station approach from adjacent to the level crossing gates in 2023. While the tram tracks are long gone, the station building is very similar in appearance to that shown on the 1902 image above. [My photograph, 8th May 2023]Tram No. 6 waits at the Sutton Terminus before setting off towards Sutton Cross. This photo was shared on the Old Howth Photos Facebook Group by Lorenzo Caira on 4th October 2015. [79]Sutton terminus once again, this time on the final day of the service. There is a suggestion in the notes under the photo that this is the final tram on that day. It may have been, although the numbers waiting toclimb aboard suggest that there may be other trams in the depot waiting to move forward to take a full load of passengers. This photo was shared on the Old Howth Photos Facebook Group by by Hugh Walsh on 22nd February 2023. [71]Tram No. 1 leaves the depot and prepares to cross Station Road as it heads for the terminus at the railway station. This photo was shared on the Old Howth Photos Facebook Group by Hugh Walsh on 22nd February 2023. [71]The 21st century view alongside the signal box looking to where the Tram depot was sited. [Google Streetview, March 2023]Tram No. 10 leaves the depot and is about to cross Station Road to enter service at the tram terminus at Sutton Railway Station. This photo was shared on the Old Howth Photos Facebook Group by Lorenzo Caira on 4th October 2015. [74]Tram No 10 retained its teak livery until the end of the network’s life, as did Tram No. 9. Tram No. 10 is waiting for the tram to the right of the picture to clear the road from the terminus, before setting off from the depot to collect passengers. This photo was shared on the Old Howth Photos Facebook Group by Lorenzo Caira on 4th October 2015. [78]The road crossing at the West end of Sutton Station. The tram depot was immediately West of the Station. This image was shared by Liam McLoughlin on the Old Howth Photos Facebook Group on 3rd July 2017. [32]Tram No. 6 sits outside the shed in the tram depot waiting to go out on service. This photo was shared on the Old Howth Photos Facebook Group by Liam McLoughlin on 13th December 2020. [73]Two other trams (no. 1 and No. 3) sit outside the shed in the tramway depot. GNR(I) main line carriages sit in the siding adjacent to the shed. This image was shared on the Old Howth Photos Facebook Group by Liam McLoughlin on16th June 2019. [72]Tram No 10 is being wheeled out of the shed by hand. This photo was taken after closure and after the removal of overhead power lines. It was shared on the Old Howth Photos Facebook Group by by Hugh Walsh on 22nd February 2023. [71]Tram No. 9 in its teak livery sits in front of sister trams inside the shed at the Tramway depot. This photo was shared on the Old Howth Photos Facebook Group by Liam McLoughlin on 10th January 2016. [81]Another view of the interior of the shed at the tramway depot. The rather odd looking tram on what seems to be the central road is Tram No. 11 which was used for maintenance work on the network. This photo was shared on the Old Howth Photos Facebook Group by Padraig Druimeanach on 15th October 2019. [77]Tram No. 11 out at work on the network at St. Fintan’s. This photo was shared on the Old Howth Photos Facebook Group by Liam McLoughlin on 9th October 2015. [80]The Tramway Depot seen from the East with the Electricity Generating Station behind. This image was probably taken after the closure of the network. It was shared by Liam McLoughlin on the Old Howth Photos Facebook Group on 7th March 2021. [31]
As we have noted already the Hill of Howth Tramway was GNR(I) owned but made little or no profit for the Company. When the nationalised compnay, Córas Iompair Éireann (CIÉ) took over GNR(I)’s operations in the Republic of Ireland on 1st October 1958, it reviewed all of the lines (including this tramway) over which it took control and the Howth Tram was replaced by buses within 8 months!
London: Hansard, vol. 62, c. 1291 – 26 July 1898, House of Lords Sitting, Private Bill Business, “Returned from the Commons agreed to, with Amendments, ‘Clontarf and Hill of Howth Tramroad Bill'”
Michael Corcoran; Through Streets Broad and Narrow — Dublin’s Trams; The Sir John T. Gilbert Commemorative Lecture, Dublin City Public Libraries, 2008.
Hill Of Howth Tramway Closure; in Irish Railfans’ News. Railway Preservation Society of Ireland. Volume 5 No. 3; 6th July 1959.
Kincasslagh Road Railway Station as seen in Joe Begley’s article about the January 1921 ambush. [1]
The next four photographs come from Dave Bell and Steve Flanders book,’The Londonderry and Lough Swilly Railway: A Visitor’s Guide‘. [2: p82]
The passenger building at Kincasslagh Road Station as it appeared in the late 1980s. [2: p82]The view Southwest through the site of the Station from what was once the level crossing. [2:p82]Stepping beyond the pillars which supported the crossing gates, this view again looks Southwest through the site of the Station. [2:p82]The old road and level crossing at the site. The road was diverted to the East of this location. The building on the left is the Crossing Keeper’s Cottage (No. 21). [2:p82]
The undergrowth at this location, (and possibly the garden planting too) has grown significantly in the last 30 years.
These pictures featured at the end of the first article about the Burtonport Extension. [My photographs, 23rd April 2023]
We start this part of the journey with a short time to reflect at Kincasslagh Road Railway Station. The station was the location of the first action in the War of Independence in 1918. The memorial shown below sits on the road at the Northeast end of Kincasslagh Road Station.
The English text on the memorial reads: TO COMMEMORATE THE FIRST ACTION IN THE WAR OF INDEPENDENCE, WHEN THE IRISH VOLUNTEERS RESCUED TWO COMRADES, JAMES WARD & JAMES DUFTY FROM BRITISH TROOPS THIS PLACE ON THE 4TH DAY OF JANUARY 1918.
Joe Begley has written an excellent piece on a later ambush which occurred on 12th January 1921 and the events that surrounded it. [1] That ambush took place in a cutting to the Northeast of Kincasslagh Road Railway Station, known locally as Paddy Ghráinne’s Cutting.
An extract from OSi mapping as shared by Joe Begley. The location of Kincasslagh Road Railway Station is marked in the bottom left of the image. The cutting where the 1921 action took place is marked top-right. [1]The same area as shown on the map extract above but now on modern satellite imagery. [Google Maps, 30th April 2023]The cutting where the January 1921 action took place, Paddy Ghráinne’s Cutting. [Google Streetview as shard be Joe Begley][1]
Joe Begley explains that the area close to Kincasslagh Road Railway Station was often in the news in the War of Independence and this latest episode brought a temporary end to services on the Burtonport Extension. [1]
Looking back through the site of Kincasslagh Road Railway Station. The garage sits on the line of the old railway. The old railway crossing is hidden behind the undergrowth beyond. The Crossing Keeper’s Cottage (or Station House) can be seen just above the vegetation to the left of the garage. [Google Streetview, April 2022] The view Northeast along the old railway from the newer road crossing its route. A road ran parallel to the old railway on its South side. Much of the next length of the old line is overgrown. Google Streetview, April 2022]Looking Northeast from a point to the East of Kincasslagh Road Railway Station. The old railway ran alongside the road on the left side of the picture. Its route has been reclaimed by nature. [Google Streetview, April 2022]
The satellite image above shows the route of the old railway in today’s landscape. Leaving Kincasslagh Road Railway Station in a Northeasterly direction the line passes through cuttings and over low embankments curving first towards the North and then back to the Northeast. Just before it reaches the cutting where the 1921 action took place it crosses a minor road at level.
I have searched a widely as I can and have only found a couple of images of rolling stock on this section of the line, both relate to the same incident in February 1923.
It is difficult to make out the line of the old railway as it runs North on the East side of Crolly village. RailMapOnline.com can be a real help in these circumstances. An extract from their map base with the line shown in orange is provided below.
RailMapOnline.com is able to show the line of the old railway imposed onto Google Maps satellite imagery. The bridge which has been demolished was close to the concrete works at the bottom of the image. The bridge in the picture above is seen between houses across the N56 from the petrol station. [11]
Not every sheet of the 25″ OSi mapping is available through the OSi historic maps portal so for the next length of the Burtonport Extension Railway we need to rely on the 6″ OSi mapping.
The old railway ran high above the village of Crolly. The road rose as it travelled North and by the top of this map extract road and railway were at the same level. [3]The same area is shown the base Google Map satellite imagery used by RailMapOnline.com. The route of the old railway is again shown by the orange line. [11]
On its way Northeast the old line crossed what would have been an unmetalled road aas shown on the satellite image above. That track is in the 21st century a metalled minor road as shown below.
As we have already noted the Clady Canal feeds water to the Clady Power Station. The Clady Hydroelectric Station is a 4.2 MW power station situated in the Gweedore area of Co. Donegal.
“Construction started in 1954, with the station going into full operation in 1959, when it also synchronised to the Donegal 38 kV network. Two lakes form the basis of this hydro scheme: Dunlewey Lough and Lough Nacung are situated in a valley 61m above sea level and are drained by the Clady River, which enters the sea at Bunbeg.” [18]
Both of the lakes were enlarged to create the storage capacity needed to run the station. Dunlewy Lough through the construction of the Cung Dam at the promontory between the two lakes. The Clady River has been partially diverted by Gweedore Weir into a 2.5 km canal which runs across country to the rim of a deep valley which forms the tidal estuary of the Gweedore River. This is the canal that we have noted. As we will see, its route conflicts with what was the route of the Burtonport Extension Railway.
“A 500m steel penstock carries the water from that canal down to the generating station at sea level. … Overall, the normal range of storage is from 60.96m OD (Ordnance Datum) to 63.70m OD. Gweedore Weir has also raised the level of Lough Nacung with a storage range from 60.96m OD to 61.57m OD. … The powerhouse is equipped with a horizontal Francis-type turbine, coupled to a generator with a capacity of 4.2 MW.” [18]
This next extract from the 1906 6″ OSi survey shows the old railway line reaching the Station at Gweedore. [3]This satellite image covers approximately the same area as the map extract above. The Clady Canal runs adjacent to the N56 and from the left edge of the image to the access bridge at the centre of the image follows the line of the old railway. East of that point the line slips away in a Northeasterly direction,, heading for what was its bridge over the River Claddy to the North. [Google Maps, May 2023]The minor road bridge over the Clady Canal. To the right of this bridge the route of the old railway slides away to the North. [Google Streetview, September 2021]The view West along the Clady Canal from the North end of the bridge in the last photo. The old railway and the canal follow a similar line to this point. [My photograph, 3rd May 2023]The view East from the North end of the same bridge. The old railway route and canal gradually separate from this point. The canal curves away to the right and is crossed by the N56. The railway heads towards its bridge over the River Clady. [My photograph, 3rd May 2023]This enlarge extract from the 6″ mapping shows the bridge on the approach to the Station from the West. A level crossing took the line over what is now the R258 and the line ran through the station. The track layout shown on this OSi map extract is not correct. A passing loop was provided at the station and there were also goods facilities. [3]A similar area on the modern satellite images provided by Google Maps. The immediate area of the station has been redeveloped but some signs of the old railway and it’s station remain.The abutments of the railway bridge over the River Clady seen from the Northeast and looking along the side of the old bridge towards the Southwest. [My photograph, 3rd May 2023]The Southwest abutment of the bridge over the River Clady seen from alongside the Northeast anutment. [My photograph, 3rd May 2023]This photograph shows the station throat as seen from the lattice girder bridge over the River Claddy in the 1950s. A road (now the R258) crossed the line between the bridge and the station. The Goods Shed can be seen on the left of the image. A waiting shelter is the next building to the right. The dark structure to the right of centre is the water tower. This photograph was shared on the Burtonport Heritage Facebook Group by Joe Begley on 31st August 2020. [12]Looking East through Gweedore Railway Station before the closure of the station and the lifting of the railway tracks. The waiting shelter can be seen on the left with the water tower beyond. This photograph was shared by Joe Begley on the Lower Rosses/Gweedore History Discussion Forum Facebook Group on 19th November 2016. [13] The waiting shelter at Gweedore Railway Station survived the dereliction of the site through to the present day. This is an undated photograph. It was shared by Joe Begley on the Lower Rosses/Gweedore History Discussion Forum Facebook Group on 19th November 2016. [13] It also appears in the book about the line that Joe Begley co-authored with Steve Flanders and E.M. Patterson. 4: p169]This modern photograph shows the station site in May 2023 as viewed from the West. The Goods Shed appears to have been replaced by houses, the western end of the station appears to be in the grounds of a newer property which can just be seen on the right side of the image. Carefully preserved in the grounds of that property is the waiting shelter noted in the three images above. The platform edge has been retained as a dwarf wall in front of the waiting shelter. [My photograph, 3rd May 2023]This photo was shared on the Burtonport Old Railway Walk Facebook Page on 26th November 2011 with the following comment: “‘An Mhuc Dubh’, the Black Pig, at Gweedore Station – very very hard to imagine, when you look at the wild countryside, that big trains like this used to travel back and forth to Derry every day. We will never see their like again.” [21]Looking West through Gweedore Railway Station before the closure of the station and the lifting of the railway tracks.bThe station name is carried by the building on the left. The wooden structure on the right probably houses a ground frame which controlled the points in the vicinity of the station. This photograph was shared by Joe Begley on the Lower Rosses/Gweedore History Discussion Forum Facebook Group on 19th November 2016. [13]Looking West through Gweedore Station in the early 1970s. At that time the platforms remained, if grassed over. The two buildings noted below are present as is the watchtower, This photo was shared as a comment by Pete Leigh on a post on the Londonderry and Lough Swilly Railway Facebook Group in April 2022. [16] This picture shows the building of which a gable end fronted onto the platform on the South side of the railway station. In 2017, Joe Begley and Steve Flanders commented that this building was still present along with the waiting shelter shown above. [4: p169] As can be seen in the image below it has survived at least until 2023! This photograph was shared by Joe Begley on the Lower Rosses/Gweedore History Discussion Forum Facebook Group on 19th November 2016. [13]A slightly wider angle view of the station site from the East. The building on the left in this image is on the left of the older image above. The platform has gone on both sides of what would have been the running lines where the articulated lorry trailer is standing. [My photograph, 3rd May 2023]The East end of Gweedore Railway Station with Errigal in the distance. This photograph was shared by Liam O Siadhail on the Lower Rosses/Gweedore History Discussion Forum Facebook Group on 18th November 2016. [14]Leaving Gweedore Railway Station heading East. This photograph was shared on the Lower Rosses/Gweedore History Discussion Forum Facebook Group by Séimidh Ó Dubhthaigh on 15th October 2015. [15]This photograph shows Locomotive No. 2 at the East end of Gweedore Railway Station. The loco is possibly running round a train or shunting at the station. This picture was shared as a comment about the picture immediately above, also by Séimidh Ó Dubhthaigh in October 2015. [15]This photograph is my attempt to replicate the three monochrome images above in May 2023. The track ed of the old railway East of Gweedore Railway Station is overgrown with gorse bushes. [My photograph, 3rd May 2023]
Beyond Gweedore Railway Station, the line of the old railway has become overgrown. It runs along the North side of the N56 for some distance.
It seems as though the An Chuirt Hotel has expanded and that its site now includes what was once railway land. The Errigal View Pet Zoo also straddles the line of the old railway.
The An Chuirt Hotel and the Errigal View Pet Zoo. The line of the old railway is illustrated by the orange line at either side of this Google Maps image. [Google Maps, 3rd May 2023]
Immediately to the East of the Errigal View Pet Zoo two larger properties straddle the route of the old railway.
It seems that there were two crossings close together at the bottom of the slope to the left of the road. These can be seen on the map extract to the left below, either or both may have been gated but I have not been able to establish whether either were.
It is possible to see the more northerly of the two crossings from the road close to the Crossing Keeper’s Cottage and I have provided a photo below which also shows the route of the old railway in orange.
The location and f one of the crossings adjacent to Crossing Keeper’s Cottage No. 14. [Google Streetview, September 2021]
North of the Cottage the minor road splits with one arm crossing the railway on a stone arch bridge and the other heading towards Cashelnagor Railway Station passing on the Southeast side of Lough Doo.
The stone arch of the bridge can be seen through the trees on the left of the road as one approaches by road from the South. [My photograph, 24th April 2023]The bridge parapets seen from the East. [My photograph, 24th April 2023]The South face of the structure seen from the Southwest corner. [My photograph, 24th April 2023]Looking South over the bridge parapets back towards Lough Trusk. [My photograph, 24th April 2023]Looking North over the bridge parapets. The railway cutting is overgrown. [My photograph, 24th April 2023]The railway continues North on the West side of Lough Doo. The 25″ OSi mapping is still unavailable for this length of the line on-line. This is the 6″ OSi mapping of 1906. When we reach Cashelnagor we will be able once again to view the 25″ mapping. [3]This satellite image covers much the same area as the map extract above. Both the old railway route and the present day road can be seen either side of Lough Doo at the bottom of the image. [Google Maps, 4th May 2023]Looking back Southwest along the old railway towards Lough Doo. [Google Streetview, March 2010] This length of the route is in private hands, despite this it seems as though the Google camera car covered the metalled track South from Cashelnagor twice in 2010.At the end of the metalled length of private road, looking Northeast towards Cashelnagor. [Google Streetview, March 2010]About 200 metres further Northeast. [Google Streetview, March 2010]And again, a further 200 metres Northeast. [Google Streetview, March 2010]Cashelnagor Railway Station comes into sight on the horizon. [Google Streetview, March 2021]Cashelnagor Railway Station features towards the top of this 1906 6″ OSi map extract. [3]Cashelnagor Railway Station as shown on the 25″ OSi mapping. It had reasonably substantial buildings, both passenger and goods, and stood in a remote position high in the moorland if Co. Donegal. [3]The station site as it appears on Google Earth. In 2923, the passenger facilities have been restored and now provide a unique holiday rental property. The outline of the old goods shed is still marked [Google Earth, May 2023]Looking back to the Southwest along the line of the old railway from the road outside Cashelnagor Railway Station. [My photograph, 24th April 2023]Cashelnagor Railway Station as it appeared in 2010. [Google Streetview, March 2010]
The next few photographs show Cashelnagor Railway Station as it appeared in the late 1980s/early 1990s.
The four monochrome photos above are courtesy of Steve Flanders and Dave Bell and are used with the kind permission of Jim McBride acting on behalf of the Donegal Railway Heritage Centre. [2]
Joe Begley very kindly sent this next series of photos by email. They represent the condition of the buildings in 2004.
Dave Bell & Steve Flanders; Donegal’s Railway Heritage Guide No. 2, The Londonderry & Lough Swilly Railway: A Visitor’s Guide to the old railway and all the bits that can still be seen; County Donegal Restoration Society, Donegal Town, Co. Donegal, 198…
Joe Begley, Steve Flanders & E.M. Patterson; The Lough Swilly Railway: Revised Edition; Colourpoint Books, Newtownards, 2017.
Joe Begley very kindly sent me a number of photographs as attachments to an email which were taken during the preparation of the book immediately above.
On Saturday 22nd April 2023, I had the pleasure of dropping into the Railway Heritage Centre in Donegal Town. We had planned a holiday in Co. Donegal in 2020 but we were foiled by the COVID-19 lockdown. This visit was well overdue.
The Donegal Railway Heritage Centre records and celebrates “the operations of the County Donegal Railways Committee which operated two narrow-gauge railways in County Donegal from 1863 until 1959. The County Donegal Railway Restoration Society restored the centre, which opened in 1995 and is housed in the old station house in Donegal Town. Today, it operates as a visitor attraction comprising a museum, information centre and shop. On display are rolling stock, historical artefacts and an audio-visual presentation on the railways’ history.” [1]
Over the period of lockdown quite a lot happened at the Heritage Centre.
The most significant event was the home-coming of No. 5, ‘Drumboe’, the Co. Donegal Railway Joint Committee 2-6-4T Locomotive on 9th October 2021. This locomotive was originally built by Nasmyth, Wilson and Company [2] in 1907 and served on the railways of Co. Donegal until the end of 1959. Now cosmetically restored, ‘Drumboe’ has pride of place at the entrance to the Heritage Centre.
No. 5, ‘Drumboe’ in service at Barnesmore Gap in the late 1950s. [5] [My photograph, 22nd April 2023]‘Drumboe’ underwent an extensive restoration job in Whitehead, Co. Antrim. The locomotive is shown here at the Works prior to being returned to Donegal. [3]‘Drumboe’ on its way home. [4]‘Drumboe‘ settled in its new home. It is undercover to protect it as much as possible from the elements! The text on the display board reads: Built in 1907, Nasmyth Wilson/Manchester. Drumboe’s original name was No. 17 Glenties. She was renamed in 1937 to No. 5, Drumboe. In 1907/8 the CDRIC ordered 5 new modern steam locomotives to deal with the growing traffic as the CDR network expanded. They were called the Class 5 locomotives and numbered 16-20. All of them were 2-6-4Ts: the numbers stand for the wheel arrangement and the T for tank engine. On the evening of 31 December 1959 Drumboe hauled the very last train from Stranorlar to Strabane and back as the CDR finally closed as a railway. [My photograph, 22nd April 2023]
Preparing for Drumboe’s arrival at the Heritage Centre required a significant re-organisation of the centre’s outside exhibits. All are now protected from the worst that the elements can throw at them by a series of different roof structures. Just a few photographs from 222nd April 2023.
The Red Van in its new location: the text on its display board reads: Built in 1887, Metropolitan Carriage & Wagon Company for the Clogher Valley Railway. Red Vans only transported goods. They were for lighter use, up to the capacity of 2 tons. The Clogher Valley Railway (1887-1941) was a 37 Mike long narrow-gauge railway in County Tyrone and County Fermanagh. After the closure of the Clogher Valley Railway in 1942 the County Donegal Railway (CDR) bought all the red vans. These covered vans were converted to run behind the CDR Railcars. Our red van retains its original wooden chassis from 1887 and all original metalwork. [My photograph, 22nd April 2023]The Grey Van(No. 84) in its new display position: the text on its display board reads: Built in 1893, the Oldbury Carriage & Wagon Company. The grey vans were used for heavy freight up to 7 or 8 tons this could be the transport of livestock or general goods. Grey vans were normally only used in steam hauled freight trains. Our grey van 84 was built as a sliding door van.It was withdrawn in 1960 and sold off before being rescued by the NWIRS (North West Irish Railway Society) in the early 1990s. Grey Van 84 was stored in Derry where it was set on fire in the early 2000s. After the closure of the Foyle Valley Railway it was moved to Donegal town. [My photograph, 22nd April 2023]Coach No. 58</strong>: the text on its display board reads: Built in 1928, Coach 58 was built on a second-hand frame 41 feet and 3 inches in length. The CDR bought this coach along with two others in January 1952 from the NCC numbering them 57-59. Formerly Coach 318 became CDR 58. Coach 58 was one of the three most modern on the whole of the Irish narrow gauge lines. It came to the County Donegal Railway on the closure of the NCC (Northern County Committee) lines near Larne in 1950. Though Coach 58 was built on an original chassis from 1879, it provided modern accommodation for Donegal excursions, and later on as a railcar trailer until the railway closed. [My photograph, 22nd April 2023]: the text on its display board reads: Built in 1928, Coach 58 was built on a second-hand frame 41 feet and 3 inches in length. The CDR bought this coach along with two others in January 1952 from the NCC numbering them 57-59. Formerly Coach 318 became CDR 58. Coach 58 was one of the three most modern on the whole of the Irish narrow gauge lines. It came to the County Donegal Railway on the closure of the NCC (Northern County Committee) lines near Larne in 1950. Though Coach 58 was built on an original chassis from 1879, it provided modern accommodation for Donegal excursions, and later on as a railcar trailer until the railway closed. [My photograph, 22nd April 2023]Railcar No.15 passenger unit: the text on the railcar body’s display board reads: Built in 1936, Walker Brothers & the Dundalk Works (GNR). Railcar 15 was the first articulated Railcar. This means that the driver’s cab was separated from the railcar body. The railcar cost £2,275, seated 41 passengers and could transport a weight of 12 tons. The County Donegal Railway pioneered the use of diesel railcars introducing the first one in 1931. The passenger unit of railcar 15 survives here at the museum, restored after a period of dereliction following the railway’s closure in 1959. Railcar 15 was withdrawn in 1960 and was sold at auction in 1961.The body of Railcar 15 was acquired by the CDRRS in 1995 and moved to Donegal Town. [My photograph, 22nd April 2023]
On entering the museum, which occupies the ground floor of the old passenger station building, one has the opportunity to look at an excellent model railway which depicts Donegal Town Railway Station and Inver Station. Inver Station was on the branch from Donegal Town to Killybegs. All six of the pictures immediately below were taken by me on 22nd April 2023.
As well as this working model a number of other models of railway vehicles are on static display. Just a couple of examples here. The first is a Walker Brothers Railbus, the second is Phoenix a unique diesel shunter. Both of the pictures below were taken by me on 22nd April 2023.
Phoenix was built by Atkinson-Walker Wagons Ltd of Preston in September 1928 as one of their Class A3 engines. After a short trial on the Clogher Valley Railway, it was found to be totally unsuitable. No buyer to be found and the engine lay idle at Aughnacloy coach and wagon shed until 1932. It was bought by Henry Forbes for the County Donegal Railway and converted at the Great Northern Railway’s Dundalk workshop to diesel power. It was fittingly named the “Phoenix” and worked on the County Donegal Railway till its closure in 1959. It can now be seen in the Ulster Folk & Transport Museum.
The major part of the indoor space at the Heritage Centre is dedicated to a series of displays centring on the different stations on the network. Each includes a track plan and a series of photographs of the location. Carefully placed around the Centre are artifacts and railwayana from the Co. Donegal Railways.
Of particular interest to me were the track plans of the various stations on the network. Some of these are shown below. Much of the text attached to each station plan comes from the Heritage Centre’s displays …
Donegal Town Railway Station was opened in 1889 and closed in 1959 it was about 19 miles from Stranorlar. The West Donegal Railway was opened between Stranorlar and Lough Eske (Druminin) on the 25th April, 1882. From 1882 to 1889, the journey between Stranorlar and Lough Eske took some 40 minutes and then passengers transferred to horse-drawn road cars for the last four miles down into Donegal. The fare was 6 pence. The final section to Donegal town was inspected on the 9th of September 1889 and opened on the 16th of September 1889. [My photograph, 22nd April 2023]Killybegs Railway Station opened in 1893 and closed in 1959. The journey from Killybegs to Donegal was 19 miles. The line out to Killybegs from Donegal Town was the result of government intervention some forty years after the famine. For the promotion of the local food industries (agriculture, fishing and food processing) a good transport infrastructure was needed. Railway travellers were reminded of their arrival in Killybegs by the intense smell of the fishmeal factory when entering the town. The Killybegs line served the local communities it passed with regular passenger and freight. In summer it was often the destination for excursions from Derry and Strabane. There are many fond memories of steam-hauled specials cautiously winding their way along the Atlantic coast. There is very little evidence of the station in Killybegs in the 21st century. Killybegs is now a thriving port which has seen major redevelopment. [My photograph, 22nd April 2023]Stranorlar Railway Station was opened in 1863 and was due to close in 1959, however, it remained open to goods until 6th February 1960 because road improvements necessary for lorries had not been completed by 31st December 1959. It was 13 miles from Strabane. Stranorlar Station was first constructed as a branch from the GNR station at Strabane. With the construction and operation of the West Donegal Railway to Donegal Town the station became an important junction. Stranorlar was at the heart of the Co. Donegal Railway network. The extensive layout of Stranorlar reflected its key role in all of the operations of the railway and it was the headquarters for all administration and the running of the system. Skilled jobs specific to the railway were signalmen, drivers, guards and shunters. Stranorlar Station and the associated offices, depots and fitters’ shops was a major employer. Practical skills included engineering, joinery, coachbuilding, foundry work, smithies and clerical workers. [My photograph, 22nd April 2023]Glenties Railway Station opened in 1895 and closed in 1952. It closed to passengers in 1947 and all traffic 1952. Glenties is 24 miles from Stranorlar. I have covered the branch in two previous articles.
The line never paid its way and services were lightly used at all times though there were occasional heavy workings associated with market days. Hugging the valley floor and in company with the river and road it continued north-westwards from Stranorlar. Proceeding on through the now bleak and windswept moorland the line continued alongside Lough Finn down into Glenties Station.
I have covered the branch to Glenties in two previous articles.
Letterkenny Railway Station was opened in 1909 and closed in 1959. The Strabane and Letterkenny Railway began life to promote the prosperous farmland north-west of Strabane. Letterkenny to was 19 miles. It was intended to facilitate trade and agriculture in the area of south-east Donegal north of the Finn Valley. Letterkenny was also served by the Lough Swilly Railway to Derry and Burtonport. [My photograph, 22nd April 2023]
I have covered the line between Strabane and Letterkenny in a series of three previous articles:
Strabane Railway Station opened in 1863 and was due to close in 1959, however, it remained open to goods until 6th February 1960 because road improvements necessary for lorries had not been completed by 31st December 1959. Strabane was approximately 13 miles from Stranorlar. Strabane to Stranorlar was the first stretch of line in Co. Donegal. The line was built by Finn Valley Railway as 5’3″ gauge. It was re-gauged to the narrow (3′) gauge in the summer of 1894 over only one weekend to match with the rest of the Donegal network! The partition of Ireland in 1922 led to serious delays and other complications for the Railway. All of its extensive freight traffic and all passengers had to clear through customs at Lifford (Republic of Ireland) and Strabane (Northern Ireland). [My photograph, 22nd April 2023]Derry Railway Station was opened in 1900 and closed.in 1954. It was just under 15 miles from Strabane. The County Donegal Railway’s own line to Derry improved the handling of the substantial through goods traffic of imported coal from the Foyle quayside to the many customers throughout the system. This station was adjacent to the twin-deck Craigavon Bridge which, at its lower level, gave rail access to Derry’s three other railway stations and the Harbour Commissioners’ own lines. The Derry line was always steam worked for both passenger and freight services. This was to gain maximum benefit from cheaper coal in Northern Ireland and to save depleting stocks at the company’s depot at Strabane. [My photograph, 22nd April 2023]
The featured image shows No. 14 on the turntable at Burtonport. The photograph was taken in April 1940 and was shared by Joe Begley on the Burtonport Heritage Facebook Group on 21st October 2020. [15]
In April 2023 we stayed close to Burtonport, adjacent to Loch Meela, in Co. Donegal. On the first full day of our stay, we walked the Burtonport Old Railway Walk. [1] A 6km length of the Burtonport extension of the Londonderry & Lough Swilly Railway has been made into an accessible path. The weather was great and the walk very enjoyable. We were impressed by the investment in the walk made by the local community and Donegal County Council.
After the closure of the line it seems that it remained undisturbed for many years. Apparently, in 2009, however, “there was a heavy snowfall, and some of the old railway line was cleared to access water mains that needed repairing. The remaining section was later cleared and gradually developed as a walkway with the support of the local community. A massive effort has gone into creating this beautiful and peaceful walk.” [1]
This first length of the old railway extends from Burtonport as far as Kincasslagh Road Station and, apart from a short length close to the latter, can be walked with relative ease.
The route of the old railway between Burtonport and Kincasslagh Road Station as shown on historic mapping provided by the Ordnance Survey of Ireland dating from the early 1940s. The latter station was located to the East of Lough Waskel, to the top right of this map extract. [6]The map displayed on the information board in Burtonport shows the length of the old railway covered in this first article. [My photograph, 23rd April 2023]
The whole of the Burtonport Extension features in a guide written in the late 1980s by Dave Bell & Steve Flanders. [2] In that guide, they provide a series of relatively low resolution monochrome photographs of the railway in operation and as they found it in the 1980s. This article is the first in a series looking again at the line and what can be found along its route.
At Burtonport, Bell and Flanders provide a station plan and a number of photographs from before closure and at the time of their survey.
Bell and Flanders describe arriving at the station from the South in the 1980s by car, the old trackbed now being a narrow road: “You drive through a small cutting before entering the railway’s terminus at Burtonport. … Just before the station itself you drive through a fish processing plant then, suddenly, on the left, you can see the engine shed, recognisable by its characteristic round-top windows and door.” [2: p83]
They go on to describe the station as they found it on their visit: “In the middle distance is the terminus station itself with a length of platform still in existence on the right-hand side of the road. The station house and offices still stand but are now derelict. They and the [engine] shed are now the only railway structures left at Burtonport. … Originally a siding ran along the quayside so that fish vans could be loaded directly from the fishing boats. Burtonport is still an important centre for Ireland’s fishing industry but today refrigerated articulated lorries haul the catches to their markets. It’s also from here that the ferry service runs to Aran Island, known as Arainn Mhór, Big Aran.” [2: p84]
Kincasslagh Railway Station and Crossing Keeper’s Cottage No. 21 are now in private hands. This article finishes with some older pictures of the site and some taken in 2023.
Kincasslagh Railway Station looking Southwest along the line towards Burtonport The Goods Shed is to the left and the passenger facilities are towards the end of the platform on the right. The station was built in 1913 and closed with this length of the line in 1940. This image was shared on the Burtonport Heritage Facebook Group by Patrick Boner on 15th February 2013. [12]The remains of the Goods Shed in the 21st century, seen from the public road to the South. [My photograph, 23rd April 2023]A 1959 view through the site of Kincasslagh Railway Station from Southwest of the Goods Shed seen in the right foreground. The Crossing Keeper’s Cottage is partially masked by the Goods Shed and the passenger facilities are on the left. This photo was taken in May 1959 by Michael Davis and was shared by Patrick Boner on the Burtonport Heritage Facebook Group on 1st September 2018. [13]A view looking Northeast through the site of the station from the location of the goods shed. The passenger building is on the left and crossing keeper’s cottage on the right. The photograph was taken in 1965 by Michael Davis and was shared by Patrick Boner on the Burtonport Heritage Facebook Group on 3rd September 2018. [14]This satellite image is at a slightly larger scale than similar images above it shows the location of what was Kincasslagh Railway Station. [Google Maps, 28th April 2023]The passenger station building and platform as they appear in the 21st century. The site is very well maintained. [My photograph, 23rd April 2023]Crossing Keeper’s Cottage No.21. [My photograph, 23rd April 2023]The view from what used to be the Level Crossing, looking Southwest into the site of the station. [My photograph, 23rd April 2023]Turning through 180°, this is the view Northeast from the old level crossing location. The modern road is ahead beyond the gorse bushes.The view Southwest from the modern road. The Crossing Keeper’s Cottage is just visible above the gorse. The garage is on the line of the old railway. [My photograph, 23rd April 2023]This is a memorial adjacent to the line of the old railway to the first action in the War of Independence. [My photograph, 23rd April 2023]
The next article in this short series can be found on this link:
Dave Bell & Steve Flanders; Donegal’s Raulway Heritage Guide No. 2, The Londonderry & Lough Swilly Railway: A Visitor’s Guideto the old railway and all the bits that can still be seen; County Donegal Restoration Society, Donegal Town, Co. Donegal, 198…
Jim McBride; The Lough Swilly Remembered; County Donegal Railway Restoration CLG, 2021. Illustrations from this book are reproduced here with the kind permission of Jim McBride.
Joe Begley, Steve Flanders & E.M. Patterson; The Lough Swilly Railway: Revised Edition; Colourpoint Books, Newtownards, 2017.
Belturbet Railway Station viewed from the West. The main passenger facilities are on the left behind an unidentified C&L locomotive with its mixed goods/passenger train. The 3ft gauge C&L entered Belturbet Railway Station from the West and it’s trains used the North face of the platform. Great Northern Railway (GNR) trains entered the station from the East and were able to make use of the protection afforded by the station roof as they used the South face of the station platform. The GNR water tower, shown here on the right of the image was relocated during the renovation of the site to occupy the location of the C&L Engine Shed which would, at the time of this picture been some distance behind the photographer and over to the right. [5]Taken from further Northwest this photograph, which was shared by the Heritage Railway Magazine on its Facebook page on 8th August 2021, shows the transshipment platform and shed at Belturbet with the broad gauge on the right of the platform and the 3ft gauge C&L to the left. On the right are the C&L Engine Shed and Water Tower and in the distance to the left, the GNR Engine Shed and at the extreme left of the image the passenger station’s roof. [6]A view of Belturbet Station from the East, only GNR broad gauge is visible in this image. [7]
In April 2023 we were able to drop in at Belturbet Railway Station on our way to Co. Donegal. The Station Museum was open Fridays, Saturdays and Sundays from 12noon to 5pm throughout the Summer season. [1][2][3] A small group of enthusiast’s have turned a derelict site into a good museum and rescued the majority of rail related buildings on the site. A patient wife allowed me a pleasant hour or so looking round the Museum.
Belturbet was the terminus for two different railway lines: the Irish standard gauge (5ft 3in) line from Ballyhaise on the Cavan Branch of the Great Northern Railway (GNR), and the Cavan and Leitrim Railway (C&L) – a 3ft gauge line which served Dromod to the Southwest and Arigna to the West with its three 3ft gauge lines meeting at Ballinamore in Co. Leitrim). At Dromod the C&L connected to the Midland Great Western Railway mainline from Dublin to Sligo.
Closure of the Station occurred in 1959. The site remained derelict for 36 years until, in 1995, Belturbet Community Development Association commenced restoration work. That work was completed in 1999. Further development of the site is planned which will see original track being relaid and with the intention of seeing trains running once again in Belturbet.
Belturbet Railway Station as shown in publicity material for the Station Museum. A North point has been added to the plan so as to avoid confusion if comparing the plan with maps of the location. [4]
The plan of the Station Site is numbered to allow easy identification of different buildings. The 3ft gauge line enters the schematic plans from the West (the right side of the image), the 5ft 3in gauge line enters from the East (the left side of the image). The buildings are:
The Main Station Building and Museum – the dressed stone buildings were the main reception area, office and waiting rooms for the Great Northern Railway (GNR) at Belturbet. What is now a single reception room was originally two separate rooms, the first being the main concourse for access to the platforms. To the East were two waiting rooms, one for the general public and one (with toilet) for ladies holding first class tickets. To the West of the main reception area (behind the museum reception desk was the ticket office leading to the Station Master’s office, which had a connecting door to his house.
The Station Master’s House – has been restored. It would have originally been a family home but can now be booked for self-catering holidays.
Railway Lines and Platform – Belturbet railway station, which opened in 1885, was built and operated by the Great Northern Railway Company of Ireland (GNR). It was the last station of the GNR broad-gauge railway line – 5ft. 3 in. (1.6 m.). In 1887 the Cavan & Leitrim (C&L) narrow-gauge line – 3 ft. (0.9 m.) was built, Belturbet was the first station on this line. On the newly extended platform, passengers transferred from one line to the other. GNR and C&L trains stopped on opposite sides of the platform. There was a roof over the platform immediately adjacent to the station buildings.
GNR Goods Shed/Store – Goods Wagons were positioned alongside the small platform in front of the Goods Store. Wagon floors were level with the platform which made it easy for the porters with their barrows to move goods on and off the wagons. A crane was used to load and unload heavy items.
Cattle Dock and Ramp – The Cattle Dock was virtually unchanged from its opening in 1885 until its closure on March 31st, 1959. The dock was used to load livestock onto the wagons. This was particularly useful on the first Thursday of every month, when Belturbet Fair took place on the Fair Green.
GNR Signal Box – this building was no longer on site when the preservation work commenced.
GNR Turntable – The circle of stones indicate the position of the turntable. It was so well balanced that one man could single- handedly turn around a 50 ton engine.
GNR Engine Shed – The GNR Engine Shed, refurbished to original specifications, is where an engine was housed at night. The large vent in the roof allowed smoke and steam to escape when the engine was in steam.
Transshipment Shed – For many years GNR coal trains were filled from C&L coal wagons by local men using only shovels, barrows and planks of timber. The demand for Arigna coal ensured that Belturbet Station remained open five or six years longer than many similar stations.
C&L Engine Shed and Water Tower – the C&L shed and water tower were demolished before renovation of the station site commenced.
GNR Water Tower – In 1997 the GNR water tower was dismantled and reassembled on the site of the original C&L Engine Shed and Water Tower, which had been demolished.
C&L Turntable – this had been removed before renovation commenced.
C&L Goods Shed/Store – this was the only building on the station site to have survived the period of dereliction with its original slate roof and wooden doors.
There are a significant number of historic photographs on display cover both the broad gauge line and the narrow gauge line.
The following photos were taken by me on 21st April 2023.
The viaduct which carried the C&L across the River Erne on its approach to Belturbet Railway Station. [My photograph, 21st April 2023]Crossing the viaduct on the C&L on the way to Belturbet Railway Station. [My photograph, 21st April 2023]Continuing our approach to Belturbet Railway Station. [My photograph, 21st April 2023]The historic 25″ OSi mapping shows the C&L approach to Belturbet Railway Station across a level crossing which had an associated Crossing Keeper’s Cottage. [8]Crossing the road on the C&L’s final approach to the station. The Crossing Keeper’s Cottage still stands in very good condition in the 21st century. [My photograph, 21st April 2023]The Station site at Belturbet close to the turn of the 20th century as recorded on 25″ OSi mapping. [8]The Transshipment Shed viewed from beyond the West end of its platform. It was primarily used for the transfer of Arigna coal from the C&L to the GNR. [My photograph, 21st April 2023]Just a little closer in. The GNR engine shed is visible just to the left of the roof of the Transshipment Shed. C&L trains from Arigna drew in to the near face of the platform. GNR trains approached the rear of the platform from beyond the Shed. On the right, the water tower base can just be made out. [My photograph, 21st April 2023]The GNR water tower base was dismantled and reassembled (in 1997) on the site of the original C&L Engine Shed and Water Tower, which had been demolished. [My photograph, 21st April 2023]The GNR Engine Shed as seen from the Southwest. The stones which mark the location of the GNR turntable can just be seen beyond. [My photograph, 21st April 2021]The GNR Engine Shed viewed from the East. [My photograph, 21st April 2023]The location of the GNR turntable. The building beyond the turntable to the left is the roof which covered the GNR passenger platform. The buildings directly behind the turntable were built on the site a long time after closure. The house a men’s charity. The GNR water tower was relocated to allow this building to be built. [My photograph, 21st April 2023]The Transshipment Shed, seen from the East with broad gauge track in evidence to the left of the platform. [My photograph, 21st April 2023]The trainshed roof over the GNR platform is on the left of this image with the passenger facilities beyond. The two storey building is the Station Master’s House. [My photograph, 21at April 2023]The GNR Goods Shed to the East of the main station buildings. [My photograph, 21st April 2023]Two views from the station approach roads, both show the main facade of the station. [My photographs, 21st April 2023]
Teelin Pier, Co. Donegal. … [My photograph, 26th April 2023]
What happened to the proposed extension to the Killybegs branch of the Co. Donegal Railways to Teelin Pier?
The short answer is that it did not really get beyond the imaginations of a few folk in the Glean Cholm Cille (Glencolumbkille) and Carrick area of Co. Donegal.
There was a government scheme which provided support to fishermen in the area, first in the Congested Districts Board establishing Teelin as the principal fish-curing station and then in supplying fisherman with large fishing smacks (and associated gear). [1]
Local parties could not countenance this investment going to waste for the want of a short railway extension from Killybegs. Revd C. Cunningham of Glencolumbkille expressed the feeling of a meeting of the Glencolumbkille and Kilcar Industrial Committee, held at Carrick, Co Donegal when he said that “with such efforts being made to make Teelin a fishing centre of unequalled importance with a fleet of first class fishing vessels, it was sad to reflect that the rich harvest which would naturally be expected from the broad Atlantic shall be in a great measure fruitless through the want of this short extension.” [1].
He went on to argue at that meeting that should the extension from Killybegs to Teelin be made “not only would existing industries be re-invigorated but others would be developed, and thus the people instead of having, in case of failure of crop, to appeal for relief to the Government, would become self-supporting, happy and independent.” [1]
It seems that the authorities turned a deaf ear to the appeals of local people. The reason given in histories of the line, for the failure to extend the line beyond Killybegs is that the topography would have required serious civil engineering features making it too expensive to construct. [1]
However, some maps of the Co. Donegal Railways show a dotted line between Killybegs and Teelin Pier, following the coastline. A typical example is shown below. …
The Railways of County Donegal. This map of the lines in Co. Donegal includes those which were considered as possible extensions and shows them as dotted lines. The line between Killybegs and Teelin Pier is shown bottom-left of this image. [2]
But … What if? … What if it had been built soon after the completion of the line to Killybegs? I am given some encouragement in following this flight-of-fancy by the publication in 2022 of the Donegal Railway Heritage Trail by the Donegal Railway Heritage Centre which seems to show a line from Killybegs to Teelin Pier, not as a possible or proposed line but as a line which seemingly got built. [4]
Is my flight-of-fancy possible?
I guess that I want to be able to imagine a parallel universe in which every proposed railway line not only was built, but remains in operation today.
Is there anything else that might encourage my flight-of-fancy? … I think there might be! Here are a few things to contemplate ….
1. Have another look at the photograph at the top of this article which shows Teelin Pier as it was in April 2023 when we visited. What might the substantial stone structure be which sits just in from the right edge of the image, if not the base of a long disused water tower? Might it not be good to imagine one of the Co. Donegal locomotives idling alongside the water tank while it’s crew refill it’s tanks for the long run through to Killybegs and on to Donegal?
2. And, just peeping into the same image is another building. The photograph below shows that building close to the “water tower” base. What might it be if not an engine shed?
Teelin Pier buildings in April 2023. [My photograph, 26th April 2023]The same building before it was re-roofed recently. [3]
Yep, it does look very much like a typical small engine shed. Might the plastic panels in the corrugated iron roof have marked locations where steam and smoke were allowed to vent as an engine was being prepared, early in the morning, for its next duty on the line?
3. Close to the road to Killybegs (R263), to the East of Carrick there is an old stone bridge which clearly carried an earlier incarnation of the R263 but could so easily have carried a 3ft-gauge railway as well! The two images below are taken from Google Streetview …
Please understand, this is just a ‘what-might-have-been’ and understand too that even if it had been true, these little indications of a possible old railway would probably be all that remained in the 21st century.
What I do need to do to complete this short fairytale is to look again at the three possible indications of the presence of an old railway and clarify their actual use, and then to allow Dr. E.M. Paterson a final word …
1. The stone base for a water tank. That might just be what it was, although with no railway connotations. It is more likely that it was an ice house, needed to allow fish catches to be preserved for onward transport. [3]
2. The engine shed. Sadly, the origins of this building are well documented and have nothing to do with any old railway. It is a detached gable-fronted single-bay single-storey former coastguard boathouse, built in 1871, originally associated with Teelin Coastguard Station. Now in use as a private boathouse. When surveyed it was described as having a “pitched corrugated metal roof. Roughcast rendered finish over rubble stone construction with rock-faced ashlar sandstone block-and-start quoins to the corners of the front elevation (north) with dressed margins. Single segmental-headed window opening to the centre of each side elevation (east and west) having rock-faced ashlar sandstone block-and-start surrounds with dressed margins, cut stone sills; openings now blocked. Segmental-headed carriage-arch to the front elevation (north) having rock-faced ashlar sandstone block-and-start surrounds with dressed margins, and with replacement timber double-doors.” [3]
Obvious, really, when you see the same building from a different angle ….
The view, from Teelin Pier, of the two structures discussed above. The use of the building on the right as a boathouse is emphasised by the ramp which would have permitted the launch of a coastguard vessel and which makes the building ideal for its private use today.
3. The stone bridge did indeed carry a previous incarnation of the R263 but never saw use as a railway structure!
Dr E.M.Paterson tells us that Barton’s 1896 map of the Co. Donegal railway network, “drawn on a scale of 4 miles to 1 inch and measuring 30 in by 22 in, shows four probable Government Railways, none of which was built as shown. … [The fourth of these] was a westerly extension of the Killybegs branch … out to the coastal villages of Kilcar and Teelin, where there was a ‘government’ pier. … Had the Killybegs-Teelin extension been constructed, it would have been a spectacular one, reaching into some of Donegal’s wildest scenery and ending near the mighty sea cliffs of Slieve League, which rise 2,000 ft above the Atlantic. It would justifiably have rivalled the Valentia branch and the Mallaig extension of the West Highland Railway.” [5: p31-32]
The featured image above was colourised by Simon Alun Hark. It makes the engine house and the mechanisms associated with the inclined plane so real. [14]
This schematic representation of the Shropshire Tub Boat Canals is helpful in clarifying the extent of the network. It shows the locations of all the inclined planes on the system. These are marked with a red arrowhead which in each case highlights the direction of the lift. The Trench Branch and Incline were in important link in the journey between the Shropshire Union Canal and the River Severn at Coalport, linking the Newport Canal to the Shropshire Canal. [10]
P. Whitehead [11] provides approximate statistics for the inclined planes on the Shropshire Canal as follows:
Lilleshall Inclined Plane: 123 yds long, 43 ft. This replaced an earlier vertical lift in a shaft and tunnel system. [11]
I first came across an example of these inclined planes before moving to East Shropshire. We drive past the Hay Incline when travelling by a circuitous route from Manchester to Ludlow. At the time I wrote a couple of short articles for my blog:
This article focuses on the Trench Inclined Plane which was built by the Shrewsbury Canal Company in 1792 after it took over the Wombridge Canal. The Wombridge Canal was a tub-boat canal in Shropshire, England, built to carry coal and iron ore from mines in the area to the furnaces where the iron was extracted. It opened in 1788. Trench Inclined Plane remained in operation until 1921, becoming the last operational canal inclined plane in the country. The canal had been little used since 1919, and closed with the closure of the plane. [15] [16]
The Inclined Plane consisted of twin railway tracks, each with a cradle in which a single tub-boat was carried. An engine and engine house were built at the top of the incline to provide power to the Incline. It was supplied by the Coalbrookdale Company and was replaced in 1842 by a new engine that lasted for 79 years, until the final demise of the incline on 31 August 1921. The remaining structural elements of the incline were remove in 1968 as part of the Telford New Town developments. [15][17]
The engine’s main function was to lift the tub boats I cradles out of the canal at the top of the incline over the end wall of the canal. The rails of the inclined plane ran up out of the canal and then down the main length of the Inclined Plane. Generally, the working traffic was in the downward direction of the incline, and was counterbalanced by empty tub-boats returning up to the top level. [17] This meant that little power was needed for the operation of the main length of the incline.
Incidentally, “a prominent feature near the top of the incline was the Wombridge Pumping Engine house. This was a Cornish type, with a tall chimney, and was erected in 1858, to pump water from the mines. The main cylinder was 60 inches (150 cm) in diameter, with a 10-foot (3.0 m) stroke, and it lifted water from a depth of around 600 feet (180 m). The engine developed 250 hp (190 kW) and normally ran slowly, raising 3,338 imperial gallons (15.17 m3) of water per minute, in three strokes. When running at maximum speed, it could achieve eleven strokes per minute.” [18]
These two images were shared by Brian Edwards on the Shropshire Past and Present Facebook Group in late August 2022. [20]
Maps and Illustrations of the Inclined Plane
The Trench Branch Canal left the Shrewsbury and Newport Canal at Wappenshall Junction.
An extract from the 1901 6″ Ordnance Survey which shows the Shrewsbury and Newport Canal (Shropshire Union Canal) running East-West, albeit in something of a ‘V’-shape with the Trench Branch running to the Southeast, off the bottom edge of the extract. [21]The same location on the ESRI satellite imagery provided by the National Library of Scotland. [21]Wappenshall Junction seen from the Northwest.[Google Earth, 2022]A much earlier view of Wappenshall Junction. The Trench Branch leaves this scene through the bridge on the far-right of the image which leads to Wappenshall Lock. [22]
The Trench Branch ran across open fields until it reached the industrial areas near Trench. The first length passed under Wappenshall Bridge, through Wappenshall and Britton Lock, Kinley Bridge, Wheat Leasows Bridge and Lock, Shucks and Peaty Locks, Hadleypark Bridge and Lock, Turnip Lock and Wittingham Bridge before reaching Baker’s Lock/Basin and Castle Iron Works, Hadley.
Richard Foxcroft provides a plan of the Shropshire Canals on ‘Exploring Telford’ a website which focusses on the industrial history of the area which is now Telford, particularly the canals and railways. An extract is shown below. [23]
The line of the northern end of Trench Branch of the Shropshire Canal as shown on ‘Exploring Telford’ [23]
I followed this length or the Trench Branch on the morning of 31st August 2022. Much of the route is on private land and where this is the case, the old canal has been reintegrated into its surroundings.
Access to the canal basin at Wappenshall Junction is at present restrict to site personnel only as the basin and associated structures are under going restoration.
Wappenhall Junction warehouses are undergoing restoration as is the canal basin. [My photograph, 31st August 2022] Grant funding has been provided and work is being undertaken predominantly by volunteers from the Shrewsbury & Newport Canals Trust [24]These new build properties front onto the line of the canal which is illustrated using a red line. The wall in the foreground is the wingwall of the arch-bridge which used to carry the village road over the canal. [My photograph, 31st August 2022]The village lane used to be carried on this structure. Closure of the branch-canal provided the opportunity to realign the road both horizontally and vertically. [My photograph, 31st August 2022]
South of Wappenshall was the Wappenshall Lock. Access to the lock was not possible. No access was possible to Britton Lock nor to Kinley Bridge. The location of Wheat Leasowes Bridge and Lock were easily found as they lie on the road between Preston upon the Weald Moors and Leegomery Round-about on the A442, ‘Queensway’.
The three images above were all taken on 31st August 2022. In sequence, they show: the view North along the line of the old canal which is marked by the field-ditch which remains alongside the hedge in this image; the view South across the road; and finally a view which shows a length of the old canal which is now in the garden of the property in the second image and which still retains water. [My photographs, 31st August 2022]
The length of canal visible in the garden of the property above was the length between the two locks, Wheat Leasowes Bridge Lock and Shucks Lock. The property concerned appears to be an extended lock-keeper’s cottage.
The 6″ OS Map of 1881, published in 1887 shows the bridge and the two locks. The road can clearly be seen to deviate to miss the lock on its alignment and it is unsurprising that once the canal became redundant, the road was realigned. [25]21st century satellite image covering roughly the same area as the map extract above. The lock-keeper’s cottage appears to have been extended. The open area of the canal falls within the curtilage of that property. [26]An extract from the 6″ 1901 OS Map published in 1902 which shows Peaty Lock and Hadleypark Bridge and Lock. [27]A 21st century satellite image of the same area as above, with the locations of the key features marked. [27]The alignment of the old canal at the point it crosses the modern A442, Queensway. Pety Lock was located just to the North of the new road. [My photograph, 31st August 2022]The overgrown route of the old canal to the South of the A442. It retains very little water but the channel is visible here for some distance. [My photograph, 31st August 2022]A picture of Hadleypark Lock taken from the location of the old bridge over the Canal at this point. [My photograph, 31st August 2022]Looking back to the North at the guillotine lock gate arrangement used on the Shropshire Canal.This is the guillotine lock gate mechanism at Turnip Lock. [May photograph, 31st August 2022]
These three images also come from Turnip Lock. The first shows the recess in the locak wall down which the gate slides. The remaining two images show the lock walls, first looking South towards Trench and then looking North towards Wappenshall. [My photographs, 31st August 2022]
Turnip Lock and then Whittingham Bridge appear on the 6″ OS Map of 1901 before the canal them bends towards the East aand passes Baker’s Lock and Basin and the site of Castle Iron Works. [28]The same area on the ESRI satellite imagery. The ochre line shows the approximate limit of public access. The canal runs through the Hadley Castle Business Park. Moveero (part of GKN) occupies the large buildings which sit over the site of the Castle Iron Works. [28][29] The Shropshire Star announced in April 2022, that GKN would be investing a further £20million in the site. [30]The 6″ OS Map shows the canal turning first to the East and then back towards the Southeast as it approached Trench Pool. [31]The line of the canal is highlighted through the industrial areas. Remnants can be seen in the top-left of this image and the alignment is, apart for where under modern structures or roads, still highlighted by a ribbon of deciduous trees. The A442 appears again in the form of the gyratory towards the right-side of this extract from the satellite imagery. Trench Pool appears on the extreme right [31]Trench Inclined Plane as it appears on the 1874 6″ OS Map. Trench Pool was used to store water for the canal system. The Shropshire Union Canal connects to the incline from the West via the Shrewsbury & Newport Canal. At the top of the incline there was a short stub branch to Wombridge Ironworks and a longer ‘Trench Branch’ or ‘Wombridge Canal’ which connected to the Donnington Wood and Coalport branches of the Shropshire Canal. [9]Trench Inclined Plane in 1901 as shown on the 25″ OS Map. Note the location of the bridge over the canal just to the South of Trench Pool, West of the Shropshire Arms. A photograph of that bridge appears below. [8]This extract from satellite imagery 9ESRI) shows the approximate location of the Inclined Plane and it engine house. [32]The bridge over the old canal at the bottom of Trench Inclined Plane. It linked the site of the Shropshire Ironworks with Trench Pool. This colourised photograph was shared by Simon Alan Hark on the Telford Memories Facebook Group on 9th August 2021. [12]
The following colourised photographs give an excellent idea of what the Inclined Plane was like and how it worked. They have been colourised by Simon Alun Hark.
John R. Day wrote two volumes in the early 1960s about the railways of Africa. The first was about the southern area of the continent and entitled, unsurprisingly, ‘Railways of Southern Africa’. [1] The second volume was entitled ‘Railways of Northern Africa’ and dealt with the remainder of the continent. [2]
An on-line acquaintance very kindly sent me a copy of the chapter from that second volume which covers British East Africa. Today, the chapter title would give cause for some concern, but colonial attitudes still held sway in the 1960s. [2: p24-41]
Reading that chapter piqued my interest and I managed to pick up a secondhand copy of the book at a reasonable cost.
I have written a series of articles about the Uganda Railway and its successors in Uganda and Kenya. Those articles can be found here on my blog (rogerfarnworth.com). [3] These articles begin with a history of the mainline and then follow the route of the railway West from Mombasa. Later articles pickup on one of the volumes about the history of the railways in East Africa which were written by M.F. Hill. [4]
Day begins his chapter on British East Africa by quoting from Sir Winston Churchill’s My African Journey, which highlights what was very true in the very early years of the 20th century, “that the Uganda Railway did not pass through Uganda. It was a railway to it, not of it. ‘It stops short of the land from which it takes its name, and falls exhausted by its exertions and vicissitudes, content feverishly to lap the waters of the Victoria Nyanza.'” [4: p24][5]
The Uganda Railway: this map of the route of the line is included in Winston Churchill’s My African Journey. [5]
Day also remarks on the level of vitriol which was directed at the Uganda Railway during its construction, quoting The Railway Gazette of 1911, “It is doubtful whether any project has been so roundly abused and so soon proved successful as the Uganda Railway. Politicians of all shades of opinion had their fling at it in turn, and it was condemned as a permanent money-sink. Yet it went on being built, slowly but surely, and in the second year of full public operation earned a profit over its working expenses.” [6] Day goes on to state boldly that it was this railway from Mombasa to Lake Victoria which created modern Kenya!
In Day’s book a short note follows about the thinking which brought the Railway into being: “The Imperial British East Africa Company, formed in 1888 from the British East Africa Association, played an important part: one of its main objects was to suppress the slave trade. In 1890, the Company arranged for 60 miles of narrow-gauge railway to be built. From England came 65 miles of 2 ft. gauge track and from India came labourers: only seven miles were built, but it was named the “Central Africa Railway”. Later it was pulled up and the material re-used for a tram-line in Mombasa.” [2: p24][7]
“Apart from the desire for good communications with Uganda, which, besides being a desirable territory in itself, controlled the head-waters of the Nile and thus much of the economy of Egypt and the Sudan, it was thought that the railway would end the slave trade. The argument was that the slaves travelled with the caravans, but once the railway was built it would so speed up and cheapen travel that the caravans would cease.” [2: p24]
Robert Clemm argues that “the territory of what would become the British colony of Kenya was little regarded by Europeans during the mid-to-late 19th century. At that time, it served as little more than a barrier to cross to places more renowned and important. For explorers who wished to verify if the reports of a snow-cappedmountain in Africa were true, it was simply a land to traverse on the way to Mount Kilimanjaro. For British officials in the aftermath of the Berlin Conference of 1884–1885, it was a land necessary to possess not for its own intrinsic worth, but only as a means to stabilize “effective occupation” and to preserve British dominance. For officers of the Imperial British East Africa Company, it was an obstacle to surmount to gain access to the much richer lands of Uganda. The construction of the Uganda Railway, however, radically changed the perception, and, by extension, the nature and history of Kenya. … The Uganda Railway was a piece of technology crafted to solve the joint political and economic concerns of the British Government in eastern Africa. In linking the coast firmly to Uganda it would solidify British control over a region contested by German colonial enthusiasts, and would ensure the prosperity of the regionthrough the expected transport of cash crops to the coast. … As much as the Uganda Railway seems to present yet another example ofthe importance of technology generally, and the railway specifically, to the process of imperialism, it goes well beyond that. The “Lunatic Express,” as the Uganda Railway was nicknamed, illustrates the power of technology to create and transform well in excess of our own intentions. While its creators simply wished to solve the technical question of linking important regions via a stable transportation network, the railway fundamentally transformed the land over which it crossed. The transformation went beyond that of the physical land-scape, which would be leveled and etched with rails and ties, and extended to the very understanding of what Kenya was.” [8: p133f]
Mervyn Hill’s first volume, [4] demonstrates the way in which the Uganda Railway fulfilled the role that Clemm describes.
Day continues, in his chapter on British East Africa, to outline the survey work of a team of three Royal Engineers led by Captain J.R.L. Macdonald which sought the best route to Lake Victoria. Day comments that Macdonald “was concerned only to find the quickest and cheapest way from the coast to Lake Victoria: no one at that time was bothered about the highlands of Kenya.” [2: p25]
Day notes that the election of Lord Salisbury’s Conservative government in Britain in 1895 finally resulted in a decision to build the railway. He describes the decision taken in 1896 to build the line to metre-gauge as ‘unfortunate‘. It was a decision “based on the assumption that, as many Indian railways were of this gauge, rolling stock could be obtained quickly if needed in an emergency.” [2: p26] Day does not state why he sees the decision as unfortunate. It may possibly be because other railways on the continent were being built to a gauge of 3ft 6in, rather than metre-gauge.
Construction started with a 1,700ft timber viaduct connecting Mombasa Island to the mainland. This remained in use until an iron bridge was opened to traffic in July 1901. Day reports that relatively quick progress was made in 1896 with the railhead being 23 miles from the coast by the end of the year.
The story of the construction work in 1896-1898 was, however, a troubling one. “By the end of 1896, the number of Indian labourers had risen to about 4,000; but more than half suffered from malaria, which also attacked the European staff. Troubles continued to dog the work in 1897 and 1898. An outbreak of bubonic plague in India dried up the labour supply for months. All the camels and all but six of the 800 donkeys used to carry supplies died, as did over a third of the mules and more than nine-tenths of the oxen. Water had to be brought by train to supply the labourers. Transport beyond railhead was eased later by the importation of four traction engines and trailers.” [2: p27]
A revolt in Uganda and a mutiny by Sudanese troops saw the incomplete railway transporting large numbers of troops about 100 miles from the coast and it was the successful use of the railway by the military which gave greater impetus to the construction work.
The first 100 miles of the line has been opened to freight at the end of 1897, and to passengers early in 1898. In December 1898, a delay of three weeks with work completely shut down was caused by attack on workers by two lions. These attacks continued into 1900 and meant that the pace of the work was slower than it might have been. Nonetheless, by the end of 1897 rails were 256 miles from the coast.
By the end of May 1899 the rails had reached what became Nairobi and the railway headquarters were built there. “By the end of 1899, more than 18,000 Indian labourers were at work and the line was pressing on from Nairobi toward the escarpment and the site of the inclines. The first few months of 1900 brought heavy rains and partly washed away the earth- works east of Nairobi, causing delays. By this time the survey had been completed to the lake by a shorter route than that first envisaged, the locomotive stock had increased to over 90, and there were about 175 passenger vehicles and 900 wagons of various types.” [2: p29]
Day comments that a “new route had been found into the Rift Valley which avoided the reversing stations which Macdonald had thought necessary. At first, however, the Chief Engineer decided to use a funicular railway to carry material down into the Rift Valley so that the railway could be continued towards Lake Victoria without wait- ing for the permanent line. The vertical height of the funicular was just over 1,500 ft. and it was in four sections. The top section was at 1 in 6, the two middle sections at 1 in 2 and the bottom section at about 1 in 11.” [2: p28f]
“On the top and bottom inclines, full wagons going down pulled the empty ones up again. On the centre sections, built to a gauge of 5 ft. 6 in., wagons were carried on special trucks so built as to have a horizontal deck on which were metre-gauge tracks for the railway wagons. These special trucks were hauled by a 1 in. dia. steel wire rope passing round a power-driven drum at the top of the incline. All four inclines were double track, but the lower portions of the 1 in 2 section were of gauntletted track, i.e. the two tracks were interlaced. A temporary railway led from the foot of the incline to the permanent line of route at a point 375 miles from Mombasa. The inclines enabled the railway to advance another 170 miles before the permanent alignment was finished into the valley and the funicular was taken out of use in November, 1901.” [2: p29]
March 1901 saw the railhead having reached 483 miles West of Nairobi, 17 miles behind the earthworks. The line reached Port Florence (later Kisumu) on 19th December 1901. It cost around £5.5 million and climbed more than 6,000ft en-route from Mombasa. Very soon minds turned towards extending the line to Uganda to avoid the need for the transshipment of goods onto and off lake steamers. Uganda was a different world to Kenya. “Sir Charles Eliot wrote in 1903: ‘To cross the lake [to Uganda] is like visiting another continent. The country is cultivated and thickly populated. There are good roads, fences and houses all constructed by the natives. The people are all clothed, and it is a reproach not to be able to read and write.’ The contrast with Kenya as it them was could not have been greater.” [2: p30] It is easy to see why Uganda was a target for colonial powers.
Winston Churchill continued his advocacy for an extension of the railway into Uganda. A deep water pier at Killindini was funded by the British government by means of a loan and £60,000 was allocated for the construction of a ‘tramway’ between Nairobi and Thika in Kenya. The ‘tramway’ was built to the same gauge as the railway and with gradual improvement over the years, became a defacto branch line.
An extract from a map produced by East African Railways and Harbours which shows the branch line heading away from the main line at Nairobi and running through to Thika and beyond. [2: p23]
Churchill’s advocacy resulted in the construction of a line between Jinja on Lake Victoria and Kakindu on the Nile and permitting access to Lake Kioga. The terminus was relocated during construction to Namasagali. The line was given the name, ‘The Busoga Railway’ and opened in 1912. I have written about this line and the article can be found here. [9]
A branch line to Lake Magadi was also constructed, running from Konza (282 miles from Mombasa) to the lake. It was around 100 miles in length. The Lake Magadi Soda Co. was formed in 1911 and later acquired a 99-year lease of the area and powers to build a pier at Kilindini. The branch line was complete in 1915. The line is referred to here and a pictorial record of a visit in the 1990s is included in that linked article. [10]
Another extract from a map produced by East African Railways and Harbours which shows the branch line heading away from the main line at Konza and running through to Magadi. [2: p23]
In the early years of the 20th century traffic on the mainline increased significantly. “In 1902, there were three or perhaps four trains a week in each direction. In 1912 there were 50 or 60: the working profit was £134,000.” [2: p32]
After WW1 the possibility of a line to the Uasin Gishu plateau was reconsidered. It was hoped that this line might eventually result in a further extension into Uganda. There was some heated argument about the best route for this line before work commenced on the new line from a junction at Nakuru in the the last few weeks of 1921. By 1923, a line as far as Sabatia was in use.
Another extract from a map produced by East African Railways and Harbours which shows the new line heading away from what was the main line at Nakuru and running through Sabatia, Equator and Timboroa. [2: p23]
The network continued to develop. The Thika line was extended to Nyeri. Work in the West of Kenya was also moving forward, decisions were taken to: extend the Usain Gishu line; create a branch to Mbale (in Uganda) from Tororo on the border; build a line from Rongai to Solai in Nakuru District; and a branch from Leseru to Kitali. All of these, bar the Mbale branch, were under construction by the end of 1924.
“In 1926, the name of the railway was changed from the Uganda Railway to the Kenya and Uganda Railway, and at the end of that year 1,128 miles of railway were open.” [2: p34] By January 1928 the line reached the River Nile and an extension to Kampala from Jinja was under consideration.
In 1927, a further name change to ‘Kenya and Uganda Railways and Harbours’ was in place and more powerful locomotives were introduced with an increase in rail weight to 80lbs/yard on the length from Mombasa to Makindu. A new causeway was under construction to link Mombasa Island to the mainland. The causeway made room for both road and rail and was completed by a 5-span bridge. The Nyeri Branch was completed mid-year. The Branch to Mbale, extended to Soroti, was under construction and a branch from Gilgil to Thomson’s Falls was agreed.
A further extract from the East African Railways and Harbours map which shows the branch from Rongai to Solai, the branch from Gilgil to Thomson’s Falls and a length of the Nyeri branch. [2: p23]
Construction of the Thomson’s Falls Branch commenced at the beginning of 1928 and was completed by August 1929. The Soroti Branch was completed by September 1929 and the branch from Kisumu to Yala by November 1930. The Naro Moru Branch was extended to Nanyuki (visible to the right side of the image above) by October 1930.
“The Jinja-Kampala line was started in early 1929 and the 58-mile line made such progress that track-laying was finished in January 1930. The inauguration has to wait for the completion of the bridge across the Nile, opened by the Governor of Uganda on 14th January 1931.” [2: 35f]
A portrait of East African Railways 59 class Garratt locomotive no. 5902, before it was named ‘Ruwenzori Mountains’. East African Railways and Harbours – A.J. Craddock’s personal collection of EAR&H publicity photos given to him during a visit to the Nairobi HQ in 1954 (EAR&H negative 961/1) – Public Domain. [11]
Engineers and surveyors were at work in Western Uganda in the 1930s looking for ways to connect through to the Congo but the world depression of the 1930s hampered any significant expansion of the network. Only a short length from Yala to Butere was completed. Trade improved in the late 1930s and new passenger and rolling stock arrived by 1939, along with six powerful Beyer Garratt Locomotives. WW2 brought a reevaluation of priorities, railway workshops were turned over to military uses. New lines were considered if they would enhance the war effort. One of these was an extenion of the Nairobi-Thika Branch to the North. A great deal of effort was put into the building of this line which in the end proved of little value as its intended use was overtaken by the speed of the military advance North from Kenya.
After the war, a line to the Kilembe Copper Mine was deemed essential. A route had been surveyed before WW2 and the idea was resurrected in 1950. Kilembe was expected “to produce 20,000-25,000 tons of copper and 1,500 tons of cobalt a year. The Government of Uganda came to the conclusion that a line would be justified and that the area through which it would run would be suitable for crop growing and cattle ranching.” [2: p37] The project was approved in January 1952, work began in the same month. The line was open to Mityana by August 1953 and to Kasese in August 1956. The construction work was demanding. Day tells us that “up to 5,000 men at a time worked on the new line, which ran in places through thick forest and in others demanded heavy earthworks. Embankments were needed to cross the papyrus swamps which the line traverses for some 40 miles of its route, and there are 24 bridges. The Lake George swamp demanded a four-mile earth embankment containing 18 million cubic feet of earth and included gaps spanned by three 60 ft. bridges. The swamp is fed by streams from the Rift escarpment and from the Ruwenzori Mountains, and concrete piers had to be sunk 40 ft. into the swamp to support the ends of the bridge spans.” [2: p38]
“Where the railway drops down into the Western Rift Valley a great spiral was built to take the line down part of the 1,000 ft. difference in level. Apart from excavation and moving 60 million feet of earth on this and other parts of the escarpment stretch of line, blasting had to be undertaken where rock barred the way. When the rails reached Kasese, with the Ruwenzori Mountains just beyond, railhead was 1,080 miles from the sea. Traffic was flowing from the mines over the £5 million line to the smelting plant at Jinja, 263 miles away, by the end of the year.” [2: p38]
In 1950 a main line realignment between Nakuru and Nairobi (113 miles) was completed at a cost of £2.25 million, shortening the journey by 10 miles and easing gradients. “It included the 2,500ft Limuru tunnel and another at Gilgil in the side of the Great Rift Valley.” [2: p38]
In 1955, the railways in East Africa had their most successful year. Day tells us that the annual report for 1957 reviewed the decade since the war and the formation (in 1947) of the larger East African Railways and Harbours Co. with the inclusion of what were originally German colonial lines in Tanganyika (Tanzania): “Public goods on the inland transport services had increased from 2.6 million tons a year in 1948 to 3.8 million tons in 1957, and ton-mileage from 769 million to 1,454 million. (in 1962 traffic had risne to4.15 million tons and 1,661 million ton-miles.) The tonnage of imports and exports passing through East African ports rose from 3.1 million to 4.4 million. The locomotive stock rose from 234 in 1948 to 461 in 1957 and the number of wagons rose from 5,764 t0 9,594. The route mileage increased from 2,930 to 3,375.” [2: p39]
At the end of 1957, locomotive stock consisted of, “129 Beyer-Garratt, 222 tender, and 58 tank locomotives as well as 46 diesels. There were 994 coaching vehicles.” [2: p39]
1957 was a pivotal year for traction on the network. The Southern section (Tanganyika) was primarily run by diesel locomotives and railcars and some diesels were in use on the Magadi branch. 1958 saw ten new diesels (1,850h.p.) ordered and over the next few years significant expansion continued. Independence for Tanganyika (Tanzania) in 1961 put in doubt the continuing use of the Southern section as the new state would need to fund at least £200,000/year to keep the system.
In May 1963, an international committee of inquiry recommended that all steam motive power should be replaced by standardised diesel-hydraulic locomotives. Days final comment is that this would be a major undertaking as at the time 406 steam locomotives remained against 56 diesels(of which some of the largest were diesel-electrics) [2: p41]
It is at this point that Day’s history of the East African lines comes to a halt. He was unable to catalogue events of the later 1960s and beyond. His book was published in 1964.
A more detailed history can be found in M.F. Hill’s book Permanent Way: the story of the Kenya and Uganda Railway. [4] This book can cost significant sums on the secondhand market. I have produced a series of articles on it which begin here. [12]
References
John R. Day; Railways of Southern Africa; Arthur Barker, London, 1963.
John R. Day; Railways of Northern Africa; Arthur Barker, London, 1964.
Immediately after publishing the article about the most southerly length of the Branch (Part 3), I was contacted by Ian Turpin who built a model of Coalport East Railway Station some years ago. He sent me a copy of the 1″ 1833 Ordnance Survey (revised in the second half of the 19th century to show the railways of Shropshire) which covers the Branch.
In addition, as part of his research for his model railway project he took a number of photographs in and around both Madeley Market Station and Coalport East Station in the late 1980s. This addendum catalogues the pictures that he took. My thanks to Ian for providing these photographs, some of which show scenes which have disappeared since they were taken.
At the end of this article are pictures of Ian Turpin’s layout which he kindly sent to me.
But first, a series of pictures associated with the Branch which have come to light since the three articles were completed. ….
An aerial view of Coalport (East) Railway Station extracted from a larger aerial image included by Heritage England on the Britain from Above website. The view is from the South across the River Severn in 1948, (EAW019495) [1]This view looks to the West along the Branch from Coalport (East) Station. It emphahsises the gradients on the line. The gradient started immediately at the station throat as the gradient marker indicates. After passing under the overbridge trains encountered even steeper gradients. Looking through the bridge the increased grade can be seen. The bridge in this picture carries Coalport High Street and remains today to allow the Silkin Way and a rainwater sewer main to pass under. Pictures below show the propping required to allow the bridge to continue to carry road loading. [National Railway Museum]A picture of Coalport East Station in 1958, only a couple of years before final closure. This view looks West under the road bridge which spanned the Station. It was shared by Metsa Vaim EdOrg on the Telford Memories Facebook Group on 9th November 2020. [2]The dismantling of trackwork at Coalport East Station after the closure of the Branch. This picture was shared by Metsa Vaim EdOrg on the Telford Memories Facebook Group on 11th December 2021.[3]After the removal of the Branch trackwork, the route of the old railway was commandeered to provide a route from Telford New Town to the River Severn for the rainwater drainage main sewer. During construction,. the sewer was very prominent. After construction and with landscaping in place, only short section of the sewer pipe remained visible. Much of the length is now below the Silkin Way and in earlier articles we have seen evidence of its presence. This picture was shared in a comment on the image above by Geoff Martin on 12th December 2021. [3]A picture of the site of Coalport East Station in 1987. This view is taken from the same location as the photograph of 1958 above. It looks West under the road bridge which once spanned the Station. It was shared by Metsa Vaim EdOrg alongside the 1958 image on the Telford Memories Facebook Group on 9th November 2020. It illustrates the way in which the site has changed with the introduction of the main rainwater sewer. It precedes the pictures taken by Ian Turpin by only a year or two. [2]This photograph from the 1930s shows Coalport Bridge in the foreground. The Carriage Shed at Coalport Station can be seen immediately above the bridge. This image was shared by Marcus Keane on the Telford Memories Facebook Group on 18th March 2014. [4]Lin Keska shared this postcard image of Coalport Bridge in the comments about the above image on the Telford Memories Facebook Group on 26th February 2019. The passenger facilities can be seen to the left of the bridge. The carriage shed is again visible above the bridge and the high retaining wall behind the station site can be picked out to the right of the image. [4]Lin Keska also shared this image in the comments on the same post on 26th February 2019. This picture was taken in the 1960s. The site of the passenger station is now overgrown and the Carriage Shed has also been removed. [4]This photograph shows the front of the passenger facilities at Coalport East Station after closure of the passenger service in the 1950s. It was shared by Marcus Keane on the Telford Memories Facebook Group on 26th August 2015. [5]
Secondly, Coalport River Severn Warehouse
A close inspection of the 1881 6″ or 25″ Ordnance Survey will show a building straddling two of the sidings in the goods yard to the West of Coalport Station.
The 1881 6″ Ordnance Survey [6] shows a warehouse building alongside the River Severn to the West of the passenger facilities at Coalport East Station. This was the River Severn Warehouse noted fleetingly by Bob Yate in his description of the Branch. [7: p183]
Yate notes this warehouse in his shirt description of Coalport East Station: “Two run-around loops gave access to a small goods yard, and to the goods warehouse alongside the River.” [7: p183] By the time of the 1901 Ordnance Survey, the main warehouse element of the building had been demolished, leaving only a truncated section which acted as a good shed. The only picture that I have found of the building dates from after it had been partially removed.
Third, the relevant parts of the 1″ Ordnance Survey of 1833(revised to show rail routes). …
This first extract from the 1″ Ordnance Survey shows the length of the Coalport Branch covered in my first article about the line, Hadley Junction to Malinslee Station.This extract shows the length covered in Part 2 – Malinslee Station to Madeley Market Station. The thick black lines drawn on the map represent possible schemes to line the different rail routes in the immediate area.This extract shows the length of the Branch covered by the third article, from Madeley Market Station to Coalport Station (Coalport East Station).
Fourthly, Ian Turpin’s photos of Madeley Market Station. … Madeley Market Station Building seemed a little isolated and forlorn back in the late 1980s, although it seems not to have suffered any significant vandalism. The pictures were taken with a mind to being able to recreate the facilities at Coalport in model form as the buildings were of similar construction.
The Bridge Toll House at street level in the 21st century. The building originated as a warehouse (1793-1808), was in use as house by 1815 and as tollhouse from 1818, when the adjacent Coalport Bridge underwent major repairs. Shropshire County Council became owners in 1922, and it was restored after it passed to the Buildings at Risk Trust in 1994. [9]
The cottages to the North of the river and to the South of the Station site. The next two photographs show the same cottages from the NorthThe same cottages as shown on Google Streetview with the Bridge Toll House on the right. [Google Streetview, April 2023]
The photographs taken by Ian Turpin were all used as background material for the construction of a model railway centred on Coalport (East) Railway Station. The pictures were taken in the period before the road-bridge across the Severn was renovated.
And, before we turn to the photographs of Ian Turpin’s layout, …. two extracts from LNWR publications. The first of these shows the 1905 timetable for the Branch, the second is the LNWR working directions of 1917 for operating Motor Trains on the Branch. Both of these were forwarded to me by Ian Turpin. The working timetable shows that the Branch was worked by two engines. A two-coach motor-train worked the branch from May 1910 until sometime after the grouping with 50ft x 8ft arc roof stock (converted from ordinary non-corridor stock). The Branch was by this time rated third class only. Of the two coaches, one was LNWR No.103 (LMS No. 53450 and the other was LNWR No. 1815 (LMS No. 5338).
Ian Turpin’s layout which featured in The Railway Modeller in the 1990s.
Ian Turpin sent me the superb photographs of his excellent model below. They were taken for an article about his layout which was published in the Railway Modeller in the 1990s. He has very kindly agreed to their inclusion here.
Bob Yate; The Shropshire Union Railway: Stafford to Shrewsbury including the Coalport Branch; No. 129 in the Oakwood Library of Railway History; The Oakwood Press, Usk, Monmouthshire, 2003.


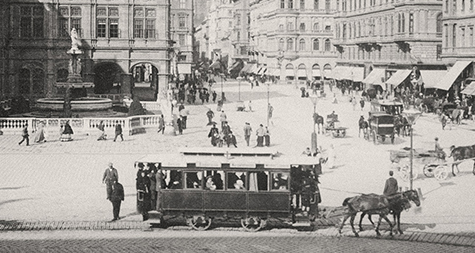
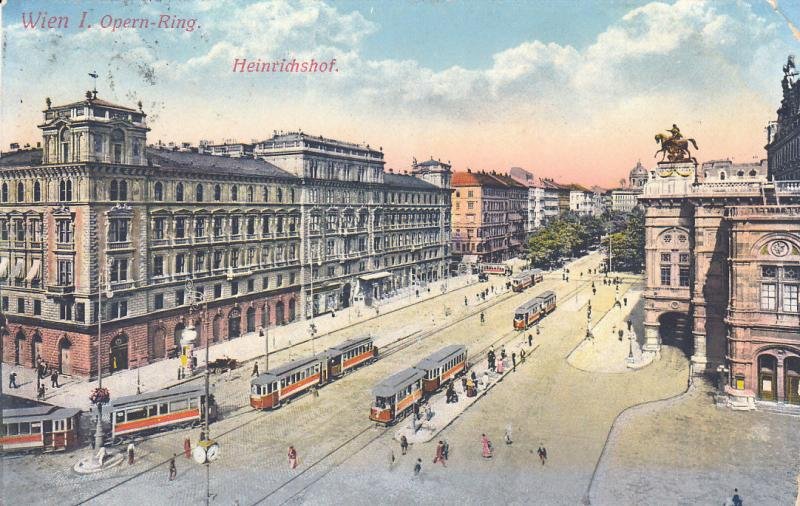
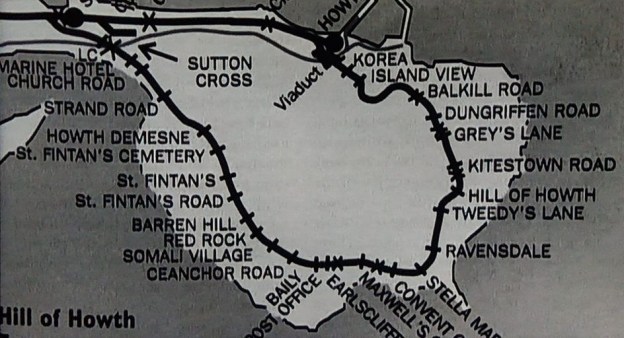
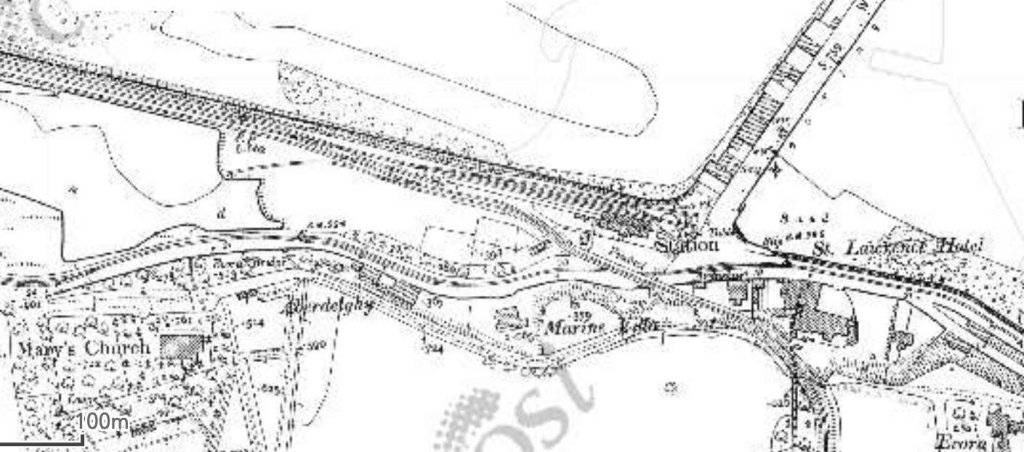
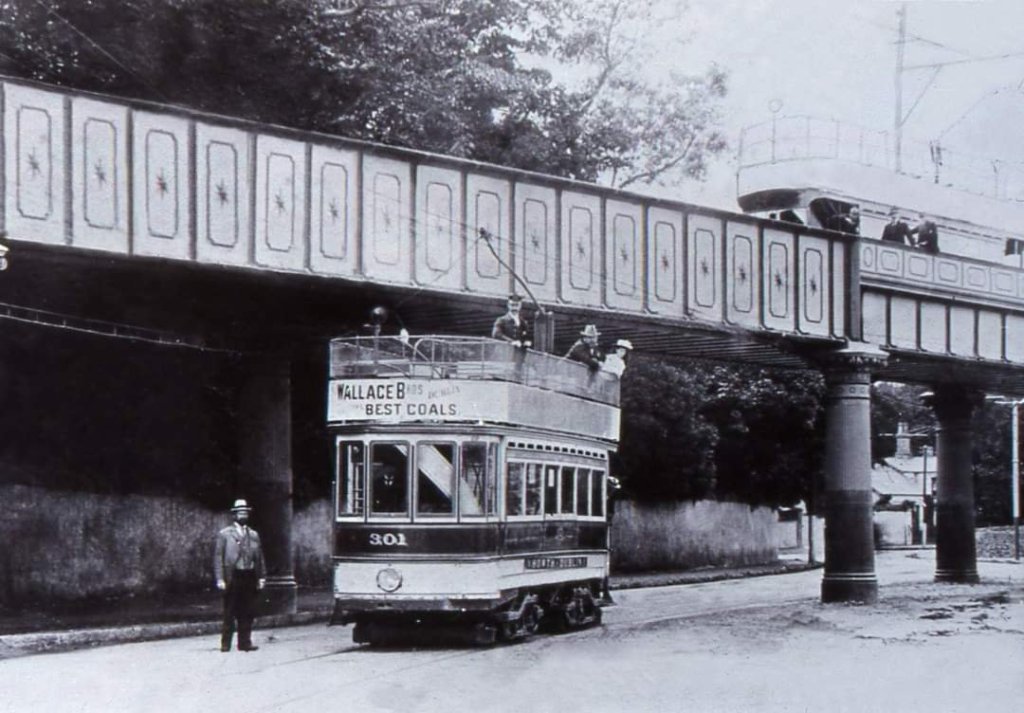
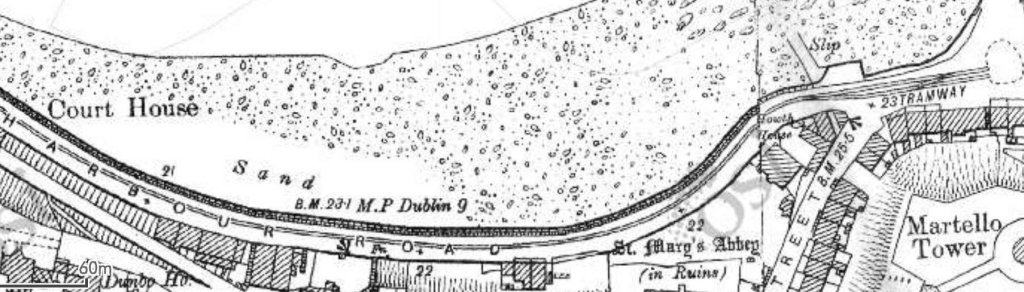
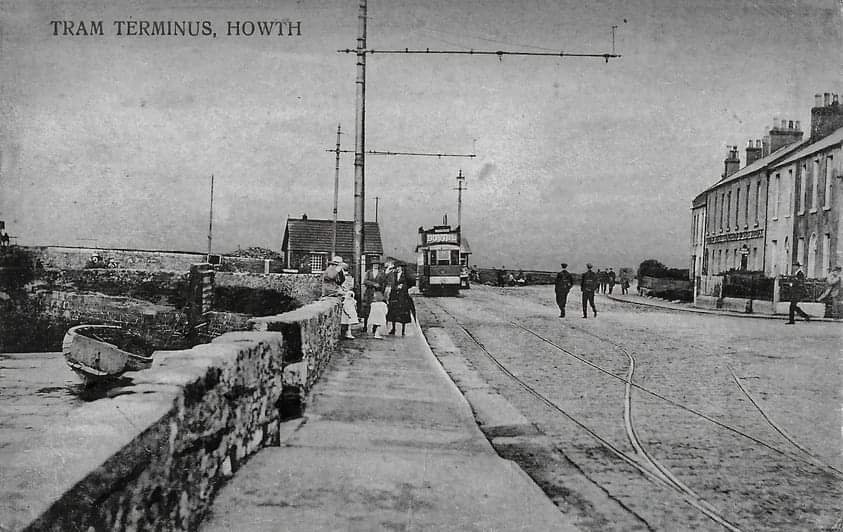
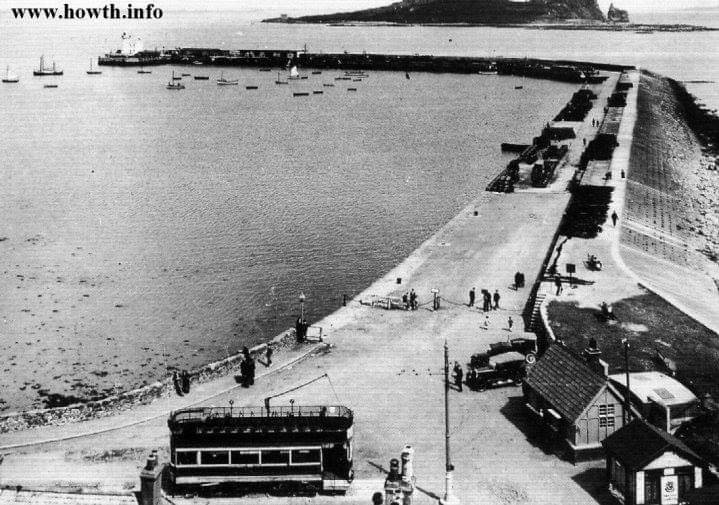
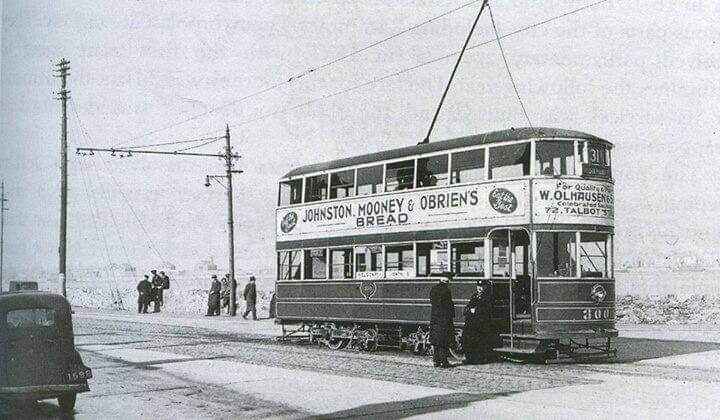
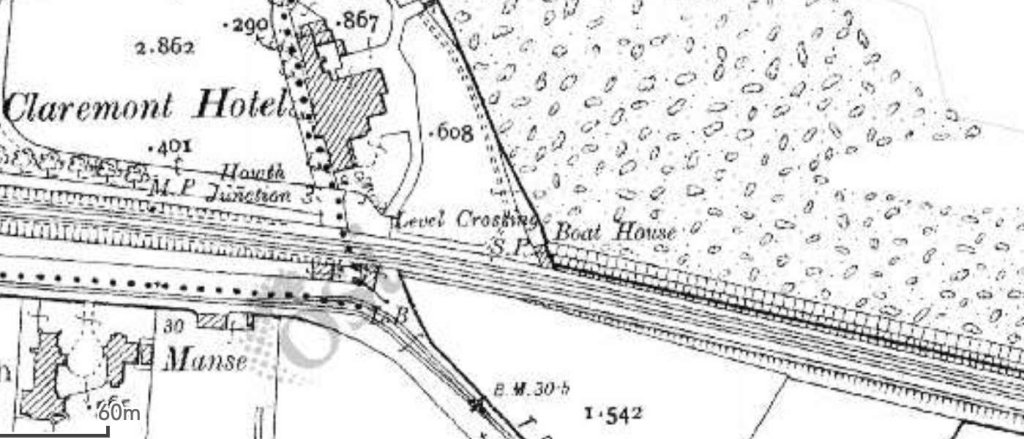
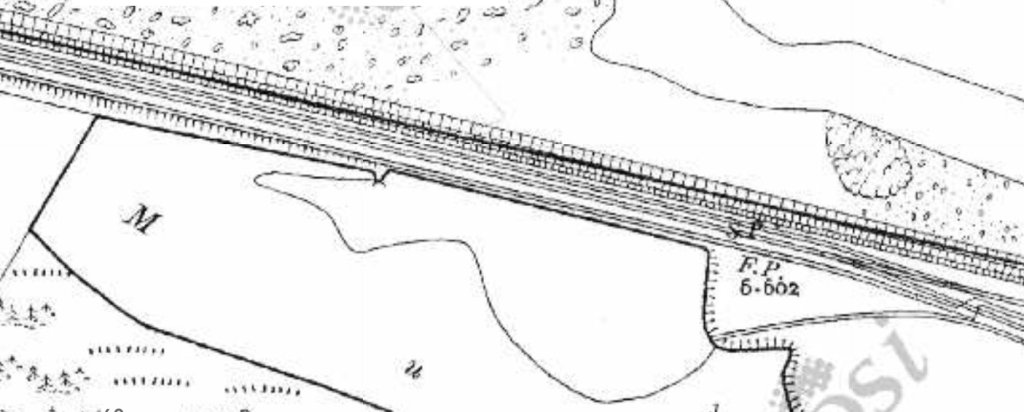
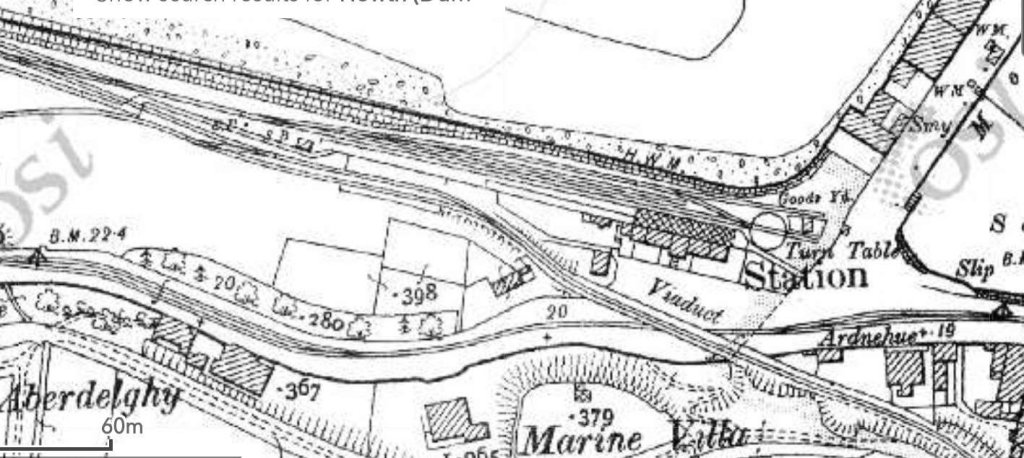


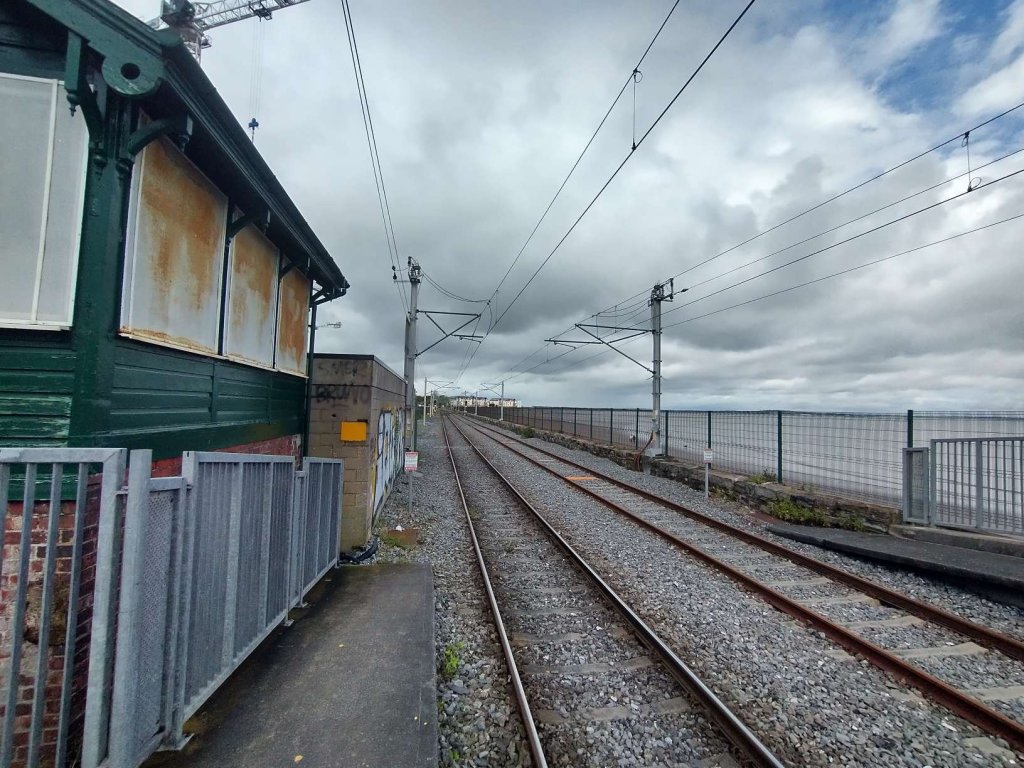
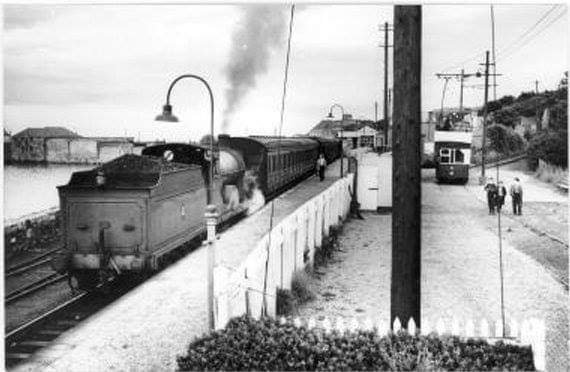
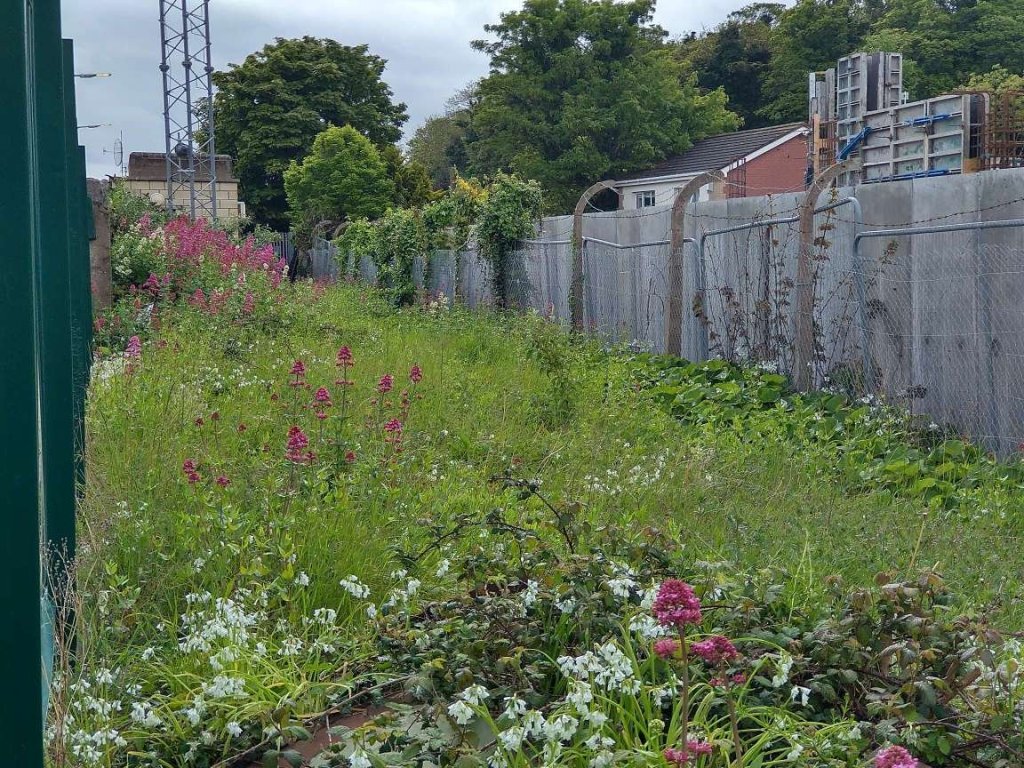
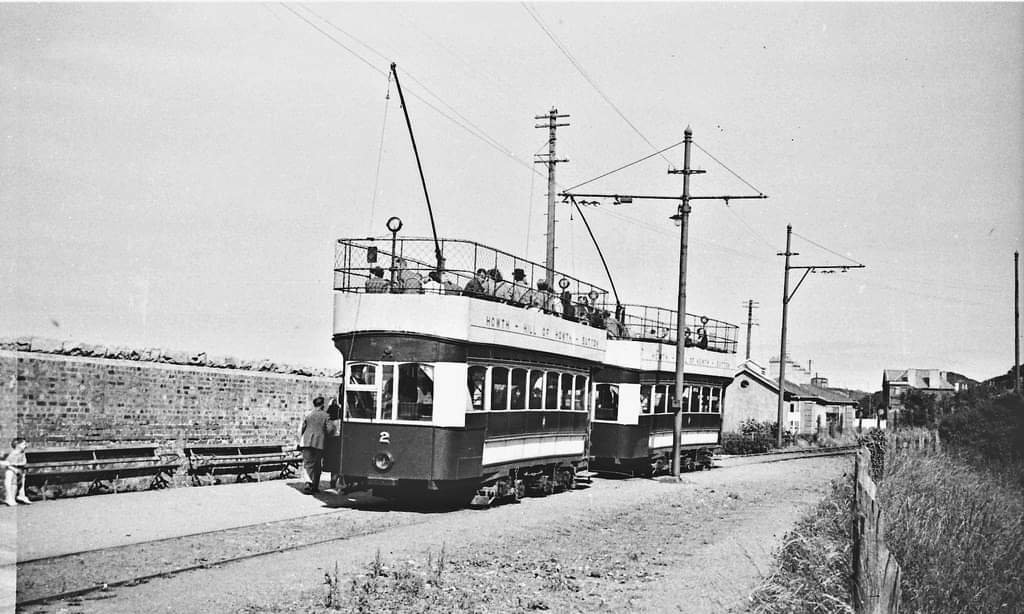
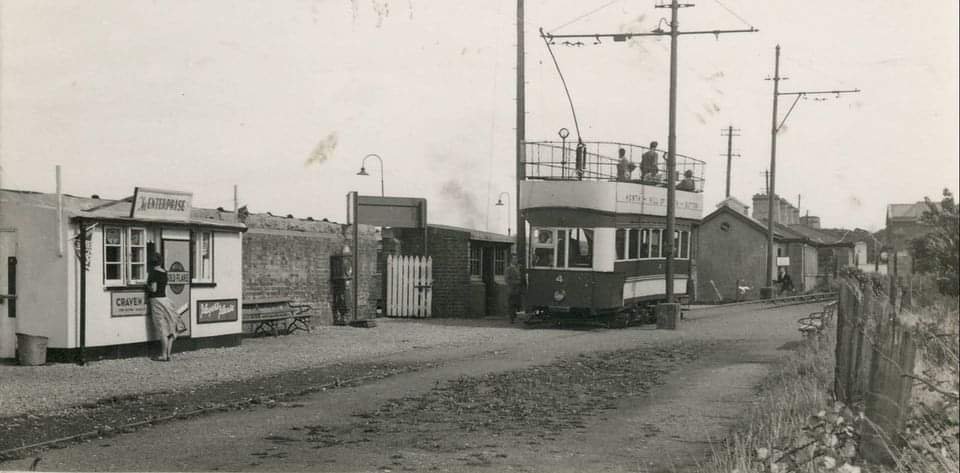
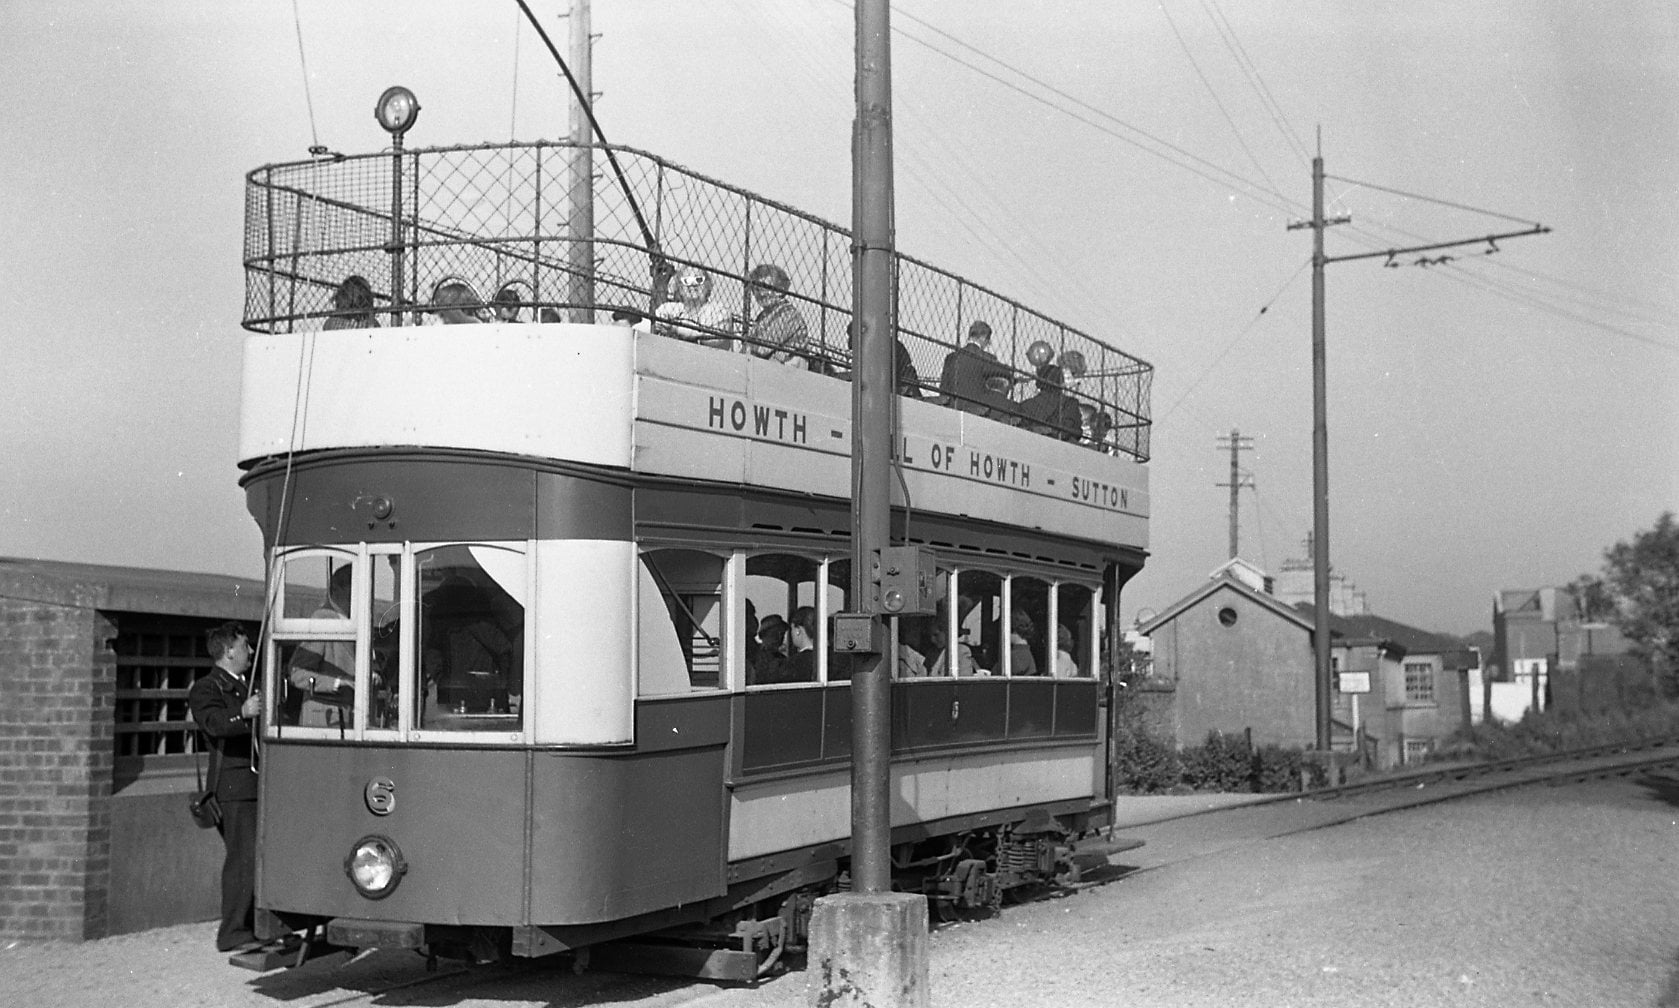
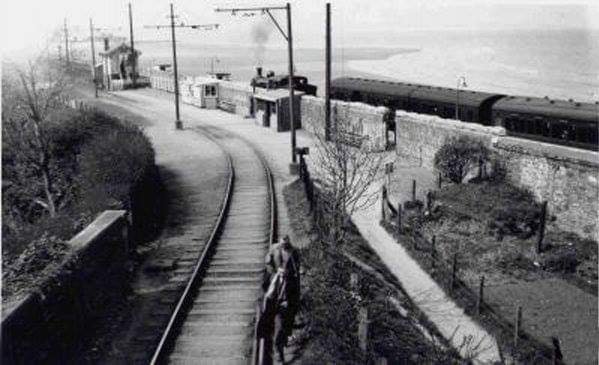
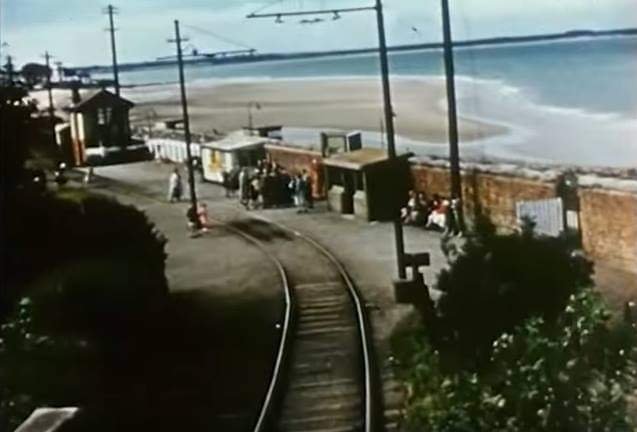
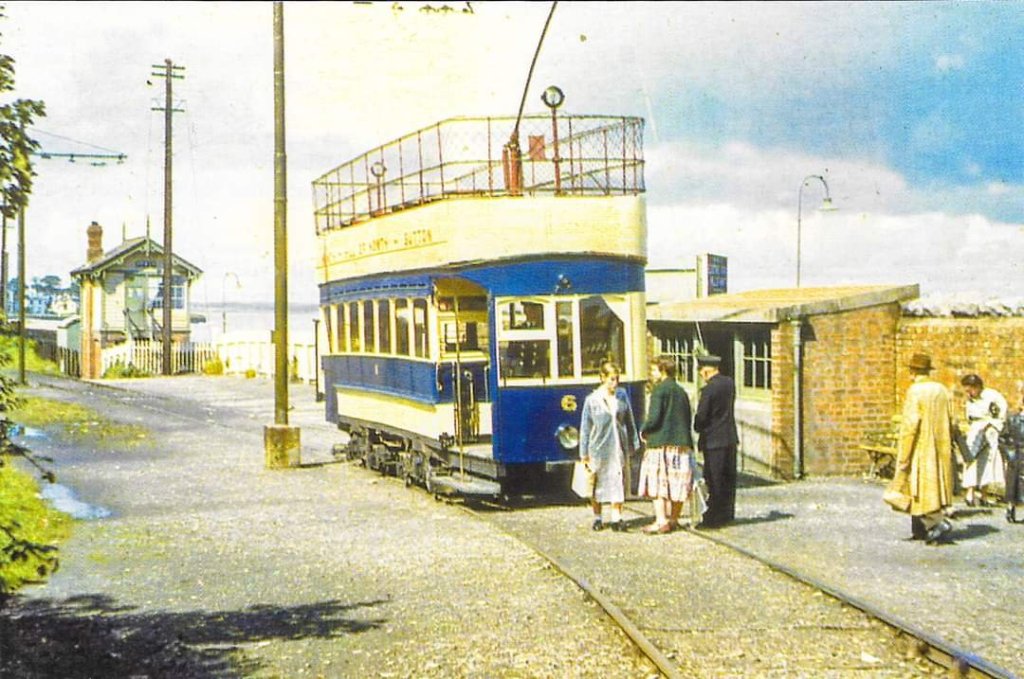

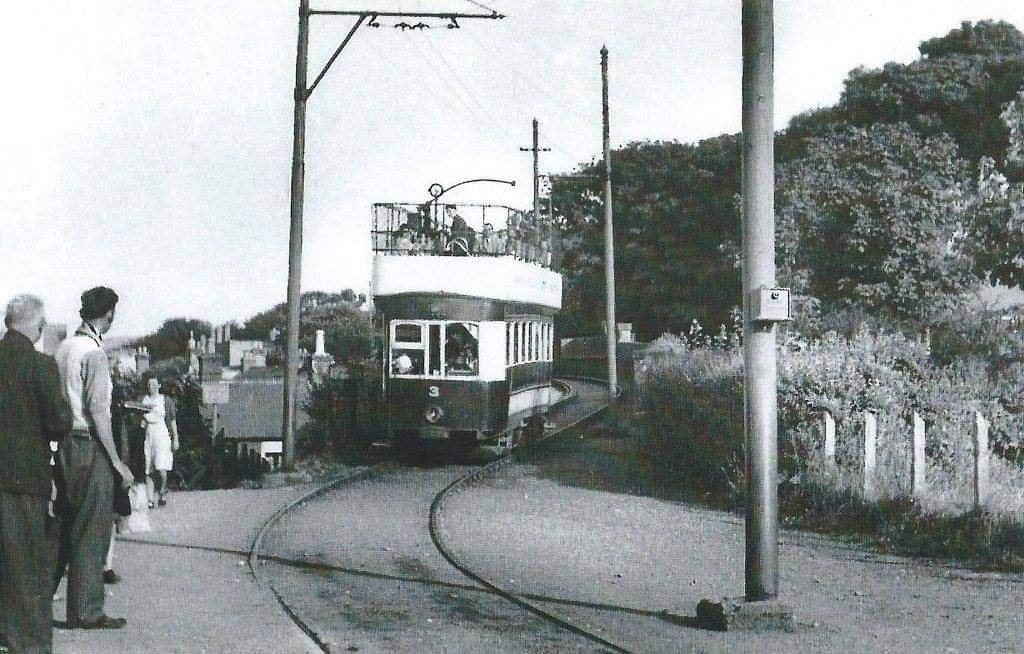
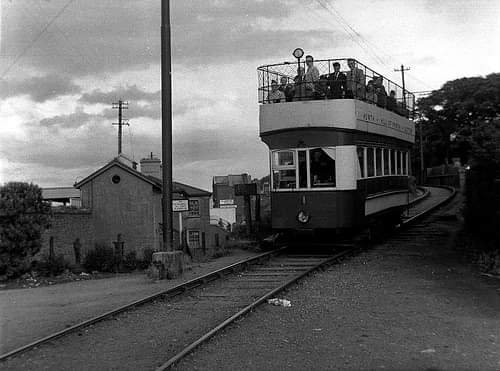
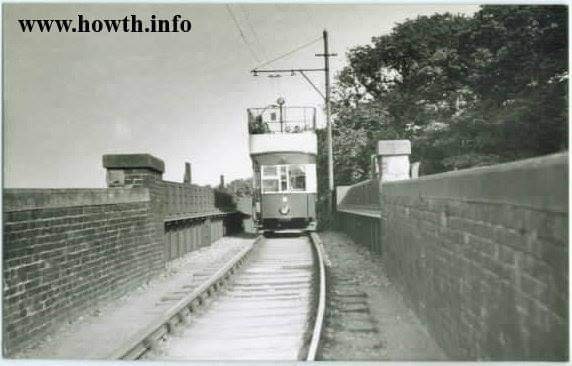
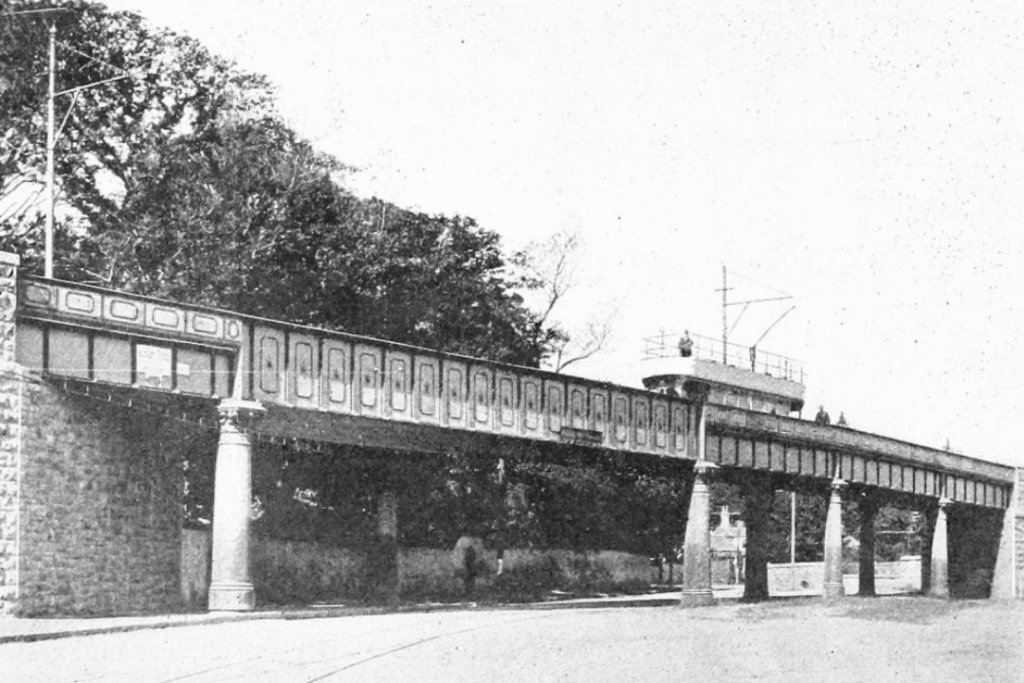
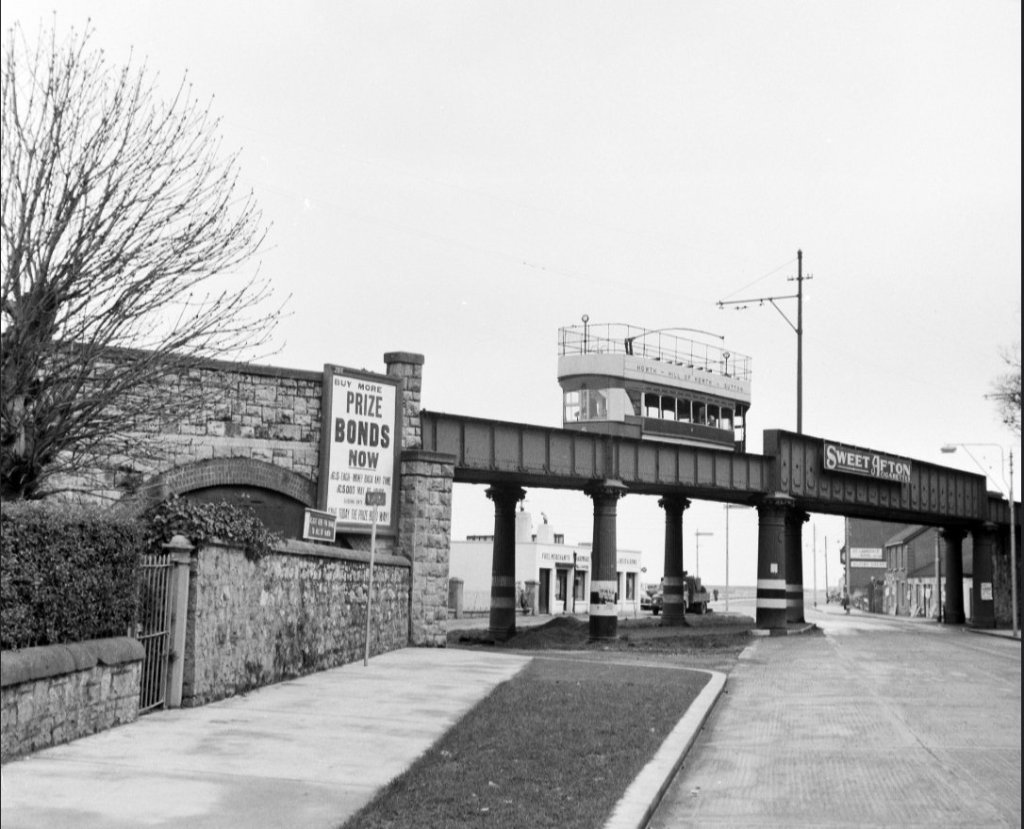

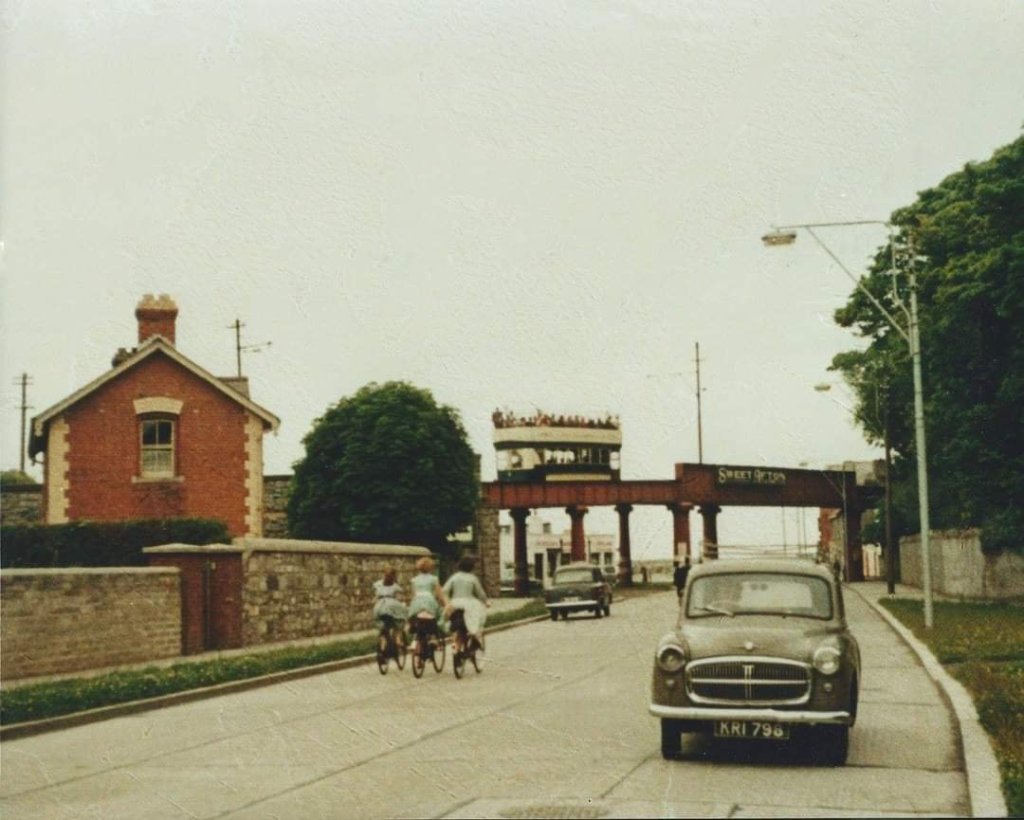
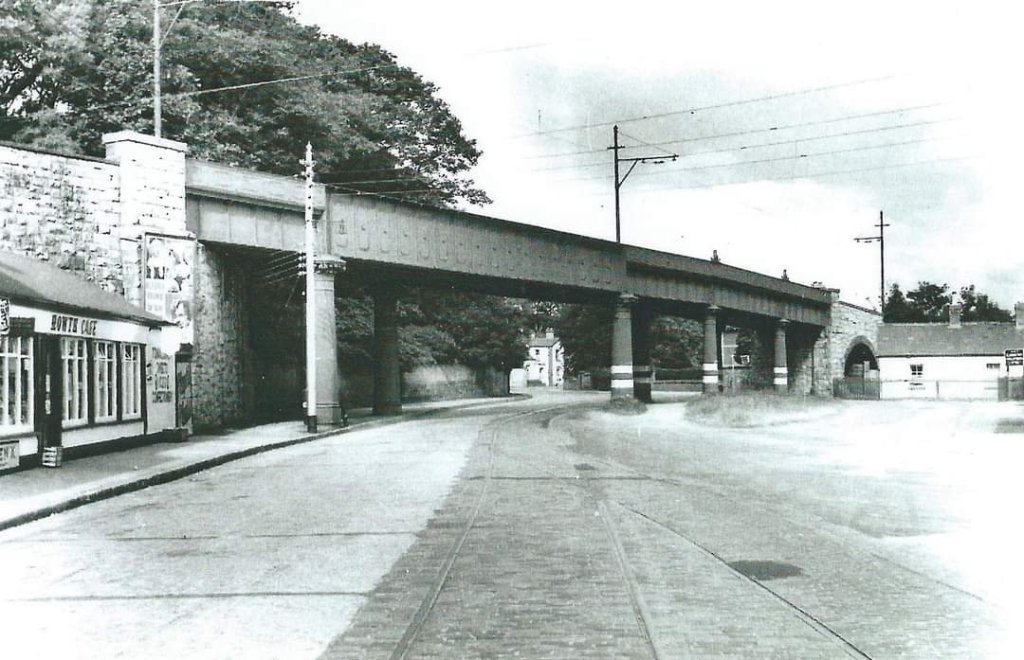

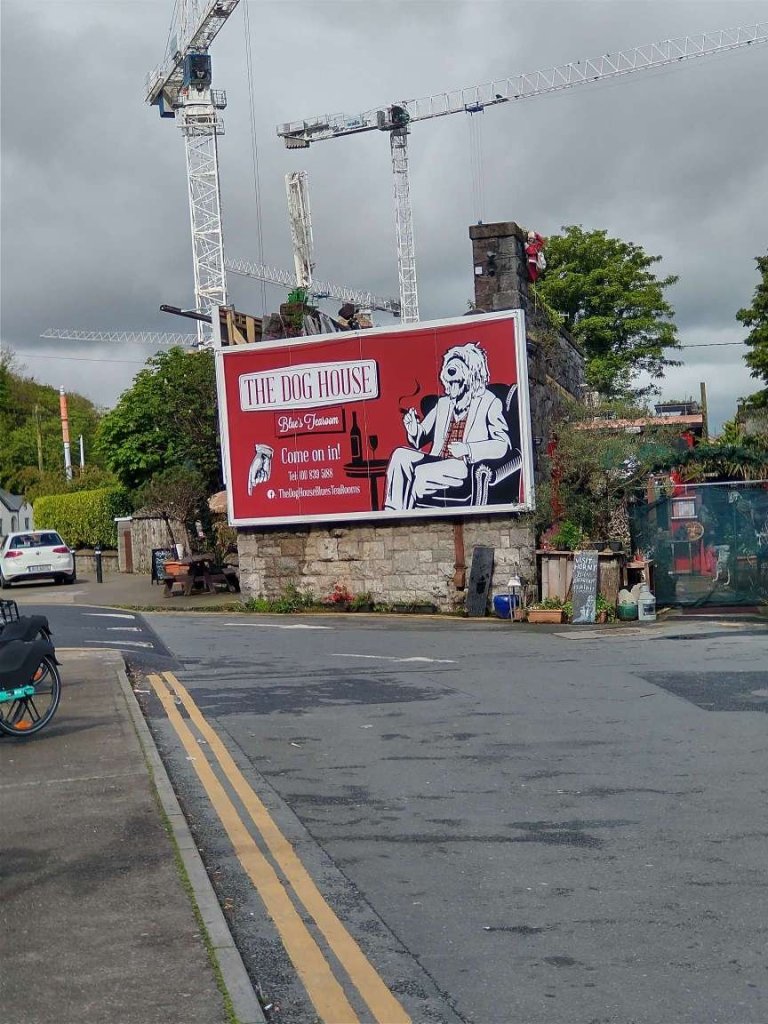
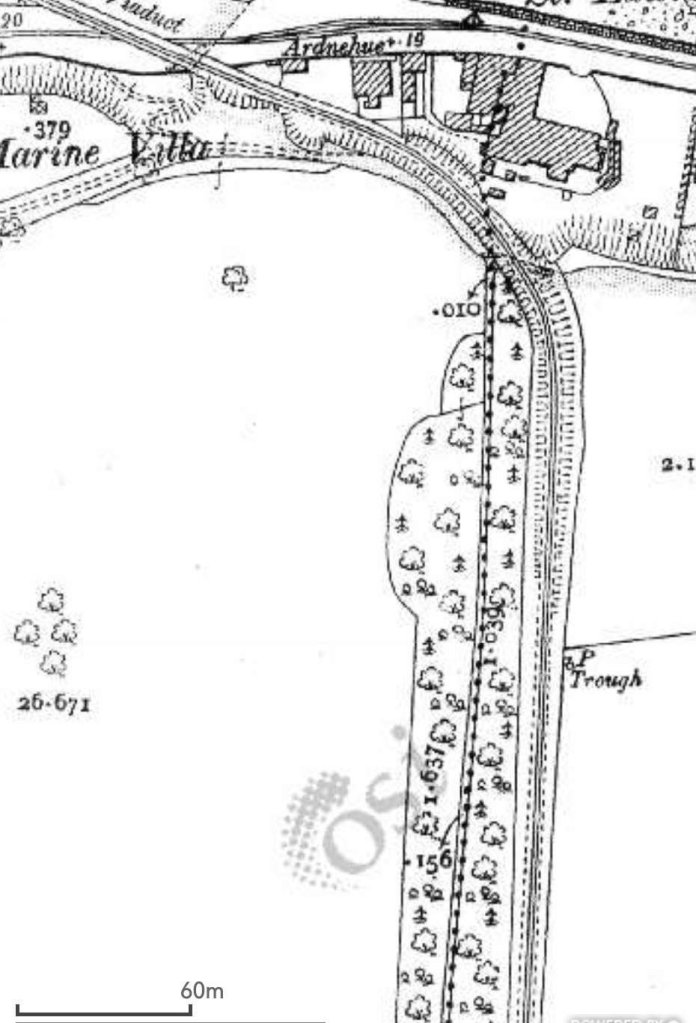
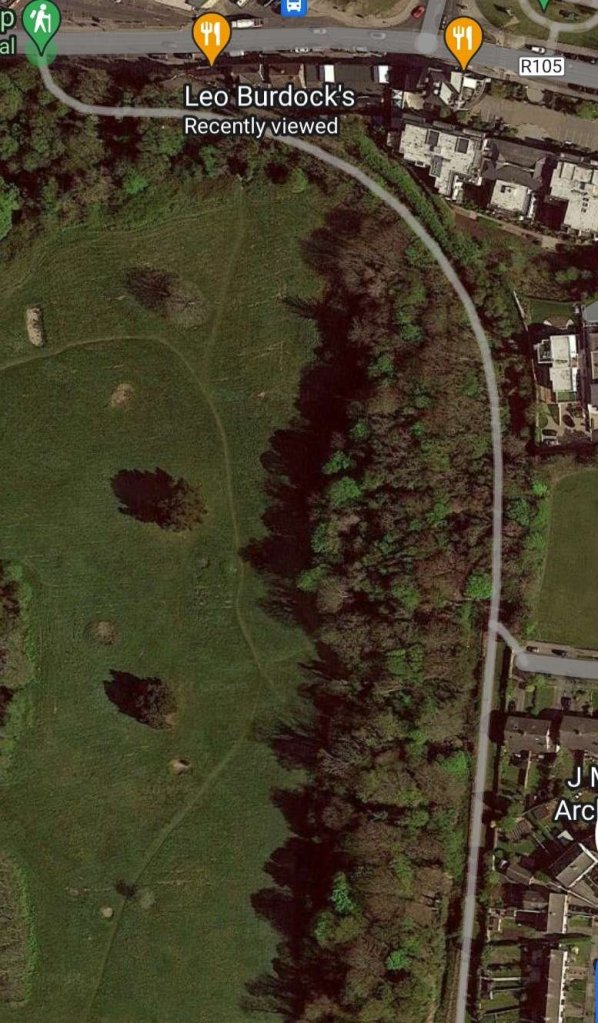
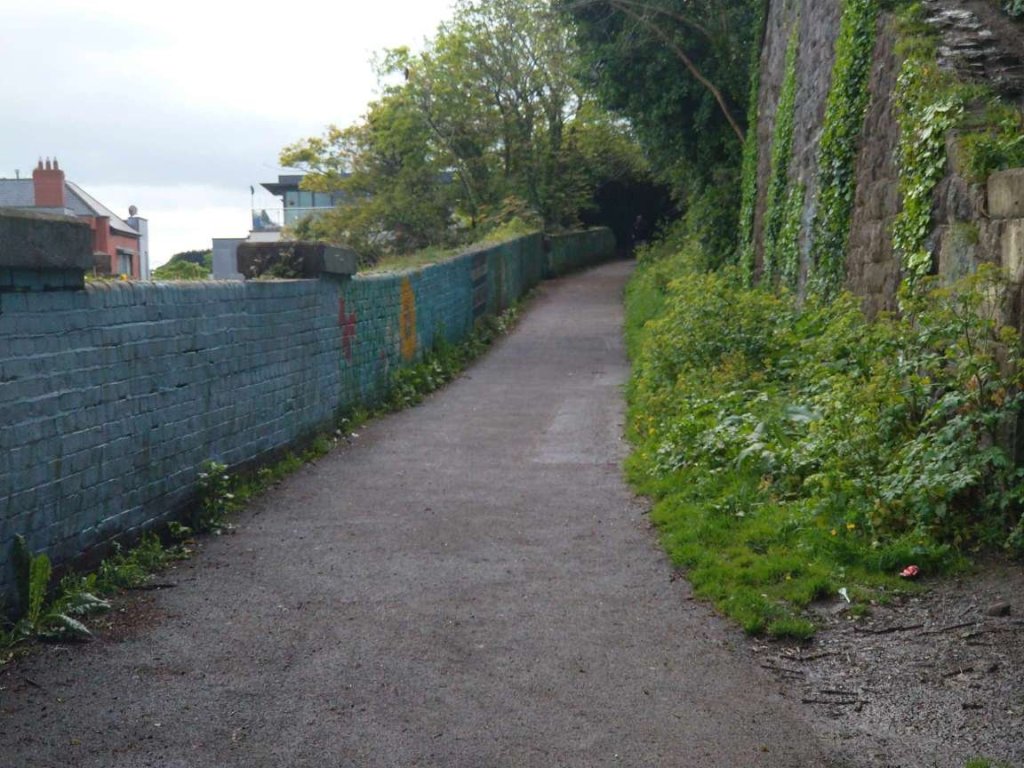
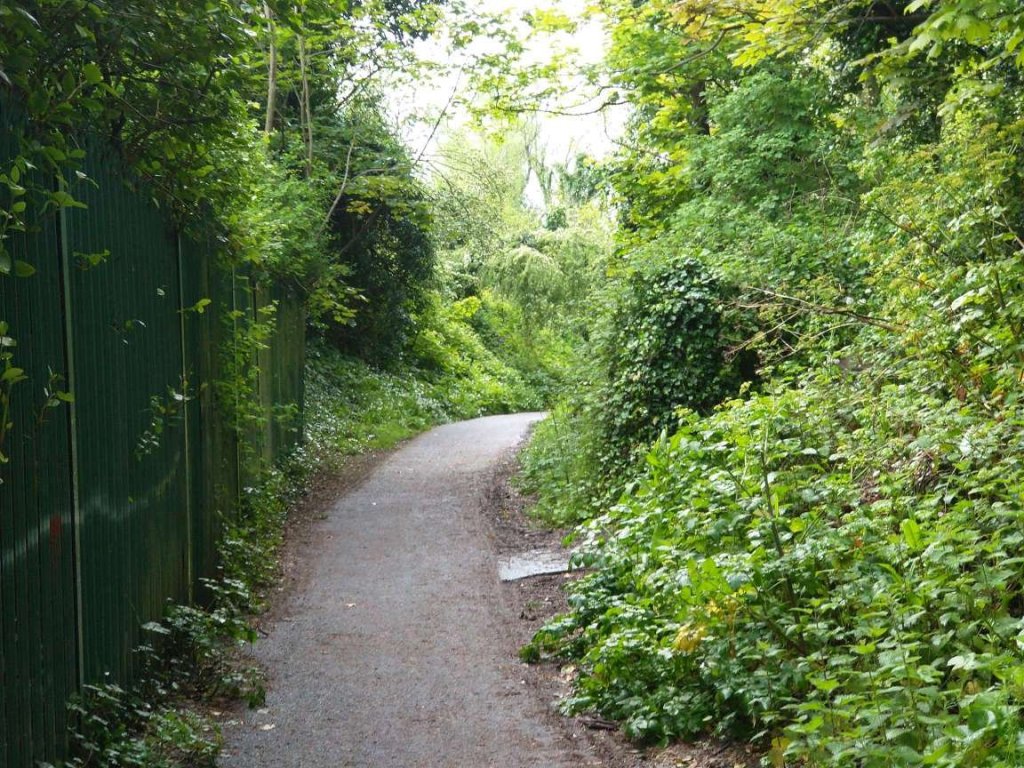
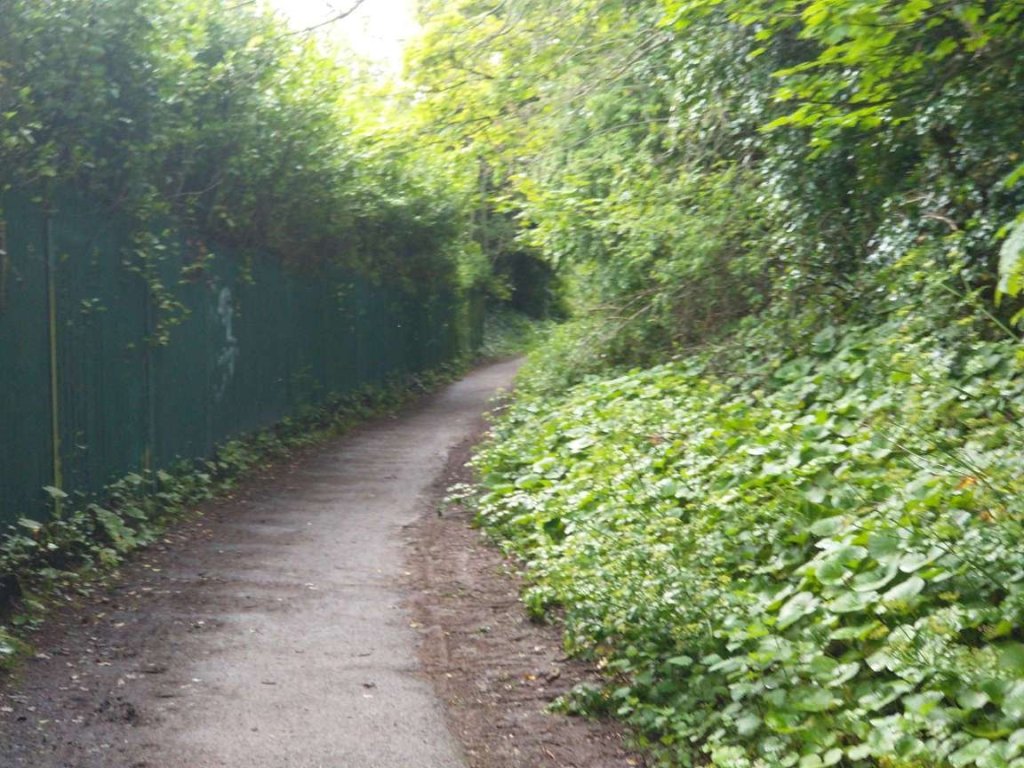
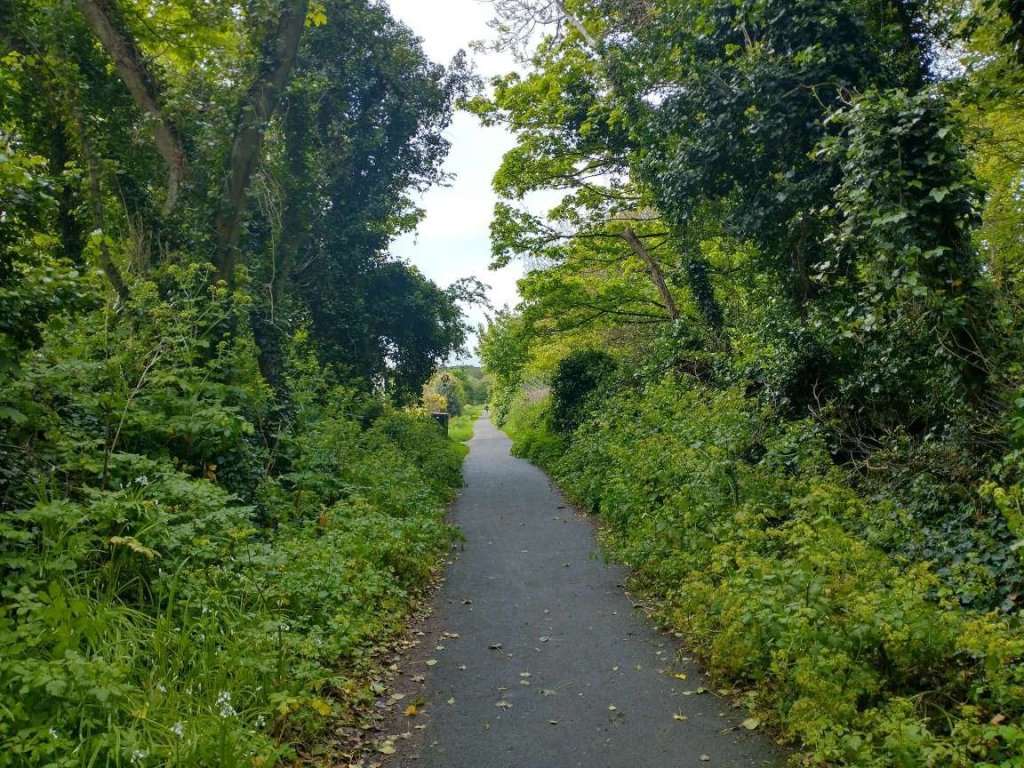
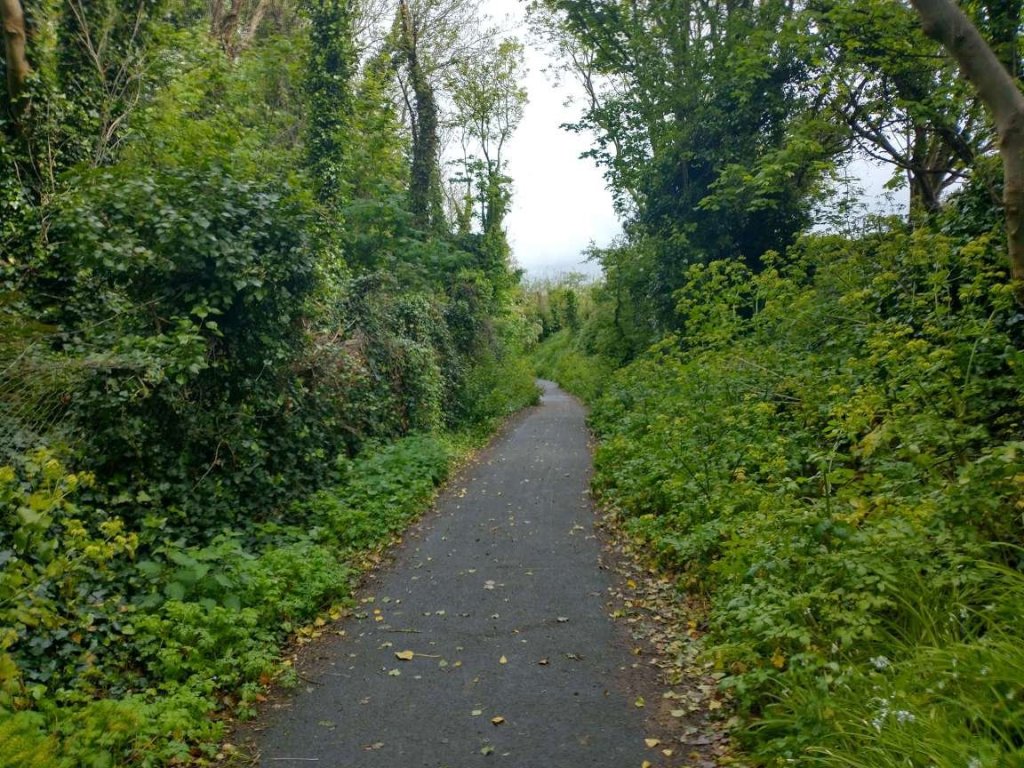
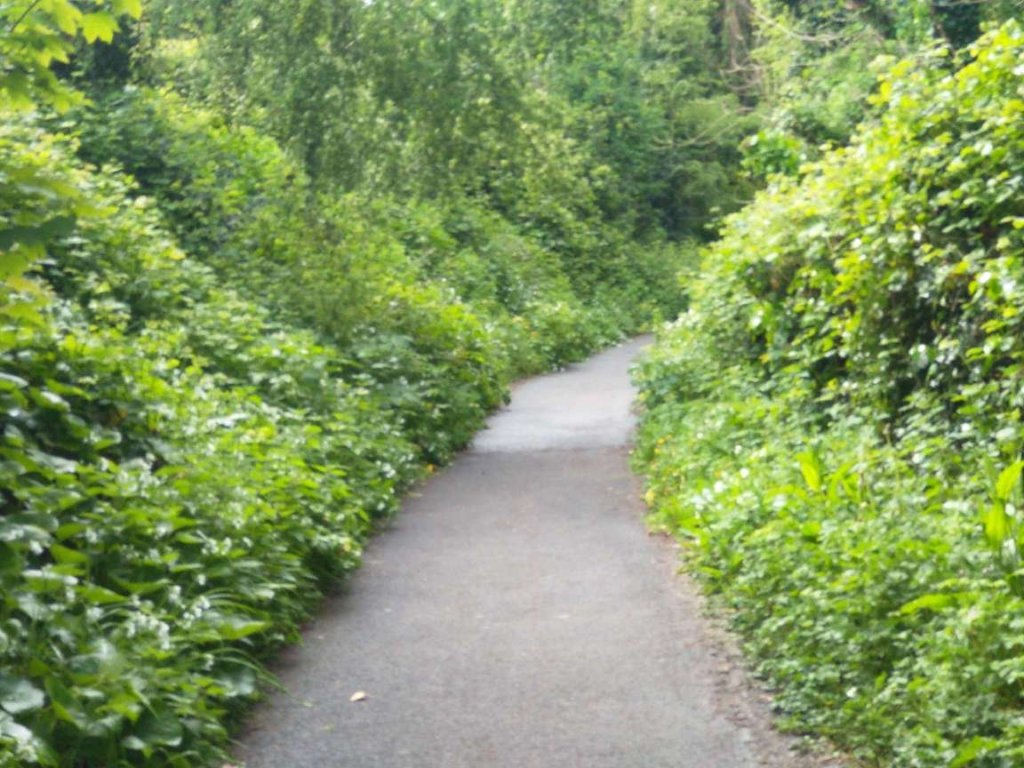
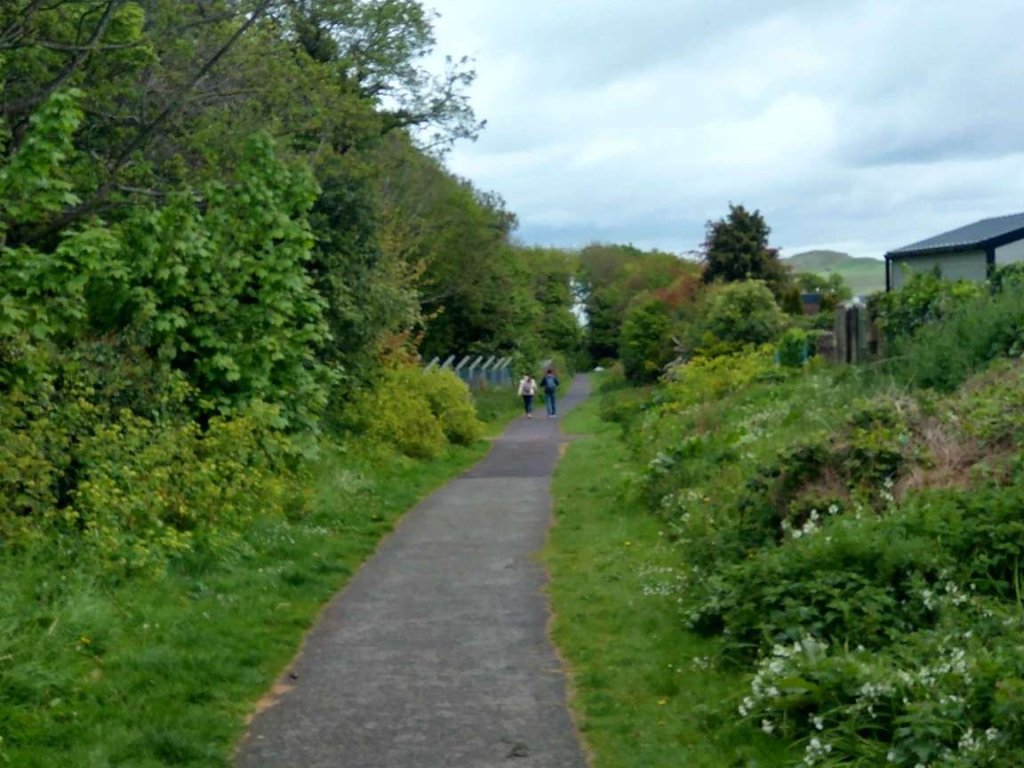
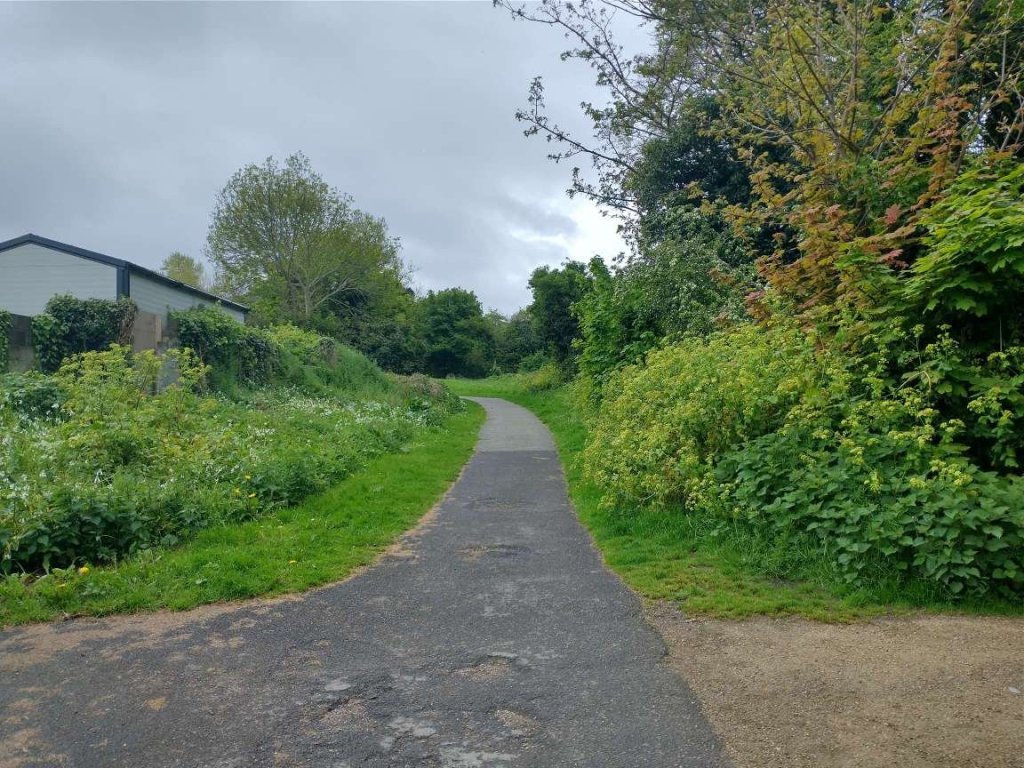
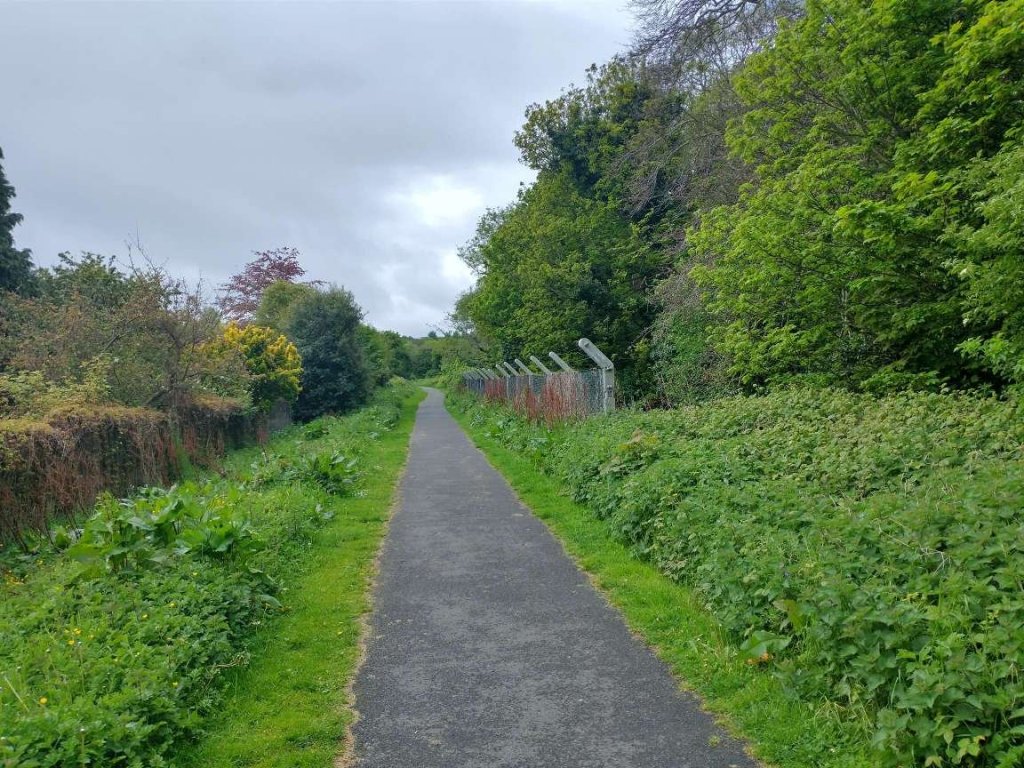
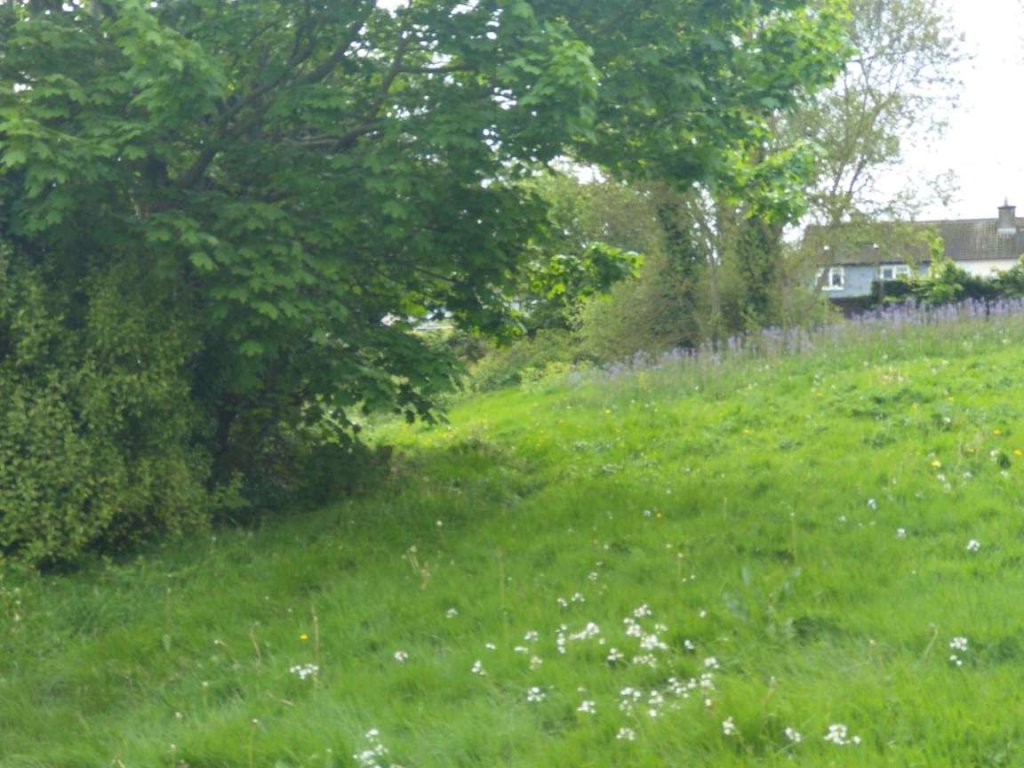
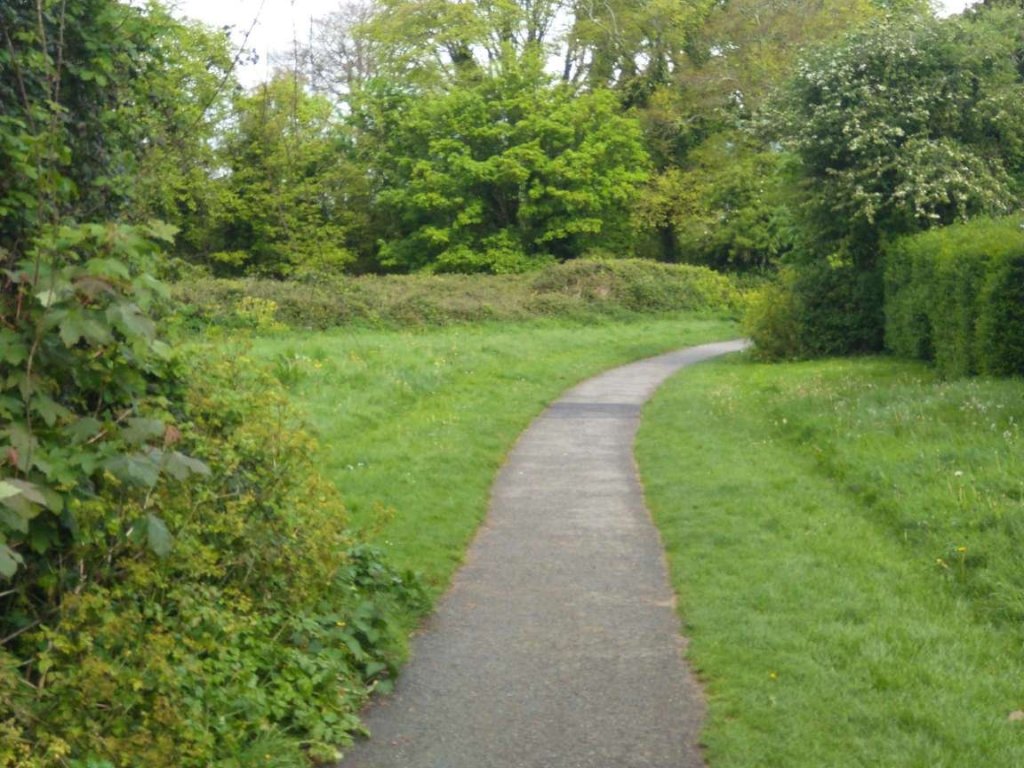
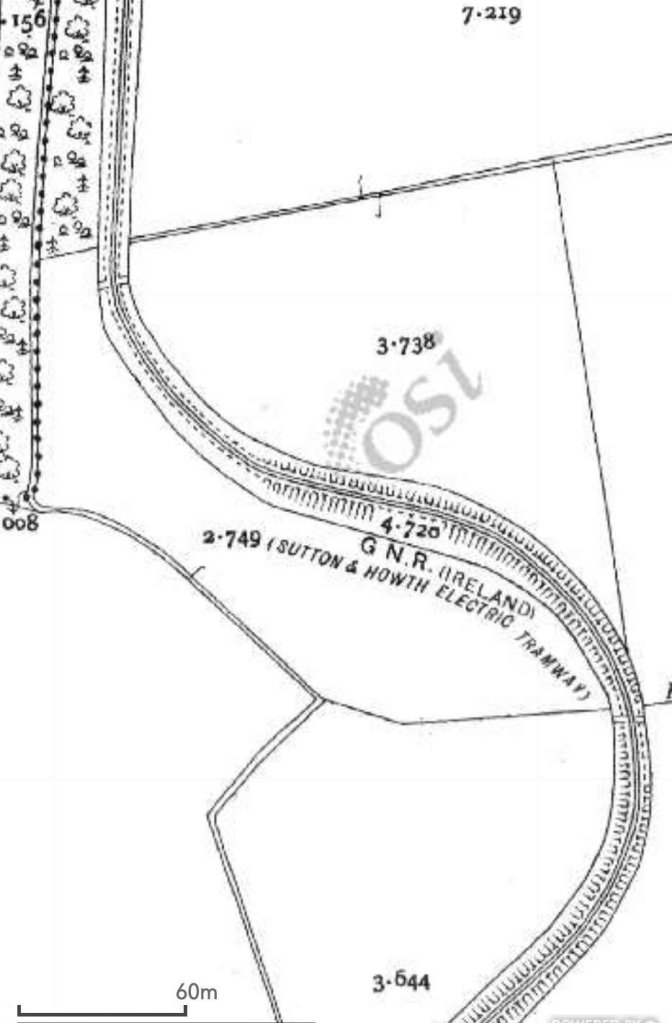
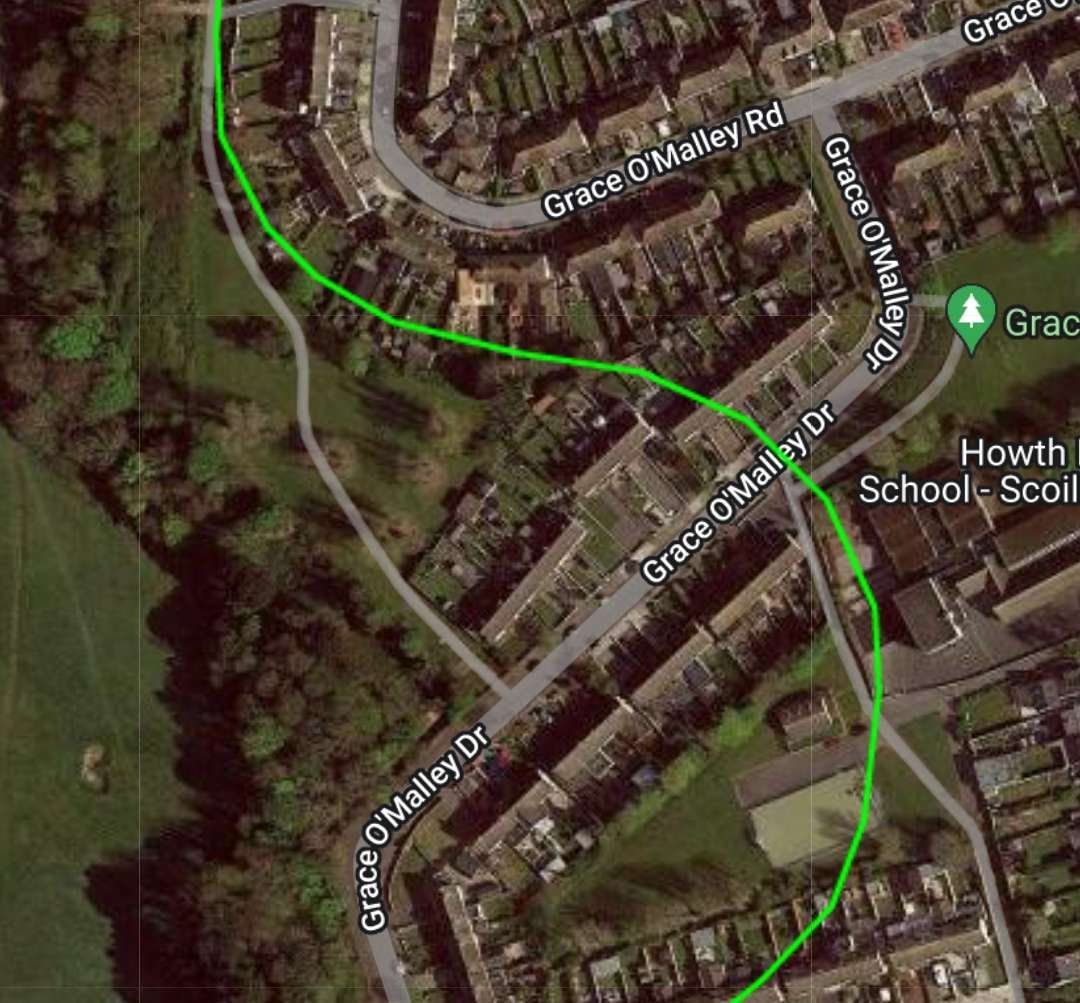
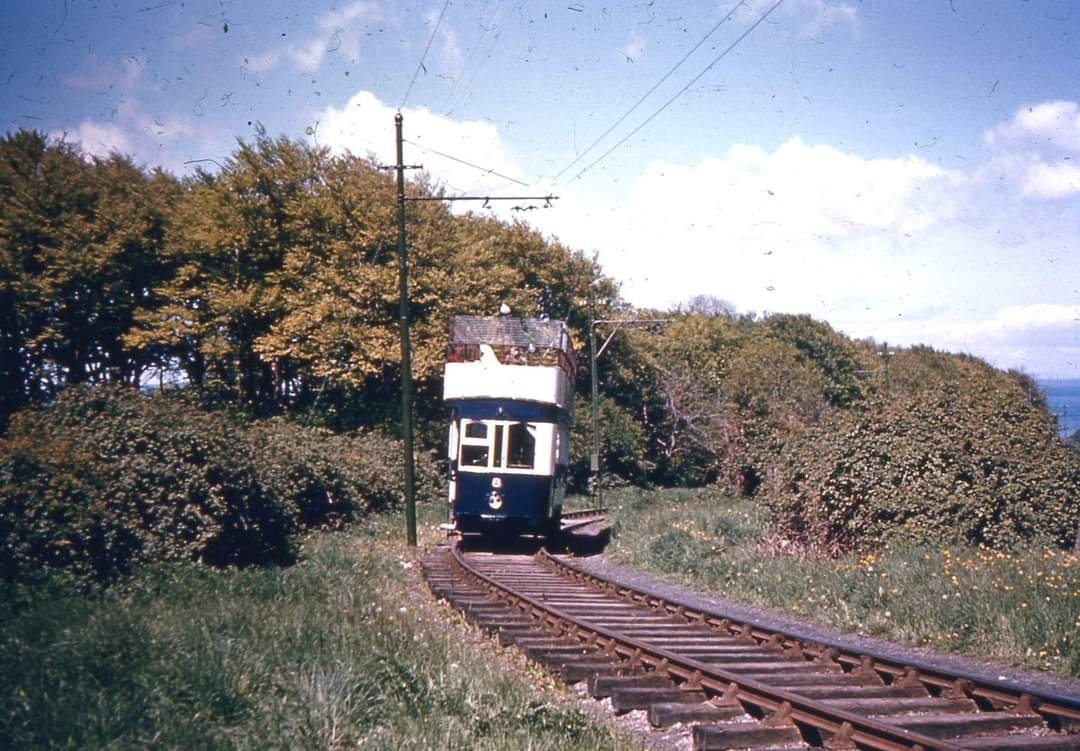
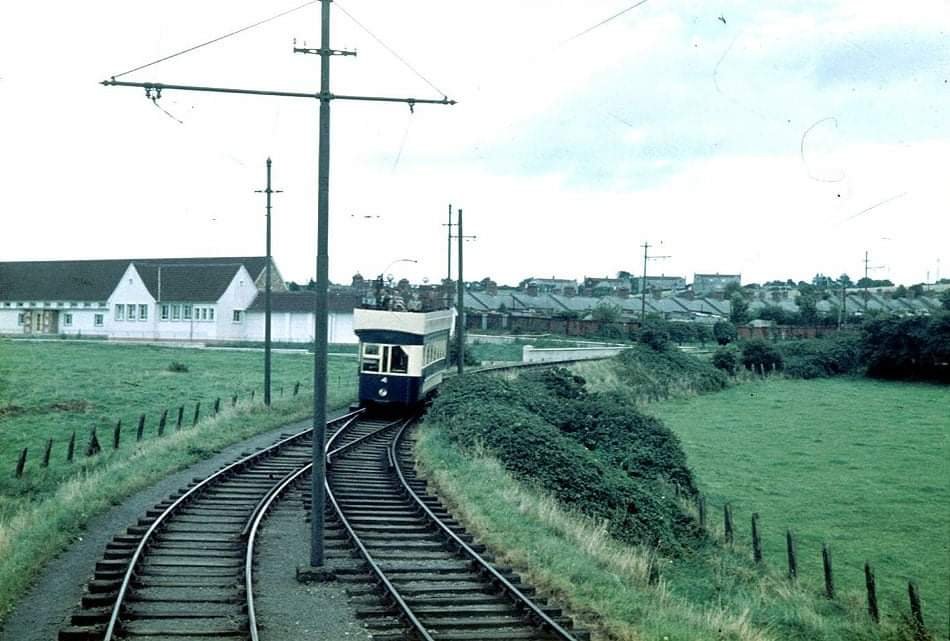
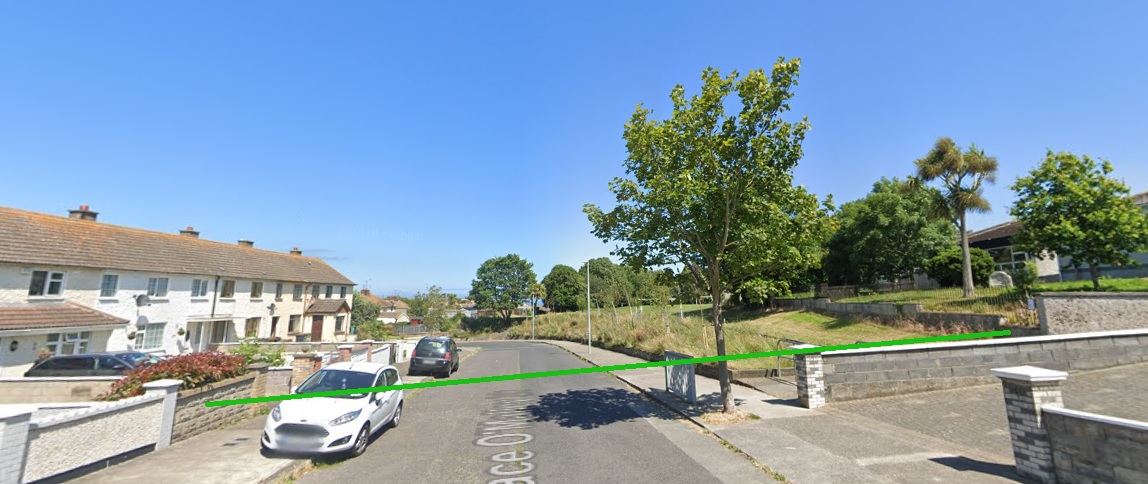
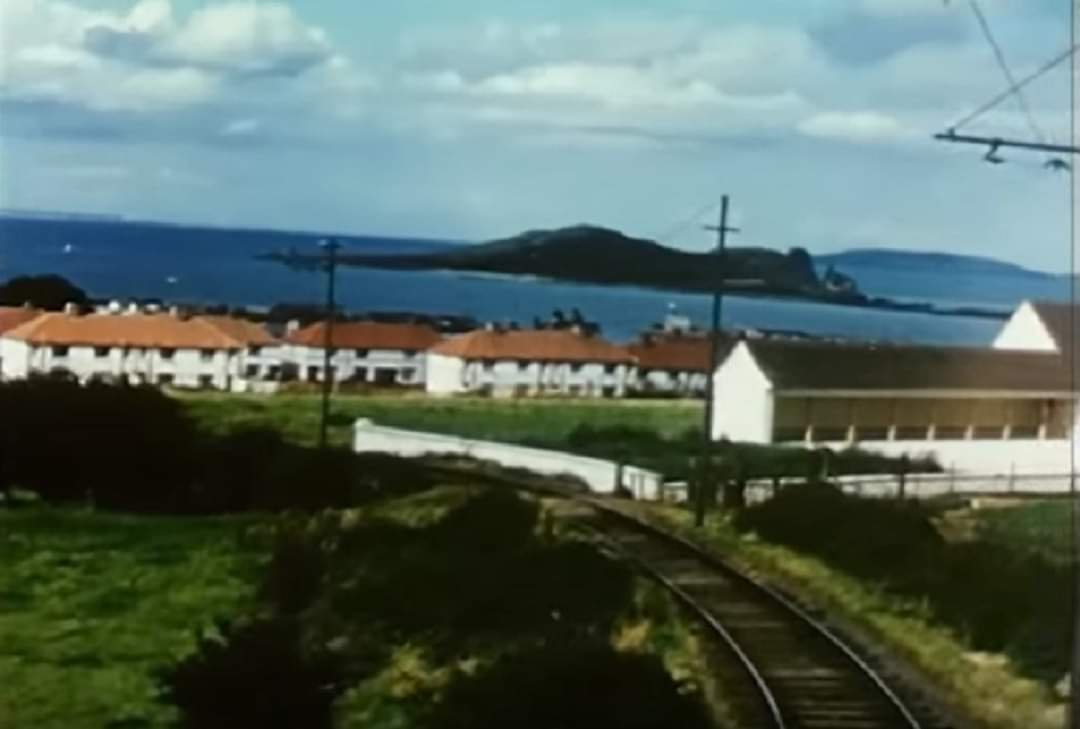
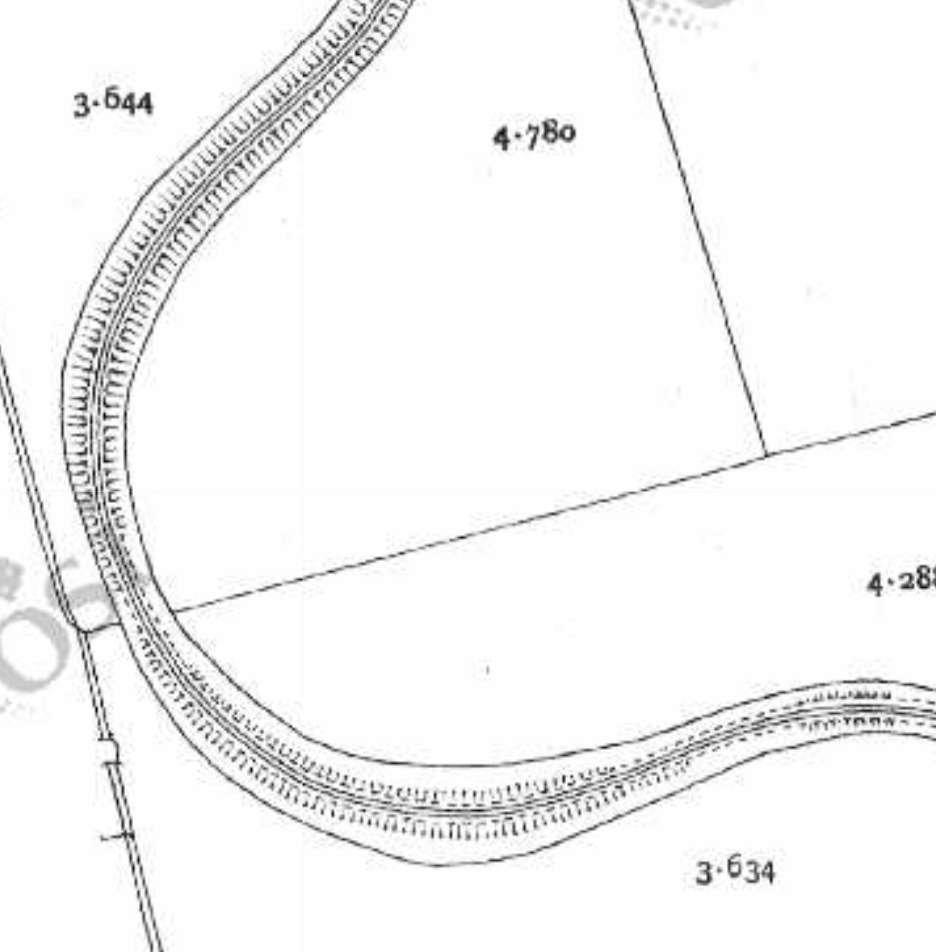
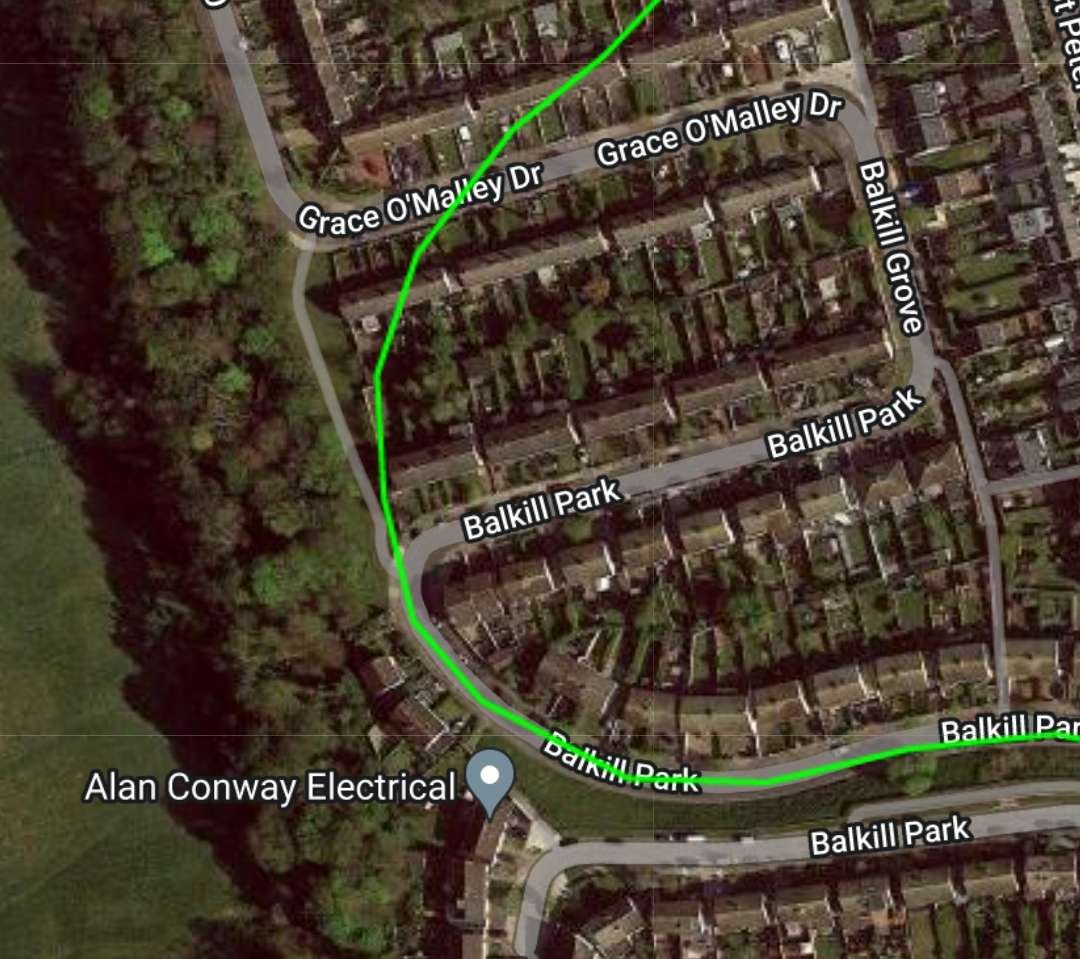
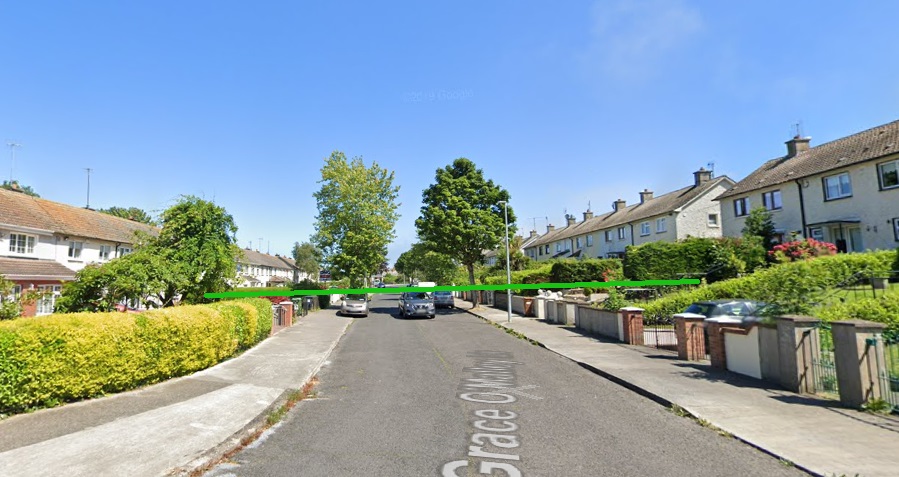
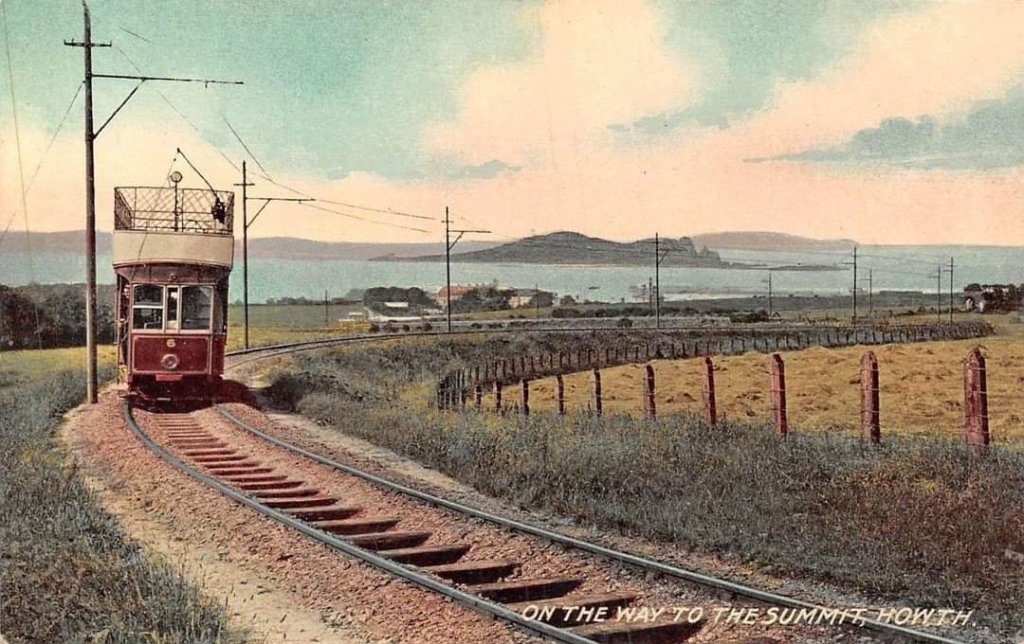
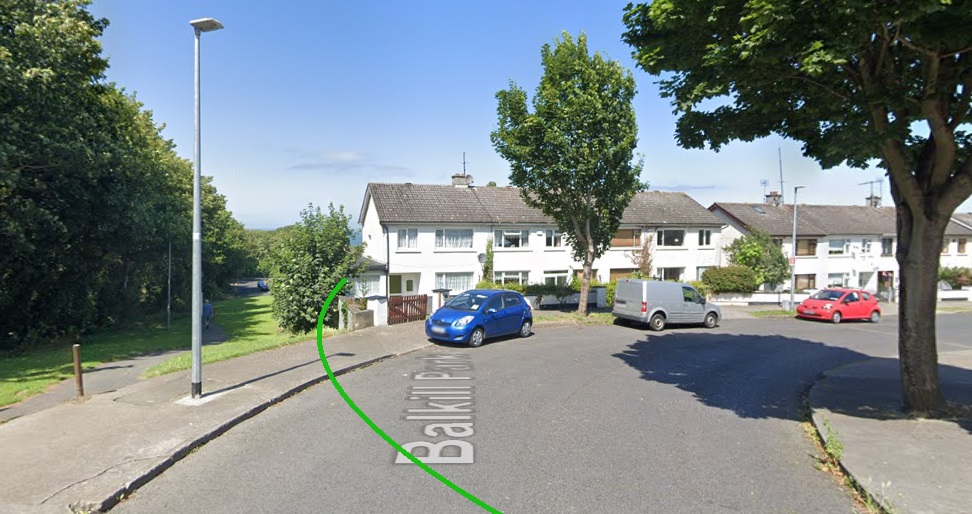
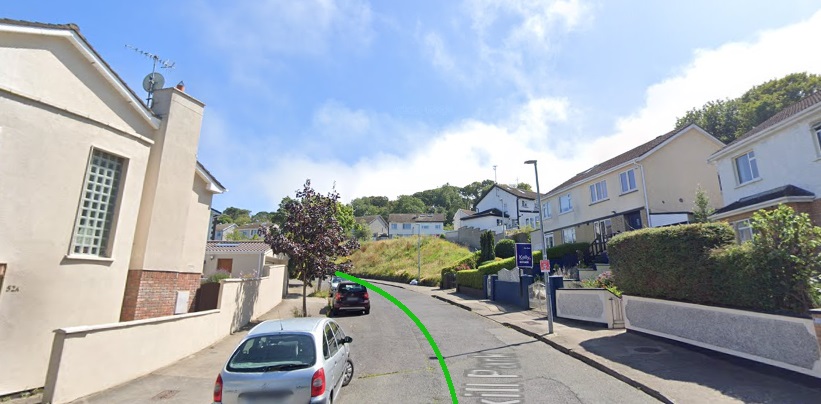
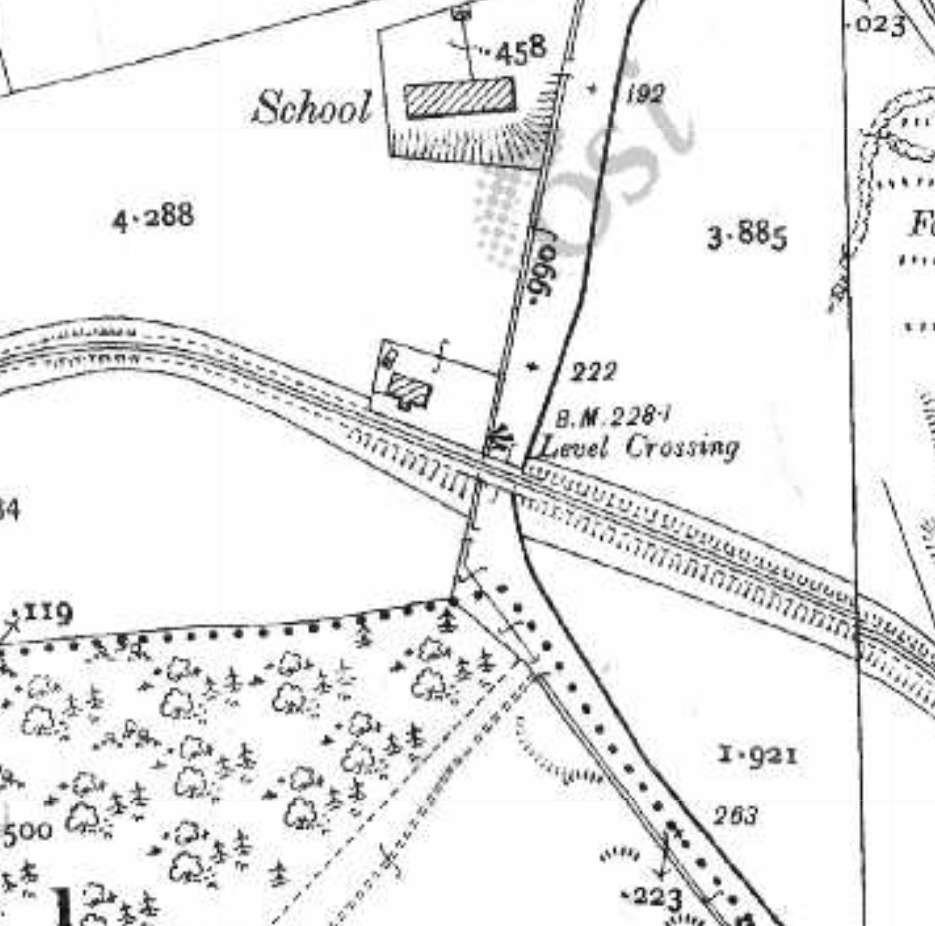
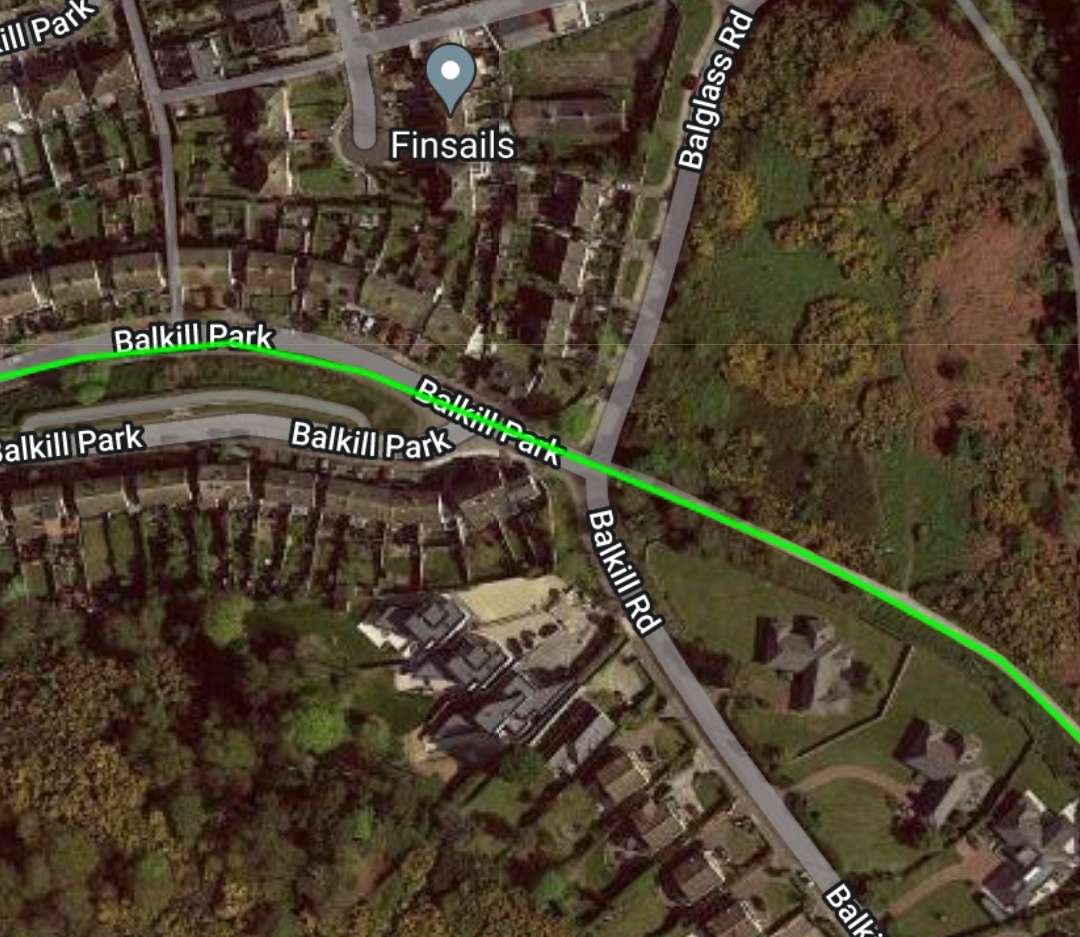
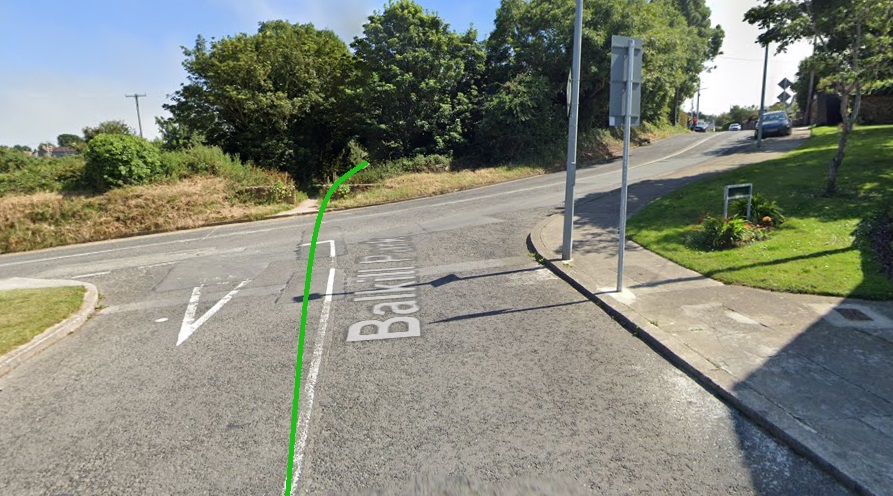
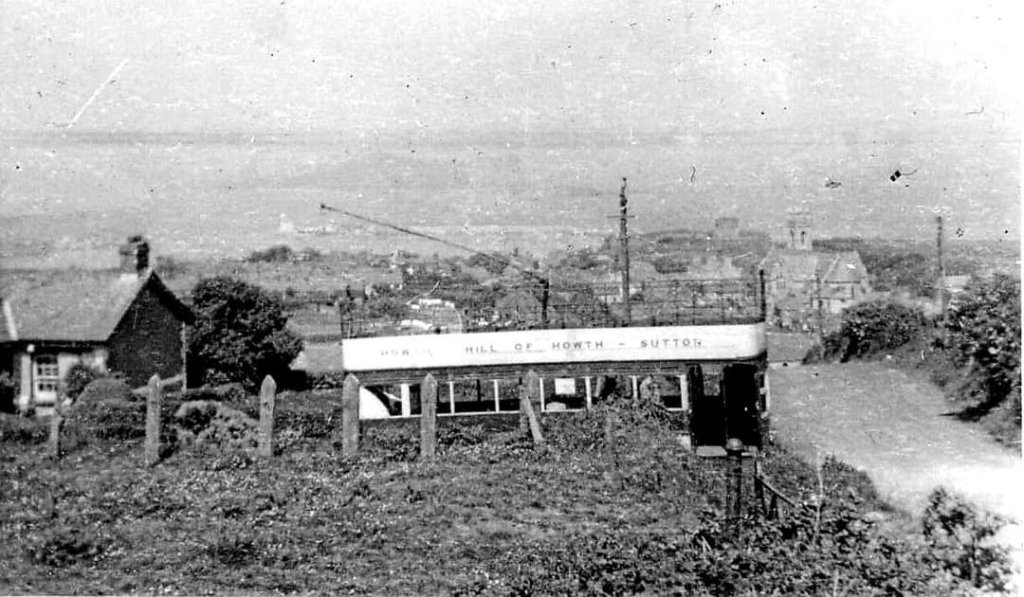
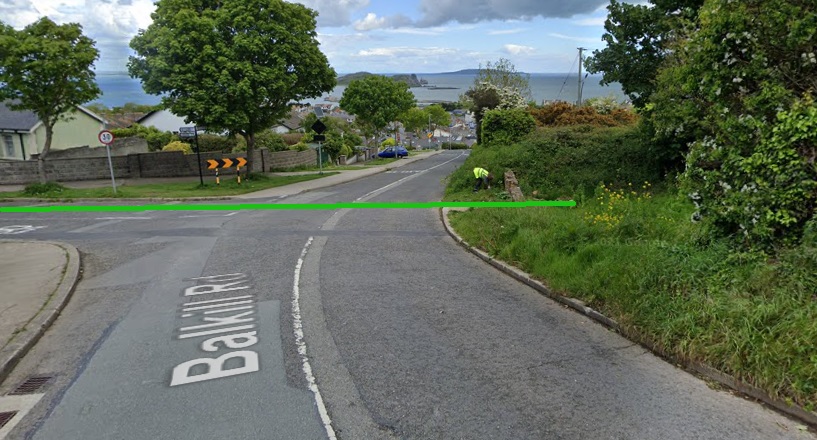
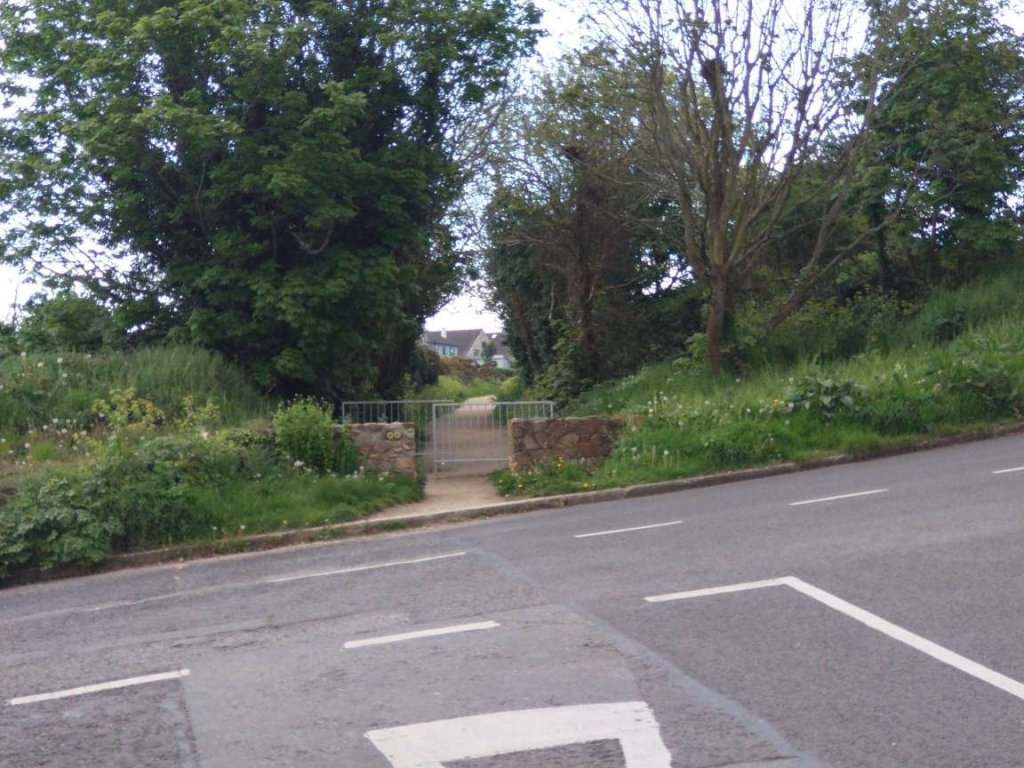
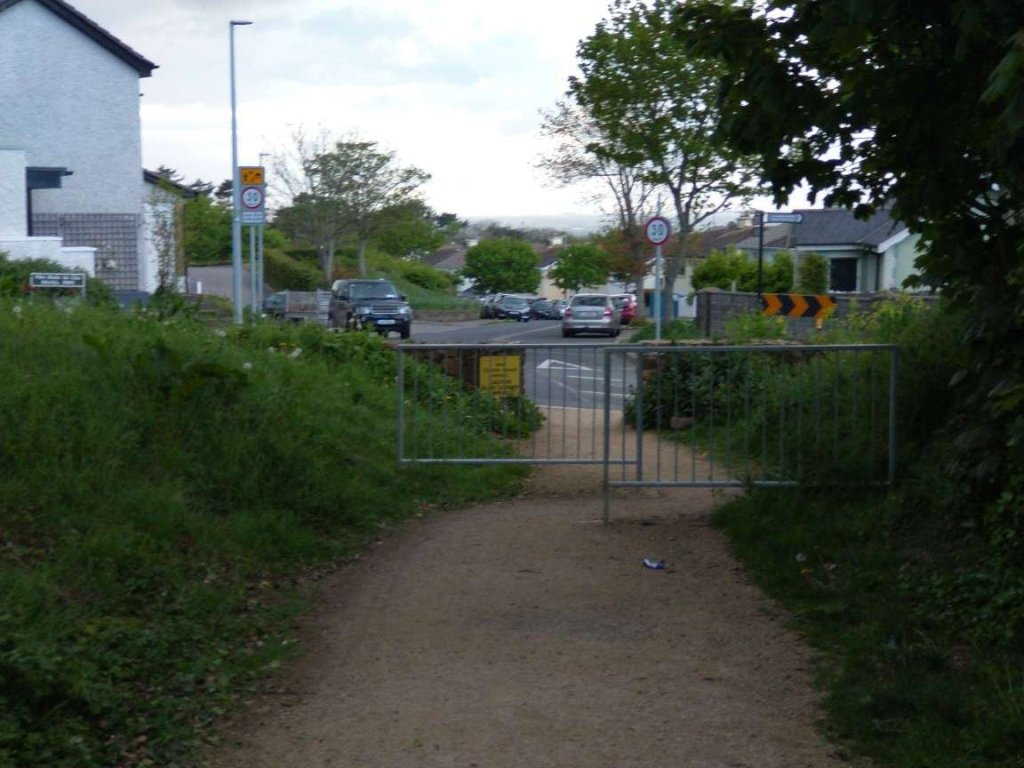
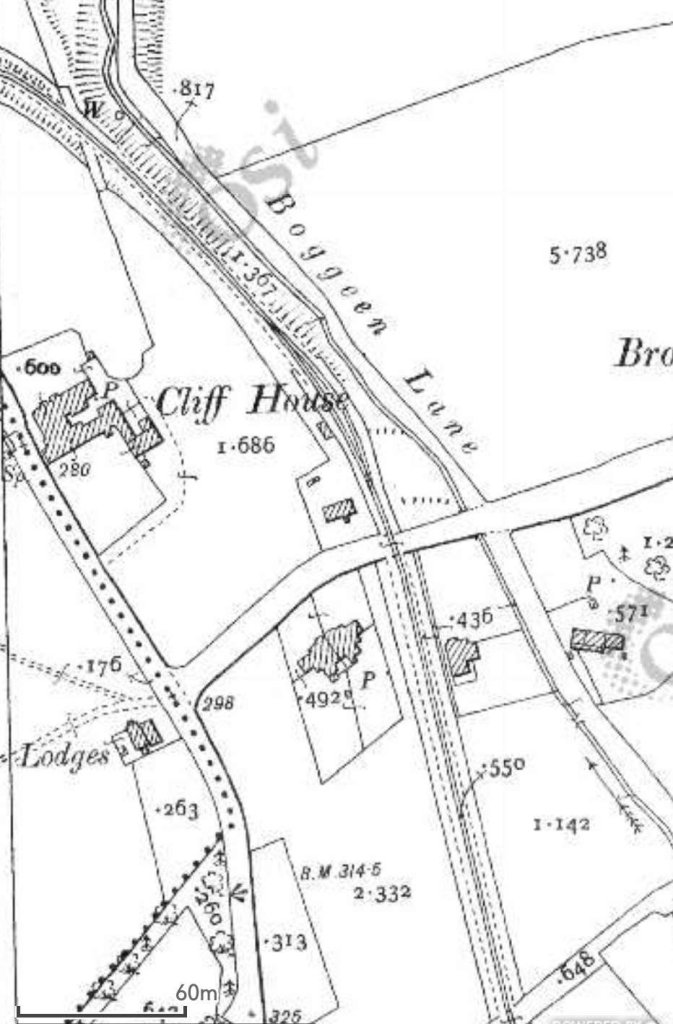
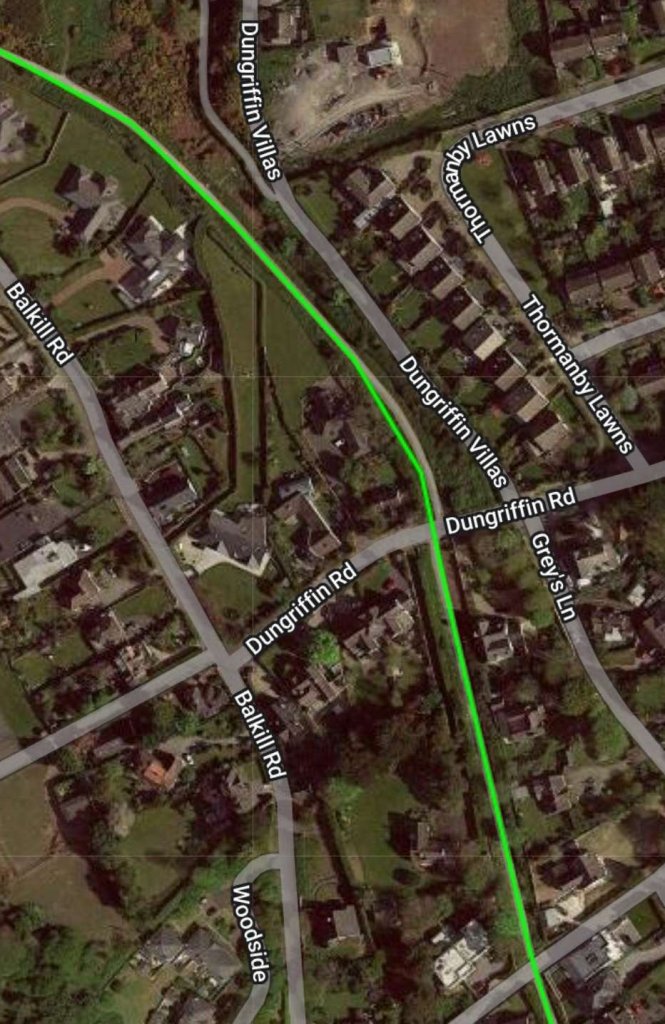

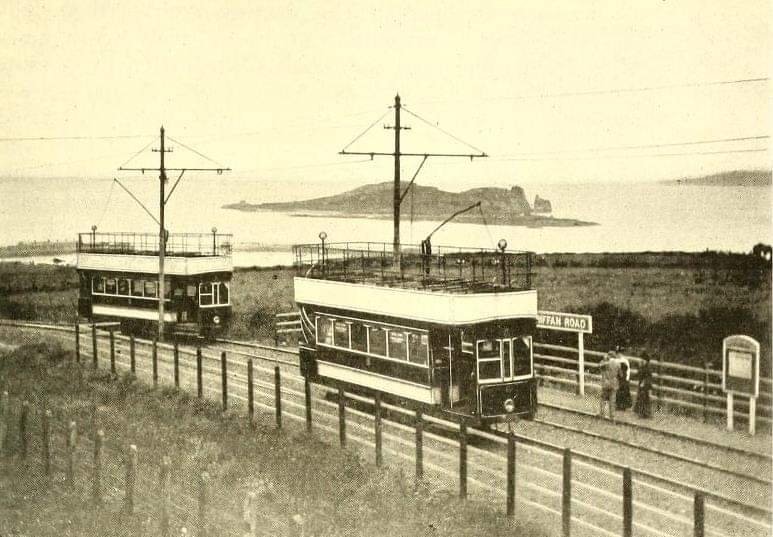


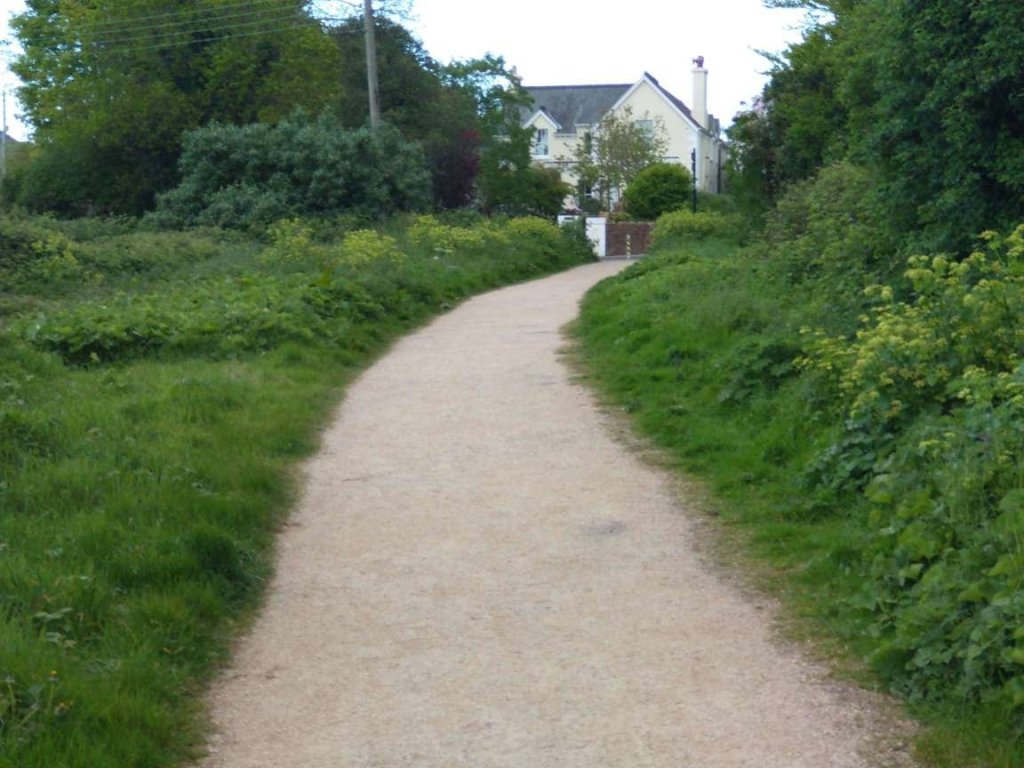


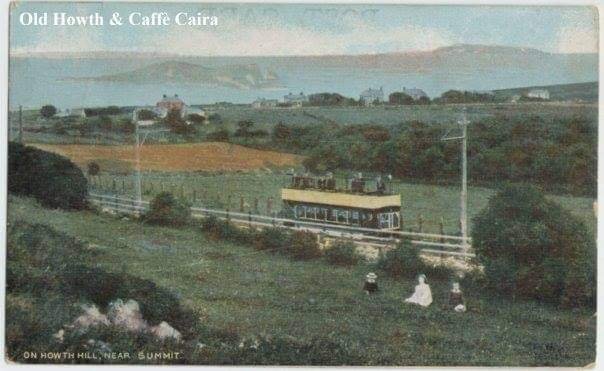
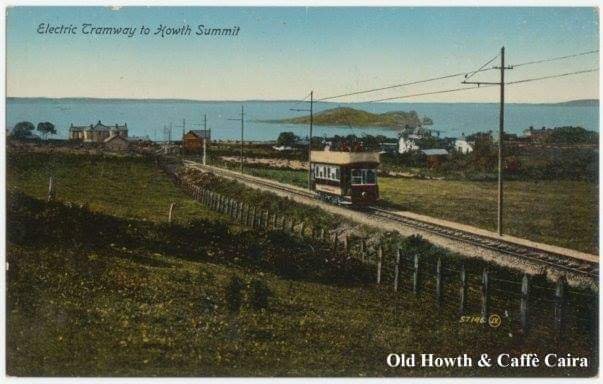
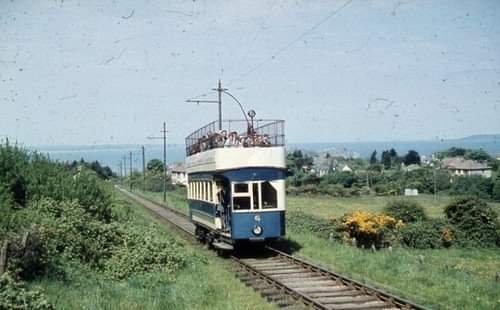
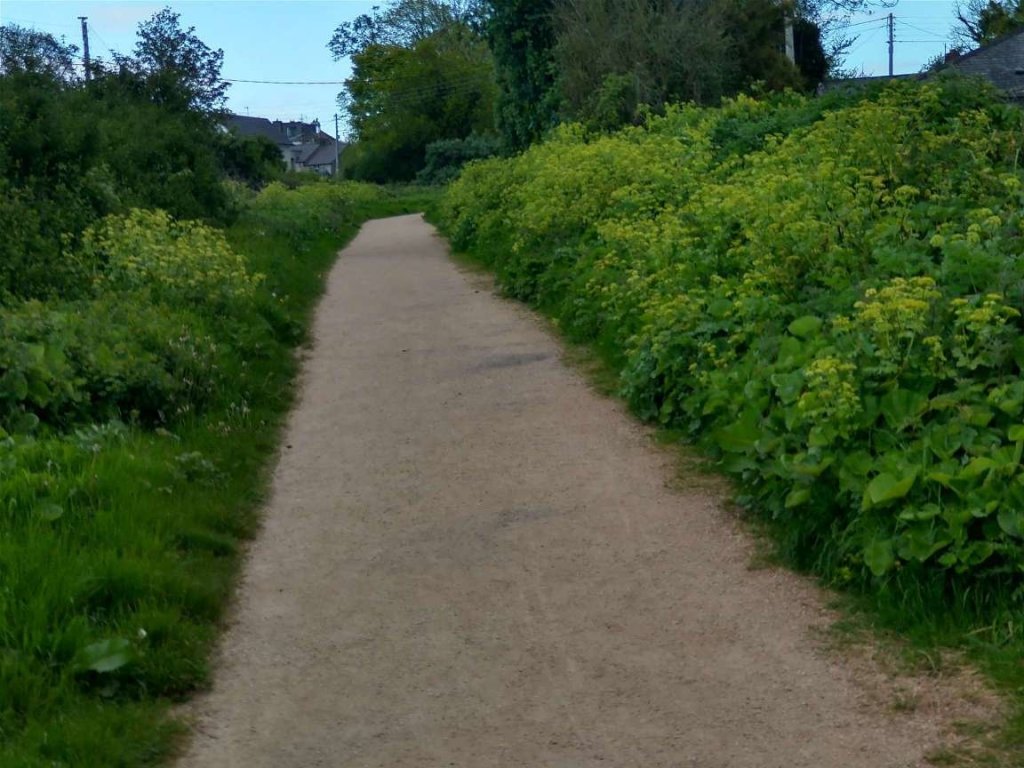
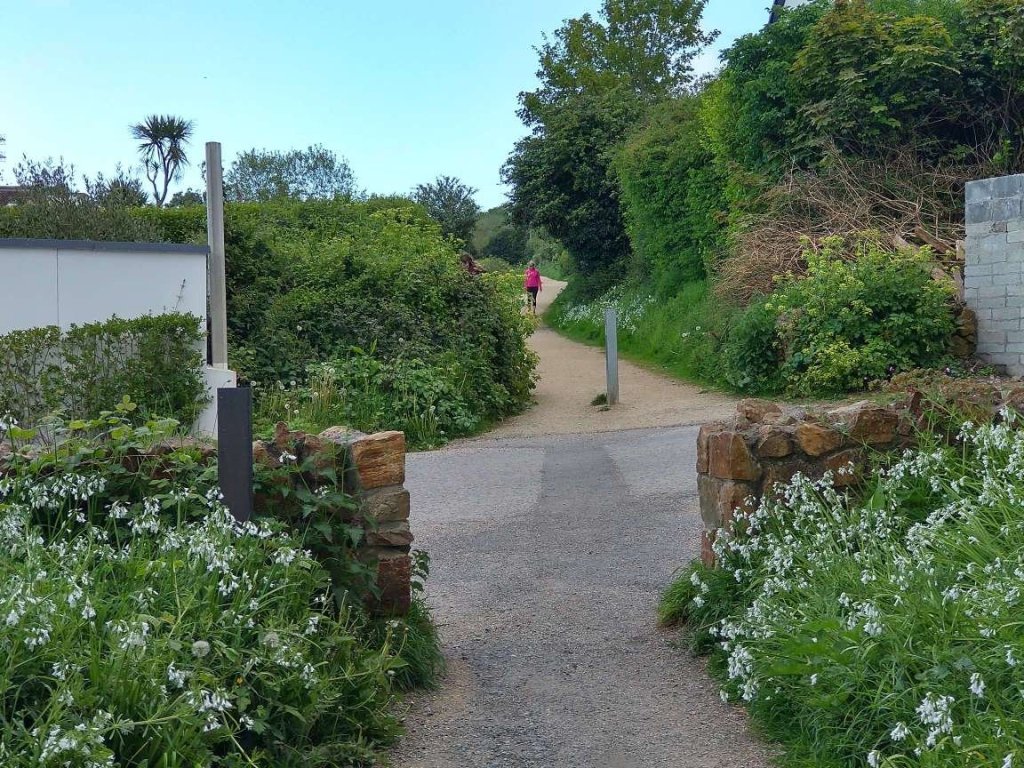
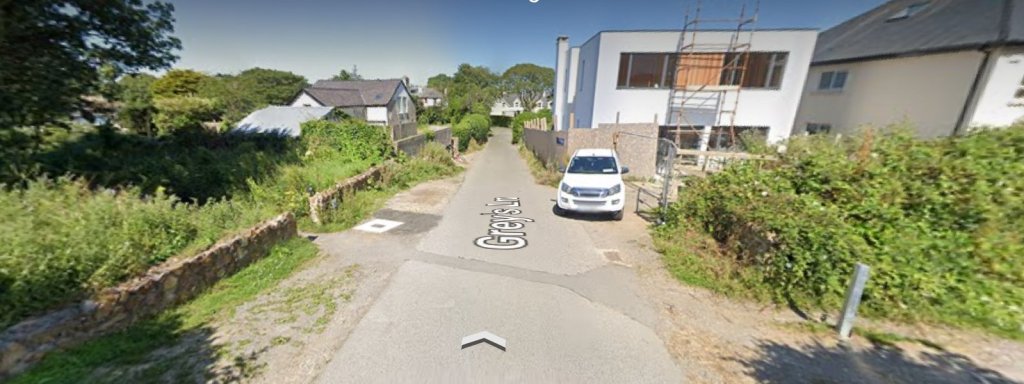
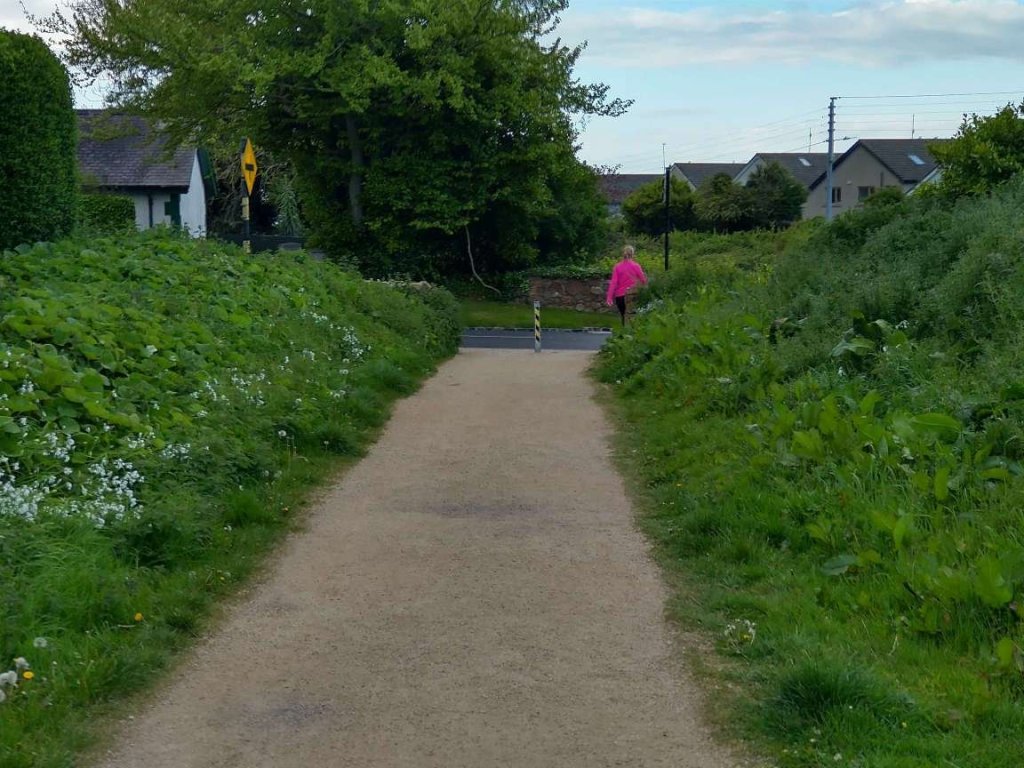
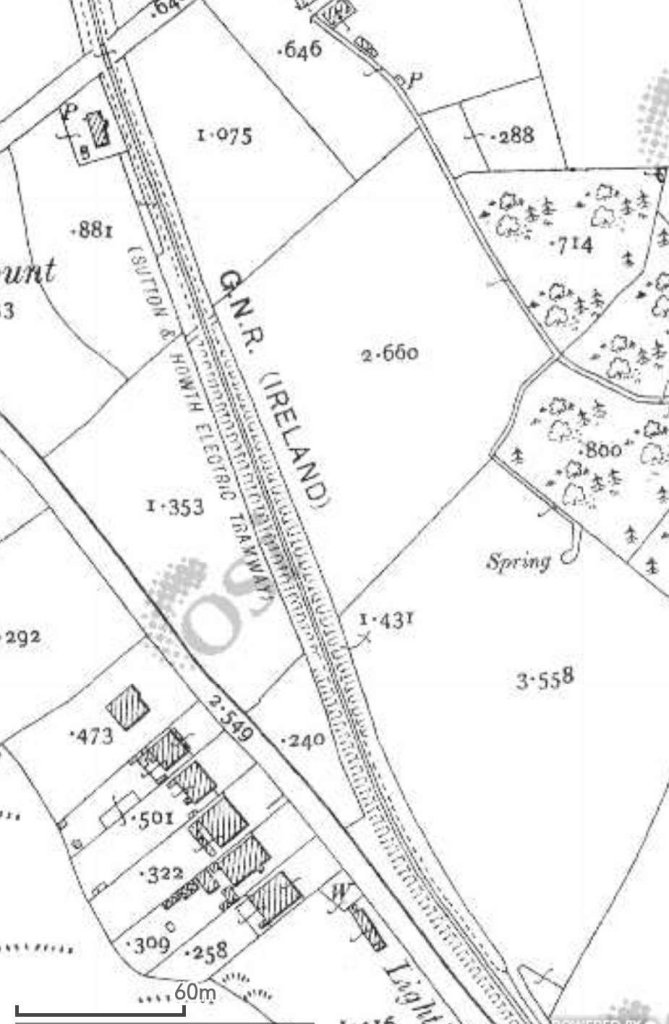
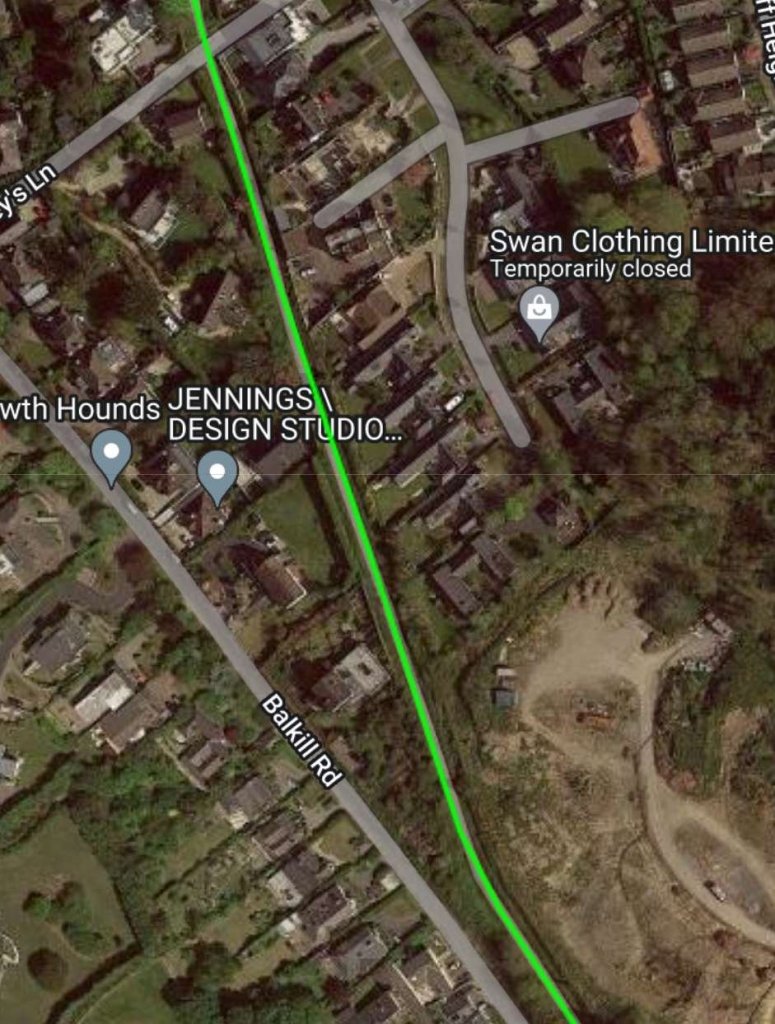
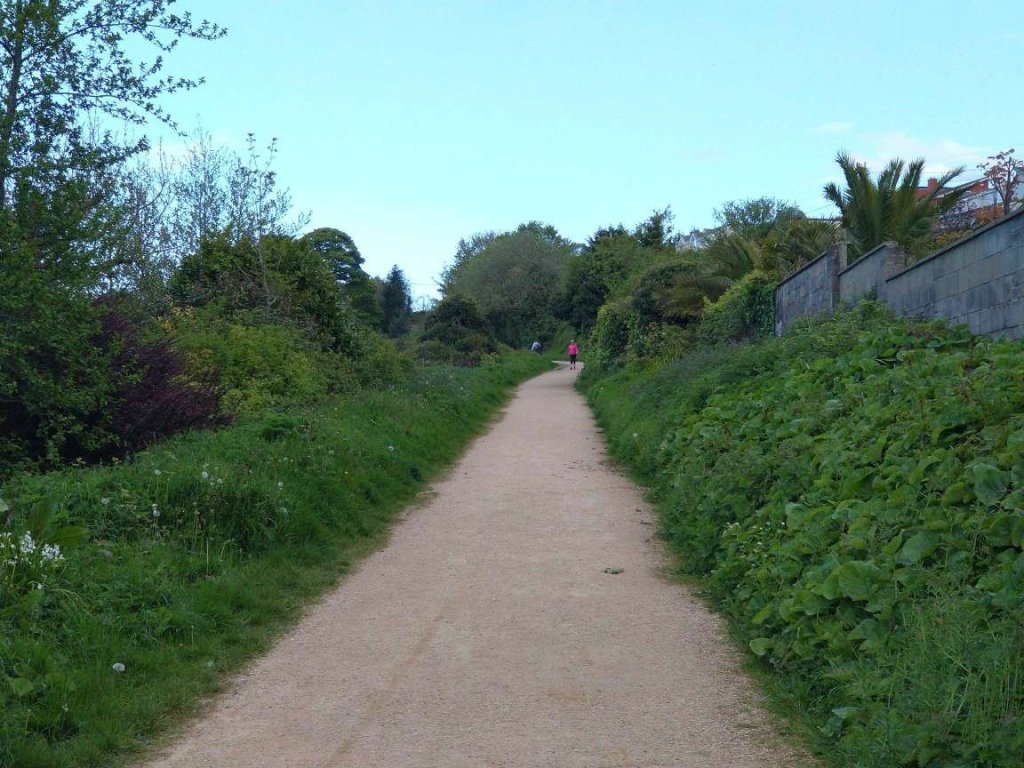
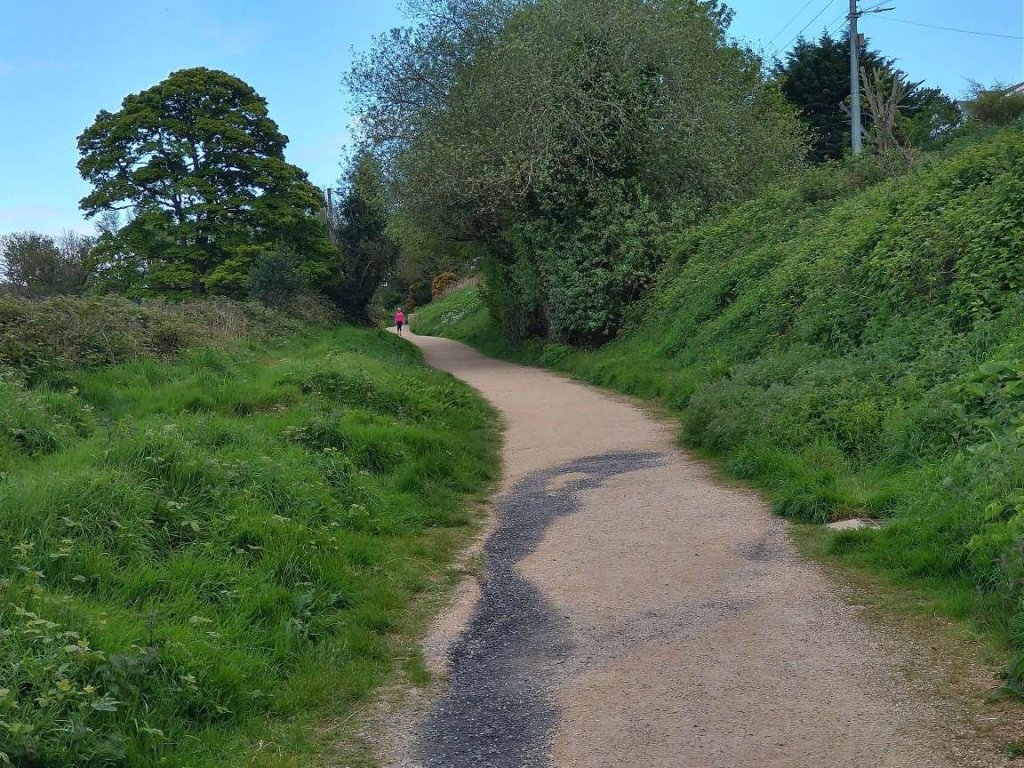
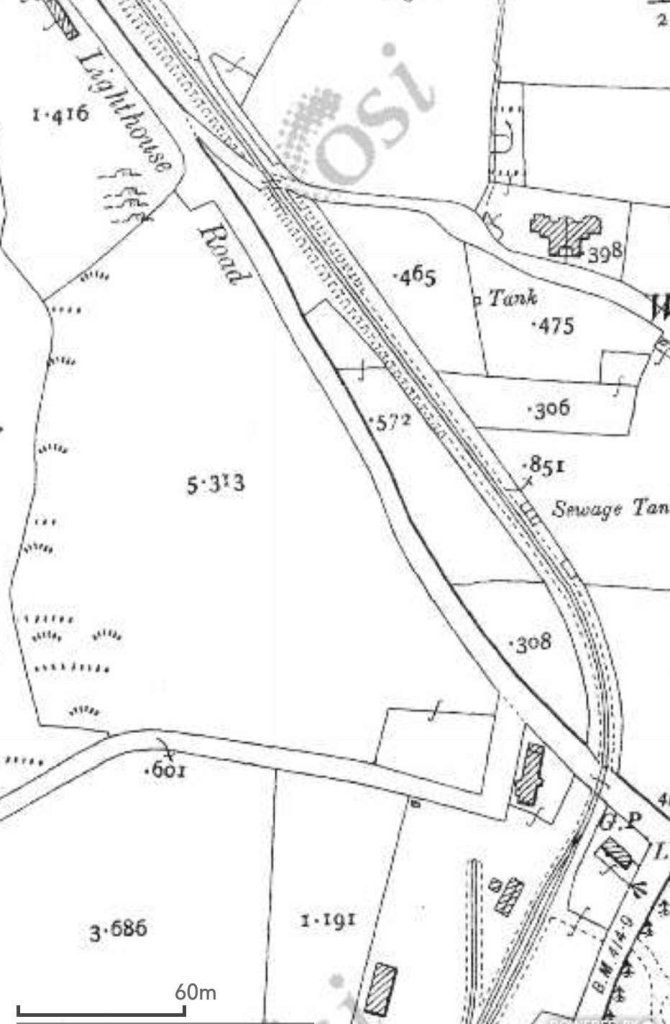
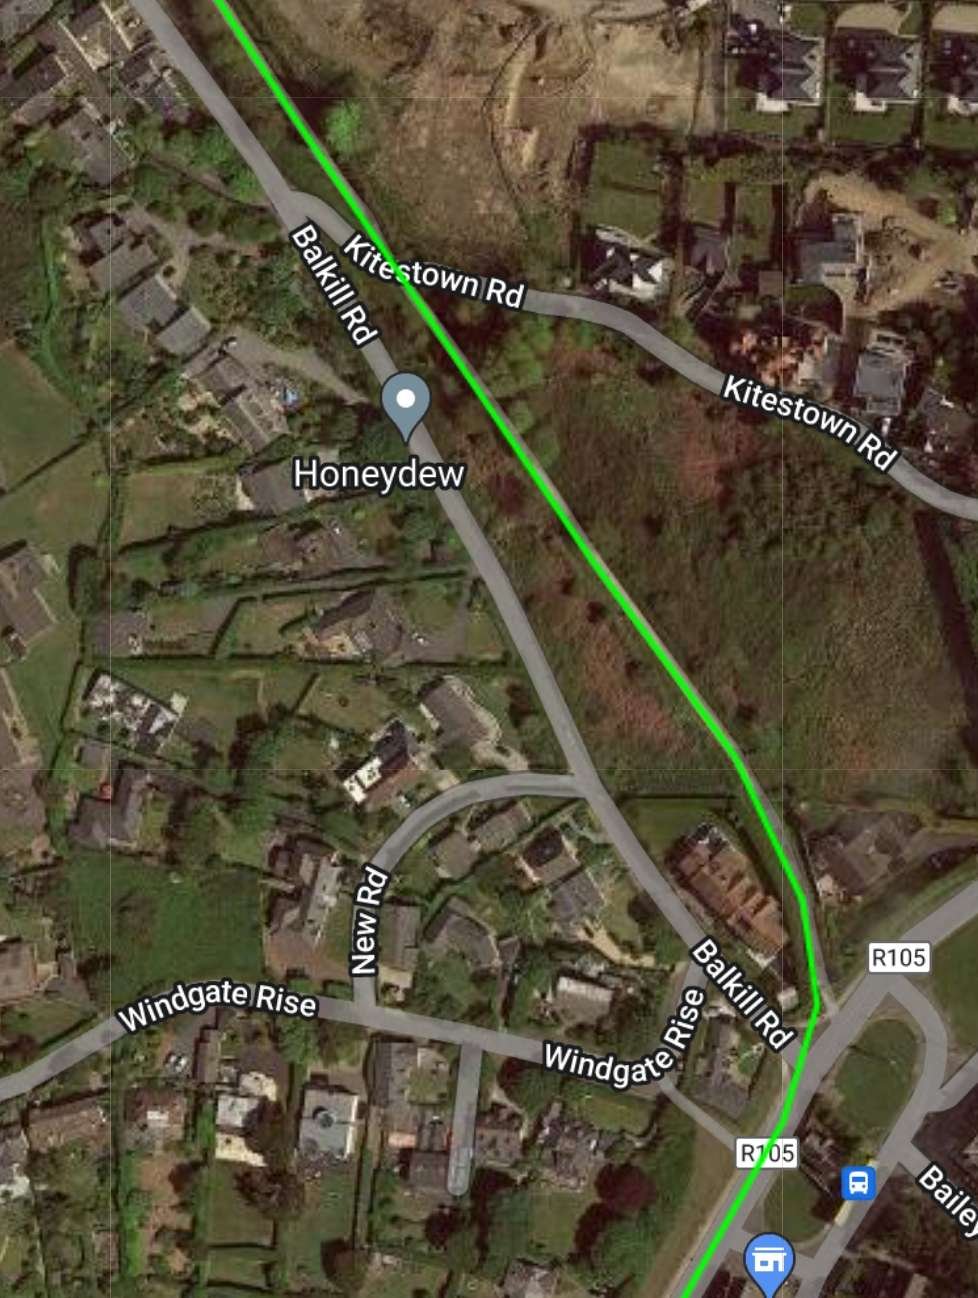
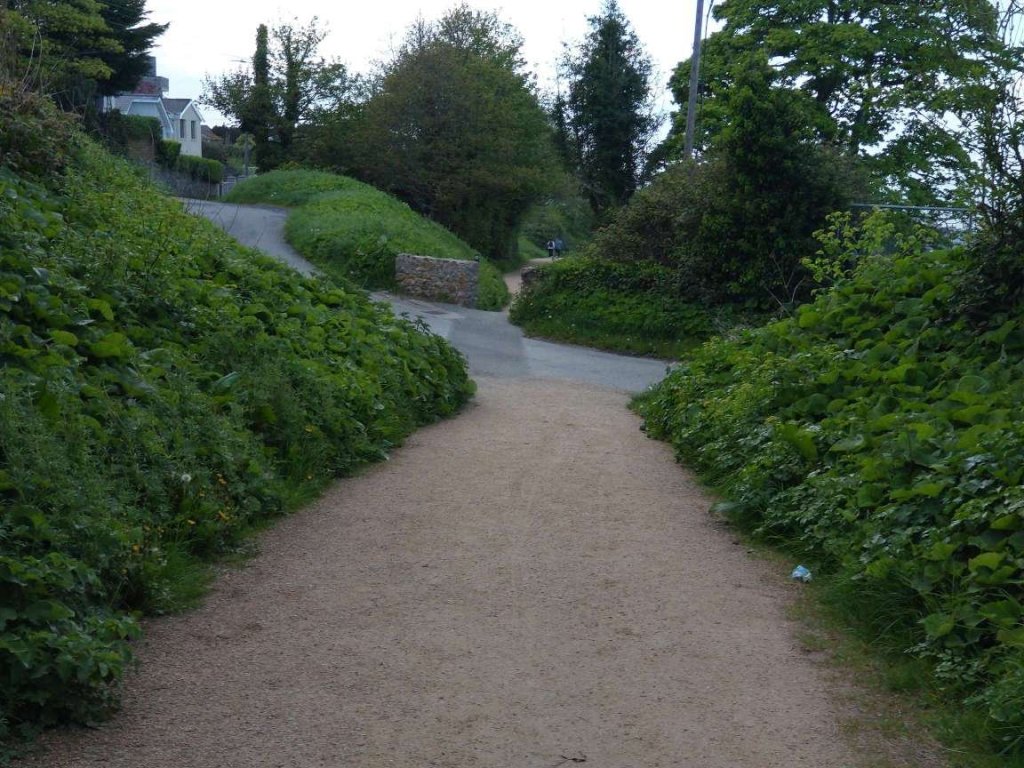
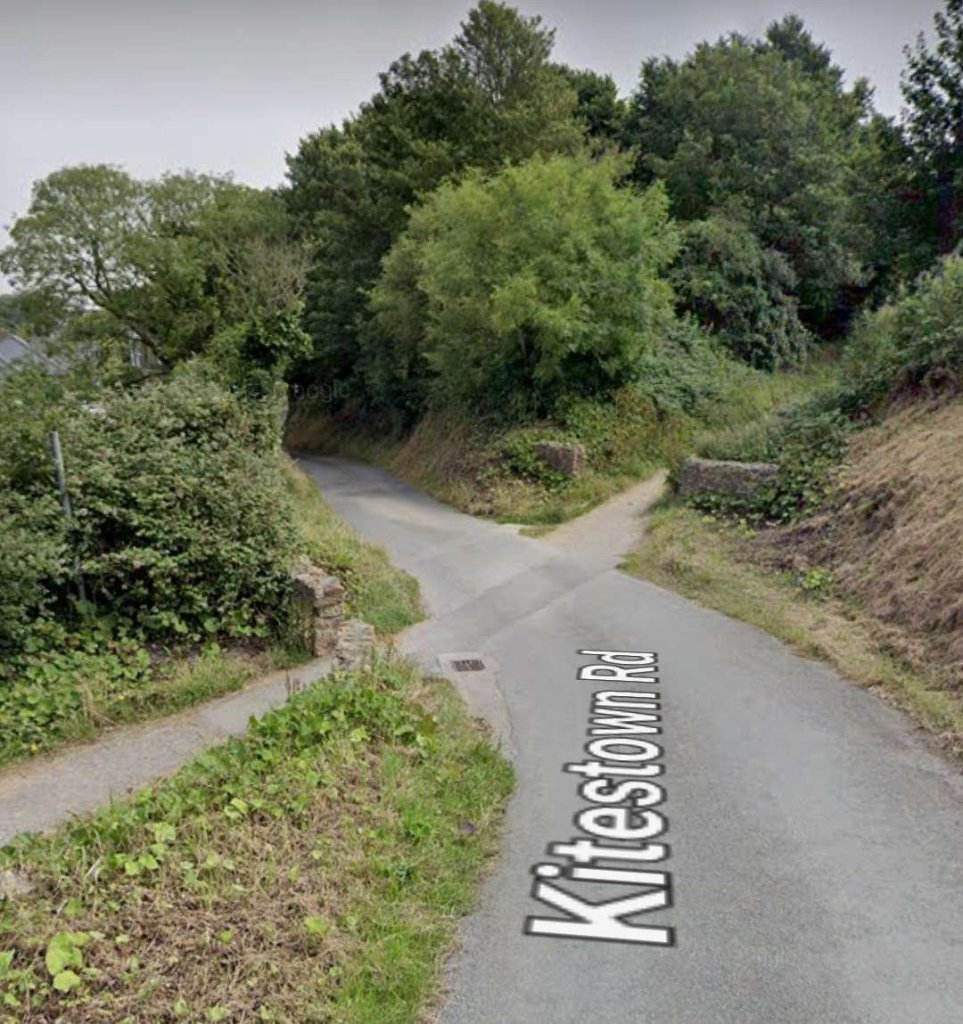
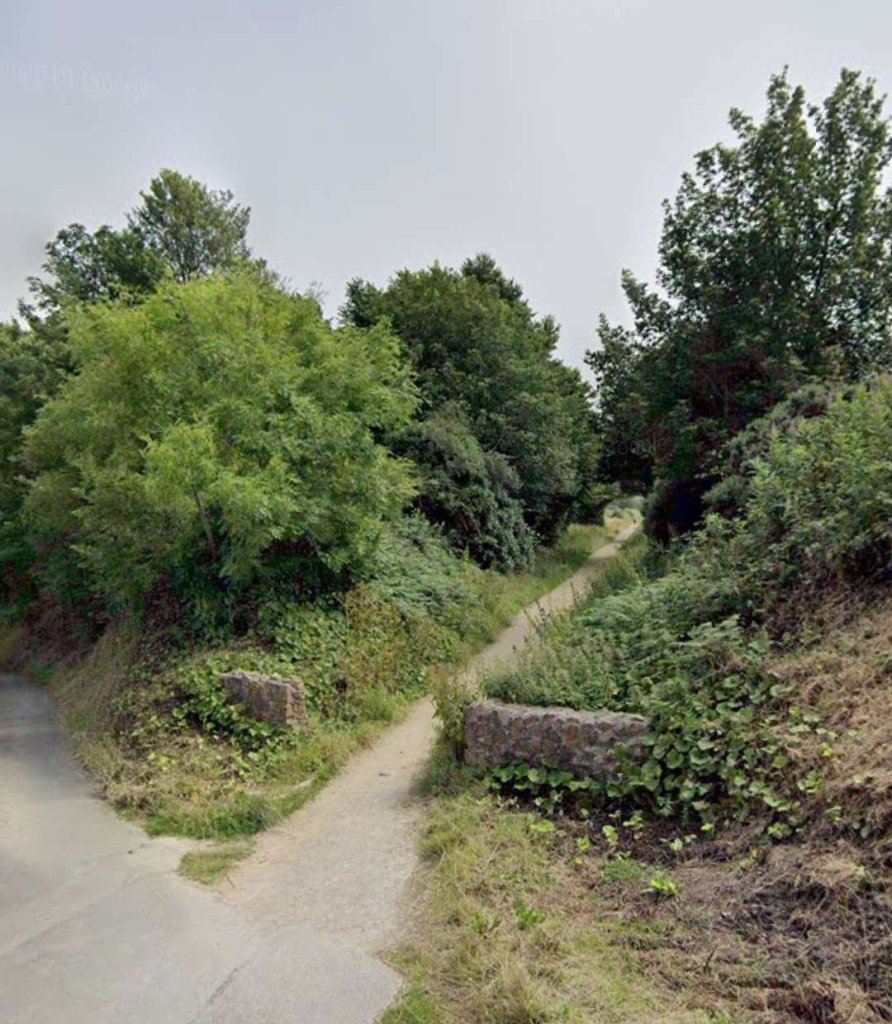
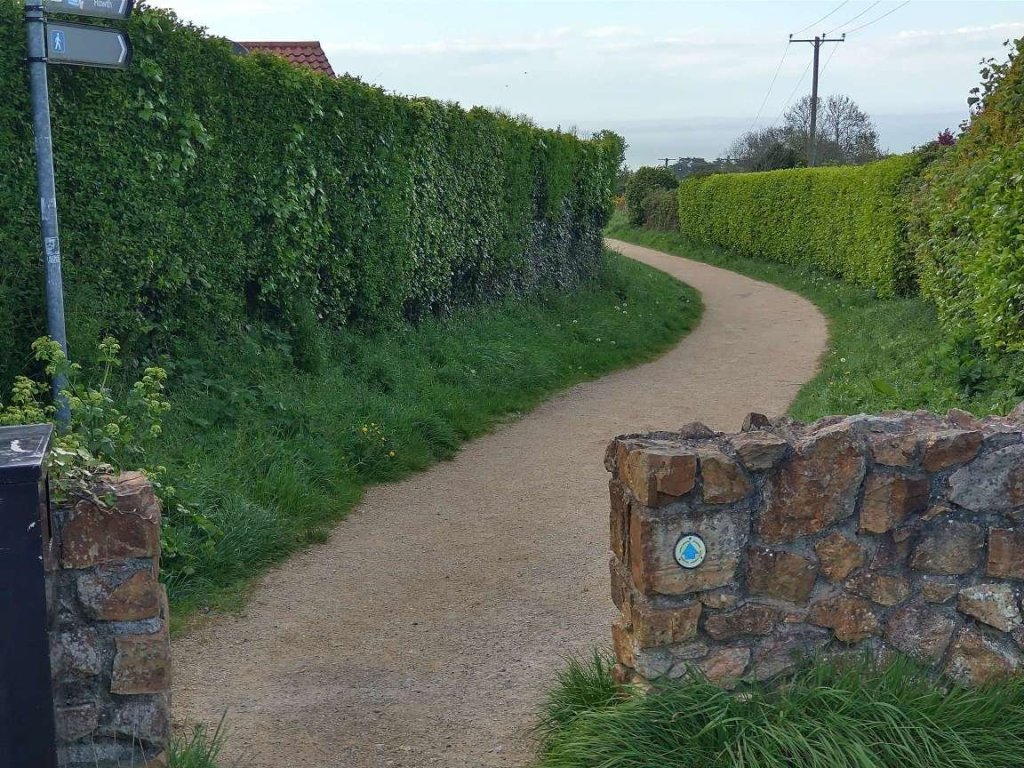
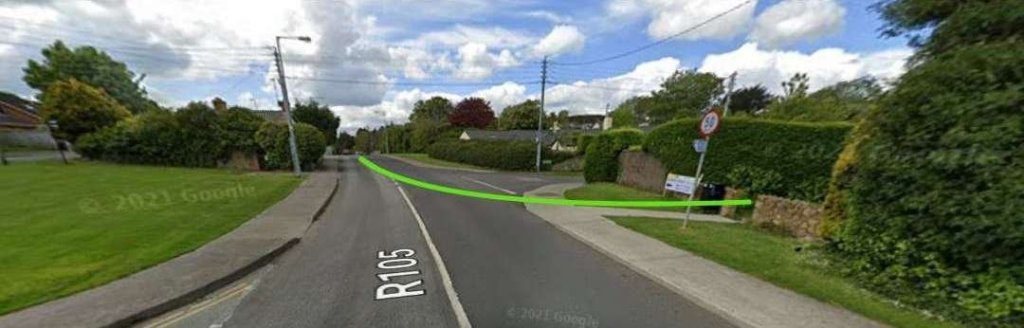
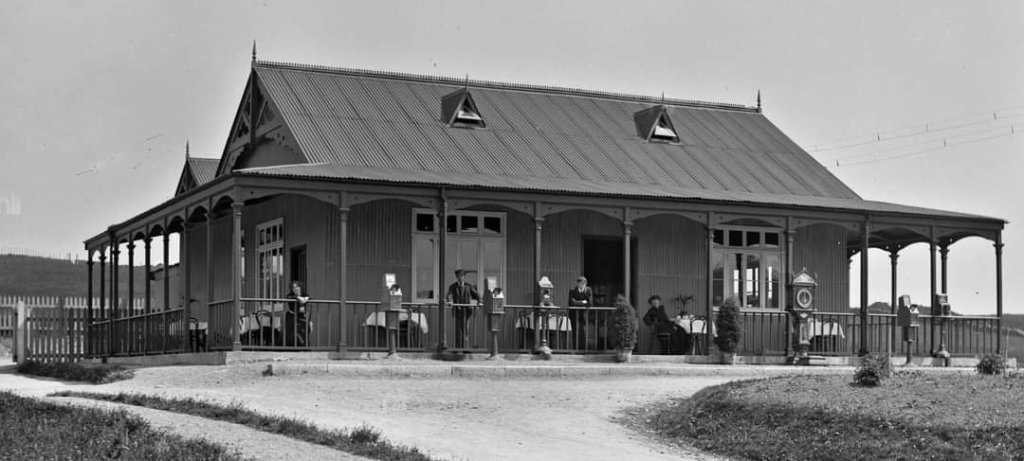
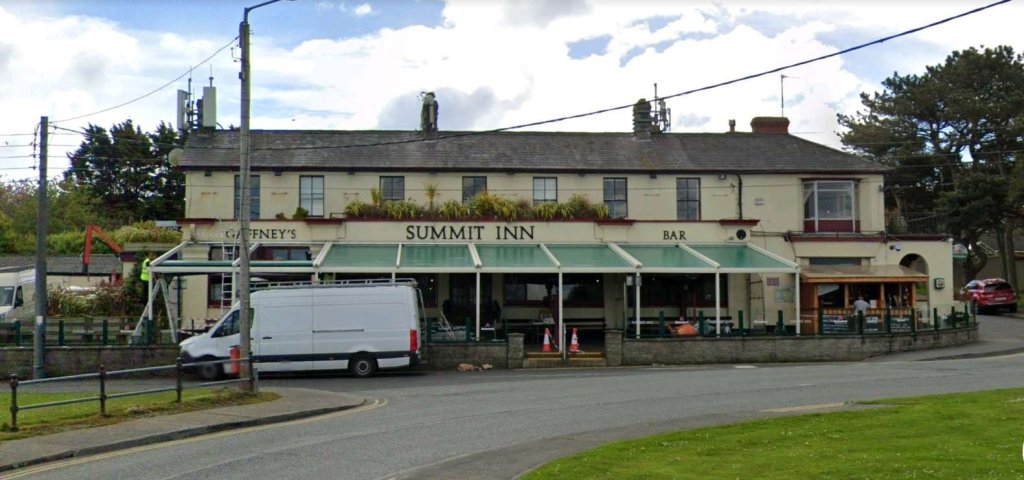
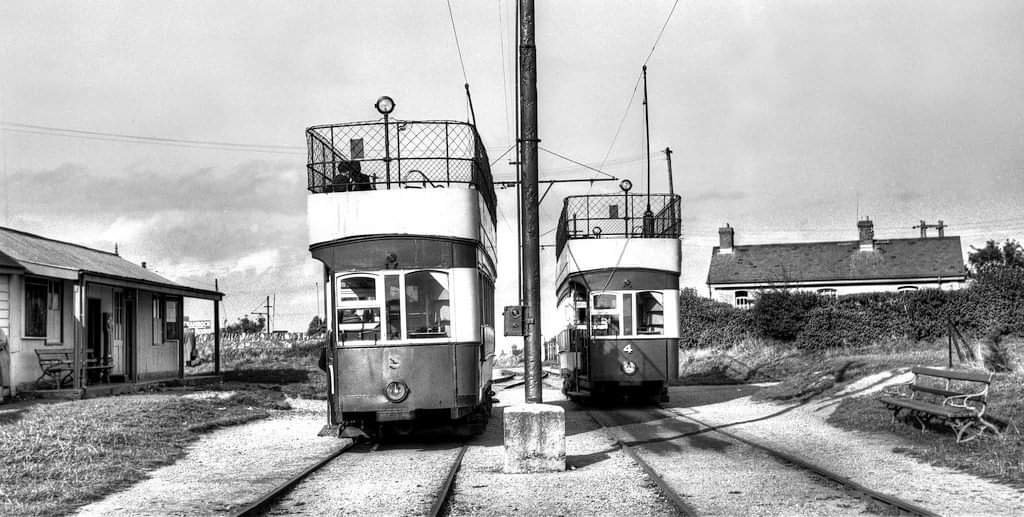
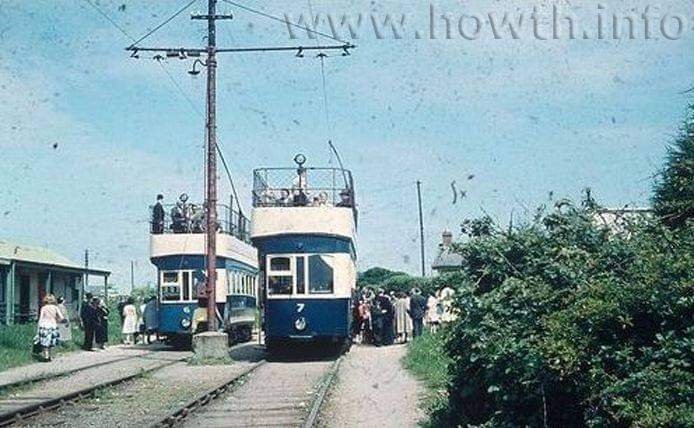
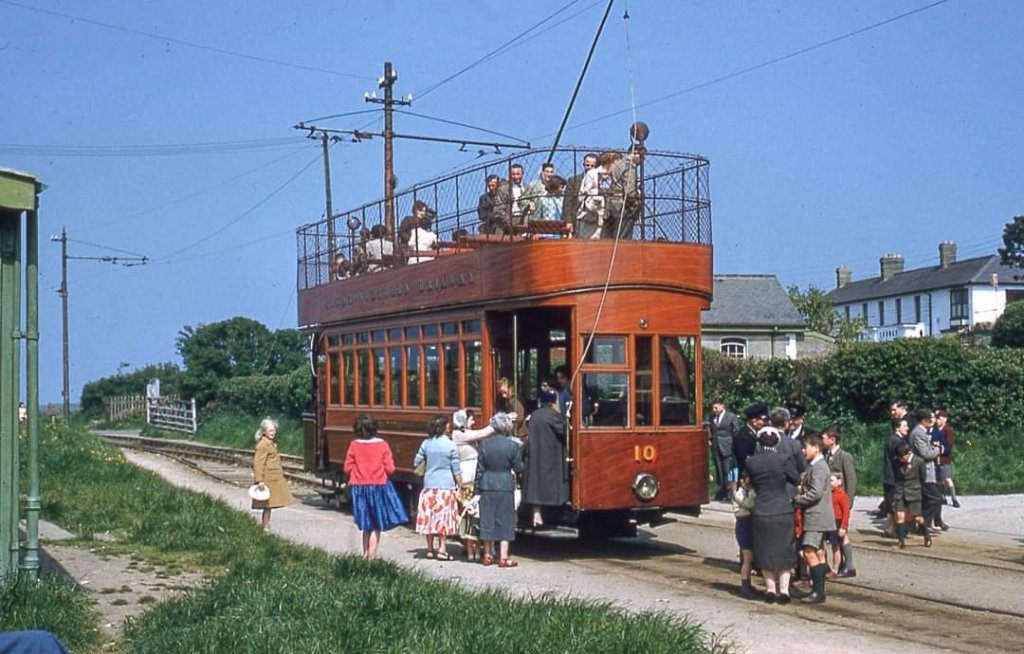
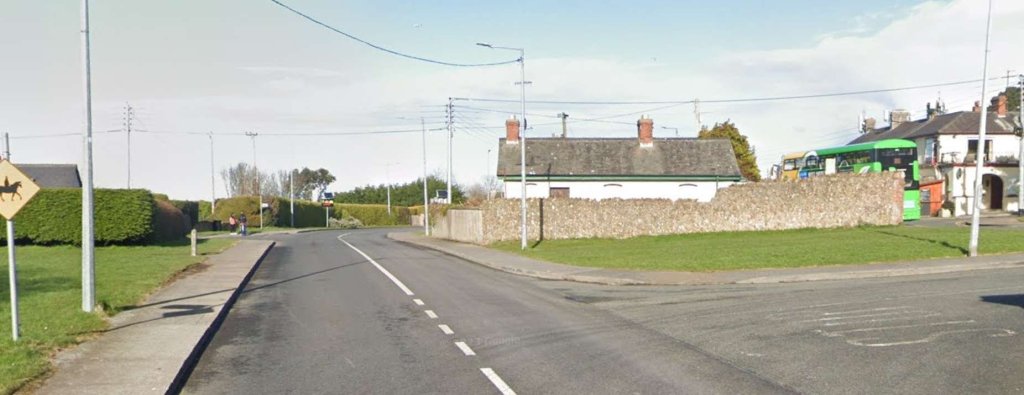

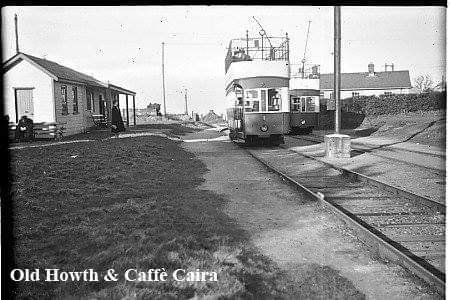
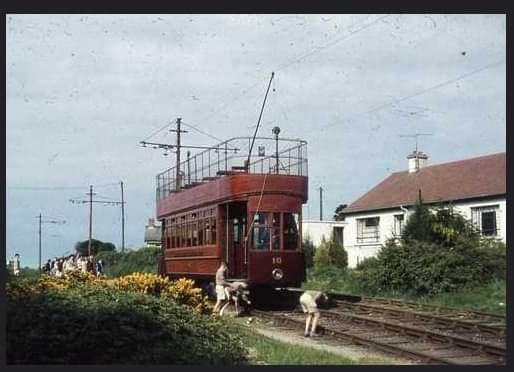
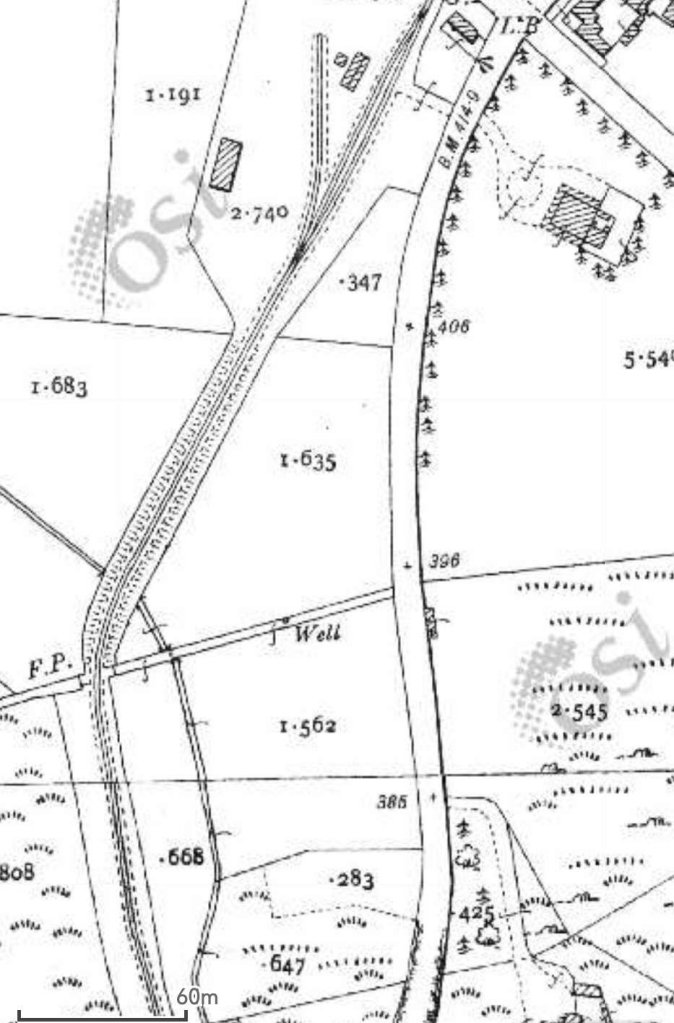
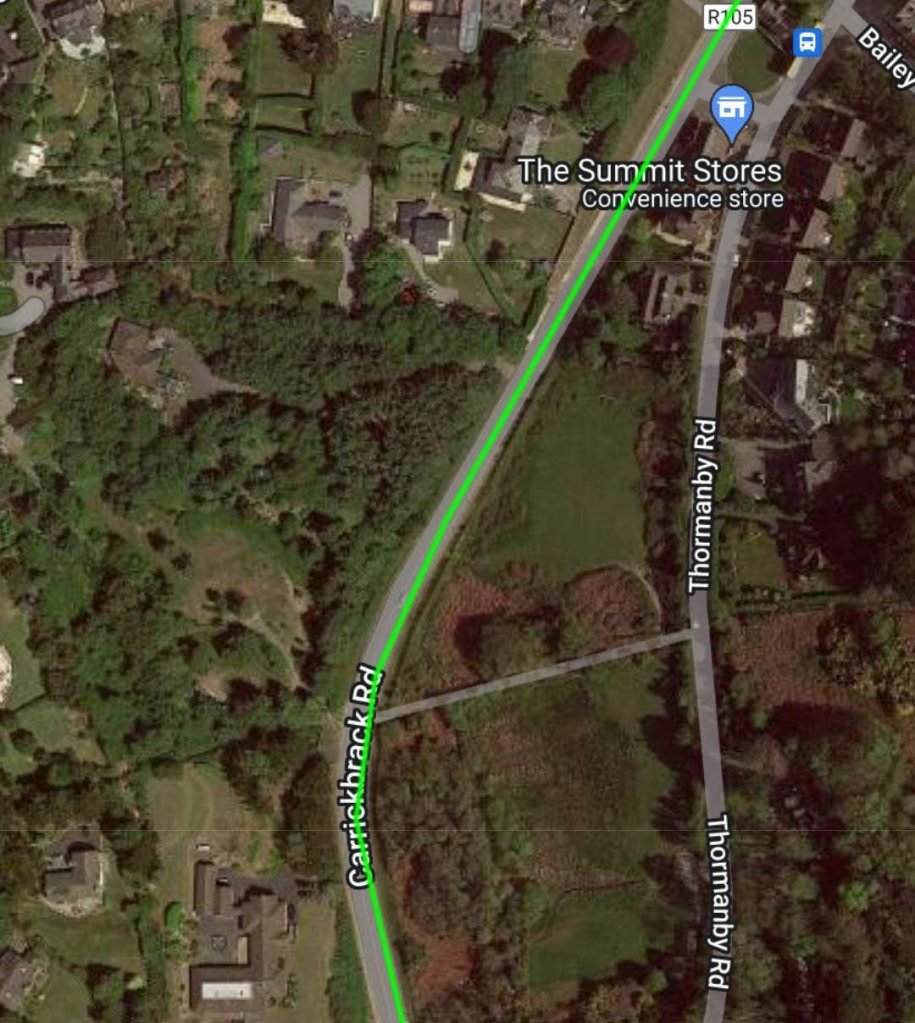
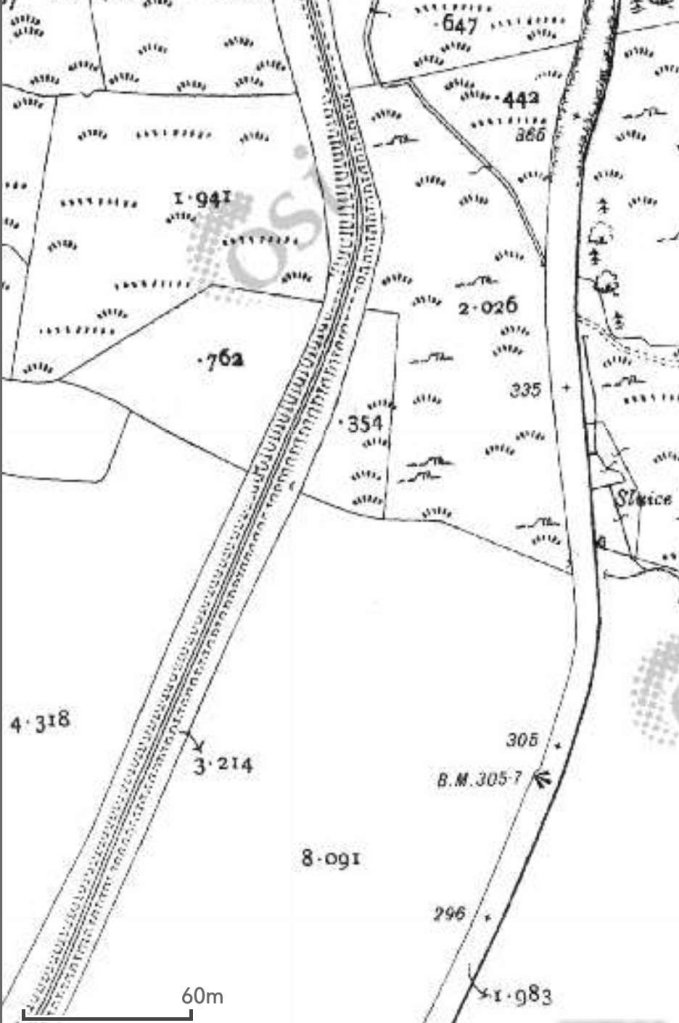
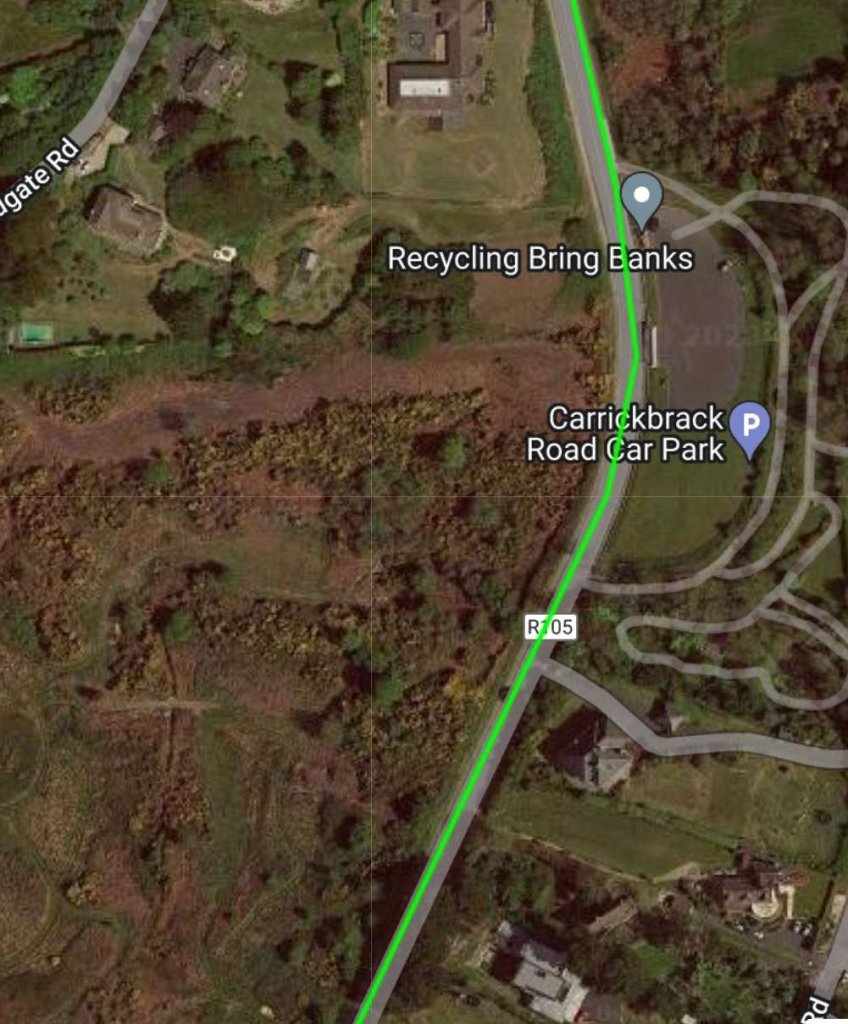

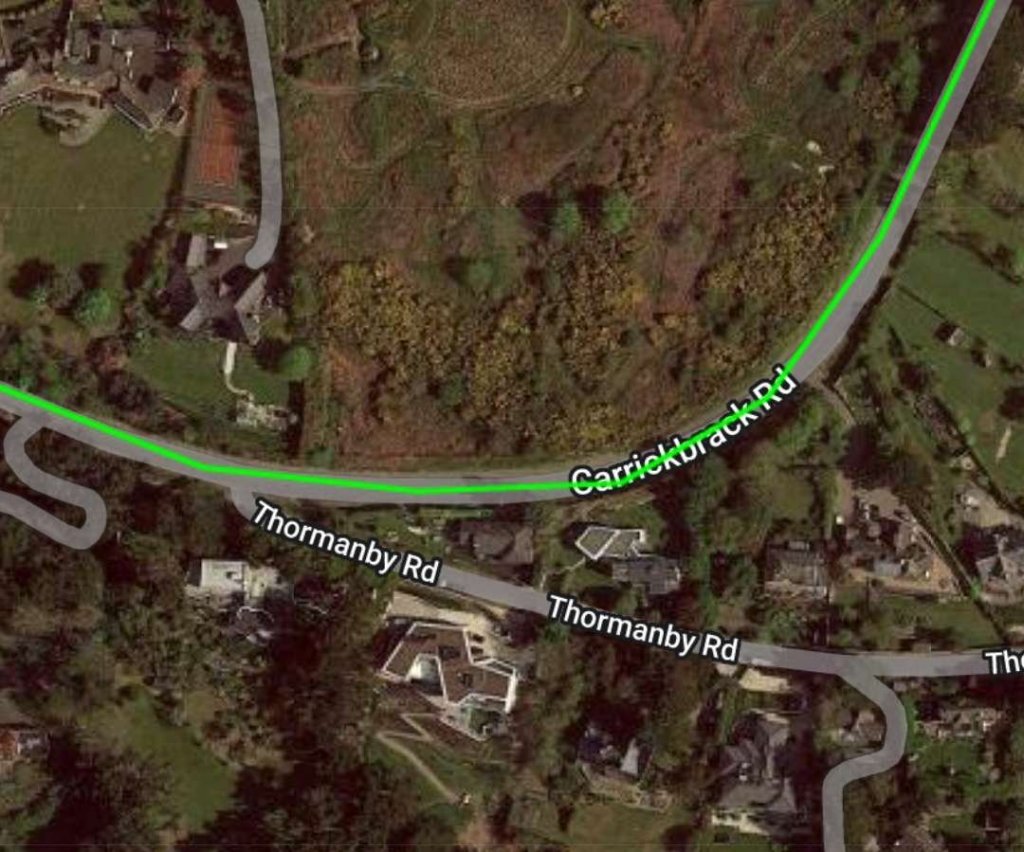
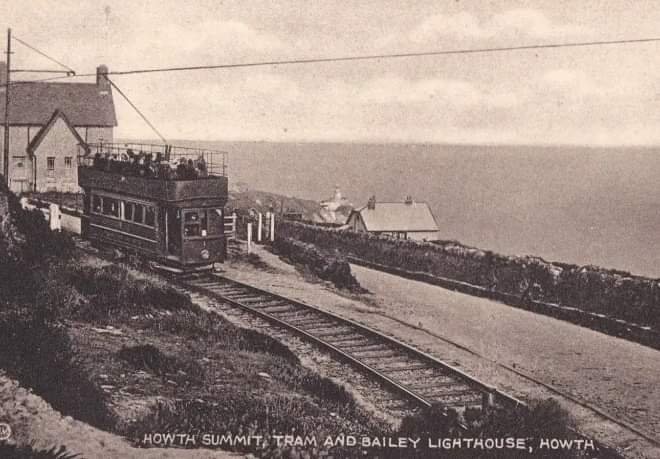
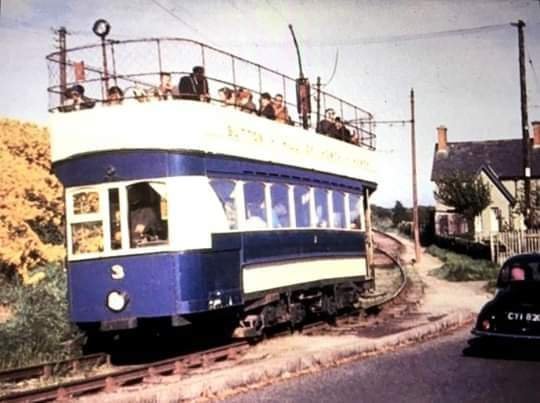
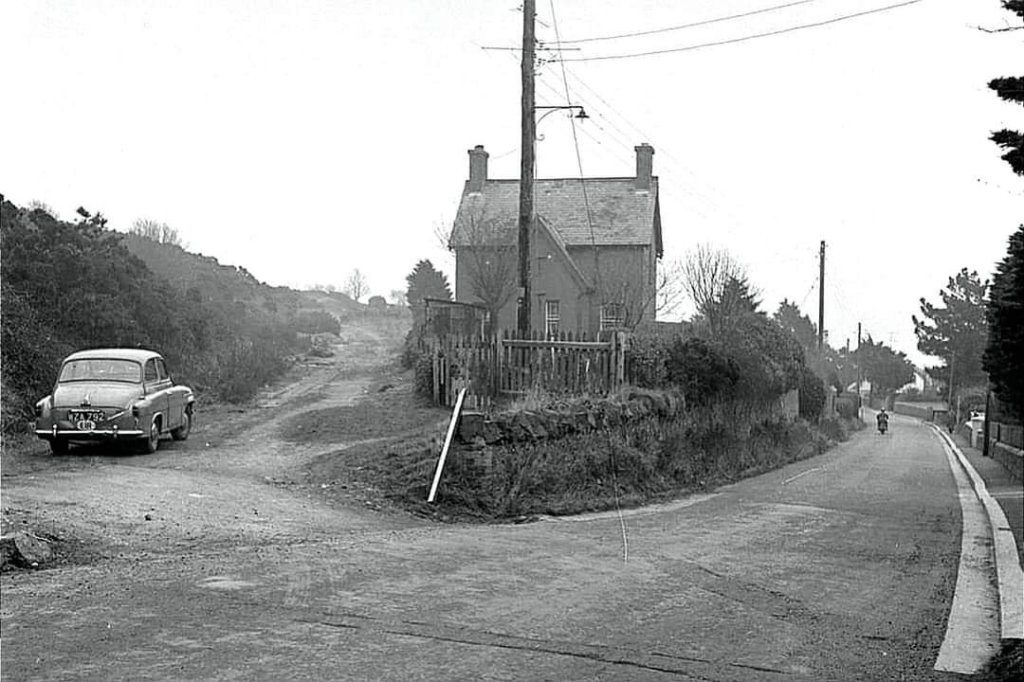
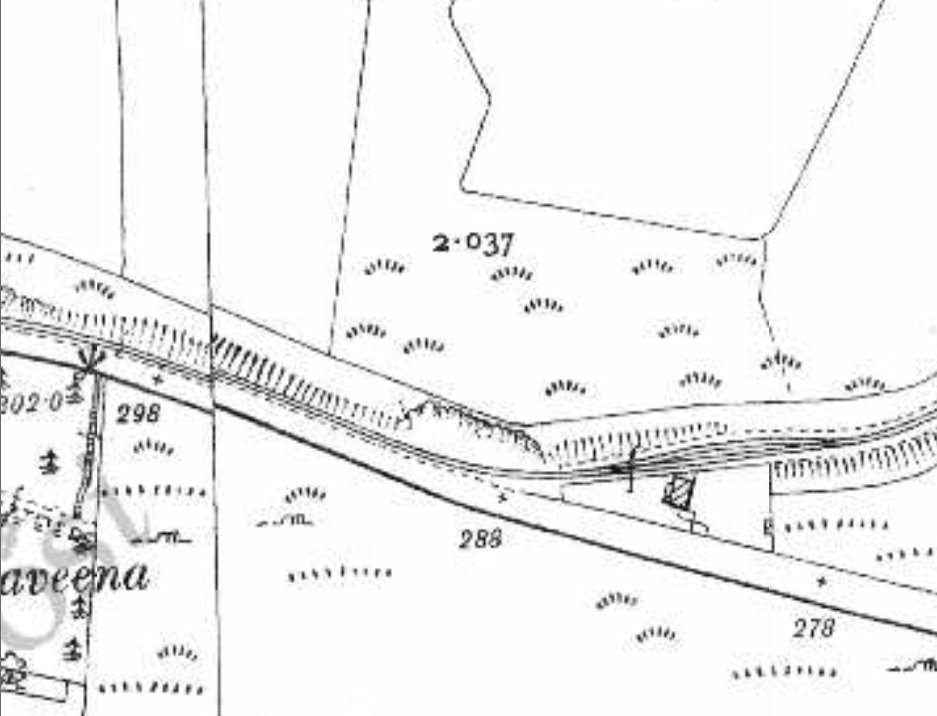
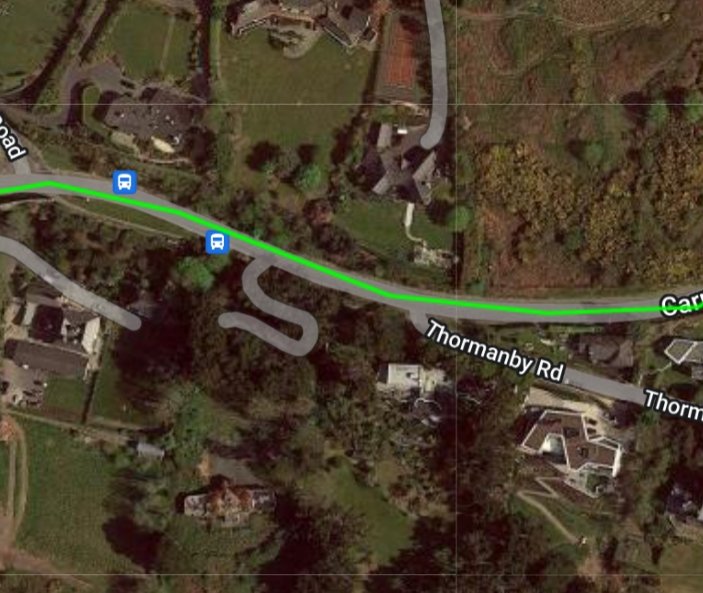
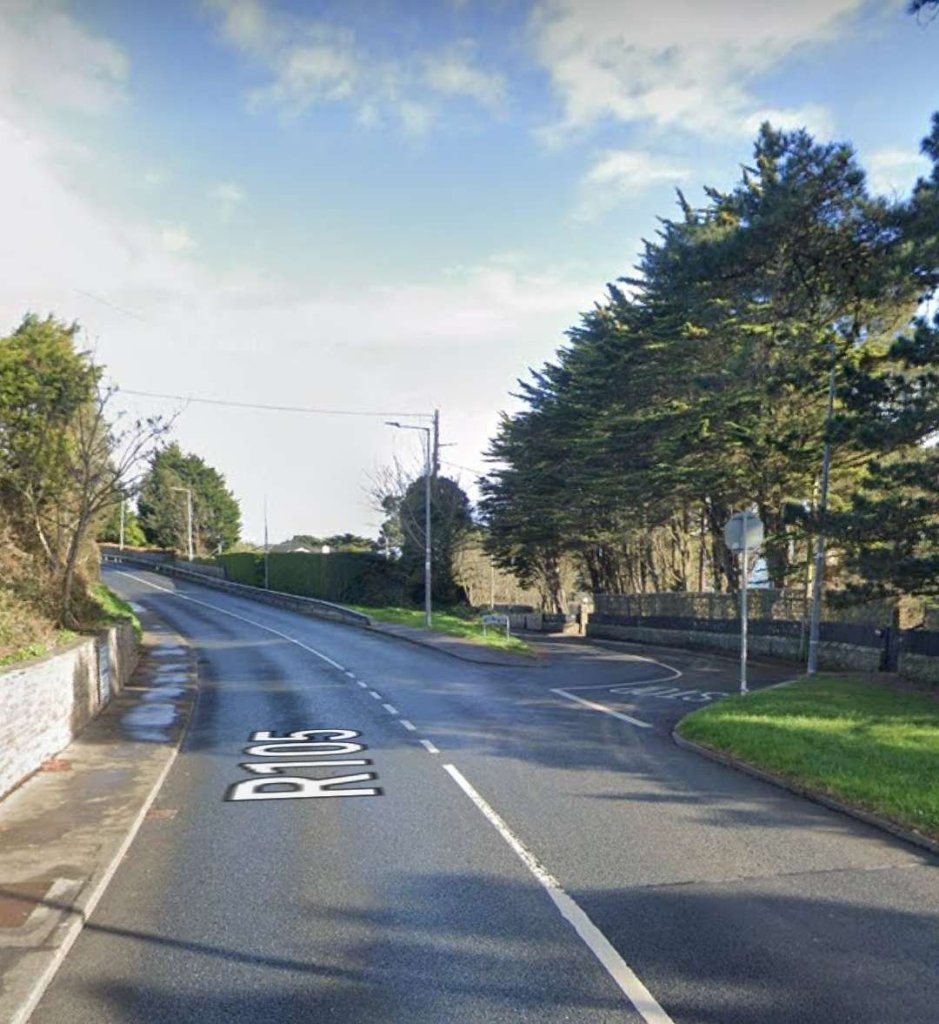

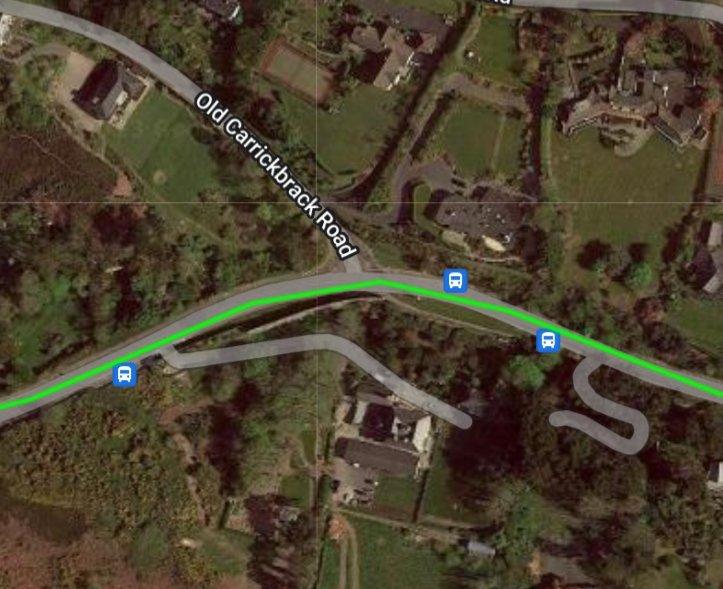
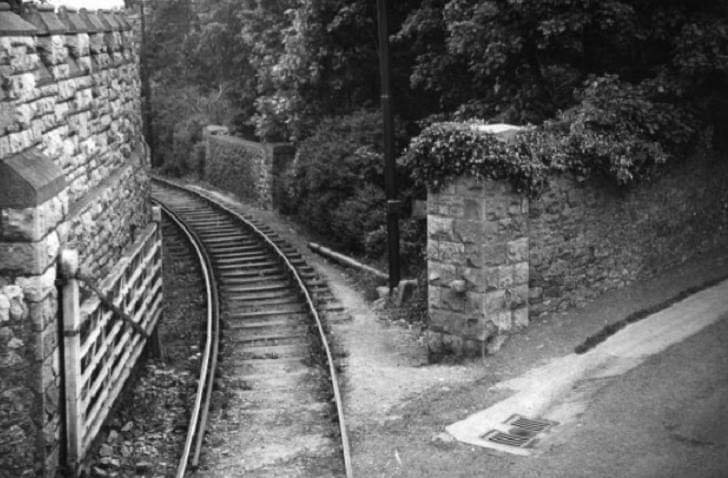
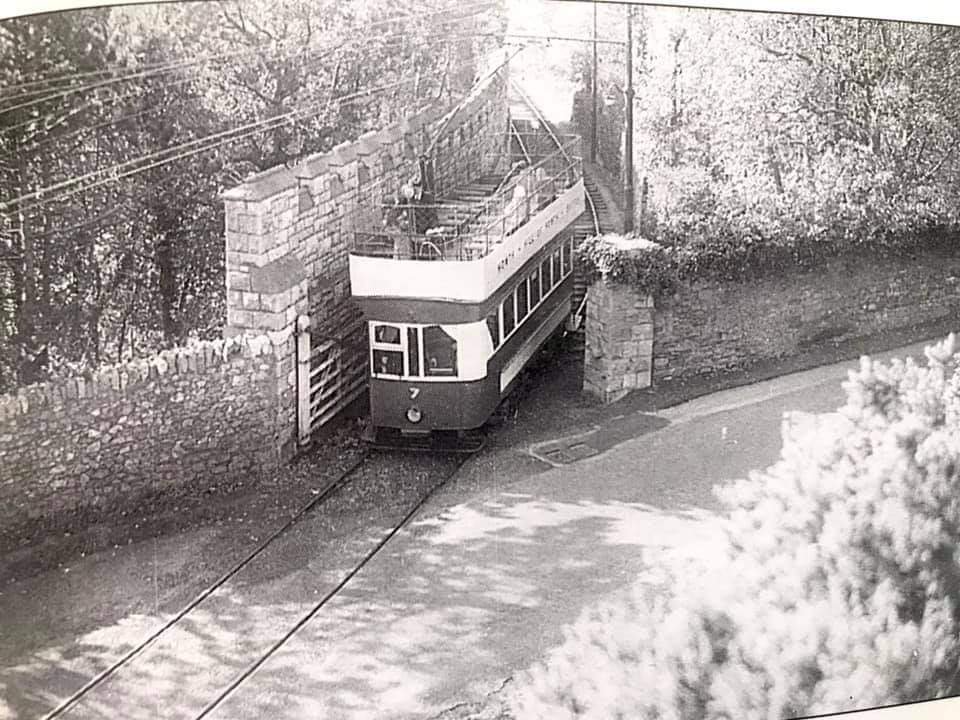
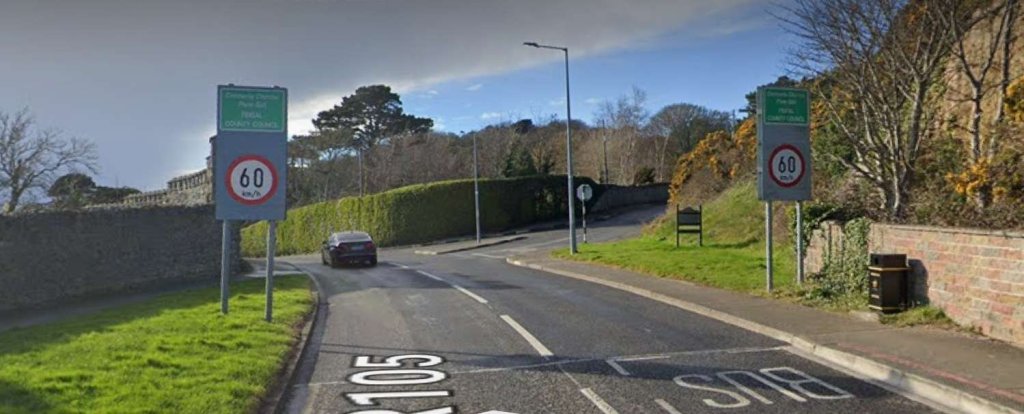
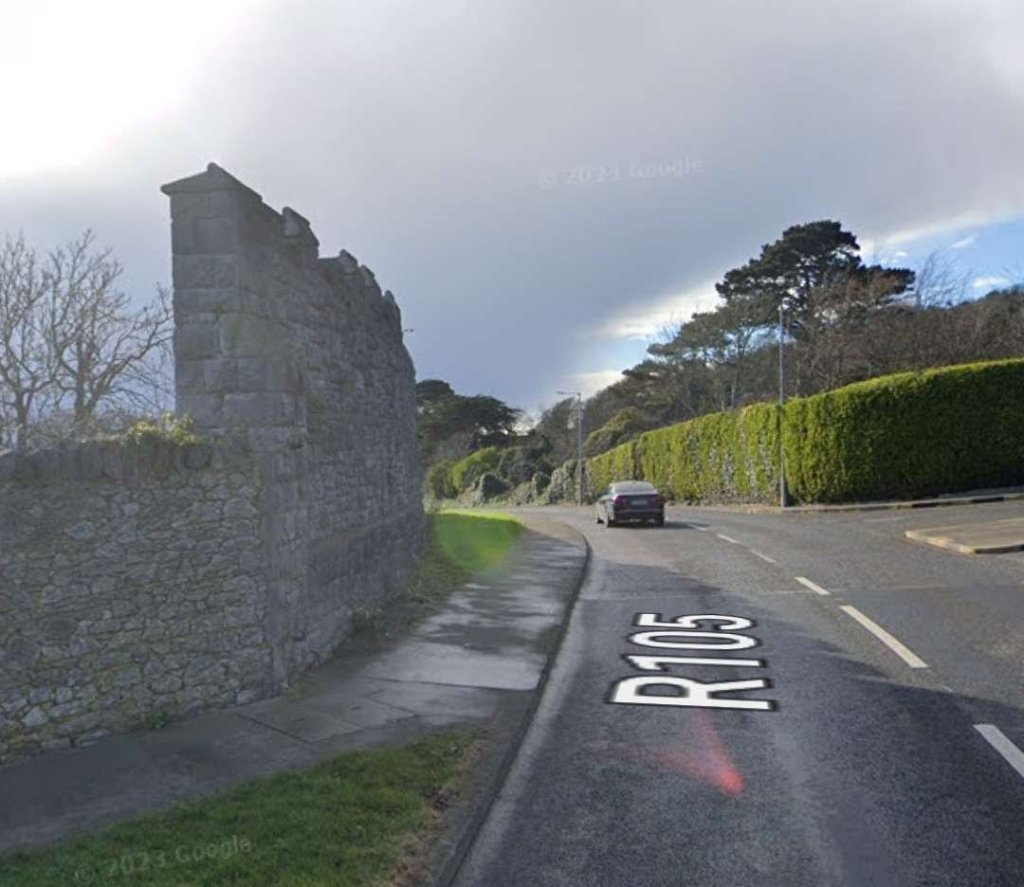
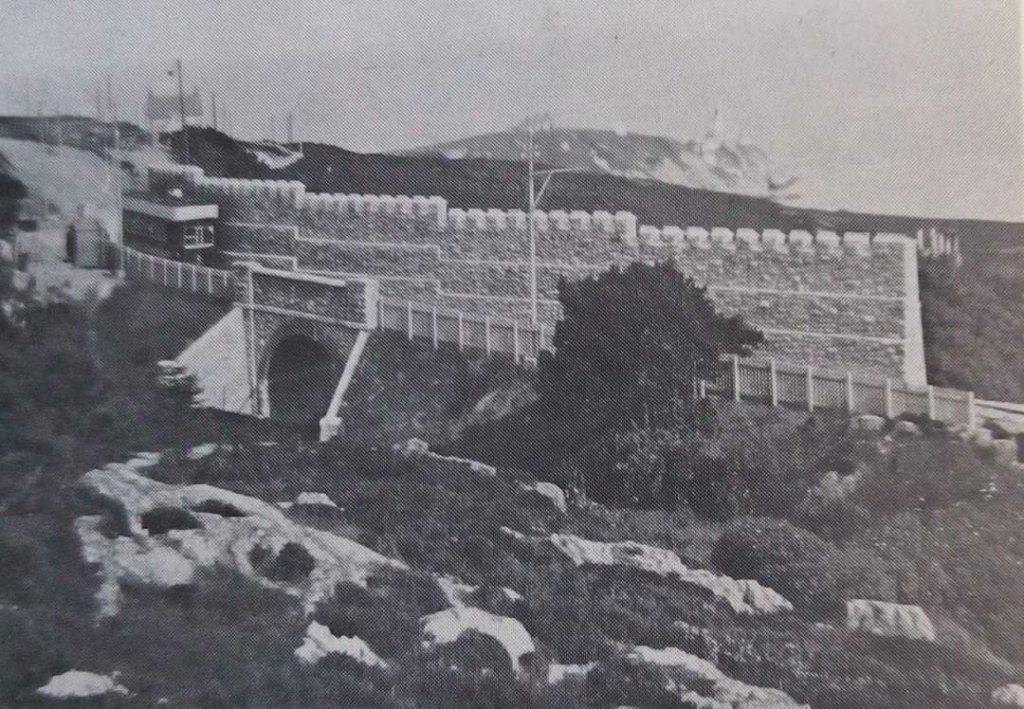
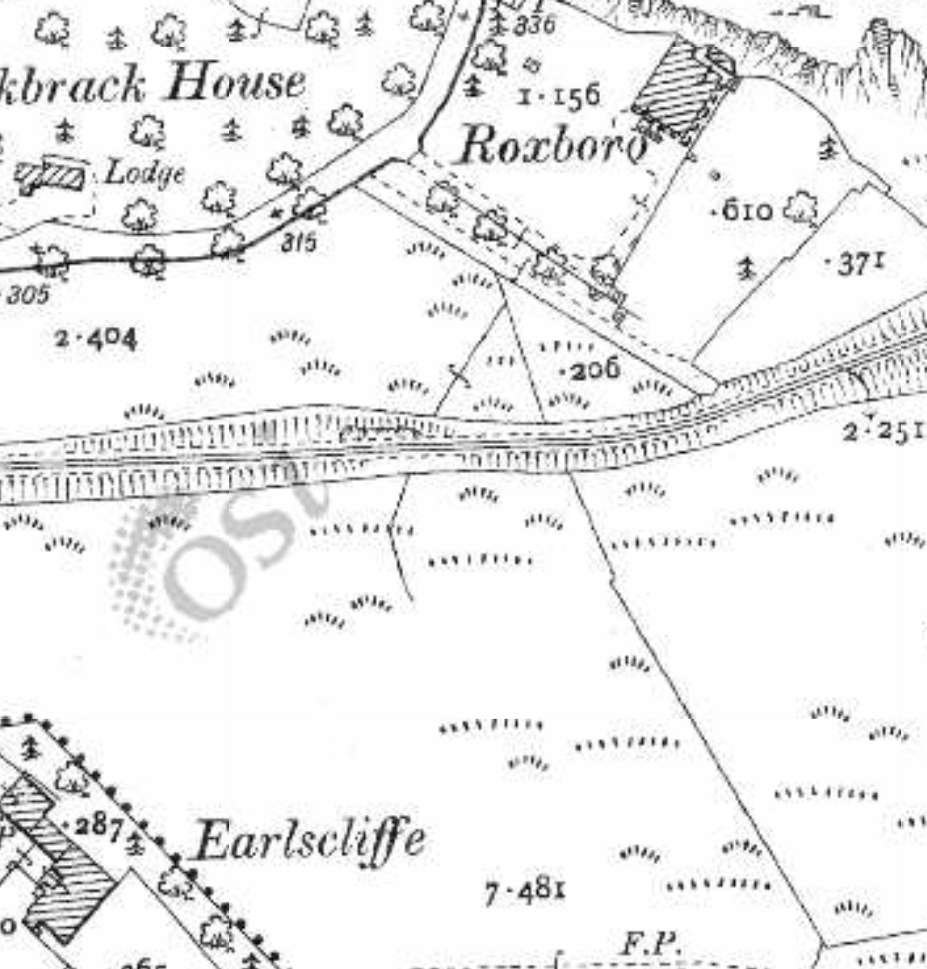
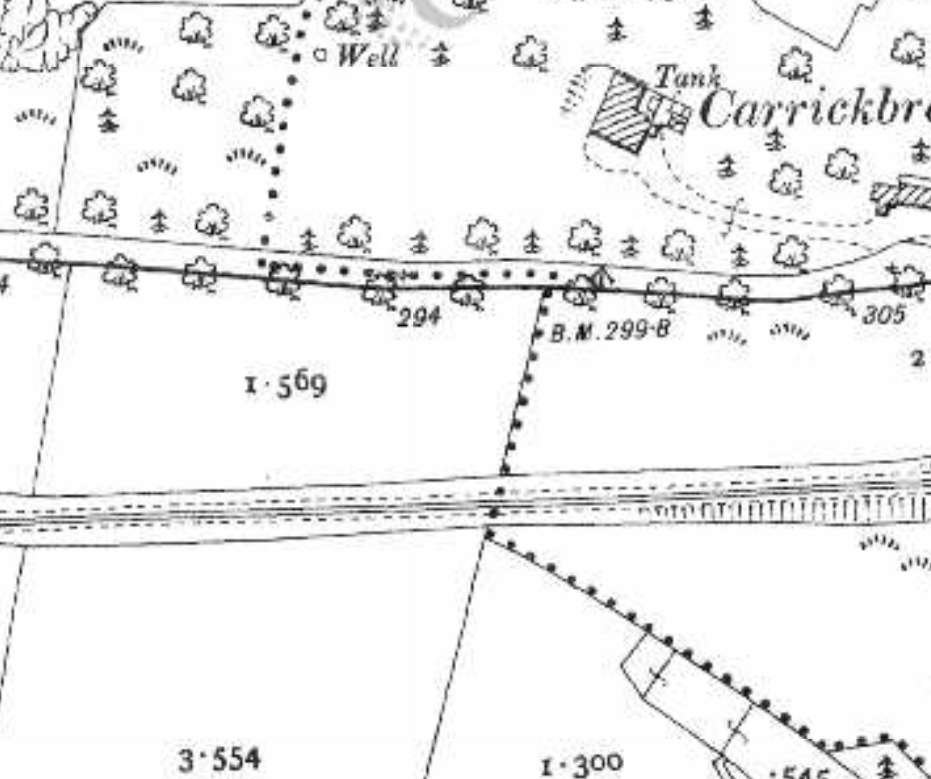
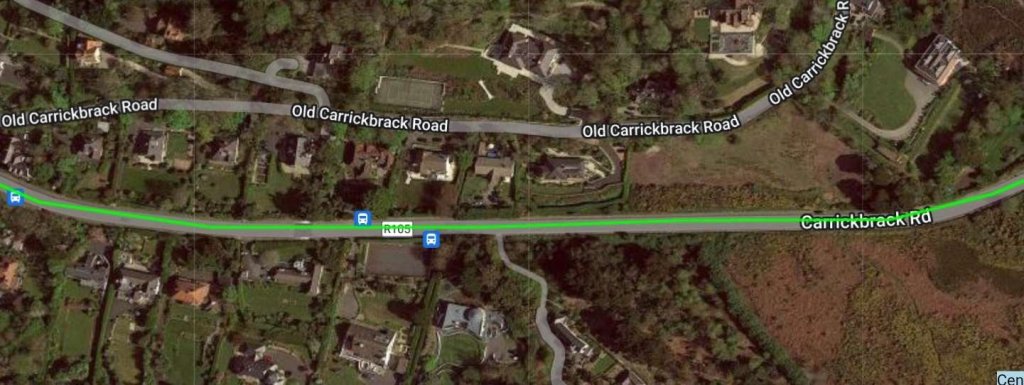
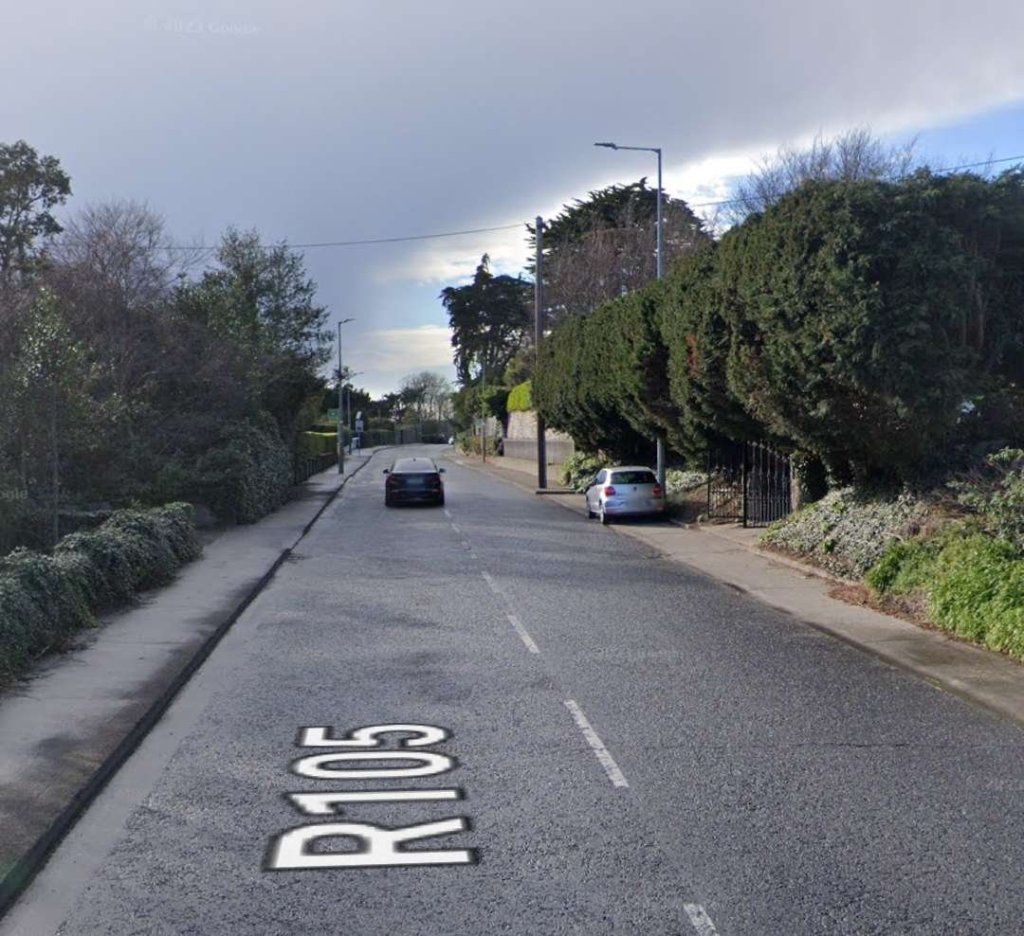
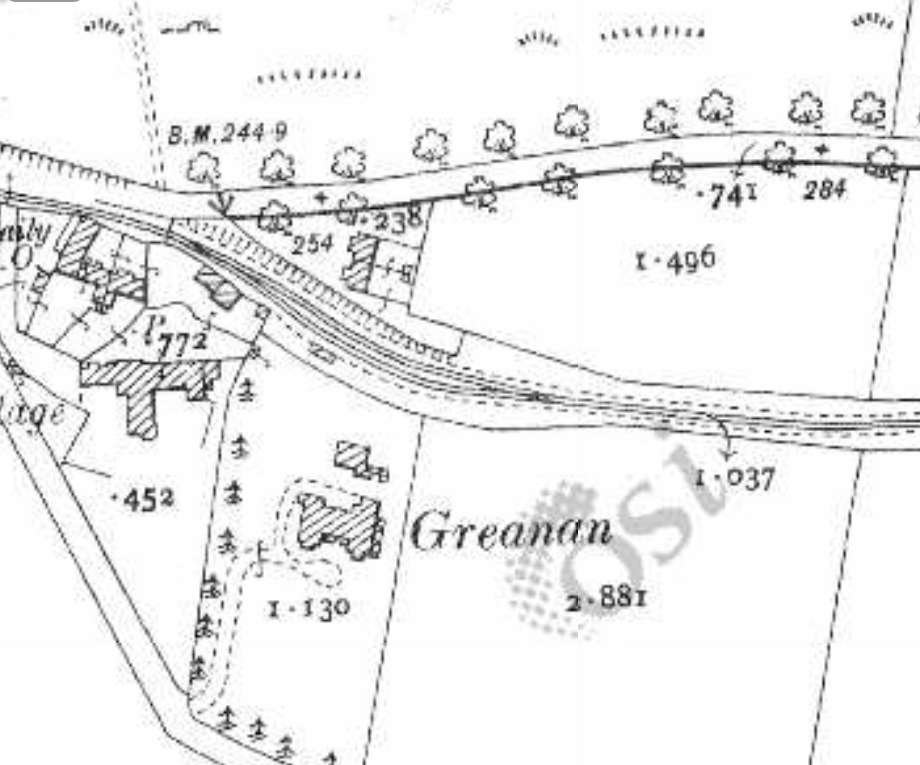
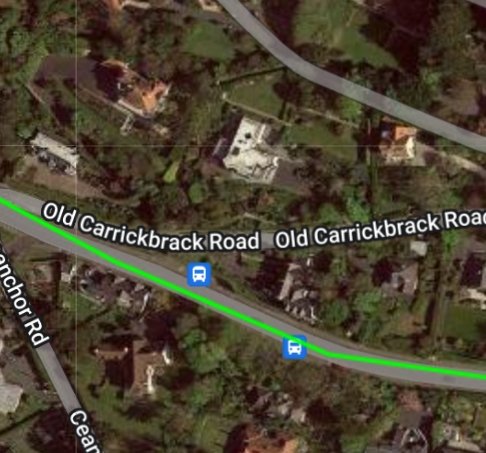
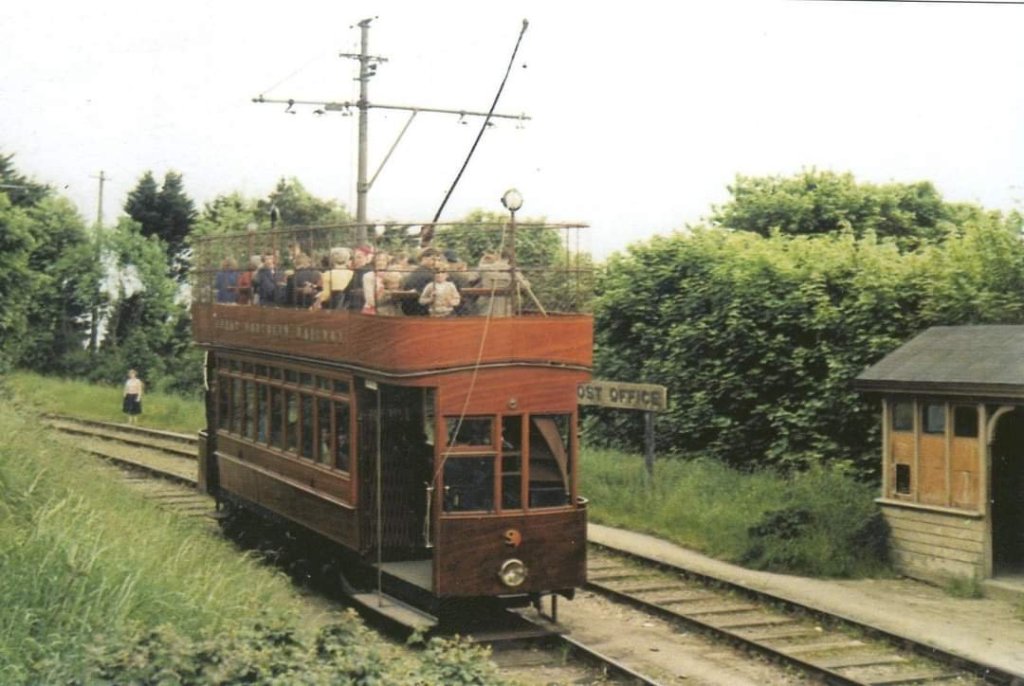
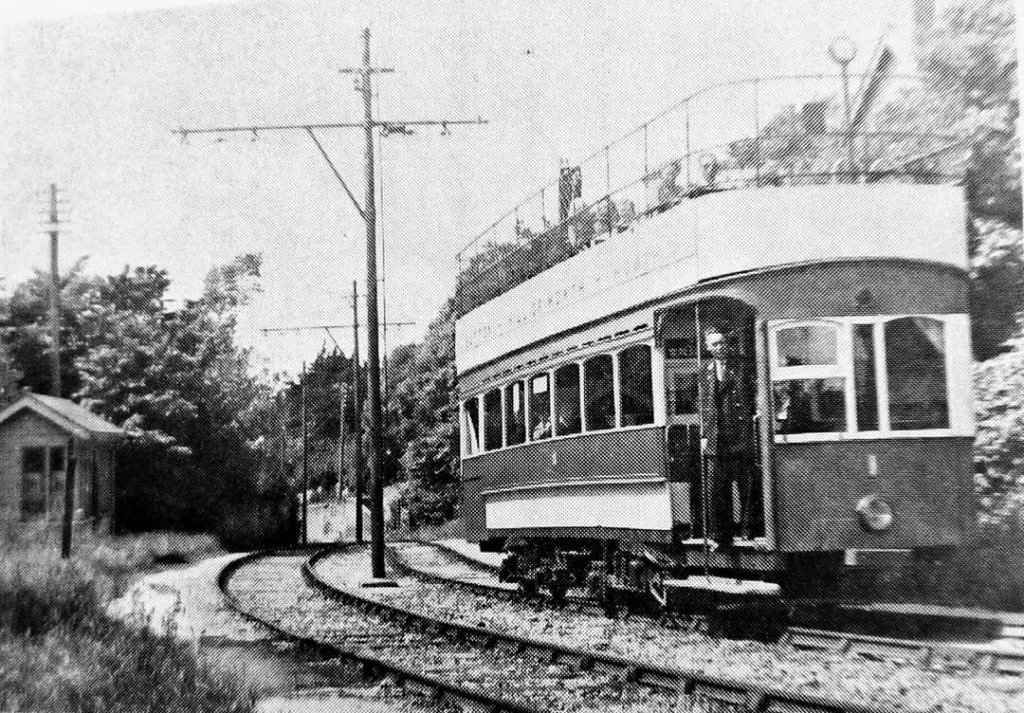
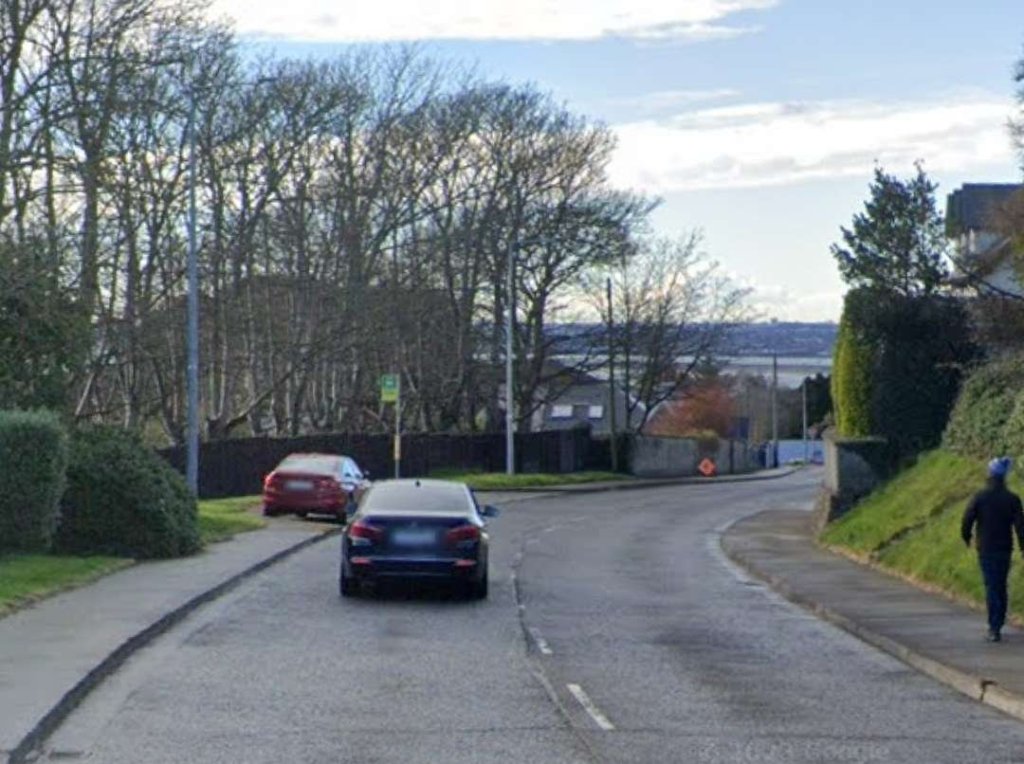
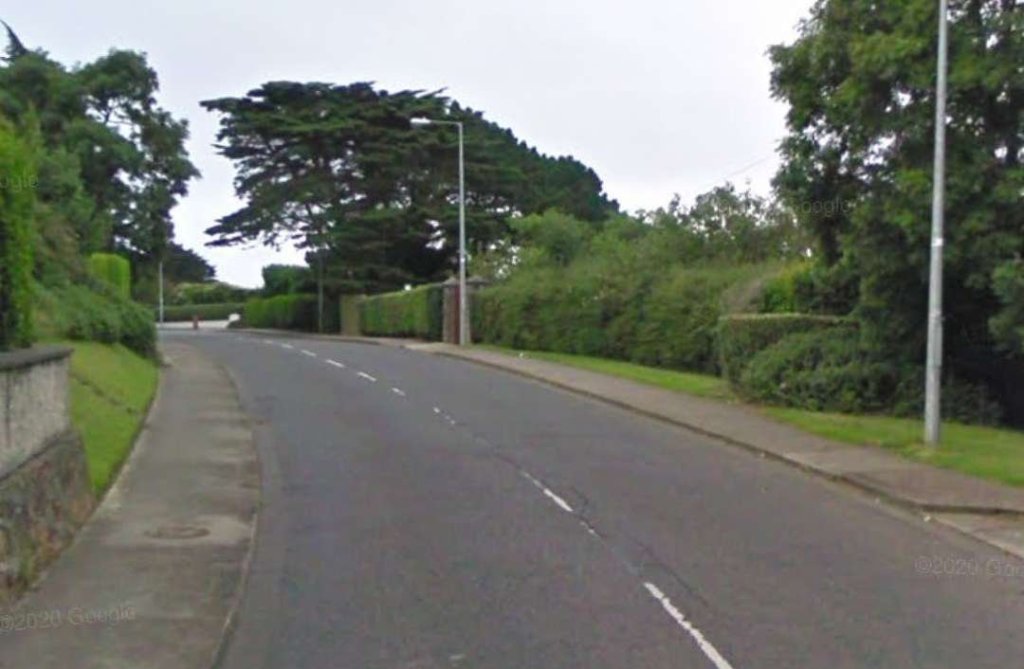
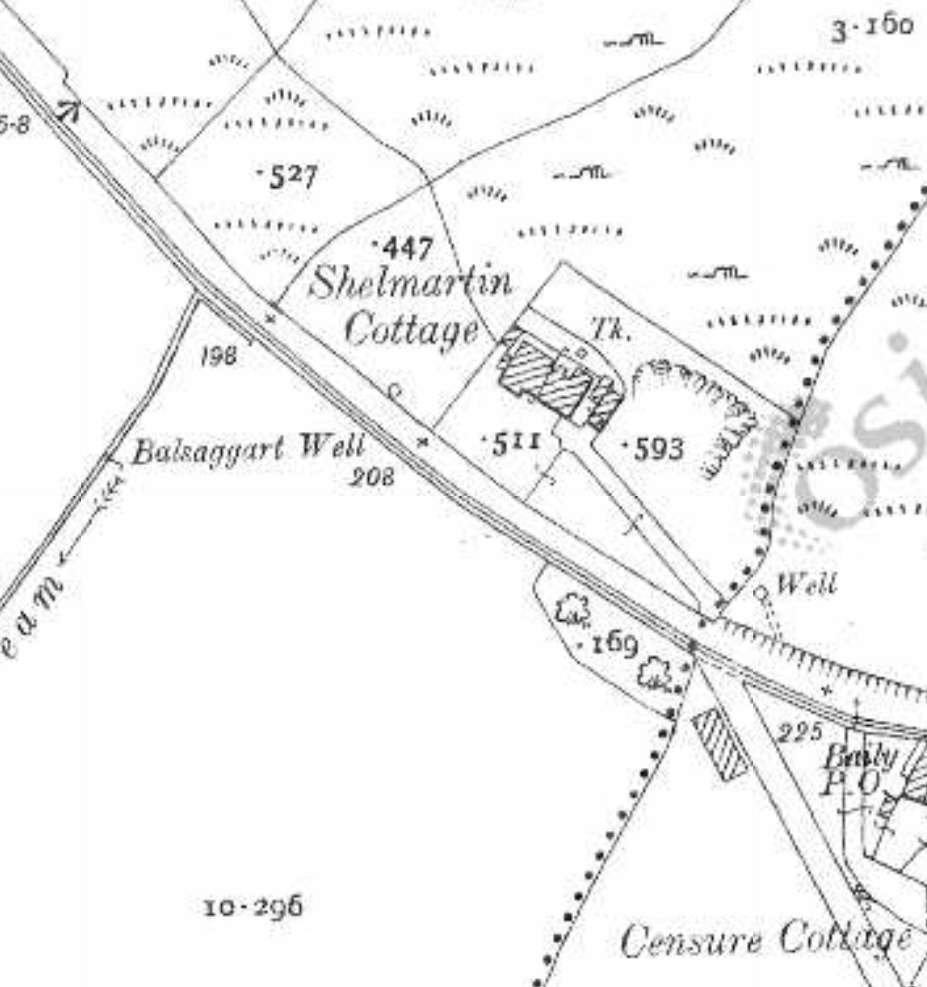


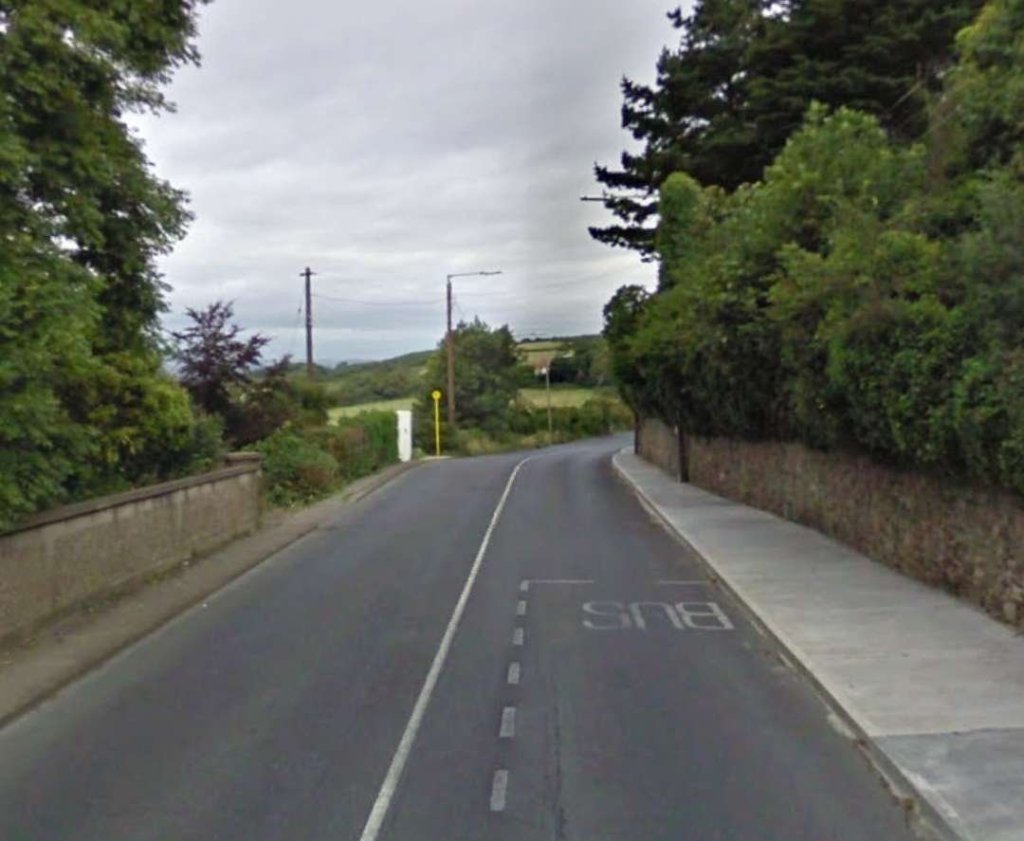
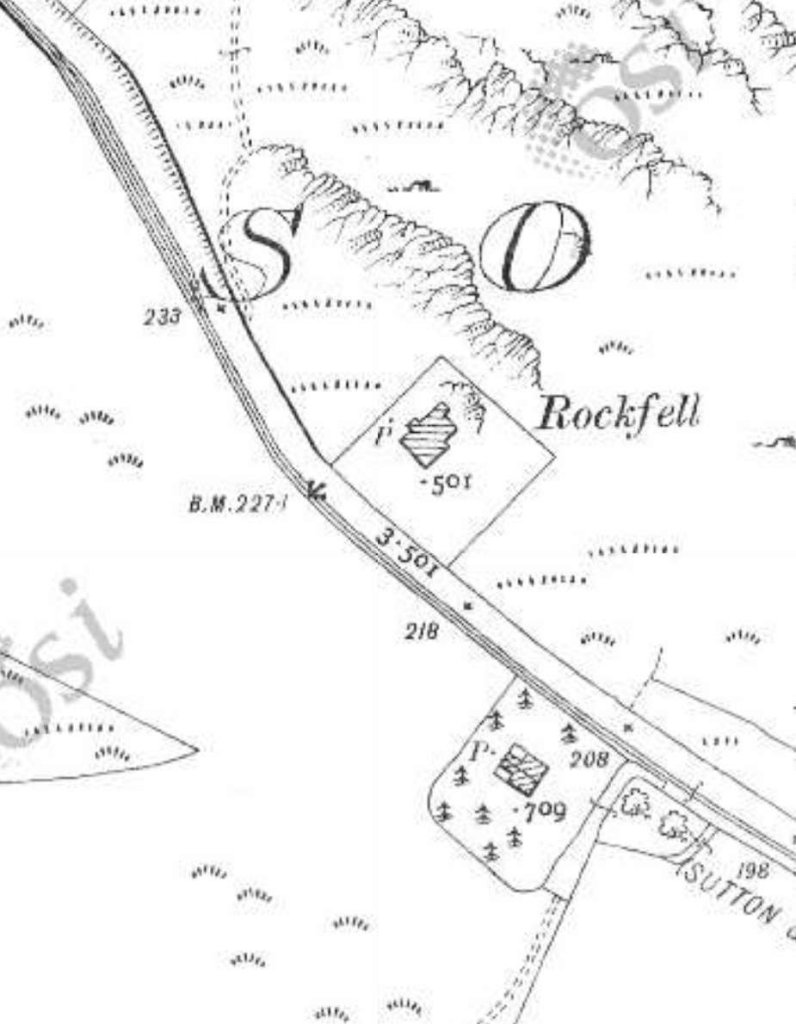
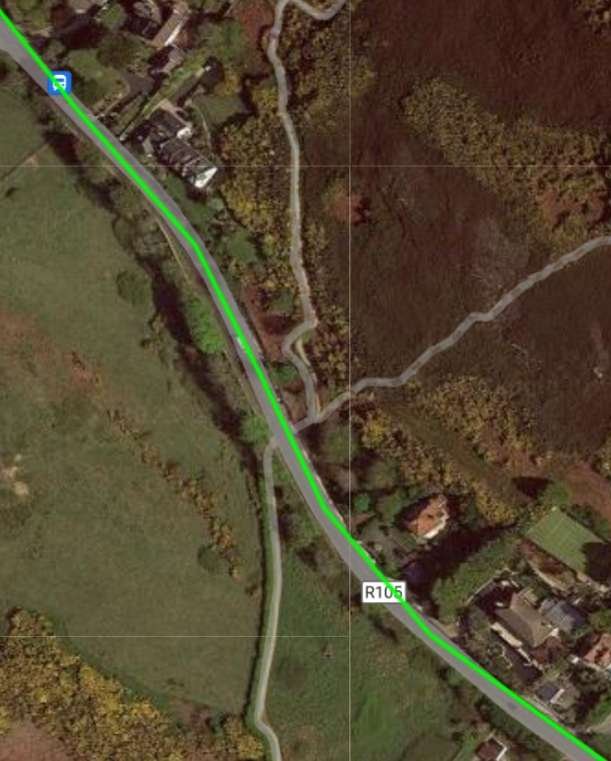

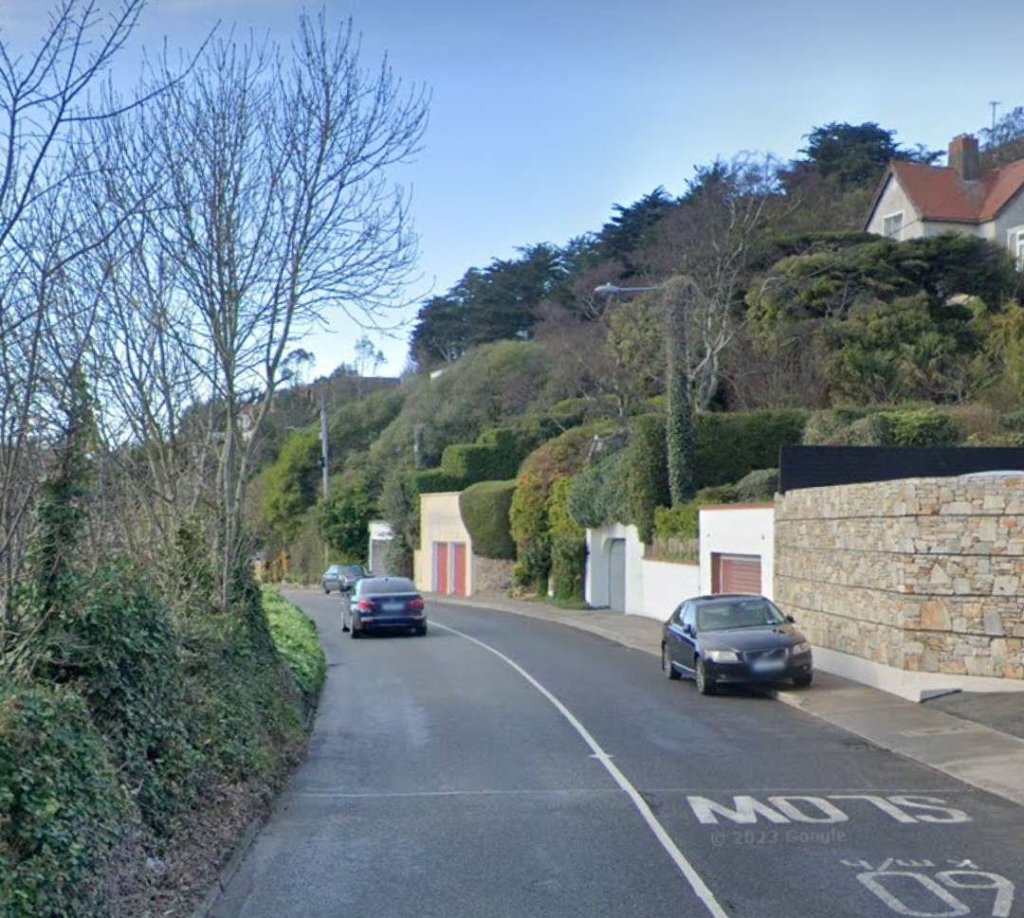
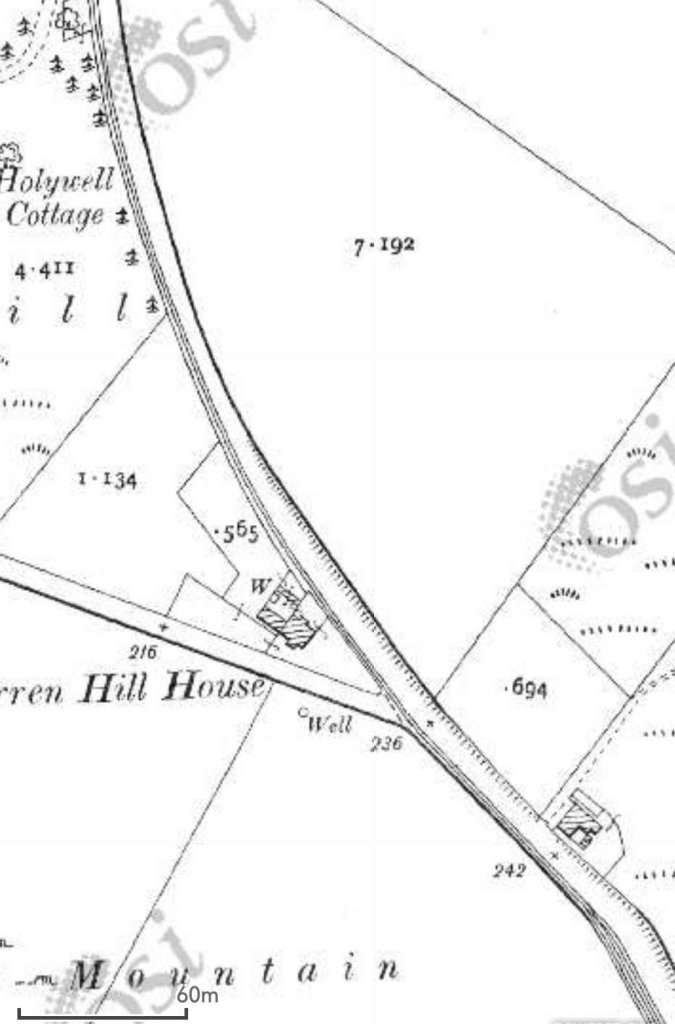
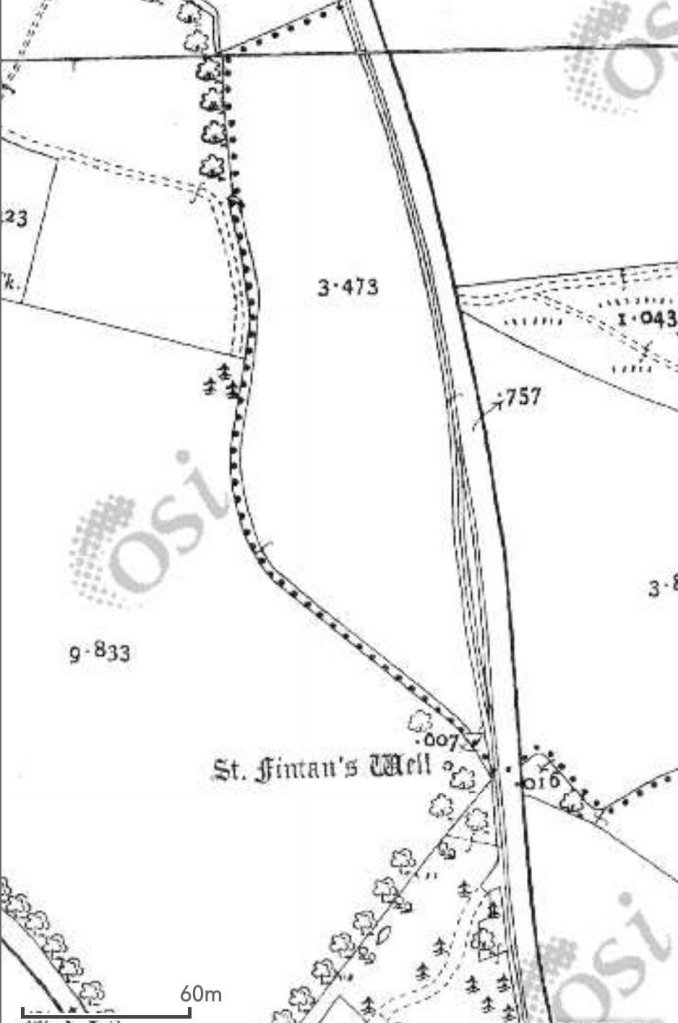
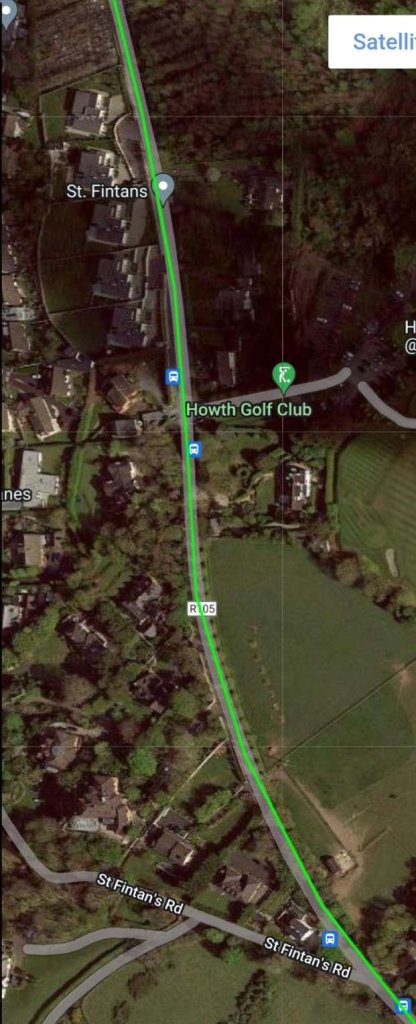
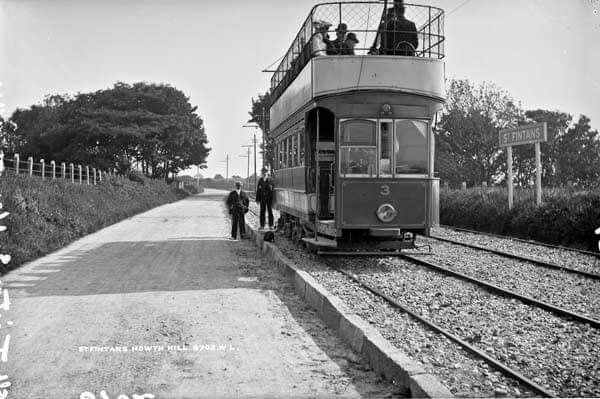
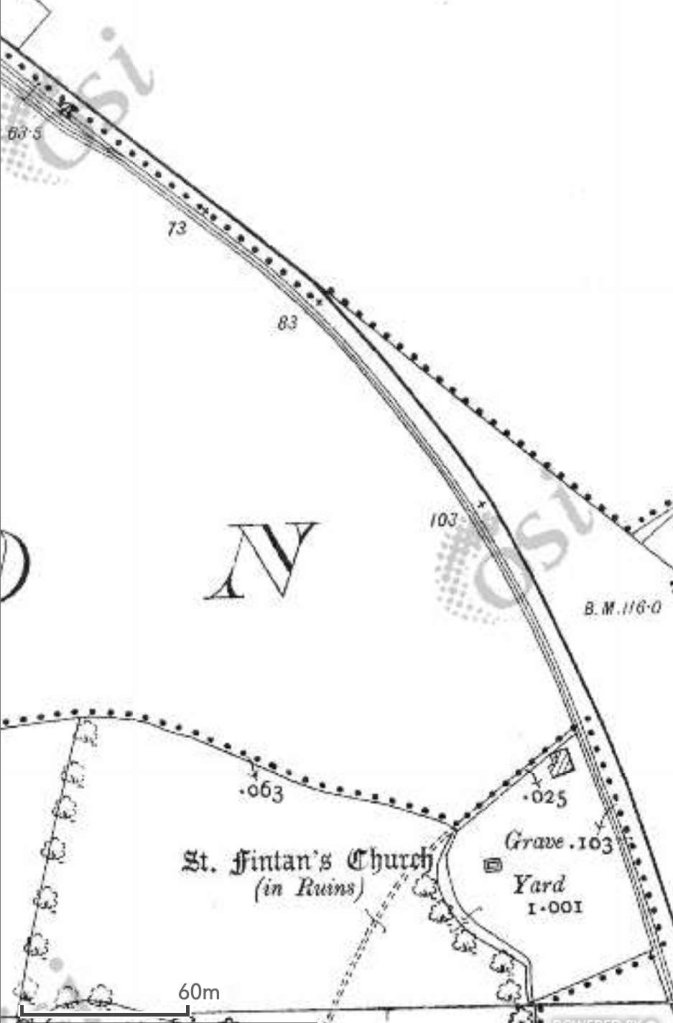
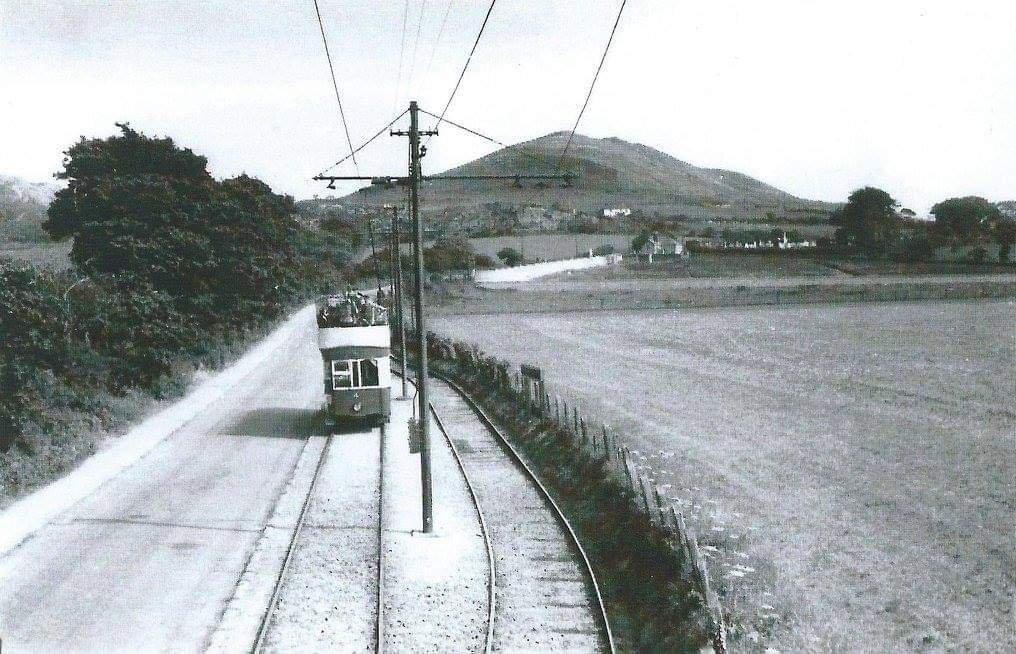
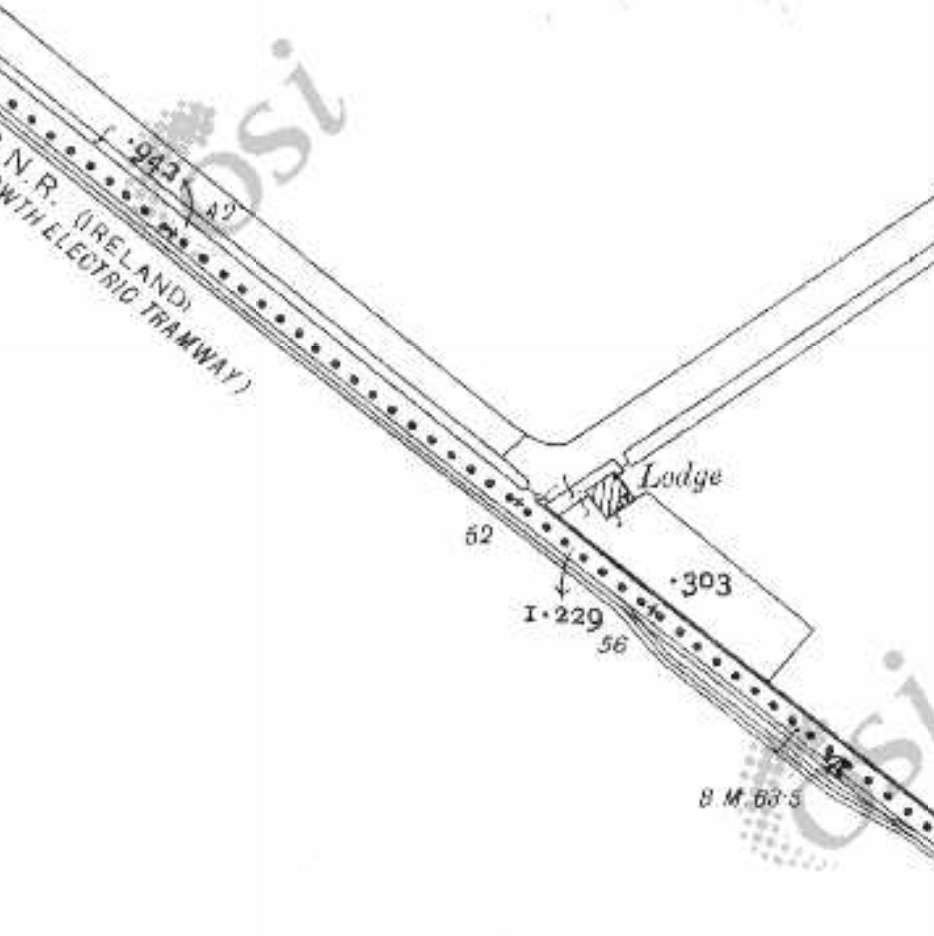
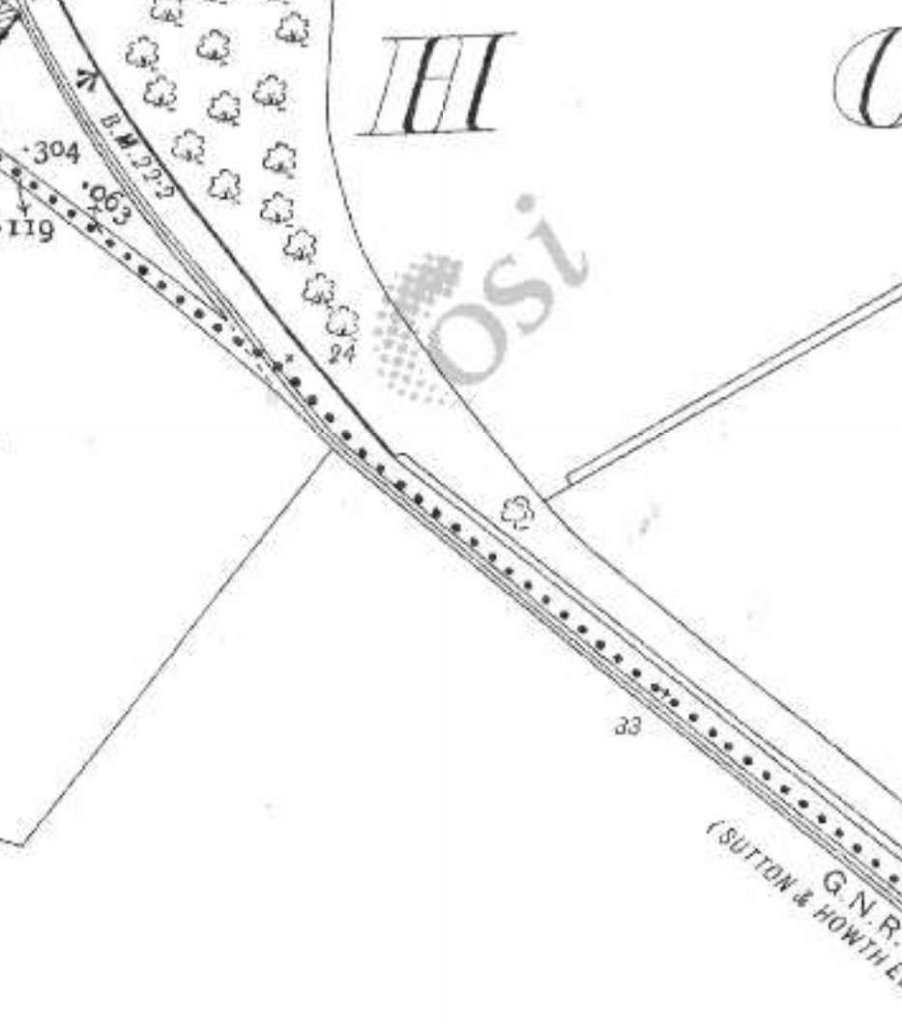

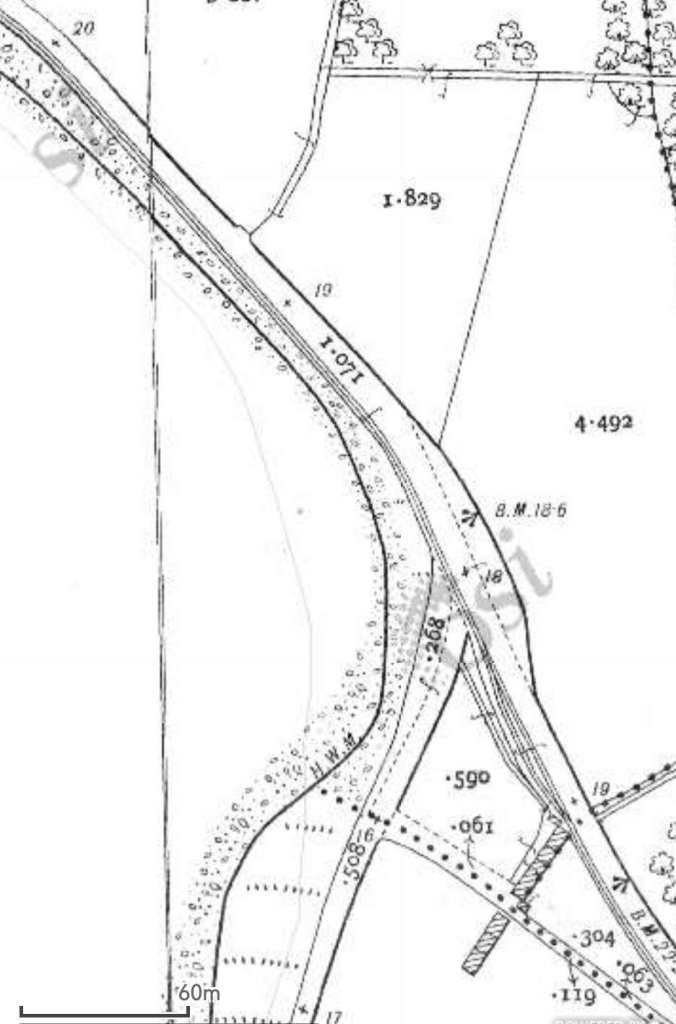
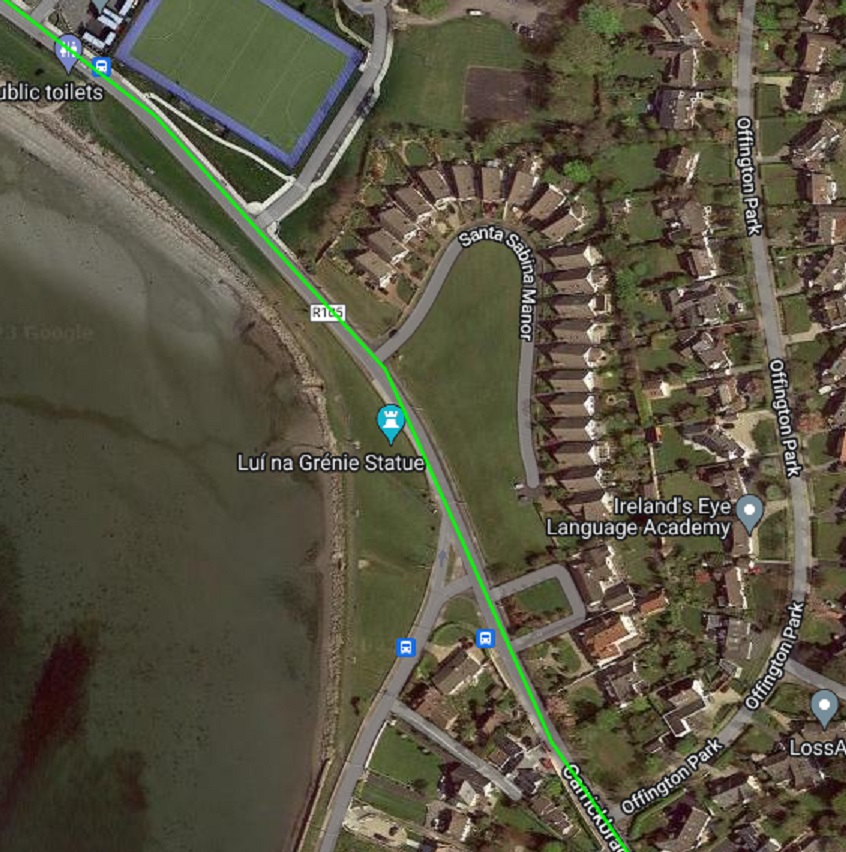
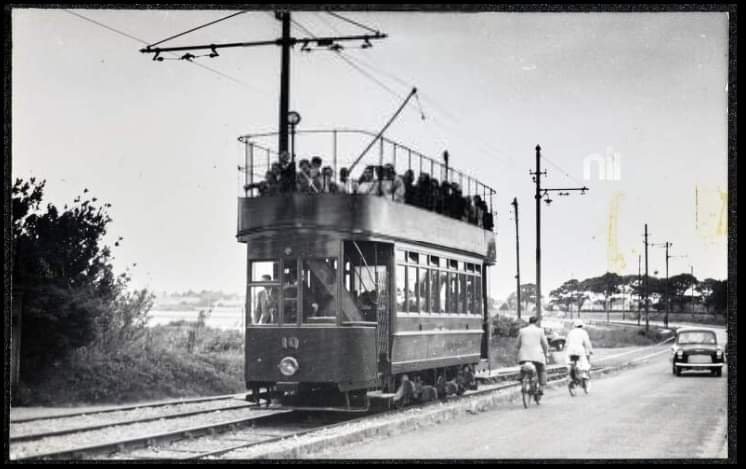


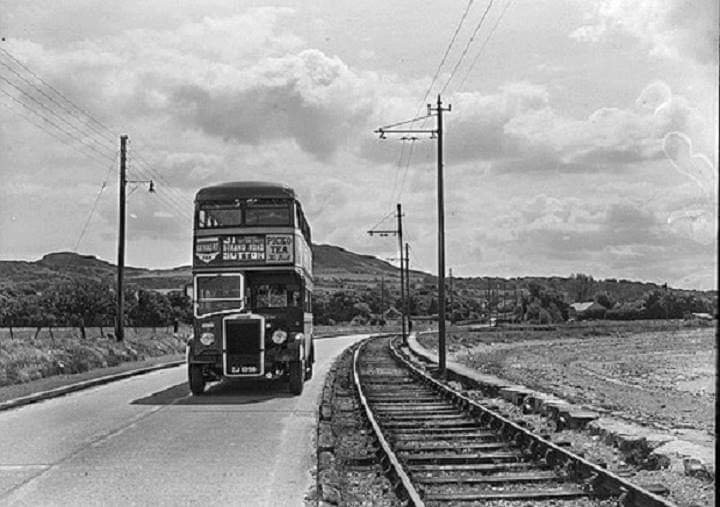

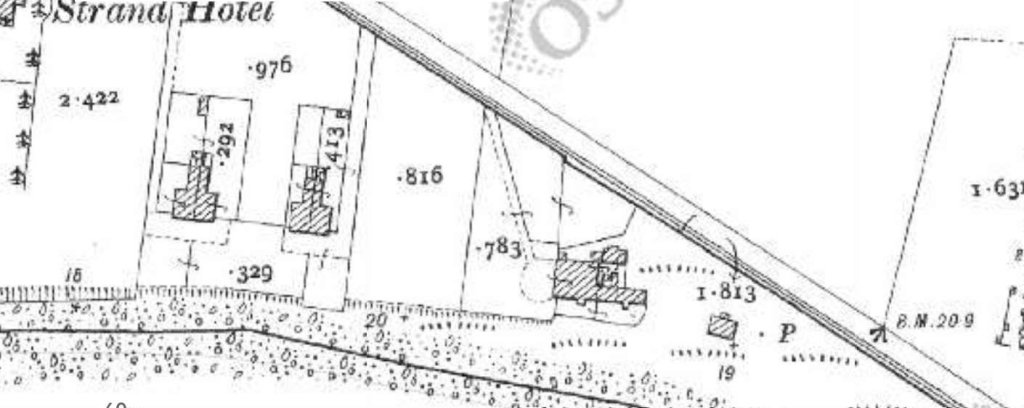

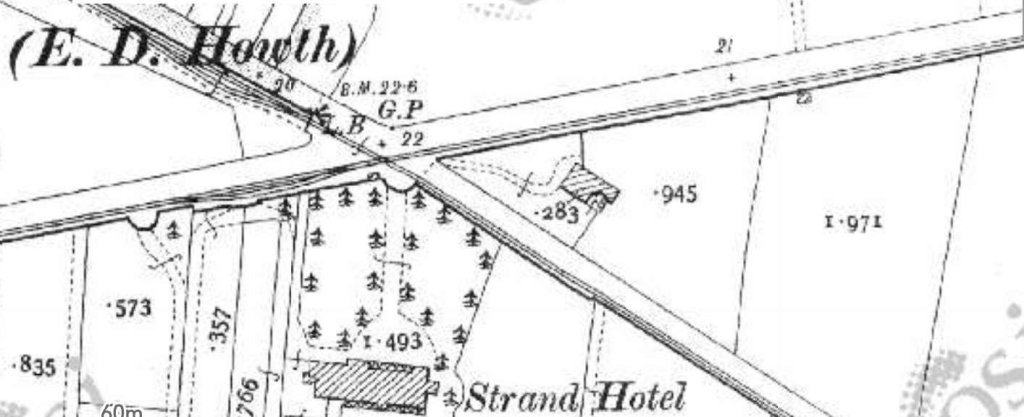
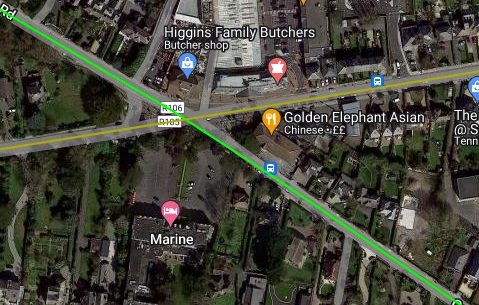
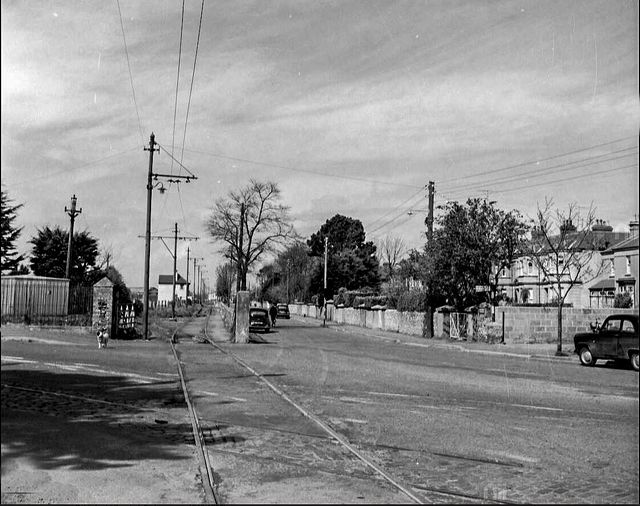
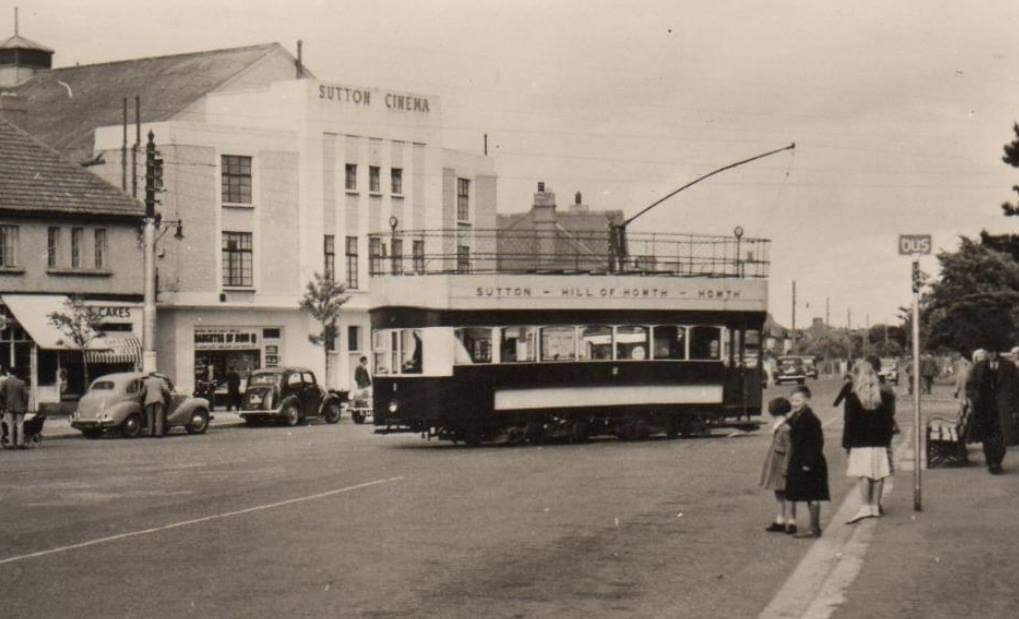
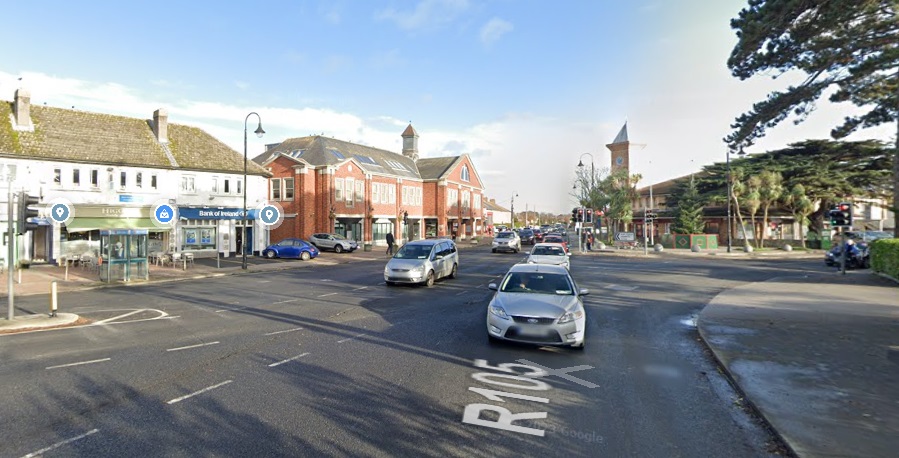

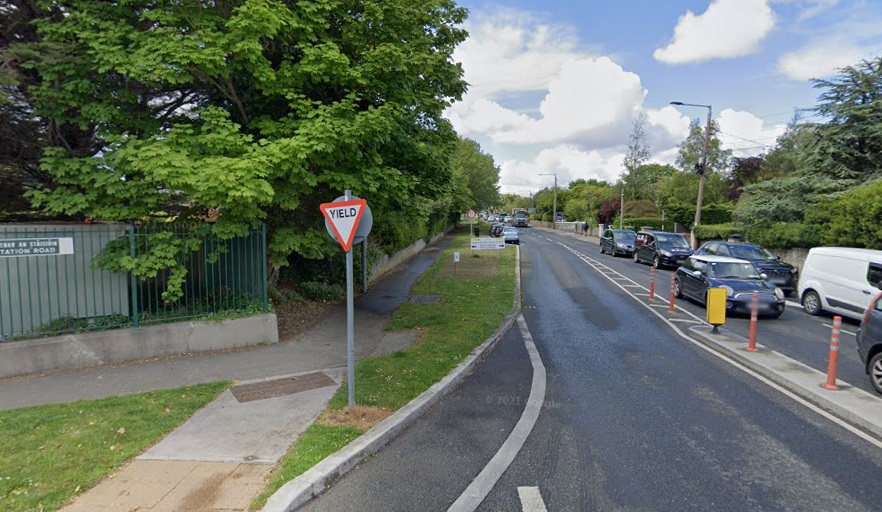
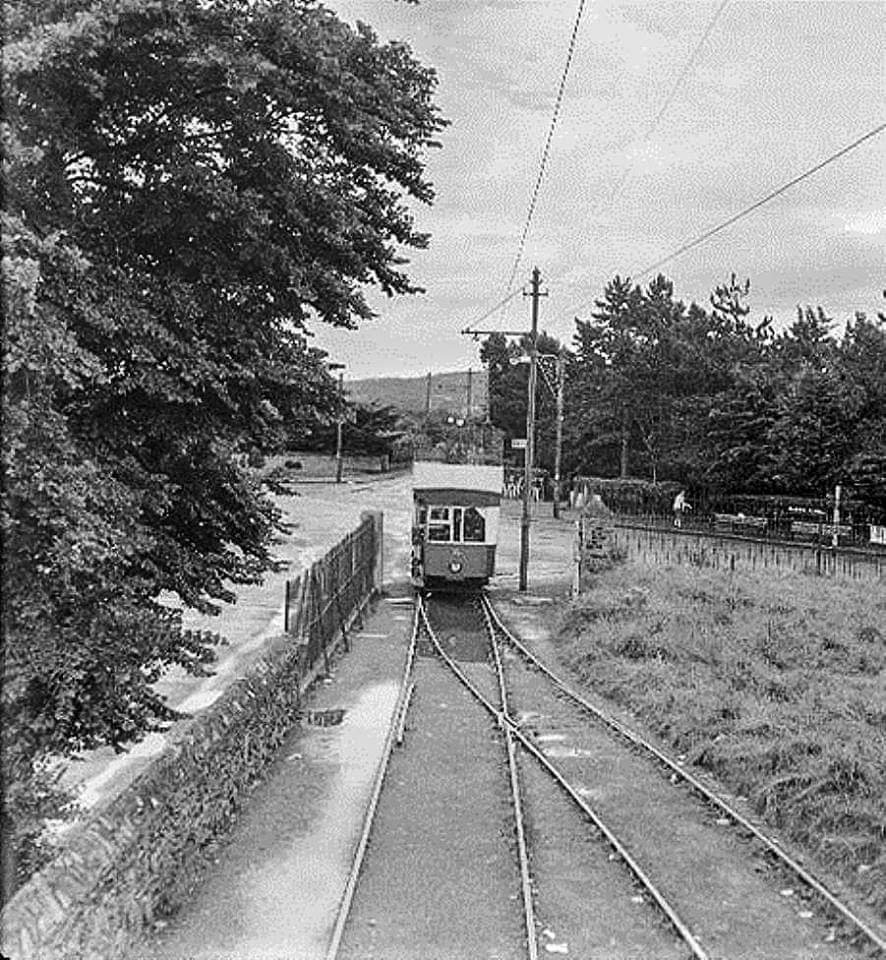
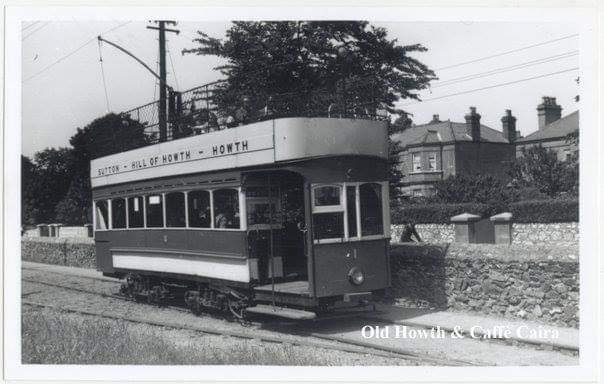
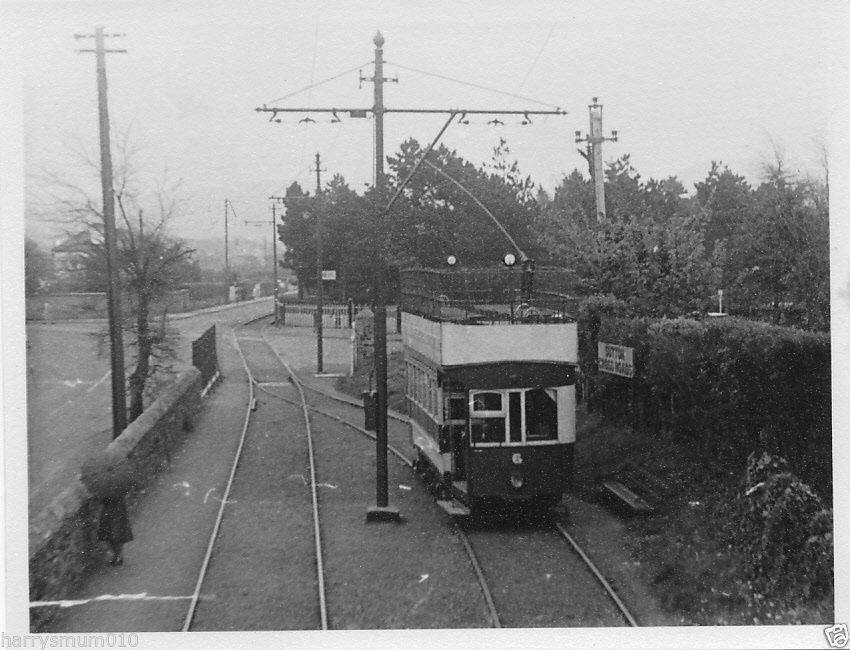
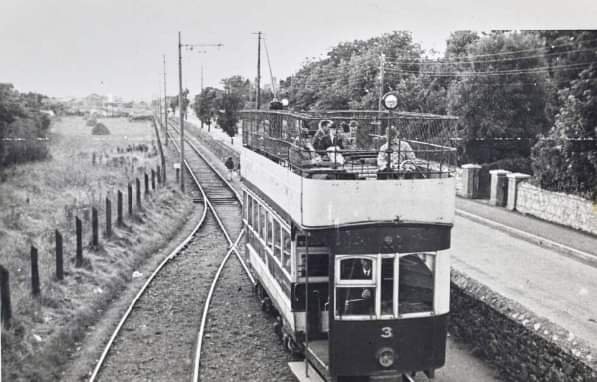
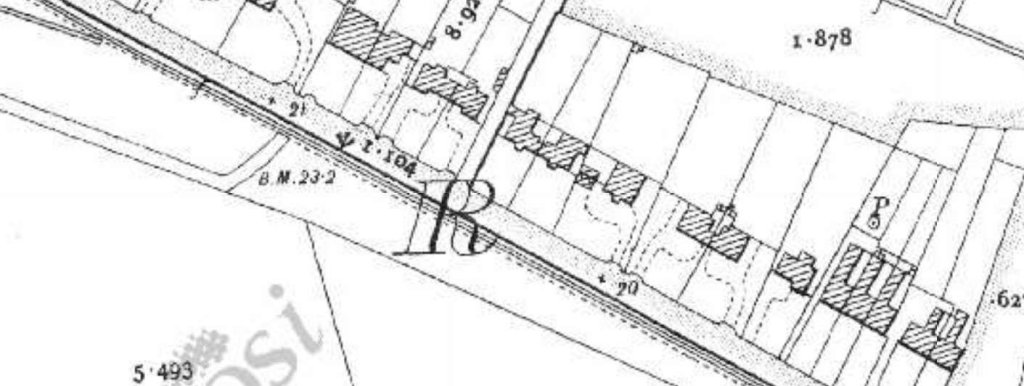
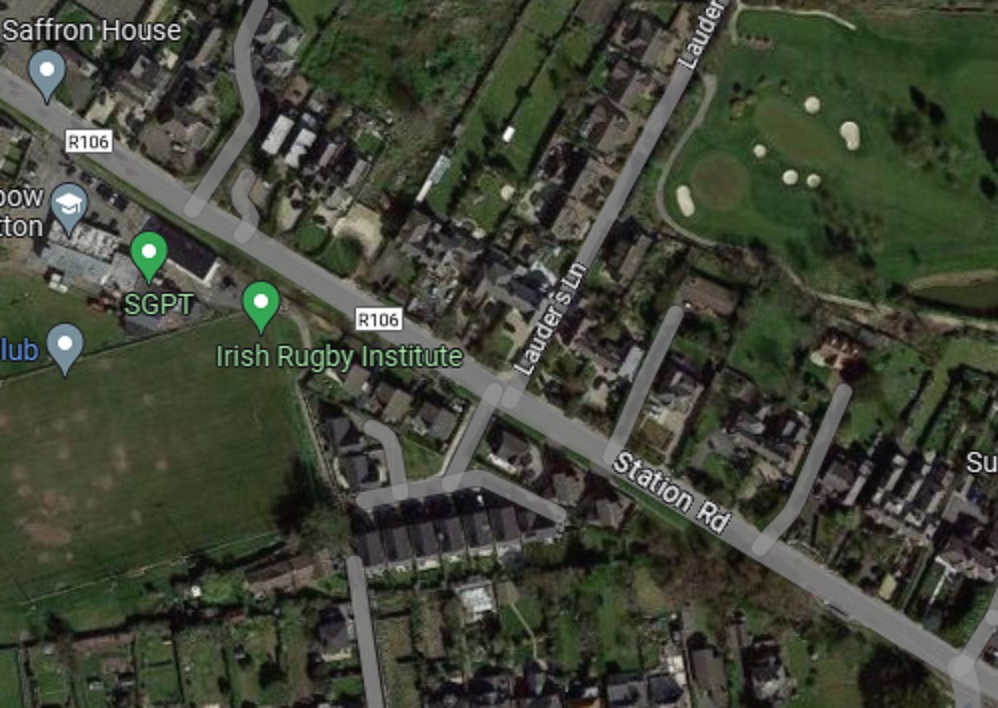
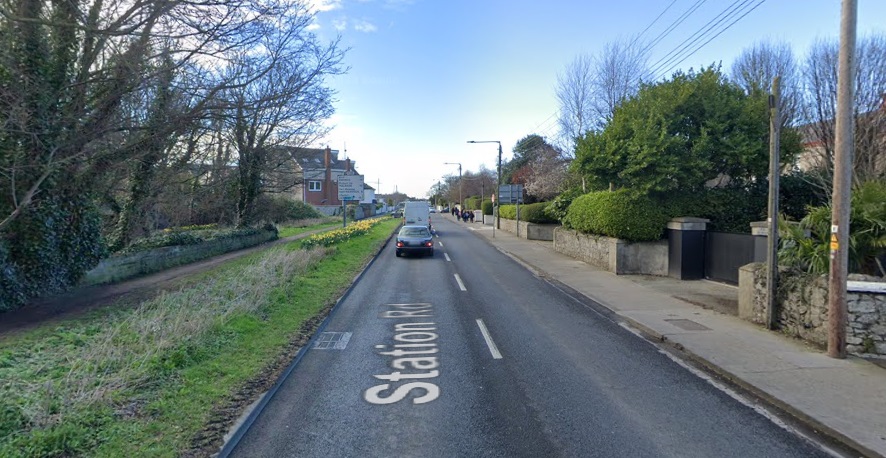
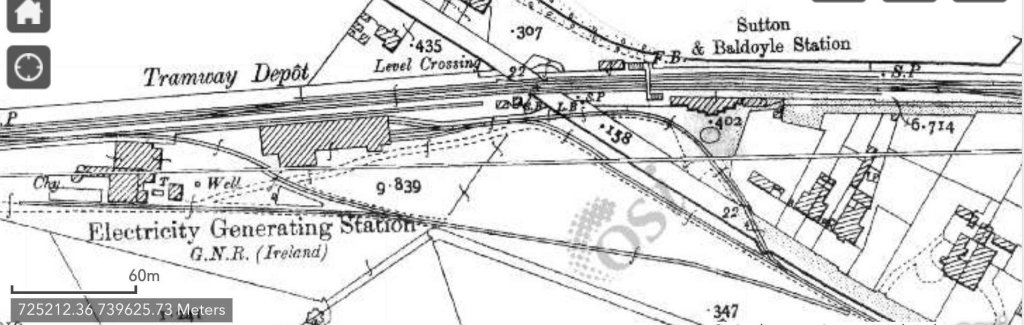
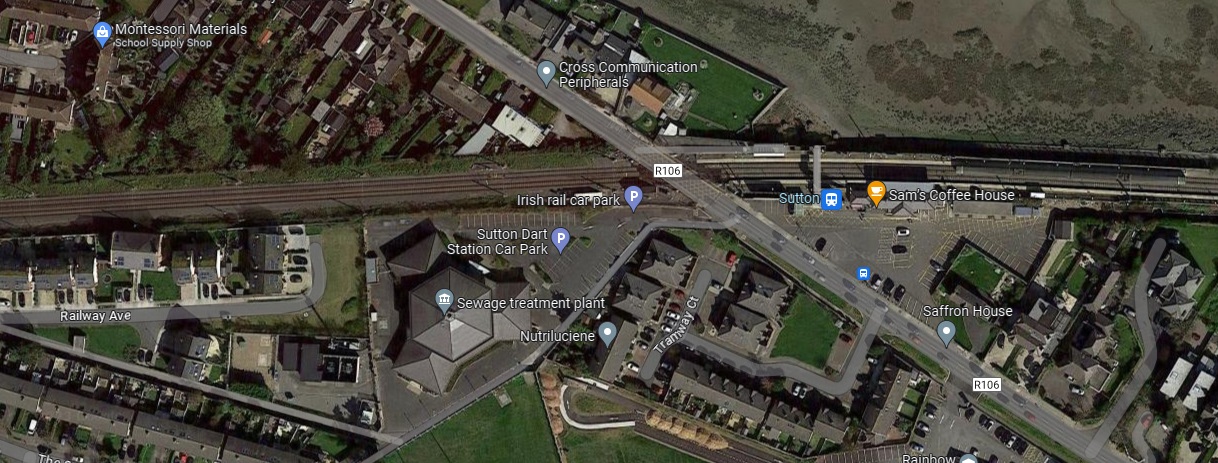
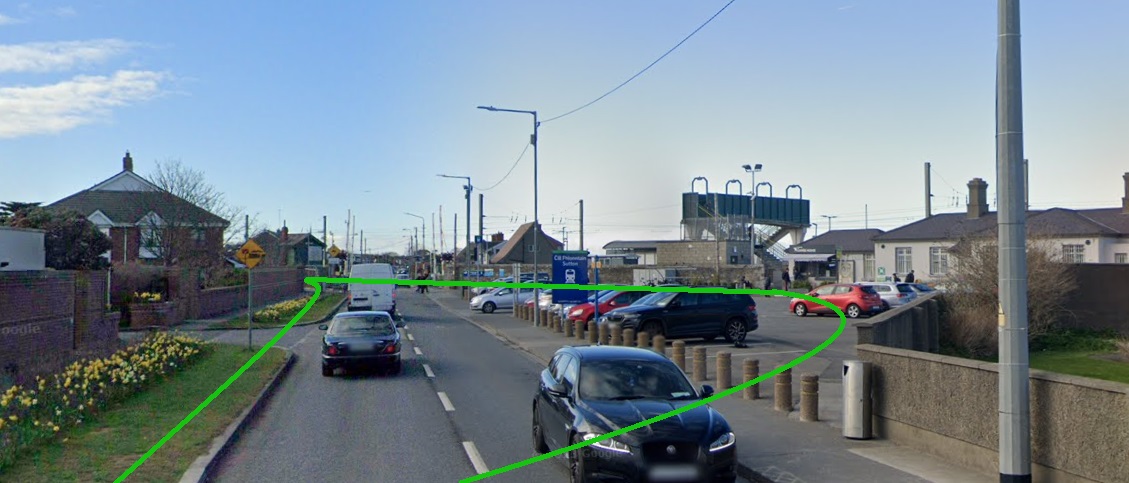
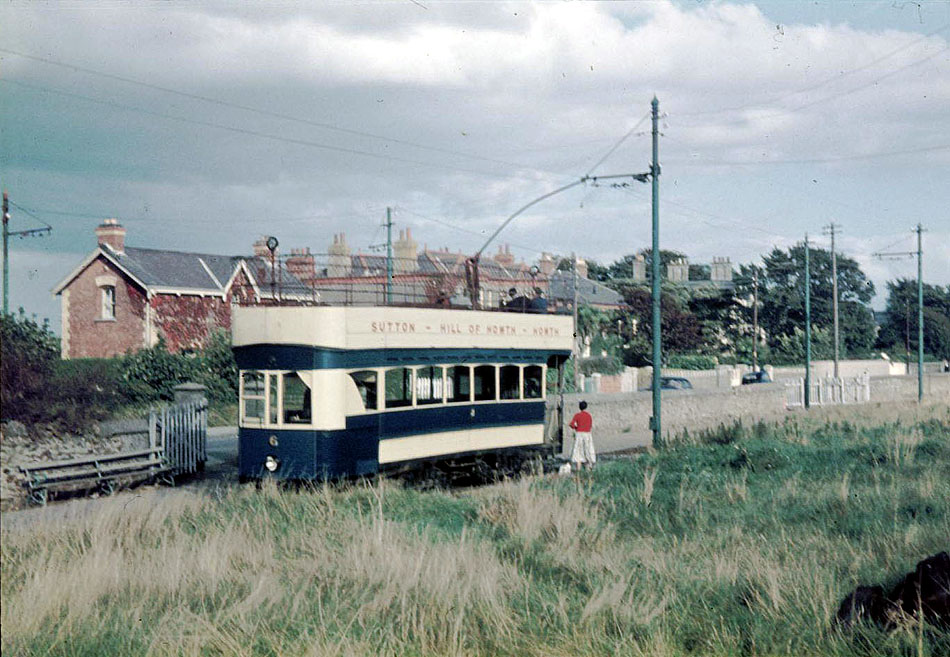
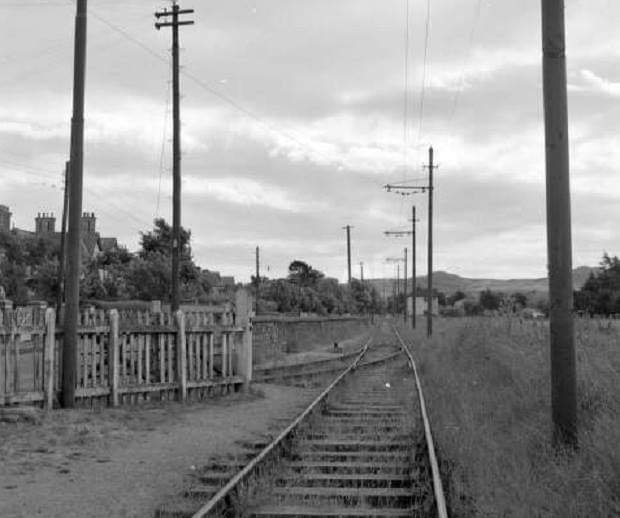
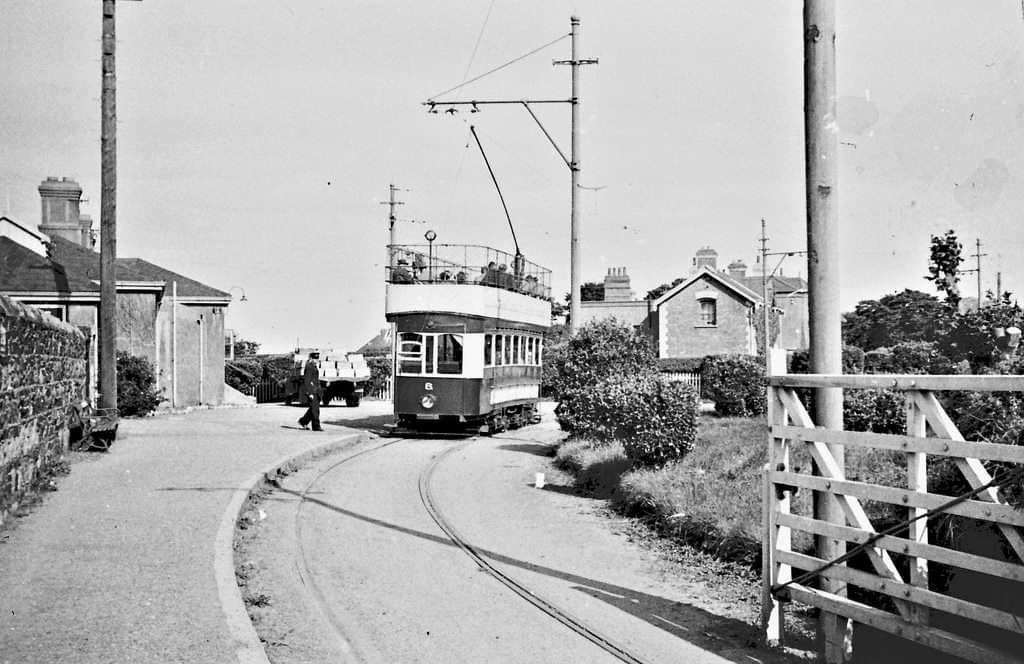

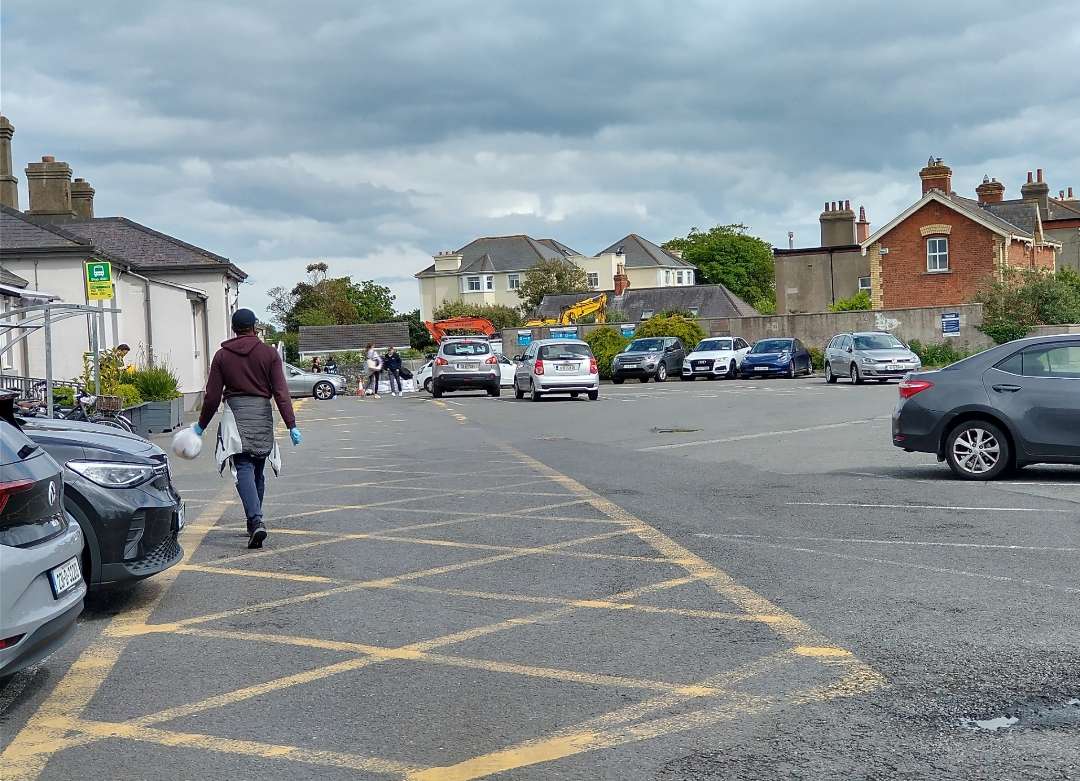
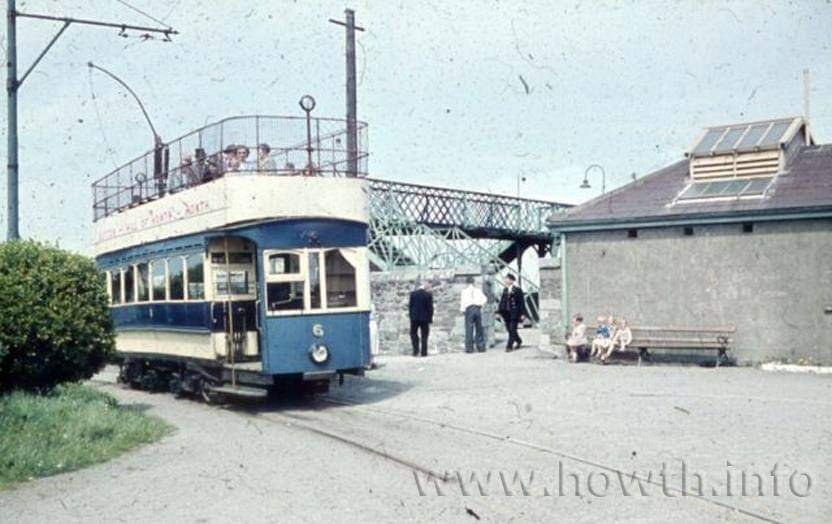
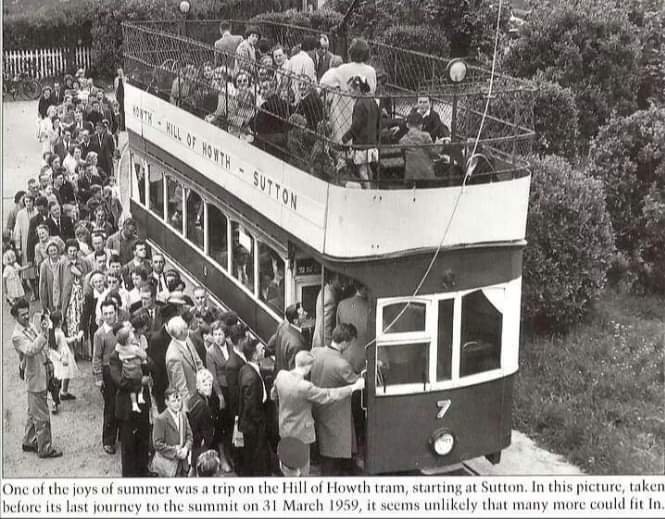
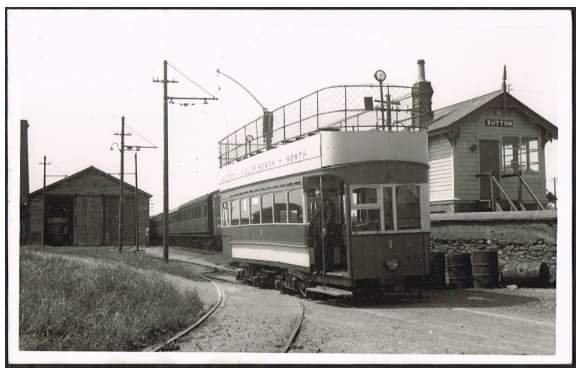
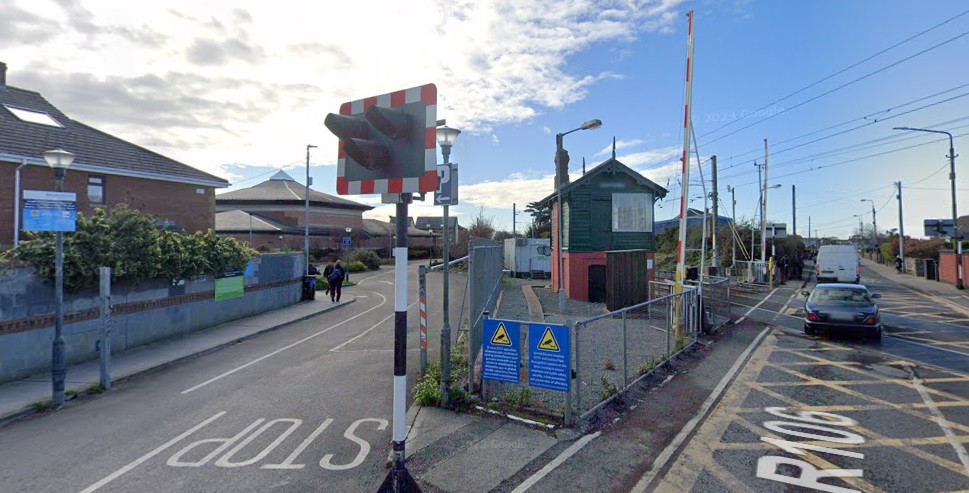
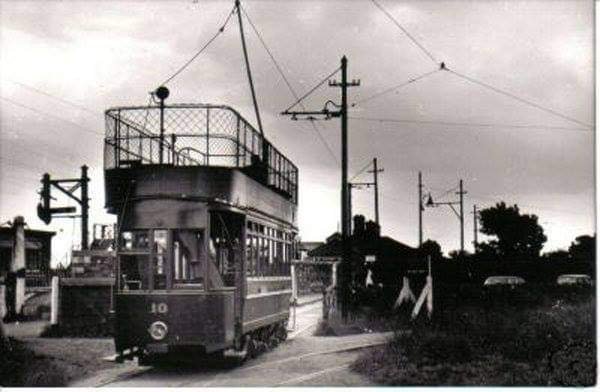
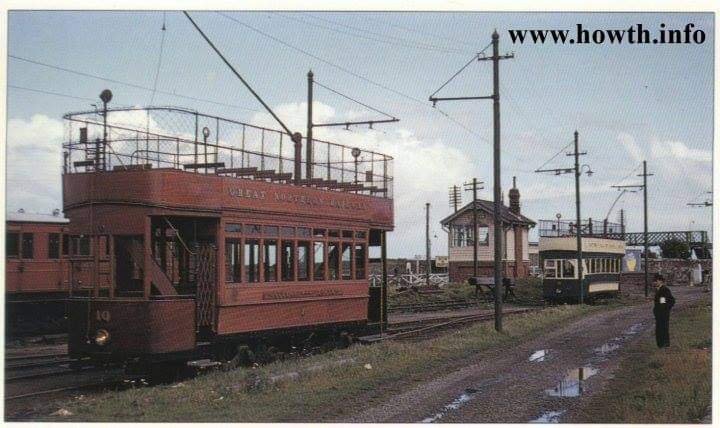
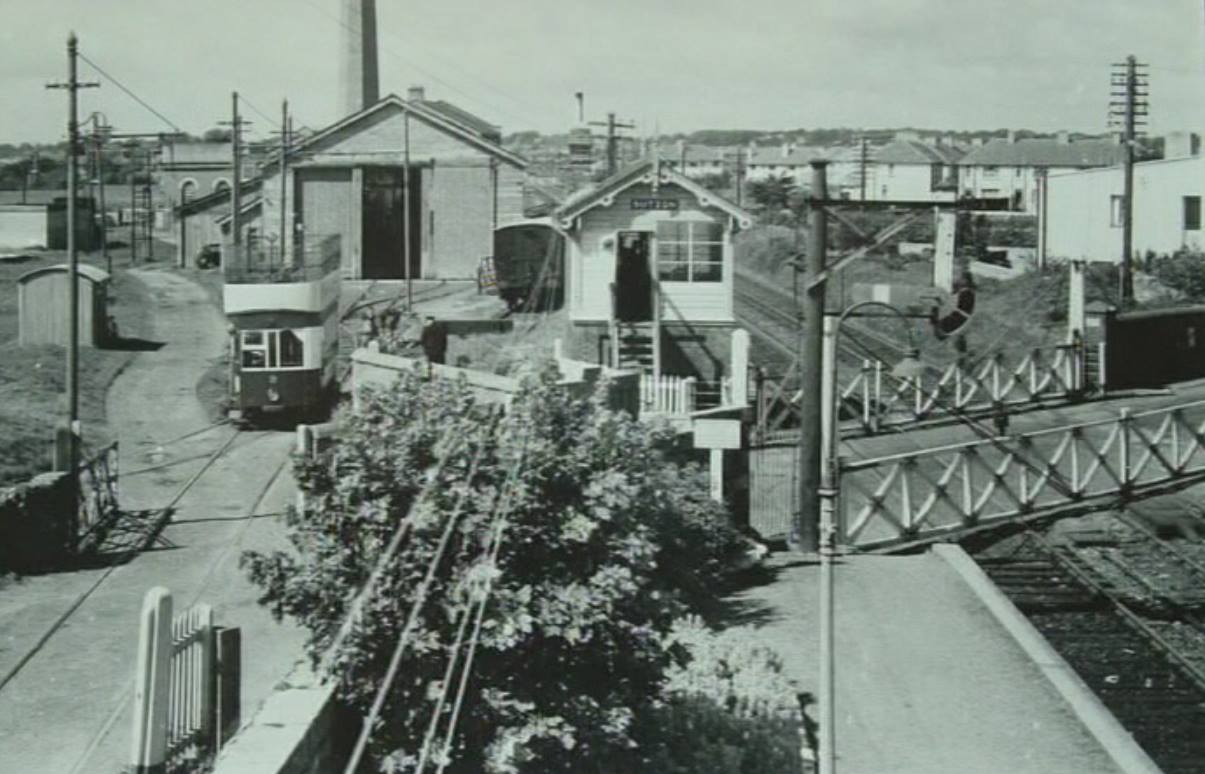

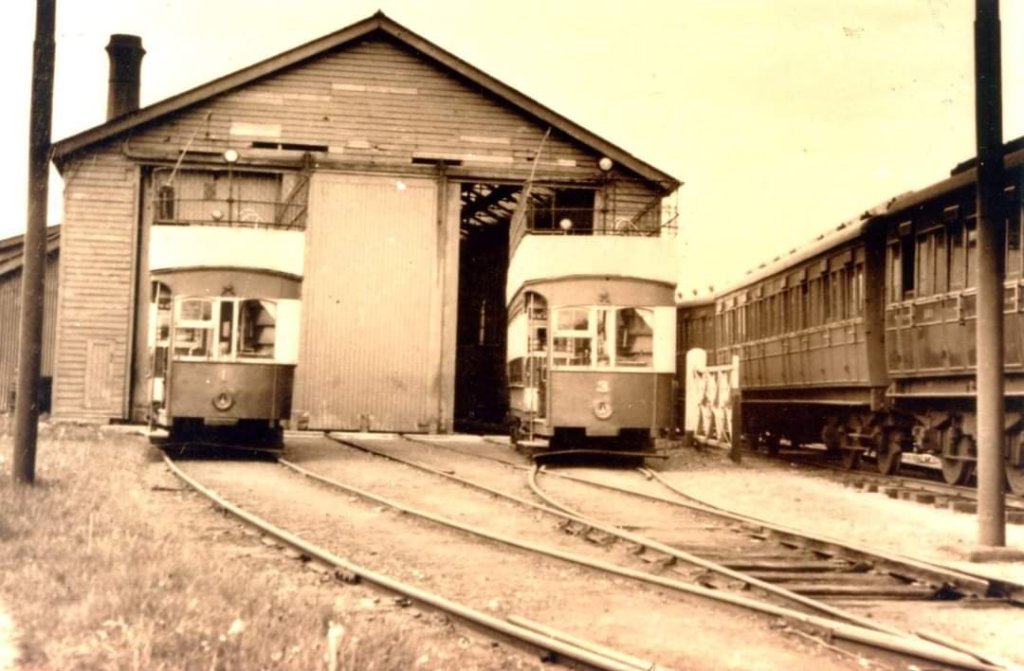
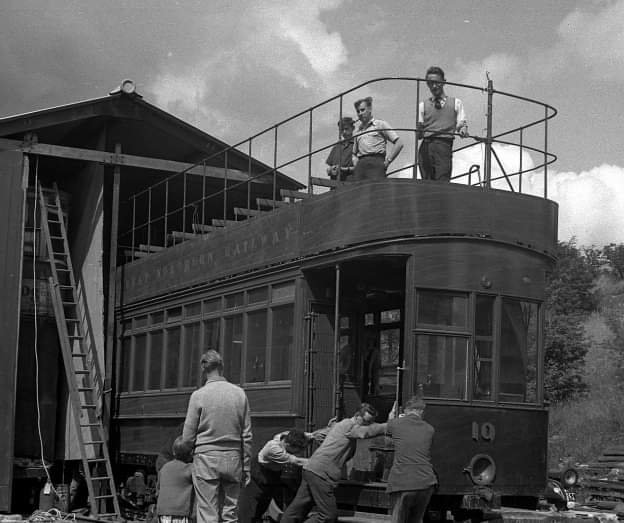
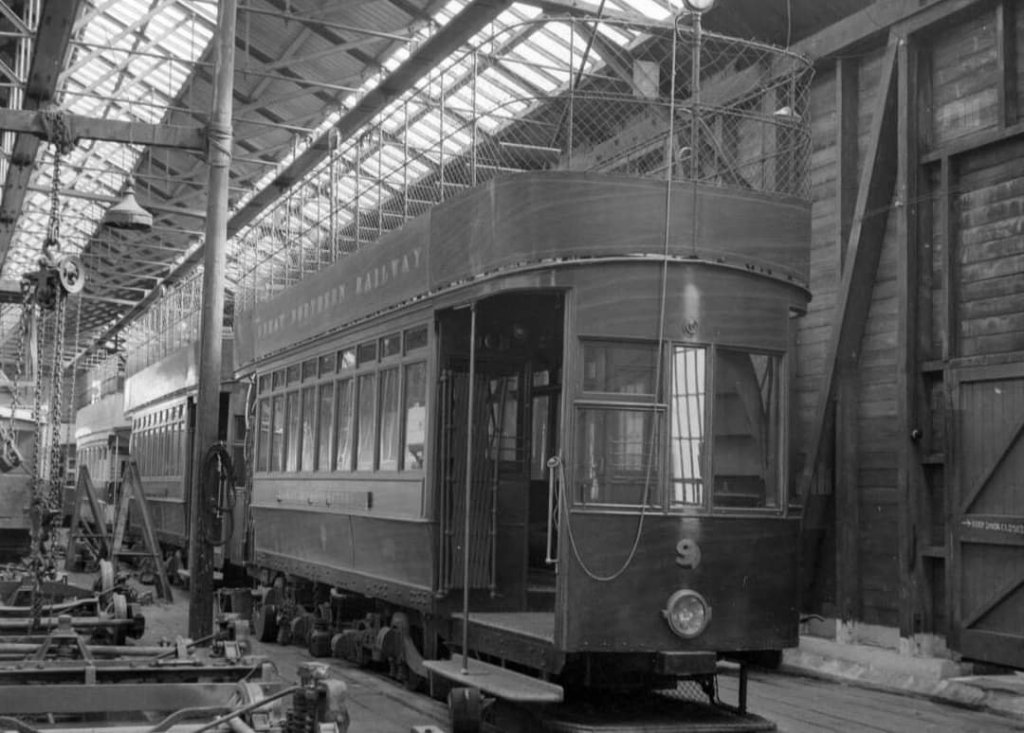
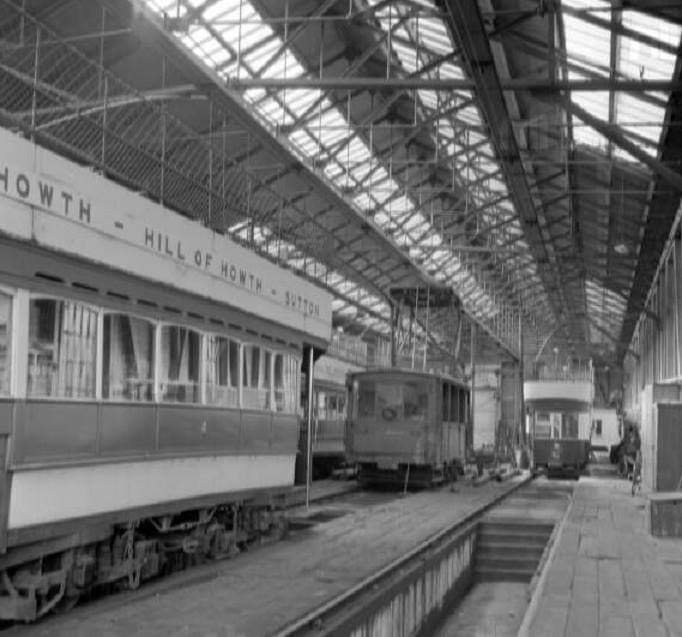
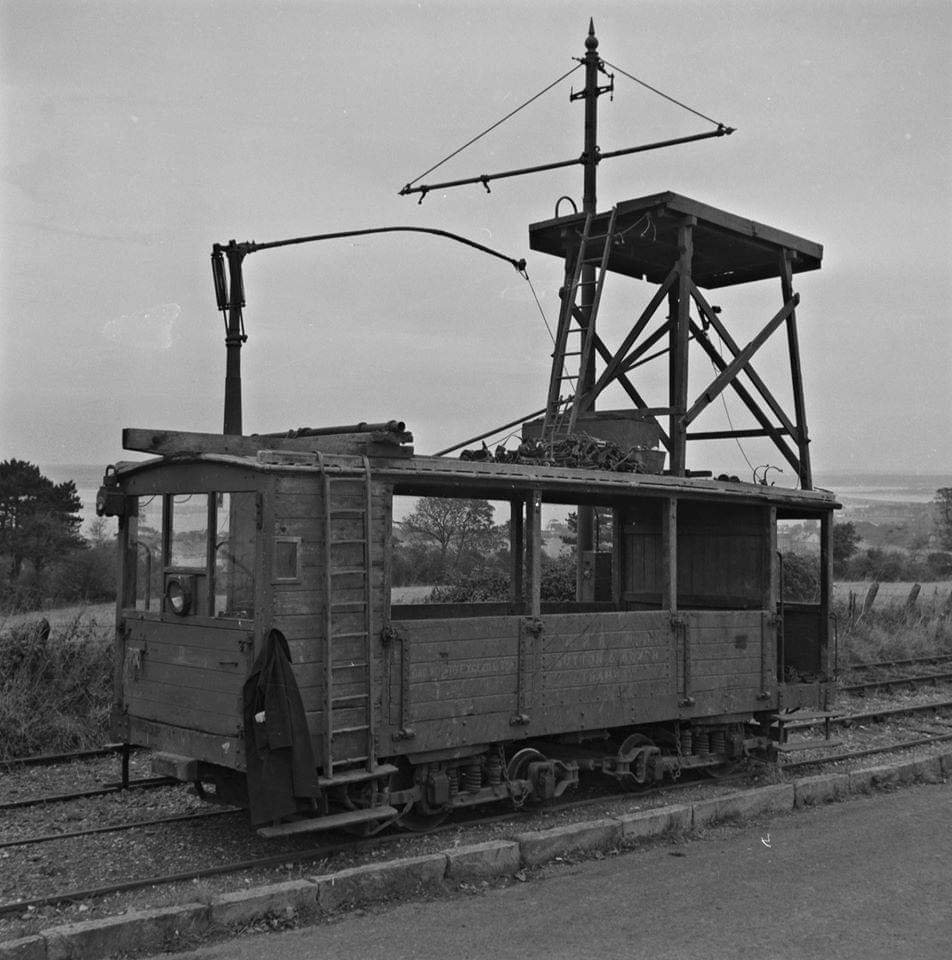
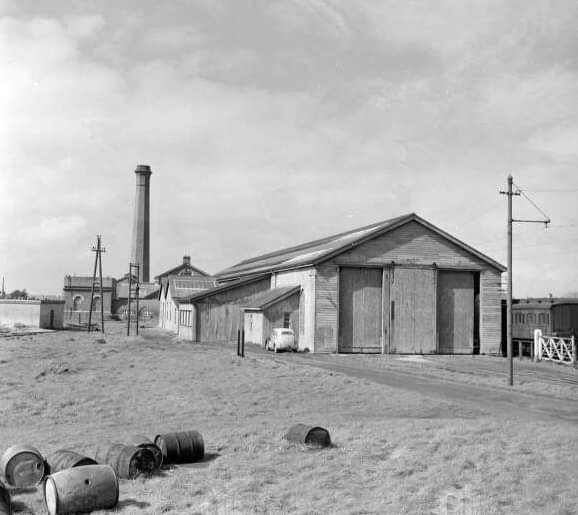
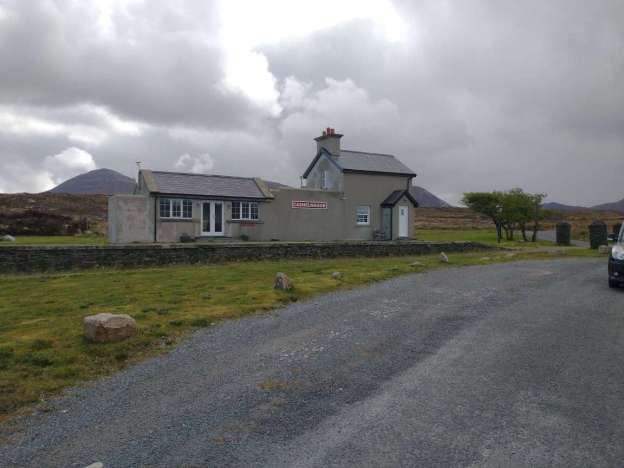
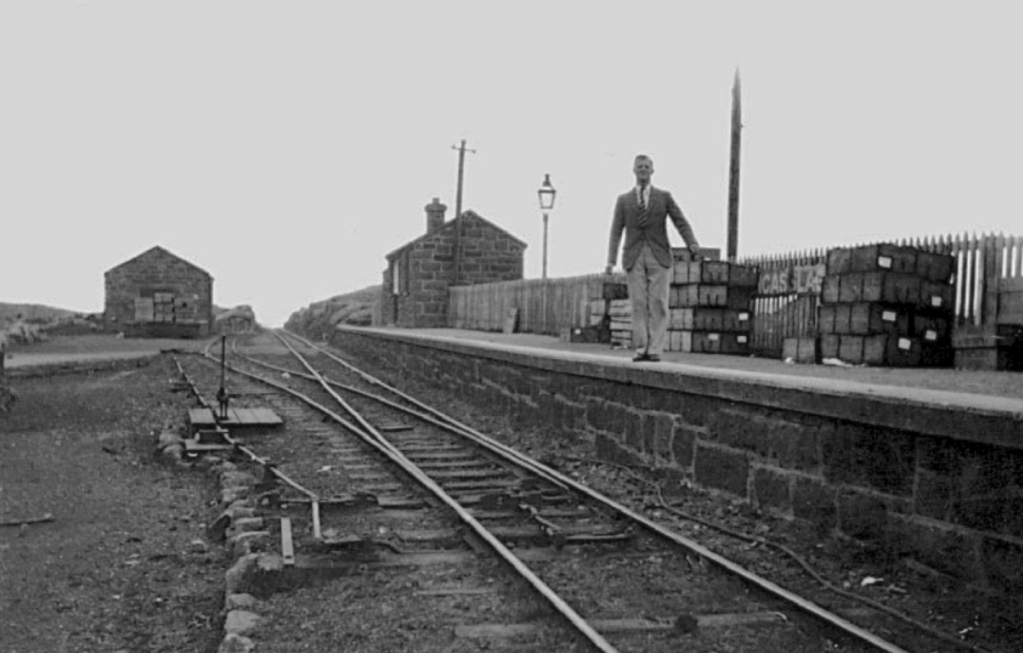
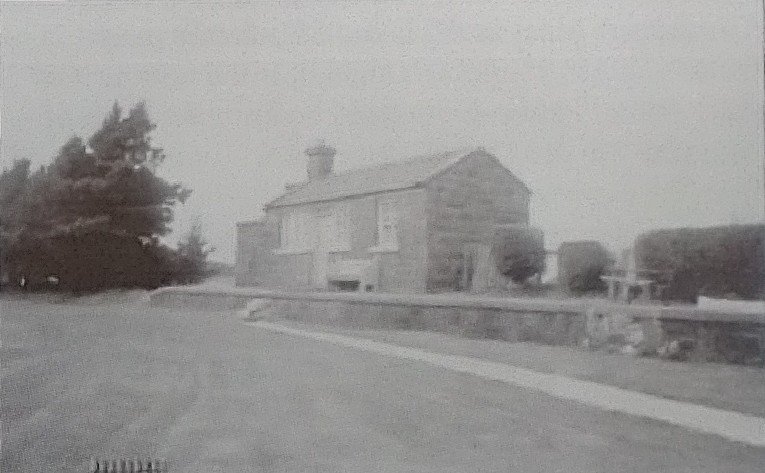
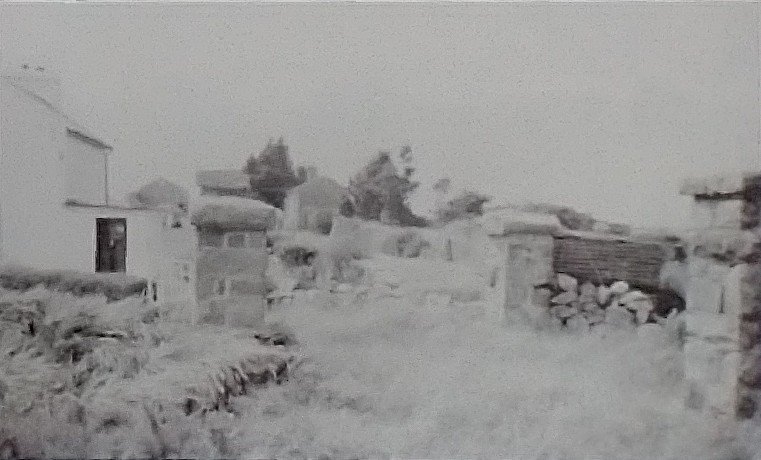
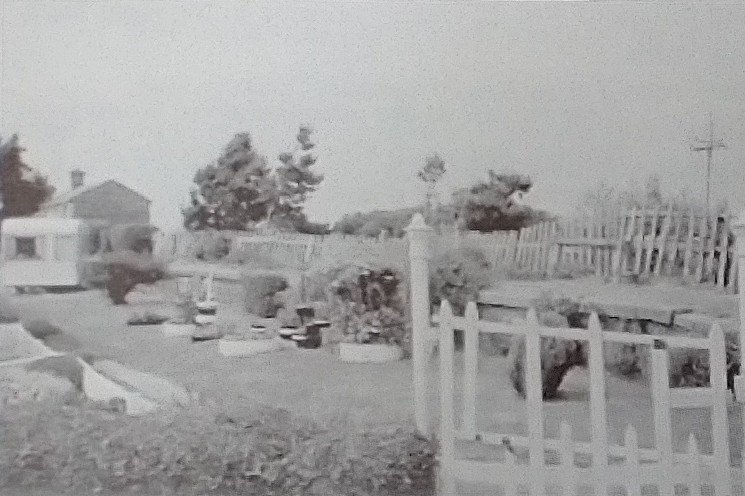
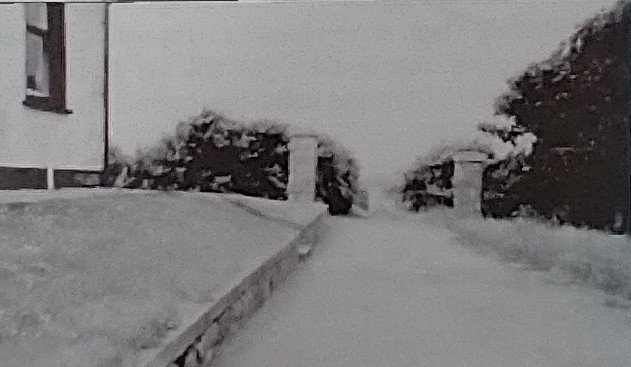
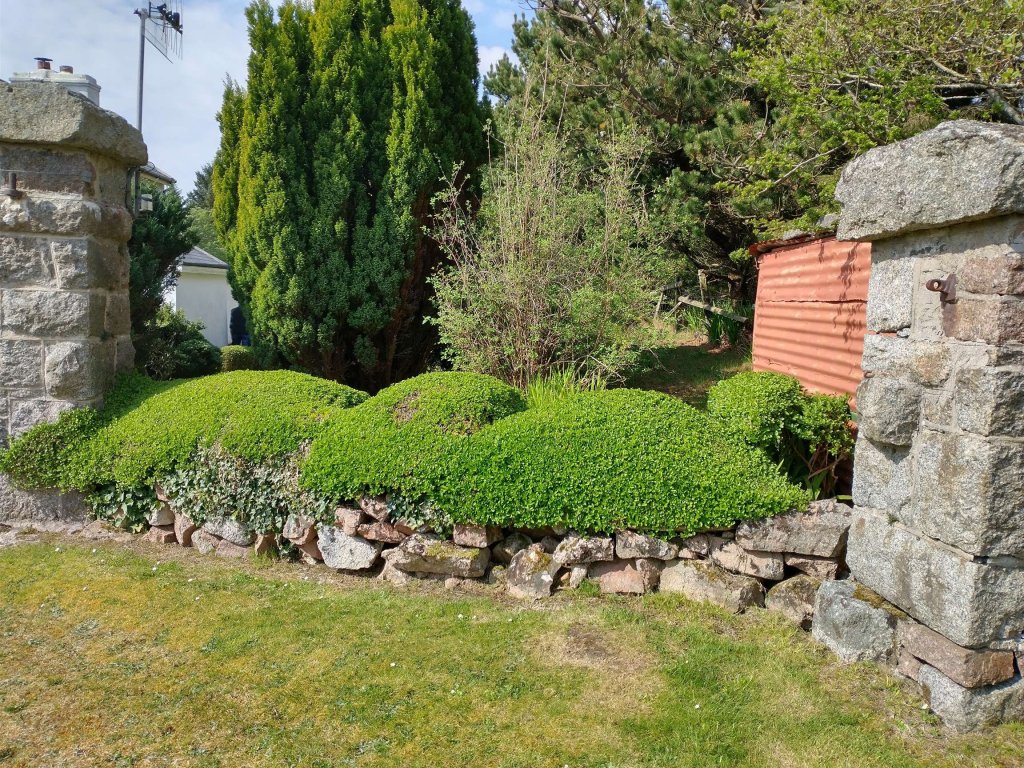
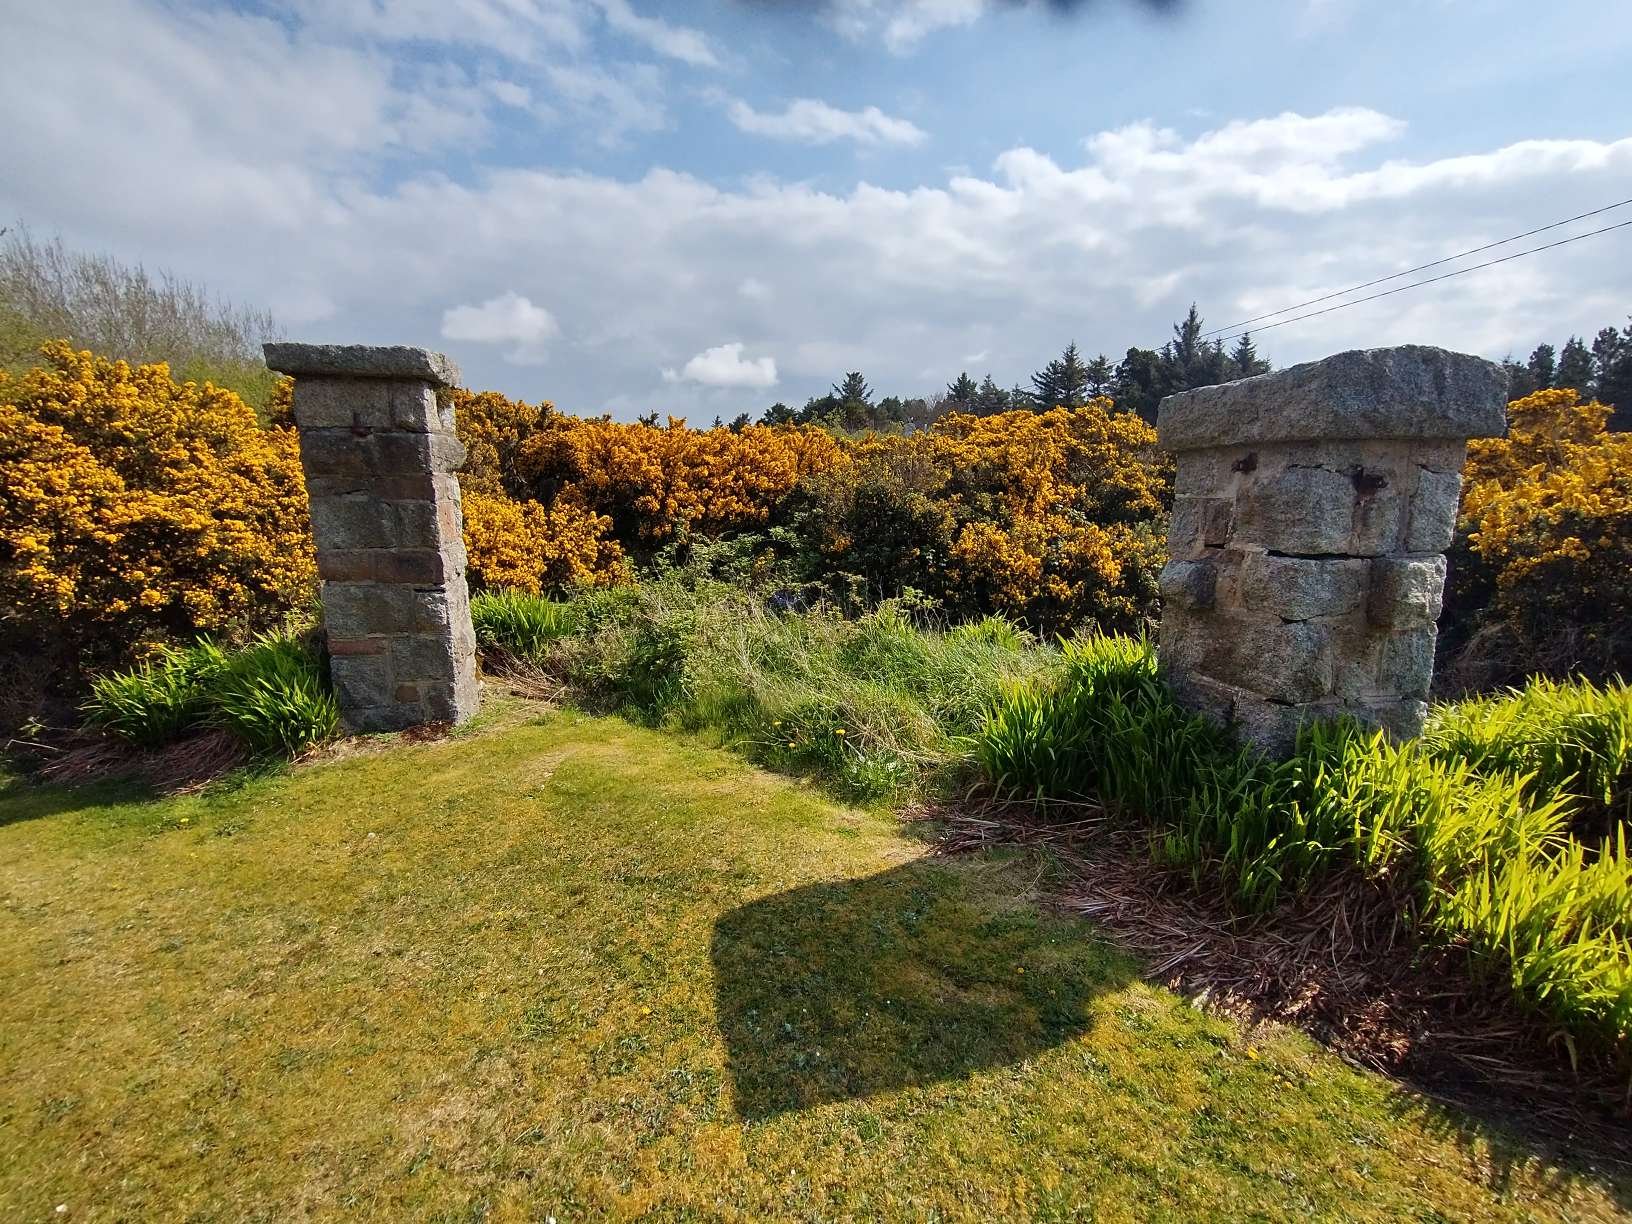

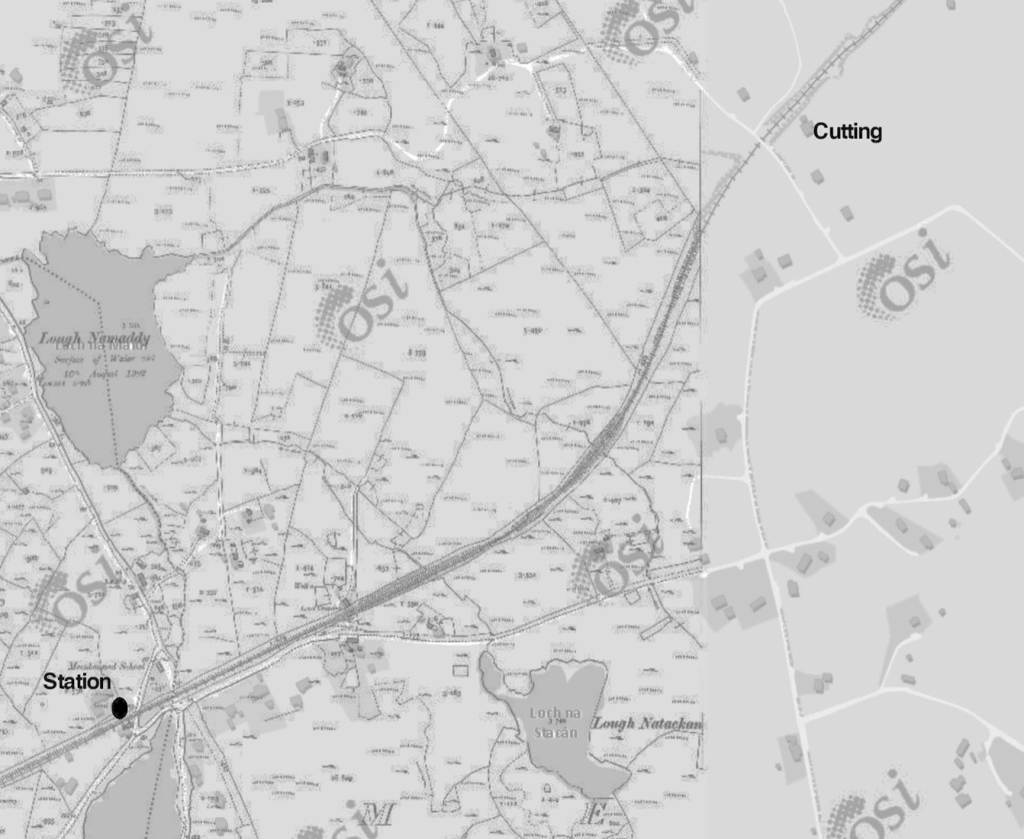


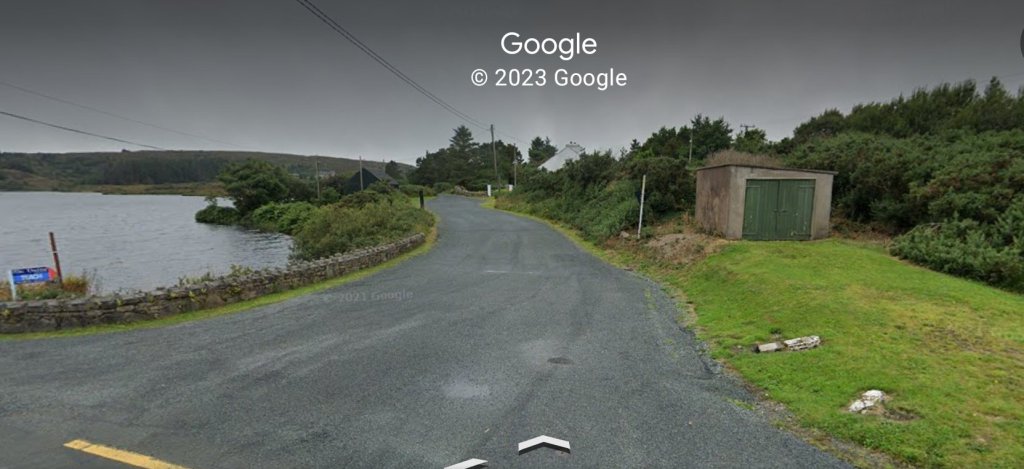
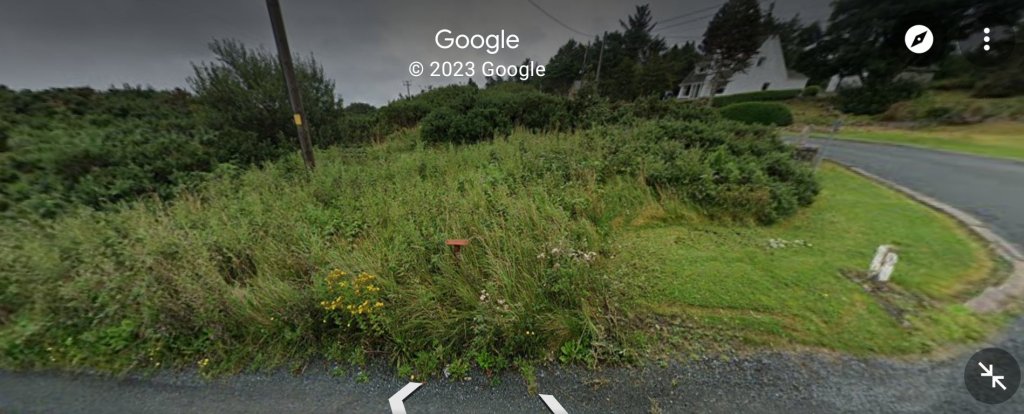
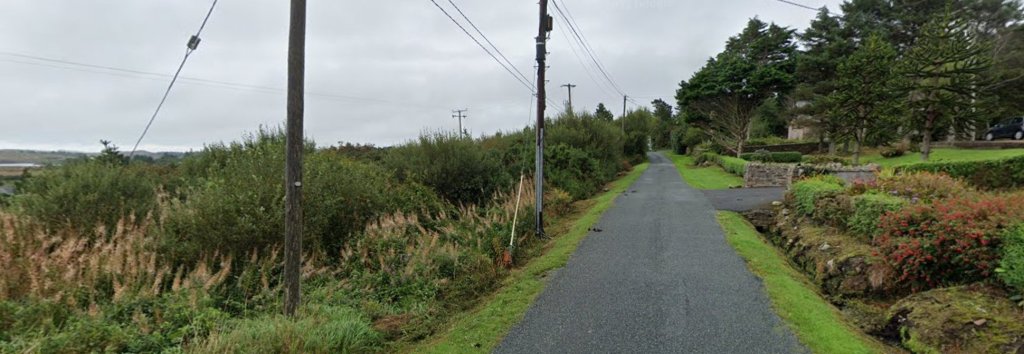
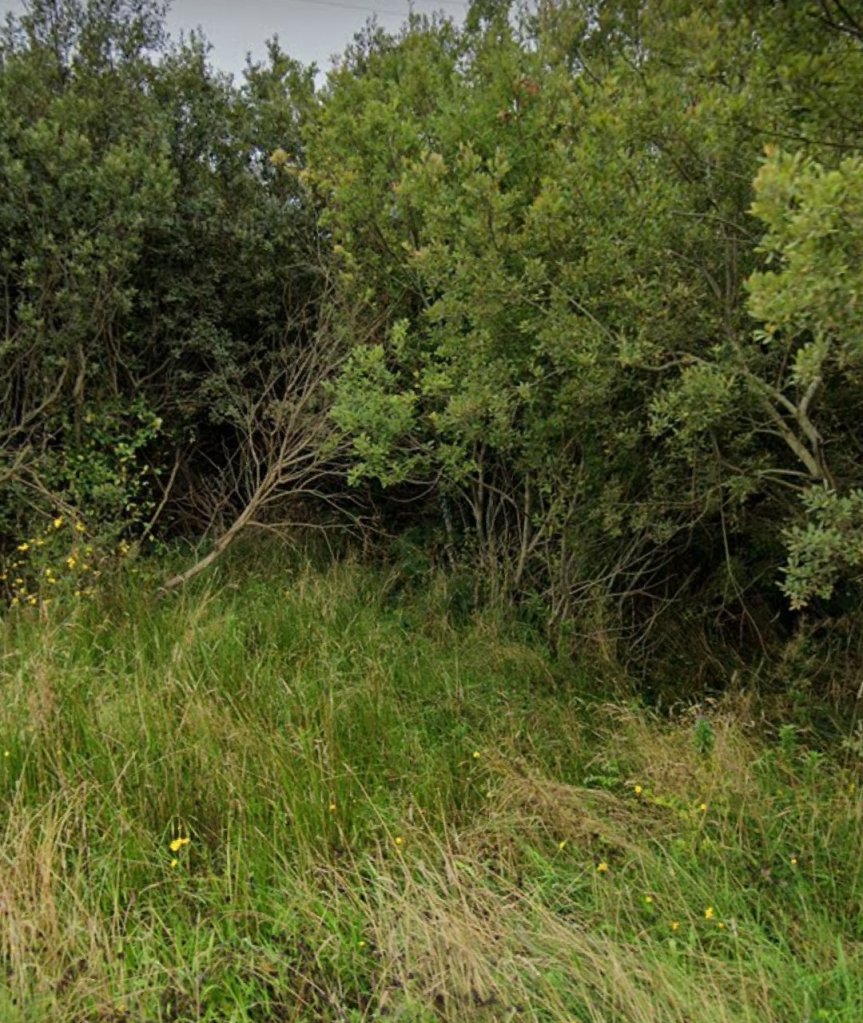
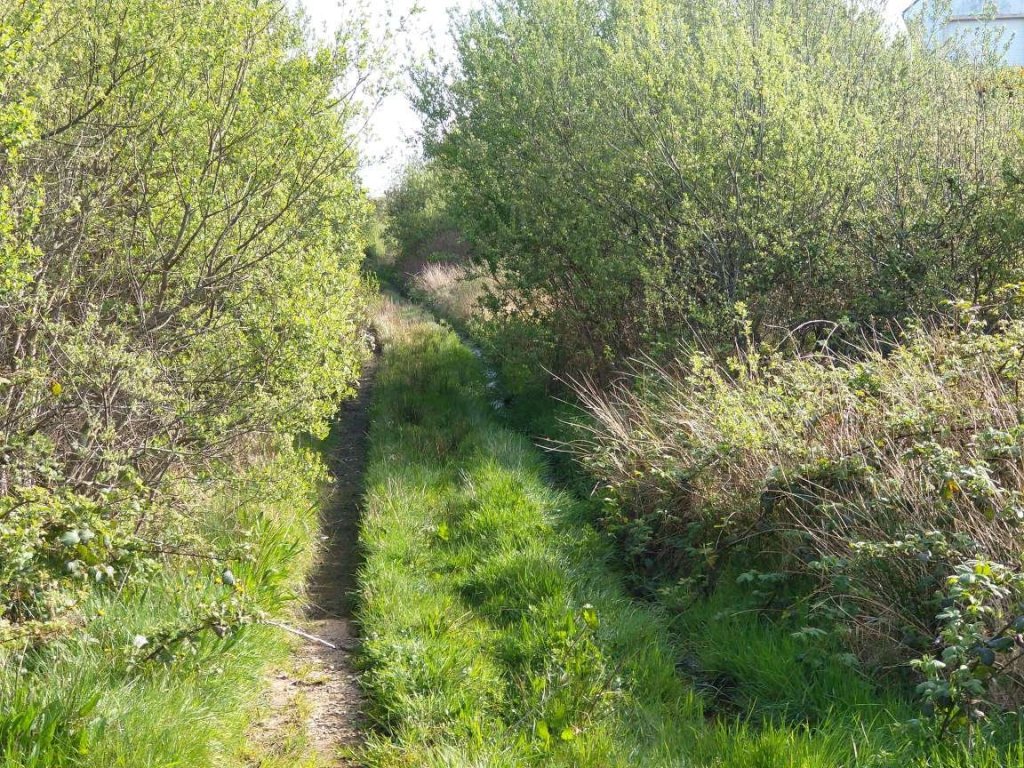
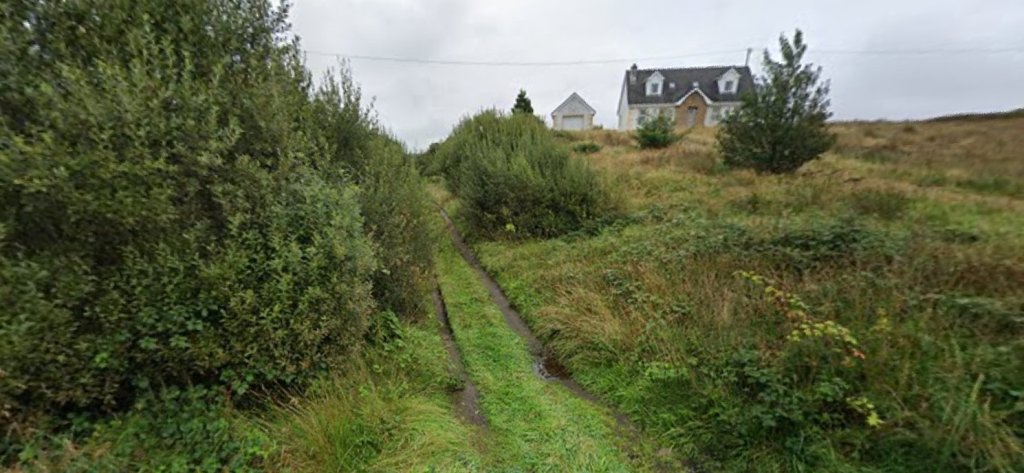
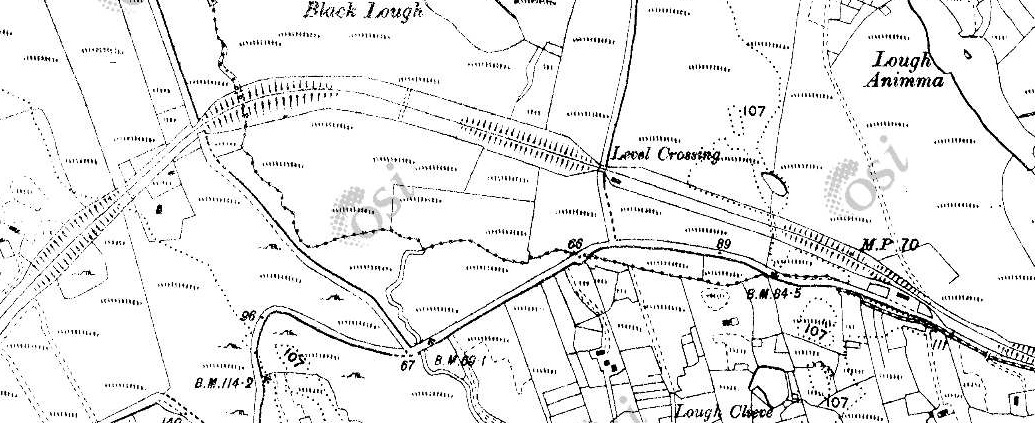
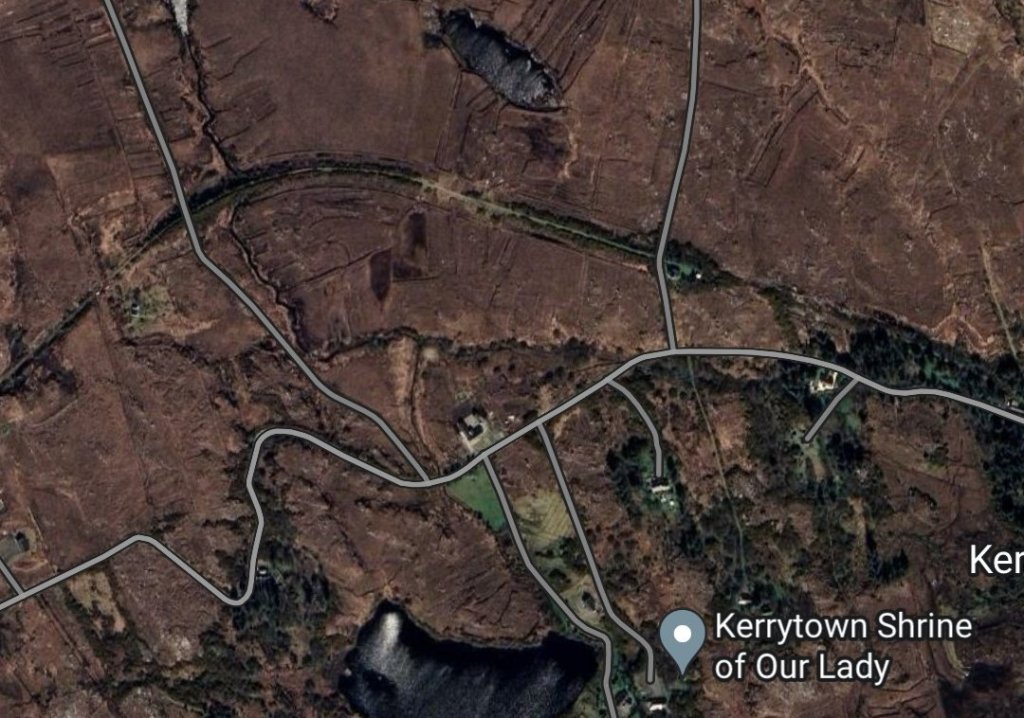
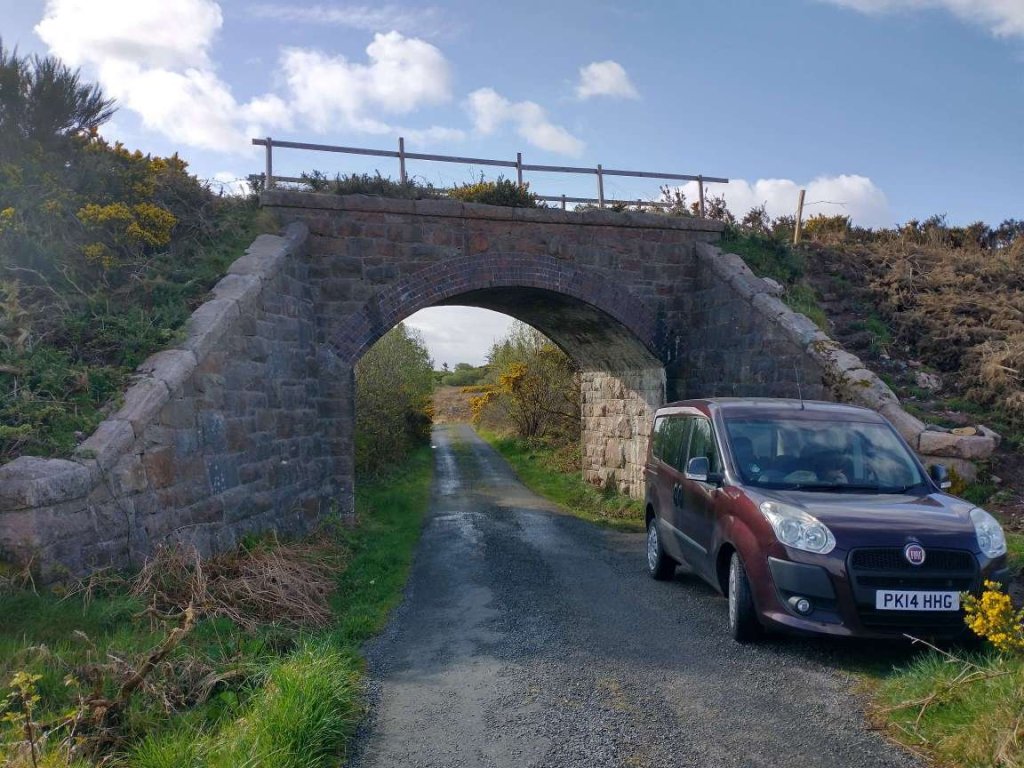
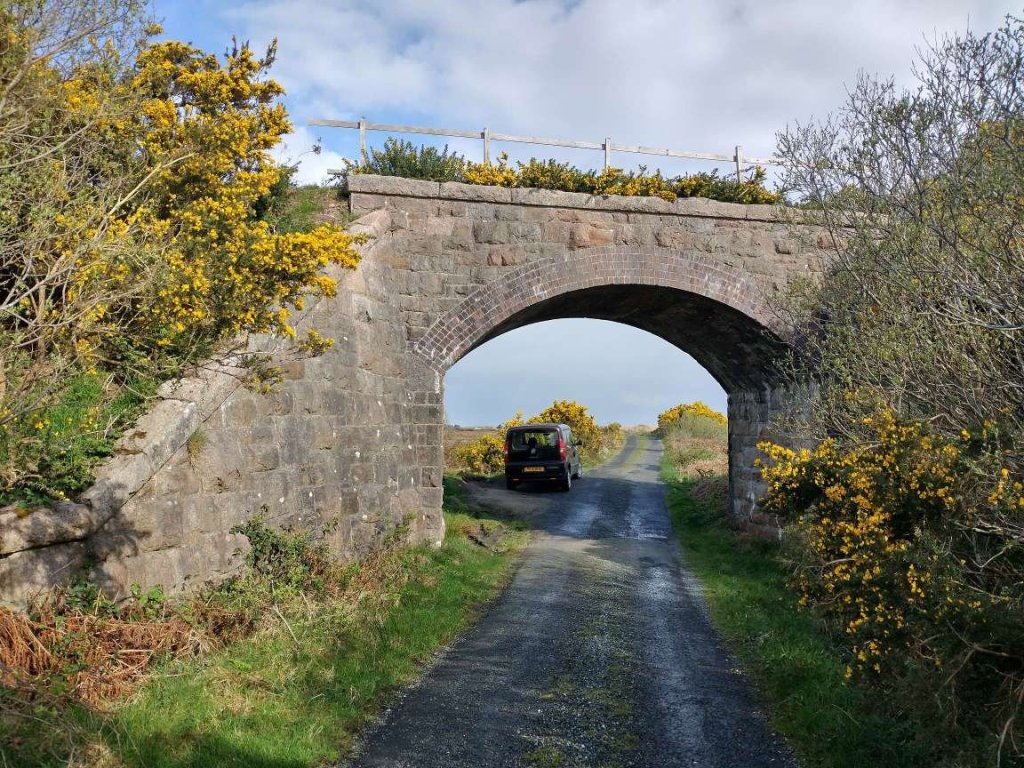
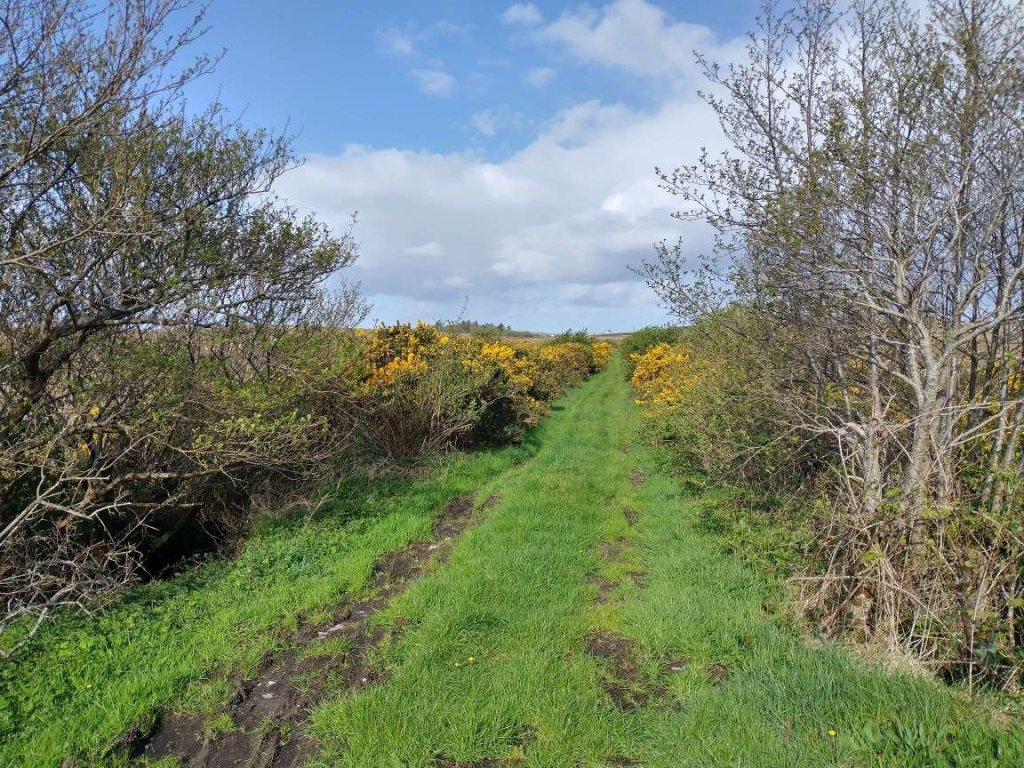
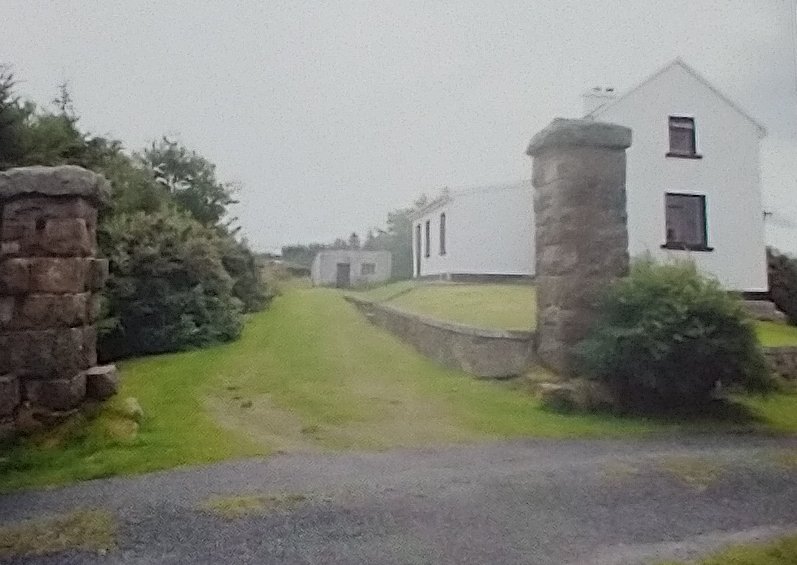
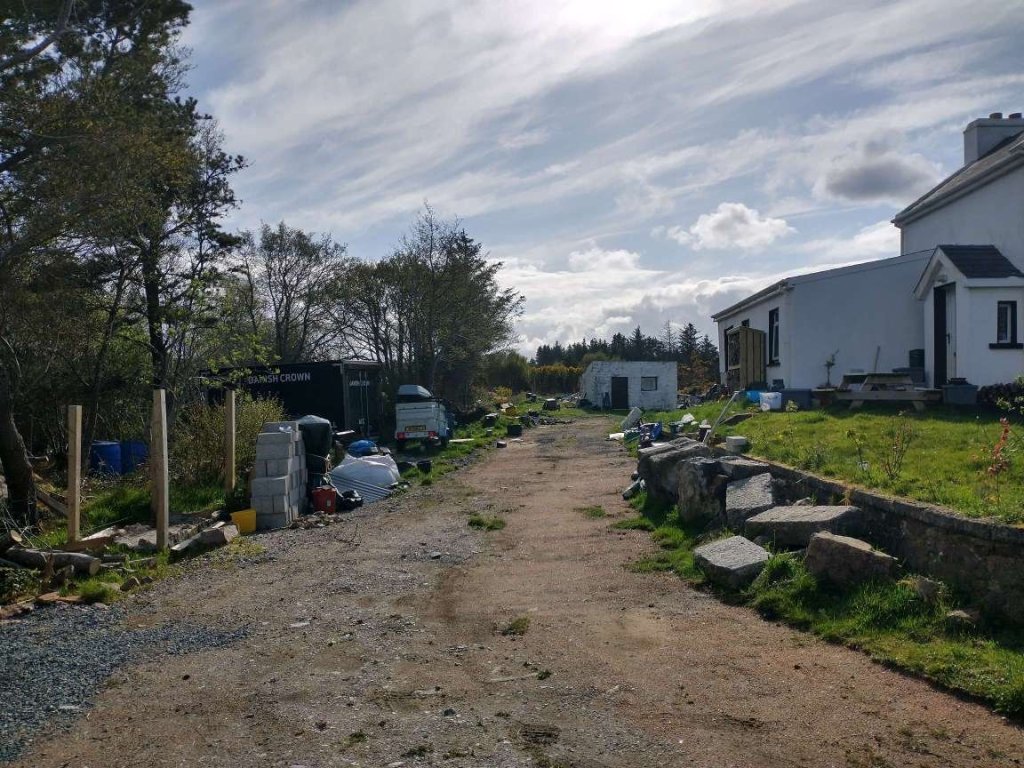

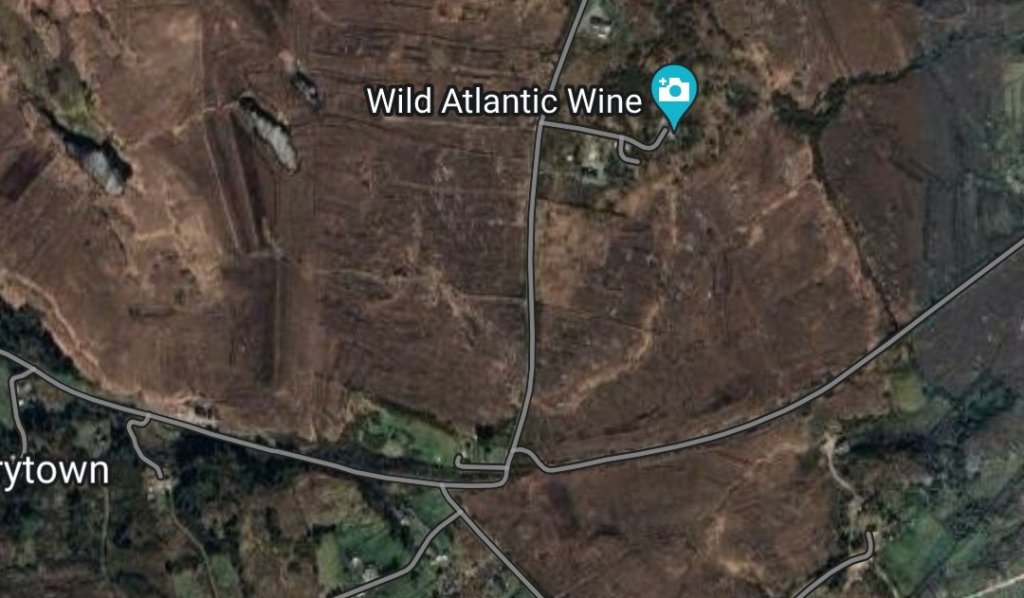
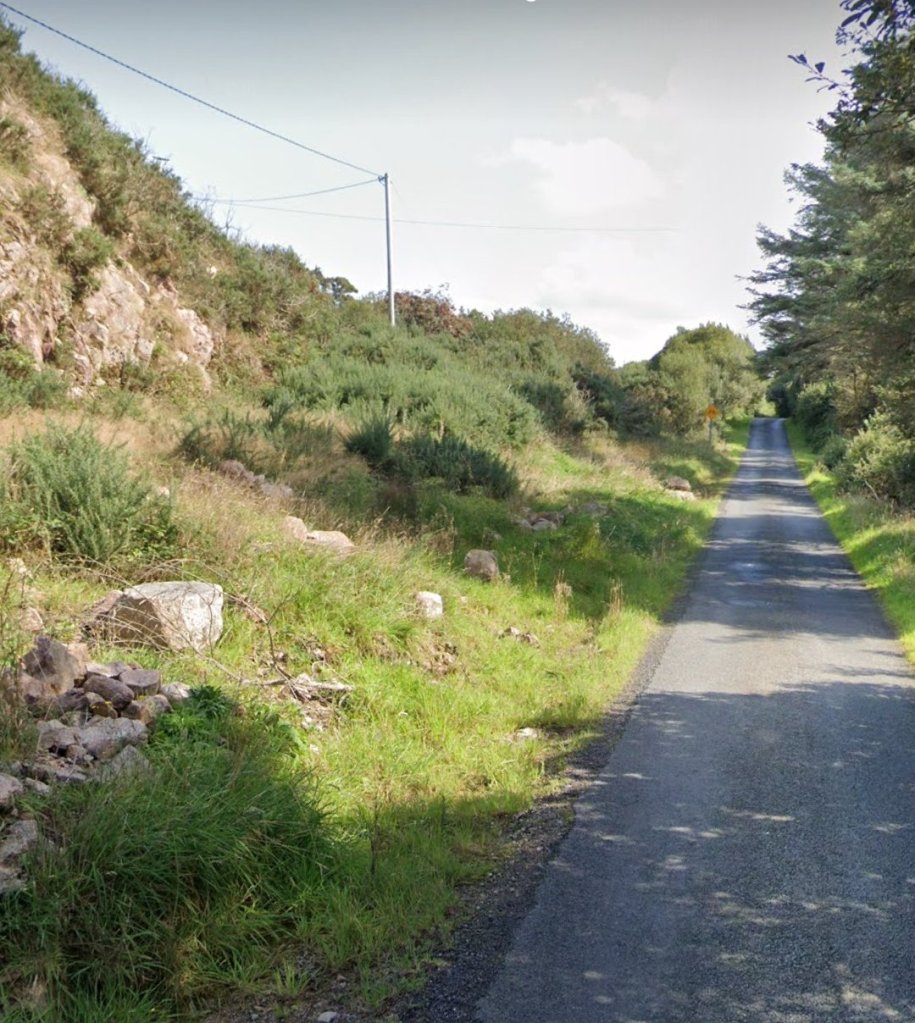
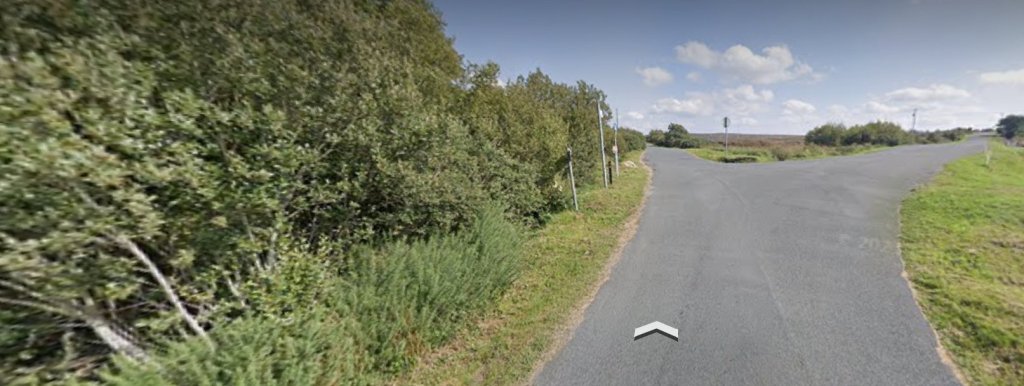

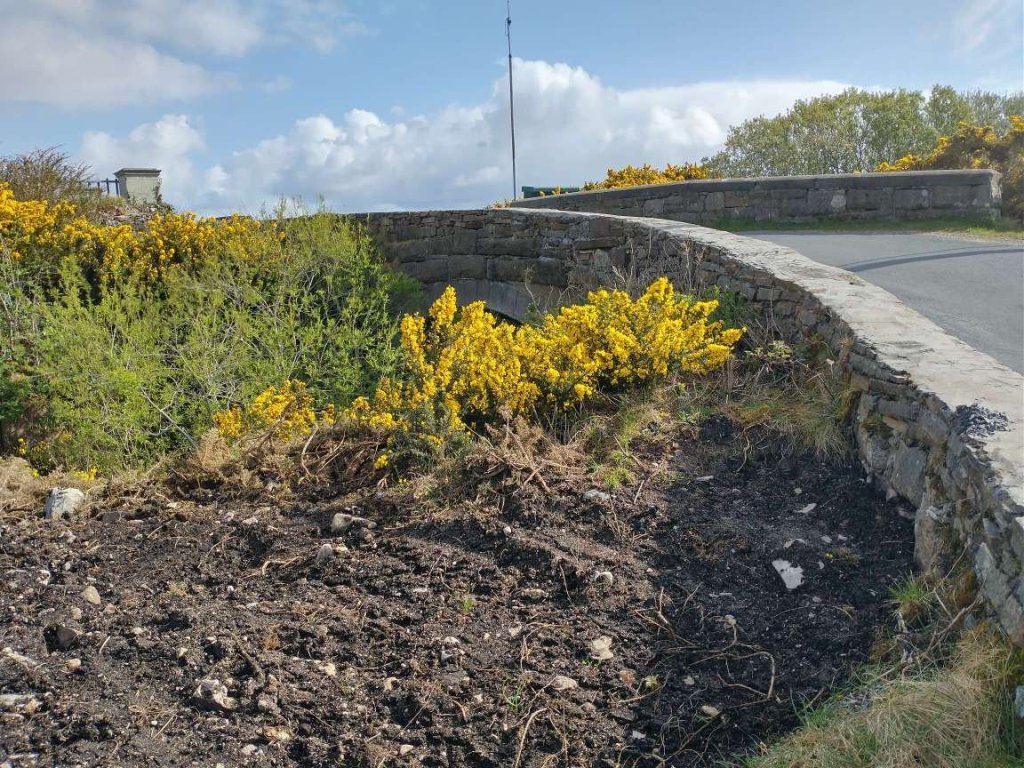

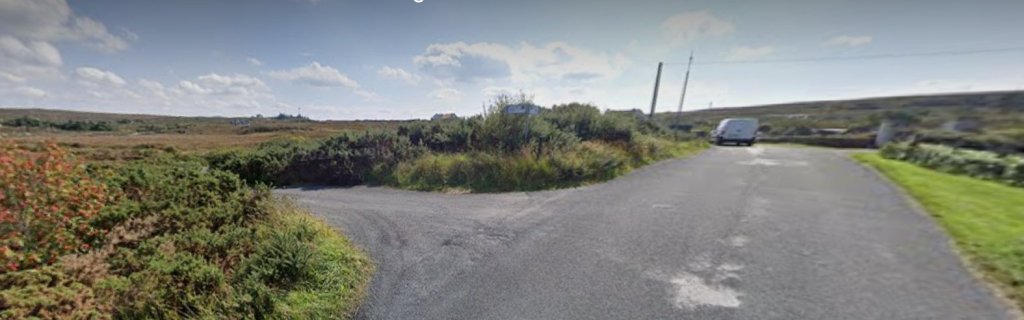
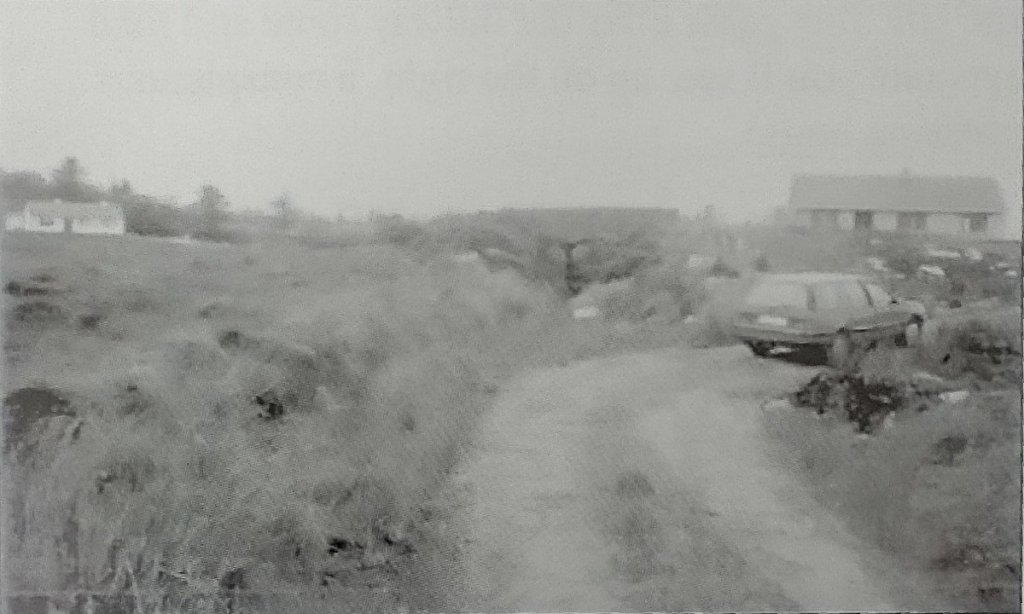
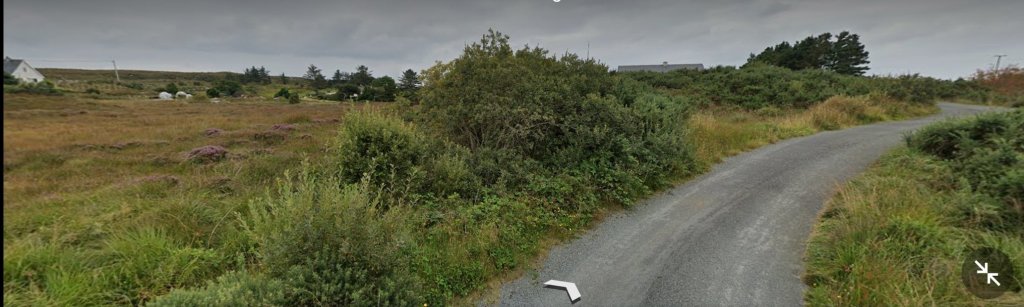
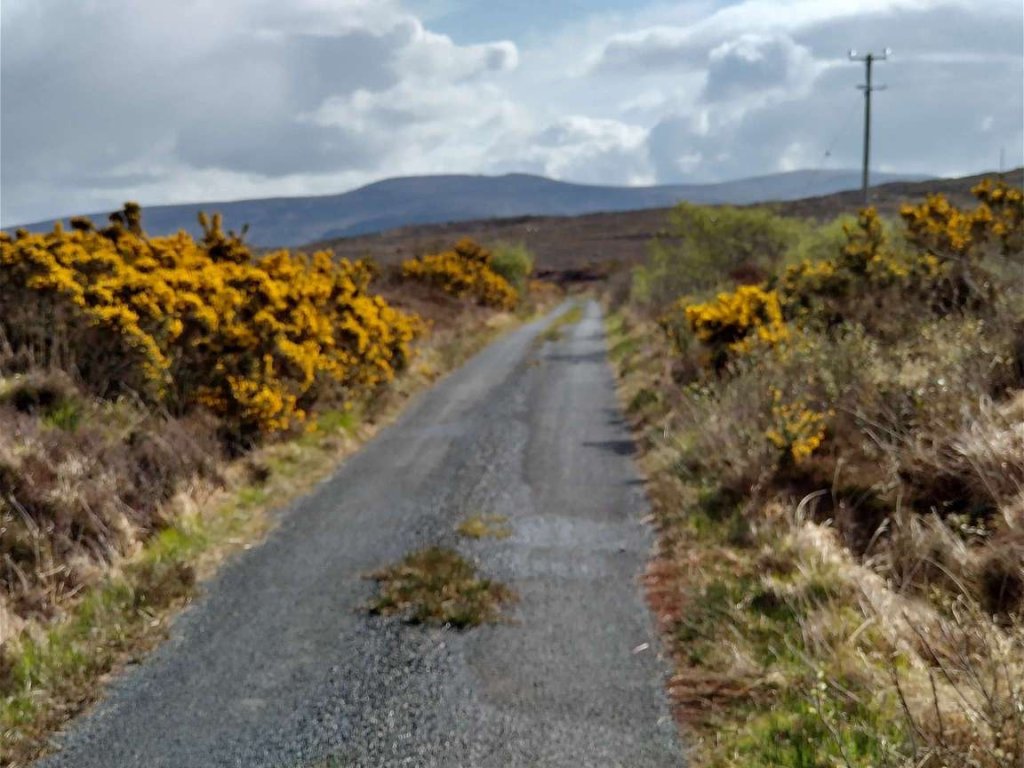
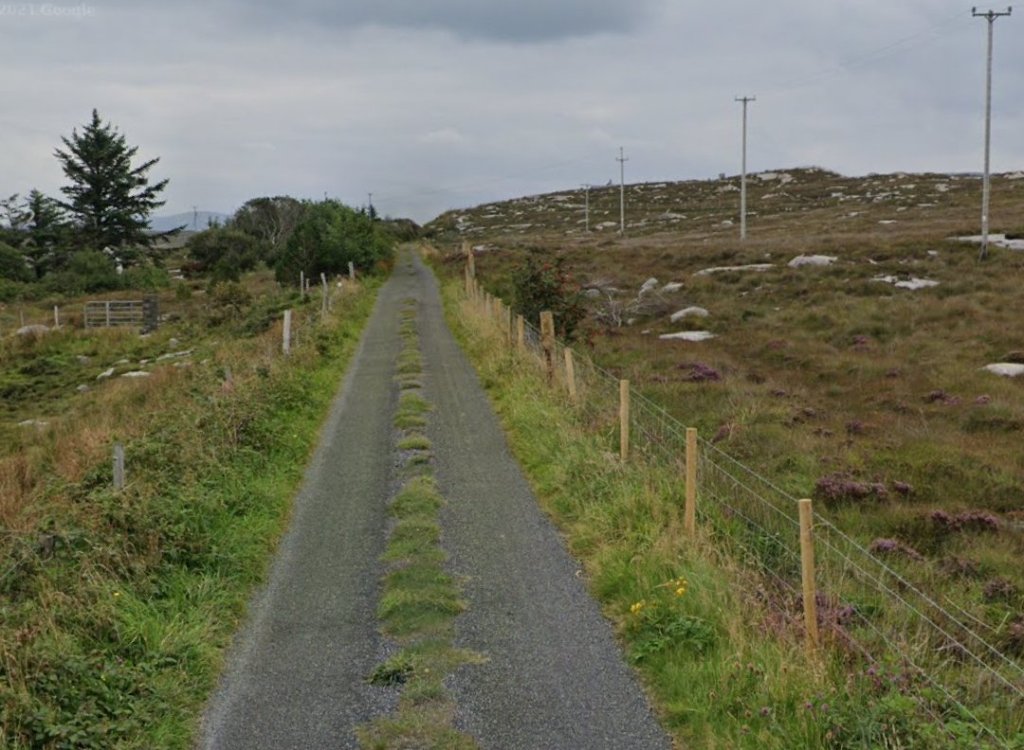

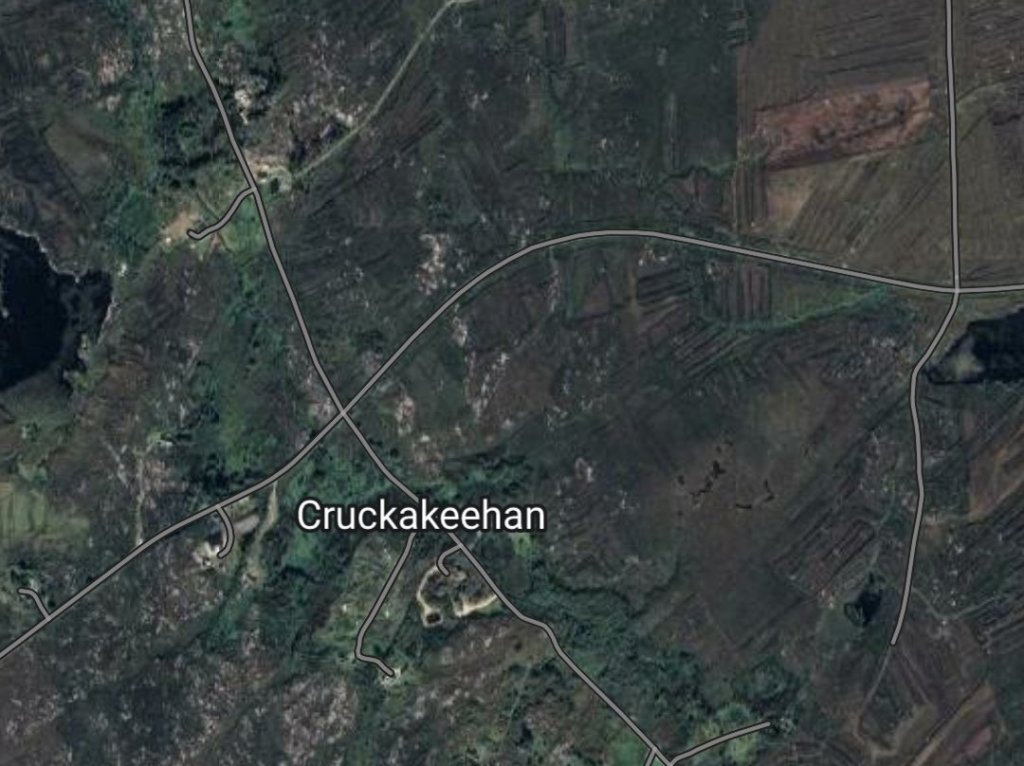

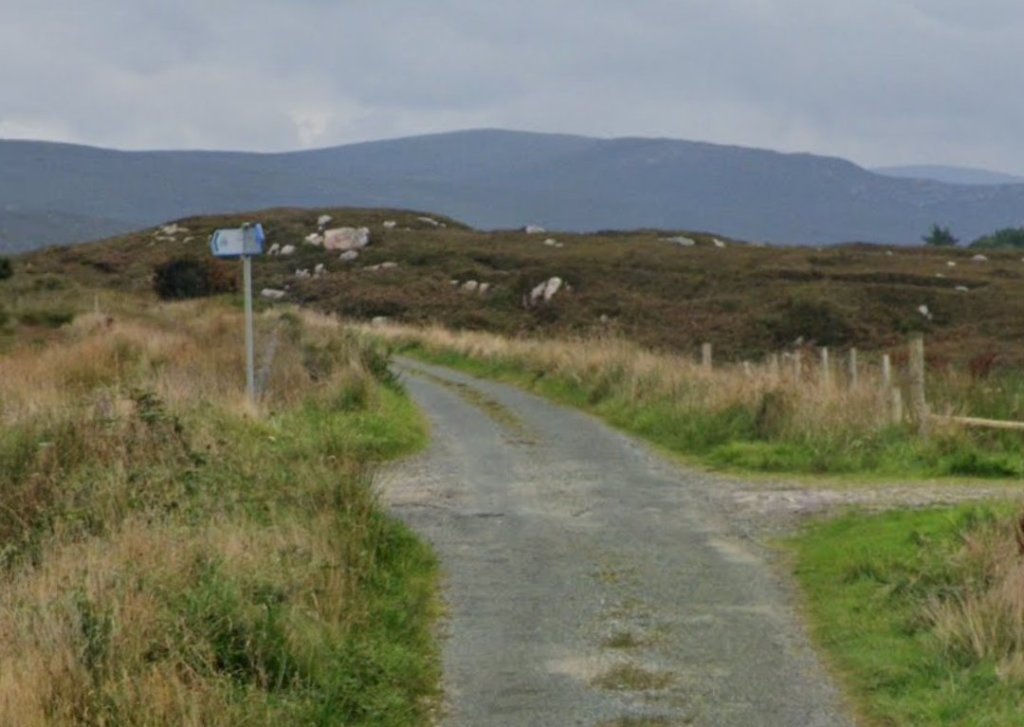
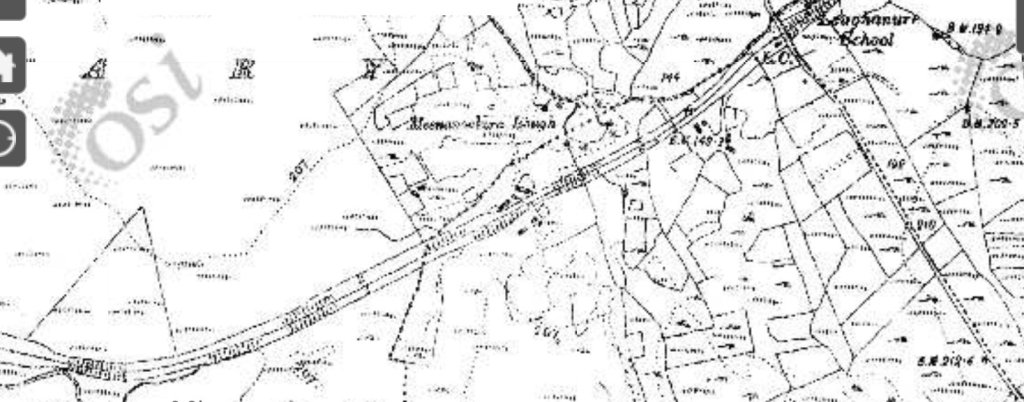
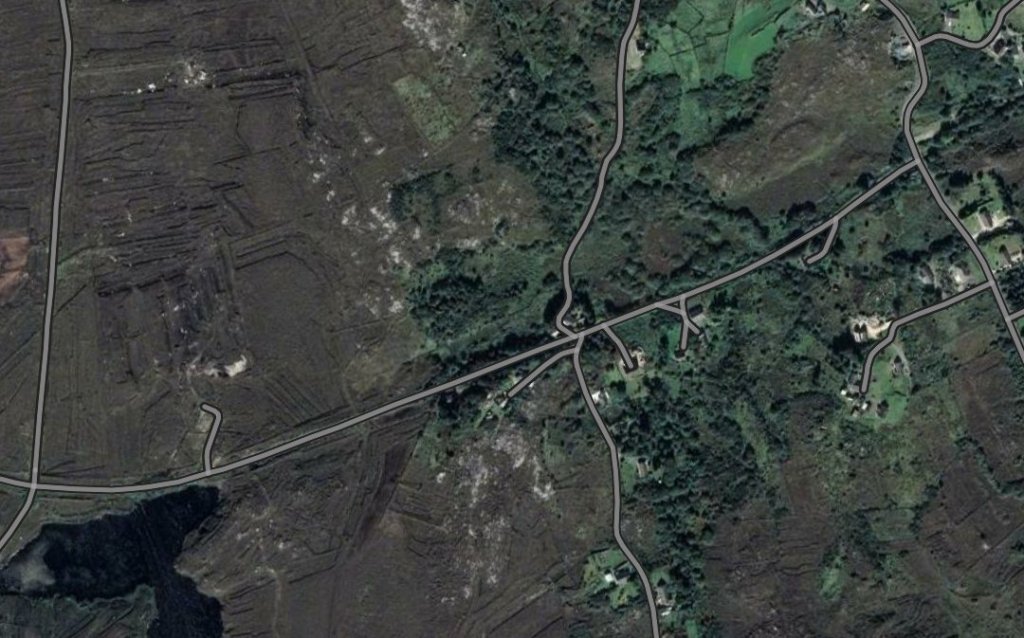
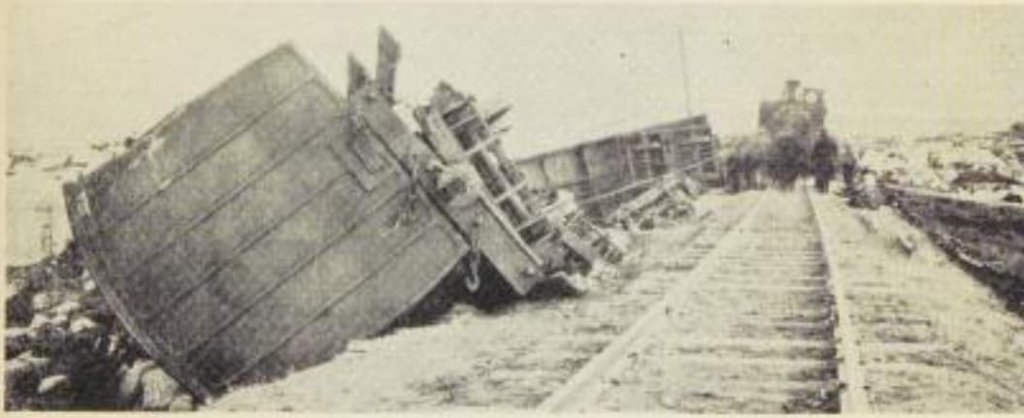
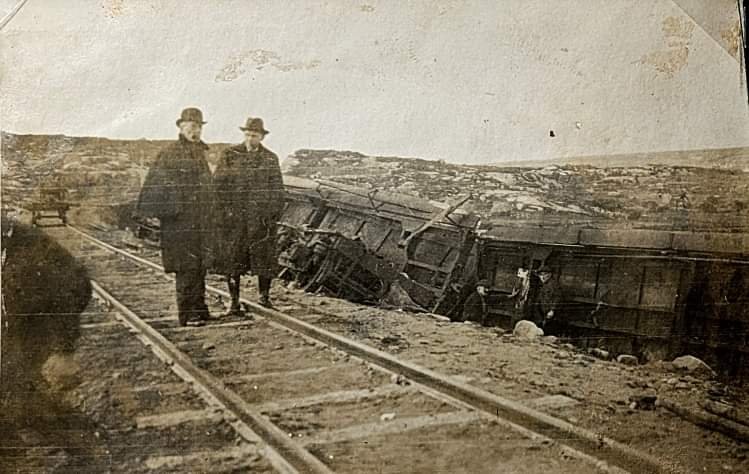
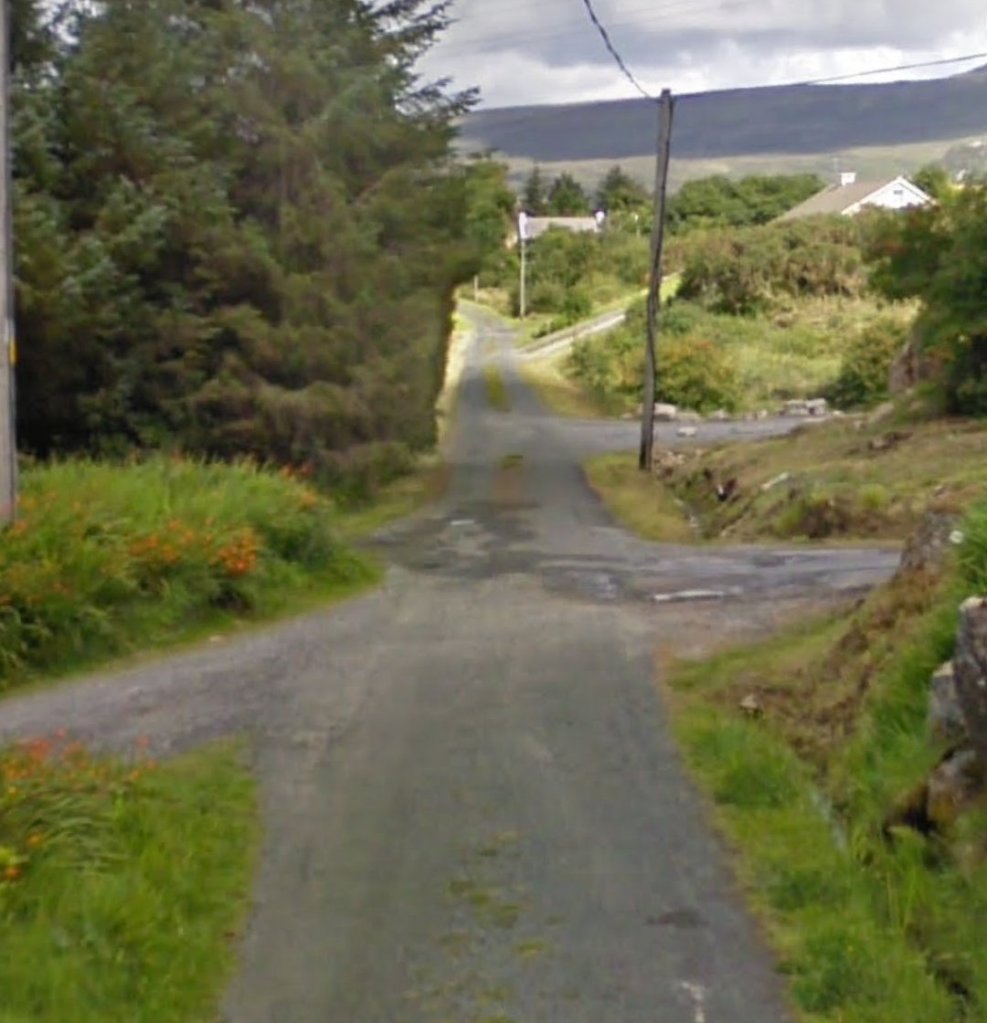
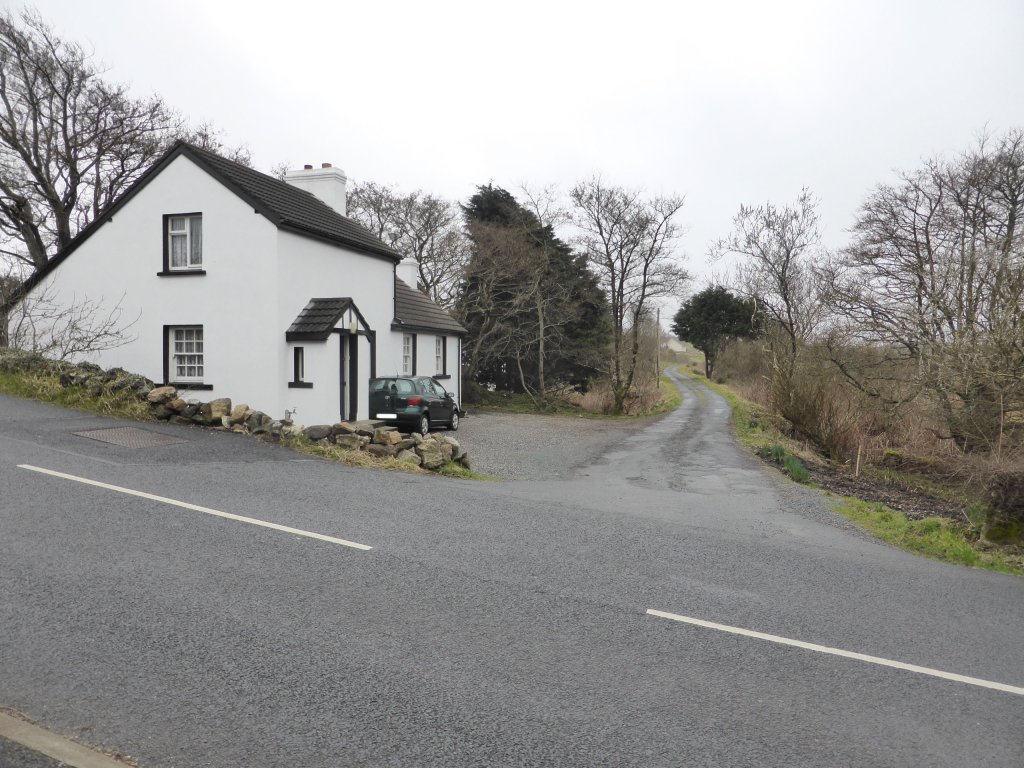
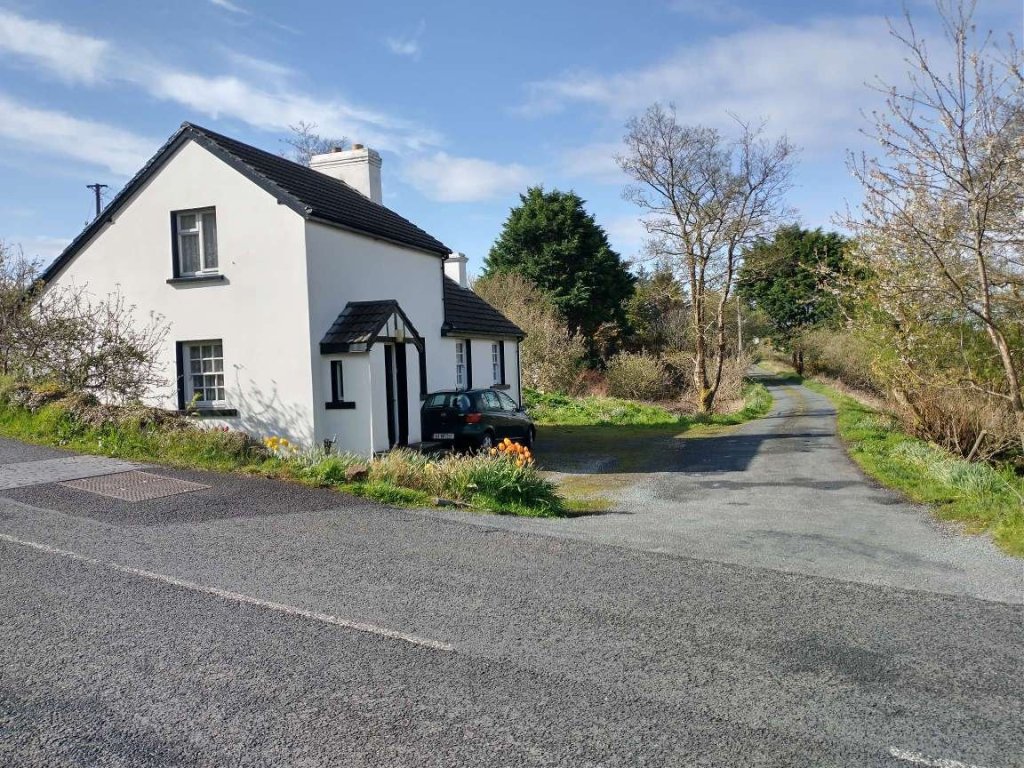
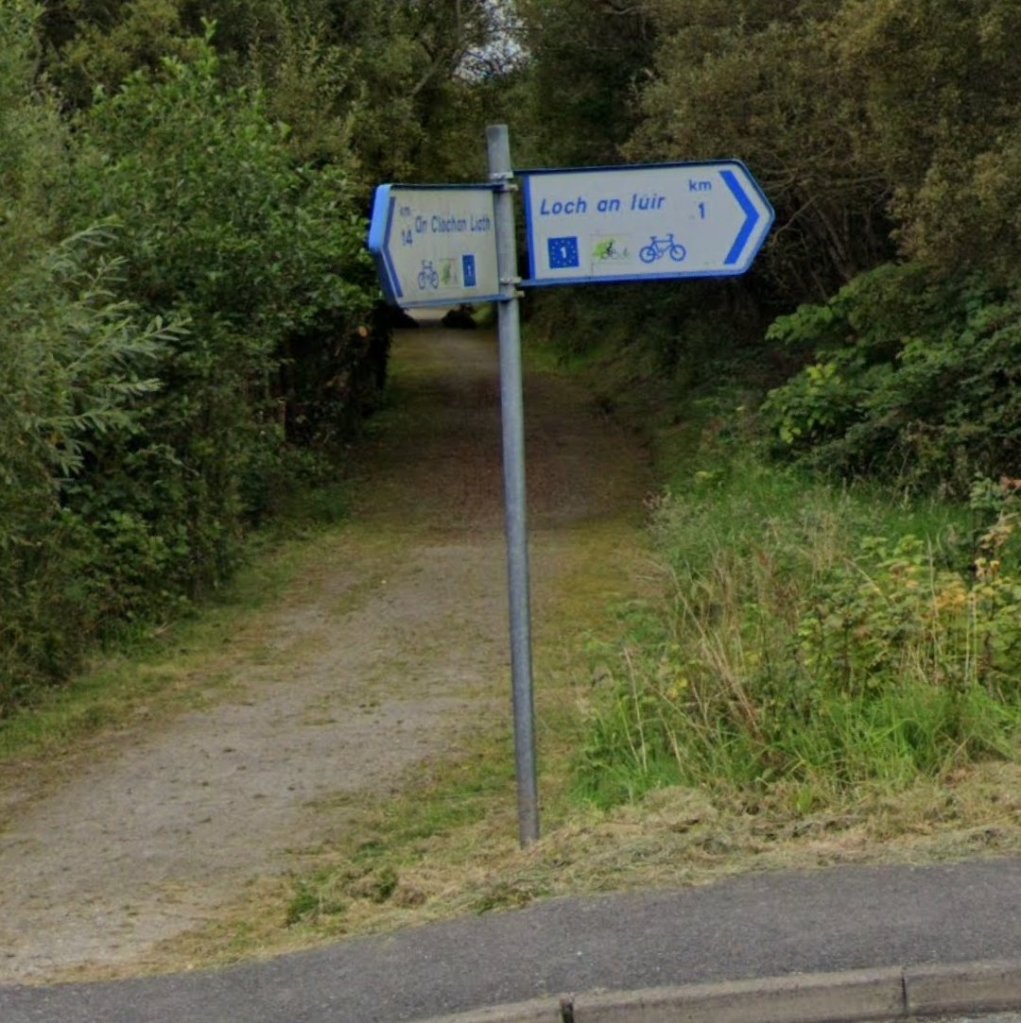
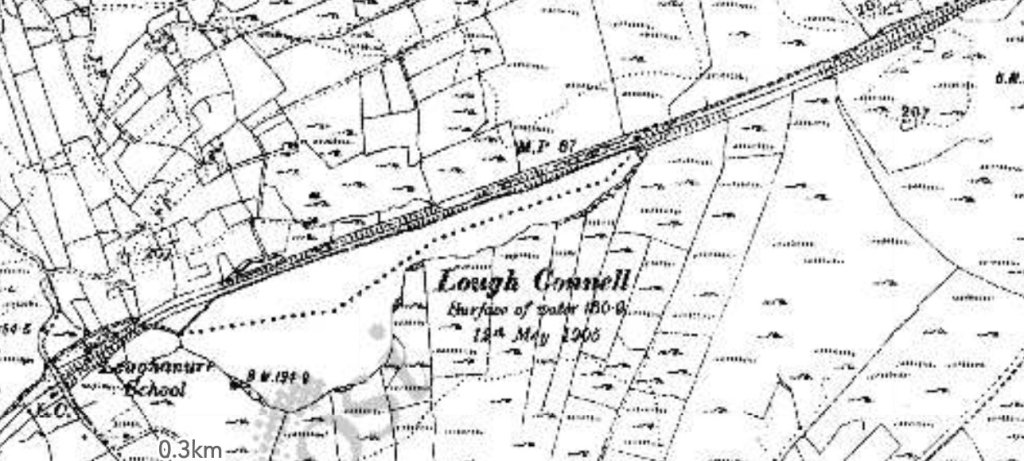
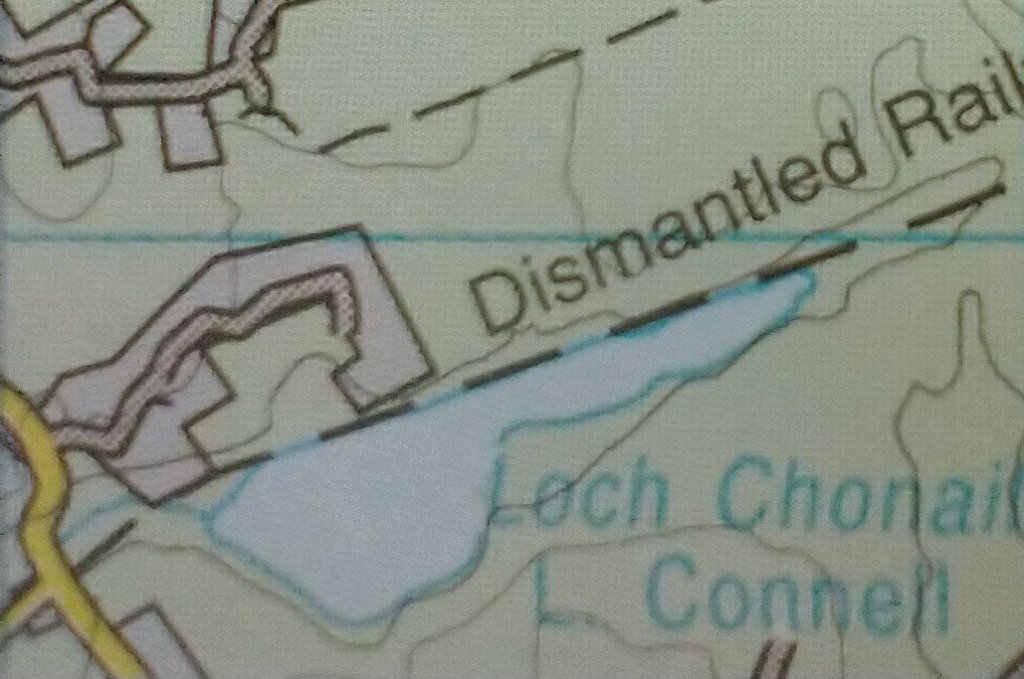
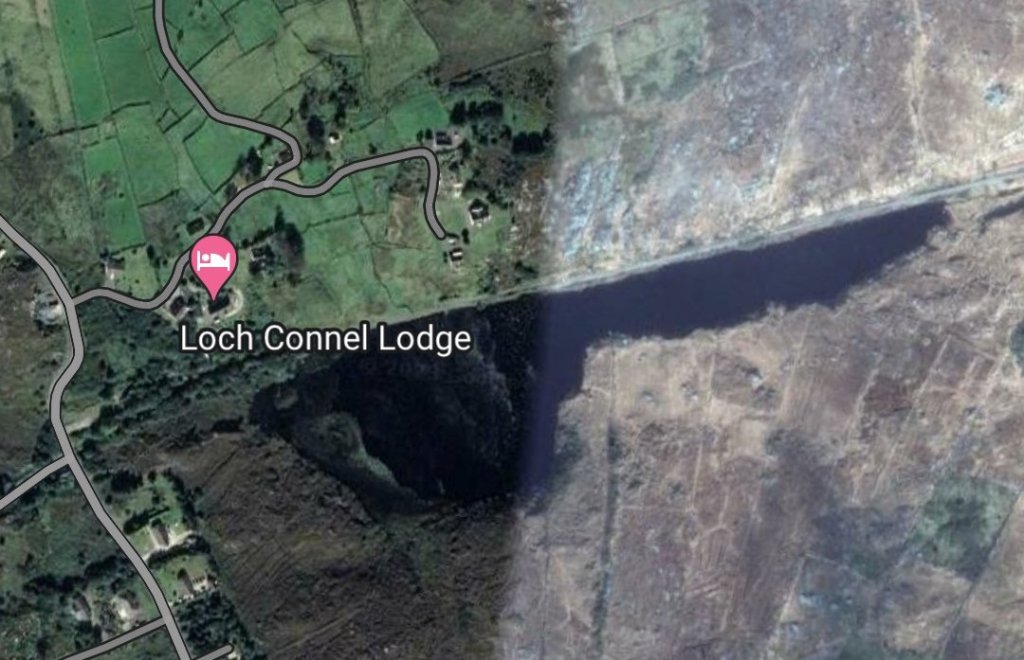
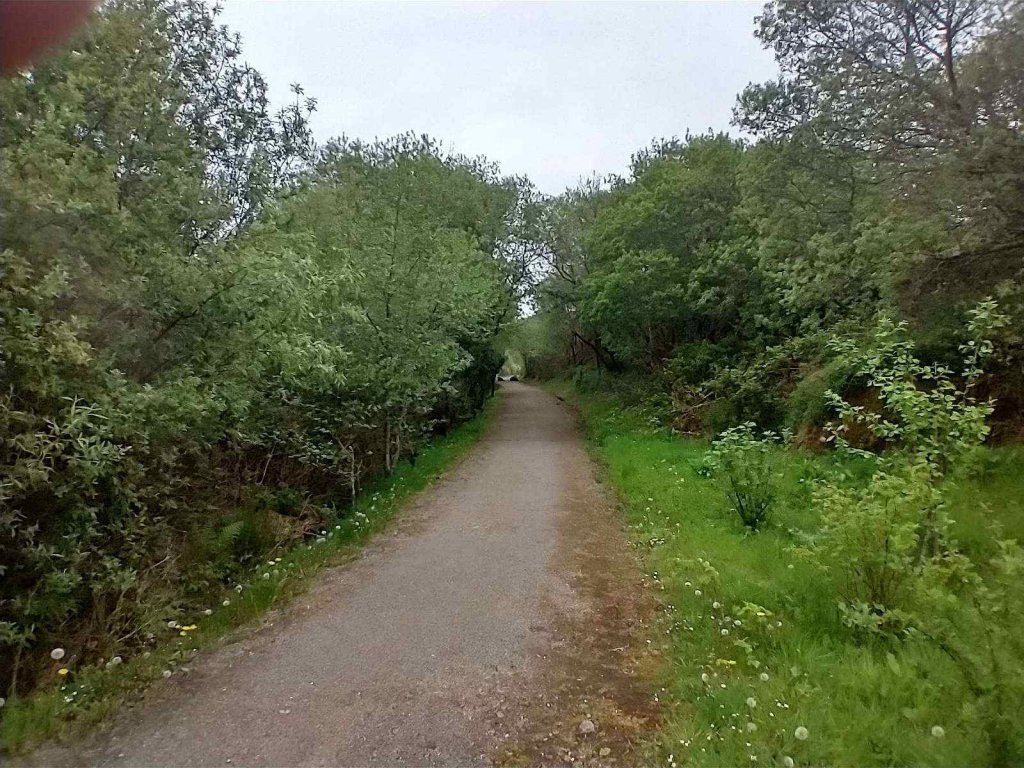
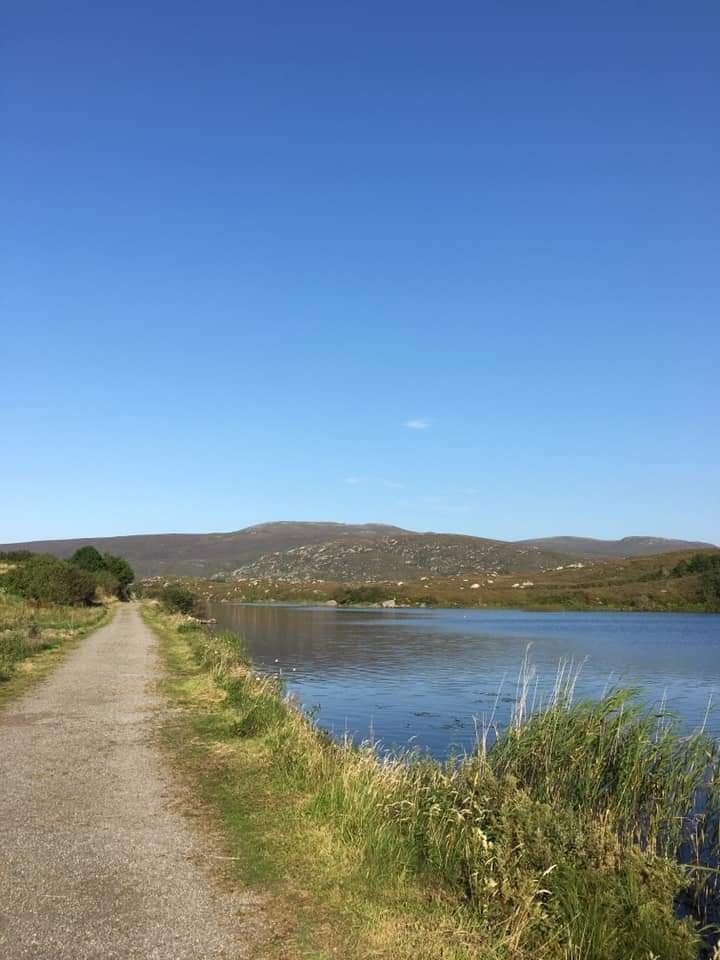
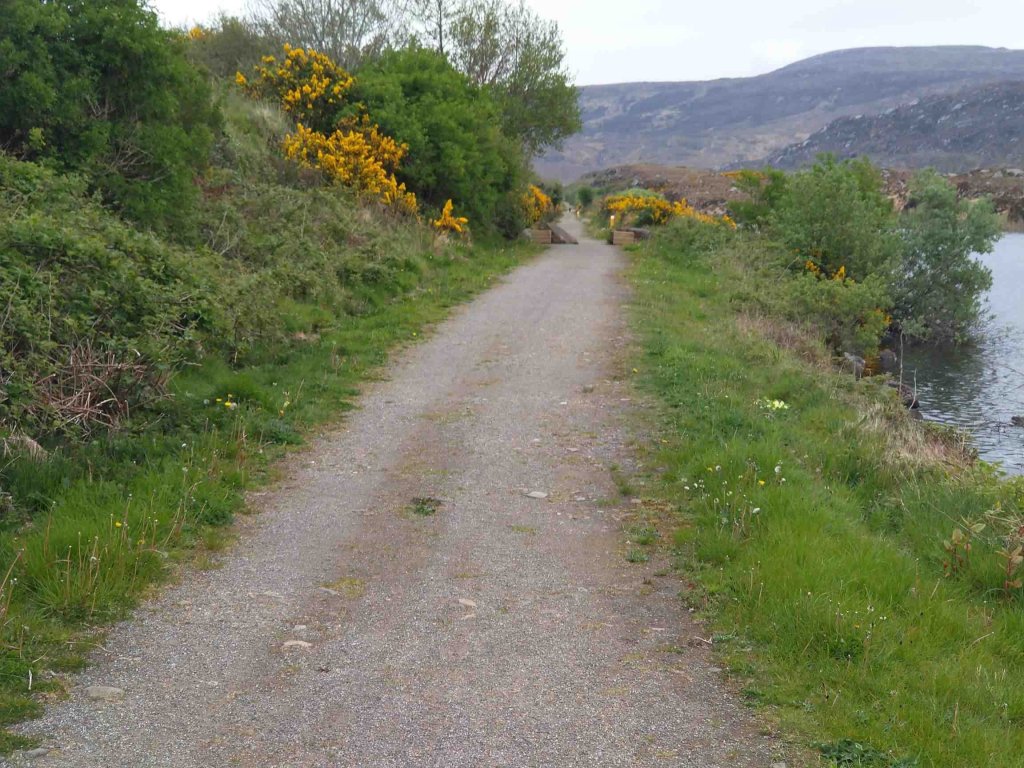
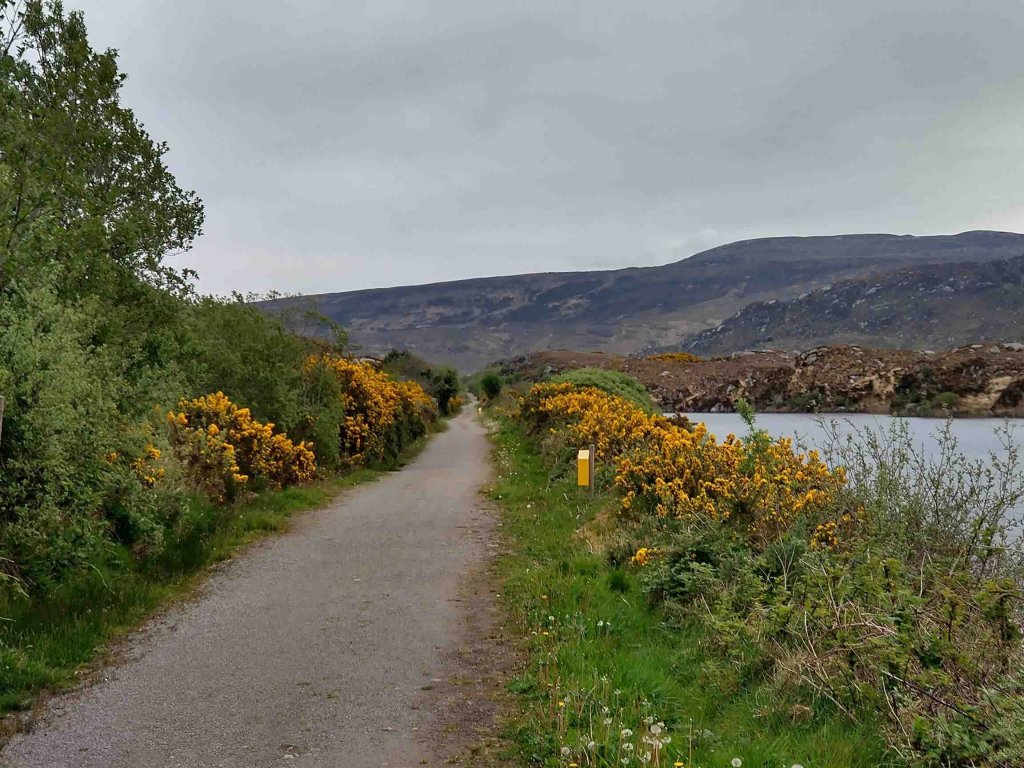
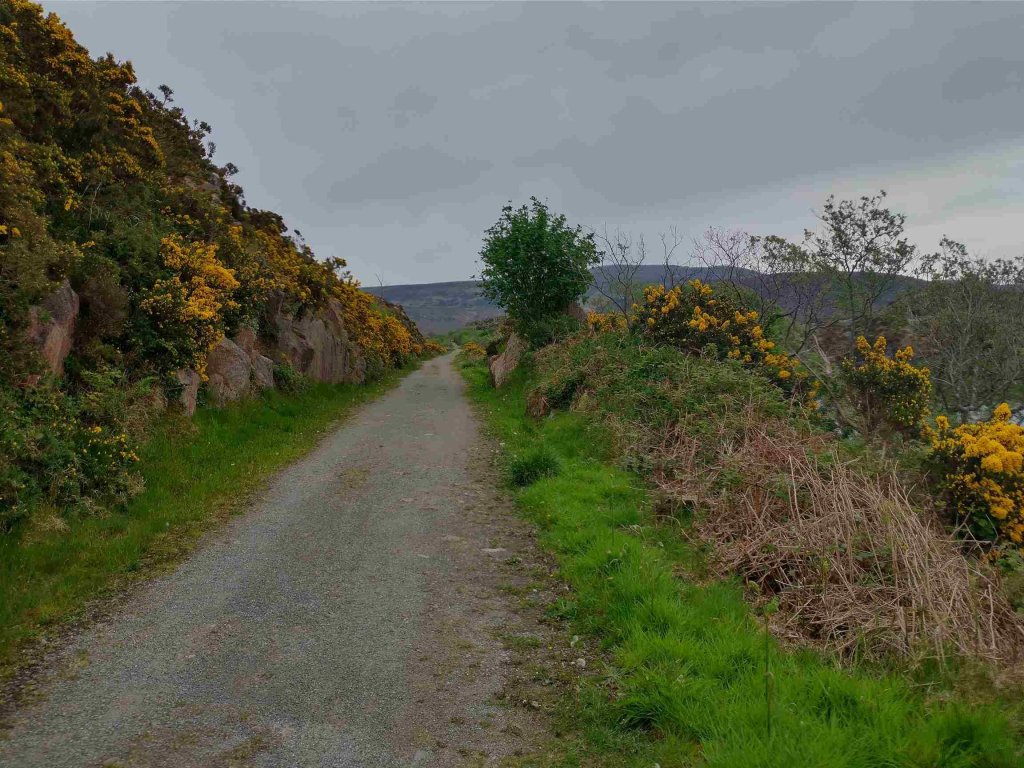
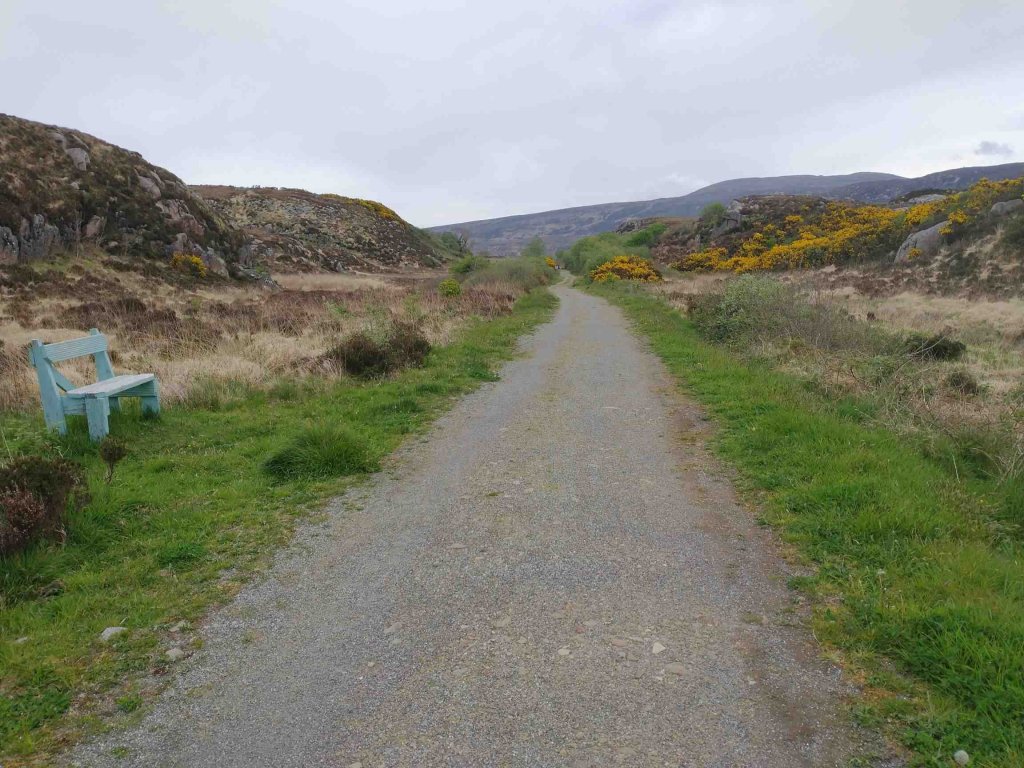
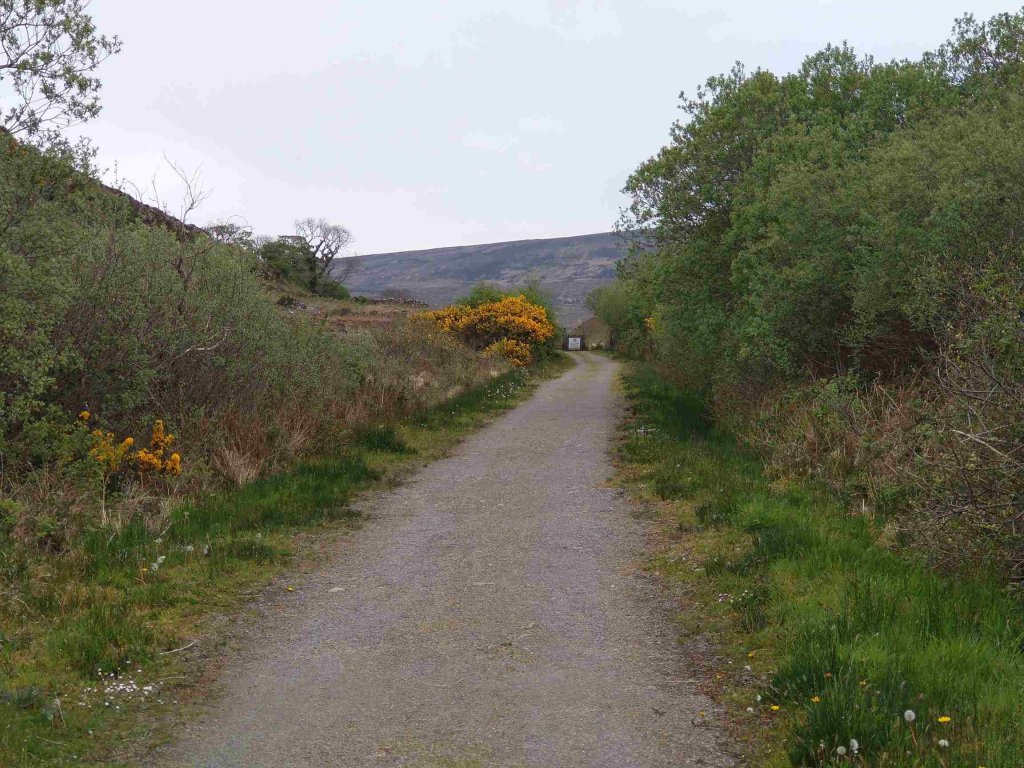
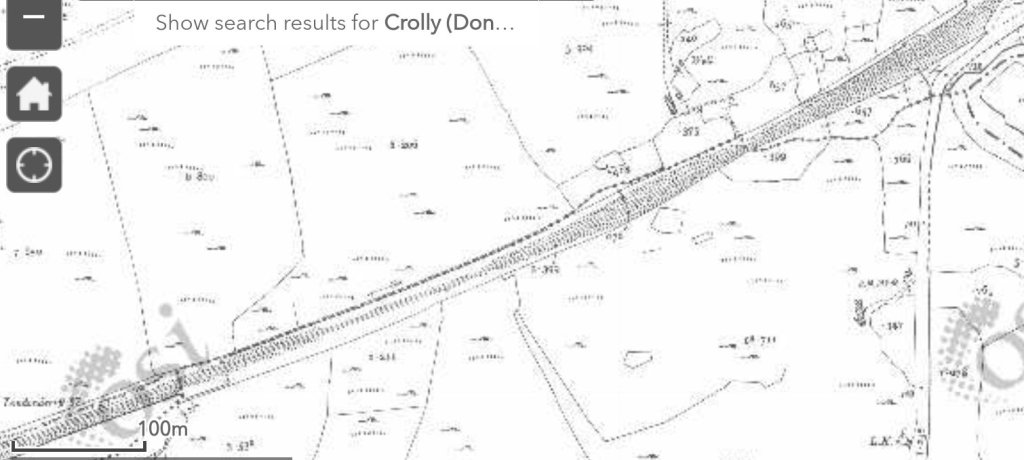
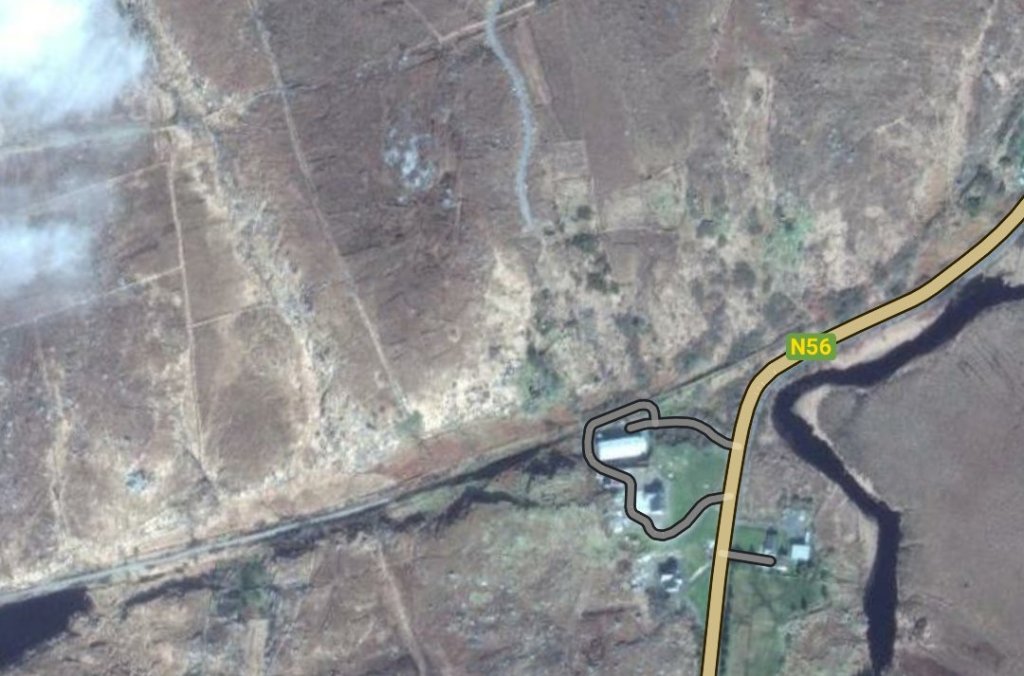
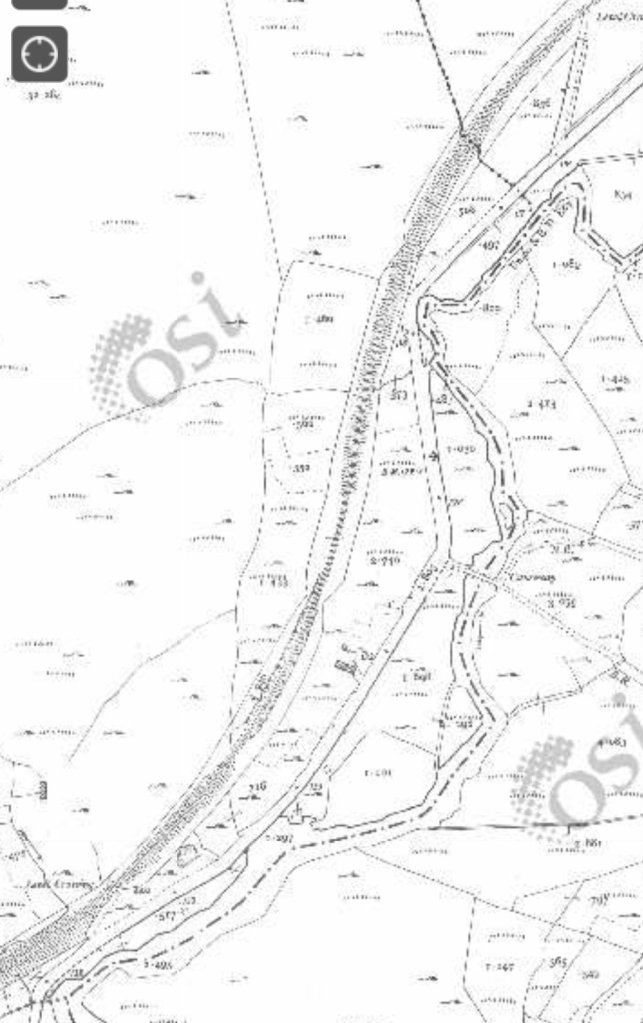
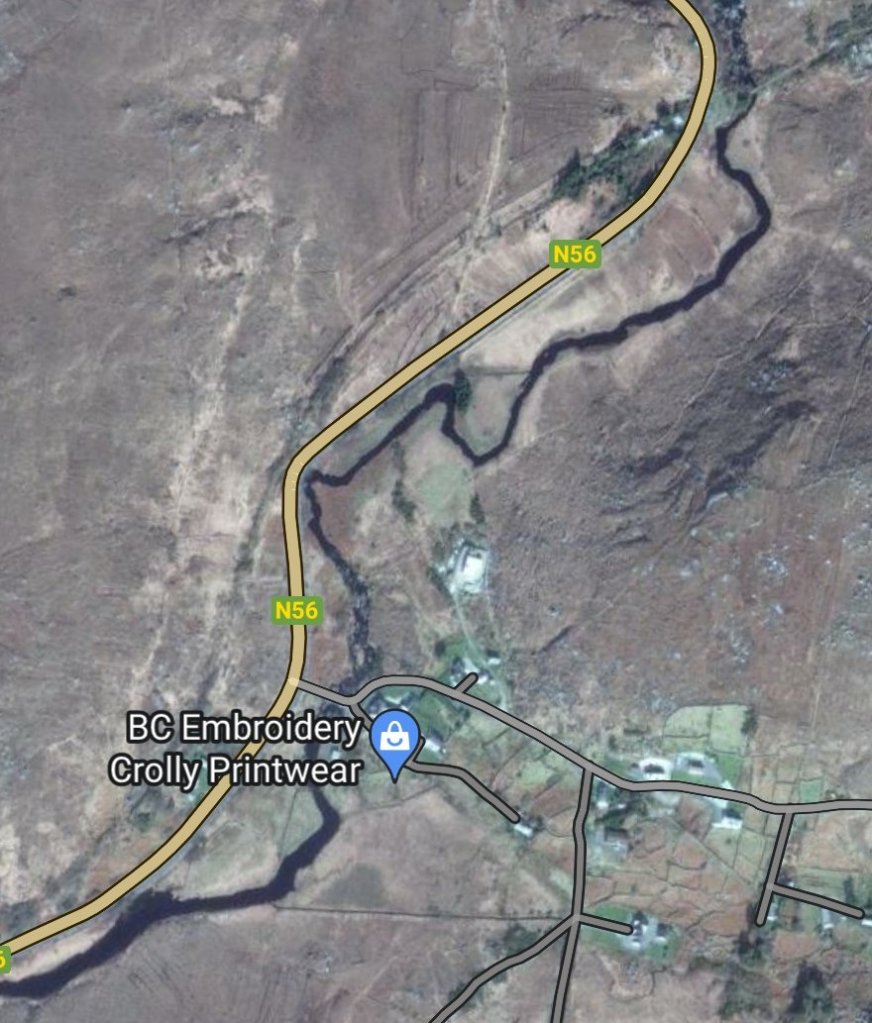
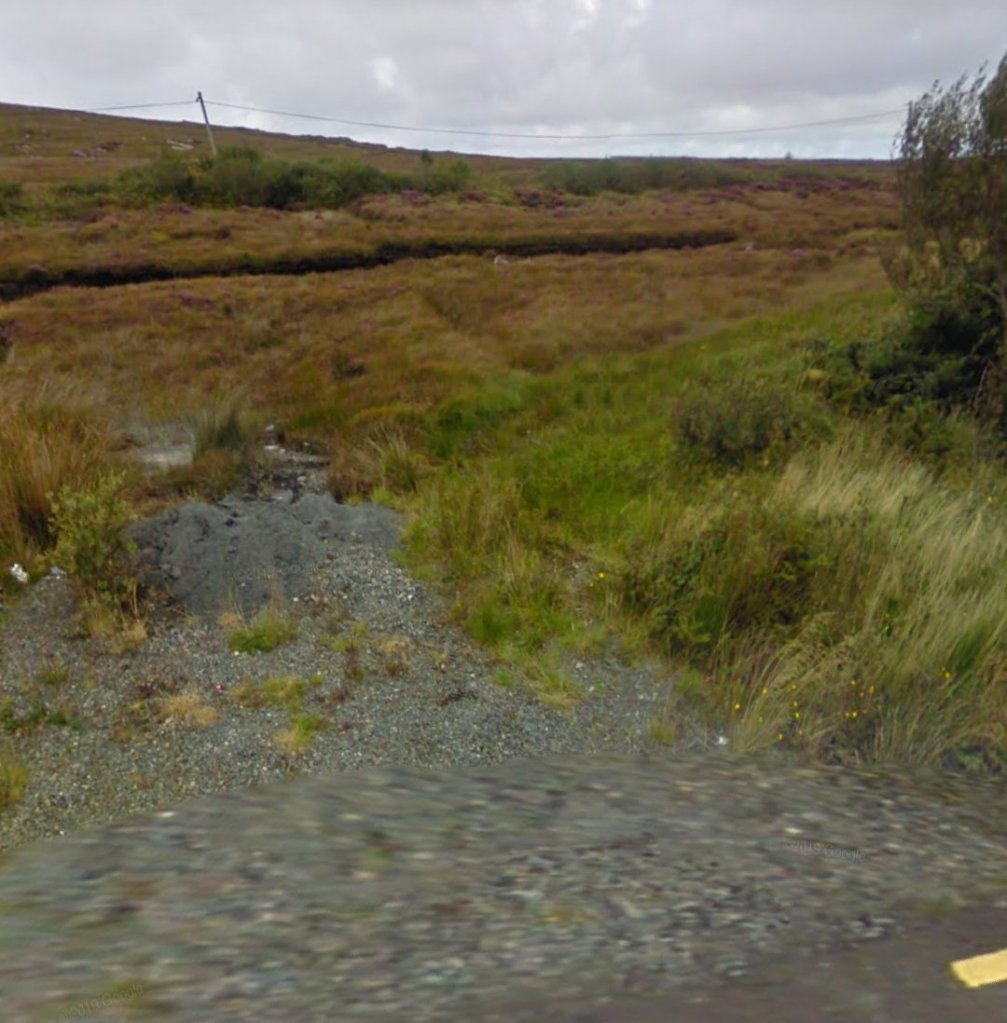
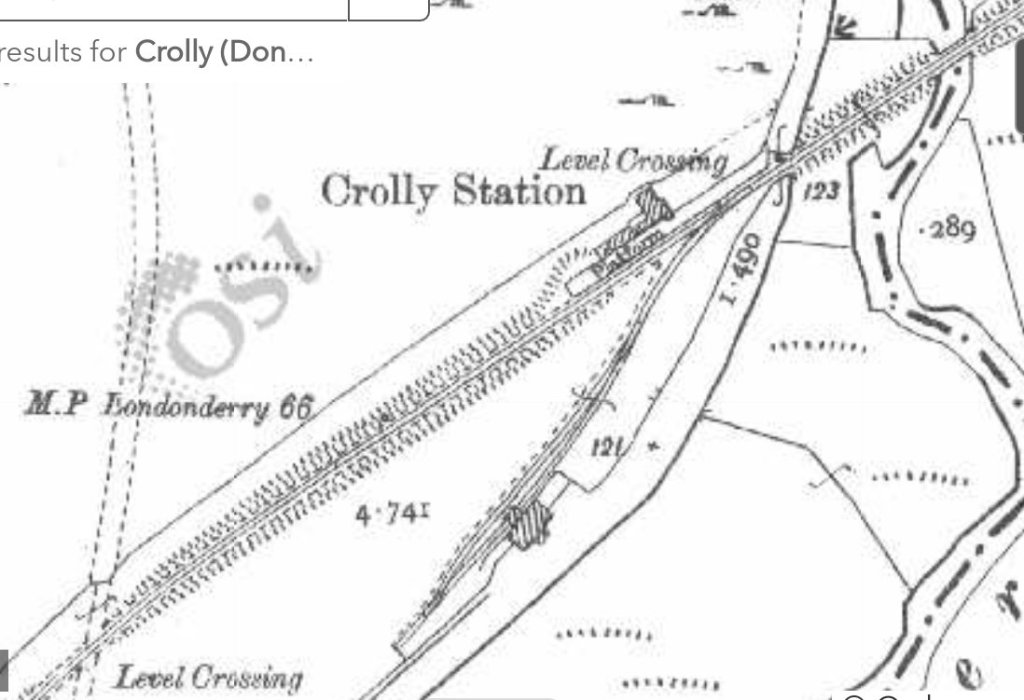
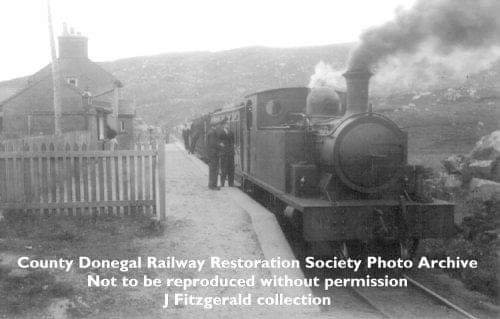
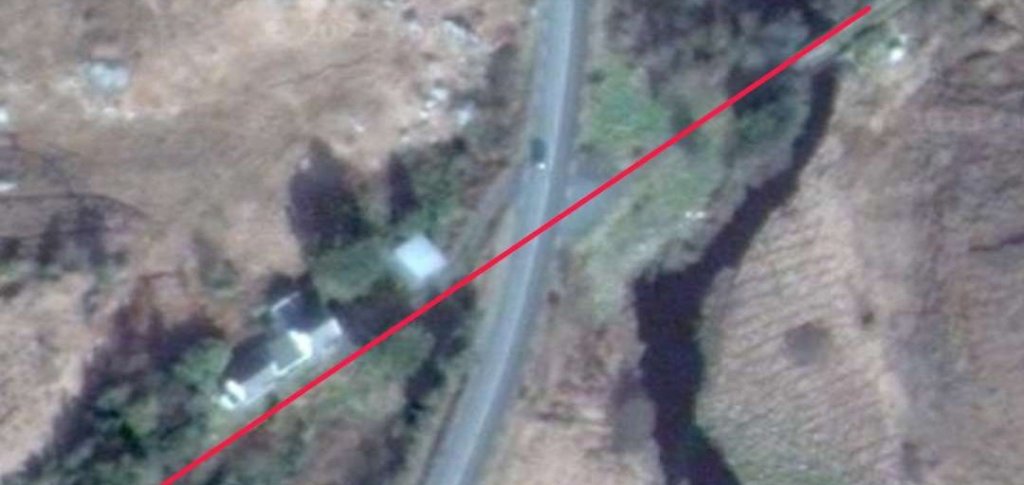
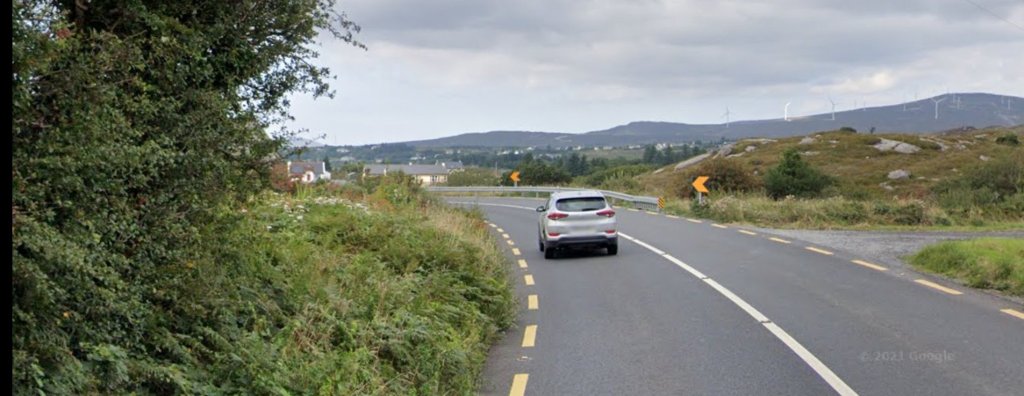
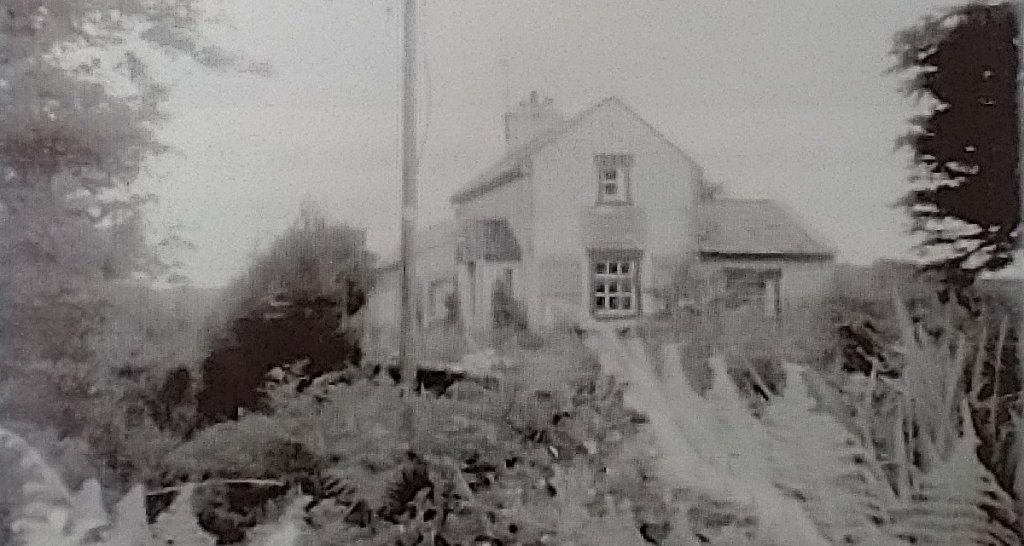
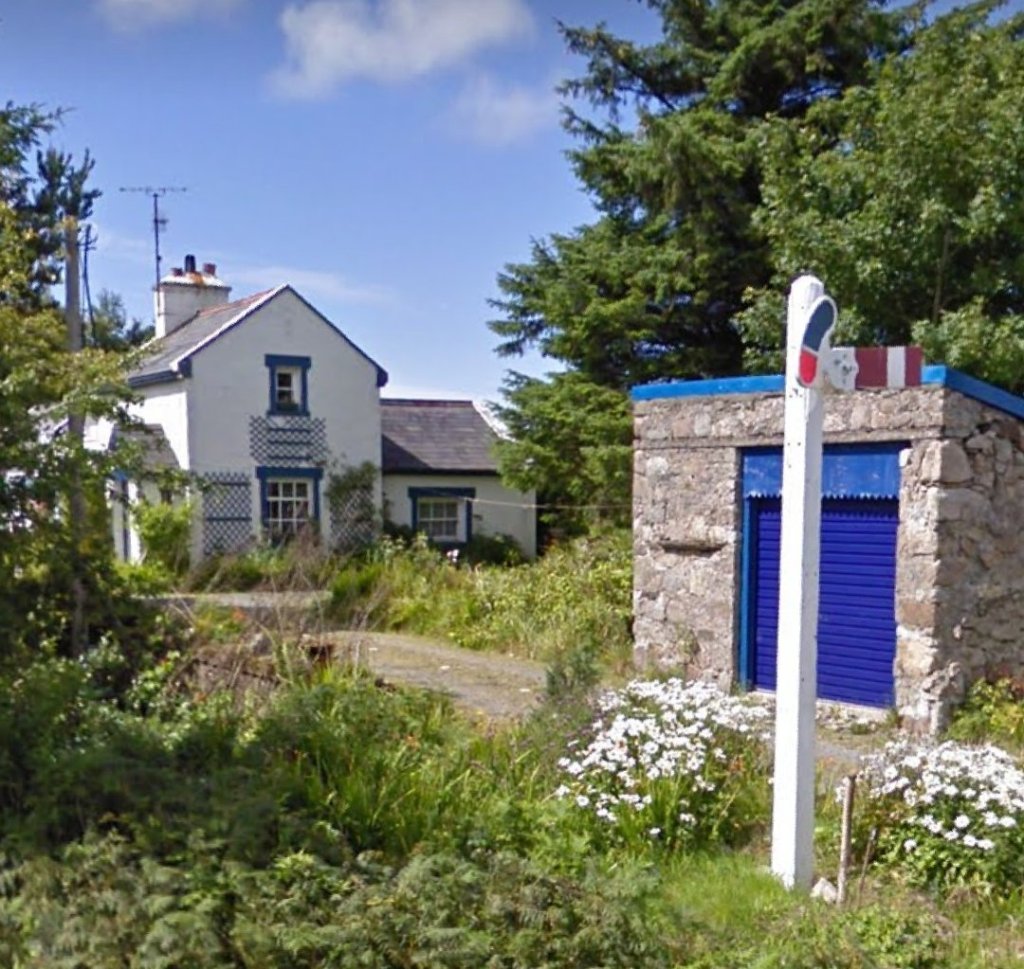
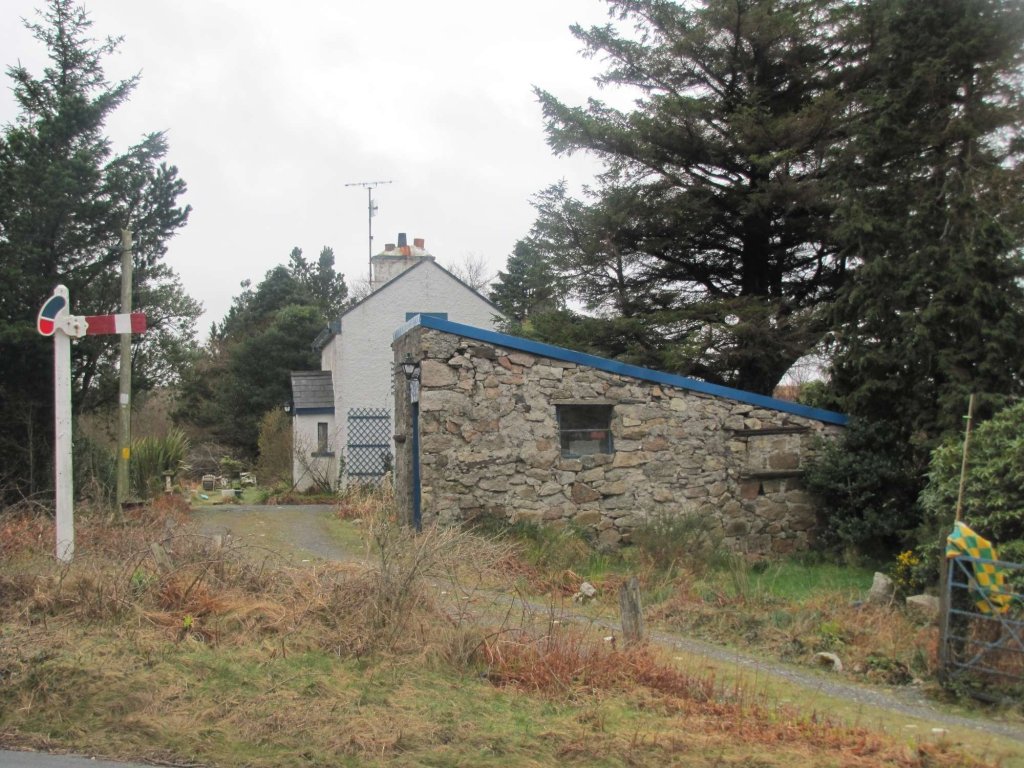
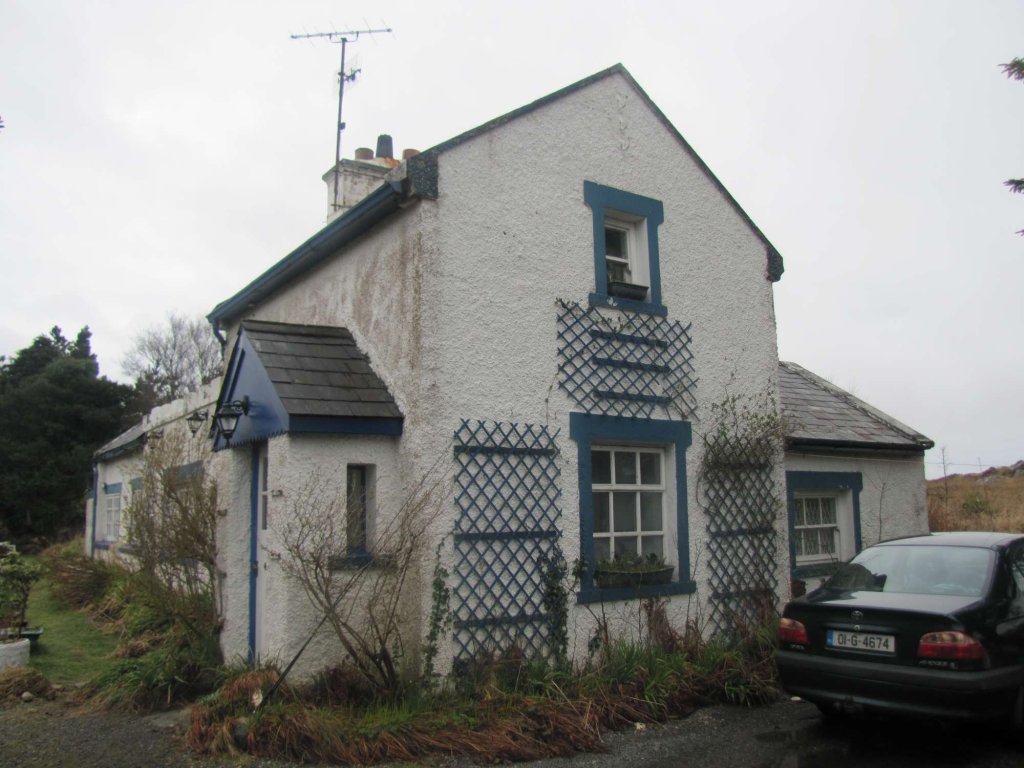
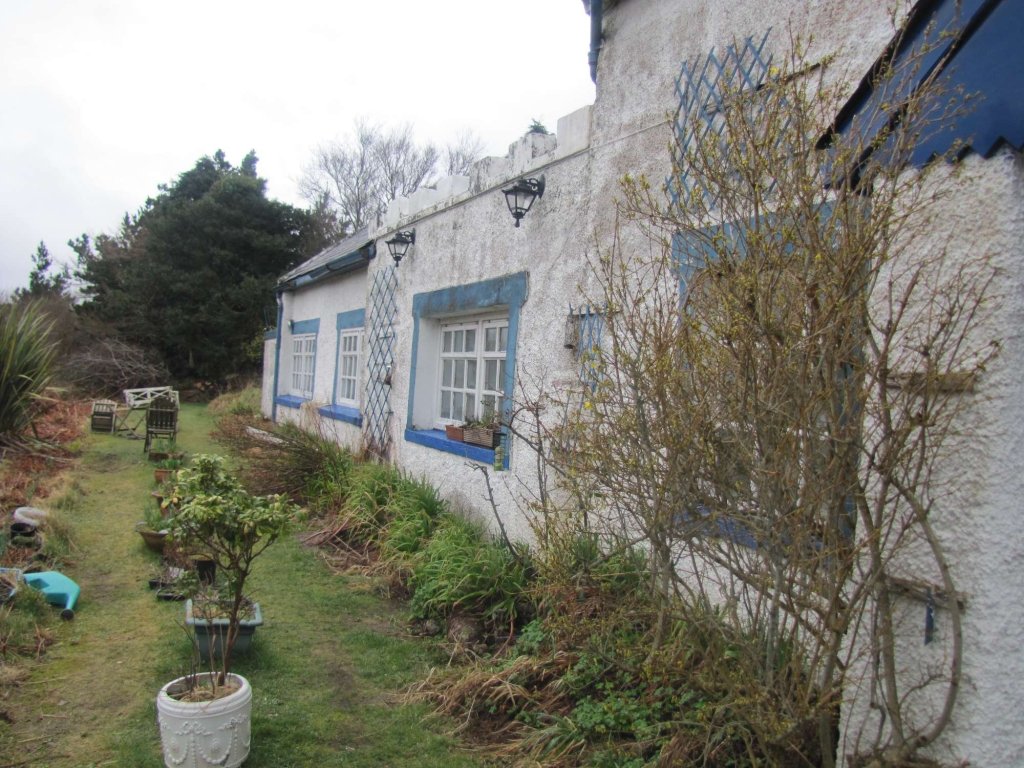
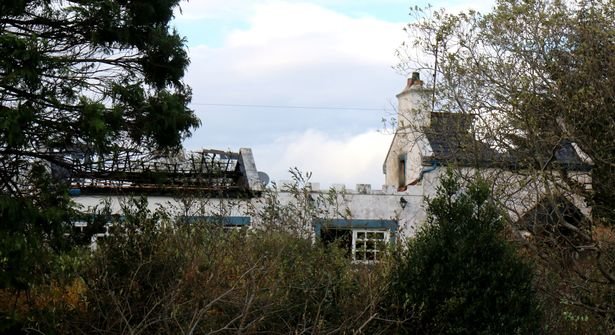

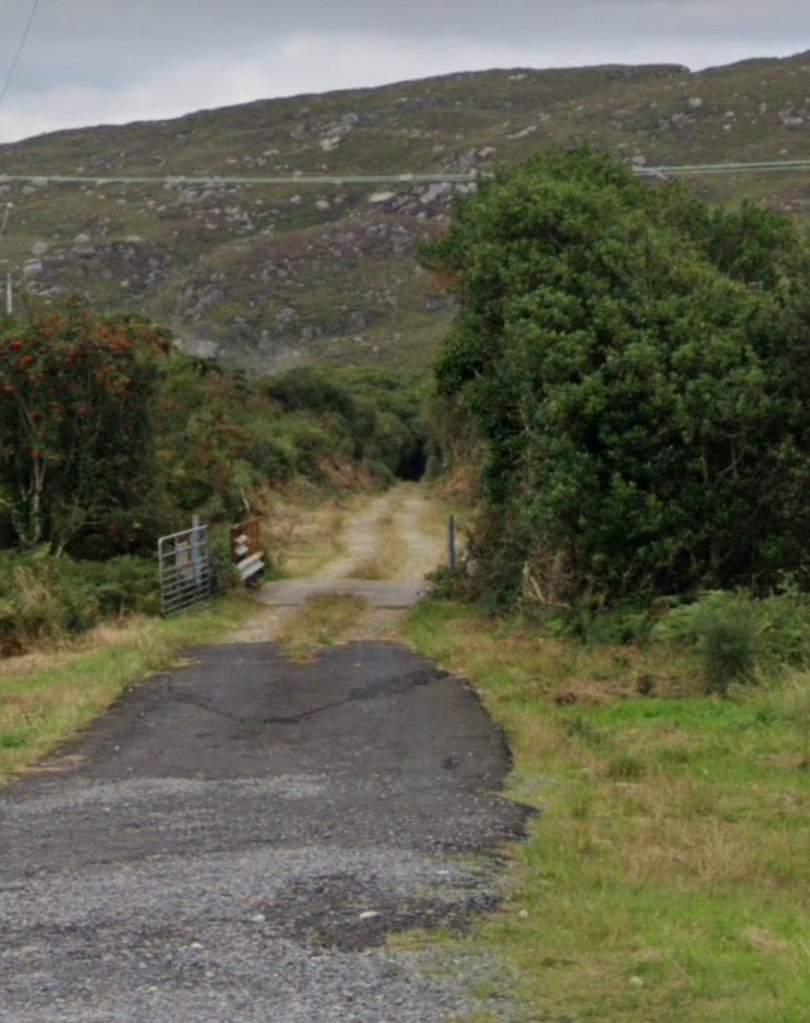
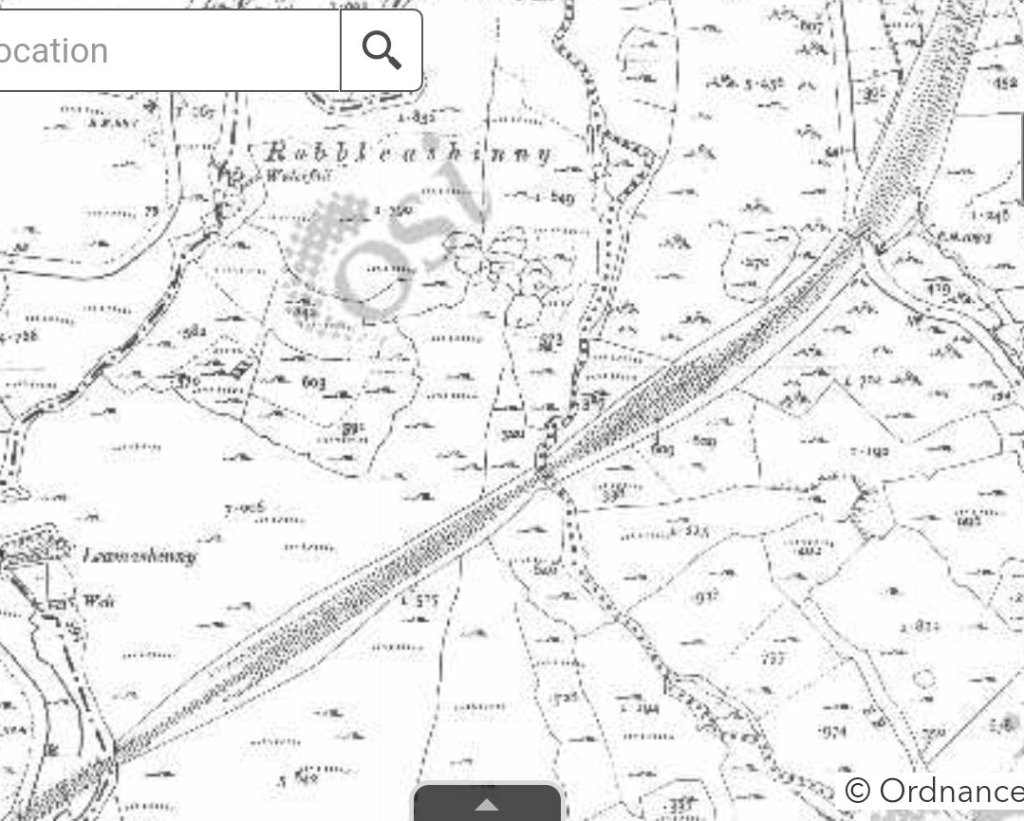
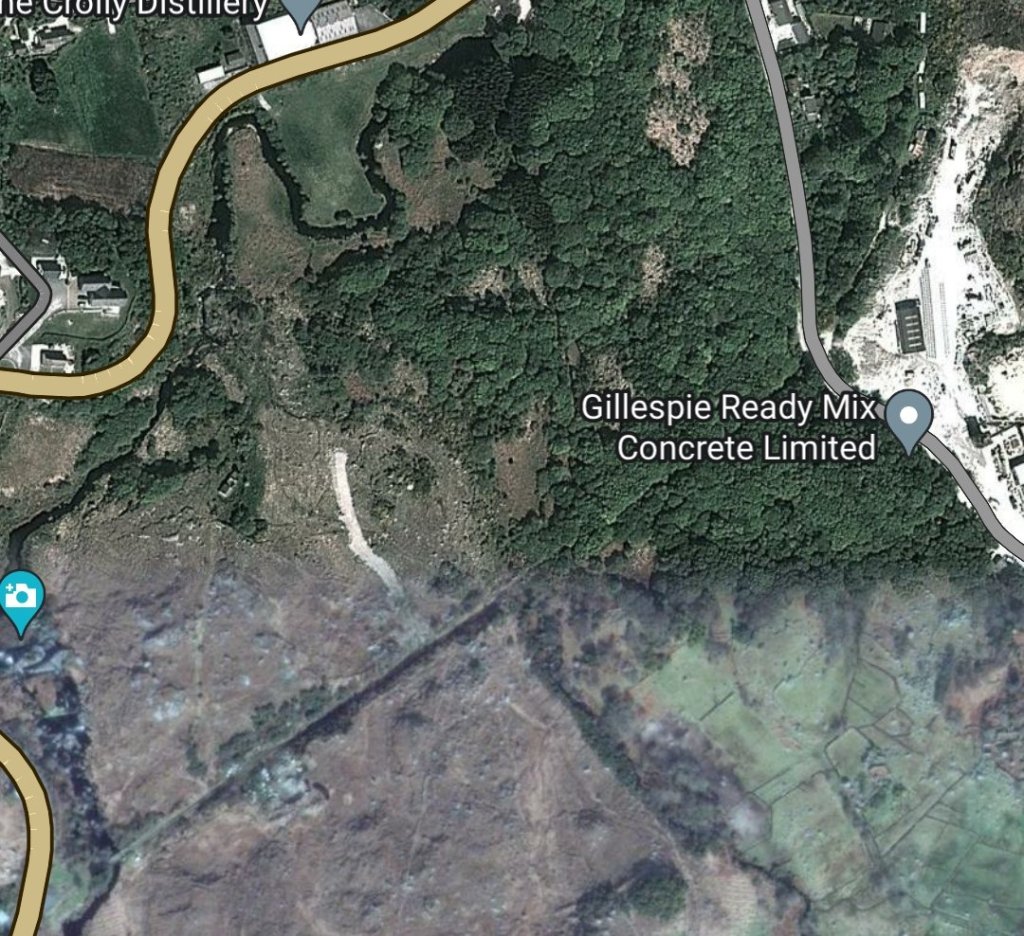
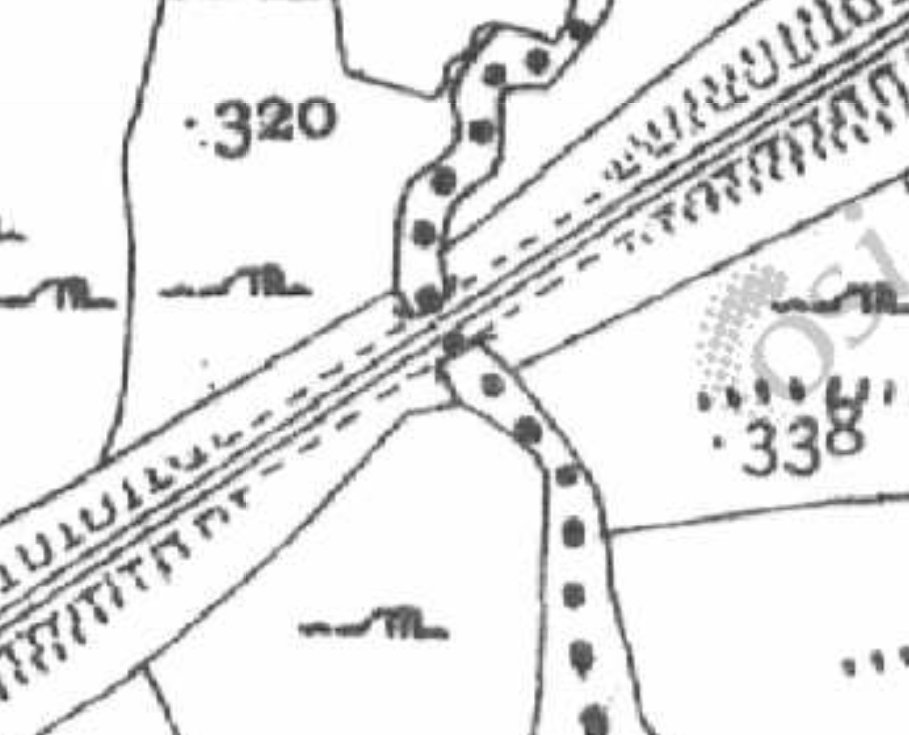
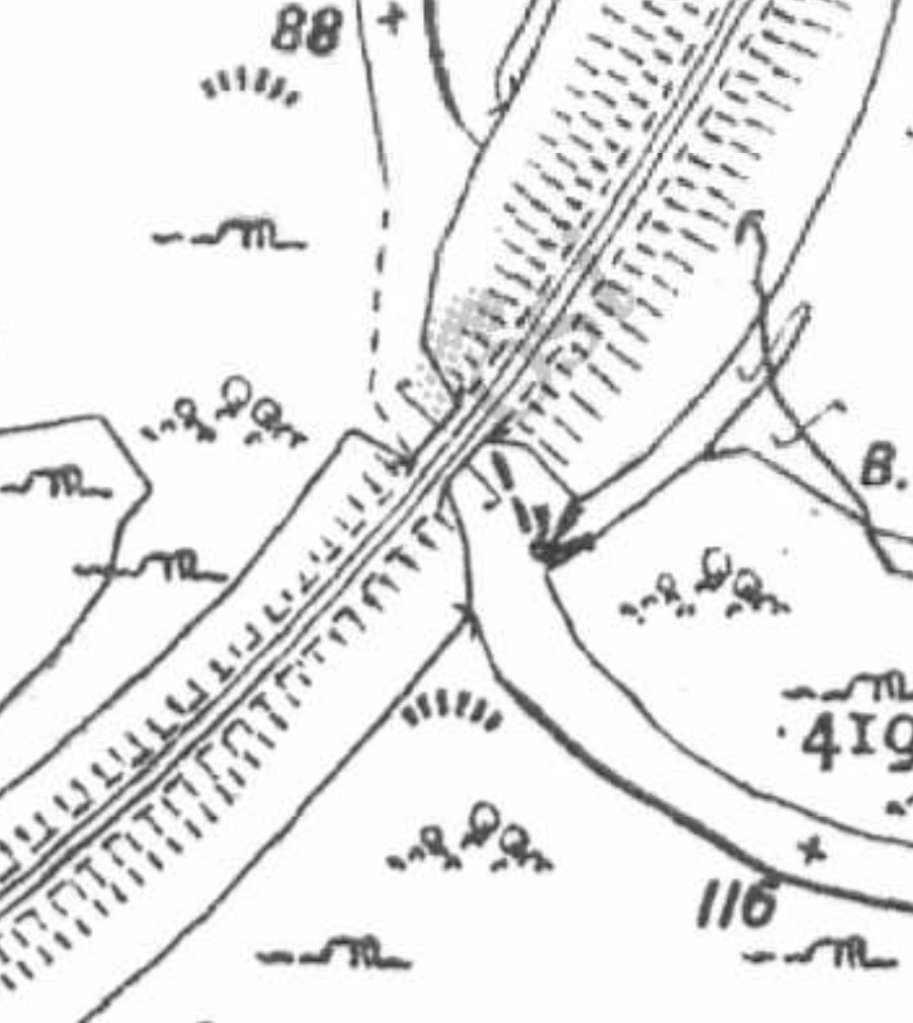
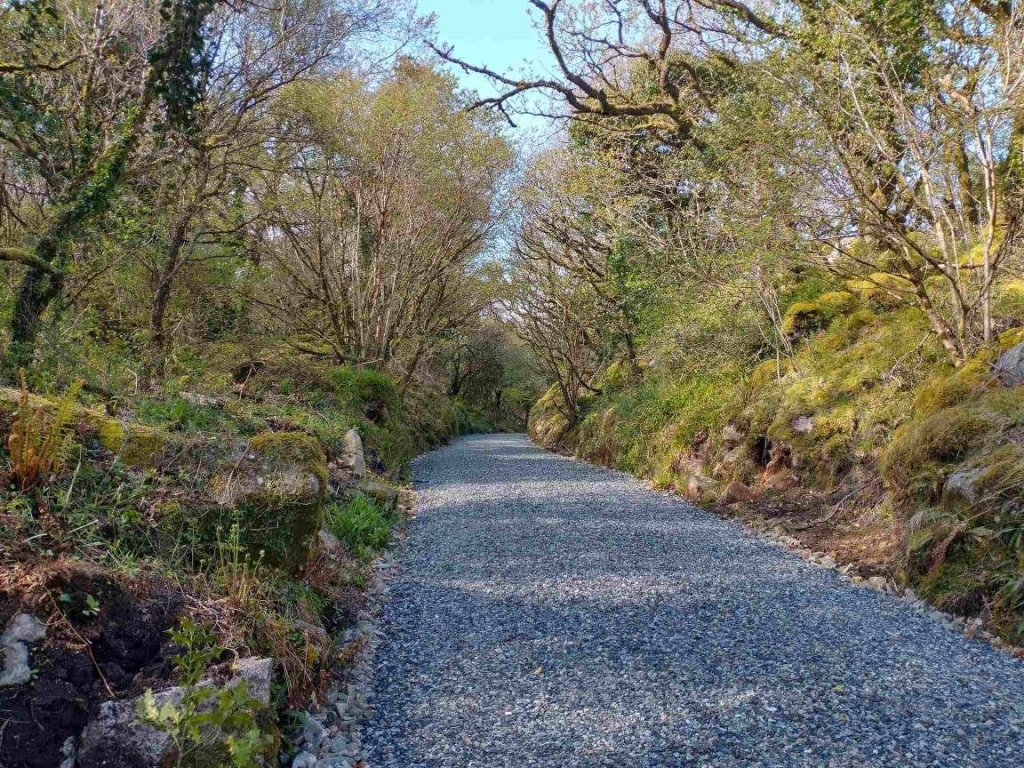
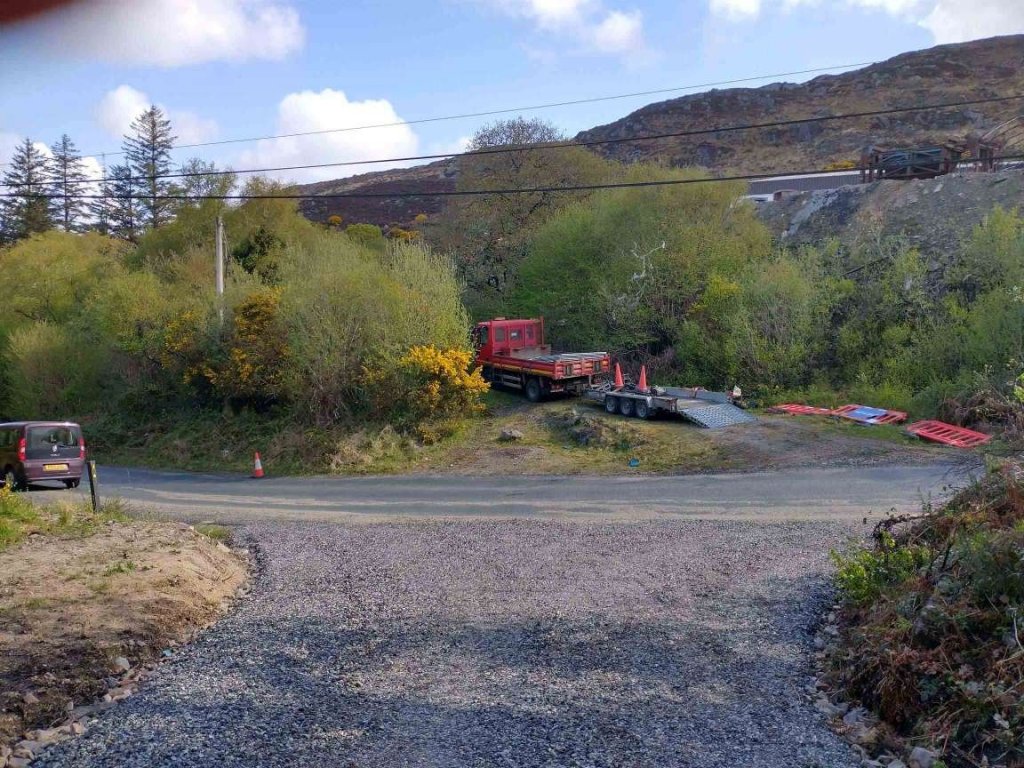
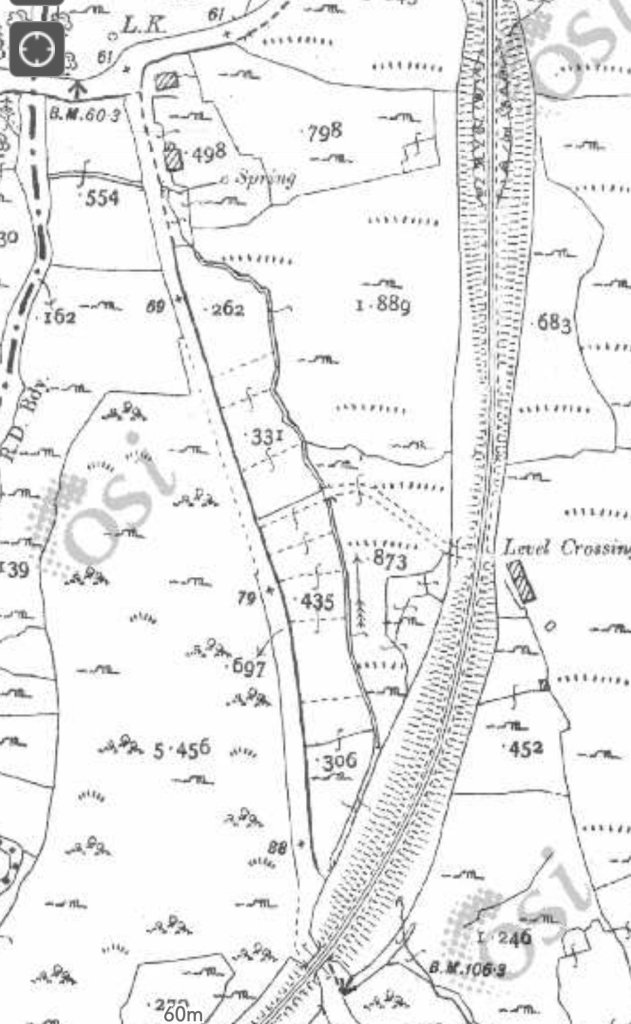
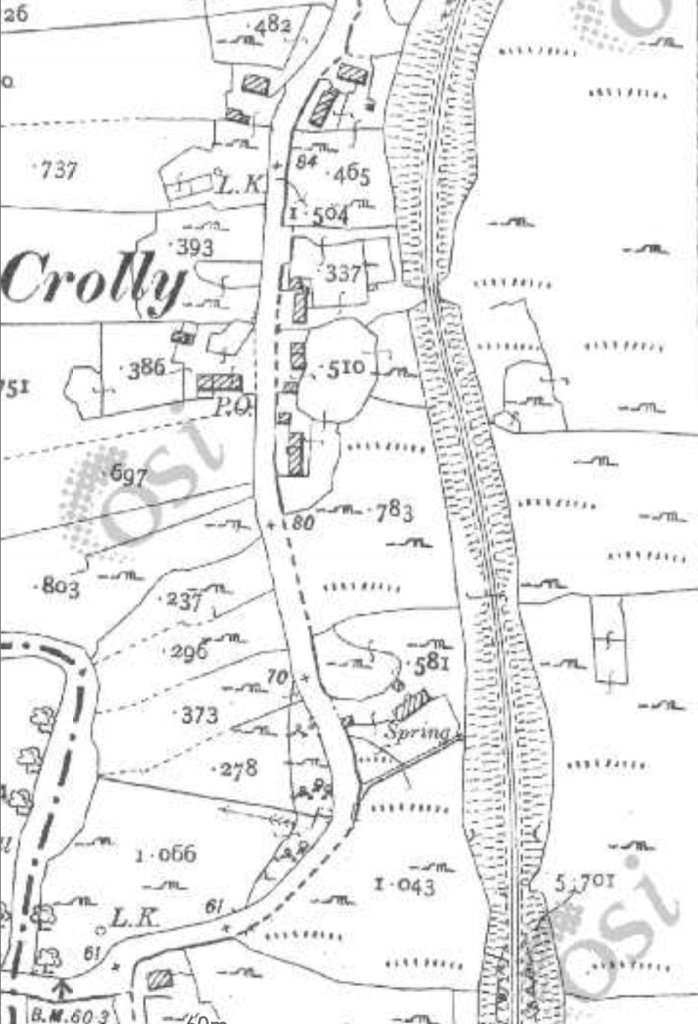
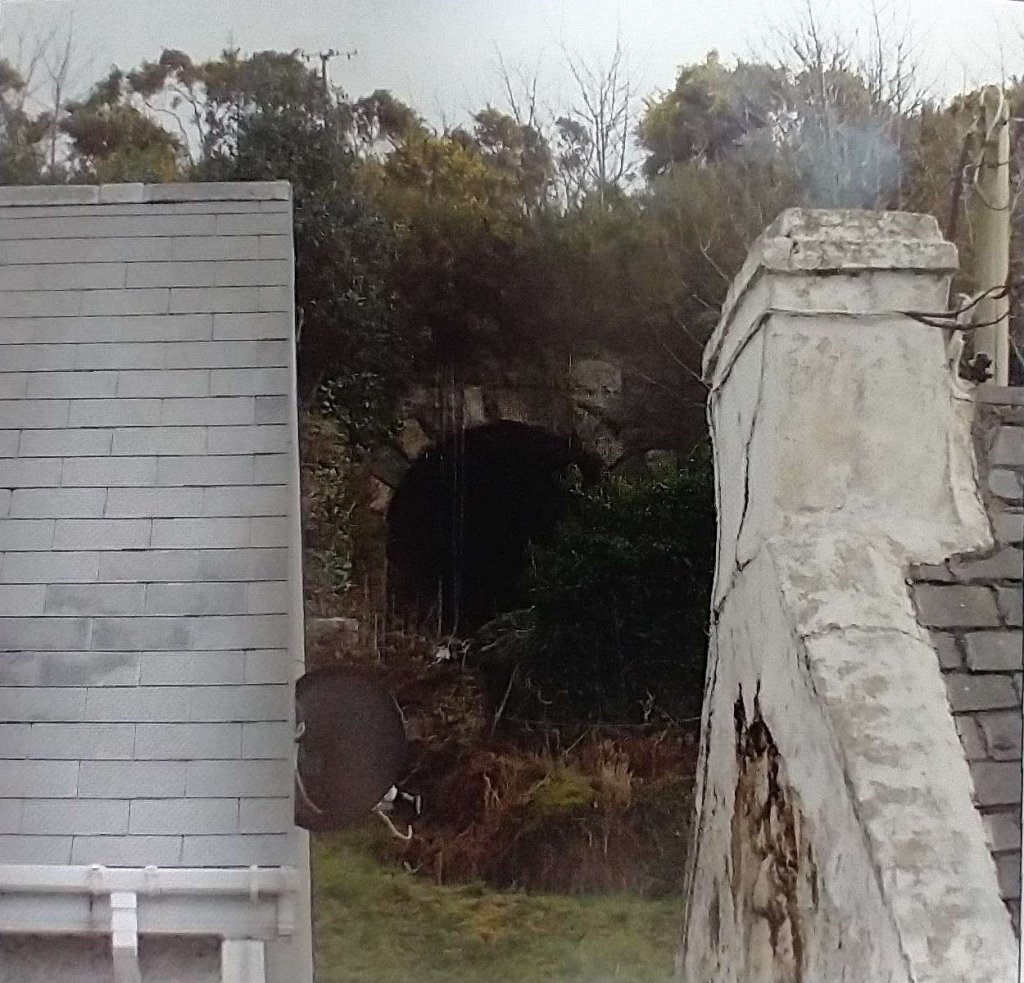
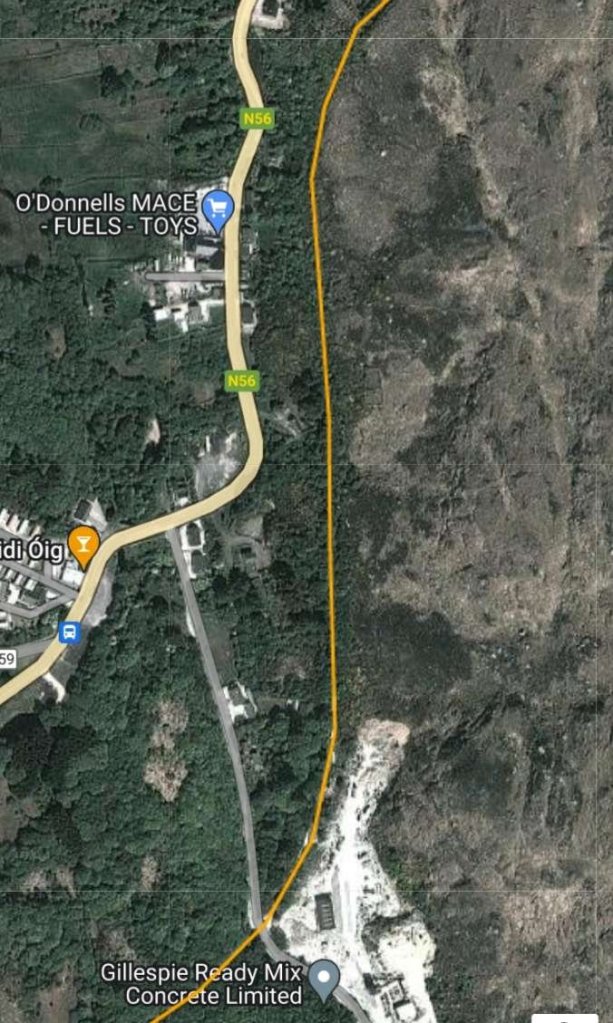
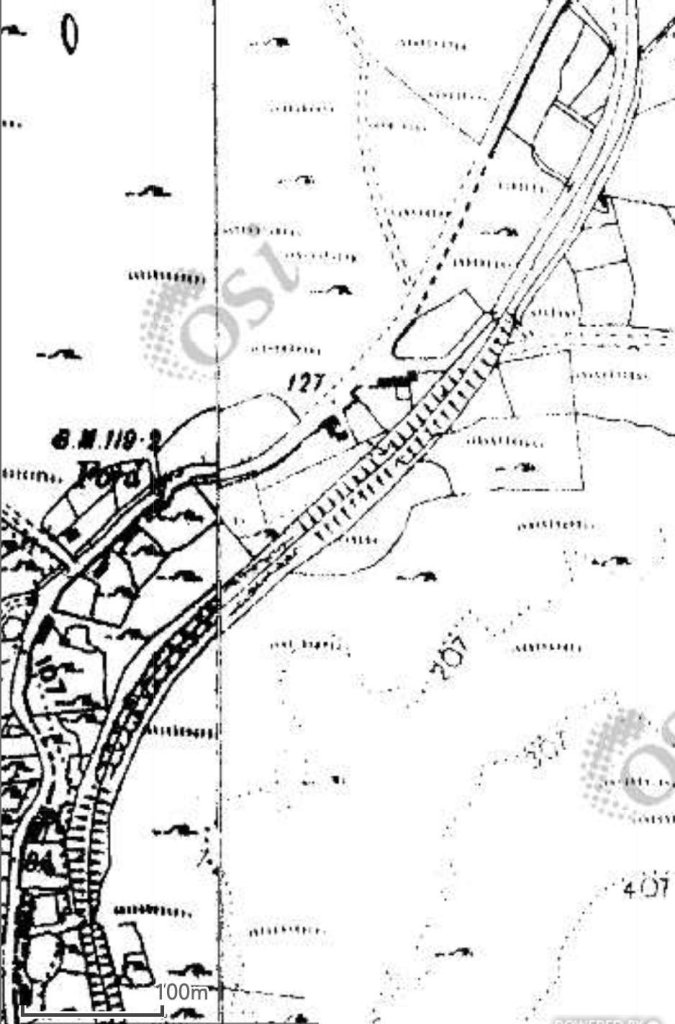
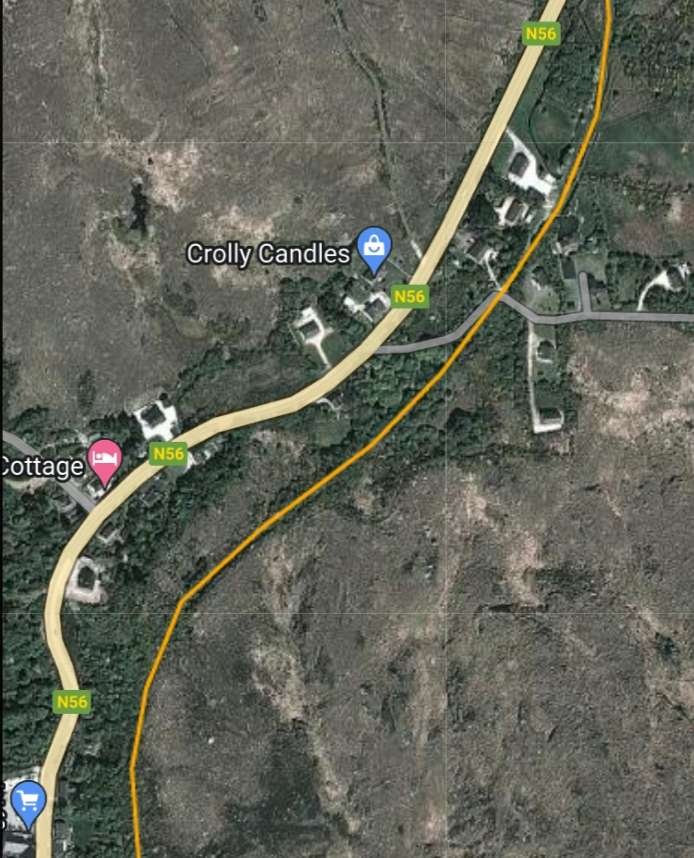
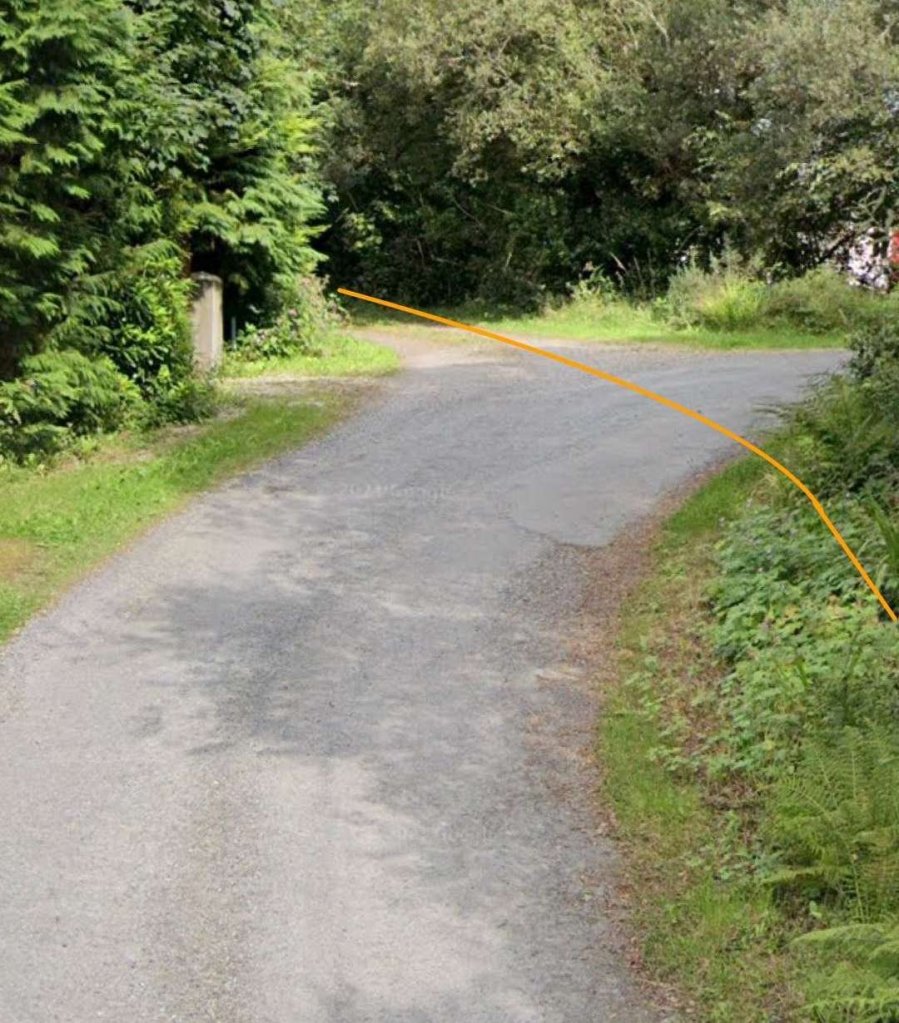
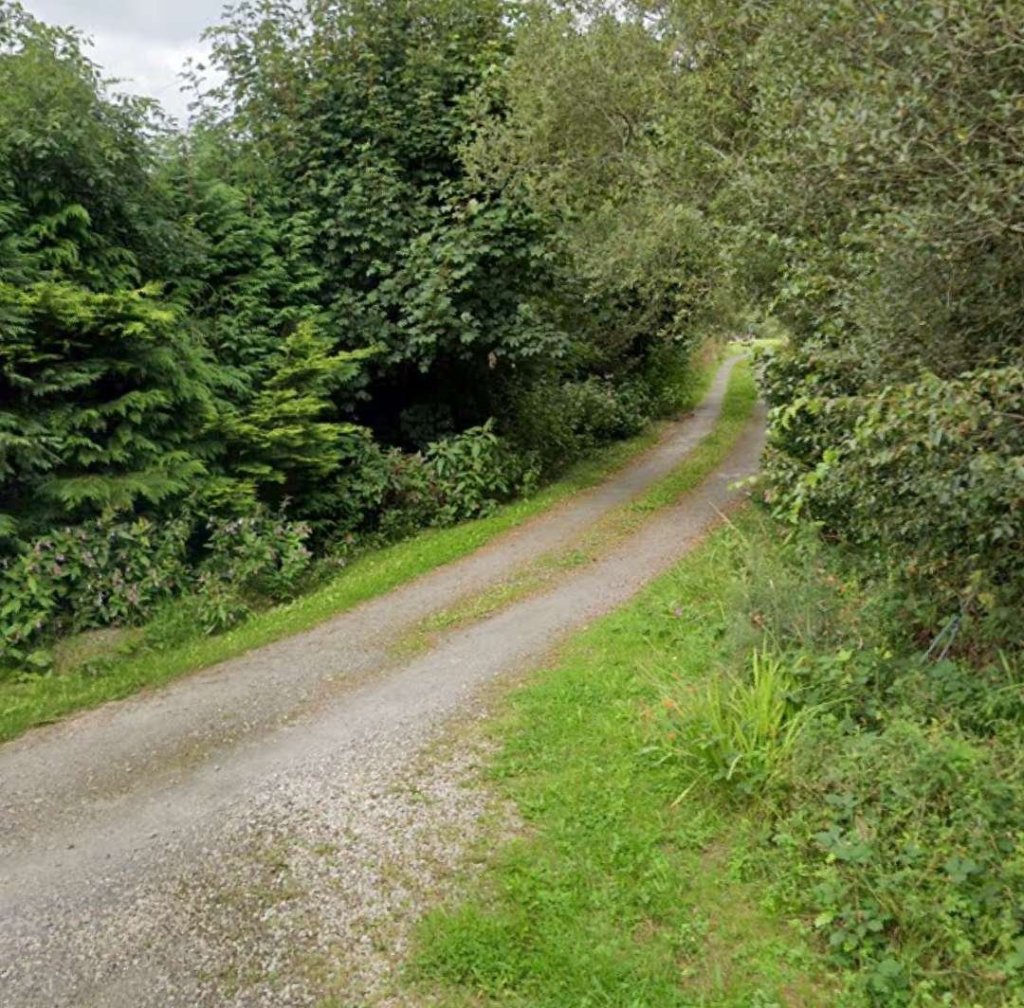
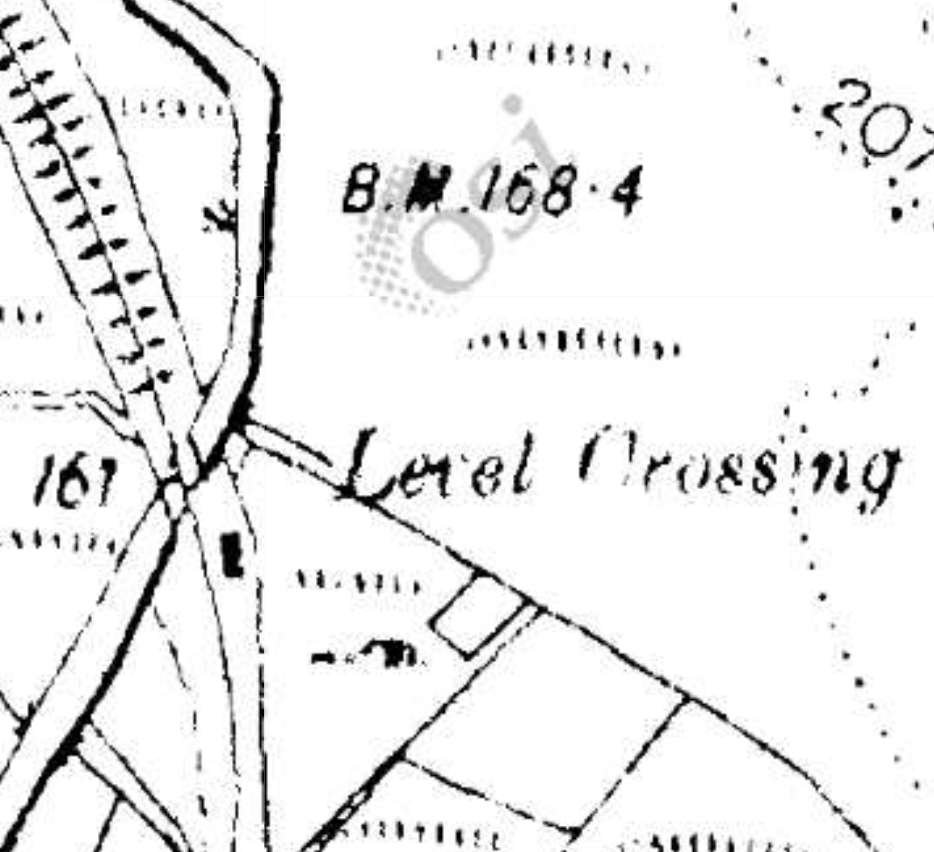
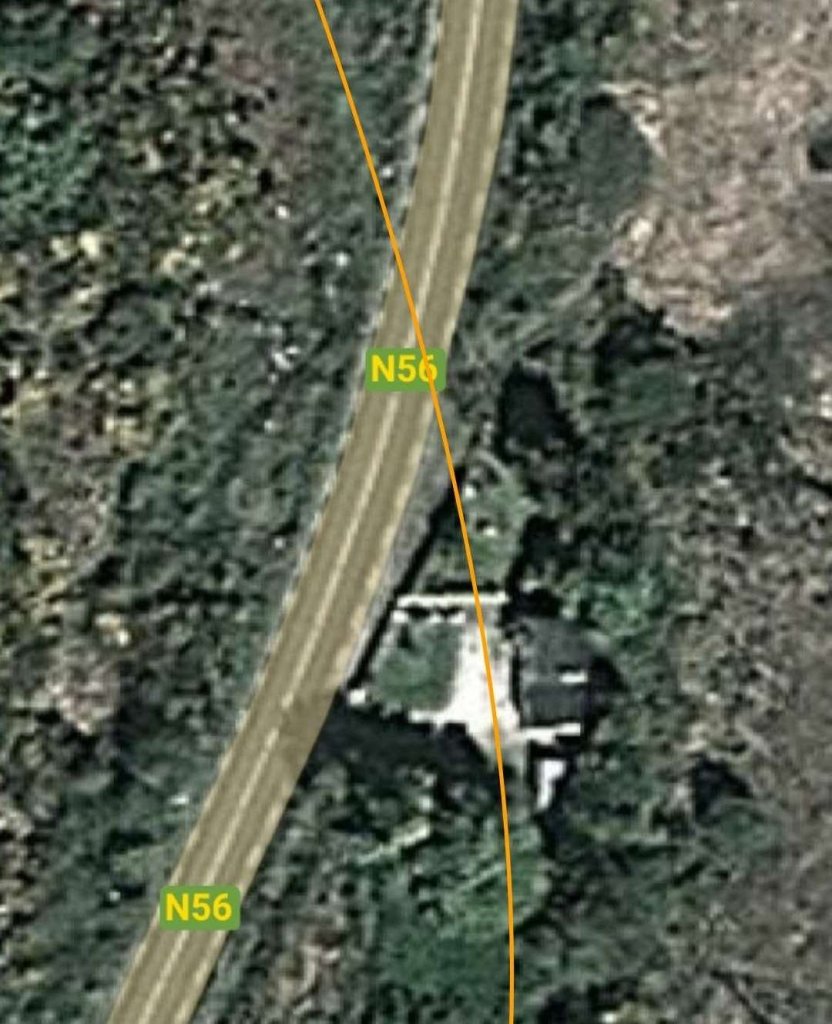
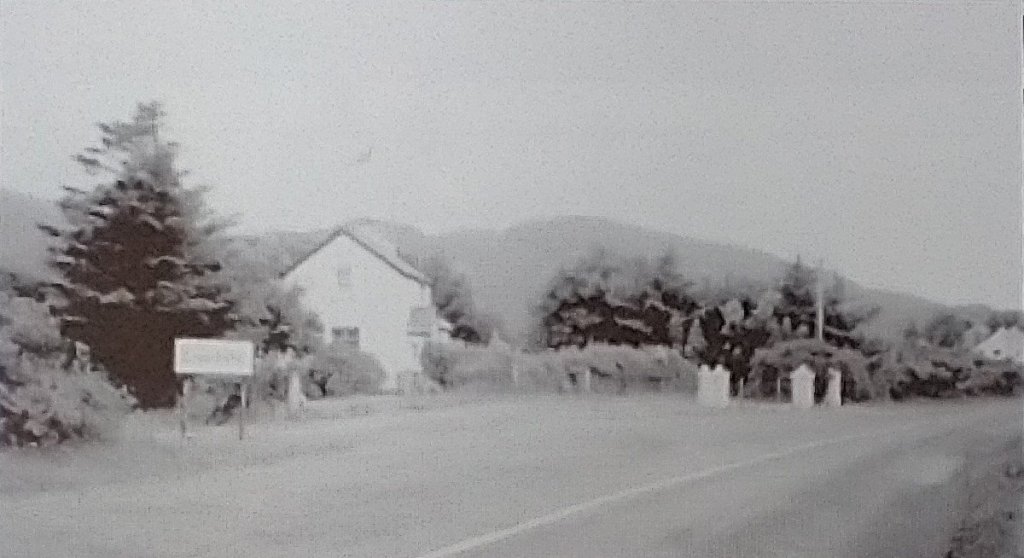
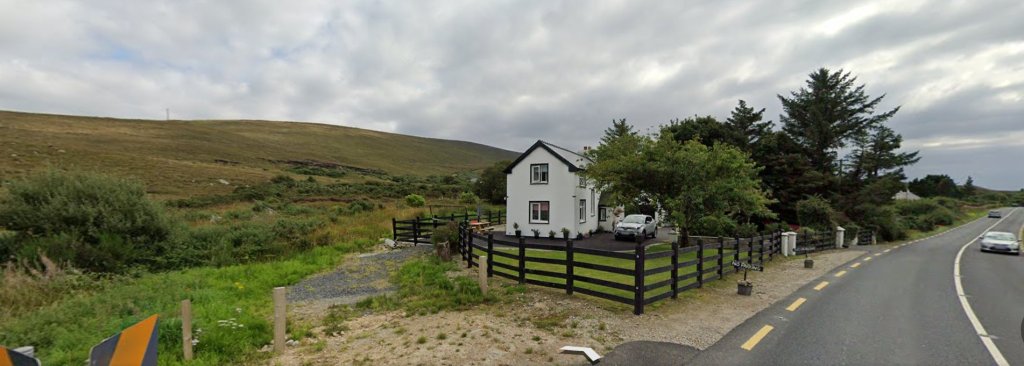
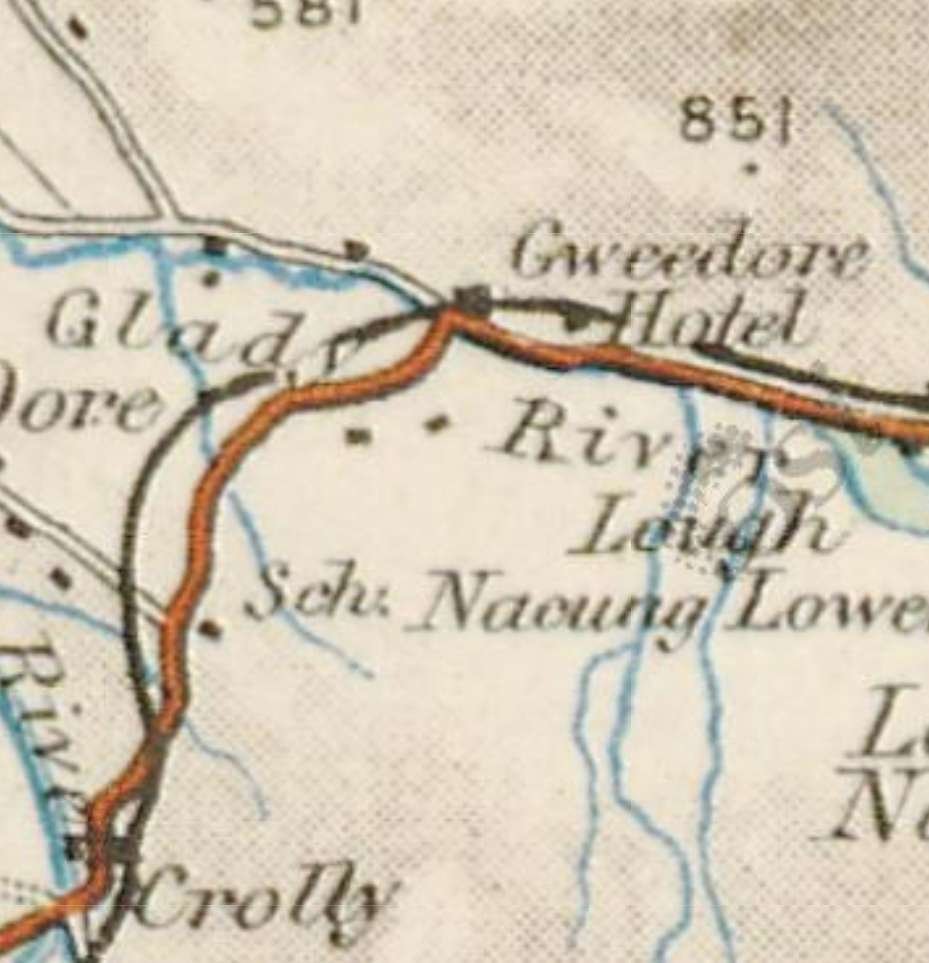
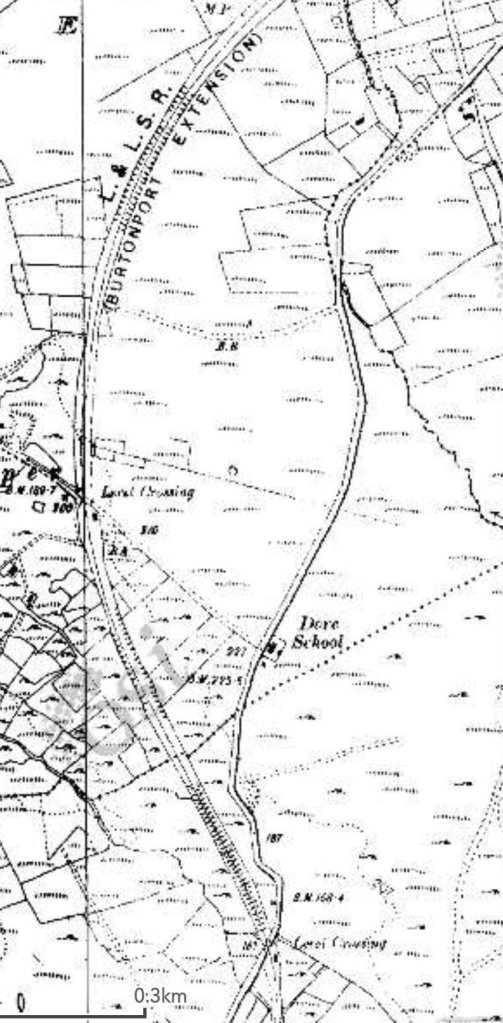
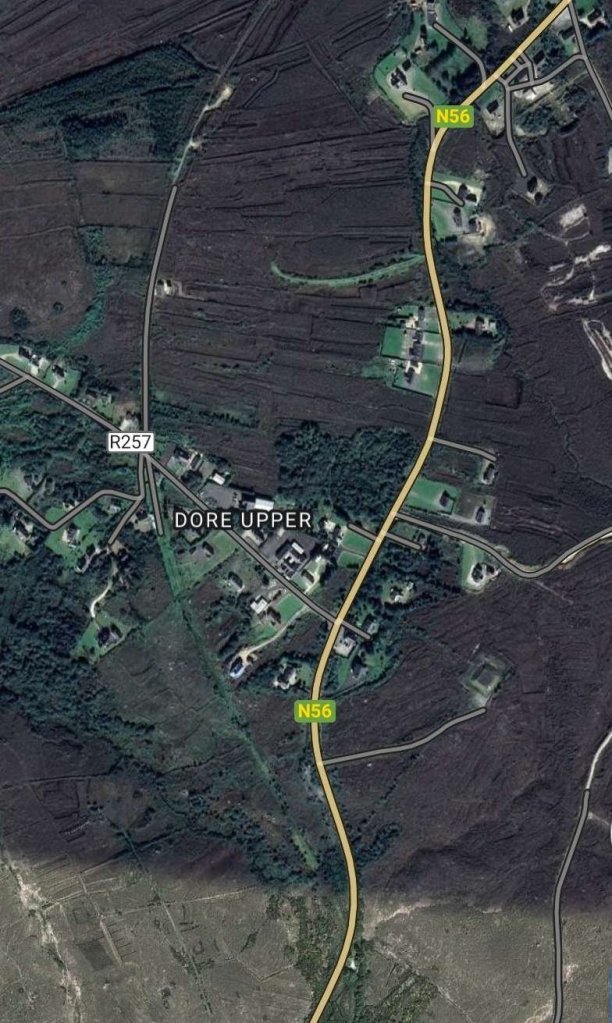
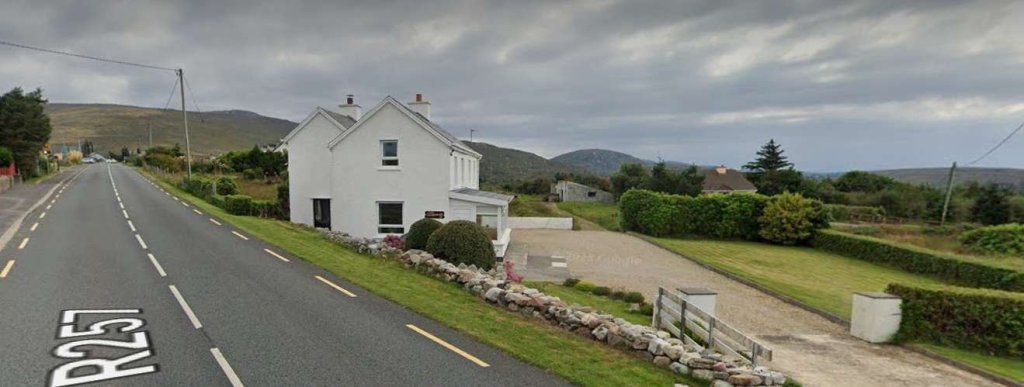
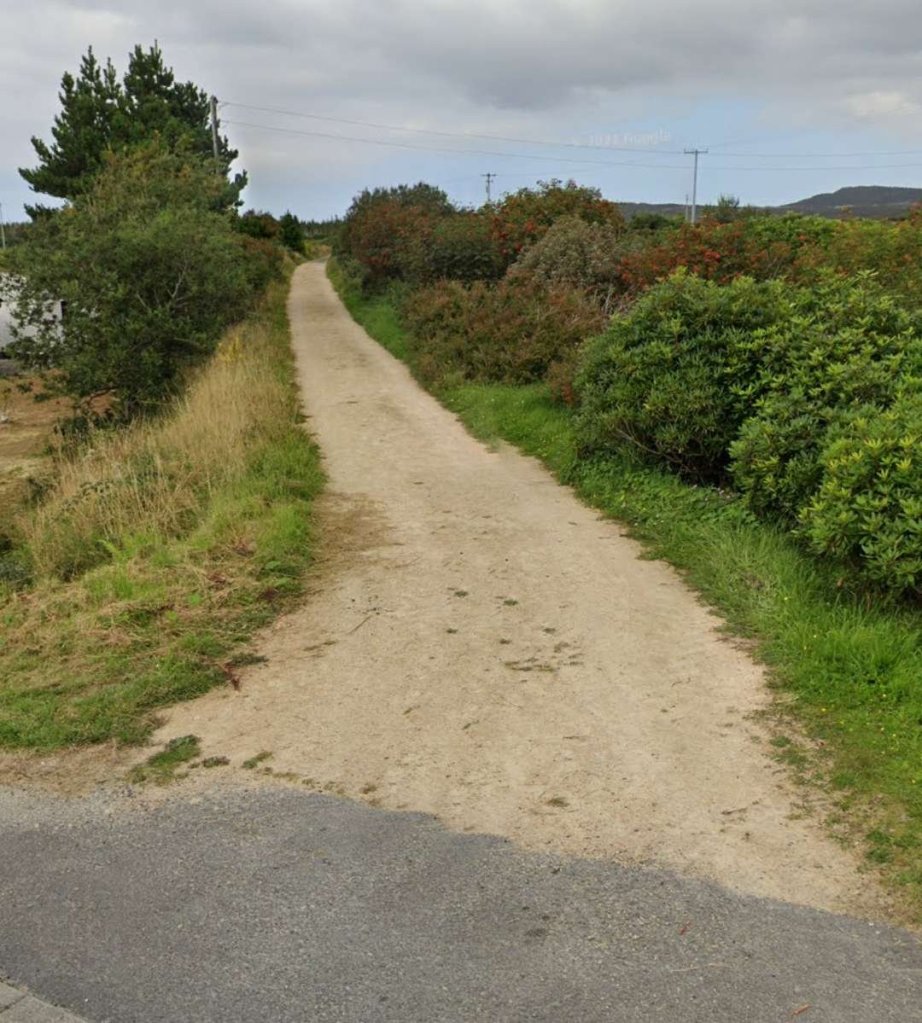
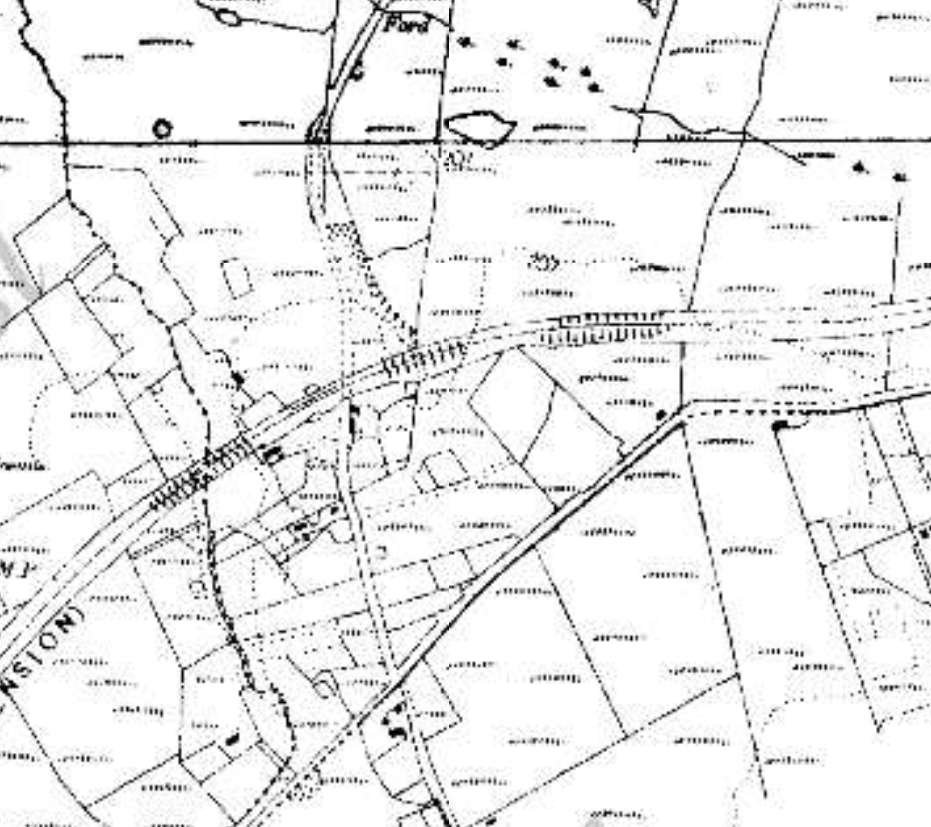
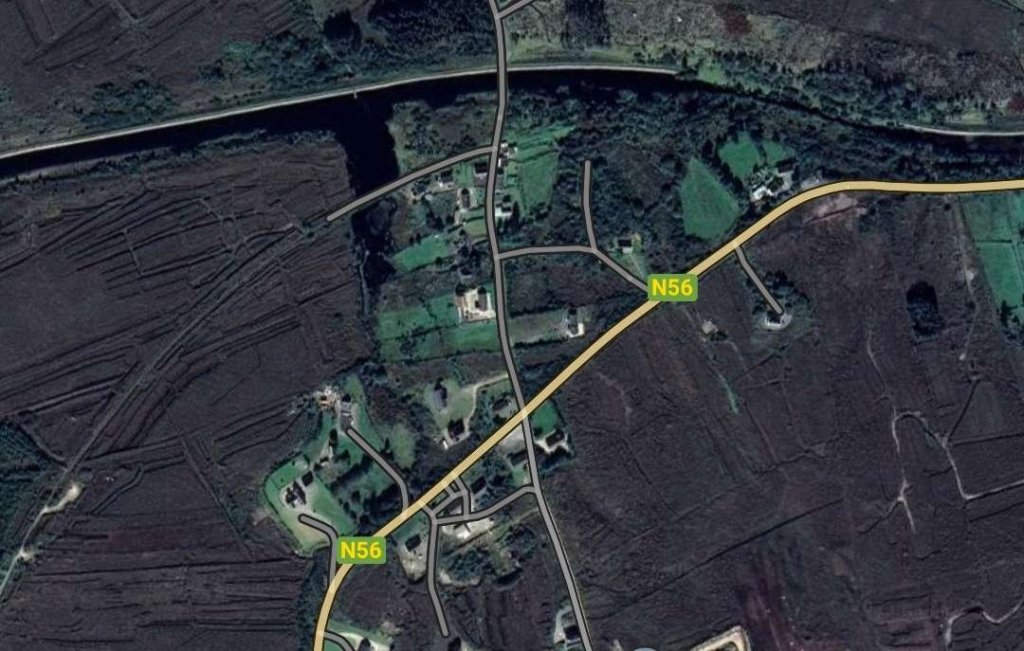
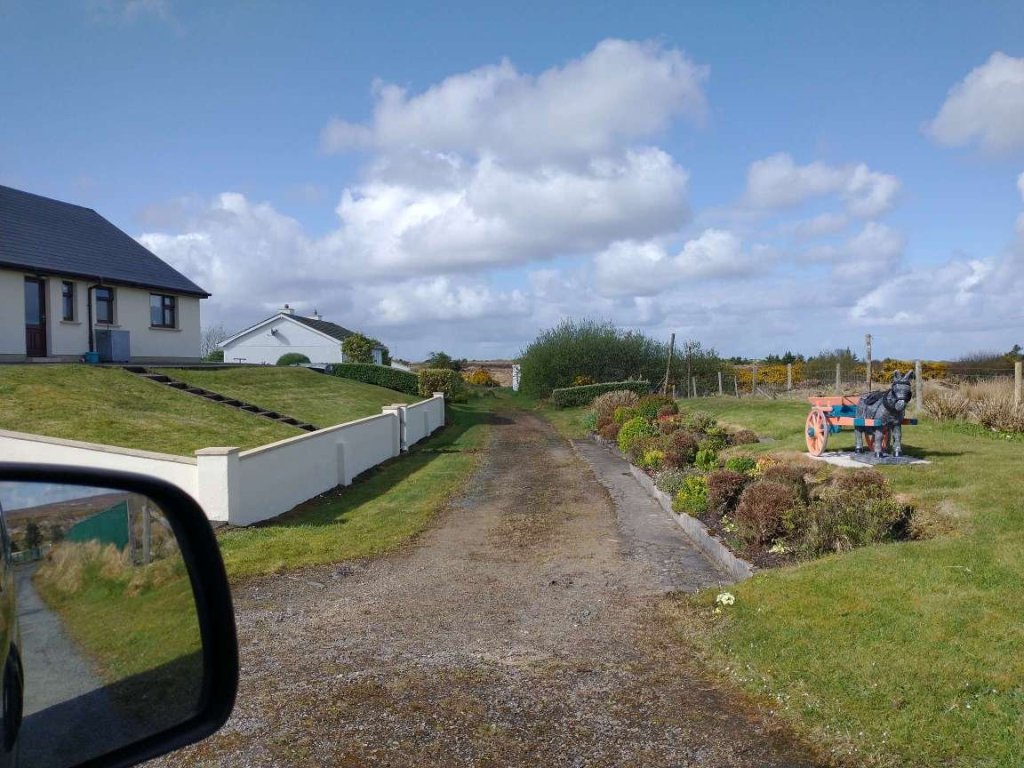

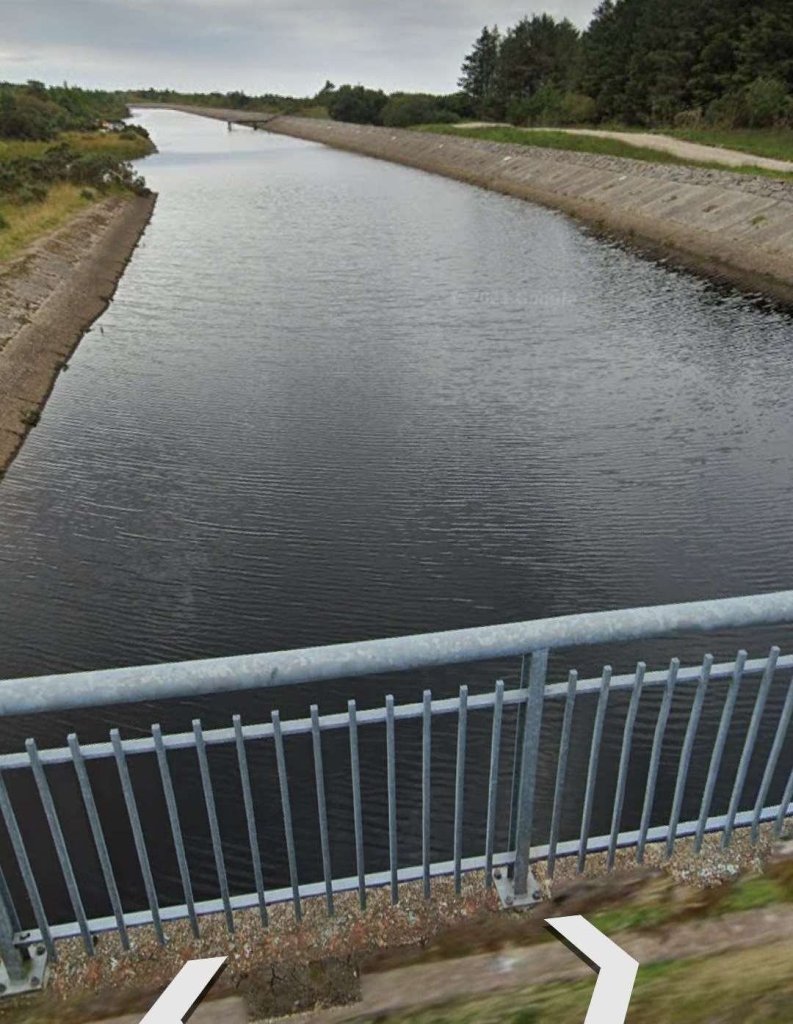
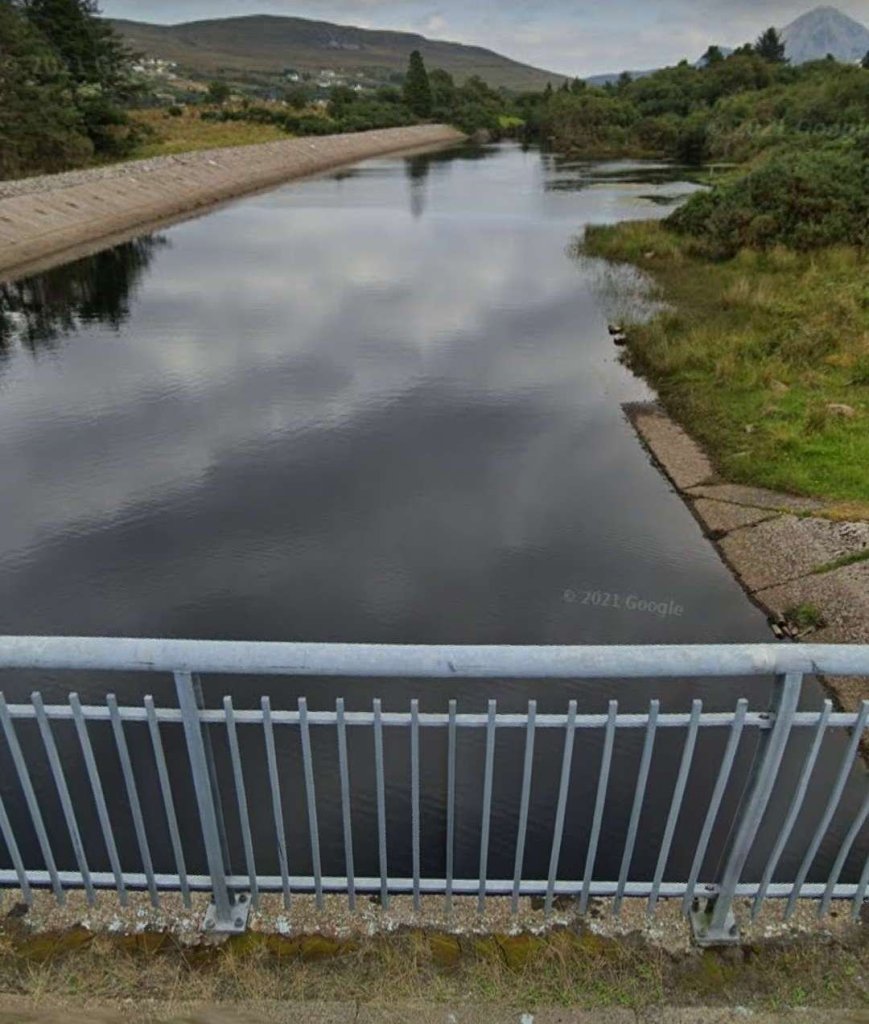
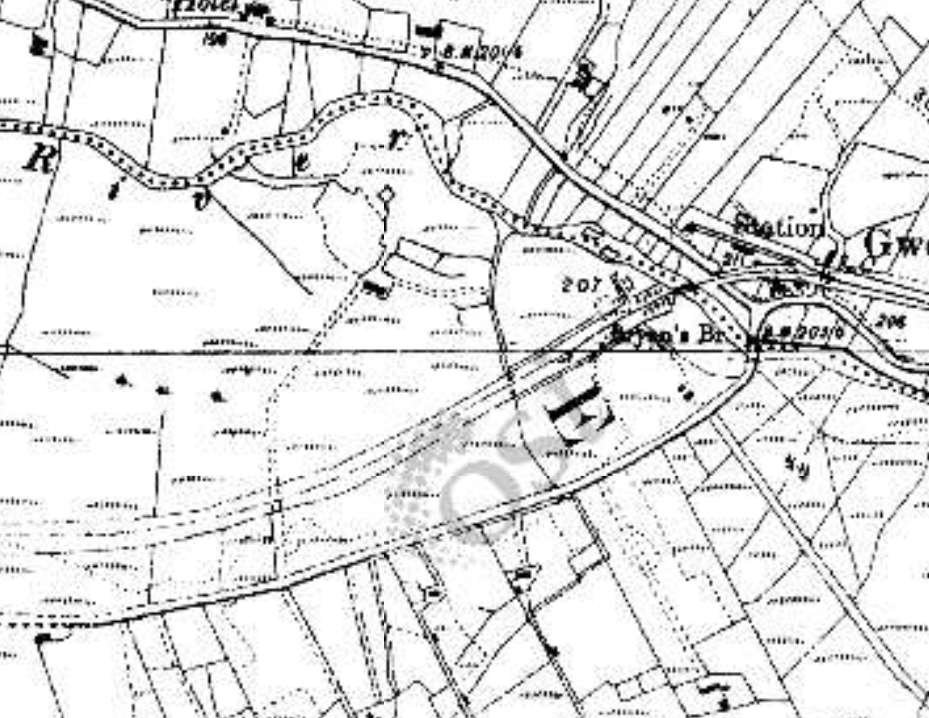
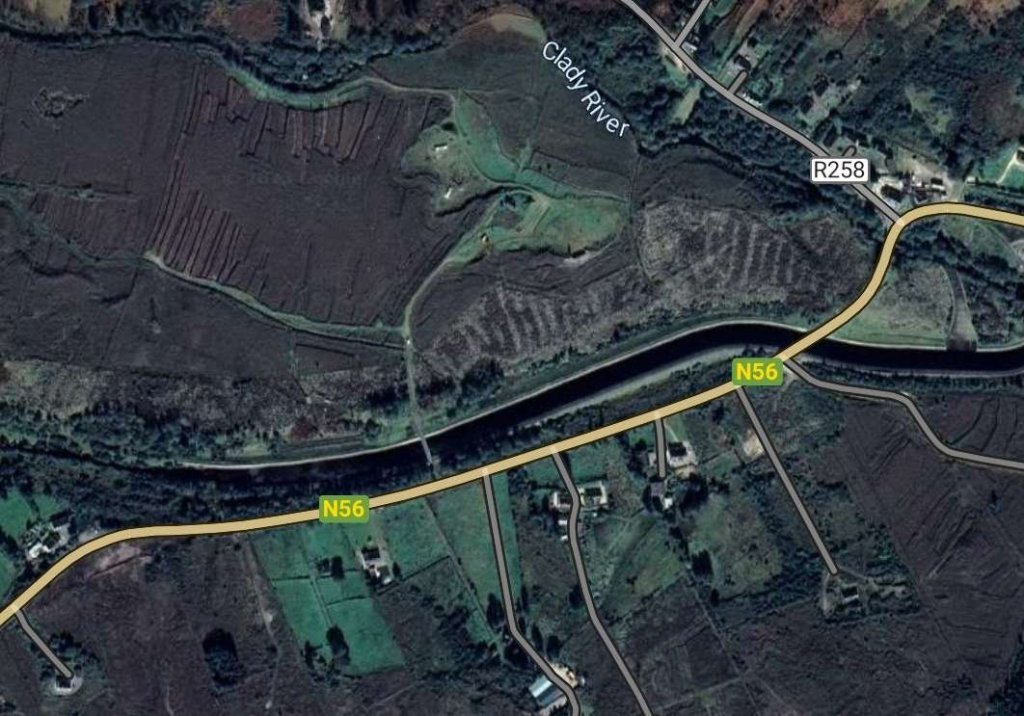
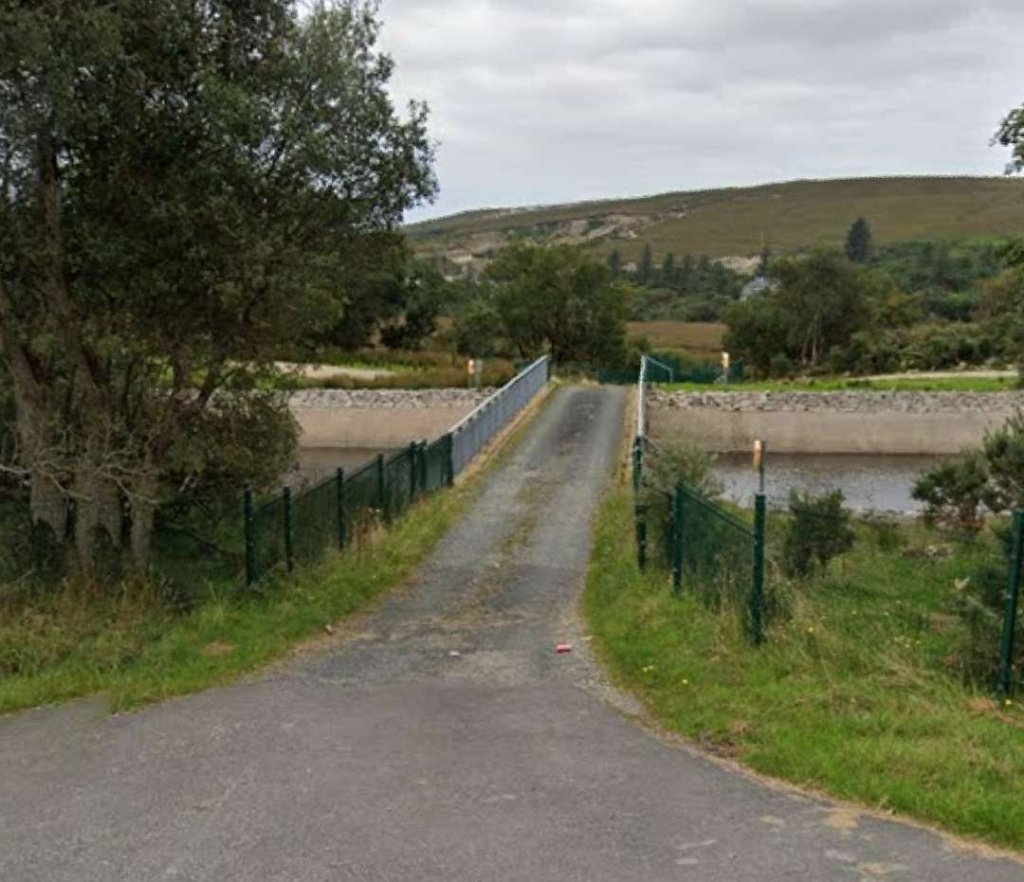
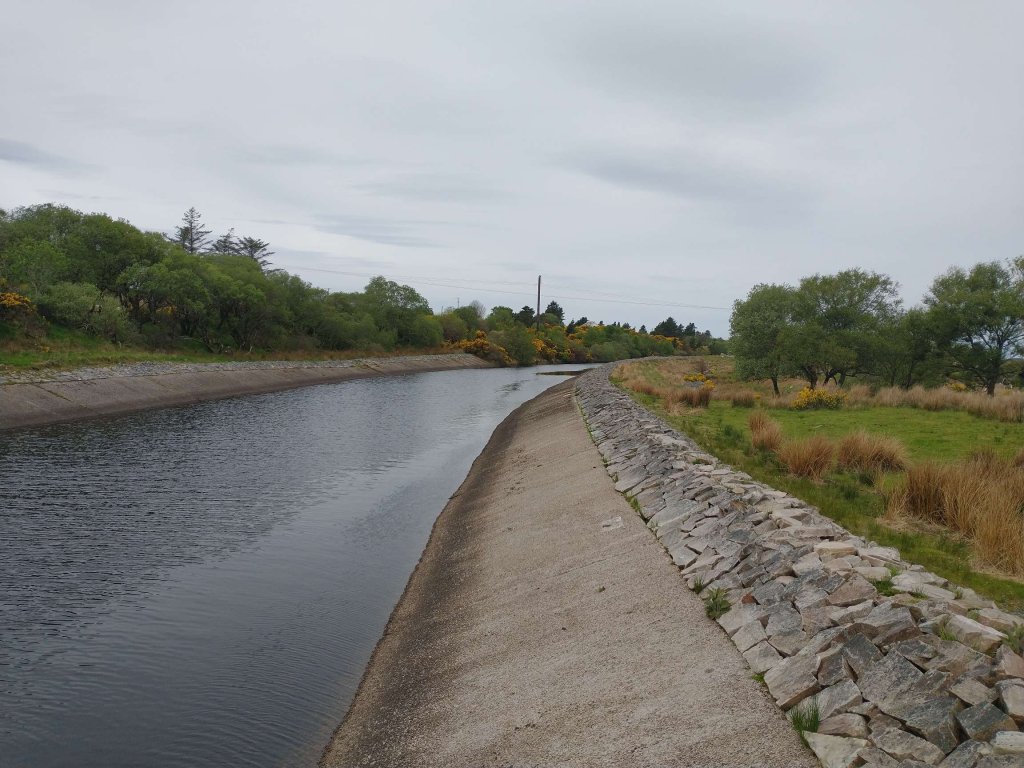
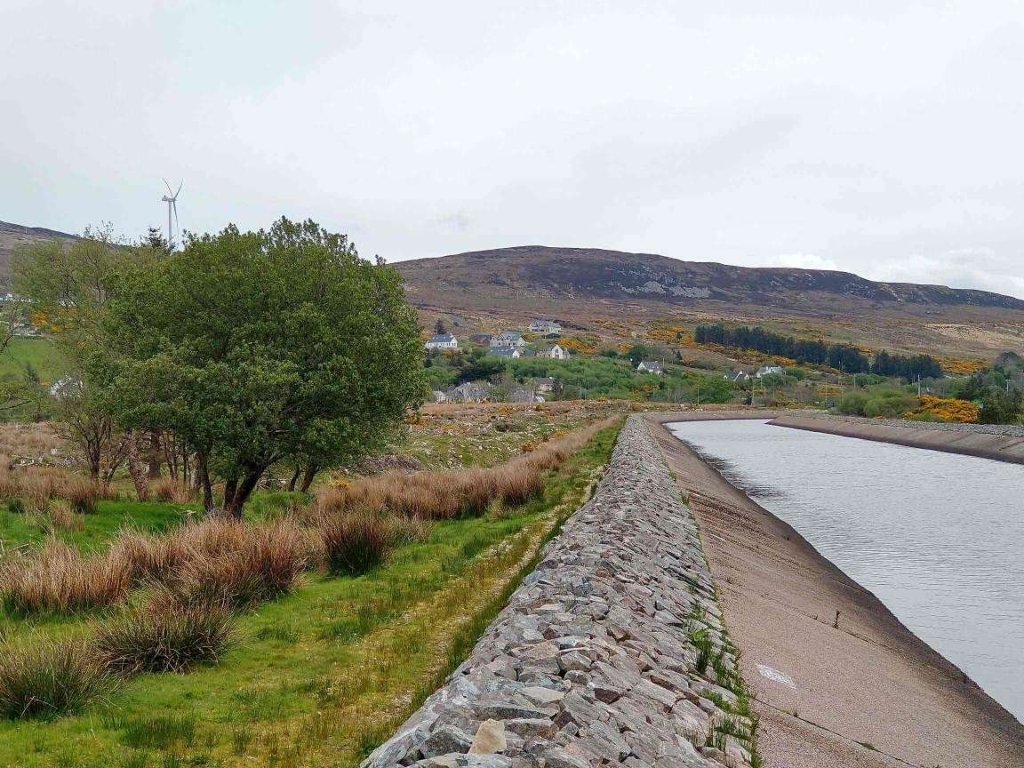
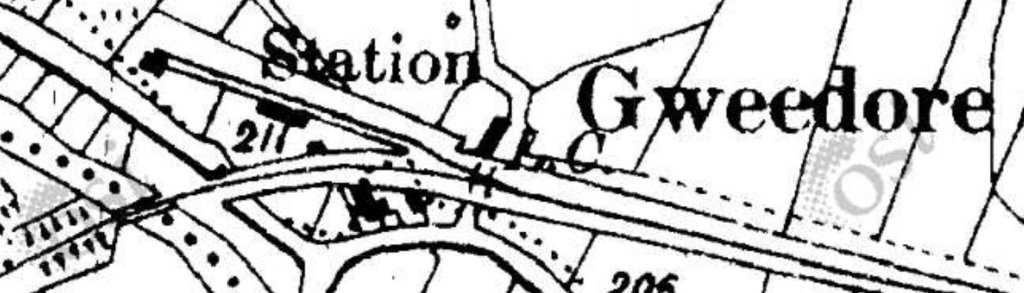
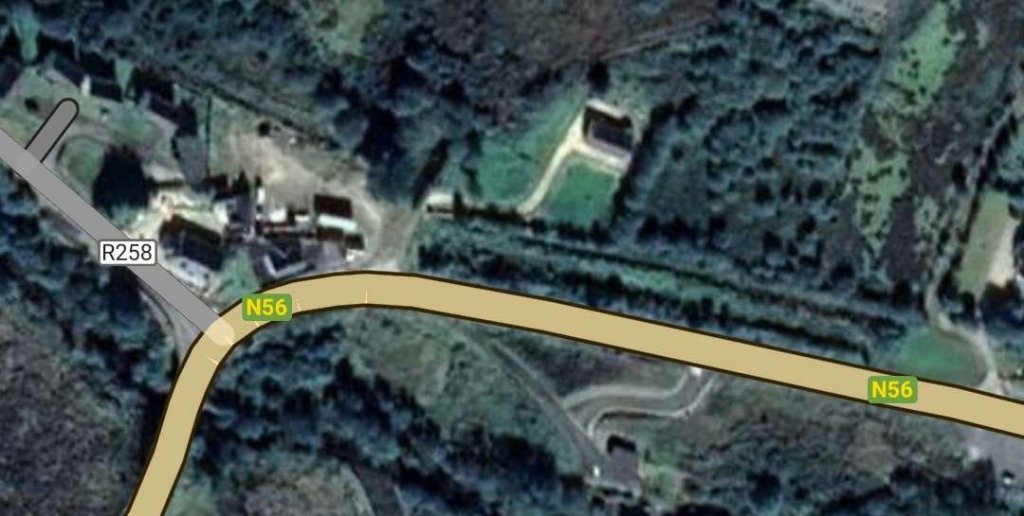
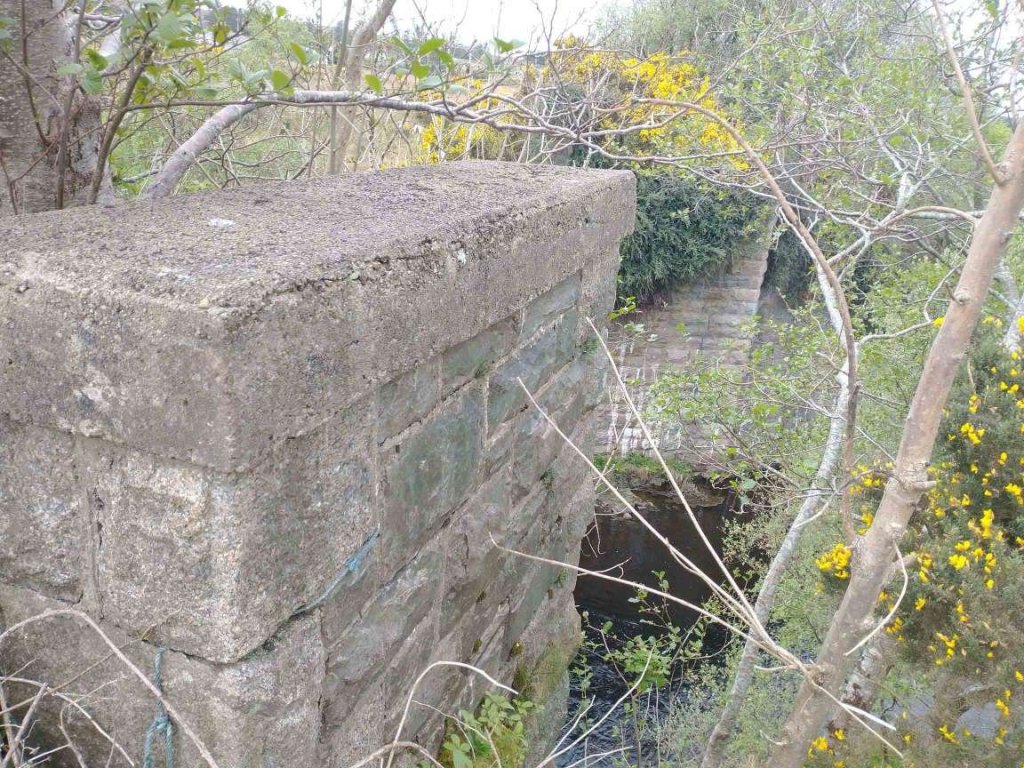
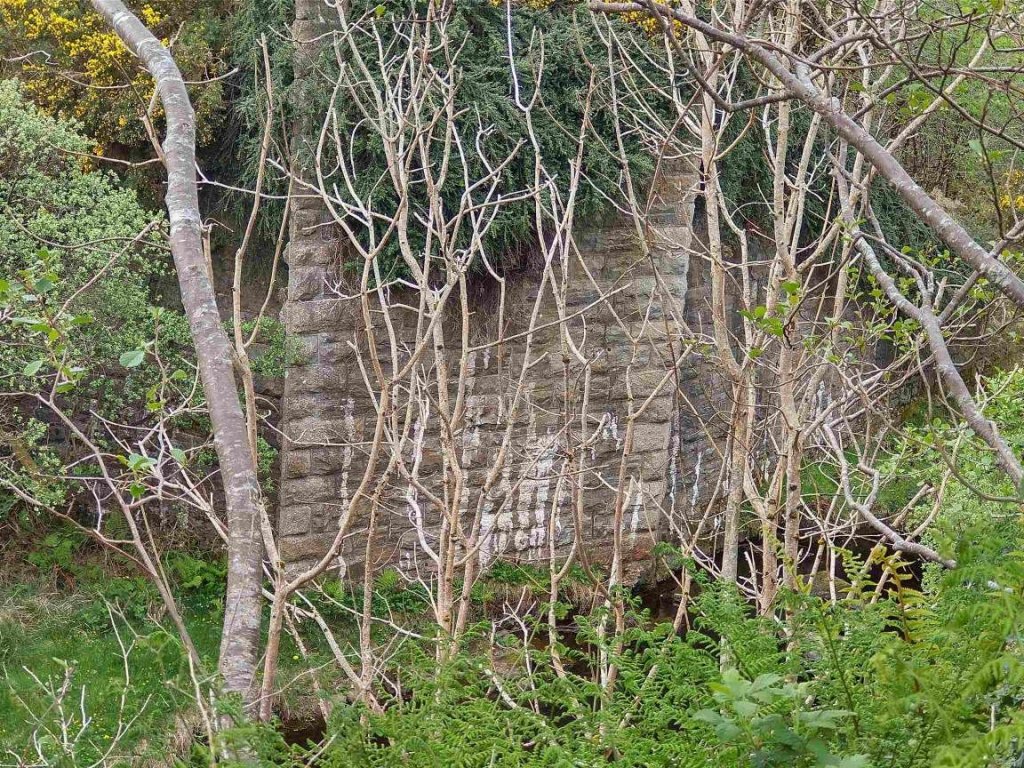
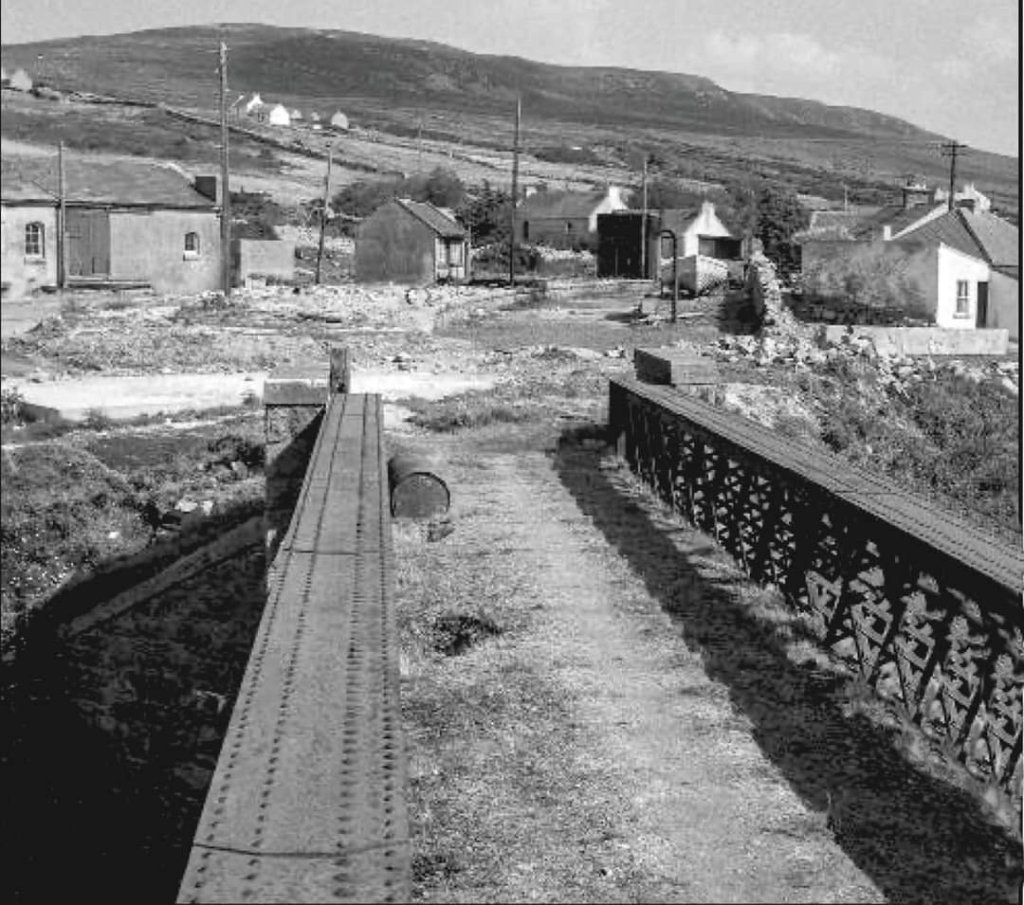

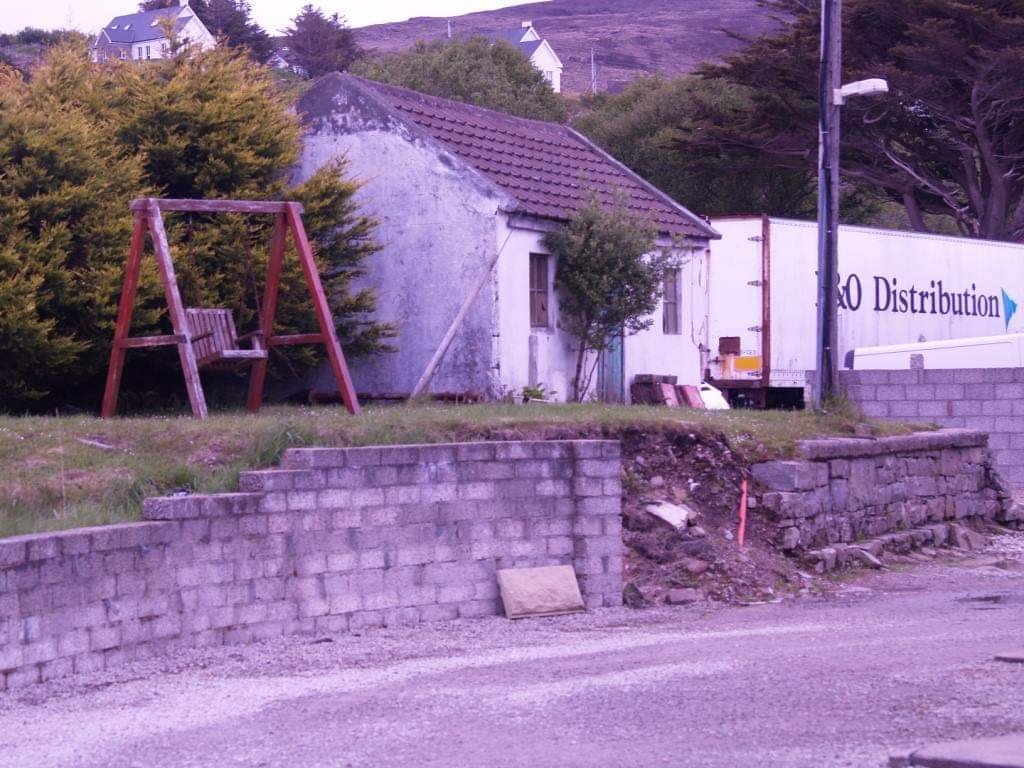
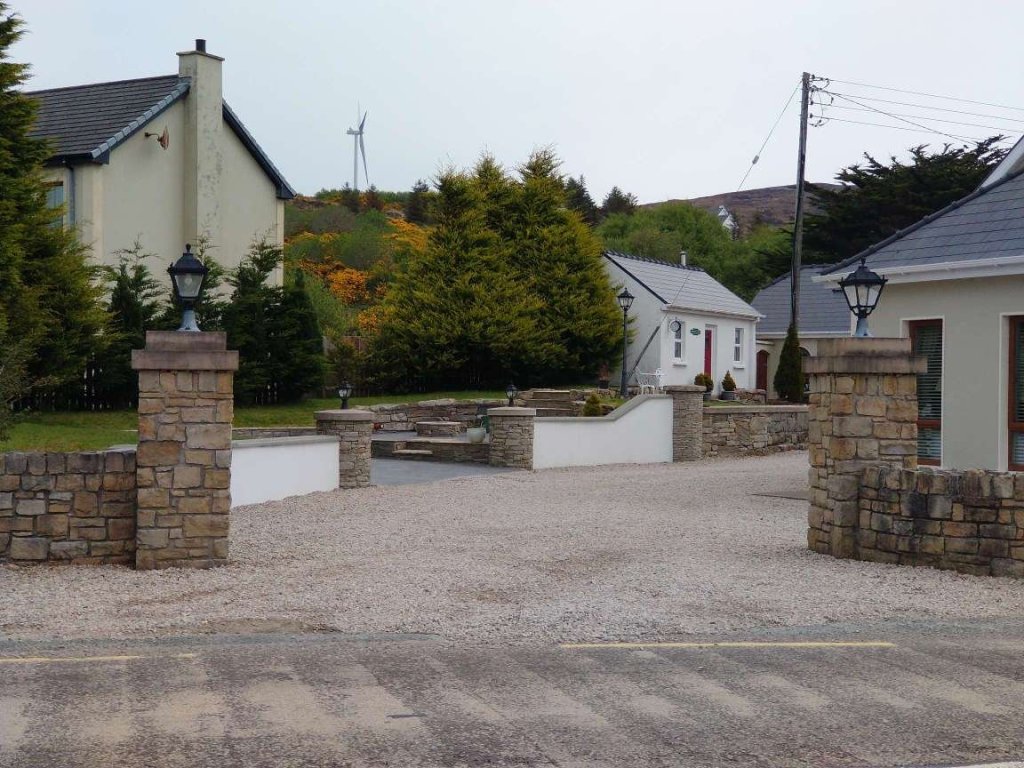
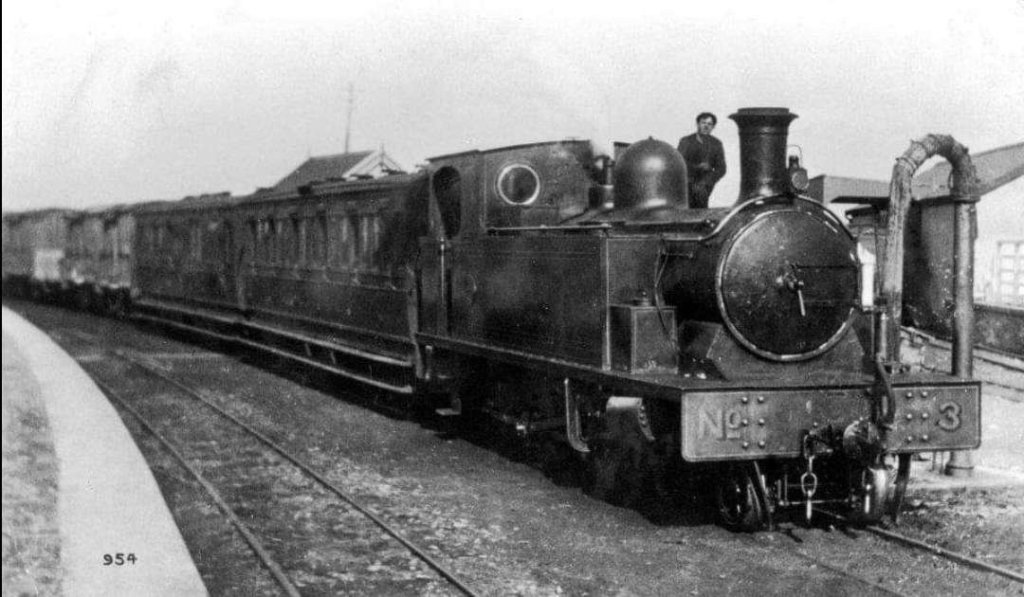
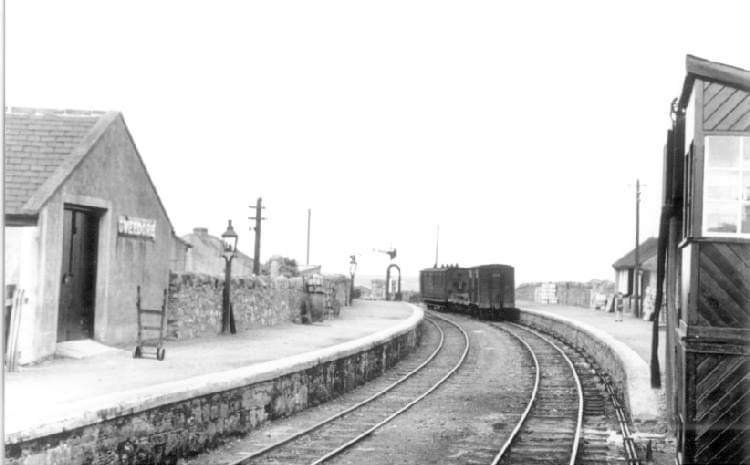
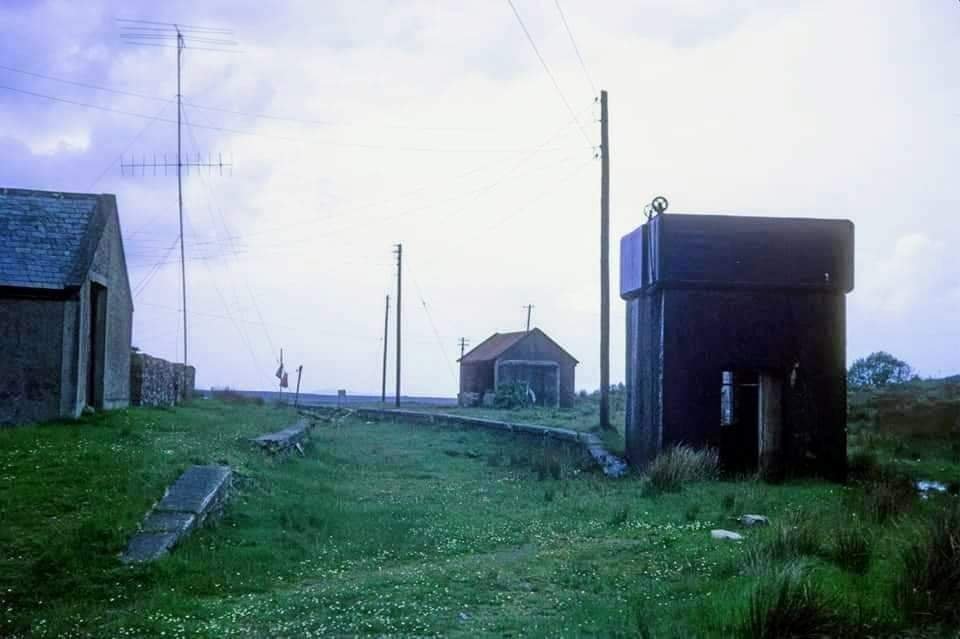
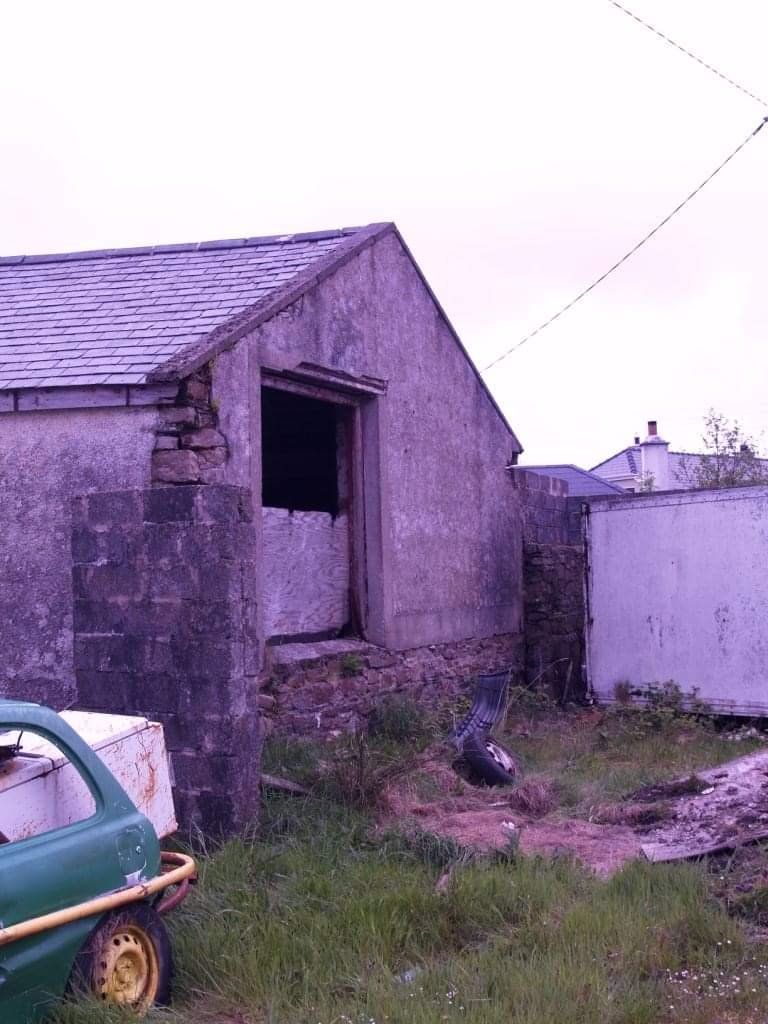
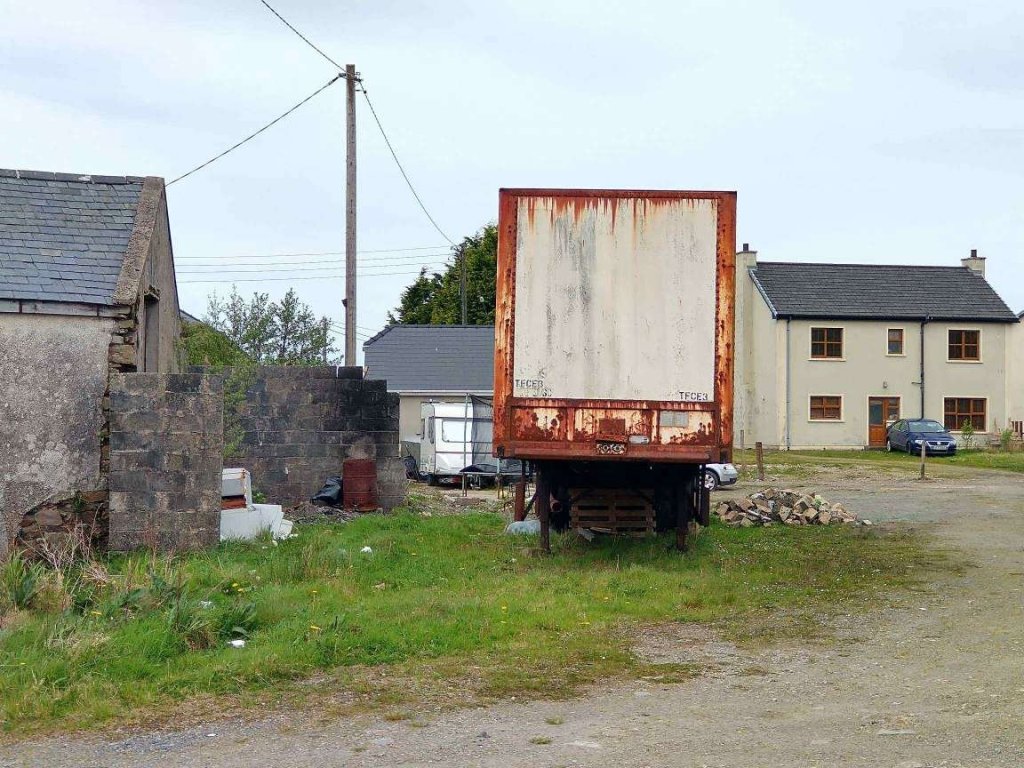
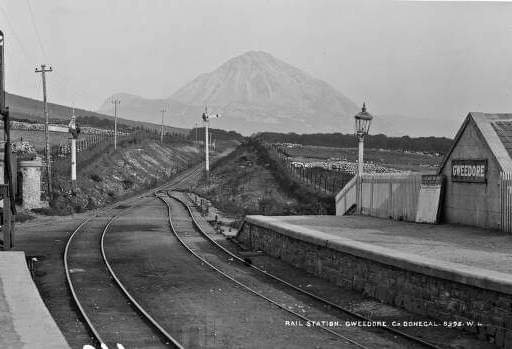
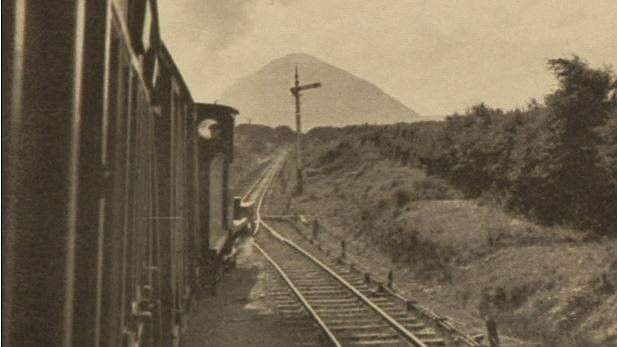
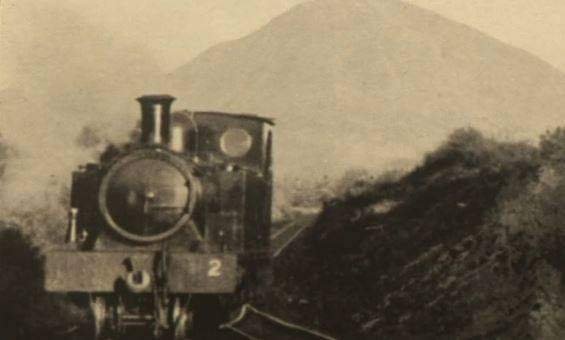
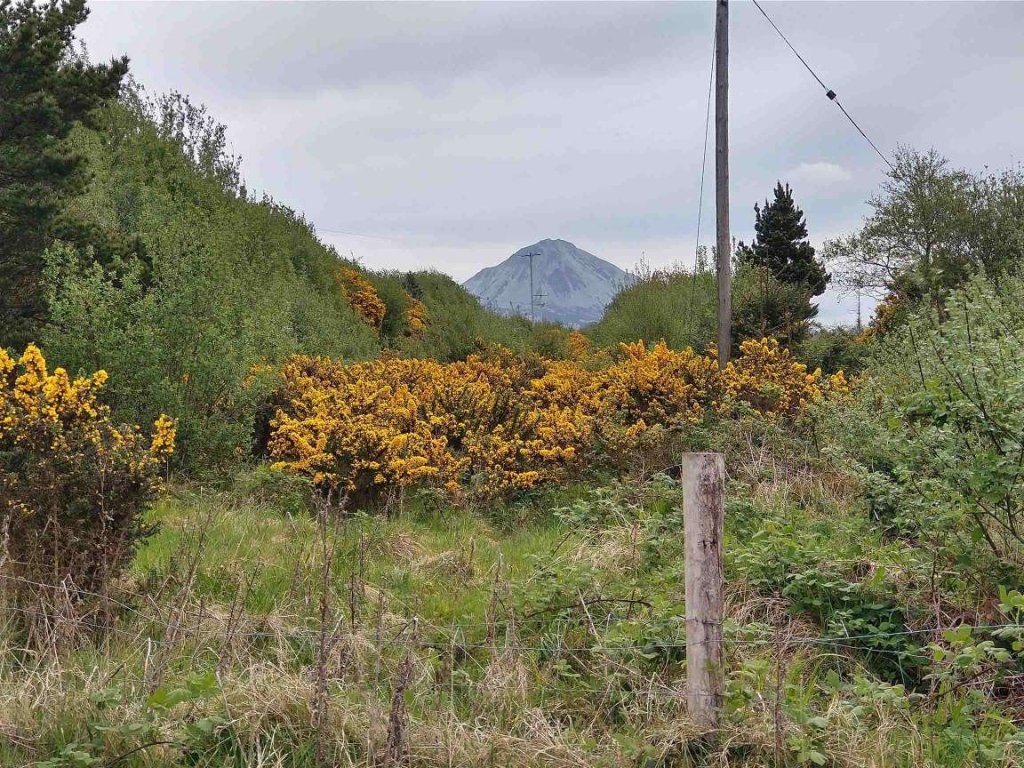

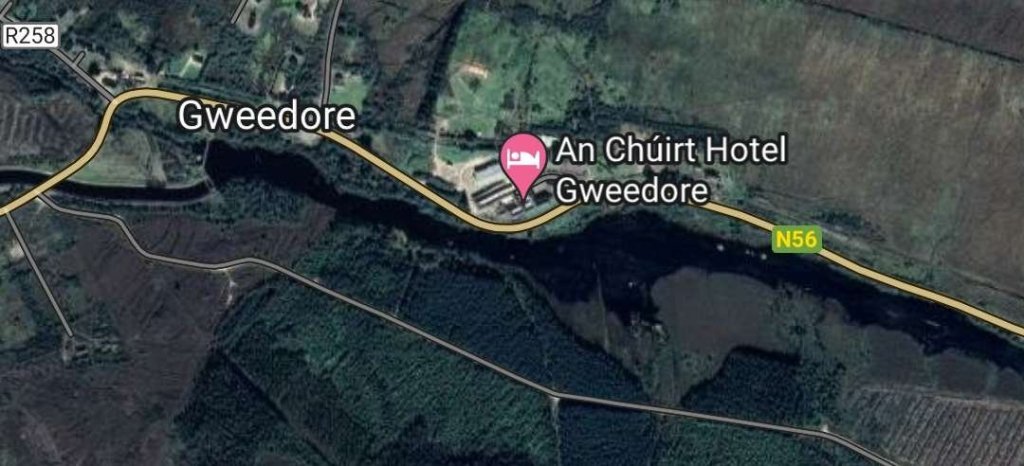
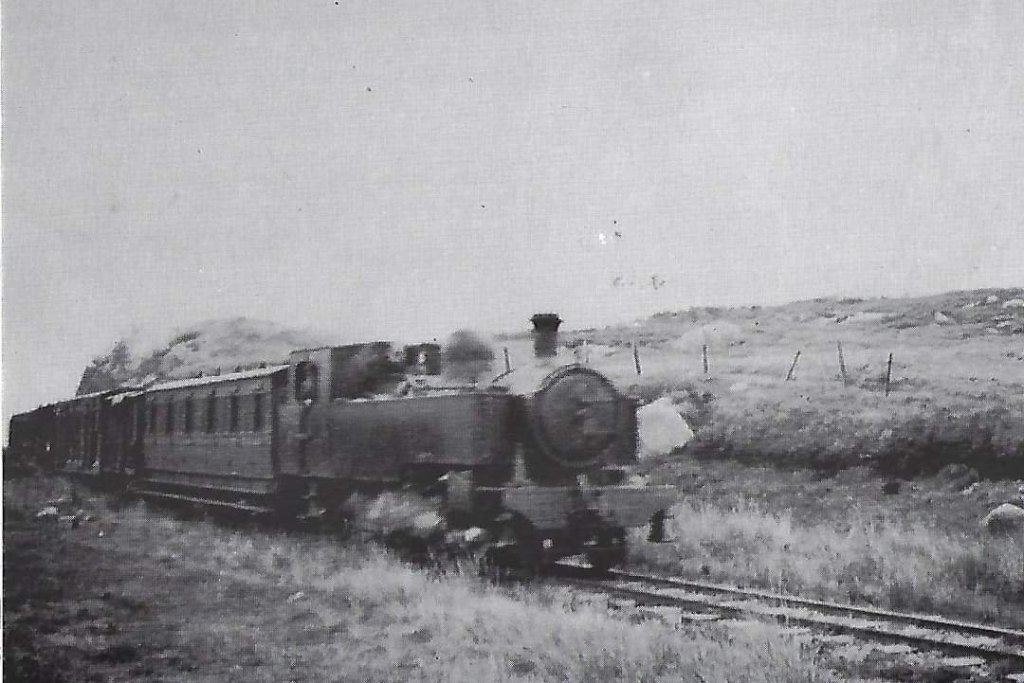
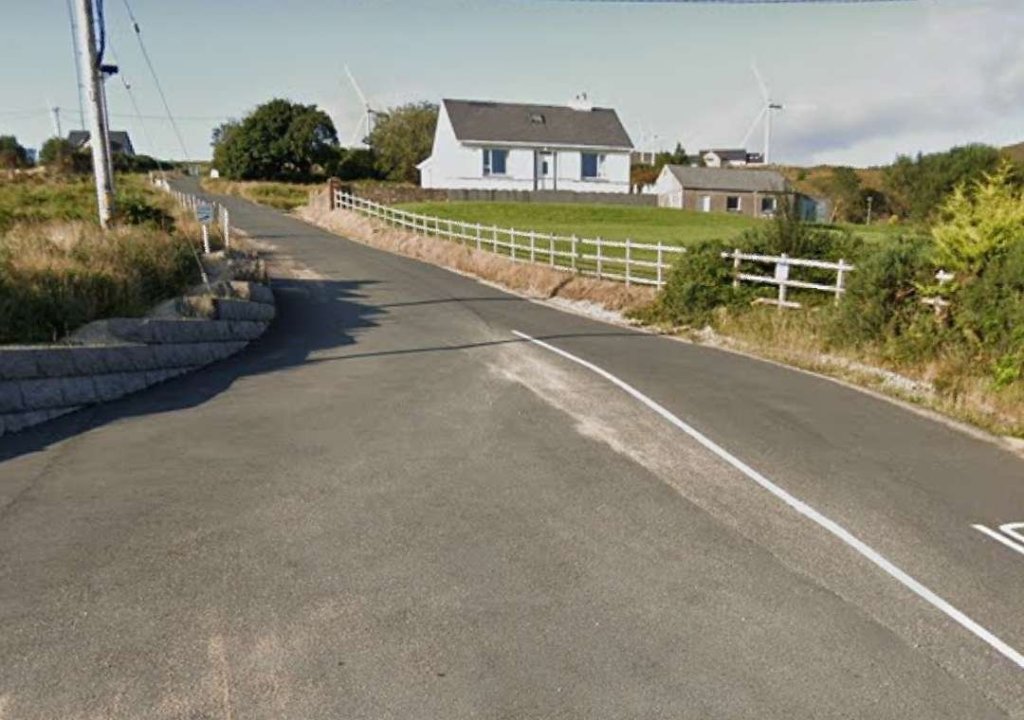
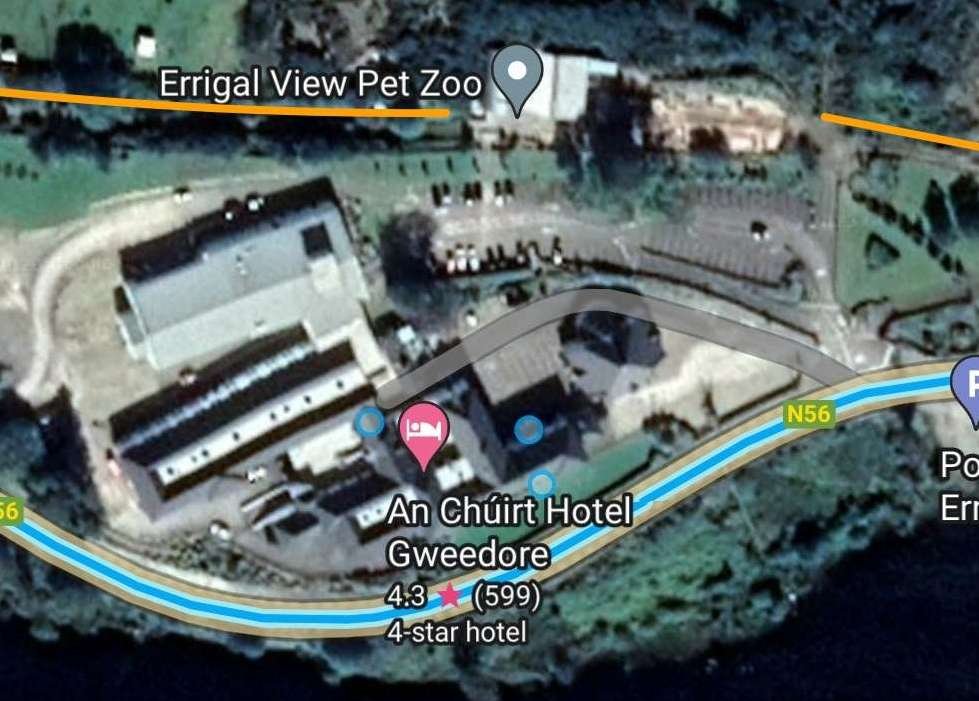
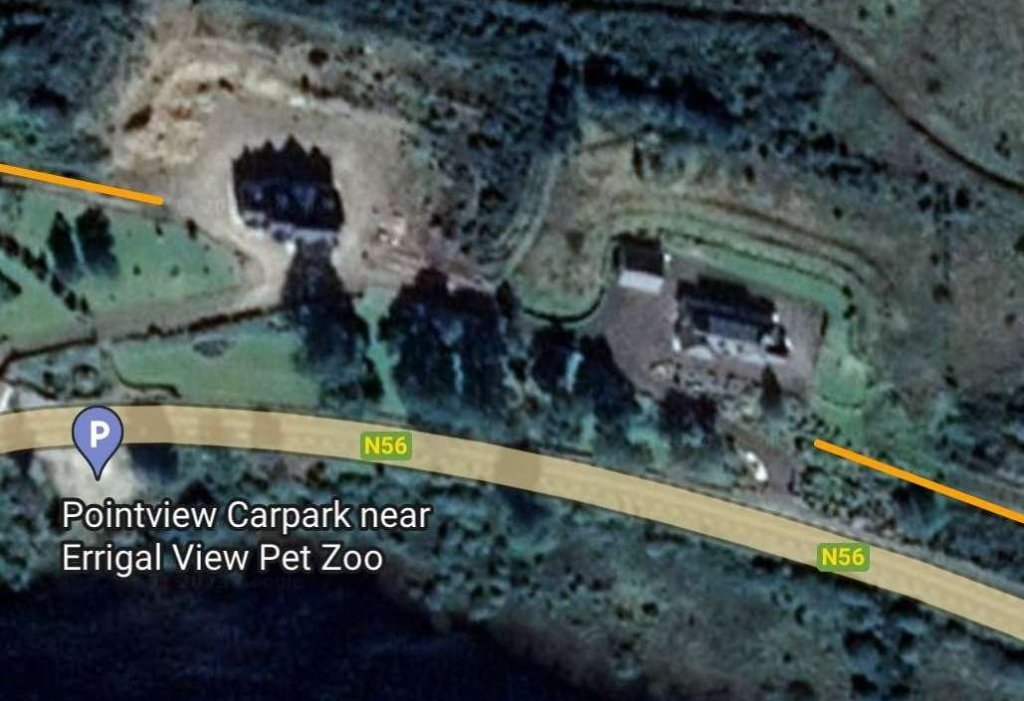
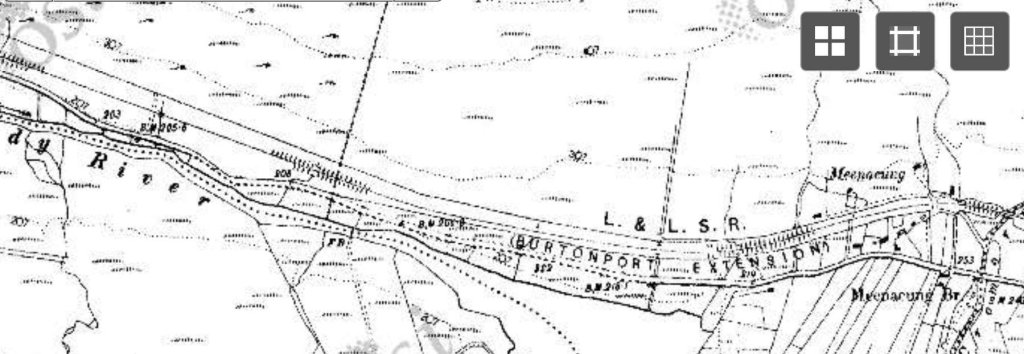

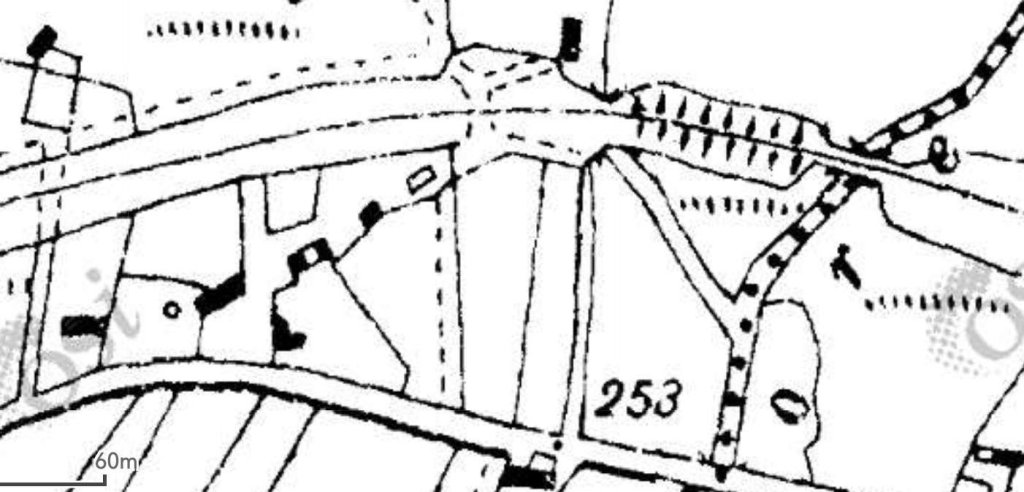
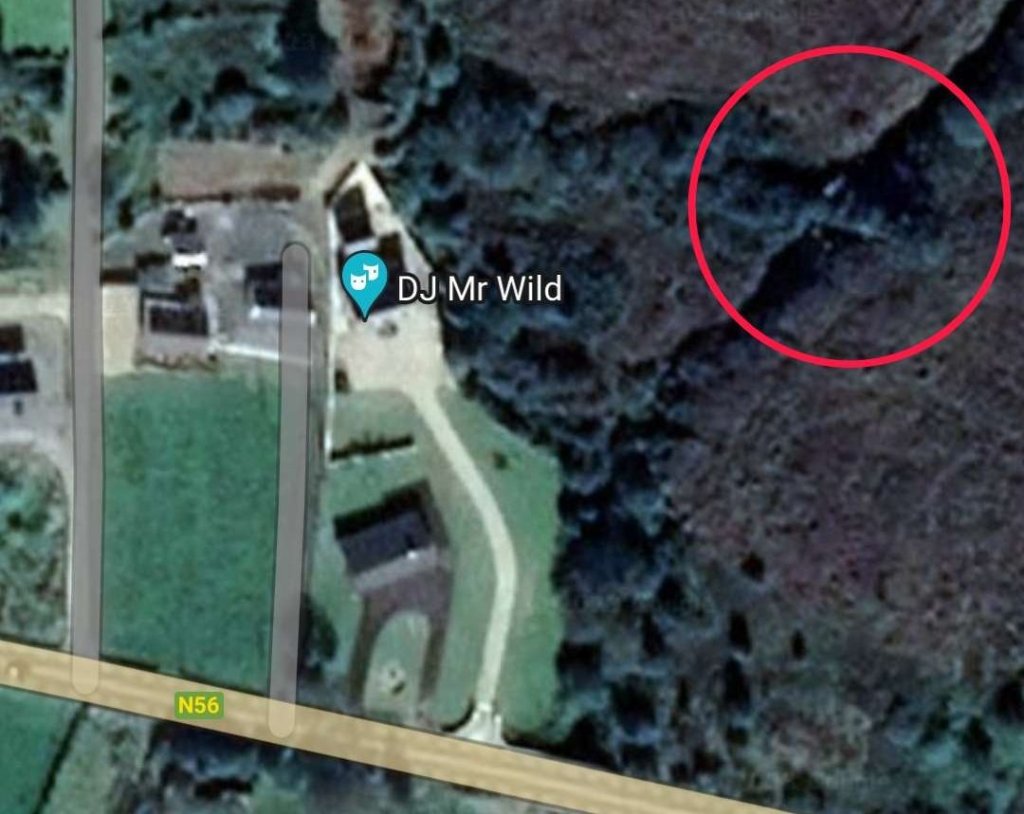
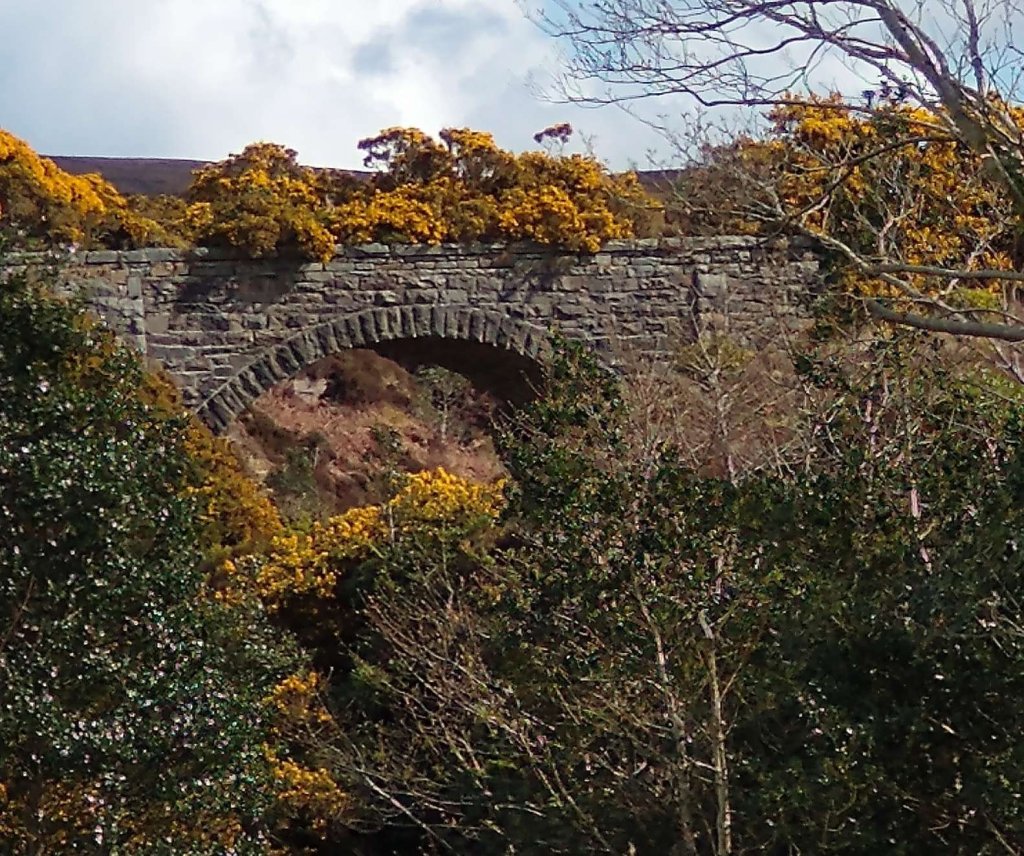
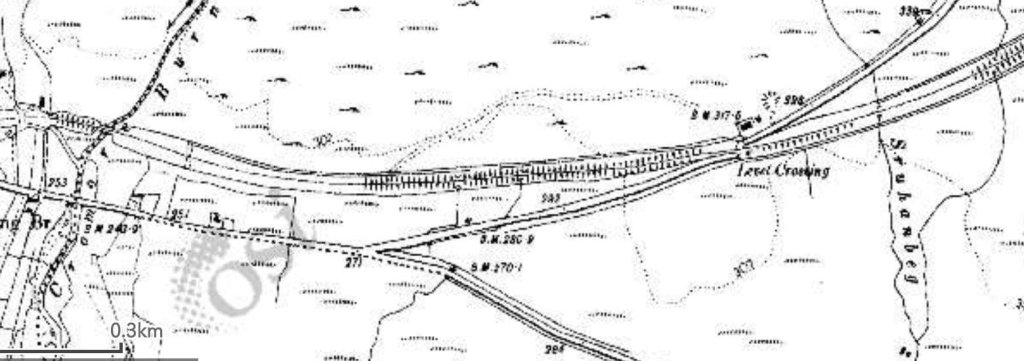
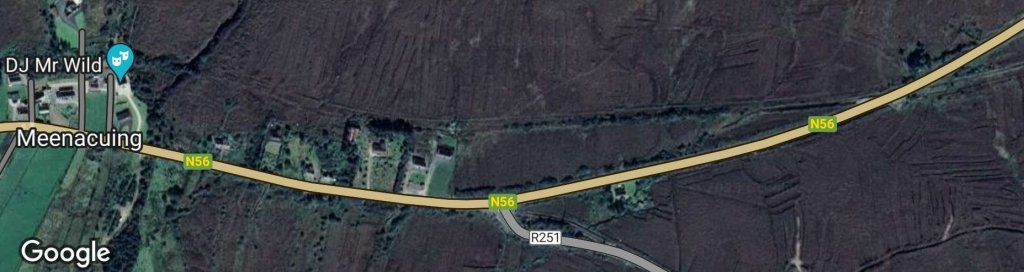
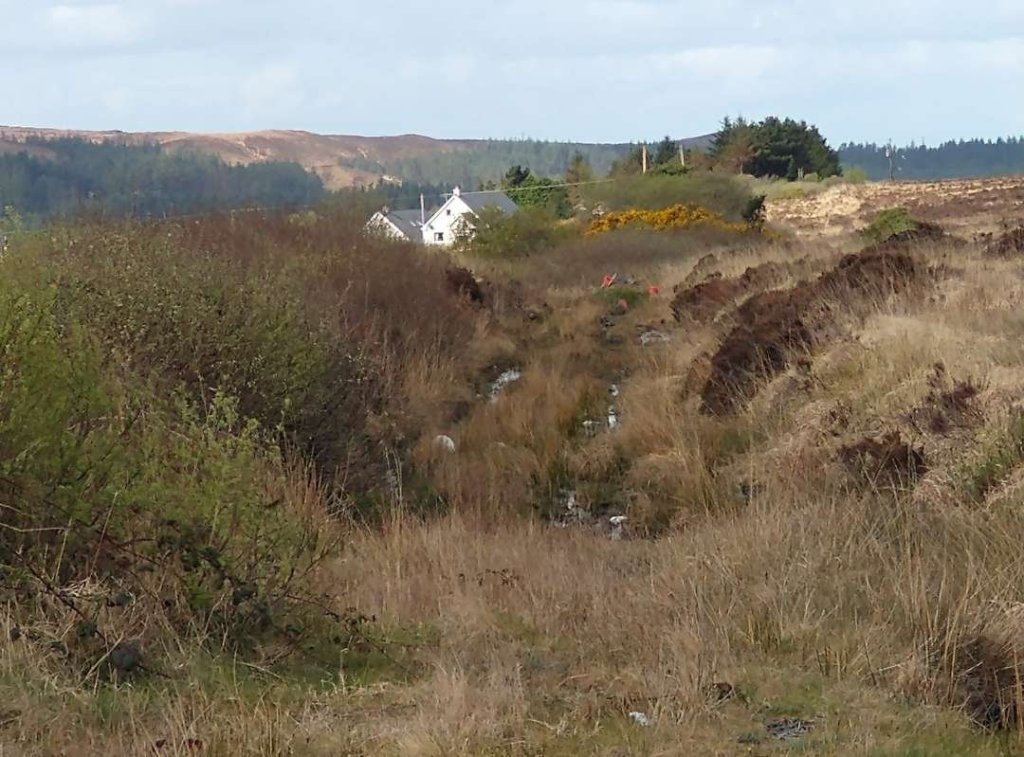
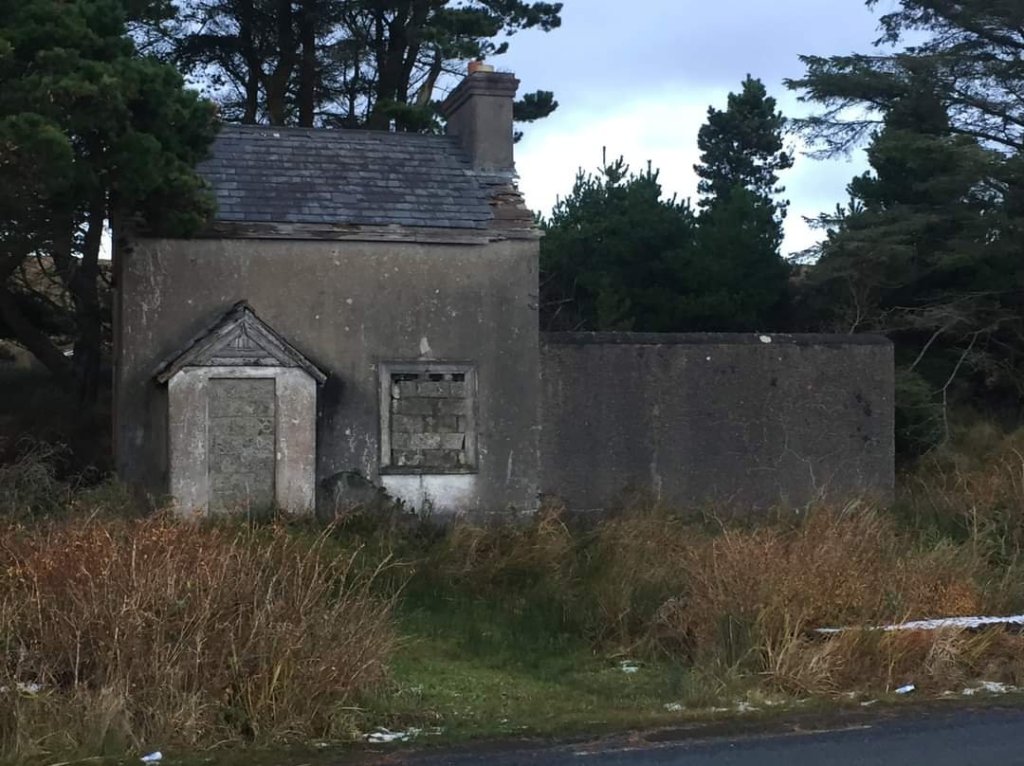
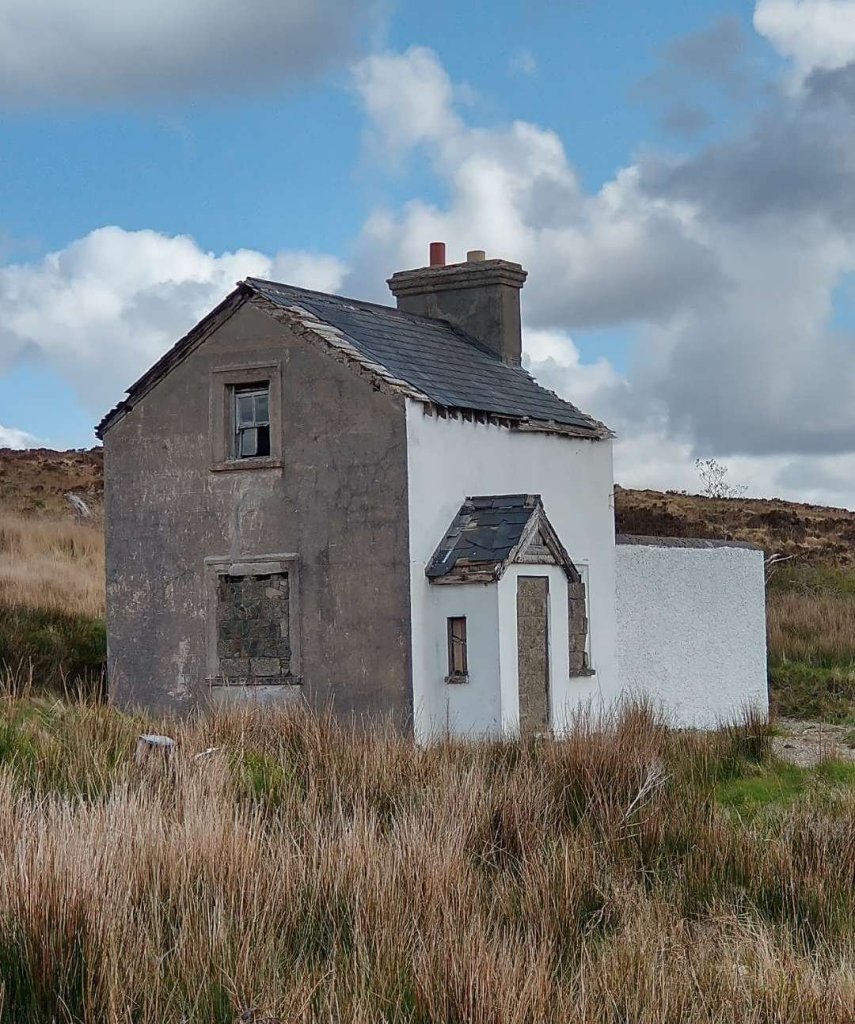
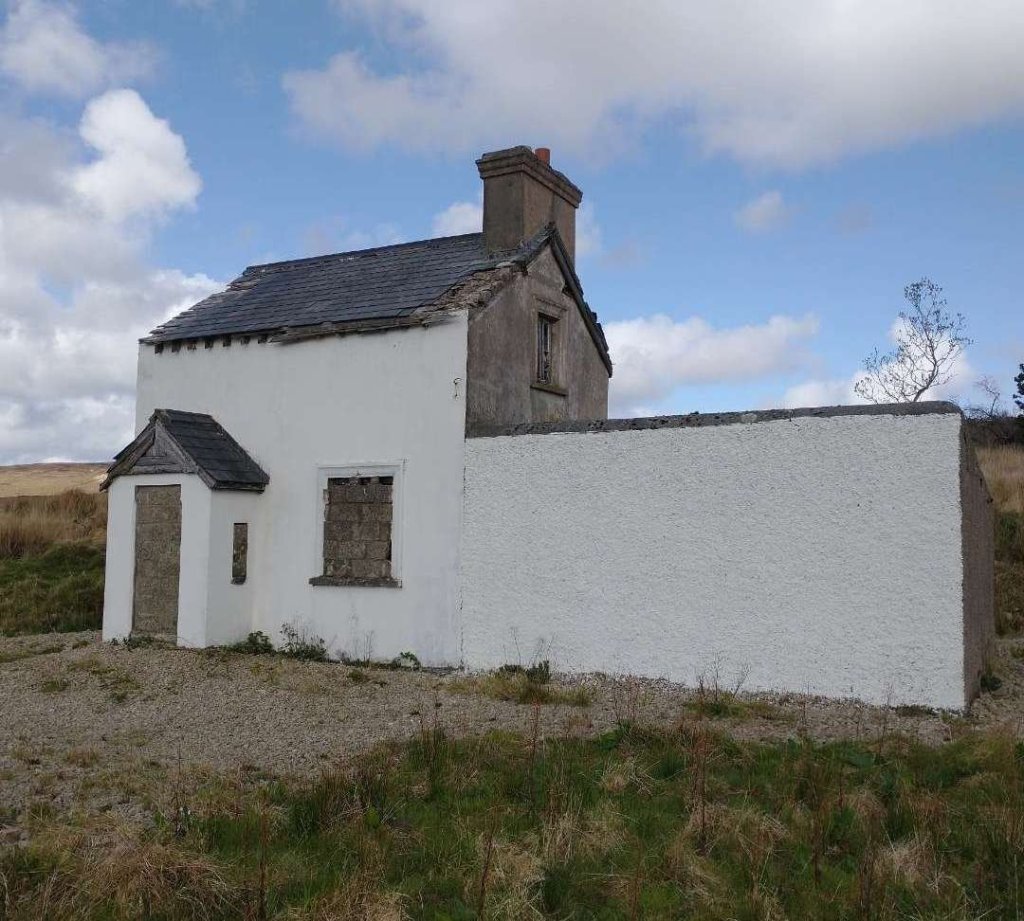

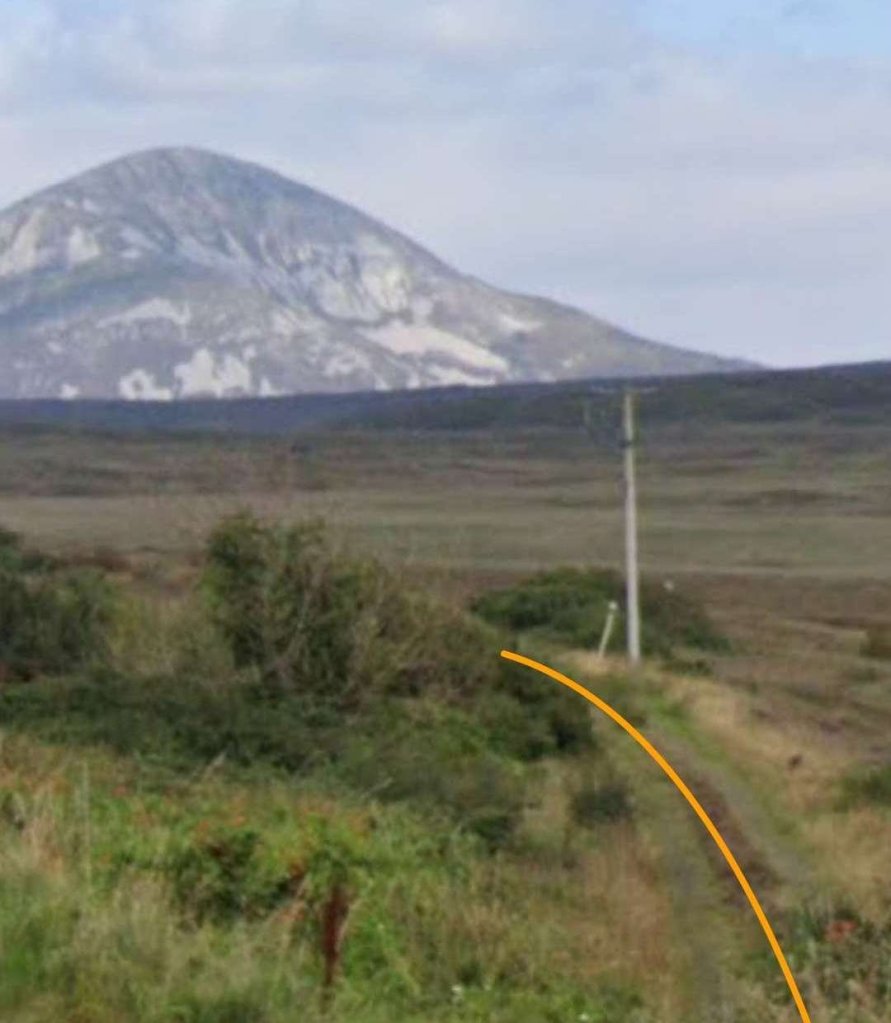
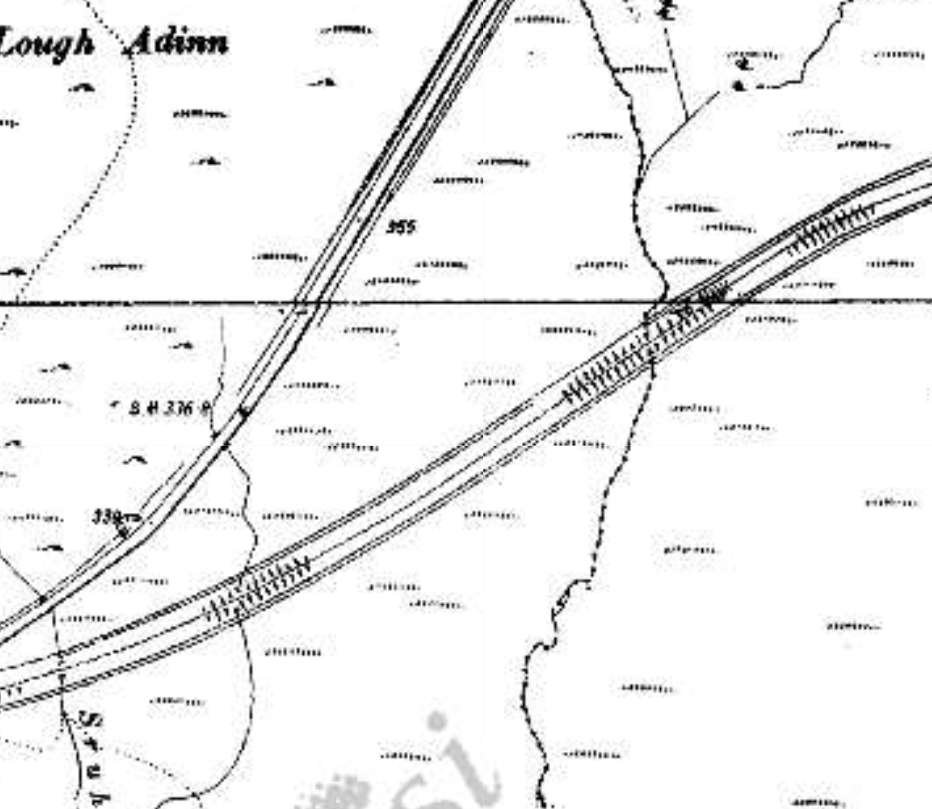
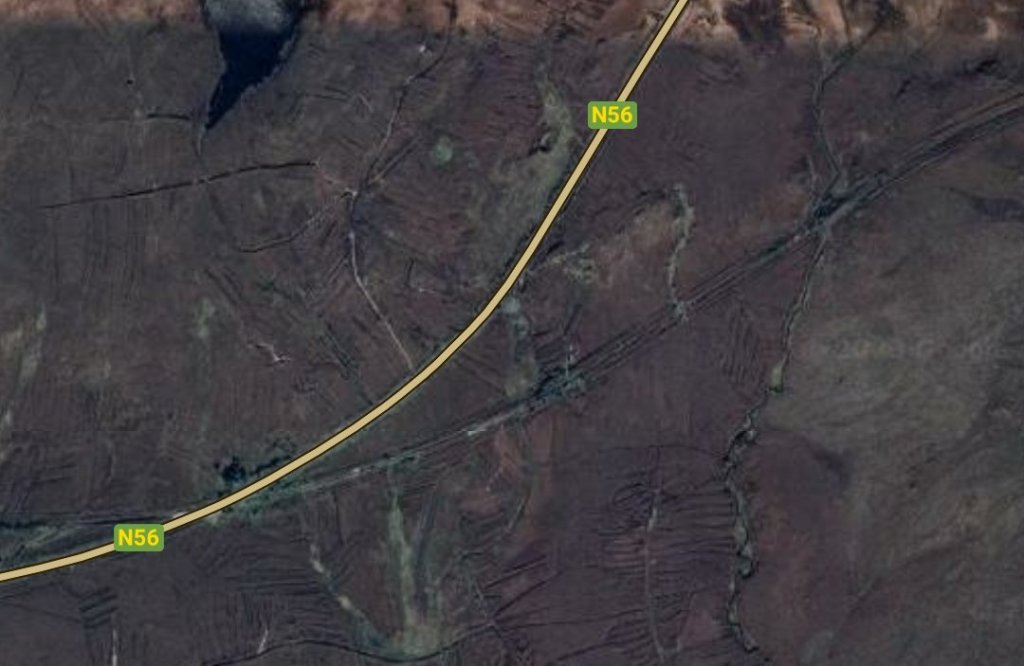
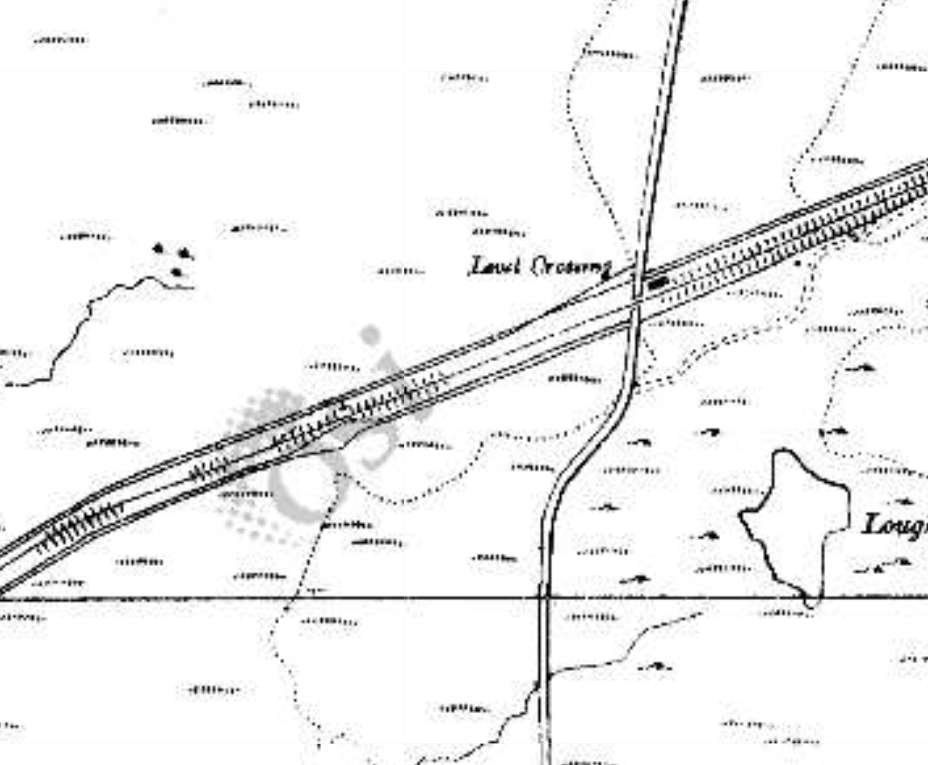
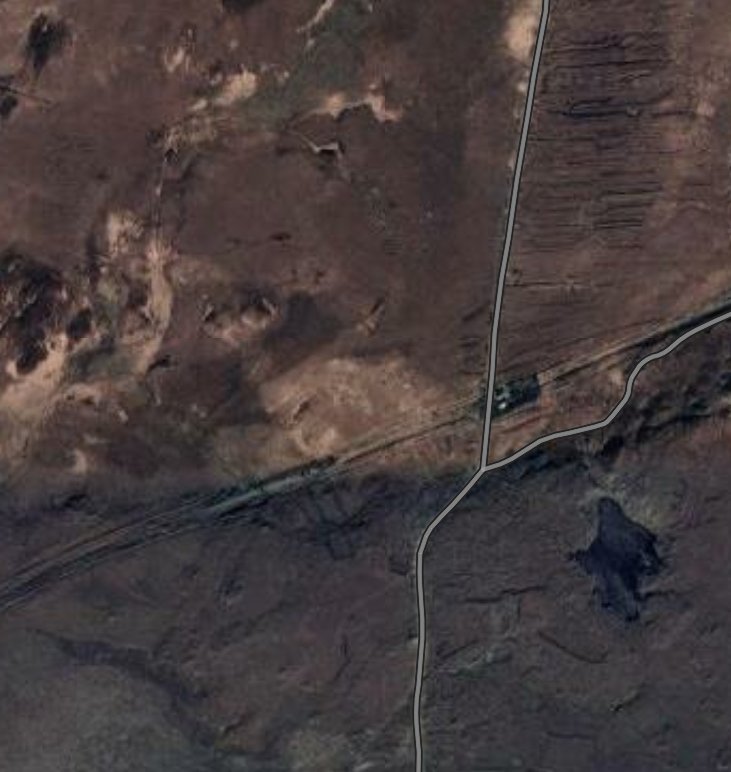
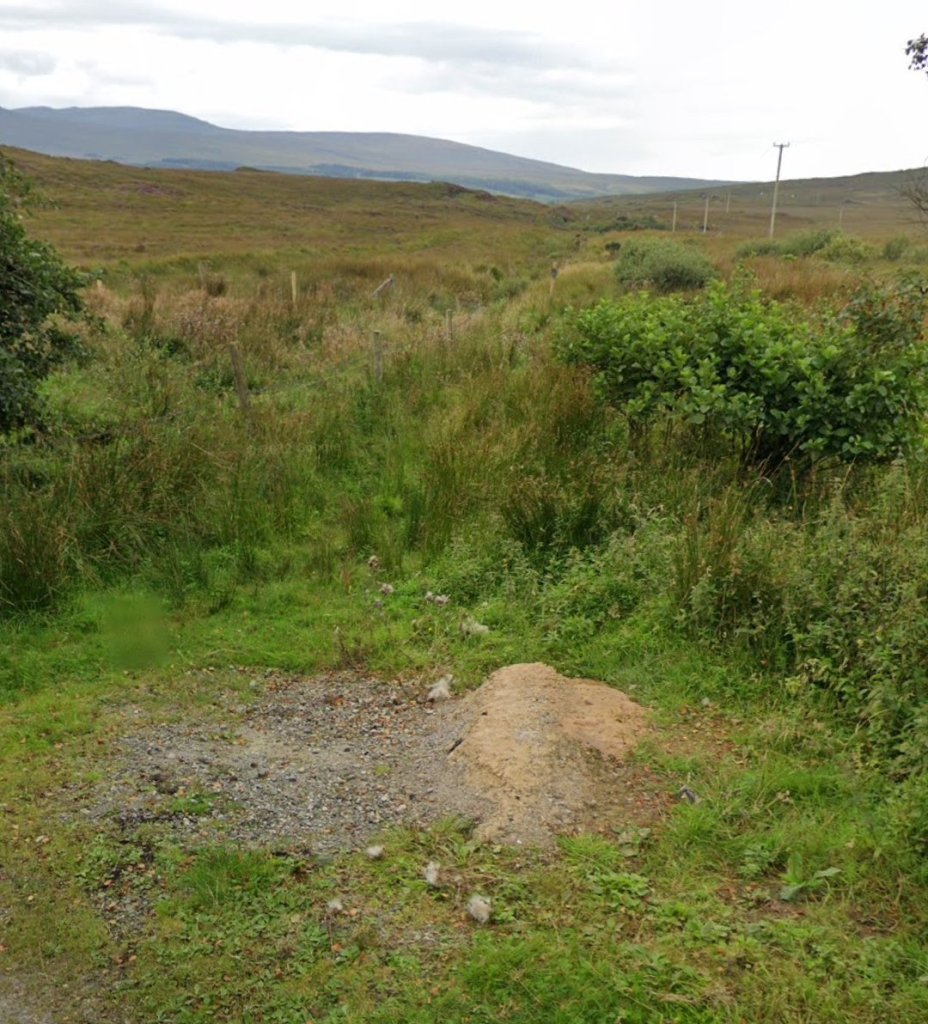
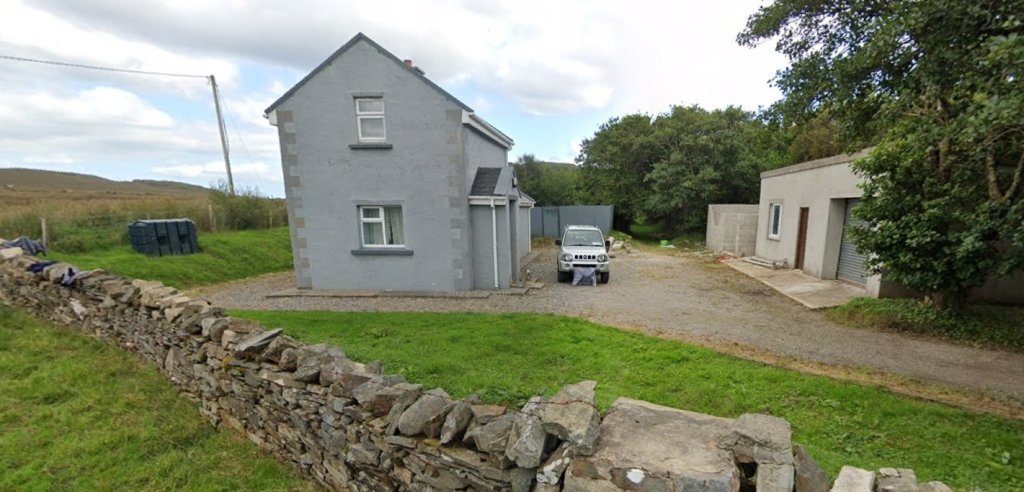
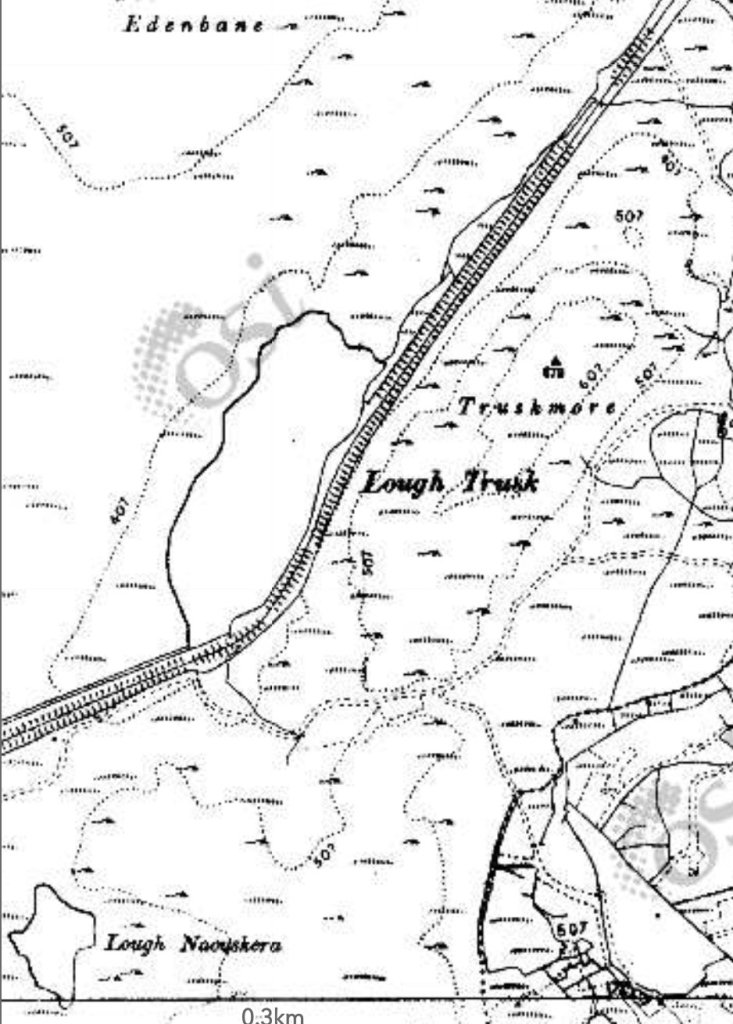
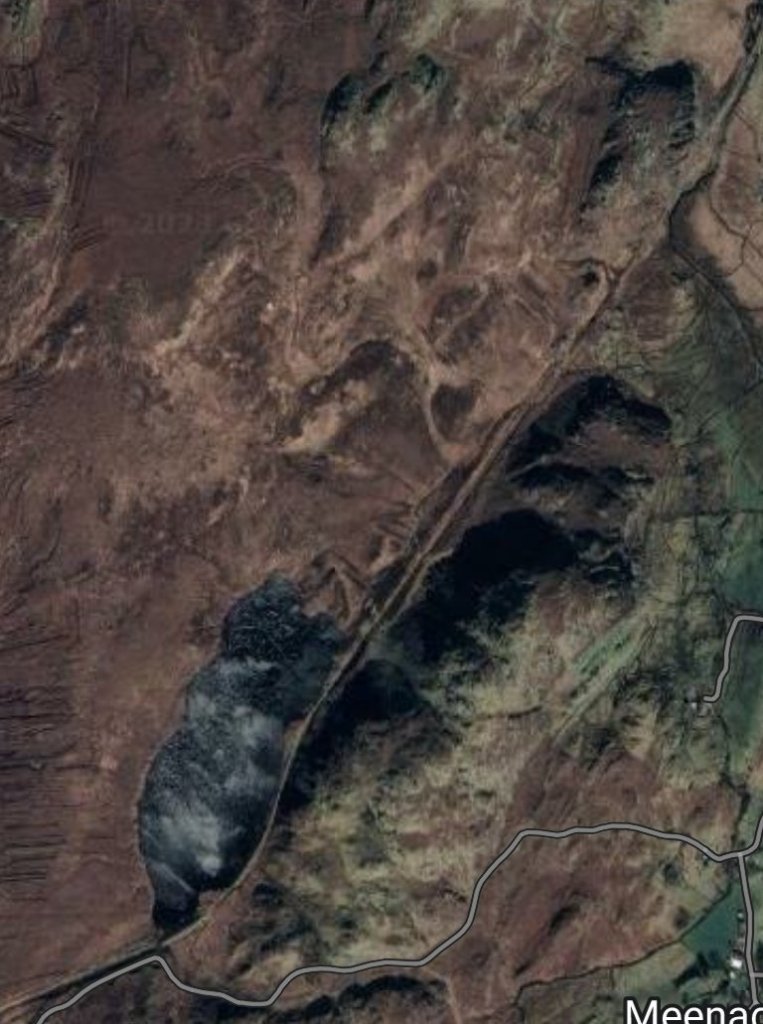
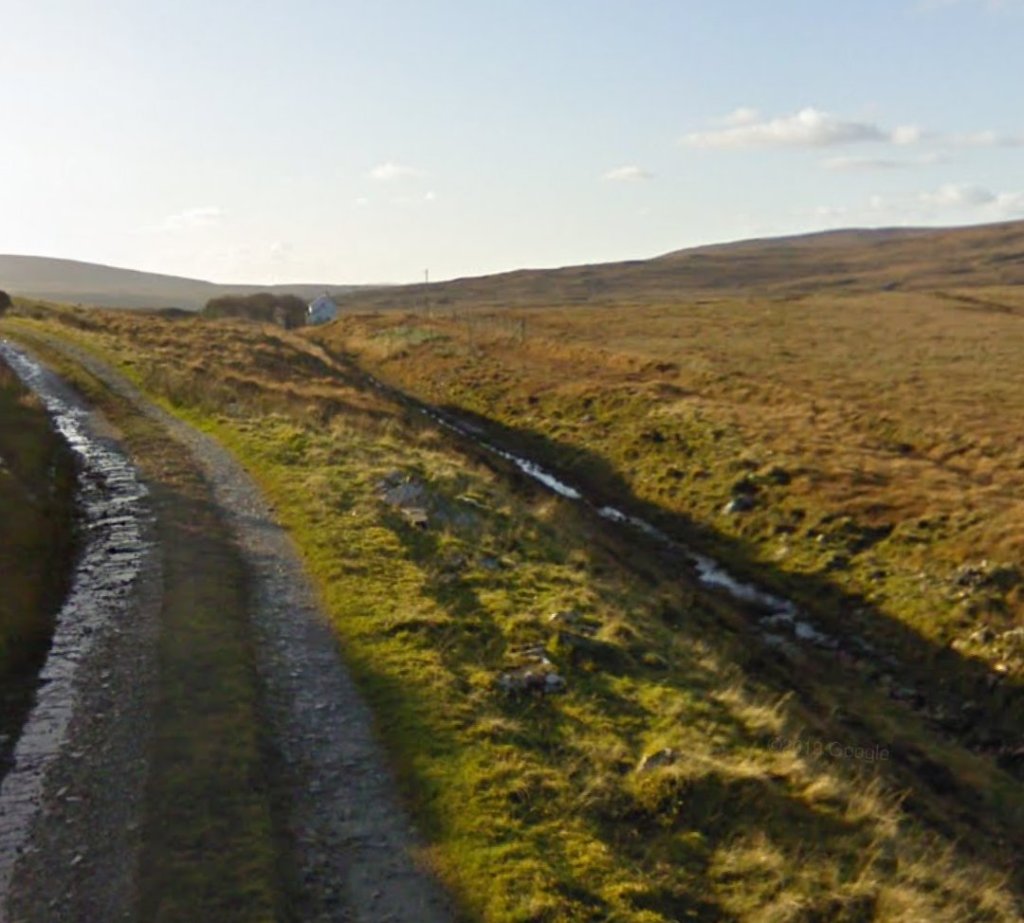
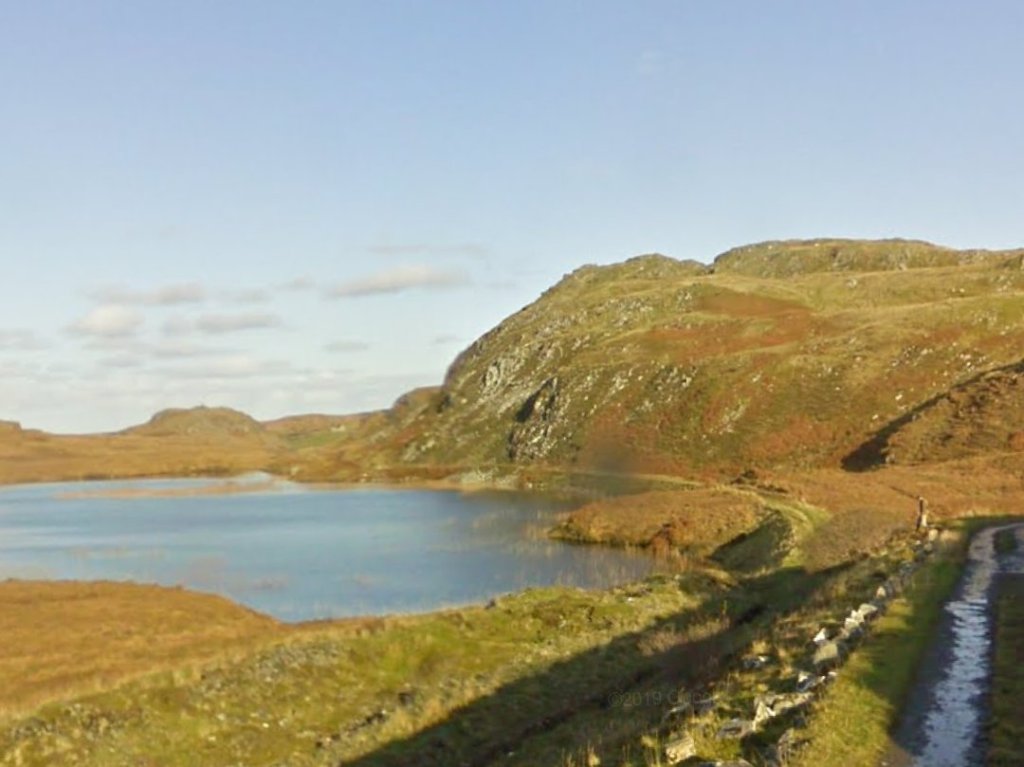
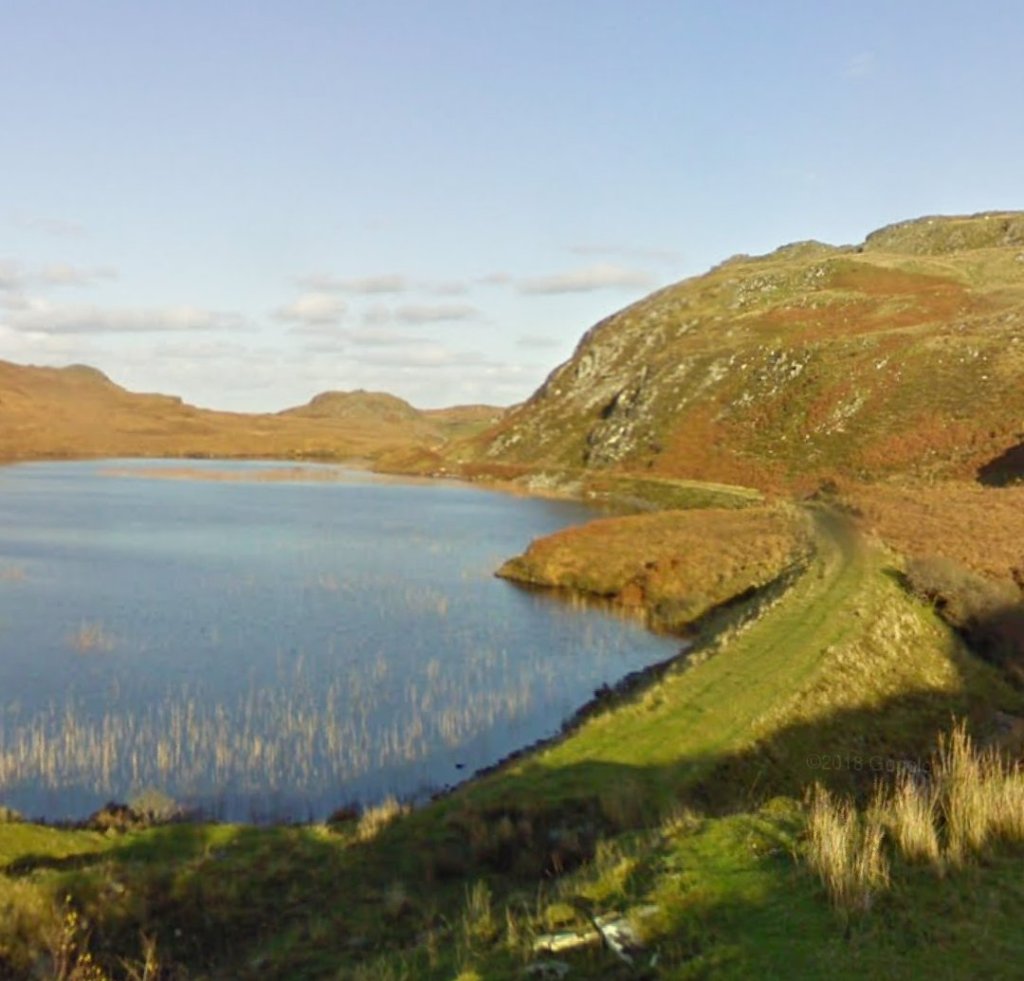

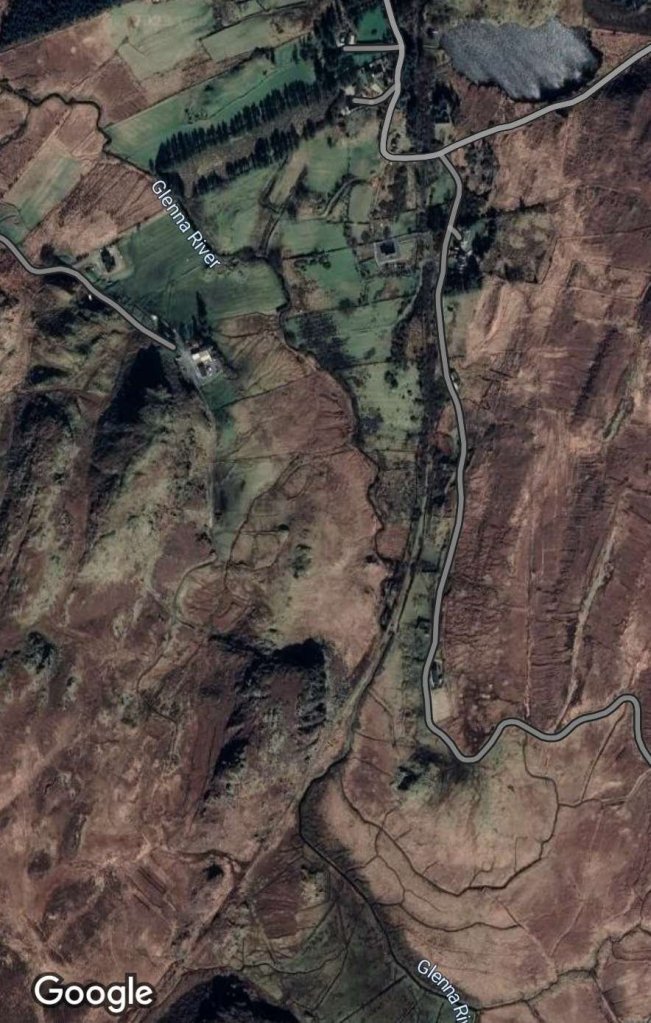
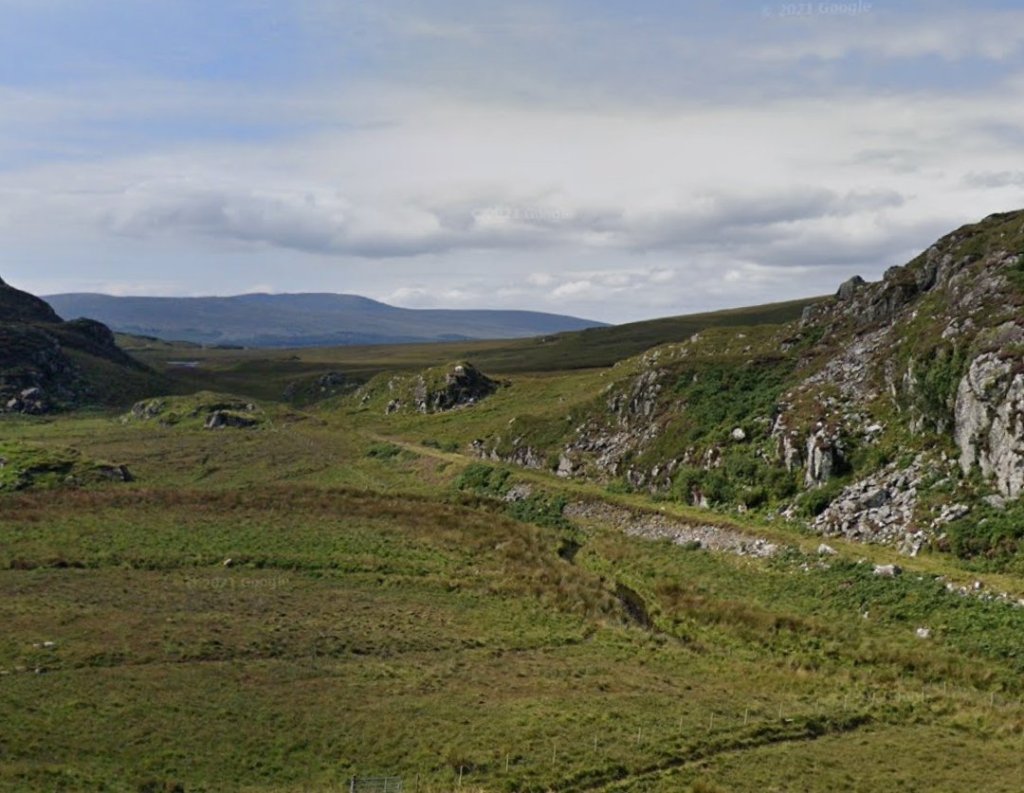
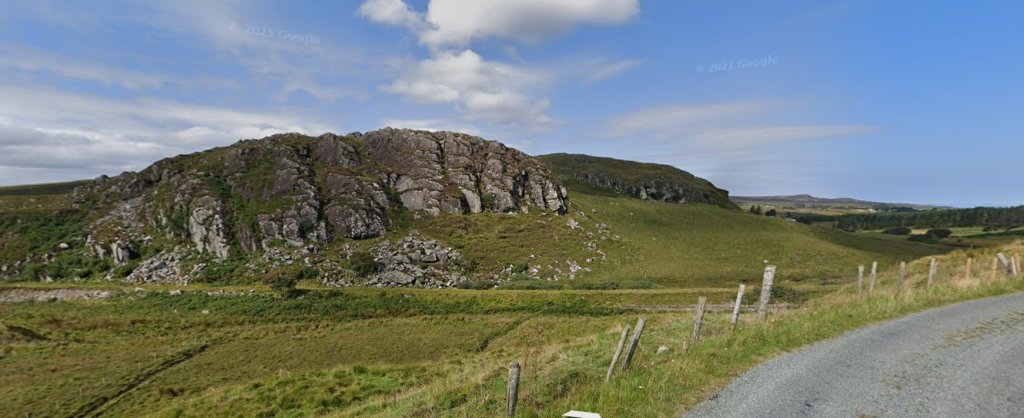
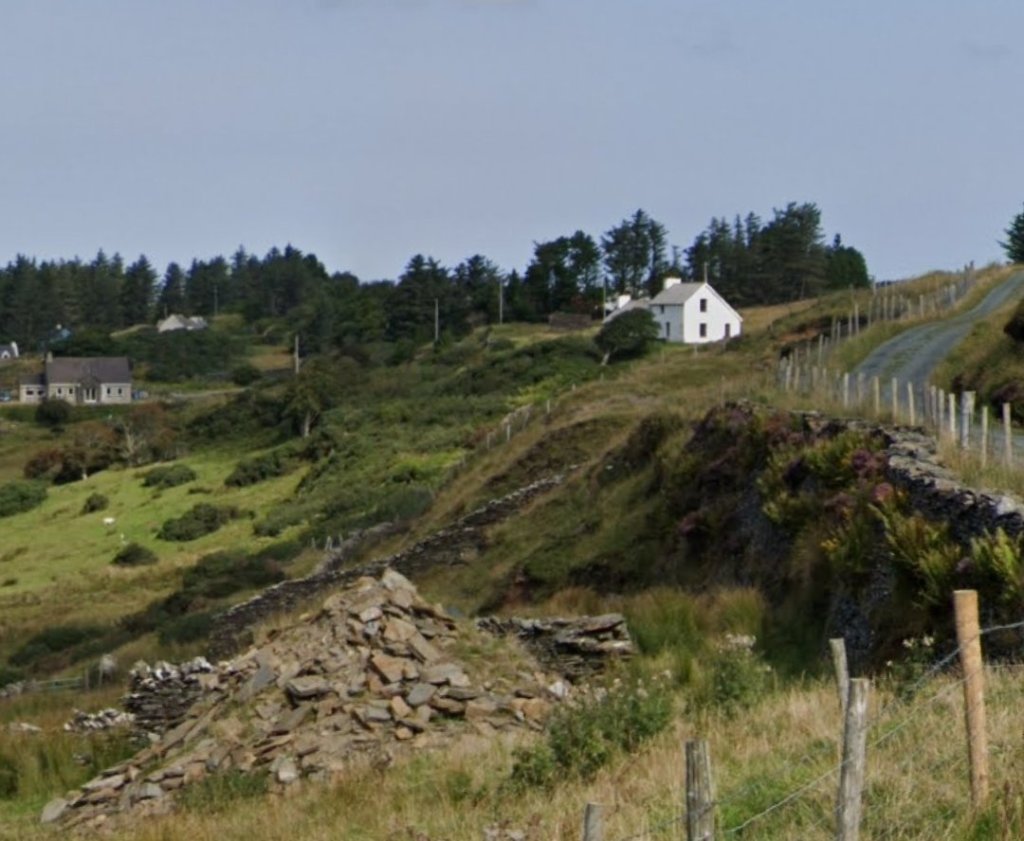
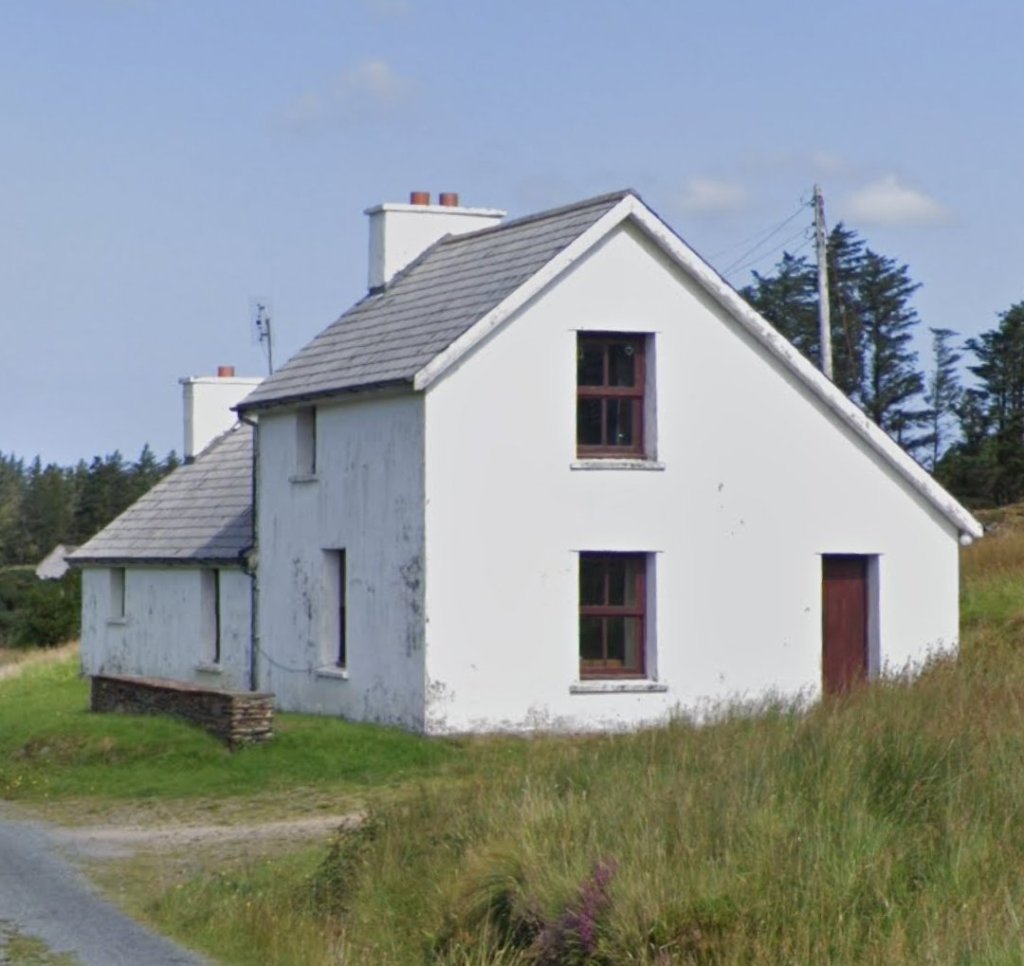

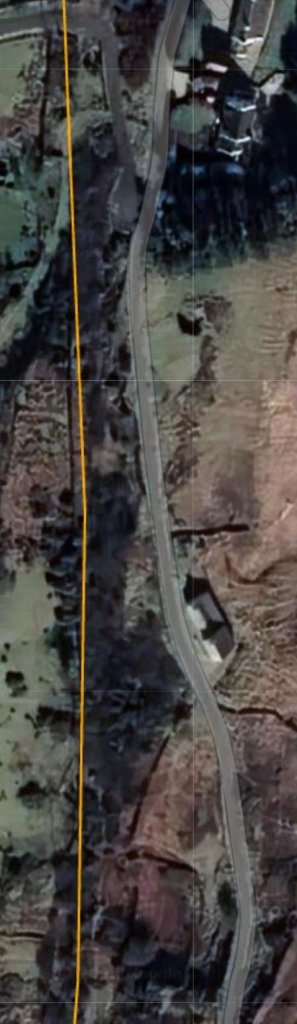
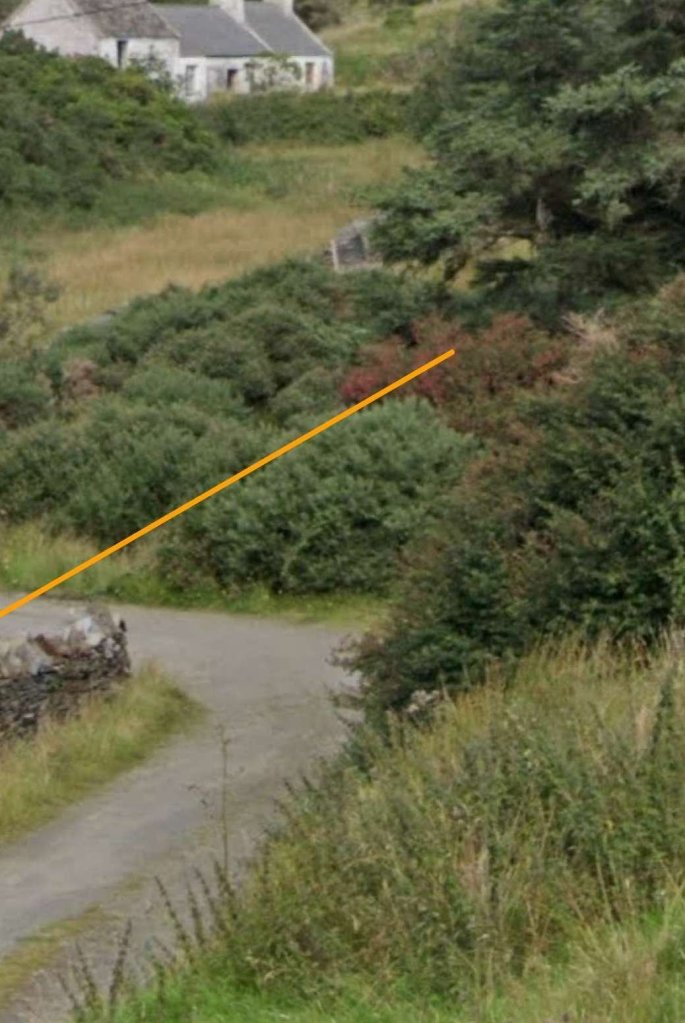
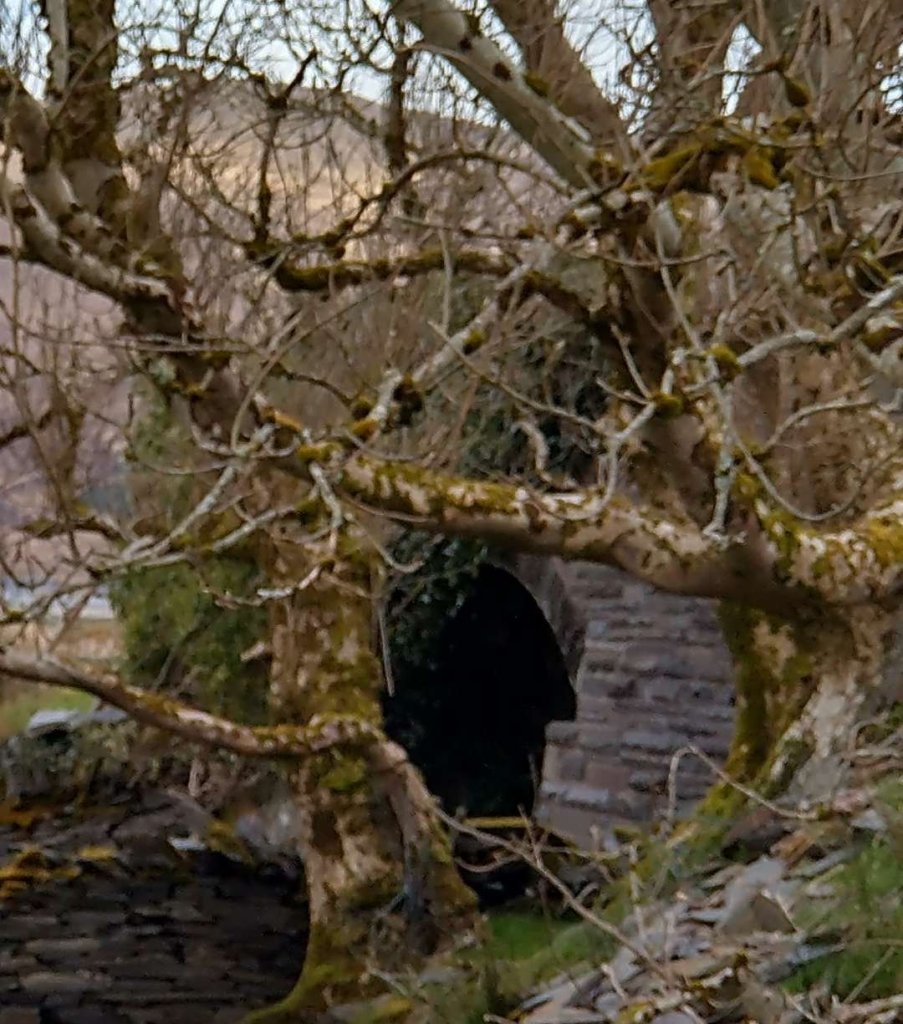
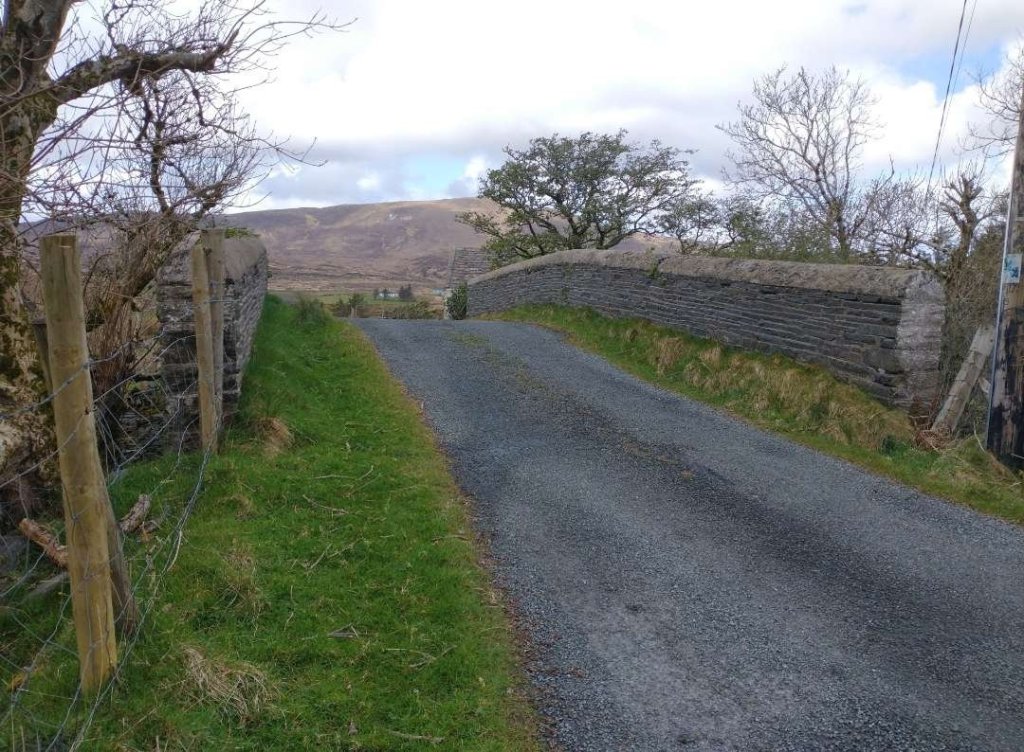
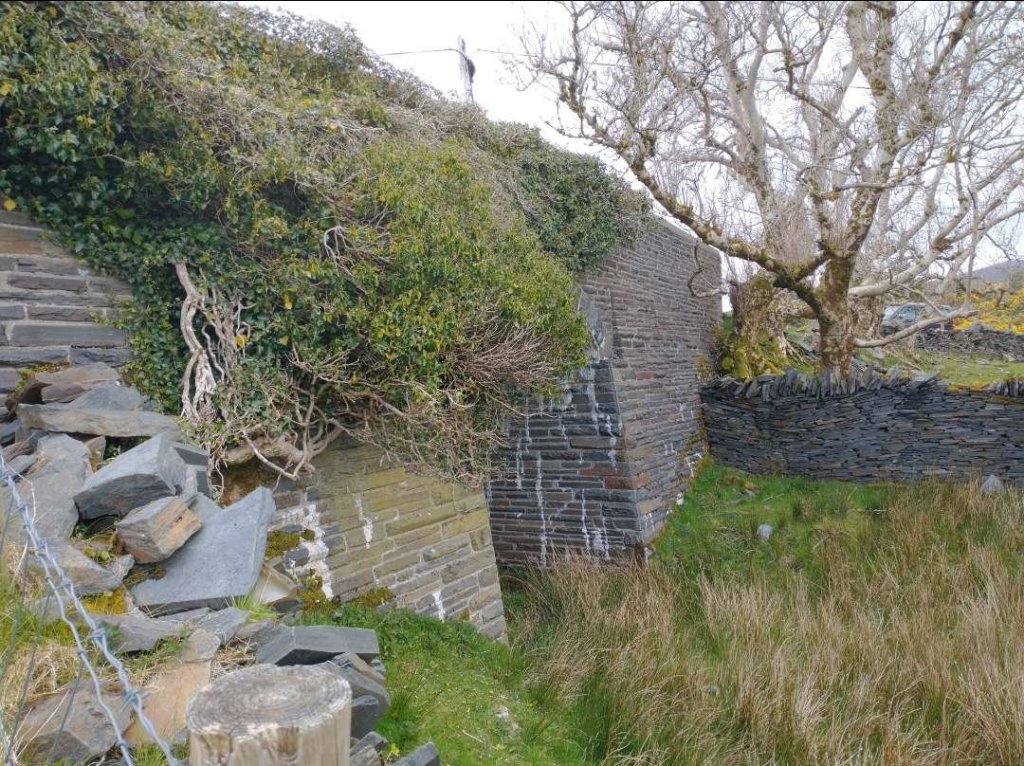
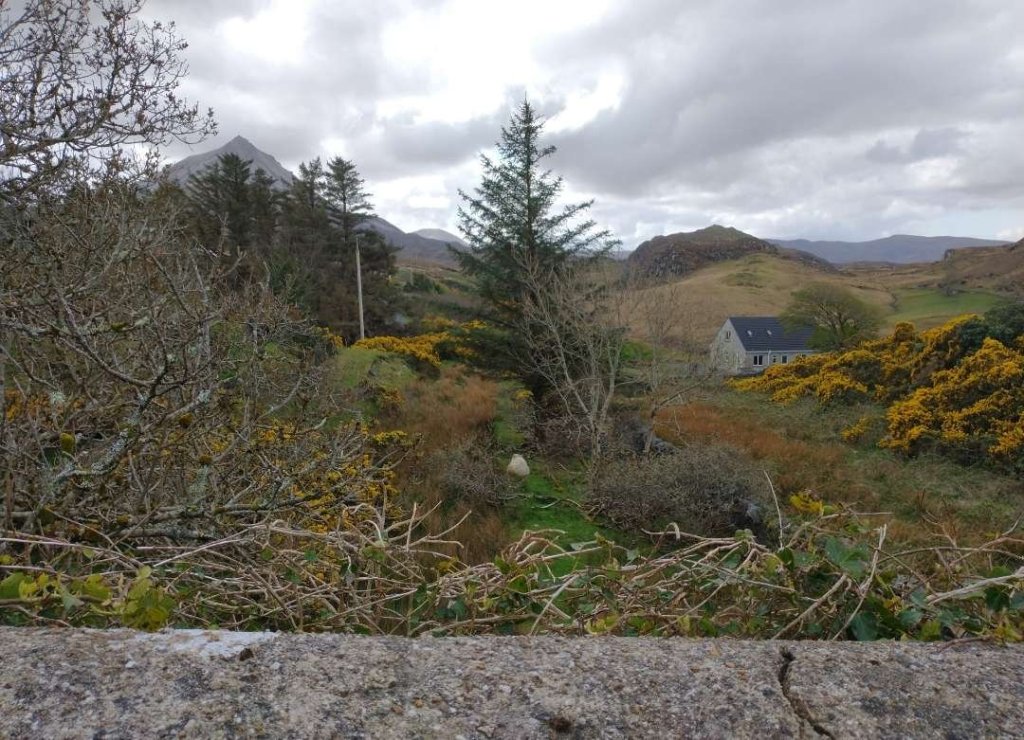
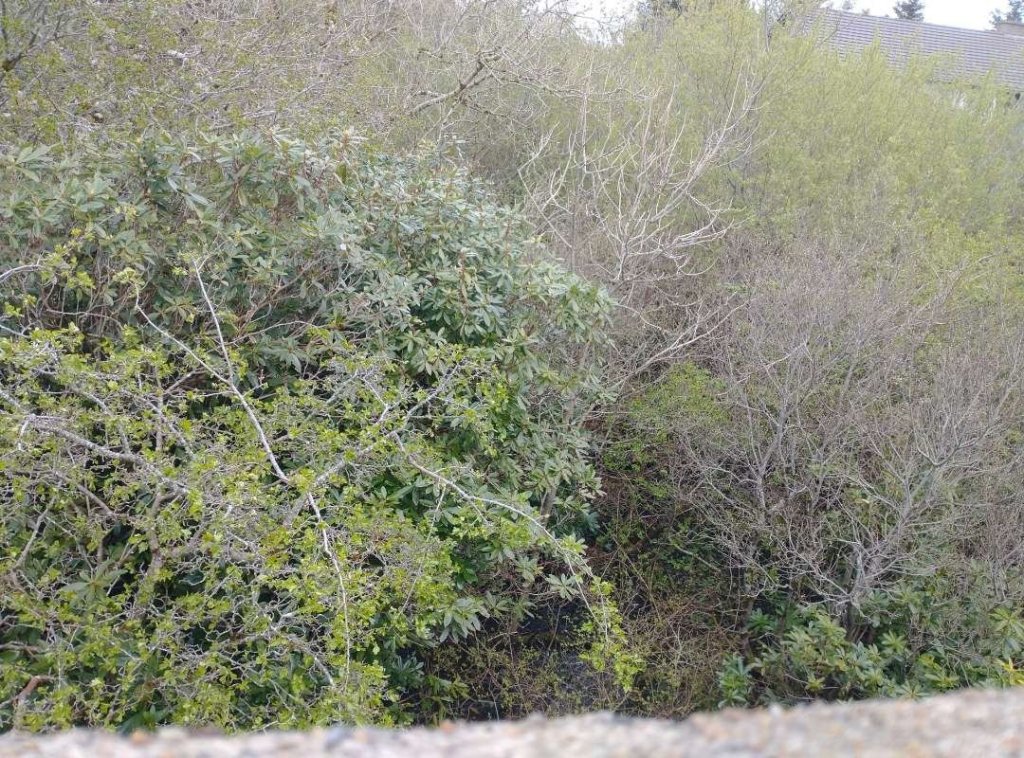
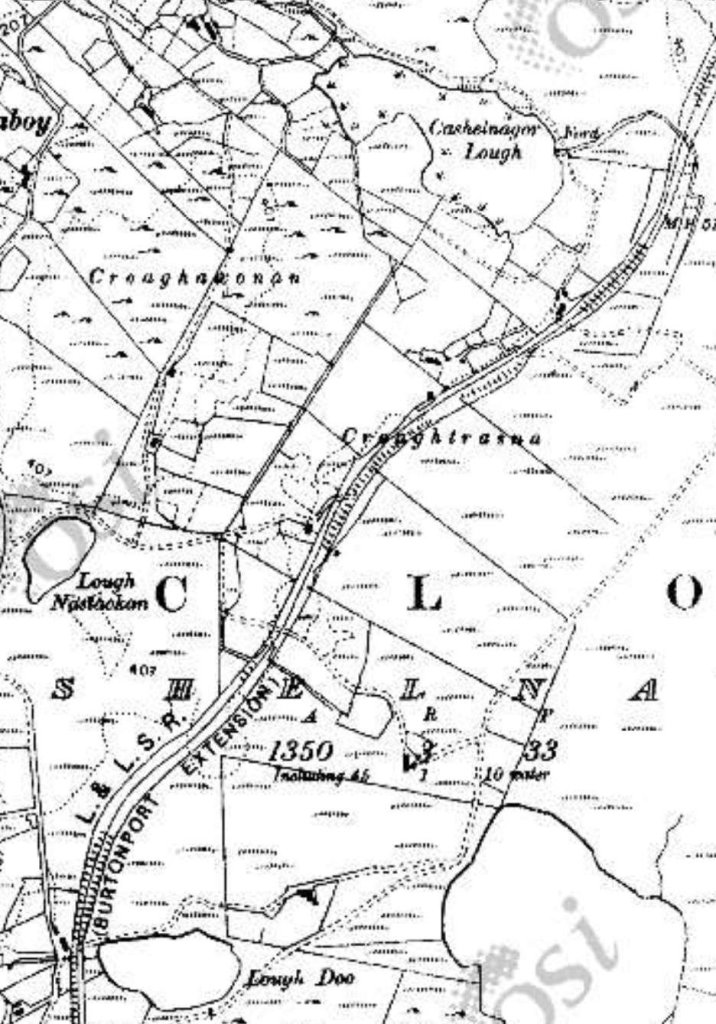
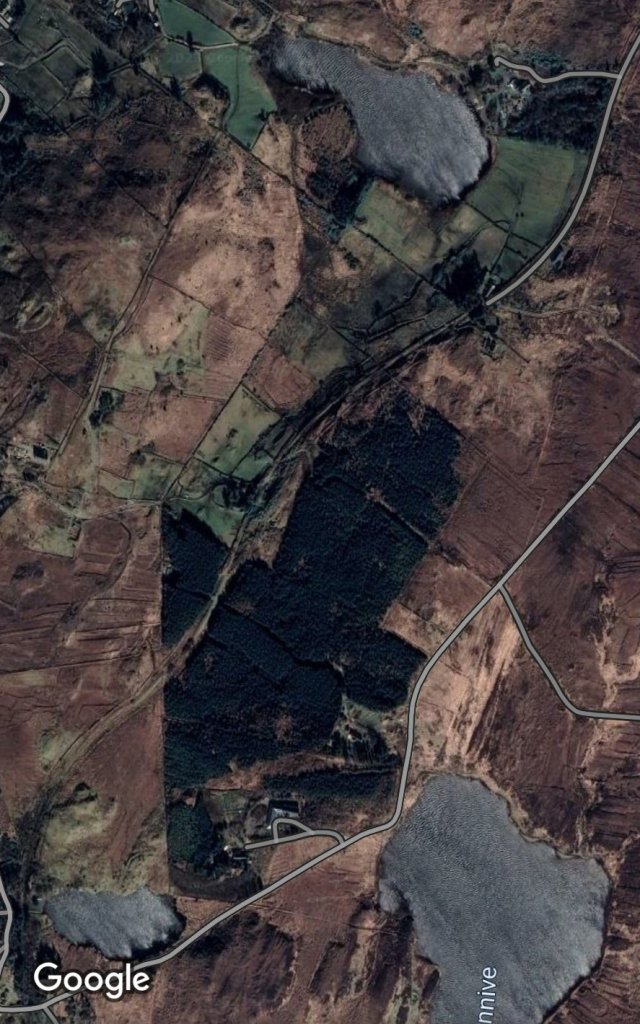
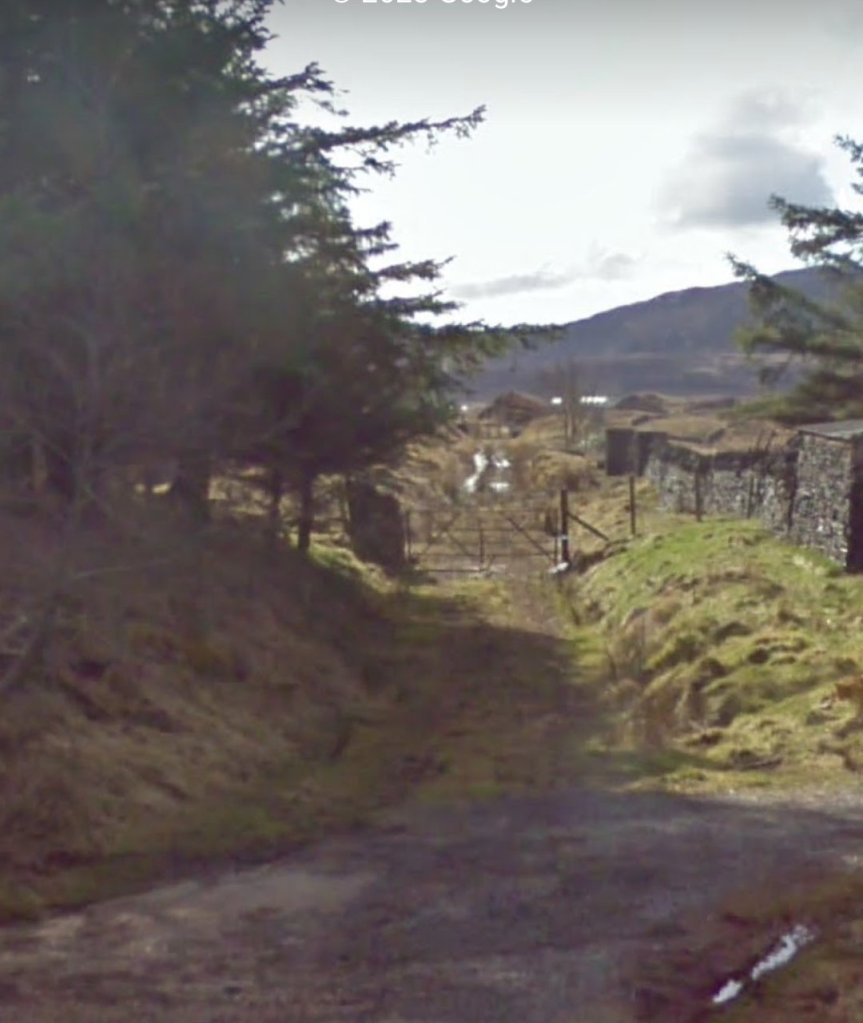
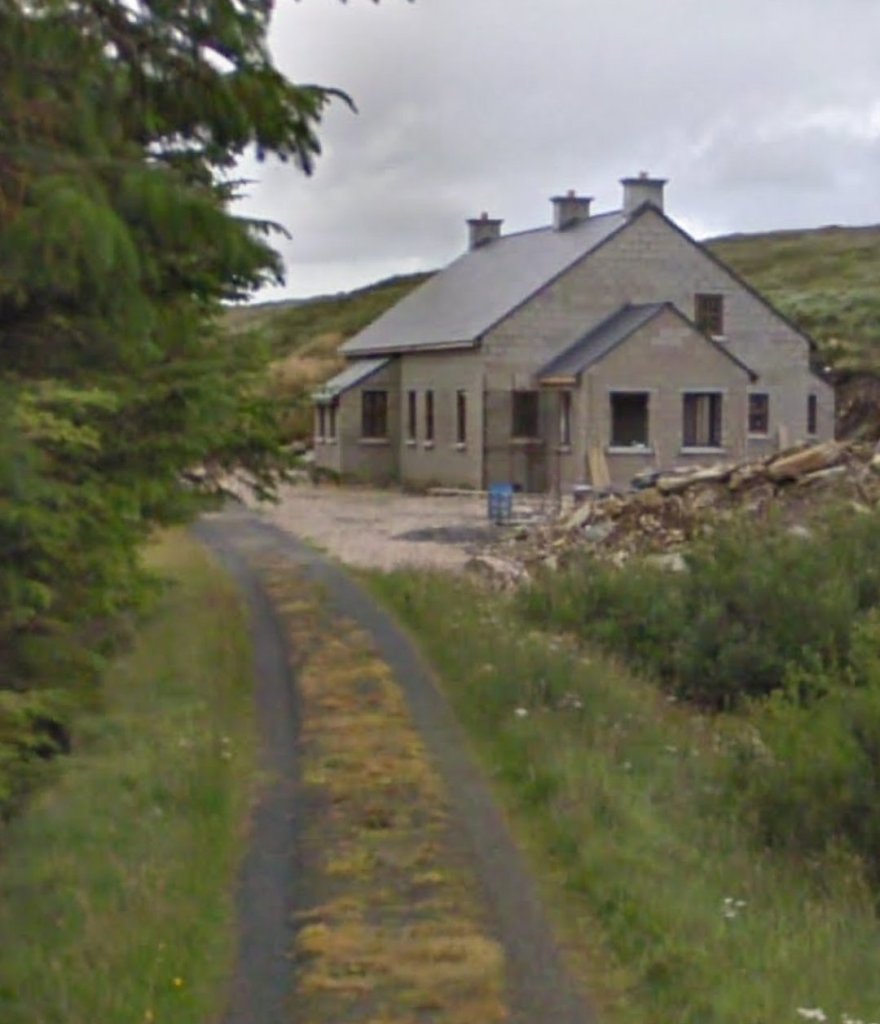
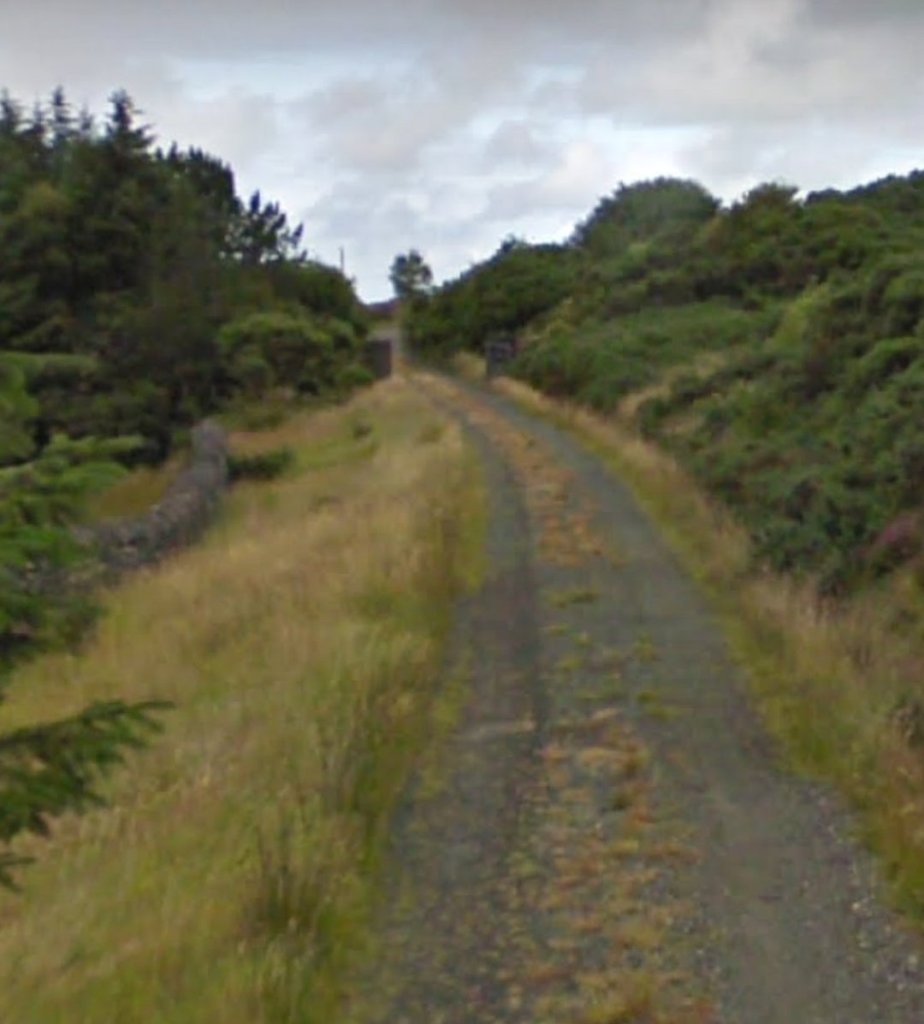
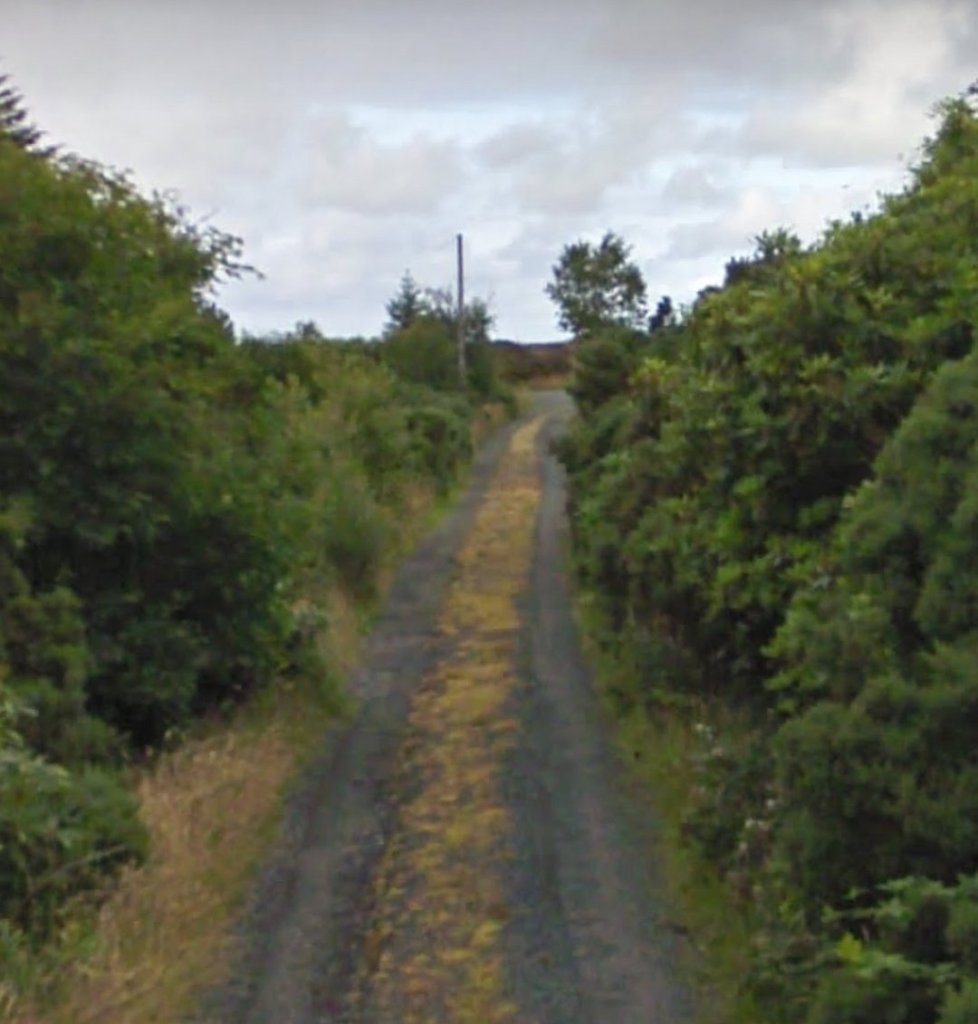
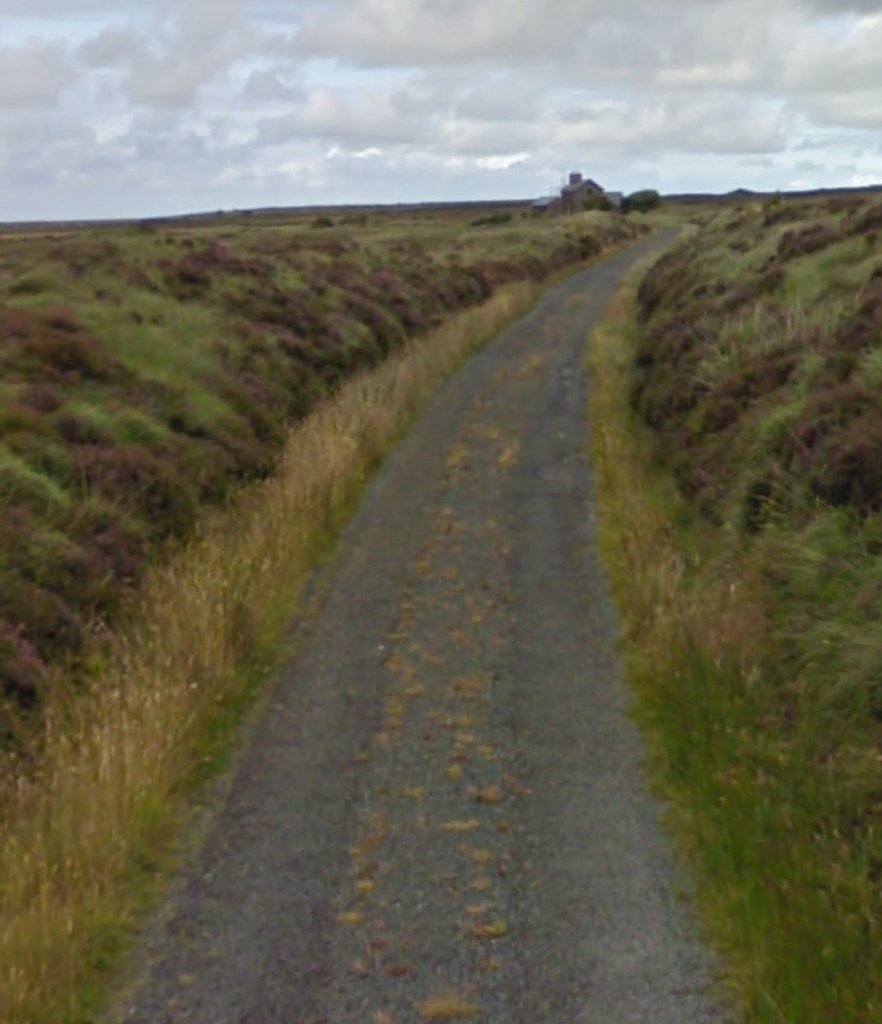
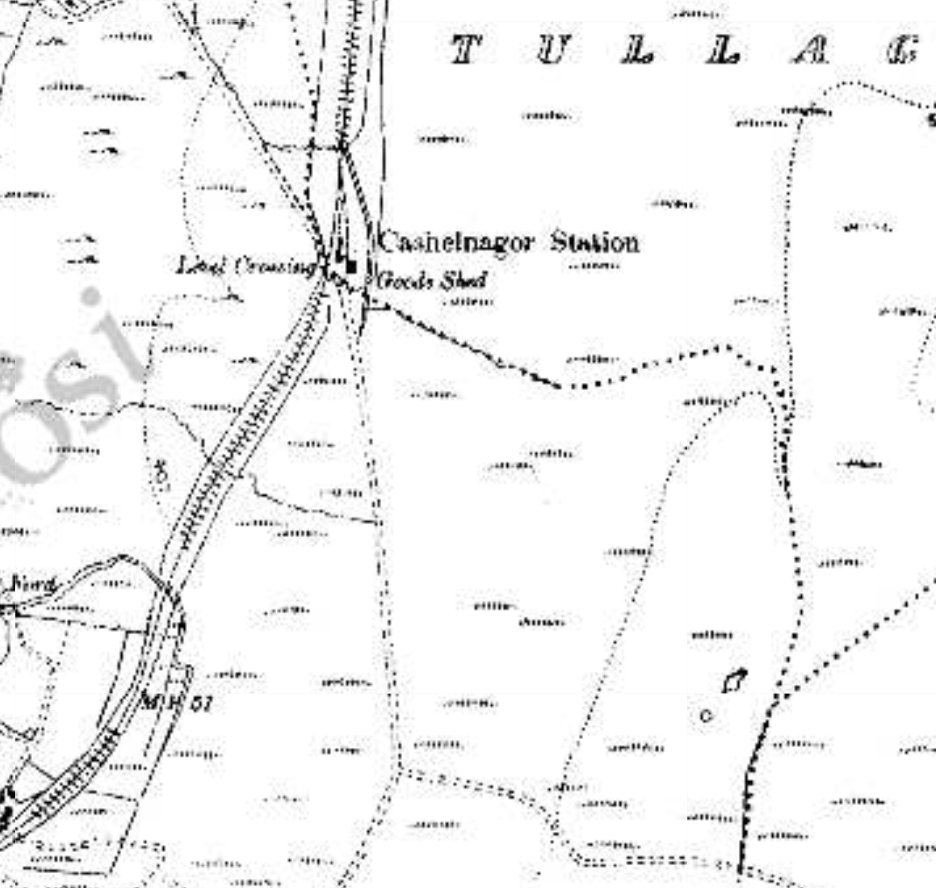

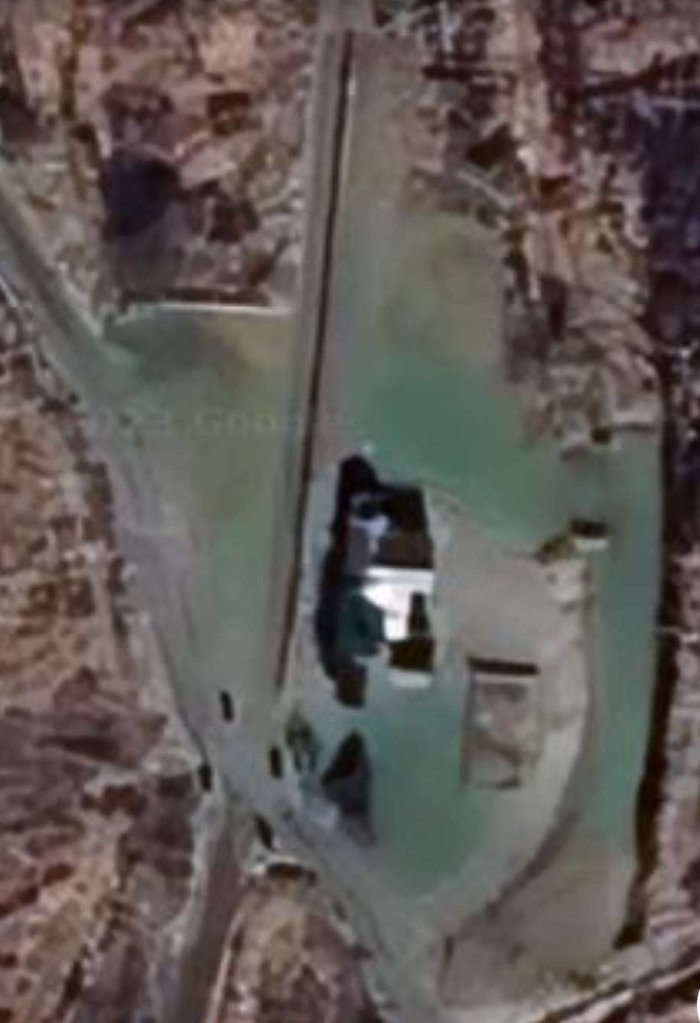
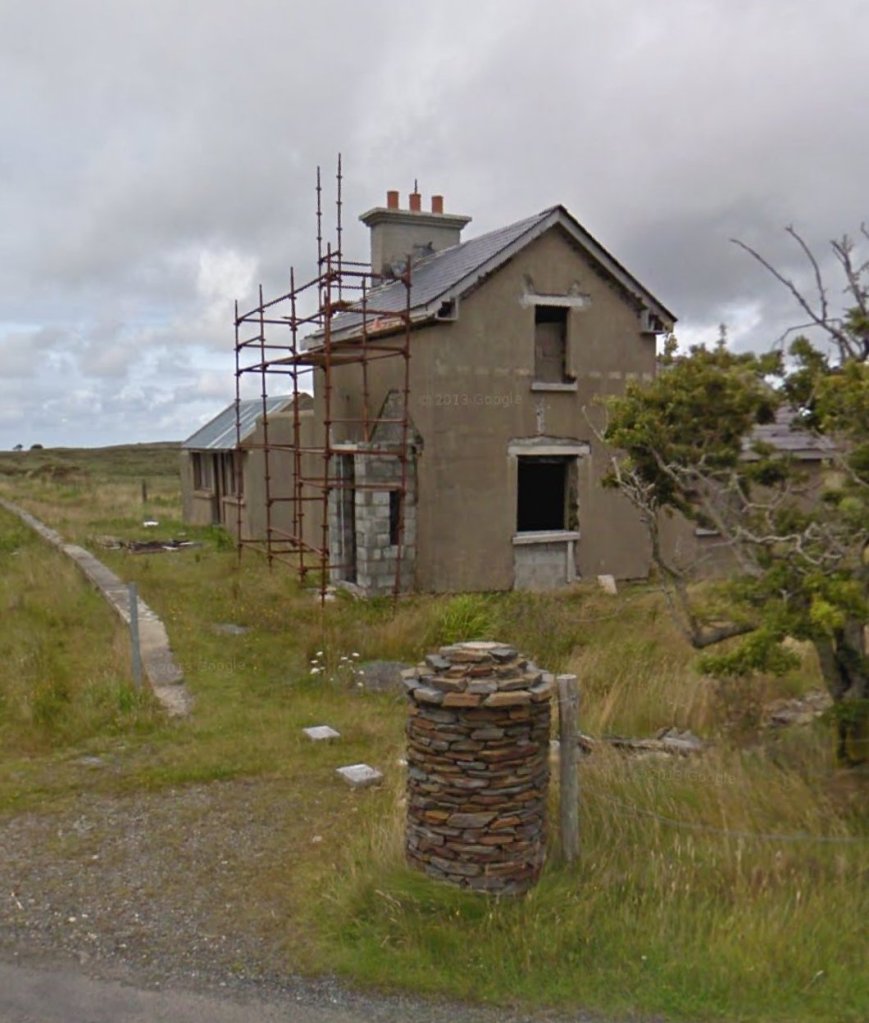
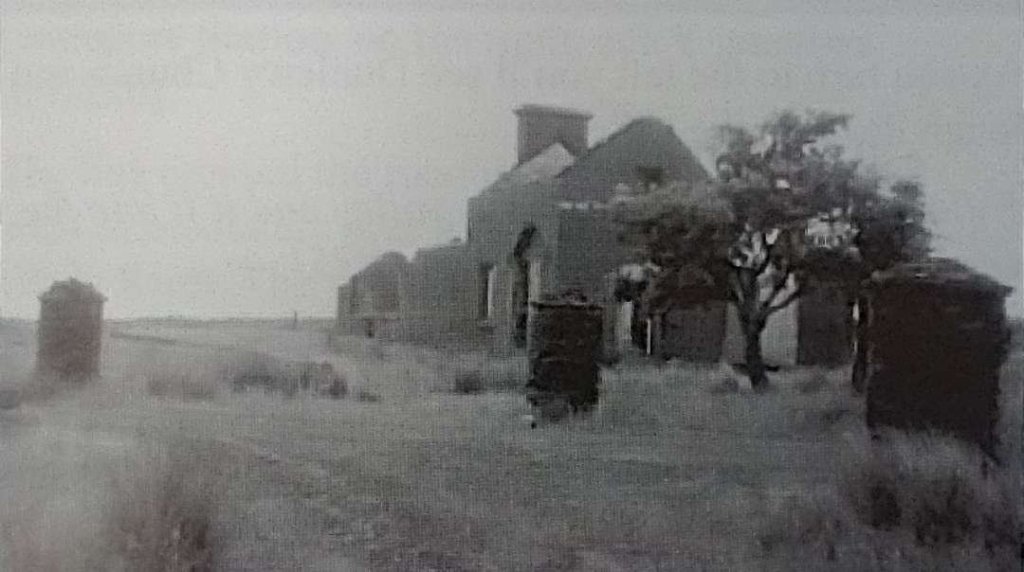
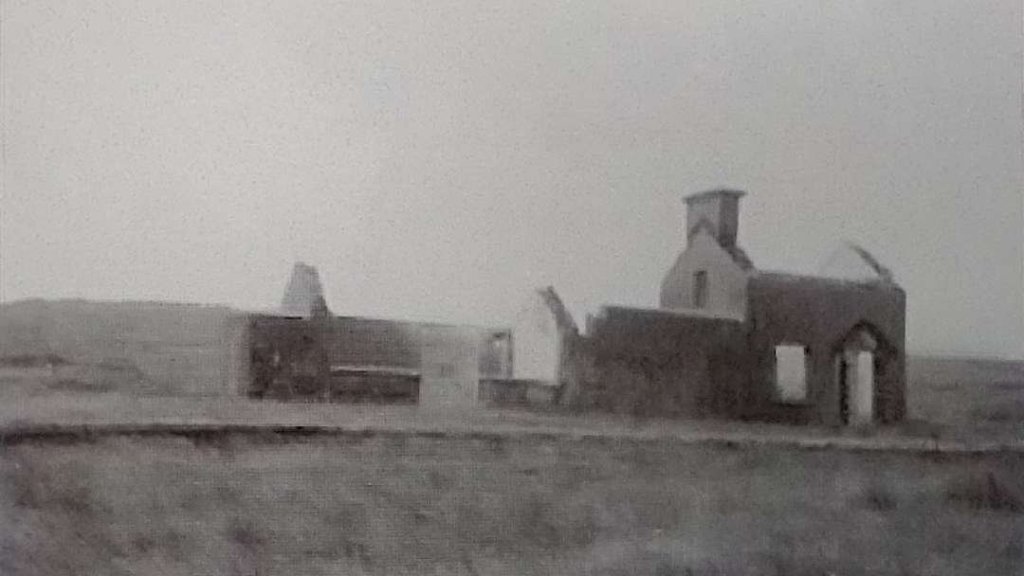
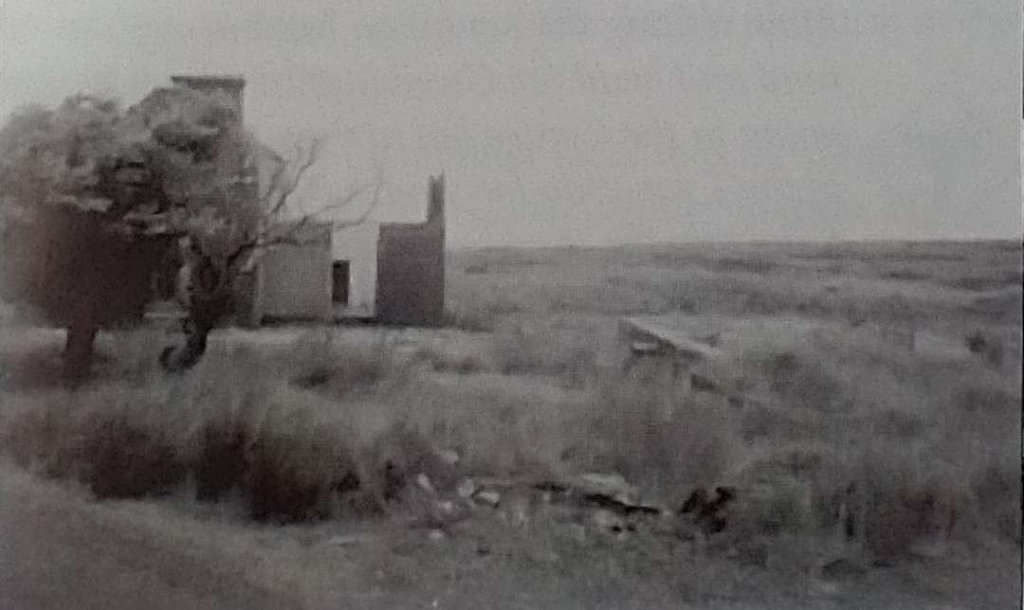
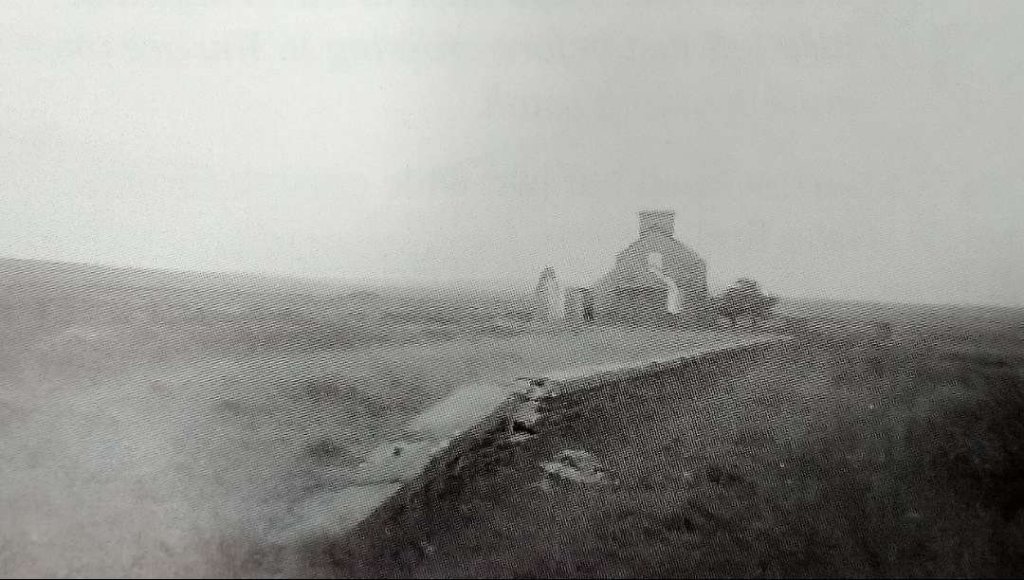
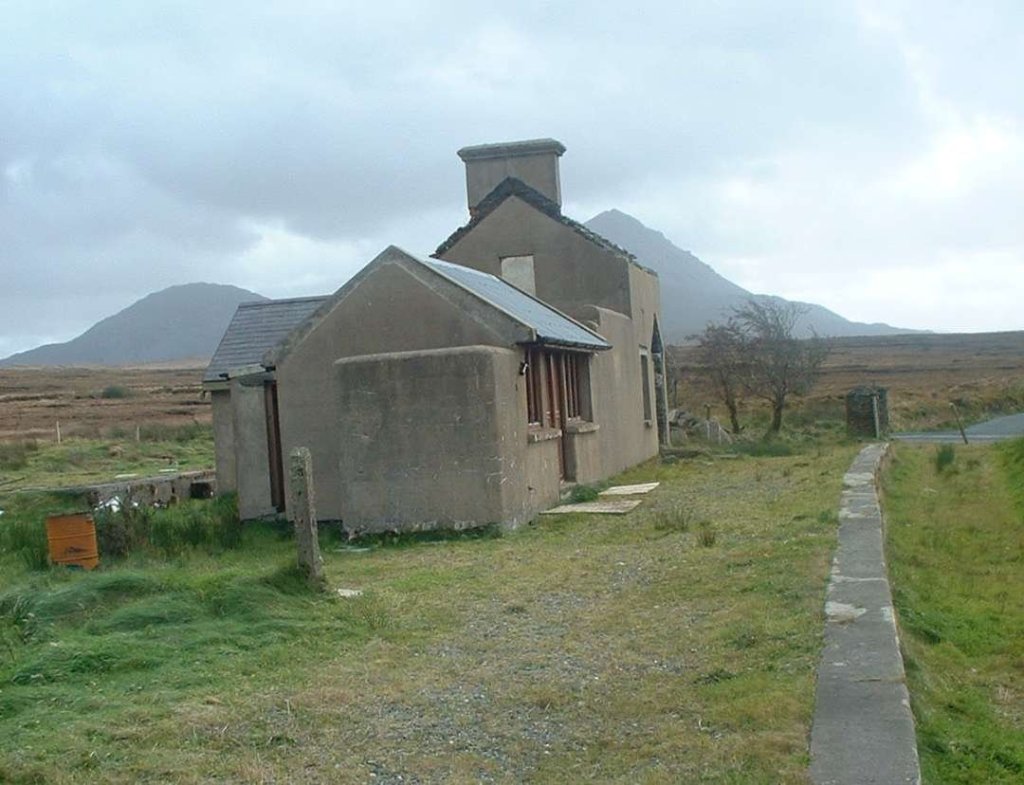
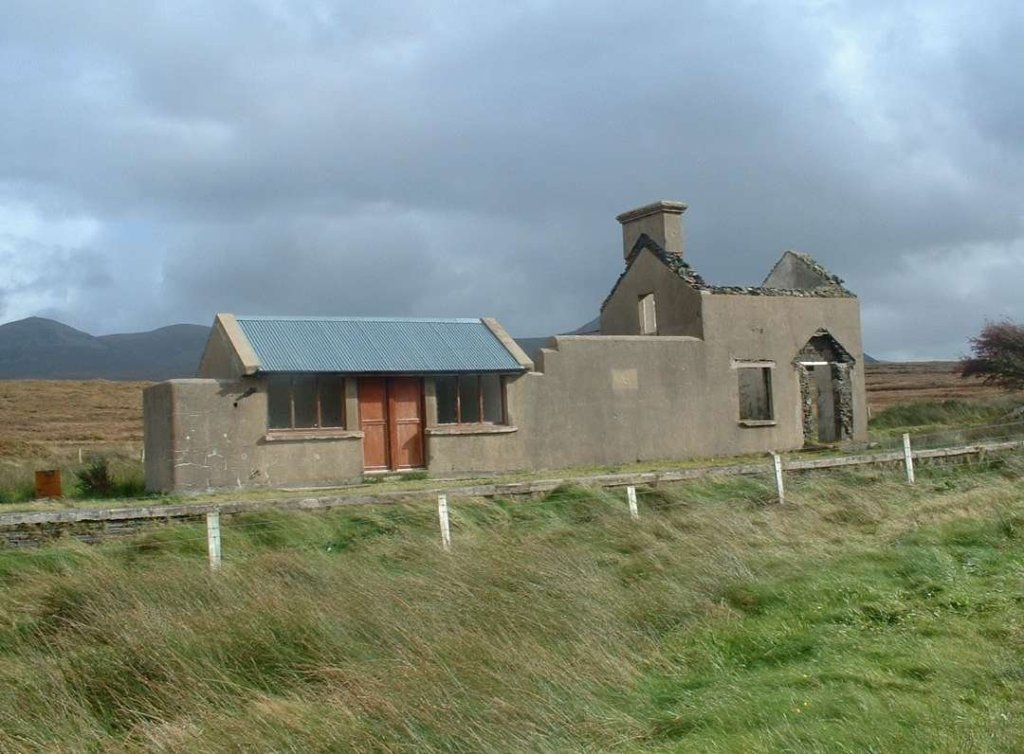
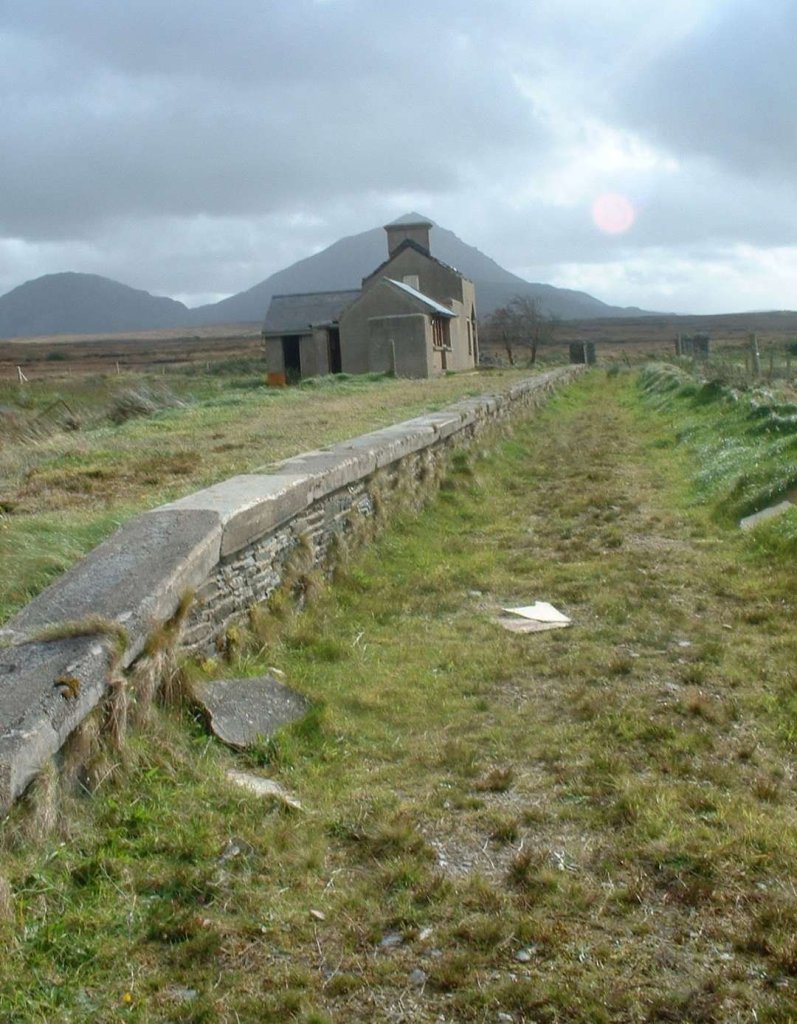

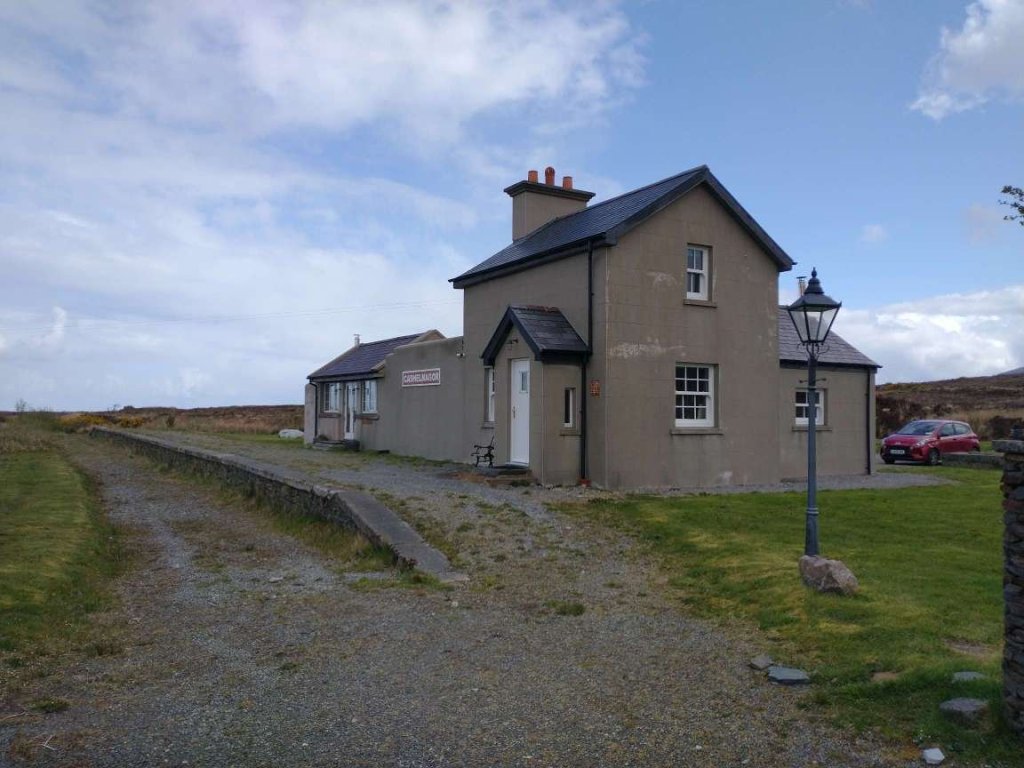
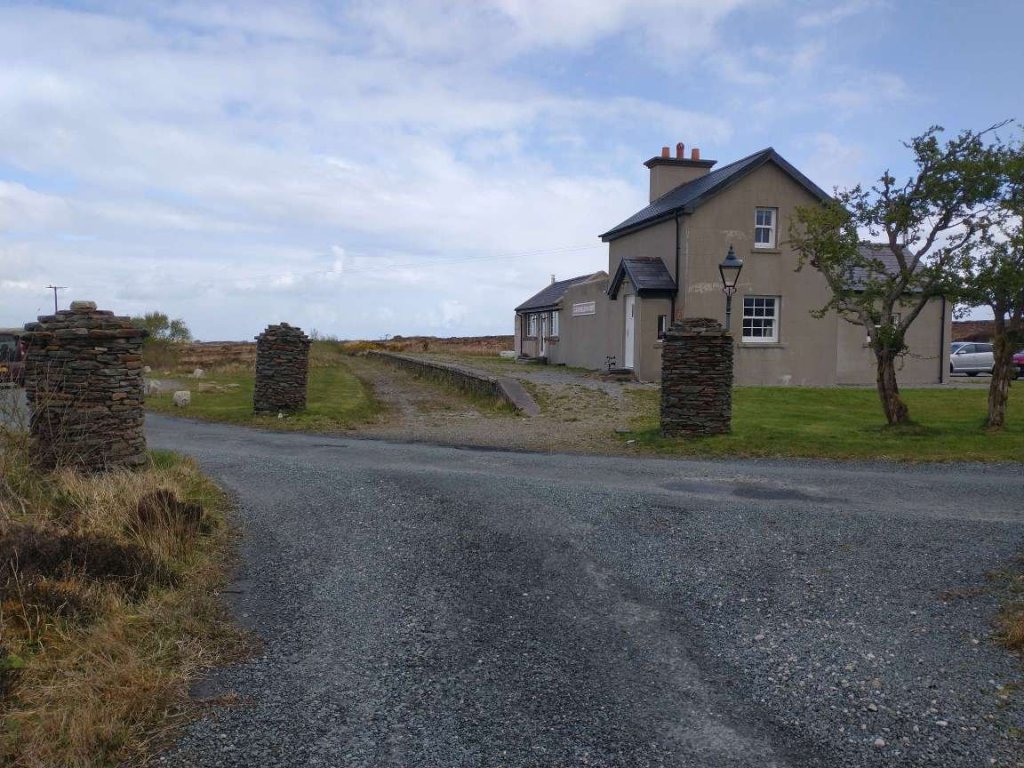
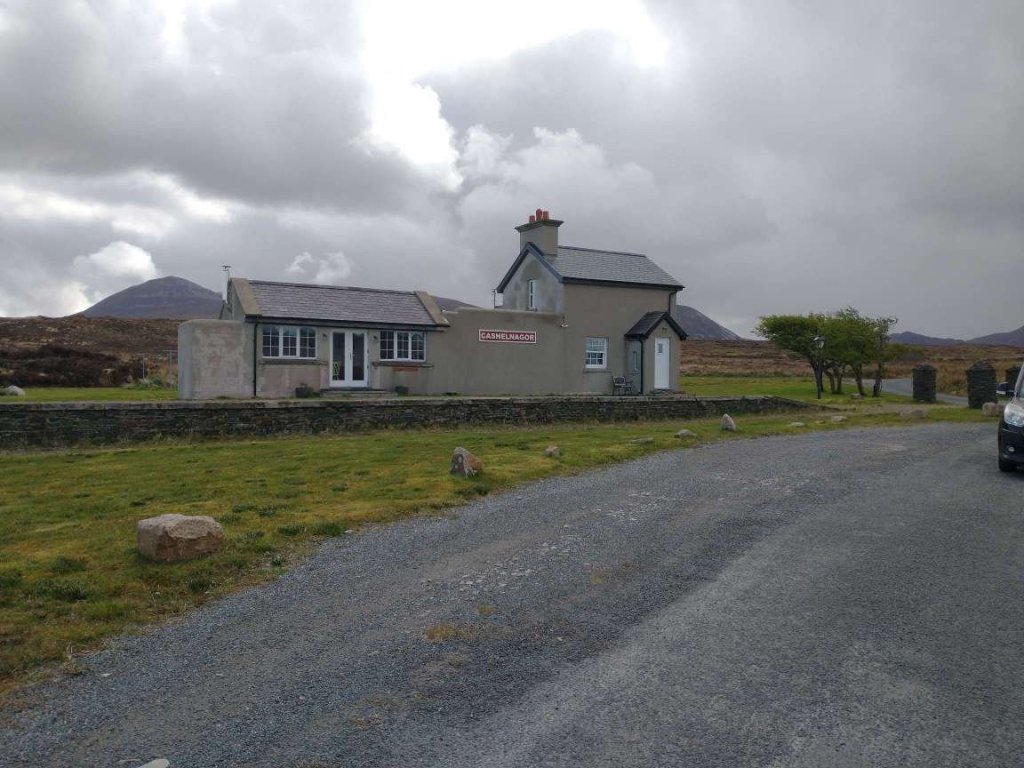
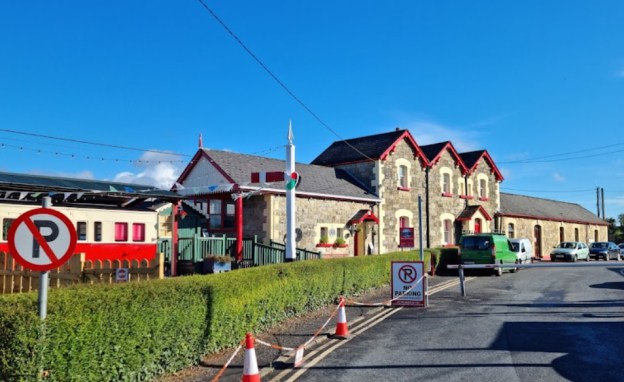
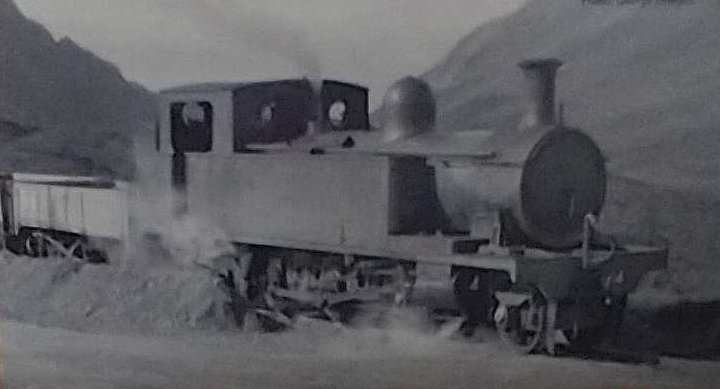
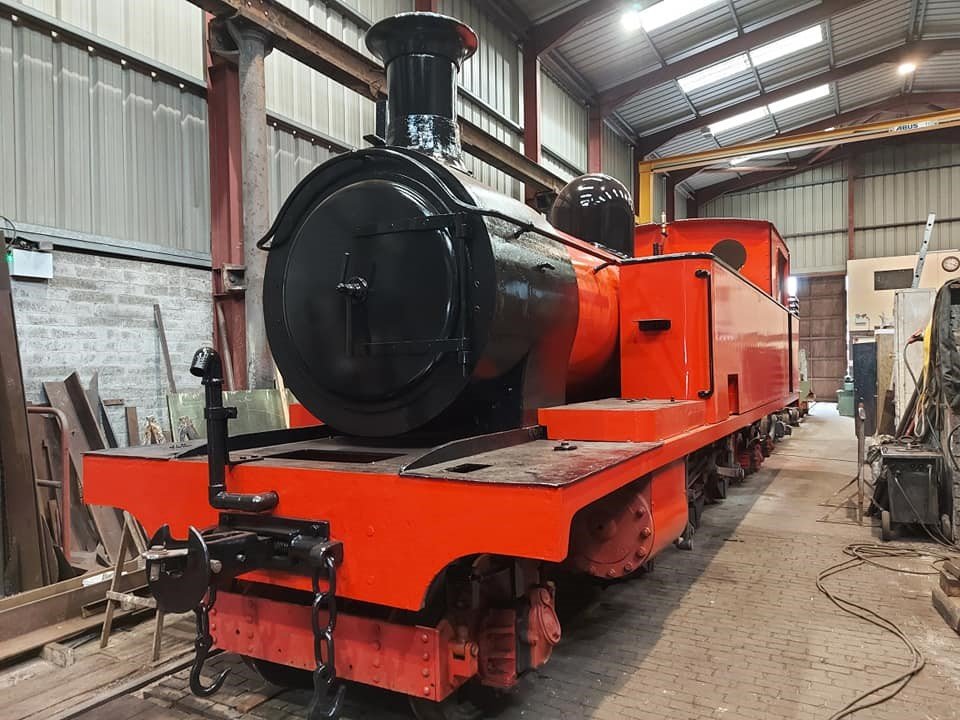
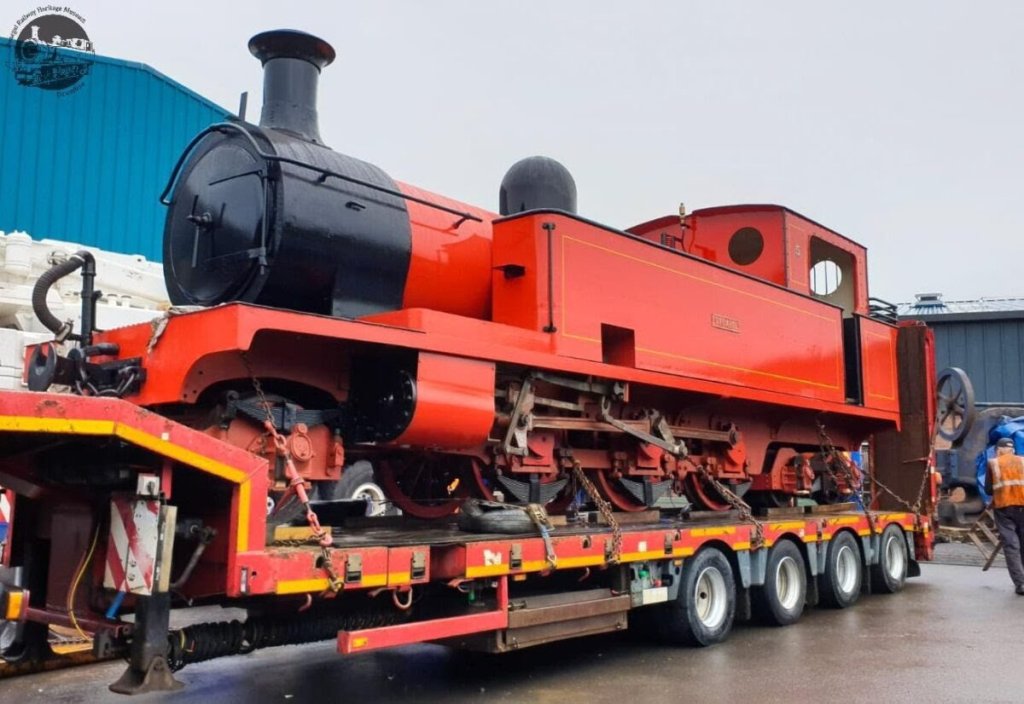
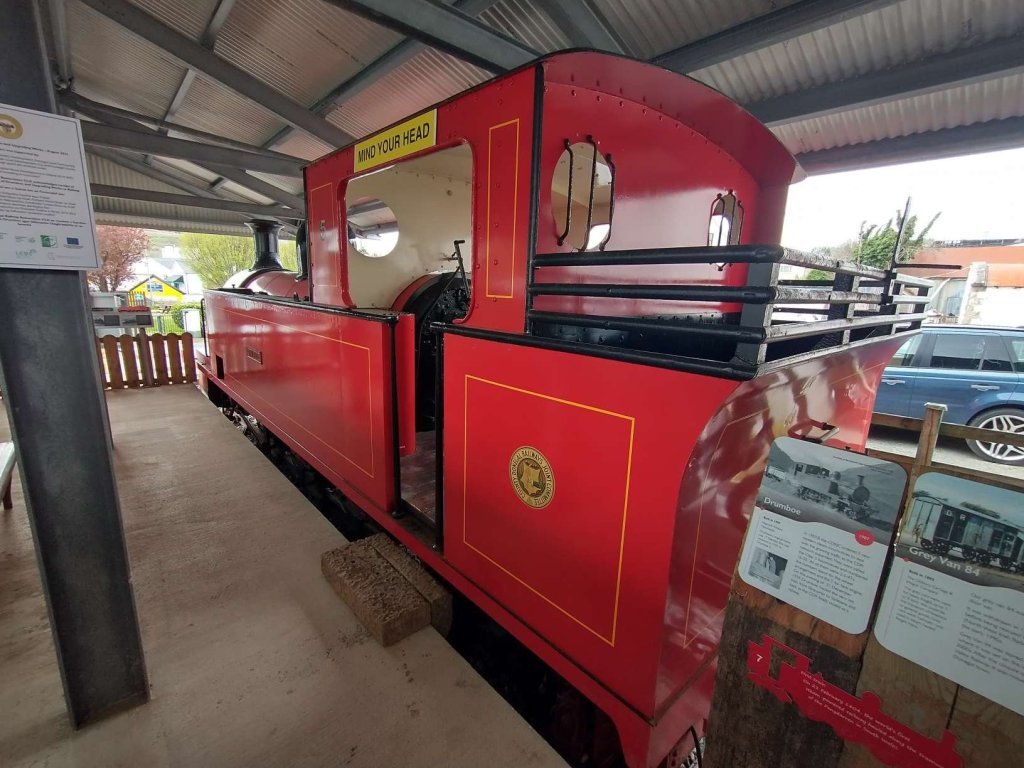
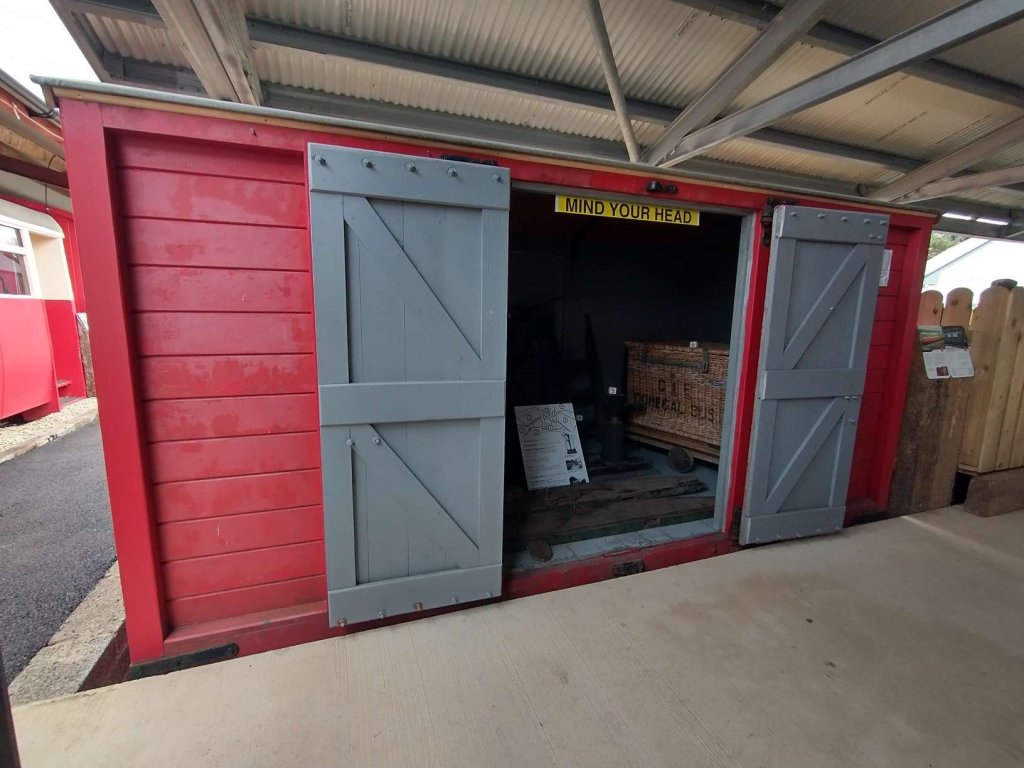
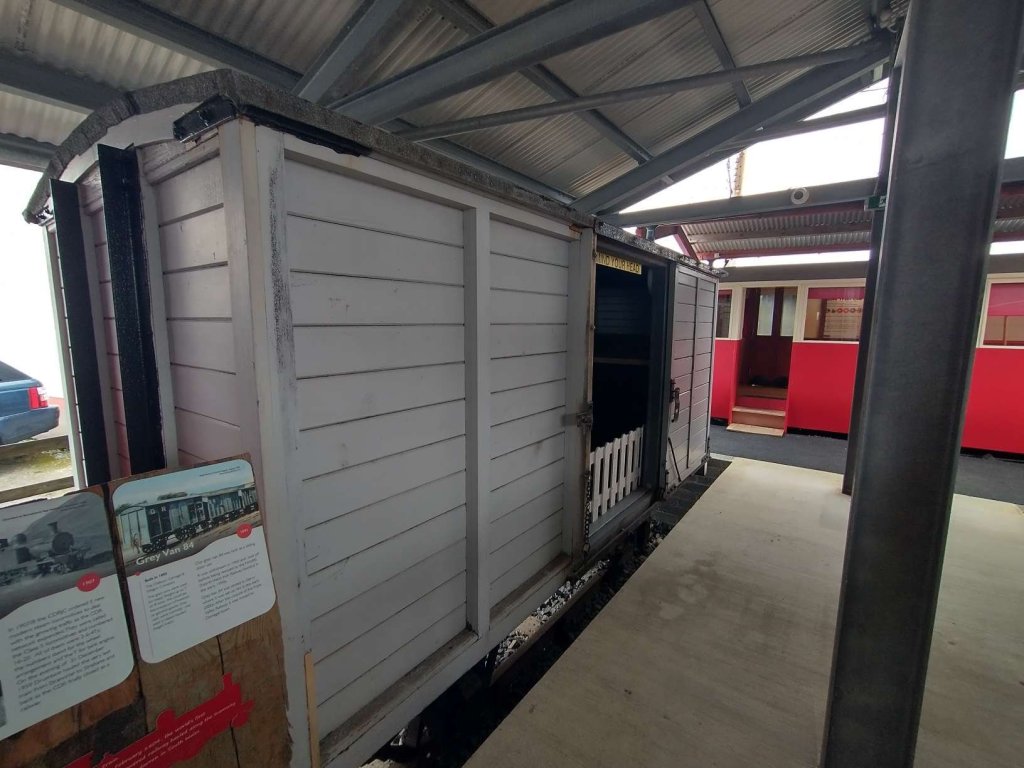

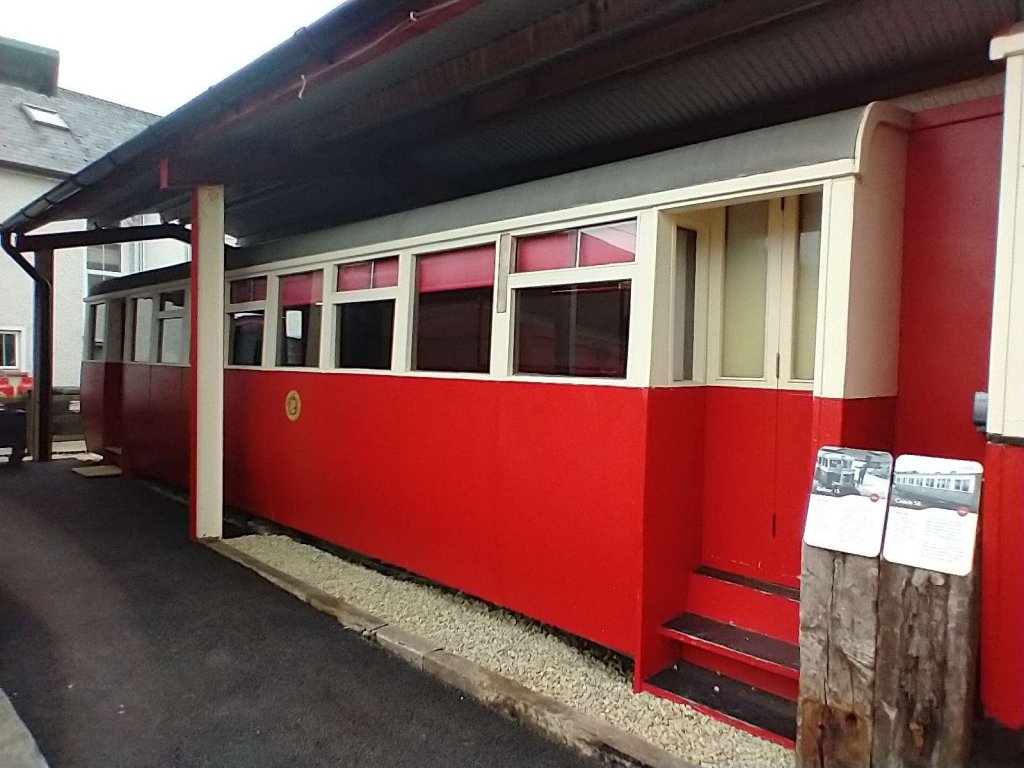
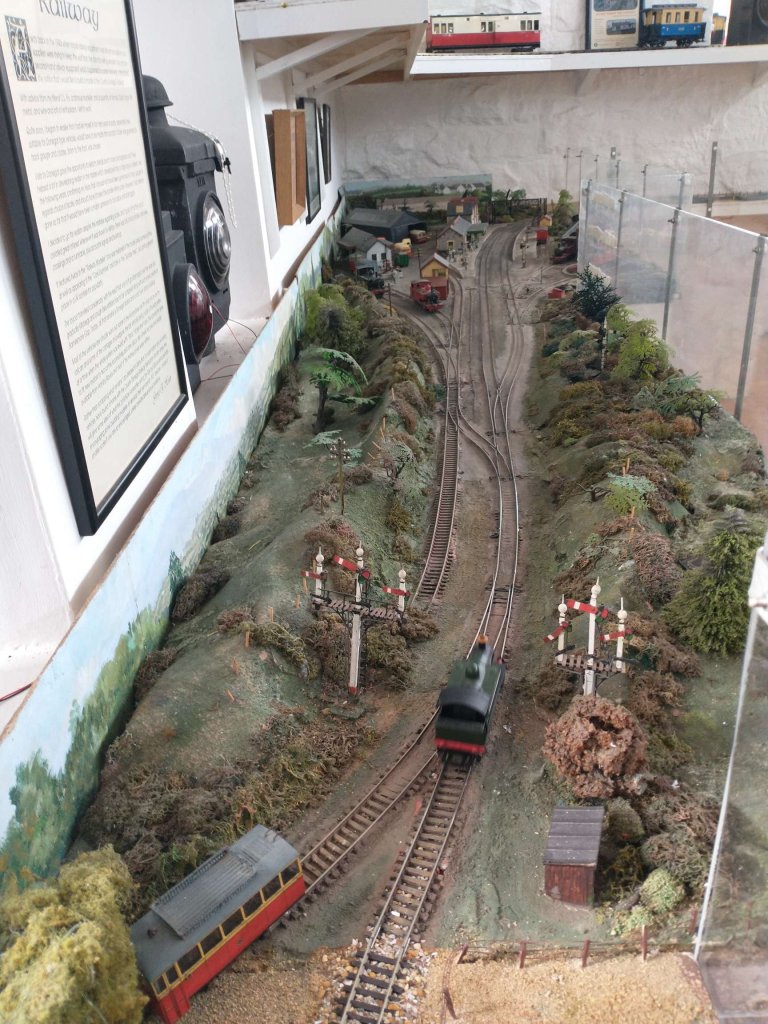
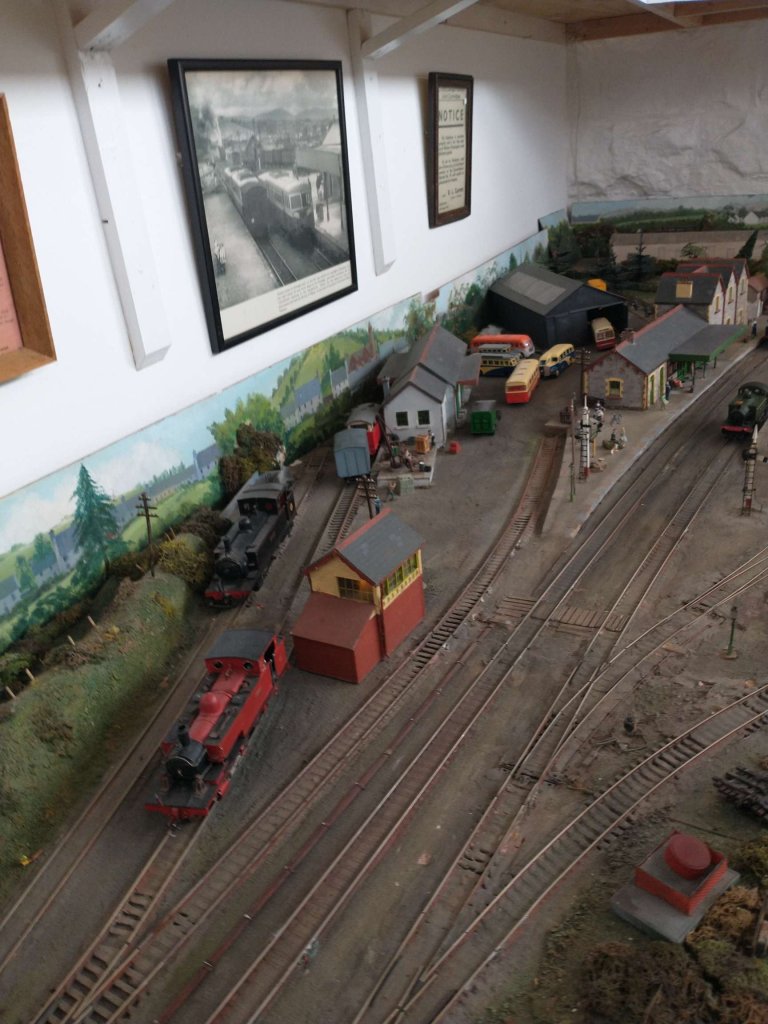
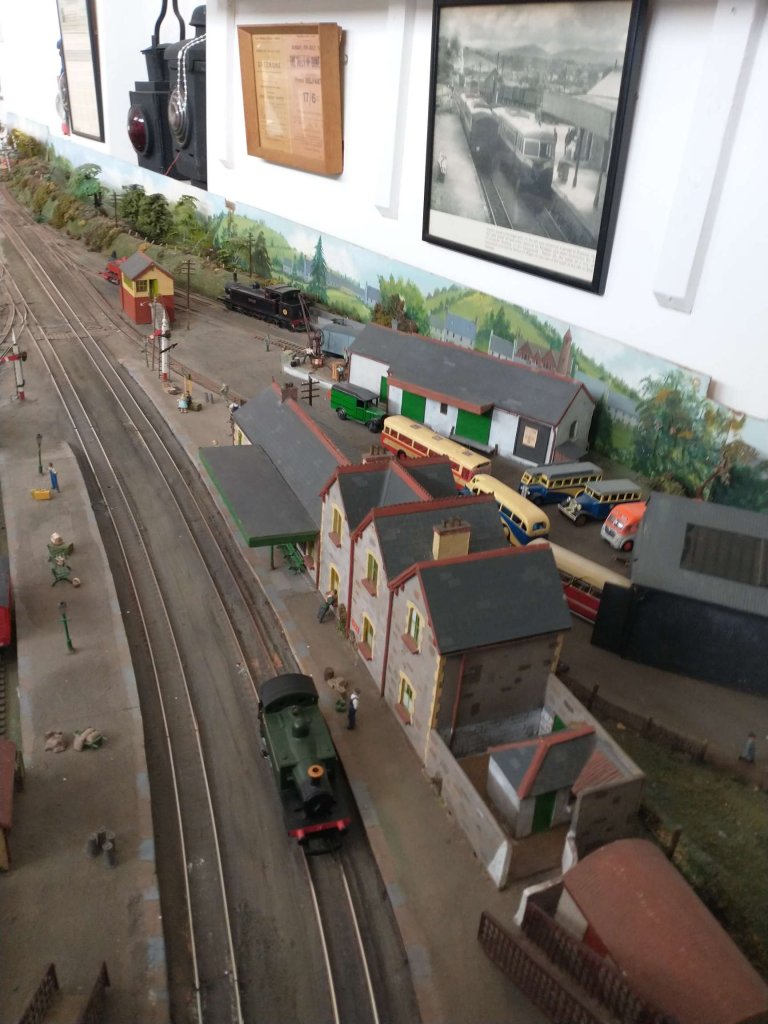
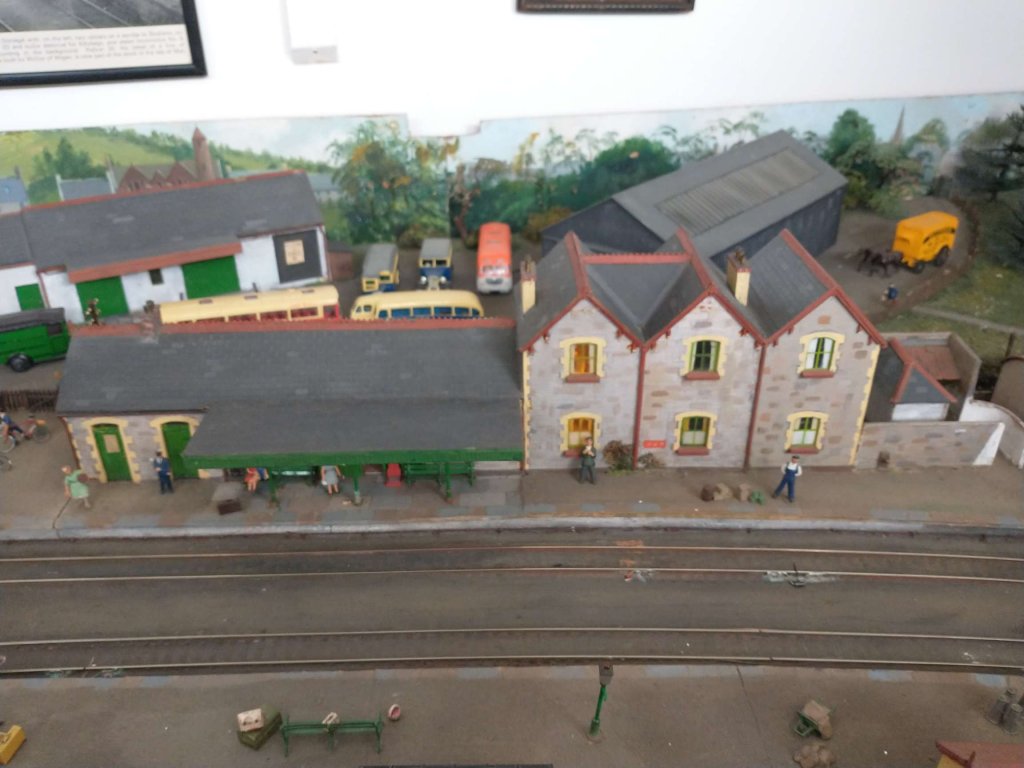
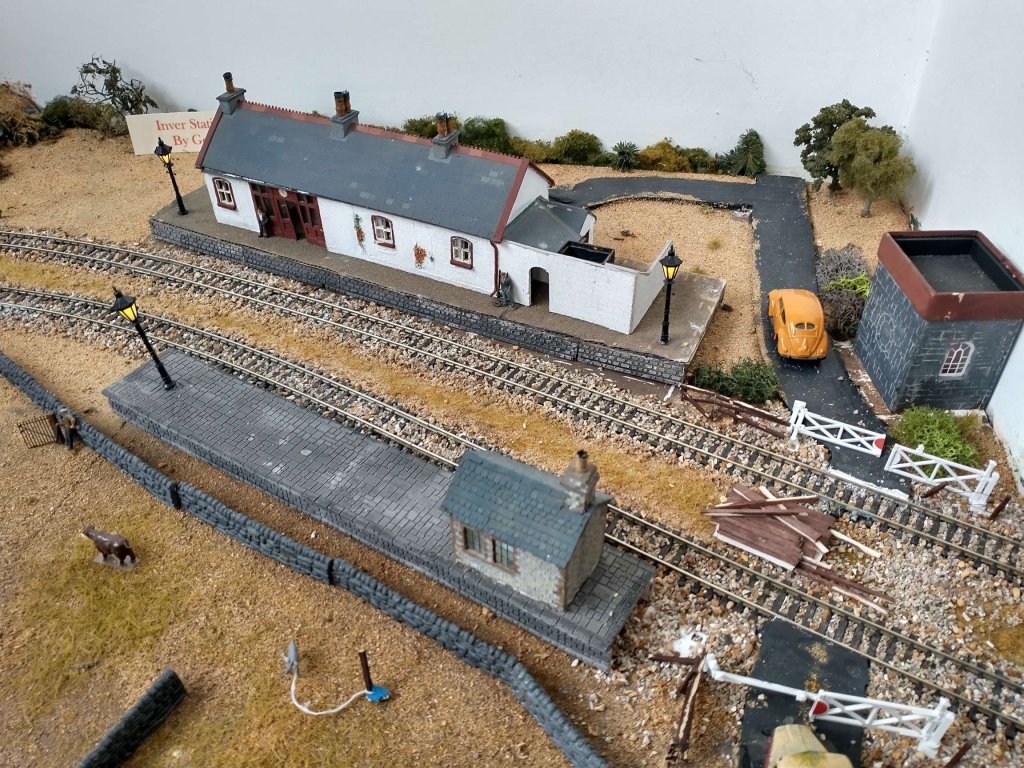
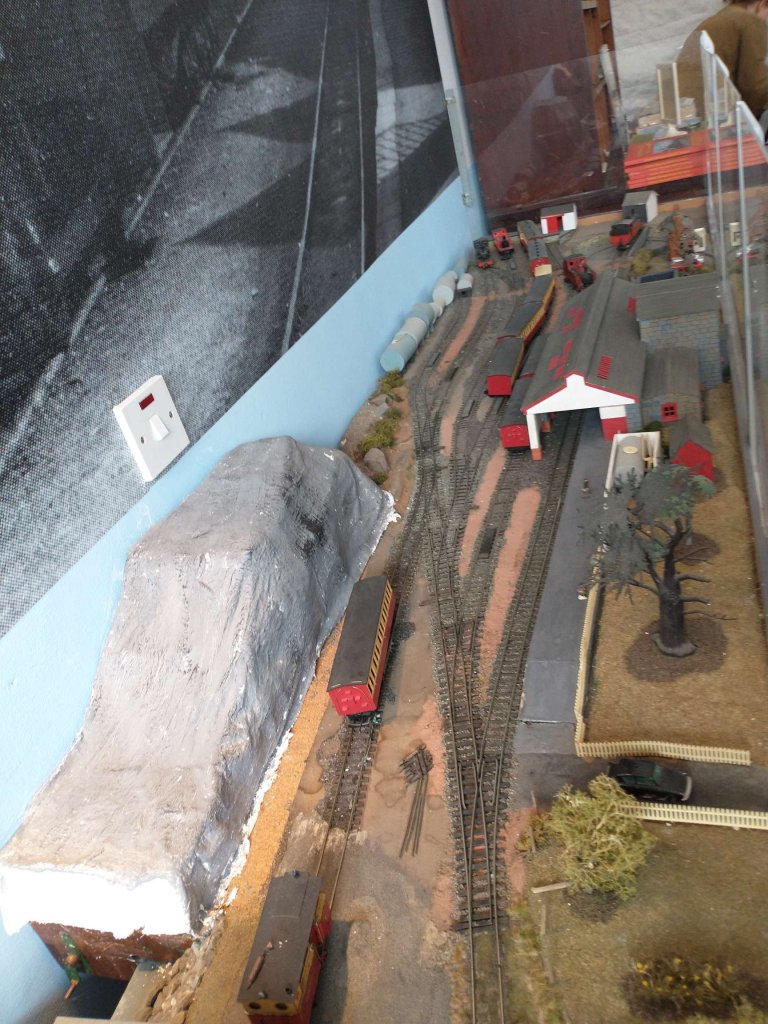
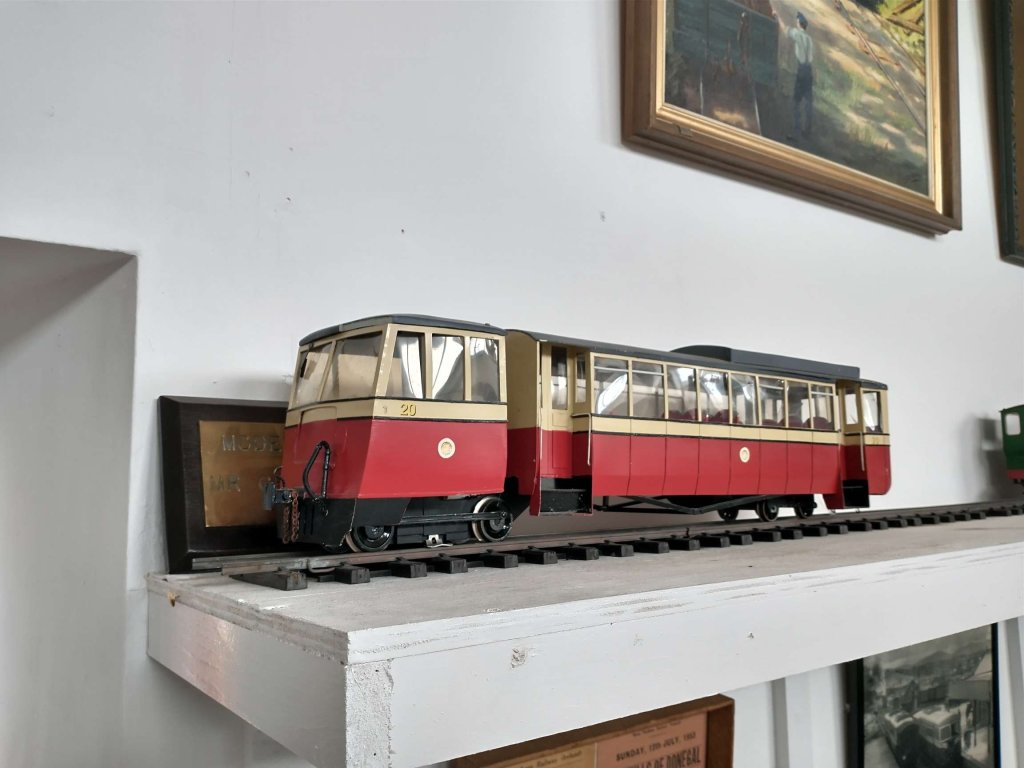
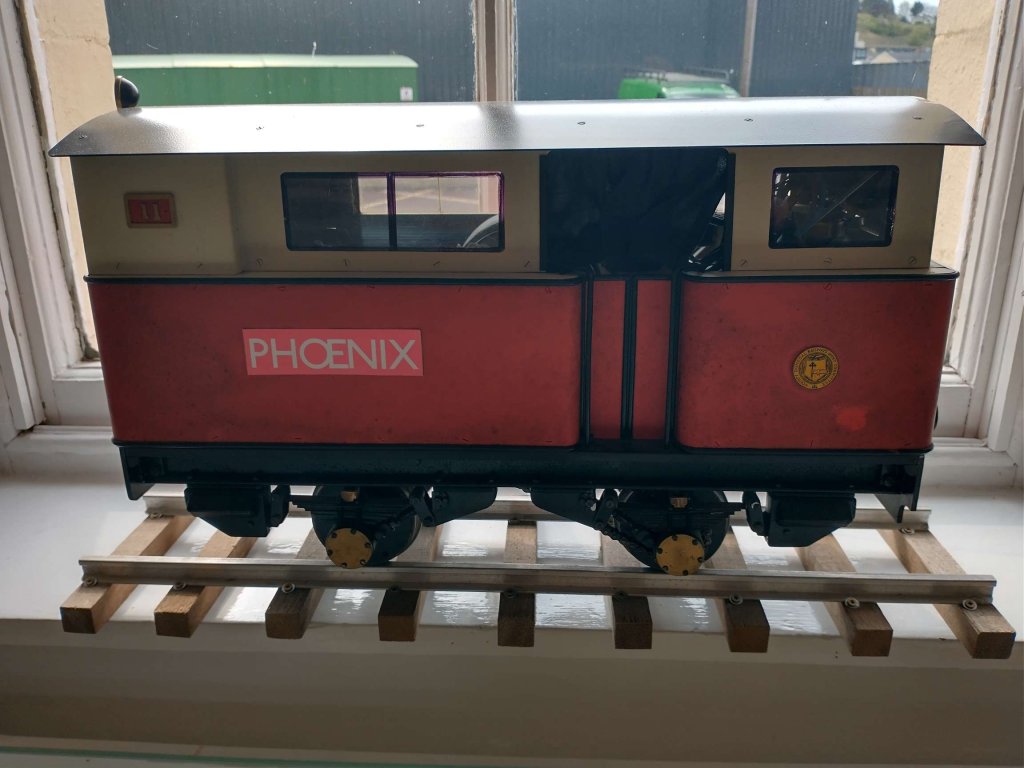
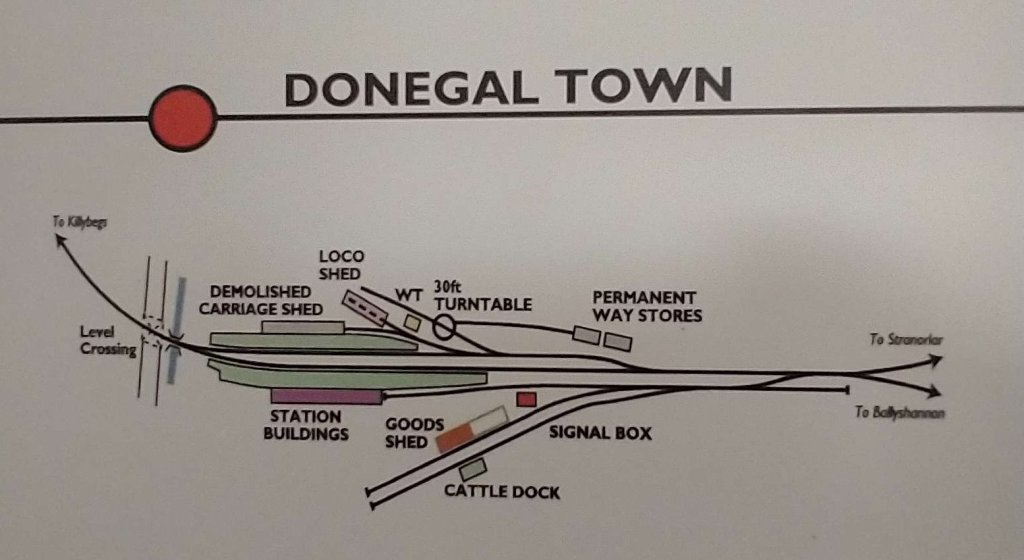
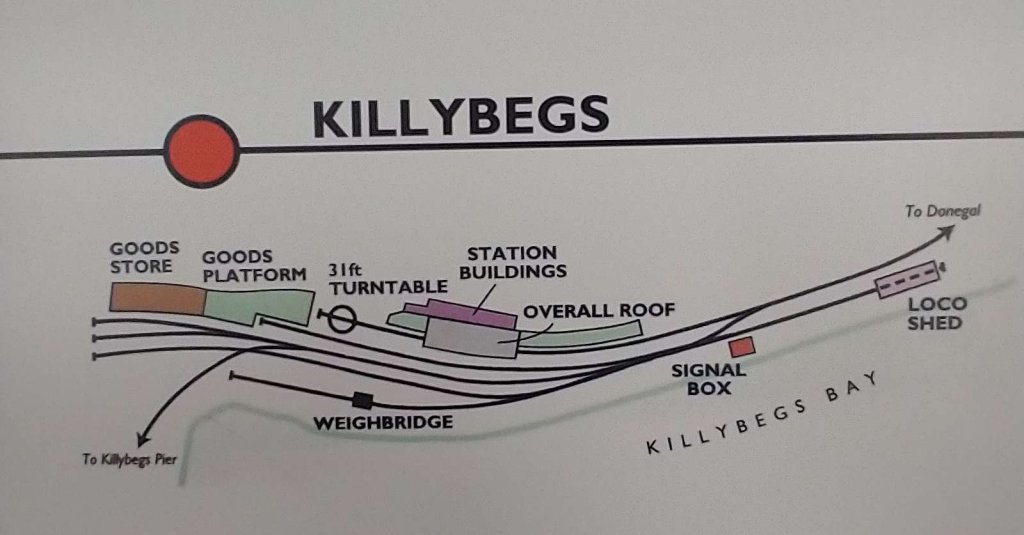
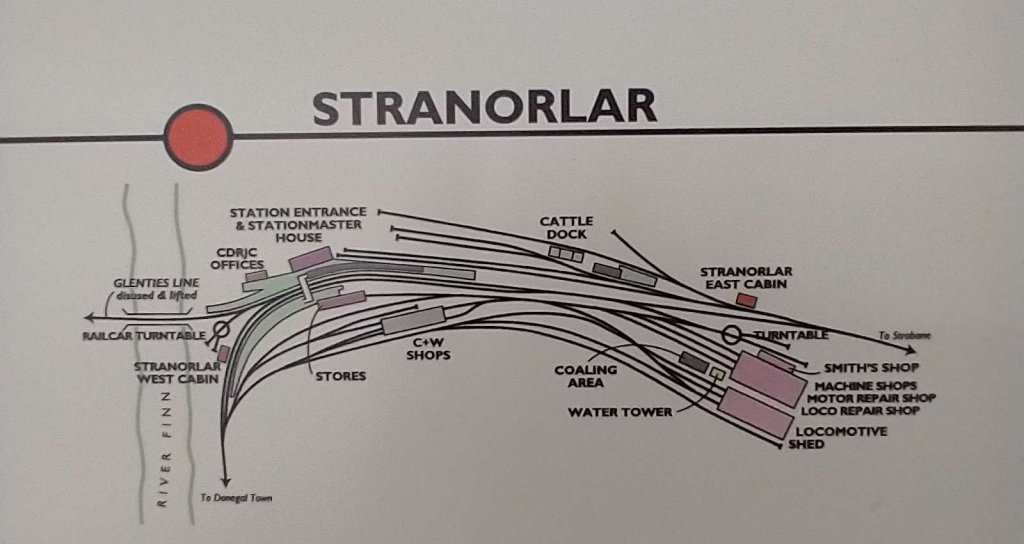
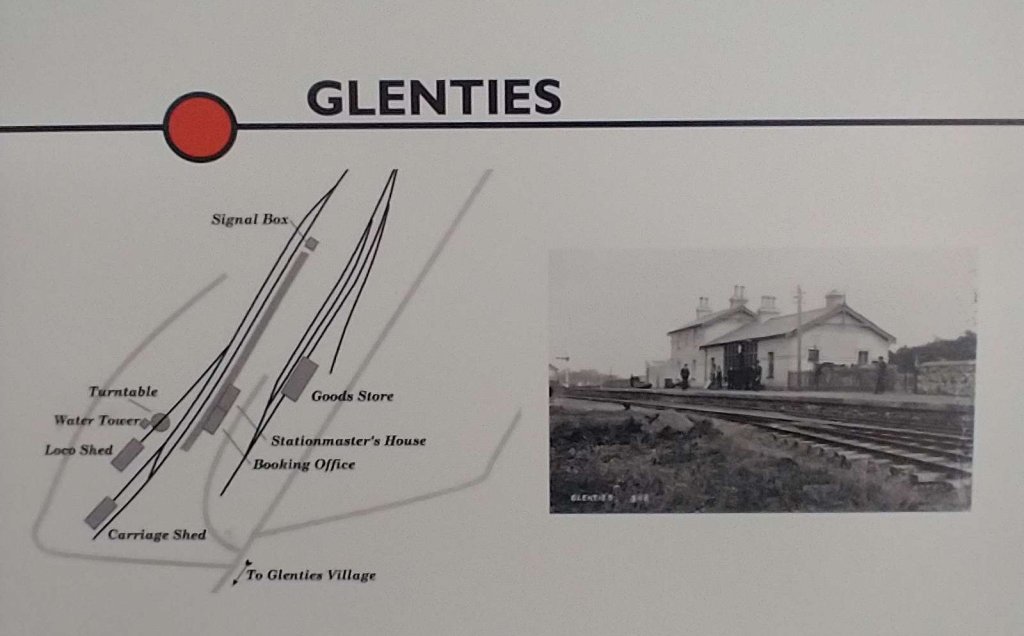
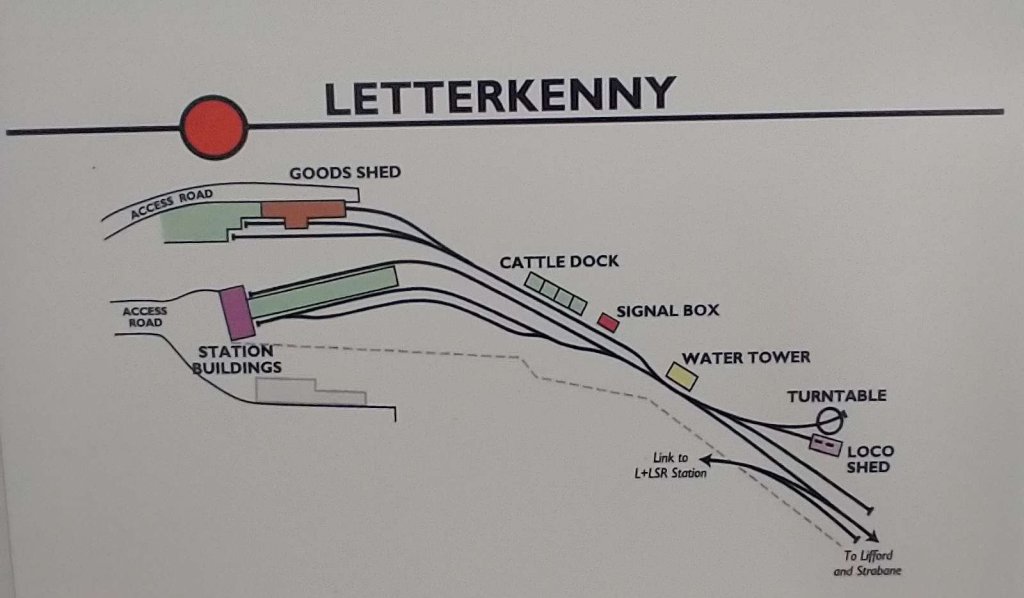
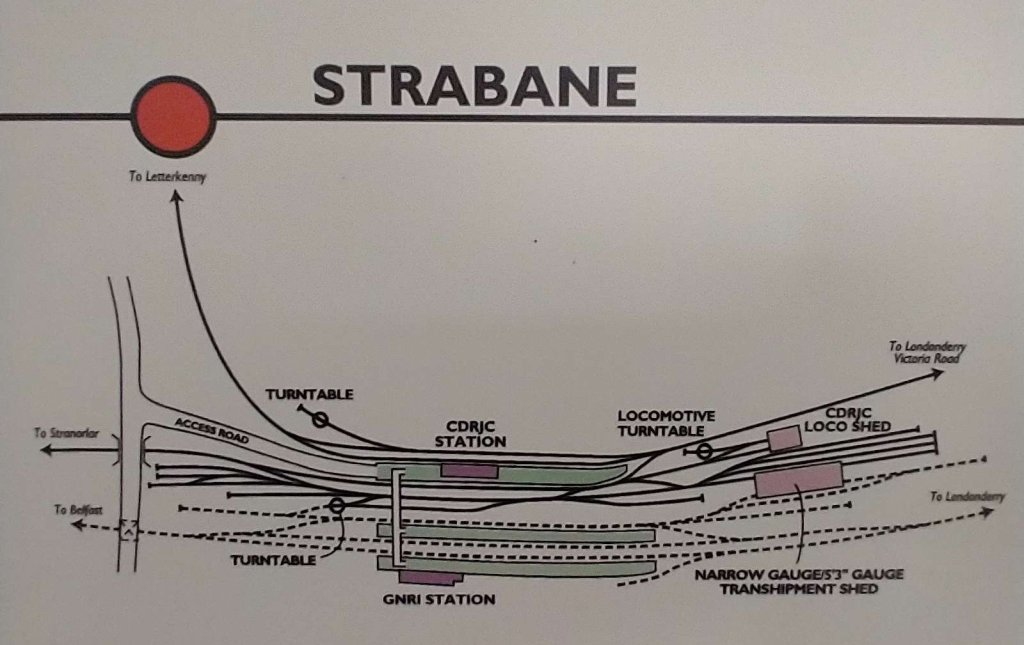
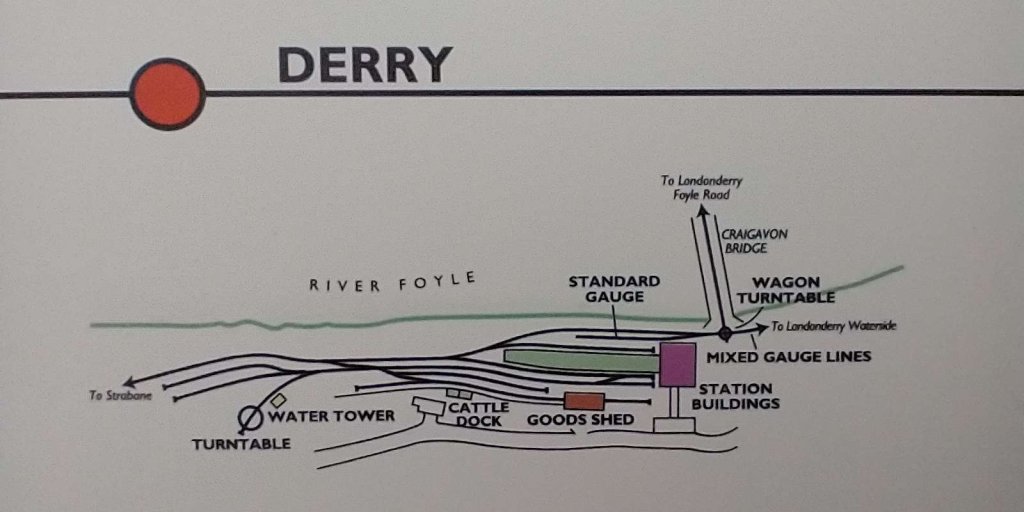
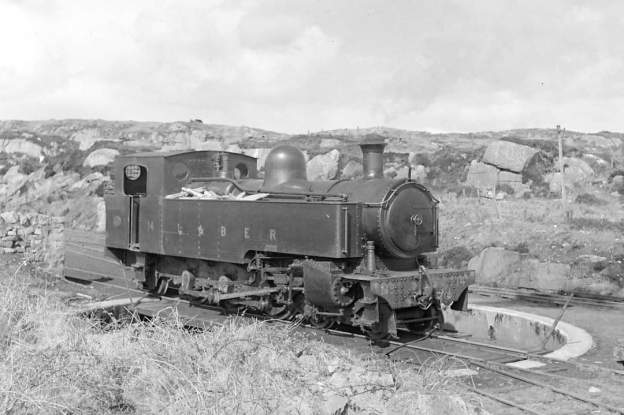
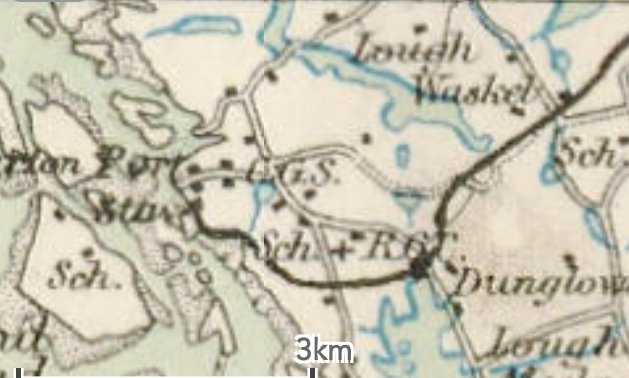
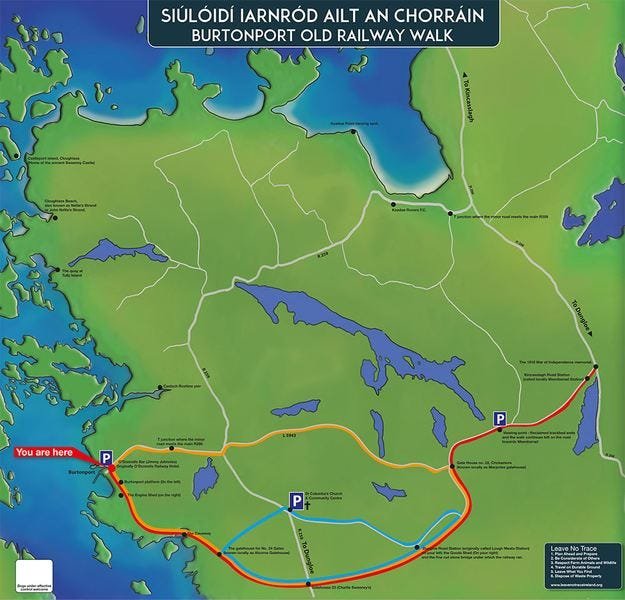
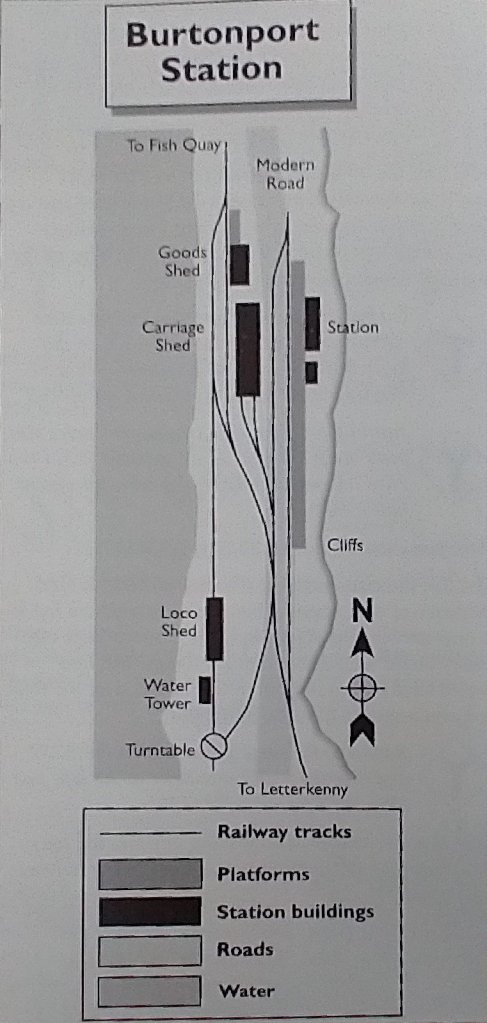
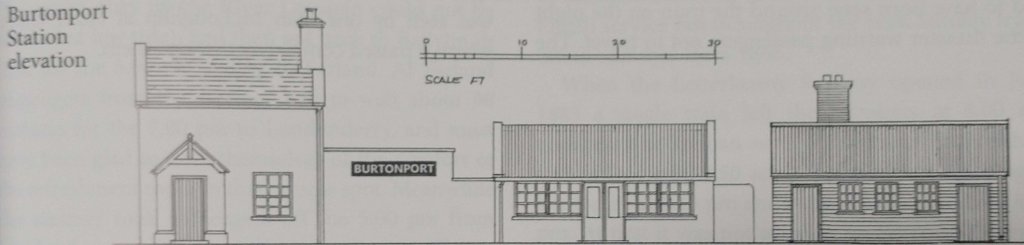
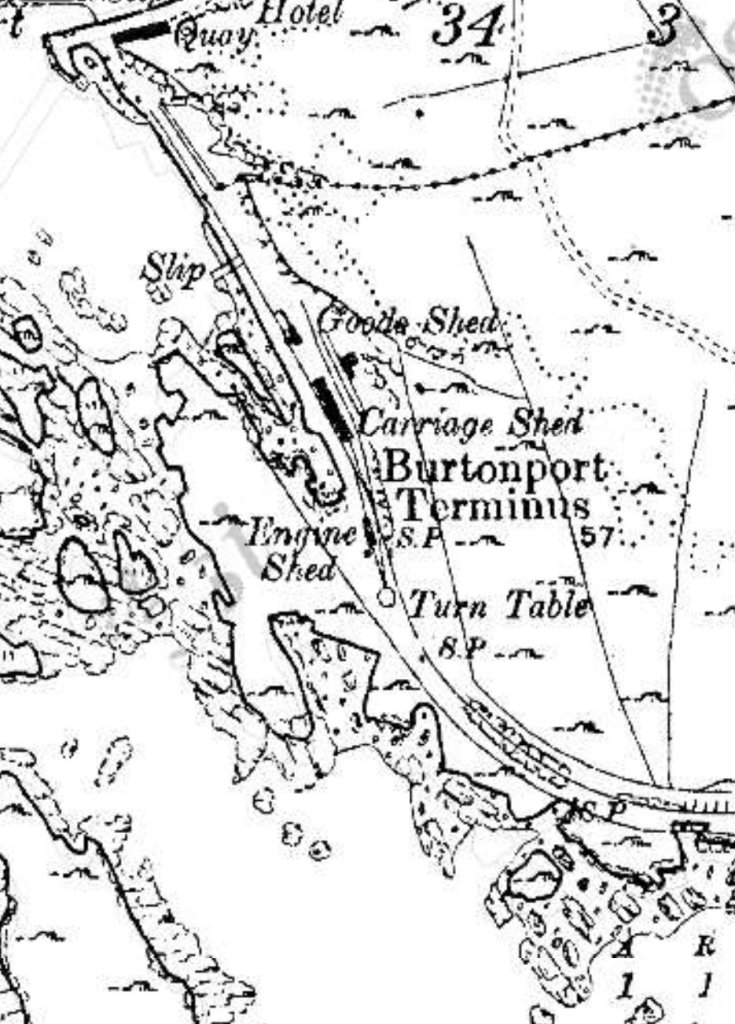
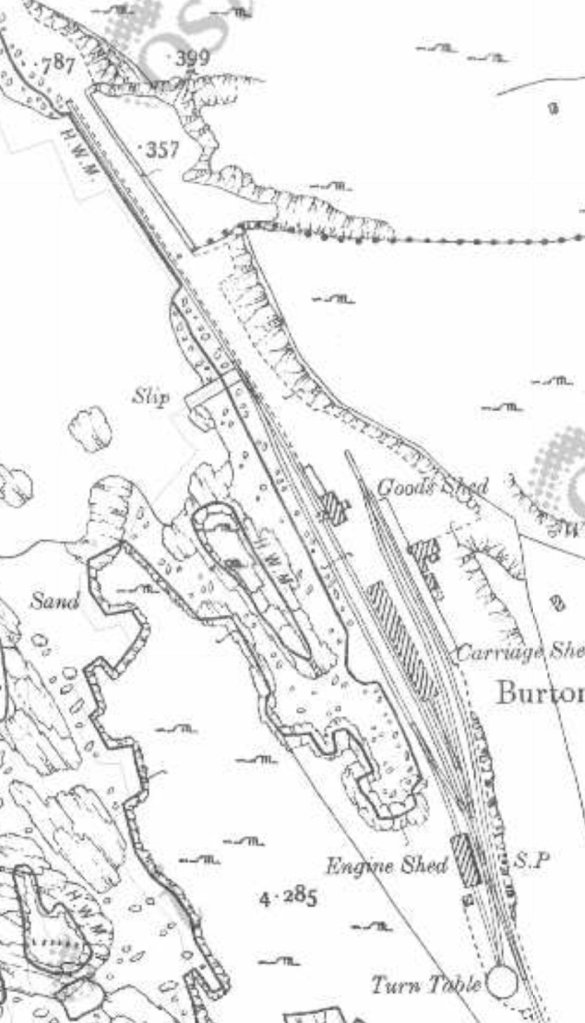
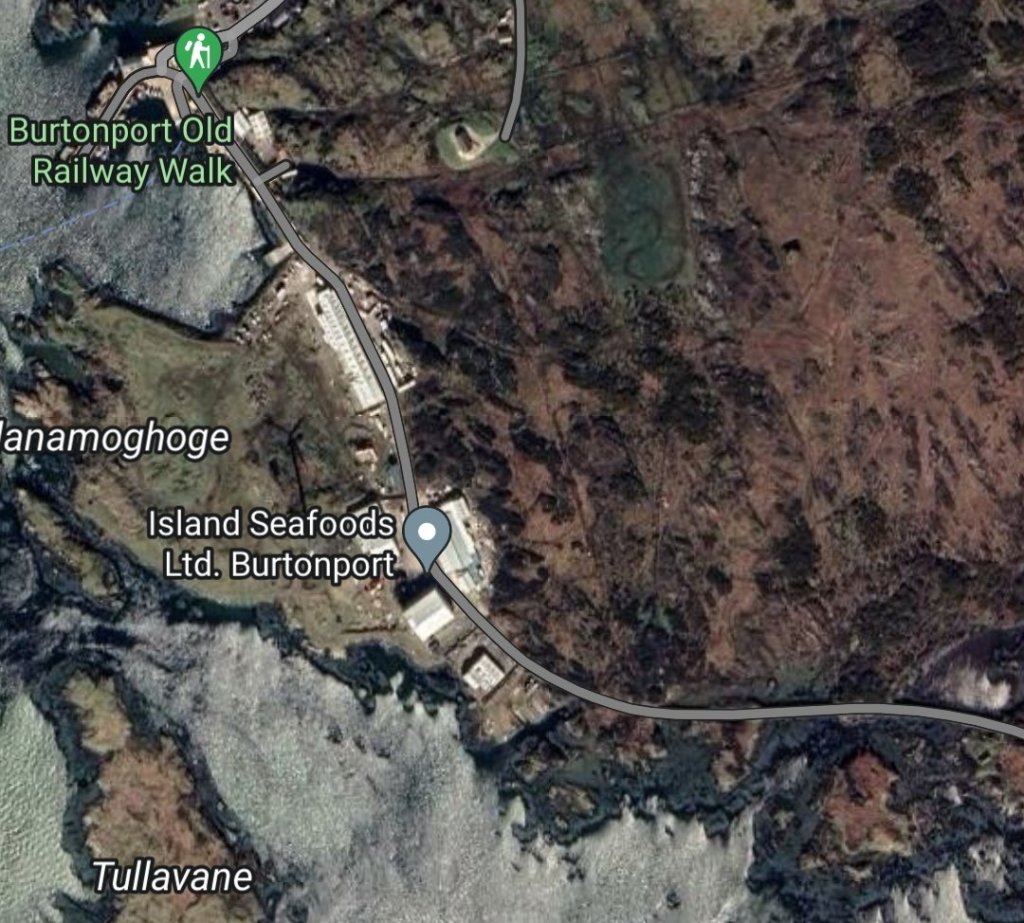
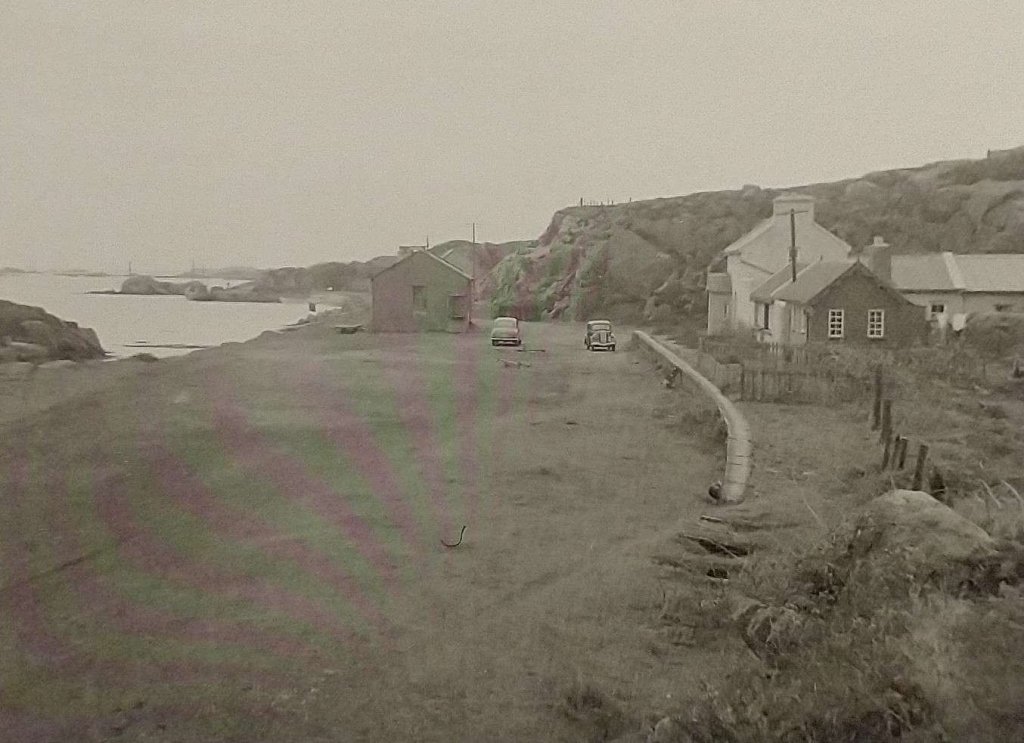
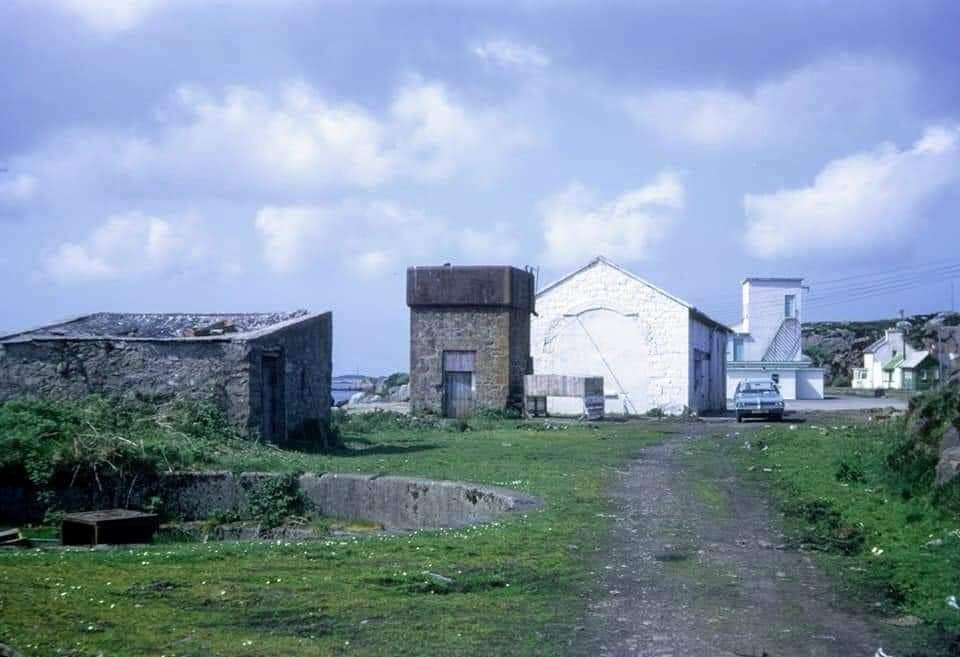
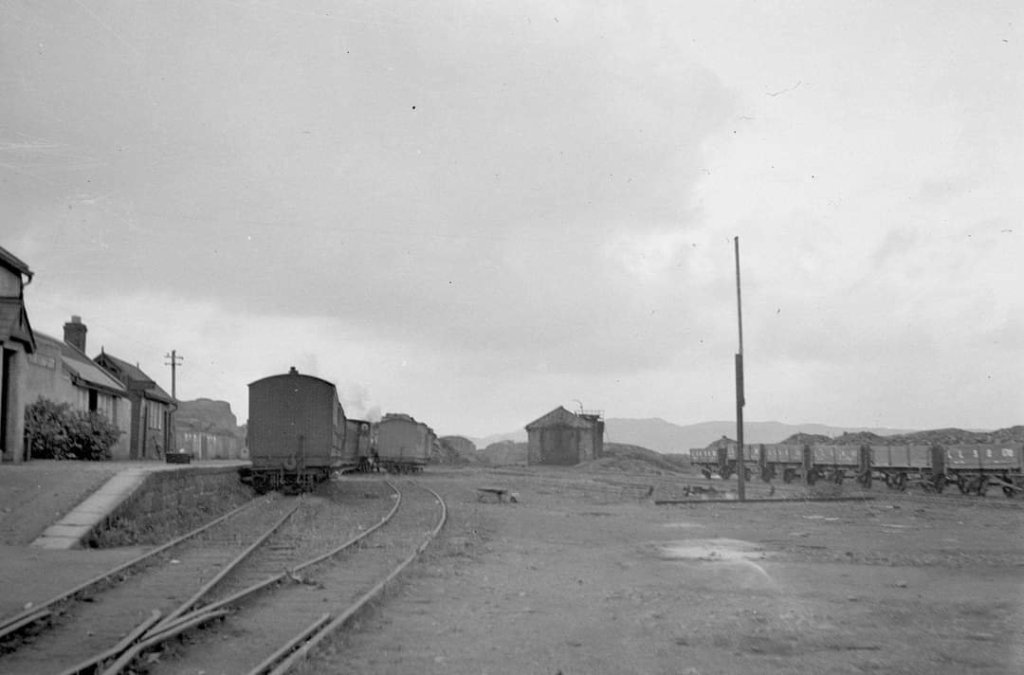
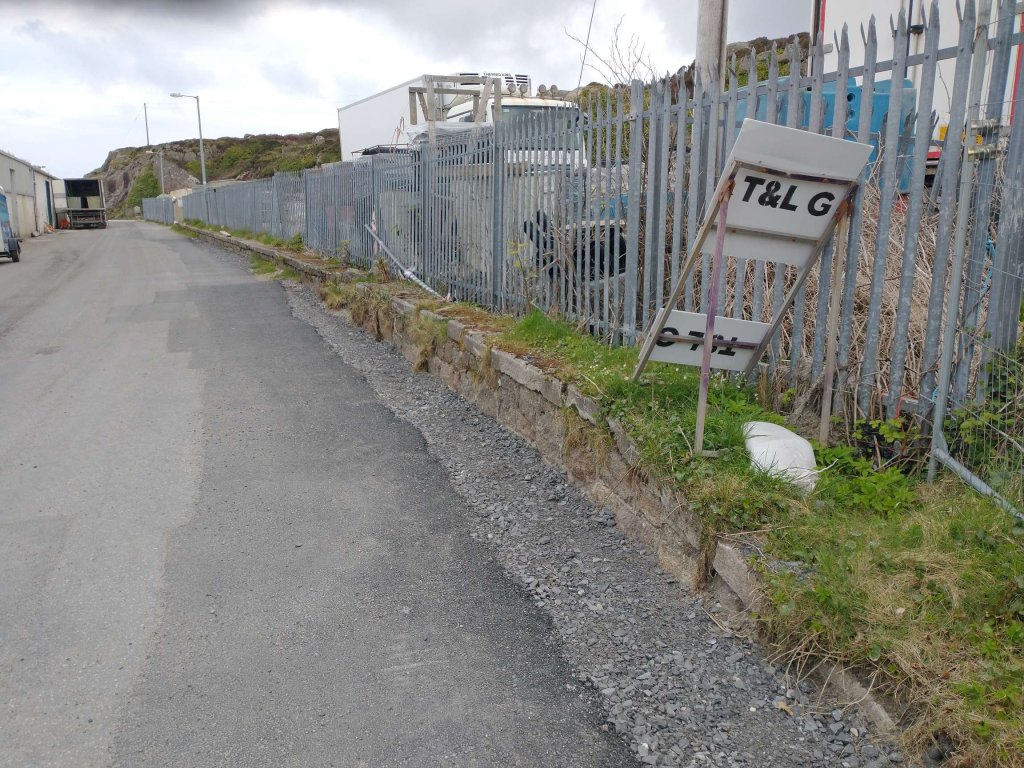
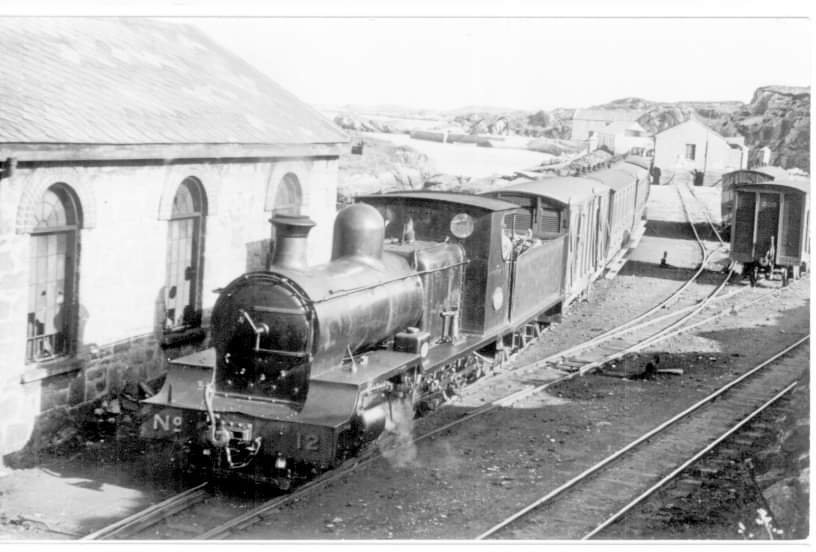
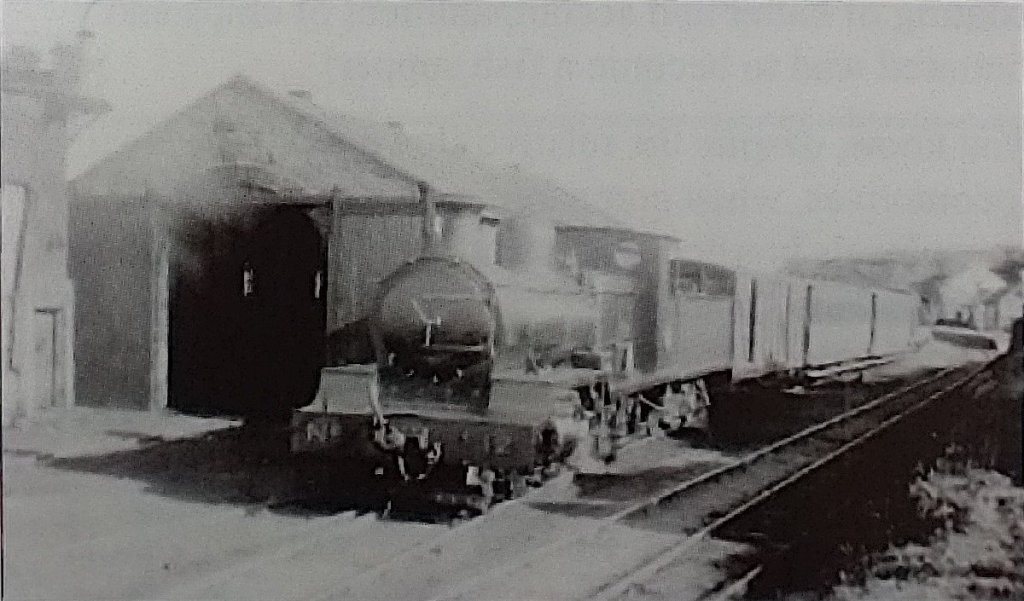
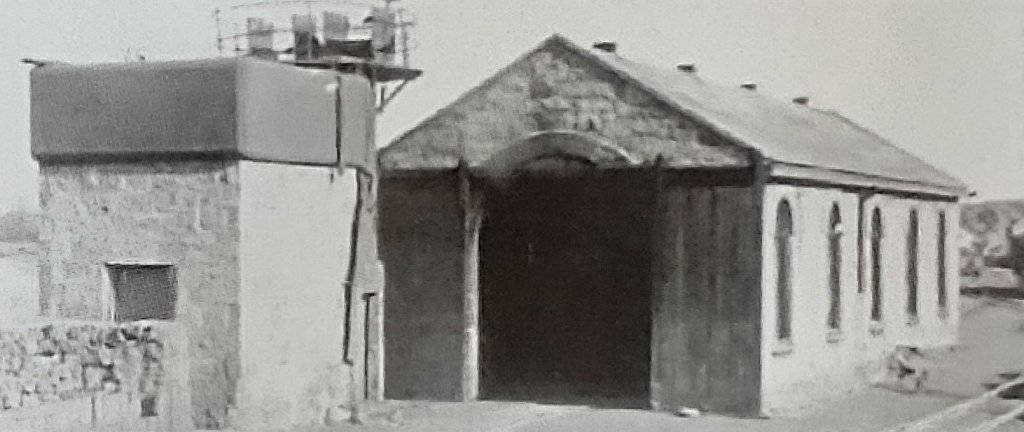
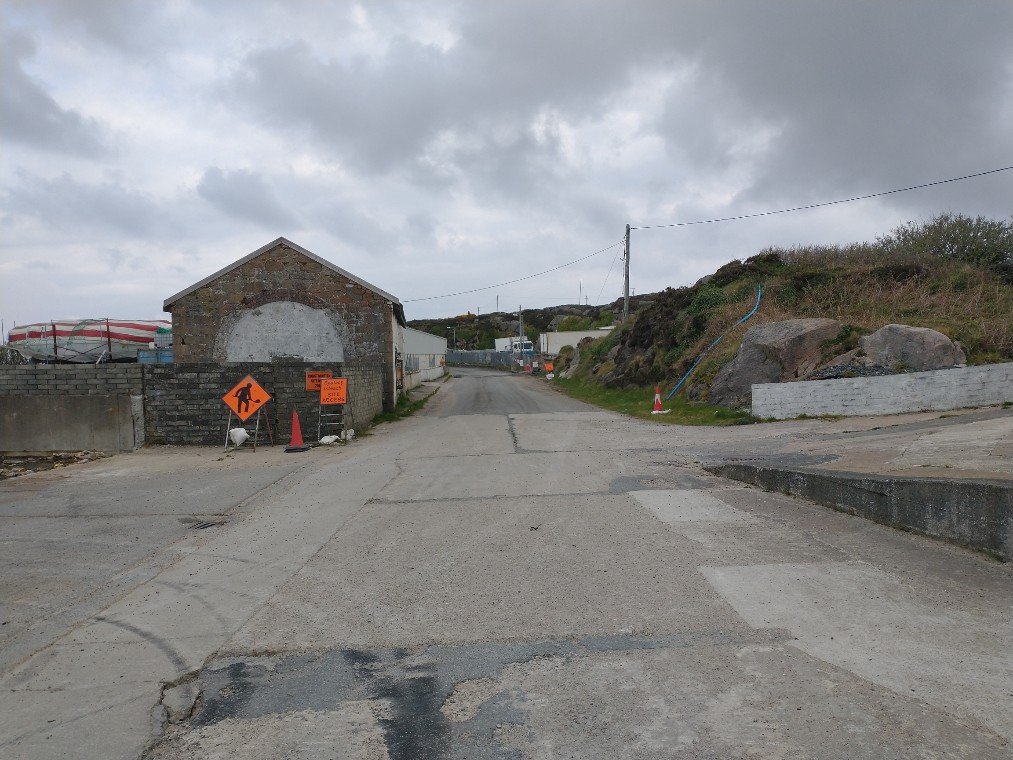
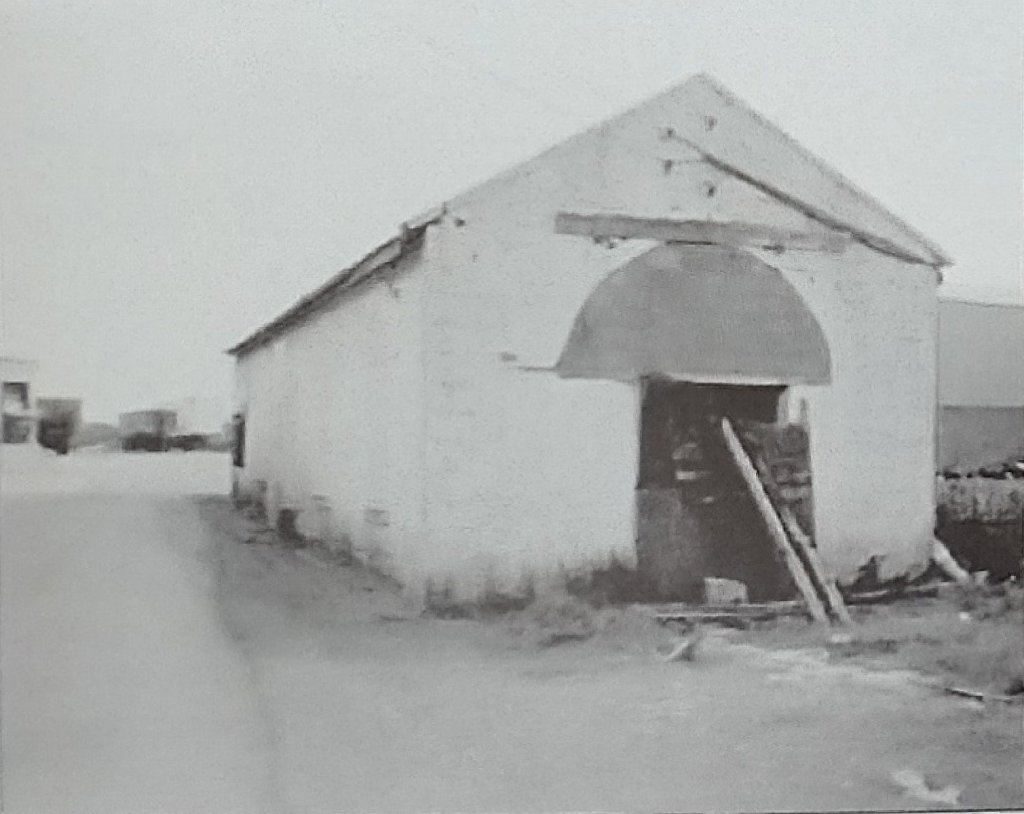
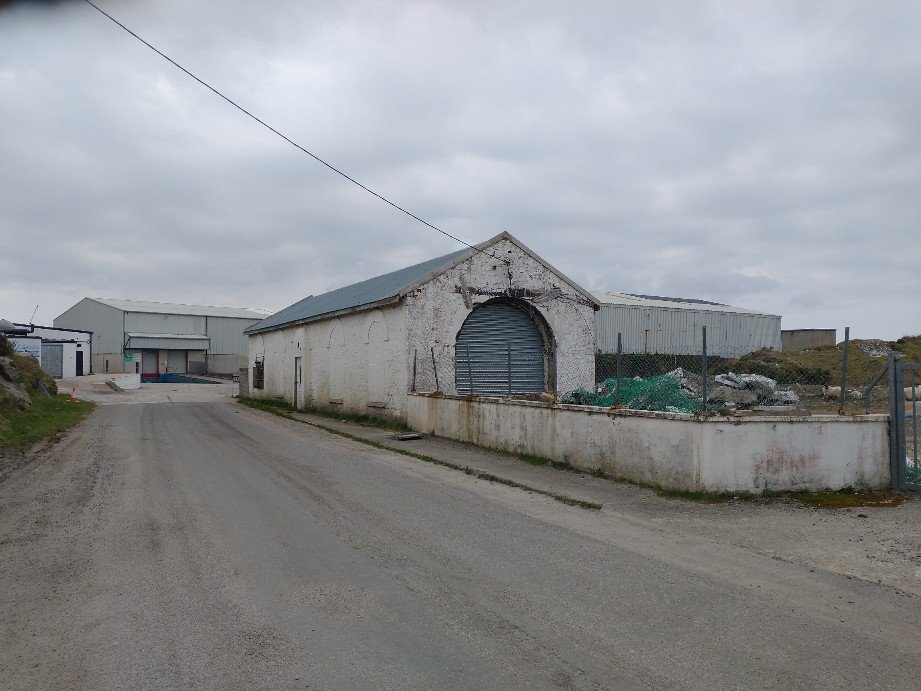
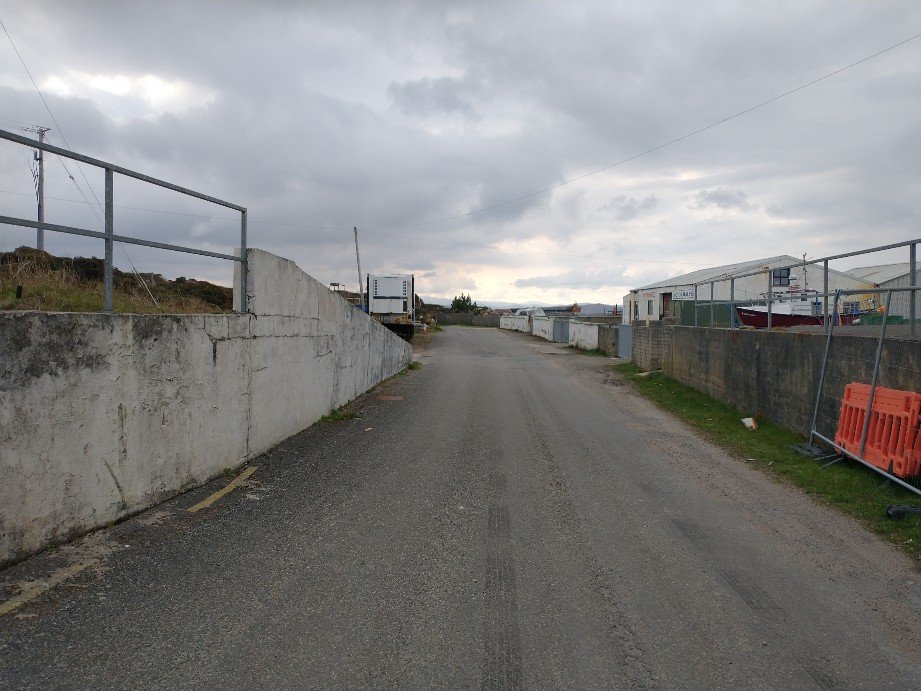
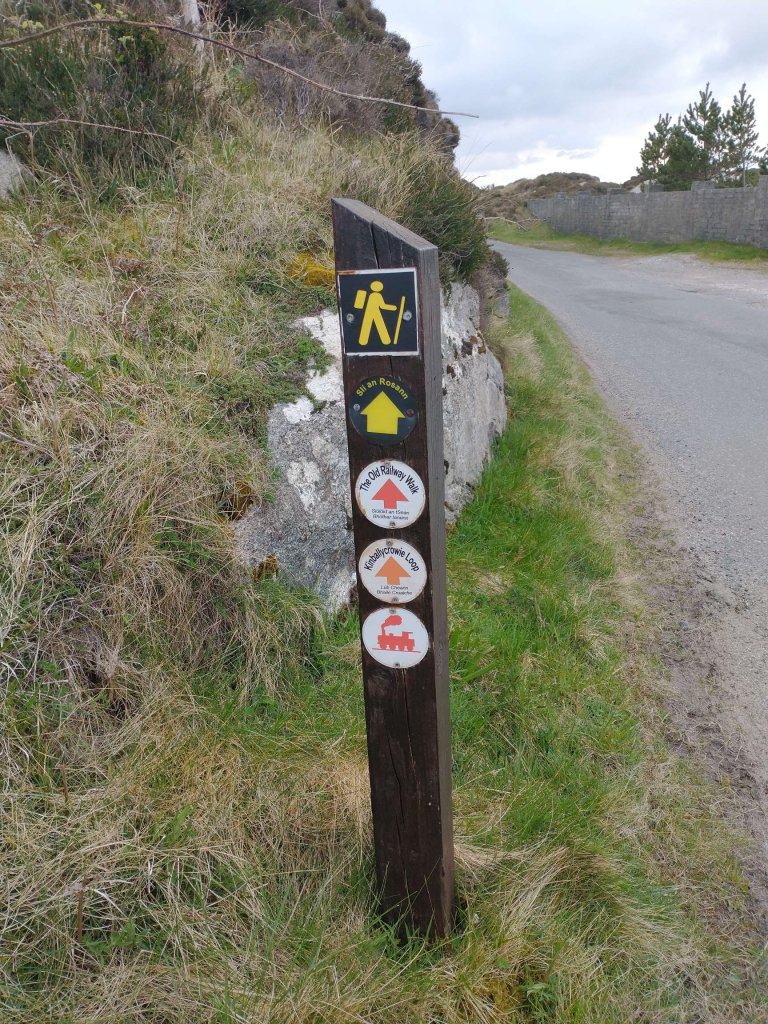
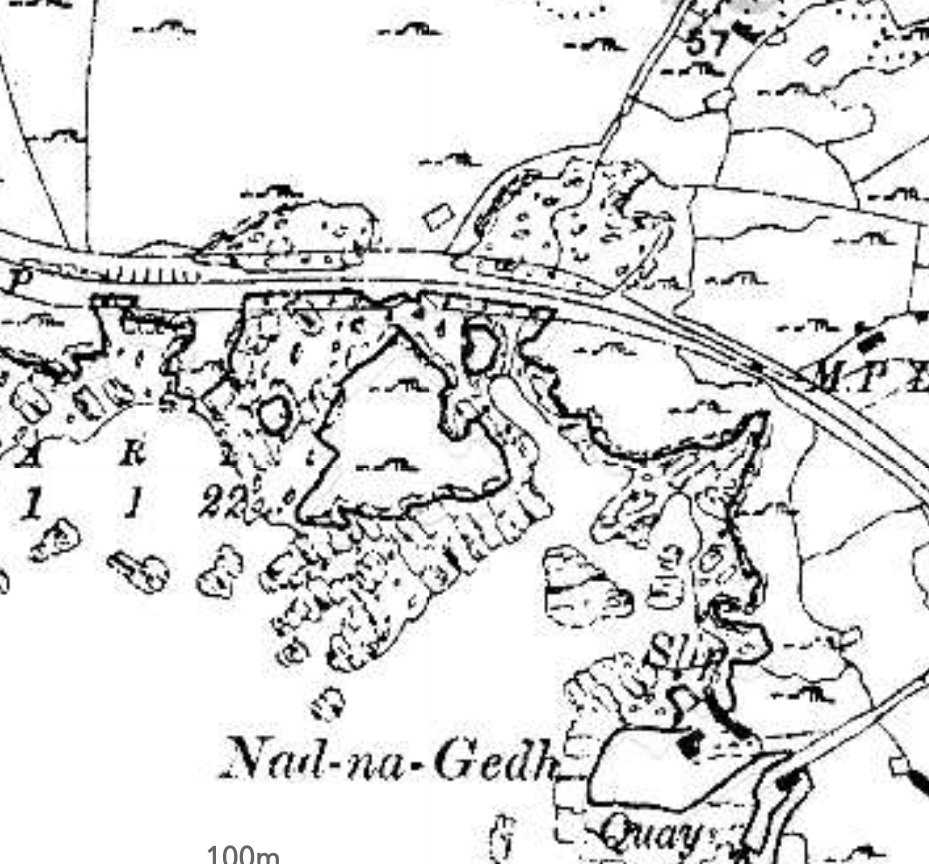
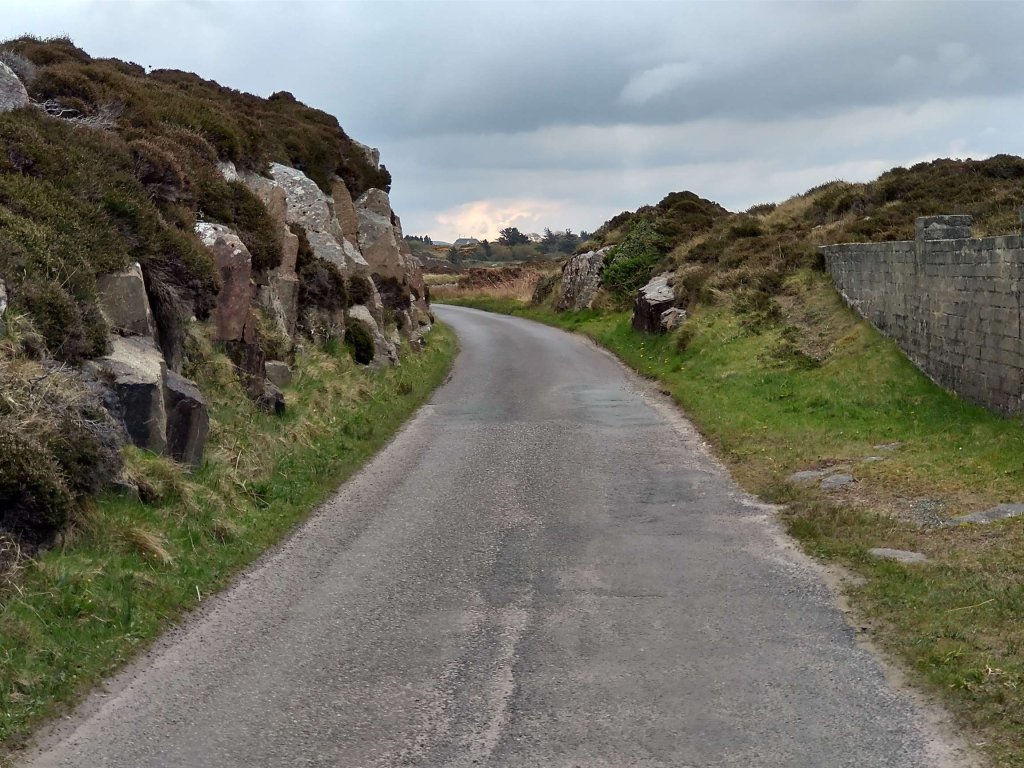
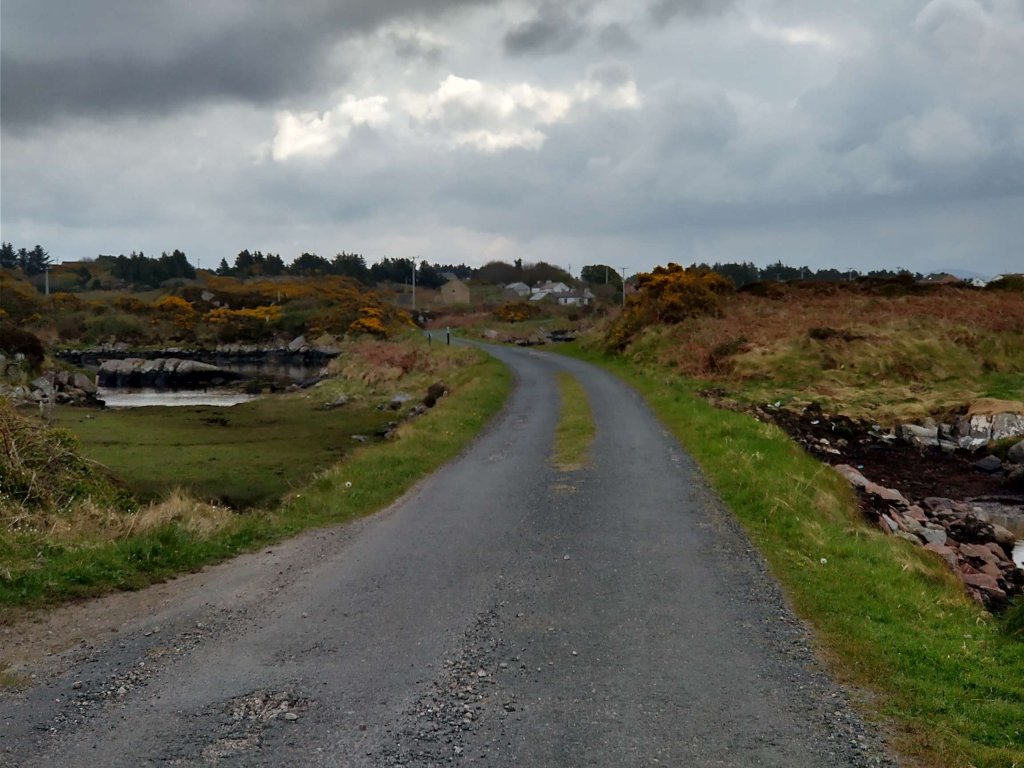
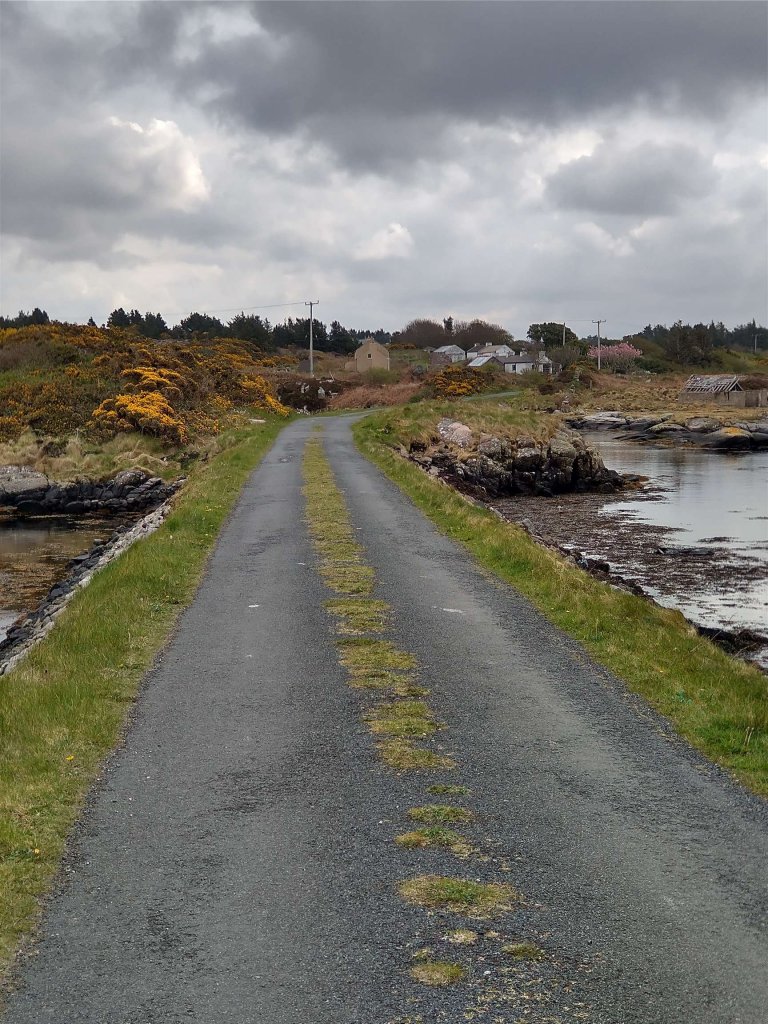
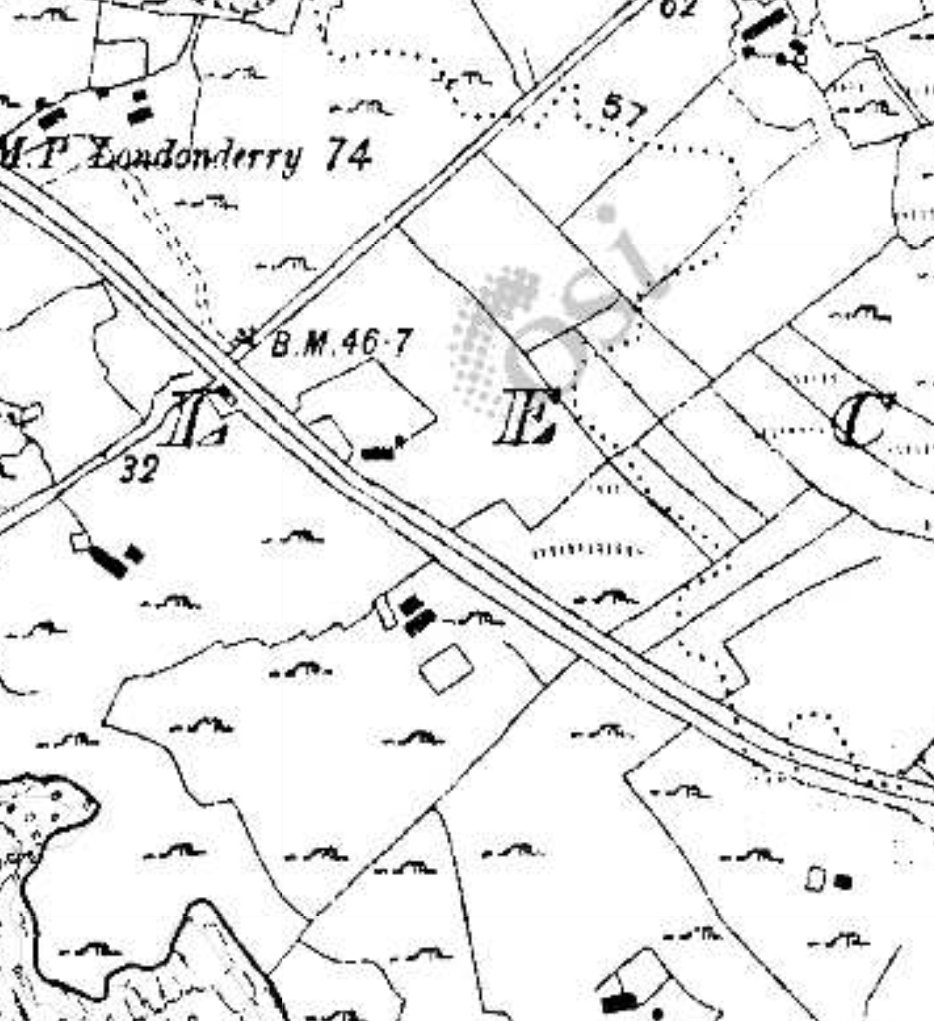
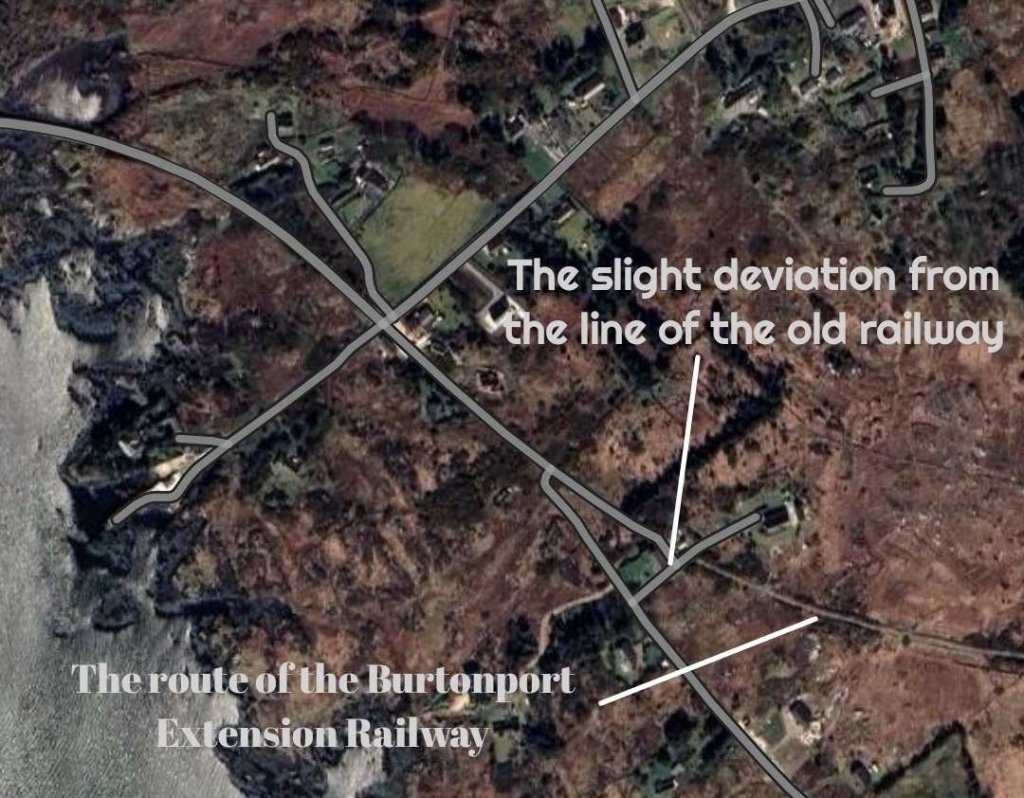
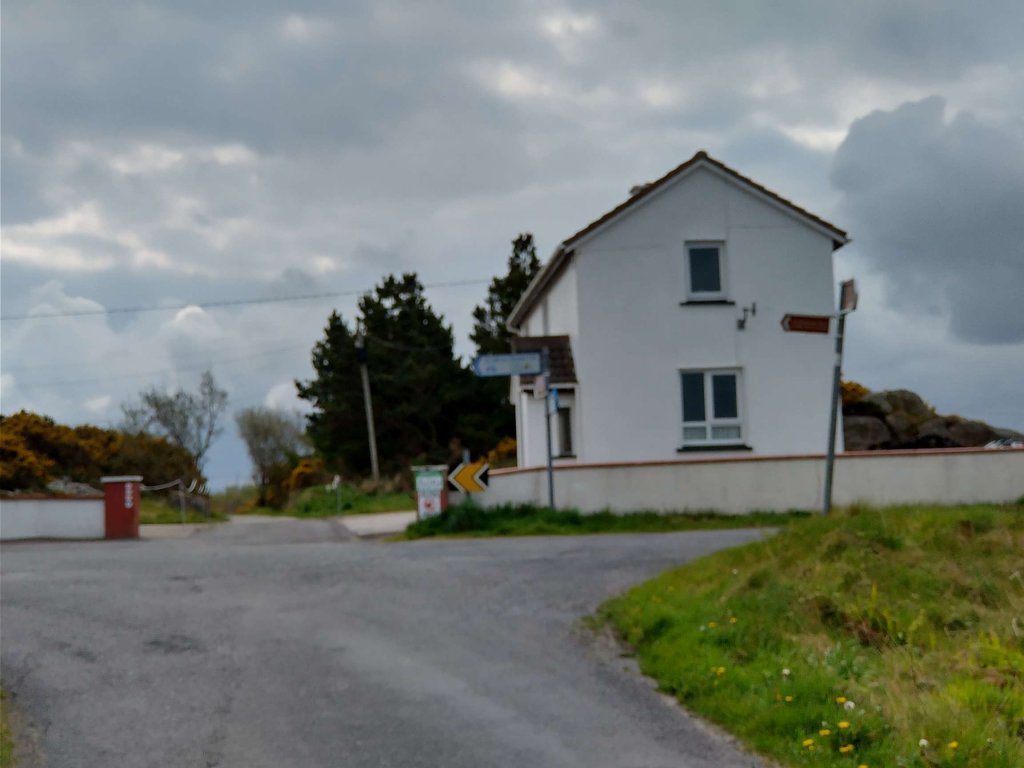
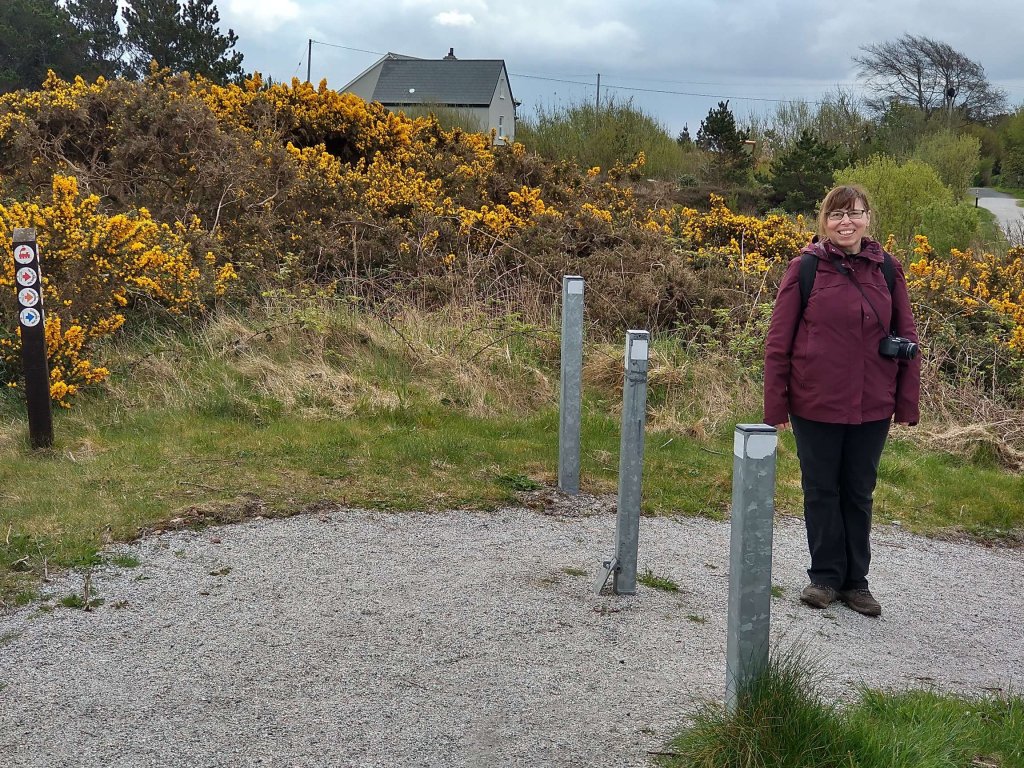
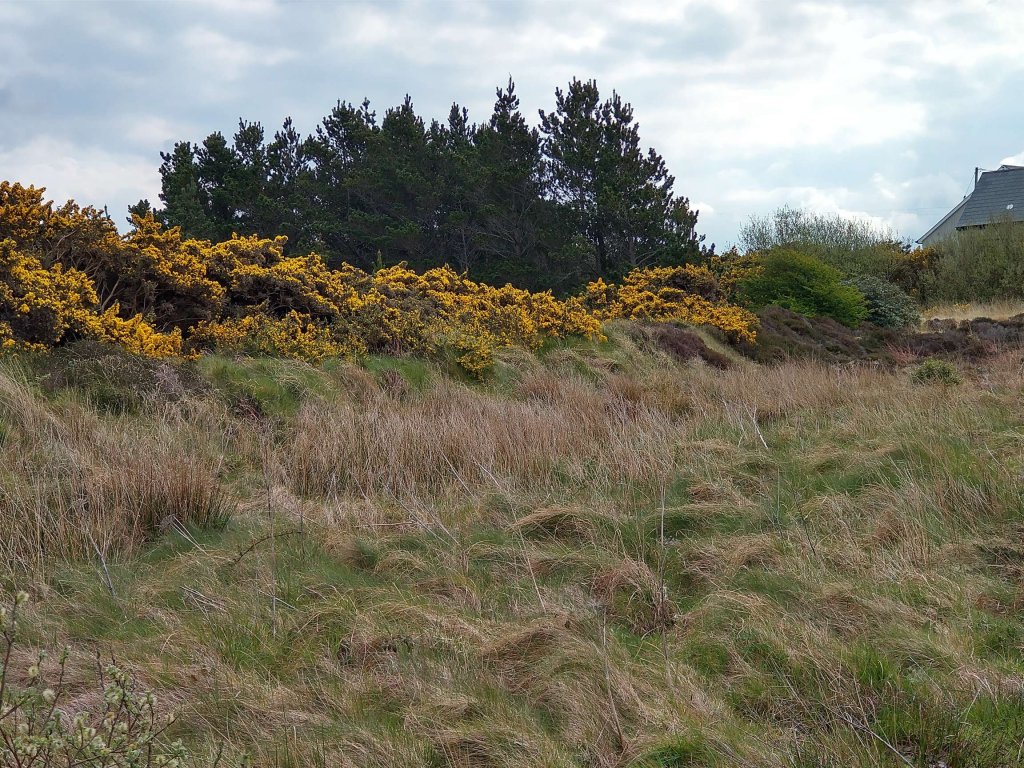
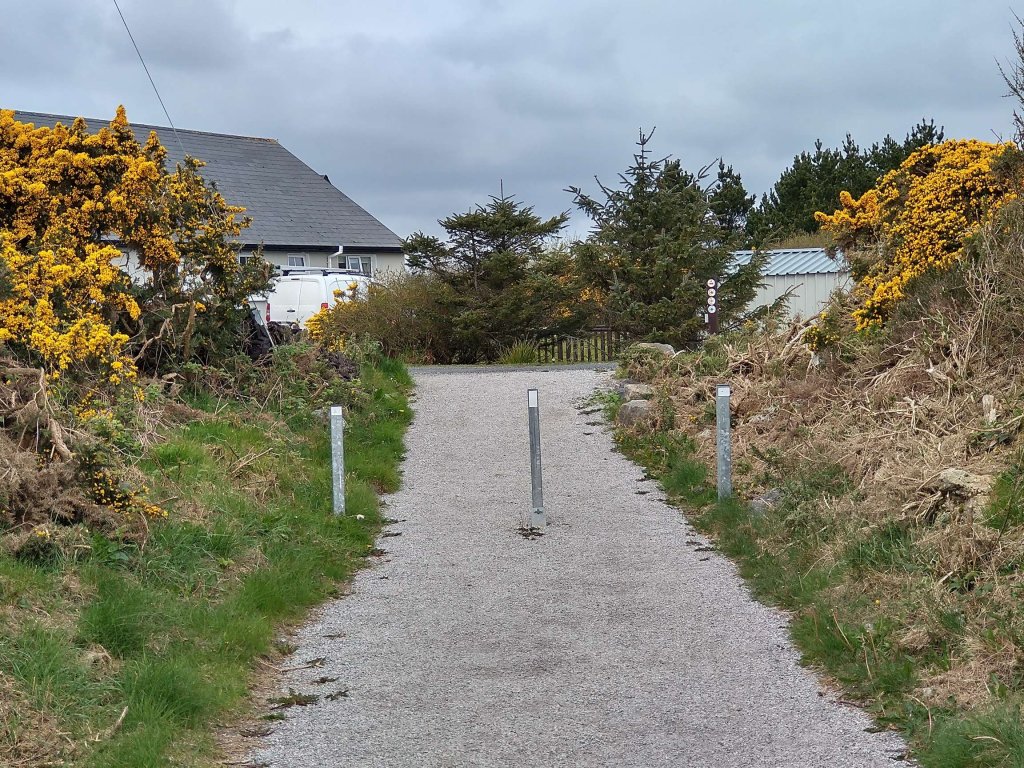
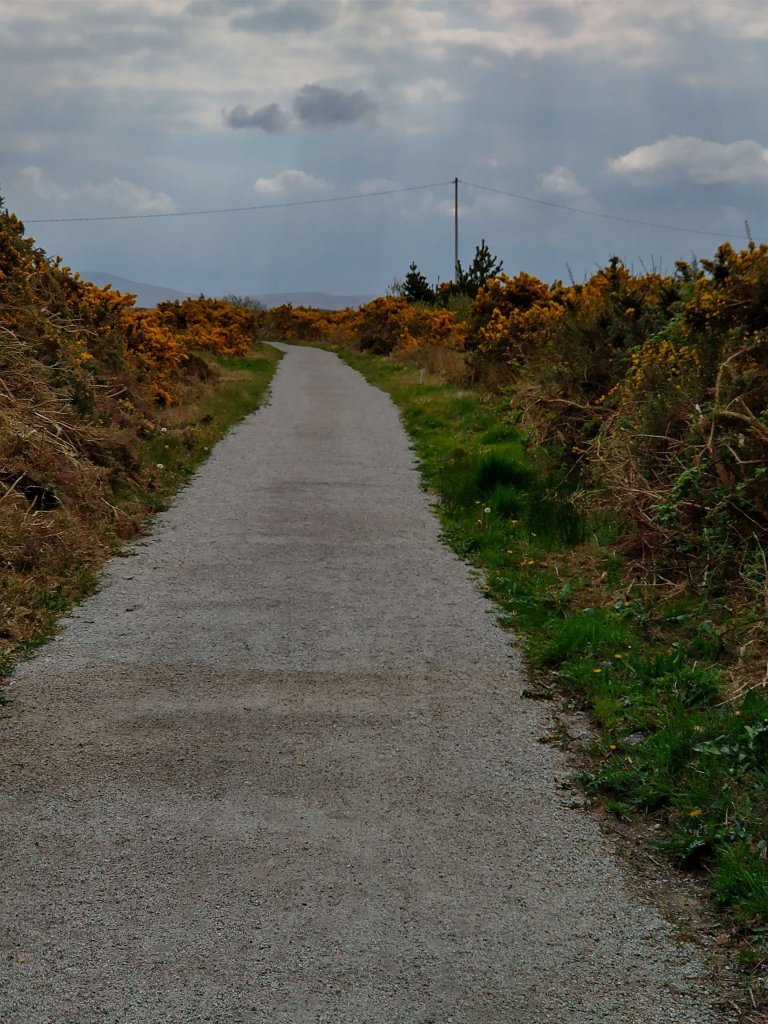
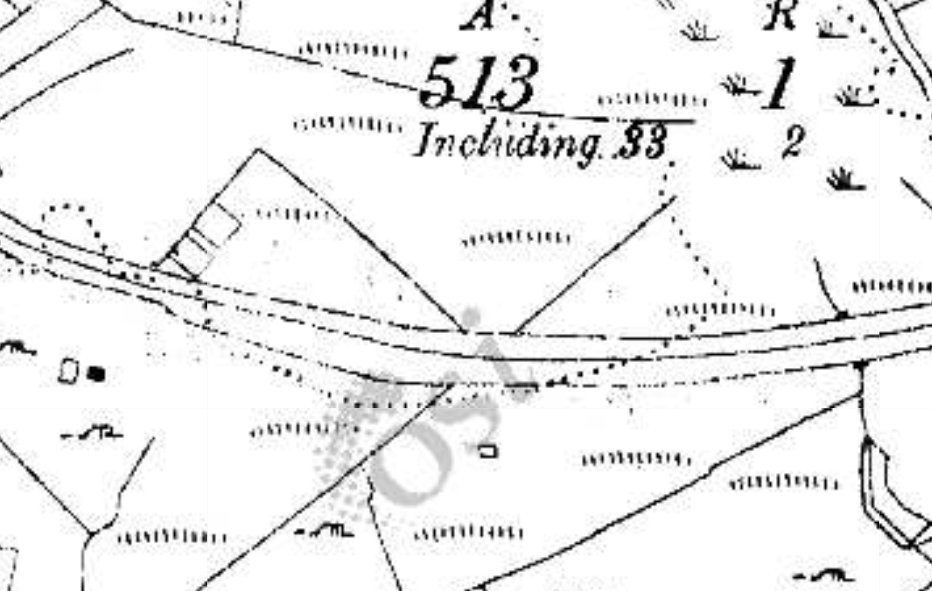
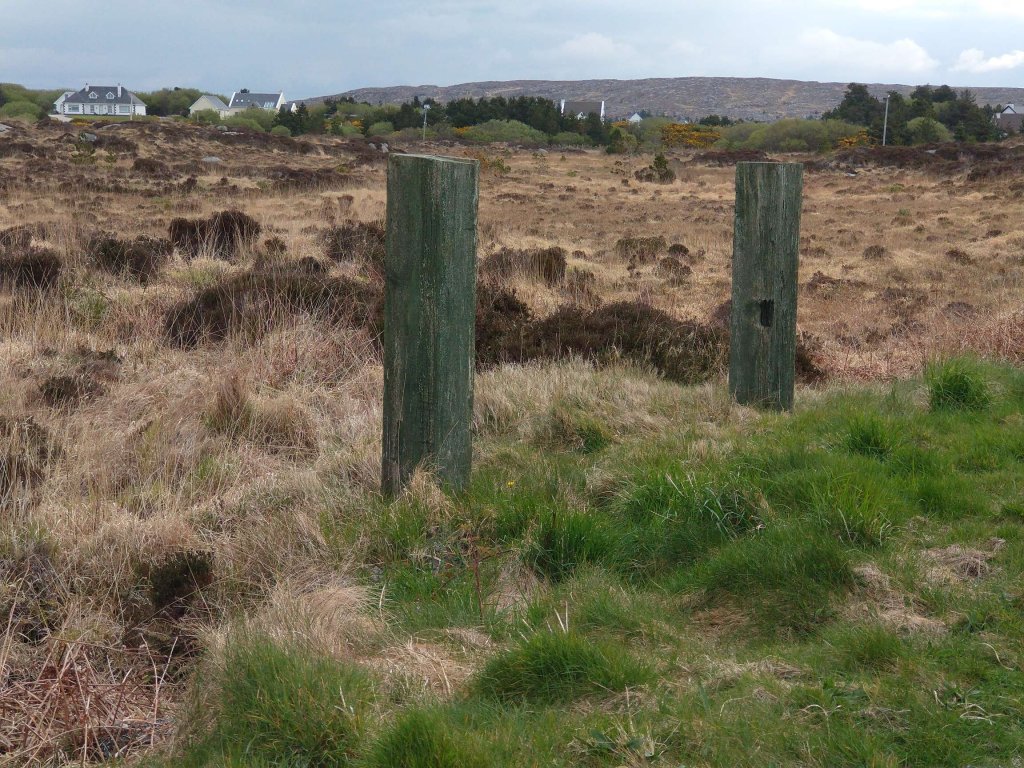
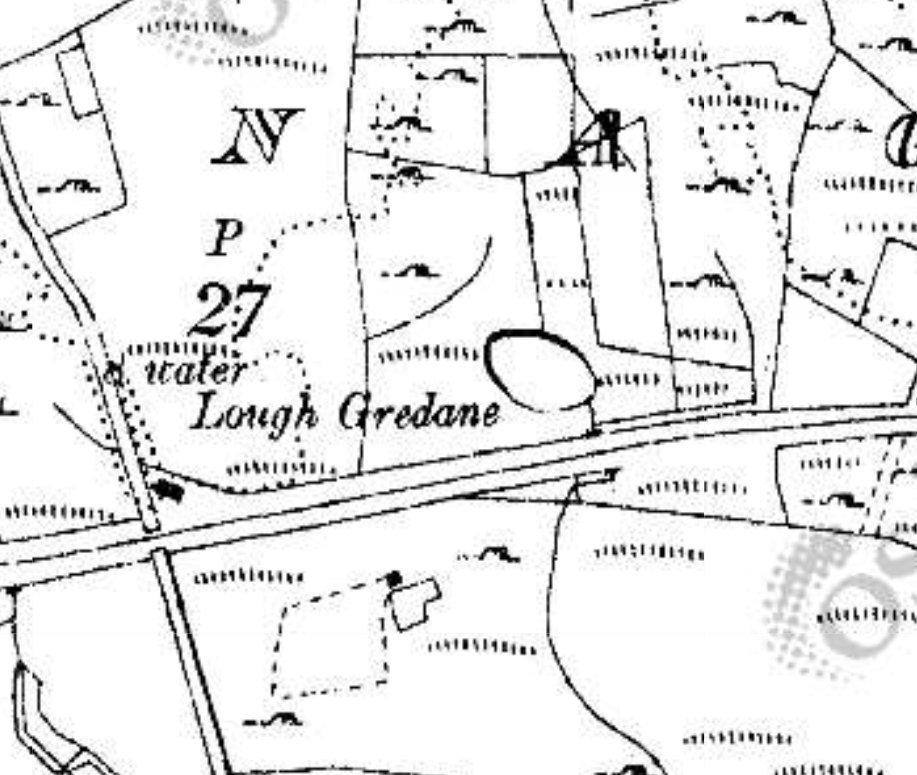
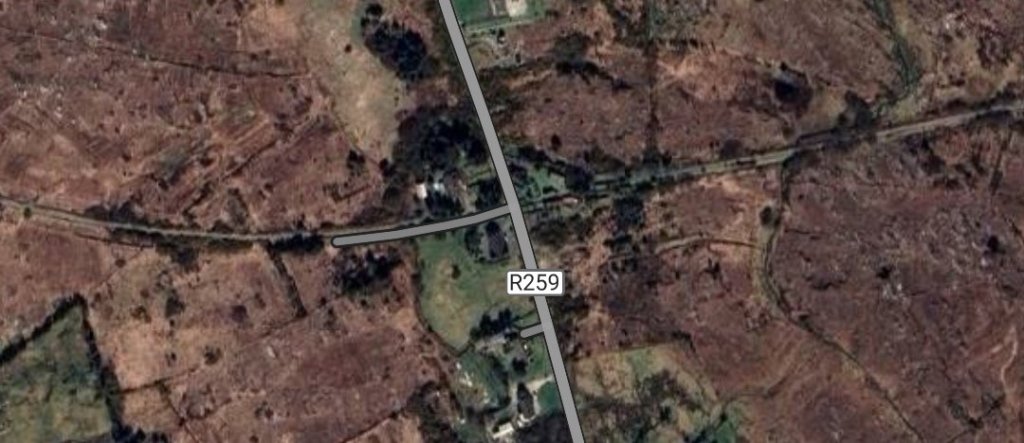
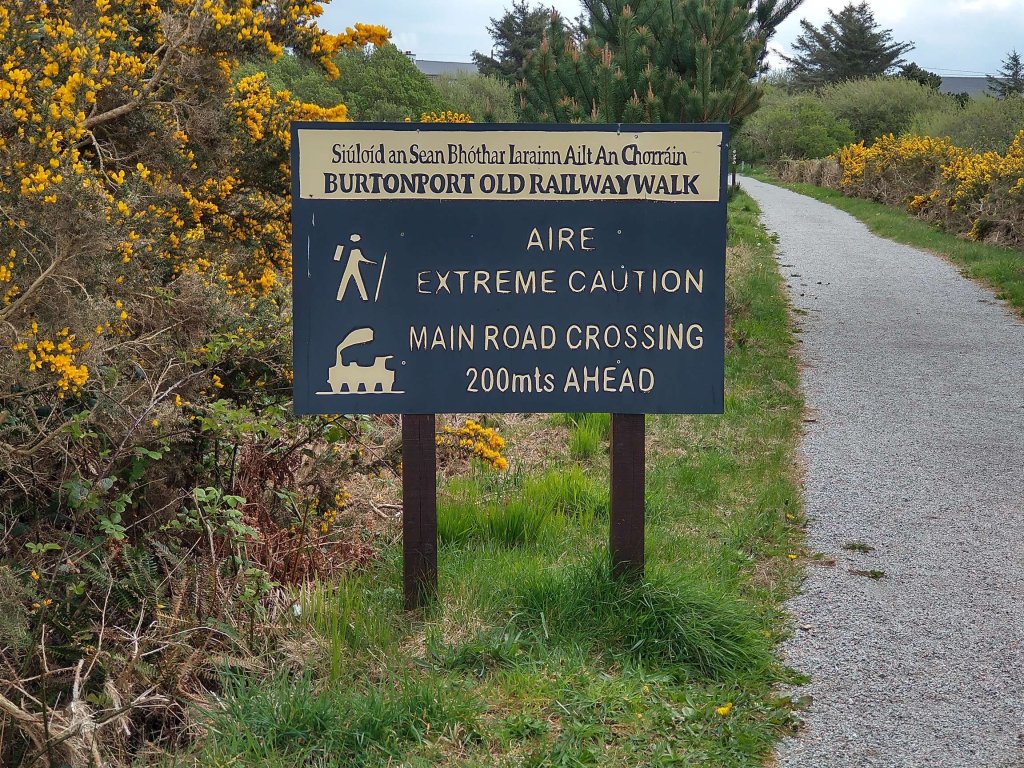
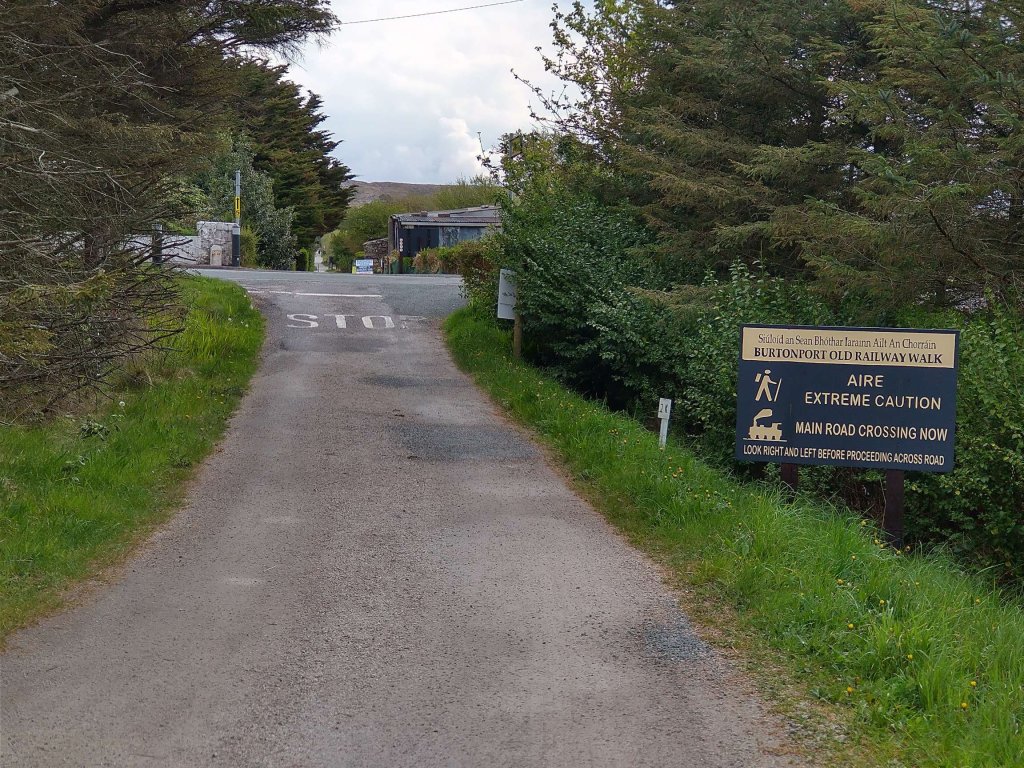
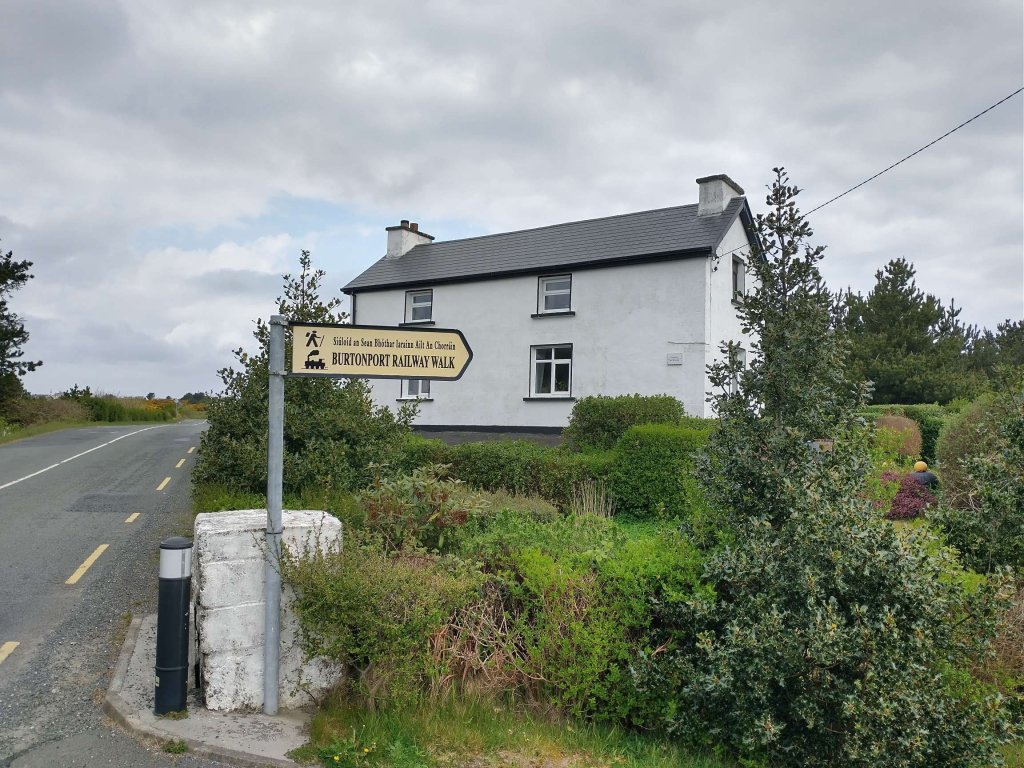
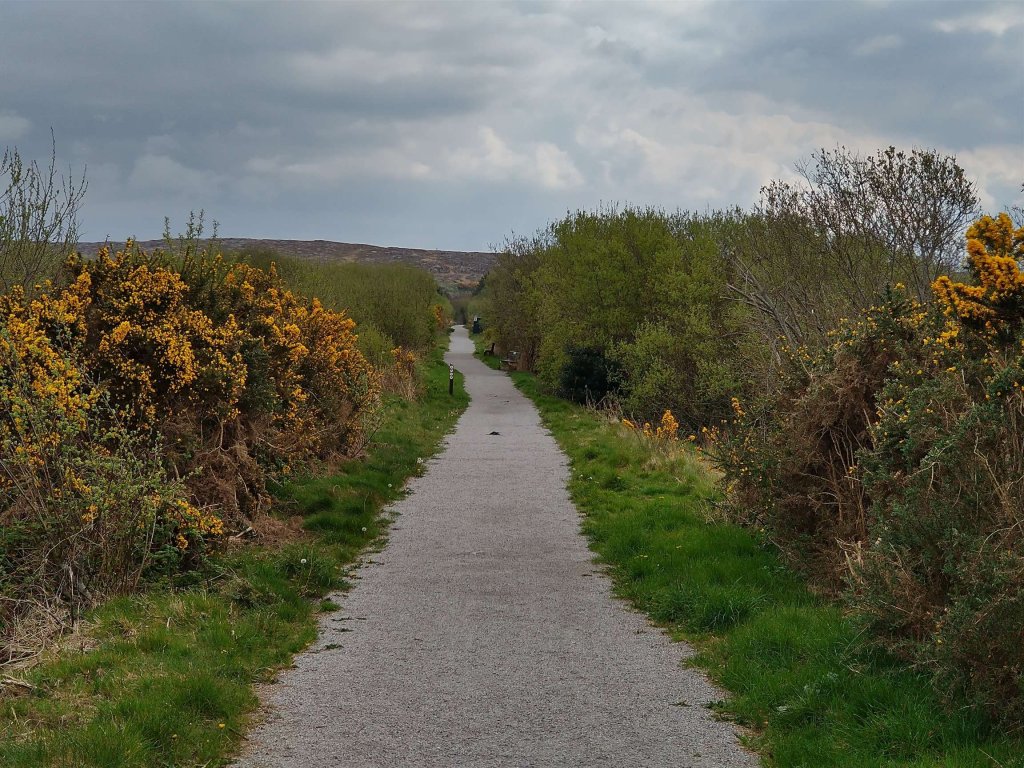
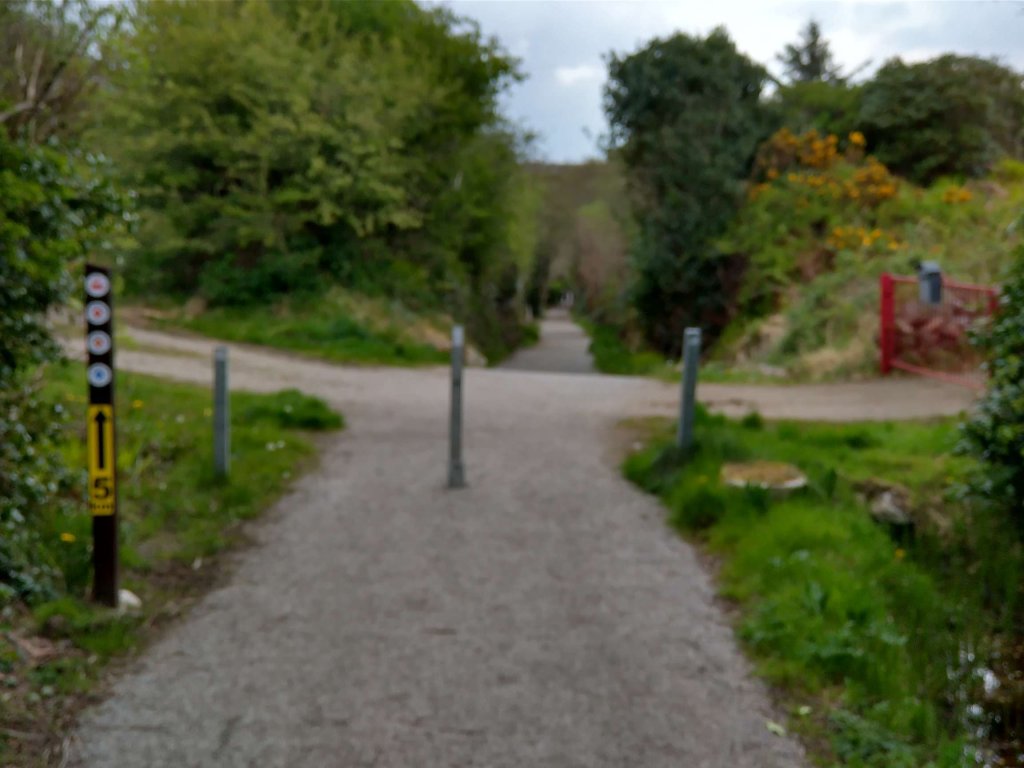
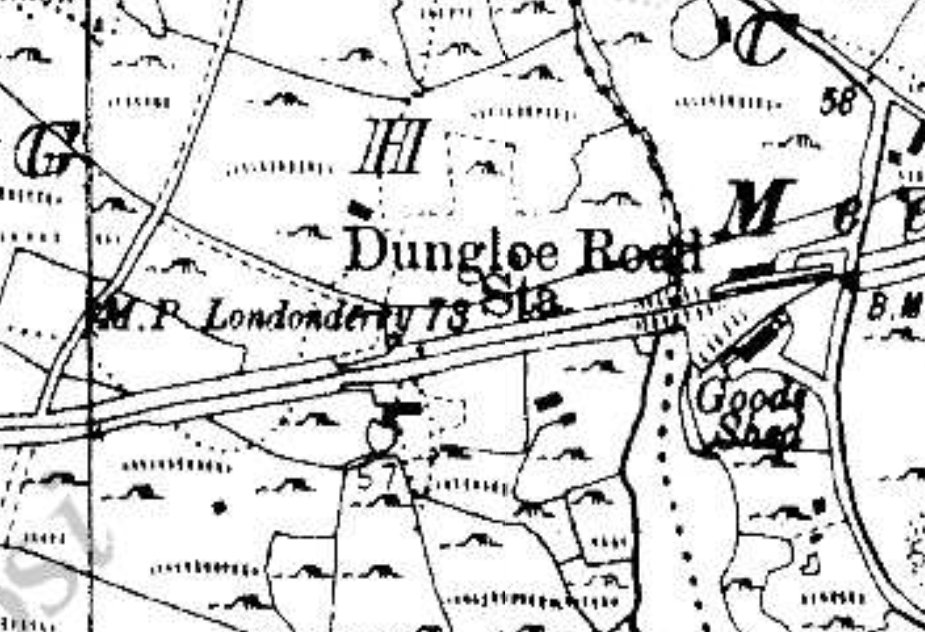
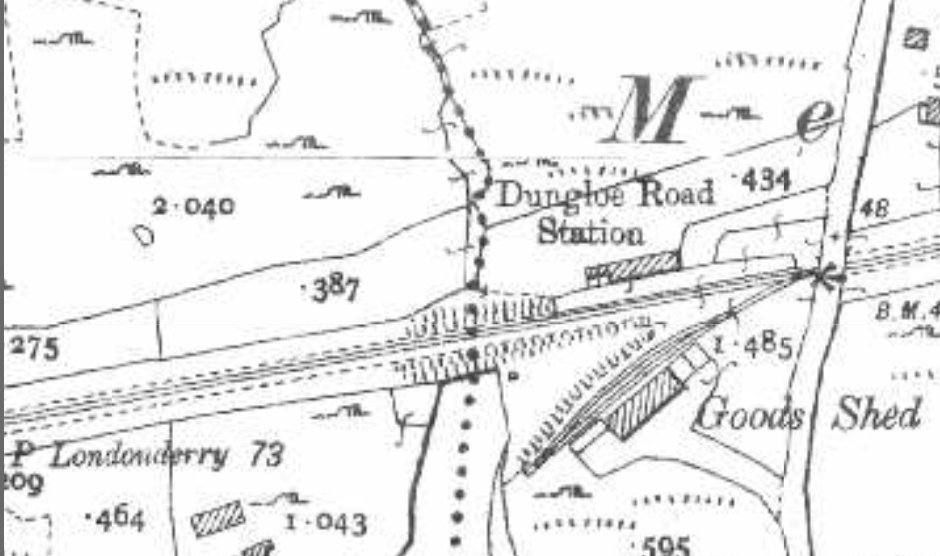
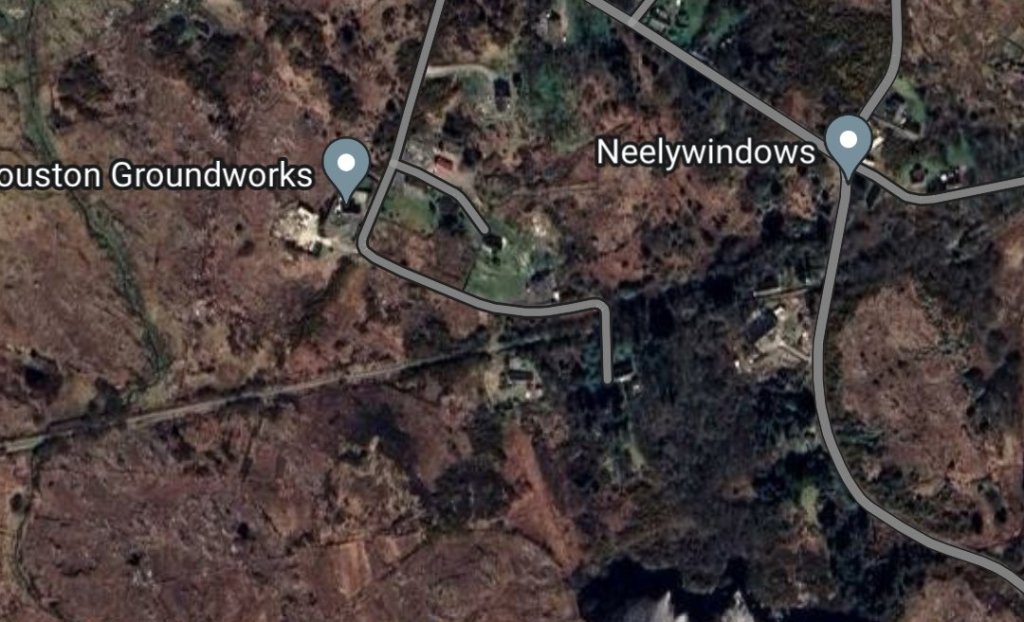
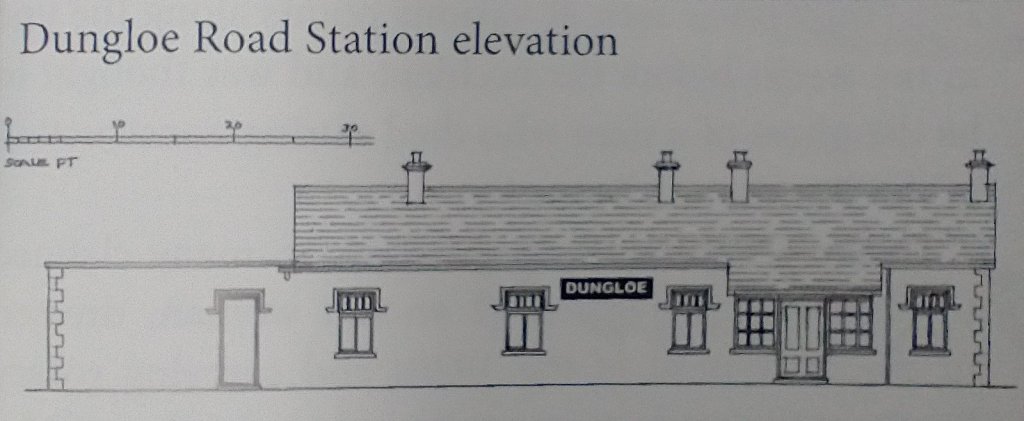
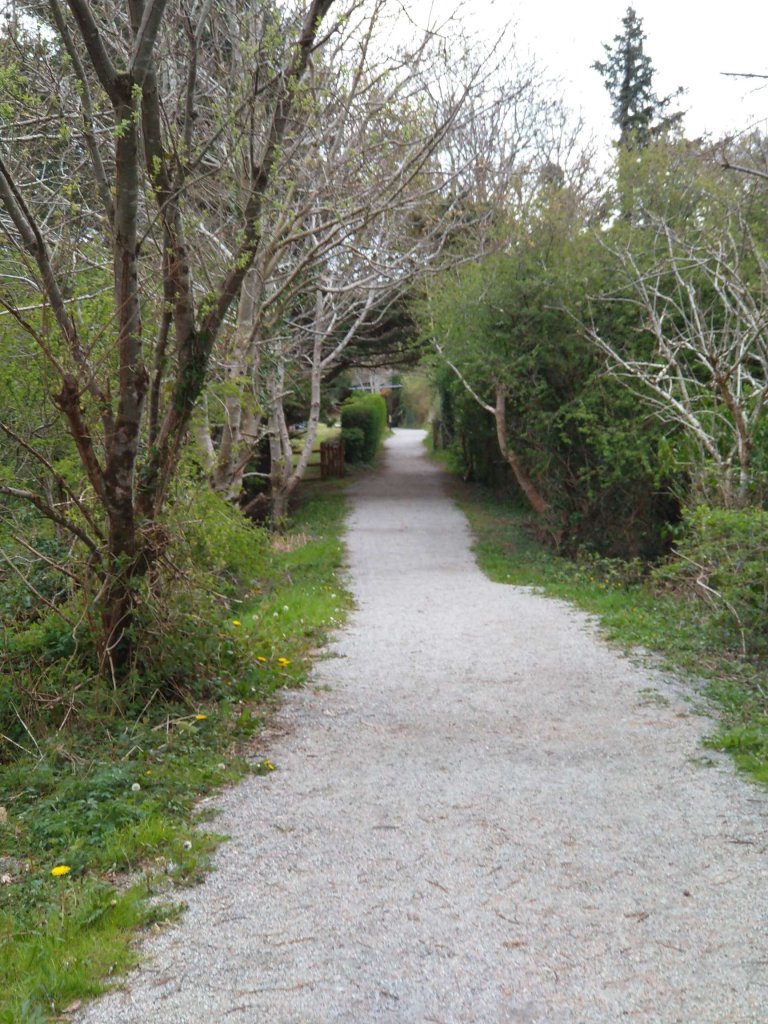
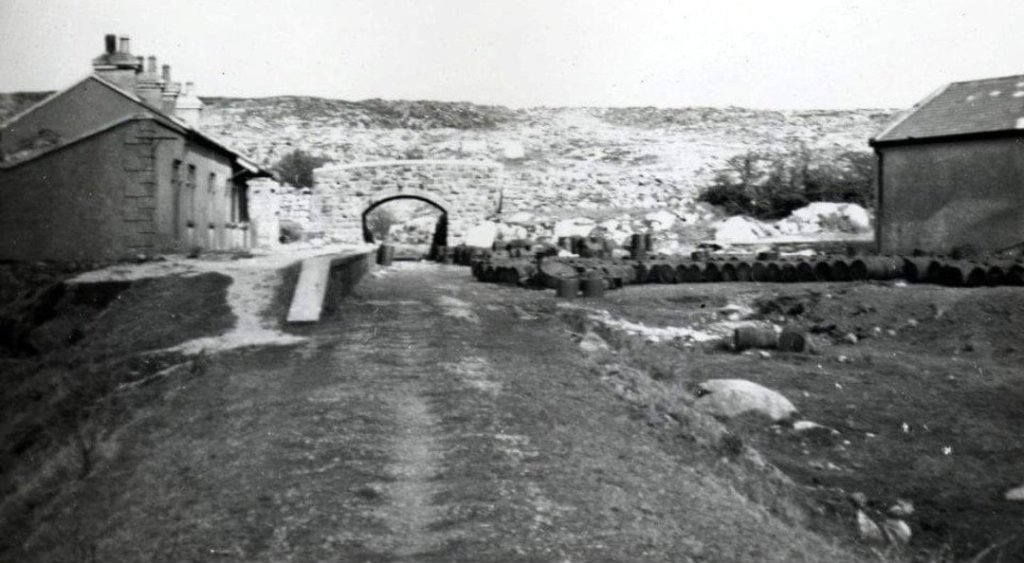
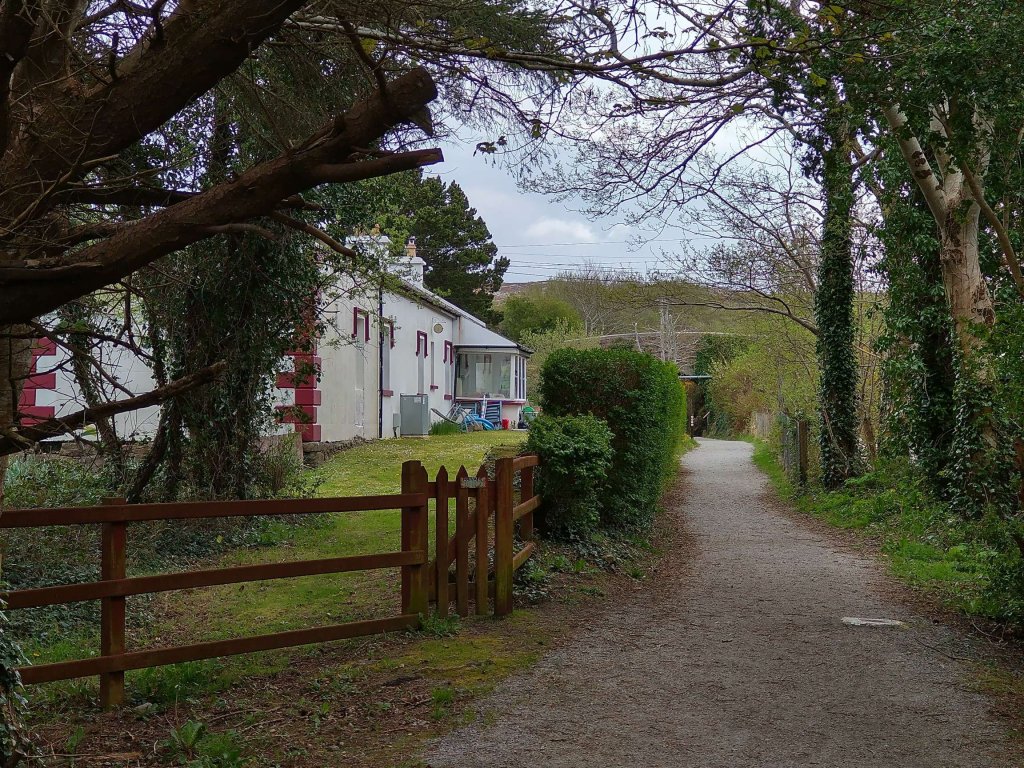
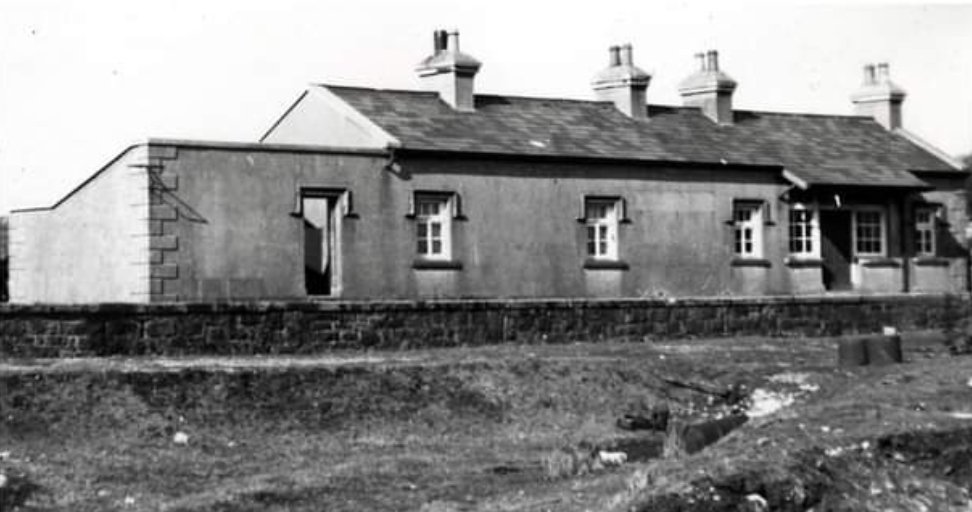
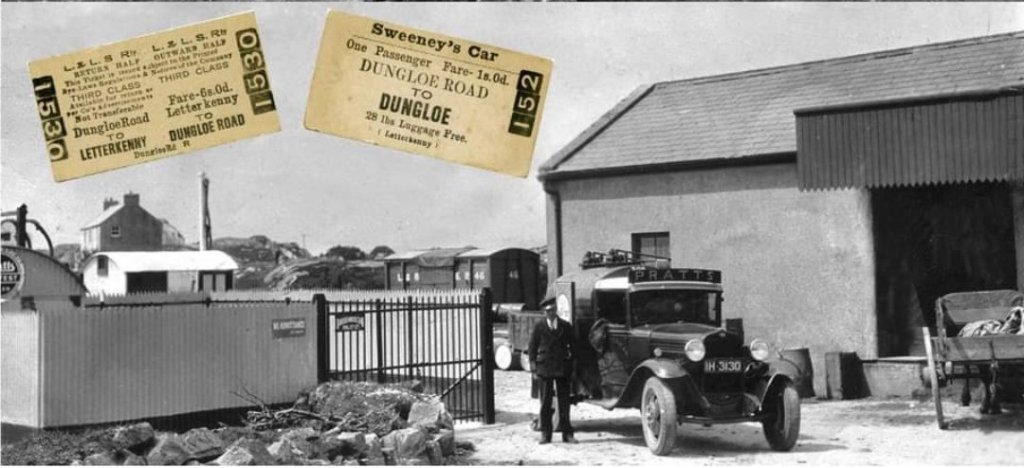
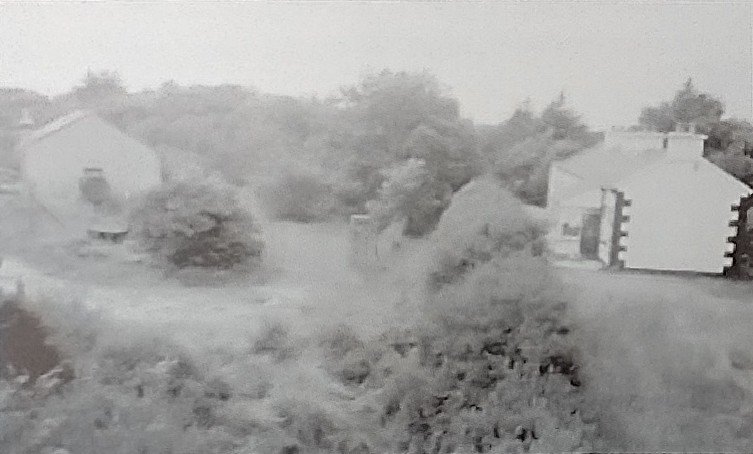
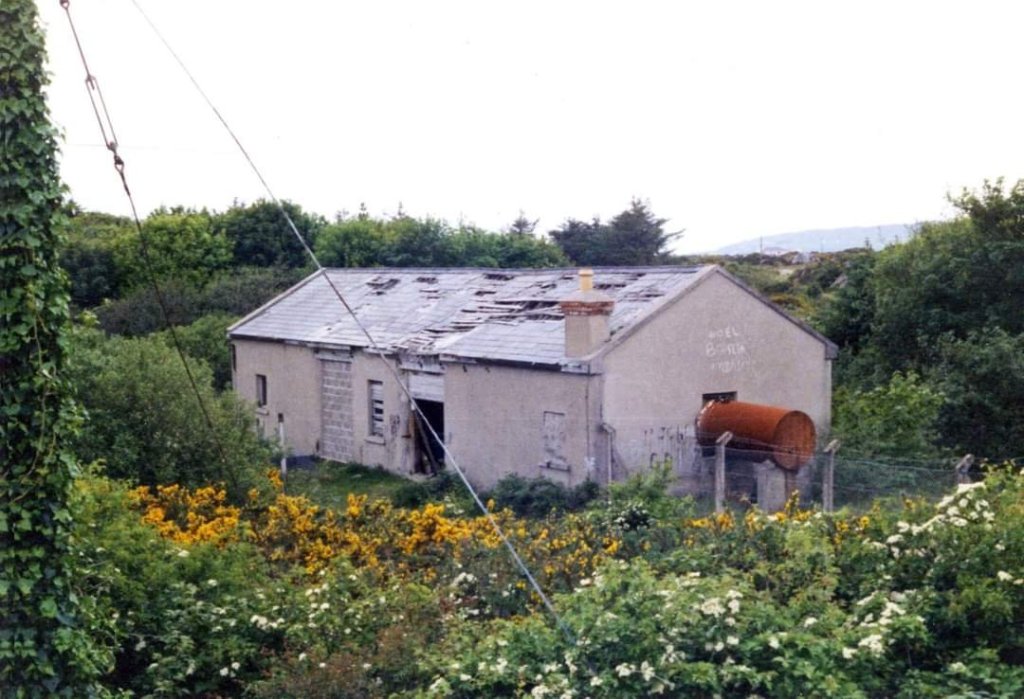
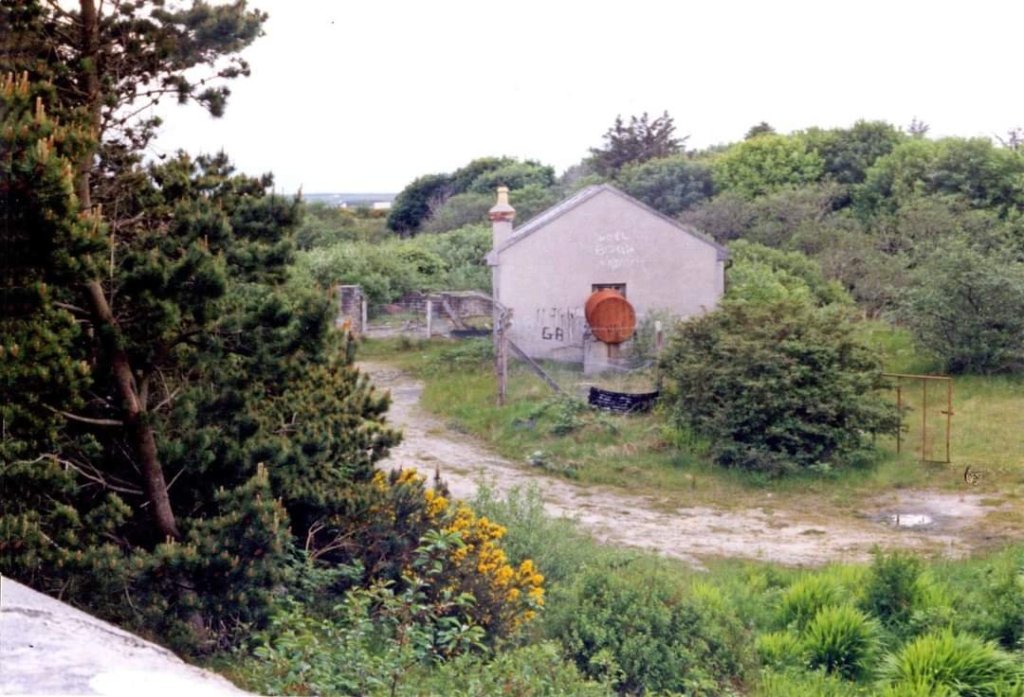
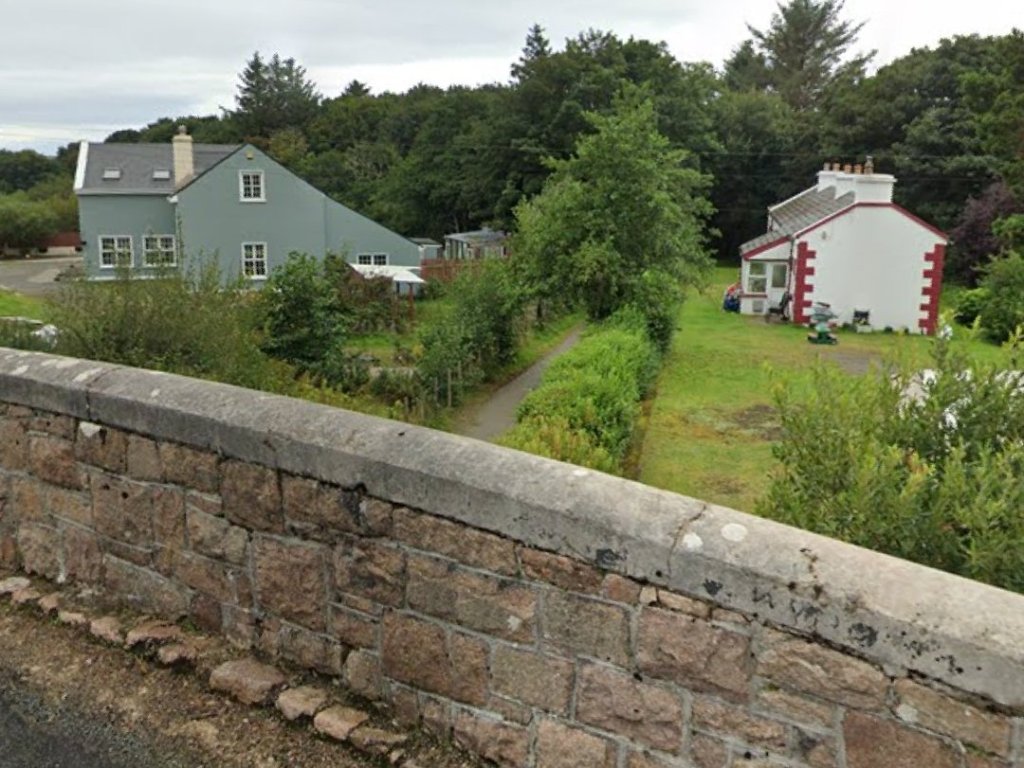
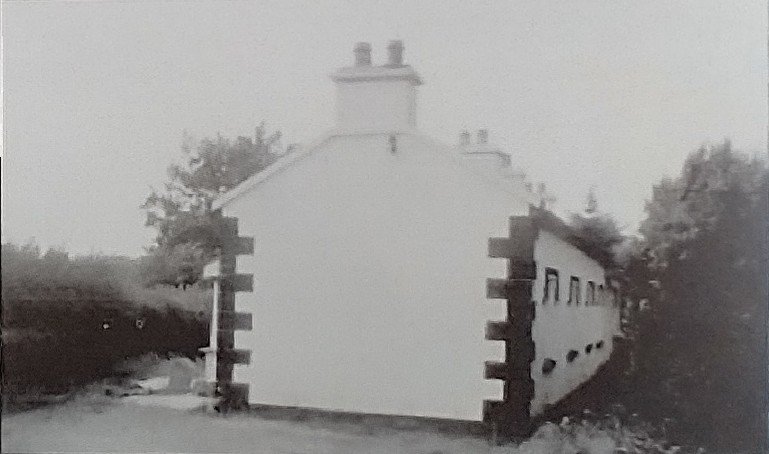


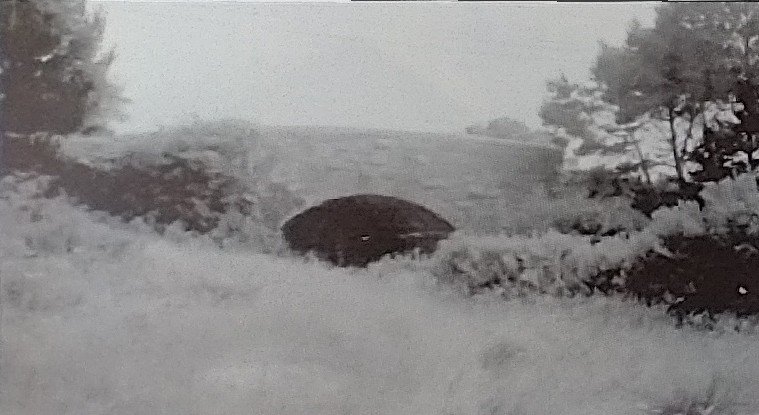
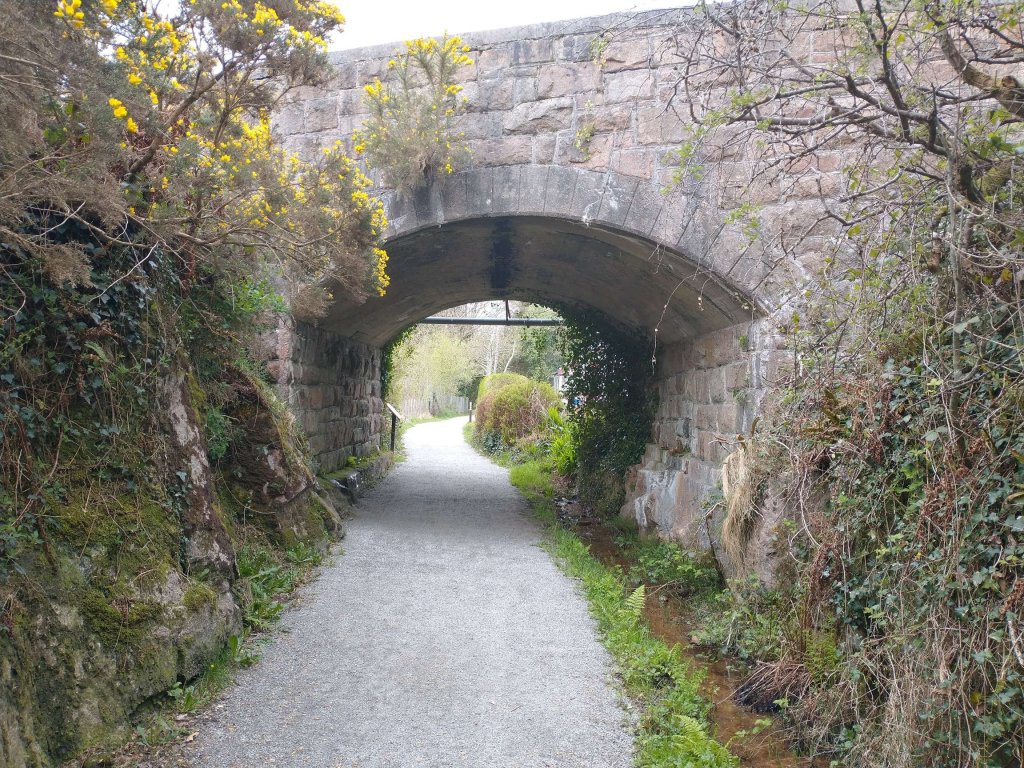
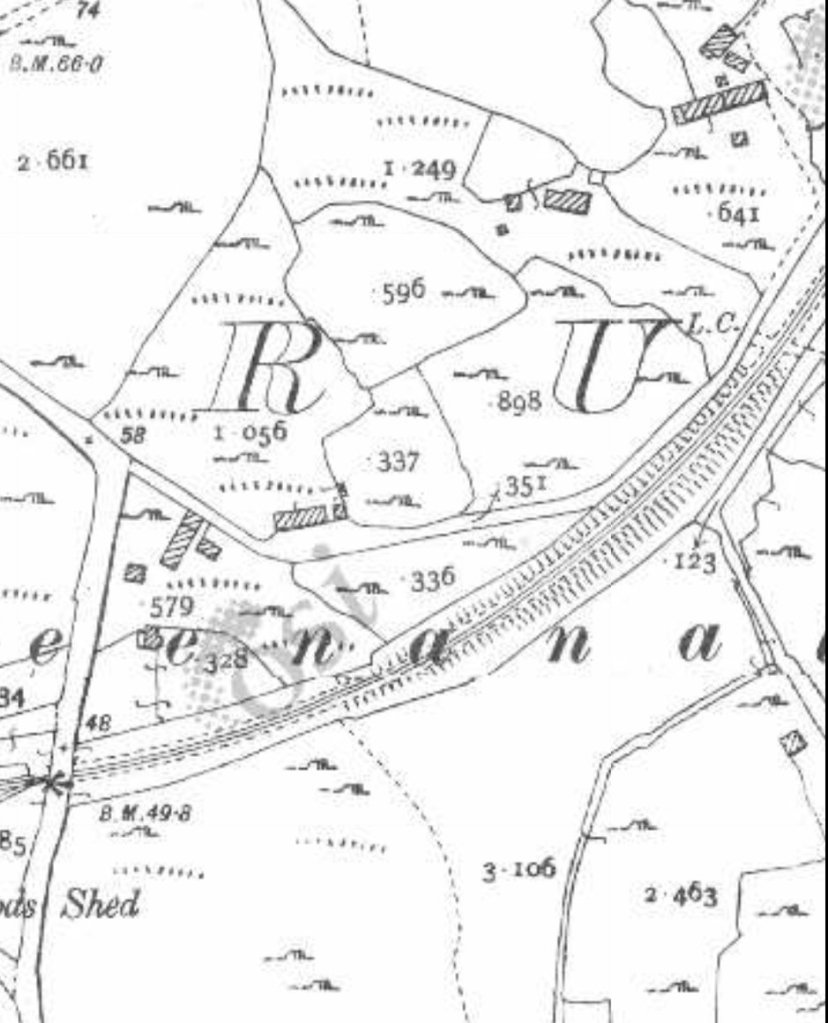
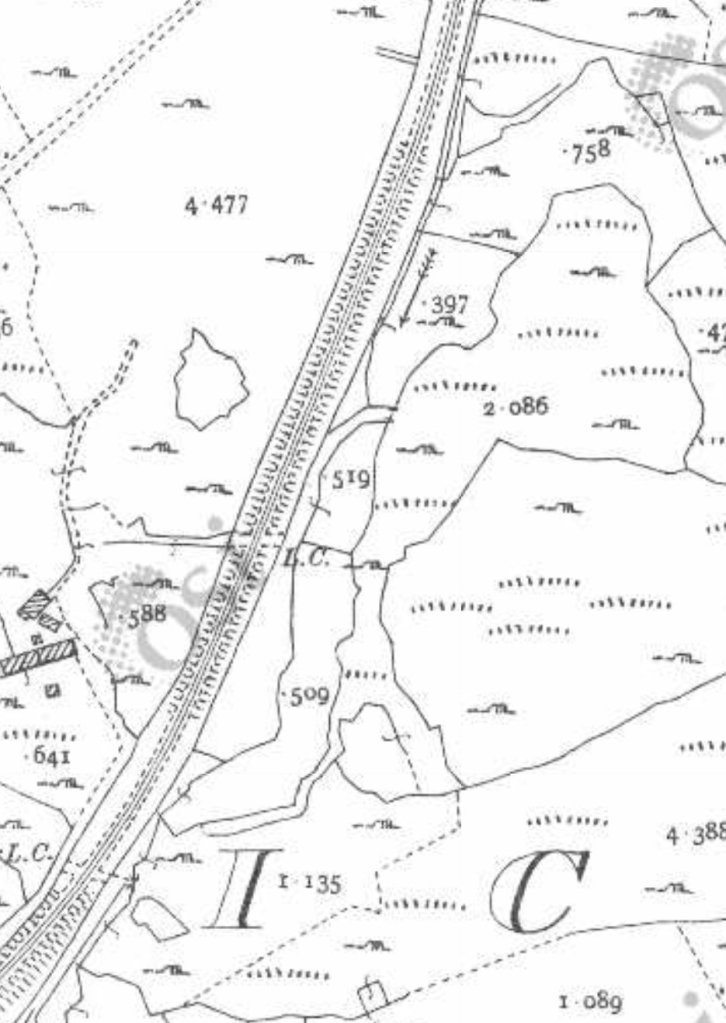
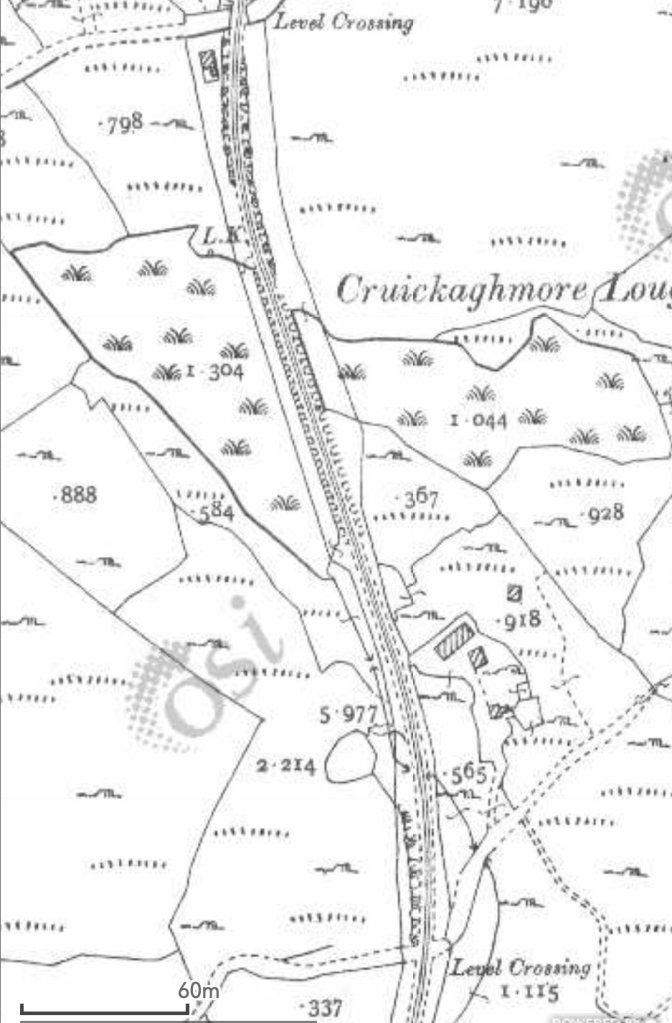

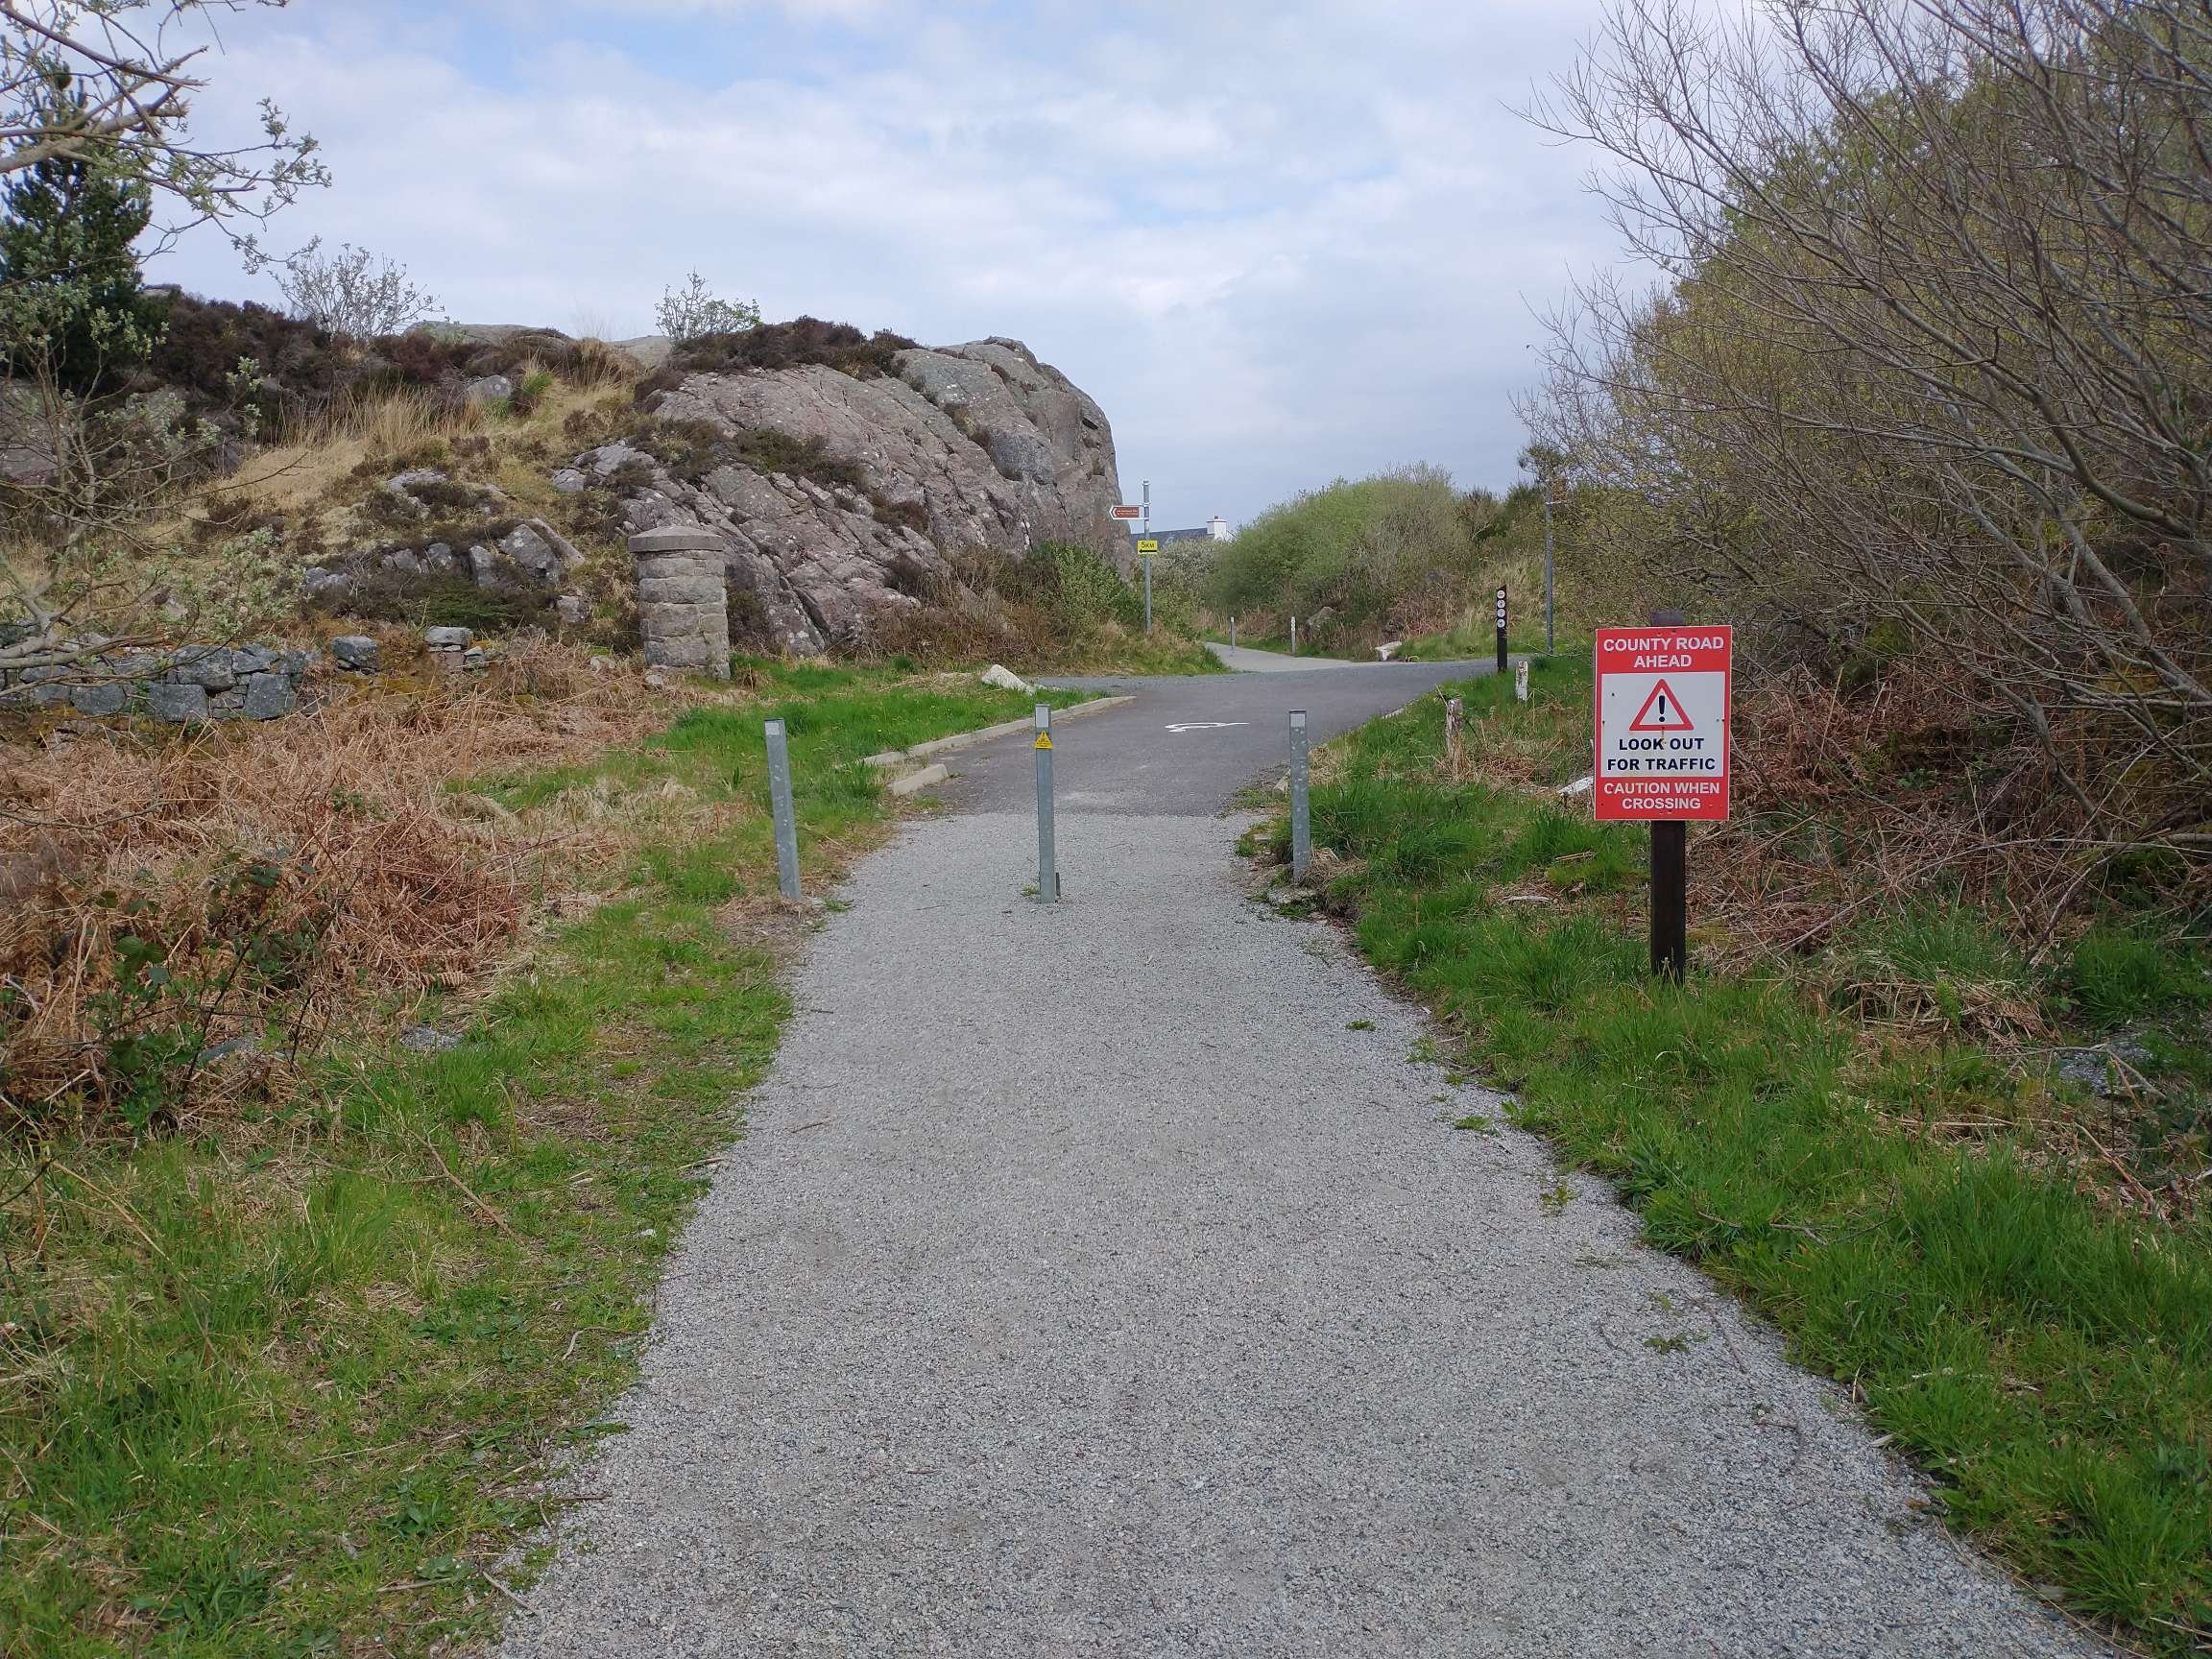
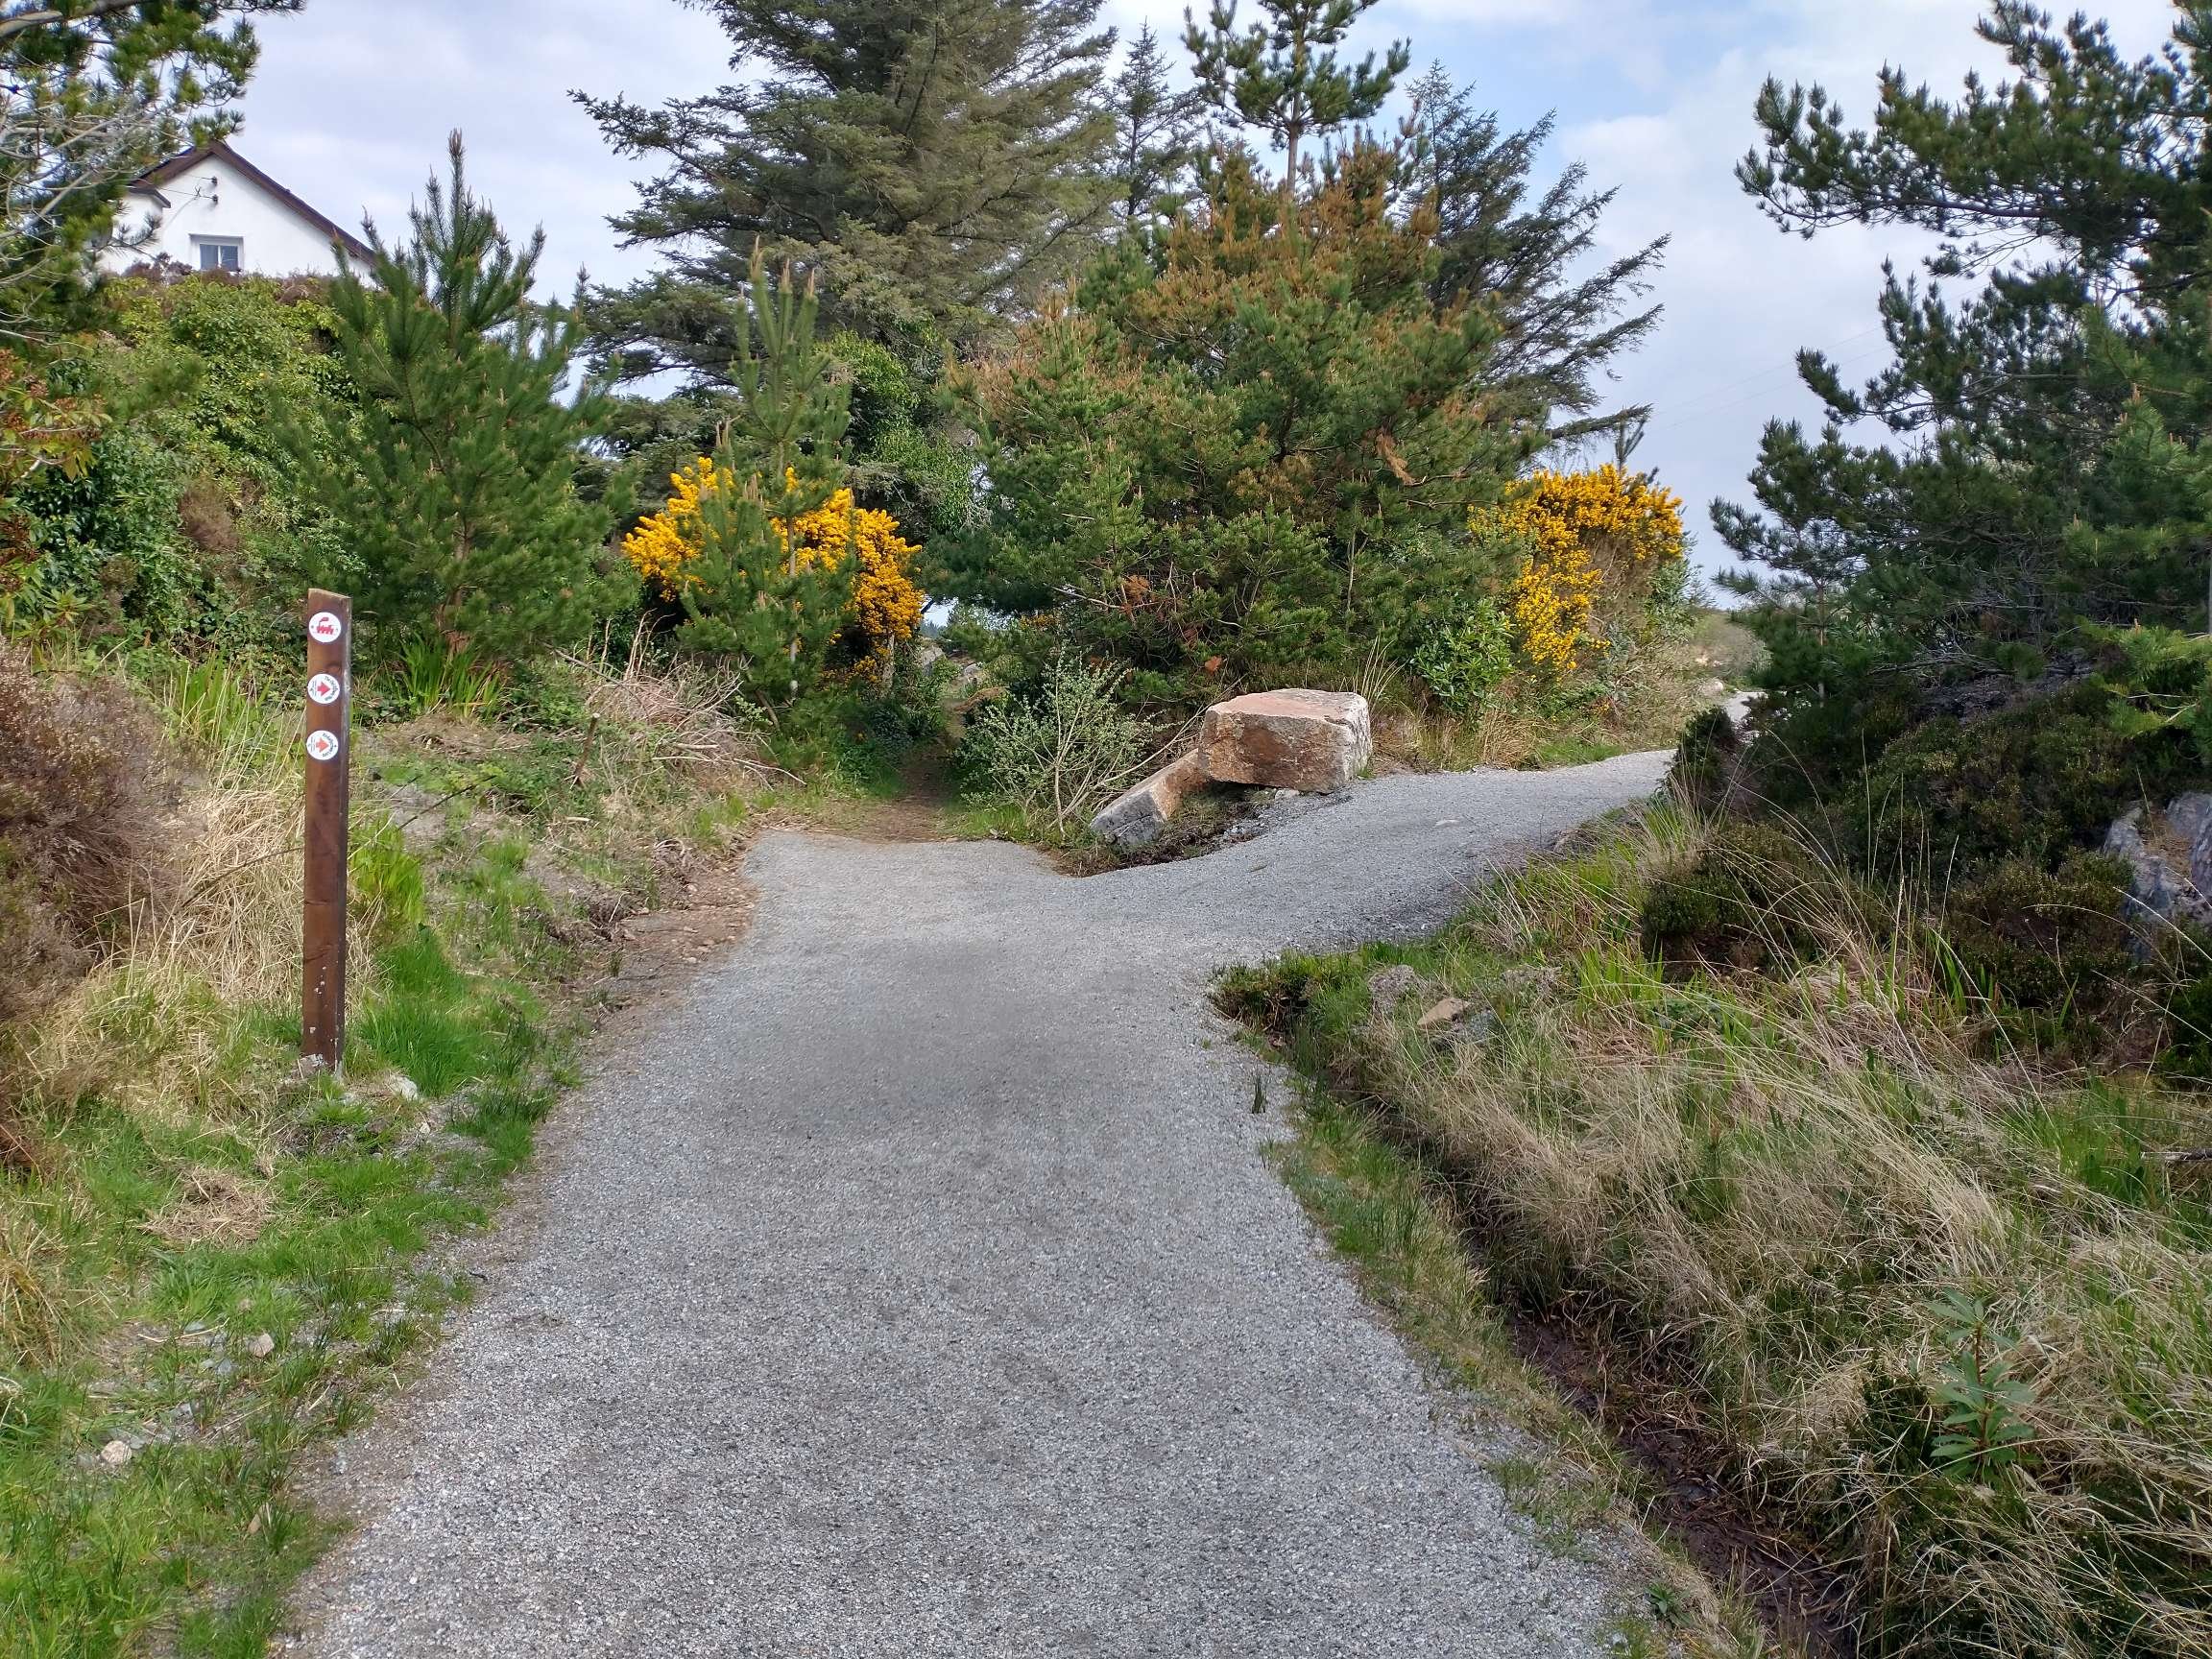
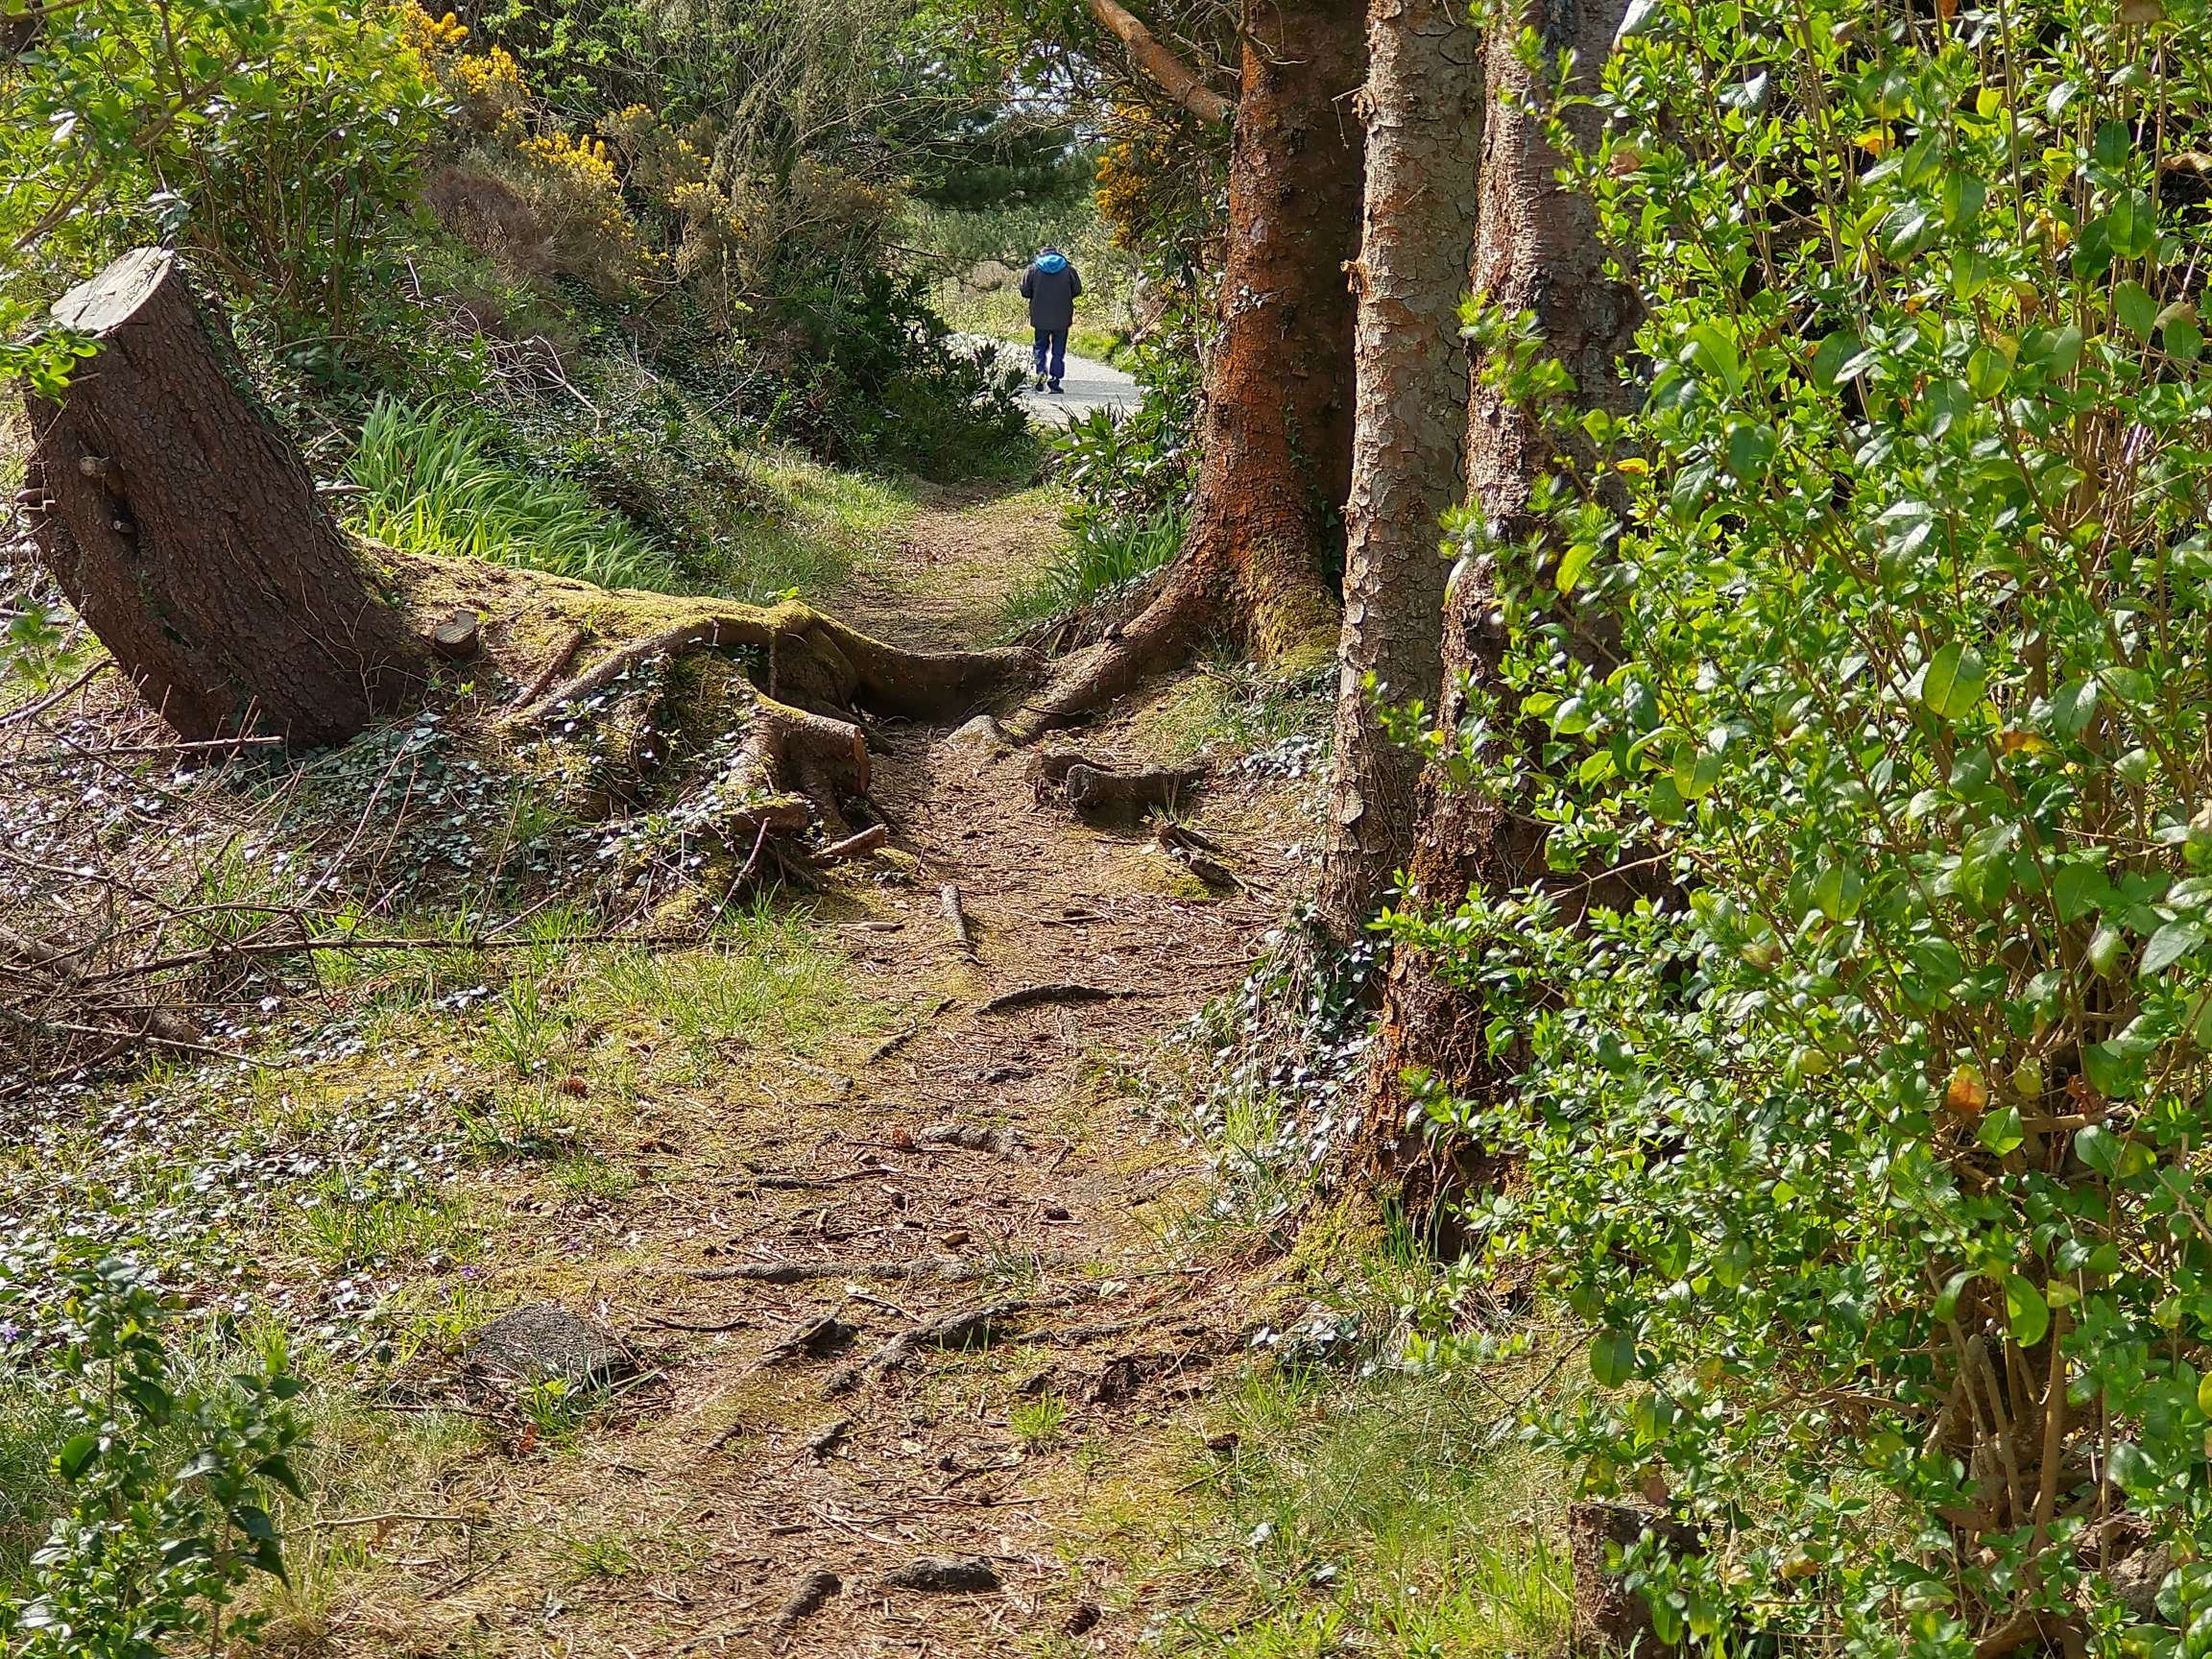
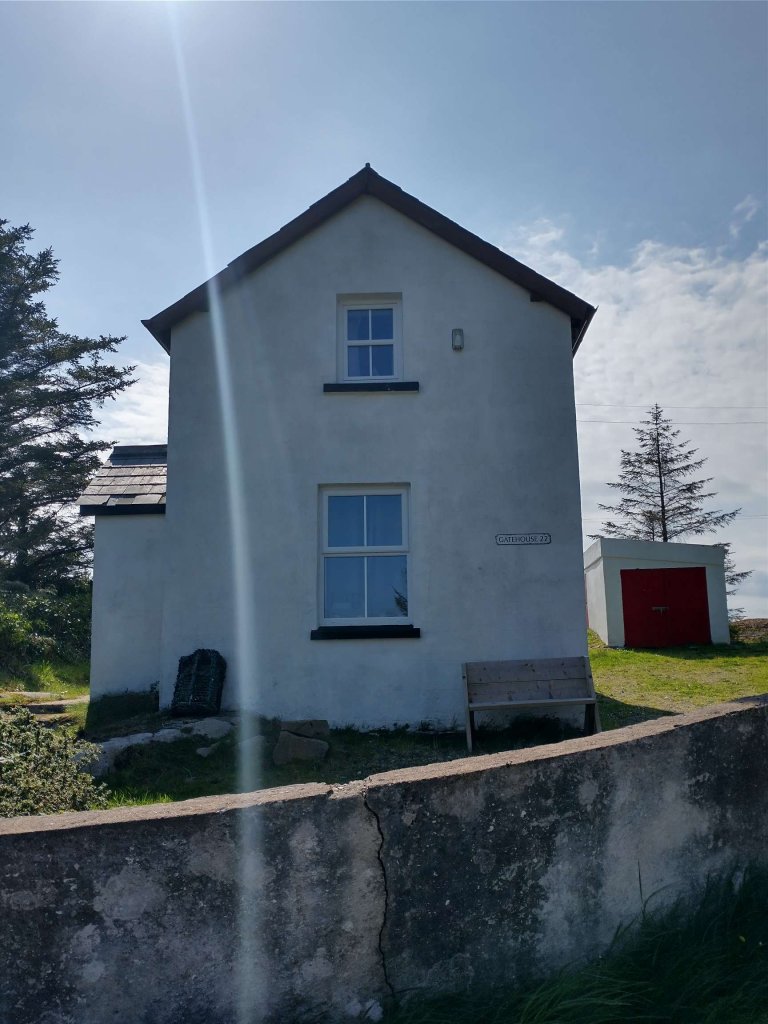

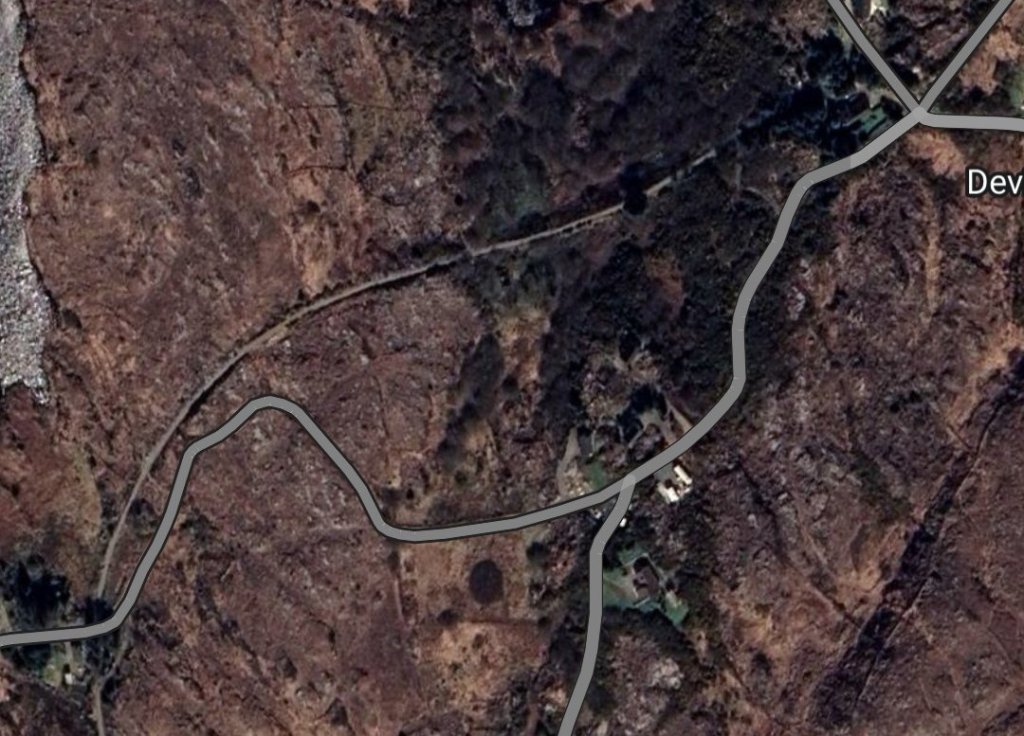
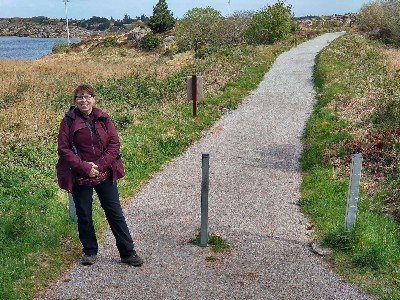
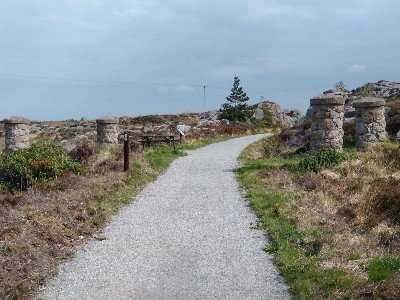
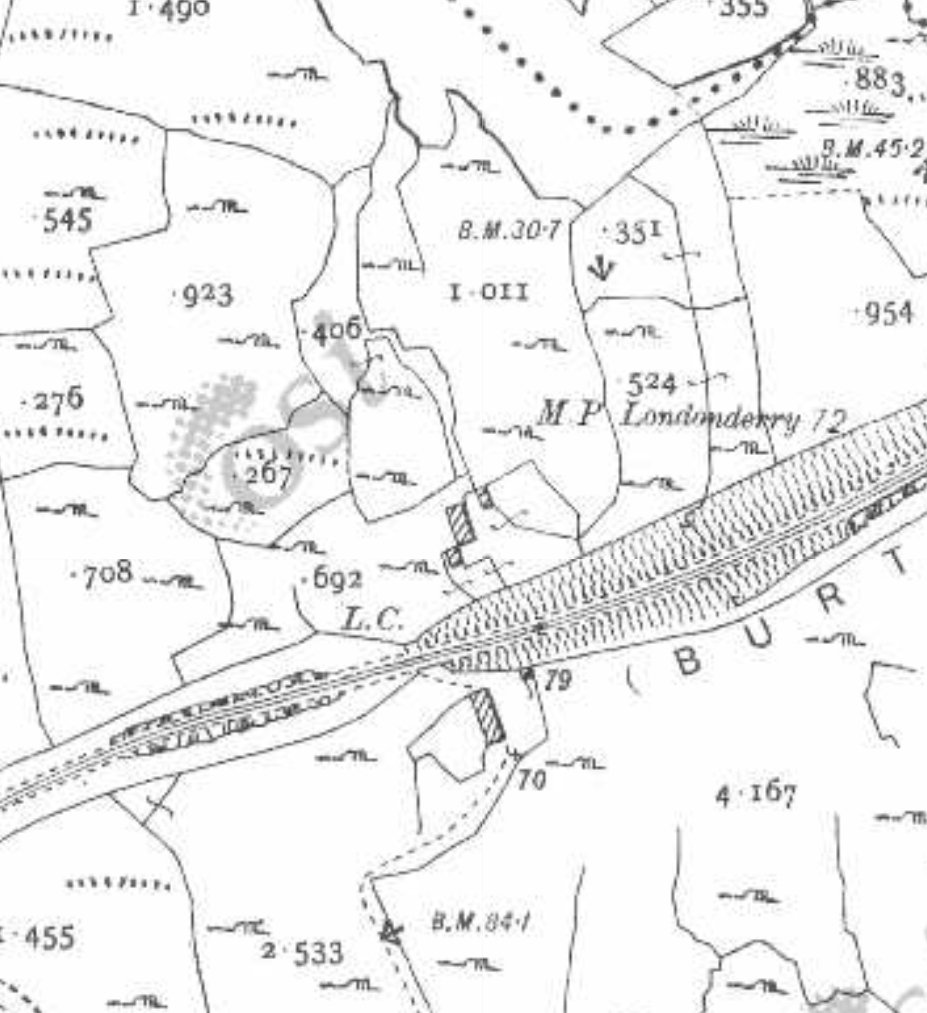
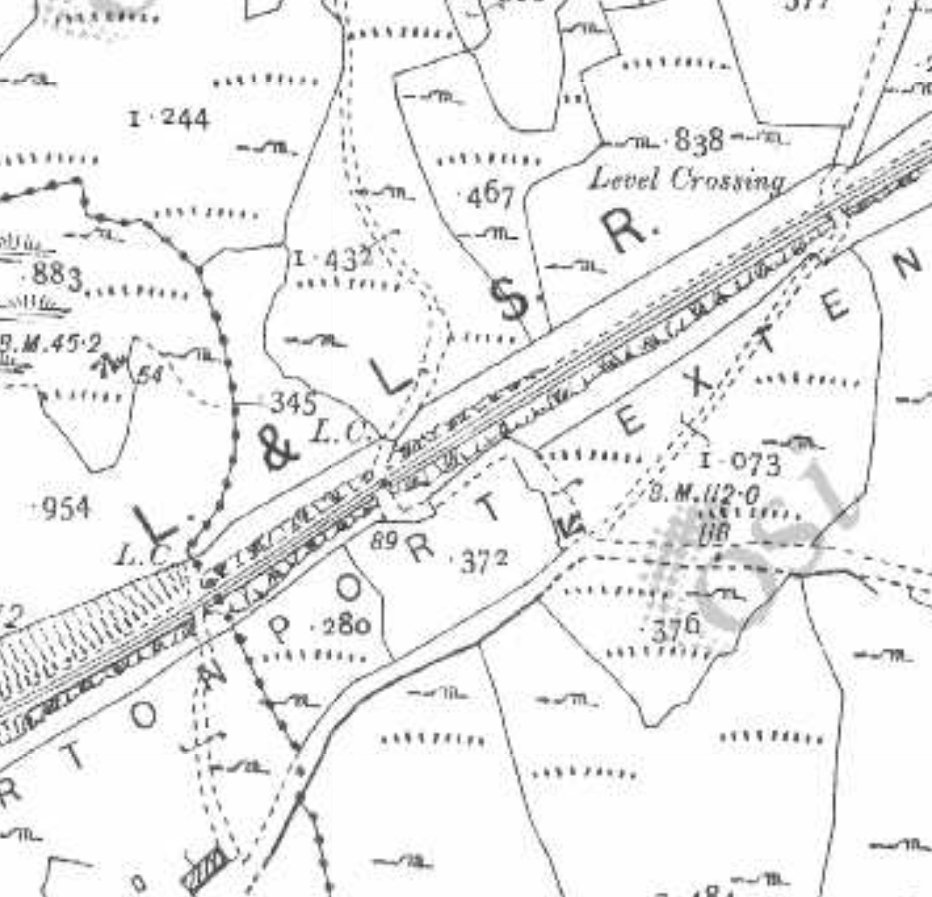
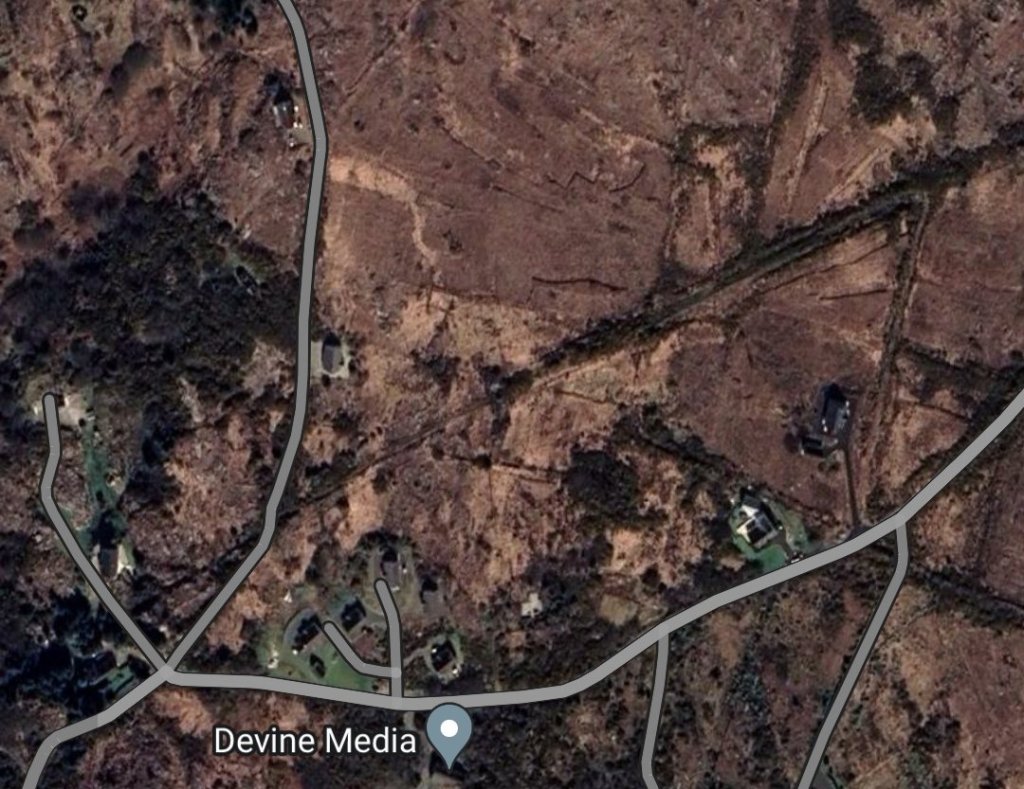

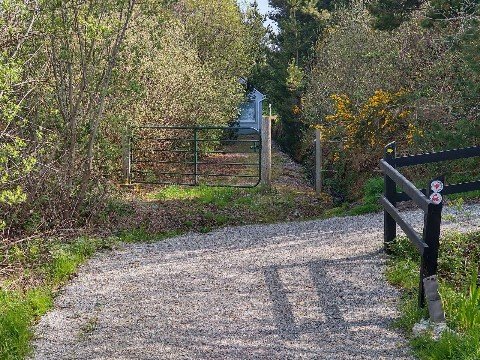
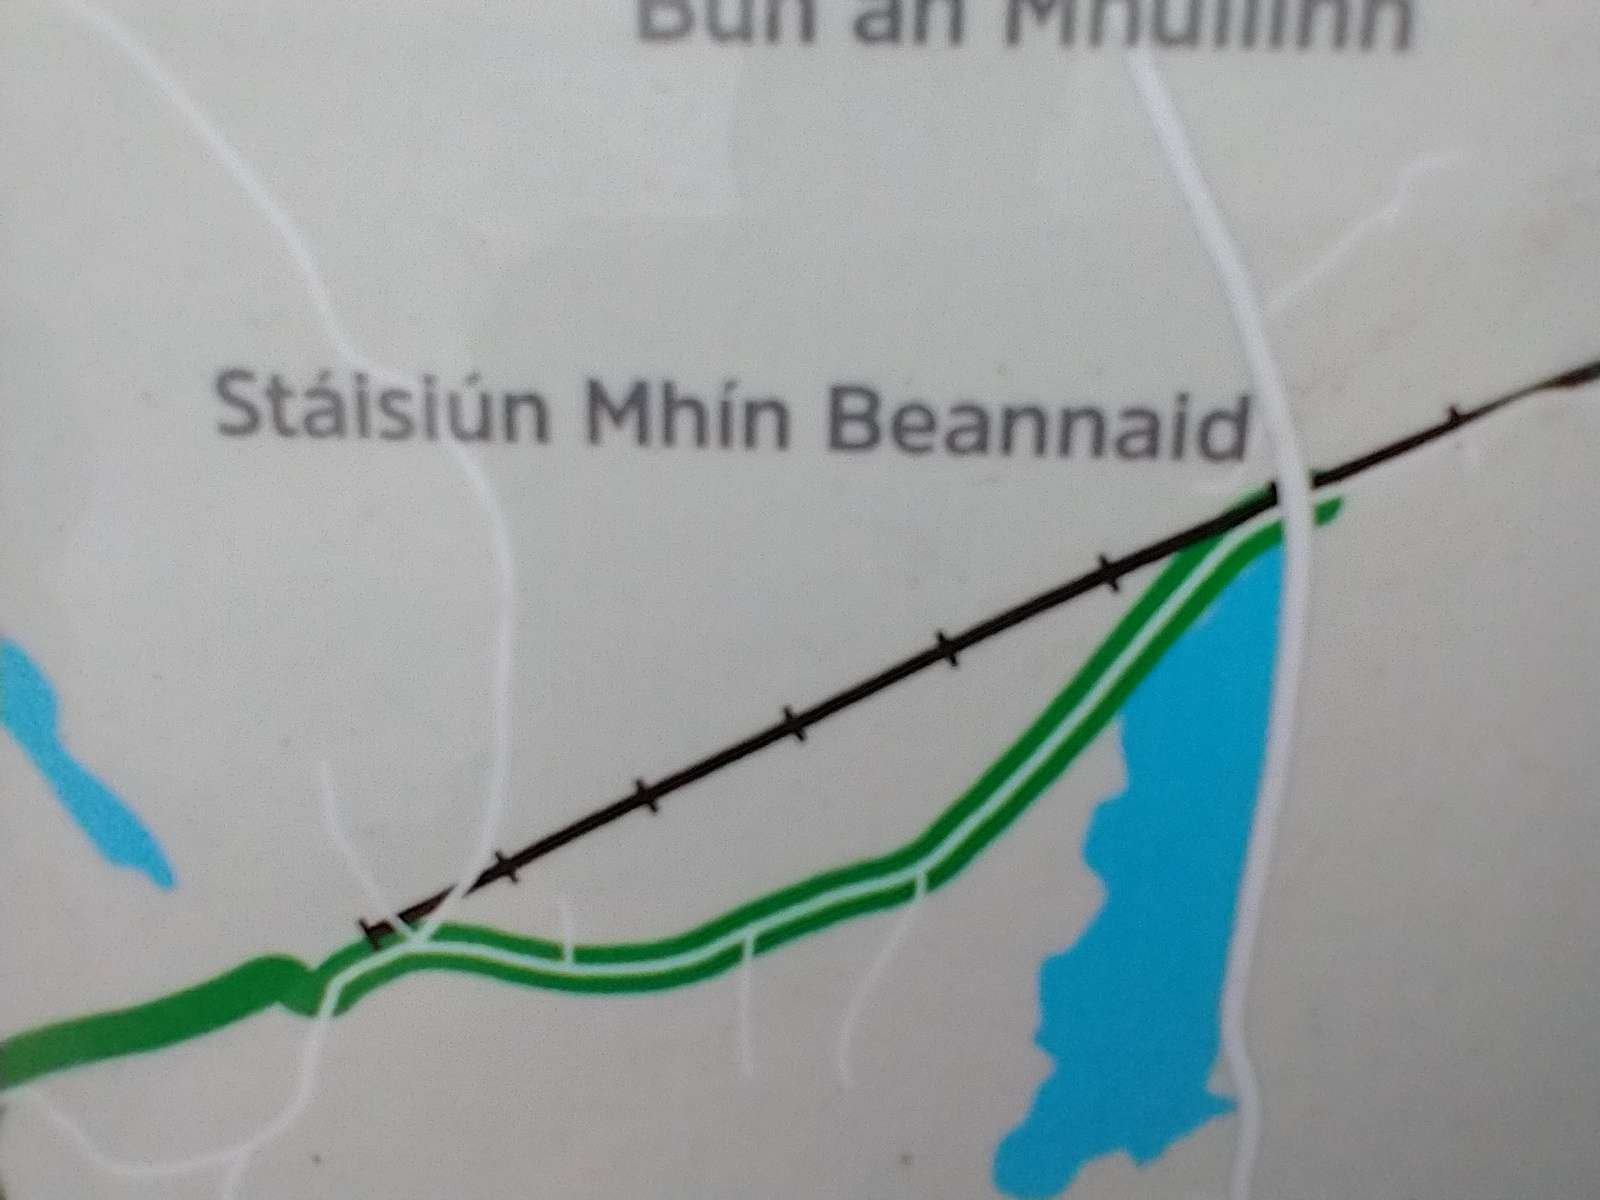
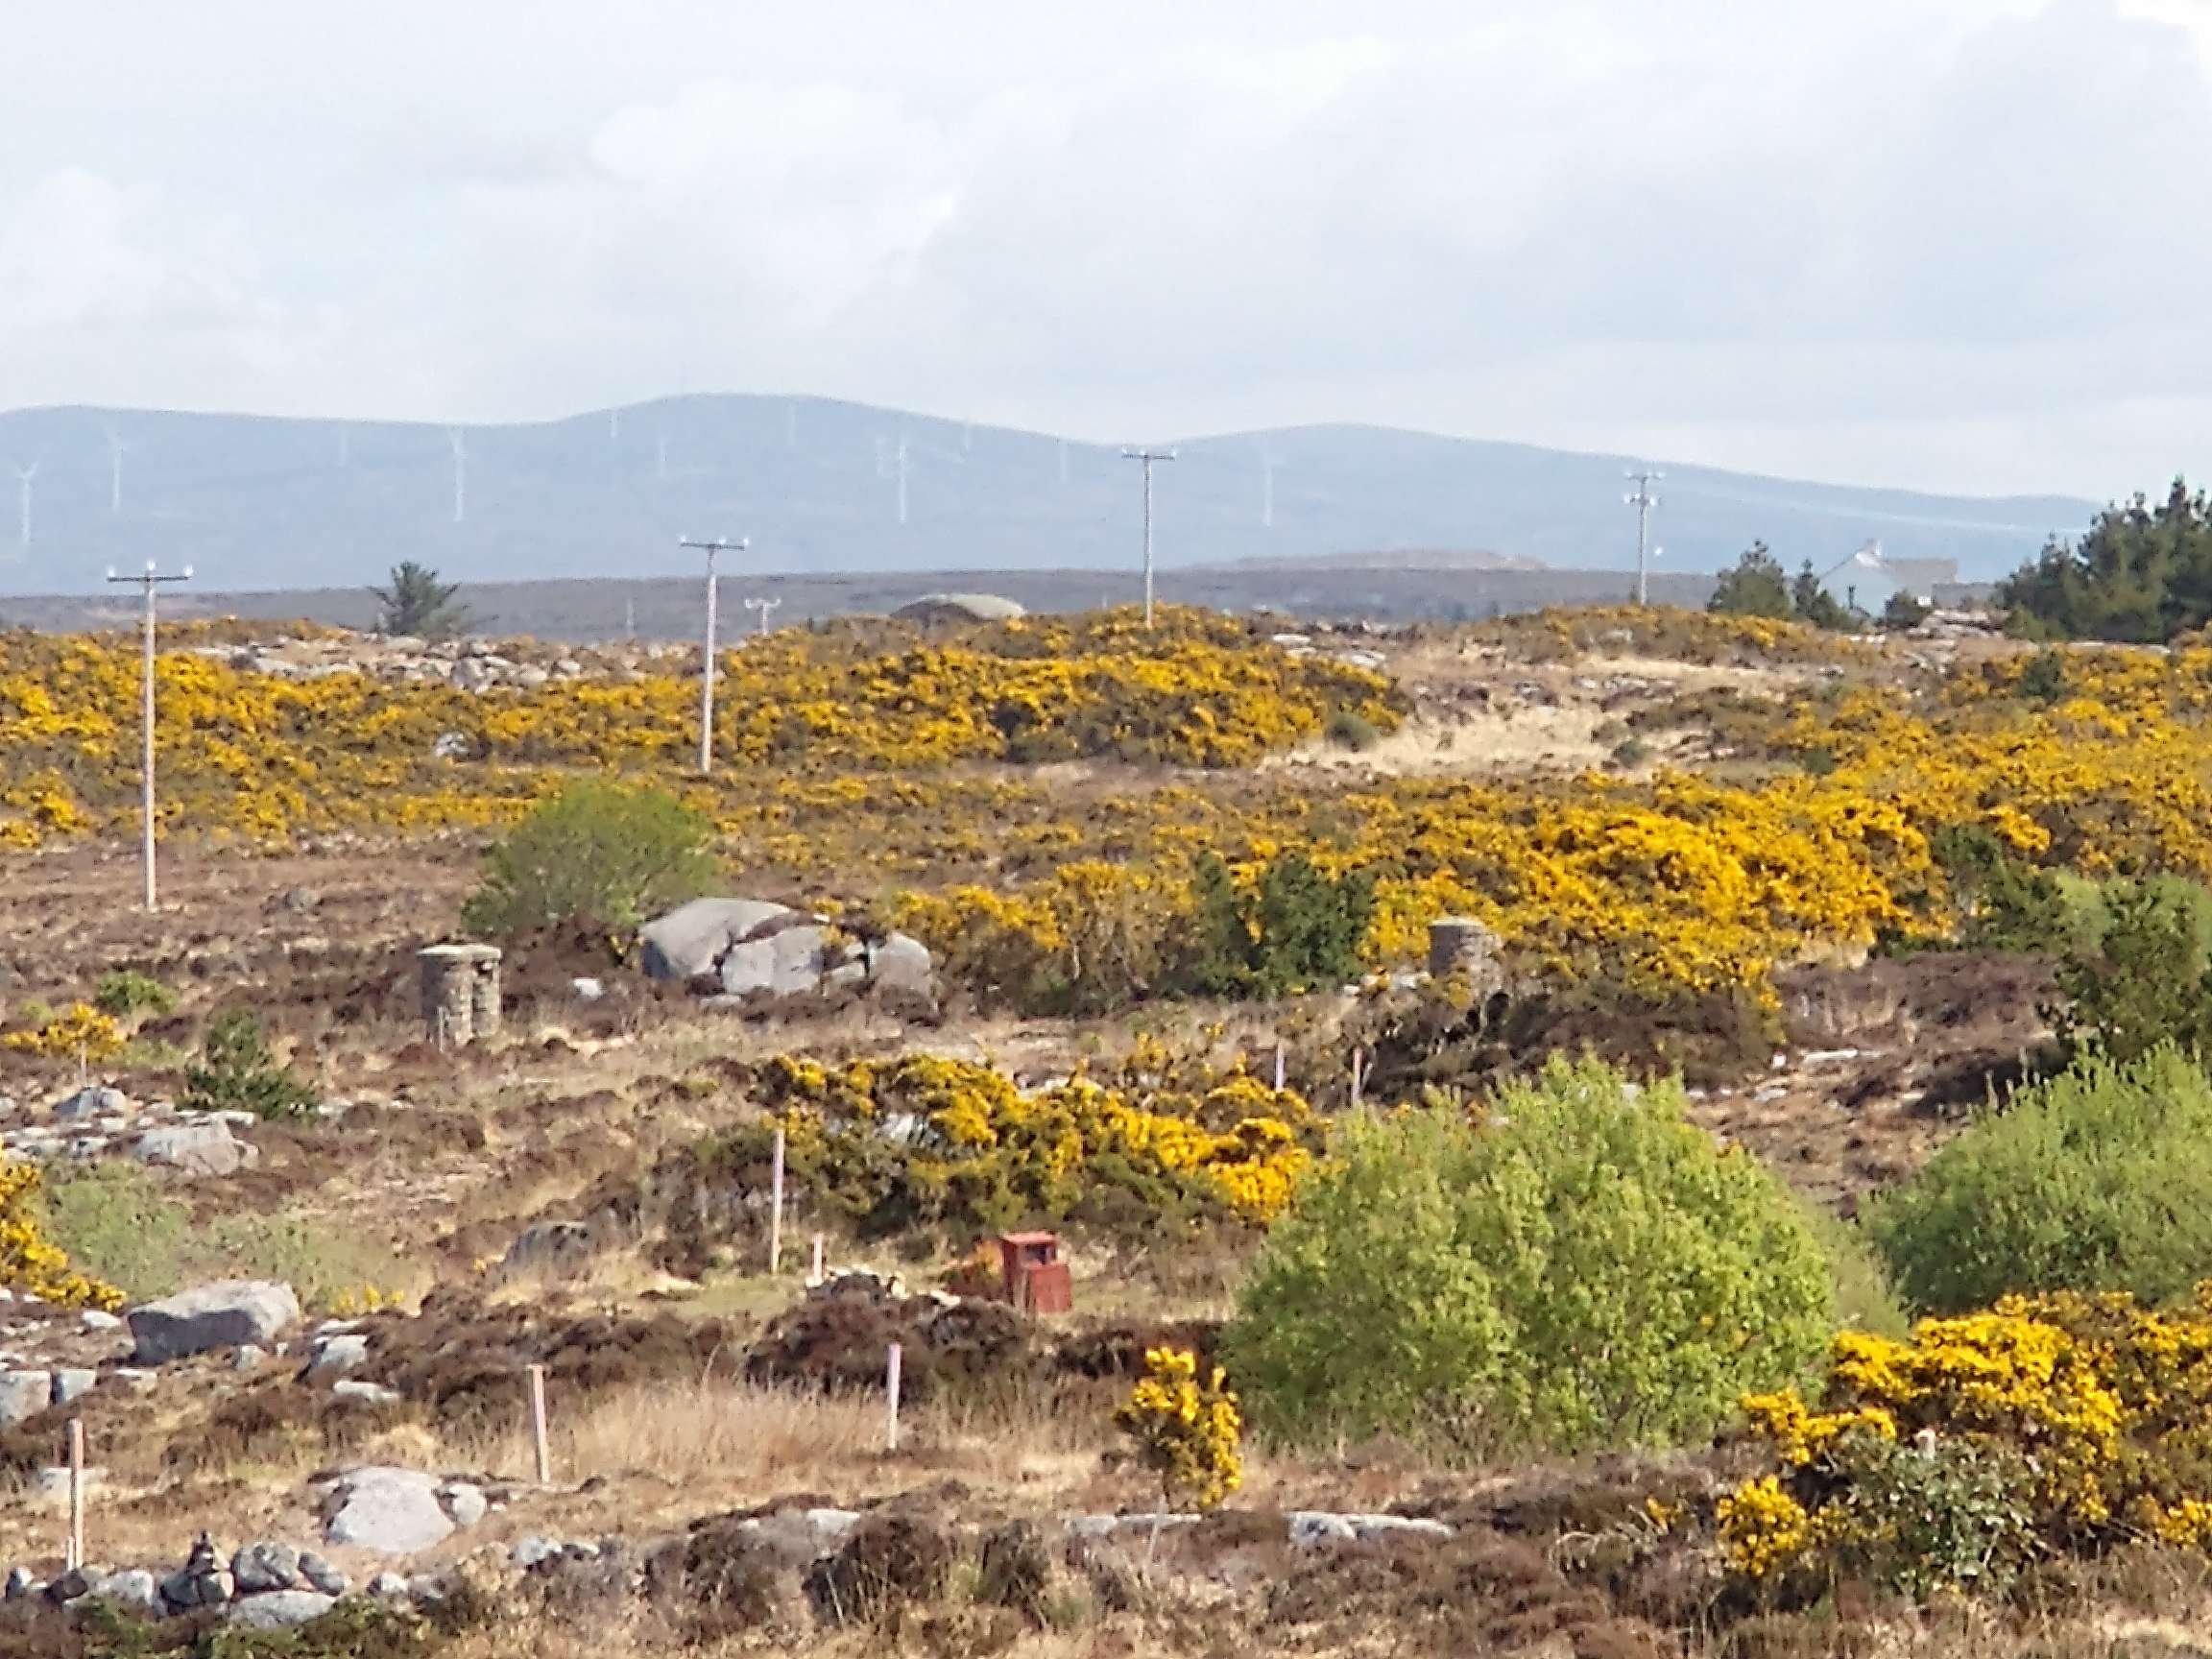
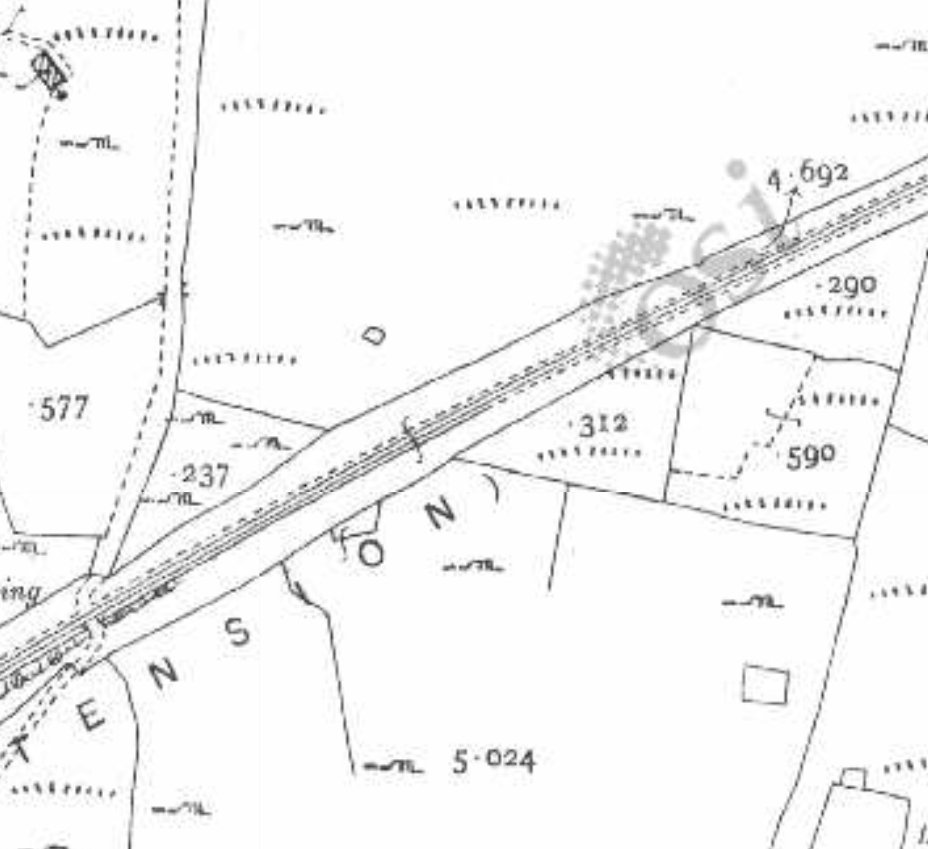
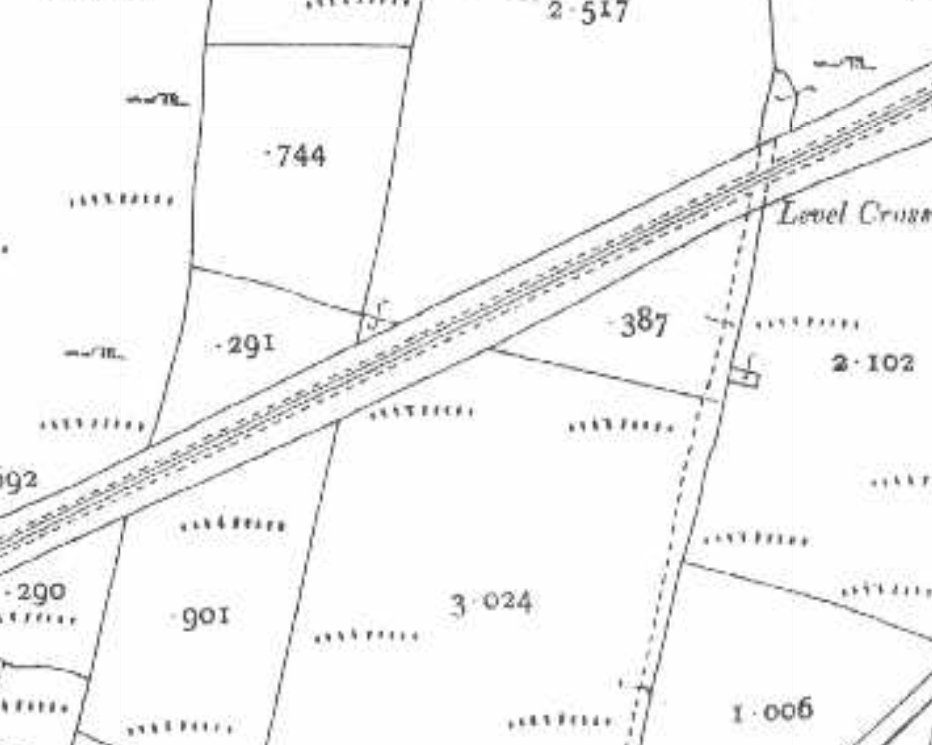
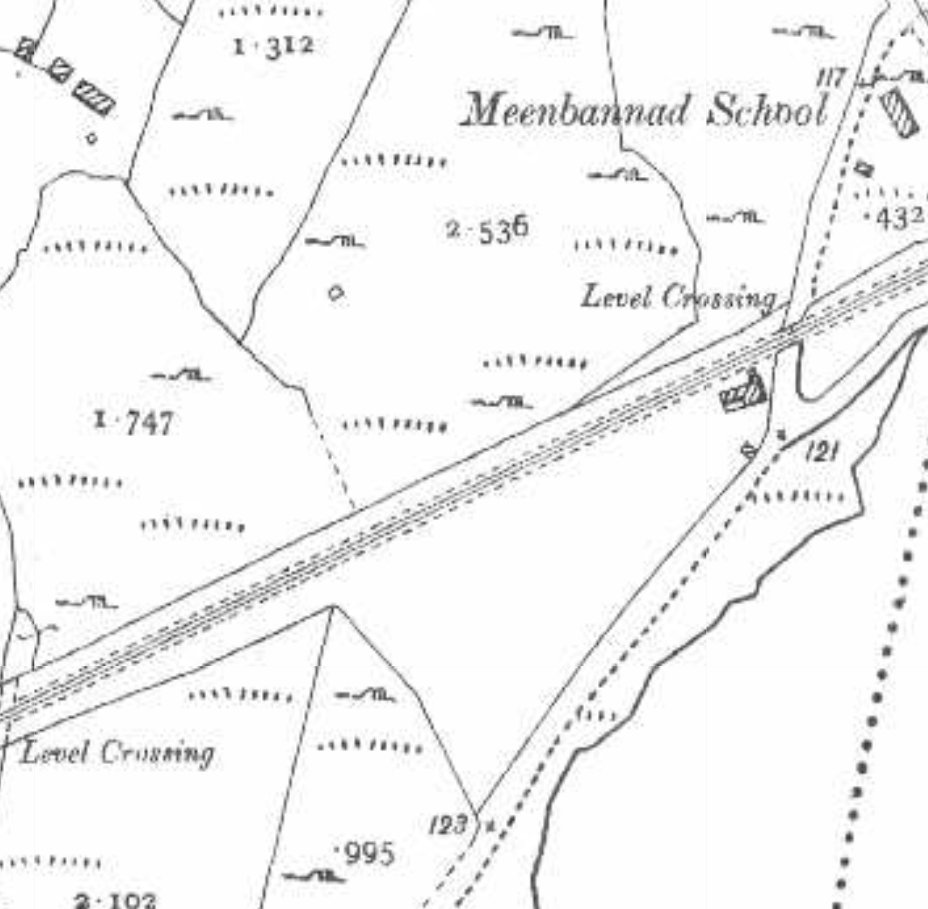
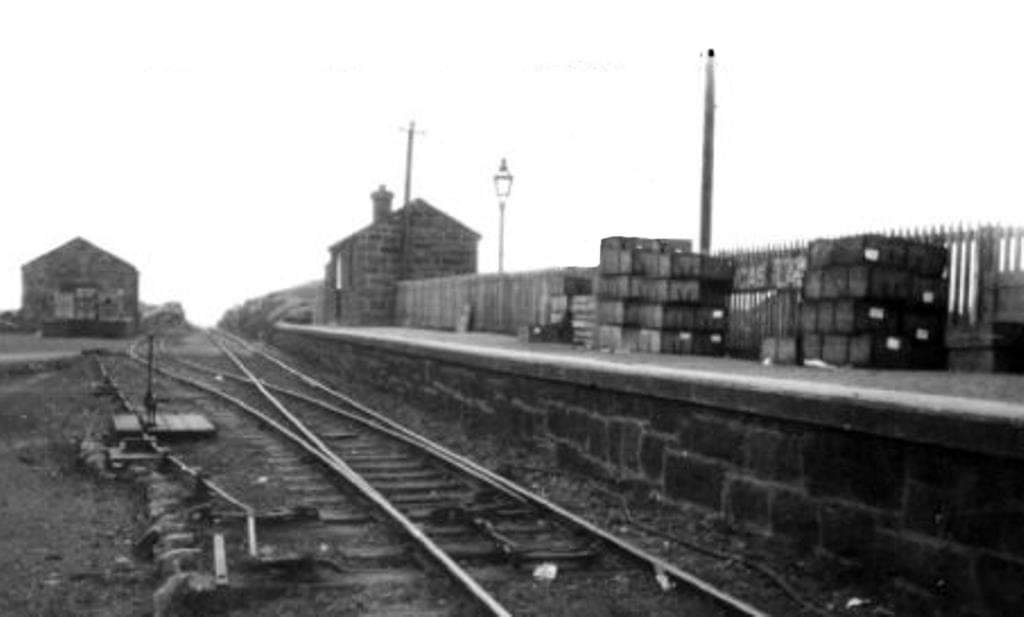
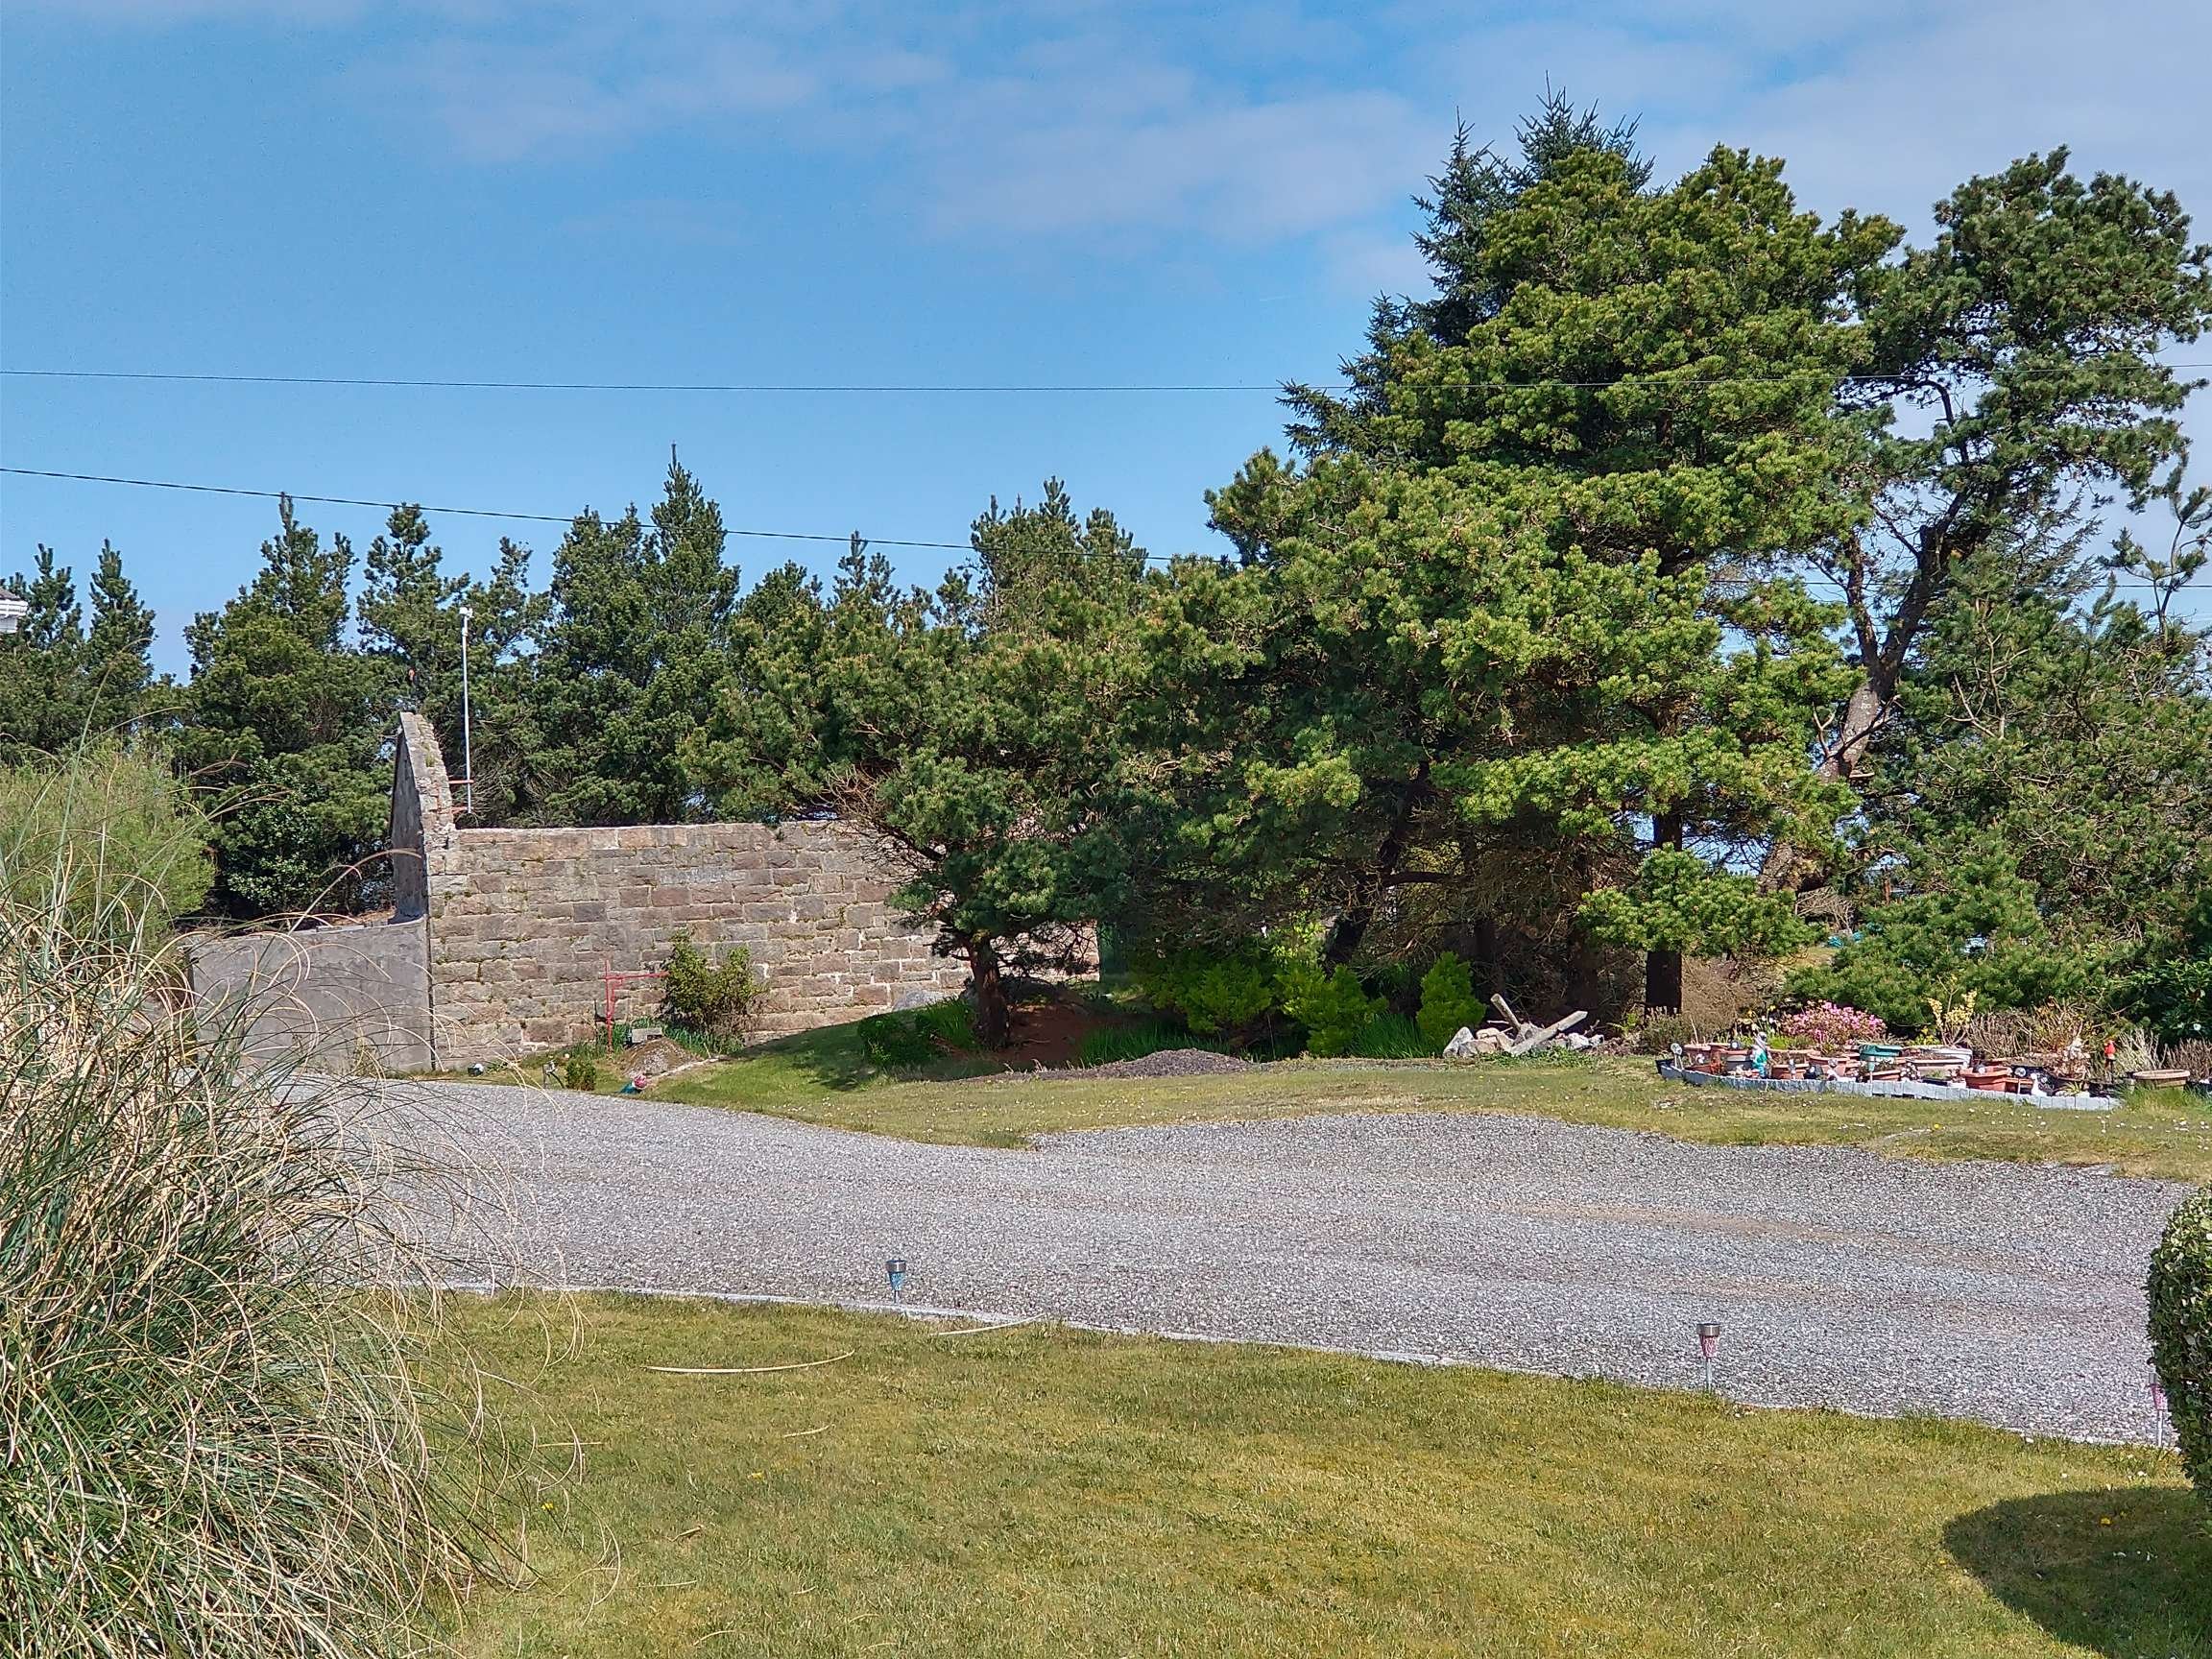
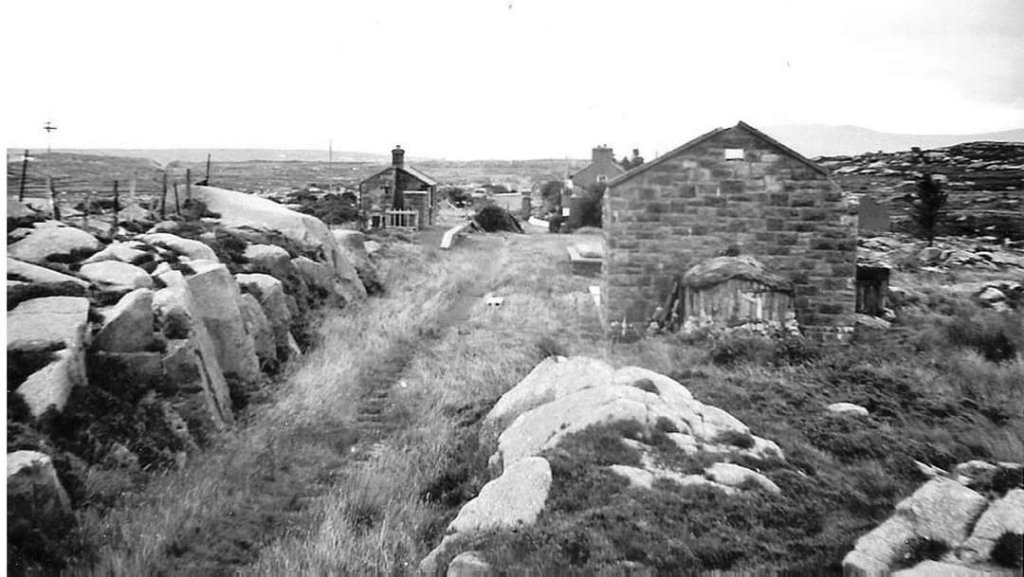
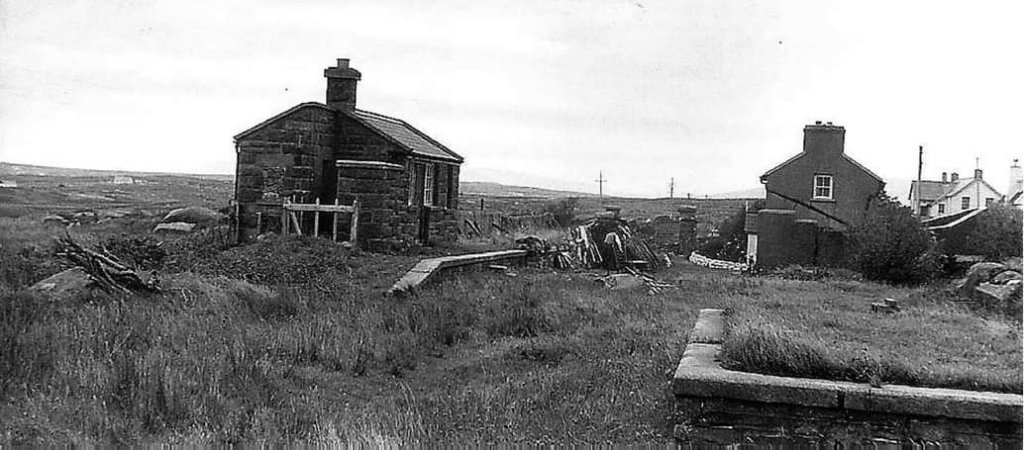
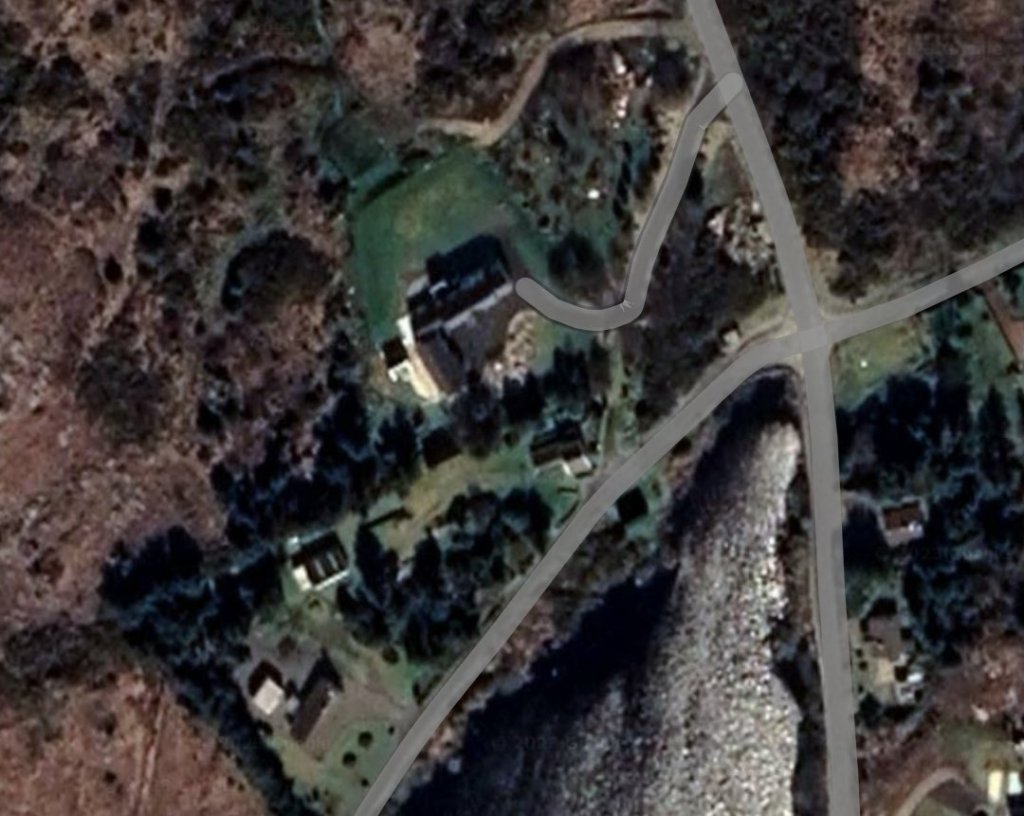
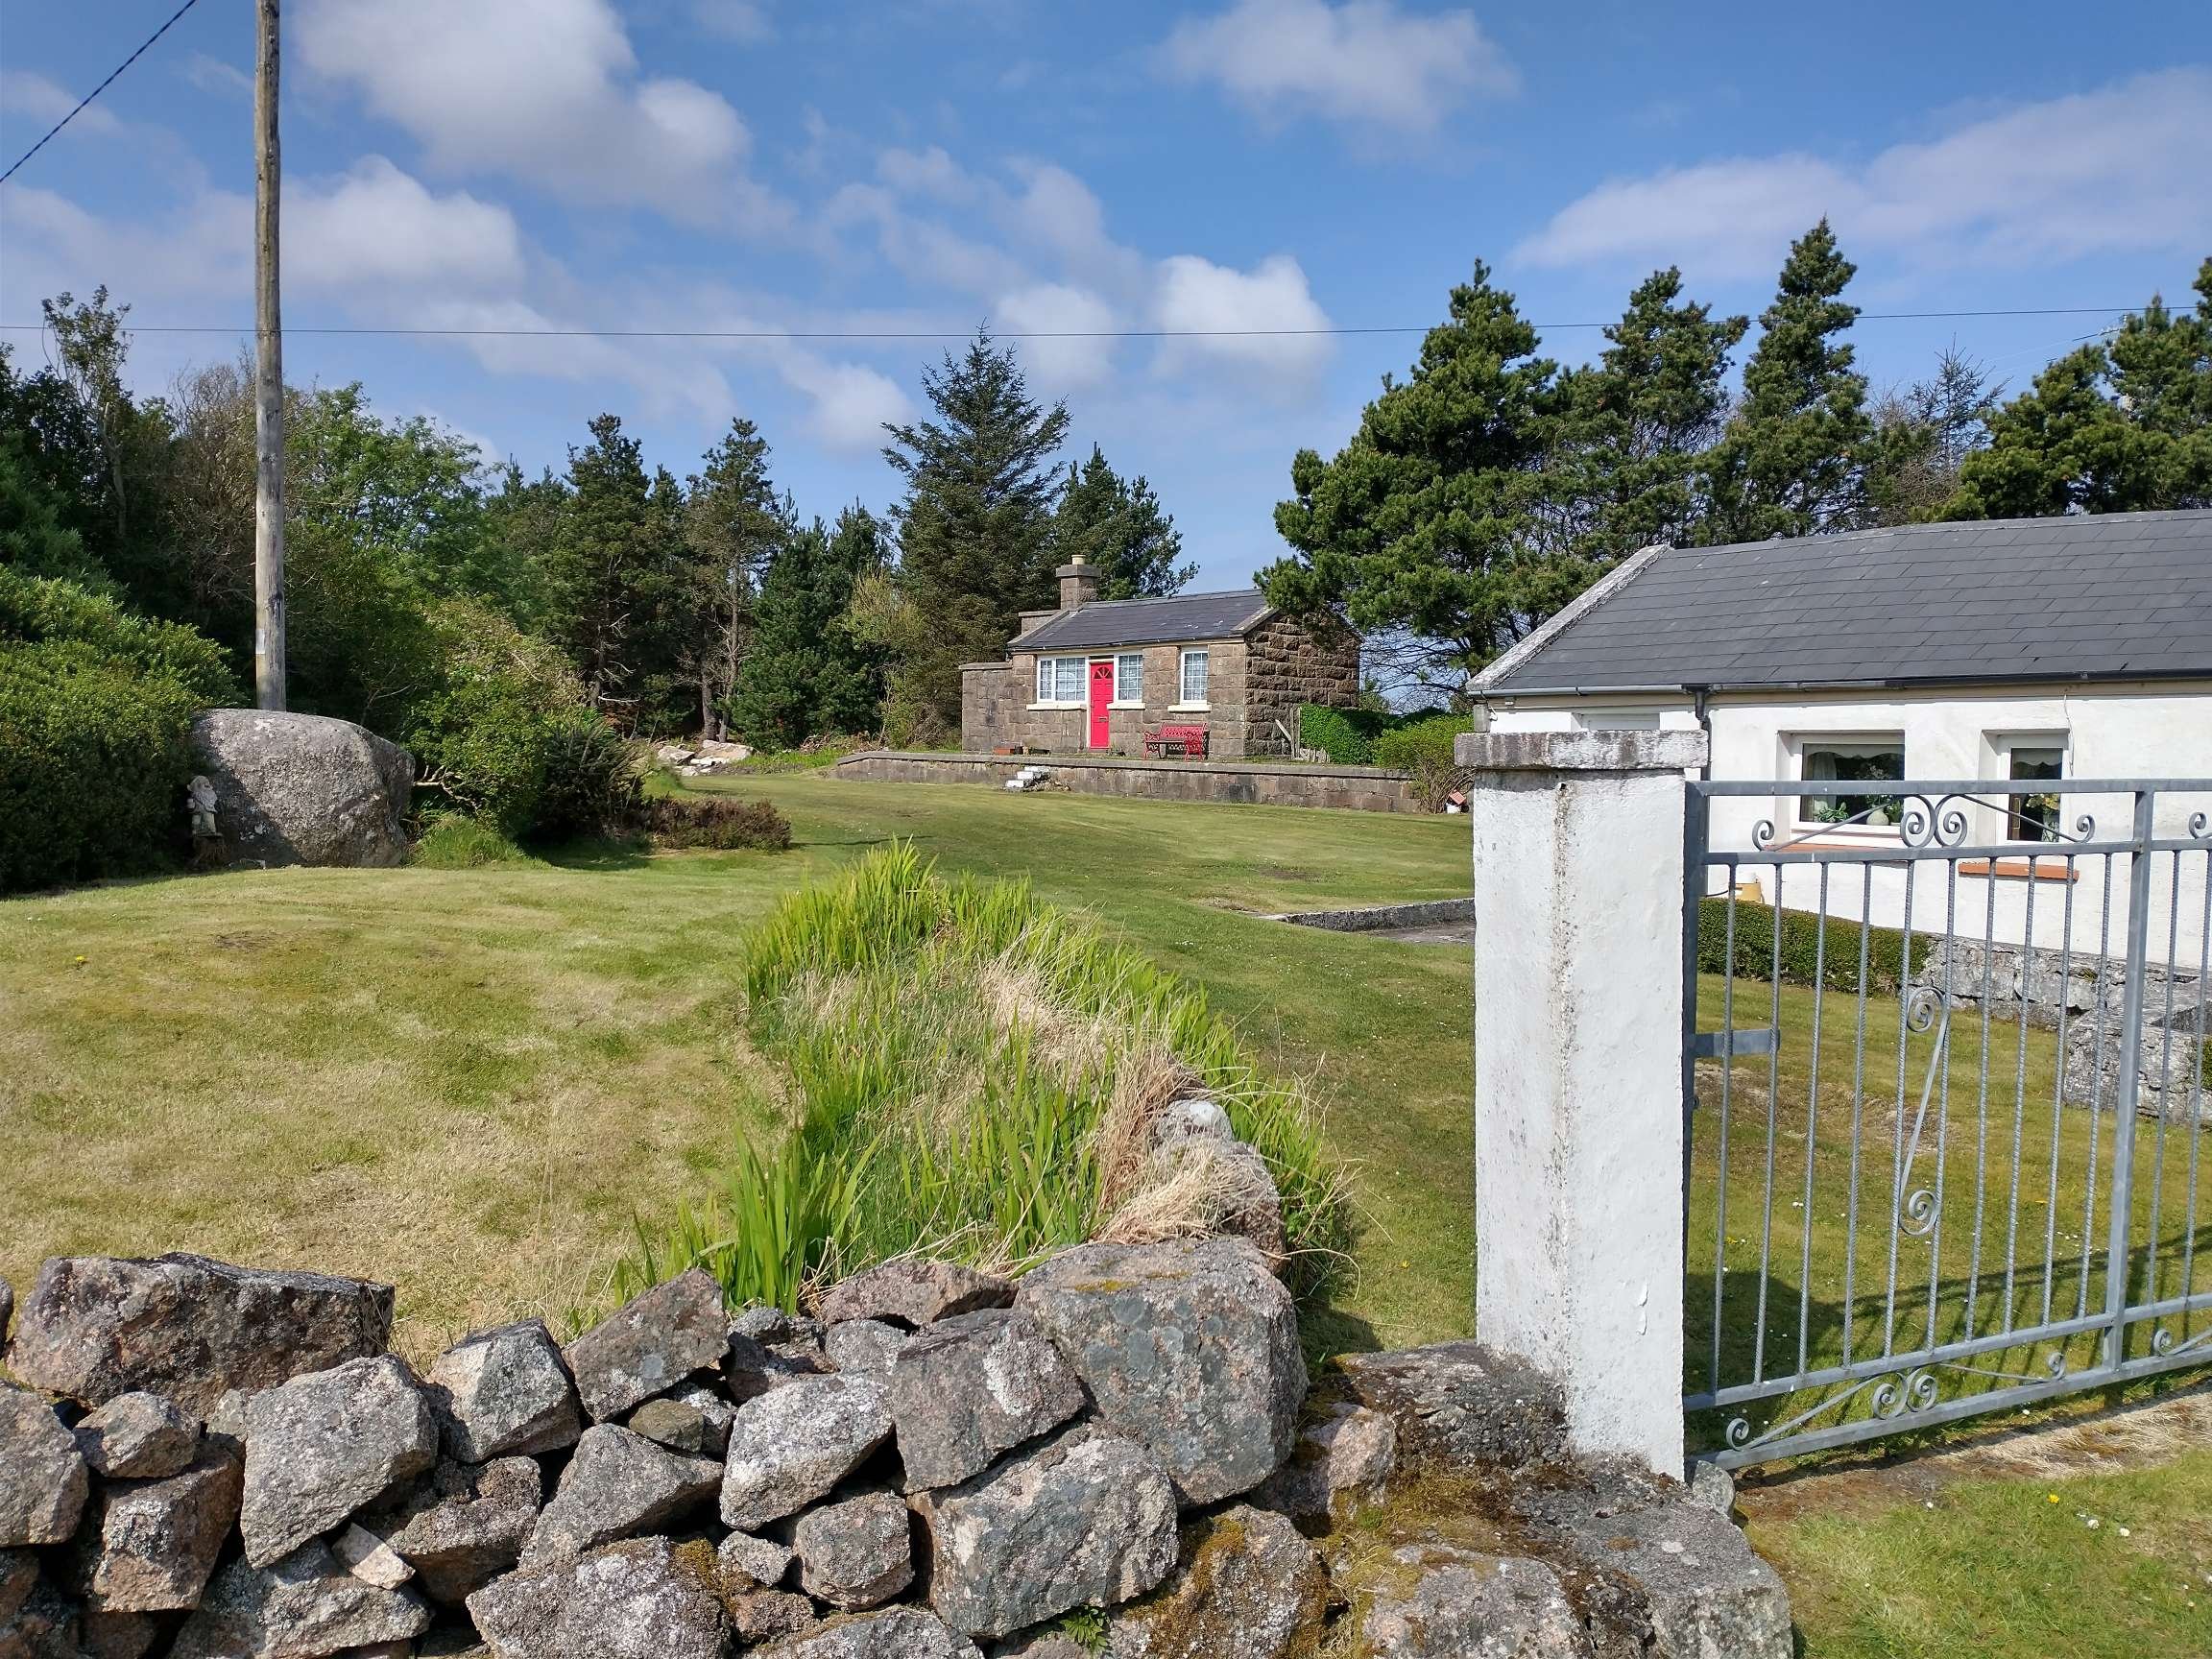


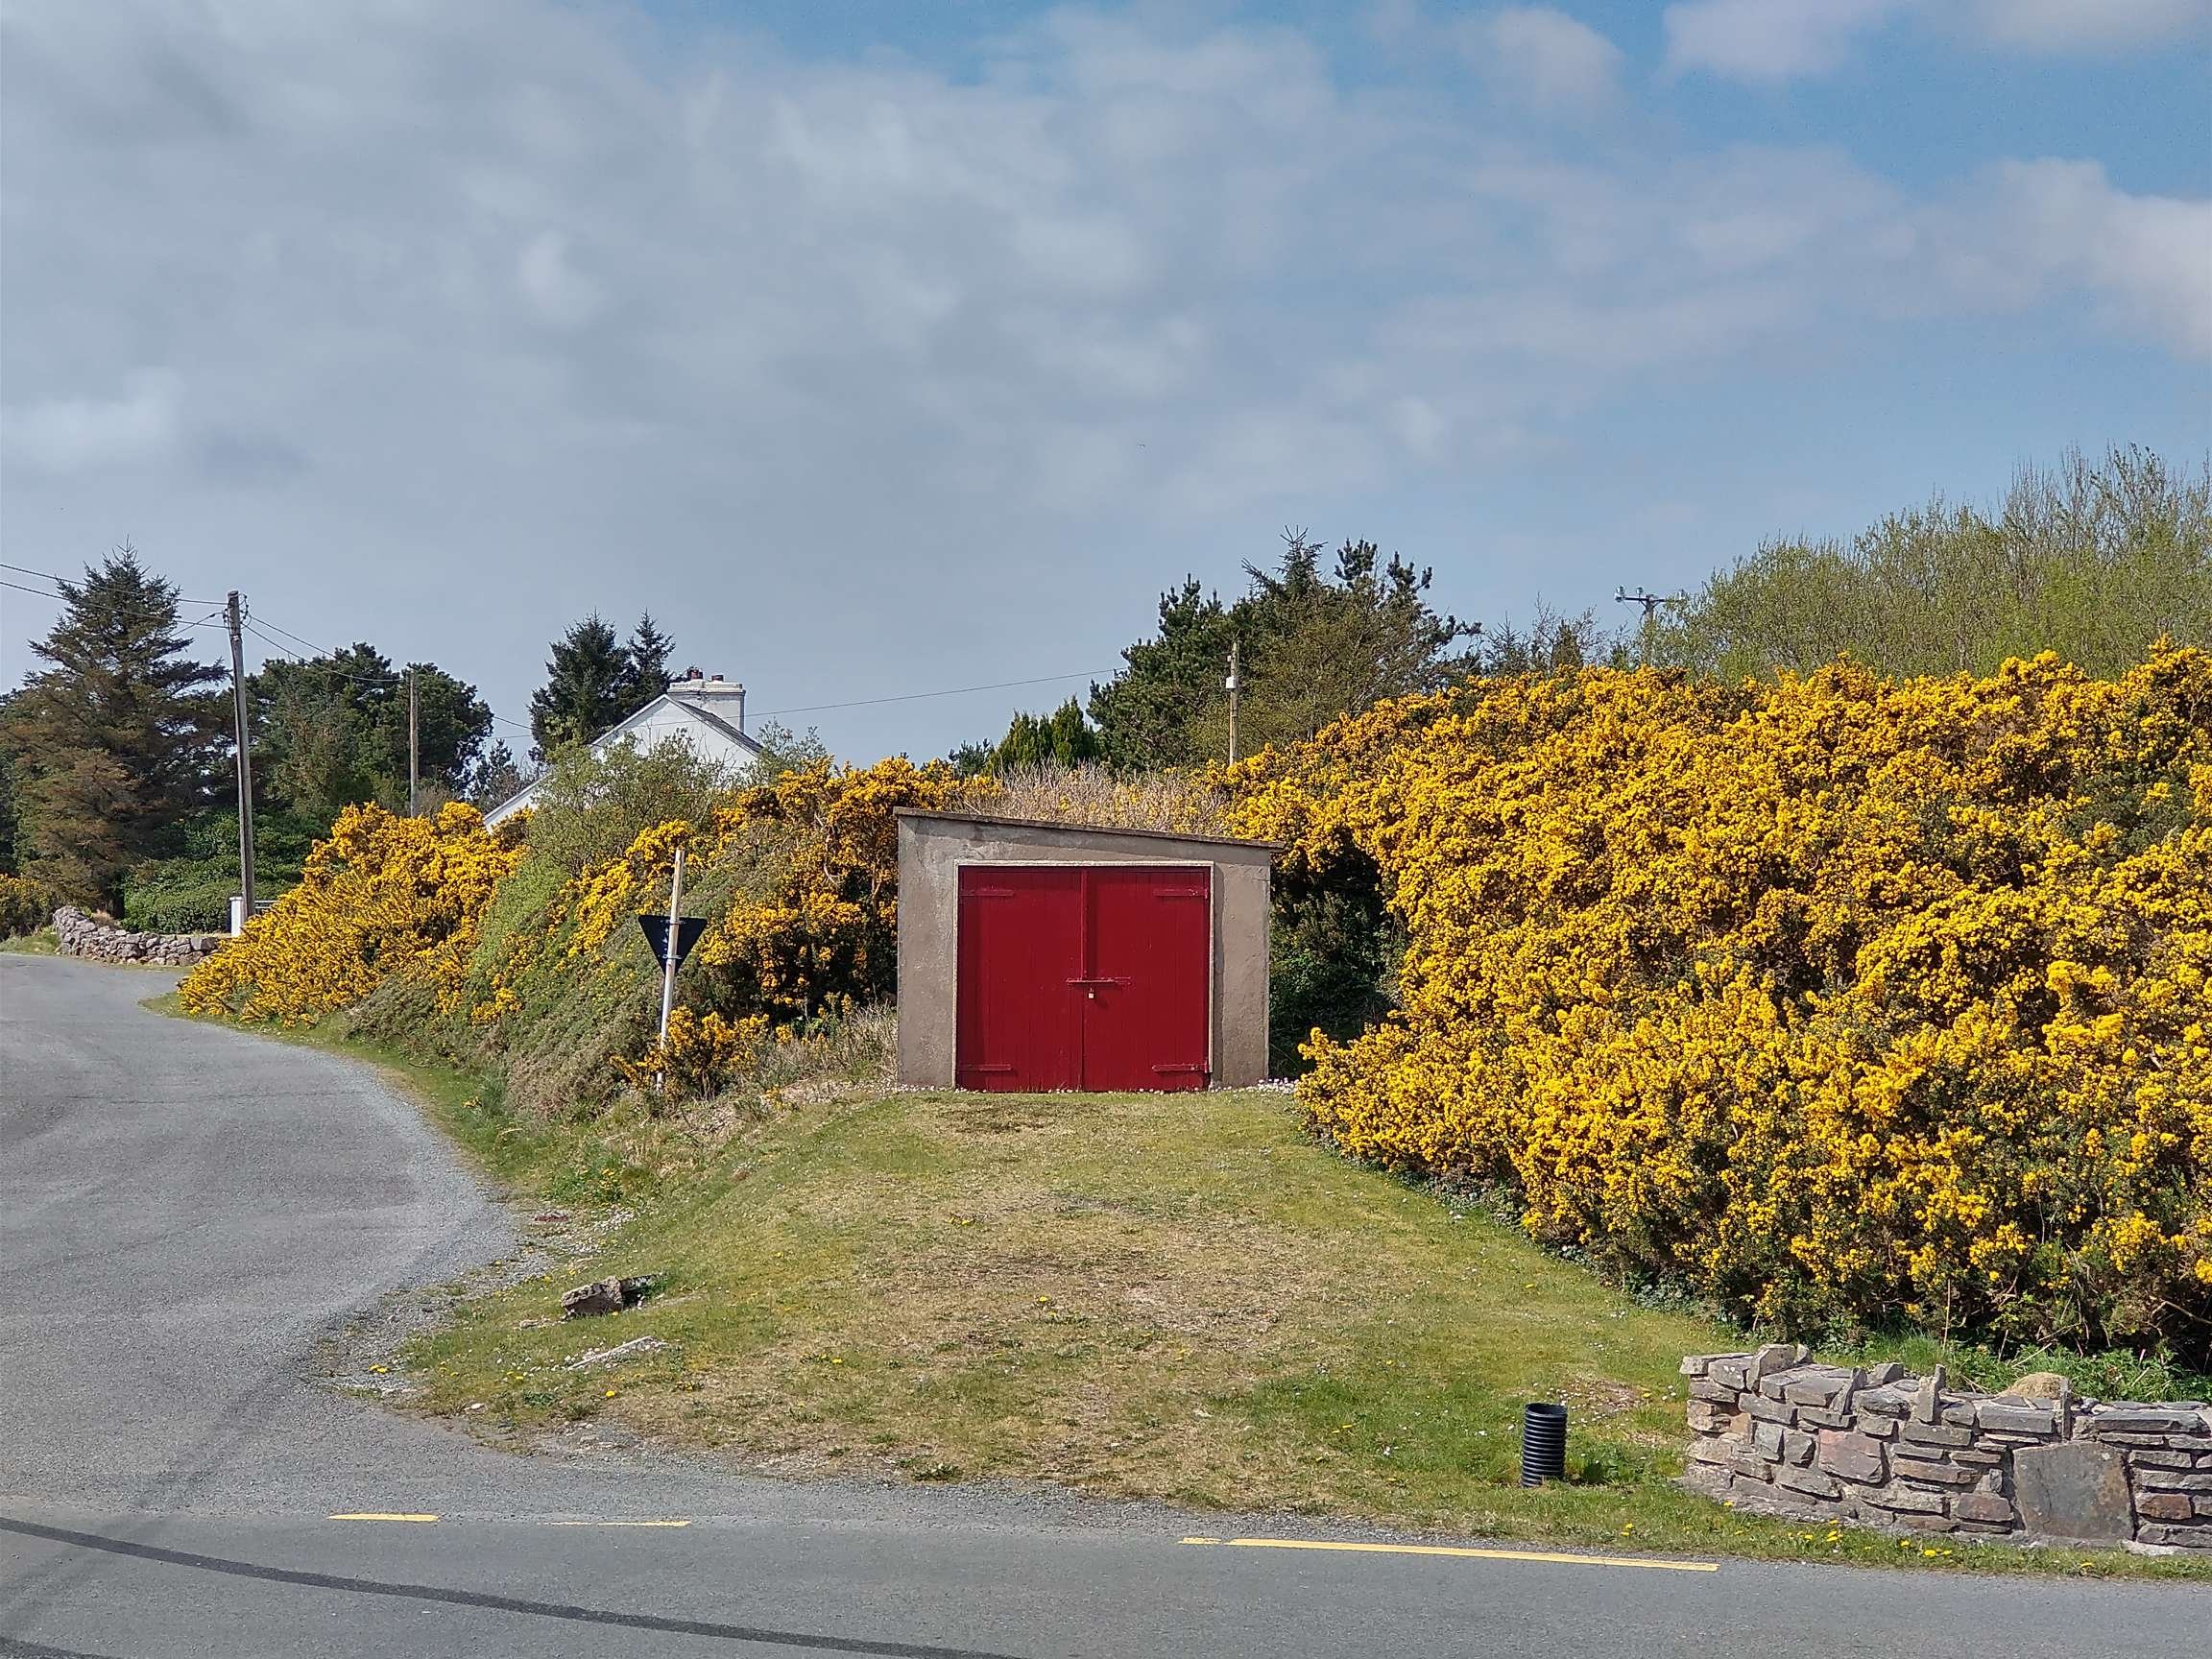
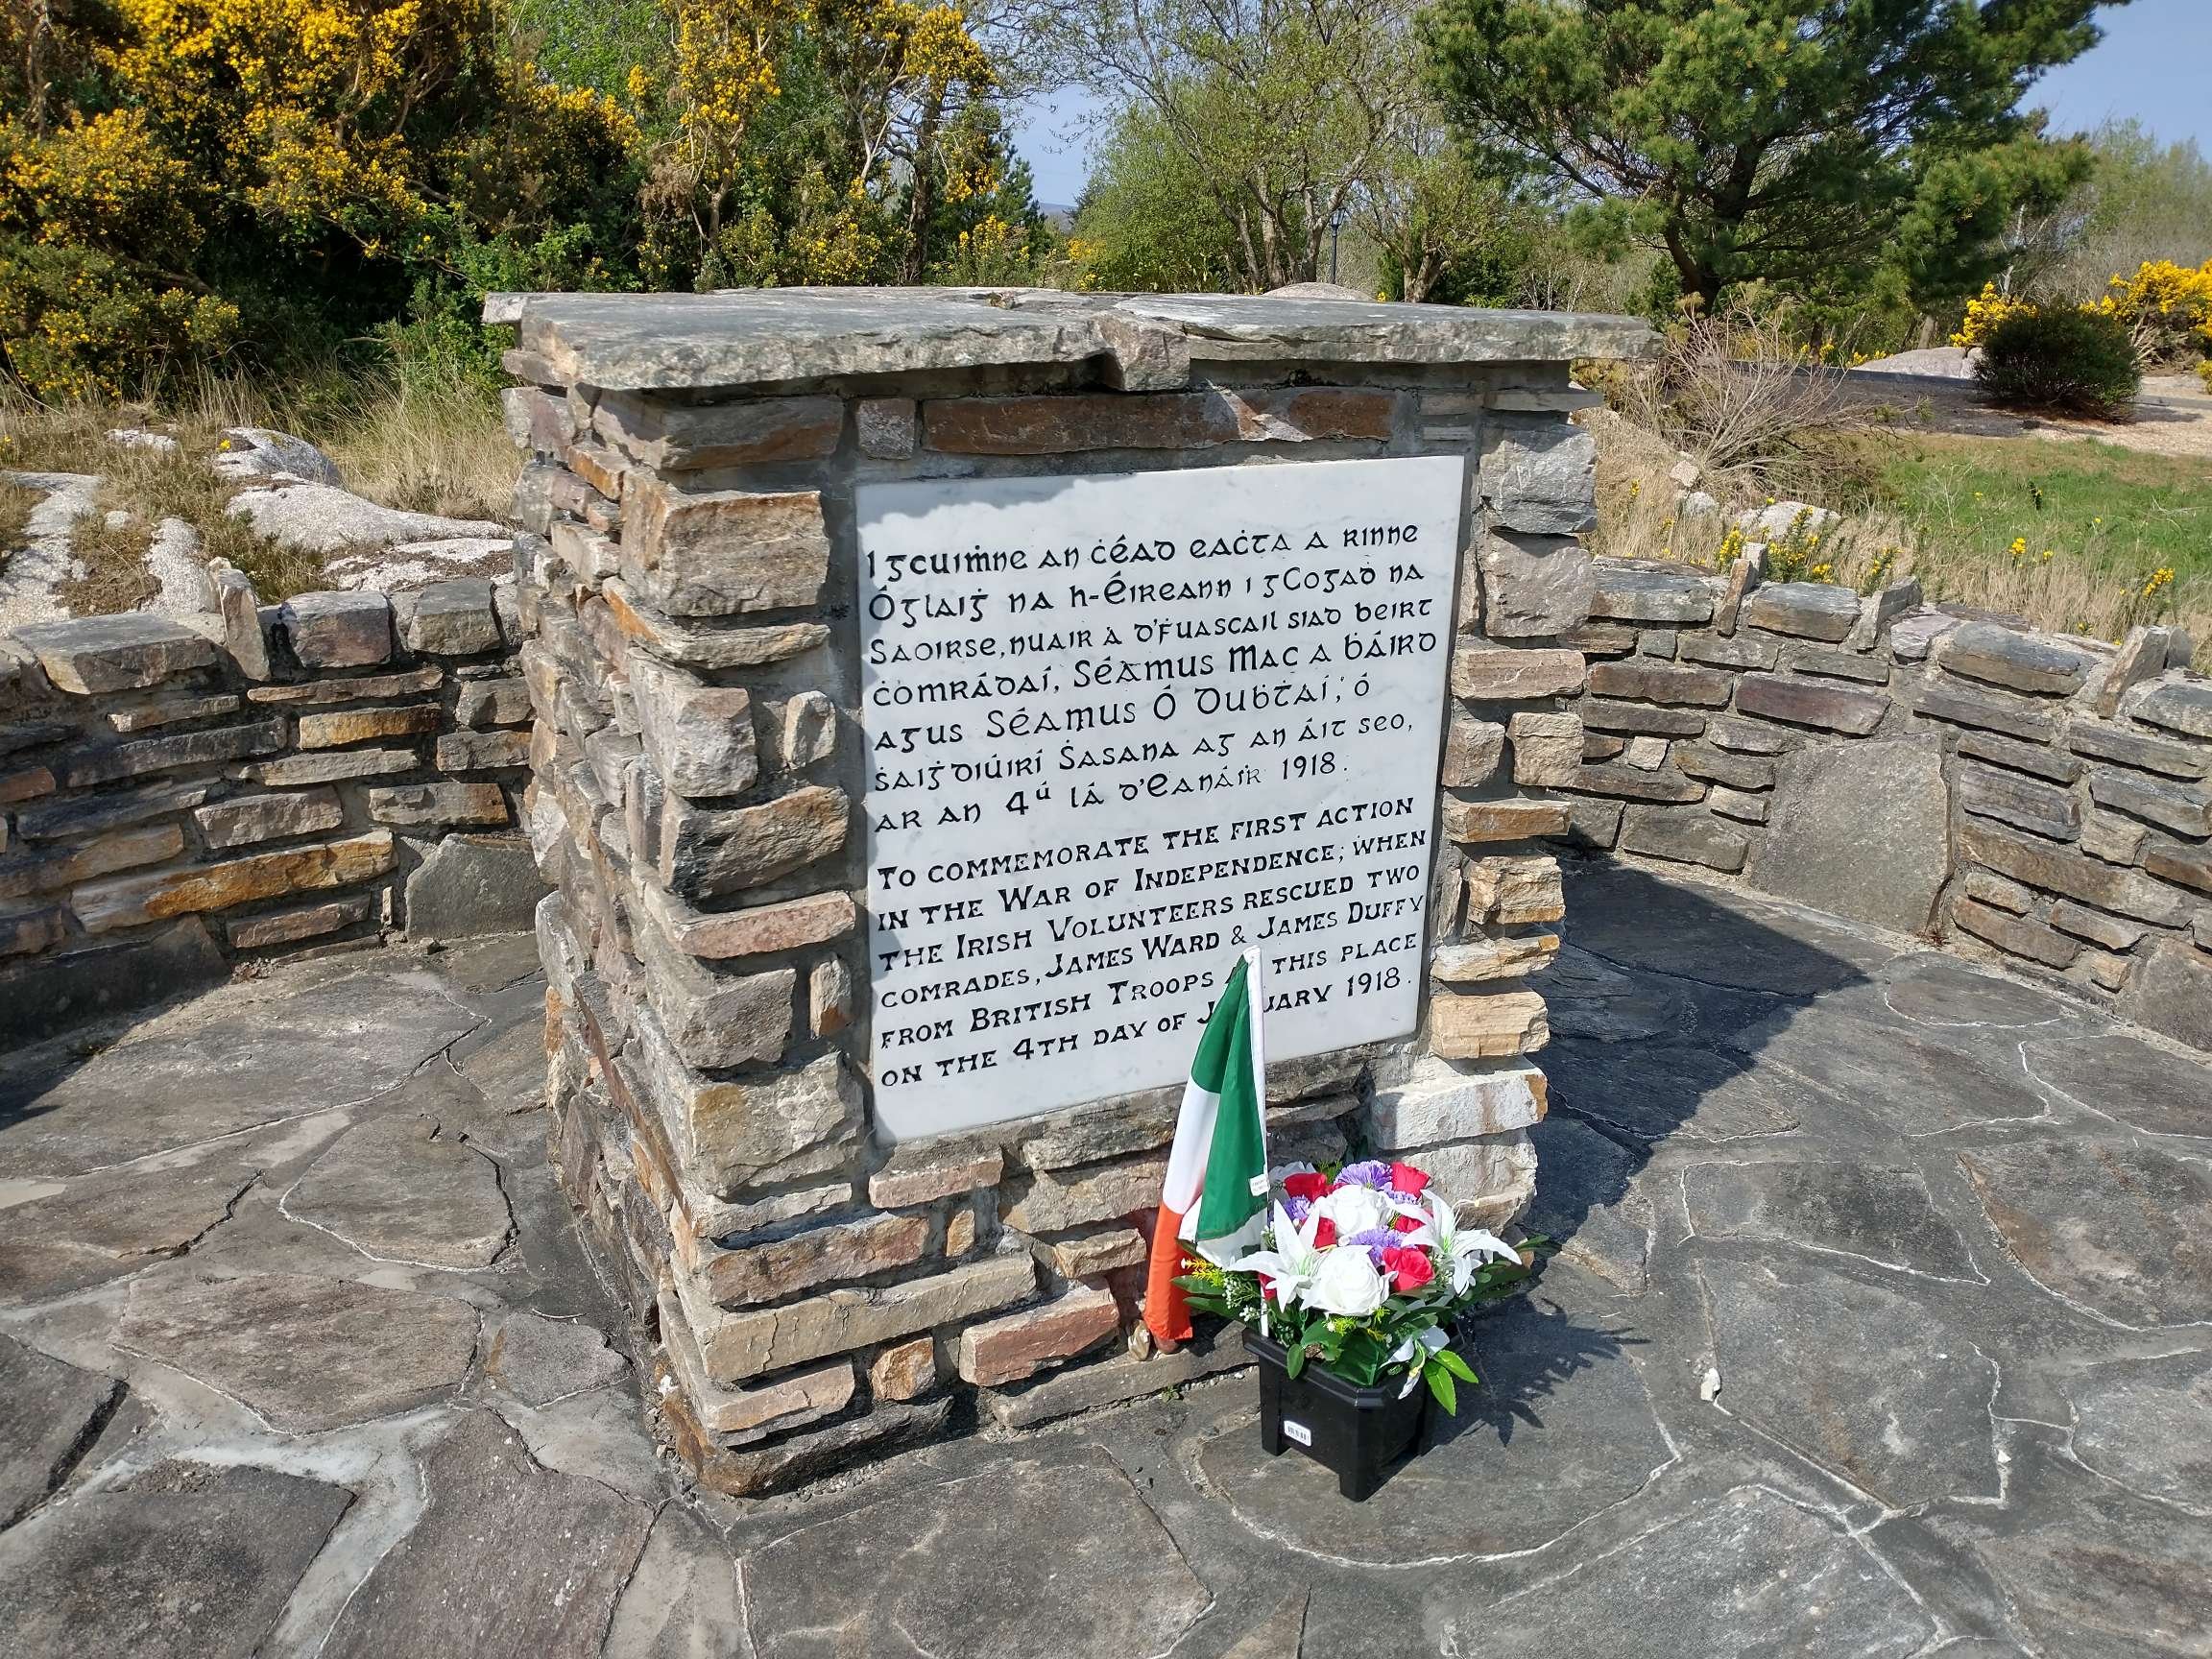

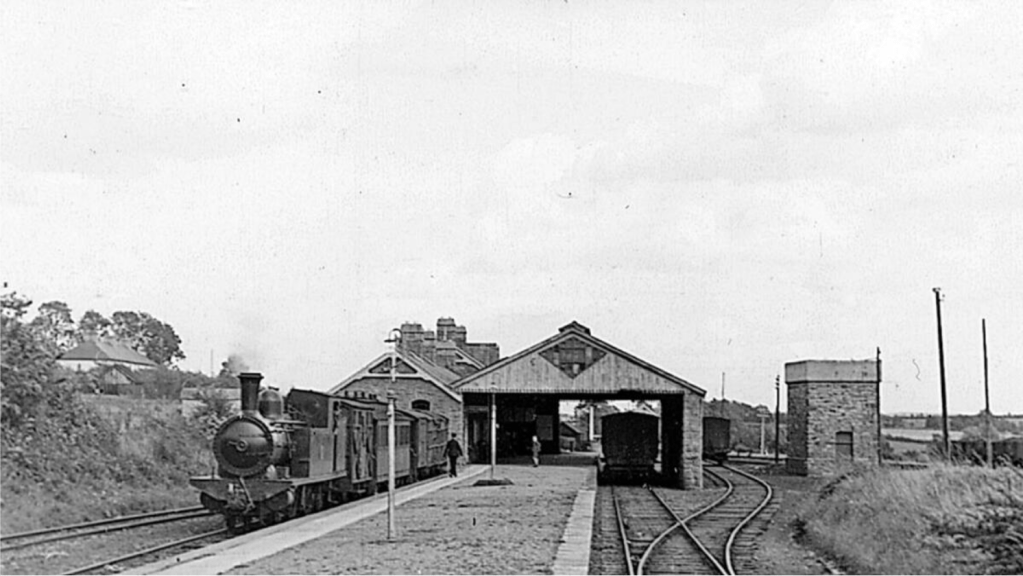
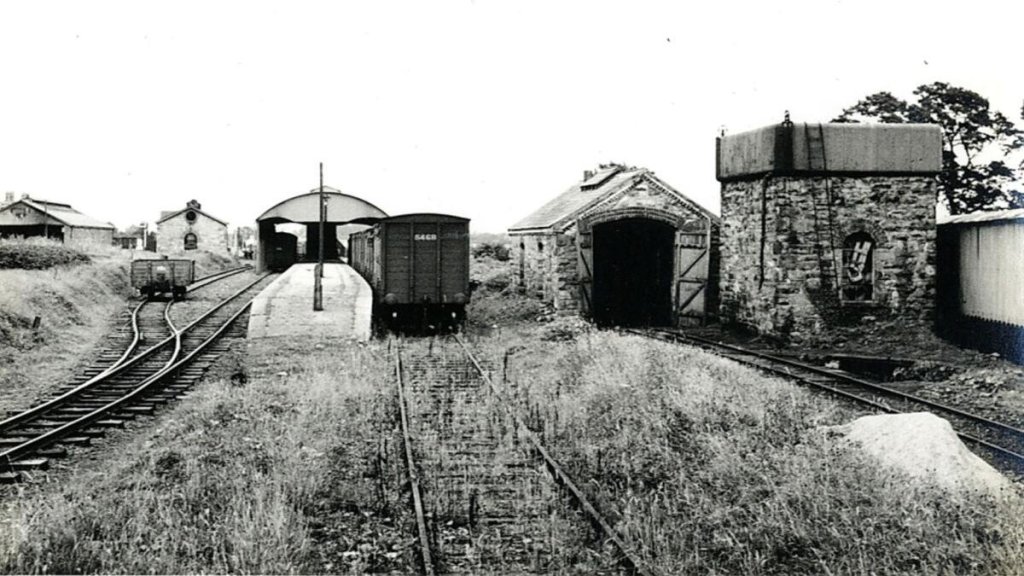
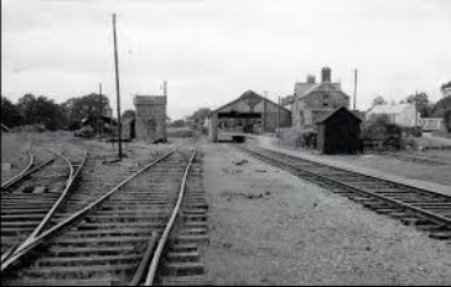
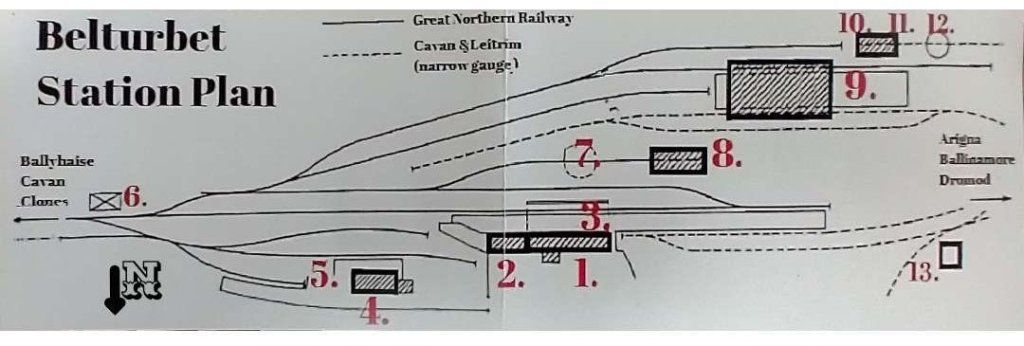
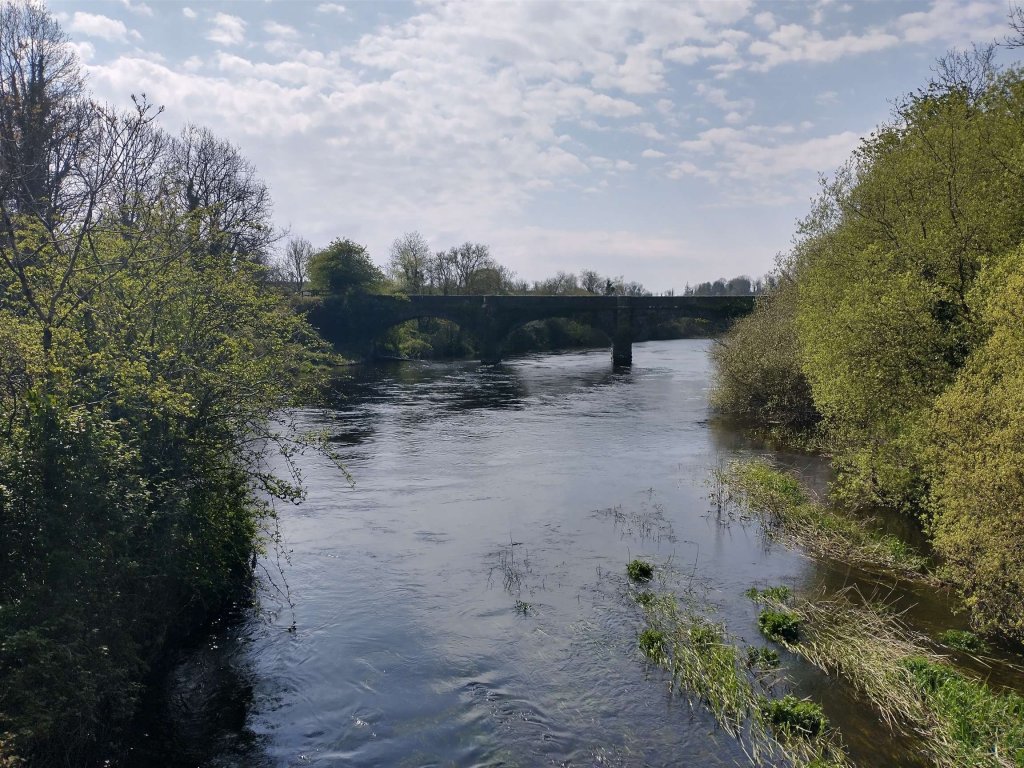
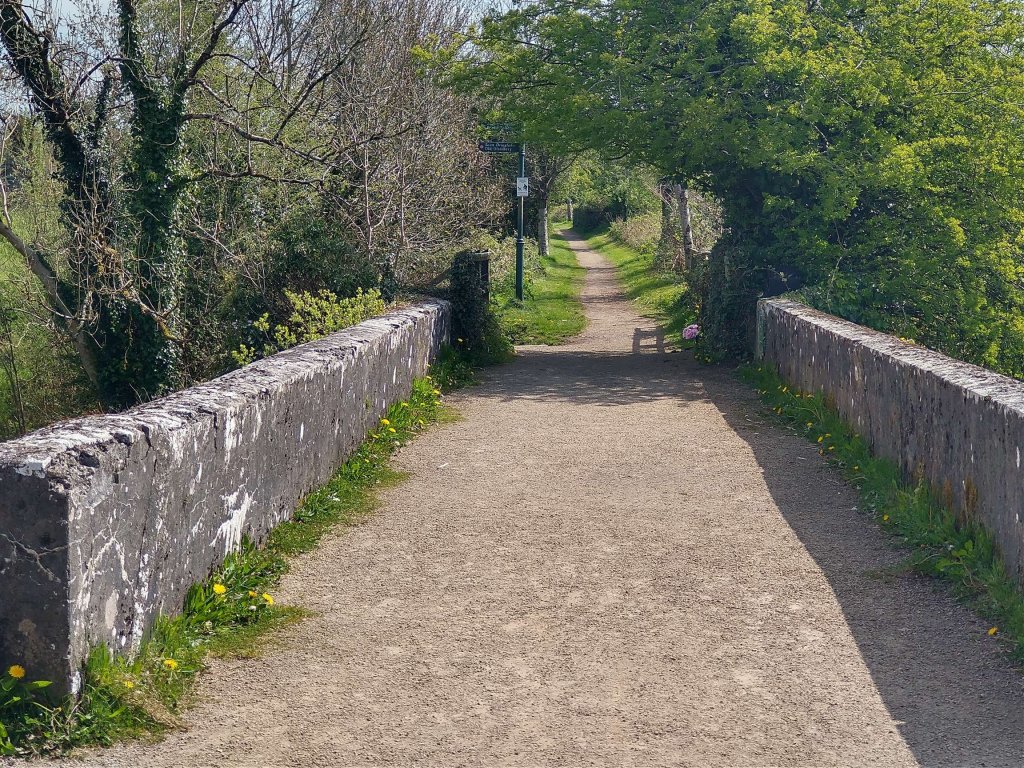

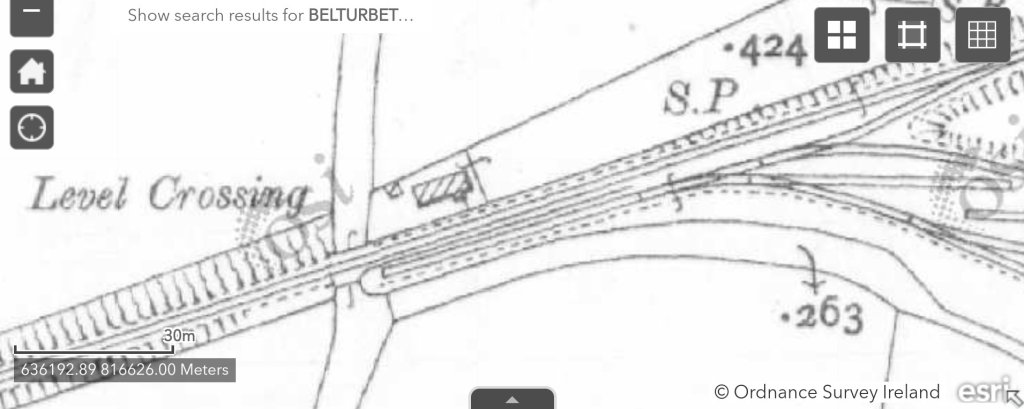
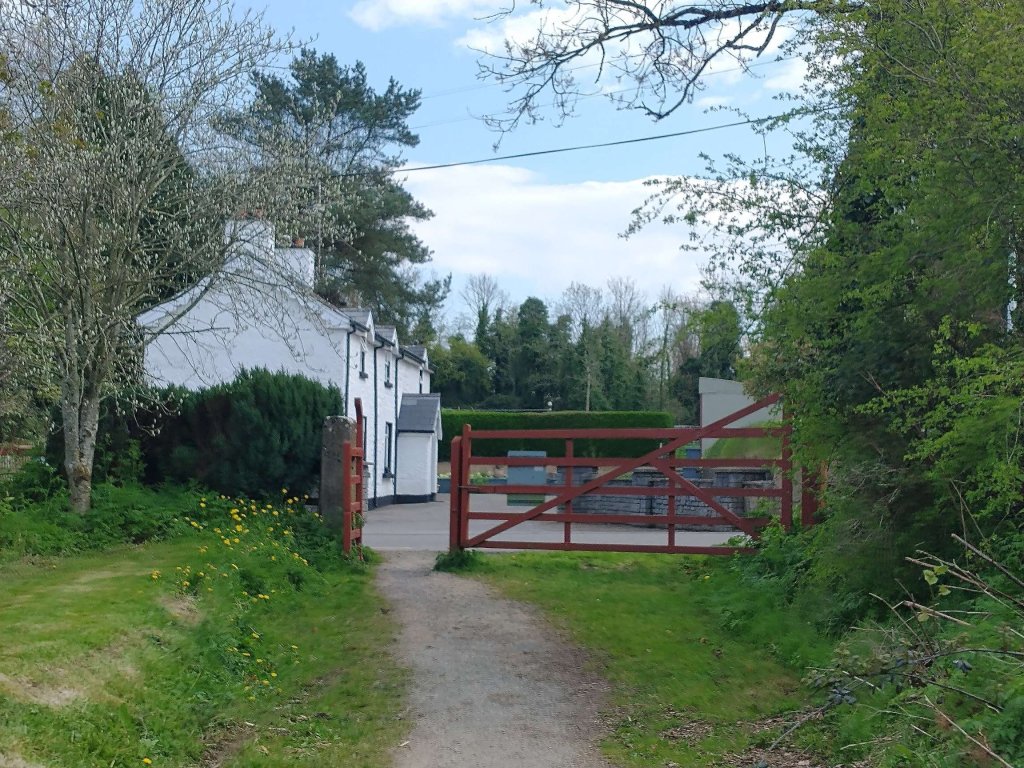
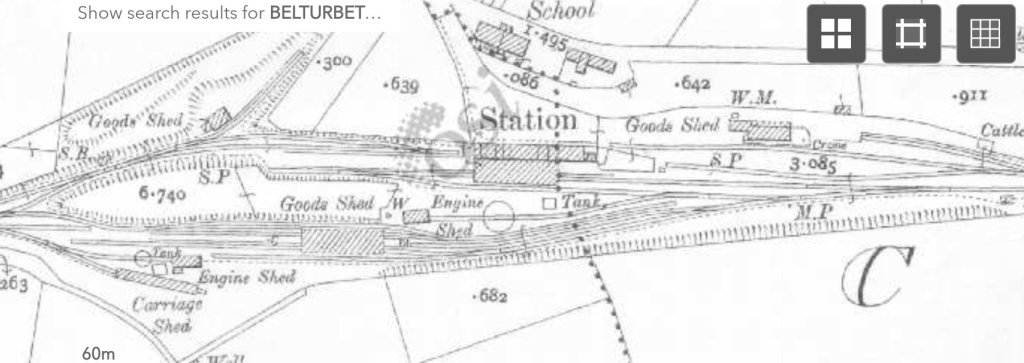
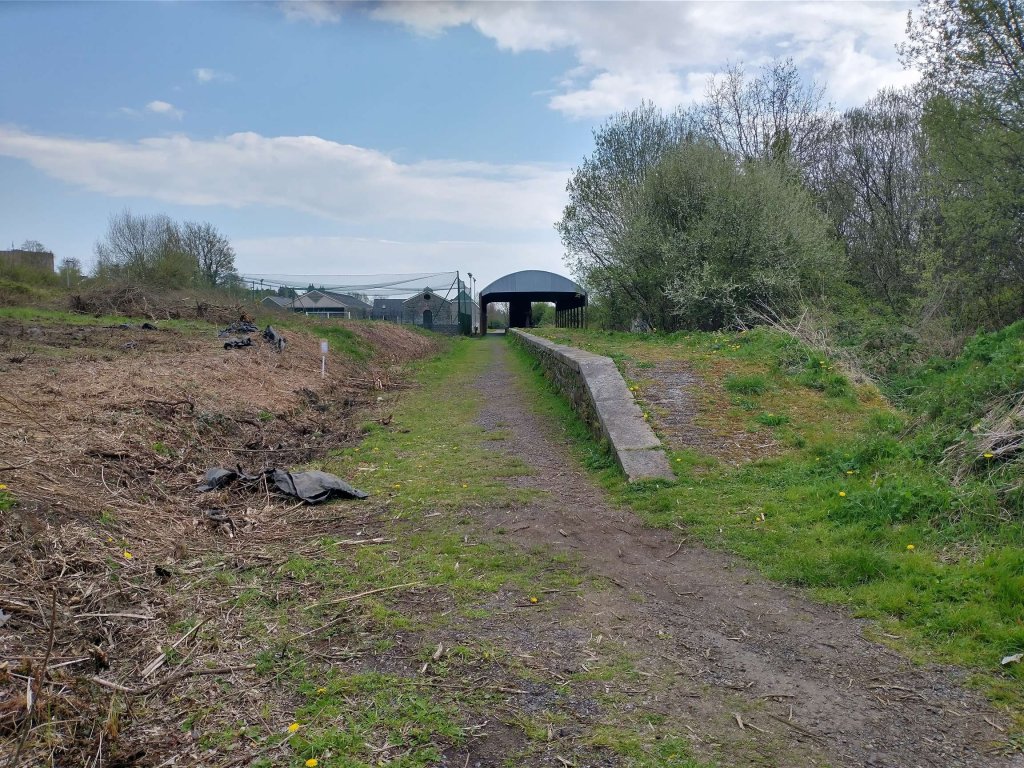
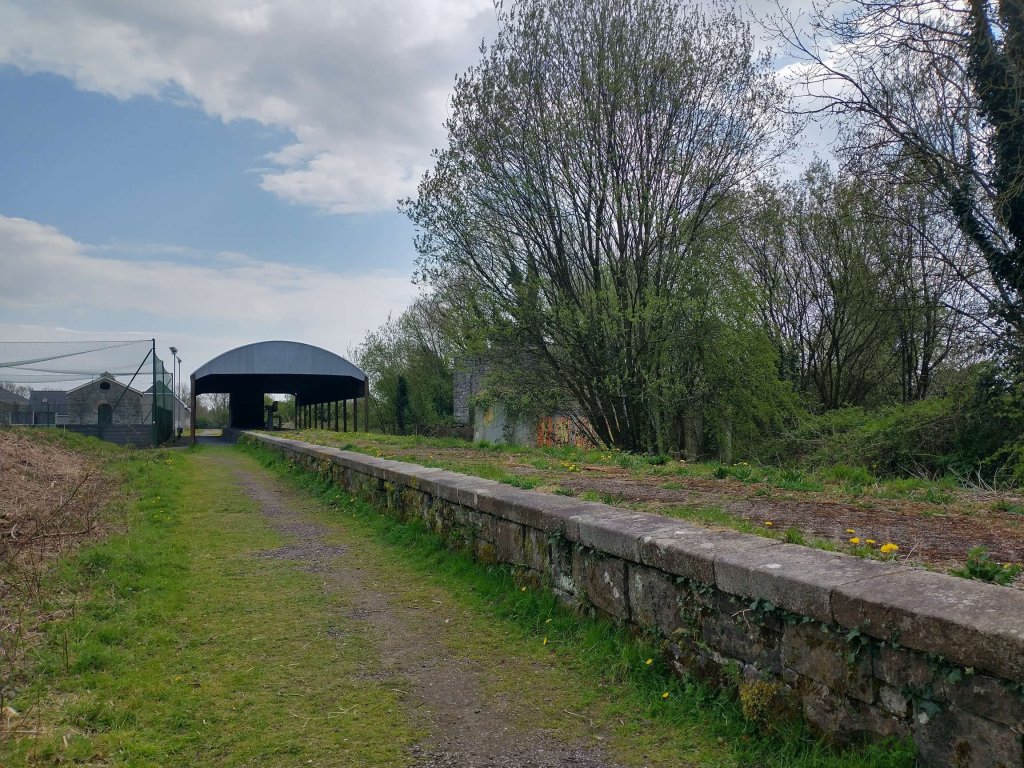
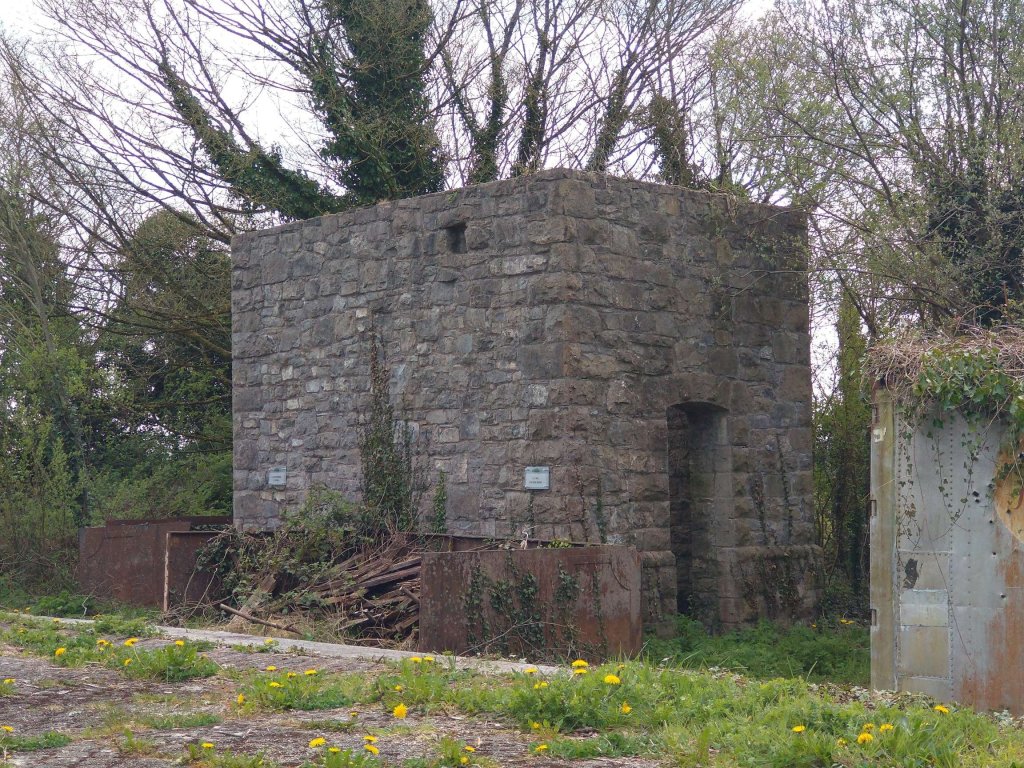
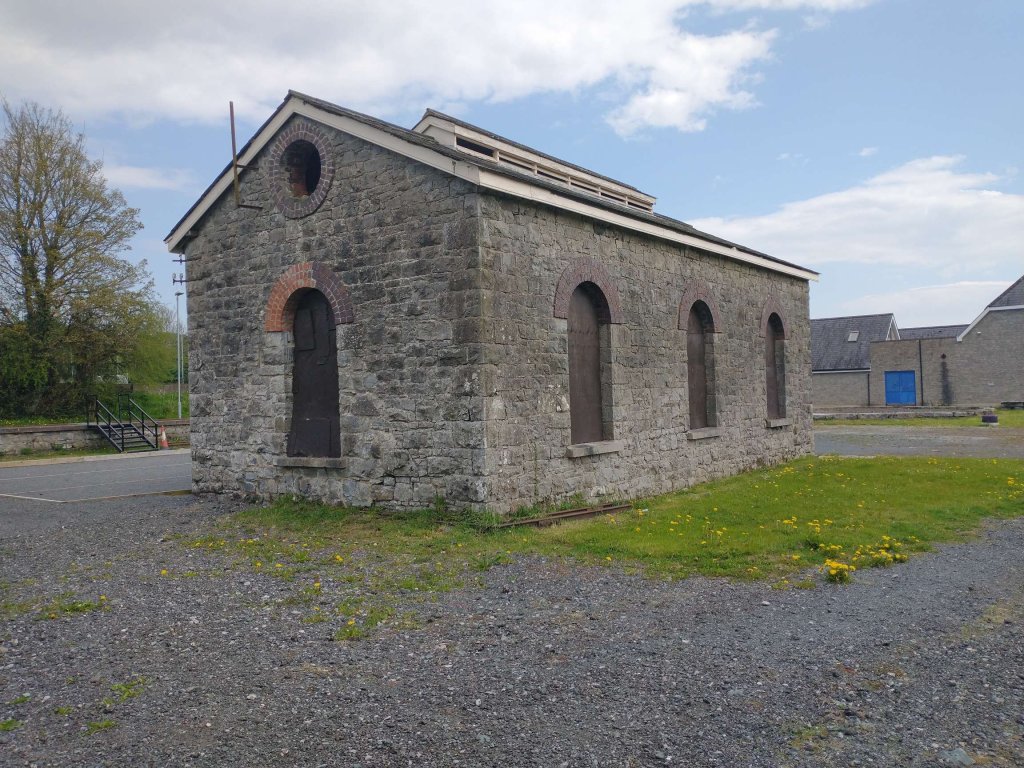
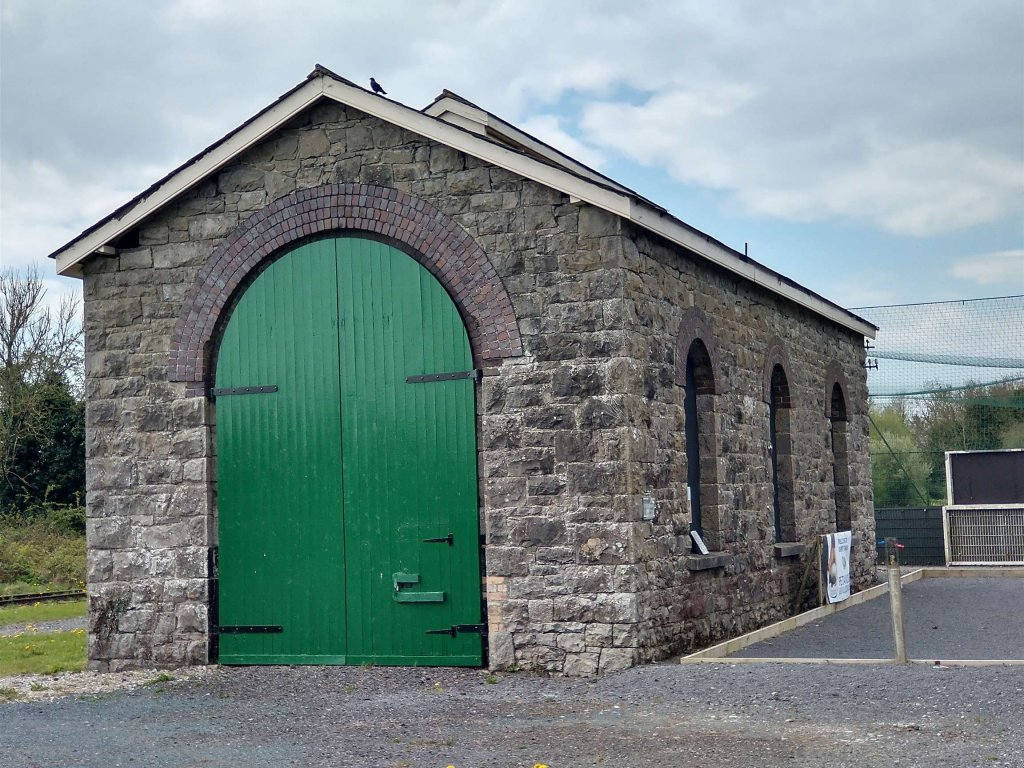
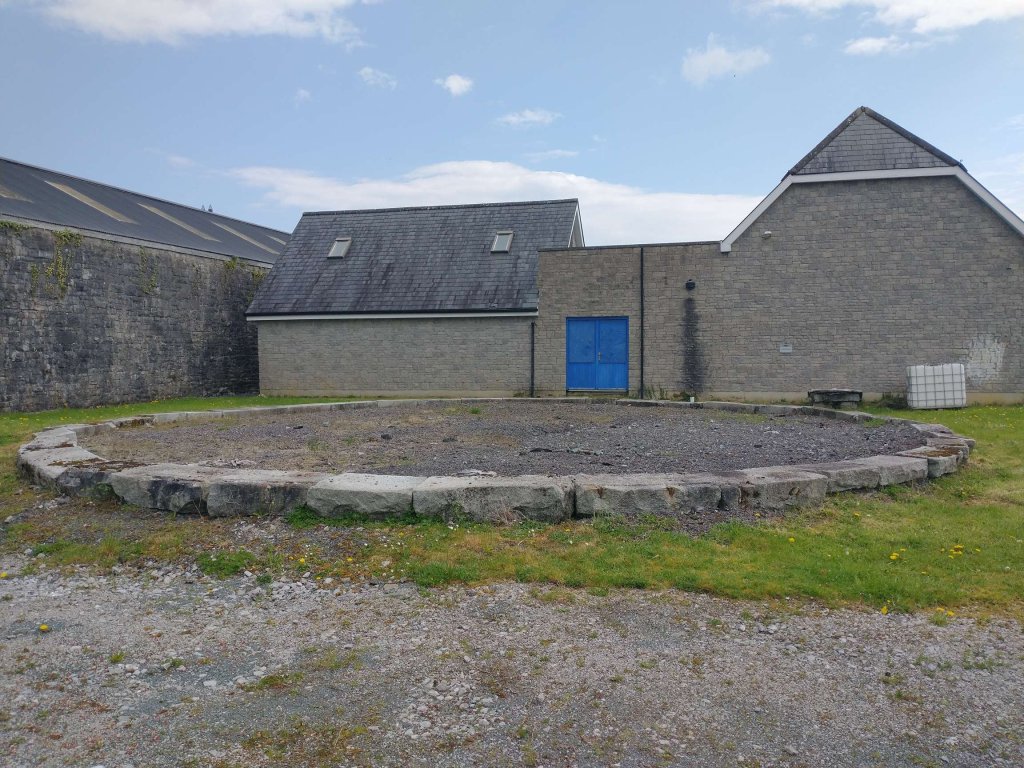
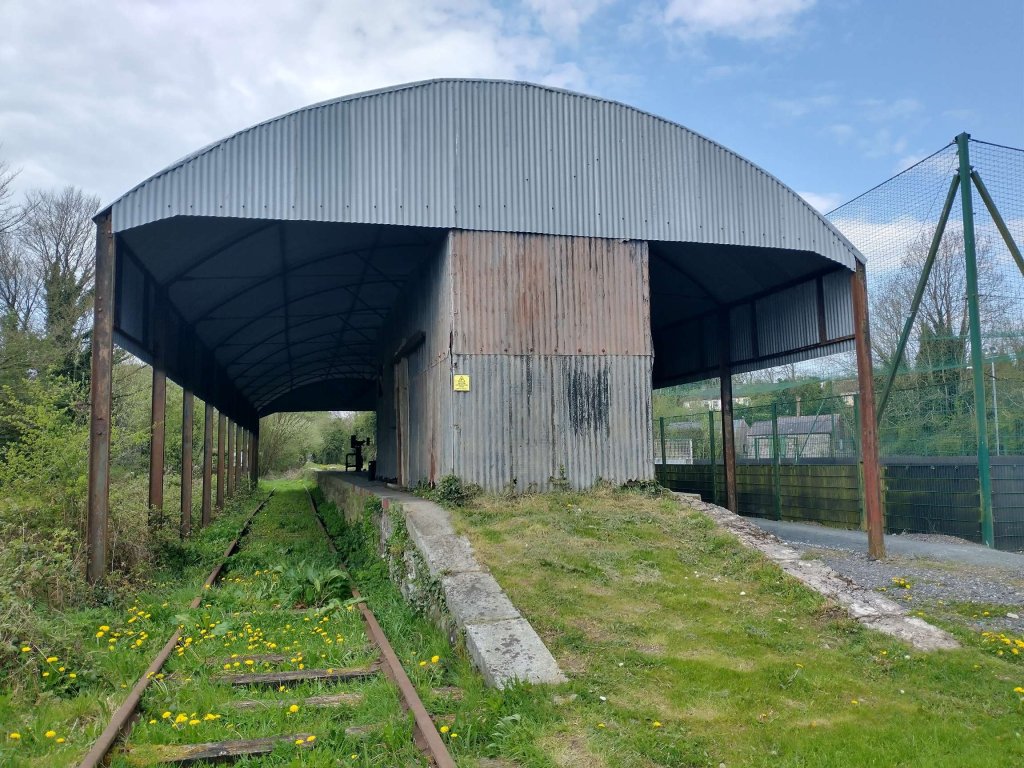
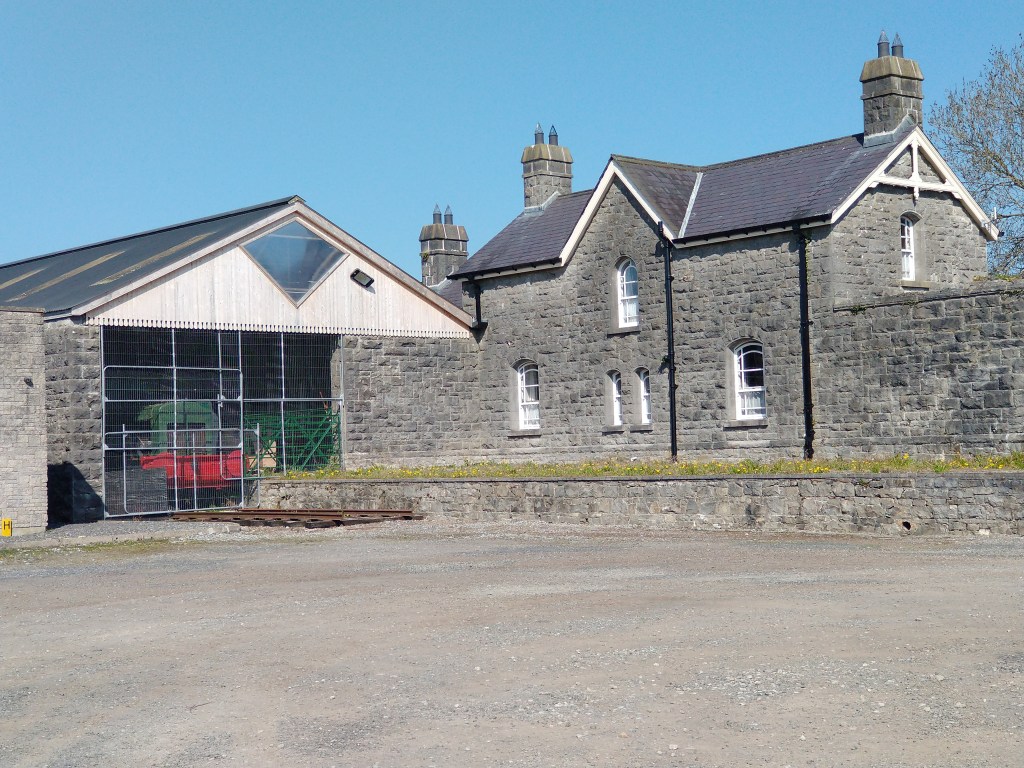
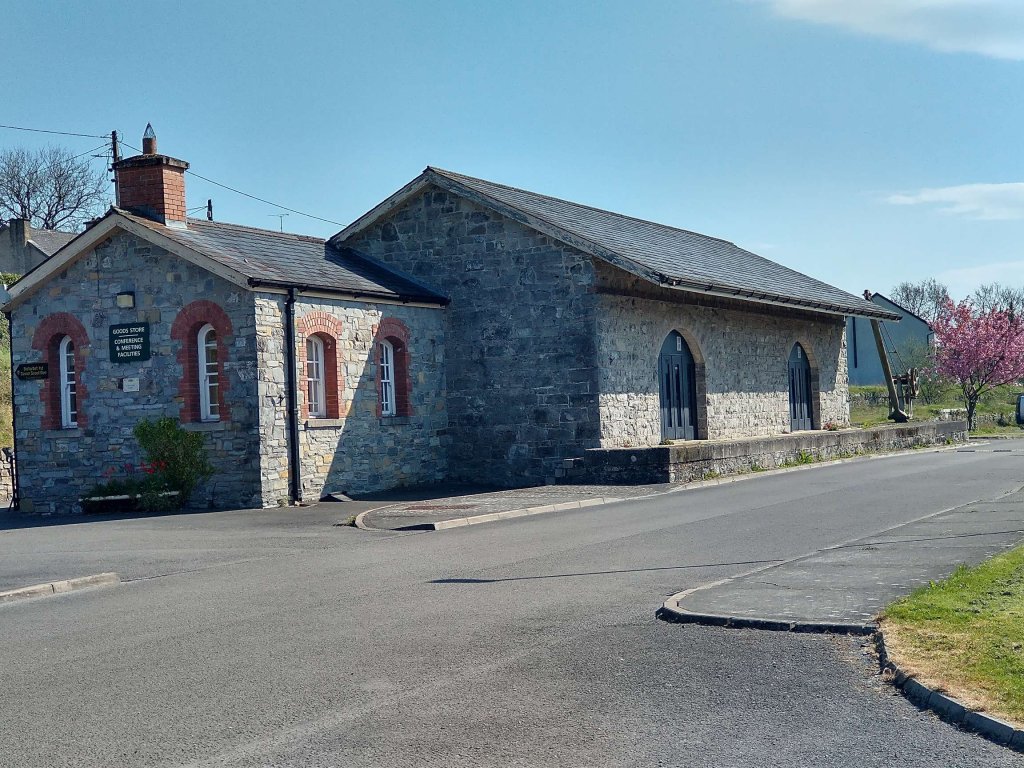
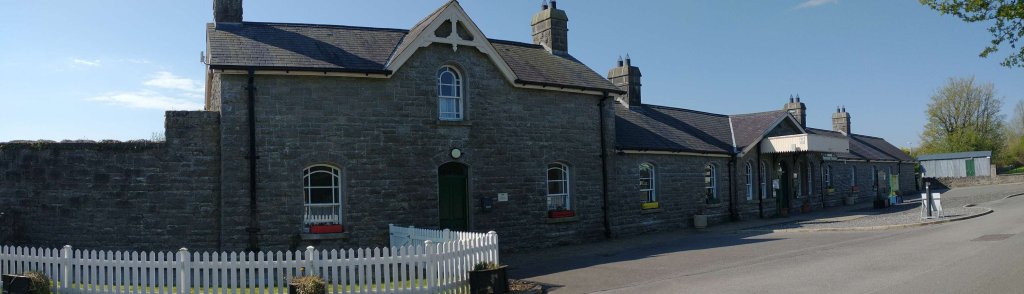
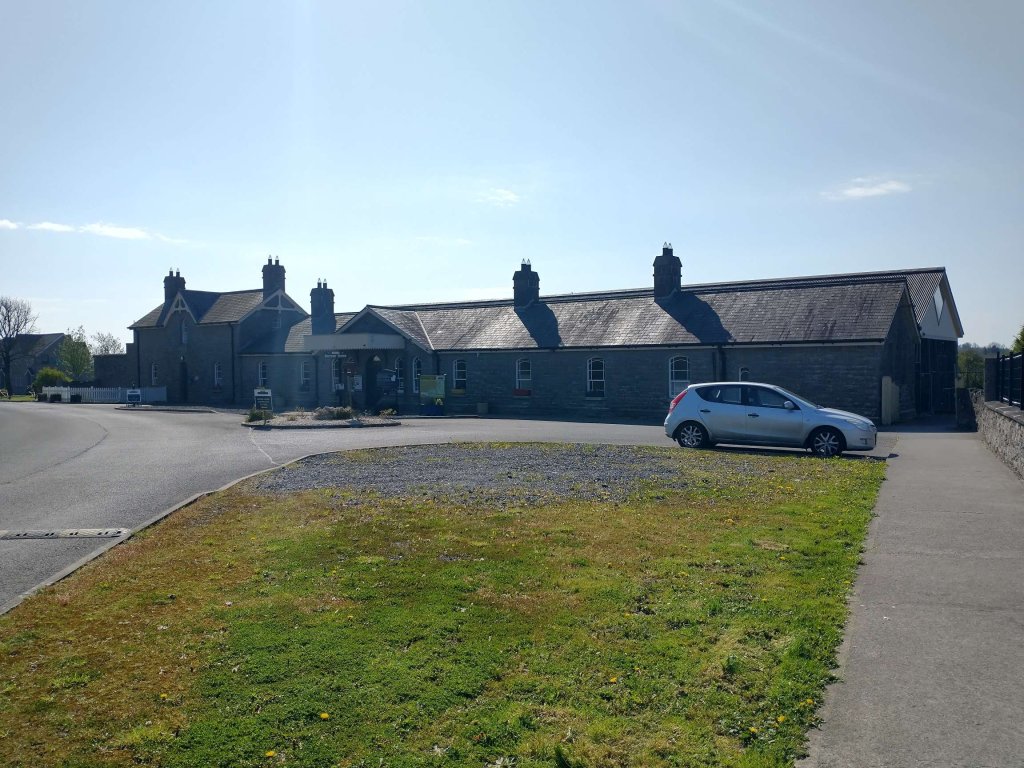
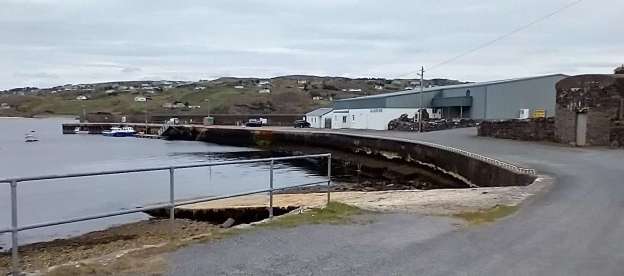
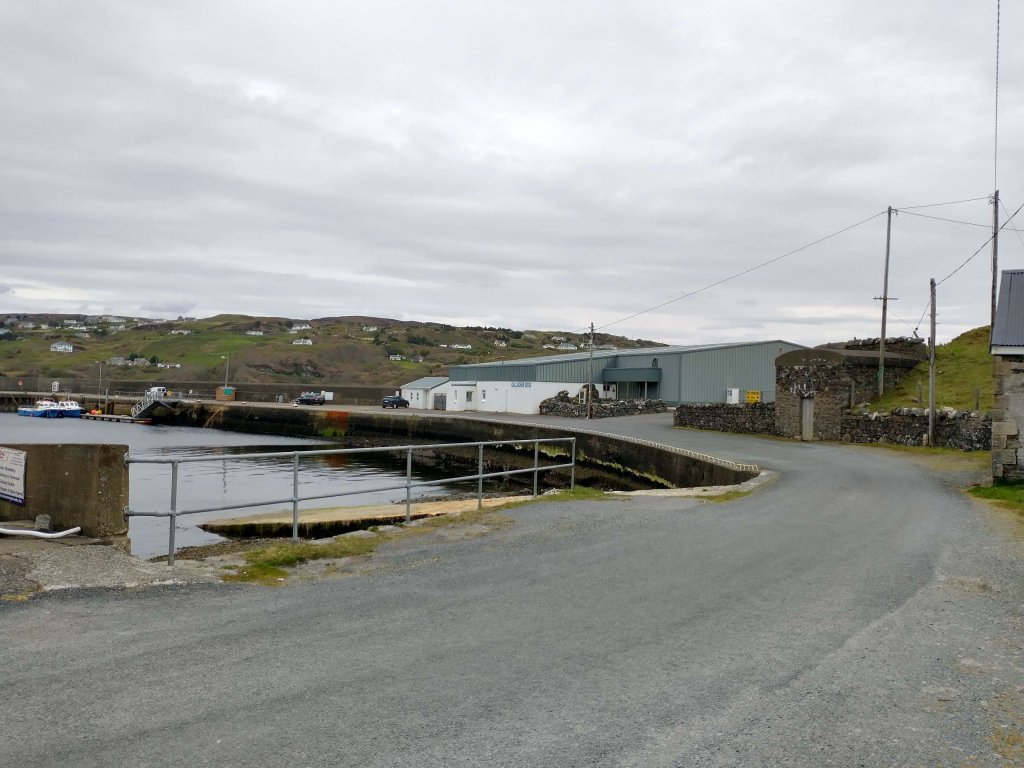
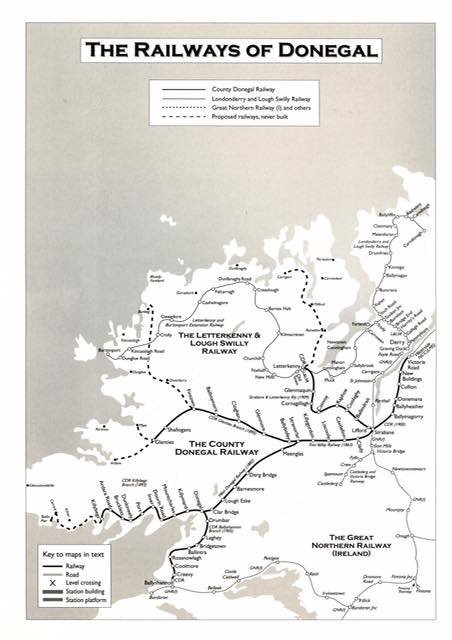
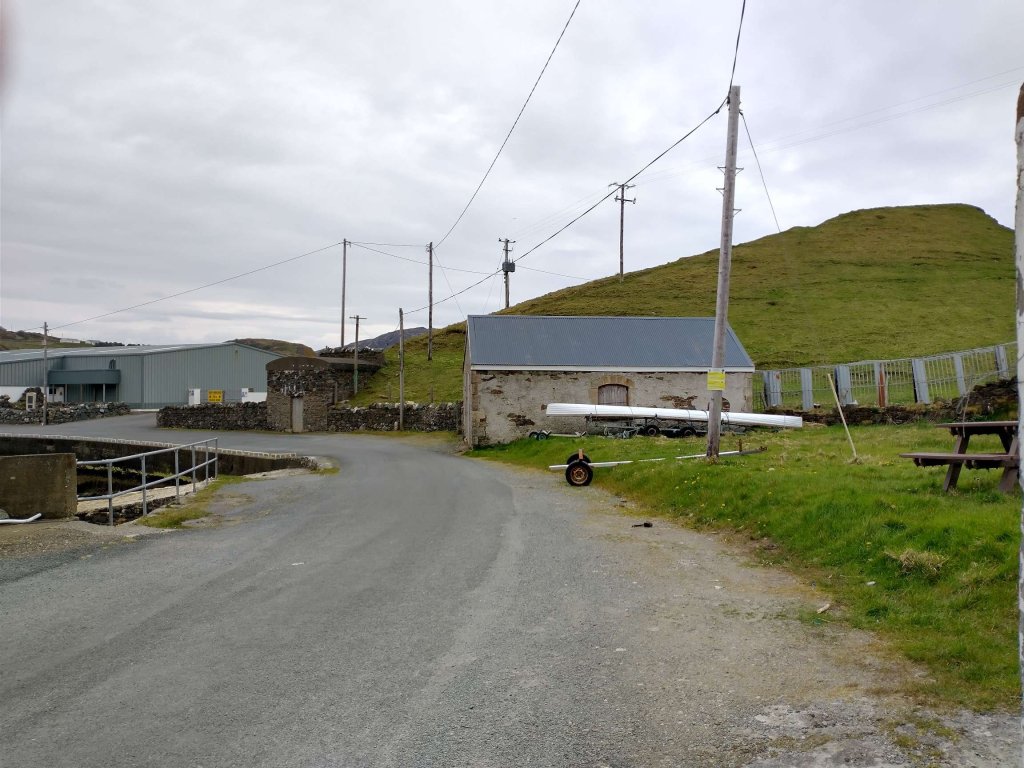
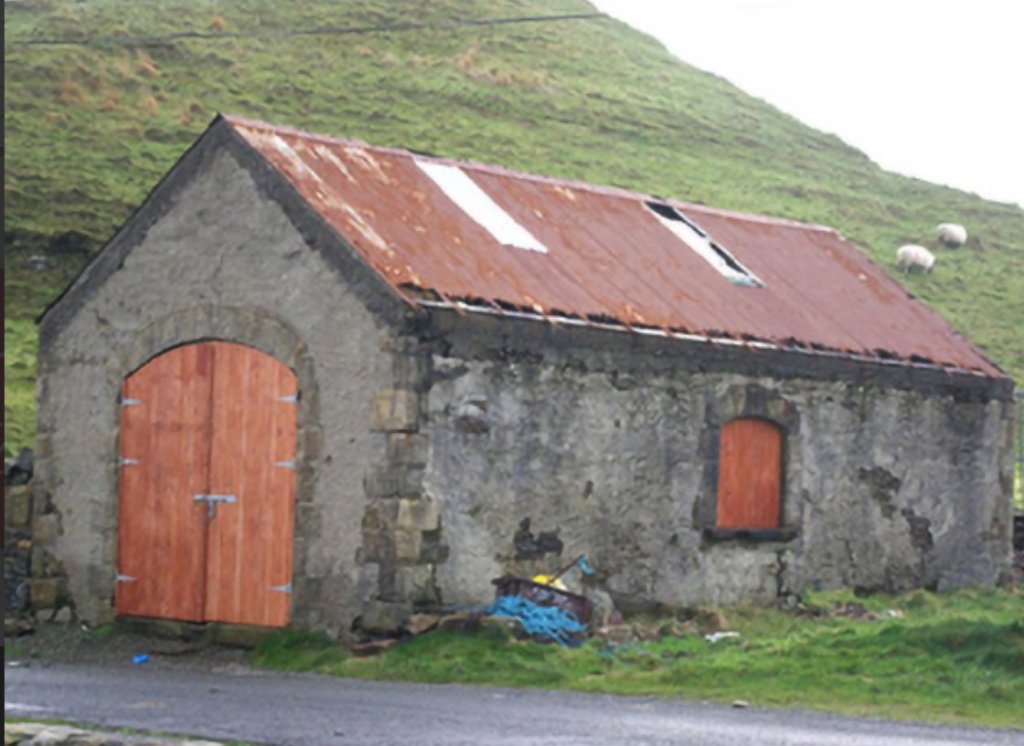


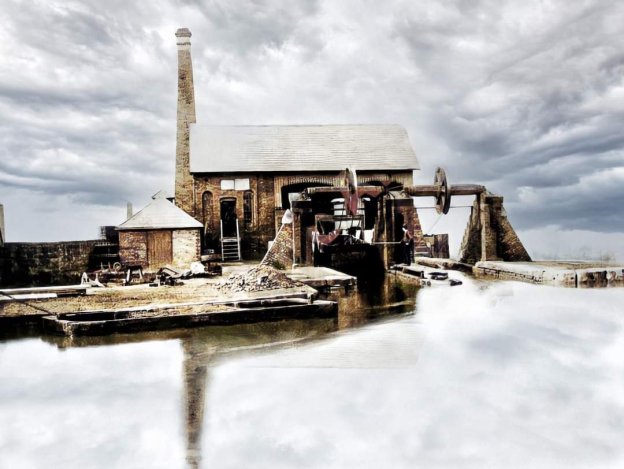
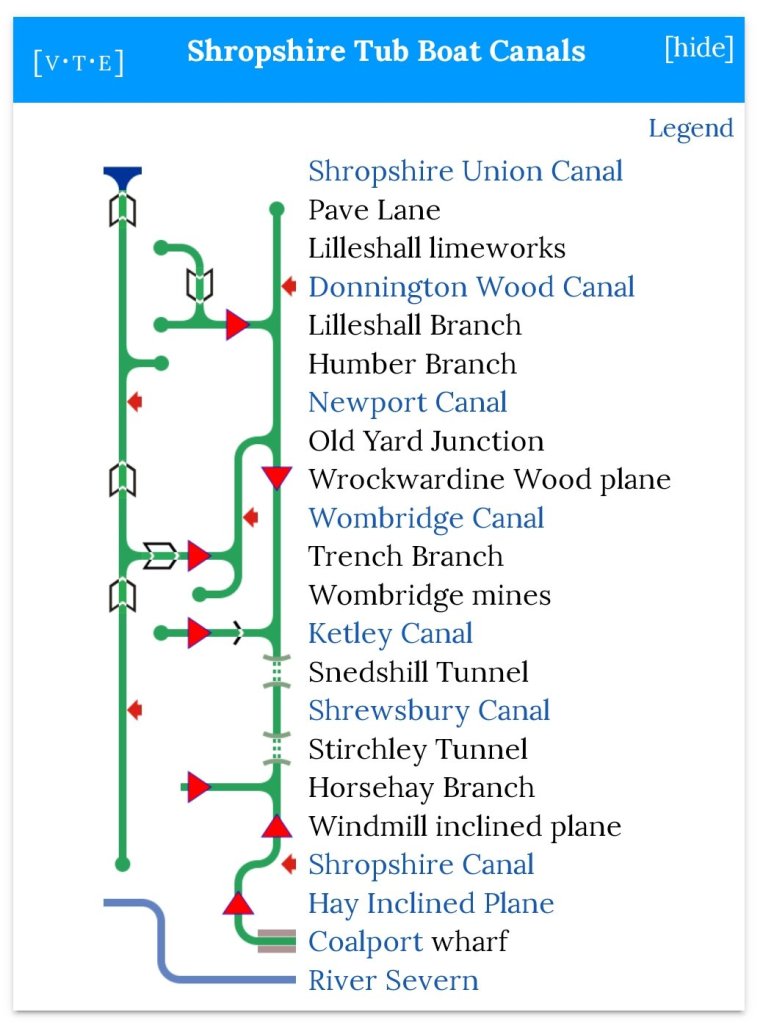

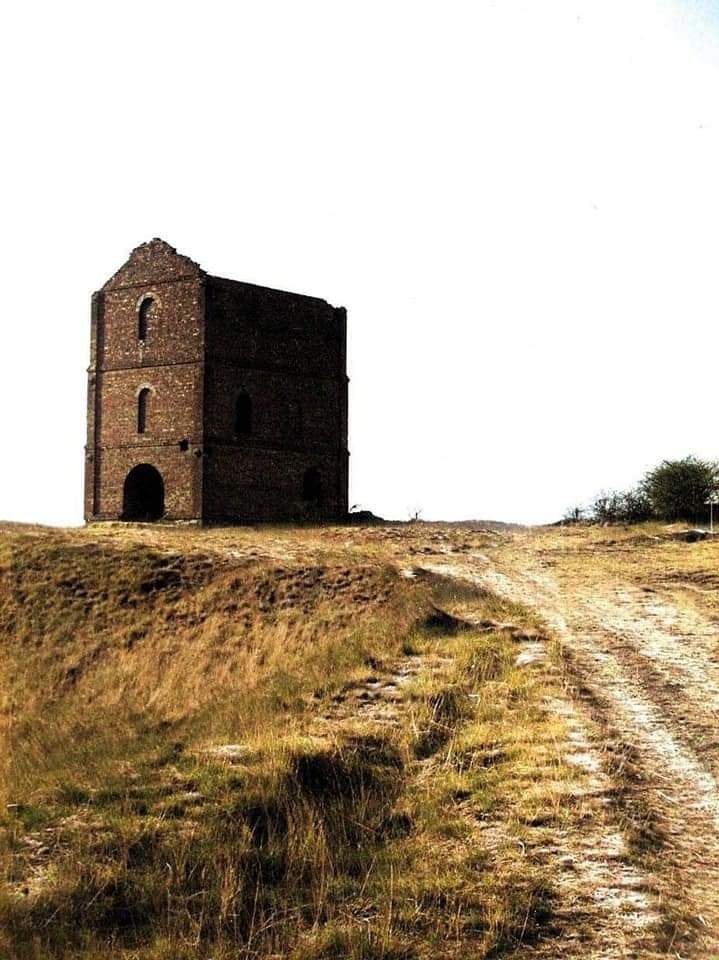

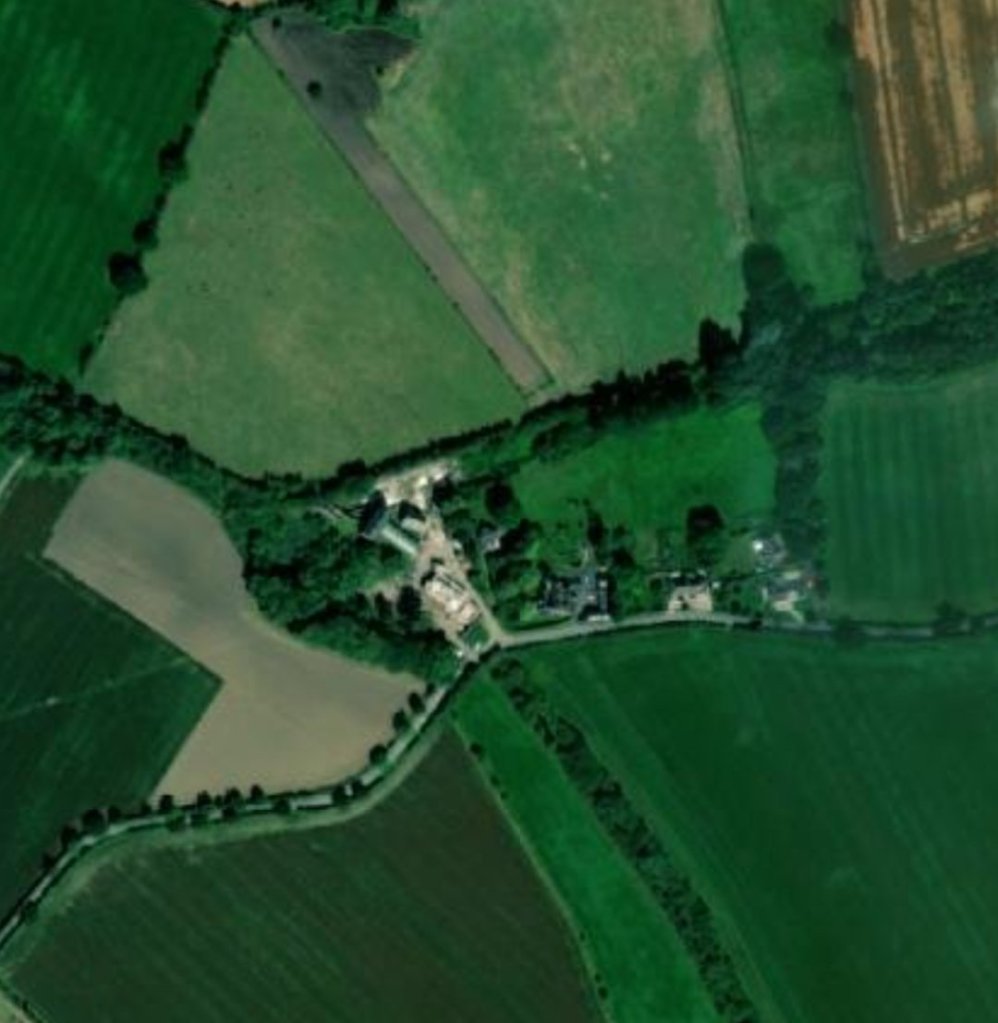
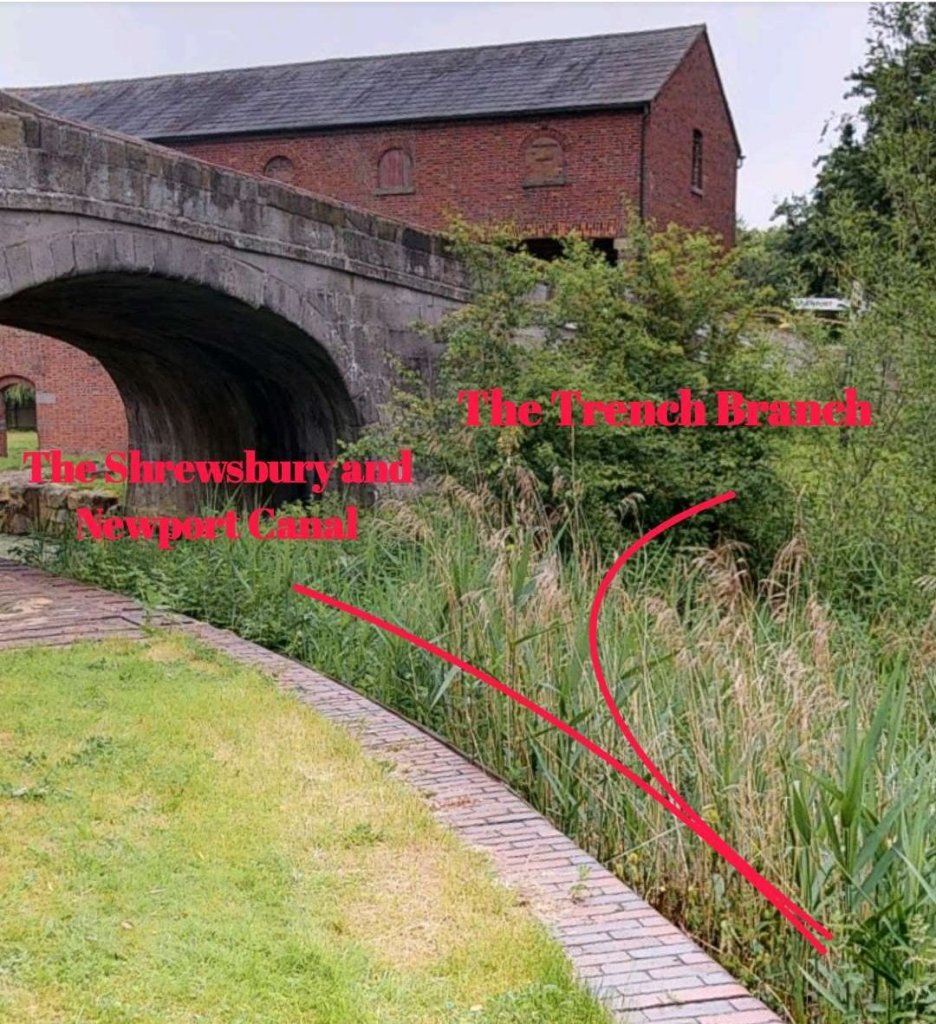
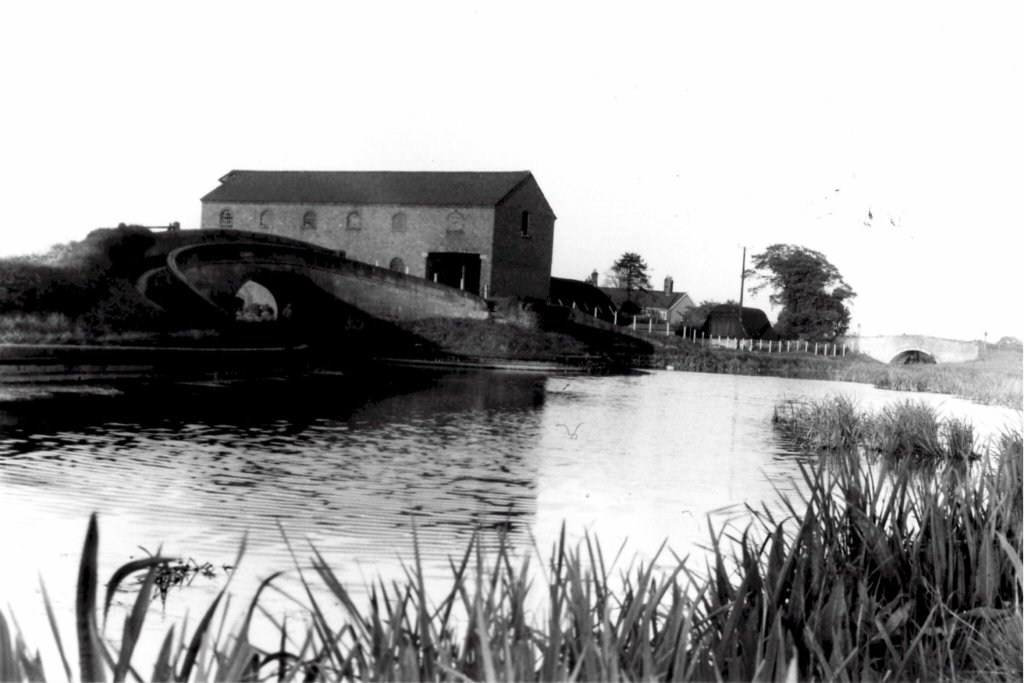
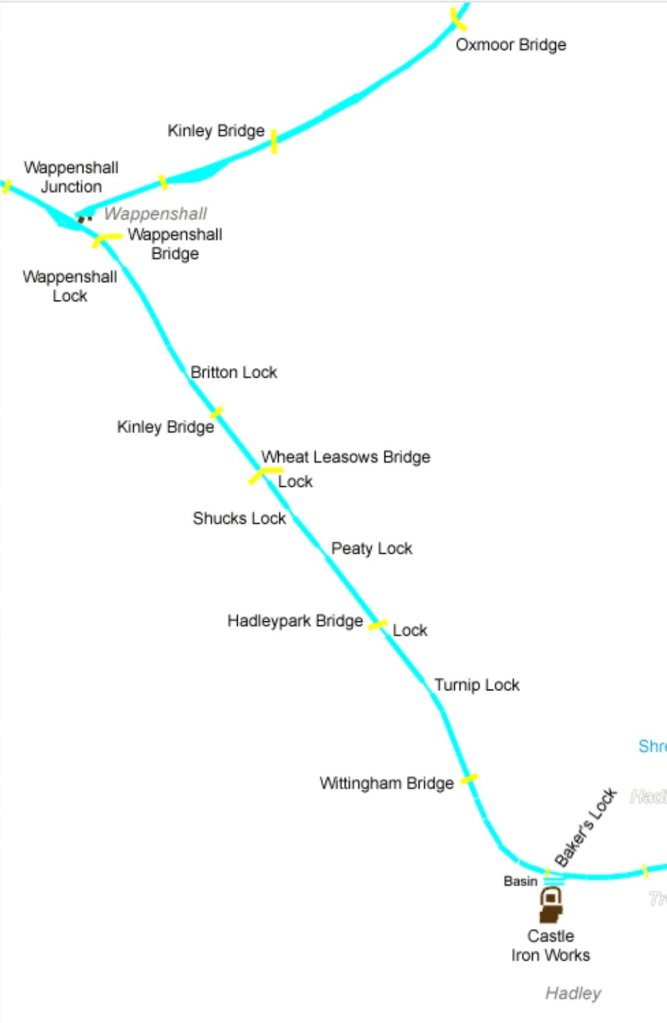
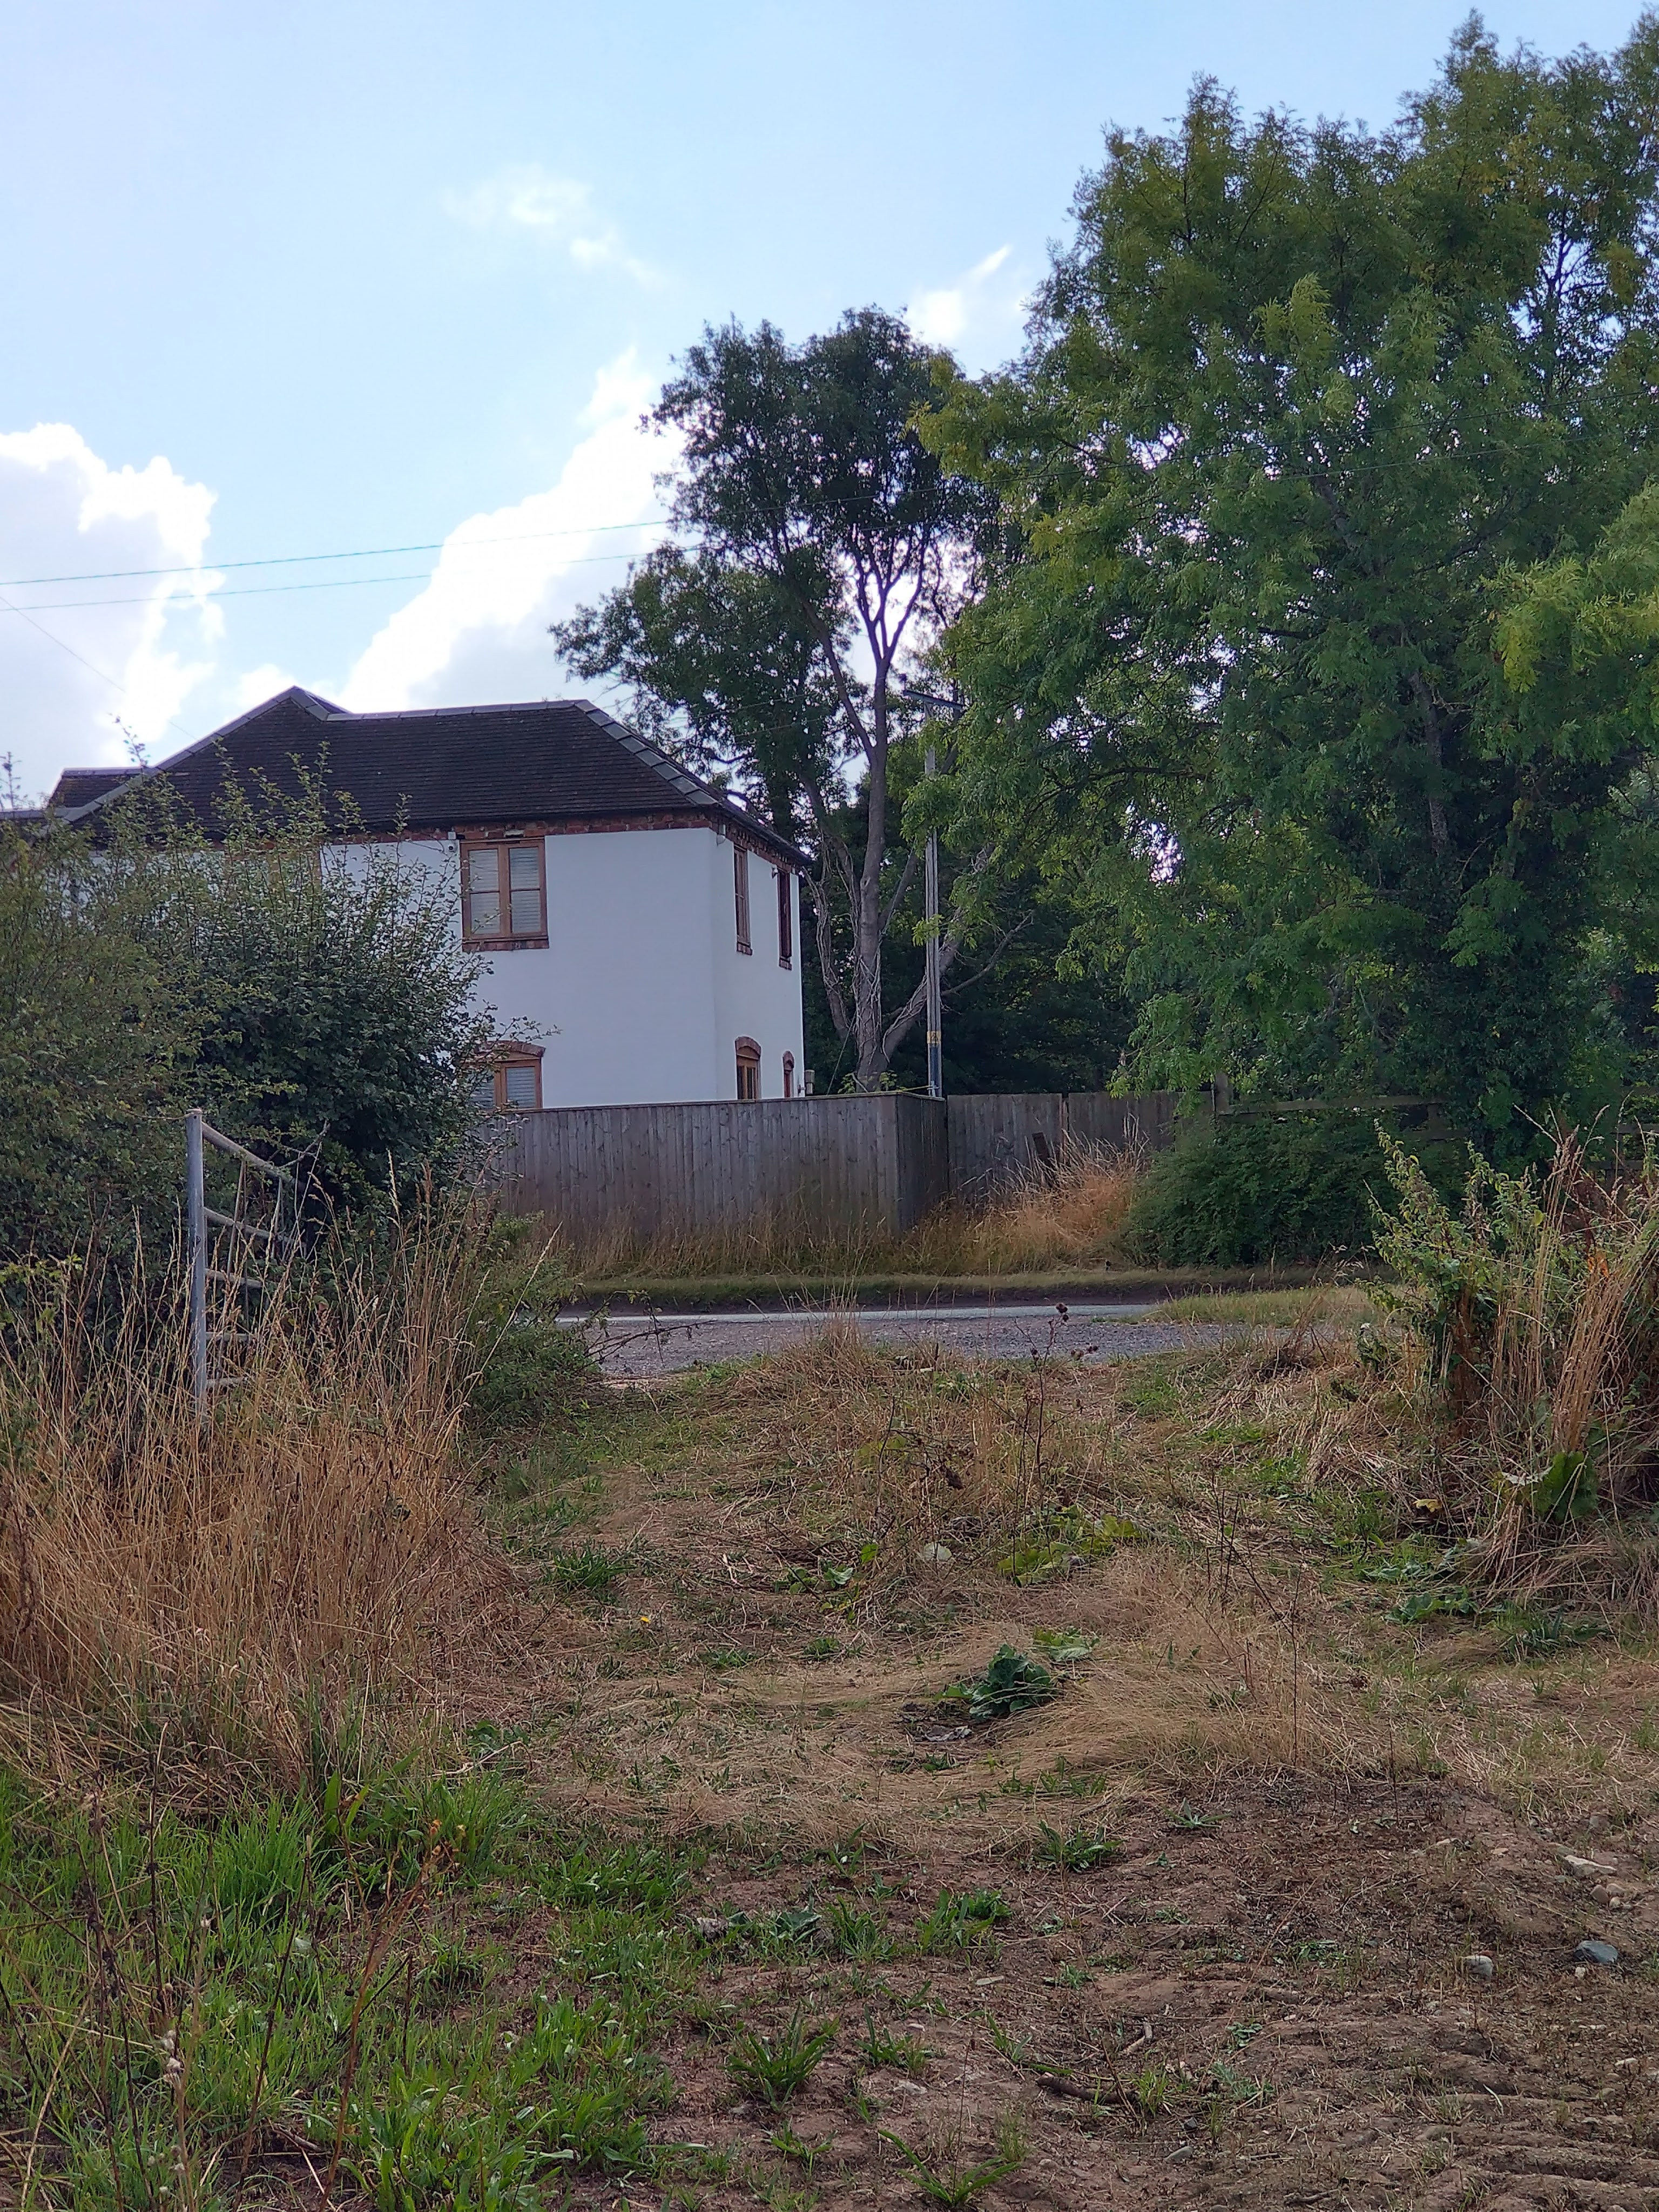
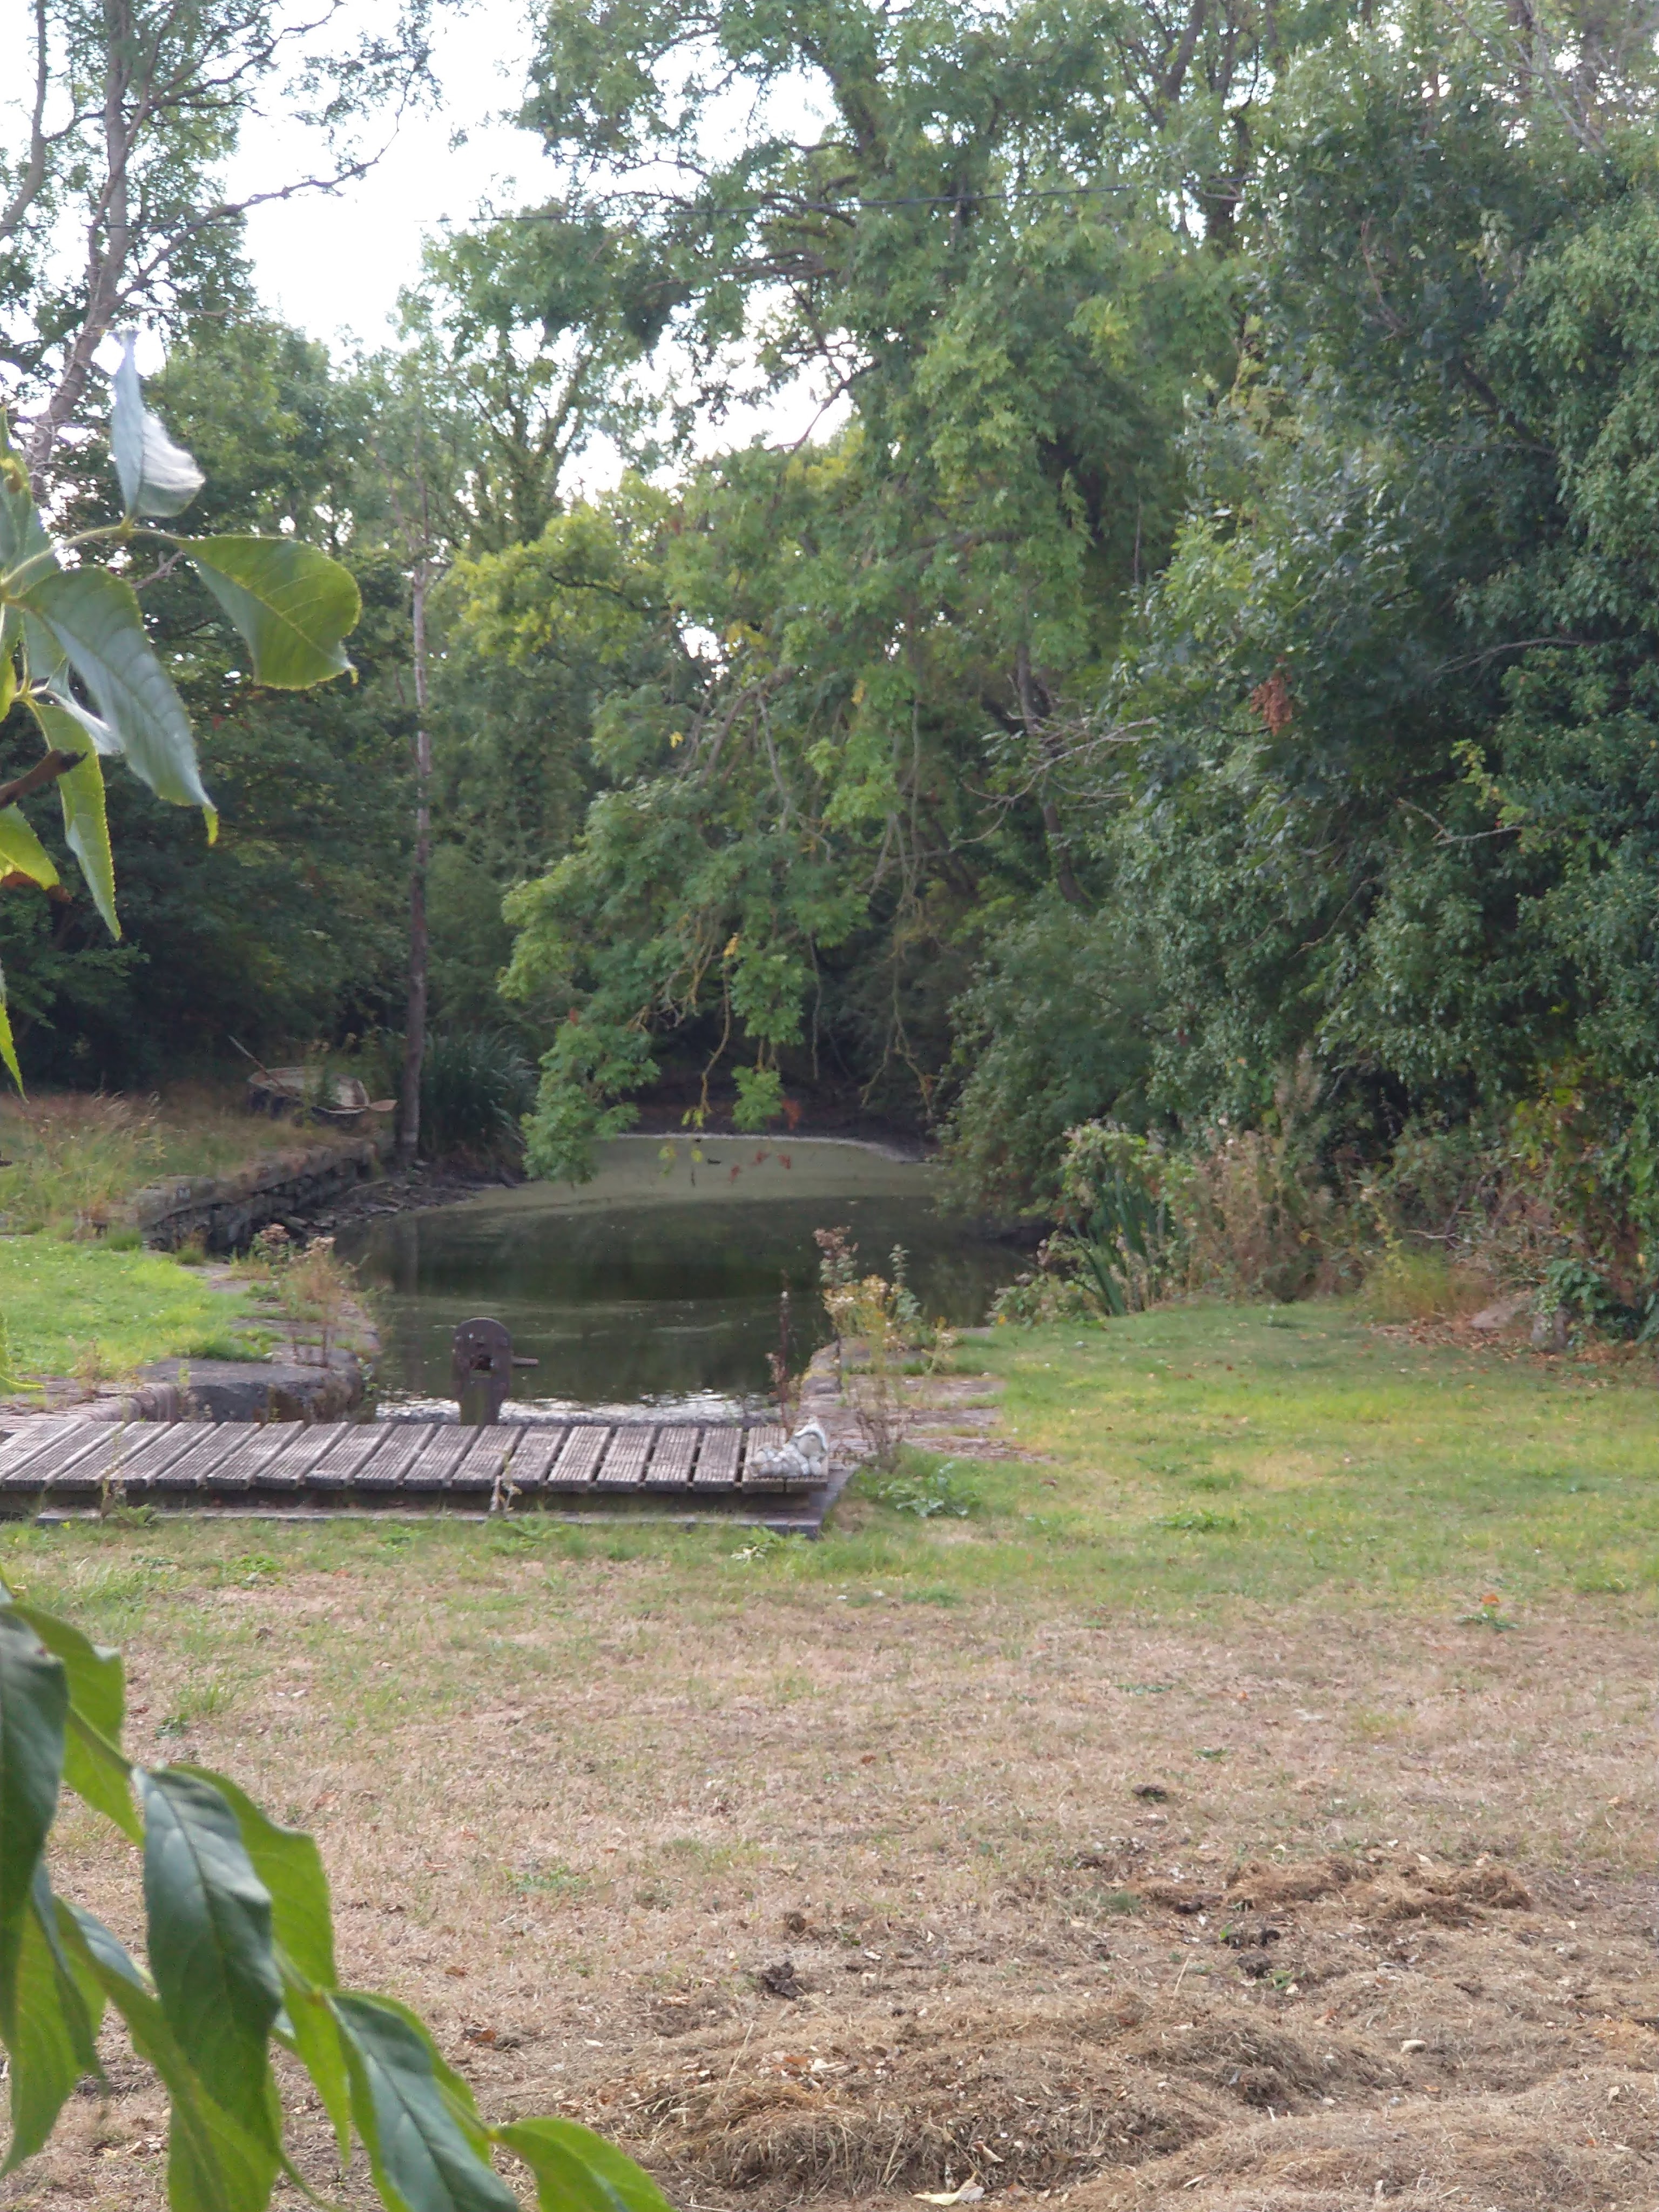
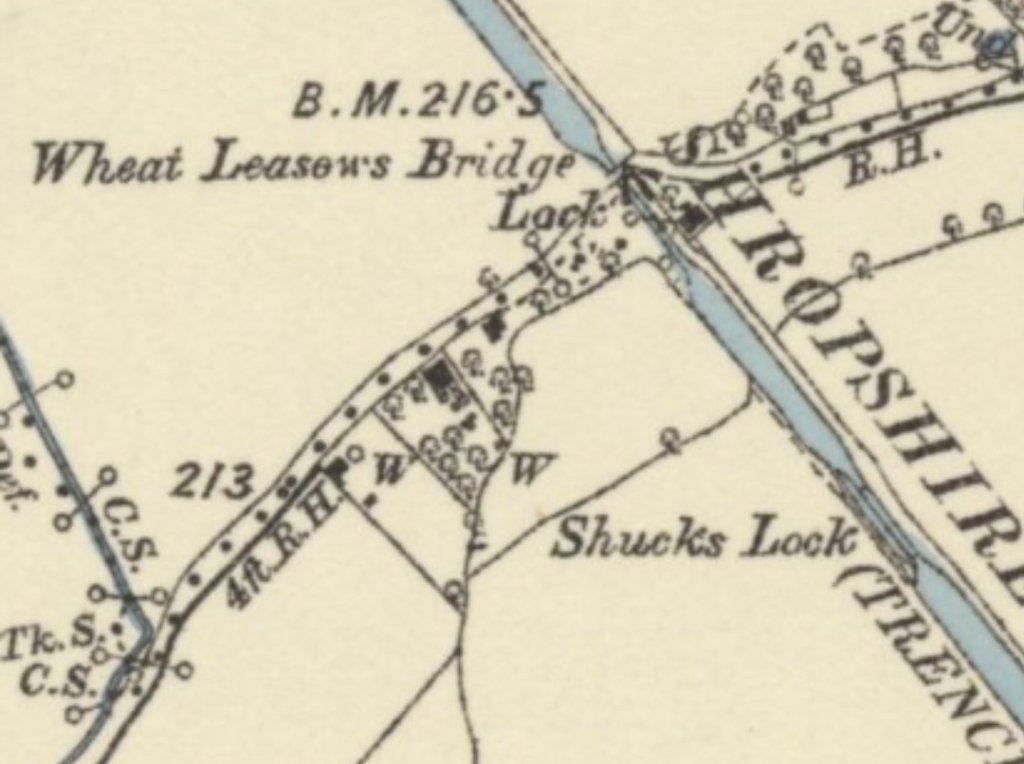
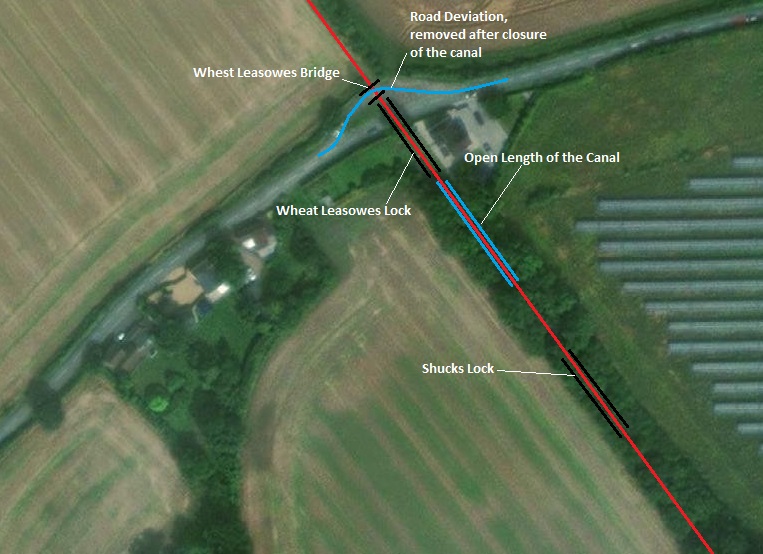
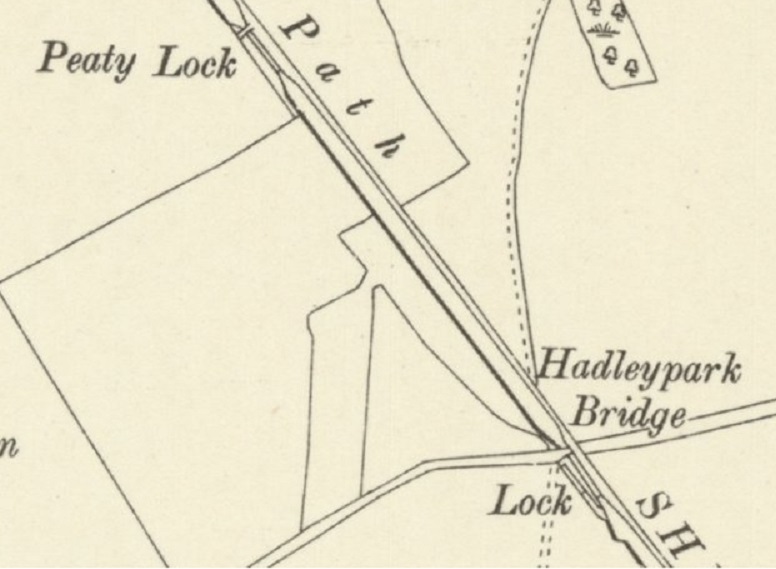
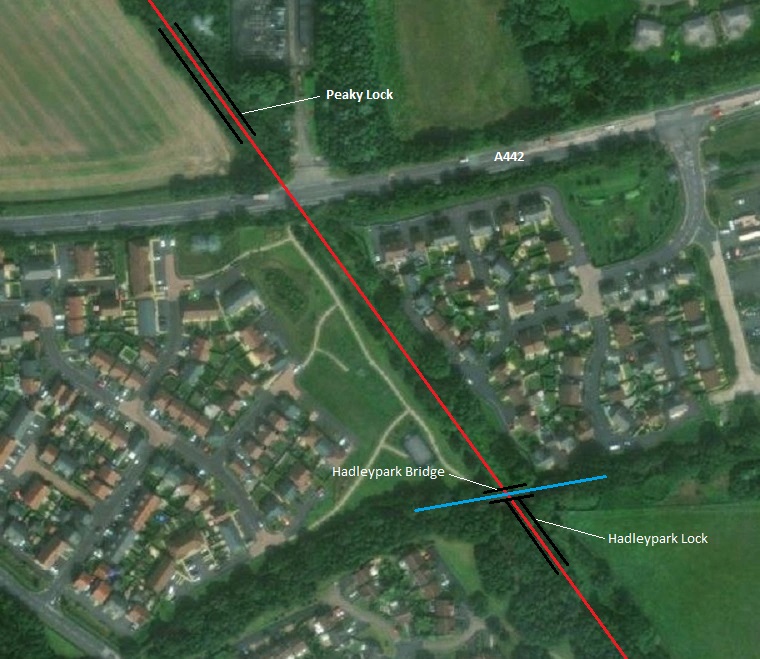
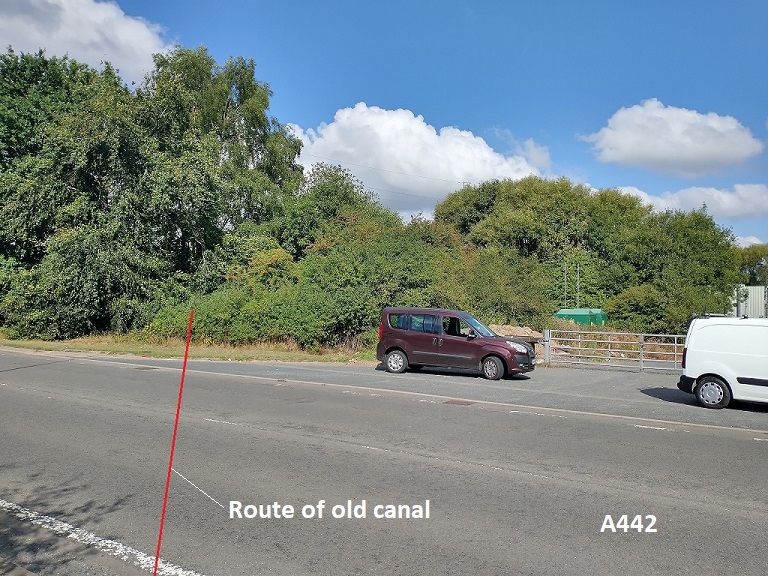
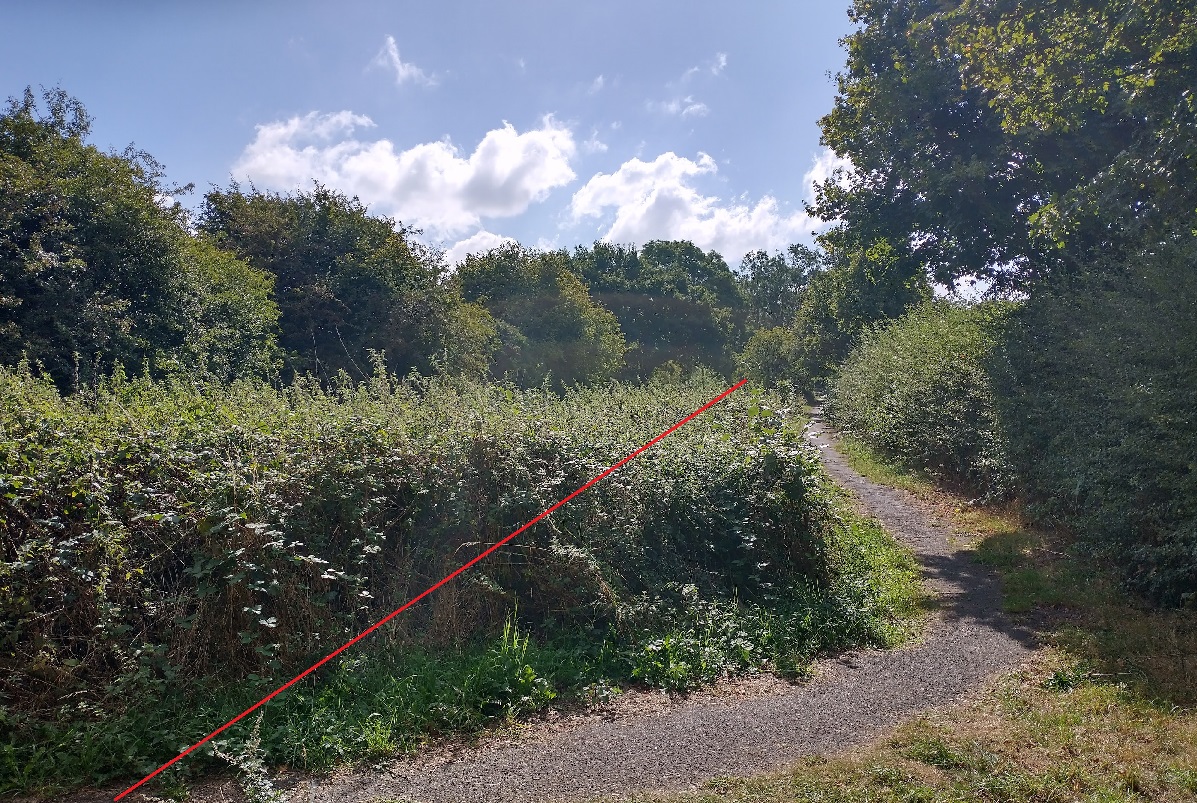
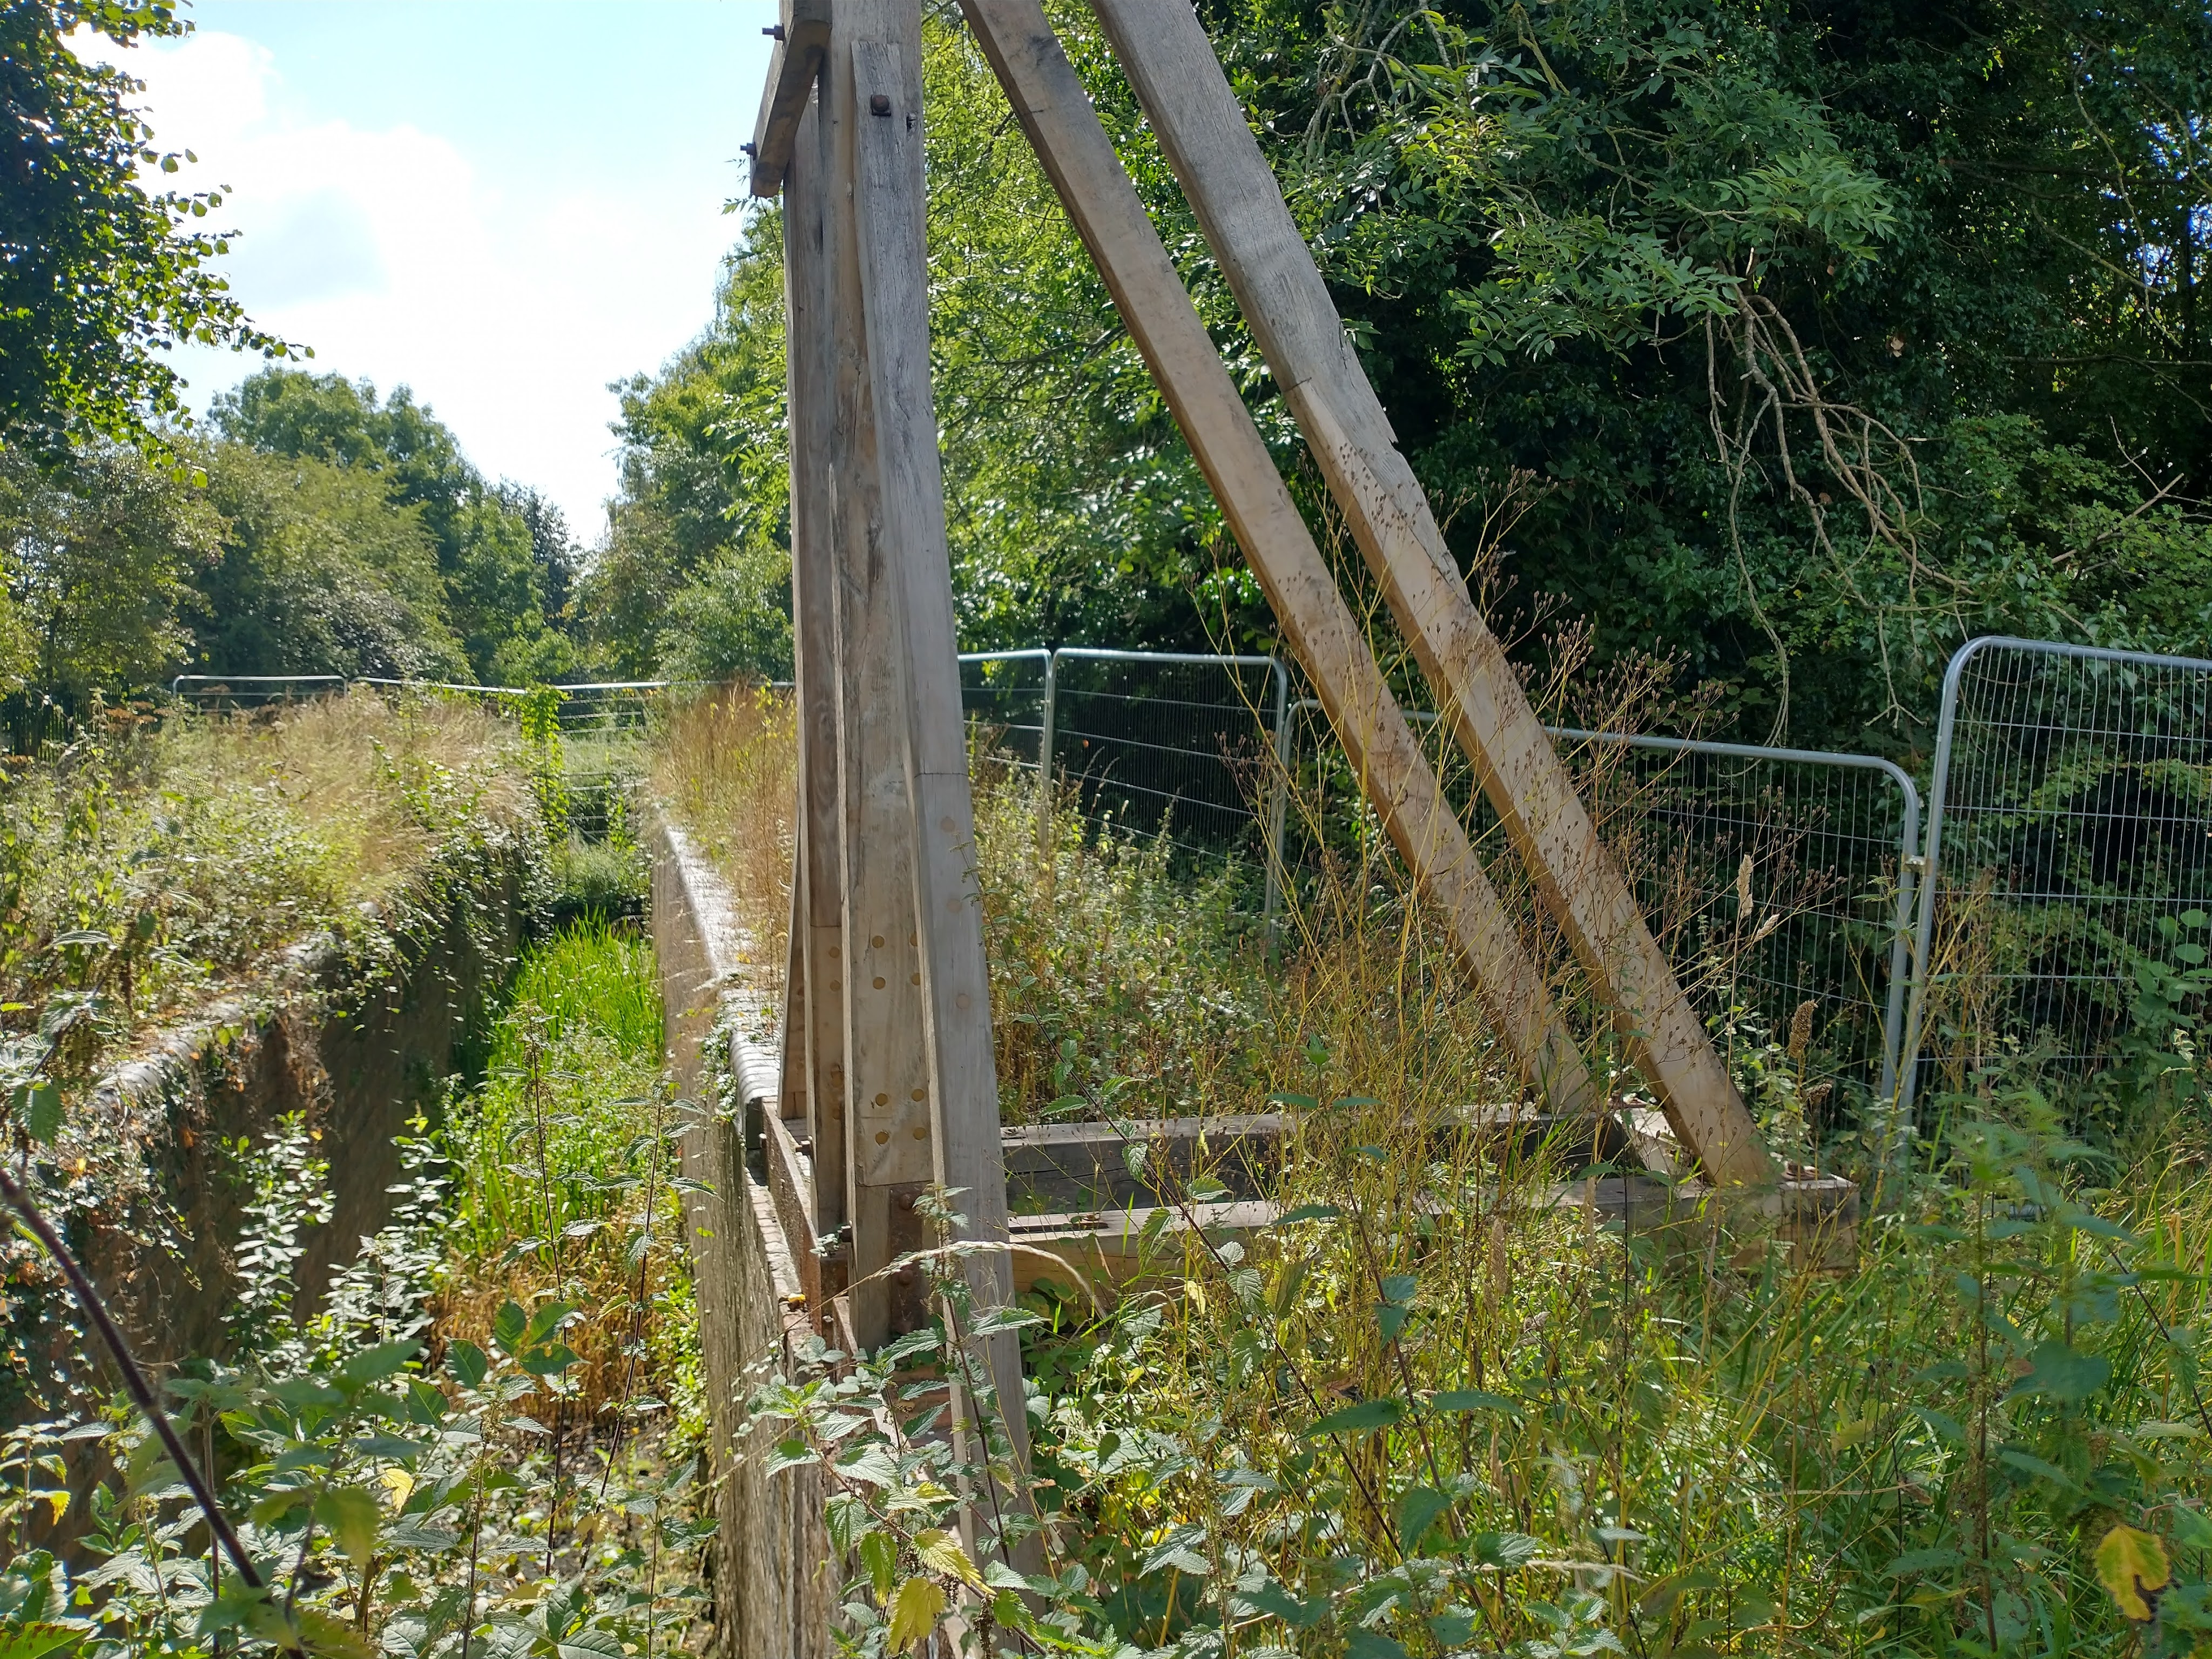
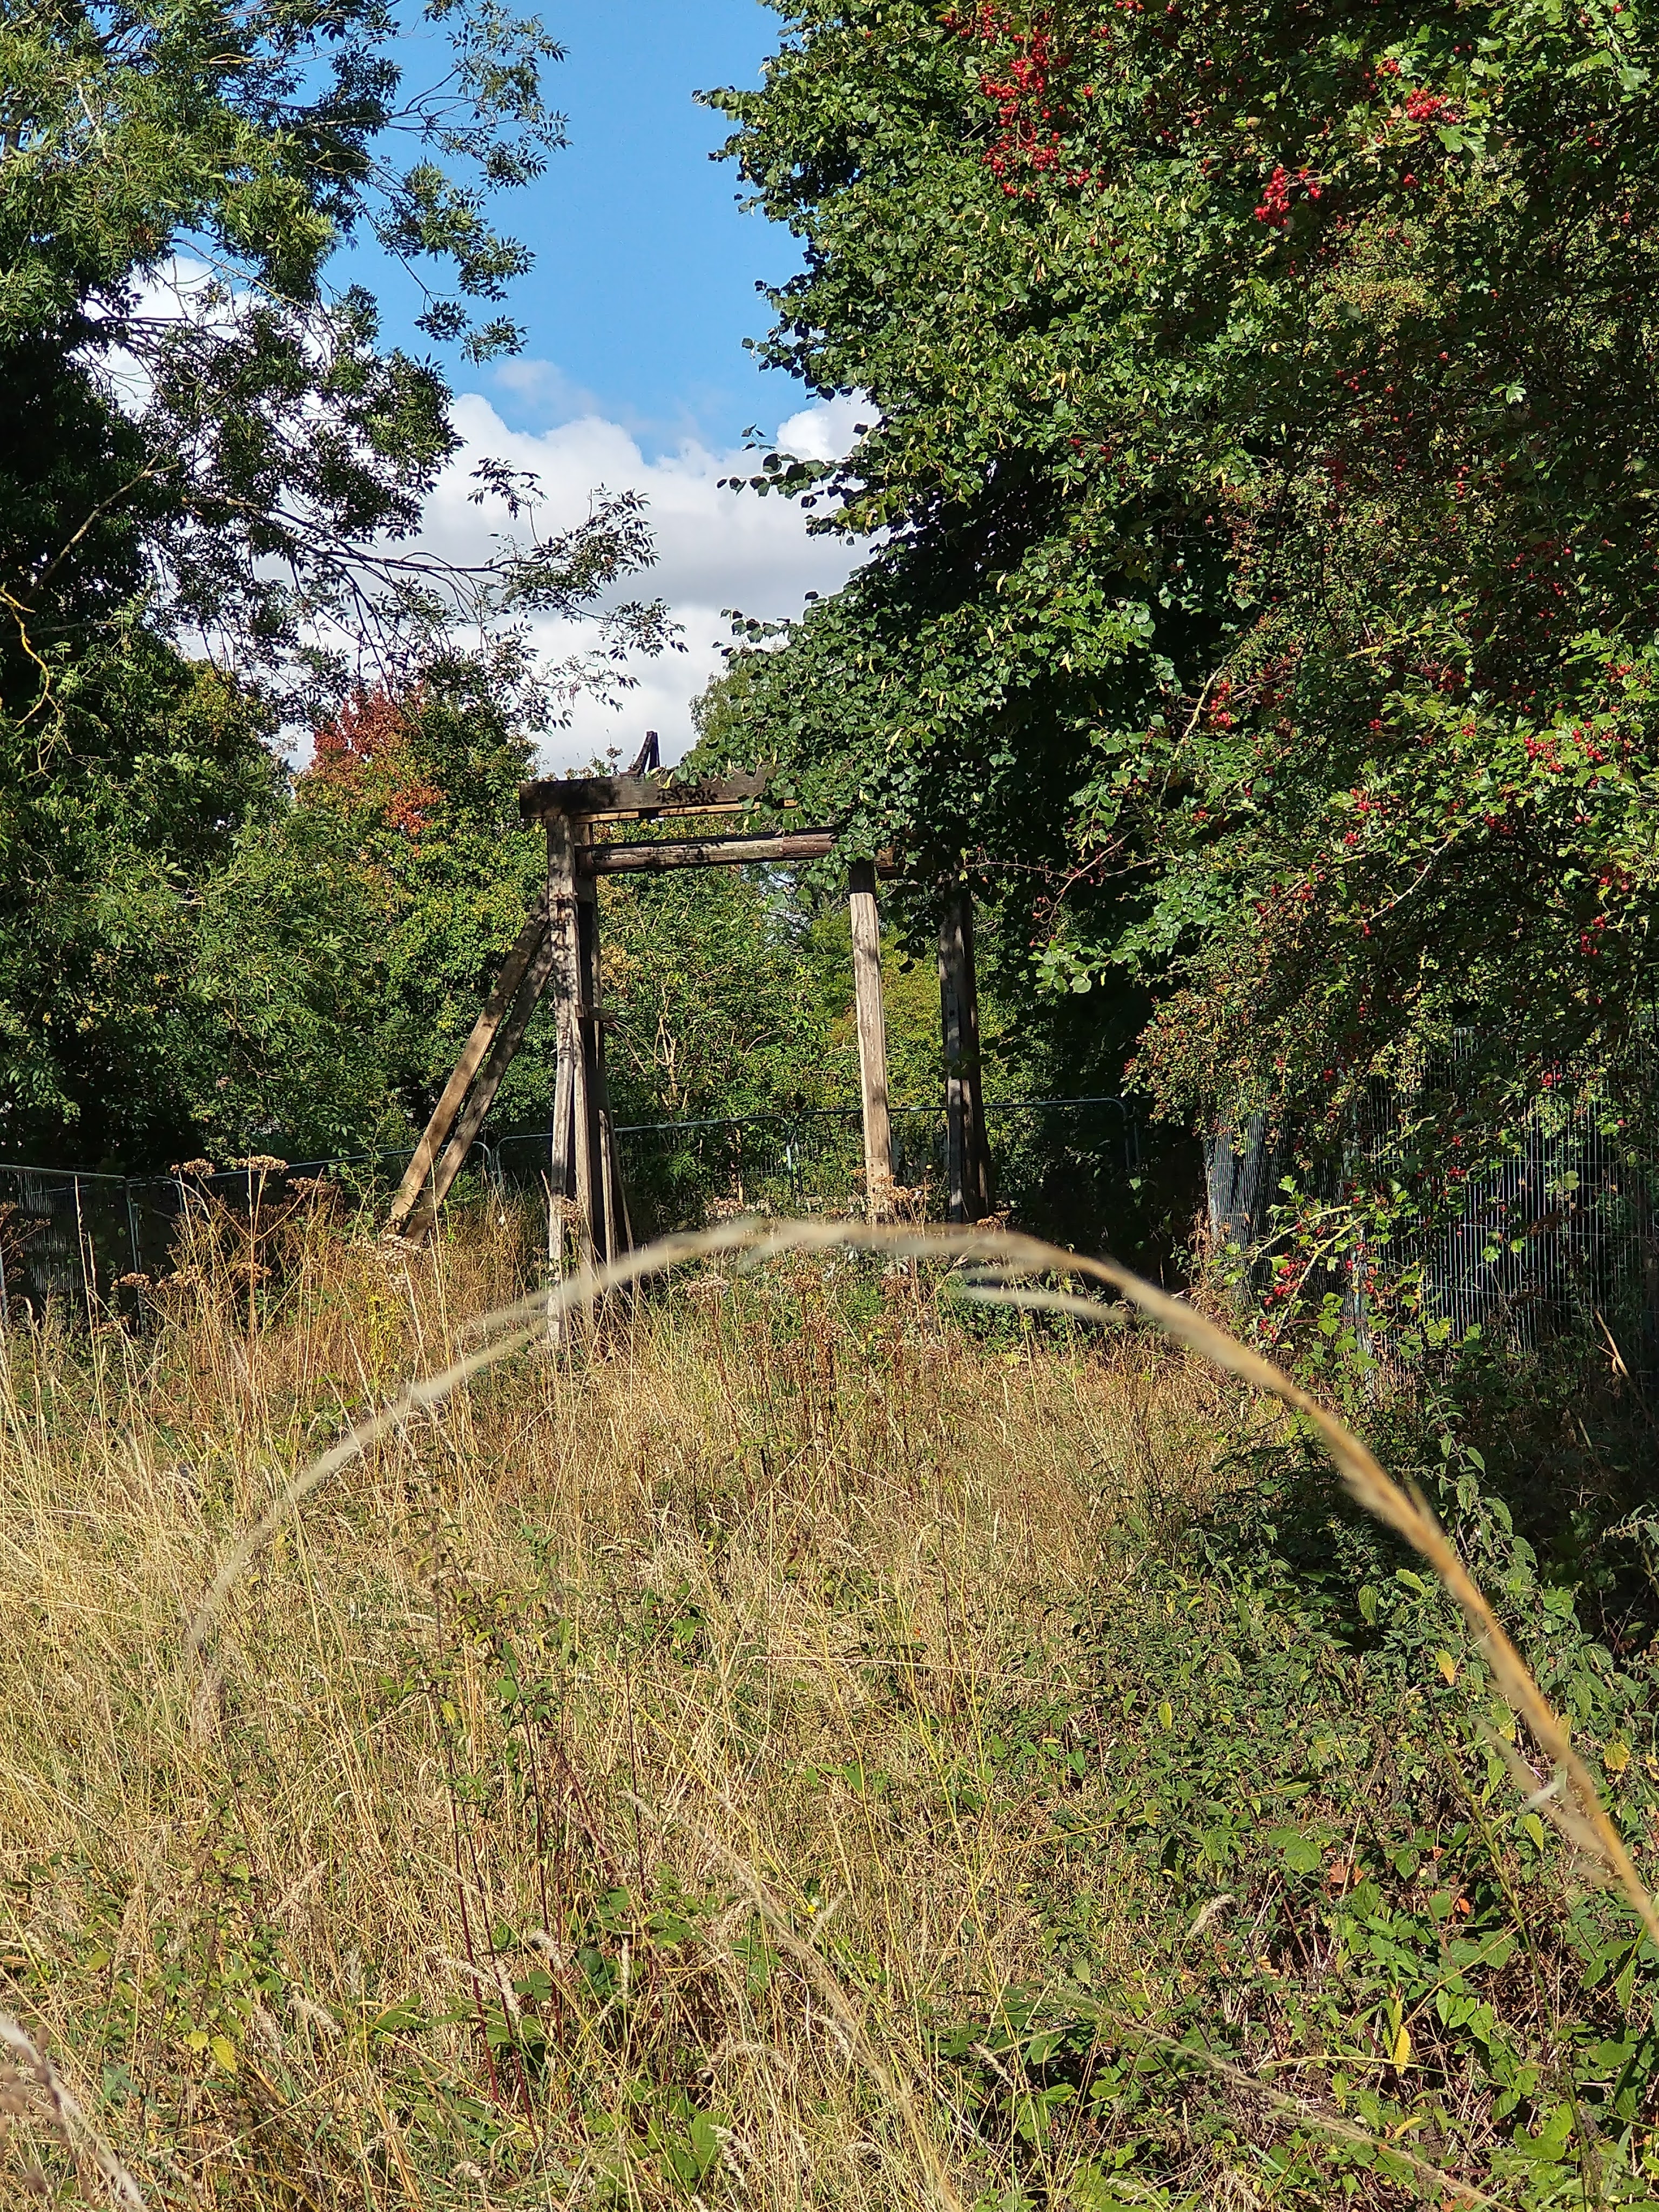
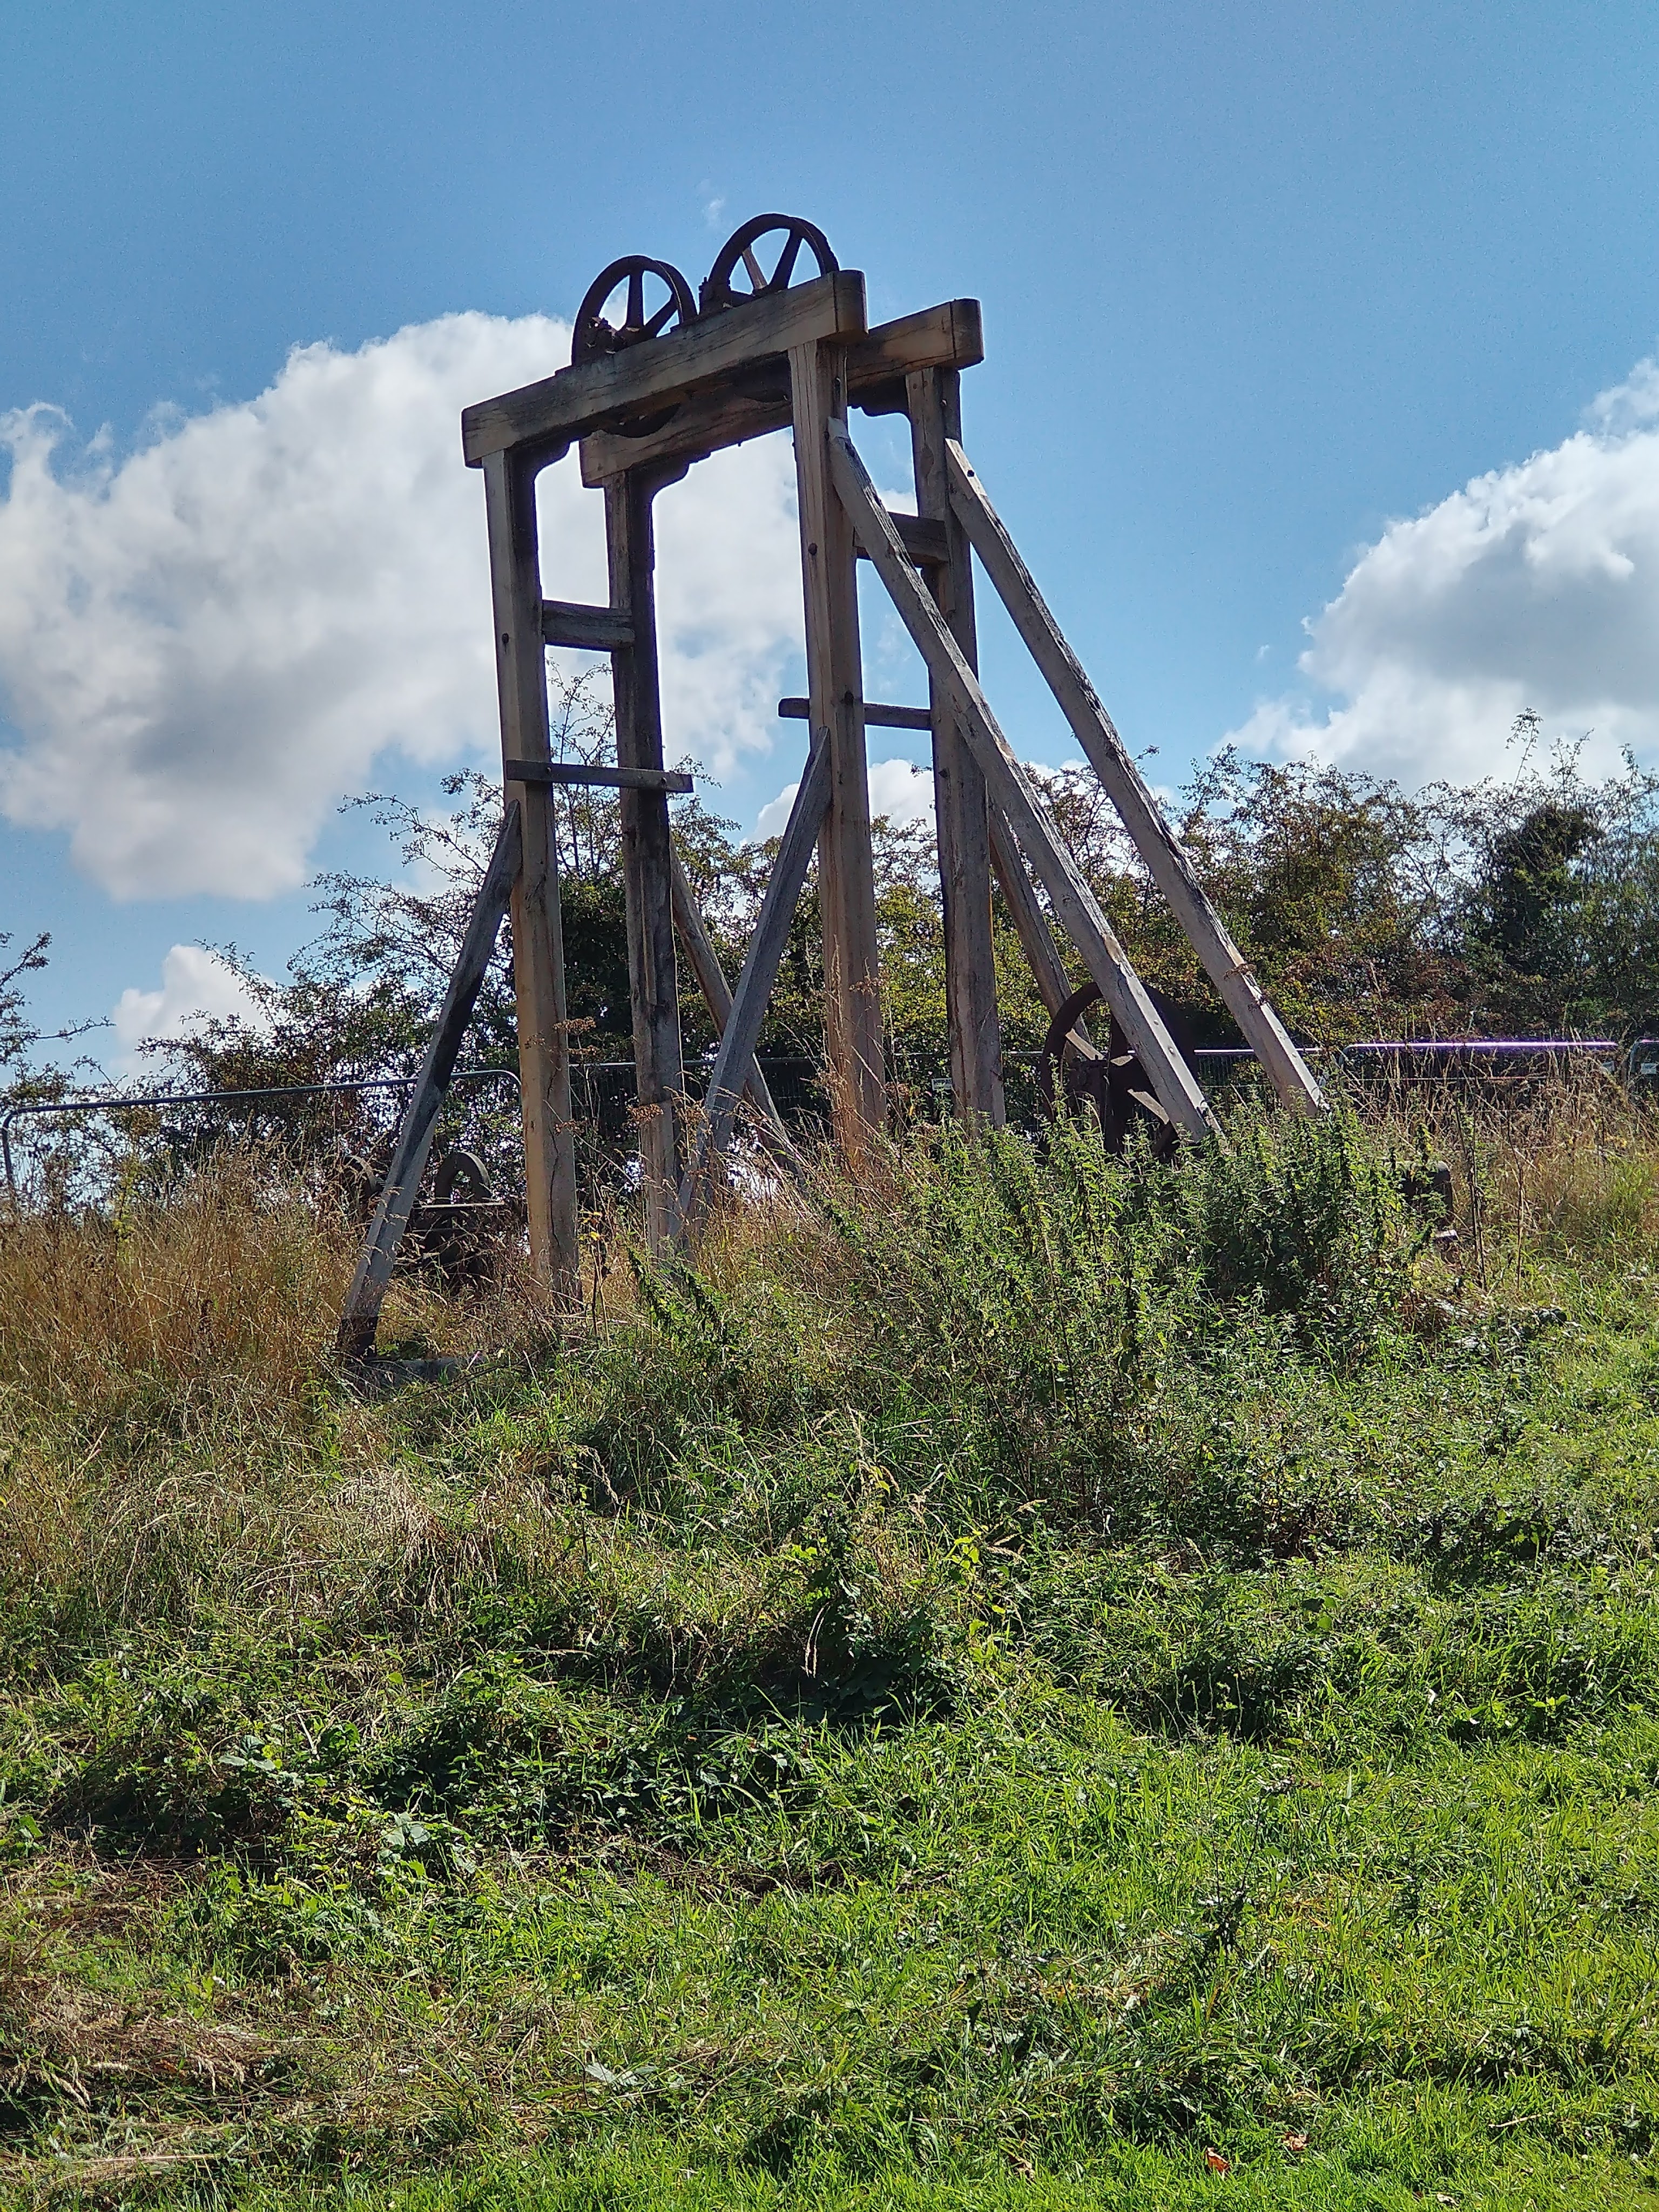

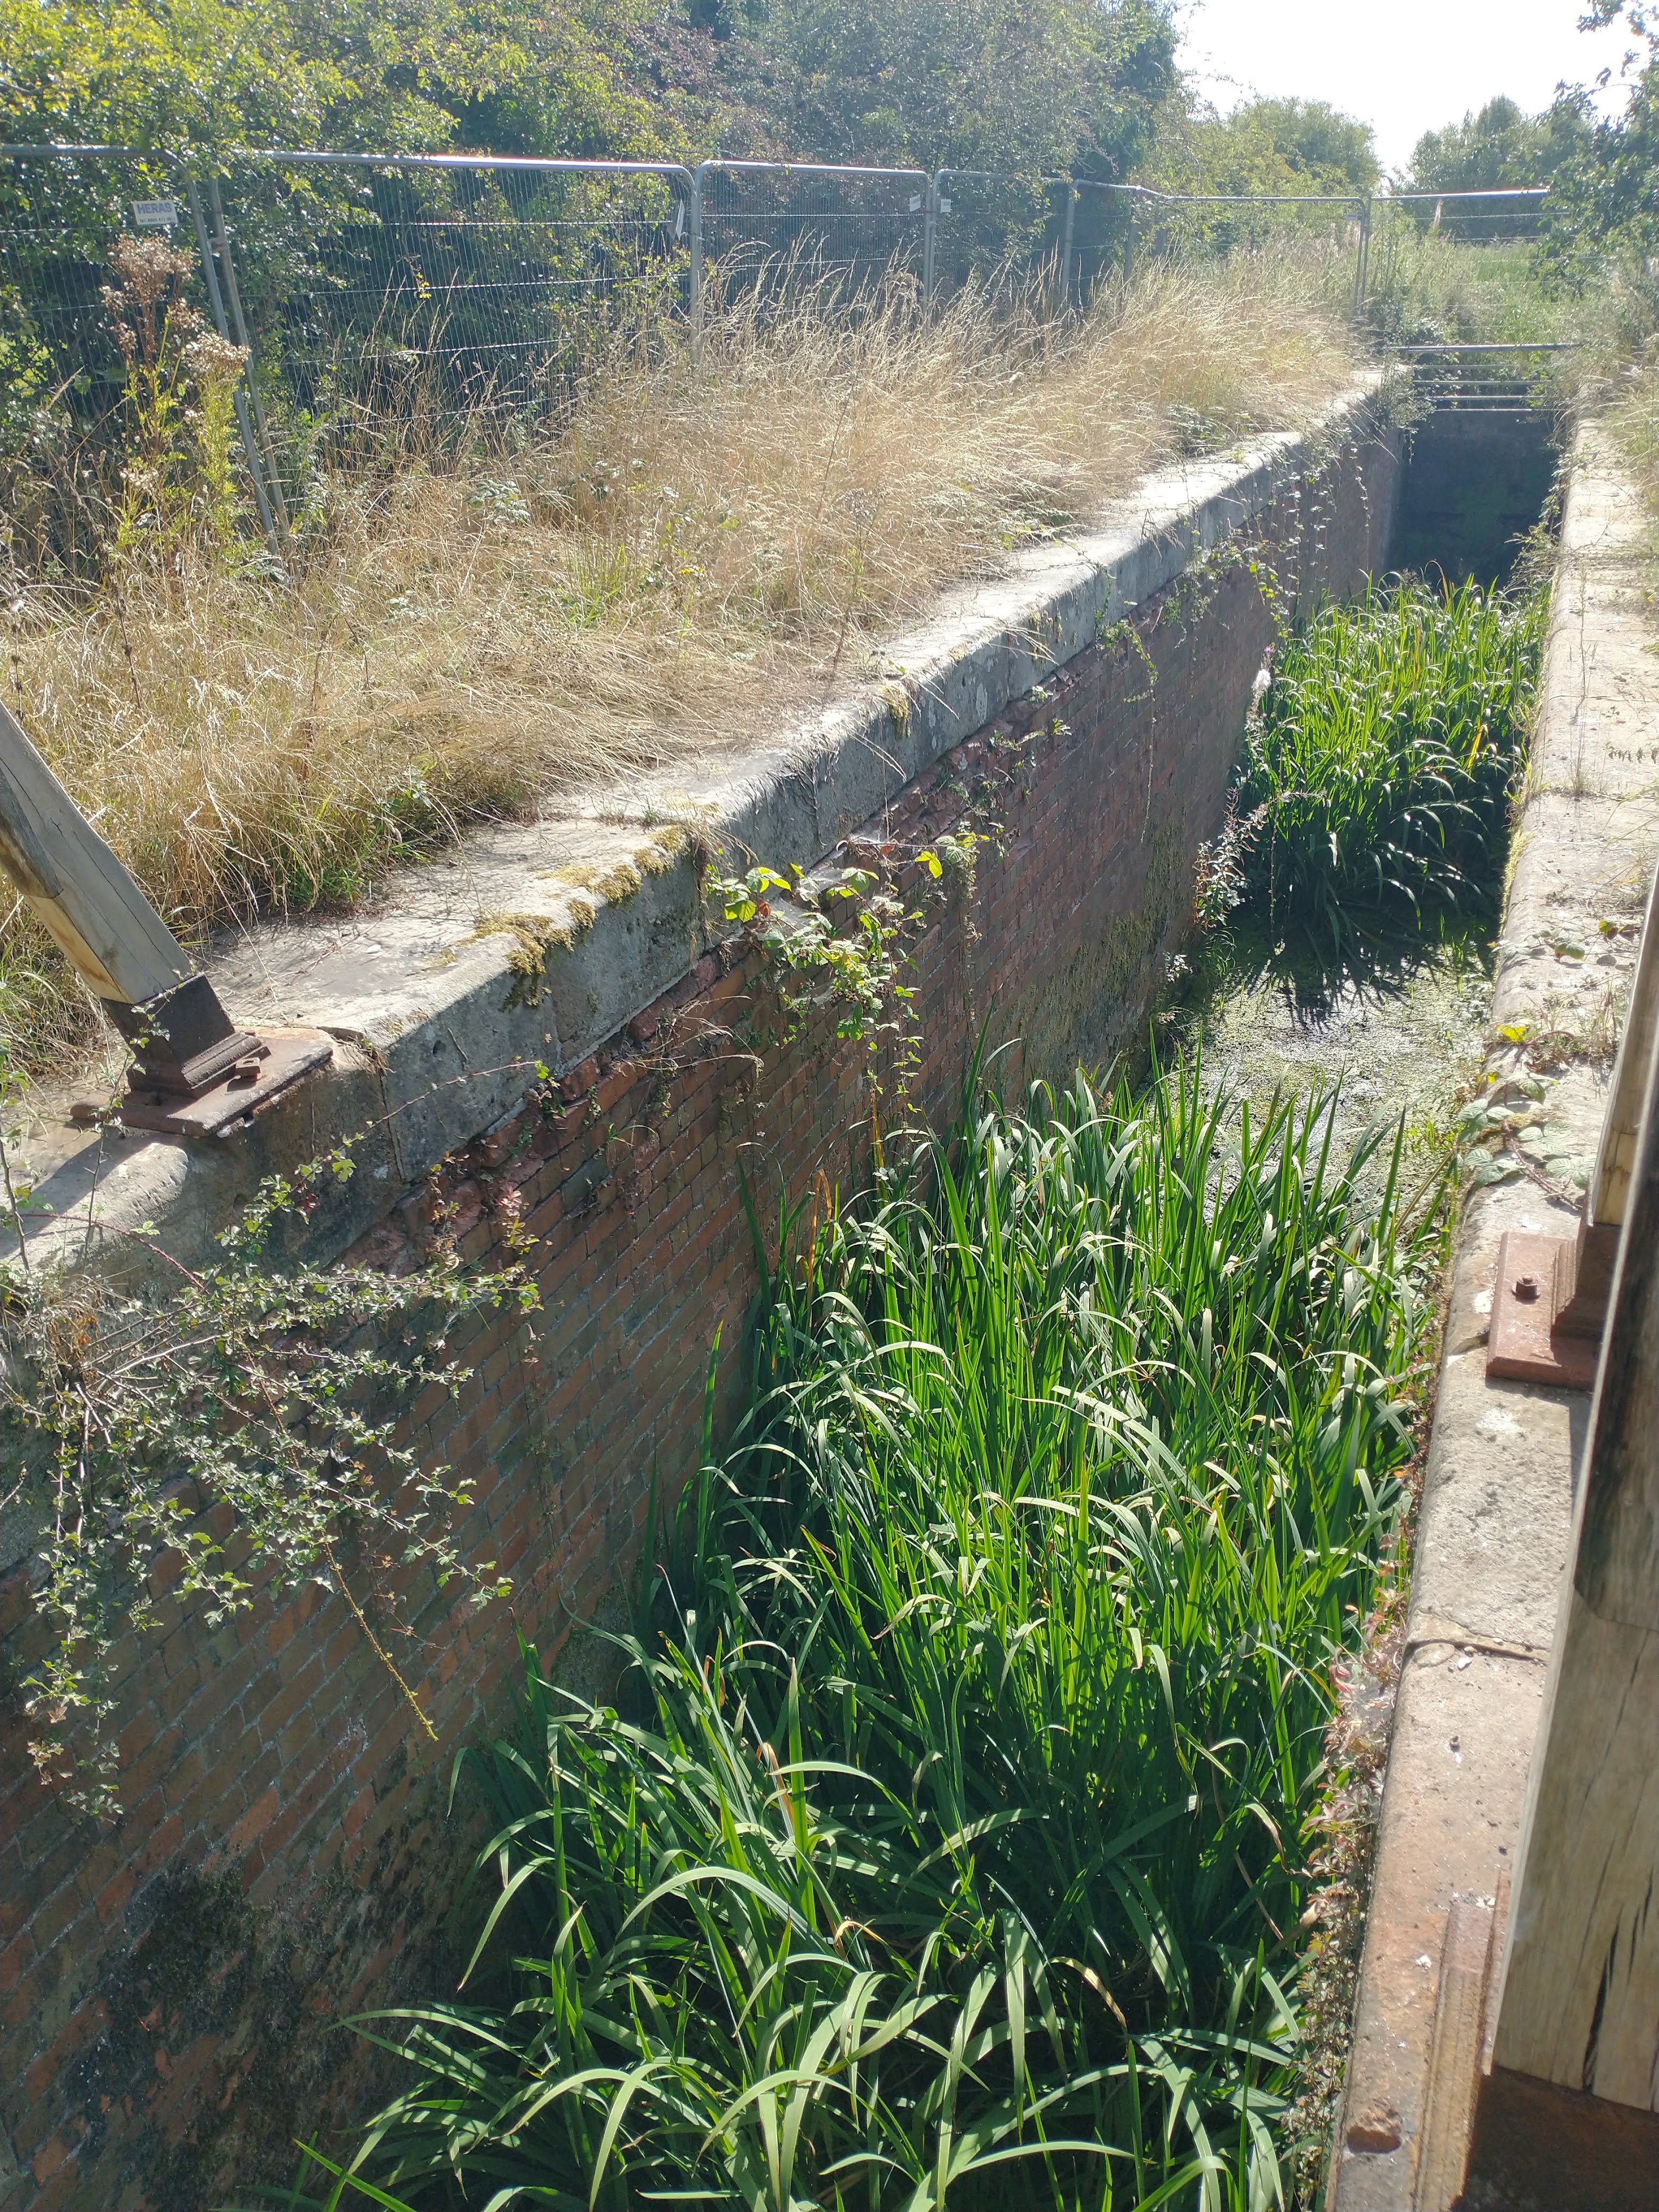
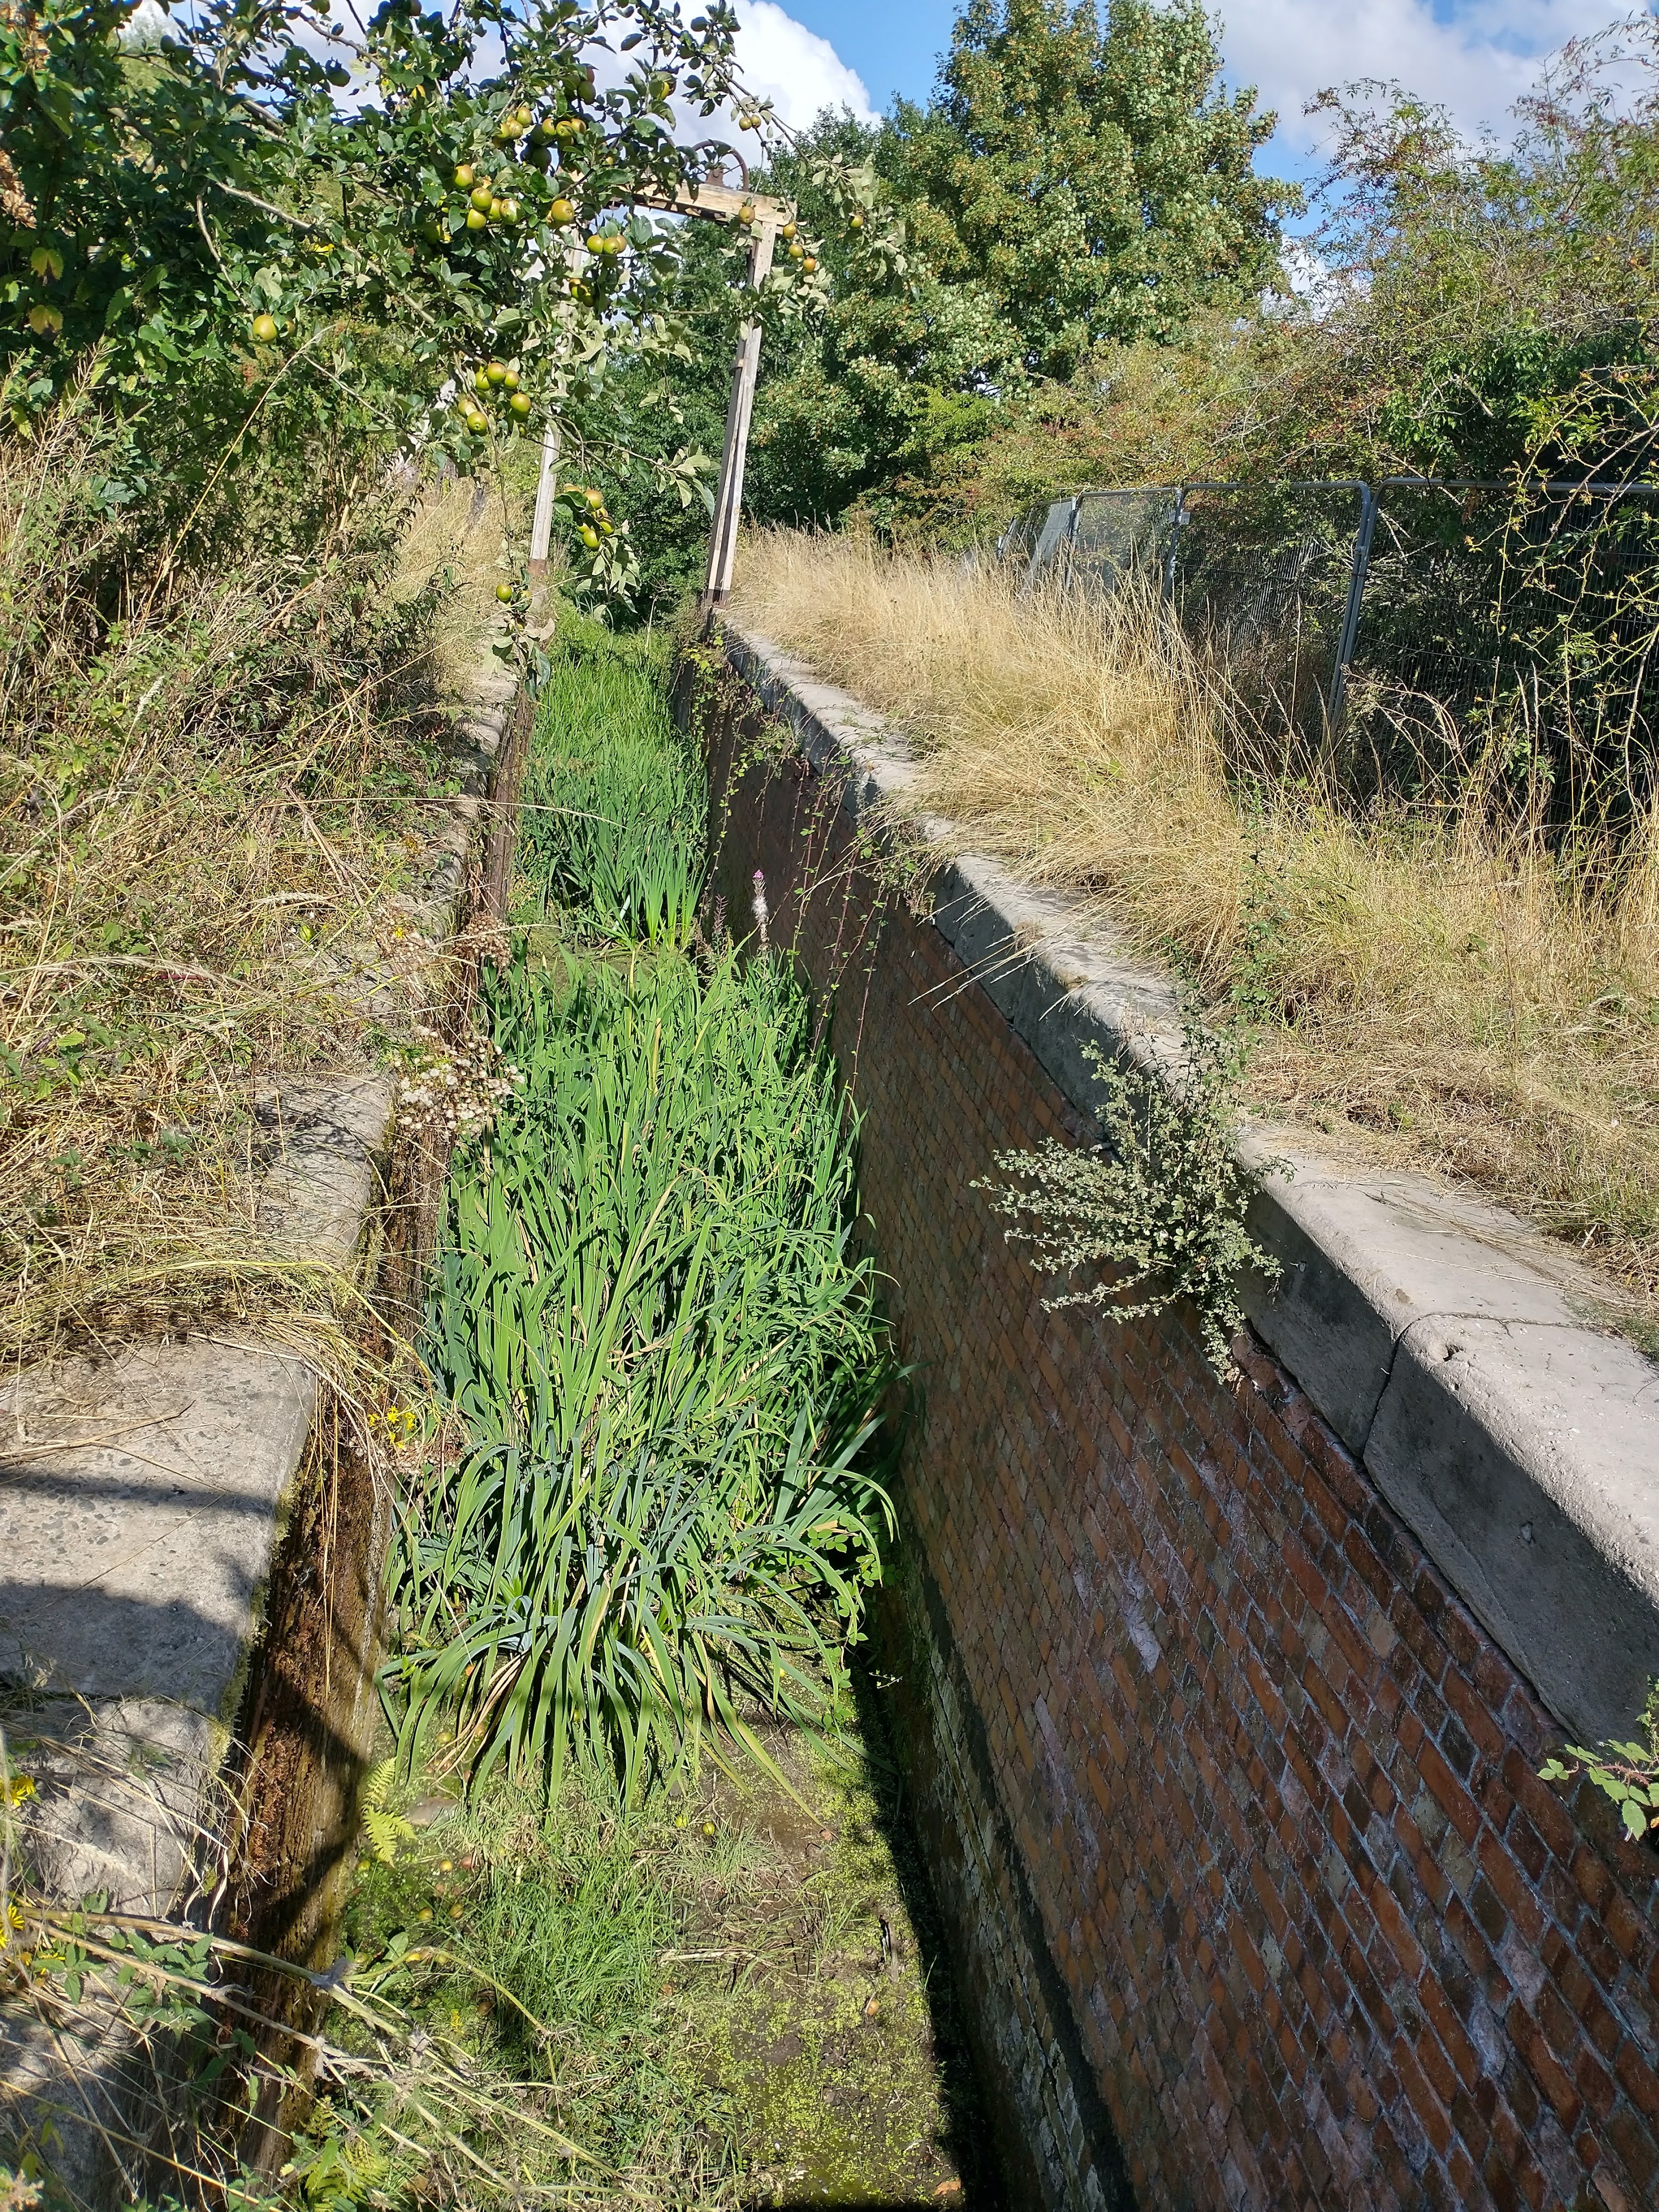
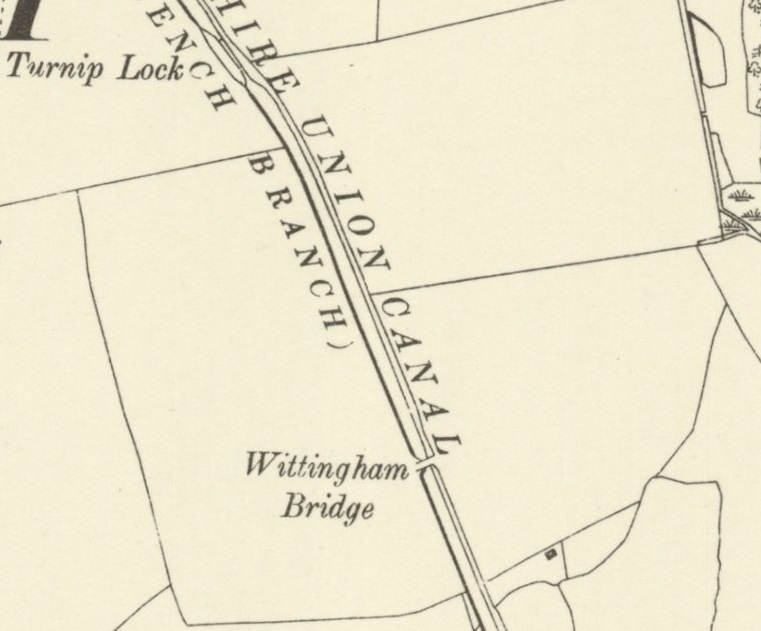
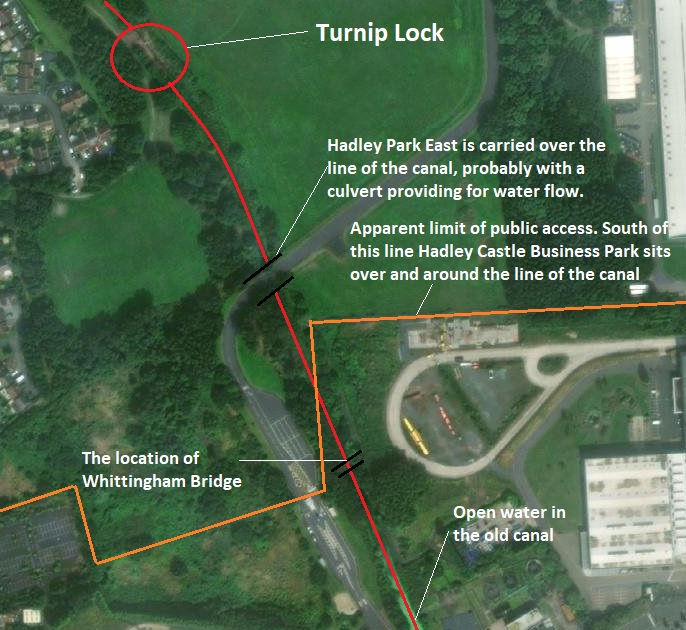
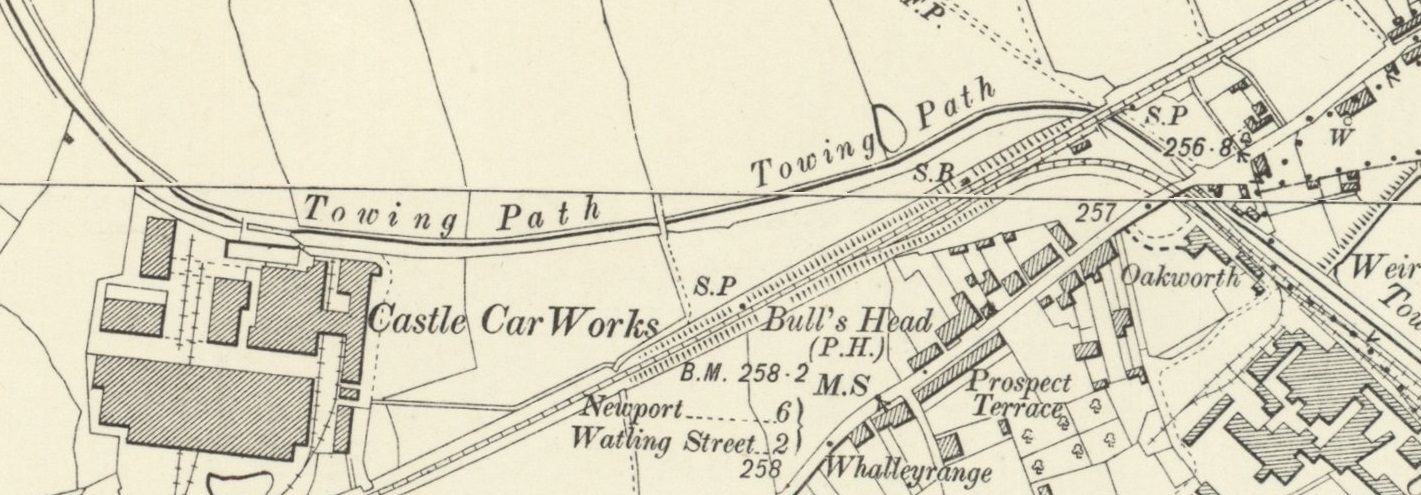
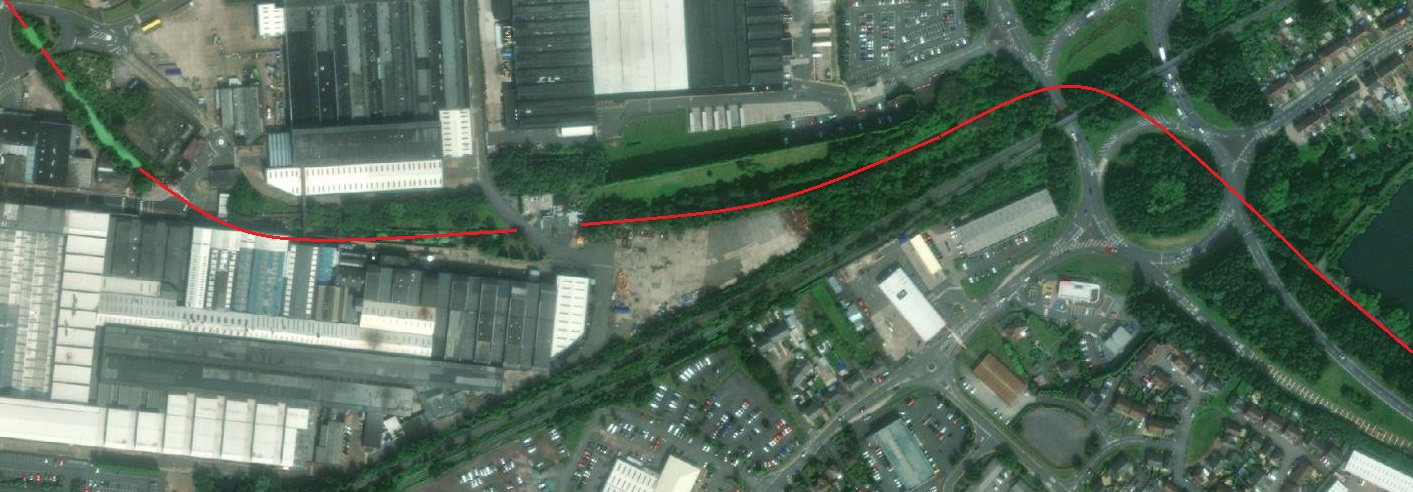
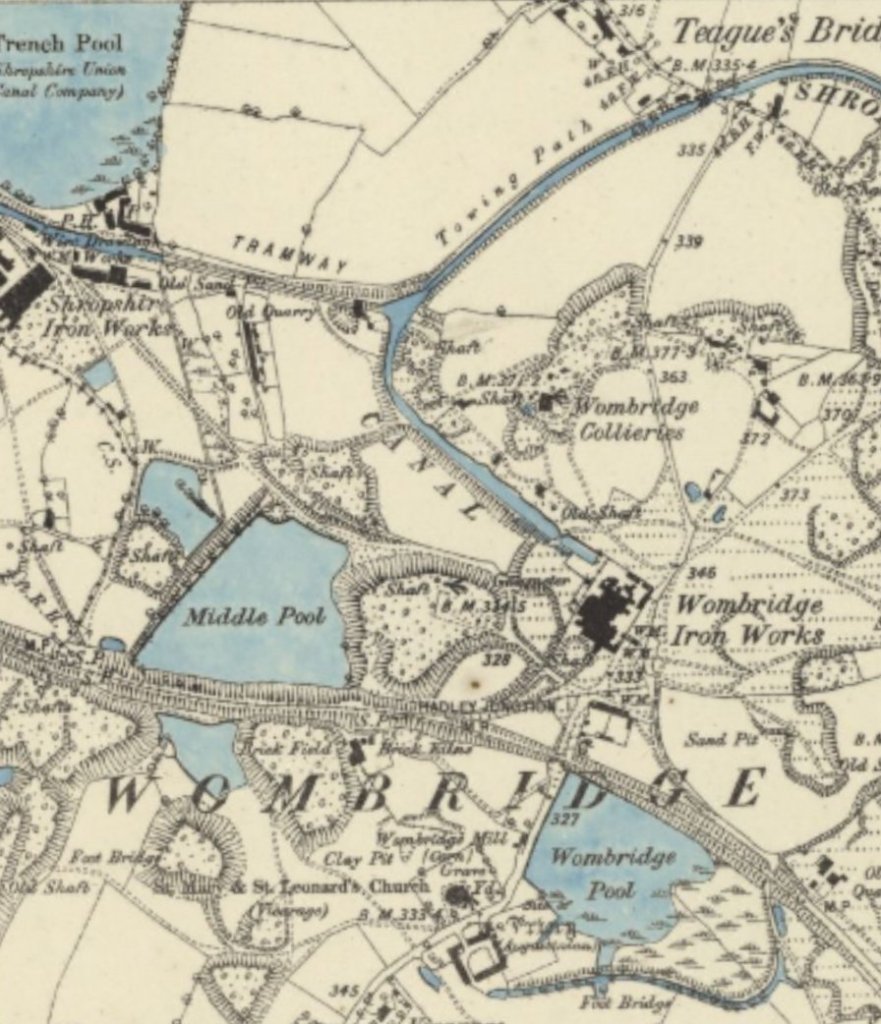
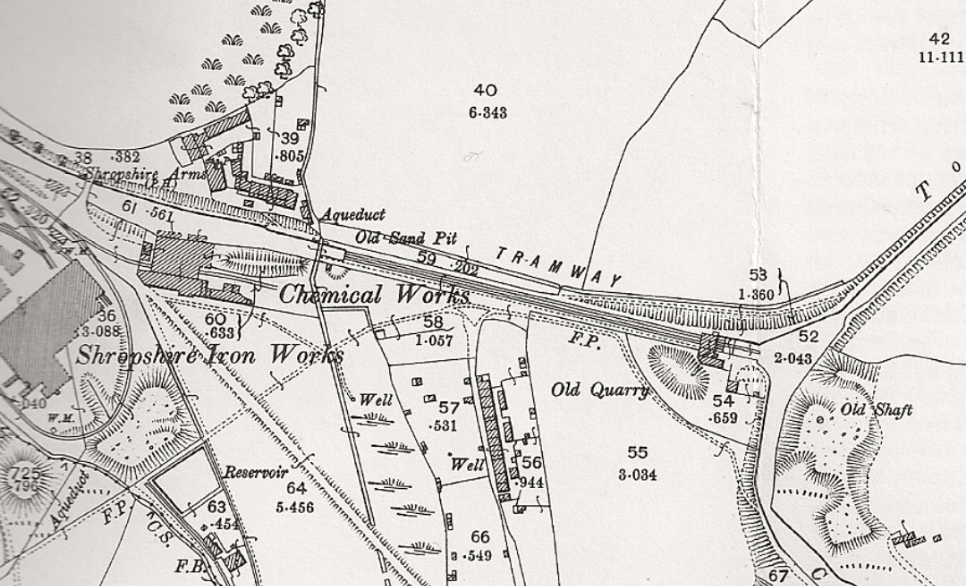
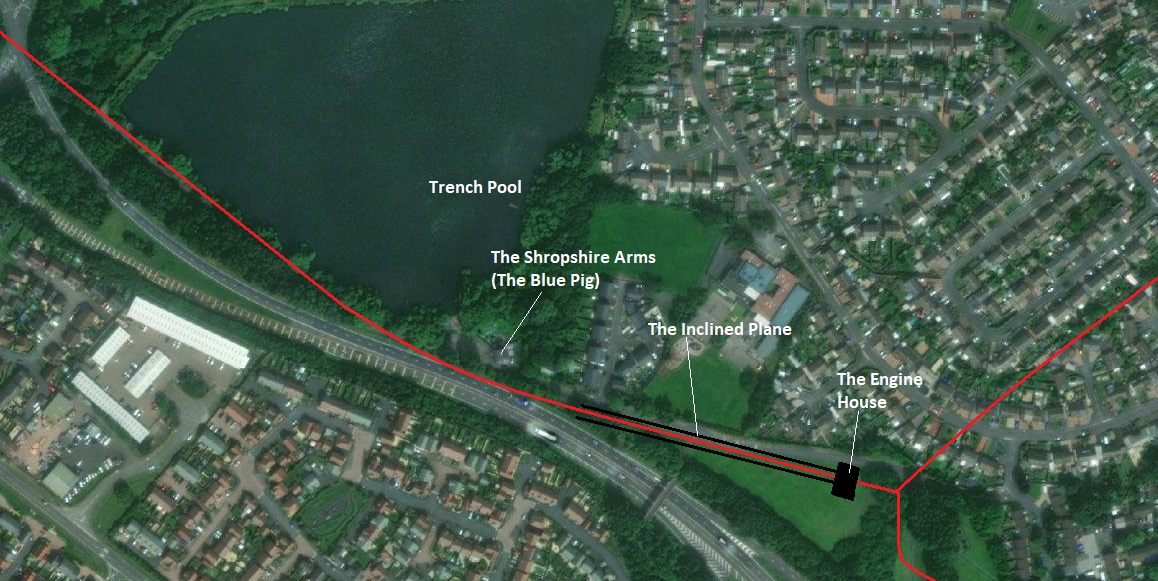
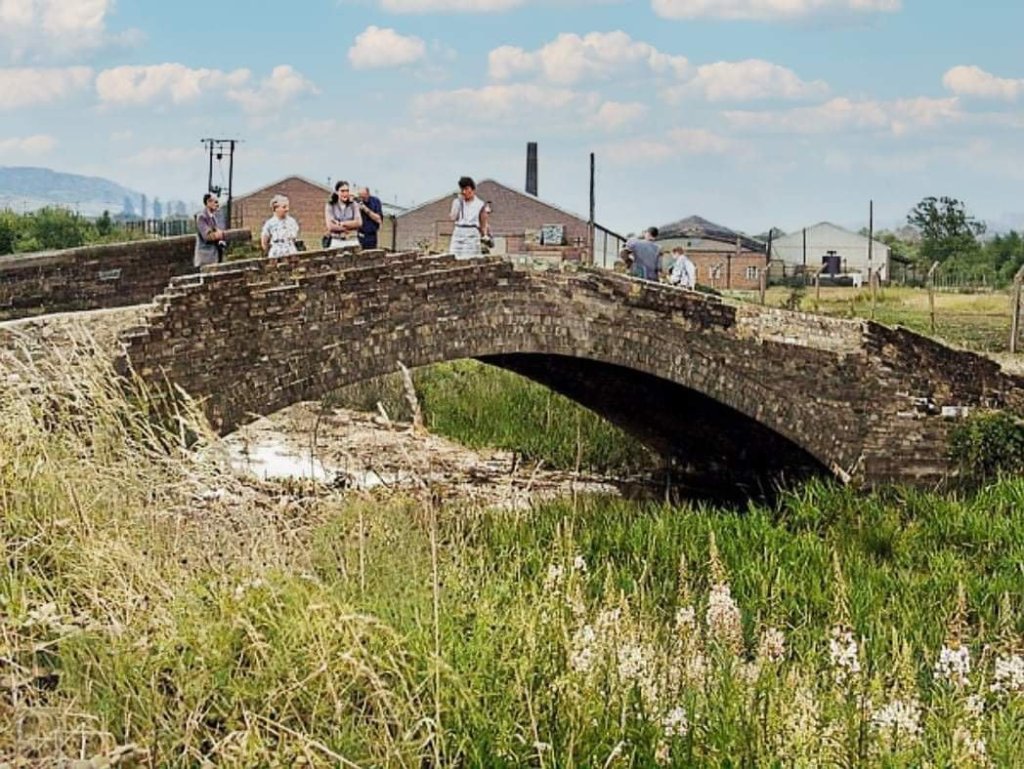
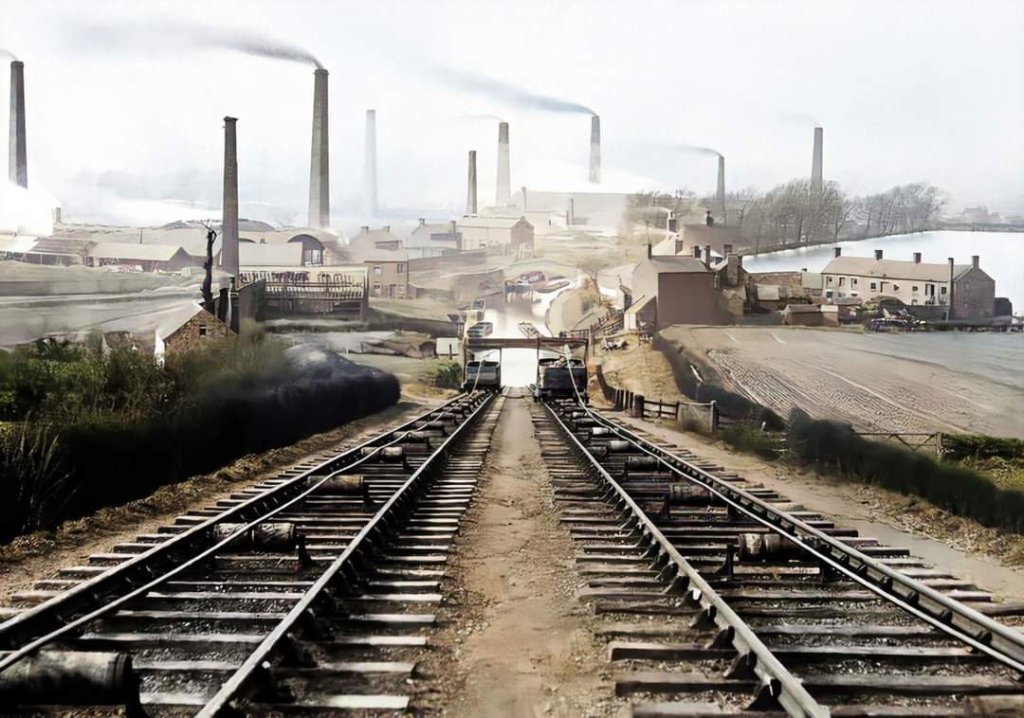
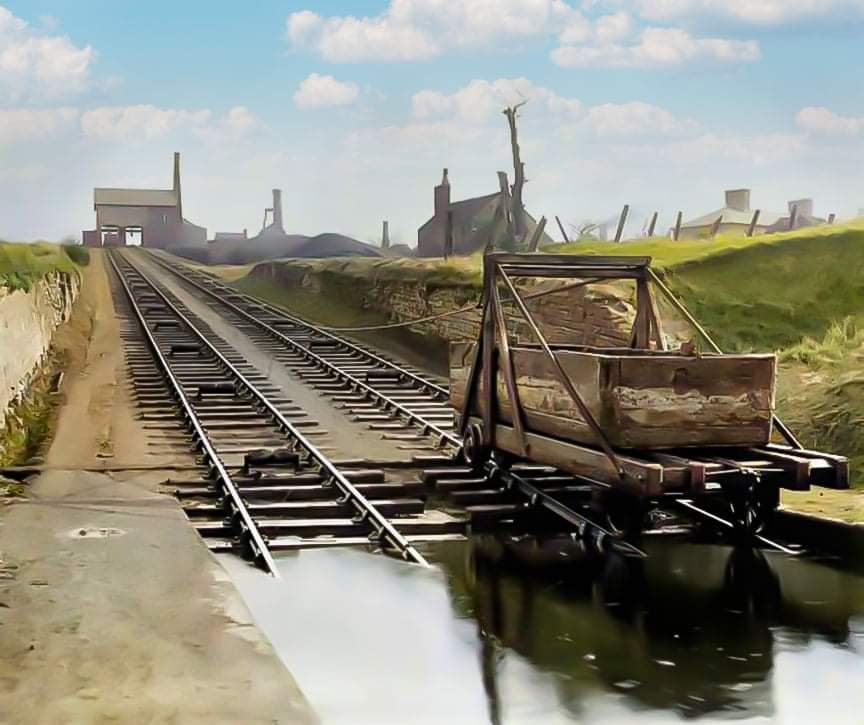
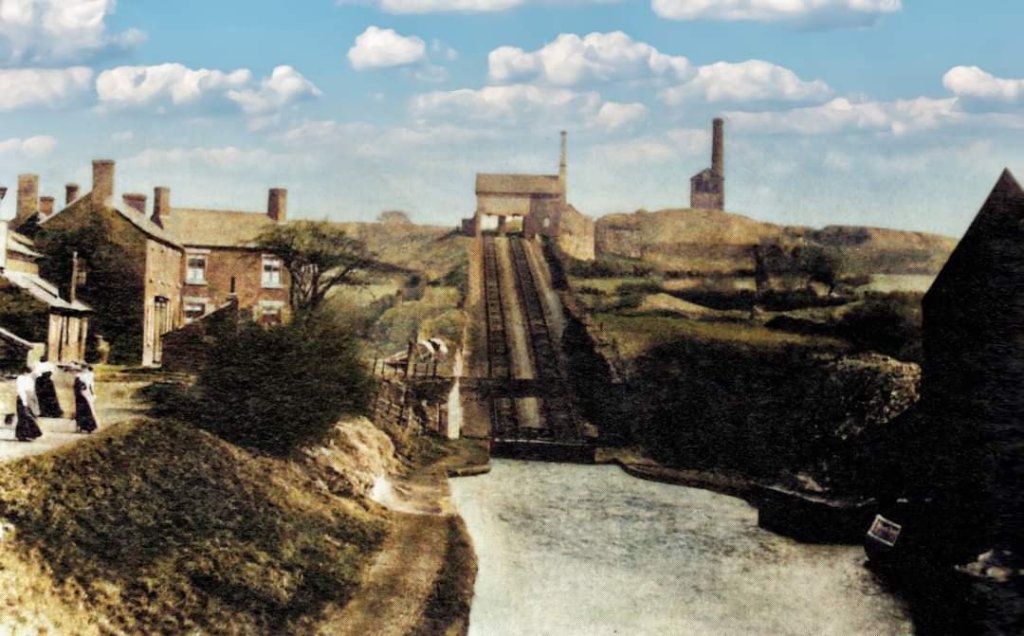
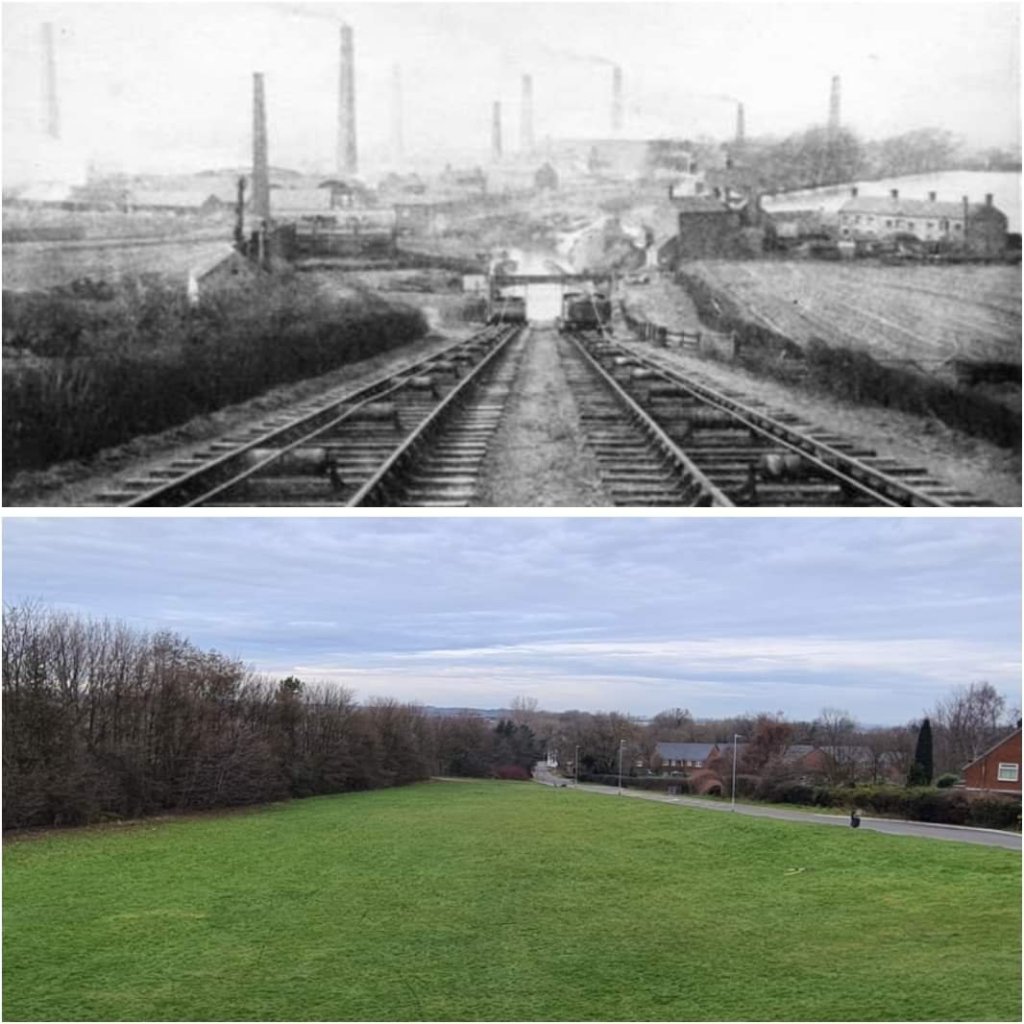
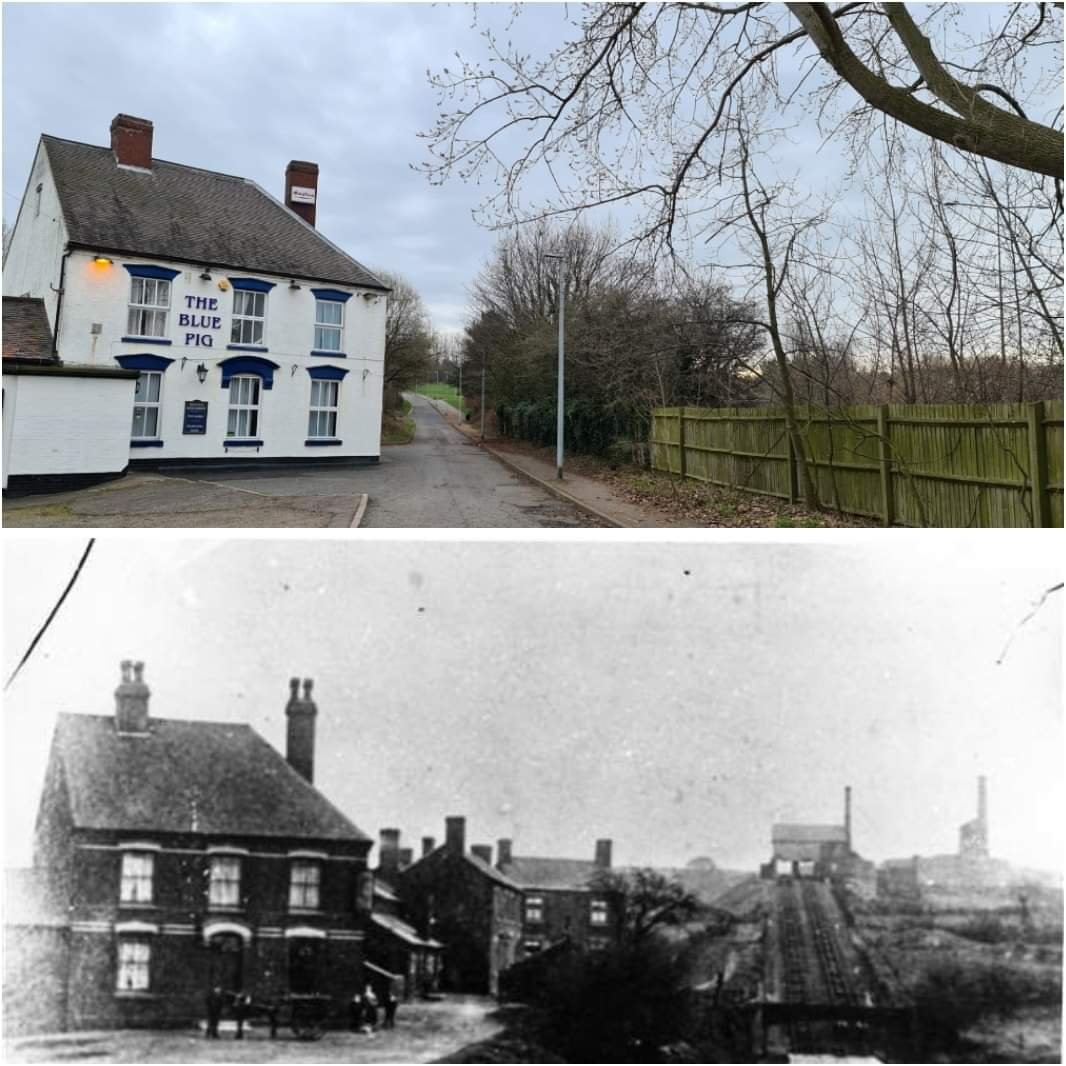
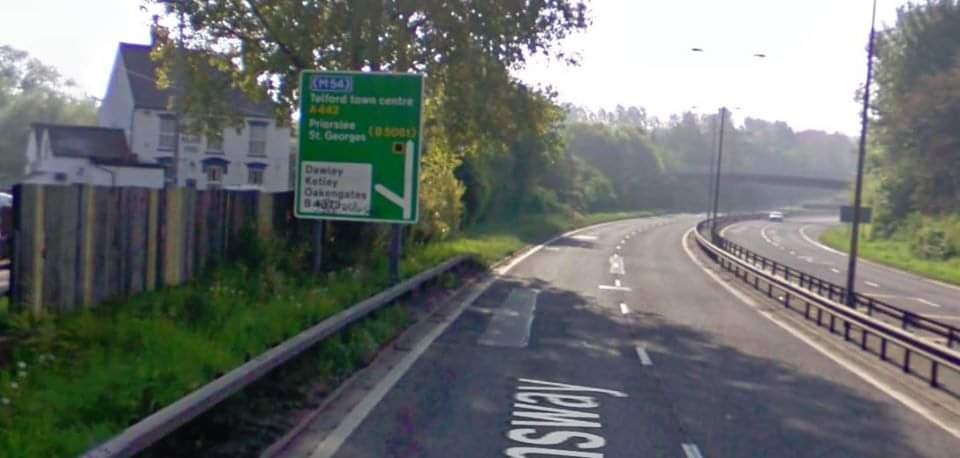
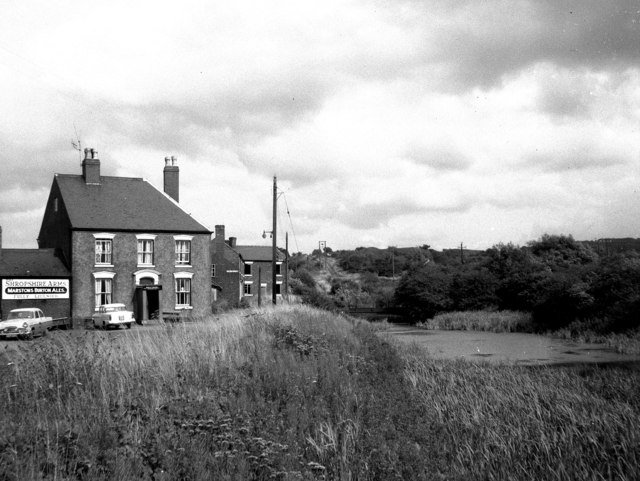


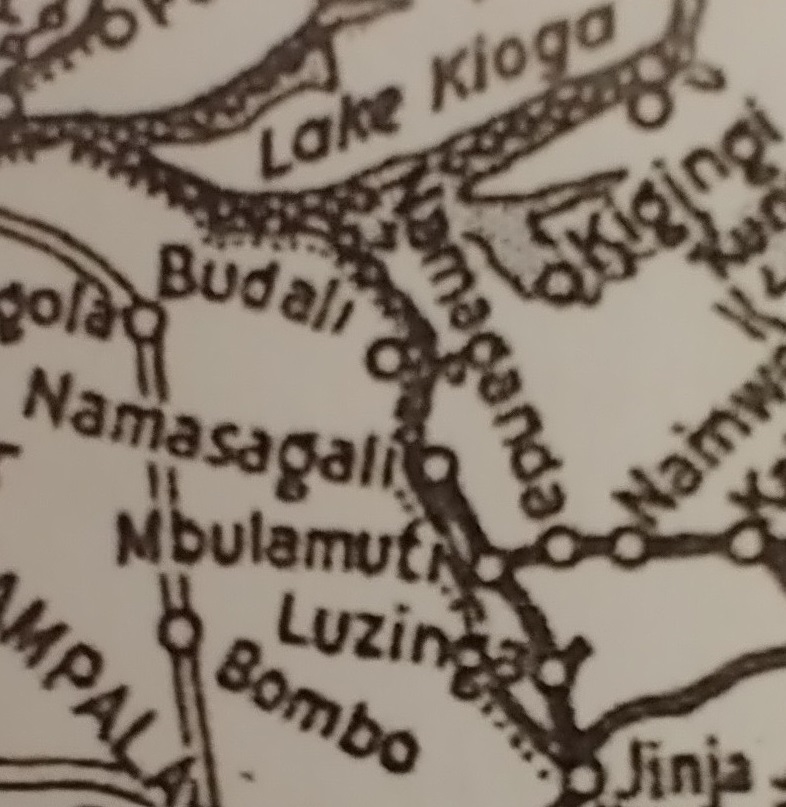
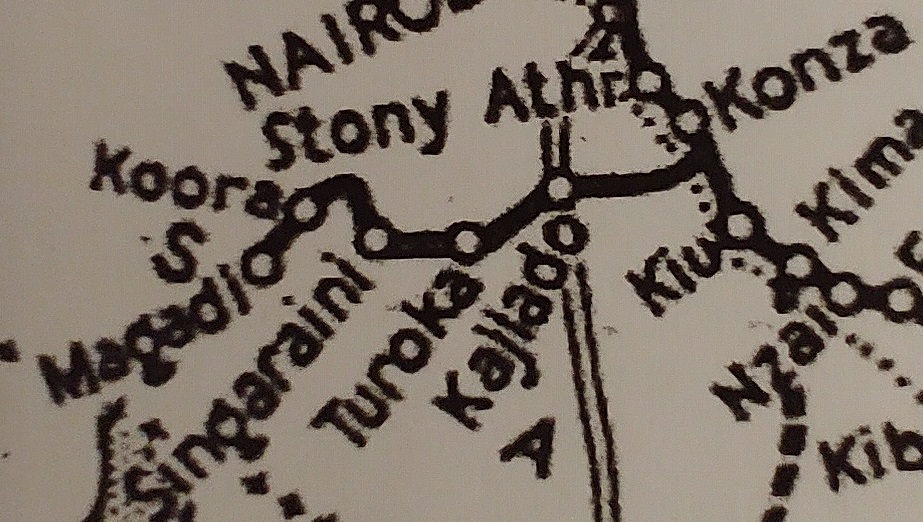

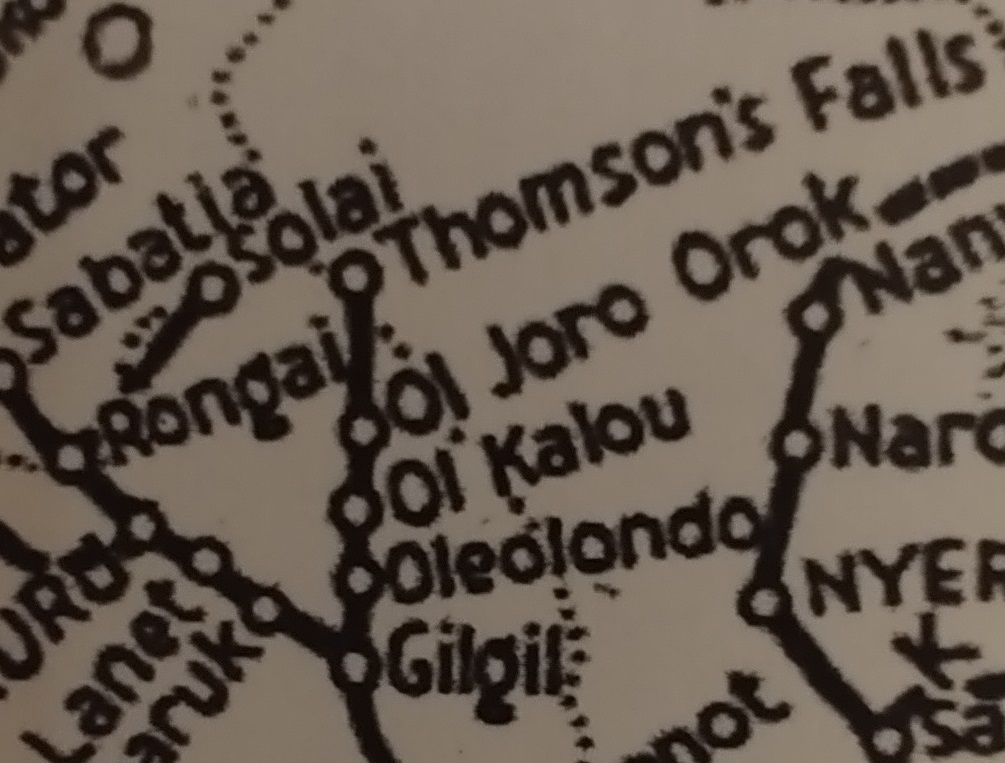

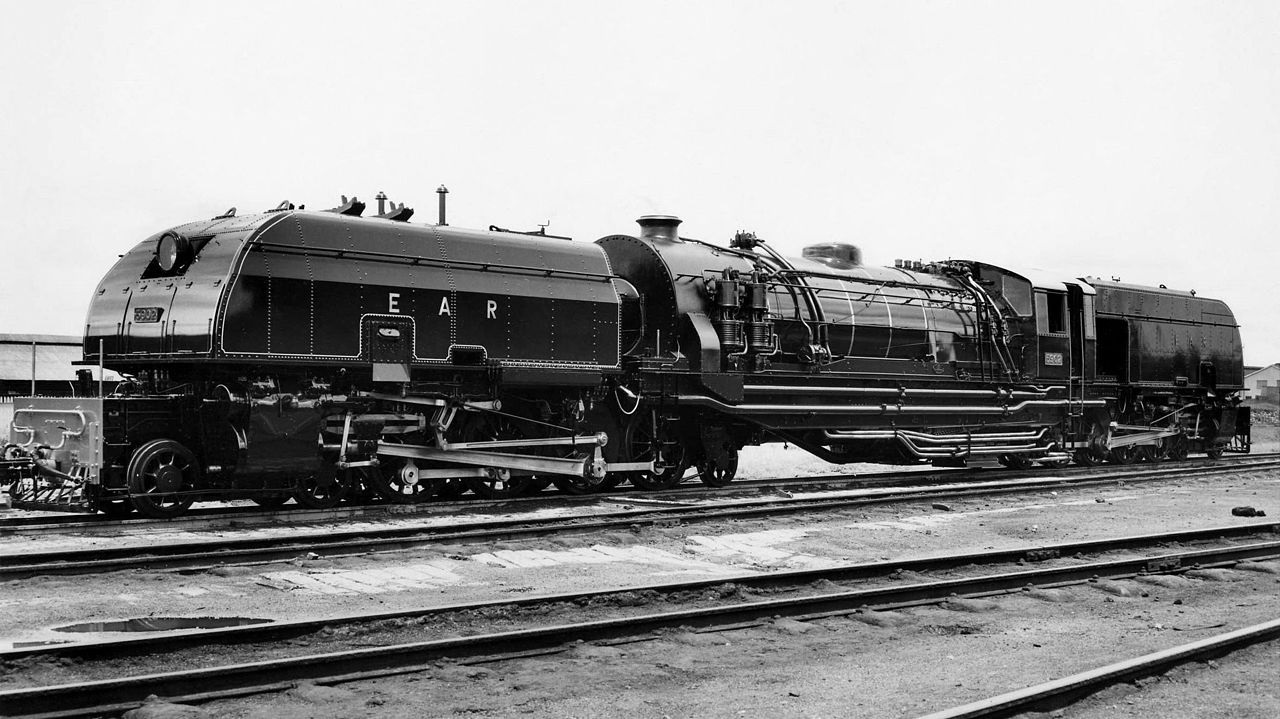
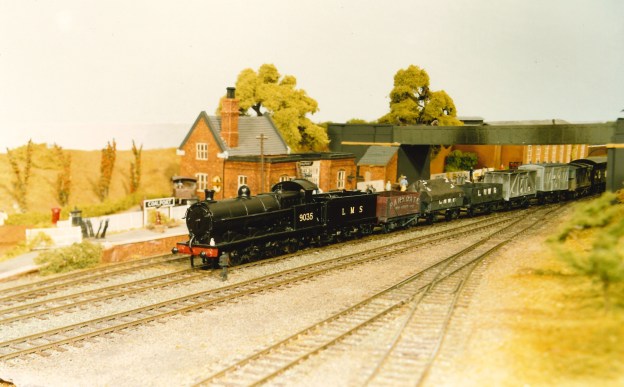


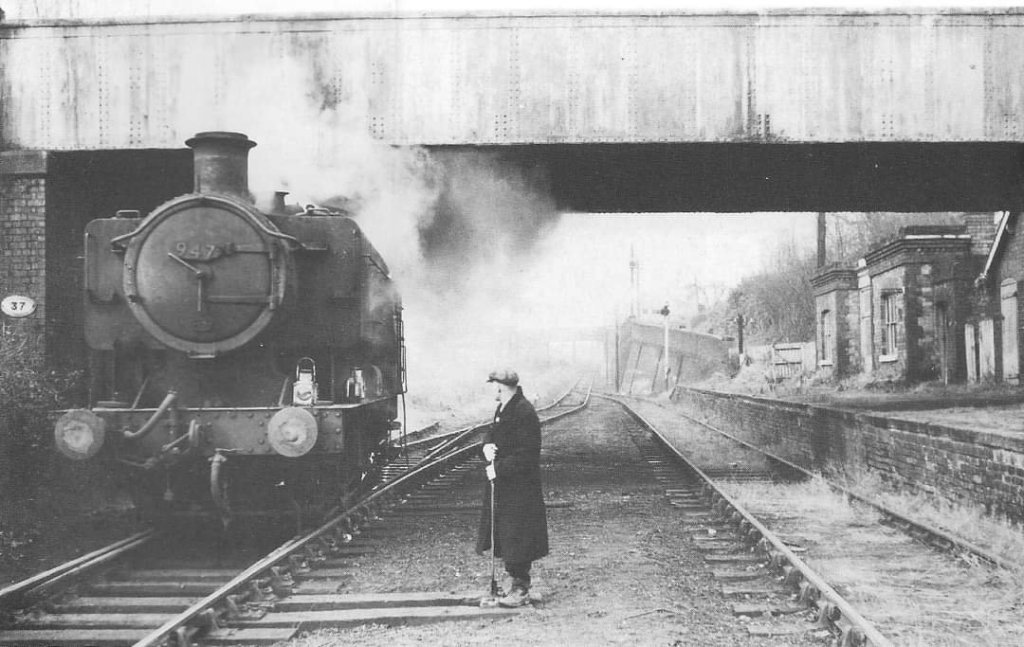
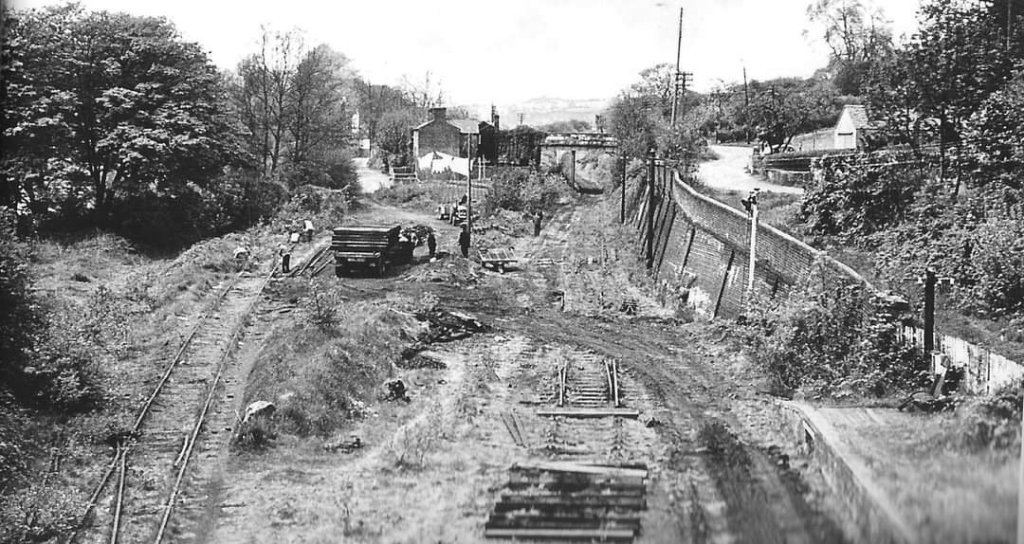
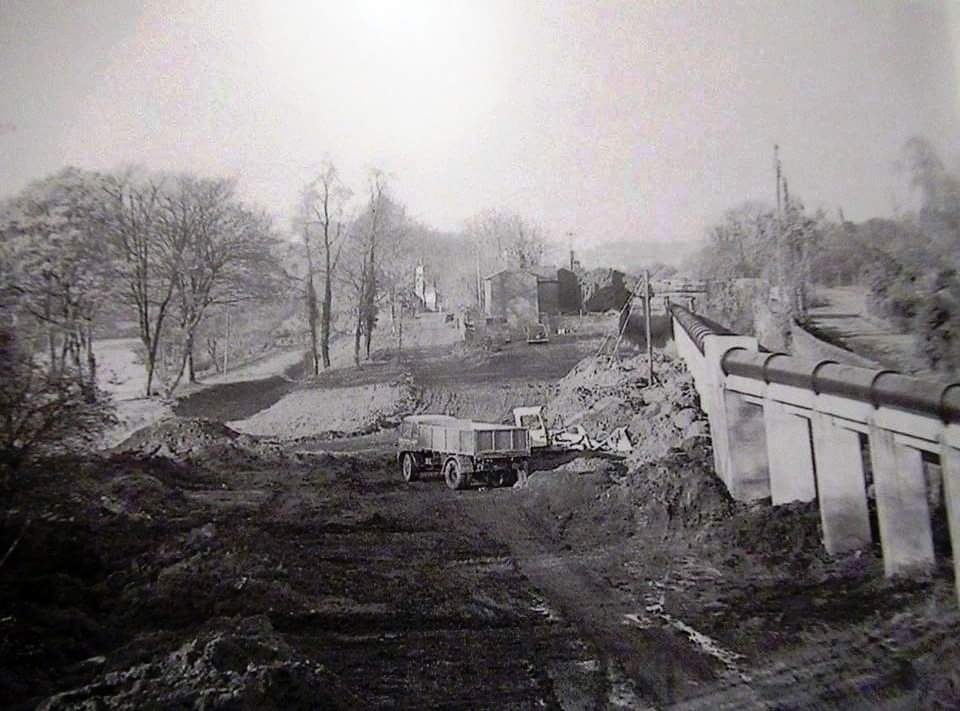

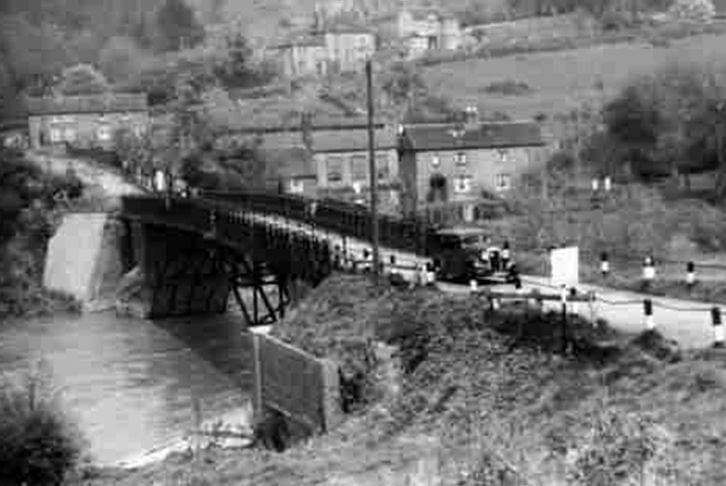
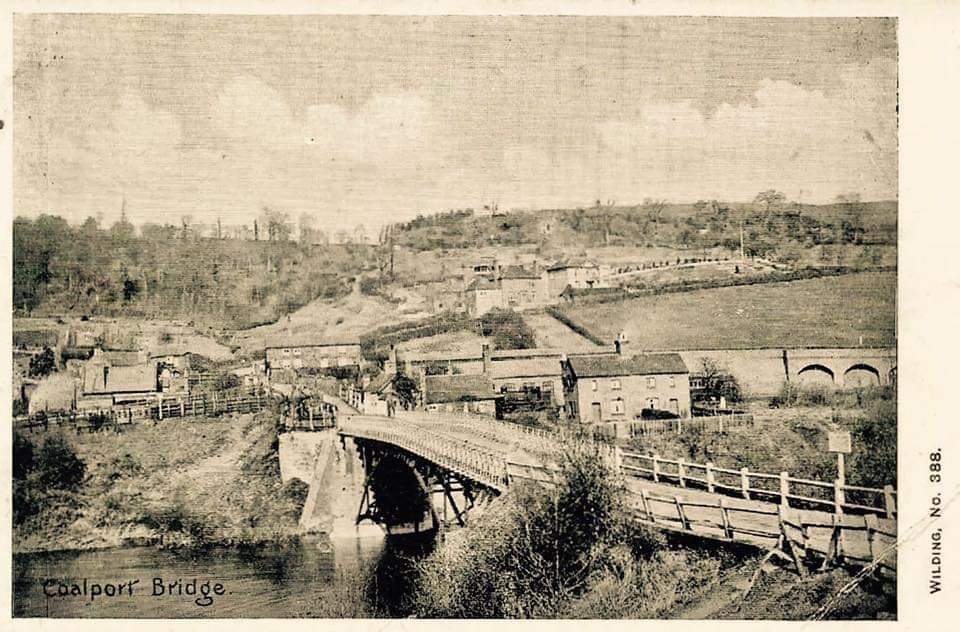
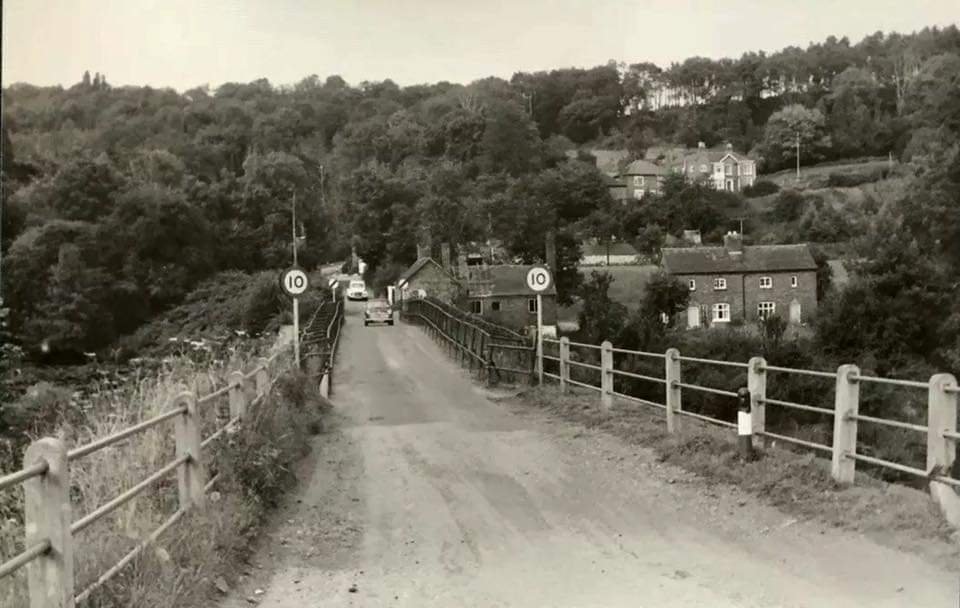
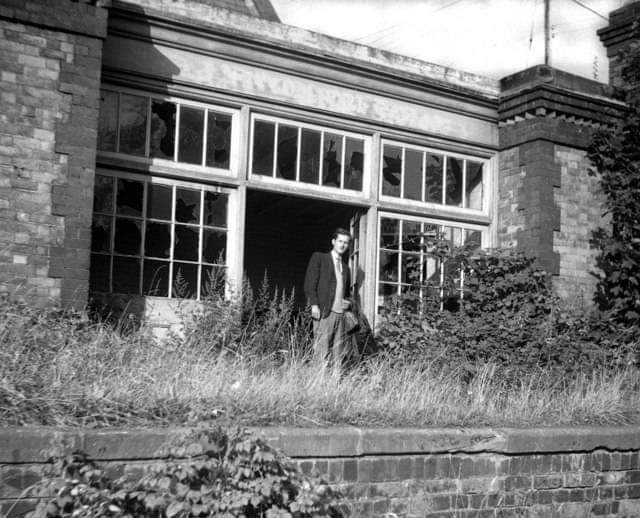
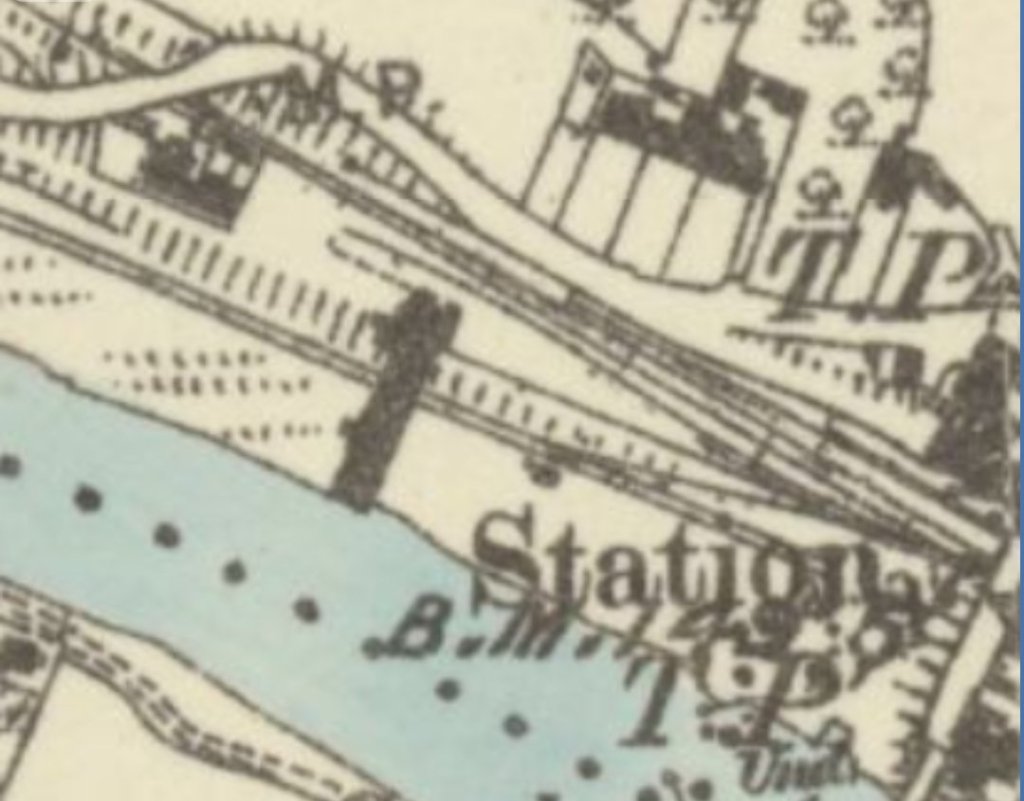
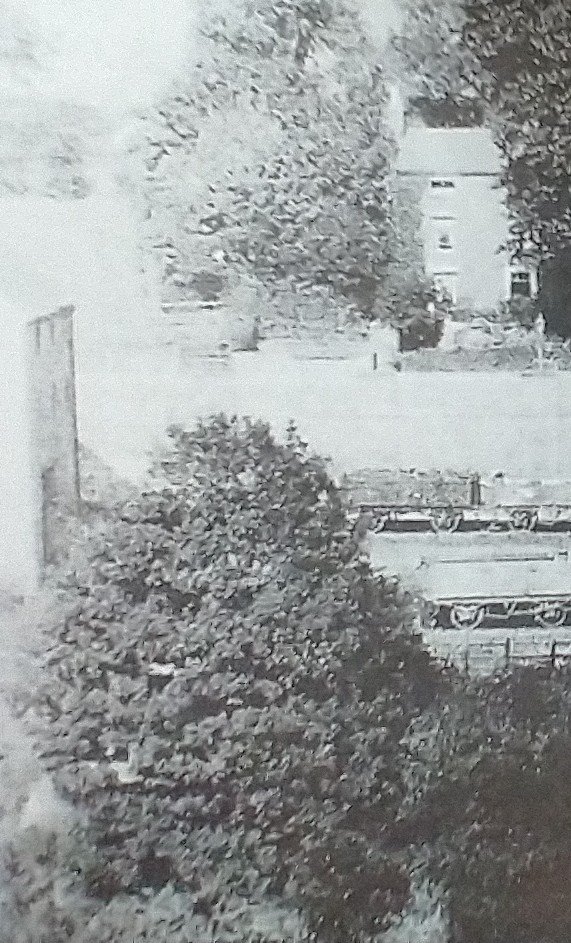

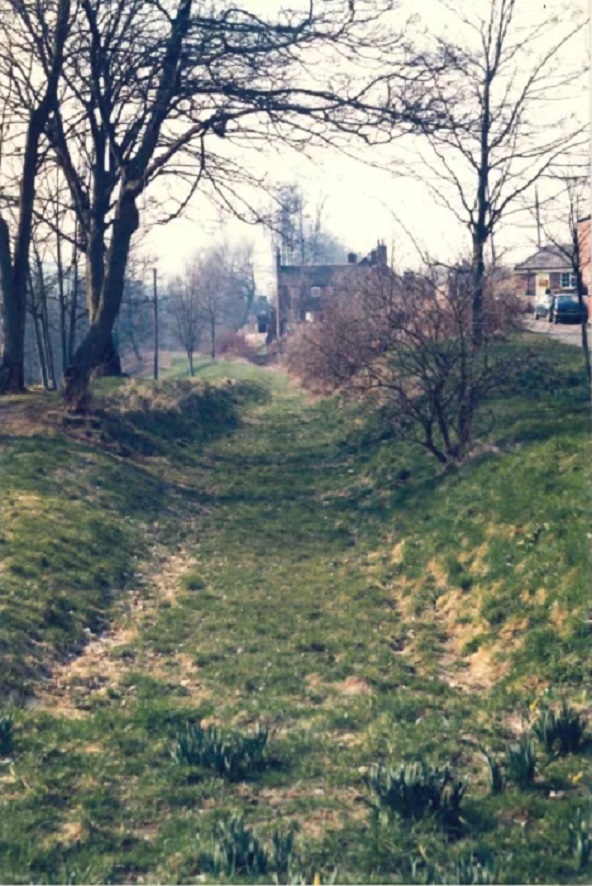
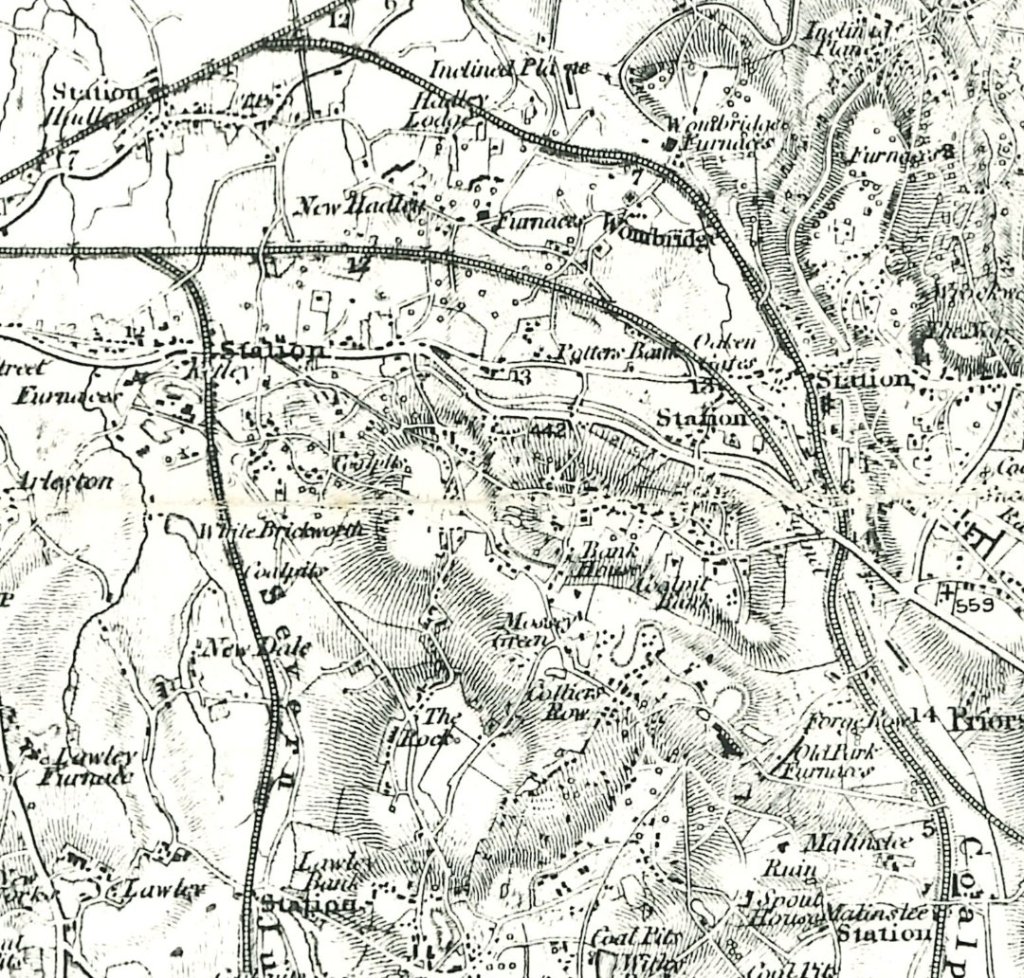
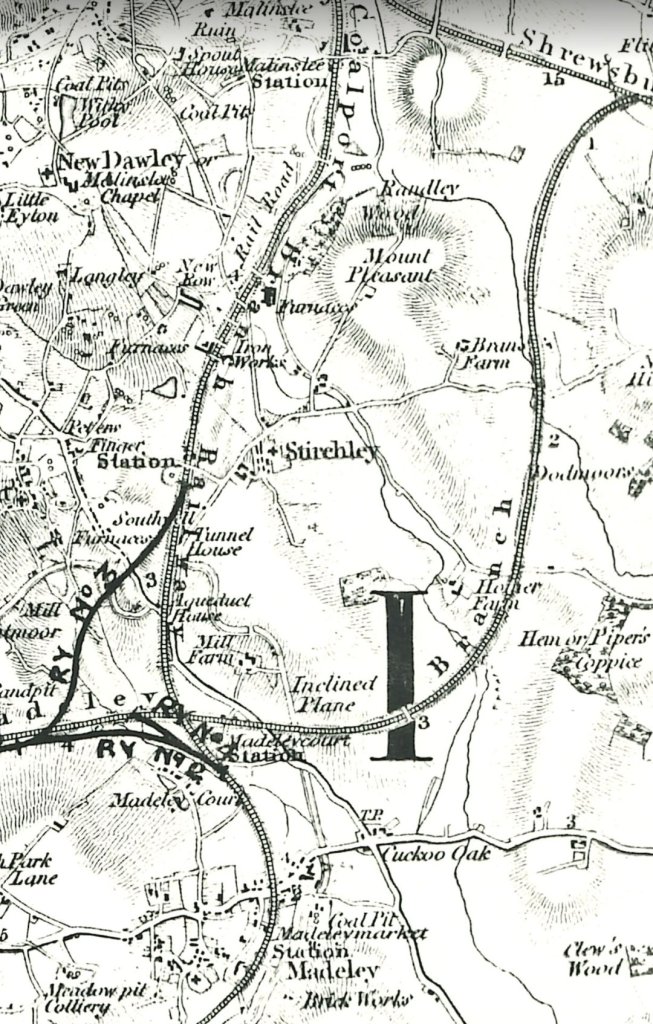
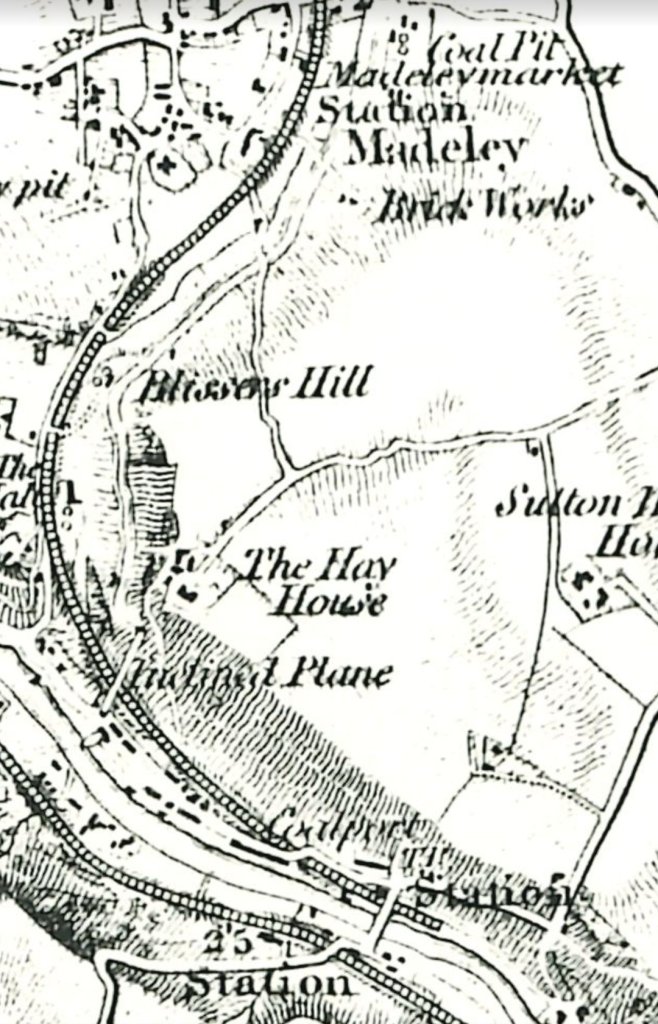
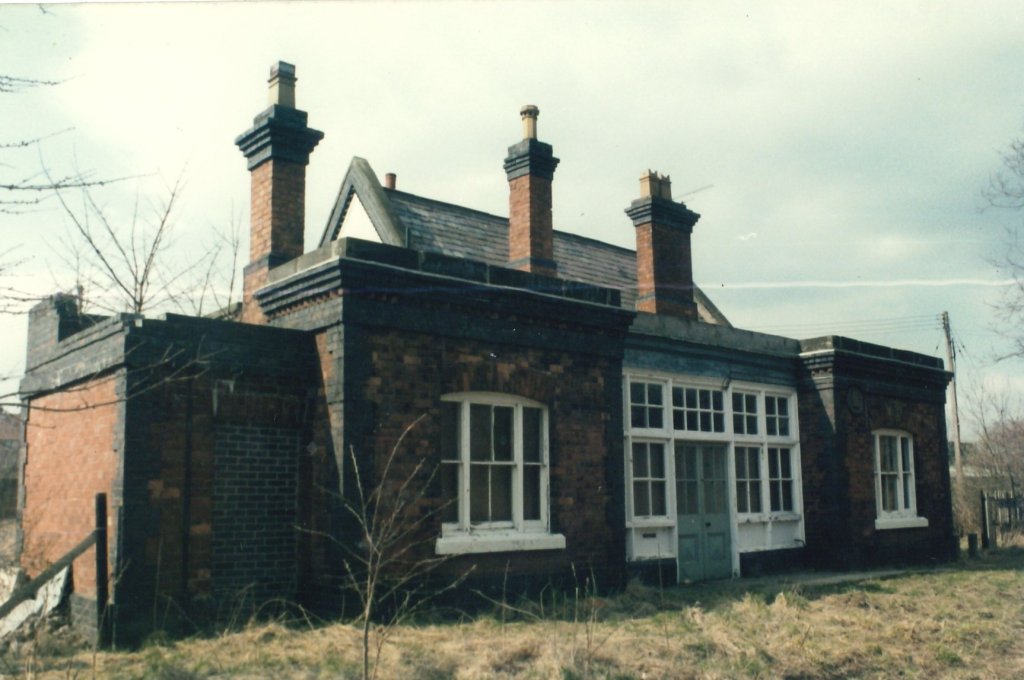
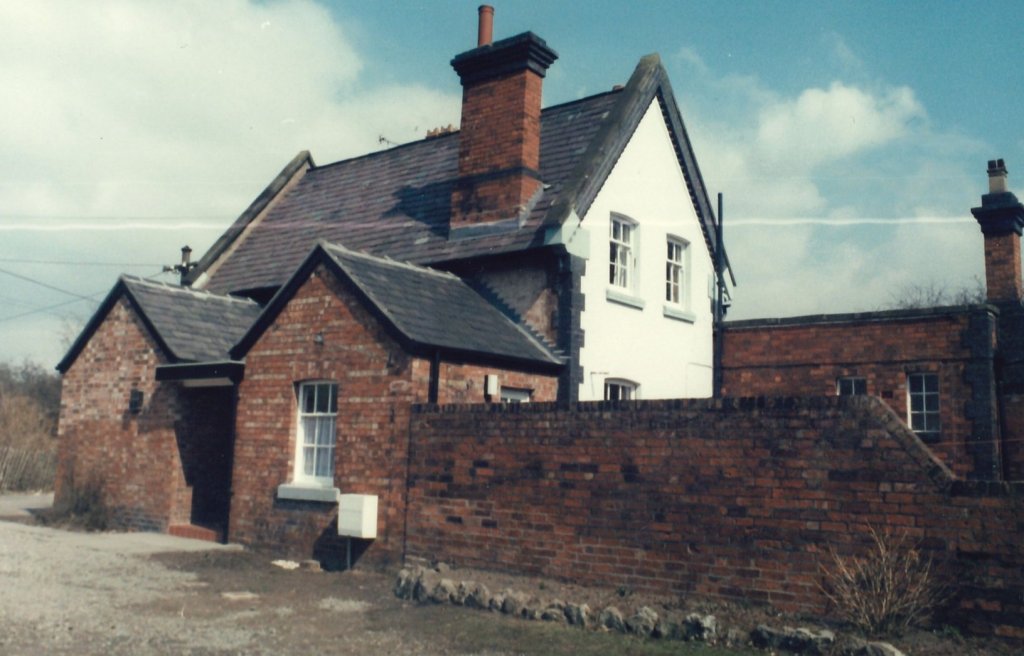
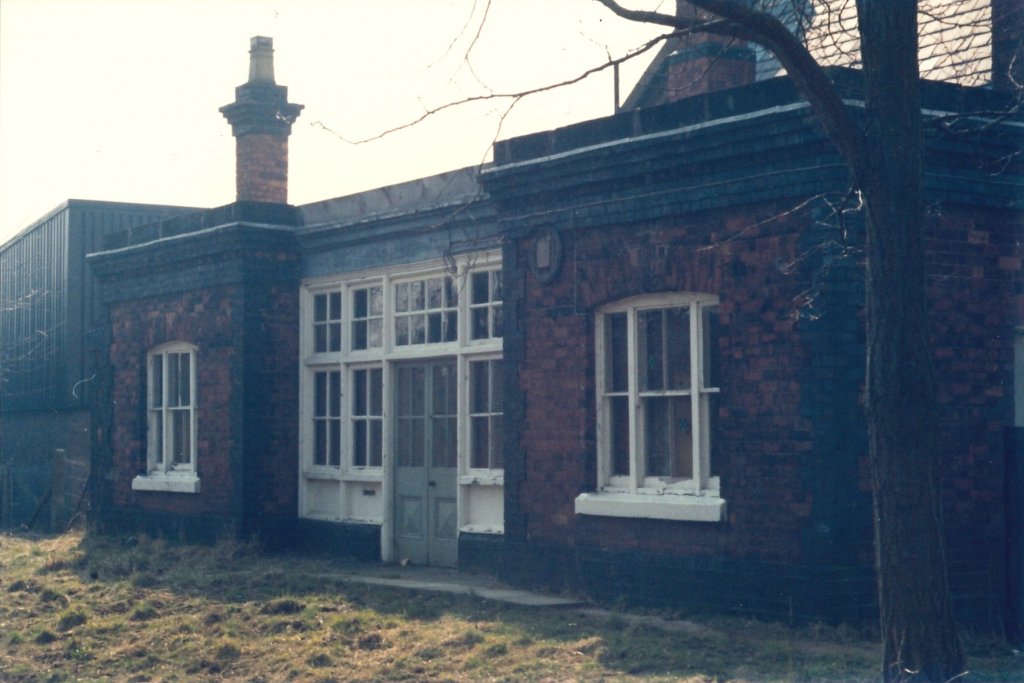
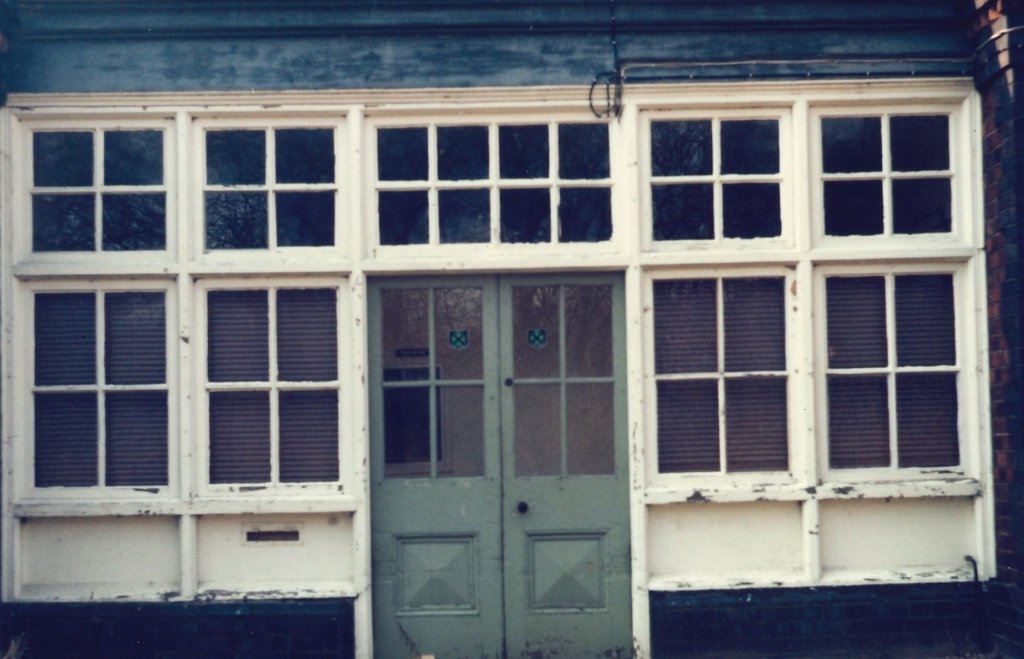
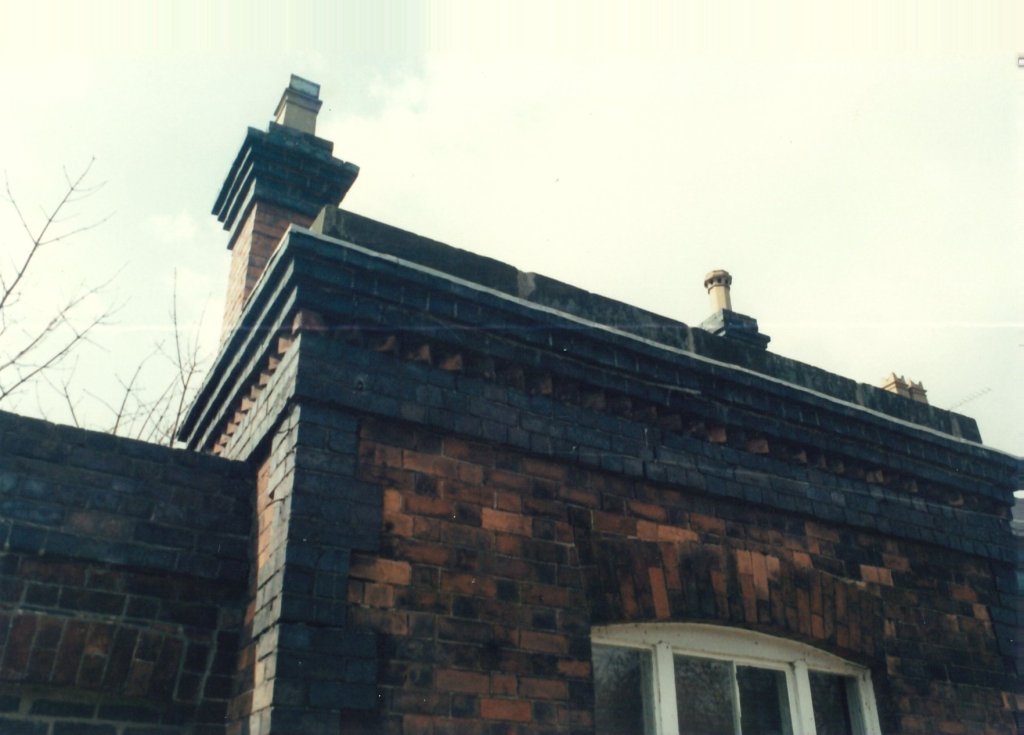
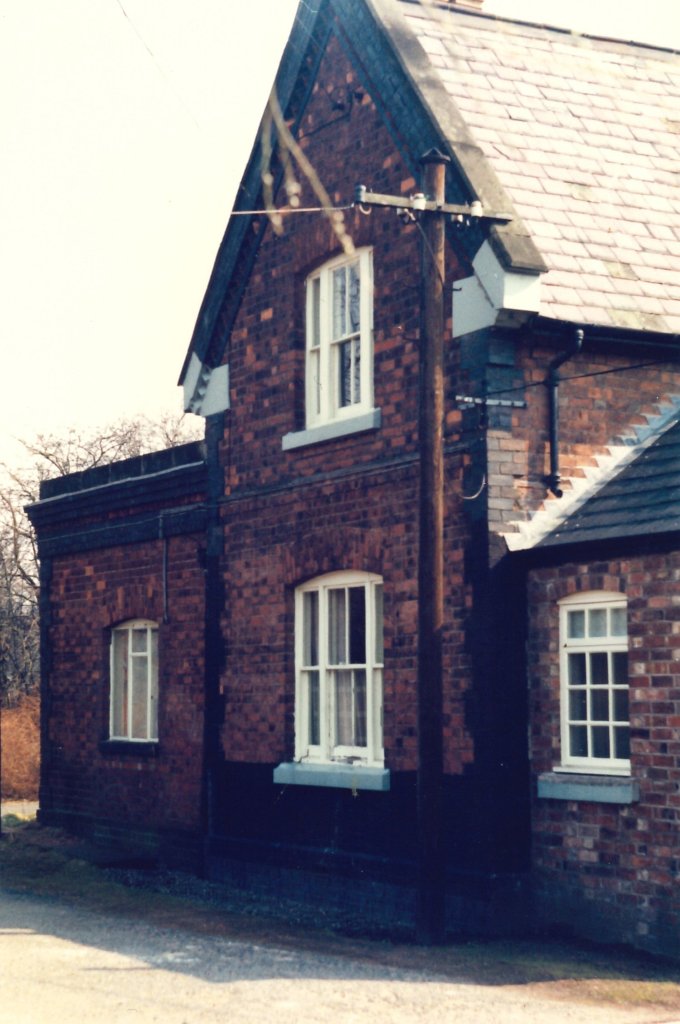
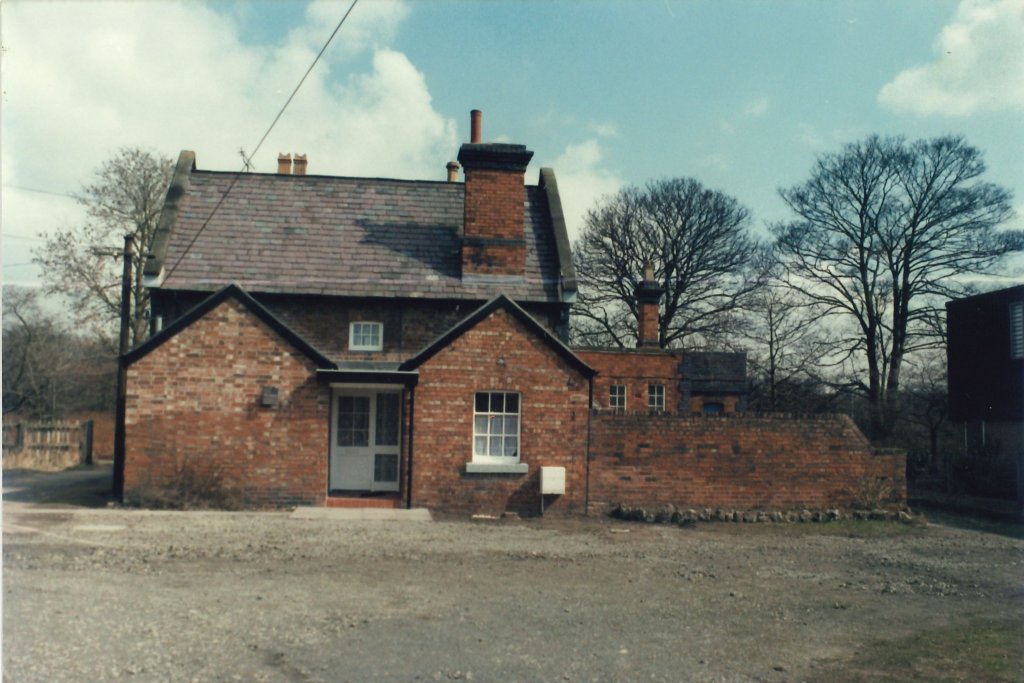
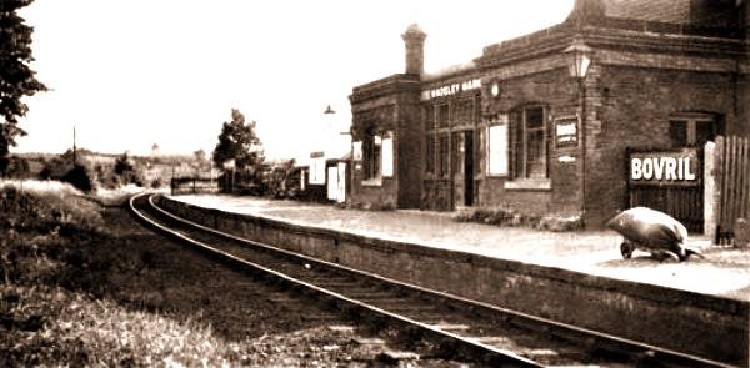
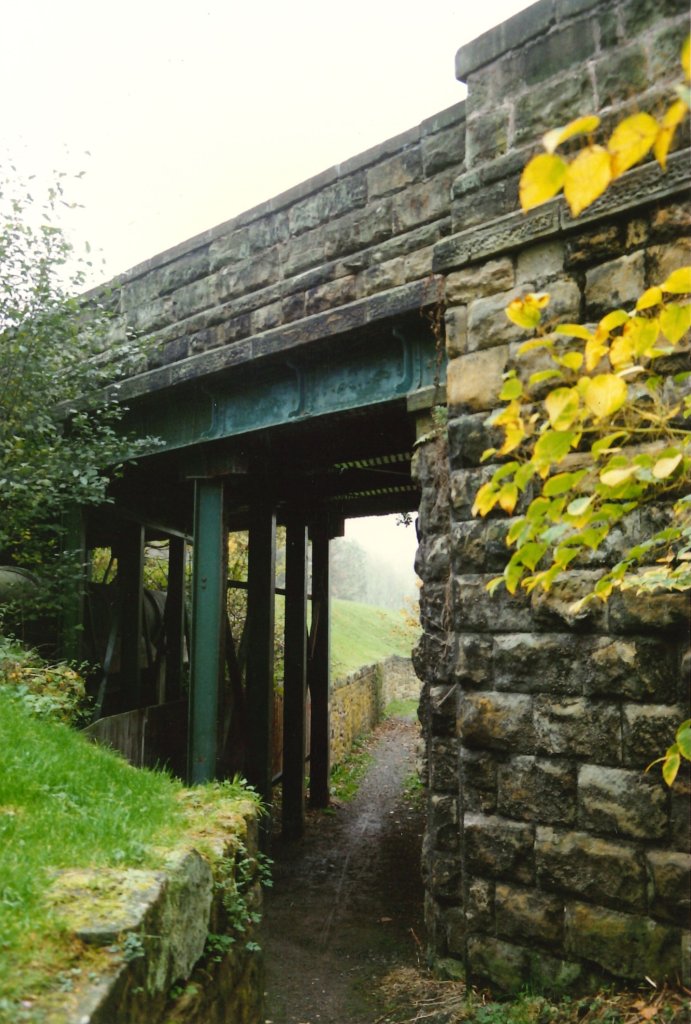
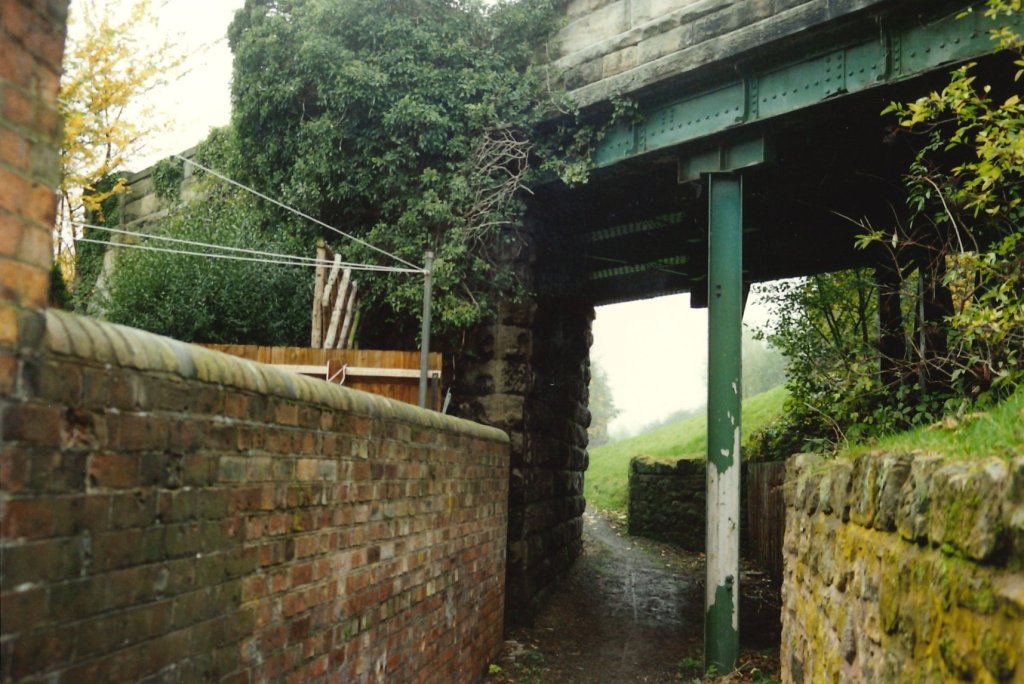

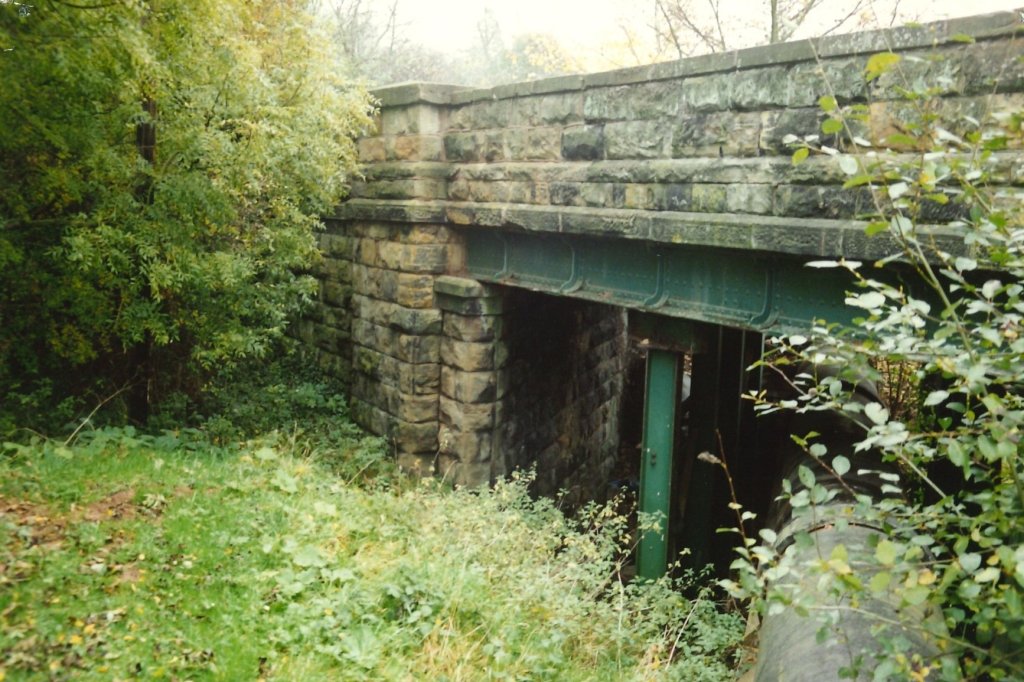

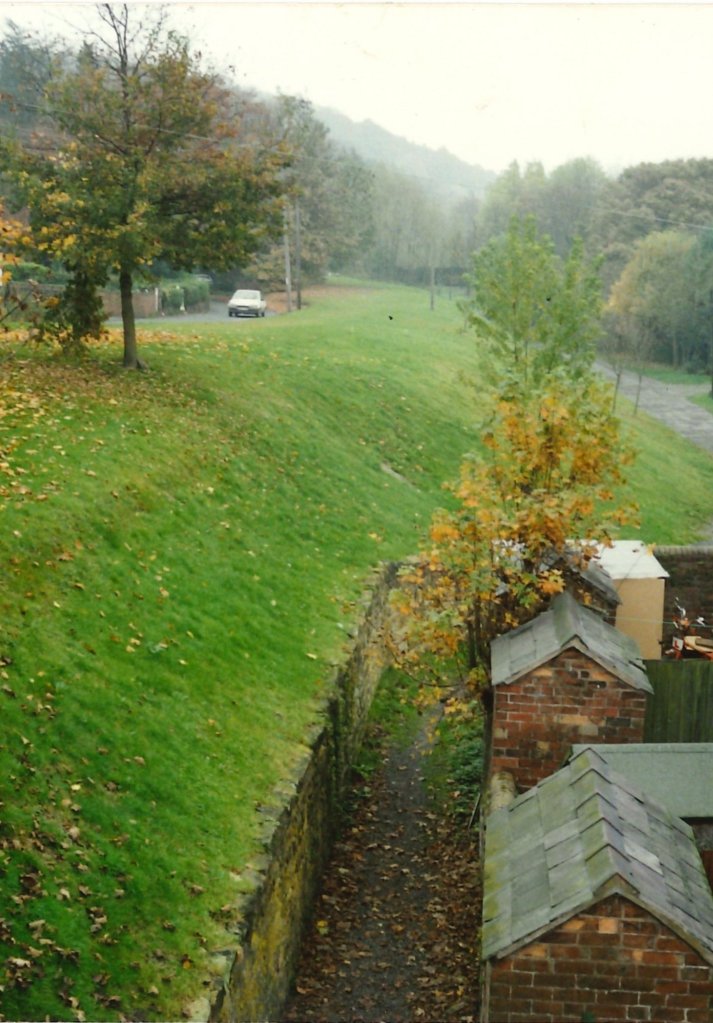

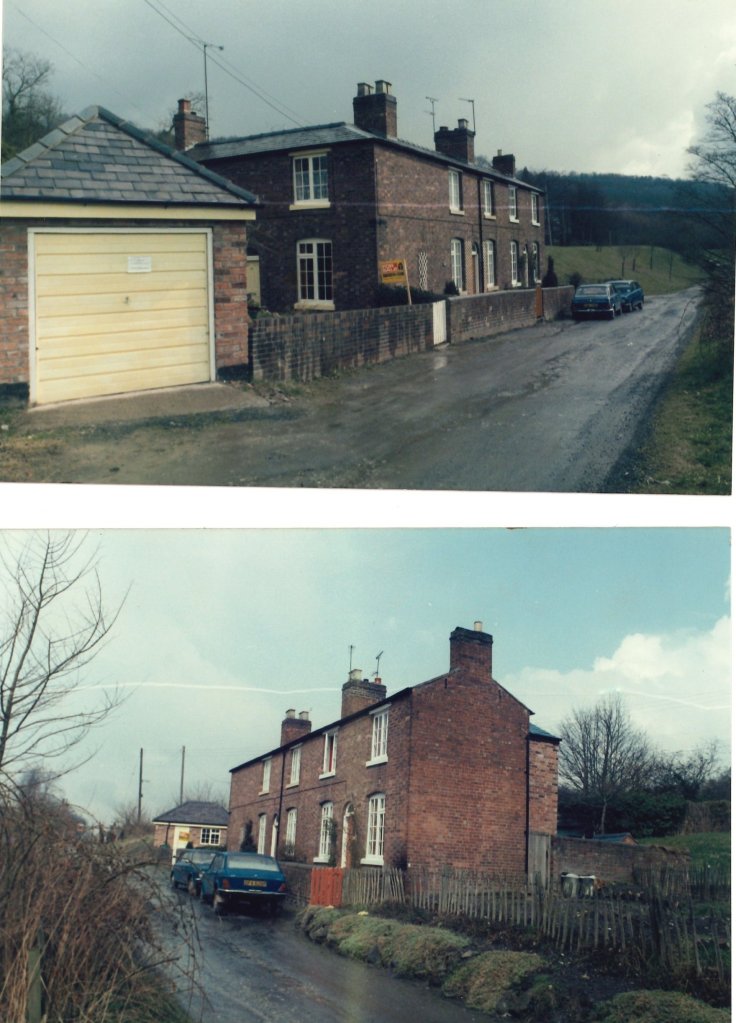
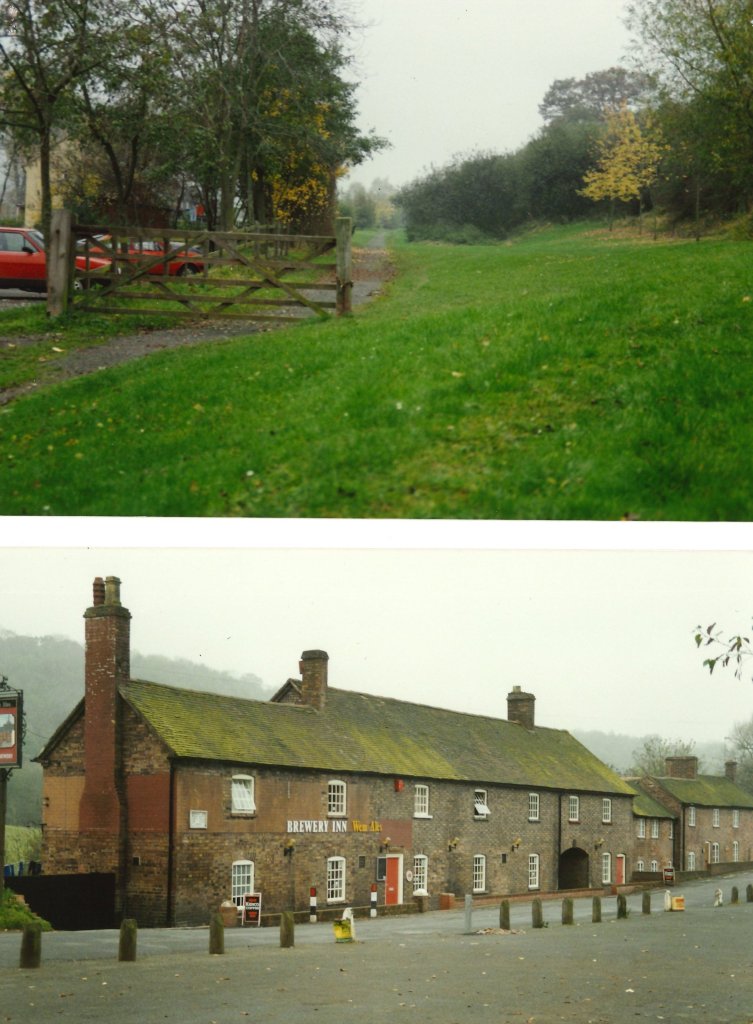
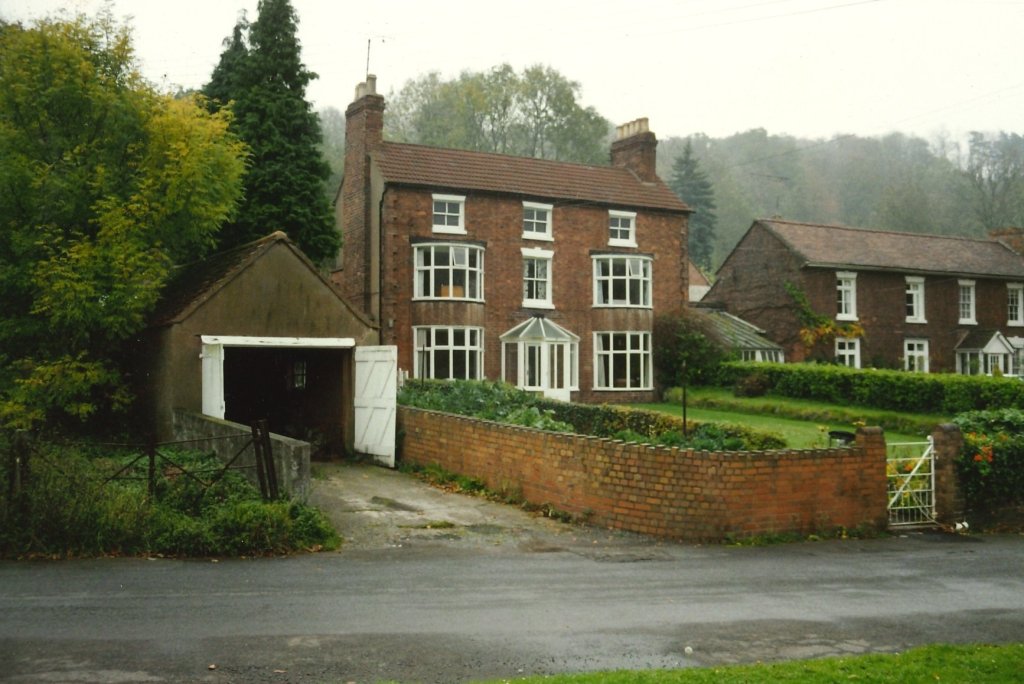
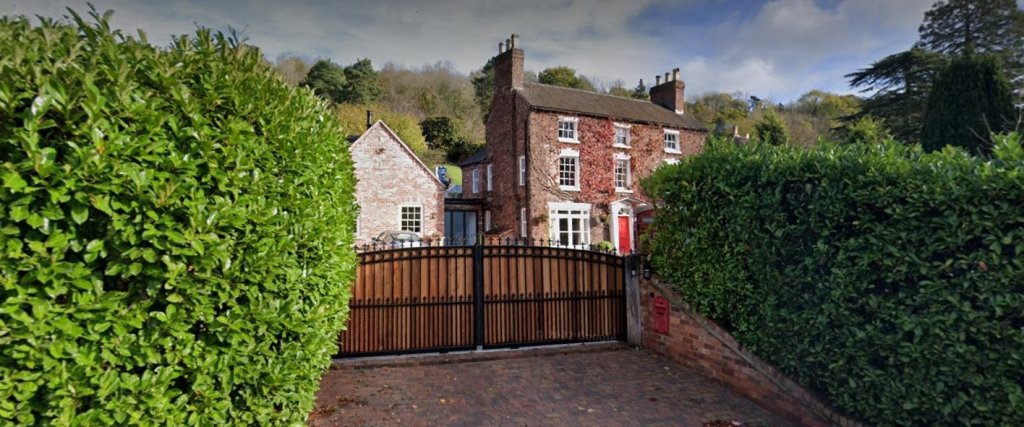
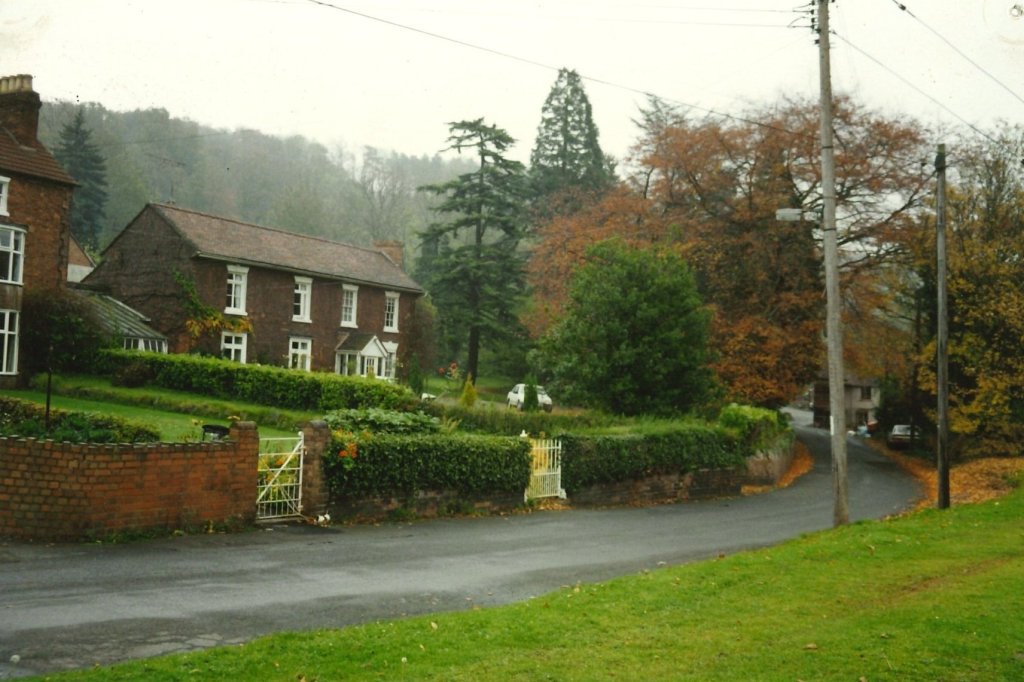

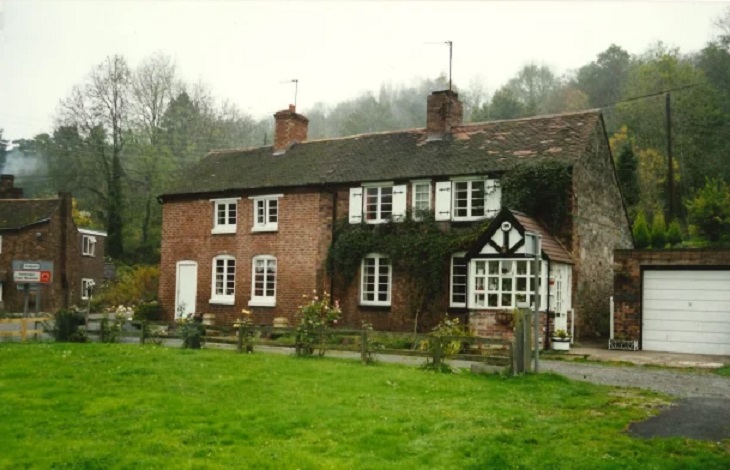
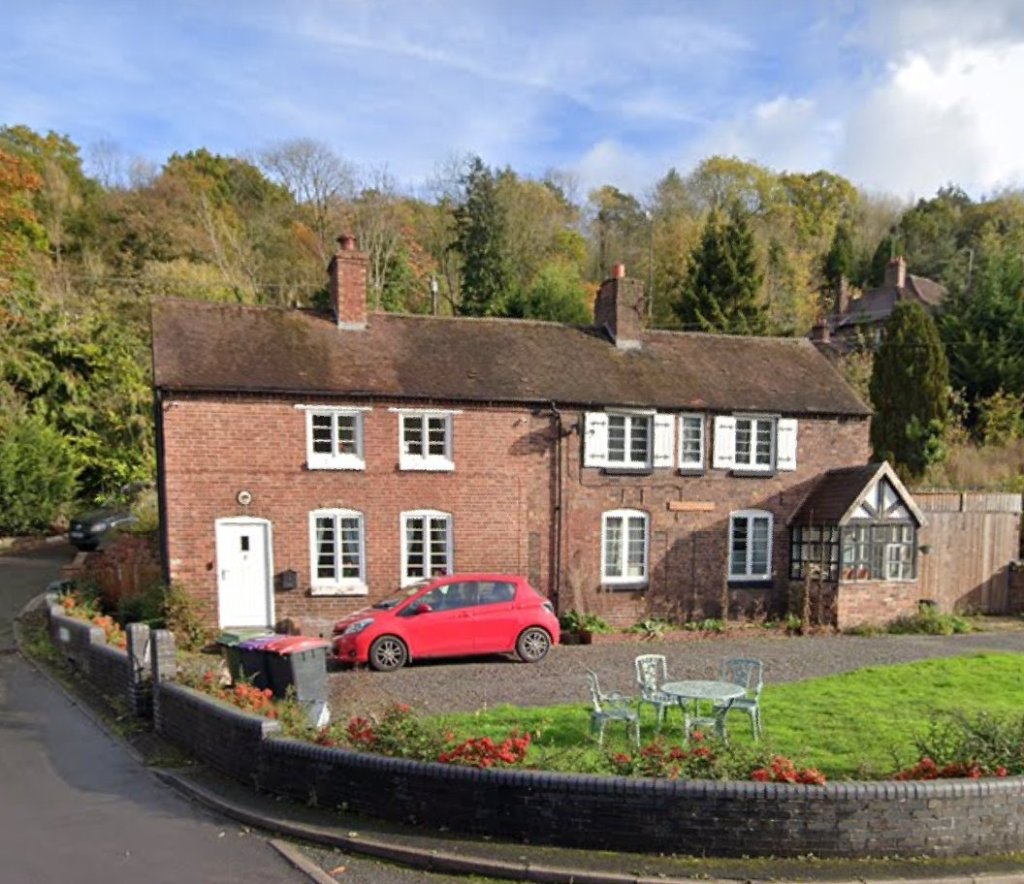
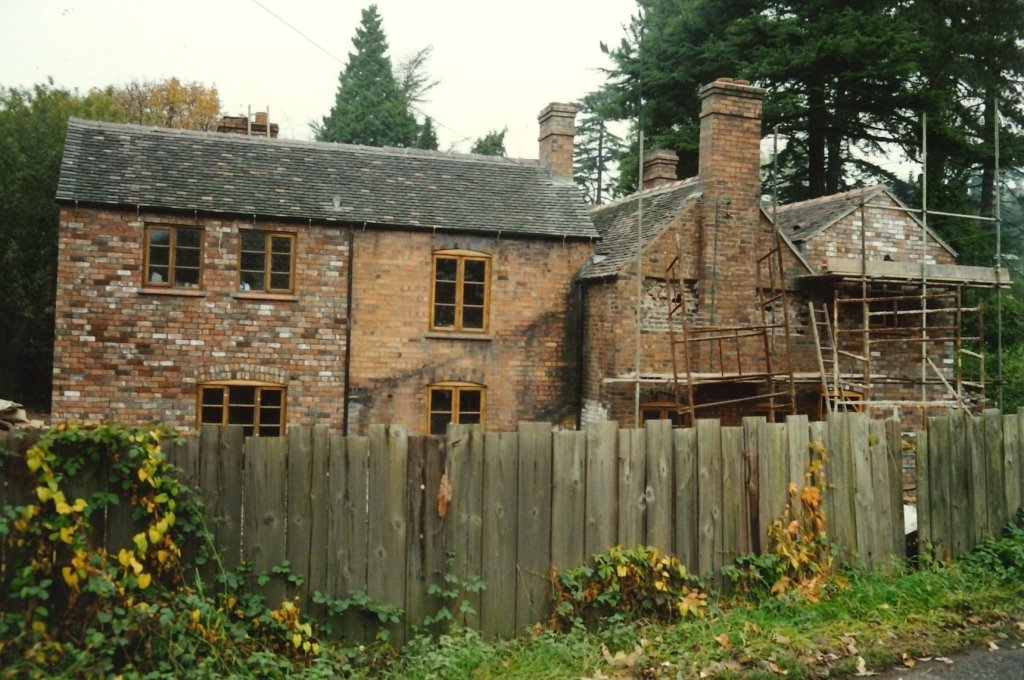

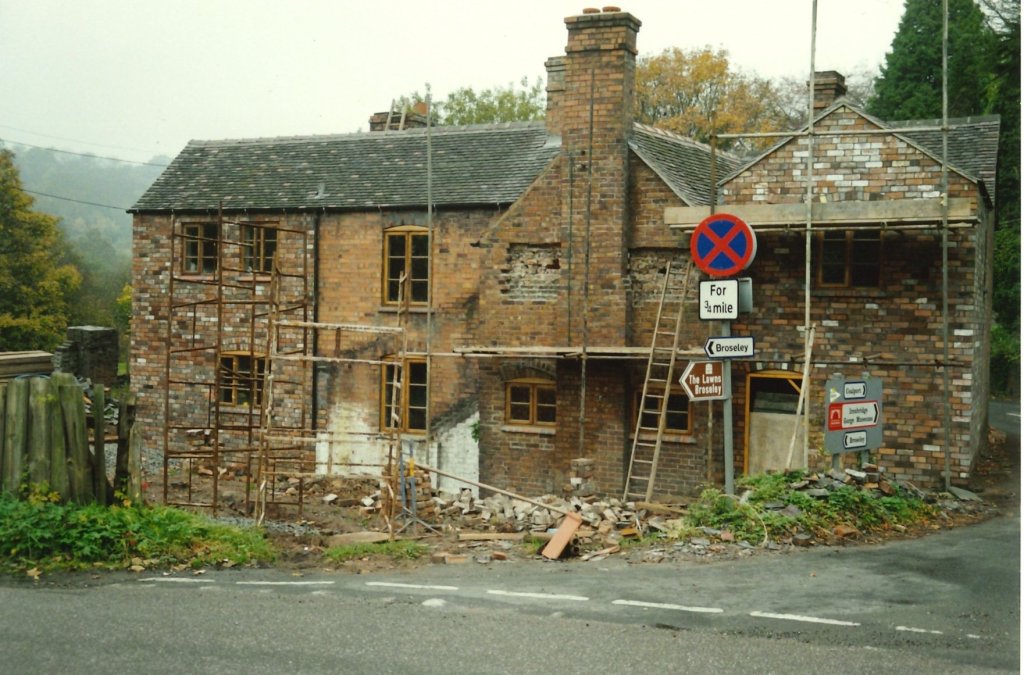
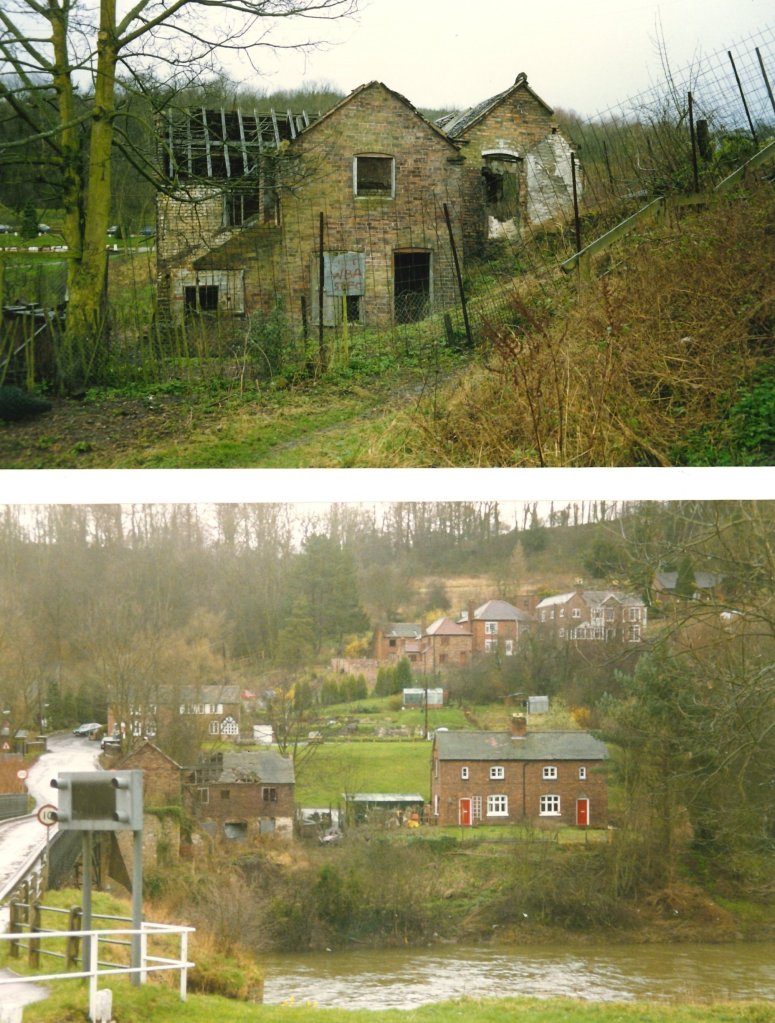
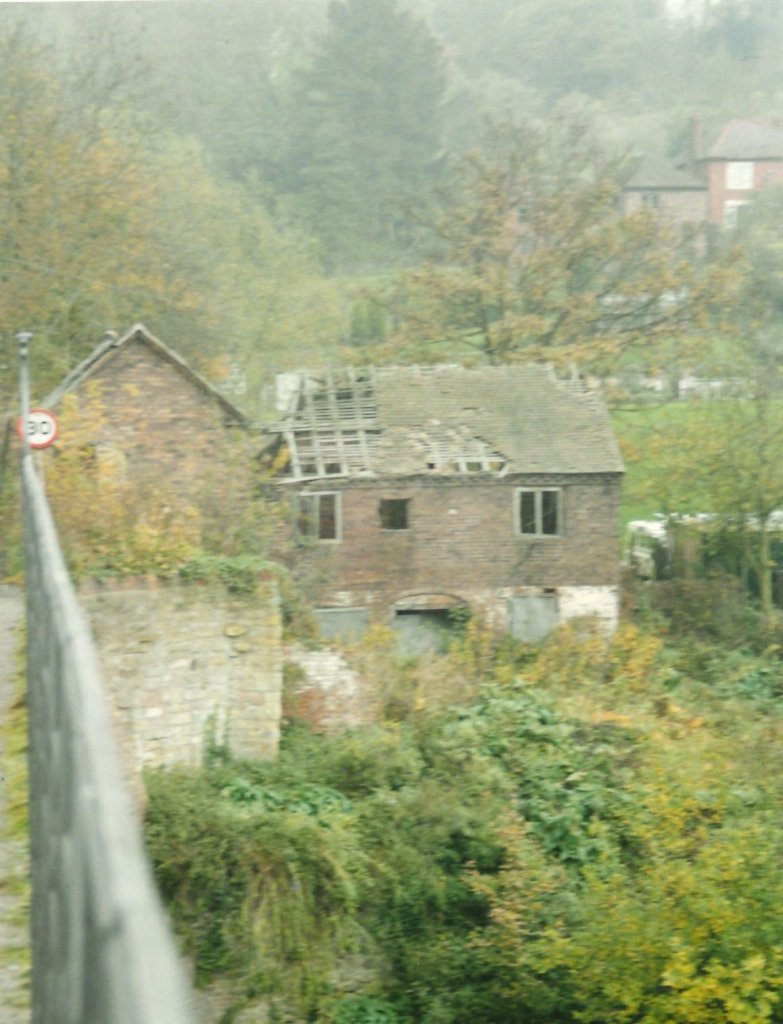
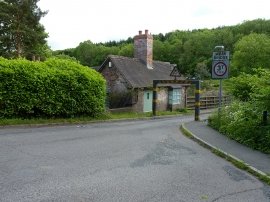
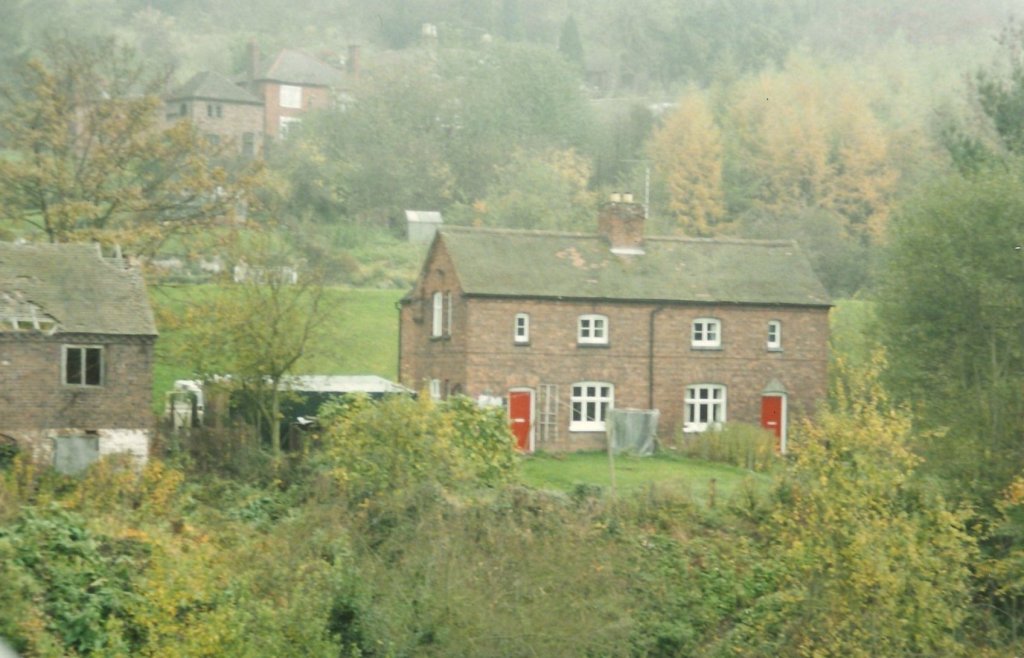
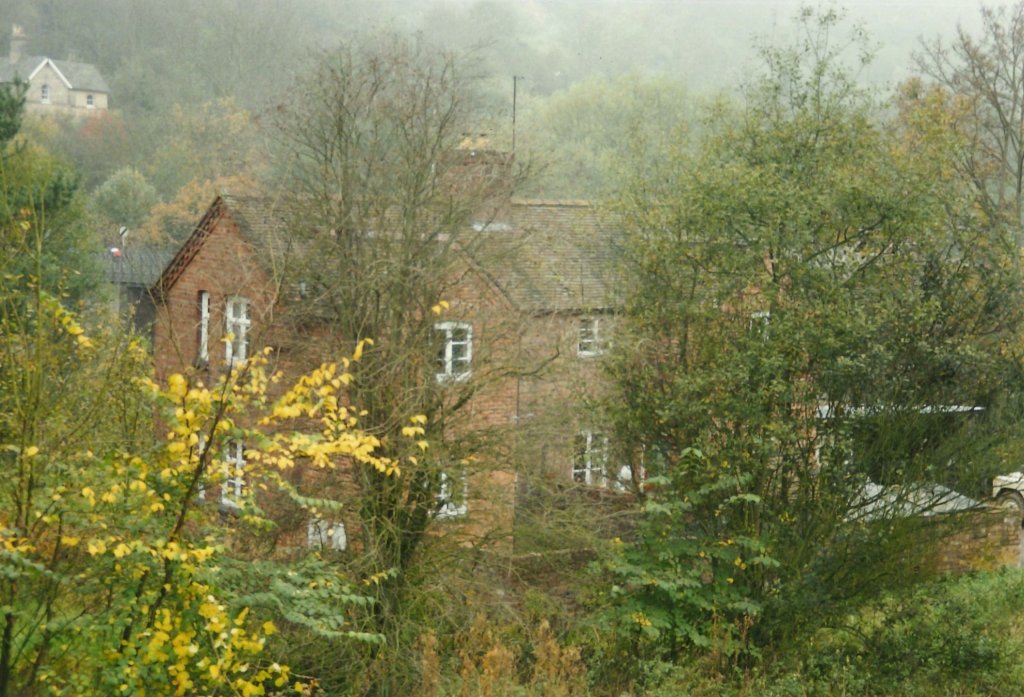
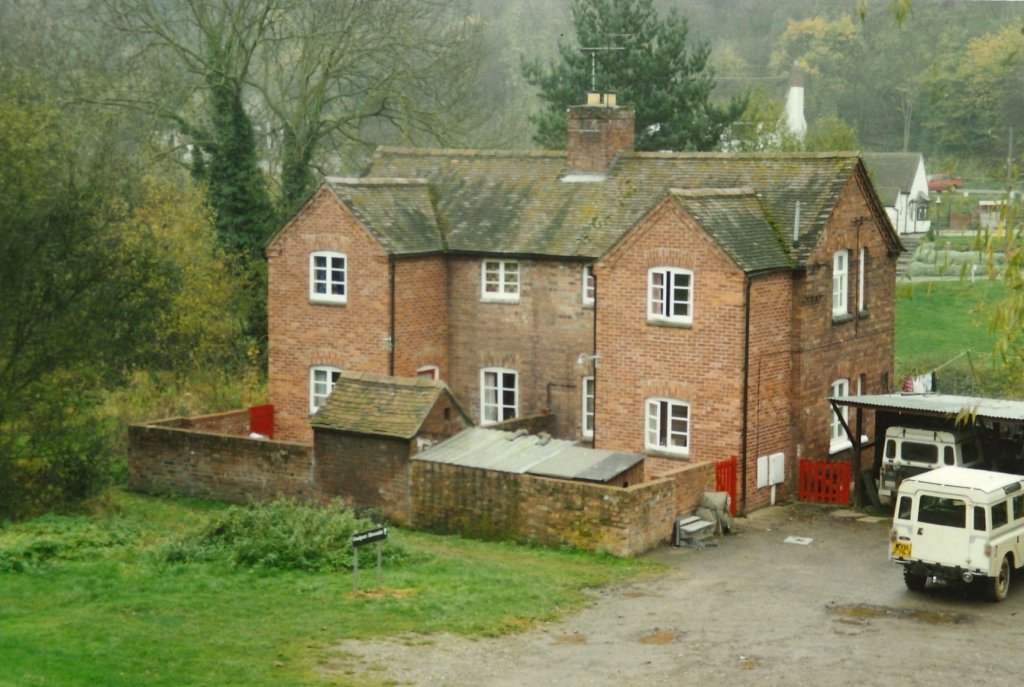
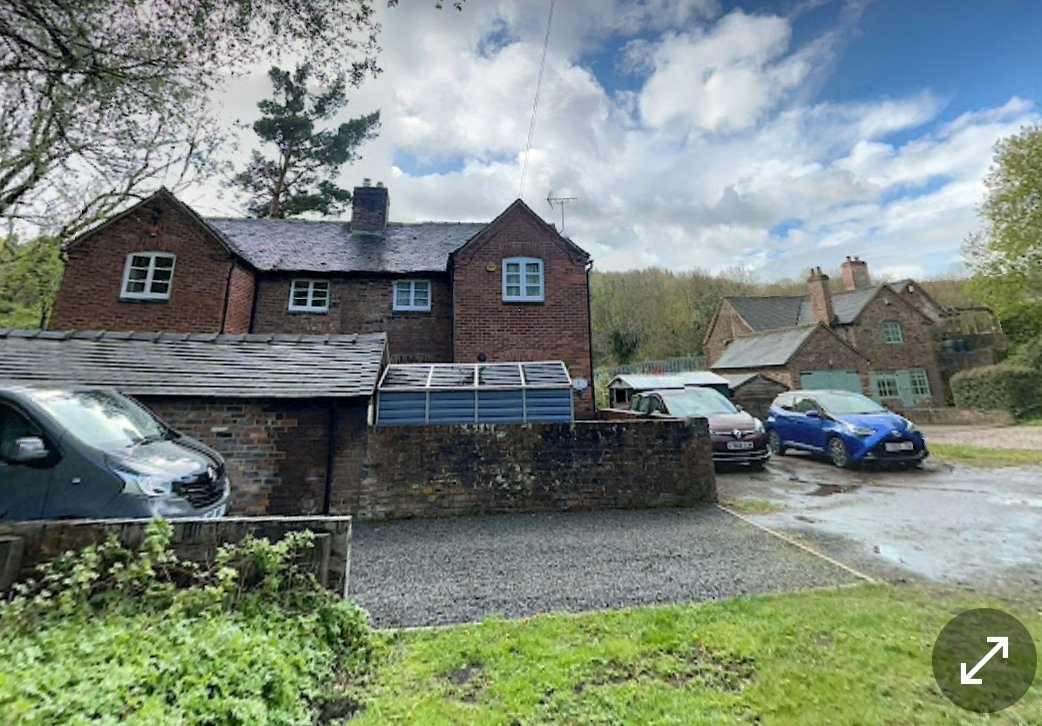
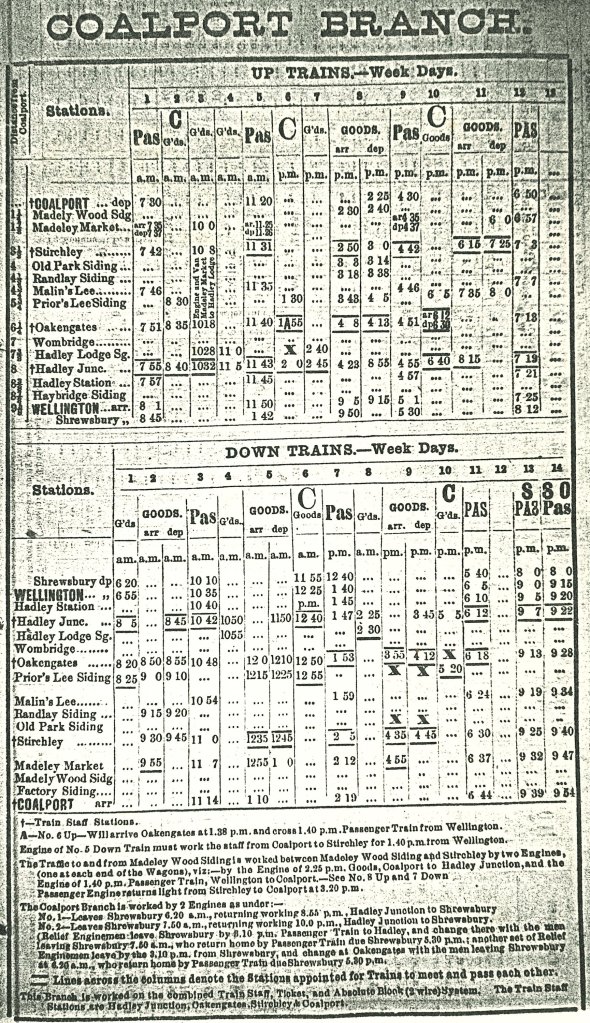
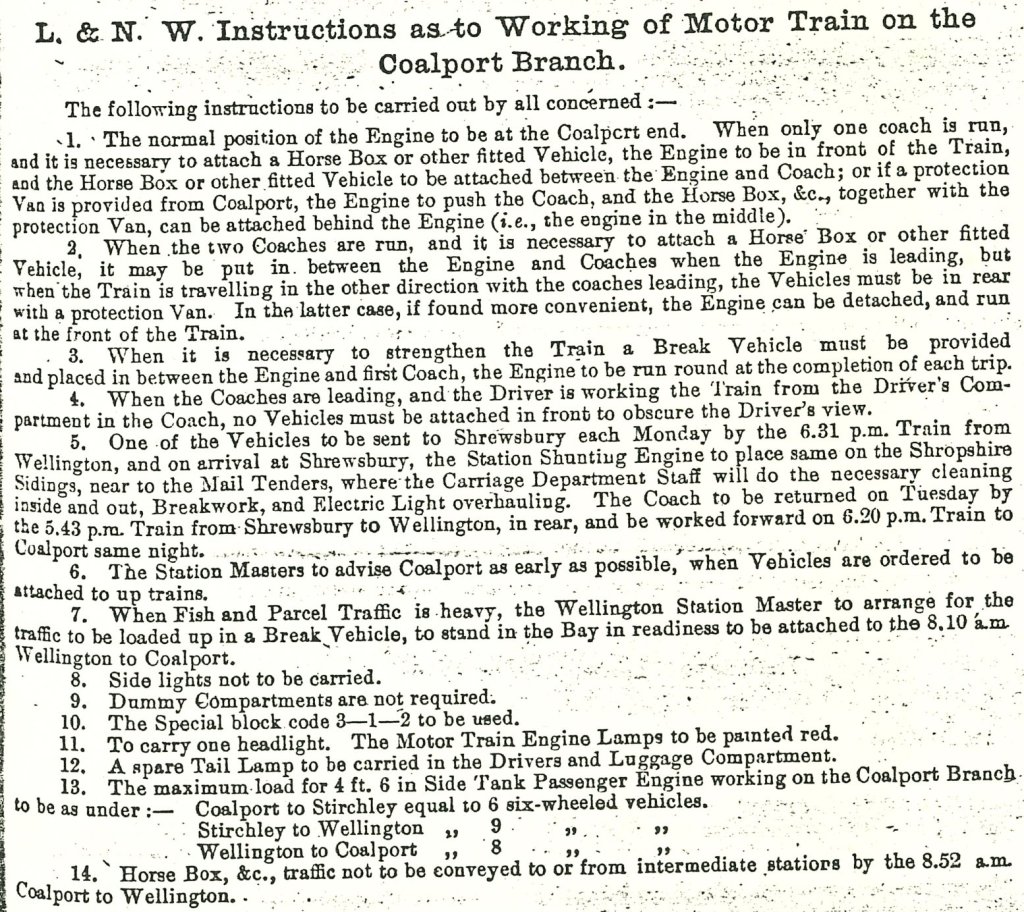
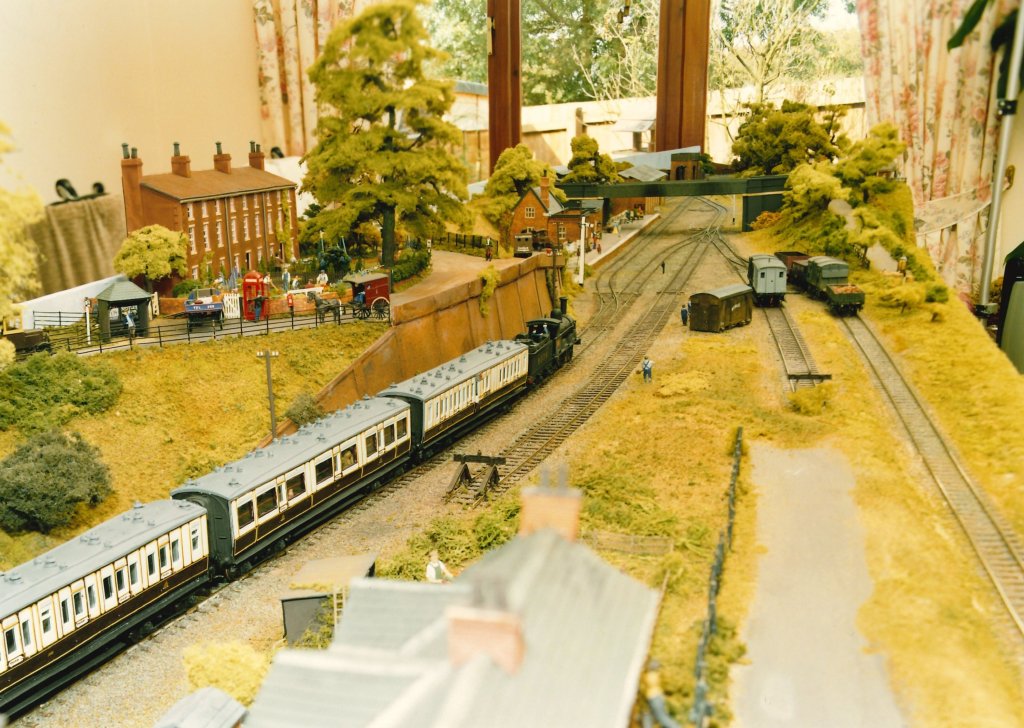
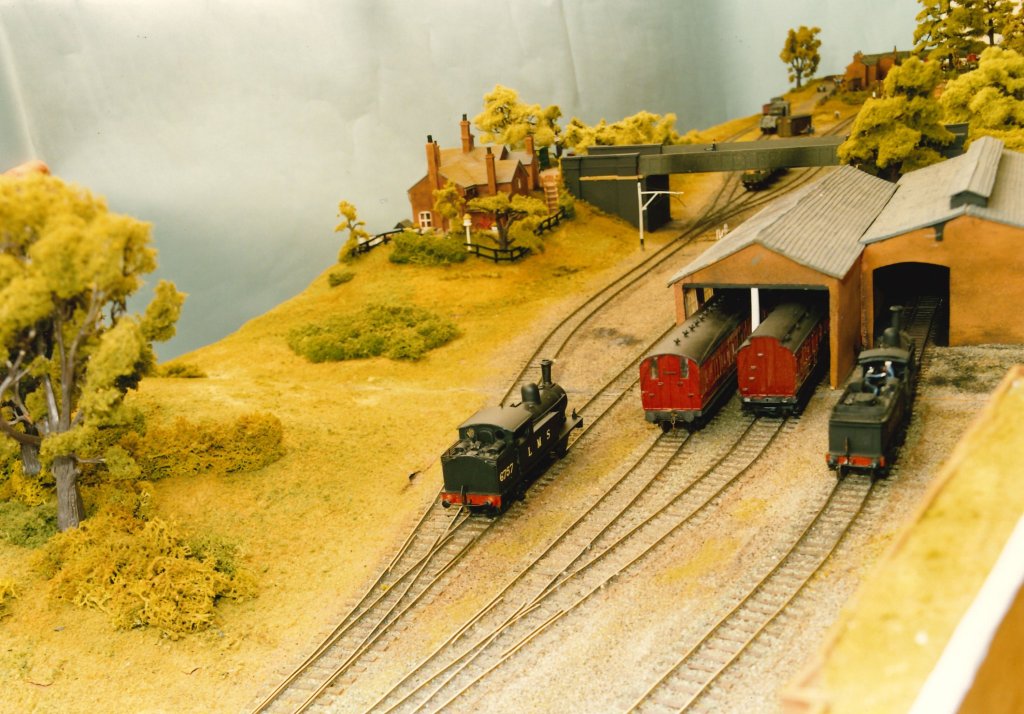
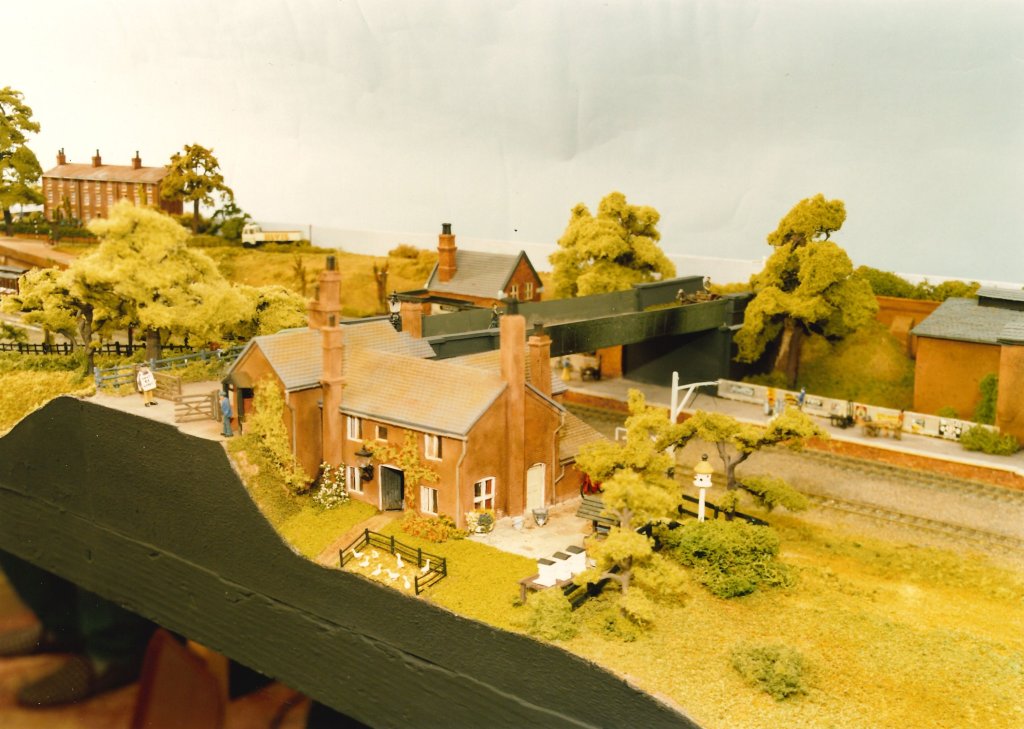
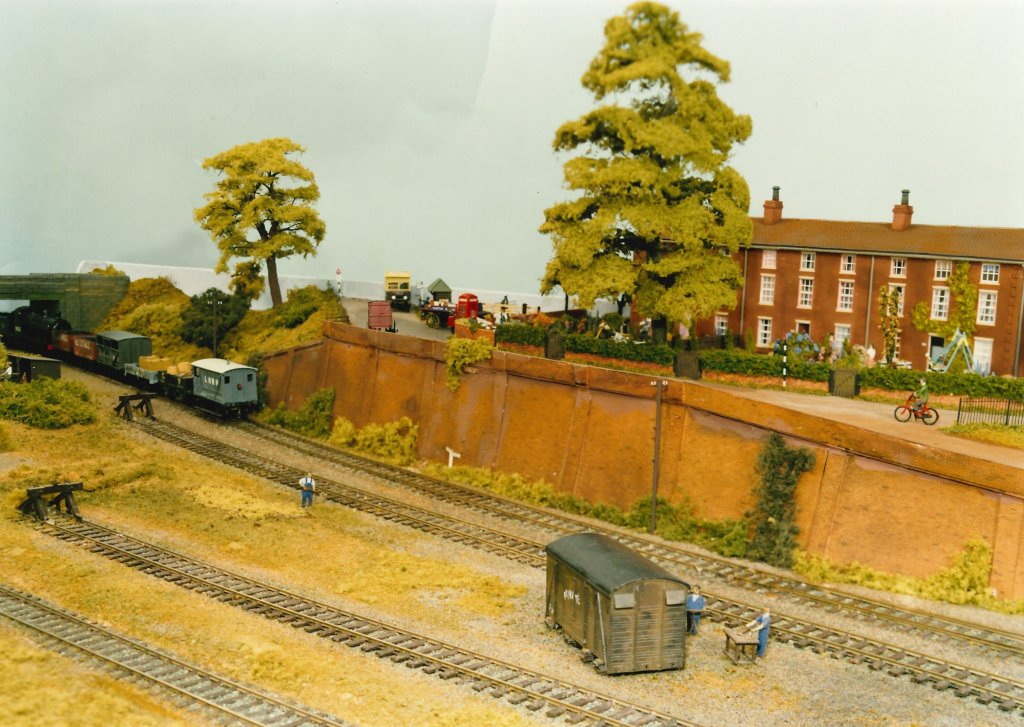
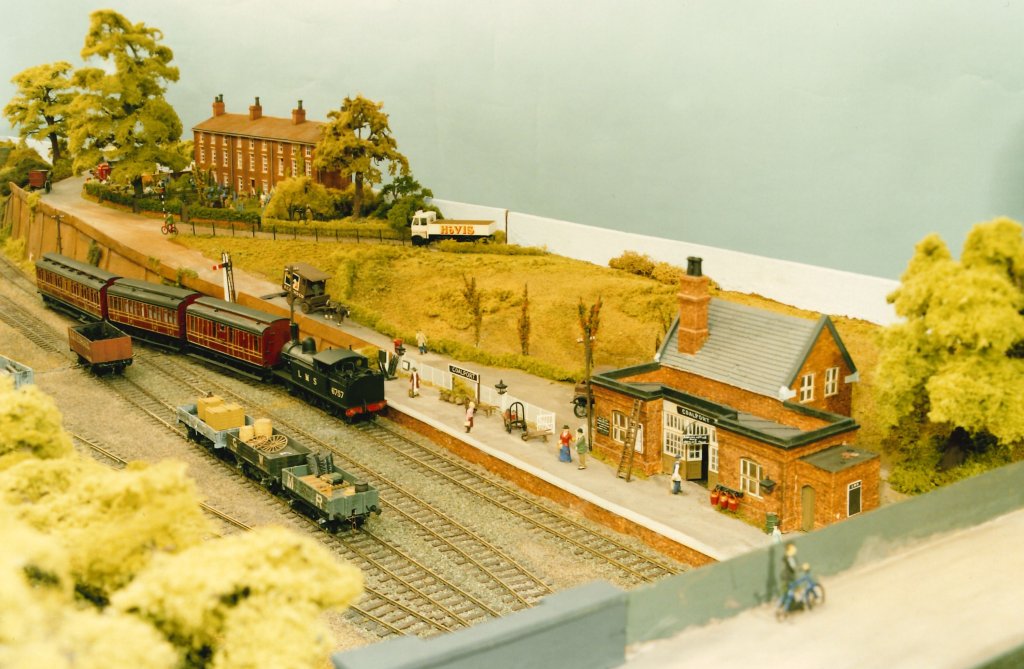
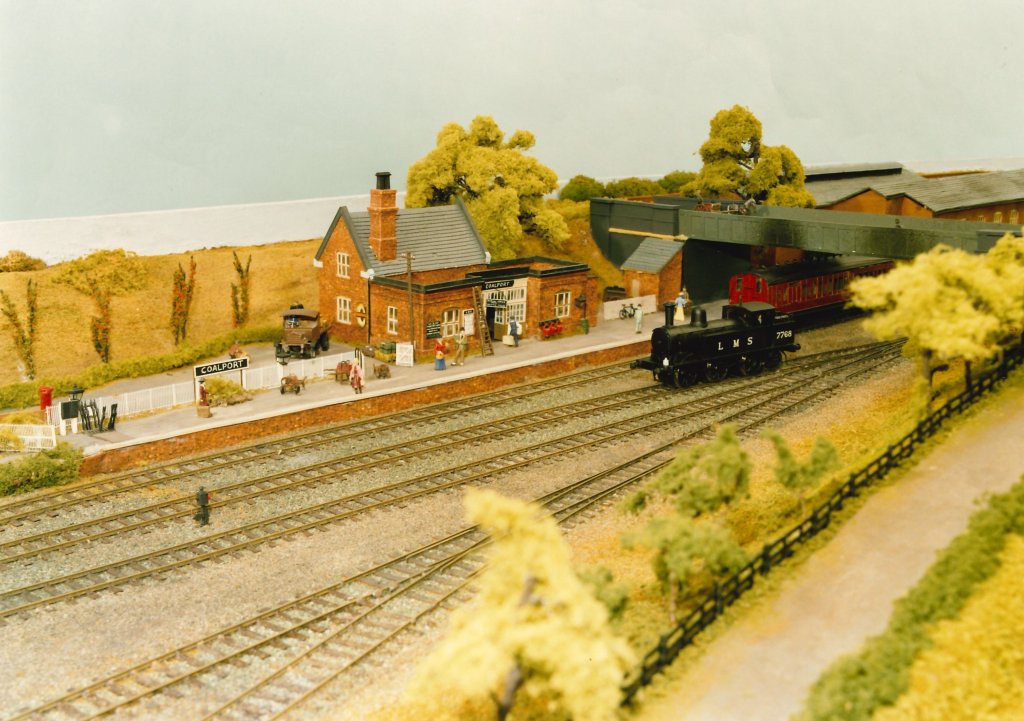

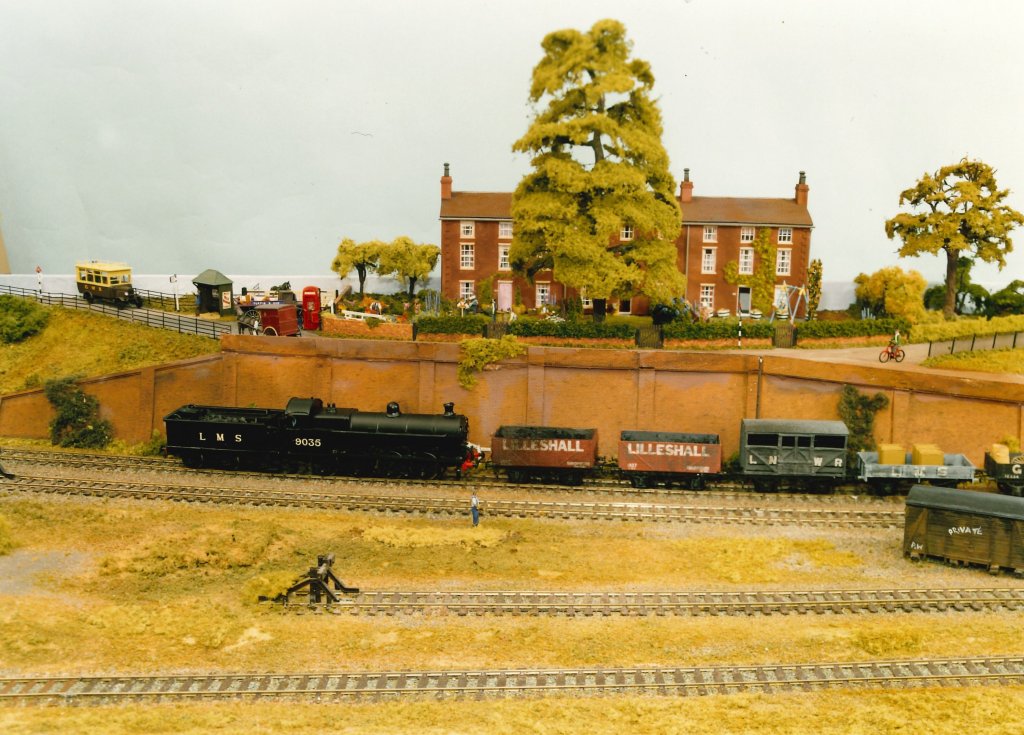
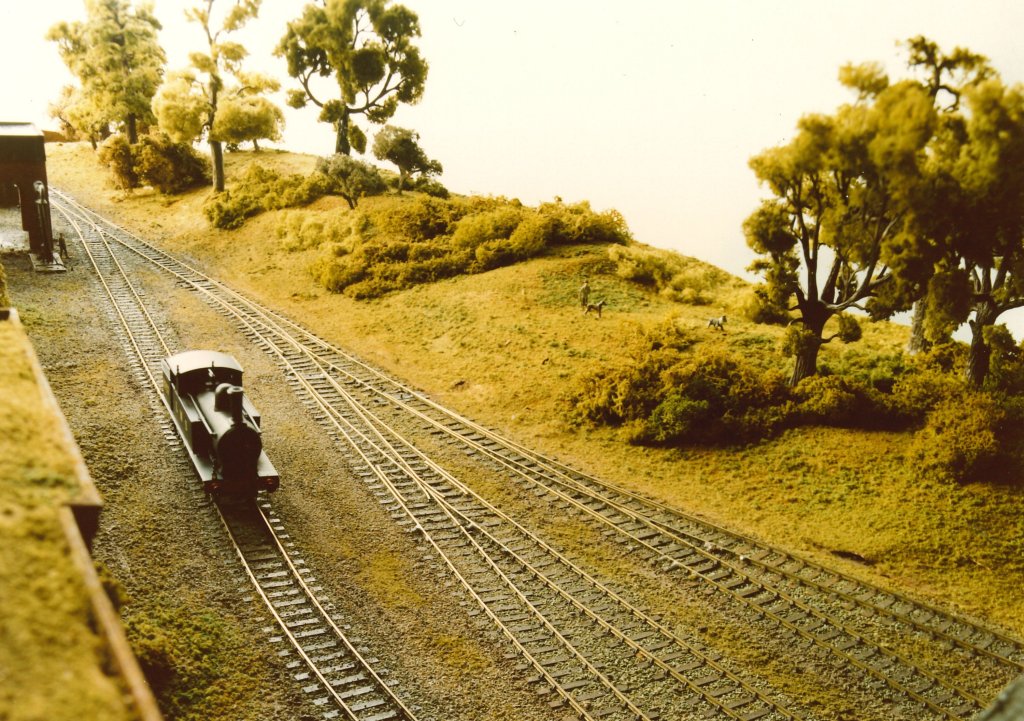

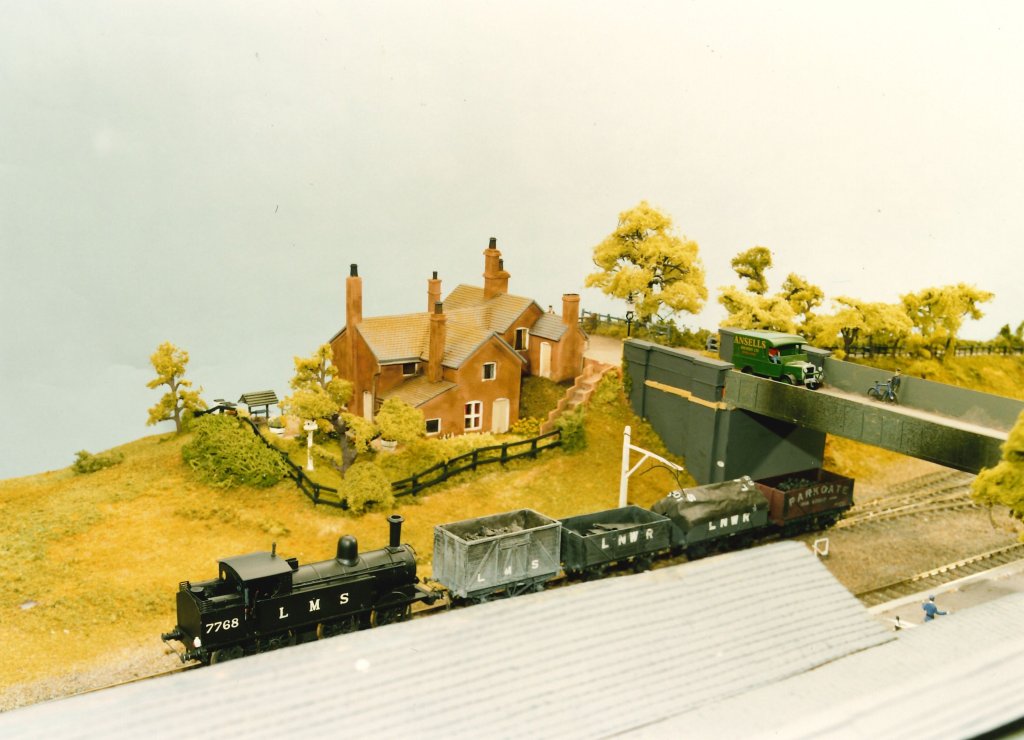

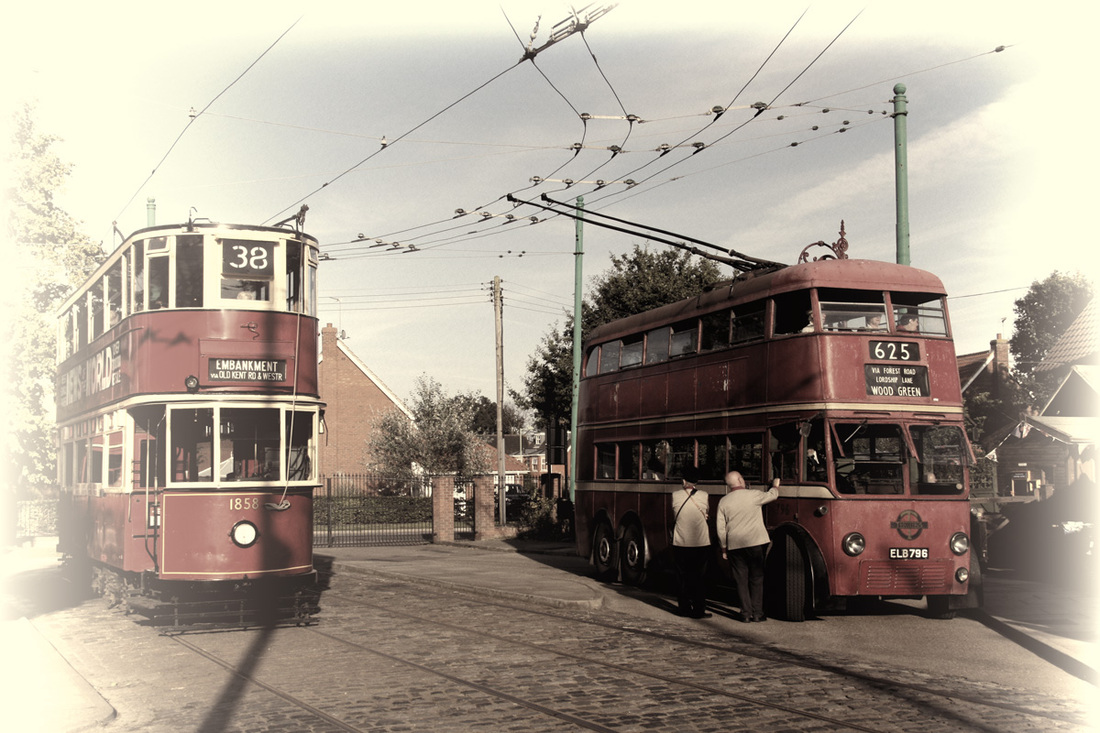