Stanley Jenkins tells us that “The opening of the Inverness & Rossshire Railway between Inverness and Dingwall on 11th June 1862 brought the benefits of rail transport to a prosperous farming area in Ross & Cromarty. The line was completed throughout to Invergordon on 25th March 1863, while a series of subsequent extensions eventually resulted in the creation of the Highland Railway’s ‘Far North’ line between Inverness and Wick. Inevitably the 161½ mile ‘Far North’ line omitted large numbers of places that would have benefited from direct rail links, and for this reason several branch-line schemes were put into effect during the latter part of the 19th century.” [1: p48]
“The Black Isle peninsula, between the Beauly and Cromarty Firths, became the focal point for two such schemes, only one of which was successful.” [1: p48]
Wikipedia tells us that “The Highland Railway was surprised when in 1889 the Great North of Scotland Railway (GNoSR) proposed the construction of a railway to Fortrose, … The GNoSR operated a network from Aberdeen and the nearest place to Inverness served by it was at Elgin, some distance away. The branch would have been detached from the owning railway, but running through the Black Isle it would have made a junction with the Highland Railway at Muir of Ord. A ferry operation from Fortrose to Ardersier, on the south side of the Moray, was included in the plans. Ardersier was then known as Campbelltown, and a railway branch to it was included. Two other schemes striking into Highland territory were proposed at the same time, elevating Highland Railway discomfort about its competitive position.” [2][3]
“The two companies had been adversaries for some time, and in 1883 and the following years there had been a state of continual warfare over junctions, frontiers and running powers. … The Highland saw at once that if this branch were built, it would be easy for the GNoSR to demand running powers into Inverness to reach its branch, and in that way the rival company would have gained access to the Highland’s stronghold.” [2]
After considerable ‘argument’ between the two companies, the GNoSR and the Highland Railway each submitted Bills to the UK Parliament for a line to Fortrose.
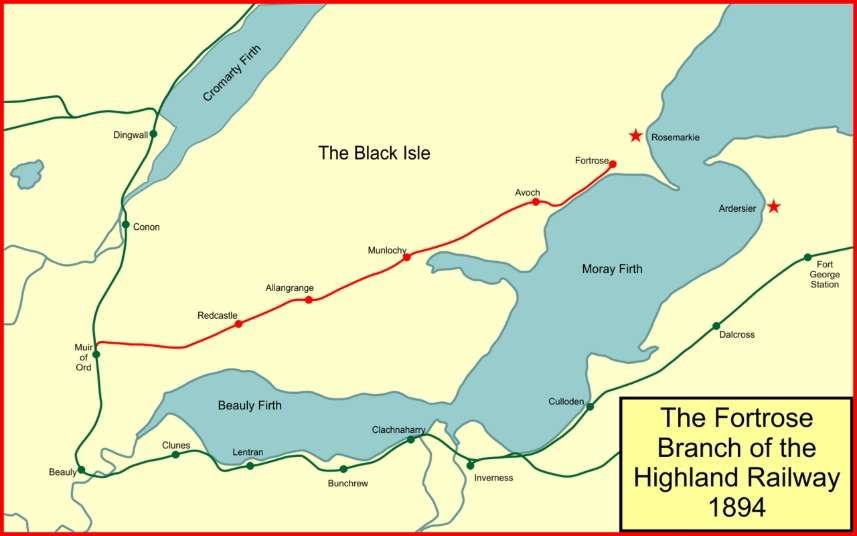
It was the Highland Railway’s scheme which received Parliamentary consent on 4th July 1890. Jenkins tells us that it was for a “16 mile branch line between Muir of Ord, on the ‘Far North’ line, and the fishing port of Rosemarkie. The gentle topography of the Black Isle ensured that the proposed line could be built with relative ease, and on 1st February 1894 a single line was opened as far as Fortrose a distance of 13 miles 45 chains. The final section between Fortrose and Rosemarkie was never built, the terminal station at Fortrose being deemed a suitable railhead for the surrounding district.” [1: p48]
“The Fortrose branch provided useful transport facilities … on the South side of the Black Isle, but it was felt that better facilities were needed on the North side of the peninsula. The 1896 Light Railways Act offered a solution to this local transport problem, and on 1st August 1902 a Light Railway Order was obtained for construction of a 19 mile line between Conon, on the ‘Far North’ line, and Cromarty. Work began at the Cromarty end, but subsequent progress was painfully slow, and extensions of Time Orders were obtained in 1907, and again in 1910. … About six miles of track was actually laid between Cromarty and Newhall, but all work was suspended in 1914 on the outbreak of World War I. At that time, construction work was in hand on a further two miles of line, but little had been done on the remaining eleven miles of line to Conon. The track was lifted around 1915 for use in the war effort, leaving the earthworks and other engineering features of the unfinished light railway in a derelict condition.” [1: p49]
“If the Cromarty & Dingwall Light Railway had been completed it would have had stations at Alcaig Ferry, Culbokie, Drumcudden, and Newhall. Other halts may have been opened once the line was in operation, while there were also suggestions that the route might be extended south-westwards from Cromarty to Rosemarkie and Fortrose, thereby creating a scenic ‘coastal’ route around the Black Isle that would have had considerable potential as a tourist attraction. Unfortunately the changed economic conditions after World War I meant that schemes of this kind were no longer viable, and the Fortrose branch was therefore left in splendid isolation as the only completed railway in the Black Isle area.” [1: p49]
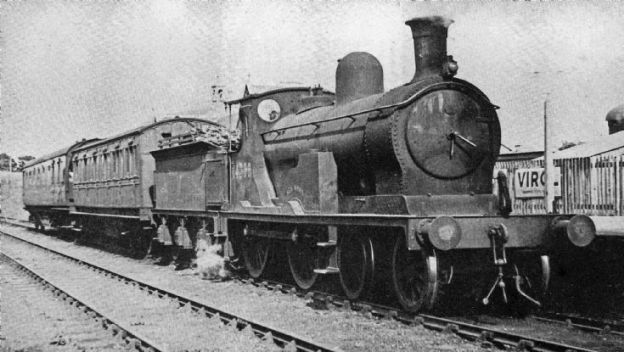
“The Fortrose route was worked as a feeder branch for the ‘Far North’ line, and as such it was moderately-successful. Like other Highland Railway branch lines it was normally worked by small tank locomotives such as the Dübs 4-4-0Ts. Other engines seen on the line were Drummond’s well-known 0-4-4 branch-line tanks.” [1: p49]
The Route from Muir of Ord to Fortrose
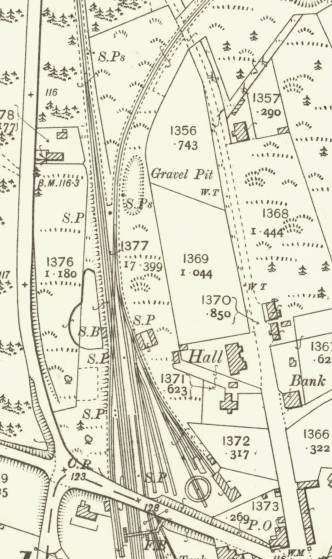
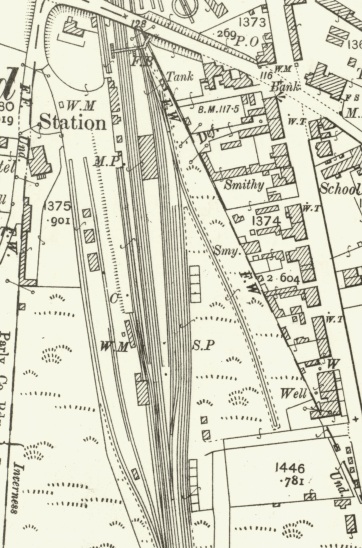
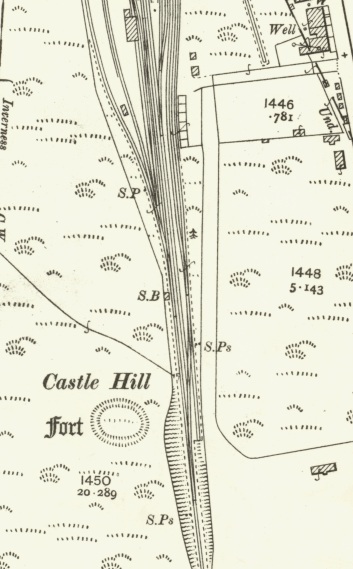
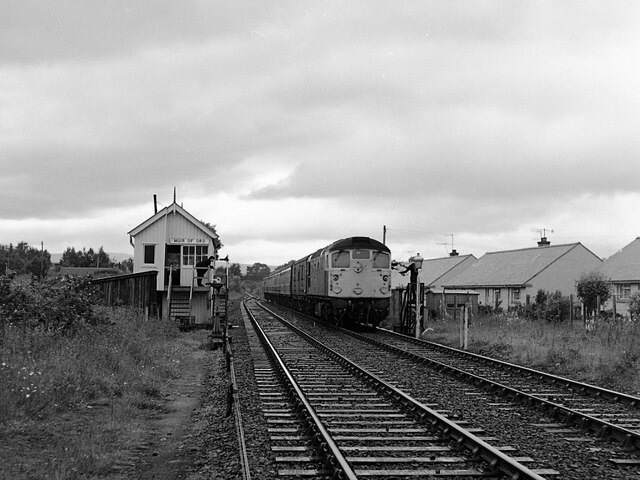
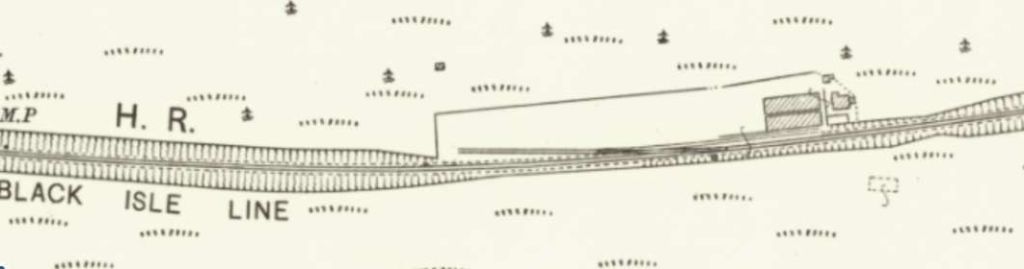
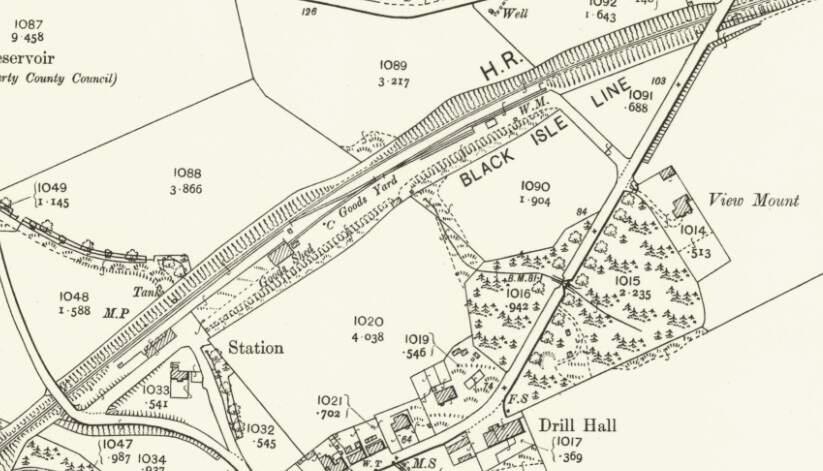
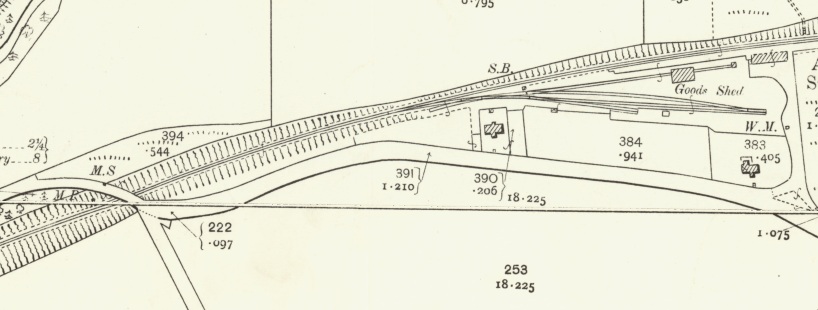
The extracts below from the 25″ Ordnance Survey of 1904, published in 1906 cover the site of Muir of Ord Railway Station. [6] Jenkins tells us that “Muir of Ord – the junction station for branch services to Fortrose – was opened on 11th June 1862 when the initial section of the Highland ‘Far North’ line was brought into use between Inverness and Dingwall.” [1: p49]
“The station was orientated from North to South, with its main station building on the down, or northbound side. The track layout was relatively complex, with sidings on both sides of the running line and a lengthy crossing loop.The main goods yard, with accommodation for coal, livestock, furniture, machinery, and general-merchandise traffic, was situated to the south of the platforms on the down side. One of the yard sidings passed through a goods shed, while others were used mainly for coal or other forms of wagon-load traffic. Further sidings were available on the up side, and one of these gave access to a 50ft diameter locomotive turntable.” [1: p49]
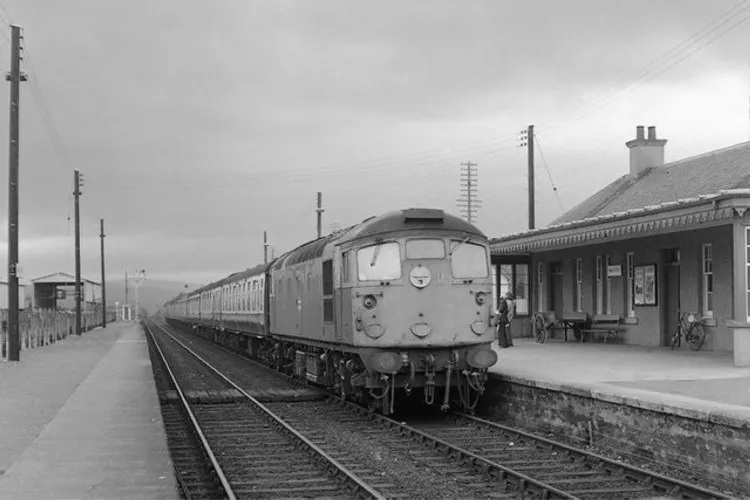
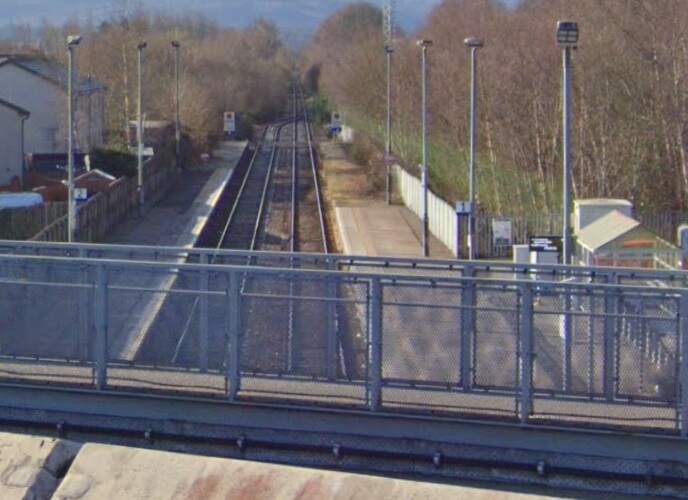
Wikipedia tells us that “The station is 13 miles 4 chains (13.05 mi; 21.0 km) from Inverness, between Beauly and Conon Bridge, and is the location of the sole remaining passing loop on the single line between Dingwall and Inverness.” [5]
“The station building and platform canopy were erected in 1894, [5][7] 32 years after the station itself opened. [8] Passenger services on the branch ceased on 1 October 1951, but the branch remained open for freight until 13 June 1960. Muir of Ord station was closed on 13 June 1960 but reopened in 1976, on 4 October.” [5][8]
“After the railway bridge across the River Ness washed away in February 1989, isolating the entire network north of Inverness, Muir of Ord was chosen as the location for a temporary depot, from which the stranded rolling stock could operate the service to the highland communities which depended on the line.” [5][9]
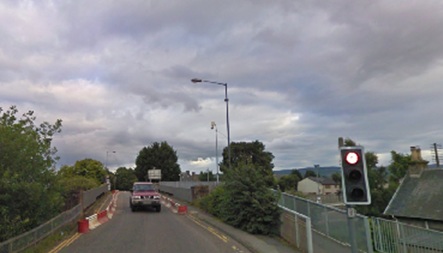
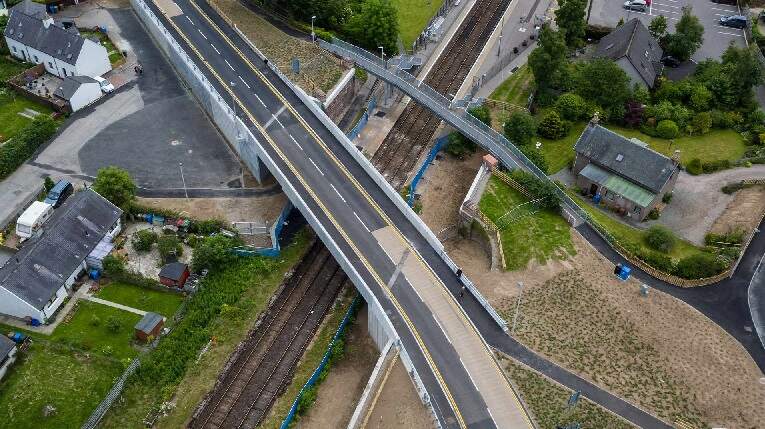
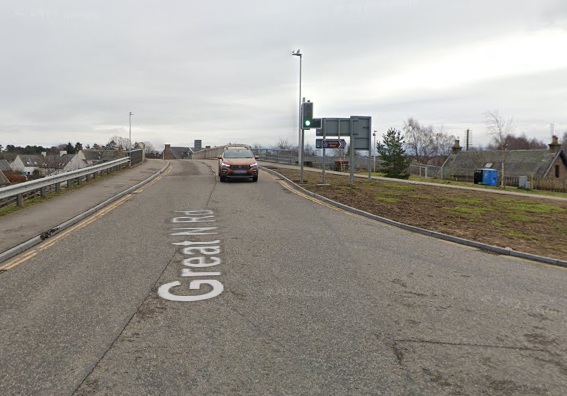
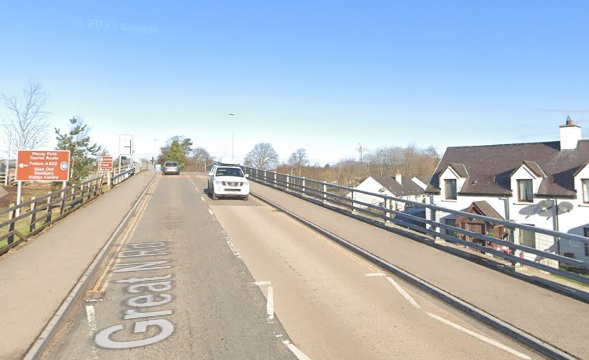
“In November 2015, work commenced on a new A862 road bridge at the northern end of the station.” [5][10]
The project cost £3.7 million and was completed in the Summer of 2017. [11]
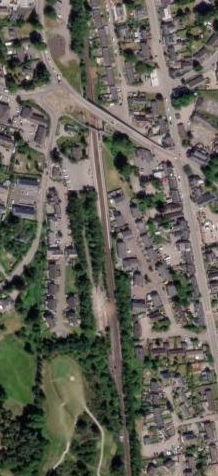
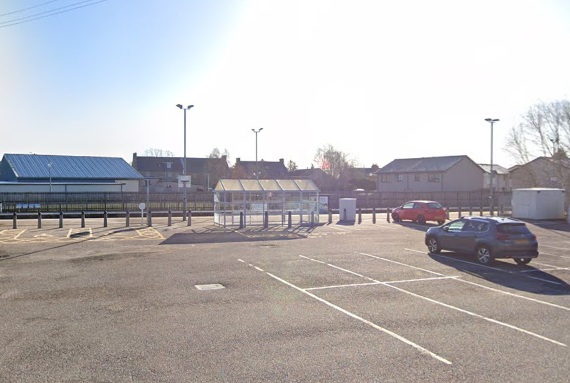
This ESRI satellite image supplied by the NLS shows the station site after the reconstruction of the raod bridge. [6]
Wikipedia tells us that “in the 21st century, both station platforms have modern waiting shelters and benches, with step-free access. There is a car park and bike racks adjacent to platform 1, along with a help point near to the entrance from the car park.” [5]
“As there are no facilities to purchase tickets, passengers must buy one in advance, or from the guard on the train.” [5]
“The station has a passing loop 32 chains (700 yd; 640 m) long, flanked by two platforms which can each accommodate a ten-coach train.” [5][12]
“On 11th June 1862 the Inverness and Ross-shire Railway opened their line between Inverness and Dingwall. It included a station at the village of Tarradale but the company decided to name it after the nearby cattle tryst (market), Muir of Ord. Eventually the name Muir of Ord was applied to the surrounding area.” [14]
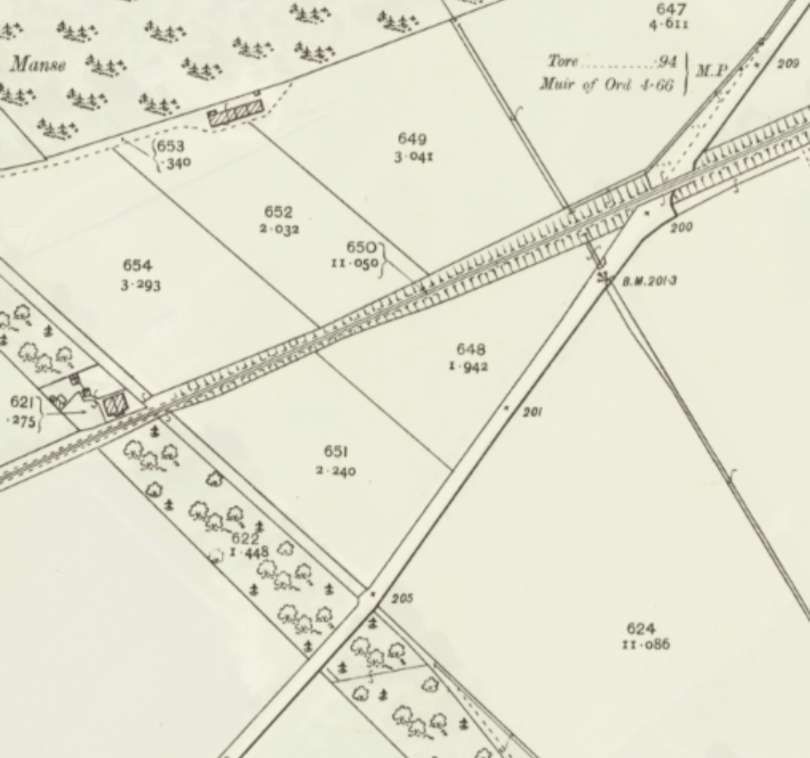
“On leaving Muir of Ord, branch trains diverged eastwards, and having, executed a full 90 degree turn the route maintained its easterly heading for about two miles.” [1: p49]
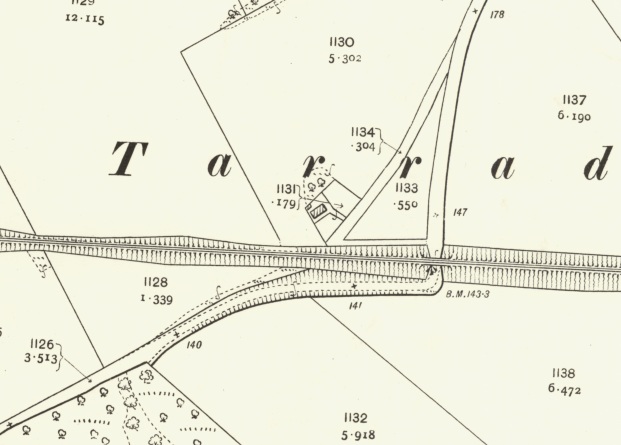
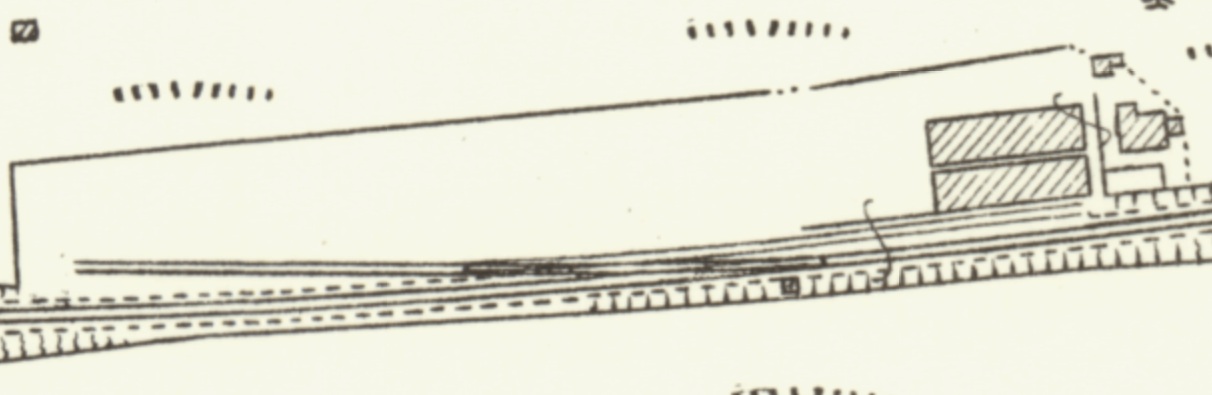
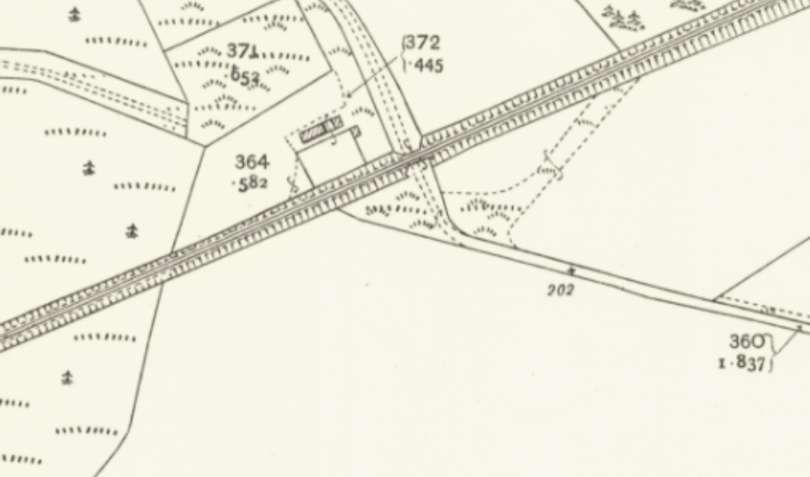
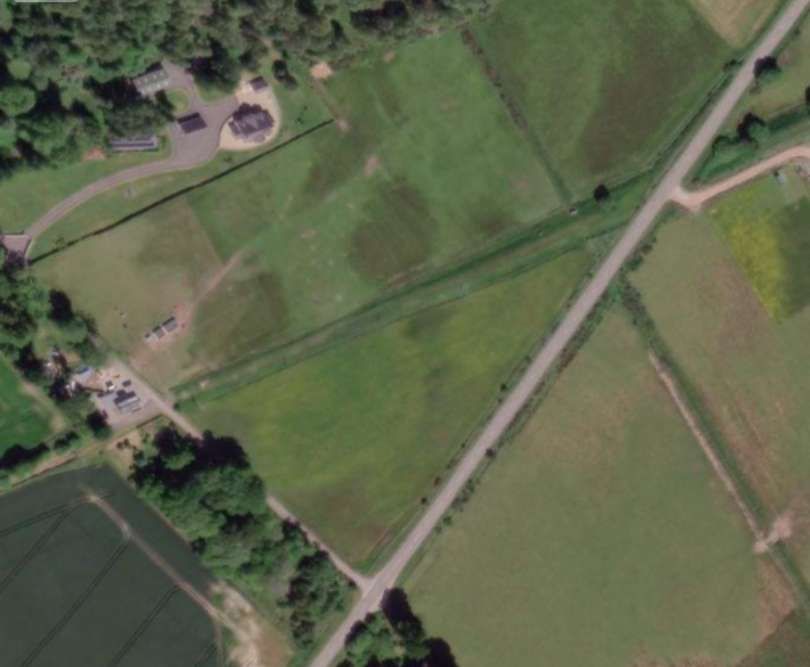
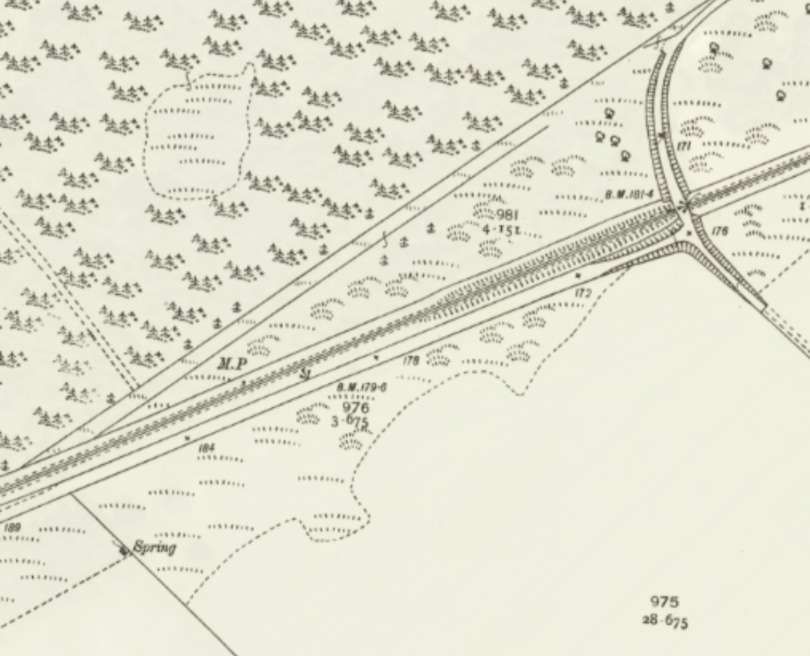
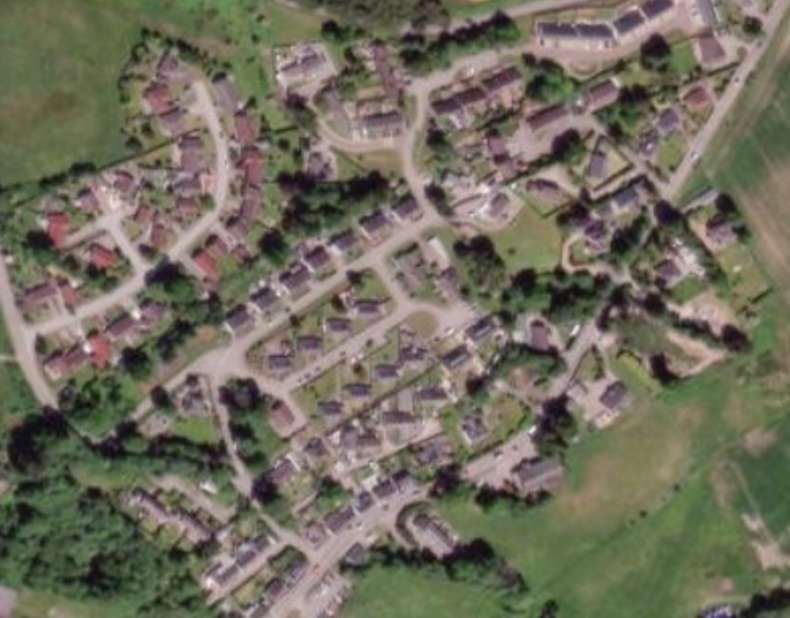
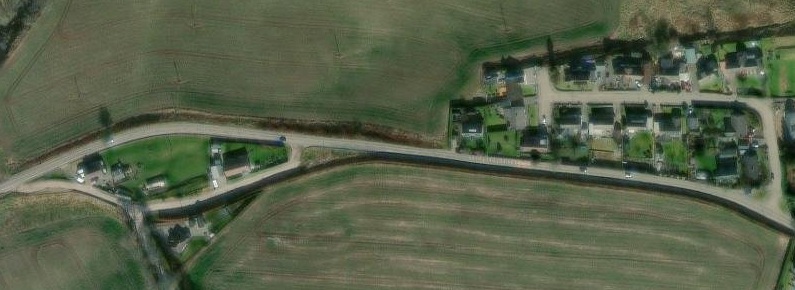
A further extract from the 25″ Ordnance Survey of 1904, published in 1906. This extract shows the brach leaving the main line just North of the Station and heading East. [17]The same area as shown on ESRI satellite imagery provided by the NLS, in the 21st century. [17]As the line curved to the East it was crossed at level by a track. [17]
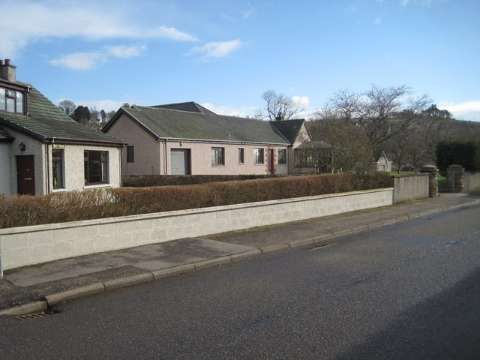
Additional sidings on the north side of the station provided locomotive facilities for the branch engine. The main engine siding gave access to a 50ft turntable, while a ‘kick-back’ spur ran into a single-road engine shed; another siding served as a coaling road. The station building was a typical Highland Railway timber-framed structure which was similar to its counterparts at Hopeman and Burghead, albeit with a second cross-wing at the left-hand end (when viewed from the platform). The resulting building was thus an ‘H-plan’ structure with a central block flanked by two cross-wings.” [1: p51]
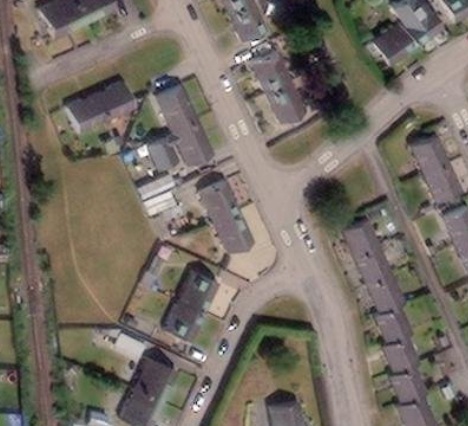
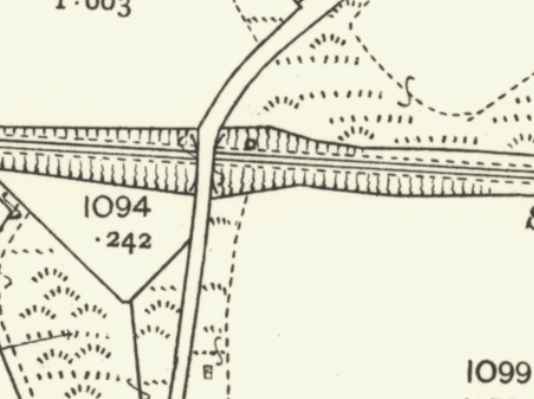
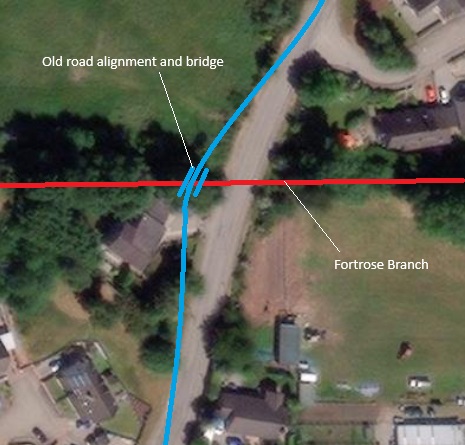
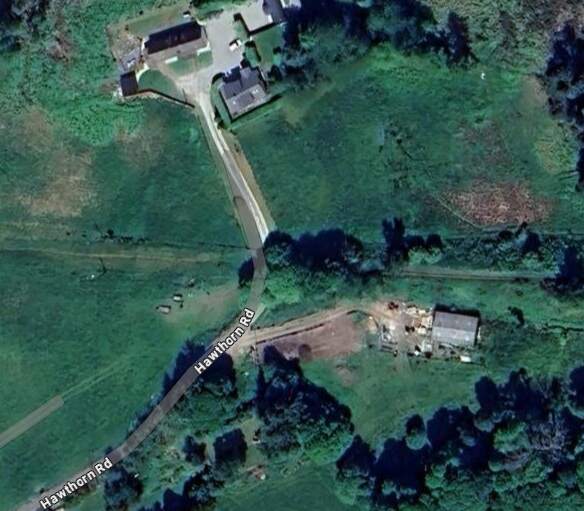
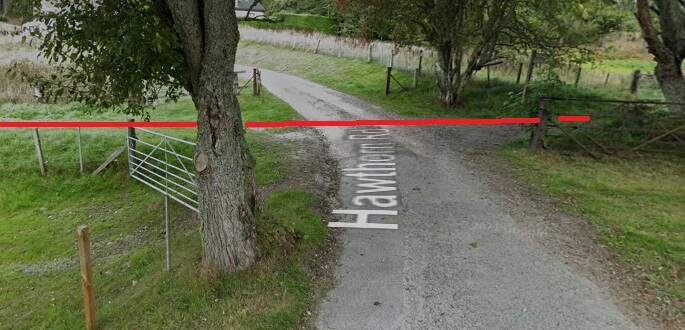
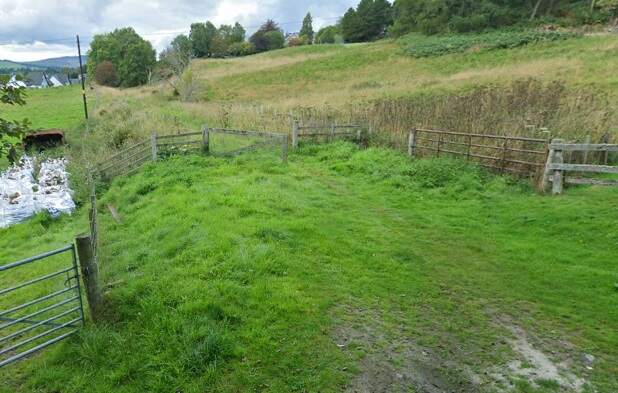
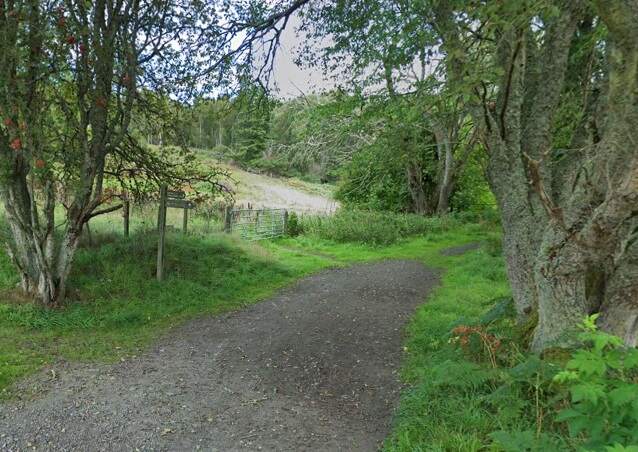
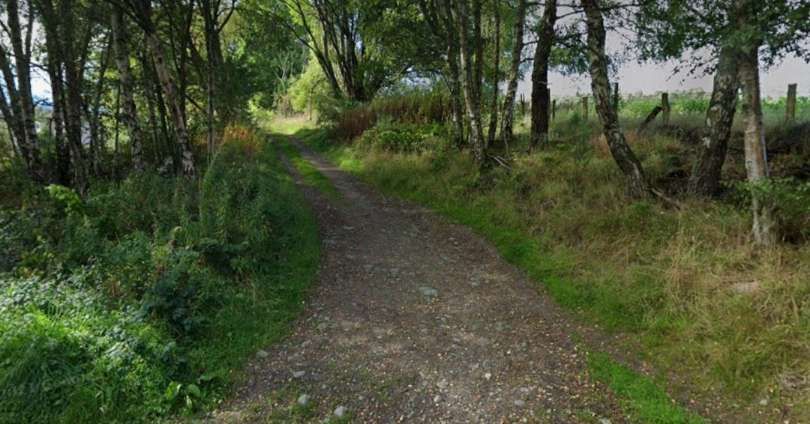
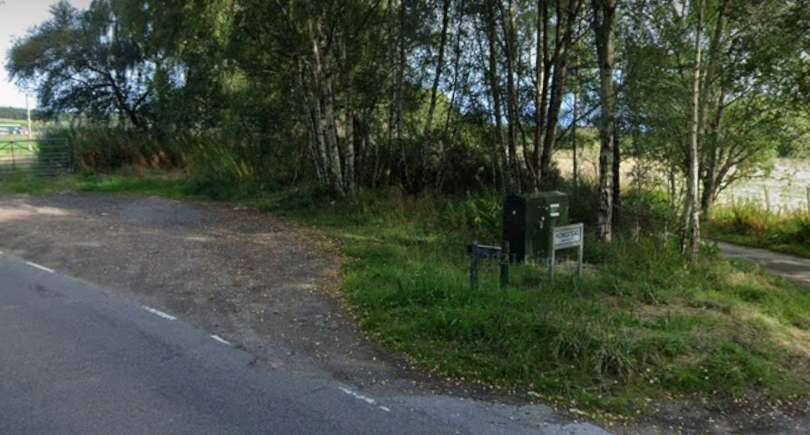
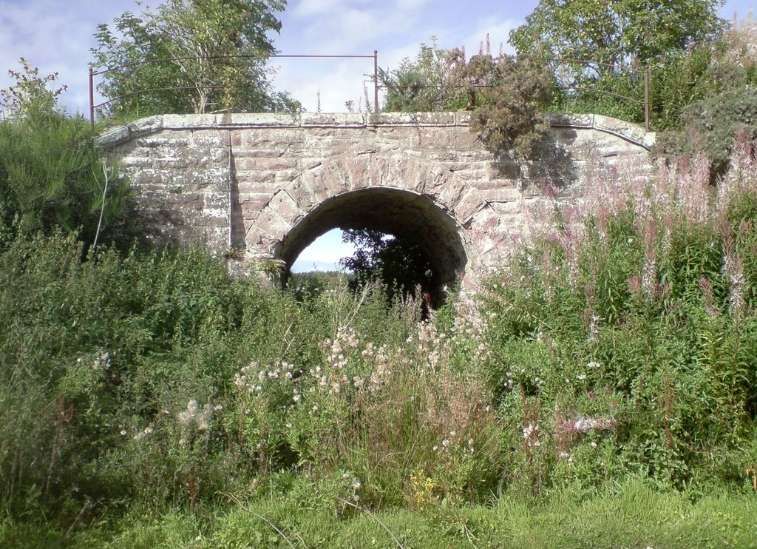
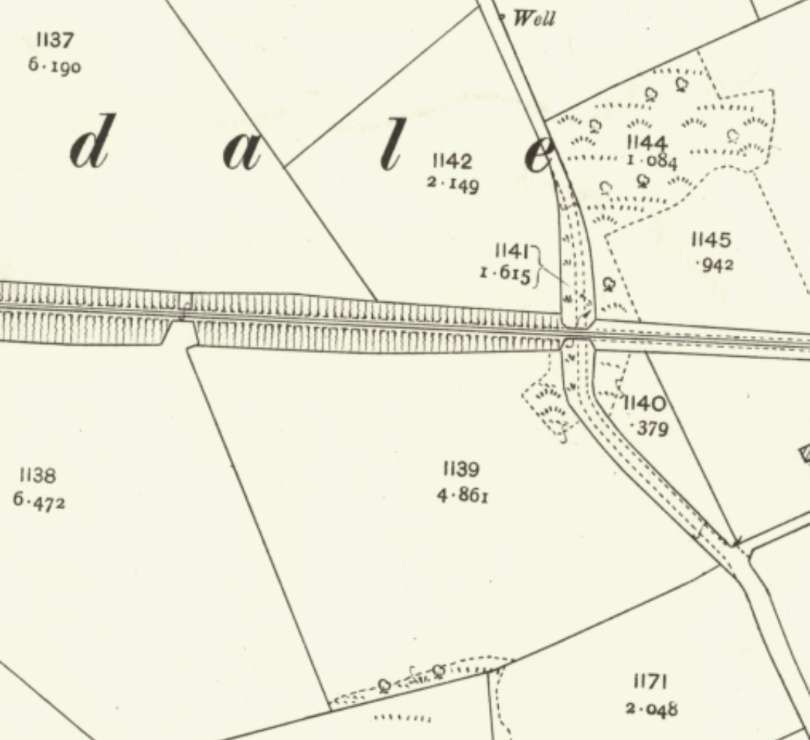
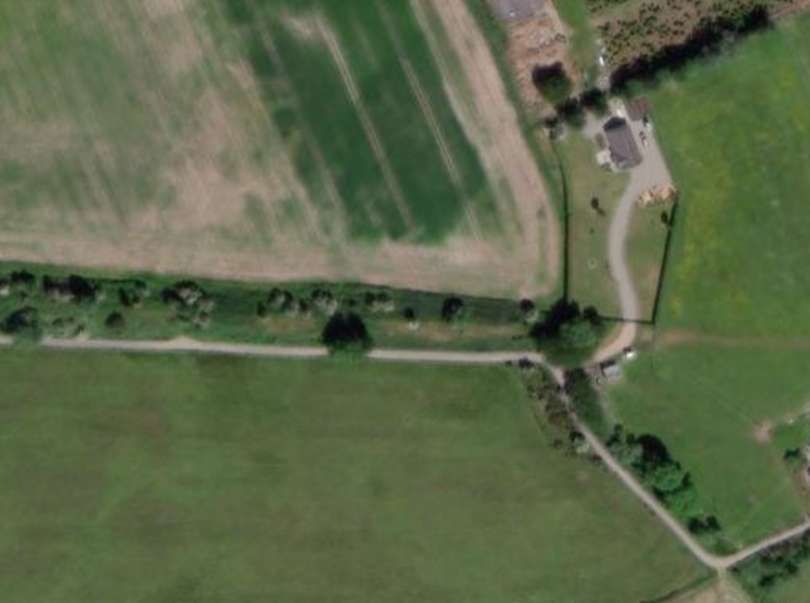
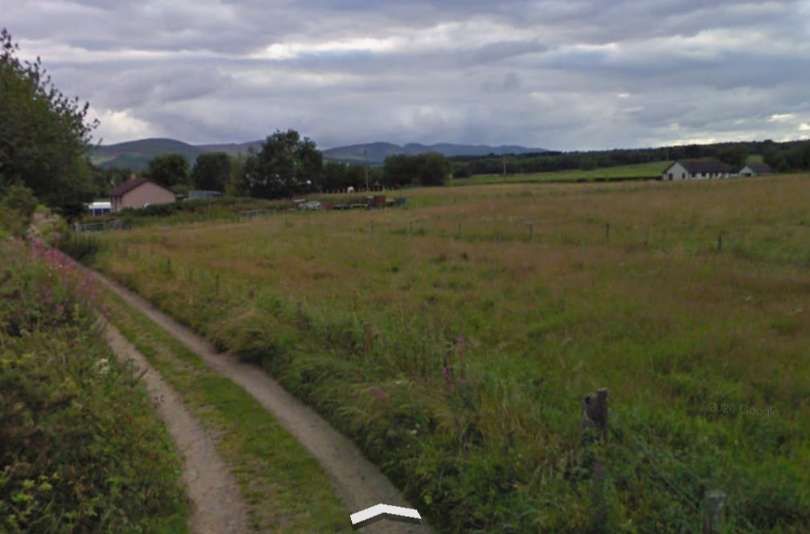
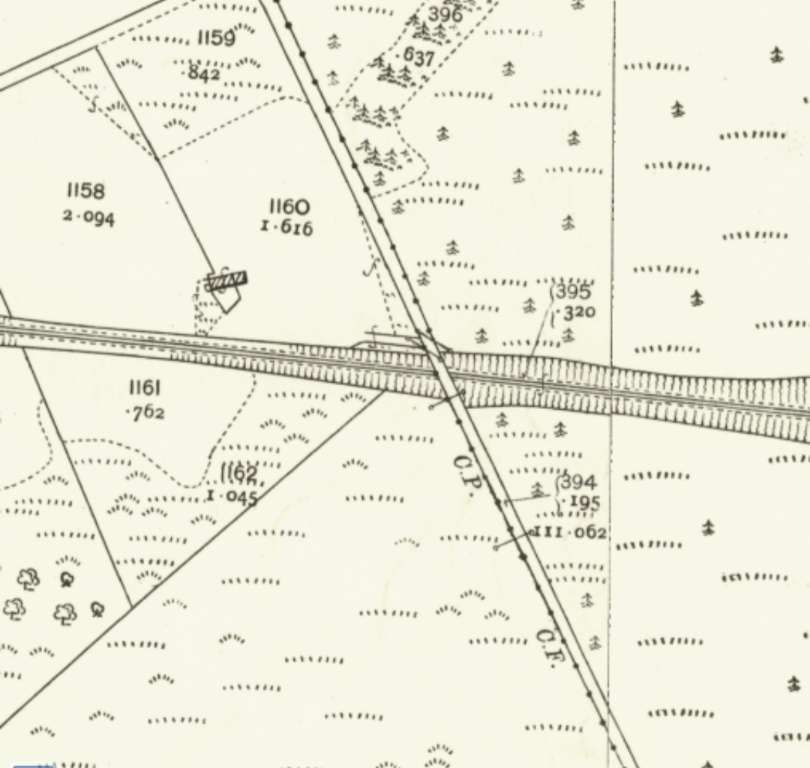
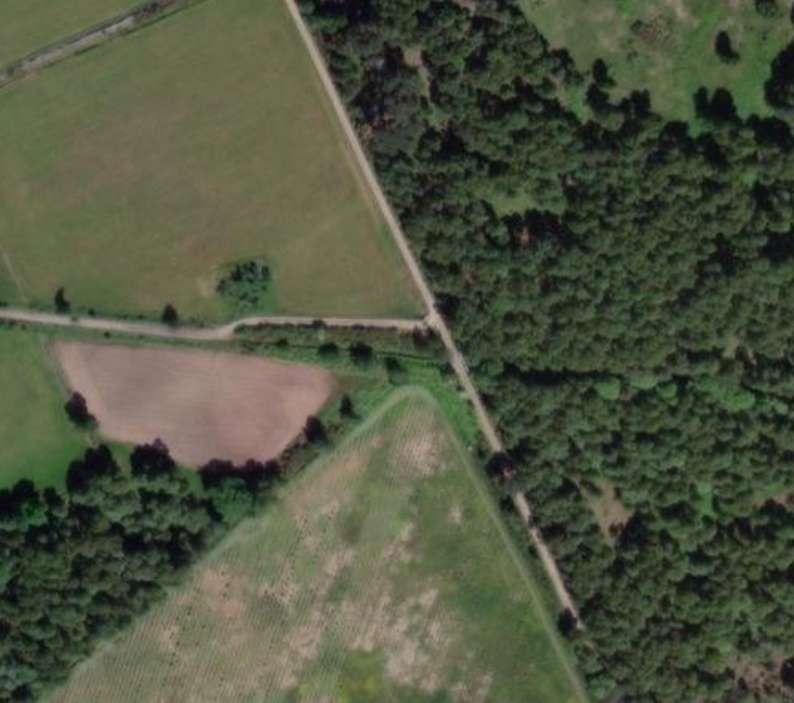
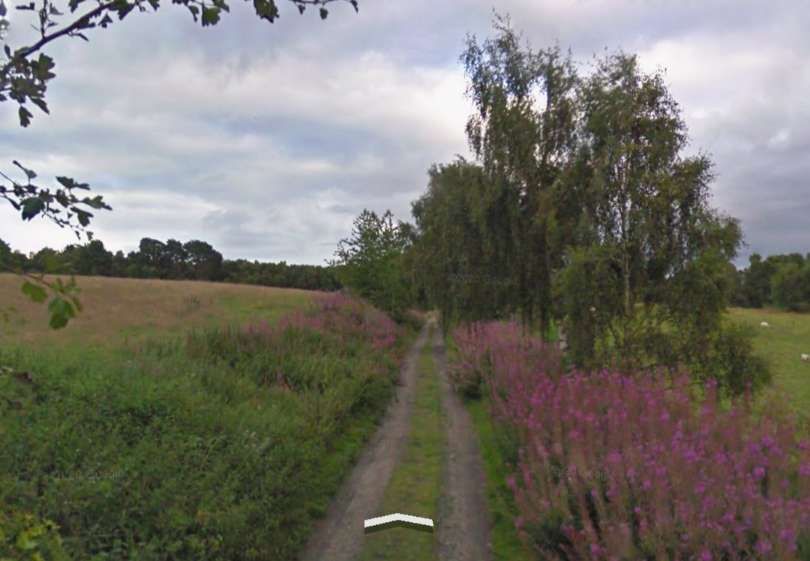
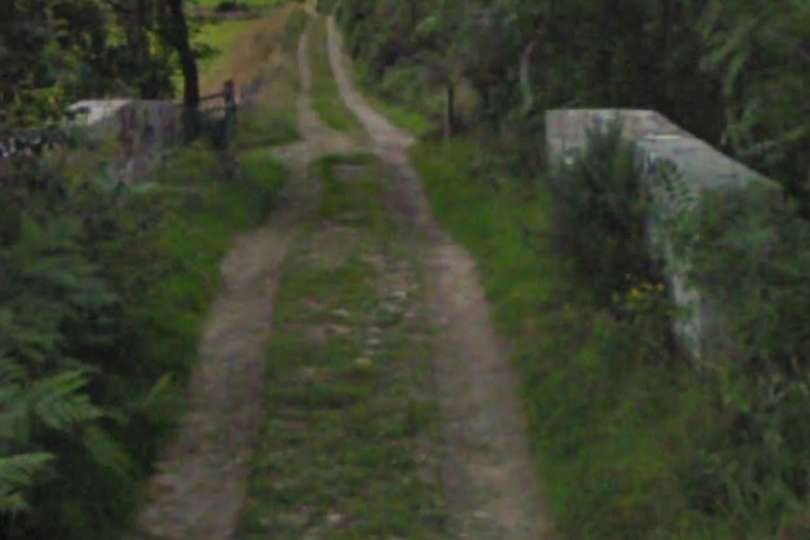
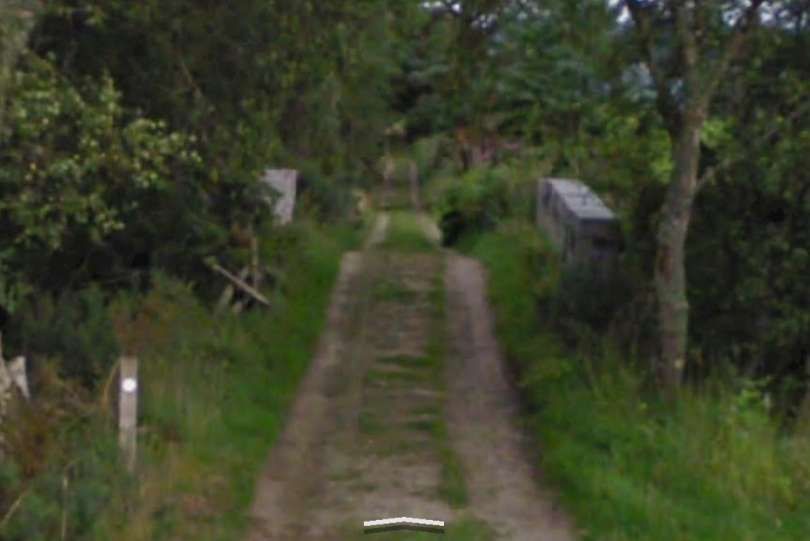
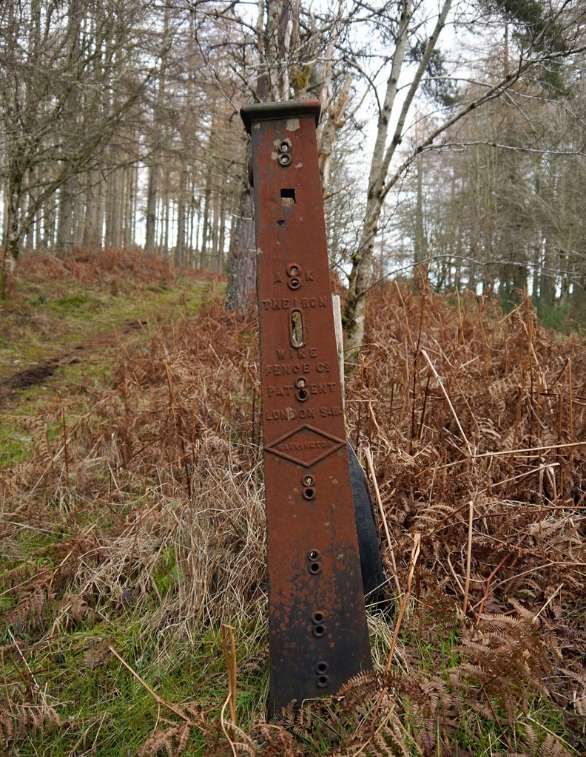
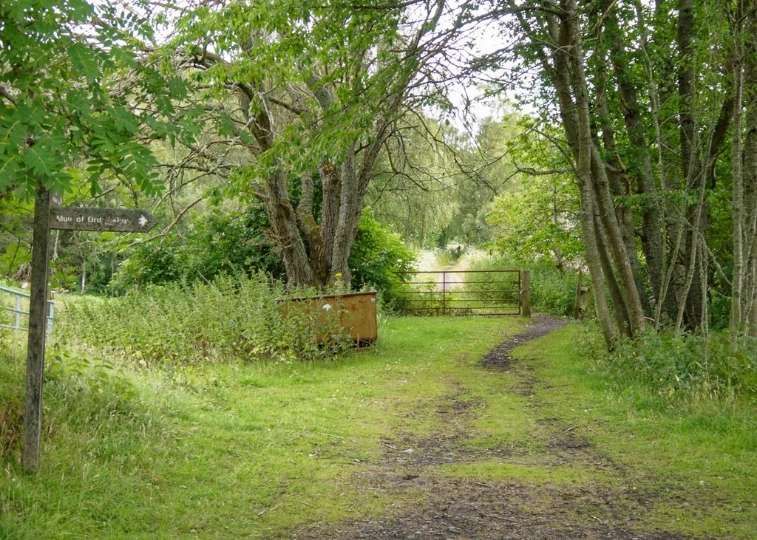
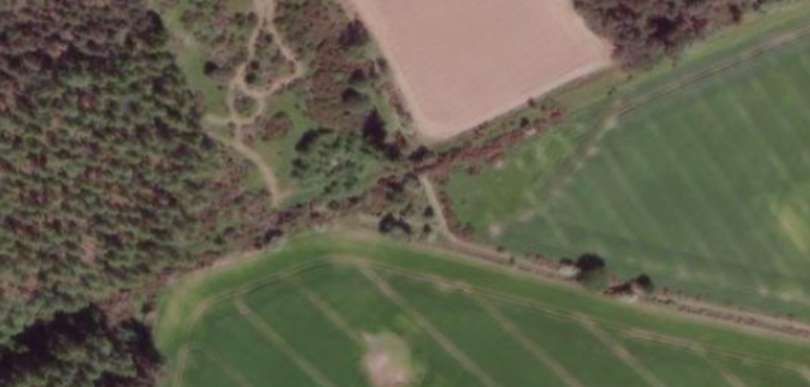
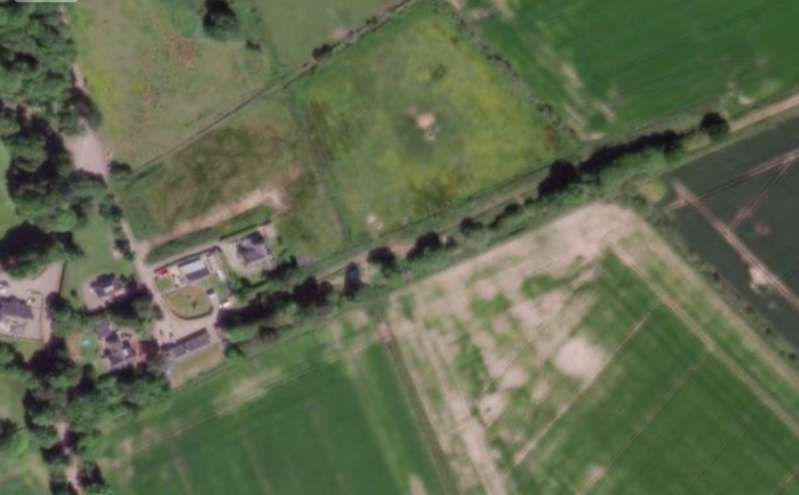
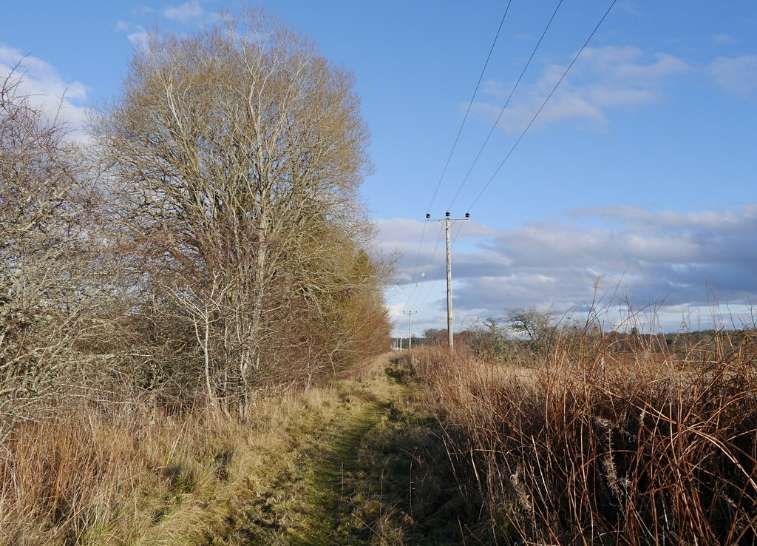
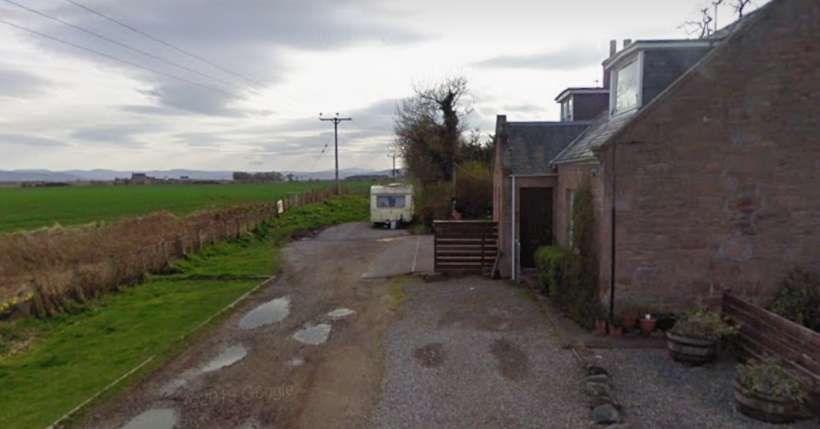
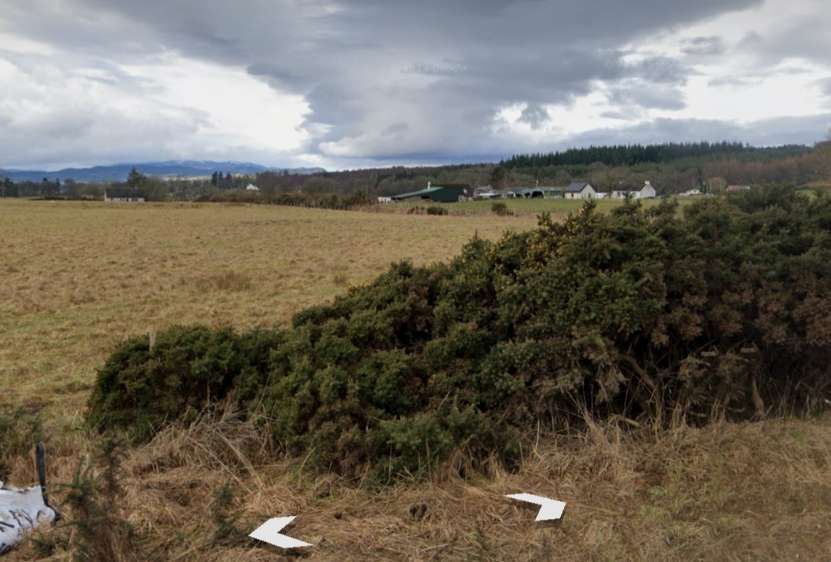
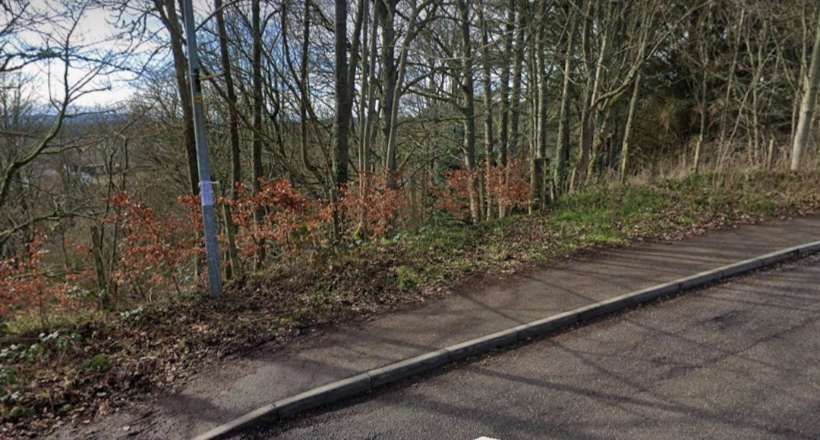
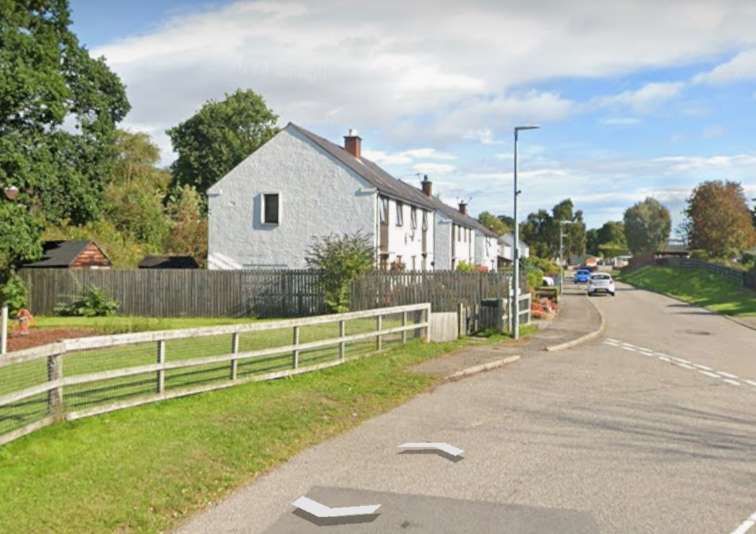
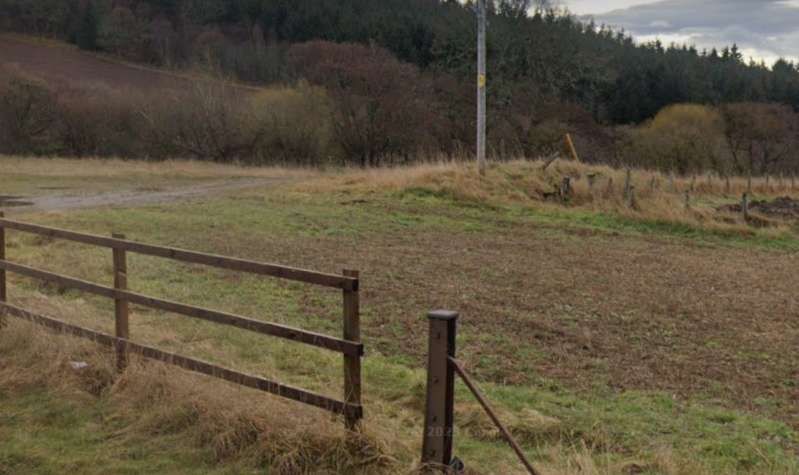
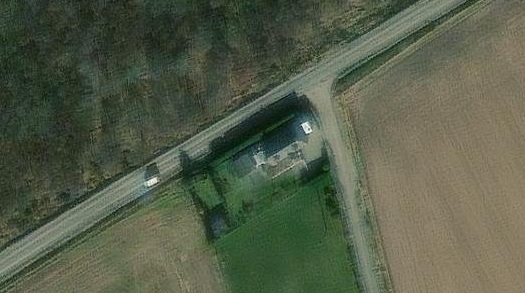
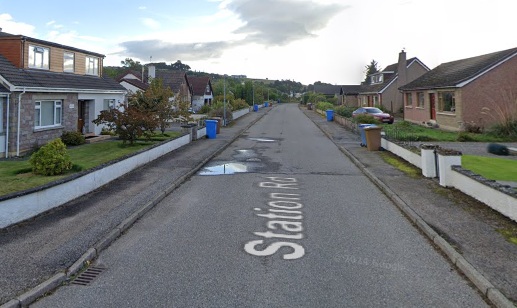
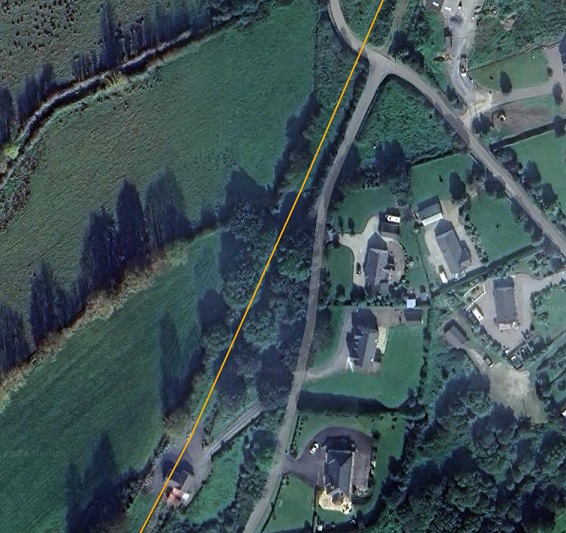
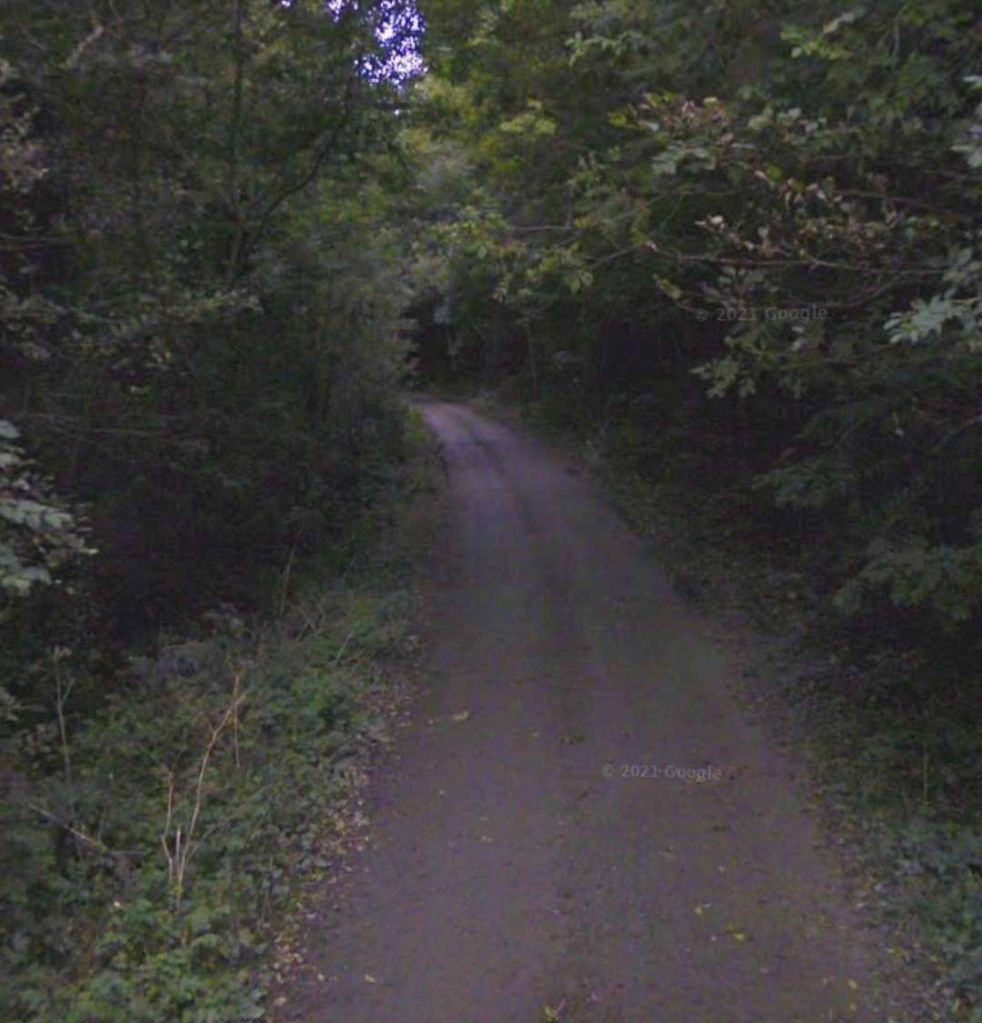
In the 21st century, the track has been replaced by a modern estate road – Highfield Circle. The road entering bottom-centre is Fairmuir Road, that leaving top-right is part of Highfiels Curcle. These two roads approximately follow the line of the old railway. [17]A short distance to the East the line was in cutting and bridged by a minor road. [17]ESRI satellite imagery from the NLS shows the realigned road in the 21st century. The approximate line of the old road (blue) and railway (red) have been superimposed on the image. The modern road is named ‘Balvaird Road’. [17]A short distance further East the line was crossed by a farm access raod at a level-crossing. [18]The same location in the 21st century as shown on Google Maps satellite imagery. The lane is now named ‘Hawthorne Road’. [Google Maps, March 2025]Looking North along Hawthorne Road, across the line of the old railway (marked approximately by the red line). Google Streetview, September 2021]Looking West from Hawthorne Road along the line of the old railway towards Muir of Ord. The line of the railway is gated by the single-bar gate and it ran from there towars the distant trees. [Google Streetview, September 2021]A footpath follows the line of the old railway to the East of Hawthorne Road. [Google Streetview, September 2021]
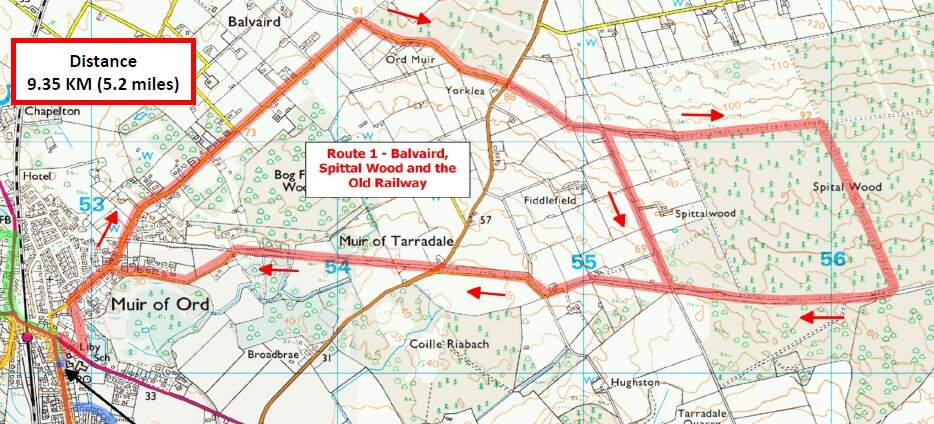
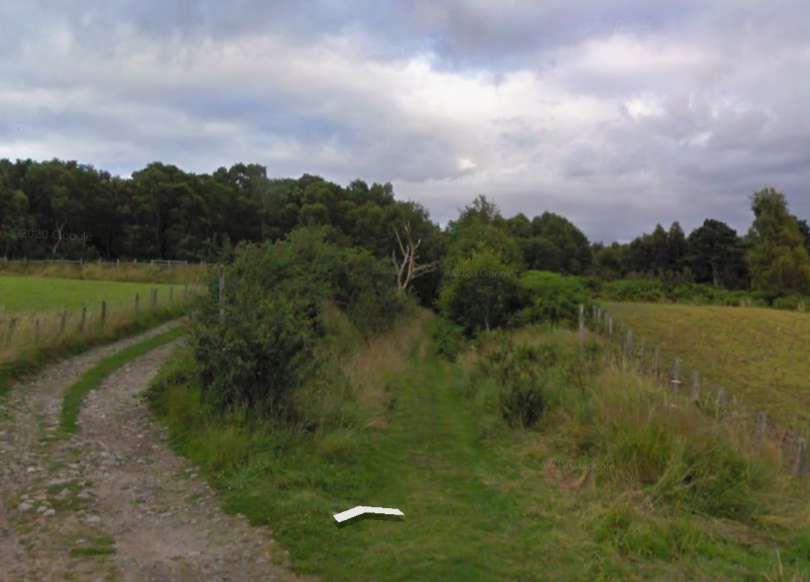
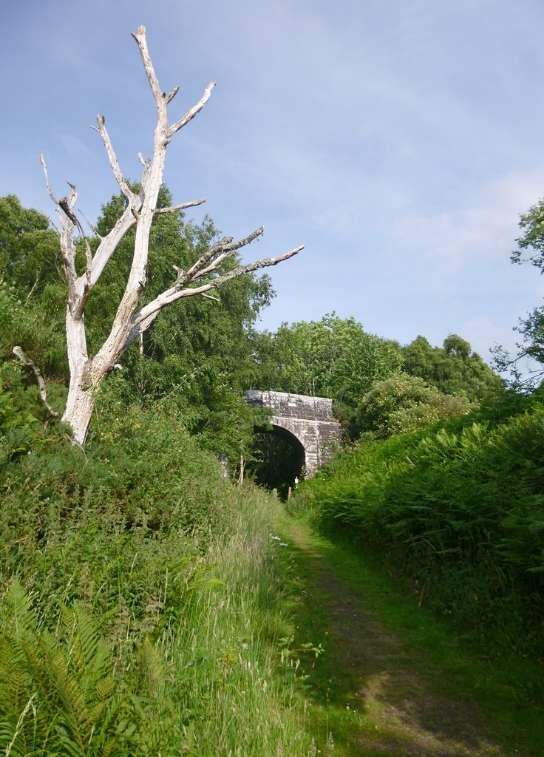
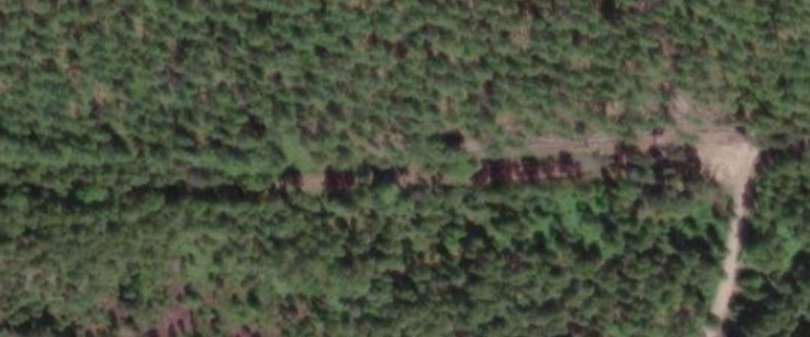
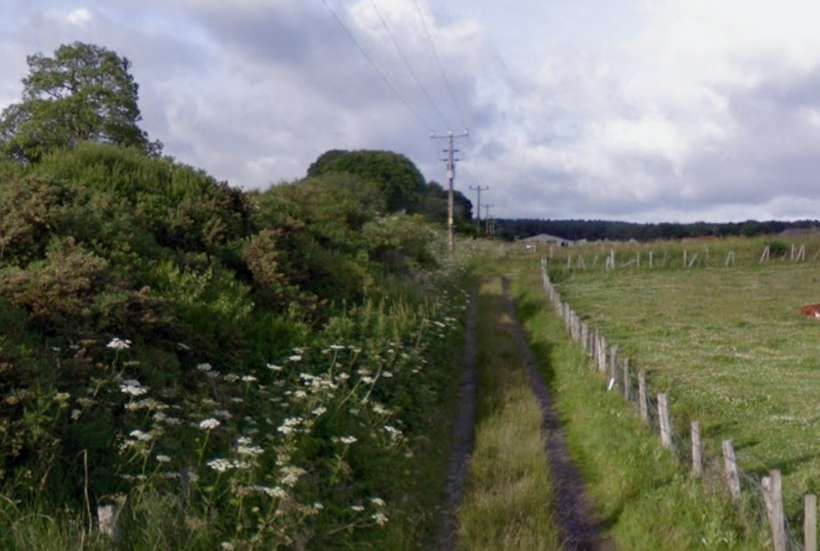
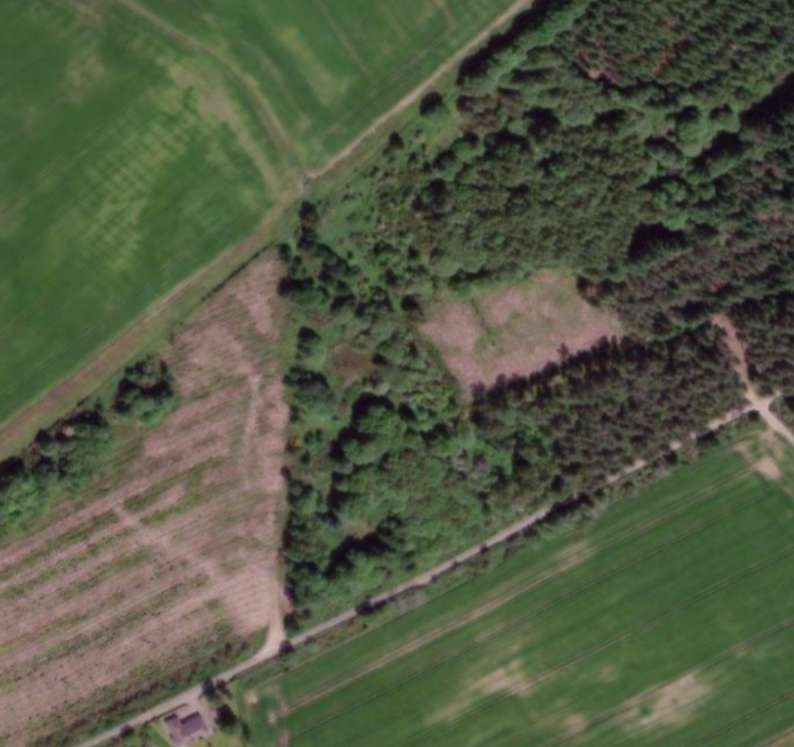
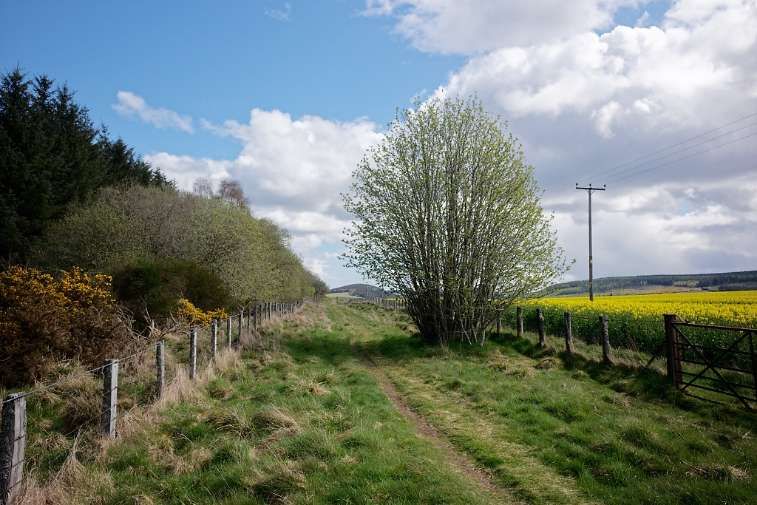
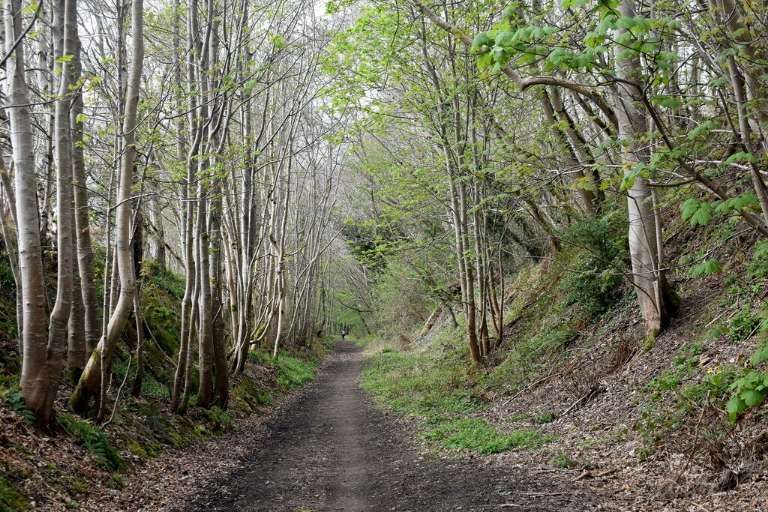
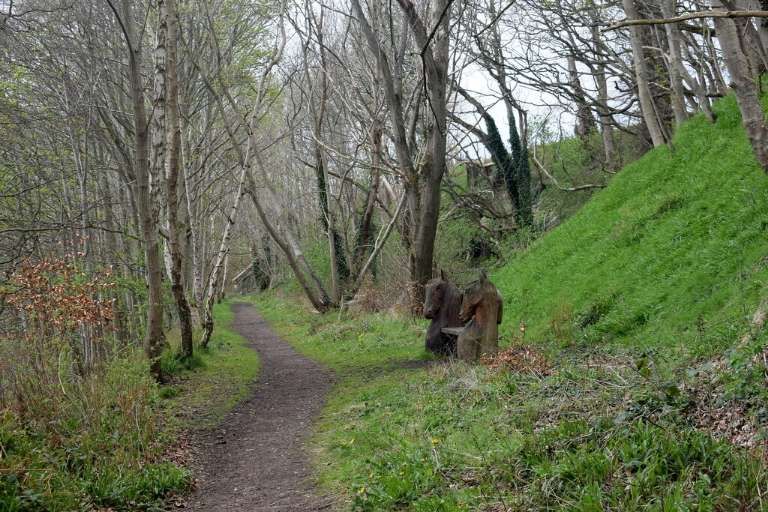
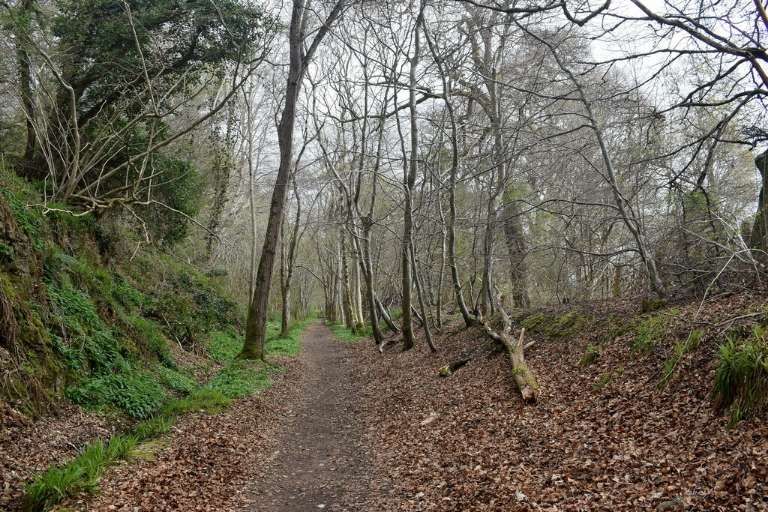
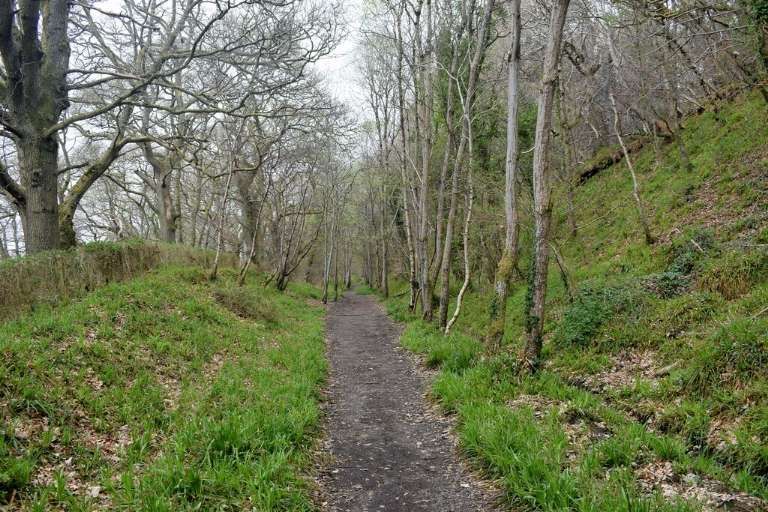
From Hawthorne Road eastwards a public footpath follows the line of the old railway. There is a leaflet of walks for the area around Muir of Ord. One of the four walks included in the leaflet includes a length of the old railway. [19]
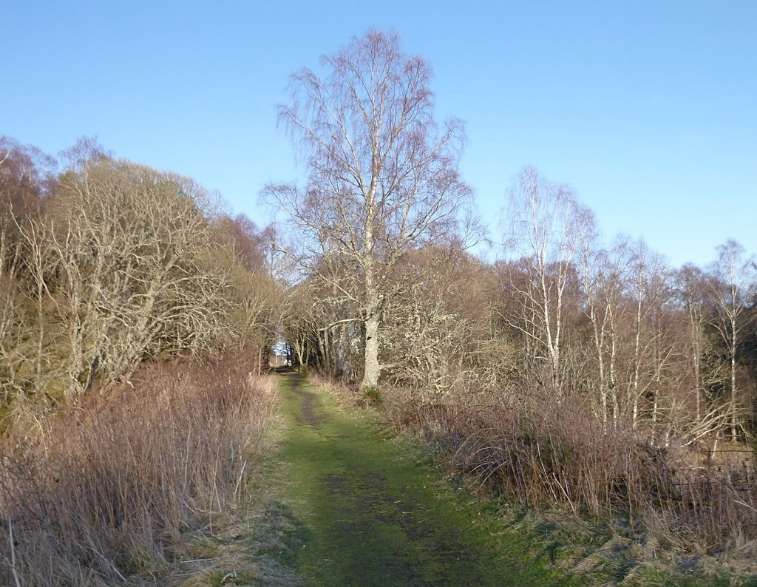
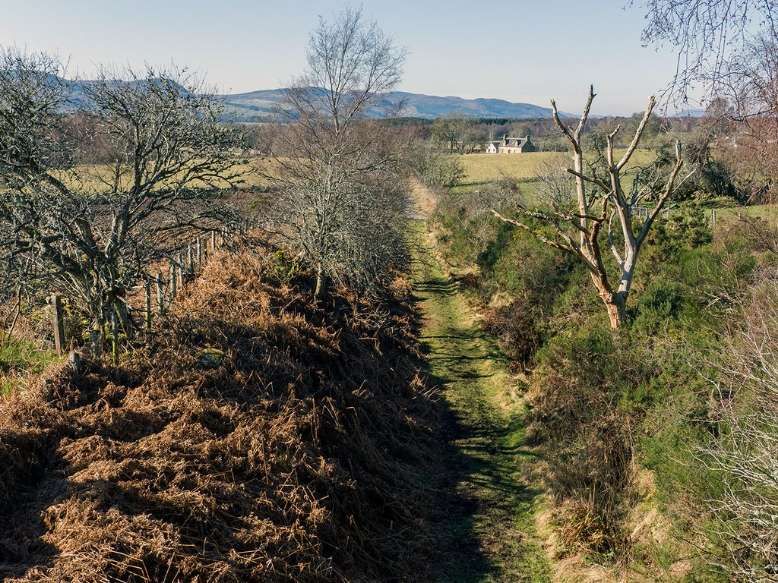
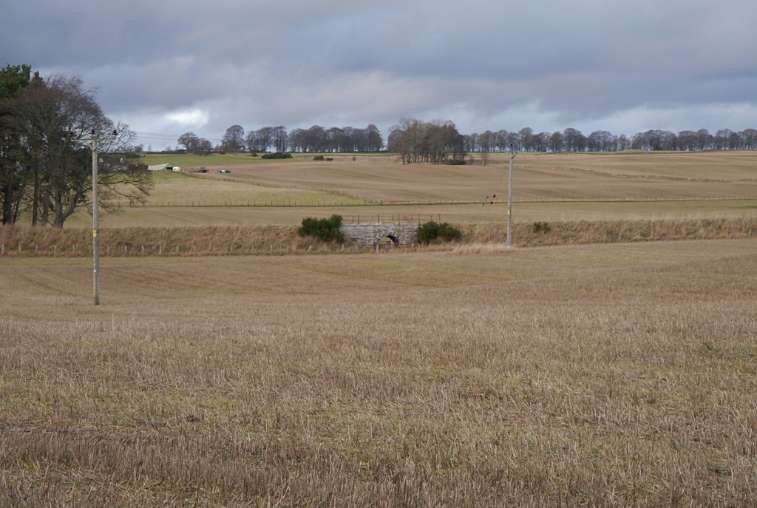
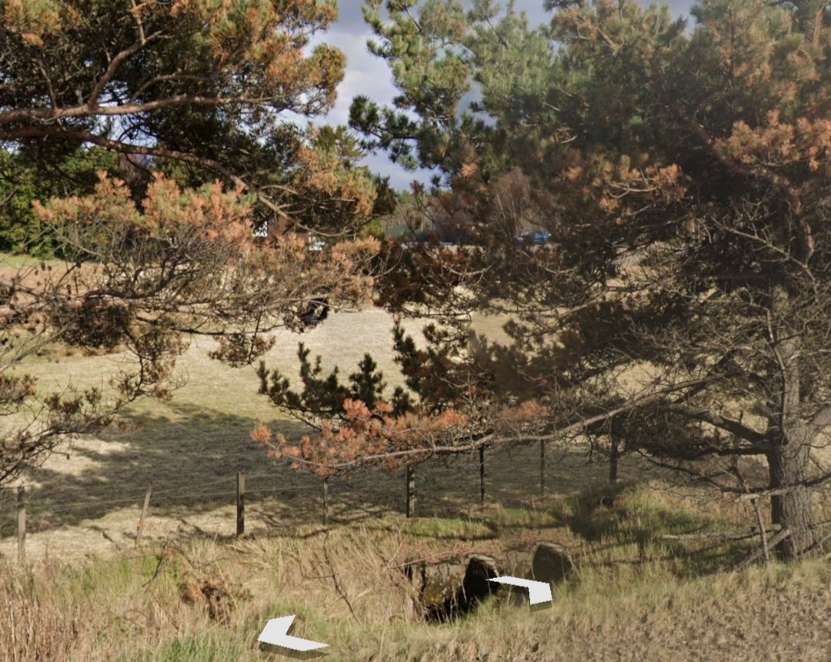
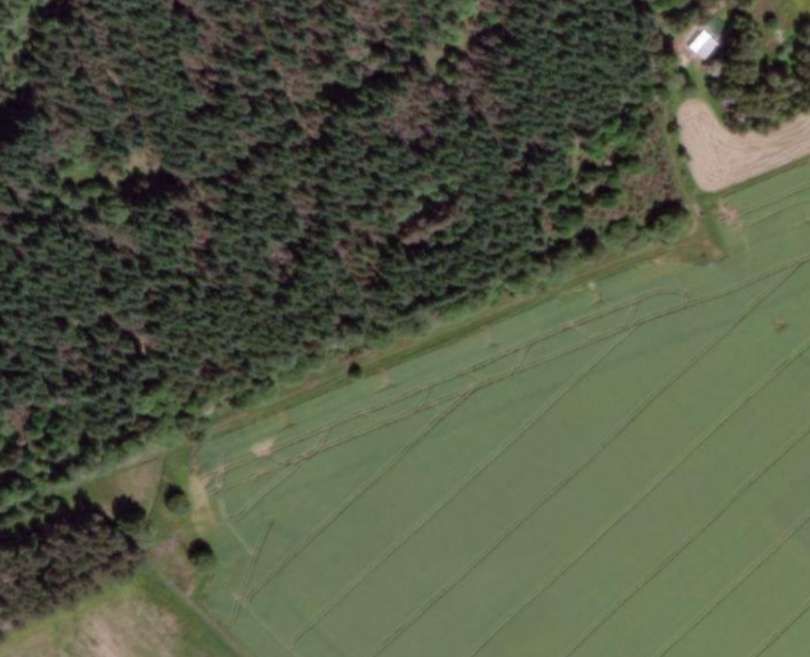
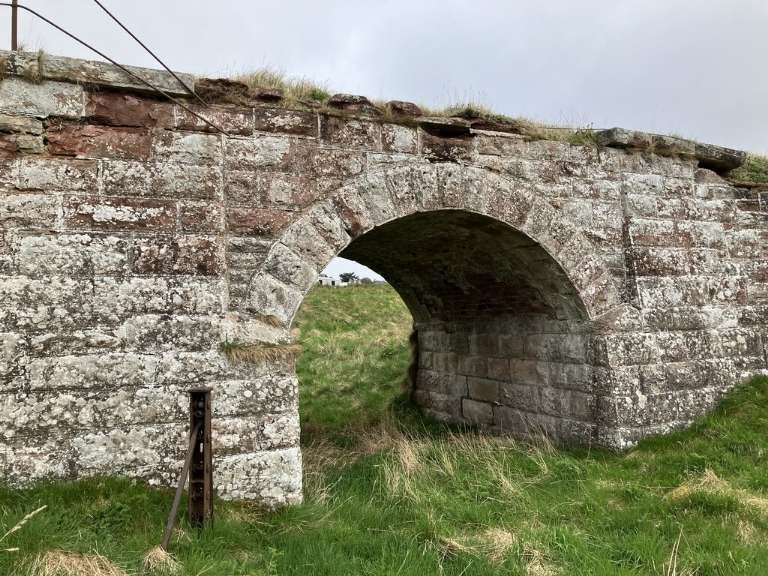
For a short length the old railway formation has been ploughed back into farmland. The next image looks back along the line of the old railway from a point further to the East.
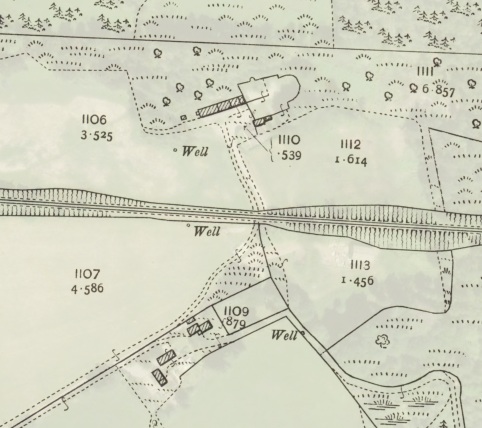
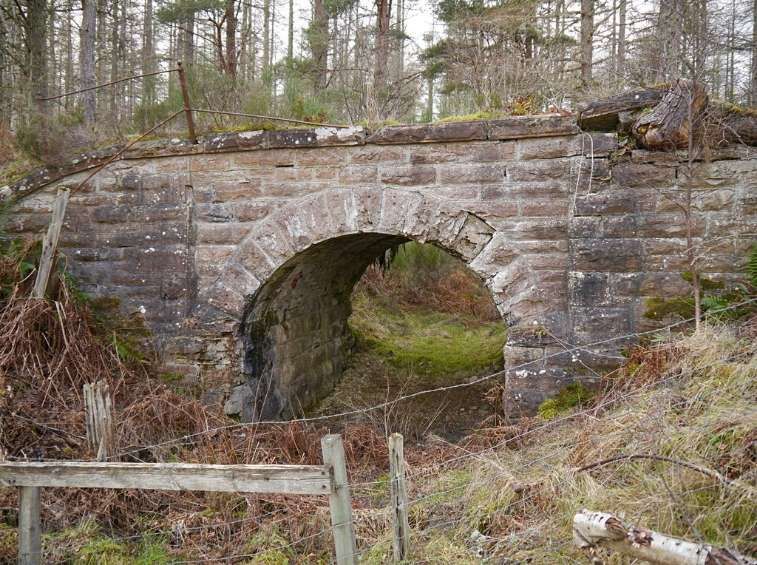
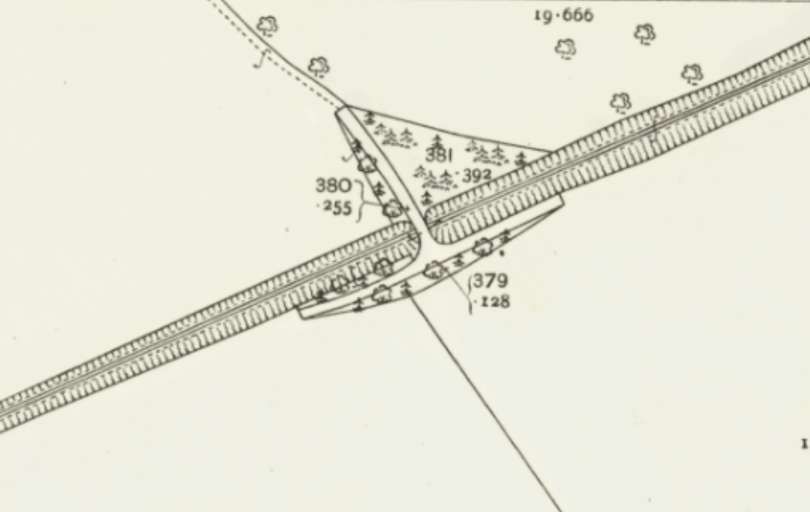
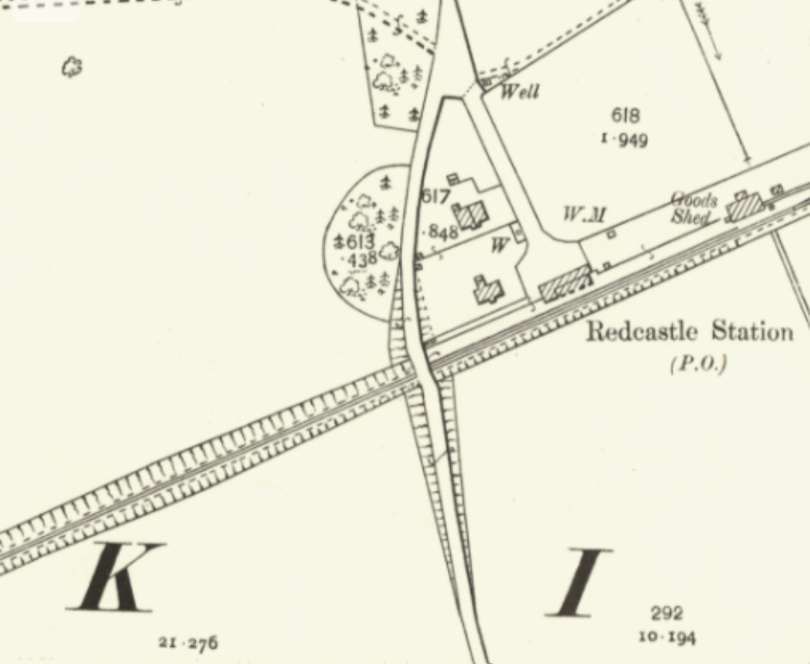
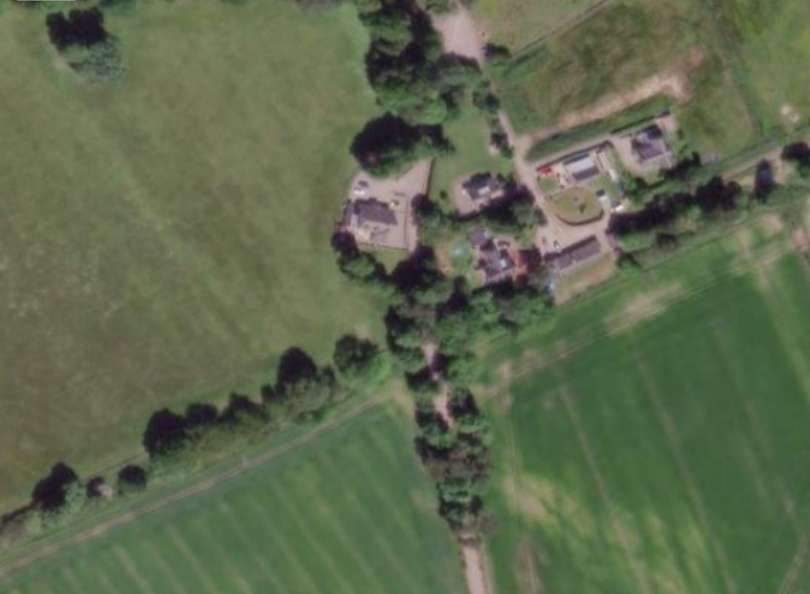
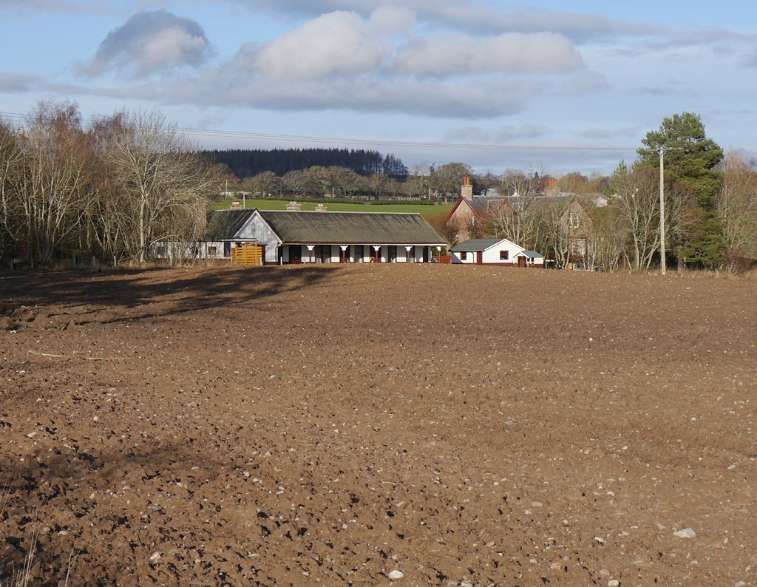
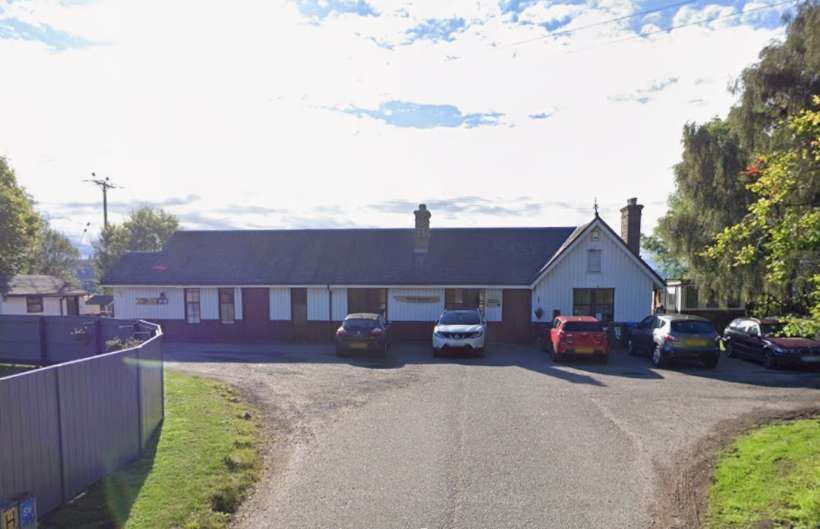
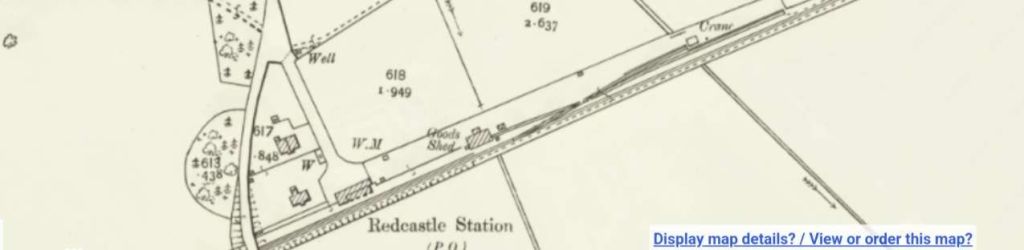
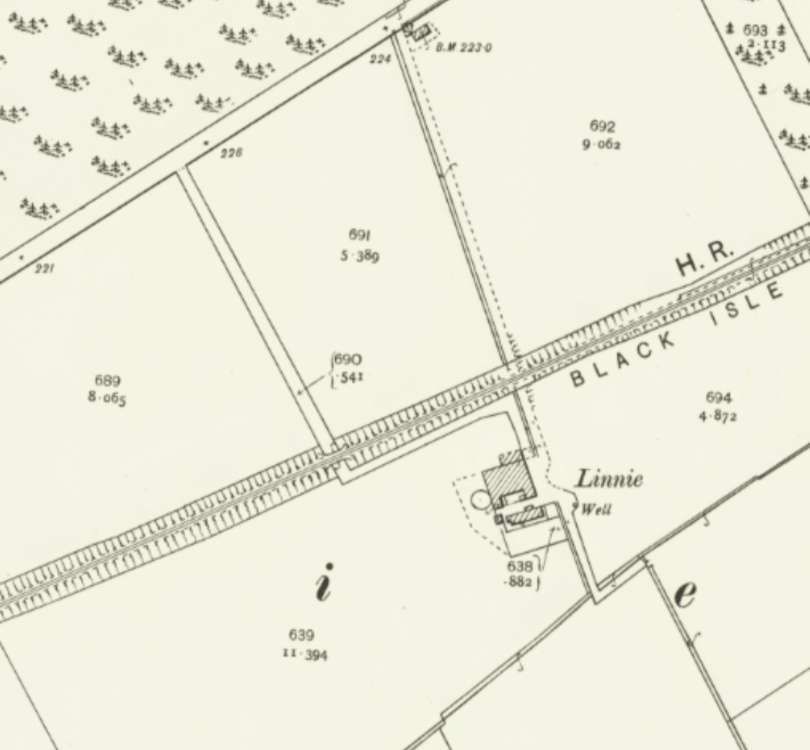
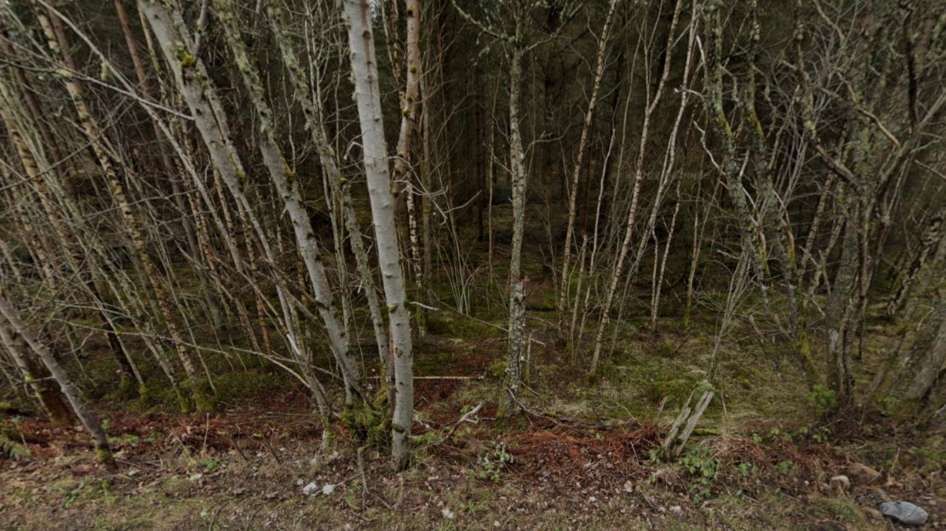
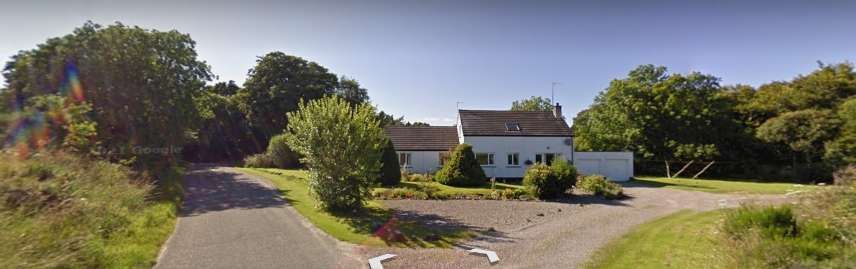
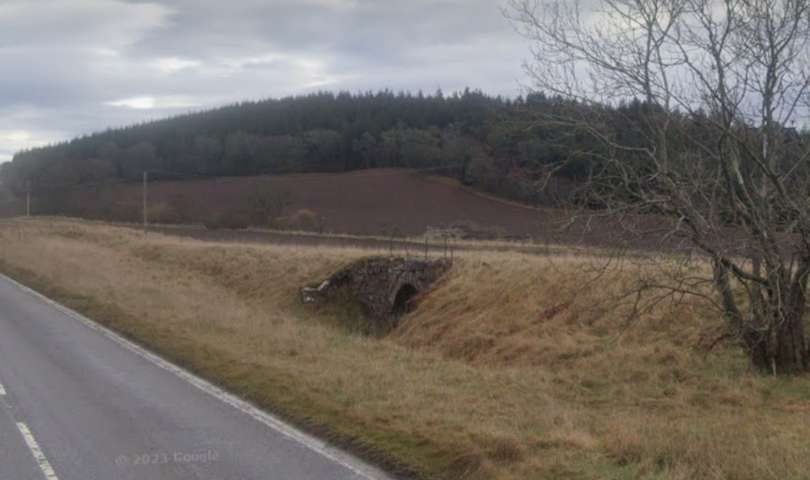
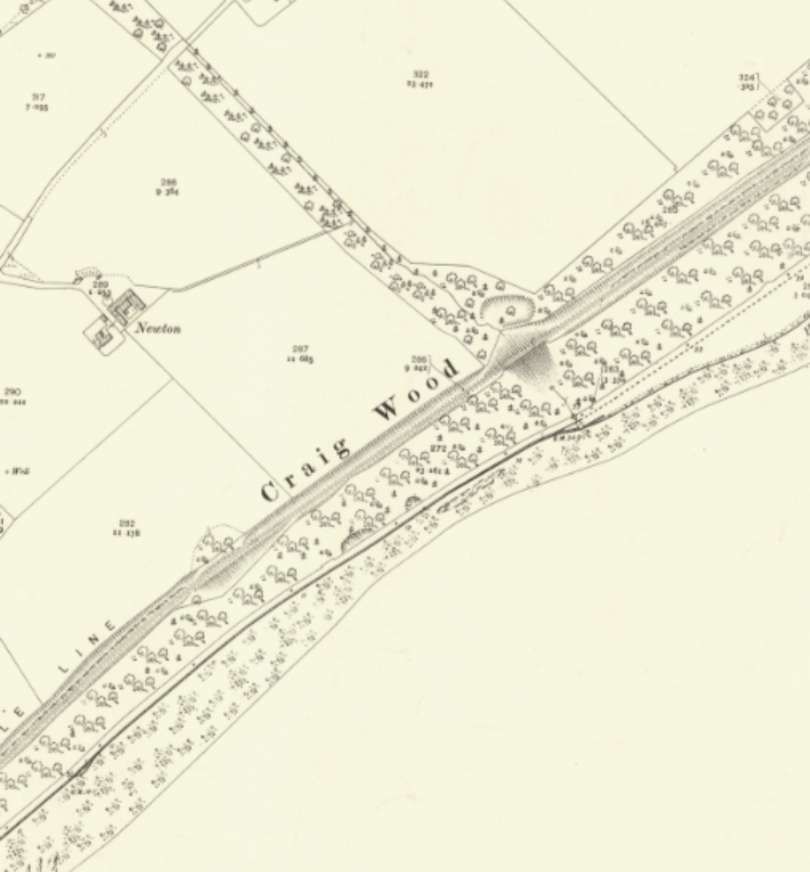
After passing under the accommodation bridge, the old line ran east in cutting through what is now Spital Wood. Then, ” curving east-north-eastwards,” Jenkins tells us, “the railway continued to Redcastle (3 miles 58 chains), where the single-platform station was equipped with a full range of accommodation for goods, passengers, and livestock traffic.” [1: p49]
“Beyond [Redcastle], trains climbed towards the 250ft contour, the line’s modest summit of around 260ft above mean sea level being sited near the next station at Allangrange. Situated some 5 miles 39 chains from the junction, Allangrange was another fully-equipped station with provision for a range of goods traffic.” [1: p49]
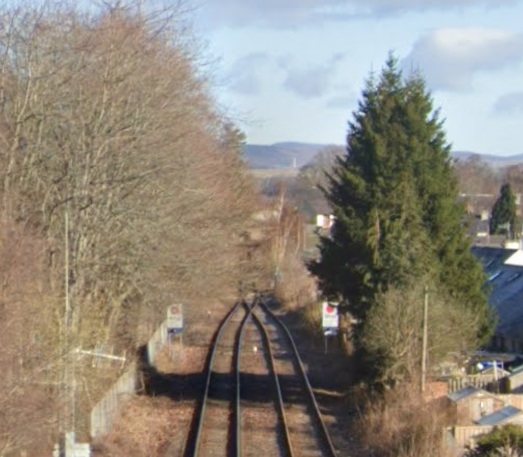
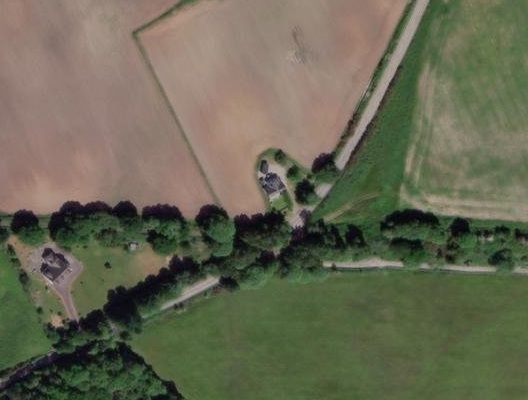
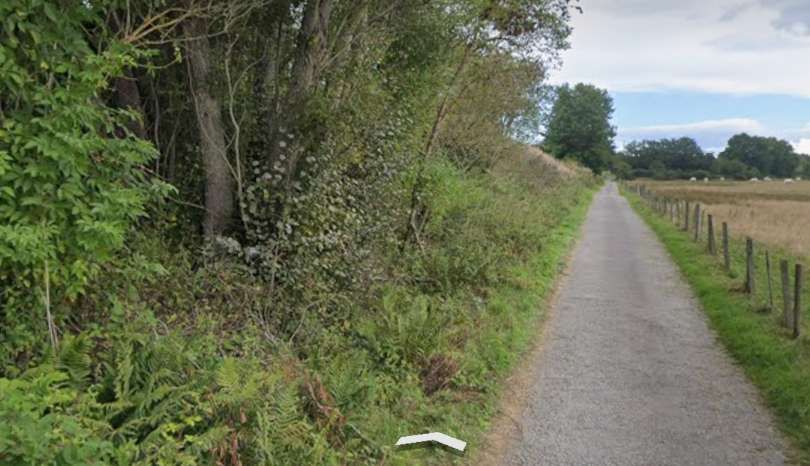
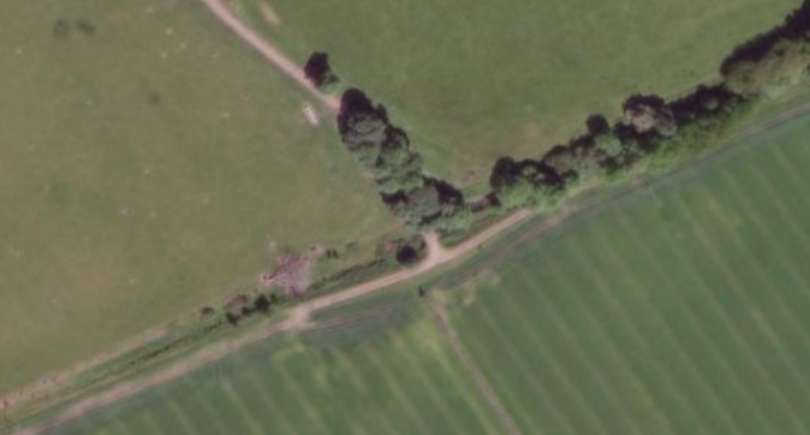
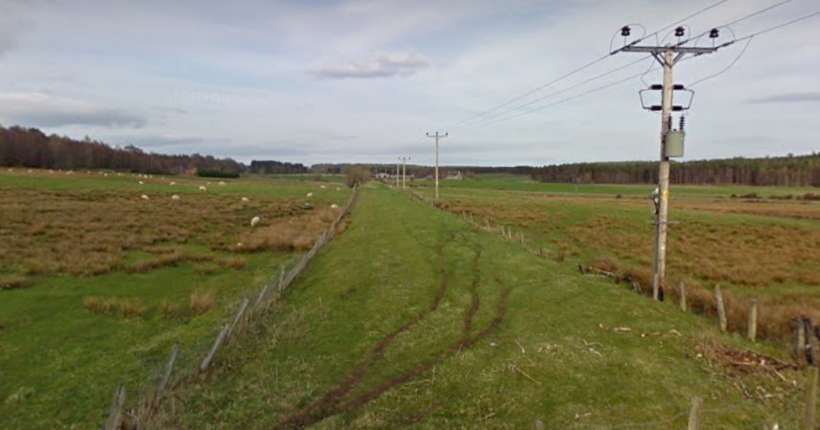
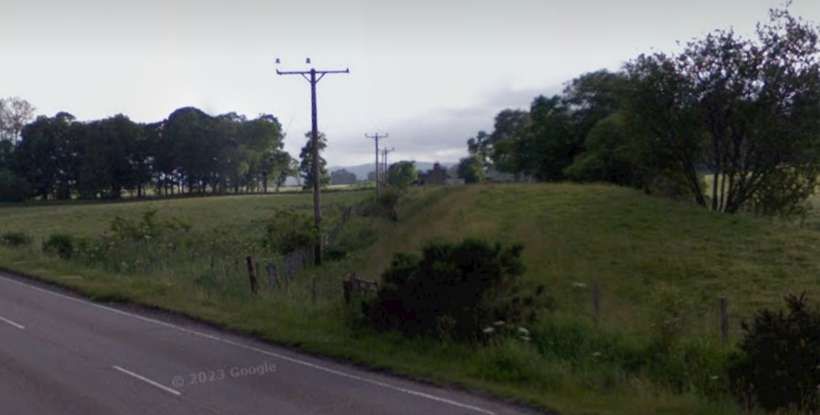
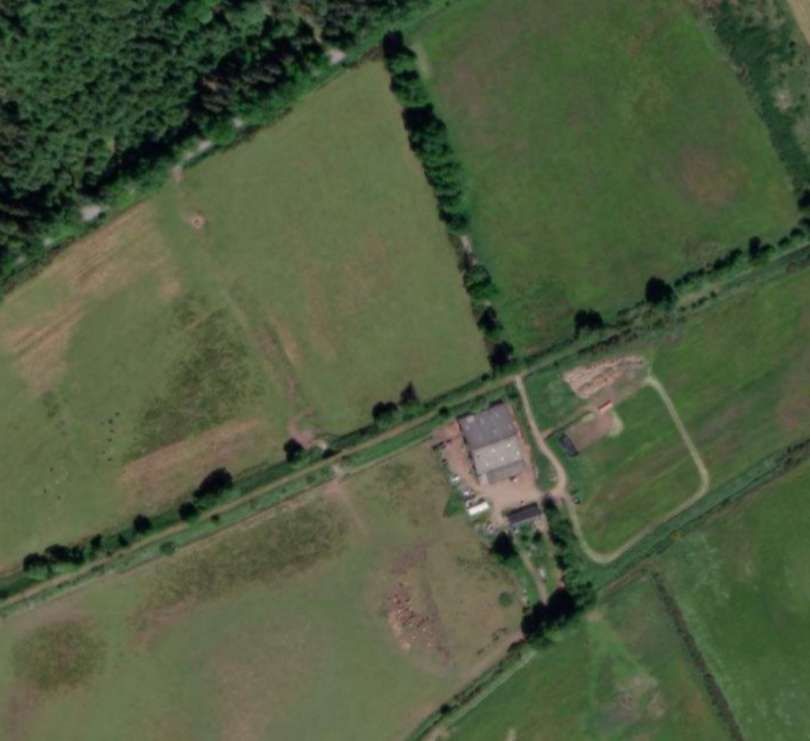
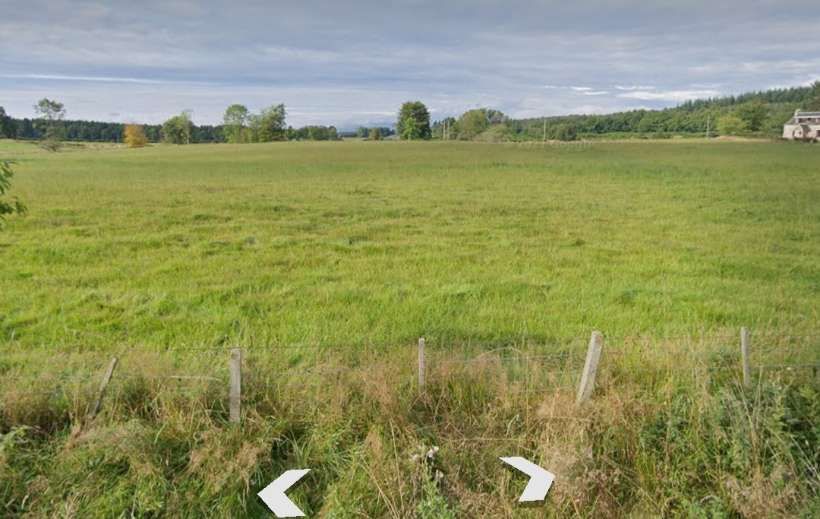
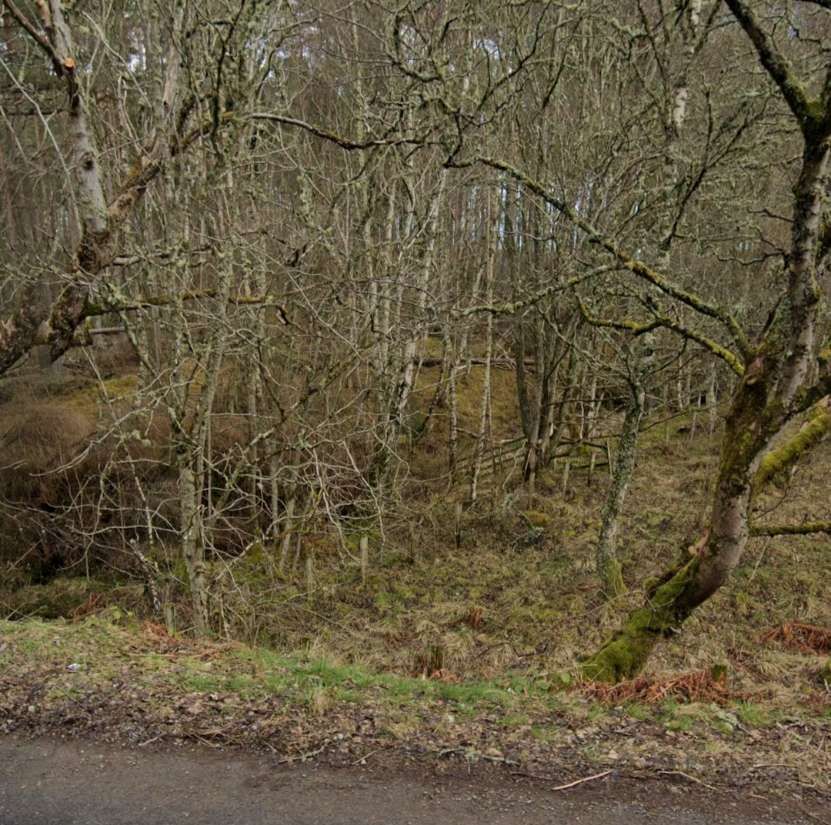
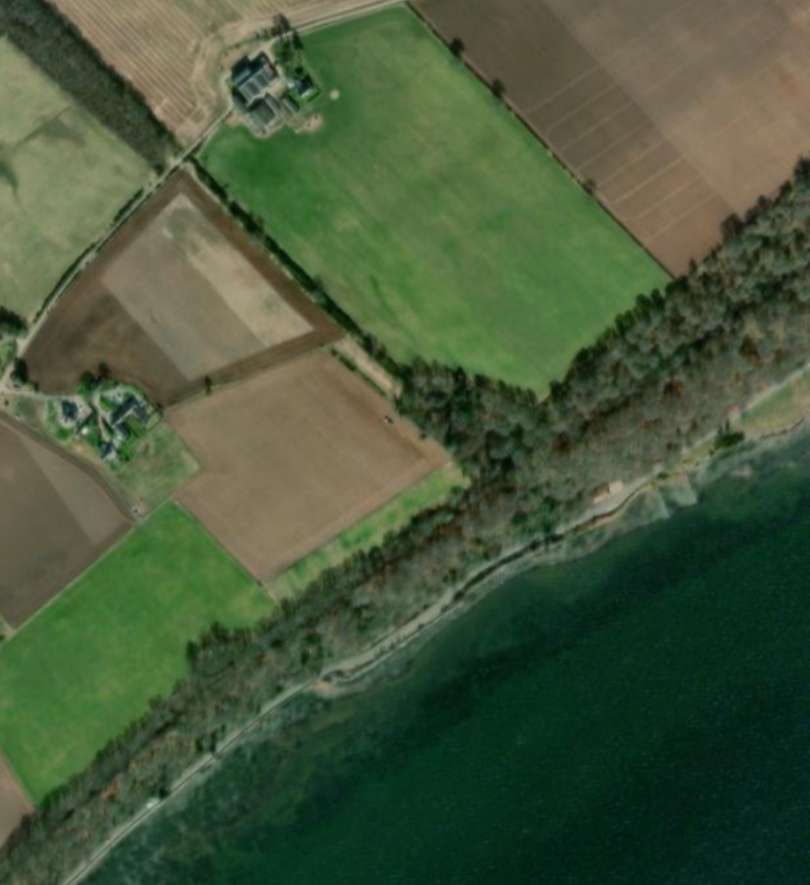
The line continued in an East-northeast direction towards Allangrange Railway Station. [28]The same area as shown on the 21st century NLS ESRI satellite imagery. [28]Looking Southwest along the old railway towards Redcastle Station from the minor road towards the left of the satellite image above. [Google Streetview, April 2011]Looking Northeast along the old railway towards Fort from the minor road towards the left of the satellite image above. [Google Streetview, April 2011]Looking Southwest along the line of the old railway from the A832. [Google Streetview, March 2023]Looking Northeast along the line of the old railway from the A832. [Google Streetview, July 2008]Again, still heading East-northeast, trains drew closer to Allangrange Railway Station. [29]The same area in the 21st century. [29]
The line curved round from an East-northeast direction to and easterly alignment before entering Allangrange Railway Station.
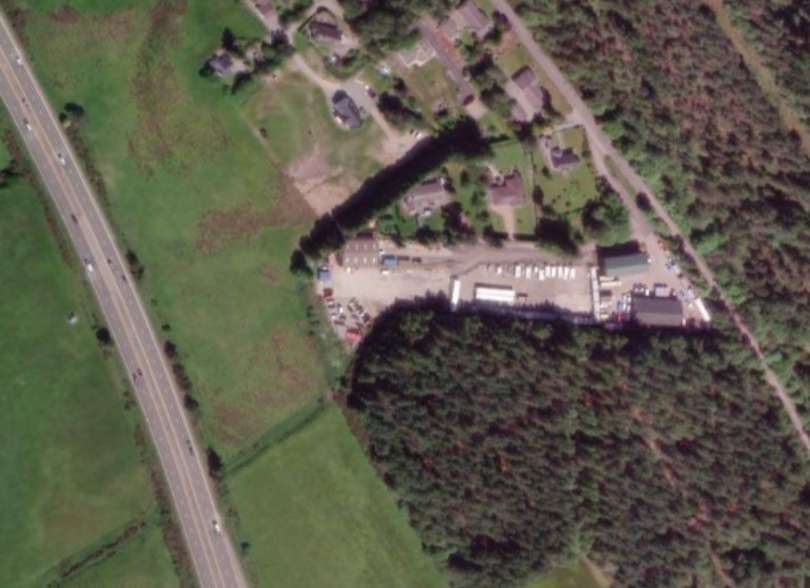
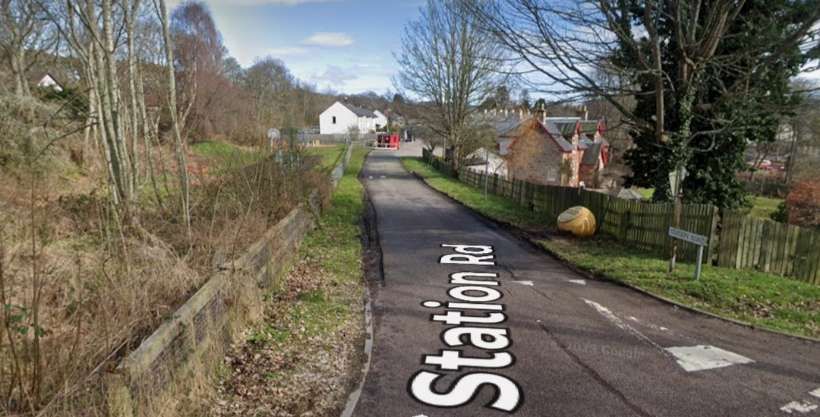
From the point at which the old line crossed another lane, this is the view back towards Redcastle Station. The tree at the centre of the image on the horizon stand immediately adjacent to the line of the railway. [Little can be seen looking towards Allangrange Railway Station from the minor road as the rail alignment close to the road is overwhelmed by vegetation. [Google Streetview, September 2021]The line curved round to run in an easterly direction through Allangrange Railway Station which had a reasonable sized goods yard to the West of the passenger facilities. [30] The same location in the 21st century. The major road at the West end of the old station site is the modern A9 dual carriageway. [30]This is the view East along the line of the old railway from the A9 dual carriageway. [Google Streetview, March 2023]Noe looking East from the A9 through the trees and through the site of Allangrange Railway Station. [Google Streetview, March 2023]Looking West from the old A9 into Allangrange Station site. [Google Streetview, March 2023]Looking East from the old A9 towards Fortrose. [Google Streetview, March 2023]
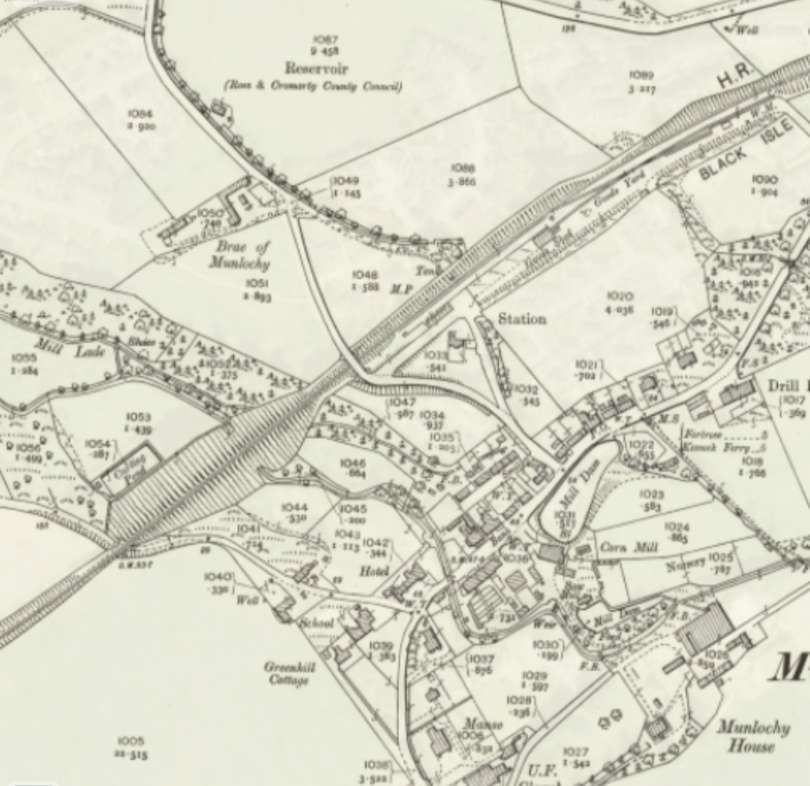
Beyond Allangrange Station, and heading east-north-eastwards again, “the single-line railway descended towards Munlochy (8 miles 2 chains) which, like the other intermediate stations on the Fortrose branch, was fully-equipped for all forms of goods traffic.” [1: p49]
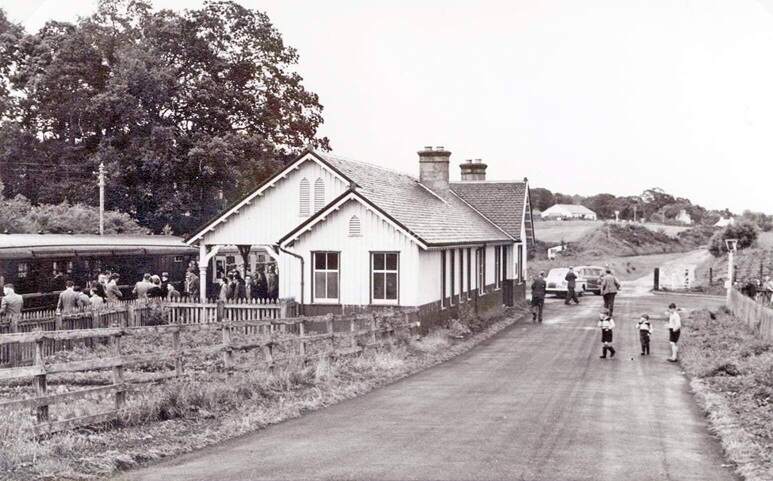
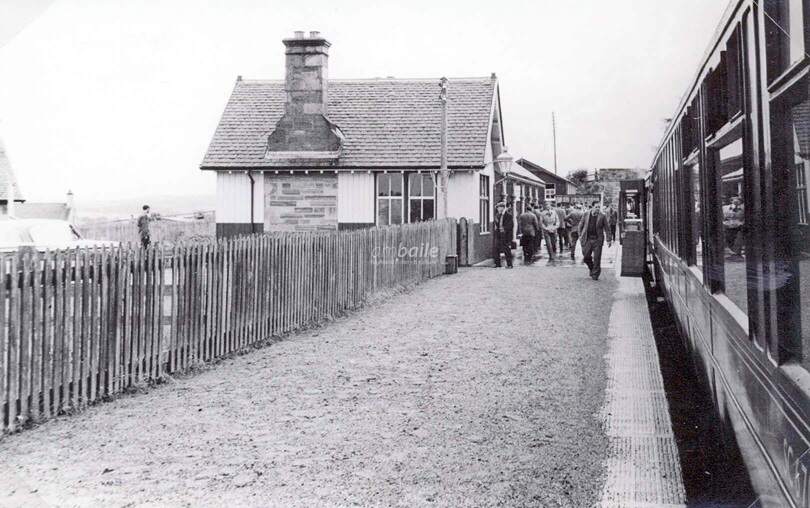
Three images of Munlochy Railway Station can be seen online at http://www.ambaile.co.ukhere, [53] here [54] and here. [55] Kind permission has been given to reproduce two of these images in this article.
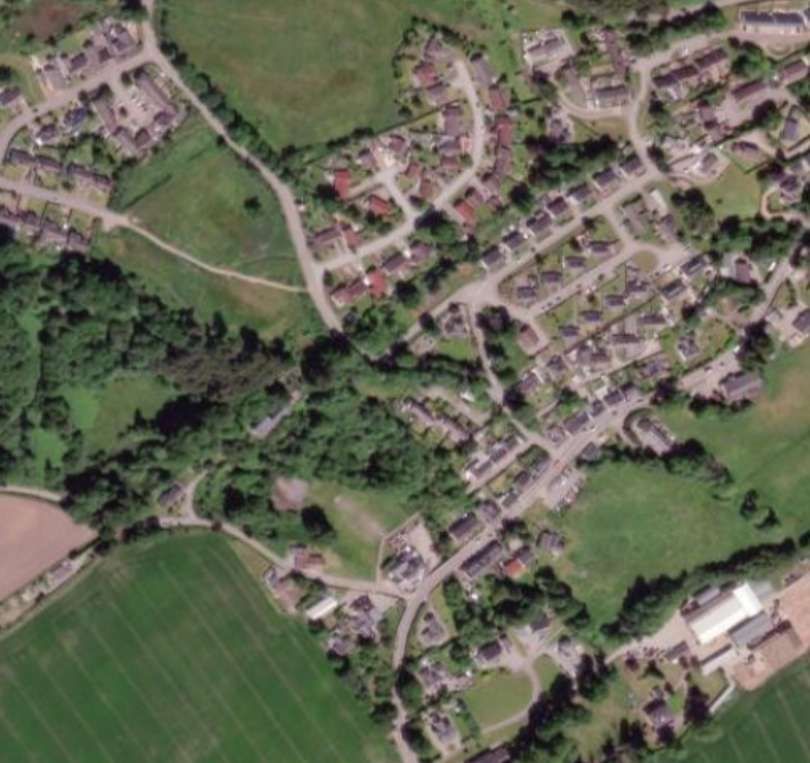
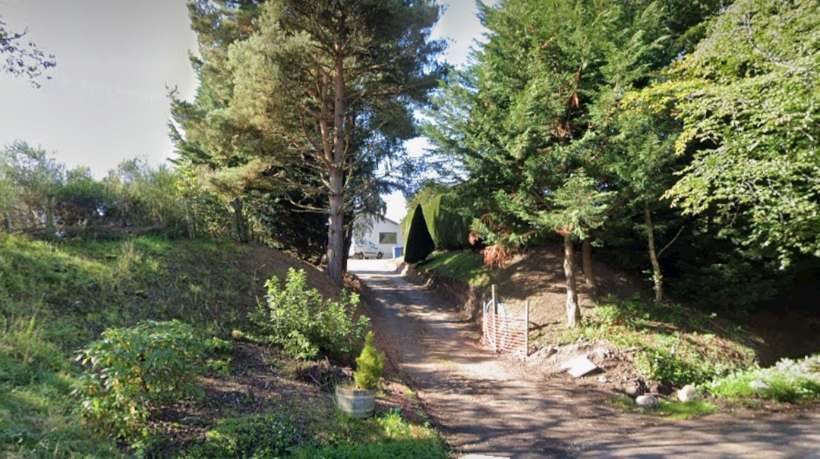
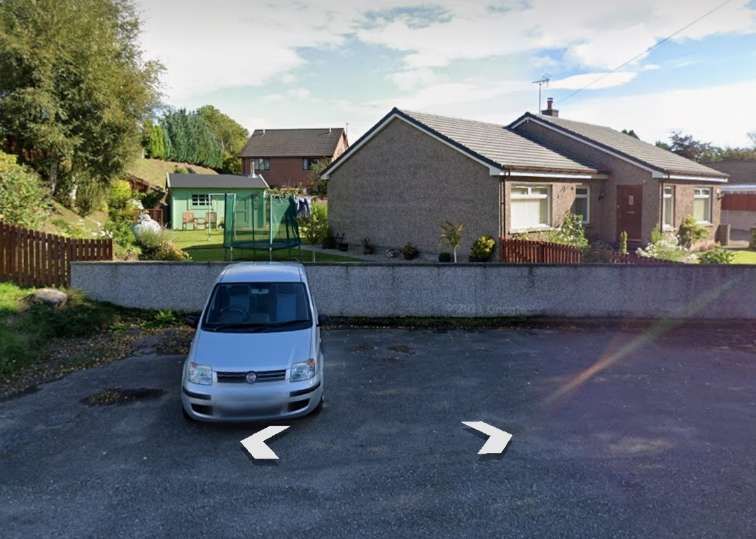
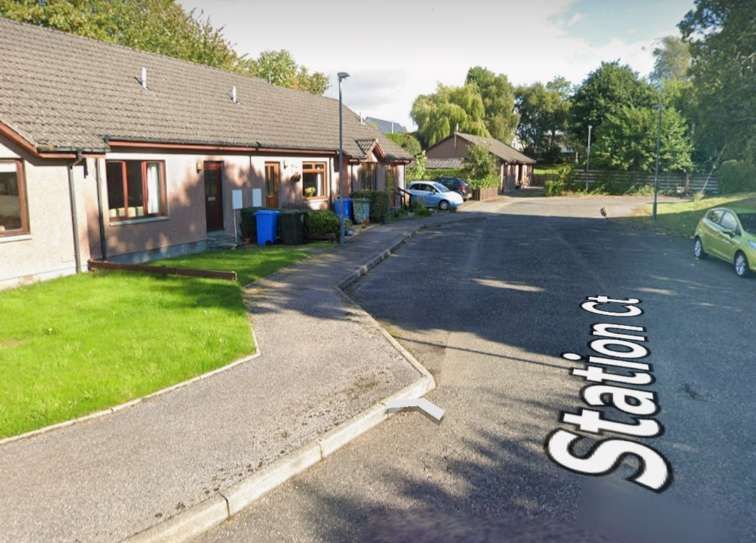
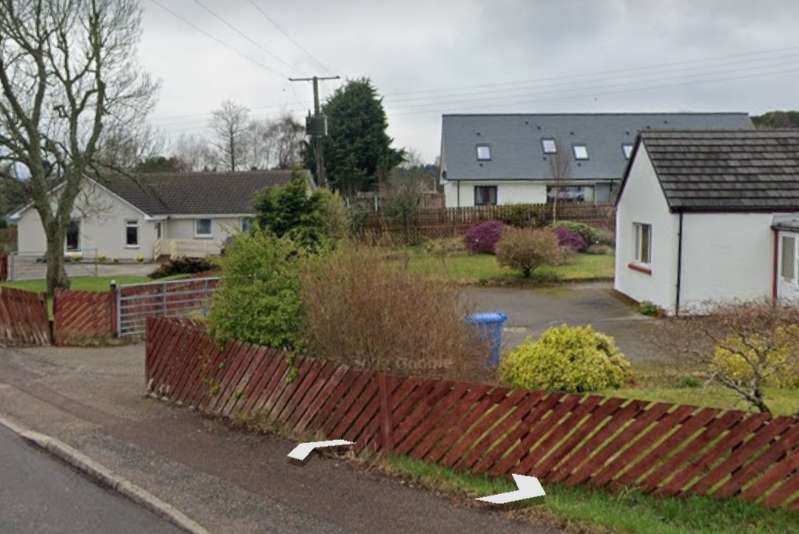
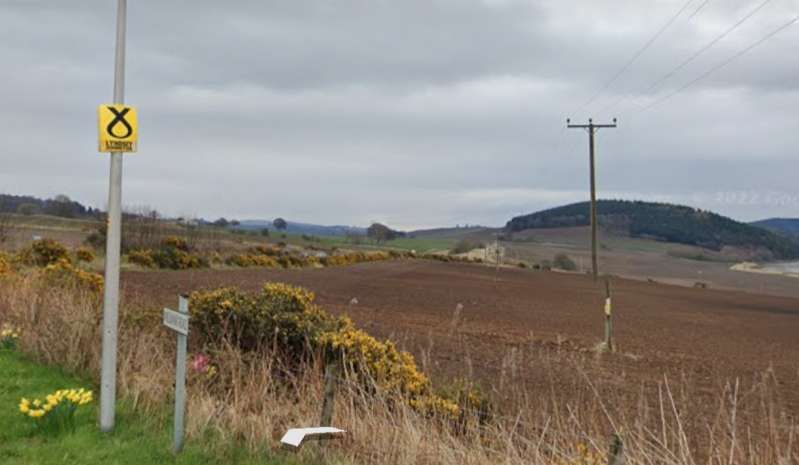
Munlochy Railway Station looking Northeast. [53]Munlochy Railway Station, looking Southwest along the platform. [54]Looking Northeast through the station site from Cameron Crescent. [Google Streetview, September 2021]Again, looking NorthEast through the station site along Station Court. [Google Streetview, September 2021]Looking back Southwest from Millbank Road (B9161) through the station site. [Google Streetview, March 2023]Looking Northeast along the line of the old railway from Millbank Road (B9161) towards Fortrose. The A842 is just to the left. [Google Streetview, March 2023]
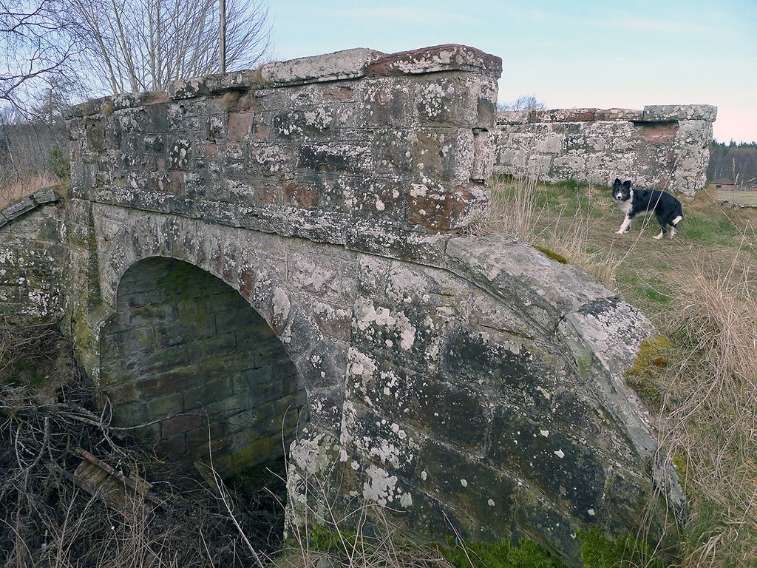
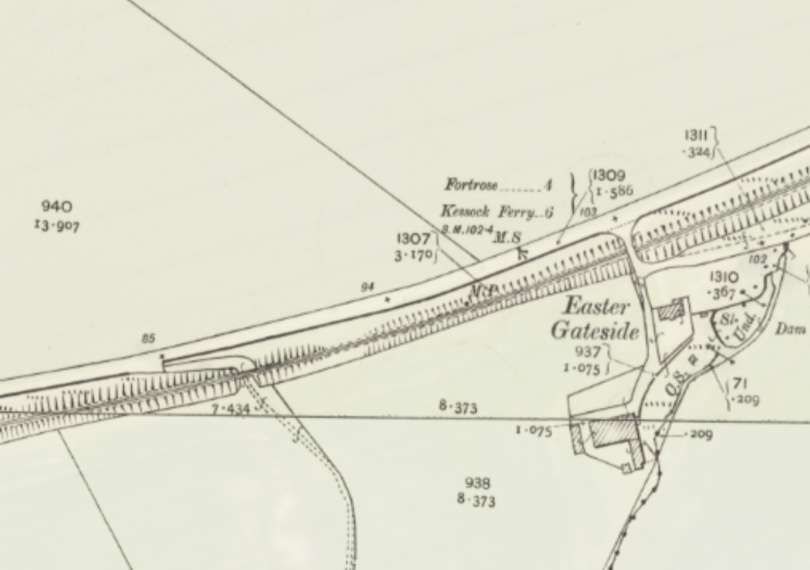
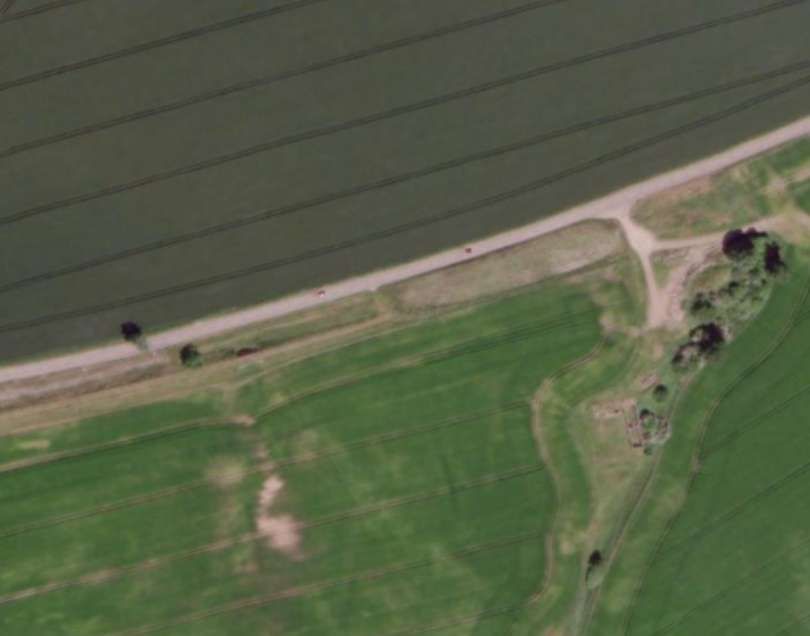
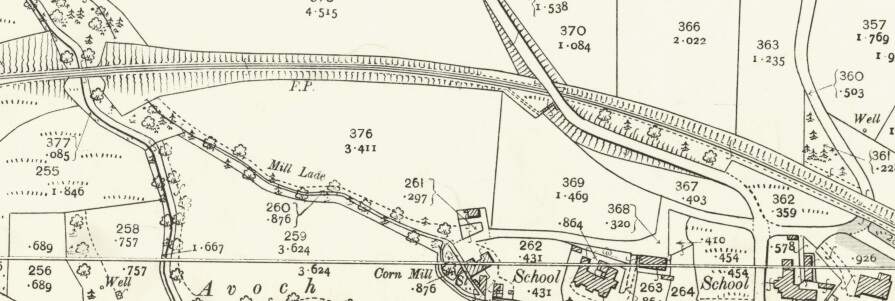
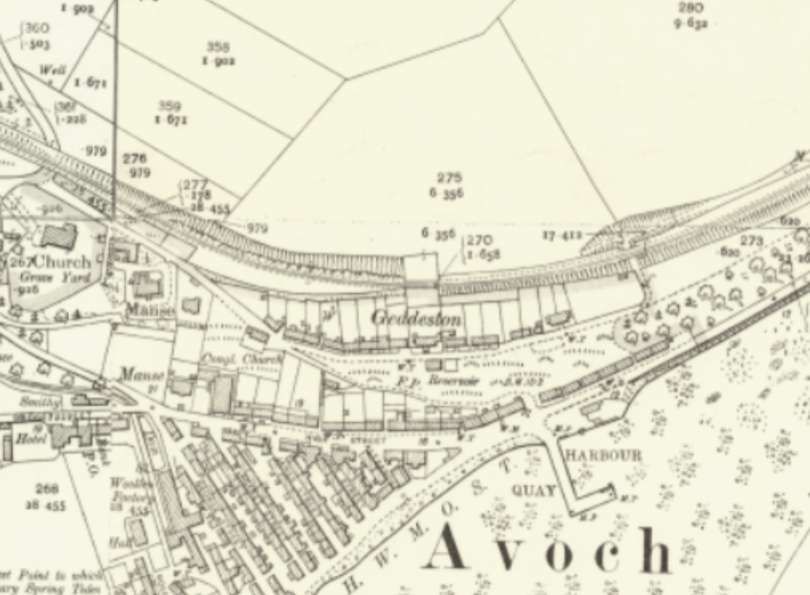
“From Munlochy the route passed over a small underline bridge, and with the A833 (later A832) road maintaining a parallel course to the left, Fortrose trains reached Avoch Station (11 miles 25 chains).” [1: p49]
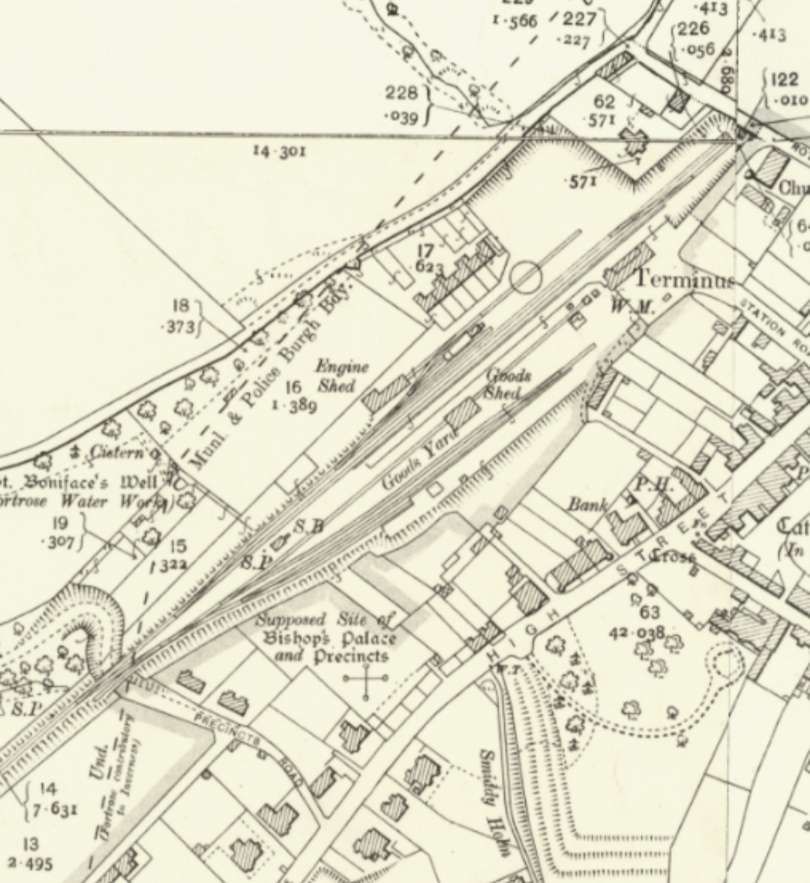
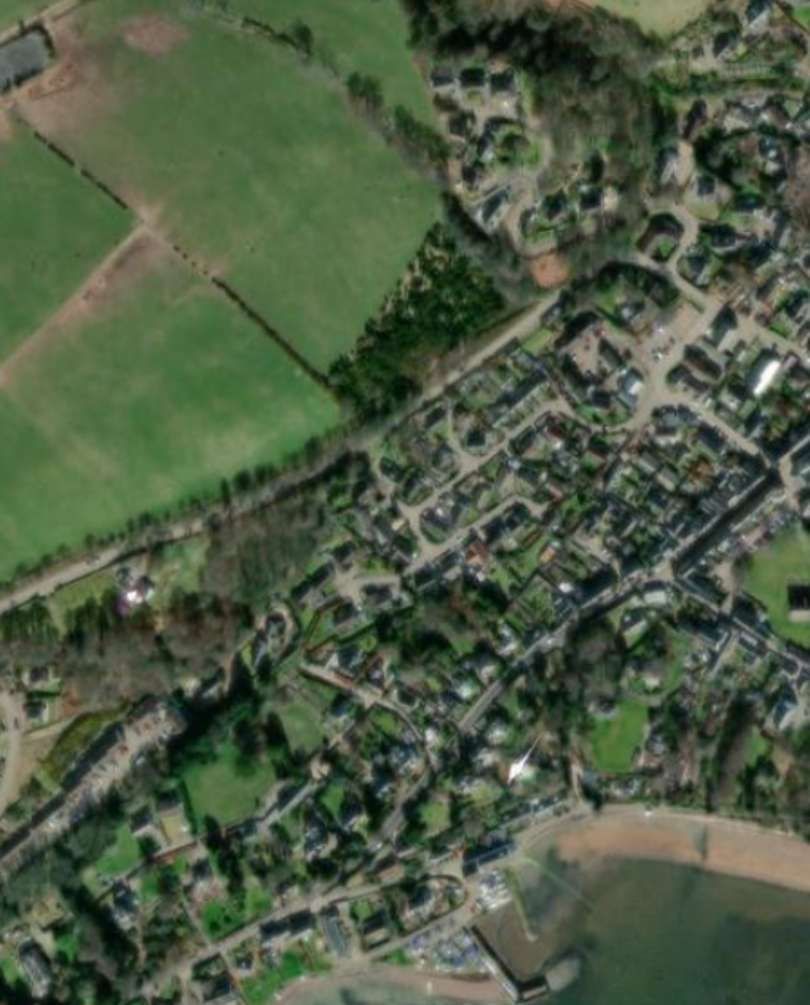
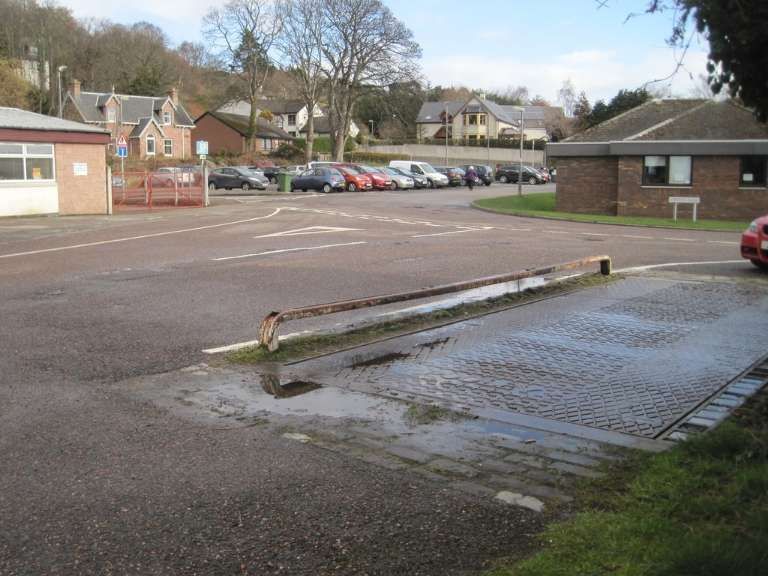
“From Avoch, the line continued north-eastwards for a further … three miles to its terminus at Fortrose where, some 13 miles 45 chains from Muir of Ord, journeys came to an end in a surprisingly large station.” [1: p49-51]
“Fortrose had just one platform on the up side, with a run-round loop to the north and a four-siding goods yard to the south. One of the goods sidings passed through a goods shed, while another served a loading bank; a spur at the west end of the goods yard formed a short headshunt.” [1: p51]
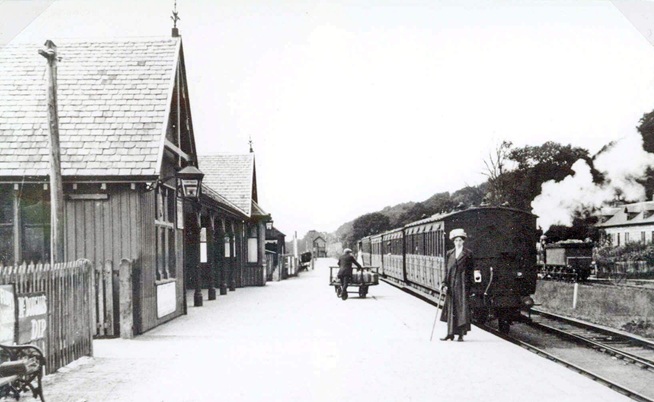
Fortrose Railway passenger station building had “the booking hall and general waiting-room … in the centre part of the building, while the booking office and toilets were housed in the ends. The timber structure was clad in American-style vertical matchboarding, with thin cover strips affixed at each join to produce a ‘ribbed’ effect.” [1: p52] The centre block was recessed between the cross-wings to create a roofed waiting area at the front of the station.
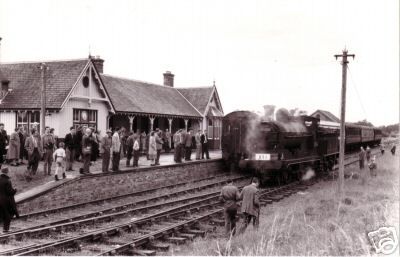
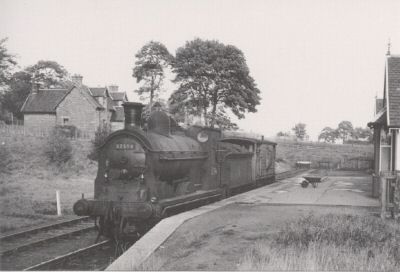
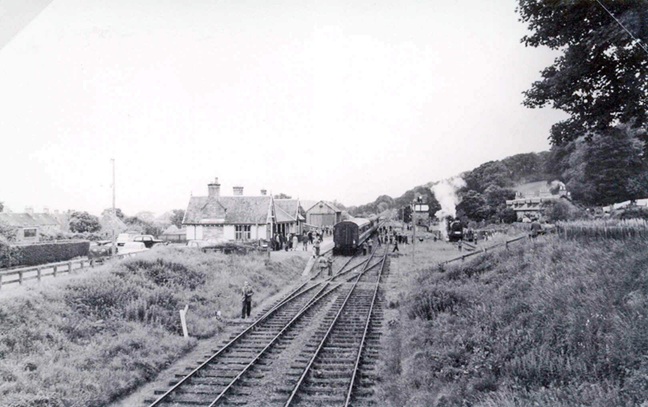
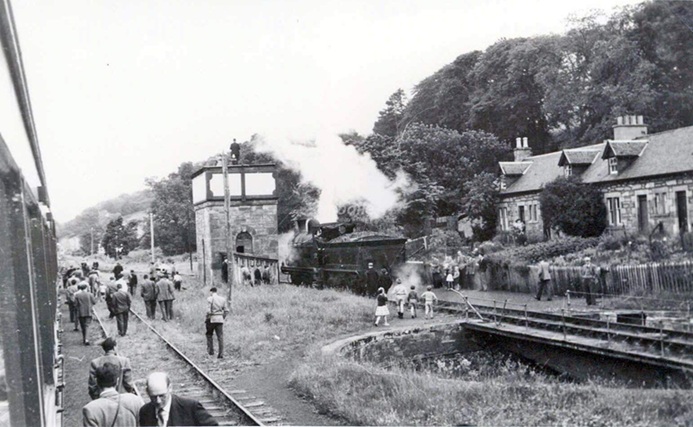
Additional photographs of the Station can be found on the www.ambaile.co.uk website here, [73] here [74] and here. [75] Kind permission has been given to reproduce these photographs here.
Fortrose Railway Station from the end of the platform in 1912, showing the station building. A branch train is in the platform and a locomotive is on the turntable in the background. [73]Fortrose Railway Station seen from the Northeast (adjacent to the buffers). Llocomotive No. 57594 is described in the notes for the next image. Here it is about to be turned to take its train back to Muir of Ord. [74]Locomotive No. 57594 has just been turned and is being readied to haul the last train from Fortrose. The locomotive is an ex-Caledonian ‘812’ Class 0-6-0, built in August 1900 as CR No. 856, becoming LMS No. 17594 and finally BR No. 57594. It was withdrawn in December 1962. [75]
Decline and Closure
The Fortrose branch was relatively successful. Its passenger services were maintained throughout the LMS era. But the line “became increasingly vulnerable to road competition after World War II, and for this reason its passenger services were withdrawn with effect from 1st October 1951. Goods traffic lingered on for a few more years, but the end came in 1960, with the line being closed to all traffic from 13th June of that year.” [1: p52]
References
Stanley Jenkins; Highland Railway Minor Lines: 2; in Rex Kennedy (ed.); Steam Days; Red Gauntlet Publications, Bournemouth, Dorset, January 2002; p48-57.
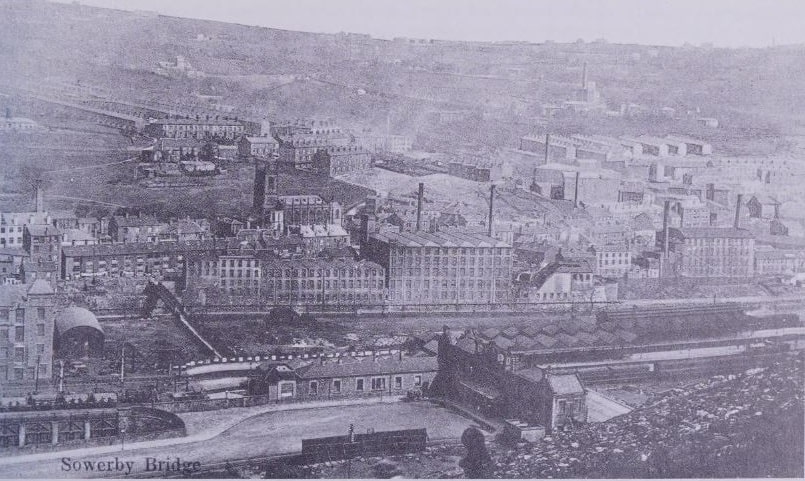
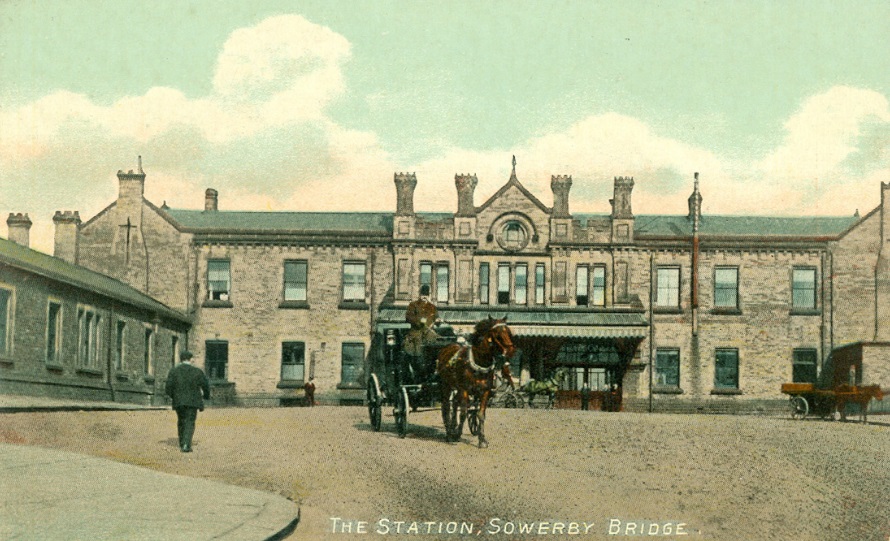
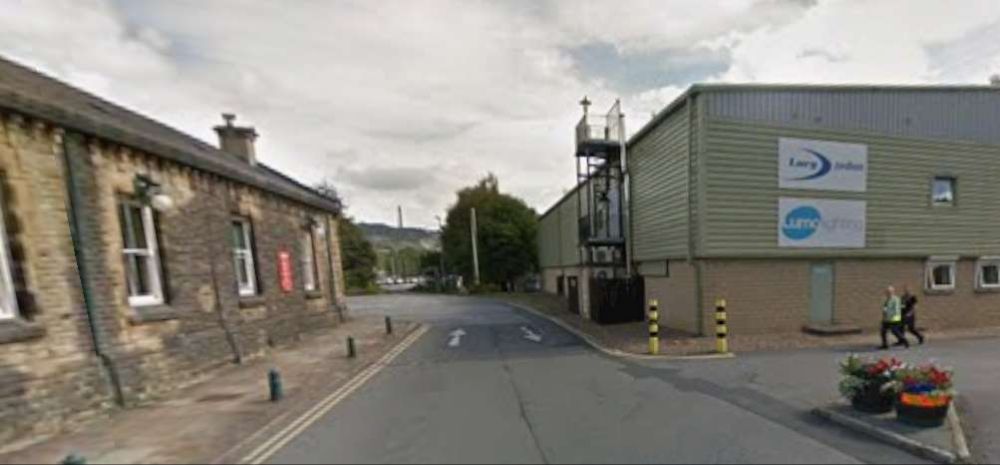
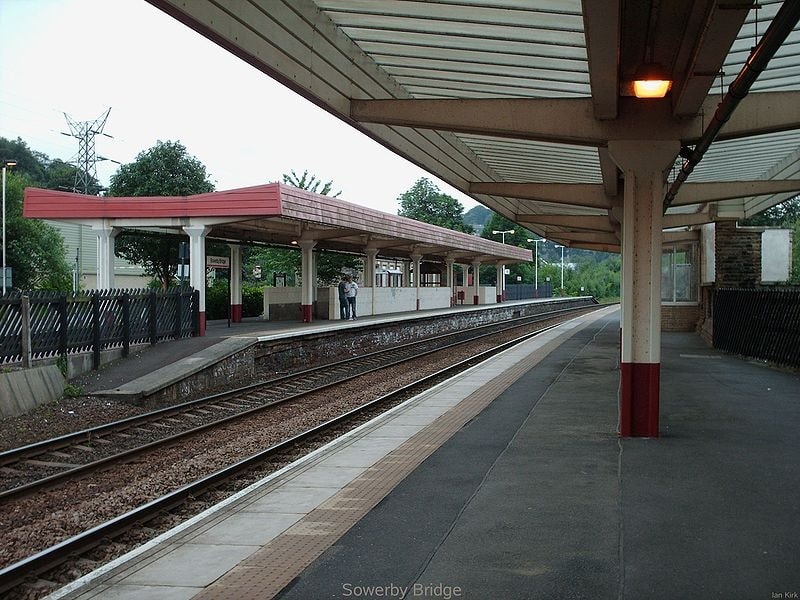
More images of Sowerby Bridge Railway Station can be found here [67] and here. [68]
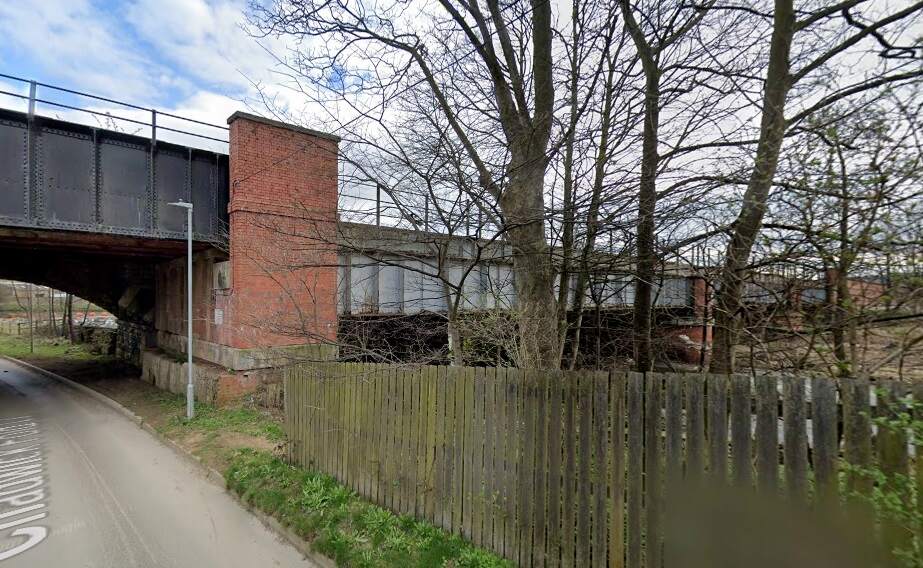
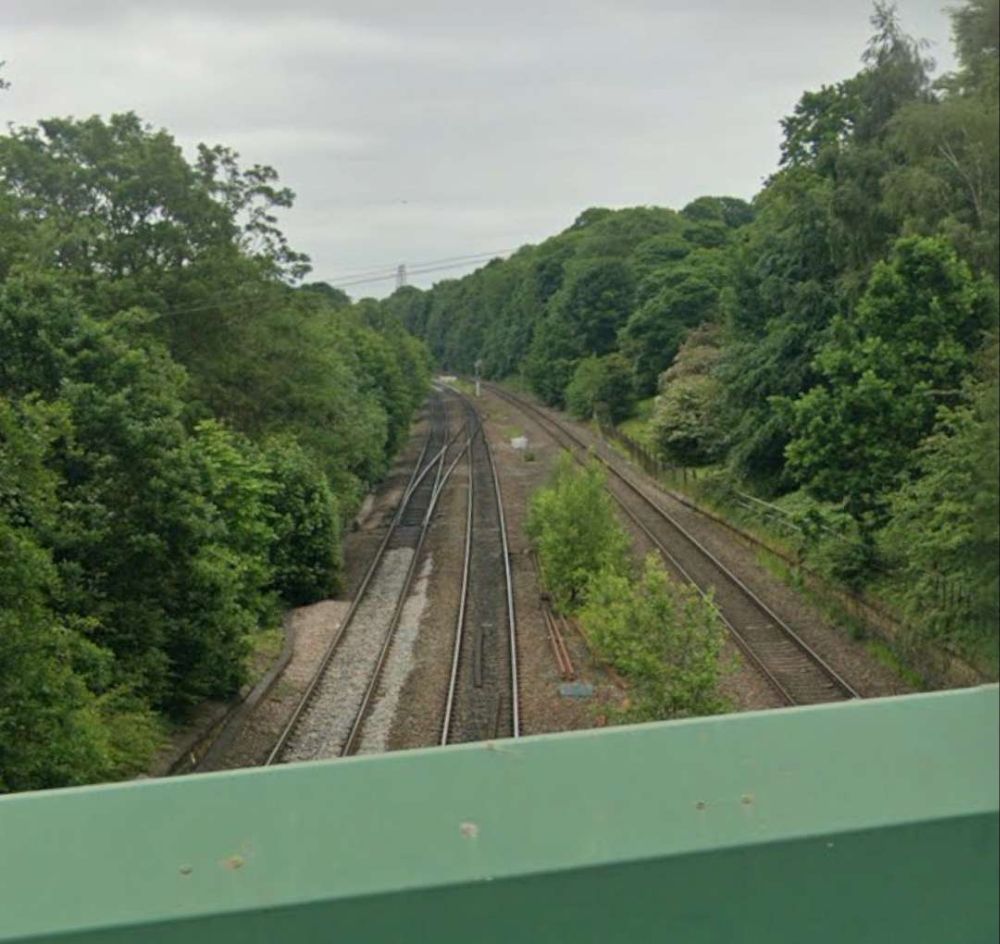
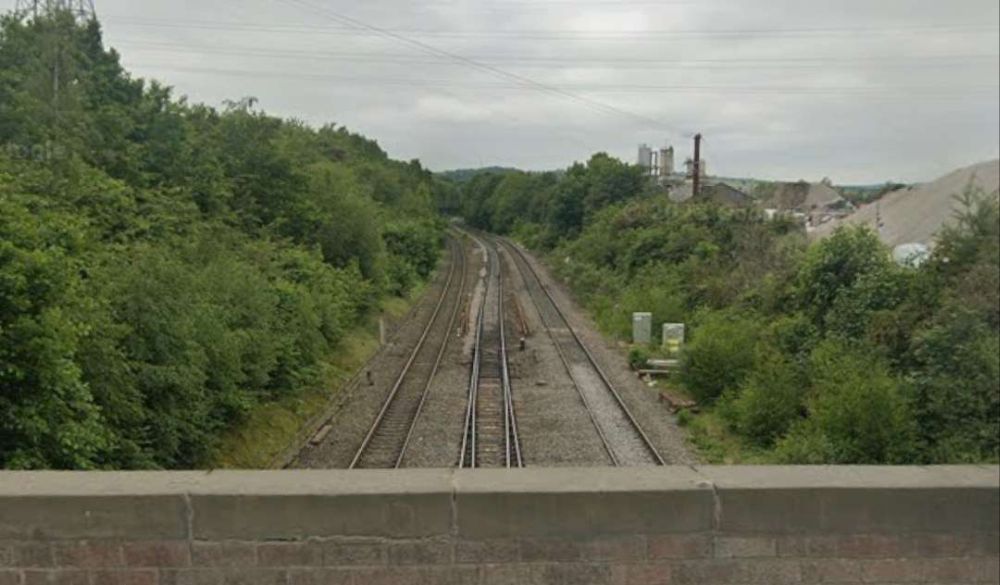
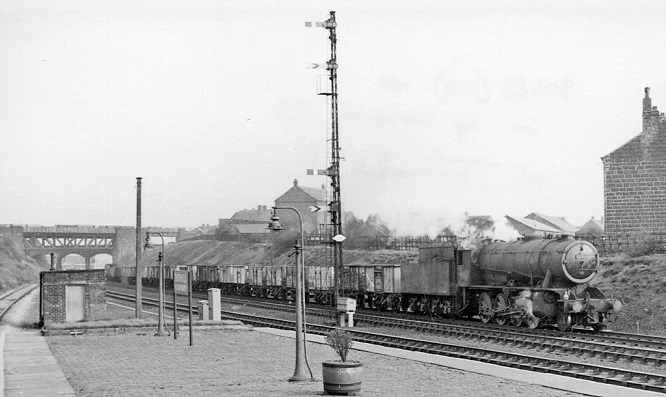
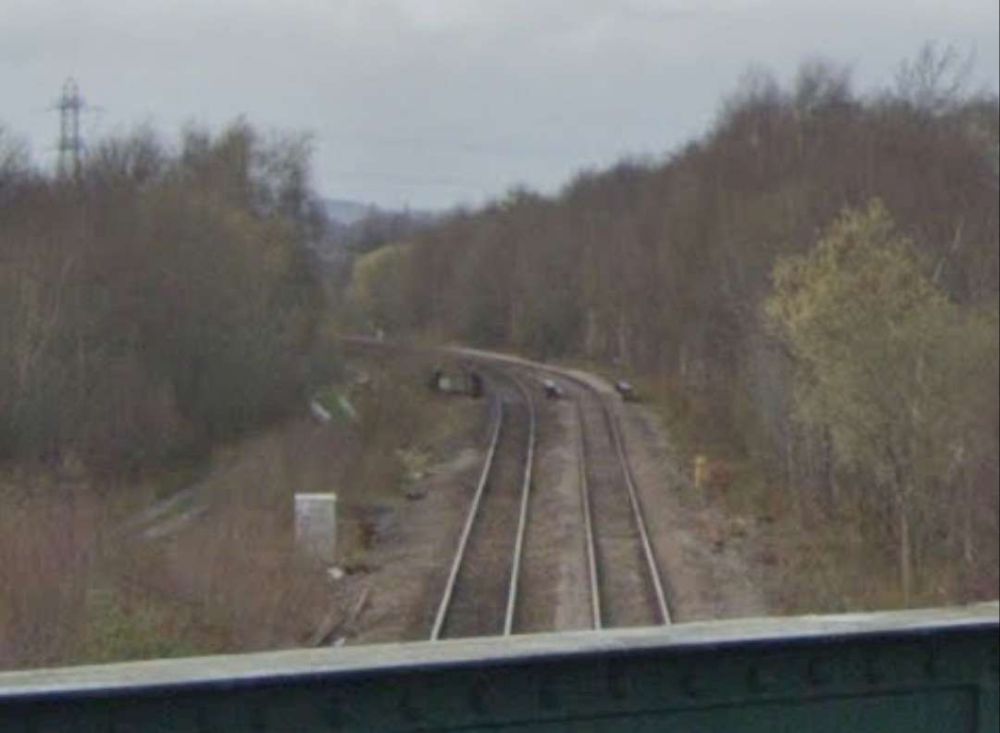
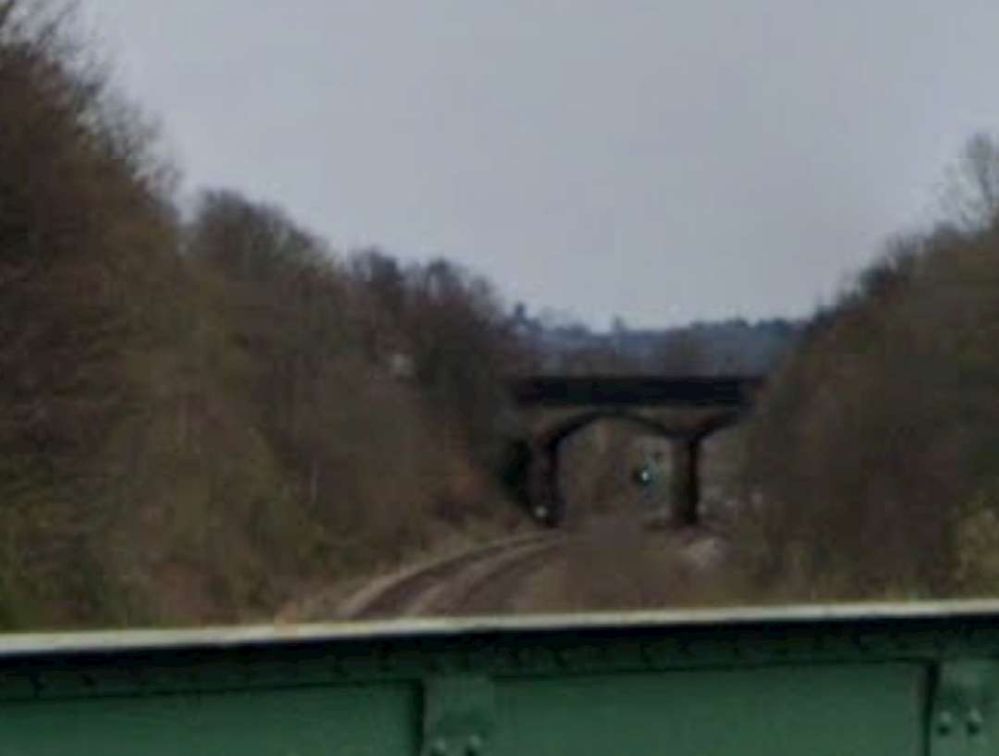
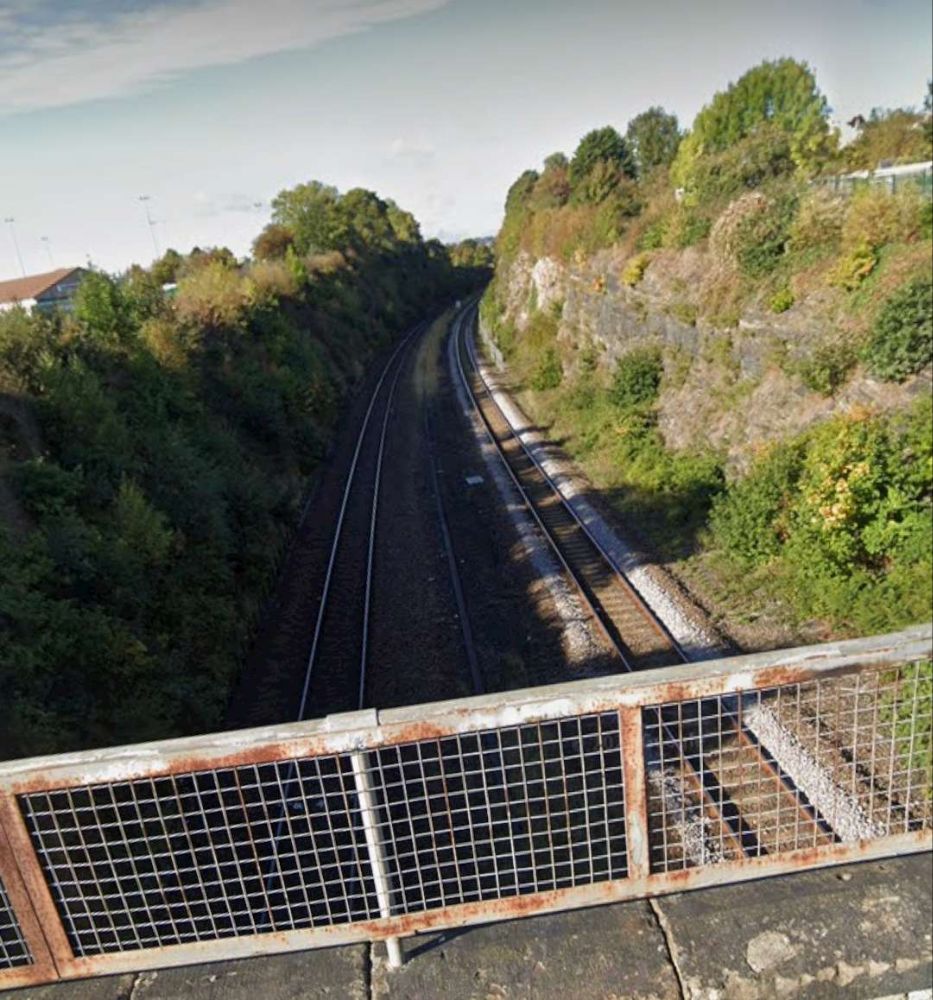
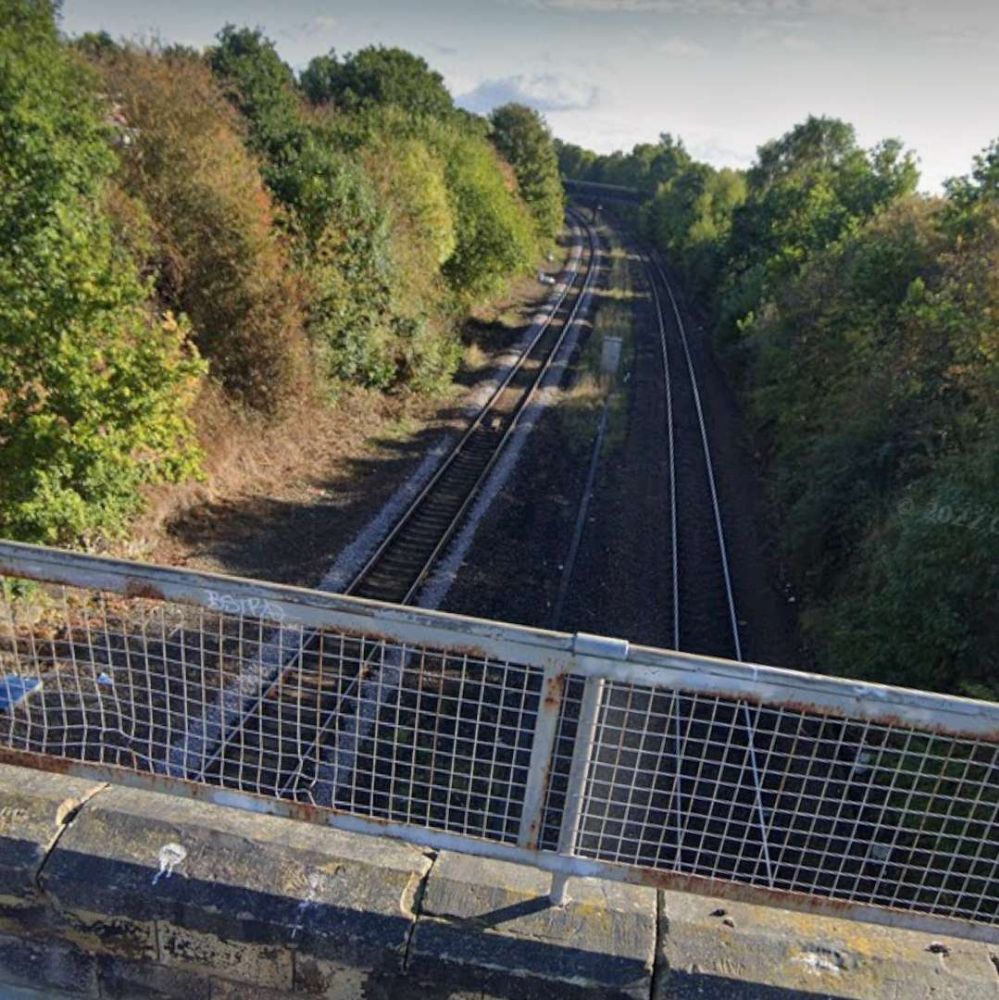
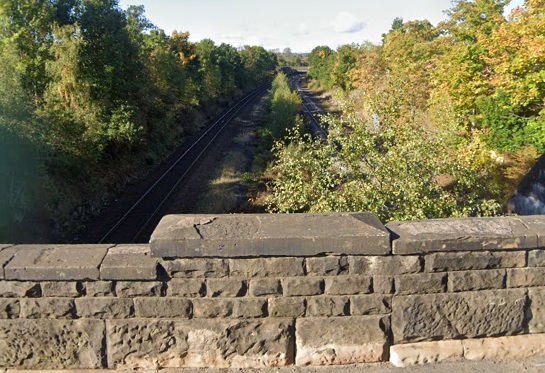
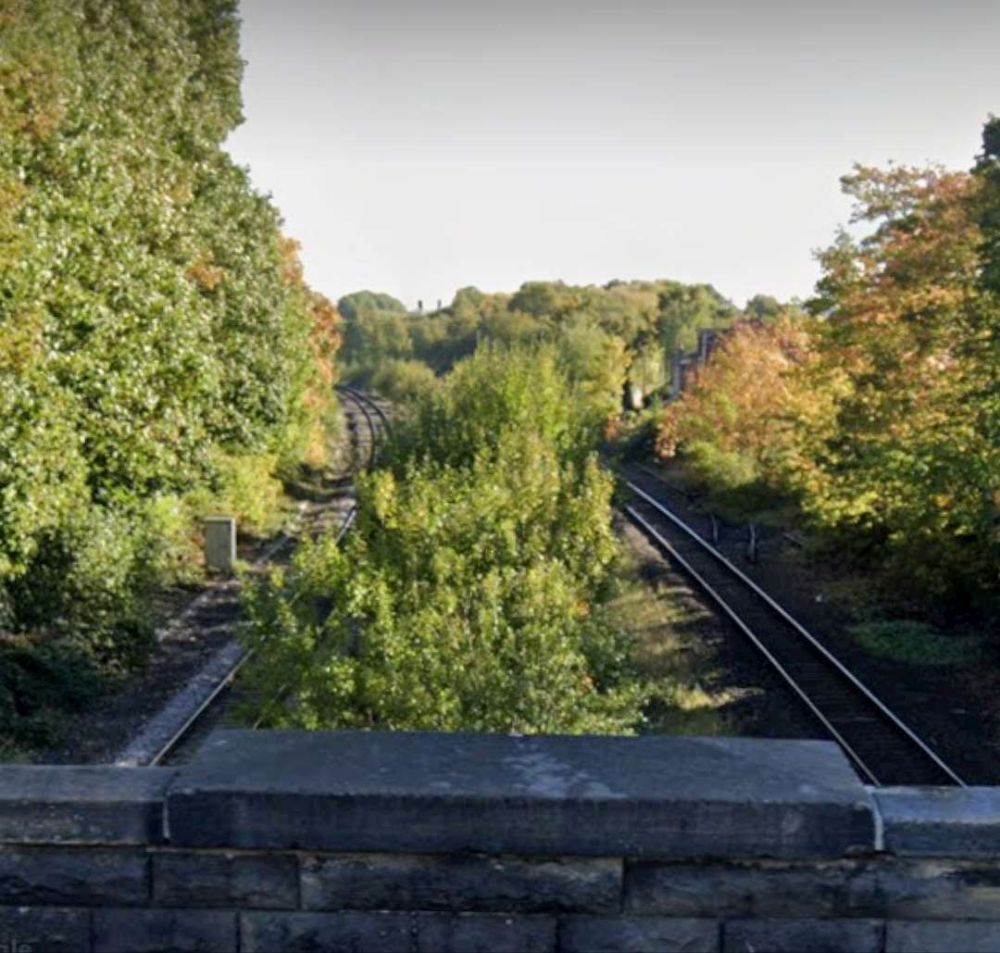
Just beyond the eastern station limits Fall Lane bridges the line – two views from the bridge follow.
The view East from Fall LaneThe view West from Fall Lane
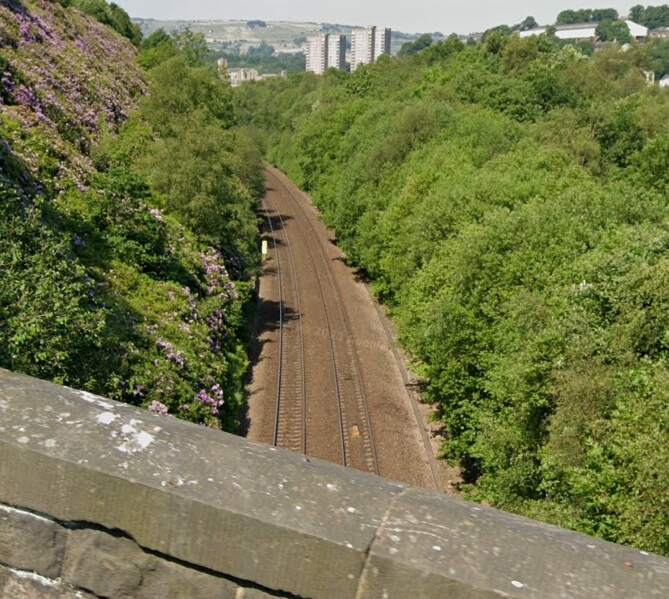
To the East of Sowerby Bridge the line crosses the River Calder again.
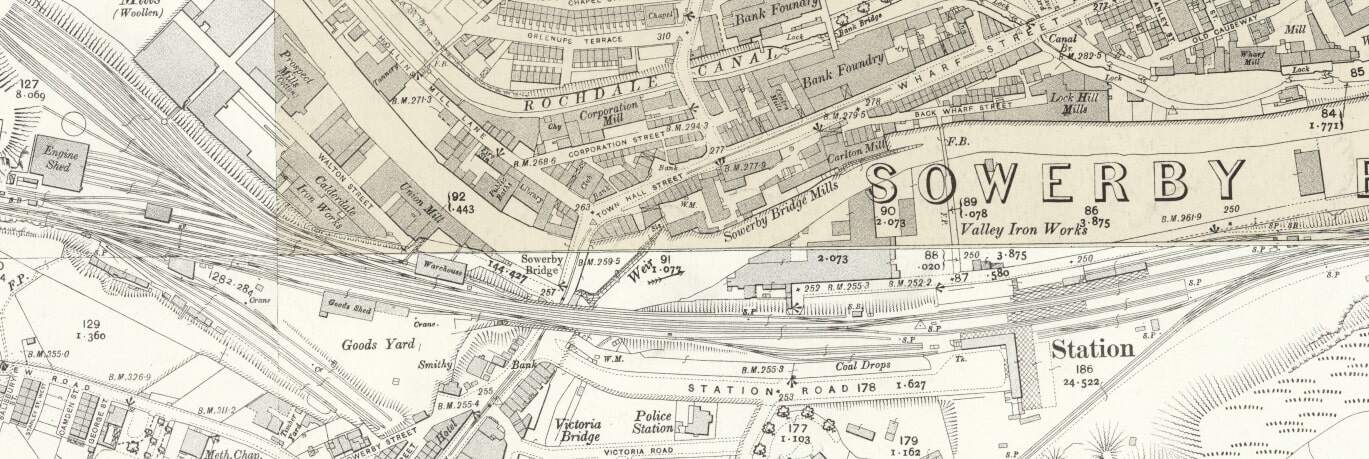
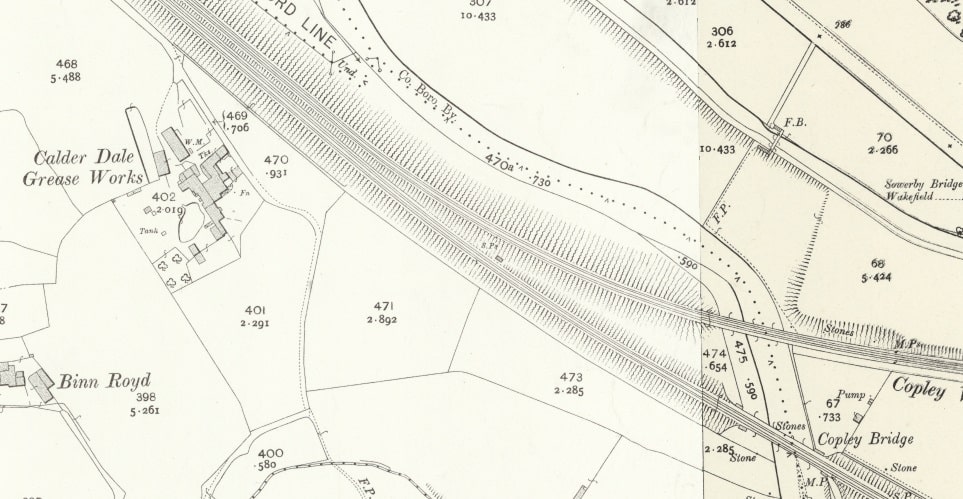
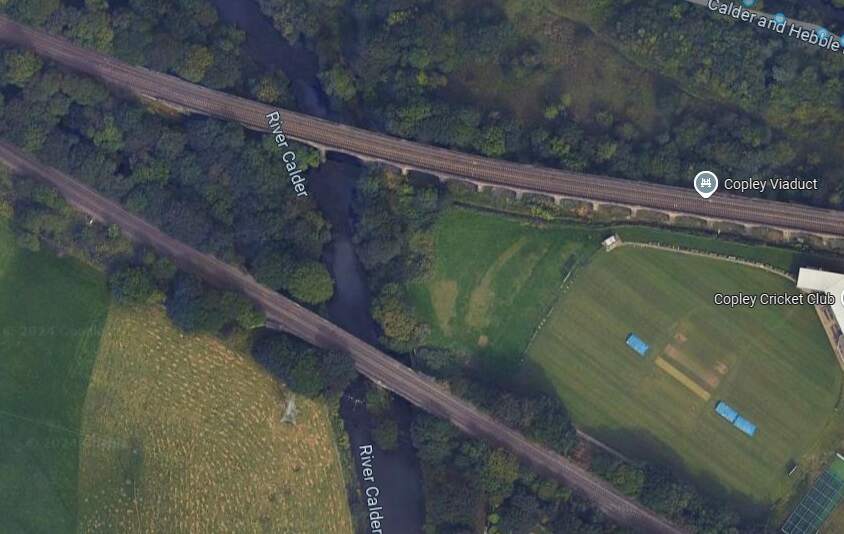
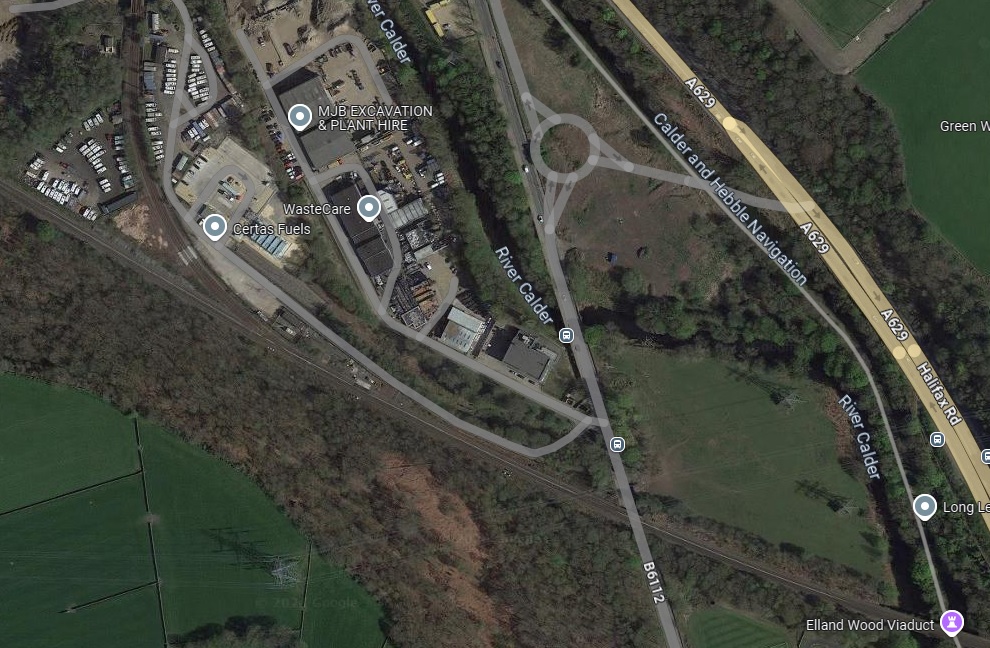
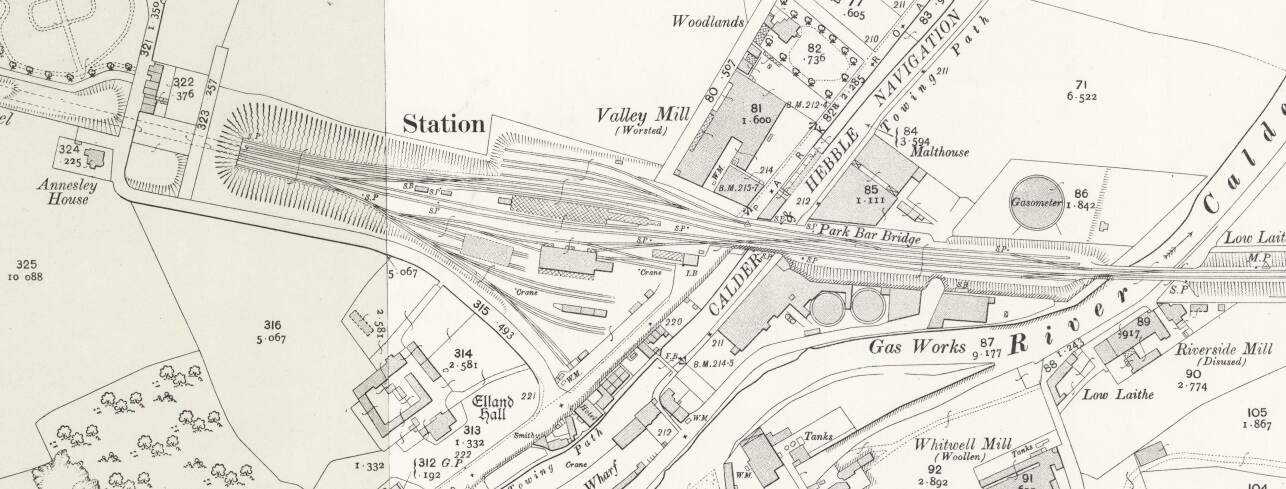
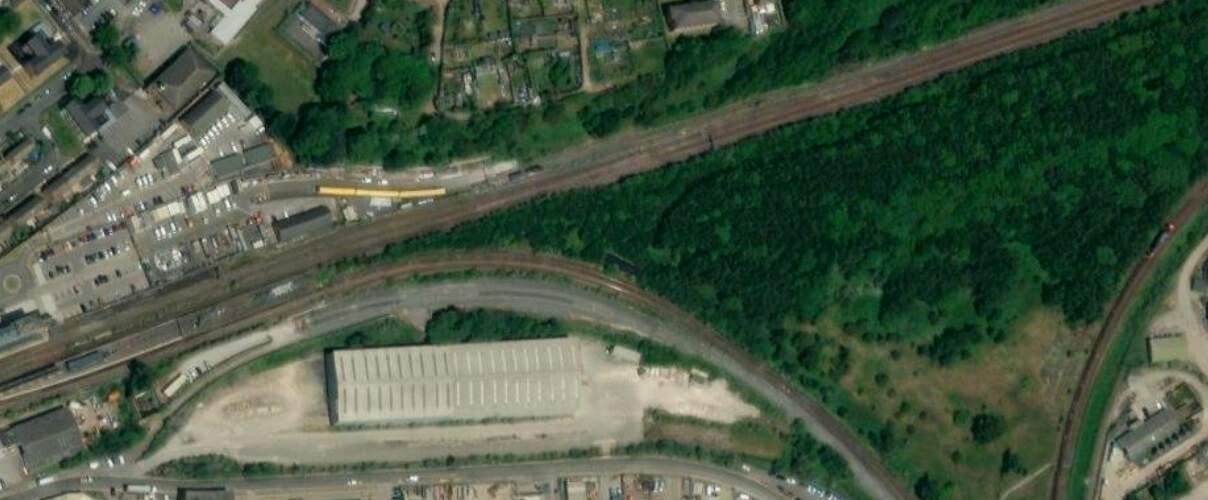
Another extract from the 25″ Ordnance Survey of 1905, published in 1907 shows Calder Dale Grease Works, Copley Bridge and Copley Viaduct. The Sowerby Bridge, Halifax and Bradford line leaves the main line at this point. [25]The bridge and Viaduct as they appear on Google Maps satellite imagery in 2024. [Google Maps, October 2024]
An image of Copley Viaduct can be seen here. Just beneath the viaduct, at the left of the linked photograph, a train is crossing Copley Bridge on the line we are following. [61]
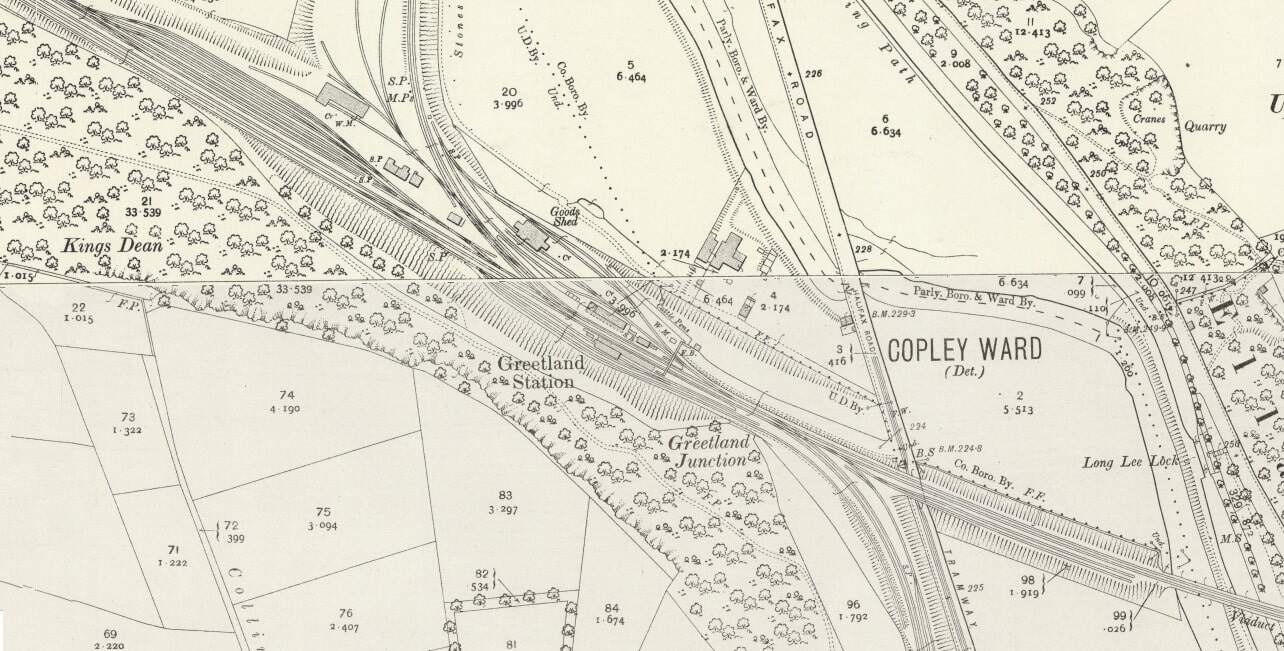
The Manchester and Leeds Railway then crosses the Calder once again and enters Greetland Station. The second arm of the Sowerby Bridge, Halifax and Bradford line joins the mainline just before (to the Northwest of) Greetland Station.
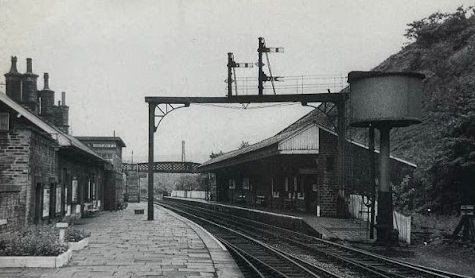
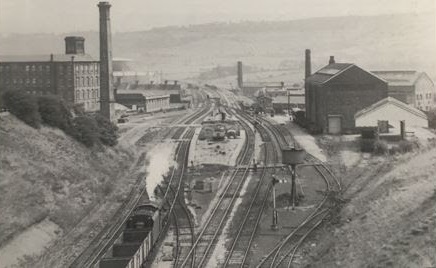
Greetland Station shown on the 25″ Ordnance Survey of 1905. Top-left the second arm of the triangular junction with the Sowerby Bridge, Halifax and Bradford line can be seen joining the Manchester and Leeds Railway. Bottom-right, the Stainland Branch leaves the main line just before the main line bridges the River Calder once again. [26]The same location in the 21st century. Greetland Station is long gone and the branch South (the Stainland Branch has also been lifted. [Google Maps, October 2024]Greetland Railway Station in 1962, just before closure. The camera is positioned at the Northwest end of the station. [28]
Greetland Railway Station “was originally opened as North Dean in July 1844. It was subsequently changed to North Dean and Greetland and then to Greetland in 1897. Situated near the junction of the main Calder Valley line and the steeply-graded branch towards Halifax (which opened at the same time as the station), it also served as the junction station for the Stainland Branch from its opening in 1875 until 1929. It was closed to passenger traffic on 8th September 1962.” [27]
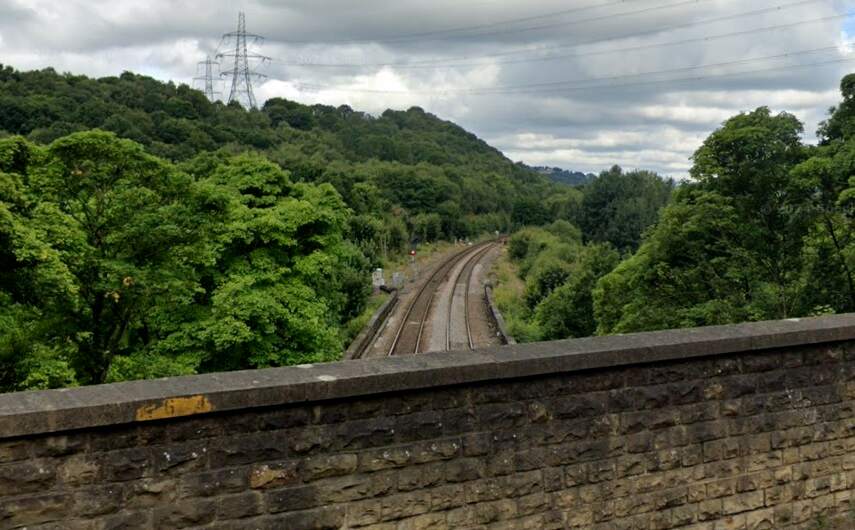
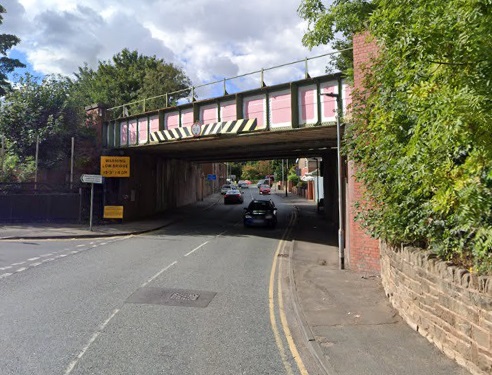
Looking West from the A629, Halifax Road which sits over the line adjacent to the West Portal of Elland Tunnel. [Google Streetview, July 2024]
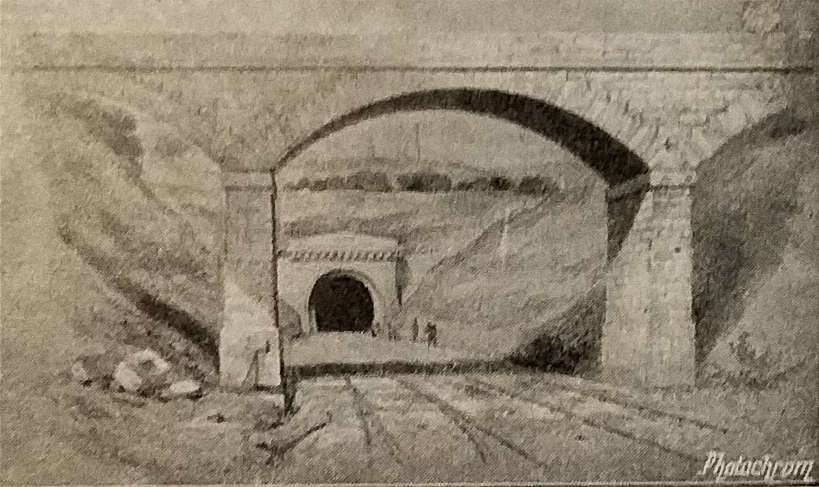
Rake says that the line then approaches “Elland Tunnel, 424 yards, in length, and, after leaving Elland Station, pass[es] through a deep cutting, from which a large quantity of stone for the building of the bridges was obtained.” [1: p471]
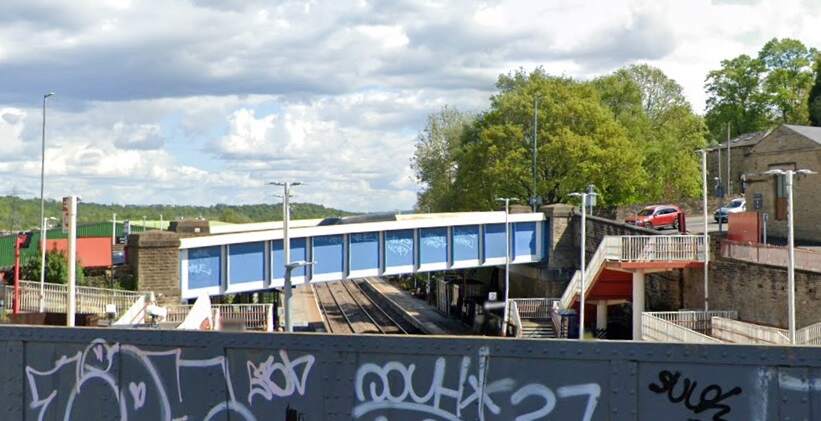
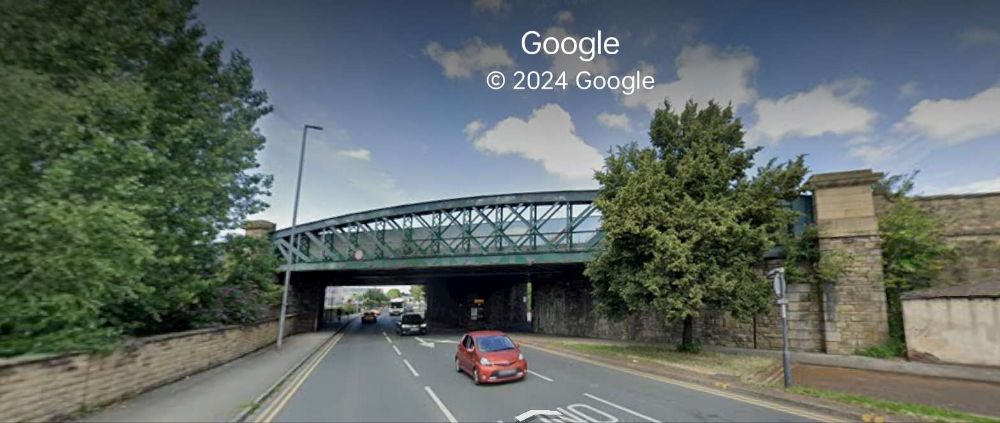
To the East of Elland Railway Station the railway is carried above the River Calder, passing Calder Fire Clay Works. Further East again, “the railway is carried across a steep and rugged acclivity, rising almost perpendicularly from the river. … The viaduct consists of six arches of 45ft span each, and leads directly to Brighouse, originally the nearest station to Bradford.” [1: 472]
The view from the South of the bridge which carries the railway over Park Road (A6025), Elland. Elland Station stood above this location and to the left. [Google Streetview, July 2024]
From Elland, the line runs on through Brighouse
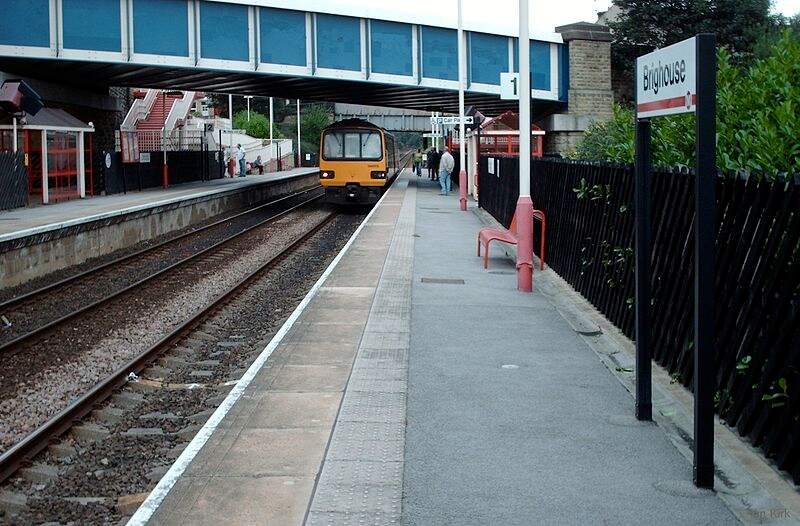
Brighouse Station and Goods Yard as shown on the 25″ Ordnance Survey of 1905. [31]The view West from Gooder Lane Bridge towards Cliff Road Bridge Elland. [Google Streetview, May 2023]The view East across Brighouse Railway Station from Gooder Lane. [Google Streetview, May 2023]Brighouse Railway Station (originally called ‘Brighouse for Bradford’). [1: p472]
Embedded link to Flickr. The image shows B1 No. 61034 Chiru at Brighouse Station on 2nd April 1964. The locomotive is arriving at the station from the East with a local passenger train. The locomotive had only recently been transferred to Wakefield from Ardseley. It was withdrawn at the end of 1964. The photograph looks Southeast through the station. [32]A much later photograph of Brighouse Railway Station (2006) which looks Northwest through the station from platform 1, (c) Ian Kirk and authorised for reuse under a Creative Commons Licence (CC BY 2.5). [33]
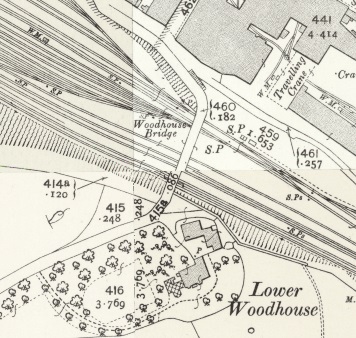
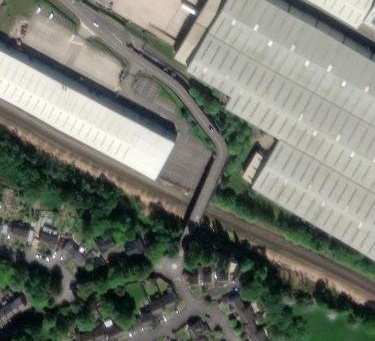
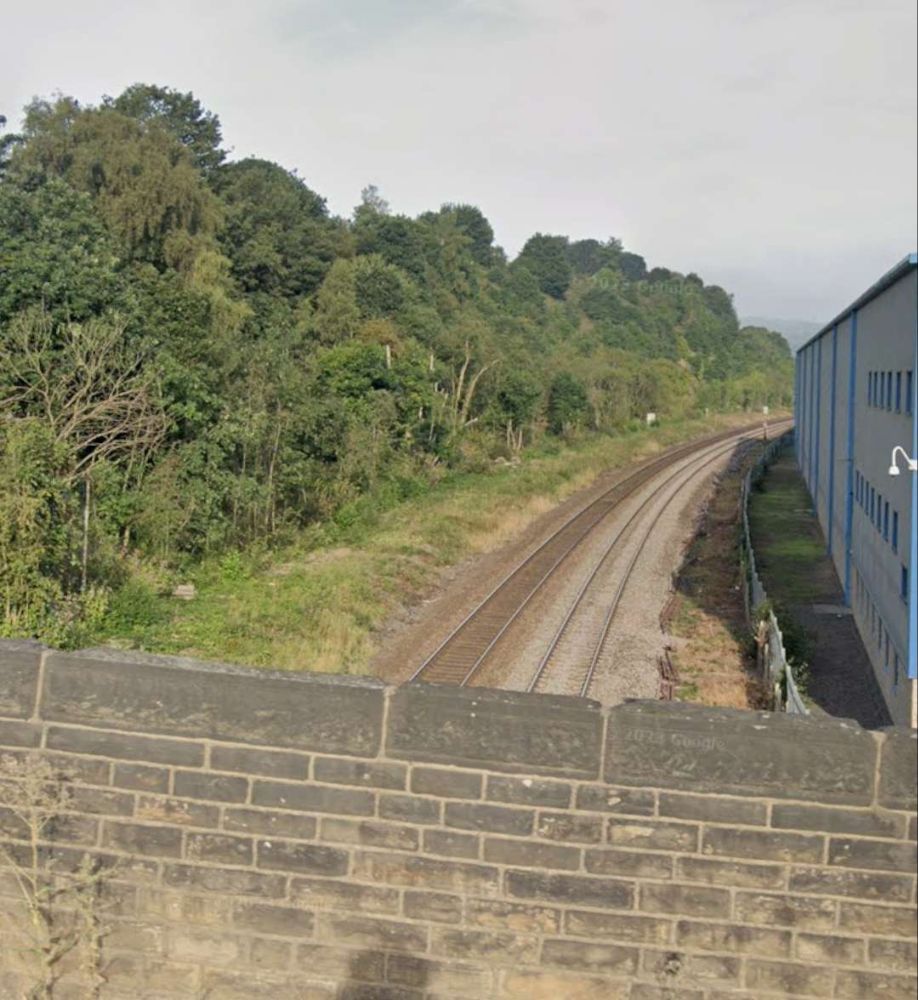
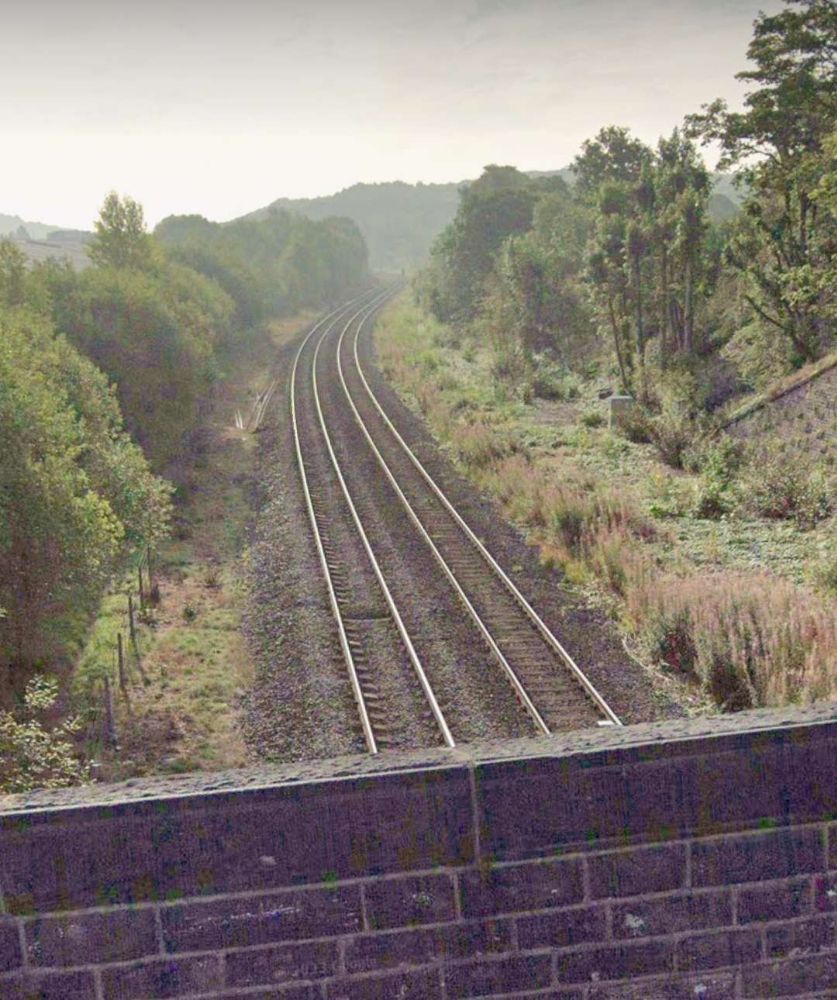
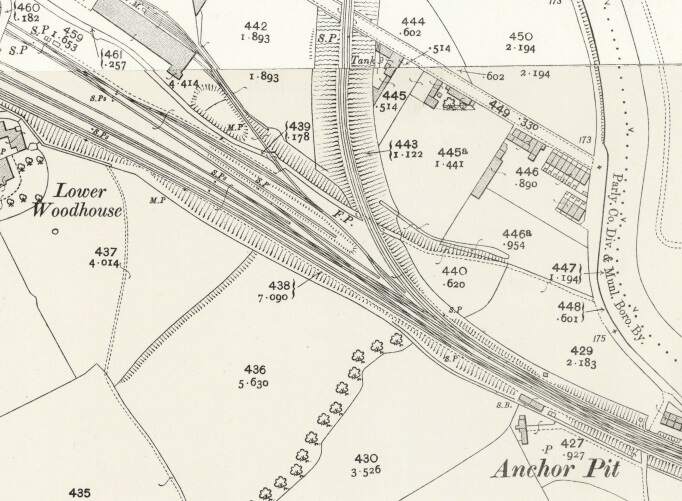
To the East of the passenger facilities at Brighouse there were a significant array of sidings. The first length of these can be seen on the OS Map above. Around 75% of the way along these sidings Woodhouse Bridge spanned the lines. Much of the area has been redeveloped by modern industry. The next four images relate to that bridge.
Woodhouse Bridge in 1905. [69]Woodhouse Bridge in 2024. [69]Looking West from Woodhouse Bridge in 2023. [Google Streetview, August 2023]Looking East from Woodhouse Bridge in 2023. [Google Streetview, August 2023]
Leaving Brighouse Station, the railway is joined, from the North, by the Bailiff Bridge Branch (long gone in the 21st century).
Immediately to the East of Brighouse Station Goods Yards, the Bailiff Bridge Branch joined the Manchester and Leeds Railway. [62]Approximately the same area in the 21st century as shown on the OS map extract above. The line of the old Bailiff Bridge Branch is superimposed on the satellite image. [Google Maps, October 2024]
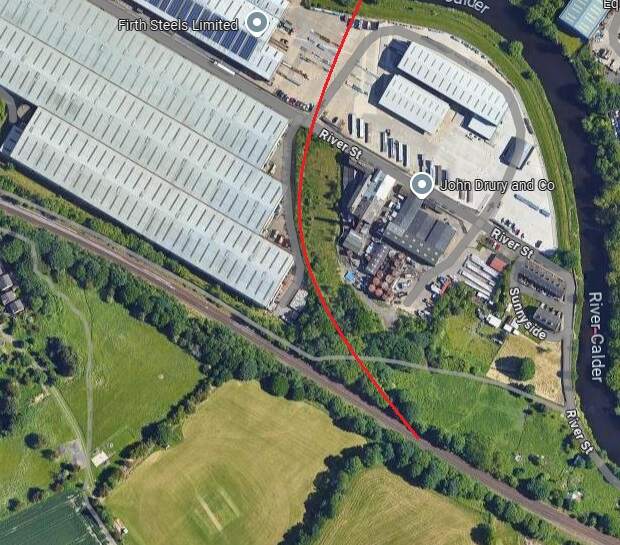
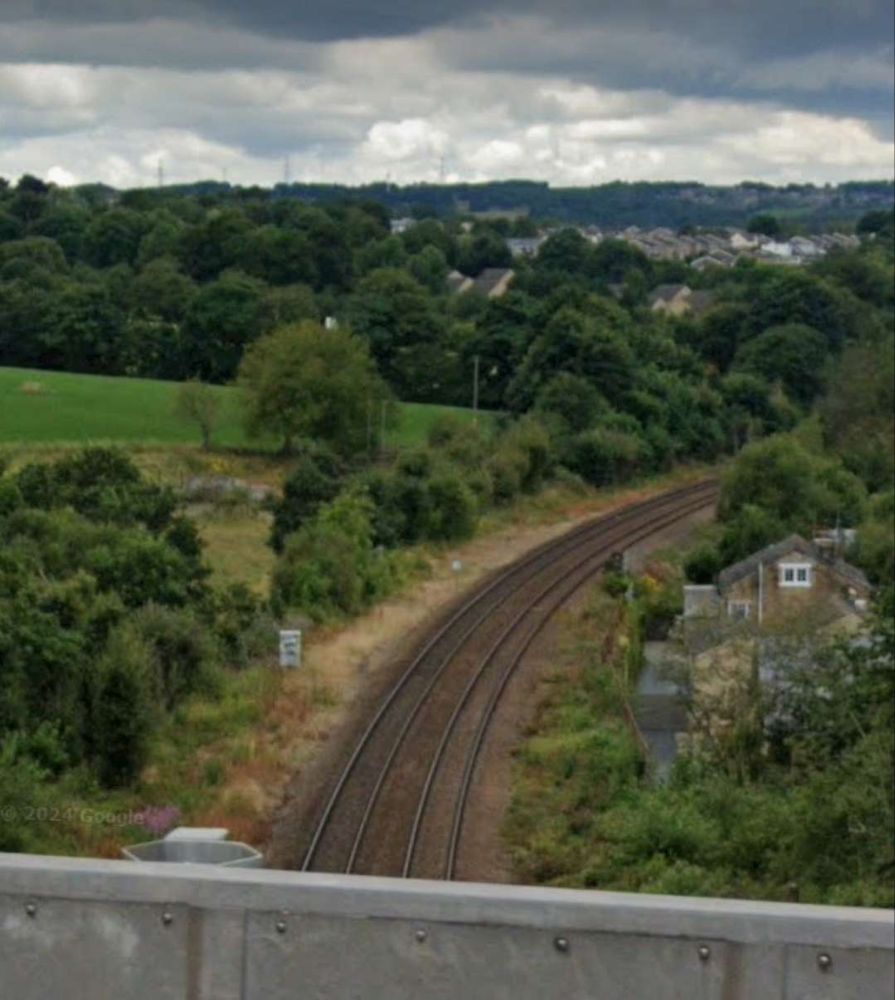
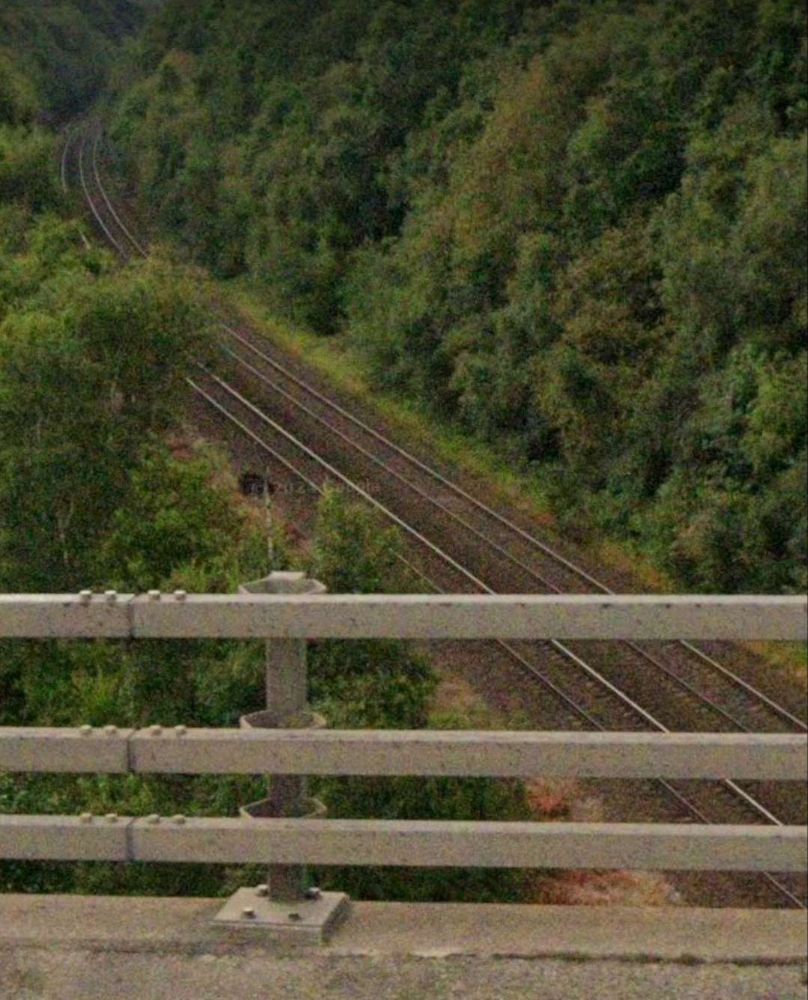
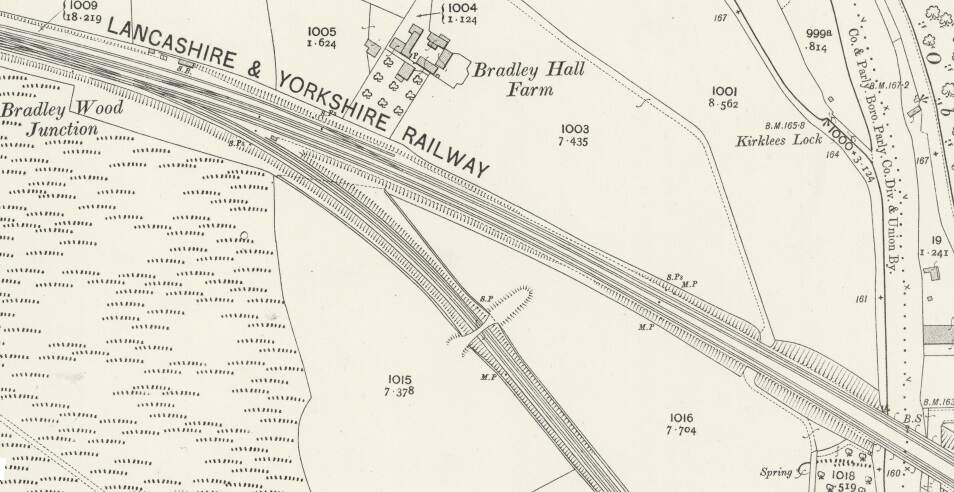
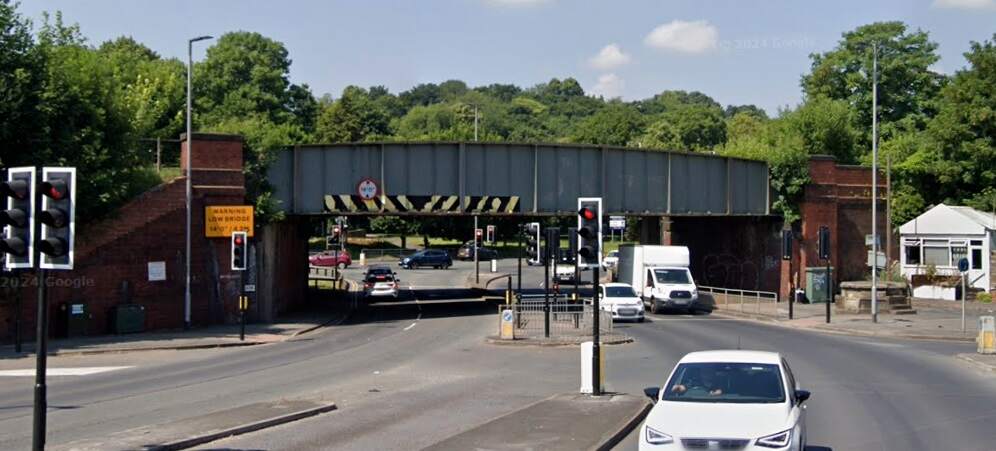
A little further to the East, in the 21st century, the line passes under the M62 and enters a deep cutting before, at Bradley Wood Junction, the Bradley Wood Branch leaves the line to the South (still present in the 21st century).
Looking West from the M62 in July 2024Looking East from the M62 in July 2024Bradley Wood Junction as shown on the 25″ Ordnance Survey of 1905. [70]Much the same area in the 21st century. [70]
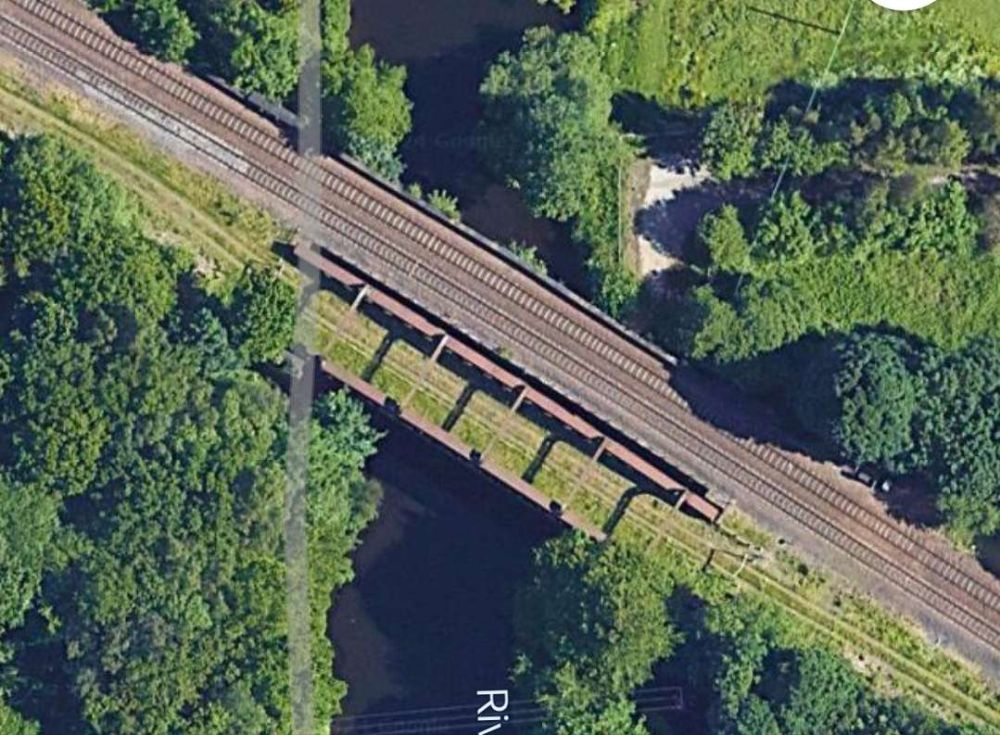
“Beyond [Bradley Wood Junction] the Calder is crossed by a viaduct of two arches of 76 ft. span each. this is succeeded by an embankment, along which the line continues down the valley. [It] again cross[es] the Calder by a viaduct similar to that just referred to.” [1: p472] The line was widened to the South side to create a four-track main line and single span girder bridges were positioned alongside the original structures.
At the first crossing of the River Calder mentioned immediately above, the original two arches of the stone viaduct can be seen beyond the more modern girder bridge in this photograph, (c) Uy Hoang. [Google Streetview, September 2022]The same bridges as they appear on Google Maps satellite imagery in 2024. [Google Maps, October 2024]
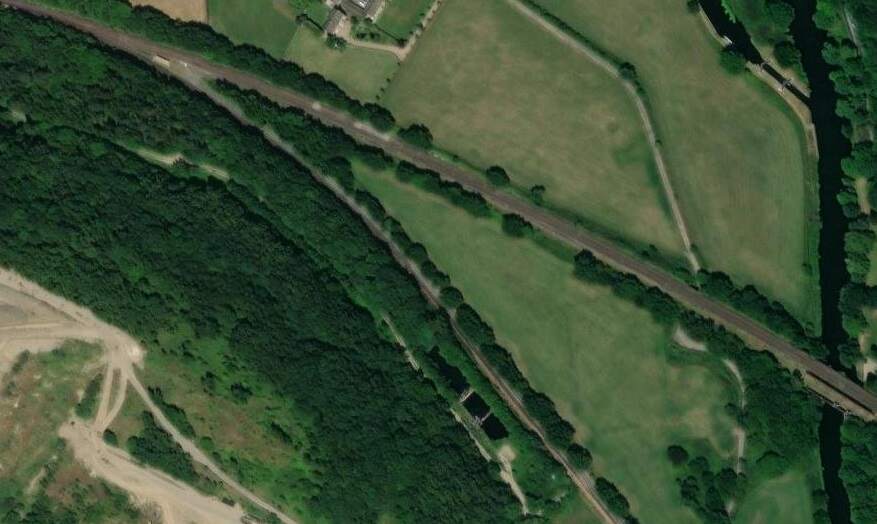
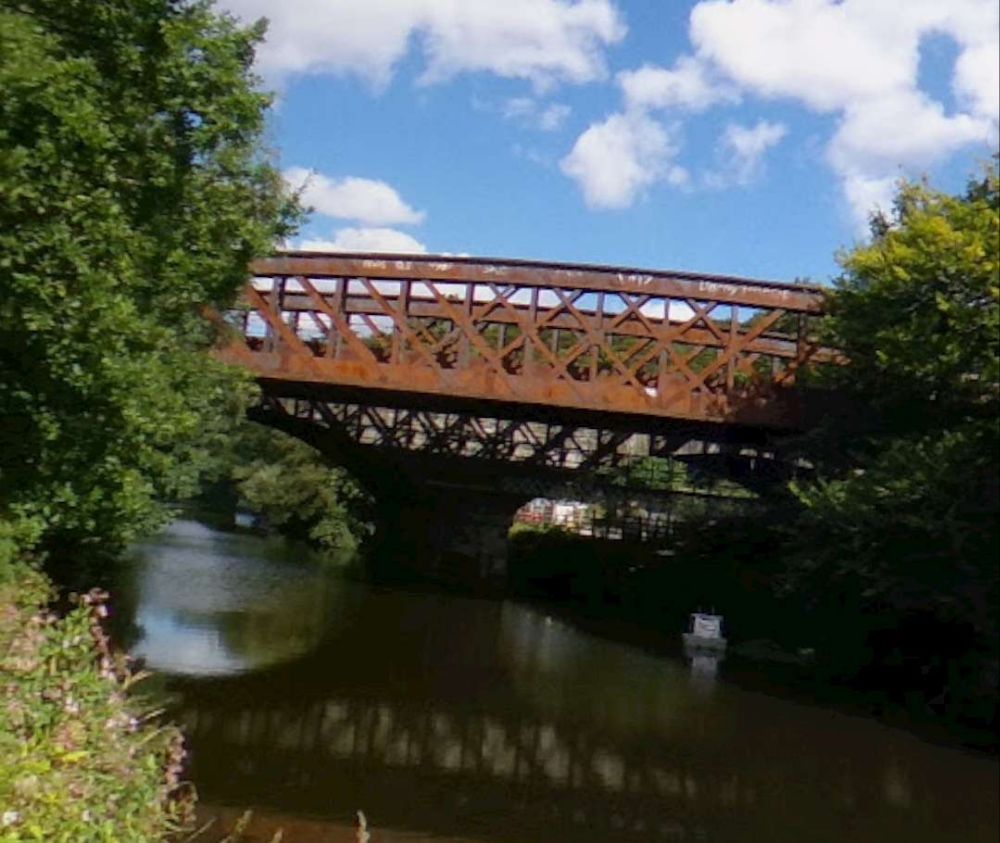
In between the two bridges across the River Calder, was Cooper Bridge Station.
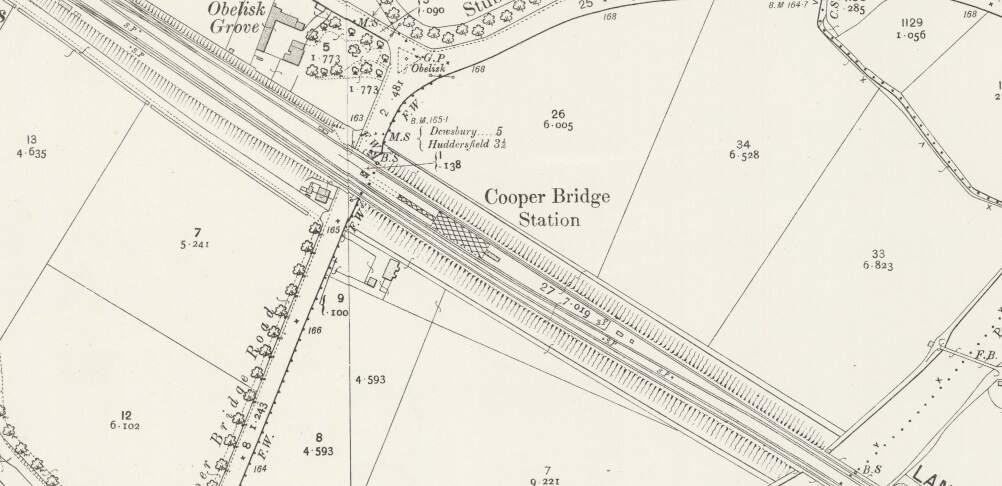
Cooper Bridge Station as it appears on the 1905 25″ Ordnance Survey. [34]The Station at Cooper Bridge is long gone in the 2st century, but the bridges remain. The station sat over the road at this location with platform buildings between the rails of the left edge of this image. This photograph is taken from the North on Cooper Bridge Road. [Google Streetview, July 2024]The second of the two crossings of the River Calder mentioned above. This photograph, taken from the Southwest, shows the girder bridge with the stone-arched 2-span bridge beyond, (c) Uy Hoang. [Google Streetview, September 2022]This view from the North East and from under an adjacent footbridge shows the stone-arched 2-span structure, (c) Uy Hoang. [Google Streetview, September 2022]
Rake’s journey along the line seems not to focus so closely on the remaining length of the line. Various features and a number of stations seem to have been missed (particularly Cooper Bridge, Mirfield, Ravensthorpe, Thornhill, Horbury & Ossett). It also seems to suggest that the line goes through Dewsbury Station. Rather than rely on Rake’s commentary about the line, from this point on we will provide our own notes on the route.
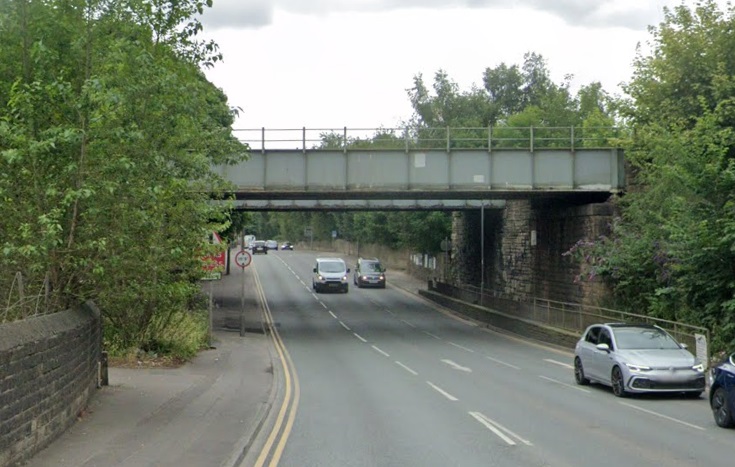
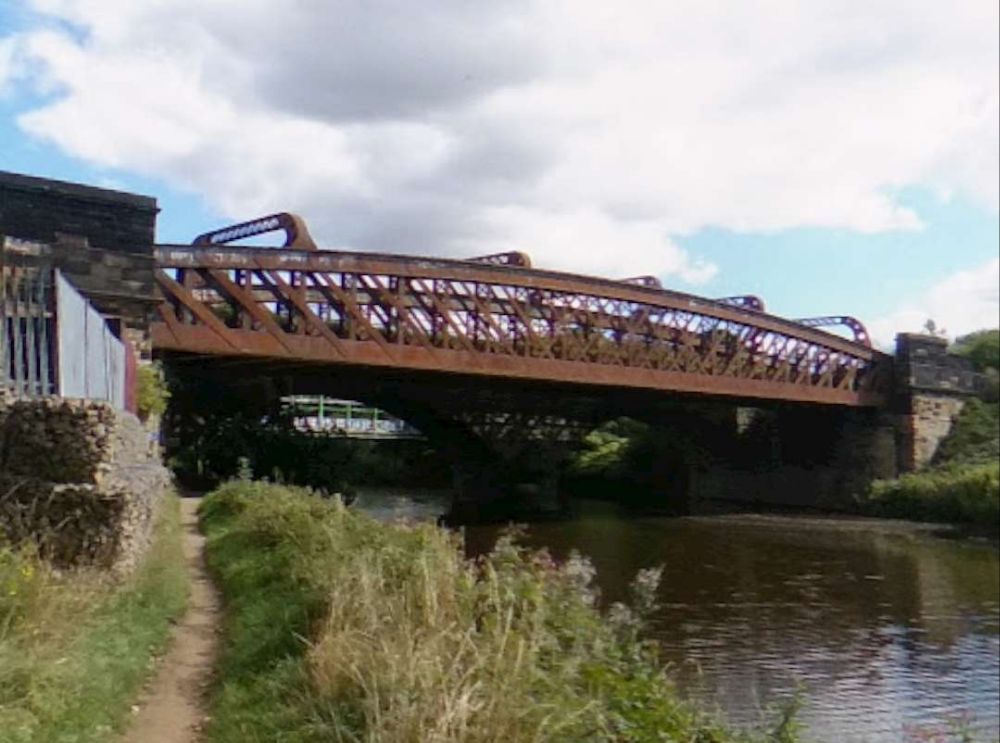
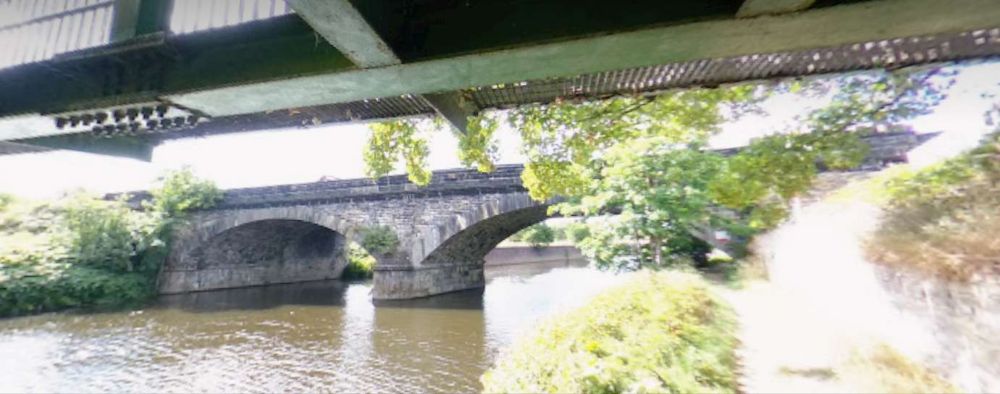
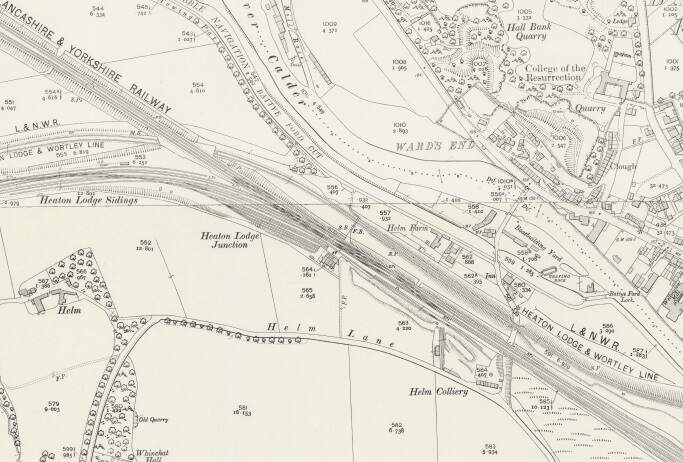
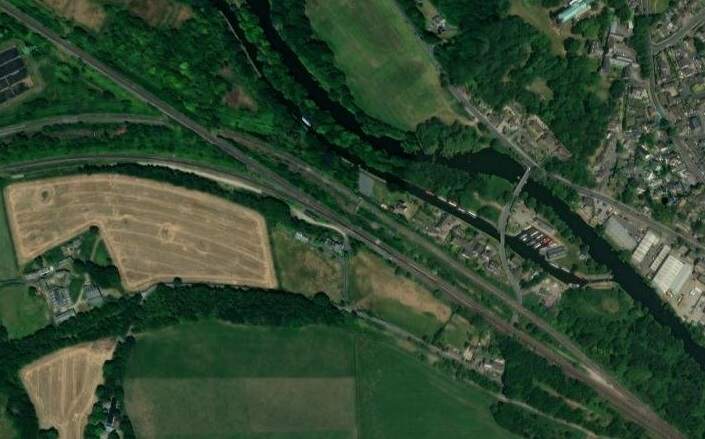
At Heaton Lodge Junction, the LNWR Huddersfield & Manchester line joined the Manchester & Leeds line with the LNWR Heaton & Wortley line passing beneath. The Manchester & Leeds line ran on towards Mirfield Station passing the large engine shed before entering the station over a long viaduct which once again crossed the River Calder.
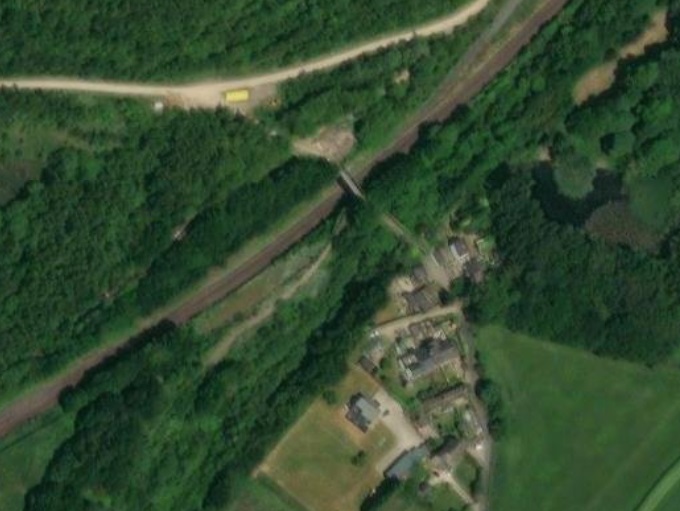
Just to the East of Mirfield Station was Cleckheaton Junction and then Wheatley’s Bridge over the River Calder. A bridge then carries Sand Lane over the railway.
Looking West from Sands Lane Bridge back towards Mirfield. [Google Streetview, May 2023]Looking East from Sands Lane Bridge. [Google Streetview, May 2023]
Soon after this the line encountered Dewsbury Junction which hosted Ravensthorpe (Ravensthorpe and Thornhill) Station.
Dewsbury Junction and Ravensthorpe Station. [39]Looking West from Calder Road towards Mirfield. [Google Streetview, May 2023]The view East from Calder Road showing Ravensthorpe Station with the Manchester & Leeds line heading away to the right of the picture. [Google Streetview, May 2023]
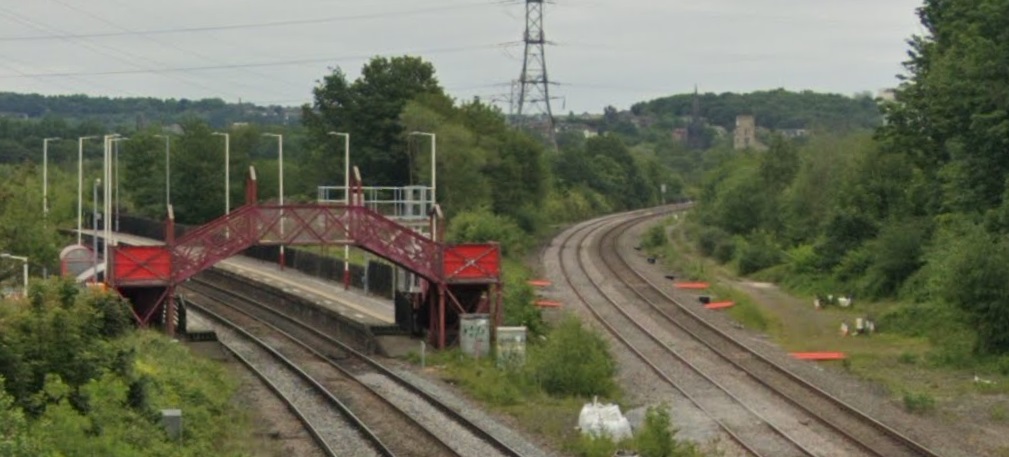
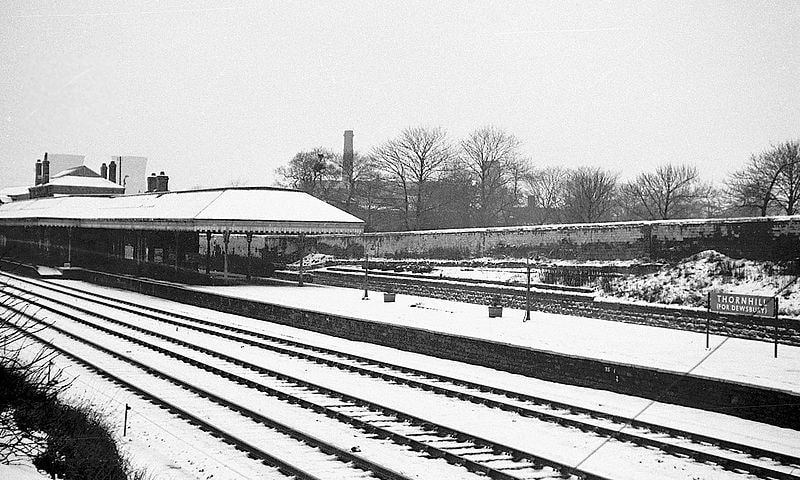
Thornhill Railway Station was a short distance further East just beyond the junction where the Ravensthorpe Branch met the main line at Thornfield Junction.
Thornfield Junction, Goods Yard and Station as shown on the 25″ Ordnance Survey of 1905. [40]Thornhill Station opened with the Manchester & Leeds Railway and only closed on the last day of 1961, a short time before Beeching’s closure of of Dewsbury Central. [37]The same station looking East towards Wakefield, Normanton etc. In the background is the bridge of the ex-Midland branch from Royston to Dewsbury (Savile Town), closed 18/12/50, (c) Ben Brooksbank and licenced for reuse under a Creative Commons Licence (CC BY-SA 2.0). [38]The view West from Station Road in the 21st century, through what was Thornhill Railway Station. {Google Streetview, March 2023]The view East from Station Road in the 21st century. The bridge ahead carries Headfield Road over the railway. [Google Streetview, March 2023]The view West from Headfield Road Bridge towards the site of the erstwhile Thornhill Railway Station and Station Road. [Google Streetview, October 2022]The view East from Headfield Road Bridge. [Google Streetview, October 2022]
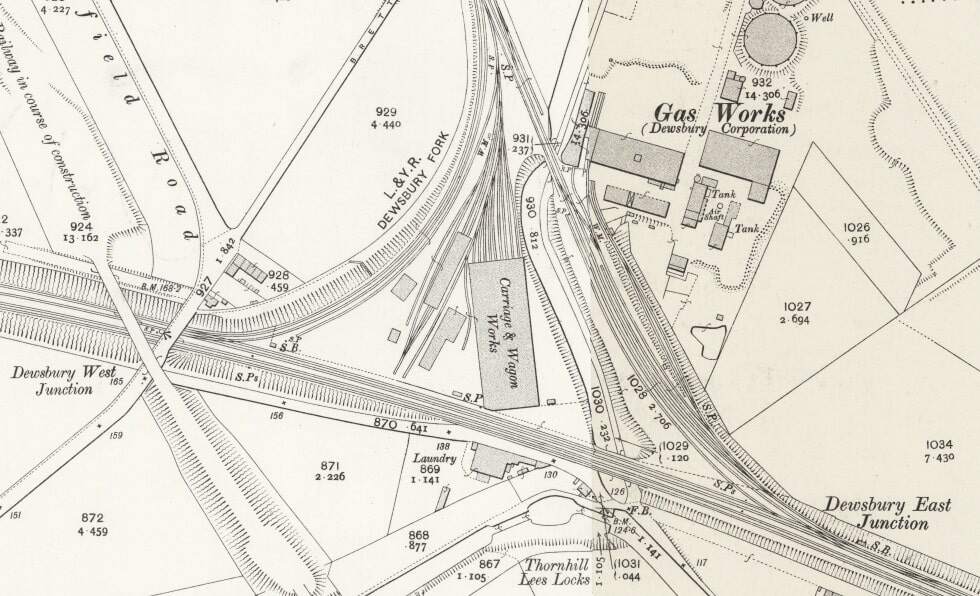
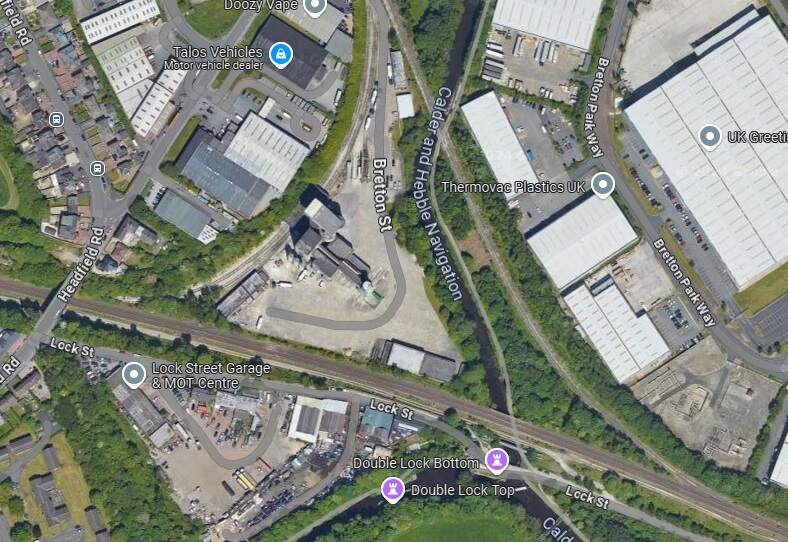
East of Thornhill Station were Dewsbury West and Dewsbury East junctions which together with Headfield Junction formed a triangular access to Didsbury Market Place Station. This was a busy location which sat close to Dewsbury Gas Works, Thornhill Carriage and Wagon Works and Thornhill Lees Canal Locks and a canal branch. Just off the North of the map extract below was a further junction giving access to the GNR’s Headfield Junction Branch, before the line crossed the River Calder and entered Dewsbury Market Place Station and Yard and terminated there.
This extract from the 25″ Ordnance Survey of 1905 shows the triangular junction which provided access to Dewsbury Market Place Station and a series of Goods Yards and Sheds. Headfield Road is on the left side of this image. [41]A similar area in the 2st century as it appears on Google Maps satellite imagery. [Google Maps, October 2024]
Dewsbury was very well provided for by both passenger and freight facilities. In its railway heyday the Midland Railway, the London & North Western Railway, the Lancashire & Yorkshire Railway and the Great Northern Railway all had access to the town. A computer drawn map showing the different lines can be found here. [42]
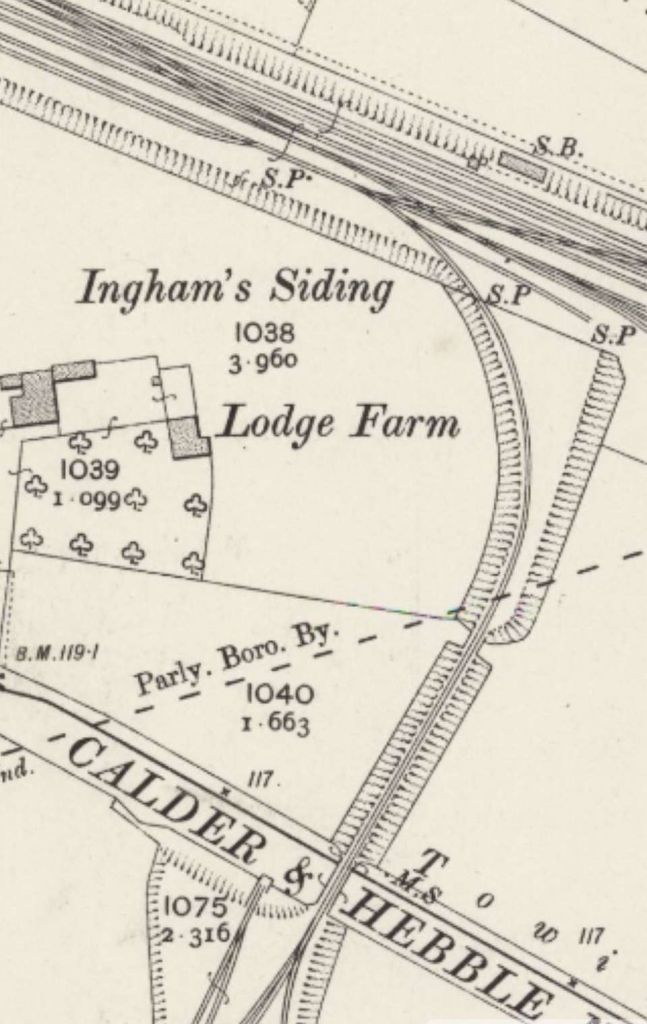
Continuing along the line towards Wakefield and Normanton, the next feature of note is the junction for Combs Colliery’s Mineral Railway at Ingham’s Sidings. Nothing remains of this short branch line.
Ingham’s Siding ran South, crossing the Calder & Hebble Navigation to reach Comb’s Colliery. [43]
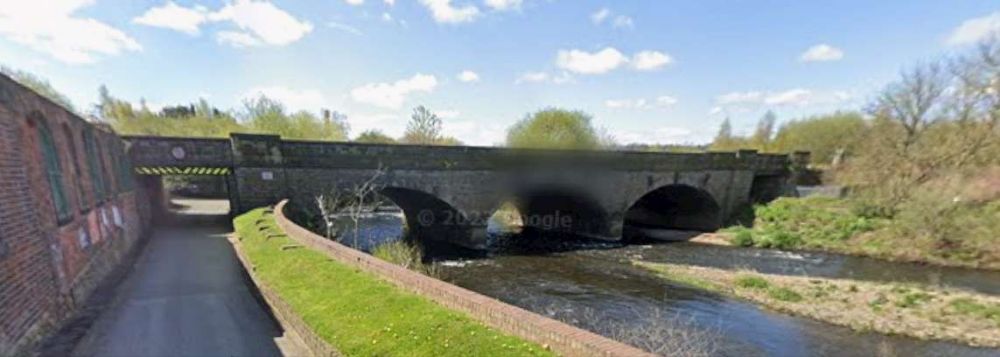
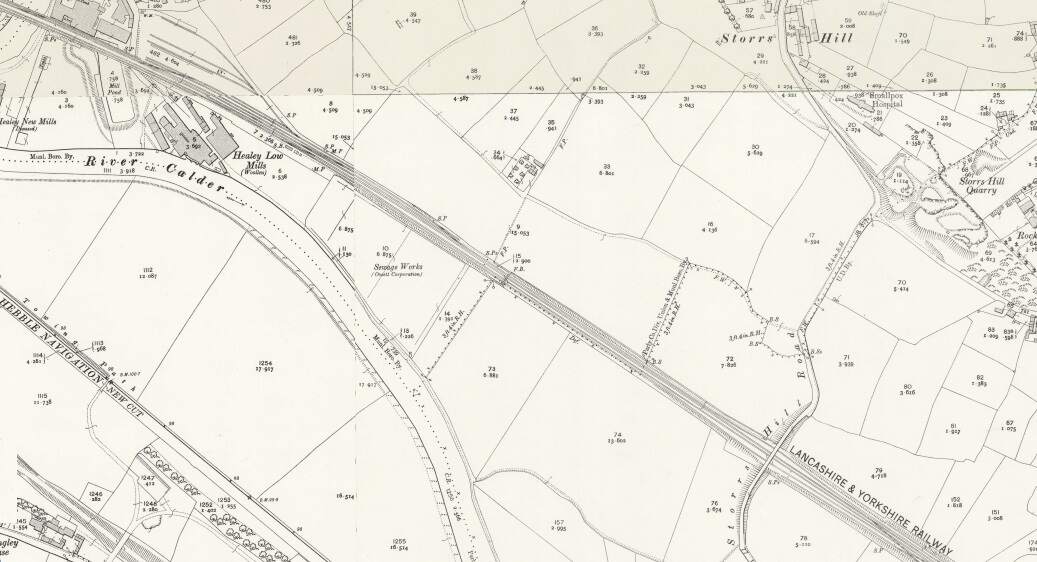
Further East the line continues in a straight line East-southeast to cross the River Calder once again. It then passes the Calder Vale and Healey Low Mills at Healey and runs Southeast to Horbury and Ossett Station.
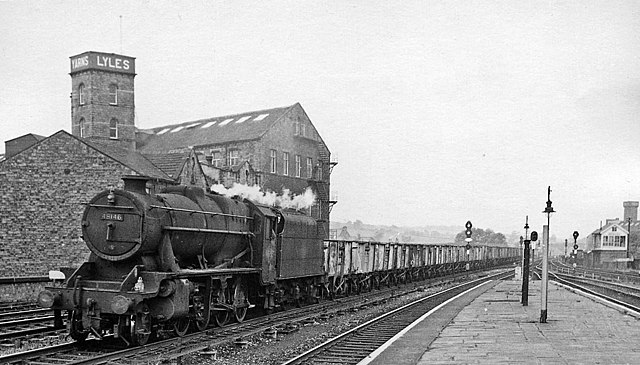
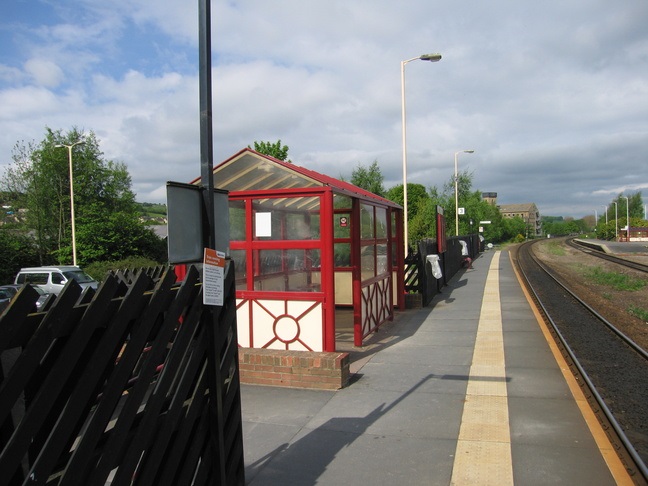
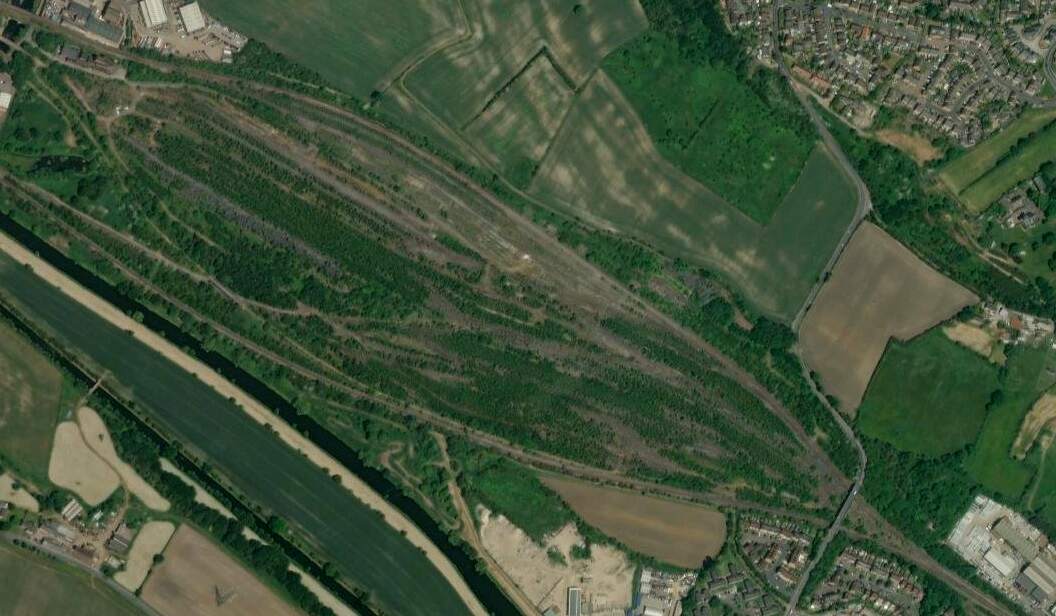
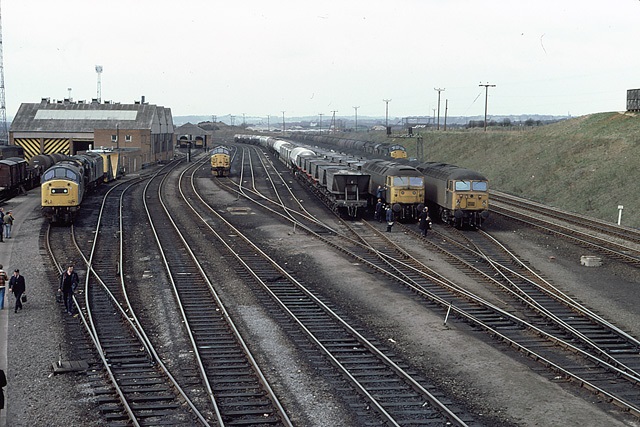
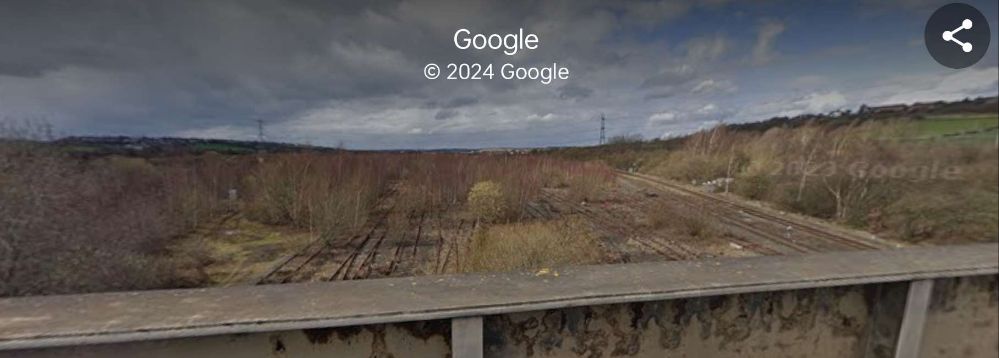
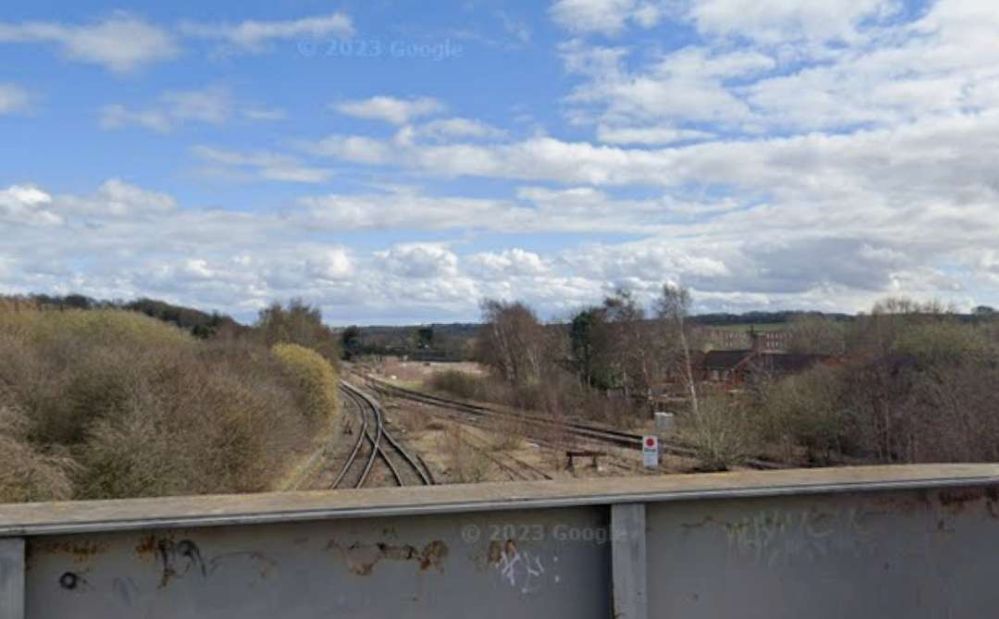
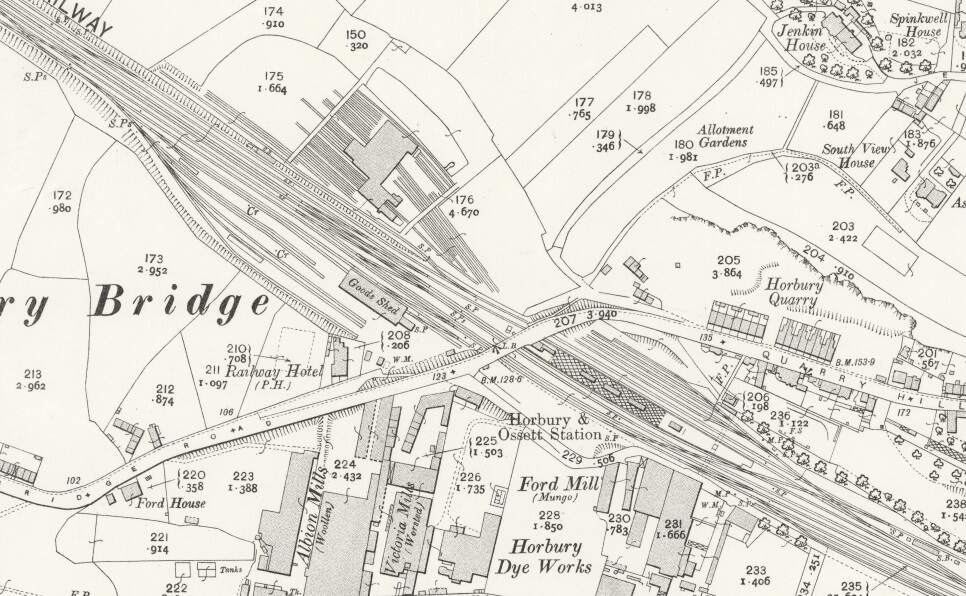
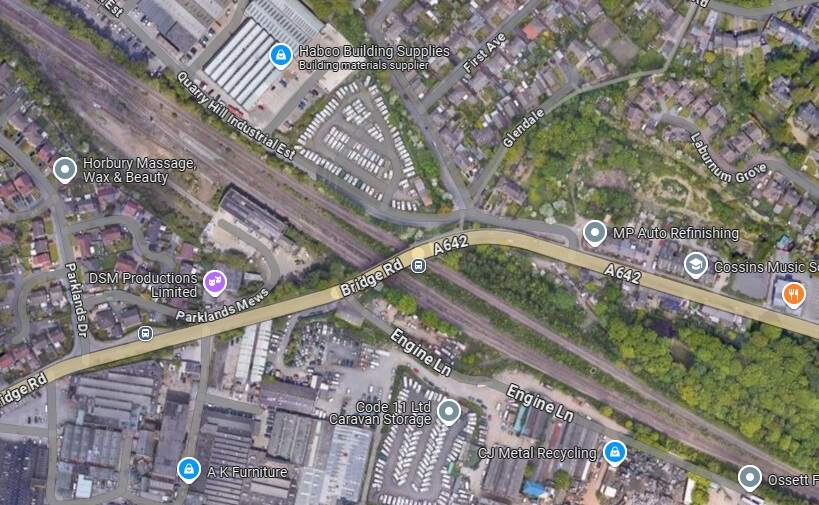
The bridge over the River Calder adjacent to Calder Vale and Healey Low Mills. [Google Streetview, April 2023]The bridge over the River Calder at Calder Vale and Healey Low Mills is in the top-left of this map extract from the 1905 25″ Ordnance Survey. This area was chosen by British Rail in the 1960s for a large marshalling yard. [46]British Railways developed a large marshalling yard in the 1960s at Healey Mills. The yard was opened in 1963 and replaced several smaller yards in the area. It was part of the British Transport Commission’s Modernisation plan, and so was equipped with a hump to enable the efficient shunting and re-ordering of goods wagons. The yard lost its main reason for existence through the 1970s and 1980s when more trains on the British Rail system became block trains where their wagons required less, or more commonly, no shunting. Facilities at the site were progressively run down until it closed completely in 2012. [46][47]Healey Mills Marshalling Yard in April 1982, (c) Martin Addison and licensed for reuse under a Creative Commons Licence (CC BY-SA 2.0). [48]Looking Northwest from Storrs Hill Road Bridge in the 21st century. [Google Streetview, March 2023]Looking Southeast from Storrs Hill Road Bridge in the 21st century through the throat of the old marshalling yard. [Google Streetview, March 2023]Horbury & Ossett Railway Station. [44]The site of Horbury & Ossett Railway Station in the 21st century. [Google Maps, October 2024]Looking Northwest from Bridge Road, A642 towards Storrs Road Bridge. Horbury and Ossett Railway Station goods facilities were on the left. [Google Streetview, July 2024]looking Southeast from Bridge Road. the passenger facilities were on the Southeast side of Bridge Road with the platform sat between the running lines. [Google Streetview, July 2024]
“Horbury and Ossett railway station formerly served the town of Horbury. … The station was opened with the inauguration of the line in 1840, on the west of the Horbury Bridge Road, to the south-west of the town. Later a new, more substantial structure was built just to the east. … British Railways developed a large marshalling yard in the 1960s at Healey Mills immediately to the west of the original station. … [The station] closed in 1970. Almost all that remains is the old subway which ran under the tracks. Ossett is now the largest town in Yorkshire without a railway station. Proposals to open a new one are periodically canvassed, perhaps on part of the Healey Mills site.” [45]
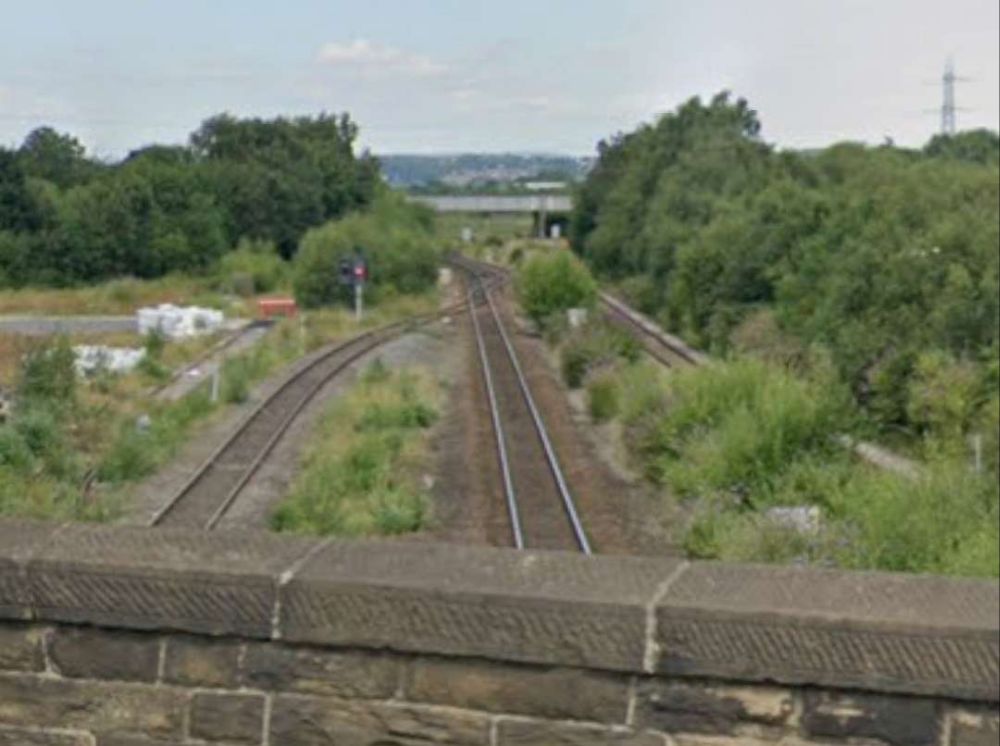
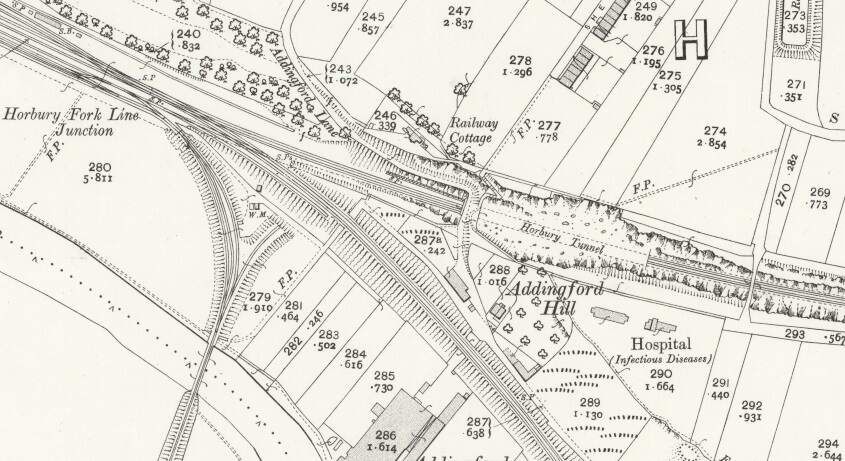
A little further East is Horbury Fork Line Junction where a mineral railway runs South to Harley Bank Colliery and the Horbury & Crigglestone Loop leaves the Manchester to Leeds line.
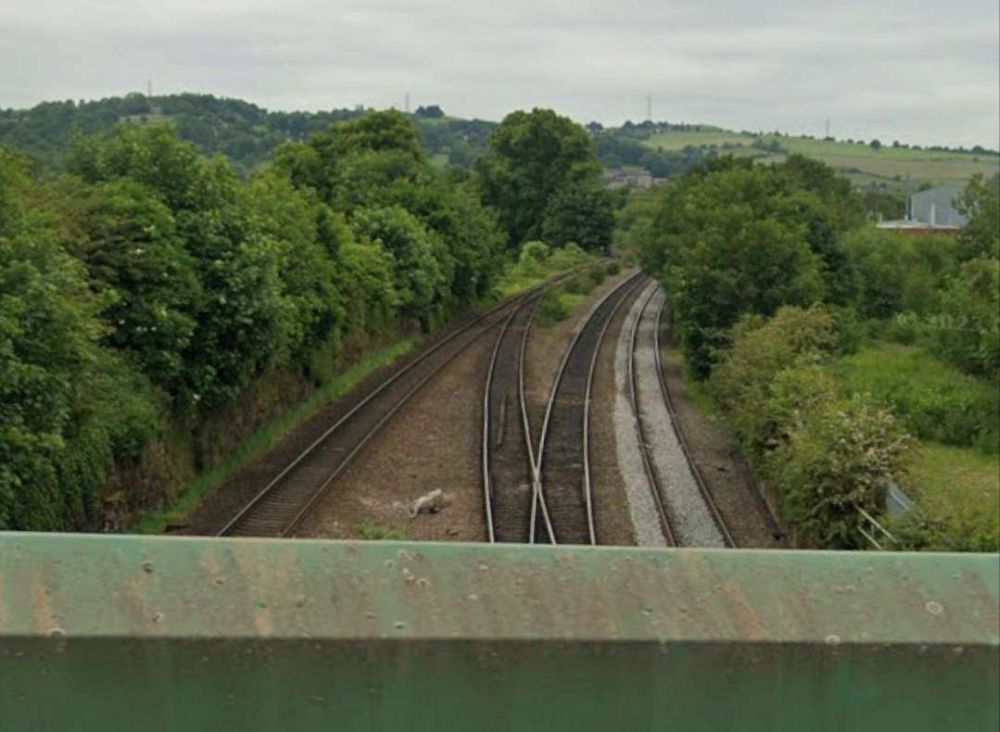
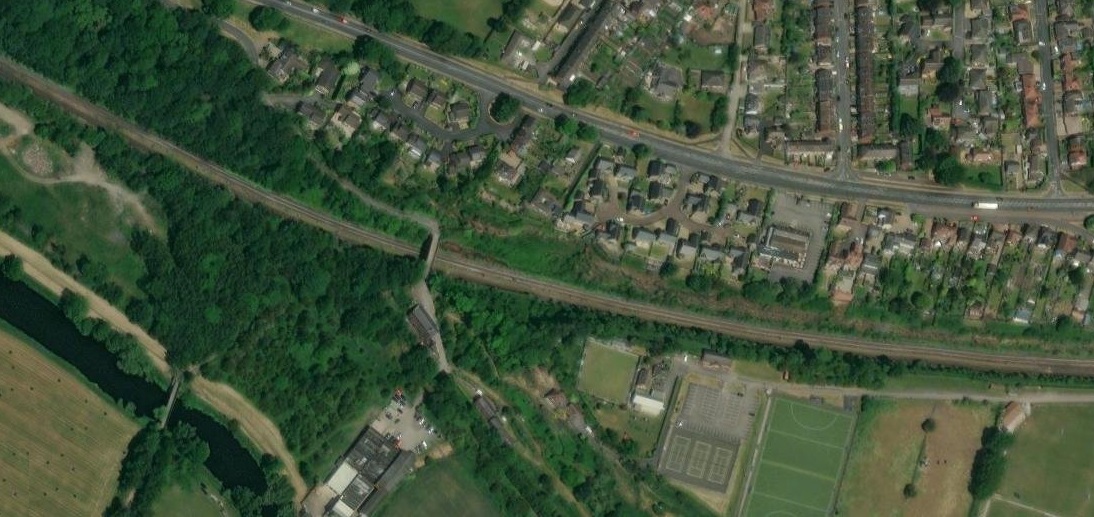
Horbury Fork Line Junction on the 1905 25″ordnance Survey. The junction sat just to the West of Horbury Tunnel. That tunnel has since been removed. [49]The same location in the 21st century. The tunnel sat to on the East side of the present footbridge which is just to the left of the centre of this image. This image is an extract from the NLS’ ESRI satellite imagery. [49]
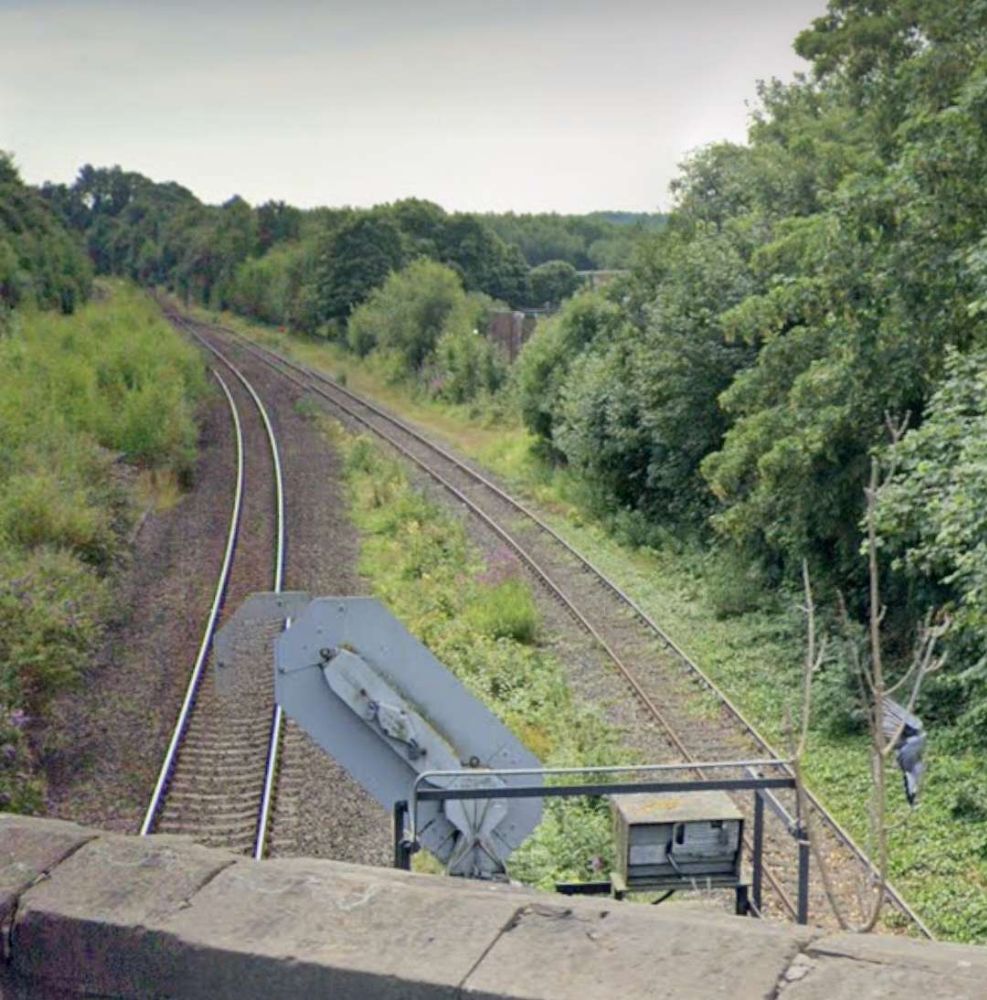
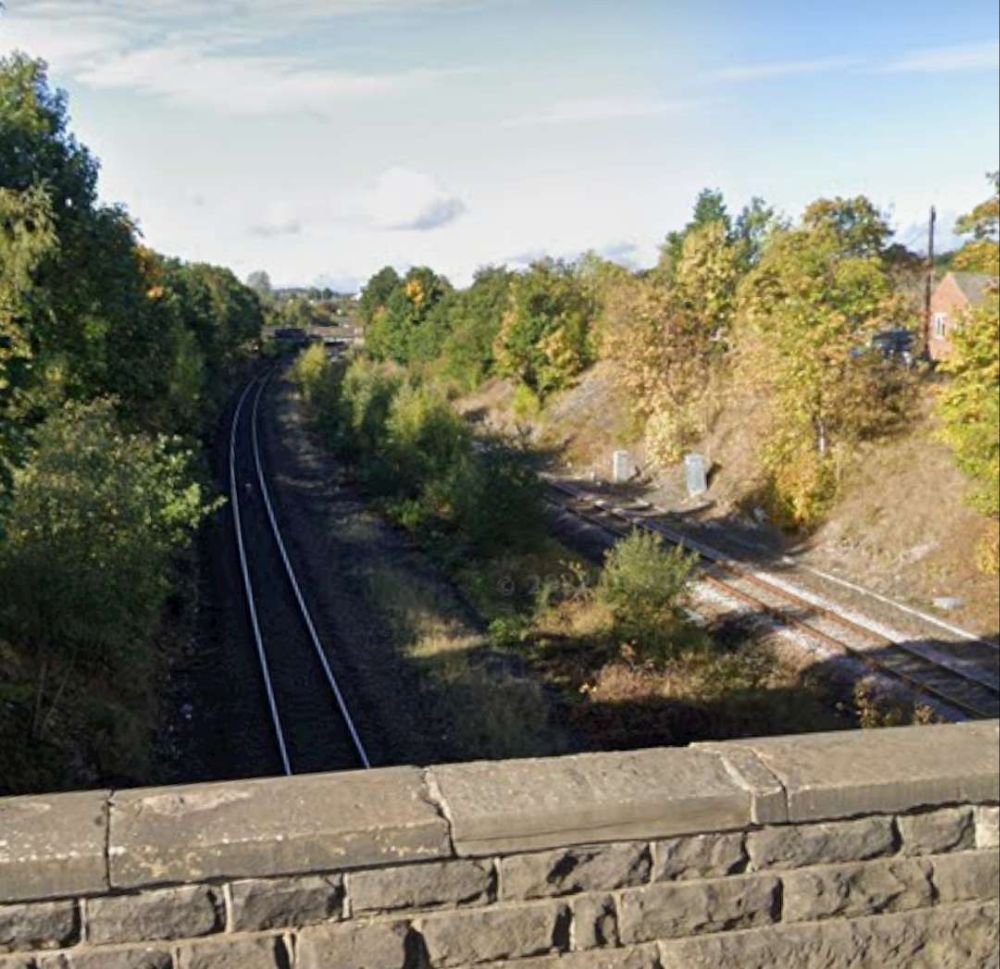
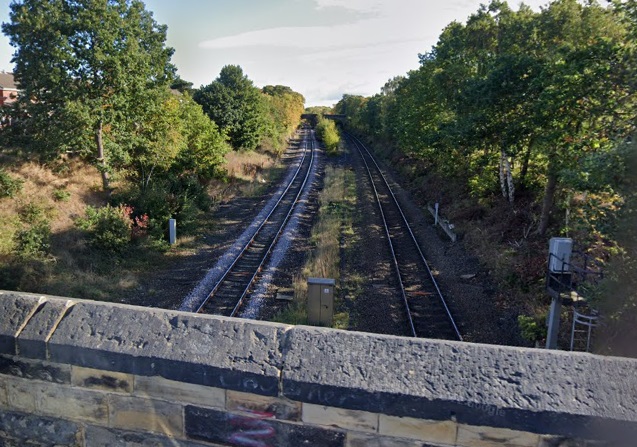
These next few photographs show views of the line from a series of three overbridges to the East of Horbury Fork Line Junction.
The view West from Southfield Lane Bridge. [Google Streetview, October 2022]The view East from Southfield Lane Bridge. [Google Streetview, October 2022]The view West from Dudfleet Lane Bridge towards Southfield Lane Bridge. [Google Streetview, October 2022]The view East from Dudfleet Lane Bridge towards Millfield Road Bridge. [Google Streetview, October 2022]The view West from Millfield Road Bridge towards Dudfleet Lane Bridge. [Google Streetview, October 2022]The view East from Millfield Road Bridge. [Google Streetview, October 2022]
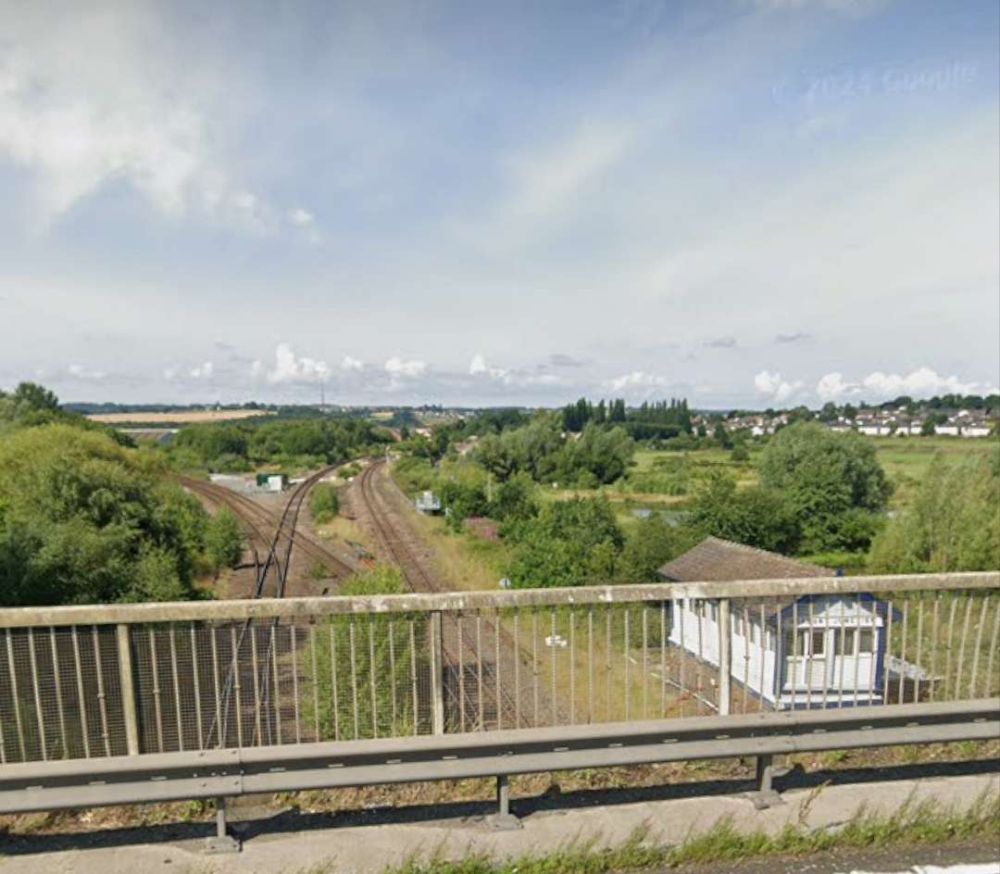
The next significant location on the line is Horbury Junction.
Horbury Junction on the 1905 25″ordnance Survey. Horbury Junction Ironworks sat in-between the Manchester and Leeds Railway and the. There was a Wagon Works just off the South edge of this image. The line heading South from Horbury Junction was the L&YR line to Flockton Junction and beyond. [50]The same location in the 21st century as shown on the ESRI satellite imagery provided by the NLS.. [50]
Industrialisation in the immediate area of Horbury Junction began “in the early 1870s with the construction of Millfield Mill, followed by the Horbury Ironworks Co. In 1873, Charles Roberts bought a site for a new factory at Horbury Junction and moved his wagon building business from Ings Road, Wakefield to Horbury Junction. Before that, the area of Horbury Junction was a quiet backwater with a corn mill and a ford across the Calder for farm traffic.” In reality, a beautiful pastoral area of countryside was changed forever with the coming of the Railway, Millfield Mill, the Wagon Works and the Ironworks.” [51]
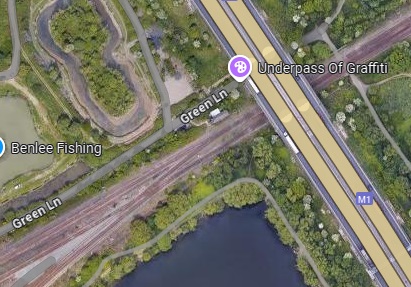
In the 21st century, just beyond Horbury Junction, the line is crossed by the M1.
In the 21st century, just beyond Horbury Junction (on the left of this extract from Google Maps), the line is crossed by the M1. [Google Maps, October 2024.
Horbury Junction seen, looking Southwest from the M1. [Google Streetview, July 2024]Looking Northeast from the M1. [Google Streetview, August 2024]Green Lane Underpass seen from the North. This underpass sits just to the East of the modern M1. [Google Streetview, October 2008]
Following the line on to the Northeast, it next passes through Thornes.
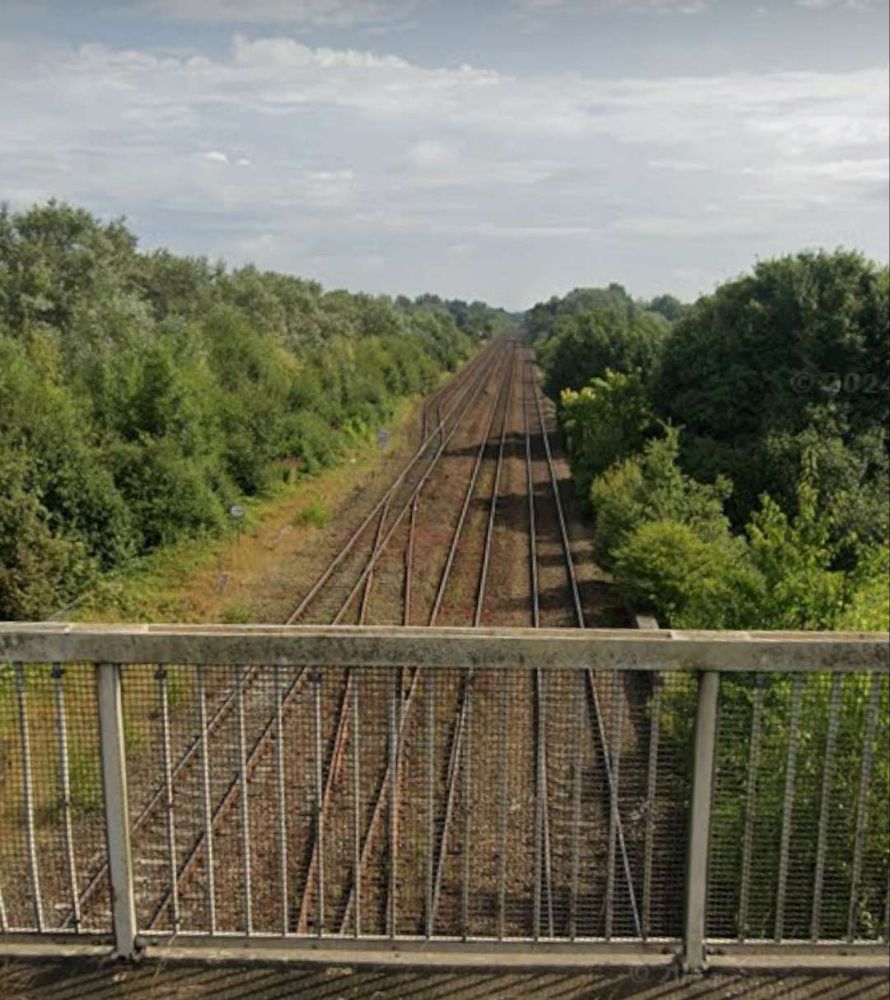
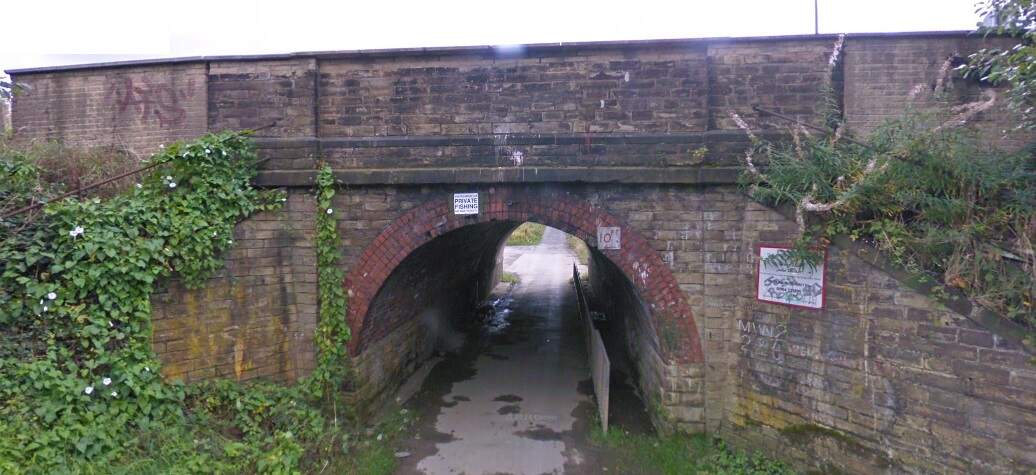
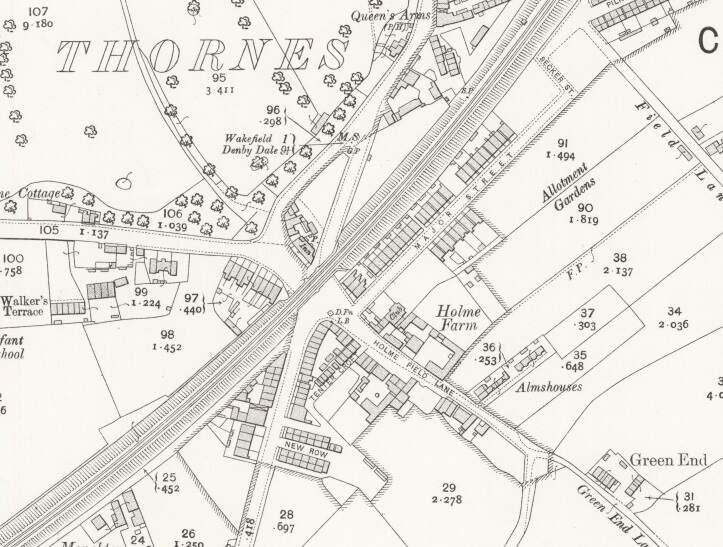
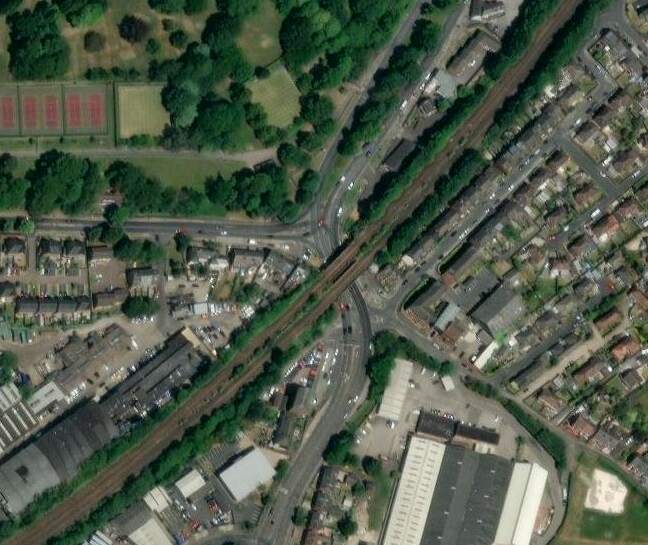
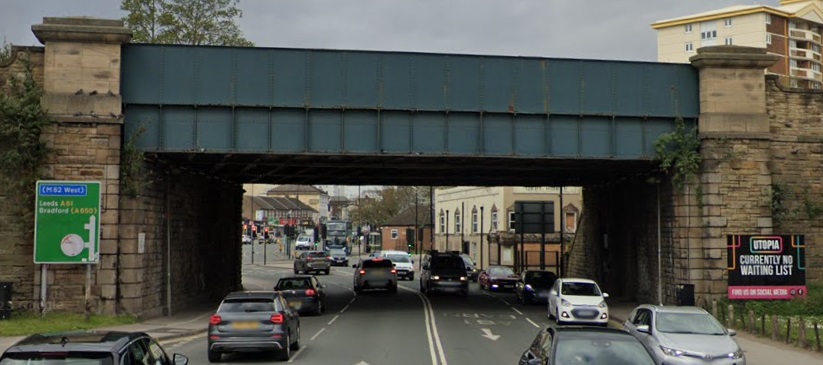
The railway bridge at the centre of Thornes in 1905. [52]The same location in the 21st century. The now quadruple line is carried by two separate bridges. [52]Thorne Bridge seen from the South in June 2024. [Google Streetview, June 2024]
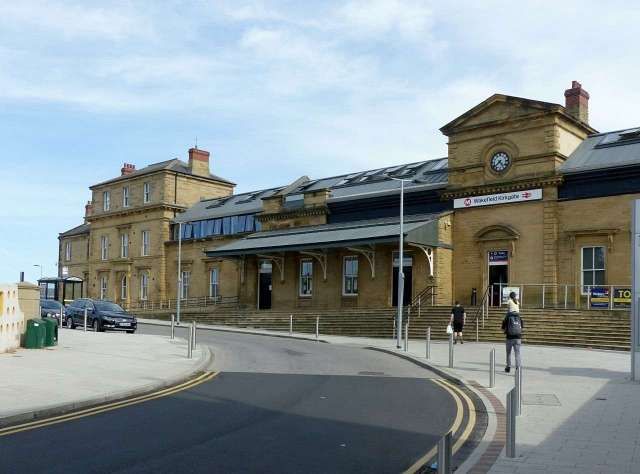
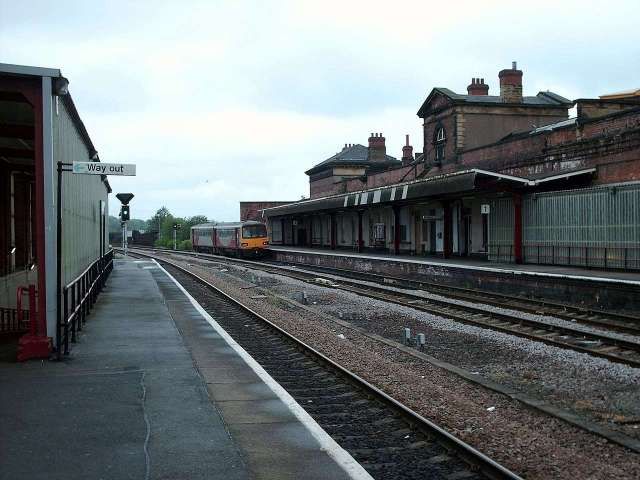
Northeast of Thornes, the Manchester and Leeds Railway ran at high level into Kirkgate Joint Station in Wakefield.
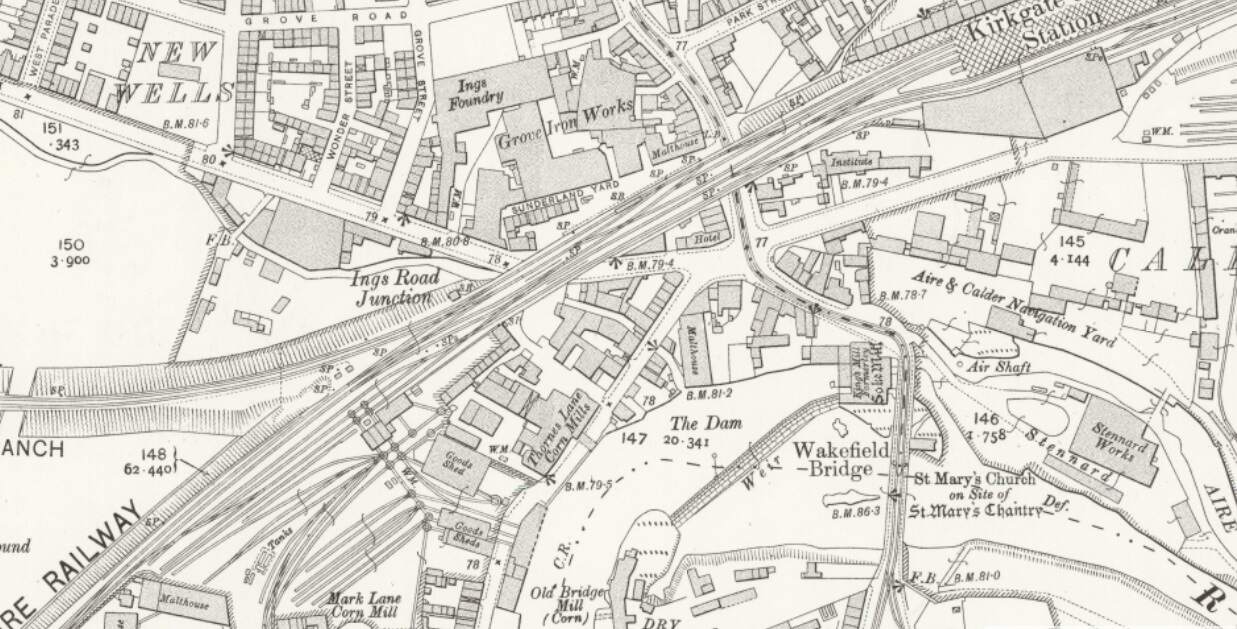
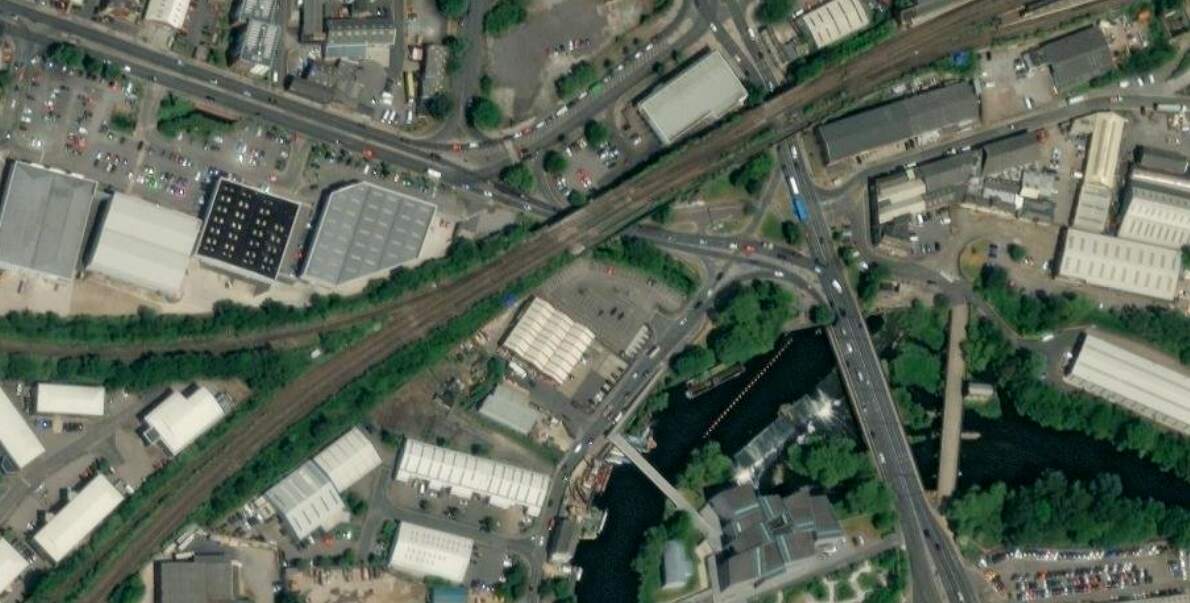
Thornes Lane BridgeA638, Ings Road BridgeThe bridge carrying the line over Kirkgate. [All three images from Google Streetview April 2023]The Manchester and Leeds Railway enters this extract from the 1905 25″ Ordnance Survey bottom-left, To the North of it id the GNR Ings Road Branch. To the South of it is a Goods Yard with access to Wakefield’s Malthouses and Mark Lane Corn Mill. [53]The same area in the 21st century. The rail lines remain approximately as on the map extract above. Wakefield Kirkgate Station (top-right) is somewhat reduced in size. Much of the built environment is different to that shown on the map above. This image is another extract from the ESRI satellite imagery. [53]
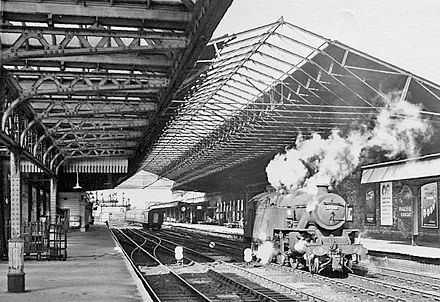
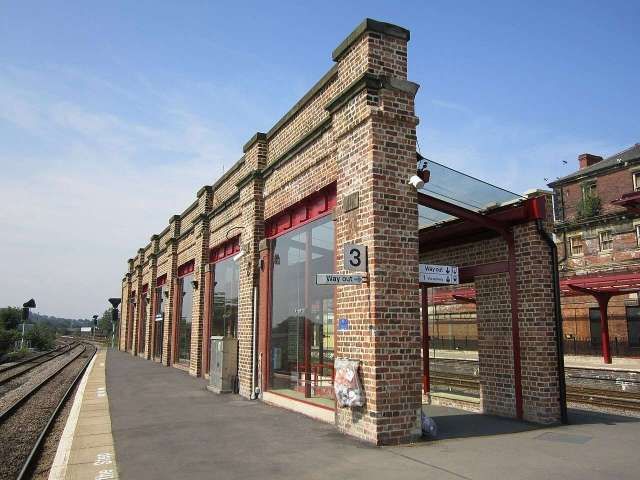
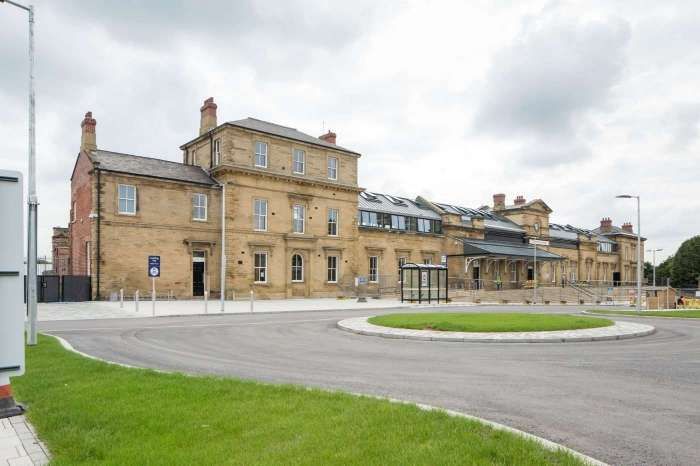
Wikipedia tells us that once it was opened by the Manchester and Leeds Railway in 1840, Kirkgate station was “the only station in Wakefield until Westgate was opened in 1867. The railway station building dates from 1854. … Some demolition work took place in 1972, removing buildings on the island platform and the roof with its original ironwork canopy which covered the whole station. A wall remains as evidence of these buildings. After this, Kirkgate was listed in 1979.” [72]
Kirkgate Station was refurbished in two phases between 2013 and 2015. [72]
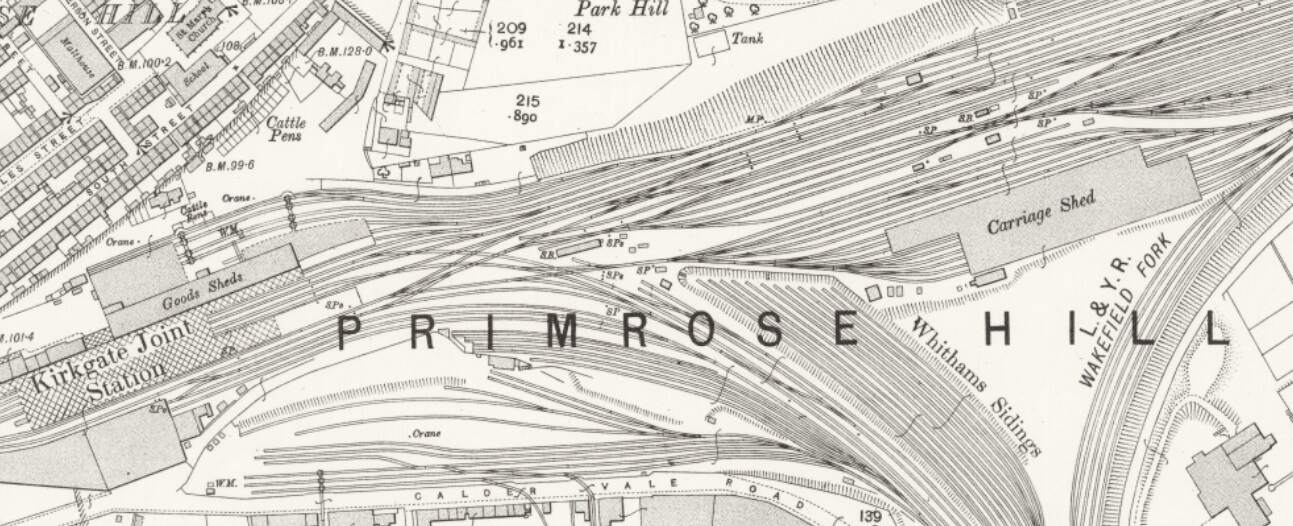
East of Kirkgate Joint Station in 1905. The landscape in Primrose Hill is dominated by the railway. The line exiting to the South of this extract is the L&YR Oakenshaw Branch which crosses the River Calder and runs past the station’s Engine Sheds. [54]the same area in the 21st century, much of the railway infrastructure has disappeared and is beginning to be taken over by nature. [54]
Just to the East of Wakefield Kirkgate Station were Park Hill Colliery Sidings.
Much the same area in the 21st century. The Midland’s lines South of Goosehill have gone, the footbridge remains but the large area of sidings to the Northeast of the Junction have also gone. [56]Park Hill Colliery Sidings and the River Calder in 1913. [55]The same location in the 21st century. [55]
And beyond those sidings a further crossing of the River Calder.
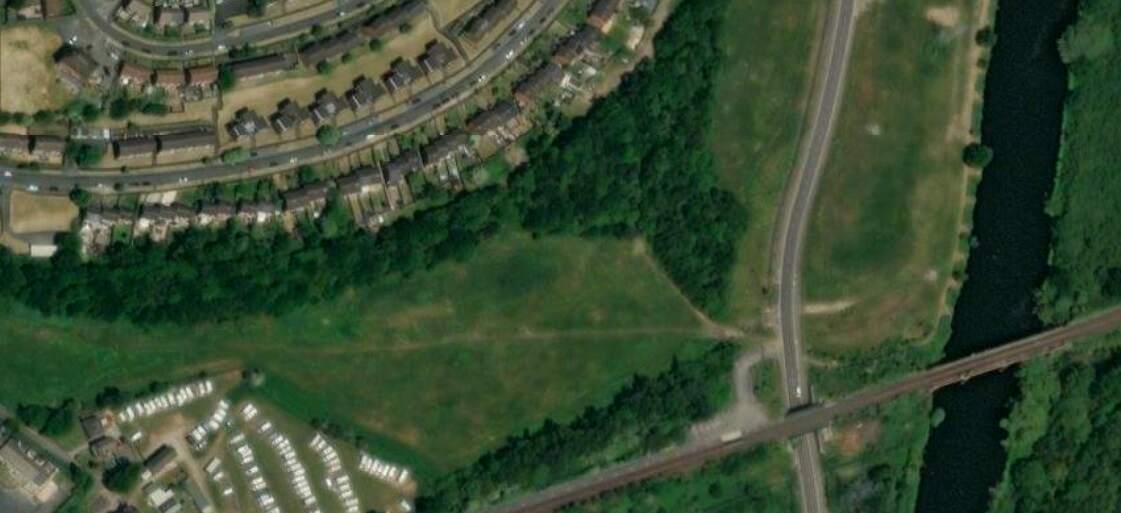
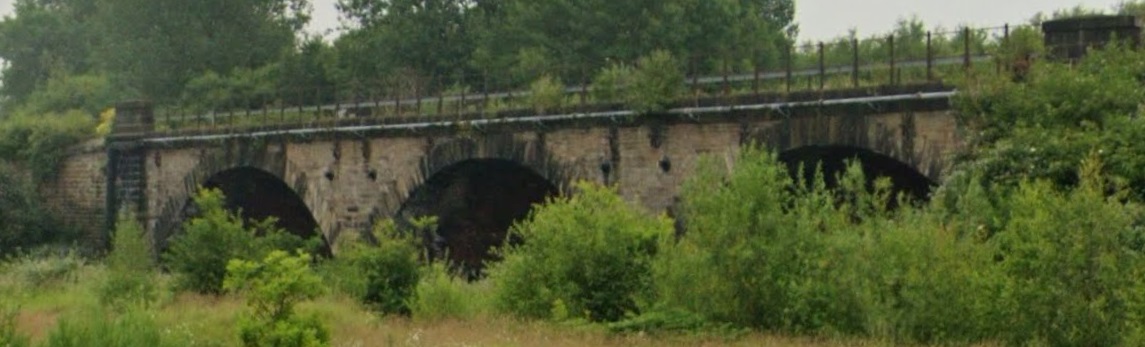
The three arched stone viaduct across the River Calder. This photograph is taken from Neil Fox Way and looks Southeast towards the bridge. [Google Streetview, June 2024]
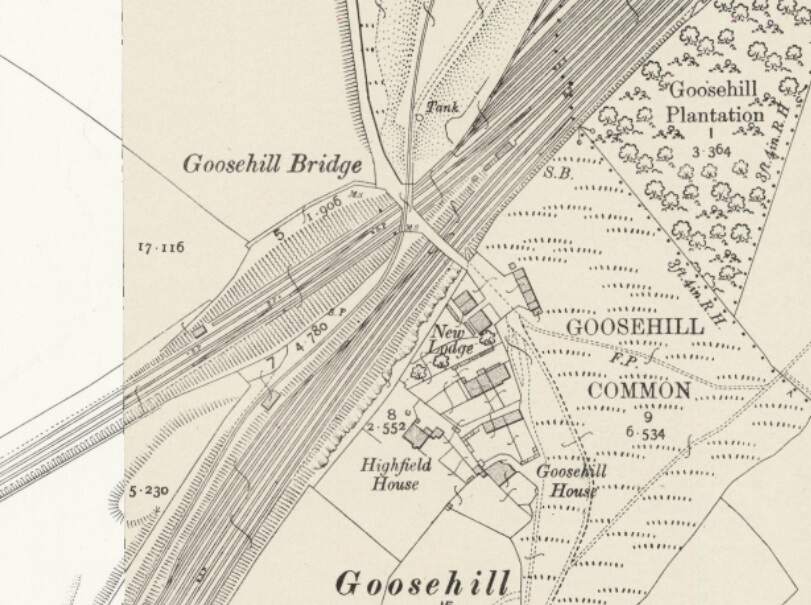
Just a short distance further along the line, at Goosehill, the Manchester and Leeds Railway (by 1905, The Lancashire and Yorkshire Railway) joined the North Midland Railway (by 1905, The Midland Railway)
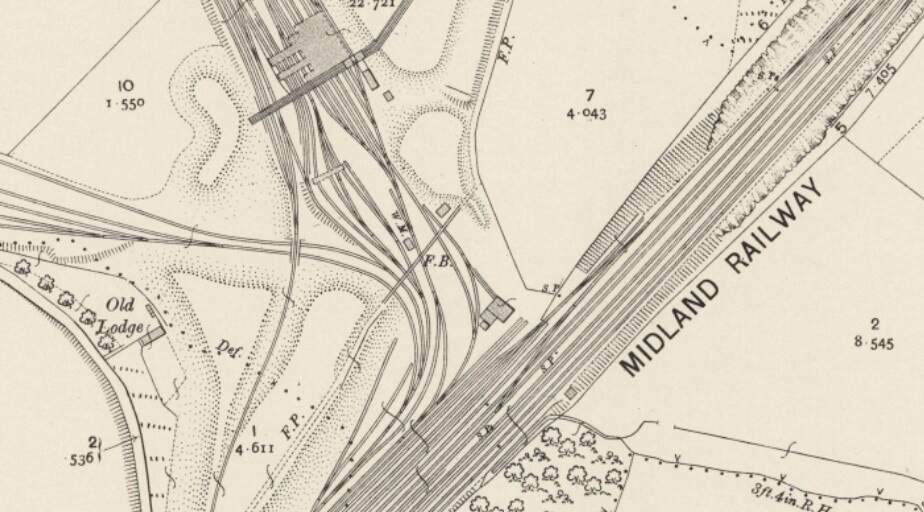
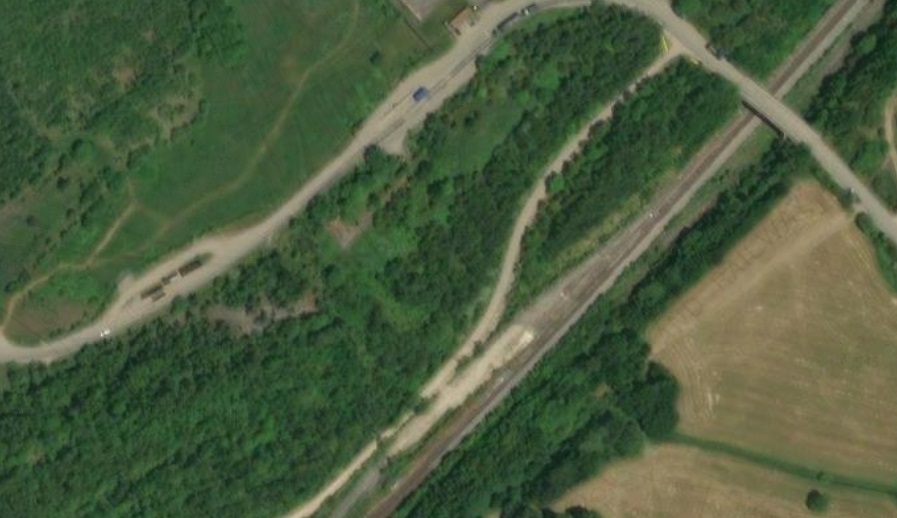
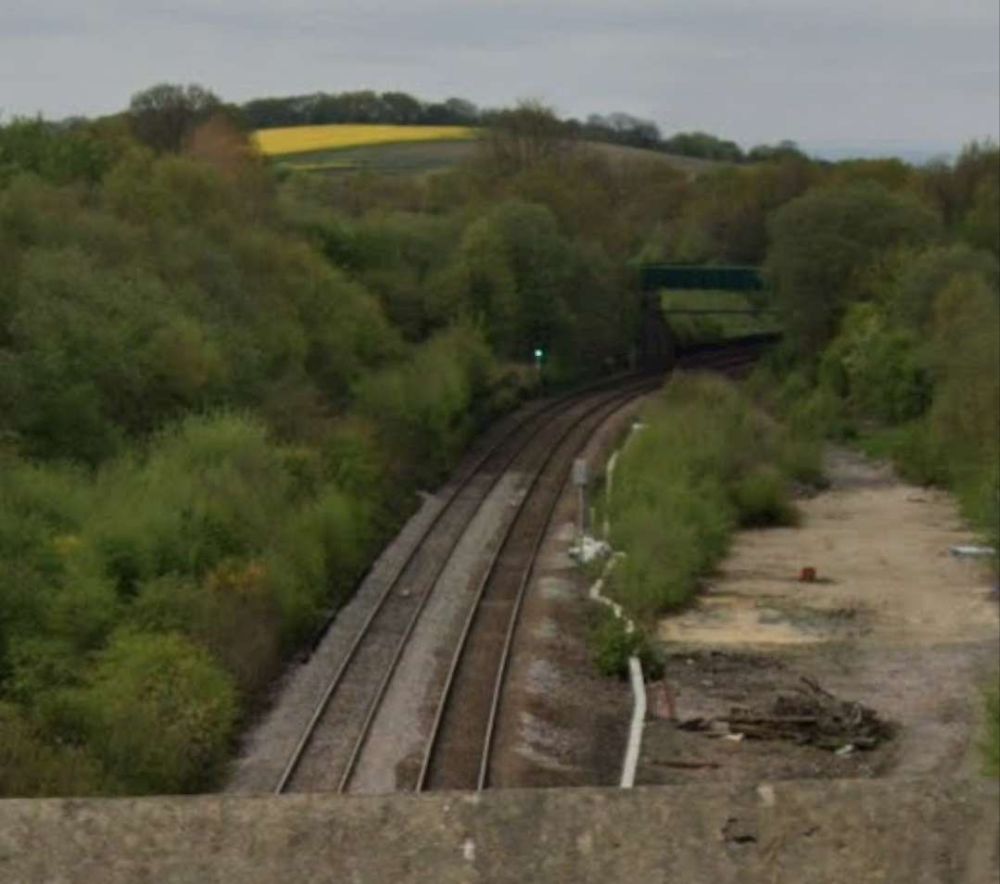
Goosehill Bridge and Junction witht he Midland Railway entering from the bottom of the extract and the Manchester 7 Leeds entering from the bottom-left. [56]Immediately to the Northeast of the last extract from the 1905 25″ Ordnance Survey, the Midland’s lines can be seen heading Northeast with branches off to the North and West. The branch heading away to the West is the St. John’s Colliery line running to wharves at Stanley Ferry. That to the North runs through the screens and serves St. John’s Colliery itself. [57]The same area in the 21st century. The roadway crossing the railway and heading off the satellite image to the West runs to a large opencast site. [57]Looking Southwest from the bridge carrying the access road to the opencast site. [Google Streetview, May 2023]Looking Northeast from the bridge carrying the access road to the opencast site. [Google Streetview, May 2023]Looking Southwest from the Newlands Lane Bridge. [Google Streetview, May 2023]Looking Northeast from Newlands Lane Bridge. [Google Streetview, May 2023]
From this point on the traffic from the Manchester and Leeds Railway ran on North Midland (later Midland) Railway metals, via Normanton Railway Station and then passing Silkstone and West Riding Collieries, and on towards Leeds, approaching Leeds from the Southeast. Normanton Station appears on the map extract below.
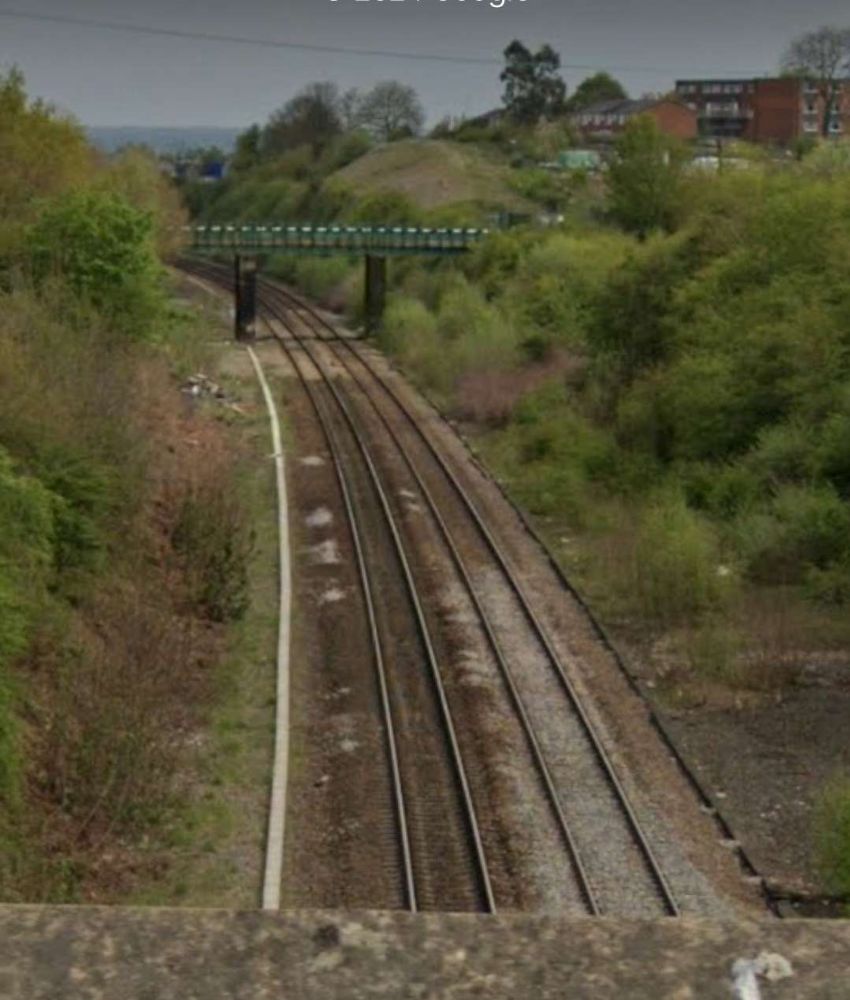
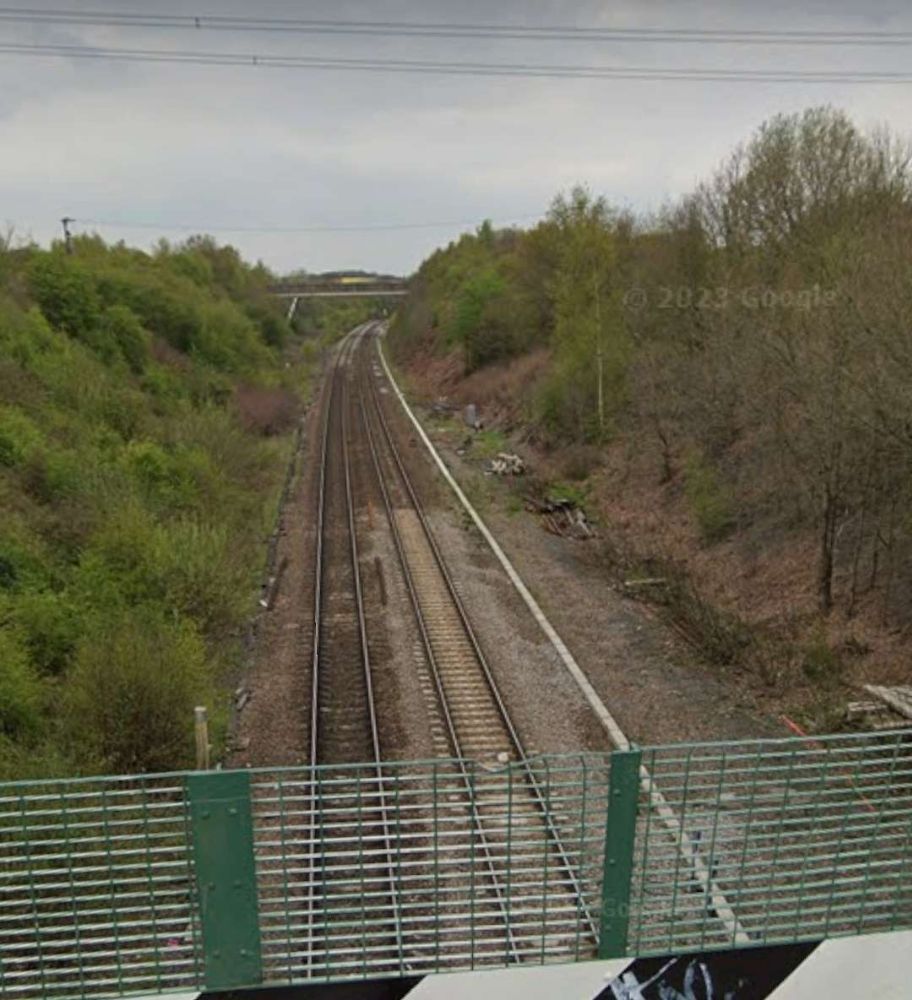
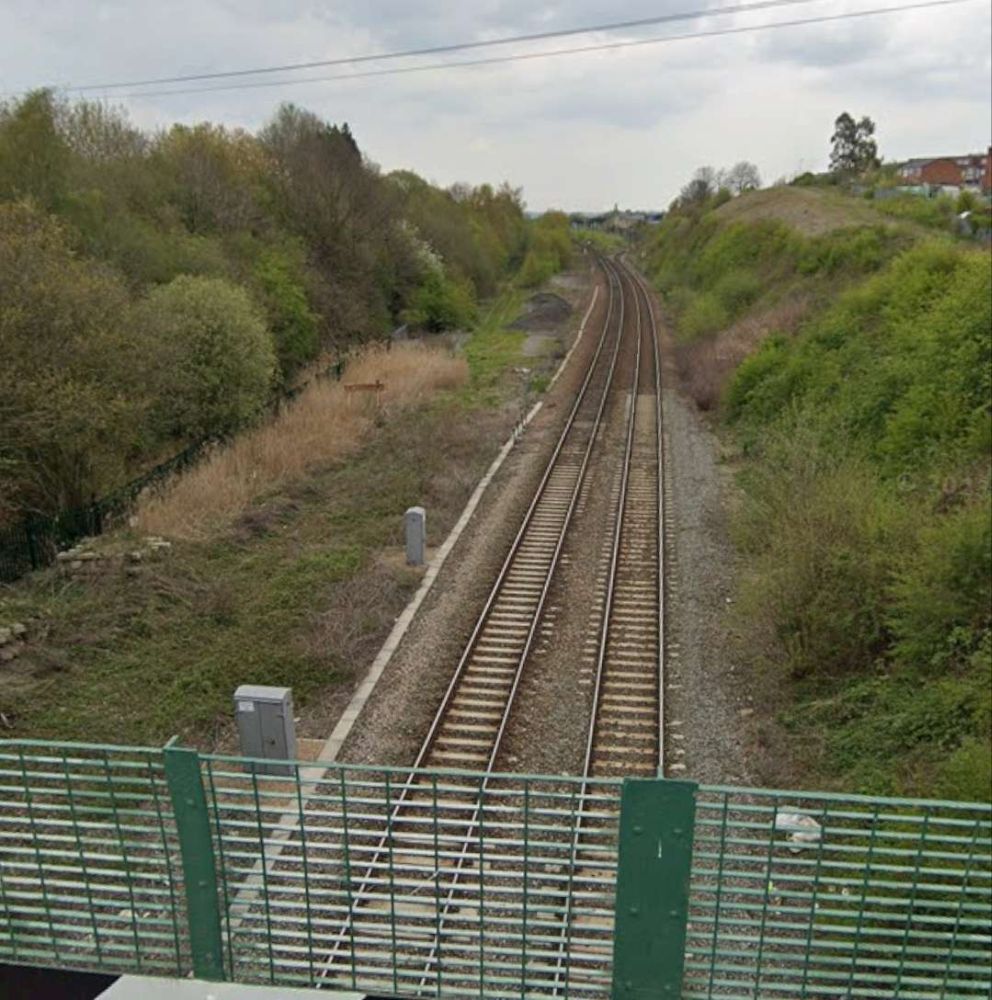
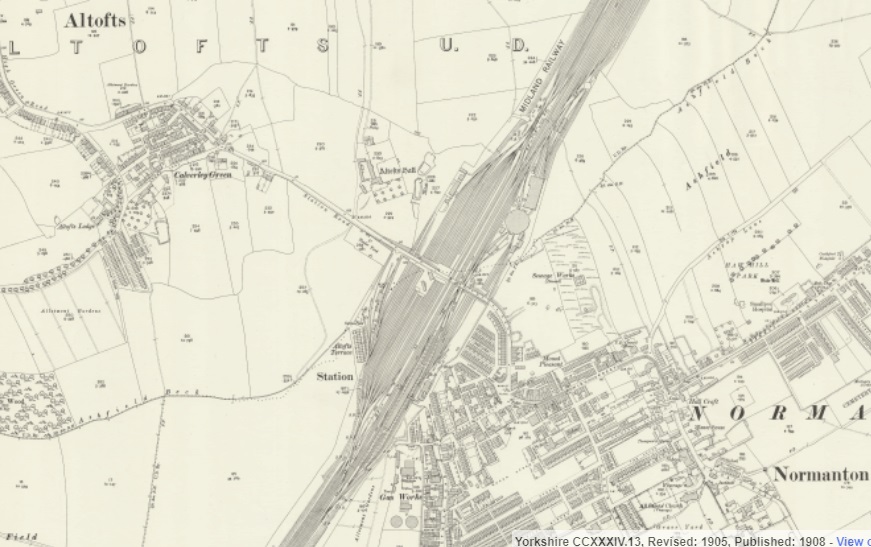
An smaller scale extract from the 25″ Ordnance Survey of 1905 which shows Normanton and its railway station. St. John’s Colliery and Gooshill Junction are just of the extract on the bottom left. [58]Looking Southwest from Altofts Road Bridge through the site of Normanton Railway Station. [Google Streetview, April 2023]
Rake’s last words on a journey along the railway are these: “Just previous to reaching Wakefield, the railway is carried over a viaduct of 16 arches, and, quitting that station it enters a deep cutting, and crosses the Vale of Calder for the last time, a little to the east of Kirkthorpe. Here was the most important diversion of the Calder, by which the cost of building two bridges was saved. … The line terminated by a junction with the North Midland Railway, a mile to the north of which point was situated the Normanton Station, where the York and North Midland, and by its means, the Leeds and Selby and Hull and Selby Railways united with the former lines. The remainder of the journey to Leeds, 9 miles, was traversed on the North Midland Railway.” [1: p472]
Rake goes on to talk about the gradients of the railway which “were considered somewhat severe. Starting from Manchester, the line ascends to Rochdale, 10 miles, over a series of inclinations averaging about 1 in 155; from Rochdale to the summit level, 6½ miles, the ascent is 1 in 300; the total rise from Manchester being 351 ft. From the summit level plane, which extends for 1 mile 55 chains, to Wakefield, a distance of 30 miles, the line descends for the first six miles on a gradient of 1 in 182, after which it is continued by easy grades of an average inclination of 1 in 350. Below Wakefield a comparatively level course is maintained to the junction with the North Midland Railway, the total fall from the summit being 440 ft. The curves were laid out so as not to be of a less radius than 60 chains. The gauge adopted on the Manchester and Leeds Railway was 4 ft. 9 in., to allow a in. play on each side for the wheels. … The rails were of the single parallel form, in 15 ft. lengths, with 3 ft. bearings, and were set in chairs, to which they were secured by a ball and key, as on the North Midland Railway. The balls, (3/4 in. diameter), were of cast iron, and fitted into a socket formed in one side of the stem of the rail; the key, which was of wrought iron, was 8 in. long (and 5/8 in. wide at one end, from which it tapered to 3/8 in. at the other end). … Stone blocks were used where they could be obtained from the cuttings, and were placed diagonally, but sleepers of kyanised larch were used on the embankments, the ballasting being of burnt and broken stone.” [1: p472-473]
It is interesting to note that the tramway/tramroad practice of using stone blocks as sleepers was in use when this railway was first built!
Rake continues: “The Manchester terminal station was located between Lees Street and St. George’s Road, and was entirely elevated on arches. The passenger shed was covered with a wooden roof, in two spans, and the whole length of the station was 528 ft. The passenger platform was approached by a flight of 45 steps from the booking-office on the ground floor. [1: p473]
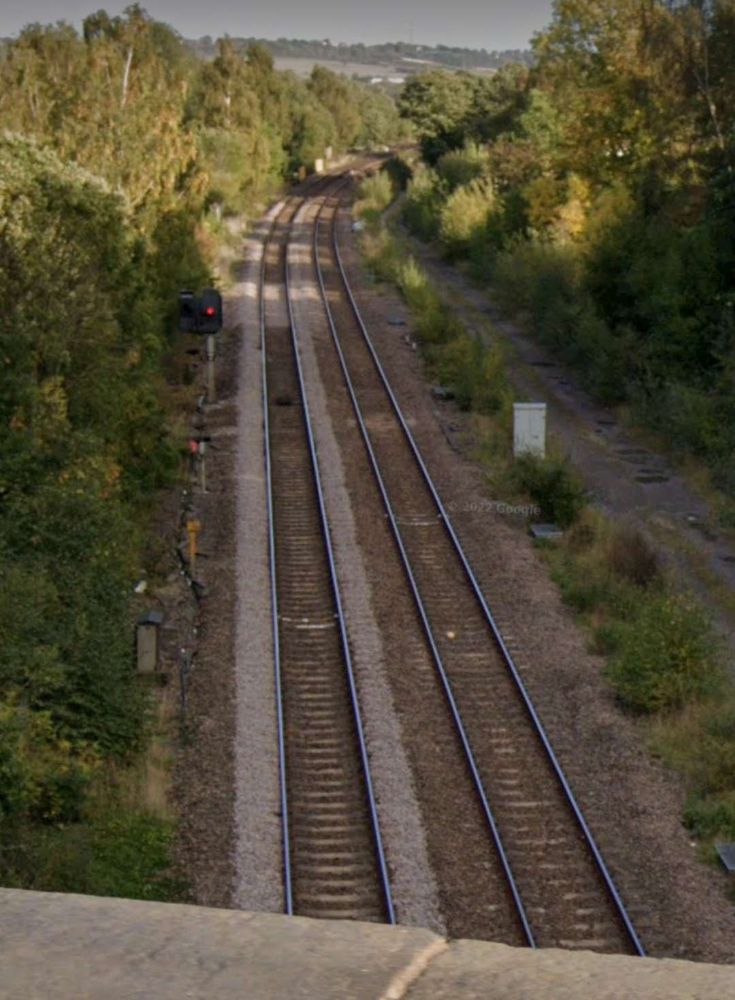
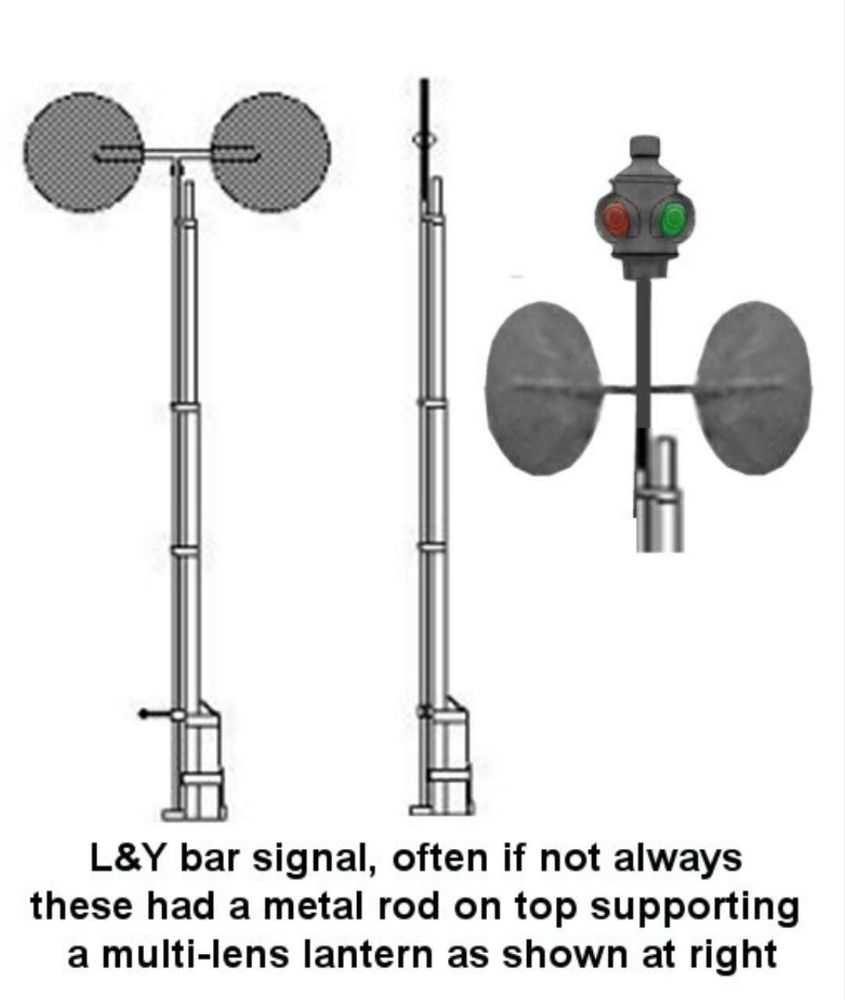
Early signals on the Manchester and Leeds.Railway which became part of the Lancashire & Yorkshire Railway network. [64]
“The signals were of the horizontal double disc or spectacle form which, when revolved to the extent of a half circle, caused both discs to be invisible to the driver and indicated all right, the lamp above showing, when illuminated, green; the colour shown by the lamp when both discs were crosswise to the line being red.” [1: p473]
Rolling Stock
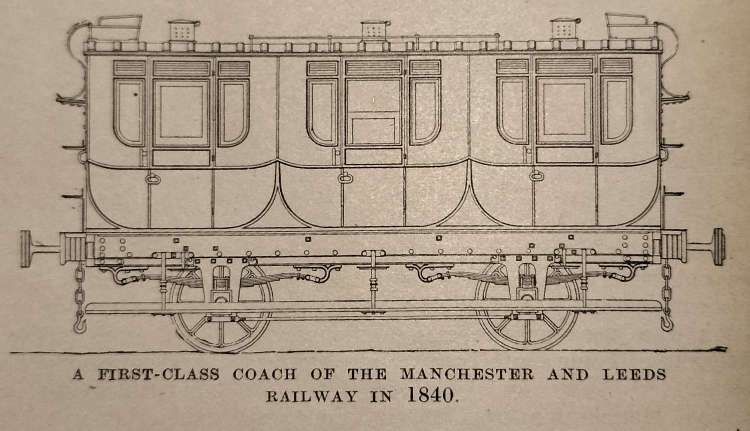
“The carriages consisted of three classes, The first class, in three compartments, upholstered, and fitted with sash windows painted blue; second-class, in three compartments, but open at the sides and furnished with wooden sliding shutters painted yellow; and carriages termed ‘mixed’, in which the middle compartment was for first-class, and each of the ends was for second-class passengers. There was also a carriage of novel construction, built according to the plan of the chairman of the company and used at the opening of the line. The under-framing was of the usual construction, but the body was unique. The floor was considerably wider than ordinary, and the sides curved outwards until they joined a semicircular roof, the greater part of which was fitted with wire gauze to give air, but capable of being instantaneously covered with waterproof material, by the action of an inside handle, so that sun and rain could be shaded out at pleasure. The sides were fitted throughout with plate glass, and ranges of seats occupied the floor, having passages on either side. Tents were also contrived in the sides which closed at will by spring action. The effect of the interior was said to resemble the interior of a conservatory! These carriages were in each case mounted on four wheels, with a perforated footboard of iron running the whole length of the body, in substitution for the lower tier of steps in use on other railways at the time.” [1: p473-474]
I have produced Rake’s description of this ‘unusual carriage’ as I have found it impossible to imagine what it looked like from Rake’s word-picture.
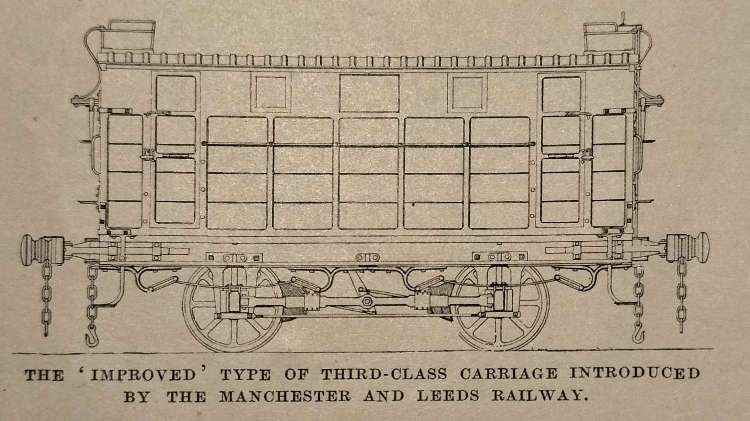
At the end of 1840, “an improved form of third-class carriage was constructed, in which each wheel was braked; the brake levers were attached to the axle-boxes and, consequently, when applied by the guard. who sat on the roof, did not bring the body of the carriage down on to the springs, The buffing springs were placed in front of the headstocks, and a flat iron bar attached to the buffer worked in brackets on the sole bar. The doors were fitted with latches on the outside, which were fastened by the guard when the passengers were inside.” [1: p474]
An improved third class carriage. Looking back from a 21st century perspective, these carriages seem to be not much better than the wagons used to carry livestock. This is borne out by Rake’s notes below. It was, however, a significant improvement on the open wagons, having a roof, glass windows and brakes. Contrary to what Rake appears to say below, Wells suggests that these covered third class wagons did have seating. [1: p474][75: p85]
“The windows and the doors being fixed, no passenger could open the door until the guard had released the catch. Roof lamps were not provided in these coaches, which were painted green. … The third-class carriages. or rather, wagons, were provided with four entrances, to correspond with the “pens” into which they were sub-divided by means of a wooden bar down the centre, crossed by another bar intersecting the former at right angles in the middle of its length. There were no seats, and the number of passengers for which standing room could be found was limited solely to the to the bulk Stanhope or ‘Stan’ups’, as they were derisively termed. The contrivance of pens was said to be due to a determination to prevent respectably dressed individuals from availing themselves of the cheaper mode of conveyance, in which there was little to distinguish them, it was complained, ‘from the arrangements for the conveyance of brute beasts which perish’. The company’s servants were strictly enjoined “not to porter for wagon passengers‘!” [1: p474]
Rake’s illustration of an early Manchester and Leeds Railway first class coach. [1: p474]
Further details of Rolling Stock on the Railway can be found in Jeffrey Wells book about the line. [75: p81-85]
Locomotives
Rake tells us that the locomotives were all mounted on 6 wheels and purchased from Sharp, Roberts & Co., Robert Stephenson & Co., and Taylor & Co. They all had 14 in. diameter, 18 in. stroke cylinders and 5 ft. 6 in. diameter driving wheels. Jeffrey Wells provides a more comprehensive, tabulated, list of those early locomotives. [75: p79-80]
A typical 0-4-2 Locomotive of 1839/1840. [76]An early (1834) R. Stephenson & Co. 0-4-2 locomotive of very similar design to those supplied to the Manchester and Leeds Railway 9c0 Public Domain. [77]
The first three 0-4-2s were made by Robert Stephenson & Co., and that company supplied plans and specifications for its locomotives which meant that The Manchester and Leeds Railway could have the same design manufactured by other firms of the Company’s choice. The first 12 locomotives built for the Manchester and Leeds in 1839 were all to Stephenson’s 0-4-2 design. Wells tells us that of these locomotives, the first three (Nos. 1 -3) were called Stanley, Kenyon and Stephenson and were built by R. Stephenson & Co. They were supplied to the Railway in April and May 1839. [75: p79]
The next three locomotives (Nos. 4-6) were supplied by Sharp Bros., Manchester. Lancashire and Junction were supplied in May 1839 and York in July 1839. Nos. 7, 9 and 10, named respectively, Rochdale (16th July), Bradford (6th September) and Hull (7th September)came from Naysmith & Co., Patricroft. Nos. 8, 11, 12 (Leeds, Scarborough and Harrogate) were supplied by Shepherd & Todd by September 1839. [75: p79]
Wells comments that No. 1, ‘Stanley’ “was named after Lord Stanley, Chairman of the House of Commons Committee who supported the Manchester and Leeds Railway Bill in 1836. … Other Stephenson designs followed: 19 engines, numbered 15 to 40, of the 2-2-2 wheel arrangement were delivered between October 1840 and April 1842. These were recommended by Stephenson to work the eastern section of the line, between Sowerby Bridge and Wakefield, thus gradually removing the [Manchester and Leeds Railway’s] reliance on North Midland Railway motive power which had at first prevailed from late in 1840.” [75: p80]
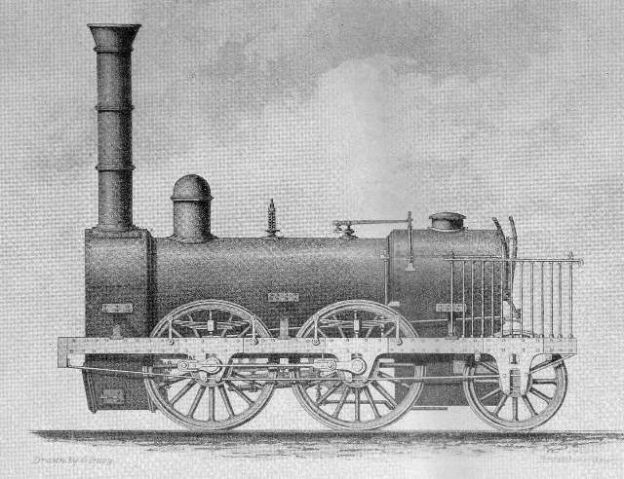
R. Stephenson patented 2-2-2 locomotive No. 123 ‘Harvey Combe’ built 1835, from Simm’s ‘Public Works of Great Britain’, 1838. This locomotive is of a very similar design to those supplied by various manufacturers to the Manchester and Leeds Railway in 1840-1842. These were given the Nos. 15-40 and were supplied by Charles Tayleur & Co., Rothwell & Co., Laird Kitson & Co., Sharp Bros., Naysmith & Co., and W. Fairburn & Co., (c) C. F. Cheffins, Public Domain. [78]
He continues: “Once again several manufacturers were involved in the supply of these locomotives. Goods engines were represented by a further batch of 0-4-2s; 13 were delivered (Nos 33 to 46) between April 1841 and June 1843, the three manufacturers involved being R. Stephenson & Co., Haigh Foundry, Wigan, and William Fairbairn & Co. of Manchester. … Three standard Bury-type 0-4-0s were the last engines to be delivered (Nos 47 to 49) the first two bearing the names West Riding Union and Cleckheaton respectively. All three were completed between November 1845 and January 1846 by the firm of Edward Bury of Liverpool.”
And finally. …
Rake concludes his article, the first to two about the line in The Railway Magazine (I currently only have access to this first article) with two short paragraphs. The first reflects on policing: “There were no police on the railway, the whole of the platelayers being constituted as constables on the completion of the first section of the line; and, we are afterwards told, that ‘the vigilance resulting from the pride these men take, in being thus placed in authority, had been found to supersede the necessity of any more expensive system of surveillance.'” [1: p474]
The second notes that: “The directors [were] very anxious to complete the railway as far as Rochdale, at the earliest possible time, and on the 4th July, 1839, it was opened through that town to Littleborough, a distance of about 14 miles, the event ‘exciting a most extraordinary degree of local interest and wonder’ we are told.” [1: p474]
References
Herbert Rake; The Manchester and Leeds Railway: The Origin of the Lancashire and Yorkshire Railway; in The Railway Magazine, London, December 1905, p468-474
Jeffrey Wells; The Eleven Towns Railway: The Story of the Manchester and Leeds Main Line; Railway & Canal Historical Society, Keighley, West Yorkshire, 2000.
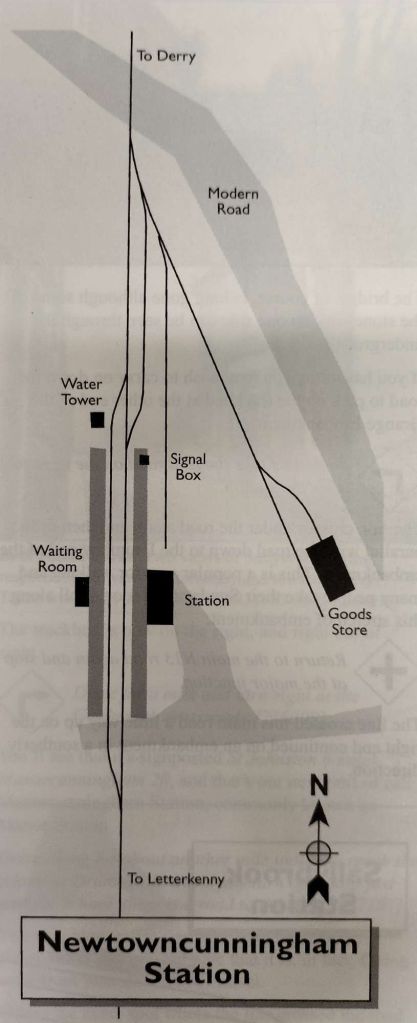
This next series of five extracts from the 25″ OSI survey show the Lough Swilly Railway heading North away from Newtowncunningham Railway Station.
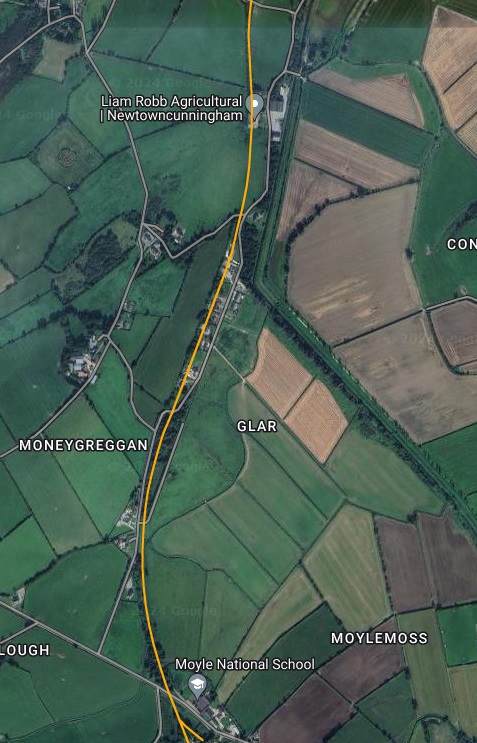
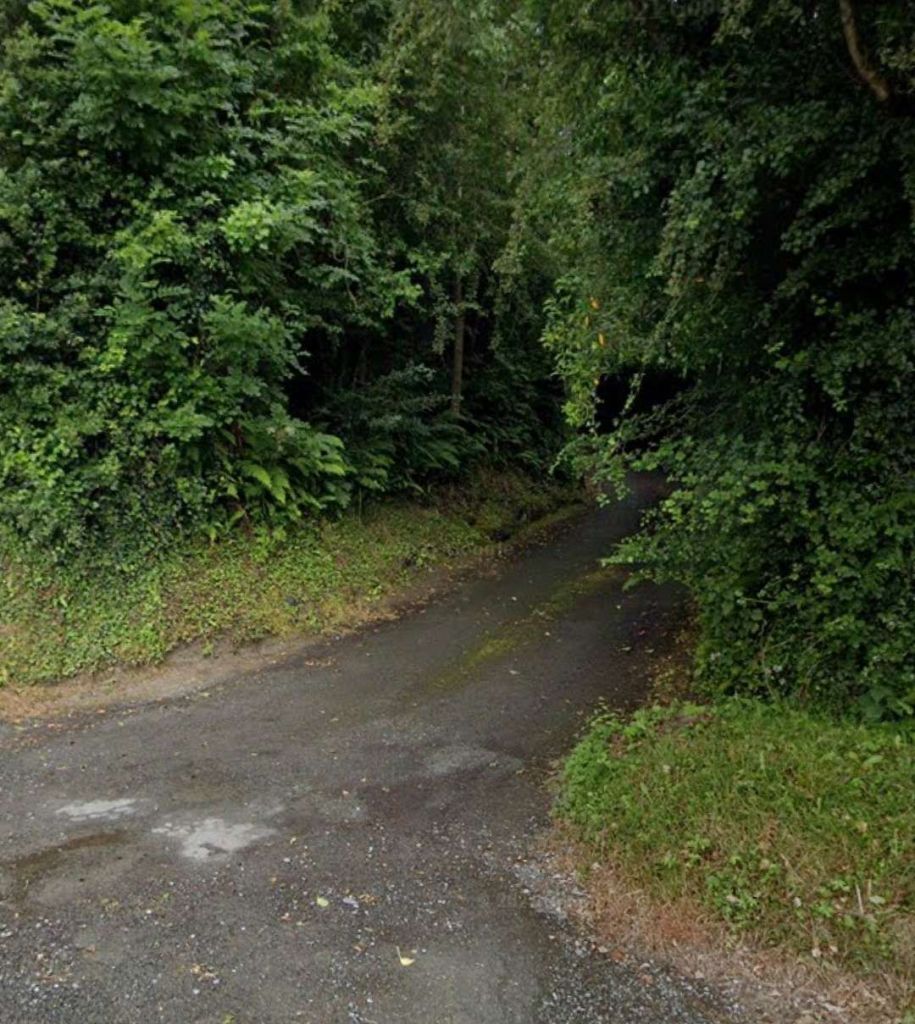
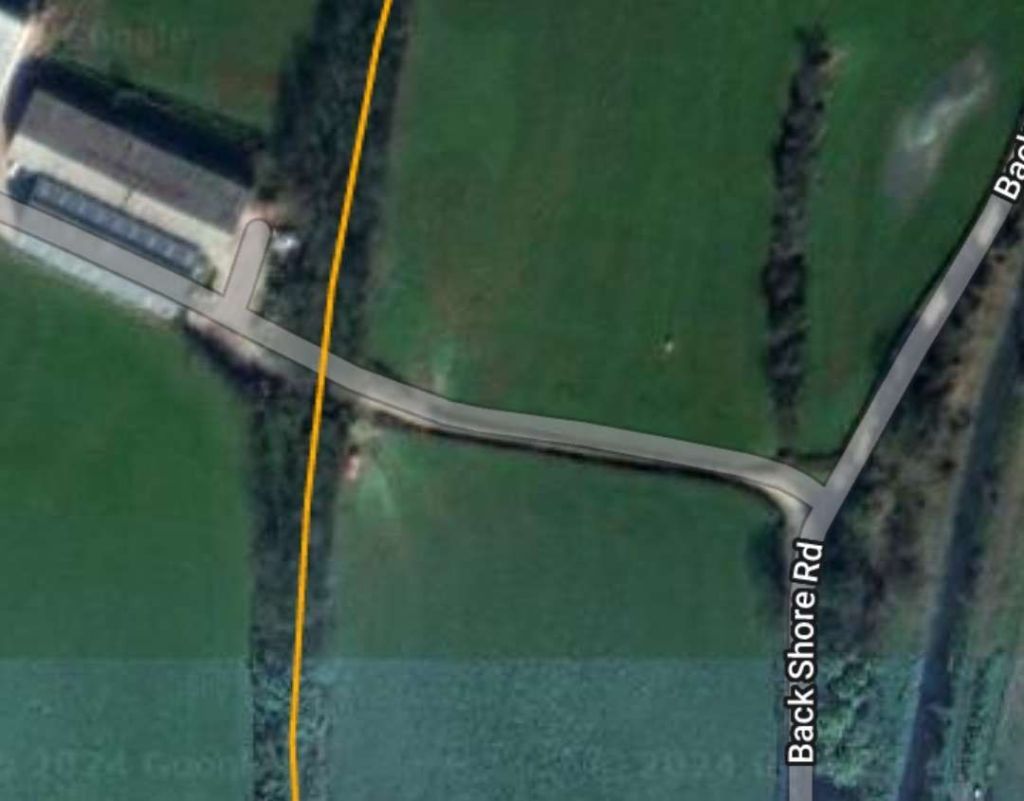
The series of five map extracts above show the Lough Swilly Railway to the North of Newtoncunningham and parallel to Back Shore Road. [3]This extract from railmaponline.com’s satellite imagery shows the railway heading North from Newtowncunningham Station, alongside Back Shore Road, and covers the same length of the line as shown in the five map extracts above. [2]A track can be seen on the satellite image above crossing the line of the old railway as it curved round toward Moneygreggan. This photograph shows that lane. The photograph is taken from Back Shore Road running parallel to the line of the railway at this point. The track at this point was probably provided after the closure of the railway. It gives access to what was the old line of the road prior to the construction of the railway. With the construction of the railway the road was diverted to cross the railway further to the North. [Google Streetview, July 2021]This enlarged extract from the OSi 25″ survey shows the changes made at the location of the photograph immediately above. [3]This extract from the railmaponline.com satellite imagery shows the same location as the map extract immediately above. [2]
The next three images show the bridge in Moneygreggan which carried Back Shore Road over the line just to the North of the location above.
The road bridge constructed to carry Back Shore Road over the Lough Swilly Railway north of Newtoncunningham. [My photograph, 9th May 2024]The view South across the bridge parapet in the direction of Newtown Cunningham Station. [My photograph, 9th May 2024]The view North across the parapet of the same bridge. [My photograph, 9th May 2024]The next location worth noting along the line is a bridge over another minor road which headed West from Back Shore Road [3]The same location, this time on the satellite imagery from railmaponline.com. [2]The lane and the embankment are shrouded by trees. The line crossed the lane very close to its junction with Back Shore Road. [Google Streetview, July 2021]The next crossing of the line was for what was once a through route of sorts but which now is really no more than a farm access track. On the OSi 26″ survey this appears to have crossed the old railway by means of an over bridge. [3]Railmaponline.com’s satellite imagery shows the rail route in the 21st century shrouded in trees. [2]This image looks West along the access road in 2011. Hidden in the trees over the line of the Lough Swilly Railway there are some masonry remains which might be parapet walls for a bridge. Either side of the track the undergrowth and tree cover is dense.[Google Streetview, August 2011]
A series of three further extracts from the 25″ OSi survey show the next length of the Lough Swilly Railway as it turned to the East.
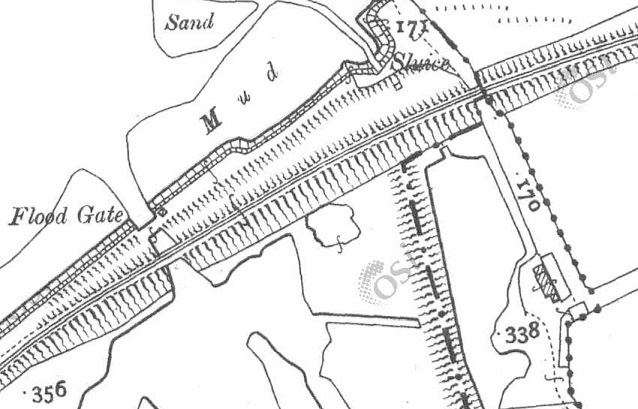
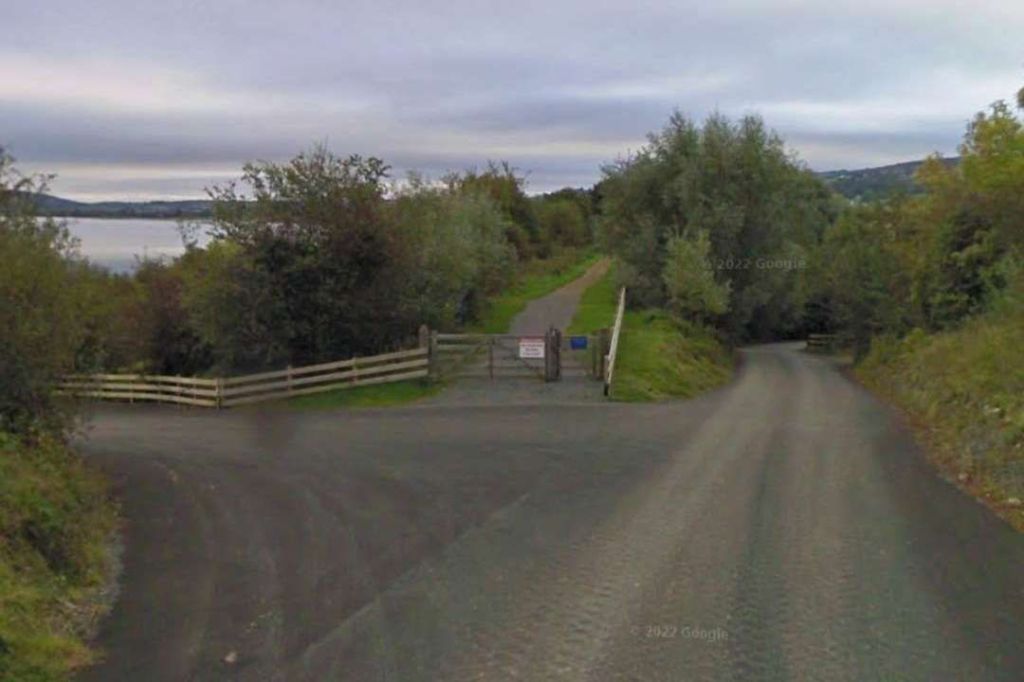
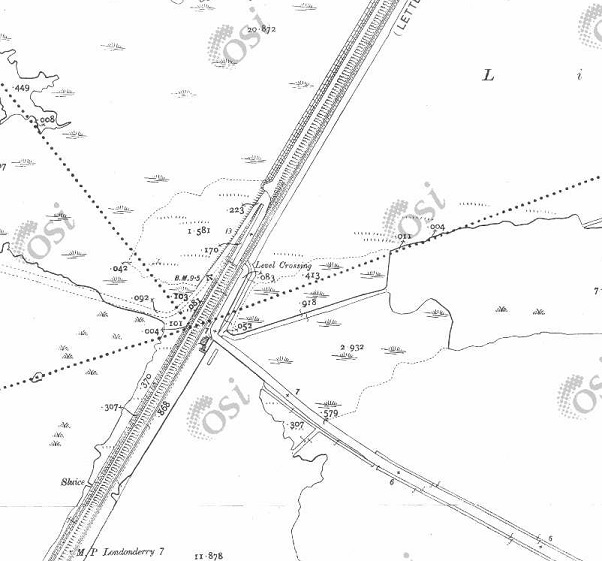
This section of the line ran North from the access road noted above. Back Shore Road crosses the old railway at a level-crossing at the top of this map extract. The stream that has followed the road North emptied into the Lough by means of a stone arch under the of railway. A photograph taken by Willie Rodgers of the stone-arched bridge carrying the old railway over the stream can be seen below. [3]Then curving round to the Northeast, the line crossed a long embankment over part of Lough Swilly. Open water was to the Northwest of the line, a lagoon and saltmarsh prone to flooding was to the Southeast of the line. [3]This extract from the 25″ OSi survey shows the line leaving the embankment and curing further round to the East. [3]The same length of the Lough Swilly Railway as shown in the three map extracts immediately above, as it appears on railmaponline.com’s satellite imagery. What was saltmarsh to the Southeast of the line has been reclaimed and is now in use as arable land. [2]Looking Southwest along the line of the embankment in the 21st century. Back Shore Road ends today in a small unmetalled carpark and a gate into the farmland visible to the top-right of this photograph. [My photograph, 9th May 2024]The small unmetalled carpark at the end of Back Shore Road. The route of the old railway is marked by the orange line heading out onto the embankment. [Google Streetview, July 2021]The stone-arched bridge at the Southwest end of the embankment which carries the route of the L&LSR over the drainage stream which empties into the Lough at this point. This image was shared on the Londonderry & Lough Swilly Railway Facebook Group by Willie Rodgers on 19th November 2021. [5]Looking Northeast along the line of the Lough Swilly Railway from a point 100 metres out along the embankment form the carpark noted above. [My photograph, 9th May 2024]
An aerial image taken by Michael Roulston in February 2021 looking Southwest along the embankment and showing the curve of the old line on its Southwestern approach can be seen by following this link: https://maps.app.goo.gl/vEEn4ViuBhW5QiTD6
A photograph taken by David Hughes in July 2020 from a point about halfway along the embankment can be found on this link: https://maps.app.goo.gl/zb85mGUaBZRqafHa6
A similar photograph taken by David Hughes on the same day shows the view along the embankment from the location of the sluice gates. The railway began to curve away from the line of the embankment at this point. The photograph can be found on this link: https://maps.app.goo.gl/o6TbpWy19muqJypu8
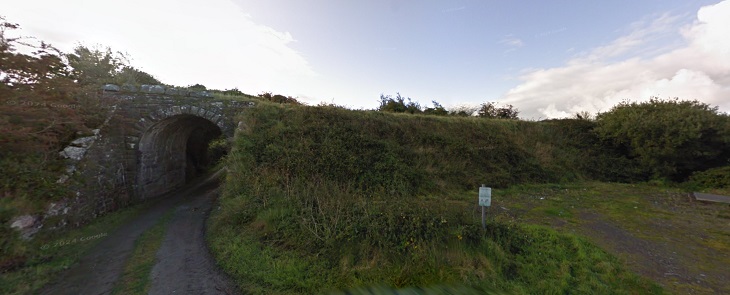
This enlarged extract from the 25″ OSI shows the old railway curving away from the straight line of the embankment. [3]The railway curved away from the straight line of the embankment. [Google Maps, May 2024]This view looks South from just to the North of the Northeast end of the embankment. The L&LSR can be seen curving away to the East and crossing the access road to the location of the photographer via a stone-arched bridge. [Google Streetview, September 2010]A better image of the bridge seen above, also taken from the North. This image was shared on the Londonderry & Lough Swilly Railway Facebook Group by Willie Rodgers on 19th November 2021. [5]The same bridge, seen this time from the South. This image was shared on the Londonderry & Lough Swilly Railway Facebook Group by Willie Rodgers on 19th November 2021. [5]The same structure seen from further to the South along the lane. The tree line to the right of the bridge marks the line of the Lough Swilly Railway. [Google Streetview, September 2010]The next significant location was a little further to the East where another minor road crossed the lien fo teh railway on a bridge. This enlarged extract from the 25″ OSi survey shows the location. [3]This enlaregd extract from the railmaponline.com satellite imagery shows the same location in the 21st century. [2]This view from the South shows the bridge parapets in place in the 21st century. The L&LSR cutting has been infilled and returned to arable use. [Google Streetview, July 2021]
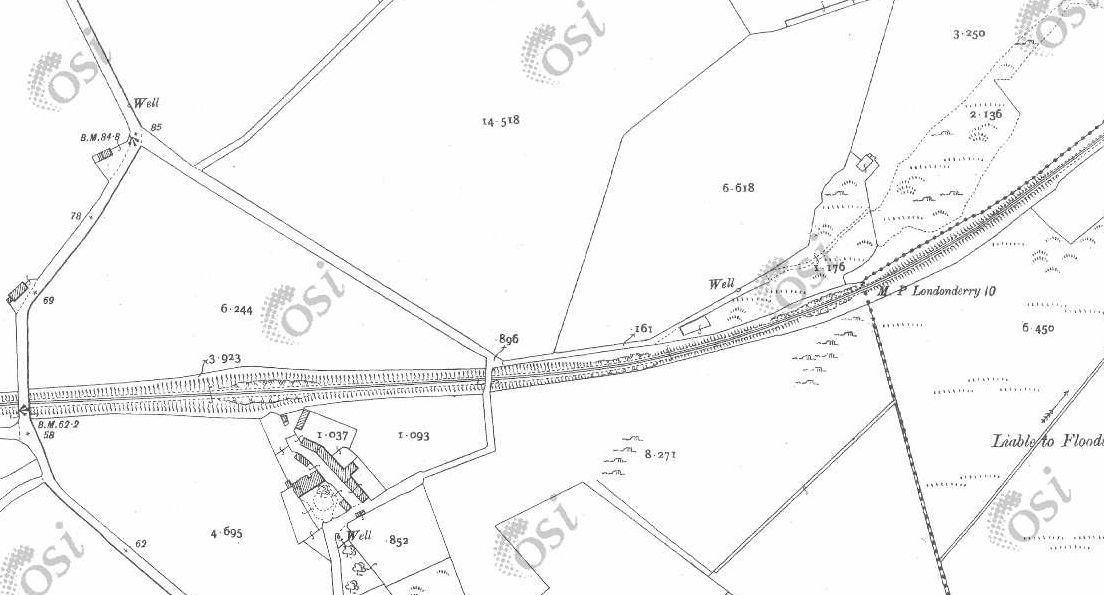
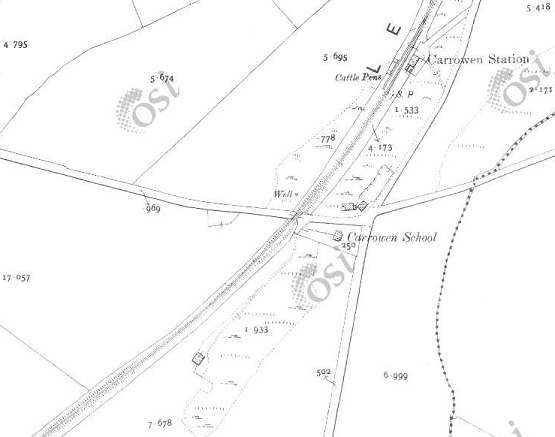
The next three extracts from the 25″ OSI survey show the line turning first to the Northeast and after a short distance reaching Carrowen Railway Station.
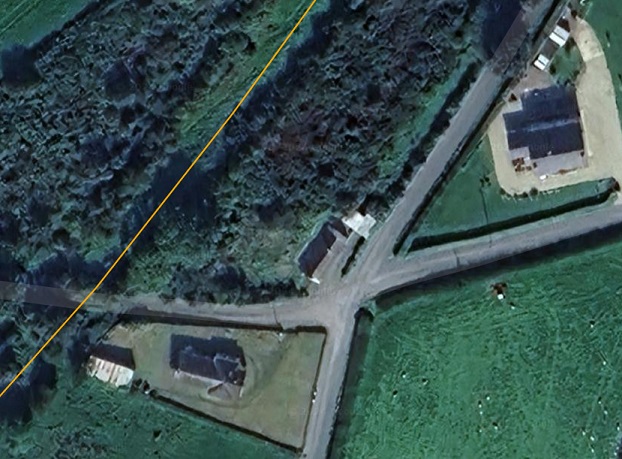
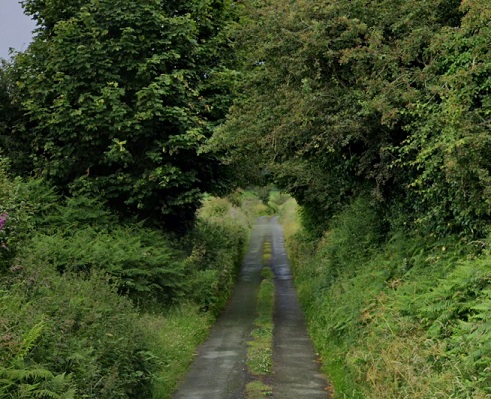
These three extracts from the 25″ OSI surveytake us as far as Carrowen Station. [3]This extract from railmaponline.com’s satellite imagery covers the same length of line as appears in the three map extracts immediately above. [2]When the L&LSR was in use it was bridged by a minor road which linked roads to the North and South of the line and provided access to the complex of buildings shown on this enlarged extract from the 25″OSi survey. [3]A wider view of the same location in the 21st century as provided by railmaponline.com’s satellite imagery. Both the road and the old railway have been ploughed back into the landscape. [2]Approaching Carrowen Railway Station, the line was carried over a road close to Carrowen School. [3]Railmaponline.com’s satellite imagery shows the same area as covered by the map extract above. [2]Trees appear to form an arch over the narrow road at the point where the L&LSR was carried by a bridge across the road close to the site of what was Carrowen School. [Google Streetview, July 2021]An enlarged view of Carrowen Railway Station as shown on the 25″ OSi survey. [3]The Station site as shown on an enlarged extract from railmaponline’s satellite imagery. The old station househas been extended out across the line of the railway. [2]Carrowen Station Hose and platform viewed from the West. The building was not of the same design of other larger station houses that we have encountered in our journey along the line of the L&LSR. This photograph was shared on the Londonderry & Lough Swilly Railway Facebook Group by Conor Harkin on 27th April 2022 courtesy of Fahan Inch & Burt Parish. [6]The modern private dwelling on the site of Carrowen Station House includes the original station house It is seen here viewed from the village road to the East of the L&LSR. The photograph looks along the old station approach. The extension to the right of the building sits over the formation of the old railway. [Google Streetview, July 2021]This next extract from the 25″ OSi survey shows the old railway heading North-northeast away from Carrowen Railway Station and bridging a local road. [3]The same length of the line as it appears on modern satellite imagery. The rail-over-road bridge was sited at the top-right of the image. The bridge has gone a a minor realignment of the road carriageway has taken place. [2]Looking Northwest through the location of the bridge. The bridge and the line’s embankments have been removed. The orange line indicates the approximate line of the L&LSR. [Google Streetview, July 2021]Continuing North-northeast, the L&LSR ran through two level crossing close to Drumgowan. [3]the location of each of the crossings can easily be picked out on the modern satellite imagery of railmaponline.com. [2]This photograph taken from the closest metalled road shows the first crossing encountered. It was about 50 t0 100 metres down the lane at the centre of the image. The approximate line of the L&LSR is shown as an orange line beyond the trees. [Google Streetview, July 2021]From a very similar location to the last photograph but this time looking North-northeast. The line of the L&LSR crossed the field to the right of the photograph and ran through the trees which appear left of centre towards the top on the image. The track on the left of the image meets the line o0f the old railway at the first of the trees and then runs along what would have been the formation of the old railway to the coast of Lough Swilly, this can be seen on the next satellite image below. [Google Streetview, July 2021]
The next three extracts from the 25″ OSi survey show the L&LSR curving round to the East to run along the side of Lough Swilly. The earthworks of the earlier line from Derry to Farland Point can be seen to the North of the line.
The station at Farland Point opened on 12th December 1864 when the Londonderry and Lough Swilly Railway built its line from Londonderry Middle Quay railway station to a terminus at Farland Point. The L&LSR owned ferries which operated from Farland Pier. [7]
The L&LSR curved round to the East to run along the side of the Lough. Close to the flood gates earthworks from an abandoned line serving Garland pier would have been visible from trains running between Letterkenny and Derry. [3]
John McCarton comments on the Londonderry & Lough Swilly Railway Facebook Group: “The Londonderry and Lough Swilly Railway Company opened a railway service from Derry to Farland Point (Inch Level Wildlife Reserve today) in December 1861. From Farland Point, a paddle steamer service took train passengers acrossLough Swilly, to Ramelton or Letterkenny.Paddle steamers were chartered in from existing Lough Foyle and Clyde companies to inauguratethis new service. In September 1864, theline was extended from Tooban Junction to Buncrana, with a spur to Fahan, extending Into sidings at the pier for the transportation of goods and passengers to and from the paddle steamers.The ferry service moved to Fahan in 1866, which then became the hub for the L&LSR’s passenger and freight services, to Ramelton, Rathmullan and Portsalon.” [8]
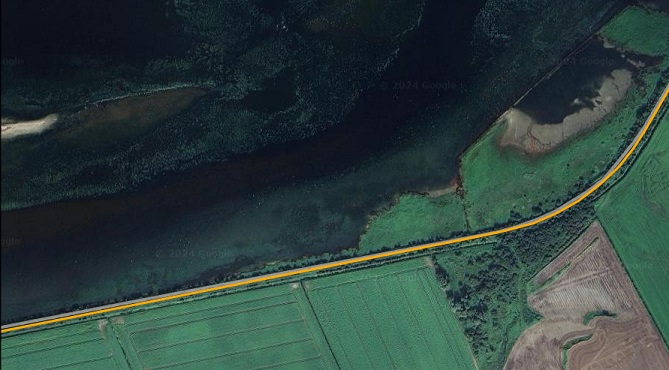
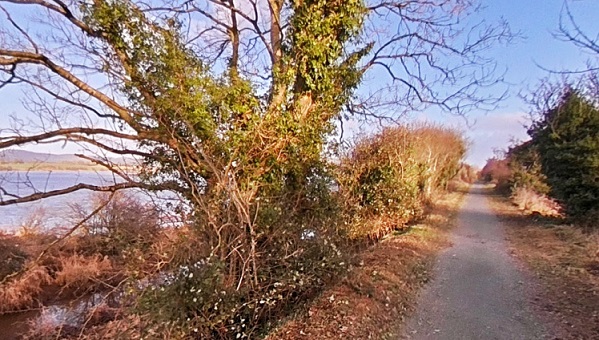
These two extracts from the OSi 25″ survey show the L&LSR running along the South side of what became Inch Wildfowl Reserve. [3]This railmaponline.com satellite image covers the same length of the old railway as the two map extracts immediately above. [2]Looking East along the line of the old railway about 200 metres further along the embankment, (c) Roy Smyth. [Google Streetview, January 2023]Looking East-northeast along the line of the old railway as it curves with the embankment towards the Northeast, (c) Roy Smyth. [Google Streetview, January 2023]Looking Northeast at a point close to the right side of the railmaponline.com satellite image above, (c) Roy Smyth. [Google Streetview, January 2023]
The next few map extracts follow the old railway heading Northeast towards Tooban Junction Station. …
These three extracts form the OSi 25″ survey show the remaining length of the embankments alongside Lough Swilly as the line heads Northeast towards Tooban Junction. After turning to the Northeast the line can be seen running on a secondary embankment to the East of that facing the sea. [3]This extract from the railmaponline.com satellite imagery shows the length of the L&LSR covered by the three map extracts above. [2]Looking back to the Southwest along the L&LSR formation from the Inch Wildfowl Reserve car park. The railway ran along a low embankment to the East of the main embankment and to the East of the modern walkway. [Google Streetview, September 2010]Looking Northeast along the L&LSR formation from the Inch Wildfowl Reserve car park. The line ran, approximately, along the tree line close to the centre of this photograph. [Google Streetview, September 2010]Looking Northeast along the L&LSR formation again. (The line ran to the right of the path ahead.) As is evident in these last few images, the old railway was protected from the worst of the weather over Lough Swilly by a high embankment. We are closing in on the curve taking the line into Tooban Junction Station, (c) Roy Smyth. [Google Streetview, January 2023]
Inch Wildfowl Reserve
The story of the Wildfowl Reserve is told on its website: [9]
“Inch Lough is a brackish lagoon cut out from Lough Swilly by embankments, and penned between Inch Island and extensive flat agricultural polders (slobs) on the mainland of County Donegal by a third long embankment.
Historically there was a large area of Lough Swilly between Inch Island and Burt, which lies at the foot of Grianan Mountain (the site of the famous Iron Age hillfort, Grianán of Aileach). In 1836 it was proposed to claim this shallow expanse of tidal estuarine mud from the lough. Work started around 1840 and was complete by 1859.
The first stage was the construction of the Tready Embankment across the centre of the area, from Tooban Junction near Burfoot in the east, to Farland Point in the west. It would also serve as the route of the Londonderry and Lough Swilly Railway – a narrow-gauge line connecting Carndonagh and Derry in the north-east, with Letterkenny and Burtonport in the far west. The line operated between 1863 and 1953.
North of Tooban was a point where the mainland was close to Inch Island, and where a causeway, the Inch Embankment, was built to link the island to the mainland.
The third stage was to construct a parallel embankment in the west, between Farland Point and the island, the Farland Embankment, or as it is now generally called, the Farland Bank.
So between these three embankments and Inch Island there was a section of water cut off from Lough Swilly, and also from the mud flats to be drained. This area would be kept as a holding tank, to receive the waters drained from the south and keep out the tidal extremes of Lough Swilly. Thus Inch Lough was created, and over the years has become steadily less salty.
South of the Tready Embankment, between it and Grianan Mountain, all that area of Lough Swilly now isolated from the tidal waters could be drained through a complicated system of large and small drains, to create agricultural land. This huge expanse of flat polderland is locally known as The Slobs, or more formally as Inch Level. The drainage was not initially very successful. Until the late 1950s the patchwork of small fields were very marshy, and included some areas of unambiguous marshland.
At that time, industrialist Daniel McDonald, started to buy up the small properties and by 1961 had amalgamated all into Grianán Estate, the largest arable farm in Ireland at around 1200ha. The fields could then be enlarged and the drainage system re-vitalised.
There have been a few changes of hands since then. Most notably, a consortium of businessmen bought the estate in 1980 and announced plans to drain the northern half of the lake. A local campaign was immediately launched to resist this – mainly defending Inch Island’s status as an island, but concerned also about the threat to wildlife from the loss of half of the lake. The consortium claimed that the scheme proved to be technically unviable, and whether or not that was the real reason, or they were overwhelmed by the strength of the opposition, they abandoned the scheme and sold up in 1989.
An Grianan Farm is now in the hands of Donegal Creameries plc., and managed as an organic dairy farm. Parts of it are leased to local farmers. In 2002 the National Parks and Wildlife Service took on a thirty year lease of Inch lough and its surrounding wet grasslands. Since then, NPWS along with various stakeholders have developed the site, with ongoing work in conservation management, community involvement, and development of visitor infrastructure. The aim now is to sustainably develop Inch Wildfowl Reserve for the future, integrating conservation with community and farming, whilst allowing limited access for the public.” [9]
This extract from the 25″ OSi survey covers the next length of the line. Included in this extract is Tooban Junction and its station and the start of the branch to Cardonagh. [3]An enlarged extract focussing on Tooban Junction. The L&LSR line to Derry is the more northerly of the two line leaving the right of this image. The other line is a long storage line or headshunt. [3]This extract from the railmaponline.com satellite imagery covers the same length of the L&LSR as shown in the map extracts immediately above. It centres on the location of Tooban Junction Station. [2]Facing Northeast along the L&LSR formation again. This time on the curve round to the location of Tooban Junction Station, (c) Roy Smyth. [Google Streetview, January 2023]Facing East along the line of the old L&LSR through the location of Tooban Junction Station from the modern footbridge over the drainage channel. Note the signal post with two arms which stands on the station site, This is a reconstruction by Buncrana sculptor John McCarron as part of the Ghosts of Tooban Junction project, (c) Roy Smyth. [Google Streetview, January 2023]Tooban Junction Station seen from the West. This image was shared by Donegal Railway Heritage Museum in their Facebook Page on 6th February 2020, (c) Edward PattersonLooking West at Tooban Junction on 20th April 1953. The line to Letterkenny is to the left of the water tower, that to Cardonagh is to the right. This photograph was shared on the Fahan Inch & Burt Parish Facebook Group on 6th September 2015. [16]
The ‘Disused Stations’ website has a series of pages focussing on Tooban Junction Station. [10][11][12][13] These pages include a history of the station and a number of photographs of the station from various sources. Click here to visit the first of these pages.
Ernie’s Archive includes a number of photos of the station. [14] Click here to access these images.
Wikipedia notes that “the station opened on 9th September 1864 when the Londonderry and Lough Swilly Railway built their line from Londonderry Middle Quay to Farland Point. It closed for passengers on 23th October 1935. Freight services continued until 10th August 1953.” [17]
We take a break at Tooban Station and await the next train!
https://en.wikipedia.org/wiki/Tooban_Junction_railway_station, accessed on 27th May 2024. However, note comments made in response to this article by Martin Baumann: “The Derry to Buncrana line saw passenger services on bank holidays after regular services had ceased. The last day this happened was 6th September 1948. … Freight traffic ceased on 8th August 1953, not the 10th but it was possible to travel on freight services as the Swilly had no Goods Brake Vans so a Passenger Brake with some seats was always in the formation.”


