Following on from a couple of articles about the Tanat Valley Light Railway written some years back, I was reading some older rather tatty magazines and found an article entitled “Rails up the Tanat Valley” in an issue of the Ian Allan publication ‘Railway World‘ – the June 1990 edition. [1]
The Tanat Valley Railway and associated lines. [1: p365]
In his article, Colin Ganley recounted the rise and decline of the minor lines running west from Oswestry, the last remnant of which by 1990 had been ‘mothballed’.
Colin Ganley wrote: “In October 1988, the last train ran between Gobowen and Biodwell Quarry in Shropshire. For some years the line had carried only stone trains, bringing out ballast to the requirements of the Area Engineer. The trains, normally Class 31-hauled, traversed the remains of five different branch lines, which in their heyday provided Oswestry and the eastern end of the Tanat Valley with a fascinating and complicated array of lines to serve local industry. With the decision to cease using ballast from Blodwell, traffic on the line came to an end, marking the final cessation of all rail services connected with the delightful one-time Tanat Valley Light Railway.” [1: p364]
He continued: “For the present, this surviving section is in suspended animation. As there is a possibility that the stone traffic may restart in the future, the railway is being left in place. Traffic will resume if BR returns to this source of ballast. If not, eventually a decision will be made to lift the track and dispose of the land: unless the Cambrian Railways Society, based at Oswestry, is in a position to take an active interest in its future.” [1: p364]
Parts of the derelict line at Nant Mawr which were once the western end of the Old Potts Railway are now owned by ‘The Tanat Valley Light Railway’ which is a modern charity that aims to preserve and restore this line.
“The original Tanat Valley Light Railway was the first cross border light railway crossing from England into Wales, meandering up the fantastic Tanat Valley from Llynclys Junction to Llangynog and providing links to Llanymynech and Llanfyllin via its other branches.” [2] It was opened in 1904, mainly as a direct result of the 1896 Light Railways Act, but, says Ganley, “before taking up its story it would be useful to look at its associated lines and also earlier schemes to provide the picturesque village of Llangynog with railway transport. At the height of railway mania in 1845, the Shrewsbury, Oswestry and Chester Junction Railway obtained powers to build a line from Shrewsbury to Chester with a branch from Gobowen to Llanymynech. All that was built of the branch was the 2.25 miles from Gobowen to Oswestry, which opened on 23rd December 1848. In 1854 this line became part of the Great Western Railway.” [1: p364]
He continues: “The second portion of line to be constructed was the Oswestry & Newtown Railway, which was incorporated in 1855. to link these two towns. The section between Oswestry and Pool Quay opened on 1st May 1860 with the remainder to Newtown opening on 14th August. … The company, which was to be the foundation of the later Cambrian Railways, opened a 1.25-mile freight-only branch from Llynclys Junction, some 3.5 miles south of Oswestry, to Porthywaen. This branch served important quarries, some of which are still operating today, and became the railhead for the industries of the Upper Tanat Valley, Shortly after the Porthywaen branch was opened, a mineral line was built from it to serve some collieries at Trefonen. These collieries however were not very successful and this line was abandoned as early as 1881.” [1: p364]
“In the meantime there had been several proposals to build a line up the Tanat Valley. One such proposal envisaged a great trunk line from Worcester to Porth Dinllaen, near Nefyn on the Caenarvonshire coast, with the object of providing an alternative route for Irish Mail traffic. In 1860, a similar proposal was put forward as the West Midlands, Shrewsbury & Coast of Wales Railway which planned a railway from Shrewsbury to Portmadoc via Llanymynech, Llangynog and Bala. This route would have included a 1.5-mile tunnel under the Berwyn Mountains between Llangynog and Bala.” [1: p364]
“However, the project had trouble raising support and money. … Proposals for a similar route were resurrected in 1862 as the Shrewsbury & North Wales Railway. Powers were obtained by 1865 to build a line from Abbey Foregate, Shrewsbury, to Llanymynech but before this section was completed the company had merged with another scheme to provide a railway from Stoke-on-Trent to Shrewsbury. The combined efforts brought forth the grand title of the Potteries, Shrewsbury & North Wales Railway (or POTTS for short) and extended the original plans to include an extension from Llanymynech to Nantmawr over which passenger trains were to run as far as Llanyblodwell (later renamed Blodwell Junction). The financial troubles of the POTTS and its rebirth as the renowned Shropshire & Montgomeryshire Light Railway [3] are outside the scope of this article, but the result was the working of the Llanymynech to Nant Mawr section by the Cambrian Railways from 1881. At this time goods traffic only was operated, the passenger service between and Llanymynech and Lianyblodwell having ceased in 1880.” [1: p364-365]
“The Light Railways Act of 1896 made possible the construction of railways to remote agricultural areas that hitherto had had difficulties in raising capital and several places along the Welsh border benefited from such schemes, one being the Tanat Valley. The Act saw the birth of two schemes to provide, at last, rail transport to the Upper Tanat Valley and the industries of Llangynog. The unsuccessful proposal was for a 2ft 6in gauge railway from the Llanfyllin terminus of the Cambrian branch from Llanymynech.” [1: p365]
“This plan, the Llanfyllin & Llangynog Light Railway, was to cross sparsely populated country between Llanfyllin and Penybontfawr and would not have benefited the lower part of the Tanat Valley. It nevertheless could have been a fascinating line had it been constructed, though the change of gauge at Llanfyllin would have proved a disadvantage.” [1: p365]
“The scheme that was selected by the Light Railway Commissioners was for a standard gauge line from the Cambrian’s Porthywaen mineral branch straight up the valley Liangynog. The plan also envisaged using a short section of the Nantmawr branch. The Tanat Valley Light Railway received its Light Railway Order in 1898 and was constructed by J. Strachan of Cardiff who employed about 125 men on the work. The total cost of the line proved to be about £92,000 which was around £20,000 more than the company had hoped for. This shortfall, not helped by a delay in construction, meant that the Tanat Valley Co was impoverished from the outset and had to approach the Treasury for more grant aid. During construction in 1903 some directors found that the contractor was giving a ‘free’ train service over the partially finished railway but as the contractor was allowed to finish the job it can be assumed that any quarrel was rectified.” [1: p365] For the earlier articles about this line, please follow these two links:
Colin Ganley continues: the Tanat Valley Light Railway “opened on 5th January 1904 to both passengers and freight and was worked by the Cambrian from the start. It became wholly part of the Cambrian in 1921, passing to the Great Western Railway and then to the Western Region of British Rail. The length of the linc from Llynclys Junction to Llangynog was some 15 miles 71 chains and included 11 stations or halts, one of which was former POTTS station of Llanyblodwell which was renamed Blodwell Junction. The stations were of typical light railway pattern with rather mean corrugated iron clad buildings and, except for Liangedwyn and Llanrhaiadr Mochnant, had only one platform. Original plans for some stations did consider refreshment rooms in effort to build up tourism but the company’s lack of capital put an end to such plans.” [1: p365-366]
“With the opening of the Tanat Valley line, passenger services were restored between Llanymynech and Blodwel Junction as this had been a condition of securing support from potential opponents during the planning stages. The opening of the Tanat Valley line also restimulated the slate quarries at Llangynog which had all but closed by 1900. Slate quarrying continued intermittently until 1939 but lead mining, which had effectively ceased in 1877, was never to resume on any commercial scale. The railway also assured the development of granite quarrying at Llangynog, the Berwyn Granite Co. providing much traffic until World War 2. The quarry survived into the mid 1950s but at the end offered virtually no traffic to the railway.” [1: p366] Berwyn Granite Quarries Ltd. remains an active company with headquarters in Wellington, Shropshire. [4]
Colin Ganley continues: “Initially the passenger service consisted of four trains each weekday with an extra trip on Wednesdays. Many trains were mixed and the journey to Oswestry took no less than 75min on some trains. Two trains a day carried a through coach to Llanymynech, detached at Blodwell Junction, but this practice ceased in 1915 and was replaced by a connecting service. The Blodwell Junction to Llanymynech service ceased completely as from 1st January 1917, having been hardly ever used and only operated to fulfil an agreement. Freight traffic over this section ceased in 1925, the Nantmawr traffic then being worked via Porthywaen, and most of it was lifted between 1936 and 1938.” [1: p366]
By 1923, “the number of passengers being carried was half the level of 1913 and continued to decline during the GWR years. By 1925 services, which normally consisted of two four-wheeled carriages, were reduced to three trains each way, though certain extras ran on Wednesdays and Saturdays. In 1929, the GWR introduced a rival bus service which was taken over by Crosville in 1933. The bus served the centres of villages far better than the train as certain stations. Llanrhajadr Mochnant in particular, were badly situated. This, coupled with the elongated journey times caused by the adherence to light railway practices, reduced traffic even further.” [1: p366-367]
“During World War 2 the passenger service was reduced to two trains each way, by now composed of a single Cambrian brake third. After the war, despite petrol rationing, few people were making the delightful trip up the Tanat Valley by rail. Goods traffic was also on the wane and on 15th January 1951 passenger services ceased because of a grave coal shortage, never to return. Official closure took place on 1st July 1952 and at the same time freight traffic was also withdrawn between Llanrhaiadr Mochnant and Llangynog. The track on this section remained in situ for several years, not being lifted until 1958. Freight traffic to Llanrhaiadr Mochnant ceased abruptly on 5th December 1960 after the river bridge near Pentrefelin was badly damaged by flooding,” [1: p367]
“Services on neighbouring lines were savaged in the mid-1960s. All passenger traffic between Welshpool and Whitchurch and also over the Llanfyllin branch were withdrawn on 18th January 1965, leaving Oswestry with the Gobowen diesel shuttle service, which ceased in November the following year. By 1967, just the single track South of Oswestry to Porthywaen and Nantmawr was left, along with the line from Gobowen. Reduction in traffic over the ensuing years left just the Blodwell Quarry service. All the sidings at Oswestry and Porthywaen disappeared. The section west of Blodwell Junction had been lifted by 1965 and though the Nantmawr branch has not seen a train for 20 years the track is still in-situ, although with sturdy trees growing between the sleepers.” [1: p367]
“No account of the Tanat Valley would be complete without a brief mention of its quaint motive power. From the outset, the Cambrian normally provided three Sharp Stewart 2-4-0Ts, Nos 57, 58 & 59 of 1866 vintage. They became GWR Nos. 1192, 1196 and 1197 respectively, and although No 1192 was withdrawn in 1929 after being sent to Devon, Nos 1196 & 1197, both in a rebuilt state, survived at Oswestry until 1948.” [1: p367]
Sharp, Stewart and Co. “was a steam locomotive manufacturer, originally based in Manchester, England. The company was established in 1843 following the dissolution of Sharp, Roberts & Co.. In 1888, it relocated to Glasgow, Scotland, where it later amalgamated with two other Glasgow-based locomotive manufacturers to form the North British Locomotive Company.” [5]
Ganley tells us that the two surviving Sharp Stewart locomotives were “assisted by No. 1308 Lady Margaret, an Andrew Barclay 2-4-0T built in 1902 for the Liskeard and Looe Railway and taken over by the GWR in 1909. This locomotive also did yeoman service in the Tanat Valley until it too was withdrawn in 1948.” [1: p367]
“Other locomotives were seen up the Tanat Valley at various times, including old Cambrian Sharp Stewart 0-6-0s dating from 1875 and the odd Dean Goods. In the latter years passenger traffic was the preserve of ‘5800’ class 0-4-2 tanks, numbers 5808 & 5812 being particular regulars. Goods traffic that remained was normally entrusted by the early 1950s to the Ivatt Class 2 2-6-0s.” [1: p367]
“Various types of diesels handled the surviving quarry services, including Classes 25, 31 and 37. A Class 31 had the privilege to be the last railway locomotive to operate a commercial train (so far) in this region of complex and fascinating railway history. It remains to be seen whether the Cambrian Railways Society will be able to continue the railway traditions of the area if they can successfully launch a private steam service from their Oswestry base.” [1: p367]
Ganley was writing in 1990, things have moved on over the past 36 years. Cambrian Heritage Railways, in the 2020s, operate a service on selected days from their Oswestry Station to Weston Wharf, featuring steam, vintage diesel and diesel multiple units. The 1.75-mile scenic route leads to Weston Wharf with its period station with a café, picnic area, and railway artifact displays. Cambrian Heritage Railways also operate the ‘Llynclys Railway Centre’ which is open on select dates – at Llynlcys South Station. [6][7]
References
Colin Ganley; Rails up the Tanat Valley; in Railway World; Ian Allan, June 1990, p364-367.
Shoeburyness was once a fortified place guarding the Northern flank of the Thames Estuary. It appears in the Anglo-Saxon Chronicle of 894 CE, and it was assumed for many years to have been built as a ‘Danish Camp’ by the Viking leader Haesten as those chronicles say that while King Alfred headed West towards Exeter, Danish marauding parties, “gathered at Shobury in Essex, and there built a fortress.” [1][2: p60]
However, in 1998, archeological excavations unearthed classic Iron Age interior features and just a year later found evidence of a Middle/Late Bronze Age pottery associated with the visible remains of the ramparts. [1] These excavations took place after the closure of Shoeburyness Barracks while the site was being prepared for redevelopment. Subsequently Southend Borough Council sought to create a Conservation Area centred on the site. [3]
Speaking of this site, Historic England (List Entry 1017206) says: “The defended prehistoric settlement at Shoeburyness has been denuded by the development of the 19th century military complex, although the southern half of the enclosure has been shown to survive extremely well and to retain significant and valuable archaeological information. The original appearance of the rampart is reflected in the two standing sections, and the associated length of the perimeter ditch will remain preserved beneath layers of accumulated and dumped soil. Numerous buried features related to periods of occupation survive in the interior, and these (together will the earlier fills of the surrounding ditch) contain artefactual evidence illustrating the date of the hillfort’s construction as well as the duration and character of its use. In particular, the recent investigations have revealed a range of artefacts and environmental evidence which illustrate human presence in the Middle and Late Bronze Age and a variety of domestic activities in the Middle Iron Age, including an assemblage of pottery vessels which demonstrate extensive trading links with southern central England. Environmental evidence has also shown something of the appearance and utilisation of the landscape in which the monument was set, further indications of which will remain sealed within deposits in the enclosure and on the original ground surface buried beneath the surviving sections of bank. Evidence of later use, or reuse, of the enclosure in the Late Iron Age and Roman periods is of particular interest for the study of the impact of the Roman invasion and subsequent provincial government on the native population; the brief reoccupation of the site in the Anglo-Saxon period, although currently unsupported by archaeological evidence, also remains a possibility.” [4]
Despite the extensive destruction wrought by the occupation of the site by the Board of Ordnance in 1849 (and successors), much more of the original survives than might be expected.
Historic England’s listing continues: “The settlement, which many 19th century antiquarians associated with historical references to a Danish Camp, lay in a rural setting until 1849 when Shoebury Ness was adopted as a range finding station by the Board of Ordnance and later developed into a complex of barracks and weapon ranges. The visible remains of the Iron Age settlement were probably reduced at this time leaving only two sections of the perimeter bank, or rampart, standing. This bank is thought to have originally continued north and east, following a line to East Gate and Rampart Street, and enclosed a sub-rectangular area of coastal land measuring some 450m in length. The width of the enclosure cannot be ascertained as the south eastern arm (if any existed) is presumed lost to coastal erosion. The surviving section of the north west bank, parallel to the shore line and flanking Warrior Square Road, now lies some 150m-200m inland. It measures approximately 80m in length with an average height of 2m and width of 11m. The second upstanding section, part of the southern arm of the enclosure, lies some 150m to the south alongside Beach Road… [Trial excavations within the enclosure during 1998] revealed a dense pattern of well preserved Iron Age features, including evidence of four round houses (identifiable from characteristic drainage gullies), two post- built structures, several boundary ditches and numerous post holes and pits. Fragments from a range of local and imported pottery vessels date the main phase of occupation to the Middle Iron Age (around the period 400-200 BC).” [4]
Our primary interest in this article is in the later development of the site from 1849 onwards and the construction and extension of a military tramway and railways associated with the Ordnance depot and other military sites along the coast close to Shoeburyness.
The land was first purchased here for Experimental artillery ranges in 1849. “Shoeburyness was chosen because of its position close to the Maplin Sands, Where a huge expanse left dry at low tide could be used in conjunction with the sparsely inhabited coast of Essex adjacent. In 1856, Lord Panmure, Secretary of State for War, submitted a recommendation that the work of proof experimentation should be severed from that of instruction. The outcome was the creation of a separate school of gunnery, which was opened on 1st April 1859.” [5: p239]
Throughout the immediate vicinity of Shoeburyness there are a lot of older buildings associated with the Military Depot. A number of these buildings can be found here. [31]
The Standard-Gauge Military Tramway
Shoeburyness changed rapidly from a hamlet to a bustling military establishment. And by 1873, and the completion of the construction of the site, “the original portion of the Shoeburyness Military Tramway had been built as an integral part of it. The line was linked to three piers to facilitate unloading and transport by river from Woolwich and elsewhere, of stores, equipment and guns, brought and destined for various parts of the garrison.” [5: p239]
The use, officially, of the word ‘tramway’ for what is in fact a ‘railway’ was derived from the term’s use in respect of colliery tramways and “is rooted in the legislation under which it was extended and worked. … Had the original line impinged on any highway, the Tramways Act of 1870 would have been applied to it, but having been laid on land already held from which the public were rigorously excluded, the Act was not invoked. By the time the first extension was required. the Military Tramways Act of 1887 had been passed, a measure designed to strengthen rather than to supersede the Act of 1870, which was intended primarily for street tramways.” [5: p239]
The main Shoeburyness military tramway was standard-gauge, but the military site also featured separate narrow-gauge sections of both 2 ft- and 2 ft 6 in-gauge. The standard-gauge line was constructed by the army to connect various installations within the experimental range and was later connected to the main railway network in 1884. The site used standard gauge lines extensively to serve its numerous buildings.
The separate narrow-gauge lines were often used in high-risk areas, such as shell filling huts, where steam locomotives were considered a fire hazard. These lines typically used hand-pushed or sometimes horse-hauled trolleys.
When the tramway was extended to New Ranges in 1890, the whole line was brought within the provisions of the Act of 1887. (But thirty years later, it appears that the extension to Havengore Island did not conform with the Act). “The Shoeburyness Military Tramways Order of 1893 authorised, retrospectively, an extension north-eastward for a distance of 1 mile 20 chains. from a junction with the original tramway, 21 chains South of Campfield Road, to where new artillery ranges had been brought into use on 5th April 1890.” [5: p239-240]
“By permission given in April 1889, the tramway passed through the London, Tilbury & Southend Railway station yard alongside its southern boundary: and an Agreement dated 8th July 1891 anticipated a rail connection there, for which £1000 had been voted in accordance with the Army Estimates for 1886/1887 This having been accomplished, fresh terms were embodied in a second Agreement dated 4th July 1895. Administrative buildings and the railway centre were placed in and around a seventeenth century property known as Suttons,” [5: p240] or Sutton Manor.
The now Grade II listed Sutton Manor was “built in 1681 of red brick and is surrounded by a red brick wall and gate. The interior has wooden panelling. An oak staircase with a dining room, servant quarters and around 9 bedrooms. The land was owned by Daniel Finch (2nd Earl of Nottingham) but the House itself was most likely built by Francis Maidstone (a dealer in woollen textiles). He may have demolished a previous house standing on site.” [6] Suttons is a Category A structure on the Historic England Heritage at Risk Register. [7]
In 1906, the line was further extended 1 mile 52.22 chains from New Ranges to Havengore Point. The War Department completed the acquisition of New England and Foulness islands in 1914/1915. In August 1915, a contract was placed with Findlay & Co Ltd. For the supply and erection of a Scherzer Rolling Lift Bridge over Havengore Creek. Scherzer was an American Company from Chicago. The contract for the viaduct to run either side of the bridge was placed with Braithwaite Thirsk in February 1917 and piling started in June. There were a number of problems with the piling and completion of the viaduct stretched out to 1919 when the lift bridge was erected.
The bridge had a split counterweight and was originally hand operated carrying a road and a military tramway which enabled the tramway to be taken to a terminus on Havengore Island by 1925. [11]
The bridge was shown on the 25″ Ordnance Survey of 1920/1921, published in 1923. However it was not connected to the standard-gauge military tramway network at this time. [23]
In 1959, this was still the terminus of the line. … The road across the bridge ran to Churchend and Fisherman’s Head was completed in 1922-23. [11]
Back to the Southwest, in 1957, work commenced on a new line, 1,300 yards long moving the line from the South side of Suttons to the North. By the beginning of 1958, track was laid along the length within the perimeter of New Ranges and earthworks were completed over the remainder of the realigned route. [5: p240]
The line was designed to relieve congestion Southwest of Suttons. It eliminated two sharp curves on the original line and opened in November 1958, after which the older line was removed.
At the time of the writing of The Railway Magazine article, the School of Gunnery had just closed. With that closure the primary purpose of the tramway became the support of the “requirements of the Ministry of Supply which [had] controlled the Proof and Experimental Establishment since 1939. Although the War Department still own[ed] the tramway and the land on which it [was] built, the right to its use and control … passed to the Ministry. For convenience, the War Department operated[d] the tramway because, [as of that date], railway operation and maintenance [was] a branch of army training.” [5: p241]
“The greatest length of the tramway [was] 5 miles, and its total track mileage [was] 24. Havengore Bridge, the only engineering feature of note, [was] a cantilever structure of 55 ft. span for road and rail.” [5: p241] The steepest gradient on the line was 1 in 52 on the eastern approach to Havengore Bridge. “Conveyance of increasingly heavy pieces of ordnance … necessitated the use of rail weighing 98 lb. per yd. The track [was] variously ballasted with slag, clinker, Thames ballast or granite. Weed-killing on the main line [was] by motor-driven spray on a diesel-hauled wagon, and on sidings by hand-spray on a plate-layers’ trolley. Points are hand-operated, sixty percent of them by MacNee tumbler lever boxes [9] and the rest by Williams two-way spring levers. [10] Facing points [had to be held down by the fireman (the word ‘Stoker’ – foreign to railway terminology – [was] used officially), although responsibility for the train’s safe passage rest[ed] with the driver. The radius for curves and turnouts varie[d] between 600 and 320 ft.” [5: p241]
Freight train at Suttons hauled by a 110-h.p. diesel locomotive built by the English Electric Co. Ltd. in 1926. [5: p241]
At one time, signals were installed to protect road crossings and these were operated by gate-keepers. In practice, they were not needed. Even so, they were only gradually removed – the last survived until the mid-1950s.
A census of locomotives and rolling stock on site in June 1957 showed that the Ministry of Supply owned “6 railcars, 99 open wagons, 71 flat-top wagons, 45 assorted vans and 28 cranes (18 steam and 10 electric). The biggest crane weigh[d] 200 tons, and ha[d] a lifting capacity of 60 tons.” [5: p241] Also on site, but owned by the War Department, were “17 locomotives (11 steam, 5 diesel and one diesel-electric) and 12 passenger coaches.” [5: p241]
One passenger vehicle, used as a drawing office, was a celebrity! It carried a plaque inscribed: ‘This coach did service on the Suakin-Berber Railway. It is reputed to have been the saloon coach used by Lord Kitchener’.
“In December, 1899, at the close of his campaign in the Sudan, Lord Kitchener left Khartoum for South Africa, whereas Suakin and Berber were not linked by rail until 1905. The reference intended probably is to Kitchener’s famous military railway built across the Nubian Desert in 1897, and completed to Berber and the Atbara River in 1898. The letters T.V.R. are moulded into the ornamental brackets supporting the lug gage racks. Built by the Metropolitan Carriage & Wagon Company of Saltney, the coach is one of a pair of 32-ft. clerestory carriages which, in common with other passenger stock, has been saved from the scrap heap by acquisition for service on the Shoeburyness Military Tramway – the so-called Kitchener coach in 1898, the other in 1900.” [5: p243]
The ‘Kitchener Coach’ built in 1898 and in use, in the late 1950s as a drawing office at Shoeburyness. [5: p242]
Locomotives, etc.
Sequestrator reports that the motive power on the tramway network fell into three categories, “steam locomotives, diesel locomotives and railcars. The maximum weight permissible on the … bridge being 20 tons, steam engines [were by 1958] confined to the west of Havengore Island. To overcome this limitation, electric battery locomotives were introduced, and diesel engines [then] superseded them. The railcars [were] for the transport of gangs with tools and light equipment or for use as inspection cars.” [5: p243]
Taken at Camp Field terminus, a WD 0-6-0ST Iain charge of a two coach train. The locomotive was delivered in 1945, the two corridor- coaches were built at Derby for the Midland Railway in 1906/7. [5: p239]
Of the steam locomotives, “ten [were] of one ubiquitous type, having been built to standard specification by various firms in 1943-45: five by the Hunslet Engine Co. Ltd., two by W. G. Bagnall Limited, and one each by Robert Stephenson & Hawthorns Limited, Andrew Barclay Sons & Company, and the Vulcan Foundry Limited. All [were] 0-6-0 saddle-tank engines with 4 ft. 5in. wheels, and inside cylinders using saturated steam at 170 lb pressure. The water capacity [was] 1,200 gal. and the weight empty 371 tons. The eleventh steam locomotive, built by Hudswell, Clarke & Company in 1923, [was] smaller and lighter, but [was] a favourite with the men for efficiency and ease of working.” [5: p243]
The Tramway’s oldest locomotive (as of the late 1950s) a Hudswell, Clarke & Co. 0-6-0ST of 1923. [5: p242]
The lined-out brown livery in use prior to WW2 had, by the late 1950s, given way to plain light apple-green for all steam locomotives. Locomotives and rolling stock were kept in excellent condition. Each engine carried three numbers. That displayed most prominently was the local number by which locomotives were distinguished for rota purposes. “Every engine owned by the War Department [had] a W.D. number, irrespective of the particular railway on which it [was] in service. There [was] also a makers’ number.” [5: p243]
“Most of the traffic [was] internal, and at times as many as twelve motive-power units [could] be at work simultaneously. Transfers to and from British Railways [took] place on an exchange siding – a single line just over 100 yd. long – on the extreme south of the station yard at Shoeburyness.” [5: p243] By the late 1950s, river-borne consignments were rare, and the piers were little used.
Military Standing Orders and Bye-laws
Military standing orders for train working, which correspond to the rule book in normal railway practice, incorporate the original bye-laws dated 11th August 1896, which were framed in compliance with the Act of 1887. Government Records [8] hold a copy of the bye-laws in place on the line. These bye-laws were promulgated by the War Department with the approval of the of Trade, under the provisions of the Military Tramways Act, 1887. Additional bye-laws were made in April 1915. The bye-laws are included immediately below. [8]
It may also be of interest to read the bye-laws covering the military ranges on the MOD site. These can be read here. [39]
Sequestrator comments that in general the bye-laws “enforce the use of the train staff on the one-engine-in-steam principle, regulate the closure of crossing gates, prohibit regular traffic after dark, and forbid anyone but the magazine attendant to ‘travel in or on the Powder Wagon’. A general speed limit of 12.5 m.p.h. is imposed. At one time the tramway system itself played a part in providing flying target practice, and a special supplementary bye-law. signed by Lord Kitchener on April 2 1915, permitted a speed of up to 35 m.p.h. by an engine and vehicle over a specified stretch near Wakering Stairs. The train staff is carried only west of Suttons, where, in passing through a semi-built-up area, the line [had] several sharp curves, some of them blind. Eastward, however, the railway crosse[d] flat, open land, where branch-lines and sidings [led] to firing platforms and testing sites, and where a collision at 12.5 m.p.h. would be inexcusable.” [5: p243]
“Administration [was] delegated to army officers of the Royal Engineers, whose responsibility [was] divided between motive power, civil engineering, track maintenance and traffic control. The staff [were] wholly civilian; their working day begins at 6.45 am, and ends at 6 p.m. Engine-drivers work[ed] on a daily rota system, which [was] set out on a ‘detail board’. Steam locomotives [were] sent to the makers for overhaul every five years, but normal repairs and maintenance [were] done in War Department’s own workshops at Suttons.” [5: p243-244]
The full extent of the Shoeburyness Military Tramway as shown in The Railway Magazine article of April 1959. [5: p239]
A Journey Along the Line
We start our journey at the Southwest end of the network.
The next two satellite images cover approximately the same area as the three map extracts above. RailmapOnline.com seeks to show all the different track layouts which once graced the MOD site. It appears to be a ‘cats’ cradle’ of different lines! …
This image shows the area of the MOD depot immediately to the North of the rail junction shown in the street level photographs above. [17]
These next two satellite images show the lines at the Western edge of the site and the buildings that they serve. …
The two buildings at the western edge of the MOD site and the lines that serve them. [Google Maps, February 2026]
Attempting to show all the lines on the site on satellite images at a larger scale bill be more confusing than helpful, so contemporary Ordnance Survey maps, and the diagrams of track layout from RailMapOnline.com will suffice, together with 21st century OpenStreetMap mapping.
In these two images, the same area as covered in the three map extracts above is shown. A myriad of different lines criss-crossed the site. [17]Access from the sidings met the main line again as shown on the right of this map extract. The double-junction in the bottom-right of this image appears at the centre-top of the satellite image immediately above. [21]The same location appears bottom-left in this satellite image. [17]Of the two lines seen on this map extract, that on the left of the image ran Northeast. In 1925, it was extended to Havengore Bridge. That running diagonally across the extract served the various coastal ranges. Both appear in the next satellite image below. [32]The road running diagonally across the bottom-left of this image appears towards the top of the last RailMapOnline.com satellite image above. [17]By 1925, the line to Havengore Bridge left the line at the left of this extract and headed North-northeast. [33]This extract from RailMapOnline.com’s satellite imagery continues to follow both lines, with the line heading to Havengore Bridge leaving the top of this image. [17]The bottom half of this TailMapOnline.com shows two lines converging to a junction off the right of the image. The line leaving the top of the image runs towards Havengore Bridge. [17]The line in the above extract ran West to join the line serving the coastal ranges. [33]The same area as it appears on modern satellite imagery. [17]The end of the coastal line was close to Haven Point (Havengore Point?). [34]This satellite image covers the remaining length of the line which served the coastal ranges. [17]The other line ran North-northeast to cross Havengore Bridge. [23]Havengore Bridge in the 21st century. The original bridge was shared by both road and rail. [17]The extension of the military tramway across Havengore Bridge was not completed until 1925. [5: p239]
The remaining extracts from the satellite imagery provided by RailMapOnline.com show the route of the line to its terminus at the eastern extremity of Havengore Island. …
Three images extracted from the satellite imagery from RailMapOnline.com’s satellite imagery take us to the full extent of the line on Havengore Island. [16]
The series of extracts from OpenStreetMap.org below shows the railway layout within the military site North of the junction on the last Google Maps satellite image some distance above (near the crossing at Brodie Road). The layout is considerably different to that in place in the 1920s and at the beginning of WW2. These extracts purport to show what remains of the rail network in the 21st century…
The biggest changes in the network appear in these first two extracts from OpenStreetMap.org. [26]
Further Northeast on the site the railway layout is much reduced from that shown on earlier series of images. …
The line that once ran across Havengore e terminated towards the top of this map extractThe coastal line still terminated close to Havengore Point.
In the 21st century, the site is managed by QinetiQ and consists of a range covering a land area of 7,500 acres (3,000 ha) with 35,000 acres (14,000 ha) of tidal sands and 21 operational firing areas. MOD Shoeburyness is also a centre of excellence for environmental testing of ordnance, munitions and explosives. The Environmental Test Centre on site also simulates extreme environmental conditions to evaluate military vehicles and equipment. [24]
Several buildings and structures on the site are listed, including the cart and wagon shed, which is used as a heritage and community centre; together they are described by Historic England as constituting “a complete mid-19th century barracks”. [25] As of 2016 many of these have been refurbished for sale as private houses, and additional housing is being built in the vicinity. A tower was planned to stand in the Shoeburyness Garrison housing development. The tower was to be 18 storeys high and designed to mark the start of the Thames Gateway development. [24]
The history of the site, in pictures, can be found here. [27]
Buildings on the site include the Air Blast Tunnel below:
Understandably full details of buildings on the site and their military uses are difficult to obtain!
Passengers
The passenger service on the line was limited to use by Government employees. The service began when the line was extended to New Ranges. By 1959, Old Ranges Station had been demolished, and the old station at Camp Field partly so. Chapel Road Station and Magazine Station were disused. Platforms in use in 1959, “were built long enough to accommodate six-coach trains, in anticipation of a large influx of troops which did not materialise; but Magazine could take only one coach, and the rest four coaches, which, until three or four years [before] was the normal complement.” [5: p244]
“All intermediate stations except Village Crossing were conditional stopping-places and Magazine and Camp Field (old station) were untimed. The bye-laws of 1893 oblige[d] trains to stop before crossing the road, and state that ‘a man with a danger flag shall warn the Public of the approach of trains’. For this reason Village Crossing ha[d] two platforms, both on the south side of the single line, but one on each side of the crossing, thus enabling passengers to alight while the train [was] waiting for the gates to open.” [5: p244]
Sequestrator tells us that average passenger numbers were: 166/day in the year to 31st March 1895; 276/day in the year to 31st March 1896; just below 140 passengers/day in January 1957. “In 1894-5 it was calculated that the cost of conveyance per mile per passenger was 0.065d. In this computation no allowance was made for depreciation, maintenance or interest on capital.” [5: p244]
Passenger train times were provided as an appendix to standing orders, and up to 1929, with each major change, the new times were printed in a pocket folder for distribution to those entitled to use the service. “The timetable for 1910 shows eight up and nine down trains on ordinary weekdays, each with a journey time of ten minutes. The first [left] the southern terminal station (then named Engine Shed) for New Ranges at 8.20am, the departure of the last, also a down train, [was] at 4.50 p.m. There [were] two additional trains each way on Saturdays during the summer, and one in winter. The schedule for 1913 [was] similar but mark[ed] the withdrawal of all Saturday afternoon trains.” [5: p244]
March, 1922, saw the service in a transitional stage, “with six trains each way between New Ranges and Old Ranges (renamed). Two more start[ed] from, and terminate[d] at, Camp Field, the latter, as well as Magazine, being names which appear for the first time. With the issue of the last printed timetable, in June 1929, … the passenger service between Camp Field and Old Ranges [was] withdrawn, and six trains each way (five in winter) beg[an] and end[ed] their journeys at a terminal station, built in 1924, on a spur at the site of an old quarry north of Campfield Road. For the benefit of employees with children attending school, one down and two up ‘children’s trains’ (untimed) [we]re introduced.” [5: p245]
A passenger service managed by a WD Austerity 0-6-0ST crossing the road at ‘ Village Crossing’, approaching the eastern platform of the station, in the later days of the passenger service. [5: p244]
“Passenger trains were withdrawn on 1st September 1958. There were at that time three trains each way daily except on Saturdays and Sundays, leaving New Ranges at 7.50 a.m. and 12.40 and 1 p.m., and returning at 8.50 a.m. and 12.50 and 1.50 p.m. The actual time for the journey of just over one mile was six minutes, compared with an allowance of eight minutes in 1929. In orders and official notices the army’s own 24-hour system of time recording was incorporated. … The two coaches, once resplendent in Midland livery with coats of arms, [we]re painted over a dull brown. Inside, though first and third class compartments [we]re still distinguishable, the plush upholstered seats [we]re covered with hessian. Above them [was] a glass-framed gallery of faded pictures redolent of the England of Edwardian days – Neidpath Castle, Rowsley Bridge, Ambleside, Sulgrave Manor, Chatsworth House with here and there a black-out notice, and the once-familiar poster depicting the individual with long furry ears erect listening to the careless talk of fellow-citizens which might cost lives. They [we]re ladies of quality, these coaches, 24 to 28 tons apiece, … fallen on hard times but still well cared for and comfortable to ride in. [In use,] they screech[ed] querulously on cruel curves; and no wonder, for the driver sa[I’d] he ha[d] to keep a good head of steam to pull them round.” [5: p245]
Havengore Bridge Replacement
The Replacement Havengore Bridge was completed in 1988. It spans Havengore Creek and provides the only vehicle crossing point to Foulness Island. No provision for a tramway was made in the design of the bridge. [12] The bridge is a single leaf, counter-weighted bascule bridge raised by a pair of double acting hydraulic cylinders. [13]
Following many years of service, it was identified that the second bridge’s lifting mechanism and associated control system were in need of refurbishment and upgrading and Fairfield Control Systems were appointed to conduct the work. This included: [13]
Comprehensive survey and inspection of the hydraulic systems, mechanical components and control systems
Refurbishment and upgrade of hydraulic control, including redesign and replacement of cylinder manifold blocks and HPU control manifold
Replacement of the two 4m main lifting cylinders
Repair of tail-locking bolts and fixings
Installation of upgraded lifting control, control desk, safety and diagnostic systems
Replacement wigwag warning lights and barrier repairs
Refurbishment of ancillary steelworks
Work was undertaken in 2019 & 2020. [13]
As the island is used for the testing of new munitions and the destruction of old ones. When these tests are in progress, the bridge cannot be used. However, the bridge is staffed for two hours either side of high water (during which time the creek is navigable) during daylight hours only, 365 days of the year.
Narrow-Gauge Tramways
In addition to the standard-gauge military tramway, the area was criss-crossed by a series of narrow gauge tramways which were primarily industrial, serving the area’s extensive brickworks, coastal gun ranges, and military depots between the late 19th century and WWII.
There was a 2ft-gauge line connecting East Beach brickfields to Elm Road and wartime, ammunition storage tracks on the New Ranges, with some remnants remaining visible at East Beach, as can be seen above. This and other lines predated the arrival of the London, Tilbury & Southend Railway. The coming of the railway saw the growth of the town and its expansion into what were the sites of brickworks.
A significant 2ft-gauge tramway network connected East Beach with the area in and around Elm Road. [17]Tramways serving the brickworks in the area between Elm Road and the Railway Station in 1896. This map extract comes from the 25″ Ordnance Survey of 1896, published in 1897. Some of these tramways remained in use as late as the 1920s. [36]
This next series of map extracts come from the 6″ Ordnance Survey of 1873, published in 1880 and they show an earlier incarnation of the tramways in the area to the North of the railway station (which had yet to be built).
A first length of tramway ran from East Beach across the North side of the old settlement. [37]The line ran North with a short branch off it to the North-northwest. [37]The end of the short branch line appears on the extract, the main line heads North and another branch heads East. [37]The line continued to the North. [37]The end of the line was a short distance to the Northwest. [37]The branch line heading East towards the coast. [37]
The different incarnations of tramway ran to the coast at East Beach where there were further brickworks and where bricks were loaded into barges on piers. The tramway crossed the standard-gauge military tramway on the level. [38]
Military Lines
The Ministry of Defence (MoD) and War Department (WD) operated narrow-gauge lines within their firing range area. These included, 2ft-gauge lines, with evidence of a 2ft-gauge Ruston diesel locomotives operating there.
East Beach Remains:
A tramway system existed near East Beach, which may be that pictured above. It was re-purposed or re-installed by the WD in 1943 for ammunition storage, connecting to the, New Ranges.
Maplin Sands Line
A separate, small-gauge, tramway existed on Maplin Sands in connection with the gun ranges.
Largely independent of the main standard-gauge line that ran into the Shoeburyness station, these systems were crucial to the town’s early industrial and military, infrastructure.
The Macnee patent was for a hand-operated point lever (or “lever box” as they were known in the trade). Although holding the patent, Macnee sold his manufacturing plant to Anderson Foundry, a significant supplier of rail chairs. Victorian patent, business relationships and tendering processes were fairly murky, but it is probable Daniel Macnee would have received his commision per unit (he was still working as a London based agent for Andersons) till his death in 1893 and afterwards to his heirs. He had business connexions with Dugald Drummond and Sons, the Caledonian Railway and the L&SWR. The levers could be positioned on either side as safety dictated, and the lever position would sit towards the V for the “main” line and pulled “back” for the diverging road. … These notes have been extracted from a post on the Caledonian Railway Association Forum (https://www.crassoc.org.uk/forum/viewtopic.php?t=38), accessed on 13th December 2025.
The short paragraph immediately below appeared in the February 1952 edition of The Railway Magazine in reply to a question submitted by G. T. Kaye.
“The Nidd Valley branch of the former North Eastern Railway (which was closed to passengers on 31st March 1951) terminated at Pateley Bridge, 14 miles from Harrogate. In 1900, a Light Railway Order was obtained for a 2 ft. 6 in. gauge line from Pateley Bridge to Lofthouse-in-Nidderdale, six miles further up the valley, but the promoters had difficulty in finding the necessary capital. At that time, the Bradford Corporation was about to undertake the construction of reservoirs in the Nidd Valley, and a railway was required to carry materials to the sites. The Corporation took over the powers for the light railway, and extended it for a further 6 miles, from Lofthouse to Angram. The railway was laid to the standard-gauge, and was opened to passengers between Pateley Bridge and Lofthouse on 1st May 1907. The remainder of the line did not carry public traffic. The line was worked by two 4-4-0 tank engines and passenger coaches purchased from the Metropolitan Railway. The passenger services were withdrawn on 31st December 1929, and the line was closed completely some months later.” [1: p143]
It appeared close to the back of the magazine in the section called, “The Why and the Wherefore”. It seemed like a good idea to explore what further information there is available about the Nidd Valley Light Railway. …….
The Website ‘WalkingintheYorksireDales.co.uk’ has a page dedicated to the railway which can be found here. [2]
A number of images relating to the line can be found here. [13]
The Oakwood Press published a book by D. J. Croft about the line. [3: p3]
Croft wrote: “The valley of the River Nidd, in the West Riding of Yorkshire, is nearly 55 miles long, beginning at Great Whernside, and ending at Nun Monkton where the Nidd flows into the River Ouse. However, the area known as Nidderdale extends for only about a half of the length, and forms a compact geographical region of its own. Despite this length, and great scenic beauty, it remains to this day one of the forgotten valleys of the Yorkshire Dales.” [3: p3]
“The area of Nidderdale can be divided into roughly two equal sec tions, with the market town of Pateley Bridge between the two. The first substantial historical accounts of Nidderdale appeared in Domesday Book of 1086. However, some of the local lead mines were worked in the time of the Brigantes, whilst several surrounding localities suggest Roman occupation.” [3: p3]
“Nidderdale has several industries, notably quarrying and lead mining. and a small textile industry. There is also a small slate quarry, a marble quarry, and a long, thin ironstone vein stretching along the valley. Through-out the ages, however, Nidderdale has had prosperity alternating with decline. As the early mining industry began to decline, so textiles became important around the thirteenth century. This too tended to decline by the seventeenth century, and mining became important once more. Unfortunately, the prosperity of the lead mining era passed, and so too did the prosperity of Nidderdale.” [3: p3]
“This period of decline lasted until 1862, when the North Eastern Railway opened its line from Harrogate to Pateley Bridge, thus opening this remote valley to the outside world. Prior to this, the only roads out of the dale had been to Grassington, Riponand Kirkby Malzeard, and the only regular connection with the outside world had been the Nidderdale Omnibus, a double-deck horse bus, linking Pateley Bridge with trains of the Leeds & Thirsk Railway at Ripley. This operated from 1st August 1849, until the opening of the railway, and ran twice daily.” [3: p3]
The approach of the 20th century brought a new prosperity to the valley, which was to last for the next thirty years or perhaps a little longer. Thid was the period when the Nidd Valley Light Railway was active.
The story of the line is the story of the thirteen or so miles between Pateley Bridge and the head of the valley, for it was there “that the Nidd Valley Light Railway was conceived, constructed and closed. All this happened within a period of less than forty years.” [3: p3]
The Story of the Line
Wikipedia tells us that the origins of a railway in the upper Nidd Valley “can be traced back to 1887–88, when Bradford Corporation began to investigate the valley as a source for the public water supply. … Alexander Binnie, who was the Waterworks Engineer for Bradford at the time, and Professor Alexander Henry Green, a geologist from Oxford, visited the area, and Green advised Binnie that the valley was suitable for the construction of large dams. The Bradford Corporation Water Act 1890 was obtained on 14th August 1890, authorising the construction of four dams. … A second Act of Parliament was obtained on 27th June 1892, by which time the four reservoirs were Angram, Haden Carr, High Woodale and Gouthwaite. Gouthwaite Reservoir was designed as a compensation reservoir, to maintain flows in the Nidd further down the valley.” [4][5: p76-77]
The first reservoir, Haden Carr, was completed in 1899, together with a 32-mile (51 km) pipeline (the Nidd Aqueduct) to deliver water to Chellow Heights reservoir on the outskirts of Bradford. [4][5: p79] “Gouthwaite reservoir was built … between 1893 and 1901.” [5: p84-85] The activity in the valley attracted attention from outside the region and a company from London, Power & Traction Ltd applied for a Light Railway Order “to construct a line from the terminus of the Nidd Valley Railway at Pateley Bridge to Lofthouse. … Following a hearing at Harrogate on 9th October 1900, the Light Railway Commissioners awarded an order to Power & Traction for a 2 ft 6 in (762 mm) gauge railway.” [4] Negotiations with Bradford Corporation over a possible £2,000 investment in the scheme ultimately failed. [5: p86]
“In 1903, Bradford invited tenders for the construction of Angram Reservoir, and … reached provisional agreement with the Nidd Valley Light Railway Company to purchase the powers awarded to them to build the light railway. … Bradford wanted to ask the Light Railway Commissioners for permission to increase [the track gauge] to 3 ft (914 mm). … They also wanted to ensure that they bought enough land to allow a standard gauge railway to be constructed ‘at any future time’. The North Eastern Railway, owners of the Nidd Valley Railway, argued that it should be standard gauge from the outset, since they were running excursions to Pateley Bridge twice a week, and these could continue over the Nidd Valley Light Railway. It would also remove the necessity of transshipping goods.” [5: p86]
Then next three map extracts show the railway facilities in Pateley Bridge while the Nidd Valley Light Railway was active. …
A transfer order was eventually granted, “with powers to borrow up to £30,000 to fund the project. In May 1904, the Board of Trade agreed to a change to standard gauge, and borrowing powers were increased to £66,000 in 1908, because of the extra costs of building the wider formation. The document was signed by Winston Churchill, the President of the Board of Trade.” The contractor working on the Anagram reservoir, John Best, “was awarded a contract to build the light railway to Lofthouse for £23,000, and a tramway from Lofthouse to Angram for £5,385.” [5: p86-87]
Then the intrigue began! A contract had been awarded in April 1902 to Holme and King for the construction of a road from Lofthouse to Angram. Bradford Council “had purchased enough land to allow the light railway to be built beside the road, and although Best was awarded a contact for the railway in 1903, it appears that Holme and King built a 3 ft (914 mm) gauge contractor’s railway beside part or all of the road. They had two locomotives on site, both 0-4-0 saddle tanks, one bought second hand some years earlier and moved to the site in spring 1902, after working on several other projects, [5: p87] and the second bought new for delivery to Pateley Bridge. [5: p89] By mid-1904, there was a 6.5-mile (10.5 km) line from Angram, which crossed the River Nidd on a 20-foot (6.1 m) bridge just before it reached Lofthouse.” [4]
So, Best began extending the line towards Pateley Bridge from the River Nidd rather than starting the work again! Wikipedia tells us that “by 13th July 1904, it had reached a level crossing at Sykes Bank, 0.5 miles (0.8 km) below Lofthouse, and work had commenced at several other sites. On that date, a party of 150 members of Bradford City Council, with invited guests, arrived by train at Pateley Bridge, and were transported to Gouthwaite Dam in carriages. Here there was a ceremony in which the Lord Major cut the first sod for the Nidd Valley Light Railway.” [4] The party “proceeded to Sykes Bank, where a train was waiting, which consisted of 15 wagons fitted with makeshift seats, and two locomotives, one of which was Holme and King’s Xit and the other was Best’s Angram. It took about an hour to reach Angram, where there were presentations, and Alderman Holdsworth cut the first sod for the dam. Refreshments were then served and the party returned to Lofthouse by train and to Pateley Bridge by carriage.” [4][5: p90-91]
The narrow gauge had hardly reached Pateley Bridge and Angram begun its regular duties along the line when standard gauge rails began to be laid starting at Lofthouse and working both up and down the line from there. “When the first standard gauge locomotive arrived, it was towed along the road to Sykes Bank by a Foden steam lorry, its flanged wheels making a mess of the road surface. The main line and sidings became mixed gauge for a while, although the third rail was gradually removed from 1906.” [5: p91 & 93] There was a veritable network of rail lines at the Angram Dam site where, as well as a village built for the workers, “the railway terminated in several sidings, which included a locomotive shed. The sidings were at a similar level to the crest of the dam. A branch left the main line and descended to the valley floor, where there was a cement mixing plant and more sidings. This line included a winch-operated incline which descended on a gradient of 1 in 15 (6.7%). Another incline, of 3 ft (914 mm) gauge, ascended the far side of the valley, giving access to Nidd sluice and lodge. A third incline brought rock down to the main line from a quarry, some 2 miles (3.2 km) below the terminus.” [4][5: p93 & 97]
At the other end of the Light Railway, “at Pateley Bridge, the Nidd Valley Light Railway station was to the north west of the North Eastern Railway’s Pateley Bridge railway station, close to the River Nidd. The two were connected by a single track which crossed a level crossing. There were a series of sidings immediately after the level crossing, with the station and more sidings beyond that. A carriage shed and a locomotive shed were located a little further along the valley of the Nidd.” [4]
Ramsgill Village was served by a stationary Bouthwaite which sat on the opposite side of the River Nidd. This map extract comes from the 25″ Ordnance Survey of 1907, published in 1909. [7]
“Best built two-storey stone buildings for the stations at Pateley Bridge, Wath, Ramsgill and Lofthouse. He built a signal box at Pateley Bridge, with the other stations having ground frames and simple signalling. Operation of the line was controlled by the Tyer’s Electric Train Tablet system, and six machines were ordered at a cost of £360. [5: p101] Both intermediate stations had goods sidings on the eastern side of the main track, while Lofthouse had a passing loop and sidings to the west.” [4]
The Station at Wath sat between the village and the River Nidd. The 25″ Ordnance Survey of 1907/1908 and published in 1909. [8]
“Best had a number of locomotives, both 3 ft (914 mm) gauge and standard gauge, which operated over the entire line from Pateley Bridge to Angram during the construction phase. For the opening of the Nidd Valley Light Railway proper, the 6.5 miles (10.5 km) from Pateley Bridge to Lofthouse, Bradford Corporation ordered six open wagons and two brake vans from Hurst Nelson of Motherwell. Locomotives and carriages were obtained second-hand from the Metropolitan Railway in London. These consisted of ten 4-wheeled coaches and two 4-4-0 Beyer Peacock side tank locomotives. All had become surplus to requirements, as electrification of the line had been completed in 1905. The locomotives were fitted with condensing equipment, for working in the tunnels under London, but the price of £1,350 for the pair included removal of this, and the fitting of cabs. All twelve vehicles arrived at Pateley Bridge, with one engine in steam … The locomotives were named ‘Holdsworth’ and ‘Milner’ after two Aldermen who had served Bradford Waterworks since 1898.” [4][5: p101, 102]
“An official opening took place on 11th September 1907, when a train consisting of three carriages and the Corporation saloon were hauled by ‘Holdsworth’ from Pateley Bridge to Lofthouse, with stops at Wath and Gouthwaite reservoir. At Lofthouse the engine was replaced by one of Best’s engines, and continued to Angram where luncheon was served in the village reading room.” [4][5: p102, 105]
“The two locomotives were much too heavy to comply with the Light Railway Order, which specified a maximum axle loading of 6.5 tons. They weighed 46.6 tons in working order, with 36.7 tons carried by the two driving axles. The Corporation applied for an increase in the axle loading, specifying the weight as “over 42 tons”. Milner, the newest of the two locomotives, dating from 1879, [5: p102] did not perform well, and was replaced by a Hudswell Clarke 0-6-0 side tank, also named Milner in May 1909. The original Milner was sold to the North Wales Granite Company at Conwy in 1914. [5: p102, 111] Following discussions with the Board of Trade in 1906, the Corporation and the North Eastern Railway had obtained permission for three passenger trains per week to pass over the goods yard and sidings at Pateley Bridge, so that excursions could continue up to Lofthouse between June and September only. Despite the agreement, when the first excursion was due to make the journey on 14th September 1907, the NER decided not to allow their stock to pass onto the Nidd Valley Light Railway, nor to allow the Corporation engine and carriages to come to their station, and so the passengers had to walk between the two stations. [5: p110] In order to avoid confusion for parcels traffic, Lofthouse station became Lofthouse-in-Nidderdale on 12th December 1907, and Wath became Wath-in-Nidderdale in February 1908 for similar reasons.” [4][5: p107-108]
Work on Angram reservoir was finally completed in 1916. “Bradford Corporation had already obtained an Act in 1913, allowing them to abandon their plans for a reservoir at High Woodale, and instead to build a much larger one at Scar House. It would submerge the site of Haden Carr reservoir, and the Act allowed them to start construction “when appropriate”. The cost of the new works was estimated at £2,161,500, and although three tenders were received, they decided on 14th May 1920 to build it themselves, using direct labour. Scar village was built between 1920 and 1921, consisting of ten hostels for a total of 640 men, a school, canteen, recreation room, concert hall, mission church and some bungalows.” [4][5: p115]
Plans to electrify the railway using hydro-electric power, were considered in March 1920, but rejected as being too expensive. uneconomic. Holdsworth, was taken out of service in 1866 because it was too heavy for the line, but when no buyers could be found, it was used as a stationary steam supply for another 14 years. There were plans to overhaul Milner, to obtain another lighter engine, and to purchase two railmotor cars. Only one railmotor (‘Hill’) was eventually purchased in 1921. It can be seen in the two images immediately below.
“From August 1920, work was carried out to improve the line between Lofthouse and Angram. This included easing the alignment on many of the curves, the addition of loops near Lofthouse and at Woodale, just below the Scar House site, and the construction of a 180-yard (160 m) tunnel near Goyden Pot, which was used by up trains only.” [4][5: p119-122]. “The line at Angram was extended to a small quarry in 1921, along the trackbed of Best’s 3 ft (914 mm) gauge line beyond the dam. Stone was extracted for remedial work, caused by wind and wave erosion of the southern bank of the reservoir near the dam.” [4][5: p123]
Close to the Scar House dam site, “a network of sidings were constructed, zig-zagging down to the Nidd, and back up the other side of the valley. A double track self-acting incline provided access to the Carle Fell Quarry, to the north of the reservoir, and as the quarry was worked, two further inclines were constructed. One was single track, with a winding engine at the top, and around 1930, an incline worked by locomotives was added. Above the later quarry face, a Simplex petrol locomotive worked on a 2 ft (610 mm) track, removing overburden.” [4][5: p118]
Power for the works “was generated using water from Angram reservoir, which was discharged into Haden Carr reservoir. A 4,775-foot (1,455 m) pipeline supplied the turbines. This was later supplemented by a steam generating station. [5: p123-124] Two locomotive sheds were built, one near the village and another on the north side of the River Nidd, with a further two at Carle Fell Quarry. All had two tracks. Twelve four-wheeled carriages were bought from the Maryport and Carlisle Railway, to provide transport for the workers and their families from Scar House to Lofthouse, and a two-track carriage shed was built to the east of the main complex.” [4][5: p125]
“Six locomotives worked in the quarry. Allenby, Beatty, Haig and Trotter were based at the shed at the top of the main self-acting incline, while Ian Hamilton and Stringer were based in a shed at a higher level. Three steam navvies were used to load stone into the railway wagons, and there were nineteen or twenty steam cranes, all of which were self-propelled and ran on the tracks either in the quarry or on top of the dam.” [4][5: p129]
The main engineering work at Scar House reservoir closed to completion in September 1931 but it was not until July 1935 that filling of the reservoir commenced. “The official opening was on 7th September 1936. Scar House, which gave its name to the reservoir, was demolished. A new Scar House was built, at the foot of the incline from Carle Fell Quarry, which provided a home for the reservoir keeper, and a boardroom for official visits. [5: p130-131] A project to re-route the waters from Armathwaite Gill and Howstean Beck through a tunnel and into the reservoir began in May 1929. A 2 ft (610 mm) gauge line was laid, on which two battery-electric locomotives and twelve wagons ran.” [4][5: p131]
Two 0-6-0ST locomotives ‘Gadie’ and ‘Illingworth’, head a goods train on the line. [12]
Decline
“The start of work on Scar House Reservoir led to an overhaul of existing stock. Seven of the original Metropolitan Railway coaches were upholstered and repainted, while the remaining five were used for the workmen. [The] steam railmotor [Hill] … obtained in 1921, … had previously been owned by the Great Western Railway. It … was fitted with electric lights in 1923. It worked on the public section of the railway, and never travelled beyond Lofthouse. Numerous new and secondhand locomotives were purchased, most for use on construction work, but two, Blythe and Gadie, were fitted with vacuum brakes, and so worked goods trains from Pateley Bridge to Scar House, as well as passenger trains between Scar House and Lofthouse and sometimes Pateley Bridge.” [4][5: p133]
“Passenger trains for the residents of Scar village ran on Tuesdays, Thursdays and Saturdays, the mid-week ones connecting with ‘Hill’ at Lofthouse, and the Saturday ones running through to Pateley Bridge. The 1927 printed timetable showed five trains a day between Pateley Bridge and Lofthouse, but also showed the trains onwards to Scar Village, with a note that these were for exclusive use of residents. Saturday trains were hauled by Blythe or Gadie, but were banked at the rear by another engine above Lofthouse because of the steep gradients.” [4][5: p134]
“Traffic returns showed 106,216 journeys by workmen in 1921, and 41,051 by ordinary passengers. The figure for workmen was not declared after 1922, as the accommodation at Scar Village was available. The peak year for journeys was 1923, with 63,020, after which there was a gradual decline, with 24,906 journeys for the final nine months before closure. The line made a total operating loss of £36,435 between 1908 and 1924, and then made a modest profit until 1929. Fares were cut by one third in early 1929, in the face of competition from motor buses, and a decision was taken to close the line in April 1929.” [4][5: p
“An approach to the London and North Eastern Railway to take over the railway was unsuccessful, and on 31st December 1929, the railway closed to public passenger and goods services. The sections below and above Lofthouse continued to be run as a private railway. [5: p135] The Saturday train to Pateley Bridge for the residents of Scar Village continued until 1932.” [4][5: p133]
The line to Angram was severed by the works at Scar House in 1933. “By 1936, with construction completed, the railway was lifted, and a sale was held at Pateley Bridge on 1st March 1937, where everything was sold as a single lot. … At its peak, the Scar House reservoir project had employed about 780 men, and the population of Scar Village had been 1,135. By 1936, there were just eight houses occupied, and seven pupils at the school, which closed on 31st January 1938.” [4][5: p130 & 138]
A Journey along the Line
“The railway began in Pateley Bridge, close to the River Nidd, with the goods yard just to the north of the B6265 road. The passenger station was a little further north, and is now occupied by a road called ‘The Sidings’.” [4]
The Nidd Valley Light Railway Station, Transshipment Yard and Goods Yard at Pateley Bridge. 25″ Ordnance Survey of 1907/08, published in 1908. [9]The Nidd Valley Light Railway Station Platform at Pateley Bridge in 1907. This image was shared on the Railways Around Harrogate & Yorkshire Facebook Group on 18th January 2024 by Ian McGregor, (c) Public Domain. [17]The same area in the 21st century. ‘The Sidings’ is the cul-de-sac directly above the centre-bottom of the image. The new build further to the North is an extension to Millfield Street. [9]The Sidings. [Google Street view, May 2024]The extension to Millfield Street. [Google Streetview, May 2024]The line’s Carriage Shed and Engine Shed sat to the North of the Station. 25″ Ordnance Survey of 1907/08, published in 1908. [9]The same area in the 21st century. The area of the Carriage and Engine Sheds has now reverted to farmland. [9]
The line headed North “along the east bank of the river, and this section of it now forms part of the Nidderdale Way, a long-distance footpath. Wath station was just to the south of the minor road that crosses Wath Bridge, and had two sidings.” [4]
Wath Railway Station was on the South side of the road between the Corn Mill and Wath Bridge. 25″ Ordnance Survey of 1907/08, published in 1908. [14]The same area in the 21st century. ESRI satellite imagery provided by the National Library of Scotland. [14]Looking South from the minor road into the site of Wath Station. The station building is now a private home. [Google Streetview, May 2024]The line North of the minor road was on a low embankment. [Google Streetview, May 2024]
“The footpath leaves the course of the railway before the station, and follows the bank of the river, crossing over the railway trackbed by Gouthwaite Dam.” [4]
The line passed close to the Northeast end of Gouthwaite Dam. 25″ Ordnance Survey of 1907/08, published in 1908. [15]A very similar area in the 21st century. [Google Maps, October 2025]Beyond the North end of Gouthwaite Reservoir, the route of the old railway can be seen from the minor road which links Coville House Farm to Bouthwaite. This view looks South from the road. The route of the old line is beyond the drystone wall in a shallow cutting. [Google Streetview, May 2024]Turning through 90° to face West, the end of the cutting can be seen on the left of this image, the line ran on beyond the tree at the right side of the photograph. [Google Streetview, May 2024]Further North along the same minor road, the old railway ran to the left of the drystone wall, between it and the electricity pole. [Google Streetview, May 2024]
“The trackbed was close to the shore of the reservoir, and the footpath rejoins it after a deviation to the north west. Ramsgill Station was at Bouthwaite, rather than Ramsgill, just to the south of Bouthwaite Bridge, where the Ramsgill to Bouthwaite road crosses Lul Beck.” [4]
Ramsgill Railway Station at Bouthwaite. 25″ Ordnance Survey of 1907/08, published in 1908. [16]Approximately the same area as it appears on 21st century satellite imagery. The line can easily be picked out close to the bottom-right of this image, to the West of the minor road. The station area remains quite distinct! The route of the line continues Northwest on the North side of the minor road which enters centre-left. [Google Maps, October. 2025]The Station Building at Ramsgill Railway Station in Bouthwaite, the main running line was to the right of the building and crossed the road to the right of the camera. [Google Streetview, May 2924]Looking Northwest from approximately the same place these trees sit on the line of the old railway. Just North of the road, the line bridged the stream running through the village. [Google Streetview, May 2924]
“The footpath rejoins the trackbed briefly at Low Sikes, where there was a level crossing over the Ramsgill to Lofthouse road.” [4]
The level crossing adjacent to the River Nidd at Low Sikes. 25″ Ordnance Survey of 1907/08, published in 1908. [18]The same location in the 21st century. Note the gap in the drystone wall bottom-right which sits on the line of the old railway. [18]Looking Southeast along Nidderdale at Low Sikes. The redline approximates to the line of the old railway in the photograph. Foreshortening of the image significantly tightens the curve of the line. [Google Streetview, May 2024]Looking Northwest alongside the River Nidd from Low Sikes. The line ran approximately straight ahead from the sign post in the foreground. [Google Streetview, May 2024]
The next significant location along the line was Lofthouse Station which sat on the South side of the village of Lofthouse, between the road and the river.
Lofthouse Railway Station sat on the Northeast bank of the River Nidd. The railway crossed the River Nidd on a bridge shared with the highway. [6]A similar area in the 21st century. [6]Lofthouse Railway Station building in 21st century, seen from the Southeast. [Google Streetview, May 2024]Lofthouse Railway Station building in 21st century, seen from the Northwest. The railway and platform were on the right of the building. [Google Streetview, May 2024]This road bridge over the River Nidd was once shared with the light railway, the red line shows the route of the line. [Google Streetview, May 2024]Once across the river the line turned sharply to the North to follow the road to Scar House. It followed the West shoulder of the road with the River Nidd off to the East of the road. [Google Streetview, May 2024]
The metalled road is owned by Yorkshire Water but open to the public. The line continued North remaining on the West shoulder of the road.
“The bricked up tunnel can be seen about 2 miles (3.2 km) from Lofthouse, where the road and river turn sharply west. There is a picnic spot near the southern portal of the tunnel.” [4]
Beyond Goyden Tunnel the original line (still used by Southbound trains after the tunnel was built) bears sharply to the West. [Google Streetview, May 2024]Before the tunnel was constructed a short passing loop was provided on the sharp bend. It was not long enough to allow any significant trains to pass but it mitigated the risk of collision! [19]
Images from two different OS sheets surveyed in the late 1920s show the tunnel noted above. [20]
The line from this point on travelled in a westerly direction. Originally the railway ran through the site of Scar House Reservoir as far as Angram Reservoir. Travellers on the railway would have been able to look down and see a small reservoir formed to secure the intake of the pipeline which served Bradford. Its Dam was called the Nidd Intake Dam.
The Nidd Intake Dam and Reservoir. 25″ Ordnance Survey of 1907/08, published in 1908. This reservoir was swamped by the later Scar House Reservoir. [22]This map extract comes from the 6″ Ordnance Survey of 1907 which was published in 1910. The Light Railway has been built but there is no sign of construction work on the Angram Reservoir. [23]A much later OS Map (1956) showing Angram Reservoir with the route of the old railway marked by red dashes. Note that Scar House Reservoir intrudes at the top-right of this map extract. [24]
At Scar Village there is another picnic spot and a car park. The railway followed the most northerly of the two tracks at this point.
A relatively low grade image showing the area close to Scar House Reservoir on which Scar Village was built. The original line of the railway in the track on the northside of the site of the village. The village historical survey report from which this image has been taken provides details (In some depth) of the site of the village and can be found here. [25]
“At Scar Village there is [a] picnic spot and a car park. The railway followed the most northerly of the two tracks at this point. Another track down to the weirs follows the course of one of the zig-zag tracks across the valley. A footpath crosses the dam to the north side of the lake, where the incline to the quarry is still clearly visible. Another road, open to the public on foot, follows the trackbed along the southern edge of Scar House Reservoir, to reach Angram dam. The course of the railway is clearly visible on the modern 1:25,000 Ordnance Survey map for almost the entire length of the railway.”[4]
A short video about Scar Village and the work on Scar House Dam. [21]
References
The Why and the Wherefore; in The Railway Magazine, February 1952; Tothill Press, Westminster, London, p142-144.
An article by Seymour Glendenning in the July 1906 issue of The Railway Magazine focussed on the newly opened Burton & Ashby Light Railway. [1]
The light railway was a 3ft 6in gauge electric tram line supplied with electricity from a diesel generator plant near Swadlincote. [3] The power plant sat alongside the tram depot. [1: p56]
The first article about the line covered the length from Burton, through Newhall and Sawdlincote to Castle Gresley. It can be found here. [4]
Glendenning notes that the construction cost for the whole network was £150,000. [1: p57] He says that it served a population of about 100,000 inhabitants in the towns and villages through which it passed.
This second article about the line completes the journey, covering the length from Sawdlincote to Ashby-de-la-Zouch.
The route of the line(s) is shown in black on the map extract below.
The Burton and Ashby Light Railway. [2]
We start this second part of the journey at the tram depot which sat in Swadlincote on the North side of the Swadlincote and Woodville Branch of the Midland Railway and to the East of the Burton and Ashby Light Railway
The tram depot off Midland Road, Swadlincote, seen from the West. The trams on the depot are (left to right) Nos. 18, 5, 14, 9 and 10. On the left of the depot is the horse-drawn trolley tower. The map extract immediately below shows the depot (top-left). [3]Glendenning provided a photograph of the bridge in this photograph under construction (see above). The bridge appears on the map extract immediately above and is seen here in use by the Burton and Ashby Light Tramway, (c) Public Domain. [13]A similar view in the 21st century. [Google Streetview, August 2022]The tram depot sat to the East of the Burton and Ashby Light Railway and on the North side of the Swadlincote and Woodville Branch of the Midland Railway, just off the top-right of this extract from the 1920 25″ Ordnance Survey. As can be seen here, the branch into the tram depot left the mainline at high level adjacent to the North abutment of the bridge over the standard-gauge line. The Burton and Ashby Light Railway is shown heading South towards Swadlincote Market Place along Midland Road. Sitting to the West of the Light Railway Bridge and at a lower level was Swadlincote Railway Station. To its North were some Sanitary Earthenware Works. [5]This extract from the 21st century Google Maps satellite imagery shows much the same area as the map extract above. The light railway ran down the full length of Midland Road as far as its junction with the High Street in Sawdlincote. [Google Maps, October 2024]A tram sits on the South side of Market Place and is about to set off for Burton (turning left and running beyond the Town Hall which is at the left rear of the photograph), or Ashby (bearing to the right off the right side of the photograph), (c) Public Domain. [14]A very similar view looking from West Street East into Market Place in the 21st century. [Google Streetview, May 2017]
At Swadlincote Market Place a branch left the main line to Ashby-de-la-Zouch. That branch ran South from Swadlincote to serve Castle Gresley. We followed that branch in the first article about the Burton and Ashby Light Railway.
In this article we follow the route of the line from Swadlincote to Ashby-de-la-Zouch which heads East from the Market Place.
“The road towards Ashby rises continuously until it reaches a height of 569 ft. above sea level. It passes through the heart of the Derbyshire Potteries, where a great industry is carried on in the manufacture of furnace bricks, sanitary pipes, and common earthenware. Furnaces and kilns abound in Swadlincote, and the subsidiary industry of crate-making is also much in evidence.
There are numerous stacks arranged in the form of a lofty cone, of the long tapering branches of timber with untrimmed bark, which are used for making the big rectangular crates for the conveyance of heavy earthenware.
The clay for the pipes and pots is obtained on the surface, but the fire clay for furnace bricks has to be reached from a depth, by sinking shafts equipped with hoisting machinery.
Imperceptibly, Swadlincote grows into Woodville, where the large pipe works are situated, with their groups of ever-smoking furnaces and yards stacked with great heaps of pipes for sewerage and drainage purposes. But the broken pottery is even more aggressive than the sound ware. Every ‘grotto’, or ‘rockery’, is made of it; every garden path is edged with it, or with fused fire bricks. The mounds of refuse adjacent to the works are continually extending their borders and spreading over the country.” [1: p55]
The road East of Swadlincote Market Place is High Street. As can be seen from the closely cropped extract from the 1920 25″ Ordnance Survey, the line was dual-tracked in the vicinity of the Market Place. Midland Road runs down to the Market Place on the East side of the Town Hall. Trams for Ashby left to the bottom-right of the map extract. [5]
Trams ran East along High Street and turned Southeast and the road became Hill Street. The area to the East of the town centre was heavily industrialised. Different industrial concerns were linked by a network of tramways which were generally below the level of the public road and passed under it, as necessary, by means of bridges and tunnels as the map extract below illustrates.
Another estract from the Ordnance Survey revised sheets of the 1920s. This sheet was surveyed/revised on the basis of what was present on the ground in 1921. [15]
These two extracts from Google Maps satellite imagery cover the same length of the Light Railway as shown on the extract from the 1921 25″ Ordnance Survey above. The Southeastern length of what was Hill Street is now the A514 which bypasses the centre of the town. [Google Maps, October 2024]
A view East along High Street, Swadlincote from the Market Place. This image was shared on the photographs New and Old of Swadlincote & Burton on Trent Facebook Group by Darren Jones on 8th July 2024. [17]A similar view down High Street in the 2st century. [Google Streetview, August 2022]Facing Southeast along High Street, Swadlincote in the 21st century. [Google Streetview, August 2022]A tram climbs Hill Street towards the Centre of Sawdlincote circa. 1910. This image was shared on the Swadlincote Area Railways, Tramways and Industrial History Facebook Group by Ian Siddalls on 24th February 2019. [33]From Hill Street the line of the old Light Railway runs along a short length of Sir Herbert Wragg Way . Ignoring the junction with the A514, the old line continued to curve gently to the East to follow the modern A514. [Google Streetview, March 2023]Facing East along the A514, the land either side of the modern road has been landscaped and shows little sign of its industrial heritage. [Google Streetview, March 2023]This next extract from the 1921 25″ Ordnance Survey shows the Light Railway running East along Swadlincote Road. The Midland Railway Woodville Brach Line can be seen entering the extract from the South. [15]Further to the East the Light Railway crossed the Woodville Goods Branch of the Midland Railway and ran through the centre of Woodville. [15]The same location in the 21st century. The goods depot is long-gone as are both the road overbridges close to the junction. [18]A tram on its way to Swadlincote passing New Inn, Woodville in the early part of the 20th century. This image was shared on the photographs New and Old of Swadlincote & Burton on Trent Facebook Group by Keith Townsley on 10th January 2023. [19]A similar view looking Northeast on High Street, Woodville, A511 in the 21stcentury. New Inn is on the left of the photo. [Google Streetview, July 2023]Woodville High Street on the 1921 25″ Ordnance Survey. [15]A similar area in the 21st century. [Google Maps, October 2024]Tram No. 13 on High Street Woodville on its test run in 1906. This image, which looks Southeast, was shared on the photographs New and Old of Swadlincote & Burton on Trent Facebook Group by Keith Townsley on 3rd May 2021. [16]A similar vantage point in the 21st century. [Google Streetview, July 2023]Further Southeast on Woodville High Street. [15]A similar area in the 21st century. [Google Maps, October 2024]Further to the Southeast once again. Trams followed the bend in the highway from High Street into Ashby Road. [15]Approximately the same length of road in the 21st century. [Google Maps, October 2024]High Street, Woodville bears left and becomes Ashby Road. [Google Streetview, July 2023]This next extract from the 1921 25″ Ordnance Survey takes us to the East edge of the particular map sheet. [15]Heading away from the camera circa 1911 Is Tram No. 7 en-route from Ashby to Burton on what is now the A511. In a minute or two, the tram would be running Northwest along High Street, Woodville. [34]The same location in the 21st century, looking West towards Woodville. [Google Streetview, July 2023]
The next three extracts for the 1920 25″ Ordnance Survey follow the line across the next map sheet.
The Burton and Ashby Light Railway to the East of Woodville. [20]The Burton and Ashby Light Railway further to the East. At Boundary the line/road run Southeast towards Ashby. [20]Further to the Southeast, the bottom of this extract is also the bottom of the particular map sheet of the 25″ Ordnance Survey of 1920. [20]
Glendenning continues:
“After passing Swadlincote and Woodville, – the top of a hill is reached, 569 ft. above the sea level. Cornfields and meadows abound on either side, and there is also the magnificent landscape of Charnwood Forest. Then comes the hamlet of Boundary, so called, as it is a boundary of shires, parishes, and manors. Close by is the notable village of Smisby, set amongst fine park-like scenery.
It can still boast of its tournament field, which Sir Walter Scott made allusion to in “Ivanhoe.” The situation is very exposed at Boundary; severe storms rage there periodically, and the inhabitants say that anyone who can live winter and summer at Boundary could live anywhere. After entering Leicestershire, the new line makes a quick descent into Ashby-de-la-Zouch. The old town has the refined air of a fashionable inland watering-place, though its medicinal saline baths are not more than a century old. The fourteenth-century castle was wrecked during the seventeenth-century civil wars; but even the portions that remain are magnificent, alike in size, strength and beauty of architecture.” [1: p55-56]
On its way down to Ashby-de-la-Zouch the road and light railway traverse another full 1921 25″ OS Sheet with little worthy of note. [21] The next image shows the line as it appears on the 25″ Ordnance Survey, much closer to Ashby-de-la-Zouch. [22]
“The power station and car shed have been built at Swadlincote, which is about midway between Burton and Ashby. These premises are designed to give every facility for convenient and economical working, with ample margins for any extensions that may be necessary in future. The shed has six lines of rails, and underneath there are pits about 4 ft. deep, like a railway engine shed, so that the motor machinery on the cars may be easily got at for the purpose of examination and repairs. Adjacent to the car shed is the spacious and well-equipped power station. Here we find that not only is steam out of date for light locomotive purpose, on a short track, but it is also being superseded as a prime-mover for the generation of electricity; at any rate, in comparatively small and isolated stations, where a varying and not very heavy load has to be dealt with.” [1: p56]
Perhaps for an audience unfamiliar with the use of electricity as a power-source for a railway, Glendenning spends quite a few words explaining the reason for the choice of diesel engines to create electricity for the network. Not initially the most obvious choice in a coal-mining area. He goes on to say that:
“There are two three-cylinder vertical engines of 240 18.1lp each with a huge fly-wheel weighing about nine tons, coupled direct to two cylinders, each capable of giving an output of 150 kilowatts.” [1: p57]
The Depot was “built with accommodation for 24 trams, 8 tracks x 3 deep but only 20 trams were owned.” [6]
Following closure of the system, “the tram sheds were used to accommodate Thomson’s Fair from 1935 into the 1940s and then for munitions during the Second World War.” [7]
Rolling Stock
Glendenning reports that the new line was to be operated by open-topped cars “with all the latest possible improvements, … Built at the Brush Electrical Company’s Works, Loughborough.” [1:p57]
Glendenning goes on to describe the tramcars:
“They bear the Midland Railway Company’s coat-of-arms, and are designed to carry 57 passengers each, 22 inside and 35 outside. They are mounted on Brush rigid wheel base trucks, with steel tyred wheels, provided with Hudson-Bowring-lifeguards, and magnetic track brakes. The electrical equipments, powerful motors, etc., were furnished by the British Westinghouse Electric Manufac- turing Company, of Trafford Park, Man- chester. Accommodation has been provided for the carrying of a limited number of parcels on the platforms of the cars, while, at a later stage, it is intended to carry booked parcels. Workmen’s cars, with special fares, will be run as soon after the formal opening of the line as possible.” [1: p57]
Electric Tramcar No. 2. [1: p56]
The LMS Society notes that: “The cars were in Crimson Lake and a white livery with ornate gold panelled lining and Midland crest. It was in this condition that the cars came into LMS ownership but all the cars were repainted in a simpler livery at Derby Works. The original white had weathered to a light cream and the later cream mellowed in a short life to a yellow. Although the method of tramsport to Derby Works is not certain the LMS owned bogie tramcar wagons and with an open top tramcar the bodies would almost certainly come within the loading gauge. The trolley pole, seats and wire screens were easily removed and so it is more than likely visits to works were by rail journey.” [6]
There was also a horse-drawn trolley tower/maintenance platform which can be seen in the photograph of the tram depot above.
The Service Provided
Glendenning notes that the frequency of service “between Ashby, Swadlincote and Burton [is] every half hour. … Between Woodville, Swadlincote, Newhall and Gresley, every 15 mins. … Ordinary service commences at 8 am. … Passengers between Ashby and Gresley change at Swadlincote Market Place or Woodhouse Road.” [1: p57]
This photograph was taken on West Street, Swadlincote. It is probably a picture of one of the Sunday School outings. The image was shared on the Photographs New and Old of Swadlincote and Burton on Trent Facebook Group by Keith Townley on 19th June 2021. [11]
The LMS Society goes on to tell us that:
“Special services were often run, Sunday School Outings and other Club Outings, and even a Railway Club on 8th July, 1909 hired three trams for a return trip from Burton to Ashby. Special services to feed passengers to excursions from Burton Station before normal services, and upon their return after the last train, were another feature.
Three Aspect Colour light signalling was installed on the reserved country stretch between Stanhope Bretby and Sunnyside, Newhall where the line traversed the brow of a hill and the west passing loop was out-of-sight from both sides. The lights were operated by a trolley wheel contact on a solenoid, a system devised and installed by a firm, Bracknell, Munro and Rogers.” [6]
The safety record of the Light Railway “was marred by only one serious accident. No. 19 ran away and overturned at the foot of Bearwood Hill in 1915 but there were few injuries.” [6] Another source says that there was an accident in 1919 which resulted in the death of two people. [10]
The 1919 accident at the bottom of Bearwood Hill which resulted in the death of two people. [10]
The line was completed in 1906 and was assumed locally and by Glendenning to have a bright future. It was, in fact, short-lived:
“The Burton and Ashby Light Railway Company had a fleet of 20 tramcars and these operated until early in 1927. … With the increasing use of the motor bus, competition for passengers was intense and the tramway services were reduced to rush hours only. With costly maintenance required on the now 20 year-old trackwork, the tramways were beset with problems and finally the doors were closed on 19th February 1927.
Rail passenger services were still running through Castle Gresley, Swadlincote, Woodville and Ashby and motor buses took over the tram services.
The major undertaking ‘Midland Red’ or the Birmingham and Midland Motor Omnibus Co. Ltd., to quote its full title, in which the LMS had a controlling interest, took over the main services. Other local operators, Victoria Motorways, Regent buses, Brooks Blue buses ran alongside the trams for a period.” [6]
References
Seymour Glendenning; The Burton and Ashby Light Railway; in The Railway Magazine, London, July 1906, p53-57.
An article by Seymour Glendenning in the July 1906 issue of The Railway Magazine focussed on the newly opened Burton & Ashby Light Railway. [1]
The light railway was a 3ft 6in gauge electric tram line supplied with electricity from a diesel generator plant near Swadlincote. [17] The power plant sat alongside the tram depot. [1: p56]
Glendenning explains that the rail network in the area between Burton and Ashby-de-la-Zouch was, of necessity design round the topography of South Derbyshire which resulted in the Midland Railway bypassing some significant industry and associated communities. A branch, built by the Midland Railway, off the main line penetrated the South Derbyshire Hills to serve Bretby Colliery. Another Midland Railway branch line described a rough horseshoe alignment, leaving the mainline not far from the Bretby Colliery line. This second branch served Newhall, Swadlincote and Woodville with a short branch designated as the Woodville Goods Branch.
This network of lines meant that the journey from Burton to Ashby was longer than the two towns might have hoped, and that transport to and from Ashby and Burton and the villages in the hills was much longer than it might be if an alternative could be designed which could cope with the steeper gradients necessary on a more direct route.
Initially local interests brought a bill before Parliament for the construction of a Light Railway. The Midland Railway opposed the bill which was then withdrawn with the Midland Railway agreeing to construct the line. Glendenning notes that it took only two years from the Midland’s agreement to carry out the project to its completion in 1906.
The Light Railways was “an electric railway, laid upon the public highway, with stopping places at all penny stages and intermediate points, while the various villages and towns through which it passes will practically serve as stations. … [Some] of the line … resembles that of a branch railway, fenced or hedged in on either side, this being necessary in consequence of short cuts across fields or garden plots. … The electric current is taken from an overhead cable, suspended from steel poles or standards, placed at frequent intervals along the line of route.” [1: p54]
Glendenning tells us that “the greater part of the track [was] laid singly and on one side of the public highway, a double road being laid at frequent intervals to serve as crossing places. An enormous expense, however, [was] incurred in widenings and clearance. For nearly half-a-mile in Newhall the street … had to be widened, involving the demolition of a number of houses and the clearing away of numerous front gardens. In Ashby itself, also, where the tram [had] to take some very abrupt curves on its tortuous way to the station, valuable property [was] cleared away in Bath Street and Market Street, in order to afford a safe route for the cars.” [1: p54]
The route of the line(s) is shown in black on the map extract below.
The line runs through 3 counties – Staffordshire, Derbyshire and Leicestershire. In 1906, Glendenning starts to describe the route:
“At the western extremity is Burton, with its huge breweries which supply a great part of the world’s beer. It was intended at first that, after crossing the Trent Bridge, the railway should leave Burton up a steep slope between the Winshill and Stapenhill roads, but eventually it was mutually agreed between the town and the railway that the Corporation track should be used as far as Winshill. The new line, therefore, begins at High Bank Road, with a very deep curved gradient up to Moat Bank, where a height of 250 ft. above Burton is reached. A fine stretch of hilly country then opens to view, with Brizlincote Hall on the right; next the line dips 60 ft. to cross a lateral valley. Then it rises again, and follows a number of switchback undulations until it enters Newhall, which is 400 ft. above ordnance survey datum line. Newhall furnishes a strong contrast to the fair country west of it. Collieries, brick yards, and pipe works abound. Newhall displays the characteristics of mining villages, i.e., it is dingy, squalid, and untidy. However, its teeming population will doubtless find the new line a very great convenience, both for business and pleasure purposes, and there seems little doubt but what the Midland Railway Company will reap a continued harvest of fares from the thousands of miners and their families. From Newhall, the level of the track gradually descends until it is below 200 ft., and then leaves the Ashby main road to take a right-angled turn into Swadlincote. Here the line, after going due south for a time, is carried over the old railway the single loop to Swadlincote and Woodville before mentioned on a long bridge of steel girders, resting on blue brick piers. The bridge [as can be seen below] has a switchback appearance, while the [second view below] taken from Swadlincote goods yard, shows a Midland Railway train passing under [the bridge there]. Shortly after crossing the bridge the track takes an abrupt turn to the left, in order to resume its eastward direction. At the same place, there is a branch about two miles long, going first south and then south-west to Gresley. The road towards Ashby rises continuously until it reaches a height of 569 ft. above sea level. It passes through the heart of the Derbyshire Potteries, where a great industry is carried on in the manufacture of furnace bricks, sanitary pipes, and common earthenware. Furnaces and kilns abound in Swadlincote, and the subsidiary industry of crate making is also much in evidence.” [1: p54-55]
Before continuing to follow Glendenning’s description of the line East from Swadlincote, it is worth looking at the first part of the line already described by Glendenning on contemporary mapping from the early 20th century, and as it appears in the 21st century.
The Burton terminus of the line was in Wellington Street, although as we have already noted the route within Burton ran not on Midland Railway metals but on those of the Corporation.
Burton-on-Trent’s tramway network opened on 3rd August 1903. “The system comprised four routes going out from Station Street to Horninglow, Branston Road, Stapenhill, and Winshill. The depot was in Horninglow Road. … The initial 20 tramcars were built by the Electric Railway & Tramway Carriage Works of Preston. A further four cars were obtained in 1919. … The system was closed on 31 December 1929.” [3]
The Burton-on-Trent tramway network. The terminus of the Burton and Ashby Light Railway was to the West of the railway station which sits, in the adjacent map extract, below the second ‘n’ of Burton-on-Trent. The terminus of the tramway was close to the Town Hall on Wellington Street, just beneath the second ‘o’ of Burton-on-Trent.
The terminus of the Burton and Ashby Light Railway was outside the post office on Wellington Street, just a stone’s throw from Burton Town Hall and the railway station just a short distance to the Southeast. The lilac line superimposed on the 1920 25″ OS map (published in 1922), shows the route of the line which ran along the town’s tramway network. [4]The same area in the 21st century. [Google Earth, October 2024]The railway station, seen from the Northwest in 1927. Burton-on-Trent Railway Station Passenger Facilities were at road level above the station platforms. Borough Road ran across the front of the station building, at the centre of this extract from Britain From Above aerial image No. EPW019724. The route followed by trams from the Burton and Ashby Light Railway started off the bottom of the image on Wellington Street and followed Borough Road. [11]The 1920 25″ OS mapping shows the route continuing along Station Street and turning up High Street. [5]Approximately the same area in the 21st century. [Google Earth, October 2024]Burton and Ashby Light Railway trams continued Northeast on High Street. [6]The Light Railway trams continued to follow the track of the Corporation Tramways across Trent Bridge. [7]The Light Railway’s trams continued to the East along Bearwood Hill Road. [7]Trent Bridge and Bearwood Hill Road to the East.
A series of images showing Trent Bridge in tramway days follows below.
After crossing the Midland Branch the Burton and Ashby Light Railway turned of the road that became the A511 (Burton Road) to the South and rather then following a highway picked its own route through the fields.
The Burton and Ashby Light Railway turned South off Burton Road (A511) to the East of what was the Stanhope Arms. [Google Streetview, August 2023]A tram on what appears to be the length of the line between the A511 and Sunnyside, (c) Public Domain. [9]The Burton and Ashby Light Railway followed its own fenced route South as Far as Sunnyside where it turned to the East. [16]The modern satellite image has the approximate route of the tramway superimposed in green. Before reaching Sunnyside, the railway followed what is now the line of ‘The Tramway’ a modern small estate road. It then turned towards the East running down Sunny side and across it junction with Bretby Road. [Google Maps, October 2024]Looking Northwest from Sunnyside, the green line shows the route of the old railway. [Google Streetview, March 2023]Looking Southeast along Sunnyside, the old railway ran down the centre of the road. There was a passing loop immediately in front of the camera. [Google Streetview, March 2023]A view looking Northwest on Sunnyside – on the right of this image a tram can be seen approaching Sunnyside from the North. This image was shared on the Newhall, Stanton & BretbyYesteryears Facebook Group by Keith Townsley on 5th December 2020, (c) Public Domain. [27]On this very similar image, a tram is turning onto Sunnyside. This image was shared on the Newhall, Stanton & Bretby Yesteryears Facebook Group by Marcus Payne on 10th September 2020, (c) Public Domain for the original image. [24]Looking Southeast along Sunnyside towards Bretby Road with the Light Railway rails in the road surface. This image was shared on the Newhall, Stanton & Bretby Yesteryears Facebook Group by Marcus Payne on 12th September 2020, (c) Public Domain for the original image. [24]Looking Southeast from Sunnyside across its junction with Bretby Road and along the line of the Light Railway which ran next to Matsyard Footpath. This image was shared on the Newhall, Stanton & Bretby Yesteryears Facebook Group by Julie Brown on 14th August 2022, (c) Public Domain [25]A similar view in 2024. The Light Railway ran along the line of the footpath. {Google Streetview, February 2023]The view towards Newhall from Bretby Road. This image was shared on the Newhall, Stanton & Bretby Yesteryears Facebook Group by Marcus Payne on 10th September 2020, (c) Simnett, Public Domain for the original. [24]This further extract from the 1920 25″ Ordnance Survey shows the line entering Newhall village alongside Matsyard Footpath and then running along the High Street. [16]Approximately the same area as it appears on Google Maps satellite imagery. The line entered at the top left corner of this image and then ran onto and along High Street (B5353). [Google Maps , October 2024]Looking Northwest from High Street, Newhall along Matsyard Footpath. The green line shows the approximate line of the old railway. [Google Streetview, February 2023]A tram approaching High Street, Newhall from the Northwest. This image was shared on the Newhall, Stanton & Bretby Yesteryears Facebook Group by Marcus Payne on 10th September 2020, (c) Public Domain for the original image. [24]Tram No. 13 entering Newhall at the same location as the Google Streetview image above, (c) Public Domain. [18]High Street, Newhall. This image was shared on the Newhall, Stanton & Bretby Yesteryears Facebook Group by Marcus Payne on 10th September 2020, (c) Public Domain for the original image. [24]A tram on Newhall High Street. This image was shared on the Newhall, Stanton & Bretby Yesteryears Facebook Group by Julie Brown on 16th January 2023, (c) Public Domain [26]The line ran on Southeast along High Street, Union Road and Newhall Road (B5353) passing St. Peter & St. Paul’s Catholic Church (which appears bottom-right on this map extract). [16]A tram on High Street/Union Street, Newhall. This image was shared on the Newhall, Stanton & Bretby Yesteryears Facebook Group by Julie Brown/Keith Townsley on 15th February 2023, (c) Public Domain. [24] Much the same location in the 21st century. [Google Streetview, August 2022]Approximately the same area as that shown on the extract from the 1920 25″ Ordnance Survey. [Google maps, October 2024]Looking Southeast along Newhall Road, B5353 with St. Peter and St. Paul Roman Catholic Church on the right of the image. The Button and Ashby Light Railway ran down Newhall Road towards Swadlincote. [Google Streetview, Aril 2019]
Another extract from the 1920 25″ Ordnance Survey. Trams from Burton-on Trent remained on Newhall Road for only a short distance, turning South along Midland Road. [16]
The same area in the 21st century, as shown by Google Maps satellite imagery. [Google Maps, October 2024]
This next extract from the 1920 25″ Ordnance Survey shows the Burton and Ashby Light Railway heading South towards Swadlincote Market Place along Midland Road. Sitting to the West of the Light Railway Bridge and at a lower level was Swadlincote Railway Station. To its North were some Sanitary Earthenware Works. [20]
The North end of the bridge on Midland Road, a tram is approaching from the North. Three trams are waiting to head out from the depot access road towards the Market Place. [29]
Glendenning provided a photograph of the bridge in this photograph under construction (see above). The bridge appears on the map extract immediately above and is seen here in use by the Burton and Ashby Light Tramway, (c) Public Domain. [19]The bridge over the Swadlincote and Woodville Branch seen from the East. A Midland Railway locomotive is about to depart the yard through Swadlincote Railway Station which is on the far side of the bridge. The station footbridge can be seen beneath the Light Railway Bridge. [1: p57]A similar view in the 21st century. [Google Streetview, August 2022]
The tram depot for the Burton and Ashby Light Railway was accessed at high level off the bridge shown above.
The tram depot off Midland Road, Swadlincote, seen from the West. The trams on the depot are (left to right) Nos. 18, 5, 14, 9 and 10. On the left of the depot is the horse-drawn trolley tower. The map extract immediately below shows the depot (top-left). [17]
We digress a little here to take a quick look at the Midland Railway’s Swadlincote and Woodville Branch which passes under the Light Railway in the image above.
This extract from the 1921 revision of the 252 Ordnance Survey shows the Swadlincote and Woodville Brach to the East of the Light Railway overbridge. Note the Mineral Railway leaving the Branch approximately at the centre of this extract. [21]
To the East of the overbridge a Mineral Railway left the Swadlincote & Woodville Branch in a southerly direction, it served a number of industrial concerns including: Anchor Glazed Brick and Sanitary Pipe Works (which sat to the Southwest of Swadlincote High Street and which were served by means of a bridge under High Street); Swadlincote Sanitary Pipe Works (on the East side of the High Street/Hill Street); Jack i th’ Holes Pottery (by means of a tunnel under Hill Street and Granville Colliery); Middle Sinks & Chimney Pots Works; and Hill Top Works (by means of a tunnel under Granville Colliery.
To the West of the overbridge sat Swadlincote Railway Station and the branch line headed away from Swadlincote to the West-southwest.
Swadlincote Railway Station sits on the West side of Midland Road close to the Light Railway Bridge. The map extract shows the Swadlincote and Woodville Brach heading away to the West-southwest. [20]
West of Swadlincote, the Swadlincote and Woodville branch served a number of industrial concerns, those closest to Swadlincote included: Swadlincote Old Colliery (and associated Brick & Pipe Works); Stanton Colliery (and Hawfields Brickworks); and Cadley Hill Colliery.
Cadley Hill Colliery. [20]Stanton Colliery. [20]Swadlincote Old Colliery. [20]
Returning to the Light Railway, we note that at Swadlincote Market Place a branch left the main line to Ashby-de-la-Zouch which ran South from Swadlincote to serve Castle Gresley.
The Castle Gresley Branch
The branch line to Castle Gresley first ran West-southwest along West Street and then, by means of a relatively wide arc (see the small image below), turned down Alexandra Road. Track was dualled along these two streets as far as a point a little to the South of the Public Library. [20]
The Light Railway turned South into Alexandra Road by means of a wide arc. The green line gives the approximate alignment of the double track tramway at this location. [Google Streetview, March 2023]
Tram No. 10 dropping down Alexandra Road towards Swadlincote Town Centre. Sharpe’s can be seen at the bottom of the hill. This image was shared by Keith Townsley on the New and Old of Swadlincote & Burton on Trent Facebook Group on 10th April 2021. [28]
The line ran South from Alexandra Road into Church Avenue. It then turned to the South-southeast along Wilmot Road before sweeping round to the West on York Road before turning sharply into Market Street. [20]
The Light Railway ran off Wilmot Street in a wide arc through what is now park land. [Google Streetview, March 2023]
The Burton and Ashby Light Railway (Gresley Branch) swept round from Market Street into Church Street. [20]
Trams swept round from Market Street into Church Street. [Google Streetview, April 2019.
The line continued in a generally westerly direction passing Church Sanitary Earthenware Works and Church Gresley Colliery. Sharp right and left curves took the railway through the square at the colliery gates and onto Castle Street. [22]The light Railway served the square outside Castle Gresley Colliery which is now a roundabout. It turned sharply towards the North and then back to wards the West as it left the square. [Google Streetview, March 2023]
A short distance along Castle Street took the line as far as Gresley Railway Station where the Gresley Branch terminated in front of the Station buildings.
The branch line terminated outside Gresley Railway Station buildings. [22]These two views shows the Gresley Station buildings before closure of the Station. Both show the platform elevation of the station, (c) Public Domian, found on the Burton-on-Trent Local History site maintained by Kevin Gallagher. [23]
Gresley Station is long-gone, the railway remains in place in the 21st century.
The location of Gresley Station seen from High Cross Bank Roundabout on the A444. [Google Streetview, March 2023]
References
Seymour Glendenning; The Burton and Ashby Light Railway; in The Railway Magazine, London, July 1906, p53-57.
I am continuing to read through old copies of ‘The Railway Magazine’. This time it is the December 1950 edition. It contains a short article about the Kelvedon and Tollesbury Light Railway in Essex. This article held my interest because it relates to a line not too far from Braintree in Essex where we lived between 1970 and 1972. A scan of the article in the Railway Magazine is reproduced at the end of this post below the References …
The Kelvedon and Tollesbury Light Railway was an 8-mile-42-chain (13.72 km) standard-gauge light railway in Essex, England. It was authorised under the Light Railways Act 1896 and operated between the two villages of Kelvedon (on the Great Eastern Main Line) and Tollesbury to the south of Colchester on the coast. The line, which was part of the Great Eastern Railway (GER), was authorised on 29 January 1901, although its opening was delayed until 1 October 1904. [1][2][3]
The approximate route of the line shown on OpenStreetMap.
The area served by the railway lay between the GER main line and the coast, mostly agricultural land, with fruit being a main crop. At Tiptree, Wilkin & Sons, the jam-making firm, founded in 1885,[4] provided a large amount of the freight traffic; it had also been hoped that a tourist trade would ensue from the yachts moored near Tollesbury. The line became known locally as The Crab and Winkle Line, although the original railway to bear that name was the Canterbury and Whitstable Railway, which used a play on the initial letters of the line.
Arthur Wilkin, the proprietor of the jam making family firm, was intent on having the railway built because Tiptree was only a farmstead in a large heathland. Fruit had to be taken to Kelvedon, the nearest village, by horse and cart, which took time. There were no made roads, just rugged tracks. For the company, it was imperative that they had a railway. In fact, Arthur Wilkin threatened to move his jam company to Dagenham if the railway was not built. [2]
Tiptree, Tollesbury and Tolleshunt D’Arcy had substantial buildings; the other intermediate stations had an old passenger coach for accommodation. [1] All the platforms were at a low level; there was no signalling, since only one locomotive worked the line; and only local tickets were issued on the trains; there were no through tickets to mainline stations. [4]
The 1.75 miles (2.8 km) extension to Tollesbury Pier never brought the expected traffic. During World War I it was used for troop training on the river and was subsequently closed to passengers in 1921.The government took it over during World War II and erected defences along it.[2] Final closure to passenger traffic took place on 5th May 1951, just 6 months or so after the article in The Railway Magazine was written. Freight traffic continued between Tollesbury Pier and Tiptree until 29th October of the same year. The section between Tiptree and Kelvedon continued in use for freight traffic until 28th September 1962. [1]
The total construction cost of the line from Kelvedon to the River Blackwater was estimated at £45,000 or £4,667 a mile. The maximum speed allowed was 25mph and 10mph through villages and ungated level crossings. Fares on the first journeys were only offered as third class. For the full excursion from Kelvedon to Tollesbury, you would have been charged 9d (about 4p), and the journey would have taken 40 minutes if there were no accidents or animals on the line. [2]
On the last day of the passenger service: “On the engine’s smokebox door were chalked ‘Born 1904. Died 1951’, and on the bunker was the solemn warning, ‘There be many a poor soul have to walk’. This last train to Tollesbury arrived on time at 6.25pm, and on departure for the last time to Kelvedon was accompanied by as much noise as the departure on the outward journey.” [1] Following the last passenger train from Kelvedon, a black coffin from Kelvedon with wreaths, one of which was shaped in the letters of BR, was laid along Tiptree platform. On the side of the train, someone had chalked: “Crab and Winkle, sorry to say, you died because you did not pay.” [2]
Access at the Kelvedon terminus was by a footway running across the road bridge and descent to the Low Level Station. The Low level station is shown in the two images above. [5] Passengers waited here for their train in a wooden shed.
A mixed train behind a GER 0-6-0 tank near Kelvedon on the Kelvedon & Tollesbury Light Railway in around 1910. [6]
The stations/halts served by the line were, Feering, Inworth, Tiptree, Tolleshunt Knights and Tolleshunt D’Arcy, before reaching Tollesbury and finally Tollesbury Pier. [1]
The route meandered through the Essex countryside, the maximum gradient being 1 in 50. The tightest curves occurred on the final section between Tolleshunt D’Arcy and Tollesbury and included an agricultural siding at Old Hall. The stations at Tiptree and Tollesbury were the most attractive on the line. The latter consisted of a small goods yard, complete with loading gauge and cart road and wooden buildings.
Tiptree Station. [6]
Tollesbury Station. [5]
Tolleshunt Knights Halt. [1]
The line then crossed the road, Station Road, by an open crossing on the other side of which was a run-round loop. [1]
The extension to Tollesbury Pier was completed on 15th May 1907 about two years after the rest of the line. It remained open for less than 20 years and skirted the village before dropping steadily to the River Blackwater. Two roads, Woodrolfe Road and Woodrolfe Farm Lane were crossed by this final section of the line. The terminus facilities included an old coach body and a red brick hut about 40 yards from where the pier began. [1]
The Tollesbury Pier Station. [7]
In 1939, the pier extension, which had only remained open until 1921, was taken over by the then War Department. Part of the structure was blown up in 1940 as an anti-invasion precaution. The overgrown track was terminated in a sand-drag and used by four locomotives to service the mobile guns that were stationed along the estuary. Part of the extension had been used previously for the storage of rolling stock, but the wooden pier had been allowed to fall into disrepair after closure nineteen years earlier. [1]
During war-time, a pill-box of thick reinforced concrete was built on the land end of the pier, and a control tower for the many electrically controlled mines, which effectively blockaded the estuary against enemy attack, was built about mile inland on the seaward side of the line. The old pier was finally demolished when the line was taken up in 1951, and any traces that might have been left were washed away when the great floods of February 1953 inundated the north bank of the Blackwater for about mile inland. Even the few rotting stumps of timber which stood above the mud at low tide have now disappeared. [1]
“Services were neither rapid nor very frequent. A majority of the trains were mixed and the time allowed for the journey was between 30 and 40 minutes. No trains ran on Sundays.” [1]
“By 1937 branch traffic was in steady decline. Ten years later passenger journeys had reached their lowest ebb – averaging only 33 return journeys along the entire route each day.” [1]
Searching the internet, I have found a number of texts relating to the line which I have not yet been able to read:
N.J. Stapleton; The Kelvedon and Tollesbury Light Railway; Forge Books; 2nd Revised edition edition, December 1975.
M. House; The Kelvedon to Tollesbury Railway: A Pictoral History;
Vic Mitchell; Branch Lines Around Witham and Kelvedon: Bishop’s Stortford, Maldon, Tollesbury; Middleton Press, 2010.
Peter Paye; The Tollesbury Branch; Oxford Pub Co, 1985.
I have also had this link to a video pointed out to me:
R.C.J. Day and R.K. Kirkland; The Kelvedon & Tollesbury Light Railway; The Railway Magazine Tothill Press Ltd, Volume 96 No. 496, December 1950, p838-842, p847.
The Railway Magazine article on which this post is based can be found in the Railway Magazine archives on line if you do not have access to the original edition of the magazine. A subsequent note in The Railway Magazine of June 1951 (p422) says that all passenger services were withdrawn from the line in May 1951. The last passenger train ran, it notes, on the evening of 5th May.

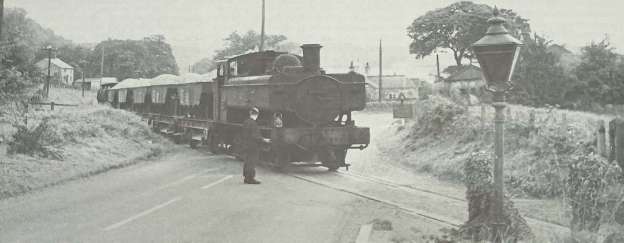
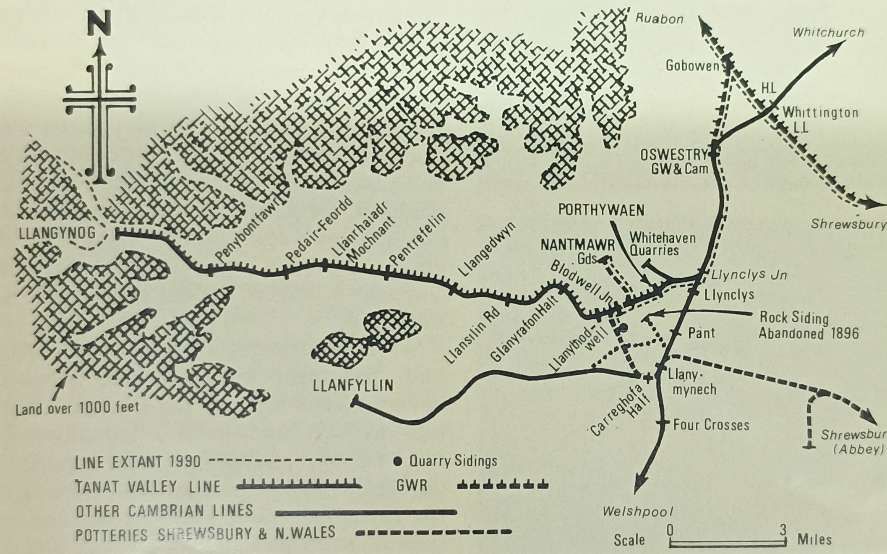
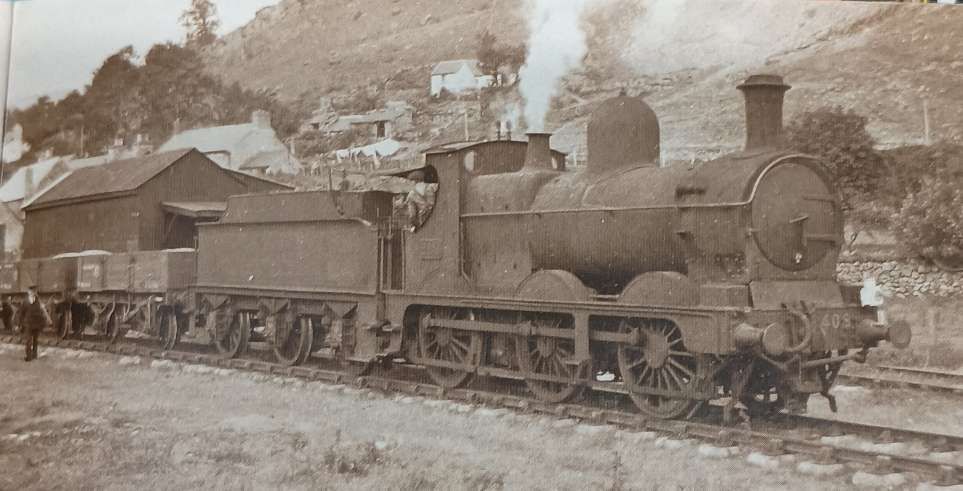
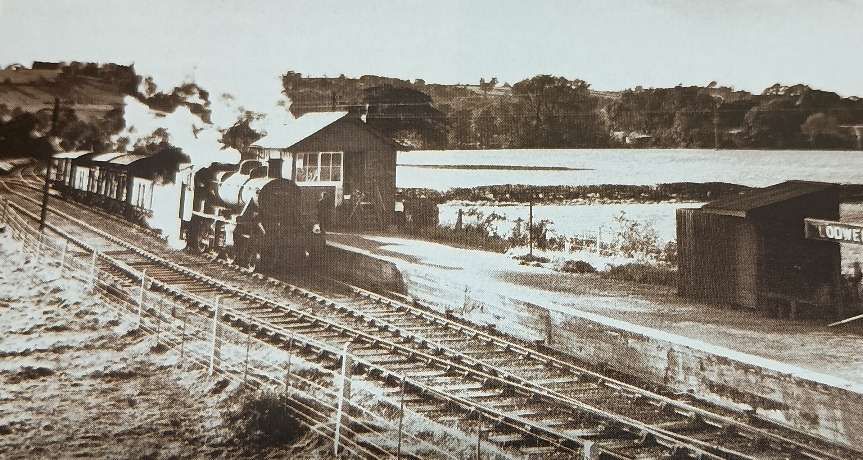
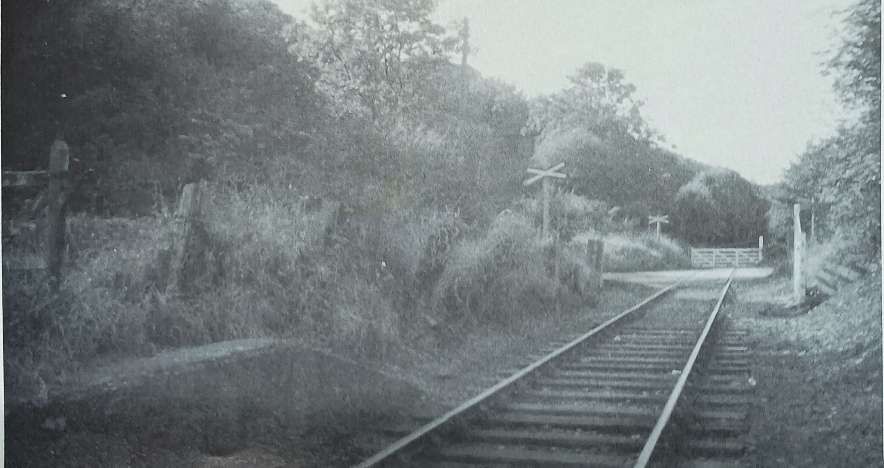
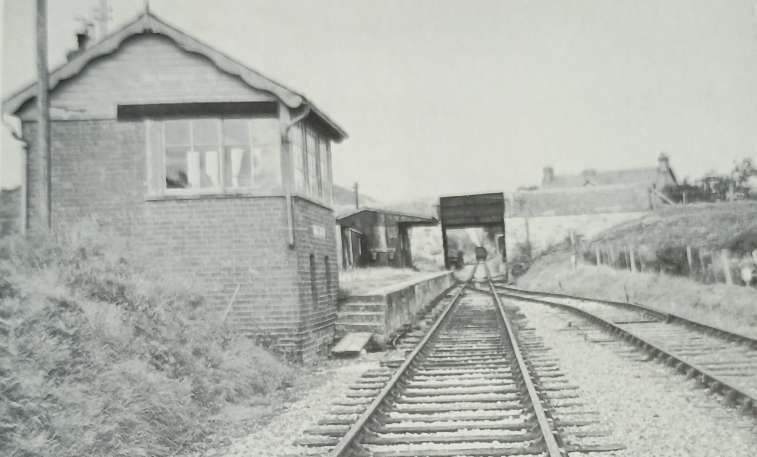
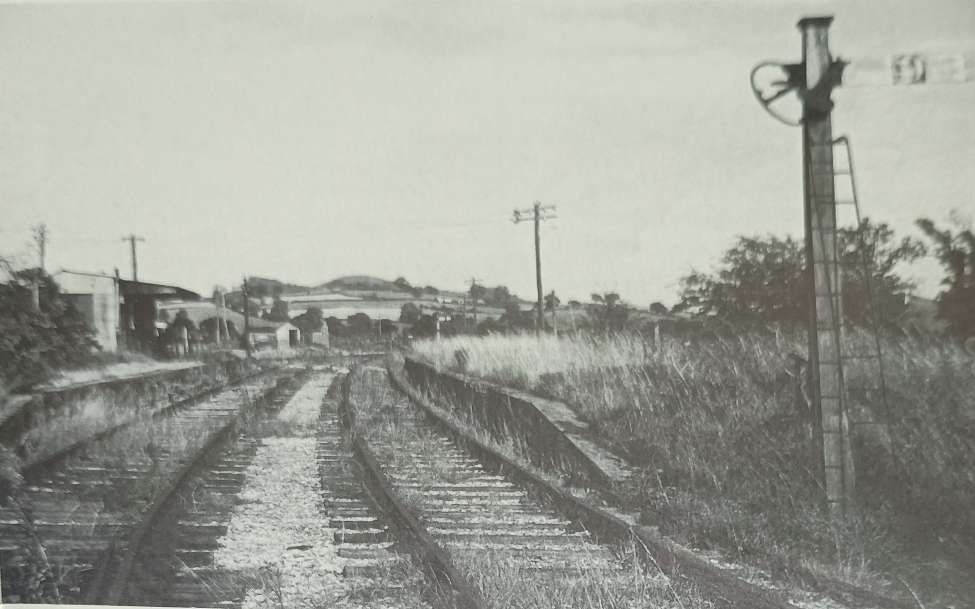
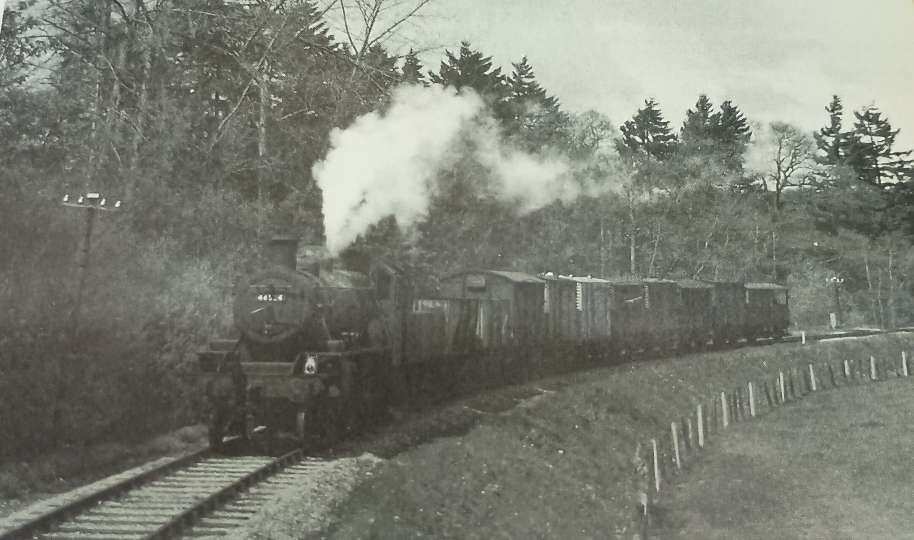
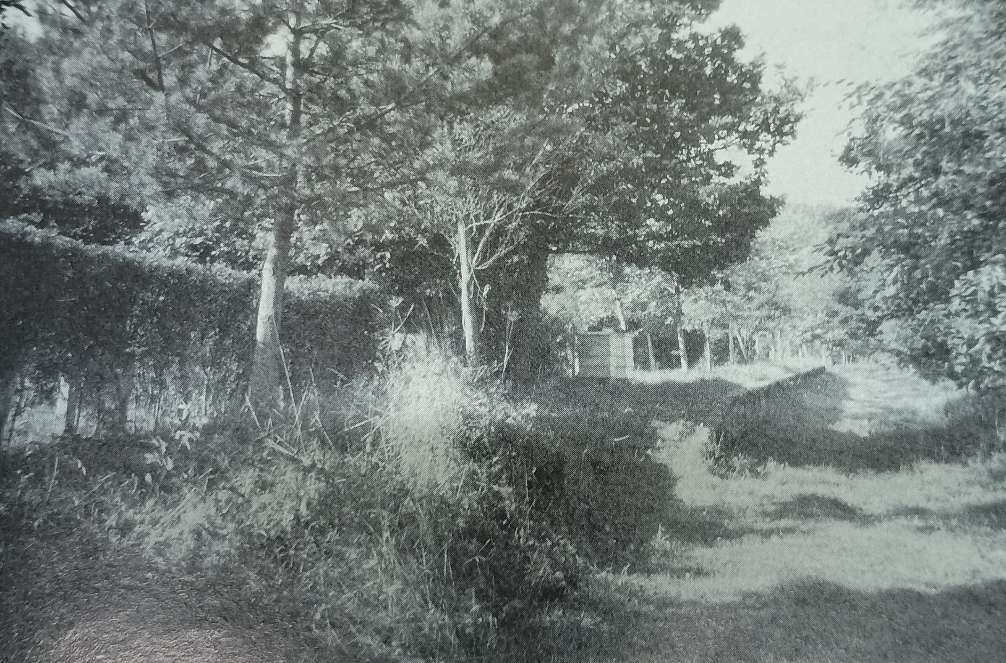
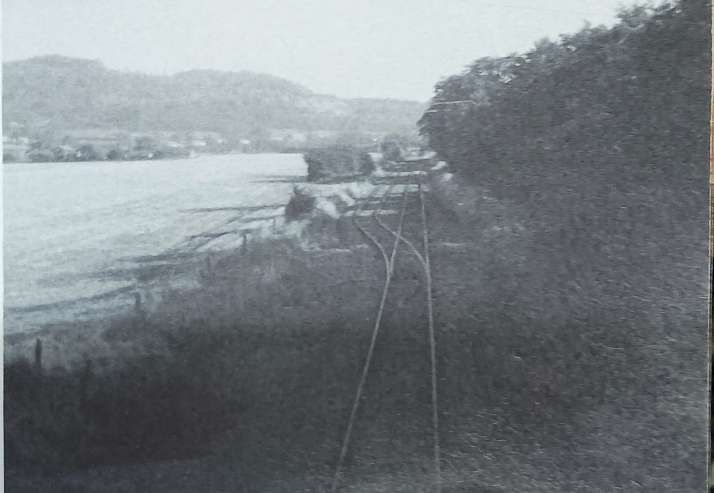
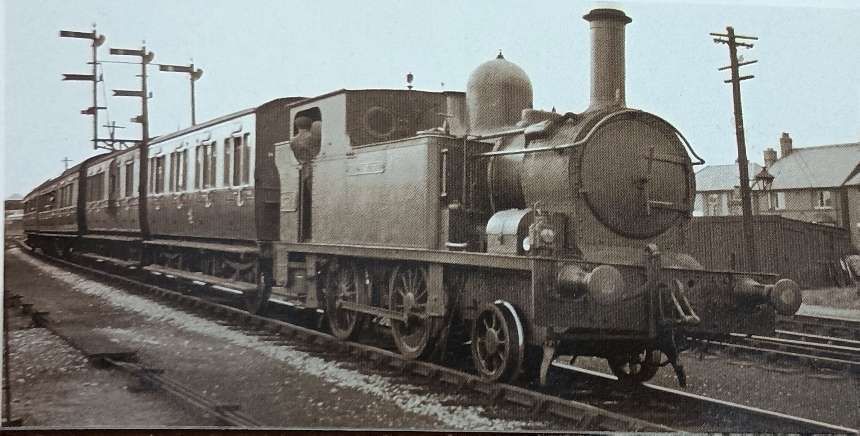
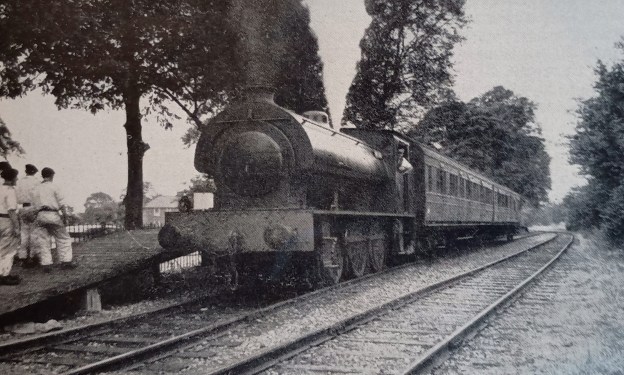
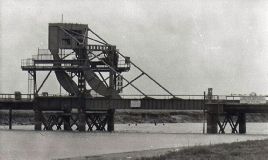
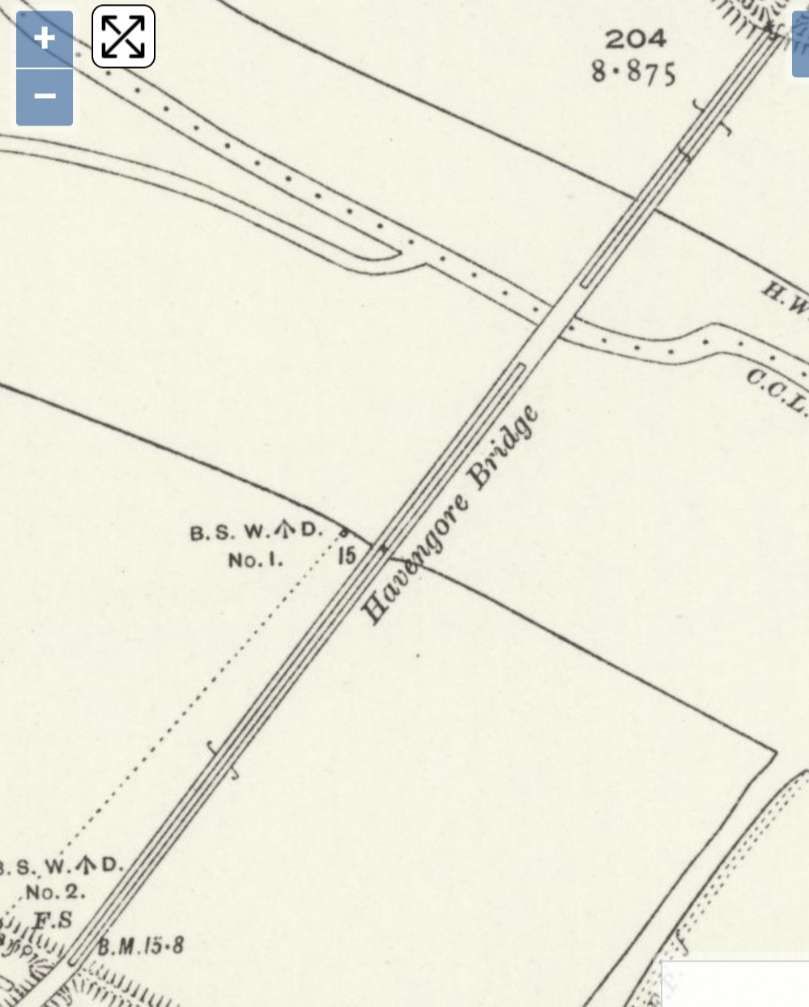
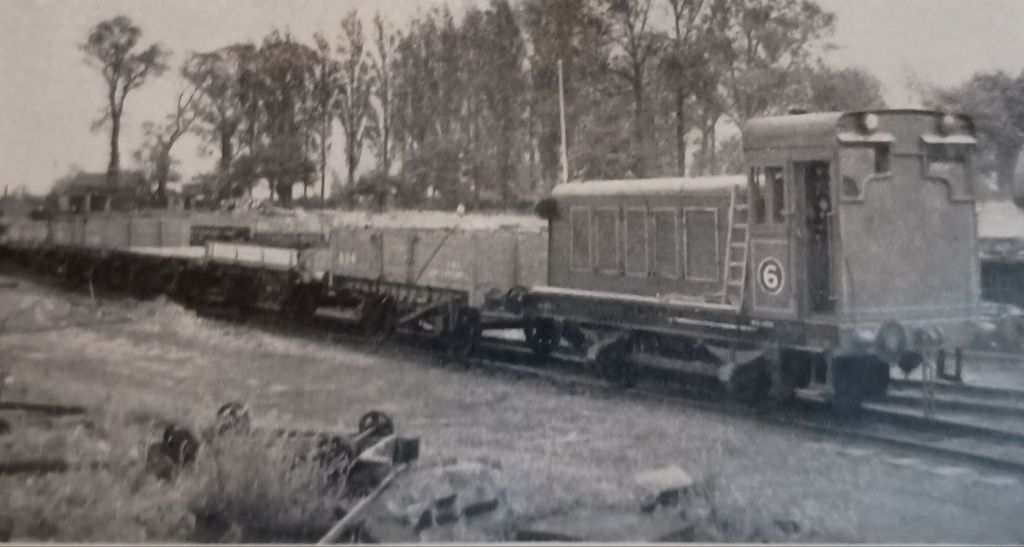
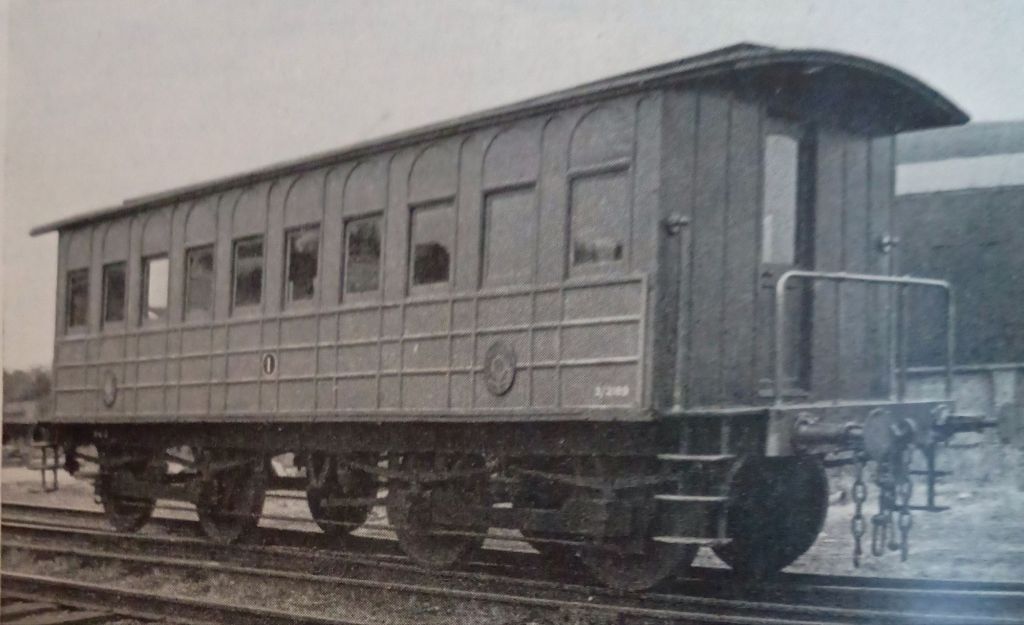
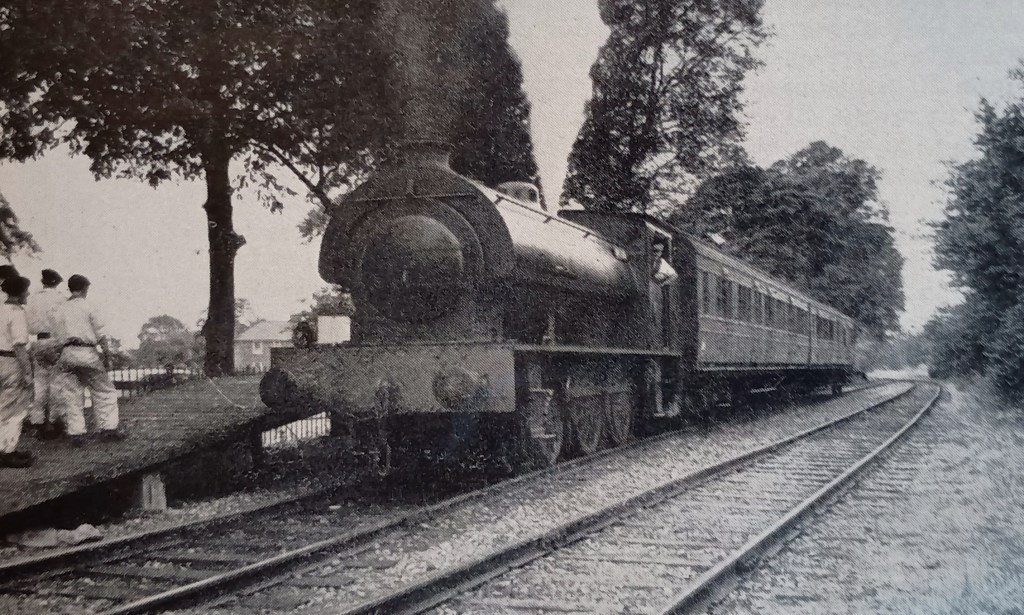
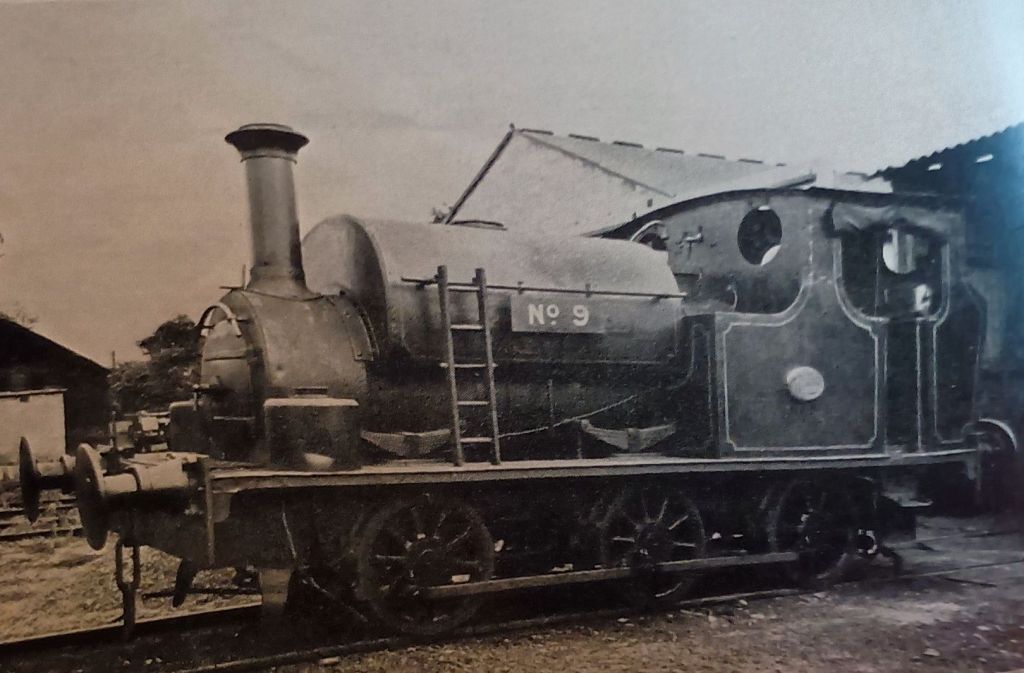
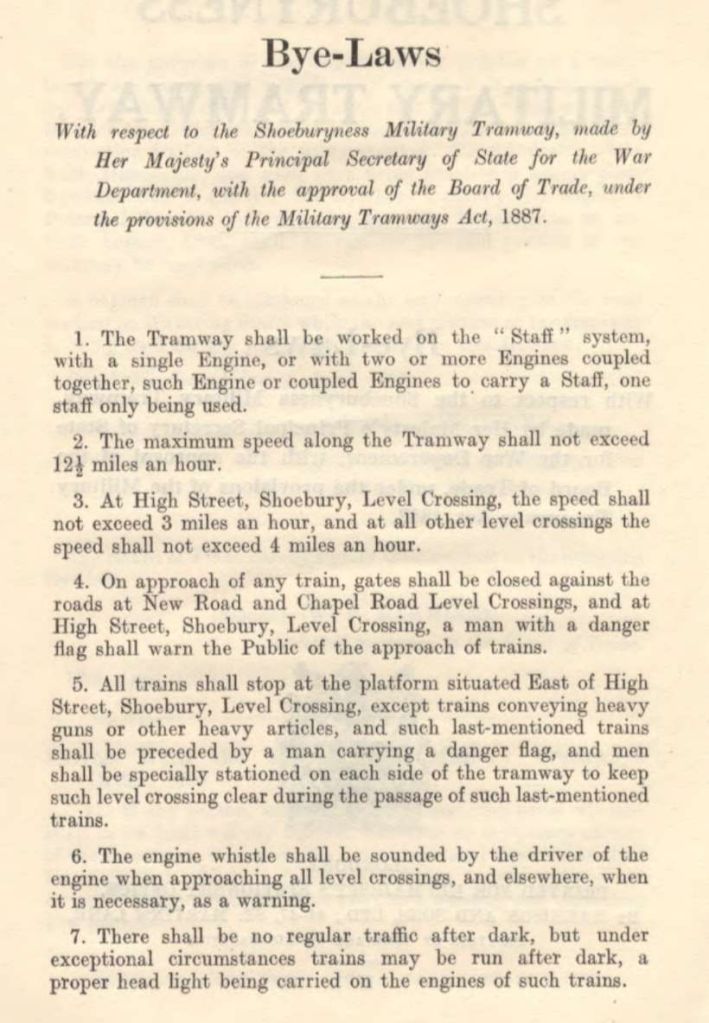
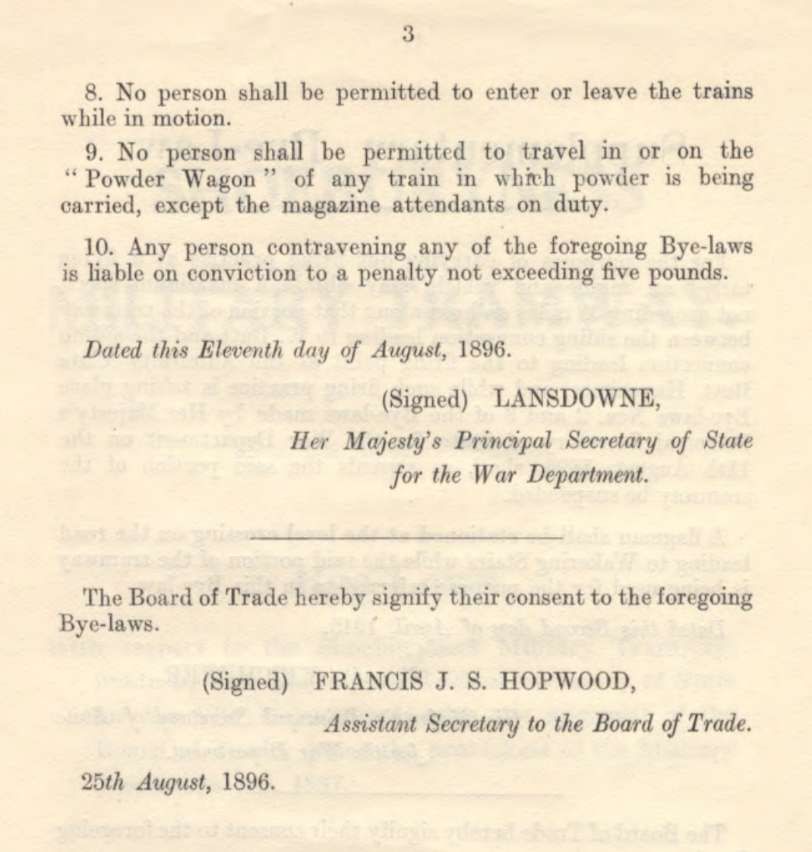

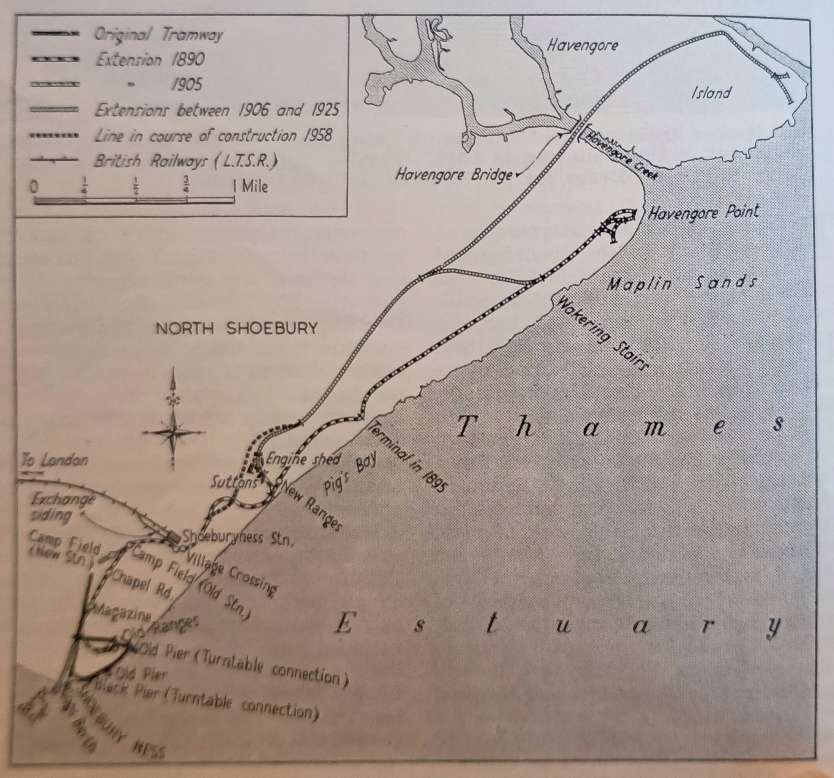
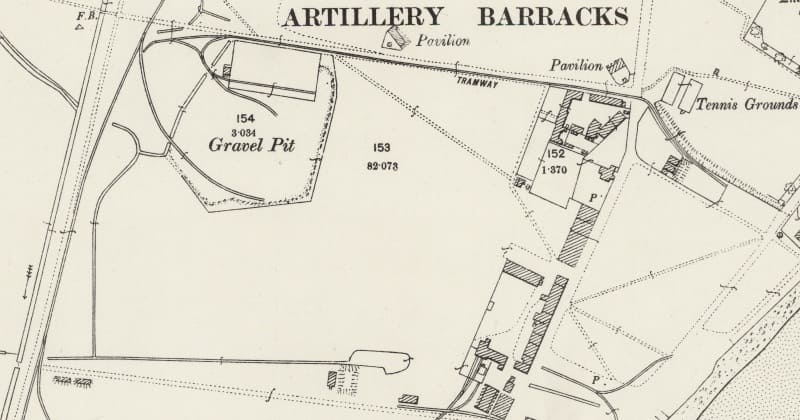
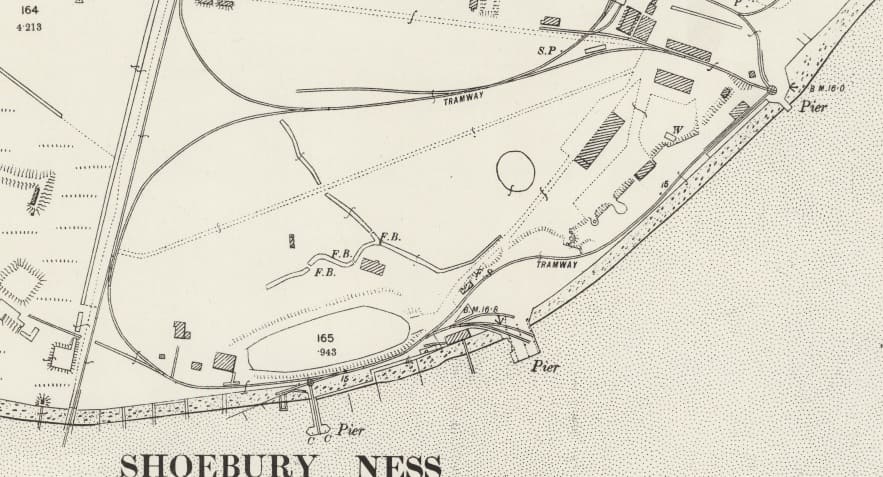
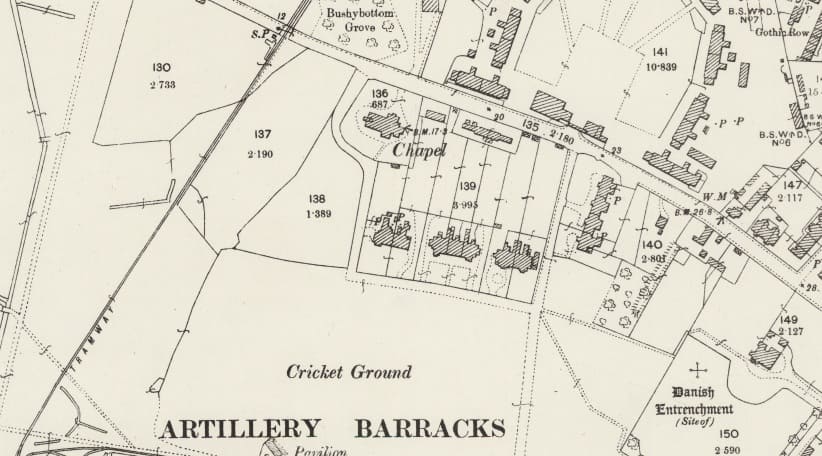
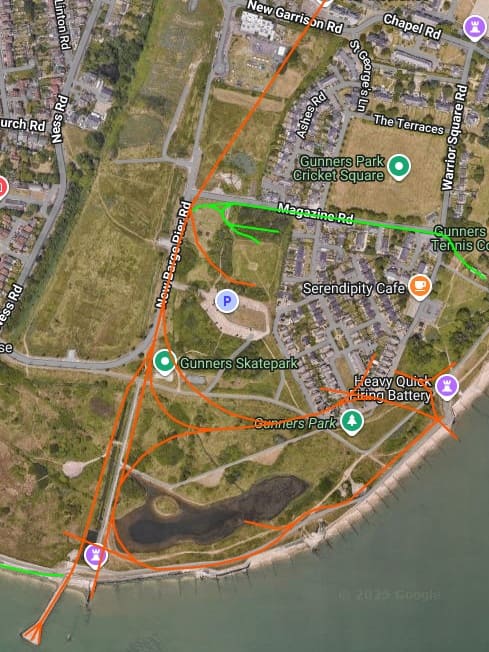
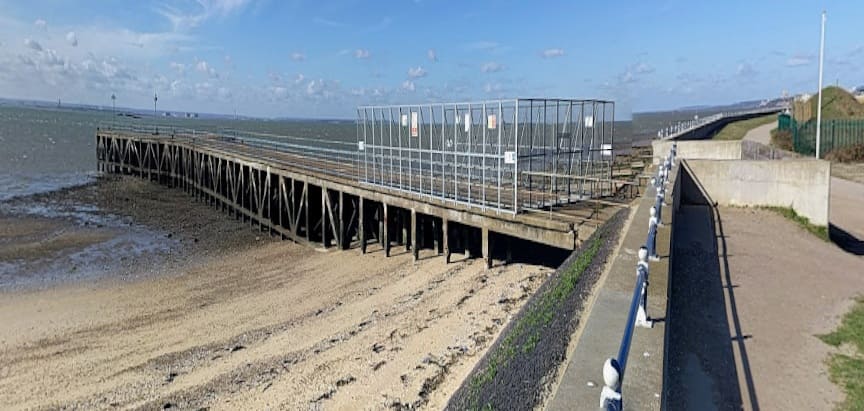
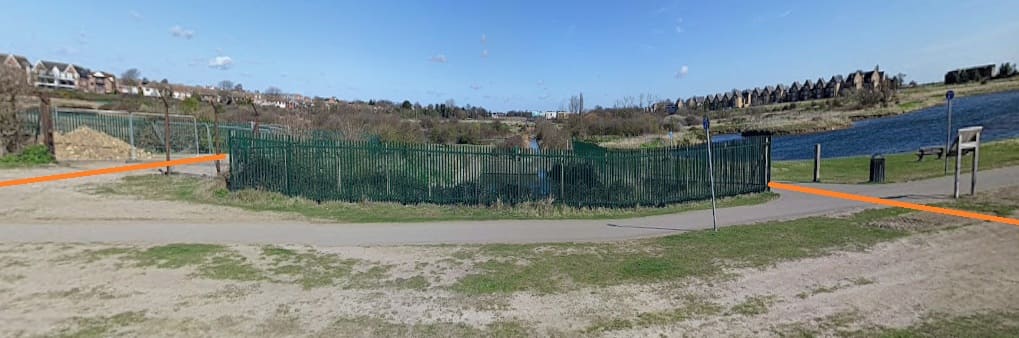
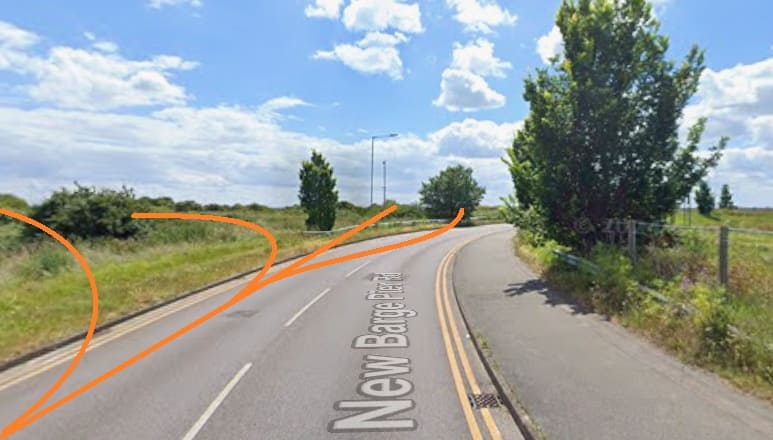
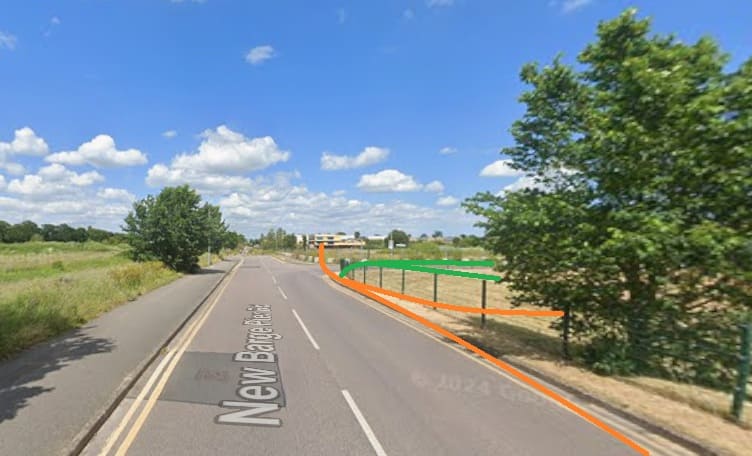
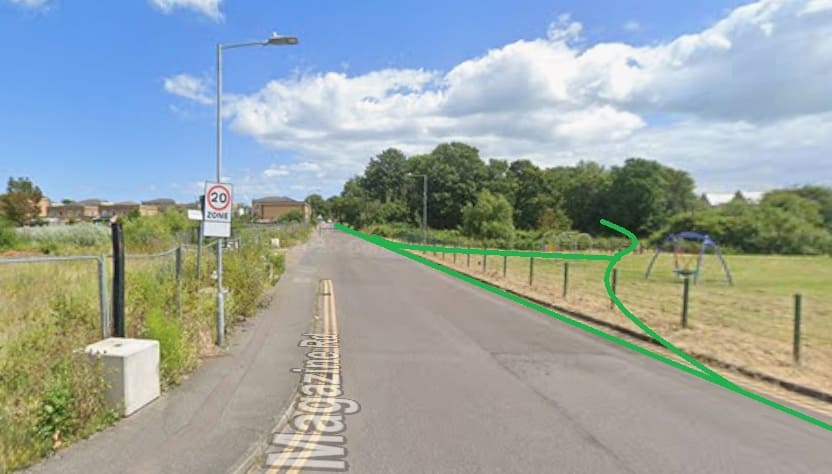
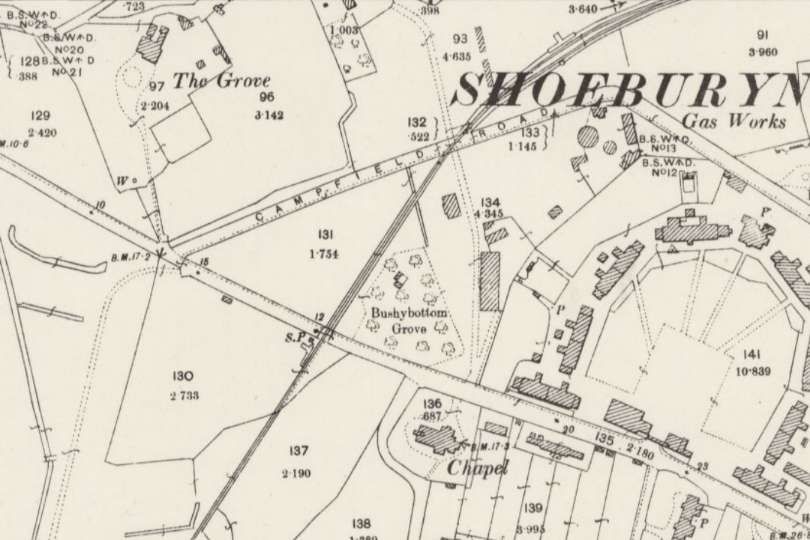
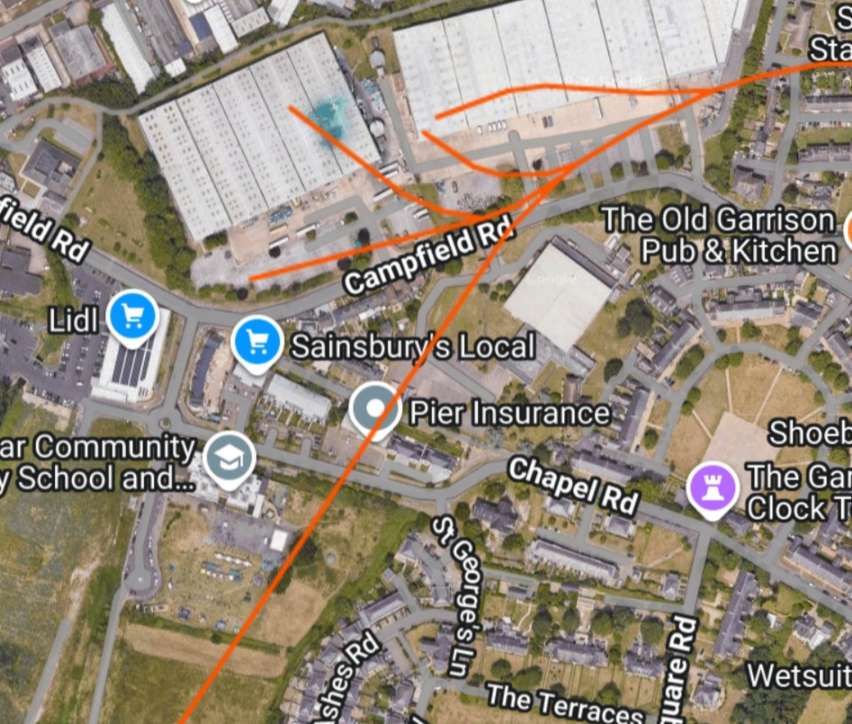
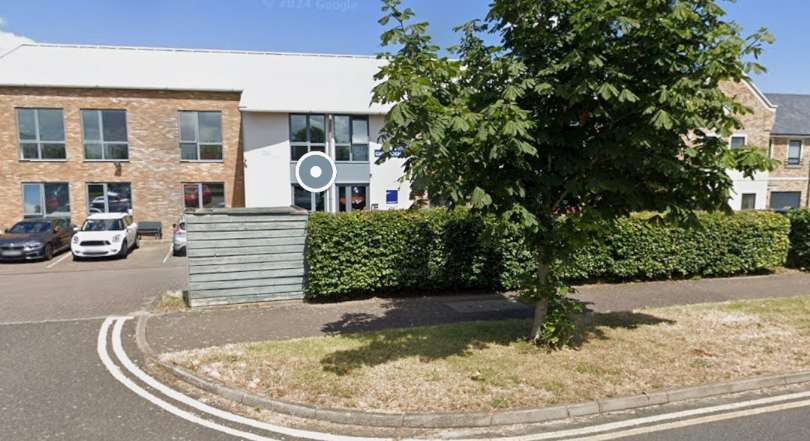
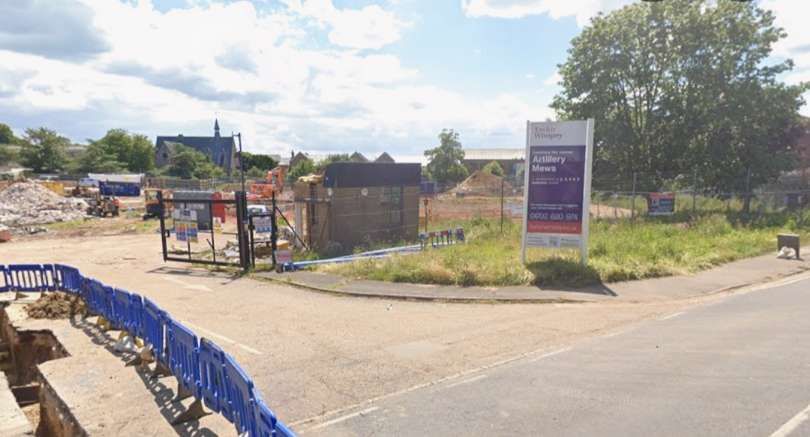
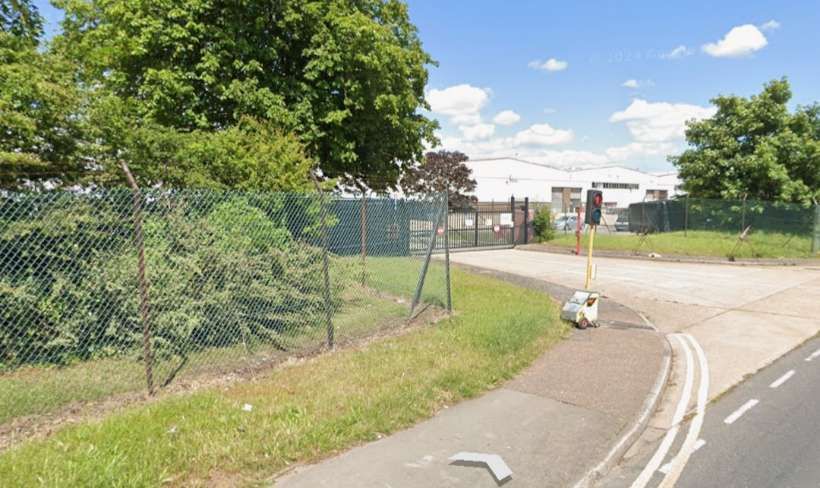
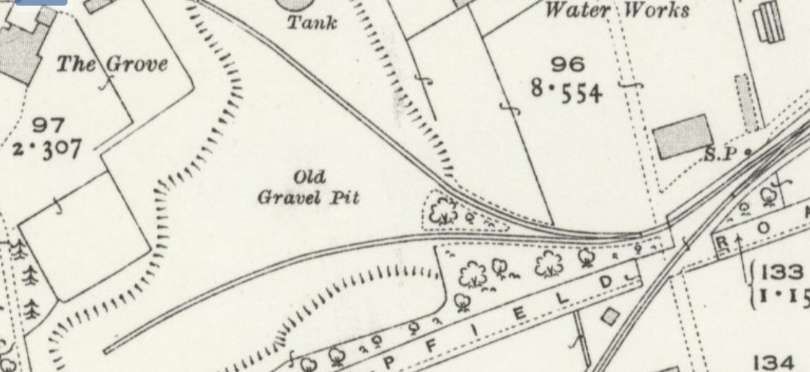
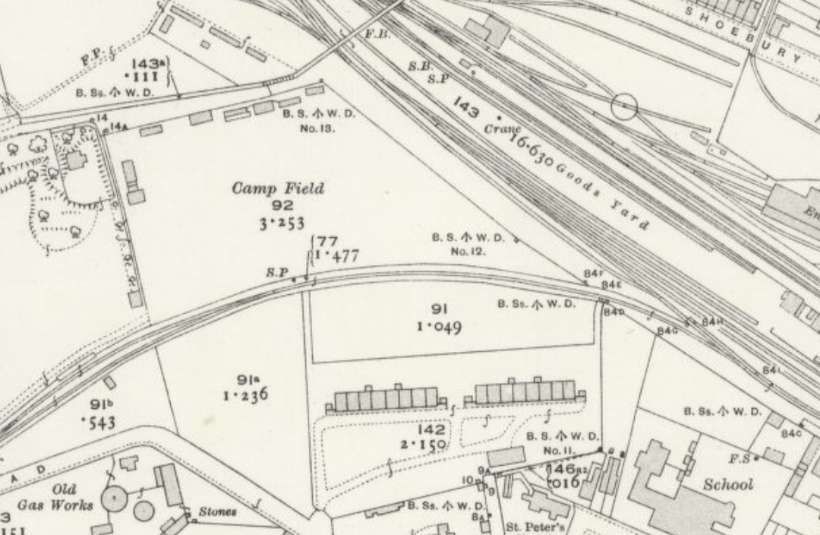
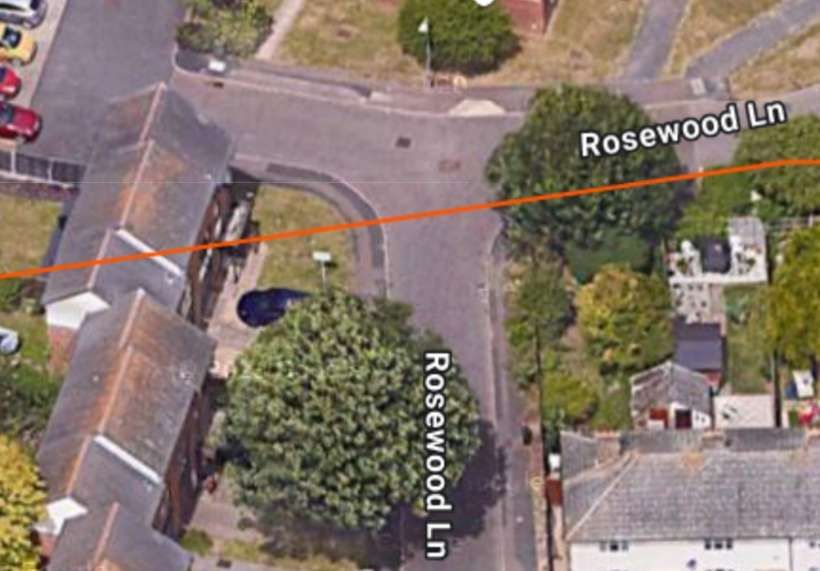


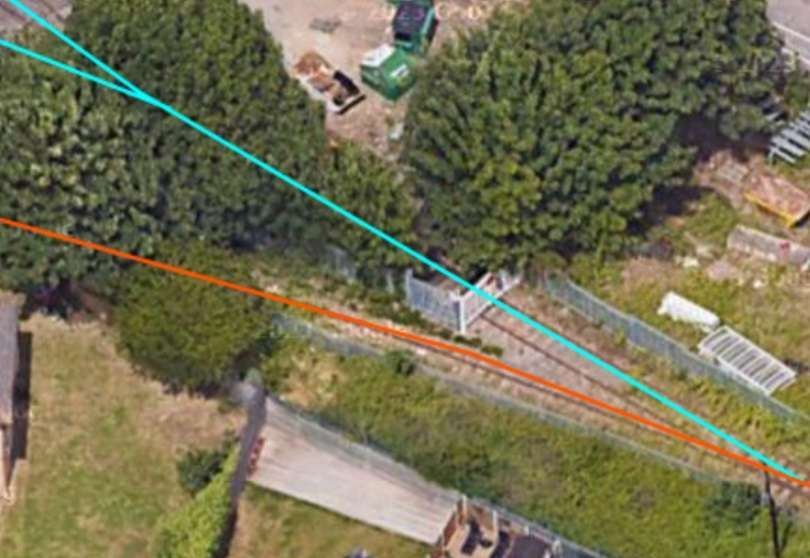
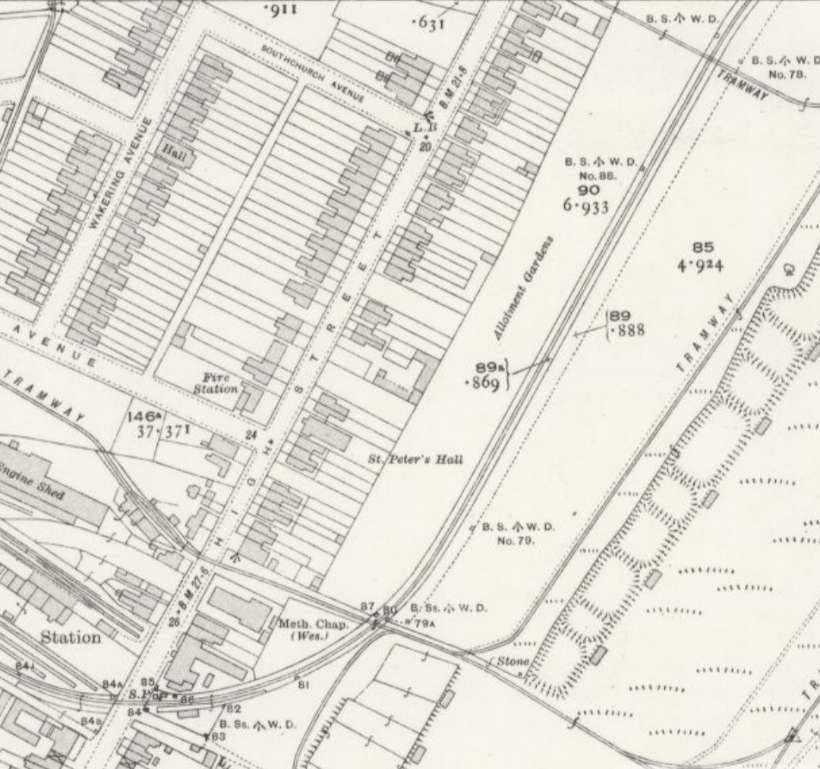
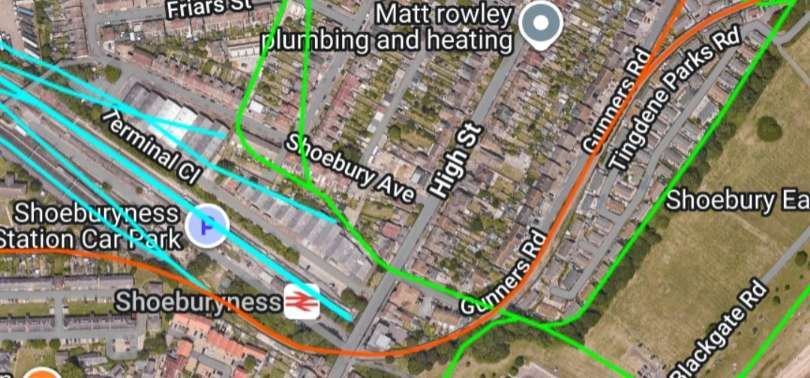
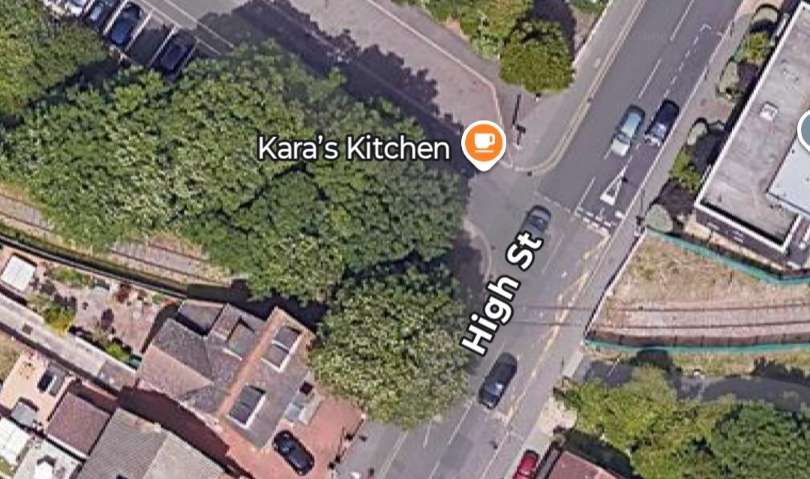
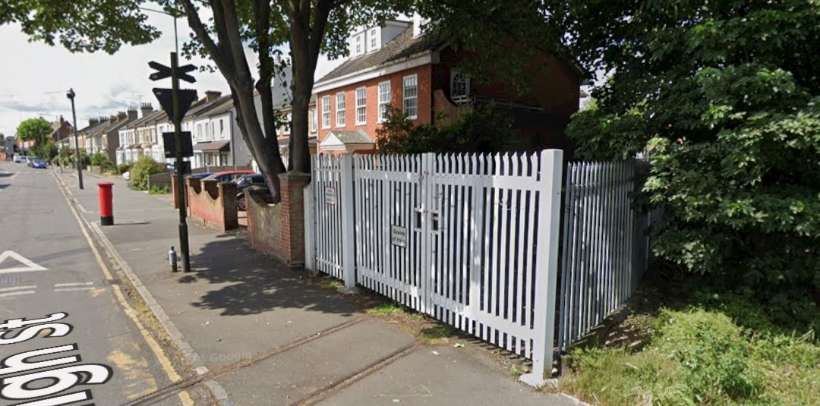
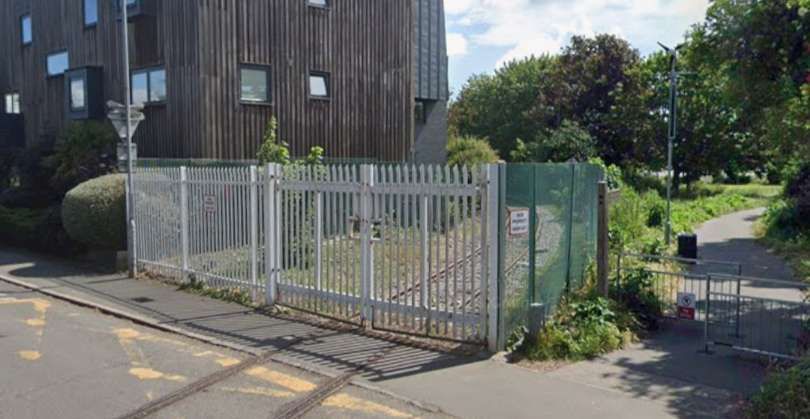
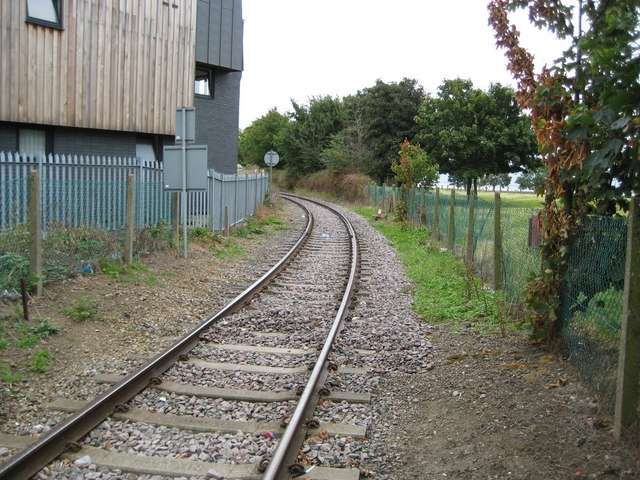
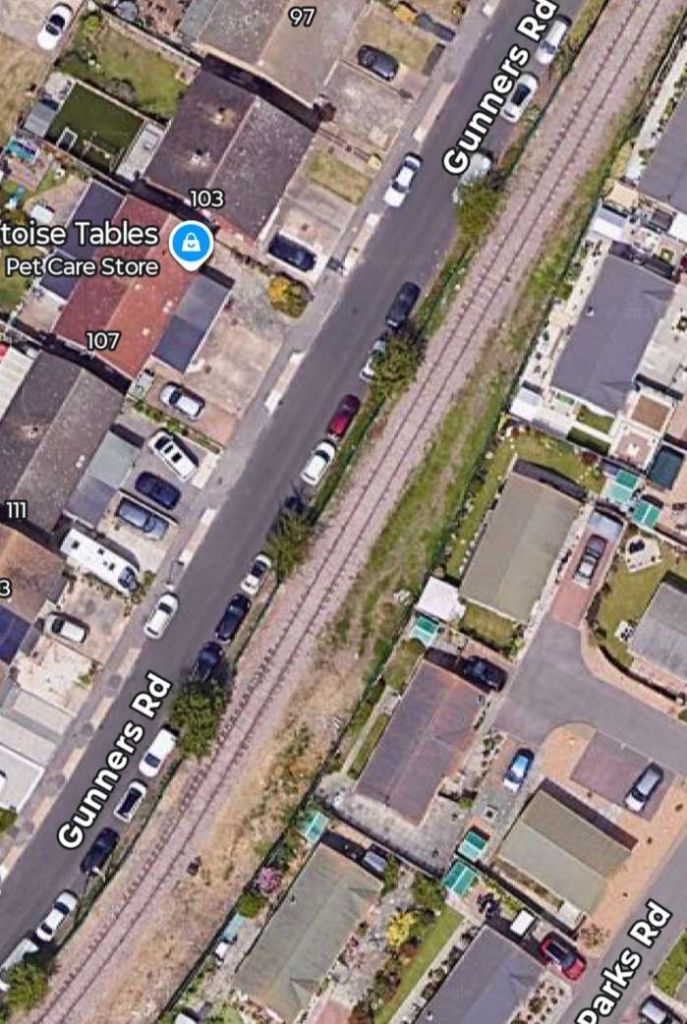
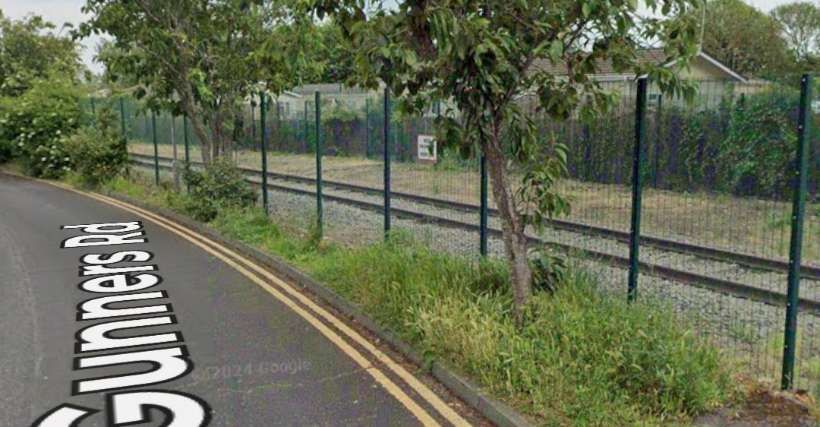
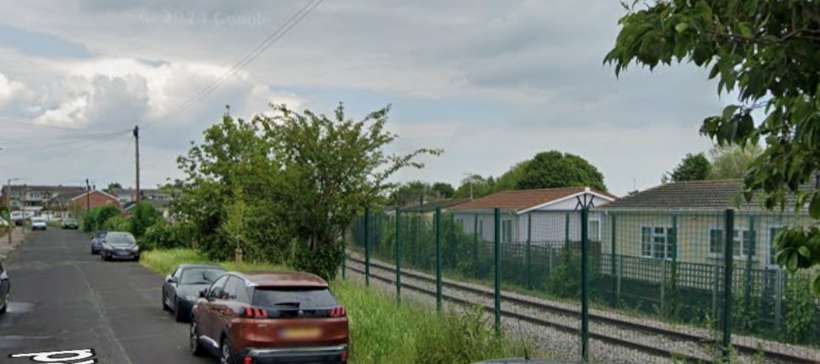
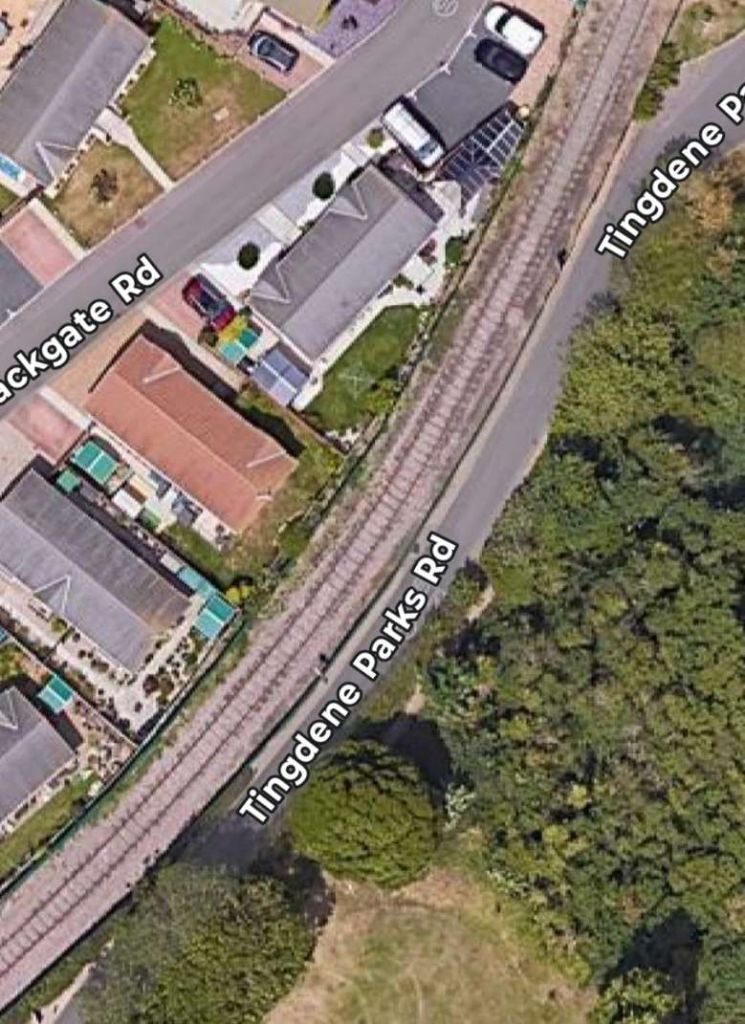
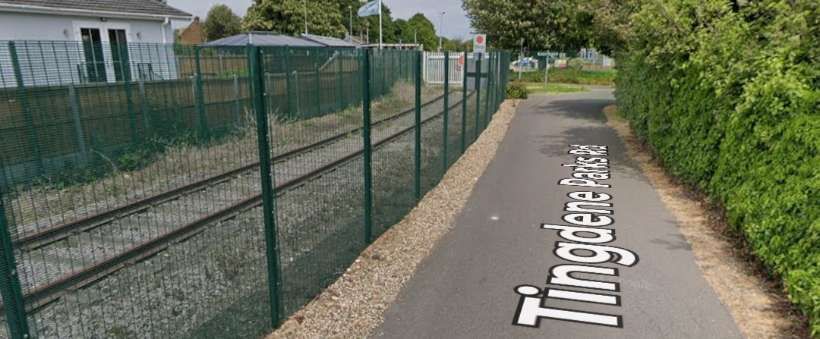
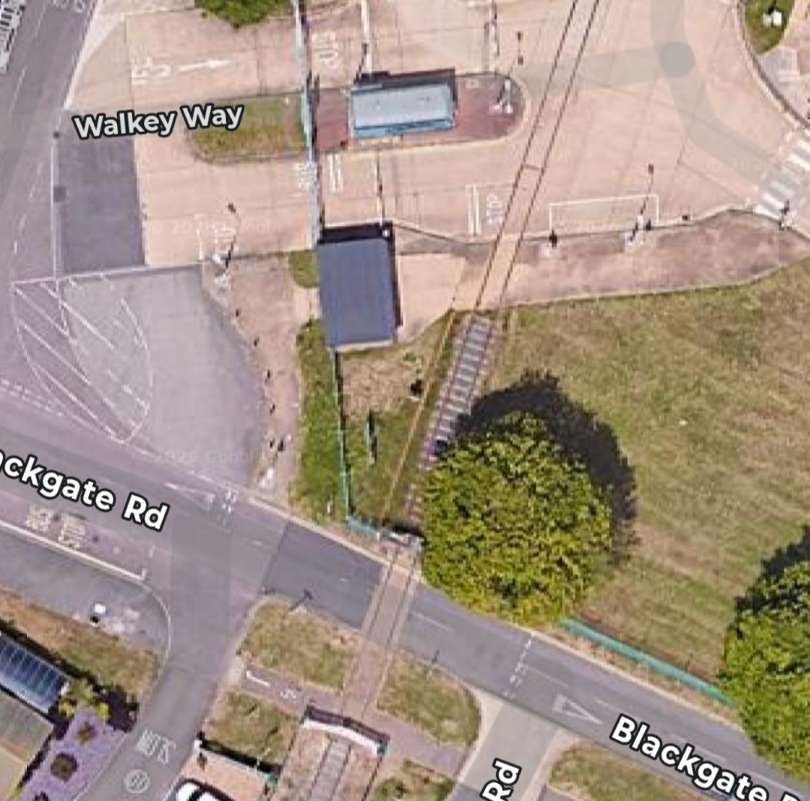
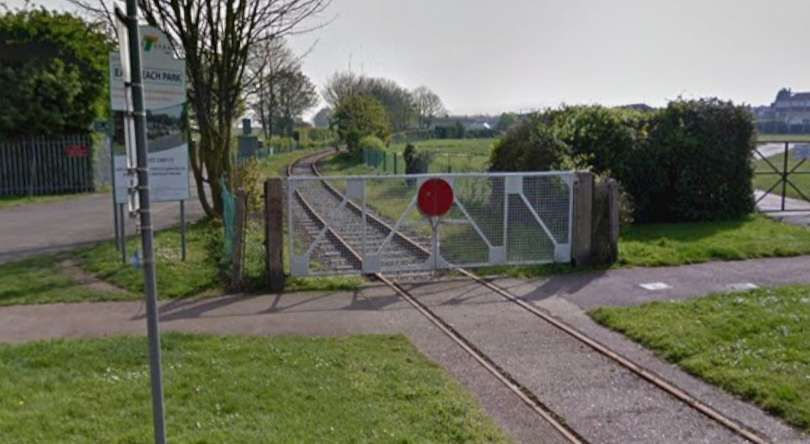
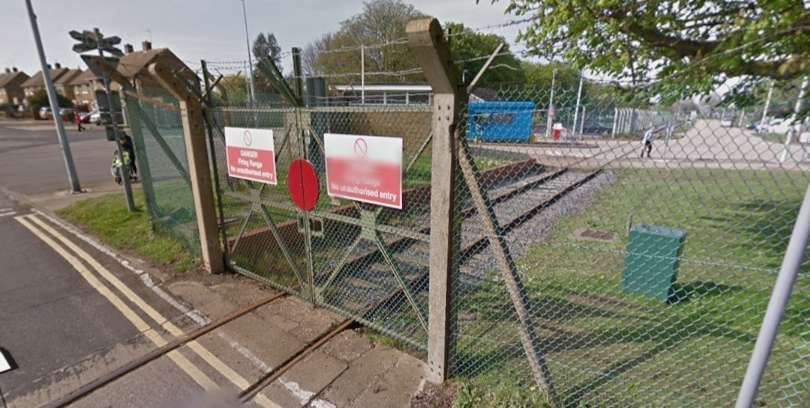
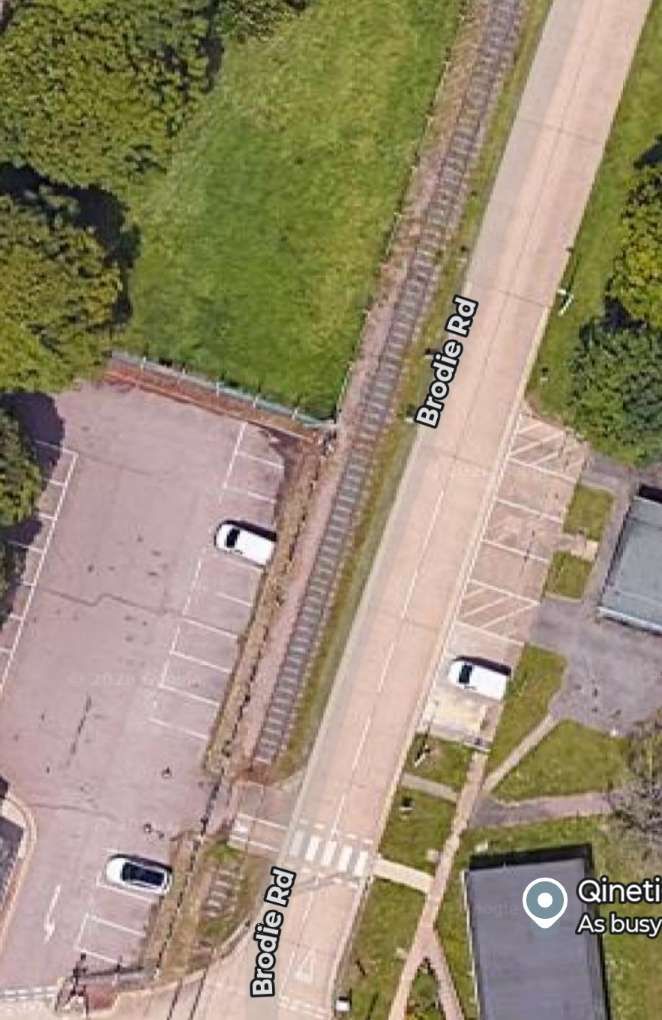
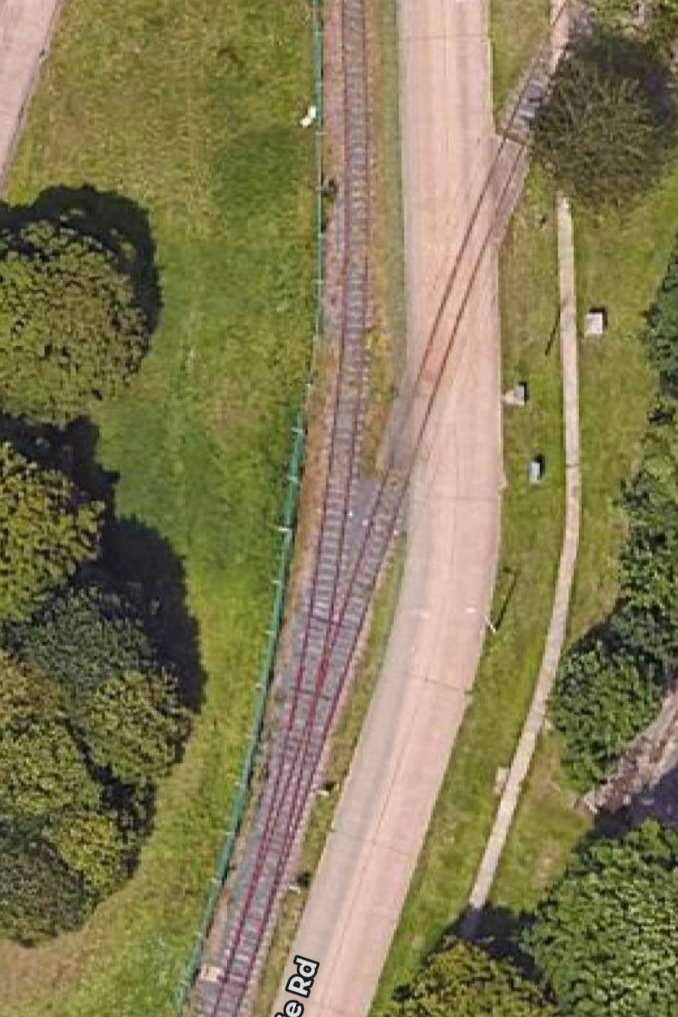
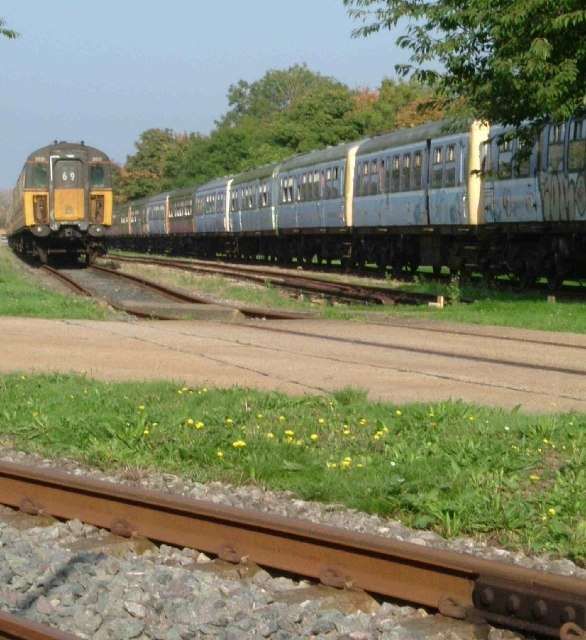
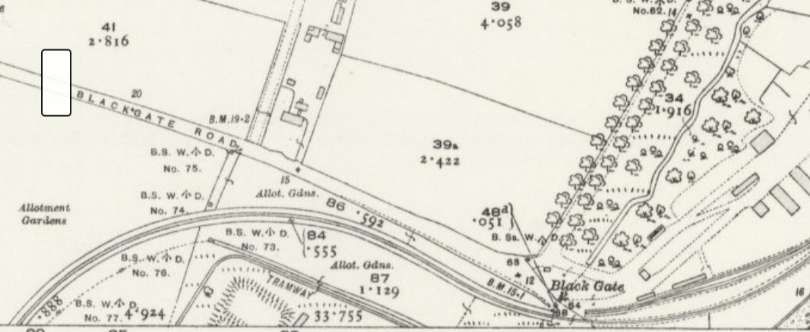
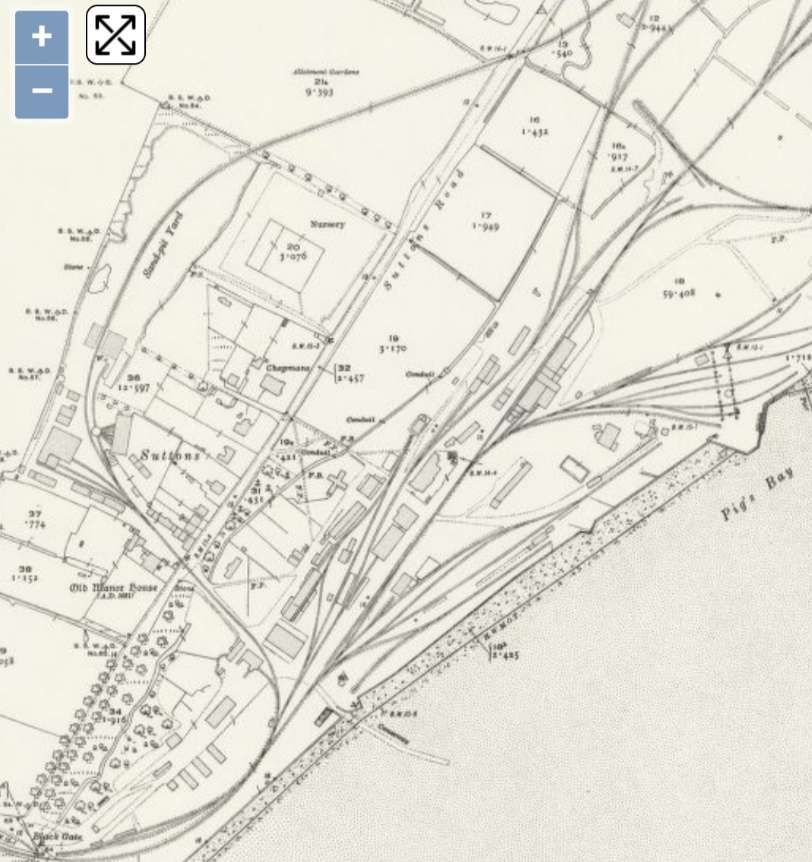
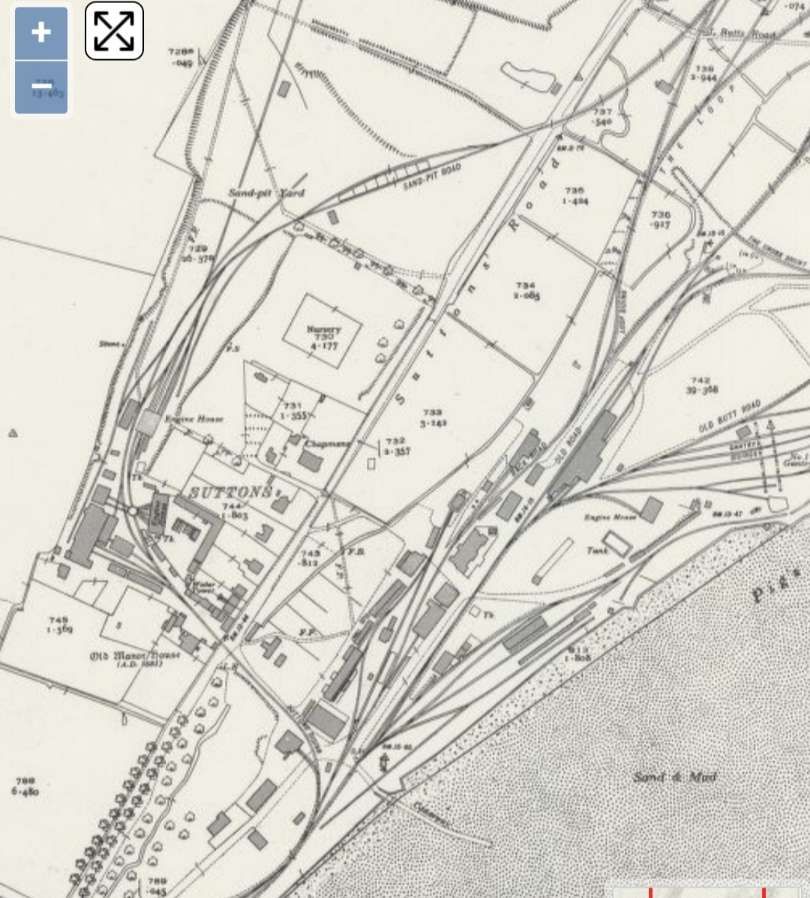
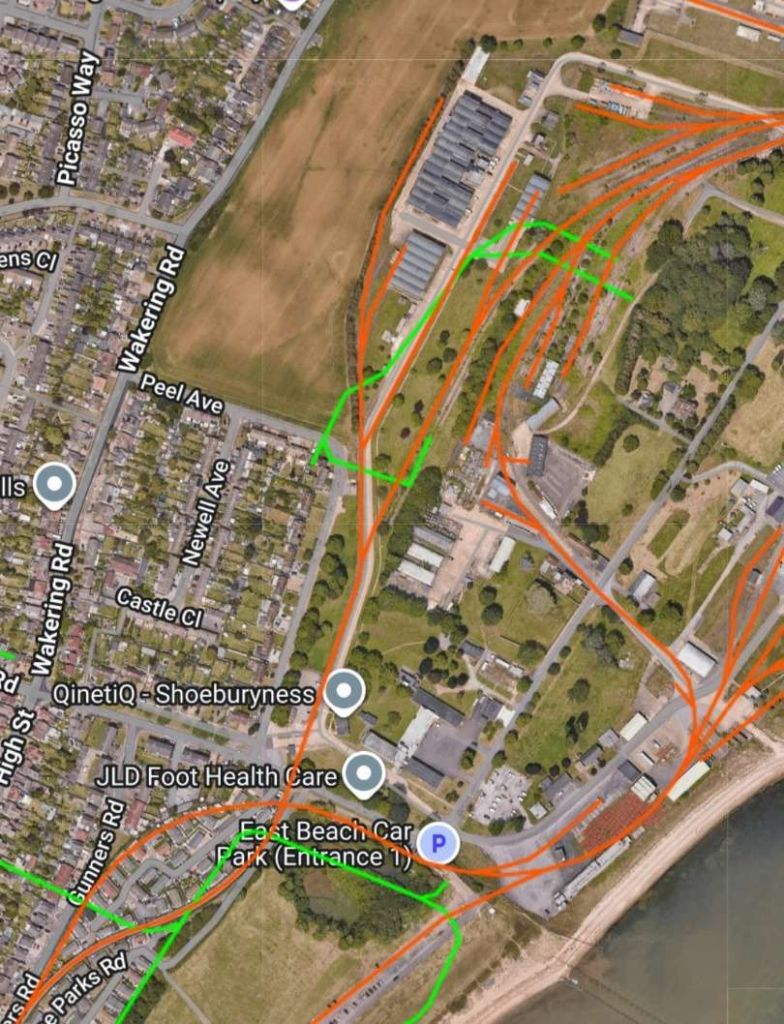
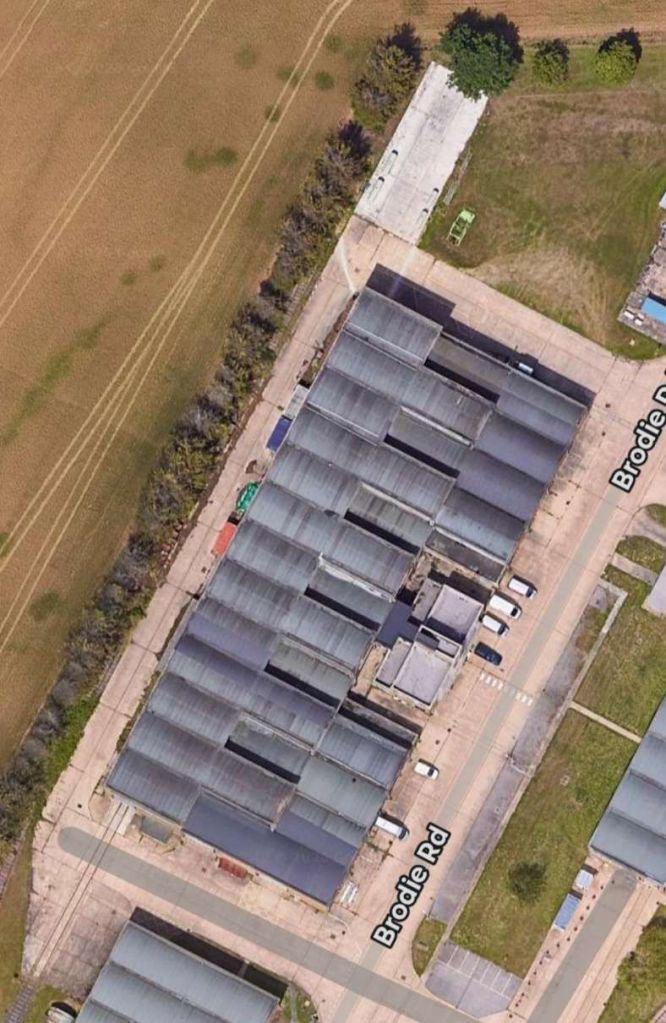
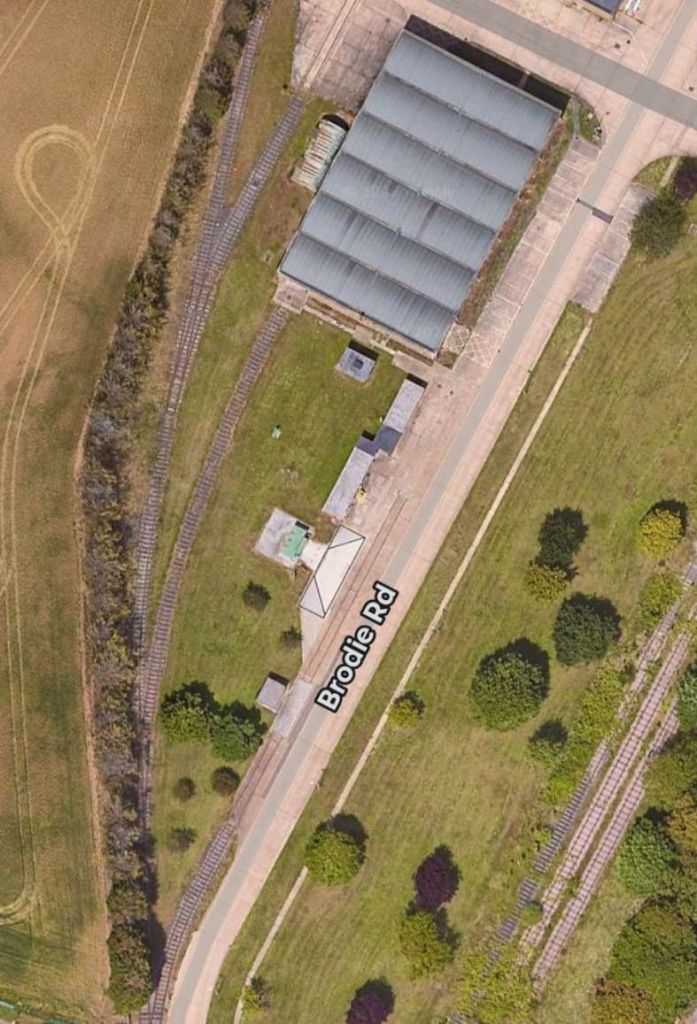
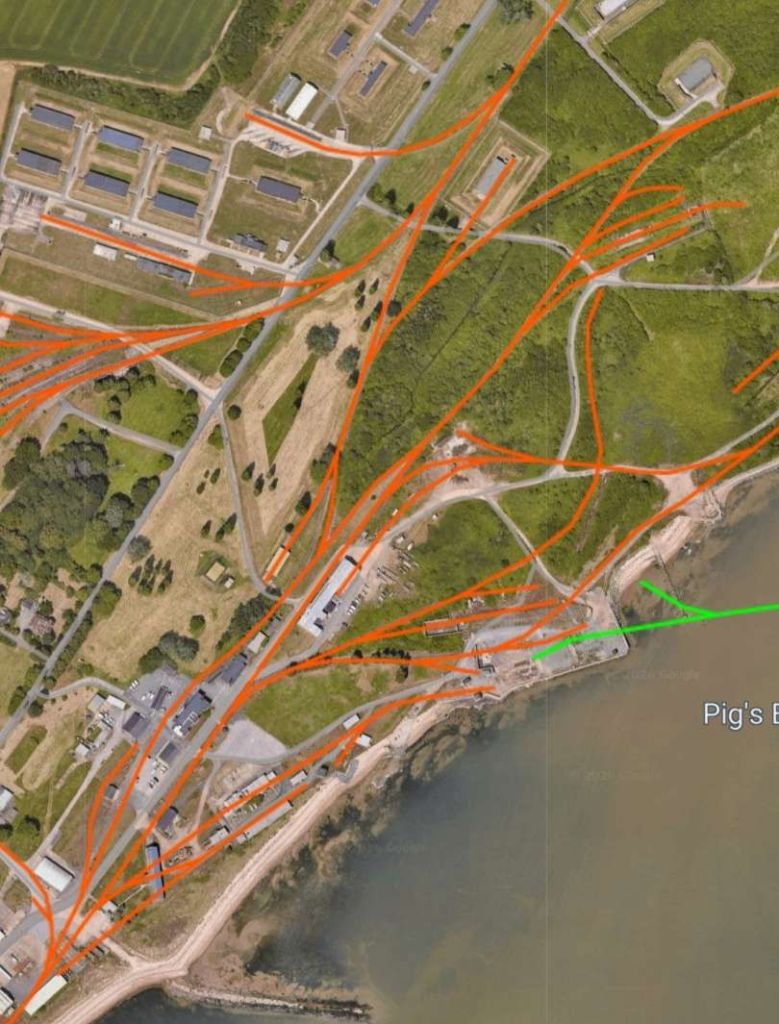

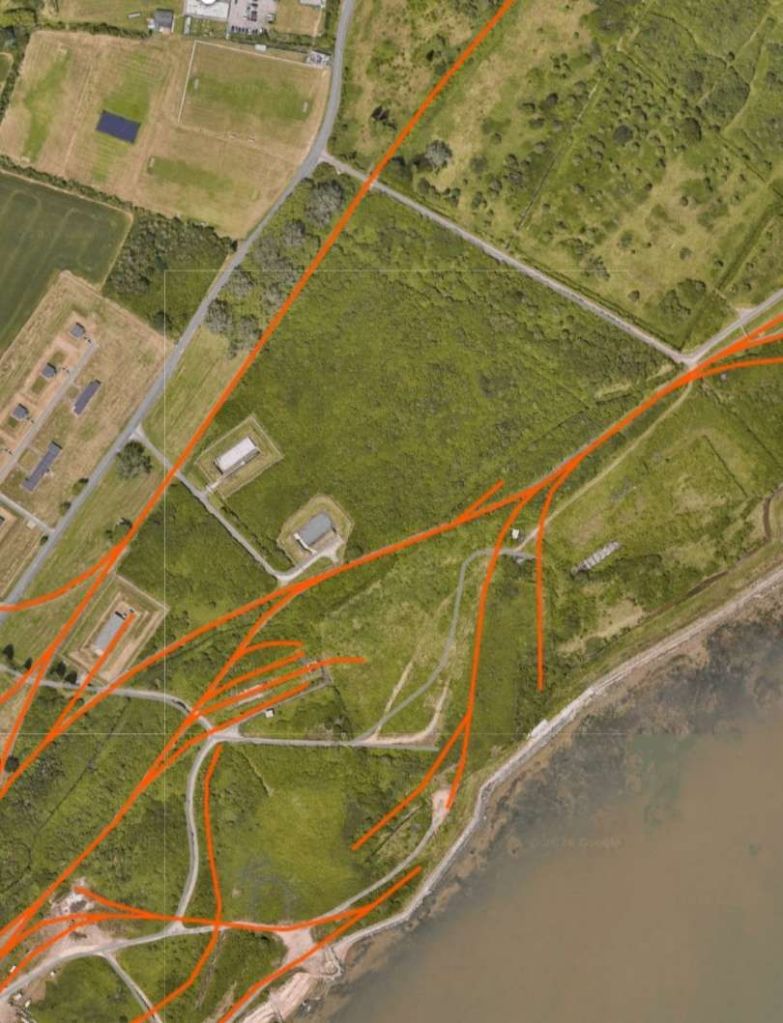
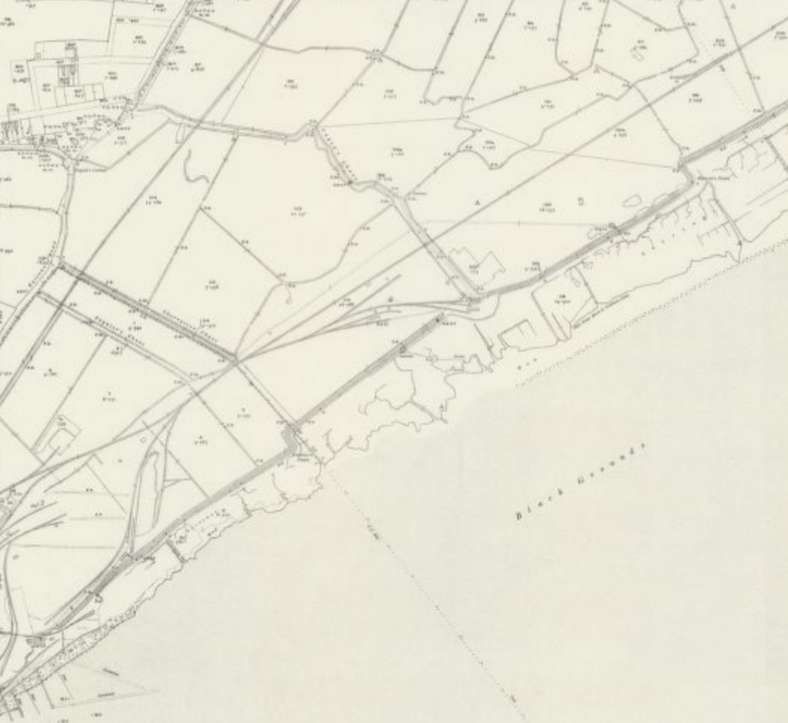
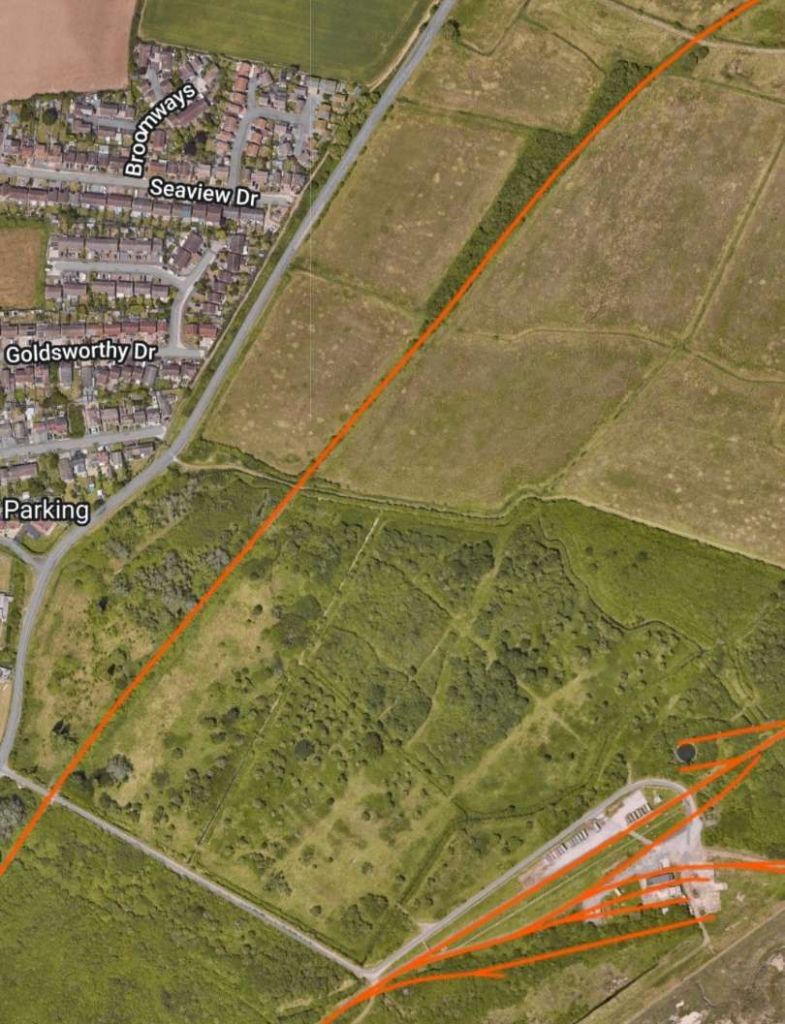
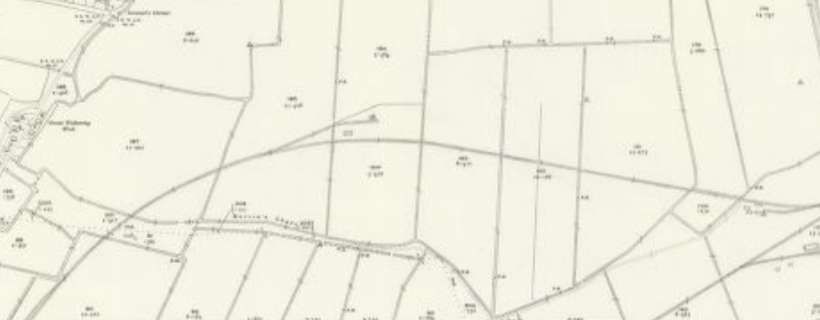
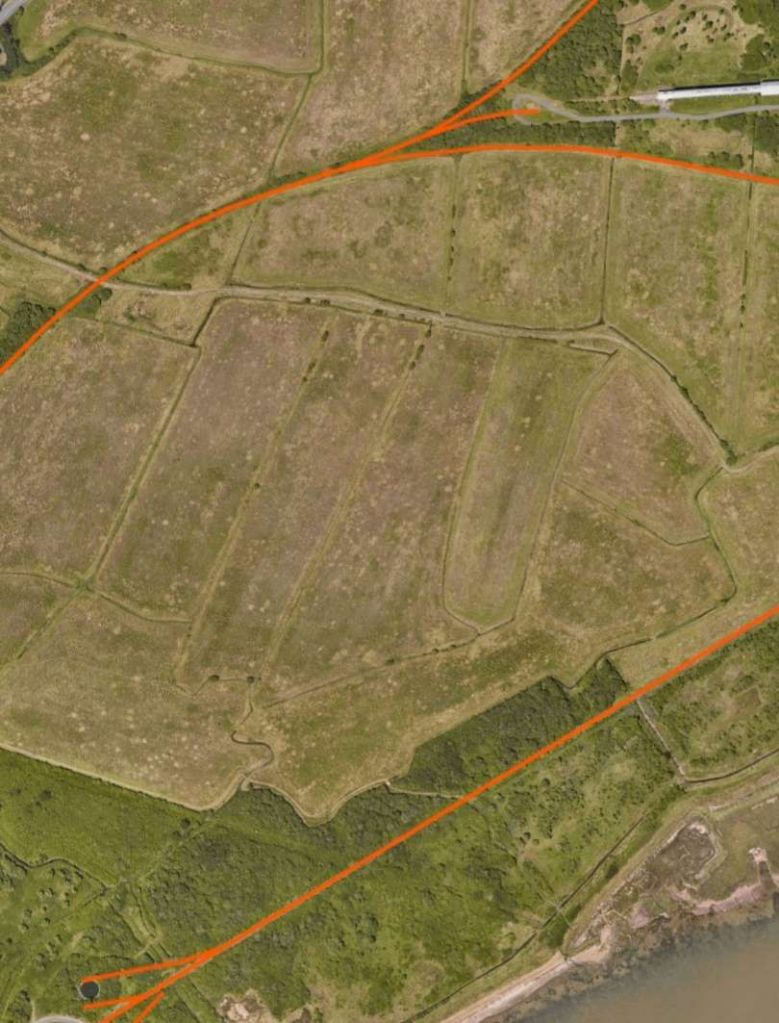
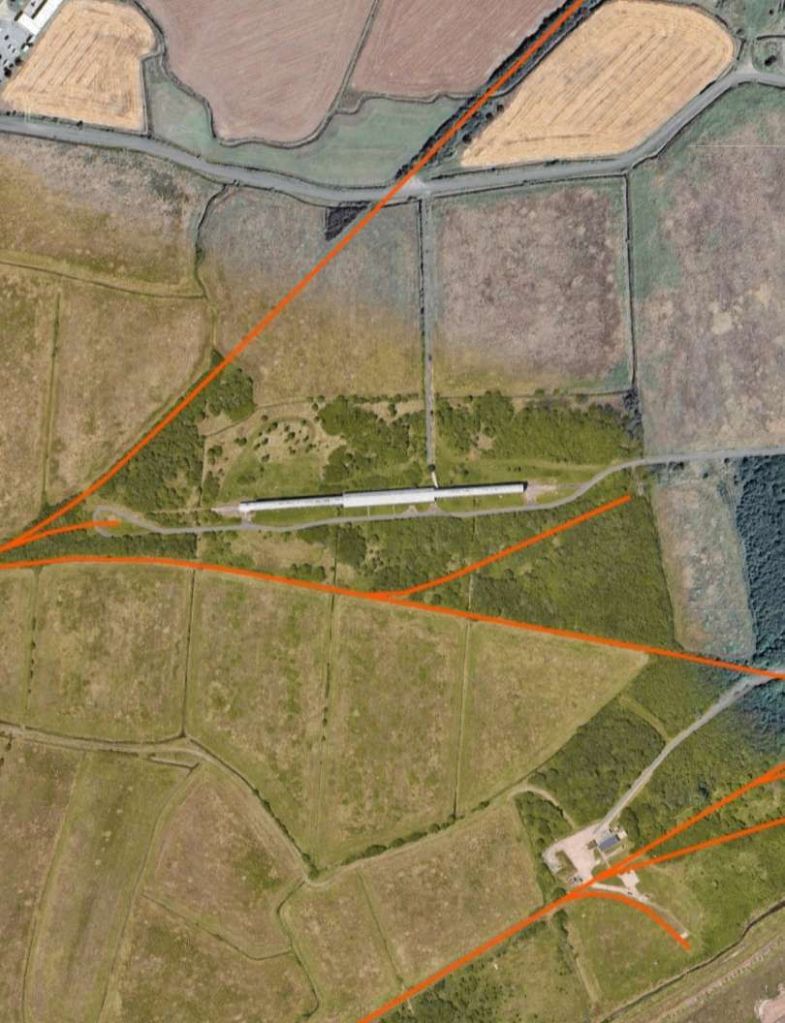
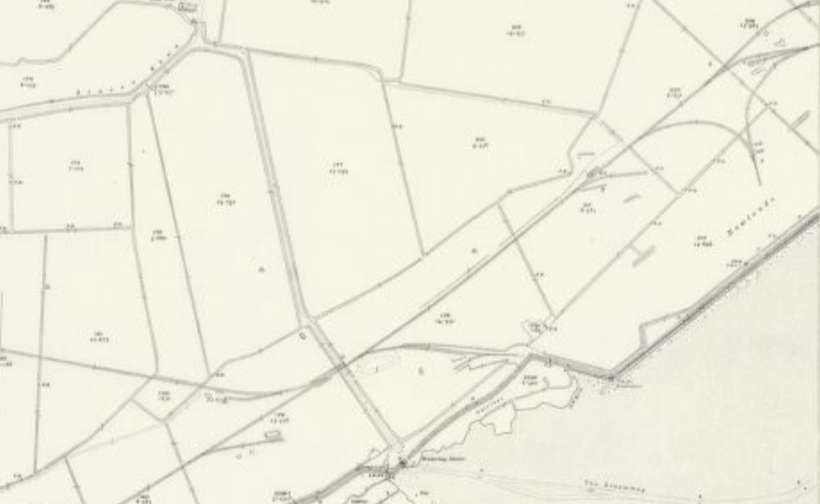
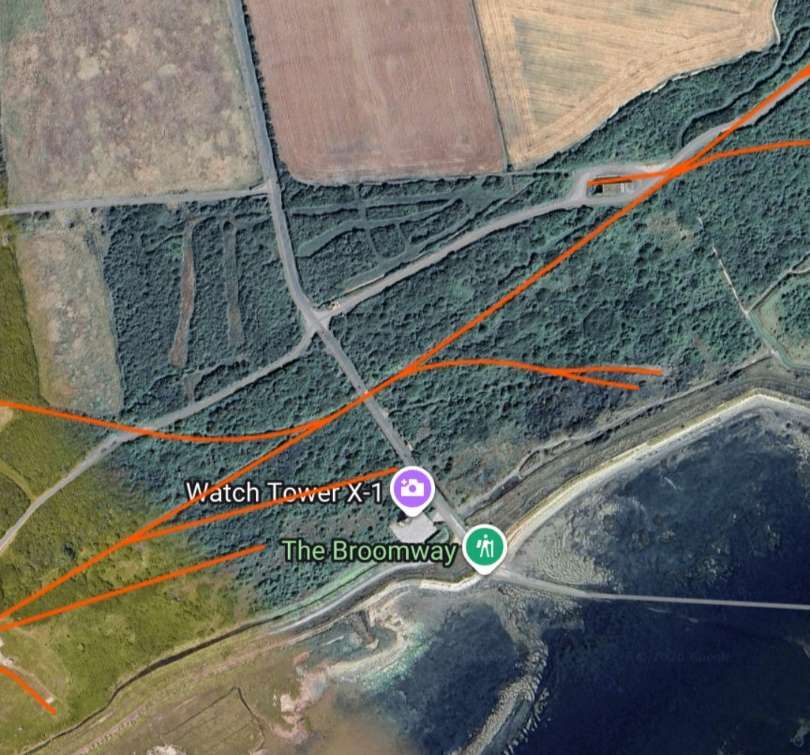
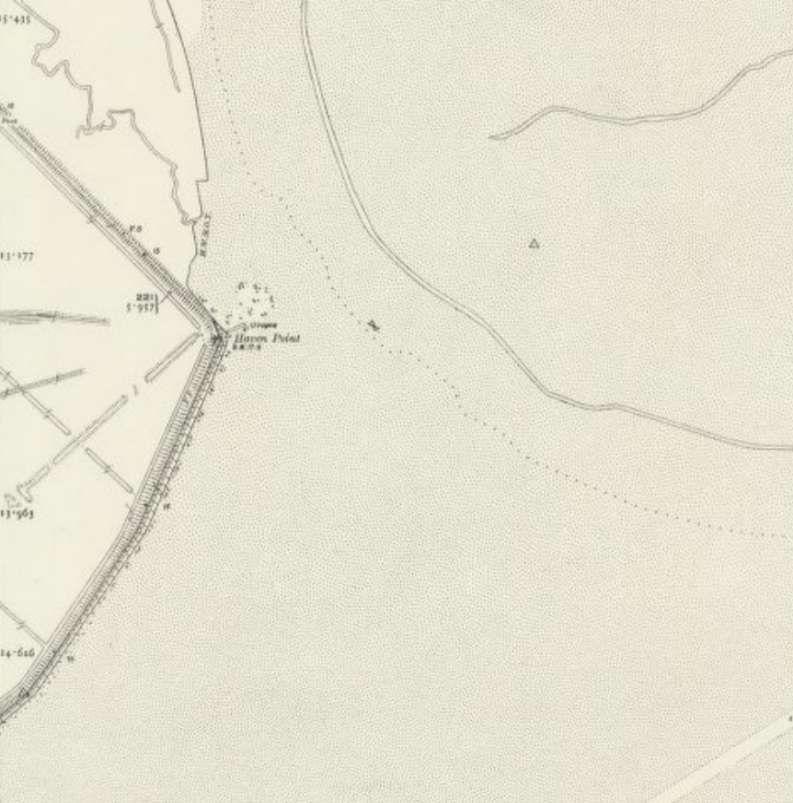
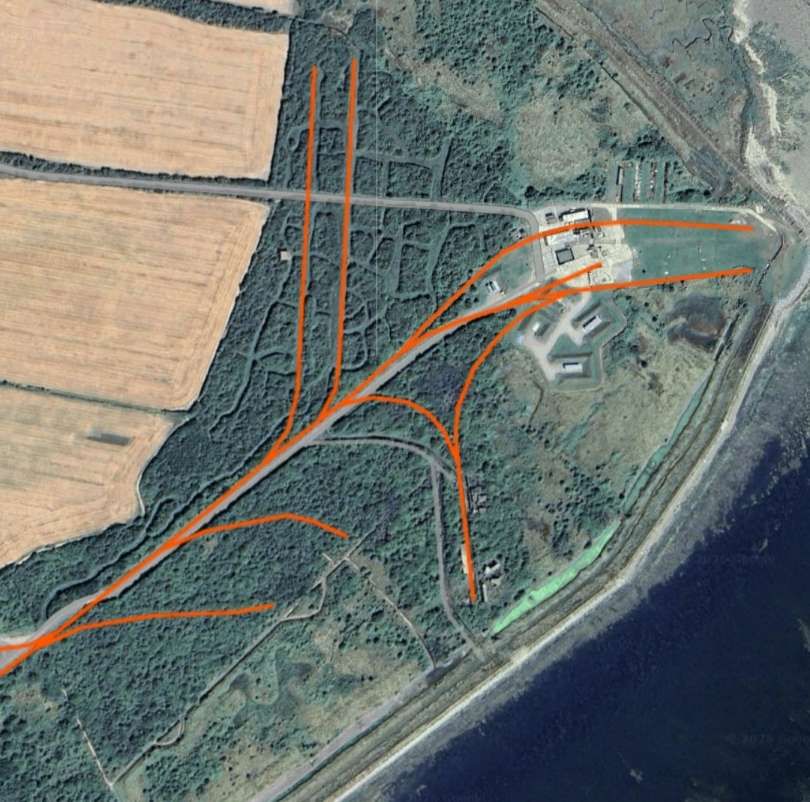
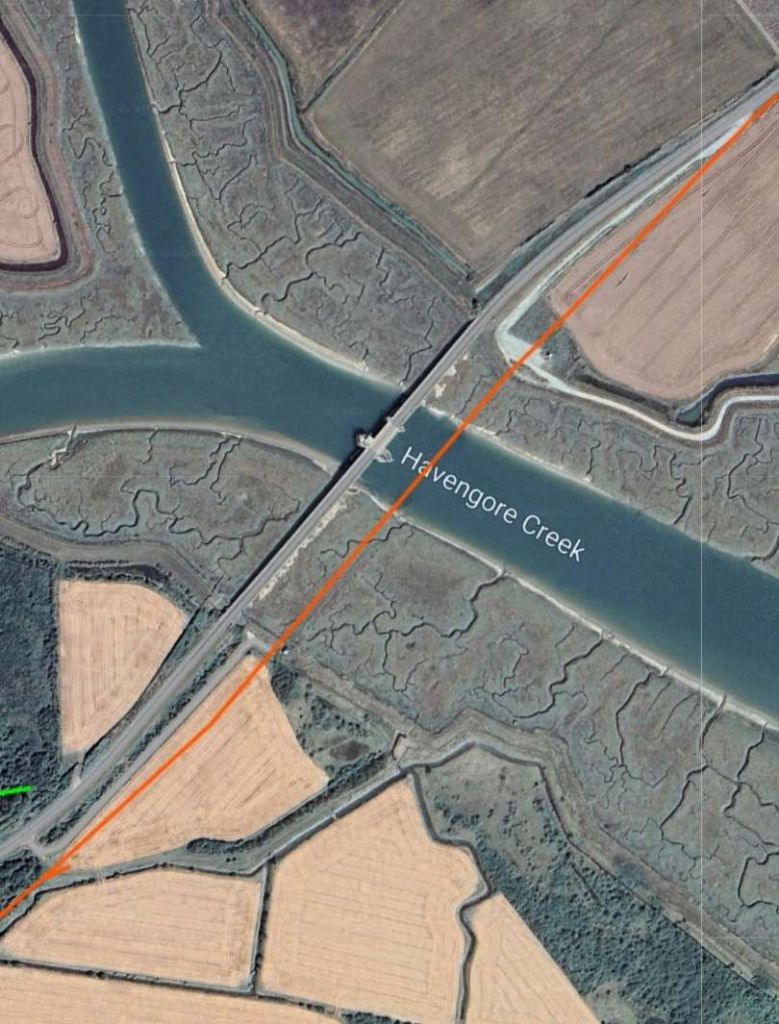
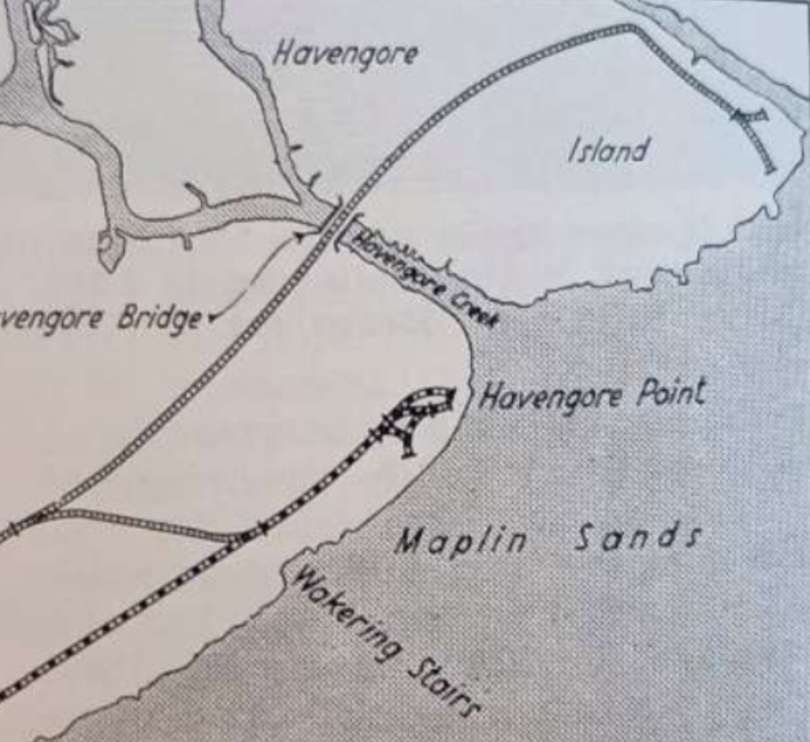
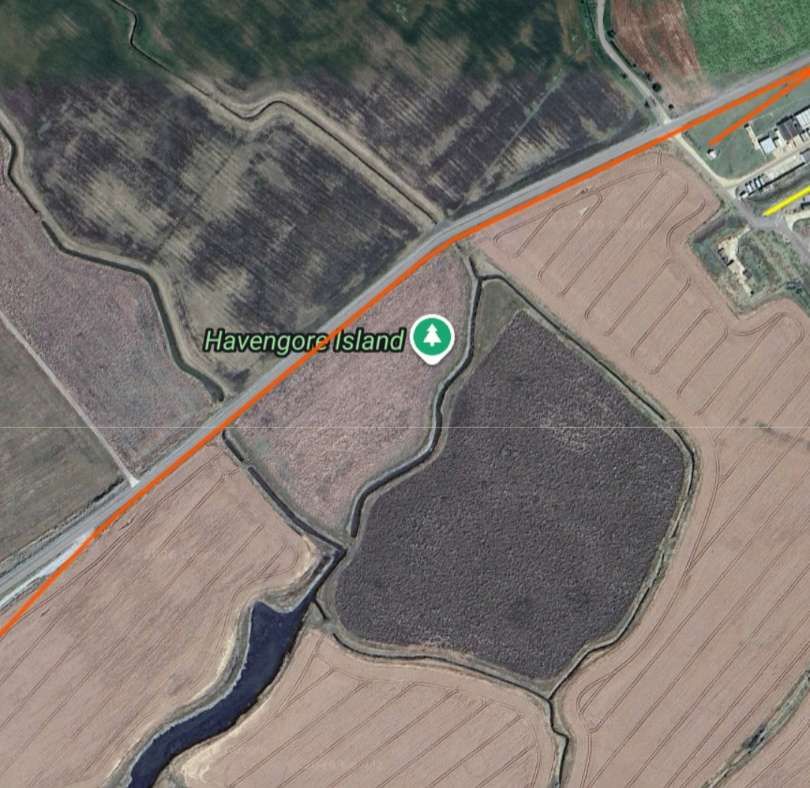
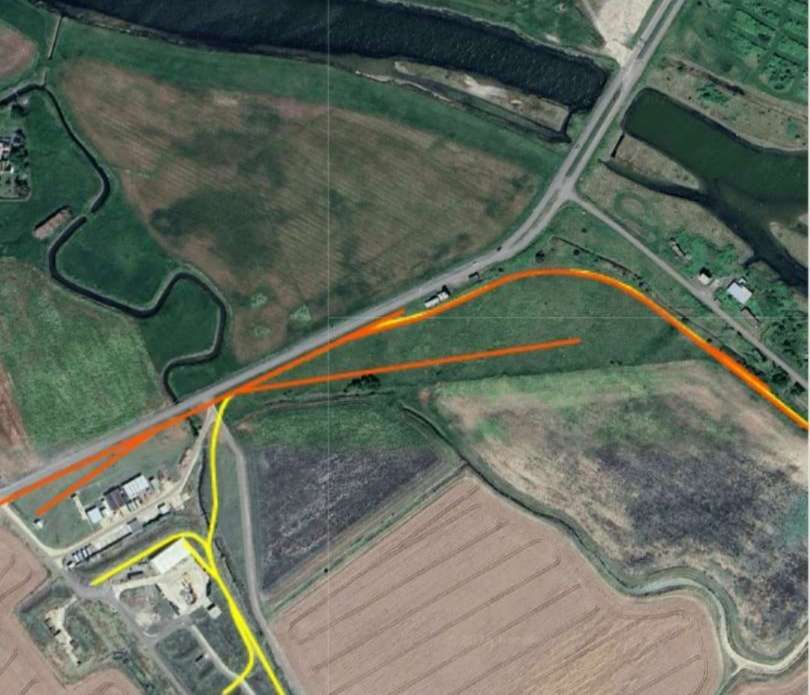
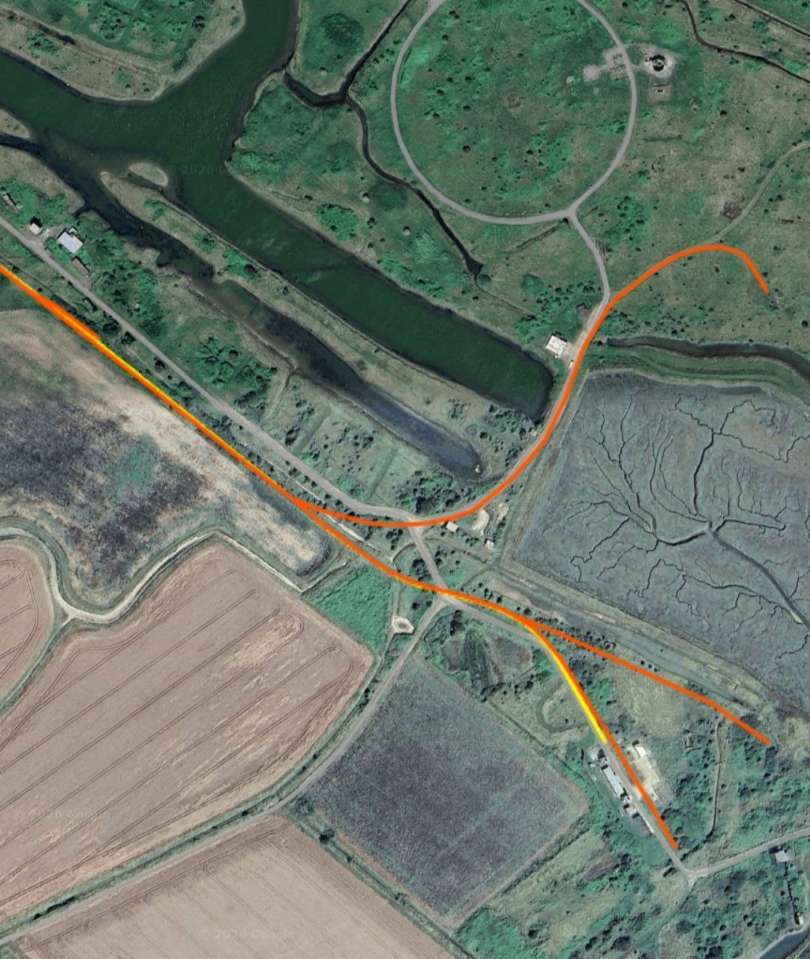
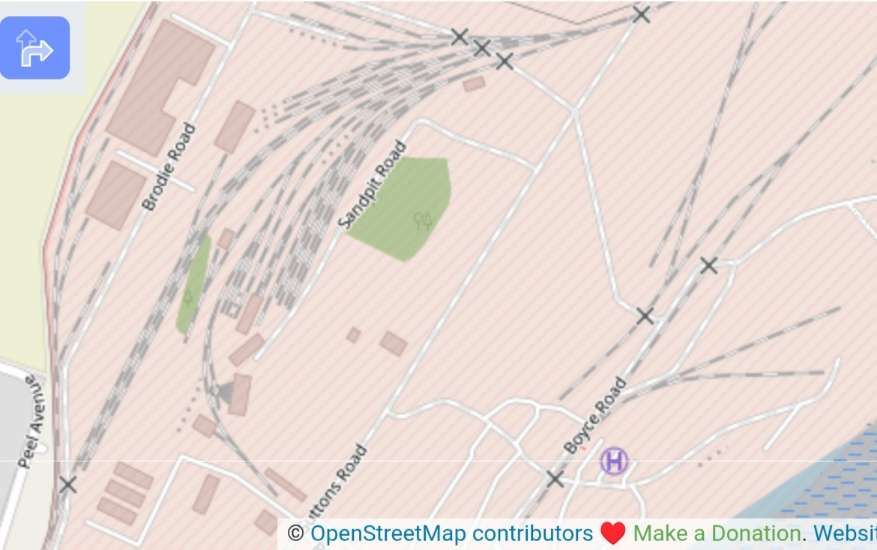
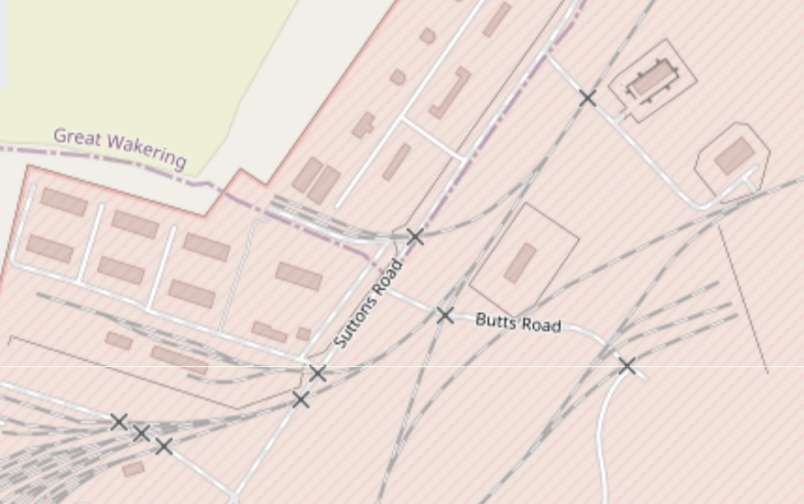
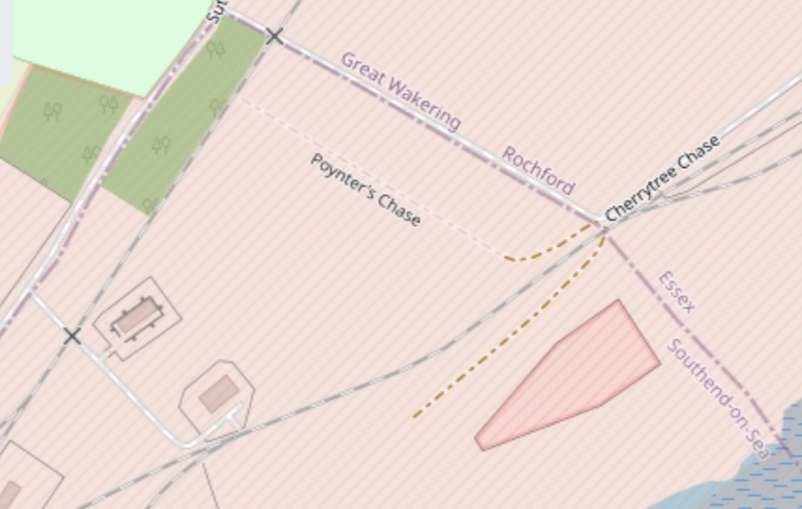
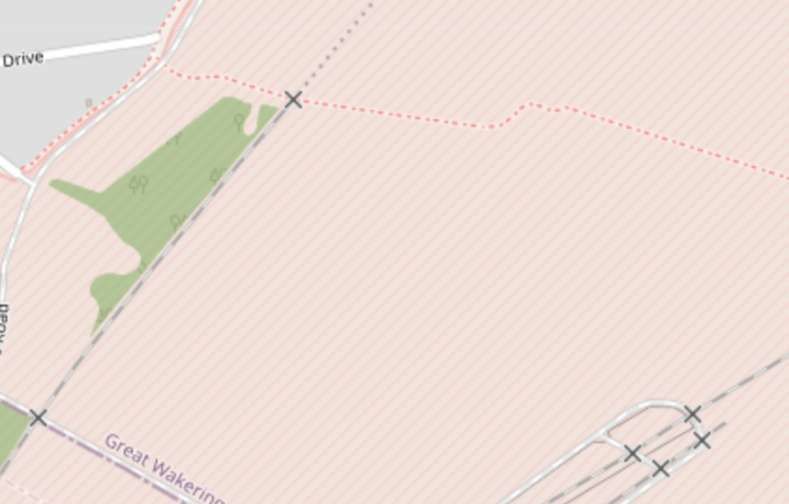
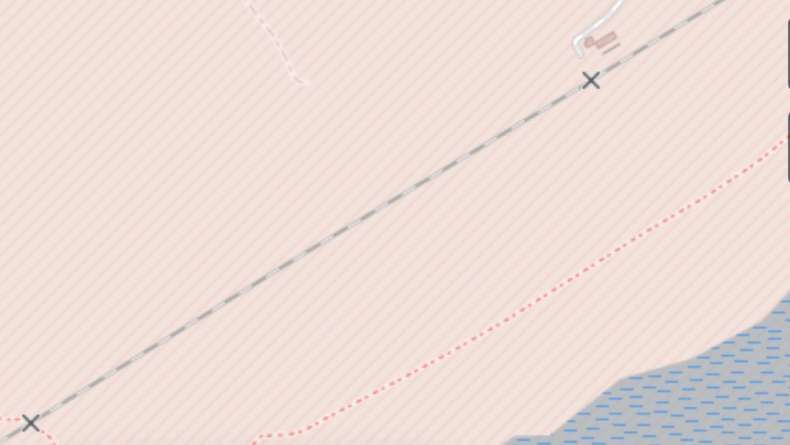
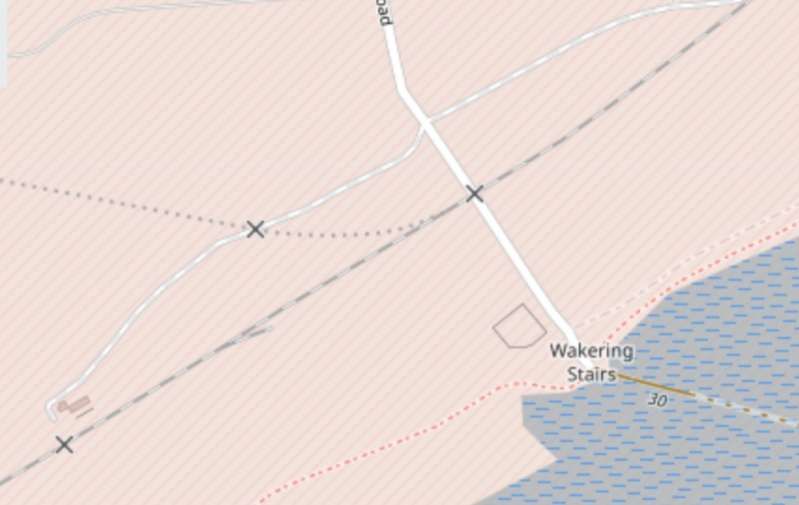
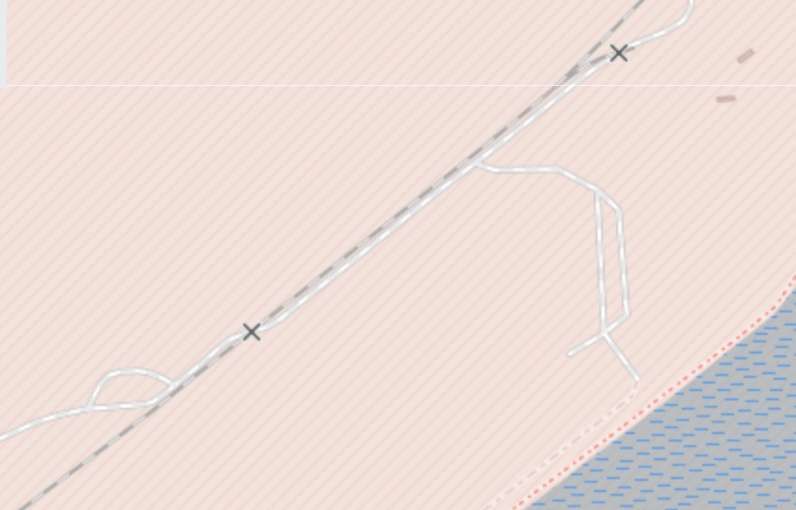
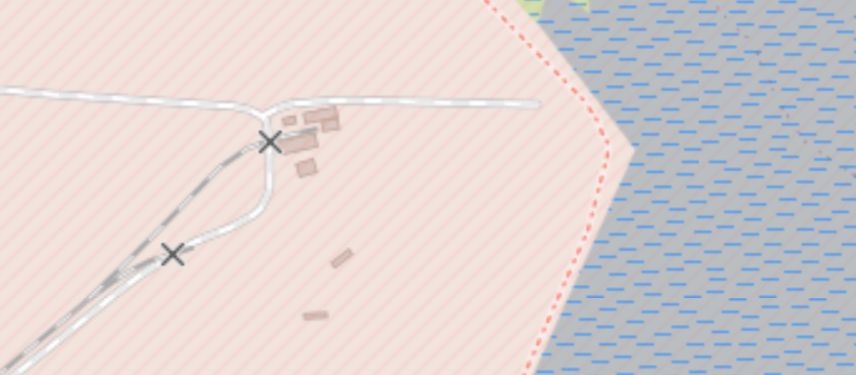
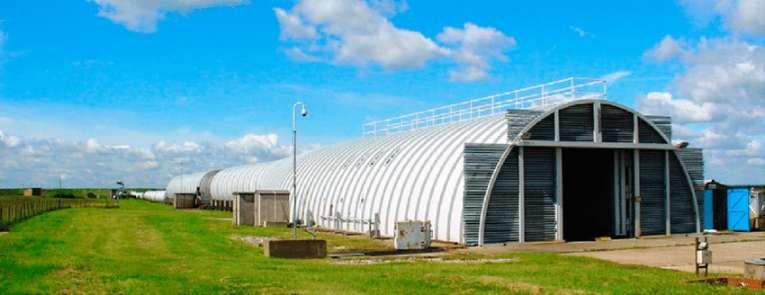

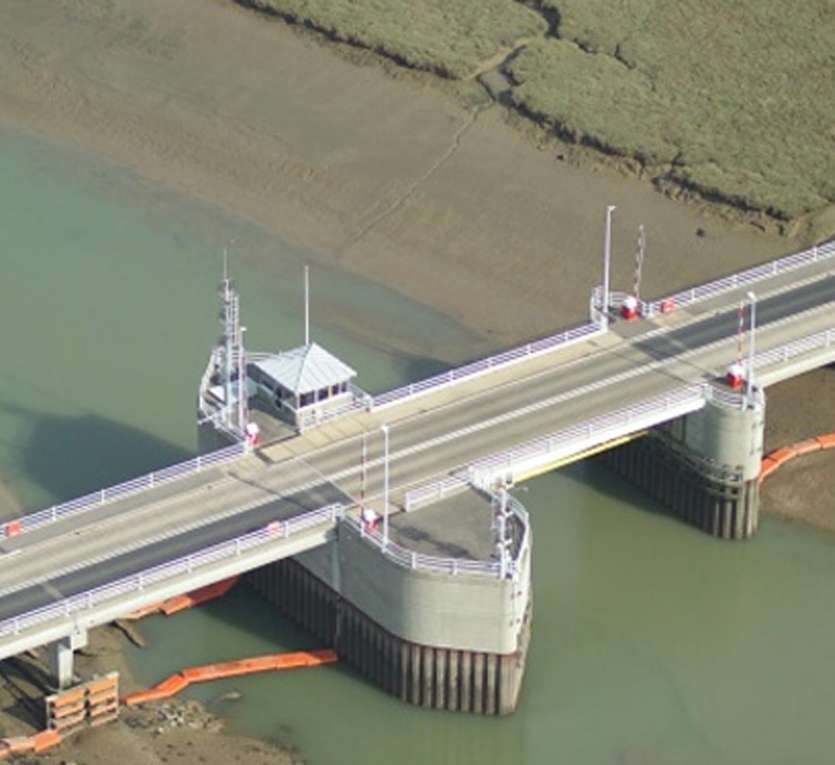
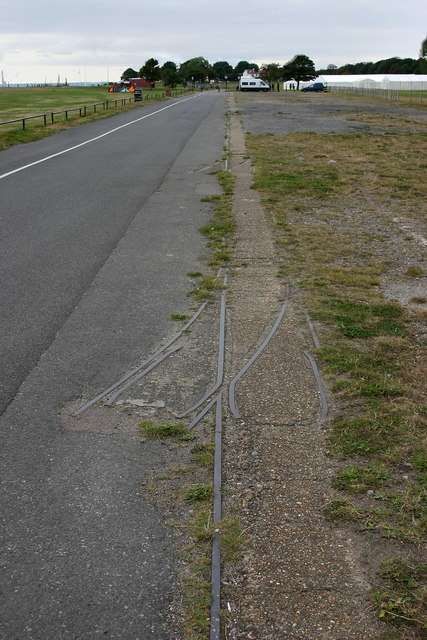
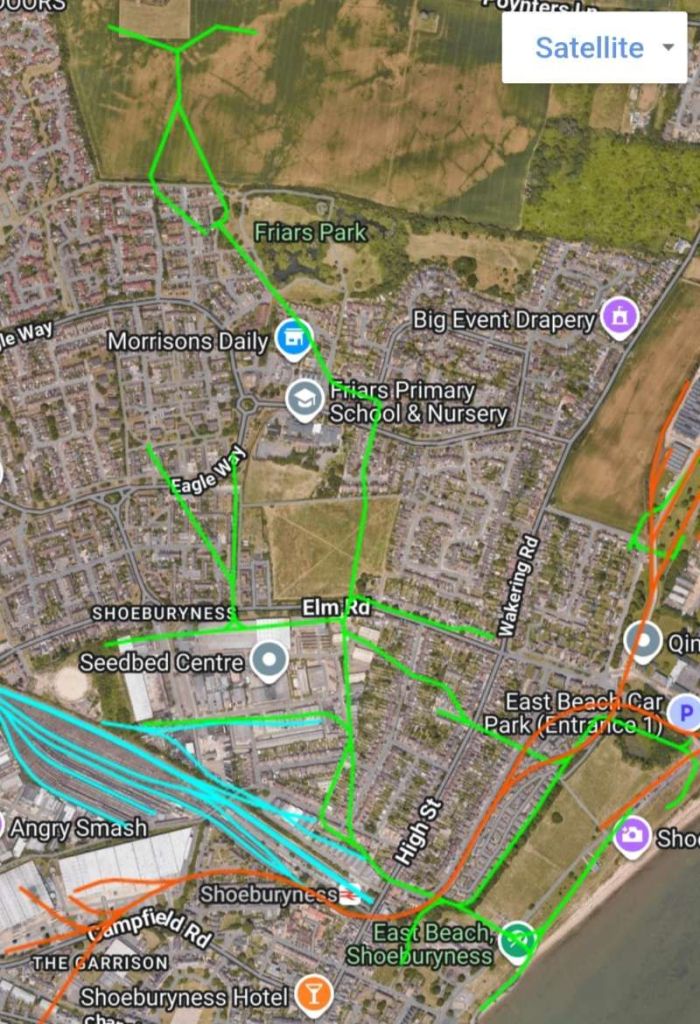
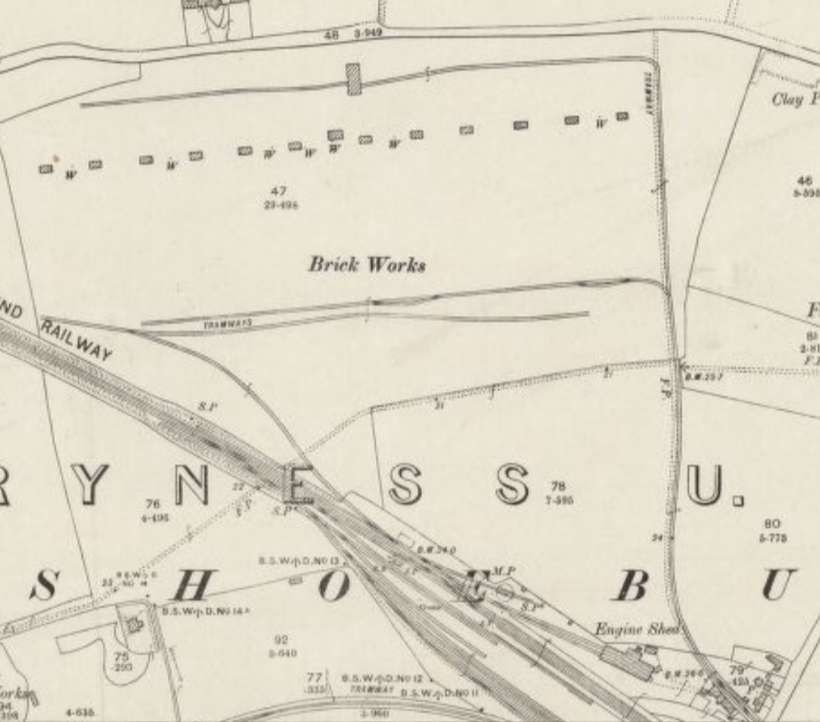
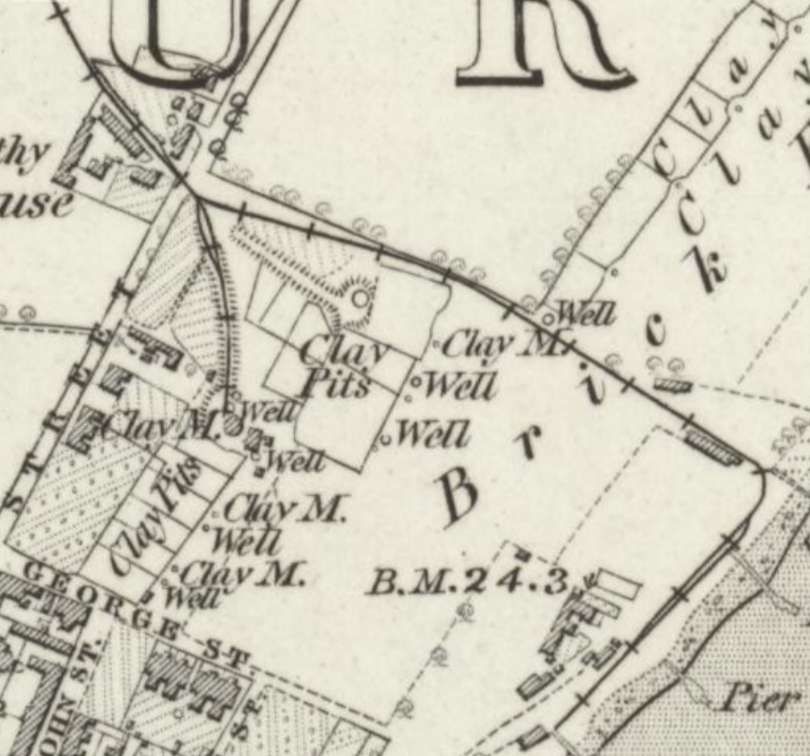

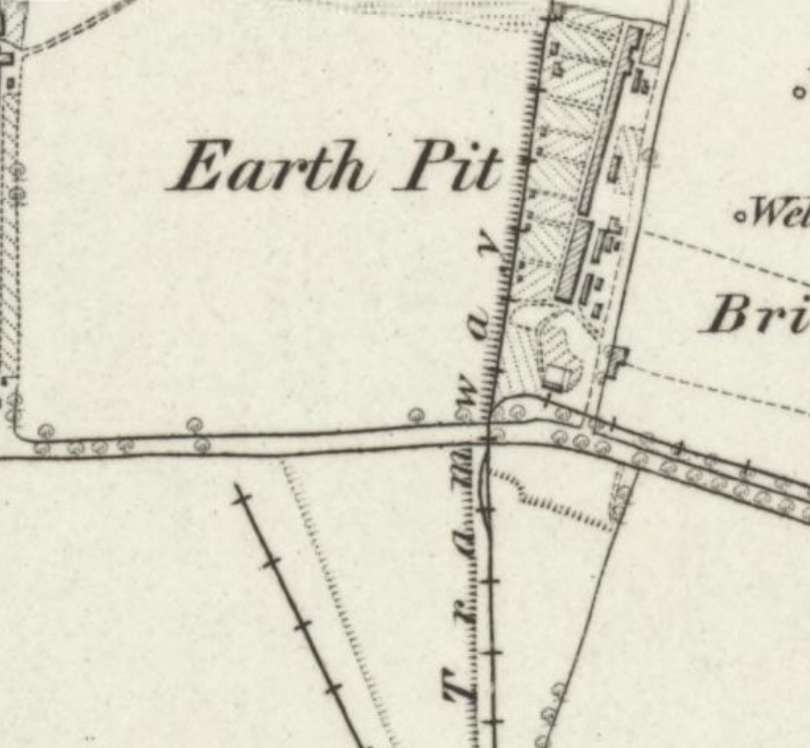
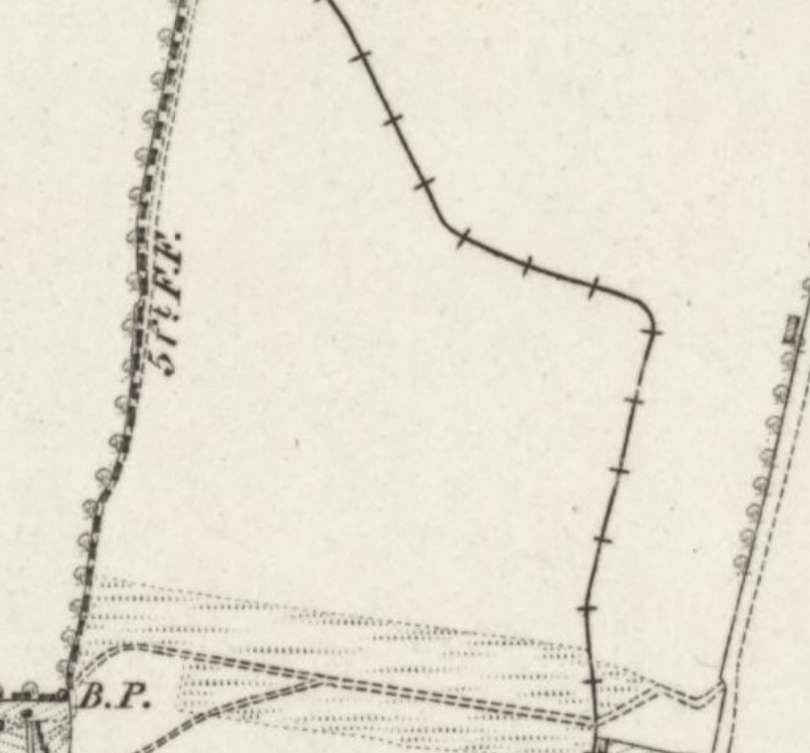
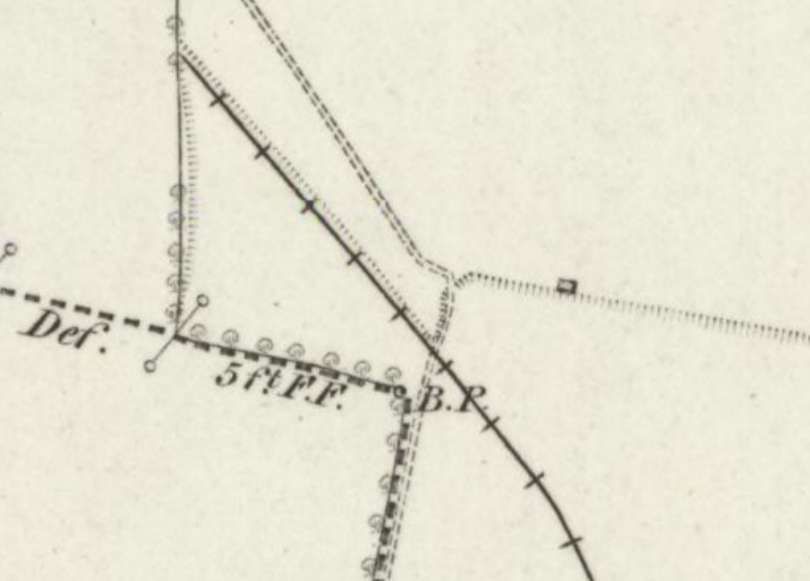
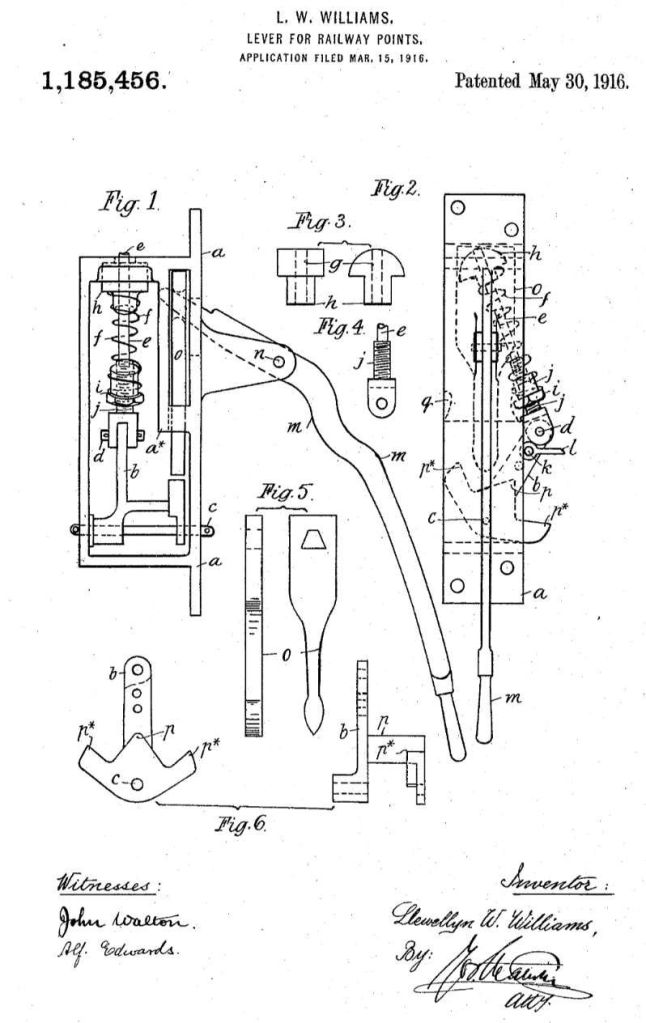
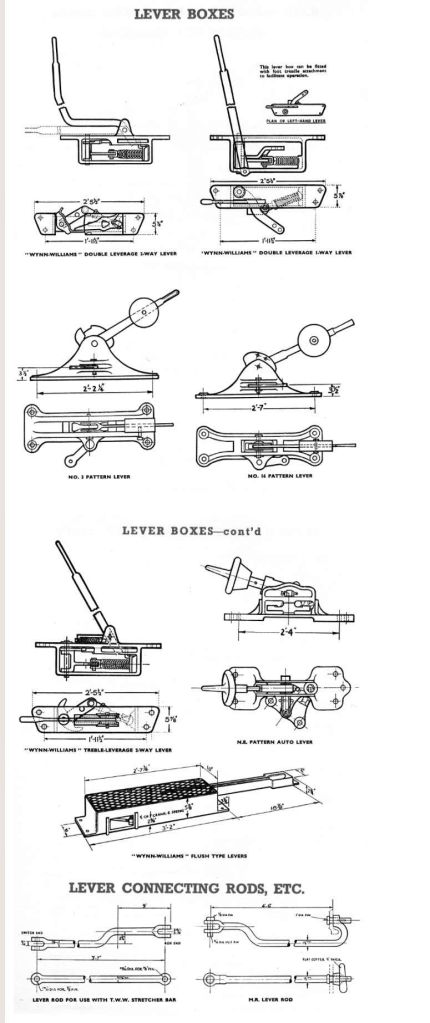

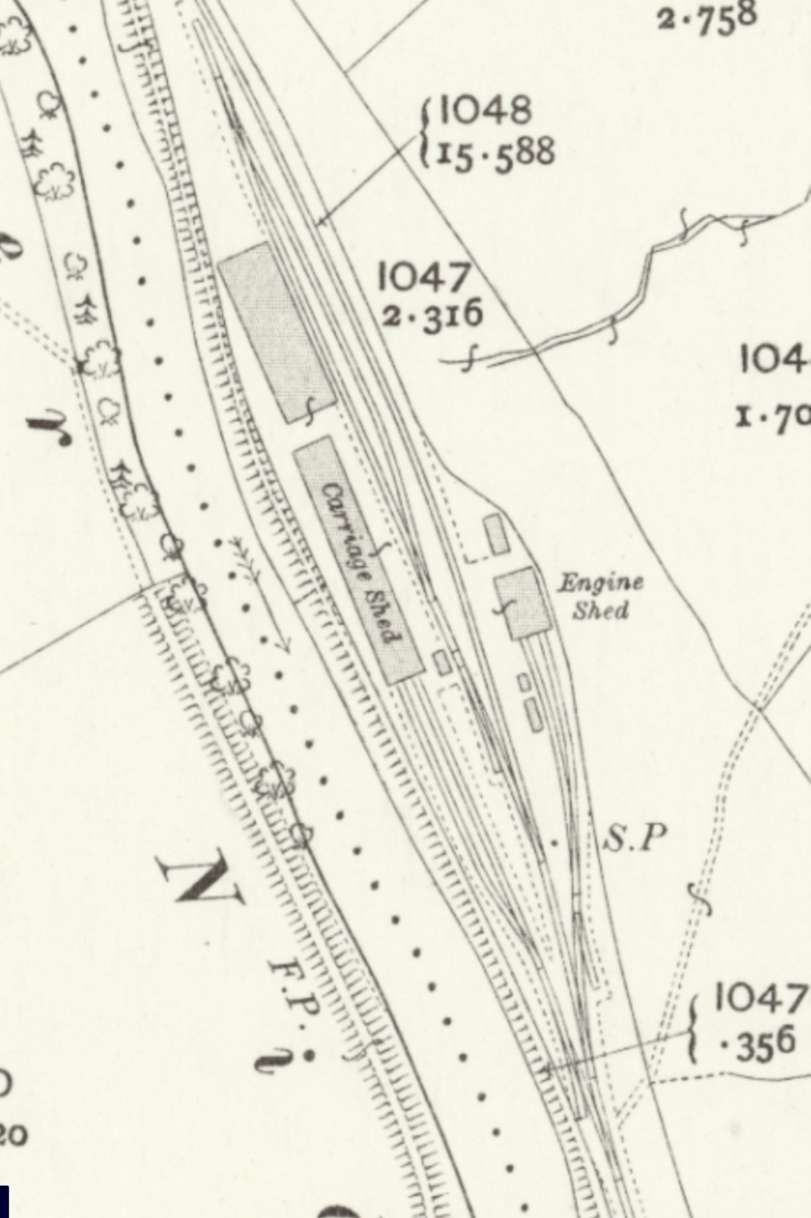

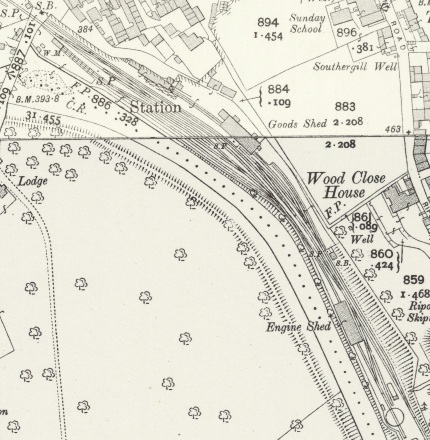
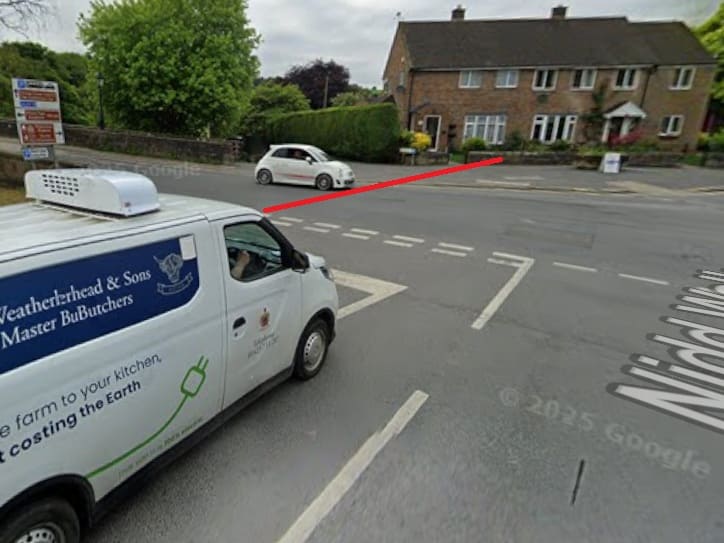
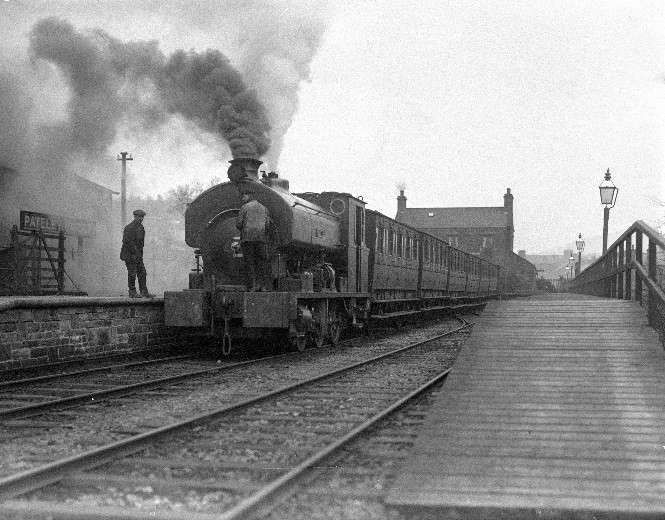
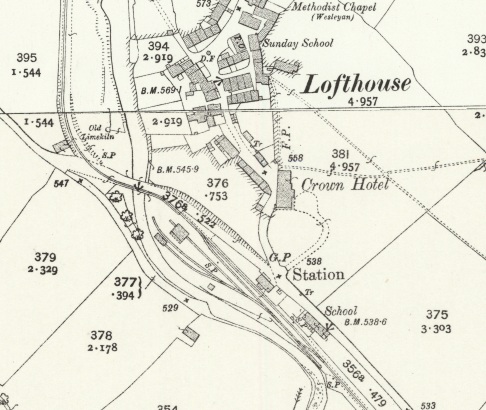
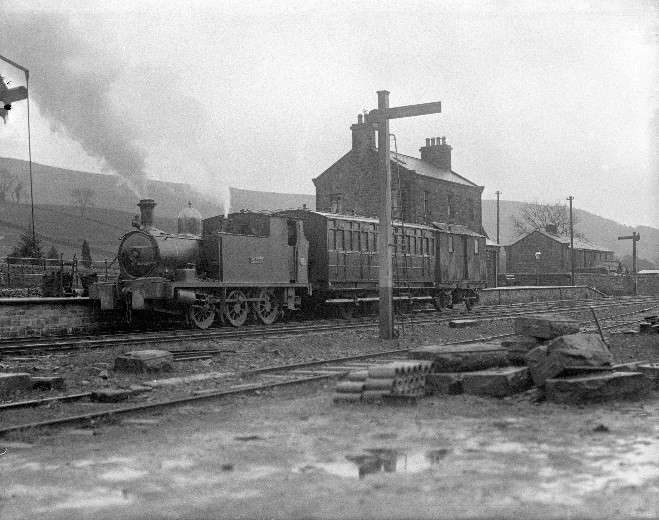
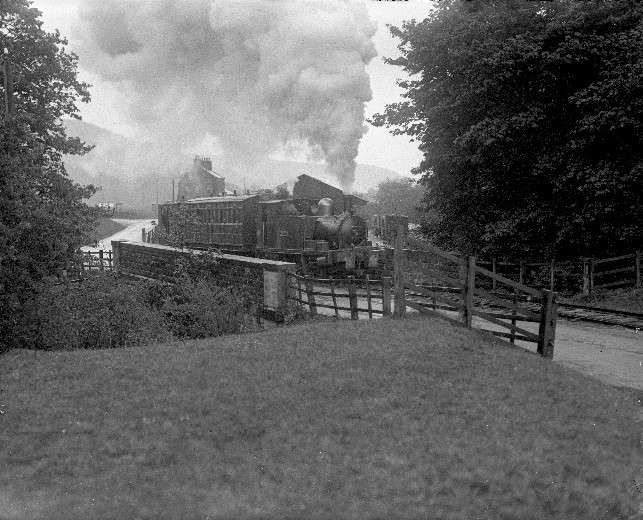
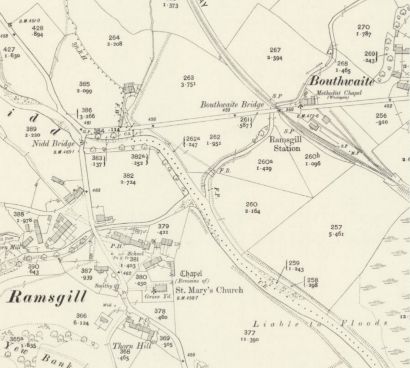
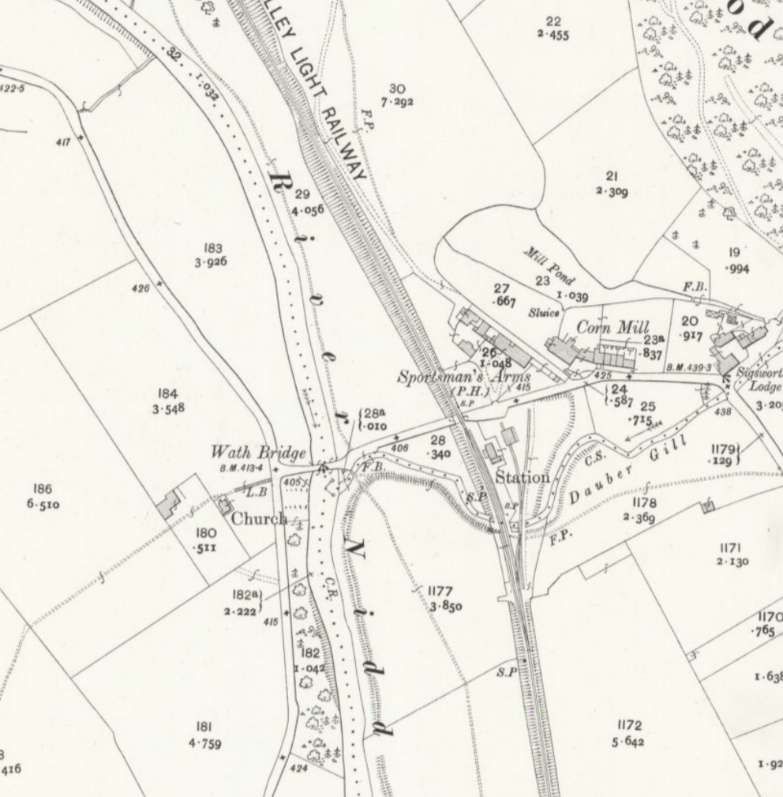
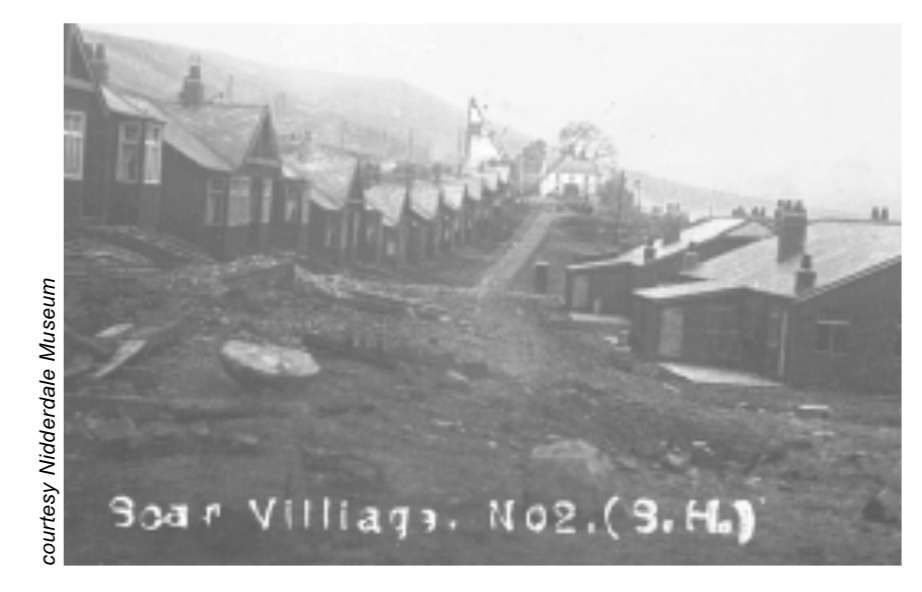
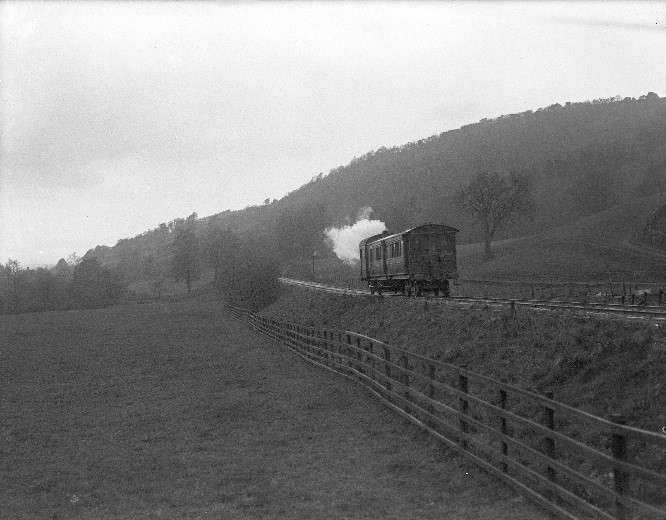
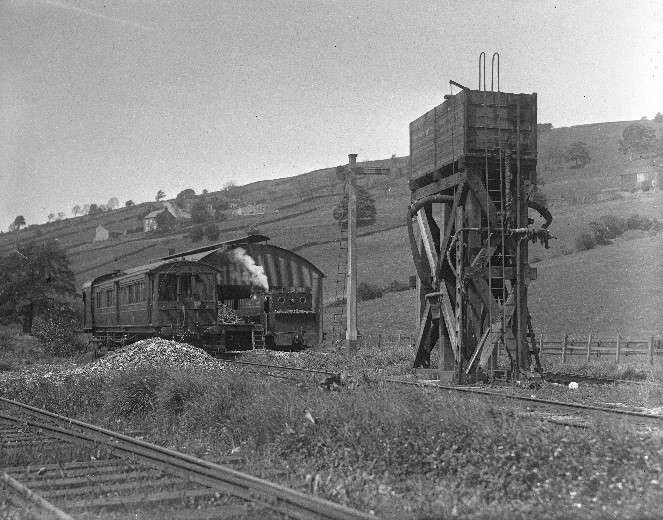
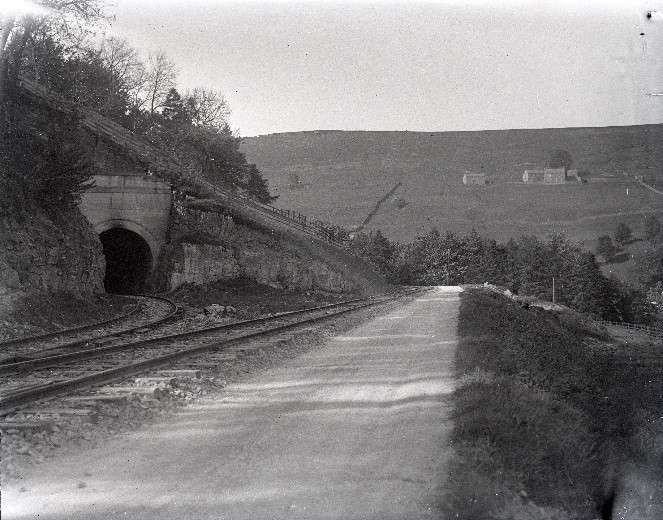
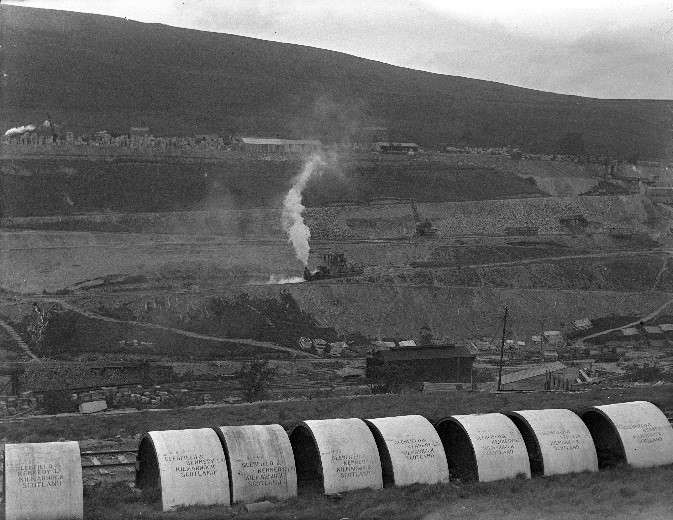
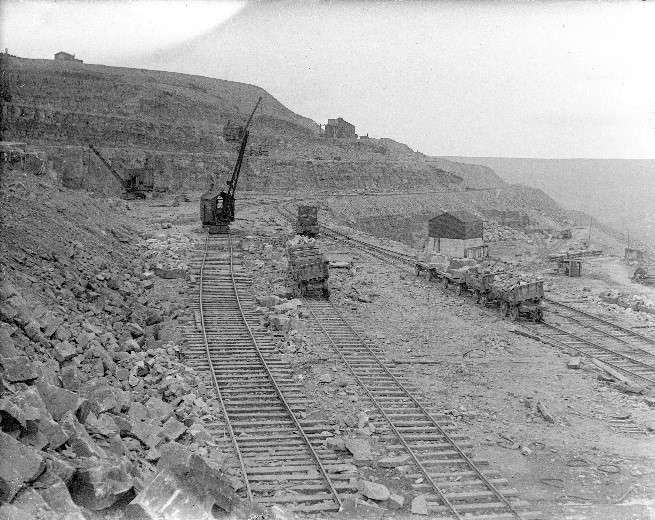
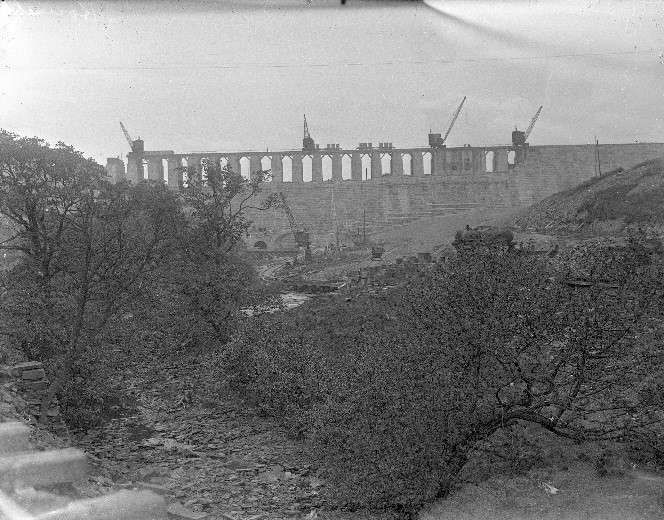
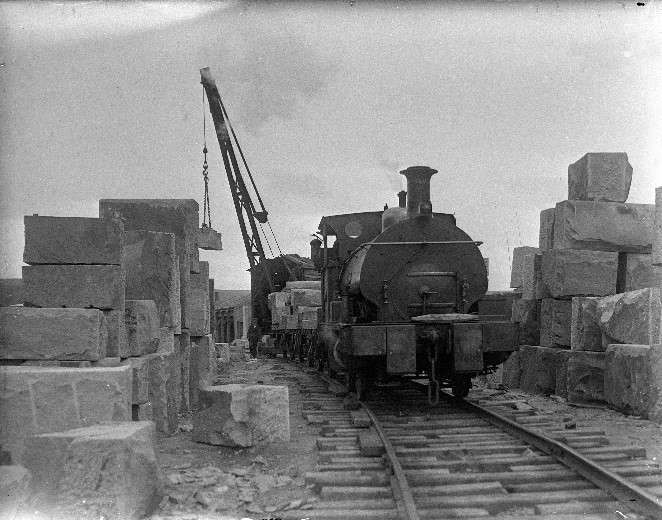
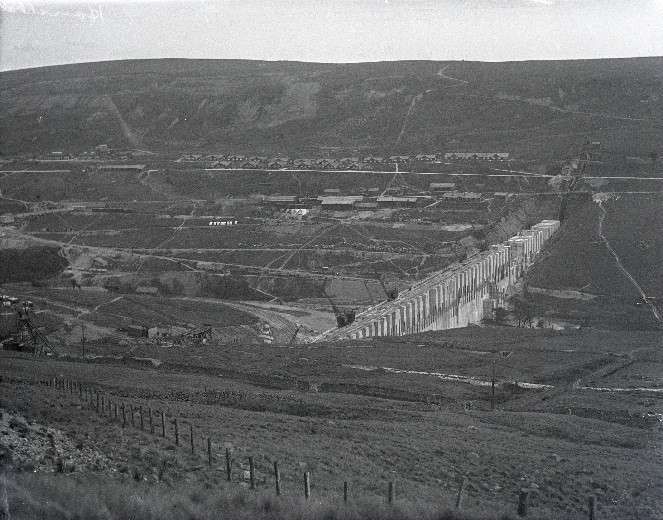
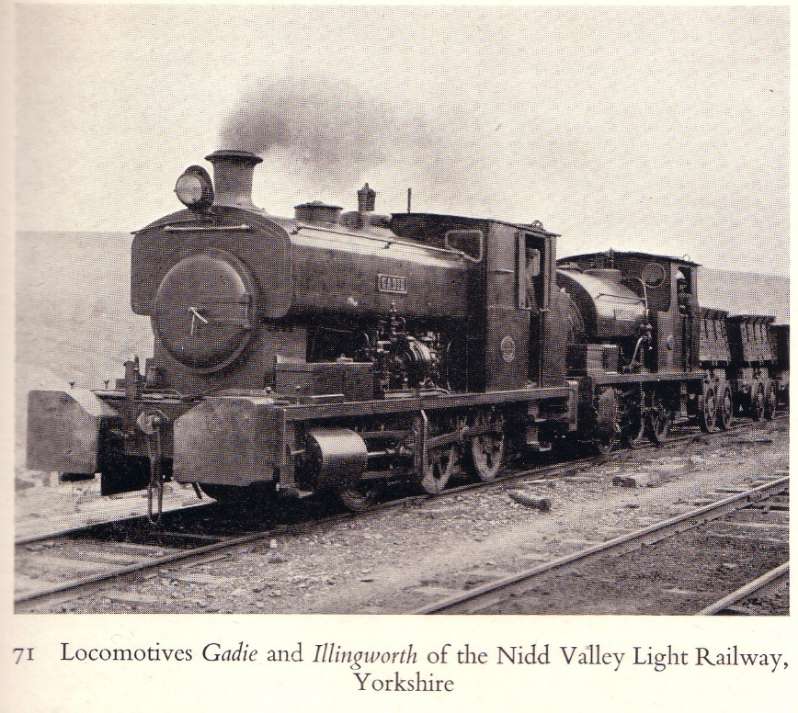

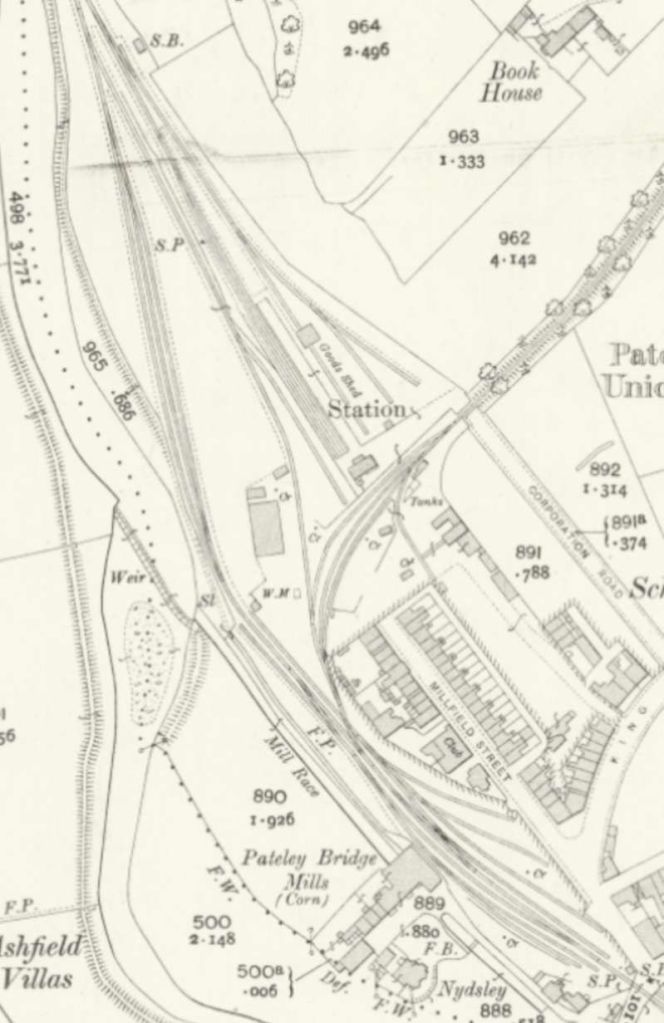
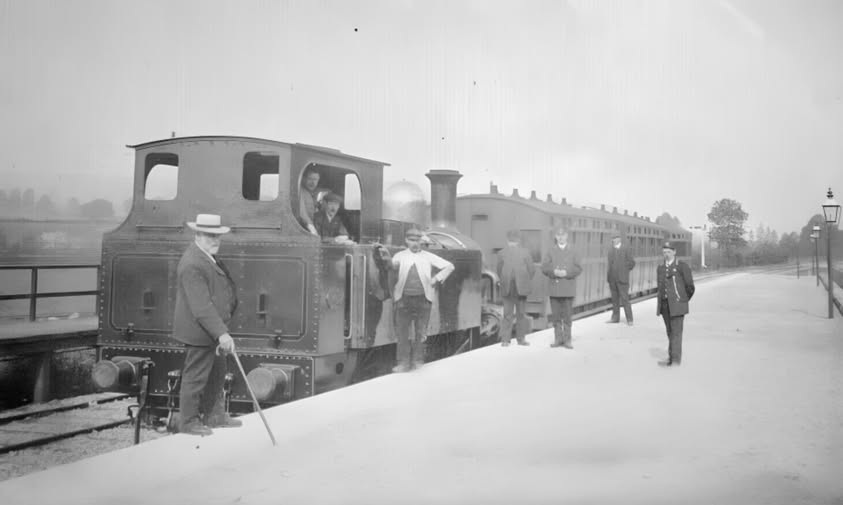
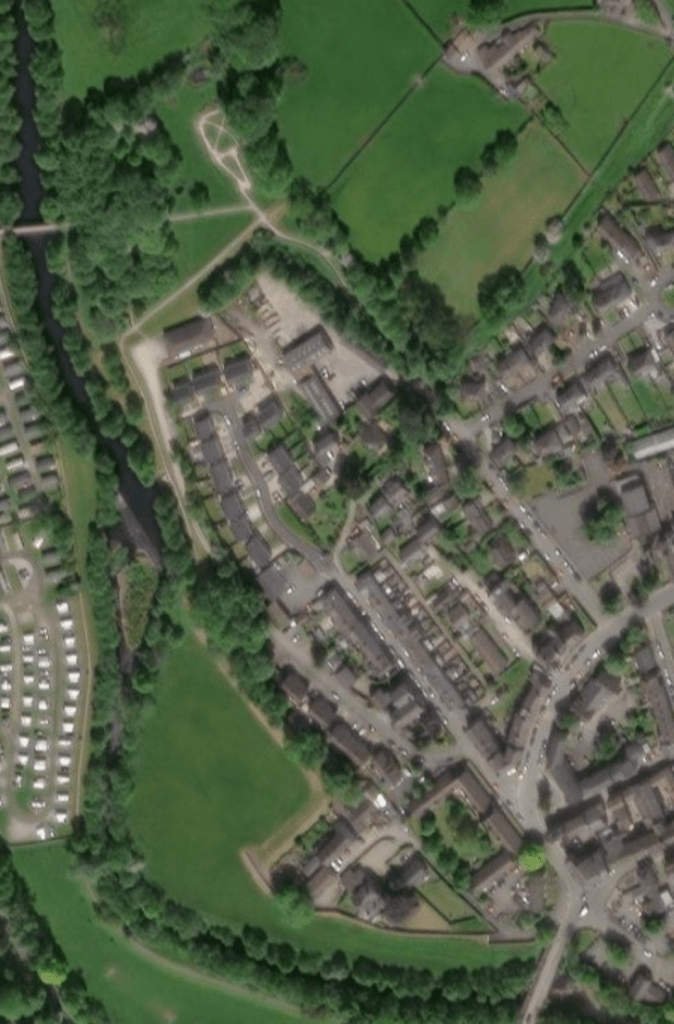
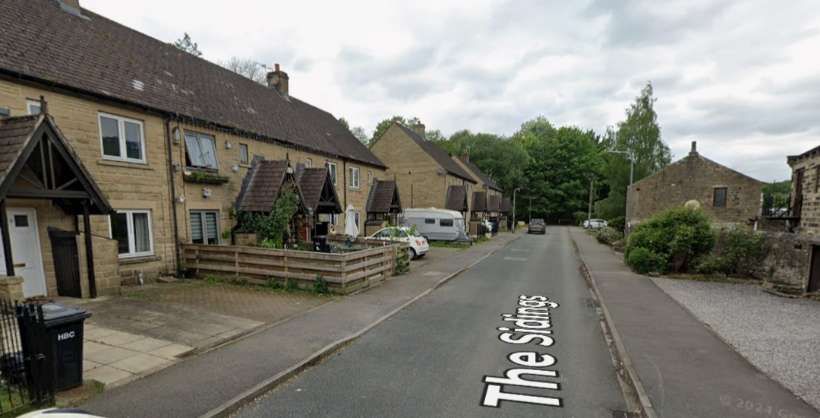
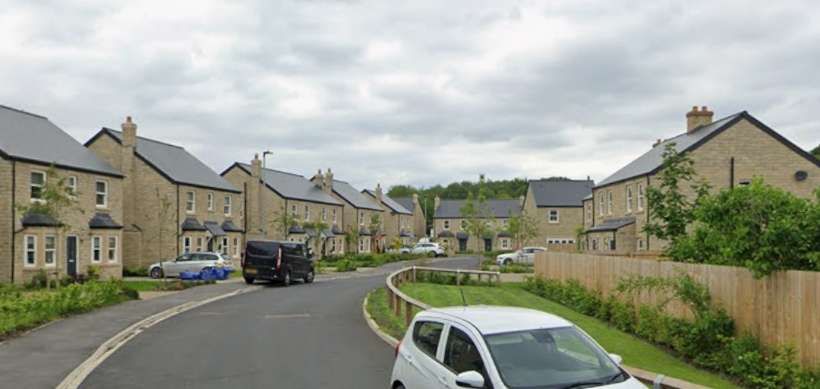
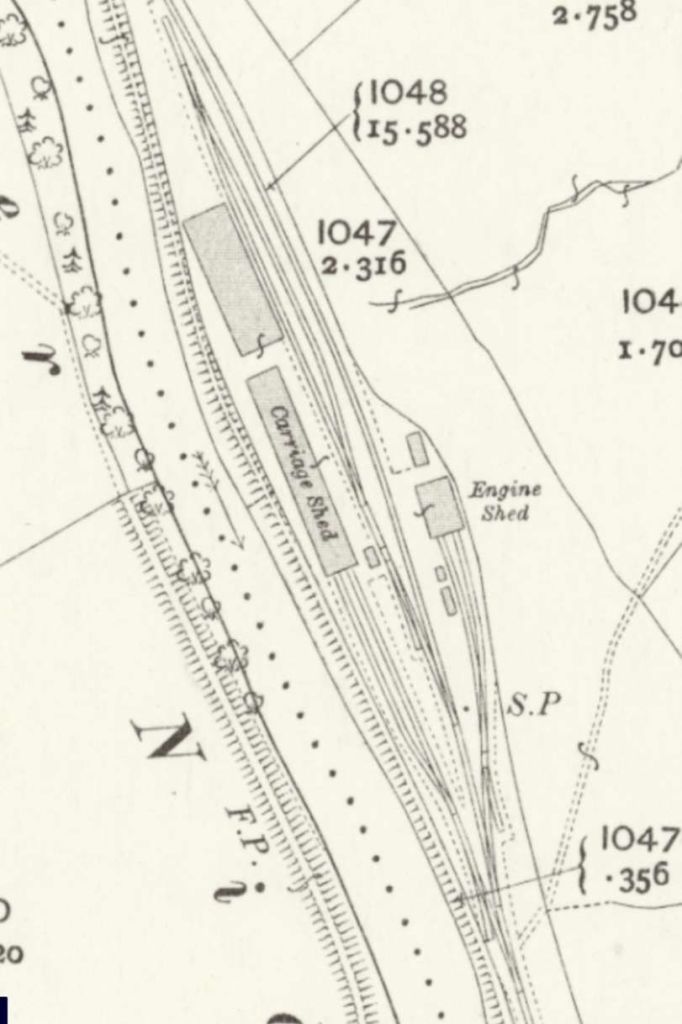
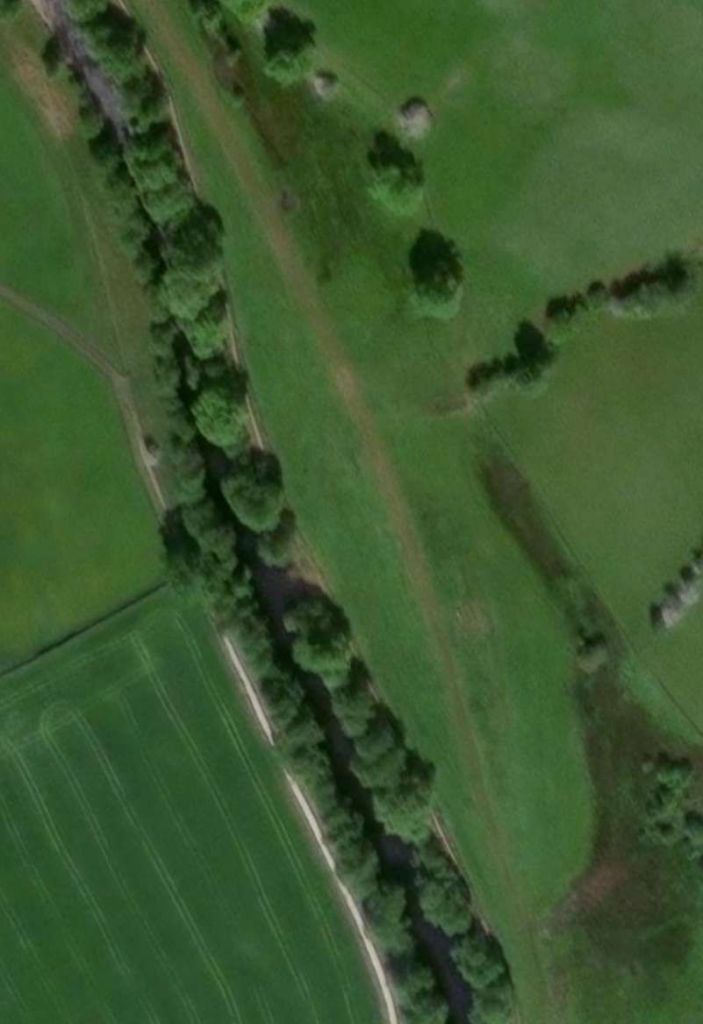
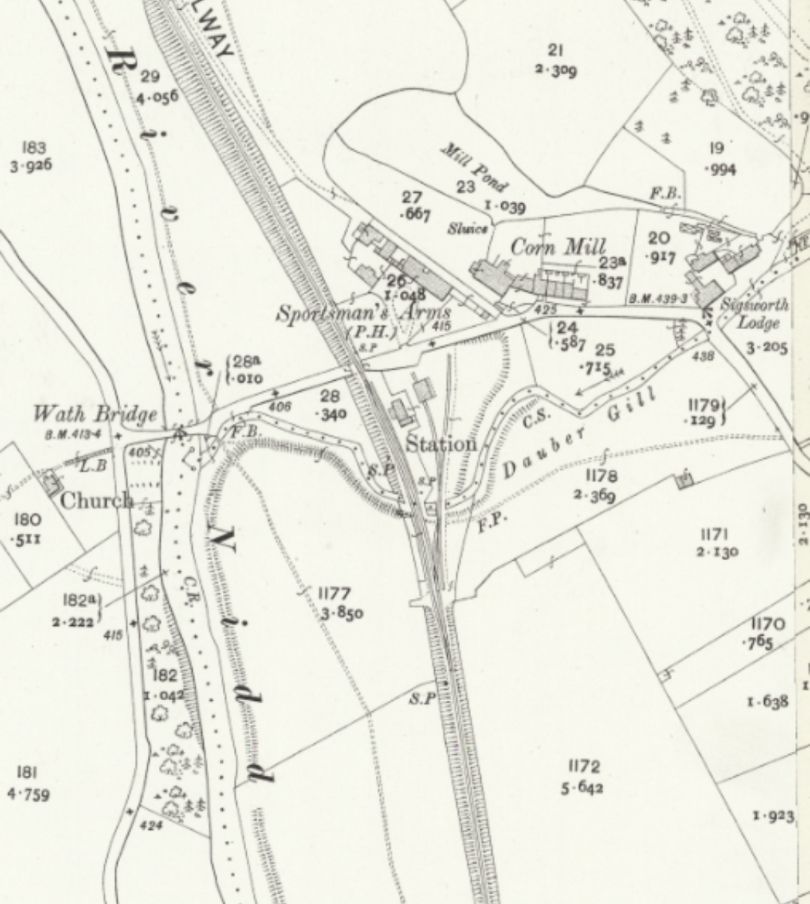
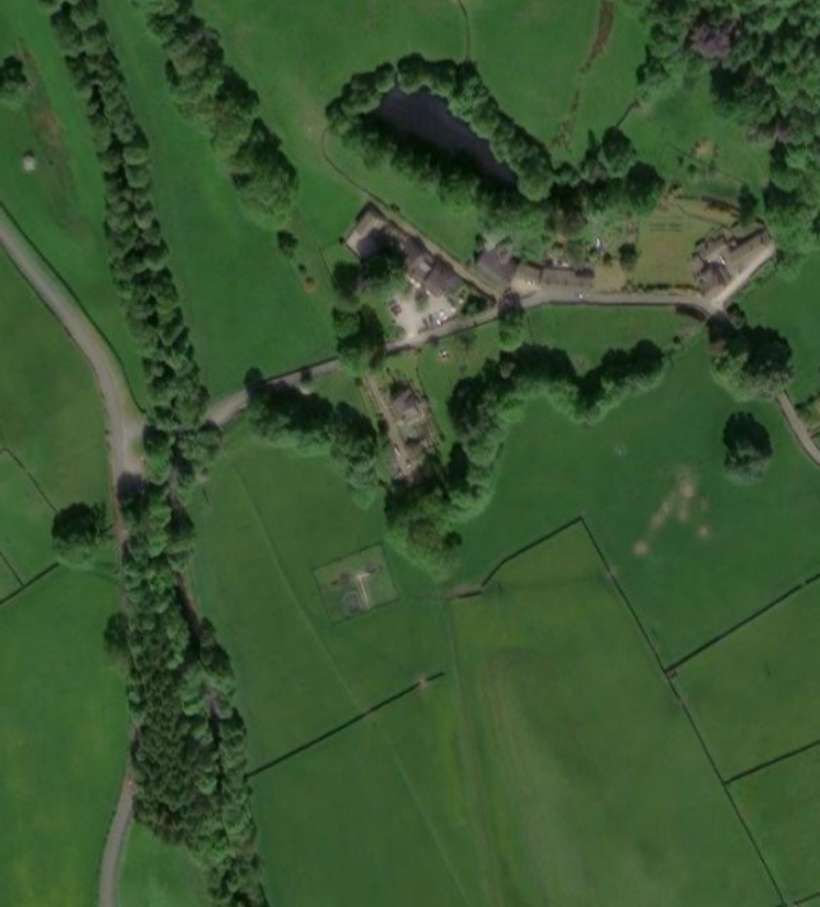
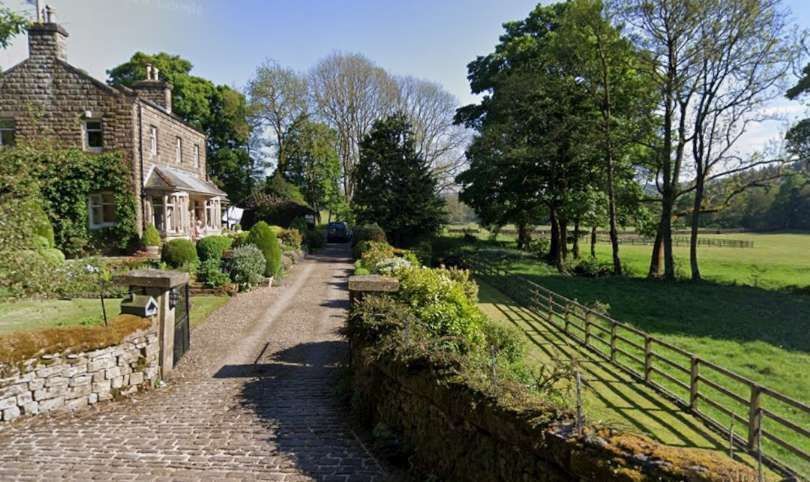

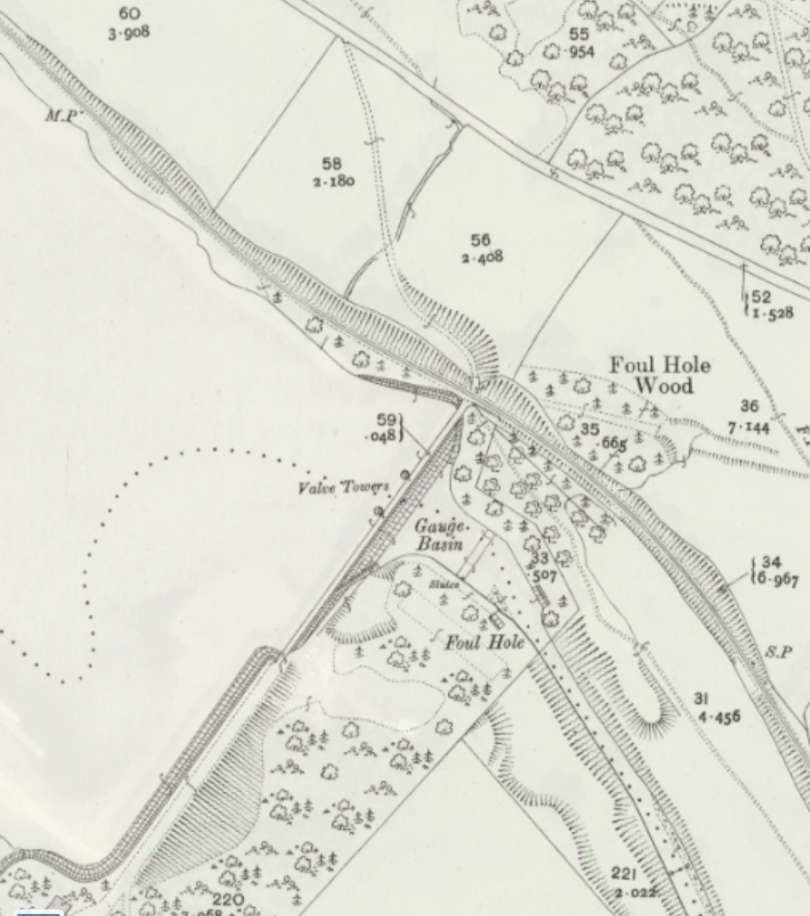
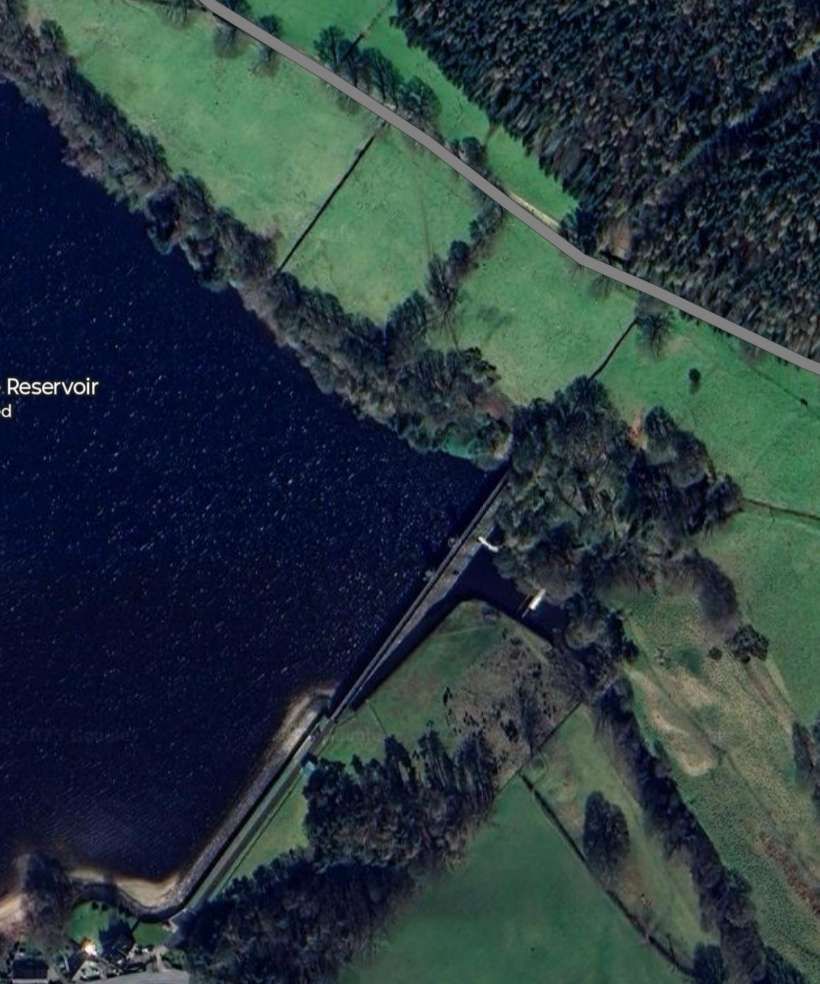
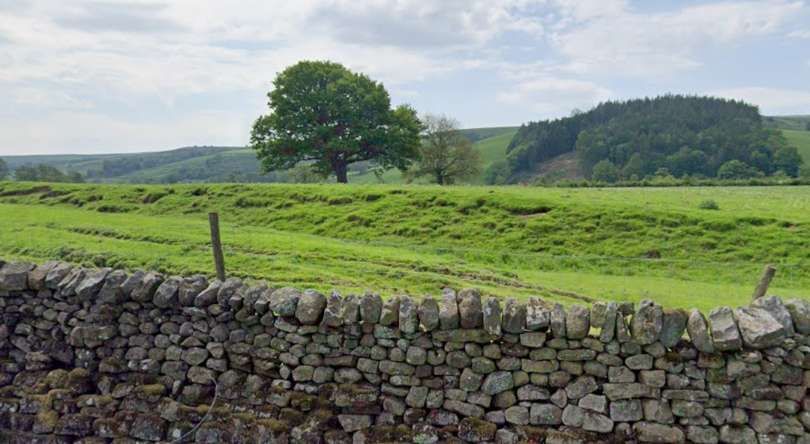
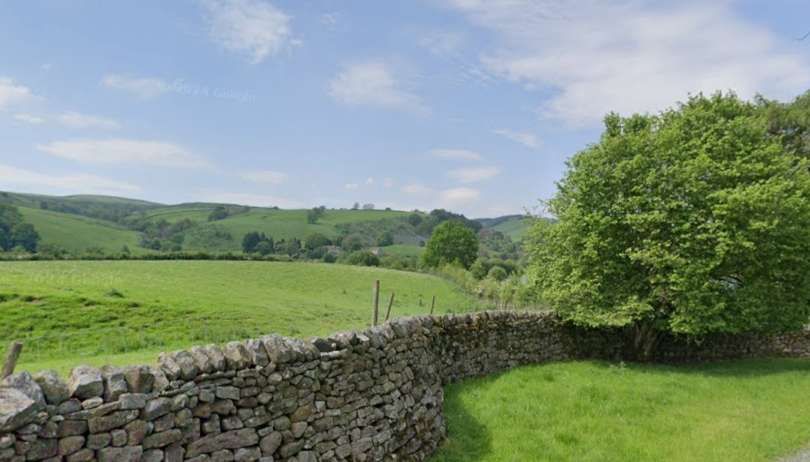
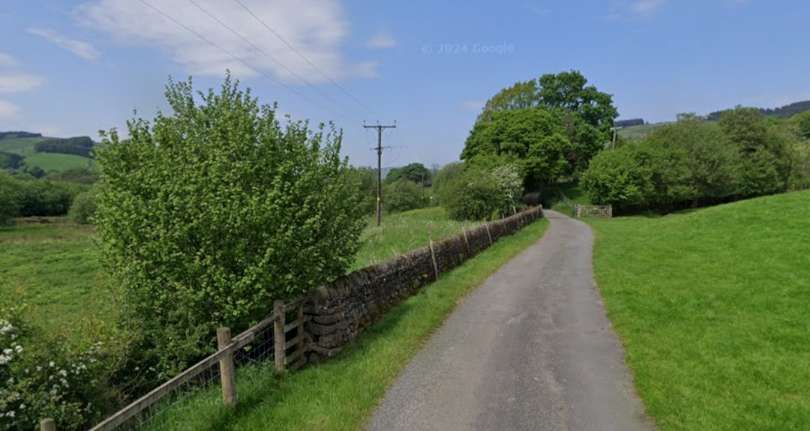
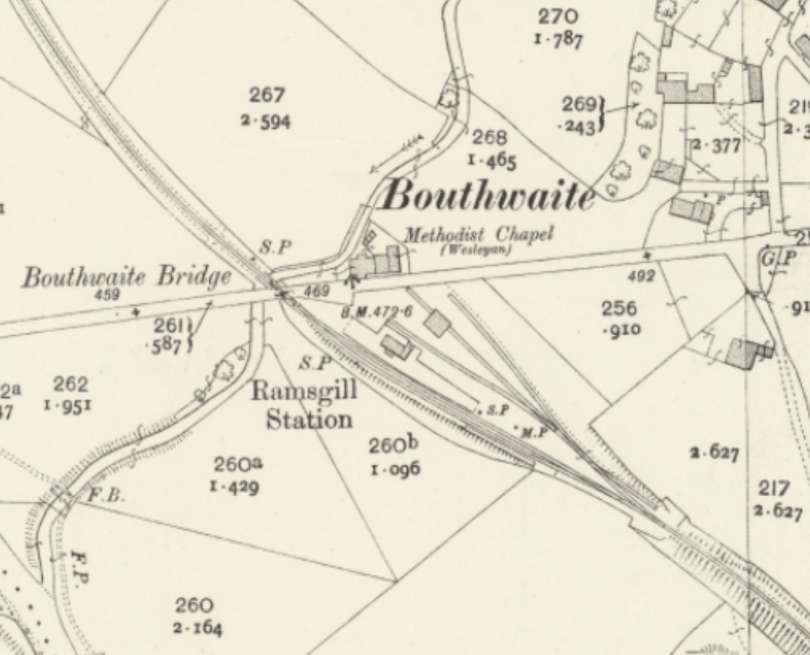
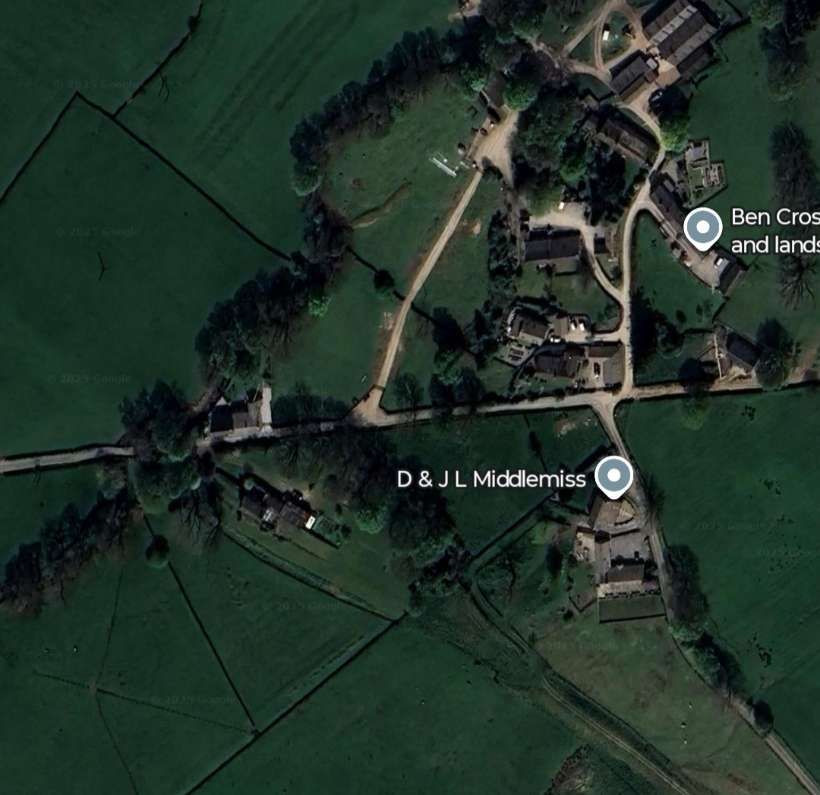
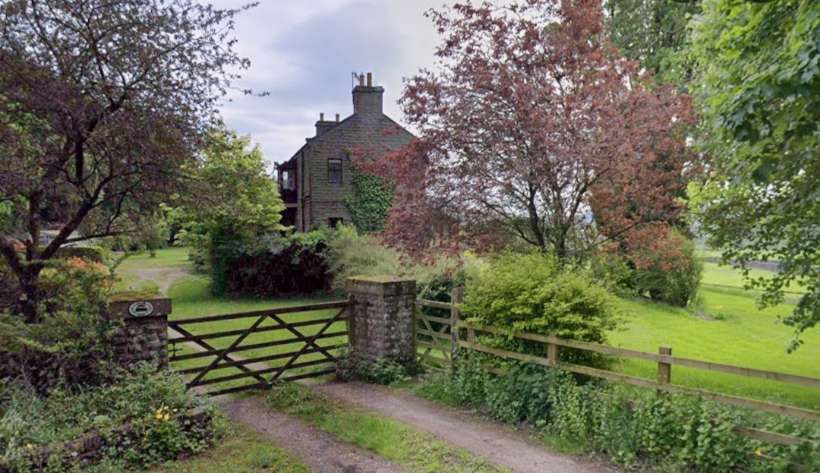
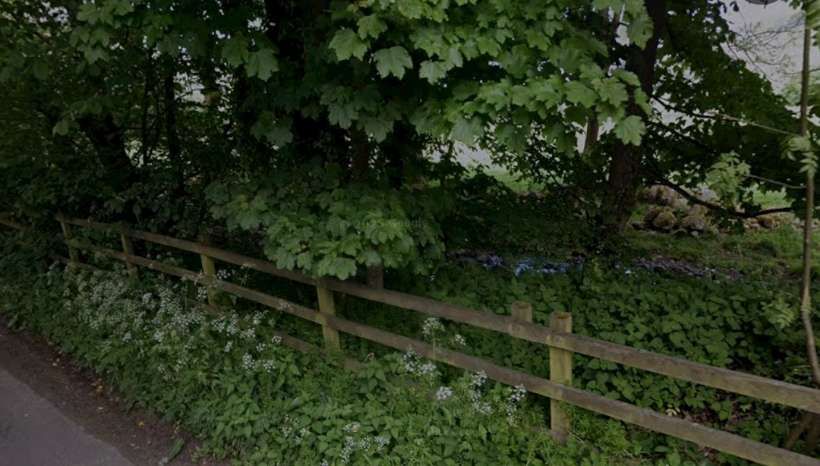
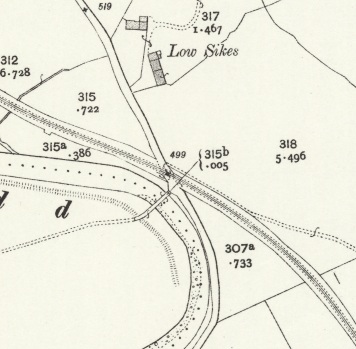
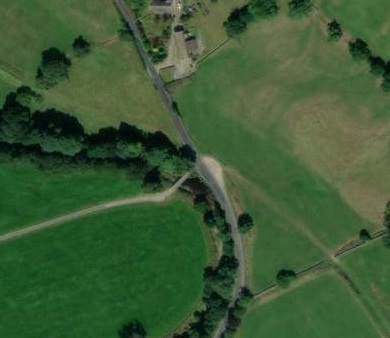

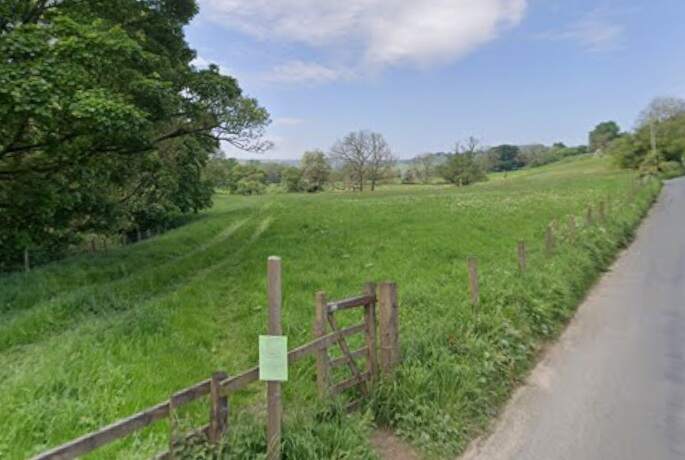
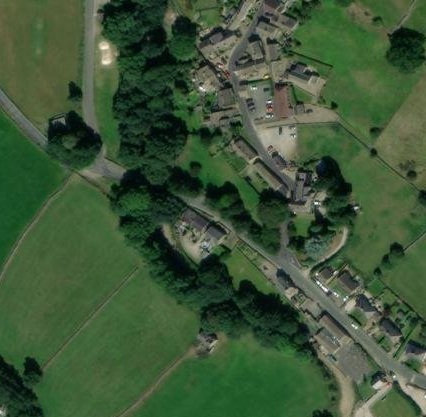
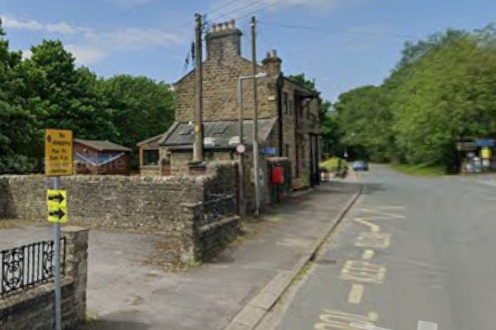
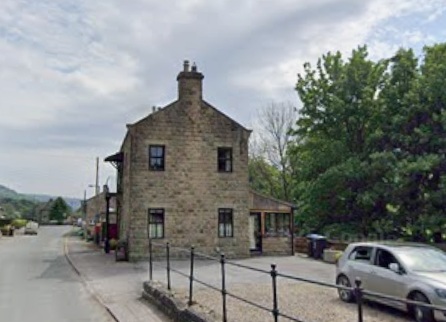

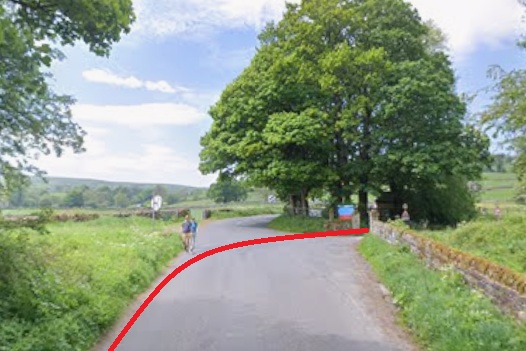

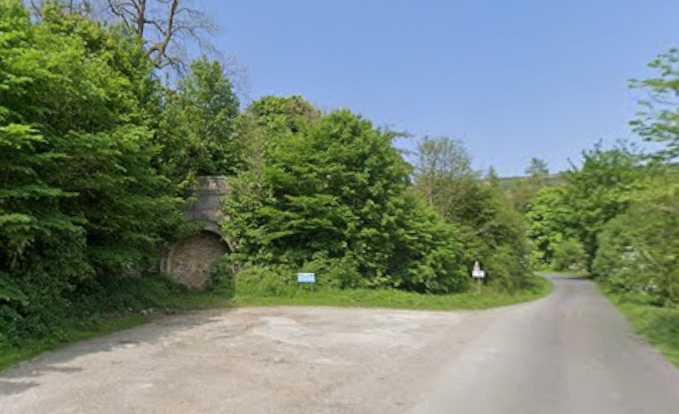

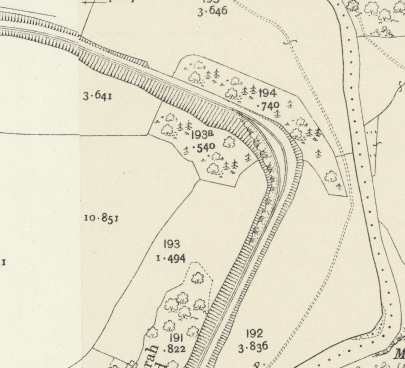
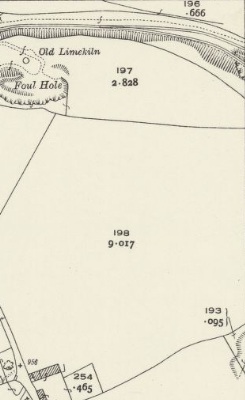
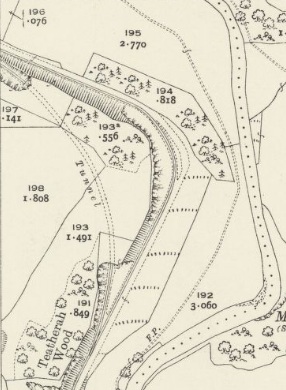

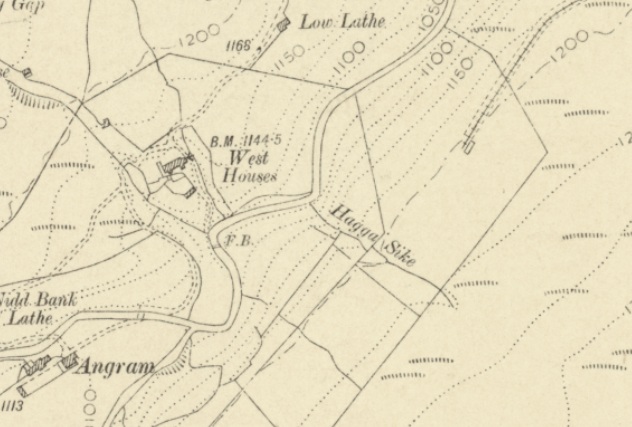
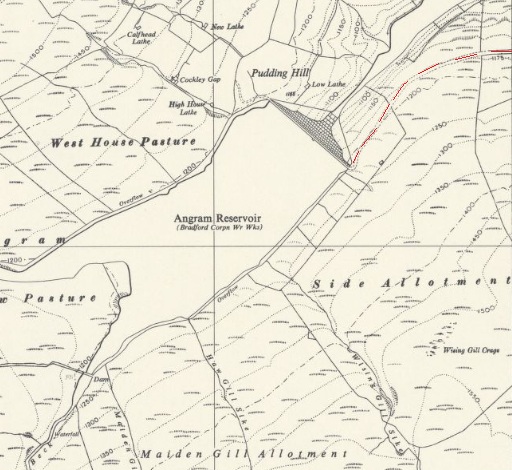
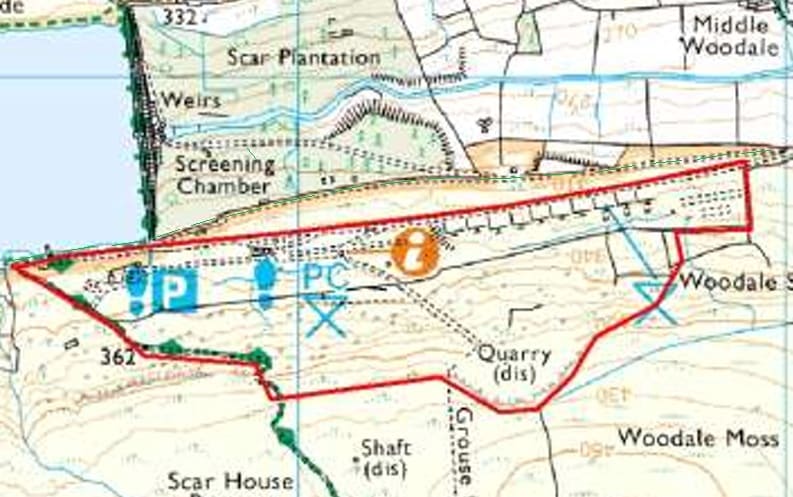
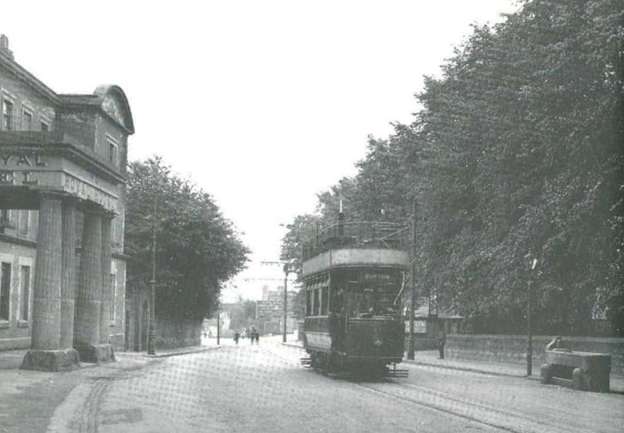

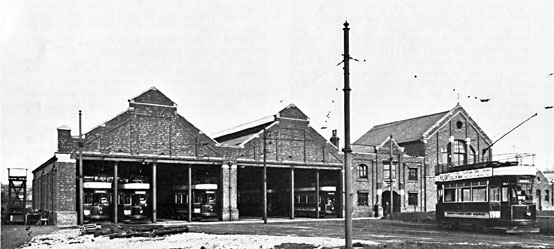
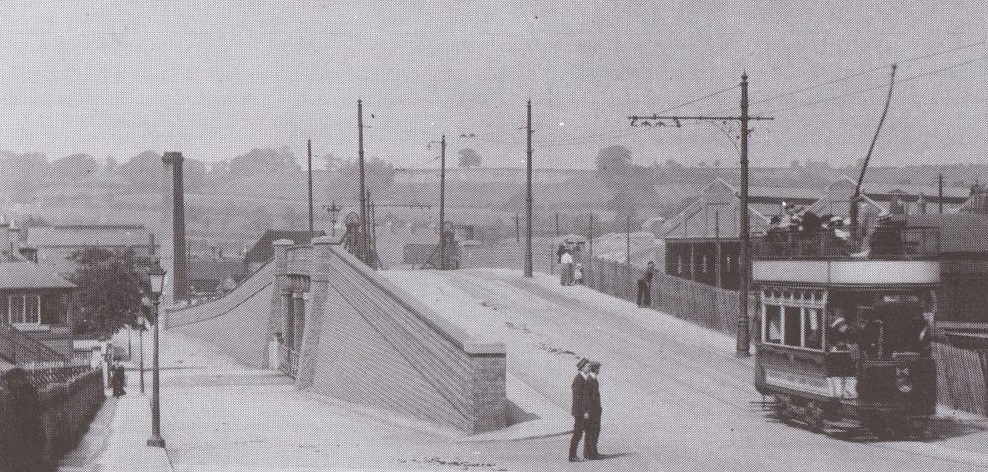
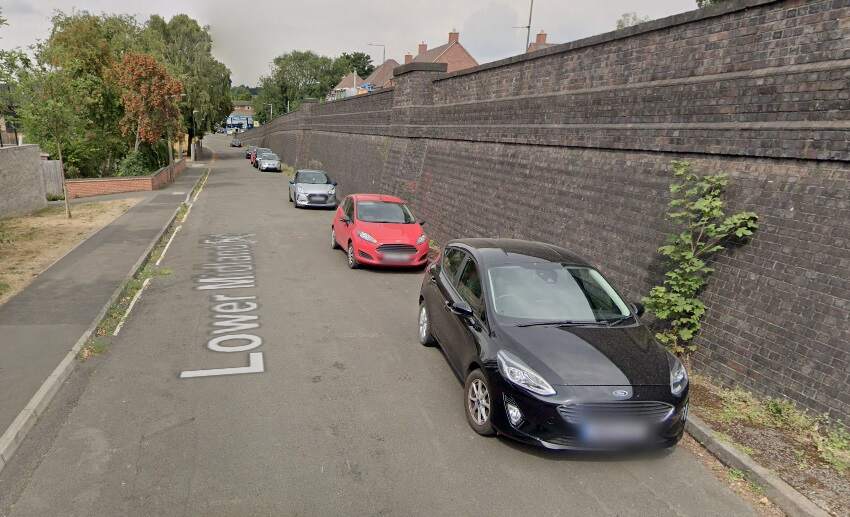
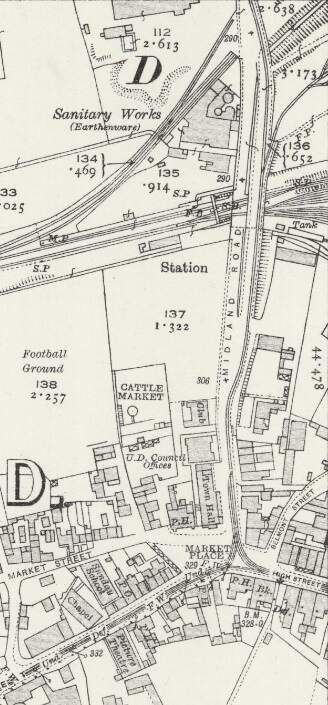


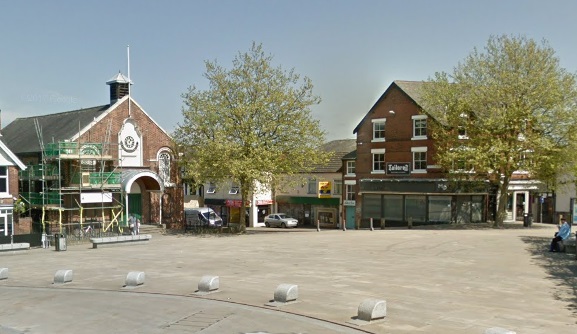
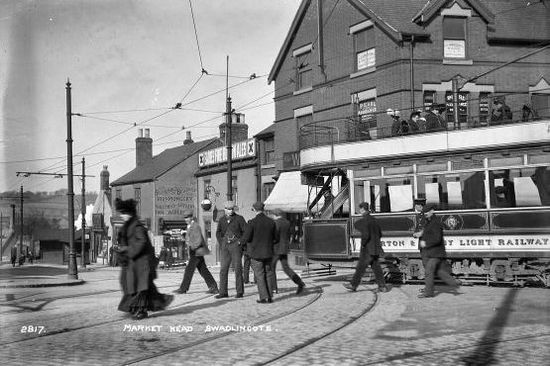
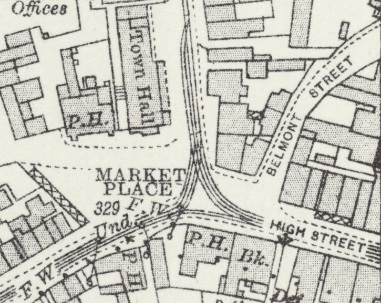
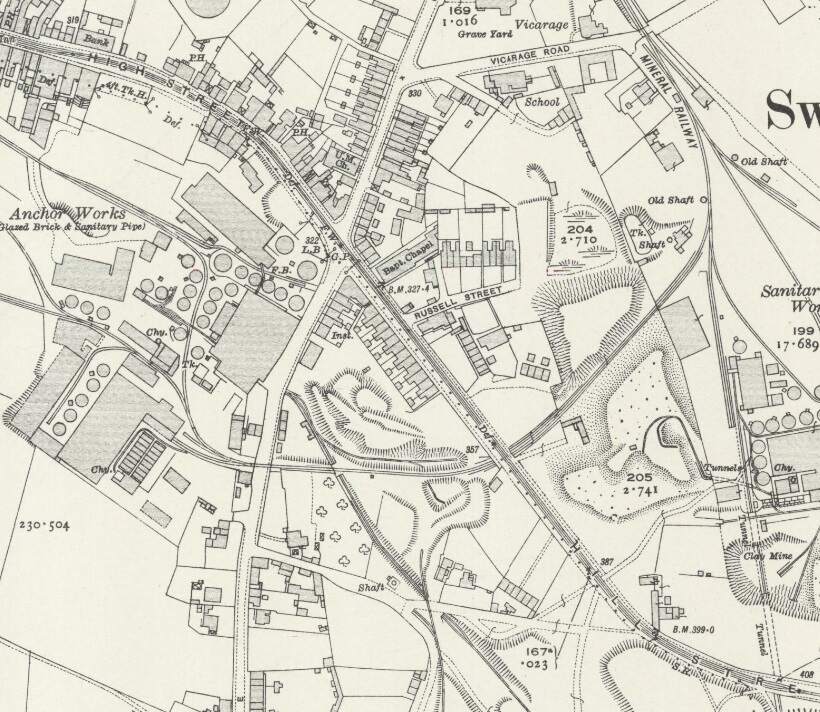
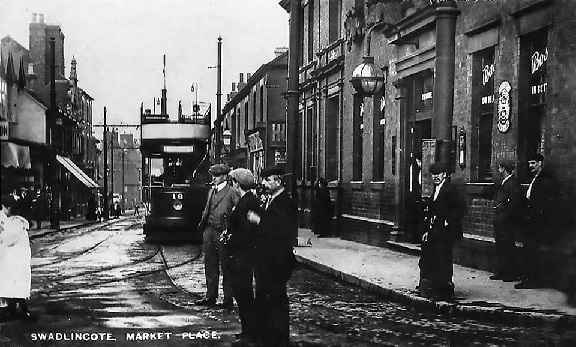
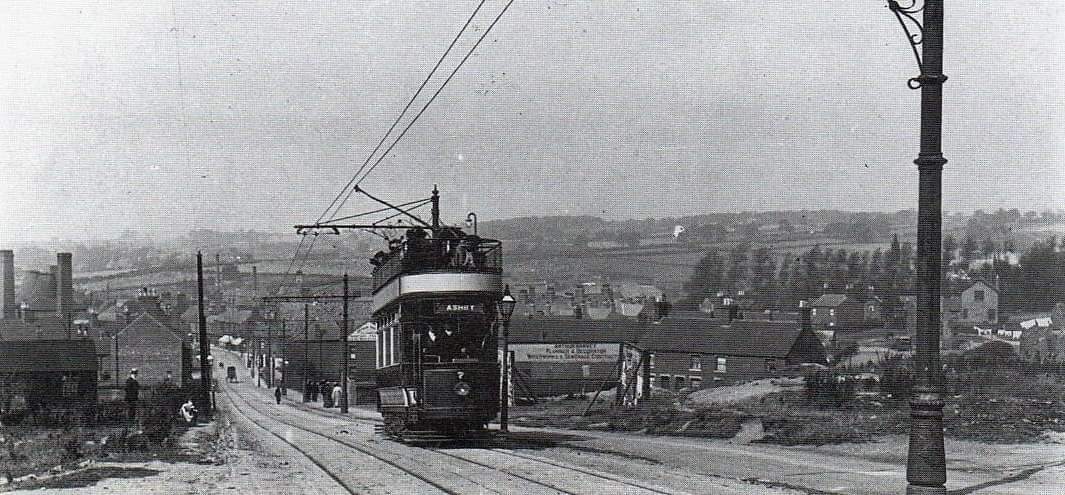
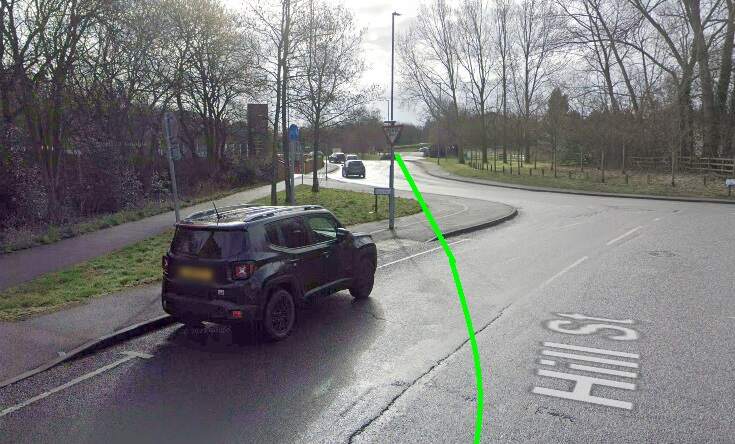
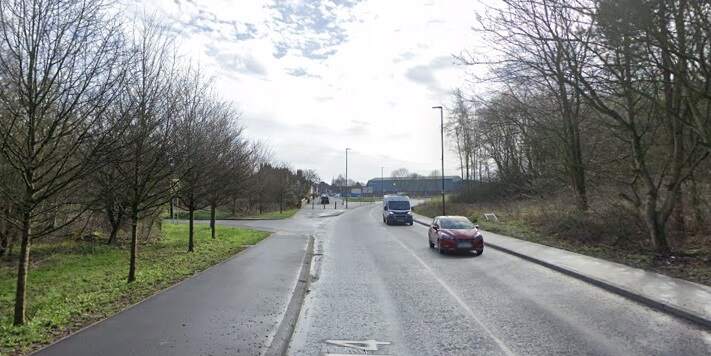
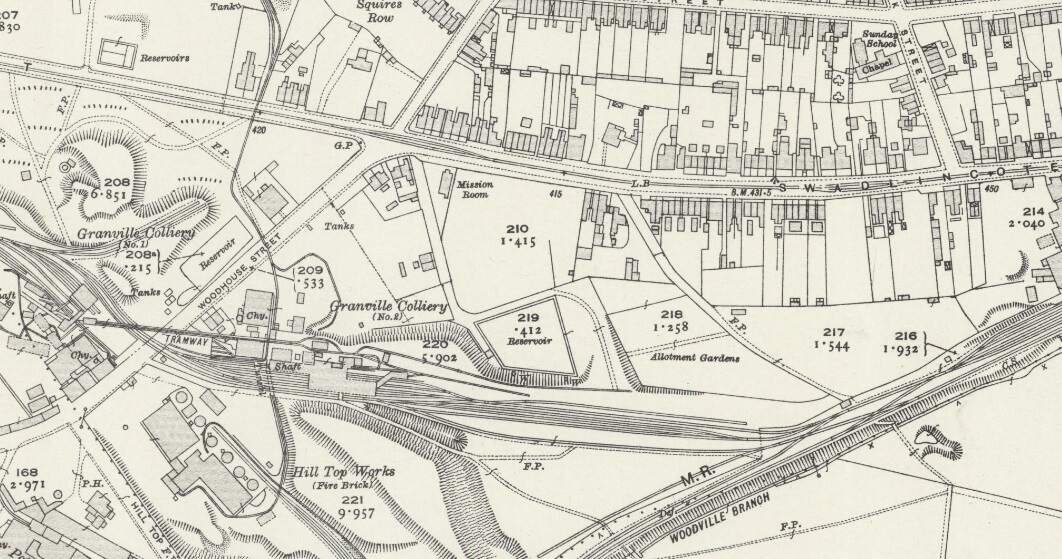
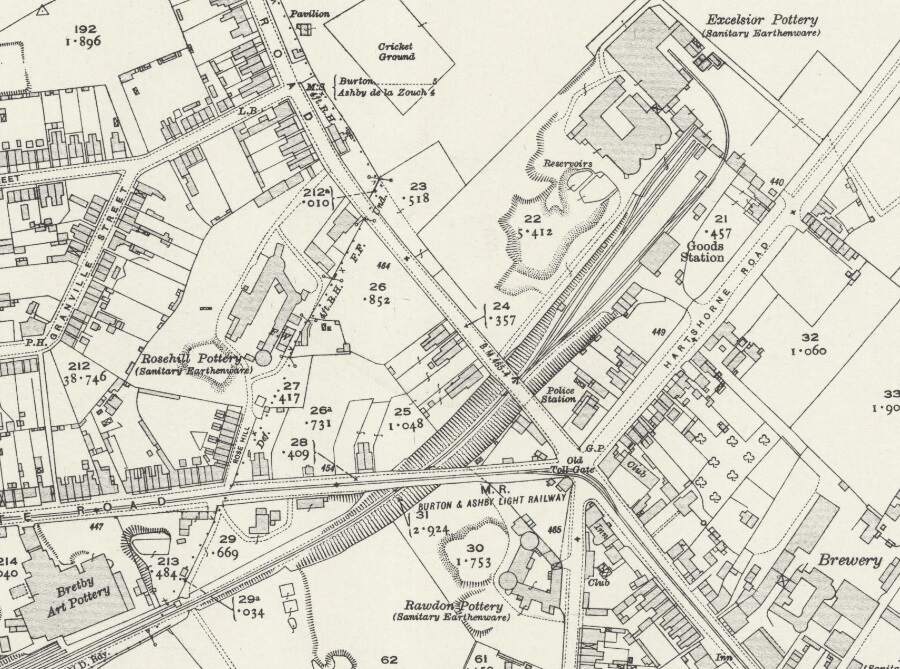
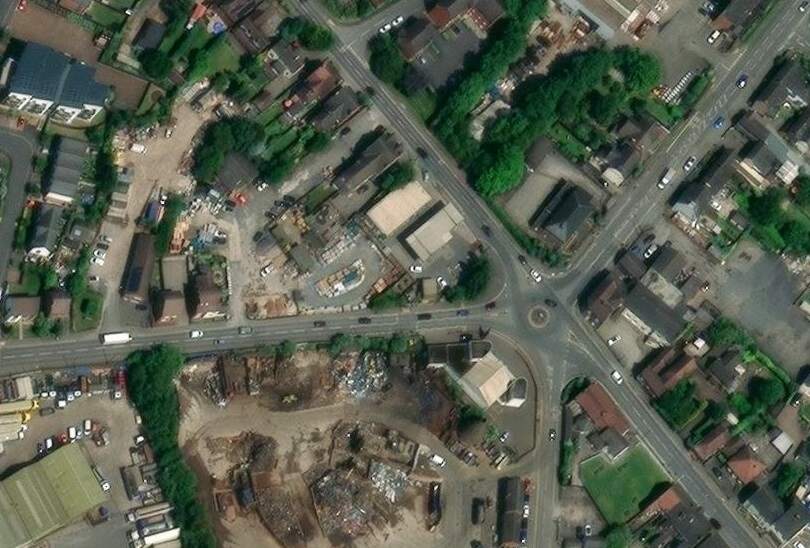
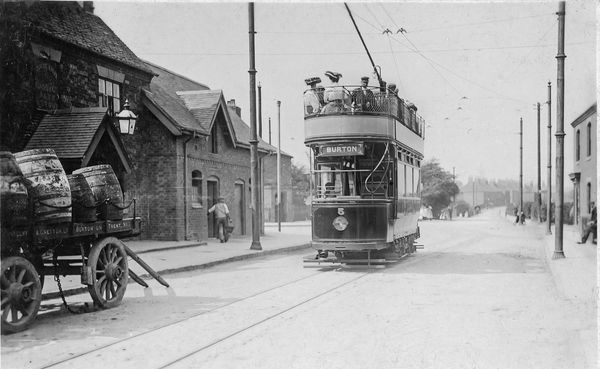
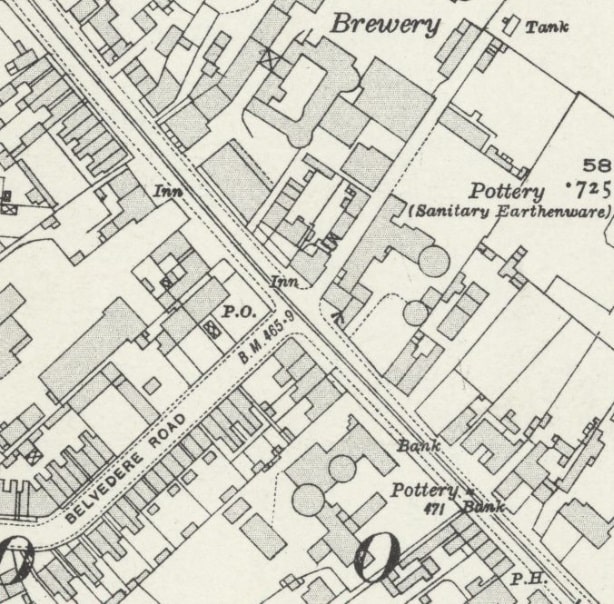
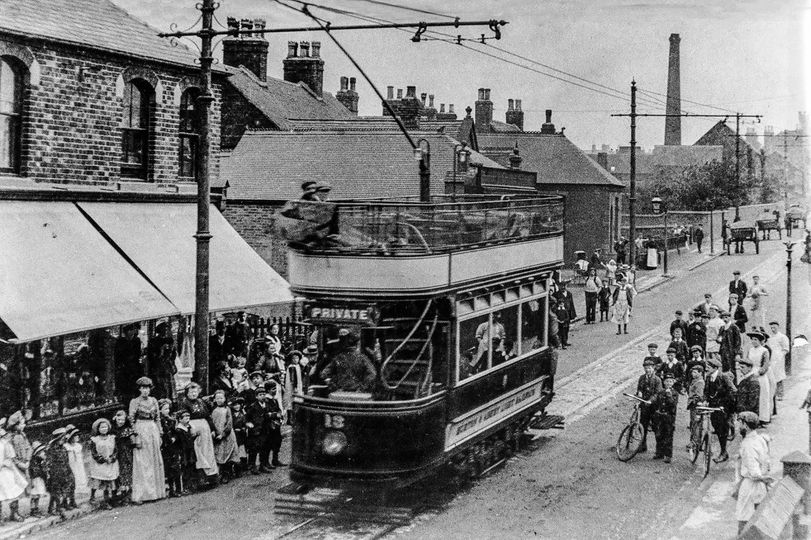
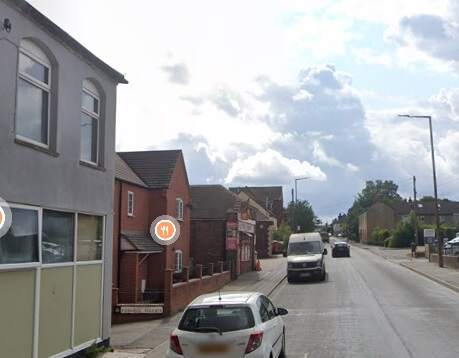
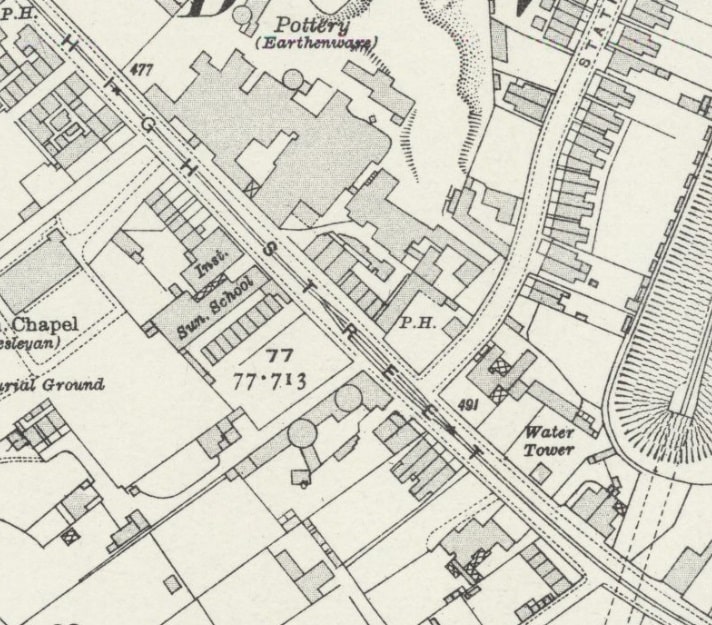
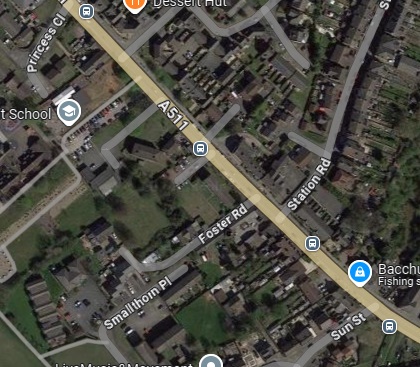
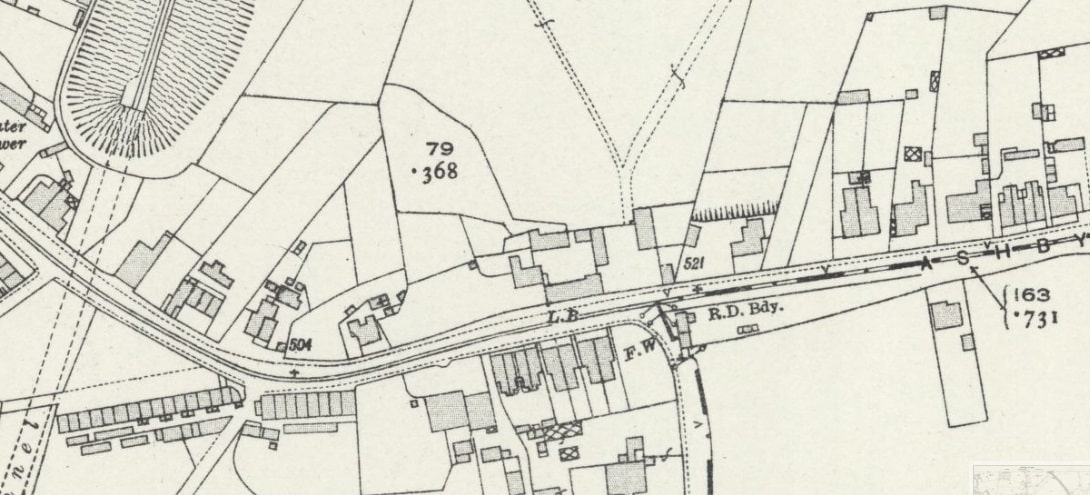
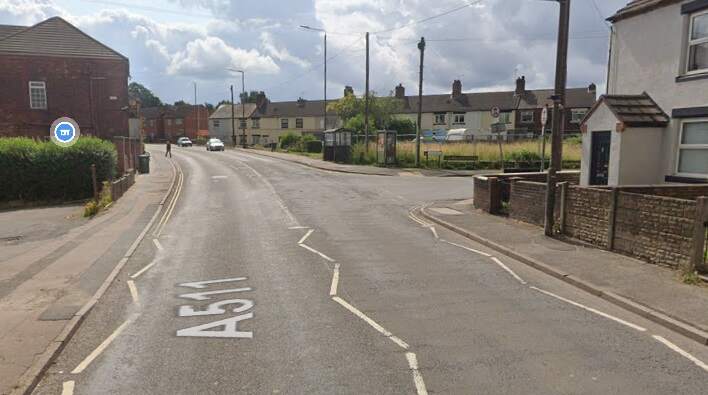
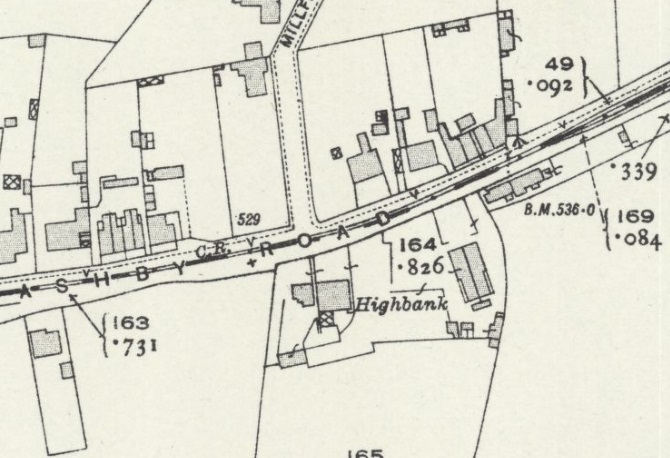
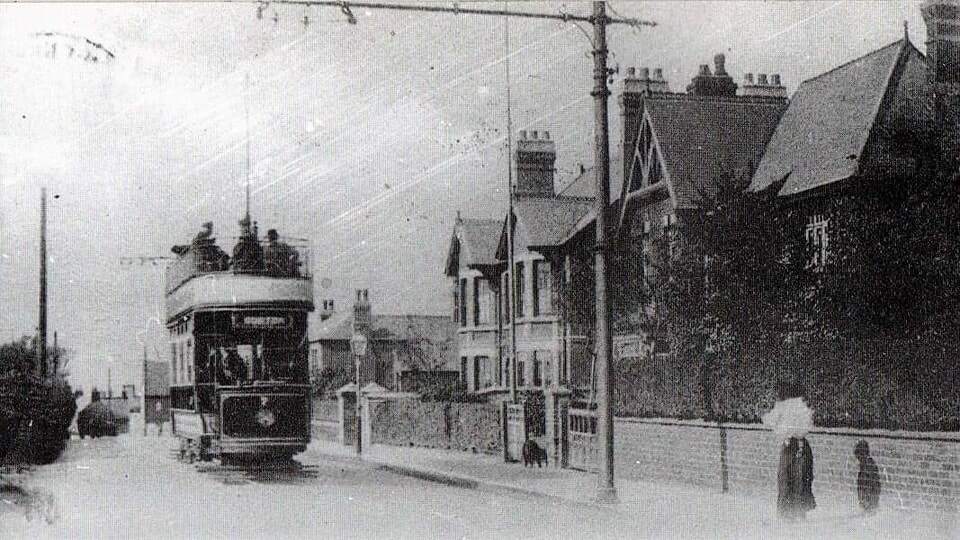

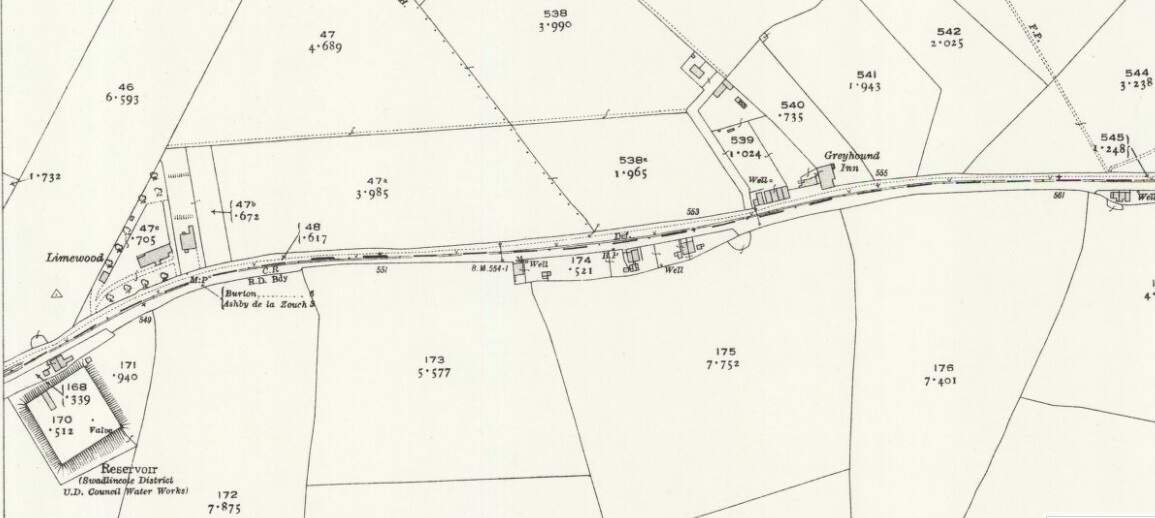
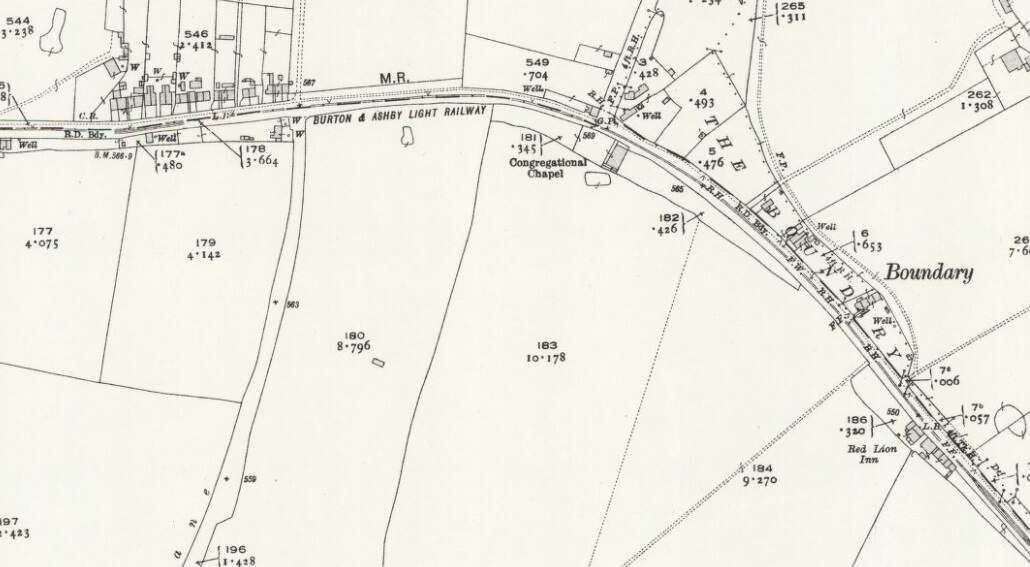
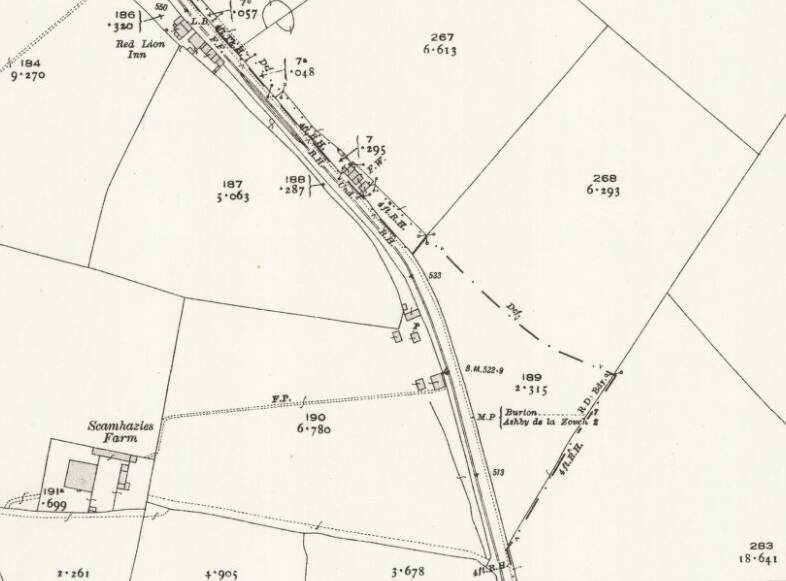


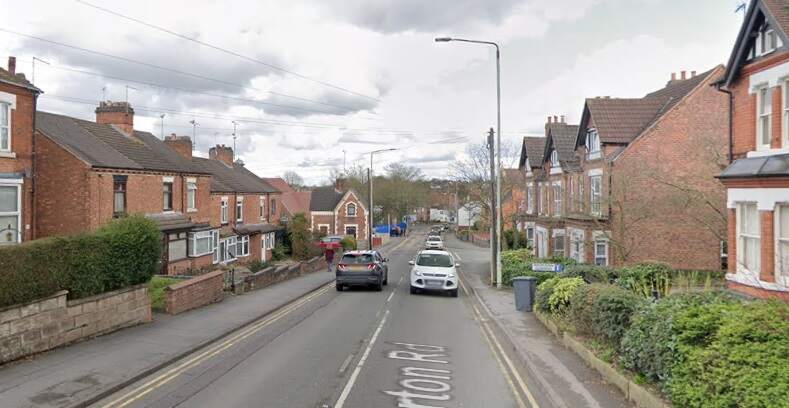
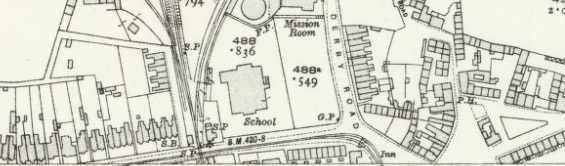
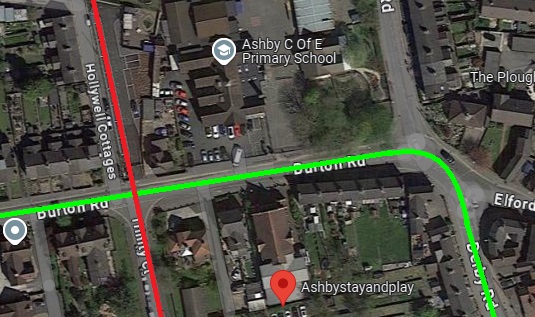
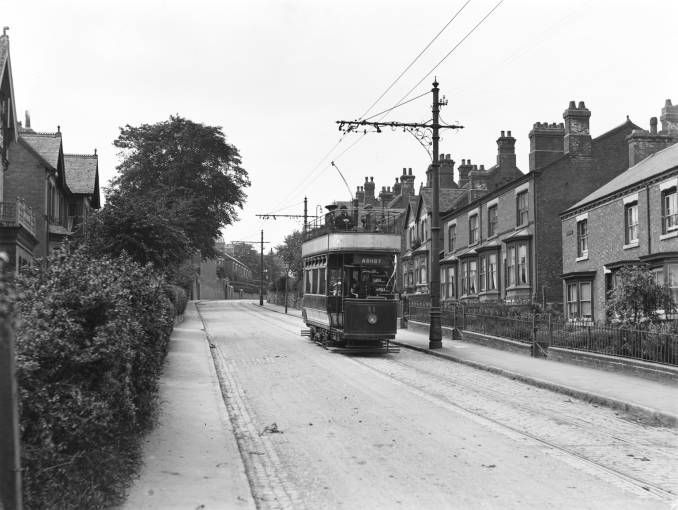
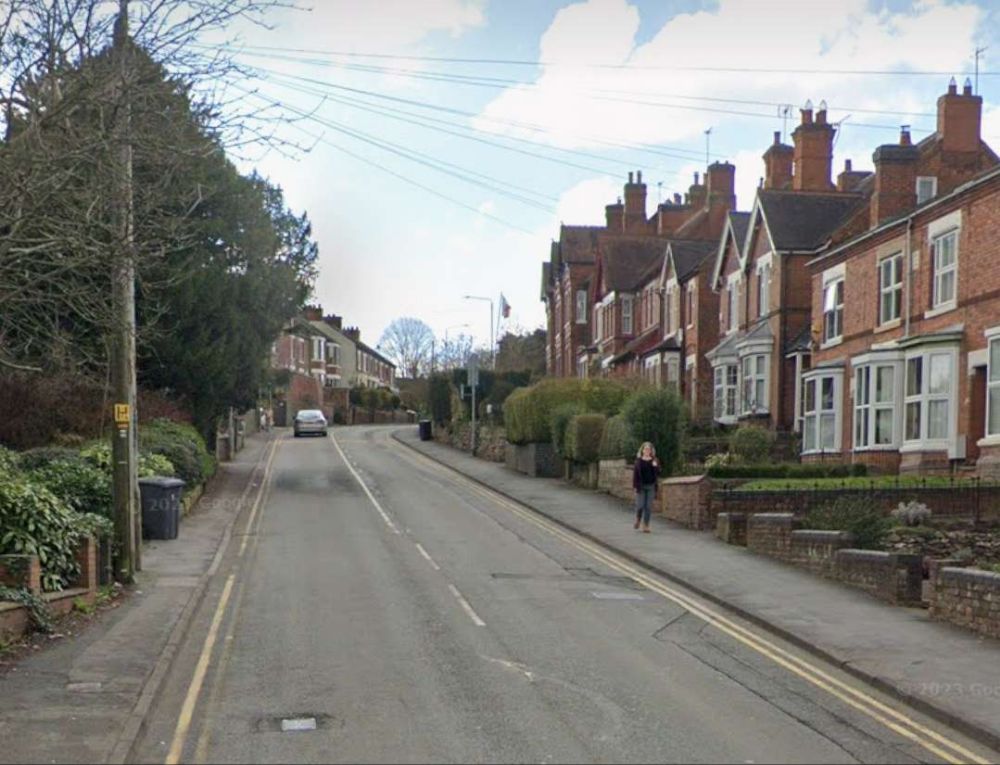
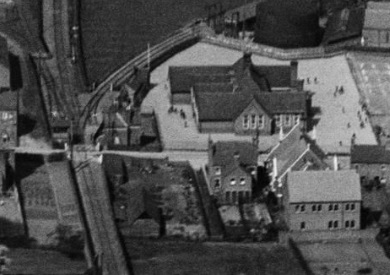
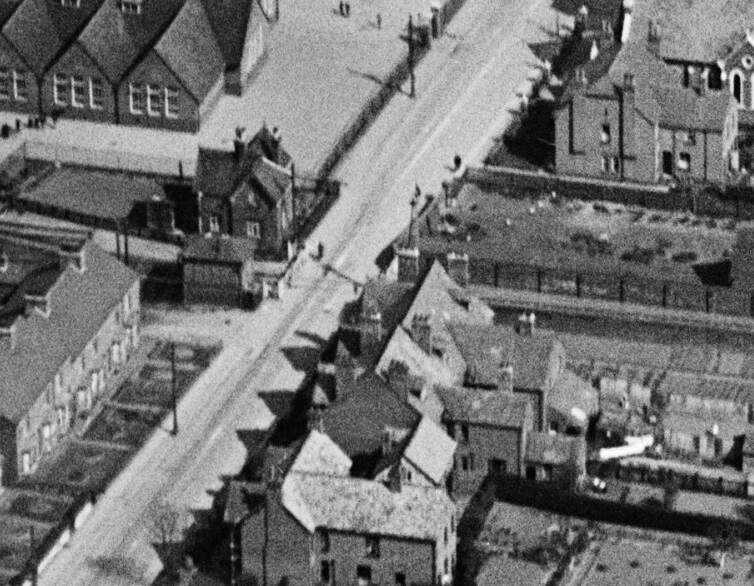
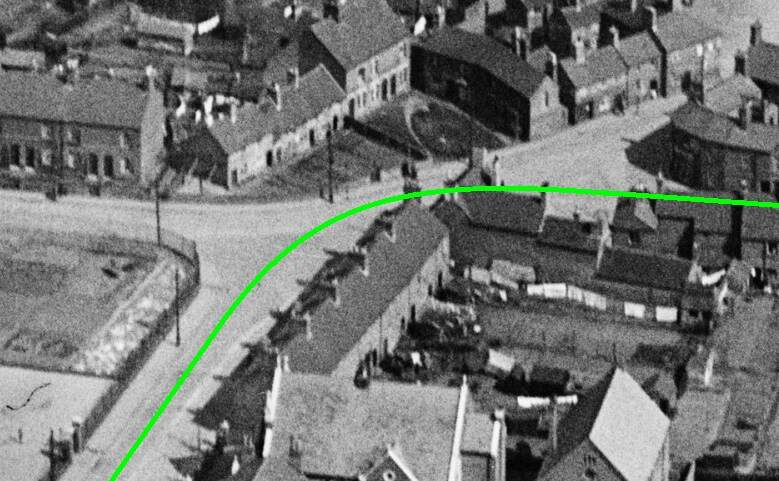
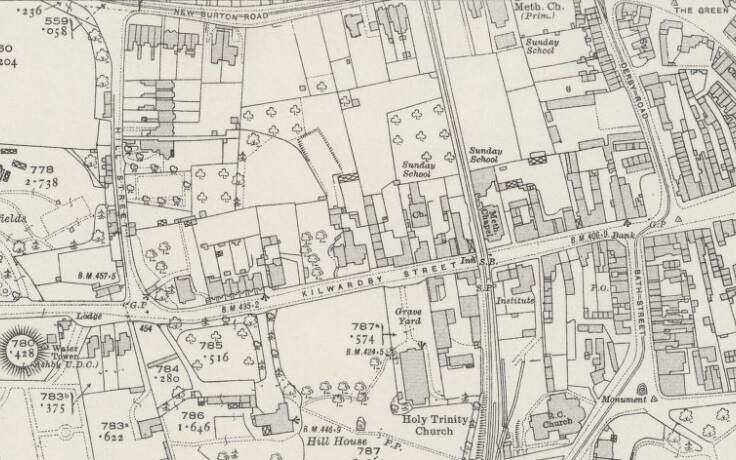
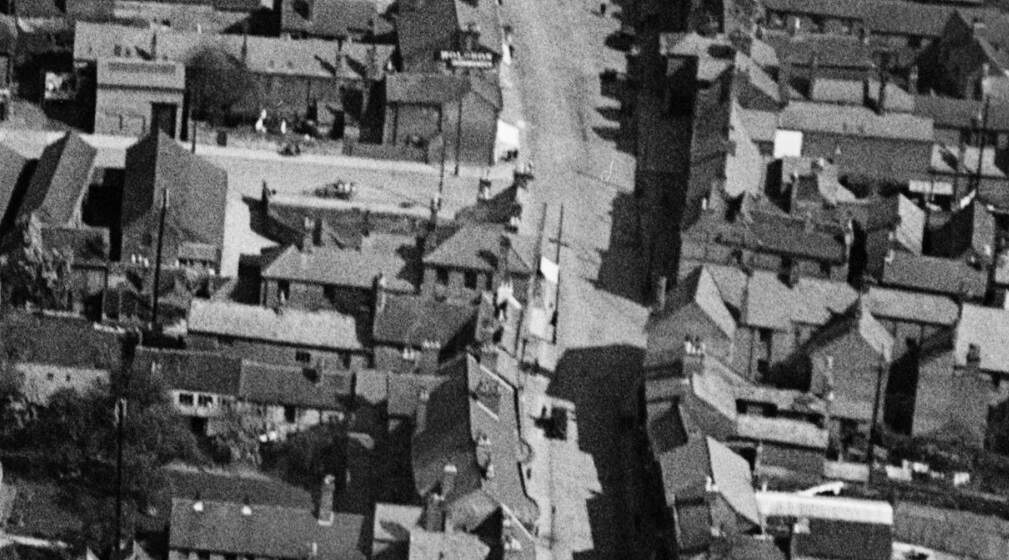
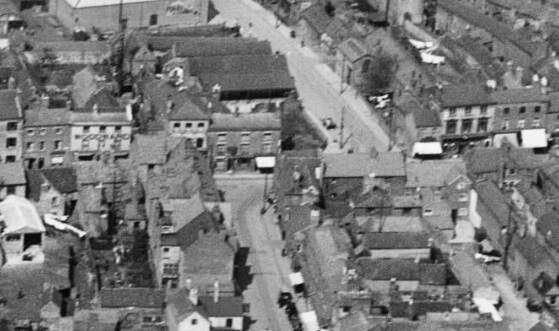
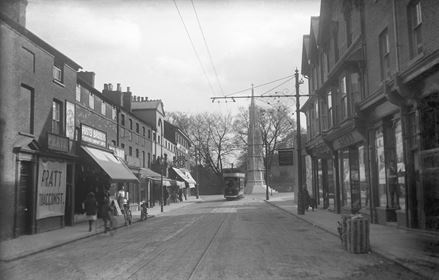
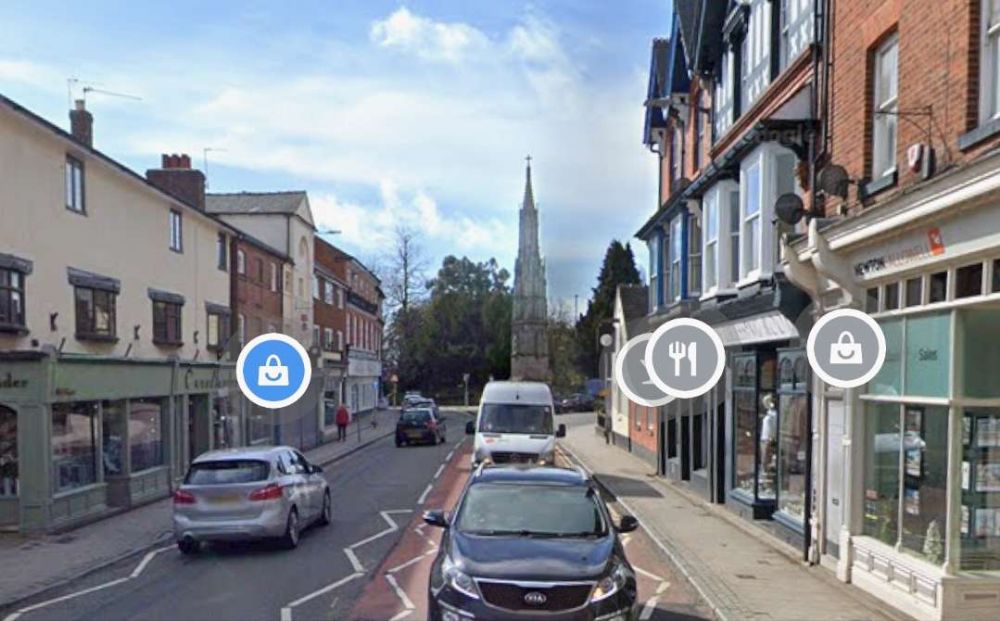
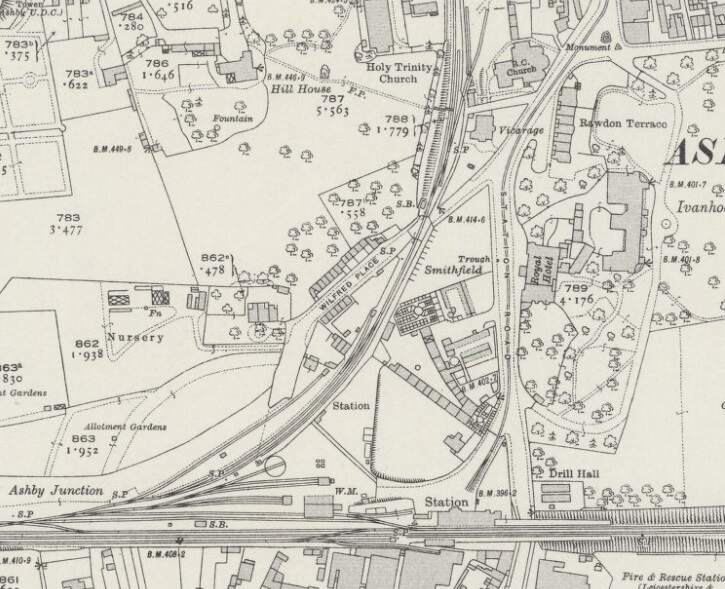
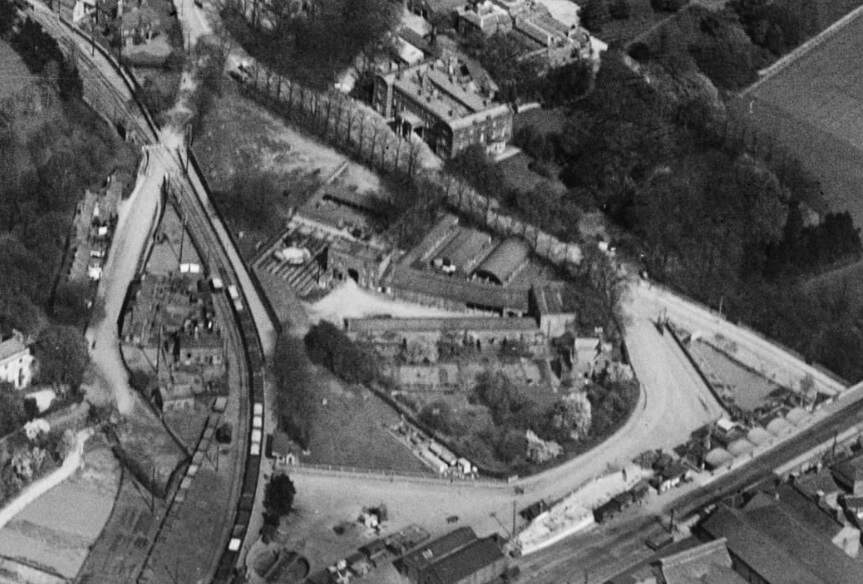
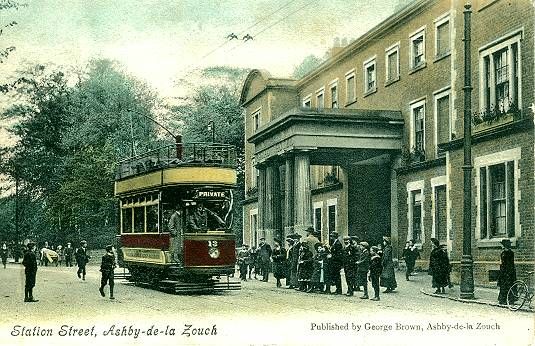
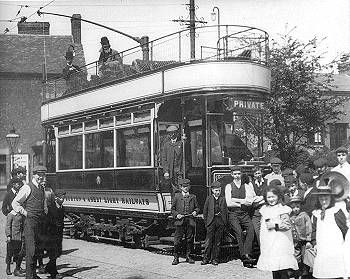
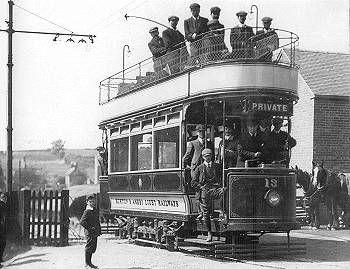
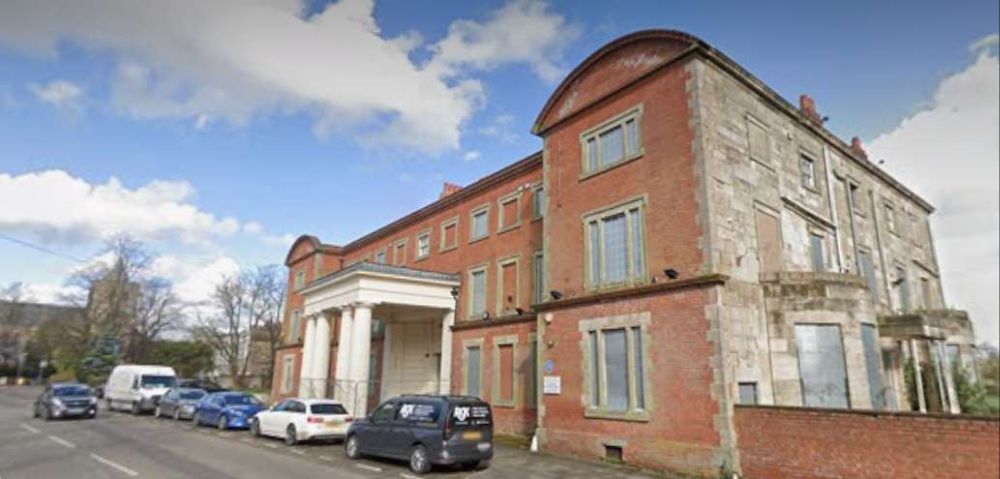
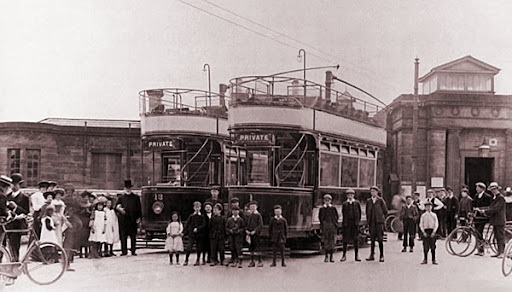
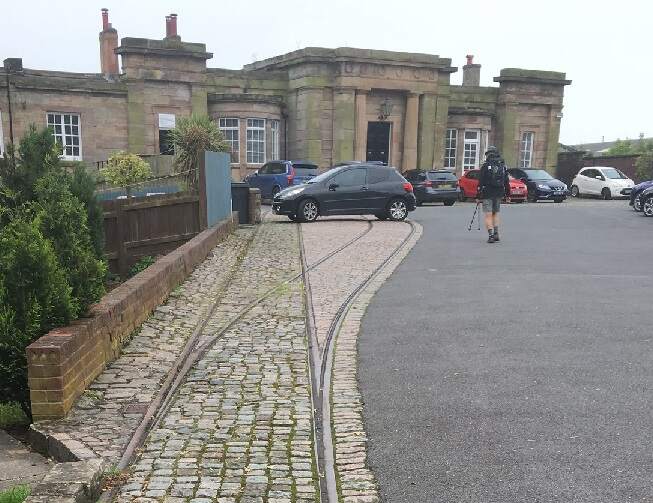
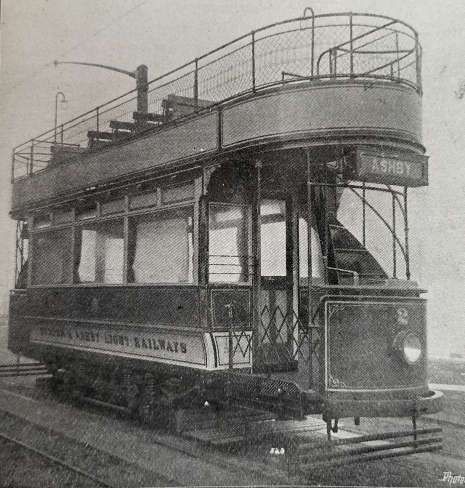
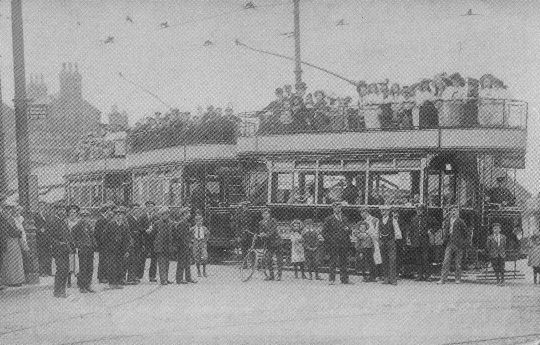
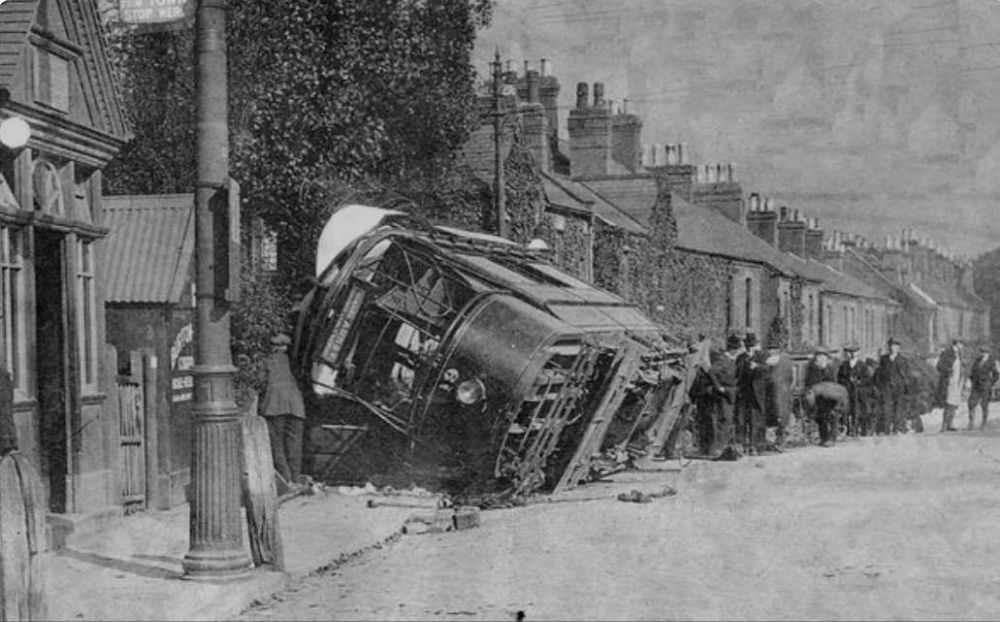
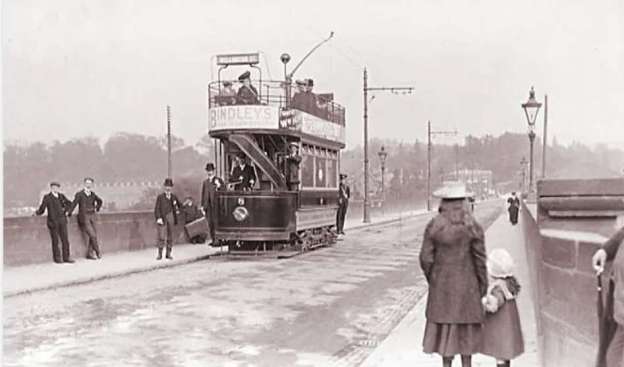
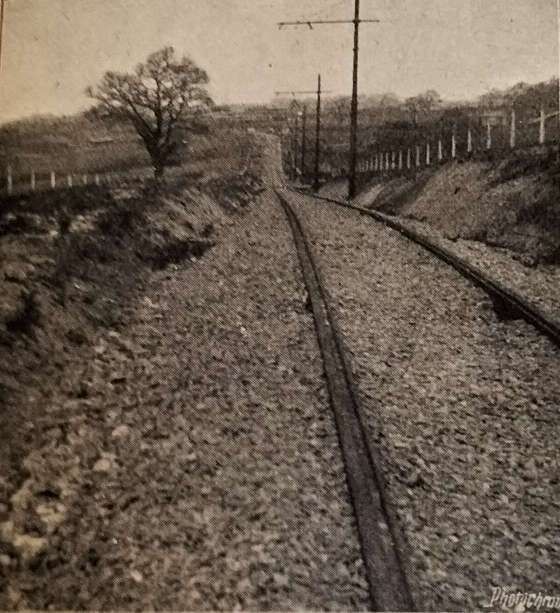
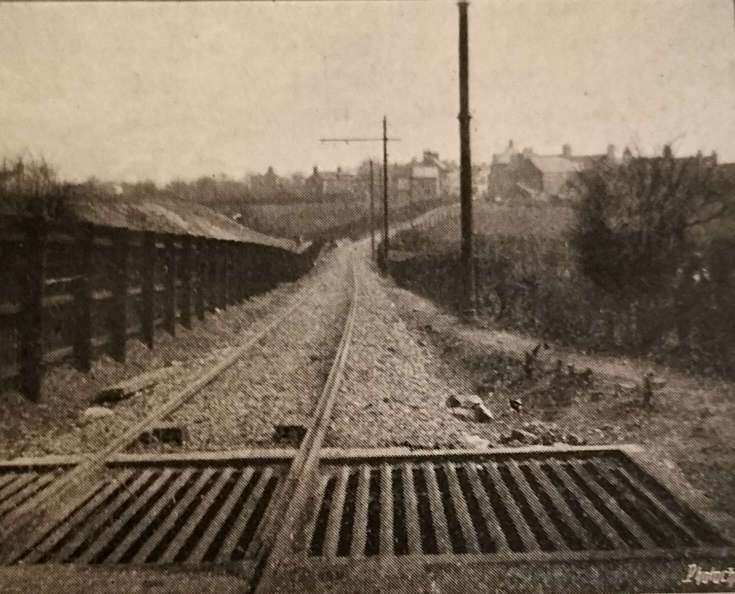
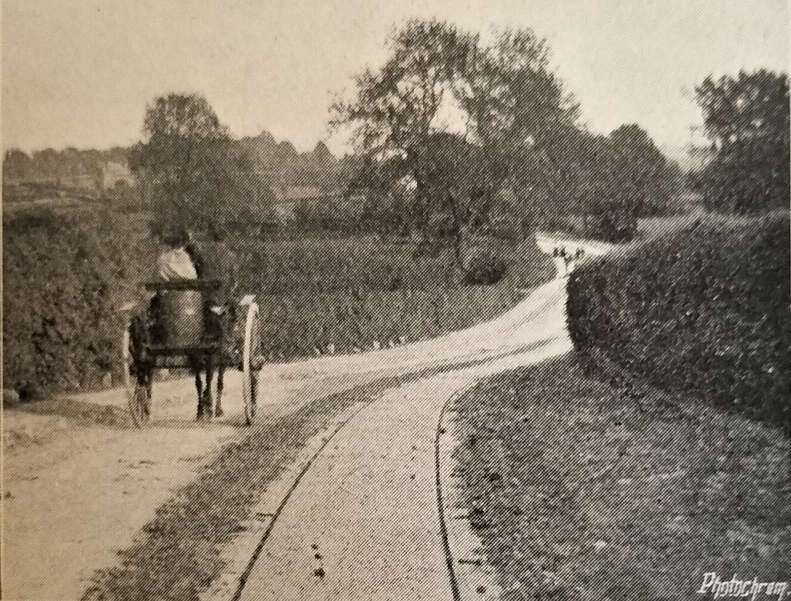

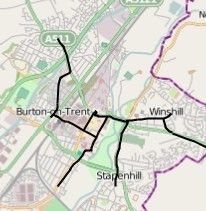
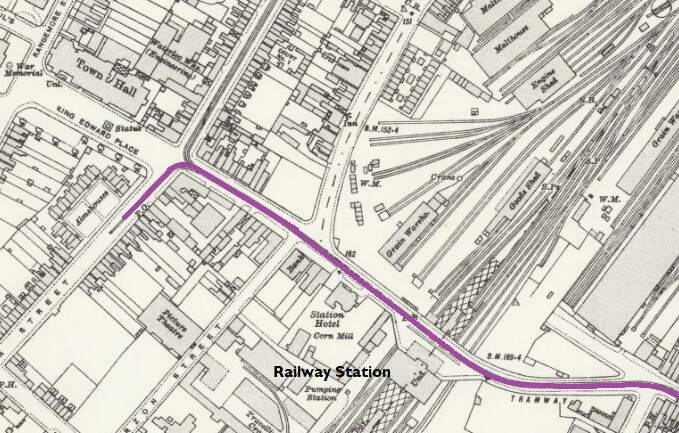
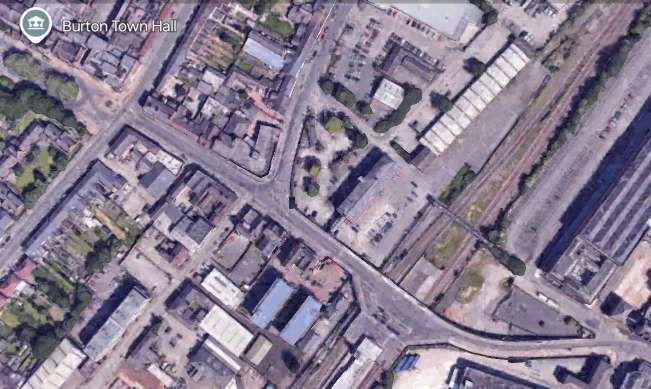
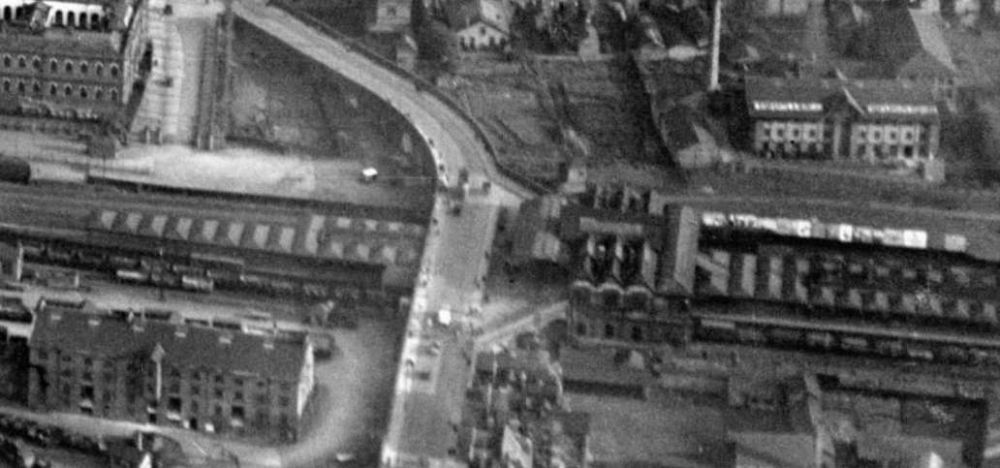
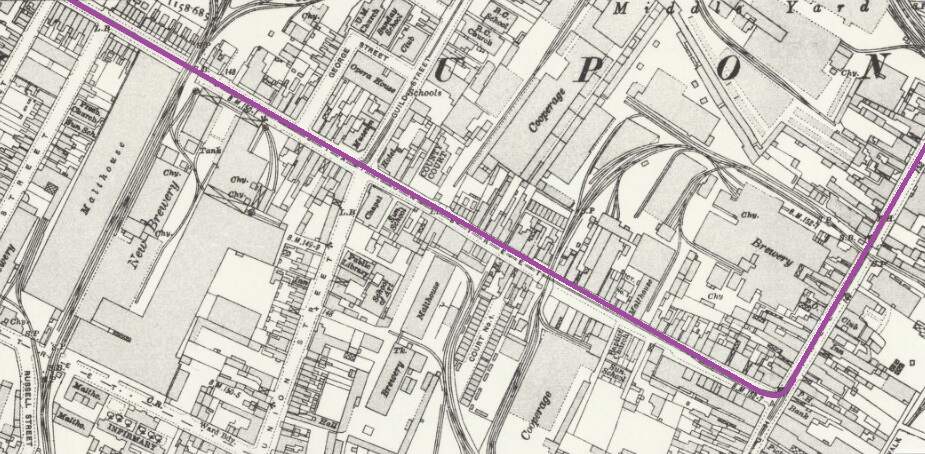
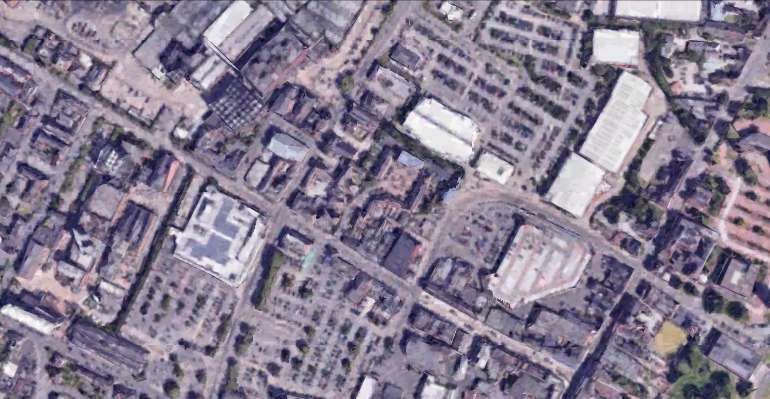
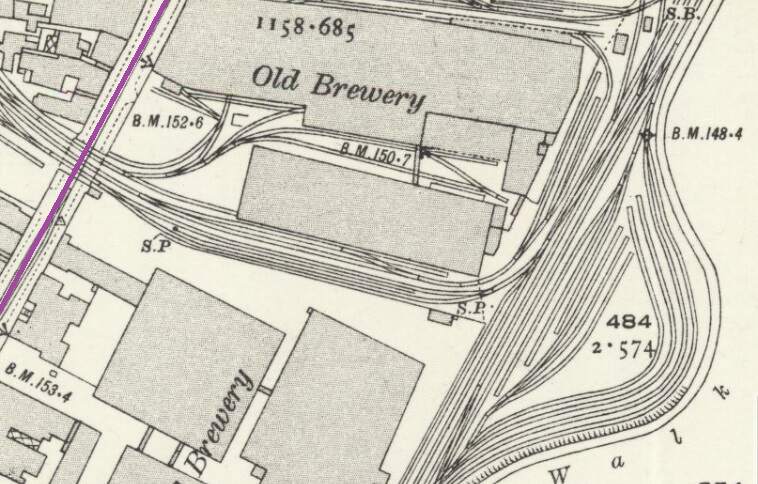
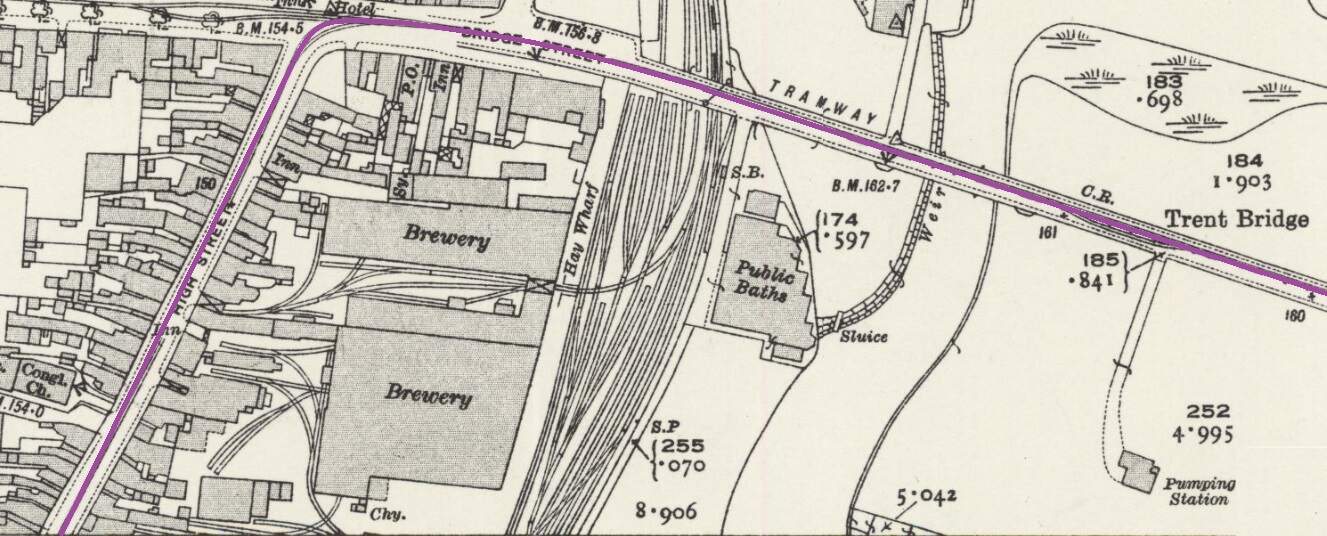
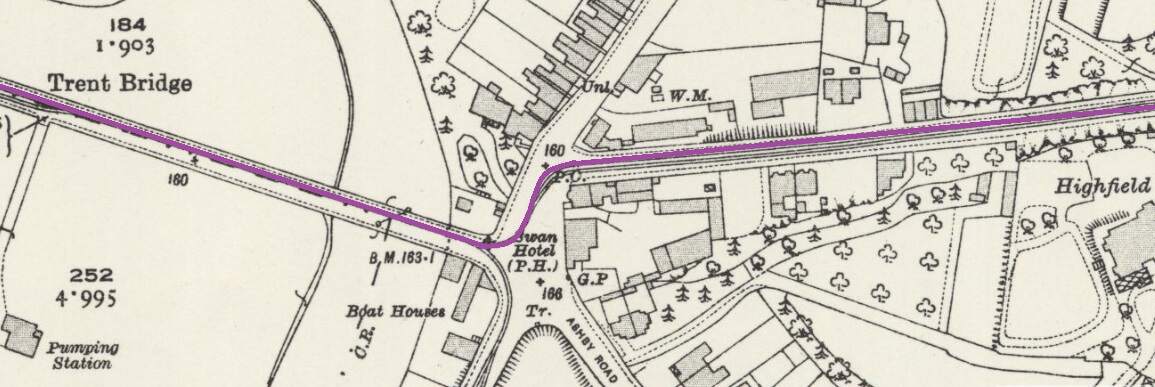
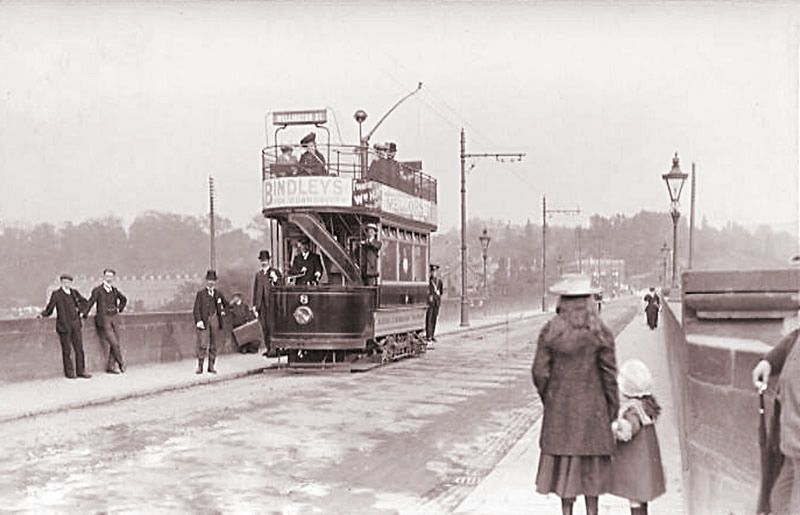
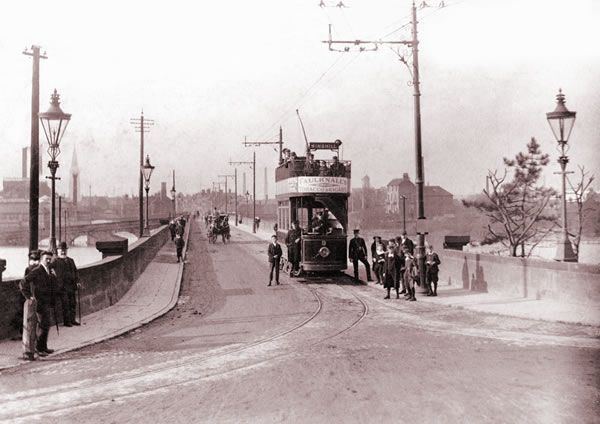
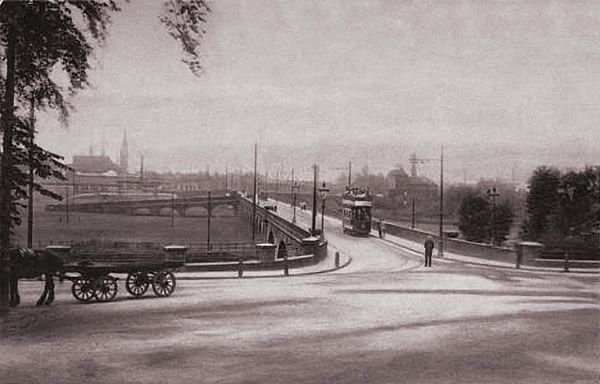
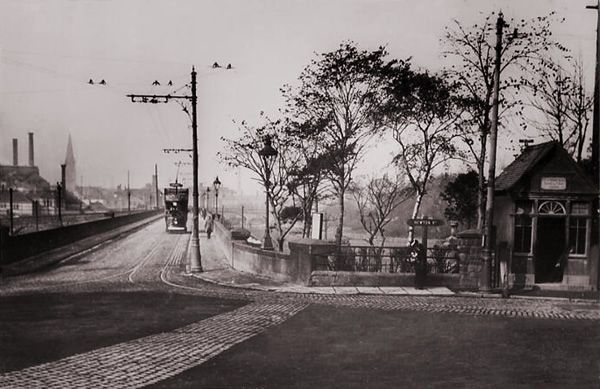
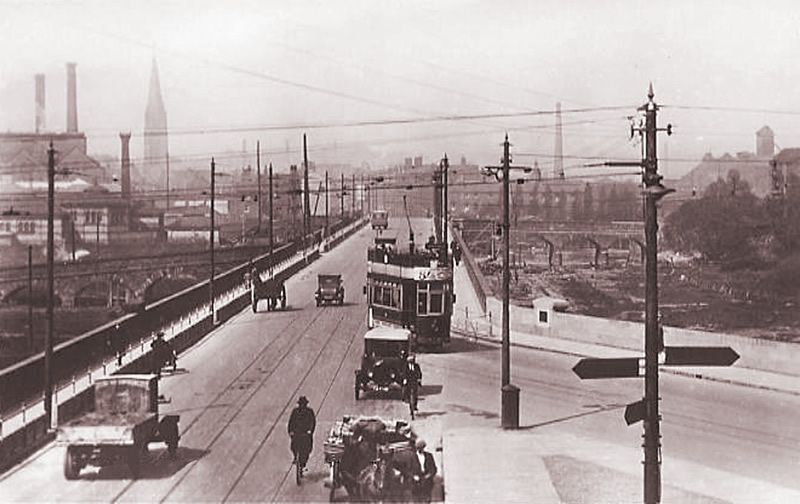
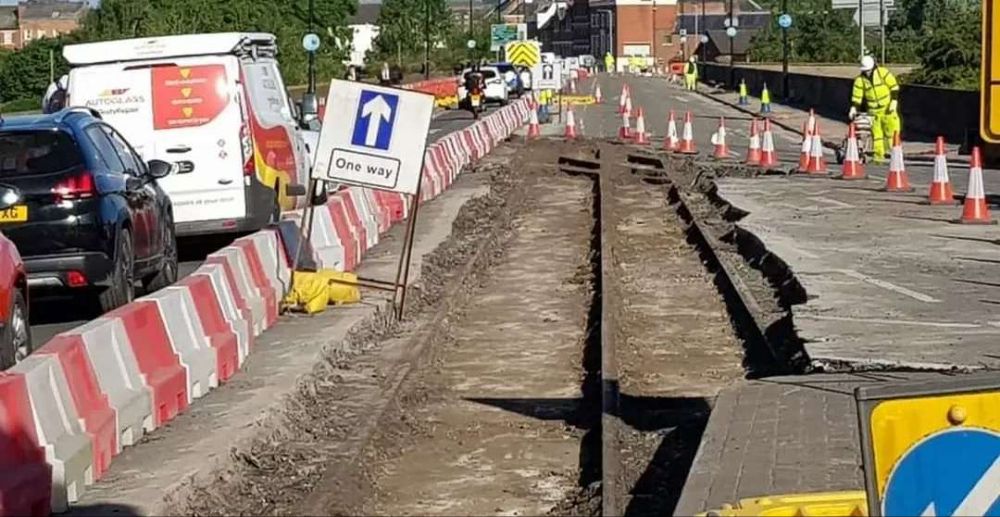
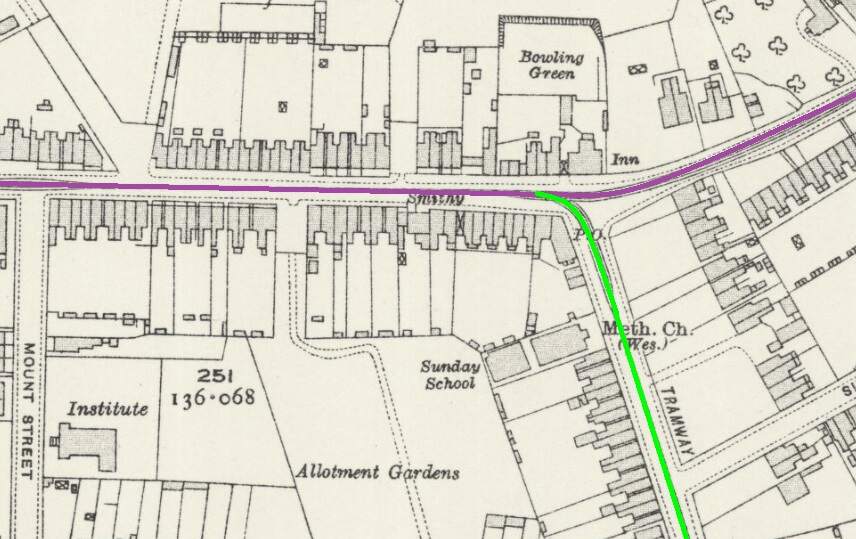

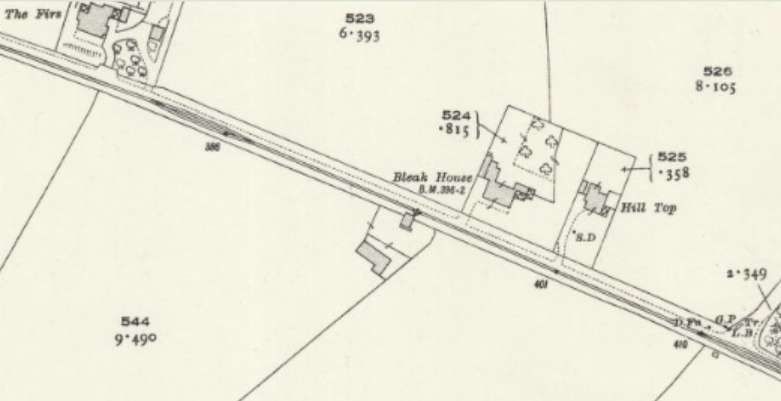
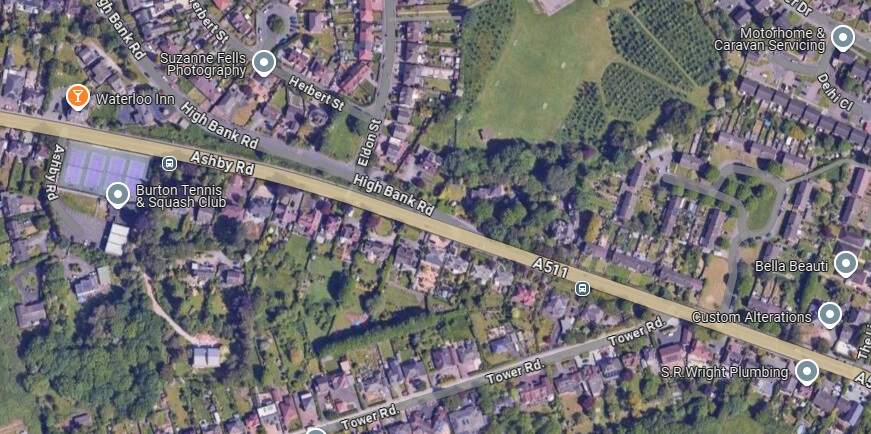
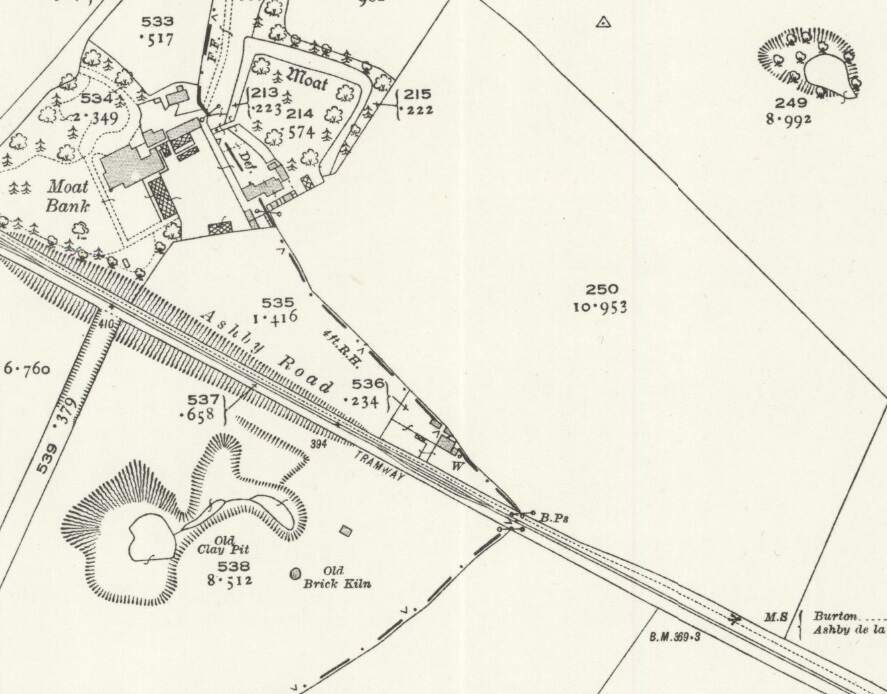
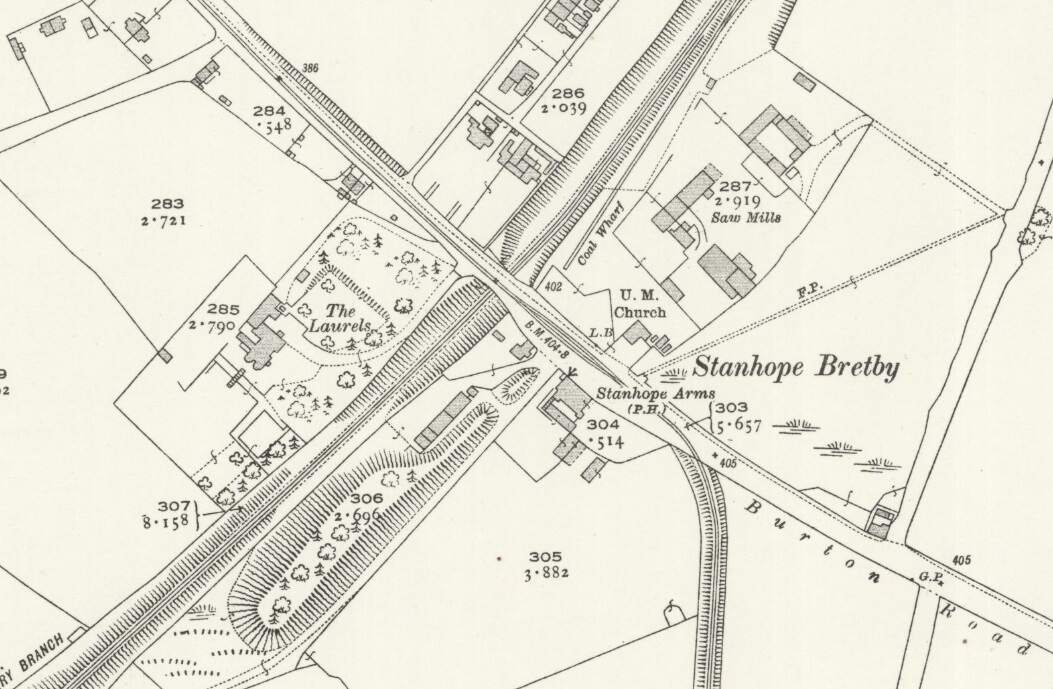
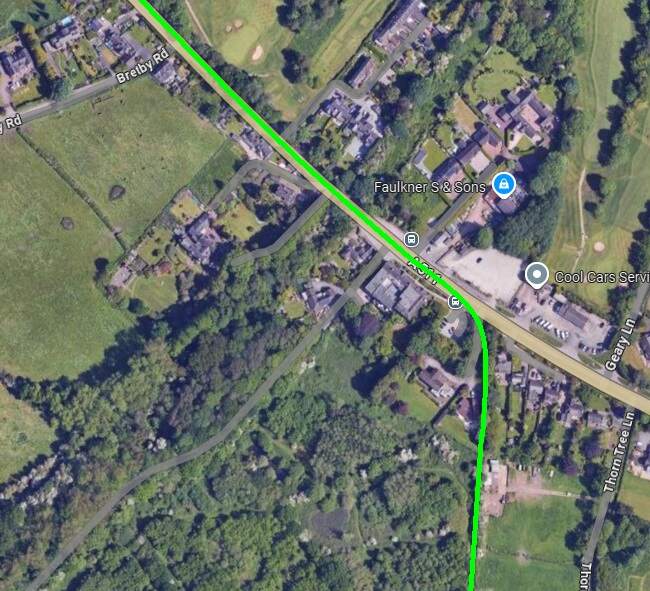
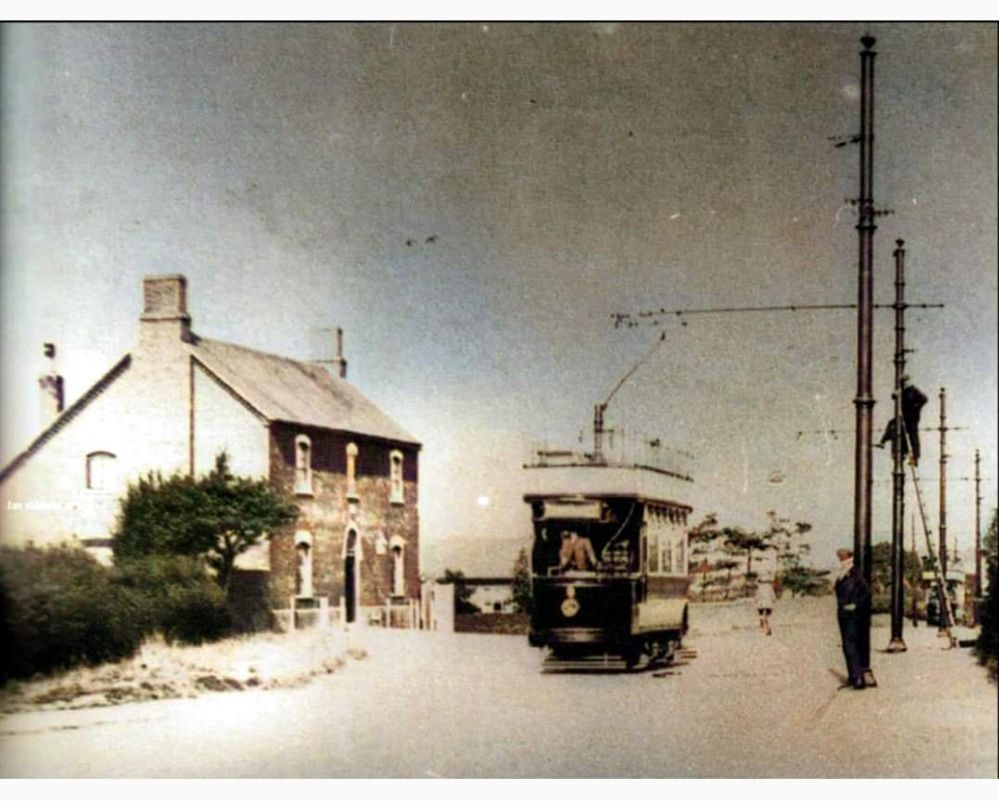
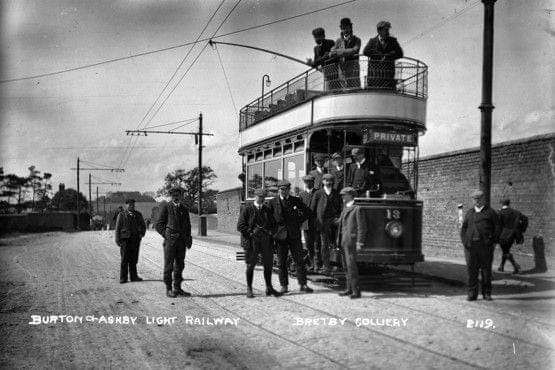

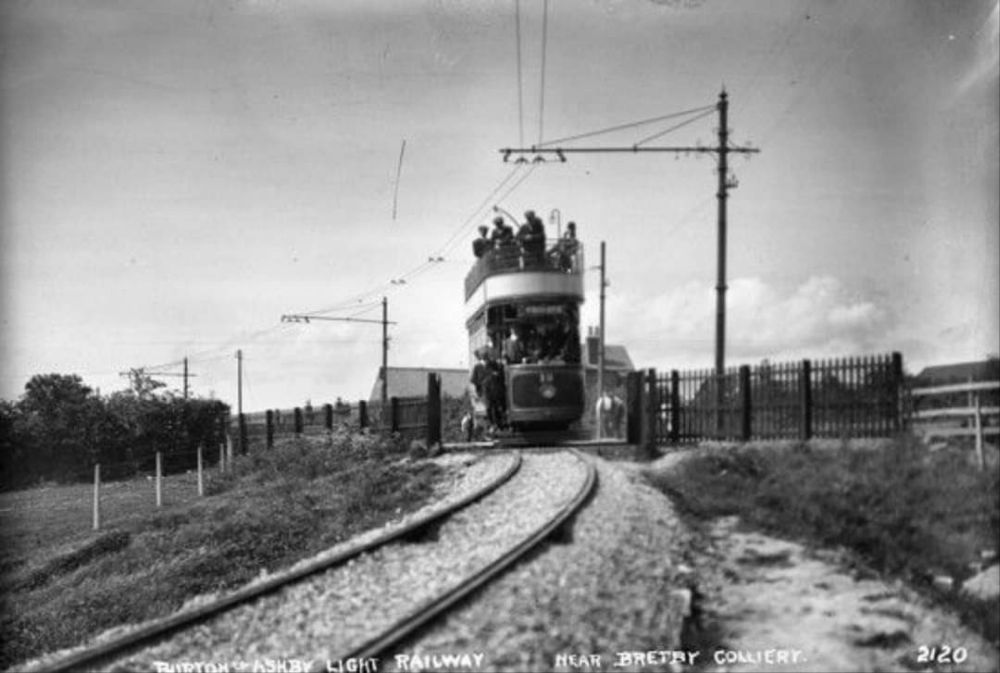

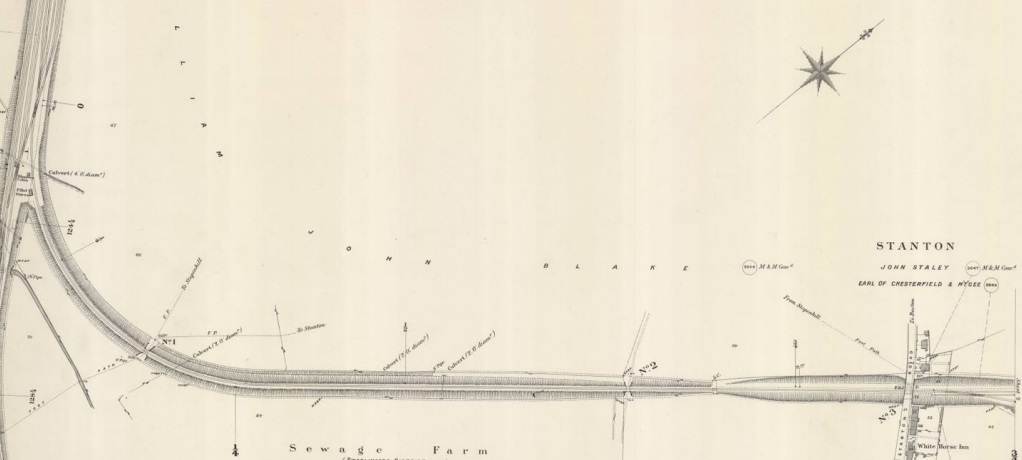
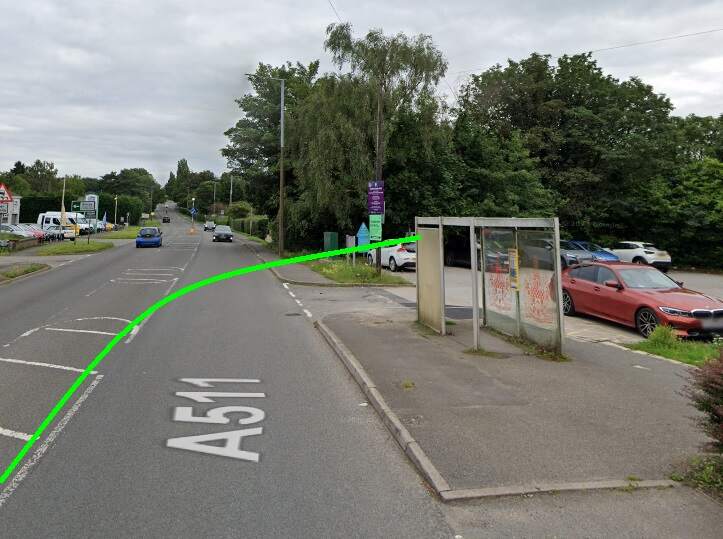
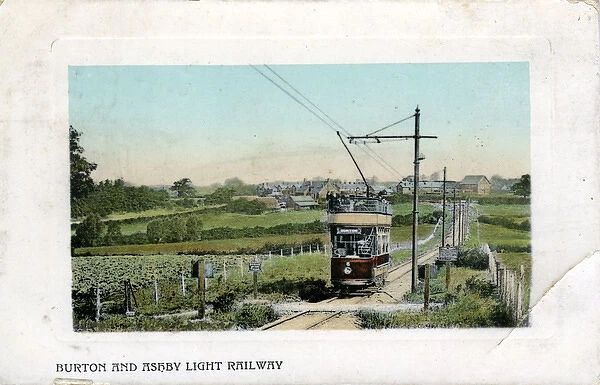
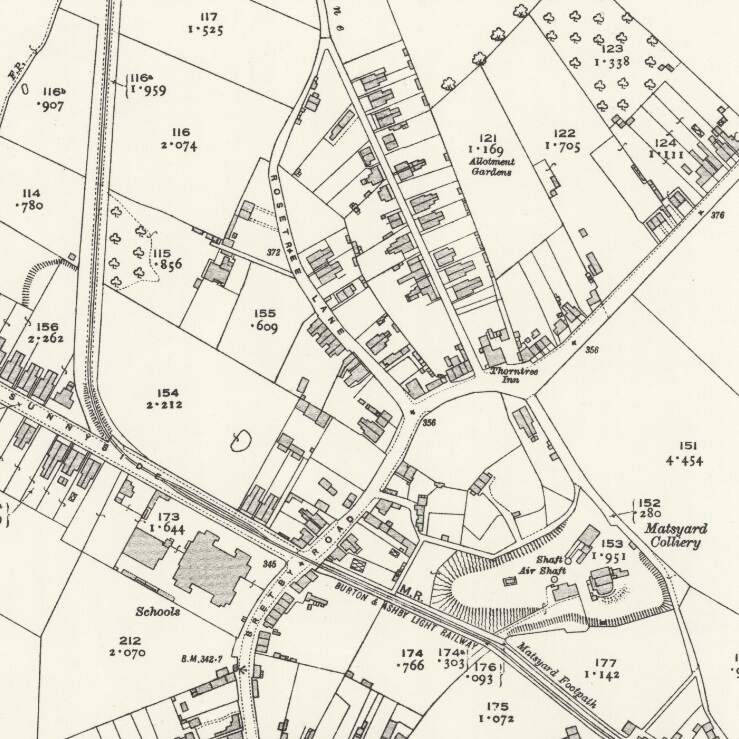
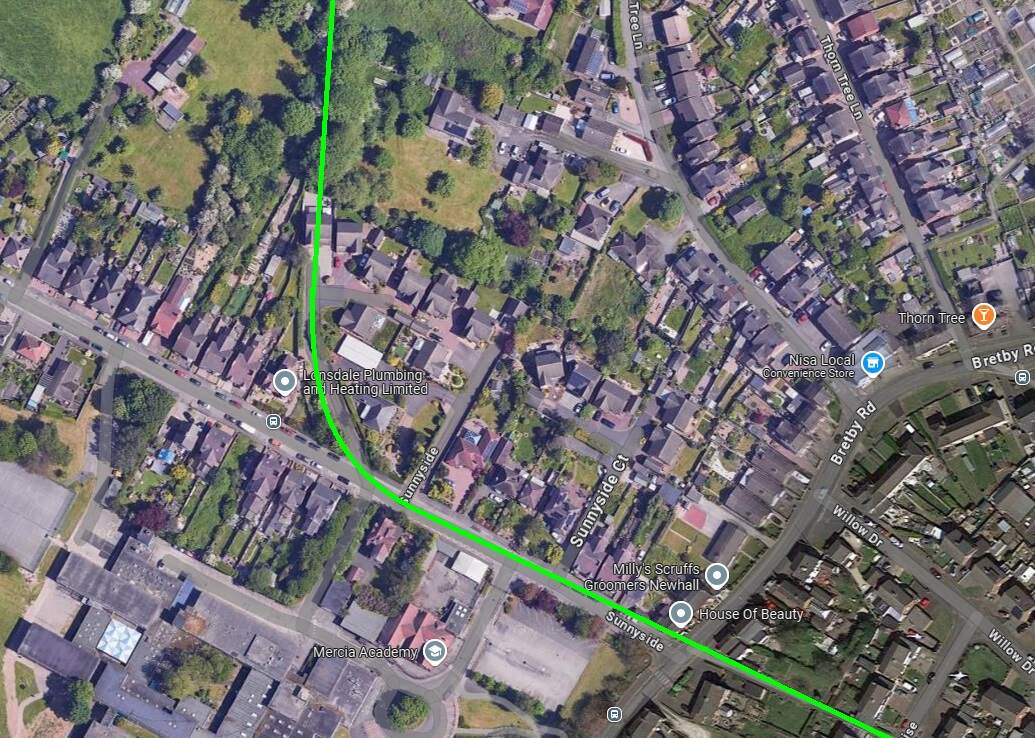
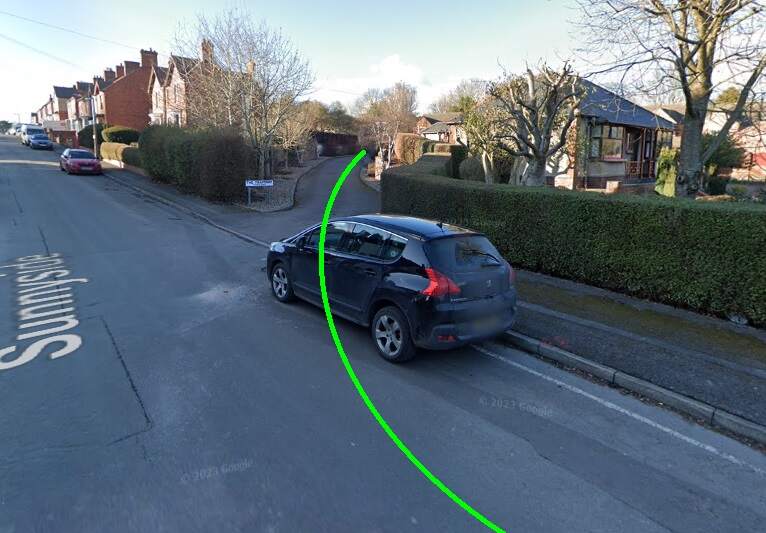
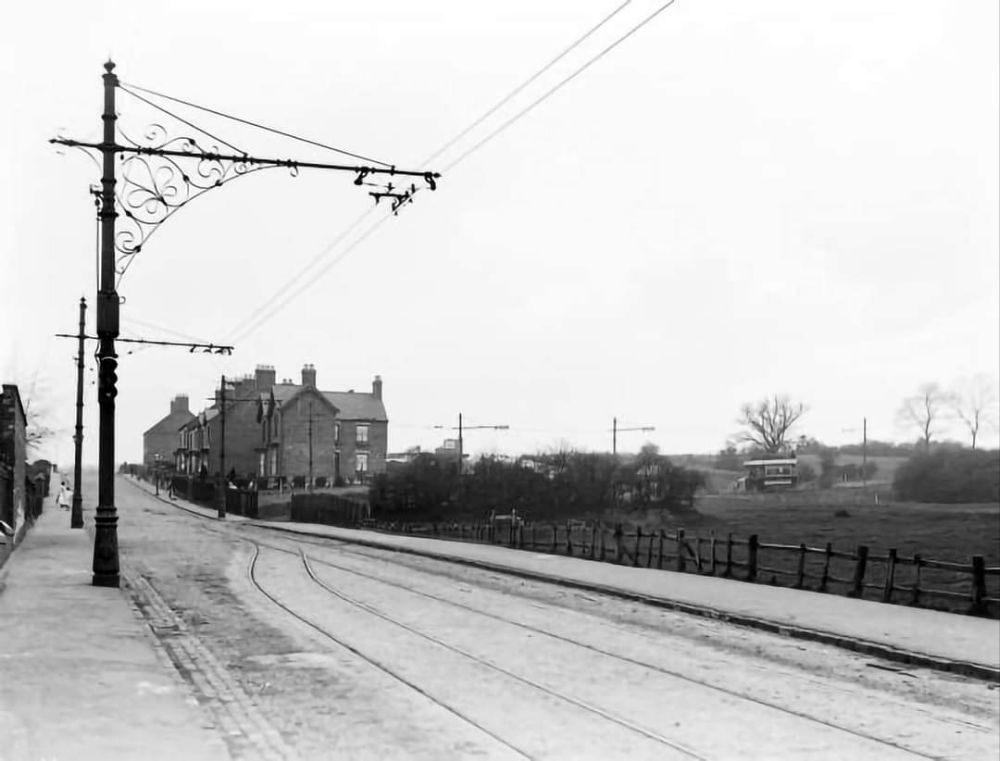
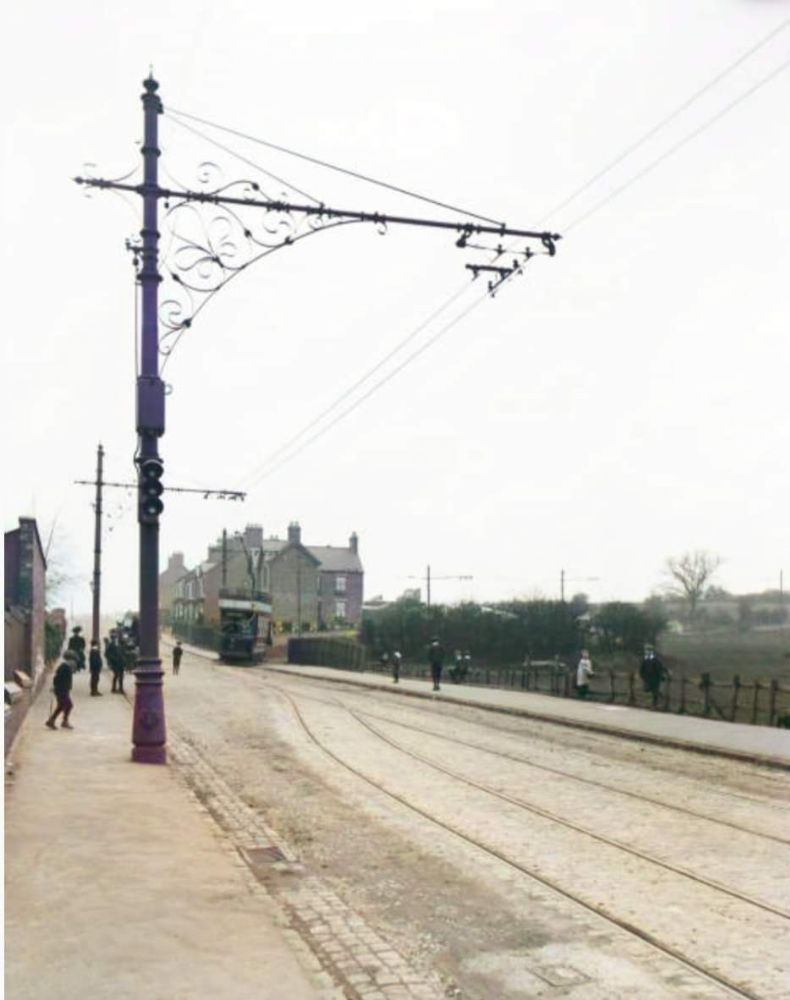
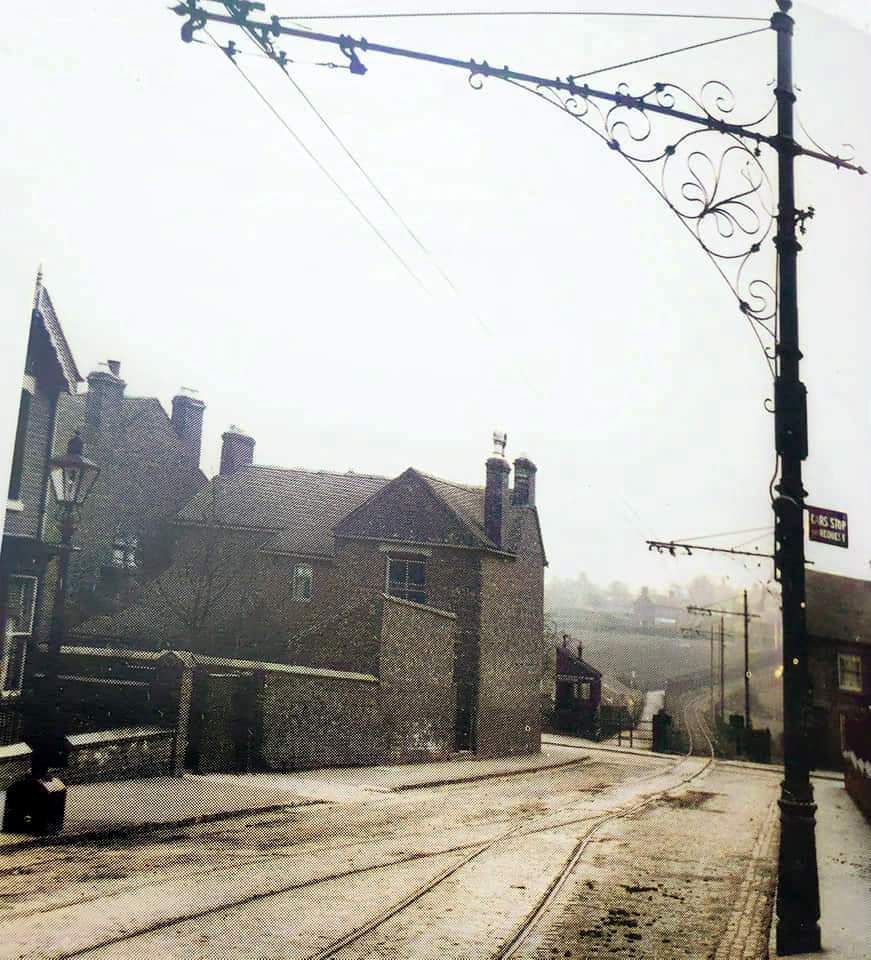
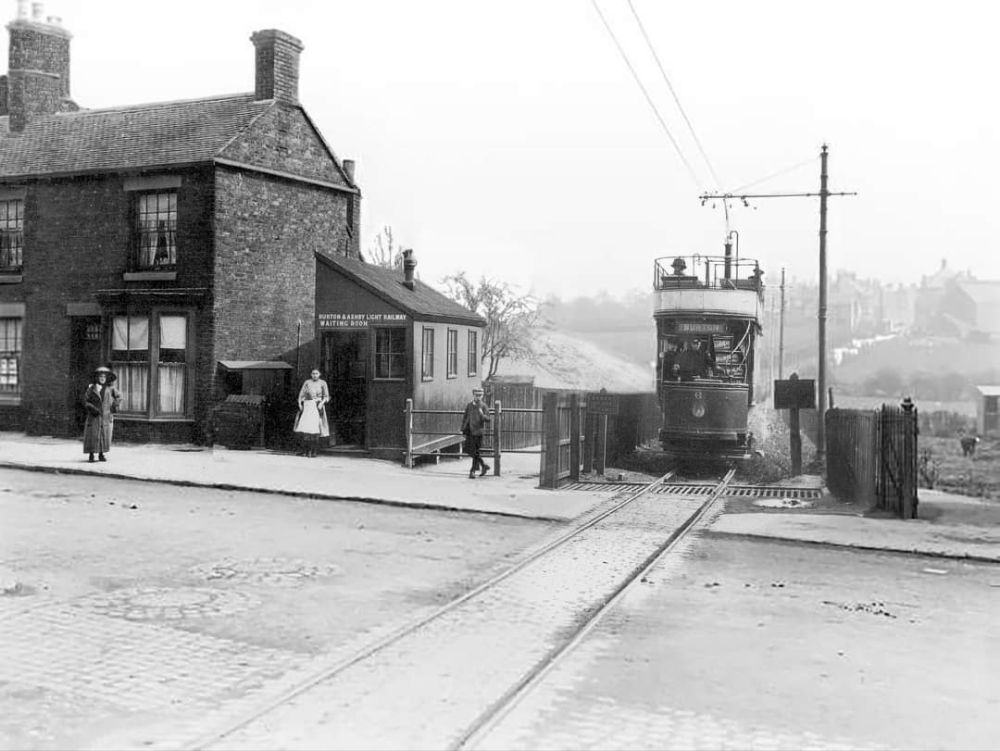
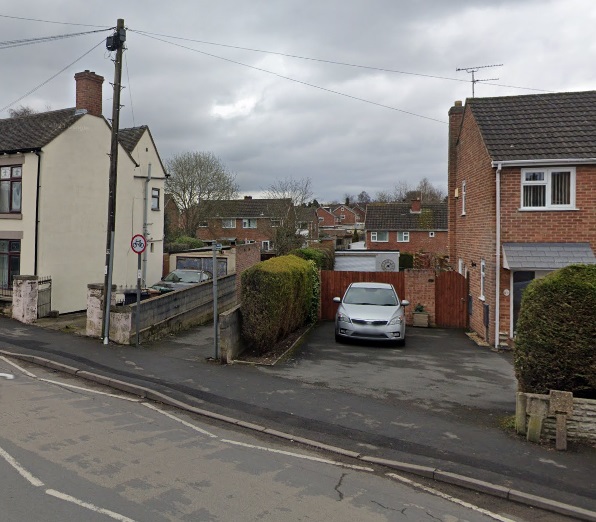
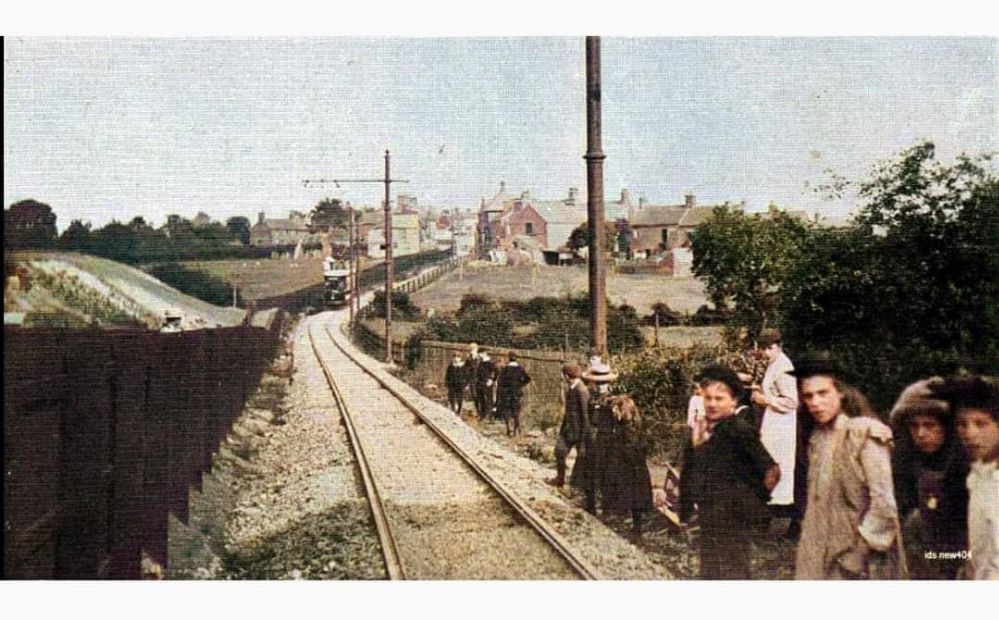
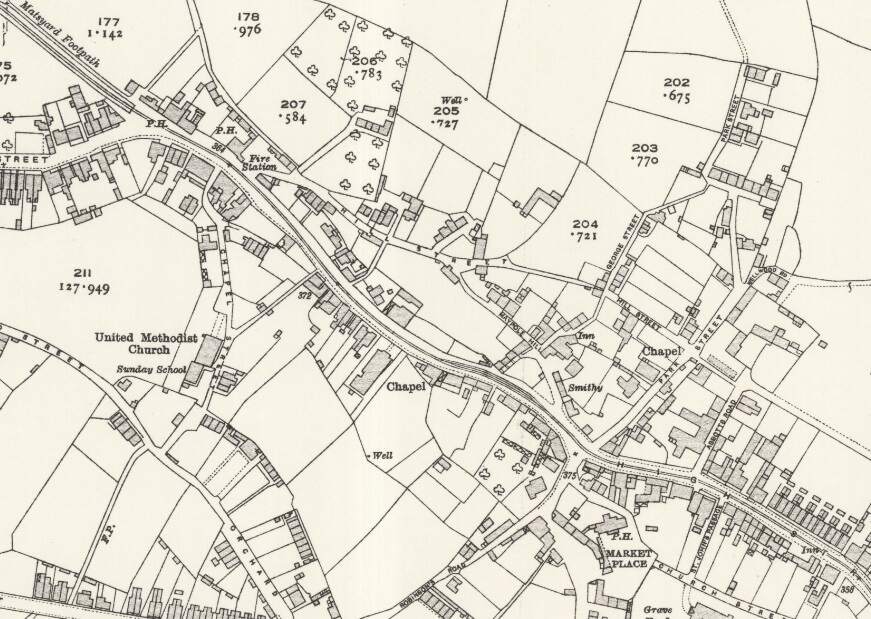
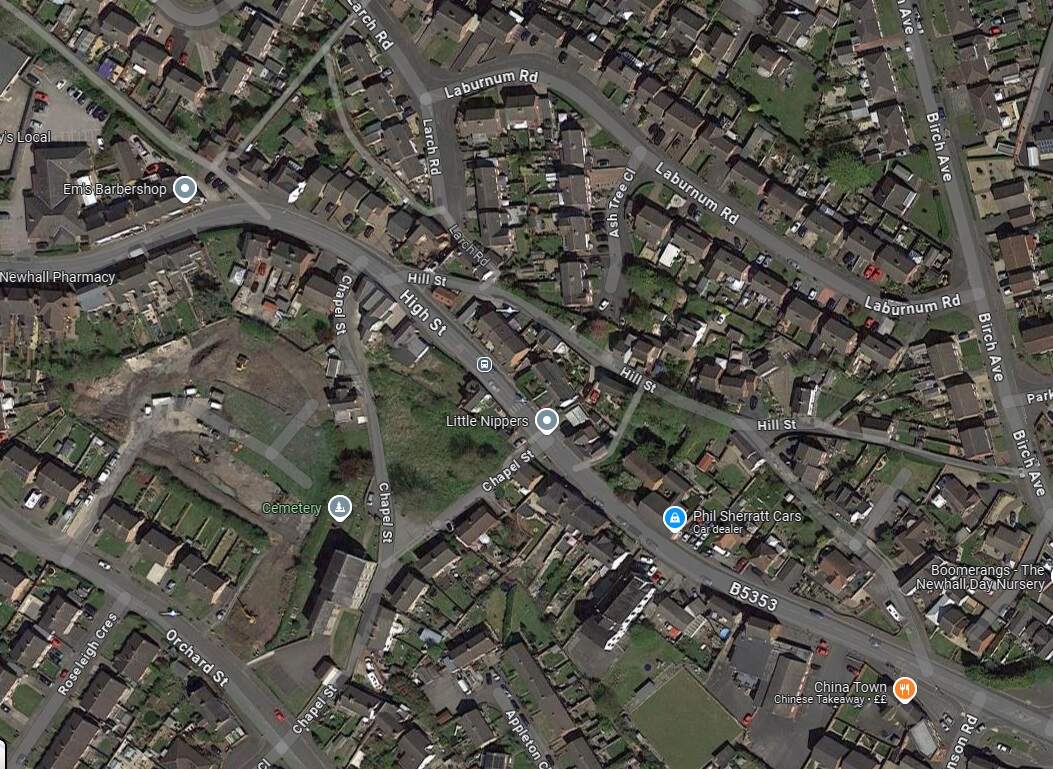
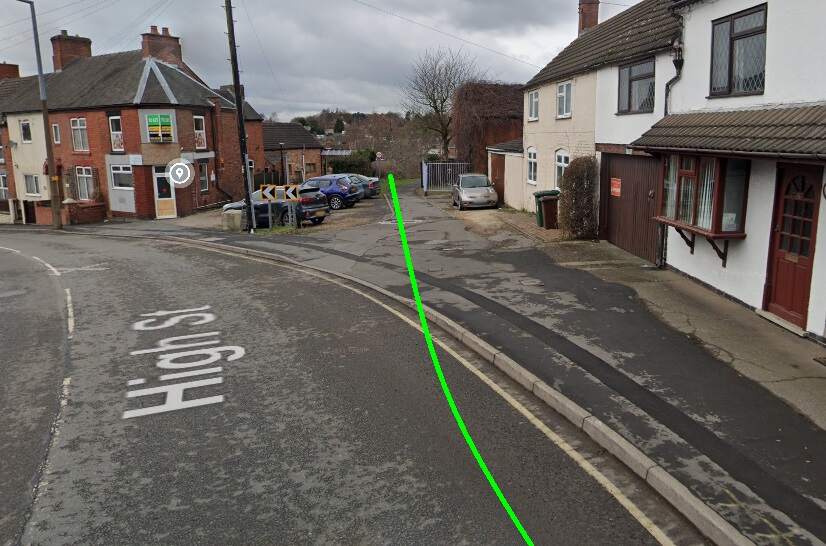

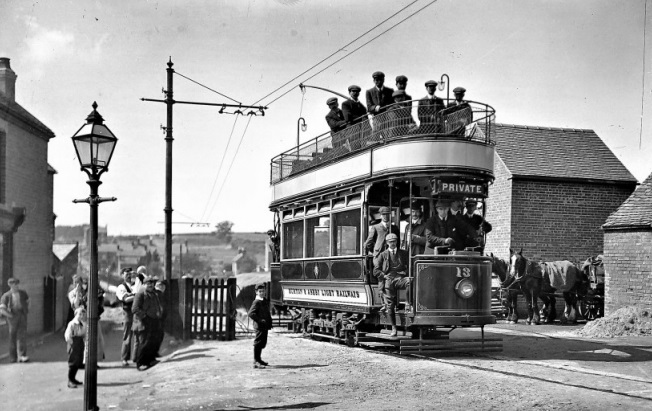


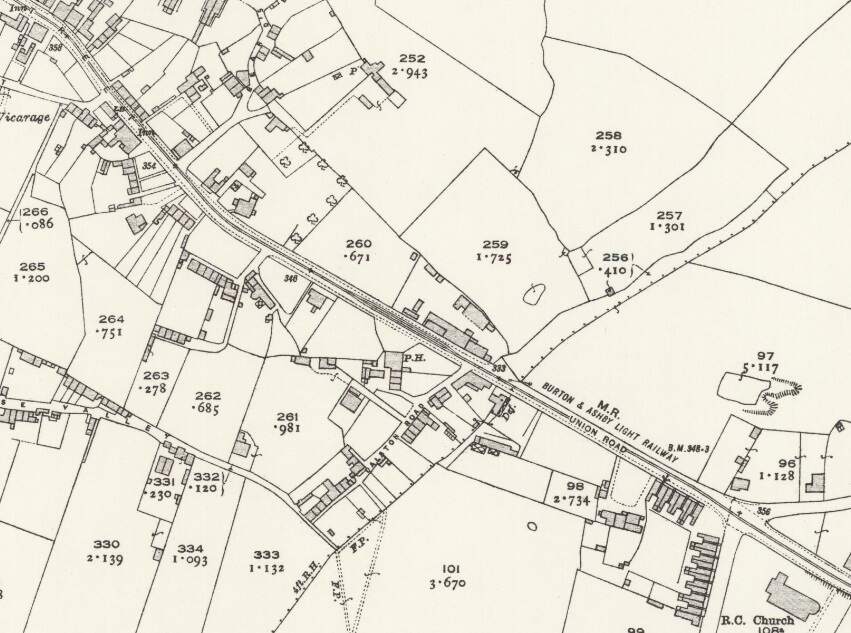
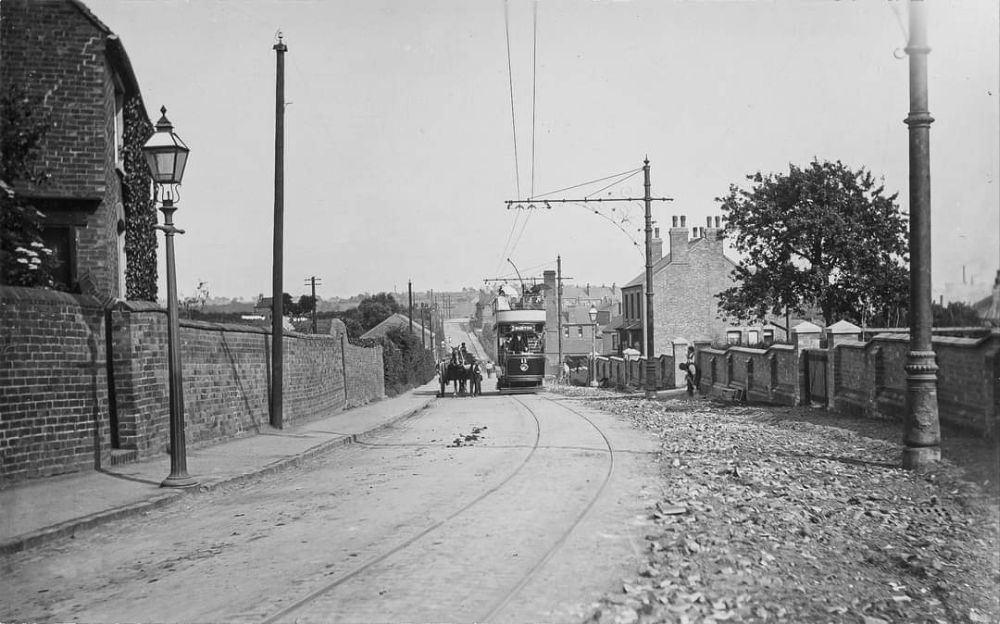
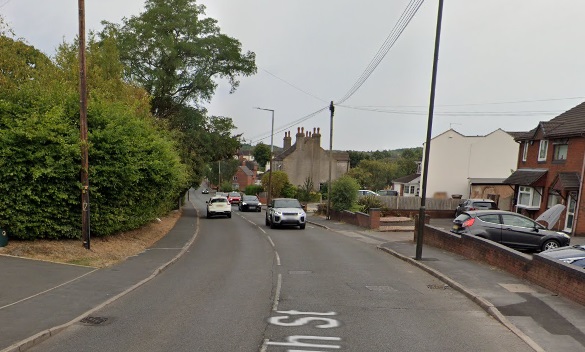
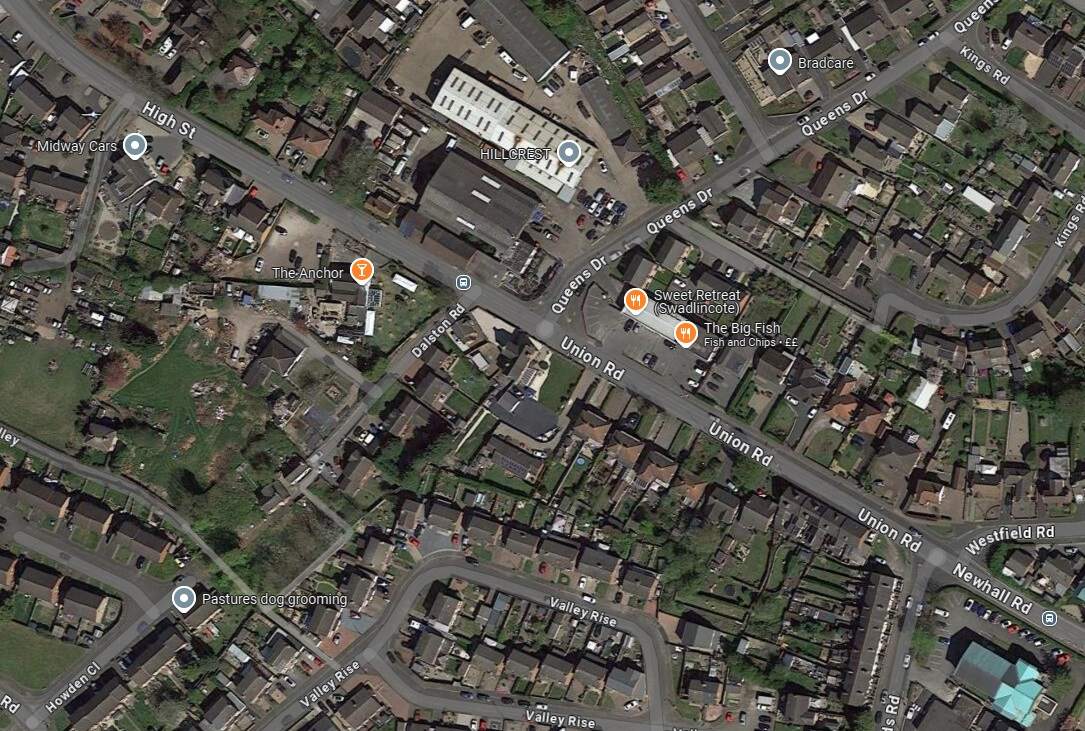
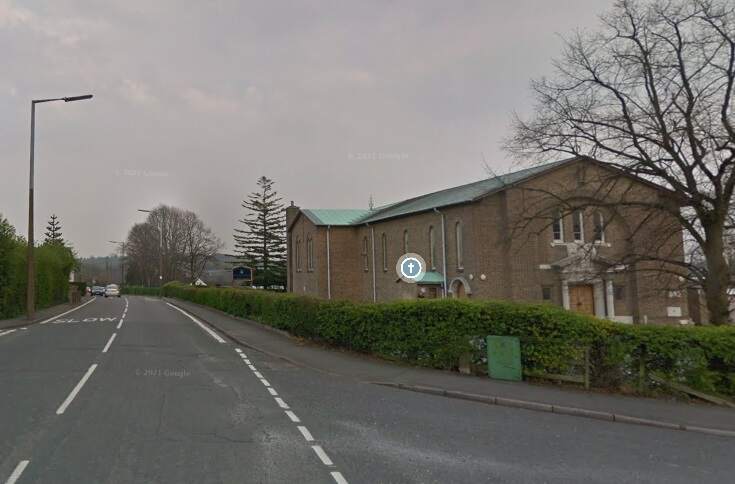
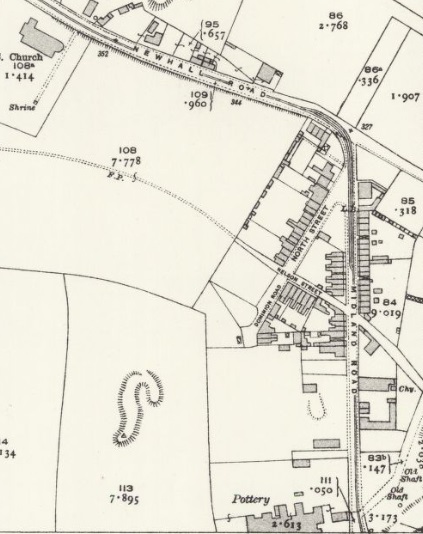
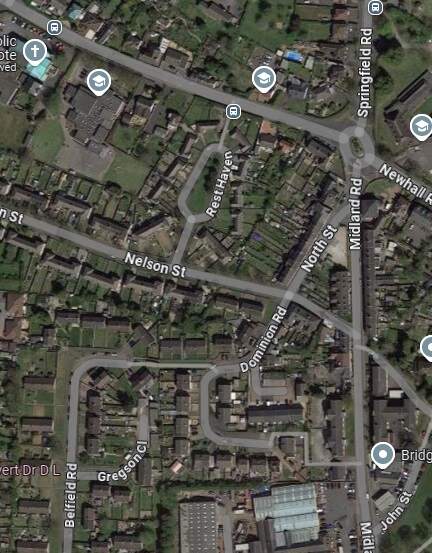
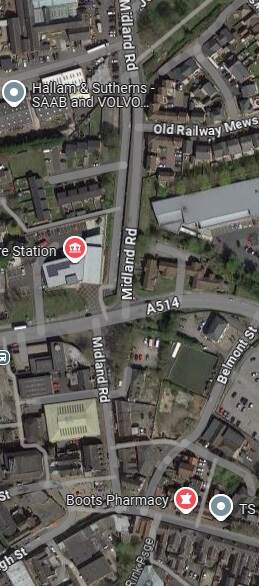
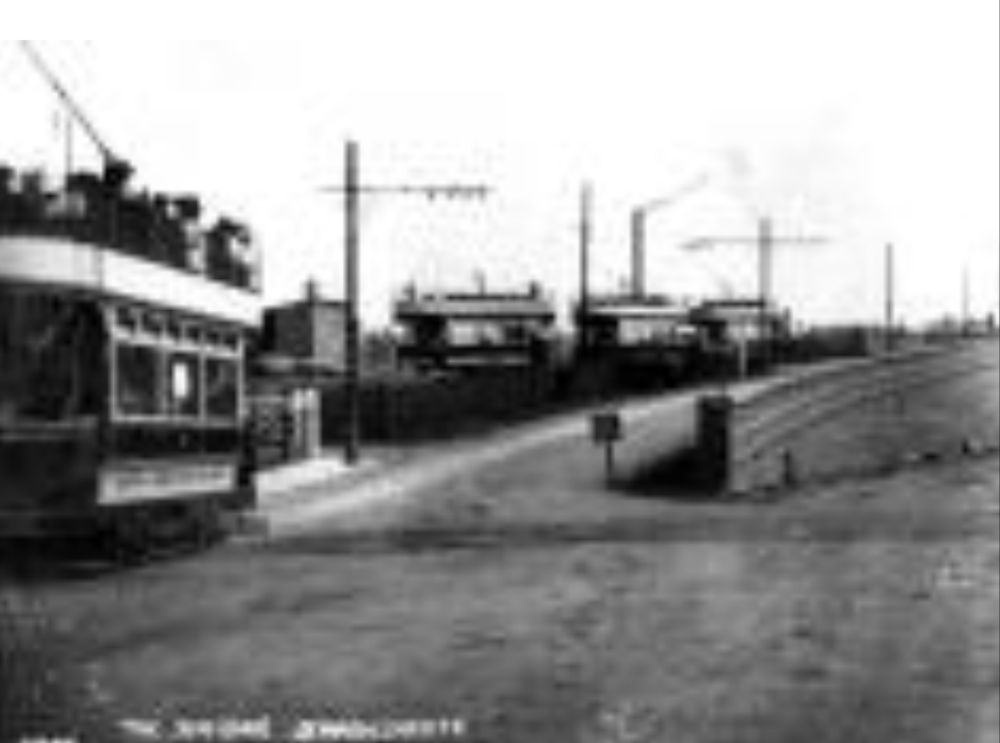
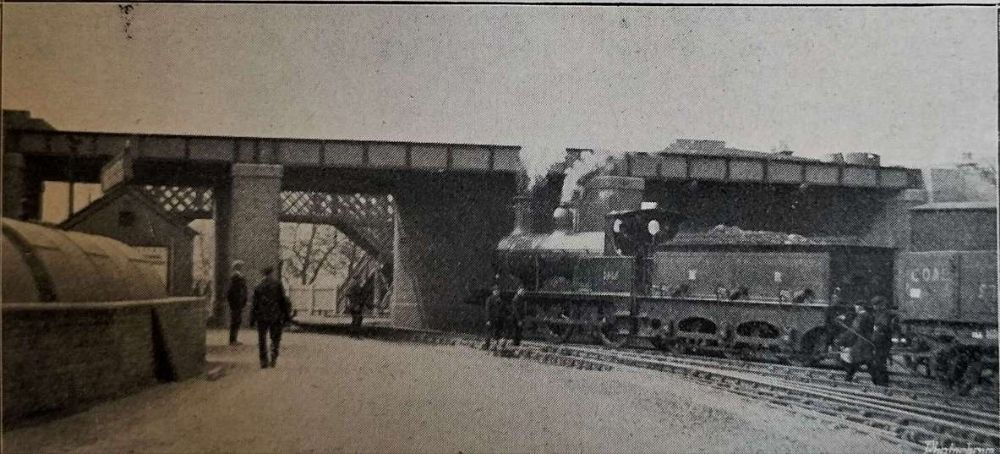
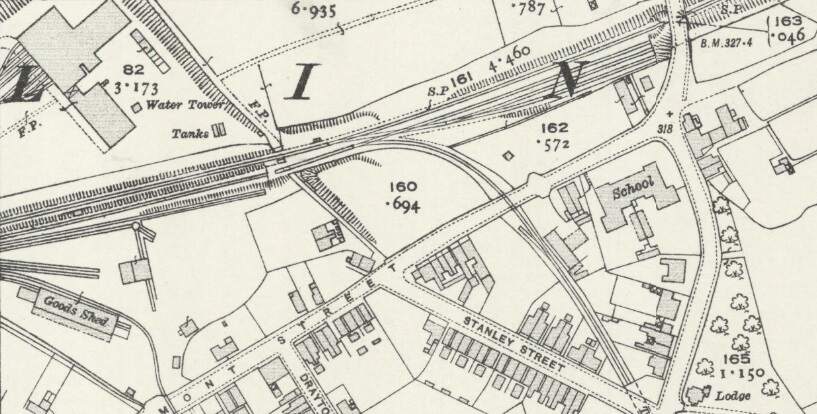
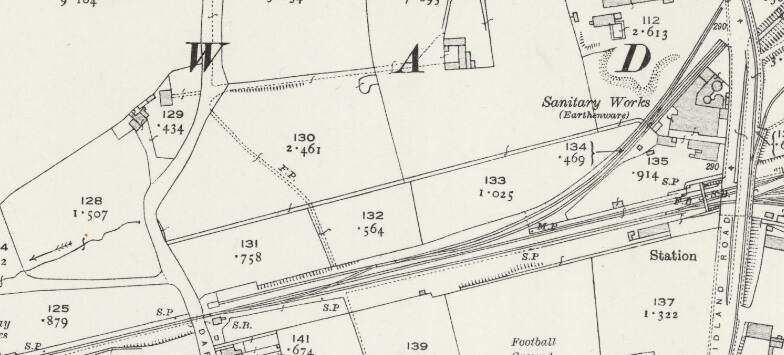
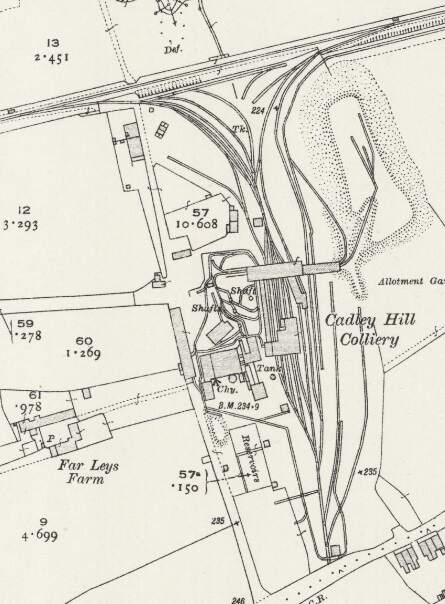
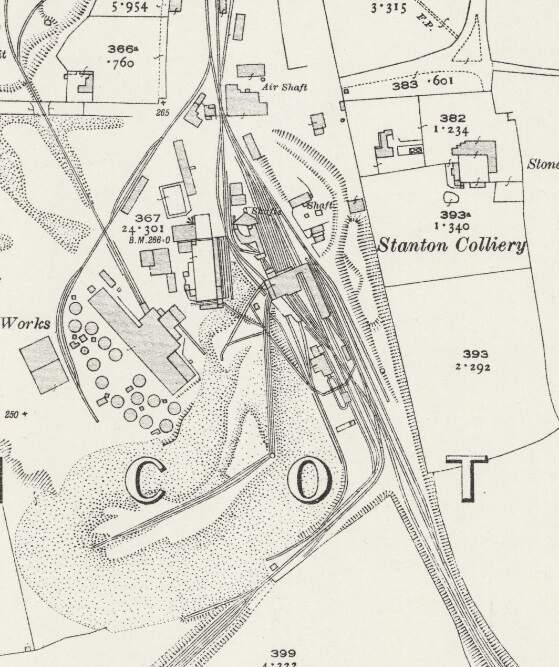

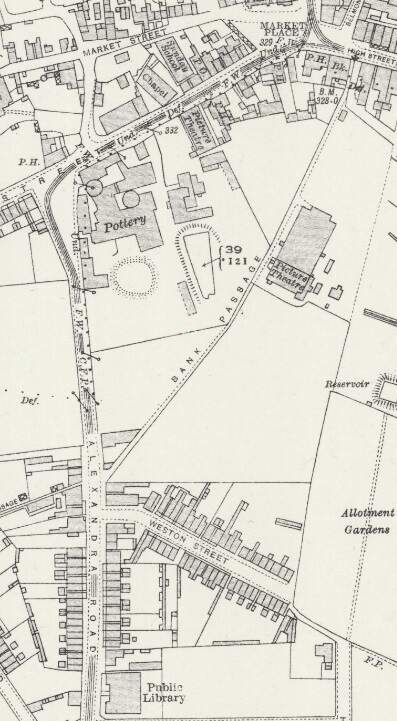
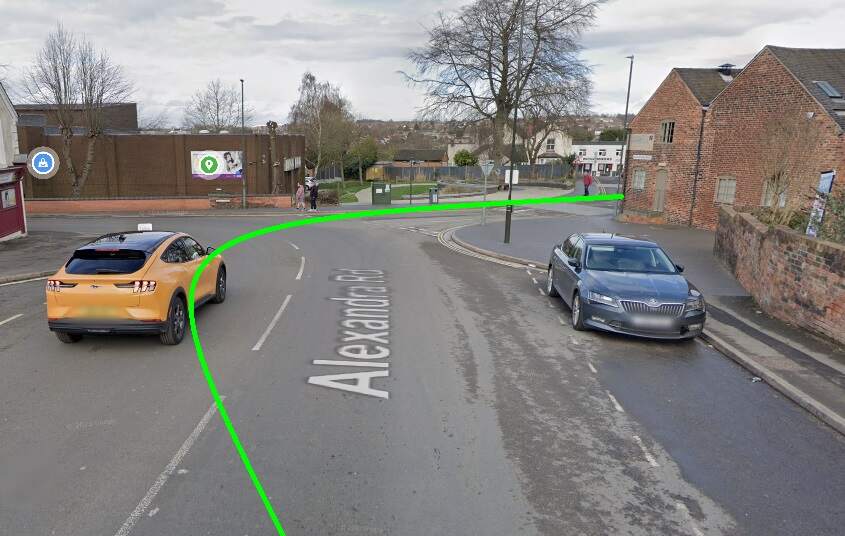
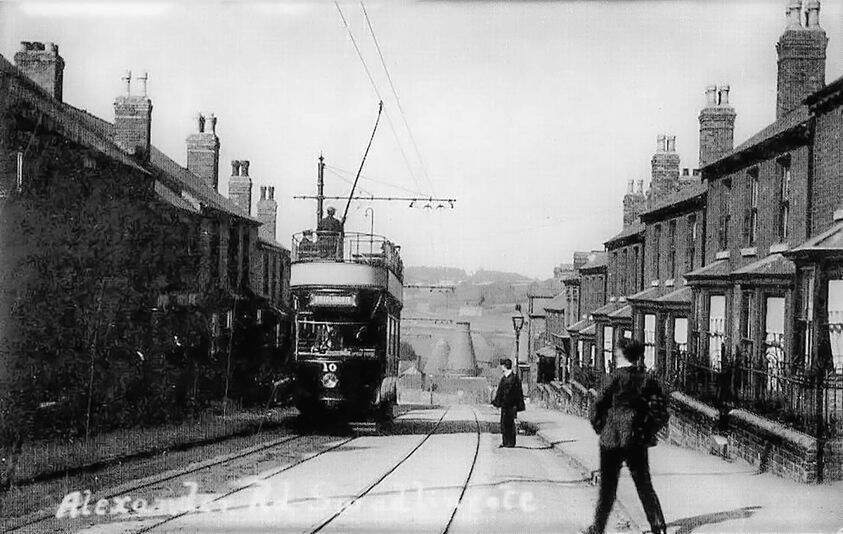
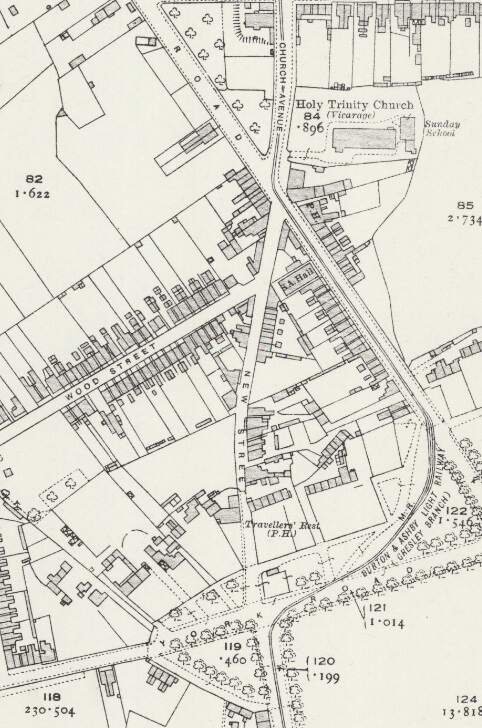
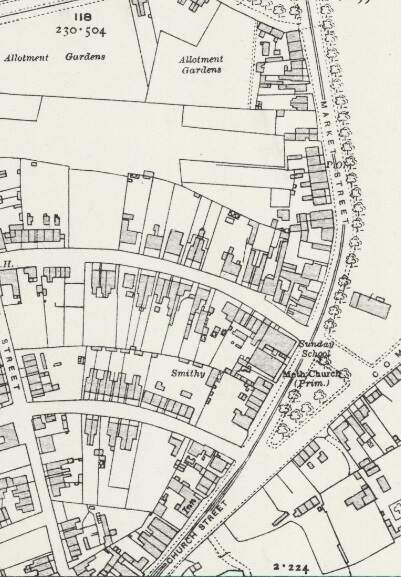
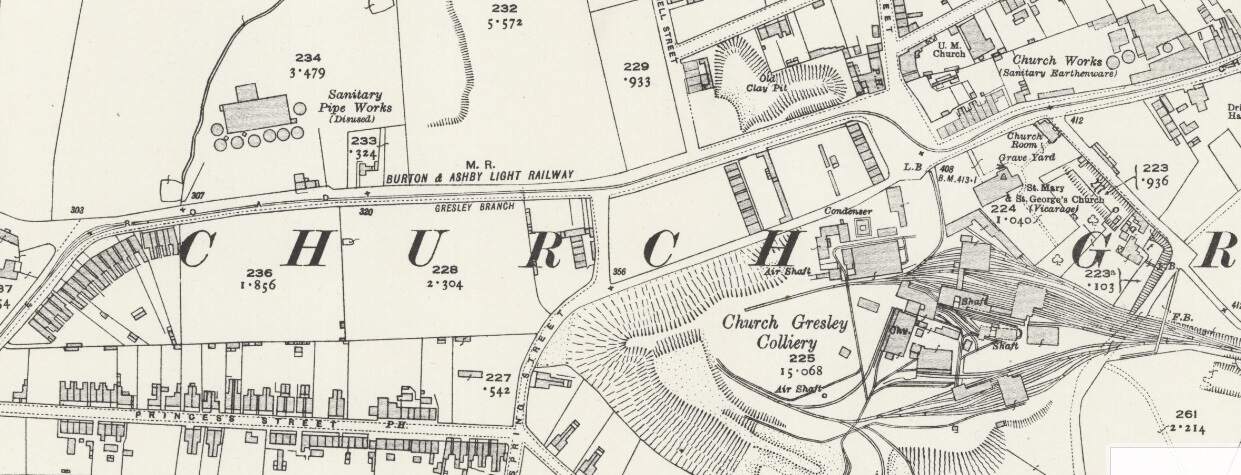
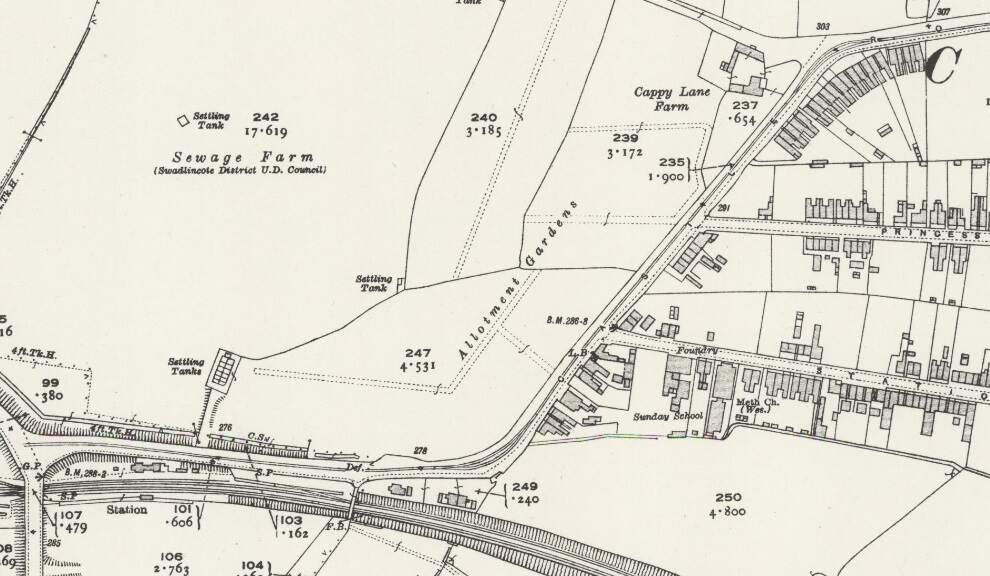

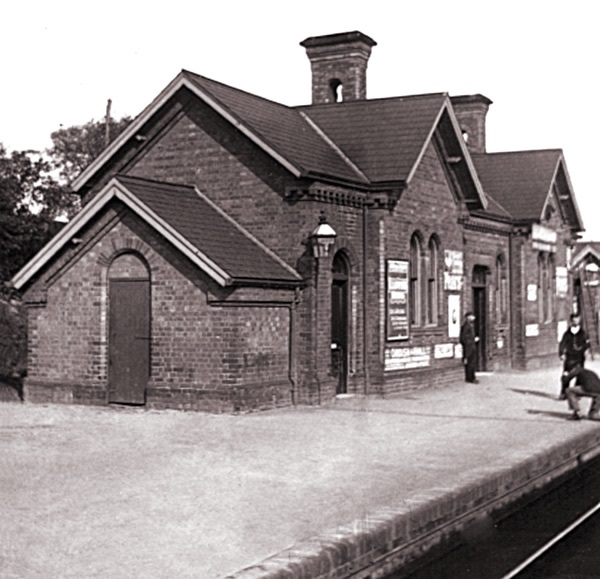


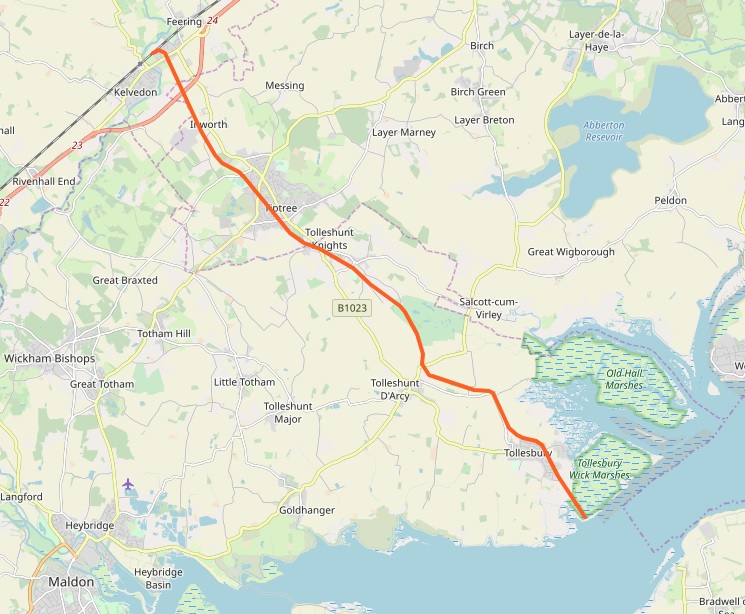
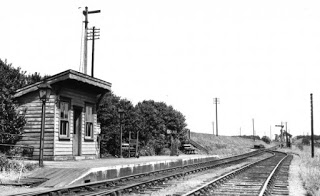
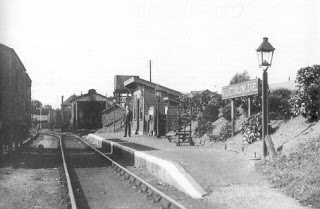
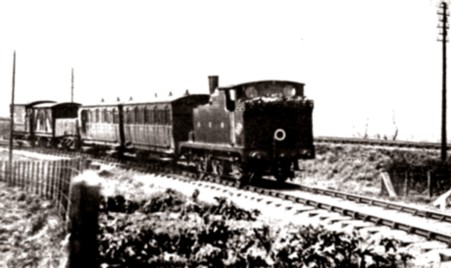
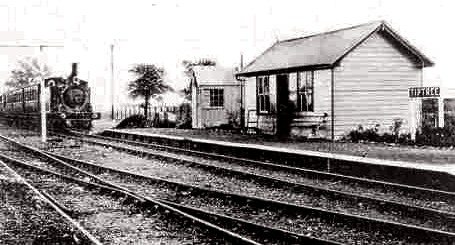
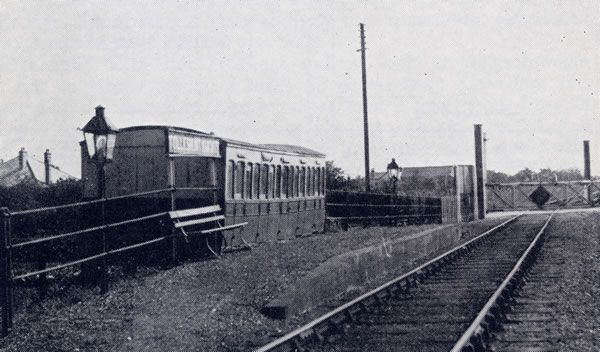
