P.W. Gentry wrote about Stockport’s trams in the July 1949 issue of Modern Tramway.
He says: “Besides possessing several interesting features of its own, the Stockport system today commands added attention as the last last surviving member of that once network of standard gauge undertakings encircling Manchester. It is an unusually pleasing system by virtue of its compact and simple arrangement, its focal point being Mersey Square.” [1: p123]
The article in Modern Tramway caught my attention because for about 9 years I worked in Stockport as a highway engineer.
This is a second article looking at Stockport Corporations Tramways. The first article which looked at the history of the network and followed one axis of that network can be found here. [2]
Mersey Square was the main hub of Stockport’s tramway network and appeared as a schematic plan in Gentry’s article in The Modern Tramway. …
Before looking at the remaining tram routes operated by Stockport Corporation it is worth noting the trams which Stockport Corporation used to operate the network. P.W. Gentry listed these as follows:
This table is taken from Gentry’s article. [1: p126]
Edgeley to Mersey Square and Mersey Square to Reddish andGorton
This first axis of the network was covered in my first article about Stockport Corporation Trams, here. [2] Two further axes are worth our attention: the first, below, that between Gatley and Bredbury; the second that between Manchester and Hazel Grove.
Gatley to Mersey Square and Mersey Square towards Bredbury
Tram services entered Mersey Square and crossed the Mersey. Services to the West of the town commenced here and ran along Princes Street to Bridge Street. That length of the network is covered in an earlier article which can be found here. [2]
We resume this article at the Northeast end of Princes Street and its junction with Bridge Street and then follow the route to Hyde.
This completes the length of the tramway from Stockport to Hyde. The next article in this short series will cover the line from Manchester to Hazel Gri
References
P.W. Gentry; Stockport Corporation Tramway; Modern Tramway, Vol. 12 No. 138, June 1949, p123-126.
Harry Postlethwaite, John Senior & Bob Rowe; Super Prestige No. 14, Stockport Corporation; Venture Publications, Glossop, Derbyshire, 2008. This document is made freely available by MDS Books as a .pdf: https://www.mdsbooks.co.uk/media/wysiwyg/Stockport_Download_1.pdf, accessed on 14th January 2025.
The Modern Tramway reported in December 1950 on the purchase by the Sudan Light & Power Company of the new 4-motor bogie tramcars. The bogies and equipment were being “supplied by the English Electric Company and the underframes and bodies by Charles Roberts and Company Ltd., under sub-contract to the English Electric Company. All motor tramcars and trailers [were to] be fitted with air brakes. As will be seen from the drawing reproduced, the body design [was] a pleasing example of modern British practice. The trailer cars [were] of similar outline.” [1: p270]
I published an article about the railways/tramways of Sudan in May 2022. That article can be found here. [7] This present article should be seen as an addendum to that article.
The image is embedded from Getty Images. It is a high-angle view of pedestrians, cars and an EEC tram &n trailer at the tram terminus in Omdurman, Sudan, circa 1955. The tramline connects Omdurman, on the west bank of the River Nile, with Khartoum. (Photo by Three Lions/Hulton Archive/Getty Images). [4]
The Modern Tramway continues:
“Electric tramway operation in Khartoum began on 16th January, 1928 when the line from Khartoum North to Omdurman via Khartoum and the White Nile Bridge was opened. The Khartoum Tramways were the first electric tramways in the Sudan and transport in the city and outskirts had been previously provided by two steam tramway lines, which were closed on the opening of the electric line.” [1: p270]
The Modern Tramway describes the electric tramway which replaced the steam-powered trams:
“The present rolling stock of the 3ft. 6 n. gauge Khartoum tramways consists of 16 single-truck motor trams, 15 4-wheel trailers, one 4-wheel electric locomotive and 30 goods trucks. All the stock was built by the English Electric Company Ltd. Four passenger services are operated, viz:
Khartoum Central Station Omdurman Central Station (5 miles).
Khartoum Central Station Khartoum North (3) miles).
Omdurman Central Station Abu Rouf (14 miles).
Circle (12 miles).” [1: p270]
“Headways are 18, 20, 20 and 30 minutes respectively. In addition a freight service is operated between Khartoum railway station and Omdurman. The main Iine begins at Khartoum North (where it made end on junction with a steam tramway to Shabat Reach, a service now operated by motor buses) and shortly turns south to cross the Blue Nile; on gaining the other bank, the line turns east, passing through the main part of Khartoum and running parallel to the Blue Nile. On this section there is the main depot and a large loop which runs round to the Central Station and the back of the city before turning north to rejoin the main line. At Mogren Point, the main line crosses the White Nile and immediately turns north towards Omdurman; this city stretches for 6 miles along the river and during the régime of the Mahdi it became the capital of his empire. The city is memorable for the battle fought outside its walls in 1898 between the followers of the Mahdi and the British. Some distance after turning north, there is another depot at Zaptia, on the western side of the line. At Omdurman Central Station the tramway turns east, back towards the river Nile, which it reaches at Abu Rouf, the final terminus. From this point, there is a ferry service to the terminus of the former steam tramway at Shabat Reach on the other side of the Nile. The tramways are all single-line-and-loop and there are several goods sidings. In 1948, 8,883,851 passengers were carried, whilst goods traffic averages 12,000 tons yearly.” [1: p270-271]
“At the time of the inauguration of the electric tramways it was thought that due to the very dry nature of the ground in Khartoum, satisfactory earth points could not be obtained for earthing the track for a track return system. It has since been established that it is possible to provide earth points, and the new trams will operate on the normal single overhead and track return system.” [1: p271]
The Modern Tramway acknowledged the help of the Sudan Light and Power Company Ltd., who provided the information on which these notes are based.
References
Modern British Tramcars for Khartoum; in The Modern Tramway Vol. 13 No. 156, London, December 1950, p270.
P.W. Gentry wrote about Stockport’s trams in the July 1949 issue of Modern Tramway.
He says: “Besides possessing several interesting features of its own, the Stockport system today commands added attention as the last last surviving member of that once network of standard gauge undertakings encircling Manchester. It is an unusually pleasing system by virtue of its compact and simple arrangement, its focal point being Mersey Square.” [1: p123]
This article in Modern Tramway caught my attention because for about 9 years I worked in Stockport as a highway engineer.
We know that tramways arrived in Stockport in the 1880’s from the Manchester direction when “the Manchester Tramways and Carriage Co, Ltd., [opened] a horse-car service into Mersey Square via Levenshulme.” [1: p123]
In 1889, the Stockport and Hazel Grove Carriage and Tramway Co. Ltd. was formed and “instituted horse car services southwards to Hazel Grove and Edgeley at Easter 1890.” [1: p123]
Stockport tramcar No. 5, dating from 1901, is preserved at the Heaton Park Tramway. The lower saloon of tramcar No. 5 was recovered from a field, where it had been used as a hen house, in 1971. It was restored by the ‘Stockport 5 Tramway Trust’. It now runs on the Heaton Park Tramway, a tramway museum in Heaton Park, Manchester. [2]
Stockport Corporation began tramway operations when, in 1890, “an Order under the Tramways Act was obtained for the construction and operation of electric tramways. Work commenced in Sandy Lane on 12th February 1901 and the three routes projected were opened in stages.” [1: p123]
Woodley Route: to Woodley Station by 26th August 1901; and Pole Bank by 30th May 1902.
Reddish Route: to Sandy Lane by 3rd September 1901; to Holdsworth Square by 30th May 1902; and to the Bull’s Head in Reddish by 25th November 1903.
Cheadle Route: to the Robin Hood on Brinksway by 23rd January 1902; to Cheadle Heath Bridge by 25th July 1903; to Cheadle Green by 5th May 1904; and to the Horse & Farrier, Gatley Green by 24th May 1904.
In parallel, negotiations secured the purchase of the horse tramways. First, the Levenshulme line (which was electrified by Manchester Corporation by 1903 and maintained by them). The Stockport & Hazel Grove undertaking was purchased in 1994 for £14,000 and electrified by 5th July 1905.
Tram service No. 35 was by then running from Manchester to Hazel Grove.
Mersey Square was the main hub of Stockport’s tramway network. …
The National Library of Scotland retains three digital versions of the OS 25″ mapping:
An extract from Map: Cheshire X.15; Ordnance Survey, 25 inch to 1 mile; revised: 1907; published: 1932 which shows Mersey Square as it was in 1907. It seems as though publication of this map was delayed for 25 years! [6]An extract from Map: Lancashire CXII.9; Ordnance Survey, 25 inch to 1 mile; revised: 1917; published: 1922, which shows Mersey Square as it was in 1917. [7]An extract from Map: Lancashire CXII.9; Ordnance Survey, 25 inch to 1 mile; revised: 1934; published: 1936, showing Mersey Square as it was in 1934. The tram depot has been enlarged and the additional depot on Heaton Lane constructed. Heaton lane Depot is accessed via the branch West off Wellington Road. [8]
The sequence of extracts from the Ordnance Survey’s 25″ series of maps shows the development from 1907 to 1934. The most significant changes in that period were: the dualling of the trackwork on the A6 South of the Square; and the development of the Tram Depot. As can be seen from the map extracts, the main depot building was widened to reach the river bank and then extended Southwest towards Mersey Square. A surprising change appears in the latest extract – the conversion of the dual track work on Chestergate where it passes under the A6, Wellington Road to a stretch of single track.
Mersey Square in 1932, seen from the West. This image was shared on the Memories of Stockport Facebook Group on 19th January 2021 by Chris Paul. [13]
The 1930s to the 1970s saw major changes to the centre of Stockport. The River Mersey was culverted from Mersey Square, Northeast to Bridge Street and a dual carriageway road was created along the line of the River Mersey. This new road was not used by trams but it altered traffic arrangements at Mersey Square while it was in use.
The construction of Merseyway in the 1930s is nearing completion in this photograph which was shared on the Memories of Stockport Facebook Group on 18th October 2020 by Dave Moran. [12]The view Southwest from Bridge Street, showing the dual carriageway over the River Mersey in the mid-20th century. This image was shared on the Memories of Stockport Facebook Group on 26th June 2020 by Julian Ryan. [9]Merseyway was built on a series of reinforced concrete portal frames spanning the river. Given the positioning of the vehicles on the structure, this image probably comes from while the road was closed. The image was shared on the Memories of Stockport Facebook Group on 26th September 2018 by Marilyn Ann Cronshaw. [11]Merseyway is seen from the Southwest, looking Northeast in the mid-20th century. The tram depot is on the left. This image was shared on the Memories of Stockport Facebook Group on 10th August 2020 by Keith Povey. [10]A final view of Merseyway as a road across the roundabout at its Southwest end in Mersey Square. The photograph was taken from Wellington Road and it was shared on the Memories of Stockport Facebook Group on 6th October 2020 by Mark Lloyd. [14]Mersey Square seen from the Southeast in 1948. The oddly shaped roundabout at the end of Merseyway is on the right with the old fire station above it. This image was shared on the Memories of Stockport Facebook Group on 28th August 2023 by Michael Sidebottom. [15]Traffic emerging from Mersey Square onto Wellington Road (A6). Manchester is away to the right, Hazel Grove to the left. Heaton Lane Tram Depot is beyond Wellington Road on the right of the image. This photograph was shared by Marilyn Ann Cronshaw on 24th June 2015. [16]Mersey Square, Stockport in the 21st century. [Google Maps, January 2025]
By July 1905, the network was “in its final shape, with a total route mileage of 19.46. Of this, however 2.51 route miles (Vernon Park Pole Bank) was the property of Bradbury and Romiley Urban District Council, 1.64 miles (Cheadle Heath Bridge Gatley Green) belonged to Cheadle and Gatley U.D.C. and 0.88 miles to Hazel Grove and Bramhall U.D.C., all these sections being leased to Stockport Corporation for operating purposes. The total length of track over the system as a whole was 34.03 miles, and the cost of track construction averaged the modest figure of £7,227 per route mile.” [1: p124]
In addition to joint working with Manchester Corporation, a similar arrangement was made with “The Stalybridge, Hyde, Mossley and Dukinfield Transport and Electricity Board, Pole Bank being the point of connection between the two systems. Stockport cars were operated through to Hyde Town Hall from 1st January, 1903, when the Pole Bank Hyde line was the property of the Oldham, Ashton and Hyde Electric Tramways, Ltd., a B.E.T. subsidiary, but it was not until 1923, when this undertaking sold out to local authorities and the Hyde – Pole Bank section was taken over by the Joint Board, that mutual through running could be started. A joint S.H.M.D.-S.C.T. service was introduced in March 1925, between Hyde and Edgeley via Mersey Square and continued until the Joint Board ceased to operate trams on 26th May, 1945. Thereafter, Stockport maintained the service unaided until 2nd March, 1947, when buses took over and the trams were cut back to Vernon Park.” [1: p124]
The withdrawal of the through services into Manchester occurred in the late 1940s but, Gently says, “luckily, only one section of the purely local system [had] suffered likewise, that being the Cheadle-Gatley section, on which buses were substituted on 21st September 1931. An early trolleybus route to Offerton was given up as impracticable many years [earlier].” [1: p124]
Wikipedia tells us that the fleet of tramcars steadily increased, with the Corporation owning a total of 87 double-deck electric tramcars through the life of the system, [3] although the highest number at any one time was 85 [4] and numbers settled down at 82, “all of which [were] of the single-truck top-covered vestibuled type with an average seating capacity of 60. Only 26 cars [had] open balconies, and these [were] used only at peak periods; ten of them [had] reversed staircases. The 56 totally enclosed cars [included] 30 which [were] fully upholstered on both decks, the seats being particularly deep and comfortable. The car [equipment comprised] Westinghouse, DK.30 or DK.35 motors and Dick, Kerr DB.1 (form K3) controllers, and hand-operated track brakes [were] fitted on account of the steep gradients. In 1944, the fleet numbering was re-arranged with the primary object of grouping together between 1 and 29 all those cars which, on account of a low bridge near Bredbury, had low-built top-covers, these being identified by a large H (denoting “Hyde,” the route concerned) on either side of the headlamp.” [1: p124] This was needed until abandonment of the lines beyond Vernon Park rendered this unnecessary. [5]
Most of the network survived the Second World War but was progressively closed in 1950 and 1951, only surviving for a short while after the Modern Tramway article of 1949. … “The Crossley Road to Hazel Grove route was the first to go, on 14th January 1950, followed by the Edgeley to Vernon Park route on 3rd March 1951, the Cheadle route on 10th April 1951 and finally the Reddish line on 25th August 1951.” [3]
Wikipedia also explains that: “The Corporation also ran a small trolleybus line, using three vehicles which collected current from the overhead lines using the German Lloyd-Kohler system, the only use of this system in Britain. The route opened in 1913, but the onset of the First World War made obtaining spare parts from Germany impossible, and it ran intermittently, due to maintenance problems. It was replaced by motor buses in 1920.” [3]
It is interesting to note that the deals made with adjacent networks “allowed long journeys to be made by tram, with the route from Hazel Grove to Seaforth Sands near Liverpool being 51.5 miles (82.9 km). One lady is known to have travelled between Liverpool and Stockport for pleasure on several occasions, although it took almost a whole day to reach her destination.” [3]
Gentry noted that Stockport’s track was “double throughout on the Levenshulme, Cheadle Heath, Edgeley and Hazel Grove routes and mostly so on Reddish except between the top of Lancashire Hill and Clare Road; this latter section, together with Princes Street and most of the Vernon Park route [was] single-and-loop. The rail used [weighed] 101 lbs. per yard. The chief depot [was] located in Mersey Square, with a subsidiary depot nearby in Heaton Lane.” [1: p124]
Trams ran through St. Peter’s Square and down the ramp into Mersey Square. The tram stop was in the centre of the paved area with both the Tram Depot and the Fire Station close by.
Reddish Road then turns to the North and later to the Northwest.
Another extract from the 25″ Ordnance Survey of 1934 (this sheet published in 1935). The tram tracks turned with Reddish Road as the road ahead led to Reddish Station forecourt. [36]As this next extract from the 25″ Ordnance Survey of 1934 shows, trams followed Reddish Road over the railway via Reddish Bridge and on to Holdsworth Square. [36]North of Holdsworth Square trams ran North along Gorton Road crossing the LMS & LNER Joint Railway between Manchester and Hayfield adjacent to that line’s Reddish Station. The location is shown on this extract from the 1934 25″ Ordnance Survey. [37]
The next map extract and photograph show the terminus of the route we have been following from Mersey Square to Gorton. …
This first article has looked at the history of Stockport Corporation’s Tramways and has highlighted two of the tramway routes operated by Stockport Corporation. The line from Edgeley to Mersey Square and the line from Mersey Square to Gorton. Subsequent articles will look at other routes operated by the Corporation.
References
P.W. Gentry; Stockport Corporation Tramway; Modern Tramway, Vol. 12 No. 138, June 1949, p123-126.
Harry Postlethwaite, John Senior & Bob Rowe; Super Prestige No. 14, Stockport Corporation; Venture Publications, Glossop, Derbyshire, 2008. This document is made freely available by MDS Books as a .pdf: https://www.mdsbooks.co.uk/media/wysiwyg/Stockport_Download_1.pdf, accessed on 14th January 2025.
The June 1950 issue of The Modern Tramway carried a report by A. A. Jackson on the tramways in the French port of Marseilles.
Marseilles sits in a natural basin facing West into the Mediterranean and surrounded by hills on three sides. Jackson’s article was based on personal observations in 1945 and later information provided by D. L. Sawyer and N.N. Forbes. He writes:
“The suburbs extend to the lower slopes of these surrounding hills and they are connected to the centre of the city by a tramway system that is now the largest in France. The original operator was the Compagnie Genérale Française des Tramways (Réseaux de Marseille) but the tramways have been under sequester since 1946. The route mileage at the present time is kilometres and the gauge is standard (i.e. 1.44 metres).
The important dates in the history of the system are:
1873: First horse tramway. (This date is questioned by other sources with 1876 being quoted for the first use of horse-drawn trams. The French Wikipedia entry talks of planned routes dating from 1873 but the concession only being awarded in 1876.) [2][3][16]
1876: C.G.F.T. acquired the tramways (excluding the Aix interurban).
1890: Electrification begun.
1904: C.G.F.T. acquired and electrified the steam railway, L’Est-Marseille.
1907: Allauch (12 km.) and La Bourdonnière (12 km.) routes opened.
1910: Electrification completed. Le Merlan route opened.
1922: First rolling stock modernisation began.” [1: p134]
These dates are not comprehensive. Jackson was writing at the end of the 1940s and could not be expected to cover later events. It is worth noting Wikipedia’s comment that, “Unlike most other French cities, trams continued to operate in Marseilles, even as through the 1950s and beyond trams disappeared from most cities around the world. The original tram system continued to operate until 2004, when the last line, Line 68, was closed. Trams remained out of operation for three years between 2004 and 2007, in advance of the effort to renovate the tram network to modern standards.” [2]
The Tramways of Marseilles in 1949. [1: p134]
Wikipedia says that “the network was modernised by the constant introduction of newer tramcars, to replace the older ones. In 1938, thirty-three trailers were recovered from Paris. These meant that reversible convoys could be operated. In 1939, the tramway company owned and operated 430 tramcars, 350 trailers and 71 lines.” [2]
A 1943 proposal would, if it had been realised, seen tunnels provided in the centre of Marseilles, the busiest lines would have been brought together in two tunnels. This project did not come to fruition.
Wikipedia continues: “In 1949 a further modernisation occurred. The first articulated tramcars was designed and built (Algiers tramway possessed articulated SATRAMO tramcars). These were created by joining two older tramcars. These tramcars remained unique [in France] until 1985 when Nantes tramway opened.” [2]
The city council did not want to keep its network of trams. The haphazard modernisation of tramcars was evidence of the council’s intentions. “The process of replacing tramways with trolleybuses and buses began after World War II in 1945 and accelerated from 1950. The first closures meant that Canebière was tramway-free from 1955. The last closure occurred on 21st January 1960.” [2] But not all lines closed. …
Line No. 68 opened in December 1893 and is the only tramway line to remain in service during the later part of the twentieth century. It “stretched from Noailles to Alhambra, serving La Plaine, the Boulevard Chave, the La Blancarde railway station and Saint-Pierre cemetery. The central terminus [was] situated in a tunnel. This tunnel, built in 1893, [was] unique in France and was built to give access to the city centre, avoiding the narrow streets of some of Marseille’s suburbs. Because of the problems involved in converting the line to bus use it was decided to keep the line operational.” [2]
Line 68 [was] 3 km (1.9 mi) long and was out of use for a few years. The decision to modernise it was taken in 1965 and the line had reopened by 1969 when twenty-one PCC tramcars were purchased and the whole track relaid. “The first of the PCC cars arrived on 26th December 1968 and the first tram went into service on 20th February 1969. The last of the old tramcars was withdrawn that spring. Modernisation resulted in an increase in passengers. Numbers increased from 4,917,000 passengers in 1968 to 5,239,000 in 1973.” [2]
The PCC cars were later modernised in 1984. Three new cars were delivered and all cars made into double cars. The line operated successfully until 2004 when it closed for reconstruction. After refurbishment, “the short section between La Blancarde and Saint Pierre was reopened as part of a new network on 30th June 2007. The section along Boulevard Chave to Eugène Pierre [reopened later the same year] … the tunnel to Noailles was … [reopened in] …summer 2008.” [2]
Returning to Jackson’s article of 1949/50, he continues:
“The longest route is that to the industrial town of Aubagne, 17 km. inland (service 40) and this is further extended 14 km. eastwards by an original trolley-bus route (to Gémenos and Cuges). The Aubagne tram line, which also carries the associated service 12 to Camoins les Bains (12 km.) and a short working to St. Pierre (service 68), begins at the Gare Noailles, a sub-surface tramway station in the centre of the city and the trams leave this station in tunnel, proceeding thus for 1 km. with no intermediate stop, to emerge on a quiet, broad boulevard before branching, (service 12 to Camoins, 40 to Aubagne). After the junction, each of these two lines continues outwards on roadside reserved track for most of its length. The origin of these important suburban arteries was the steam railway L’Est Marseille which was constructed in 1892 from the Gare Noailles to St. Pierre, and converted to an electric tramway by the C.G.F.T. in 1904. Bogie cars and trailers provide a fast service on these routes and the local services to St. Pierre are worked by single-truck cars, One so often hears aesthetic criticism of tramways that it is interesting to note that a well-known League member once explored the Marseilles system and left the city, blissfully unaware of the existence of this interesting sub-surface terminus.” [1: p134-135]
“The other City termini are in side streets off the main thoroughfare La Canebiere (Boulevard Garibaldi, Alliées Leon Gambetta, Cours Belsunce, Cours Joseph Thierry) also opposite the Préfecture, and on the two main streets leading north out of the city (Place Jules Guesde and Place Sadi-Carnot). To cross the city involves a change of cars in all but one instance, the sole remaining cross-city service being No. 41, Chartreux St Giniez. Coastal lines extended to L’Estaque in the north-west and to La Madrague in the south, the latter serving the popular beach and pleasure resort La Plage du Prado (rather similar to Sunderland’s Sear burn route). Other lengthy routes (mostly with rural termini) are: Chateau Gom bert (5), La Bourdonnière (1) Allauch (11), Les trois lucs (7), Le Redon (24) and Mazargues (22 and 23). The circular service, No. 82, serves the residential and coastal areas to the south of the city and enjoys wide roads and unrestricted run ning over most of its length; it traverses the scenic Corniche for part of its run. This is one of the few routes on which cars may be seen running without the almost inevitable trailer. In the older parts of the city many of the streets are narrow, but the greater part of Marseilles is planned on the usual French pattern and therefore possesses wide streets and boulevards well suited to tramway operation. As in Italy, the track in the boulevards is often placed against either curb, well away from the main traffic stream, and in such places the parking of cars is strictly controlled to ensure that tramway operation is unrestricted. At boulevard intersections such as the Rond Point du Prado there are well planned circular layouts joining all tracks. Four-wheeled trolleybuses of standard design and small oil buses have replaced the trams on a number of strictly urban routes unsuitable for tramway operation (the oil bus substitutions are presumably an intermediate stage with the eventual intention that they be replaced by trolleybuses). These trolleybus and oil bus substitutions retain the old tramway services numbers although in certain cases the original tramway route has been extended or slightly modified. Mr. D. L. Sawyer, who was in Marseilles recently, reports that the trolleybuses are not unaffected by the daily shaking up they receive from the rough, uneven street surfaces which gives one cause to reflect that an effective trolleybus installation in many European cities would prove to be a very expensive business as the traditional street surfaces would need to be completely replaced with a surface rather more kind to the not-so-sturdy trolleybus. The tram tracks, which suffered badly from war time neglect, were very noisy in 1945, but they have now been put in excellent condition.” [1: p135-136]
The “Régie Départmentale des Chemins de Fer et Tramways des Bouches du Fer et Tramways des Bouches du Rhône formerly operated a reserved-track roadside electric tramway from Marseilles to the university and cathedral city of Aix en Provence, 29 km to the north. This line was physically connected, by end-on junction, with the Marseilles system, and its Marseilles terminus was at the Place du Change, by the Vieux Port. The dark blue and silver bogie cars, towing one or more heavy bogie trailers, operated an hourly service with a journey time of just under 90 minutes. The Aix terminus was at the extreme end of the main street, the Cours Mirabeau, at the Place Forbin, and the depot and works were situated at the Pont de l’Arc, Aix. This line was converted to trolleybus operation during the winter of 1948-49 and the main trunk road has thus been burdened with additional vehicles. Mr. Sawyer states that the trolleybuses have reduced the journey time considerably; this is hardly surprising as the trams they have replaced were not modern and the number of stops on the tram route was unnecessarily large. New tramcars and a certain amount of track re-alignment would probably have produced an even greater improvement than the trolleybuses it is certain that they would have been a better investment.” [1: p136]
Jackson reports on the rolling-stock in use on the network:
“The rolling stock of the Marseilles system is an interesting mixture of semi-modern and modernised cars, painted blue and cream and mostly of single-truck design. The trailers approximately equal the motor cars in number and are of even greater variety; one type, a covered toastrack, is known locally as ‘Buffalo’ and is very popular during the hot Mediterranean summer. Extensive use is made of twin-units in Marseilles thus obviating the necessity of shunting at termini. The cars are fitted with deep throated hooters and the sound of these, together with the clanging of the bells that announces the changing of the traffic lights is a characteristic of the city. The rolling stock is housed in five depots, all marked on the map, viz., Arenc, Les Catalans, Les Chartreux, La Capelette and St. Pierre. The repair and construction workshops are at Les Chartreux. The high price of materials and the financial situation forbid the purchase of new trams under present conditions and the current programme is therefore concerned with the rehabilitation of existing equipment. A fine and bold beginning has been made in car No. 1301, placed in service in the summer of 1949. This is an articulated car, built from two of the more modern motor cars and the result is a vehicle of pleasing and efficient appearance, 21 metres in length with a passenger capacity of 175 (35 seats) and a maximum speed of 50 km. per hour. One driver and one conductor only are needed (a saving of 35 per cent on personnel against the motor car and trailer type of unit); loading is through the front entrance, unloading through centre and rear exits. The car is double-ended and the doors are pneumatically controlled, one by the driver and the other two by the conductor. The tram cannot start until the central door is closed.
The tickets are issued on the usual carnet system and the books of tickets can be purchased at a reduced price at kiosks and tobacco shops, a book of twenty 5-franc tickets costing 85 francs. Two tickets are taken by the conductor for one section, three for two sections, and four for three sections or over. After 9 p.m. and on Sundays the rate is increased by one ticket and on special journeys to the Sports Stadium and Race Course, a minimum of five tickets is taken. The length of the sections is short and it is only on the longer suburban routes that the all-over fare becomes cheaper. Many cars are equipped for “pay as you enter” (although to use the word “pay” is not entirely accurate as the carnet system means that the conductor rarely handles money). On the Aubagne route (No. 40) a special fare tariff is in force; the complete journey requires five tickets costing eight francs each. Transfer tickets are not used as they have been declared unsuitable for Marseilles.” [1: p136-137]
The French Wikipedia entry for the trams of Marseilles gives some significant detail relating to the trams used on the network. The original, early, rolling-stock delivered between 1891 and 1925 was “cream-coloured, the colour adopted by the CGFT on all the company’s networks. All the motor cars had open platforms and could be transformed in summer, with the glass frames on the side walls being replaced by curtains. The numbers were painted in large figures on the four sides of the vehicles.” [16]
Two axle trams: [17]
No. 501 to 524, “Saint Louis” motor car, 1891-95, power: 2 × 12 hp , empty weight 6.7 tonnes, ex No. 201 to 224 before 1900; (Drawings can be found here. [18])
No. 525, prototype “K” engine, 1891-95, power: 2 × 27 hp, ex No. 301 before 1900;
No. 526-530, “P”, 1898, power: 2 × 27 hp, ex No. 1 to 5 Marseille Tramways Company
From 1925, the engine bodies were modernized. They were rebuilt with closed platforms and their capacity was increased. The trucks (chassis) remained original, but the electrical equipment was reinforced to gain power. This fleet was completed by two series of new engines. All modifications were made according to the criteria of the “Standard” type, a standard defined for vehicles to use the future tunnel network. [17][24]
Bogie trams: [17]
1200, prototype of a closed platform tram;
1201-1231, 1924, transformation of the “C” trams, 1002-1033, power: 4 × 32 hp, empty weight 16.4 tons;
2001-2004, 1929, known as “Pullmann”, delivered new, power: 4 × 42 hp, empty weight: 21.5 tonnes.
Trailers
The number of trailers varied between 400 and 500 depending on the period. The majority of trailers had 2 axles and were numbered in the series 1 to 500. These included: open trailers called “Badeuse” with side access to the rows of transverse benches; and closed trailers with access via end platforms. [17]
In addition there were a number of bogie trailers:
138-153, 1899, transformed into tram cars;
2051-2054, 1928, accompanying the “Pullmann” engines 2001-2004;
2201-2233, 1937, purchased from the STCRP (Parisian network) and coupled to the 1200 locomotives;
2551-2572, 1944, of the “Standard” type, coupled to the 1200 motor cars. [17]
Jackson continues:
“In 1945, overcrowding of trams had reached a peak as there then existed no other means of public transport and the number of cars in service had been reduced by the shortage of electricity and lubricants and the ravages of war-time lack of maintenance. Passengers were then to be seen riding on the steps, on the bumpers, on the roofs and even standing tightly jammed between the trailer and the motor car, precariously balanced on the couplings; indeed it was often difficult to see the cars for the passengers. This is only mentioned as a tribute to the sturdiness and reliability of electric tramways which here, as in many other cities all over the world, continued to operate and bear the brunt of all the city’s passenger traffic long after war conditions had forced other means of transport out of service.” [1: p137]
“With regard to the future, it is encouraging to know that the main tramway routes will be retained and modernised and that modern tramway equipment and reserved track routes of the electric light railway type will be a feature of the Marseilles of the future-a fine tribute to the planners of the original tramway system. It is officially recognised that trolleybuses would be unable alone to cope with the heavy traffic of this great French port, and only a small number of tram routes remain to be converted to trolleybus operation. Further tramway subways, including one under the Canebière, were proposed some years ago and it may be that these will, after all, be built as they would be considerably less expensive than the tiny network of underground railways that is part of the current plans.” [1: p138]
It is worth a quick look at the development of Marseille Metro further below.
Jackson also provides details of the different services in place in 1949 (his list was correct as at May 1949, but omitted some all-night services and short workings):
Line 23, Tram No. …34 (first digit not visible) in Place Castellane. This image is made available under a Creative Commons Licence (CC BY-NC-SA 2.0). [30]
The 21st Century
Marseilles modern tram network was inaugurated on 30th June 2007. The first phase of the new Marseille tram network opened on that date. It consists of one line linking Euroméditerranée in the northwest with Les Caillols in the east. Between Blancarde Chave and Saint-Pierre stations, it runs on part of the former Line 68.
“In November 2007, the portion of the old Line 68 between Blancarde Chave. and E-Pierre (near the entrance to the tunnel) reopened, and two lines were created. Line 1 links E-Pierre and Les Caillols, and Line 2 runs from Euroméditerranée to La Blancarde, where a transfer between the two lines was created. La Blancarde train station is a transit hub: a station on Line 1 of the Marseille Metro opened in 2010, and it has long been served by TER regional trains to and from Toulon.” [2]
“In September 2008, Line 1 was extended to Noailles via the tunnel formerly used by line 68. This tunnel now carries a single track since the new trams are wider than the [PCC trams]. In March 2010, Line 2 was extended 700 metres North from Euroméditerranée-Gantes to Arenc.” [2]
“In May 2015, the 3.8 km (2.4 mi) Line 3 was inaugurated. It shares Line 2 tracks between Arenc and la Canebière where Line 2 turns west. Line 3 continues South on new track through Rue de Rome to Place Castellane. Line 3 extensions south, 4.2 km (2.6 mi) to Dromel and la Gaye, and 2 km north to Gèze are planned. Tram Line 3 will therefore continue to run parallel to the Dromel-Castellane-Gèze Metro Line 2, which may limit its ridership.” [2]
Rolling-stock: “Customized Bombardier Flexity Outlook trams are used on the new tram line[s]. Composed of five articulated sections, they were 32.5 m (106 ft 8 in) long and 2.4 m (7 ft 10 in) wide. Twenty-six were delivered in 2007.[2][3] They were extended by 10 m (32 ft 10 in) by adding two additional articulated sections in 2012. [6] In 2013, six new Flexity were ordered for the T3 line.” [2]
“Their exterior and interior appearance was designed by MBD Design. [6] The exterior resembles the hull of a ship, and the driver’s cabin resembles the bow. A lighted circle displays the colour of the line the tram is on. Inside the tram, the floor, walls, and ceiling are coloured blue, and seats and shutters are made of wood.” [2]
“The tram network is run by Le Tram, a consortium of Régie des transports de Marseille and Veolia Transport. The proposal to privatize the operation of public transit was unpopular, and resulted in a 46-day transit strike.” [7]
Marseilles Metro
The Marseilles Metro is independent of the tram network. It consists of two different lines, partly underground, serving 31 stations, with an overall route length of 22.7 kilometers (14.1 mi). [10] Line 1 opened in 1977, followed by Line 2 in 1984. Two stations, Saint-Charles and Castellane , each provide interchange between lines. [11]
The mention of ‘Lickey’ in the railway press usually conjures up thoughts of the Lickey Incline and the bankers needed to enable steam-powered trains to make the climb.
In an article written in 1949 (Modern Tramway’s Prize Article of 1949) and published in February 1950, B.J. Pridmore prophetically proposed a Light Rail solution to anticipated traffic issues on the transport corridor centred on the Bristol Road.
Would cities in the UK which already had some reserved tram tracks have benefitted from forward thinking that sustained the use of trams through the latter years of the 20th century on tracks and routes which would be suitable for the current wave of Light Rapid Transit/Modern Tramway provision?
Here is Pridmore’s article in full (illustrations are from a variety of referenced sources):
“Summary
There are few cities with a passenger transport route so convenient for conversion to a rapid-transit light railway as is the Birmingham route to the Lickey Hills. In this article is submitted a scheme for such a conversion, describing the route, the alterations required to the track and vehicles, the attractive services which could be operated, and the possibility, in the future, of the possession by Birmingham of a true rapid-transit installation giving a public passenger transport system freed from the delays due to street congestion.
Introduction
The Lickey route of the Birmingham tramways extends about eight miles Southwest of the city, connecting it to the suburb of Edgbaston (2 miles) and the almost separate entities of Selly Oak (4 miles), Northfields (6 miles) and Longbridge (7 miles and location of the Austin Works), bifurcation at this point giving two termini at the dormitory villages of Rednal and Rubery on the edge of the Lickey Hills.
The traffic on this route is partly of a business character, with a morning peak to the city, two small mid-day peaks, outward and inward, from the city to Selly Oak, and the evening peak of outward-bound traffic. Superimposed upon this are the industrial peaks, of a general nature to and from the city, and of a concentrated nature in the opposite directions to and from the Austin Works at Longbridge. Further traffic is of an interurban nature: between each of the shopping centres of Northfields and Selly Oak as well as from each of these to Birmingham there is appreciable miscellaneous traffic. There is also considerable holiday traffic to the Lickey Hills on non-working days.
Services are operated from the city to Rubery and Rednal, with many short workings to Selly Oak, and extra mid-day journeys from Longbridge to Northfields and Selly Oak, whilst services on the inner (and suburban) section of the route are amplified by the superposition of those to and from Pershore Road (Cotteridge). which share the Bristol Road with the Lickey routes for the first two miles or so to the junction at Pebble Mill Road.
This trunk route with large and varied traffic and high load factor has already about three-quarters of its length constructed as reserved track. Much of this has recently been relaid “solid” on a concrete foundation, instead of on the ballasted sleepers as originally.
It has only two short gradients of any magnitude, and would thus seem ideal for gradual conversion towards an interurban light railway giving ample capacity on the route and removing public transport from the road proper, hence also reducing congestion in the bigger Birmingham of tomorrow for it is along this route that Birmingham seems ripe for the next phase of expansion.
In the remainder of this article it is suggested how, ultimately, this route should be converted to a light railway as a contribution towards ideal transport in the greater Birmingham of the future.
The Track and the Route
The present Navigation Street terminus loop should be improved to give loading islands outside two parallel tracks at the terminal loading point; the track layout should include crossovers to enable Pershore Road cars to be separated from Lickey cars, and Selly Oak and other short working cars to be separated from through cars (as will be needed for peak-hour services, q.v.). The one-way streets forming the loop are amply wide enough to permit the tram tracks to be relocated at the sides and be totally reserved; public transport would thus be segregated from the rest in this most congested section of the route.
Tram No. 842 sits at the Navigation Street terminus of the route from Birmingham to Rednal and Rubery. [3]The Navigation Street terminus of the tram service to and from the Lickey Hills. Tram services No. 70 and No. 71 circulated round the loop shown on this extract from the 25″ Ordnance Survey of 1913 (published in 1918). [6]
The Bristol Road as far as Pebble Mill Road will ultimately have to be widened if traffic increases much more; but taking in part of the footways and front gardens would in general give room for the central eighteen feet of reservation which would suffice for the tramway. Alternatively, the reservation could be at the side and a three-lane road be left for the remainder of the traffic. As an interim measure local road-widening and the provision of loading islands with queue barriers, the former combined with pedestrian crossings, at the few important stops, should be undertaken.
The narrow road through Selly Oak and under the railway bridge presents the greatest obstacle; track reservation should be made when this is widened, while the provision of loading islands would seem the only present practicable measure.
The roads through Northfields and Longbridge are amply wide enough for a narrow track reservation (lacking the wide grass borders of the present reservations) and conversion of these sections to dual carriageway with central reservation for the tramway should be done as soon as the conversion scheme is commenced.
The tracks at present reserved can remain as now except that it would be wise to convert the remainder of the sleeper track to ‘solid’ track before high-speed running is commenced.
The Cars
Pending the acquisition of new cars (possibly like those at Llandudno, which show what can be done on 3ft. 6in. gauge if the spirit is willing), conversion of about 20 cars of the ‘800’ class for the base service and its reserves, and rehabilitation of another forty air-braked cars, would enable the Department to put the scheme into operation with the minimum of delay.
The cars to be converted should have their roofs and ends removed and the body sides made straight (instead of waisted). The roofs and ends should be renewed and the cars at the same time lengthened about two feet each end. The new ends and roofs should be on the lines of those of the post war Glasgow cars: platform doors should be added and the stairhead doors and bulkheads omitted. Large destination and route number blinds should be fitted below the top-deck windows. Interior decoration should be as modern and attractive as in any other vehicle of early 1950s – brown ceilings are out of place to-day.
To reduce noise the short coil springs on the bogies might be replaced by rubber pads. The long coil springs should be shortened and stiffened (to reduce noise) and have rubber pads above them, again to reduce noise. The motor gear ratio should be decreased by about 10 per cent and helical gears fitted. Automatic but optional field shunting, giving 66 per cent of normal field, should be added. This should give free-running speed of up to 35 m.p.h., yet, by reason of the large amount of free-running possible on such a route, should not unduly stress the motors thermally. The present controllers would suffice for the more arduous duty if a lineswitch contactor were added to perform circuit breaking; the cost and complexity of contactor control would not, in such a conversion, be justified. The present brake installation could be retained if rubber bushed joints were used in the rigging to reduce noise.
The cars to be rehabilitated should be given straight sides, new roofs, rubber rods in the springing, automatic optional weak field, and lineswitch circuit breakers. These alterations would render them comparable in appearance and performance with No. 843, which in good condition, is still an advertisement for 3ft. 6in. gauge possibilities.” [1: p37-38]
These should be spaced as widely as possible, on the theory of ‘greatest good for greatest number’, even if the short-distance passenger suffers during peak hours. It is more important that the many living in Selly Oak and beyond should have a fast journey home than that an Edgbaston passenger should be set down at the end of his turning. There should be three stops only between Navigation Street and Pebble Mill Road, located where they will be of most use to peak-hour passengers. These stops should have loading islands and queue barriers as described earlier. Other stops, convenient for short distance passengers, clearly labelled ‘not used in peak hours’, should be provided to attract the extra revenue, so useful to any undertaking, which accrues from the casual off peak travel which is a consequence of an attractive service being available.
Beyond Pebble Mill Road, peak-hour stops at each outskirts and the centre of Selly Oak, Northfields, and Longbridge, should be the main points for loading and unloading; there should be some additional stops between these centres at places where the need is obviously great. None of these additional stops should be separated by less than a quarter of a mile, however, but additional stops ‘not used in peak hours’ should also be provided where considered appropriate.” [1: p38-39]
The junction of Pebble Mill Road and Bristol Road, Birmingham as shown on the 25″ Ordnance Survey of 1939 which was published in 1945. [7]Looking Southwest along Bristol Road through its junction with Pebble Mill Road. The trams for The Lickey Hills stopped just beyond the junction. Pebble Mill Road central reservation was at times used to store trams and particularly after the closure of the network before there was room for them at the Depot. [Google Streetview, June 2024]
Pridmore continues:
“Services
A base frequency of 12 cars per hour from Navigation Street, half of which would run to Selly Oak only, would probably suffice. Pershore Road should be symmetrically superimposed. The equal service to
During peak hours, however, a different technique would facilitate traffic flow and give quick travel to long-distance passengers; it is suggested that 12 packets of departures per hour be arranged. The first of each packet would be a fast to Rednal or Rubery, running non-stop to Pebble Mill Road. The second would be a duplicate of the first, but routed to the alternative terminus, stopping only at the peak hour stops to Pebble Mill Road to pick up only. Thence both these cars, would continue, using peak hour stops only (as is presumed in all peak hour services), to their respective termini. The third car would be the triplicate, running as the duplicate but probably to Selly Oak, Northfields or Longbridge only, as the traffic for the extremities of route dictates. Fourth would be the Pershore Road car, stopping also to set down at intermediate points to Pebble Mill Road, and fifth would be its duplicate performing similar duties as necessary.
If a less or more frequent service should prove necessary its pattern should be similar to that indicated above, as the suggested total frequency of 60 cars per hour is well within the capacity of a single line of tramway, whilst the use of packet departures will facilitate the through-running of the long-distance cars.
Inwards peak hour working, when with the load, would be arranged so that cars from Bristol Road would stop only to set down between Pebble Mill Road and Navigation Street, and that such cars should be given priority at the Pebble Mill Road junction.”
The necessity for large destination blinds on the cars, a point mentioned earlier, is now appreciated; the indication of “limited stop” must be given, as well as the destination, and regular users will wish clearly to be aware of both whilst a car approaches their stop.” [1: p39-40]
The success of a scheme such as that described above would commend its application to the similar but not quite so heavily trafficked routes to Pype Hayes and Erdington on the east of Birmingham.
When the full conversion to reserved track had been completed in the less near future, consideration should be given to the provision of a third track to Pebble Mill Road to permit the regular operation of peak hour expresses both ways, and for the ultimate operation of two or three-car trains of single deck high-speed vehicles much as the P.C.C. cars on metre gauge lines in the U.S.A. and elsewhere.
The use of such trains would then render possible the economic construction of cross-town subways in further effort to remove passenger transport from the sorely congested central streets of Birmingham.
The transport problem of Birmingham, as of many large cities, is becoming increasingly severe. The author is of the opinion that such problems can only be solved by the provision of an urban transport installation, and not by the use of supposedly flexible vehicles on the existing network of roads; it is the attempt to solve the problem by this latter means that is responsible for the congestion in the centre of Birmingham at the present time. An embryo specialised installation exists in Birmingham to-day; it is recommended that it be developed as far as possible for its specialist purpose while there is still time and before the traffic of the future swamps the Bristol Road completely, as it will do if numberless small vehicles are expected to cope with it in competition with the many others who regard themselves as having equal claim to the surface of a public road.” [1: p40]
References
B. I. Pridmore; A Lickey Light Railway; in Modern Tramway Vol. 13 No. 146, London, p37-40.
Modern Tramway talks, in 1949, of the Shaker Heights Rapid Transit (SHRT) Lines as “A high speed electric light railway entirely on reserved track, connecting a beautiful high class residential district with the centre of a large city. affording such speedy and efficient service that the car-owning suburban residents prefer to use it and park their cars on land provided by the line; a system which makes a handsome profit and has recently taken delivery of 25 of the most modern type of electric rail units in the world [which] are only some of the outstanding facts about Shaker Heights Rapid Transit.” [1: p101]
Two images from Modern Tramway which show: first , a station in Shaker Heights which shows the central reservation and a car of standard type; second, a PCC car equipped for multiple-unit operation, one of a fleet of 25 delivered in 1948. [1: p112]
The network was created by the Van Sweringen brothers and purchased after their bankruptcy, and a period of 9 years in receivership, by Cleveland City Council in 1944. [2]
The official ownership details down the years are:
“1913–1920: Cleveland & Youngstown Railroad 1920–1930: Cleveland Interurban Railroad 1930–1935: Metropolitan Utilities 1935–1944: Union Properties (47%), Guardian Savings and Trust (33%) and Cleveland Trust (20%) 1944–1975: City of Shaker Heights 1975–present: Greater Cleveland Regional Transit Authority.” [4]
The SHRT connected the city of Cleveland, Ohio, with the largest residential area known as Shaker Heights, six miles East.
The Van Sweringen brothers planned the line “in the early 1900’s as part of a land development scheme, … to serve the district that would grow up on the Heights and beyond, and the charter was obtained in 1907. The land development was planned around the line, and the engineers allowed for a railway area 90 feet wide through the property with 50 feet of open space each side of the tracks (room for four tracks and a grass verge on each side). Building was delayed by the First World War and the line was not opened until 11th April, 1920.” [1: p101]
On 20th July 1930, Shaker Rapid Transit cars began using the Cleveland Union Terminal (CUT), after the Terminal Tower opened. [12]
Before this, on 17th December 1913, trams began operating on the first 1.6-mile segment in the median of what would become Shaker Boulevard, from Coventry Road east to Fontenay Road. [12] The line was grandly named ‘The Cleveland & Youngstown Railway’.
In 1915, the tram service was extended to Courtland Boulevard. In 1920 it became apparent that the plan to link Cleveland to Youngstown would not succeed and the line was renamed as ‘The Cleveland Interurban Railway’ (CIRR). In April of that year, the Van Sweringen brothers opened a segregated (trams separate from other rail and road traffic) line from East 34th Street to Shaker Heights with their trams using the urban tram (streetcar) network to reach the city centre. [12]
“In 1923, the Standard Oil Company built the Coventry Road Station for $17,500. … In 1924, the Shaker trains were referred to as ‘the private right-of-way rapid transit line’, but calling it ‘the rapid’ probably dates back further than that.” [12]
The historic station at Tower City (1927 onwards) was the early terminus of the Shaker Heights Rapid Transit Lines which were extended along the Cleveland Waterfront.
The modern Tower City Station is the central station of the Cleveland, Ohio RTA Rapid Transit system, served by all lines: Blue, Green, Red and Waterfront. The station is located directly beneath Prospect Avenue in the middle of the Avenue shopping mall. The station is only accessible through the Tower City Center shopping complex. [13]
The first cars were ordinary tramcars from the Cleveland City system, specially refitted for fast service. “In July, 1930, the SHRT (which had formerly entered the city over street tracks) was brought into the main line railway terminus over existing railway tracks. By this time the line extended for 9.5 miles from the Union Terminal Building in Cleveland to Green Road, at the far end of Shaker Heights; in addition, there was a branch line to Moreland.” [1: p101]
The two lines in the suburbs were extended. The Moreland line in 1929, eastward from Lynnfield (its original terminus) to Warrensville Center Rd. The Shaker line, in 1937, was extended from Warrensville Center Rd. to a new loop at Green Rd. [2]
“Under the main floor of the Union Terminal Building, the SHRT tracks are adjacent to the main line railway platforms. The six miles out to Shaker Square are on an ascending grade along the valley of the Cuyahoga river, and are entirely on private right-of-way; from Shaker Square onwards, the line runs through a grass reservation in the centre of Shaker Boulevard as far as Green Road Terminal.” [1: p101]
“The branch to Moreland, a suburb of smaller type property, diverges about 500 feet east of Shaker Square station, running in a south-easterly direction; at this terminus are storage yards with car parking facilities inside a U track formation.” [1: p101]
“The overhead is compound catenary out to East 55th Street, Cleveland, and normal trolley-wire elsewhere; the line is signalled throughout and road crossings are well spaced.” [1: p101]
The journey from Green Road outer terminus to the Union Terminal Building in downtown Cleveland “is covered in 22 minutes including 16 stops en route. The six miles from Shaker Square down into Cleveland (which include four curves with speed restriction) are covered in 8-9 minutes by non-stop cars. The up-grade increases the express timing on the outward journey to Shaker Square to 12 minutes.” [1:p101]
“When the City Council bought the line in 1944, the Director of Transportation, Mr. Paul K. Jones, began to modernise the existing fleet and to look around for new cars. He chose PCC cars with multiple unit equipment, and after trial runs in 1946 with a PCC-MU car ordered for Boston’s tramways, he ordered 25, to be modified to suit the SHRT’s demands and these were delivered towards the end of [1948]. They have Sprague Multiple Unit Control and are equipped for MU operation in trains of up to six cars. Other details are: Seating capacity. 62; overall length, 52ft. 7in.; overall height, 10ft. 4in.; width, 9ft.; truck wheel base, 6ft. 10in.; livery, canary yellow.” [1: p101]
A new $60,000 sub-station was built by 1949 in Shaker Heights which ensured adequate power for the PCC cars. Other improvements undertaken were “the doubling of car parking space at stations and an increase in service frequency.” [1: p101]
Extensions of the SHRT were, in 1949, considered likely; at that time, the line had been graded beyond Green Road as far as Gates Mills and steel poles had been erected part of the way. (This extension never occurred even though the preparatory work had been undertaken.) [7]
The Moreland Branch had been graded south to the Thistledown Race Track beyond Warrensville and there was little doubt, at that time that this extension would be completed. It turns out that this extension also never came to fruition.
“In Cleveland itself, the City Council … asked for 31 million dollars for the purpose of financing extensions of its city lines east and west of the city. The East Side line was laid out and partly graded by the original builders of the SHRT; it left the Heights line at East 60th Street and needed, at the time of writing of the article in Modern Tramway, only a few months’ work to complete.” [1: p101]
“Snow [had] no effect on the operation of the SHRT and the line [carried] on when local bus and trolley bus lines [had] ceased … in the severe winter of 1947-8; and all the year round, as mentioned before, the owners of the $75,000 homes of Shaker Heights [left] their cars behind and [travelled] into town by the faster and more reliable means so amply provided.” [1: p102]
“In 1955 the Cleveland Transit System (which was formed in 1942 when the City of Cleveland took over the Cleveland Railway Company) opened the first section of the city’s new rapid transit line, now known as the Red Line. It used much of the right-of-way and some of the catenary poles from the Van Sweringen’s planned east-west interurban line adjacent to the NYC&StL tracks. The first section of the CTS rapid transit east from Cleveland Union Terminal included 2.6 miles (4.2 km) and two stations shared with the Shaker Heights Rapid Transit line, necessitating split platforms with low-level sections (for Shaker Heights rapid transit cars) and high-level sections (for CTS rapid transit cars).” [4]
In the 21st century, the Red Line (formerly and internally known as Route 66, also known as the Airport–Windermere Line) is now “a rapid transit line of the RTA Rapid Transit system in Cleveland, Ohio, running from Cleveland Hopkins International Airport northeast to Tower City in downtown Cleveland, then east and northeast to Windermere. 2.6 miles (4.2 km) of track, including two stations (Tri-C–Campus District and East 55th), are shared with the light rail Blue and Green Lines; the stations have high platforms for the Red Line and low platforms for the Blue and Green Lines. The whole Red Line is built next to former freight railroads. It follows former intercity passenger rail as well, using the pre-1930 right-of-way of the New York Central from Brookpark to West 117th, the Nickel Plate from West 98th to West 65th, and the post-1930 NYC right-of-way from West 25th to Windermere.” [5]
The Red Line is shown on the four extracts from OpenStreetMap below. [5]
These four map extracts show the full length of the Red Line from the airport in the West to East Cleveland. [5]
In the 21st century the two original Shaker Heights routes form the Blue Line and the Green Line as part of Cleveland, Ohio’s Rapid Transit System.
“The Blue Line (formerly known as the Moreland Line and the Van Aken Line, and internally as Route 67) is a light rail line of the RTA Rapid Transit system in Cleveland and Shaker Heights, Ohio, running from Tower City Center downtown, then east and southeast to Warrensville Center Blvd near Chagrin Blvd. 2.6 miles (4.2 km) of track, including two stations (Tri-C–Campus District and East 55th), are shared with the rapid transit Red Line, the stations have low platforms for the Blue Line and high platforms for the Red Line. The Blue Line shares the right-of-way with the Green Line in Cleveland, and splits off after passing through Shaker Square.” [3]
The Blue Line from Cleveland to Shaker Heights shown on OpenStreetMap. [3]
“The Green Line (formerly known as the Shaker Line) is a light rail line of the RTA Rapid Transit system in Cleveland and Shaker Heights, Ohio, running from Tower City Center downtown, then east to Green Road near Beachwood. 2.6 miles (4.2 km) of track, including two stations (Tri-C–Campus District and East 55th), are shared with the rapid transit Red Line; the stations have low platforms for the Green Line and high platforms for the Red Line. The Green Line shares the right-of-way with the Blue Line in Cleveland, and splits off after passing through Shaker Square.” [4]
Tram cars used on the Shaker Heights lines since 1920 include: the 1100-series and 1200-series centre-entrance fleet; the colourful PCC cars; and the current fleet of Breda LRVs which have operated the line since 1982. [15]
Cleveland’s 1100-series and 1200-series center-door cars were built in the mid-1910s. “Not only were these cars distinctive and immediately identifiable as Cleveland cars, but many of them outlasted the Cleveland street railway itself. This was because the suburban streetcar route to Shaker Heights, barely on the drawing board when the center-door cars were built, bought a handful of 1200-series cars to hold down service when it was new. For years these cars were the backbone of service to Shaker Heights until the last of them were finally retired in favor of PCC cars in 1960.” [16]
Cleveland’s PCC Trams began arriving in the late 1940s, as we have already noted. PCC (Presidents’ Conference Committee) trams were streetcars of a design that was first “built in the United States in the 1930s. The design proved successful domestically, and after World War II it was licensed for use elsewhere in the world where PCC based cars were made. The PCC car has proved to be a long-lasting icon of streetcar design, and many remain in service around the world.” [17]
The Shaker Heights Rapid Transit network purchased 25 new PCC cars and 43 second-hand cars. A total of 68: the original 25 Pullman cars were extra-wide and had left-side doors. The second-hand cars were: 20 cars purchased from Twin Cities Rapid Transit in 1953; 10 cars purchased from St. Louis in 1959; 2 former Illinois Terminal cars leased from museums in 1975; 2 cars purchased from NJ Transit in 1977; 9 ex-Cleveland cars purchased from Toronto in 1978. PCCs were used until 1981. [17]
The Cleveland Transit System had 50 PCCs purchased new and 25 second-hand. The second-hand cars purchased from Louisville in 1946. All Cleveland’s cars were sold to Toronto in 1952. Of these, nine cars were (noted above) sent to Shaker Heights in 1978. [17]
Pullman Standard PCCs “were initially built in the United States by the St Louis Car Company (SLCCo) and Pullman Standard. … The last PCC streetcars built for any North American system were a batch of 25 for the San Francisco Municipal Railway, manufactured by St. Louis and delivered in 1951–2. … A total of 4,586 PCC cars were purchased by United States transit companies: 1,057 by Pullman Standard and 3,534 by St. Louis. Most transit companies purchased one type, but Chicago, Baltimore, Cleveland, and Shaker Heights ordered from both. The Baltimore Transit Co. (BTC) considered the Pullman cars of superior construction and easier to work on. The St. Louis cars had a more aesthetically pleasing design with a more rounded front and rear, compound-curved skirt cut-outs, and other design frills.” [17]
“Both the Cities of Cleveland & Shaker Heights purchased PCC trolleys after WWII. Cleveland operated theirs from 1946 to 1953 before they sold them to the City of Toronto. Shaker Heights operated their PCCs for a much longer period – i.e. from 1947 up until the early 1980s.” [18]
Cleveland’s Breda LRVs are a fleet of 34 vehicles operating on the Blue, Green and Waterfront lines. One is shown below on the Blue Line and one on the Green Line. [19]
The LRVs were purchased from the Italian firm, Breda Costruzioni Ferroviarie, to replace the aging PCC cars. They were dedicated on 30th October 1981. [3]
The cars consist of two half bodies joined by an articulation section with three bogies. The two end bogies are powered, and the central bogie under the articulation section is unpowered. “The car is slightly more than 24 m (79 ft 10 in) long, is rated AW2 (84 seated passengers and 40 standing), and can travel at a maximum speed of 90 km/hr (55 mph). This speed can be reached in less than 35 sec from a standing start.” [20]
Overall length: 79ft 11in.
Width: 9ft 3in
Tare weight: 84,000lb
Acceleration: 3mph/sec.
Service braking: 4mph/sec.
Emergency braking: 6mph/sec.
Each LRV “is bidirectional with an operator’s cab at either end and three doors per side. The passenger door near the operator’s cab is arranged to allow the operator to control fare collection. The 84 seats are arranged in compliance with the specification requirements. Half the seats face one direction and half the other. Each end of the car is equipped with … an automatic coupler with mechanical, electrical, and pneumatic functions so that the cars can operate in trains of up to four vehicles.” [20]
In 2024, the Greater Cleveland Regional Transit Authority board approved “the selection of Siemens Mobility for a contract to replace the Breda light rail vehicle fleet. … The planned framework contract with Siemens Mobility would cover up to 60 Type S200 LRVs, with a firm order for an initial 24. … The high-floor LRVs will be similar to cars currently used by Calgary Transit, with doors at two heights for high and low level platforms, an infotainment system, ice cutter pantographs, 52 seats, four wheelchair areas and two bicycle racks. … The fleet replacement programme currently has a budget of $393m, including rolling stock, infrastructure modifications, testing, training, field support, spare parts and tools. This is being funded by the Federal Transportation Administration, Ohio Department of Transportation, Northeast Ohio Areawide Co-ordinating Agency and Greater Cleveland RTA.” [21]
References
Shaker Heights Rapid Transit Lines; in Modern Tramway Vol. 12, No 137, May, 1949, p101,102,112.
The June and July 1962 issues of ‘Modern Tramway’ included a 2-part review of the first five years of operation and maintenance of the Manx Electric Railway (MER) after nationalisation on 1st June 1957.
June 1962 marked the end of the first term of office of the MER Board. … ‘Modern Tramway’ Journal, in its June 1962 edition, begins:
“We should first explain something of how the Isle of Man Government sets about its work; day-to-day administration is in the hands of Boards of Tynwald, consisting partly of elected members of the House of Keys (the Manx House of Commons) and partly of non-Tynwald members appointed by the Governor. These Boards occupy much the same position as Ministries in the British Government, except that they serve in a part-time capacity. The M.E.R. Board, set up in 1957, has three Tynwald members and two others.
The first Manx Electric Railway Board was appointed in May, 1957. Its Chairman was Sir Ralph Stevenson, G.C.M.G., M.L.C., with Mr. R. C. Stephen, M.H.K. (a journalist), Mr. A. H. Simcocks, M.H.K. (a lawyer), Mr. T. W. Kneale, M.Eng. (a former Indian Railways civil engineer, with an expert knowledge of permanent-way) and Mr T. W. Billington (an accountant) as it’s members. … They were entrusted with the task of running the railway and reconstructing much of the permanent way, and an annual estimate of the money required was to be presented to Tynwald by 31st March of each year. No changes were made in the railway’s staff, the full-time management, as under the Company, remaining in the capable hands of Mr. J. Rowe (Secretary and Joint Manager) and Mr. J. F. Watson, M.I.E.E. (Chief Engineer and Joint Manager), who occupy the same posts today.
The new Board took over from the Company with due ceremony on 1st June, 1957, but found during their first year of office that, owing to rapidly rising costs, far more money than anticipated would be needed to reconstruct the railway at the rate intended, and to keep it running. Instead of a grant of £25,000 per year (the figure agreed upon by Tynwald), they would require £45,000, and after Tynwald had rejected both this request and their alternative proposed economies (cutting out early and late cars, and closing down in winter) the entire Board, with the exception of Mr. Kneale, resigned. A new Board then came into being, the Chairman being Mr. H. H. Radcliffe, J.P., M.H.K., with the following gentlemen as Mr. Kneale’s new colleagues: Mr. W. E. Quayle, J.P., M.H.K.. (Vice-Chairman), Lieut.-Commander J. L. Quine, M.H.K., and Mr. R. Dean, J.P. The new Board undertook to do their best to run the railway within the originally- planned subsidy of £25,000 per year, and reaffirmed that they would continue the work of reconstruction, but at a rate such as to lie within the original budget, the effect being of course that the rate of reconstruction has been somewhat slowed down and the method of financing has varied from that originally planned. The original. intention was to finance the relaying of the Douglas-Laxey section by an outright. annual grant, so that the track would enjoy. many years of debt-free life, but after the 1958 re-appraisal Tynwald reverted to the proposal of the second Advisory Committee to finance this work by a loan repayable over the 20-year life of the new track.” [1: p201-203]
A map of the MER and other rail routes. I find the hand drawn maps, which appear in the post-war to 1960s period magazines, of greater interest than the computer-aided mapping/drawings of layer years. This image should assist in placing elements of the MER referred to in the text. [1: p202]Roughly the same area as shown on the hand-drawn map above. The light blue line is the MER. The red lines are the Isle of Man Railway. The pink line is the Groudle Glen Railway. The Green line is the Douglas Bay Horse Tramway. The Dark Blue line is the Snaefell Mountain Railway. Manx Northern Railway is shown in Yellow. []
Modern Tramway continues:
“In July, 1958, the Board was granted borrowing powers up to a maximum of £110,000, and of this the sum of £20,000 has been borrowed at 5 per cent, the usual interest and sinking funds being set up to provide for repayment. The money was used to relay 200 tons of rails, including labour, rail fastenings, sleepers and ballast. In January, 1960, however, Tynwald made a special grant of £9,000 for the next stage of the track relaying, with another grant a year later, while the traffic results from the 1960 and 1961 seasons were so good that in these two years a sizeable part of the £25,000 operating subsidy remained in hand and was able to be spent on relaying; 4,000 sleepers were bought out of the annual grant in 1961, and 100 tons of rails and 4,000 sleepers by the same means early in 1962. …
Since June, 1957, despite the overall financial stringency, quite a lot has therefore been done. Five hundred tons of new rail have been laid, and to date the Board has completely renewed about seven single-track miles of line between Douglas and Laxey. Concurrently, more than half of the 24,000 sleepers on this section have been renewed. To date, new 60 lb. per yard flat-bottom rails have been laid on the following sections: both tracks from Douglas Bay Hotel to Onchan, the northbound track from Far End to Groudle, both tracks from Groudle to Baldrine, the northbound track from Baldrine to Garwick, the southbound track from Ballagaune to Ballabeg, the north- bound one from Ballabeg towards Fairy Cottage, and the southbound track from Fairy Cottage to South Cape, plus new crossovers at Onchan Head and Groudle. Many of the new sleepers were produced on the island by the Forestry Board, but the more recent ones have been imported from Scotland since no more are available locally at present. The old ones, apart from a few sold to the Groudle Glen railway, are sent to Douglas prison and cut up there for firewood.
Since the M.E.R. Company had been living a hand-to-mouth existence for several years prior to the nationalisation, the management had lost touch with manufacturers, and had to make fresh contacts. This has had the incidental advantage of allowing them to benefit from the very latest improvements in track components, and much of the recent relaying has been done with elastic rail spikes, while to the north of Ballagaune is an experimental 200-yard length of track laid with rubber pads, giving a superb and almost noiseless ride. Modern techniques have also been adopted when relaying some of the sharp curves, with careful prior calculations to determine the correct transition and super-elevation for each, instead of the rule-of-thumb methods used in earlier days.
The permanent way renewal carried out to date represents about half the total trackage between Douglas and Laxey, including all the heavily-worn sections which in 1956 were overdue for renewal. At the time the Government took over, it was hoped to relay the entire line to Laxey within seven years, followed by the Snaefell line in the ensuing three. …
Corresponding renewals have also been made to the overhead line, using round-section trolley wire and phosphor-bronze overhead parts supplied by British Insulated Callenders’ Cables Ltd., who have undertaken to continue the manufacture of whatever components the MER. may require. With gradual change to grooved wire at Blackpool, the Manx Electric will probably be the last British user of tradi- tional round trolley wire, with its big trolley wheels and “live” trolley poles reminiscent of American interurban practice. The gradual corrosion of the overhead standards in the coastal atmosphere … has been very largely arrested by a very thorough repainting.” [1: p204-205]
Further support from the Manx Government was forthcoming during the first-year period after nationalisation under a scheme designed to offset the seasonal nature of the island’s biggest industry, tourism. £7,000/year was allocated dependent on the level of employment achieved. This funding could not be for planned major work as it covered the provision of work for those employed in the summer tourism period. It was “used for marginal rather than essential work, and the Board prepare[d] estimates of such work that could usefully be done and submit them to Tynwald for eventual adoption later on. Under these schemes, Laxey and Ramsey stations [were] resurfaced in tarmac, and the whole of the Douglas-Ramsey line and most of the Snaefell line [were] completely weeded and the fences and drainage works trimmed and cleaned, which when related to the real mileage (all double track) is a considerable achievement. … The Board, … in addition, treated the whole right-of-way with a selective weed-killer. … The chemical [was] applied by a special 6-ton wagon rebuilt as a weed-killer tank wagon, with a small petrol engine providing pressure spraying at 5 m.p.h. This unit [was] based at Laxey depot.” [1: p205]
Track maintenance formed the largest element of the Board’s expenditure. Little, other than routine maintenance, was done to rolling stock during this period. Physical deterioration to stock was reduced as a result of track improvements. As the images above show, some stock received cosmetic treatment, what might be called rebranding in the 21st century world.
Modern Tramway continues:
“The passenger stock remains at 24 cars and 24 trailers (excluding trailer 52, which is now a flat car). … With the increased amount of track work, car No. 2 has been converted each winter to a works car, with work-benches and equipment in place of its longitudinal seats, but like No. 1 it can be restored to passenger service in mid-summer if need be. Certain freight wagons not required for engineering purposes, including those lying derelict at Dhoon, have been dismantled in the general clearing-up. The average age of the present 48 cars and trailers is now 61 years, but most of them are only used in the summer and should be good for many years yet.” [1: p205]
This begs the question about the stock remained on the MER in the 21st century. …
In 2023, Wikipedia tells us that, “The Manx Electric Railway … is unique insofar as the railway still operates with its original tramcars and trailers, all of which are over one hundred years old, the latest dating from 1906. Save for a fire in 1930 in which several cars and trailers were lost, all of the line’s original rolling stock remains extant, though many items have been out of use for a number of years, largely due to the decrease in tourism on the island over the last thirty years. Despite this, members of each class are still represented on site today, though not all are in original form or in regular use.” [2]
The following list details what has happened to the full fleet of motorised trams:
No. 1: built in 1893 by G.F. Milnes & Co., Ltd is an Unvestibuled saloon and painted Red, White and Teak. It has 34 seats and is painted in the MER 1930s house style. It remains available for use.
No. 2: built in 1893 by G.F. Milnes & Co., Ltd is an Unvestibuled saloon and painted Red, White and Teak. It has 34 seats and is painted in the MER 1930s house style. It remains available for use.
No. 5: built in 1894 by G.F. Milnes & Co., Ltd is a Vestibuled saloon and painted Red, White and Teak. It has 32 seats and is painted in the MER 1930s house style. It remains available for use.
No. 6: built in 1894 by G.F. Milnes & Co., Ltd is a Vestibuled saloon and painted Maroon, White and Teak. It has 36 seats and is painted in the MER late Edwardian livery. It remains available for use.
No. 7: built in 1894 by G.F. Milnes & Co., Ltd is a Vestibuled saloon and painted Blue, Ivory and Teak. It has 36 seats and is painted in the original MER livery. It was rebuilt between 2008 and 2011 and remains available for use.
No. 8: lost in 1930 in a shed fire.
No. 9: built in 1894 by G.F. Milnes & Co., Ltd is a Vestibuled saloon and painted Red, White and Teak. It has 36 seats and is painted in the standard MER livery. It is illuminated and remains available for use.
No. 10: built in 1895 by G.F. Milnes & Co., Ltd is a Vestibuled saloon, painted Grey and has no seats. It was rebuilt as a freight car and is currently stored.
No. 11: was scrapped in 1926.
No. 12: was scrapped in 1927
No. 13: was scrapped in 1957.
No. 14: was built in 1898 by G.F. Milnes & Co., Ltd is a roofed ‘toastrack’ and painted Maroon. It has 56 seats and was rebuilt/restored to original condition between 2015 and 2018 and remains available for use.
No. 15: was withdrawn from service in 1973, it is currently stored. It was originally built by G.F. Milnes & Co., Ltd in 1898 and is a roofed ‘toastrack’. It is painted Red & White and has 56 seats.
No. 16: was built in 1898 by G.F. Milnes & Co., Ltd is a roofed ‘toastrack’ and painted Red & White. It has 56 seats . The livery is described as ‘House Style’. It remains available for use.
No. 17: was built in 1898 by G.F. Milnes & Co., Ltd is a roofed ‘toastrack’ and painted Red &White. It was withdrawn in 1973. It has 56 seats and is currently stored.
No. 18: was built in 1898 by G.F. Milnes & Co., Ltd is a roofed ‘toastrack’ and painted Red &White. It has 56 seats and was withdrawn to storage in 2000.
No. 19: was built in 1899 by G.F. Milnes & Co., Ltd is a winter saloon and is painted Maroon, Cream & Teak. It has 48 seats and is in its original livery. It remains available for service.
No. 20: was built in 1899 by G.F. Milnes & Co., Ltd. It is a winter saloon and painted Red, White & Teak. It has 48 seats and is in 1970s style. It remains available for service.
No. 21: was built in 1899 by G.F. Milnes & Co., Ltd. It is a winter saloon and painted Green & White. It has 48 seats and is in nationalisation livery. It remains available for service.
No. 22: was built in 1899 by G.F. Milnes & Co., Ltd. It is a winter saloon and painted Red, White & Teak. It has 48 seats and is in standard livery. It remains available for service.
No. 23: was built in 1900 by the Isle of Man T. & E.P. Co., Ltd. It is a Green & Grey Locomotive. It was withdrawn to storage in 1994.
No. 24: was lost in a shed fire in 1930.
No. 25: was built in 1898 by G.F. Milnes & Co., Ltd was a roofed ‘toastrack’ and painted Red &White. It had 56 seats and was withdrawn in 1996.
No. 26: was built in 1898 by G.F. Milnes & Co., Ltd was a roofed ‘toastrack’ and painted Red &White. It had 56 seats and was withdrawn in 2009.
No. 27: was built in 1898 by G.F. Milnes & Co., Ltd was a roofed ‘toastrack’ and painted Yellow, Red &White. It had no seats and was withdrawn in 2003.
No. 28: was built in 1898 by the Electric Railway and Tramway CarriageCo., Ltd. It was a roofed ‘toastrack’ and painted Red &White. It had 56 seats and was withdrawn in 2000.
No. 29: was built in 1904 by the Electric Railway and Tramway Carriage Co., Ltd. It is a roofed ‘toastrack’ and painted Red &White. It has 56 seats and was rebuilt between 2019 and 2021.
No. 30: was built in 1904 by the Electric Railway and Tramway Carriage Co., Ltd. It was a roofed ‘toastrack’ and painted Red &White. It had 56 seats and was withdrawn in 1971.
No. 31: was built in 1906 by the Electric Railway and Tramway Carriage Co., Ltd. It was a roofed ‘toastrack’ and painted Red &White. It had 56 seats and was withdrawn in 2002.
No. 32: was built in 1906 by the United Electric Car Co., Ltd. It is a roofed ‘toastrack’ and painted Green &White (Nationalisation livery). It has 56 seats and is still available for service.
No. 33: was built in 1906 by the United Electric Car Co., Ltd. It is a roofed ‘toastrack’ and painted Red &White (Nationalisation livery). It has 56 seats and is still available for service.
No. 34: was built in 1995 by Isle of Man Transport. It is a diesel locomotive, painted Yellow & Black.
As an aside, G.F. Milnes & Co., Ltd was initially based in Birkenhead but before the turn of the 20th century had purchased a site in Hadley, Shropshire, now part of Telford. “Production commenced at Hadley in June 1900, and the works in Birkenhead closed in 1902. There were around 700 employees and 701 tramcars were built in 1901. The business benefitted from the rush of orders when horse and steam tramway systems were converted to electric traction, but the market had begun to contract by the beginning of 1903. The Company went into receivership in September and, after some complex manoeuvering, became part of the United Electric Car Company Ltd. in June 1905.” [3]
Hadley is only a few miles away from our home in Malinslee, Telford. The Works are still referred to as the Castle Car Works.
Other rolling stock on the MER included four roofed ‘toastrack’ trailers which were lost in the 1930 fire (Nos. 34, 35, 38, & 39); two ‘toastrack’ trailers in storage (No. 50, withdrawn in 1978; and No. 55, withdrawn in 1997); two ‘toastrack’ trailers being rebuilt in 2020 (Nos. 36 & 53); nineteen available for passenger service in 2020 (Nos. 37, 40-44, 46-49, 51, 54, 56-62); and two flatbed trailers (Nos. 45 & 52). [2]
In addition to ‘home-based’ stock the MER has welcomed a number of visiting vehicles over the years details of which can be found on Wikipedia. [2]
Returning to the ‘Modern Tramway’ articles: the Journal reported that, “Maintaining this picturesque but veteran fleet has brought its usual quota of problems, and in view of the age of much of the equipment the Company has installed an ultrasonic flaw-detector at Derby Castle works, which is being used very successfully to detect cracks in axles, and has also been used to test axles bought from British Railways before turning them down to size for use in trailers. This method of flaw-detection is markedly superior to the earlier method with magnetic fluid, since the latter could not reveal faults that were hidden by the wheel boss or the gear seating. The car motors are being rewound with glass fibre insulation, which is expected to cure burn-outs caused by the moisture that tends to accumulate while the cars are idle in winter, and should therefore bring longer motor life. Cars 7 and 9 have been fitted experimentally with hydraulic shock-absorbers on the bogie bolster springs to counteract excessive sideways motion, and the Brush type D bogies of car No. 2 have had their axlebox leaf-springs replaced with a system of brackets and coil-springs, allow- ing more movement in the hornways and. giving a smoother ride. The Management hope that these two modifications when combined will give a vastly superior ride on the ten cars with this type of bogie.” [1: p205]
In the second of the two articles, [4] the Journal continued to note that in 1960 further modern compressor sets were purchased from Sheffield Corporation which were fitted to cars Nos.1, 5, 6, 7, 9, 16, 25, 26, 27, 32 & 33.
For a short while after nationalisation a green and white colour scheme was employed to mark the change. It was quickly realised that the vehicles looked their best when painted and trimmed in accordance with their builders intentions. So, in 1962, the Journal noted that, “The more recent repainting of M.E.R. cars has therefore seen a reversion to varnished teak and Post Office red with white and light brown secondary colourings, and with full lining, crests and detail in pre-war style, and many visitors have expressed their pleasure at this reversion. For the open cars, the equivalent livery is red and white, in each case with the full title instead of the initials M.E.R. During the winter of 1960, saloon trailer No. 57 was splendidly re- upholstered in blue moquette, replacing the original cane rattan which dated quite unchanged from 1904, and No. 58 has undergone the same transformation during the past winter; the concurrent refurbishing of the interior woodwork is a joy to behold. The red used on these two cars is somewhat deeper than that mentioned above.” [2: p221-222]
Planned addition provision of four new saloon cars had by 1962 been deferred indefinitely. Grants being only sufficient to address trackwork concerns. And, since inflation had seen the cost of new cars rise significantly, it was likely that in future the Board would “probably be forced back on the alternatives of reconstructing existing cars or buying others second-hand, if any can be found. Unfortunately, the engineering restrictions imposed by the 3ft. gauge and the 90ft. radius curves and reduced clearances are such that none of the available second-hand cars from Continental narrow-gauge systems is acceptable, and although quotations were obtained for relatively modern cars from the Vicinal and the E.L.R.T., the Vicinal cars were too wide and the cost of the others including modifications was prohibitive. In the whole of Continental Europe, the 3ft. gauge (exact or approximate) is found on electric lines only in Majorca, Linz and Lisbon, and although Lisbon has some two-motor Brill 27G trucks that would be ideal for the MER, the Lisbon tramway staff think the world of them and have no intention of selling.” [2: p222]
The Journal also observed that “the problem of the two main-road crossings between Douglas and Laxey, … still remains unsolved, and although a quotation was obtained for installing powerful flashing lights, the Highways Board whose responsibility this is has not yet been willing to find the money. This is a pity, for 1962 will see the introduction of a car-ferry steamer from the mainland and the arrival of many motorist visitors unfamiliar with such Manx phenomena as rural electric railways. Despite the vigilance of MER drivers, accidents are likely to continue at these points until something drastic is done; in the meantime, some prominent warning boards and white letters on the road surface would be better than nothing.” [2: p222]
A quick look at Google Maps/Streetview shows that by 2023 that problem had been resolved.
The road crossing closest to Douglas is at the top-right of this extract from RailMapOnline. [5]The view North-northeast along the A2 at the above crossing. [Google Streetview, October 2010]The road crossing closer to Laxey. [5]The view North along the A2 at the crossing above. [Google Streetview, October 2010]
By 2010, both crossing points were protected by standard crossing lights.
During the 5 years from 1957 to 1962 traffic, as predicted, fluctuated with the weather. It was “doubly unfortunate that the first two summers (1957 and 1958) were rather poor ones. However, the splendid weather in the summer of 1959 revitalised the railway, and the new Board was happily surprised to find that the returning popularity of the railway was sustained in 1960 and even more evident in 1961.” [2: p222]
The Journal provided a comparison of passenger numbers on a number of heritage lines on the Isle of Man and in Wales. Their table is reproduced below.
‘Modern Tramway’ cautions against making too much from the figures in this table as season are not comparable. It is clear however that the MER was performing acceptably when it’s performance was judged against its peers. [2: p222]
Throughout 1957 to 1962, the MER operated with the limits imposed by Tynwald (operating revenues plus an annual grant of £25,000, supplemented by monies allocated under employment relief schemes). A wage increase threatened to upset this equilibrium, but Tynwald responded by increasing the annual grant by £3,000 in 1961. Performance improvements meant that the sum was not actually drawn down.
References
Manx Electric 1957-1962; in Modern Tramway, Volume 25, No. 294, June 1962; Light Railway Transport League and Ian Allan, Hampton Court, Surrey, p201-205
Manx Electric 1957-1962; in Modern Tramway, Volume 25, No. 295, July 1962; Light Railway Transport League and Ian Allan, Hampton Court, Surrey, p221-225.
As part of a batch of magazines from the 1950s and 1960s I picked up a number of editions of ‘Modern Tramway’ from 1963 into 1964. ‘The Modern Tramway’ was the journal of the Light Railway Transport League (LRTL). By 1963 it had dropped the ‘The’ and was published jointly by Ian Allan and the LRTL. Its formal title was ‘Modern Tramway and Light Railway Review’.
The February 1963 edition of the journal was priced at 2s 6d.
Among a number of articles in the journal was a piece by G. Hyde, The Strange Tale of No. 2.
This No. 2 was Beyer Peacock steam tram engine No. 2. It is shown in the featured image above in which it is seen at Beyer Peacock’s works in Gorton, Manchester. [2]
It was originally built to a Wilkinson patent for the New South Wales Government tramways in 1885 and shipped to Australia in April of that year. It made several trial runs on the Redfern Station line of the Sydney steam tramways, but it evidently did not compare favourably with the Baldwin locomotives then in use there. Hyde says that, “It was reputed to have a heavy fuel consumption. and Beyer Peacock’s received complaints about the difficulties in maintaining a sufficient head of steam, but the engine hardly had a fair trial as only short runs were made with it, and the drivers’ inexperience may have contributed to its shortcomings. The trials were invariably carried out after midnight so no photographs were taken of the engine in service; neither was it ever incorporated into the Sydney tramway stock, consequently it never had a fleet number. Whilst in Australia it was referred to as ‘John Bull’.” [1: p48]
After its short unsuccessful trials in Sydney, John Bull was shipped to the small port of Wollongong and worked the isolated Wollongong-Clifton section of the New South Wales Government railways. It stayed there until the section was connected to the main coastal line in 1886.
Hyde commented that at this point “John Bull” disappeared. “Nothing further is known about it until it turned up again at Manchester in 1890, when it featured in Beyer Peacock’s stock list as yard engine No. 2. The mystery of this missing four years is heightened by the fact that Beyer Peacock’s records refer to the engine as having been salvaged, and returned to their works. This led to the rumour which persists in the Gorton works that No. 2 fell into the sea at one point during its travels round the world.” [1: p48]
In 1890 the loco was modified, the duplicate controls were removed, as also were the wheel curtains, then railway type buffers and drawgear were fitted.
In 1915 a steam brake was fitted, then in 1930 a new boiler was installed and in 1958 a new steam dryer was fitted. It was ultimately withdrawn from service in early 1959.
Hyde asserted that No. 2 was “certainly the biggest tramway engine ever built to Wilkinson’s patent, and was one of the most powerful steam tramway engines ever to be built in this country Its gross working weight of 16 tons compares with the 12 tons of the heavy 83-86 class Wilkinson engines of the Manchester, Bury, Rochdale & Oldham tramway, one of which is being kept by the British Transport Commission.” [1: p49]
Hyde provided detailed information about No. 2. … It had two simple cylinders, 9.5 in. diameter by 12 in. stroke. The crank axle had a pinion in the centre with 20 teeth geared to a spur wheel on the driving axle having 33 teeth, thus having a ratio of 1.65 to 1. It was fitted with a Stephenson type link motion. The four coupled driving wheels were of 30 in. diameter, with a wheelbase of 6 ft. 8 in. The water capacity was 225 gallons and there was a fuel space of 11 cubic feet. The vertical boiler was of the Field type, and had 121 tubes, each with an outside diameter of 2.13 in. The tubes, which project down into the firebox, were between 19 and 27 inches long, and had fitted concentric open-ended internal tubes known as circulating tubes. The working pressure is 150 lb. per sq. in., and the total heating area was about 184 sq. ft. with a total fire grate area of 10.8 sq. ft. The engine has an overall length of 13 ft 6 in. and an overall width of 7 ft.
“For close on 70 years, No. 2 trundled round the Gorton works of Beyer Peacock’s being affectionately known there as Old Coffeepot,” and it is hoped that it will now see many more years of active life at the Crich Tramway Museum. In the erecting shops at Beyer Peacock’s the wheels were re-tyred and the new tyres turned down to tramway standards. Then, after boiler inspection and insurance formalities had been completed, it was despatched to join the T.M.S. fleet at Crich as the only working British steam tram engine.” [1: p49]
Hyde noted that “Project Steam Tram” would involve the Tramway Museum Society in some heavy capital outlay, and that the Society was appealing to tramway enthusiasts to take an interest in the project and support it with donations. [1: p49-50]
More recent research has filled in some of the unknowns which Hyde commented on in 1963. It was Beyer Peacock Works No. 2464 and carried an operational number of 47 in Australia. In the missing years the locomotive is thought to have spent time working in Illawarra between 1887 and 1888 prior to returning to the UK in 1889. That it was at Illawarra may be a reference to its work on the Wollongong-Clifton section of the New South Wales Government railways. If so then it remained in New South Wales longer than the article in ‘Modern Tramway‘ suggested. [2][3]
As a works shunter, the tram operated in the firm’s large works complex towing huge Beyer-Garrett locomotives from one shed to another.
After arriving at Crich in 1962, No. 2 “was operated under steam for some years from 1966. A period of off-site storage between 1971 and 1978 was followed by a return to steam in the 1980s, during which it even performed on the Santa specials. However, the work involved in firing it up, supplying it with coal and clearing away the ash helped to explain why steam traction gave way to electricity on Britain’s tramways in the early years of the twentieth century.” [3]
Crich Tramway Museum’s website tells us that, “because it was destined for export and as it was expected to be pulling much heavier loads it was much larger than those built for the home market. With 30 inch driving wheels and weighing almost 16 tons it was a true giant of a tram engine, though it did boast a number of features in common with other road-going locomotives including the fully enclosed wheels and a mechanism – in this case a “Wilkinson Patent” exhaust superheater – that was designed to reduce the amount of smoke emitted.” [3]
References
G. Hyde; The Strange Tale of No. 2; in Modern Tramway Volume 26 No. 302, LRTL and Ian Allan, Hampton Court, Surrey; February 1963, p48-50.

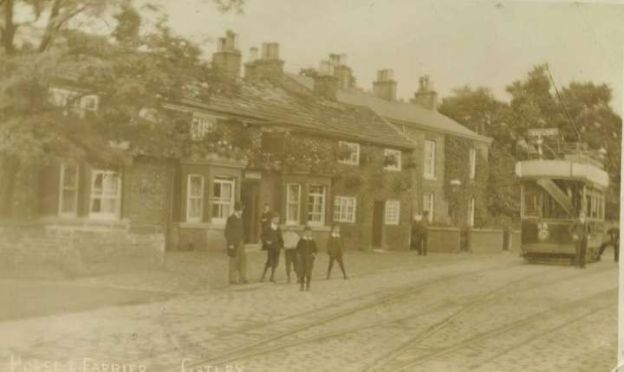
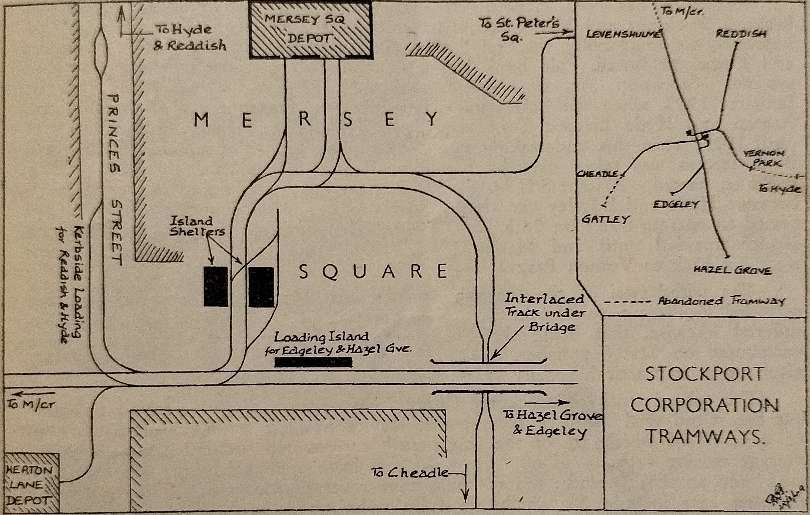
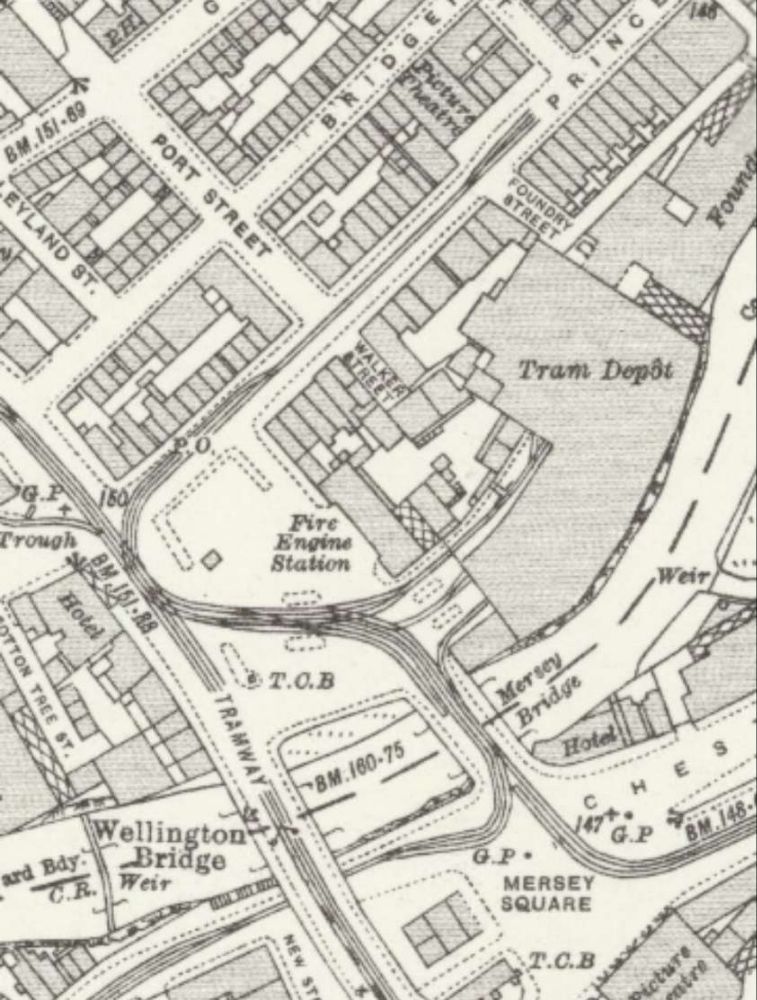
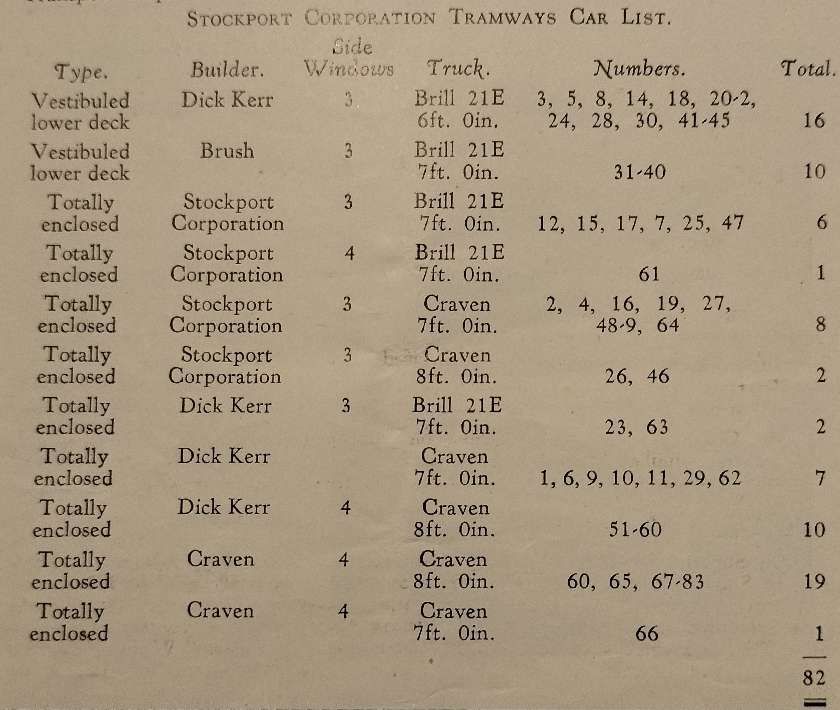
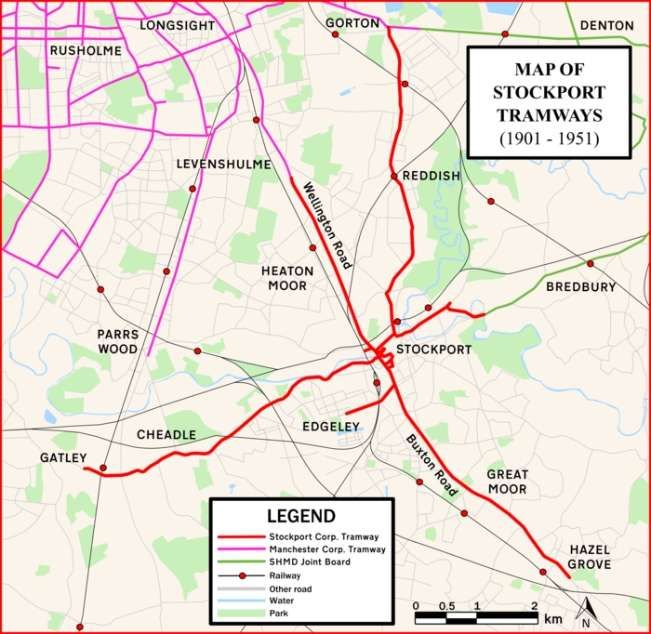
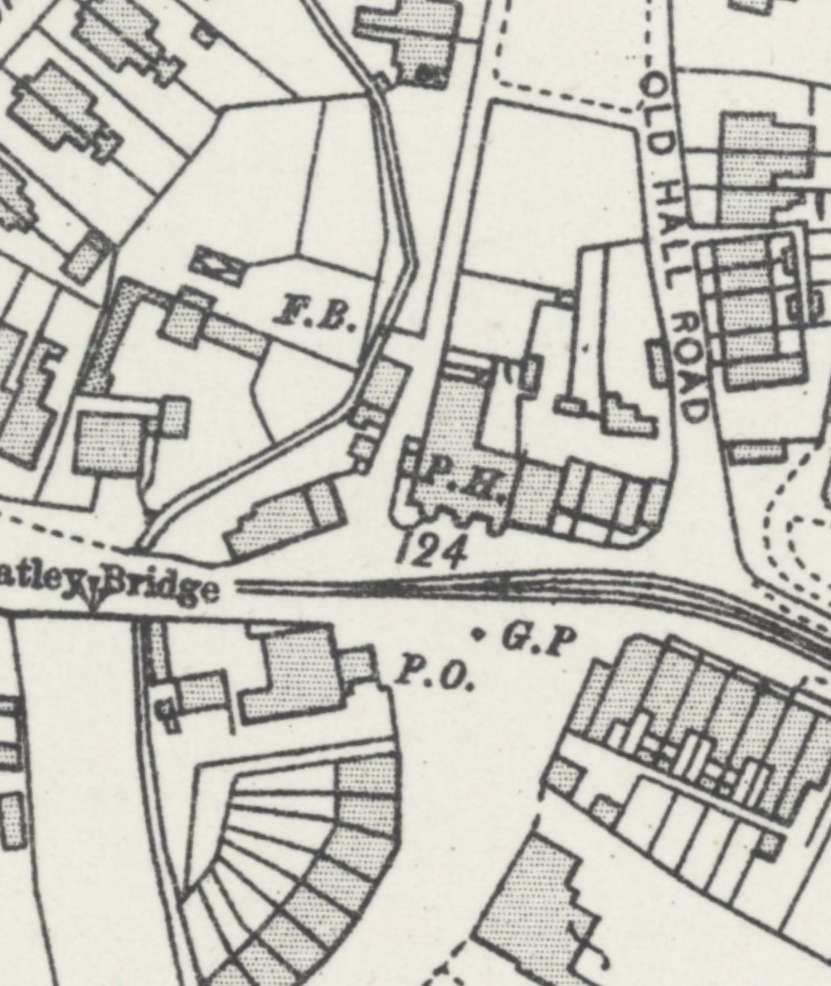
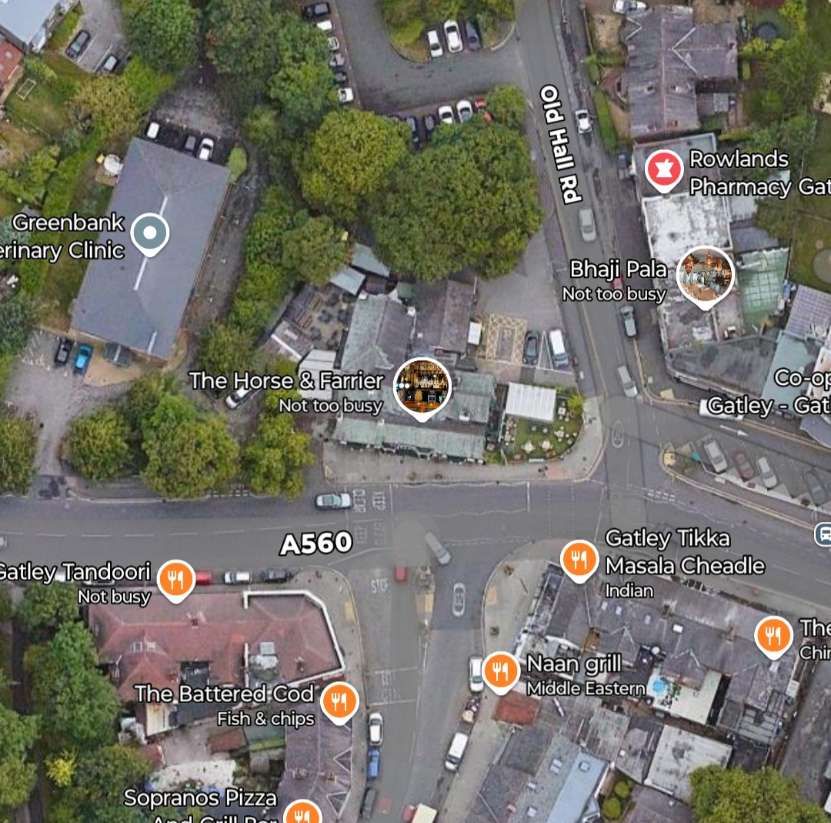
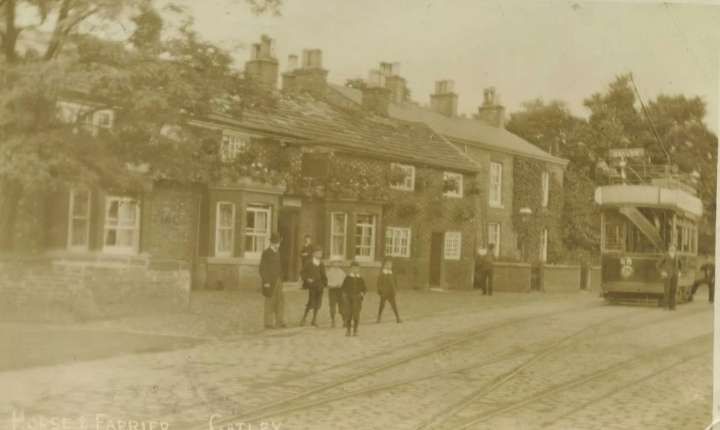
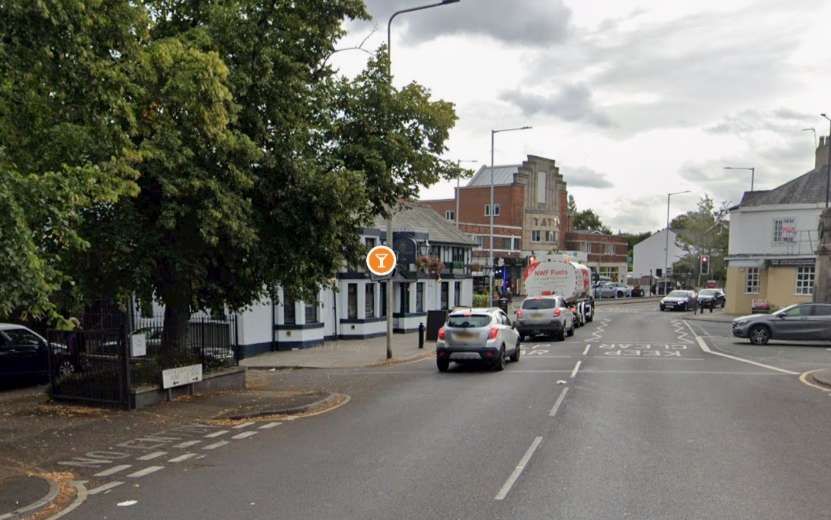
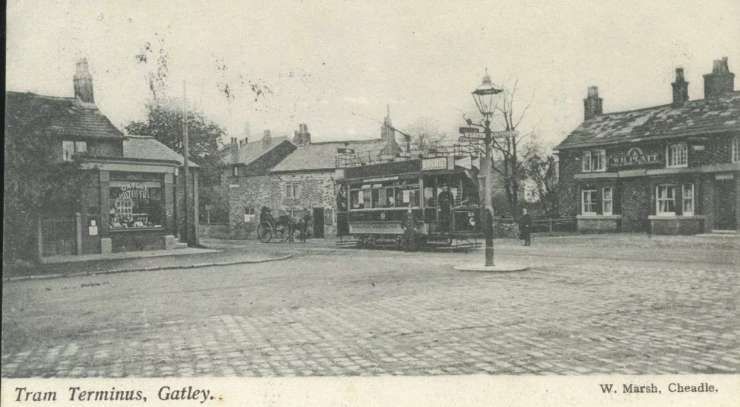
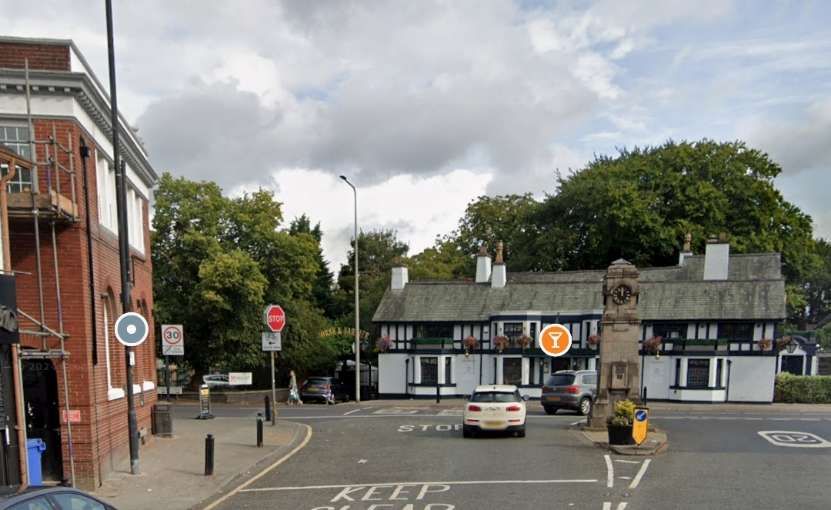
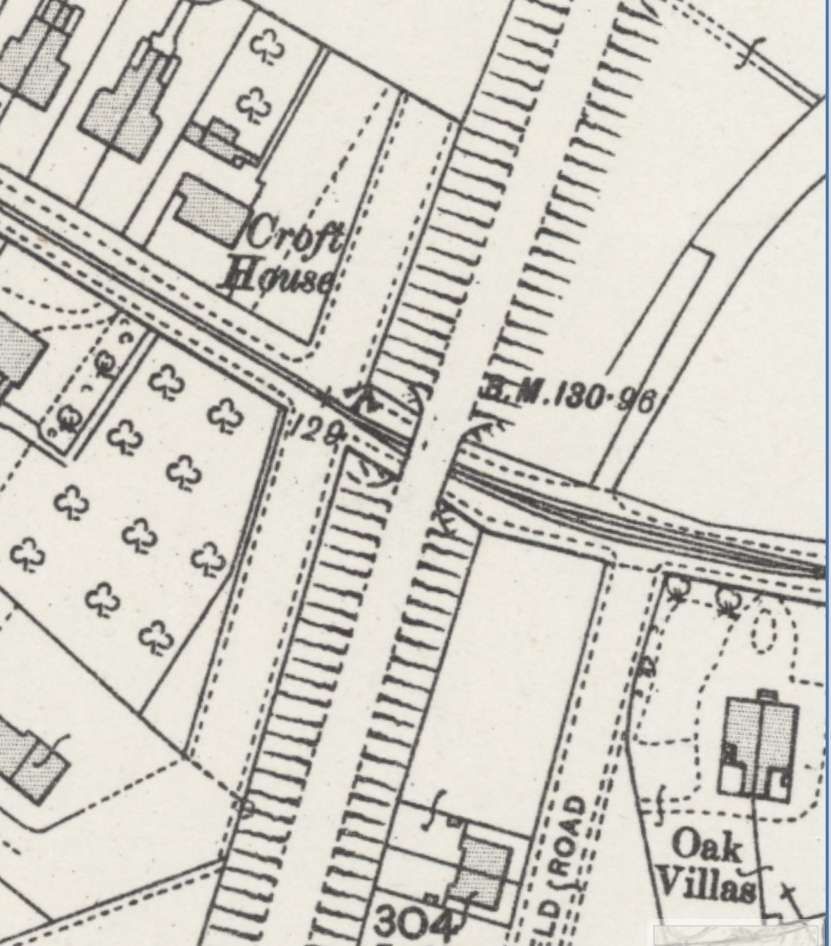
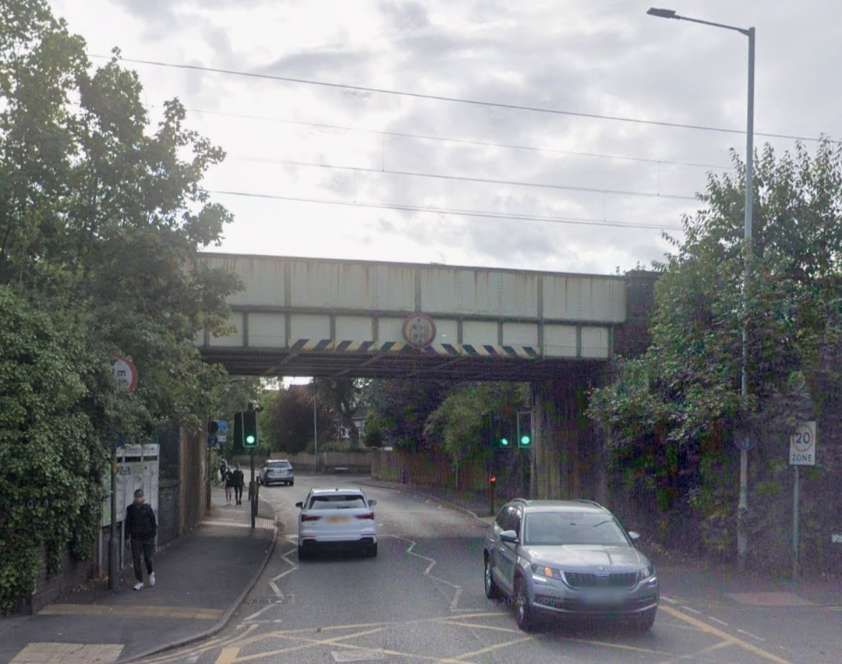
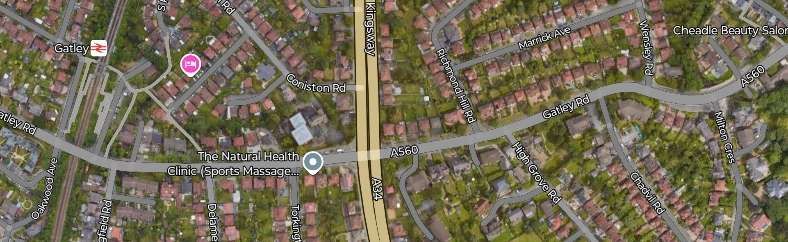
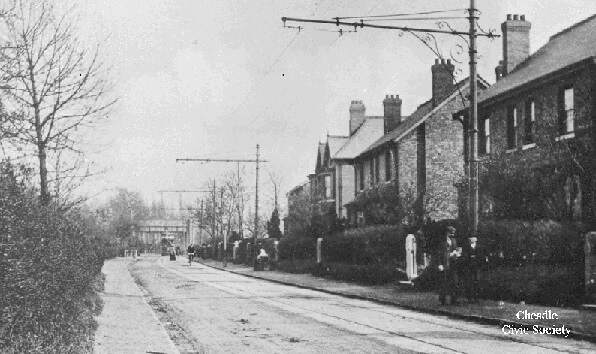
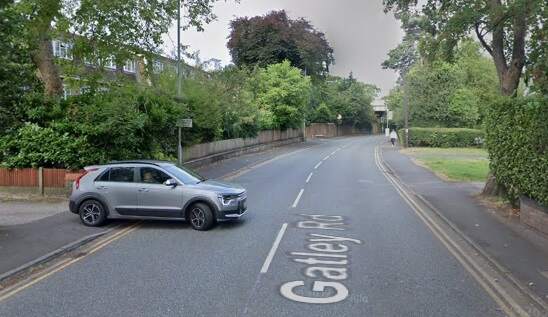
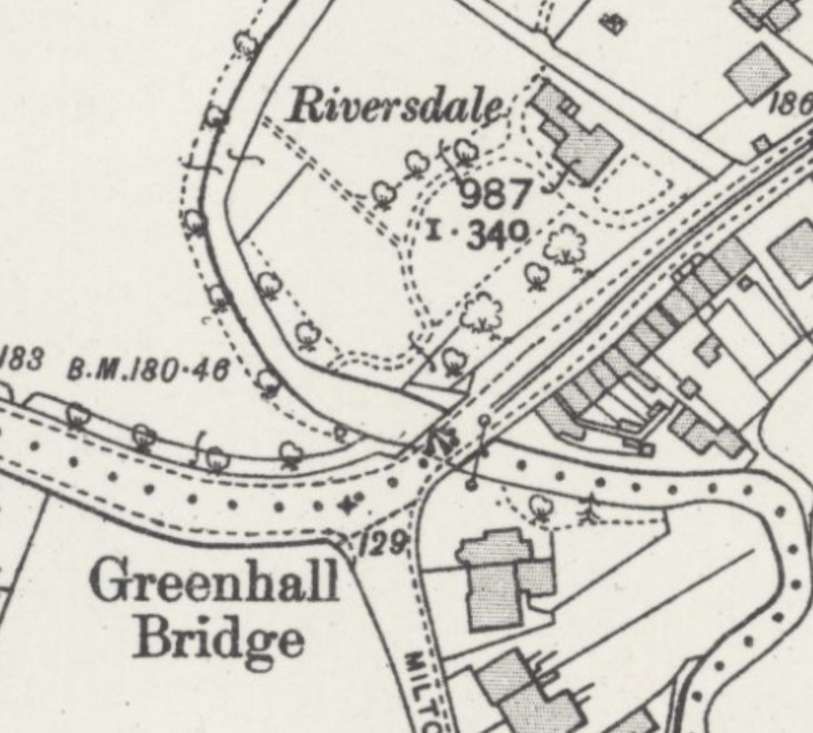

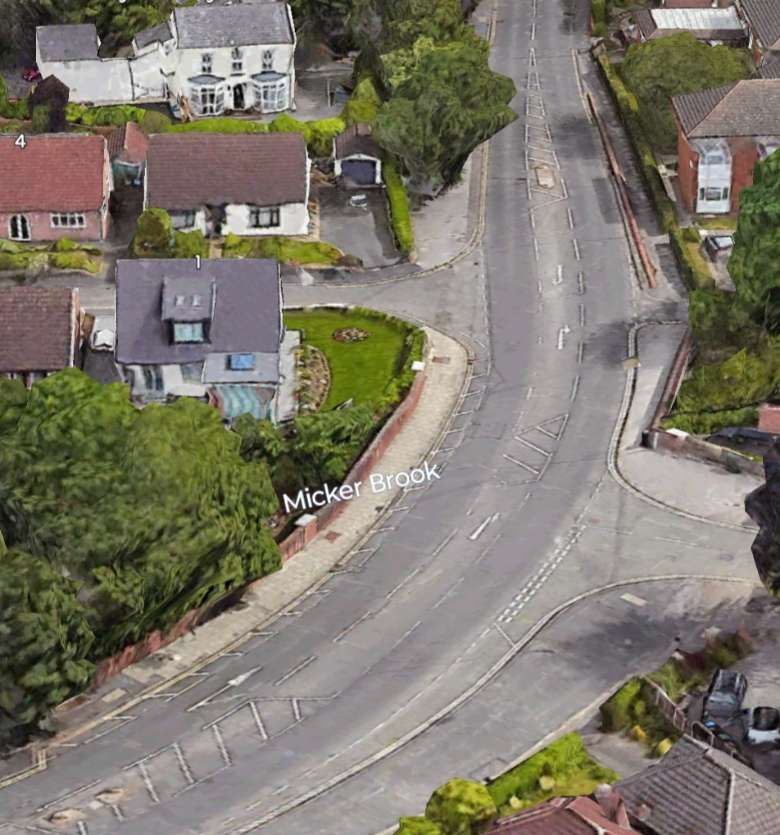
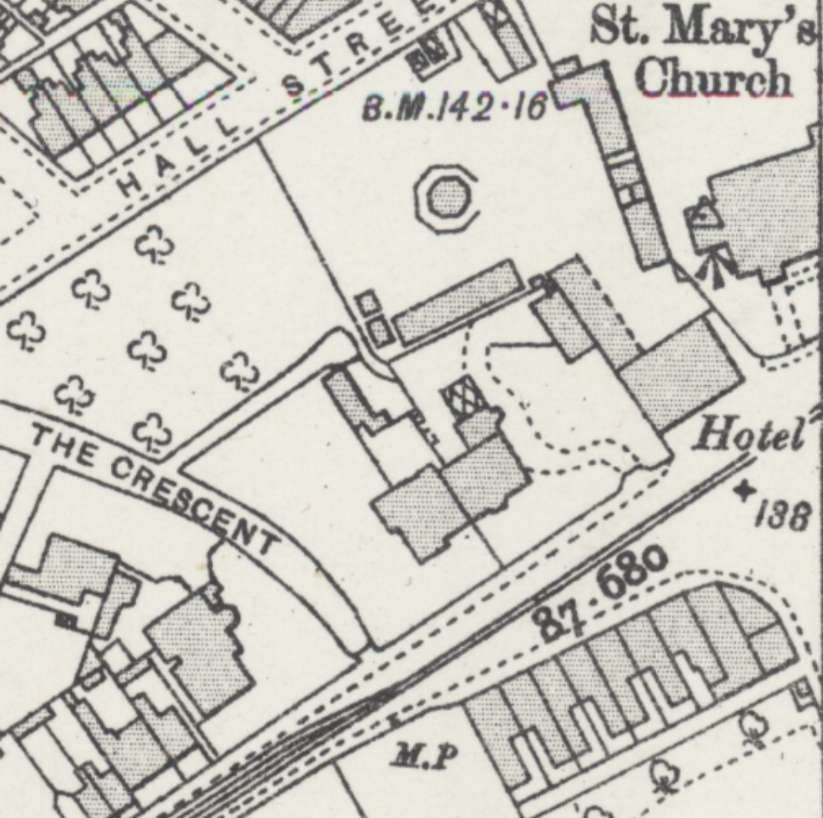
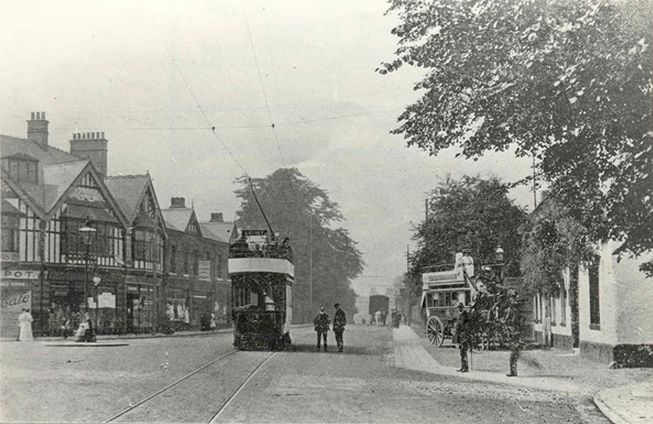
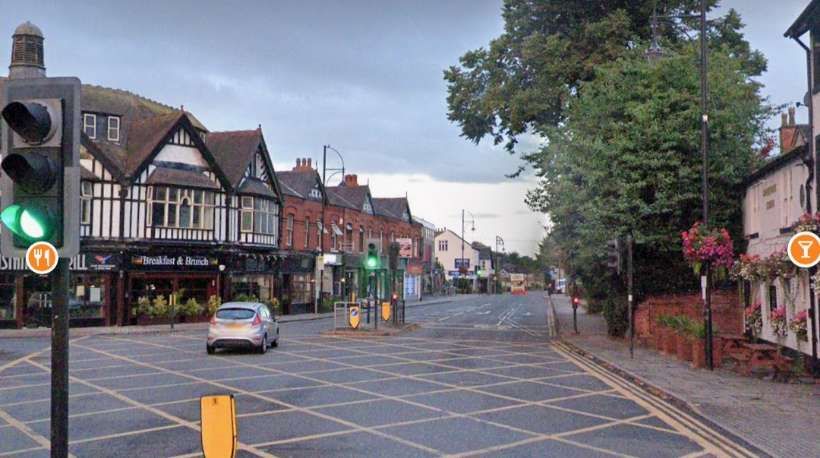
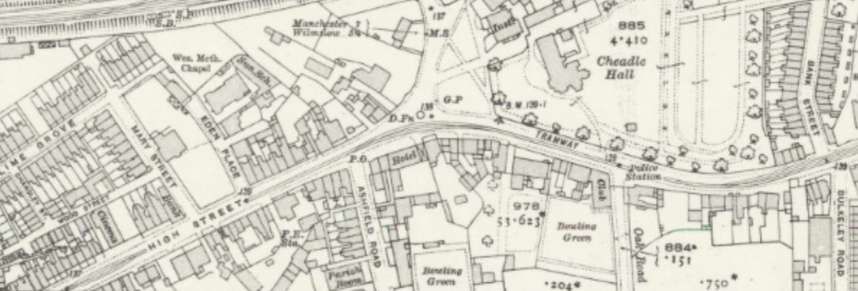
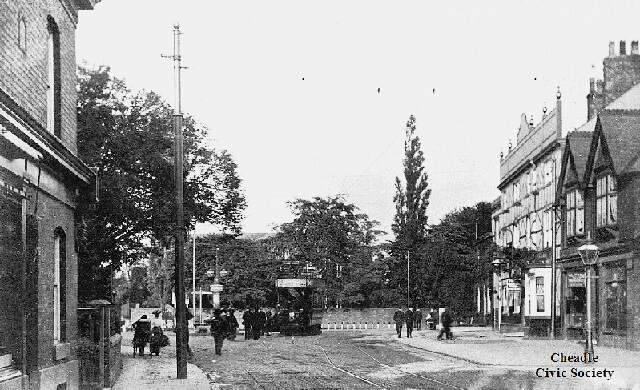
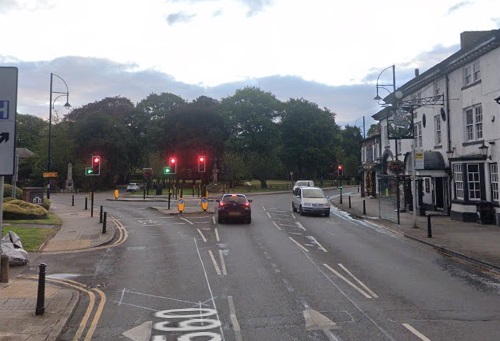
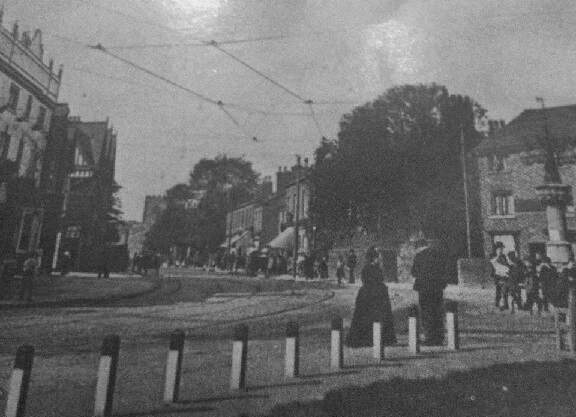
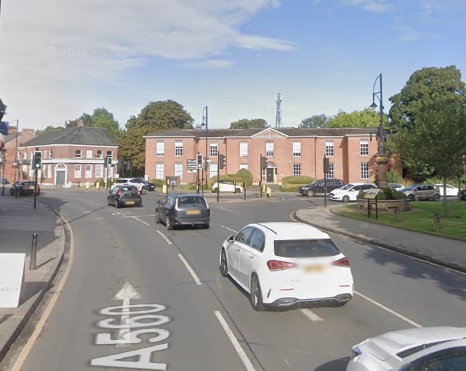

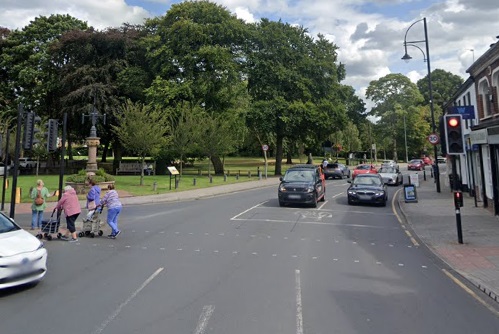

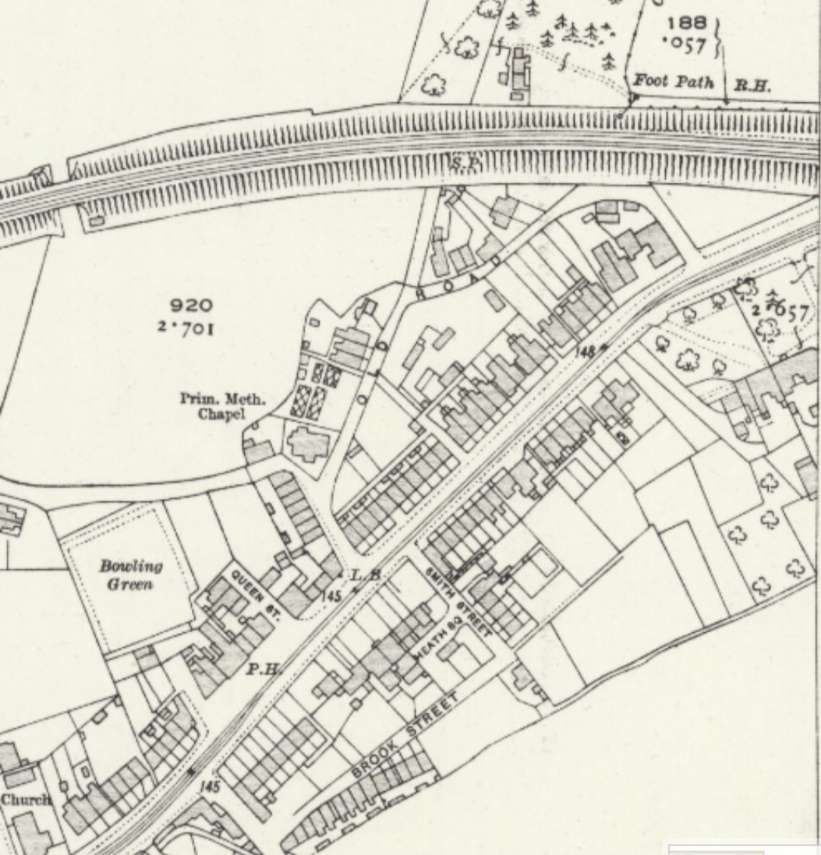
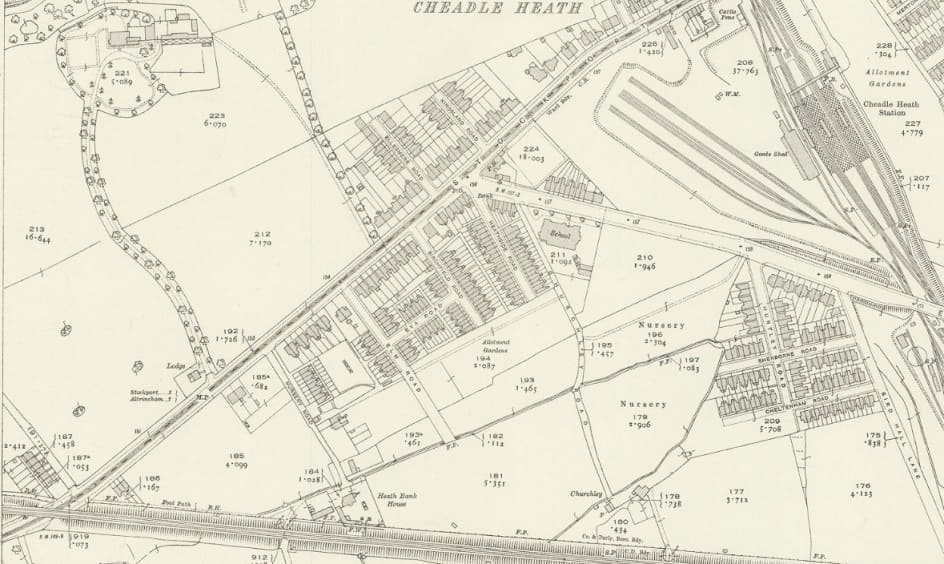
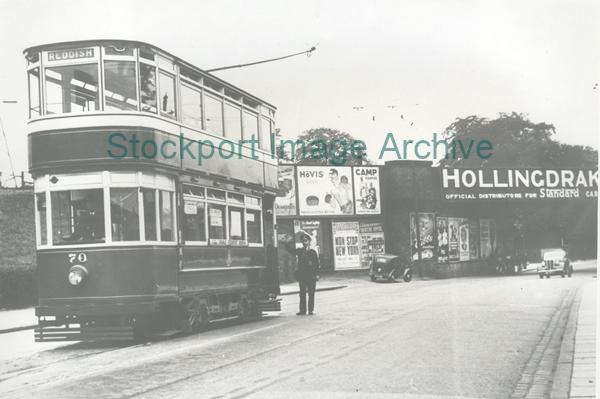
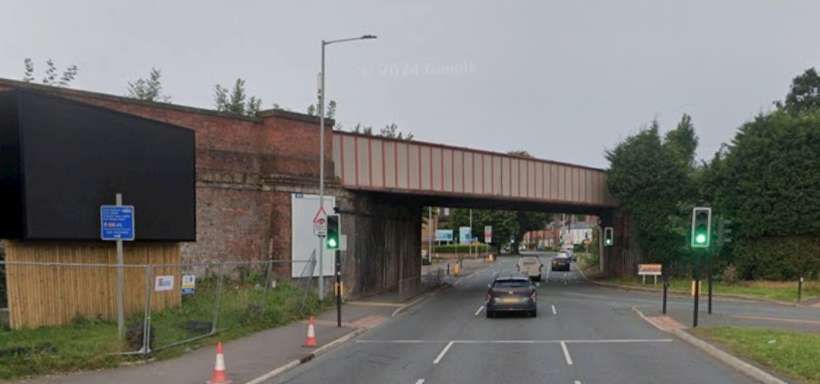
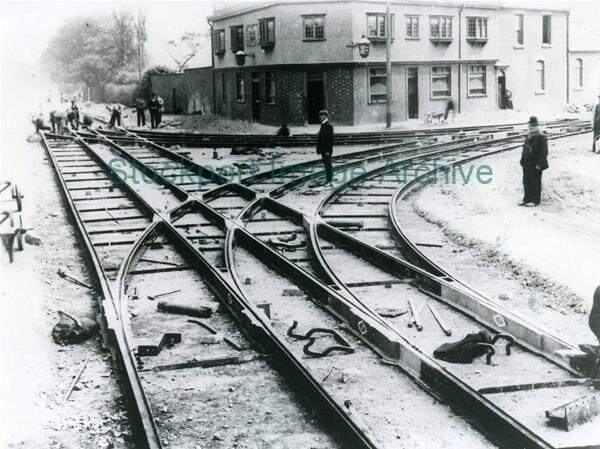

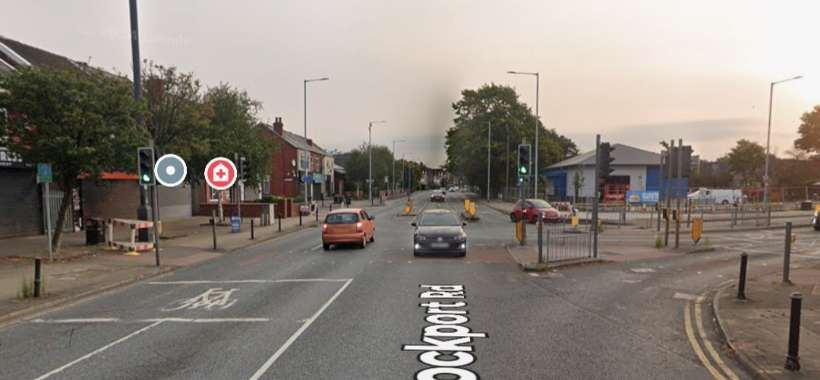
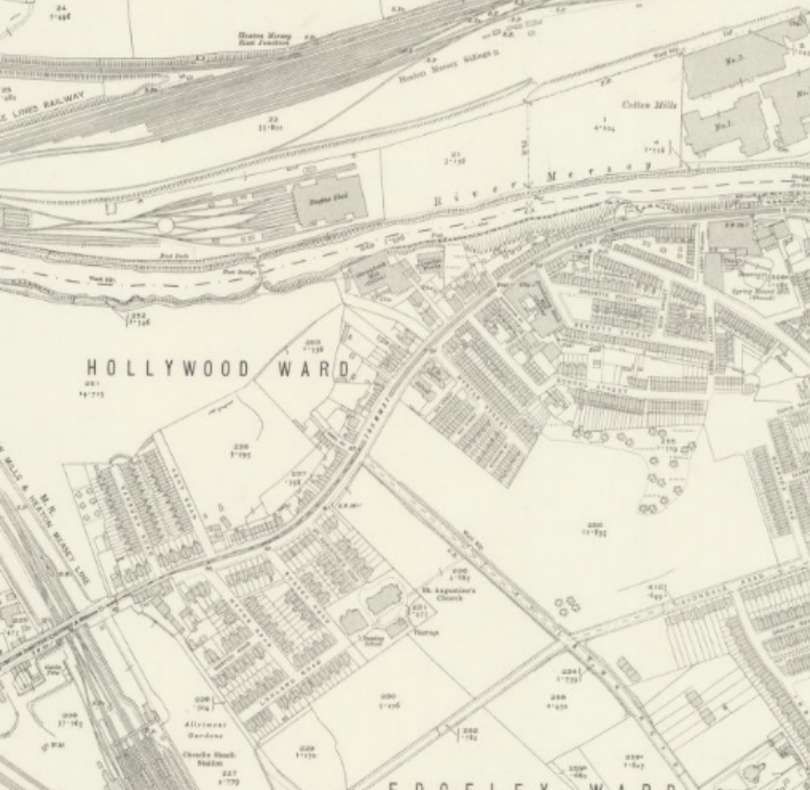
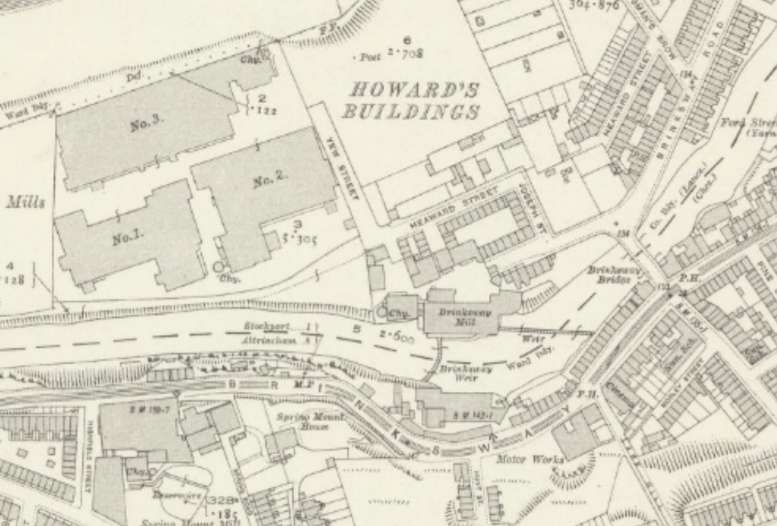
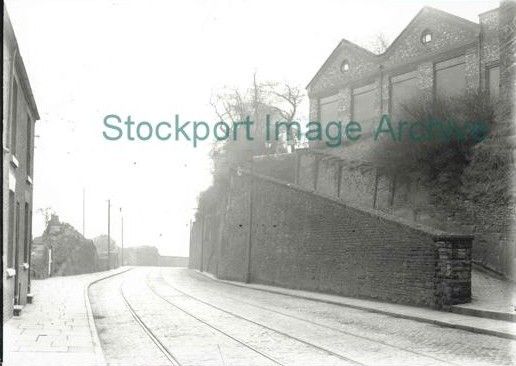
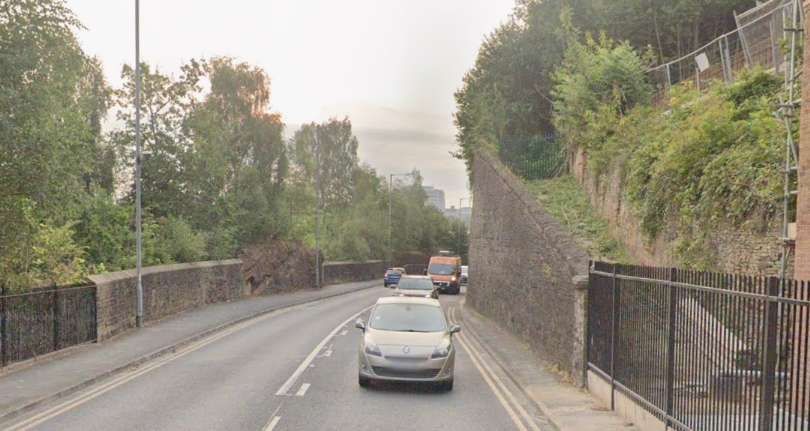
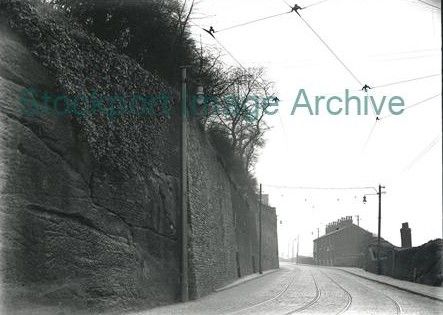
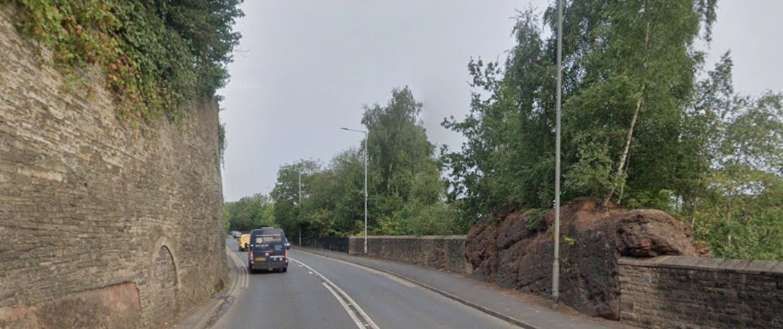
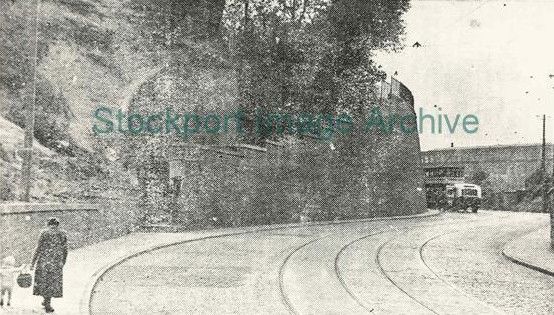
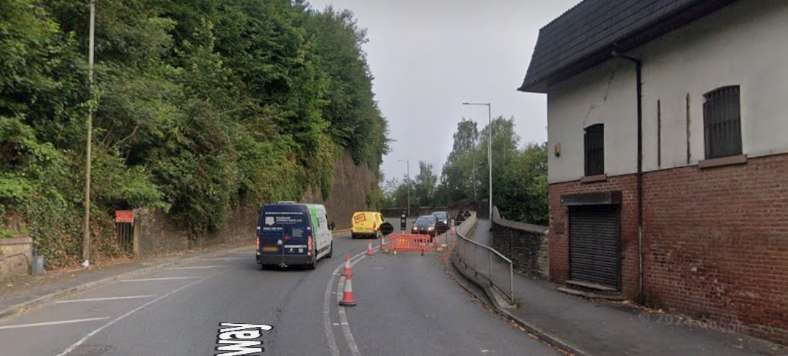

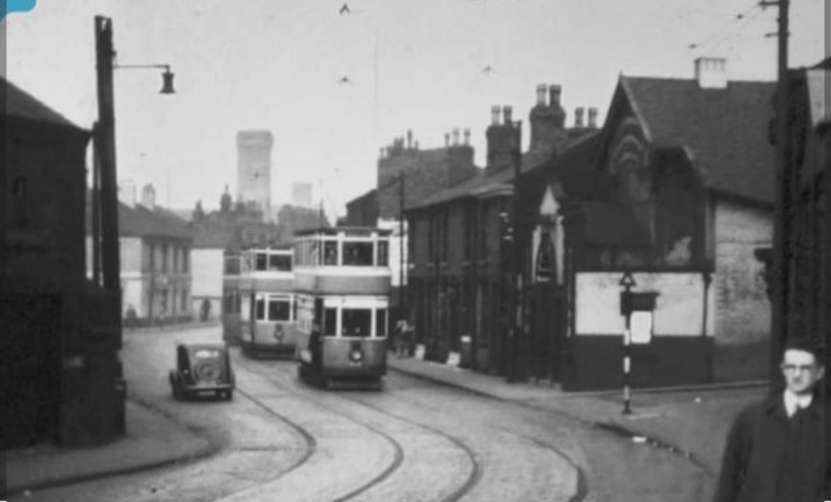
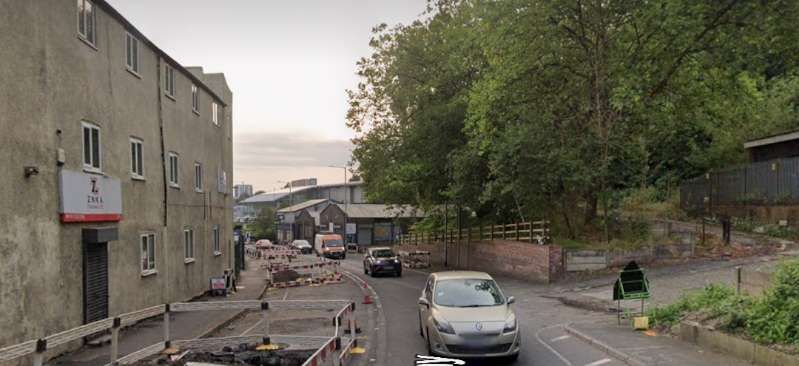
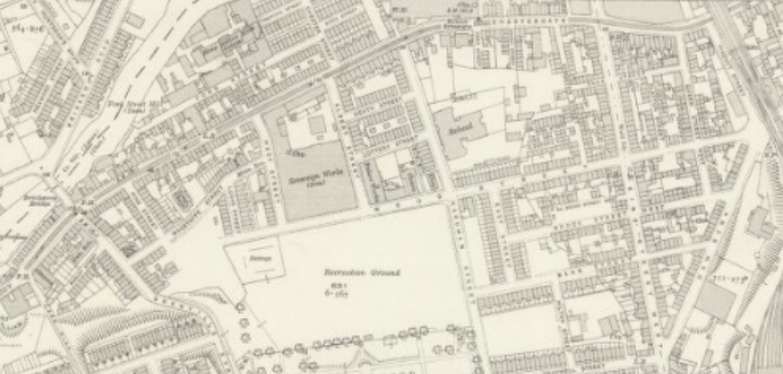
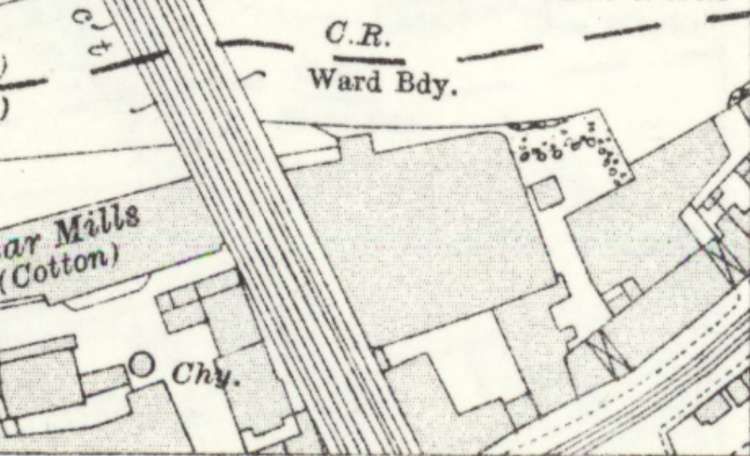
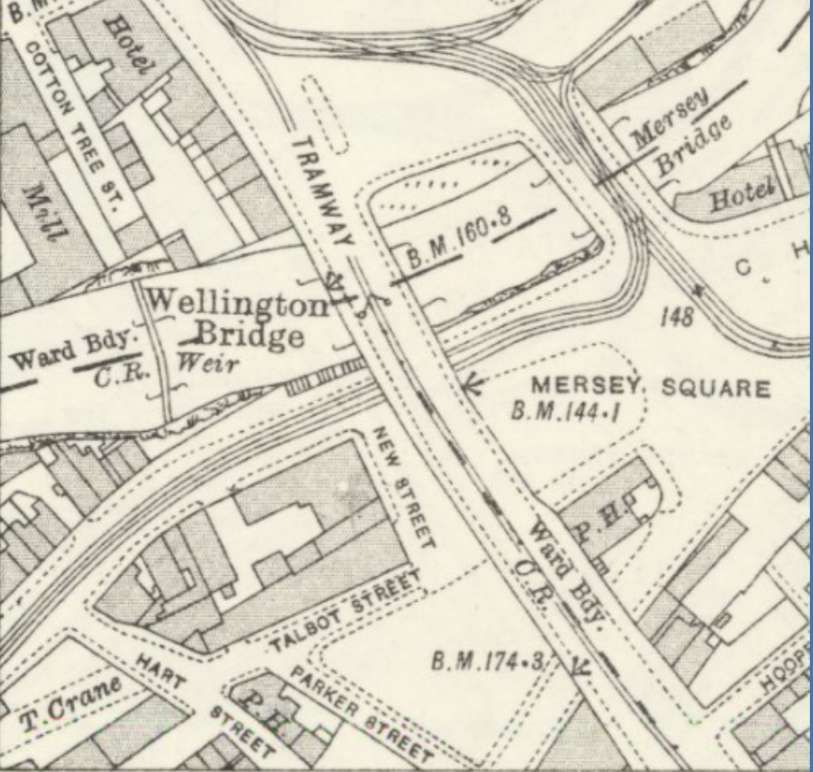
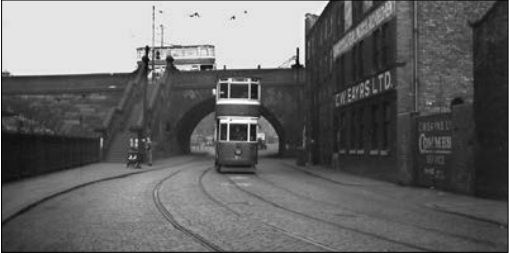
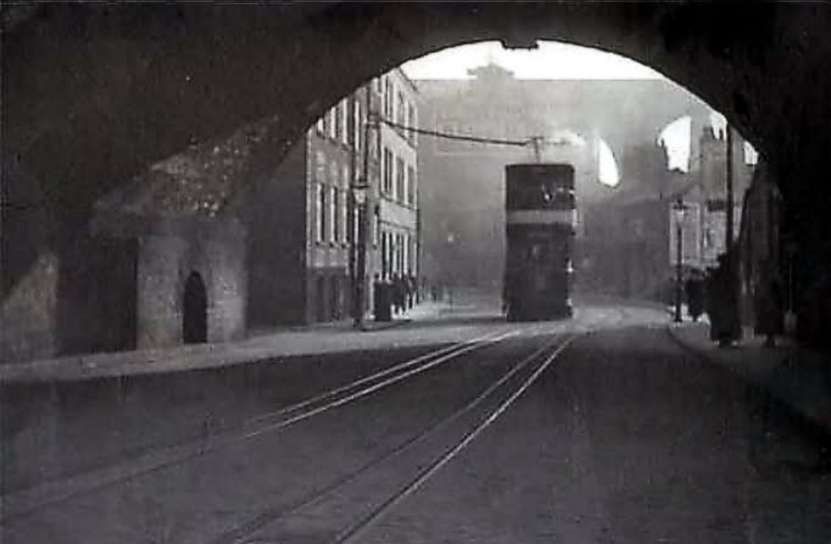
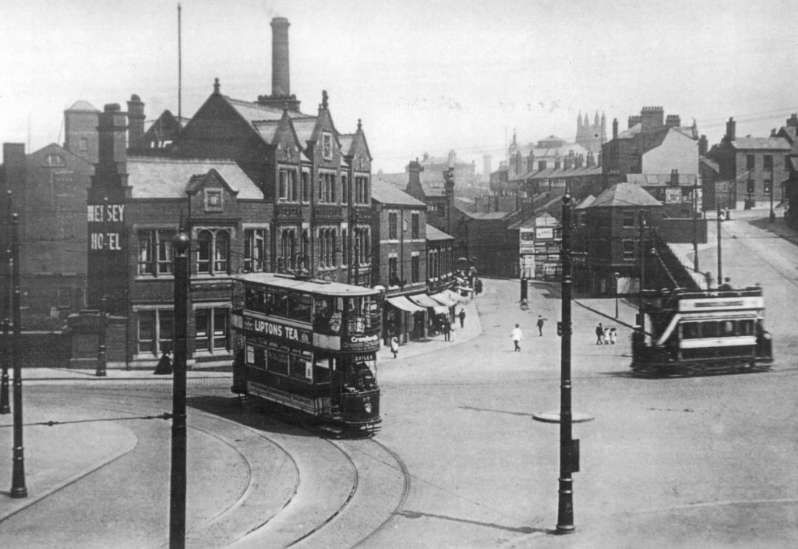
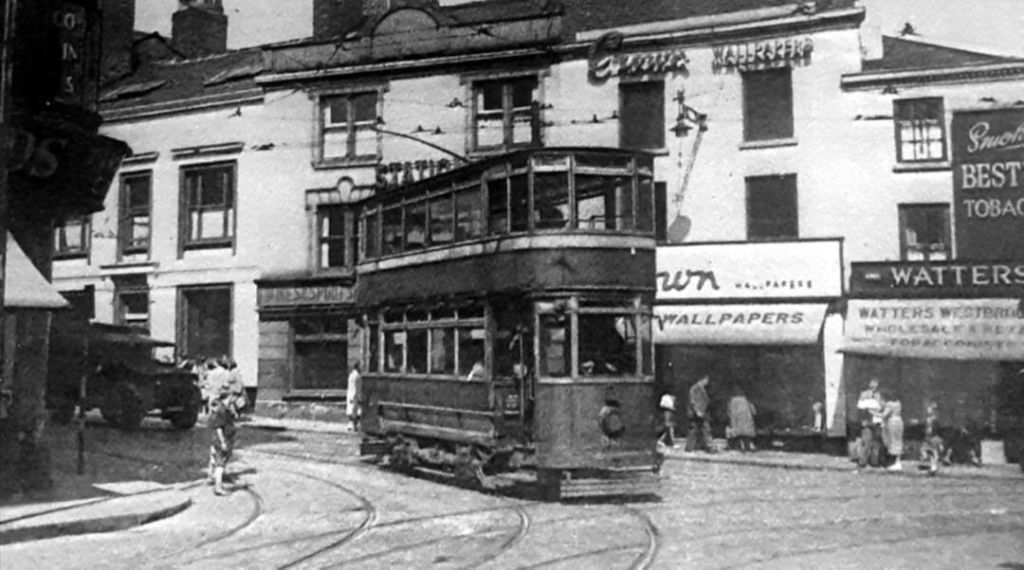
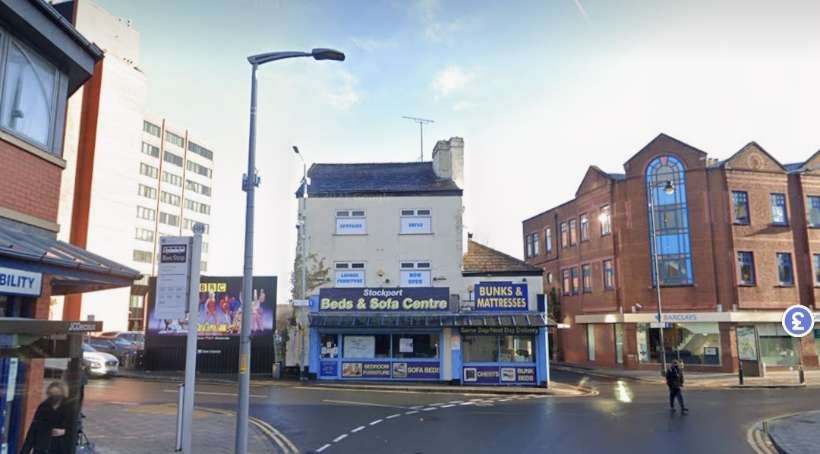
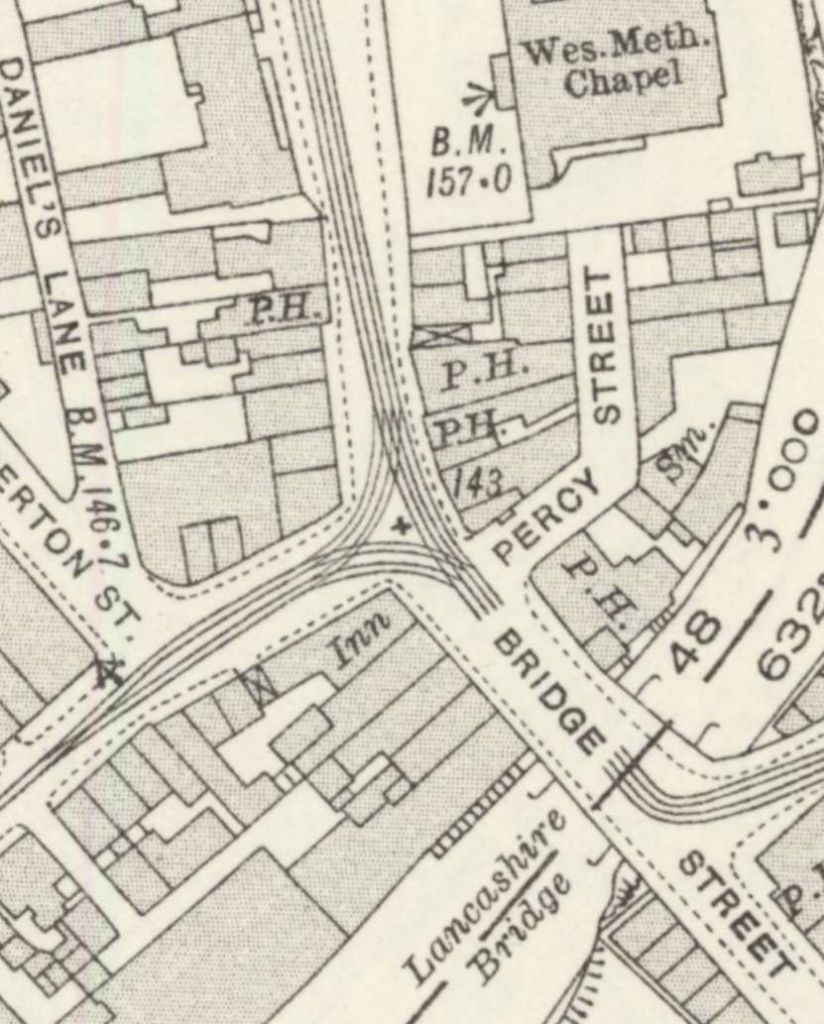
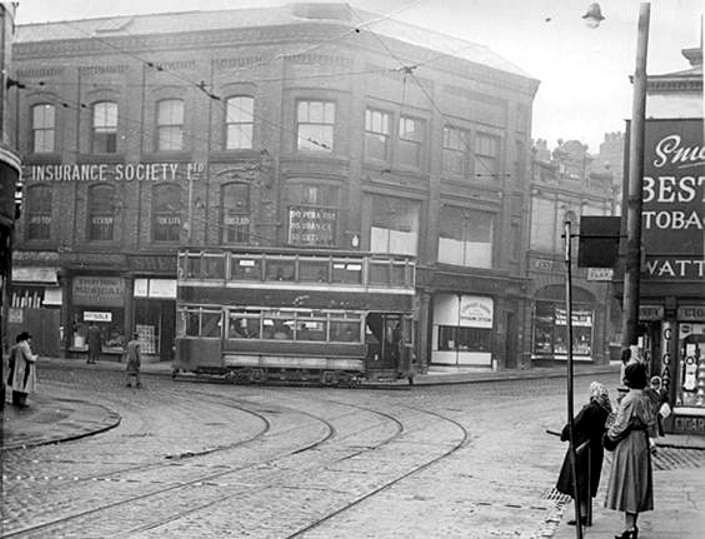
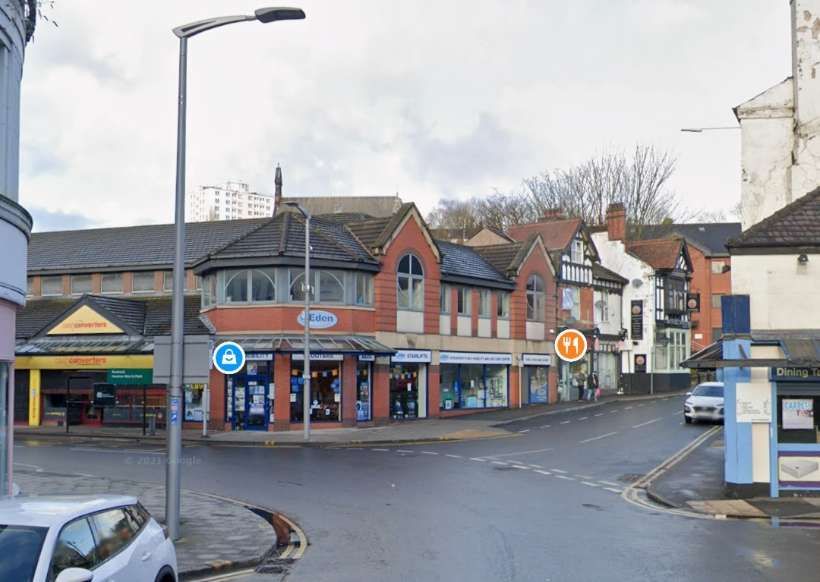
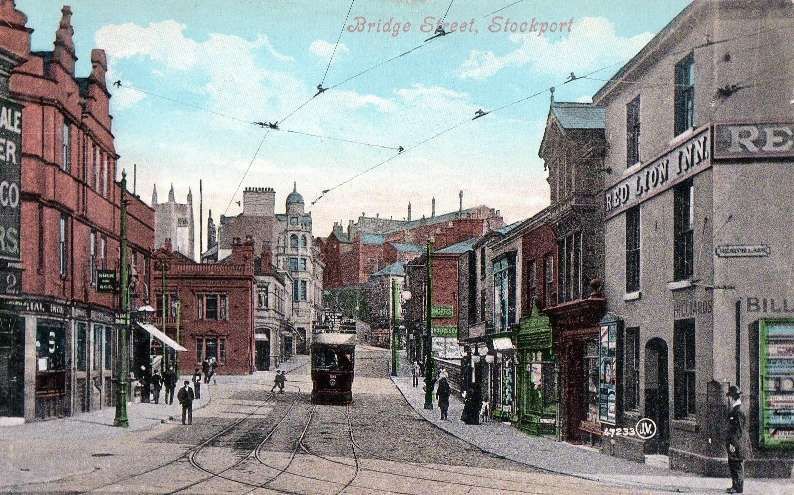
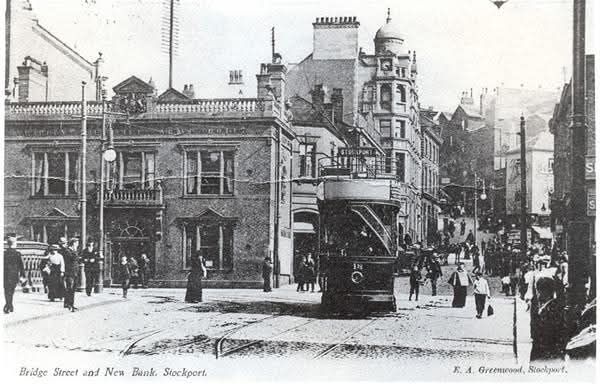
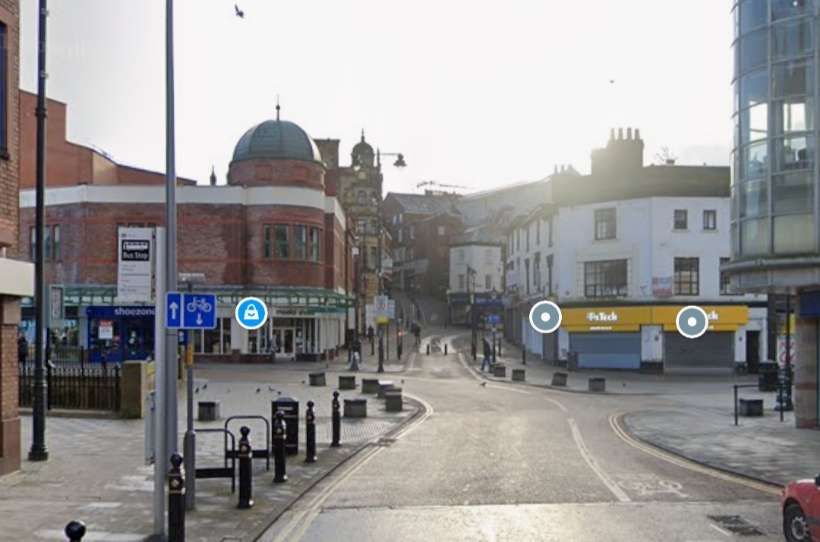
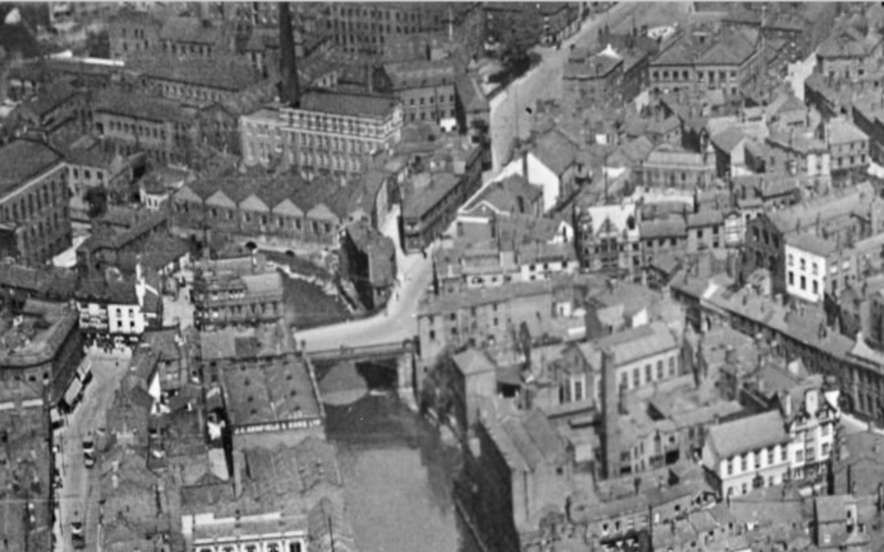

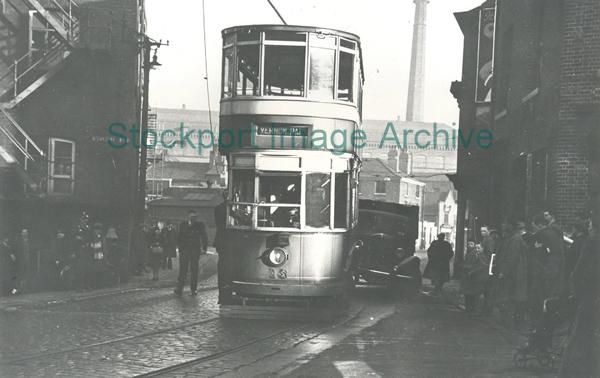
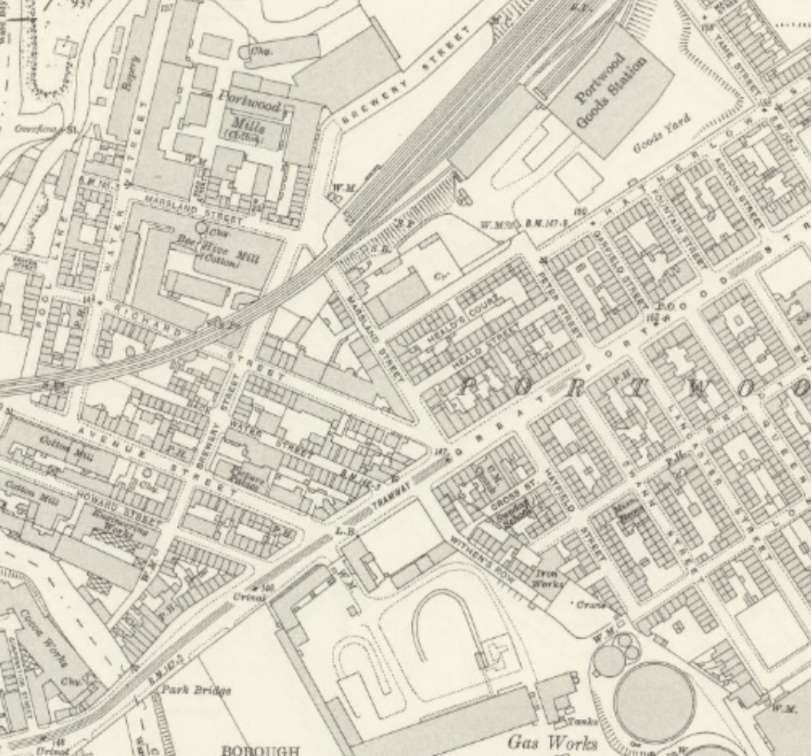
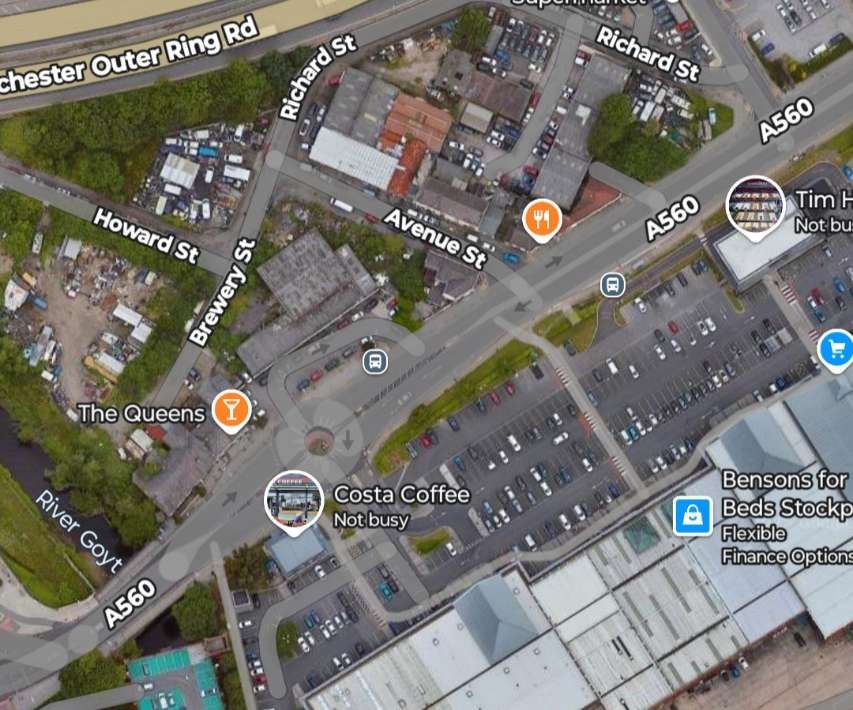
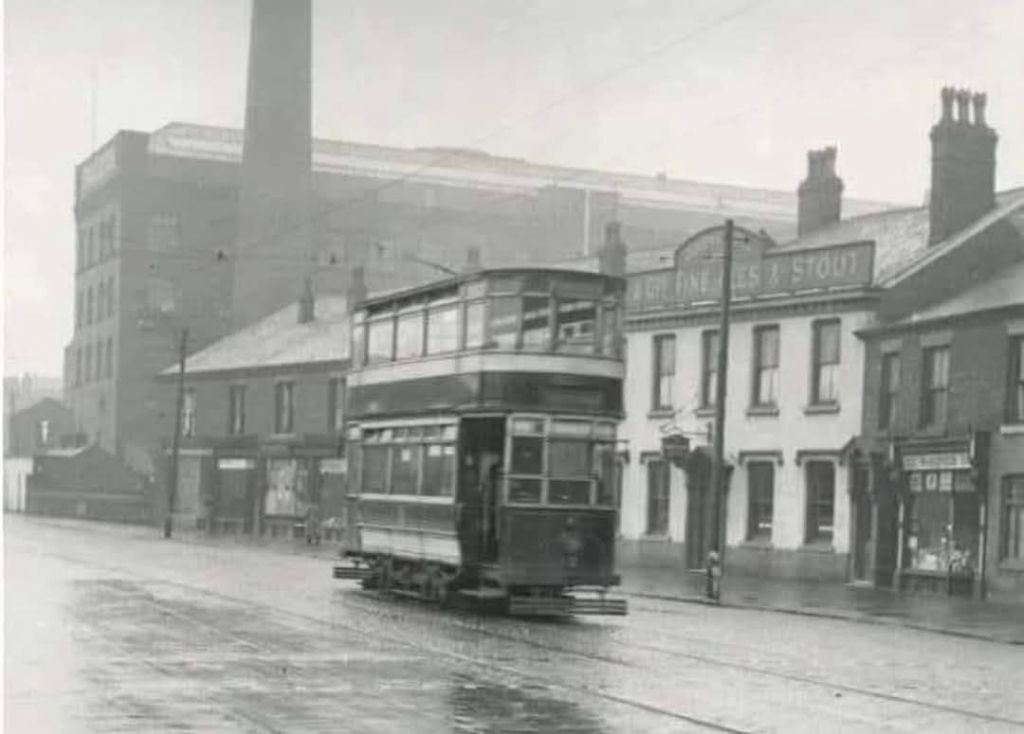
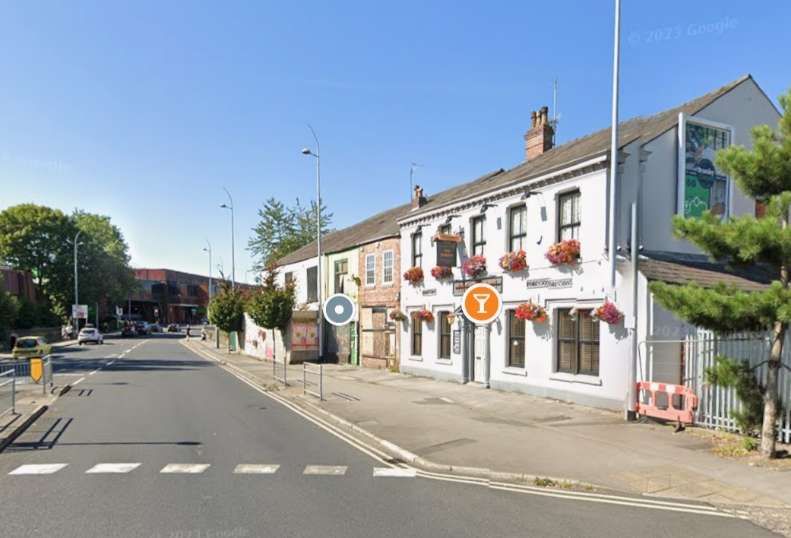
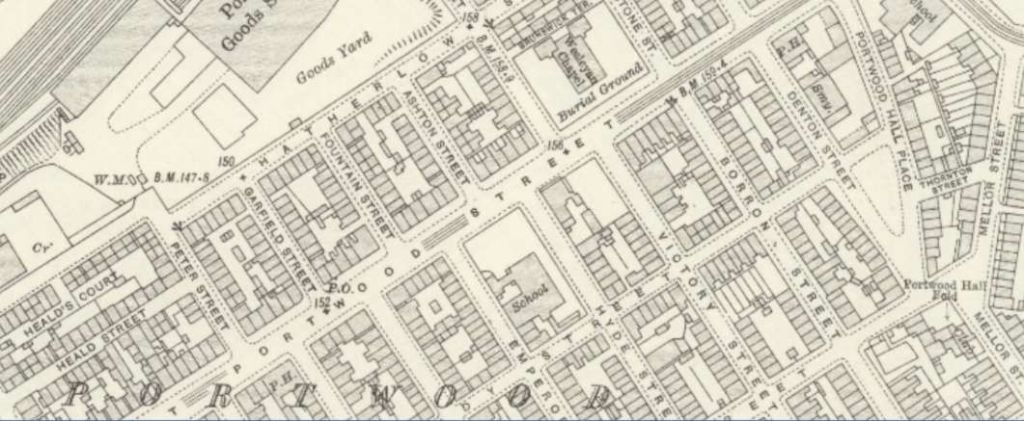

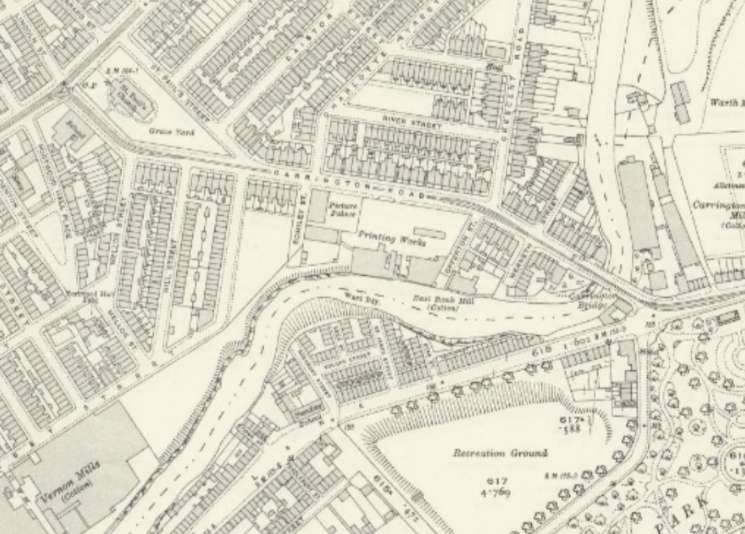
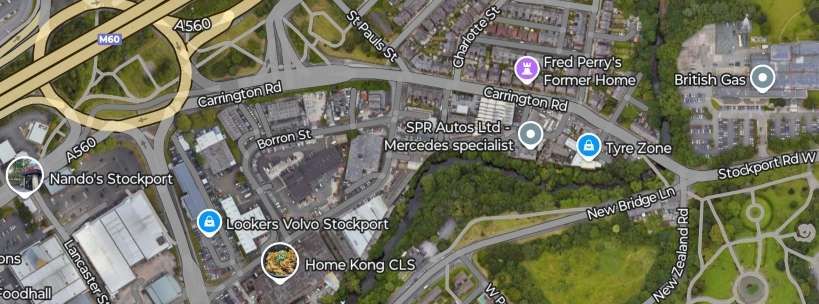

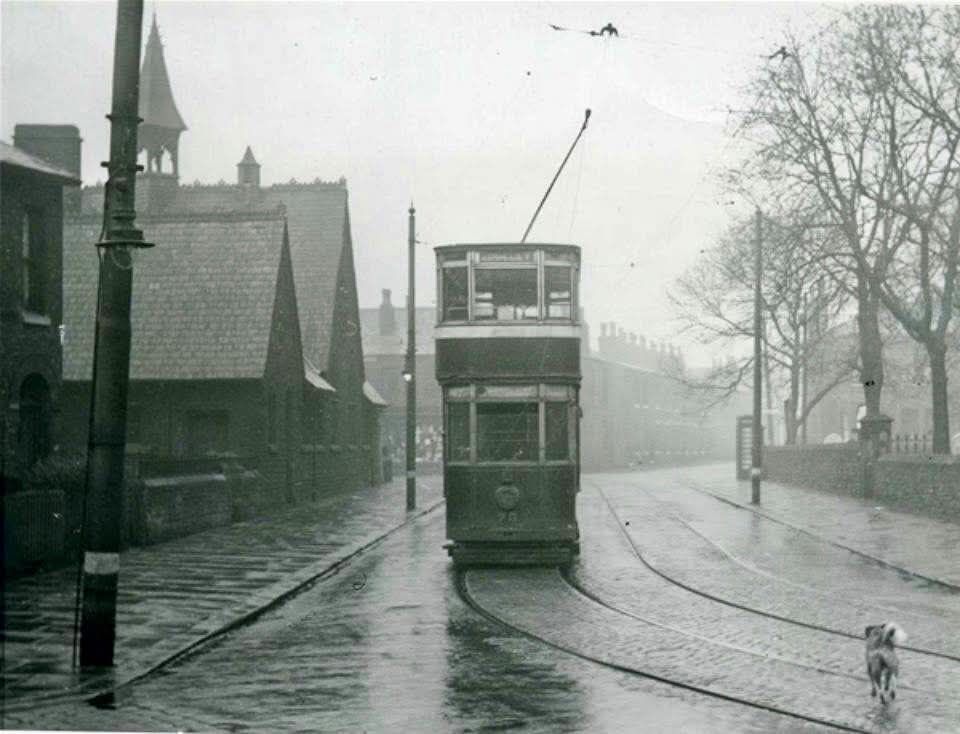
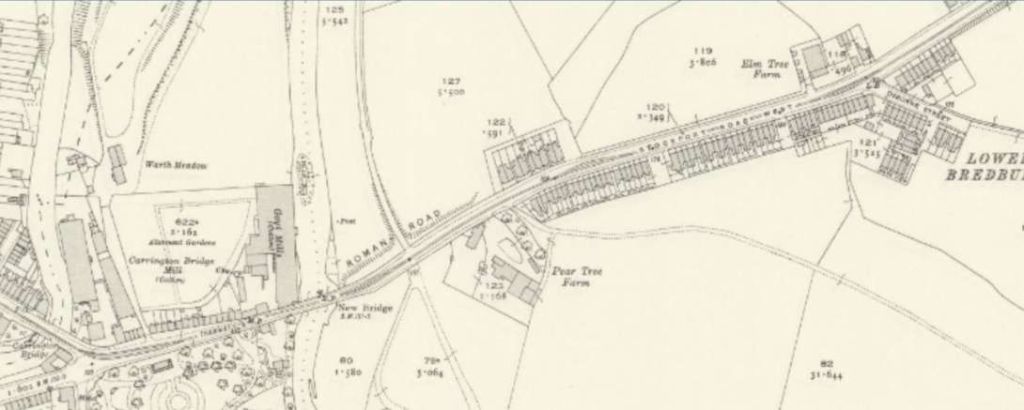
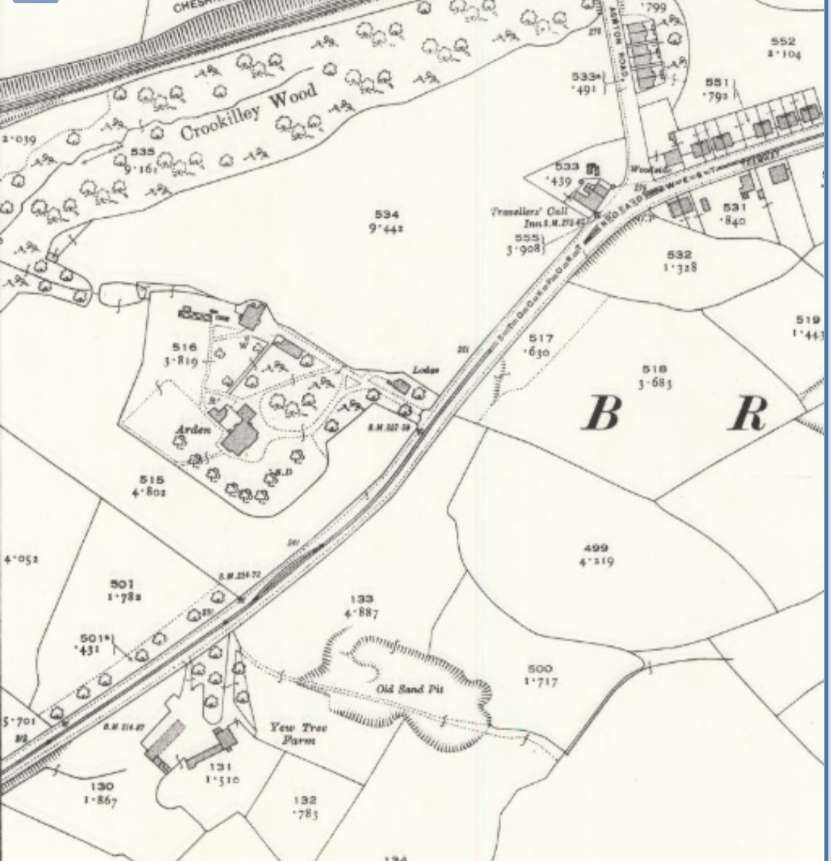
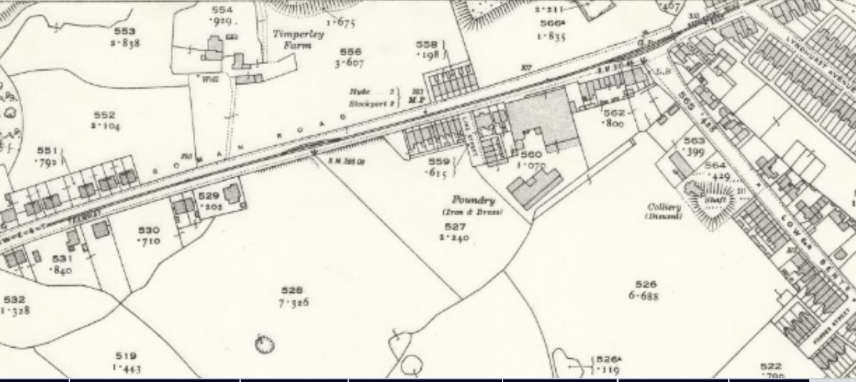
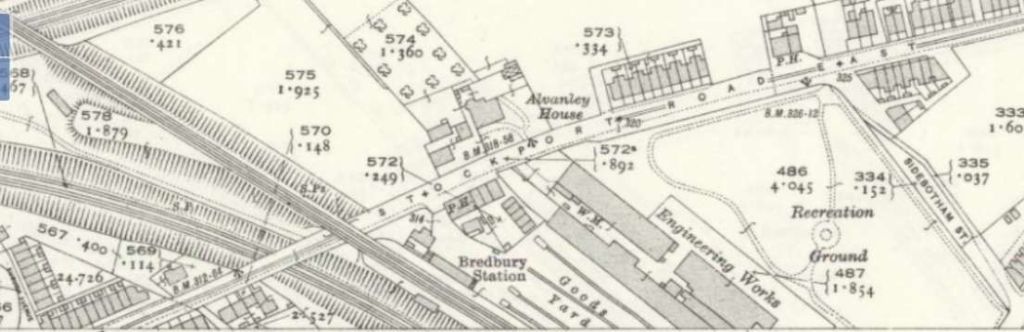
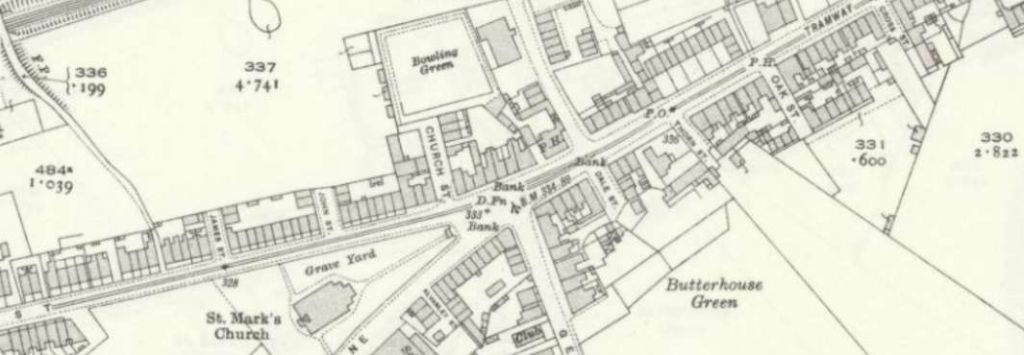
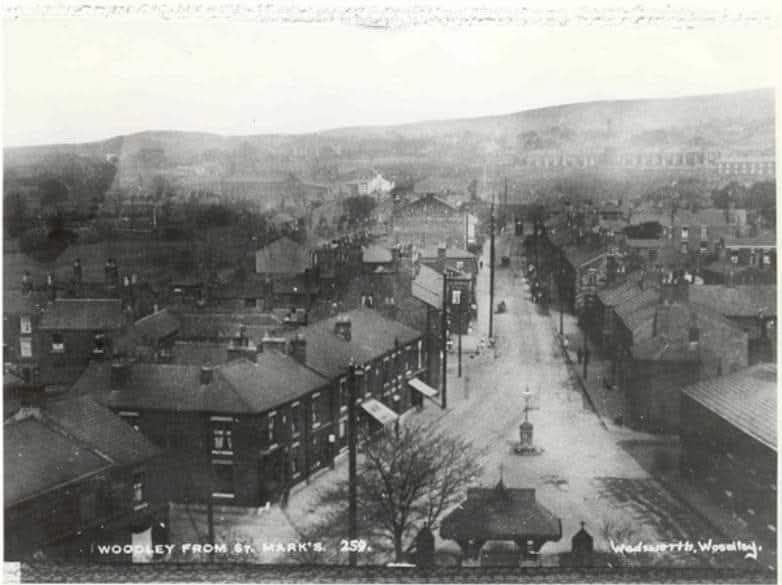
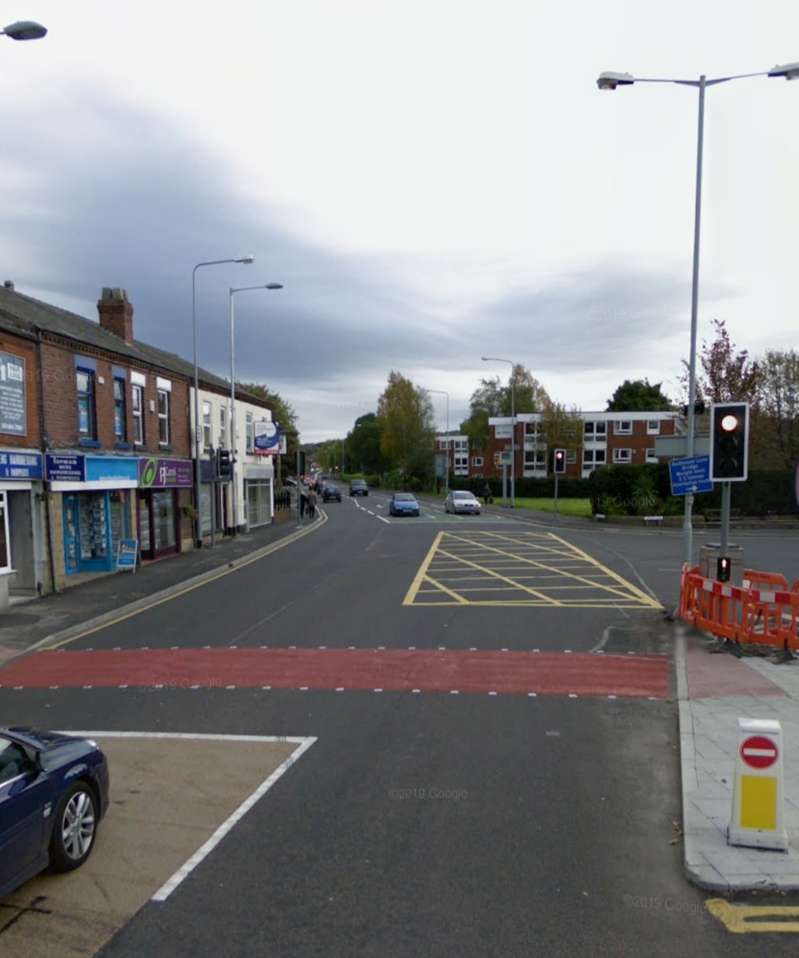
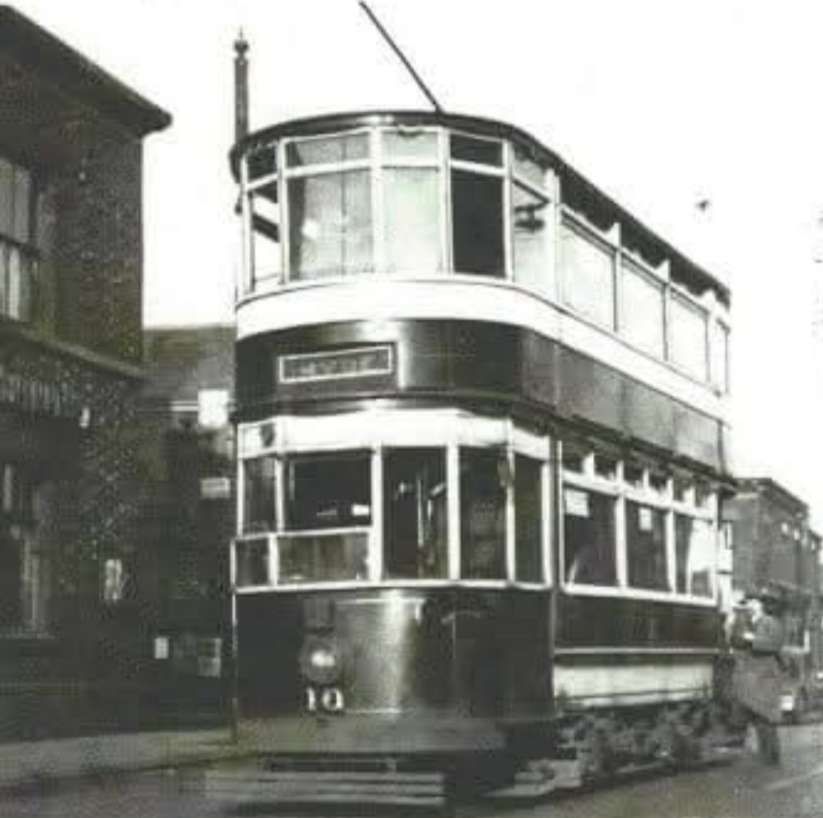
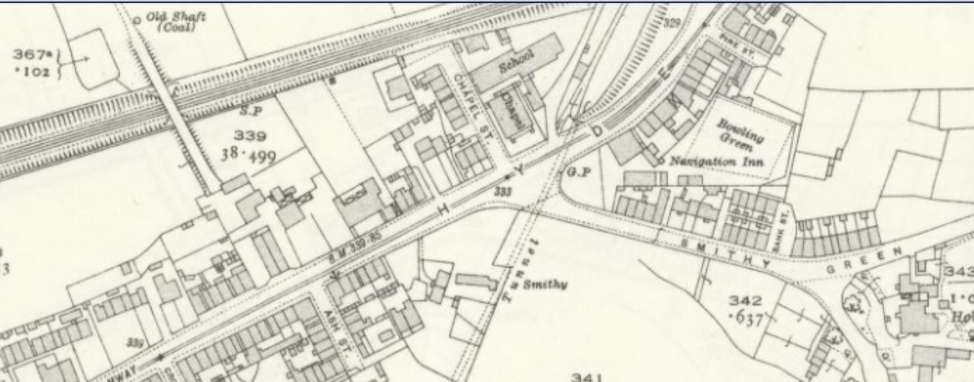
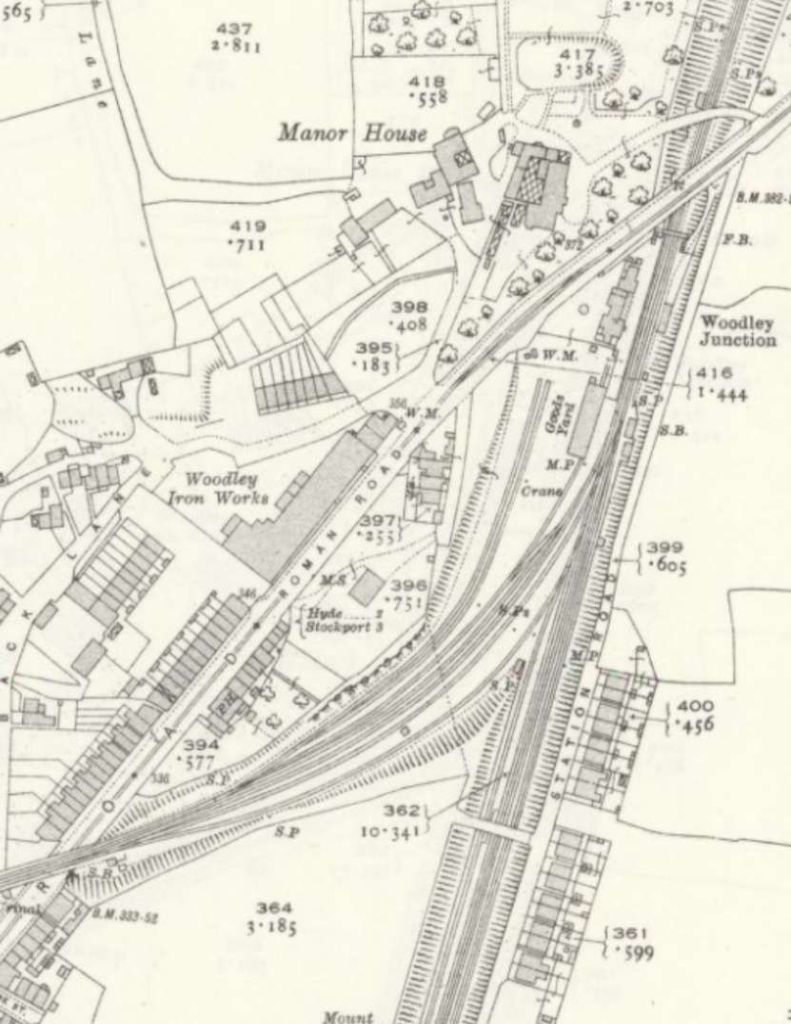
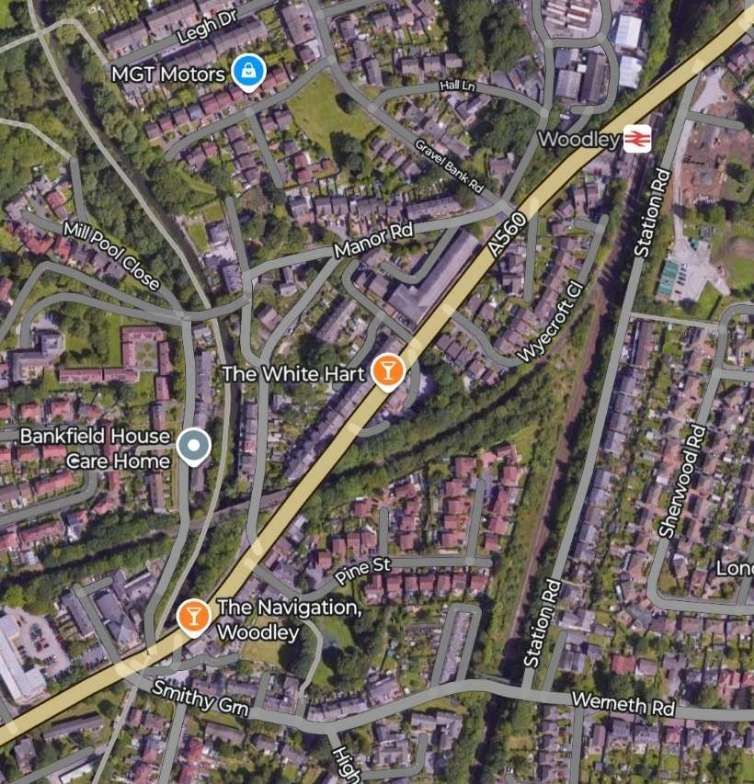
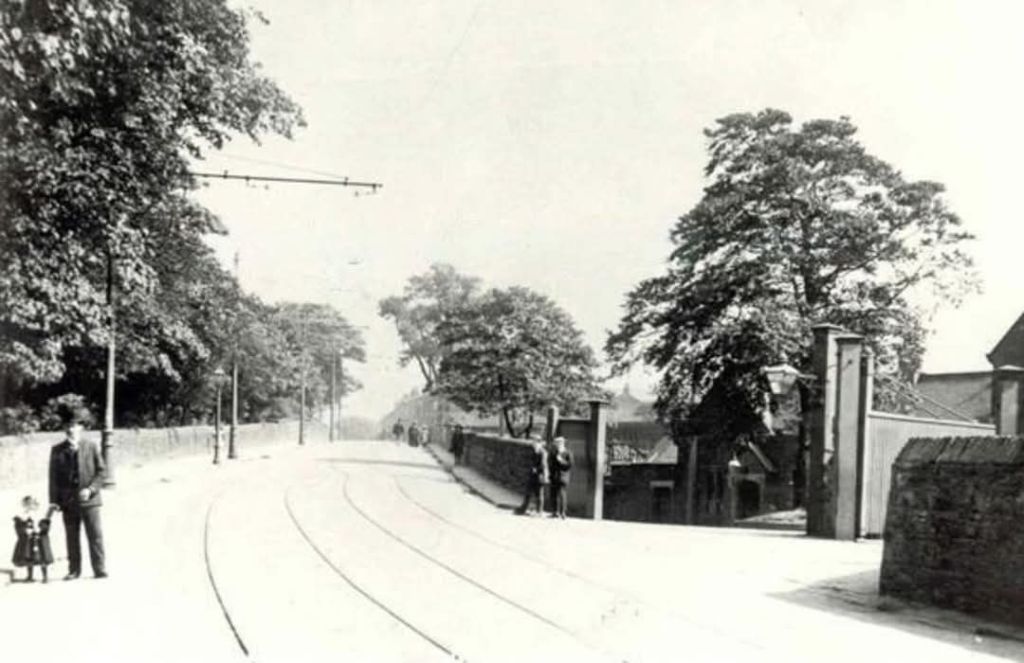
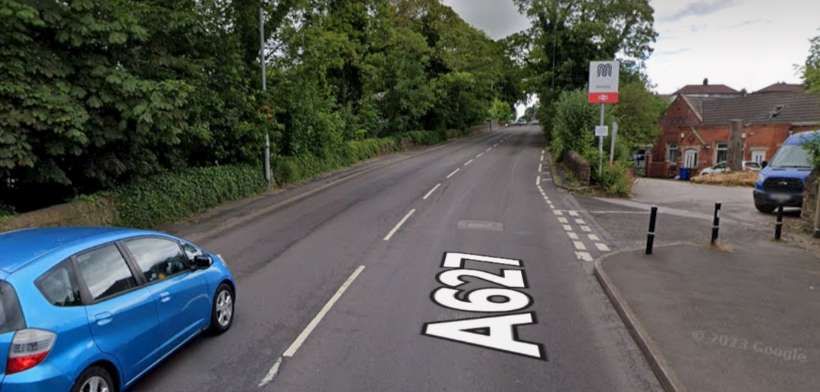
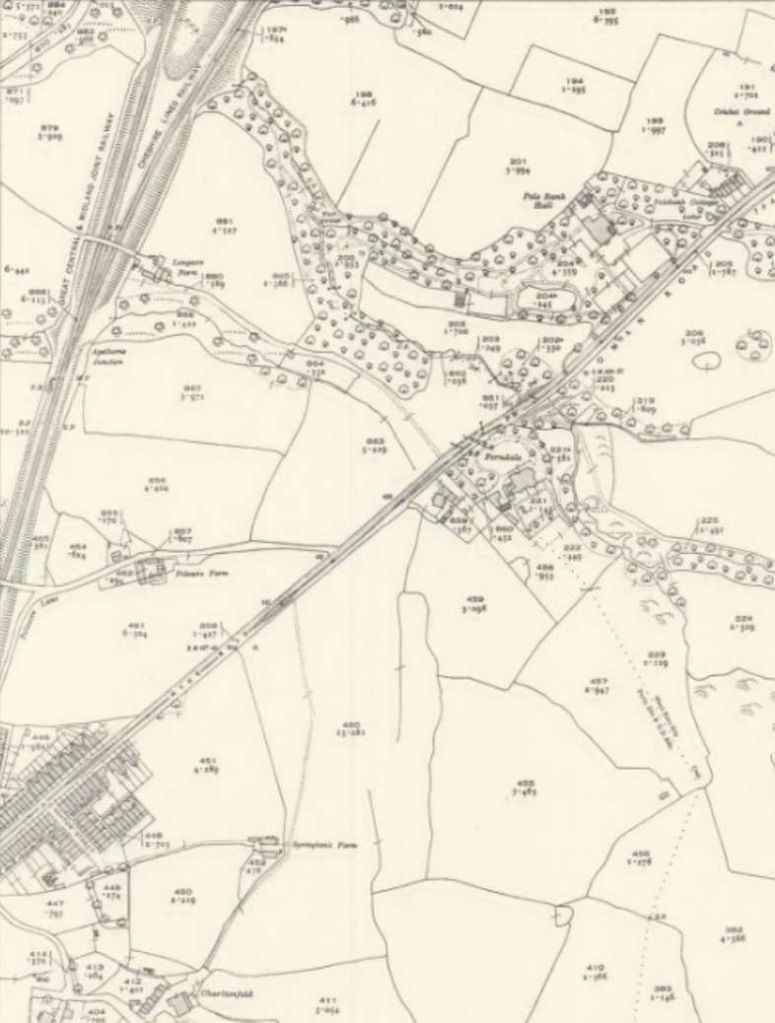

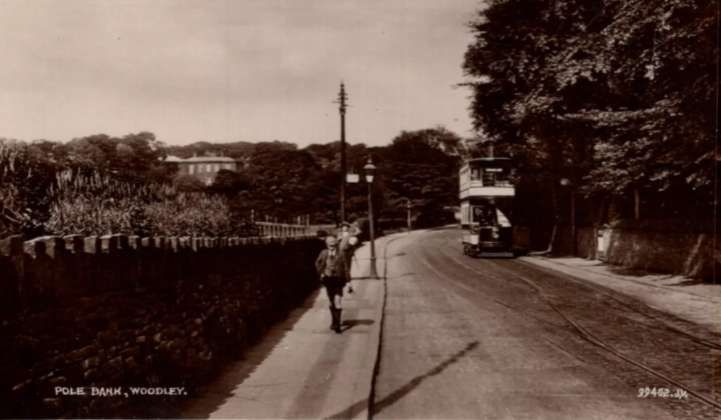
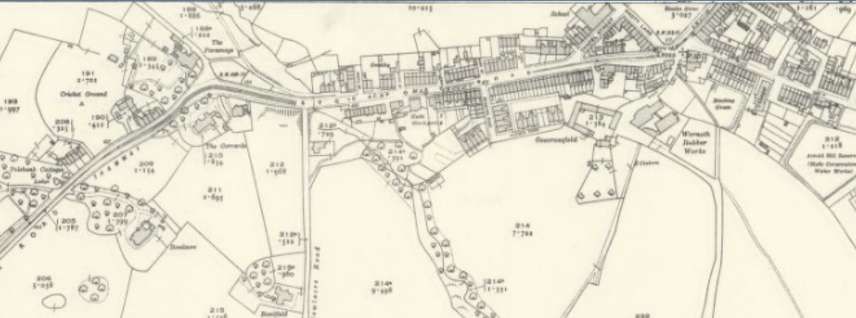
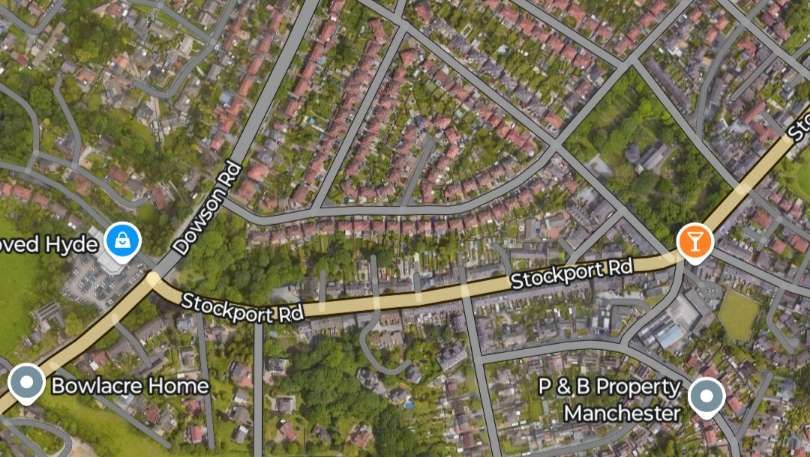

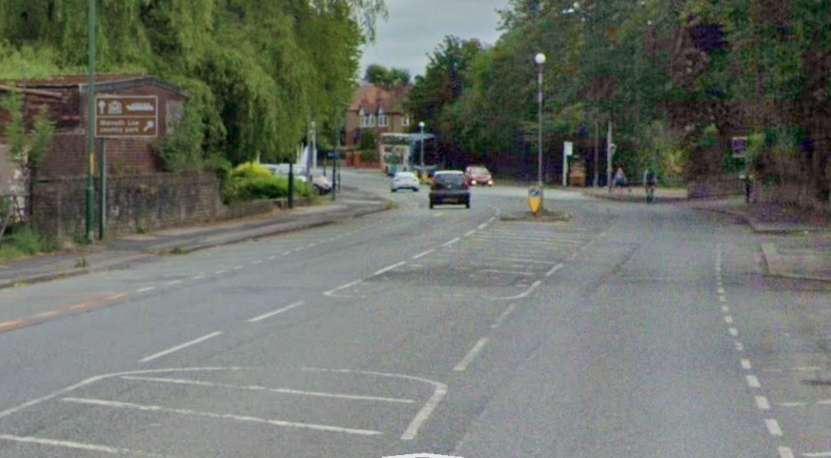
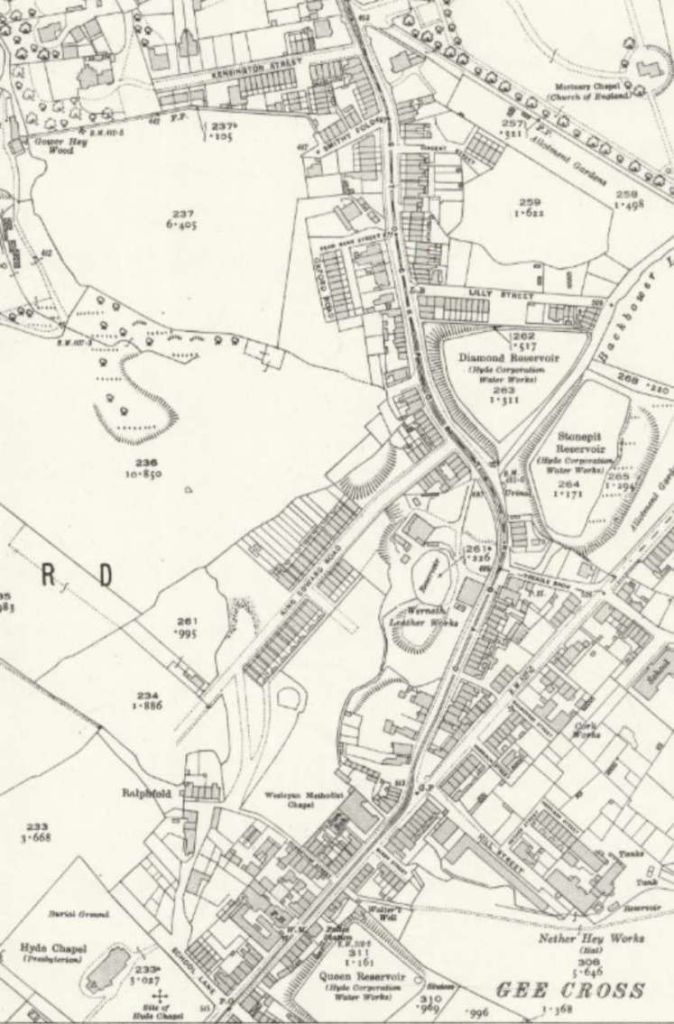
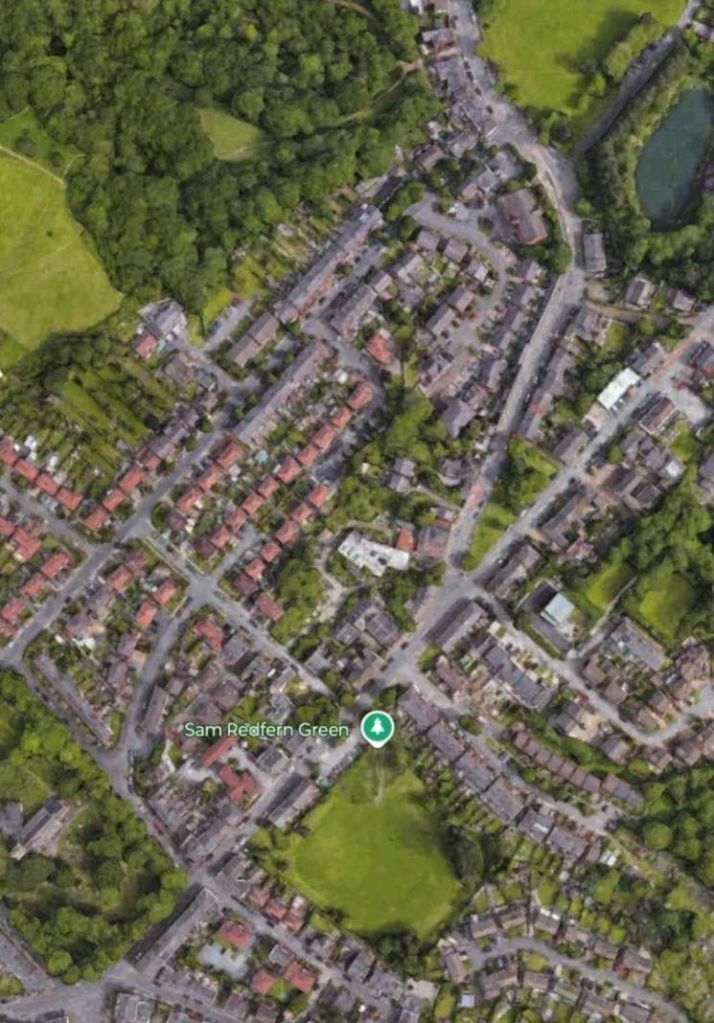
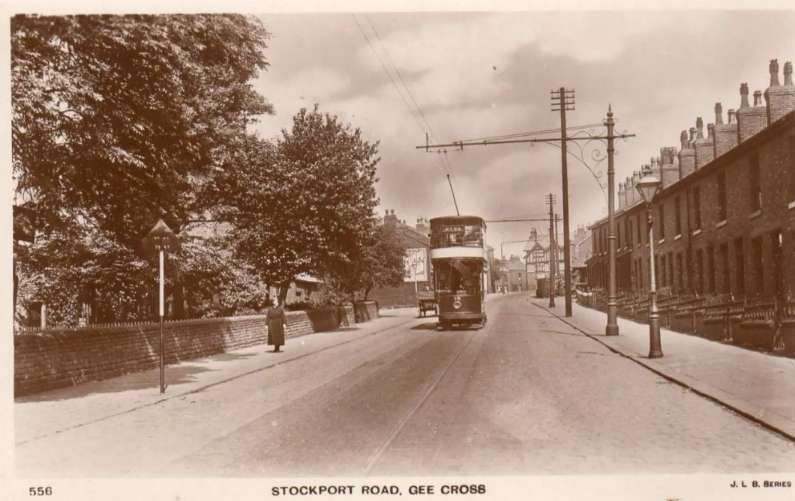
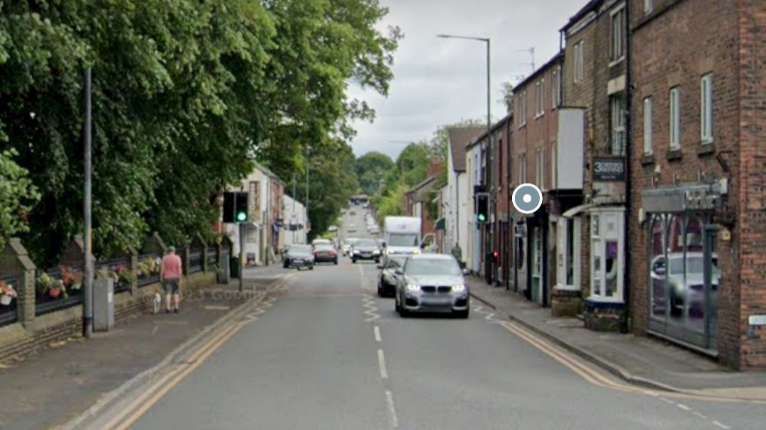
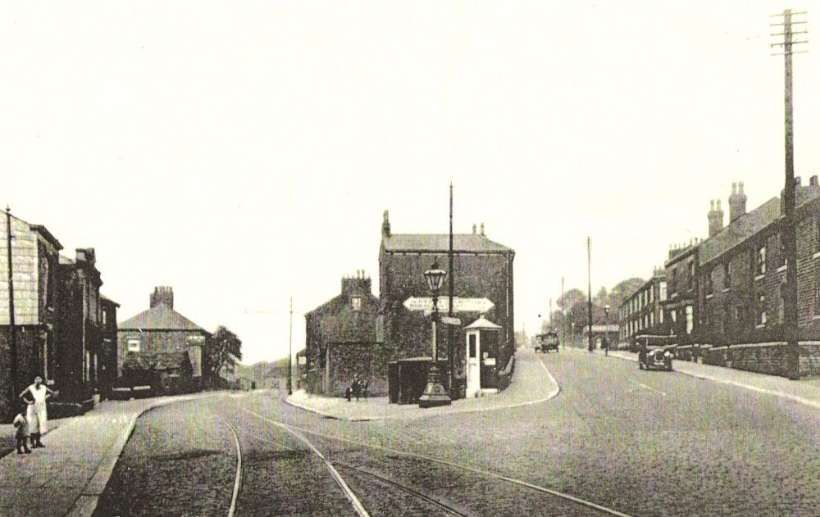

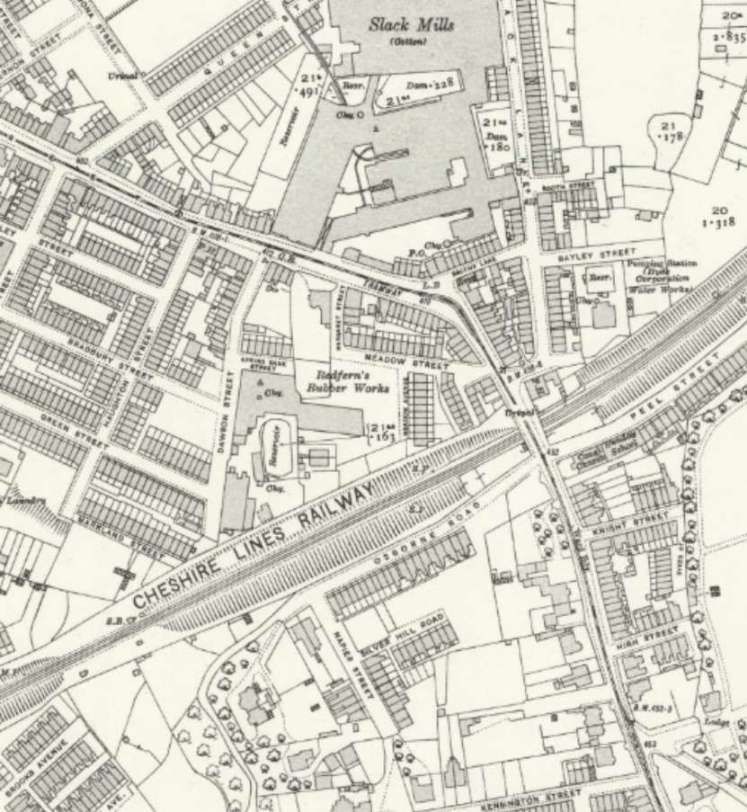
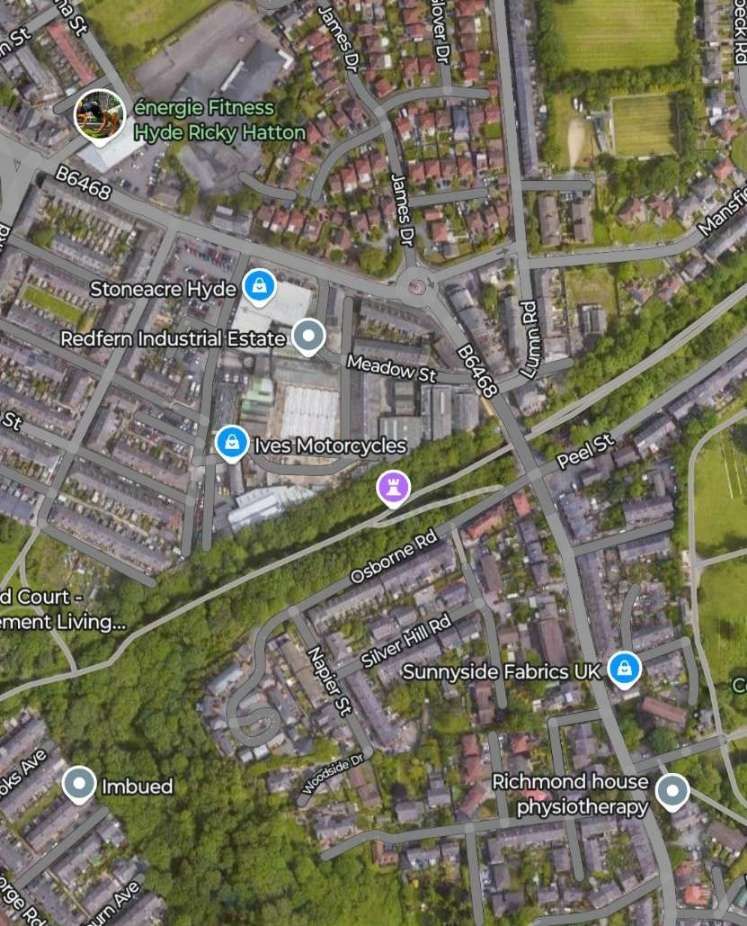
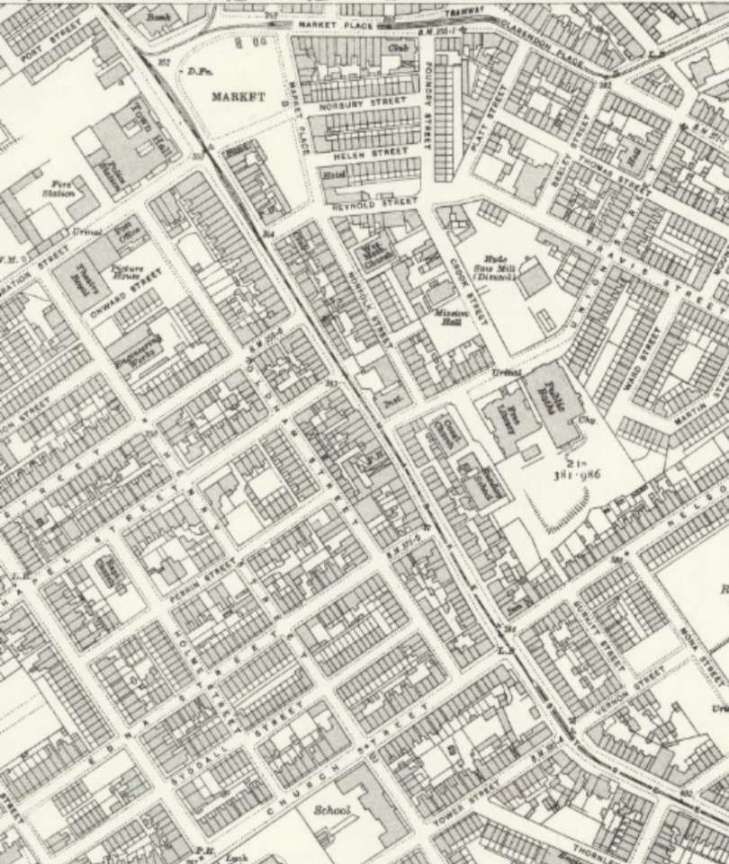
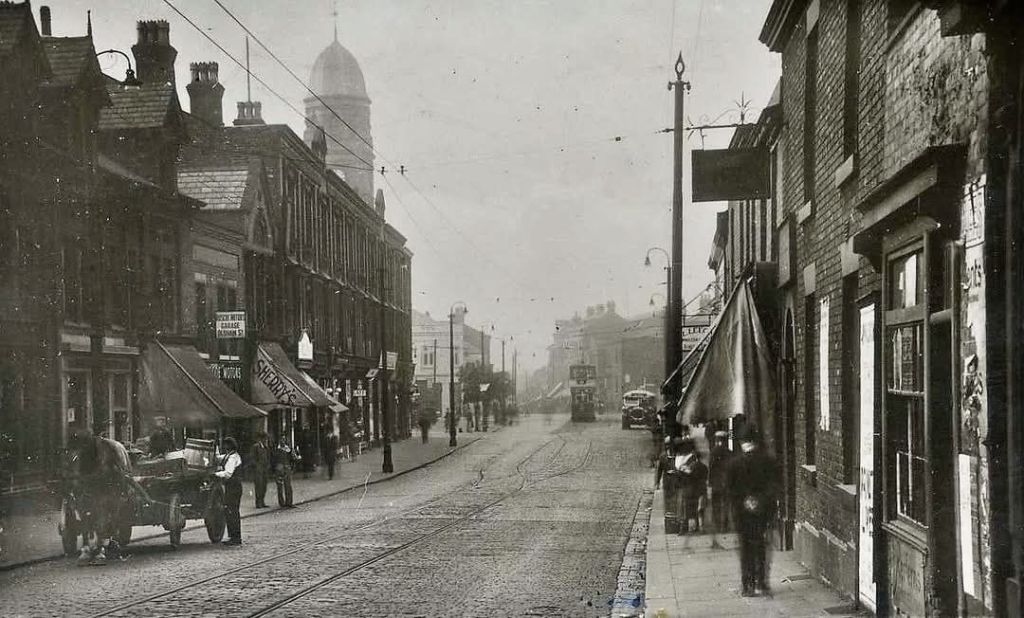
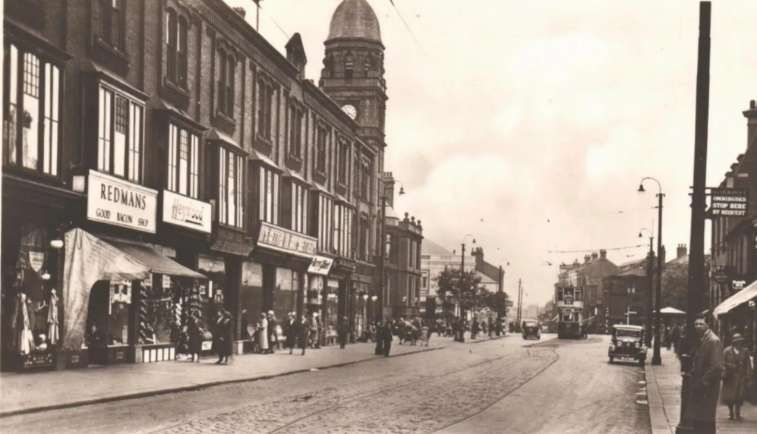
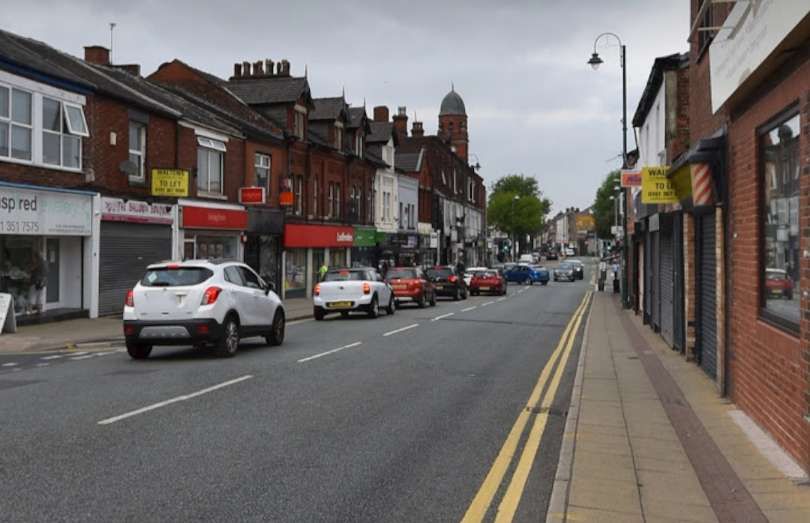
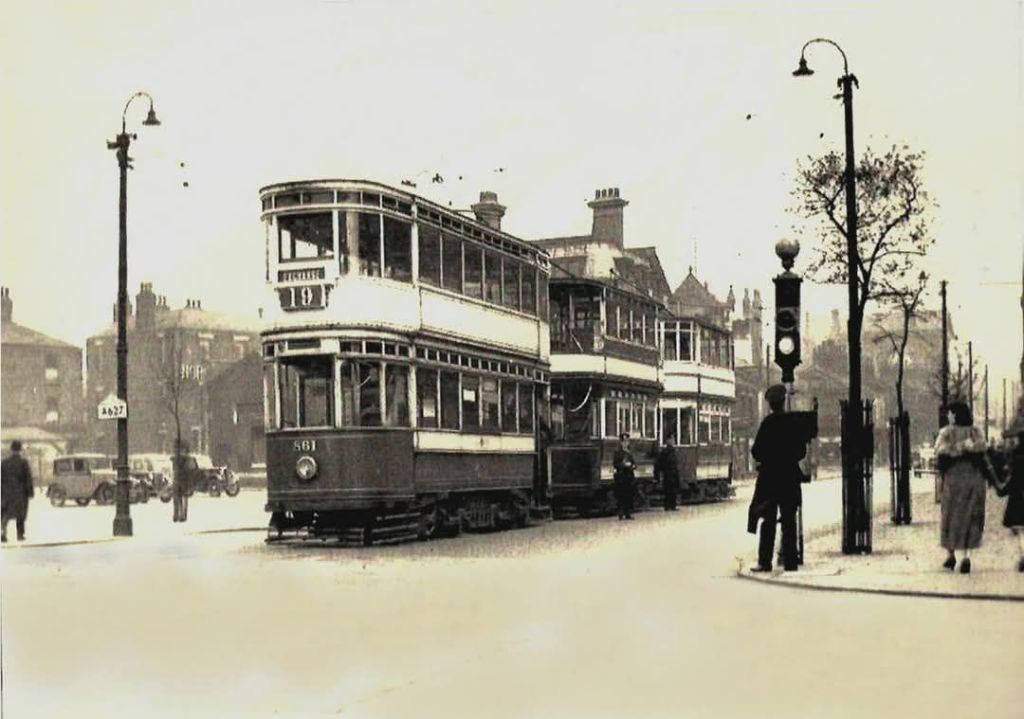
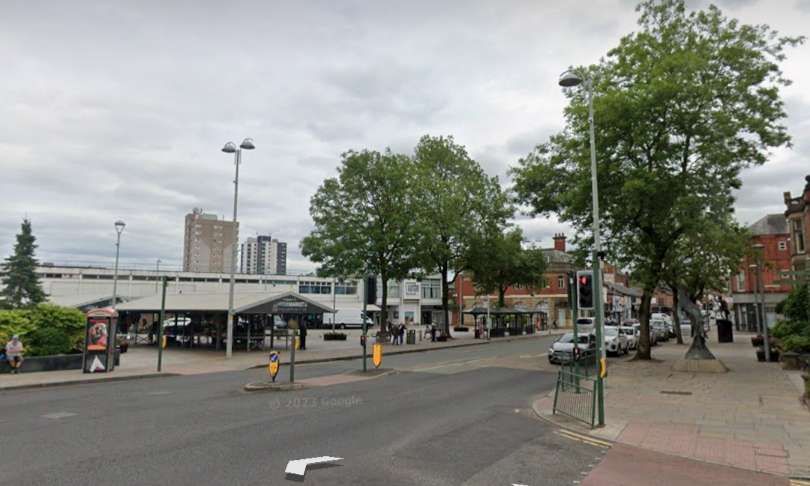
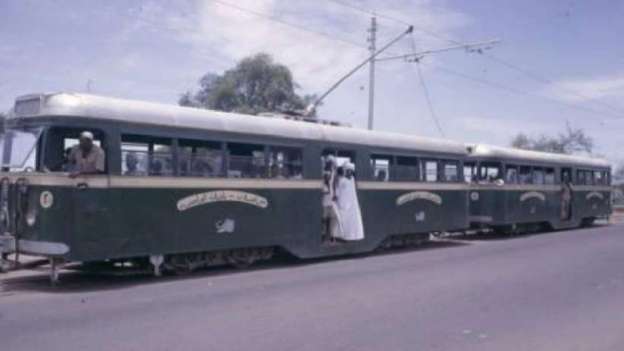


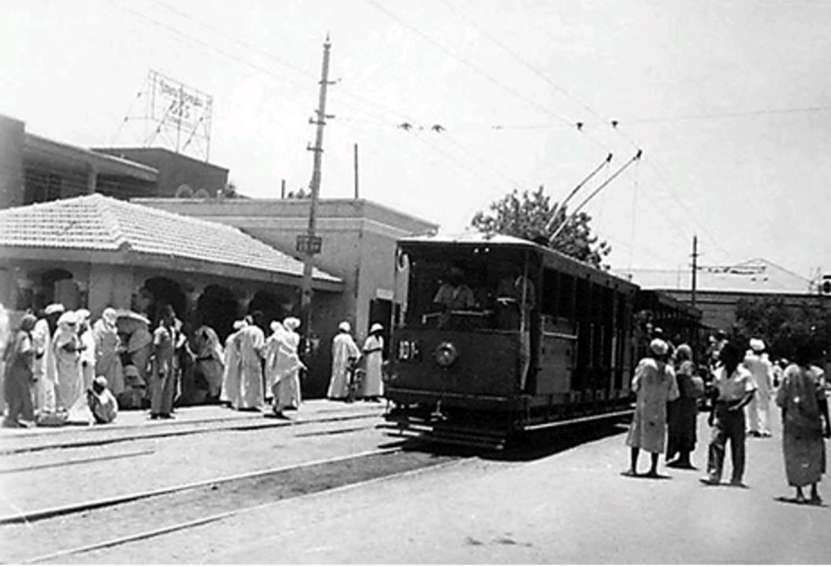
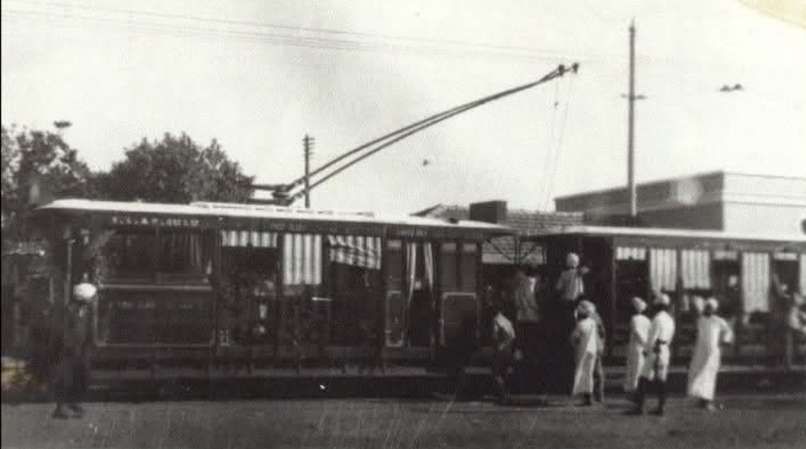
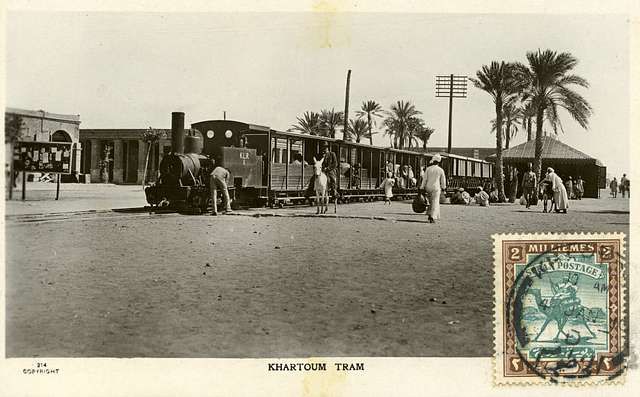
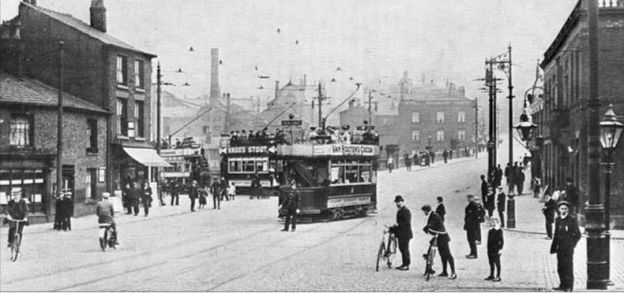
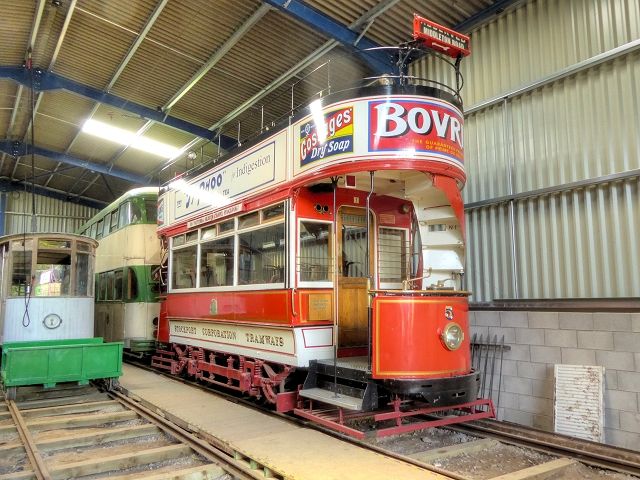
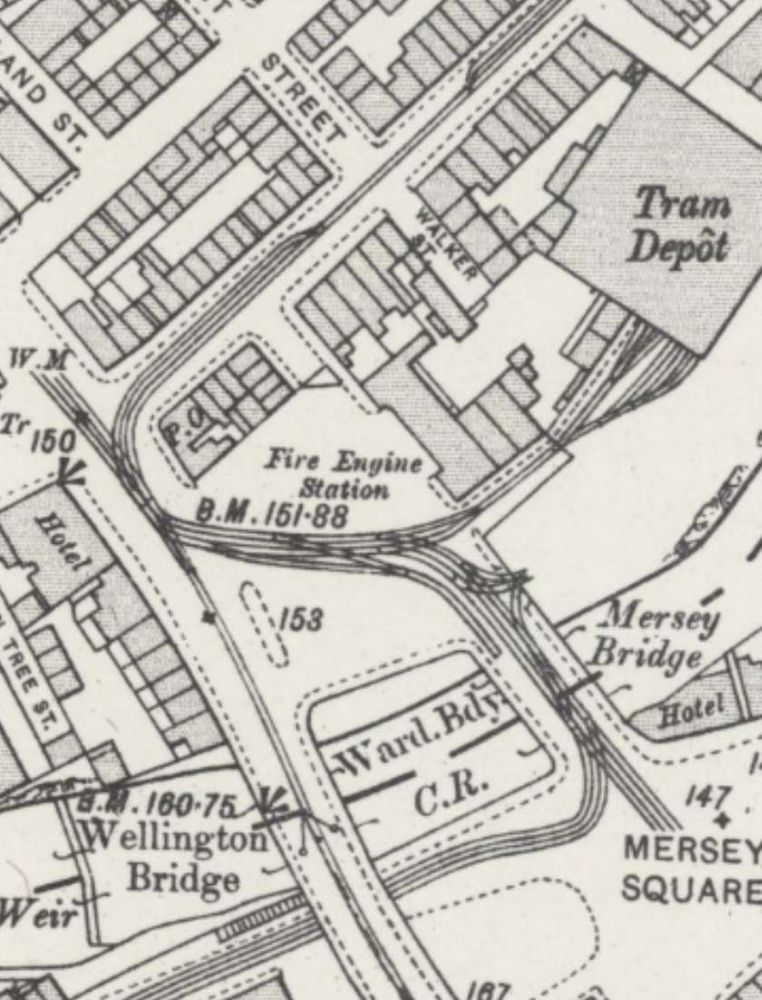

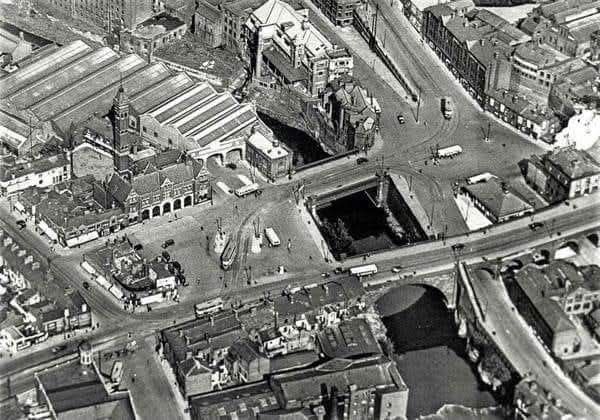

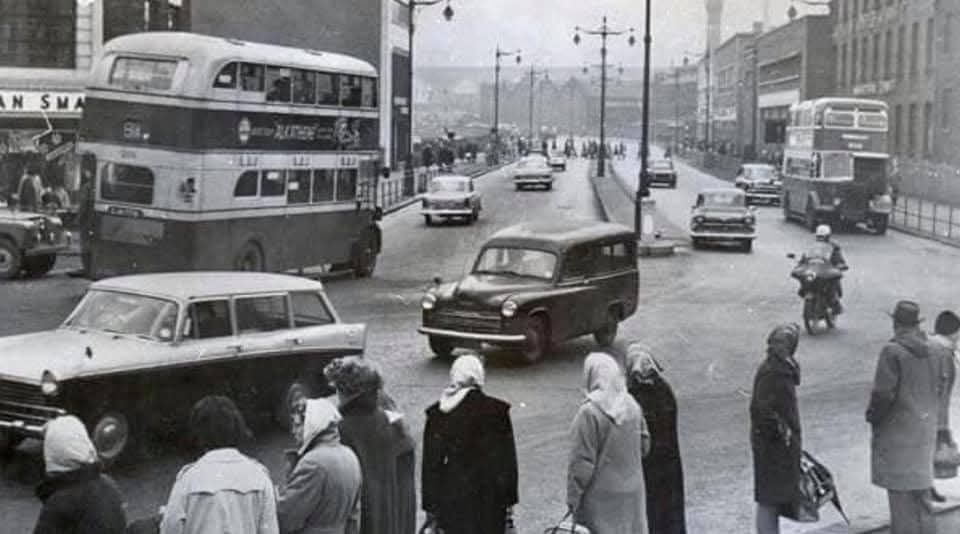
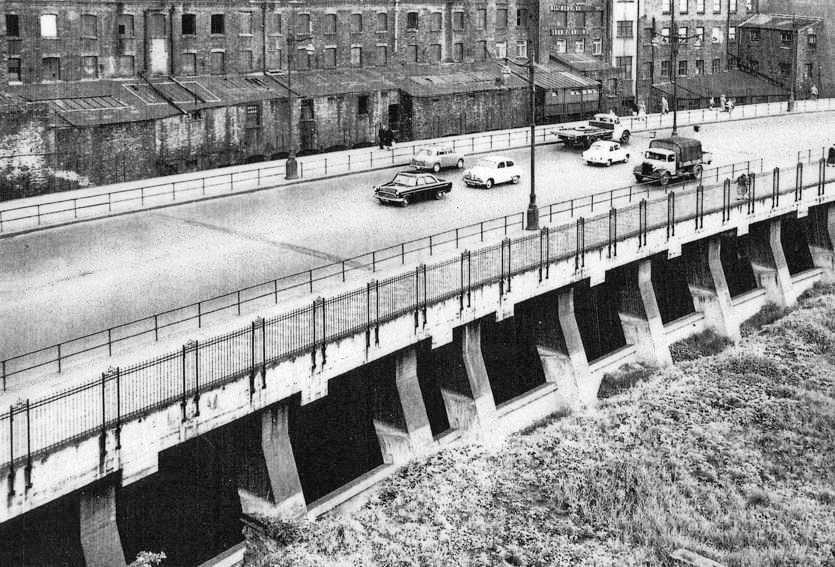
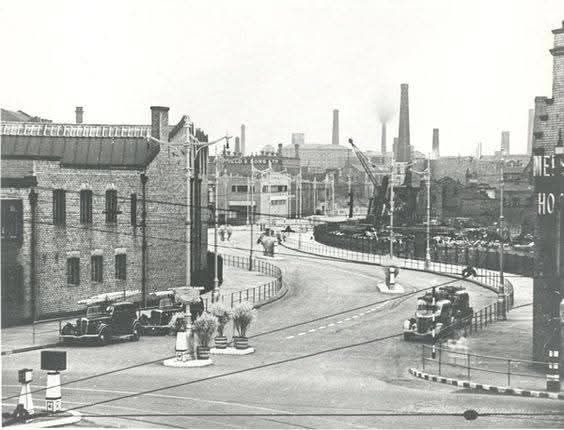
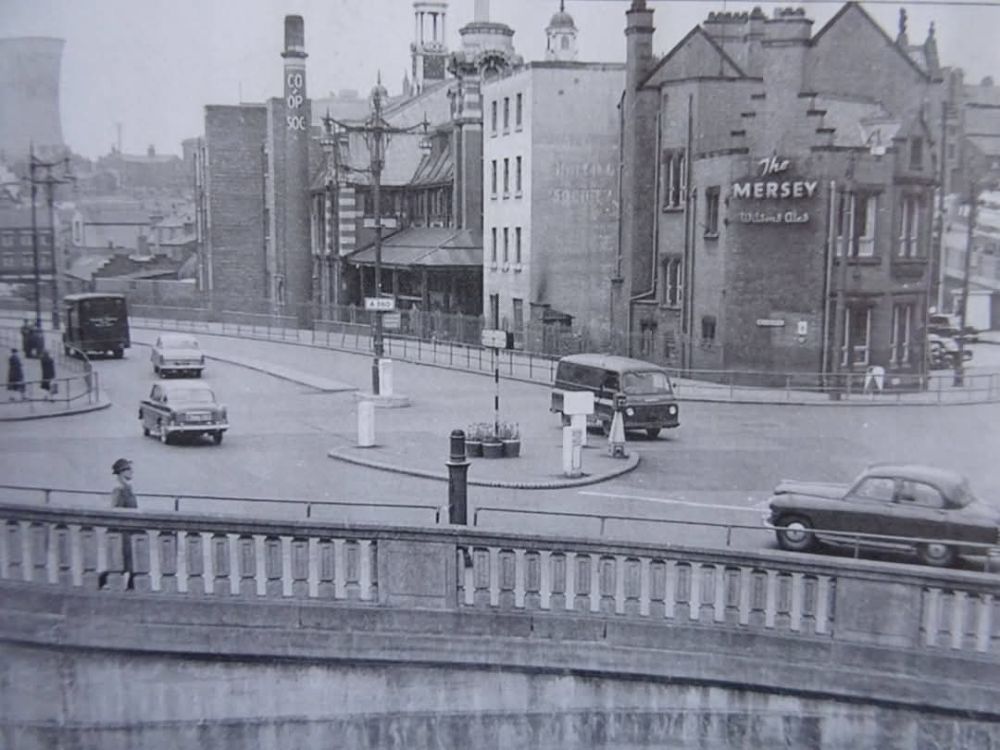
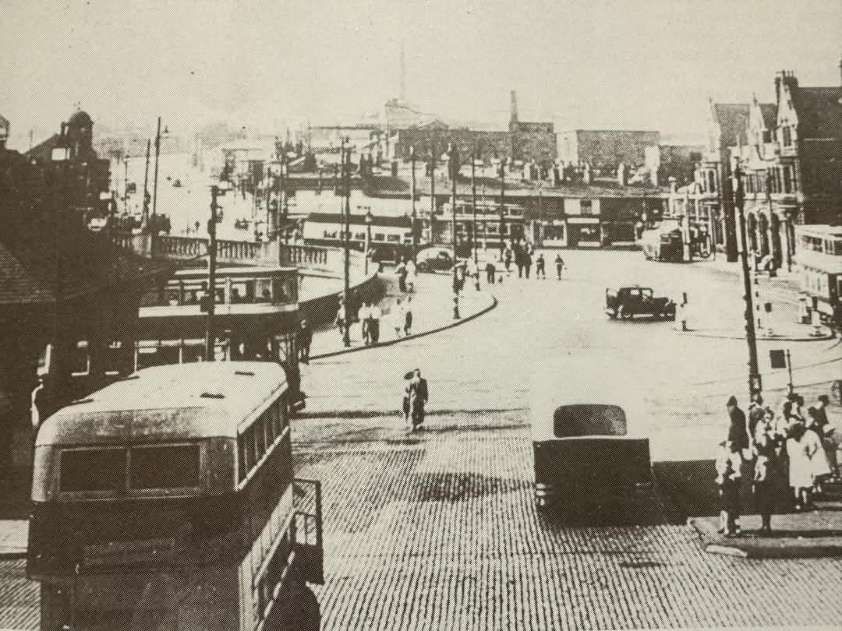
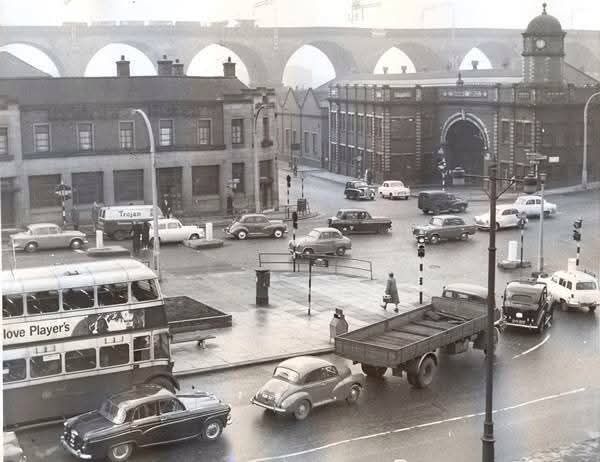
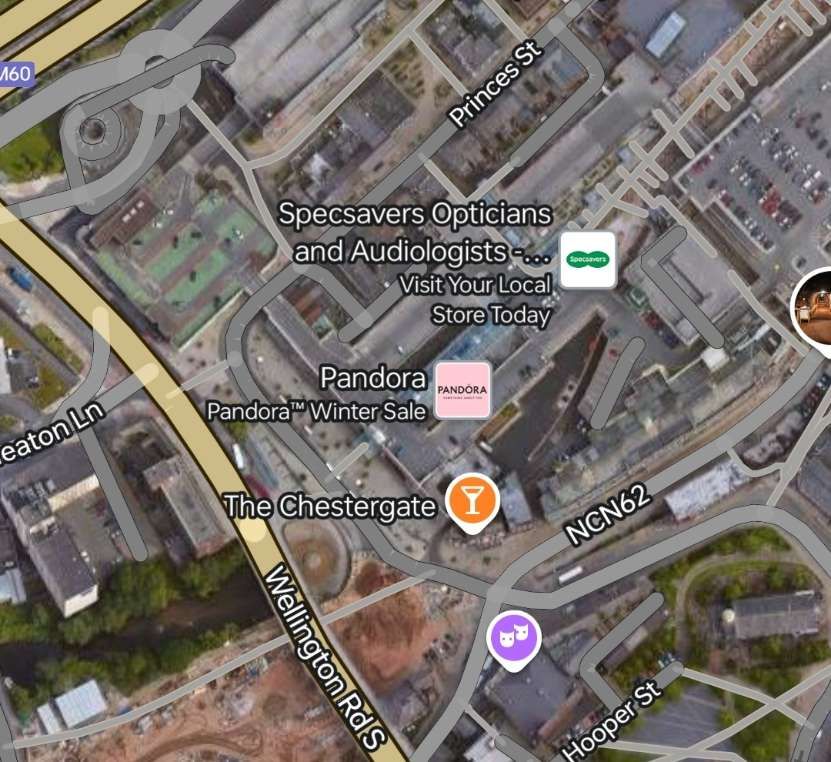
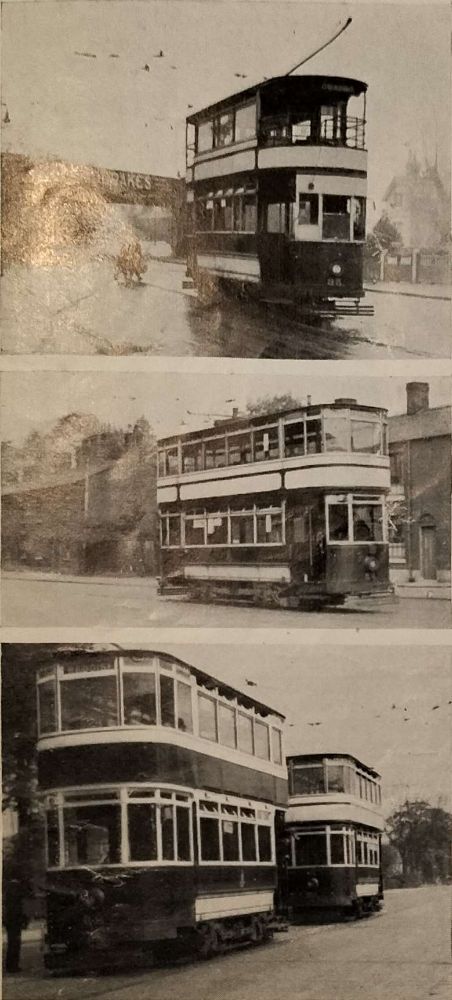
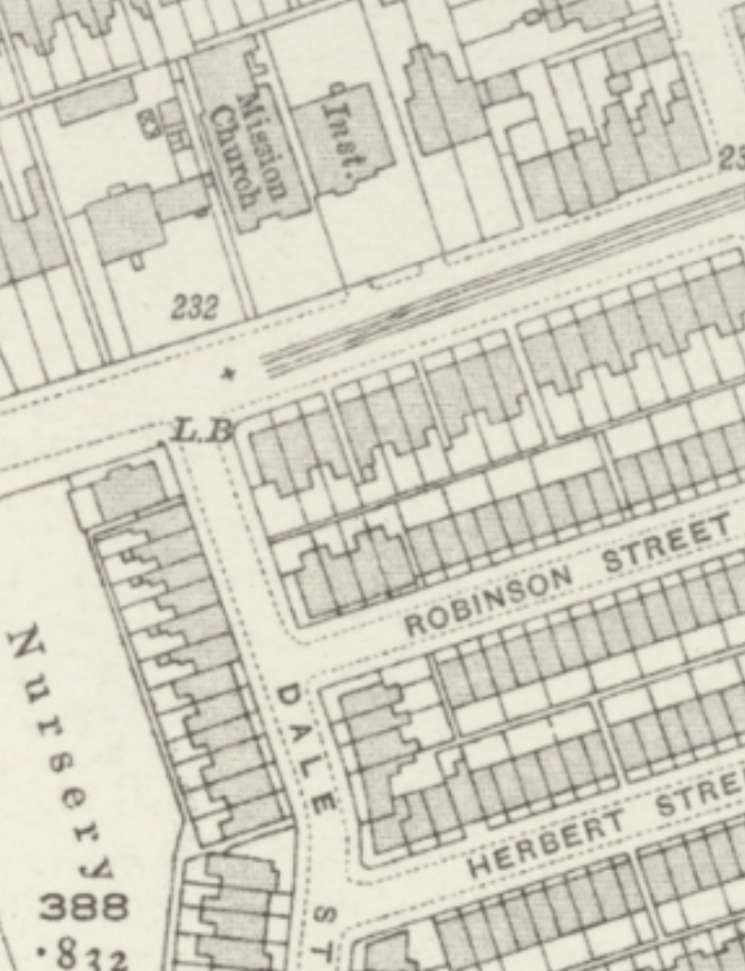
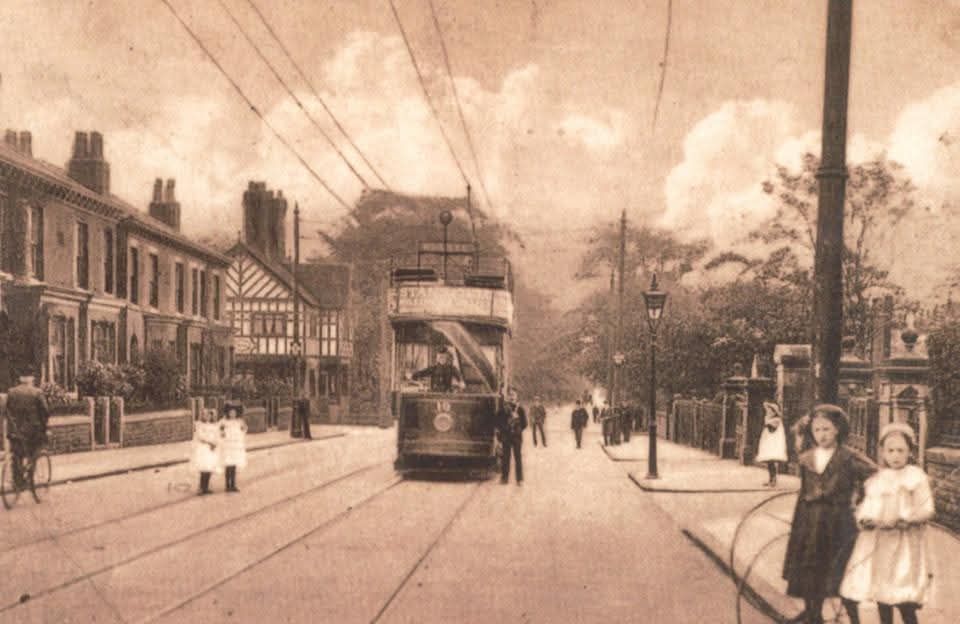
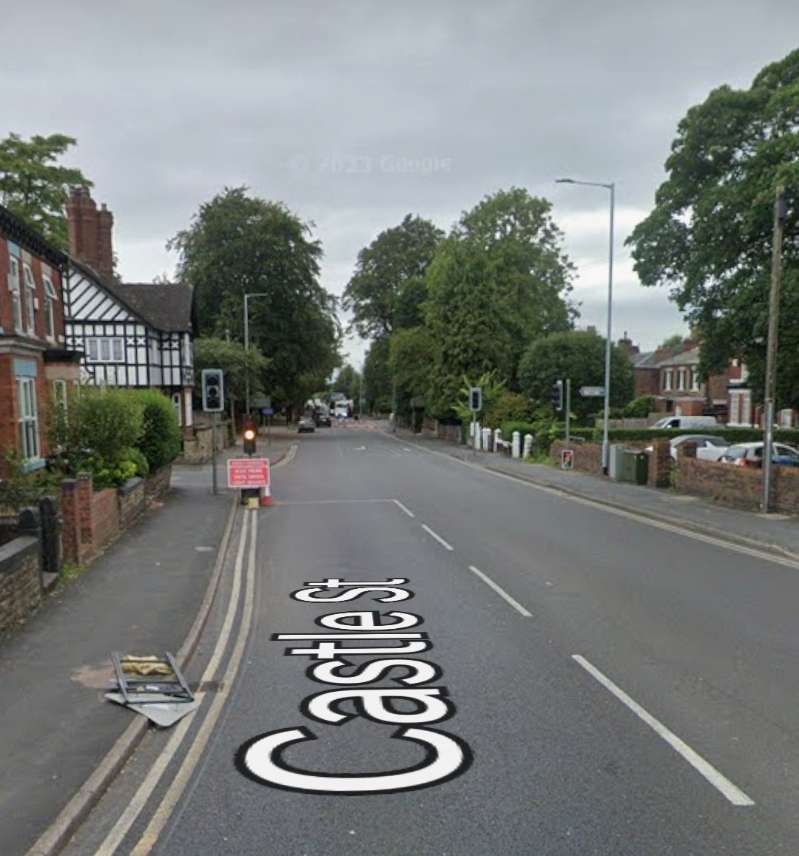

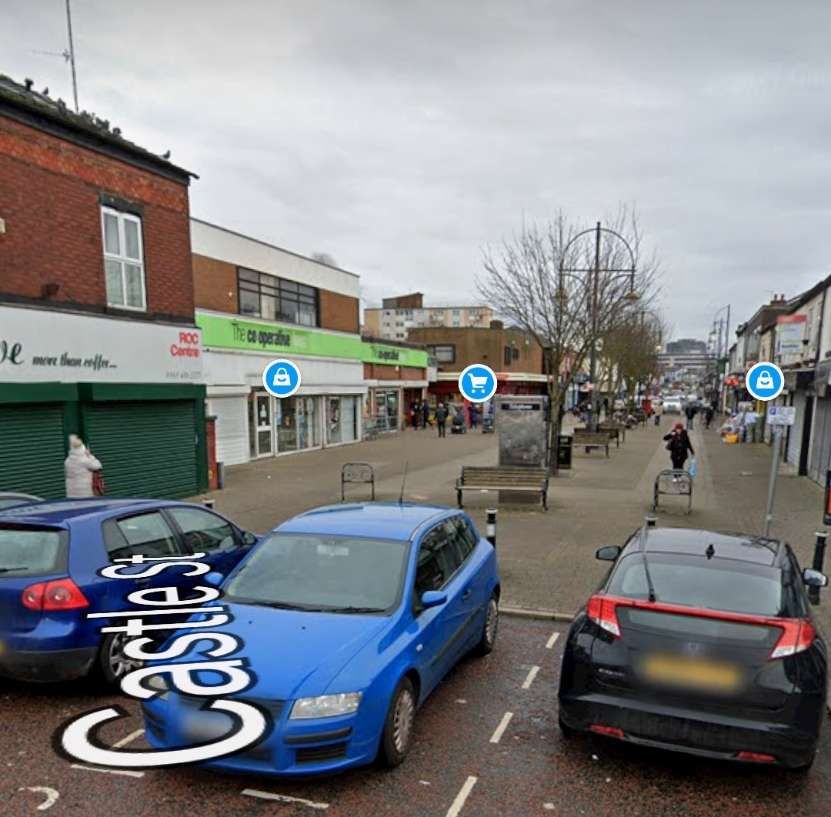
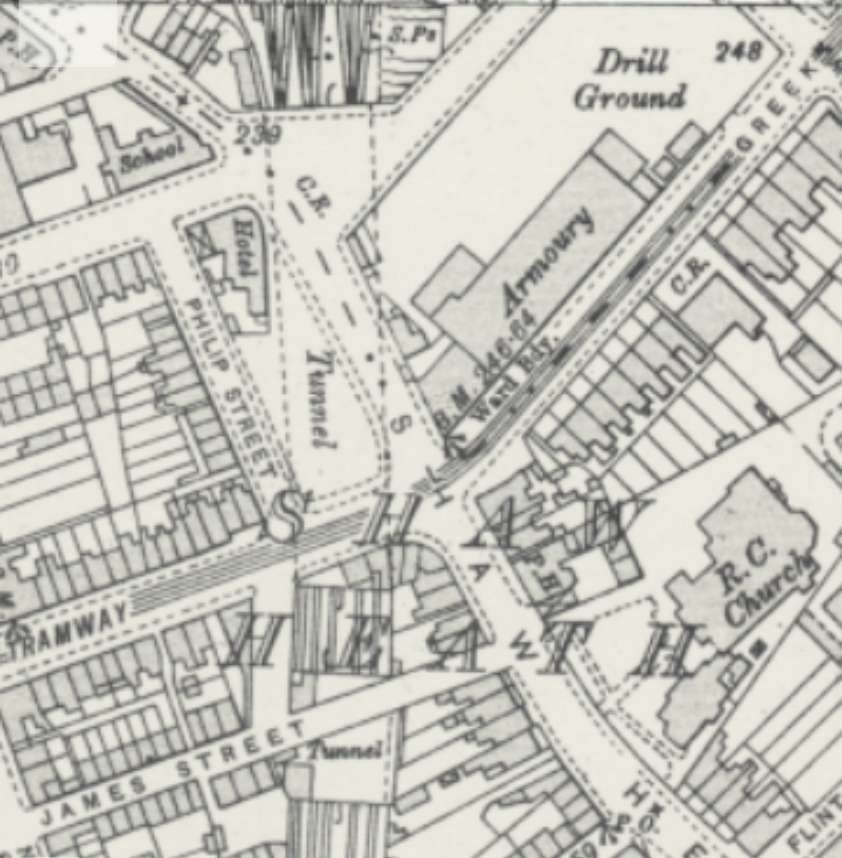
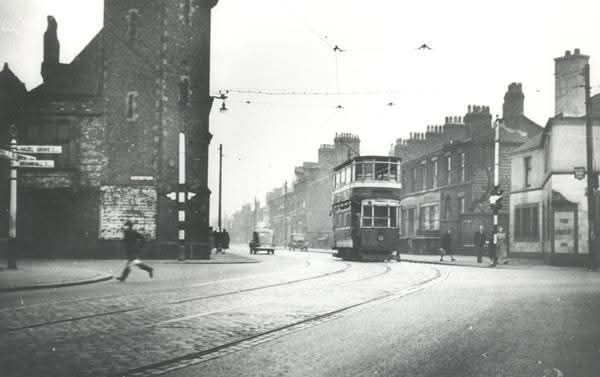
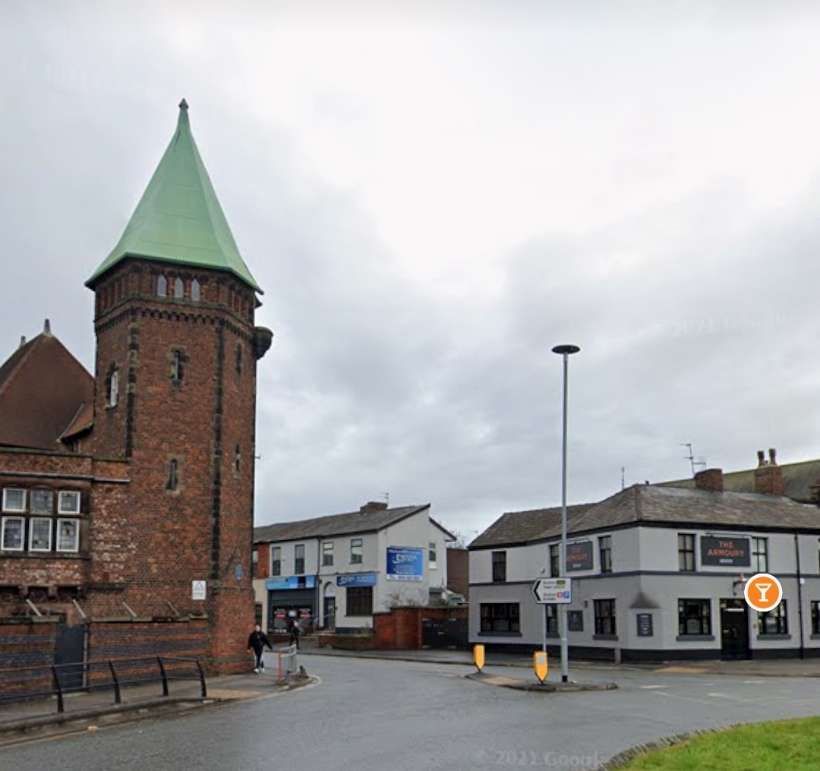
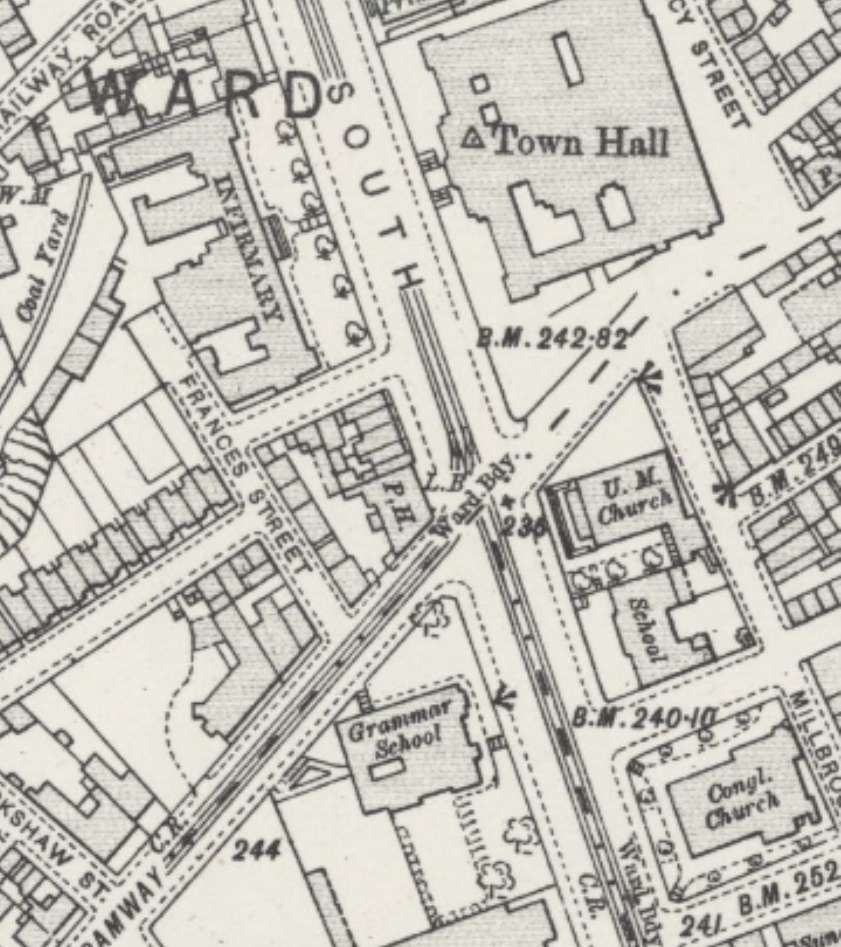
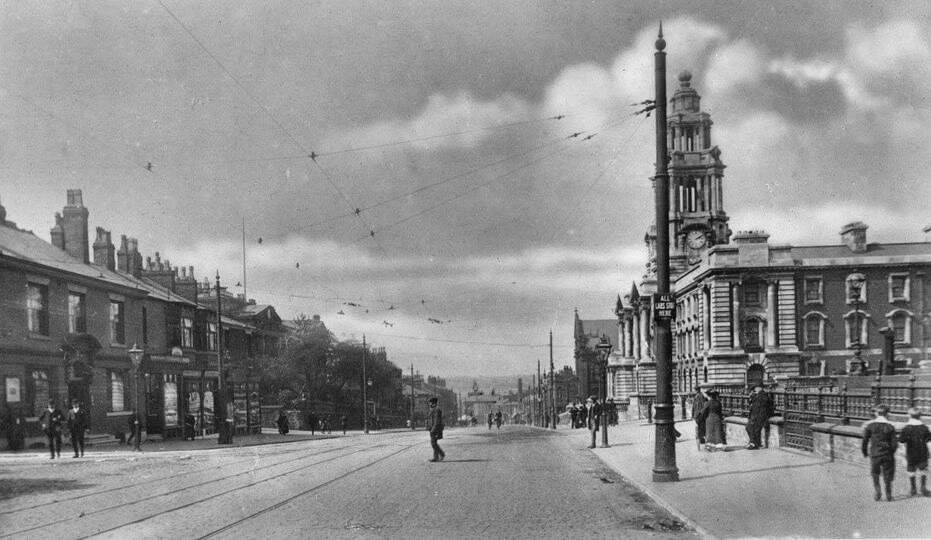
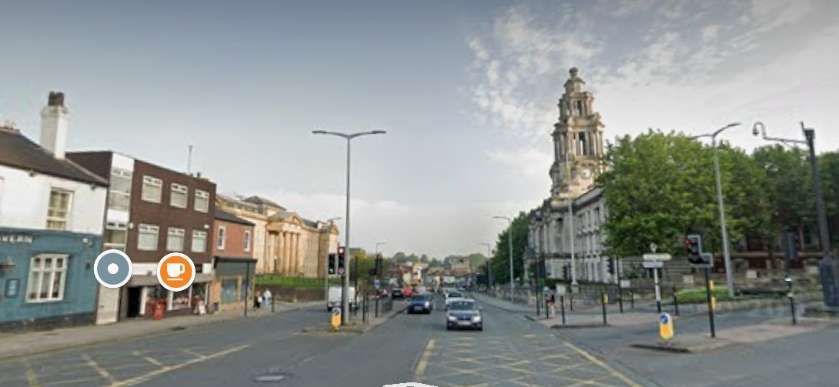
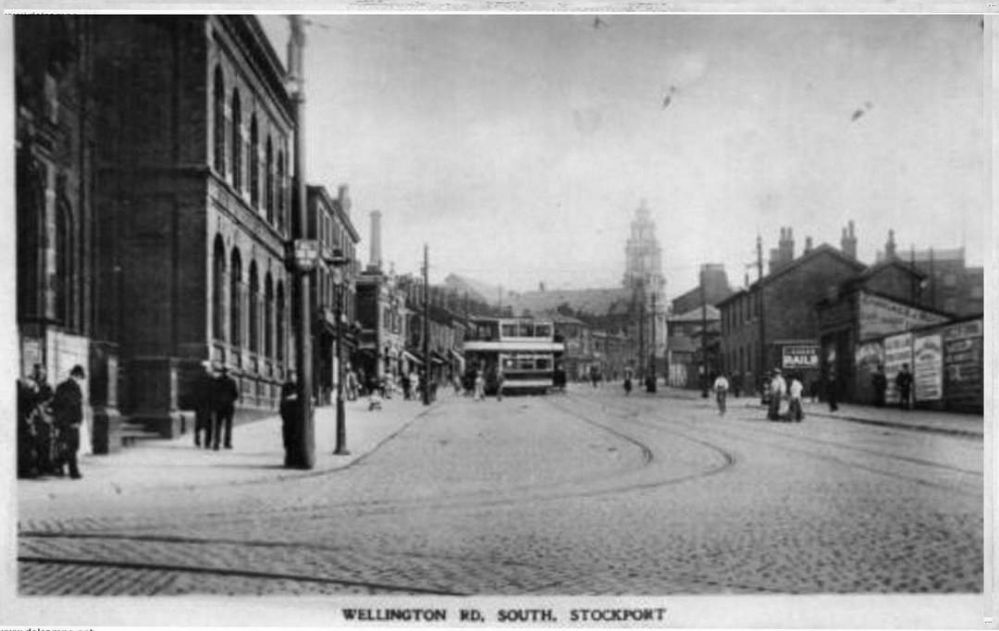

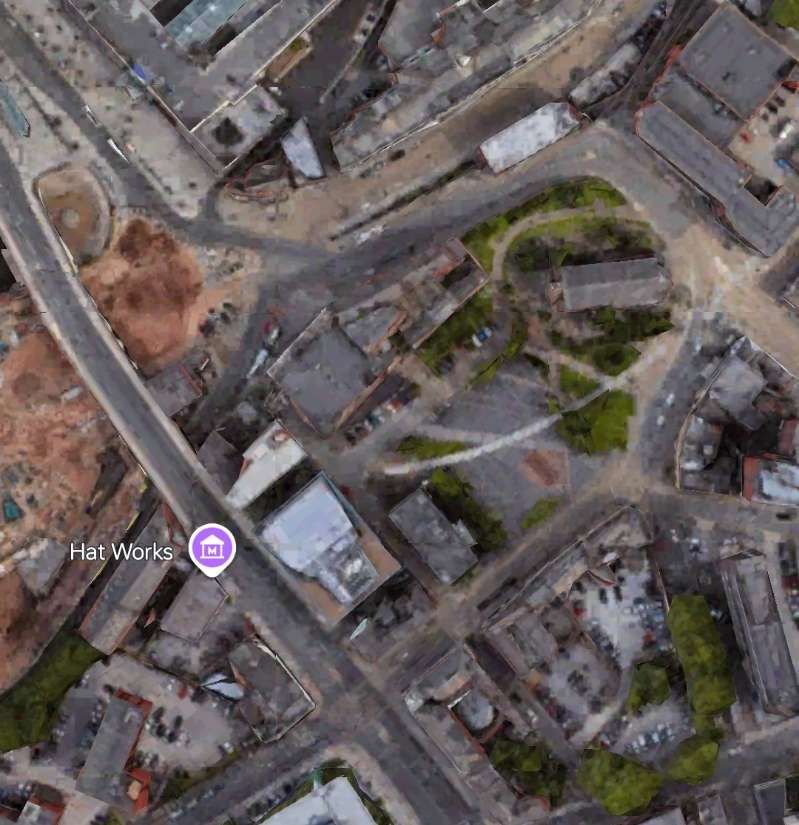
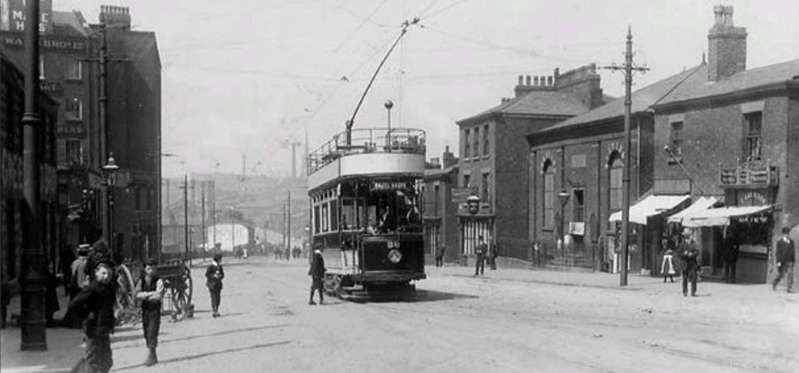
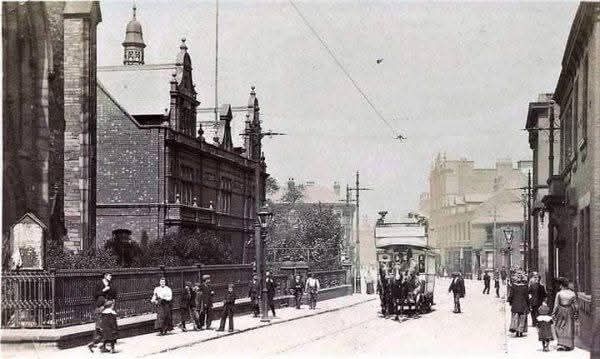
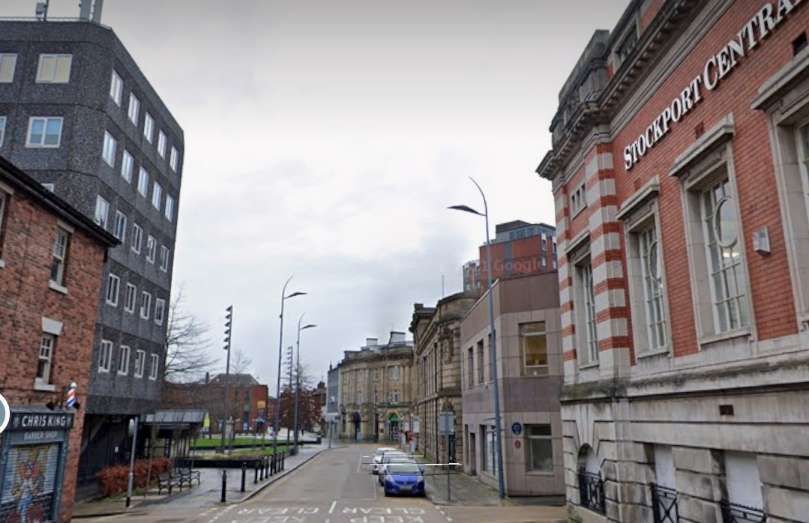
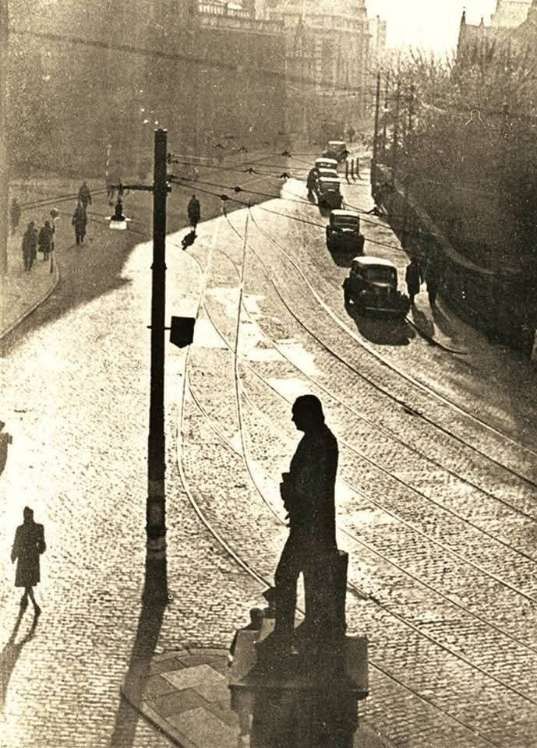
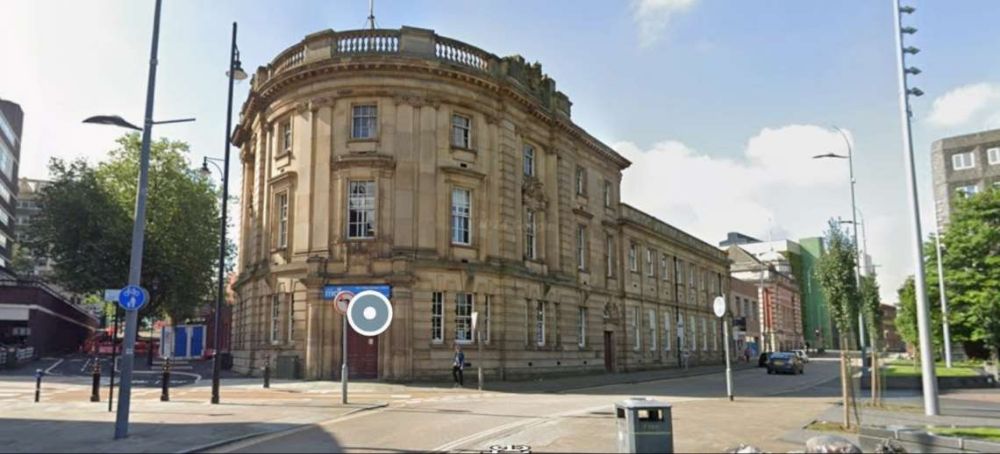
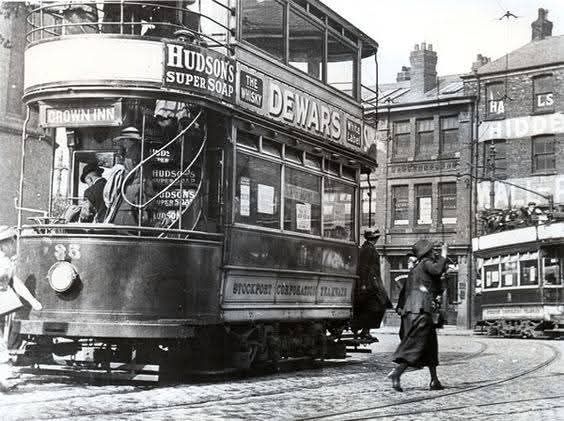
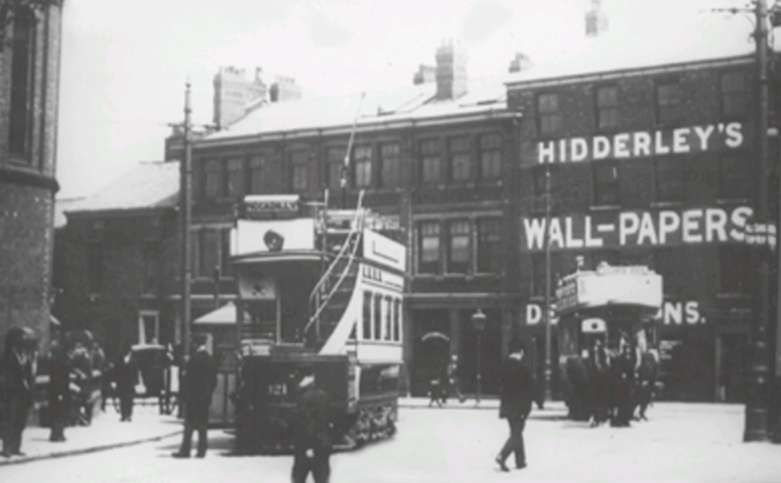
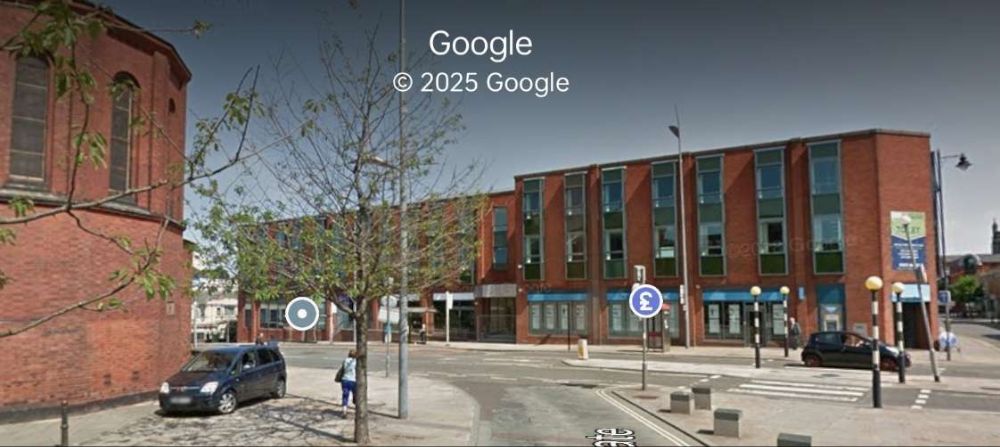
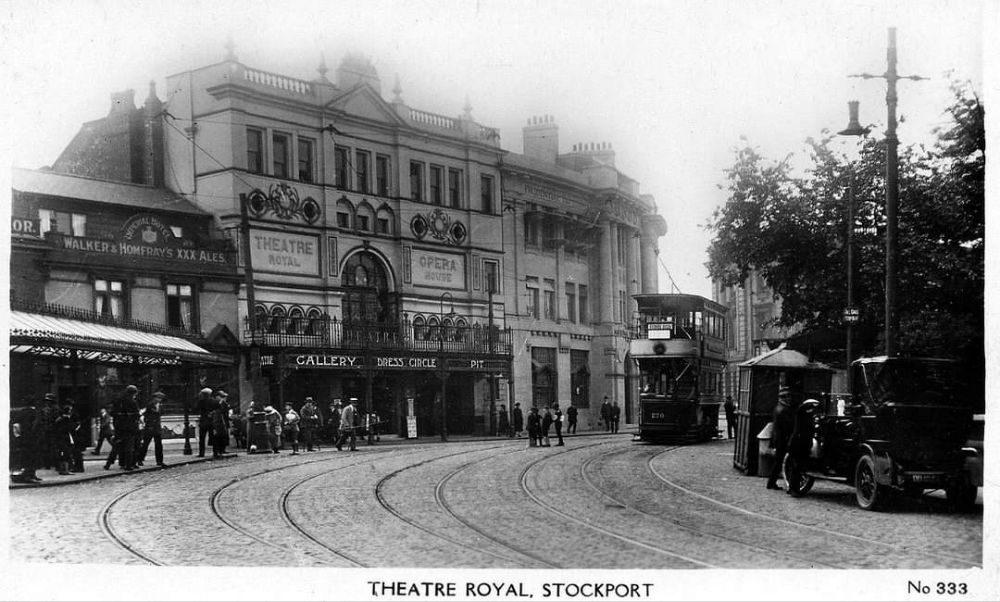
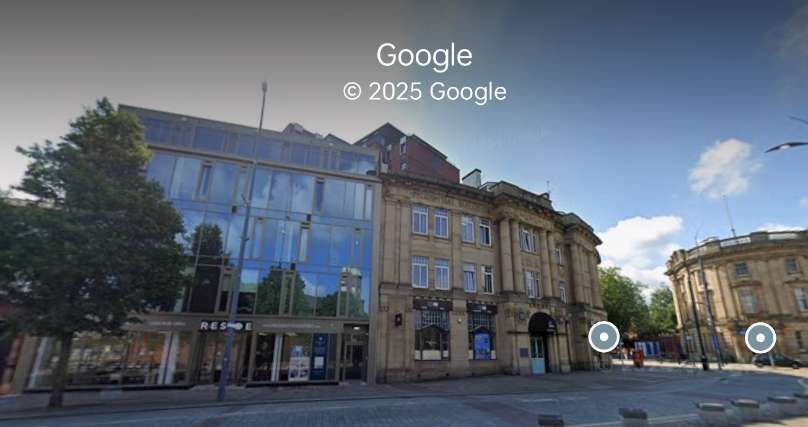
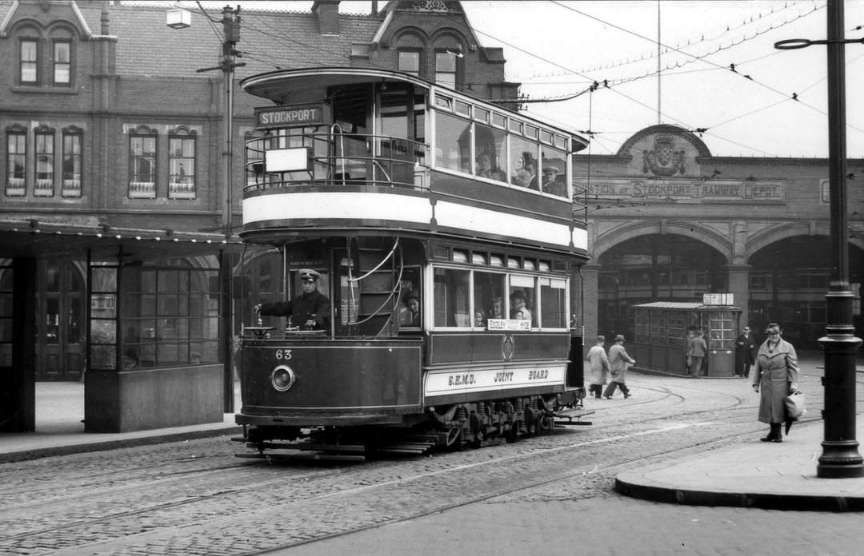
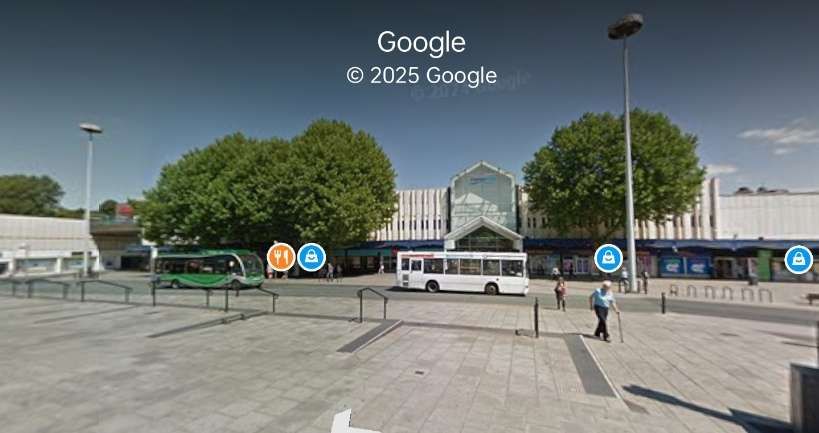
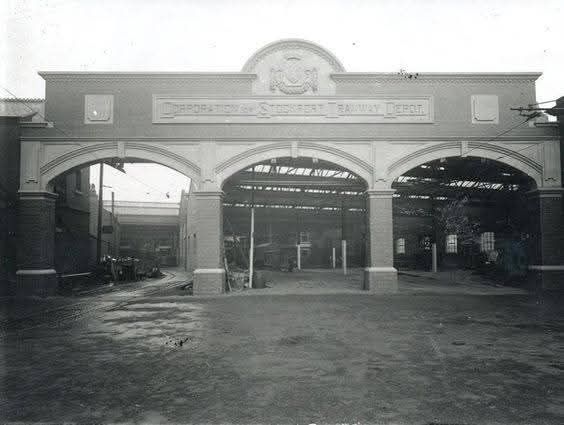

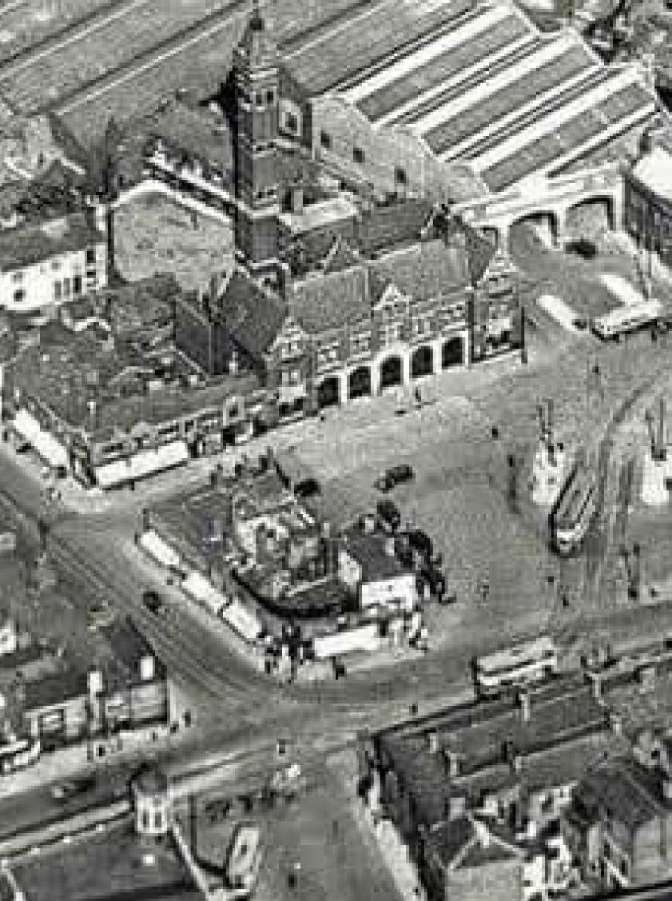

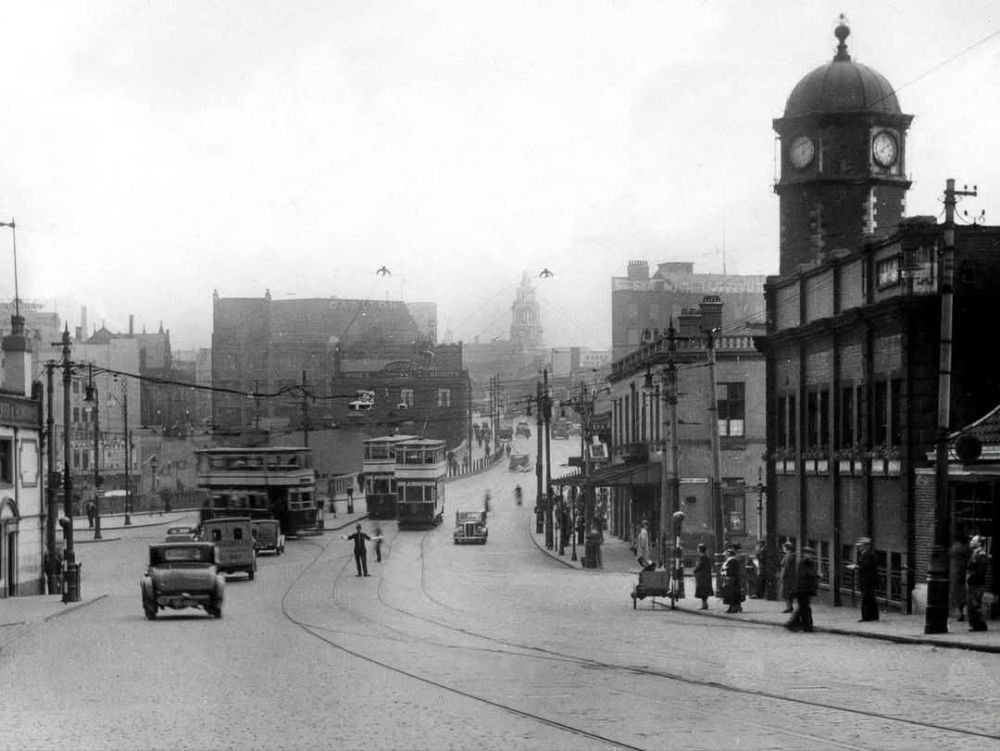
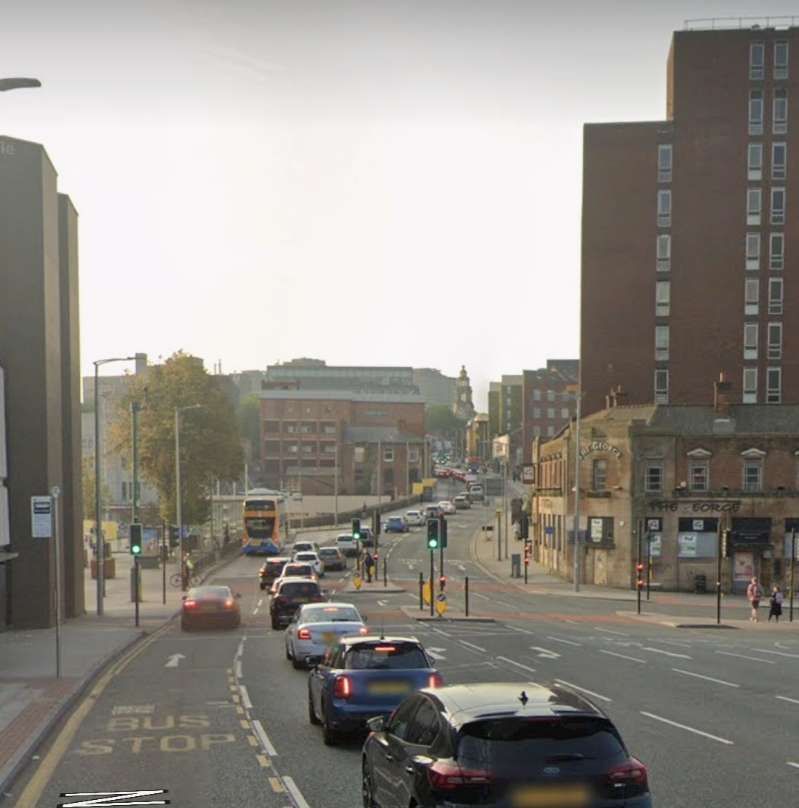
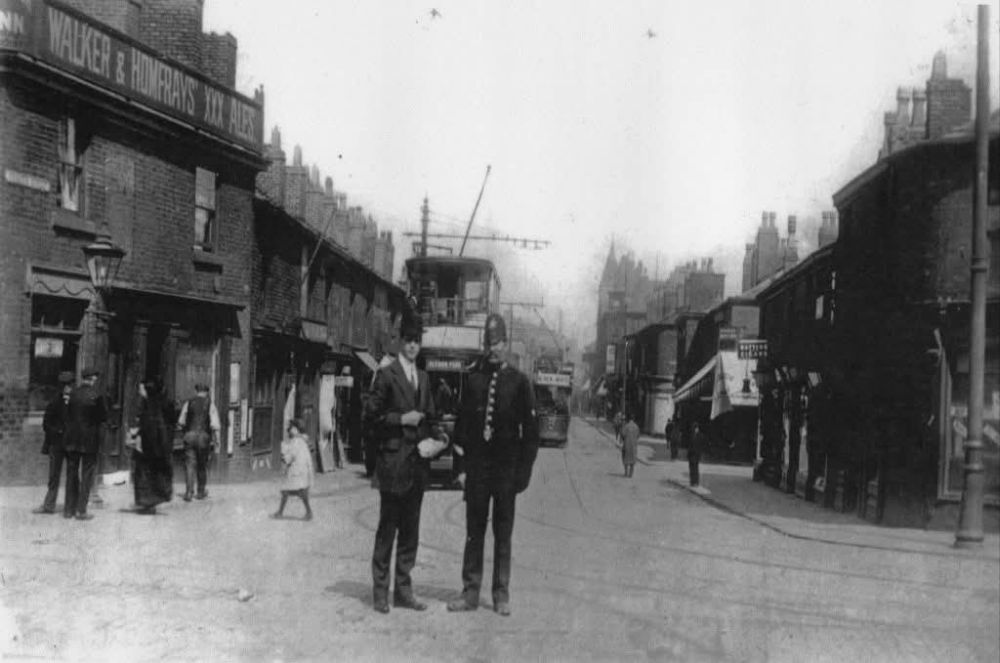
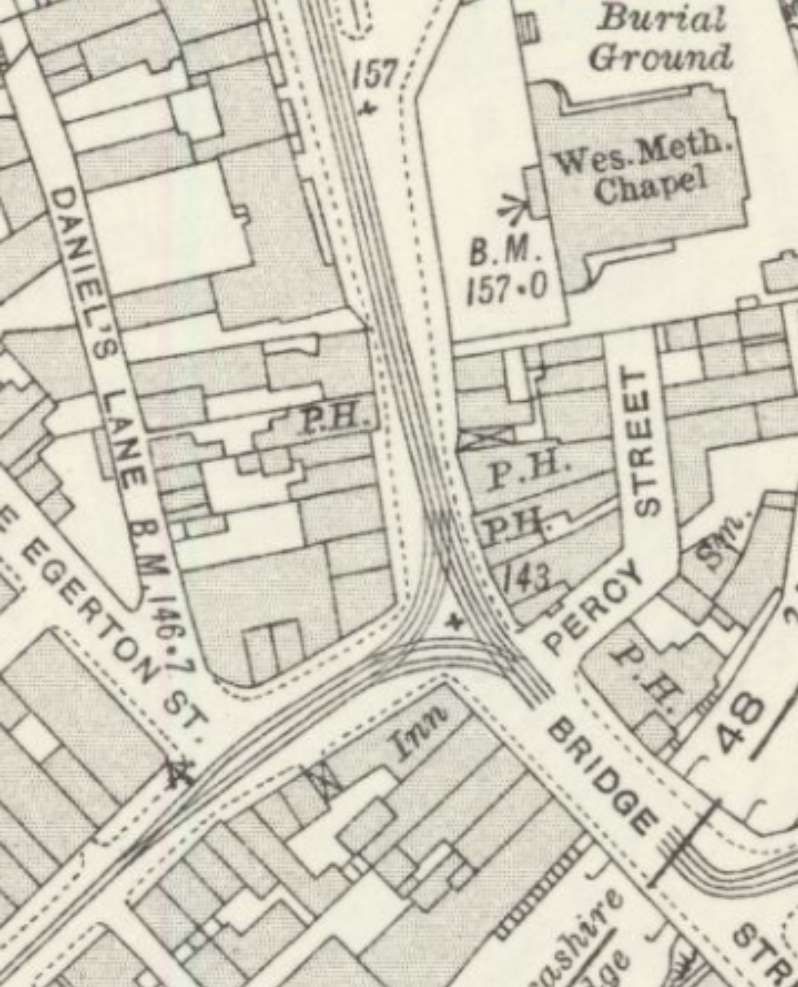


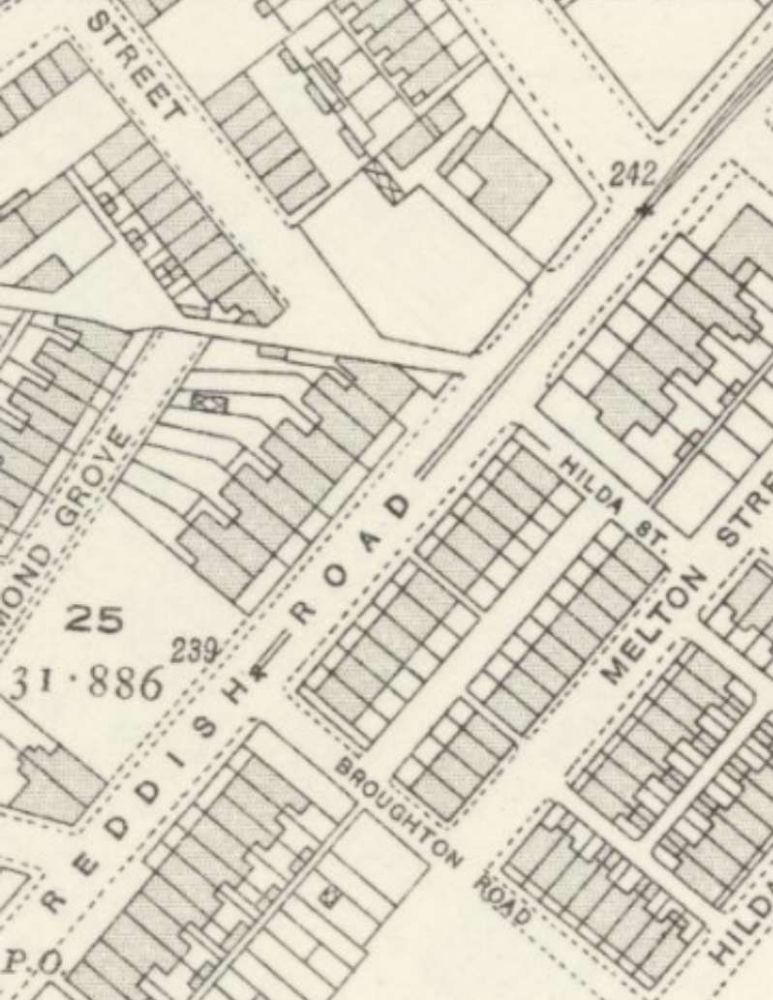
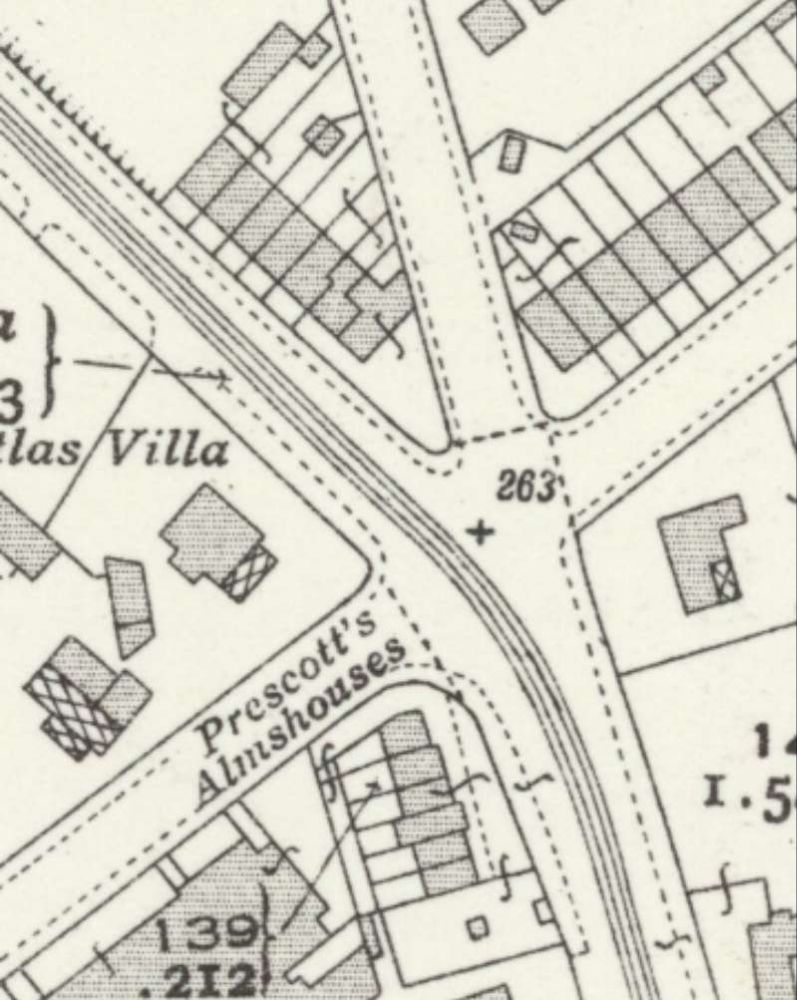
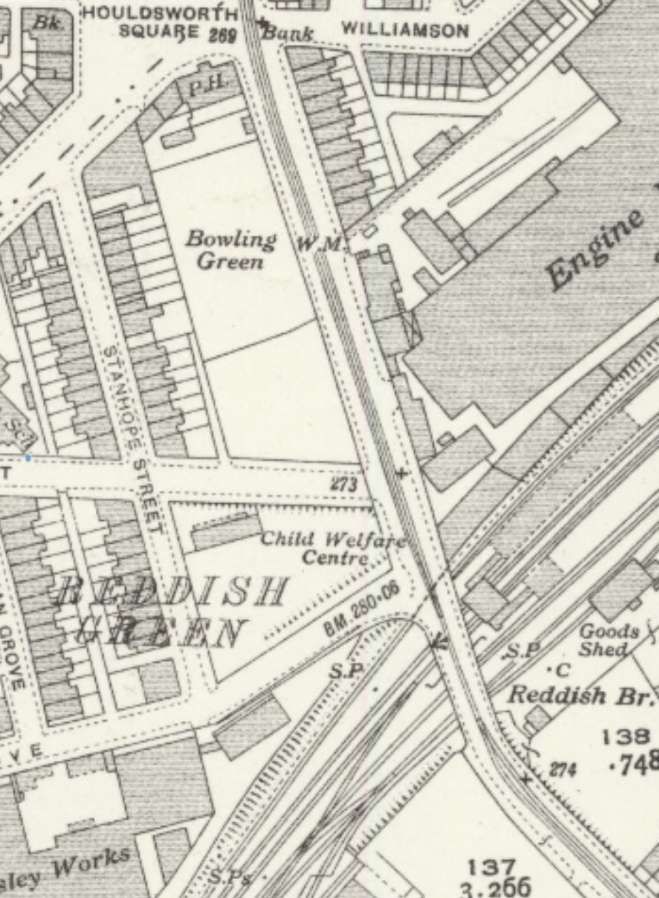
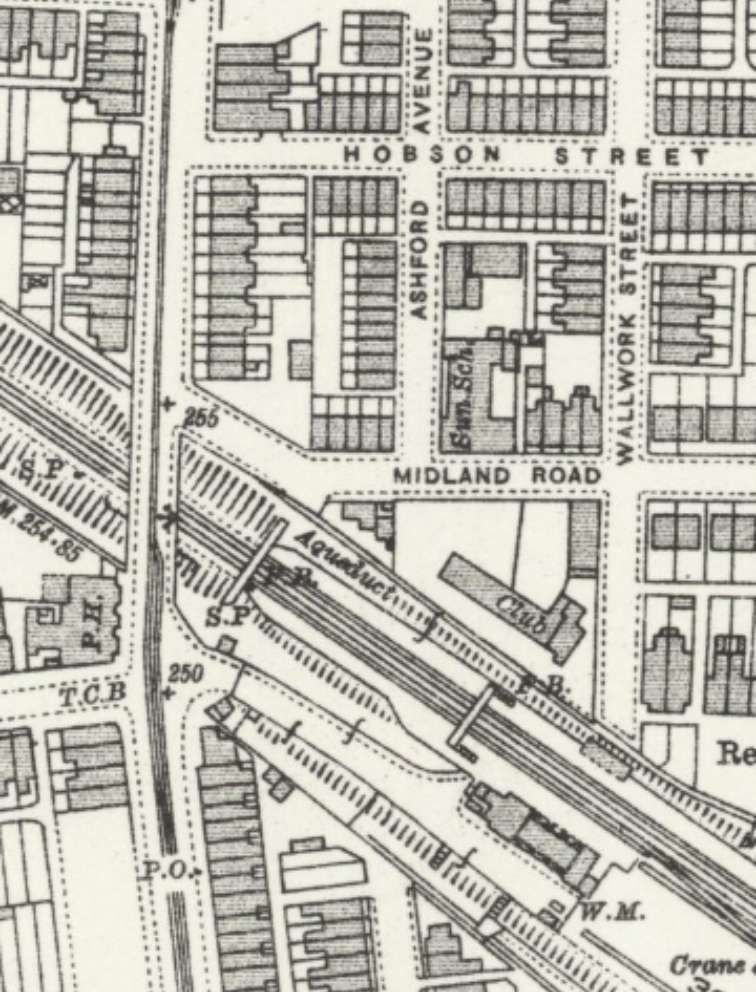
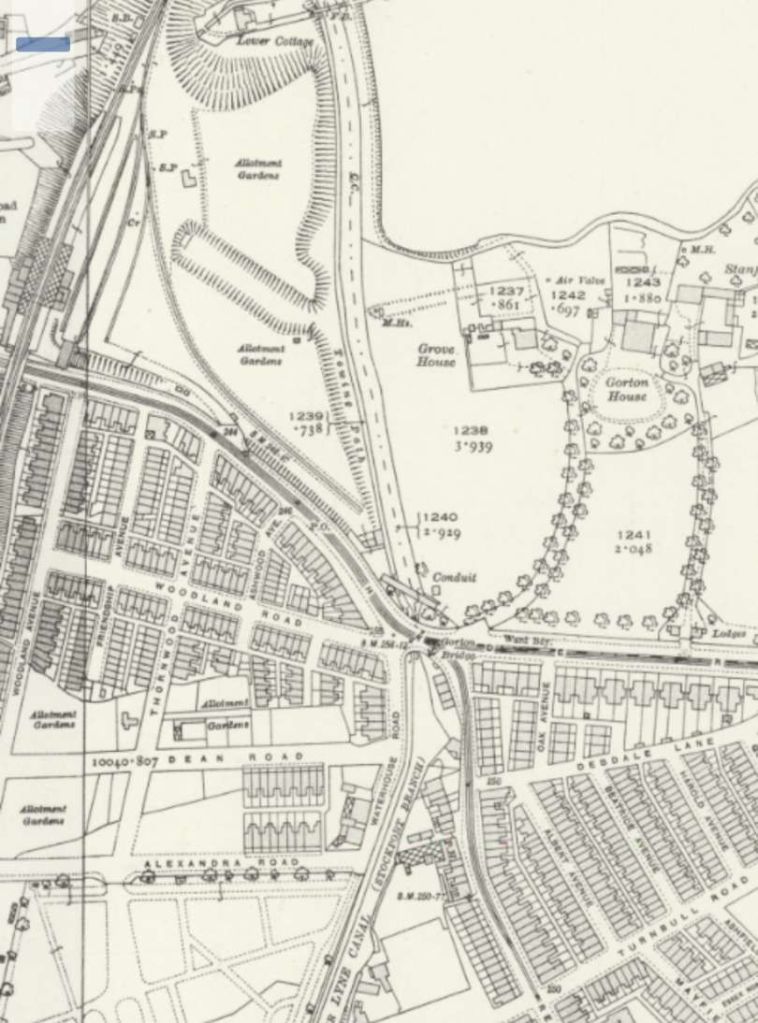
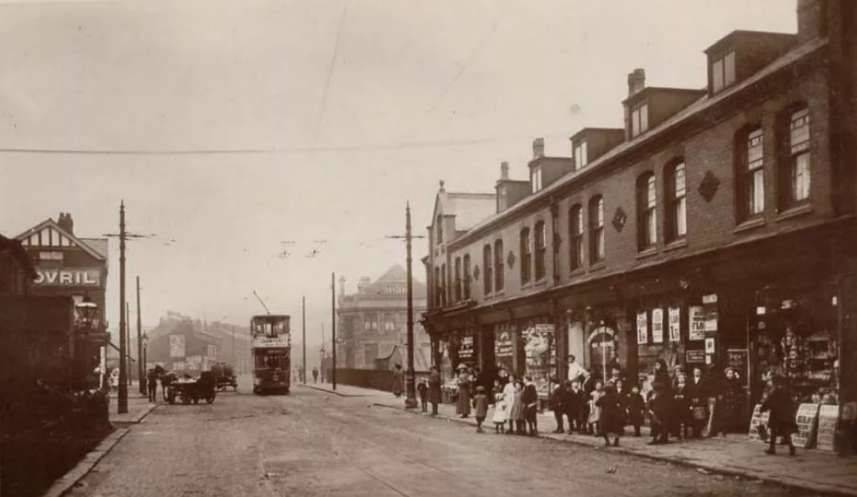
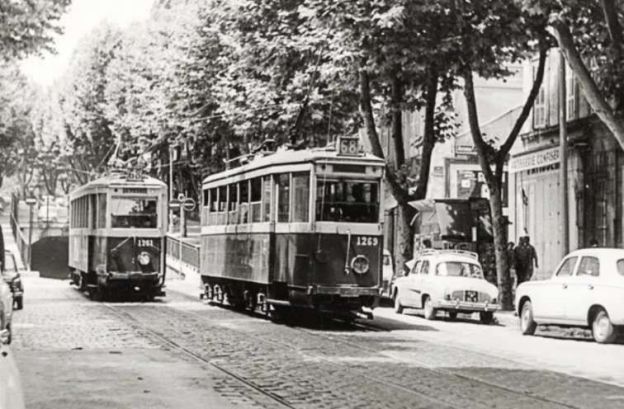
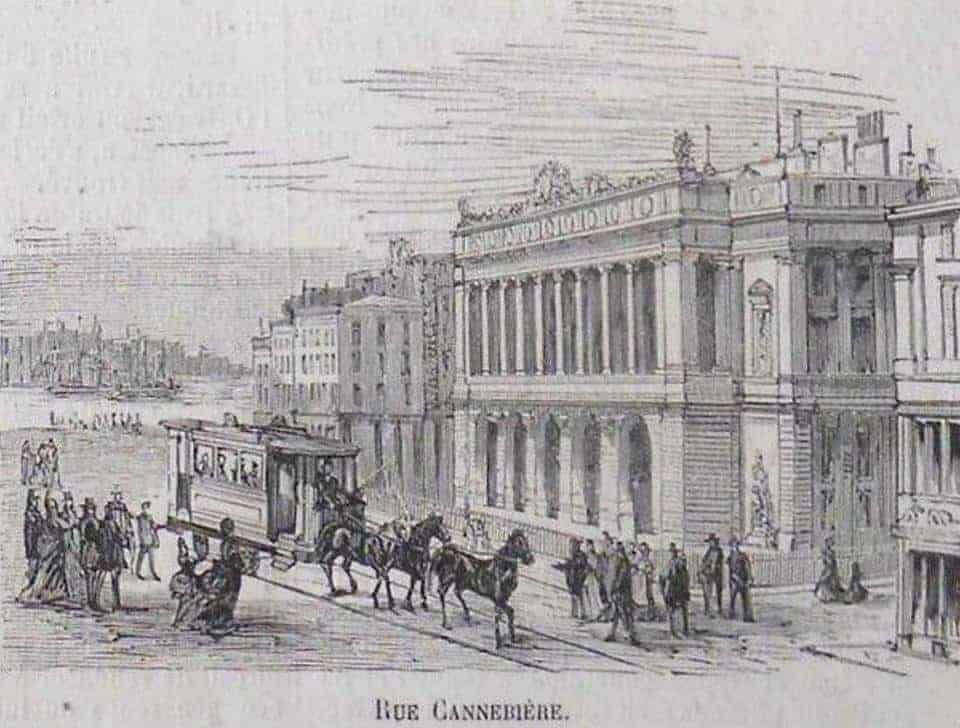

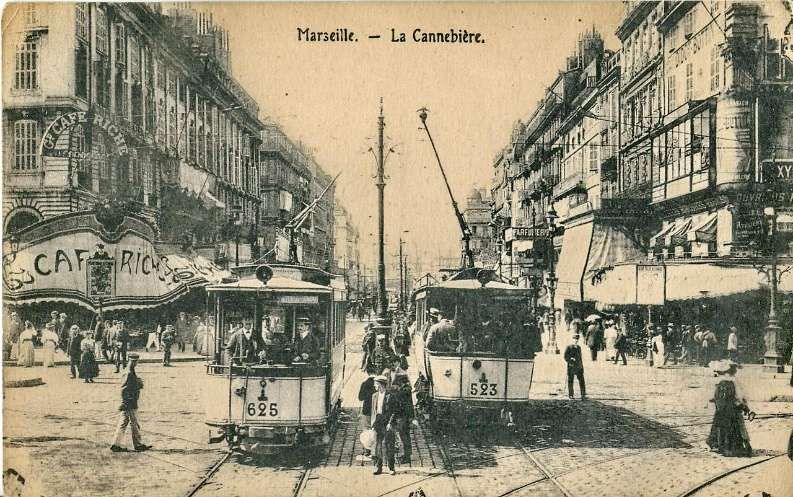
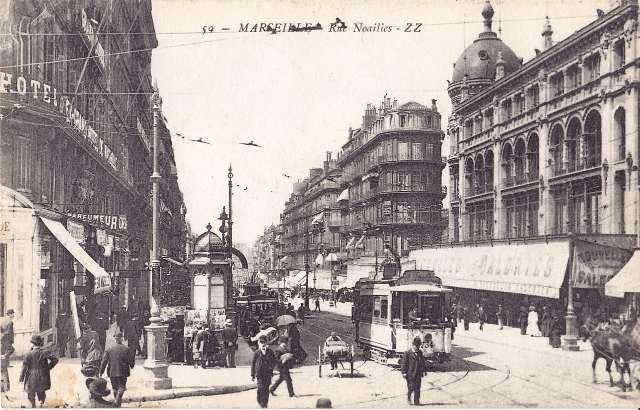
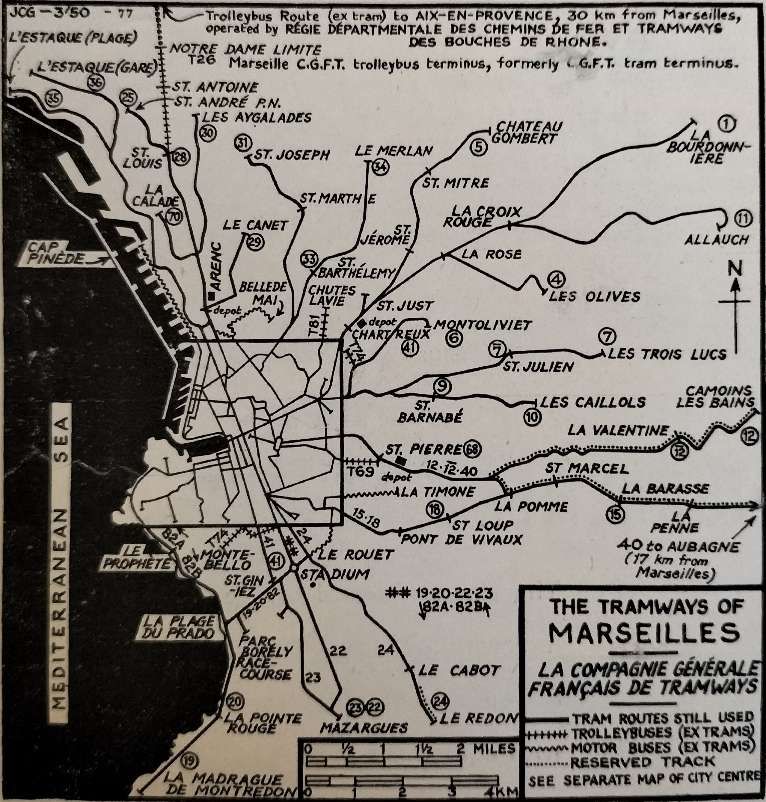
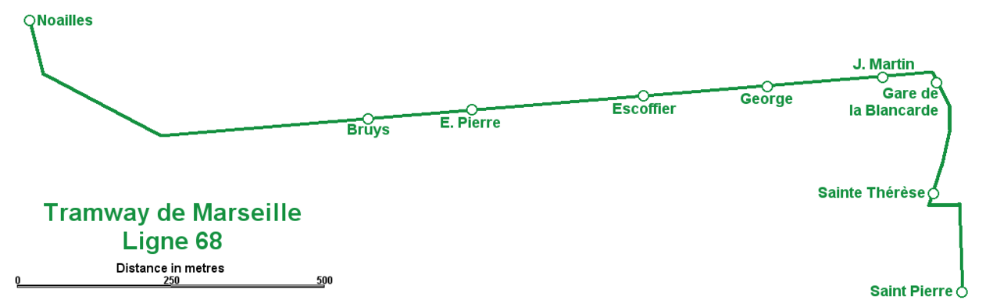
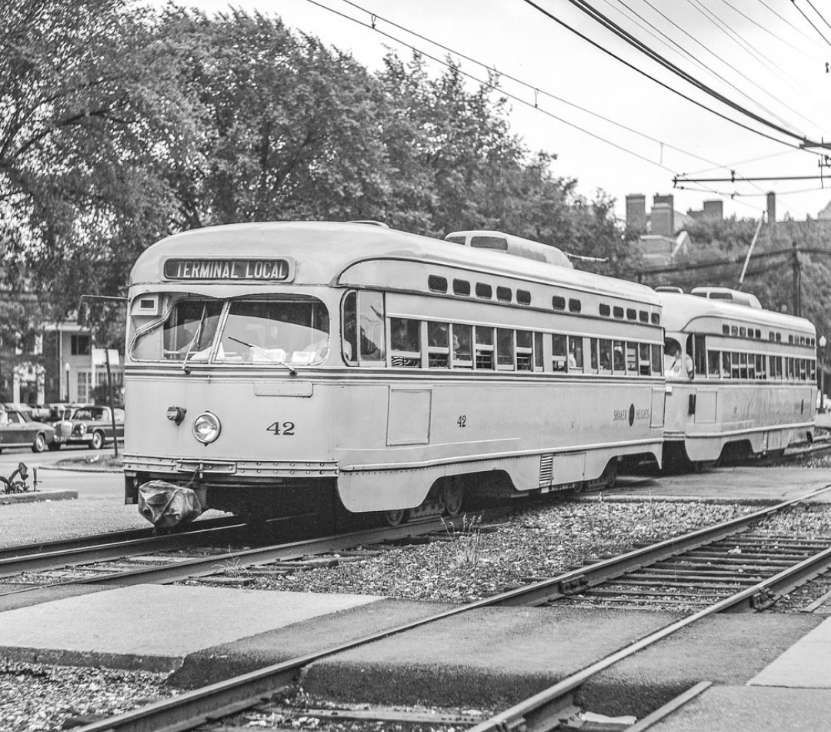

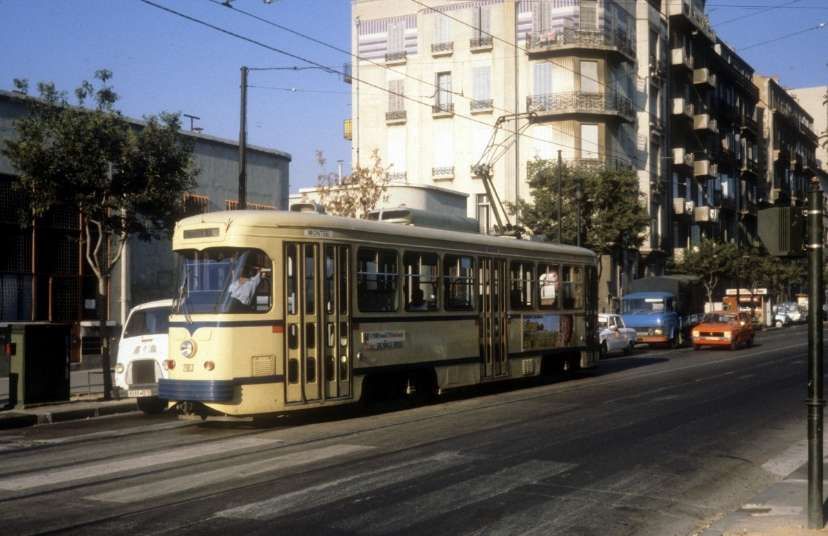
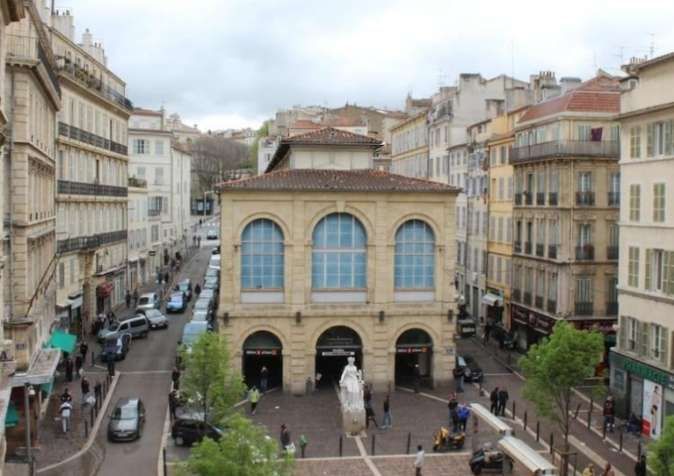
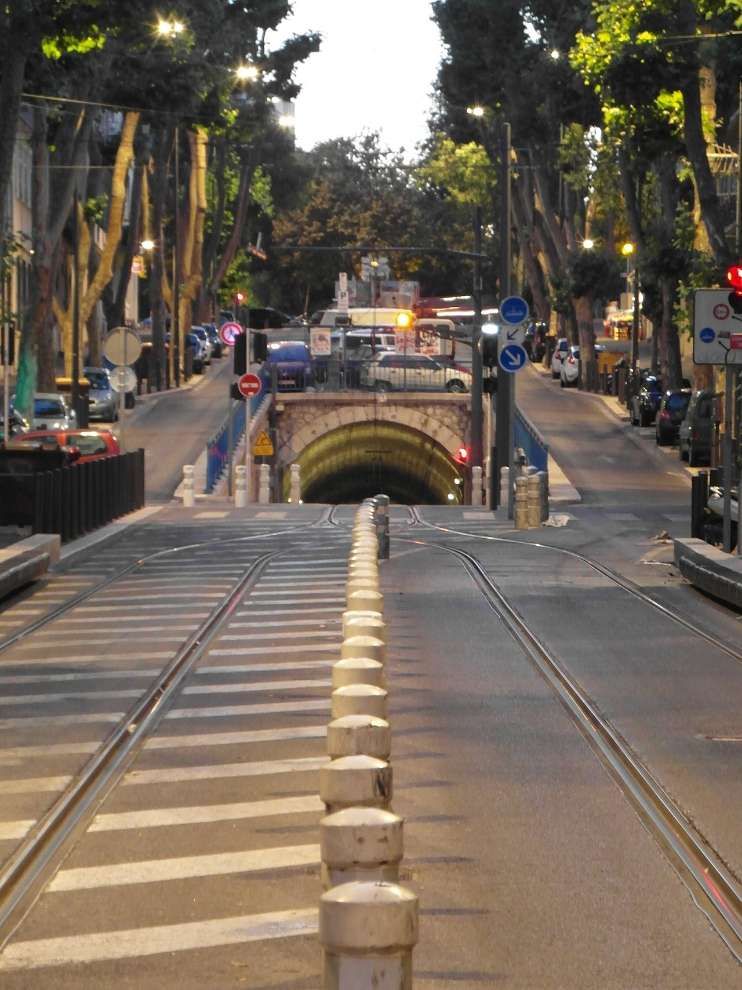
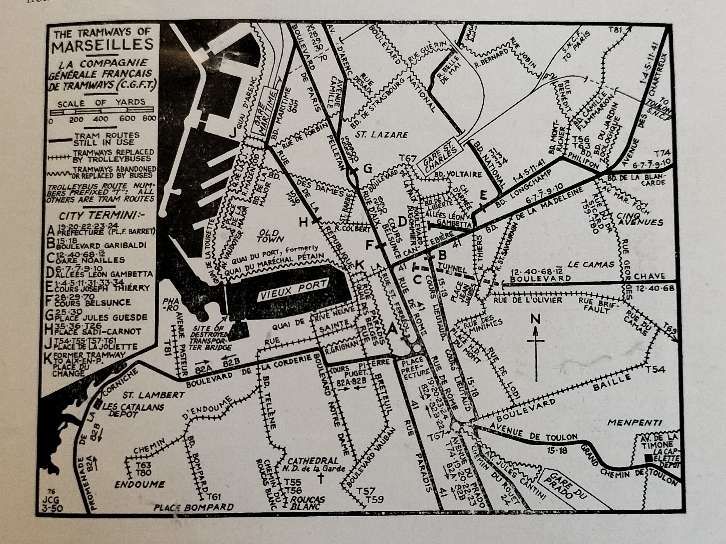
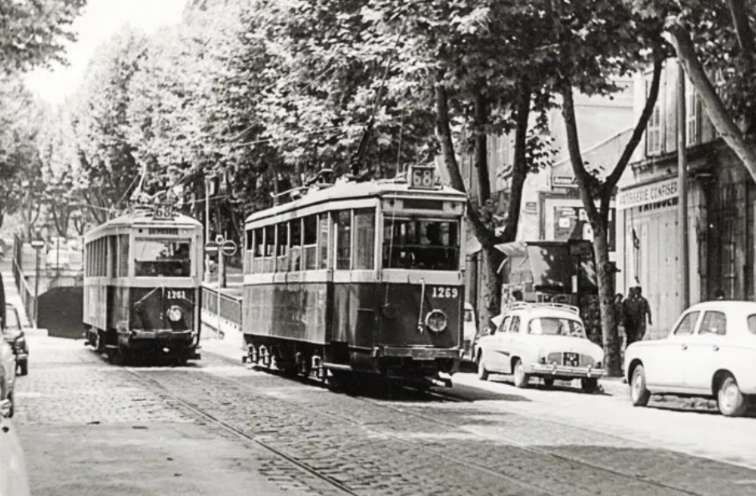
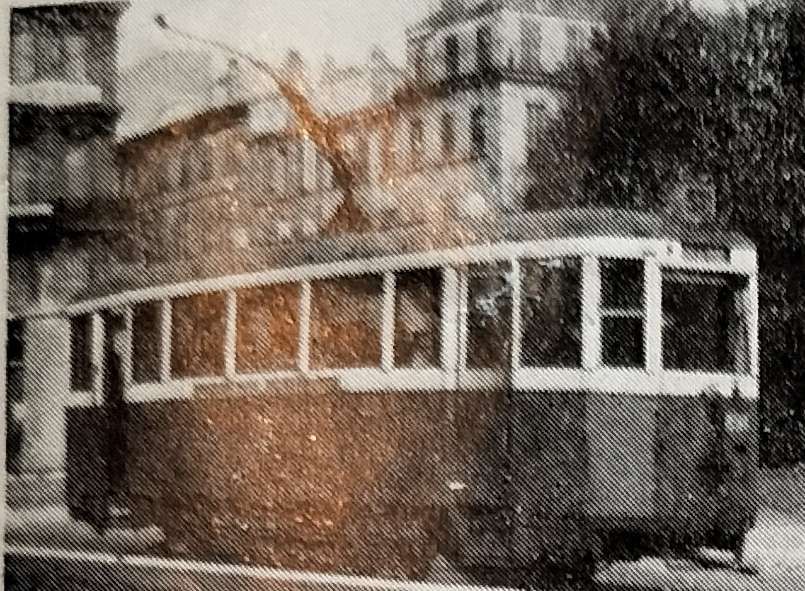
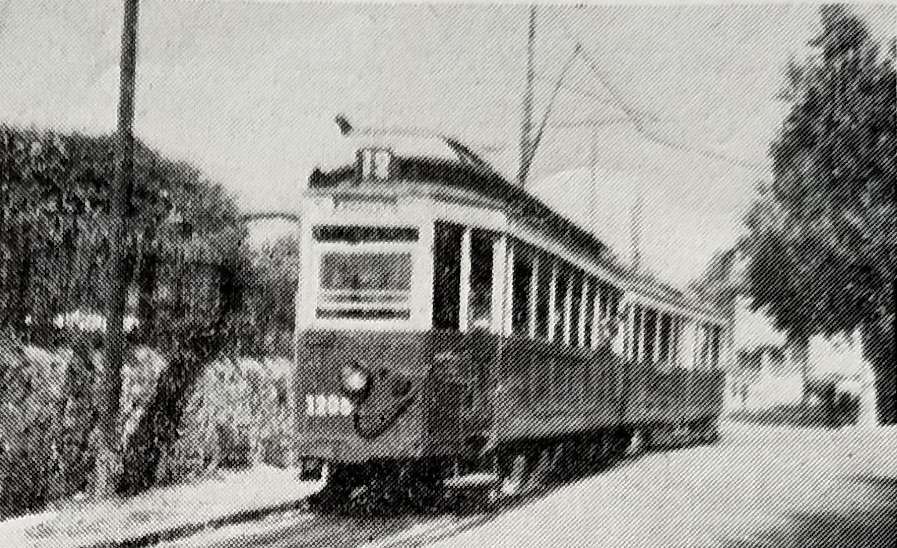
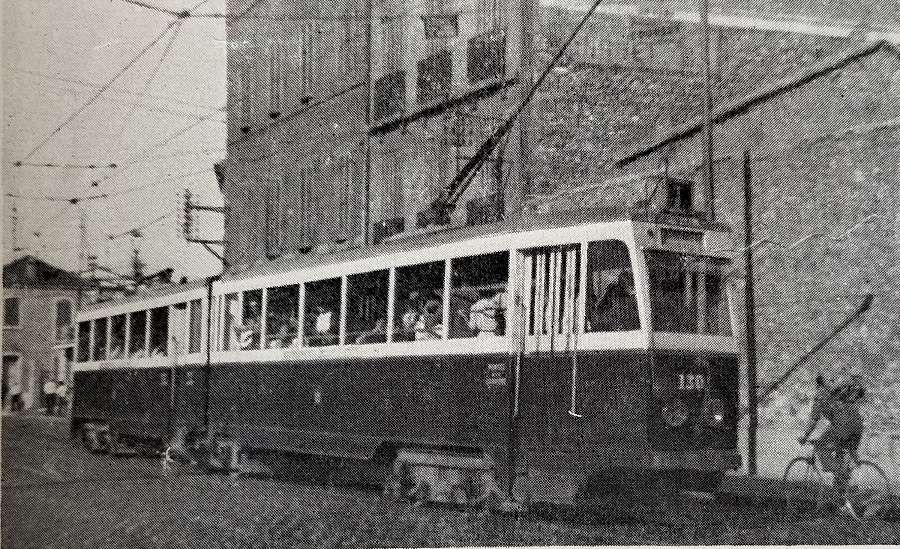
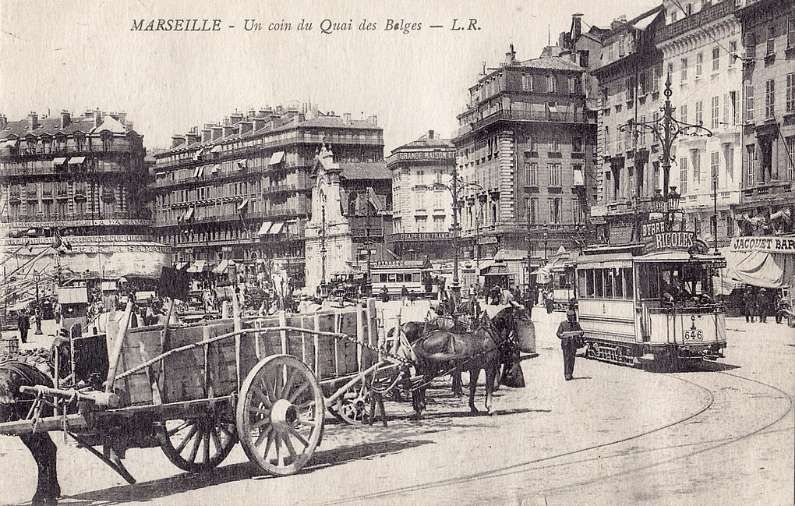
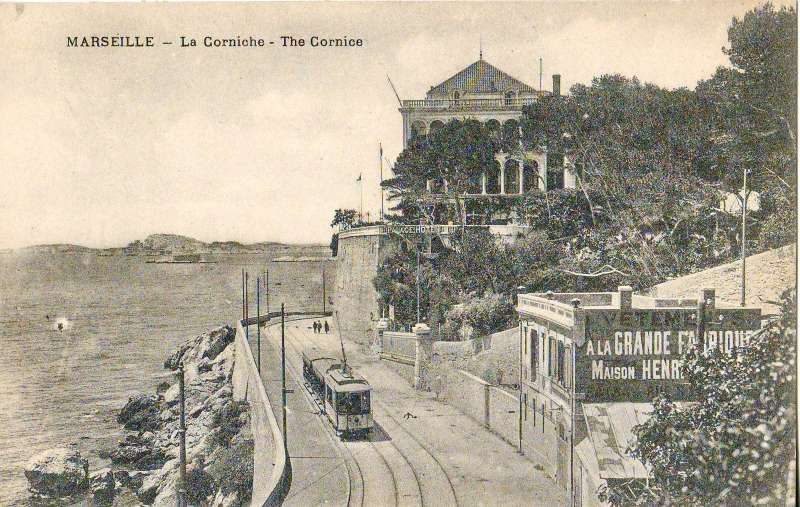
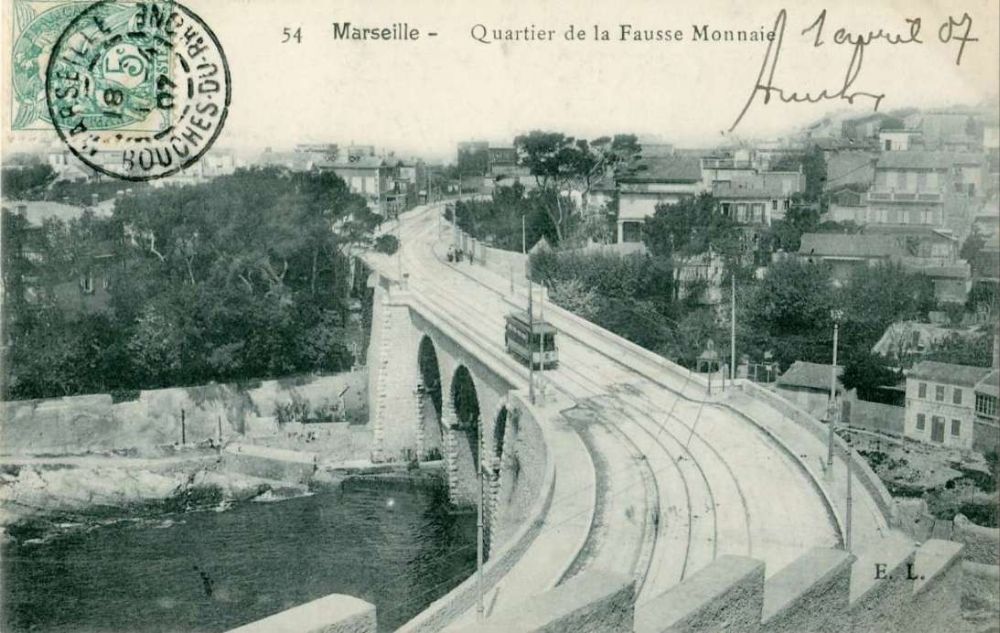

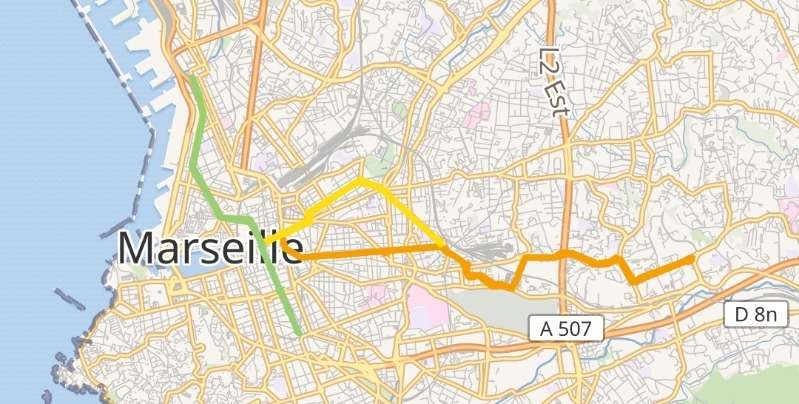
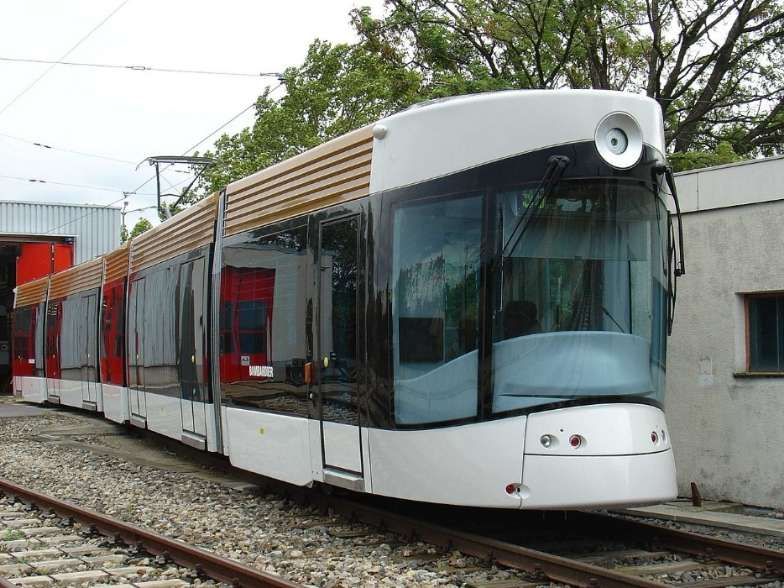
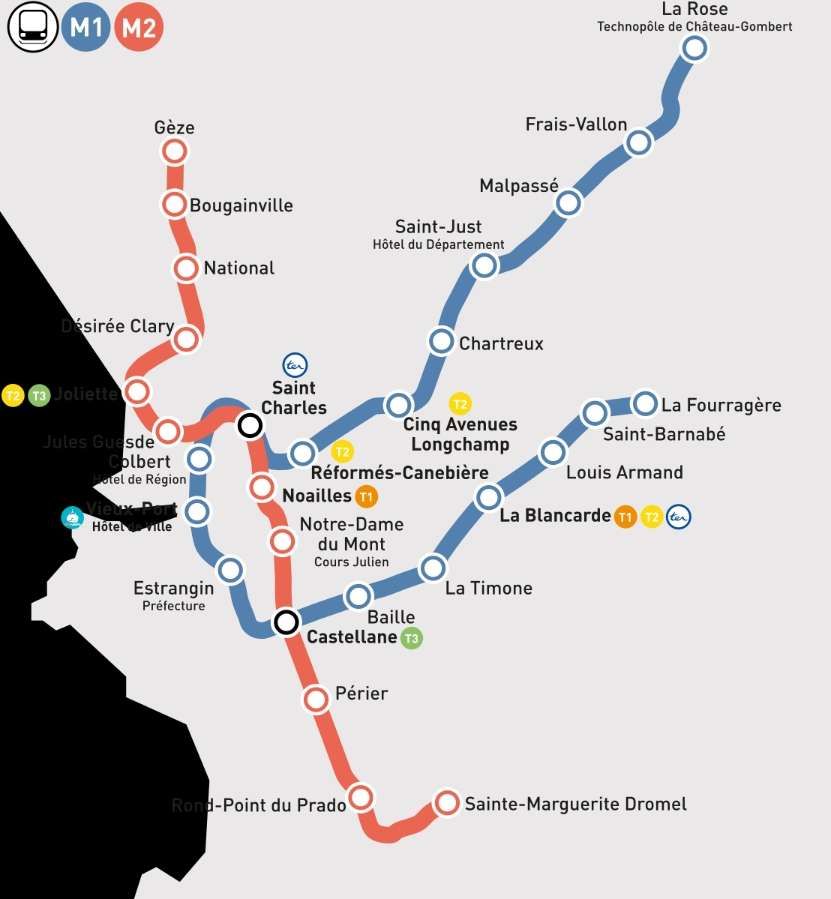
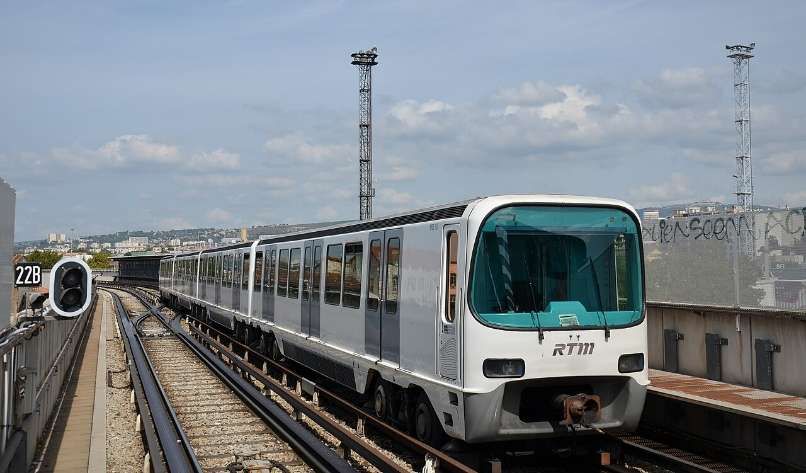

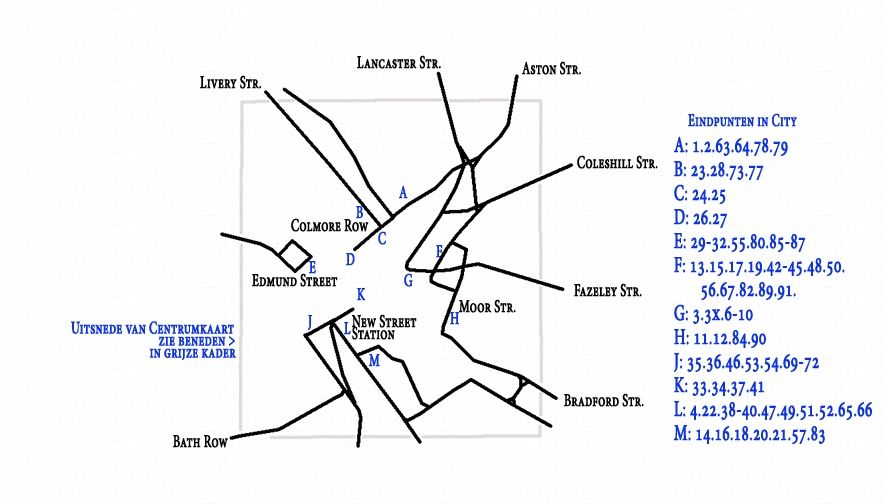

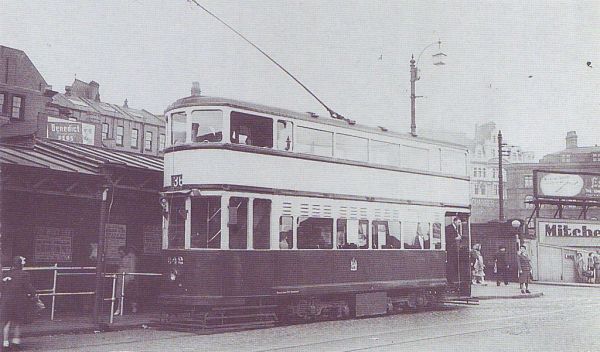
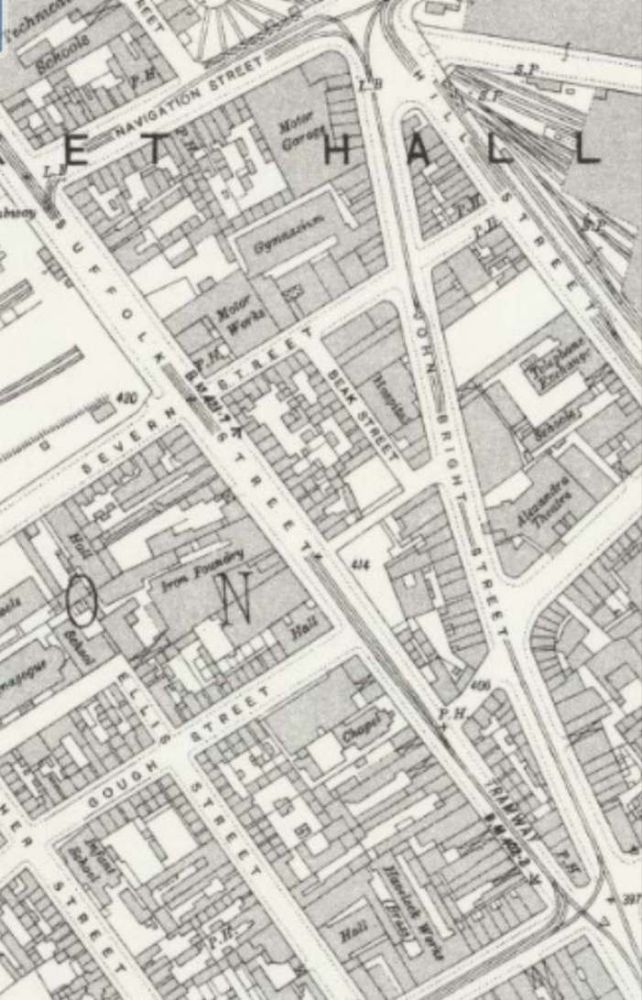

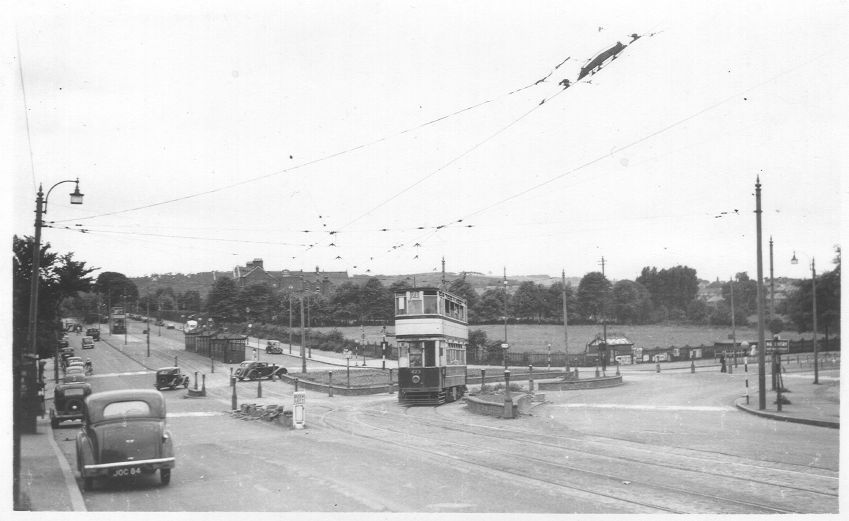
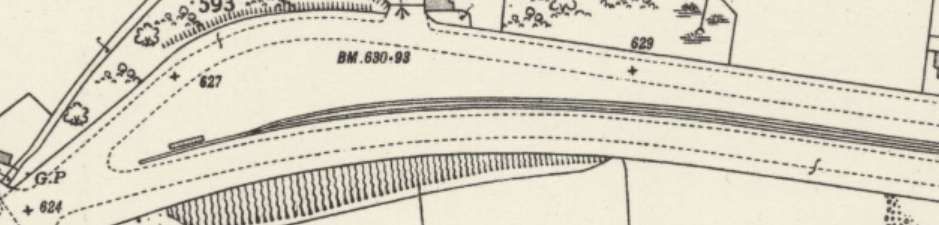
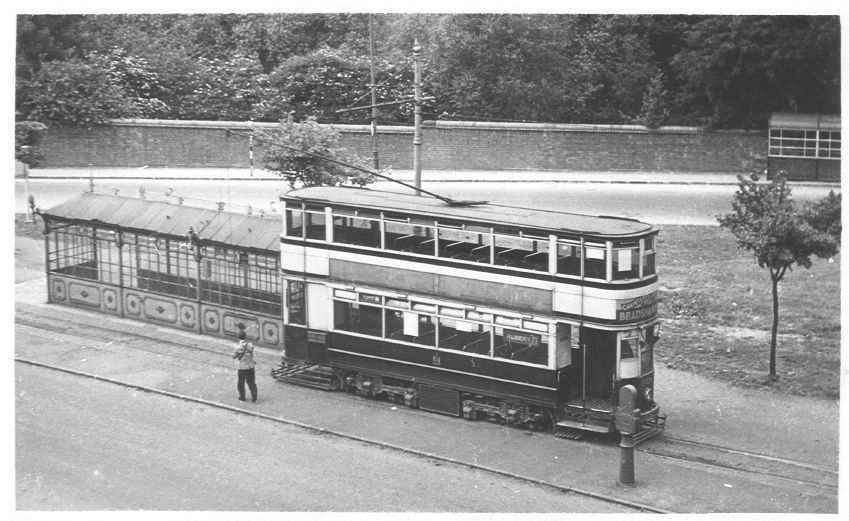
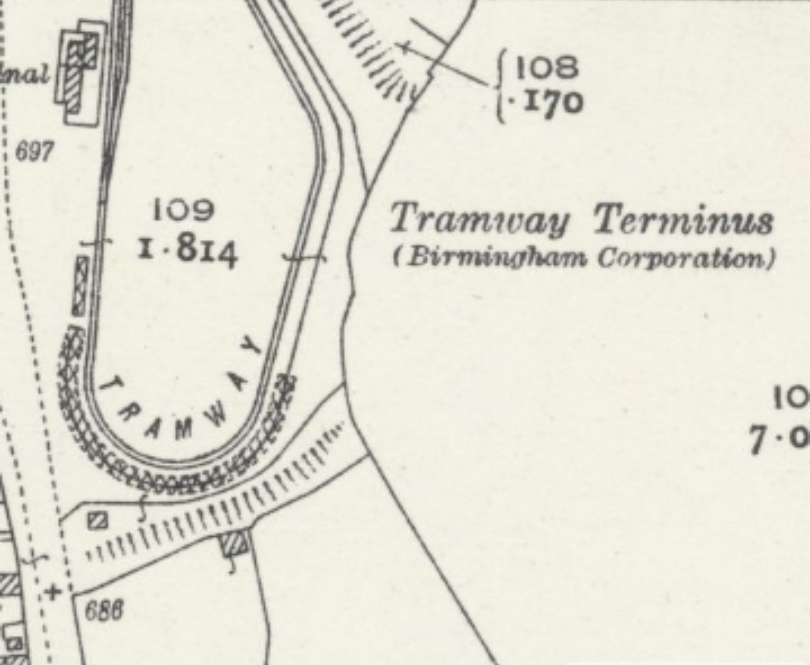
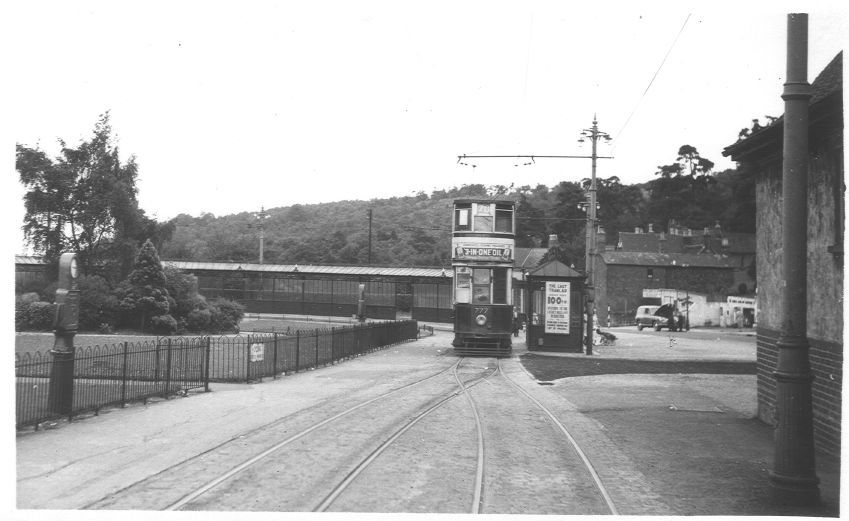
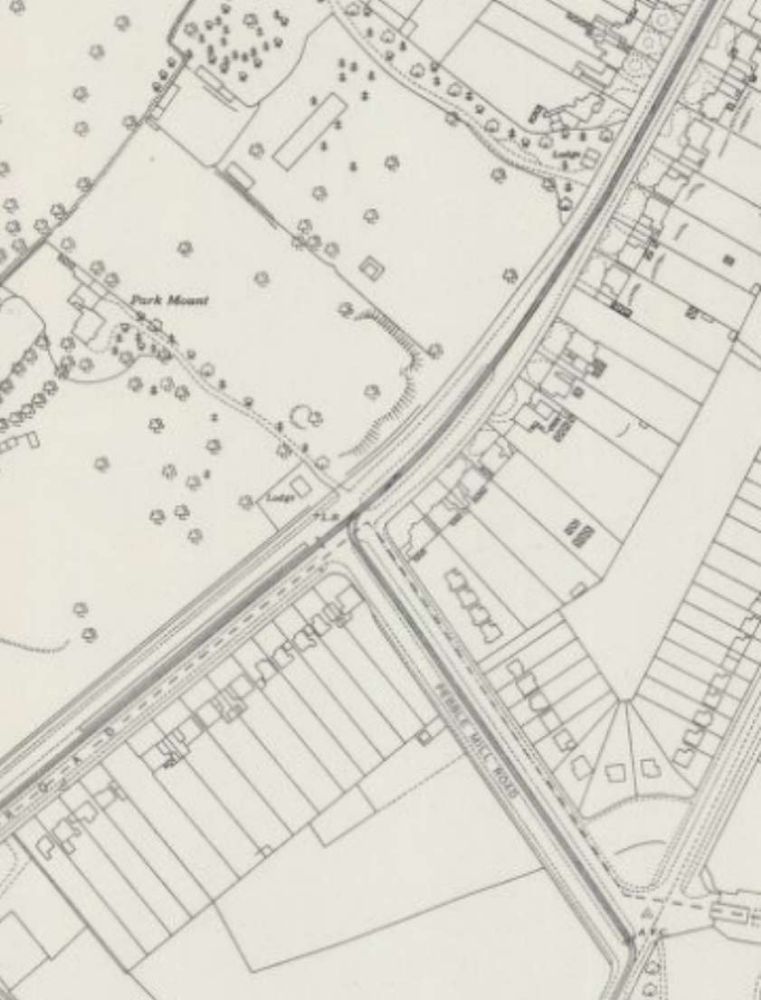
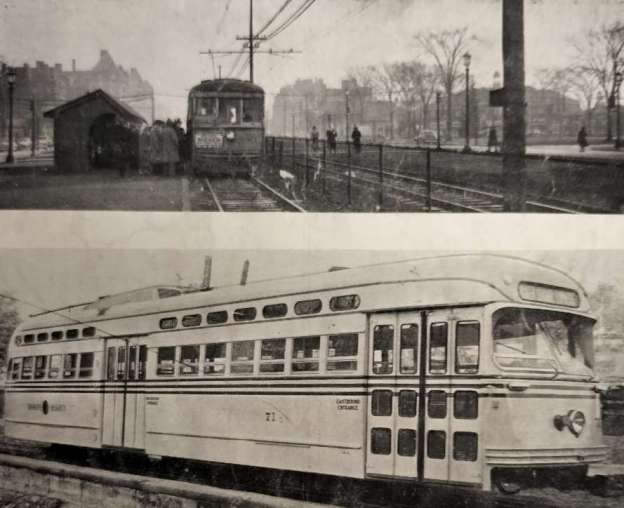
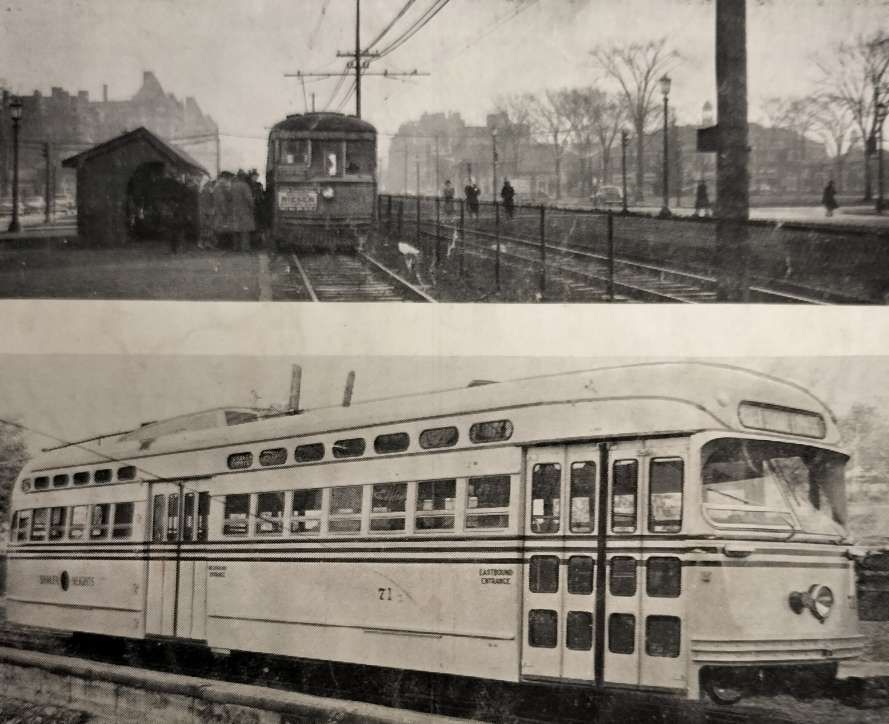
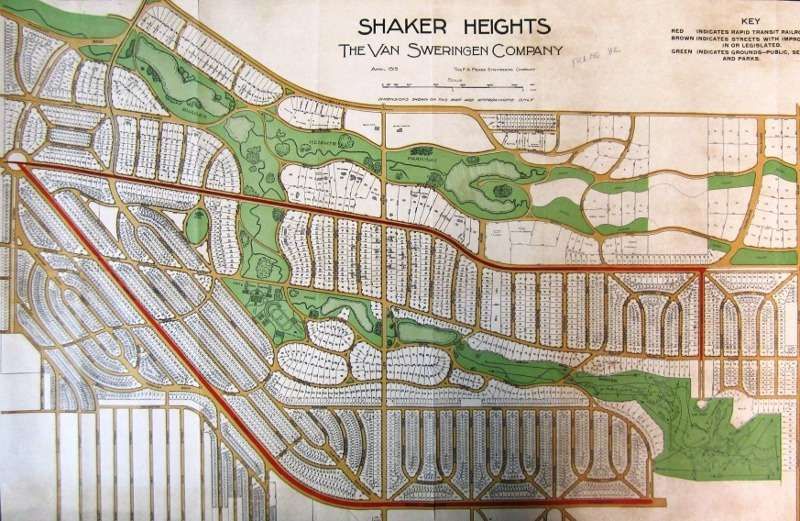
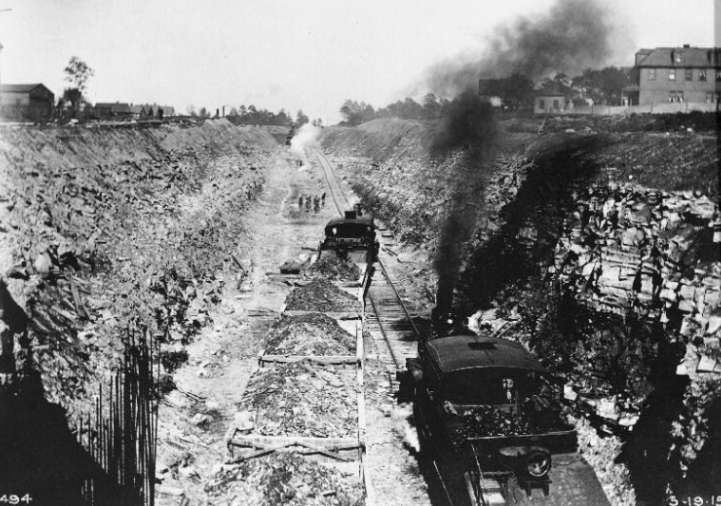
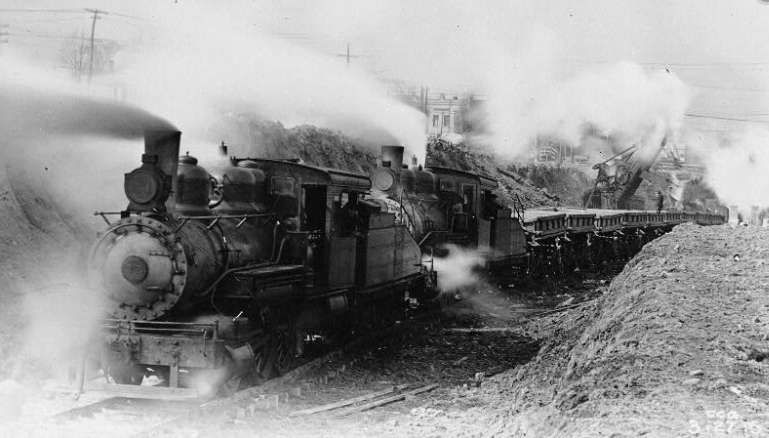
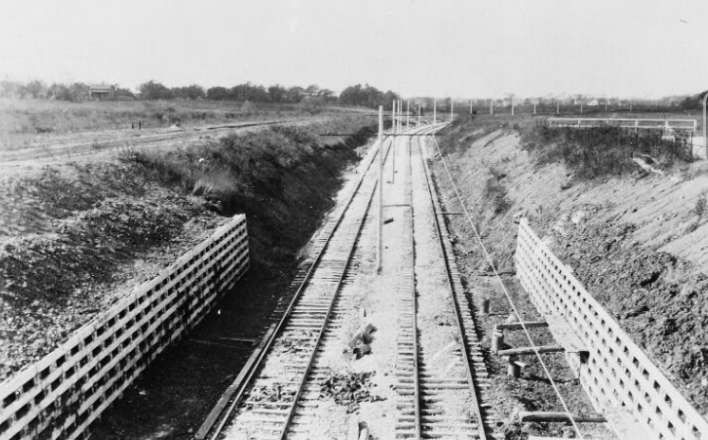
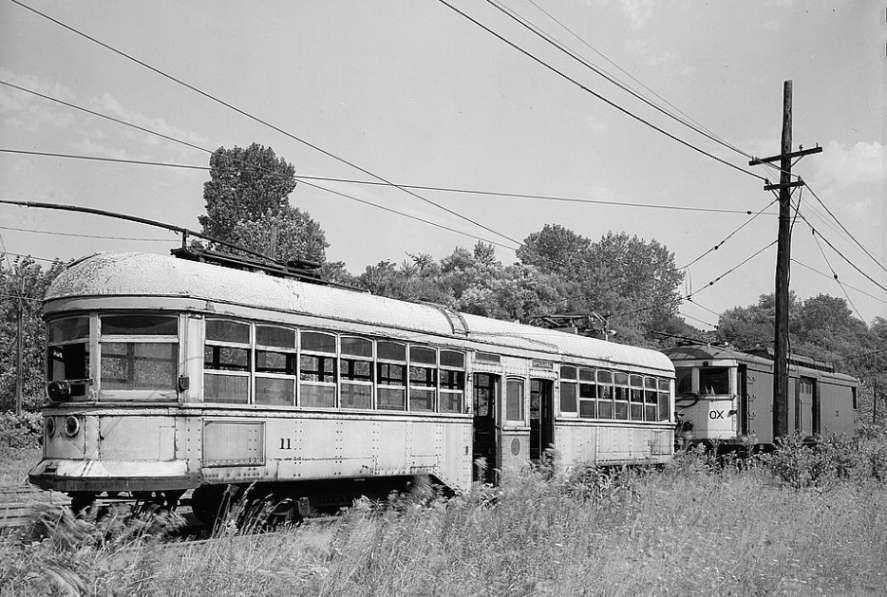
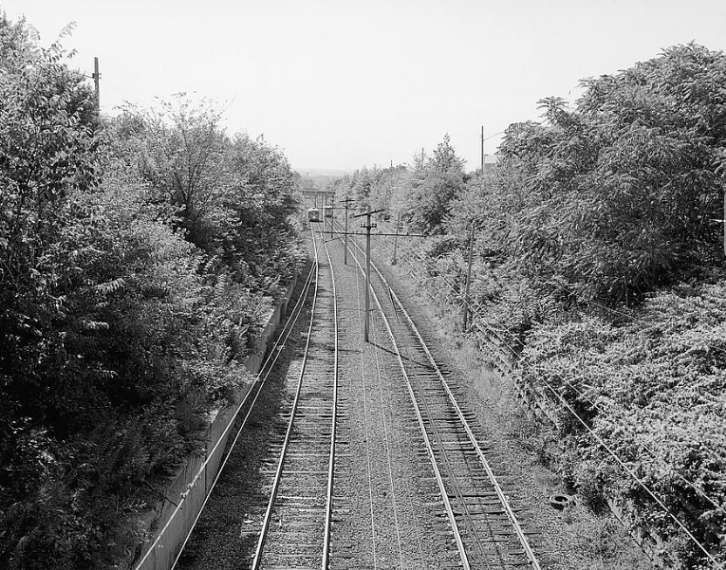
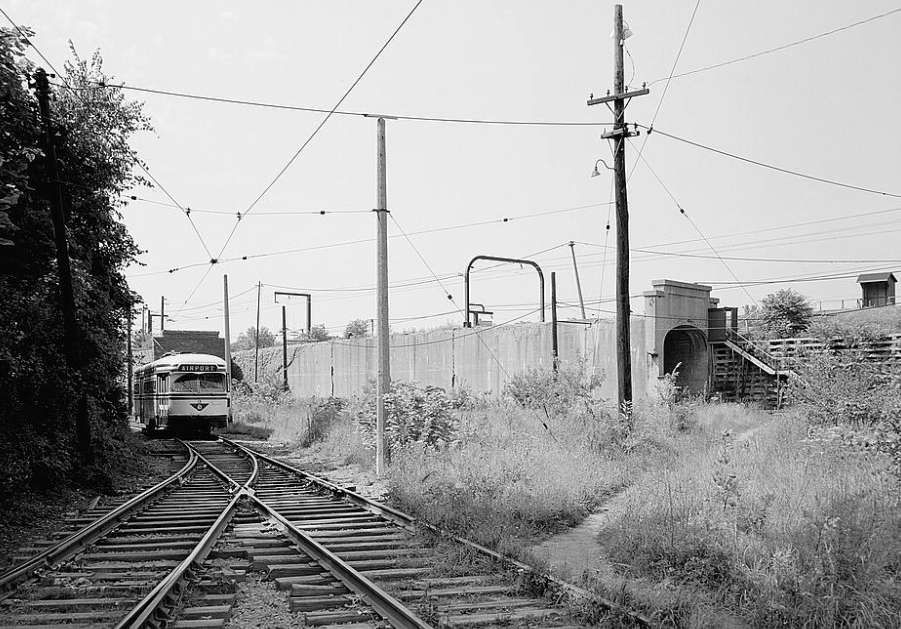
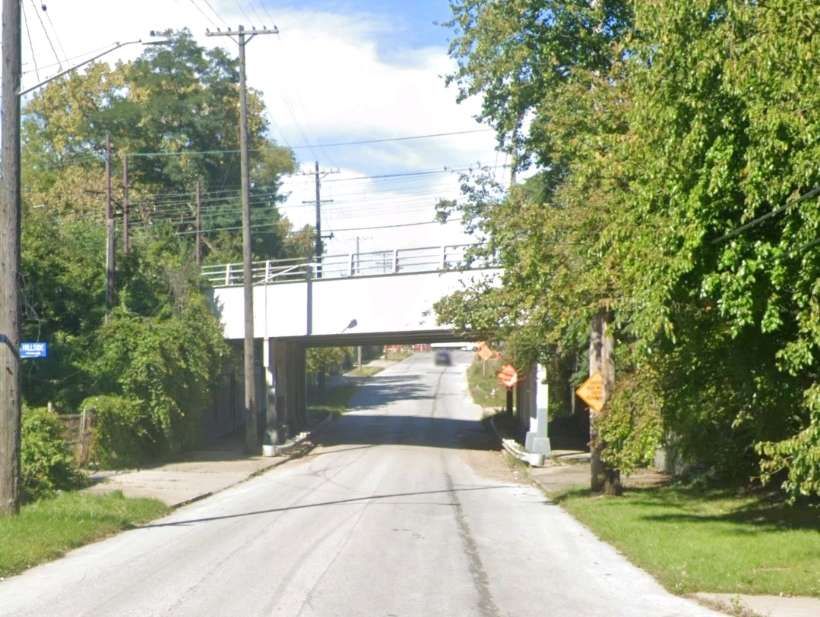
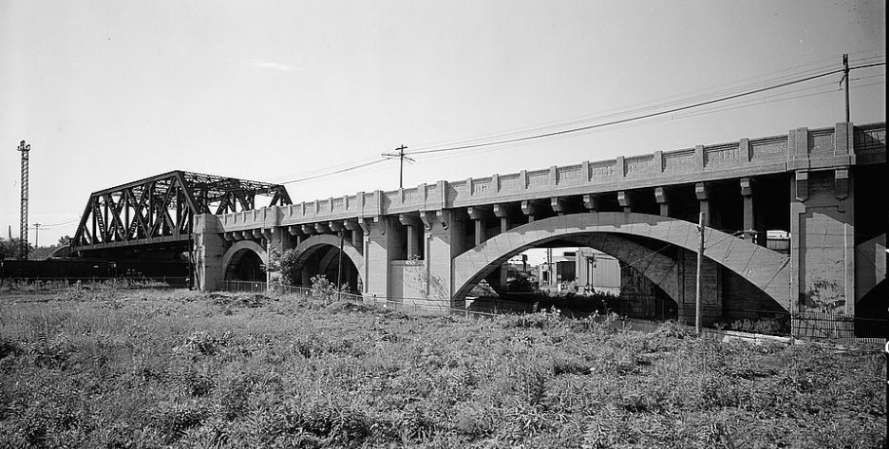
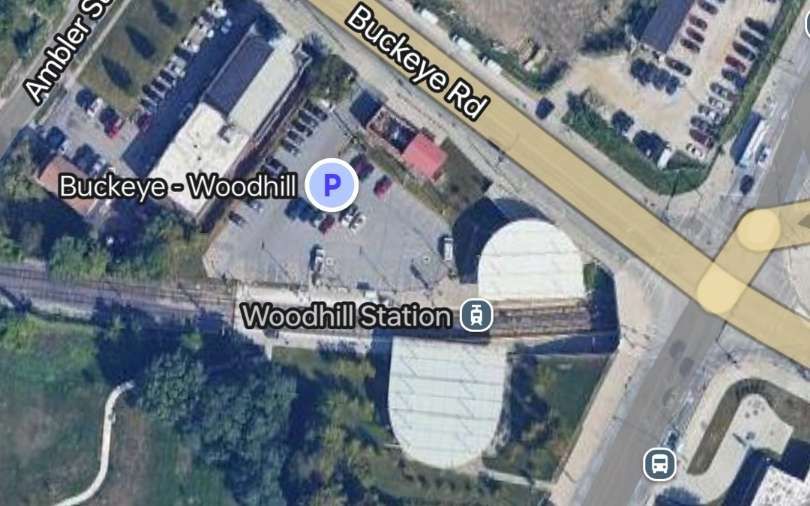

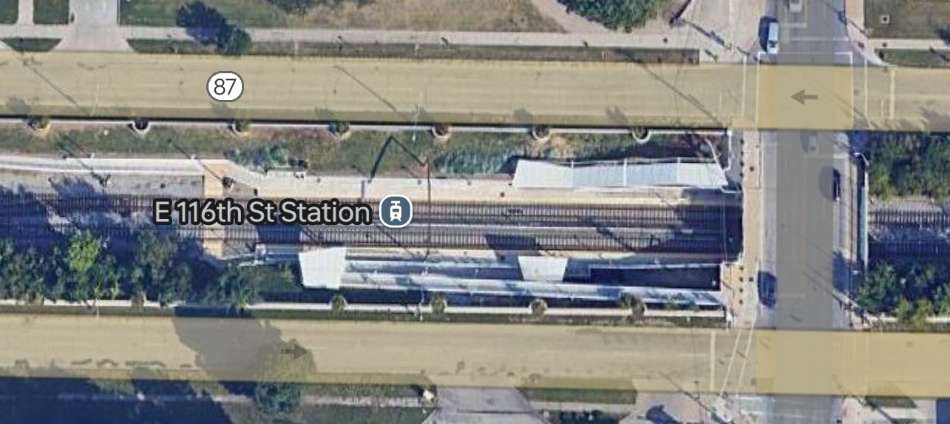

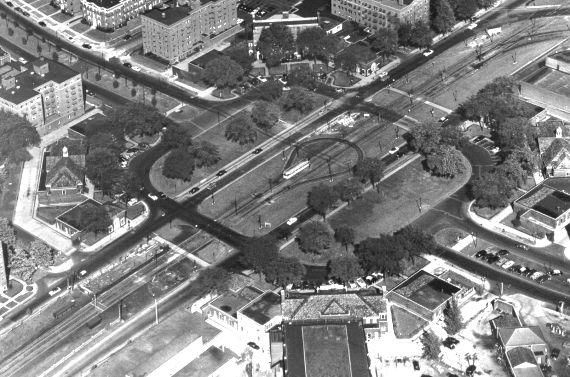
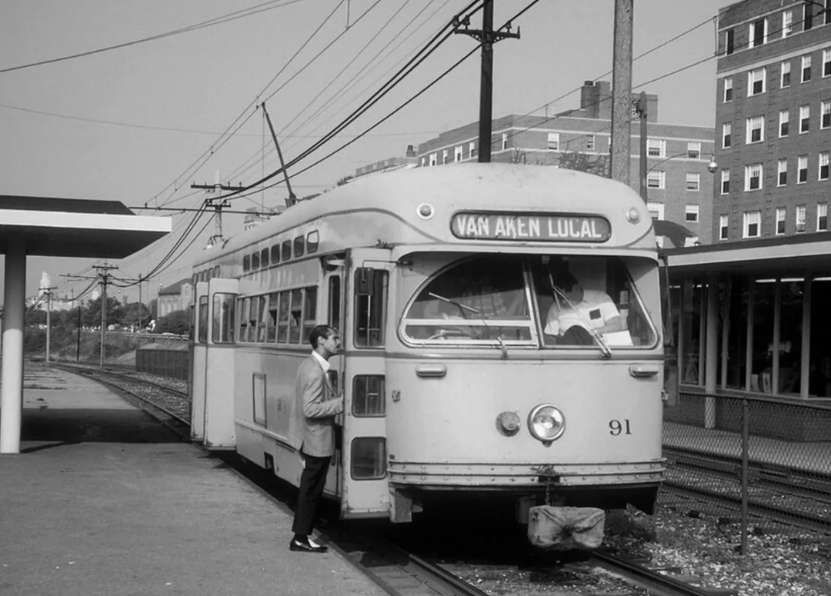
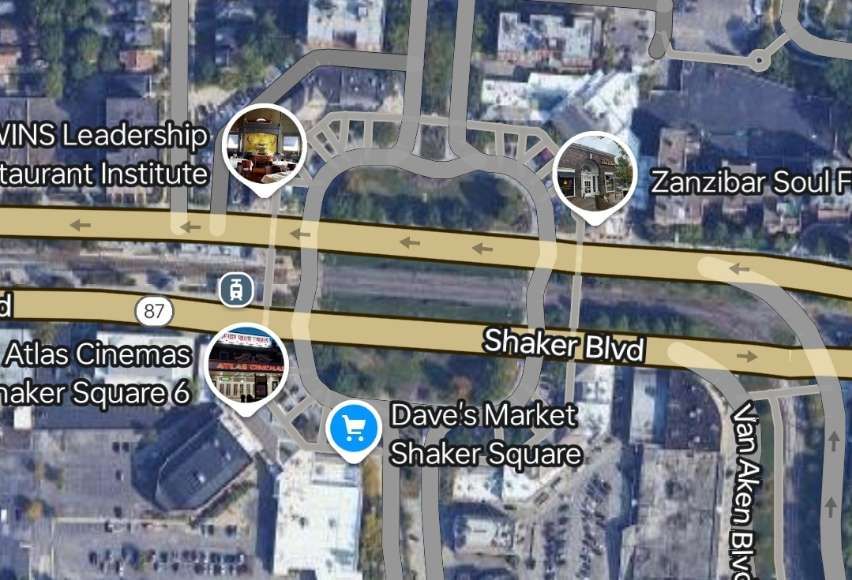
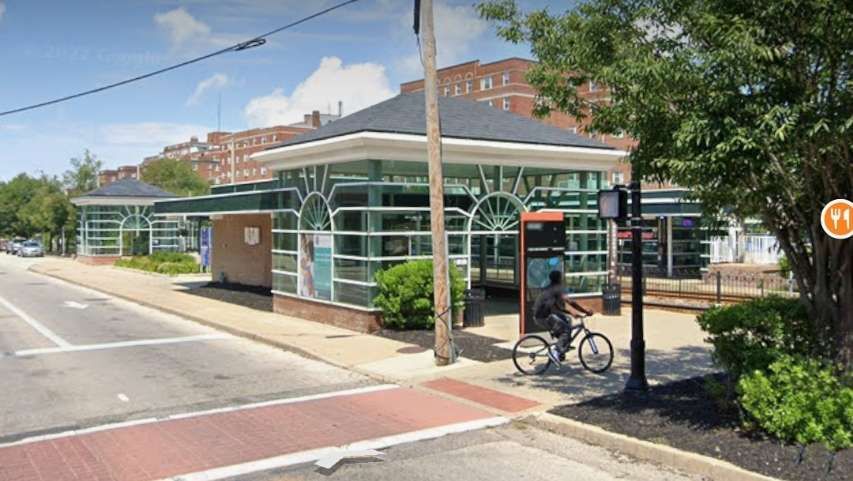
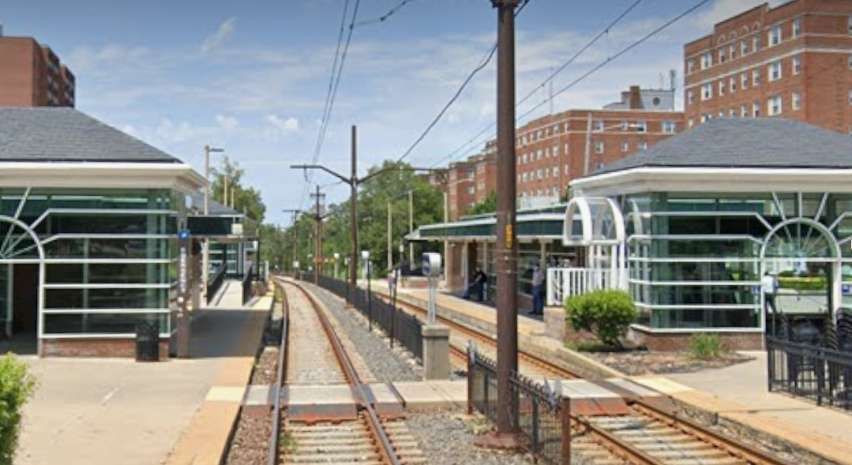
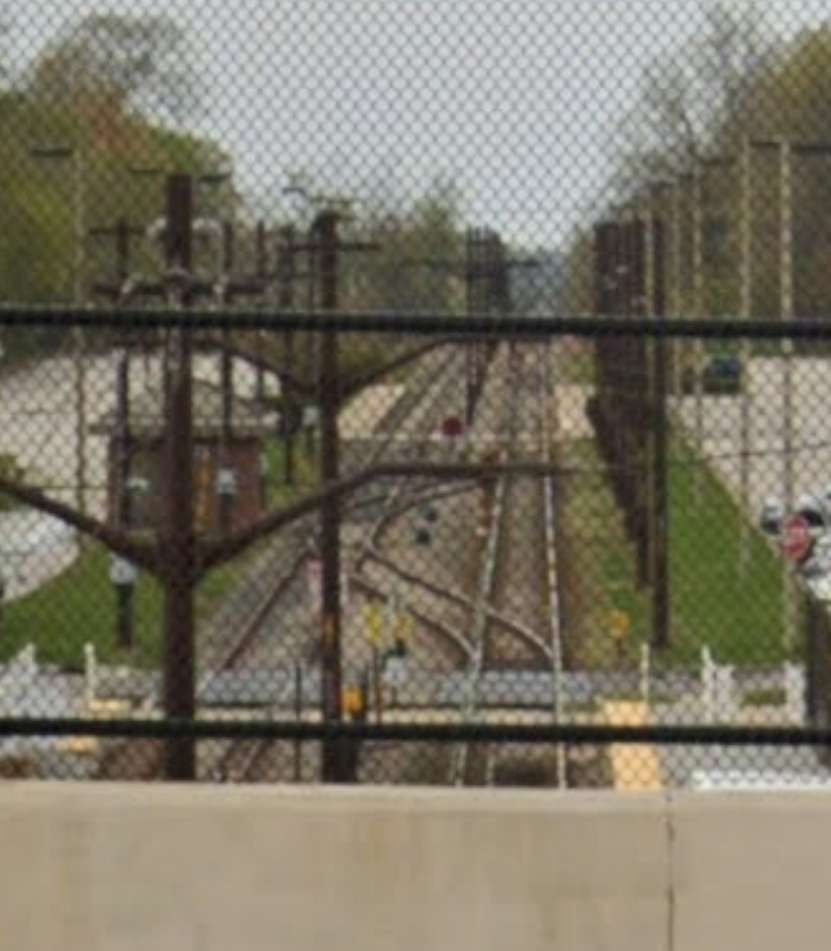
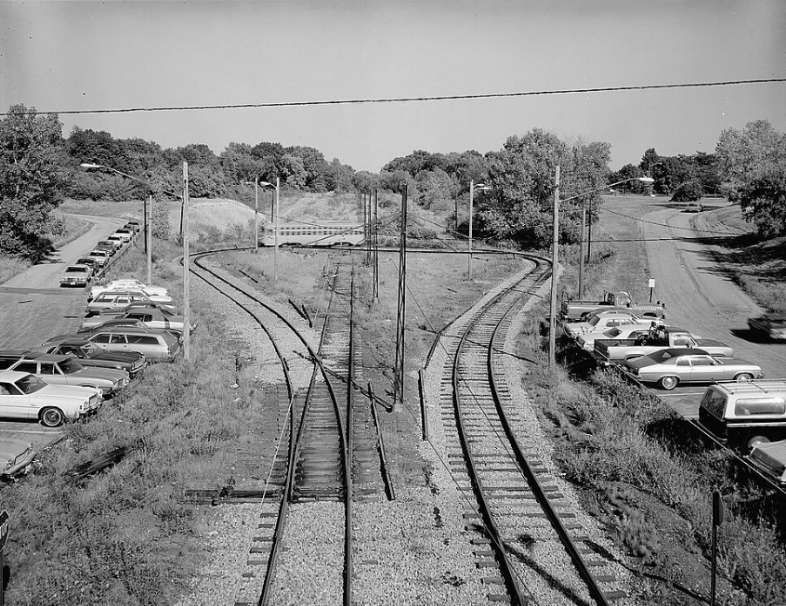
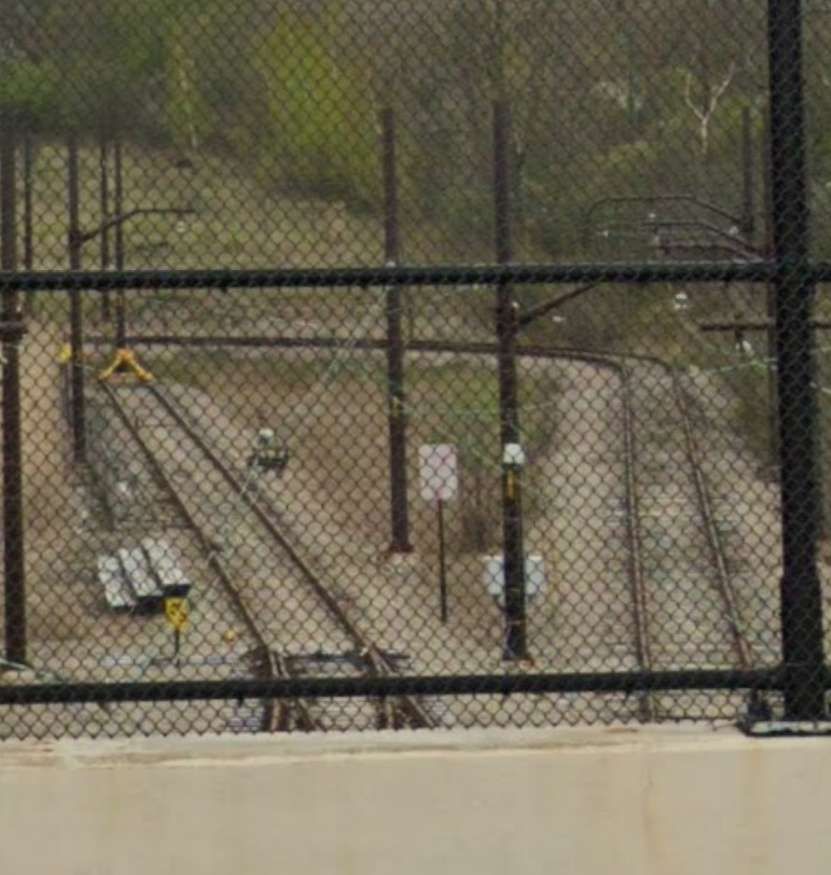
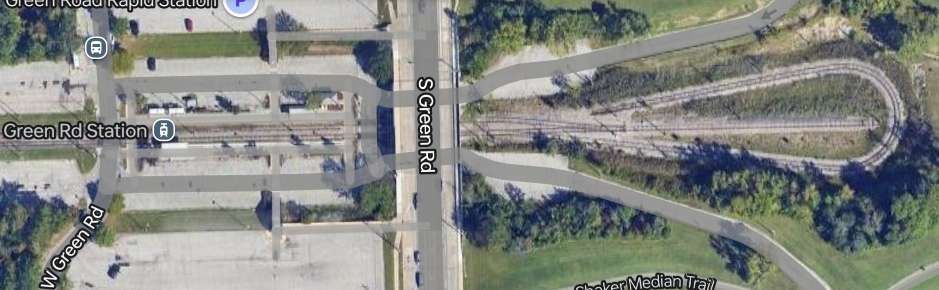
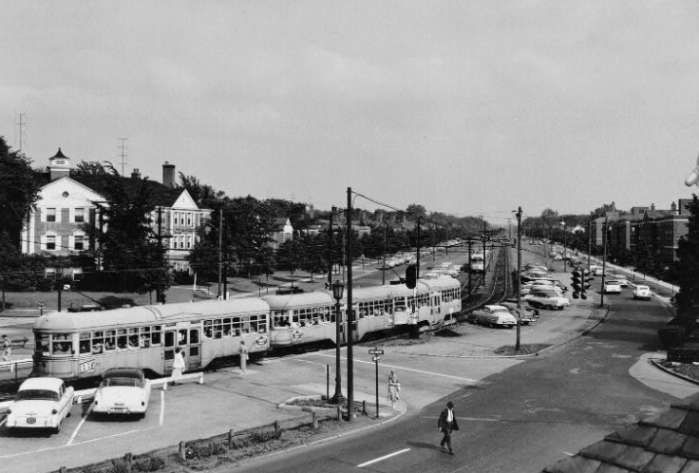
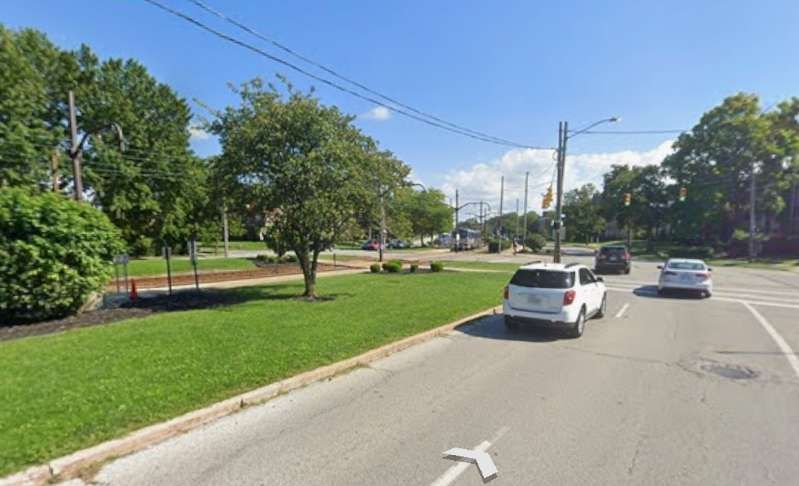
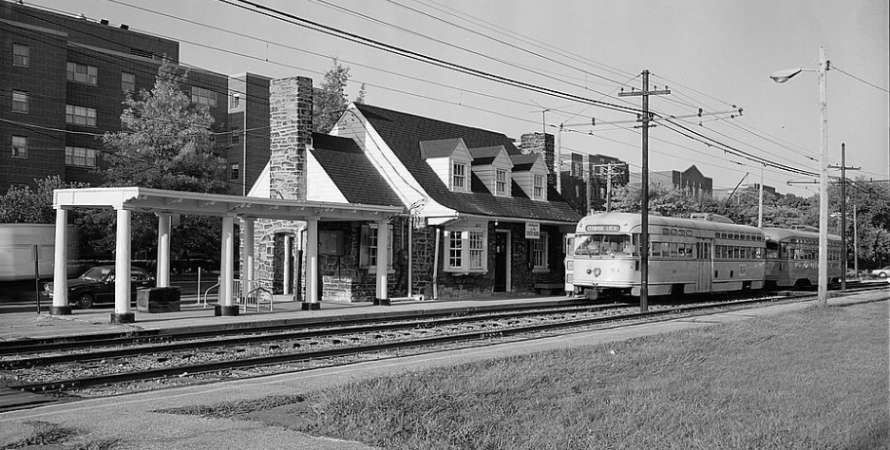
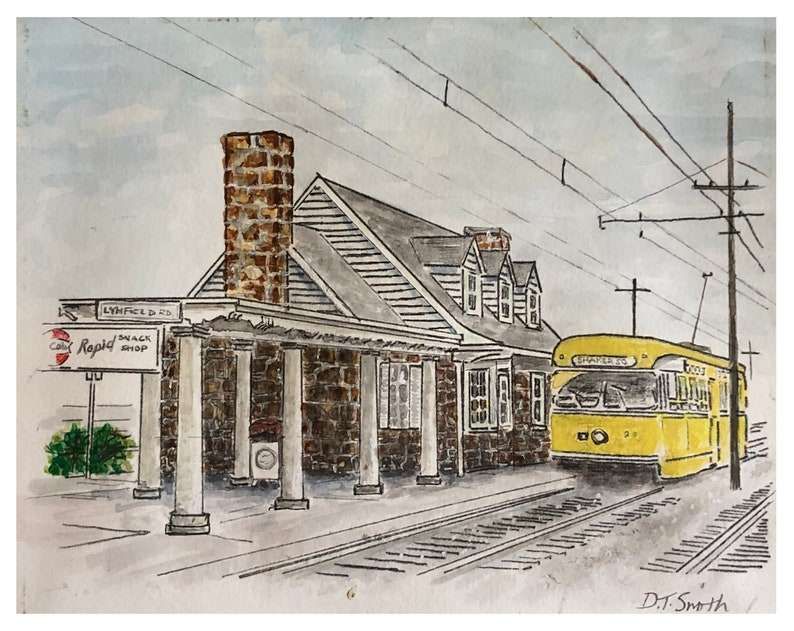
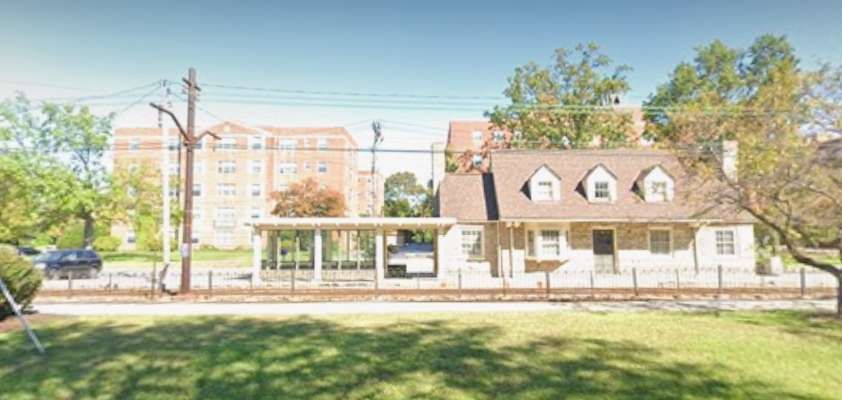
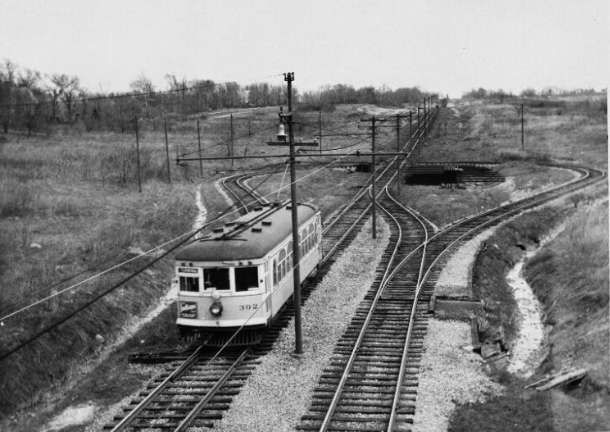


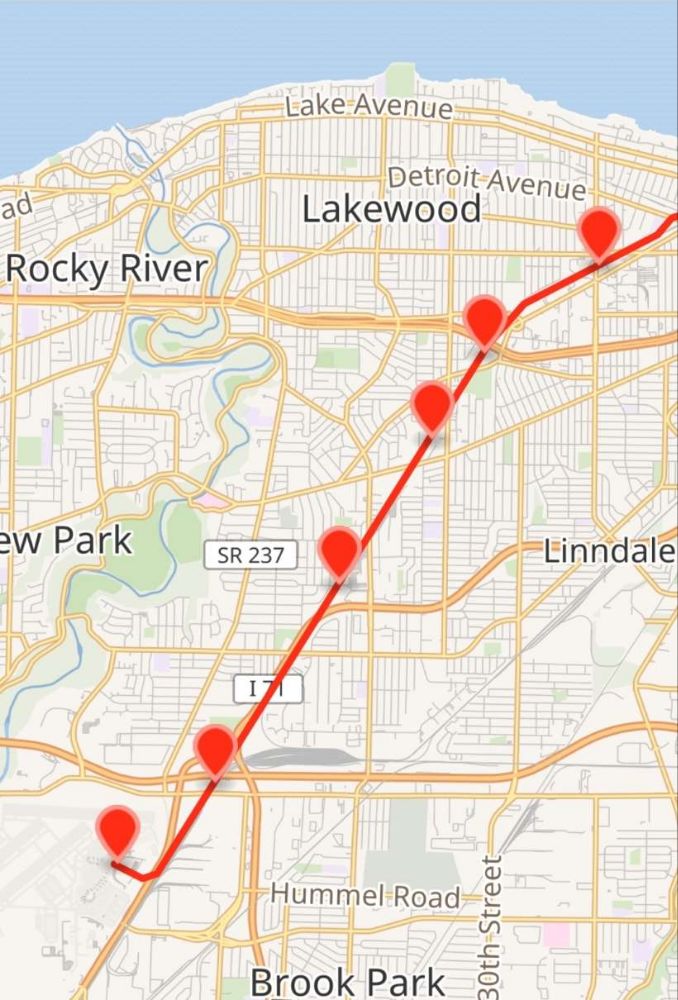
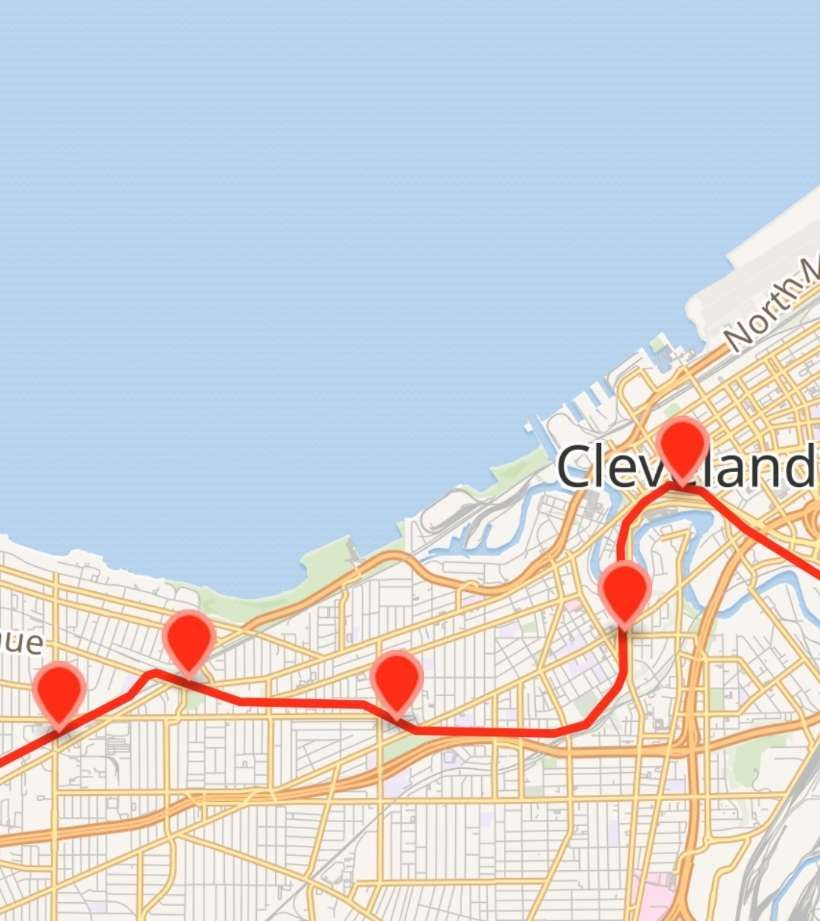
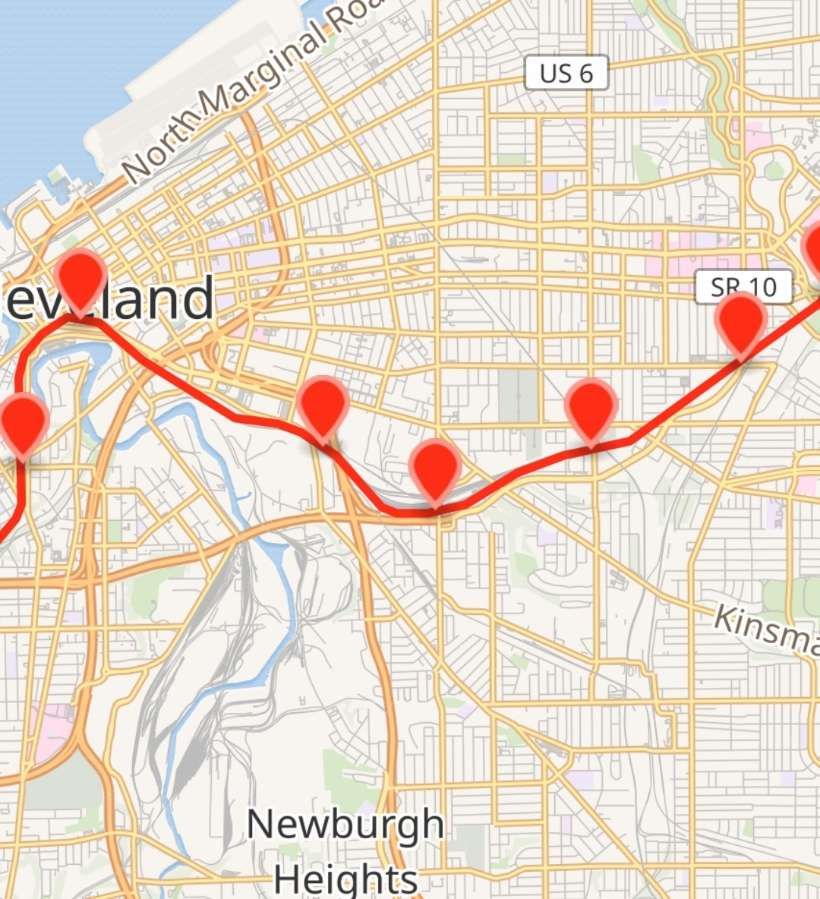
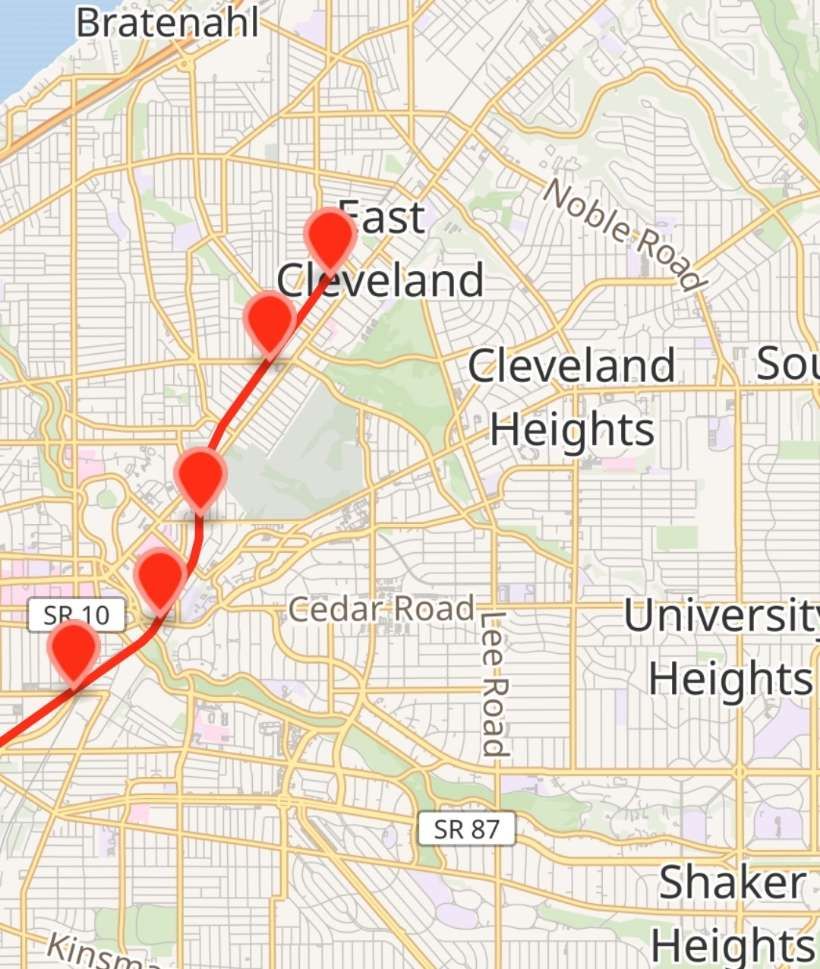
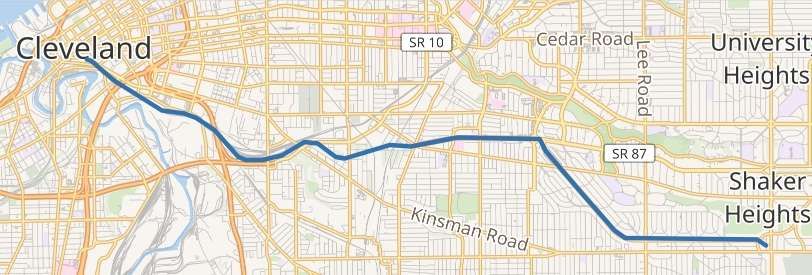
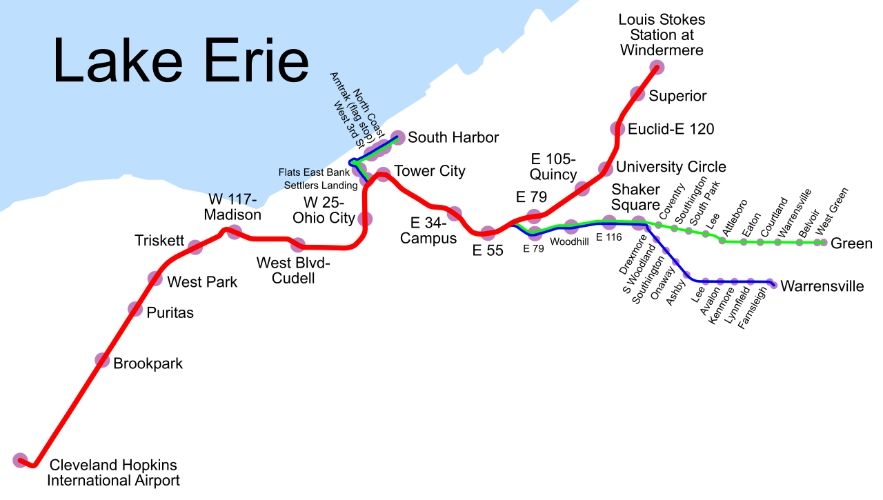
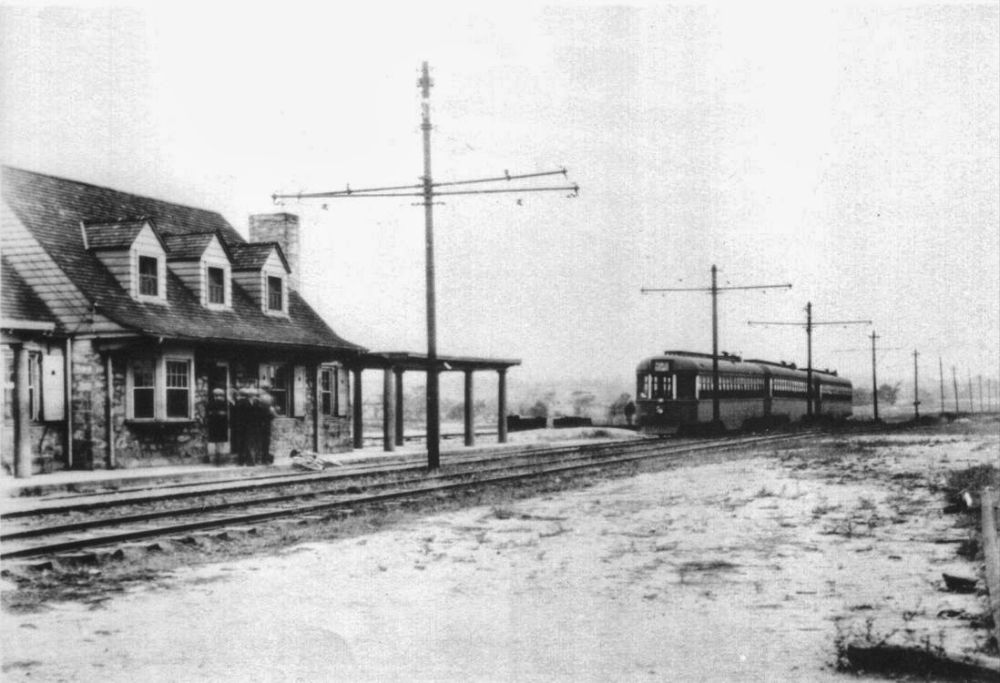
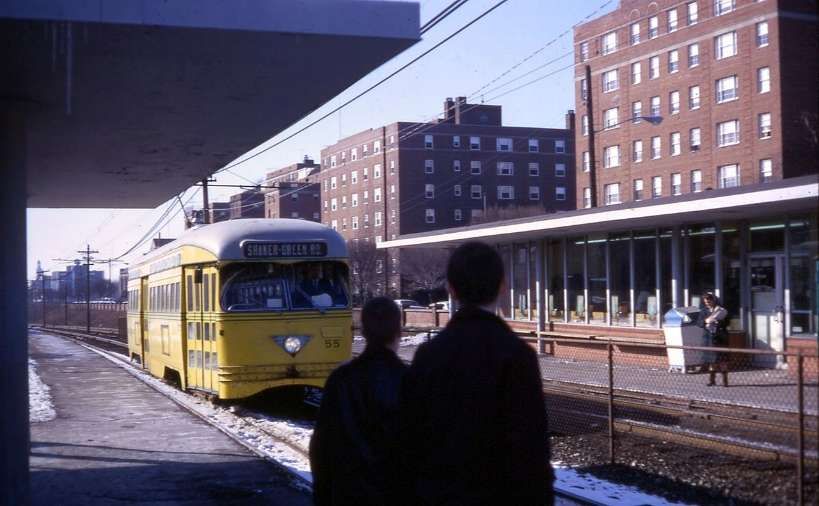


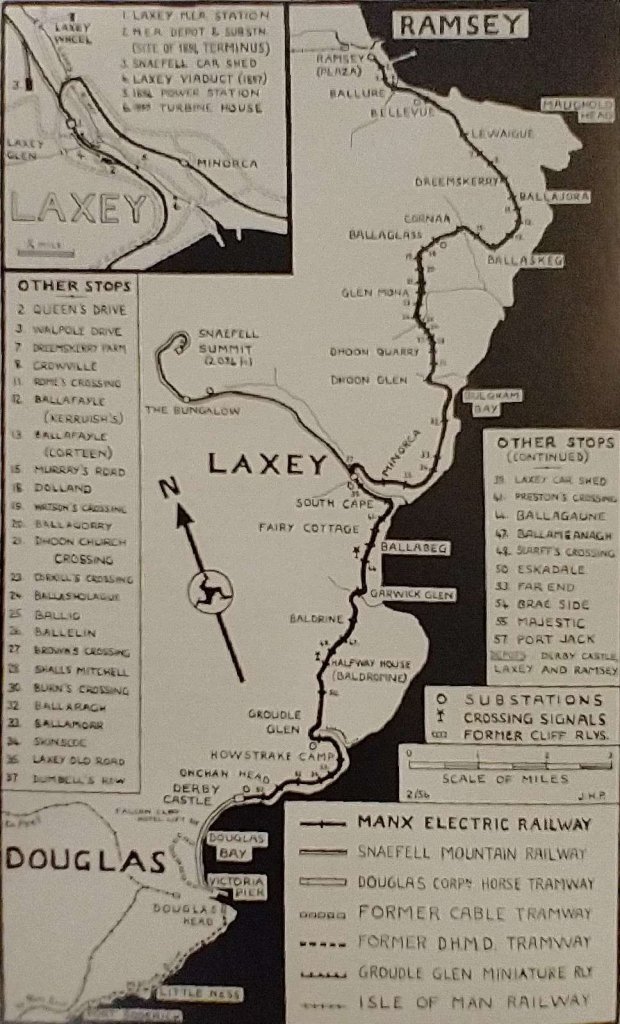
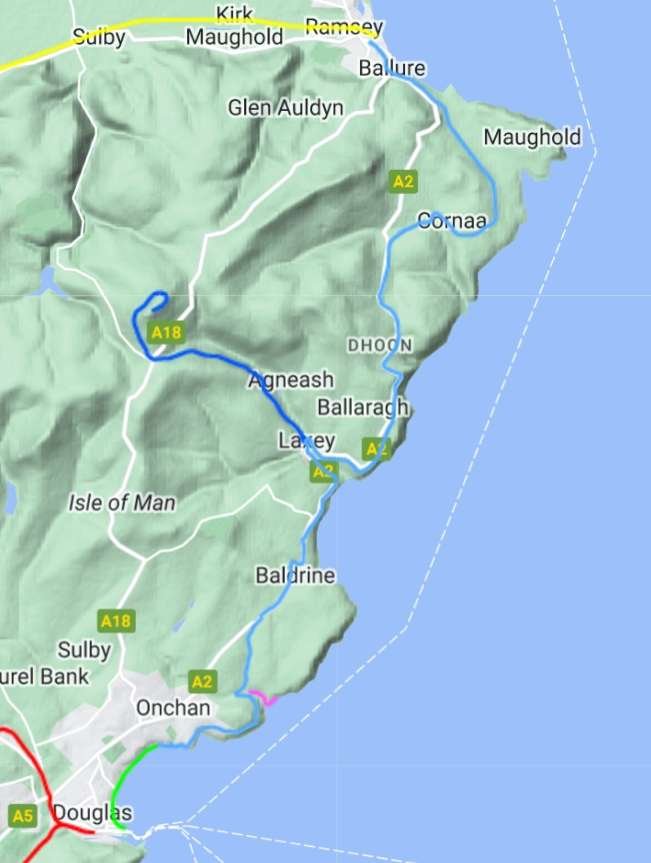


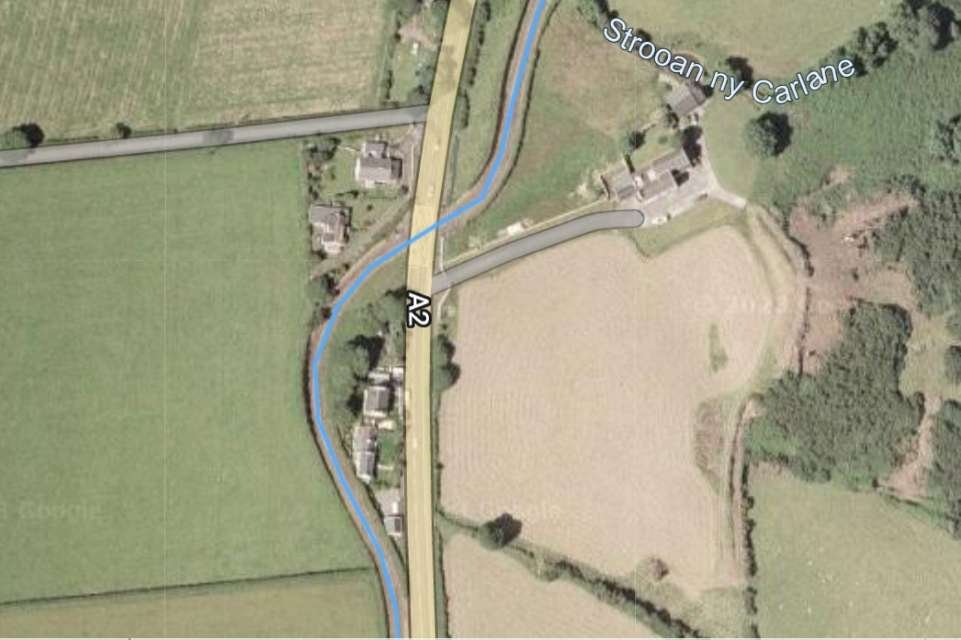
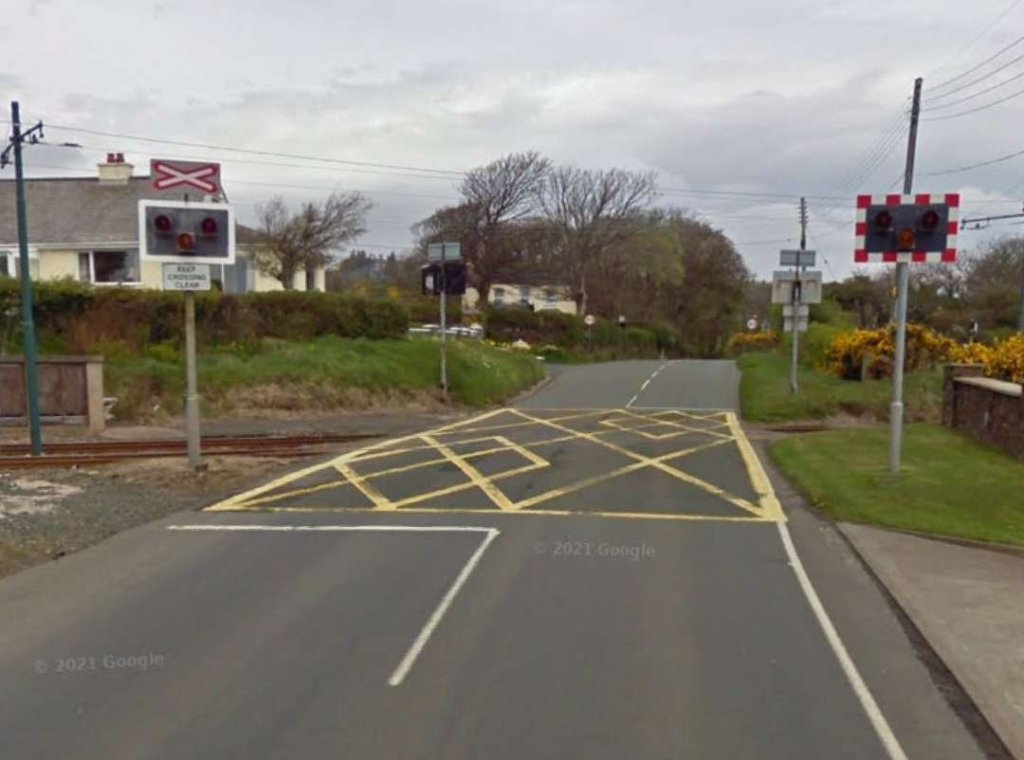
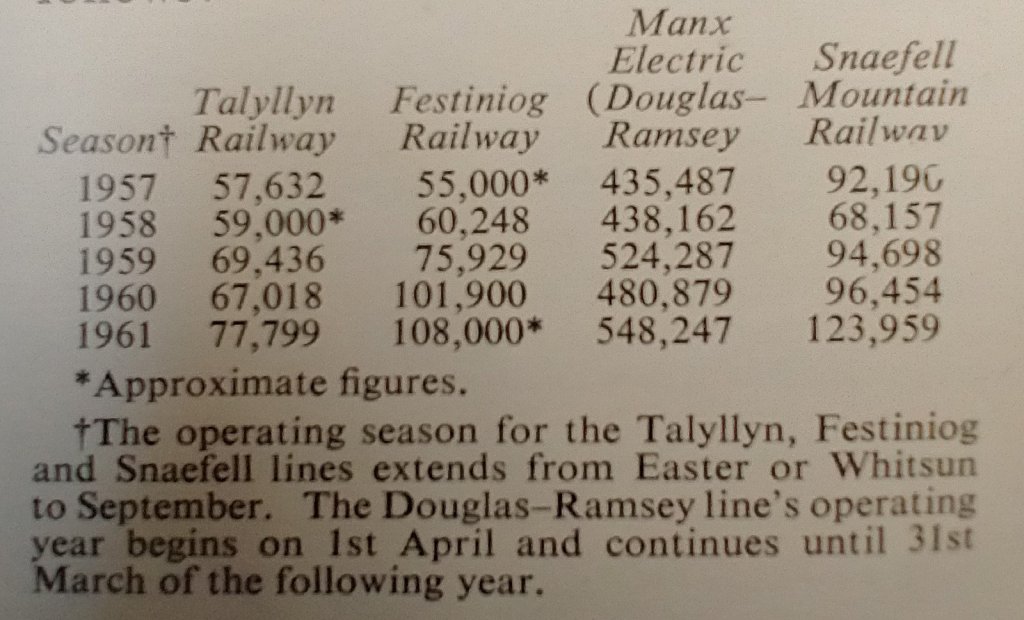
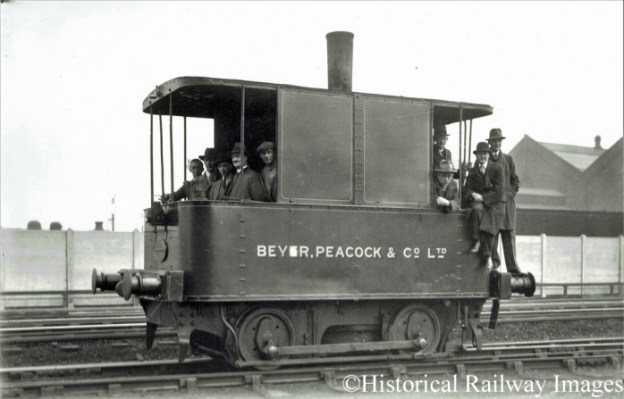
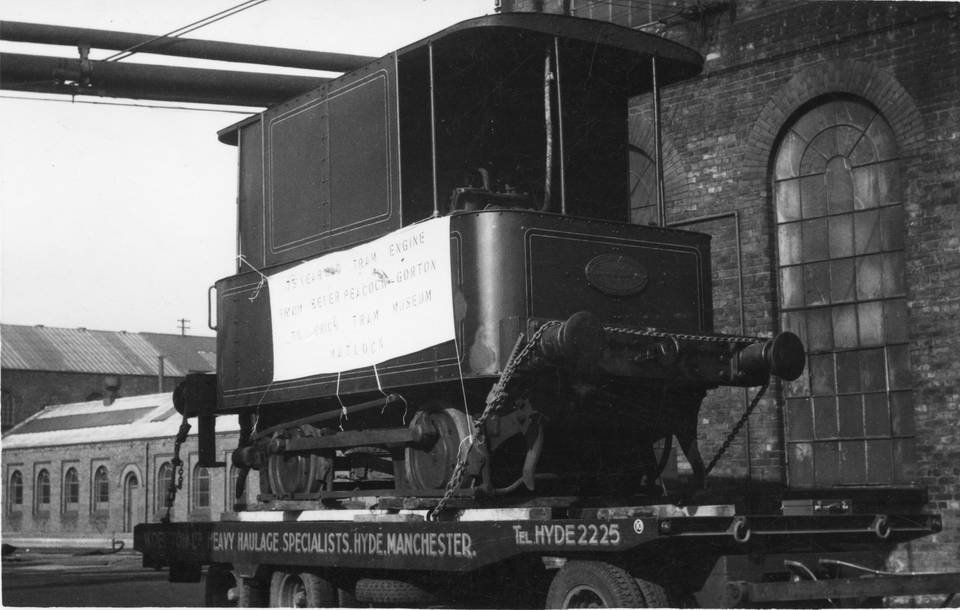
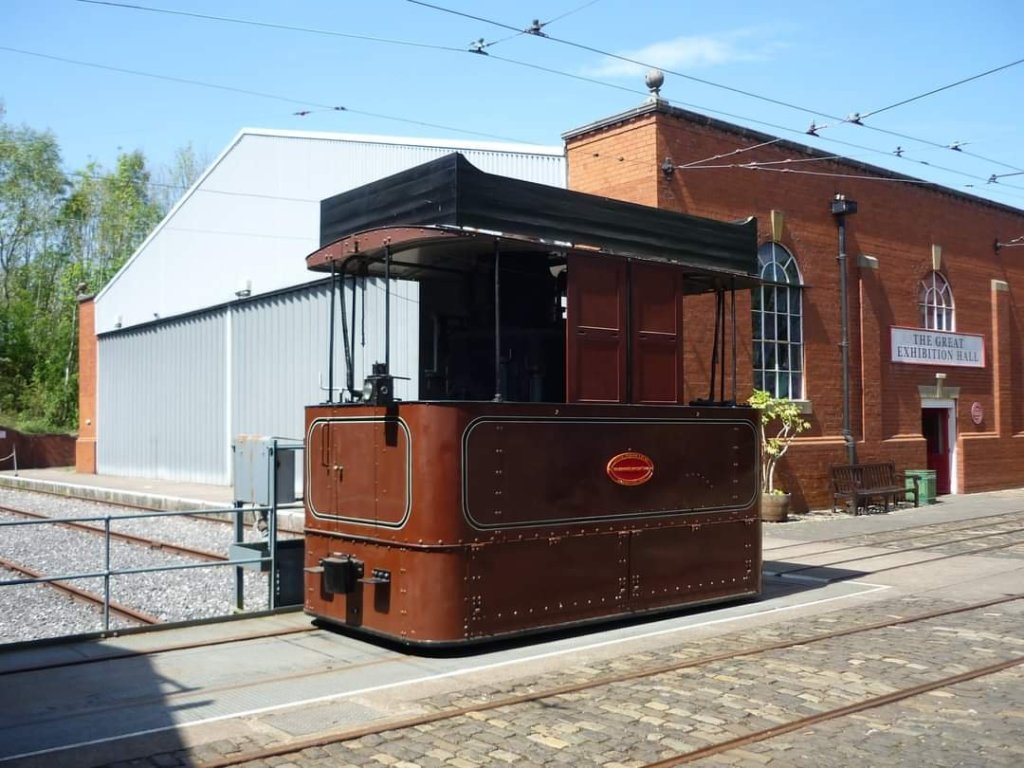

.jpg)
.jpg)