
Just after I posted my first article about the Micklehurst Loop, I was sent a series of photographs by an online acquaintance, Tony Jervis. In February 1981, he visited the same length of the Micklehurst Loop as covered in that article. Tony’s pictures show the line before removal of the two viaducts but after the lifting of the length of line retained to serve the Staley and Millbrook Sidings opposite Hartshead Power Station.
Tony also pointed out a further YouTube video from Martin Zero which is embedded towards the end of this addendum. …..
My first article on the Micklehurst Loop can be found using this link:
At the time of Tony Jervis’ visit on 14th February 1981, only one section of the Spring-Grove Viaduct had been removed – a simply supported span which took the line over the Spring-Grove Mill. Toney was very happy for me to share these pictures as an addendum to my original article and he very kindly provided some notes to go with a number of the photographs. I have provided some annotated OS Maps to go with the pictures.
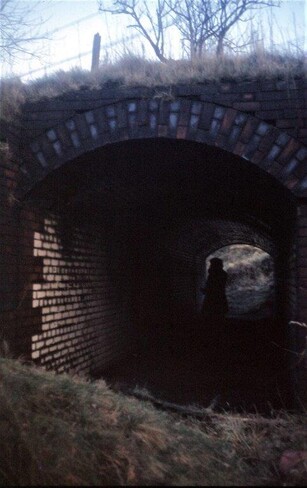
I have retained the reference numbers of the photographs used by Tony Jervis. I find the images fascinating. The first three photographs speak for themselves and are centred on Knowl Street Viaduct at the bottom end of the loop immediately adjacent to Stalybridge New Tunnel.
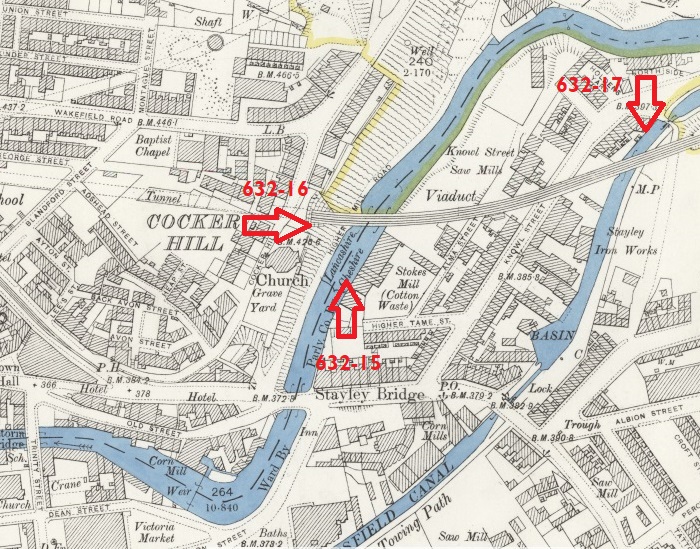 The 25″ OS Map showing the area to the East of Cocker Hill where the Micklehurst Loop broke out of Stalybridge New Tunnel and immediately spanned the River Tame. The locations of three of Tony’s photographs marked. [1]
Photograph 15, 1981, (c) Tony Jervis. [2]
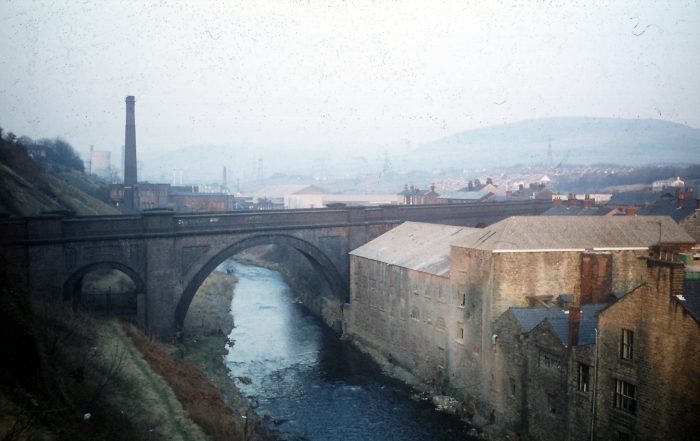
Photograph 632-16, shows the length of the viaduct and is taken from above the Eastern Portal of Stalybridge New Tunnel, 1981, (c) Tony Jervis. [2]
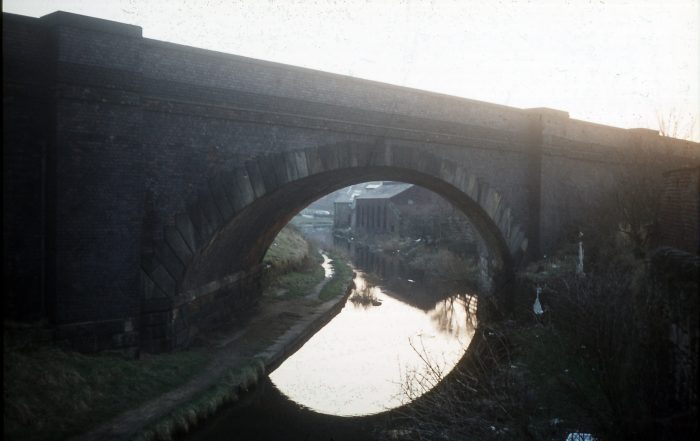
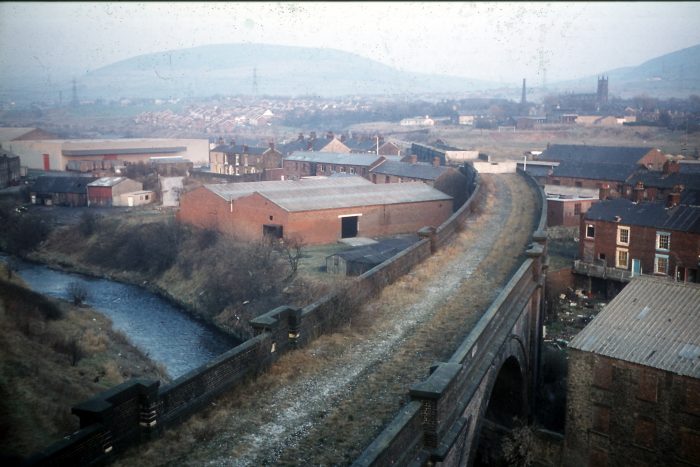
Photograph 632-17,shows the skew span over the Huddersfield Narrow Canal looking towards the Centre of Stalybridge, 1981, (c) Tony Jervis. [2]
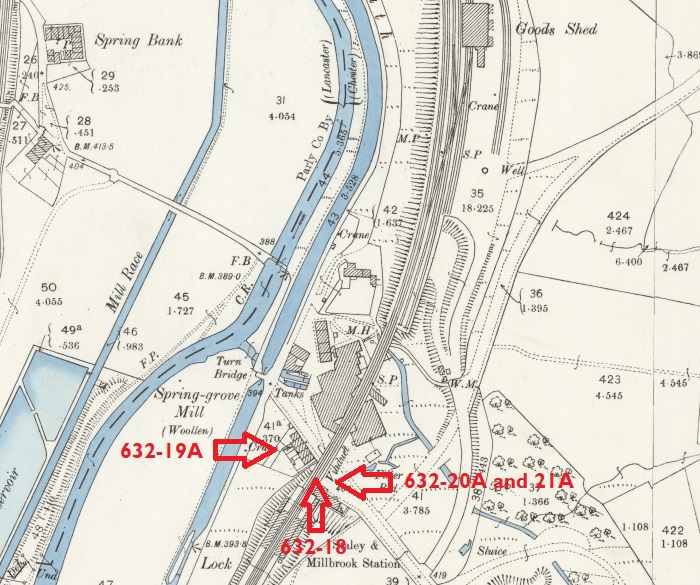
25″ OS Map of Staley & Millbrook Station site at the turn of the 20th century. [1]
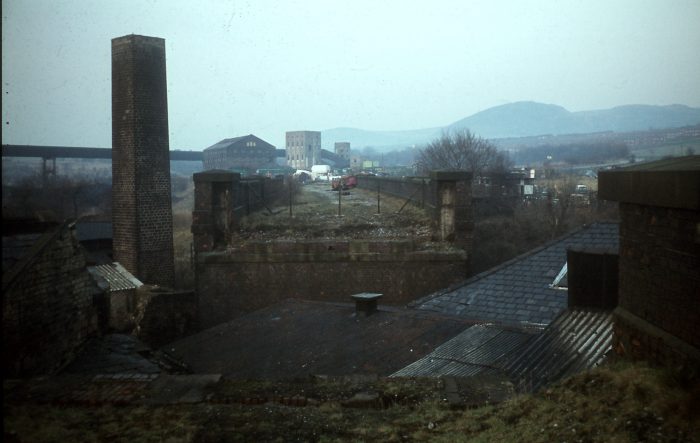
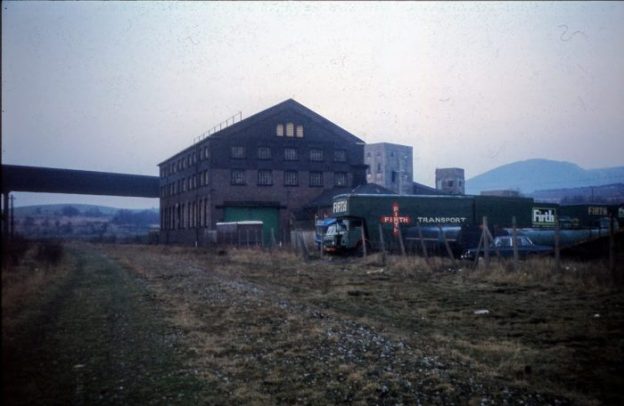
Photograph 632-18 shows Spring-Grove Mill was spanned by a simply-supported girder bridge which had already been removed when Tony Jervis visited in 1981, (c) Tony Jervis. [2]
The Goods shed and part of the conveyor are still in place. The viaduct, the mill chimney,the section of the mill visible to the extreme left of the image, the coal handling facilites are long-gone in the 21st century.
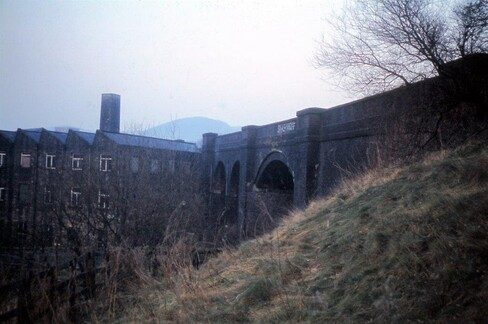
Photograph 632-19A, 1981, the portion of the mill on this (West) side of the viaduct and the mill chimney, still present in 1981, were demolished along with the viaduct in the later part of the 20th century (c) Tony Jervis. [2]
Photograph 632-20A, 1981, (c) Tony Jervis. [2]
Photograph 632-21A, 1981, (c) Tony Jervis. [2]
Tony has also provided photographs which were taken late in the evening on 14th 1981 of the Goods Yard across the river and canal from Hartshead Power Station. Their locations are again marked on the 25″ OS Map immediately below ……
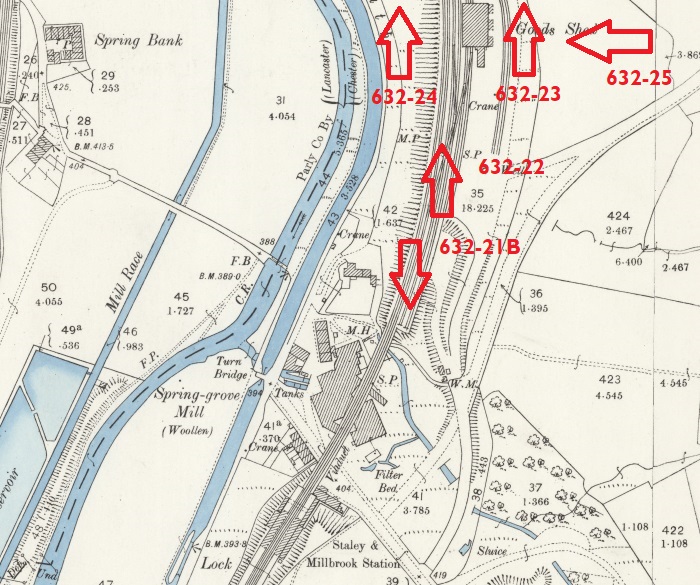
25″ OS Map of the Staley & Millbrook Coal Sidings site. The extract does not show the full extent of the sidings which were in place in the mid-20th century..[1]
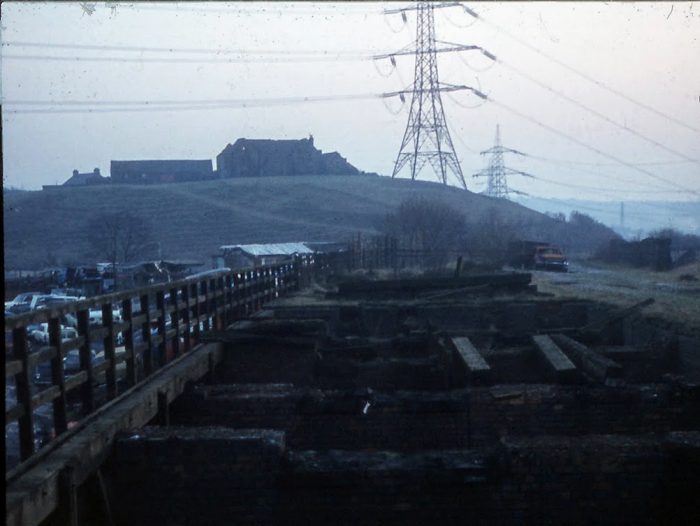
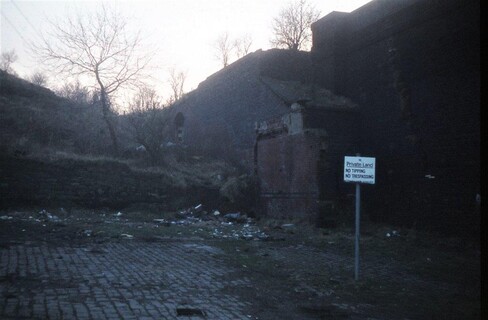
Photograph No. 632-21B 9-644 14 Feb 1981 SD 976000 S Former coal drops at Staley & Millbrook Goods Depot alongside Spring Grove Viaduct. The ruined structure on the horizon is Staley Hall. These drops were just to the North of Spring-Grove Viaduct, (c) Tony Jervis, 1981 – [Tony comments: The “B” suffix is because I managed to give two slides the same number when I numbered them back in 1981.] [2]

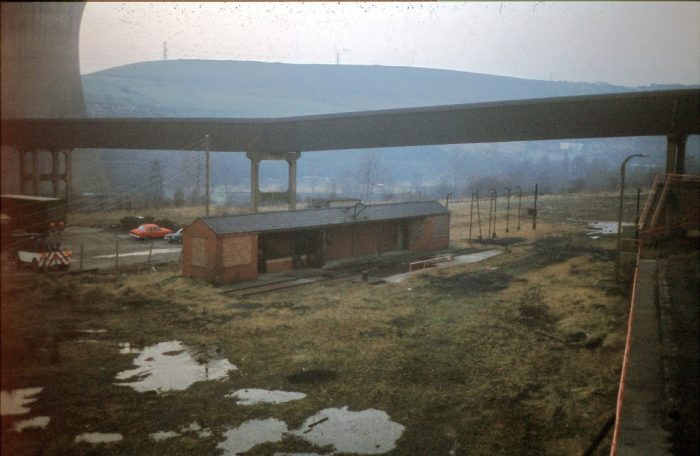
Photograph No. 632-22 9-646 14 Feb 1981 SD 976001 N Staley & Millbrook Goods Warehouse and the former Hartshead Power Station coal conveyor, (c) Tony Jervis, 1981. [2]

Photograph No. 632-23 9-645 14 Feb 1981 SD 977002 NW Hartshead Power Station Sidings and start of coal conveyor, Staley & Millbrook Goods Depot, (c) Tony Jervis, 1981. [2]
Photograph No. 632-24 9-647 14 Feb 1981 SD 977002 WNW Site of Hartshead Power Station Sidings and coal conveyor, Staley & Millbrook Goods Depot, (c) Tony Jervis, 1981. [2]
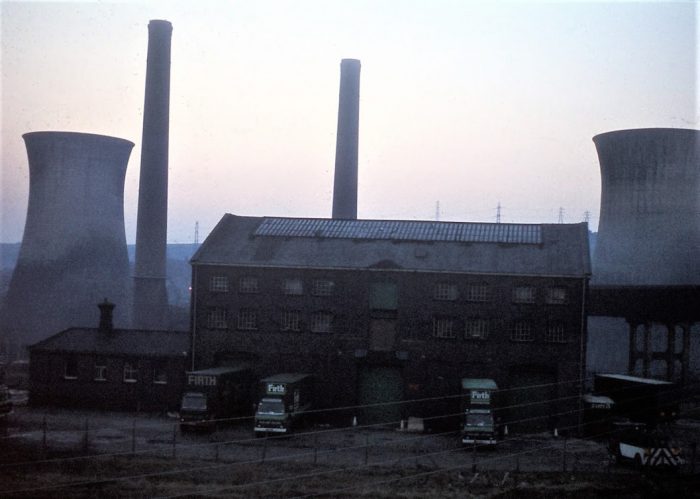
Photograph No. 632-25A 9-648 14 Feb 1981 SD 978002 WSW Staley & Millbrook Goods Warehouse; Hartshead Power Station beyond, (c) Tony Jervis, 1981 [2]
Flicking back and forth between this short article and the latter part of my first article about the Micklehurst Loop (https://rogerfarnworth.com/2021/01/31/the-micklehurst-loop-part-1), will allow a comparison with images of the Staley and Millbrook Station and Goods Depot Sites early in their life and in the 21st century.
To complete this short addendum to my first post here is another video from Martin Zero.
Tony Jervis comments: [4] “After watching the half-hour video, I read some of the comments by other viewers, some of whom had worked on the site. The tunnel turned out to be the power station’s engine shed and the steps led down to a conical underground coal hopper from which conveyor belts took the coal onwards or, perhaps, removed fly-ash.”
“Martin also found on the surface a length of surviving rail track with a lump of iron between the rails that might have been a “mule” or “beetle” for moving wagons slowly past an unloading point. It was mentioned by some people that there had also been an “oil conveyor” — surely a pipeline? — leading from the sidings owards the power station. That makes me wonder if my postulation that the low building in my “S & M Goods 4” posting (slide 632-24) may have been a tank wagon unloading station was in fact correct.”
“Martin did also show a circular object buried in the ground nearby which could perhaps have been the base of the capstan that appears in my photo. But the area is nowadays so afforested that it was impossible to work out accurately how the various items and buildings he found related to one another.”
References
- https://maps.nls.uk, accessed on 2nd February 2021.
- Photographs taken by an acquaintance on the “bygoneLinesUK@groups.io” group, online, Tony Jervis. They are reproduced here with his kind permission.
- https://youtu.be/IL6yY5UFTPI, accessed on 6th February 2021.
- From an email dated 6th February 2021.

Pingback: The Micklehurst Loop – Part 1B | Roger Farnworth
Pingback: The Micklehurst Loop – Part 1C – Including Hartshead Power Station | Roger Farnworth
Pingback: The Micklehurst Loop – Part 2 | Roger Farnworth
Pingback: The Micklehurst Loop – Part 3 | Roger Farnworth
Pingback: The Micklehurst Loop – Part 1D – Some Miscellaneous Items relating to the area around the Staley and Millbrook Goods Yard. | Roger Farnworth
Pingback: The Micklehurst Loop – Part 4 | Roger Farnworth
Pingback: The Micklehurst Loop again … | Roger Farnworth
I’m modelling the Leeds – Manchester route, as it was circa 1960, on Train Simulator. I can’t thank you enough for all these photos and the info: really helpful. Thanks again
You are welcome, Keith.