

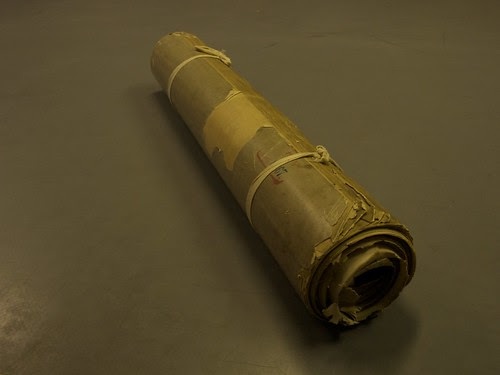
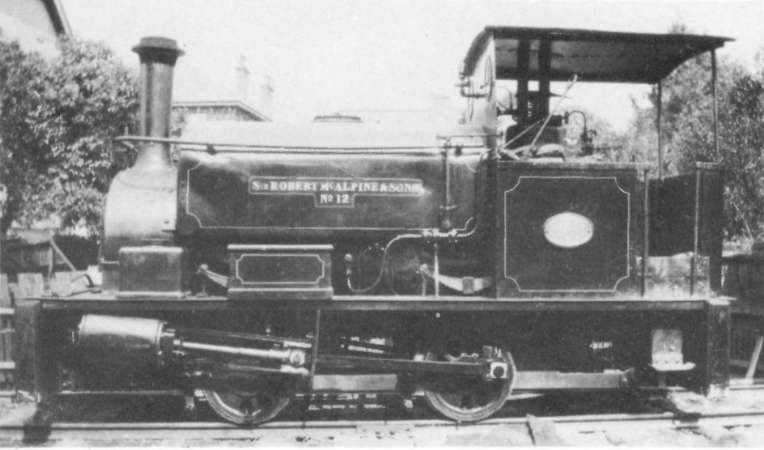
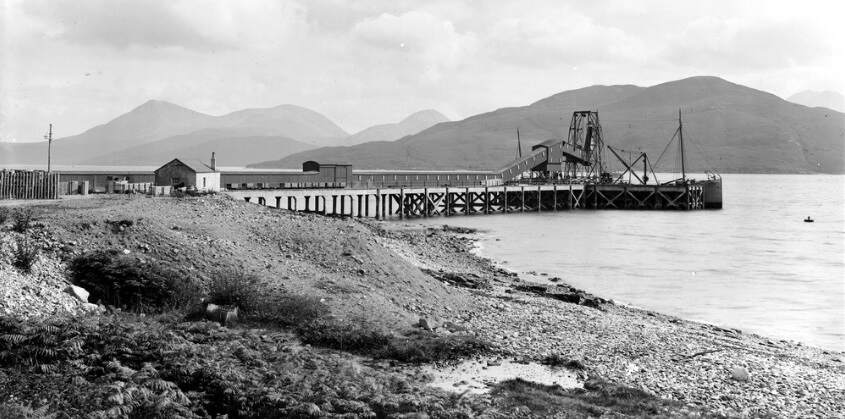
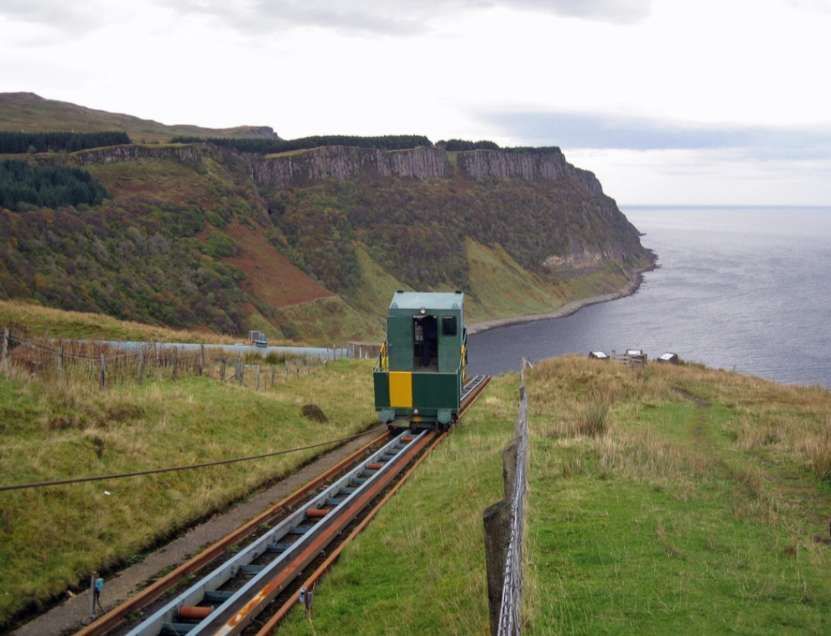
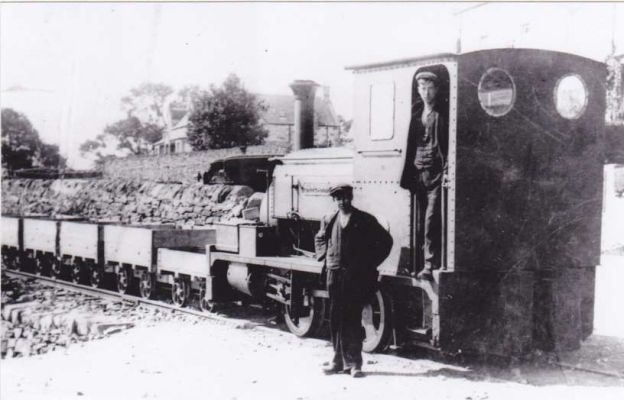
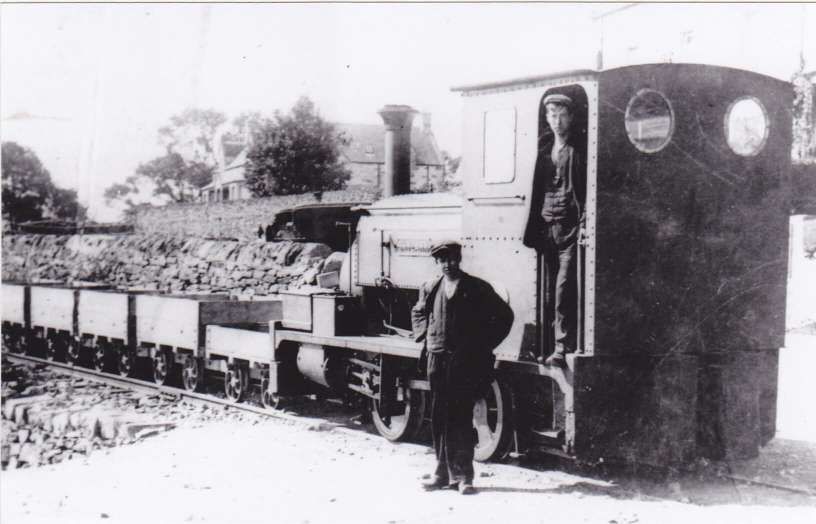
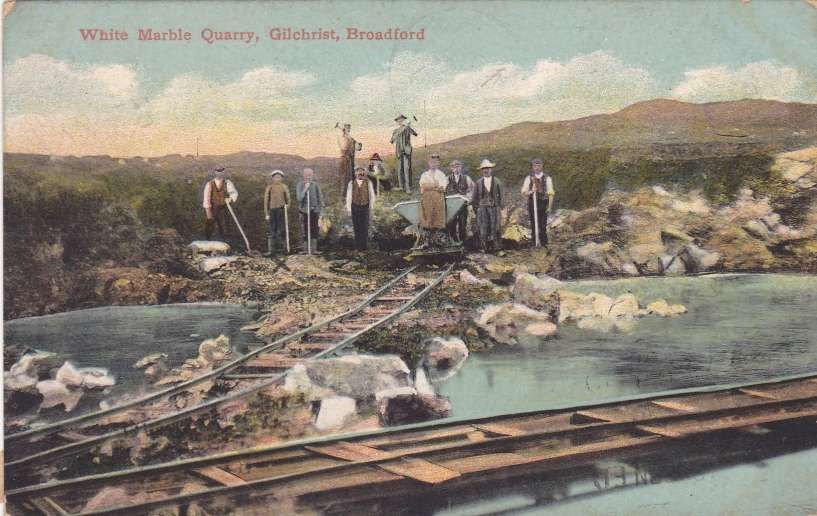
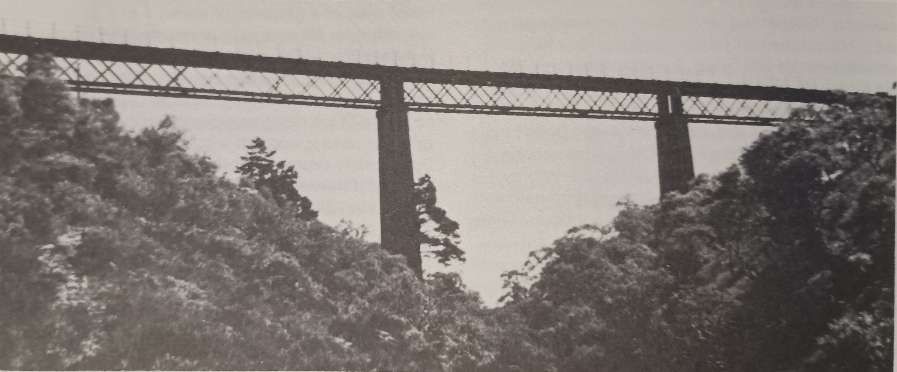
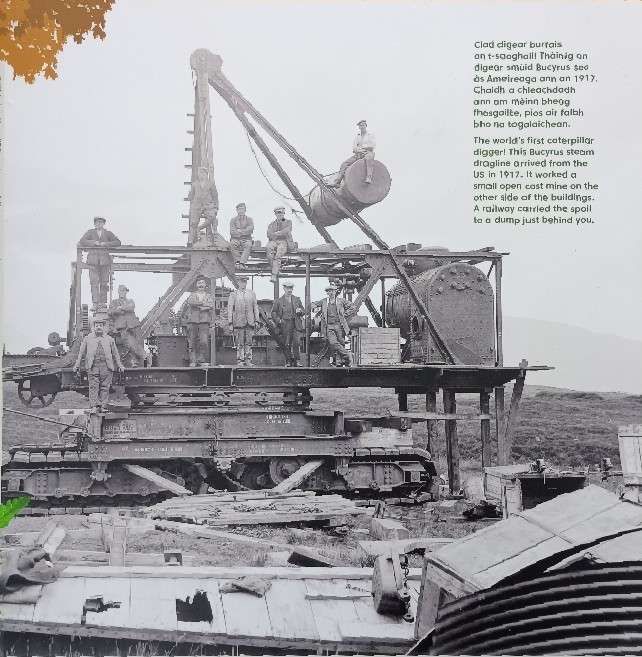
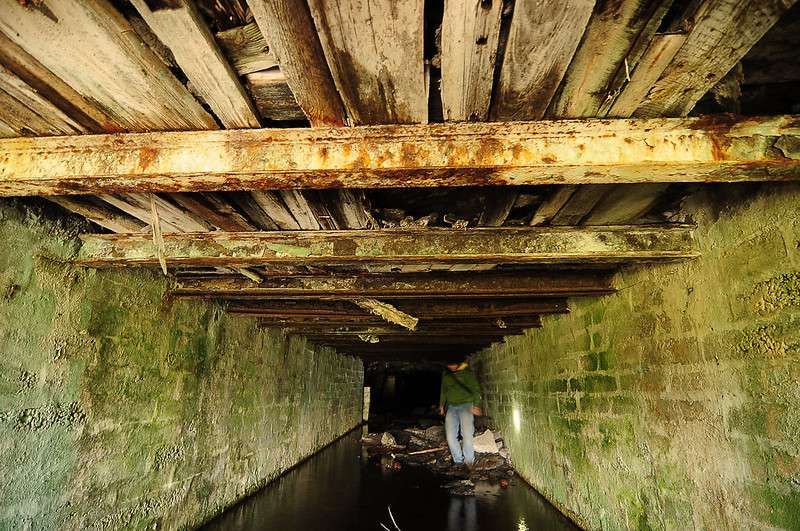
The featured image is a steam locomotive that was gainfully employed on Lewis on a contract fulfilled by Sir Robert McAlpine & Co. The Branahuie Railway (3ft-gauge) was a temporary line used in the construction of a Canning Factory, roads and houses for Lord Leverhulme. (Sir Robert McAlpine & Sons No. 12, one of the two Hudswell Clarke locos ( 1037/1913) used on the contract, © Public Domain courtesy of the collection of J. A. Peden. [15: p13]
Roger Hutchinson tells the story of Lord Leverhulme’s interest in Lewis, Harris and (to a much lesser extent) Skye, in the years following the First World War. Lord Leverhulme purchased Lewis and later Harris with a view to developing the islands.
Mingled in with the story are Lord Leverhulme’s plans for transport infrastructure and particularly railways. Hutchinson first introduces railway plans in comments attributed to Thomas Mawson who wrote about Lord Leverhulme’s plans in the Manchester Guardian. Late in 1918, Mawson wrote: “before any … industry can be a success [on Lewis] it will be necessary to provide better transit facilities by sea and land. Safe harbours are the first essential of all economic developments. Engineers are accordingly at work making preliminary surveys for railways which will connect the principle harbours of the island with Stornoway, their natural base. We may soon have a railway on the east coast, connecting Port of Ness, another railway connecting with Callernish on the west, and possibly a third to Loch Seaforth, connecting the Isle of Harris directly with Stornoway. As supplementary to these the main roads are likely to be further improved and motor routes created as feeders to the railways. … A natural corollary to the introduction of railways and harbour facilities will be an increase in the number and size of the steamers trading with the mainland. A trawling fleet, too, is bound to appear as an arm to the fishing industry. Ice factories, cold storage, and canneries for the curing and treatment of fish for export are already planned, and the work of construction will soon begin.” [1: p91]
Hutchinson goes on to comment: “The idea of giving Lewis a couple of branch railway lines was neither original nor utterly ridiculous. Just twenty years previously, in 1897 and 1898, two separate private enterprises, the Highland Railway Company and the Highland Light Railway Company, had surveyed and proposed small-gauge lines between Stornoway and Tarbert in Harris and between Stornoway and Breasclete and Carloway on the west coast. The £500,000 schemes had collapsed when the amount of capital required to be raised by private subscription – £290,000 – was not forthcoming.” [1: p93-94]
Also, “Lewis did have railways, around the turn of the 19th/20th century. There was a railway from the quarry at Bennadrove to Stornoway. Posts related to this track can still be found in the Castle Grounds, opposite the Caberfeidh Hotel.” [5] …
It seems that under Lord Leverhulme’s tenure, “a trackbed was laid near Garrabost in Point, but a railway was never built. The same fate befell the track, linking Carloway to Stornoway along what is now the Pentland Road.” [5]
Very little other evidence exists of his proposed railways, and it is entirely possible that the remains referred to in the last paragraph could relate to much earlier railway proposals. [8]
Lord Leverhulme “planned to develop several smaller fishing harbours around the island’s coast that would be linked by new [his proposed] railways and roads to Stornoway, which would be transformed into a huge fish-processing centre. There was also to be a cannery, an ice-making factory, and a plant to make glue, animal feed and fertiliser from the offal.” [2]
“A chemical industry would also be developed to process the plentiful seaweed around the island; peat would be used in large scale power stations; and unproductive land would be transformed into forests, or fruit or dairy farms. Lewis would grow to become an island of up to 200,000 people. … He had prominent architects and town planners produce a vision of a future Stornoway in 1920. There was to be a town hall and art gallery, a bridge to connect the town to the Castle grounds, long avenues and a railway station, with a war-memorial on South Beach. None of these were constructed although he did give the town a gas supply, and he also intended to use electricity to light the streets.” [2]
For all Lord Leverhulme’s grandiose plans, he was unable to stay the course. His plans “failed in Lewis partly from trying to force the people into too rapid and too fundamental change; he was used to a totally different lifestyle and he tried to define progress on his own terms.” [2]
He faced determined resistance from the local population whose overwhelming desire was for croft land and the freedom to choose what work to undertake. As a result, they did not take to the idea of industrial jobs centred in Stornoway and, in fact, regarded that kind of work, even though salaried, as effective slavery.
“Despite the growing tensions, Leverhulme spent over £1 million in Lewis. Two model housing schemes were built in Stornoway, one on Matheson Road and another on Anderson Road, to house Leverhulme’s managers and employees. New roads were built in Lewis: a concrete bridge, now known as the Bridge to Nowhere, was constructed in Tolsta as part of a scheme to create a coastal road linking Tolsta to Ness at the north tip of the island. The road was never completed.” [3]
Lord Leverhulme’s failure to understand the basic, even visceral, connection between the people and the land was significant.
His proposals centred on his perception of a significant fishery in the waters around Lewis which would sustain industrialised fishing and canning. In reality the stocks were not as great as he believed and the postwar demand for canned fish deteriorated (partly because of barriers to trade with Russia imposed by the UK after the Russian revolution) and as more and more fresh fish from other sources became available. He saw the sale value of fish reduced by 90%.
Lord Leverhulme believed that his offer of good housing and allotments close to Stornoway would ultimately be more attractive than a hand-to-mouth crofting lifestyle. He could not have been more wrong. “What the crofters most needed was casual work to supplement their subsistence farming; what was proposed was regular employment in an industrial process. They did not want to be dependent on any landlord, even a millionaire philanthropist, for their livelihood, and most preferred to take control of their own destiny.” [3]
He stubbornly refused crofters access to good farmland in favour of his desire to see the island self-sufficient in milk, which could anyway be cheaply be imported from Aberdeenshire. As a consequence many men of Lewis raided those farm lands, began building and setting up crofts.
Only a matter of a few short years after the conclusion of the war, Lord Leverhulme had decided that his project was over.
A young doctor, Halliday Sutherland arrived in Stornoway in 1923 “a half-built factory on which work had been abandoned, a derelict small-gauge railway, and thousands of pounds’ worth of machinery rusting on the shore.’ Anxious to uncover the reasons for such a depressing scene, Sutherland approached what was presented in his later transcription as a bellicose old man working a croft in the Back district. The man had no desire, Sutherland said, ‘to answer a whistle at six in the morning and work for wages in Lever’s factory. No damn fear. Poor as I am, I’m master here, and could order you off this croft. … Why did some of us raid his pasture-land? A dairy farm for the island it was to be. I’ve another name for that a monopoly in milk. No damn fear. We are poorer now than we were. Why? Because the line-fishing in the spring has failed. Why? Because of these damned trawlers that spoil the spawn, and half of them are Lever’s English trawlers. He makes us poor, and then wants us to work for him.'” [1: p169][4]
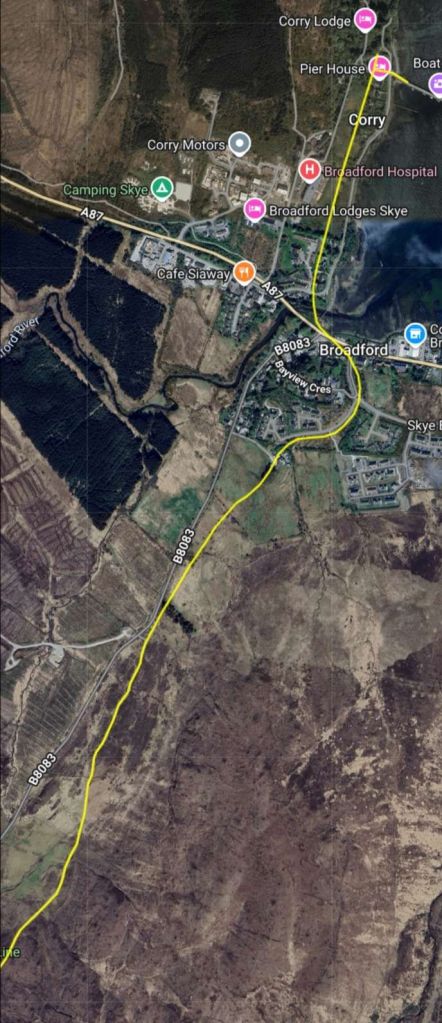
Had Lord Leverhulme’s grandiose plans for Lewis and Harris resulted in lasting changes, there would probably have been some significant changes on Skye. Not the least of these changes may have been the provision of some form of railway from Kyle of Lochalsh onto Skye and through Broadford and Portree to Dunvegan inthe North of the Isle of Skye.

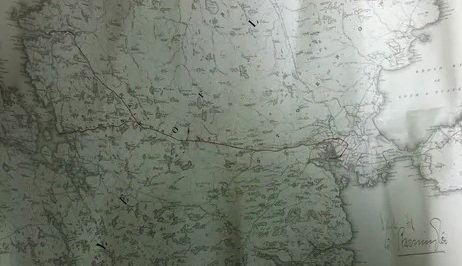
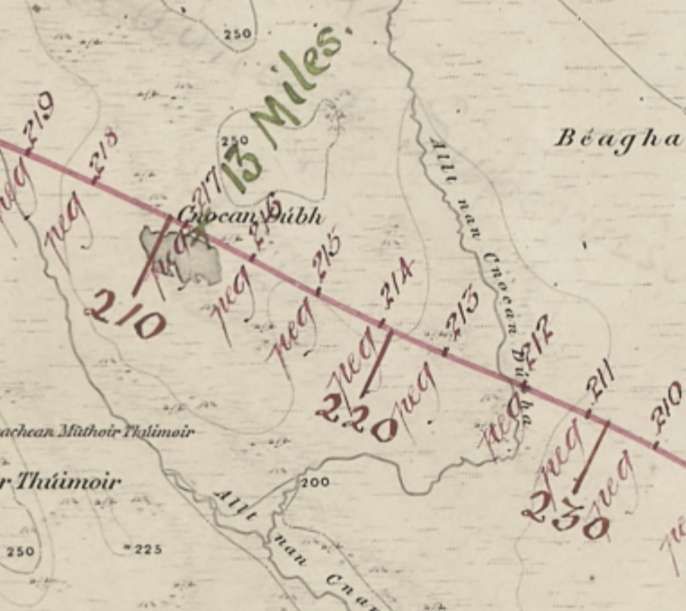
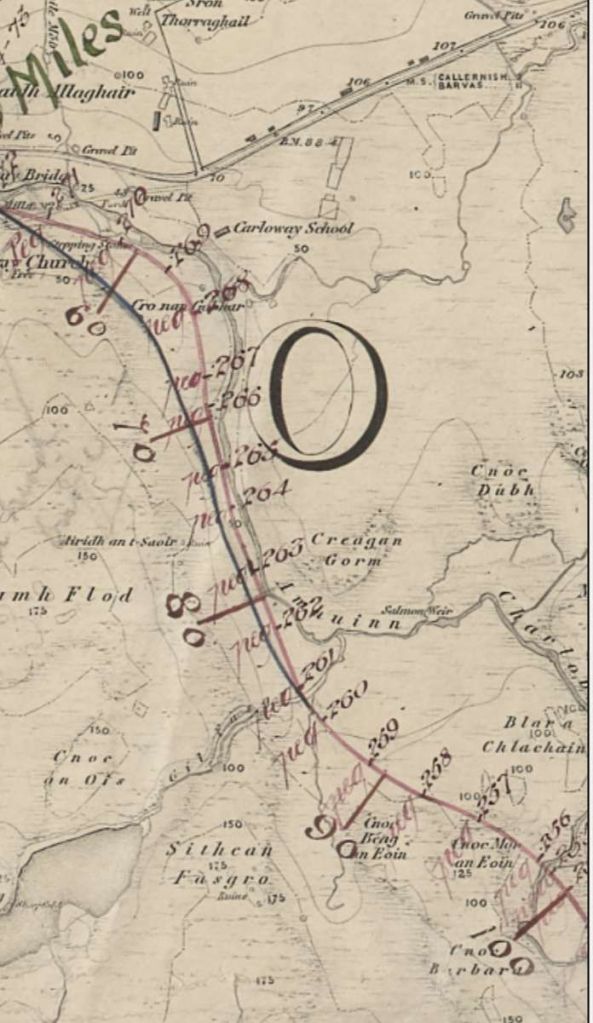
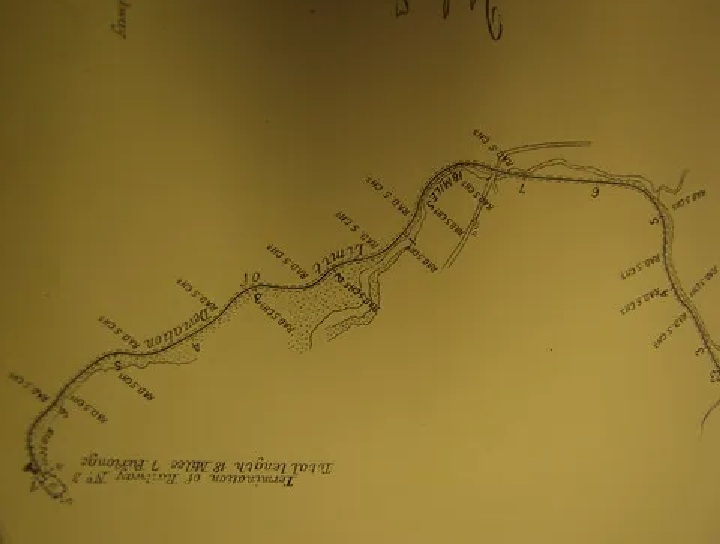
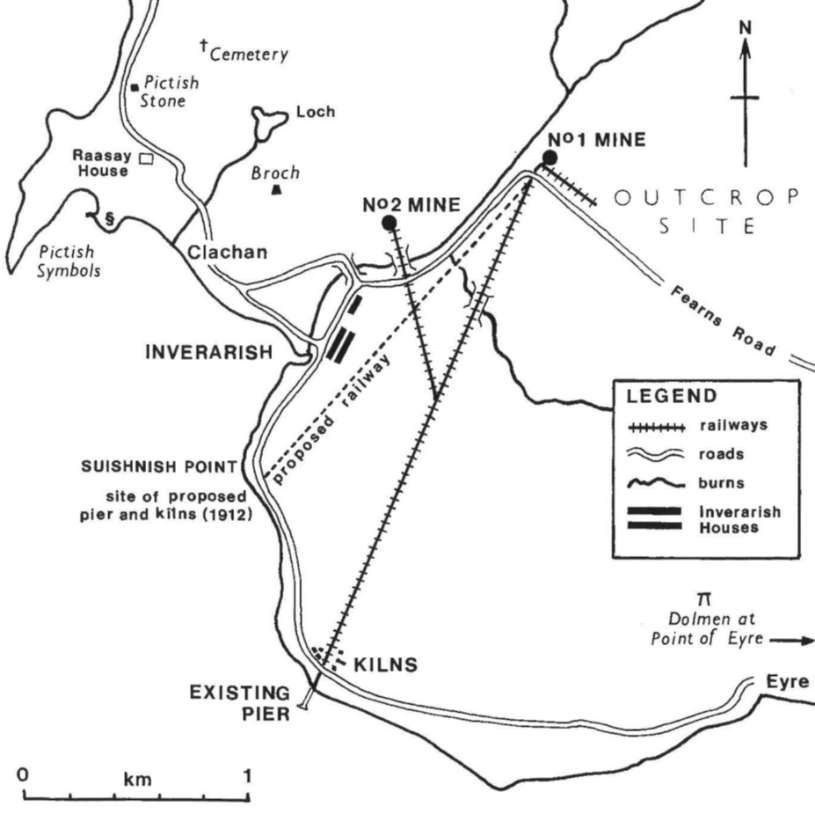
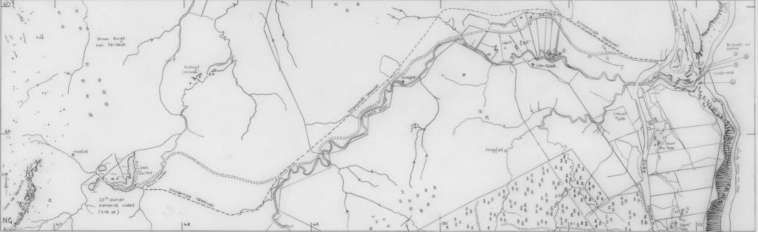
Spaven and Holland’s map does not tell anything like the full story of the planned railways for Lewis and Harris. The map below, provided by Ian B. Jolly shows considerably more detail. It is included in an article in The Narrow Gauge magazine. [15]
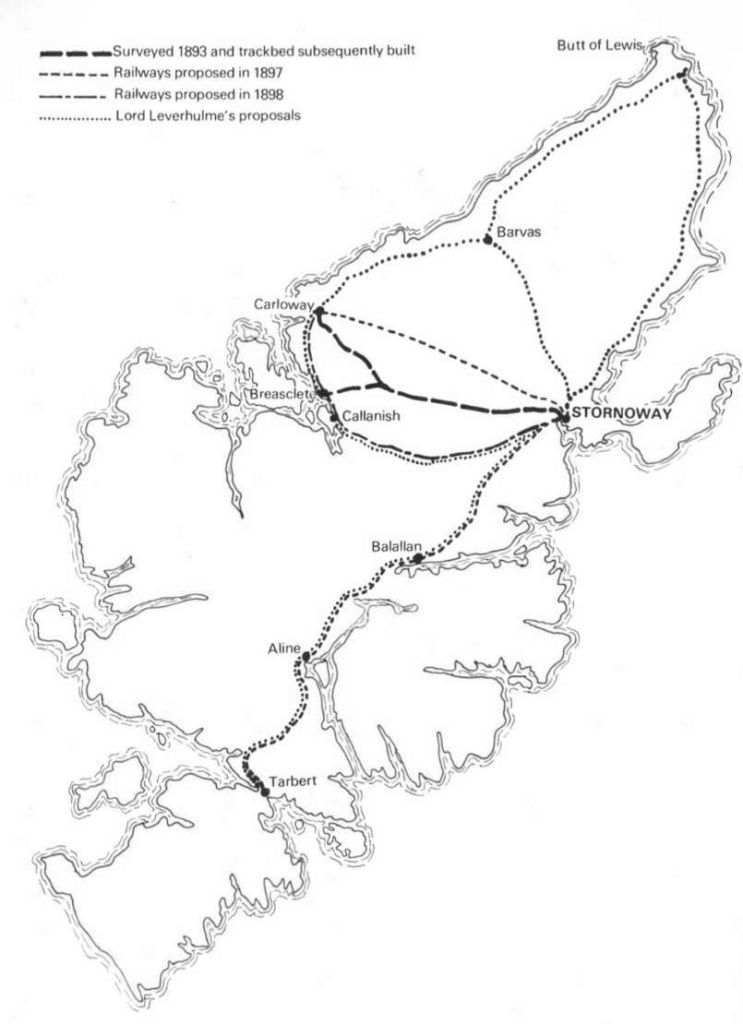
The Napier Commission’s report on crofting published in 1884 proposed the use of light railways on Lewis and Skye. As a result, The Hebridean Light Railway Co. was formed to promote 130 miles of railway in Skye and Lewis. This led to surveys being undertaken by Alex MacDonald, Engineer, of a possible railway linking Stornoway to Breasclete and Carloway. The survey report was dated 1st June 1893.
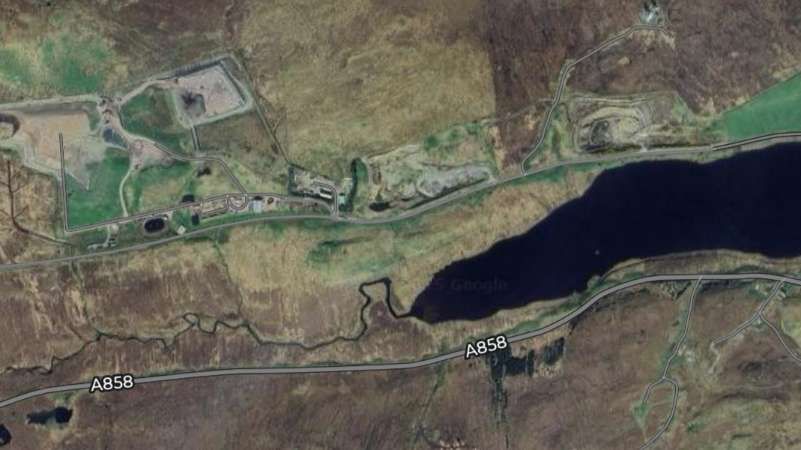
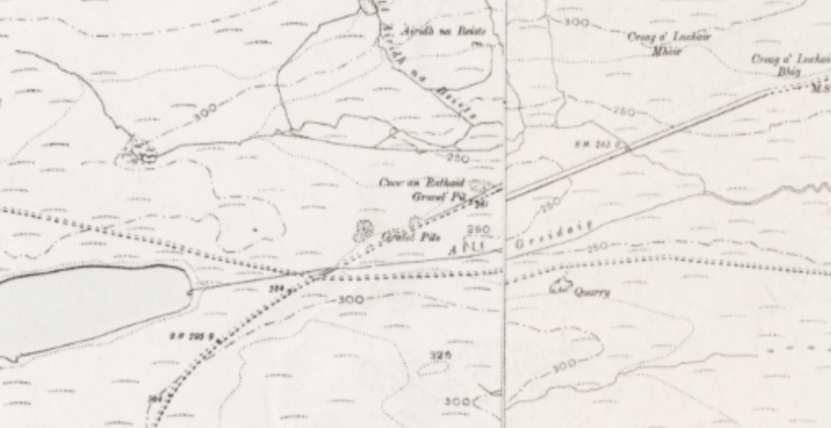
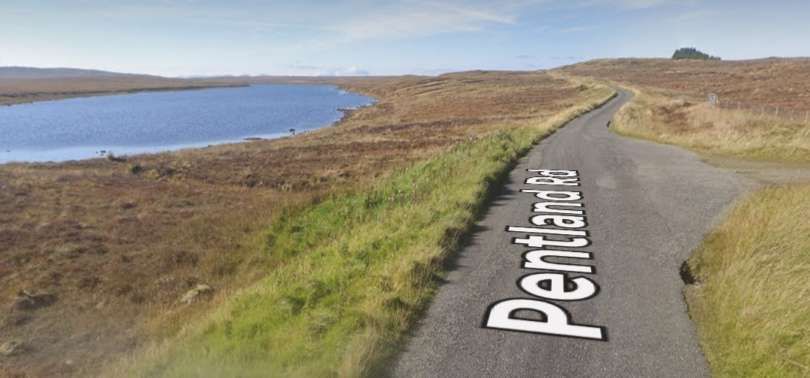
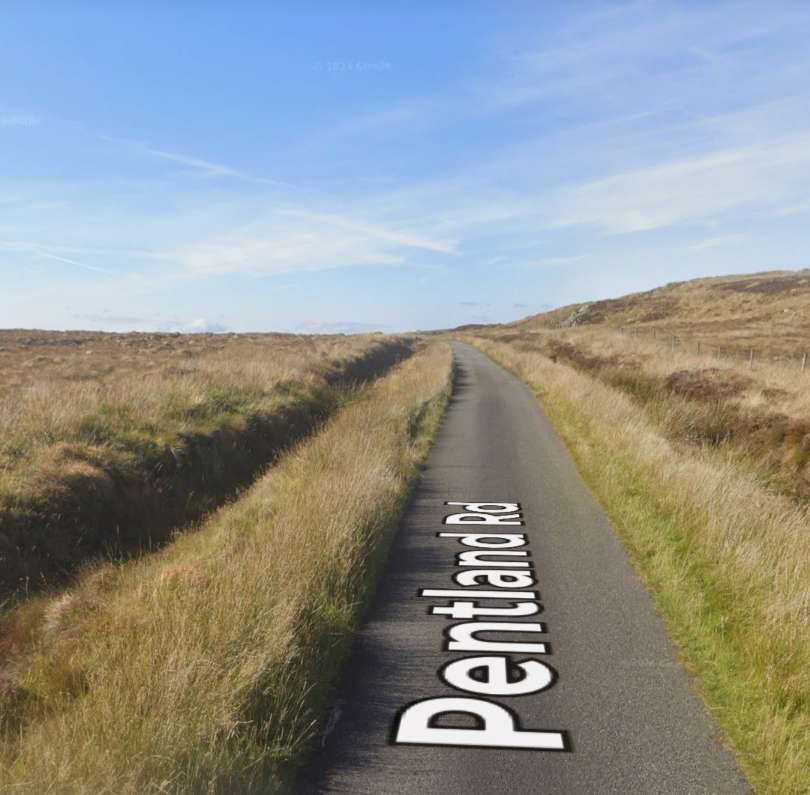
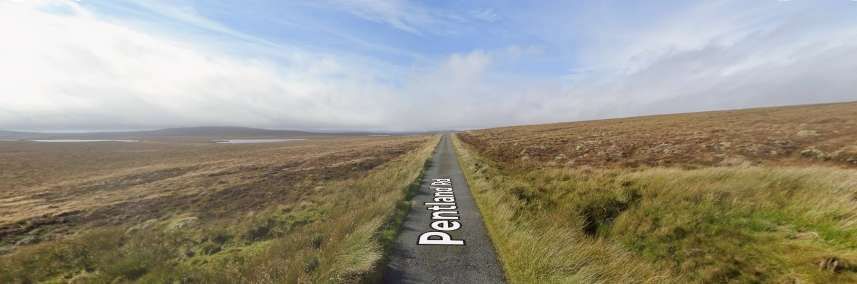
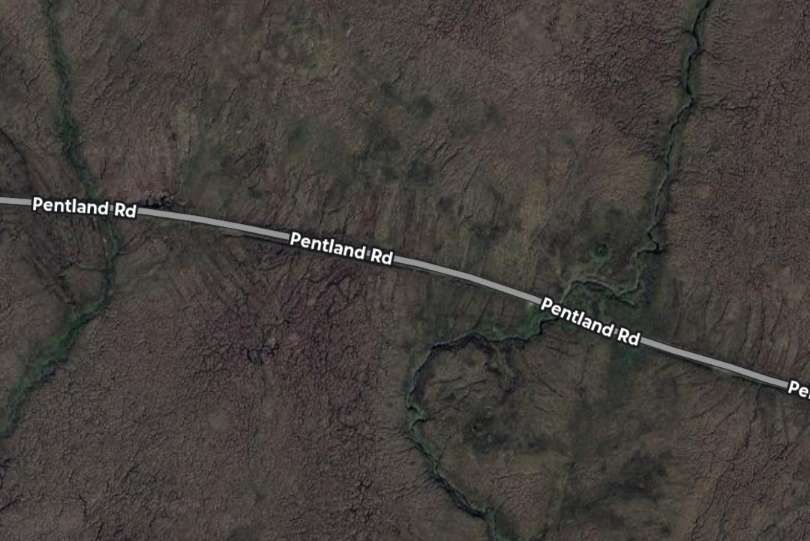
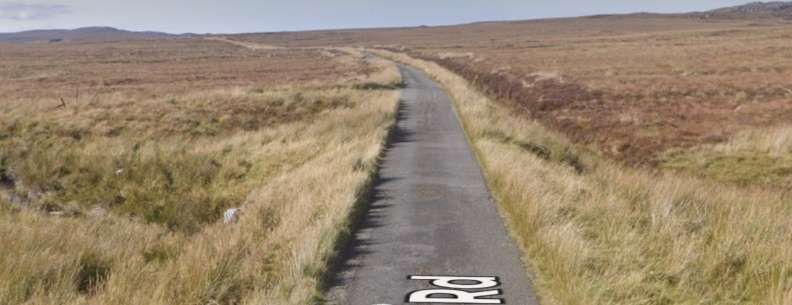
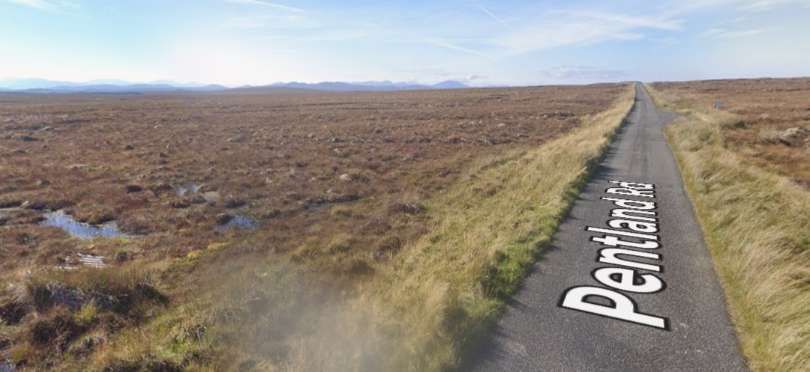
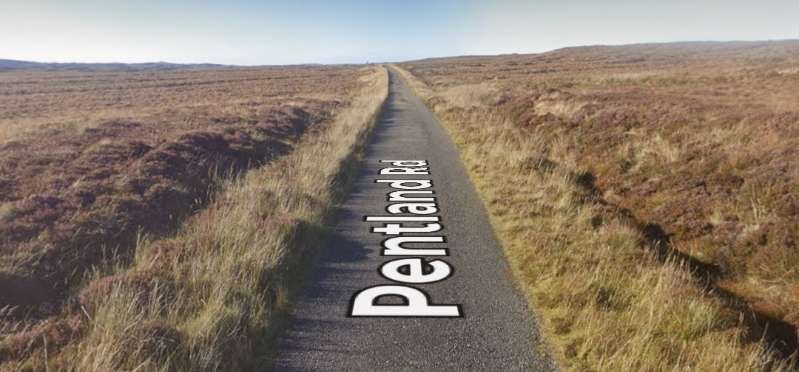
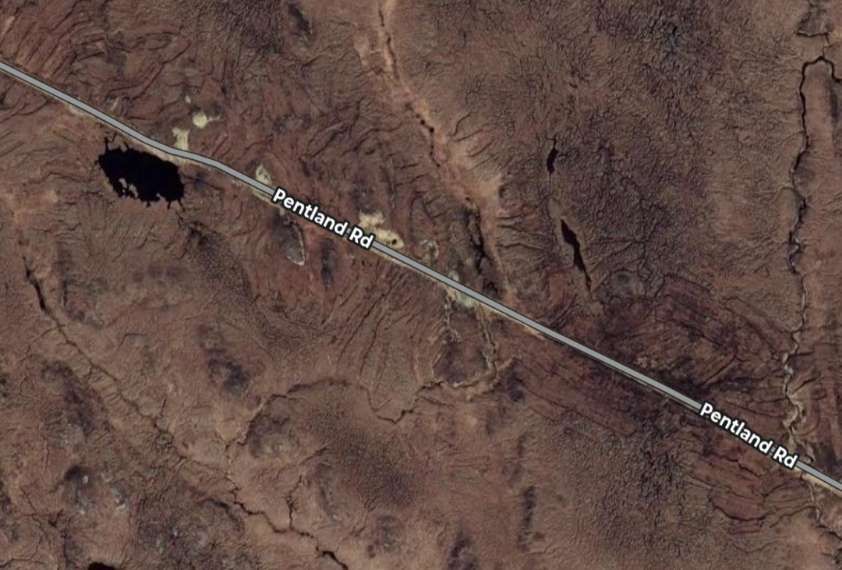
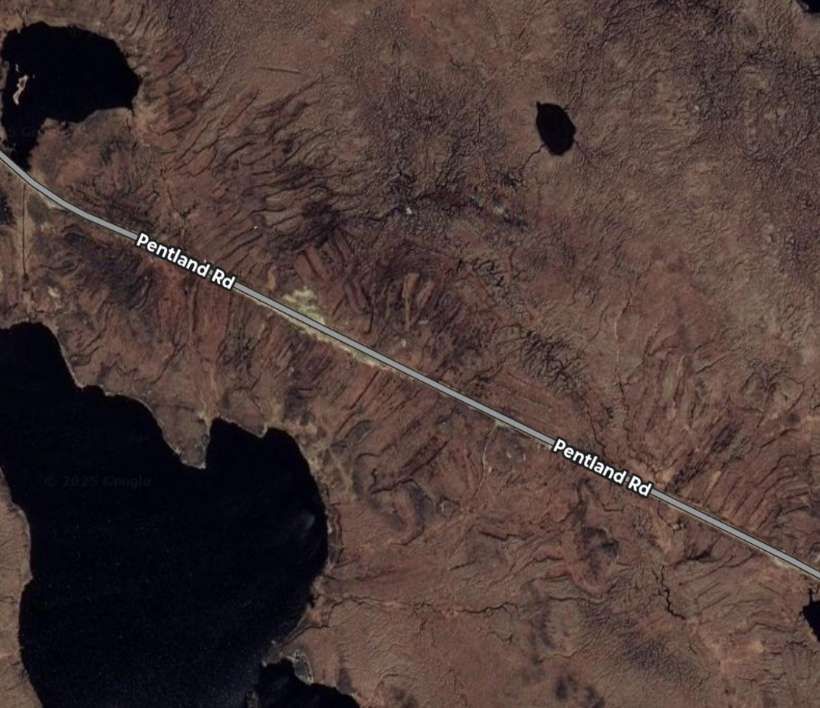
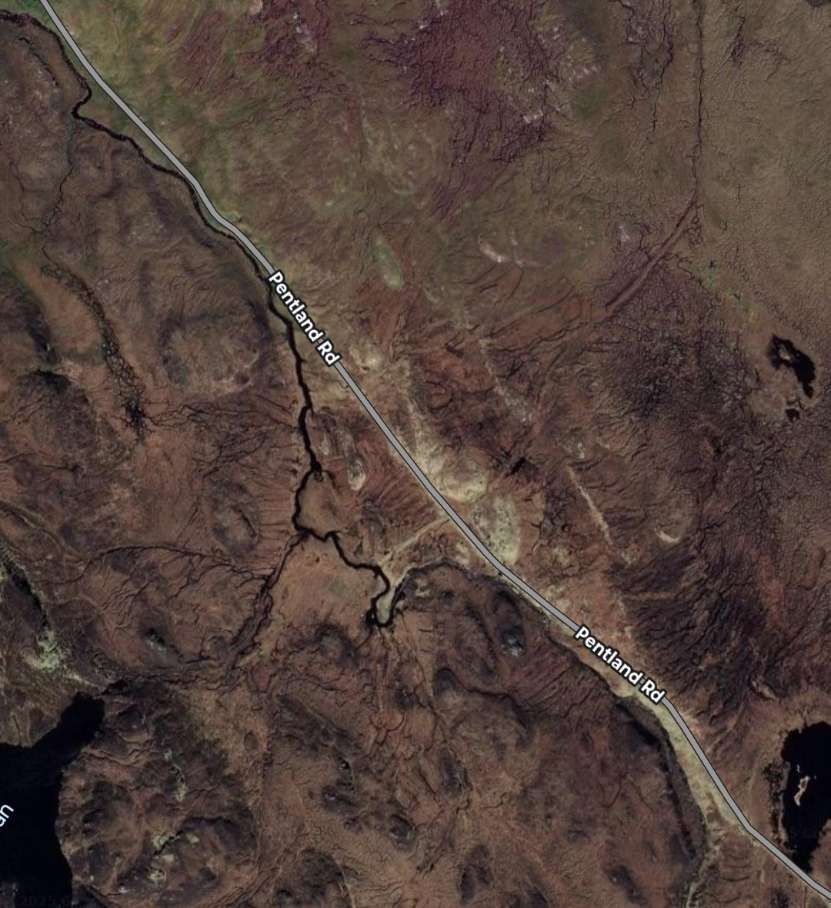
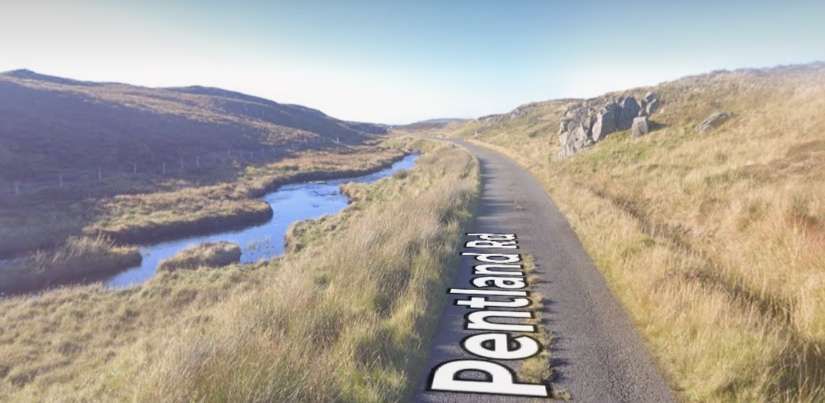
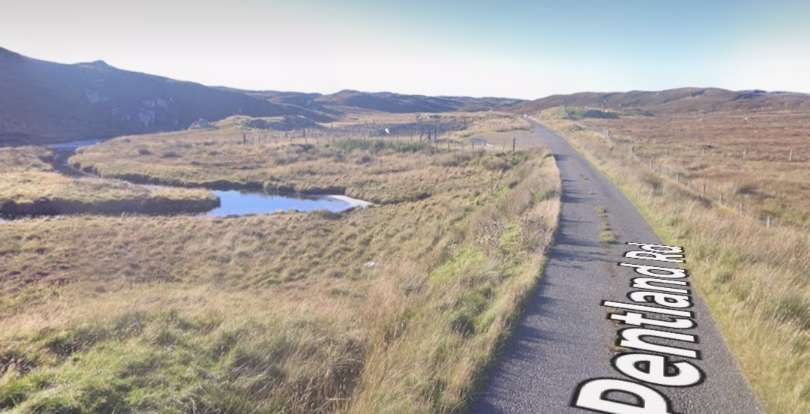
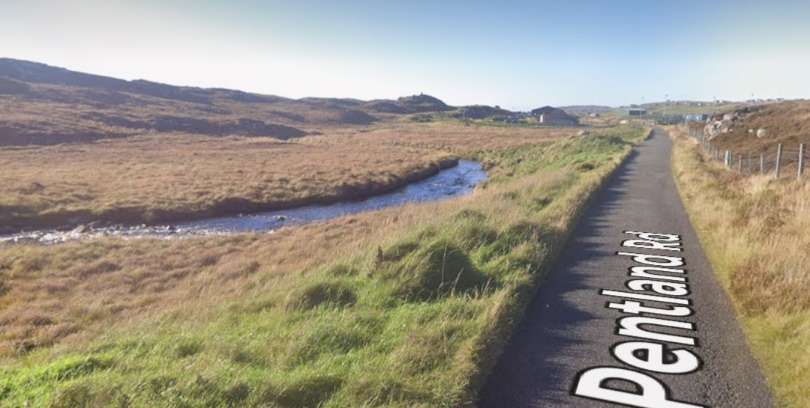
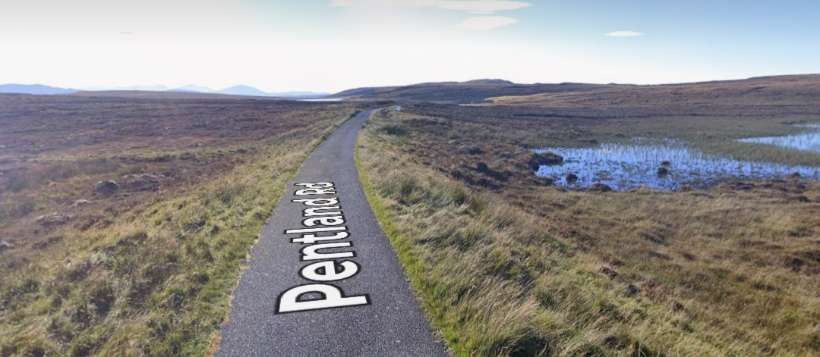
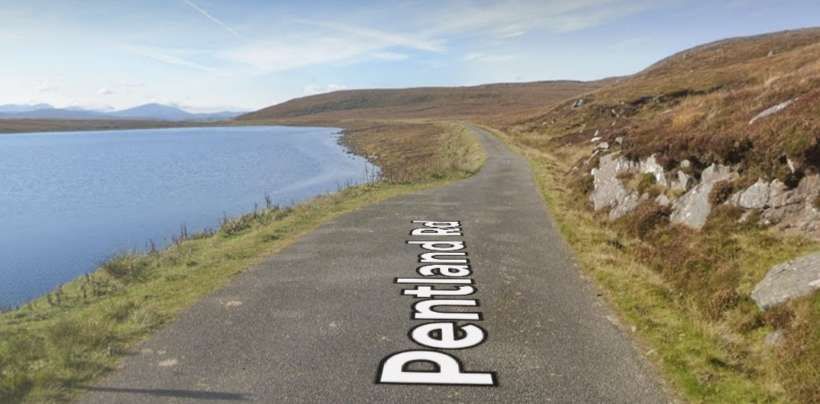
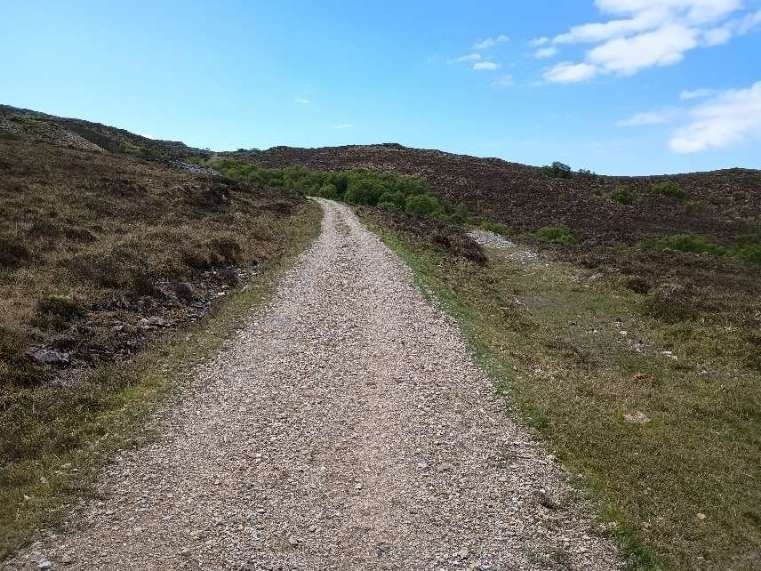
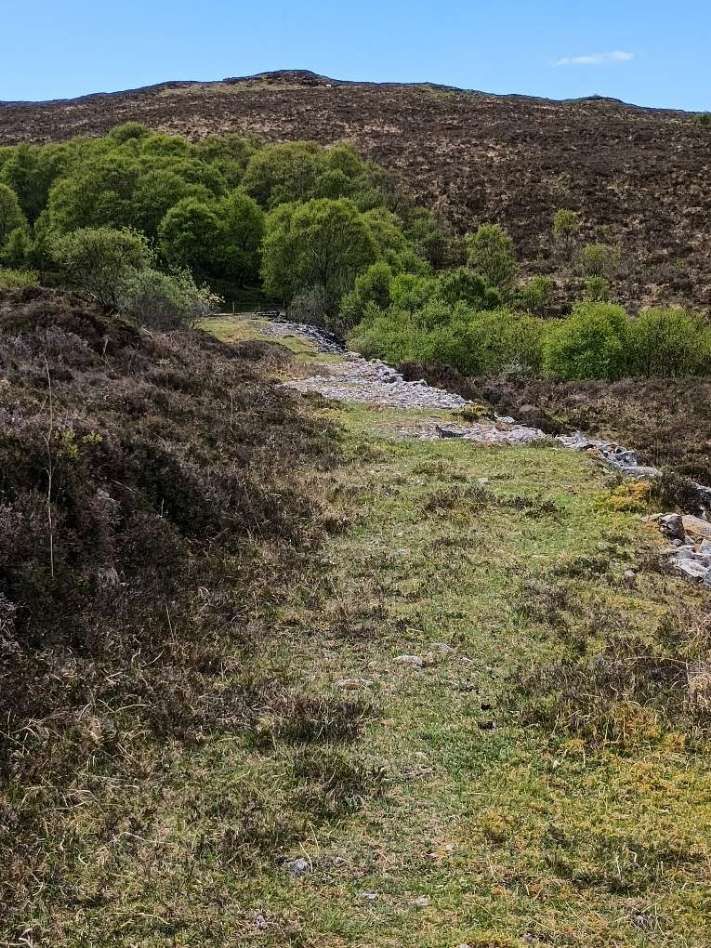
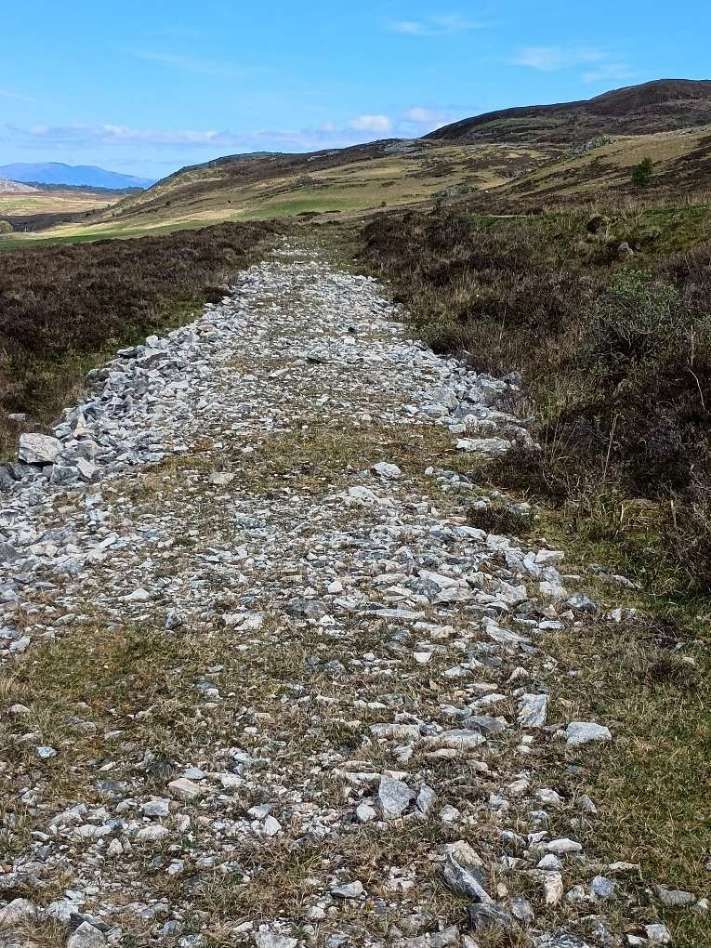
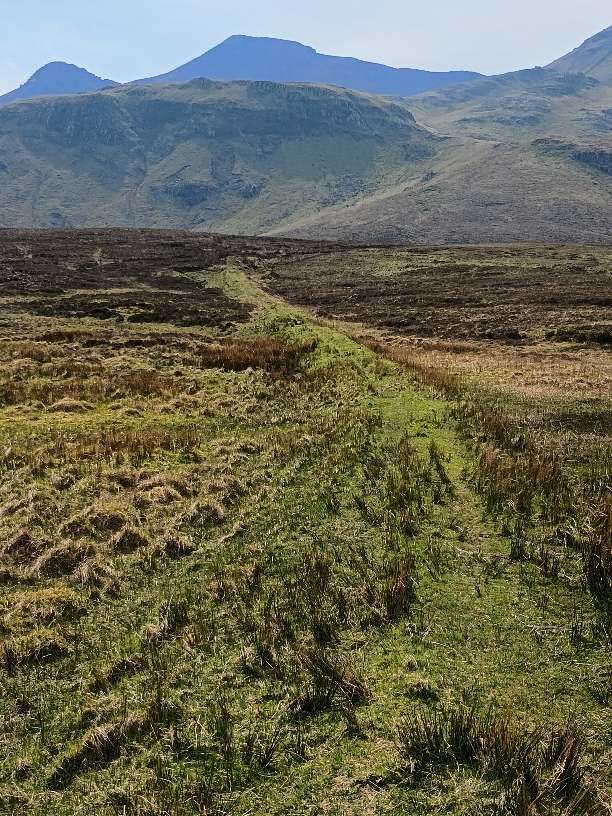
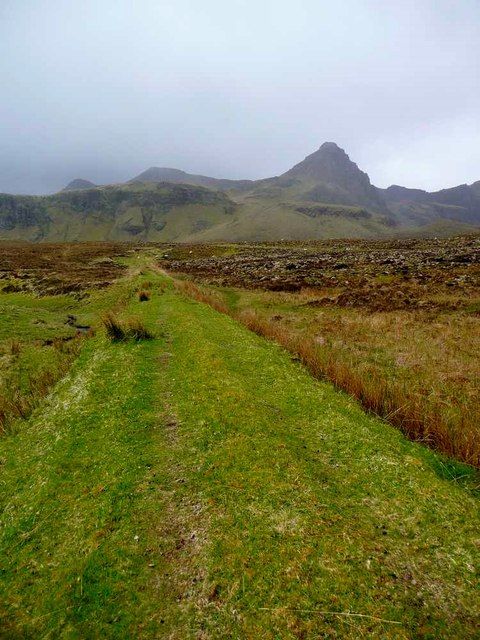
Ian Jolly reports that “the trackbed of this line was constructed and, for the first two or three miles out of Stornoway now forms the A858 road, while the rest of the route is an unclassified road to Breasclete.” [15: p12] The unclassified road is the ‘Pentland Road’ which has two arms, one to Carloway and one to Breasclete.
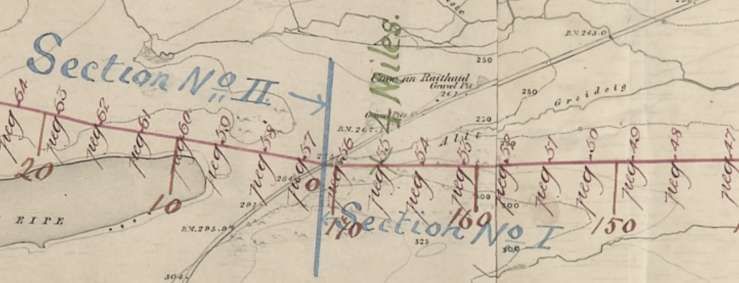
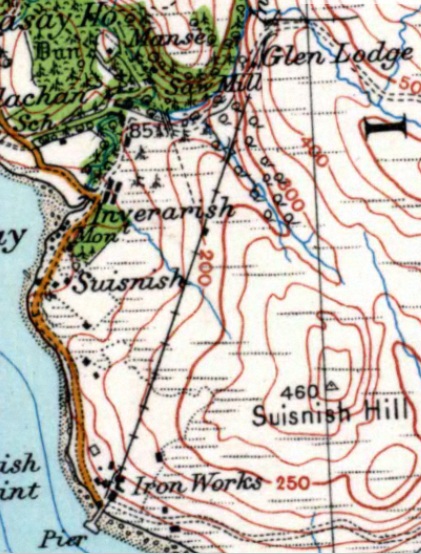
Jolly also notes that O’Dell and Walton, include in their book, ‘Highlands and Islands of Scotland’, a map showing projected railways for Lewis and Skye in 1897 and 1898. In fact, this is just a small part of a map covering the whole of Scotland and are at best schematic in nature. [15: p12][16: p206]
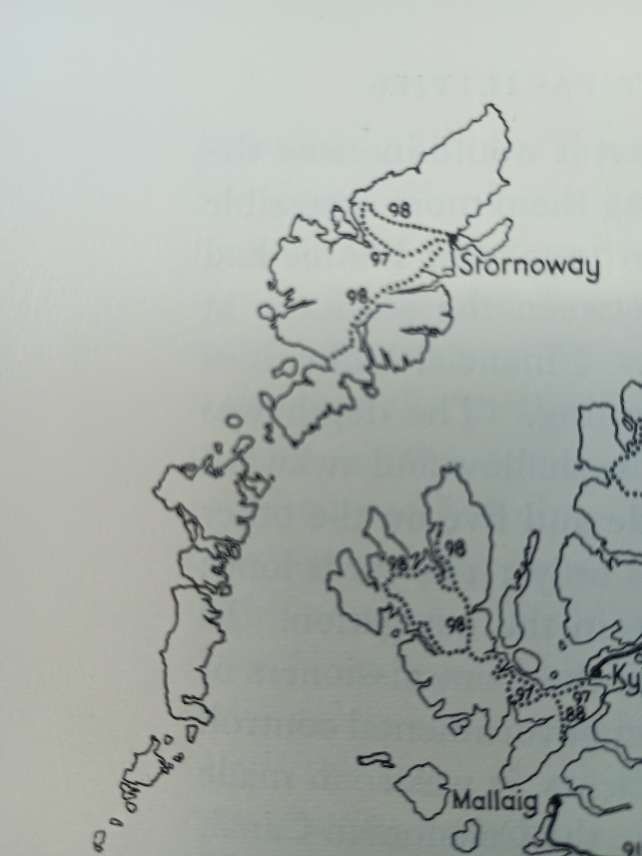
The Outer Hebrides and Skye, showing various schemes which did not come to fruition in the later years of the 19th century and mark with the year in which the schemes would have been constructed. The lines drawn are no more than indicative of the routes proposed. There is no indication of schemes proposed in the 20th century. [16: p206]
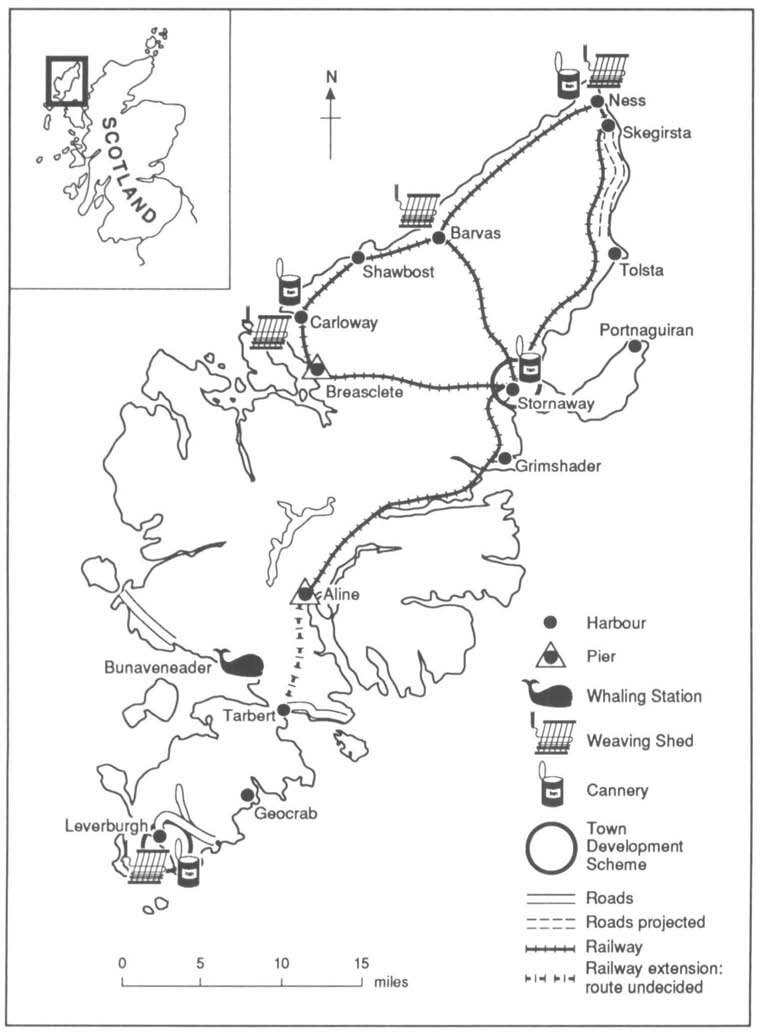
One further map is worth noting. This map is provided in a paper by John and Margaret Gold and shows Lord Leverhulme’s development plan for Lewis and Harris. …
Later, in April 1919, Jolly says, there were proposals (elsewhere reported as being considered during the first world war) put to a meeting at Staffin, in the north-east of Skye, when representations were made to the Secretary of State, Ministry of Transport and the Highland Reconstruction Committee for a system of light railways on the East side of Skye. There was a similar meeting at Uig, also on Skye, in September 1920 when representations were made to the Ministry of Transport for a light railway connecting Uig to Kyleakin via Portree. Both these meetings were reported in the local press at the time.. [15: p12]
Jolly mentions a comment by Lord Leverhulme which was reported the Highland News, 17th May 1919, that the new harbour at Stornoway should come before the light railway.
Nigel Nicolson, in Lord of the Isles, notes that in a relatively short time (circa. 1920) Lord Leverhulme was looking seriously at light railway schemes on Lewis and had marked out their courses. Leverhulme’s scheme would have had a terminus at Stornoway and three lines:
1) A line South through Balallan to Aline with later extension to Tarbert.
2) A line West, then North to Callanish and Carloway and return to Stornoway via Barvas; and
3) A Branch North from Barvas to serve townships near the Butt of Lewis and return down the east coast through Tolsta to Stornoway.
The total track mileage would have been about 100 miles. The gauge was to be 3ft using WDLR rails being sold as surplus. Lines to be steam worked but Leverhulme wanted electric working! [15: p12] [17: p110-111]
None of these schemes came to fruition.
Photographs and further information can be found in a copy of The Narrow Gauge which is available online. [15]
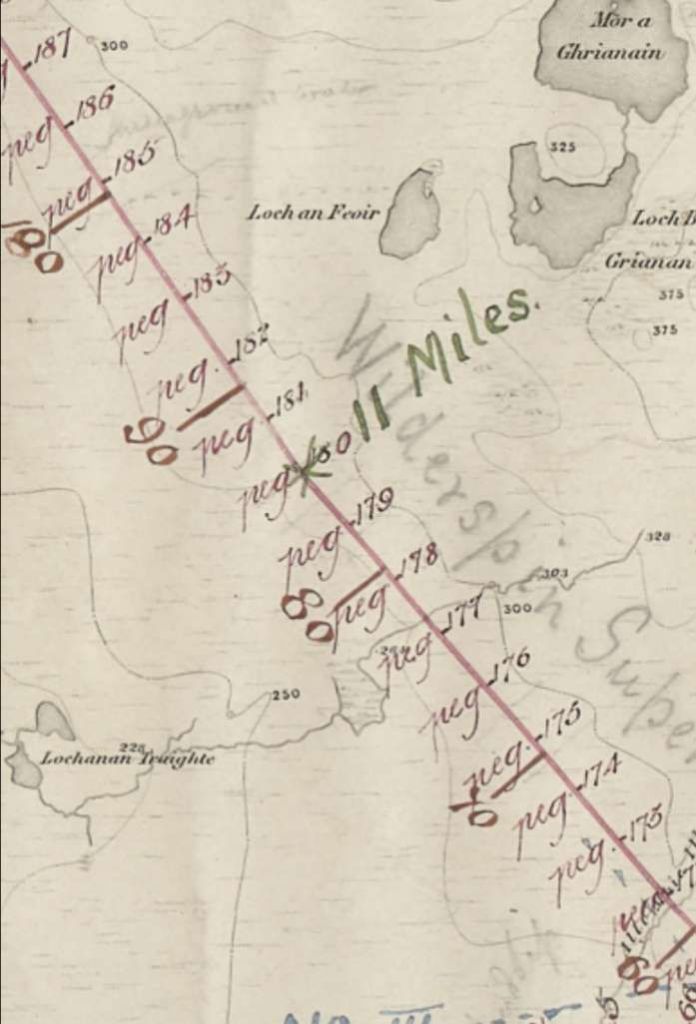
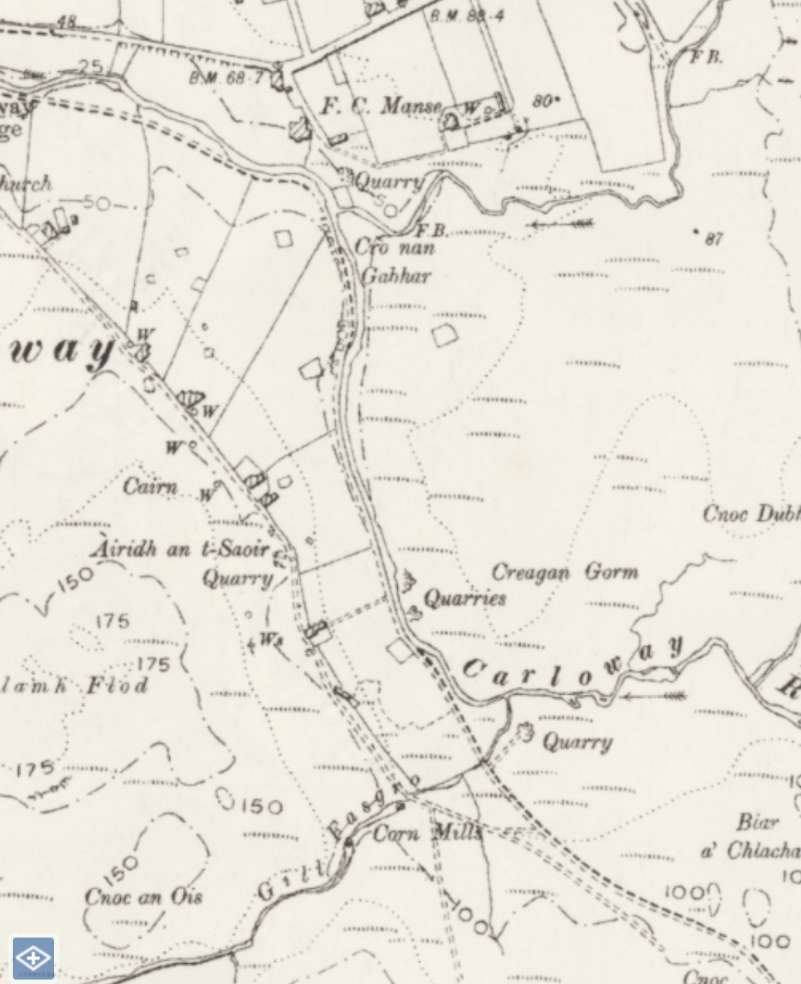
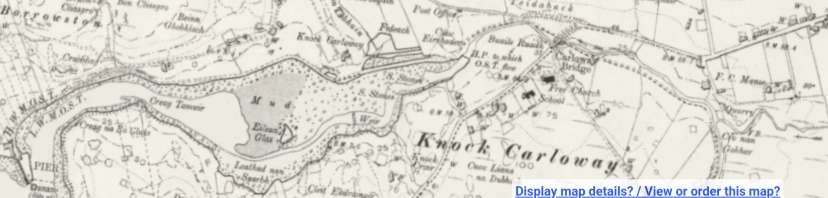
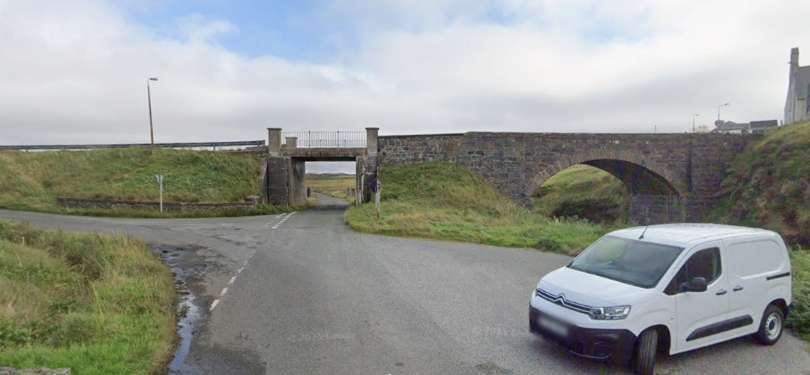
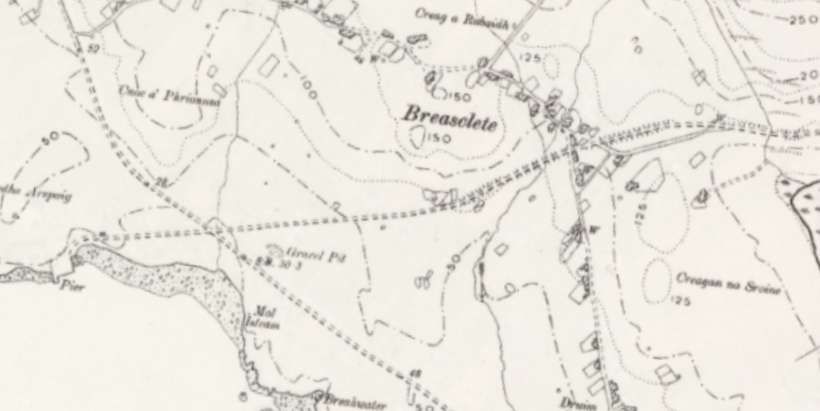
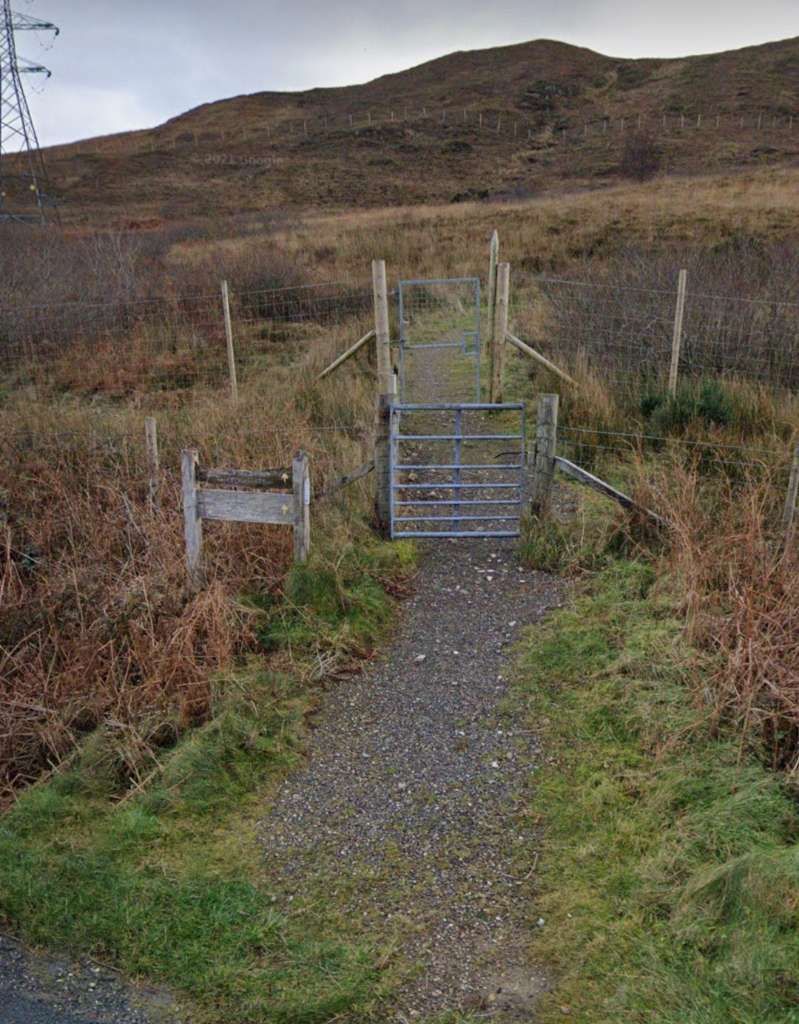
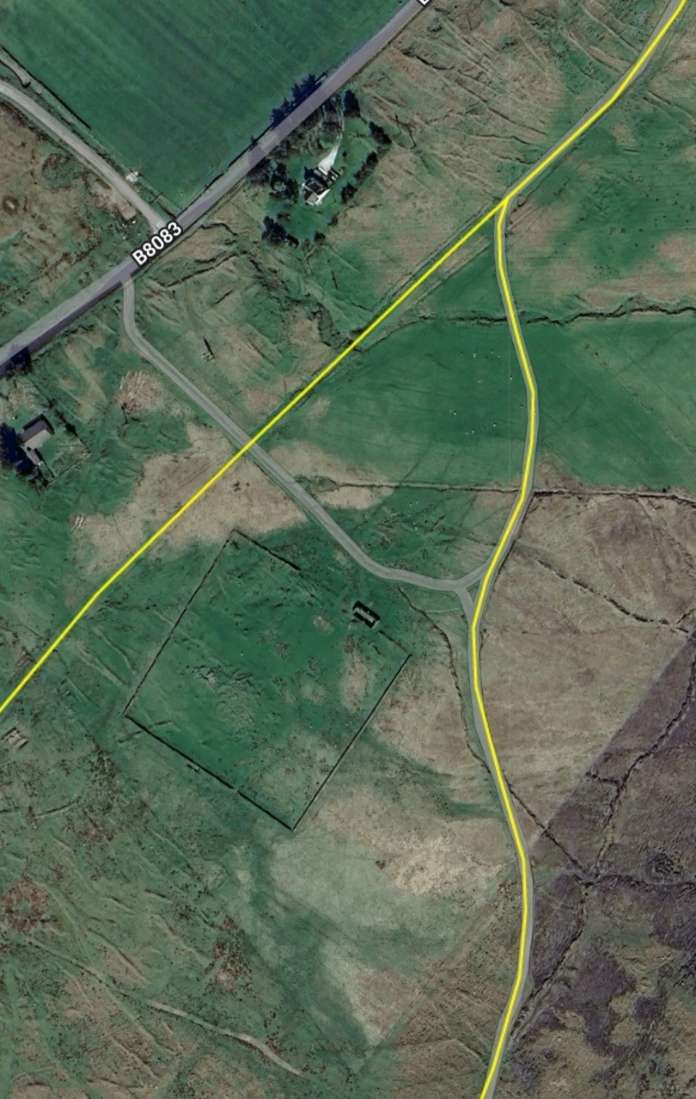
The Stornoway, Breasclete and Carloway Route
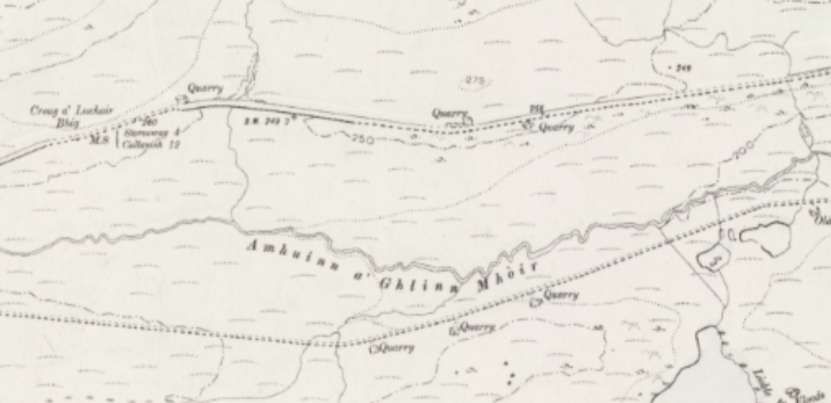
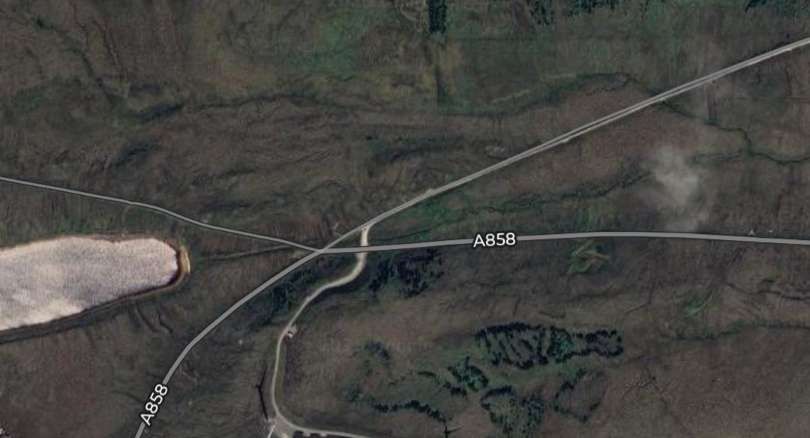
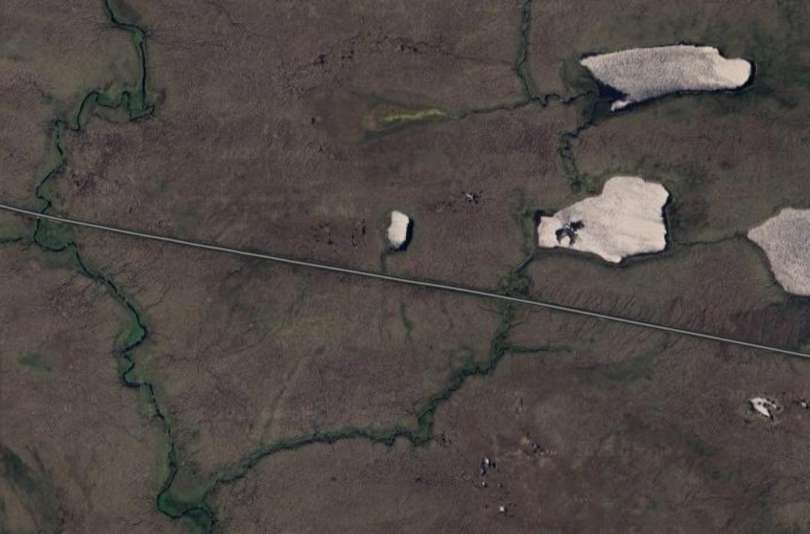
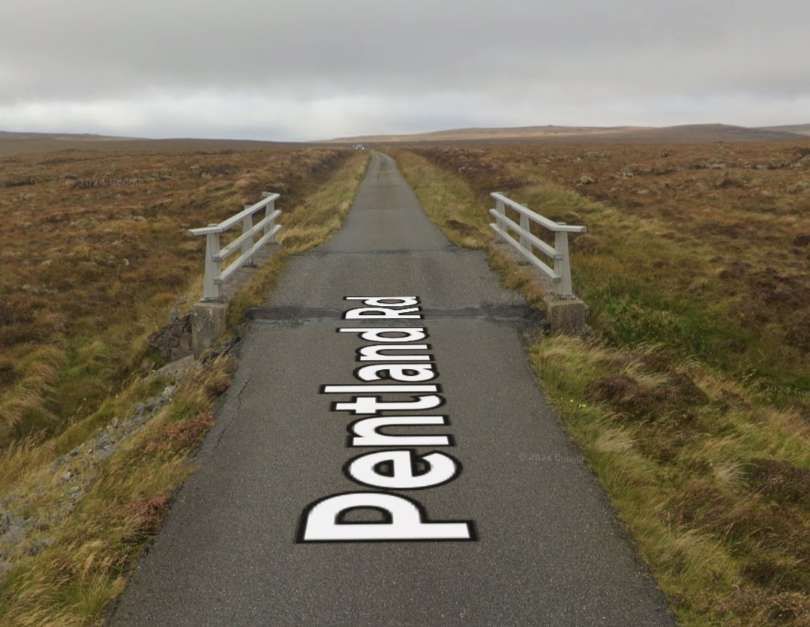
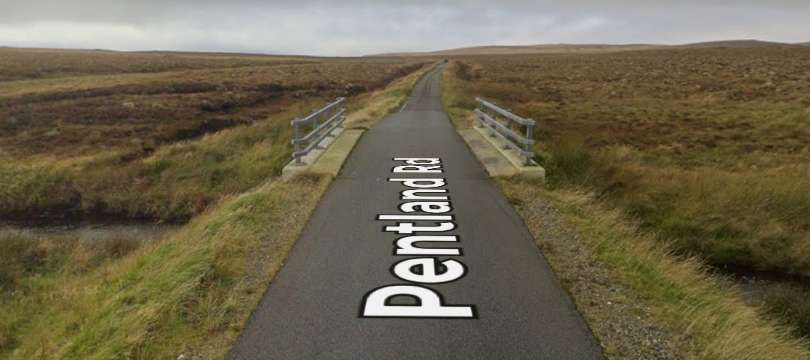
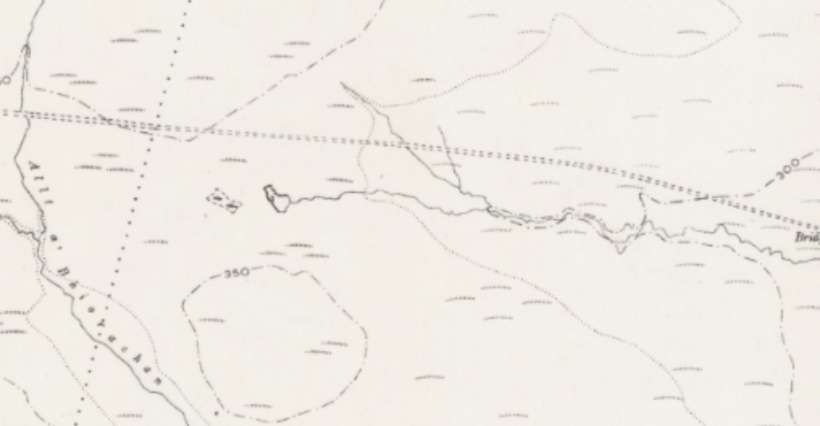
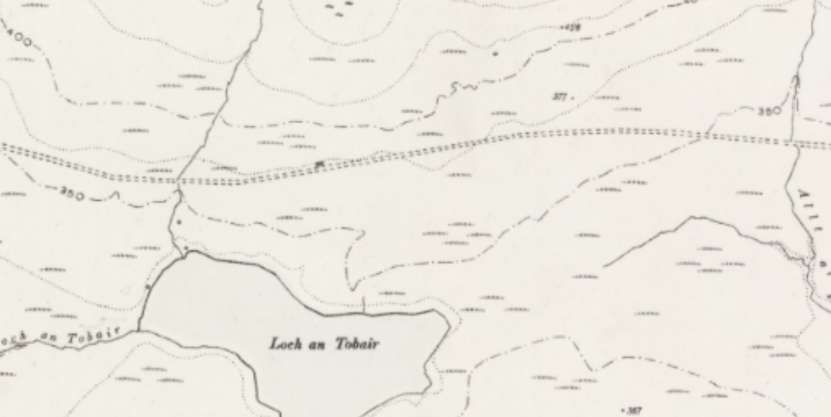
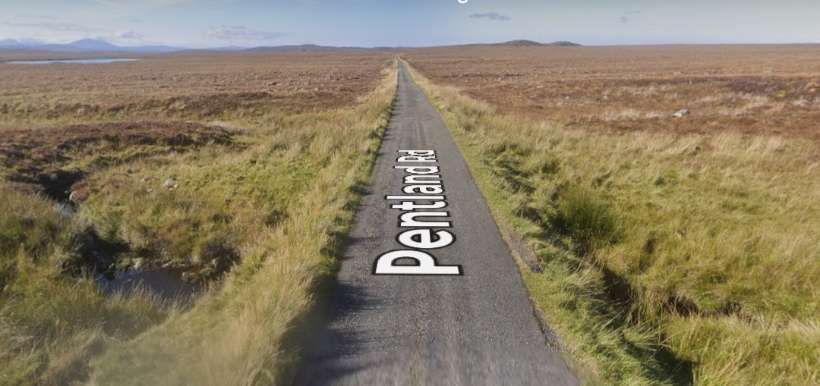
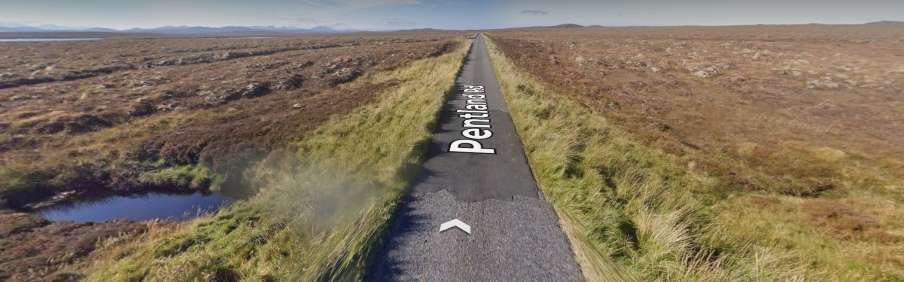
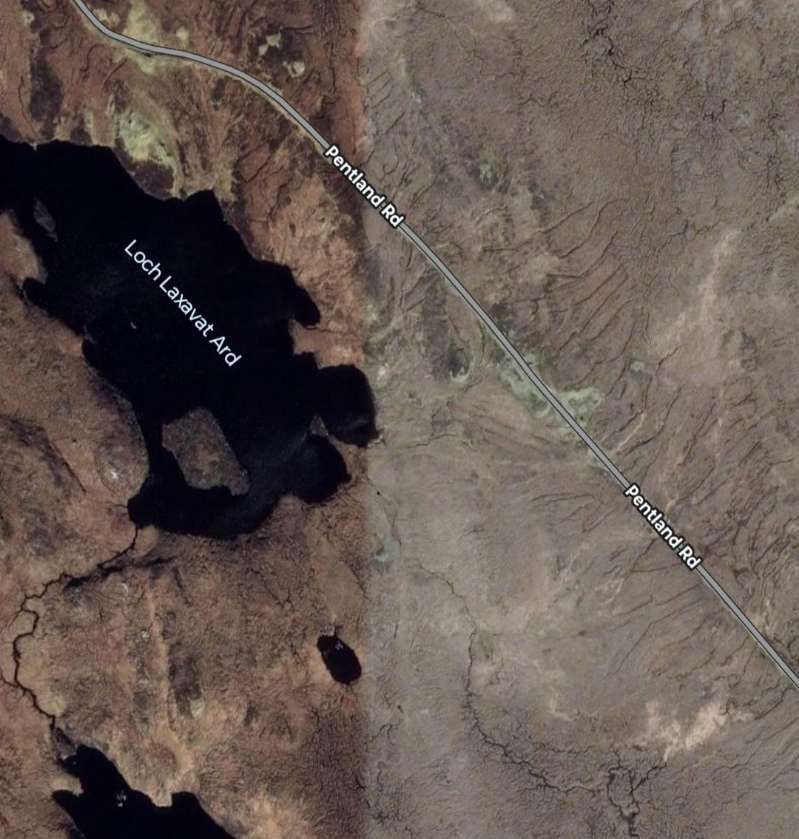
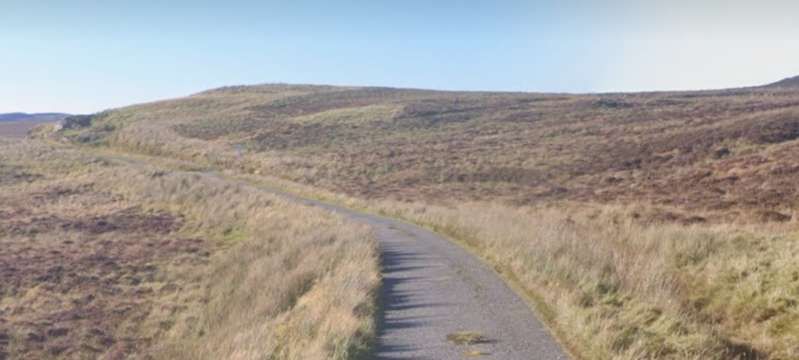
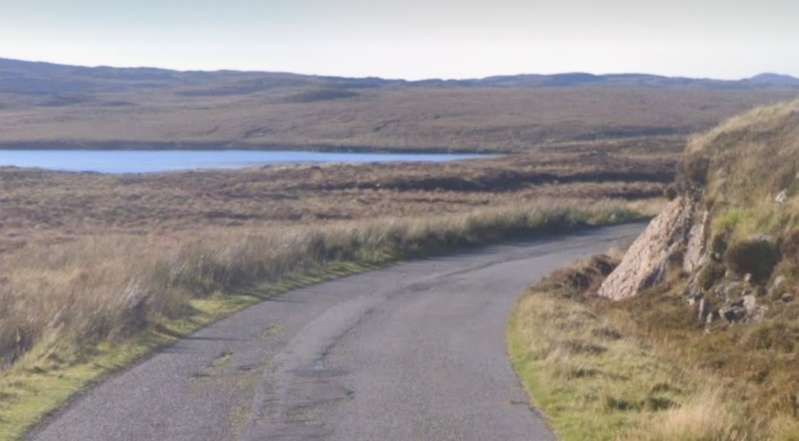
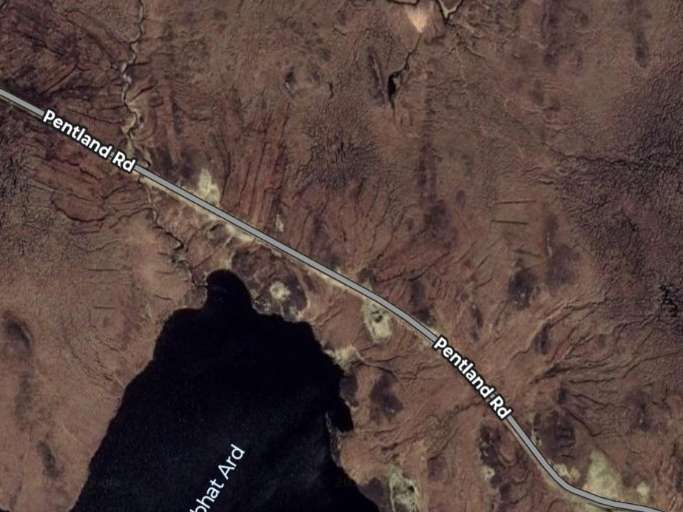
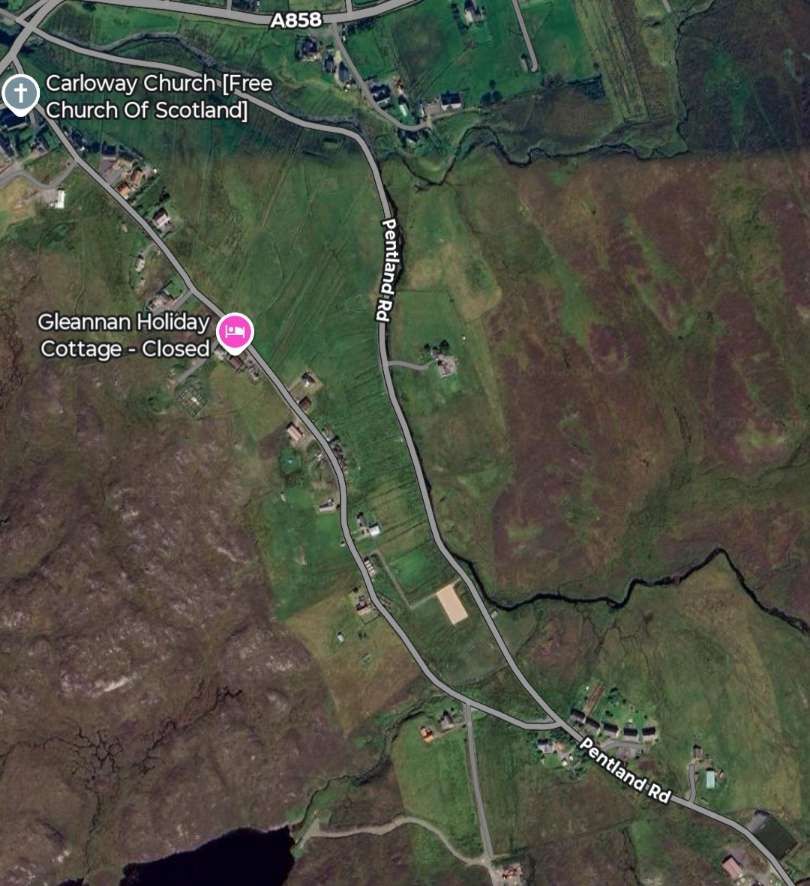
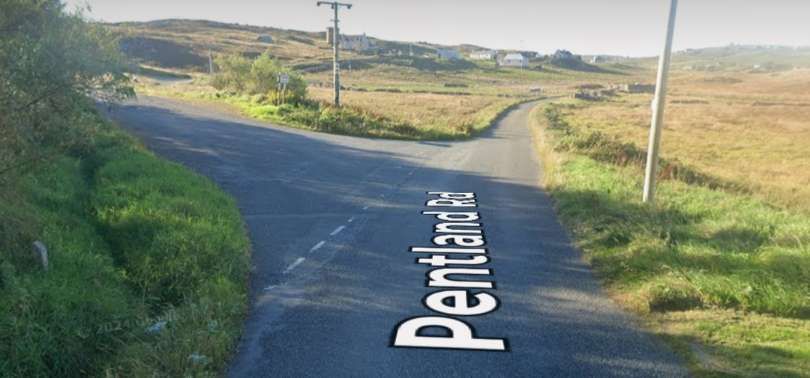
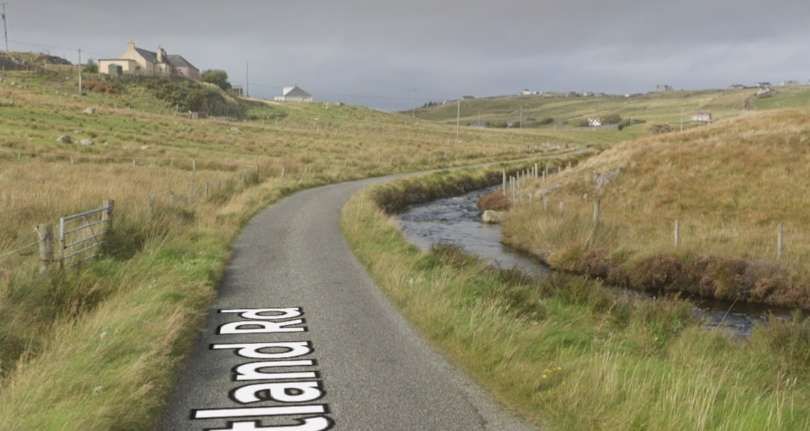
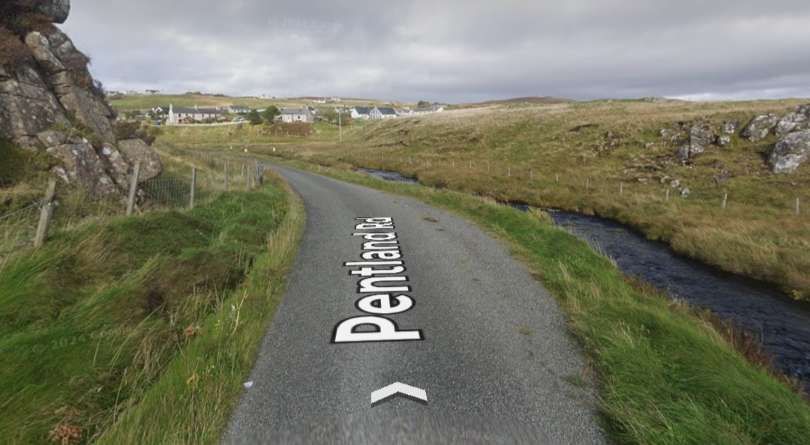
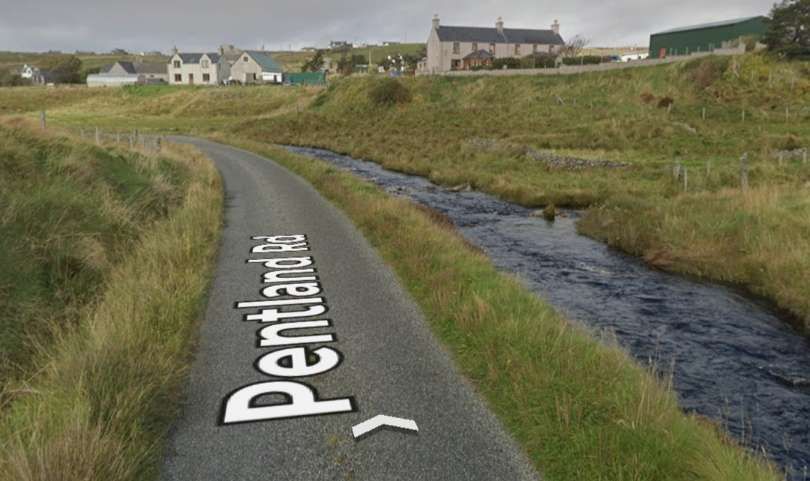
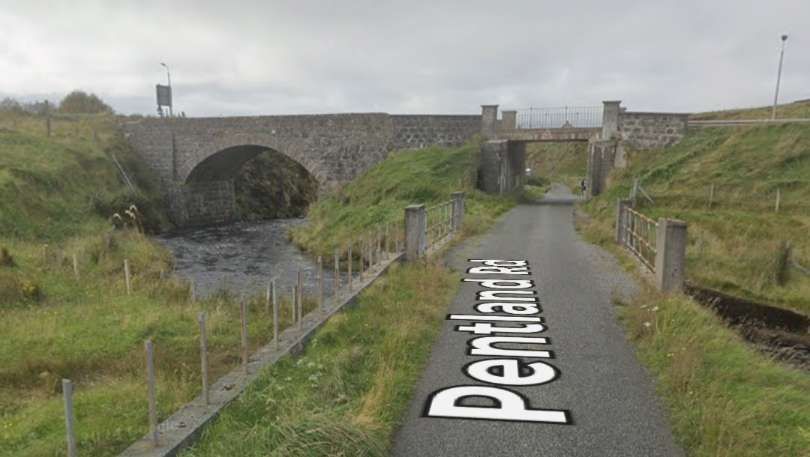
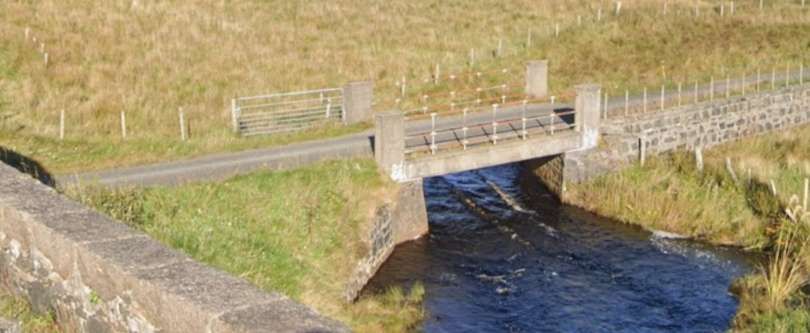
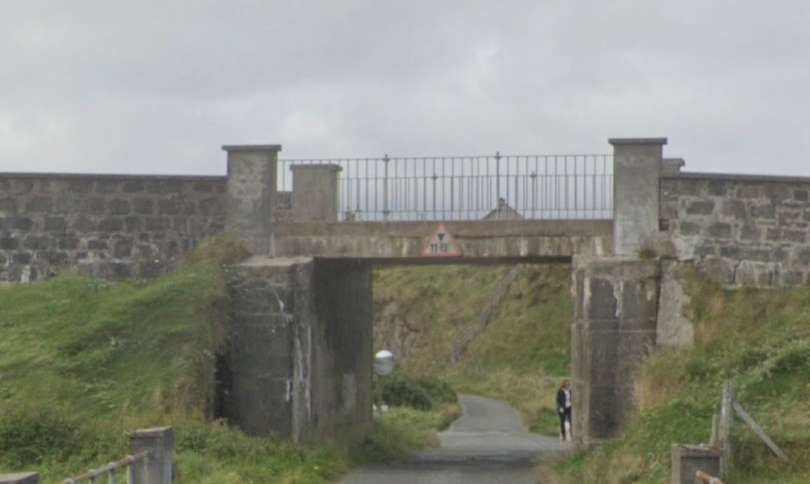
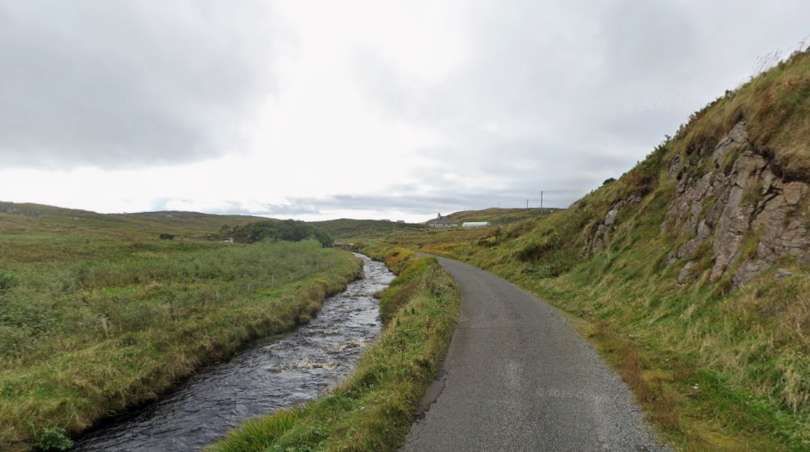
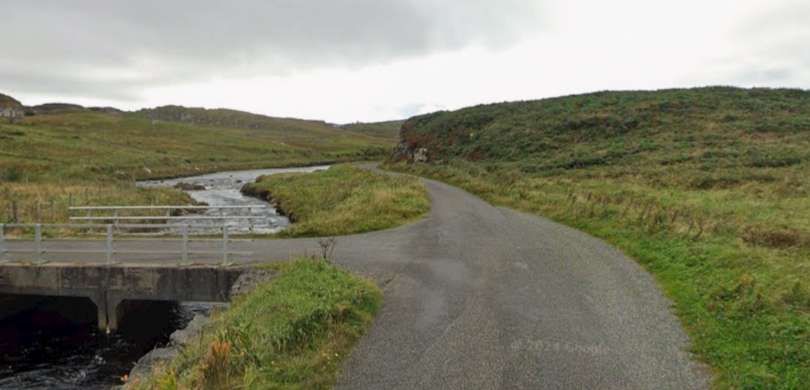
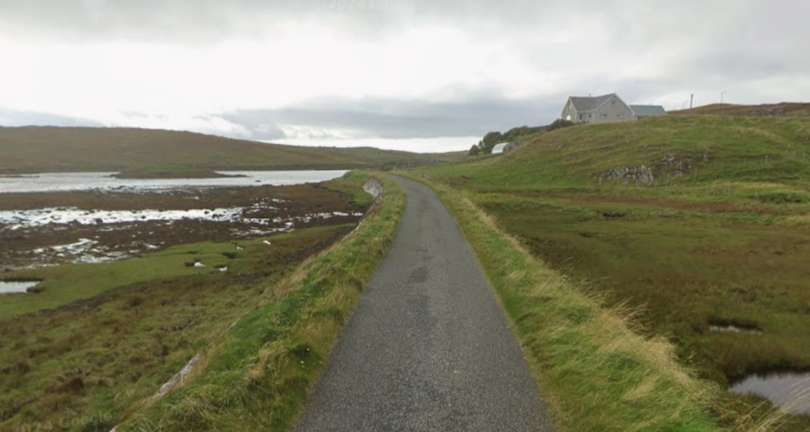
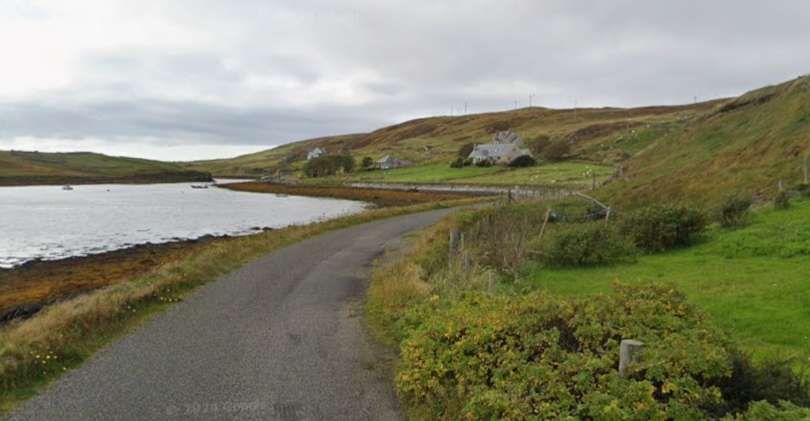
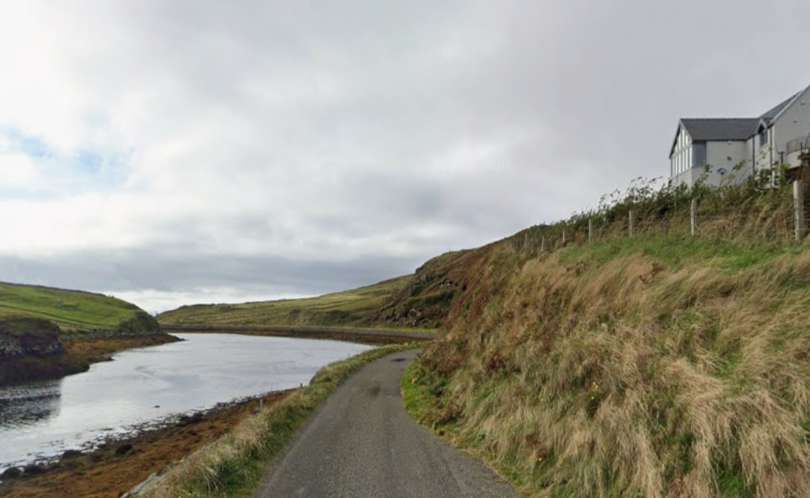
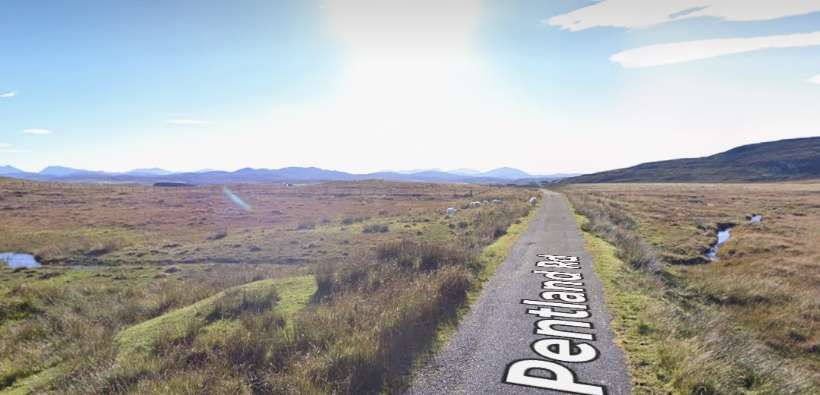
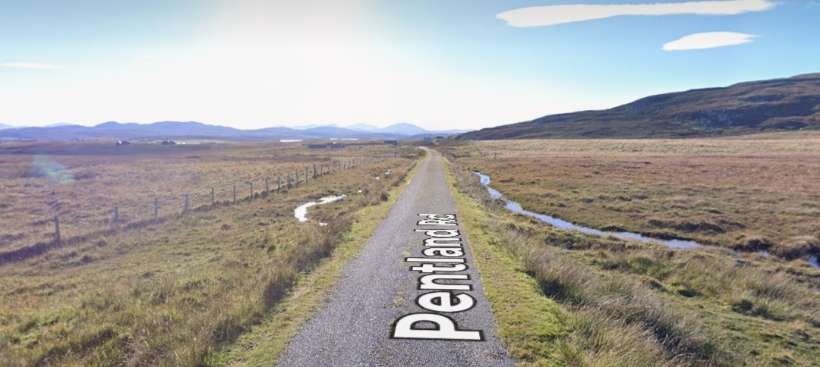
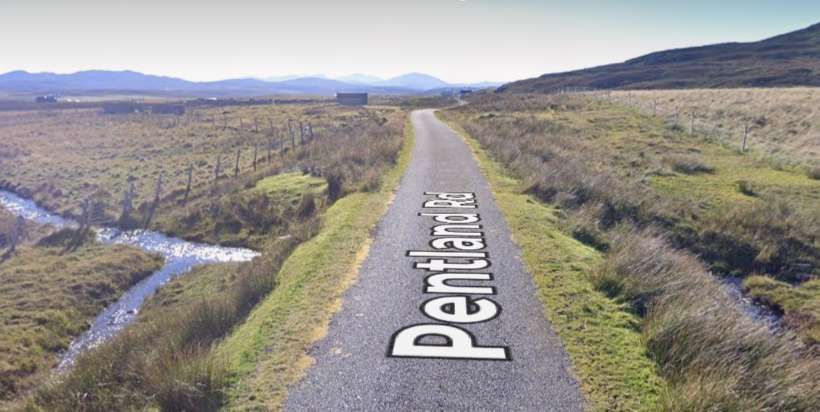
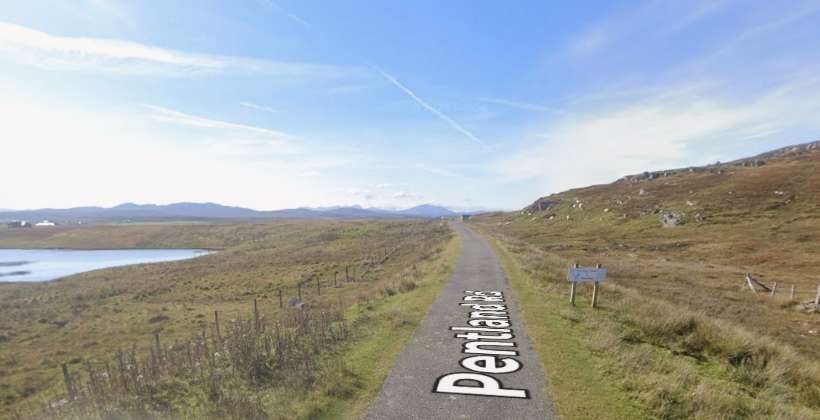
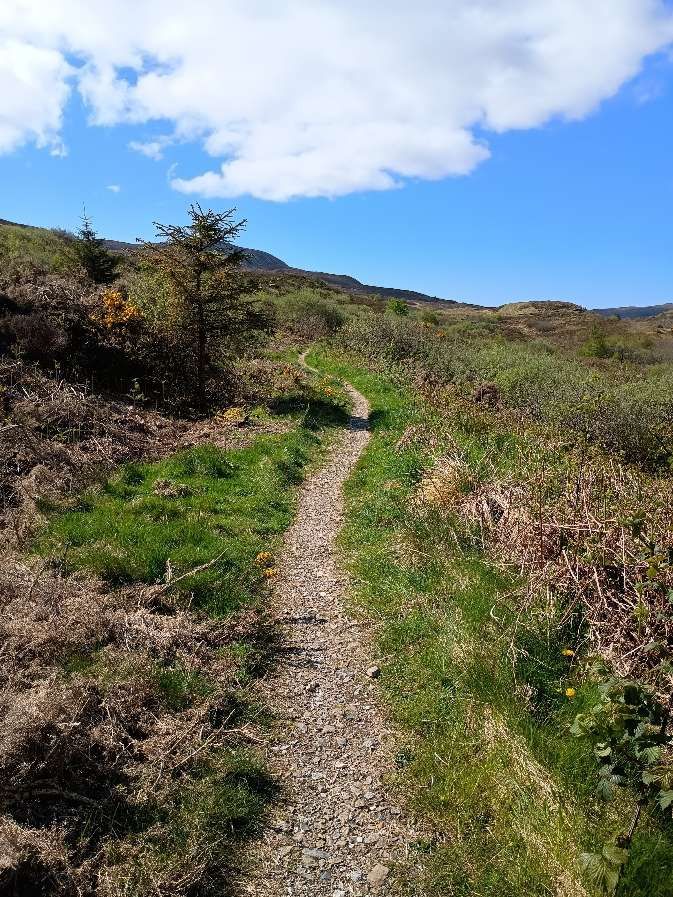
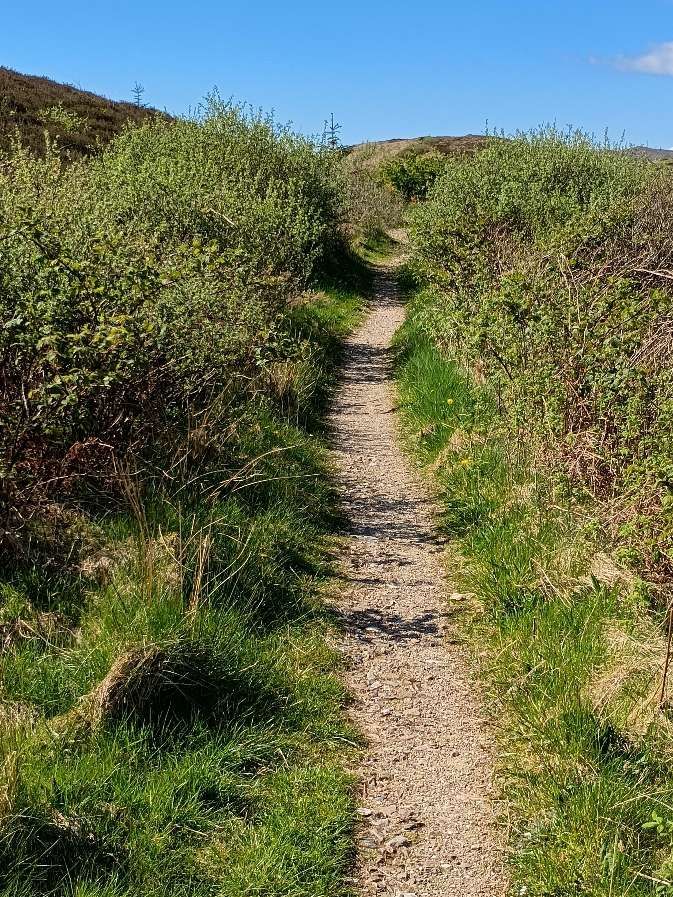
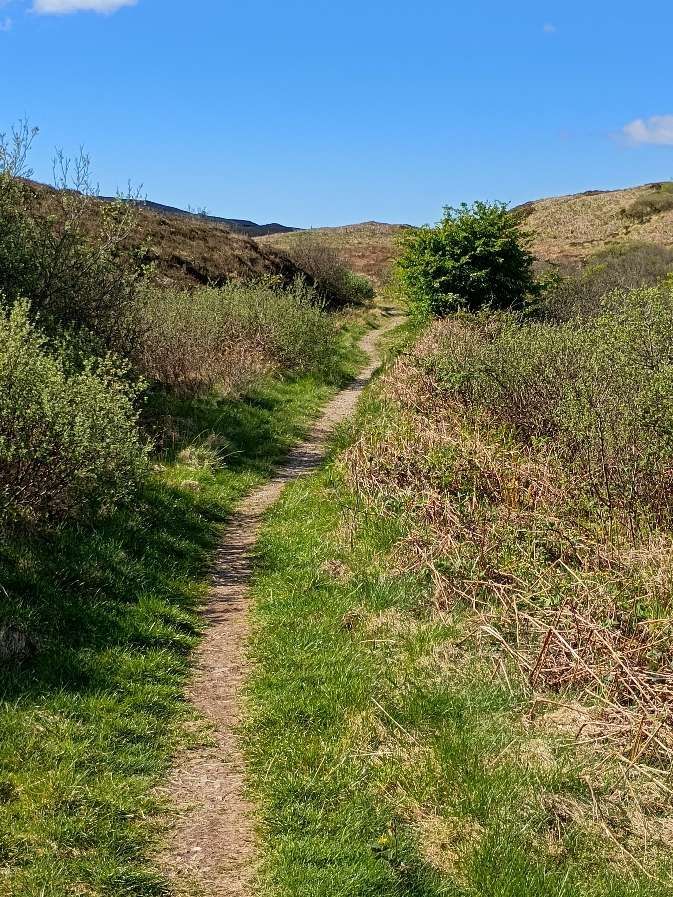
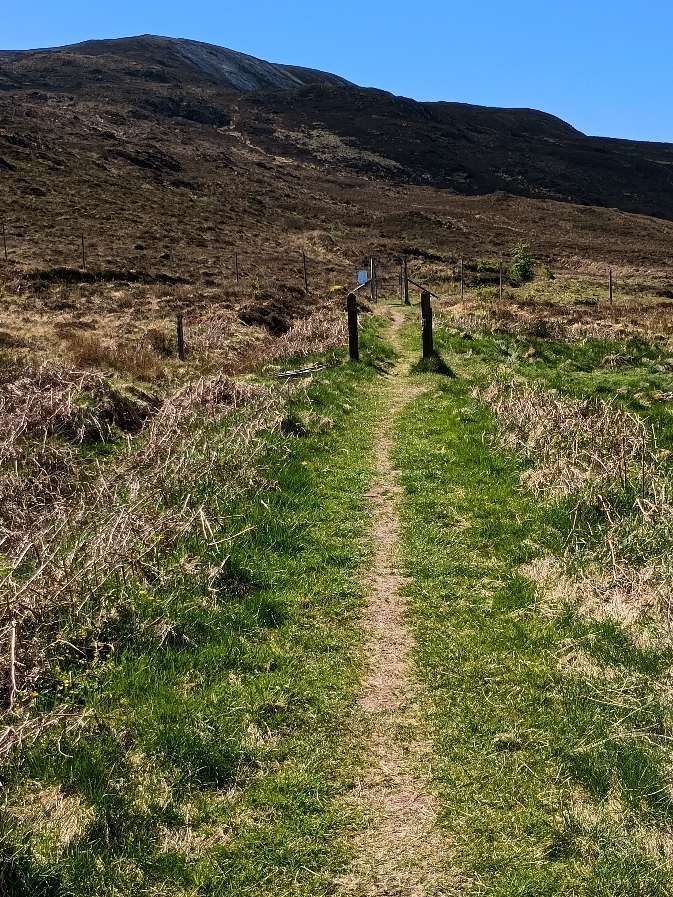
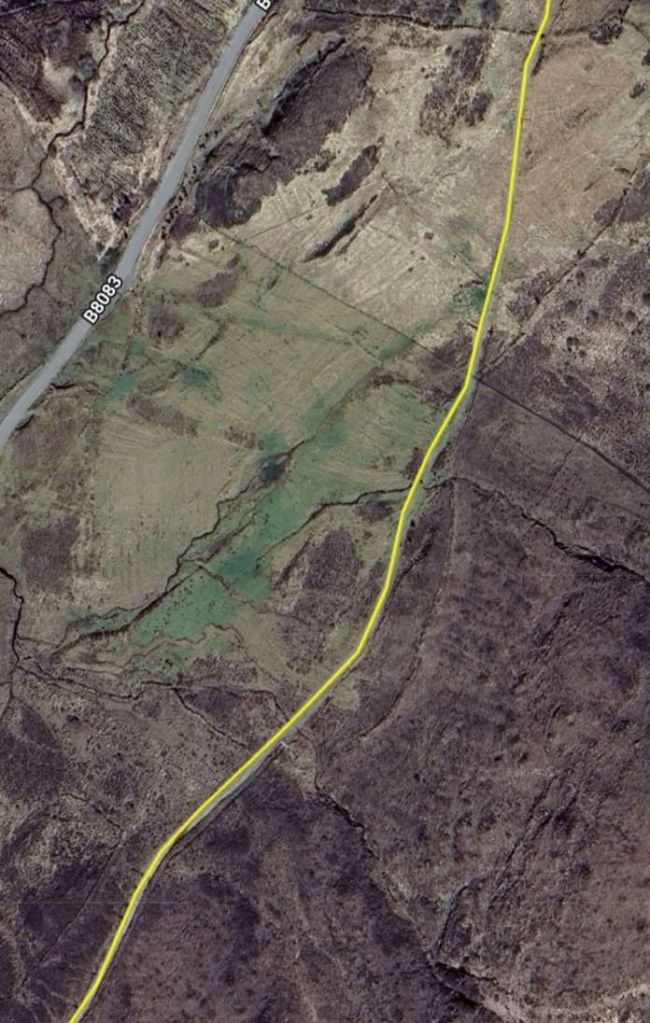
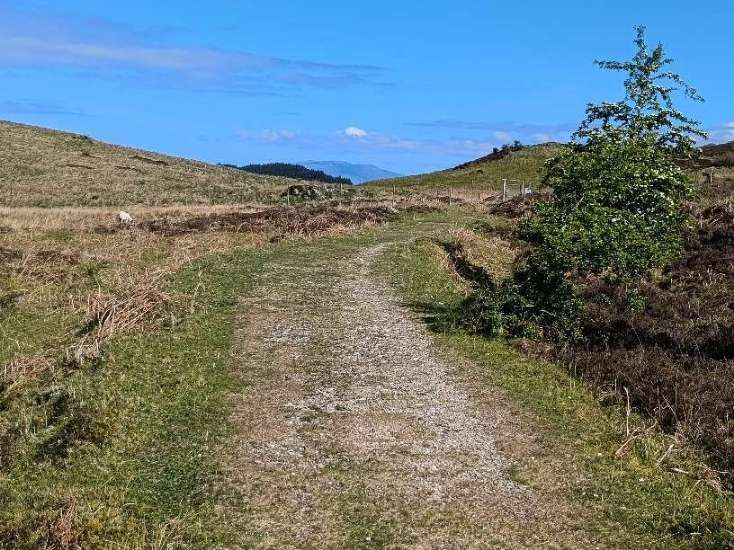
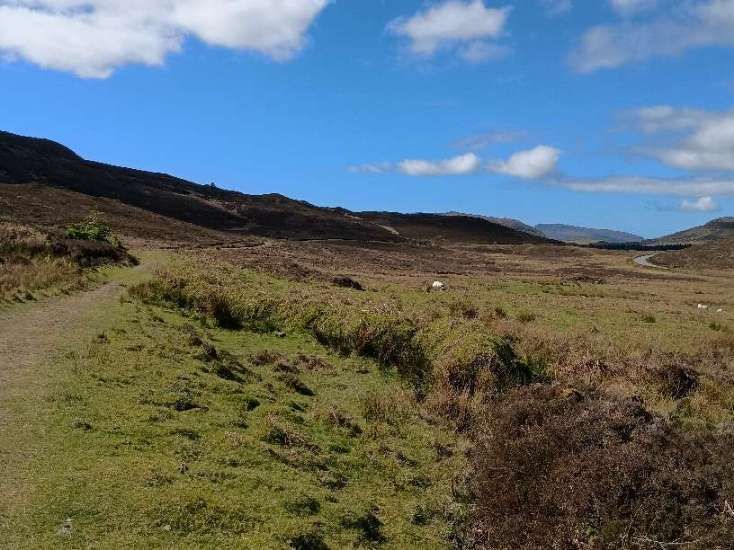
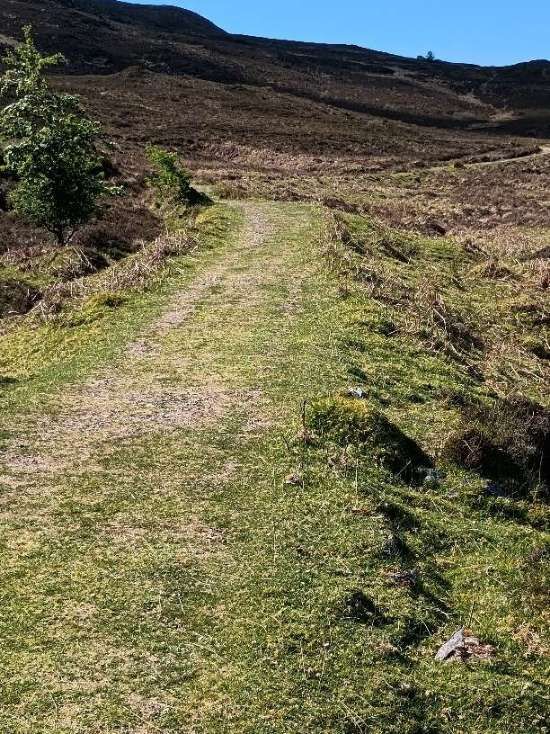
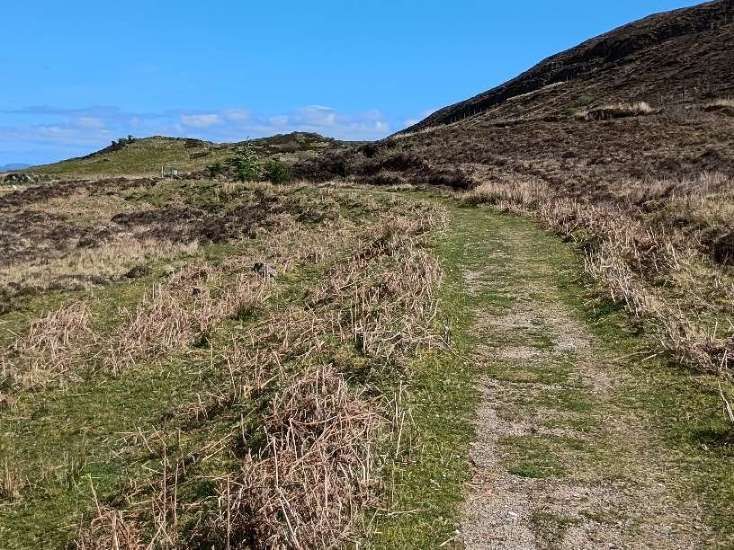
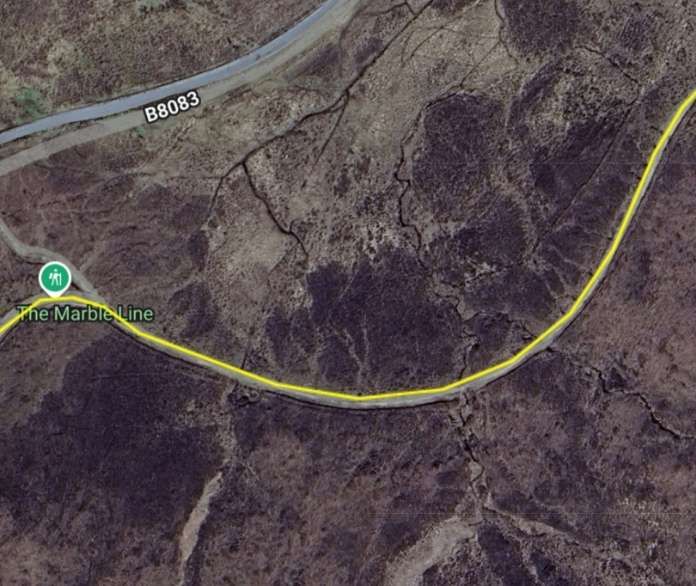
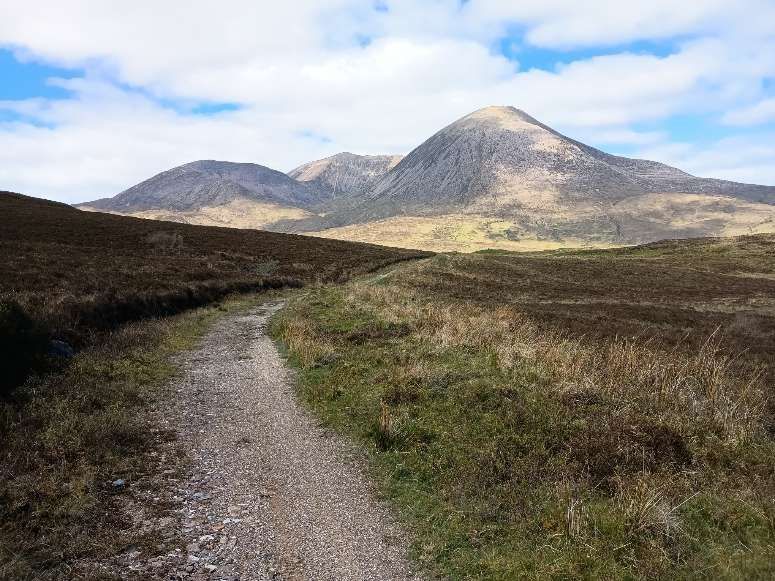
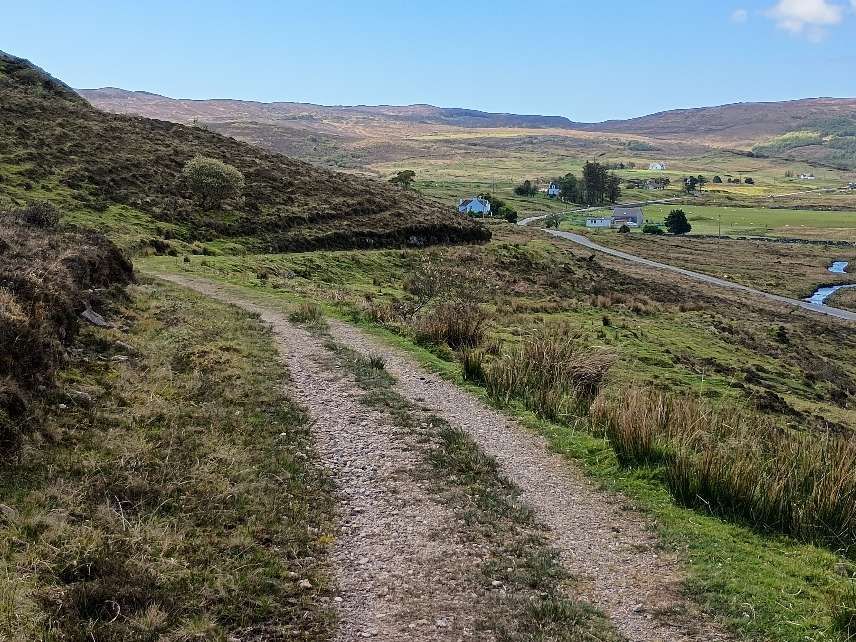
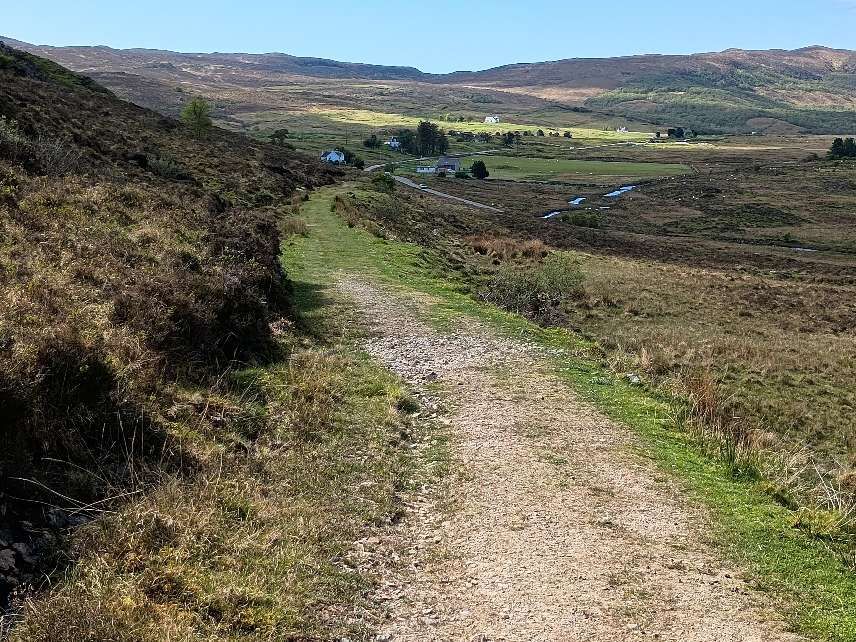
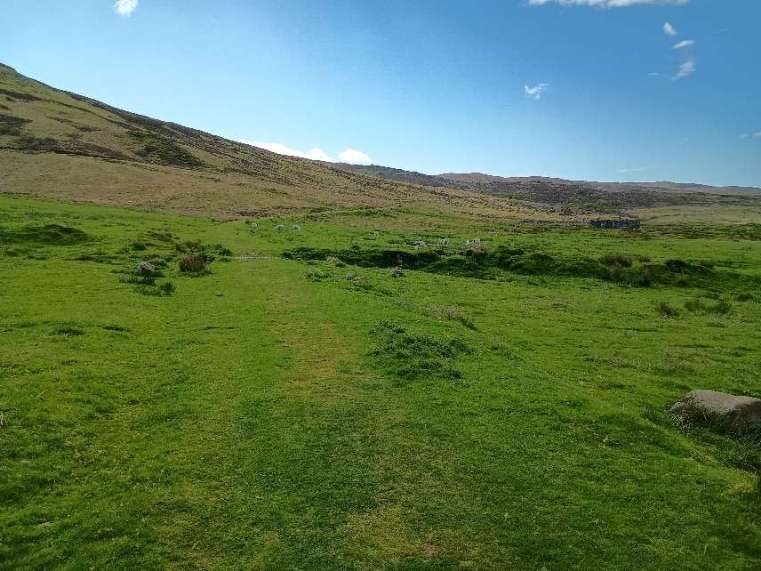
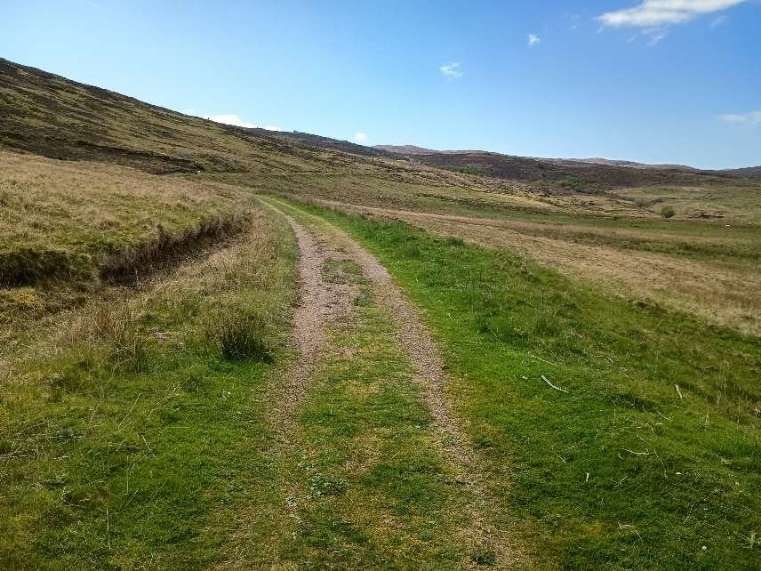
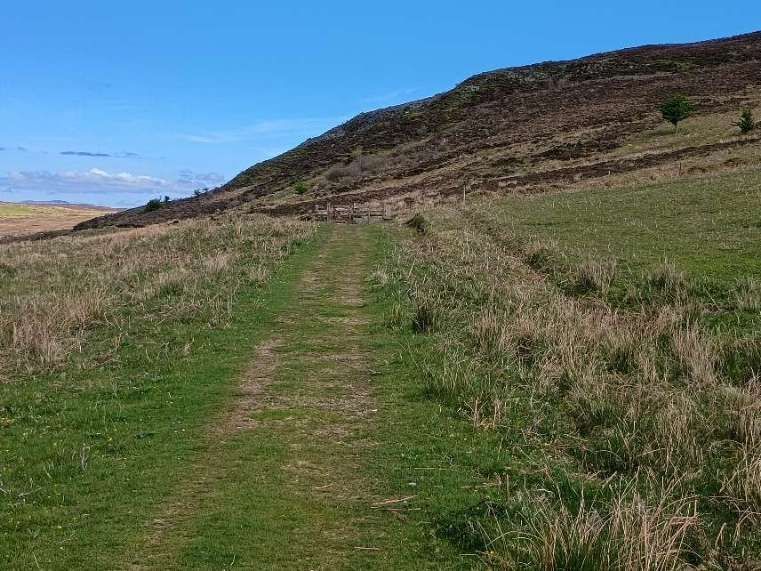
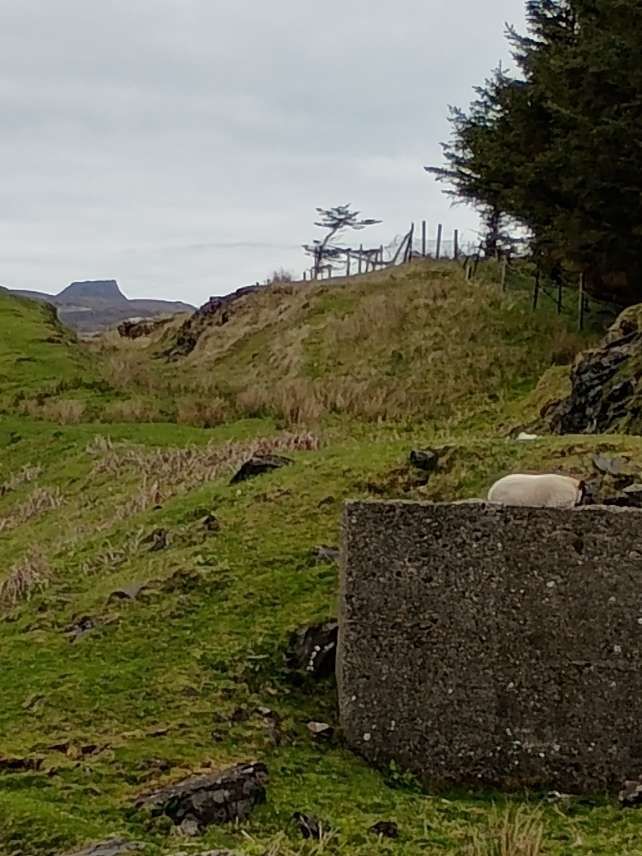
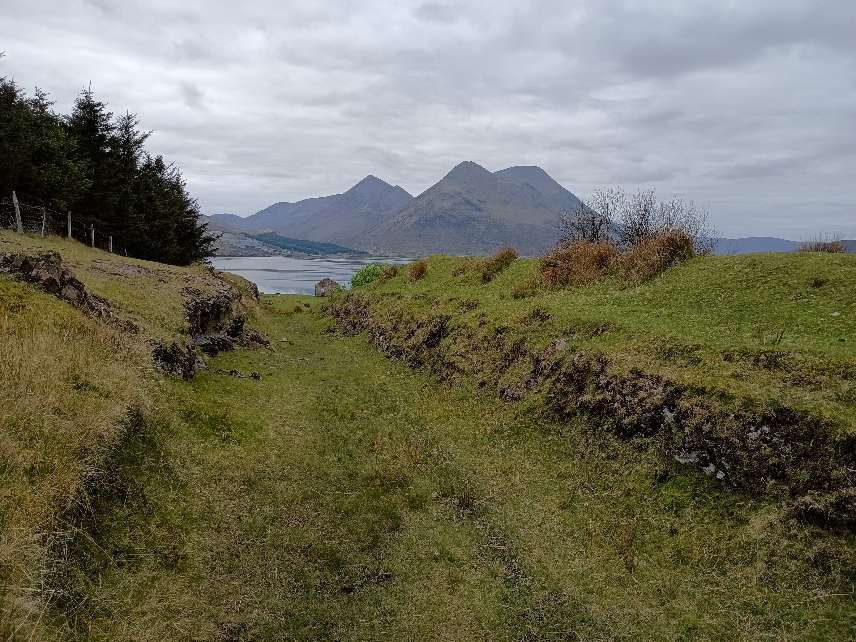
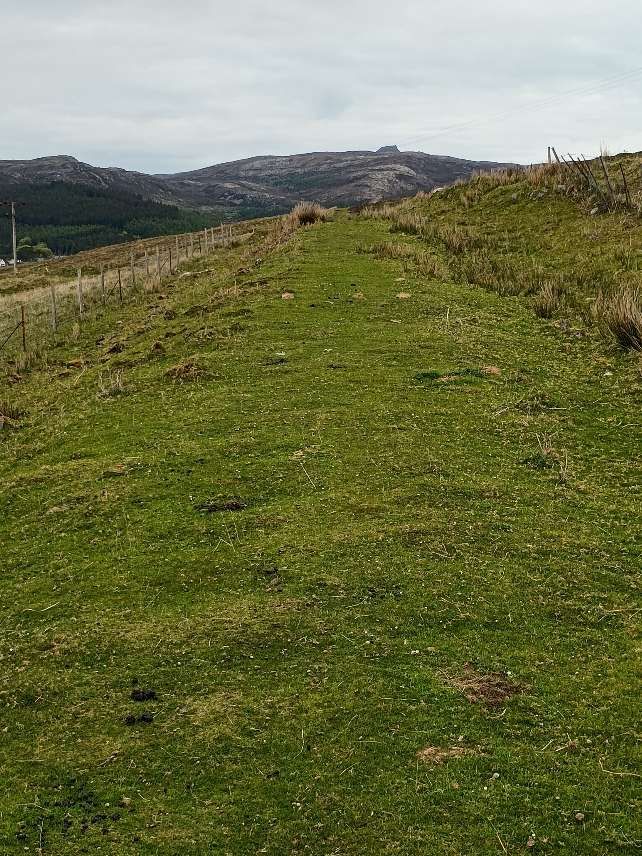
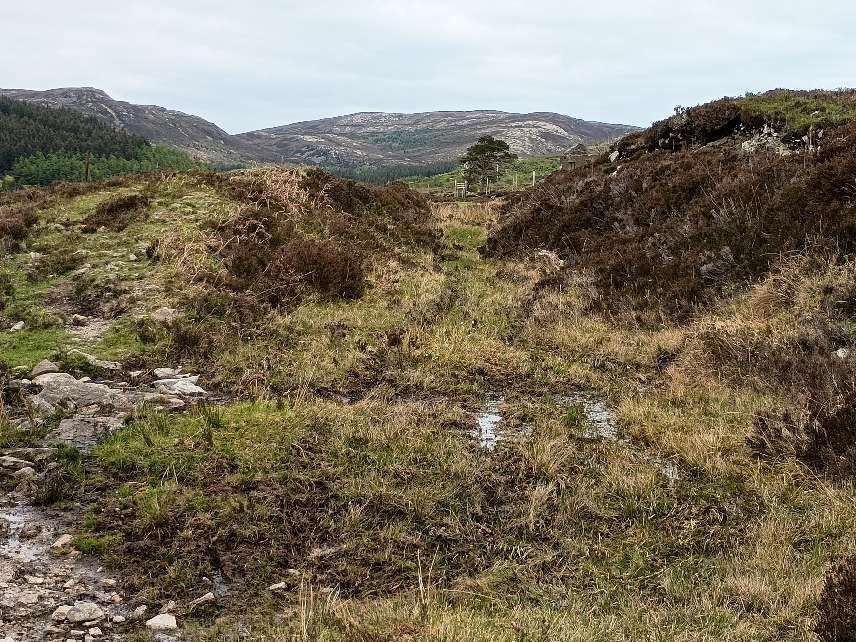
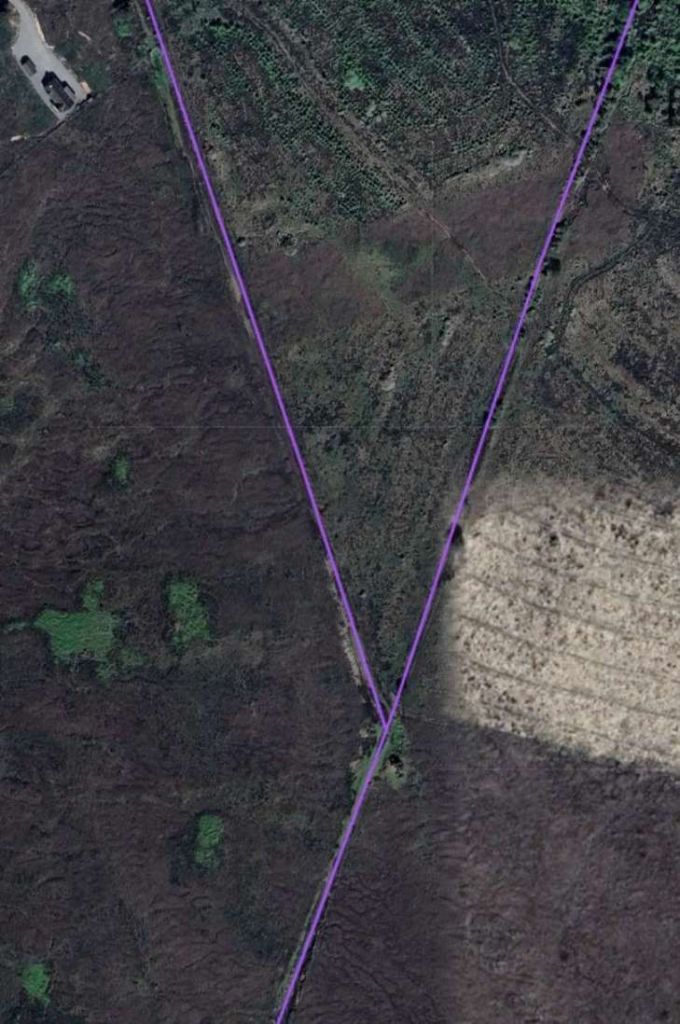
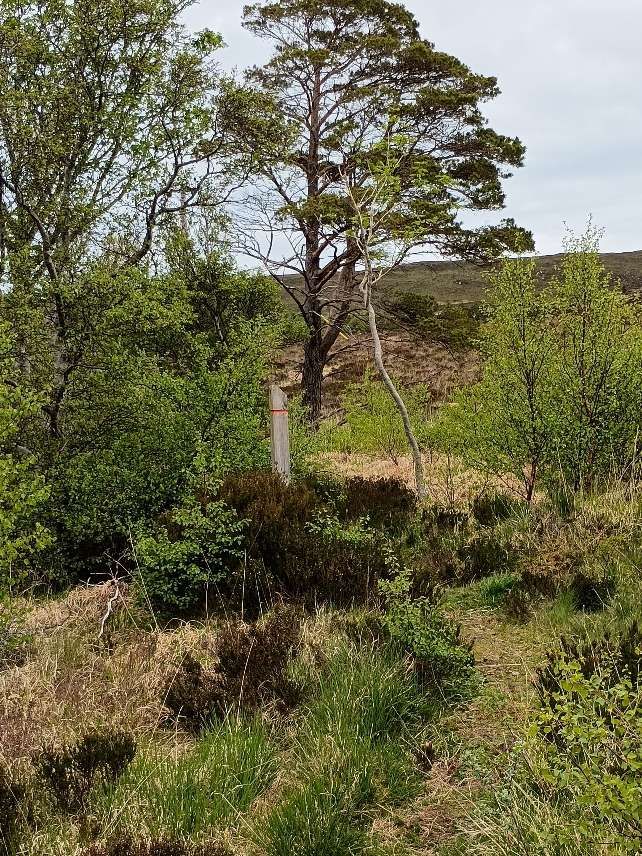
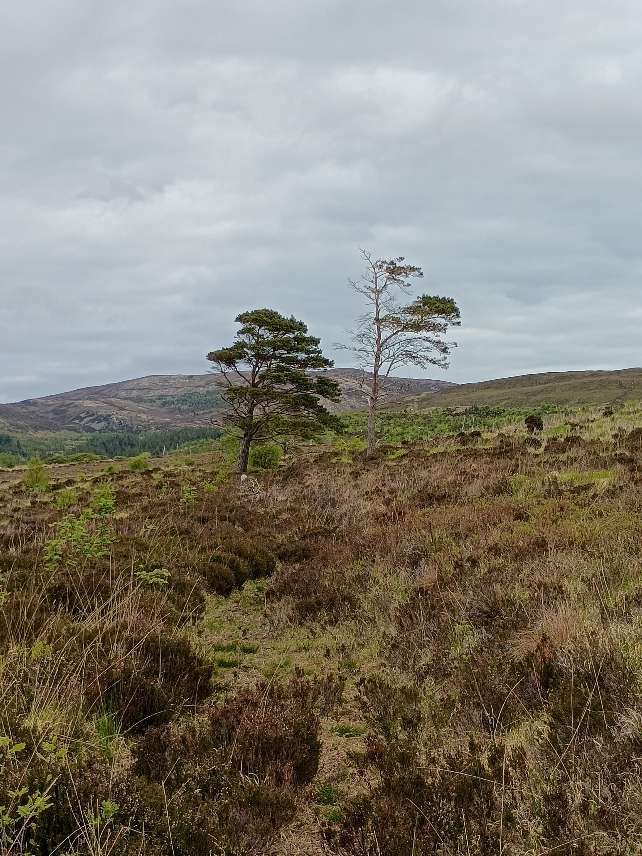
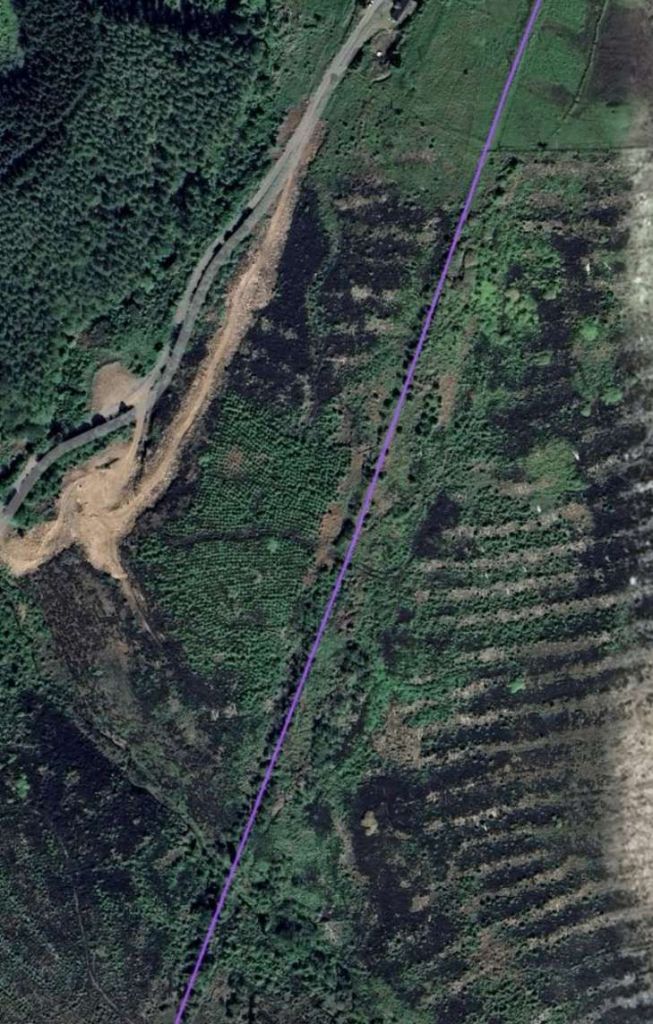
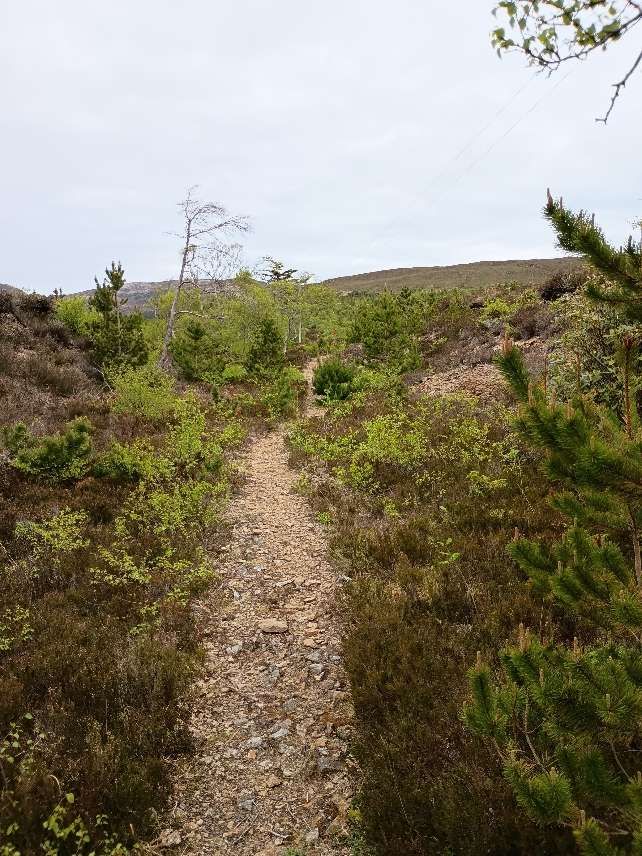
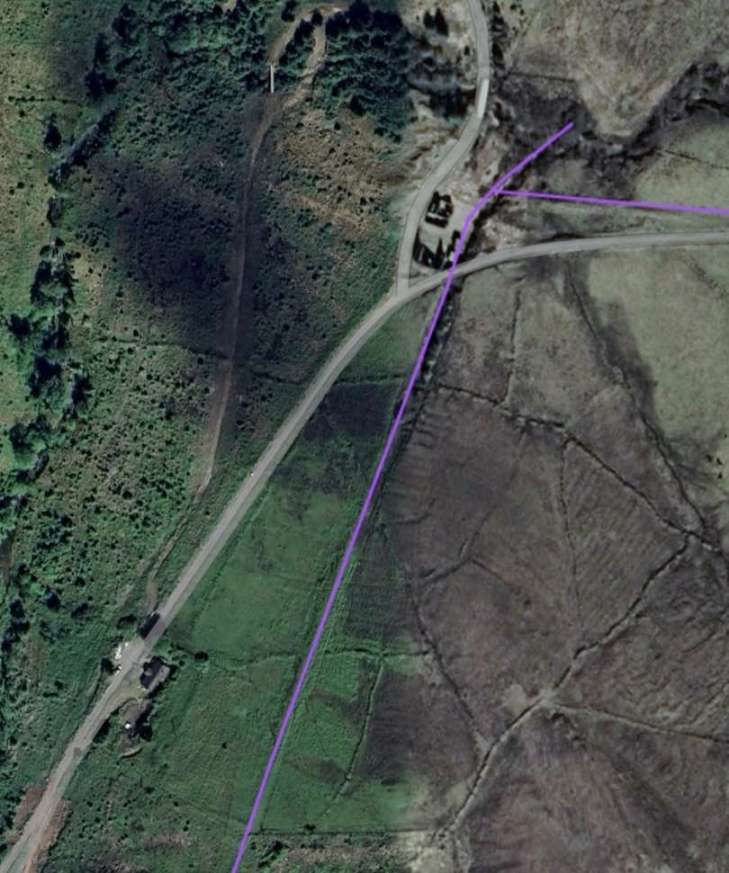
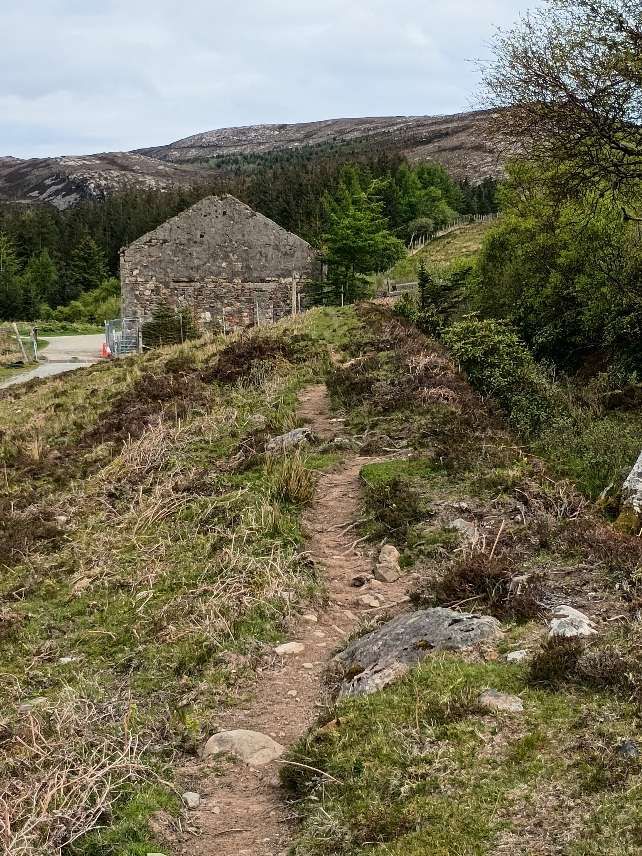
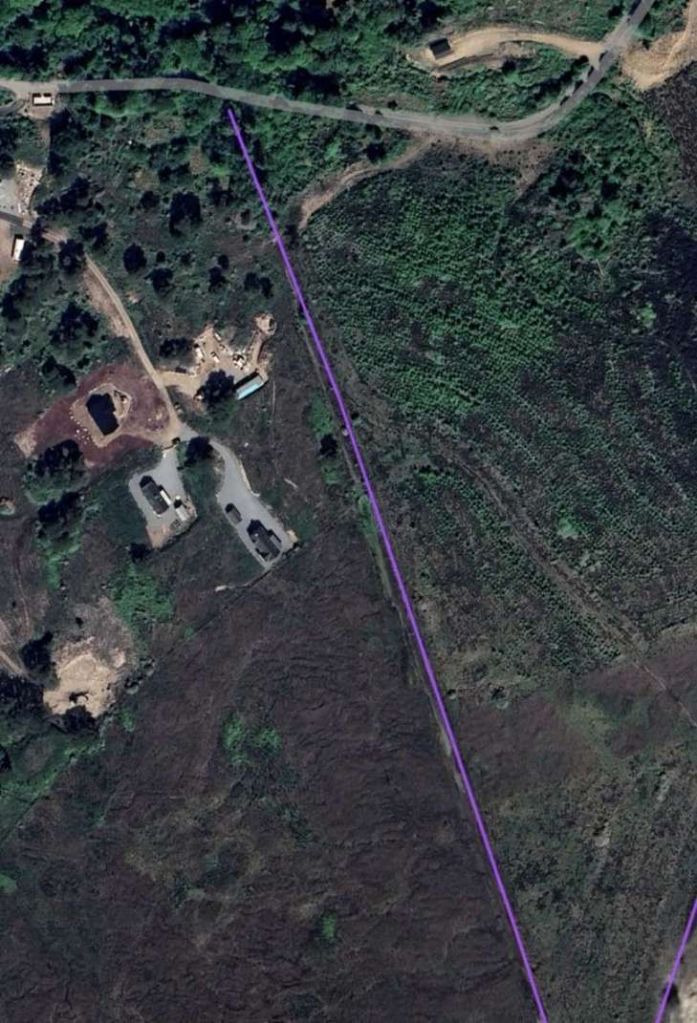
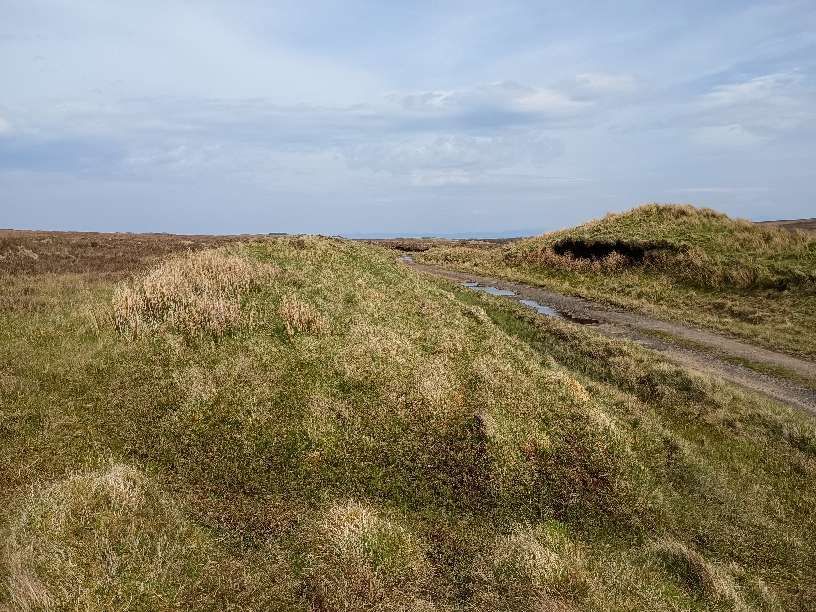
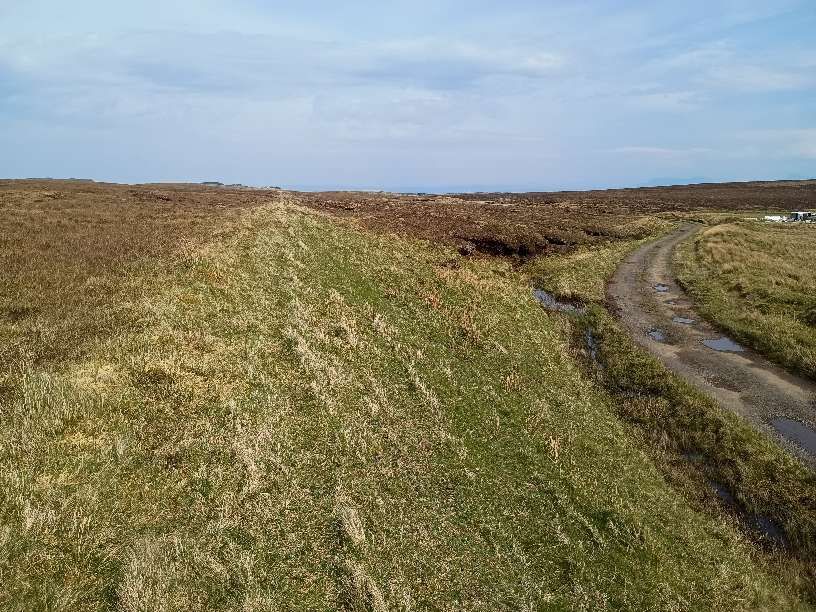
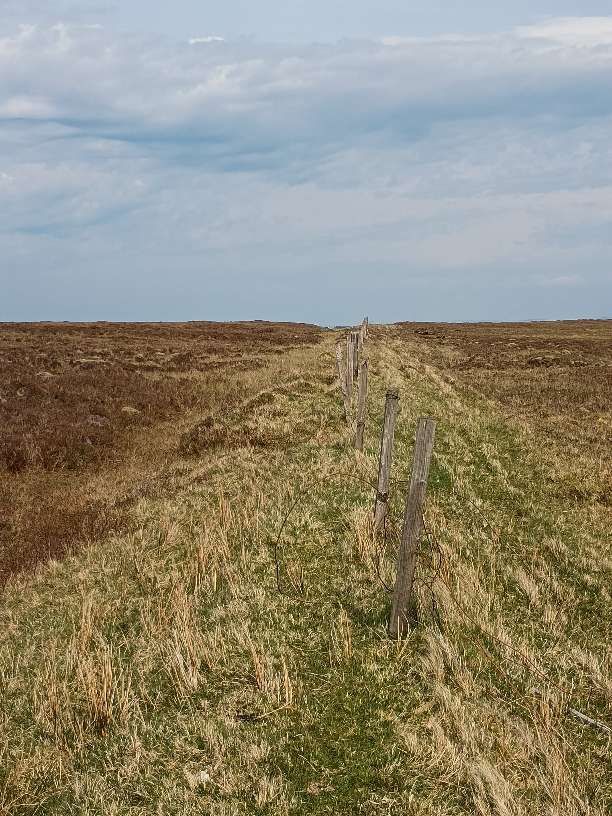
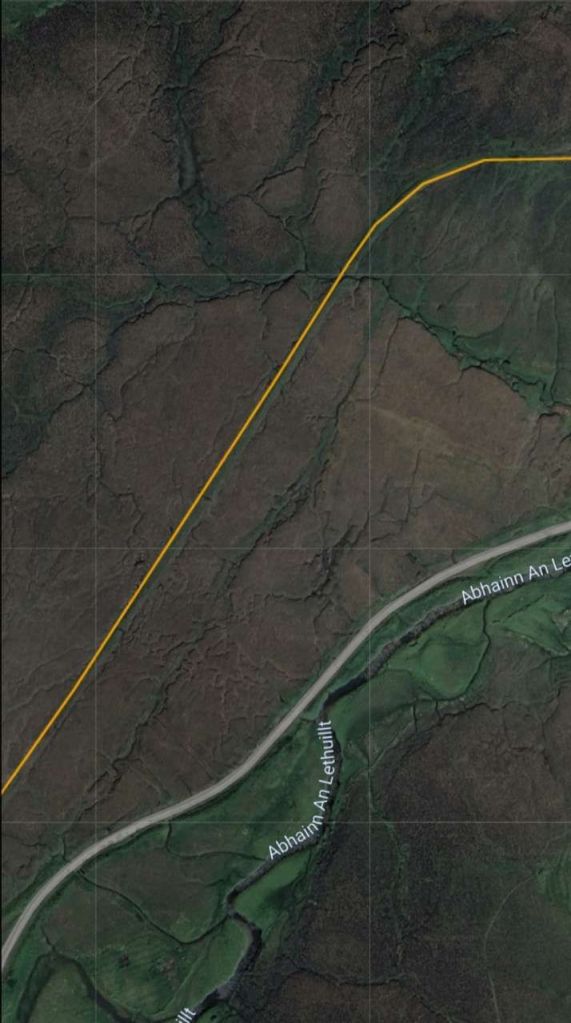
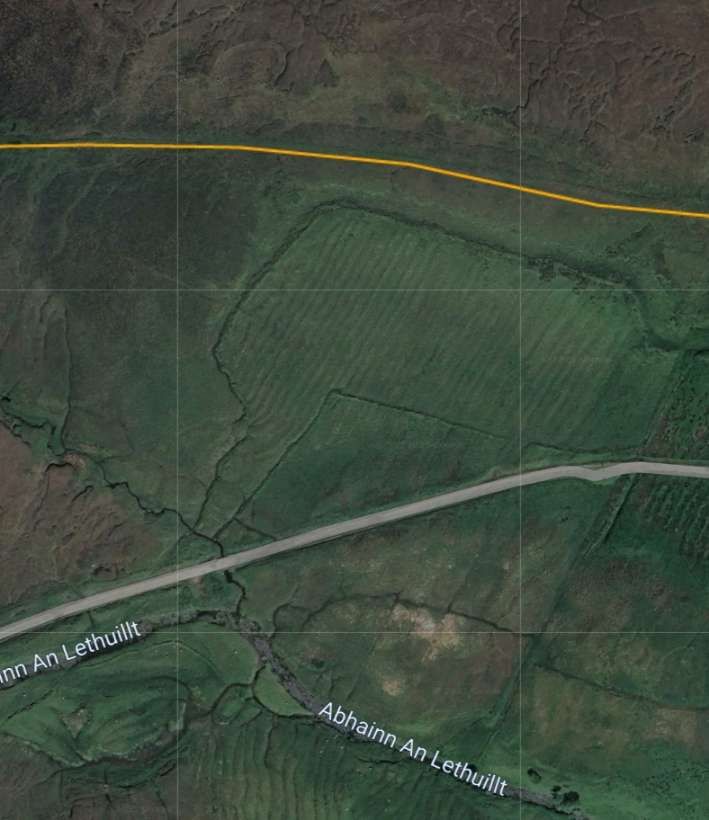
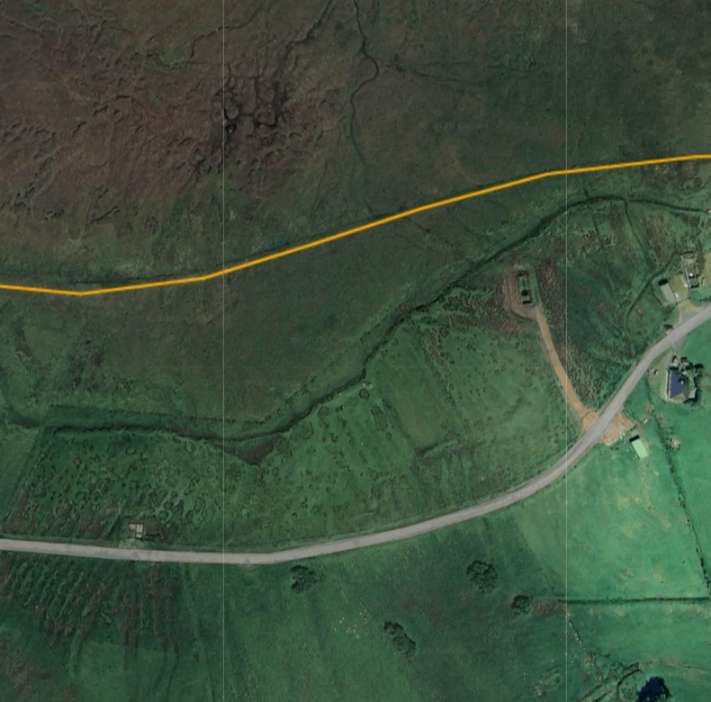
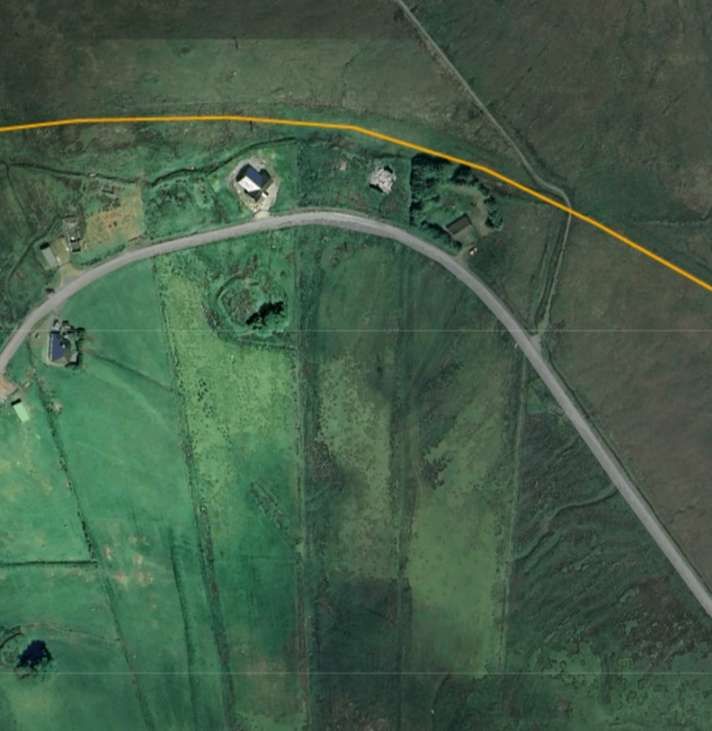
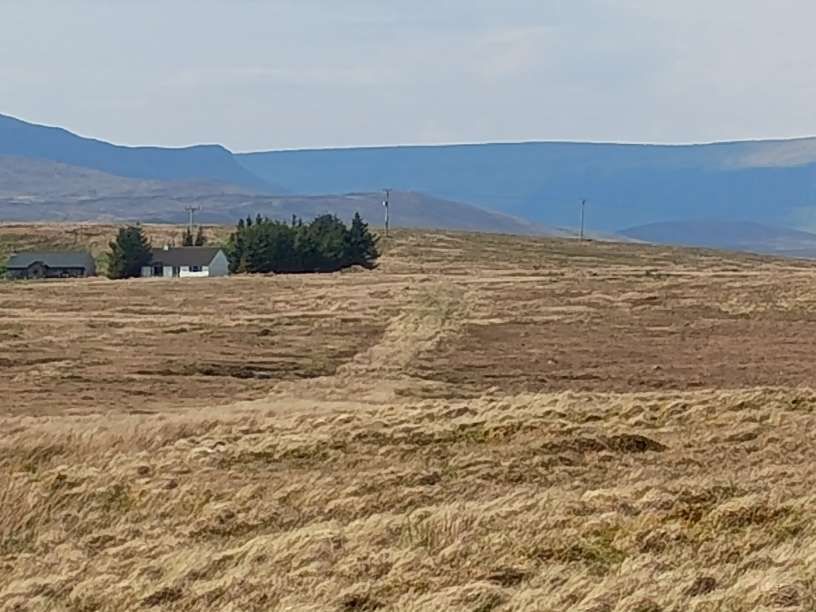
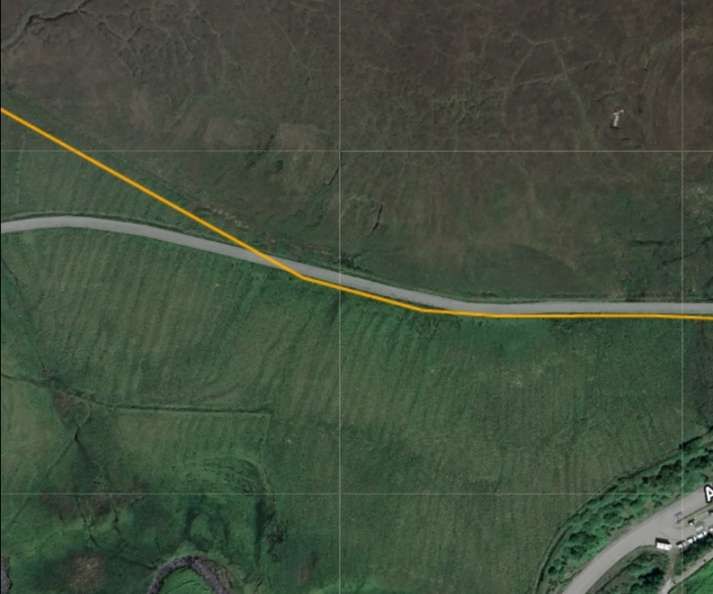
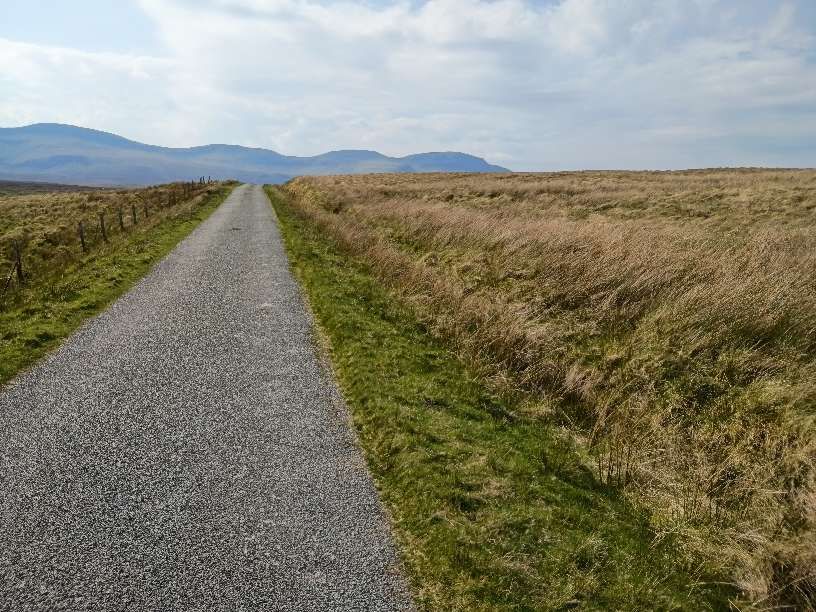
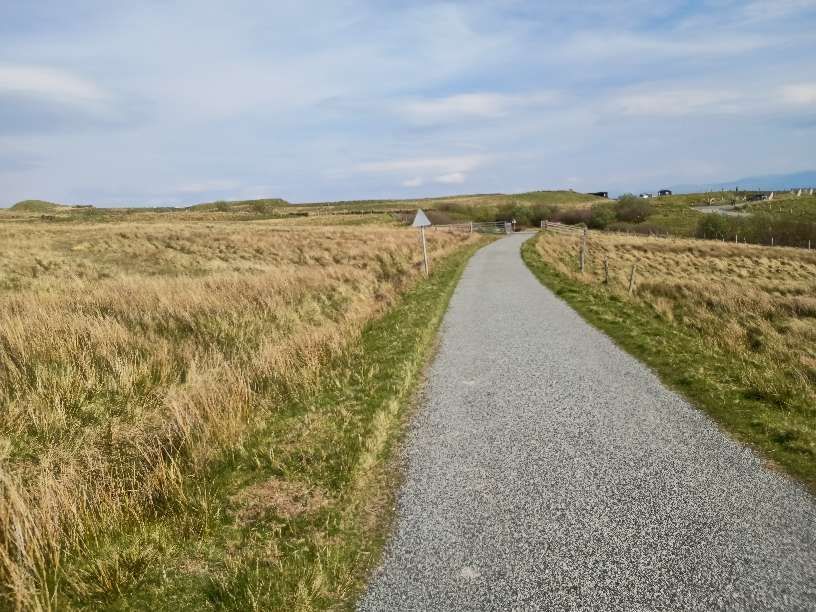
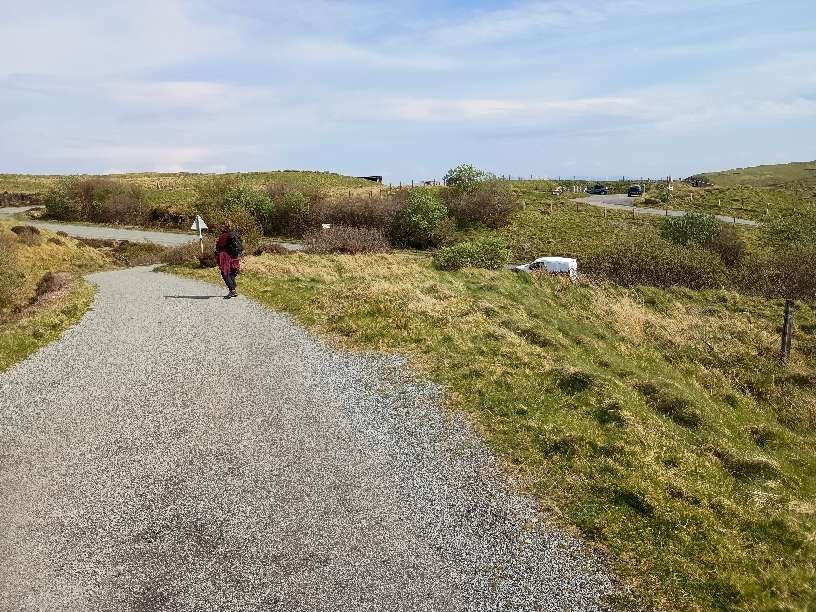
We noted above that construction work did commence on the lines surveyed in 1893, specifically that the trackbed was constructed “and, for the first two or three miles out of Stornoway now forms the A858 road, while the rest of the route is an unclassified road to Breasclete.” [15: p12] It should be noted that the unclassified road follows the planned railway to Carloway as well as to Breasclete and is known as the Pentland Road.
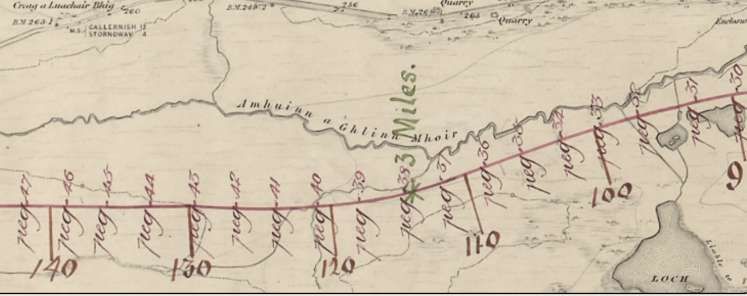
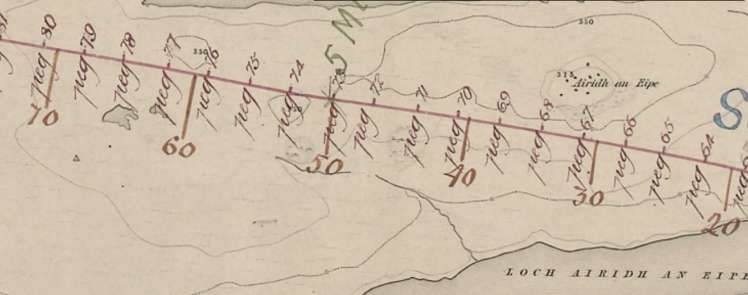
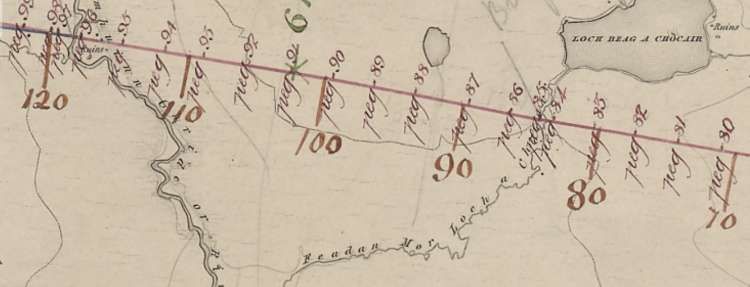
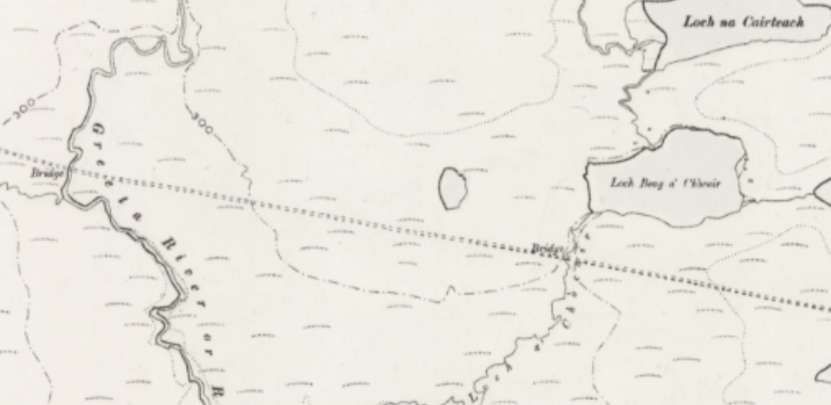
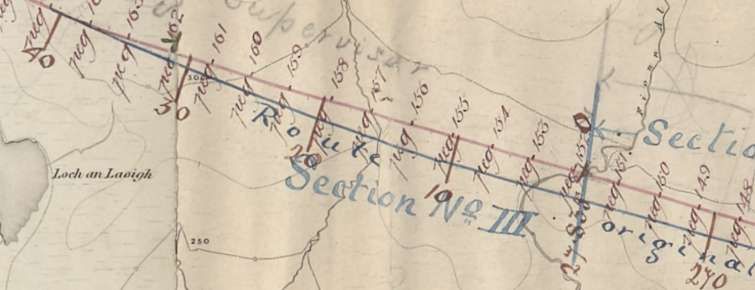
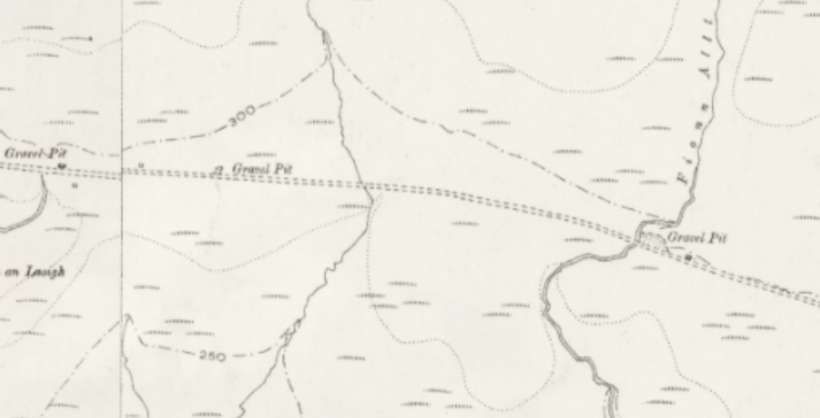
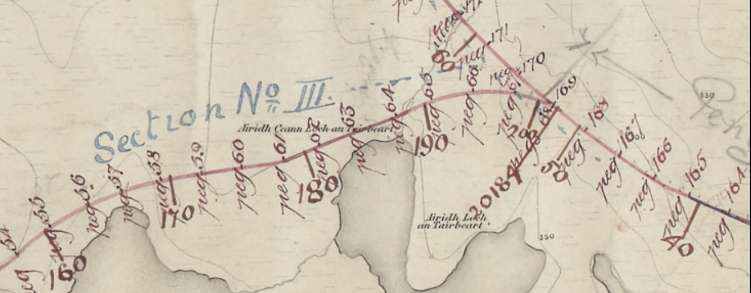
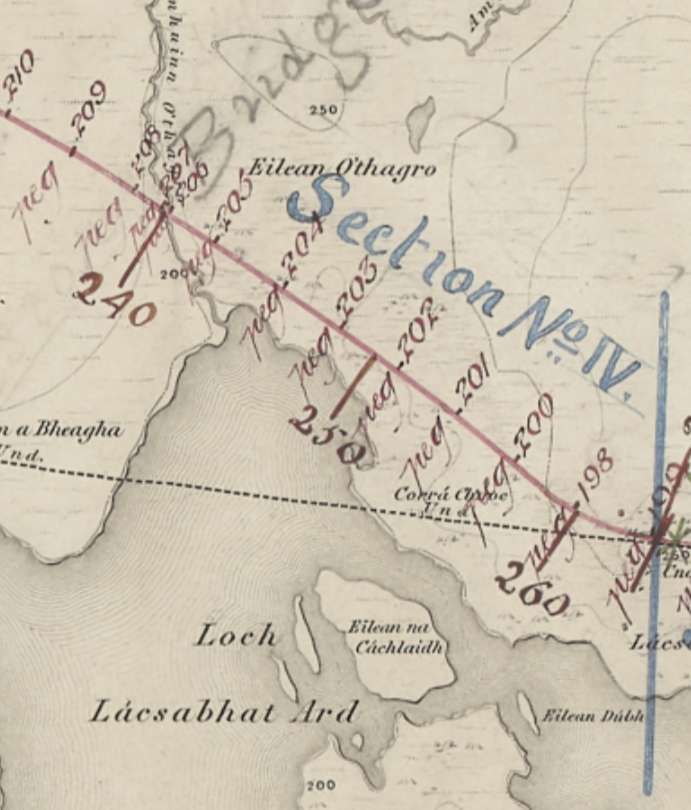
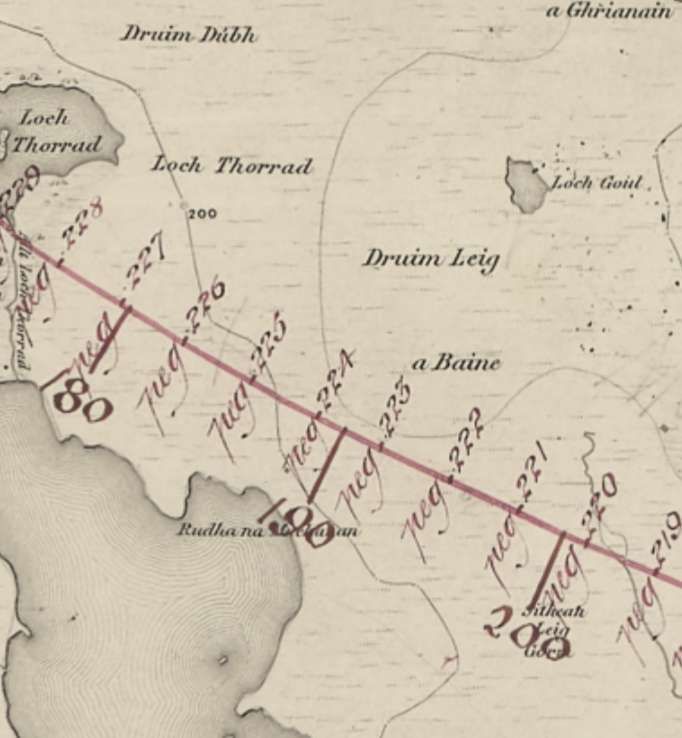
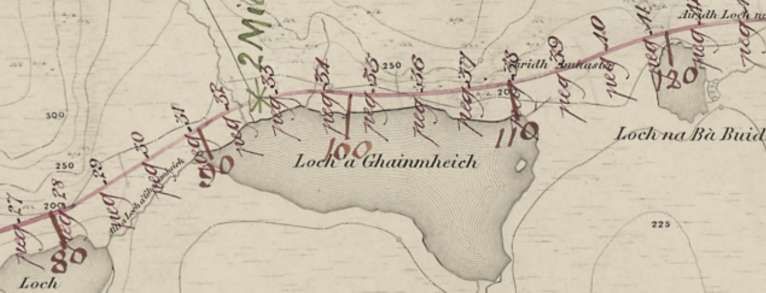
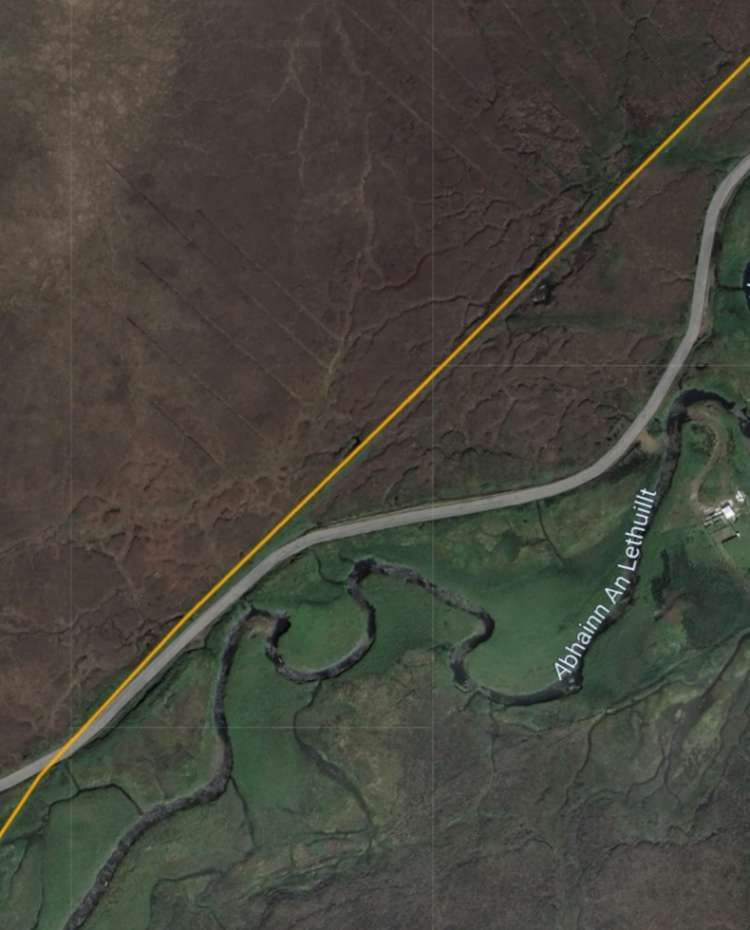
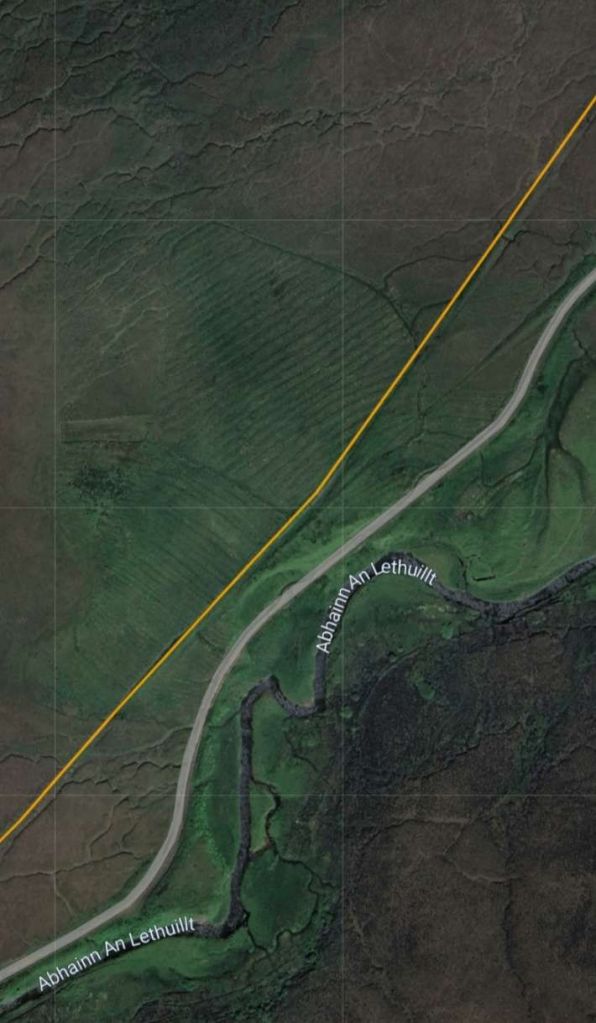
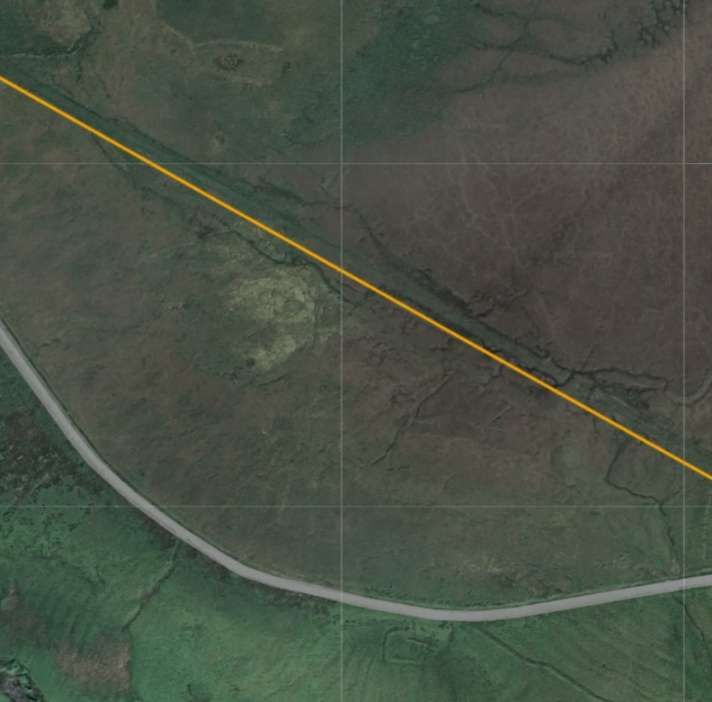
It is nigh impossible to establish the location of the Stornoway terminus from this limited information. Given that modern roads follow the formation of the planned railway route it is quite easy to follow the routes to Breasclete and Carloway. There is, however, a specific, relevant resource held at Stornoway Public Library. It comprises 4 sheets from the 1″ Ordnance Survey 1st Edition mapping from the 1850s, that have been stuck together, with the route itself annotated on top. A digital version of this map has been made available by the National Library of Scotland (NLS). [18] Please note that after navigating to the correct webpage, it will be necessary to scroll down to find the annotated map.
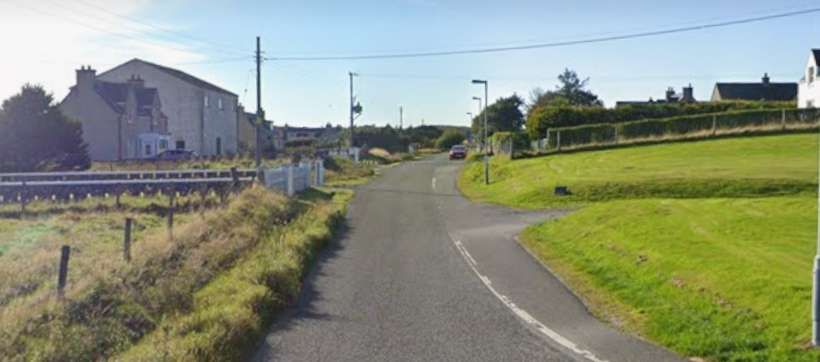
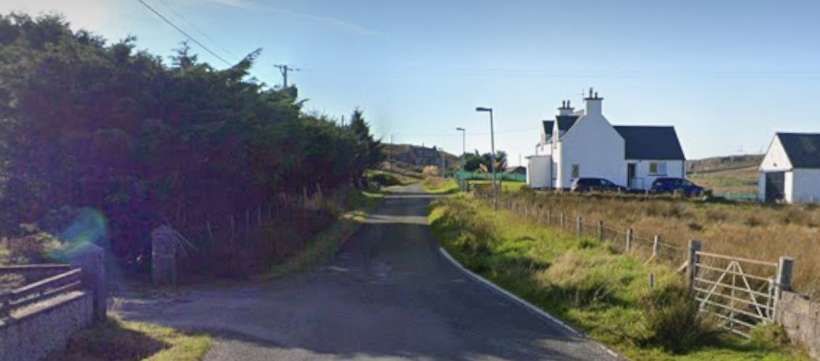
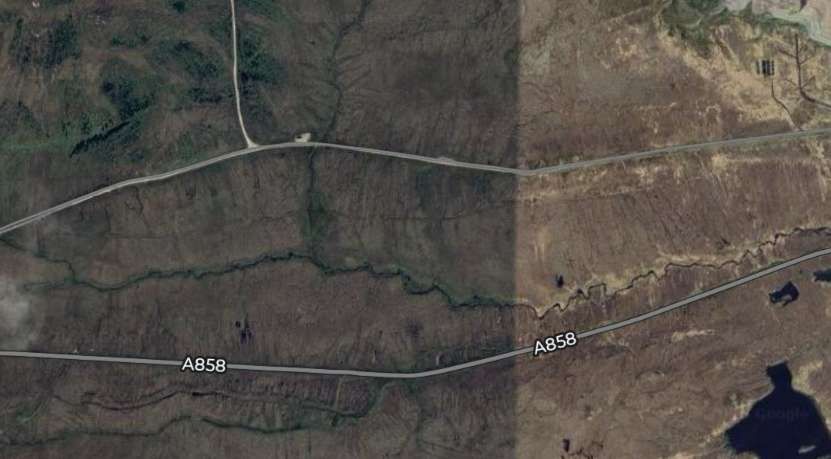
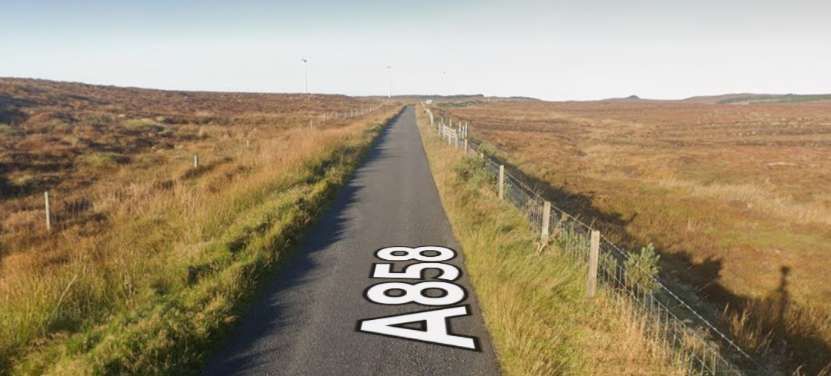
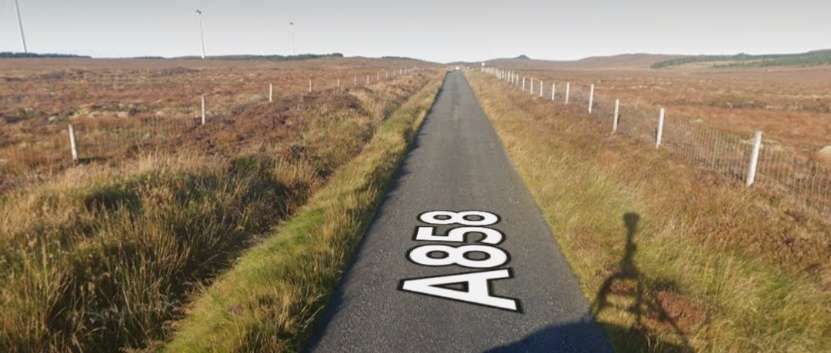
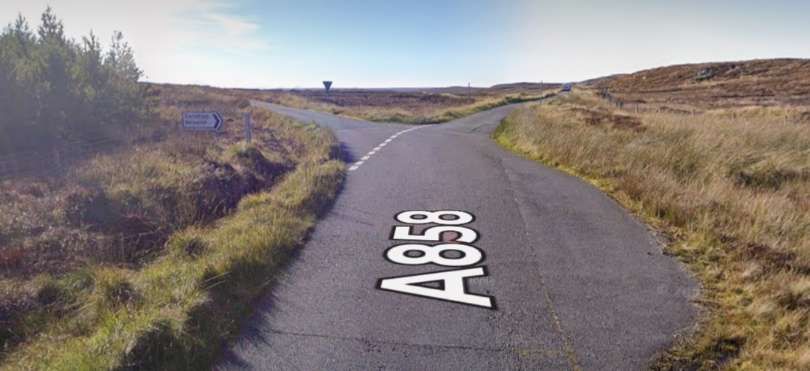
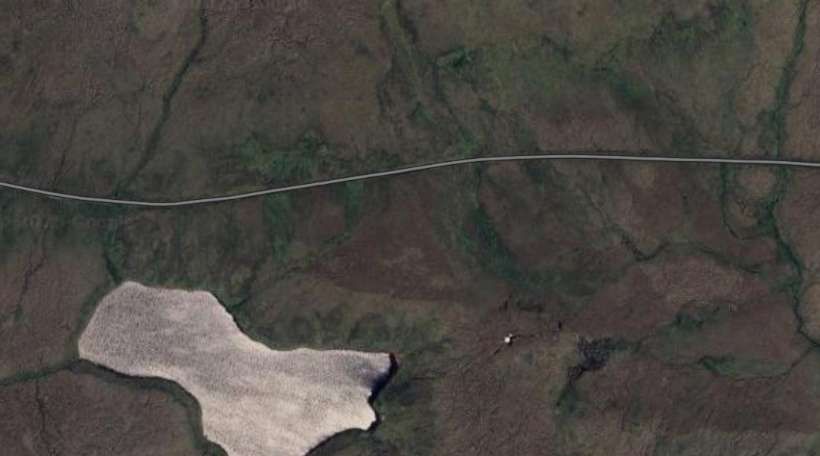
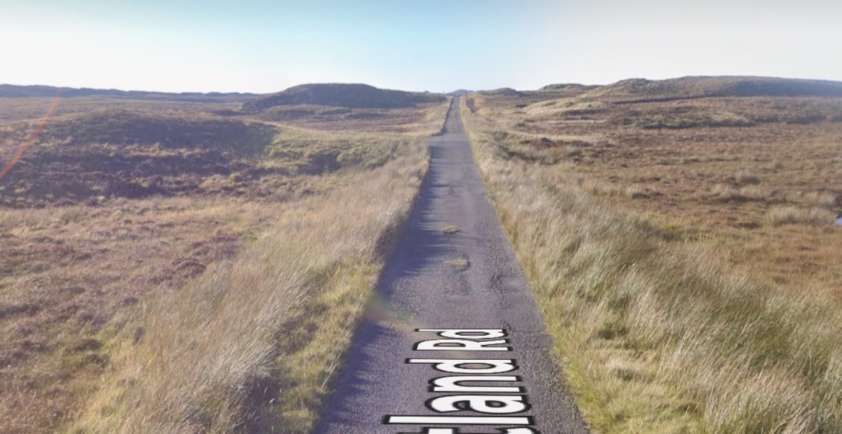
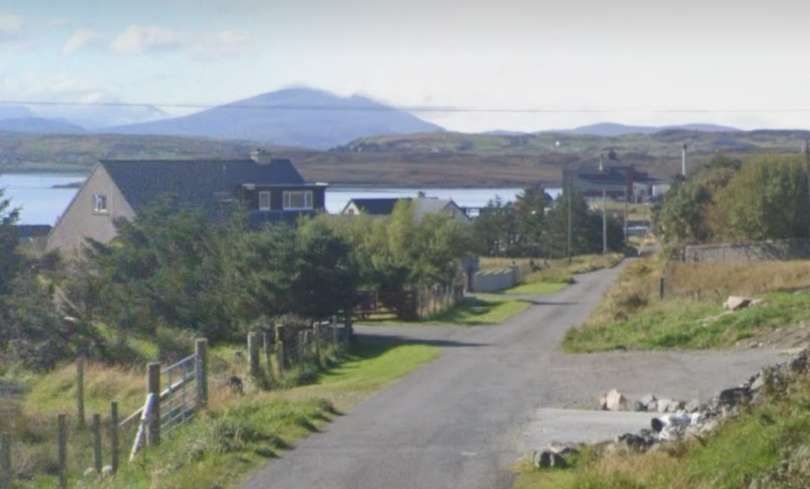
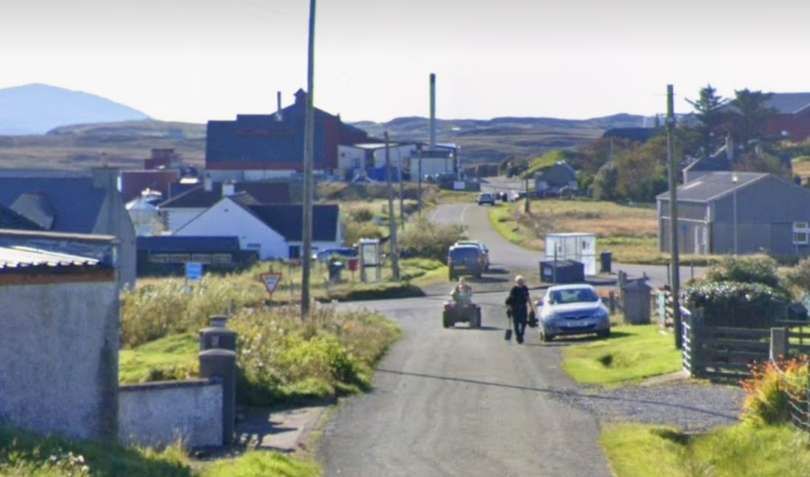
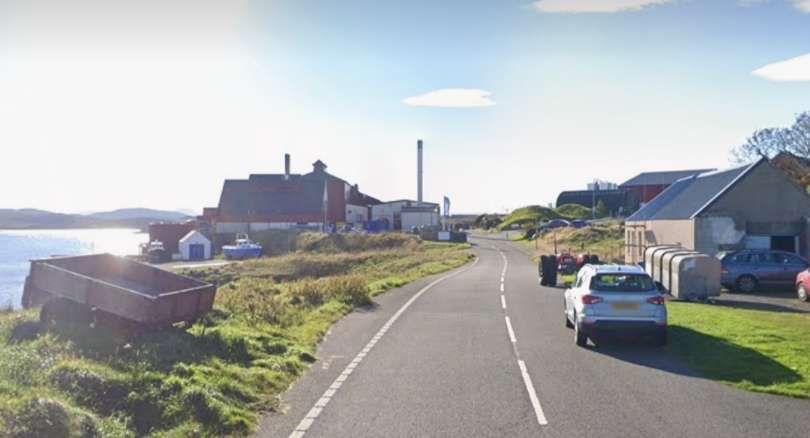
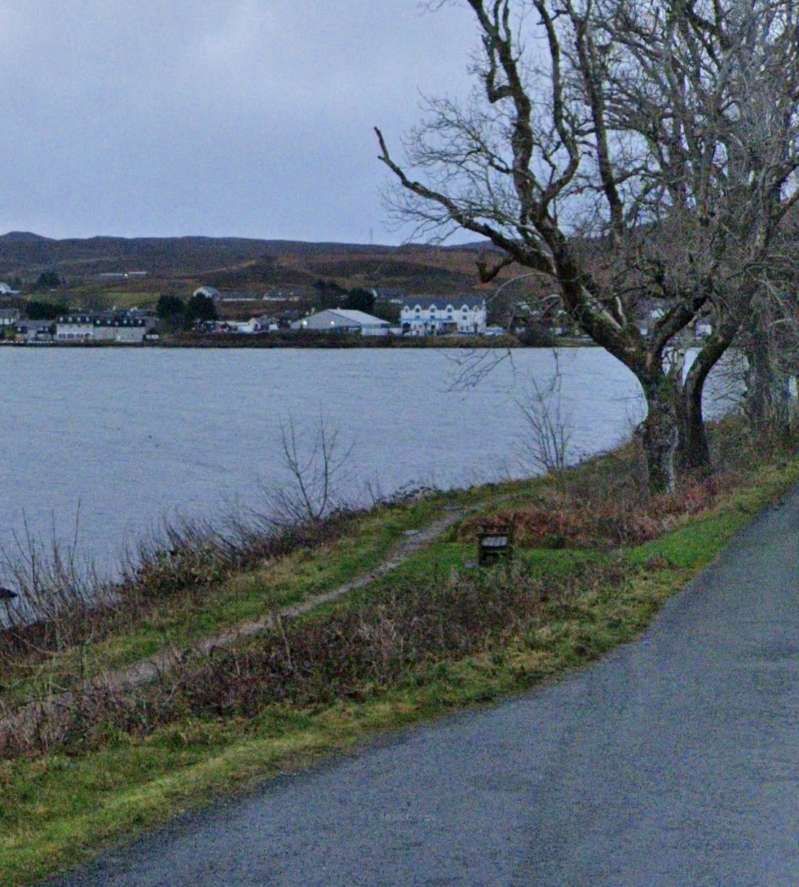
The proposed railway “was planned to connect Carloway and Breasclete on the west coast with Stornoway. Work began on the scheme, but ran into economic and legal problems. Although the railway was never constructed, the ‘Pentland Road’, largely followed the same route, and was built instead by 1912. The road was named after John Sinclair, better known as Lord Pentland who was the Secretary for Scotland between 1905 and 1912 and who helped to secure funding for the completion of the road.” [18]
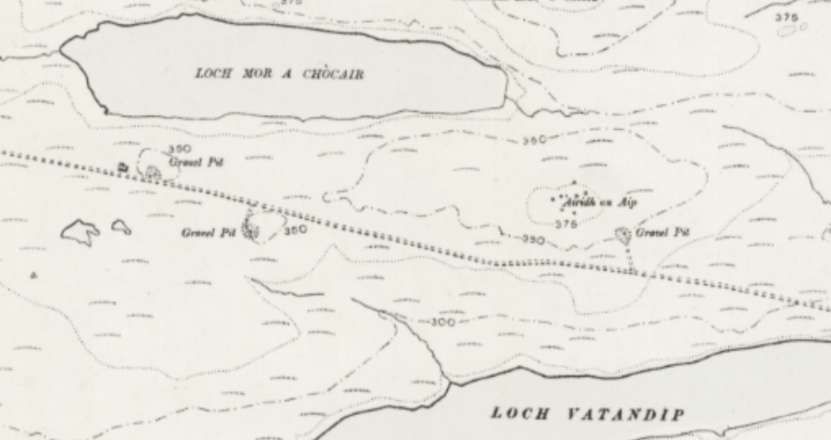
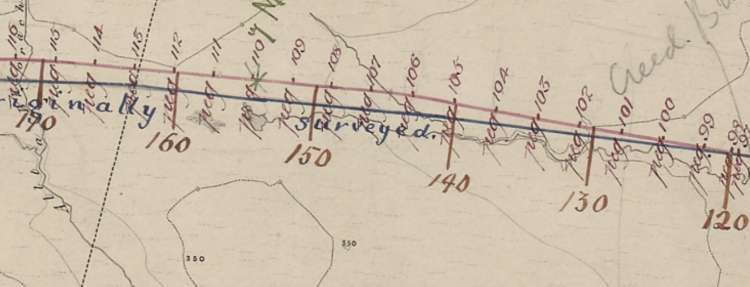
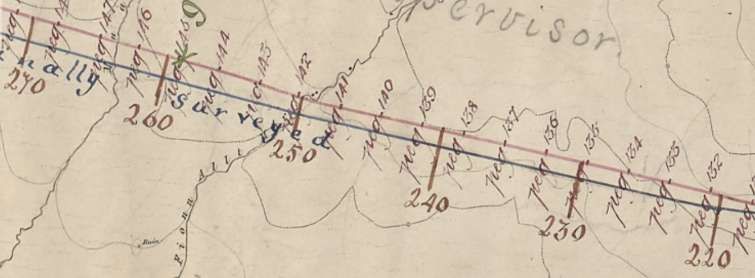
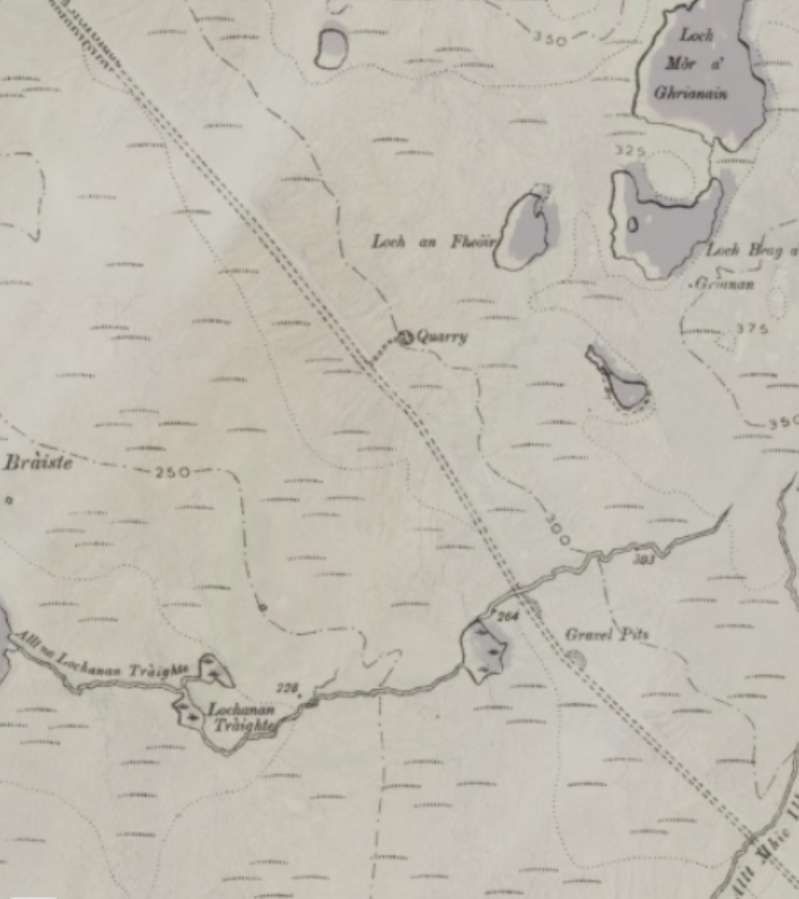
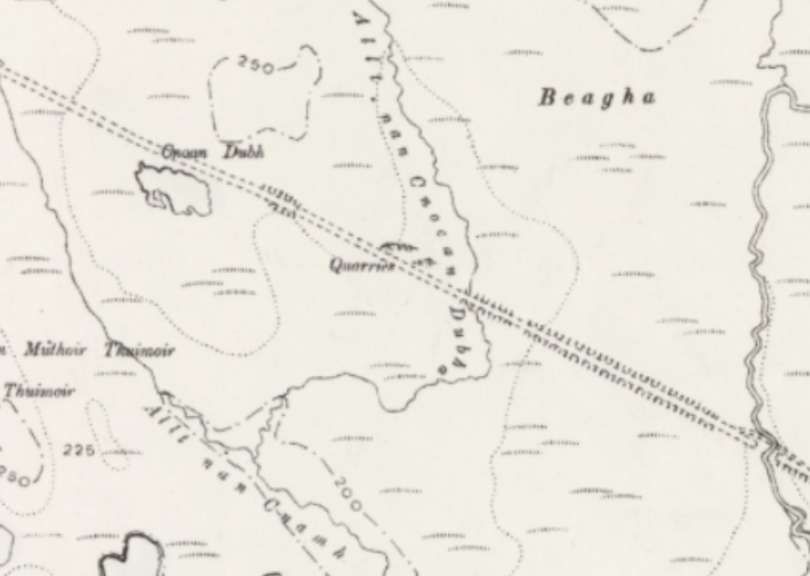
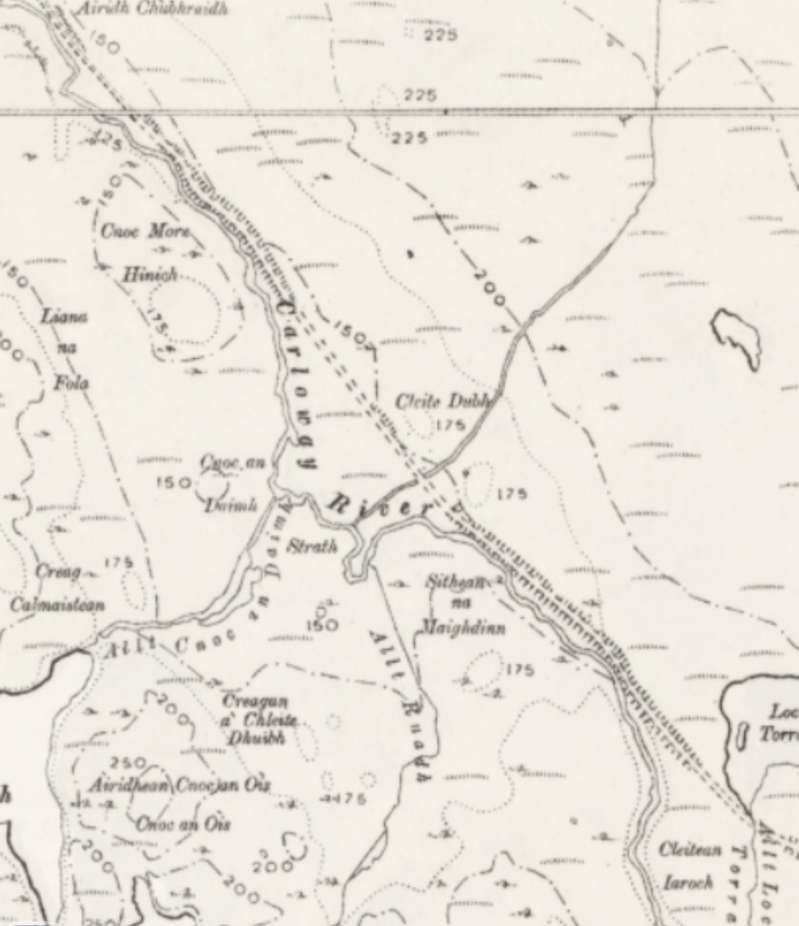
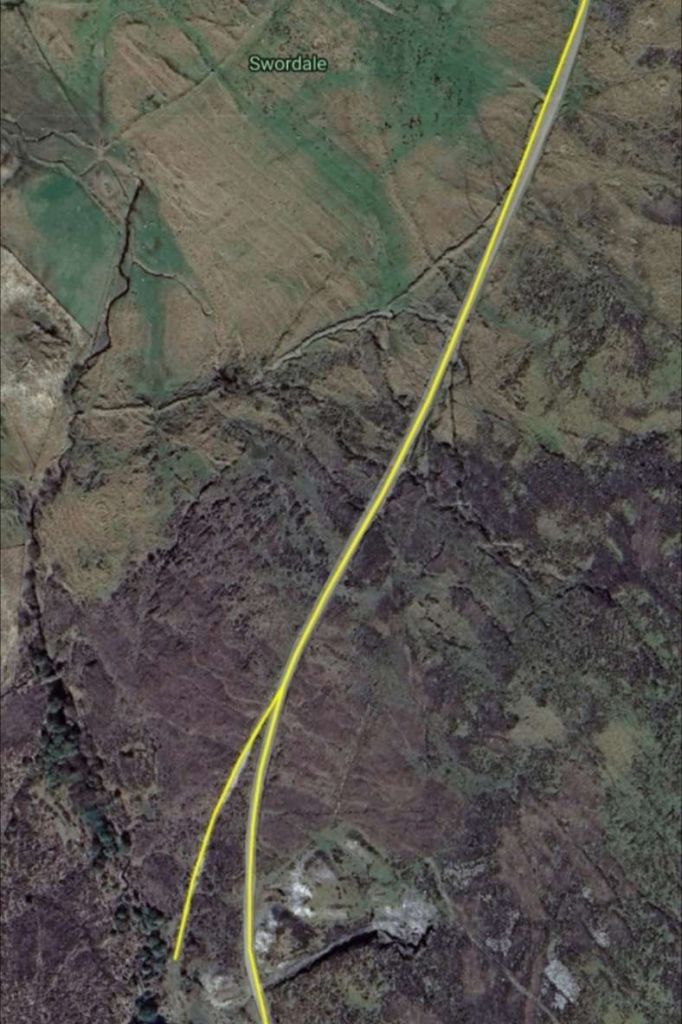
The map is made up of “four original Ordnance Survey first edition six-inch to the mile maps from the 1850s that have been stuck together, with the route itself annotated on top. … Near Carloway, there is an additional Blue line shewing route originally surveyed changed to avoid damaging arable land.” [18]
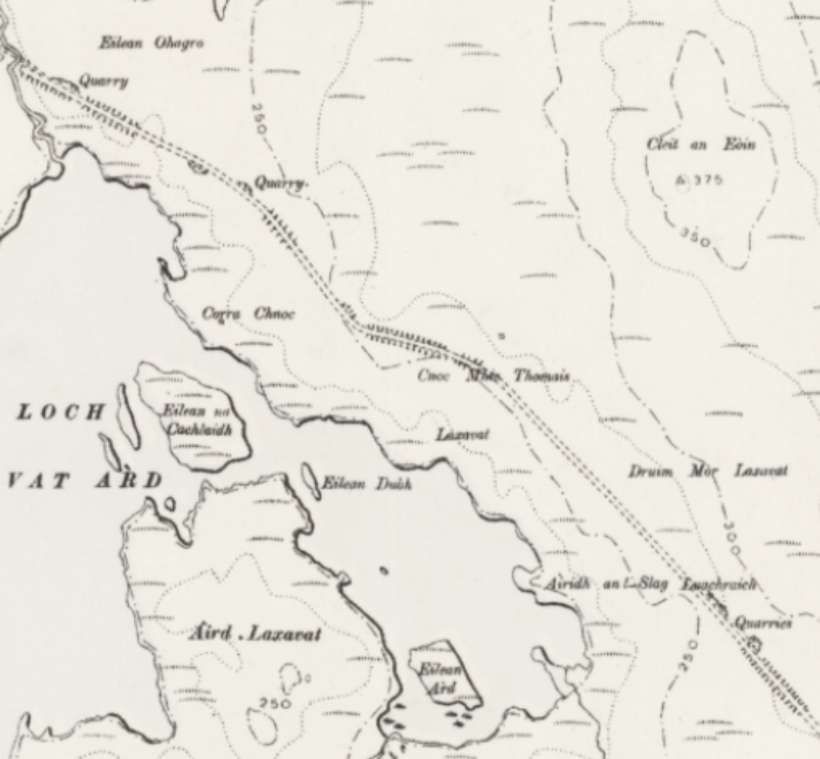
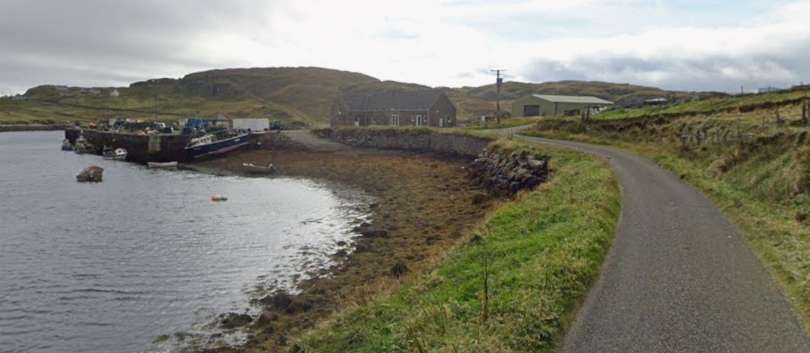
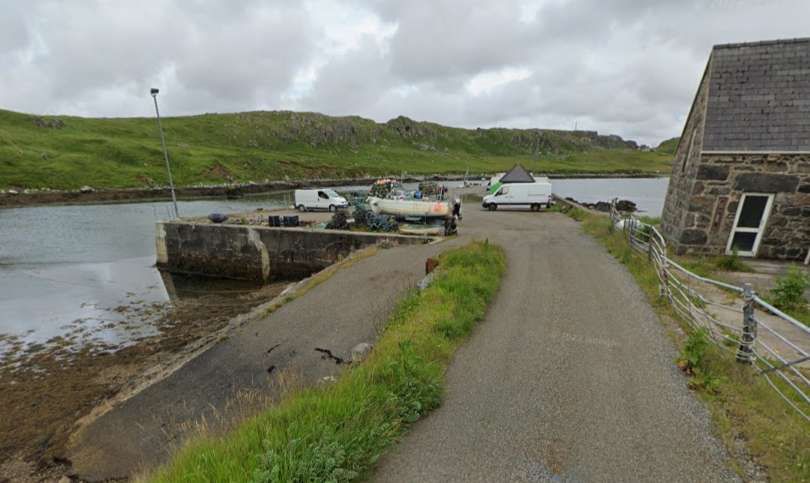
Carloway and Breasclete were the western termini of the network with the line to Breasclete appearing to be a branch line.
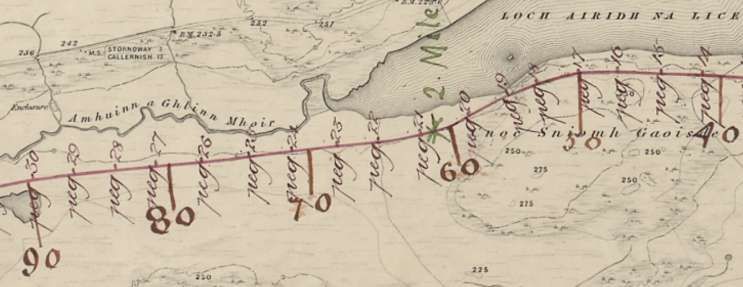
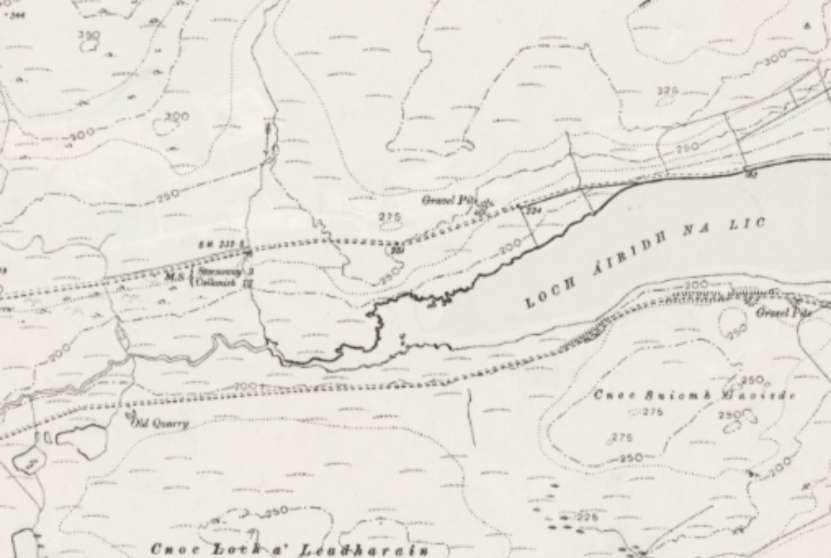
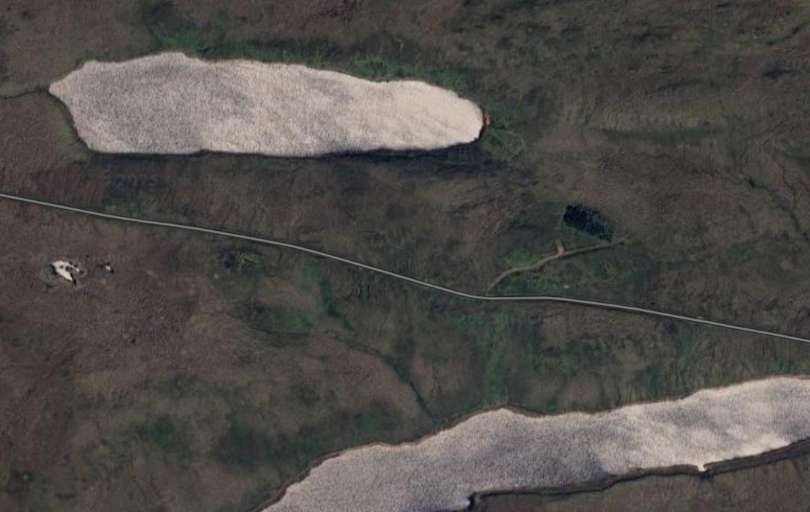
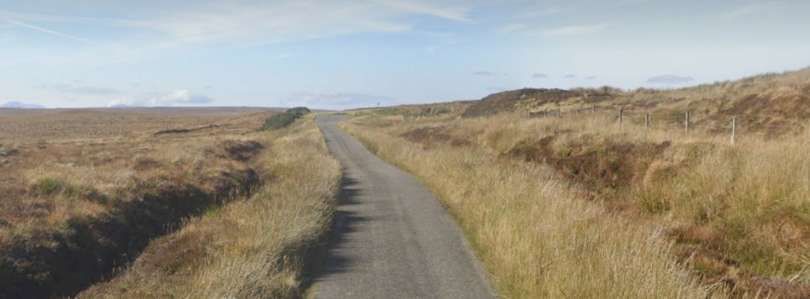
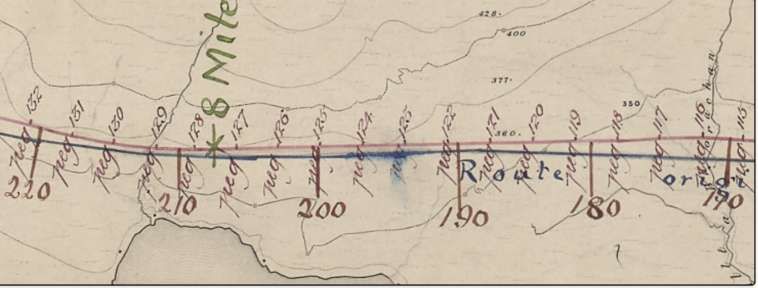
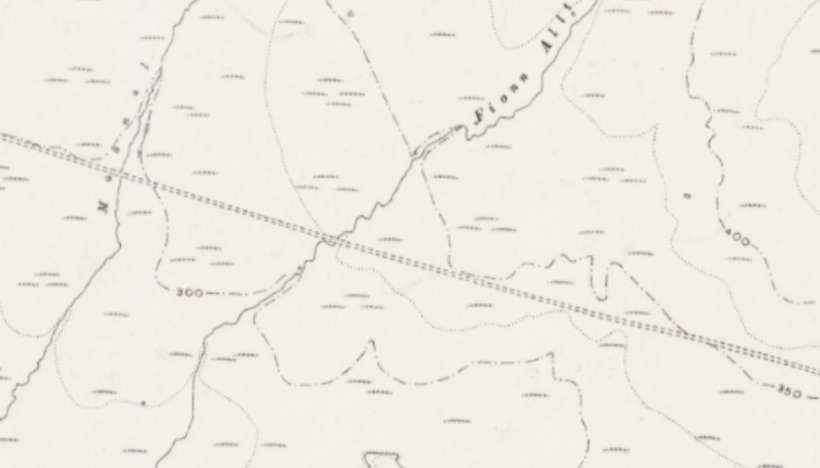
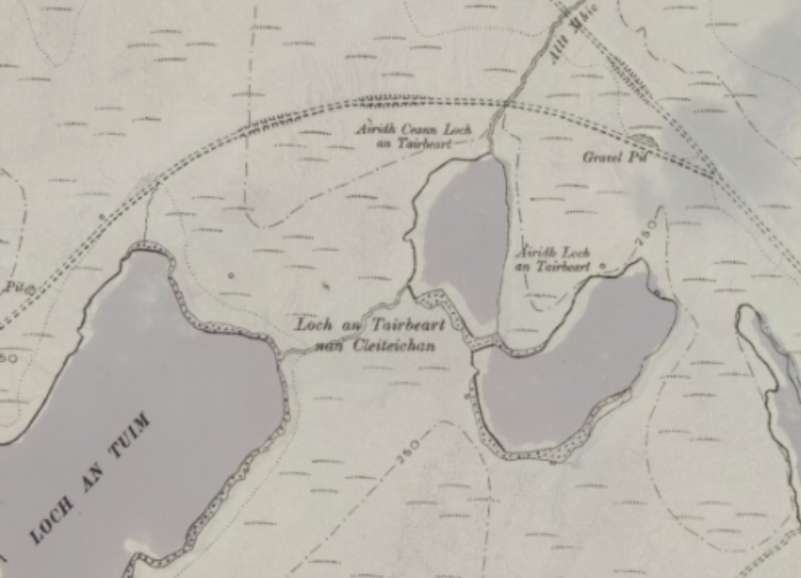
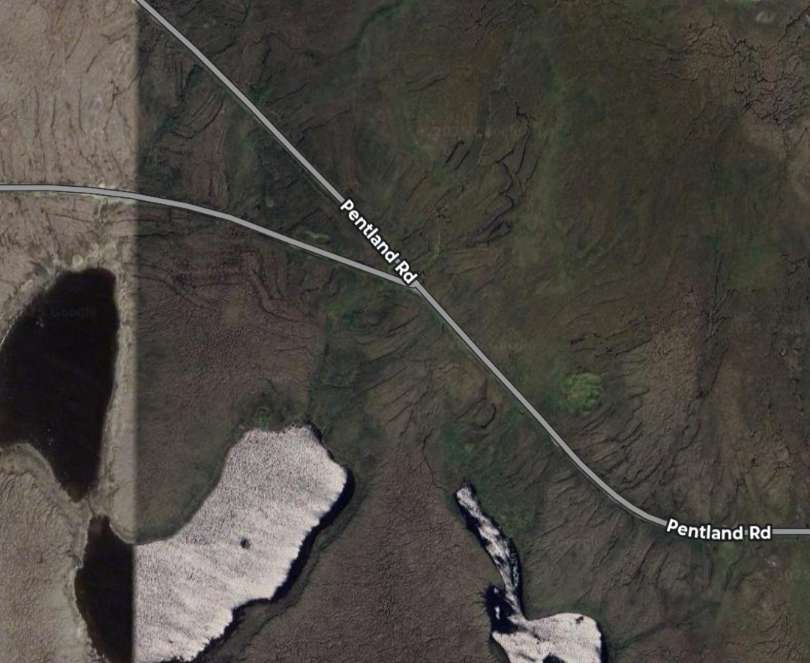
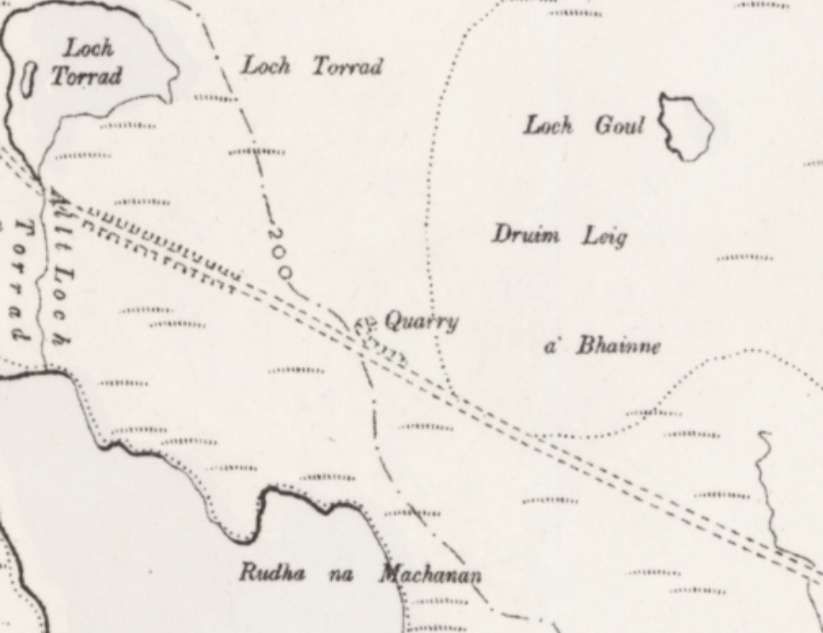
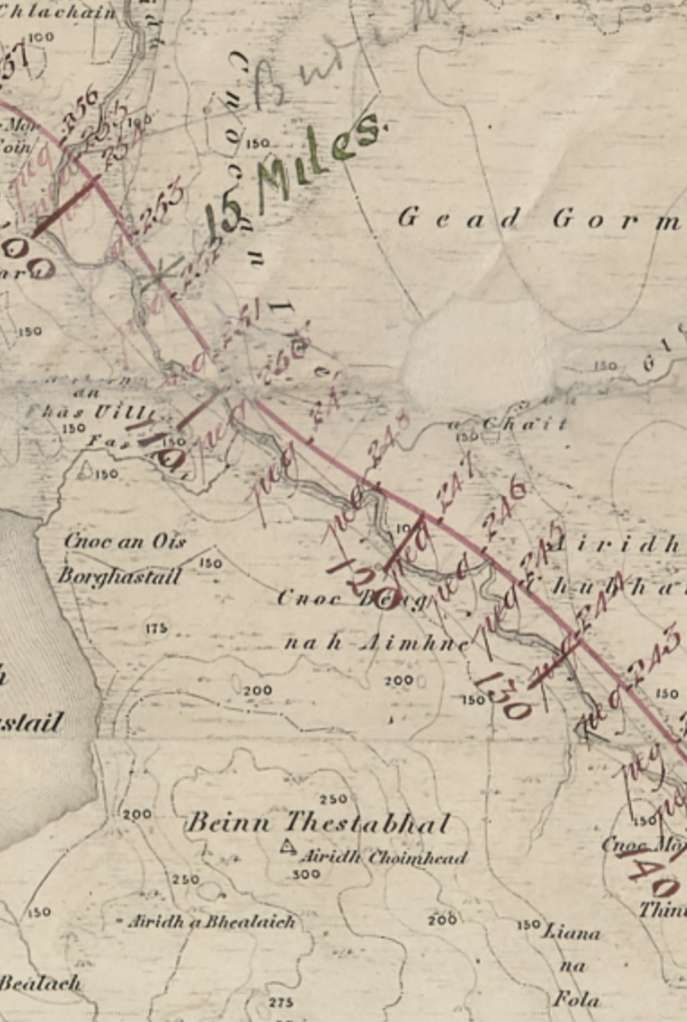
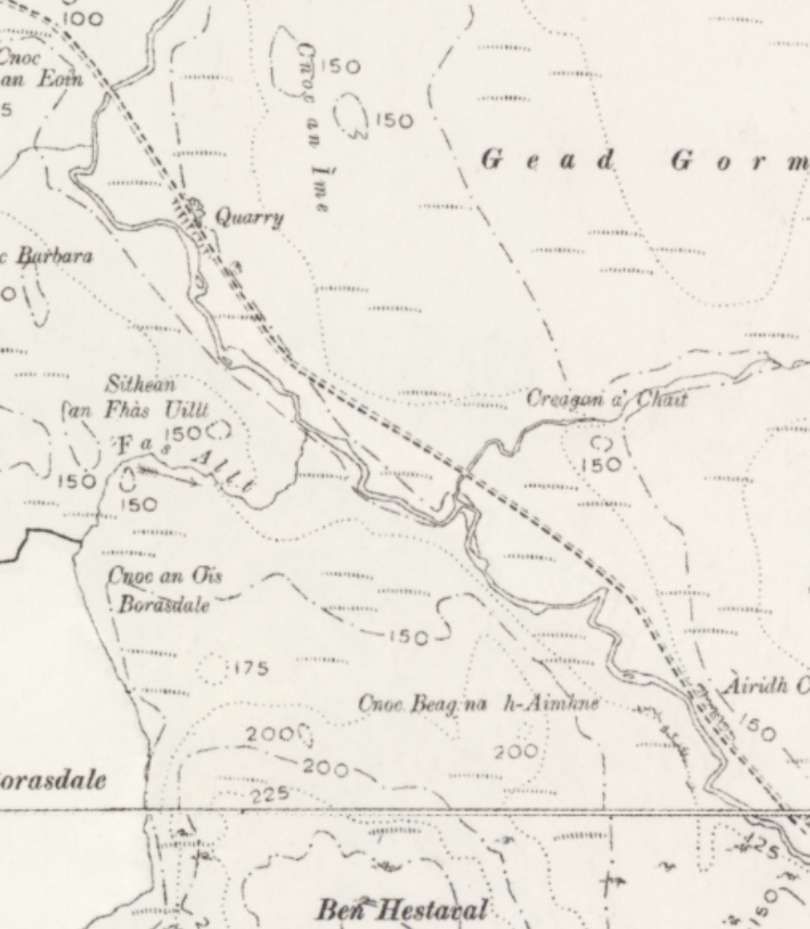
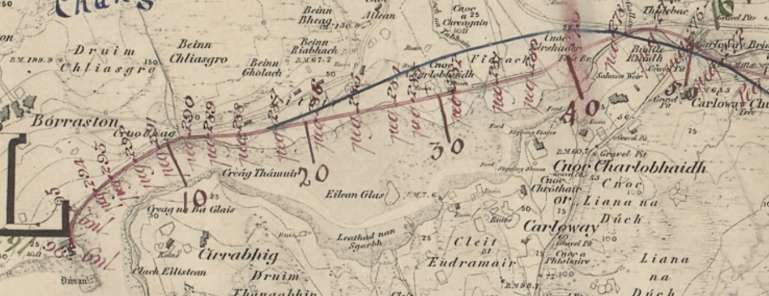
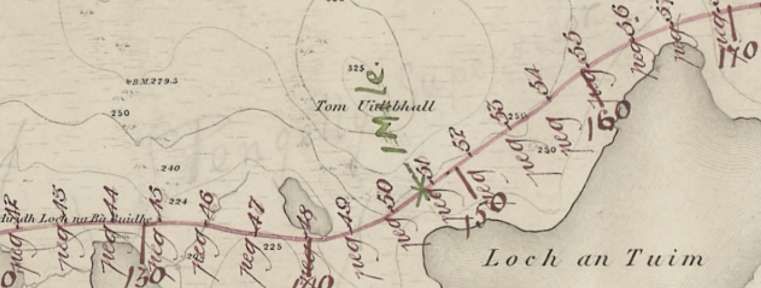
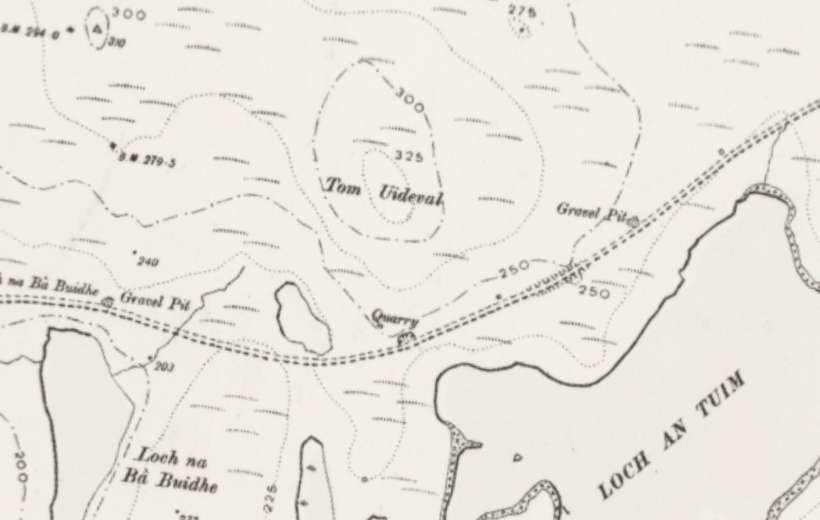
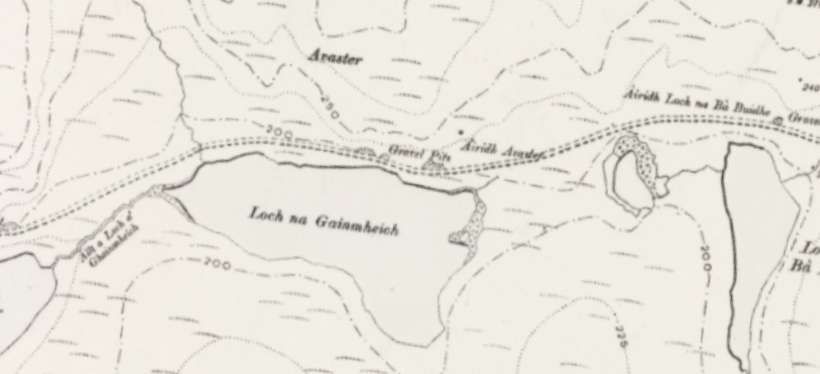
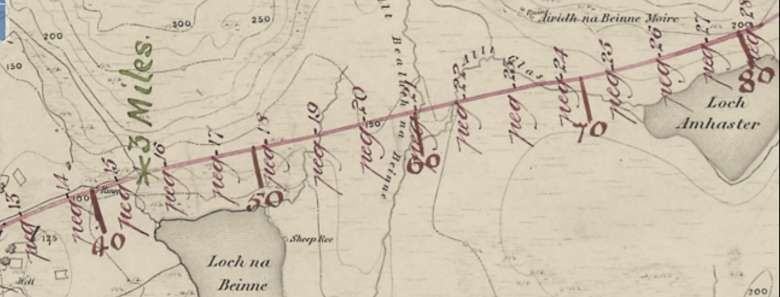
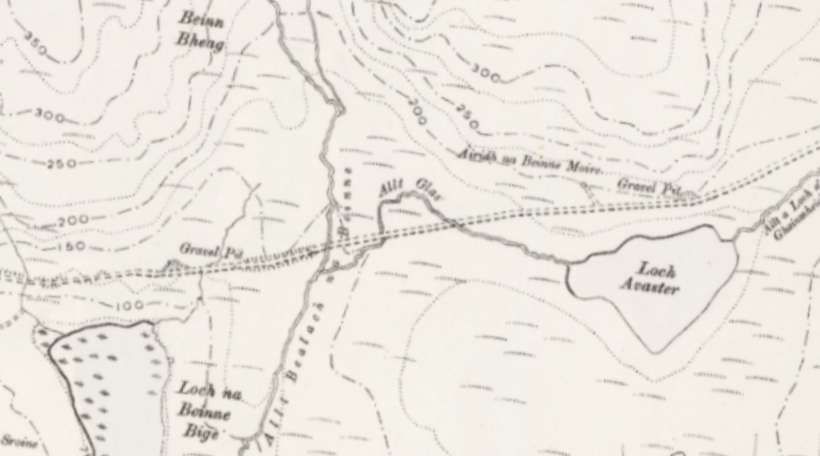
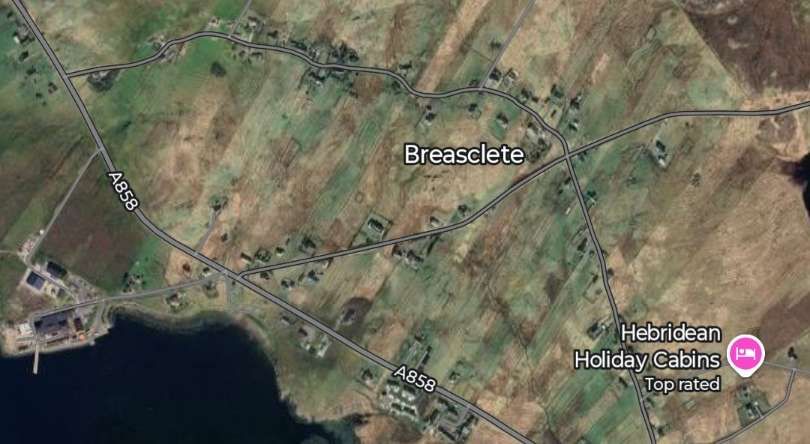
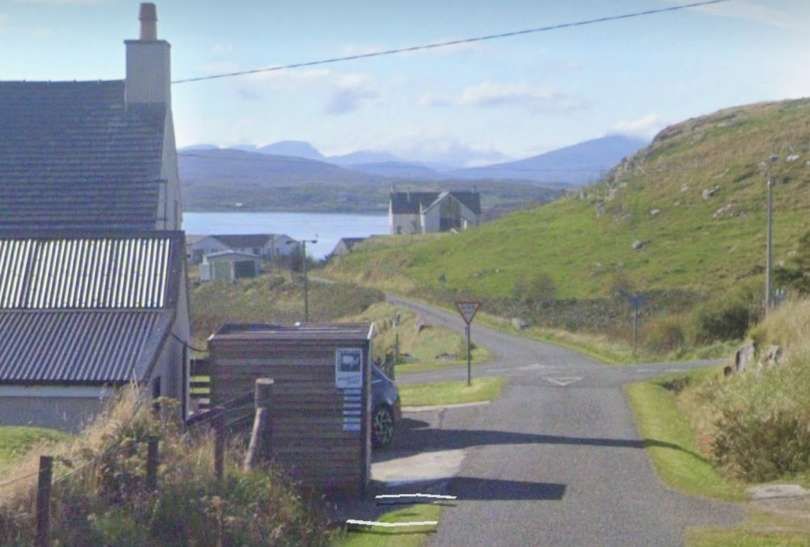
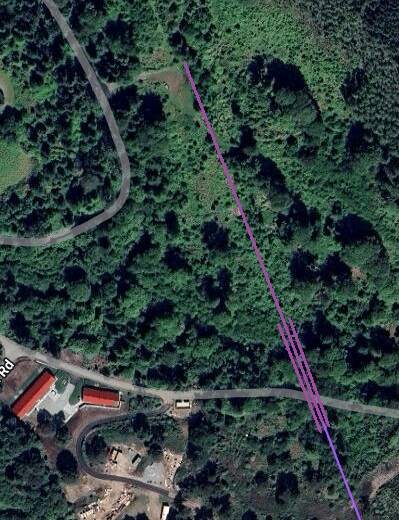
The extracts from the annotated 1″ Ordnance Survey of the 1850s run in sequence from Stornoway to Carloway and then from the junction to Breasclete. They are the sepia coloured map extracts. Beneath each extract from the 1″ Ordnance Survey is the 2nd Edition 6″ Ordnance Survey from around the turn of the 20th century. These extracts precede the construction of the Pentland Road but show the route the road(s) will take as a dotted track.
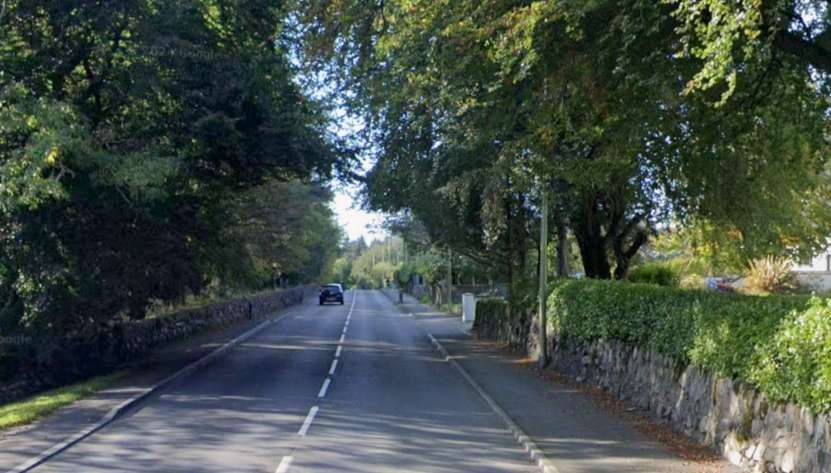
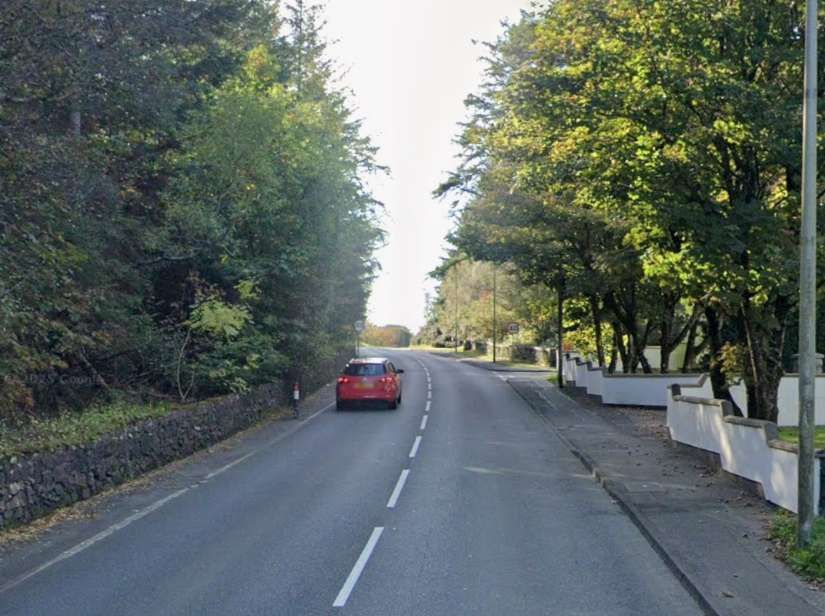
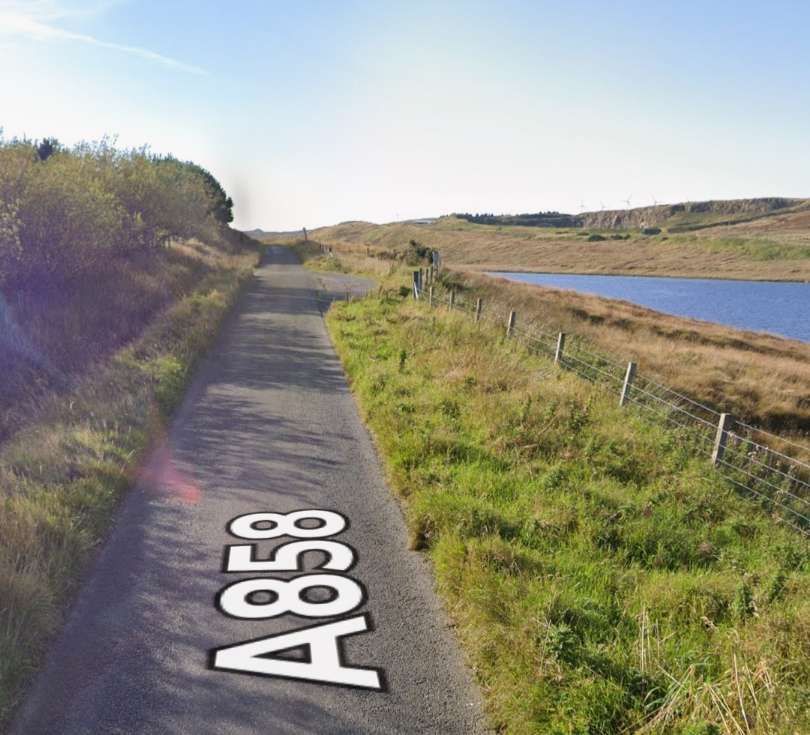
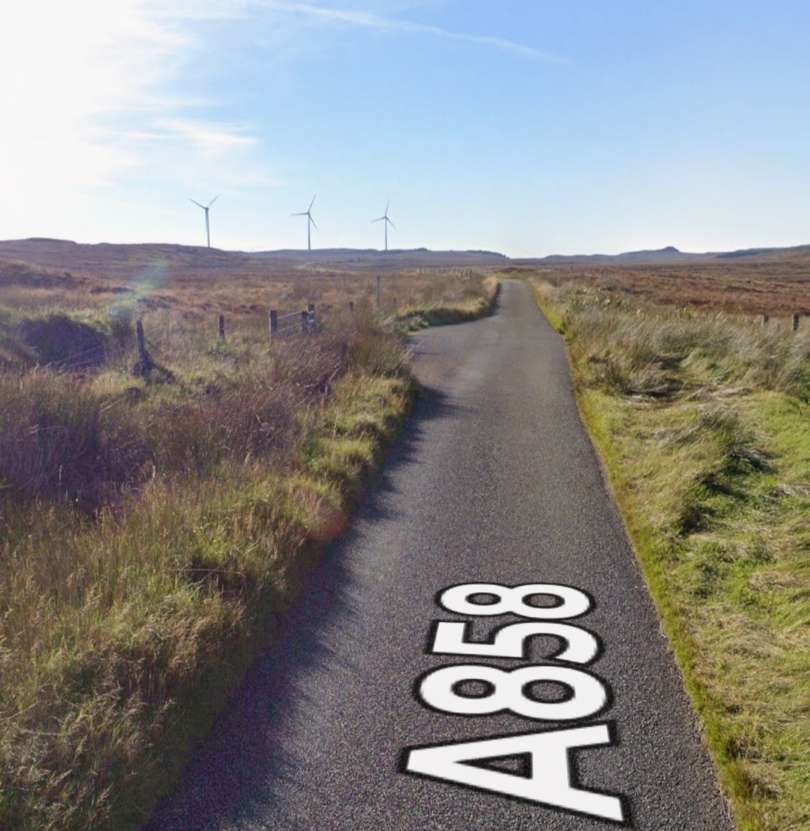
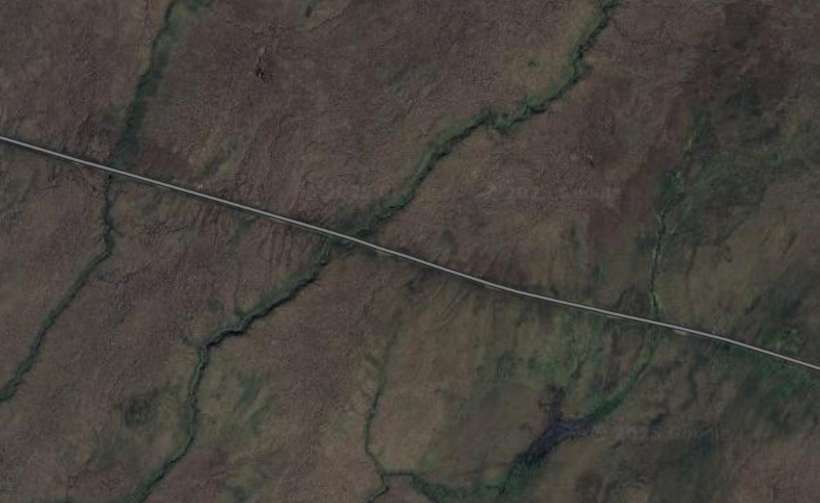
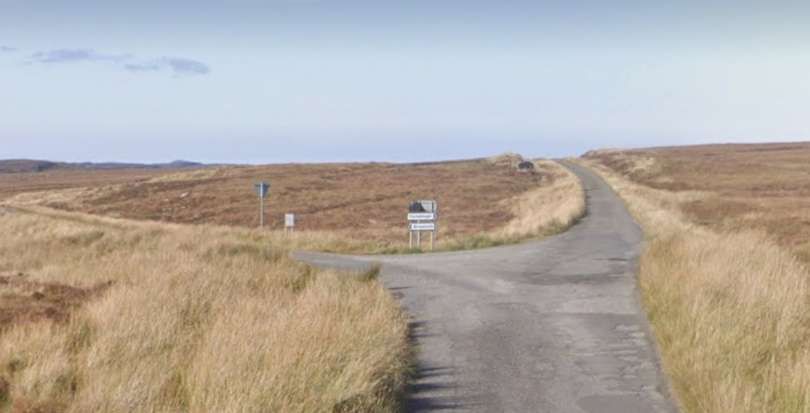
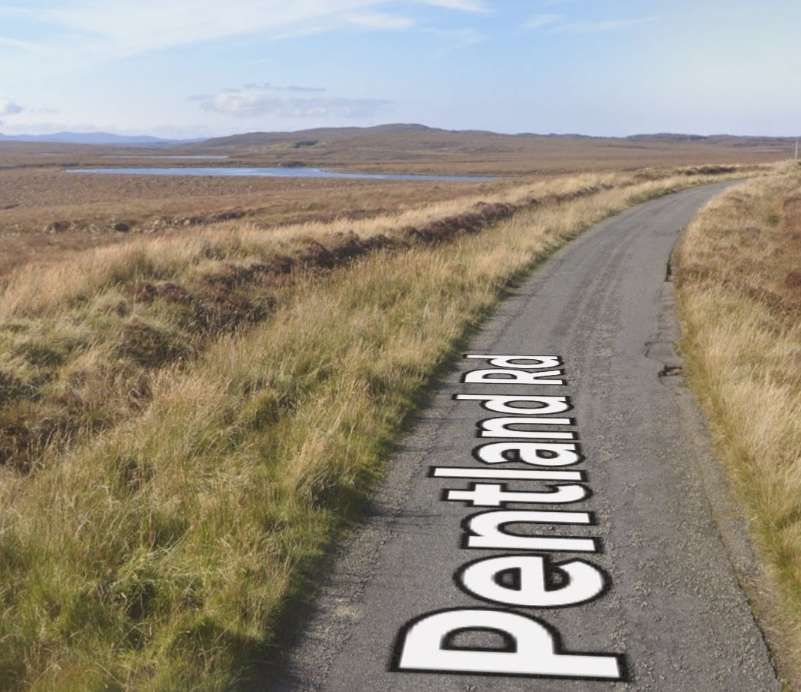
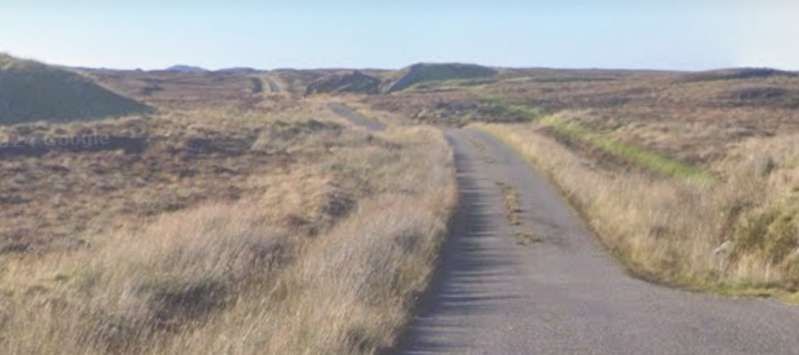
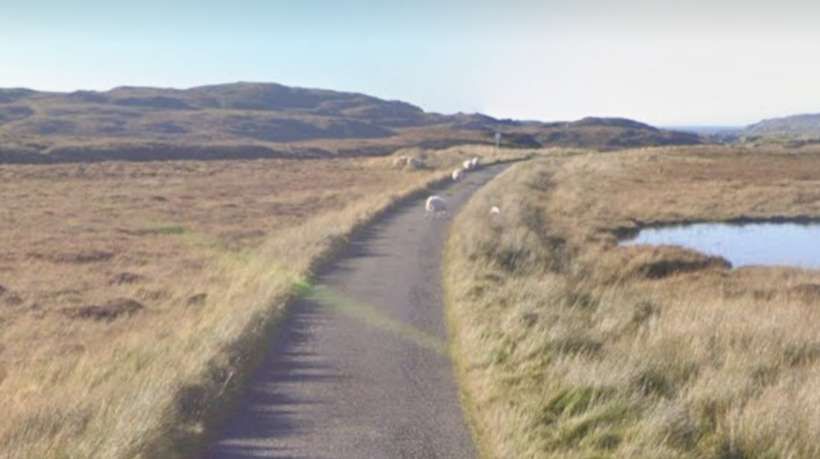
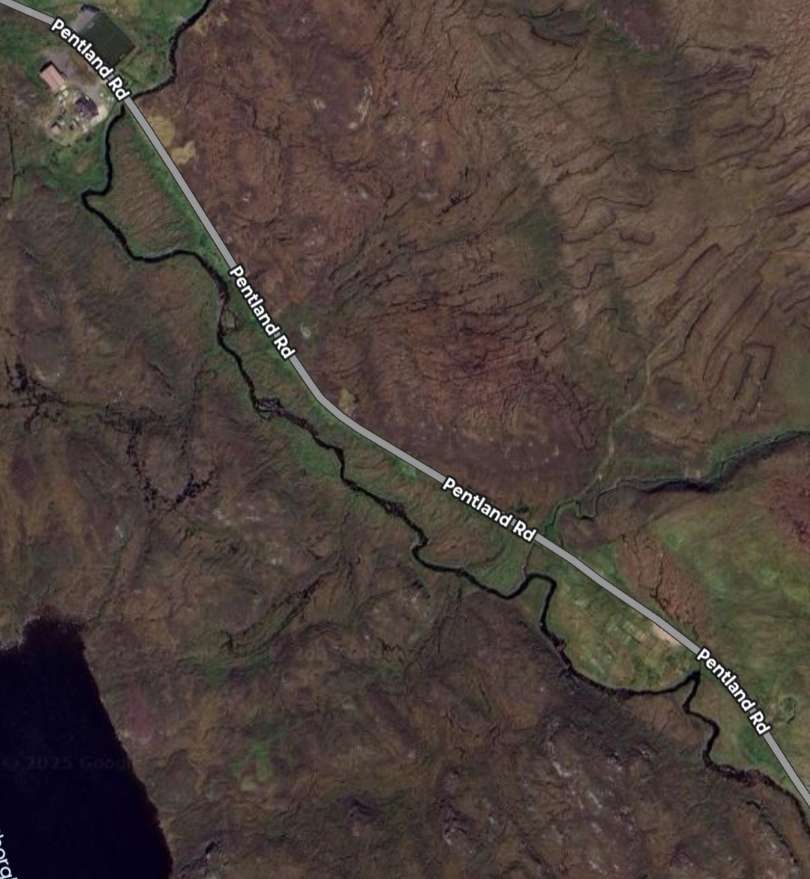
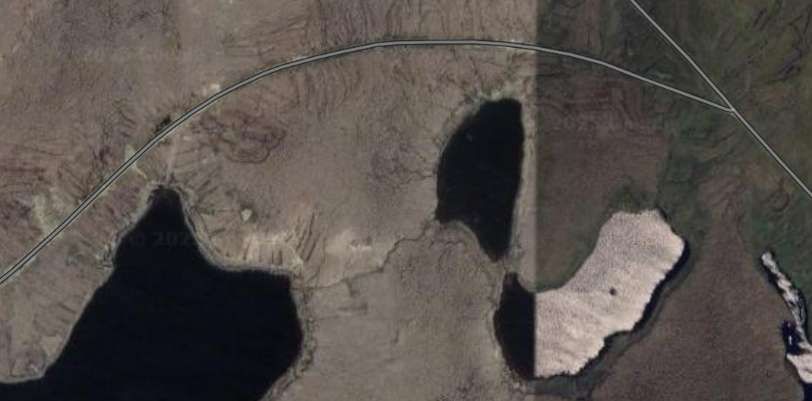
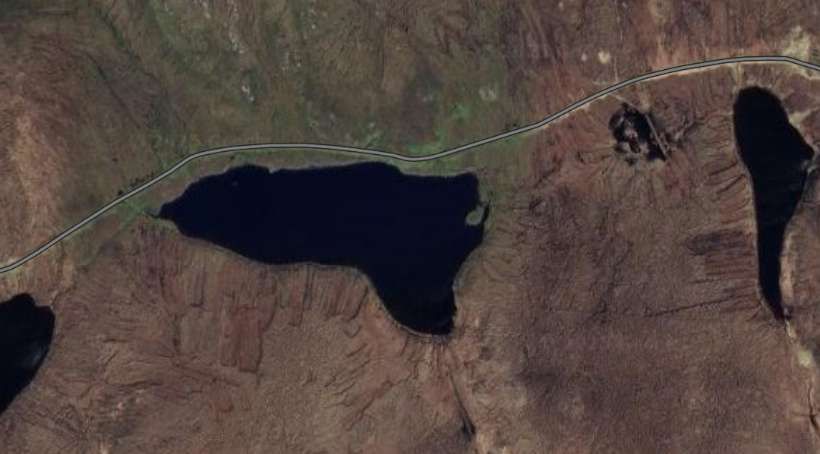
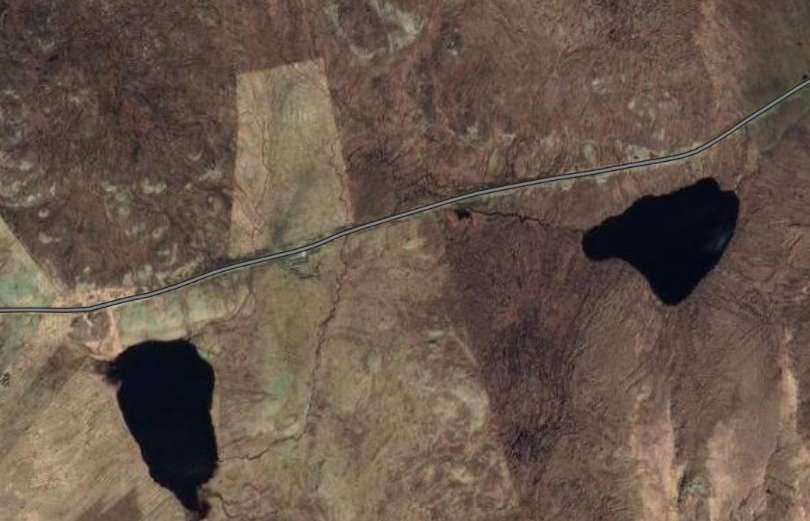
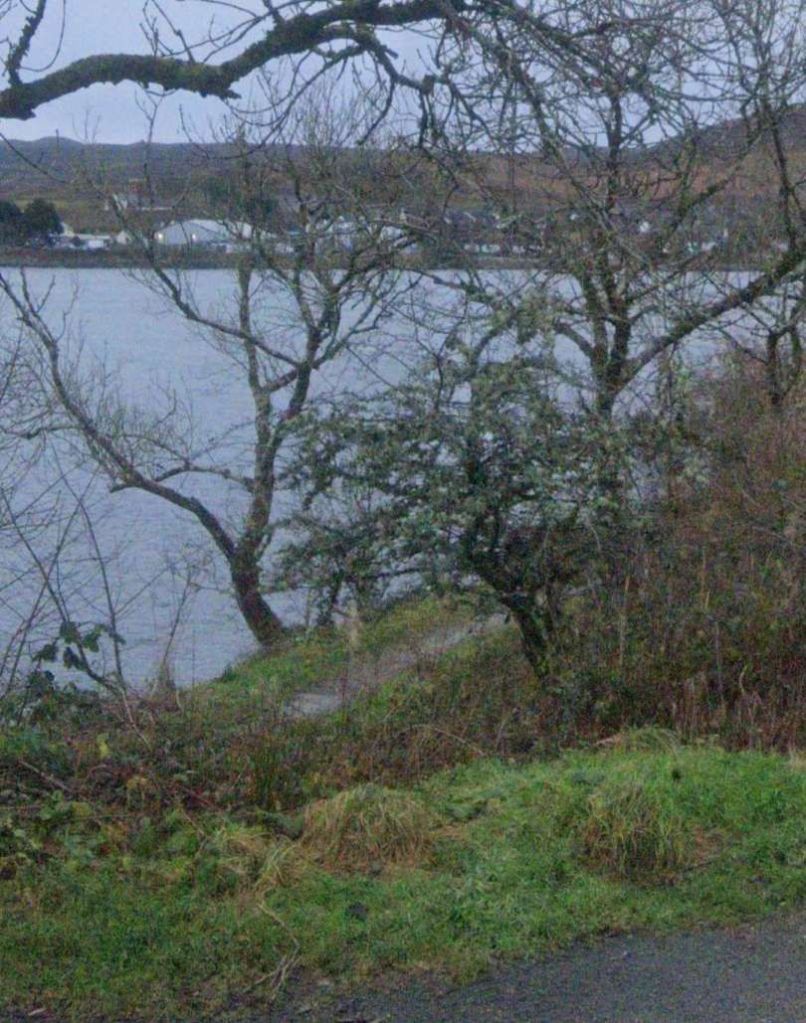
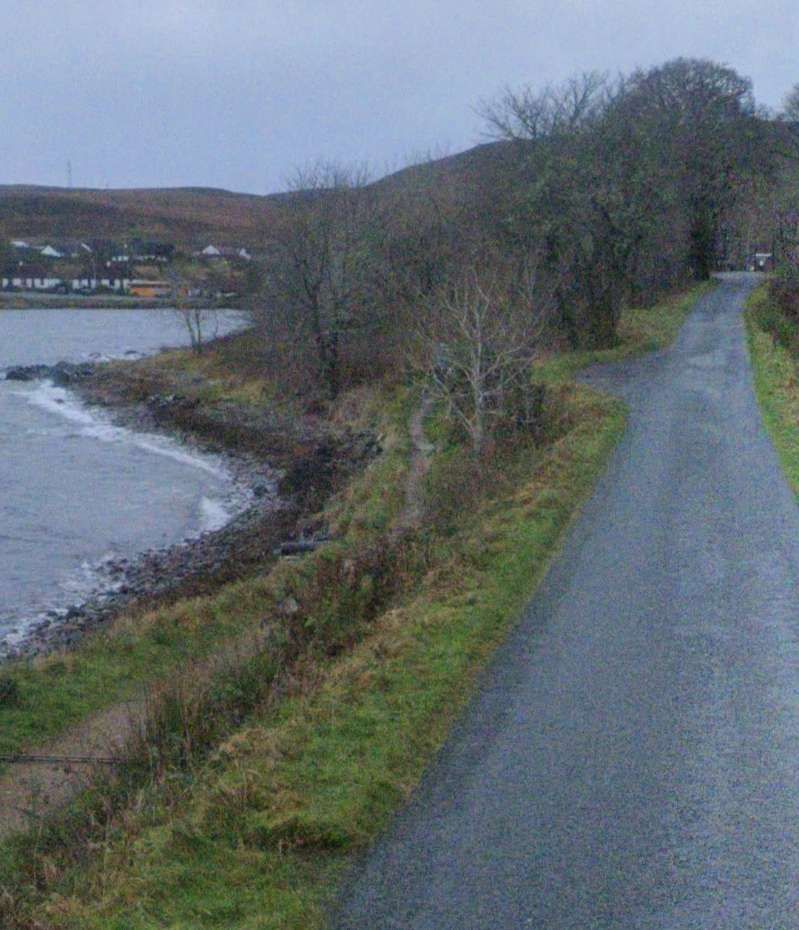
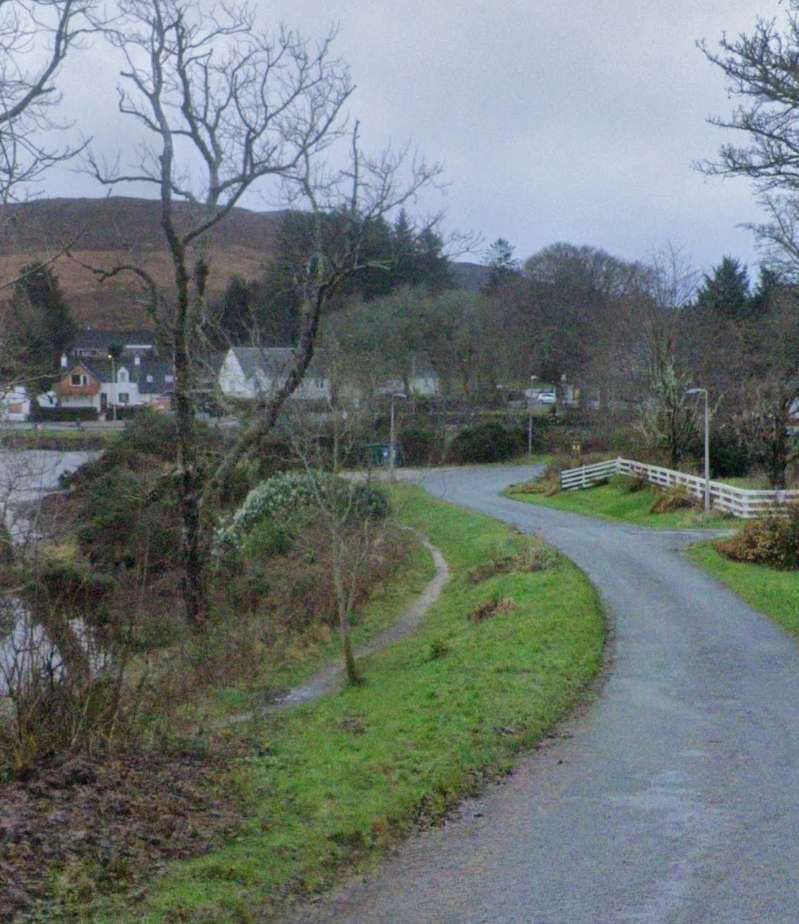
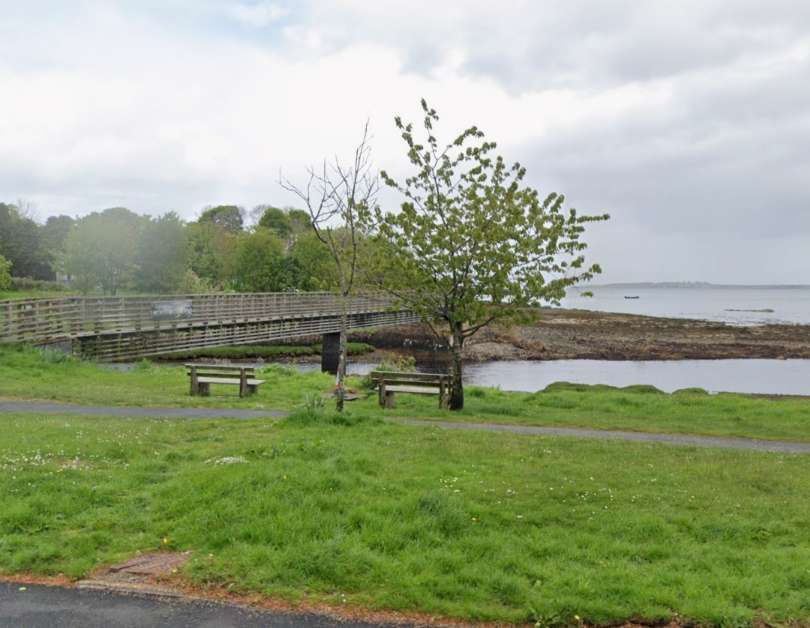
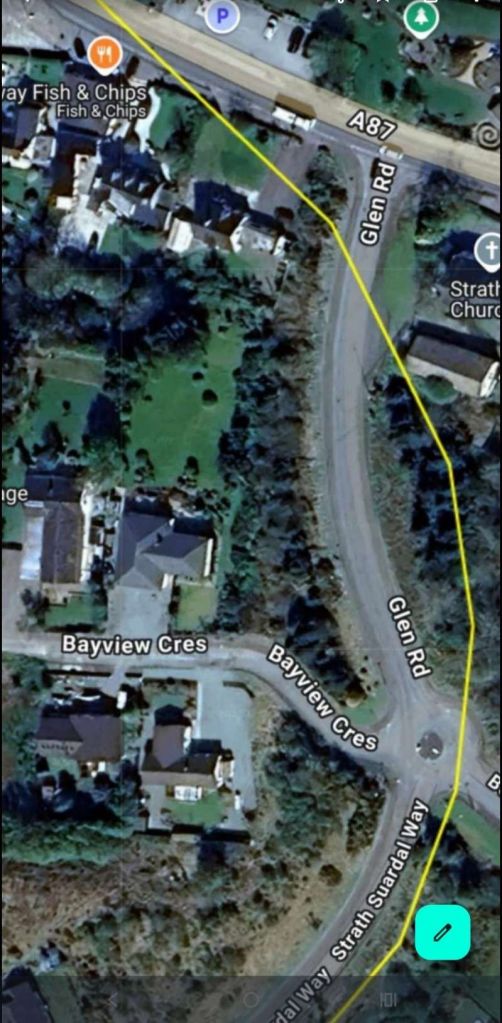
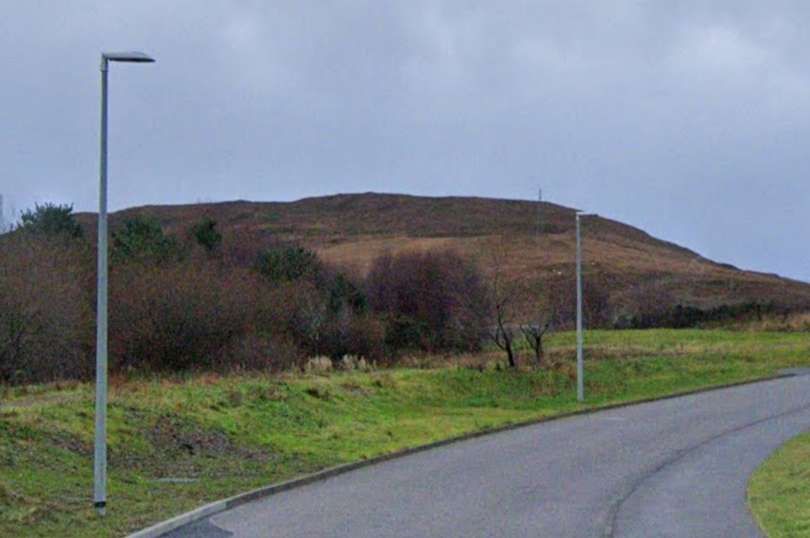
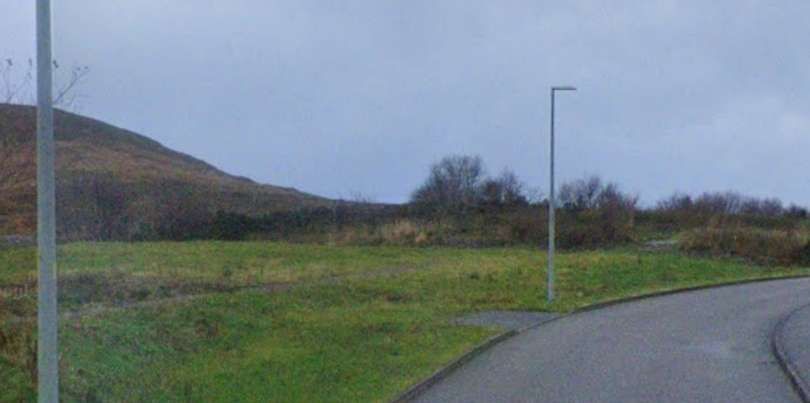
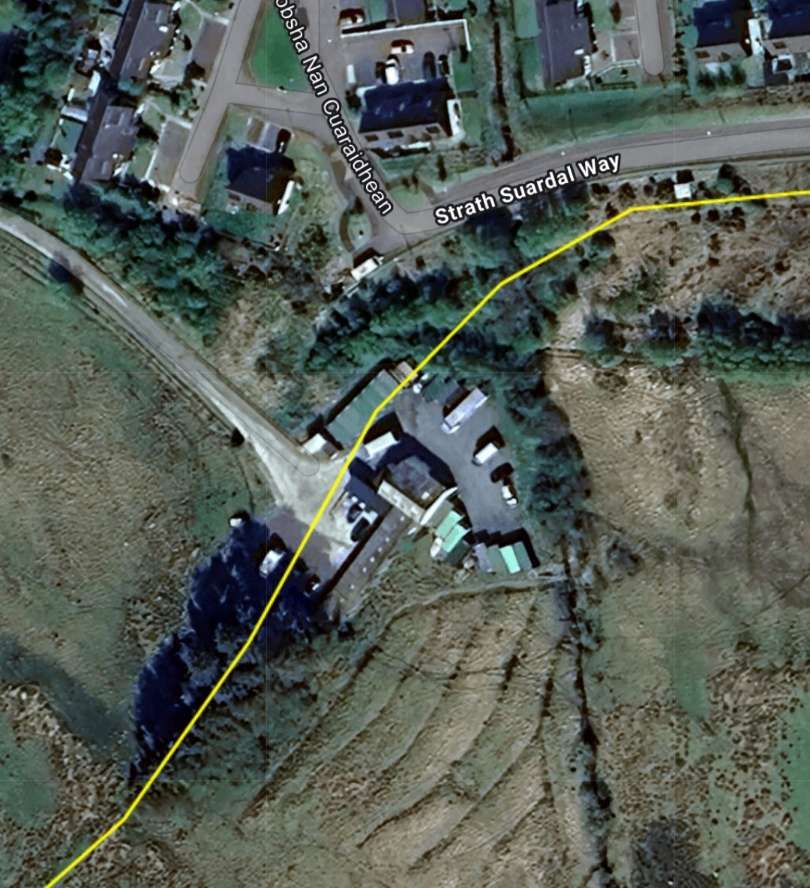
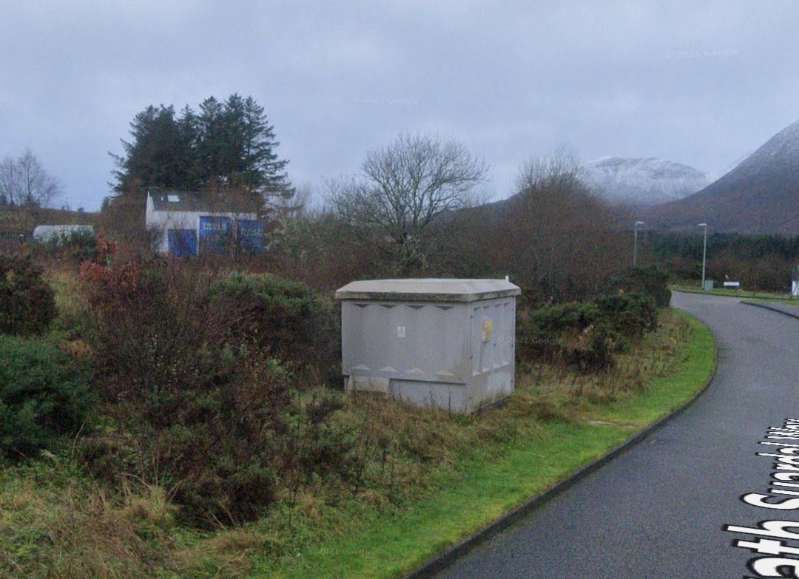
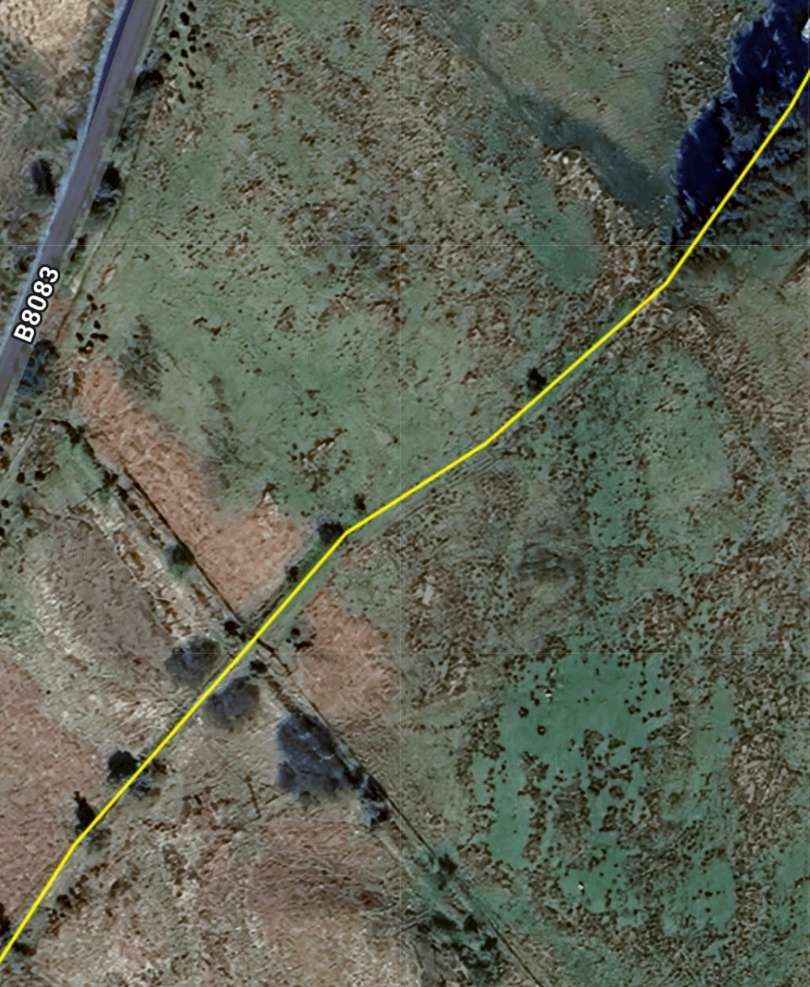
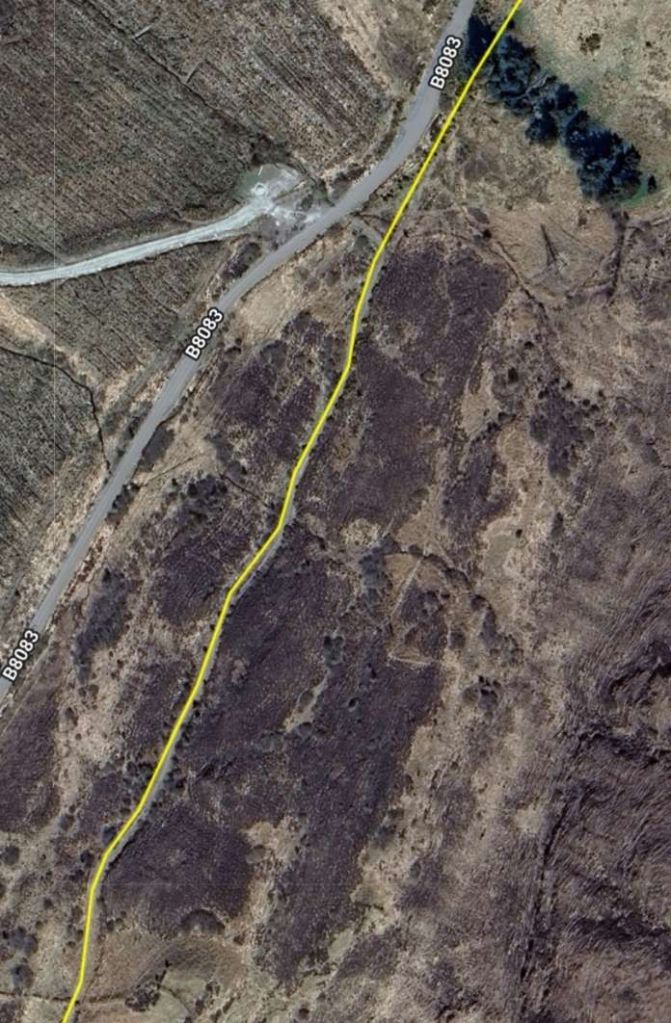
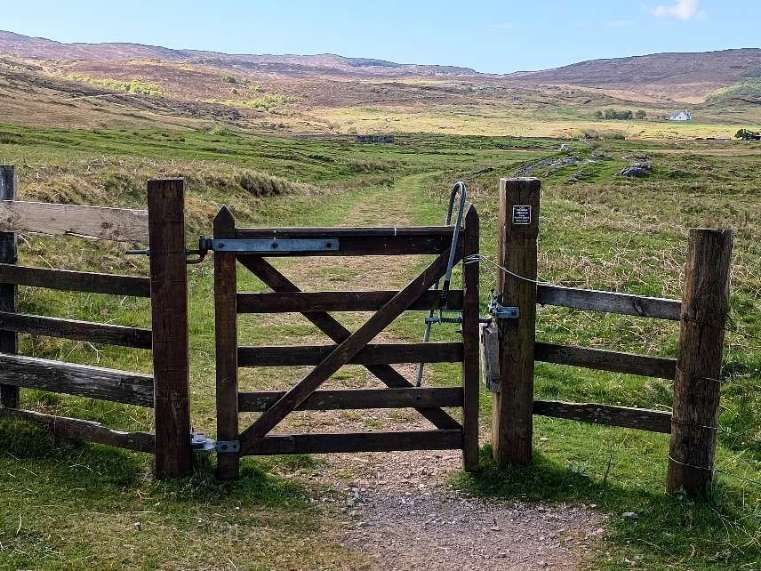
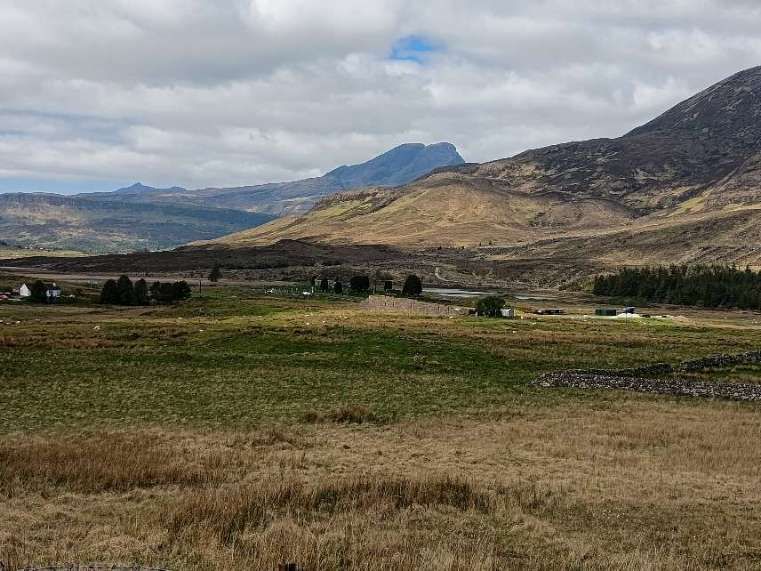
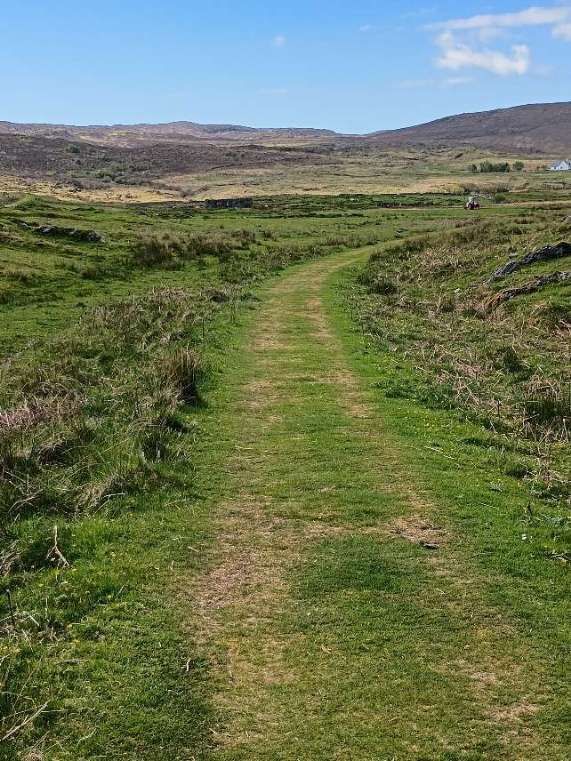
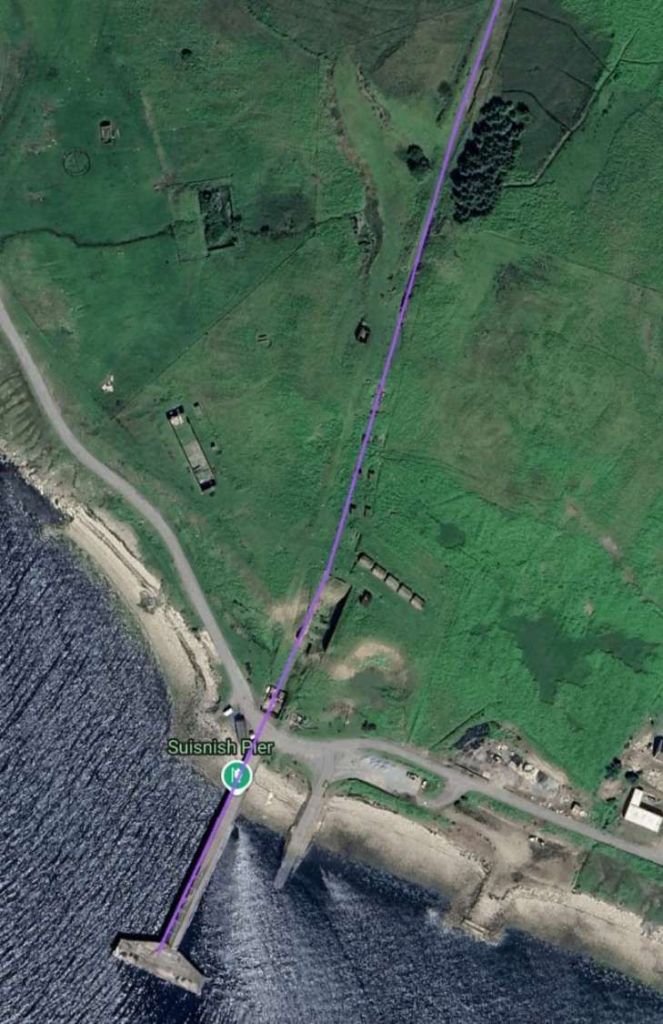
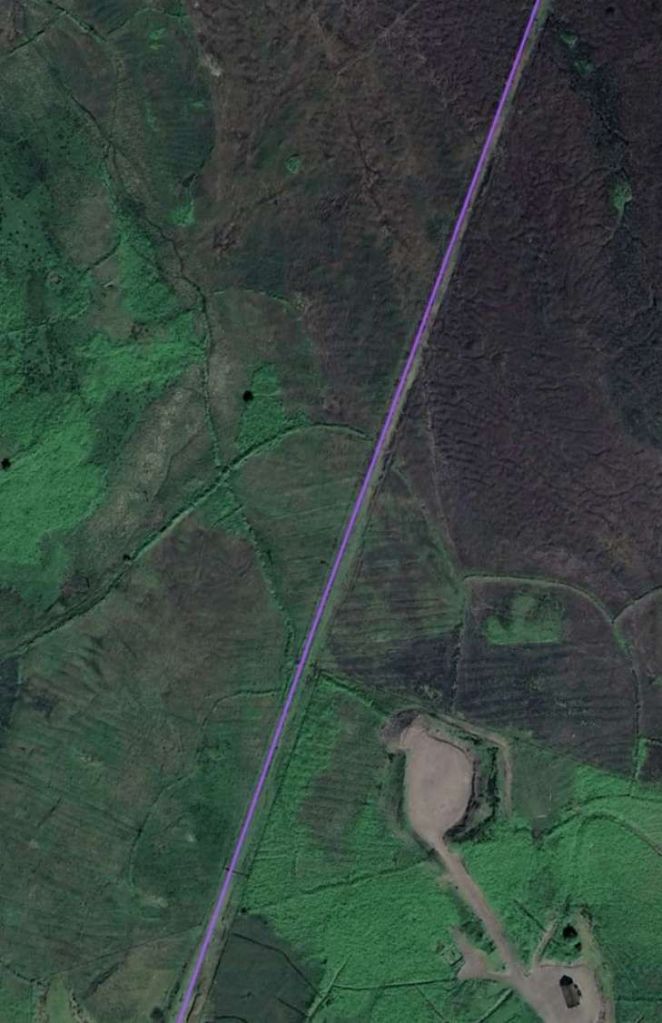
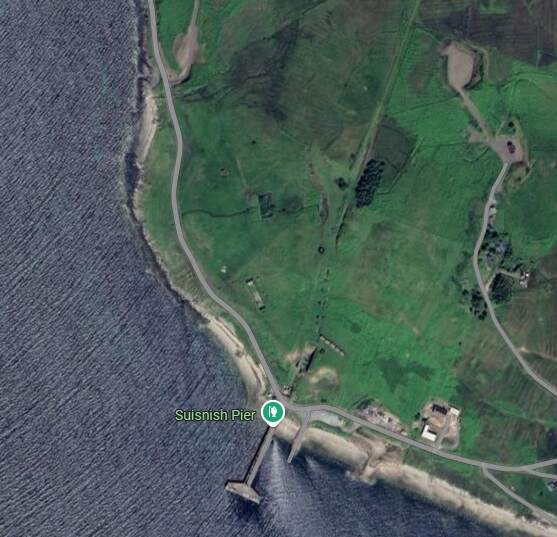
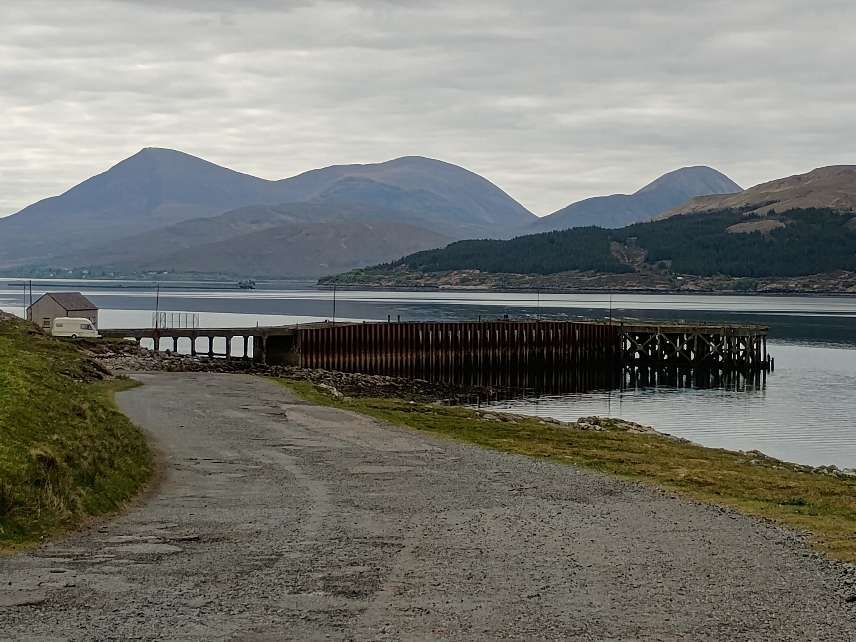
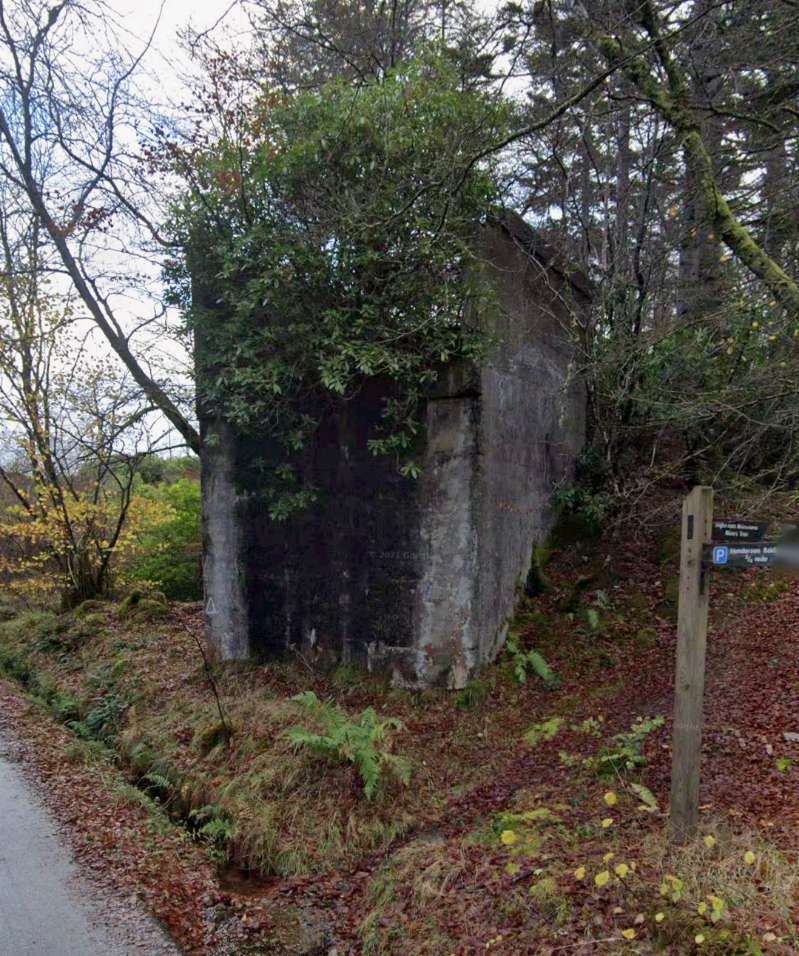
Modern satellite imagery is then provided alongside some Streetview images to show the built roads which were completed in 1912 and which are still in use in the 21st century.
There is some doubt over the route of the line approaching and entering Stornoway. Two possibilities with supporting drawings start our look at the line. …
Stornoway to Carloway
Close to Stornoway the alignment of the planned, but never built, railway is not certain. The first possibility is shown immediately below. This takes the mapping provided by the NLS. … [18] The second alternative was discovered by ‘Tom’ in the National Archives at Kew and highlighted on his blog. [53][54]
First, the NLS supplied drawings from the Stornoway Public Library. …


Second, the alternative alignment for the East end of the line which appears in documents at the National Archives. [53][54]
The Hebridean Light Railway Company, a blog by ‘Tom’ includes this photograph of a plan from the National Archive at Kew.This plan matches the plan provided by the NLS throughout the length of the line with the exception of the eastern end of the line. [54]
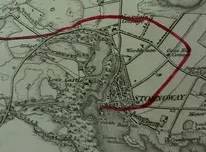
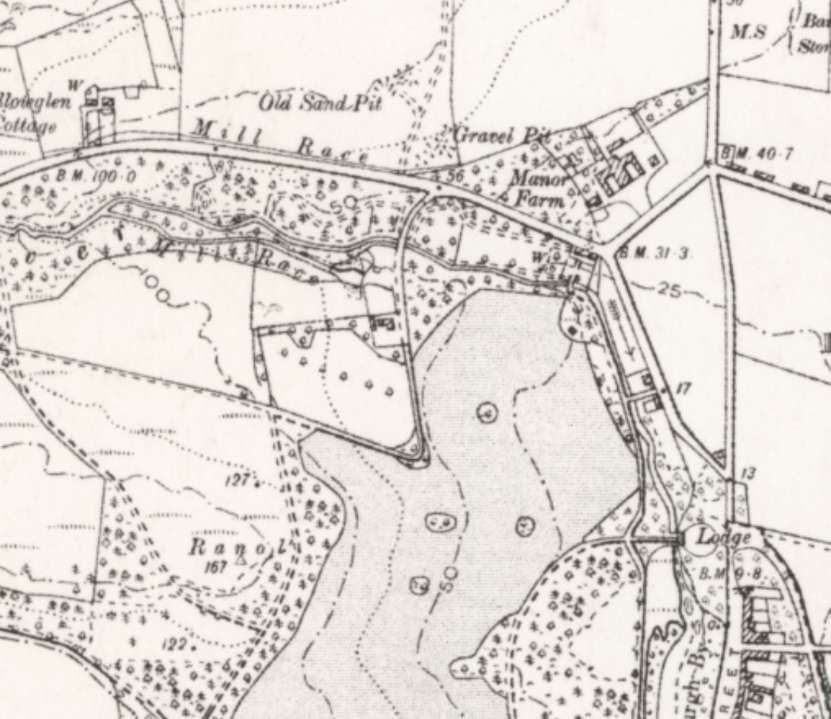
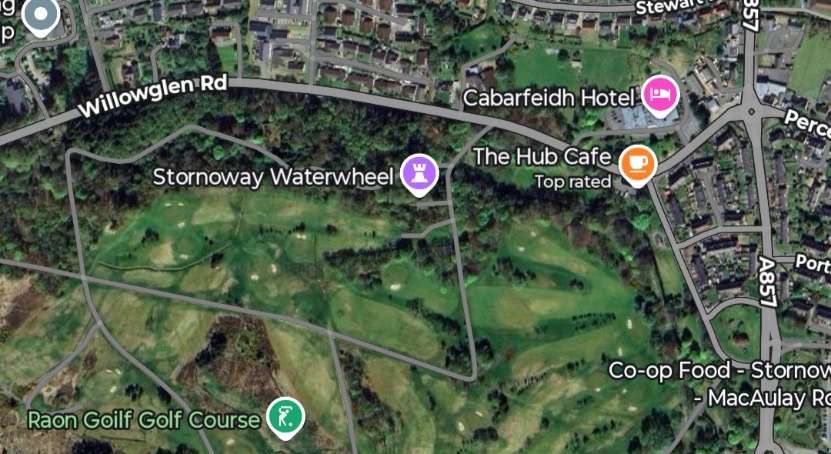
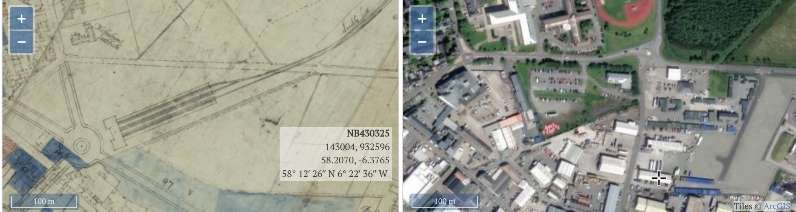
This image shows the eastern end of the line at Stornoway. The route takes a line to the North of what is now Willowglen Road, and to the North of what was Manor Farm, now the Cabarfeidh Hotel, then swinging in a wide arc round the East side of Stornoway before running across the South of the town. [54]
The superimposed red line is a diagrammatic representation of the route, but it does have some resonance with the later temporary railway built by Robert McAlpine & Co. which is covered towards the end of this article. It does however match with other papers in the bundle which ‘Tom’ discovered in the National Archives. …
A very low resolution photograph of the plan of the proposed railway around Stornoway. This is a match for the red line shown above. [54]
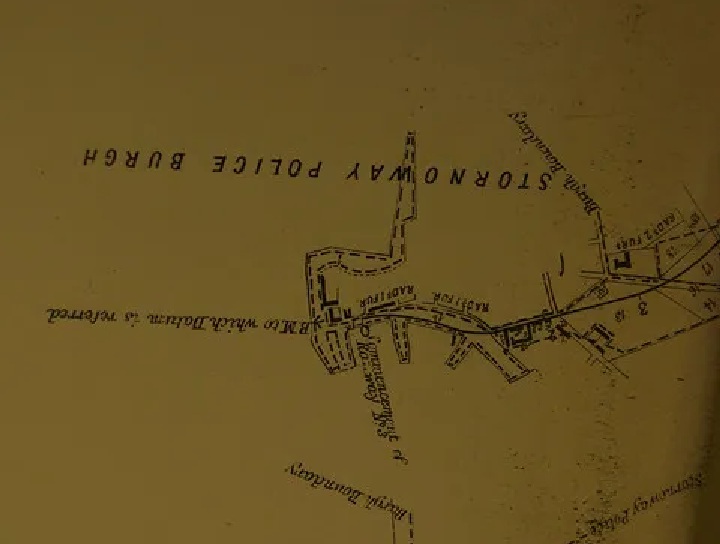
A closer view of the last portion of the proposed line on the South side of Stornoway. This compares well with the 6″ Ordnance Survey extract below. It shows that the plan was for the line to terminate at the West end of South Beach Quay. [54]
An extract from the 6″ Ordnance Survey of 1895, published 1899. [55]
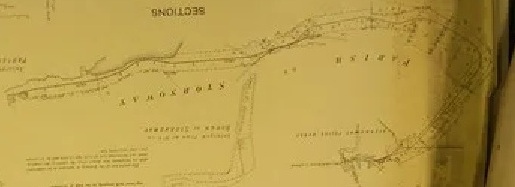
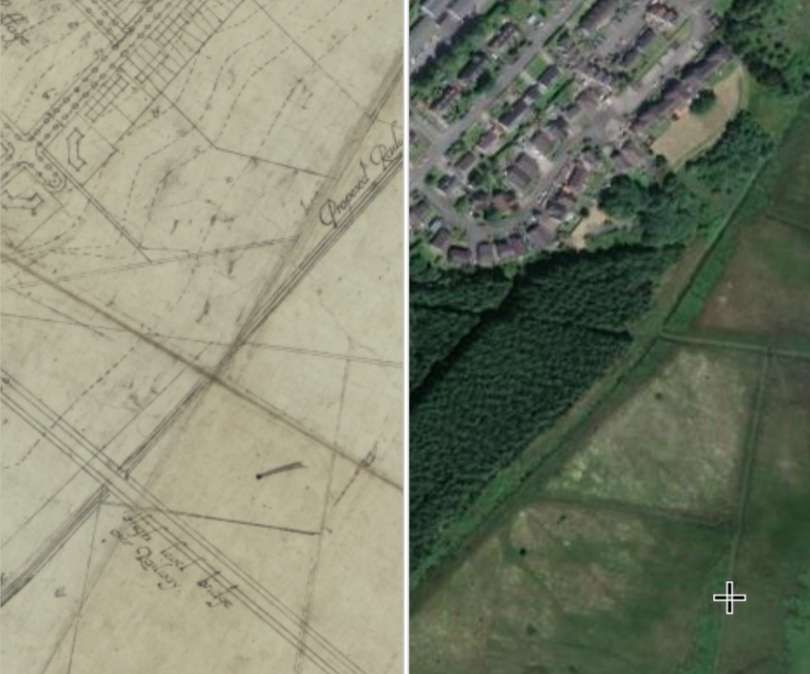
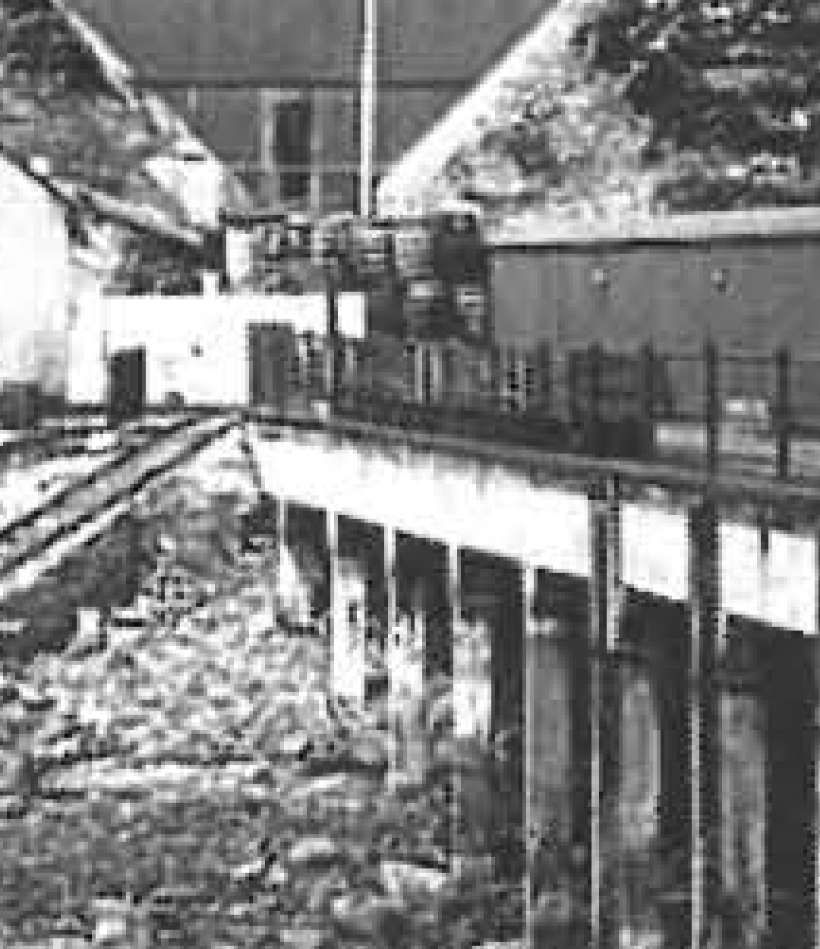
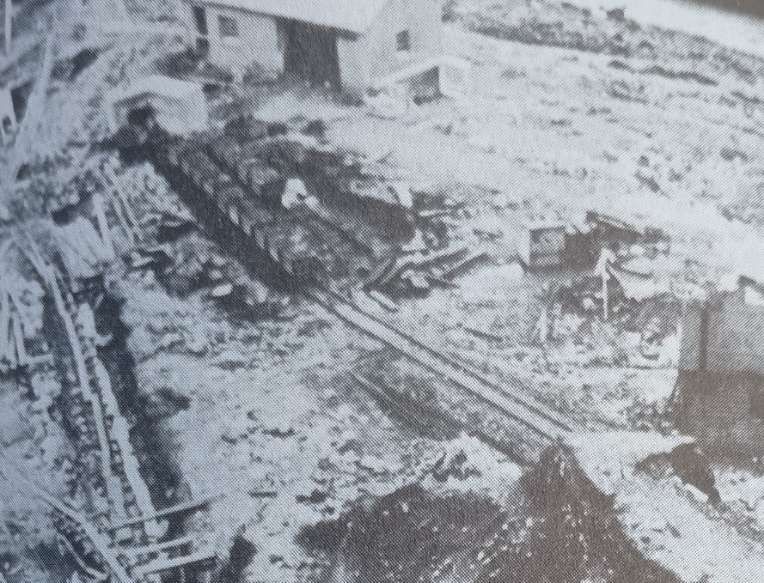
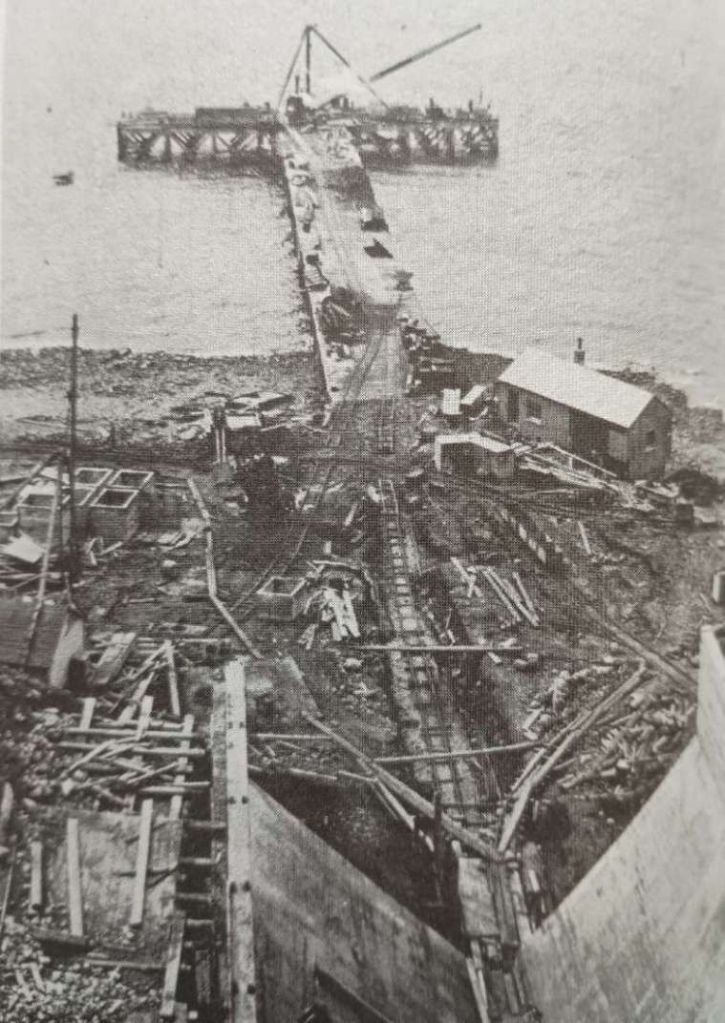
The remainder of the route to the West of Stornoway. …..


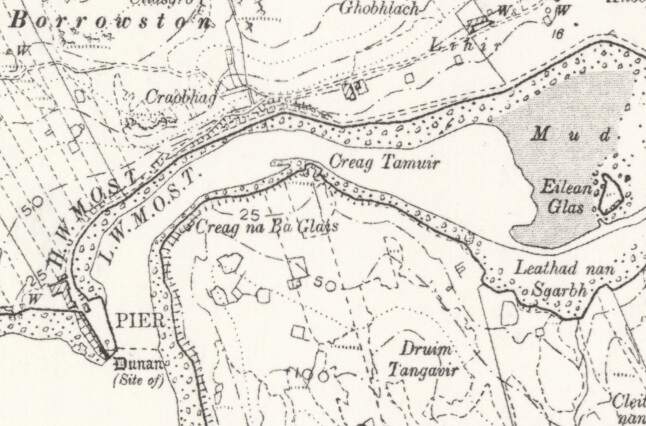
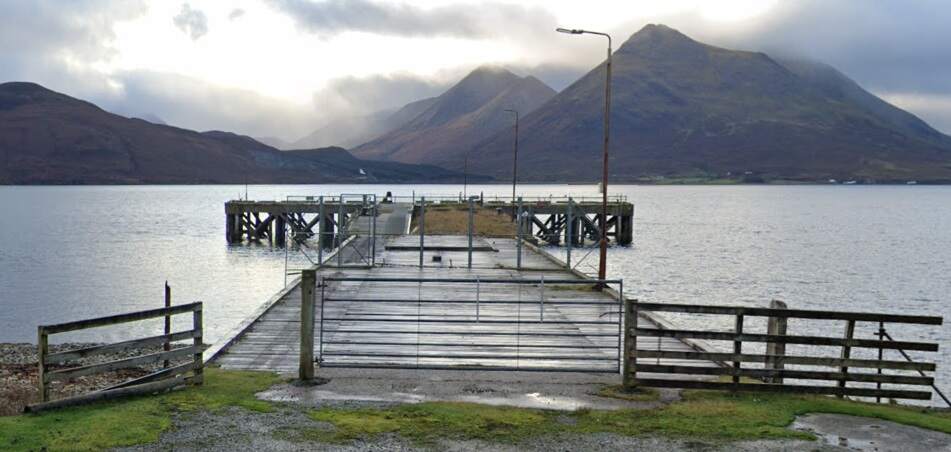
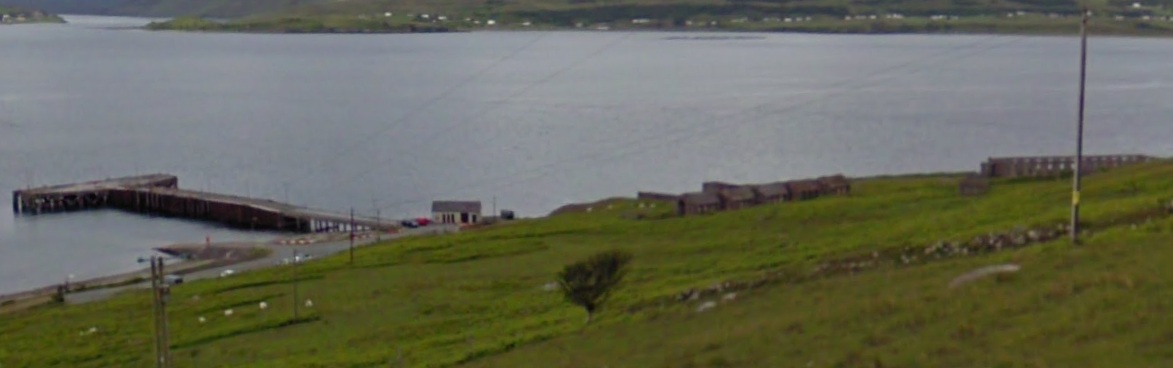
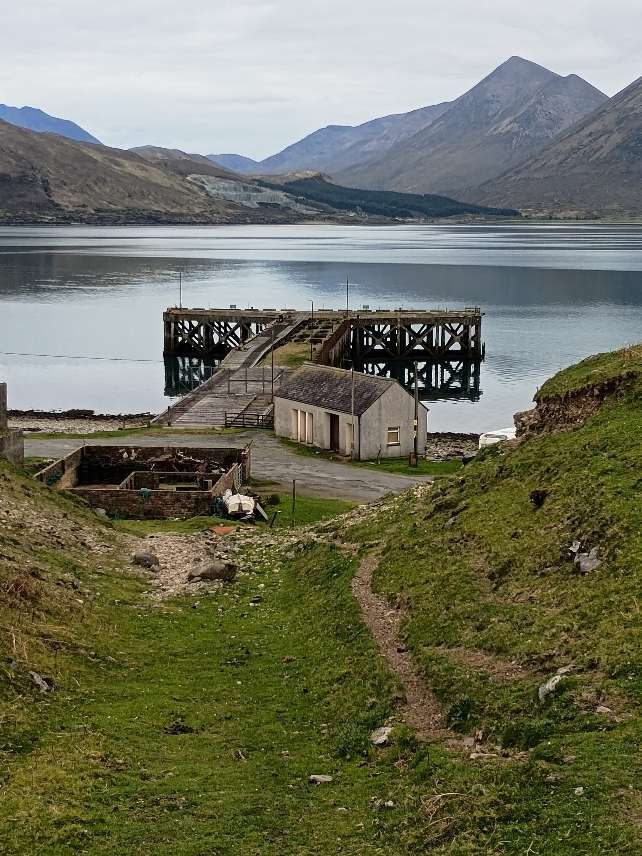
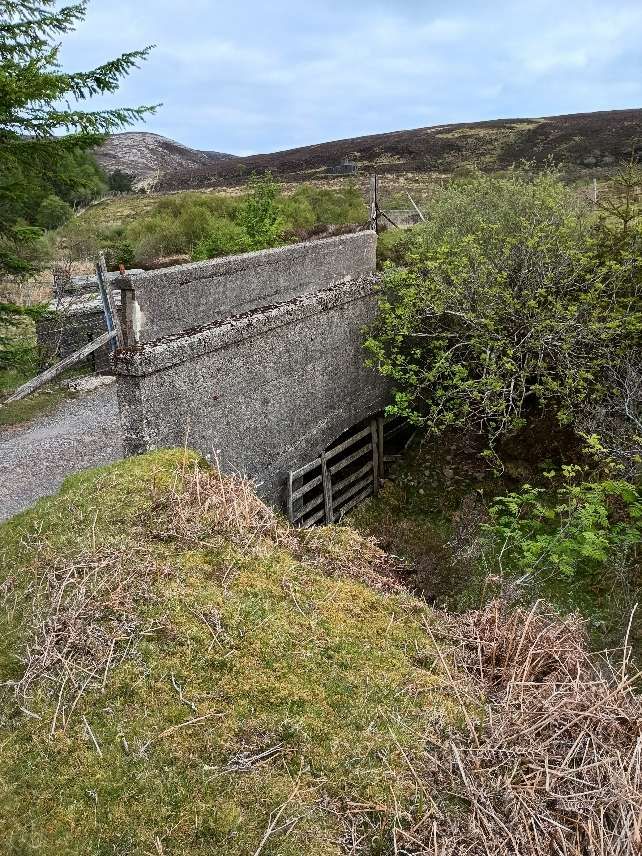
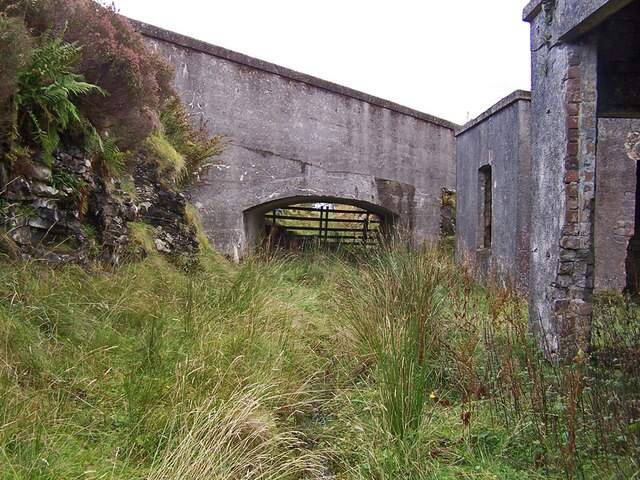
The next seven images form a sequence showing the last length of the route to the pier at Borraston. Note the causeway in the third image which will have been built for the railway. …
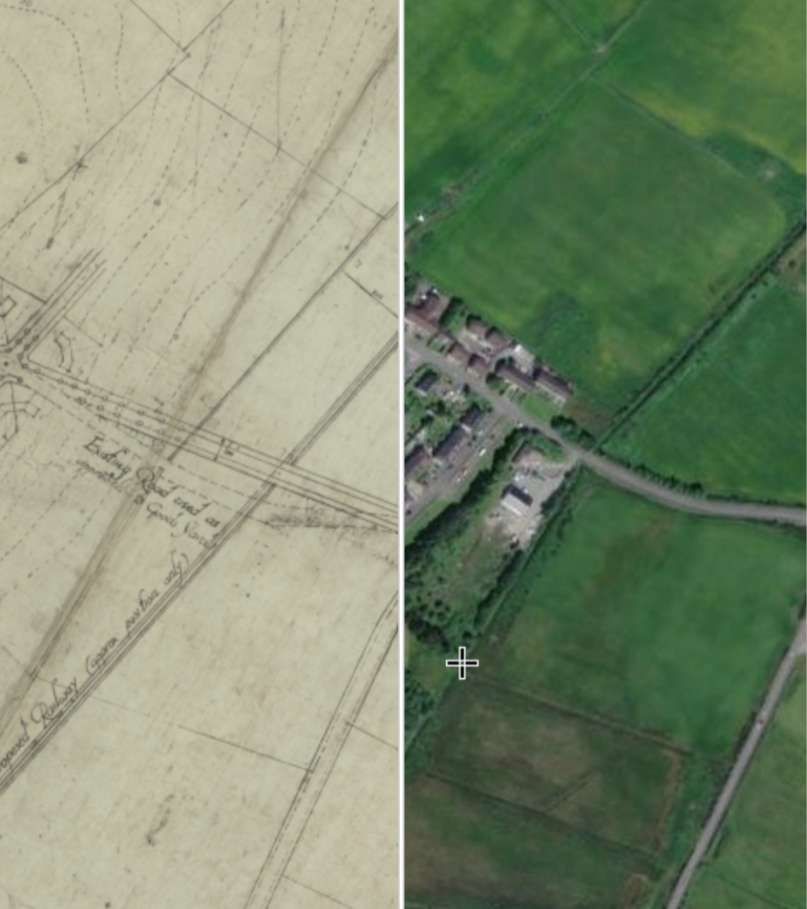
The Junction to Breasclete


We have followed the two lines that almost got built on Lewis. sadly, lack of funding resulted in a project that was quite well advanced, being abandoned. As noted, the earthworks were later (1912) used to create the single track Pentland Road which appears in many of the modern images above. There remains some uncertainty over whether the early construction works were designed first for a railway or were just designed as an easily graded public road. [50] It is possible that some construction work for a road was undertaken but the National Archives hold plans for a railway dated to the same period, predating the construction of the Pentland Road which was not completed until 1912. [53]
The plans, which include proposals for railways on Skye and on Lewis were accessed by ‘Tom’ in preparing for a modelling project centred on these intended railways. This image comes from an early blog. [53] The images relating to Lewis come from a later blog. [54]
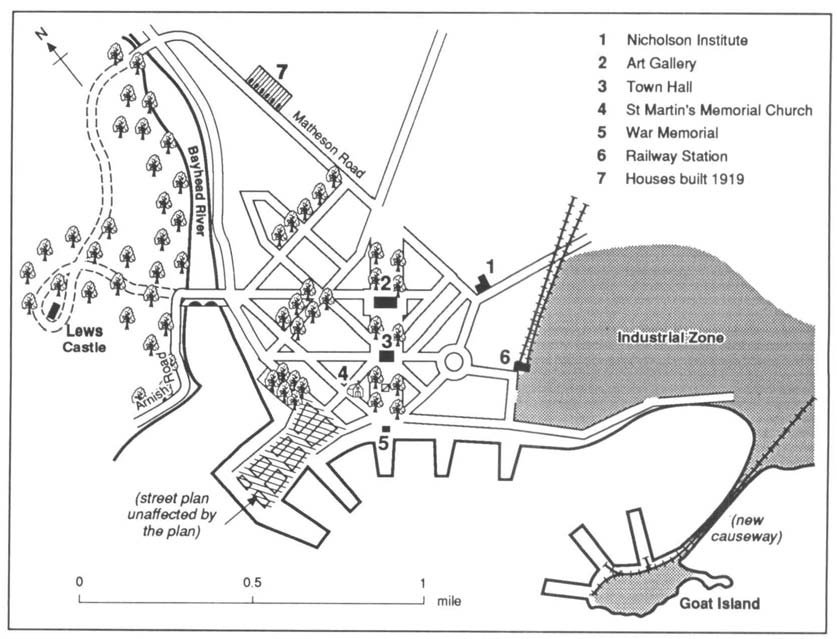
Lord Leverhulme’s Planned Railway Station, Stornoway
Lord Leverhulme was very interested in town planning, The National Library of Scotland has on its website, a town plan of Stornoway drafted by James Lomax-Simpson, Leverhulme’s godson and also his chief architect at Port Sunlight. The plan is entitled, ‘Port Sunlight plan of Stornoway, showing proposed lay-out’ and is dated 16th July 1919. It is 710 mm x 710 mm in size. The plan is included on the website, courtesy of The Stornoway Trust. [44]
“Simpson took charge of the Architectural Department of Lever Brothers from 1910 and he was made a director in 1917. In his role as Company Architect, he worked in over twenty-five different countries around the World, but he also carried out much work for Lever himself, including alterations and additions to Lews Castle. The plan also illustrates part of Leverhulme’s ambitious ideas for redeveloping Stornoway along garden city lines, with new suburbs, broad avenues, circuses, and open spaces. The new planned railways, that were part of the wider plans for the economic transformation of Lewis, curve in and down to the Harbour on the eastern side of the town. Existing roads are shown with dashed lines. In places, ‘Parlour Cottages’ were planned, which had been constructed at Port Sunlight, as larger ‘Arts and Crafts’ residences for working families with a parlour at ground-floor level. Although visionary and ambitious, some of the new planned streets would have demolished much of the original old town. Over time, the plans were subsequently altered, shown as annotations on top of the original plan. Some construction began along these lines in the 1920s, but economic difficulties and considerable opposition to Leverhulme’s plans by the islanders curtailed developments, and the schemes were largely abandoned by 1923.” [44]
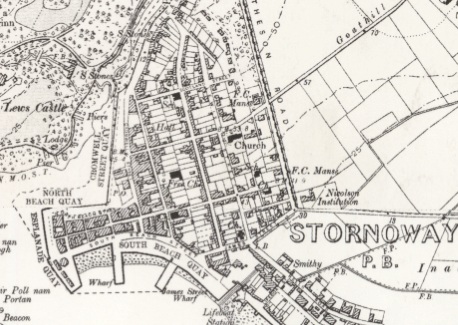
Small extracts from the plan are included here. They show a proposed railway station close to the Harbour on the East side of the town. Each of the three extracts is paired with the ESRI satellite imagery provided by the NLS. …
These plans did not see the light of day!
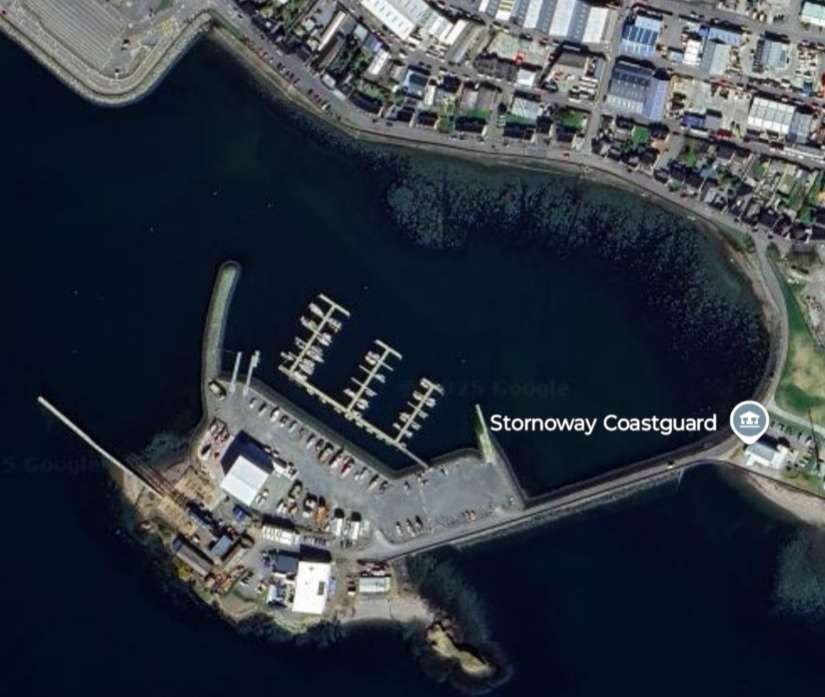
Goat Island
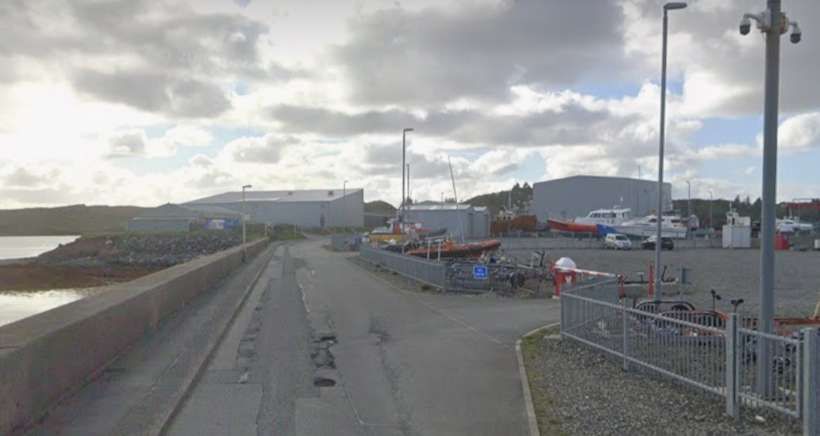
Lord Leverhulme’s plans included the construction of a causeway to link Goat Island to the mainland and the provision of additional quays on the West side of the island. He expected to provide a light railway along the causeway to link his Cannery and associated industries to the quays. John & Margaret Gold provide a plan showing Leverhulme’s intentions for Stornoway and Goat Island. [45: p200]
John & Margaret Gold comment that in Leverhulme’s Plan: “An industrial area was located in the east of the town. Goat Island would act as home base for the MacLine Drifters and Trawler fleet and was joined to the mainland by a causeway. The ice plant and cannery were situated inland near the site of the existing fish-oil and guano works. A light railway would connect them with the quays. There were tweed mills, electricity generating plant, a laundry and a dairy to take the increased output from the east coast farms. Between the industrial area and the residential districts was the railway station serving both freight and passenger purposes.” [45: p200]
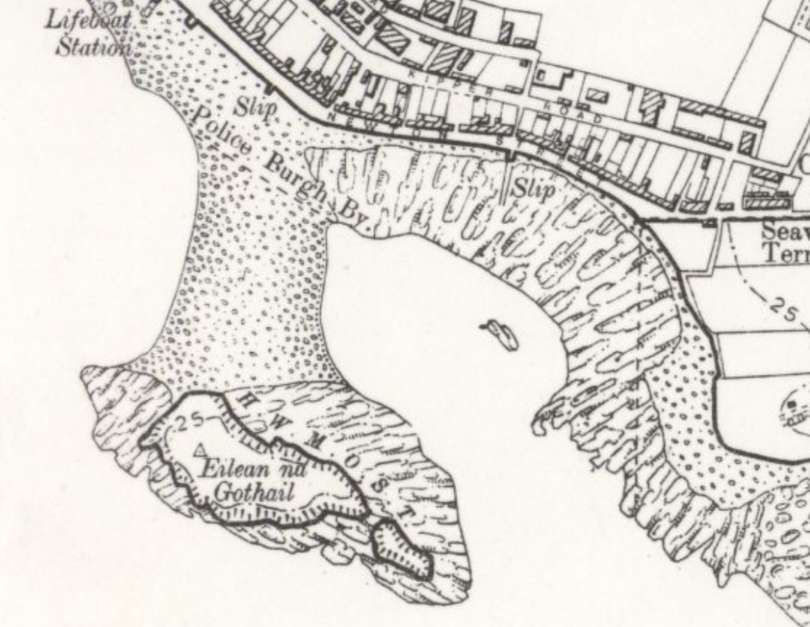
It would not be until after the Second World War, in 1947, that the causeway was built. It was 2,030 feet in length. Work undertaken that year also included the construction of an embankment to the south of the causeway; the construction of the Slipway and a jetty at Goat Island; the demolition of No. 3 Pier. The work was authorised by The Stornoway Harbour Order Confirmation Act, 1947. [48]

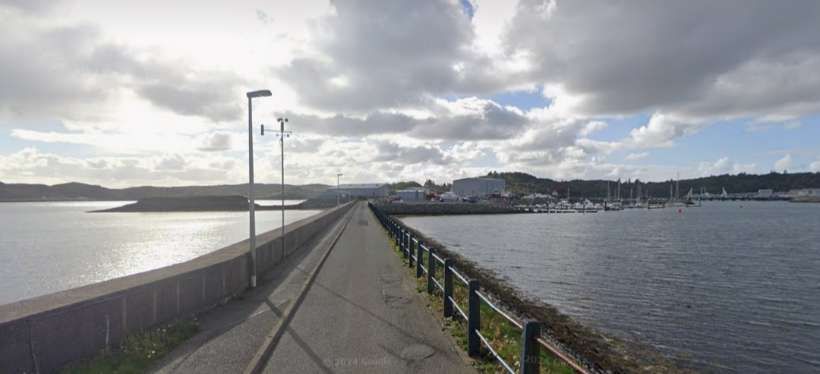
While the causeway was built, the railways were not!
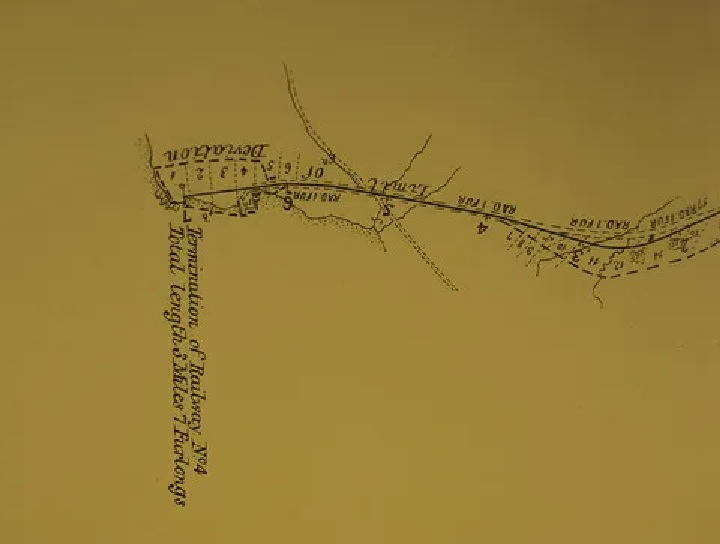
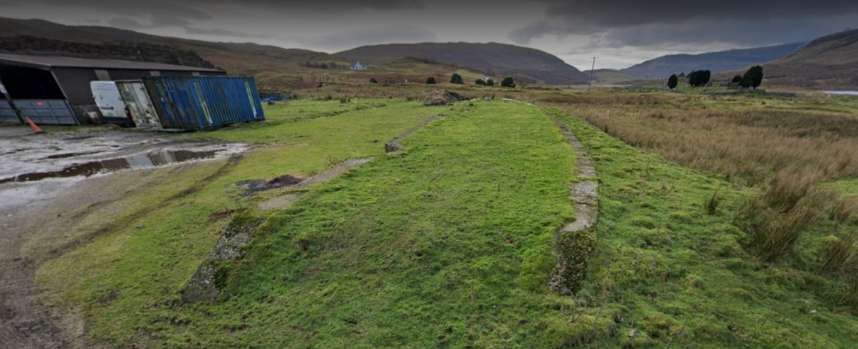
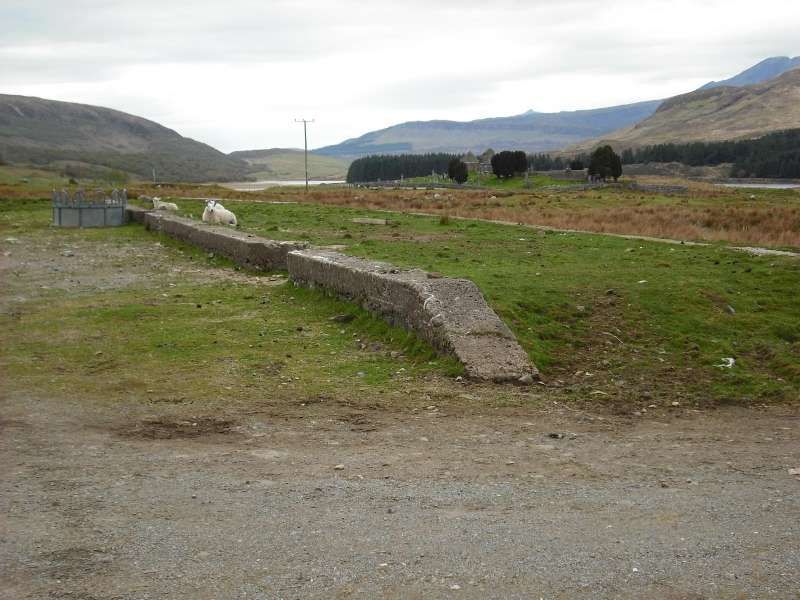
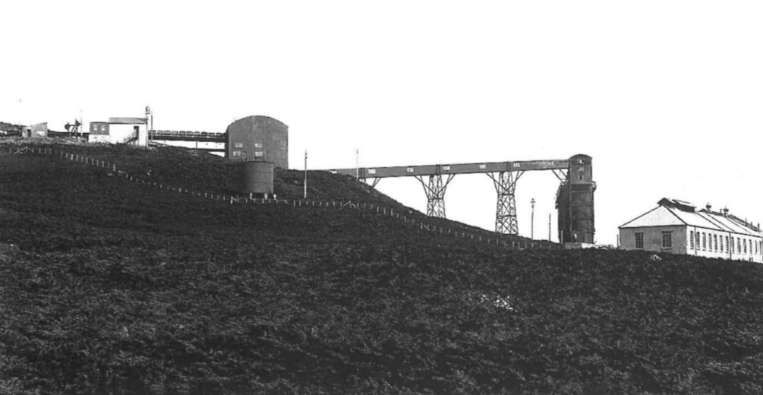
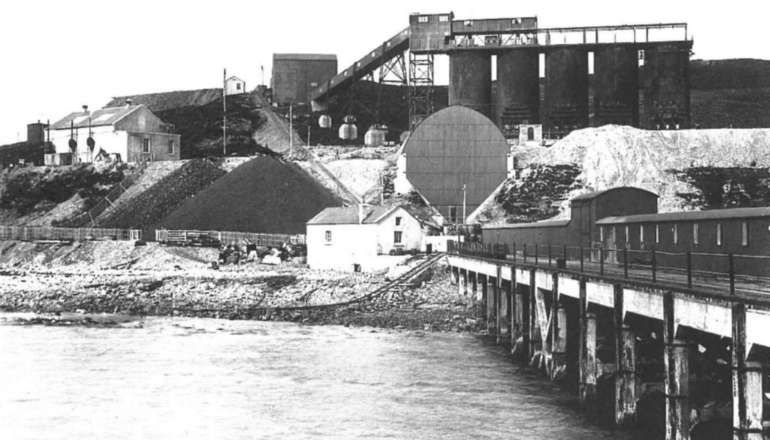
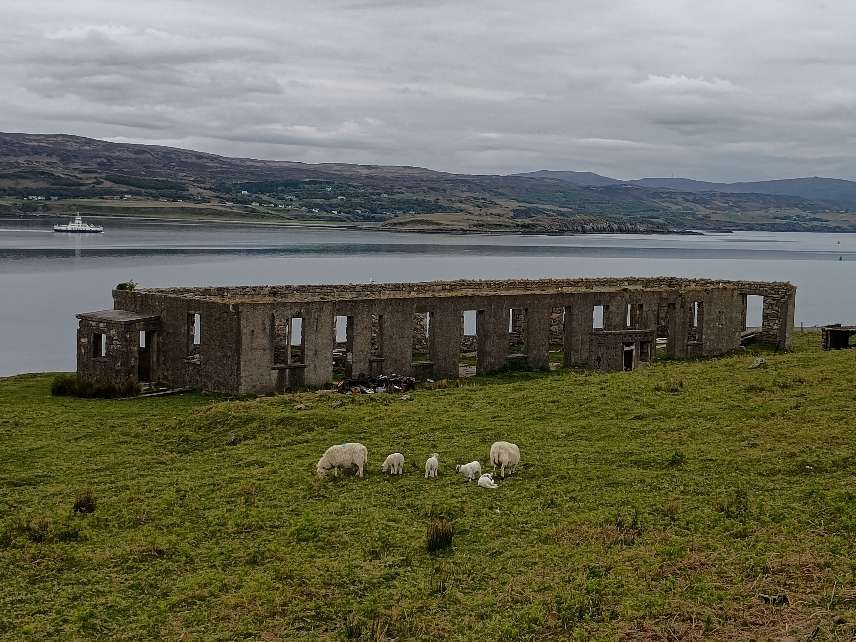
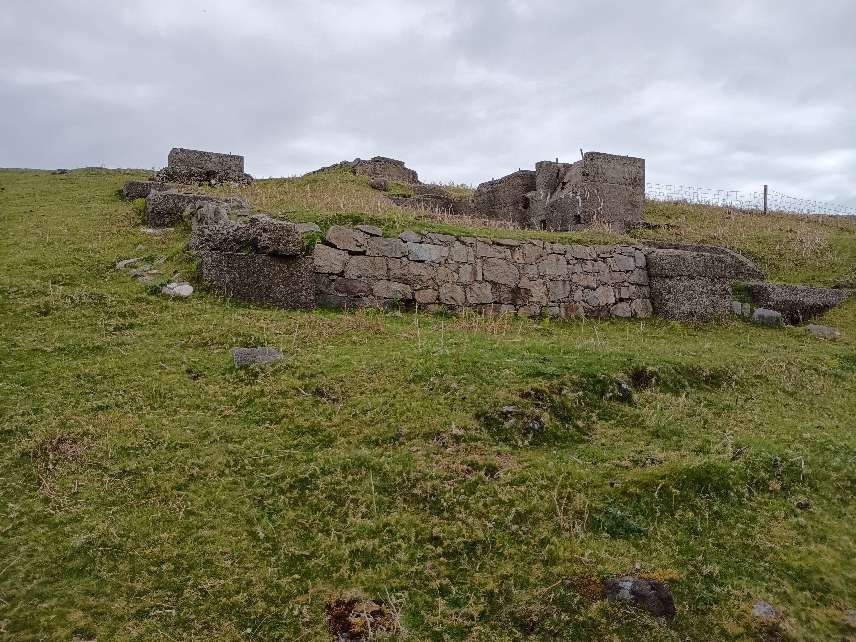
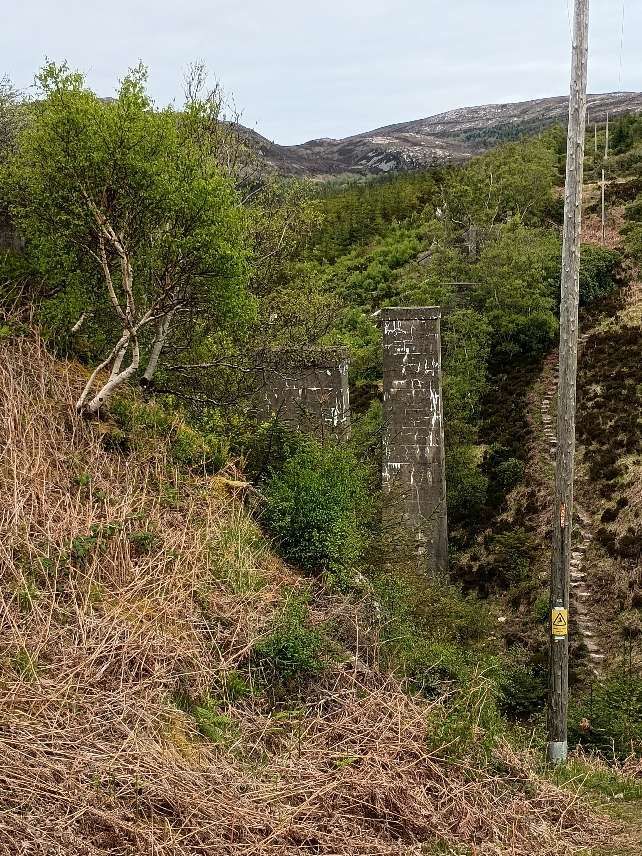
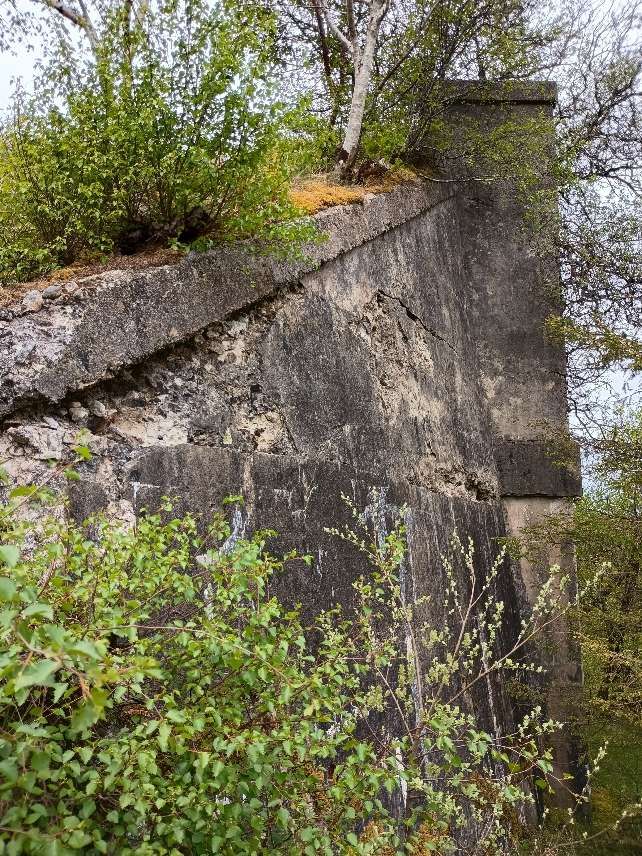
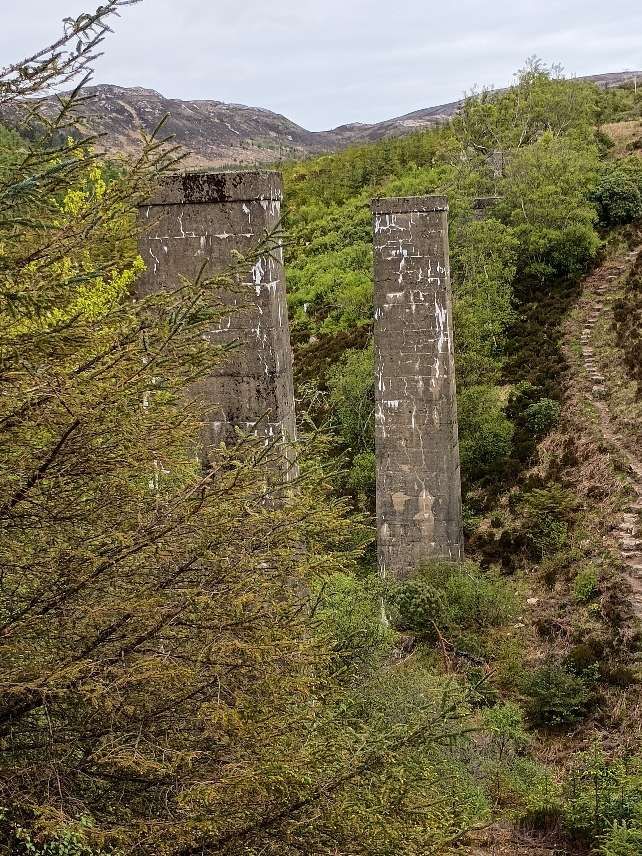
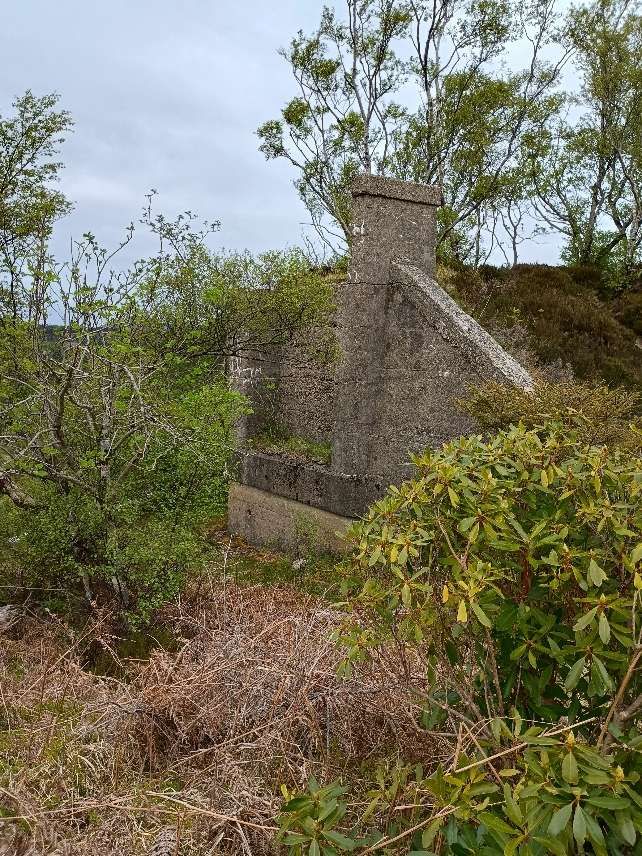
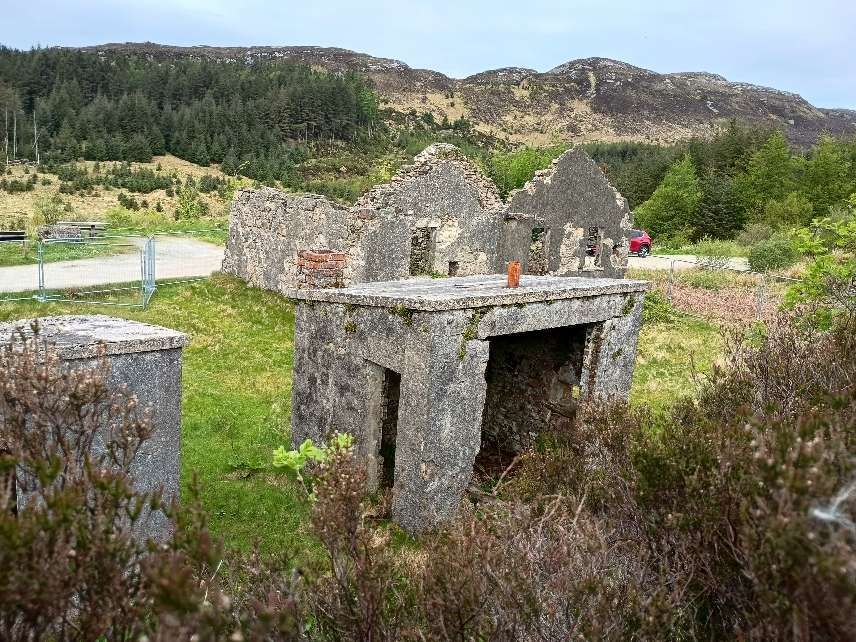
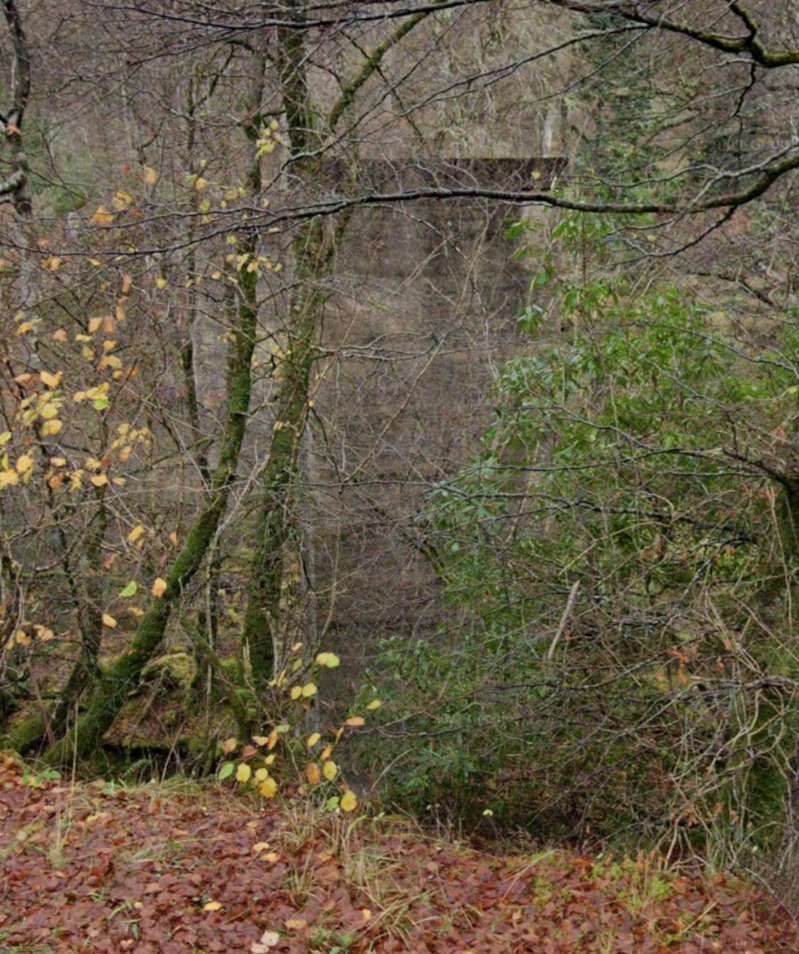
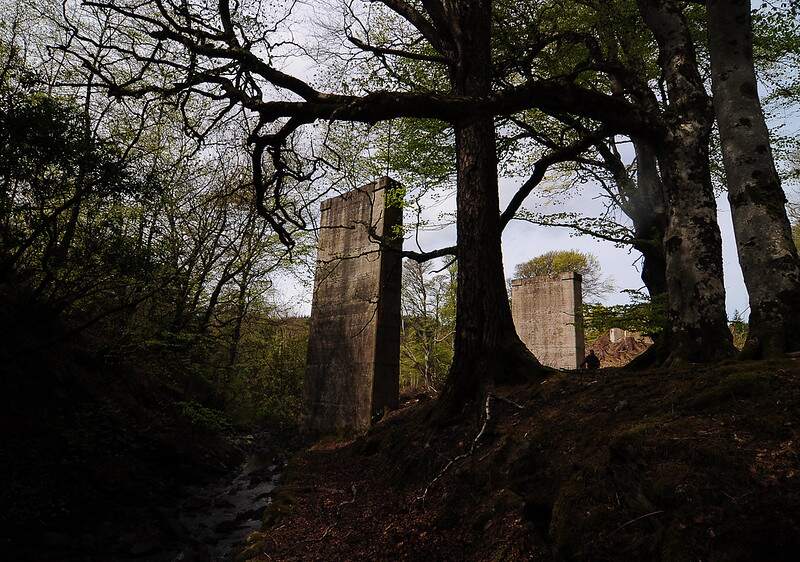
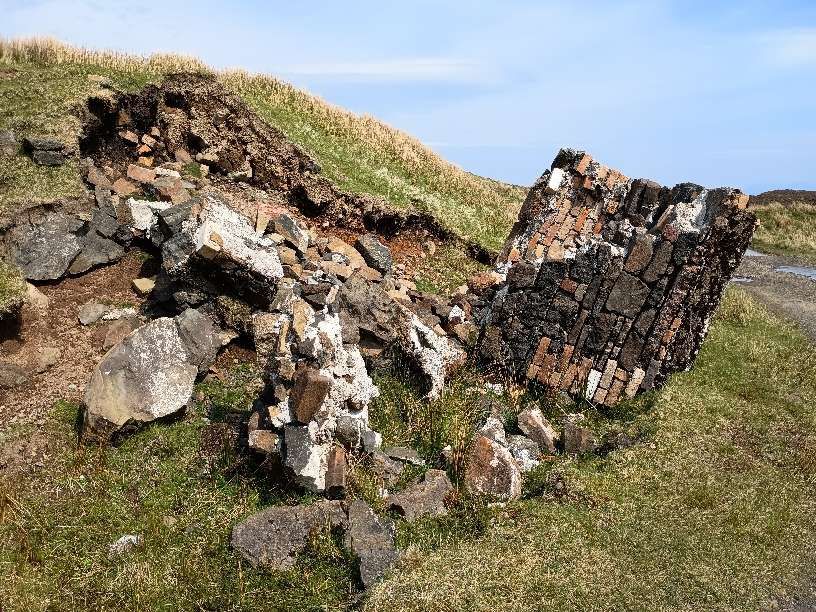
The Branahuie Railway (3ft-gauge)
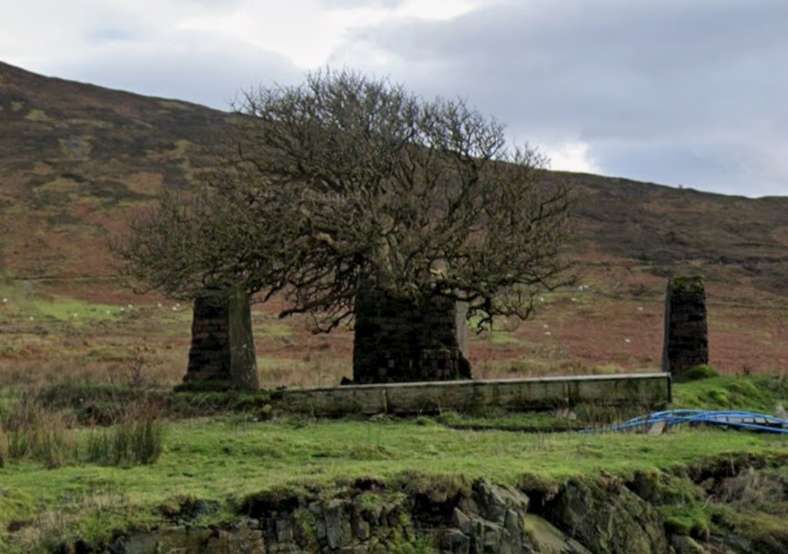
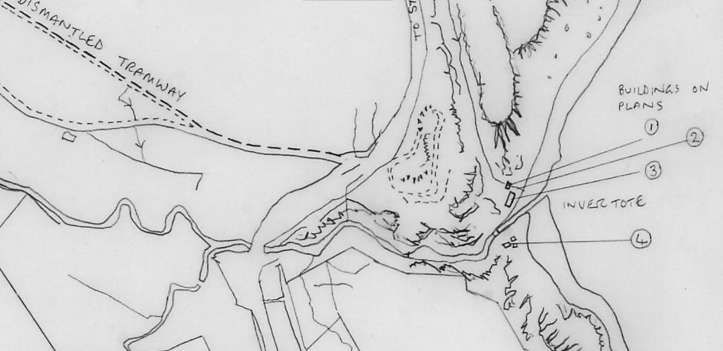
One line that did get built on Lewis in Lord Leverhulme’s time was a 3ft-gauge line built by “Sir Robert McAlpine and Co. for the Harris & Lewis Welfare Development Co. Ltd. (a company owned by Lord Leverhulme) – part of a £345,000 contract to build the canning factory, roads and houses. … [It] was in operation by 1920 when the first loco arrived – [that] was McAlpine’s Loco No 34, an 0-4-0ST built by Hudswell Clarke (Works No 1037) in 1913 and delivered to McAlpine’s Pontstycill Reservoir contract near Merthyr Tydfil in South Wales. It carried the plant number 778 when it arrived but that had changed to 606 by the time it left in 1923 moving to the Maentwrog reservoir contract in North Wales. It then worked on other contracts until it was sold for scrap to George Brothers in 1956. The second loco to work on the line was another 0-4-0ST built by Hudswell Clarke in 1901 (Works No 597). It was new to Newcastle & Gateshead Water Co Ltd at Whittledean reservoir carrying the name ‘PONT’. It was sold back to Hudswell Clarke who resold it to McAlpines in 1906 on their Culter reservoir contract. It arrived at Stornoway as Plant No 1780 in 1920 leaving on 25th May 1923 as Plant No 813. Last recorded as being for sale at McAlpine’s Ellesmere Port depot in 1929.” [8]
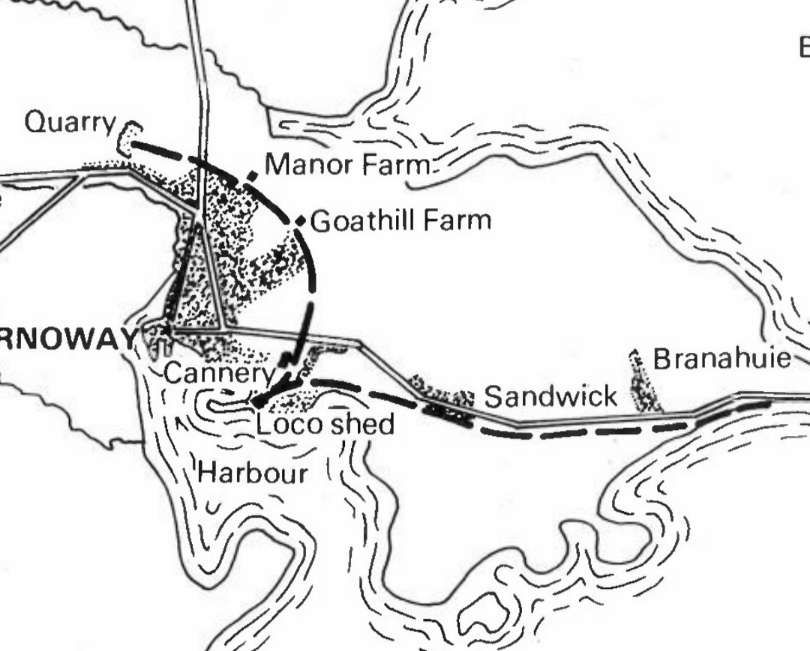
A first reference was made to the Branahuie line in the Highland News on 15th May 1919 when Sir Robert MacAlpine & Son wrote to the Council seeking permission to lay a light railway from Manor Farm to Goathill Road crossing public roads at three different places. Gates and fences were included in the scheme which received Council permission. In June 1919, MacAlpine applied for permission to lay a water main at Manor Farm to supply water to engines. This was agreed at charge of £5 per annum. [15: p12]
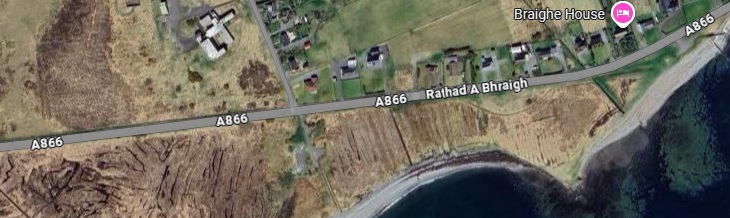
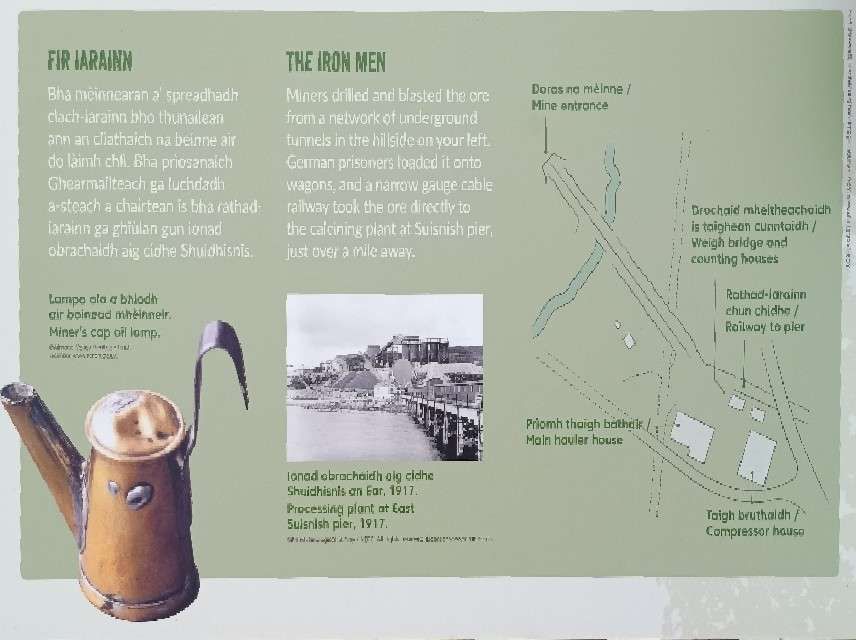
Jolly records these details: “The line was some five miles long and was used for the construction of Leverhulme’s Cannery, from where it ran northwards past Goathill and Manor Farm (Coulregrein), where there was a watering point, to the Town Council’s Dormitory Quarry beneath the War Memorial. This line ran around the then outskirts of the town and much has been built over. Another line ran south from the cannery to the locomotive shed (also now built over). From here another line ran eastwards across the fields to Sandwick, then for 2.5/3 miles beside the A866 to the beach at Branahuie. The evenly graded trackbed is very distinct alongside the undulating road on this section. A shallow cutting can also be seen on the northern line. … At least two steam locos were used on the contract by MacAlpines.” (15: p12]
Jolly continues: “The cannery was completed in late 1921 or early 1922, and at the end of May 1922, the “Contract Journal carried an advertisement: ‘For sale-railway track and plant inc. two 3ft gauge locos Hudswell Clarke, … built 1901 and 1913, and 59 wagons 3ft gauge, 34 wagons 2ft gauge. Plant will be handed over to purchasers FAS (free aboard ship) Glasgow-Lewis & Harris Welfare & Development Co., Bebington, Nr. Birkenhead’. Only two locomotives fit this description: Hudswell Clarke 597/1901 was delivered new to the Newcastle & Gateshead Water Co, and was later used by McAlpine on the Motherwell Corporation Culter Waterworks contract between 1903 and 1906. Its later history is not known for certain. The later machine, Hudswell Clarke 1037/1913, was supplied to McAlpine for work on the Pontstycil reservoir between 1913 and 1917. It was subsequently used on the Maentwrog Hydro-Electric reservoir contract, near Ffestiniog, from 1924-28, and must therefore have been retained by McAlpine.” [15: p12-13]
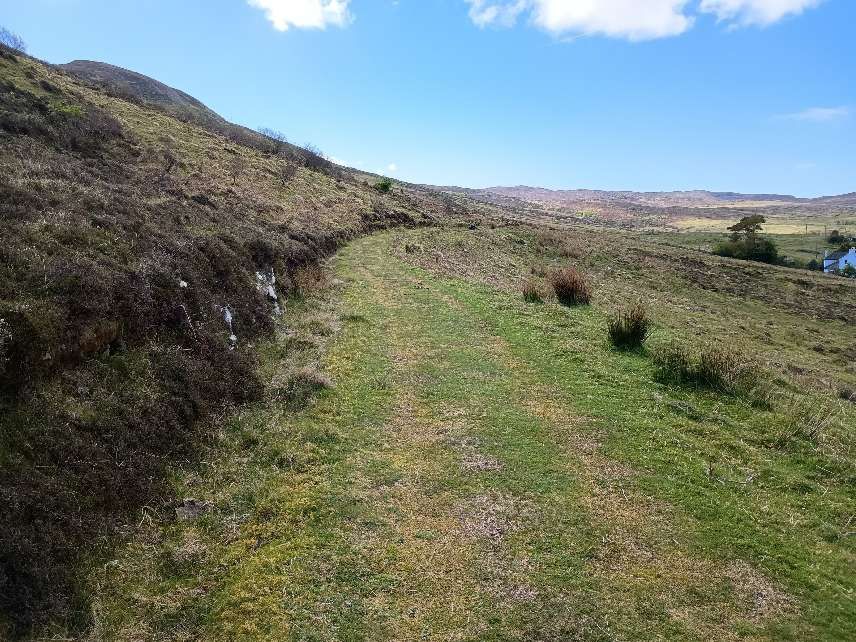
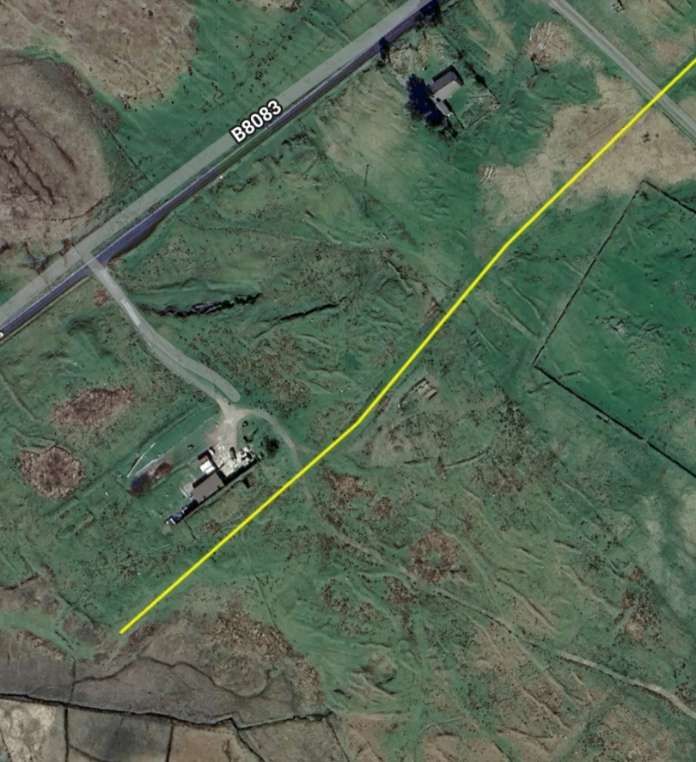
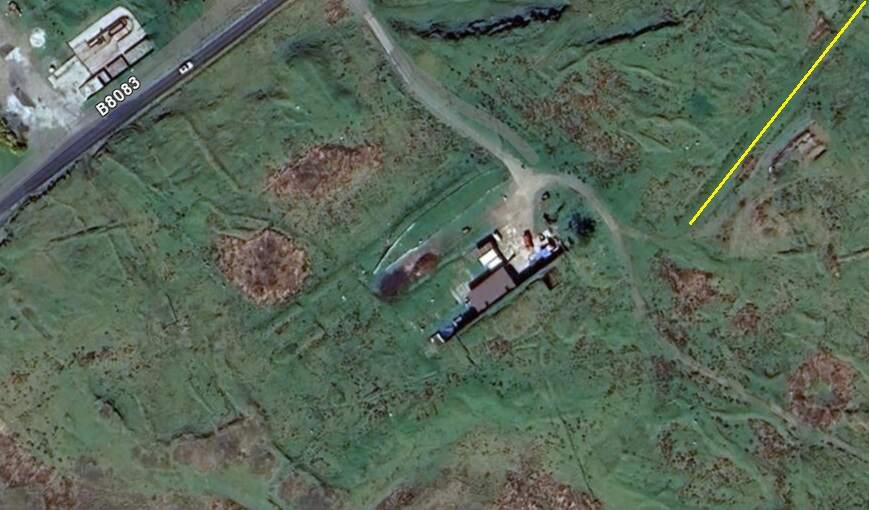
The Route
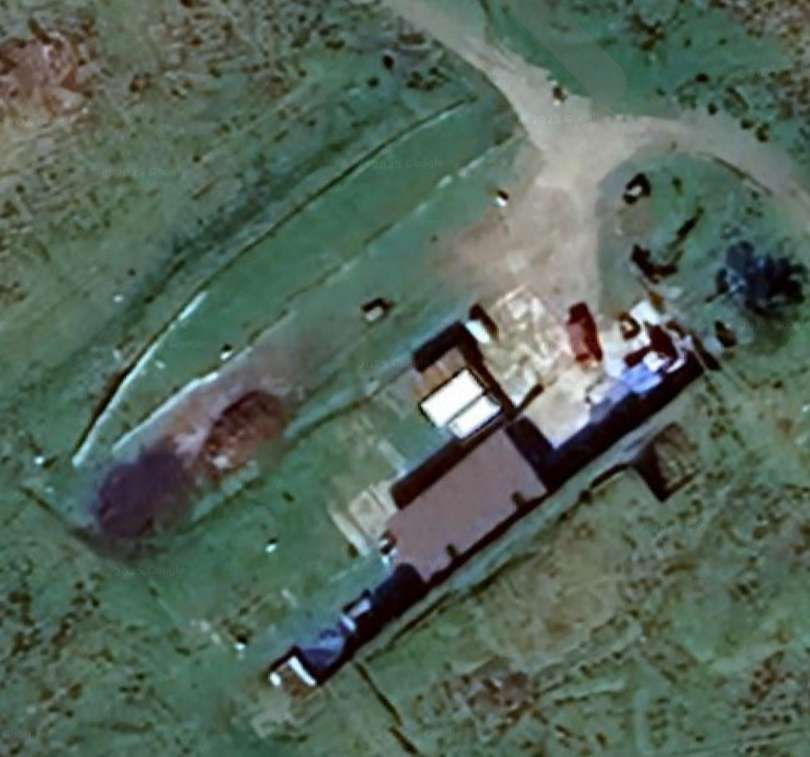
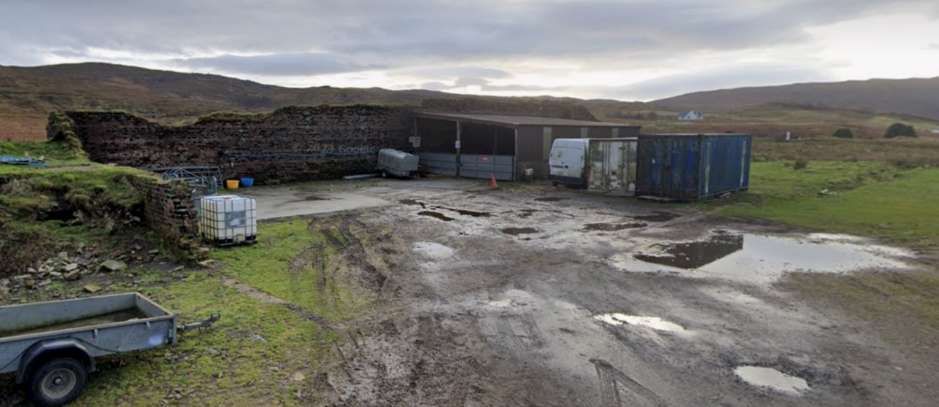
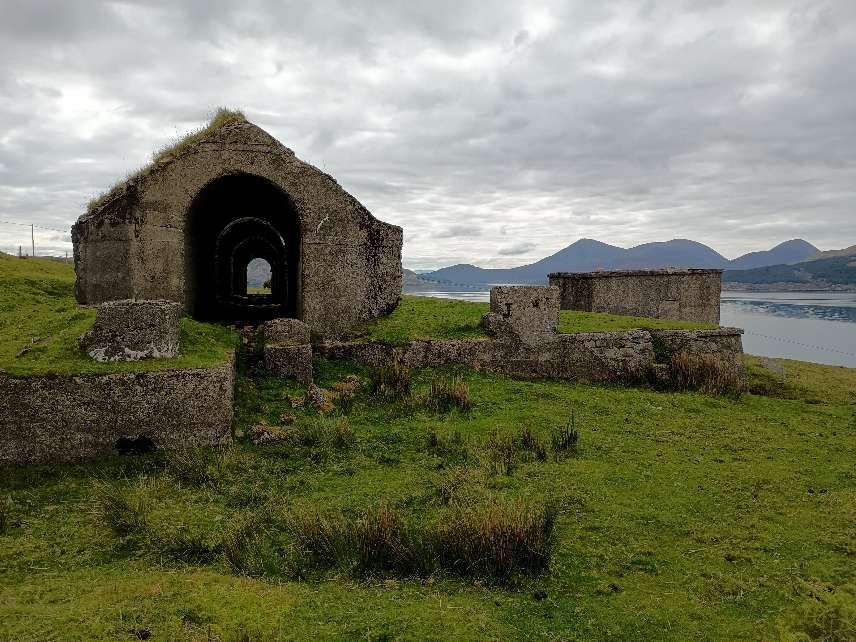
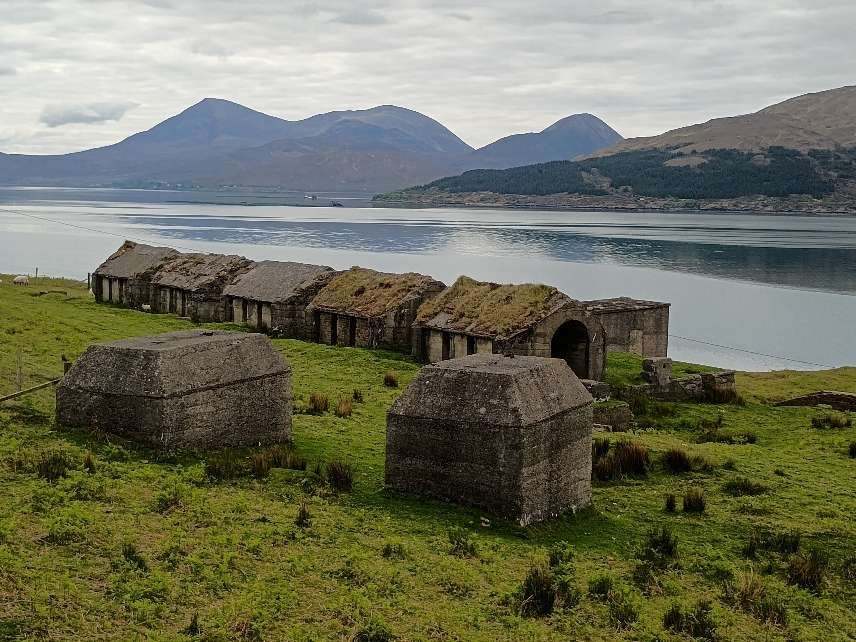
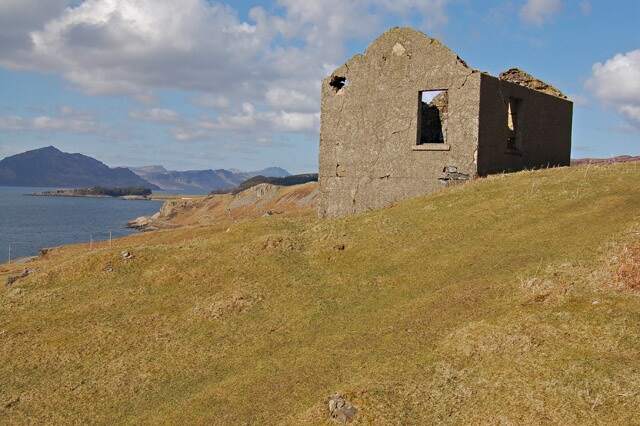
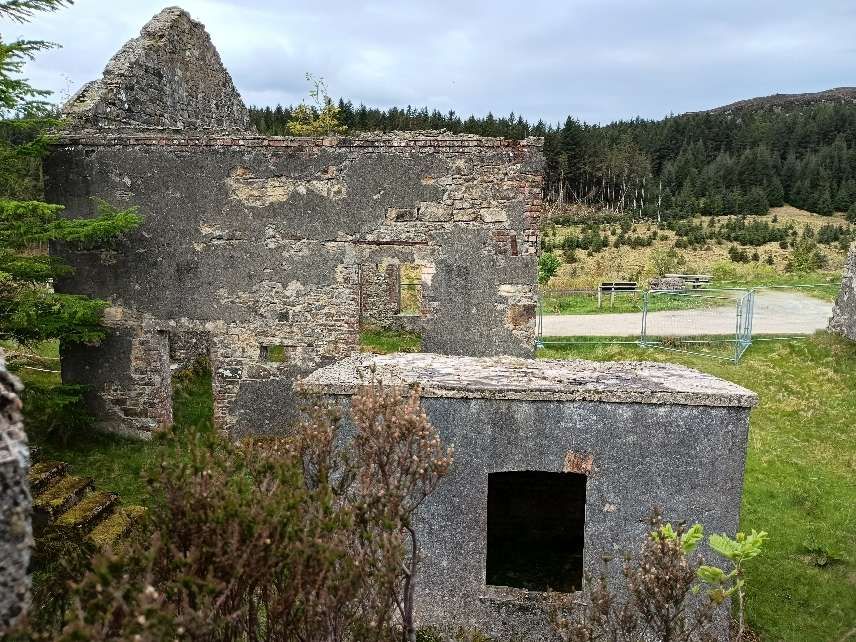
Lord Leverhulme’s Cannery sat to the East of Stornoway town centre. Appropriately, its address was Cannery Road. The building was never used as a cannery and later became a Harris Tweed Factory.
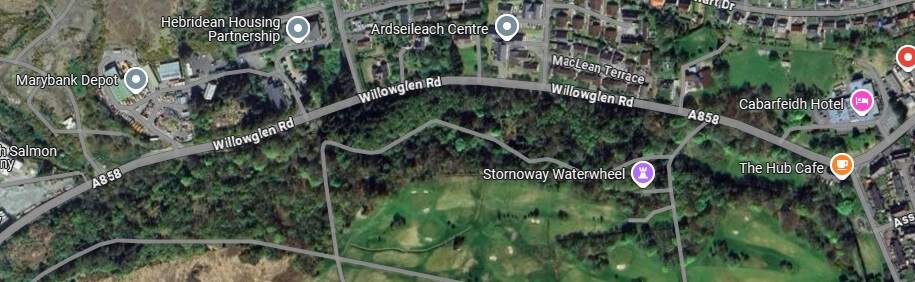
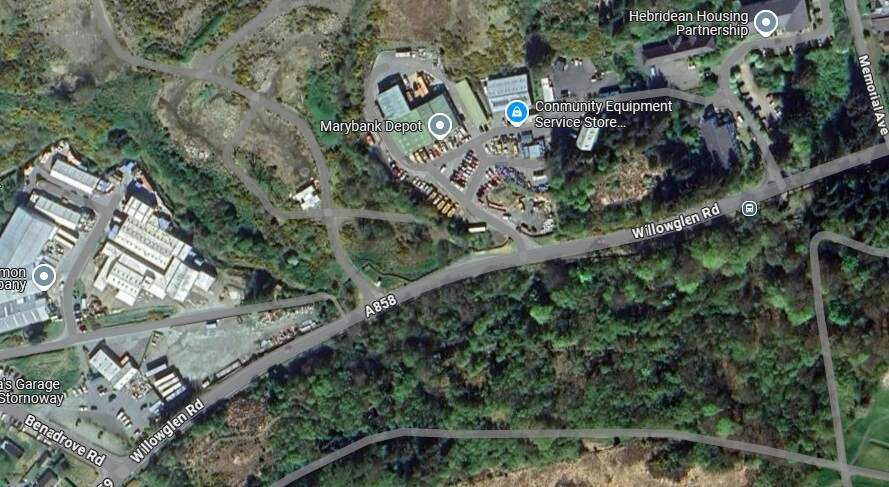
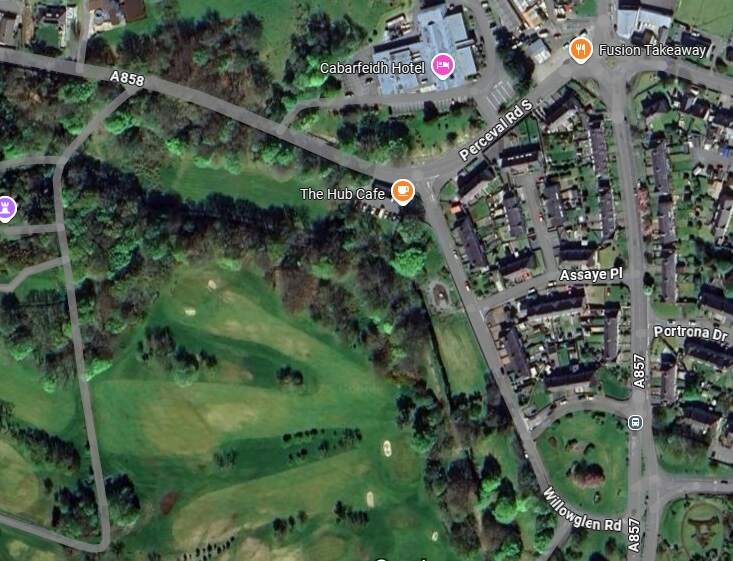
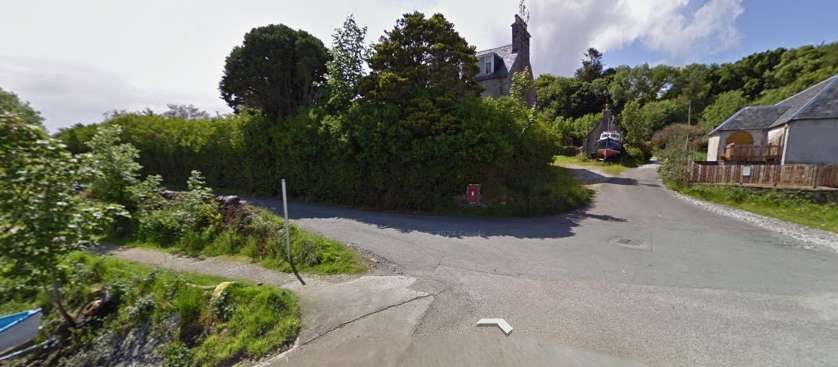
As Jolly mentions, material for the construction contract was excavated at a quarry at Dormitory which was to the West of the War Memorial (itself to the North of the town). Jolly also mentions that the temporary railway line ran close to Manor Farm (in the 21st century the Caber feidh Hotel occupies this site). His sketch map above shows the line running to the South of Manor Farm. This suggests that the line ran close to Willowglen Road, on its North side. Assuming that this is the case then the Contractor’s railway would have crossed Percival Road South close to its junction with Willowglen Road.
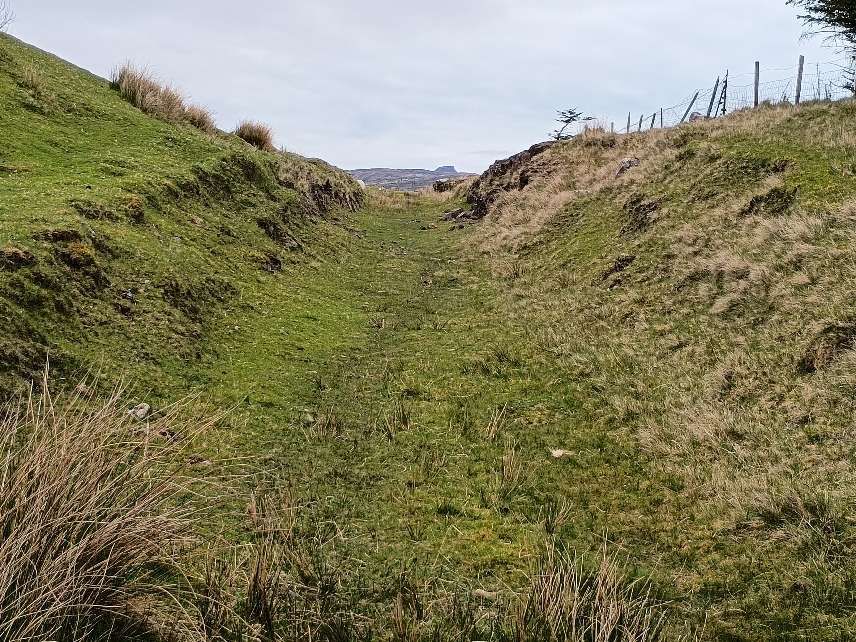
There has been mention of an incline leading from a point close to the War Memorial into Stornoway which may be a remnant of the line. [8]
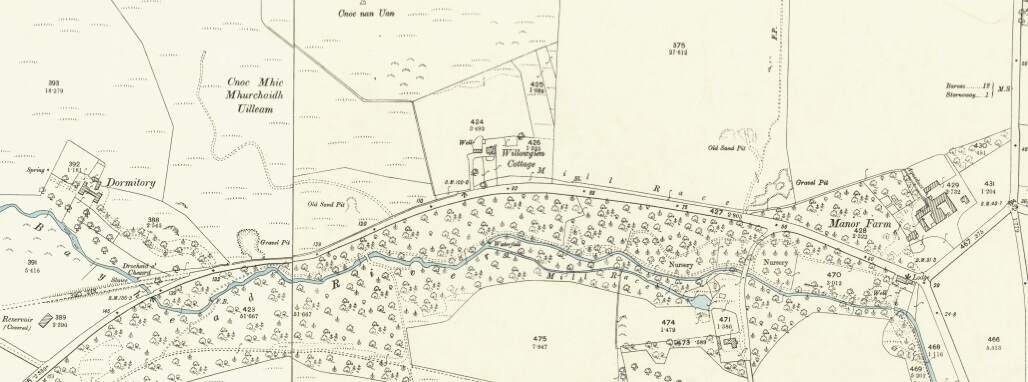
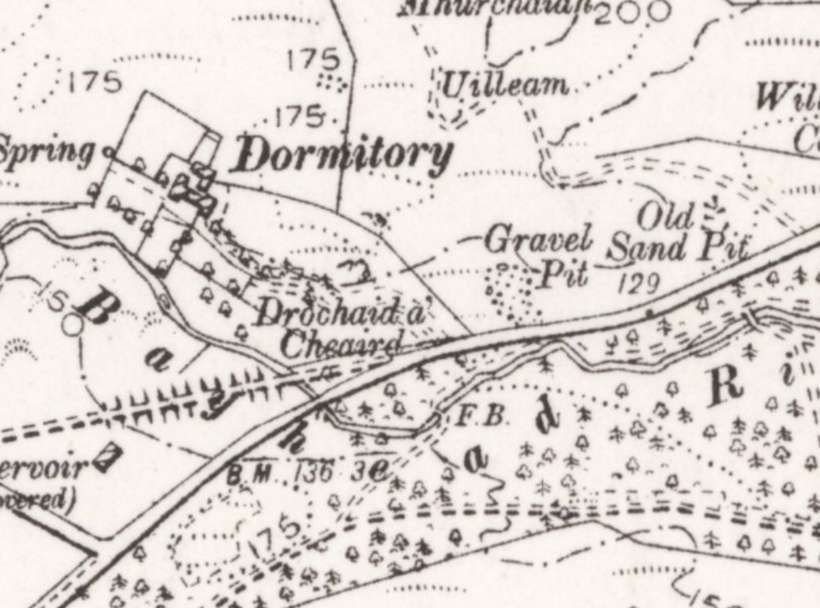
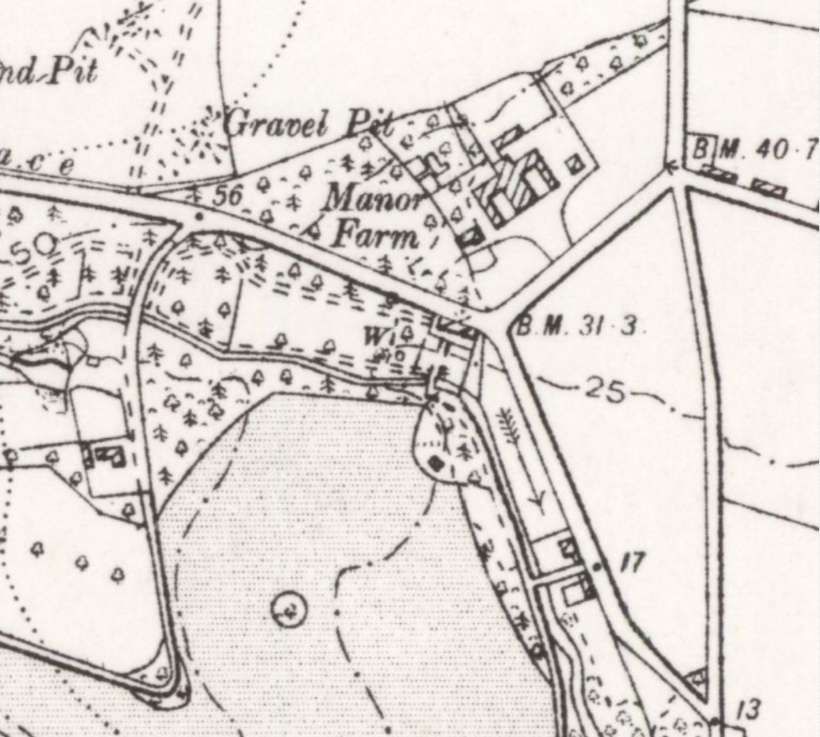
After crossing what is now called Percival Road South, the line crossed Macaulay Road and curved round through Goat Hill, passing the Poor House and the Hospital, running close to the pre-existing Fish Oil Works (adjacent to which Leverhulme’s Cannery was to be built). The Locomotive Shed was South and West of that location, as was a junction between the line from the quarry and the line East to Branahuie.

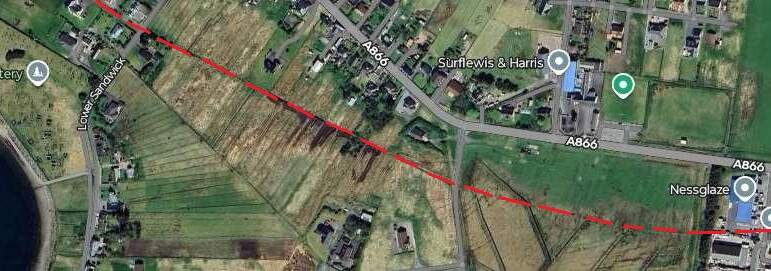
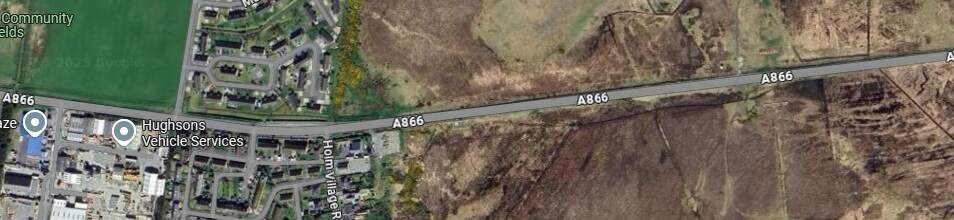
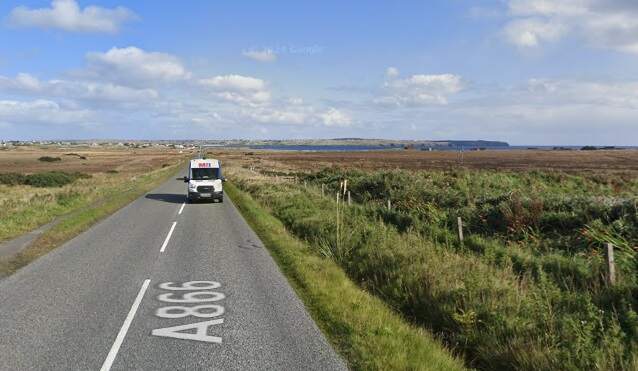

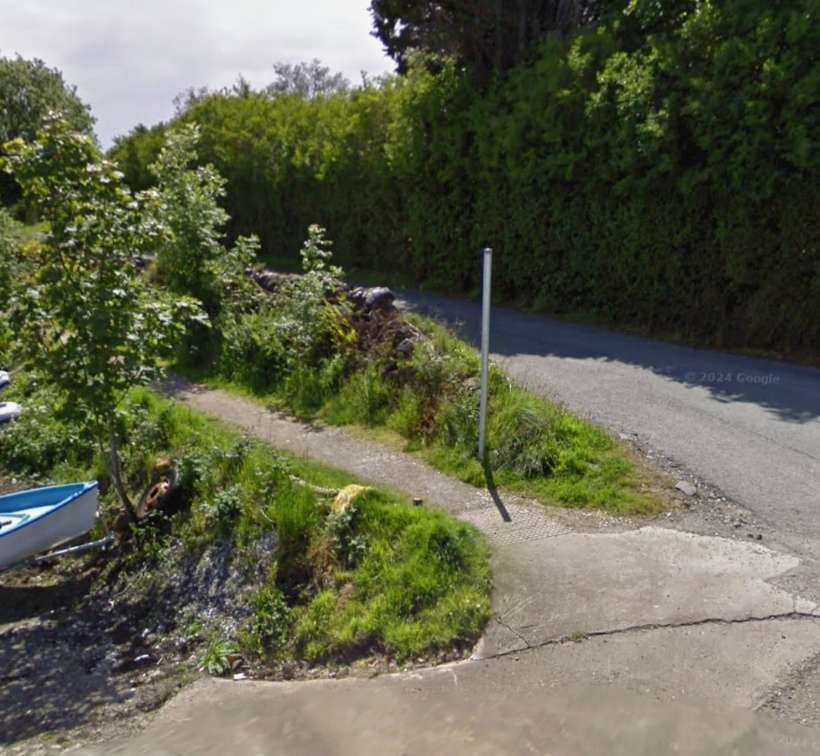
It is entirely possible that the road now evident in the 21st century is not that which was present in the 1920s. It is very likely that the road to Branahuie was a single track road in the 1920s and that the widening of the road has covered the formation from the contractor’s railway line.
Stornoway Waterworks Railway (2ft-gauge)
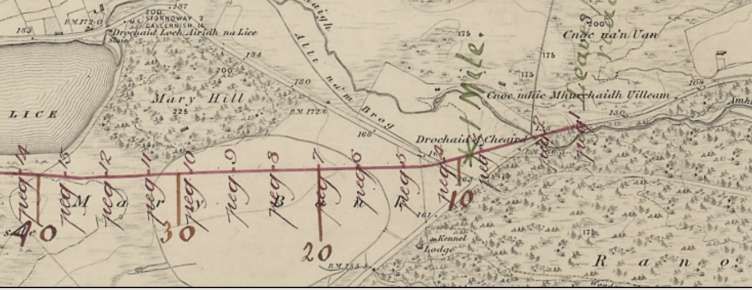
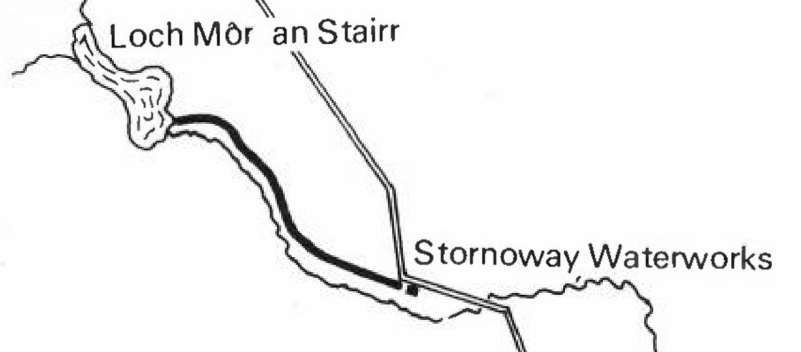
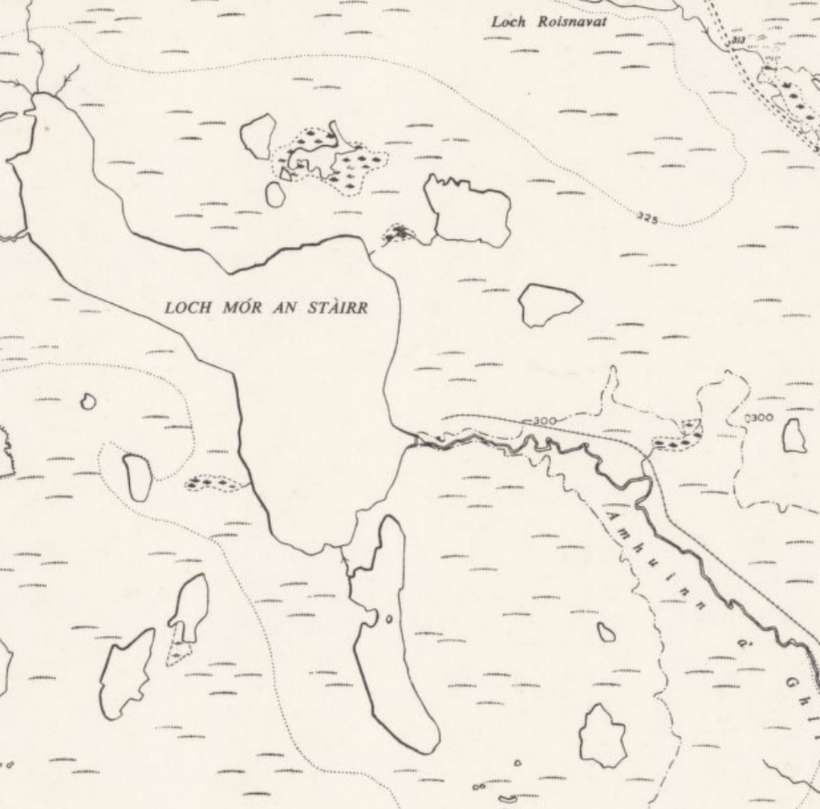
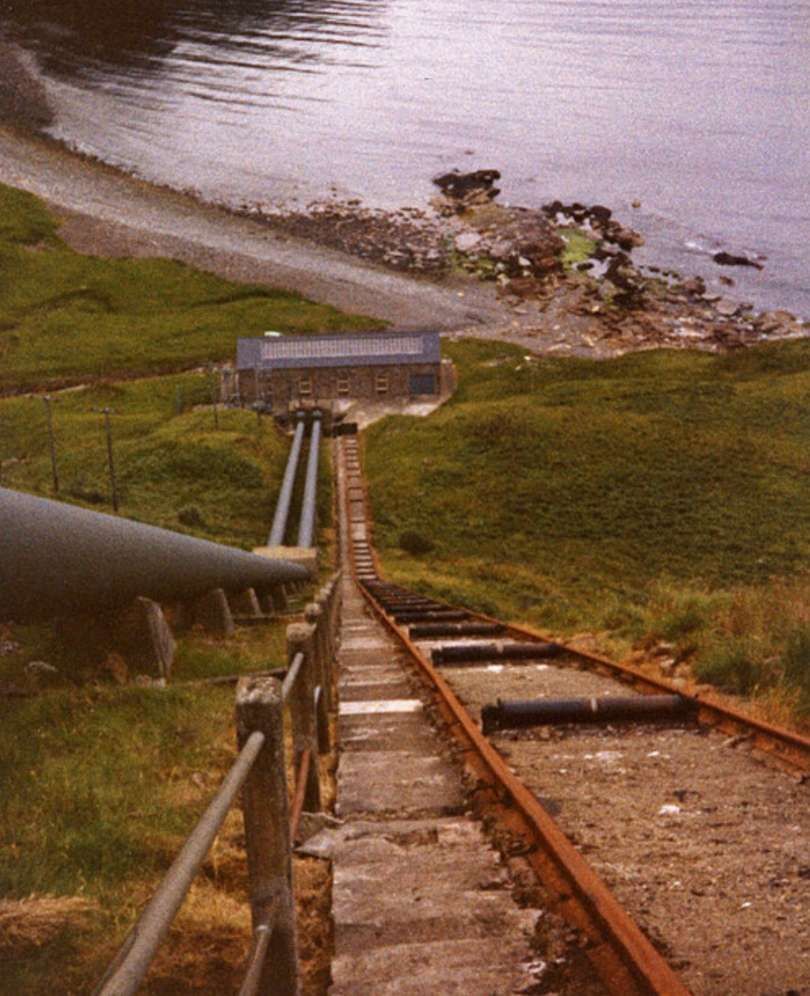
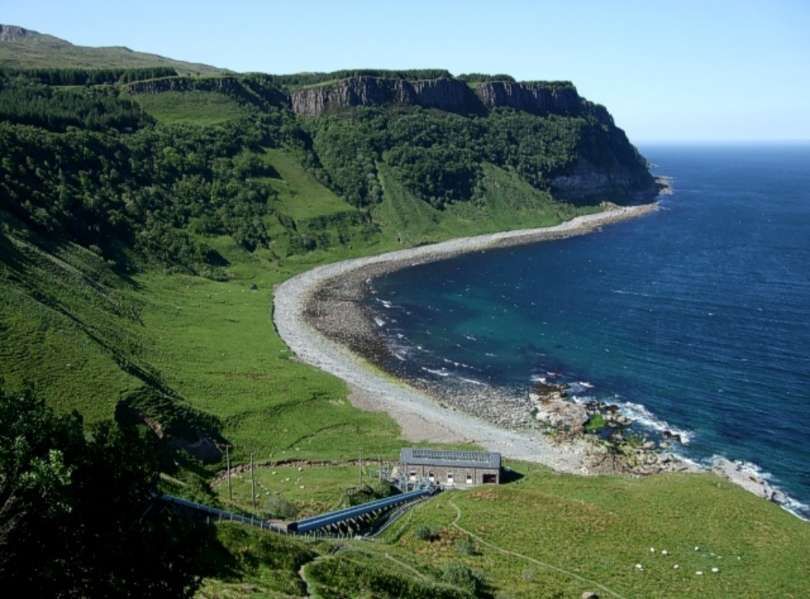
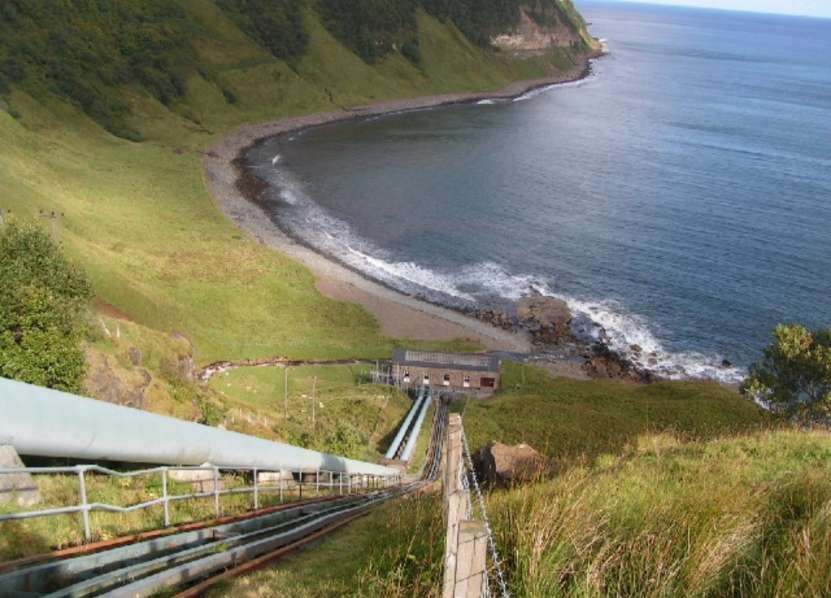
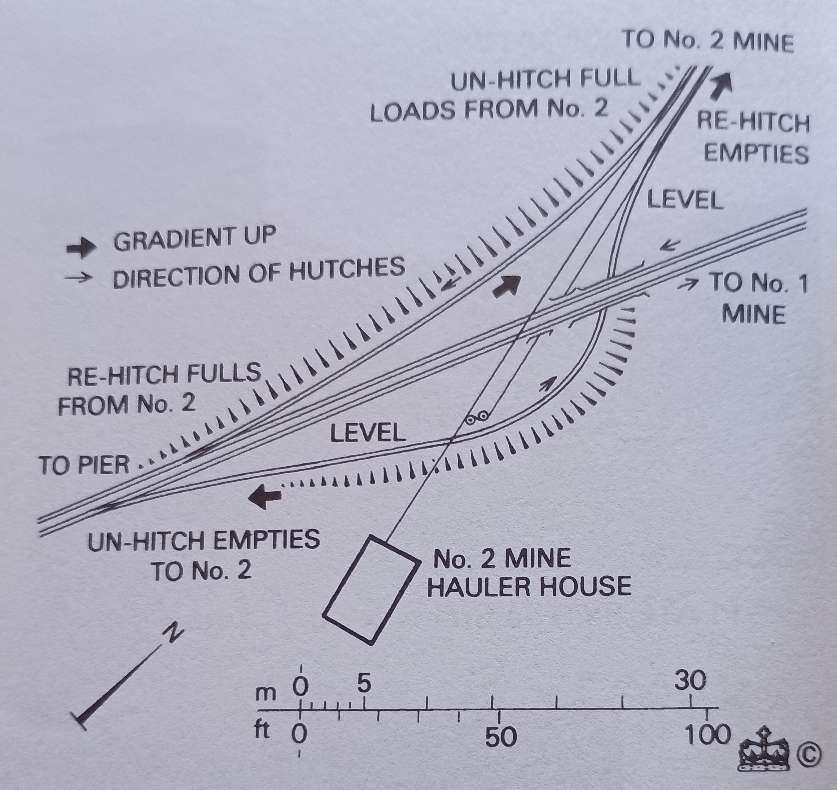
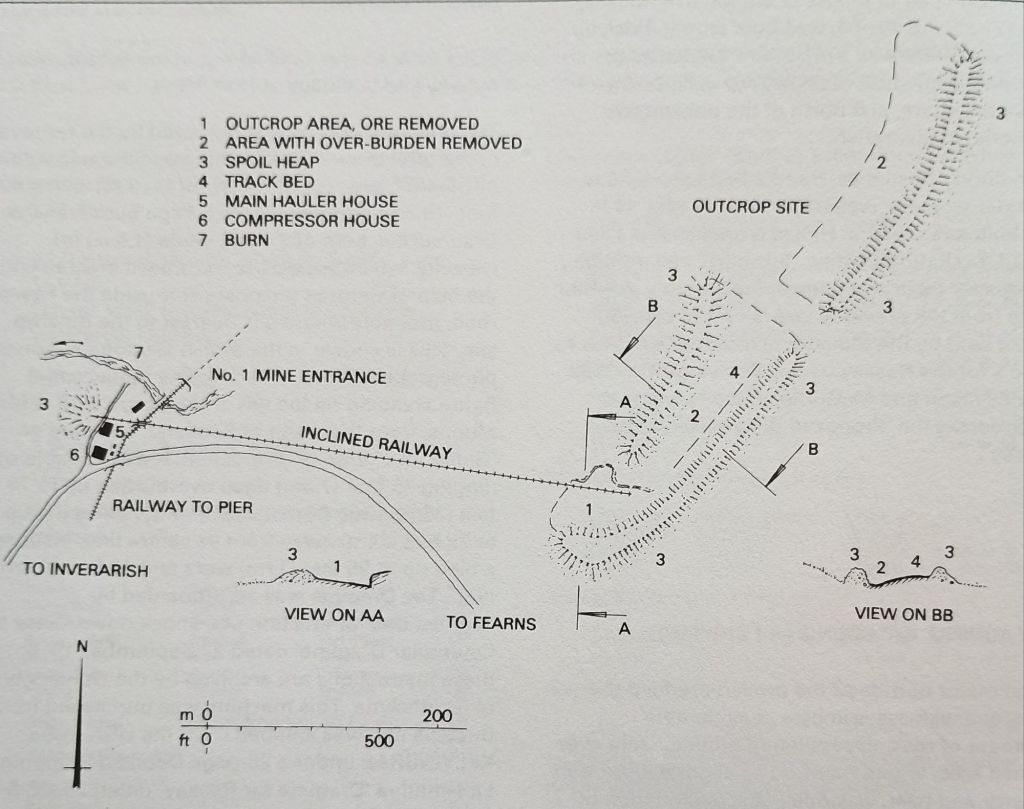
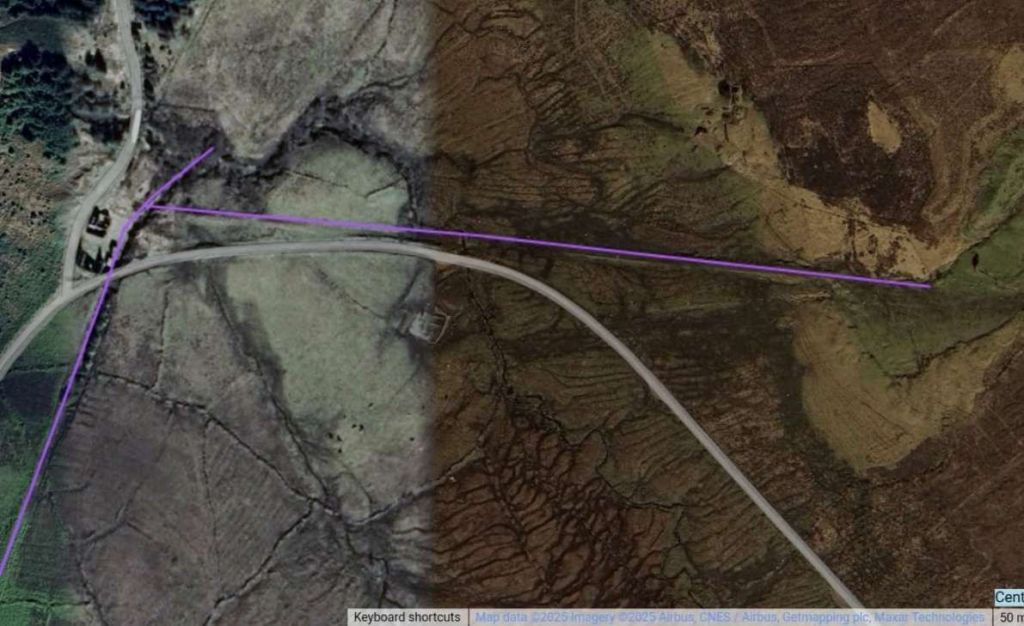
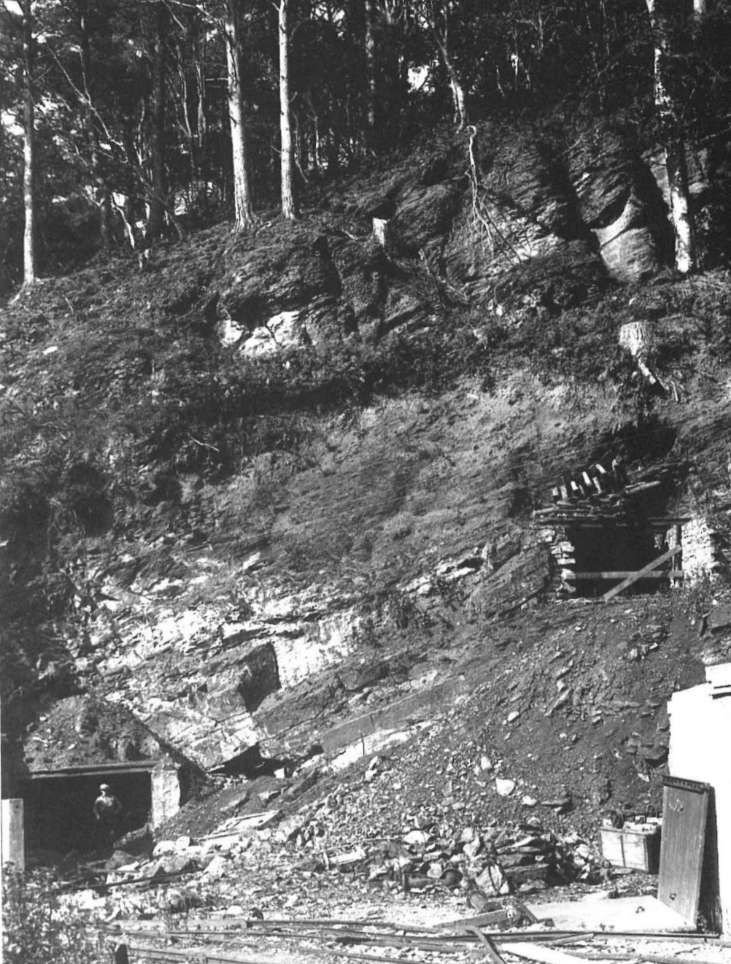
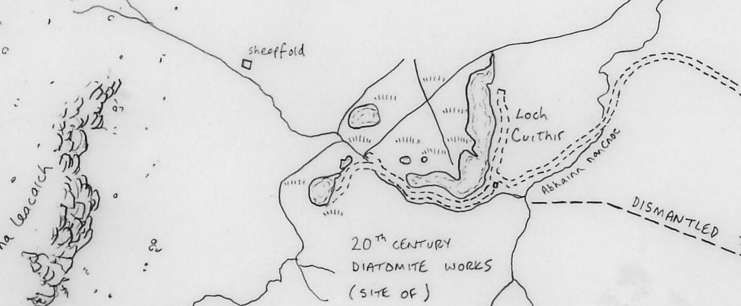
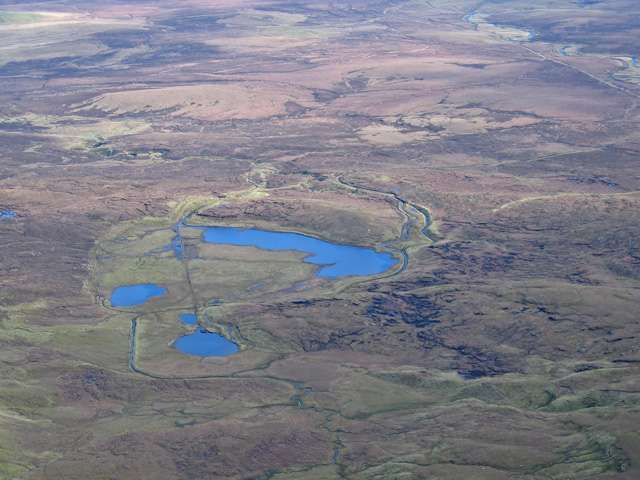
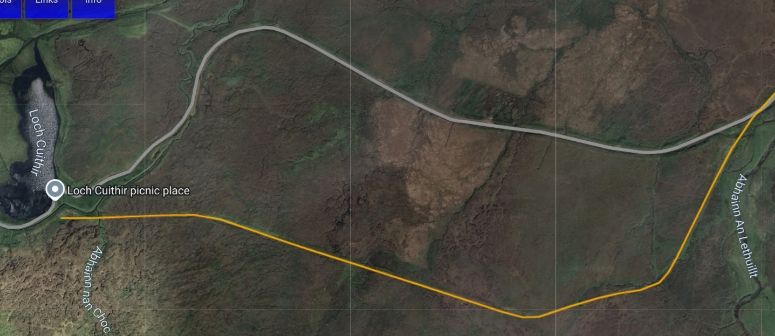
“Since the 1870s Stornoway’s water supply had come from Loch Airigh na Lic, about two miles west of the town, but by the mid-1930s this was proving insufficient for the population of around 5000 which was swelled by four or five hundred herring drifters operating out of the port during the season. Loch Mor an Stairr, five miles north-west of the town, was chosen to augment the supply as it was free from pollution and some distance from public roads. The exit from the Loch was between peat banks some 65ft apart, and it was across this that a concrete dam, 92ft long, was constructed. Pipes led at different levels to a small valve house on the north bank of the outlet stream, and a 9inch main then connect[ed] to the filter houses beside the main road.” [15: p8]
The work was facilitated by the construction of a 2ft-gauge railway line.
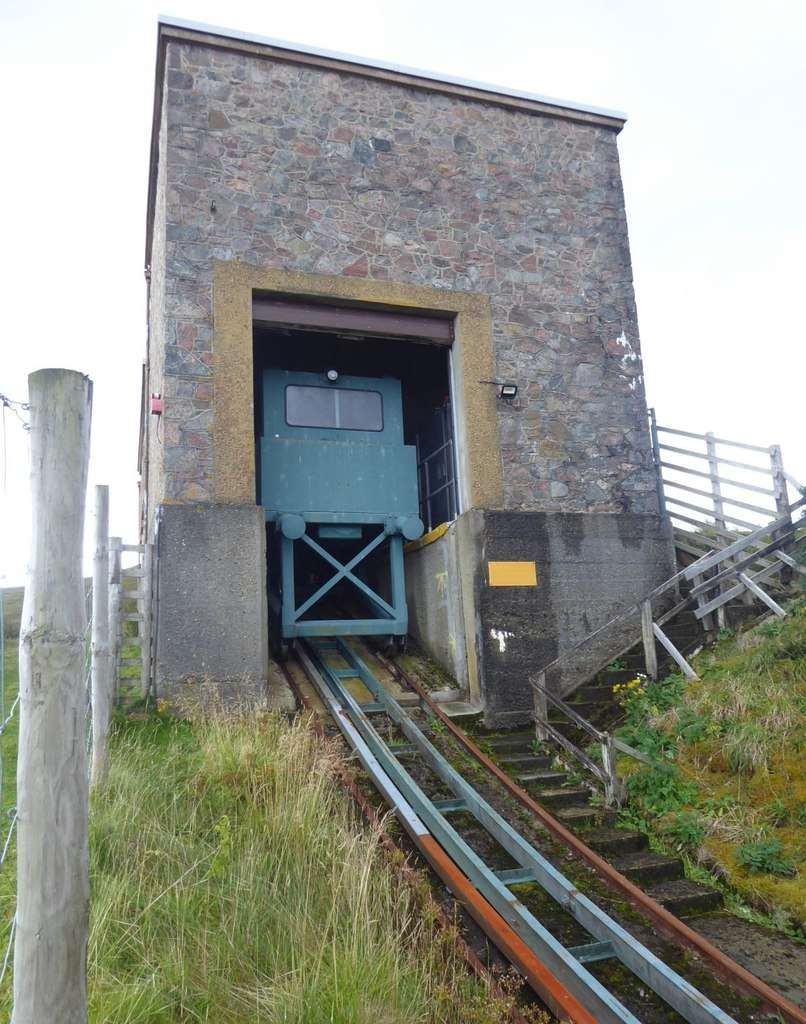
A Simplex locomotive was used on the Stornoway Waterworks Railway. This locomotive was a 20hp model built by Motor Rail Ltd. It operated on the 2-foot gauge line that served the Stornoway Waterworks. Its Works No. is not known. One source suggests No. 110U082 but the records at the Apedale Valley Light Railway have that works number attributed to a 3ft-gauge locomotive at the Bo’ness & Kinneil Rly. [10] It is worth noting that the Almond Valley Light Railway has a 2ft 6in-gauge example. [11]
The Stornoway Waterworks Railway was built in the 1930s and ran for approximately 1.5 miles between Stornoway Waterworks and Loch Mòr an Stàirr. It was used to transport materials during the conversion of the loch into a reservoir for the waterworks and for subsequent maintenance works. It was closed by the 1960s. [12][13]
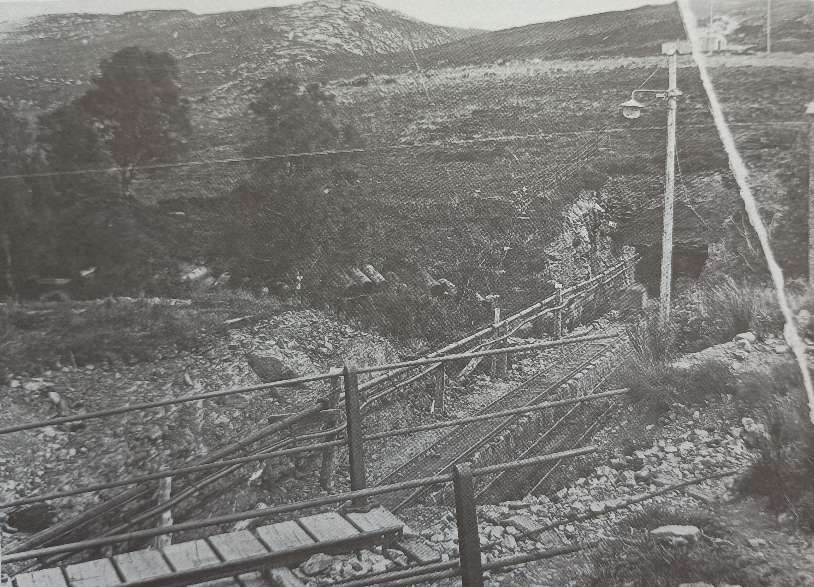
Writing about the locomotive and the construction work in 1982, Ian B. Jolly states: “The Contractor for the dam and pipeline was G. Mackay & Son. of Edinburgh, who started work on the dam in 1935. Their work was completed mid-1936 when the pipeline was connected direct to the town’s mains – the filter house and covered reservoirs were completed within the next few years. … A locomotive-worked narrow gauge tramway was used by MacKay & Son to construct the dam. Rock was excavated and crushed in a small quarry east of the main road. across which it was transferred by lorry to the tramway terminus. Stone and other materials were then carried by rail to the site of the dam. The railway was left in-situ and used by Stornoway Town Council for maintenance of the dam for many years. The loco, a 20 h.p. bow-framed model built by the Motor Rail & Tramcar Company of Bedford, was in use until at least 1940 when Mr Alex Macleod, the fitter who maintained it. was called up for military service. By 1943 the engine had been removed and it had been reduced to a frame and wheels. in which form it is believed to have been in use, pushed by hand, until the early 1960’s as the line’s only item of rolling stock. The loco frame is now [1982] very delapidated and derailed about half a mile from the filter house. It was originally fitted with a Dorman 2JO two-cylinder petrol engine; not the later, but similar 2JOR engine. The axleboxes have ‘W D 1918’ cast on them. whilst the loco had been fitted with the narrow pattern of brake column. This suggests that it was built during late 1918 for the War Department Light Railways, but sold directly as Government Surplus. Motor Rail’s records throw no light on its identity – the only locomotives credited to G. Mackay & Son of Edinburgh are two 40 h.p. ‘protected’ machines: LR3057 4wPM MR 1336/1918 and LR3088 4wPM MR 1367/1918. Both were in the service of MacKay by 21st June 1924. MR 1336 was later with Inns & Co Ltd, Moor Mill Pits. Colney St, Herts. and MR 1367 was with Thomson & Brown Bros Ltd, of Edinburgh by 16th February 1933. There is no mention of a 20 h.p. loco but MacKay was obviously no stranger to Motor Rail & Tramcar Company products.” [15: p9]
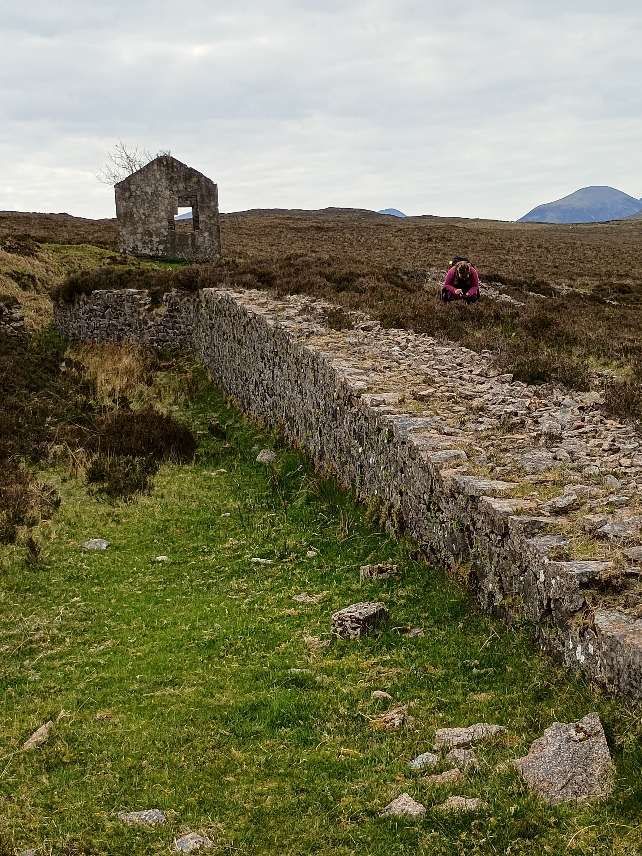
Jolly further notes that “Rolling stock on the line at the time of the dam construction consisted of nine one-cubic-yard skips, a mixture of side and end tippers. The derelict remains of several [could in 1982] be seen at the foot of the bank beneath the filter house, one being a single end tipper. The axle boxes [were] marked ‘Du Croo & Brauns’ – the Dutch firm of railway equipment suppliers. … Most of the track from the roadside terminus to just beyond the loco [had by 1982] been removed without authority – probably for fencing posts! However, the track layout [could] be traced because the turnouts [had in 1982] been left in place. These [were] rivetted to corrugated steel sleepers, whilst the remaining track [was] spiked to wooden sleepers or clipped to corrugated steel sleepers.” [15: p11]
Of further interest, is the significant variation in rail cross-section and weight (between 14lb and 20lb per yard). Jolly also notes that, “On the lengths of prefabricated track where the rails [were tied accurately to gauge, three distinct gauges [could] be measured – 2ft, 60cm (1ft 11.5/8in) and 1ft 11½ in! The loco wheels [were] set to 60cm gauge.” [15: p11]
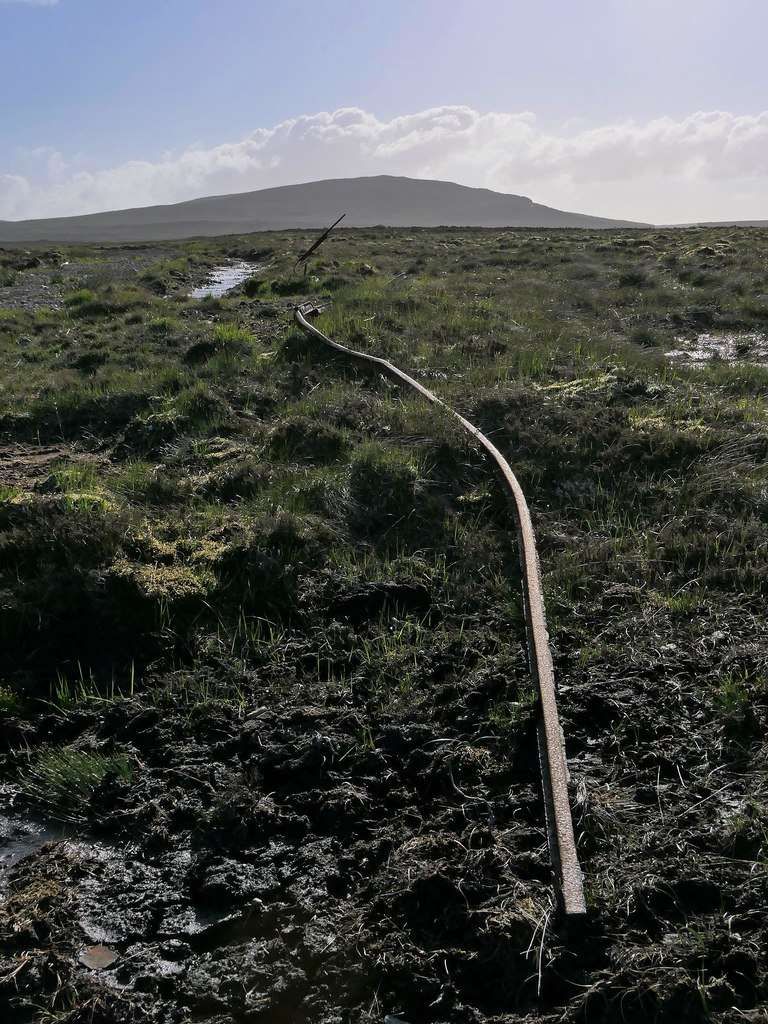
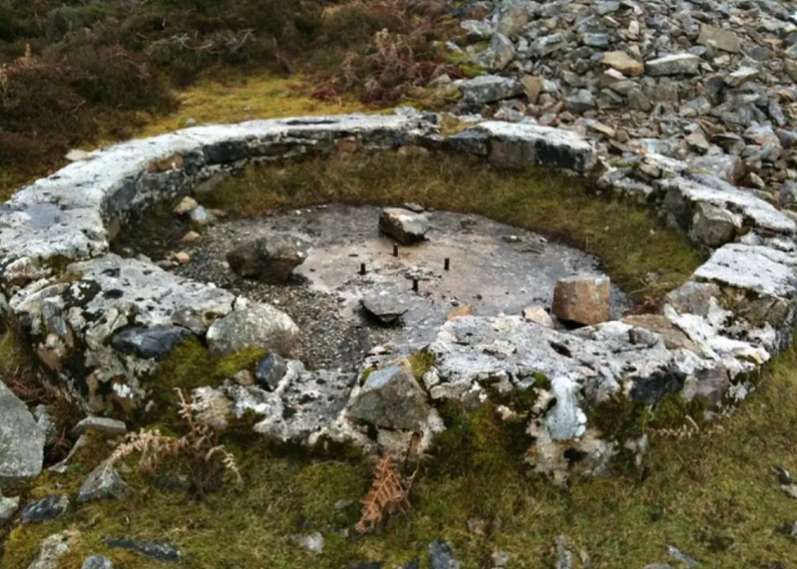
In 1982, only minimal earthworks were evident, with track following the undulation of the land but, says Jolly, “there is a rise of just over 25 feet from one end of the line to the other. The track terminates near the dam without so much as a buffer stop or siding. The remains of the loco and line will probably survive for many years to come, as scrapmen are unknown in the Outer Hebrides.” [15: p11]


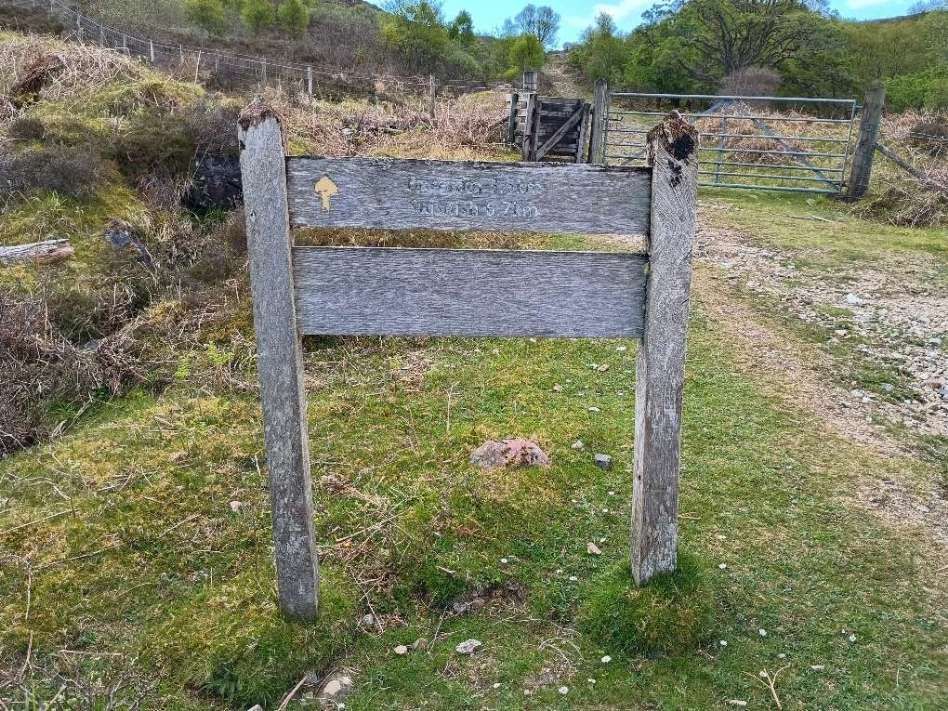
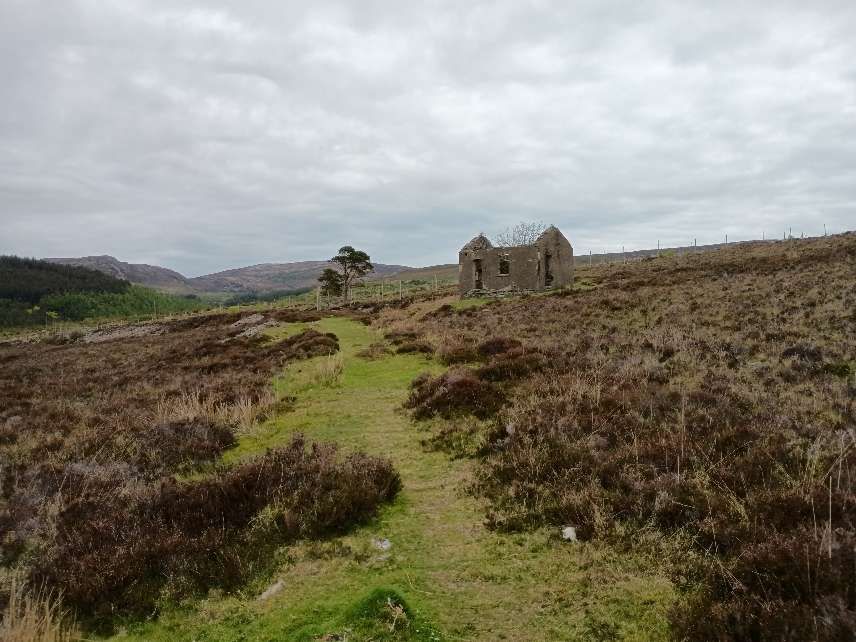
Another photograph which shows remains of point work close to the Waterworks can be seen on the Railscot.co.uk website. [14]
Other Railways?
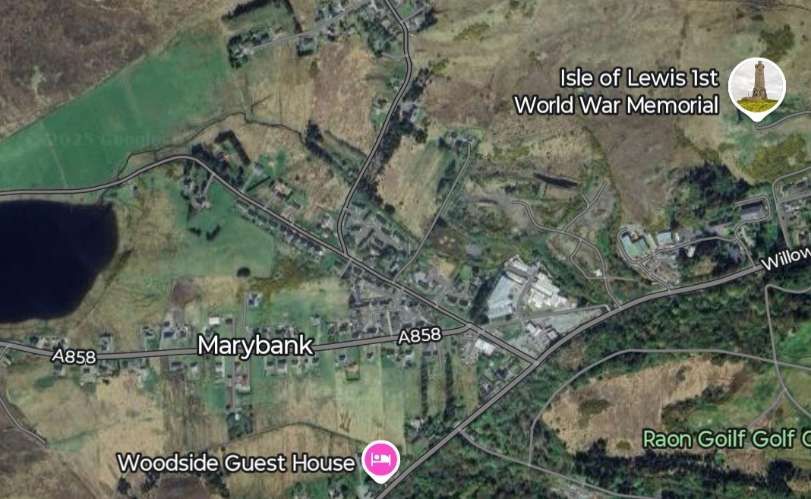
Jolly comments: “There appear to have been three other industrial railways in Lewis, lain D.A. Frew referred to the horse-worked system on the outskirts of Stornoway. This served the factory of the Lewis Chemical Co, promoted in the late nineteenth century to extract paraffin-oil from peat by a patent process. Garrabost Brickworks, about 8 miles east of Stornoway) is reputed to have had a short line. The brickworks is shown on the 1852 6in map but no railway, and the 1897 edition shows the works as ‘disused claypit. We were also told of Marybank Quarry, west of Stornoway, where there was a hand worked line from the rockface about 100 yards to the crusher. The quarry was operated in the few years before the last war by William Tawse of Aberdeen.” [15]
Other lines are referred to in a blog about the island accessed through the BBC website. The blog is entitled ‘Arnish Lighthouse’ and includes these words. … “Lewis did have railways, around the turn of the 19th/20th century. There was a railway from the quarry at Bennadrove to Stornoway. Posts related to this track can still be found in the Castle Grounds, opposite the Caberfeidh Hotel. … A trackbed was laid near Garrabost in Point, but a railway was never built.” [56]
I have not yet been able to find anything further about any of these short lines. There is an active quarry at Bennadrove. This is not far from Marybank

Records
Plans illustrating the surveyed railway routes proposed by Lord Leverhulme can be accessed at Tasglann nan Eilean Siar, the Hebridean Archives. [6]
References
- Roger Hutchinson; The Soap Man: Lewis, Harris and Lord Leverhulme; Birlinn, Edinburgh, 2003 (latest reprint 2017).
- https://stornowayfacilities.weebly.com/lord-leverhulmes-tenure-and-legacy-1918-1923.html, accessed on 19th June 2025.
- https://www.designingbuildings.co.uk/wiki/Lord_Leverhulme_on_Lewis_and_Harris, accessed on 19th June 2025.
- Halliday Sutherland; Arches of the Years; Geoffrey Bles, London, 1933.
- https://www.bbc.co.uk/scotland/islandblogging/blogs/005132/0000008950.shtml, accessed on 19th June 2025.
- http://ica-atom.tasglann.org.uk/index.php/map-of-lewis-and-north-harris-with-fishing-estates-around-garynahine-to-carloway-marked-in-colour-and-surveyed-railway-system, accessed on 19th June 2025.
- David Spaven & Julian Holland; Mapping the Railways; Times Books, London, 2012.
- https://hlrco.wordpress.com/scottish-narrow-gauge/proposed-lines/leverburgh-branahuie-railway, accessed on 20th June 2025. (See the comments made by Ian Jolly on 24th September 2013)
- https://maps.nls.uk/view/76344155, accessed on 29th June 2025.
- https://www.simplex.avlr.org.uk/existing%20simplexes.htm, accessed on 29th June 2025.
- https://en.m.wikipedia.org/wiki/Almond_Valley_Light_Railway, accessed on 29th June 2025.
- https://www.geograph.org.uk/photo/6217818, accessed on 29th June 2025.
- https://www.geograph.org.uk/photo/6217804, accessed on 29th June 2025.
- https://railscot.co.uk/img/35/600, accessed on 29th June 2025.
- Ian B. Jolly; Hebridean Adventure; The Narrow Gauge No. 97, Autumn 1982, p8-14; via https://www.ngrs.org/downloads/TNG.1-100/tng97-autumn-1982.pdf, accessed on 29th June 2025.
- A. C. O’Dell & Kenneth Walton; Highlands and Islands of Scotland; Thomas Nelson & Sons, London, 1963.
- Nigel Nicolson; Lord of the Isles; Weidenfeld and Nicolson, London, 1960, (published in paperback by Acair Ltd., Stornoway, 2005).
- https://maps.nls.uk/projects/stornoway/index-en.html#layer=9, accessed on 1st July 2025.
- https://maps.nls.uk/geo/explore/#zoom=15.6&lat=58.21875&lon=-6.39236&layers=6&b=ESRIWorld&o=93, accessed on 1st July 2025.
- https://maps.nls.uk/geo/explore/#zoom=14.4&lat=58.22270&lon=-6.40823&layers=6&b=ESRIWorld&o=93, accessed on 1st July 2025.
- https://maps.nls.uk/geo/explore/#zoom=14.4&lat=58.22136&lon=-6.43868&layers=6&b=ESRIWorld&o=93, accessed on 1st July 2025.
- https://maps.nls.uk/geo/explore/#zoom=14.4&lat=58.21899&lon=-6.46359&layers=6&b=ESRIWorld&o=93, accessed on 1st July 2025.
- https://maps.nls.uk/geo/explore/#zoom=14.4&lat=58.21559&lon=-6.48359&layers=6&b=ESRIWorld&o=93, accessed on 1st July 2025.
- https://maps.nls.uk/geo/explore/#zoom=14.4&lat=58.21435&lon=-6.51529&layers=6&b=ESRIWorld&o=93, accessed on 1st July 2025.
- https://maps.nls.uk/geo/explore/#zoom=14.4&lat=58.22152&lon=-6.53815&layers=6&b=ESRIWorld&o=93, accessed on 1st July 2025.
- https://maps.nls.uk/geo/explore/#zoom=14.7&lat=58.22122&lon=-6.56470&layers=6&b=ESRIWorld&o=93, accessed on 1st July 2025.
- https://maps.nls.uk/geo/explore/#zoom=14.6&lat=58.22118&lon=-6.59031&layers=6&b=ESRIWorld&o=93, accessed on 1st July 2025.
- https://maps.nls.uk/geo/explore/#zoom=14.6&lat=58.22295&lon=-6.61322&layers=6&b=ESRIWorld&o=93, accessed on 1st July 2025.
- https://maps.nls.uk/geo/explore/#zoom=14.8&lat=58.22739&lon=-6.63937&layers=6&b=ESRIWorld&o=93, accessed on 2nd July 2025.
- https://maps.nls.uk/geo/explore/#zoom=15.2&lat=58.23321&lon=-6.66554&layers=6&b=ESRIWorld&o=64, accessed on 2nd July 2025.
- https://maps.nls.uk/geo/explore/#zoom=15.2&lat=58.23920&lon=-6.67022&layers=6&b=ESRIWorld&o=64, accessed on 2nd July 2025
- https://maps.nls.uk/geo/explore/#zoom=15.0&lat=58.24937&lon=-6.68719&layers=6&b=ESRIWorld&o=95, accessed on 2nd July 2025.
- https://maps.nls.uk/geo/explore/#zoom=16.1&lat=58.24991&lon=-6.69284&layers=6&b=ESRIWorld&o=95, accessed on 2nd July 2025.
- https://maps.nls.uk/geo/explore/#zoom=15.3&lat=58.25347&lon=-6.70561&layers=6&b=ESRIWorld&o=95, accessed on 2nd July 2025.
- https://maps.nls.uk/geo/explore/#zoom=15.6&lat=58.25864&lon=-6.72145&layers=6&b=ESRIWorld&o=95 , accessed on 2nd July 2025.
- https://maps.nls.uk/geo/explore/#zoom=15.3&lat=58.26459&lon=-6.73542&layers=6&b=ESRIWorld&o=95, accessed on 2nd July 2025.
- https://maps.nls.uk/geo/explore/#zoom=15.6&lat=58.27161&lon=-6.74811&layers=6&b=ESRIWorld&o=95, accessed on 2nd July 2025.
- https://maps.nls.uk/geo/explore/#zoom=15.6&lat=58.28025&lon=-6.76040&layers=6&b=ESRIWorld&o=95, accessed on 2nd July 2025.
- https://maps.nls.uk/geo/explore/#zoom=14.9&lat=58.28236&lon=-6.77484&layers=6&b=ESRIWorld&o=95, accessed on 2nd July 2025.
- https://maps.nls.uk/geo/explore/#zoom=15.0&lat=58.22770&lon=-6.68319&layers=6&b=ESRIWorld&o=95, accessed on 2nd July 2025.
- https://maps.nls.uk/geo/explore/#zoom=14.7&lat=58.22450&lon=-6.70241&layers=6&b=ESRIWorld&o=95, accessed on 2nd July 2025.
- https://maps.nls.uk/geo/explore/#zoom=14.9&lat=58.22126&lon=-6.72278&layers=6&b=ESRIWorld&o=95, accessed on 2nd July 2025.
- https://maps.nls.uk/geo/explore/#zoom=14.8&lat=58.21871&lon=-6.74460&layers=6&b=ESRIWorld&o=95, accessed on 2nd July 2025.
- https://maps.nls.uk/projects/stornoway/geo-en.html#zoom=13.0&lat=58.21500&lon=-6.37000&layer=10, accessed on 3rd July 2025. (Once on the correct webpage, please scroll down to the relevant map, dated 1919).
- John R. Gold & Margaret M. Gold; To Be Free and Independent: Crofting, Popular Protest and Lord Leverhulme’s Hebridean Development Projects, 1917-25; in Rural History Volume 7 No. 2, 1996, p191-206; via https://acrobat.adobe.com/id/urn:aaid:sc:EU:f5cf9740-225f-4de0-ae7d-cdf4bf13d22f, accessed on 4th July 2025.
- https://maps.nls.uk/view/76344950, accessed on 4th July 2025.
- https://maps.nls.uk/view/76344944, accessed on 4th July 2025.
- https://www.stornowayportauthority.com/about-us/our-history, accessed on 5th July 2025.
- https://maps.nls.uk/geo/explore/#zoom=16.0&lat=58.28010&lon=-6.78611&layers=6&b=ESRIWorld&o=100, accessed on 6th July 2025.
- https://www.virtualheb.co.uk/phentland-road-isle-of-lewis-western-isles, accessed on 6th July 2025.
- https://maps.nls.uk/geo/explore/#zoom=16.0&lat=58.22062&lon=-6.39641&layers=168&b=ESRIWorld&o=100, accessed on 5th July 2025.
- https://maps.nls.uk/view/76344158, accessed on 5th July 2025.
- https://portnacailliche.blogspot.com/2010/09/post-kew-excitement.html, accessed on 6th July 2025.
- https://wp.me/p153uL-81, accessed on 6th July 2025.
- https://maps.nls.uk/geo/explore/#zoom=15.0&lat=58.21120&lon=-6.38465&layers=6&b=ESRIWorld&o=100, accessed on 6th July 2025.
- https://www.bbc.co.uk/scotland/islandblogging/blogs/005132/0000008950.shtml, accessed on 5th July 2025.


