Tag Archives: railway

The Railways of Telford – the Wellington to Severn Junction Railway (W&SJR) – Part 1 – Wellington to Horsehay

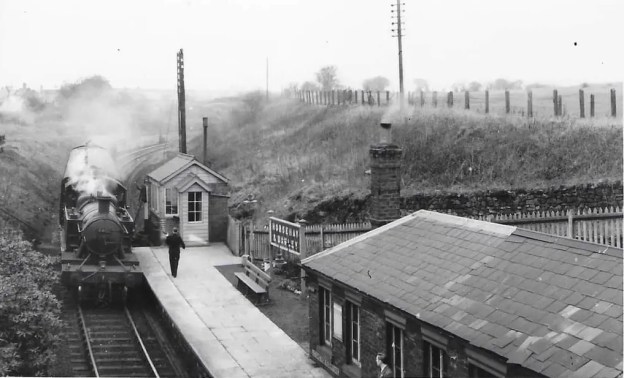
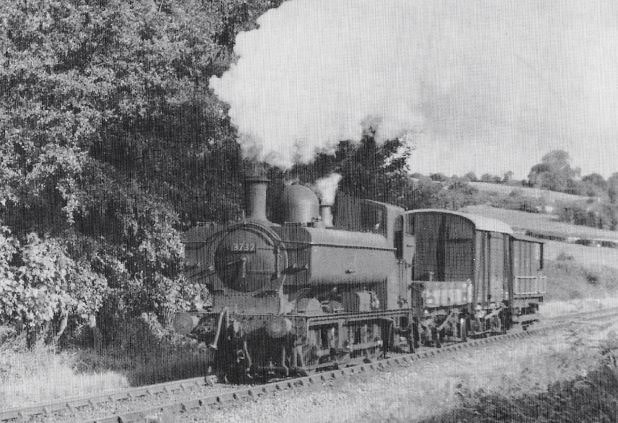
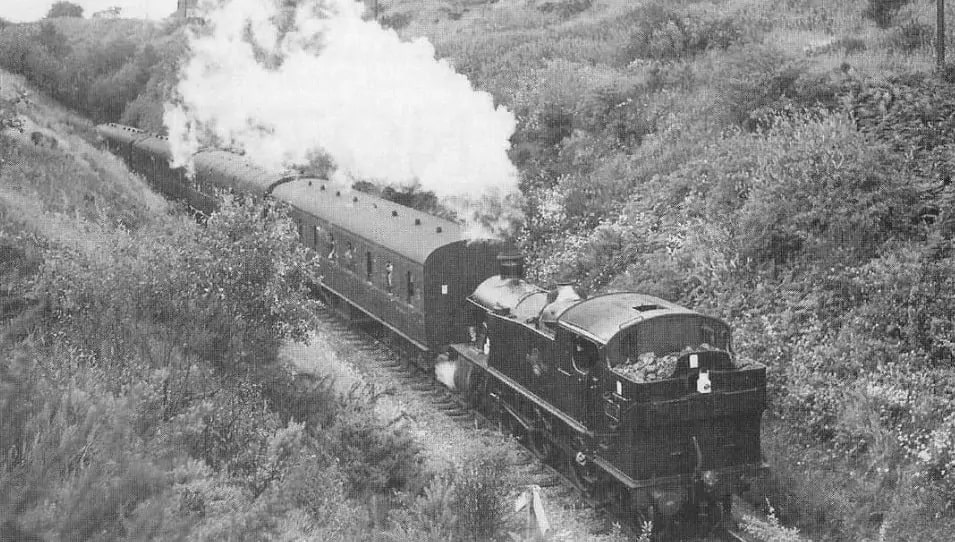
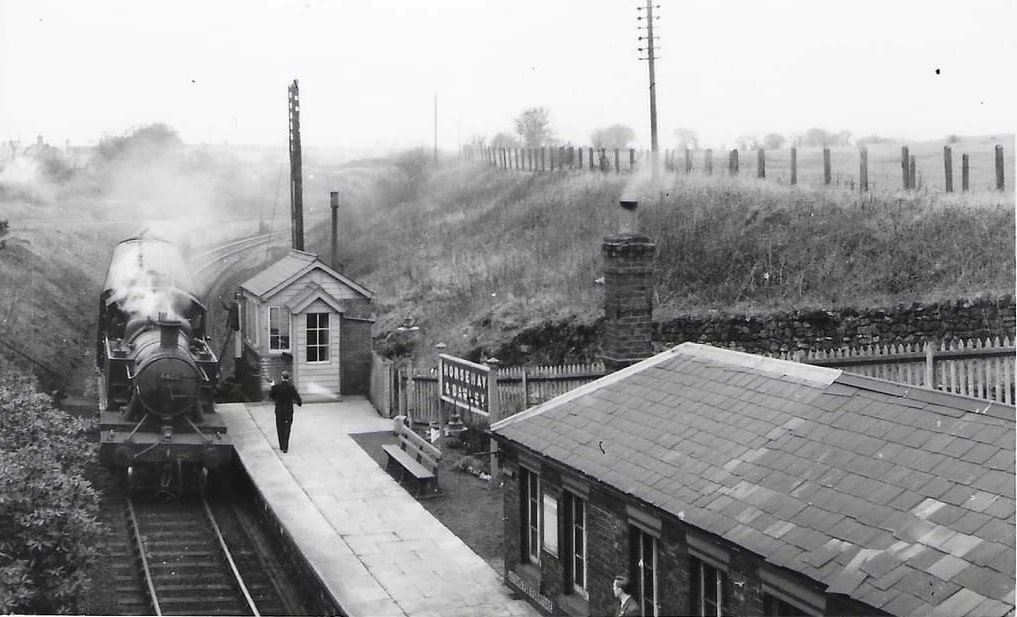
The featured image shows a 1950 service to Much Wenlock and Craven Arms entering Horsehay and Dawley Railway Station. Details of the photograph are given towards the end of this article.

“The Wellington and Severn Junction Railway … was built between 1857 [and] 1861 and formed part of the Wellington to Craven Arms Railway. For much of its working life, it was operated by the Great Western Railway and subsequently the Western Region of British Railways.” [1]

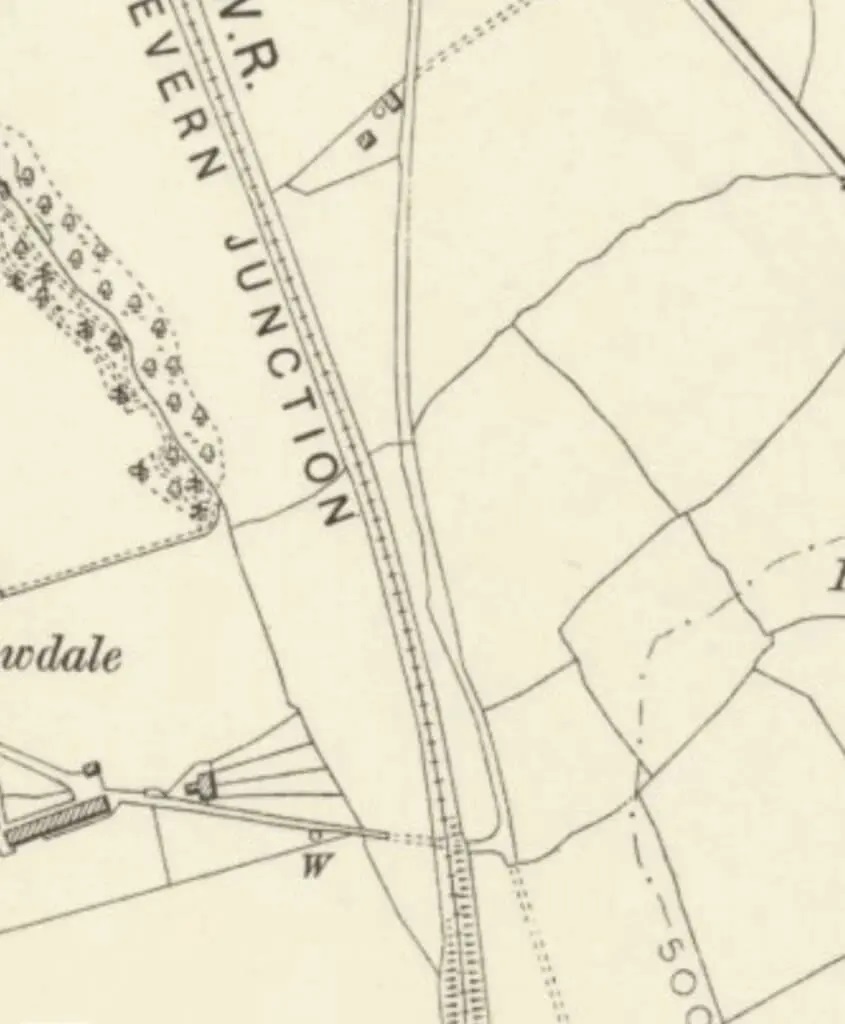
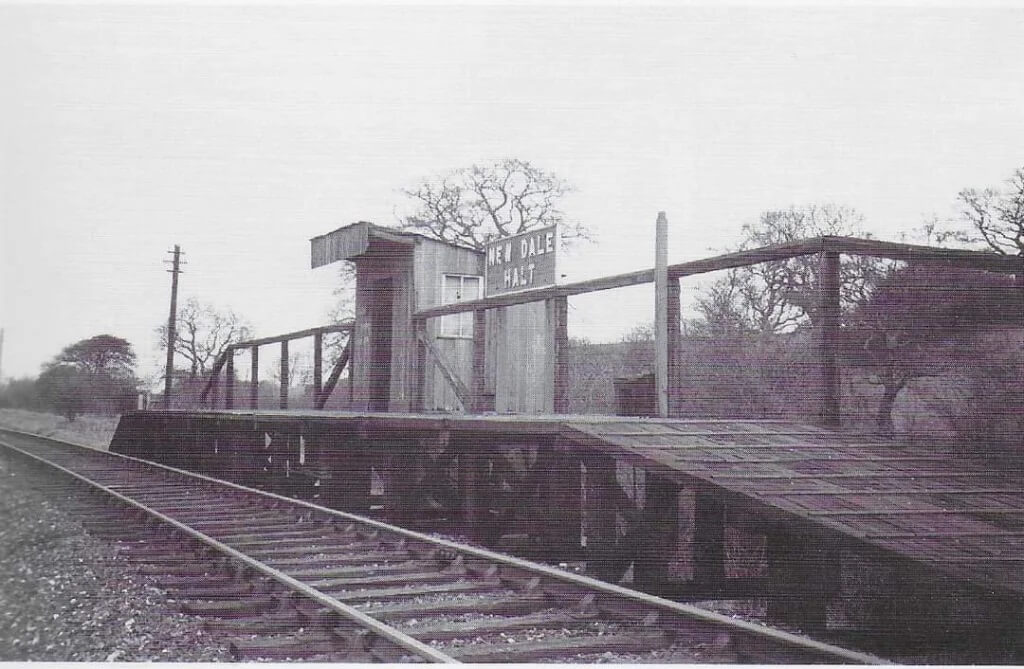
Wikipedia tells us that “Its route included the following stations: – Wellington, Ketley, Horsehay and Dawley, Doseley Halt, Lightmoor Platform and Coalbrookdale.” [1] That list on Wikipedia is not exhaustive: Ketley Town Halt was opened by the GWR in March 1936 a little to the South of the Sinclair Iron Foundry; [17] New Dale Halt opened in 1934 to serve Newdale; [18] Lawley Bank Station was set in a relatively rural area; [19] Green Bank Halt (close to Jigger’s Bank, between the bridge over Jigger’s Bank and that over Cherry Tree Hill) opened in 1934 and closed in 1962. [16]

The necessary Act of Parliament, the Wellington and Severn Junction Railway Act, was promulgated in 1853. [3]

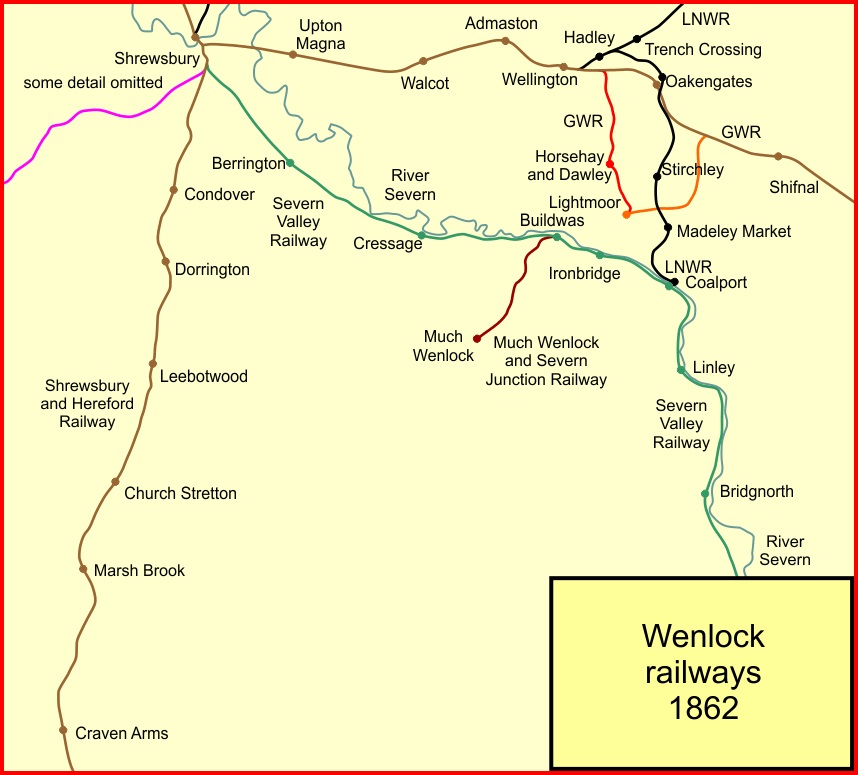
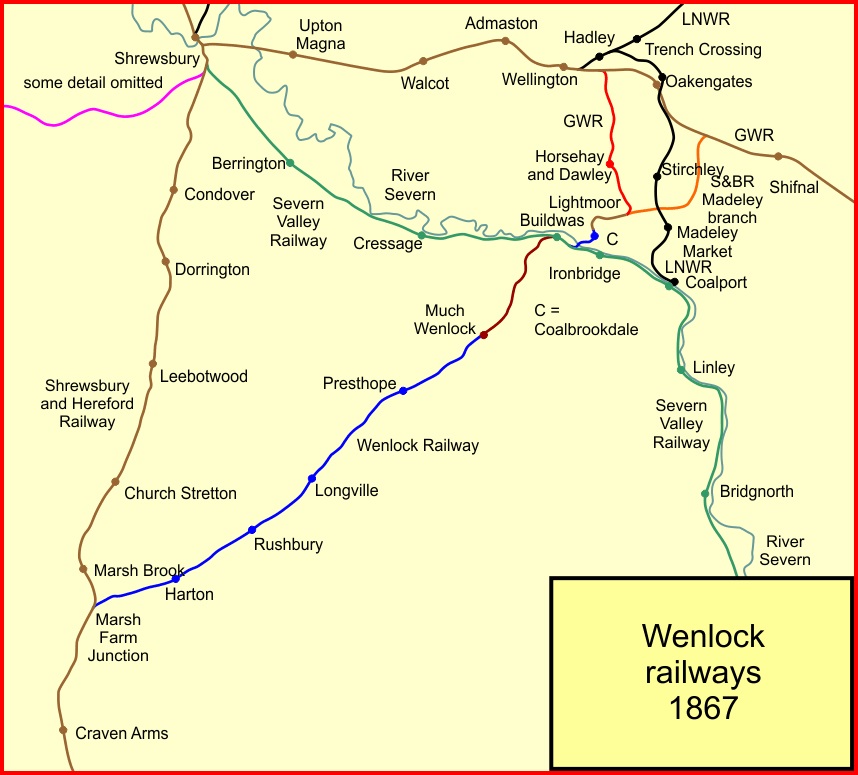
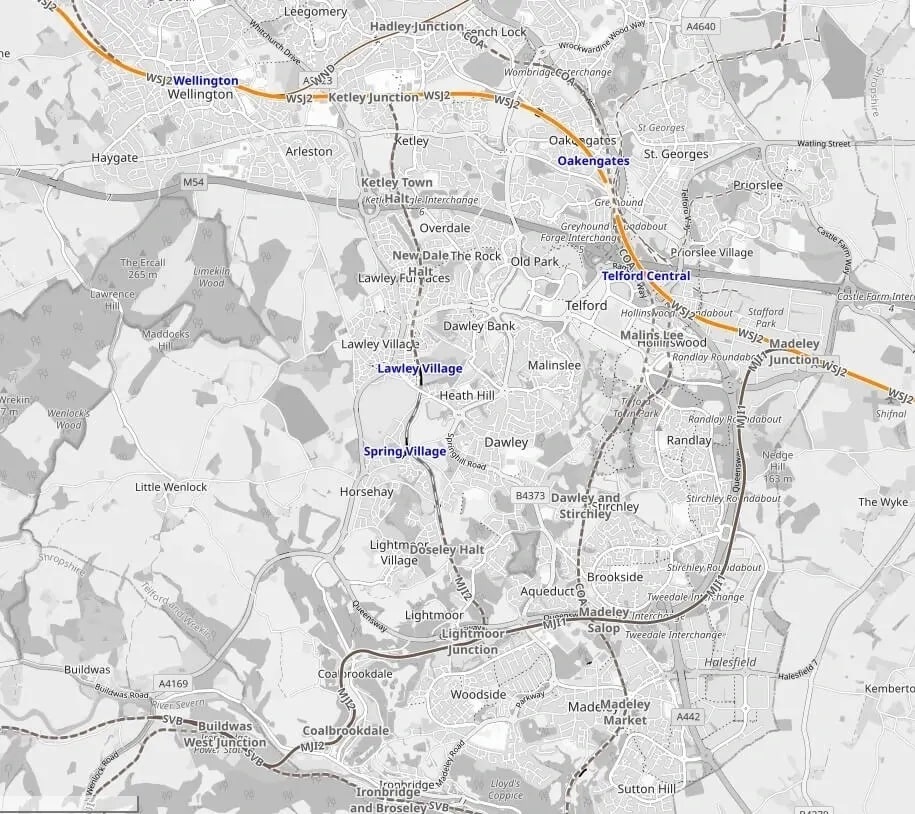
The images below show the developing standard-gauge rail network around the River Severn. By 1957 the W&SJR linked Ketley Junction to Lightmoor. It was a little longer before the line made a connection with the Severn Valley Railway and eventually the route through to Craven Arms opened.

Ketley Junction to Lightmoor was open by 1857. [4]
The Severn Valley line was open by the time covered by this map. [4]
The complete route of the Wellington, Much Wenlock & Craven Arms Railway was in use by 1867. [4]
The railways in the area around what was the Wellington & Severn Junction Railway (W&SJR) as shown on the OpeRailwayMap. OpenRailwayMap (previously called “Bahnkarte”) is a detailed online map of the world’s railway infrastructure, built on OpenStreetMap data. It has been available since mid-2013 at OpenRailwayMap.org [40]

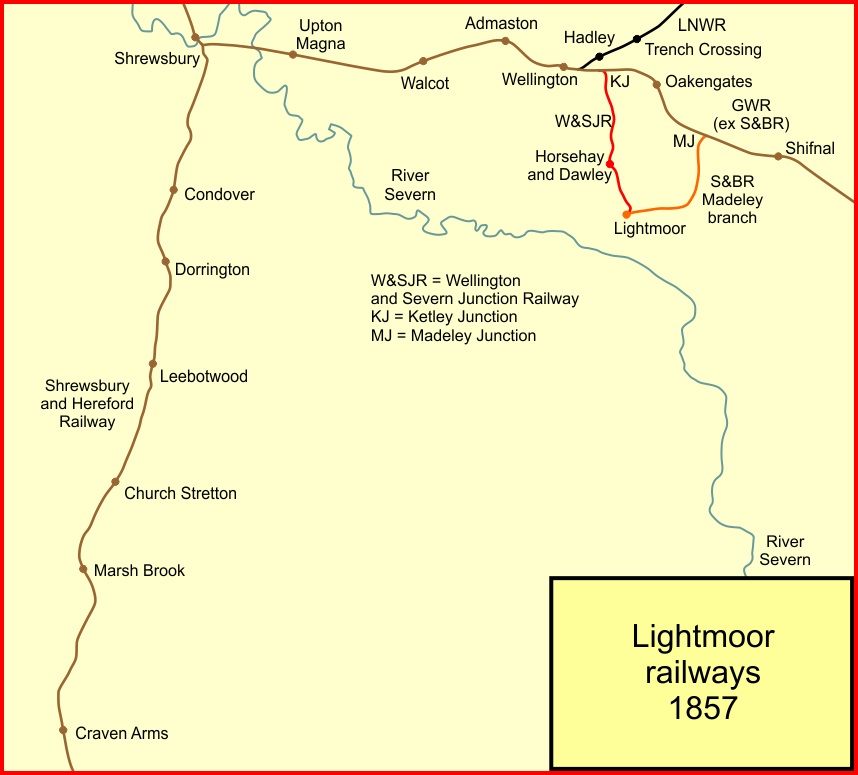
Adrian Knowles [2] tells us that it was always intended that there would be a standard-gauge railway serving “the western side of the coalfield – particularly the ironworks at Ketley and Horsehay – and indeed the main Coalbrookdale Company works following the cutback of the original Shrewsbury & Birmingham (S&B) scheme to Lightmoor in 1851.” [2: p19]

In 1851/52, Dickson & Co. built a short line from Waterloo sidings on the Shrewsbury & Birmingham Railway close to Wellington to the Ironworks at Ketley. The Coalbrookdale Co. became major backers of an initiative to extend that short line down into the Severn Gorge.

Knowles tells us that “the route was surveyed during 1852 by John Barber of Wellington and initial plans were drawn up by John Mackenzie.” [2: p19]

In an effort to keep the LNWR out of the area around Coalbrookdale the S&B board granted running rights over their line between Wellington and Ketley and part-funded the parliamentary process required to allow the line to progress.

The Act received Royal Assent on 20th August 1853, the same day as the Severn Valley Railway Act. [2: p20] It “dictated that the S&B, LNWR and SUR should allow free passage to all traffic to and from the W&SJR and that the W&SJR should reciprocate in accommodating traffic from those companies.” [2: p20]

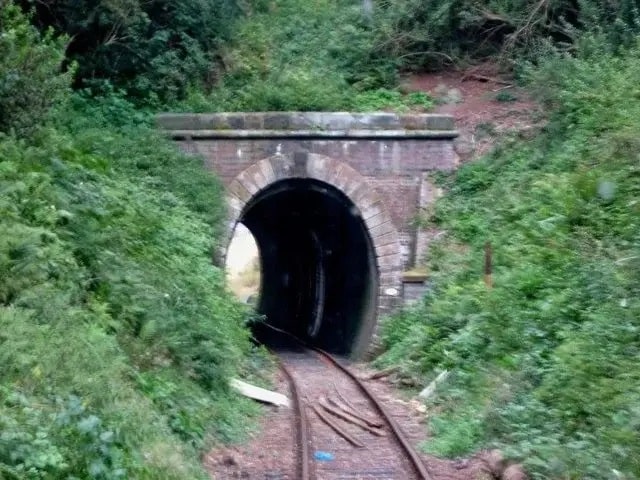
Knowles tells us that the estimated cost of the new railway was £60,000. The share uptake was slow but enough was raised to make headway on purchase of land. Nothing was spent on construction until all the land had been acquired. By mid-1855 funds were still inadequate to allow a start on construction along the full length of the line. The board decided to start work on the heaviest engineering works, which began on 25th August 1855. [2: p20] A start was made on the length of the line between Ketley Junction and Horsehay which included Horsehay Tunnel.

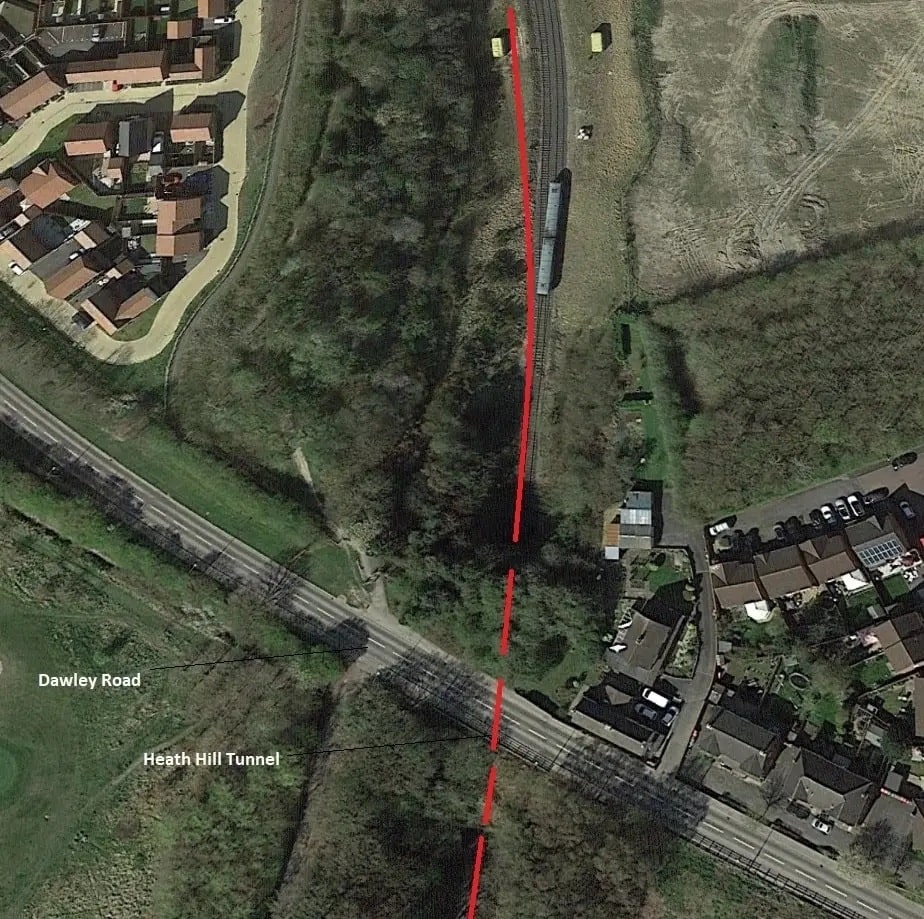
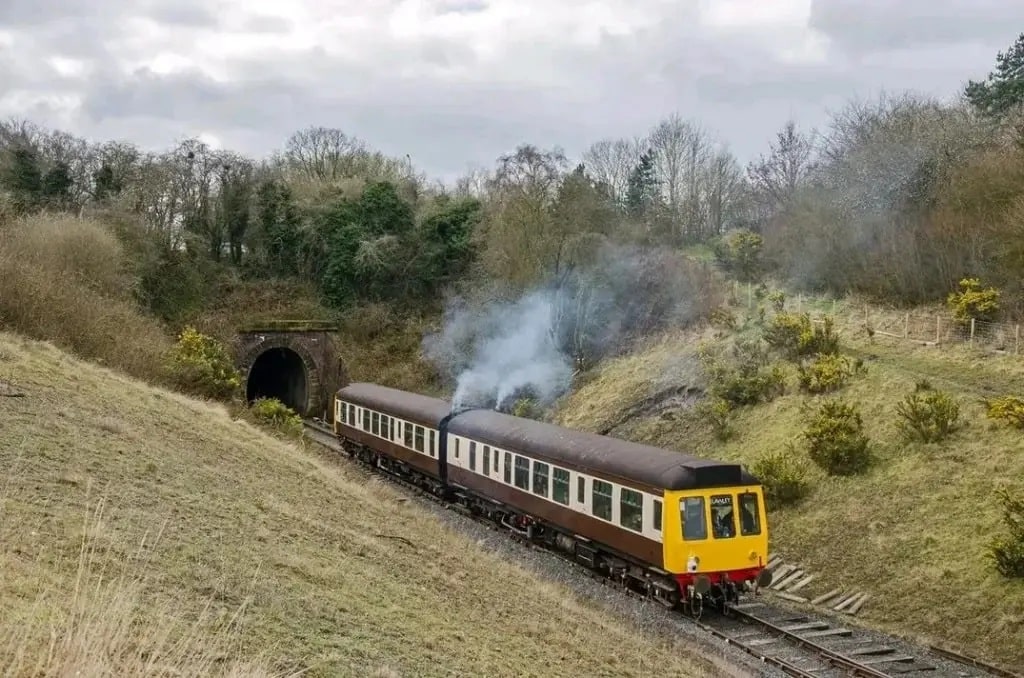
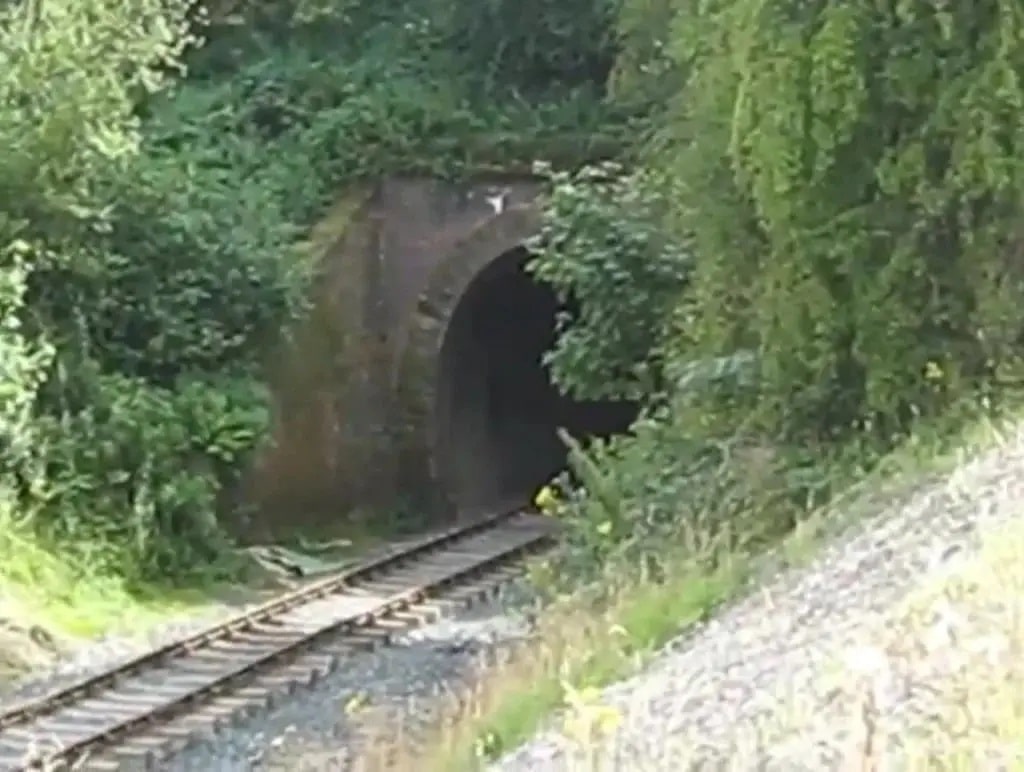
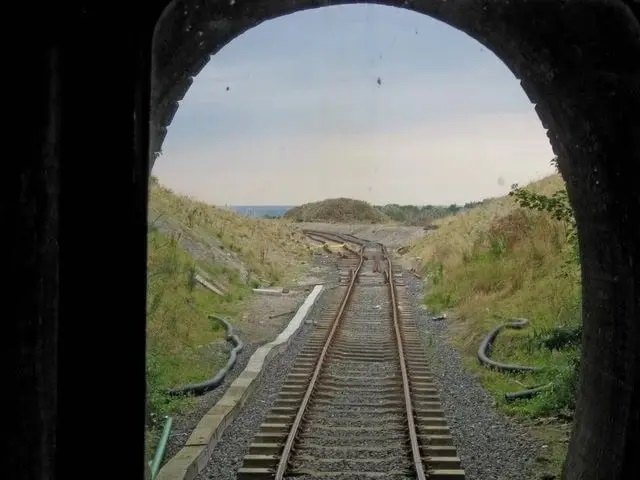
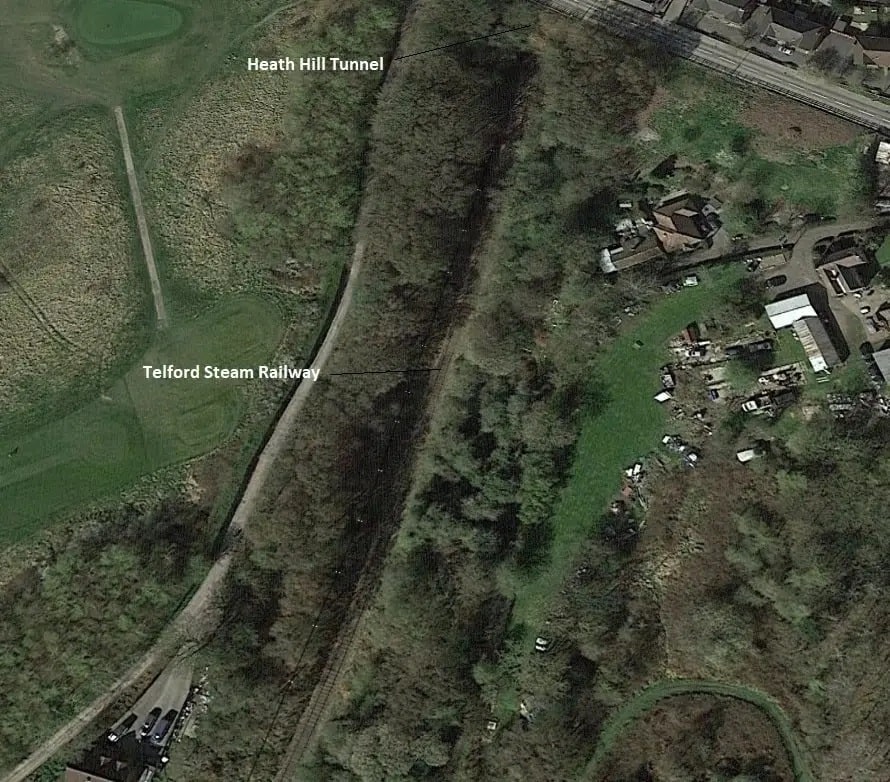
By 1st May 1857 the line between Ketley Junction, including Heath Hill Tunnel, was ready to open for goods and mineral traffic. [2: p22-23] It is interesting that because the branch “was being used largely to serve Horsehay Works, and the GWR was withholding any revenue payments pending a formalised working agreement which would set the amount, the Coalbrookdale Company sympathised with W&SJR shareholders who were receiving no returns on their money. The Coalbrookdale Company therefore agreed to pay a five per cent annual dividend while negotiations with the GWR over operating the line continued. The first such payment was made to shareholders on 1st July 1958.” [2: p24]

Steady progress was being made on the remainder of the line to Lightmoor. “During the winter of 1857-8, £5,732 was spent on the work, all subscribed by the Coalbrookdale Company which by this time had a 75% stake in the W&SJR.” [2: p24]

Knowles goes on to mention arrangements made at Lightmoor to cope temporarily with the unfinished connection to the GWR (Shrewsbury & Birmingham) Madeley Branch. “All trains passing from the W&SJR to the GWR and vice versa had to reverse at Lightmoor.” [2: p 24]

Passenger services between Wellington, Lightmoor and Shifnal eventually started operating on 2nd May 1859.

Soon after the opening of the W&SJR proposals were developed by the Wenlock Railway to pass through Coalbrookdale and Brosley and led to a significant enhancement in the value of the W&SJR as it would become part of a through route. [2: p25]

“Almost as soon as the Wenlock Railway Bill received Royal Assent in July 1861 the GWR, now eager not only to have control of the railways to Coalbrookdale, but also to ensure that a line was actually built, offered to assume responsibility for construction of the Lightmoor-Coalbrookdale section. With the blessing of the Wenlock Railway the GWR gained powers for this by including the line in their next ‘omnibus’ Bill later in 1861.” [2: p26]

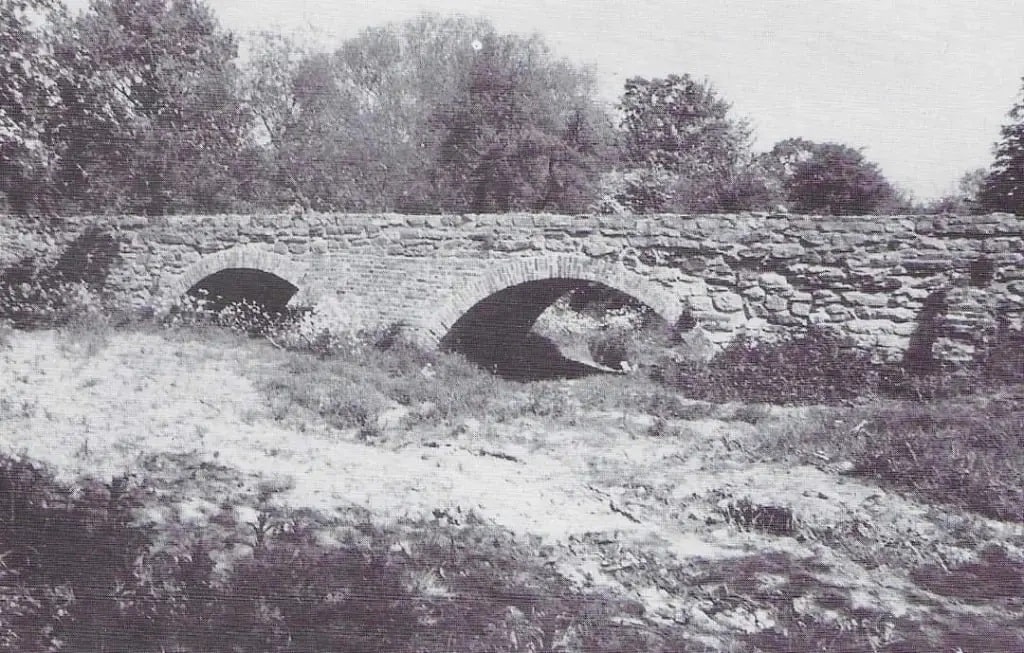
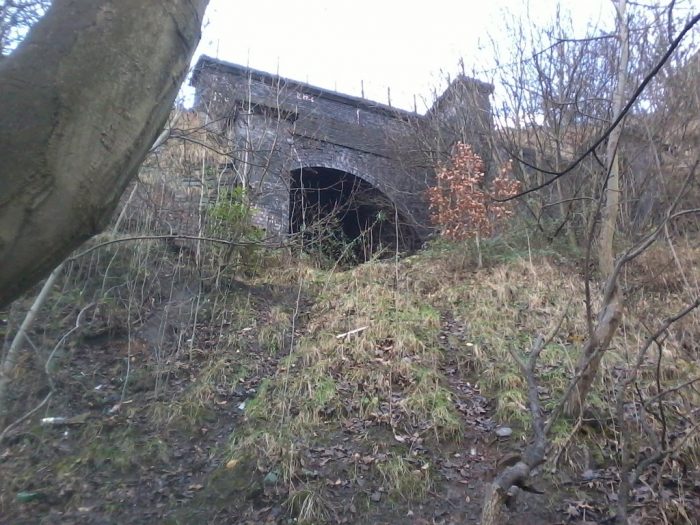
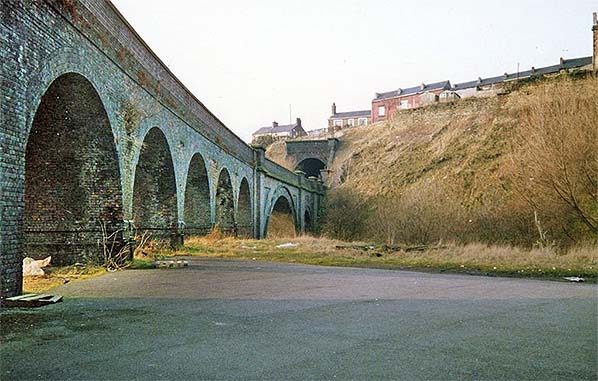
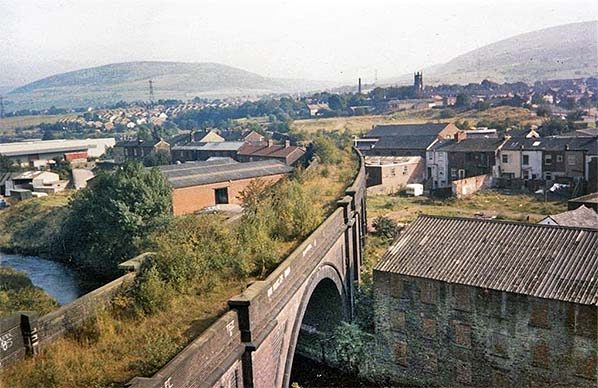
It seems reasonable to include the line through Coalbrookdale in our review of the W&SJR. It was about 1.5 miles in length and gave the GWR direct access to Coalbrookdale. It included the cutting of a ledge from the steep hillside and a 26-arch brick viaduct which carried the line through the Coalbrookdale Company’s works and over Upper Furnace Pool. Knowles says that the biggest obstacle was “‘New Pool’ at the head of Coalbrookdale. There was no alternative but to drain the pool temporarily and build a massive retaining wall to hold back the water, after which the new track-bed was laid on the strip of reclaimed land.” [2: p65]

The line from Lightmoor Junction onwards was double-track and generally fell at 1:50 towards the River Severn.

The Route

Wellington Railway Station was the junction station for the Coalbrookdale line (W&SjR). The bay platform on the South side of the station site was shared with the Coalport branch passenger services – the 6″ OS Survey of 1881/82, published in 1888. [5]
Approximately the same area as it appears on the 25″ OS Map of 1901, published in 1902. The station is on a relatively confined site and little has changed in the twenty years between 1881 and 1901. [6]
The same area in the 21st century as shown on the ESRI World Mapping provided by the National Library of Scotland. The station layout is much rationalised. The Goods yard is a casualty of progress and development! A single bay platform line remains. [7]
The immediate station area as it appears on Google Maps in 2022. The bay platform can more easily be seen on this image. Platform 3, the bay platform, is now out of regular use following the withdrawal of the Wellington to Walsall local service and its subsequent replacement with through Shrewsbury to Birmingham New Street local services. Traces of another defunct platform face (the outer side of the old up island platform) can be seen from the car park behind platform 1. [Google Maps][13]
Wellington Railway Station in June 2022, (c) Kylxa, authorised for reuse under a Creative Commons Licence (CC BY-SA 4.0) [13]
The bay platforms at Wellington Railway Station in July 1950. Small Prairie No. 4406 is about to work the 4.30pm to Much Wenlock running down the W&SJR. The loco to its right is LNWR 0-6-2 No. 58904 with the 3.53 to Coalport (east) using the LNWR Coalport Branch. [14]
Wellington Railway Station in July 2018, looking West from the overbridge. [Google Streetview, July 2018]
Looking East from the same overbridge in July 2018. The arched-bridge ahead is King Street Bridge. [Google Streetview, July 2018]
The view West, back towards Wellington Railway Station from King Street Bridge. [Google Streetview, May 2021]
The view East from King Street Bridge. The bridge in the distance is Junction Bridge and it marks the Western extent of Wellington Junction. In the 2st century that bridge carries Mill Lane. [Google Streetview, May 2021]
The length of the line between King Street Bridge and Wellington Junction on the 6″ 1881/82 OS Map. [5]
Wellington Junction in 1881/82 on the 6″ OS Map. [5]
Wellington Junction in 1901 on the 25″ OS Map [8]
The same area in the 21st century [Google Maps]
The view East from Mill Lane Bridge in 2011. The railway junction has been rationalised with only a single line following the old LNWR Shropshire Union Railway Line. The old Shrewsbury and Birmingham Line (GWR) remains as a double-track mainline. [Google Streetview, March 2011]
The line passed to the South of Haybridge Iron Works, 1881/82 on the 6″ OS Map. [5]
Ketley Junction followed after the mainline crossed Ketley Brook, 1881/82 on the 6″ OS Map. [5]
Trains for the W&SJR left the mainline and followed the single line round to the South before entering Ketley Station, 1881/82 on the 6″ OS Map. [5]
As we are now on the W&SJR route, the line of the railway is shown approximately on this modern satellite image. Ketley Station was just to the South of what was once the A5 but is now the B5061, Holyhead Road. The line can be seen on the OS Map above passing under an accommodation bridge on the curve round towards Ketley Station. That bridge remains in the 21st century carrying an extension to Copper Beech Road. [Google Maps, 2022]
The refurbished accommodation bridge seen from Copper Beech Road. [Google Streetview, June 2015]
The view Northwest from the accommodation bridge. A red line shows the route of the railway. [Google Streetview, May 2011]
The view Southeast from the accommodation bridge. The route of the line is much more easily picked out than on the photograph above! However, by 2022 the grass route close to the accomodation bridge had become overgrown. A narrow footpath leads down the embankment on the East side of the bridge to track level. [Google Streetview, May 2011]
The track-bed of the W&SJR about 100 metres South of the accommodation bridge above. [My photograph, 2nd July 2022]
A short distance further south a stepped path from Copper Beech Road leads down to the old track bed which is maintained as a Greenway. [My photograph, 2nd July 2022]
Just a little further to the South, this image shows the old railway line in cutting alongside a footpath which leads off Copper Beech Road to the old level-crossing at what was once A5. [Google Streetview, June 2015]
The route of the railway approaching the old A5. [My photograph, 2nd July 2022]
The view North from Station Road, Ketley looking back along the route of the railway which was in cutting to a point relatively close to the road. [Google Streetview, September 2021]
The Ketley Station site in 1901 as shown on the 25″ OS Map. [11]
Postcard view of Ketley Railway Station from the West. The Methodist Chapel is visible in the distance on the left. Shared on the Telford Memories Facebook Group by Marcus Keane. [21]
Ketley Station viewed from the Northwest in May 1957. Shared on the Telford Memories Facebook Group by Metsa Vaim EdOrg. [22]
Ketley Station from the Southwest. Shared on the Telford Memories Facebook Group by Peter Wheeler. [23]
A view from the South along the platform at Ketley Station with crossing gates closed to allow traffic through on the A5 on 18th February 1967. Shared on the Telford Memories Facebook Group by Carol Anne Huselbee. [24]
The view South through Ketley Railway Station site from Station Road in September 2021. The redline gives the approximate alignment of the railway. [Google Streetview]
The remains of Ketley station platform and trackbed, looking due south toward Horsehay in May 2008. The photographer comments that the trackbed is now a public footpath and the picture is taken from the former site of a level crossing across what in railway days was the A5 trunk road, © Copyright Peter Whatley and licensed for reuse under this Creative Commons Licence (CC BY-SA 2.0). [12]
Looking back North from the location of Ketley Station towards what was once the level crossing. [My photograph, 2nd July 2022]
The 6″ OS Map 1881/82 survey as published in 1888, shows Ketley Station and the line continuing to the South. [5]
Approximately the same area on the modern satellite images provided by the National Library of Scotland. There is no need to highlight the route with a red line as the route is tree-lined and runs down the centre of the image. [27]
The 25″ OS Map as revised in 1937 shows private sidings to the Iron Foundry and Ketley Town Halt which can be seen to the South of Sinclair Gardens. [25]
Ketley Town Halt in 1936. Shared on the Telford Memories Facebook Group by Metsa Vaim EdOrg. [26]
Looking South through the location of Ketley Town Halt. [My photograph, 2nd July 2022]
Looking North through the location of Ketley Town Halt. [My photograph, 2nd July 2022]
The 6″ OS Map shows the line continuing to the South. Ketley Town Halt was at the point where the signal post is shown on this extract. The modern M54 is shown on the satellite image below, it crosses the line travelling East-West at approximately the ‘GT’ of ‘ WELLINGTON’. [5]
The route of the old line continues to be delineated by woodland as it approaches and crosses the M54. [28]
The footpath following the W&SJR diverts away from the line South of the location of the Halt. This view looks South down the alignment of the W&SJR towards the modern M54. [My photograph, 2nd July 2022]

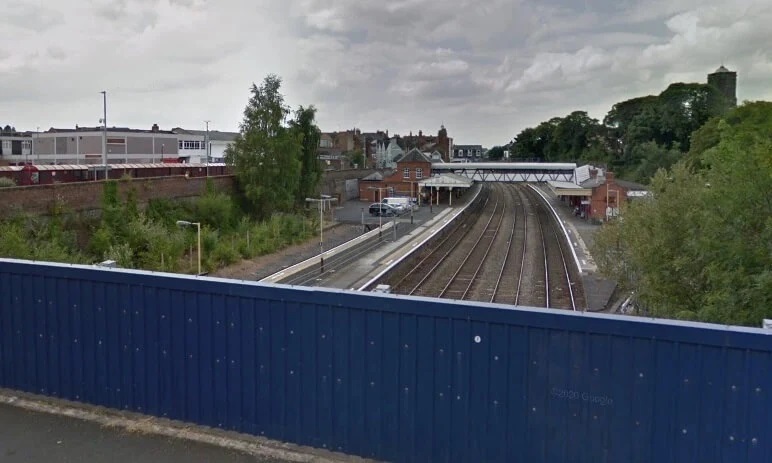
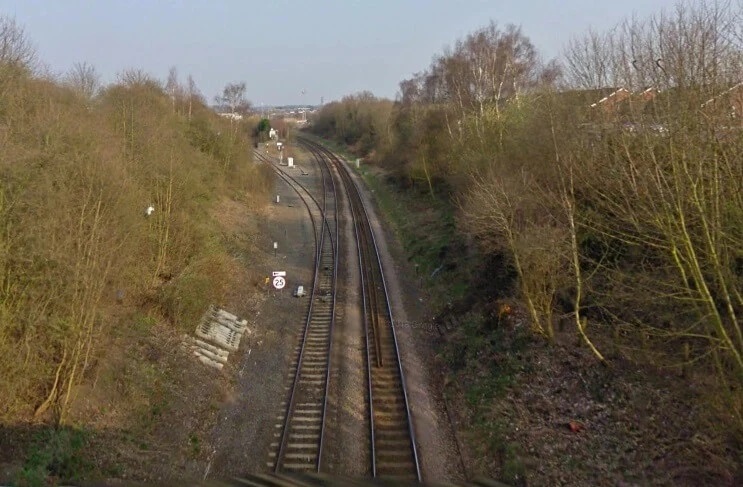
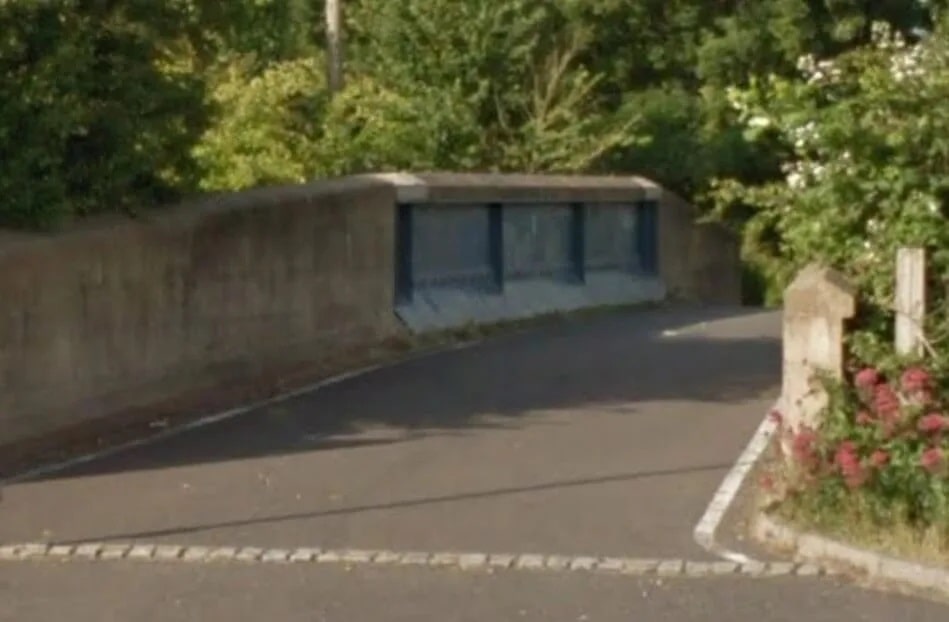
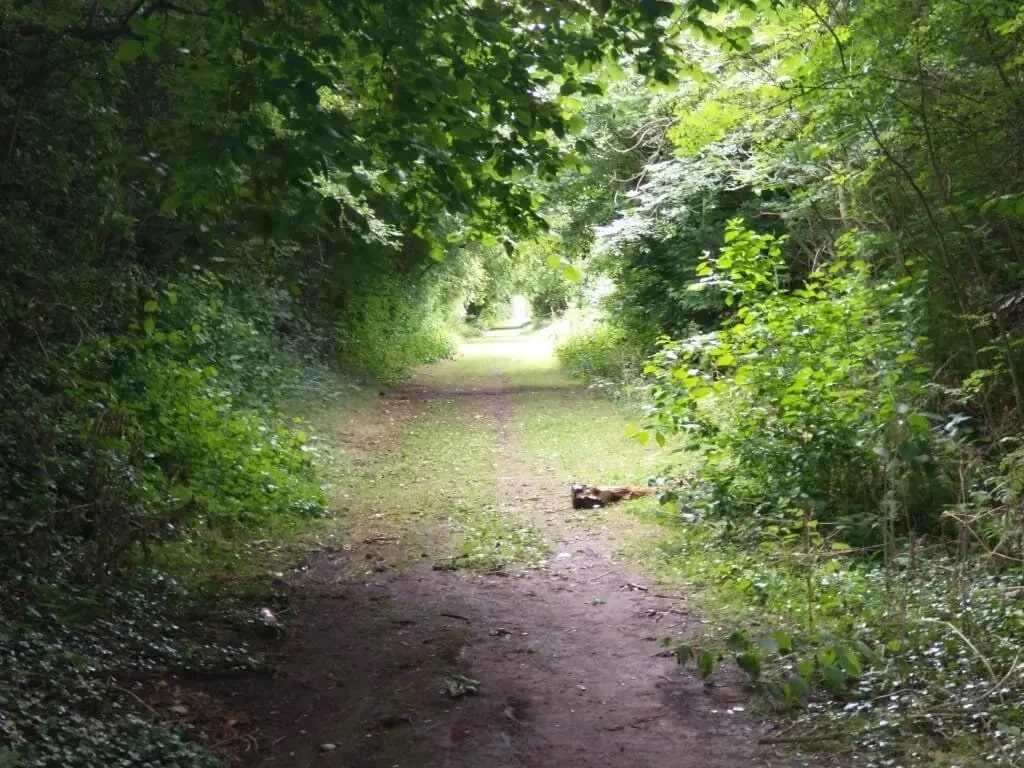
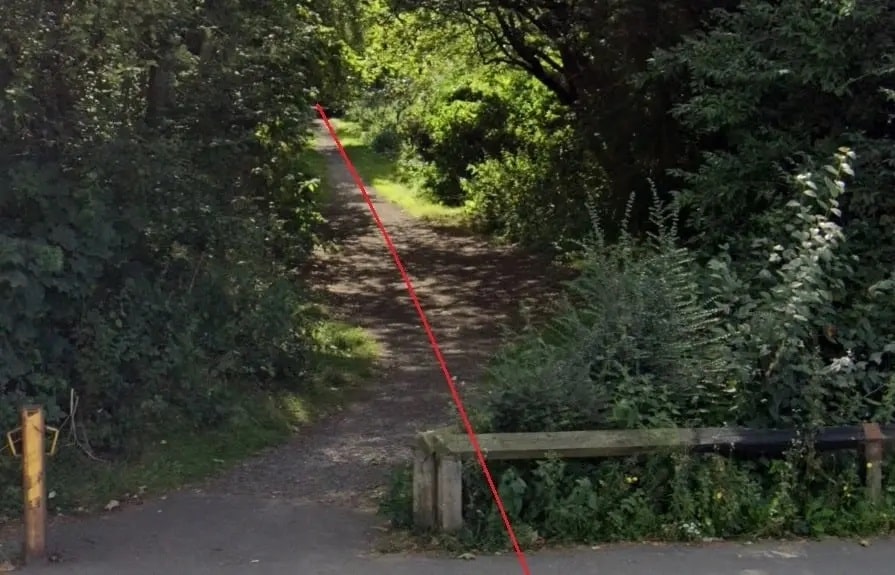
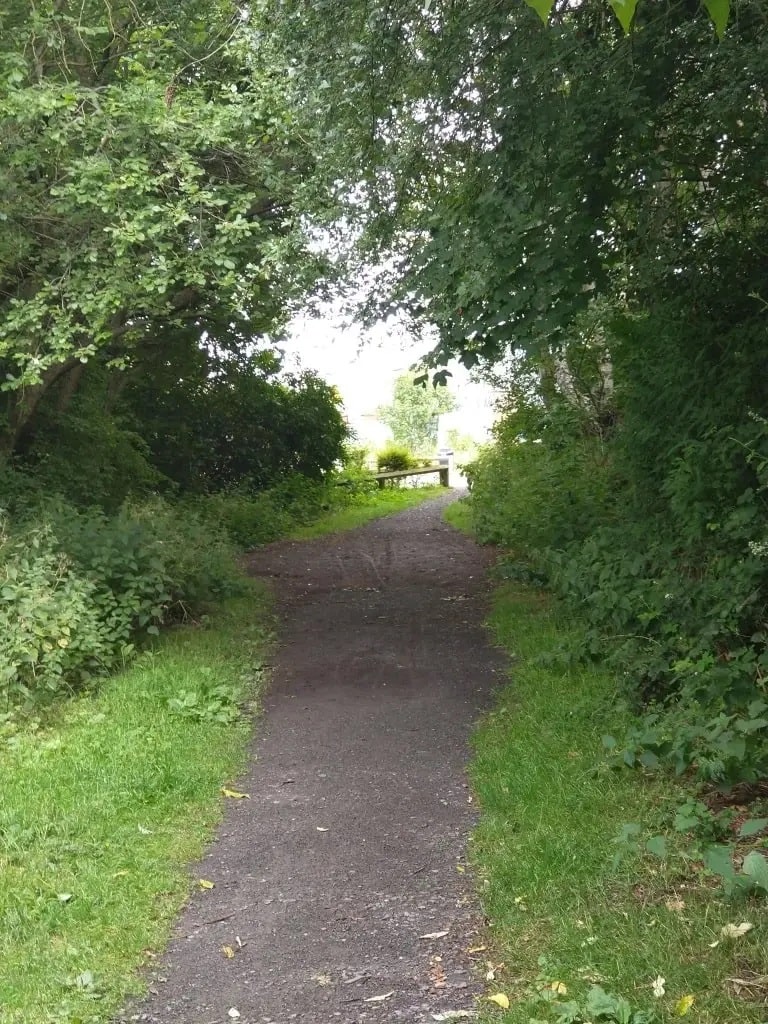
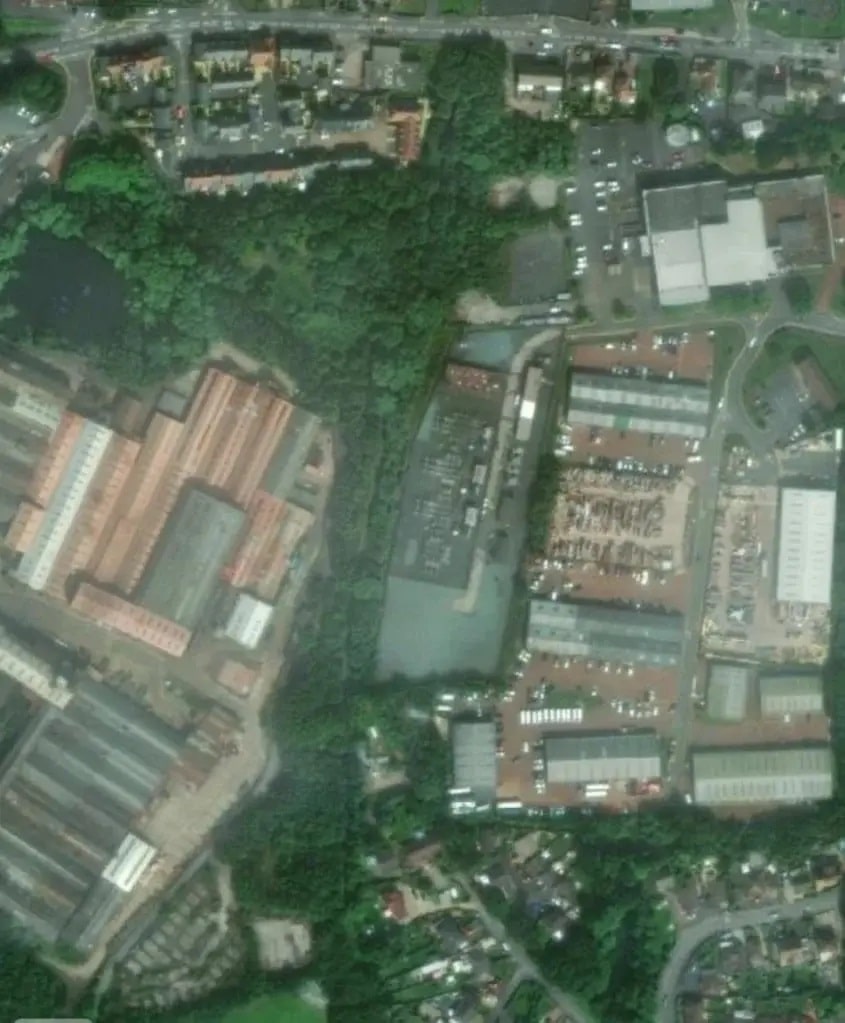
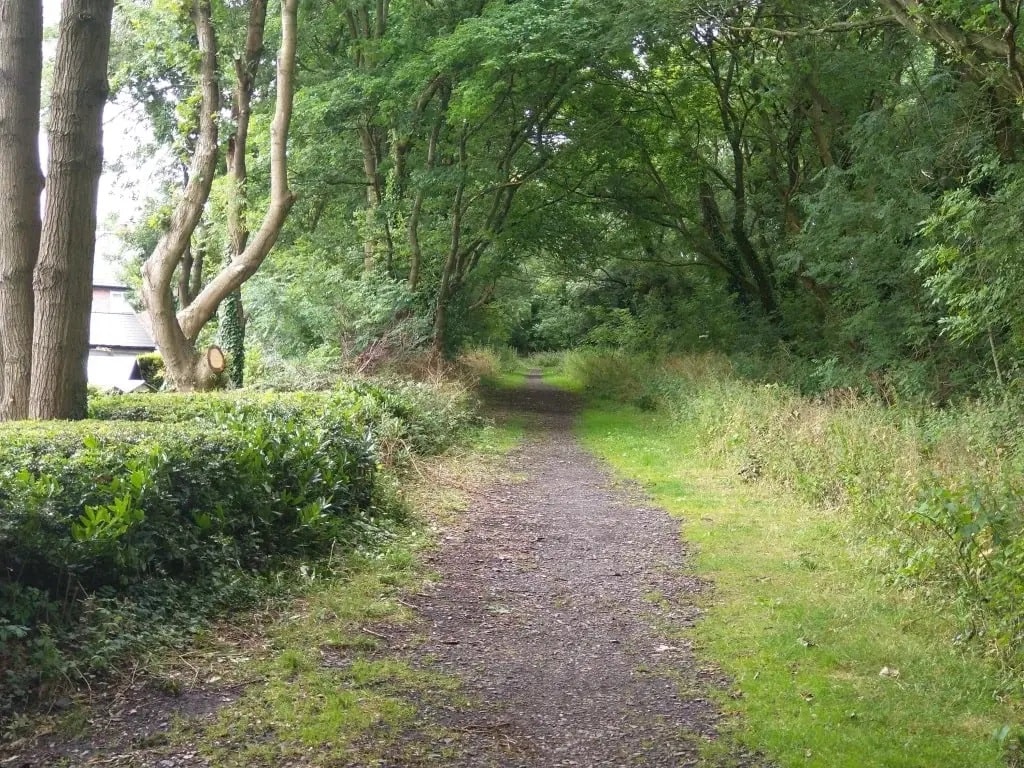
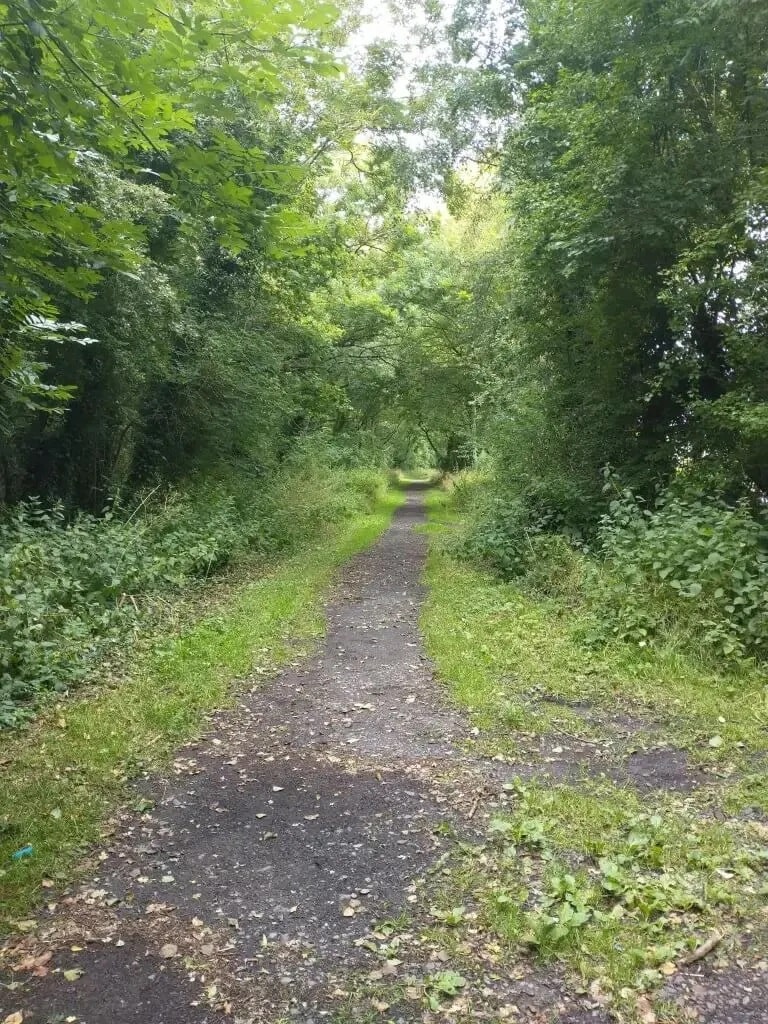
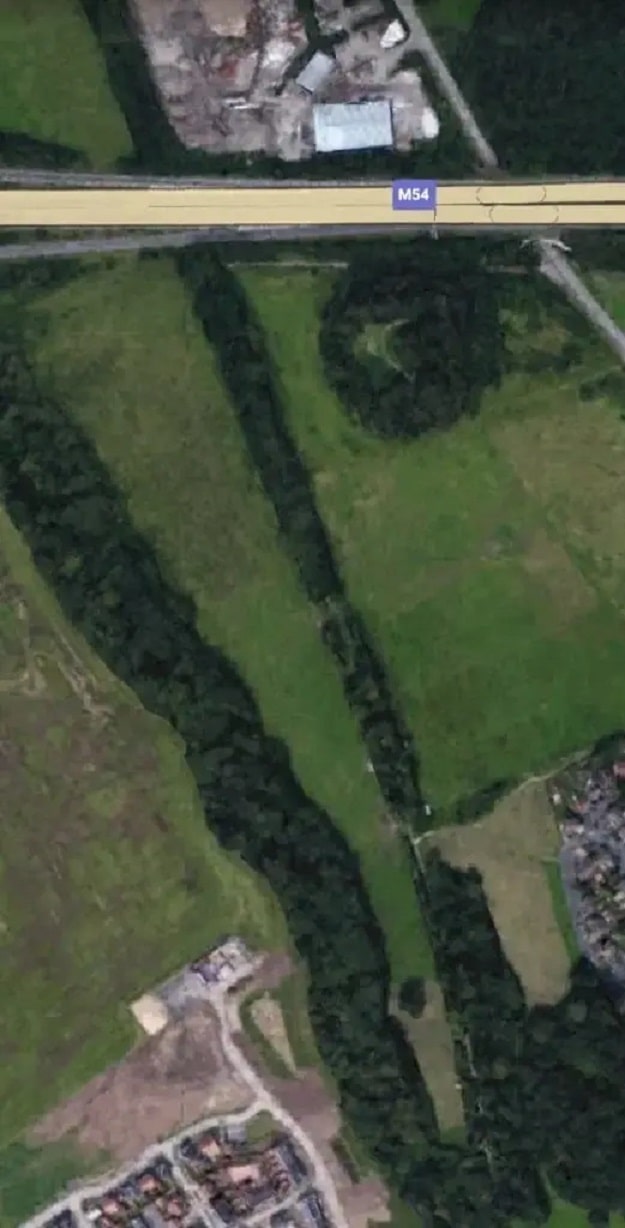
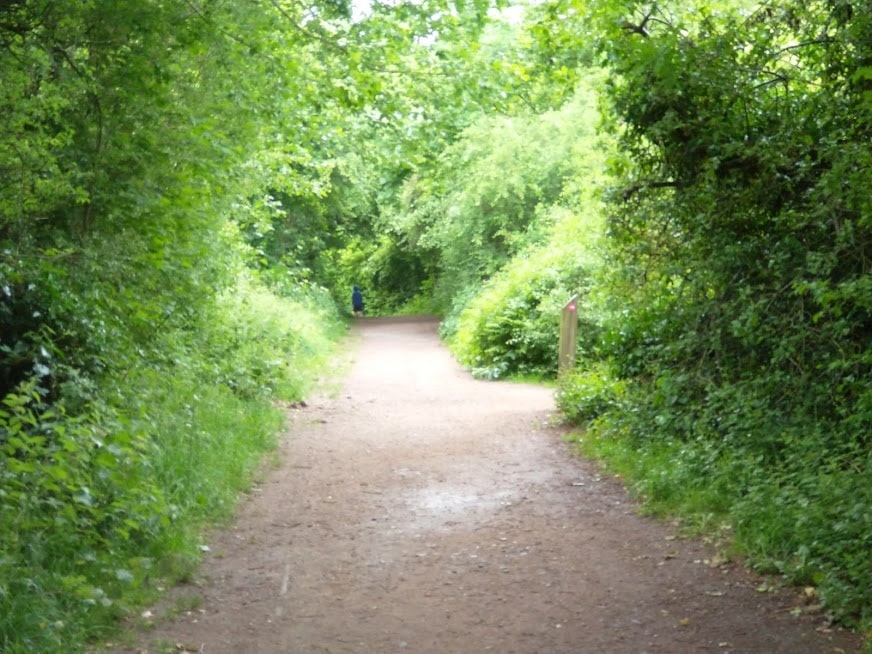
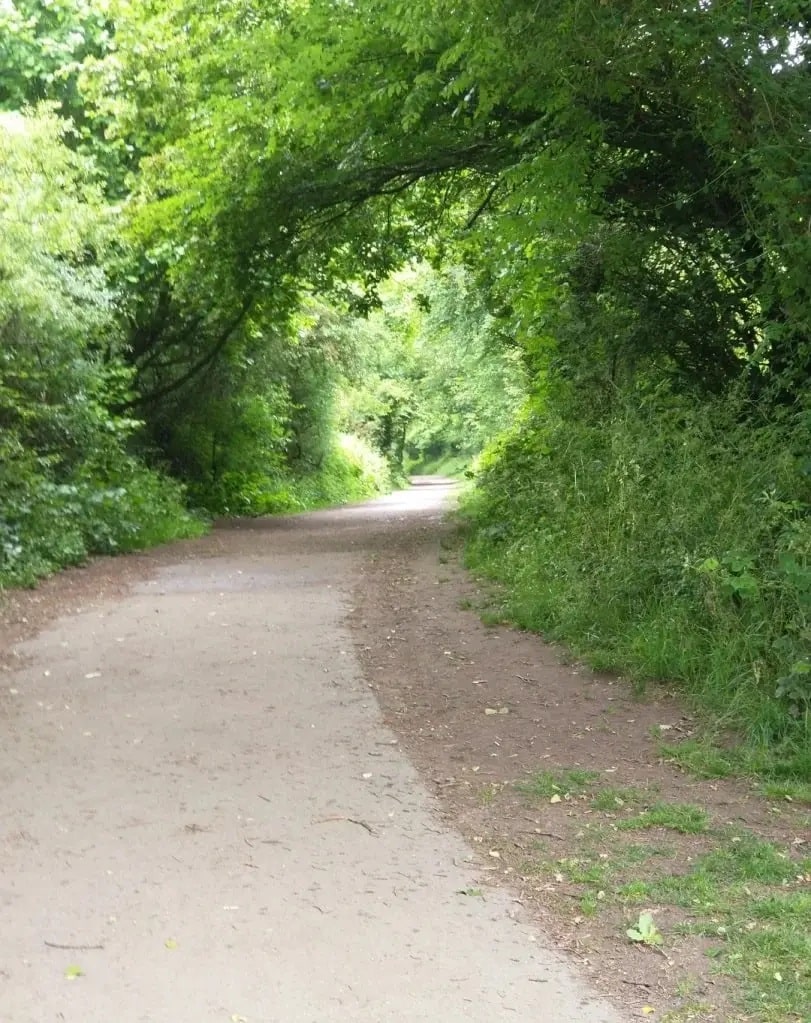
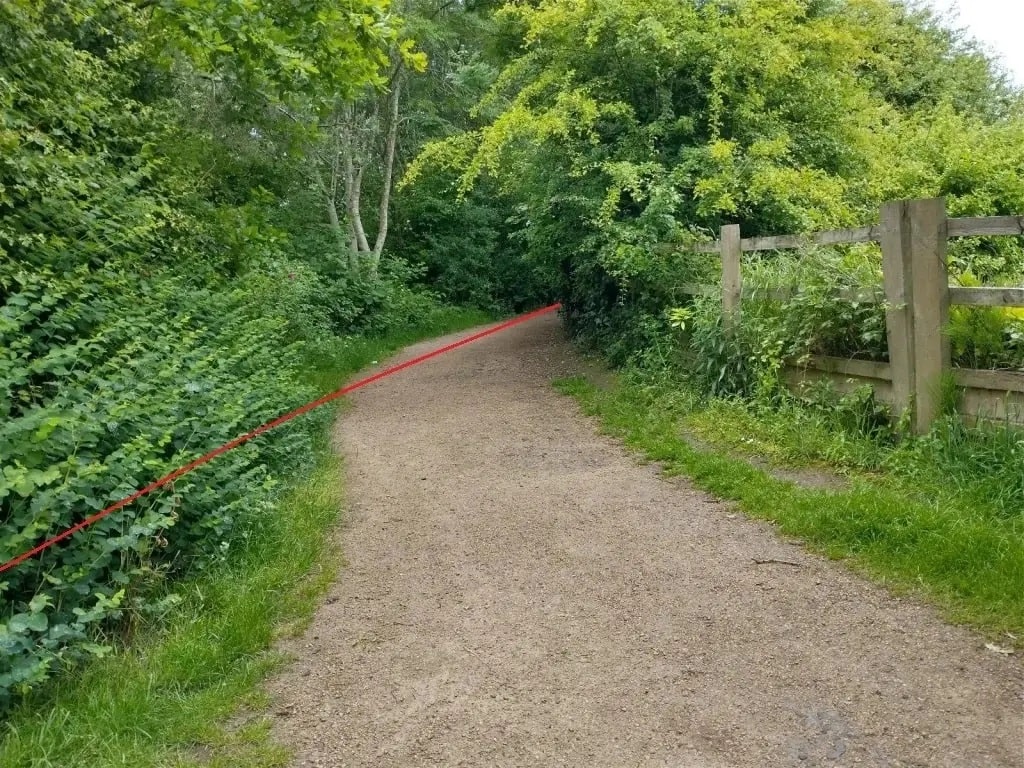
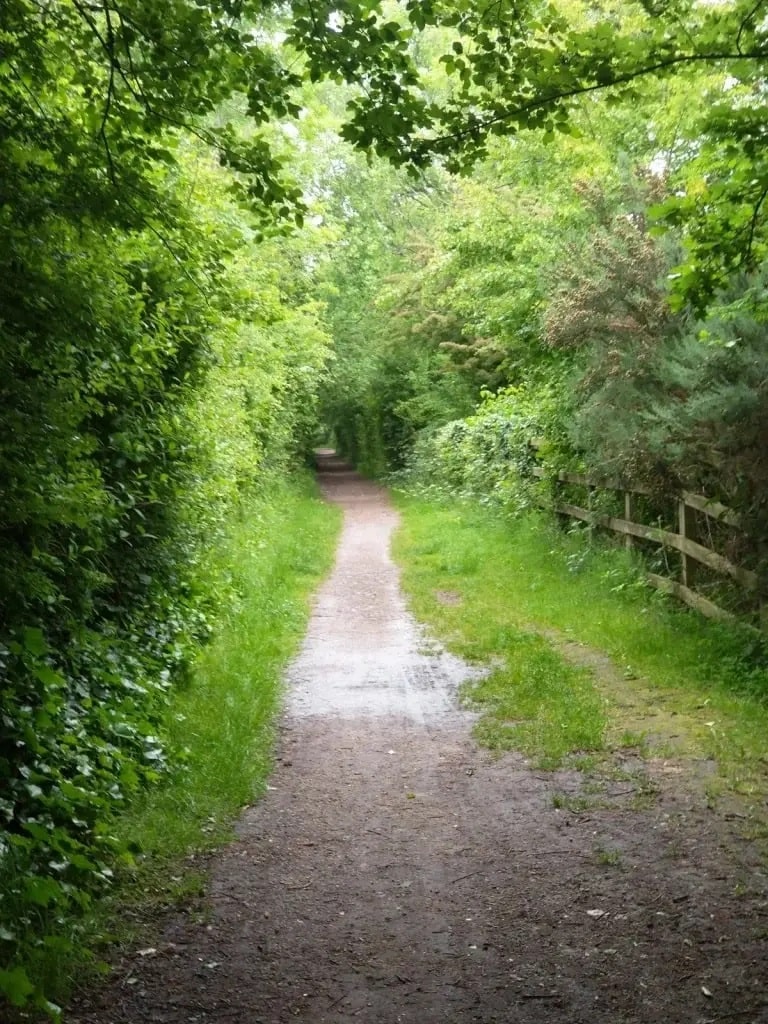
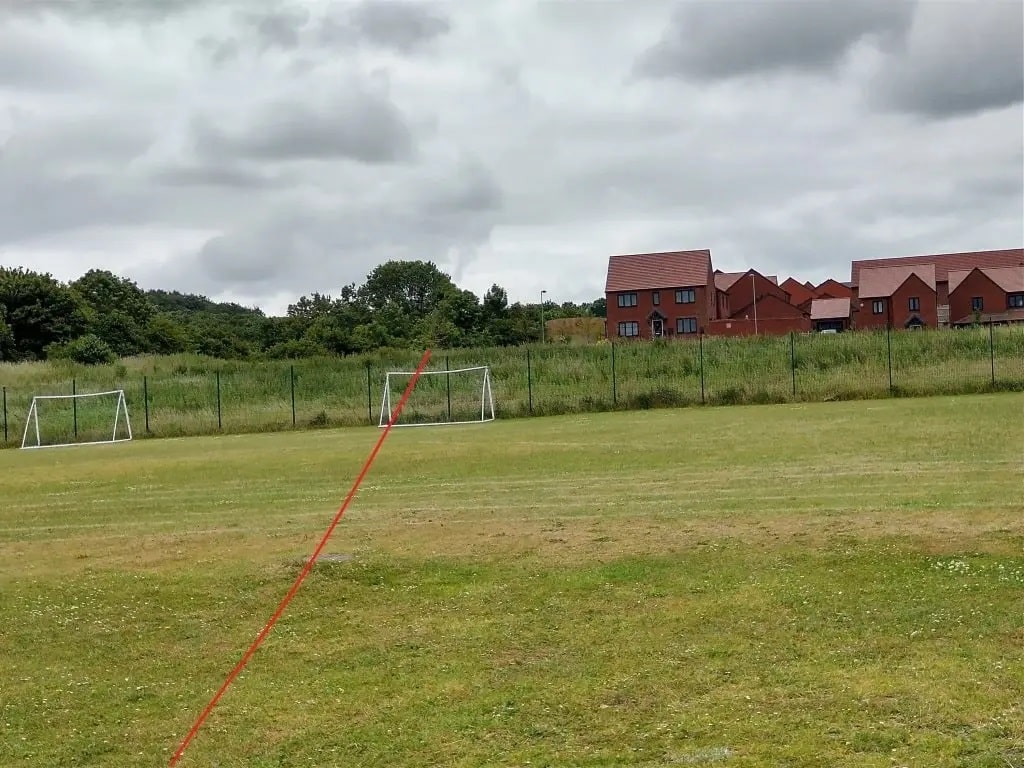
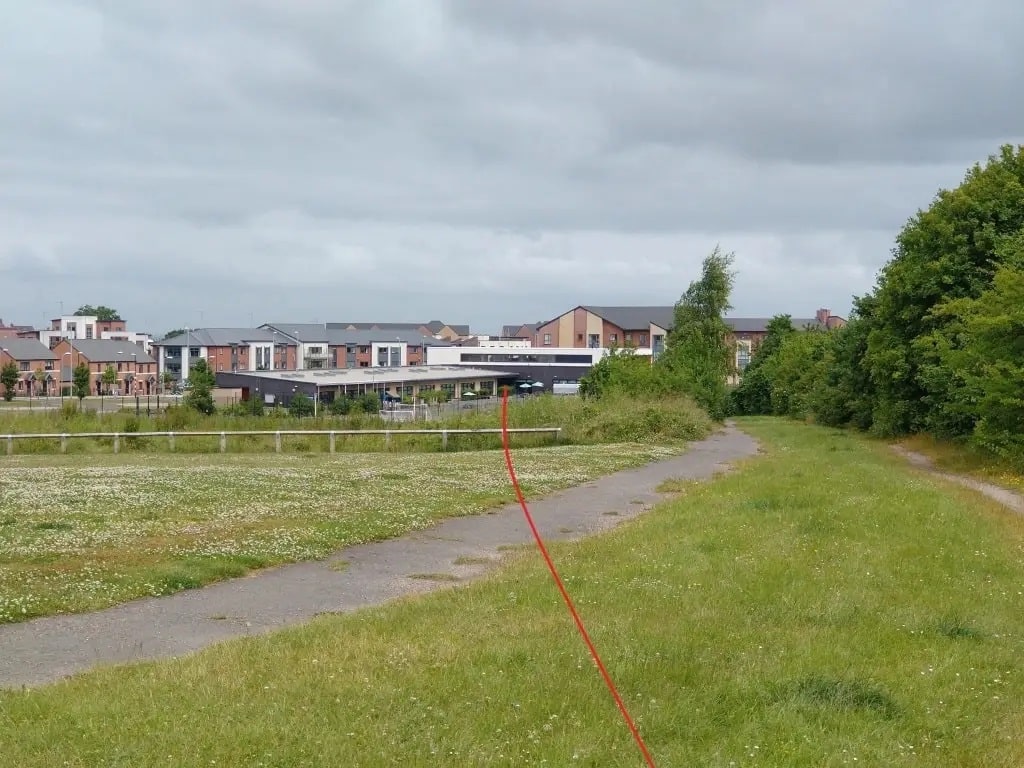
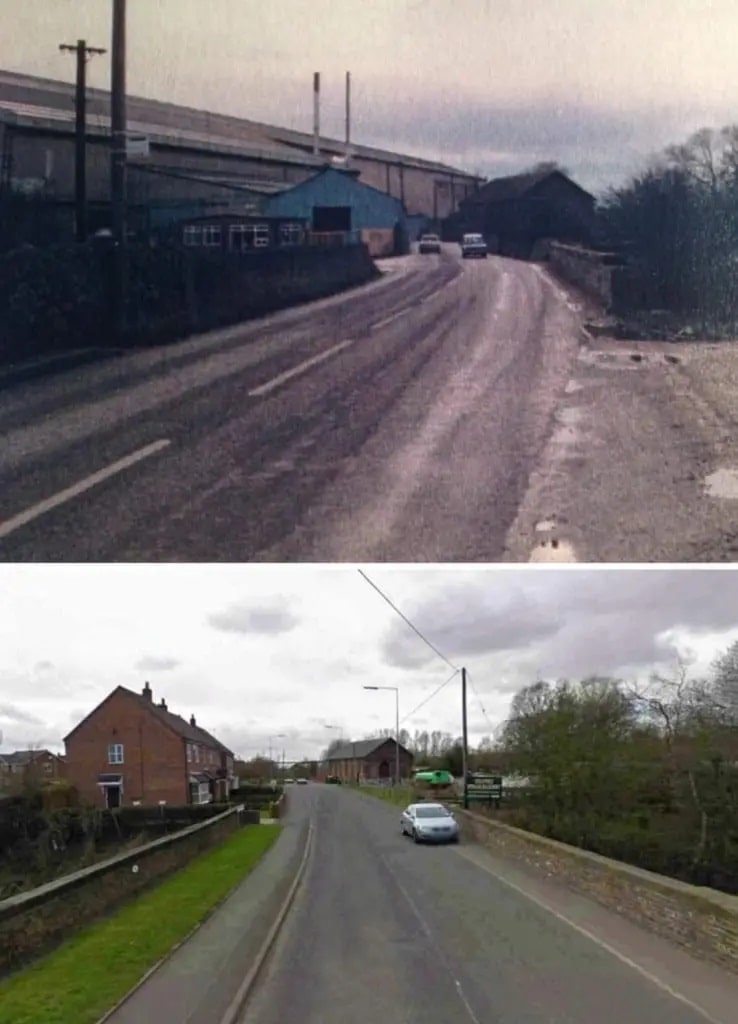
The M54 forms a significant barrier if one intends to follow the line. Walking North to South, the route requires one to head Northeast from the old railway along Sinclair Gardens passed Littlefords Garden Centre to Waterloo Road and then turn South to pass under the M54. Just beyond the motorway a footpath leaves Waterloo Road heading West to meet the route of the old railway again.

South of the motorway, there is no need again to highlight the line of the old railway as once again trees line the route. [Google Earth]
The line of the W&SJR regained. [My photograph, 9th June 2022]
Pannier Tank no. 3732 in charge of a short pick-up goods service between Ketley and Lawley Bank in 1953. This photograph was shared by Metsa Vaim EdOrg on the Telford Memories Facebook Group in March 2020. [37]
Further South, close to the location of New Dale Halt. [My photograph, 9th June 2022]
The W&SJR continues South passed Newdale. A small settlement that has now disappeared. The road shown crossing the line at that point is also the line of an old tramway. Just to the West of the line is an old two arch tramway bridge crossing Ketley Dingle. (Details of the bridge can be found here.) [5]
New Dale Halt in the 1930s. Shared by Metsa Vaim EdOrg on the Telford Memories Facebook Group. The halt served the hamlet of Newdale and was located a little to the North of the point where the old tramway route crossed the W&SJR. [26]
New Dale Halt is shown on the 25″ OS Map as revised in 1937. [25]
Just beyond the location of the Halt, the way-marker post marks the location of the path down to the tramway bridge and therefore the point where the W&SJR crossed the older tramway. [My photograph, 9th June 2022]
Newdale Tramway Bridge in the middle of the 20th century, shared on the Telford Memories Facebook Group by Metsa Vaim EdOrg. [29]
South of Newdale, this is the next length of the line on the 6″ OS Map of 1881/82. We are now on the next map sheet (No. 101594458). [9]
Looking back to the North along the W&SJR towards Newdale. [My photograph, 9th June 2022]
Looking forward to the South along the line of the W&SJR. Its approximate line is highlighted by the red line. [My photograph, 9th June 2022]
Looking ahead, once again with the approximate line of the W&SJR highlighted. [My photograph, 9th June 2022]
Looking back to the North over open ground with the route of the old line highlighted. [My photograph, 9th June 2022]
Facing South once again, a footpath follows the old line. [My photograph, 9th June 2022]
And again, looking South. [My photograph, 9th June 2022]
Much of the landscape has changed dramatically over the years. Much of the development in the area has occurred since the millennium. We are approaching the location of what was once Lawley Bank Railway Station. [My photograph, 9th June 2022]

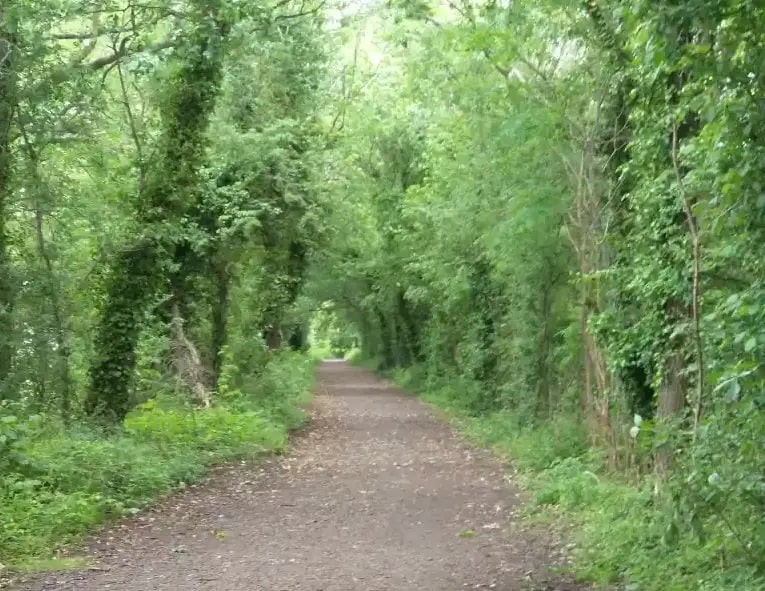
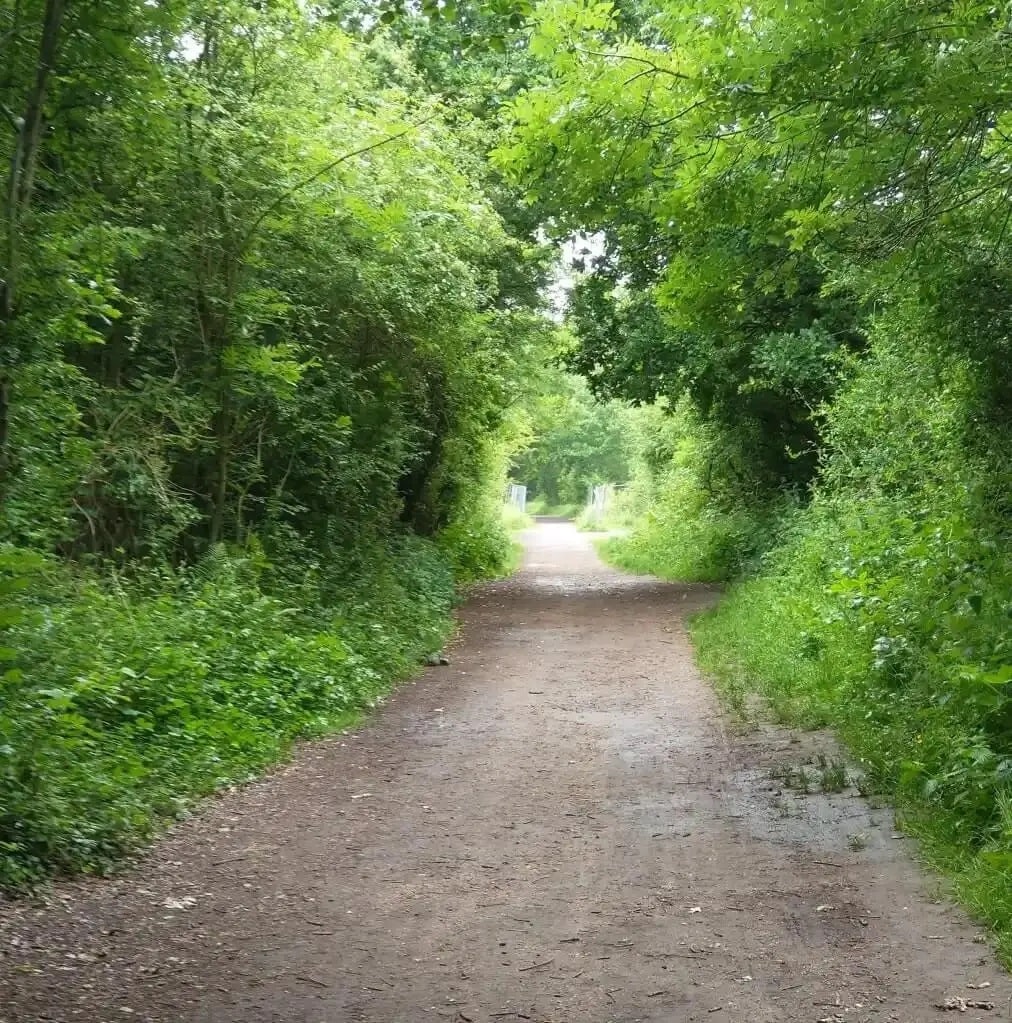
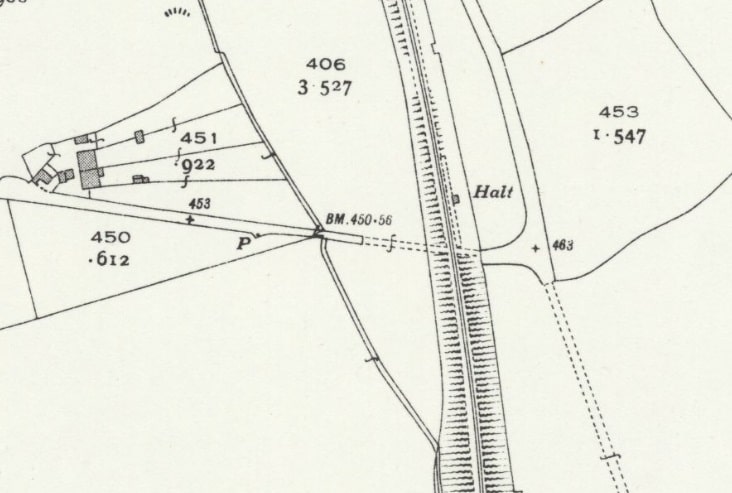
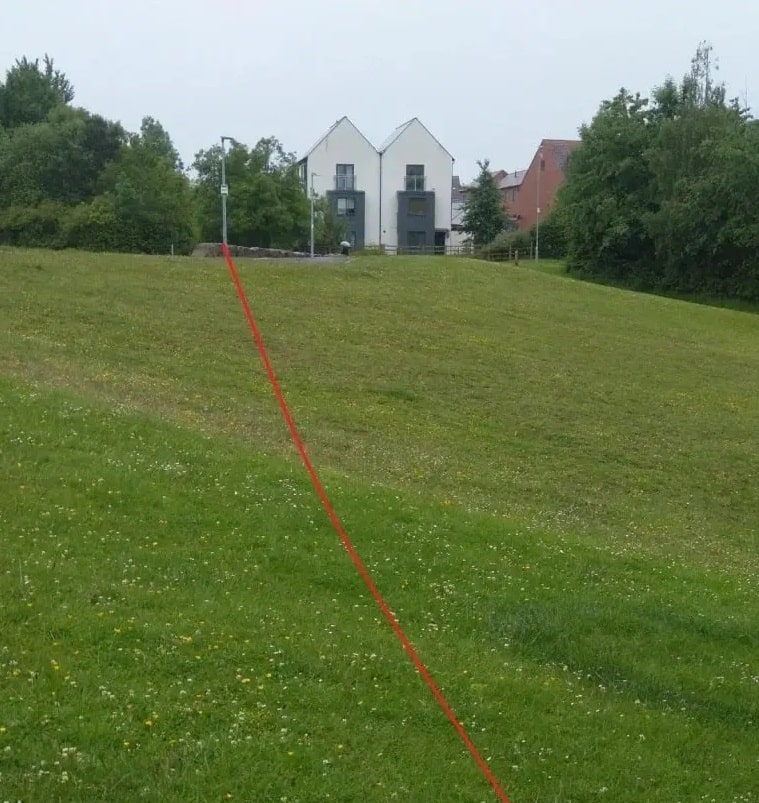
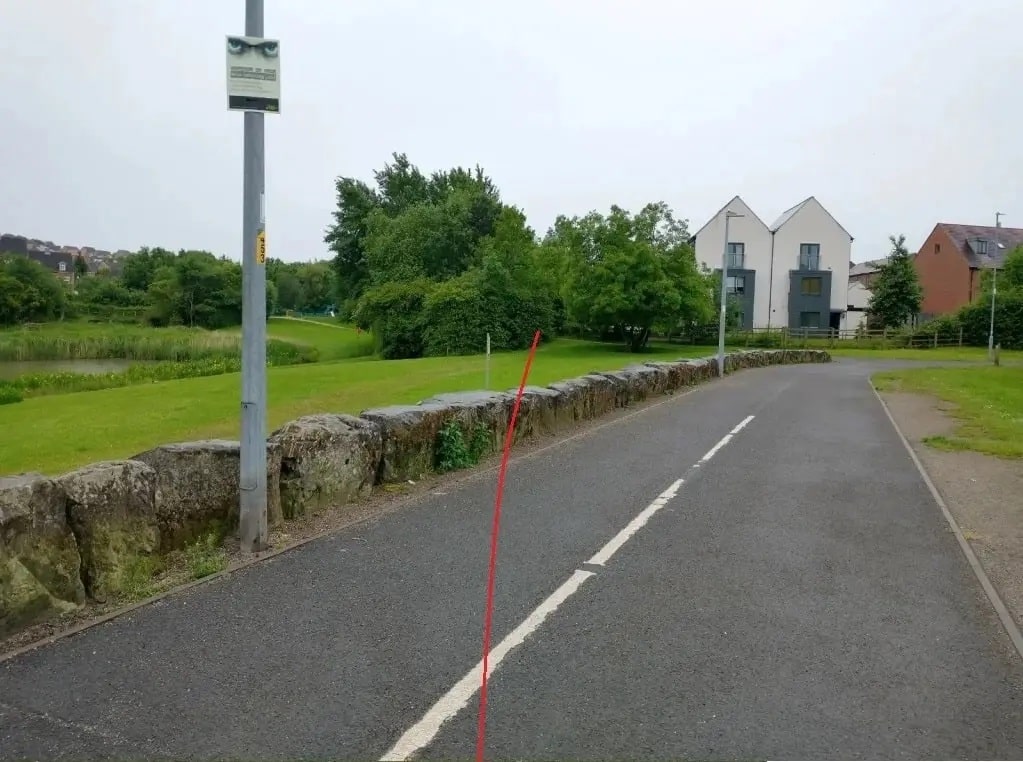
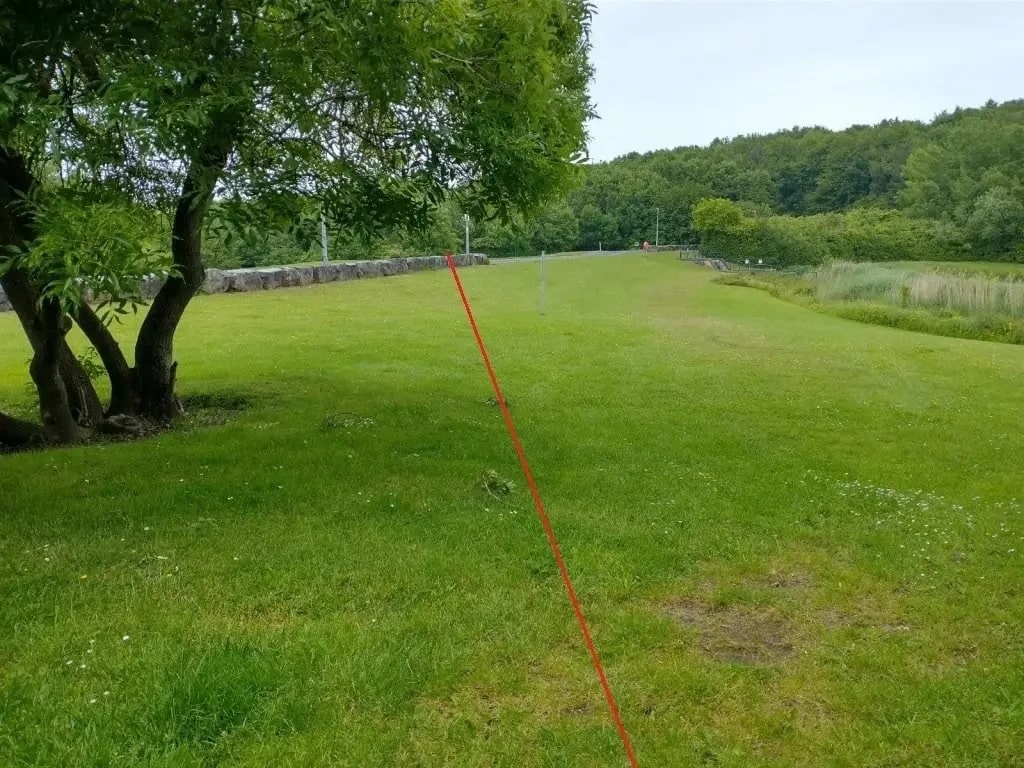
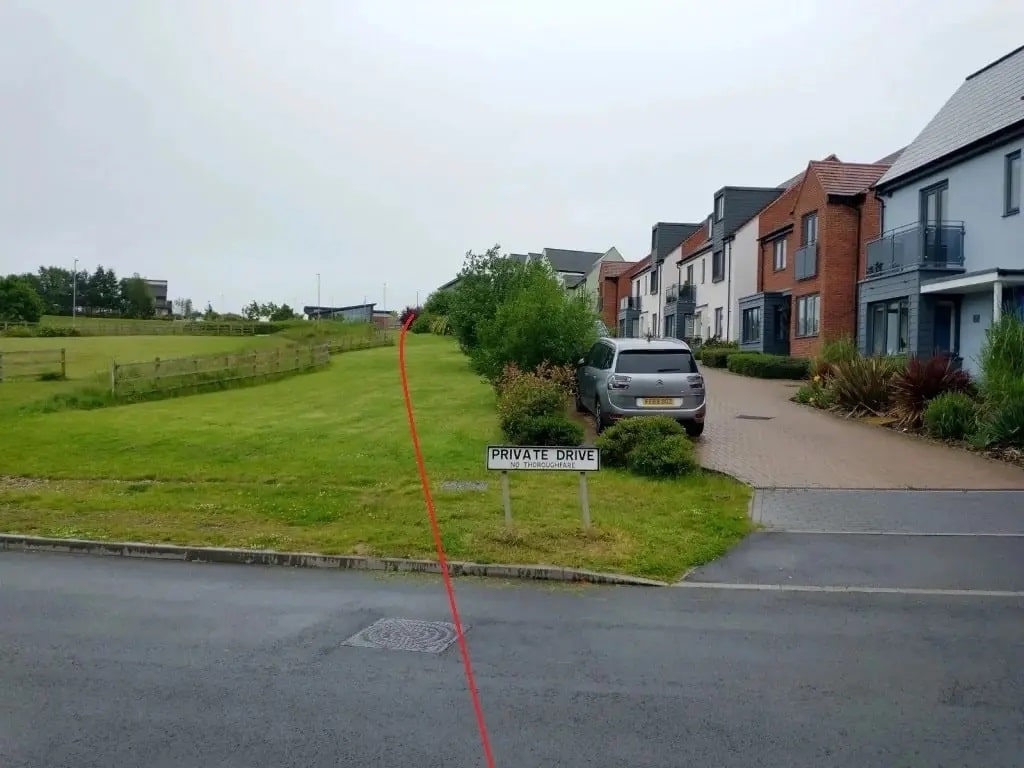
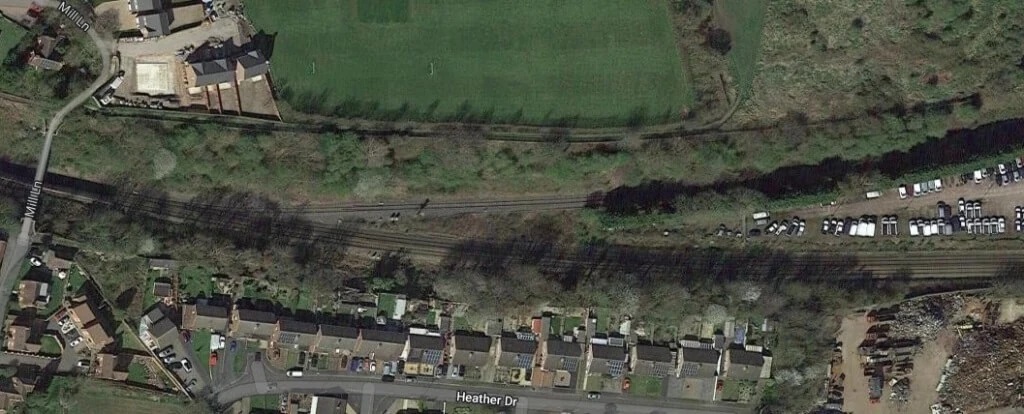
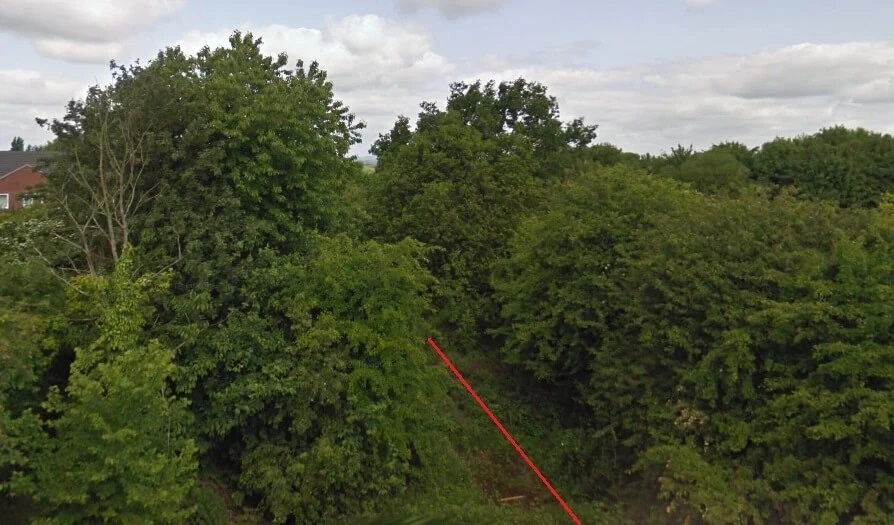
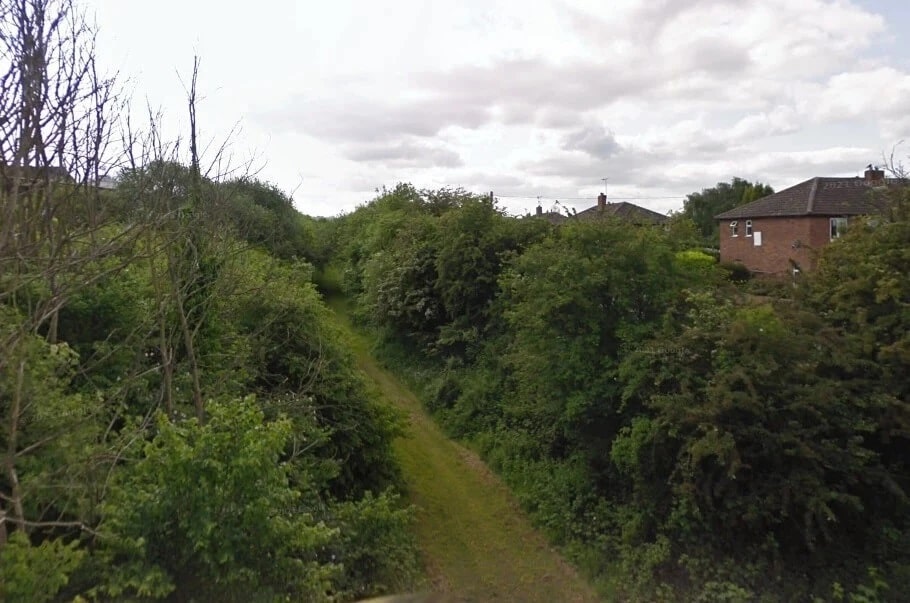
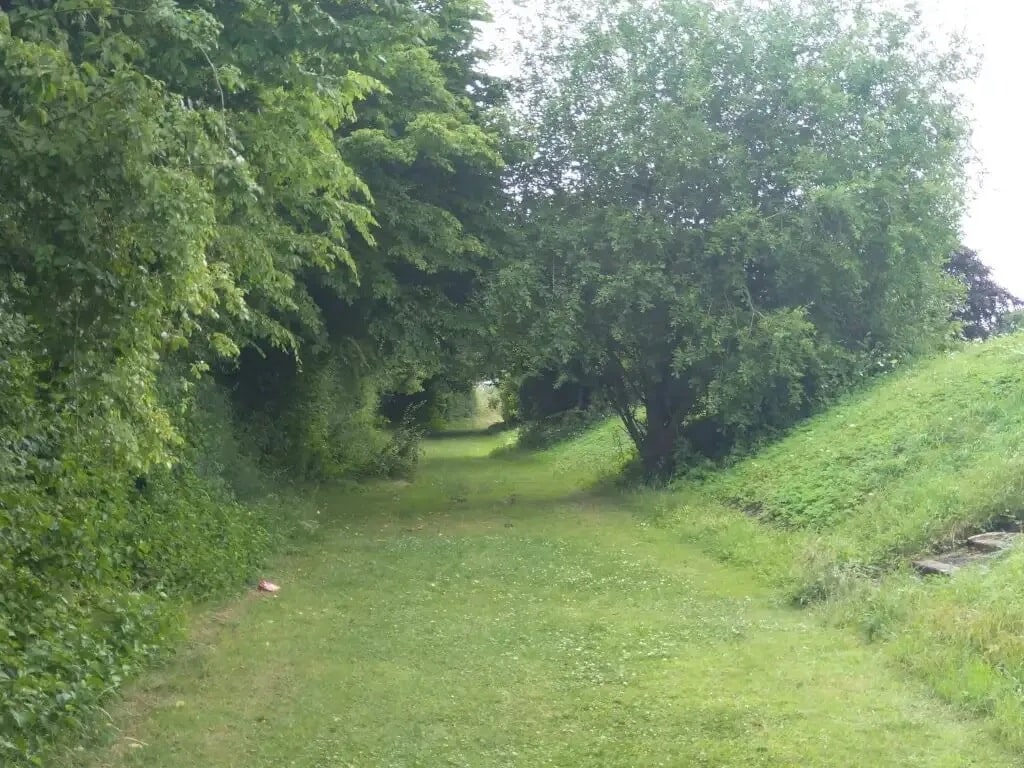
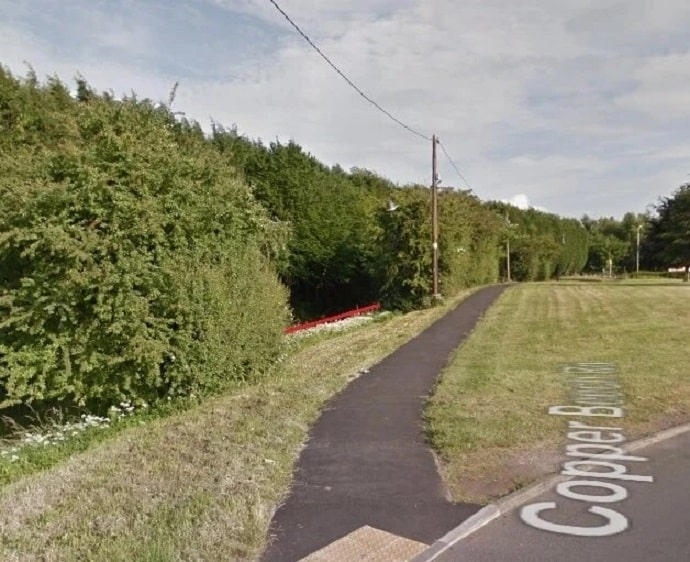
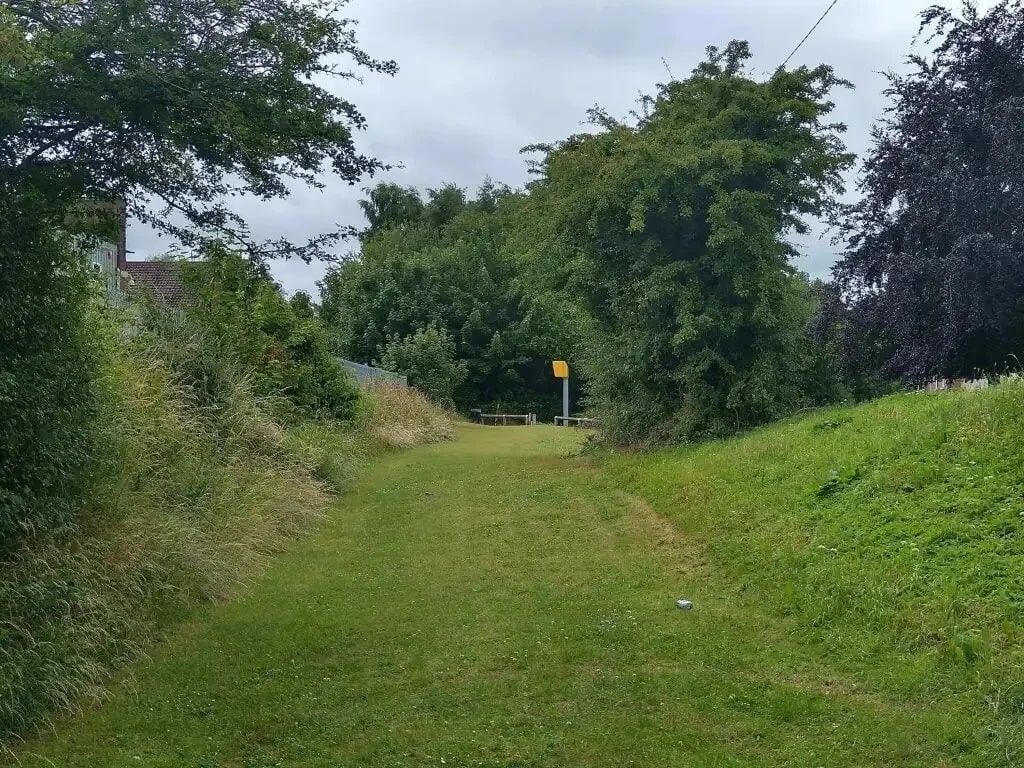
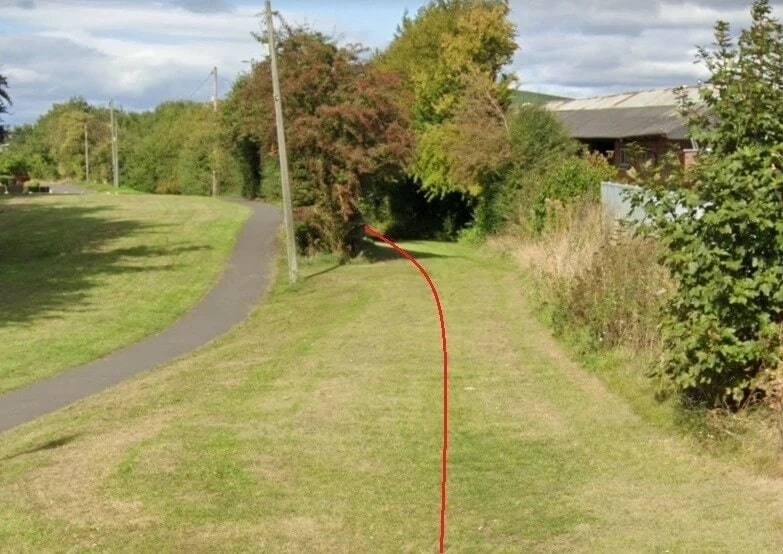
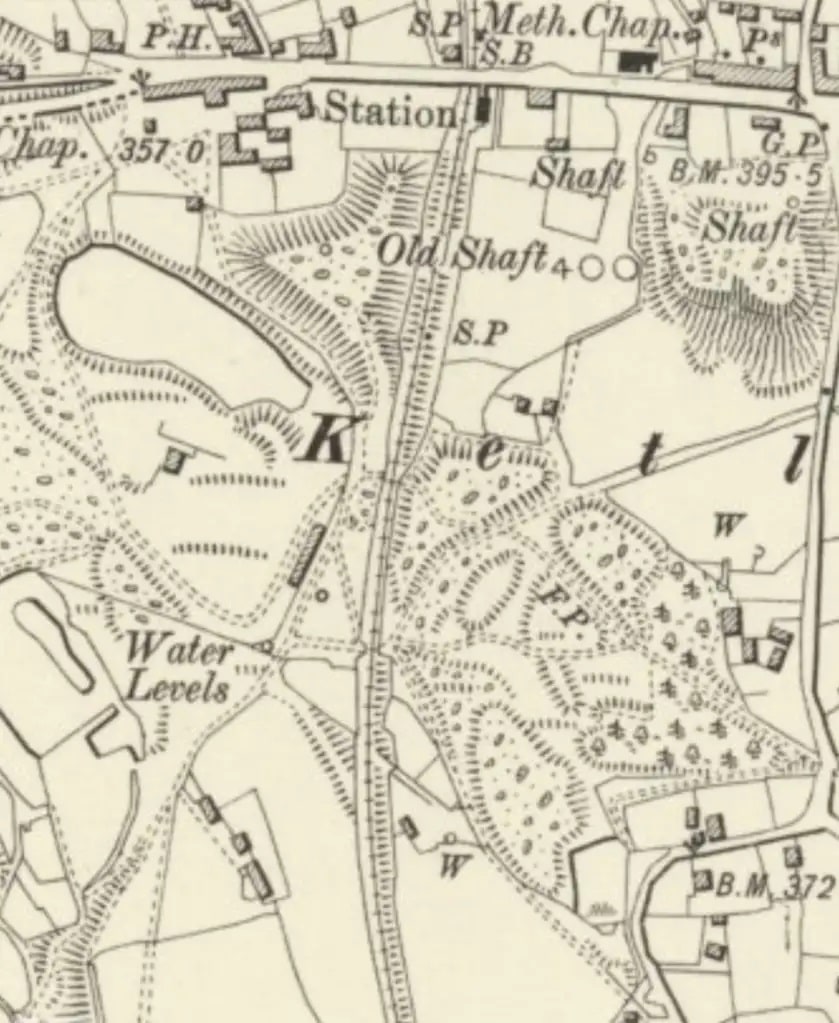
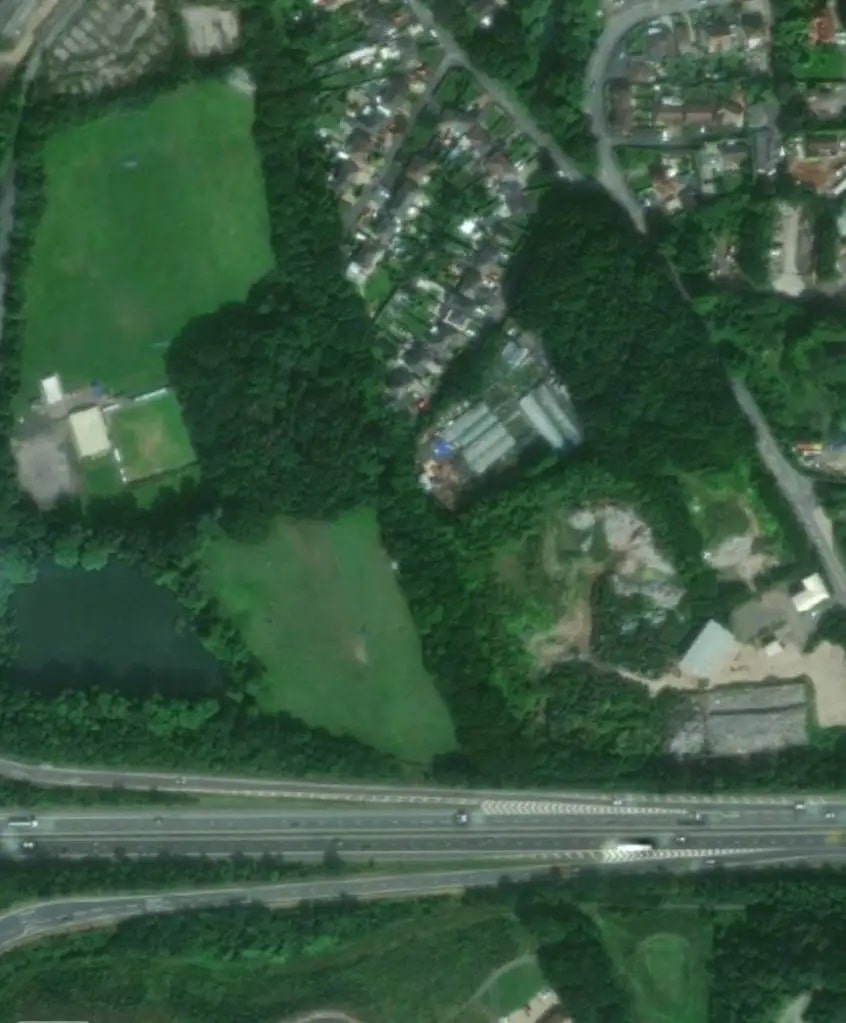
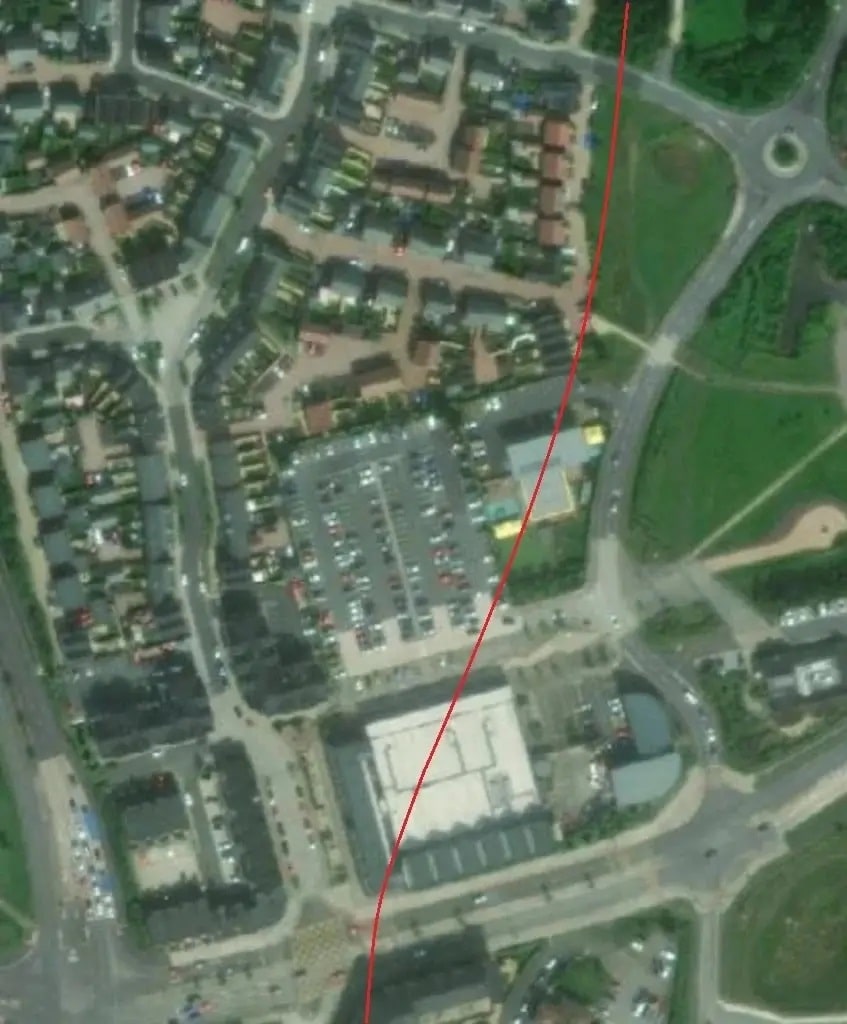
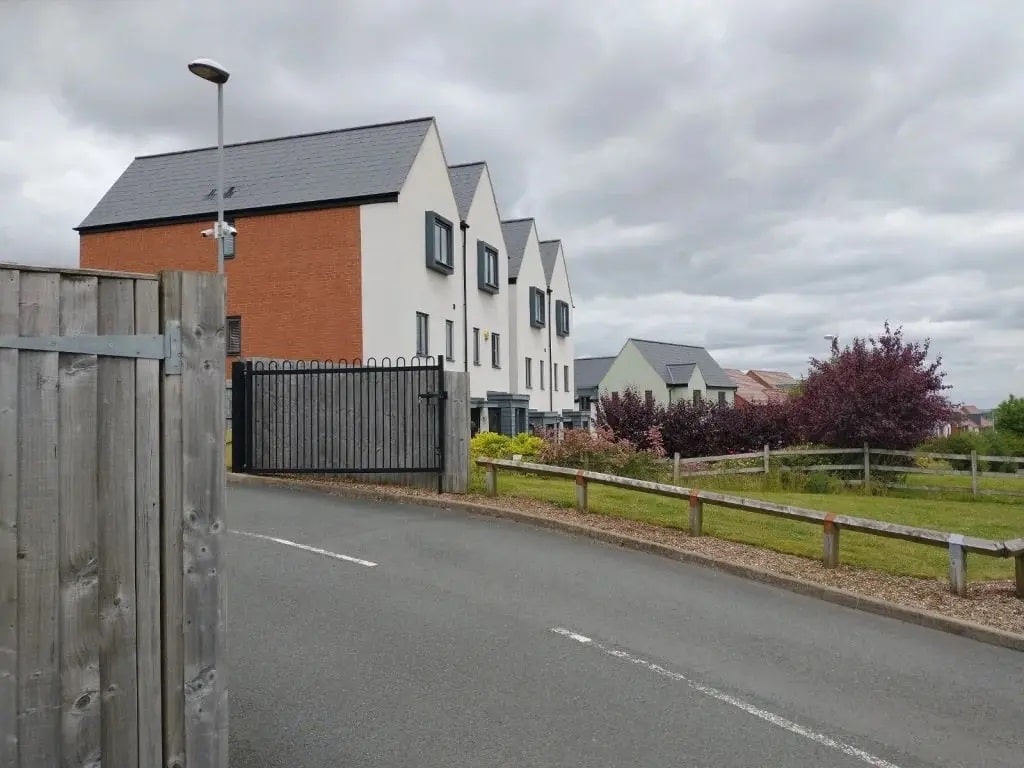
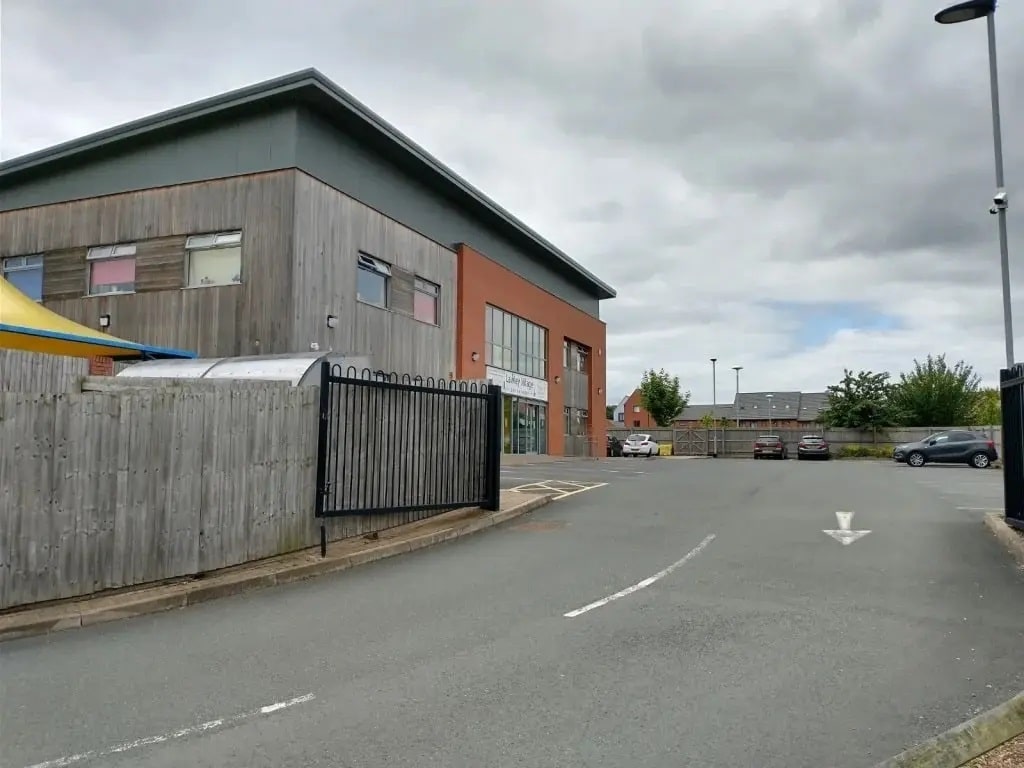
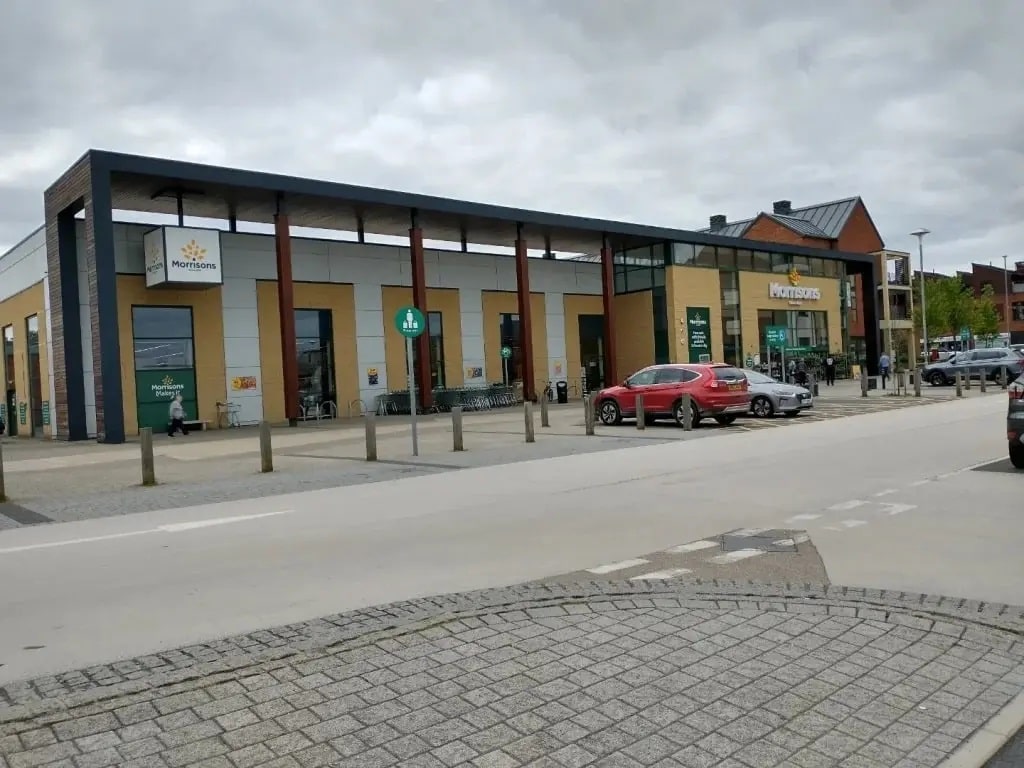
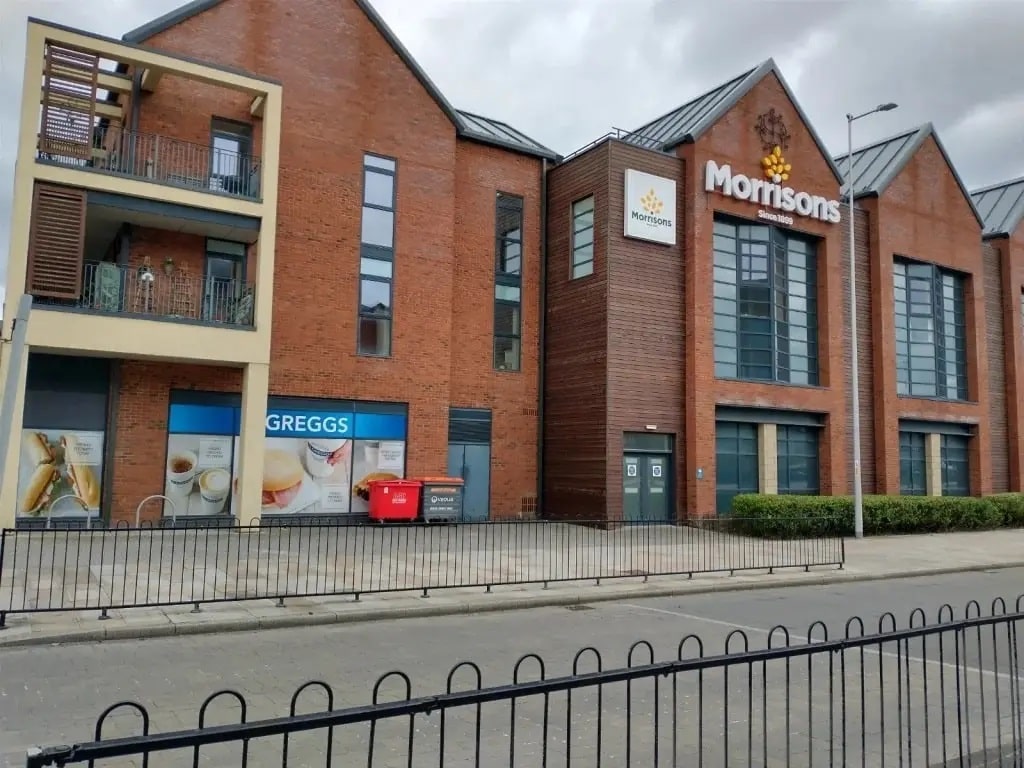
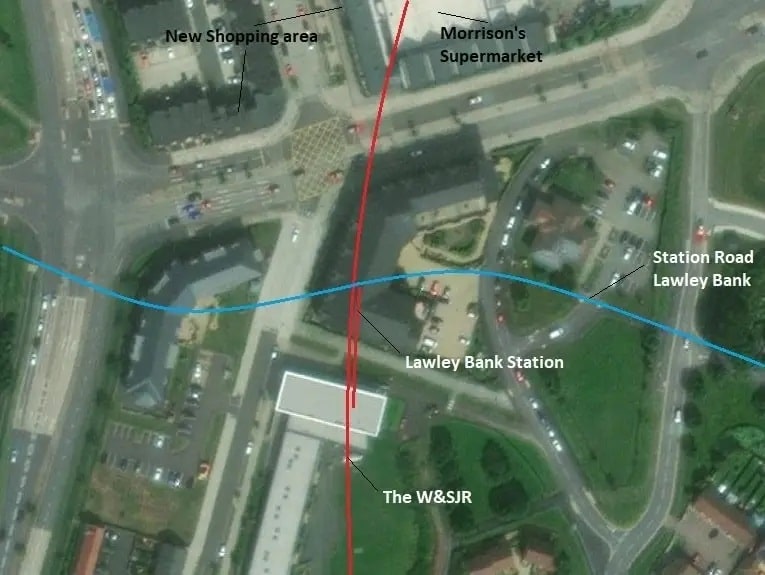
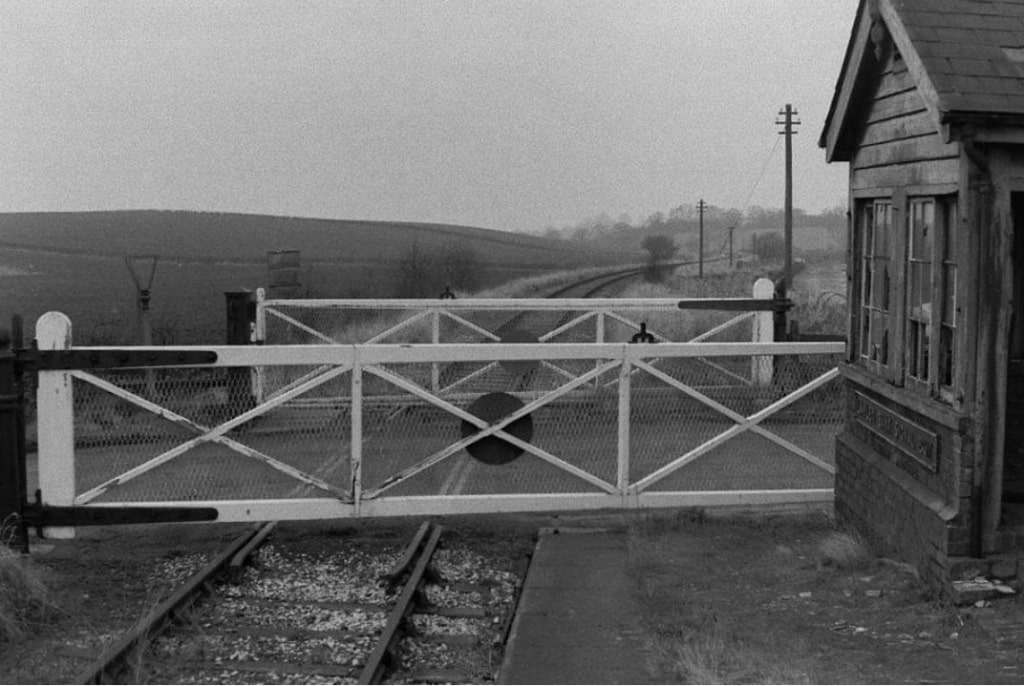
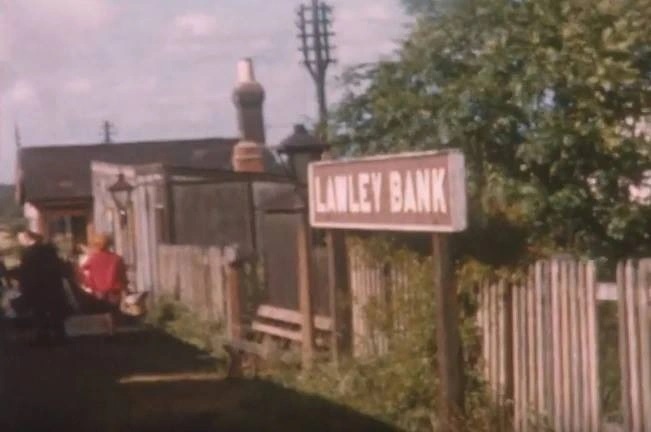
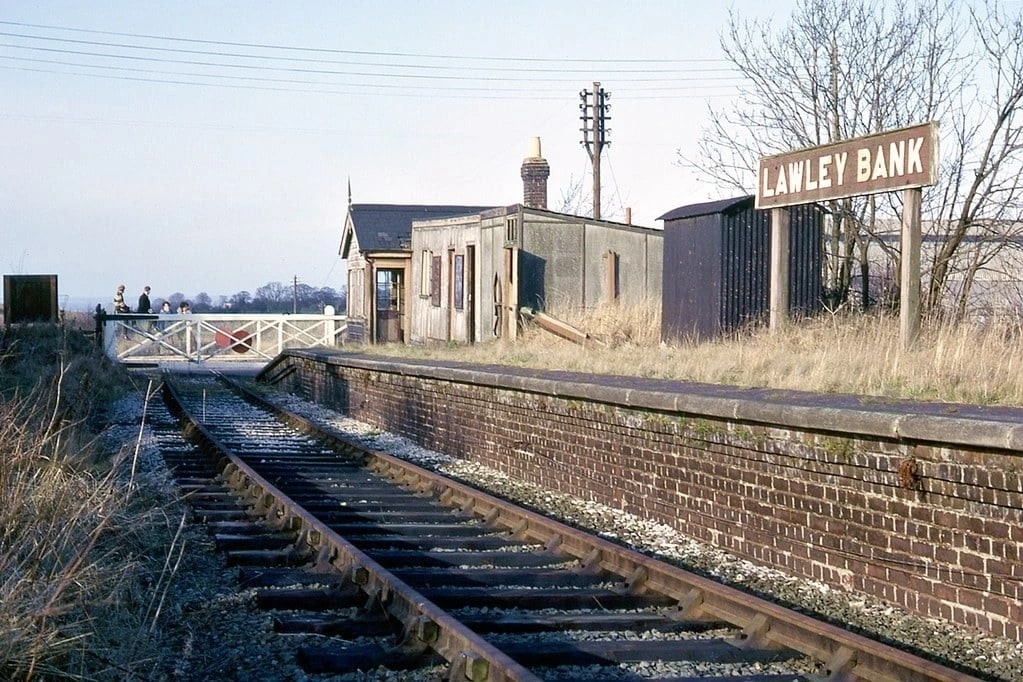
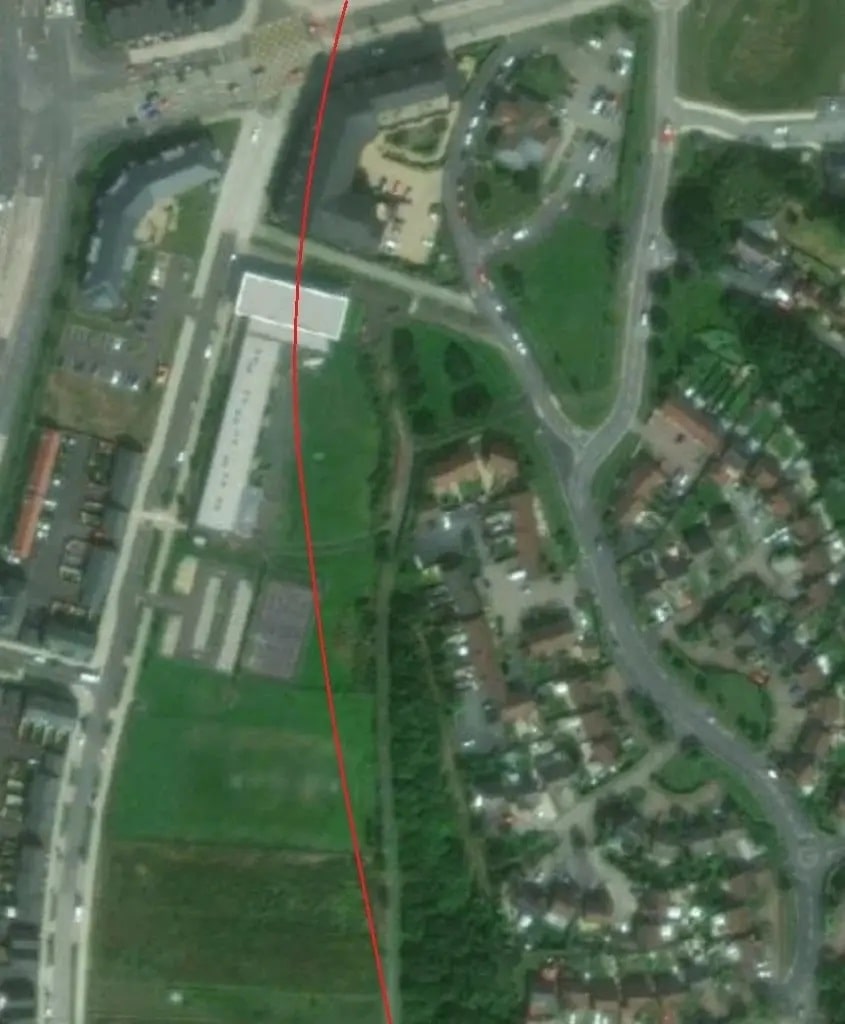
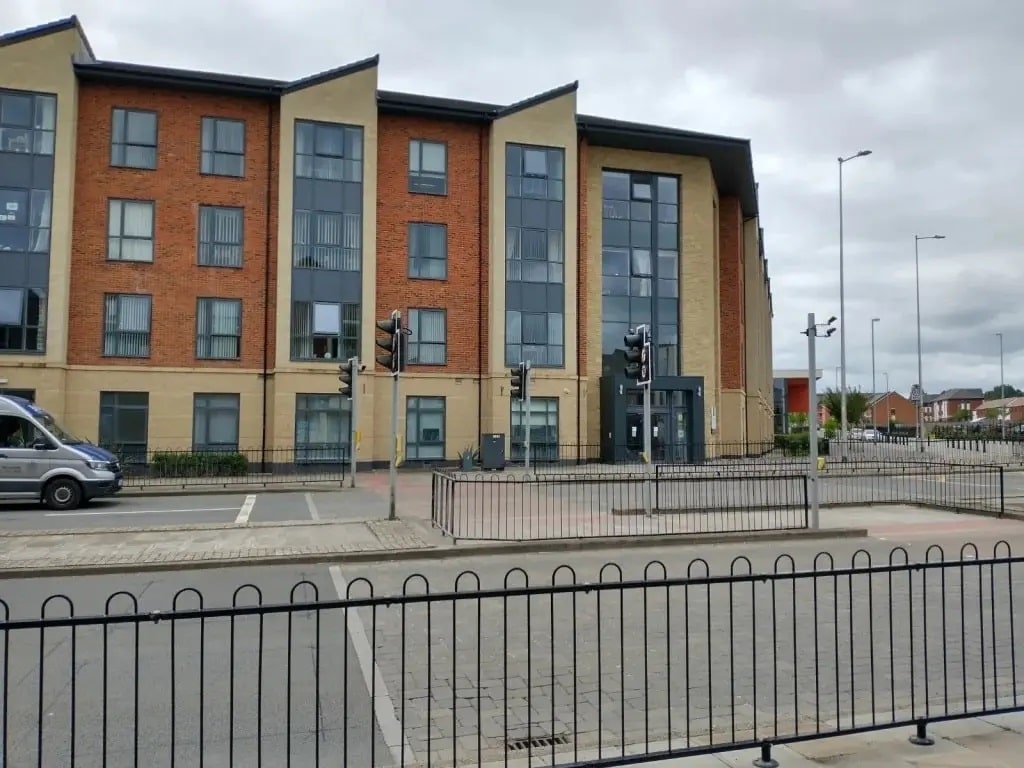
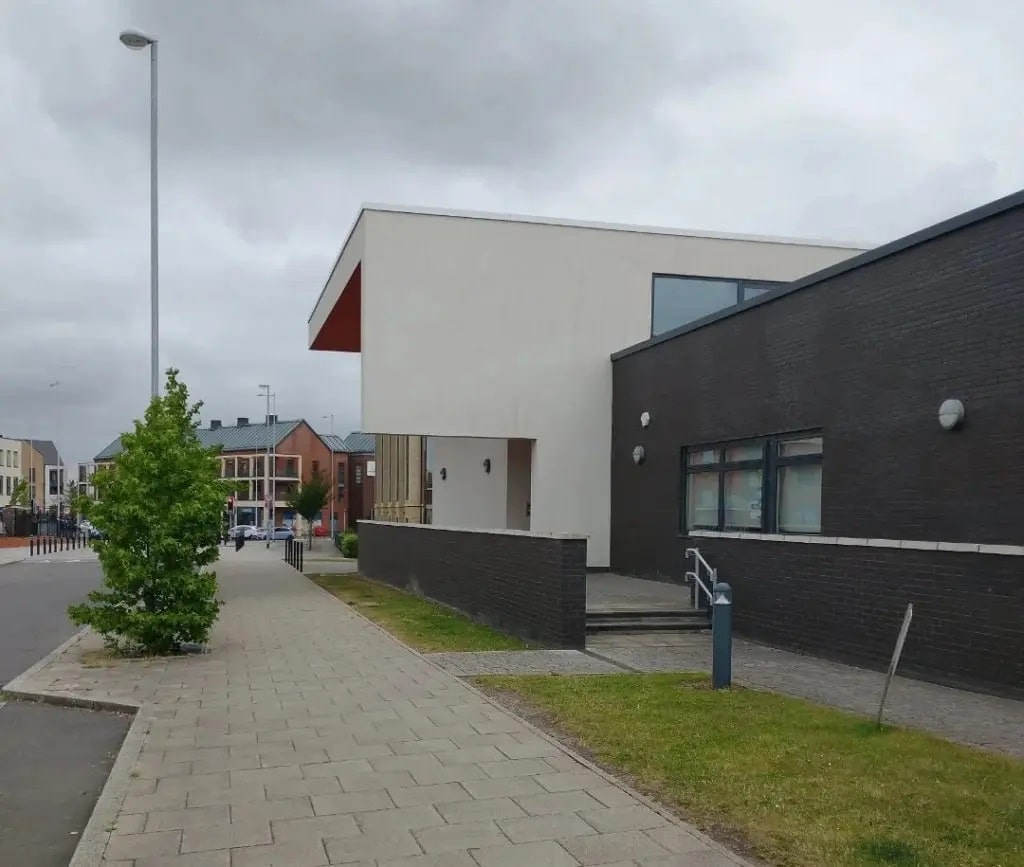
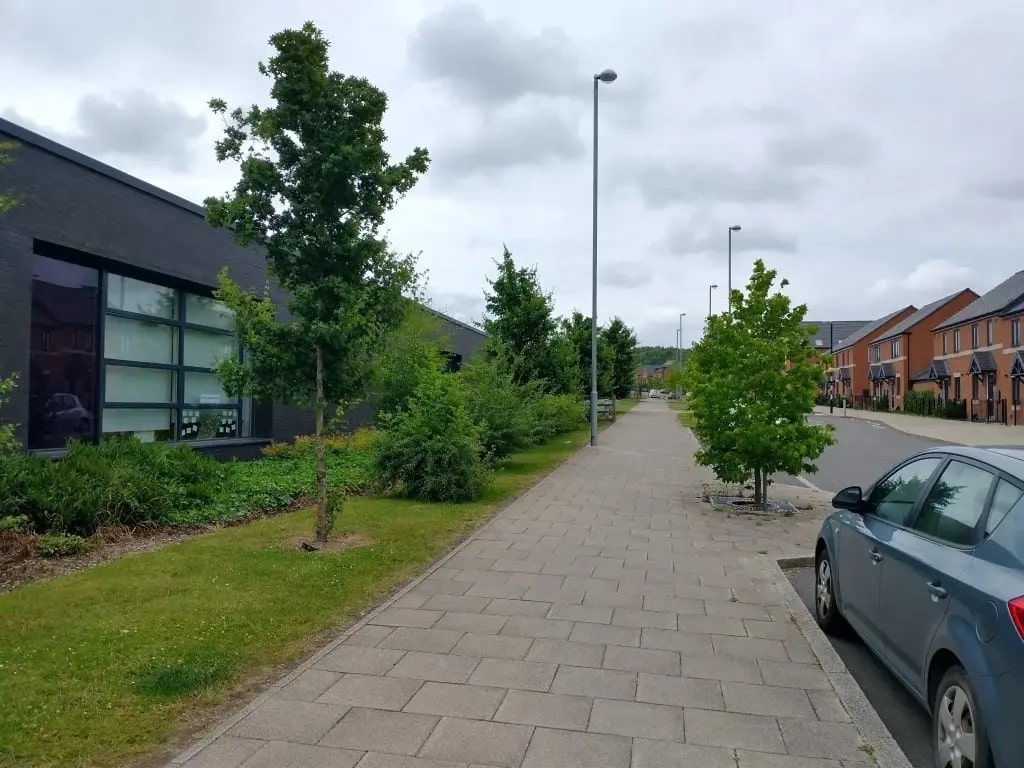
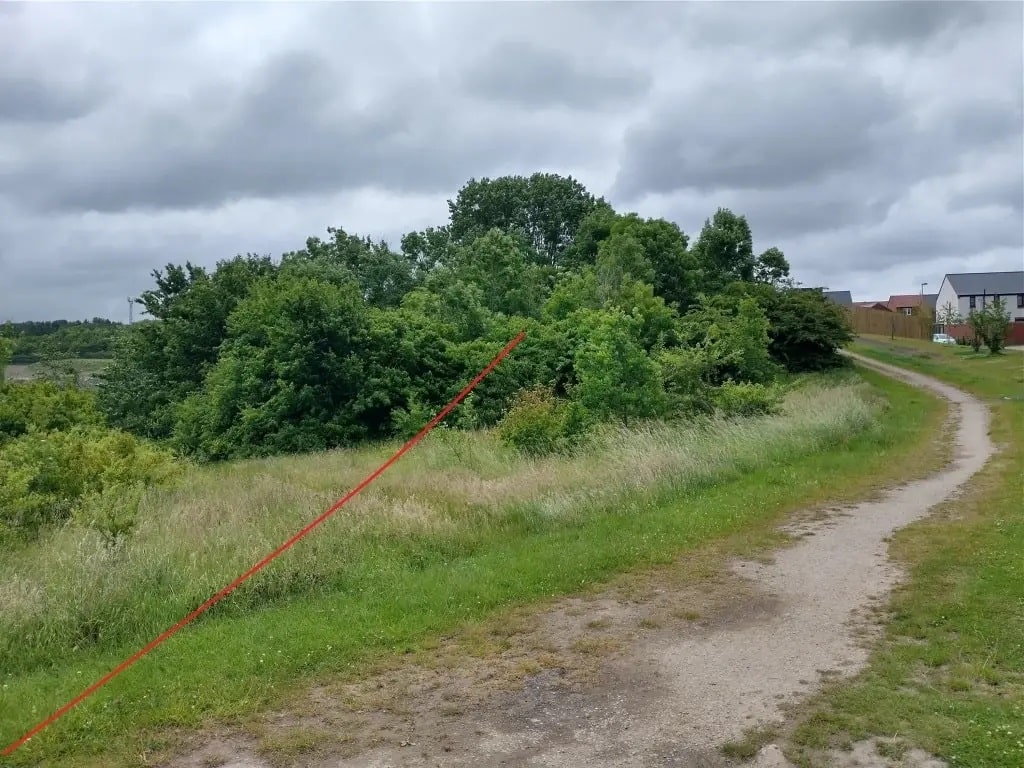
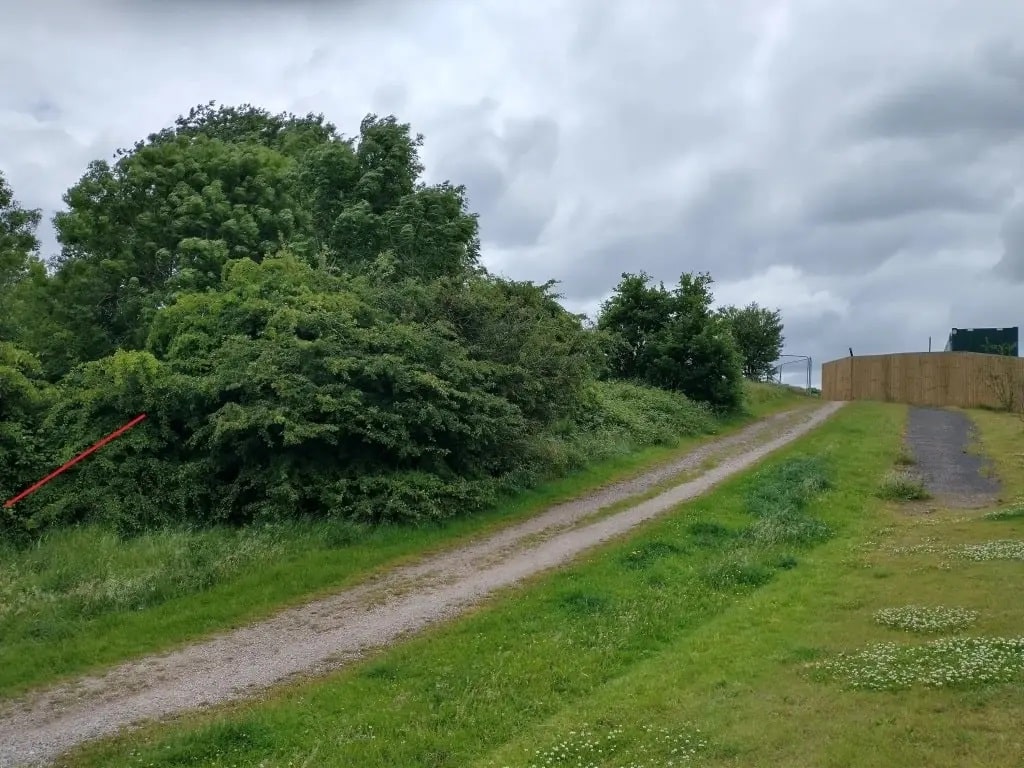
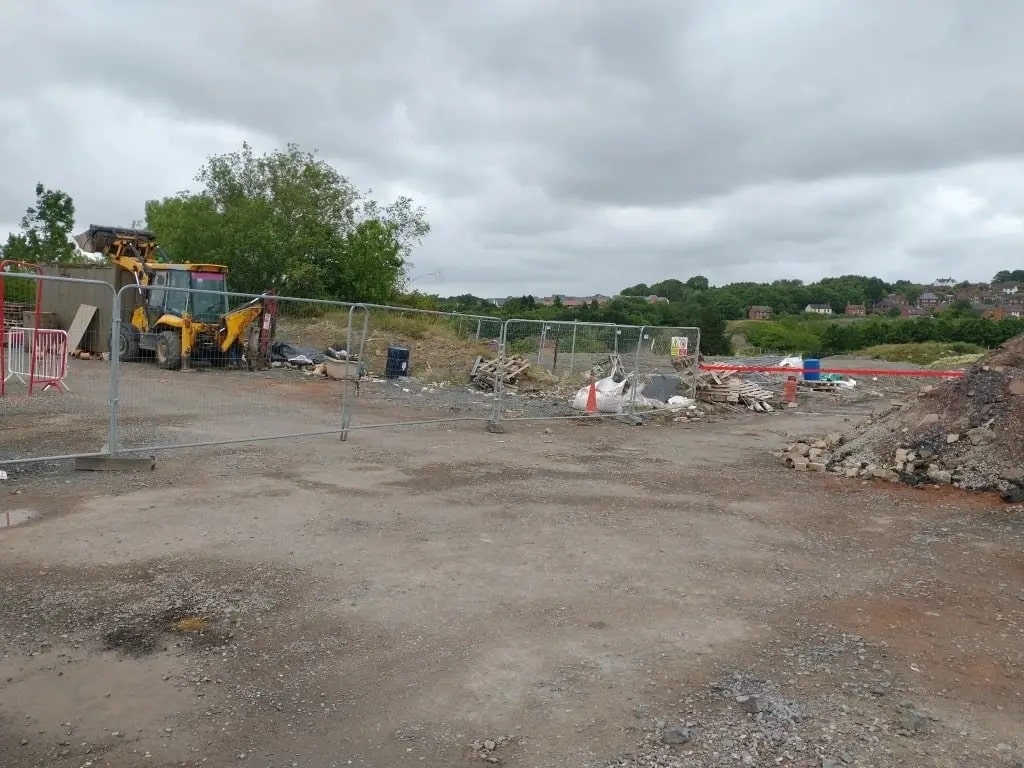
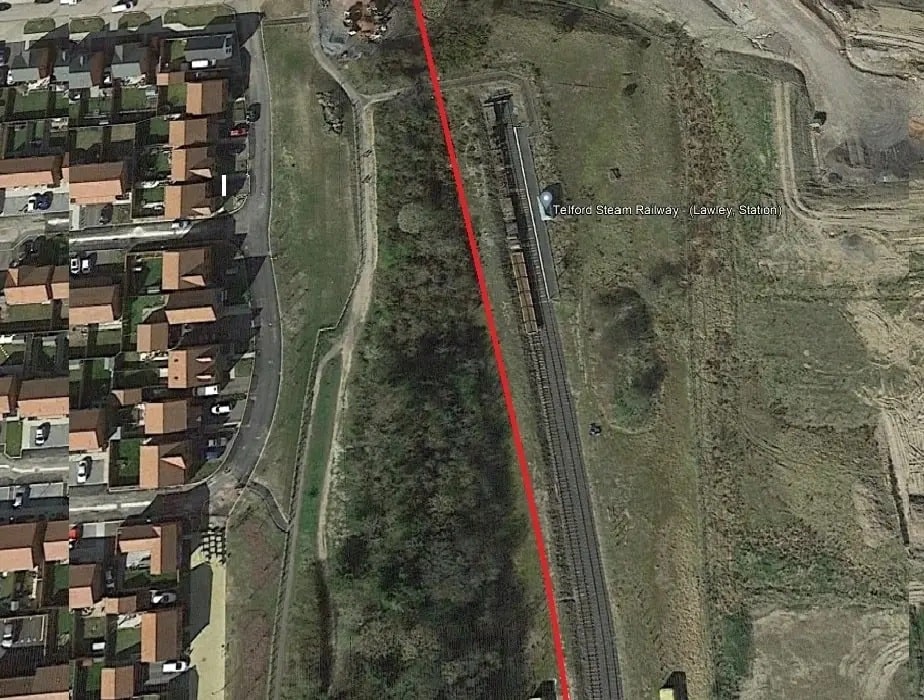
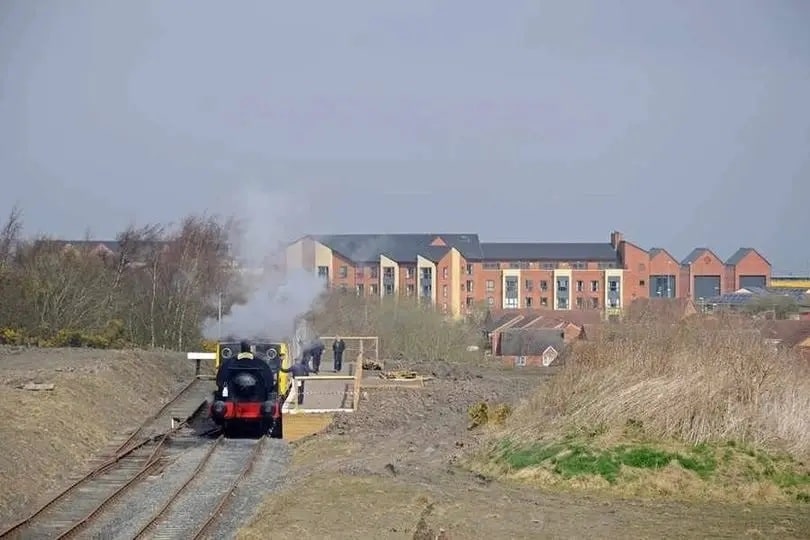
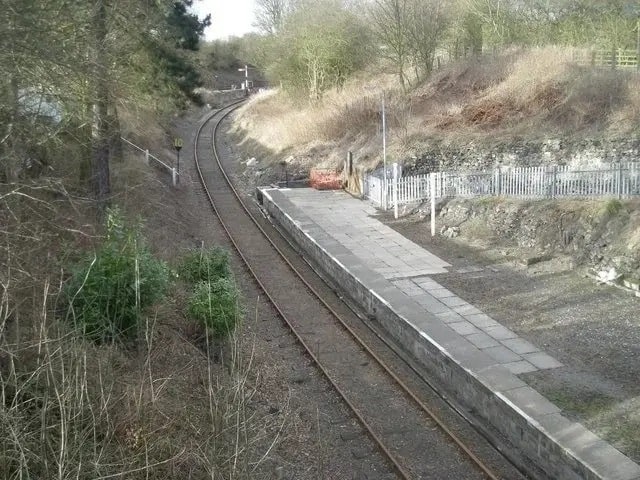
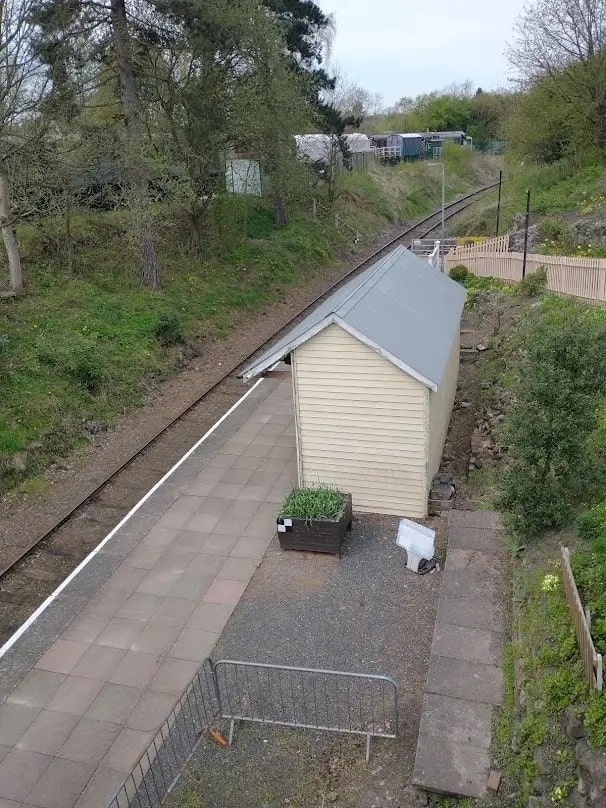
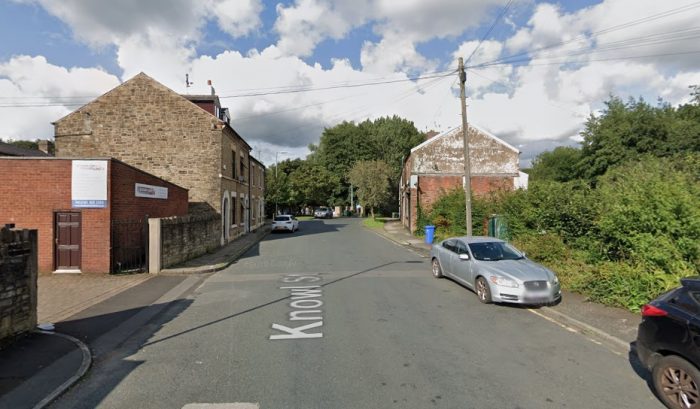
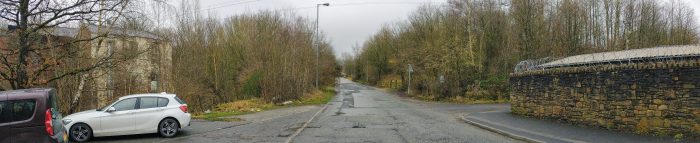
South of New Dale Halt, the next station was ‘Lawley Bank’. Major development has taken place in recent years. New housing and a shopping area have replaced open fields. The site of the station is covered by new development.

The satellite image from the National Library of Scotland of the northern approach to of what was Lawley Bank Station. The approximate line of the W&SJR is shown by the red line. [31]
Modern housing dominates the route of the old line.[My photograph, 13th June 2022]
Lawley Village Day Nursery straddles the line of the old railway. [My photograph, 13th June 2022]
Looking back to the North along the line of the old railway from the car park of Morrison’s Supermarket. [My photograph, 13th June 2022]
Morrison’s Supermarket also straddles the line of the old railway. [My photograph, 13th June 2022]
The South side of Morrison’s Supermarket, the old line ran to the left hand side of this picture. [My photograph, 13th June 2022]

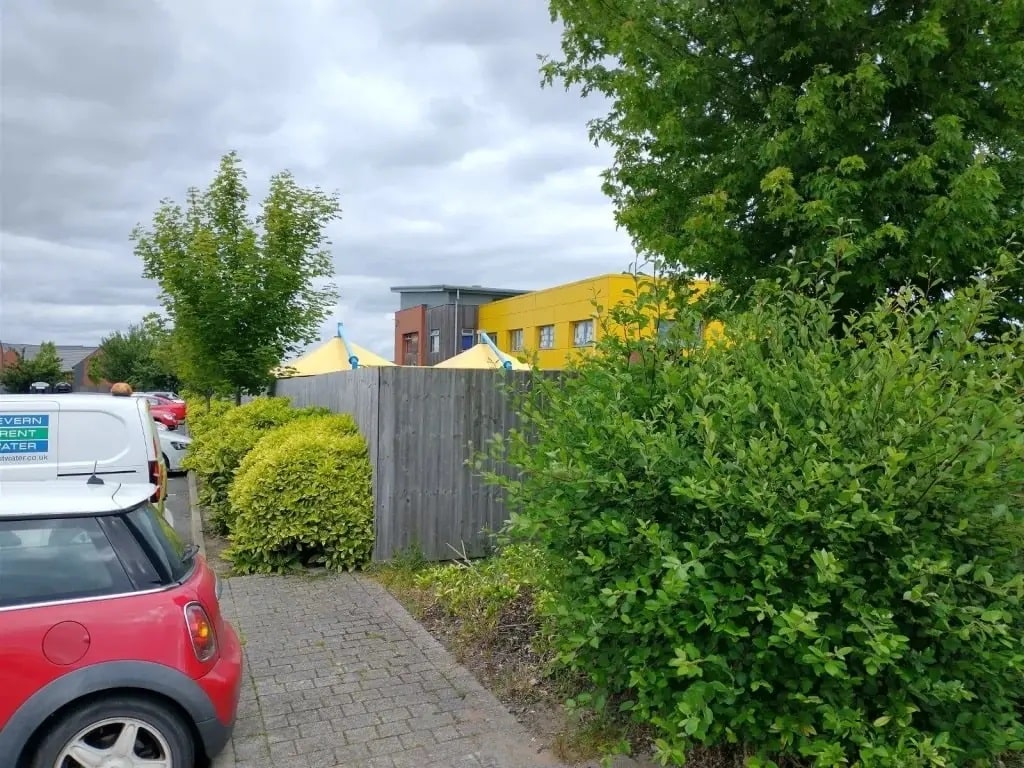
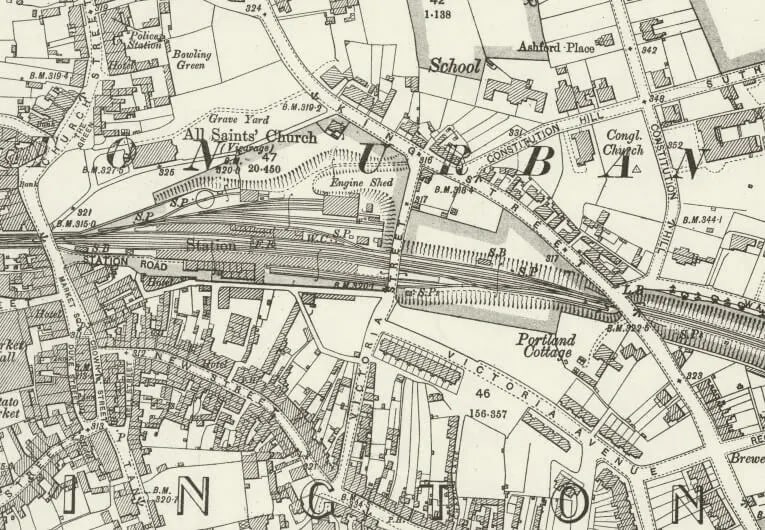
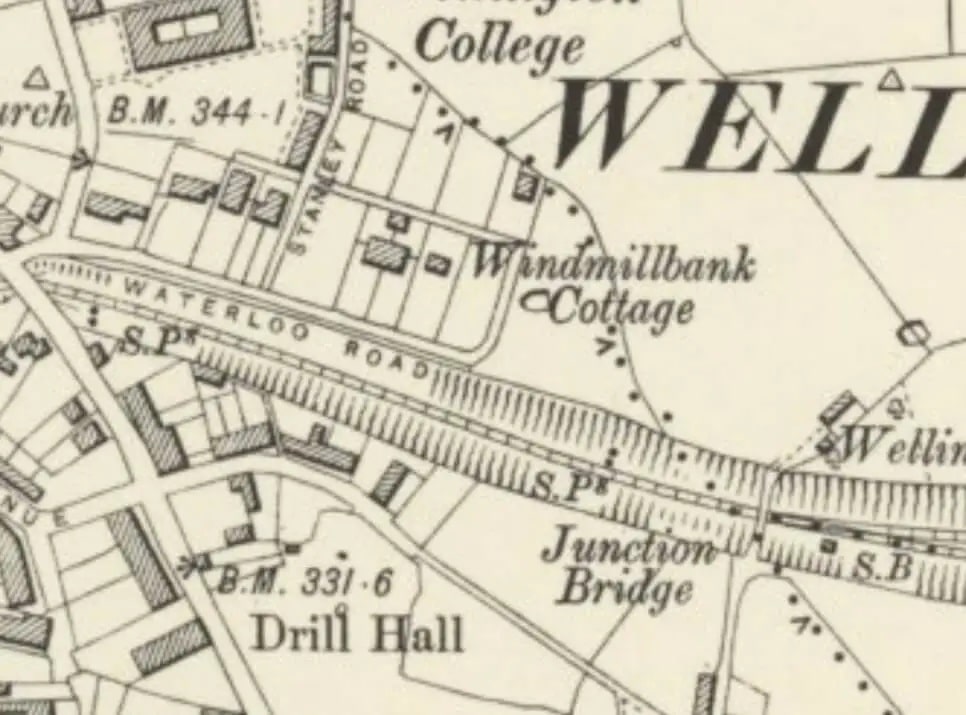
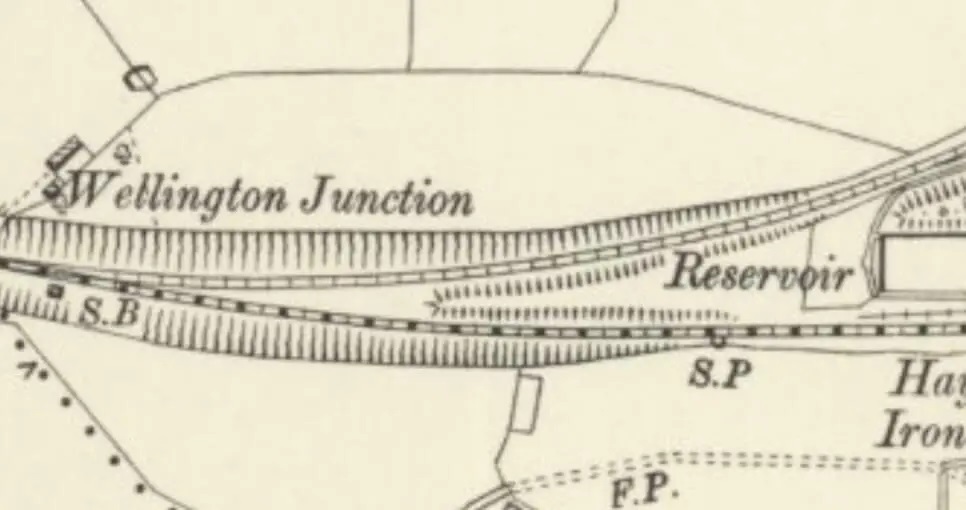
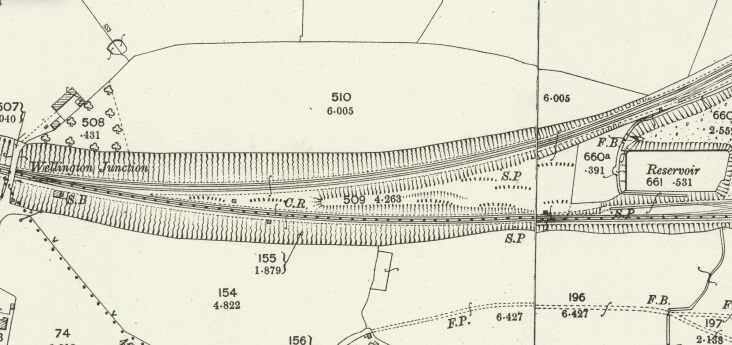
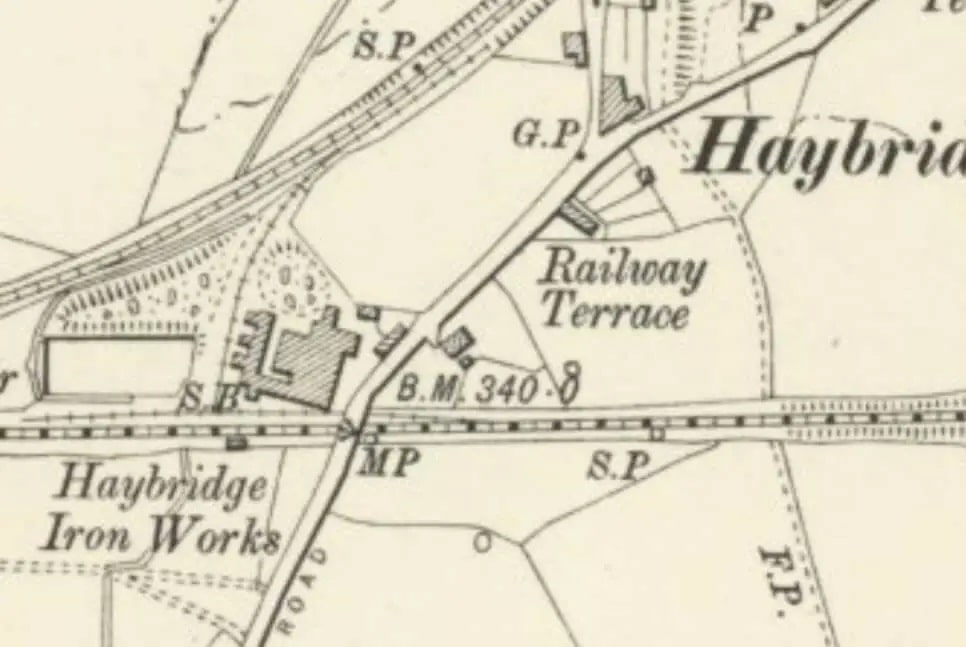
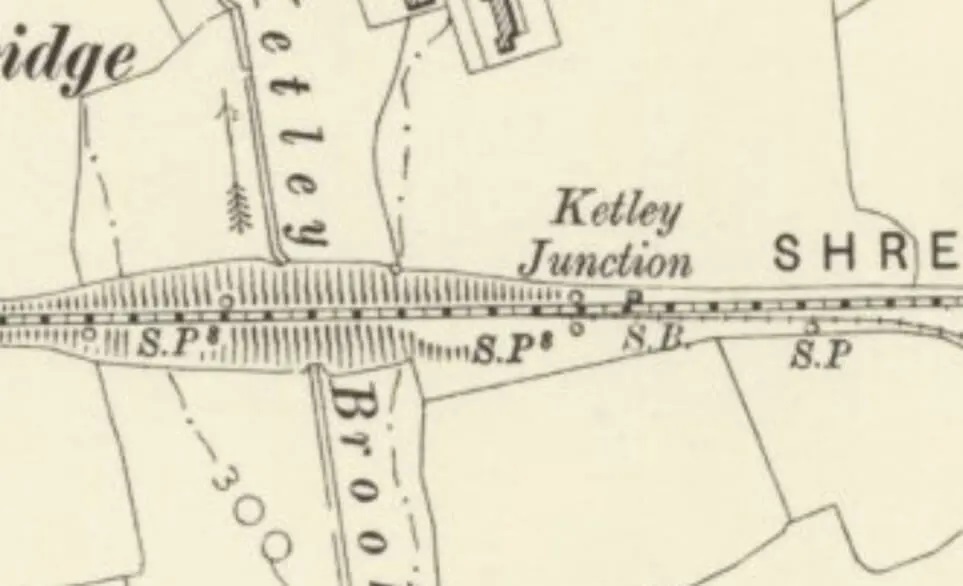
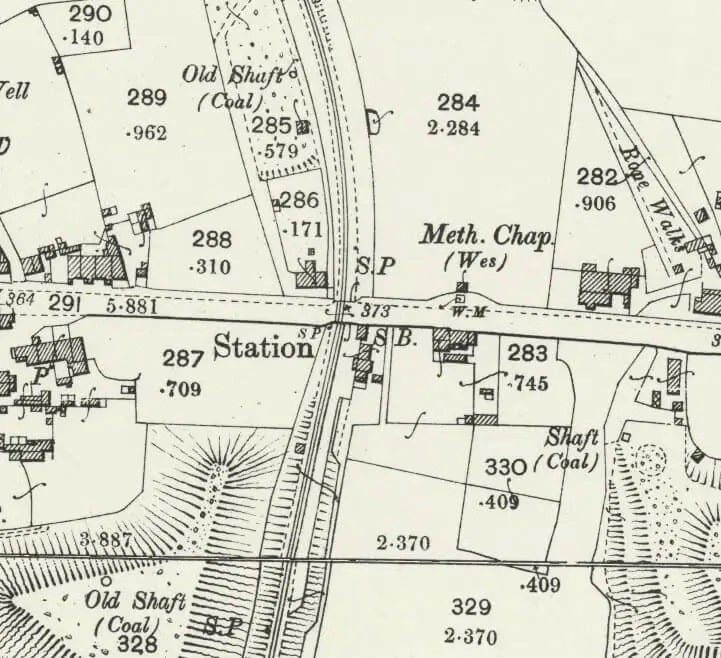
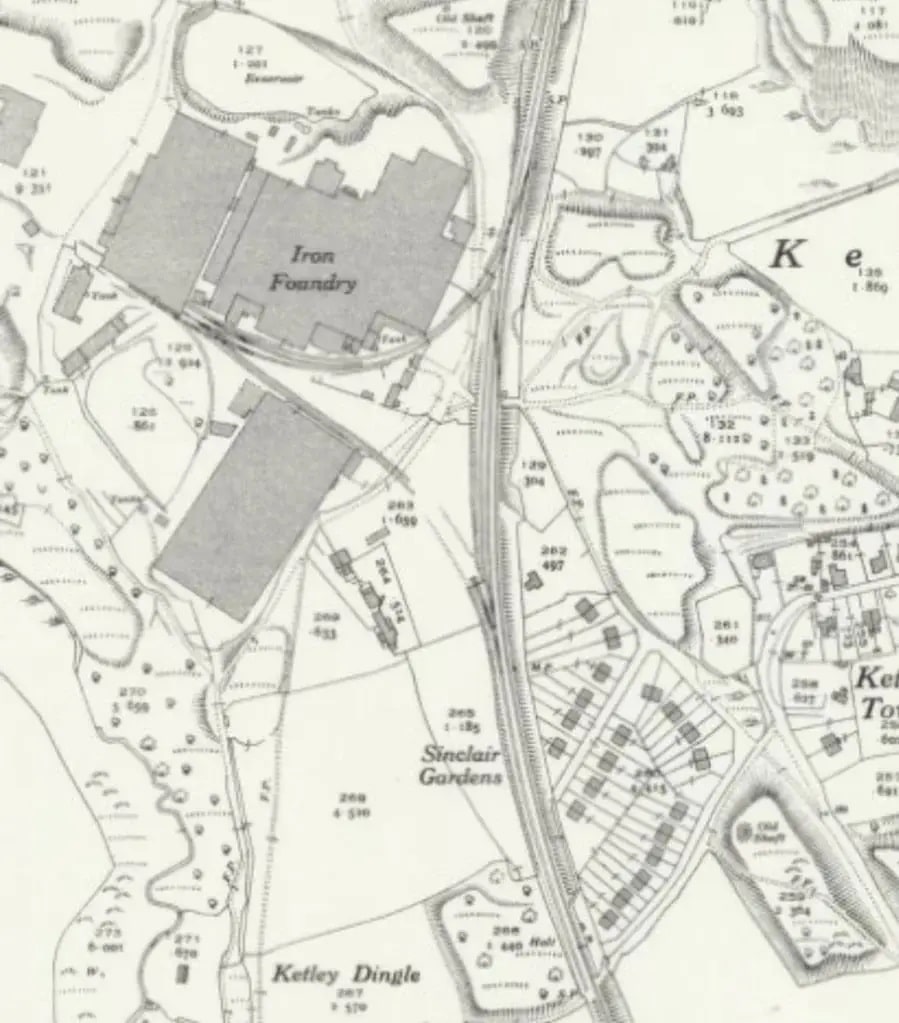
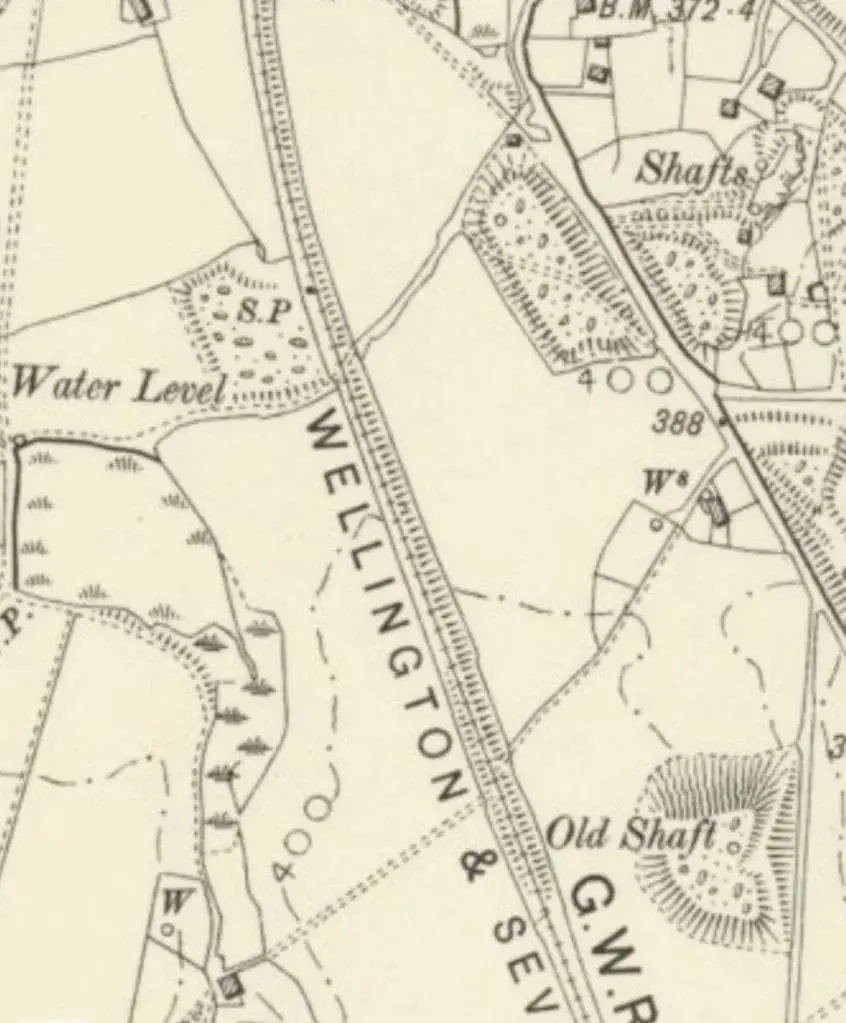
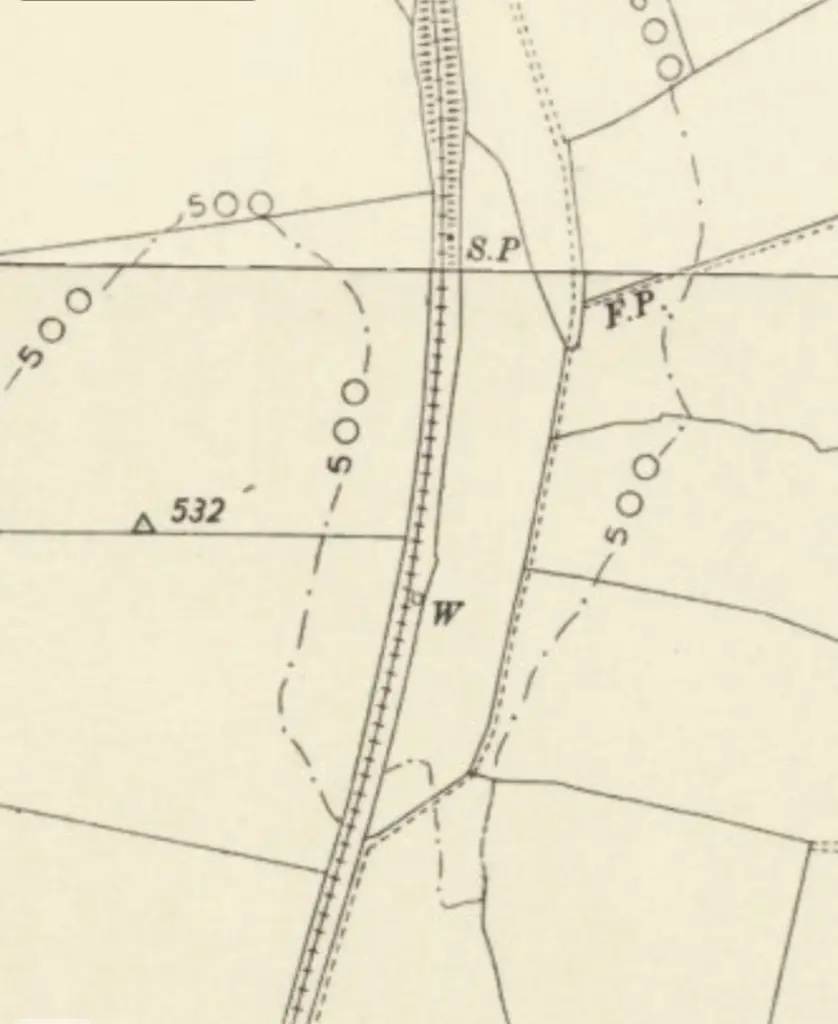
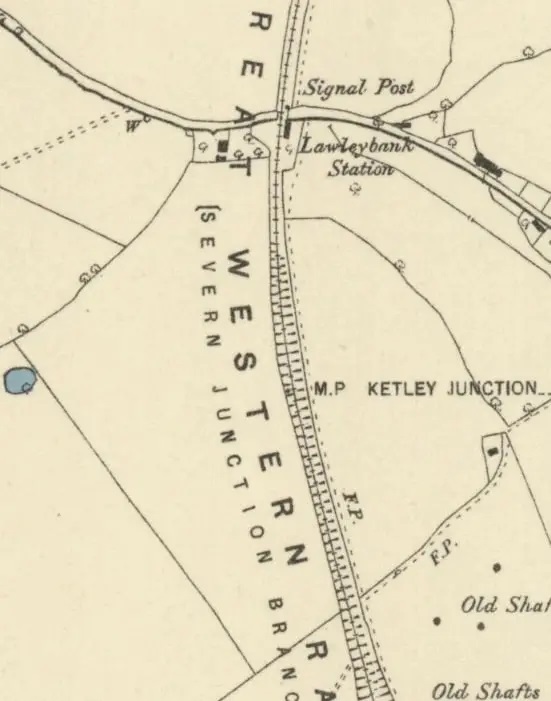
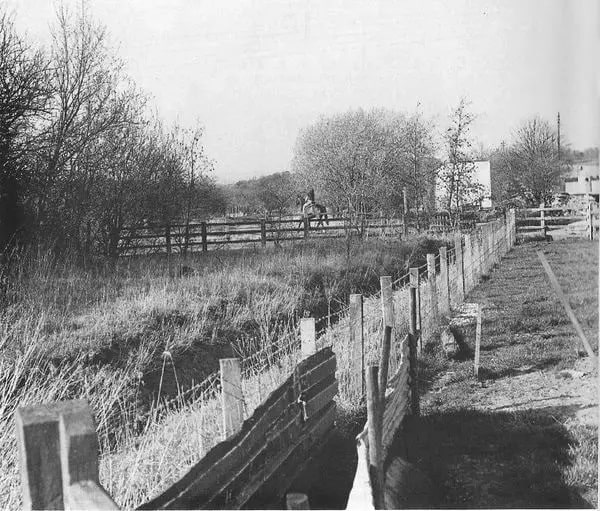
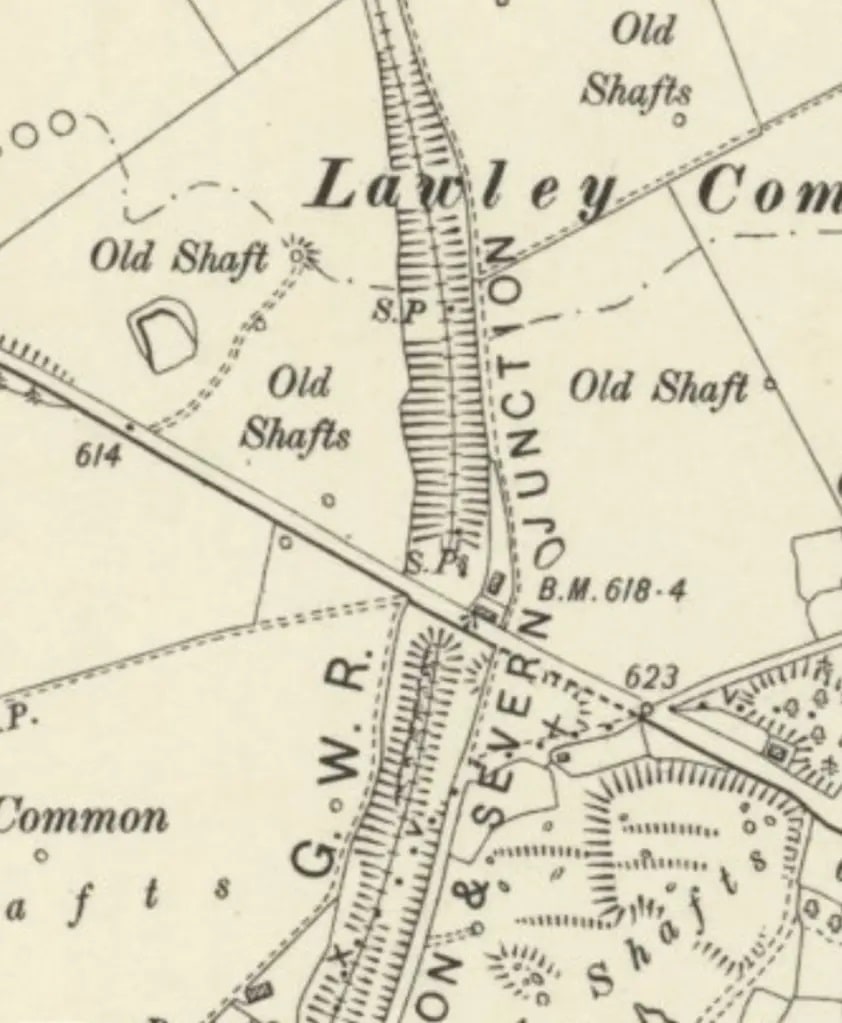
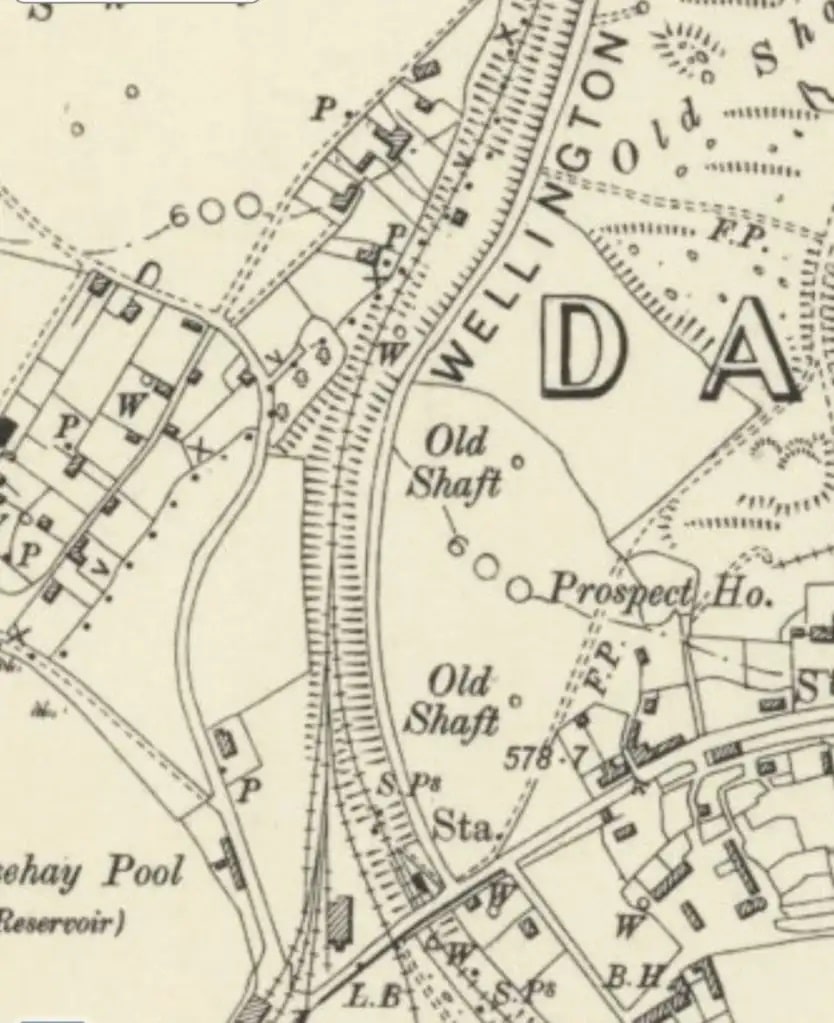
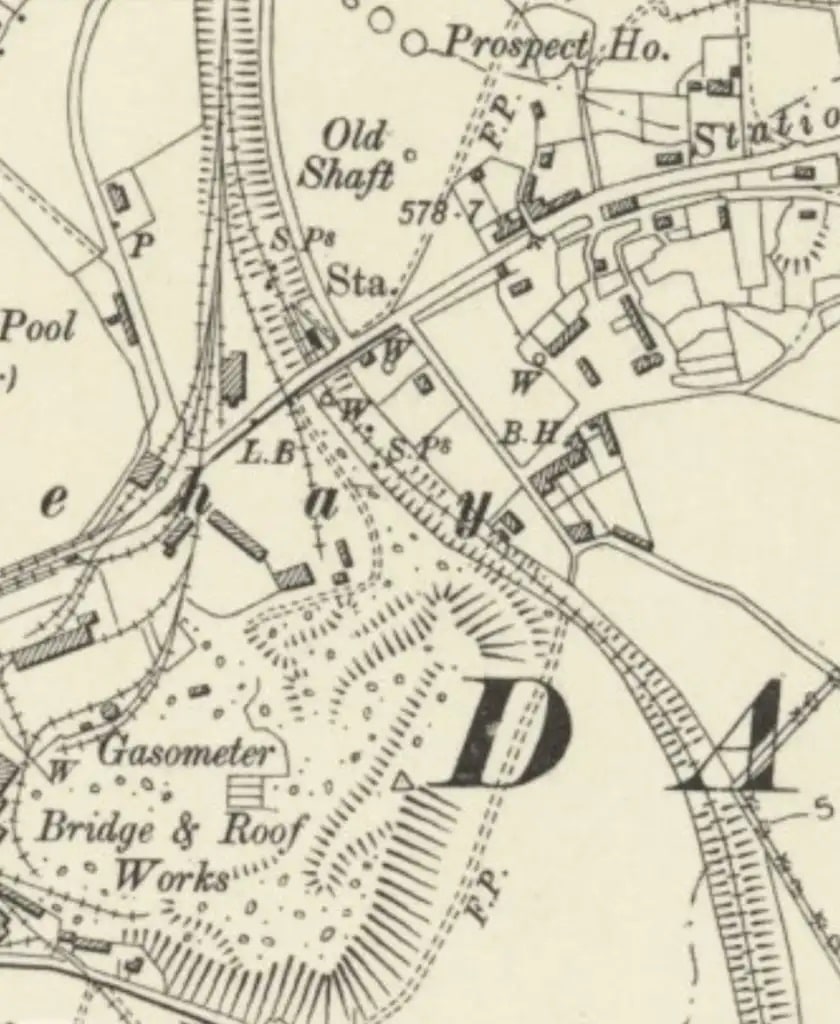
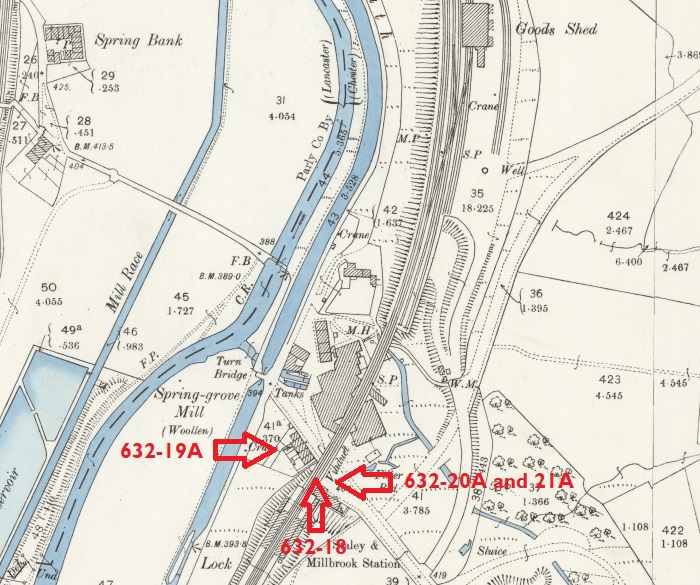
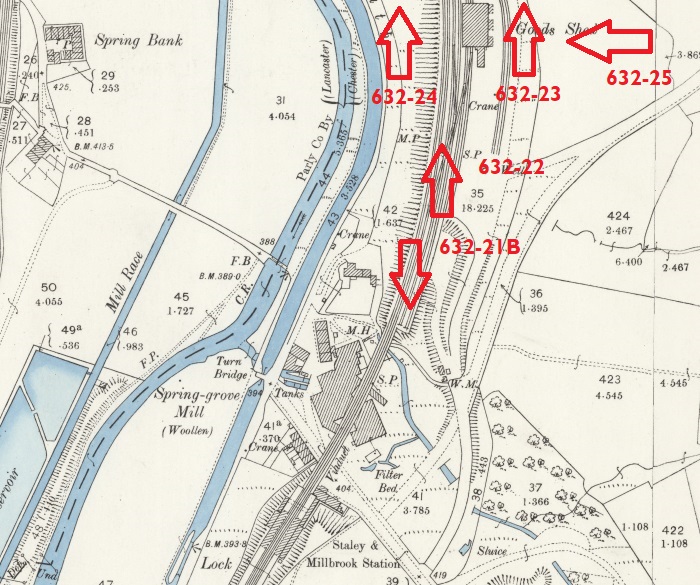
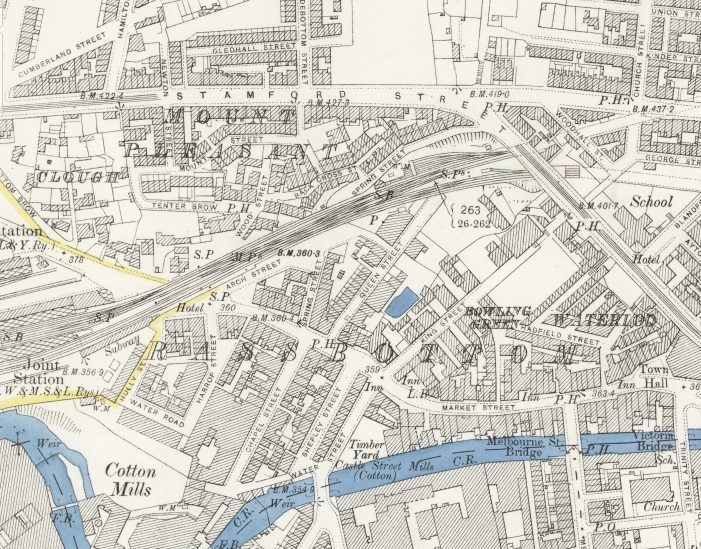
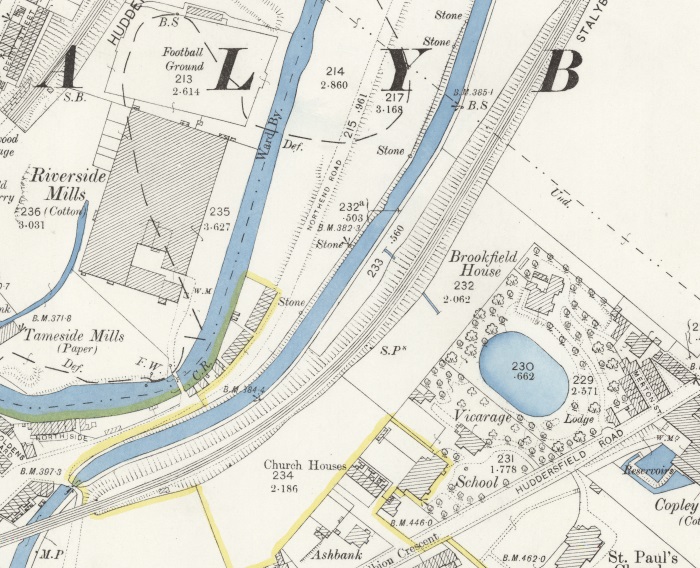
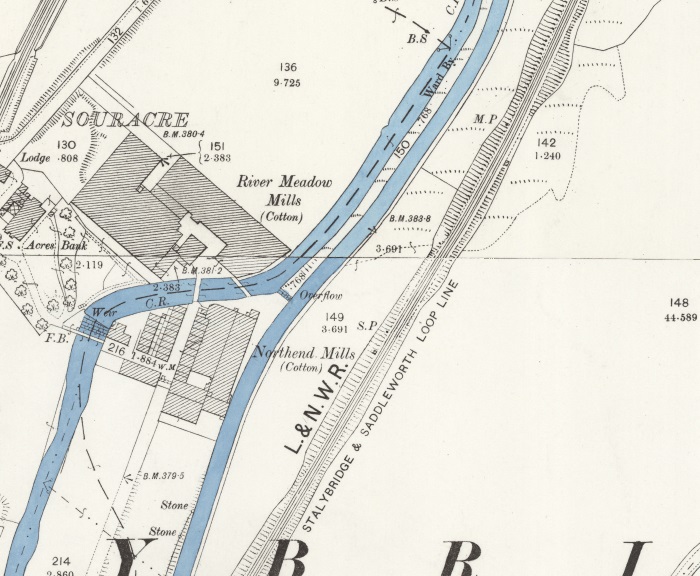
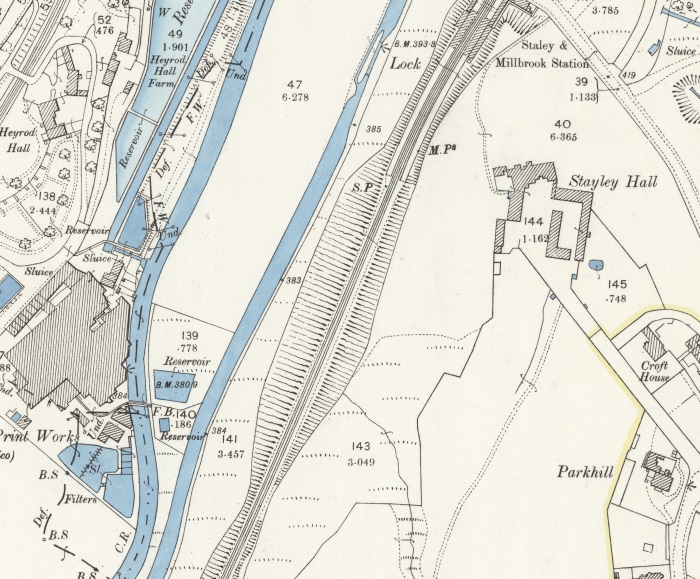
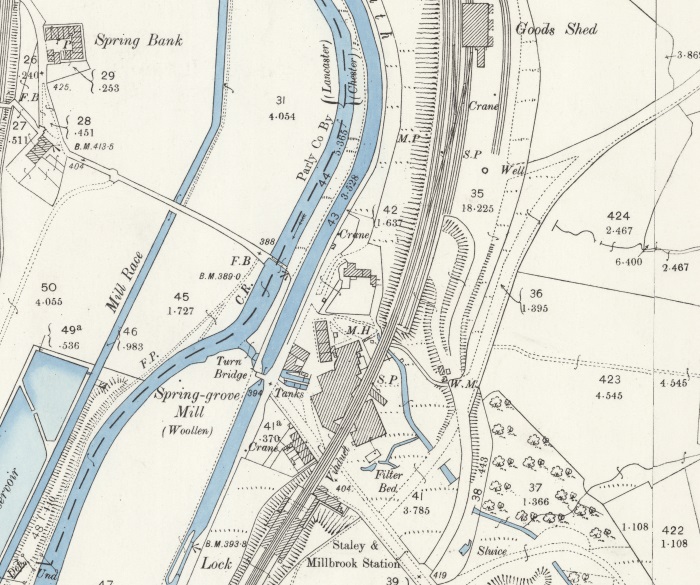
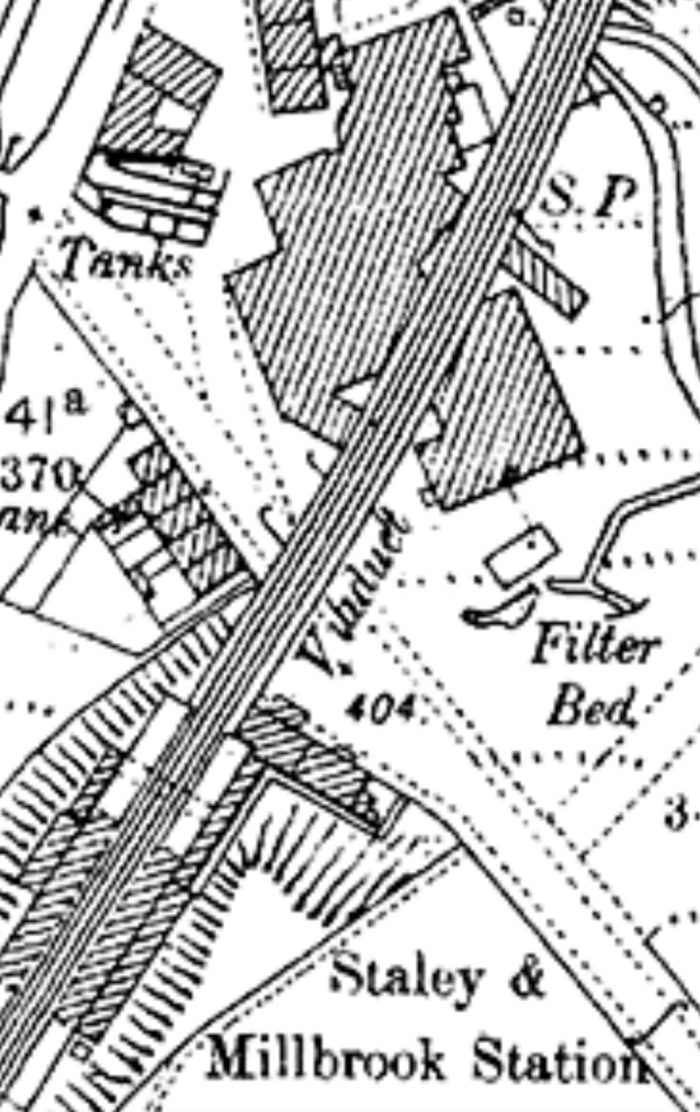
At the time that the 1881/82 maps were drawn, this was a relatively rural area. The 6″ 1881/82 survey is immediately below. It shows very little detail close to the railway station. The later 1901 6″ survey follows below and appears to show the remnants of a tramway running on the West side of the W&SJR. This would need further investigation, particularly since it does not appear on the 1881/82 survey.

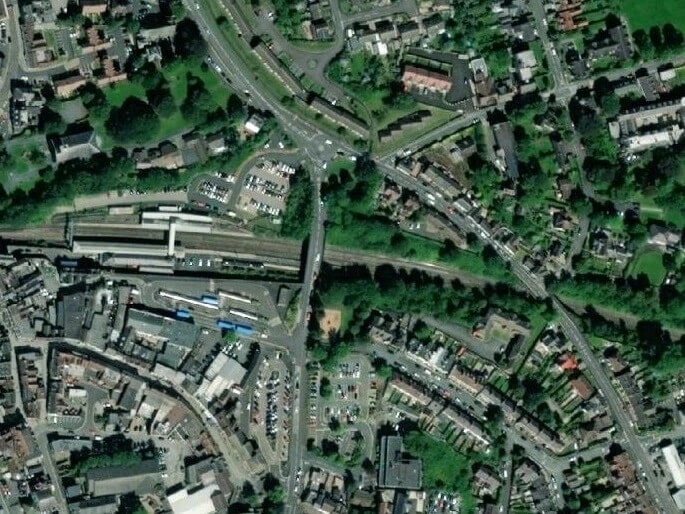
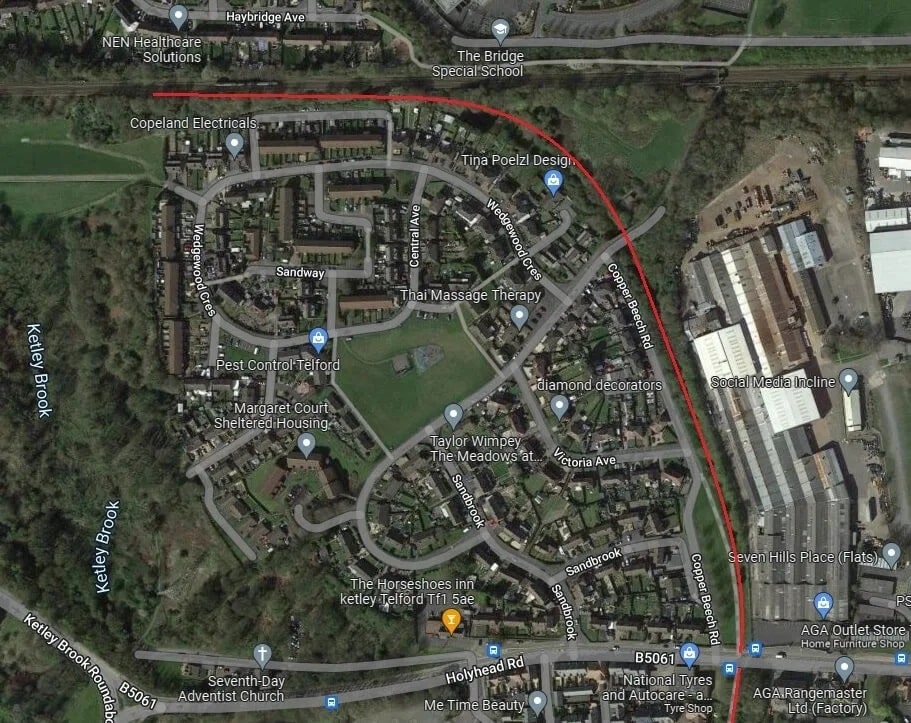
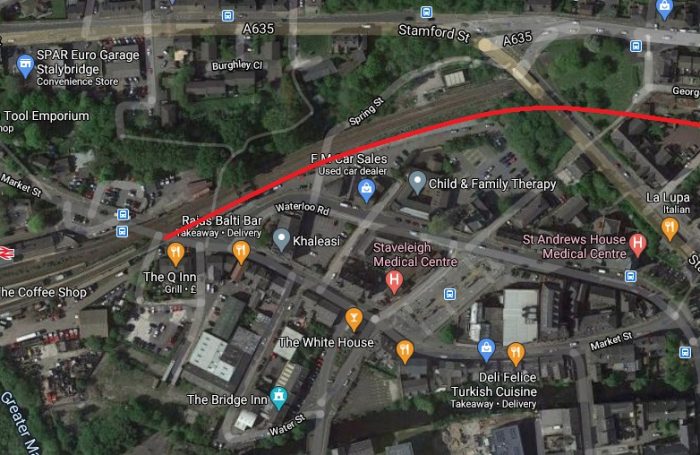
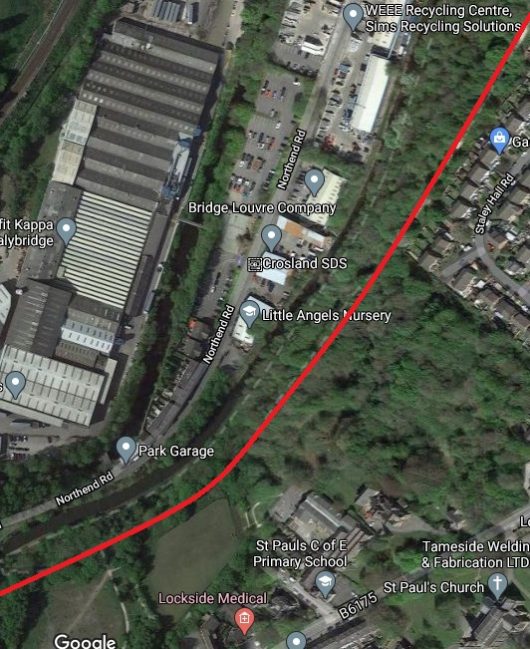
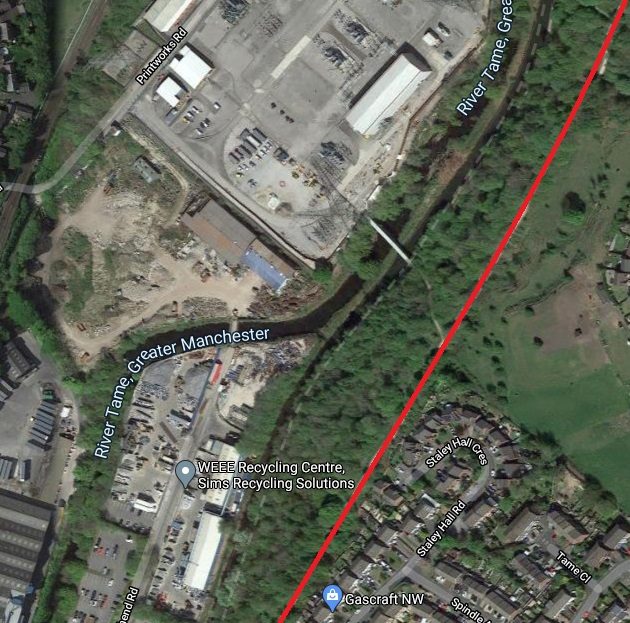
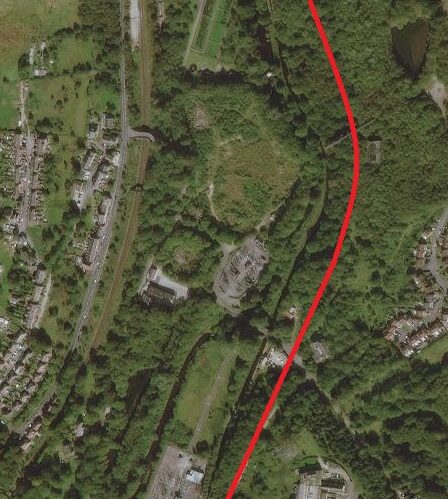
The satellite image which follows the two 6″ maps shows the position of the station overlaid on the modern satellite image of the location provided by the National Library of Scotland.

Lawley Bank Station on the 6″ OS Map of 1881/82. Again, the surroundings either side of the line were, at that time, essentially rural. [9]
The 25″ OS Map from 1901 showing the location directly around Lawley Bank Station. An interesting feature is the shepherd’s crook to the West of the line which is very suggestive of a tramway. It may not be a tramway, but it certainly will warrant further investigation. It is worth noting that it does not appear on the 1881/82 6″ Survey and that it is not marked on this extract as a tramway. [30]
The area around the site of Lawley Bank Station has been radically altered by new development. [30]
Looking North through the crossing gates at Lawley Bank Station on 18th February 1967. The rural nature of the surrounding landscape is evident. This image was shared on the Telford Memories Facebook Group by Carole Anne Huselbee in September 2014. [36]
Lawley Bank Station in 1962 taken from a train standing at the platform. This image was shared by Stuart Geoffrey Davis on the Memories of Shropshire Facebook Group in September 2018, (c) Stuart Geoffrey Davis. [33]
Lawley Bank Station again, taken from a Southwesterly direction, a wider angle taken from track level, shared by Metsa Vaim EdOrg on the Telford Memories Facebook Group on 22nd February 2021. [34]
The location of Lawley Bank Station in 1987. This view looks North across Station Road. It was shared by Metsa Vaim EdOrg on the Telford Memories Facebook Group in November 2020. Metsa comments: “The railway route has more or less vanished in 1987. Probably the last time I walked the line with my mum’s dog. The stream is now a trickle, that once flowed faster and deeper from Horsehay Common. Gone are the Hares, Curlews, Green Plover, Grey Partridge, Skylarks and Snipe from the fields either side of the track. Gone are the fruit trees, especially a large pear tree that was hidden behind some Silver Birches, a field away from our house. Gone are the dragonflies that patrolled through the Horsehair Ferns either side of the track-bed.” [35]
The approximate line of the railway South of Lawley Bank Station is shown on this NLS satellite image. The rectangular white building straddling the old line in both these last two images is Lawley Village Primary Academy. [32]
Standing in front of Morrison’s Supermarket on the North side of West Centre Way looking South along what was the route of the old railway. [My photograph, 13th June 2022]
Lawley Village Primary Academy sits over the line of the old railway. This photograph looks along the side of the building parallel to the line of the railway, North, towards the location of the erstwhile Lawley Bank Station. [My photograph, 13th June 2022]
Turning through close to 180°, this photograph looks along the side of the school again but this time to the South. At this point, the old railway route runs at the back of the school building. [My photograph, 13th June 2022]
Looking South across the level crossing at Lawley Bank Station with a service for Wellington at the station platform. This image was shared by Lin Keska on the Telford Memories Facebook Group on 12th February 2017. [42]
Looking North from the area of the School car park. Morrison’s Supermarket can be seen in the distance. The School is the white and grey building on the left of the image. The approximate line of the old railway is marked by the red line imposed on the photograph. [My photograph, 13th June 2022]
Looking South from the fence-line at the edge of the School carpark. The red line approximates to the line of the old railway. [My photograph, 13th June 2022]
Looking back to the North from adjacent to the housing in the [picture immediately above. Lawley Village Primary Academy is in the centre of the image and the approximate line of the railway is, again, shown as a red line. [My photograph, 13th June 2022]
This satellite image provided by the NLS (National Library of Scotland) had been edited to show the line of the railway as a red line. At the bottom edge of the image on the East side of the redline the current extent of the preservation line ‘Telford Steam Railway can be seen. [38]
Looking South from the location of the photograph above, the old line entered a cutting. The tree growth is in that cutting. [My photograph, 13th June 2022]
The surrounding land is rising and the cutting is deeper as the line heads South, the red line at the left of this image shows its route. A contractors compound is just evident on the right skyline in this picture. [My photograph, 13th June 2022]
This image shows a view from the estate road looking East towards what was the route of the railway. The red line to the right side of this image provides an indication of the railway alignment, which was East of the fenced compound. [My photograph, 13th June 2022]
Around 100 metres to the South the new Lawley Station on the Telford Steam Railway’s preservation line. A typical GWR ‘pagoda’ platform shelter has been erected on the relatively new platform. [My photograph, 13th June 2022]
This Google Earth Satellite image shows the old railway alignment just a few metres to the West of the alignment of the preservation line and its Lawley Station. Railway rolling-stock can be seen stored on one of the two tracks at the station. [Google Earth]
Heath Hill Tunnel is the next location to note. This is the 1881/82 6″ OS Map. It passes under the line of Dawley Road. [9]
An photograph of Lawley Station while it was being built. The pagoda platform building has still to be constructed. This image was shared on the Telford Memories Facebook Group by Marcus Keane. There appears to be significant foreshortening which has the effect of bringing buildings to the North much closer to the station. This suggests that the picture was probably taken from close to the northern portal of Heath Hill Tunnel. More about Telford Steam Railway can be found on their website. [39]
Google Earth shows a DMU either setting off from or arriving at Lawley Station. [Google Earth]
Class 108 DMU North of Heath Hill Tunnel on Telford Steam Railway. [46]
The northern portal of Heath Hill Tunnel as it appears in a video on YouTube. [44]
Looking North from the northern portal of Heath Hill Tunnel on 5th September 2010. The new line and Lawley Station are not yet open, © Copyright L.S. Wilson and licensed for reuse under a Creative Commons Licence (CC BY-SA 2.0). [43]
South of Heath Hill Tunnel, the modern preservation line of Telford Steam Railway follows the route of the W&SJR. As it leaves the tunnel it is in relatively deep cutting. [Google Earth]
A relatively grainy photograph of the Southern portal of Heath Hill tunnel after clearance work was completed by Telford Steam Railway, taken on 5th September 2010, © Copyright L.S. Wilson and licensed for reuse under a Creative Commons Licence (CC BY-SA 2.0).. [41]
The cutting between Heath Hill Tunnel and Horsehay & Dawley Station. Shared on the Telford Memories Facebook Group by Metsa Vaim EdOrg.  [20]
The 6″ OS Map from 1881/82 shows the tightly curved approach to Horsehay & Dawley Station from the North. [9]
The 1881/82 OS Map gives some sense of the industrial lines associated with the Horsehay Works. More details can be found in an article about the Coalbrookdale Tramroads. Both the old goods shed and the Coalbrookdale Company’s transshipment shed appear on this map extract. Both are on the North side of Station Road. The transshipment shed is the more westerly of the two. It is known locally as the ‘Old Loco Shed’. [9]
Shared on the Telford Memories Facebook Group by Metsa Vaim EdOrg, who comments: “The station yard, Horsehay in 1971. Now the site of Horsehay Steam Trust, this was the site we played, or trespassed on in the sixties. Above the loco is the roof of the Cub/Scout Hut on Fence Road, and further to the right was the derelict rolling stock and the large two storey building that we played football in. On the first floor avoiding the holes in the floor. Horsehay Works is also to the right. The picture shows a ‘Horsehay Special’ load on its way to Scotland via Lightmoor and Madeley Junctions,” © G.F. Bannister. [54]
The Old Loco Shed. [My photograph, 20th April 2022]
Dawley Hamlets Parish Council erected this blue plaque on ‘The Old Loco Shed’. It reads ‘Built in 1863, as an exchange point for good for the Coalbrookdale Company plateways, narrow gauge system to the standard gauge line of the Great Western Railway, that ran from Wellington to Craven Arms. The loco shed has been the base for the Telford Steam Railway, a voluntary group, operating a section of the GWR line since 1976 with services to the public beginning in 1984. [My photograph, 20th April 2022]
The Old Loco Shed. The base of the Telford (Horsehay) Steam Trust. The picture was taken in 1978. Shared by Metsa Vaim EdOrg on the Telford Memories Facebook Group on 10th May 2021. Metsa writes:
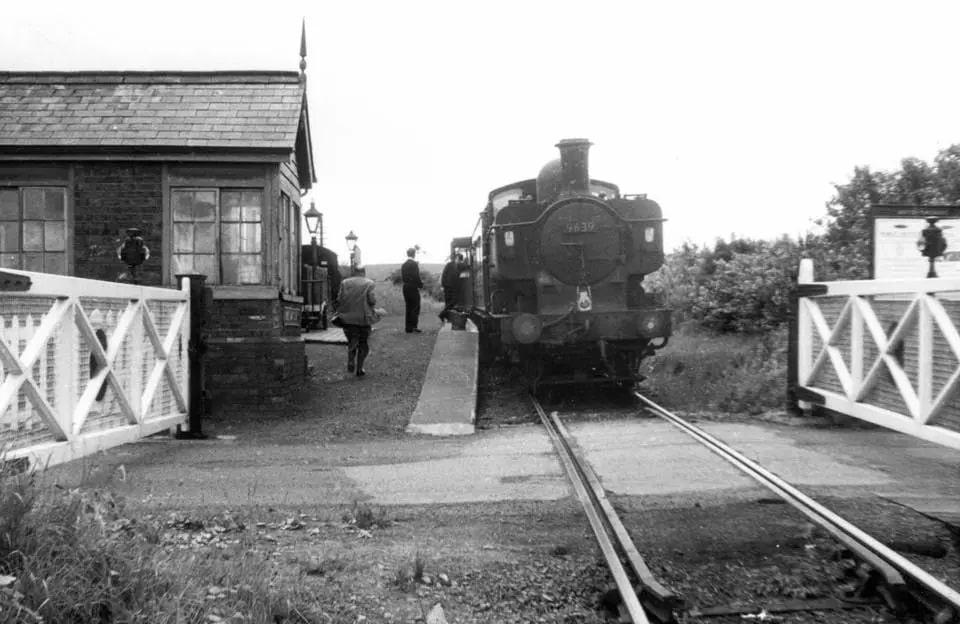
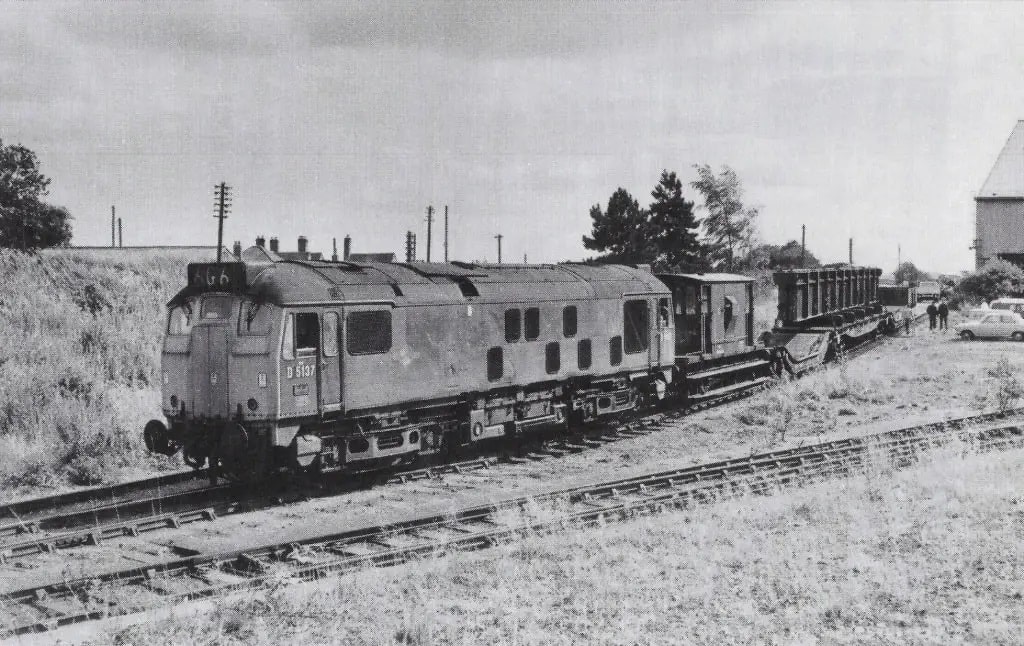
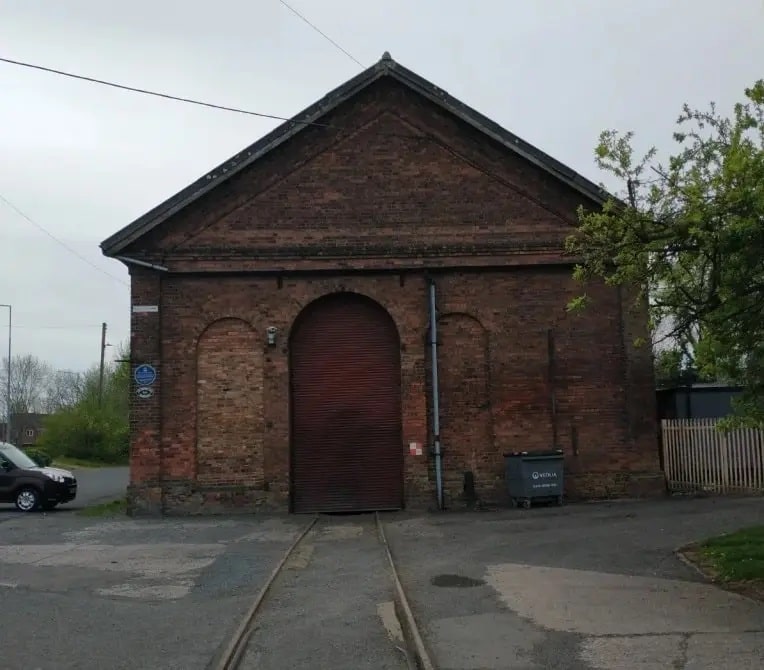
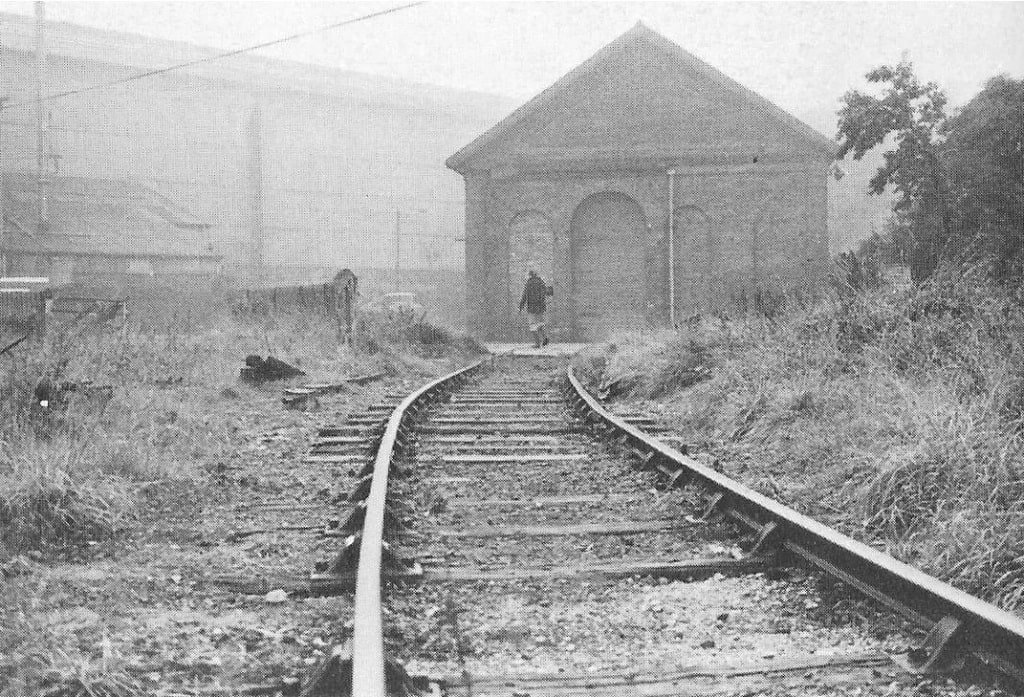
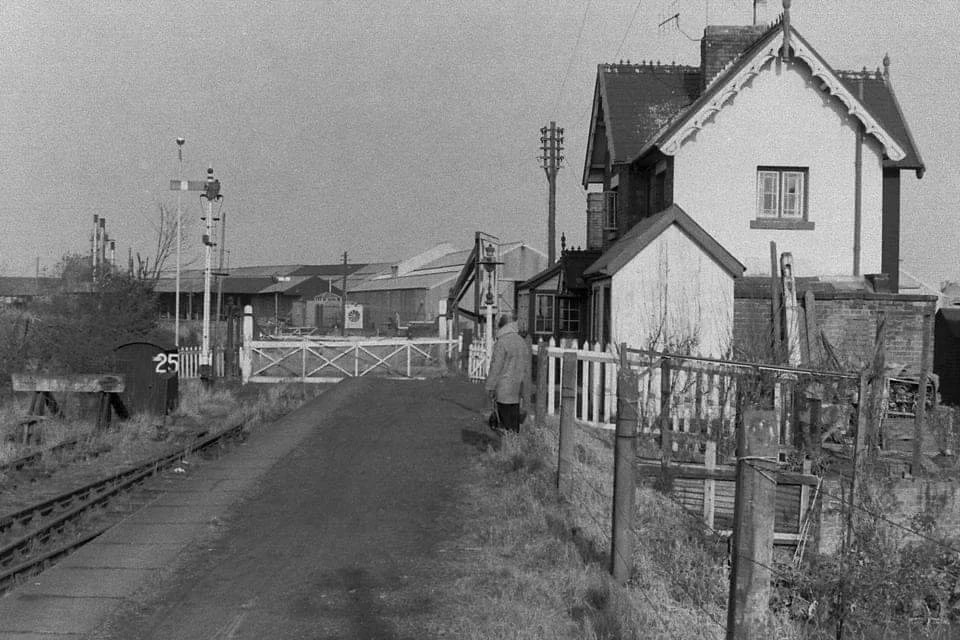
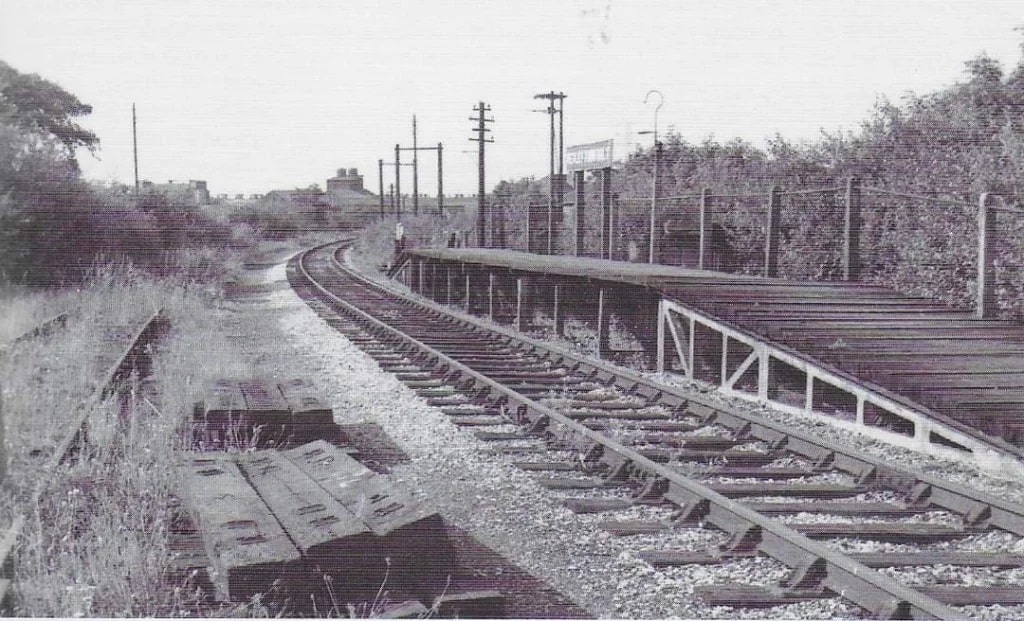
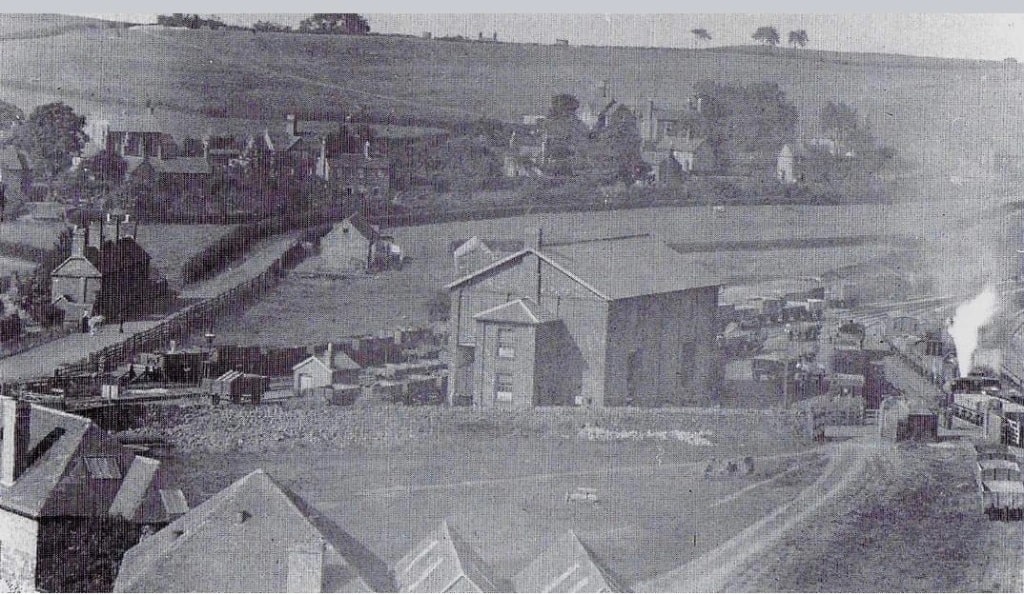
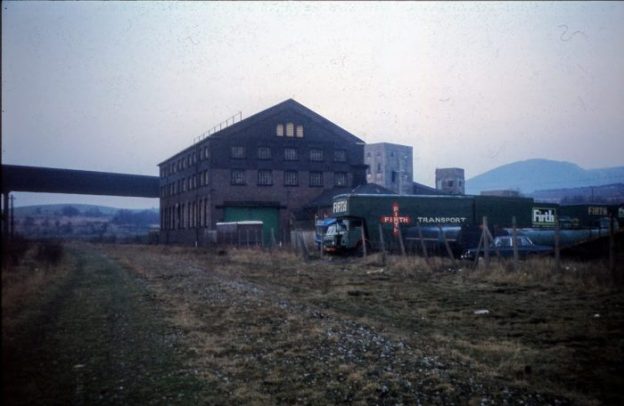
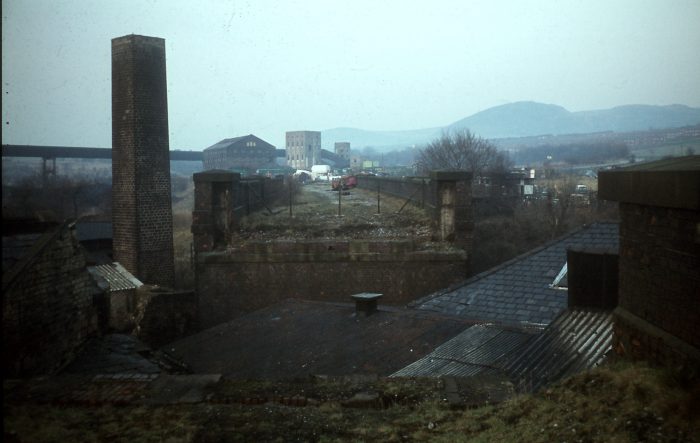
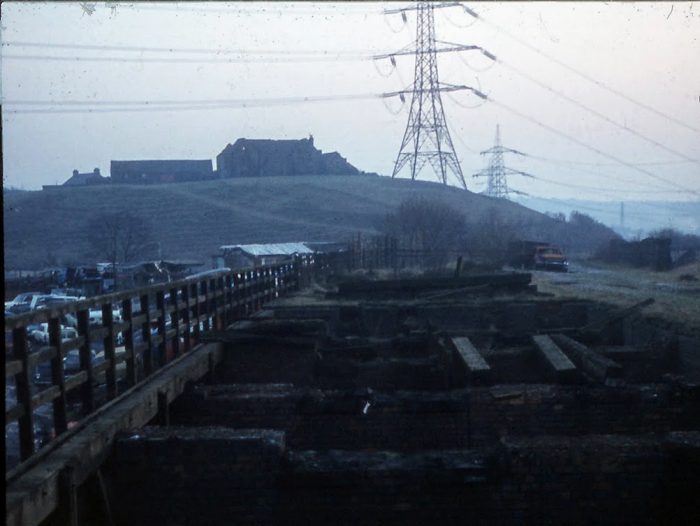
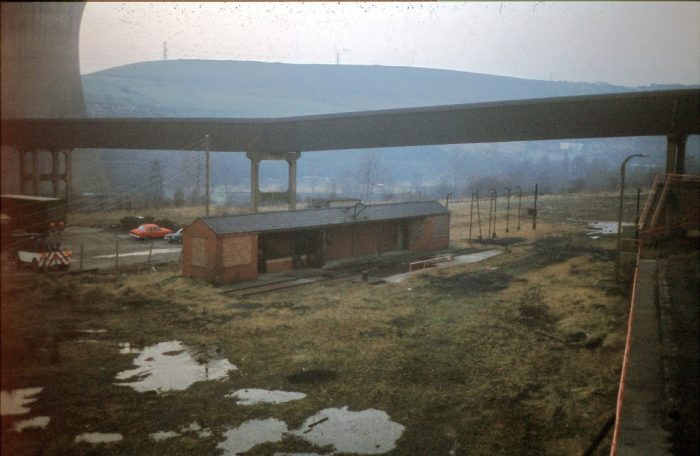
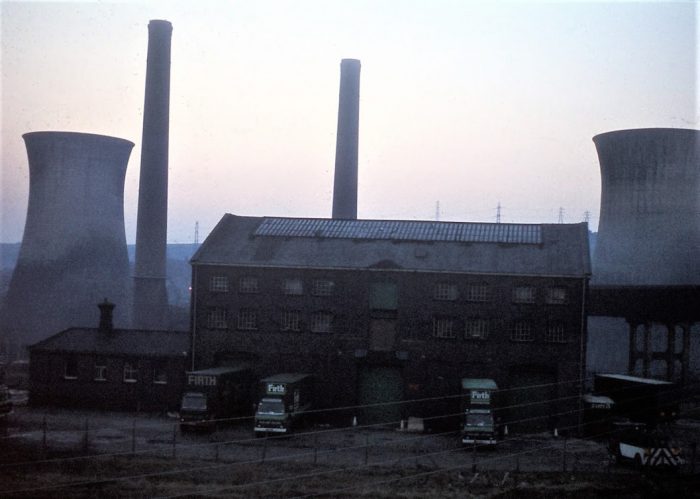
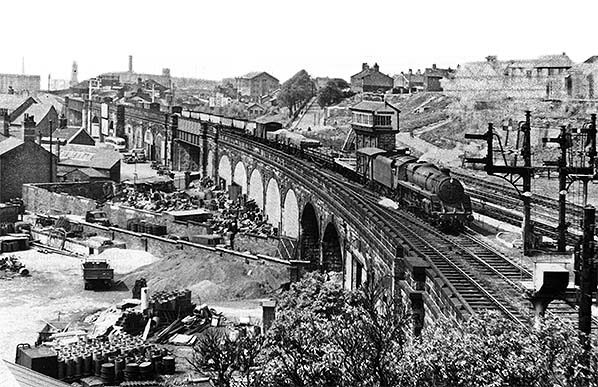
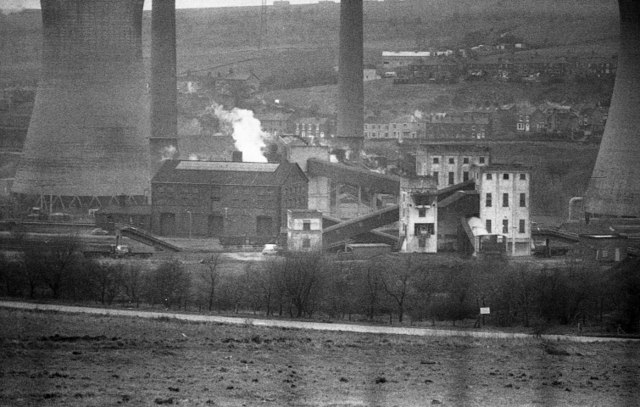
“The Horsehay locomotive shed has the Adamson-Butterley engineering works in the background.
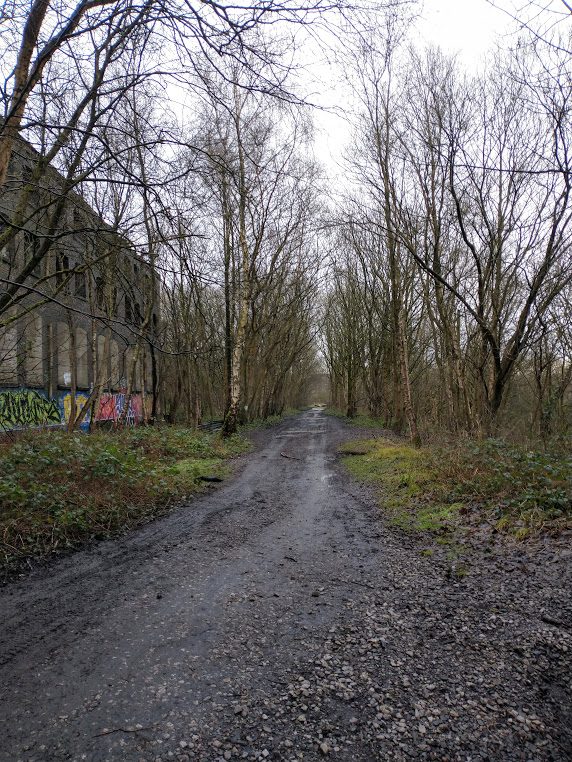
The number of times I walked my mother’s dog down these tracks – probably trespassing at some time. The other shed is to the left out of shot – I think. In the late sixties and seventies this line to Lawley Bank was alive to the birdsong of warblers, linnets, yellowhammers and the like. [47]
Horsehay & Dawley Good Shed, now demolished. The lines to the left head for the ‘Old Loco Shed’ which was the transshipemtn shed for the Coalbrookdale Company, and towards the main Horsehay Works. This image was shared by Lin Keska and Tom Cooper on the Telford memories Facebook Group on 13th February 2017. [48]
The Horsehay and Dawley Station looking South towards the road over-bridge early in the 20th century. This image was shared by Lin Keska and Tom Cooper on the Telford memories Facebook Group on 13th February 2017. {53]
Horsehay & Dawley Railway Station in the early 20th century, shared on the Telford Memories Facebook Group by Metsa Vaim EdOrg on 12th December 2020. [49]
Horsehay and Dawley railway Station in 1950. The photograph was taken from the over-bridge looking to the Northwest. Shared by Metsa Vaim EdOrg on the Telford Memories Facebook Group on 7th July 2022. [50]
Horsehay and Dawley station on 5th May 1957. Shared by Metsa Vaim EdOrg on the Telford memories Facebook Group on 25th July 2021. Metsa writes: “When the trains were no more, the perfect walk with the dog. From Lawley Bank, under the tunnel, past the smouldering coal seams under the heather, past numerous singing warblers, past the back of Kevin Rollins’s house to the Horsehay station. Through the goods yard, around the pool, up unto Horsehay Common, across to New Works wood. Down to the Forge pools, along the path to the Newdale packhorse bridge. Along the track back to Lawley station and back alongside the stream that emanated on Horsehay Common. Good job the Steam Trust now operates otherwise they probably would have concreted over/filled in the Heath Hill Tunnel by now. I will always treasure those walks with my mothers collie in the late 60’s and early seventies,” © G.F. Bannister. [51]
Horsehay & Dawley station. The signal in the middle distance marks the junction of the spur into Spring Village station and the yard, which is to the left. Refurbishment is incomplete. The station sign board still has to be fixed to its supporting uprights. The station building still have to be built. [45]
Horsehay & Dawley Railway Station with the now very popular Polar Express which the preservation company puts on in the Winter each year, and has done so since 2016, embedded from an article on the Shropshire Star’s website. The station is in its finished form with the new platform building. [55]
The view from the station access path, looking to the South and the road bridge at Horsehay and Dawley Station. [My photograph, 20th April 2022]
A view of the road bridge from behind the station building at Horsehay and Dawley Station. [My photograph, 20th April 2022]
The view North from the road bridge with the station building in the foreground and the Telford Steam Railway Yard (the old Goods yard) in the background. [My photograph, 20th April 2022]
These two pictures are a ‘then & now’ study. They are both taken looking West across the road bridge across the W&SJR at Horsehay. The first picture shows the old works which were Adamson Alliance Works before becoming home to AB Cranes. The second is after the demolition of the main factory buildings. These two pictures were shared on the Telford Memories Facebook Group by Andy Rose on 21st December 2021. [52]

References

  1. https://en.m.wikipedia.org/wiki/Wellington_and_Severn_Junction_Railway, a ceased on 26th June 2022.
  2. Adrian Knowles; The Wellington, Much Wenlock and Craven Arms Railway; Lightmoor Press, Lydney, Gloucestershire, 2022.
  3. https://vlex.co.uk/vid/wellington-and-severn-junction-808032237, accessed on 26th June 2022.
  4. https://hyperleap.com/topic/Wellington_and_Severn_Junction_Railway, accessed on 26th June 2022.
  5. https://maps.nls.uk/view/101594296, accessed on 29th June 2022.
  6. https://maps.nls.uk/geo/explore/#zoom=17&lat=52.70121&lon=-2.51629&layers=168&b=1, accessed on 30th June 2022.
  7. https://maps.nls.uk/geo/explore/#zoom=17&lat=52.70121&lon=-2.51629&layers=6&b=1, accessed on 30th June 2022.
  8. https://maps.nls.uk/geo/explore/#zoom=17&lat=52.70036&lon=-2.50296&layers=168&b=1, accessed on 30th June 2022.
  9. https://maps.nls.uk/view/101594458, accessed on 30th June 2022.
  10. https://maps.nls.uk/view/101594482, accessed on 30th June 2022.
  11. https://maps.nls.uk/geo/explore/#zoom=18&lat=52.69612&lon=-2.48378&layers=168&b=1, accessed on 30th June 2022.
  12. https://www.geograph.org.uk/photo/804810, accessed on 30th June 2022.
  13. https://en.m.wikipedia.org/wiki/Wellington_railway_station_(Shropshire), accessed on 30th June 2022.
  14. https://www.shropshirestar.com/news/features/2020/06/01/new-queens-stay-in-deepest-south-shropshire, accessed on 30th June 2022.
  15. https://maps.nls.uk/geo/explore/#zoom=16.560351011060174&lat=52.64292&lon=-2.48610&layers=168&b=1, accessed on 1st July 2022.
  16. https://www.wikiwand.com/en/Green_Bank_Halt_railway_station, accessed on 1st July 2022.
  17. https://www.wikiwand.com/en/Ketley_Town_Halt_railway_station, accessed on 1st July 2022.
  18. https://en.m.wikipedia.org/wiki/New_Dale_Halt_railway_station, accessed on 1st July 2022.
  19. https://en.m.wikipedia.org/wiki/Lawley_Bank_railway_station, accessed on 1st July 2022.
  20. https://www.facebook.com/groups/674238619260811/permalink/5358295114188448, accessed on 1st July 2022.
  21. https://m.facebook.com/groups/674238619260811/permalink/2905700199447964, accessed on 1st July 2022.
  22. https://m.facebook.com/groups/674238619260811/permalink/6120237234660895, accessed on 2nd July 2022.
  23. https://m.facebook.com/groups/674238619260811/permalink/1658359617515368, accessed on 2nd July 2022.
  24. https://m.facebook.com/groups/674238619260811/permalink/846348998716438, accessed on 2nd July 2022.
  25. https://maps.nls.uk/view/121150310, accessed on 2nd July 2022.
  26. https://m.facebook.com/groups/674238619260811/permalink/3024958504188799, accessed on 2nd July 2022.
  27. https://maps.nls.uk/geo/explore/#zoom=16.478660506218784&lat=52.69402&lon=-2.48370&layers=6&b=1, accessed on 2nd July 2022.
  28. https://maps.nls.uk/geo/explore/#zoom=17&lat=52.69048&lon=-2.48447&layers=168&b=1, accessed on 2nd July 2022.
  29. https://m.facebook.com/groups/674238619260811/permalink/3023720624312587, accessed on 3rd July 2022.
  30. https://maps.nls.uk/geo/explore/#zoom=17&lat=52.67576&lon=-2.48151&layers=168&b=1, accessed on 5th July 2022.
  31. https://maps.nls.uk/geo/explore/#zoom=17&lat=52.67816&lon=-2.48176&layers=168&b=1, accessed on 5th July 2022.
  32. https://maps.nls.uk/geo/explore/#zoom=17&lat=52.67474&lon=-2.48158&layers=168&b=1, accessed on 5th July 2022.
  33. https://www.facebook.com/photo/?fbid=2208000166151460&set=pcb.1648058645323490, accessed on 6th July 2022.
  34. https://www.facebook.com/photo/?fbid=492524151741258&set=pcb.5358300260854600, accessed on 6th July 2022.
  35. https://www.facebook.com/photo/?fbid=431533454506995&set=gm.4918250424859588, accessed on 3rd July 2022.
  36. https://www.facebook.com/photo/?fbid=350926448418731&set=gm.846919291992742, accessed on 6th July 2022.
  37. https://www.facebook.com/photo/?fbid=255763268750682&set=gm.3788716084479700, accessed on 3rd July 2022.
  38. https://maps.nls.uk/geo/explore/#zoom=17&lat=52.67249&lon=-2.48130&layers=168&b=1, accessed on 7th July 2022.
  39. https://www.facebook.com/photo/?fbid=10201031066934406&set=gm.1060353237316012&cft[0]=AZV_yliKbIqlO8QzxgHLhCOGNDzl2q0JXz5sxj3DqnQvD0DDaeoXaxNVv24KosDWAQnnbtiDfyZQc7ou1TSNLtuS1FE-av5agWpNMlHyZuJmcYpbHRH7WTRyA0vgoRPmmhQdfbqbQrowrwZIZcePiFpL&tn=EH-R, accessed on 7th July 2022.
  40. https://www.openrailwaymap.org, accessed on 7th July 2022.
  41. https://www.geograph.org.uk/photo/2055888, accessed on 7th July 2022.
  42. https://www.facebook.com/photo/?fbid=1394210450623388&set=pcb.1533300770021254, accessed on 7th July 2022.
  43. https://www.geograph.org.uk/photo/2055924, accessed on 7th July 2022.
  44. https://youtu.be/TFCnvUg91hc, accessed on 7th July 2022.
  45. https://upload.wikimedia.org/wikipedia/commons/8/85/Horsehay_%26_Dawley_station_on_the_Telford_Steam_Railway.jpg, accessed on 7th July 2022.
  46. https://www.facebook.com/455639901281038/posts/pfbid0zgjgUvUWoXJz5CUVxNaLCT9JU3uaadGceZ6CYWGLwJ3kjQKMthg3XmH9MsyUYKMwl/?app=fbl, accessed on 7th July 2022.
  47. https://www.facebook.com/photo/?fbid=536113694048970&set=gm.5750220041662618, accessed on 7th July 2022.
  48. https://www.facebook.com/photo/?fbid=1394447547266345&set=pcb.1533901016627896, accessed on 7th July 2022.
  49. https://www.facebook.com/photo/?fbid=451145022545838&set=pcb.5046193635398599, accessed on 7th July 2022.
  50. https://www.facebook.com/photo?fbid=792862381707432&set=gm.7989826267701973, accessed on 7th July 2022.
  51. https://www.facebook.com/photo/?fbid=580770409583298&set=gm.6120294991321786, accessed on 7th July 2022.
  52. https://www.facebook.com/photo?fbid=3069342153301946&set=gm.6951096261574984, accessed on 7th July 2022.
  53. https://www.facebook.com/photo/?fbid=1394447307266369&set=pcb.1533901016627896, accessed on 7th July 2022.
  54. https://www.facebook.com/photo/?fbid=253270635666612&set=gm.3775392372478738, accessed on 7th July 2022.
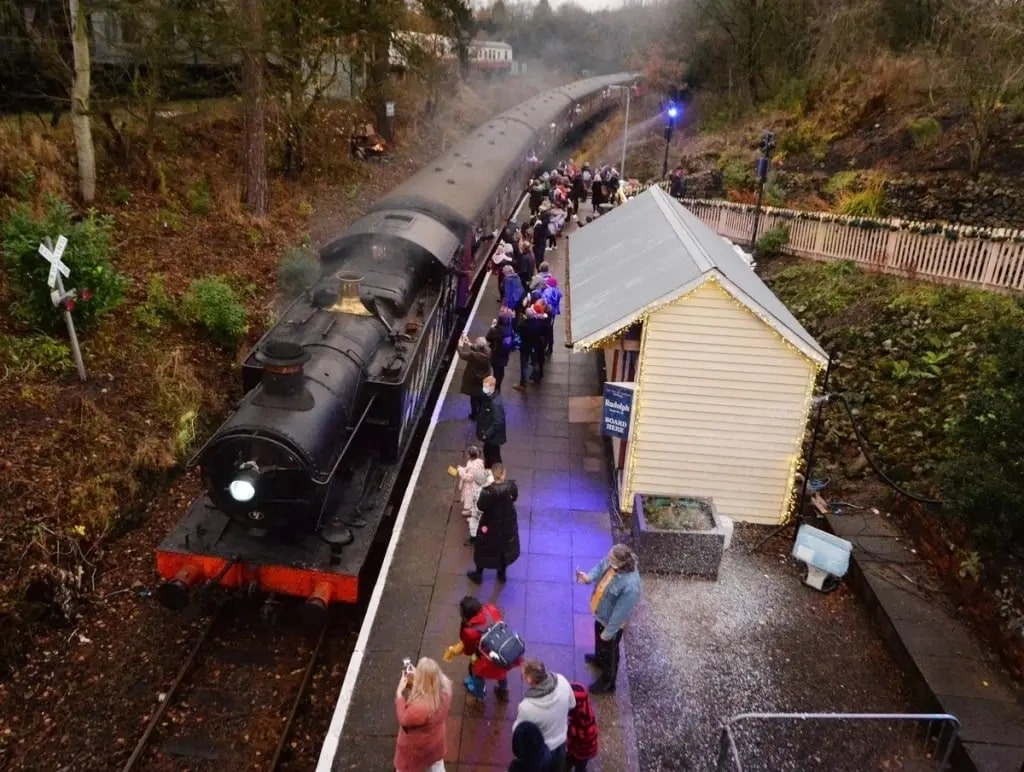
  55. https://www.shropshirestar.com/news/local-hubs/telford/2021/12/16/telford-steam-railways-polar-express-experience-brings-christmas-magic-to-telford, accessed on 7th July 2022.

The Micklehurst Loop – Part 1A

Just after I posted my first article about the Micklehurst Loop, I was sent a series of photographs by an online acquaintance, Tony Jervis. In February 1981, he visited the same length of the Micklehurst Loop as covered in that article. Tony’s pictures show the line before removal of the two viaducts but after the lifting of the length of line retained to serve the Staley and Millbrook Sidings opposite Hartshead Power Station.

Tony also pointed out a further YouTube video from Martin Zero which is embedded towards the end of this addendum. …..

My first article on the Micklehurst Loop can be found using this link:

The Micklehurst Loop – Part 1

At the time of Tony Jervis’ visit on 14th February 1981, only one section of the Spring-Grove Viaduct had been removed – a simply supported span which  took the line over the Spring-Grove Mill. Toney was very happy for me to share these pictures as an addendum to my original article and he very kindly provided some notes to go with a number of the photographs. I have provided some annotated OS Maps to go with the pictures.

I have retained the reference numbers of the photographs used by Tony Jervis. I find the images fascinating. The first three photographs speak for themselves and are centred on Knowl Street Viaduct at the bottom end of the loop immediately adjacent to Stalybridge New Tunnel.

The 25″ OS Map showing the area to the East of Cocker Hill where the Micklehurst Loop broke out of Stalybridge New Tunnel and immediately spanned the River Tame. The locations of three of Tony’s photographs marked. [1]

Photograph 15, 1981, (c) Tony Jervis. [2]

Photograph 632-16, shows the length of the viaduct and is taken from above the Eastern Portal of Stalybridge New Tunnel, 1981, (c) Tony Jervis. [2]

Photograph 632-17,shows the skew span over the Huddersfield Narrow Canal looking towards the Centre of Stalybridge, 1981, (c) Tony Jervis. [2]

The next few pictures were taken in and around the Staley and Millbrook Station. The software I use allows me to add arrows which are vertical or horizontal but not at an angle, so the locations of the pictures shown on the OS Map immediately below are approximate.

25″ OS Map of Staley & Millbrook Station site at the turn of the 20th century. [1]

Photograph 632-18 shows Spring-Grove Mill was spanned by a simply-supported girder bridge which had already been removed when Tony Jervis visited in 1981, (c) Tony Jervis. [2]

Tony comments about the above image: this picture shows “the gap in the viaduct over the roof of Spring Grove Mill.  I assume the gap was spanned by a horzontal girder bridge, which would have been easier to lift away for scrap than demolish a viaduct arch.  In the background, the power station’s coal conveyor and bunkers are still intact, though the station had been closed about 18 months earlier.  The goods shed … was still in the hands of Firth Hauliers.” [2]

The Goods shed and part of the conveyor are still in place. The viaduct, the mill chimney,the section of the mill visible to the extreme left of the image, the coal handling facilites are long-gone in the 21st century.

Photograph 632-19A, 1981, the portion of the mill on this (West) side of the viaduct and the mill chimney, still present in 1981, were demolished along with the viaduct in the later part of the 20th century (c) Tony Jervis. [2]

Tony Jervis, writing in 1981, comments: “the station platforms were up to the right at the top of the grassy bank but would not have been accessible for passengers from this side.  Beyond the third arch was a span across the top of Spring-Grove Mill, which was presumably modified to allow the railway to be built.  I assume the span was some sort of flat girder bridge which has since been craned away.” [2]

Photograph 632-20A, 1981, (c) Tony Jervis. [2]

He continues: “Passengers for the northbound platform would have climbed a covered passage from the booking office and come through this subway (picture 632-20A) whence another short covered ramp or steps would have led up to the platform waiting room. Note the glazed white tiles designed to slightly lighten the subway’s gloom. Since I appear not to have photographed them, I assume that the station platforms had long been swept away.

Photograph 632-21A, 1981, (c) Tony Jervis. [2]

Tony Jervis says: “Picture 632-21A (below) is taken from the middle of Grove Road east of the viaduct.  The red brick wall would have been the end of the booking office; the station master’s house would have been out of shot to the left.  In the distance is the entrance to the subway. There are marks of the platform retaining wall, which is partly of red brick at the bottom and blue engineering brick further up, that suggest a flight of stairs with an intermediate landing led up the southbound platform and that a lower ramp alongside followed the grass bank up to the subway.  One might wonder, thinking of travel a century ago, whether there might have been a need for sack trucks or even a four-wheeled luggage trolley to reach  the platforms.  The white notice forbidding tipping and trespassing is not in the middle of the road but at the edge of the triangular station forecourt; it won’t show up on the posted picture but above the words is the BR “kinky arrow” symbol. Looking at the 25-inch OS plan, it is interesting to note that the formal entrance to nearby Staley Hall was from Millbrook village to the south but from the back of the building a footpath dropped down to Grove Road alongside the the stationmaster’s house, a tradesmen and servants’ entrance maybe?”

Tony has also provided photographs which were taken late in the evening on 14th 1981 of the Goods Yard across the river and canal from Hartshead Power Station. Their locations are again  marked on the 25″ OS Map immediately below ……

25″ OS Map of the Staley & Millbrook Coal Sidings site. The extract does not show the full extent of the sidings which were in place in the mid-20th century..[1]

Photograph No. 632-21B        9-644    14 Feb 1981    SD 976000 S    Former coal drops at Staley & Millbrook Goods Depot alongside Spring Grove Viaduct. The ruined structure on the horizon is Staley Hall. These drops were just to the North of Spring-Grove Viaduct, (c) Tony Jervis, 1981 – [Tony comments: The “B” suffix is because I managed to give two slides the same number when I numbered them back in 1981.] [2]

Tony Jervis comments: “These coal drops are near the end of the two sidings on the 25-inch OS map closest to the running lines.  They are not marked on the map but the road approach for coal merchants’ lorries is clearly shown.  I did wonder if the apparent tramway in Grove Road in one of [the photographs in the previous article] was a way of transferring coal from here round to the mill’s boiler house (below the chimney, one presumes) but I have seen no indication of it on any map.  The viaduct over Spring Grove Mill starts by the rusty car.  The building on the hill is Staley Hall and the “tradesmen’s” footpath I mentioned in a previous description can be seen descending the bank.” [2]

Photograph No. 632-22        9-646    14 Feb 1981    SD 976001 N    Staley & Millbrook Goods Warehouse and the former Hartshead Power Station coal conveyor, (c) Tony Jervis, 1981. [2]

Tony comments: This picture shows “the goods shed when in use by Firth Transport.  The cleaner ballast in the foreground was the southbound running line and the smoother patch to left of that is presumably where the walkway is today.  In the background is the part of the coal conveyor that remains in situ today.” [2]

Photograph No. 632-23        9-645    14 Feb 1981    SD 977002 NW    Hartshead Power Station Sidings and start of coal conveyor, Staley & Millbrook Goods Depot, (c) Tony Jervis, 1981. [2]

Tony comments: “One of the two towers on the edge of the power station coal sidings.  I presume the “stepped” areas fenced in orange surrounded conveyor belts lifting the coal from siding level up to the high-level conveyor.” [2]

Photograph No. 632-24        9-647    14 Feb 1981    SD 977002 WNW    Site of Hartshead Power Station Sidings and coal conveyor, Staley & Millbrook Goods Depot, (c) Tony Jervis, 1981. [2]

Tony comments: “Swinging left about 45 degrees from the previous photo, I’m not sure what purpose this building served.  There is a capstan in front of it, suggesting that locomotives were not allowed to traverse the length of surviving track and wagons thereon were moved by cable.  Could it have been an oil depot of some sort? The tall pipes at the far end could have been used to empty rail tank cars. Some power stations could burn oil as well as coal; was Hartshead one of them?” [2]

Photograph No. 632-25A      9-648    14 Feb 1981    SD 978002 WSW    Staley & Millbrook Goods Warehouse; Hartshead Power Station beyond, (c) Tony Jervis, 1981 [2]

Tony comments: that it was really too dark by the time this picture was taken, none-the-less  by screwing the contrast control to its maximum a grainy image of the shed and power station  appears reasonably clear but very grainy. [2]

Flicking back and forth between this short article and the latter part of my first article about the Micklehurst Loop (https://rogerfarnworth.com/2021/01/31/the-micklehurst-loop-part-1), will allow a comparison with images of the Staley and Millbrook Station and Goods Depot Sites early in their life and in the 21st century.

To complete this short addendum to my first post here is another video from Martin Zero.

Tony Jervis comments: [4] “After watching the half-hour video, I read some of the comments by other viewers, some of whom had worked on the site.  The tunnel turned out to be the power station’s engine shed and the steps led down to a conical underground coal hopper from which conveyor belts took the coal onwards or, perhaps, removed fly-ash.” 

Martin also found on the surface a length of surviving rail track with a lump of iron between the rails that might have been a “mule” or “beetle” for moving wagons slowly past an unloading point.  It was mentioned by some people that there had also been an “oil conveyor” — surely a pipeline? — leading from the sidings owards the power station. That makes me wonder if my postulation that the low building in my “S & M Goods 4” posting (slide 632-24) may have been a tank wagon unloading station was in fact correct.

Martin did also show a circular object buried in the ground nearby which could perhaps have been the base of the capstan that appears in my photo.  But the area is nowadays so afforested that it was impossible to work out accurately how the various items and buildings he found related to one another.”


References

  1. https://maps.nls.uk, accessed on 2nd February 2021.
  2. Photographs taken by an acquaintance on the “bygoneLinesUK@groups.io” group, online, Tony Jervis. They are reproduced here with his kind permission.
  3. https://youtu.be/IL6yY5UFTPI, accessed on 6th February 2021.
  4. From an email dated 6th February 2021.

The Micklehurst Loop – Part 1

I am indebted to Alan Young for a number of the images in this and the following articles about the Micklehurst Loop. This is his drawing of the Loop which appears at the head of his article about the Loop on the ‘Disused Stations‘ website. It is used with his kind permission, (c) Alan Young. [7]

During January 2021, my wife and I walked the majority of the length of the Micklehurst Loop from Stalybridge to Diggle. This was the goods relieving line for the main Stalybridge to Huddersfield railway line. It had been hoped to alleviate congestion by making the mainline into a 4-track railway but the geography mitigated against this and a route on the other side of the Tame Valley was chosen instead.

The maps used in this sequence of articles are predominantly 25″ OS Maps from 1896 through to 1922 and have been sourced from the National Library of Scotland. [1] There are a number of websites which focus on the Loop which are excellent. The sites concerned are noted immediately below and the relevant link can be found in the references section of this page or by clicking on the highlighted text here:

  1. The most detailed treatment of the line and its stations can be found on the Disused Stations – Site Records website. The particular pages on that site which cover the Loop were provided by Alan Young. One page covers the route and pages covering each of the stations can be accessed from that page. [7]
  2. Particularly good for old photographs of the Loop is the Table 38 webpage about the railway. [12]
  3. 28DL Urban Exploration has pages about Stalybridge New Tunnel under Cocker Hill [19] and about Hartshead Power Station. [20]

Part 1 – Stalybridge to Staley & Millbrook Station and Goods Yard

This first map extract shows the Western end of the Micklehurst Loop. It left the mainline at Stalybridge Station which can be seen on the left side of the extract. Both the mainline and the loop entered tunnels under Stamford Street, Stalybridge. [1]This modern satellite image covers approximately the same area of Stalybridge as the map extract above. The route of the former Micklehurst Loop is highlighted by the red line.Looking west towards Stalybridge Station circa 1960 from Stamford Street BR standard Class 5 No.73162 takes the Micklehurst Loop as it pulls away from Stalybridge Station with a Huddersfield-bound freight and approaches Stalybridge New Tunnel. Photo by Peter Sunderland courtesy of Alan Young. [7]

The Western portal of Stalybridge New Tunnel sits just to the East of the Bridge that carries Stamford Street over the route of the Loop. It is difficult to photograph and access is not easy. While search for images of the line I came across a video on YouTube:

This video shows the Western end of the tunnel and then covers a walk through the full length of the tunnel and a glance out of the Eastern Portal. [8]

This next map extract shows the Micklehurt Loop emerging from the tunnel under Cocker Hill. The main line is in tunnel further North. Just South of the tunnel mouth Old St. George’s Church can be picked out, an octagonal church building which has now been replaced by St. George’s Church which is off the map extract to the North. Immediately to the East of the tunnel entrance, the Loop crossed the course of the River Tame and the Huddersfield Narrow Canal on a Viaduct.Much has changed in the satellite image above which covers approximately the same area. The canal basin can just be picked out, as can Knowl Street. The course of the River Tame is unchanged. Old St. George’s is long-gone. There is no evidence left of the Viaduct which carried the line.

Old St. George’s Church was located almost directly over the tunnel. It was an unusual church building and over its life was rebuilt twice on essentially the same plan. “The first was built in 1776. It was the first recorded church in Stalybridge and it did fall down shortly after it was built. The next church was demolished around a hundred years later because of structural problems and the last church was demolished in the 1960’s as it was no longer used.” [3]The last incarnation of Old St. George’s Church on Cocker Hill. This coloured monochrome image is held in the archives of Tameside MBC. The Micklehurst Loop can be seen exiting the tunnel below the church to the right and immediately crossing the River Tame on Knowl Street Viaduct. [4]This monochrome image is provided with permission,  courtesy of Alan Young, once again. [7] He comments: “looking north up the River Tame the western end of Knowl Street Viaduct in Stalybridge is seen in this undated view. Having crossed this 16-arch viaduct the Micklehurst Loop promptly plunged into Stalybridge New Tunnel through Cocker Hill (left). This section of line ceased to handle traffic in 1972, when coal movements to Hartshead Power Station (near Staley & Millbrook) ceased, and the line was taken out of use in July 1976, but it was not until 1991 that the viaduct was demolished.” [7]

The Eastern Portal of the tunnel, which was directly below the church can still be reached with a little careful clambering. The image below has a Creative Commons Licence. (CC BY-SA 2.0).The East Portal of Stalybridge New Tunnel which is directly below the site of Old St. George’s Church © Copyright Tom Hindley and licensed for reuse under a Creative Commons Licence. (CC BY-SA 2.0). [5]

Knowl Street Viaduct carried the Loop over the River Tame, Knowl Street and the Huddersfield Narrow Canal and a series of arches in between. There were 16 arches in all.This photograph taken from the East alongside Knowl Street Viaduct is included with permission, courtesy of Alan Young. [7] Alan comments: “The Micklehurst Loop diverged from the original Huddersfield-Manchester line a short distance east of Stalybridge station, entered Stalybridge New Tunnel (about 300yd in length) then promptly crossed the broad valley of the River Tame on Bridge No.3 (also known as Knowl Street Viaduct). This impressive curving viaduct, in the blue engineering brick used by the LNWR on the Loop’s major structures, was 330yd in length with 16 arches. In addition to crossing the River Tame, the viaduct also strode across Huddersfield Narrow Canal and three roads. In this undated westward view, the viaduct and Stalybridge New Tunnel through Cocker Hill are shown. Coal trains that served Hartshead Power Station ceased to run over the viaduct in 1972, but it was not until July 1976 that the line was officially taken out of use. Fifteen years elapsed before the viaduct was demolished in 1991.” [7]A further image used with permission, courtesy of Alan Young. [7]  Alan comments: “Looking north-east from a point close to the eastern portal of Stalybridge New Tunnel. The Knowl Street Viaduct, 330yd in length and with 16 arches, is seen crossing the River Tame then curving away towards the next station of Staley & Millbrook. The local passenger service on the Micklehurst Loop, on which this viaduct was located, ceased in 1917, but occasional passenger trains and many freight workings continued into the 1960s; coal traffic continued to pass over the viaduct until 1972 en route to Hartshead Power station near Staley & Millbrook station and the line was officially taken out of use in 1976. Nature is taking over the former trackbed as seen on this undated photograph. The viaduct was demolished in 1991.” [7]A modern view of Knowl Street taken from Google Streetview. Knowl Street Viaduct crossed Knowl Street at this location. The spandrel walls on the North side of the Viadct passed very close to the gable end of the terraced building to the East of Knowl Street, the righthand side in this view.

After crossing the Huddersfield Narrow Canal the Loop line regained the embankment shown on the next OS Map extract below. Just to the North of the point where the viaduct crossed the canal is a stone bridge carrying what is now (in the 21st century) the canal-side walk. That bridge is shown at the centre of the Google Streetview image below and at the bottom left of the OS Map extract. It is named Knowl Street Bridge and carries the number 97. [8]

After crossing the Canal the line was carried on embankment, passing to the West of Brookfield House and running North by Northeast parallel to the Canal with Huddersfield Road a distance away to the South. Across the valley of the River Tame to the West were Riverside Mills.The approximate line of the railway, shown in red, runs parallel to the canal. We parked in a small car park just off the south of this satellite image, as illustrated below. The image shows that the site of the Riverside Mills is now occupied by the premises of Smurfit Kappa, Stalybridge. [9]Stalybridge and the Southwest end of the Micklehurst Loop.

Brookfield House was  “a large detached house built in the early 19th century for James Wilkinson, and shown on the 1850 Stayley Tithe Map. All that remains is the former mid-19th century lodge house at 93, Huddersfield Road, with the entrance to the former drive with stone gate piers on its south side. The grounds of Brookfield House are clearly shown on the 1898 OS Map, and included an oval lake and glasshouses, …. Brookfield House was demolished and the lake filled in between 1910-1933. The grounds are now overgrown with self-set woodland.” [2]This next OS Map extract illustrates, at the the top right, how tightly the river, railway and canal follow each other at times up the Tame Valley. The railway sits above the canal which in turn sits a little above the river. Also evident is the name used on this series of OS Maps for the Loop Line – the “Stalybridge and Saddleworth Loop Line.”

Alan Young explains: “Although described as both the ‘Stalybridge & Saddleworth Loop‘ and ‘Stalybridge & Diggle Loop‘ on Ordnance Survey maps, the line is more commonly known as the ‘Micklehurst Loop’.” [7]

River Meadow Cotton Mills were owned by Henry Bannerman who was a successful farmer in Perthshire, Scotland At the age of 55 in 1808 he “moved with his family to Manchester, determined to get involved in the burgeoning Lancashire cotton industry.” [10]

At one time the company had “four cotton mills in the Manchester area: Brunswick Mill in Ancoats, Old Hall Mill in Dukinfield and the North End Mill and River Meadow Mill, both in Stalybridge.” [10]

In 1929, the Lancashire Cotton Industry was struggling. It had not regained its markets after the First World War. In an attempt to save the industry, the Bank of England set up the ‘Lancashire Cotton Coroporation’. Bannermans’ mills were taken over a few years later. The mills were acquired by Courtaulds in 1964 and all production ceased in 1967.” [10] After closure the four-storey mill which was Grade II Listed “was used by Futura before they moved to Quarry Street and then S. A. Driver warp knitters, dyers , printers and finishers.” [11] As can be seen in the satellite image below, the Mill is now demolished.Souracre and River Meadow Cotton Mill and Souracre in the 21st century .

North of Souracre and visible at the bottom left of this next OS Map extract were Hartshead Calico Print Works East of Printworks Road and close by Heyrod Hall. Also visible on this map extract are Stayley Hall and the first Station on the Micklehurst Loop – Stayley and Millbrook Station.

Hartshead Print Works – is visible just below centre-left on the OS Map extract above. The works was listed in the Stalybridge Directory of 1891 as owned by John L. Kennedy &Co. Ltd, Calico Printers. lt was purchased in 1899 by the Calico Printers Association. [18]

Heyrod Hall – is shown on the top left of the OS Map extract above.

Stayley Hall – is a Grade II* Listed Building which dates back to at least the early 15th century.[14] The first records of the de Stavelegh family as Lords of the Manor of Staley date from the early 13th century. Stayley Hall was their residence. [15]

It came into the possession of the Assheton family through marriage and united the manors of Stayley and Ashton and thence into the family of Sir William Booth of Dunham Massey. In the middle of the 16th century. [15]

Stayley Hall 1795. [21]

In the middle of the 18th Century the Earldom of Warrington became extinct and the Hall, alonng with all the Booth’s estates passed to Harry Grey, 4th Earl of Stamford. Stayley Hall was owned by the Booth family until the death of  Roger Grey, 10th Earl of Stamford in 1976. [15]

Wikipedia concludes its history of the Hall as follows: “In 2004 the Metropolitan Borough Council announced that they had granted permission to a developer to build 16 homes next to Stayley Hall. A condition of the planning consent was that the hall be restored.[3] The developer has converted the hall and outbuildings into houses and apartments, most of which are now occupied.” [15]

Early 25″ OS Map covering the length of the passenger facilities and most of the goods facilities at Staley & Millbrook Station. [1]

Staley and Millbrook Station – Alan Young’s on his webpage about the Station comments as follows: “Staley & Millbrook station stood on a steep slope immediately south of Spring Grove Viaduct.  The two facing platforms were equipped with waiting rooms, most likely of timber construction, with glazed awnings, as is thought to have been the building style at all four of the Loop’s stations. The platforms, too, were most likely of timber construction as that material was used for the platforms at Micklehurst, where they were also on an embankment, and timber would be a much lighter load than masonry for an embankment to support. The stationmaster’s house and adjoining single-storey office range to its west faced Grove Road across a small, triangular forecourt. The station house was constructed of dark red brick with string courses of blue engineering brick and pale stone lintels.” [18]Staley & Millbrook Station building and the Sprong-grove Viaduct take from the East on Grove Road in the early 20th century. The picture shows a clean and relatively well maintained site, very different to what remains in the 21st century, please see the pictures below. [18]Staley and Millbrook Railway Station and Spring-grove Mill. [16]

Staley and Millbrook Station buildings have long-gone as has the Viaduct, the first arch of which spanned Grove Road and looked to be a graceful structure. Also of interest in the monochrome picture of the Station and Viaduct above is what appears at first sight to be evidence of a tramway or industrial railway in the cobbles of Grove Road. I have not as yet been able to find out anything about what this feature actually is. The feature is not marked on the map extract immediately above. Closer examination of the picture above suggests that rather than being part of a short industrial line the cobbles may have been laid to facilitate a particular movement around the Spring-grove Mill.

In the 21st century, this length of Grove Road has been tarmacked – a thin layer of tarmac covers the original sets. The next two pictures were taken on 30th January 2021 on a second visit to the site after walking the route of the Loop.

Taken from East of the route of the Micklehurst Loop, this photograph shows the location of the old station building. It sat facing the road on the left-hand side of the panorama. The Southern abutment of the viaduct sat adjacent to the station building, in the area of trees between the 5-bar field gate and the stone wall towards the right of the picture. The masonry wall is in the location of what were terraced houses between the canal and the railway viaduct. (My photograph, 30th January 2021)Another panorama, this time taken from the canal bridge to the West of the Loop. What is left of Spring-grove Mill can be seen on the left side of the image. Grove Road, heading towards Millbrook is central to the image. The masonry wall is the location of the terraced houses mentioned above. The first trees beyond it mark the line of the viaduct. The station building was sited beyond to the West. (My photograph, 30th January 2021)

Spring-grove Mill – As we have already noted, Spring-grove Mill is shown straddled by the viaduct on the OS Map extract above. When Staley & Millbrook station opened, “there was already some population and industry in the immediate neighbourhood. Spring Grove Cotton Mill faced the station across Grove Road, and map evidence suggests that the railway’s viaduct sliced through the existing mill building. A terrace of three cottages, also pre-dating the railway, stood immediately north of the platforms, and Stayley Hall was about 100yd south of the station. Millbrook village, with three cotton mills, was about ten minutes’ walk uphill east of the station.” [16] [18]The remaining buildings of Spring-grove Mill. The lighter (cream painted) brickwork is the part of the mill shown on the map extracts as being on the East side of the viaduct. The portion of the Mill to the West of the viaduct has been demolished. The red-brick portion of the remaining building would have been under the arches of the viaduct. The Western spandrels of the viaduct arches would have followed a line running from the intersecting kerb-stones in the right-foreground over the redbrick part of the present building. (My own photograph – 30th January 2021)

Spring Grove Mill was a cotton mill from 1818 to 1868 and then was a woollen mill for 100 years, it was the last steam-powered mill in the area. [17] The image of Hartshead Power station below, includes Spring-grove Mill in the bottom right-hand corner. By the time the aerial photograph was taken Grove Road appeared to extend across the Canal and the River Tame towards Heyrod.

Hartshead Power Station was also located North of Souracre to the West of the River Tame. It was a coal-fired station and was served by trains on the Micklehurst Loop up until the 1970s. The picture immediately below was posted by Tameside Council on their Facebook page in 2015.An aerial picture of Hartshead Power Station taken before the Second World War. It was opened by the Stalybridge, Hyde, Mossley and Dukinfield (SHMD) Joint Board in 1926 and the cooling towers were erected in the 1940s. The station closed in 1970 and was demolished in the 1980s. Although the Good Shed visible to the top right of the image still stands. The Micklehurst Loop curves from the bottom right to the top left of the picture. [13]This enlarged extract from the image above show the coal transfer facilities and railway sidings associated with the power station . [13] The resolution of the image is not wonderful but it does highlight the traffic which was brought to the site throughout the middle 50 years of the 20th Century.

OS 1:25,000 Map form the early- to mid-20th century, sourced from the National Library of Scotland – Hartshead Power Station. One of the two cooling towers is not shown in full as it crosses the map join. [14]

The full extent of the Hartshead Power Station site at Souracre can be seen on the adjacent OS Map extract from the middle of the 20th century, which also shows the location of Stayley Hall and the Stayley and Millbrook Station build just North-northwest of Stayley Hall.

Approximately the same area is shown below on a relatively recent extract from the ESRI World Image website which is the satellite mapping used by the National Library of Scotland. [13]

The Good Shed which is considered further below is visible on both the map extract and the satellite image and the extent of the railway sidings on the East side of the Loop line is evident.

ESRI Satellite Image extract showing the current status of the Hartshead Power Station site with the approximate route of the Micklehurst Loop Line shown in red. The Goods Shed is still standing and can be seen just to the right of the red line. Along with the Loop line all of the lines in the sidings have ben lifted. [13]A view from the East looking across the power station site with the Good Shed and coal transshipment facilities in the foreground. the lack of trees compared with the satellite image and all other pictures of the site in the 21st century is striking, © Copyright David Dixon and licensed for reuse under this Creative Commons Licence. [23]

The substantial Goods Shed was built at the same time as the Loop initially with two sidings to its East. These sidings were expanded with the advent of the power station in the early 20th century. The site is now overgrown and is returning to nature. The only exception being the Goods Shed itself. There is an excellent video showing its current condition on ‘Martin Zero’s’ YouTube Channel which is embedded below. My own pictures of the site also follow below.

The Goods shed at Stayley and Millbrook Station presided over a large expanse of sidings which served Hartshead Power Station on the opposite side of the Huddersfield Narrow Canal and the River Tame. [22]Looking South towards the location of the passenger facilities at Staley and Millbrook Station. The Goods shed is on the left (the East side of the Loop line). (My photograph, 18th January 2021).The Goods Shed taken from the same location as the last photograph – a substantial three-storey structure. (My photograph, 18th January 2021).

The next part of this walk following the line of the Micklehurst Loop sets off from this goods shed traveling North.

References

  1. https://maps.nls.uk, accessed on 18th January 2021.
  2. Copley Conservation Area Appraisal and Management Proposals; Tameside MBC, March 2013, p9-10.
  3. https://cockerhill.com/2010/07/06/old-st-georges-church-cocker-hill, accessed on 23rd January 2021.
  4. https://public.tameside.gov.uk/imagearchive/Default.asp & https://cockerhill.com/2010/07/06/old-st-georges-church-cocker-hill, accessed on 23rd January 2021.
  5. https://www.geograph.org.uk/photo/3119673, accessed on 22nd January 2021.
  6. http://nwex.co.uk/showthread.php?t=6918, accessed on 27th January 2021.
  7. http://disused-stations.org.uk/features/micklehurst_loop/index.shtml, accessed on 25th January 2021.
  8. https://canalplan.org.uk/waterway/cjdf & https://canalplan.org.uk/place/1hv4, accessed on 27th January 2021.
  9. https://www.smurfitkappa.com/uk/locations/united-kingdom/smurfit-kappa-stalybridge, accessed on 28th January 2021.
  10. http://cosgb.blogspot.com/2010/12/henry-bannerman-sons-limited.html, accessed on 28th January 2021.
  11. https://en.wikipedia.org/wiki/List_of_mills_in_Tameside#Mills_in_Stalybridge, accessed on 28th January 2021.
  12. http://www.table38.steamrailways.com/rail/Micklehurst/micklehurst.htm, accessed on 24th January 2021.
  13. https://scontent.fman2-1.fna.fbcdn.net/v/t1.0-9/10923473_10152970711638376_5311634515634523408_n.jpg?_nc_cat=102&ccb=2&_nc_sid=9267fe&_nc_ohc=TvOmLmn5KTcAX_Ayq7O&_nc_ht=scontent.fman2-1.fna&oh=2306db45618ba15e6bc27d582f00e643&oe=6037BA9F, accessed on 29th January 2021.
  14. Mike Nevell; Tameside 1066–1700; Tameside Metropolitan Borough and University of Manchester Archaeological Unit. p. 112 & 141, 1991.
  15. https://en.wikipedia.org/wiki/Stayley_Hall, accessed on 29th January 2021.
  16. https://m.facebook.com/story.php?story_fbid=784689891661955&id=121283594669258, accessed on 29th January 2021.
  17. https://www.google.com/url?sa=t&source=web&rct=j&url=https://www.tameside.gov.uk/countryside/walksandtrails/lowerbrushes.pdf&ved=2ahUKEwjXrum3xMHuAhVMTBUIHYmQAeQ4ChAWMAJ6BAgSEAI&usg=AOvVaw2DR5SZ9N3AM7__DD-ZN0Bv, accessed on 29th January 2021.
  18. https://gracesguide.co.uk/John_L._Kennedy_and_Co, accessed on 29th January 2021.
  19. https://www.28dayslater.co.uk/threads/stalybridge-new-tunnel-stalybridge-july-2012.72653, accessed on 26th January 2021.
  20. https://www.28dayslater.co.uk/threads/hartshead-power-station-heyrod-and-millbrook-2015-2019.119500, accessed on 29th January 2021.
  21. https://www.ebay.co.uk/itm/1795-Antique-Print-Stayley-Hall-Stalybridge-Greater-Manchester-after-E-Dayes-/292642997239, accessed on 29th January 2021.
  22. https://youtu.be/VdmWydx4VBw & https://www.facebook.com/martinZer0/?comment_id=Y29tbWVudDoxNTU4MjI2MDIxMDExNzUxXzE1NjA0NDMwMjQxMjMzODQ%3D, accessed on 31st January 2021.
  23. https://www.geograph.org.uk/photo/2204271, accessed on 31st January 2021.