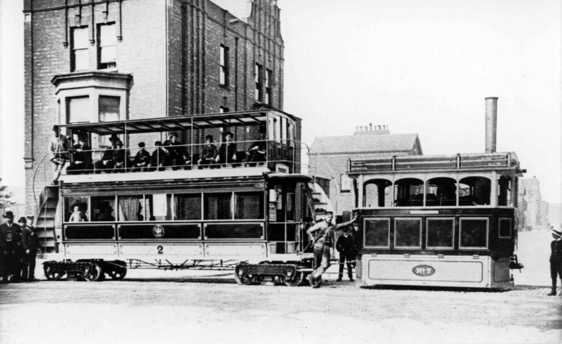
The Barrow-in-Furness Tramways Company operated a steam-powered tram service from 11th July 1885 until electrification in 1904. Using a 4 ft (1.219 m) gauge, the tramway reached Ramsden Dock by 1886 and continued expanding through the electric era to locations such as Bigger Bank. Ultimately, on 5th April 1932 the tramway network was closed in favour of buses. [1]
From 1876 to 1901 the Kitson built over 300 steam tram engines and steam railmotor units, which were developed from a design by W. R.Rowan. [6][7]
The tramway network connected the town centre with areas like Ramsden Dock (1886) and eventually extended to Biggar Bank on Walney Island in 1911. After the network was bought by British Electric Traction, the company embarked on a modernisaton programme and the network saw its first electric service in 1904. [1]
Barrow-in-Furness Corporation took over operation of the service on 1st January 1920 at a cost of £96,250 (close to £5 million in 2026). Technological advancements in the form of petrol and diesel powered buses resulted in the closure of the tramway, with the last service running on 5th April 1932. [1]
The Network in 1899/1890
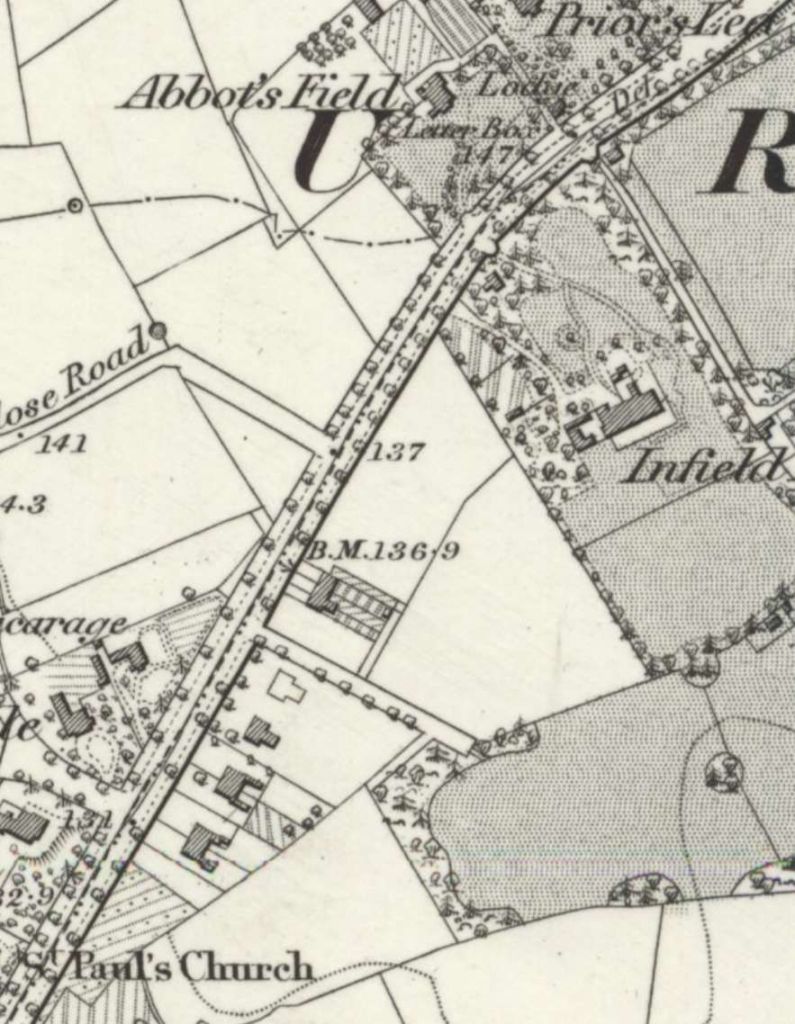
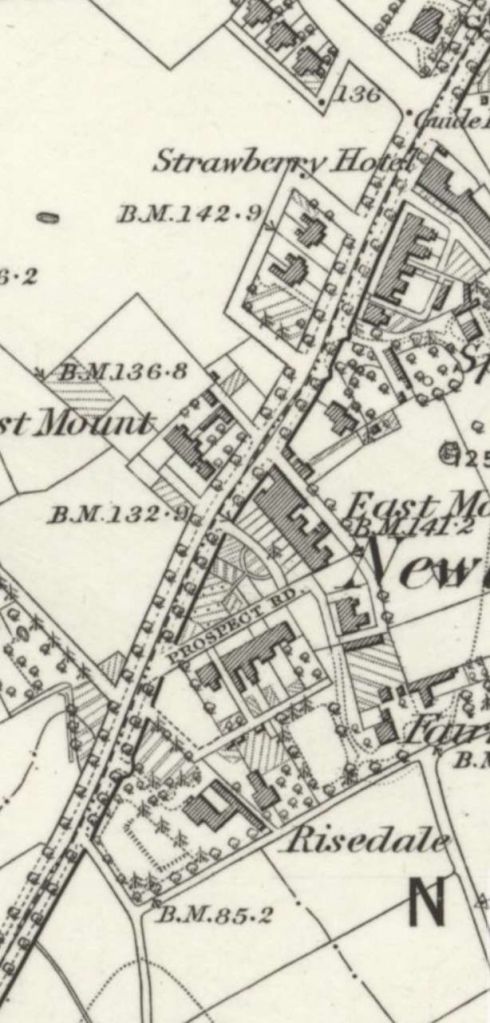
The steam tram network appears on the 1889/1890 6″ Ordnance Survey which was published in 1895. Three element can be identified:
1. Priors Lea to Ramsden Dock Station
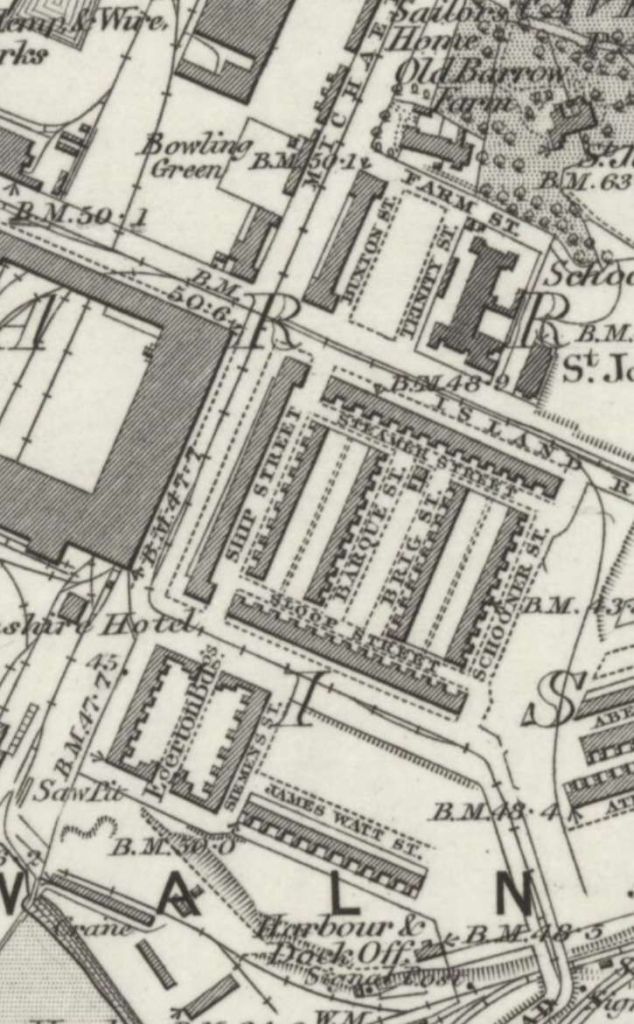
One axis of the steam tramway appears to have run from Priors Lea in the North to Ramsden Dock in the South via Ramsden Square. … The route appears on the next eight extracts from the 6″Ordnance Survey of 1889/1990 which was published in 1895.
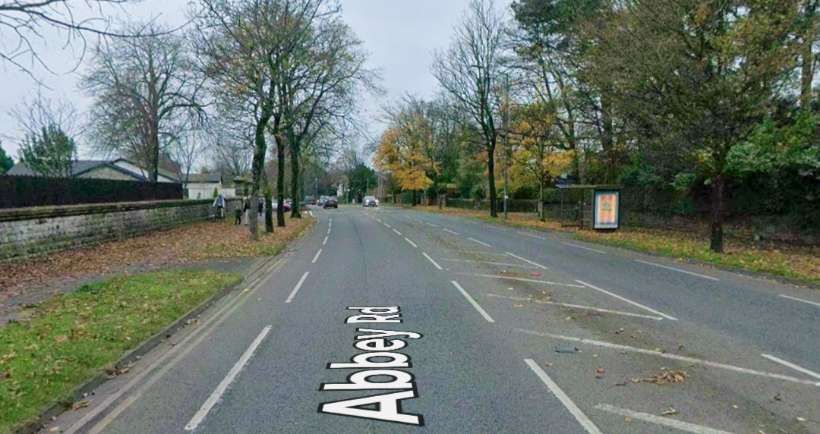
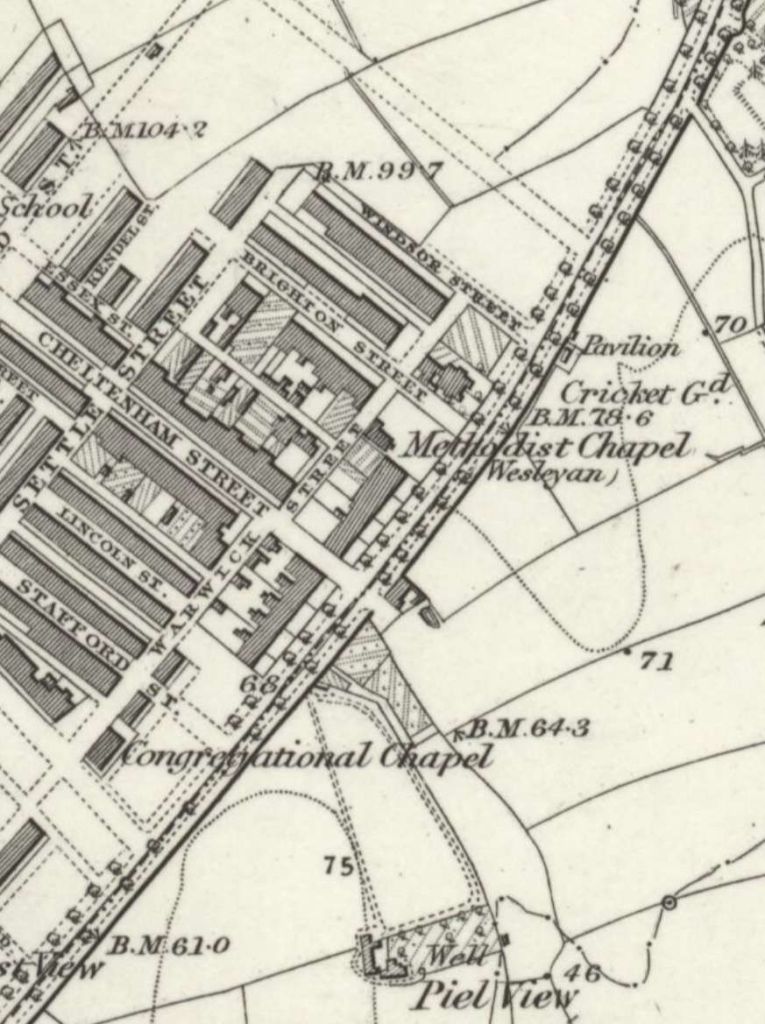
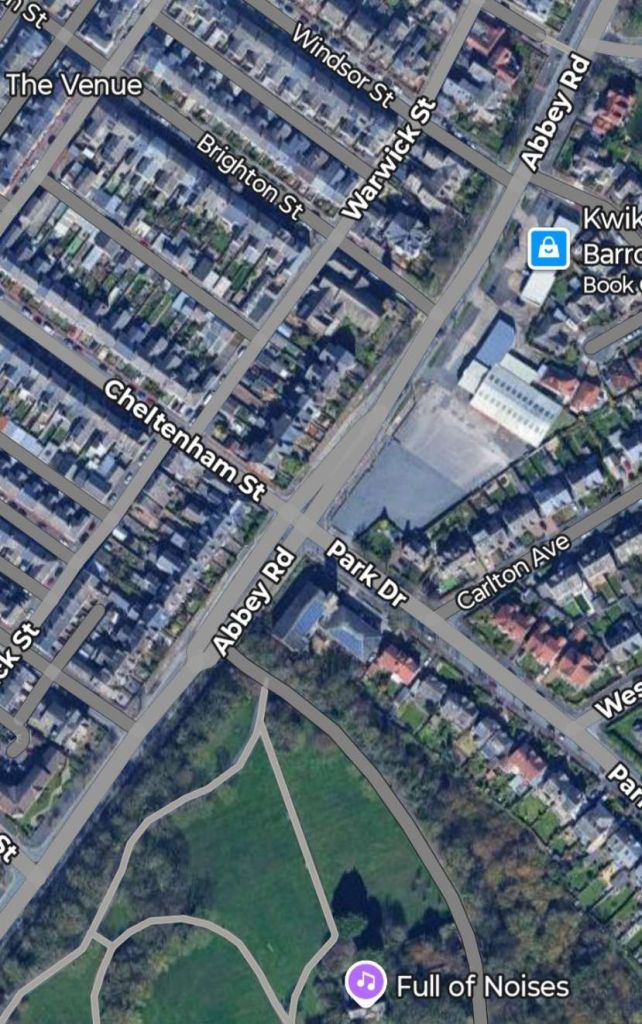
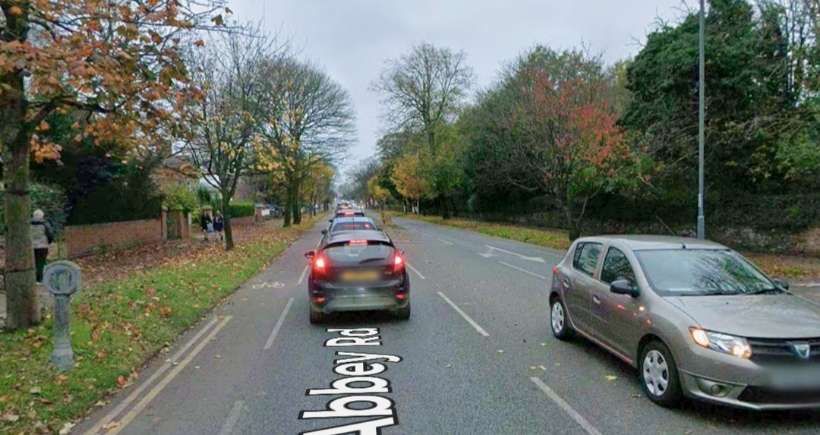
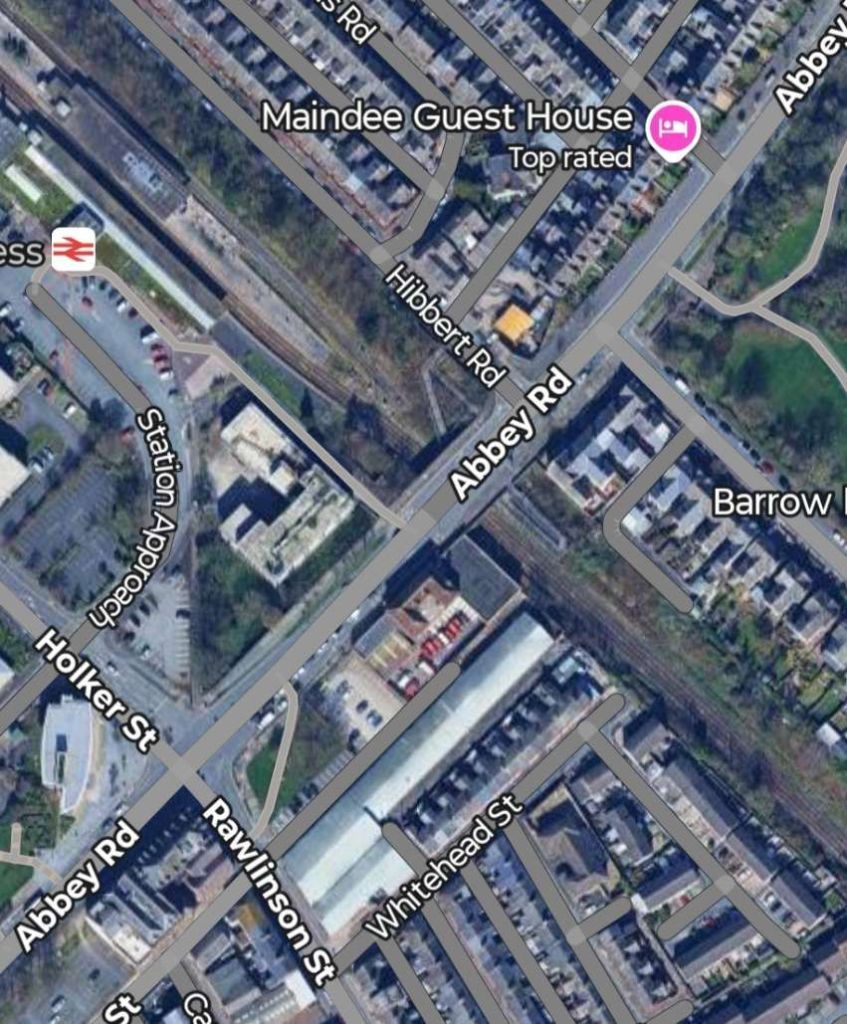
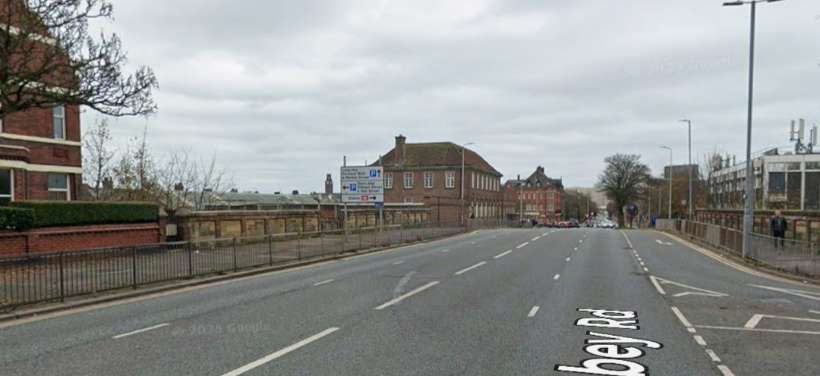
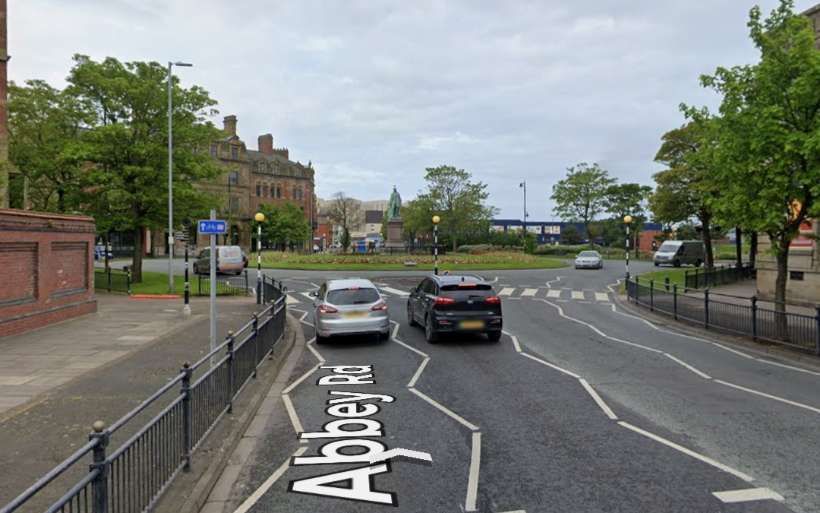
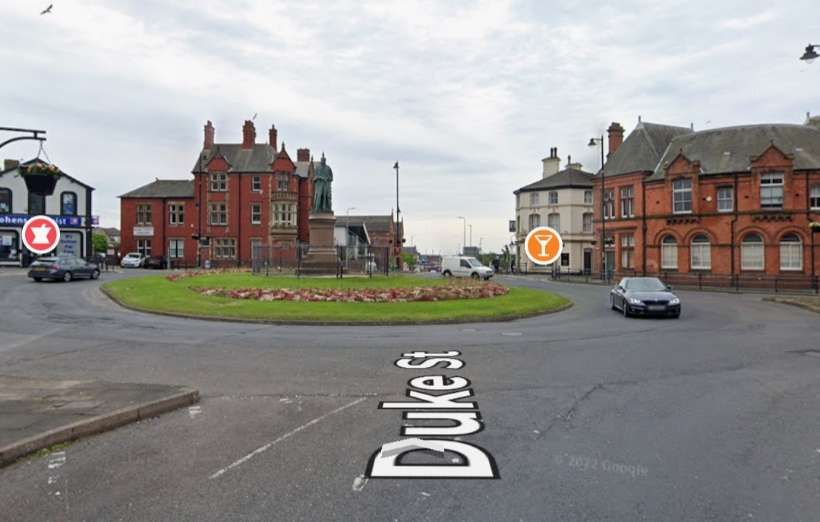
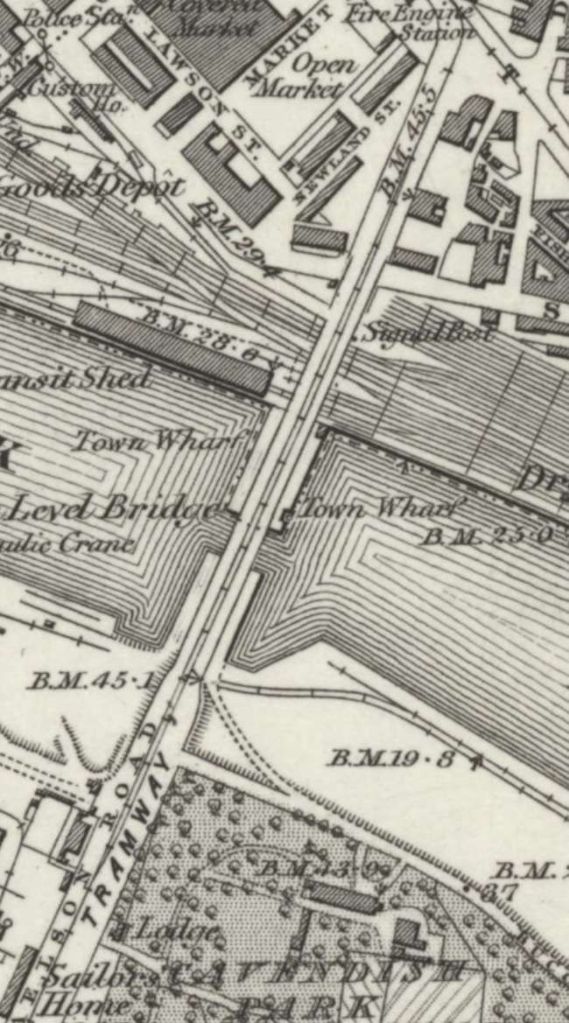
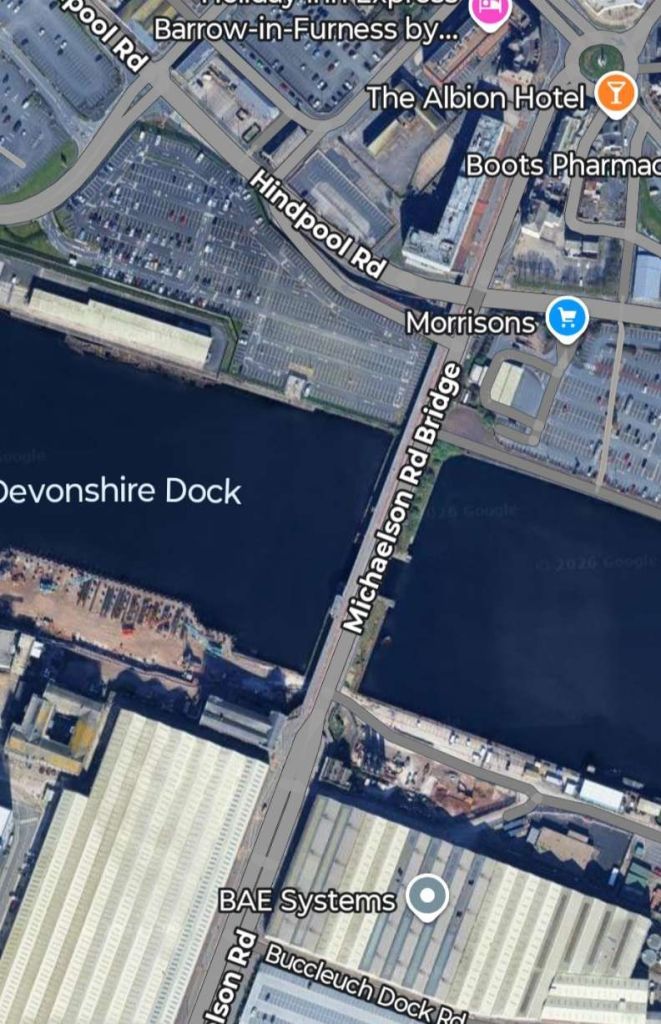
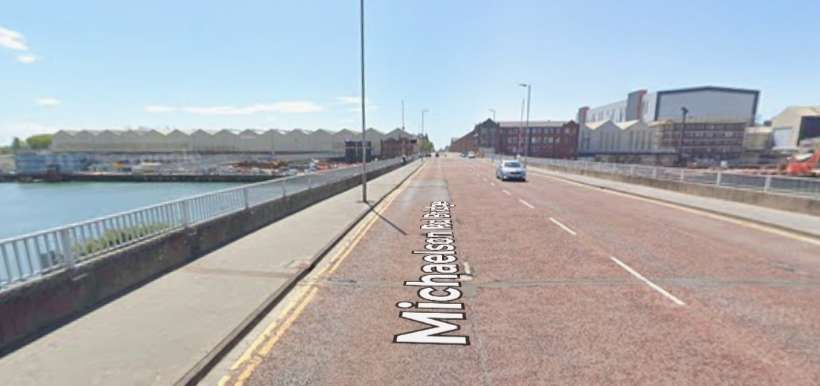
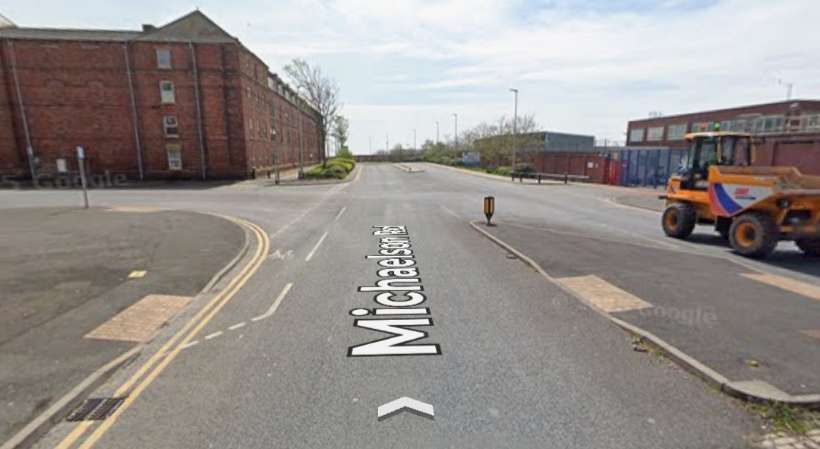
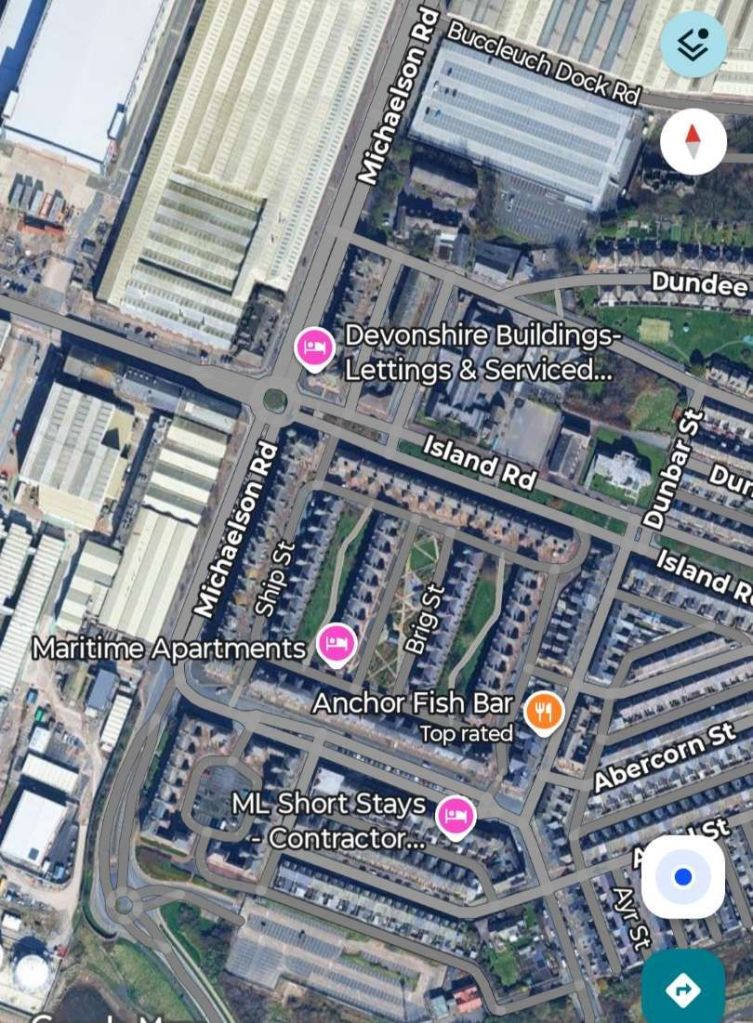
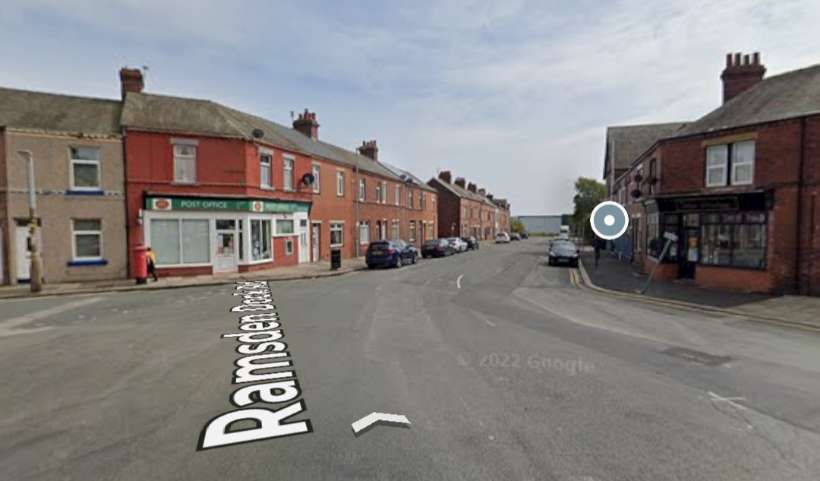
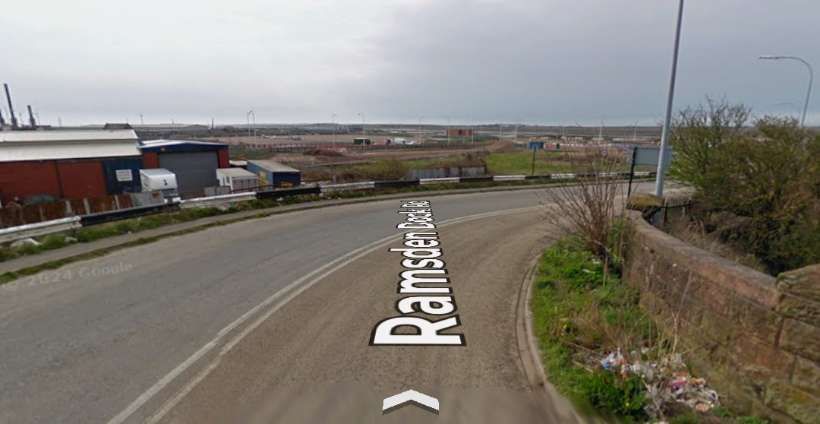
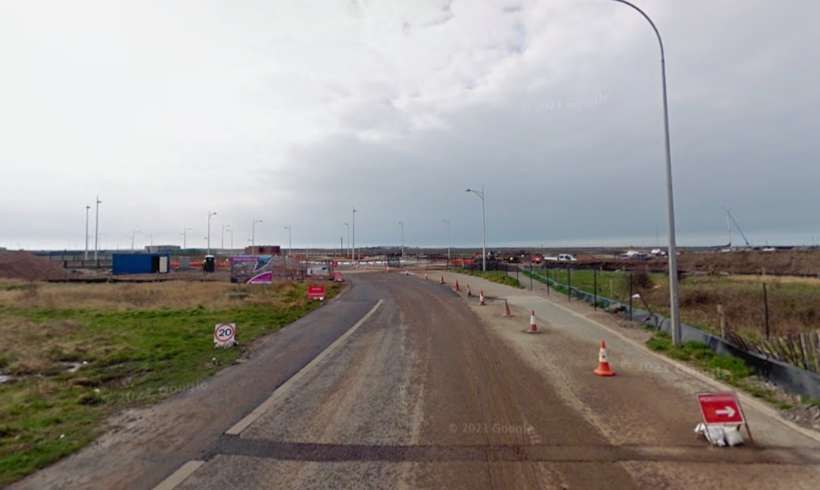
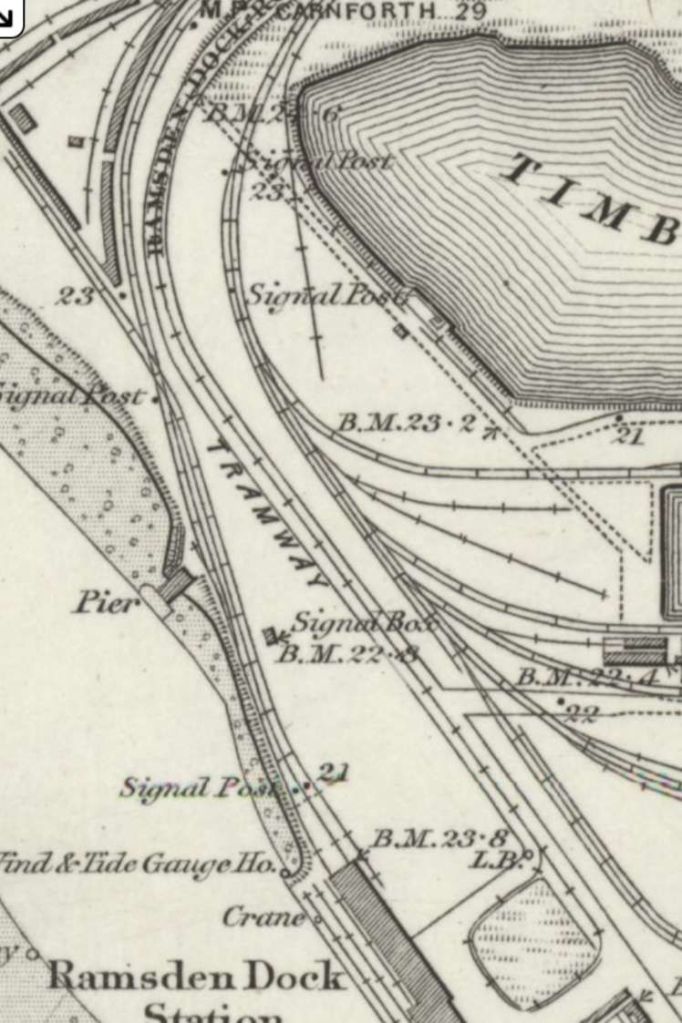
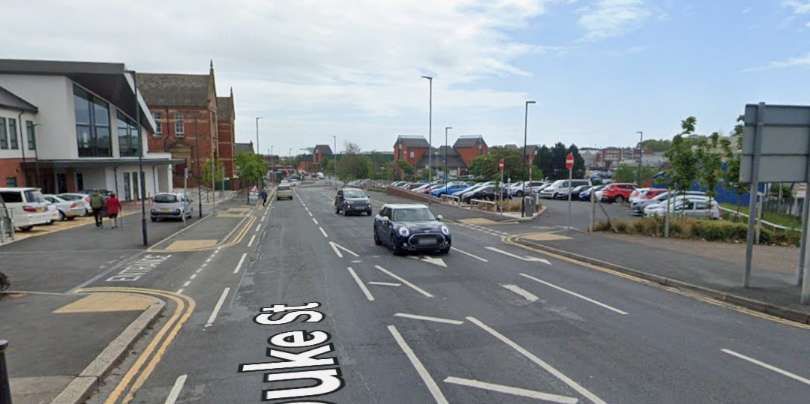
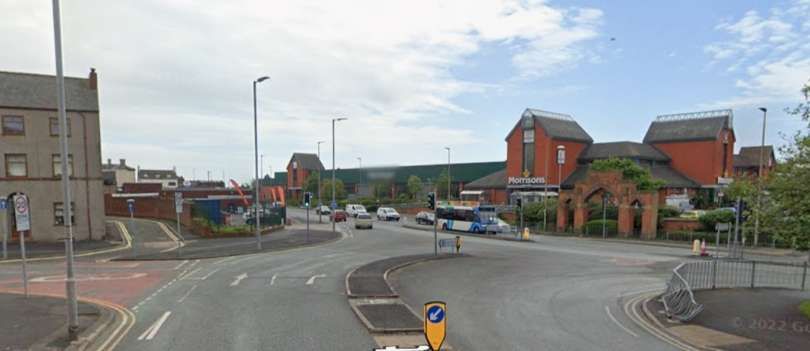
At the Priors Lee terminus, Top-right a tram engine had to run round its carriage. [5]The same length of Abbey Road in the 21st century, as shown above. [Google Maps, February 2026]Looking South on Abbey Road approximately at the location of the old tramway terminus. [Google Streetview, November 2024]Trams ran up and down Abbey Road. [5]The same length of Abbey Road in the 21st century, as shown above. [Google Maps, February 2026]A Methodist Chapel and Congregational Chapel sat to the West of the line. [5]A similar length of Abbey Road. [Google Maps, February 2026]Travelling South down Abbey Road. [Google Streetview, November 2024]The line crossed Abbey Road Bridge, with the Station a short distance away to the Northwest. [5]A similar length of Abbey Road in the 21st century. [Google Maps, February 2026]Looking Southwest along Abbey Road. Ahead is the bridge carrying the road over the railway. [Google Streetview, November 2024]At Ramsden Square the tramway turned Southeast along Duke Street. [5]Abbey Road, Ramsden Square, Duke Street and the very top of Michaelson’s Bridge Road. [Google Streetview, February 2026]The approach to Ramsden Square along Abbey Road. [Google Streetview, May 2022]Having turned left into Duke Street, trams continued in. Southeasterly direction. [Google Streetview, May 2022]A roundabout now sits at the top end of Michaelson Road. Trams would have been confined by the road layout of earlier time and swept round to the right on the near side of the modern roundabout. [Google Streetview, May 2022]It then turned Southwest along Michaelson Bridge Road [5]Michaelson Road Bridge carried the Tramway across the Devonshire & Buccleuch Docks. [Google Maps, February 2026]Looking South along the line of the old tramway across Michaelson Bridge. [Google Streetview, May 2022]Further South down Michaelson Road trams turned to the left into Ramsden Dock Road. [Google Streetview, May 2022]Trams ran along Ramsden Dock Road from its right-angle junction with Michaelson Road. [5]Approximately the same area in 21st century. [Google Maps, February 2026]Trams followed Ramsden Dock Road sweeping round to the South. [Google Streetview, May 2022]A relatively sharp curve to the right followed Ramsden Dock Road after the road had bridged the dock railways. [Google Streetview, May 2022]Ramsden Dock Road has now been closed to traffic. This photograph in 2009 appears to have been taken as the work to close the road was underway. [Google Streetview, April 2009]The steam tram served Ramsden Dock Station at its Southern terminal, where a loop was provided to obviate the need for the steam tram to run past its carriage. [5]The same length of the route of the old tramway as is shown on the above map extract. [Google Maps, February 2026]This final photograph faces South along the line of the old tramway towards the location of Ramsden Dock Station. [Google Streetview, May 2022]
2. A Line to Roose Station
A line left the route to Ramsden Dock Station at the North end of Michaelson Road, continuing Southeast on Duke Street and then along Strand to Cambridge Hall Mechanics Institute where it turned Northeast.
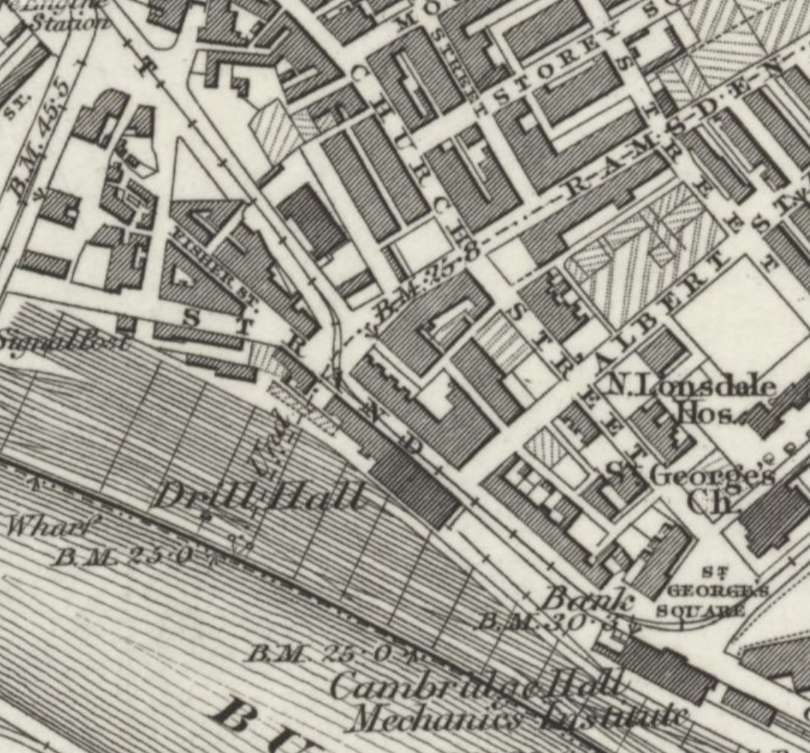
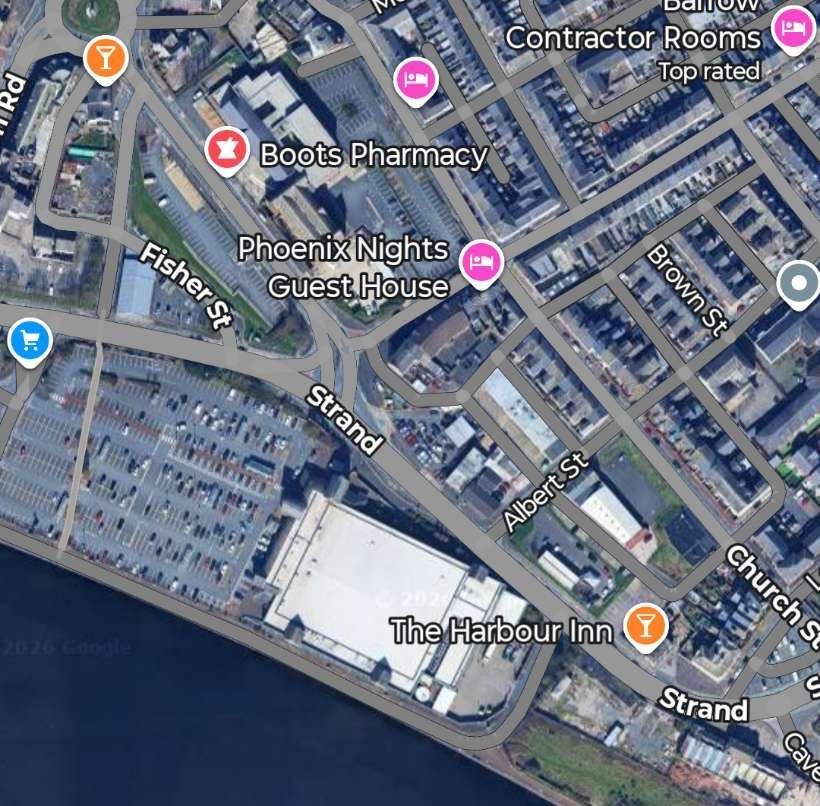
This tramway route ran along Duke Street and Strand to Cambridge Hall Mechanics Institute and the old Strand Station where it turned Northeast at St. George Square. [5]The roads mentioned above still remain – Duke Street, Strand. St. George’s Square still exists but Salthouse Road now runs through it to meet Strand. [Google Maps, February 2026]Duke Street immediately beyond the roundabout. [Google Streetview, May 2022]Duke Street meets Strand, the tramway ran round to the left, almost straight on. [Google Streetview, May 2022]Further along Strand with the old railway station in the distance. [Google Streetview, May 2022]Trams turned from Strand onto Salthouse Road. [Google Streetview, May 2022]
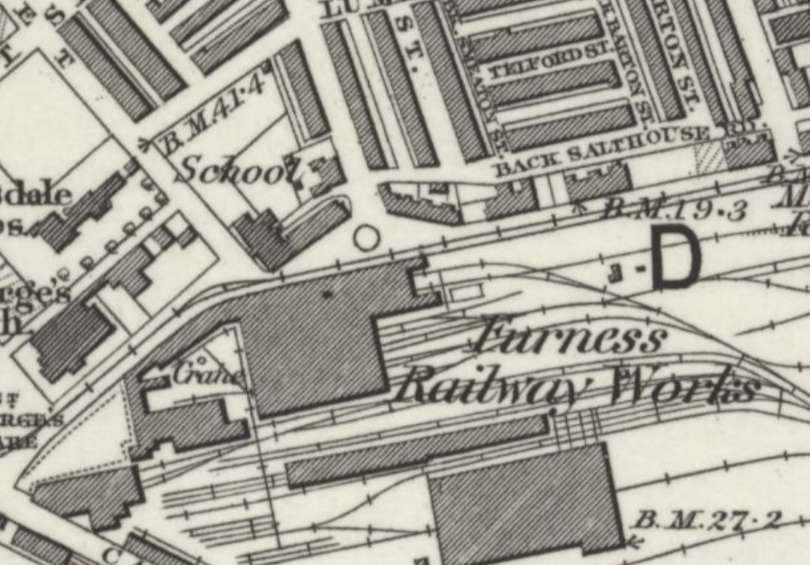
The tramway then ran along Salthouse Road on the North side of the Furness Railway Works.
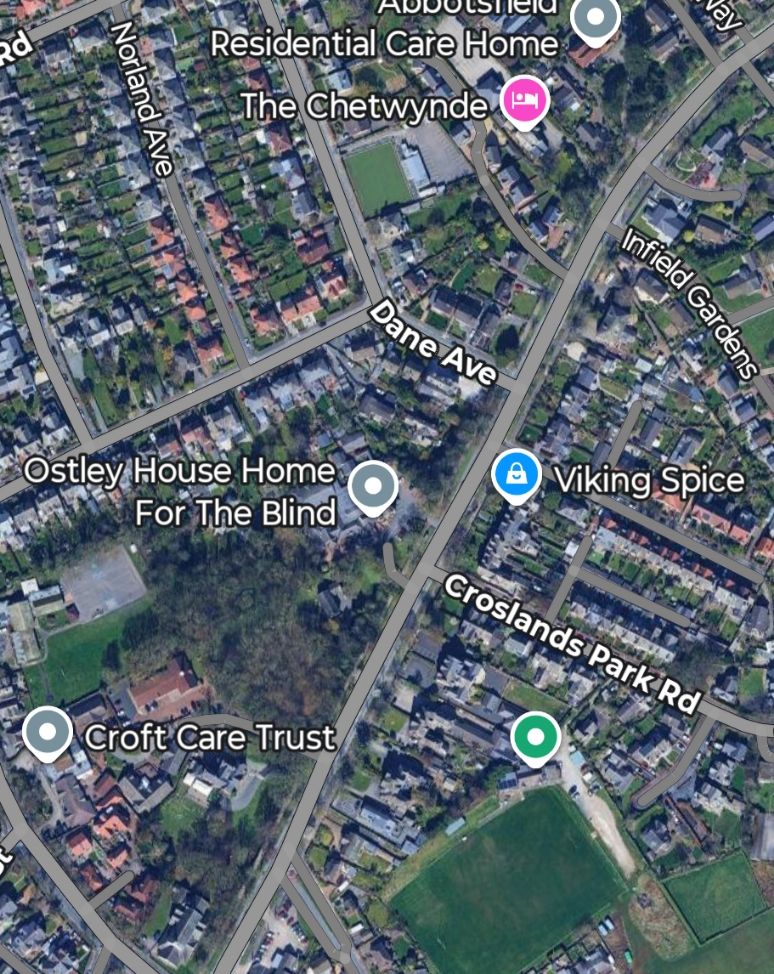
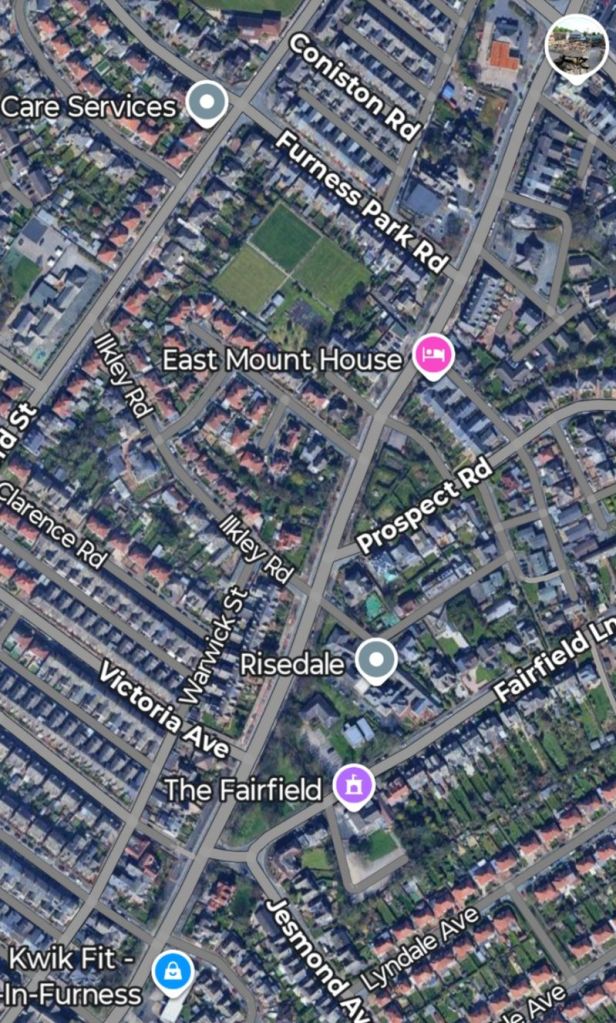
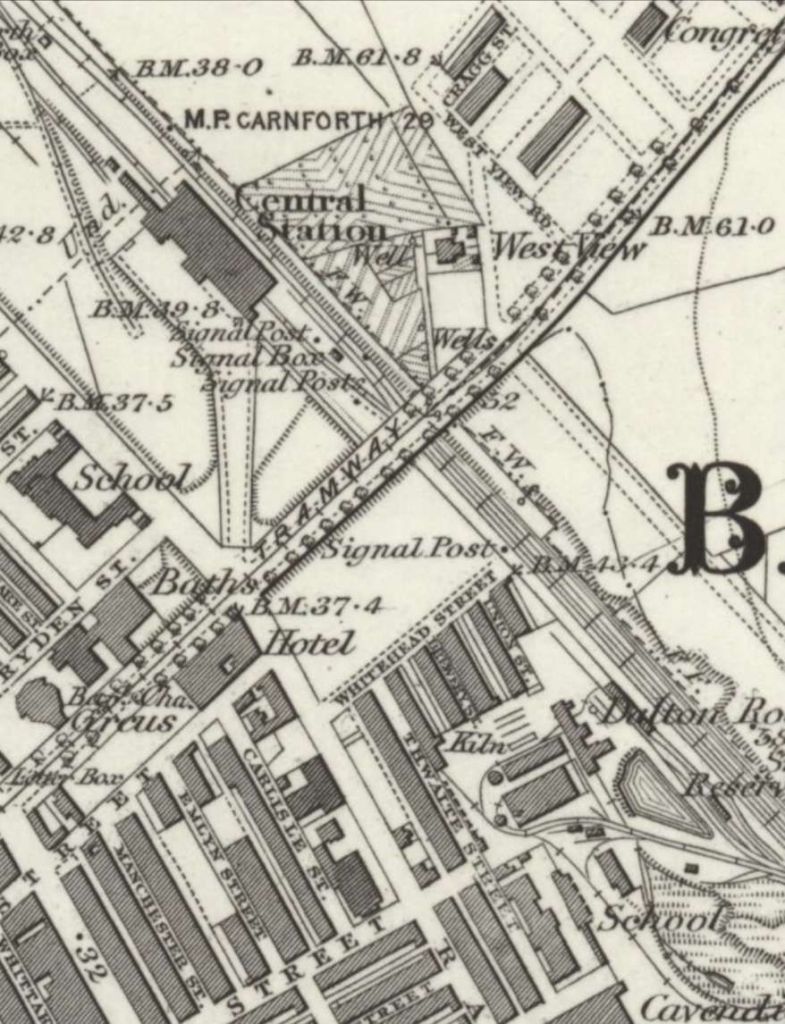
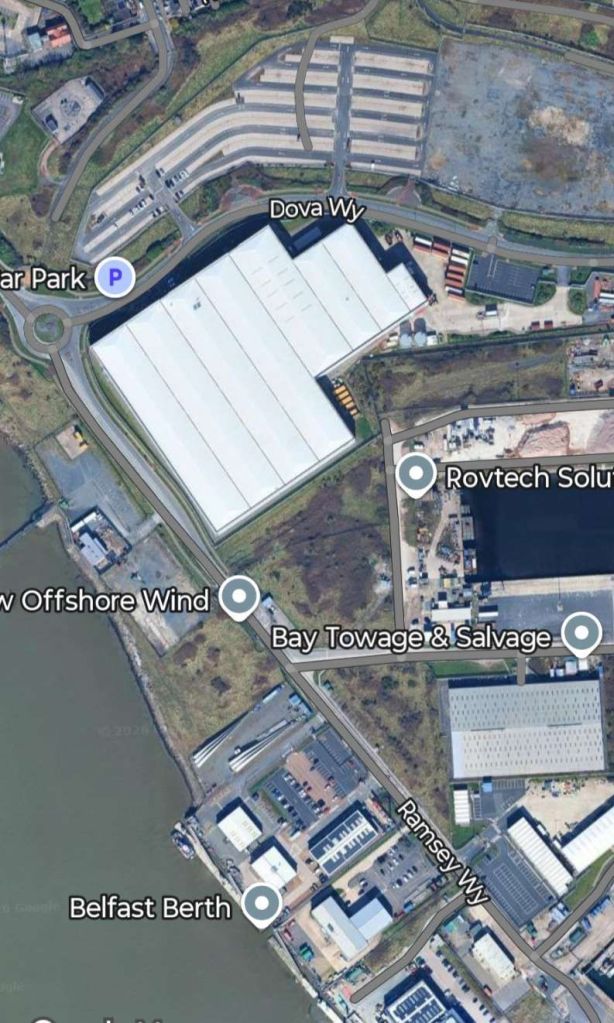
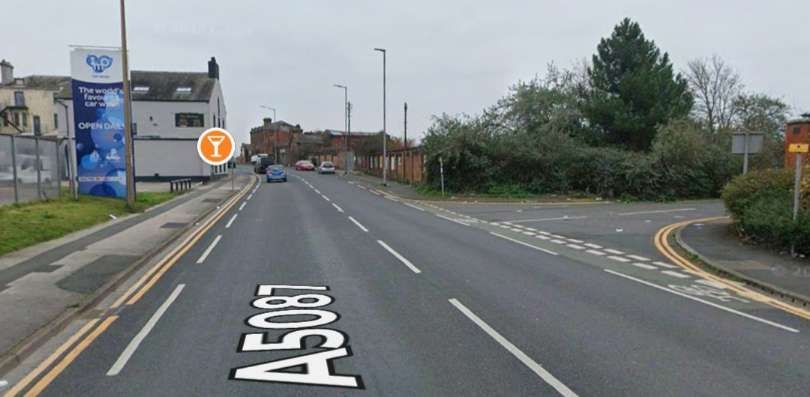
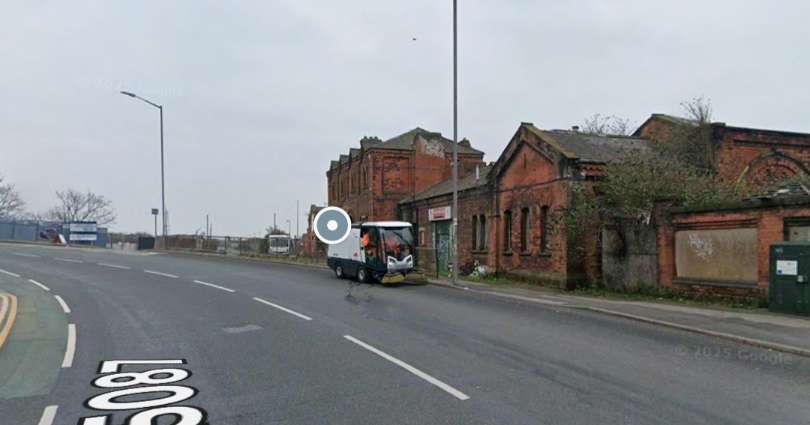
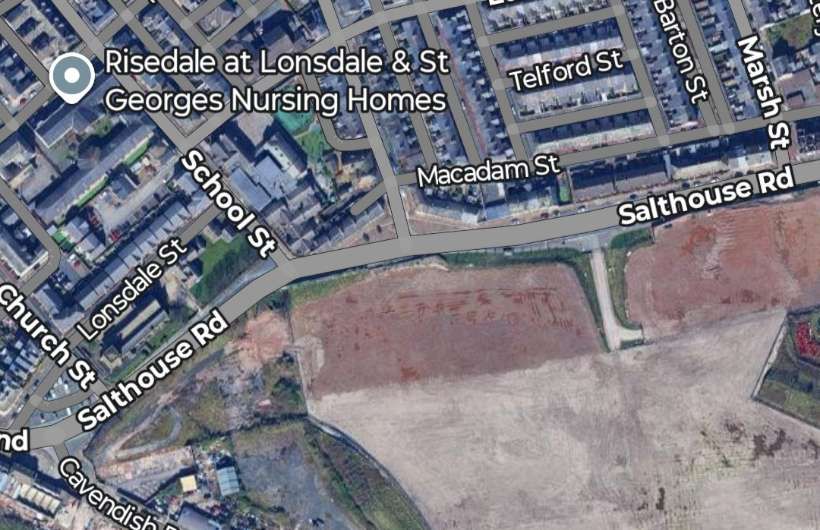
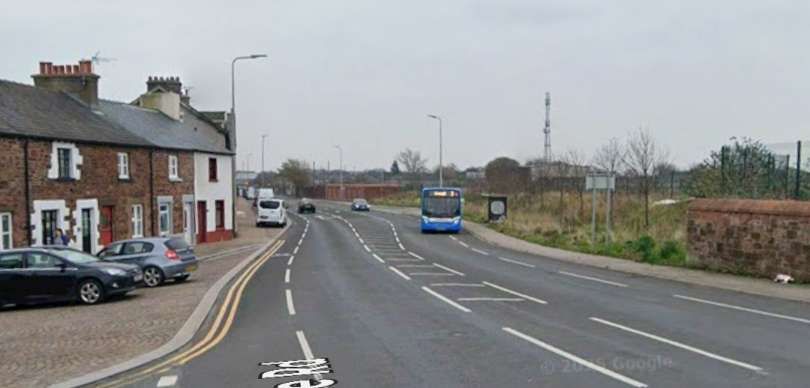
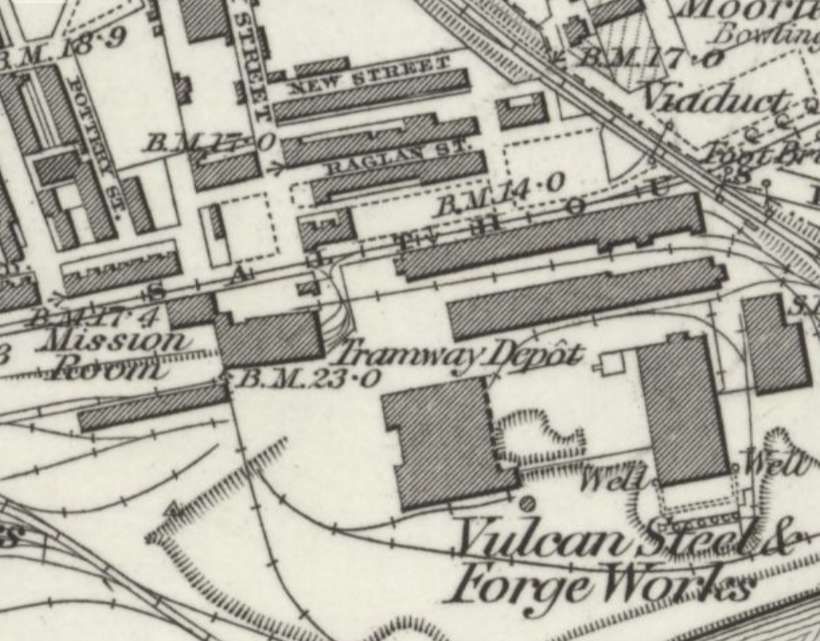
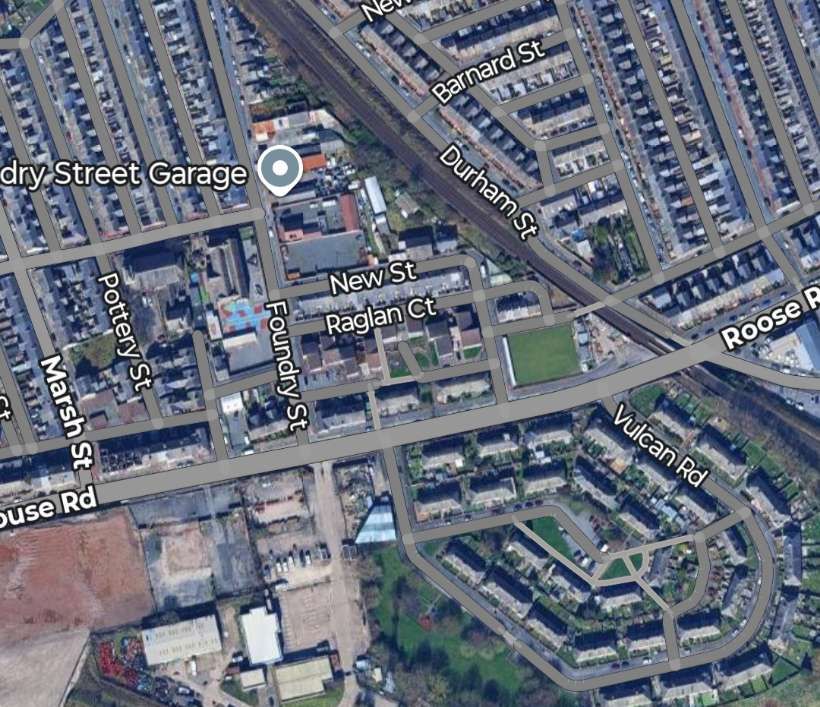
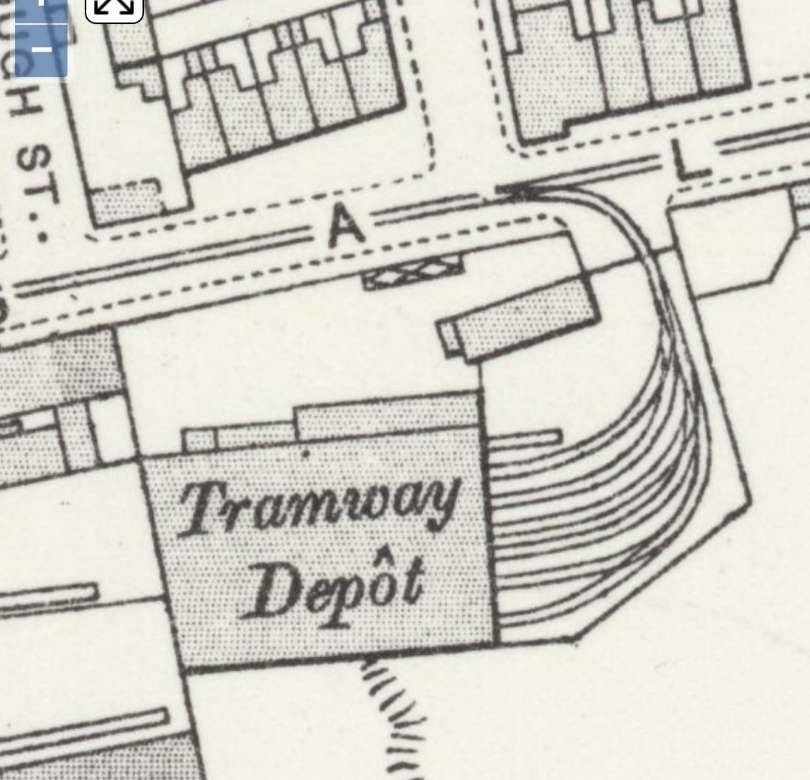
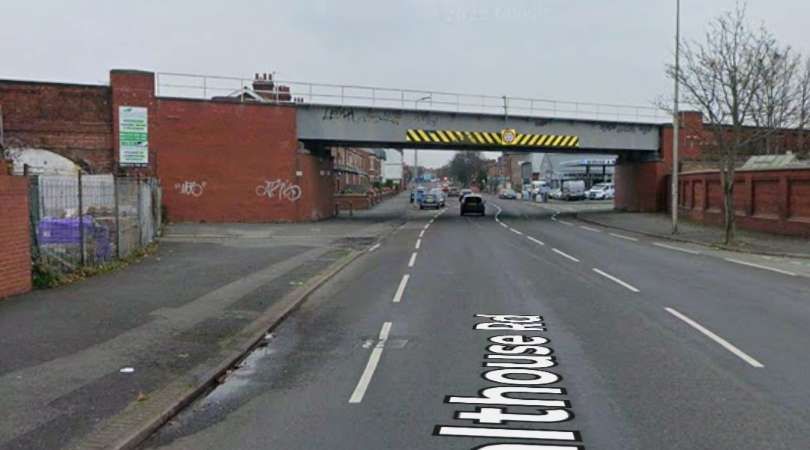
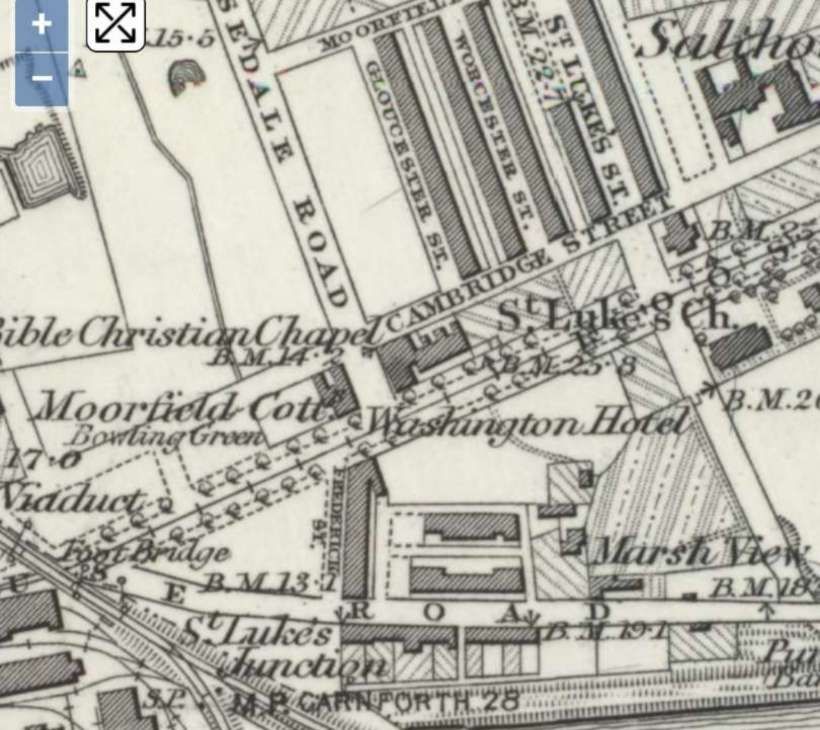
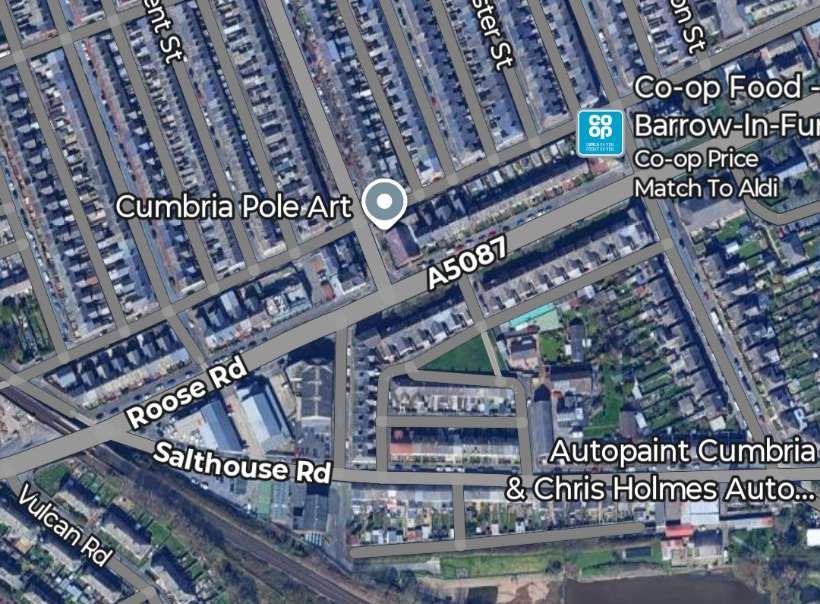
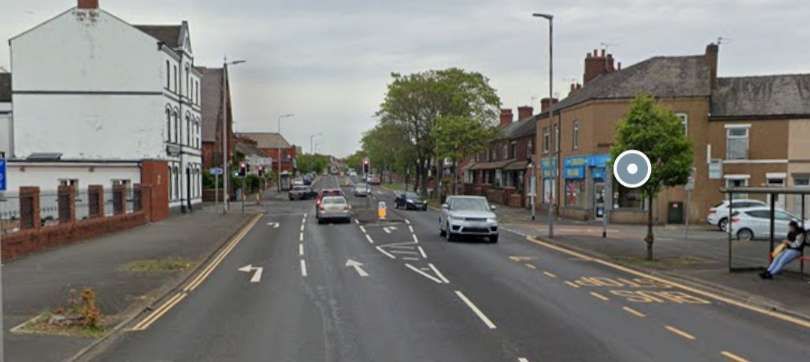
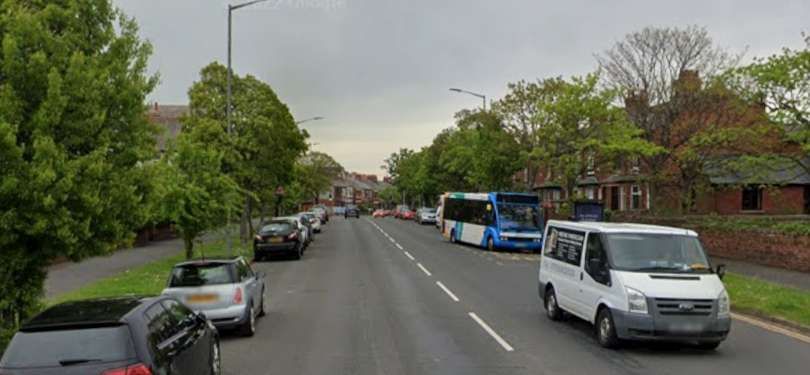
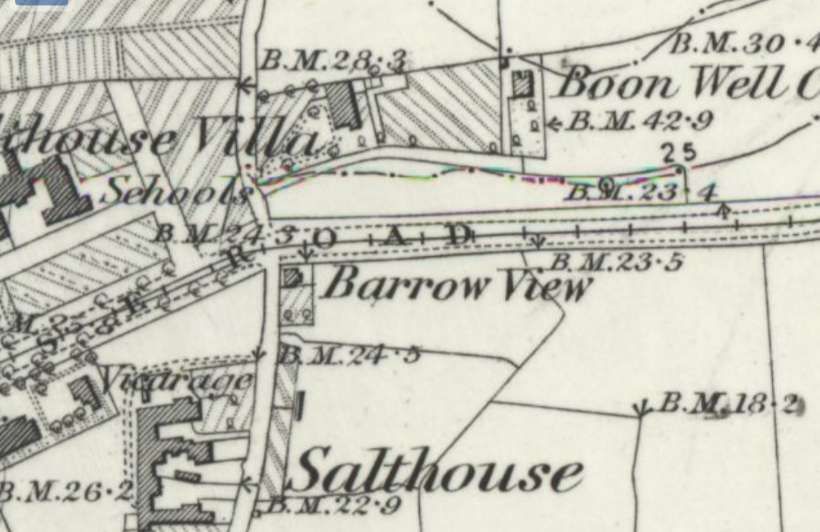
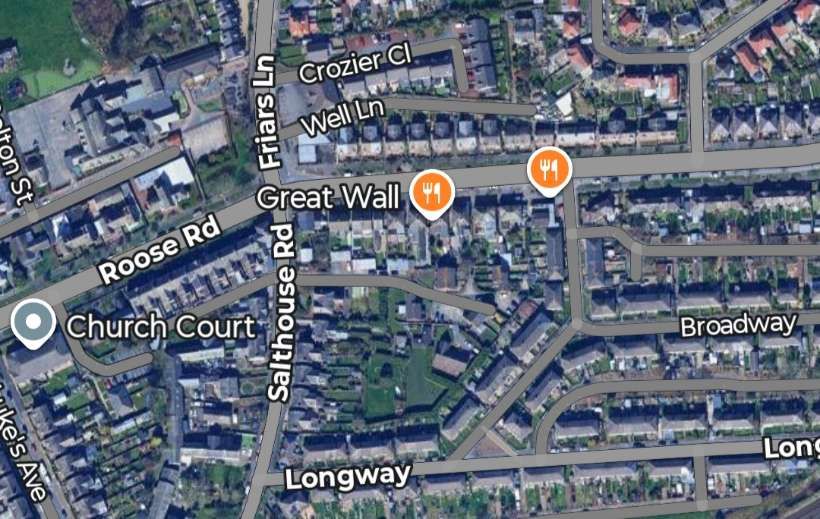
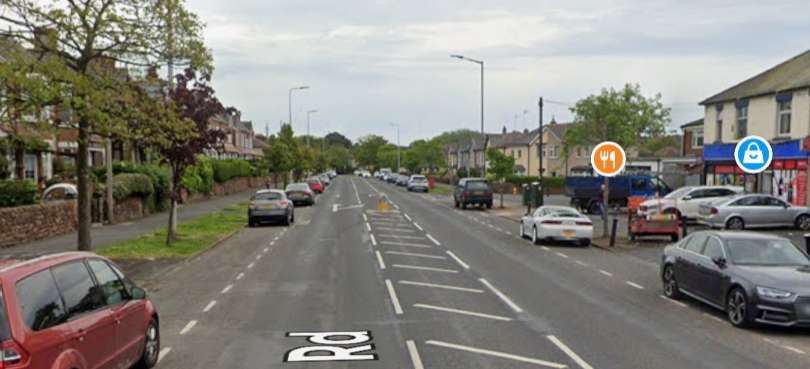
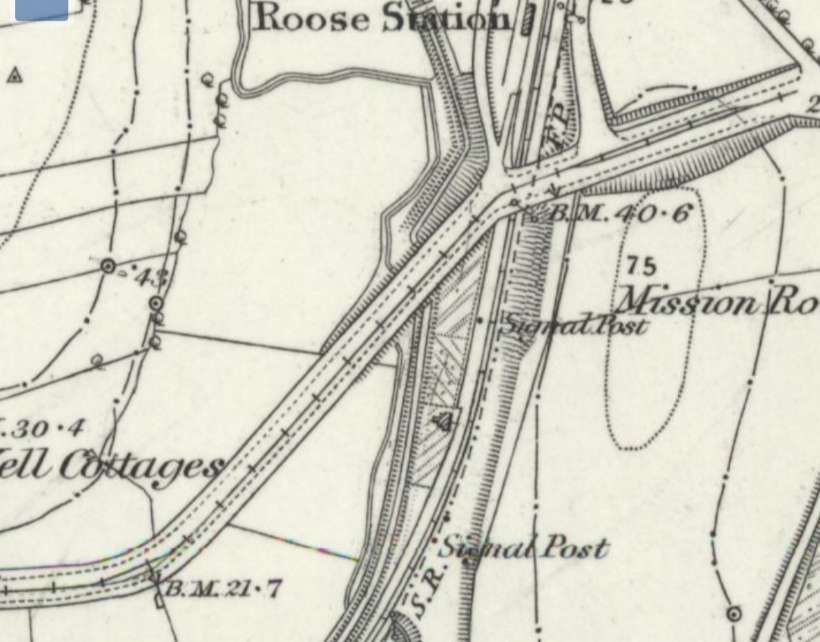
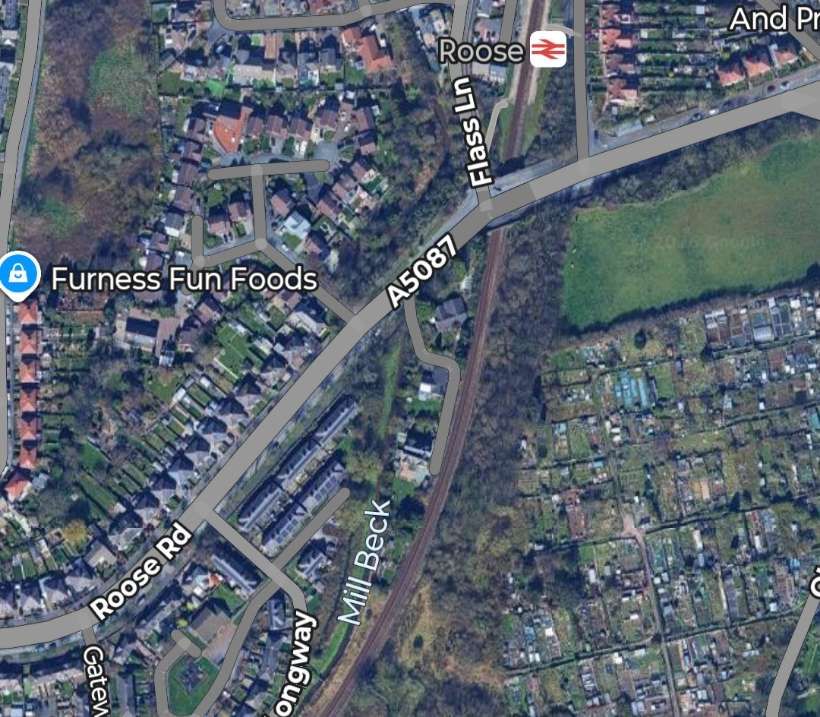
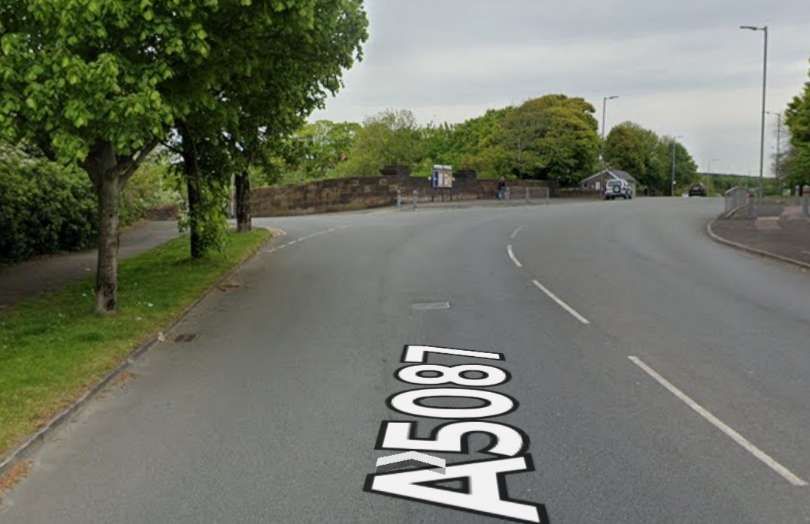
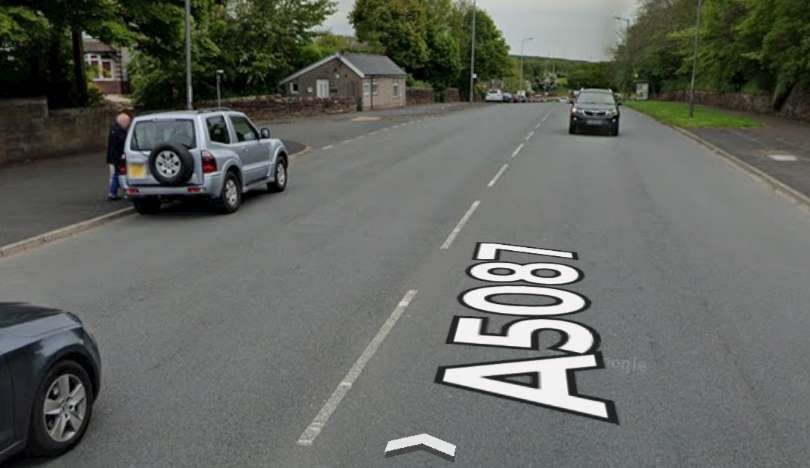
From St. George’s Square the line ran along Salthouse Road on the North side of the Railway Works. [5]The area of Furness Railway Works appears to be underdevelopment in this image. Salthouse Road runs across the top of the site. [Google Maps, February 2026]Salthouse Road with the old Furness Railway Works on the right. The rod curves round to the right. [Google Streetview, May 2022]Further East on Salthouse Road. [Google Streetview, May 2022]Close to the Vulcan Foundry was a tramway depot on the South side of Salthouse Road. The tramway then passed under the viaduct carrying the line Northwest from St. Luke’s Junction to Barrow Central Station. [5]The same area in the 21st century. A housing estate sits on the site of the Vulcan Steel & Forge Works. [Google Maps, February 2026]The tramway depot on the South side of Salthouse Road, as it appears on the 1910 25″ Ordnance Survey. [8]The Viaduct carrying the railway from what was St. Luke’s Junction, Northwest towards Barrow Central Station. Google Streetview, May 2022]St. Luke’s Junction is bottom left of this next map extract, St Luke’s Church is at the right side of the image. The tramway continues Northeast up Roose Road. [5]The same location in the 21st century. [Google Maps, February 2026]Further East, the old tramway ran ahead along Roose Road. [Google Streetview, May 2022]Further East the tramway continued along Roose Road. [Google Streetview, May 2022]The tramway continued East on Roose Road. [5]The same area in the 21st century. [Google Maps, February 2026]Continuing along Roose Road. [Google Streetview, May 2022]Approaching Roose Station and the terminus of the tramway, the road and tramway turned Northeast before bridging athe railway at the South end of Roose Railway Station. A loop was provided to allow a steam tram to run round its carriage. [5]The final length of the tramway was on Roose Road. The terminus was to the East of the railway line and Roose Station. [Google Maps, February 2026]Roose Road bends round towards the Northeast. [Google Streetview, May 2022]Approaching the location of Roose Station, the road curves back towards the East a crosses a railway bridge. Google Streetview, May 2022]The location of the tramway terminus, the photograph is taken facing away from Barrow in an East-northeast direction. Google Streetview, May 2026]
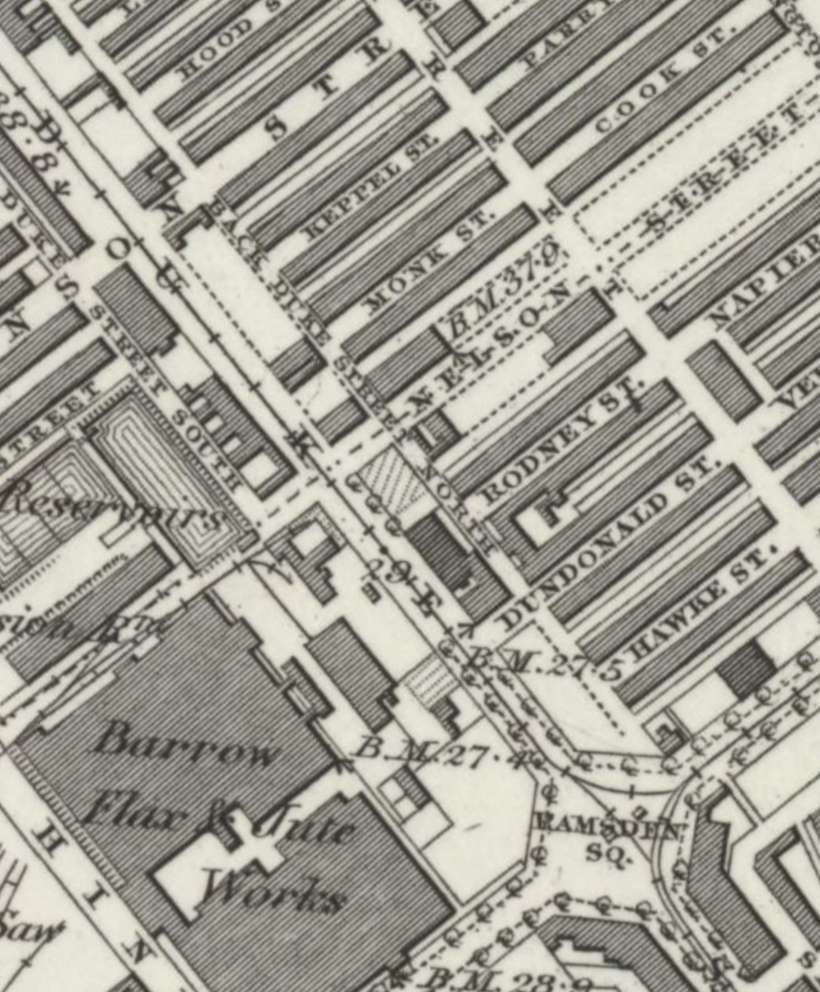
3. A Short Line Serving the Steelworks
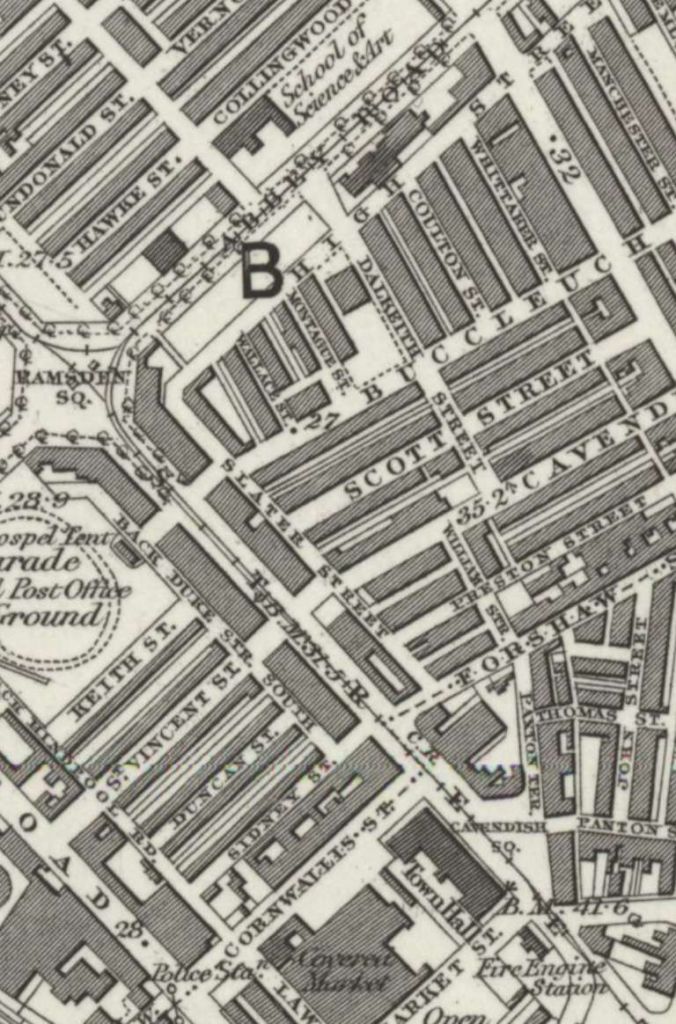
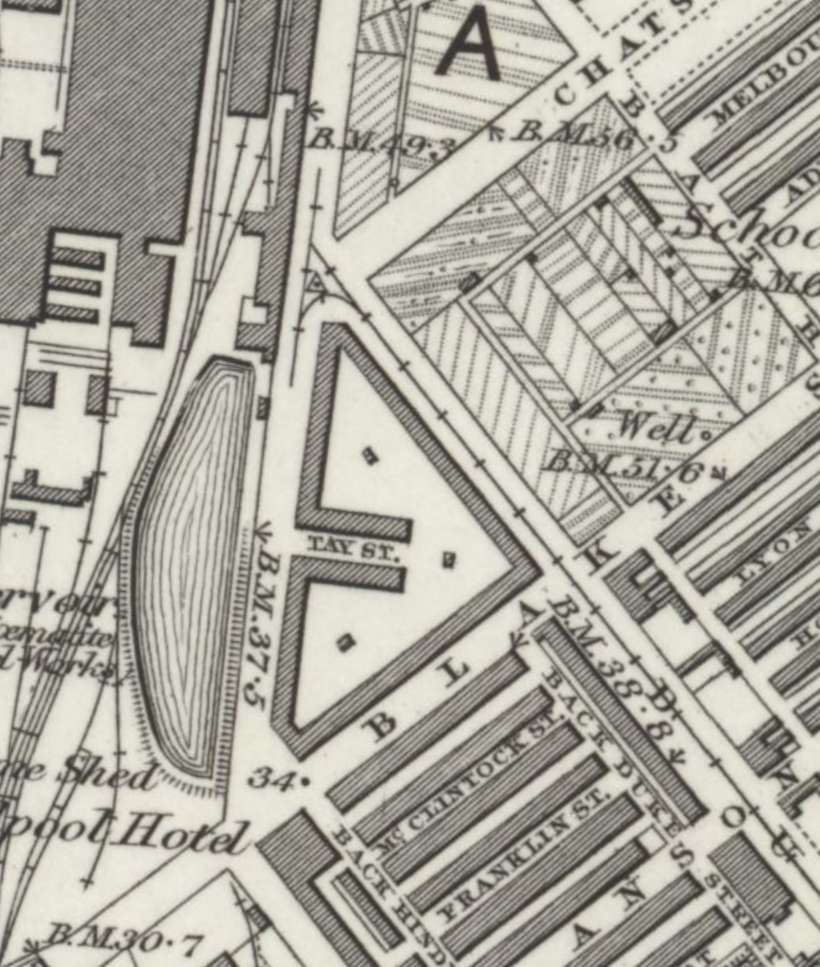
Just two map extracts are all that is needed to cover the length of this short line which ran along Duke Street between the Steelworks and Ramsden Square.
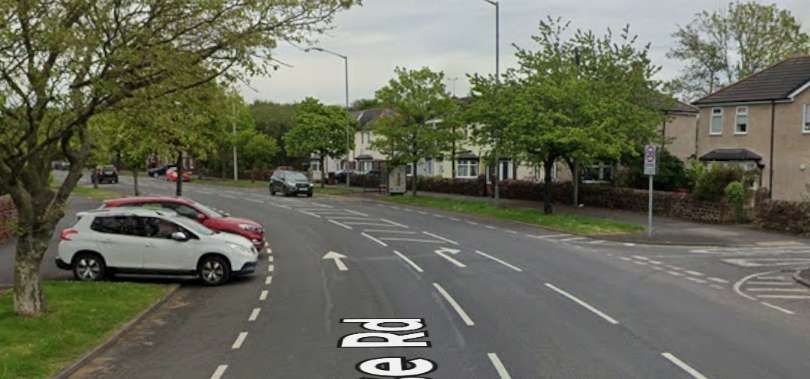
A triangular junction was formed at the Northwest end of Duke Street. A short length of tramway with its mid-point at the junction with Duke Street, ran North-South on Walney Road outside the Steelworks. From there the line ran Southeast along Duke Street. [5]The line continued Southeast on Duke Street and met the wider tramway network at Ramsden Square. [5]
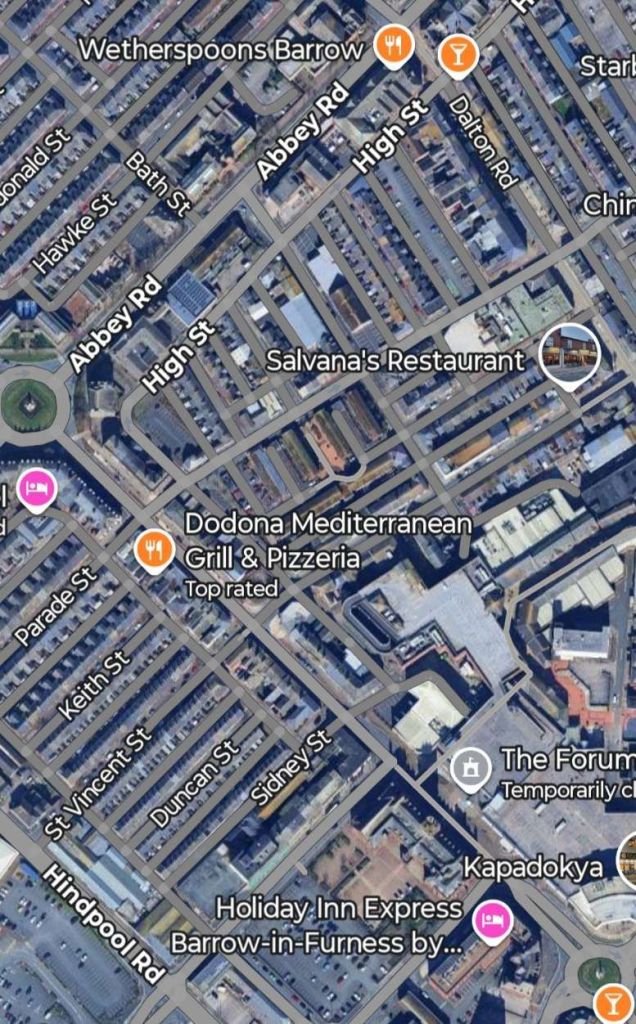
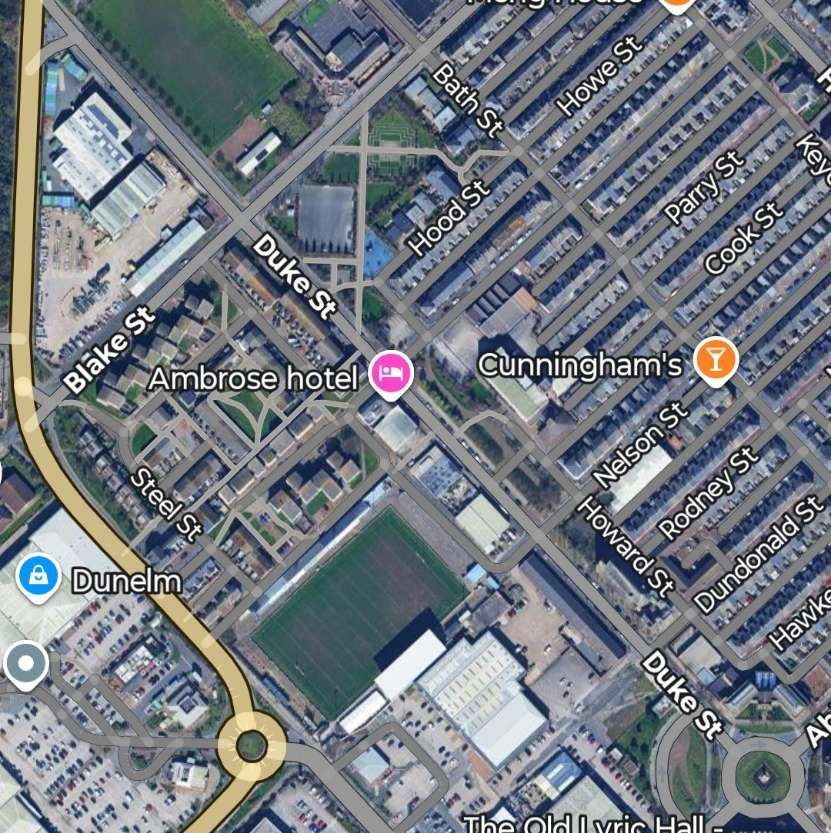
The full length of the line is shown on modern mapping below. ….
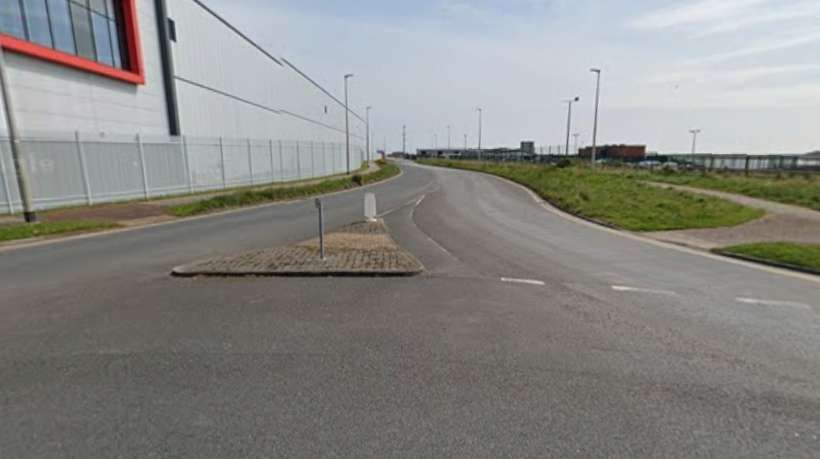
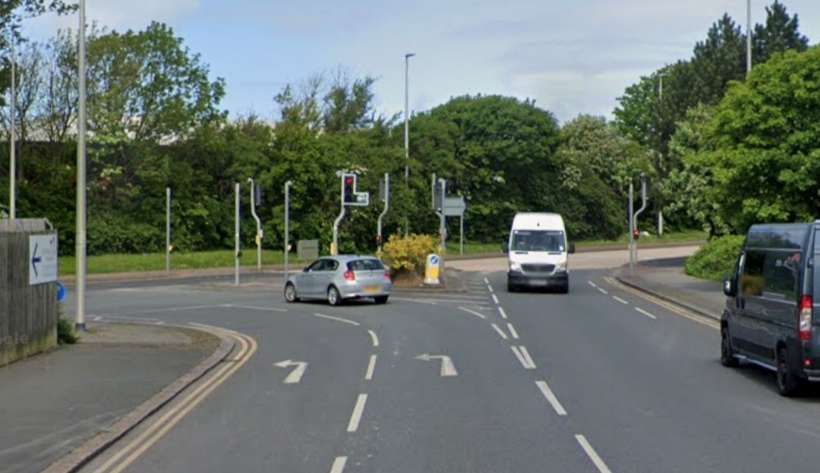
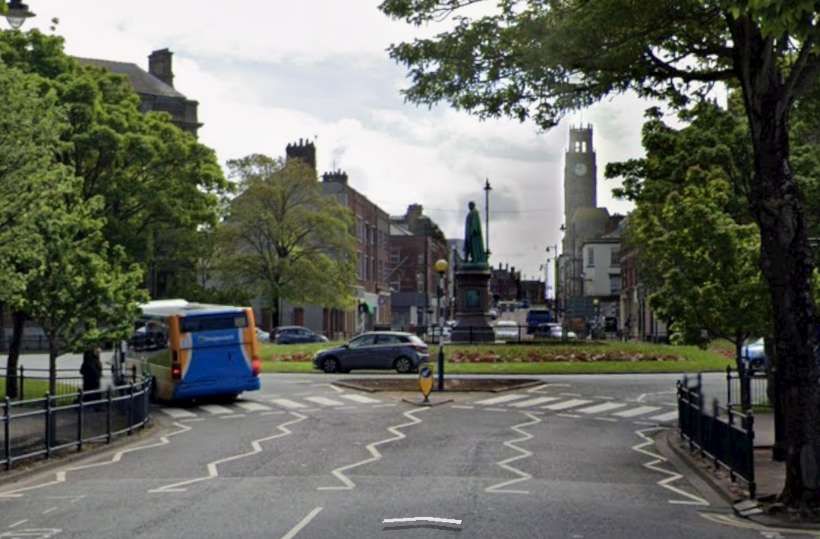
The old tramway ran from Walney Road to Ramsden Square along Duke Street. [Google Maps, February 2026]The View Northwest along Duke Street towards the junction at Walney Road. In times past this view would have been dominated by the Steelworks and no doubt shrouded in a pall of smoke. Google Streetview, May 2022]A view along Duke Street, facing Southeast towards Ramsden Square. [Google Streetview, May 2022]Looking Southeast along Duke Street close to Ramsden Square. [Google Streetview, May 2022]
Changes Immediately After Electrification
The short line along Duke Street serving the Steelworks does not feature on the 1910/1911 25″Ordnance Survey published in 1911/1913.
A new tramway line left Michaelson Road at its junction with Bridge Road. The surface of Bridge Road was littered with a whole series of different lines. The tramway sat on the North side of the road and ran on Northwest into Ferry Road, terminating opposite the Walney Bridge Approach Road.
Summary
Steam powered trams in Barrow-in-Furness, like elsewhere we’re a relatively short-lived phenomenon which last only until electrical technology had advanced sufficiently to be used on street networks.
“Kitsons entered the steam tramway locomotive field in 1876 building some combined steam cars to W.R. Rowan’s design. In 1878 they built three to their own design with vertical boilers, four coupled wheels and inclined outside cylinders. Motion was by means of a modified version of Walschaerts valve gear. All was enclosed in bodywork and the wheels and motions were surrounded by protective plates. The condensing system was placed on the roof and consisted of a series of copper tubes through which the exhaust steam passed, the surrounding air cooling the steam and the condensate returning to the feed water tank. After many trials it was decided to replace the vertical boiler by a horizontal type and this was standardised for future steam trains. Various types of condensers were tried and the final type was a series of arched transverse tubes which were a great improvement.
In Kitson’s patent valve-gear, a modification of Walschaert’s valve gear, the ends of a floating lever are linked to the crosshead, the valve-spindle, and intermediately at a point near the valve-spindle; the lever is pinned to the radius-link, which receives its rocking movement through an arm linked to the coupling rod. The motion of the valve and its spindle is a compound of two movements: one, a movement directly the inverse of that of the piston, on a reduced scale, for the lead; the other a reduced duplicate of the vertical movement of the coupling rod, to open the port for steam” (D. K. Clark Tramways, their construction and working, 2nd Ed., 1894).
More than 300 units were built and besides supplying many to the tramway systems of the British Isles, others were sent to New Zealand. Australia and the continent. The last one built was in 1901 for the Portstewart Tramway (Works No. T302). Work numbers for tram locomotives were kept separate and bore a prefix T.”, via, https://steamindex.com/manlocos/kitsons.htm, accessed on 16th February 2026.
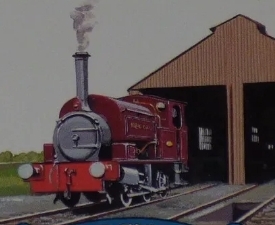
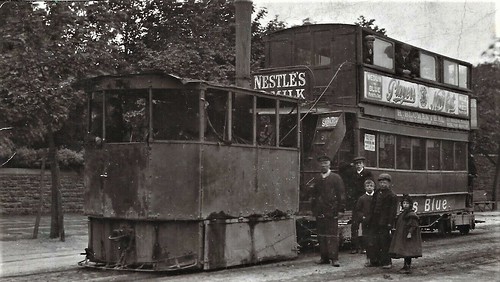
The featured image above is a picture of the Pilling Pig. It was shared by Mandy Sharpe on the Visions of Trains and Tracks of the North West of England Facebook Group on 19th August 2017. [6]
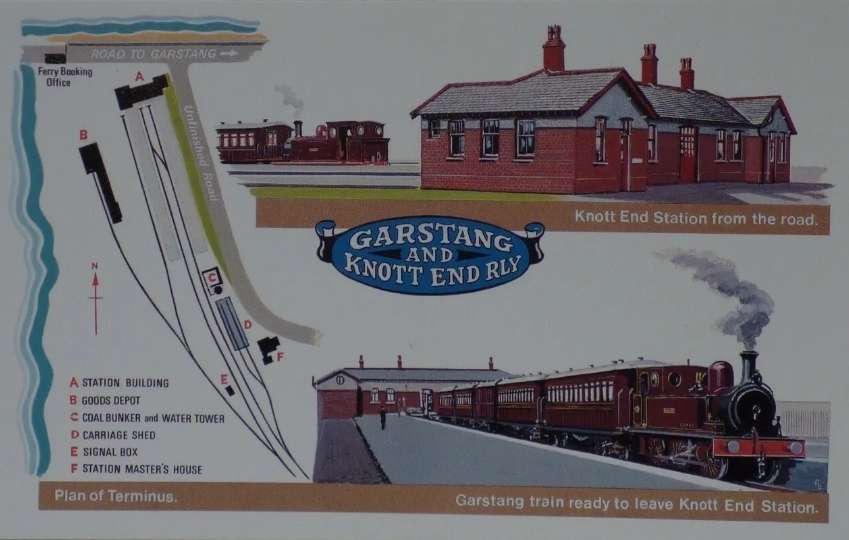
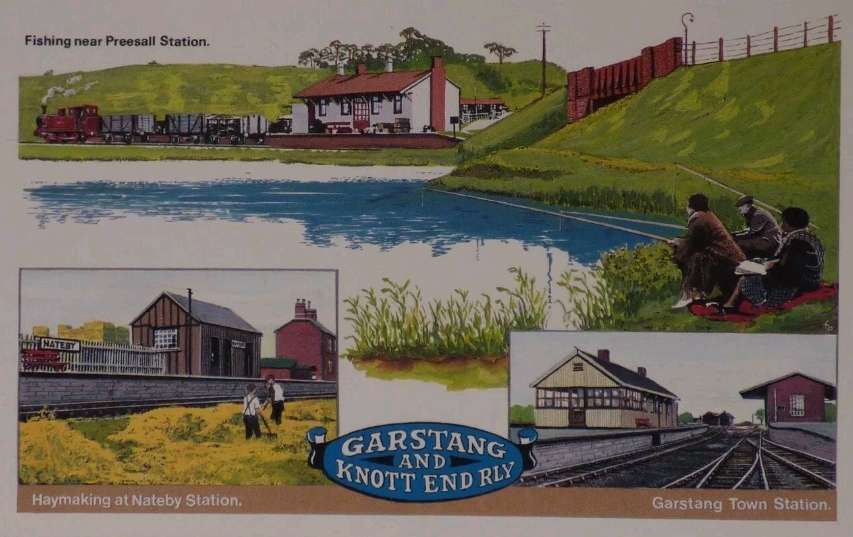
One of six postcards produced by Dalkeith. This card shows the full length of the line. [16]
In the past, I have written two articles about the Garstang to Knott End Railway, those articles can be found on these two links:
Reading some back copies of Railway Bylines, I came across an article in the March 2002 edition of the magazine about this short rural line. The article was written by R. Supwards with photographs by Douglas Robinson.
The line had a hesitant start and always struggled financially, but it remained independent until being taken over by the LMS at the Grouping but lost its passenger service in 1930. It was closed to goods traffic beyond Pilling at the end of 1950. In the summer of 1963, the line beyond Garstang Town was closed. The remainder of the branch did not last long. It was closed by the end of August 1965.
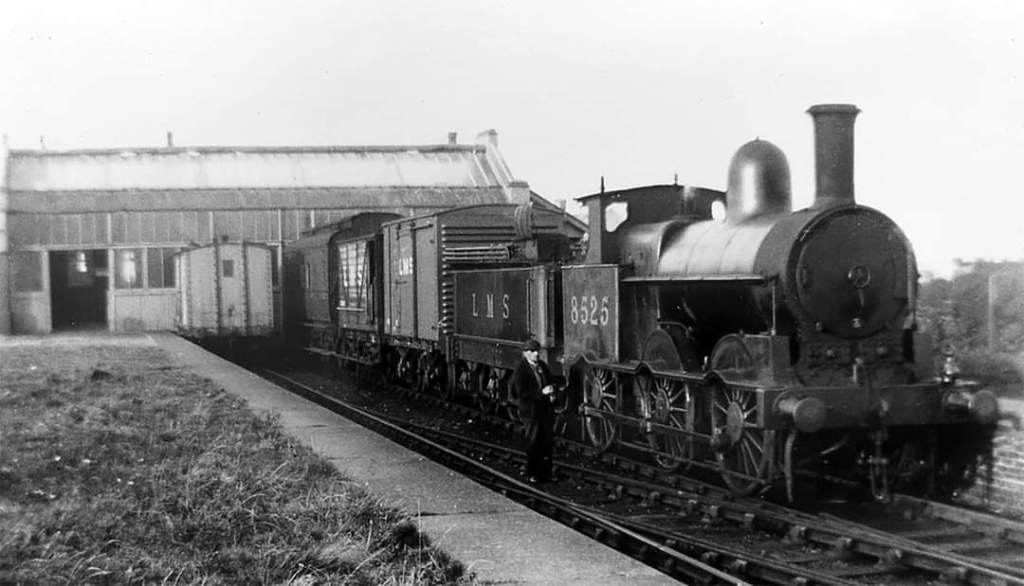
A ‘Cauliflower’ 0-6-0 locomotive in LMS colours sits at Knott End before setting off towards Pilling and Garstang. This image was shared by Steve Scott on the Visions of Trains and Tracks of the North West of England Facebook Group on 27th August 2017. Permission to use here has been applied for. [7]One of six postcards produced by Dalkeith. The station at Knott End is shown from two different angles on the right of the card. The station layout is shown on the left. [16]
Supwards’ article highlighted the different locomotives used on the line: “until about 1950 the engine was usually a ‘Cauliflower’ 0-6-0 from Preston.” [1: p196] These were followed by “Ivatt Class 2 2-6-0s, with the line being worked on the ‘one engine in steam’ principle. On weekdays the ‘Pilling Pig left Preston (North Union Yard) a little before midday and returned from Pilling at 3.10pm, whereas on Saturdays it left Preston at 7.37am and started back from Pilling at 10.17am. The return trips went to Farington Junction in Preston.” [1: p196]
By the mid-50s, the Ivatt locos were replaced by ex-L&YR 0-6-0s, which in turn were soon replaced by ex-LNWR 0-8-0 locomotives and then, by the late 1950s, Stanier Black 5 4-6-0s.
Supwards’ also records enthusiasts visits to the line. The first he records was on 1st May 1954 (when a joint Stephenson Locomotive Society/Manchester Locomotive Society tour visited Pilling as part of a tour of several ‘goods only’ lines in the area, hauled by 2-6-4T No.42316). [1: p196]
Another railtour took place on 29th May 1958 (a Manchester Locomotive Society brake van trip, which comprised a single brake van attached to the usual branch working in the care of an LMS Black 5 Class 4-6-0 locomotive, No. 45438). [1: p196] By that time Black 5s were the standard motive power on the line and remained so until its closure. [1: p196/198]
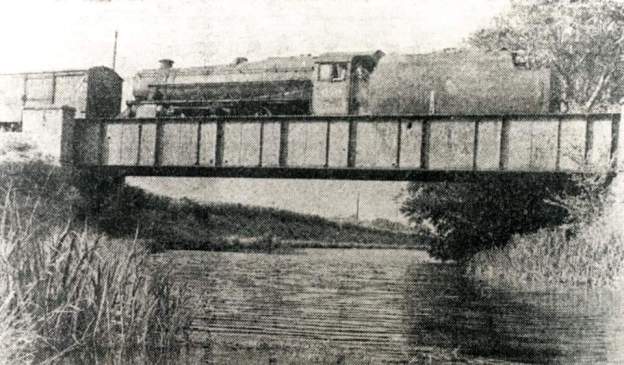
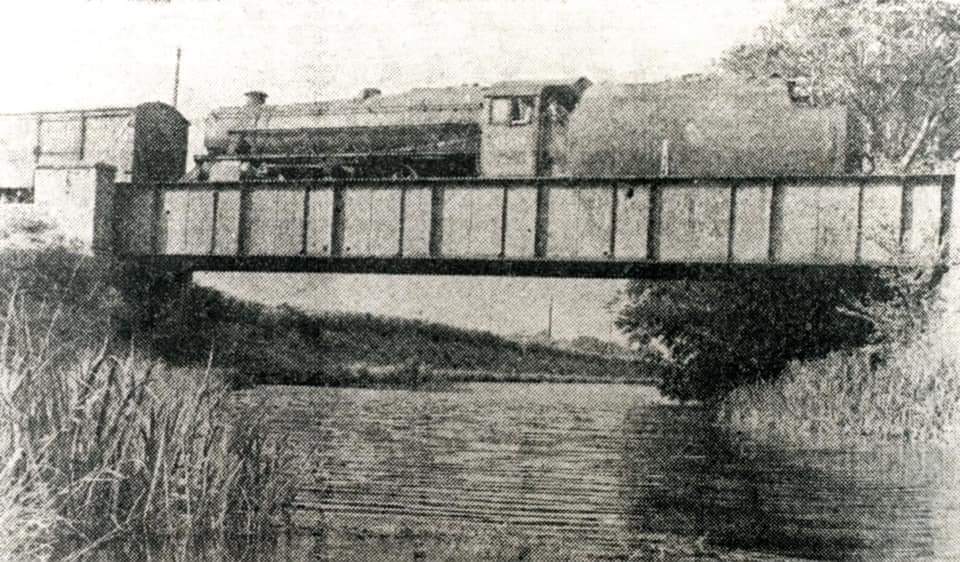
Various sites along the length of the branch line. This is another of the six postcards produced and sold by Dalkeith. [16]The Pilling Pig crossing the canal bridge at Nateby near Garstang in the mid-20th century. This image was shared on the Visions of the Trains and Tracks of the North West of England Facebook Group by Ian Gornall on 21st September 2021. It is used by kind permission from Ian Gornall. [3]
Supwards’ short article is supported by a series of photographs taken by Douglas Robinson which are not reproduced here for copyright reasons.
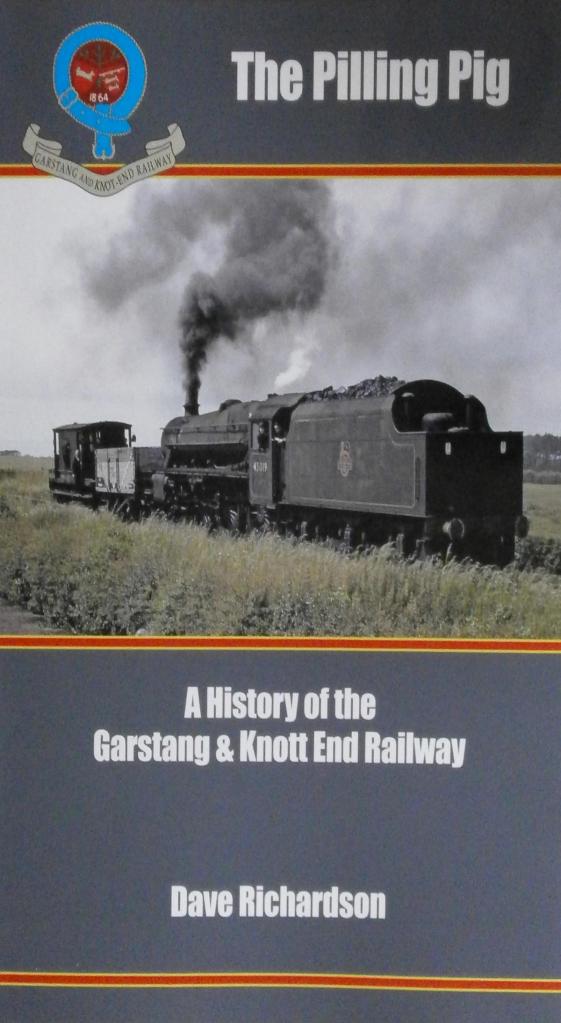
An excellent book about the line was written by Dave Richardson, published by the Cumbrian Railways Association. [4]
The Pilling Pig: A History of the Garstang & Knott End Railway. [4]
There is a superb set of photographs of the branch collated by Paul Johnson on smugmug.com. [5]
Locomotives
As promised in an earlier article about this line, here are some details of the locomotives that served the line in its early years before it was absorbed by the LMS. The basic details come from the Wikipedia article about the line: [8]
1870: Black, Hawthorn 0-4-2ST Hebe
“The line opened on December 5, 1870, running with a single locomotive, Black Hawthorn 0-4-2ST Hebe, passengers boarding any point along the line by request. … In 1872, Hebe broke down, with all services suspended, and soon the company was in rent arrears. The locomotive was repossessed, and for the next three years only occasional horse-drawn trains were run.” [9]
1874: Manning Wardle 0-4-0ST Union
“Services resumed in 1875 using a new locomotive, Manning Wardle 0-4-0ST Union.” [9]
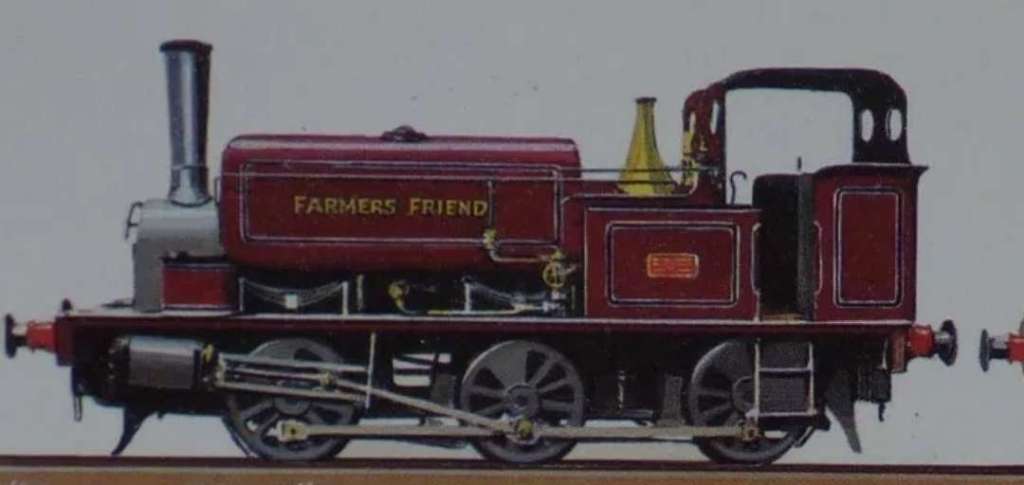
In the late 1870s, Farmer’s Friend, was given the nickname ‘Pilling Pig’ “because of the squeal made by its whistle. This name became colloquially applied to all of the line’s locomotives and even the railway itself.” [9] This locomotive was operational until 1900. [11]
Hudswell Clarke 0-6-0ST ‘Farmer’s Friend’. This is an extract from one of six postcard images printed and sold by Dalkeith. [16]
1885: Hudswell Clarke 0-6-0ST Hope
This locomotive had larger cylinders than Farmer’s Friend (13×20 in rather than 11×17 in) but operated at the same boiler pressure (120 psi). [12]
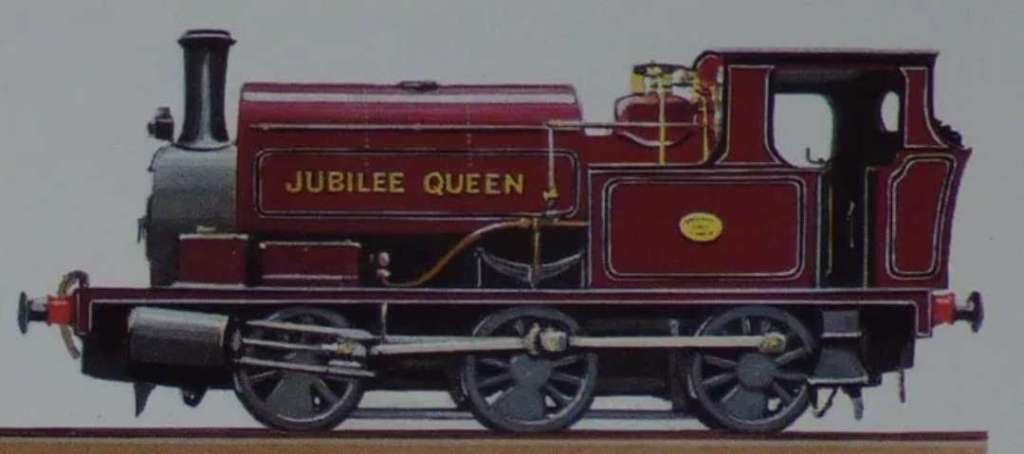
1897: Hudswell Clarke 0-6-0ST Jubilee Queen
Hudswell Clarke 0-6-0ST ‘Jubilee Queen’. This is another extract from one of six postcard images printed and sold by Dalkeith. [16]
This locomotive had larger cylinders than Hope (15×20) and operated at a higher boiler pressure (140 psi). [12]
1900: Hudswell Clarke 0-6-0ST New Century
This is an enlarged extract from one of the six Dalkeith postcard images. It shows ‘New Century‘ at Garstang Engine Shed. [16]
This loco was a sister loco to Jubilee Queen, and is recorded by Wells [14] as having been purchased at the same time.
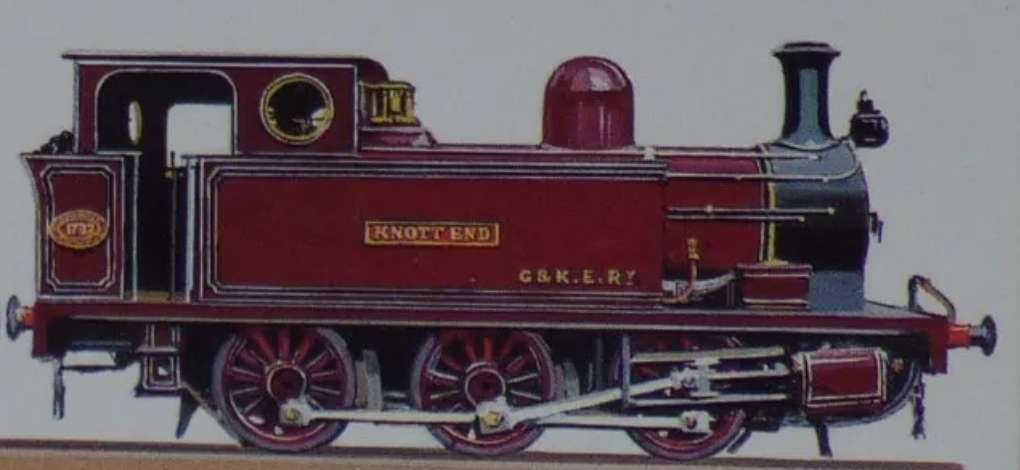
1908: Manning Wardle 0-6-0T Knott End
Hudswell Clarke 0-6-0ST ‘Knott End’. This is a third extract from one of six postcard images printed and sold by Dalkeith. [16]
This locomotive had 14×20 in cylinders and operated at 150 psi. [12]
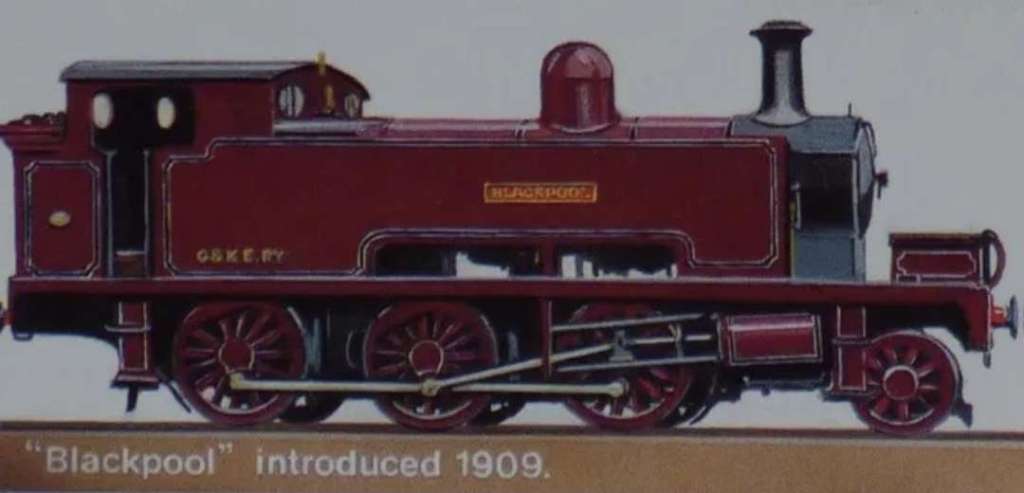
1909: Manning Wardle 2-6-0T Blackpool
Manning Wardle 2-6-0T ‘Blackpool’. This is a fourth extract from one of six postcard images printed and sold by Dalkeith. [16]
This loco had 16×22 in cylinders, operated at 150 psi, and had larger diameter driving wheels (48 in). It was fitted with Isaacson’s patent valve gear. [12][13][14] It was Works No. 1747. Isaacson, together with Edwin Wardle and Charles Edward Charlesworth took out payments for the valve gear in 1907 (patents No’s. 17533 and 27899 of 1907). Atkins is quoted by steamindex.com as saying that “The 2-6-0T was rare on British standard gauge railways. The only other was on the Wrexham, Mold and Connahs Quay Railway – a rebuild from an 0-6-0.” [15]
Other Rolling Stock
Railmotor
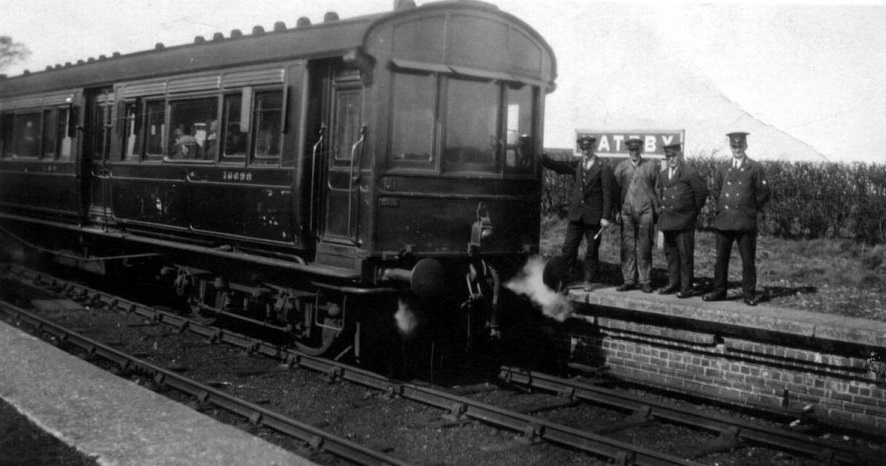
In 1920, just a couple of years before the line was absorbed by the new LMS, a railmotor was hired by the G&KE from the LNWR. It was still running on the line in March 1930 when the passenger service ceased. [22: p22] It looked after the majority of passenger services on the line. “Seating 48 third class passengers, this vehicle originally operated in LNWR colours, but was later repainted in LMS red with the number 10698.” [22: p24-25] The last passenger service actually ran on Saturday 29th March, although the formal closure took effect before traffic started on Monday 31st March 1930. [22: p25]
Ex-LNWR Railmotor, LMS No. 10698, paused at Nateby whilst working a passenger service between Knott End and the main line at Garstang & Catterall. No. 10698 was renumbered as 29988 in 1933 and became the last of its type in service running through the war until withdrawal in 1948. (c) Knott End Collection. The photograph is used here by kind permission and can be accessed on the Railscot website, here. [23]
Coaches
The six postcards published by Dalkeith [16] include one showing coaching stock on the line. It is shown below:
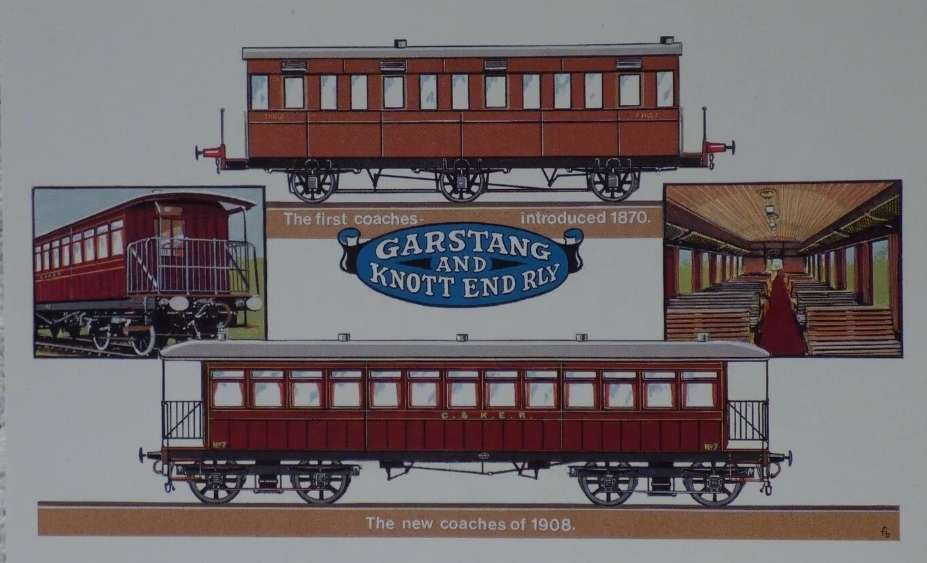
Another of the Dalkeith postcards. as with the other postcard images, this appears to be a reproduction is of a Garstang & Knott End Railway poster from 1908. [16]
When the full line was completed to Knott End, eight bogie coaches were supplied by Birmingham Carriage and Wagon Co. Ltd. Since the bogie coaches had no guards compartment they originally worked with the goods brake vans, but in 1909 two new passenger brake vans were introduced.
After the removal.of passenger service from the Garstang to Knott End (G&KE) Railway, it seems that one or two items of rolling stock were transferred to the Wanlockhead branch of the Caledonian Railway in the 1930s. That line was originally the ‘Leadhills and Wanlockhead Light Railway’. [17] A thread on the Caledonian Railway Association Forum [18] explores what is known by members of that Forum.
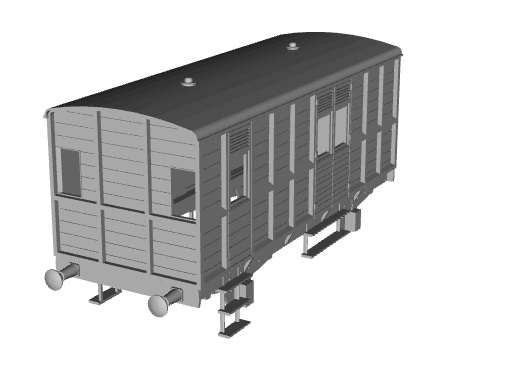
Apparently, “In the early 1930s a composite coach with end roofed platforms was transferred from the Garstang and Knott End Railway to the Wanlockhead branch. Its LMS number was 17899.” [18]
It appears that “a G&KE 4 wheeled passenger brake van transferred at the same time.” [17]
It was scrapped at the same time as the bogie coach when the Wanlockhead line closed in 1939.[20]
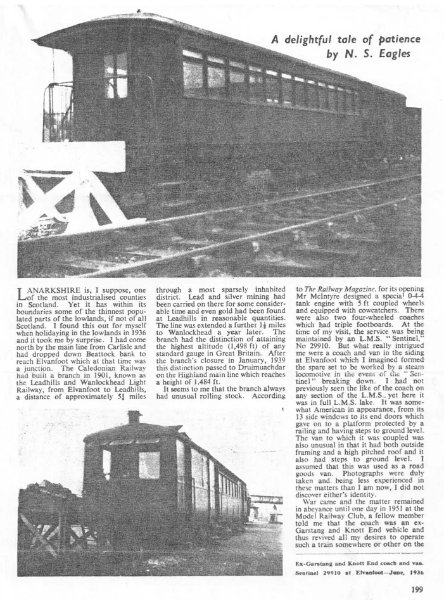
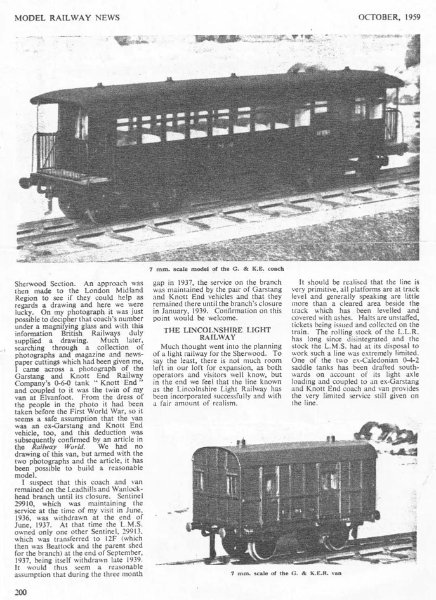
There was an article about the construction, in 7mm/ft (O Gauge), of the two carriages in Model Railway News in October 1959. That article is produced in full below. [19]
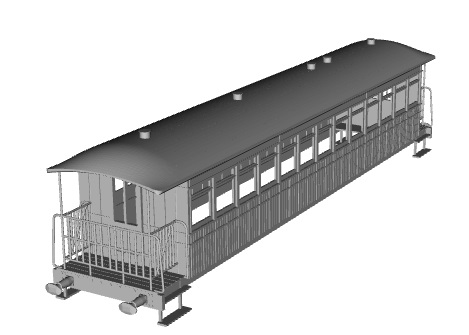
A three-page article by N.S. Eagles in Model Railway News, October 1959 features his models of the two coaches. [19]3D images of the two coaches produced for 3D printing. [20]
Apparently, 6 of the 8 G&KE coaches “fetched up at the LMS Carriage depot at Slateford, where they were used as offices and stores until at least 1959.” [17]
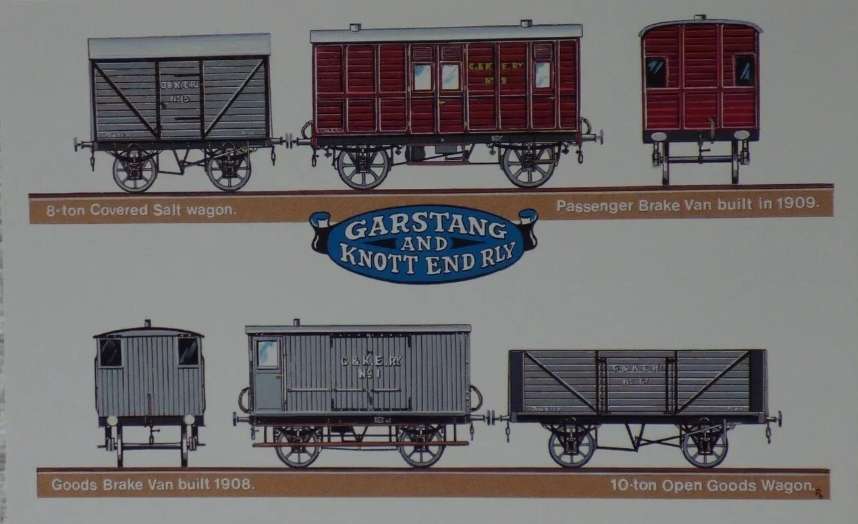
Wagons
One of the postcards in the Dalkeith series shows wagons used on the line. One of these is covered above. There were two dedicated coaching brake wagons. In the image below the goods wagons are in grey and the coaching brake in deep red. [16]
The goods wagons on the line are featured on this last image, another of the Dalkeith postcard images. [16]
Drawings of G&KE Railway wagons can be found here. [21]
References
R. Supwards and Douglas Robinson; A Pig of a Job; in Railway Bylines; The Irwell Press, March 2002, p196-200.
Frank K. Walmesley; The Garstang & Knot-End Railway; in The Railway Magazine Volume 22, December 1959, p859–864
Jeffrey Wells; The Pig and Whistle railway: a Lancashire backwater; in BackTrack Volume 7, September 1993, p257–265; a summary is provided on steamindex.com: https://steamindex.com/backtrak/bt7.htm#1993-5, accessed on 9th December 2023.
Philip Atkins; Blackpool – Britain’s most obscure locomotive; in Backtrack Volume 10, January 1996, p40-42; a summary is provided on steamindex.com: https://steamindex.com/backtrak/bt10.htm#10-40 accessed on 9th December 2023.


