Tag Archives: 3 ft 6 in gauge

The Wolverton and Stony Stratford Tramway and the Wolverton Works

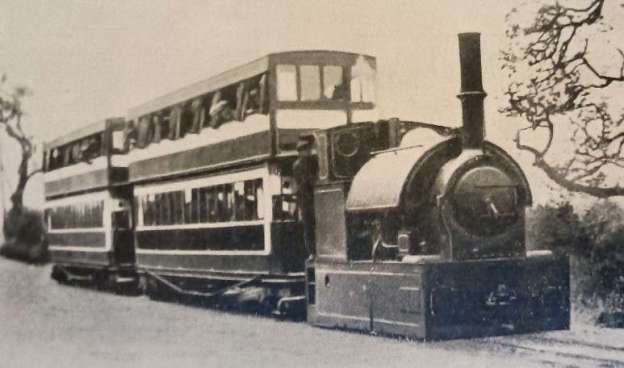
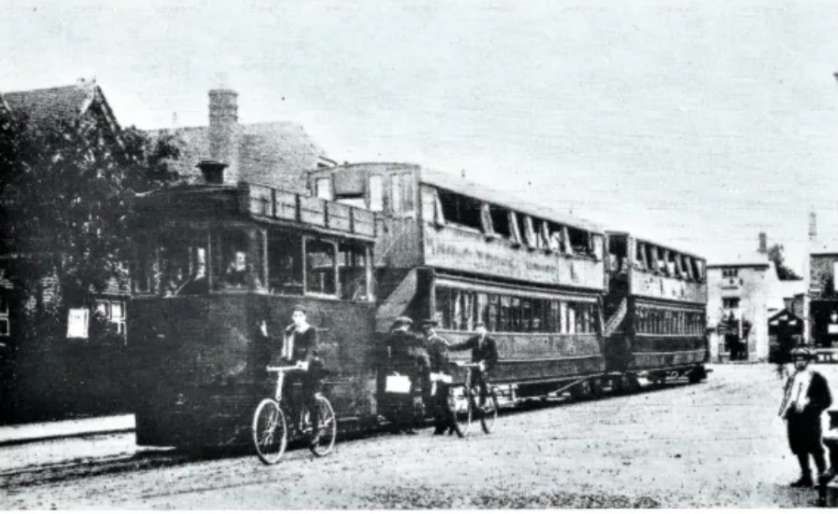
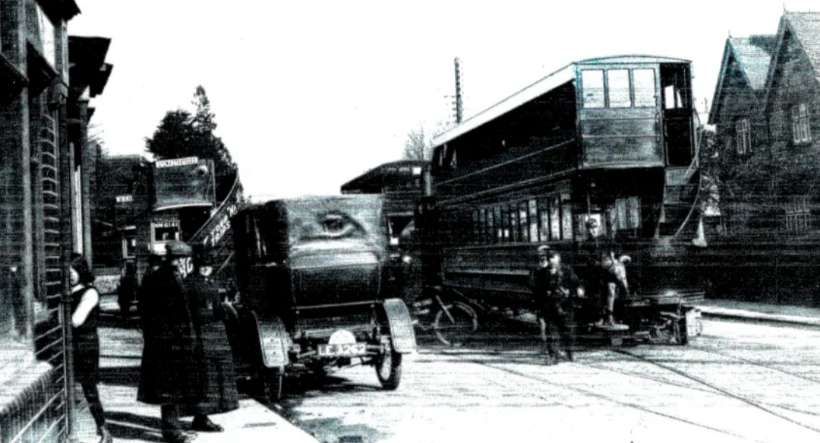
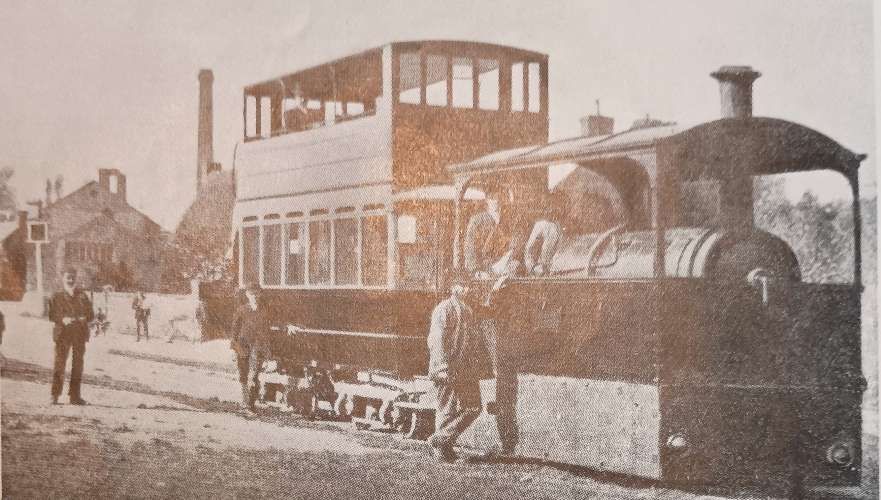
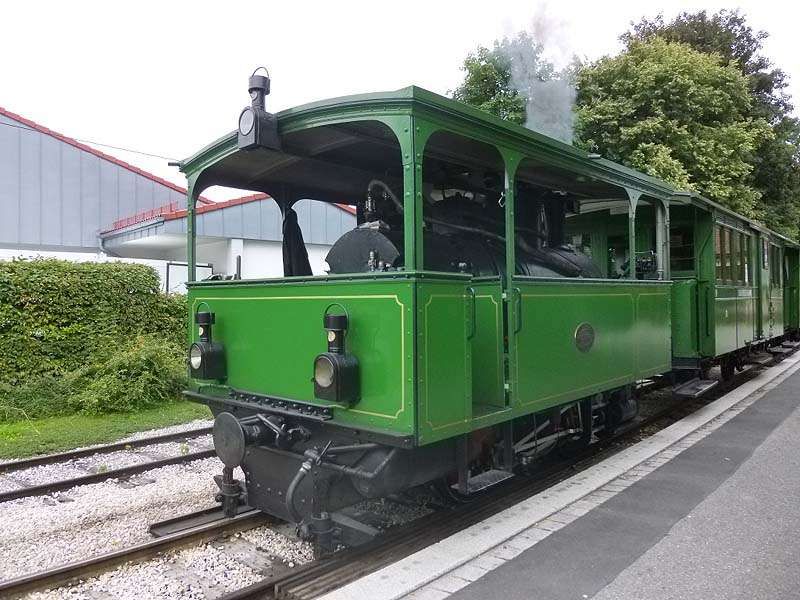
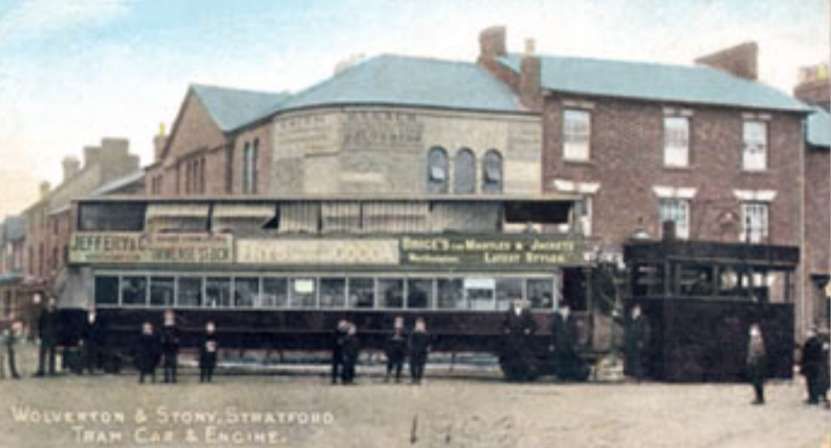
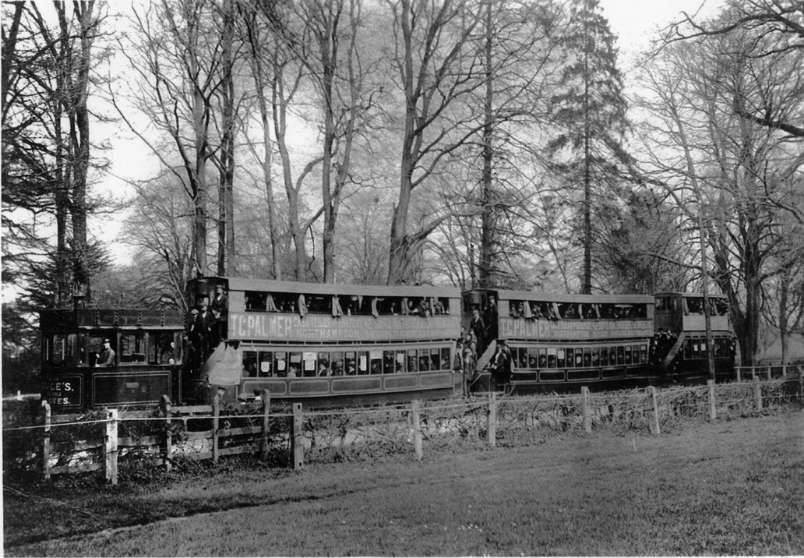
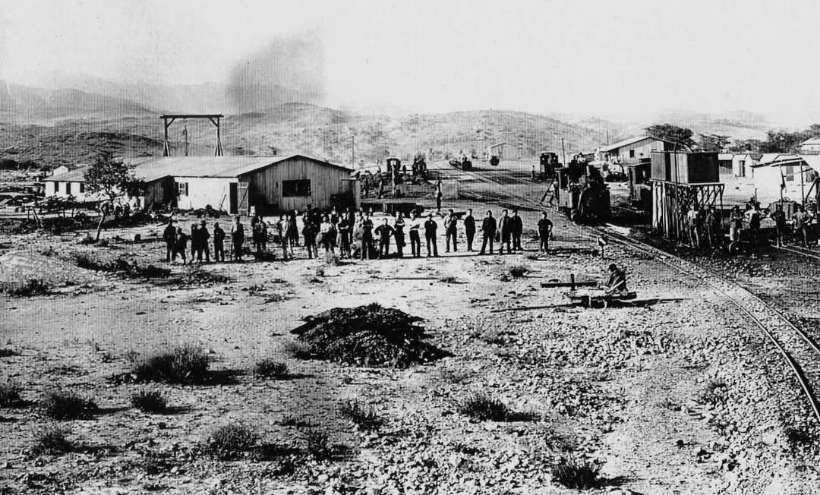
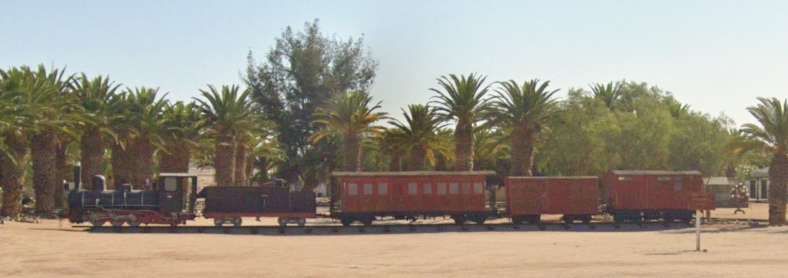
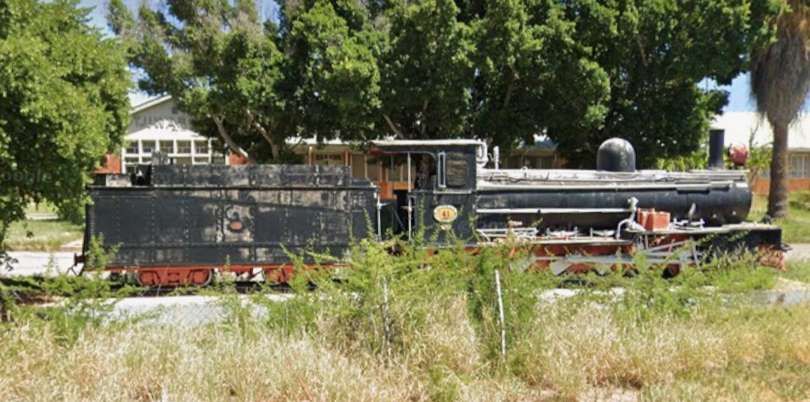
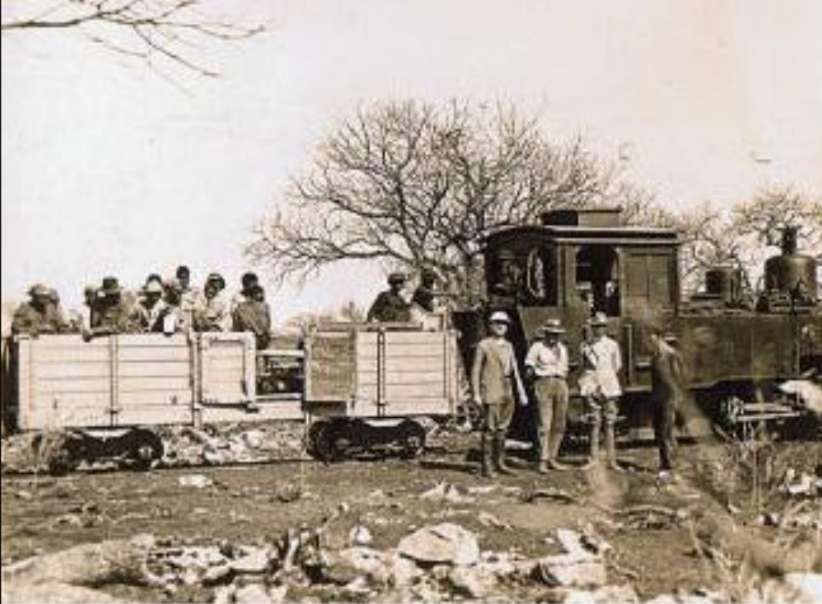
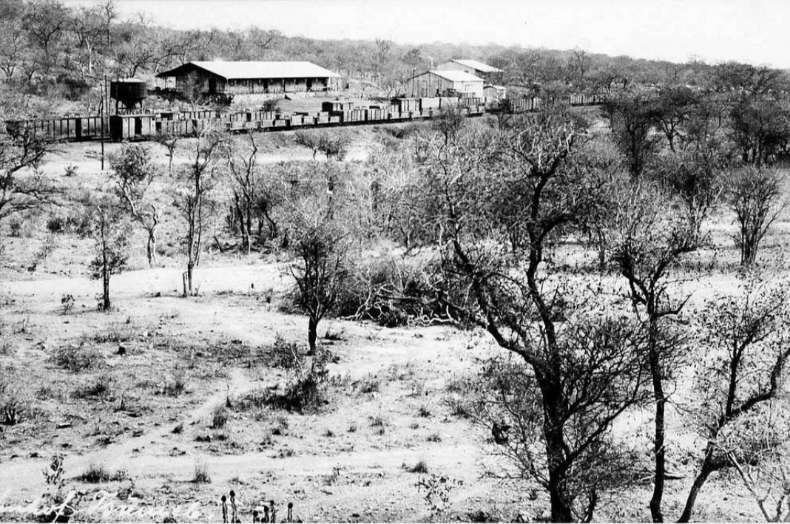
The featured image for this article shows a Bagnall saddle-tank engine and train of two 100-seat workmen’s cars in L.N.W.R. livery on the Wolverton and Stony Stratford Tramway.

Wolverton Works

The LNWR works at Wolverton. The tramway crosses this plan on Stratford Road. [13: p19]

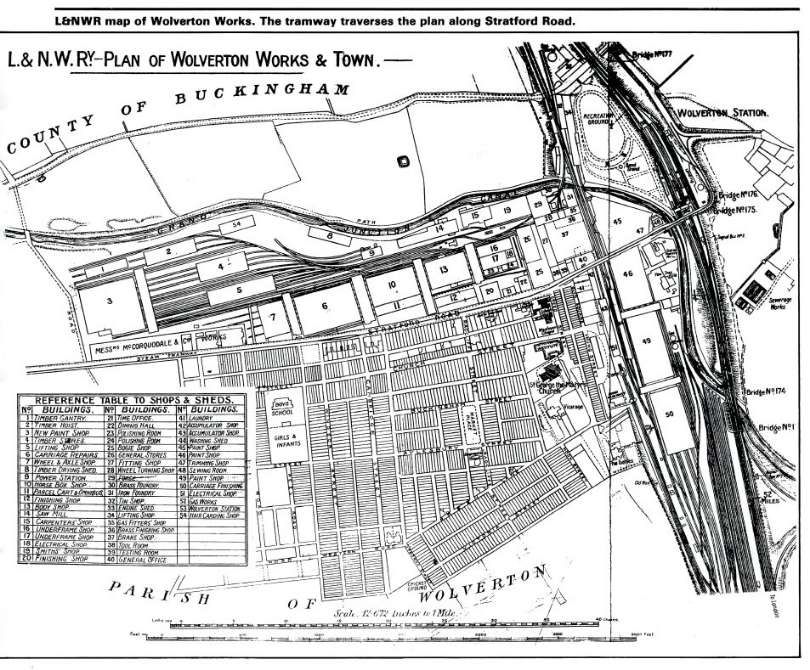
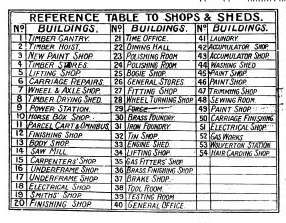
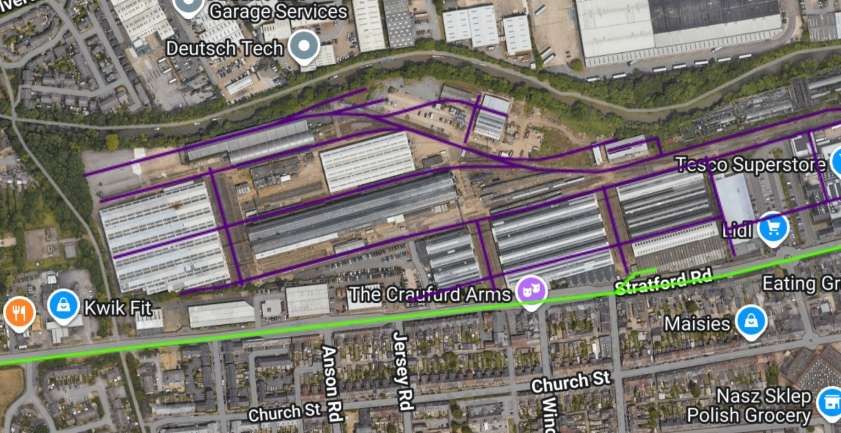
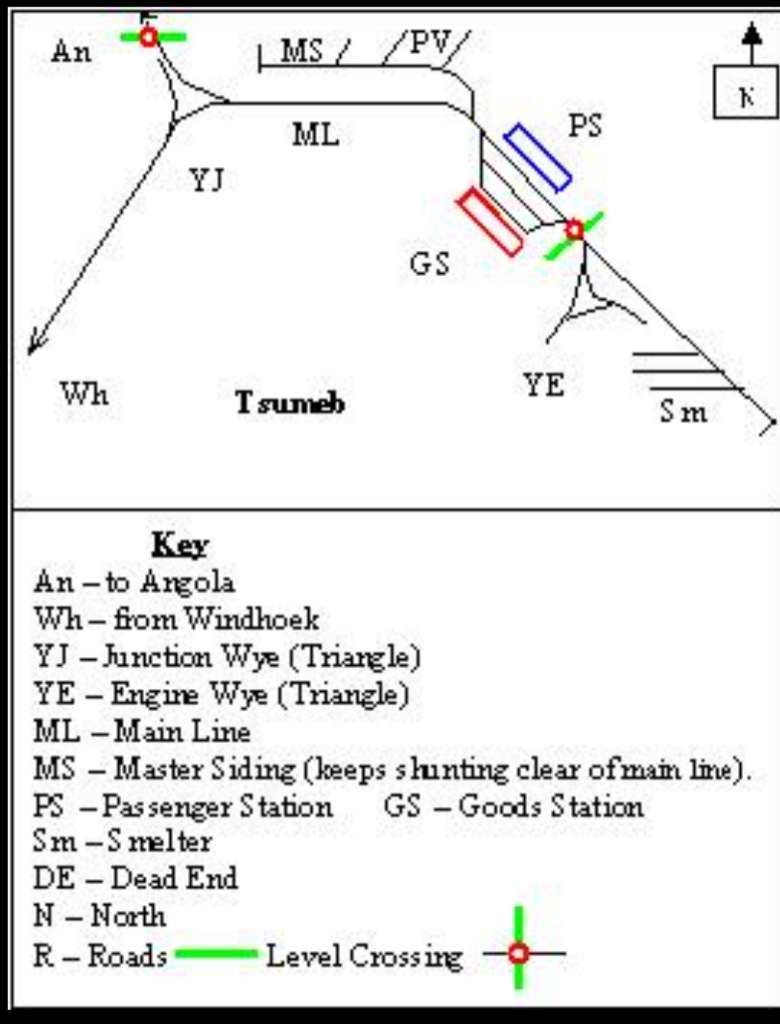
An enlarged key to the plan above which details the use of each building on the LNWR Site. [13: p19]
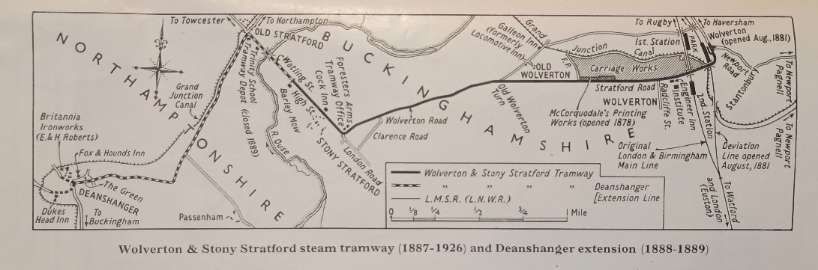
Mainly by reason of the growth of the London North Western Railway works at Wolverton in the late 1870s, and the establishment of McCorquodale’s printing works alongside in 1878, a scheme to link the old market town of Stony Stratford, on Watling Street, with the London & North Western Western Railway station at Wolverton by means of a light railway began to take tangible form in 1882.” [1: p547]

Wolverton Railway Works was established in Wolverton, Buckinghamshire, by the London and Birmingham Railway Company in 1838 at the midpoint of the 112-mile-long (180-kilometre) route from London to Birmingham. The line was developed by Robert Stephenson following the great success of the Liverpool and Manchester Railway line. [2]

The Victorian era new towns of Wolverton and New Bradwell were built to house the workers and service the works. The older towns of Stony Stratford and Newport Pagnell grew substantially too, being joined to it by the Wolverton and Stony Stratford Tramway and the Wolverton to Newport Pagnell Line (a branch line), respectively. The trams were … hauled by steam locomotives: the tram cars were certainly the largest ever in the UK and possibly the world.” [2]

After a survey of all possible sites for the London and Birmingham Railway works, “Wolverton was chosen due to its co-location alongside the wharfing facilities of the Grand Union Canal, thereby also enabling the railway company to gain an easy agreement to build a viaduct over the canal company’s land at this point.”

In 1837, Edward Bury of Bury Curtis & Kennedy of Liverpool was appointed Locomotive Superintendent of the London to Birmingham railway with his headquarters at Wolverton. However, as Wolverton was simply considered to be a repair shop for the engines his Liverpool firm supplied to run on the line, he left the running of the Works to his Shop Foreman.” [3]

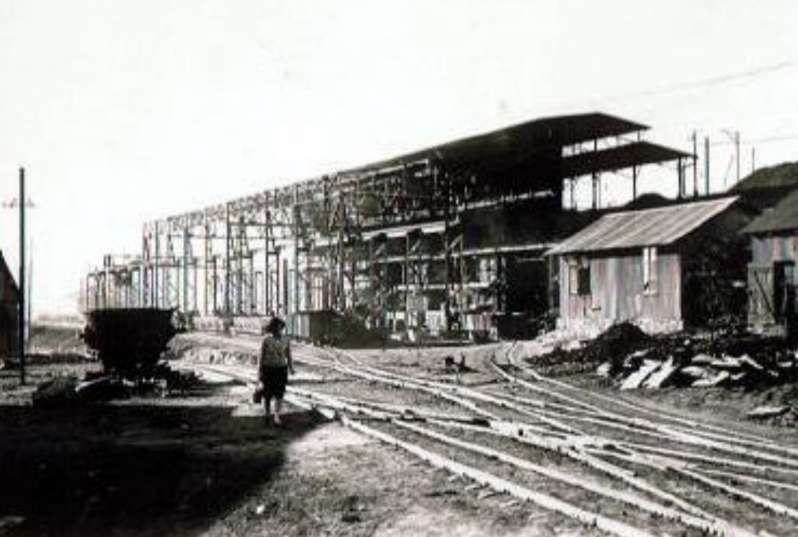
It became necessary for expansion to take place to accommodate, service and repair the increasing amount of rolling stock owned by the Company. “A large engine shed was built, said to be cathedral sized, together with all supporting facilities which also enabled the Works” [3] to produce, locomotives in house.

J E McConnell was appointed Superintendent in 1847. He built his first locomotive in 1849. This was “the prototype of the ‘Bloomer’ class (the wheels and works being more exposed the engines became know as Bloomers after Mrs Amelia Bloomer who was trying to reform ladies dress). During his time at Wolverton he made many innovations such as train heating, failsafe braking, hollow axles, boilers, fireboxes etc. Early in 1851, the first Bloomer engines were running.” [3]

Bloomer was a name used to refer to three similar classes of 2-2-2 express passenger locomotives designed by James McConnell. “A total of seventy-four were built between 1851 and 1862. The classes were similar in design and layout but differed in dimensions.” [4]
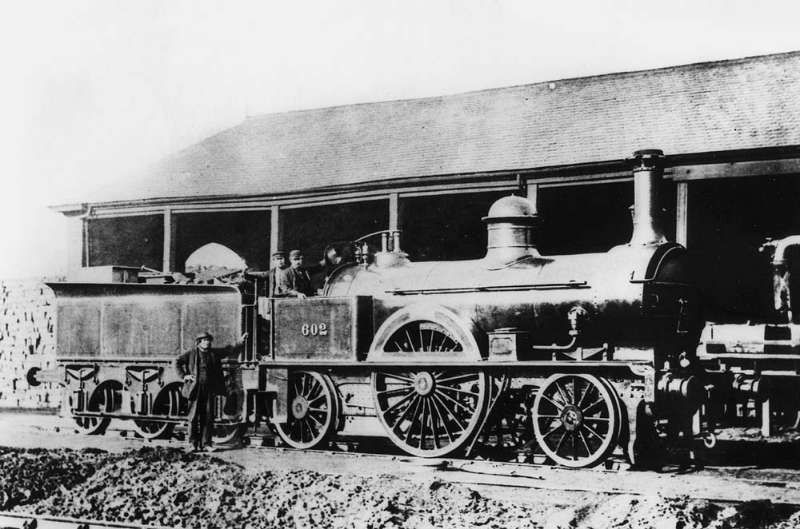
A LNWR engine No. 602, a Small Bloomer Class Locomotive. The photograph was taken circa. 1868 at Rugby’s coke sheds. The Class was introduced in 1854, they were inside-cylinder inside-frame single-wheelers with 6′-6″ driving wheels. [4]

In 1859, thirty four engines were transferred from Crewe to Wolverton which involved further expansion of the Works. Under McConnell the Works flourished but unfortunately for him Mr Richard Moon was appointed Chairman of the Company and there was a clash of personalities resulting in McConnell retiring. A year or two after his retirement the engineering works were transferred to Crewe. Before the transfer to Crewe, 165 engines had been built at Wolverton.” [3]

Expansion of the Works again took place during 1864 when Wolverton became the Carriage Works for the LNWR and the manufacturing shops were converted to enable carriages to be built, painted and repaired. In 1869 two Royal Saloons for Queen Victoria were built at Wolverton. Sadly in 1872 the locomotive shop finally closed and Wolverton became exclusively a carriage works until in 1877 it was the largest in Britain.” [3]

Image No. EPW022487 looking West over Wolverton Works in 1928. The Grand Junction Canal runs through the right half of this image, © Historic England. [7]

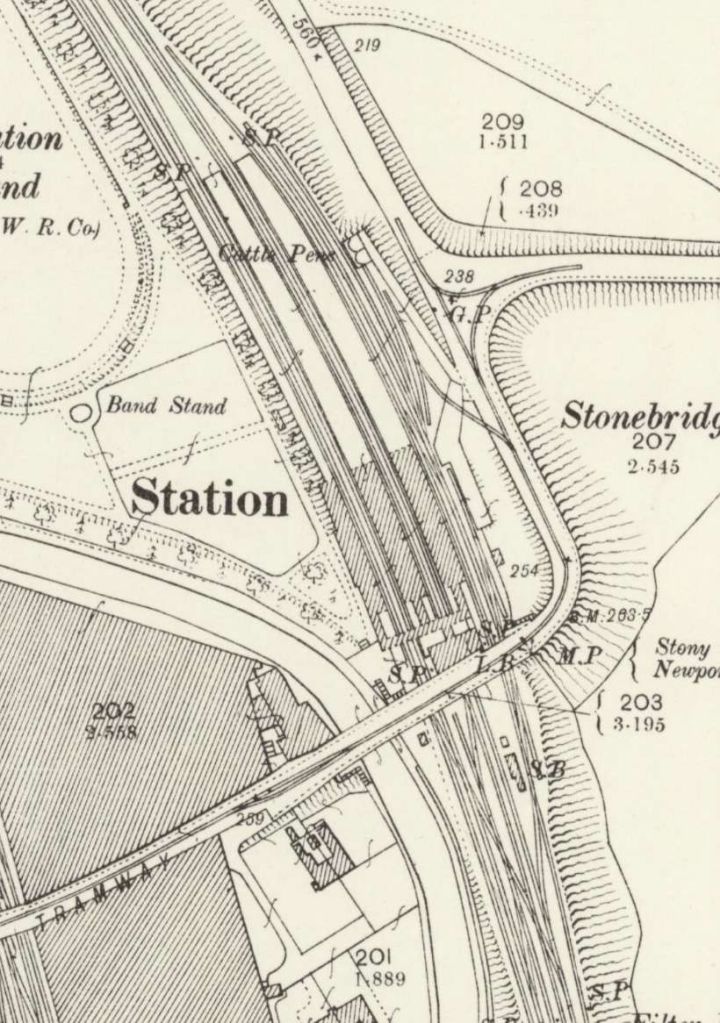
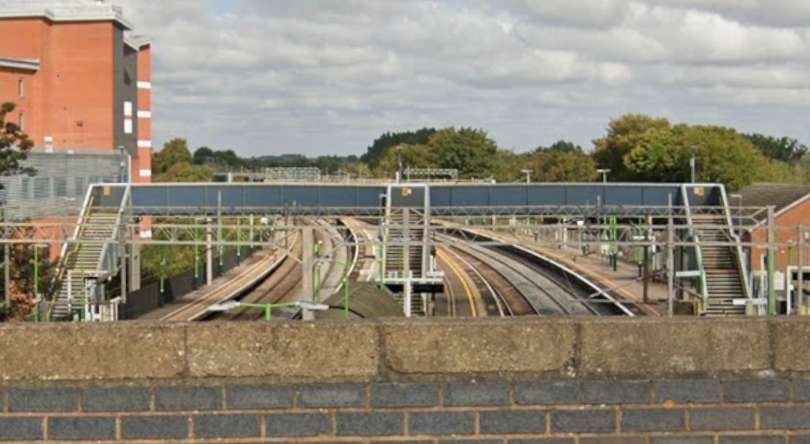
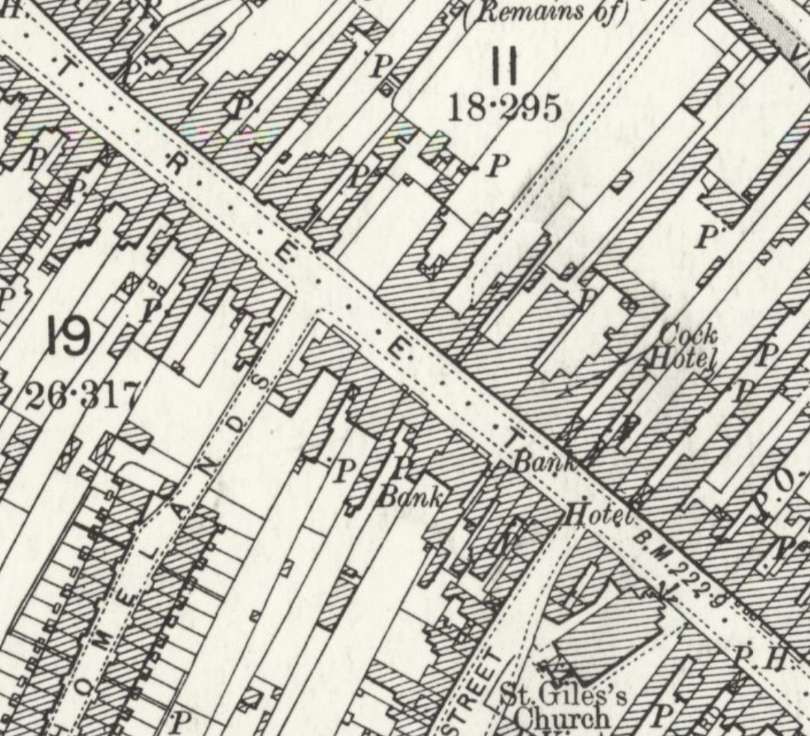
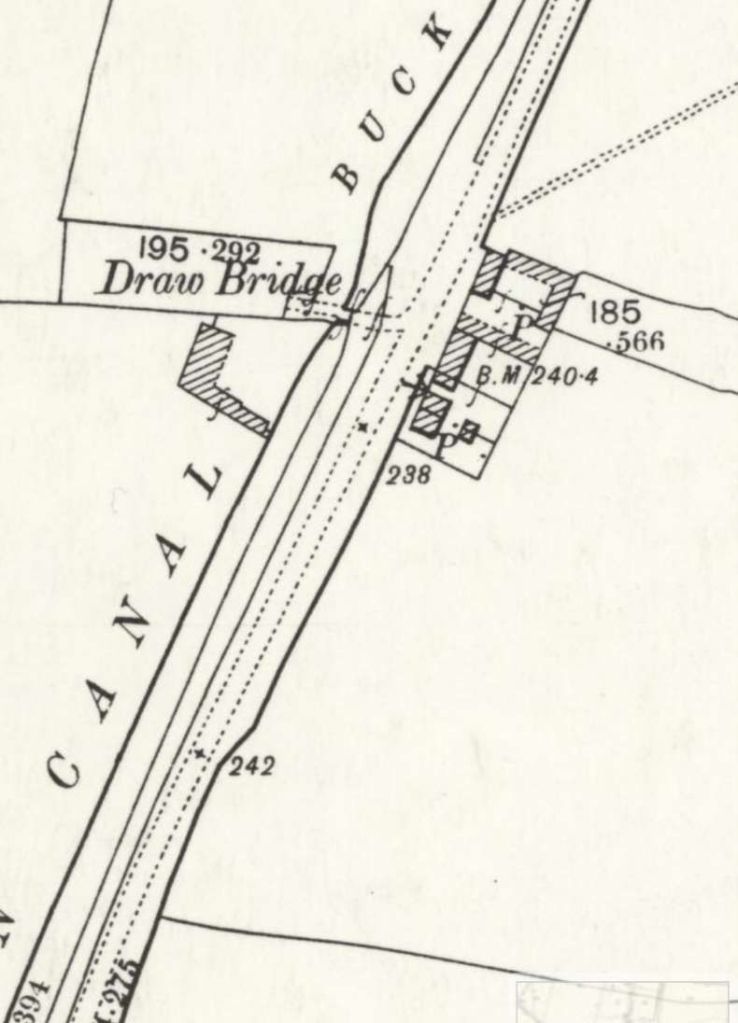
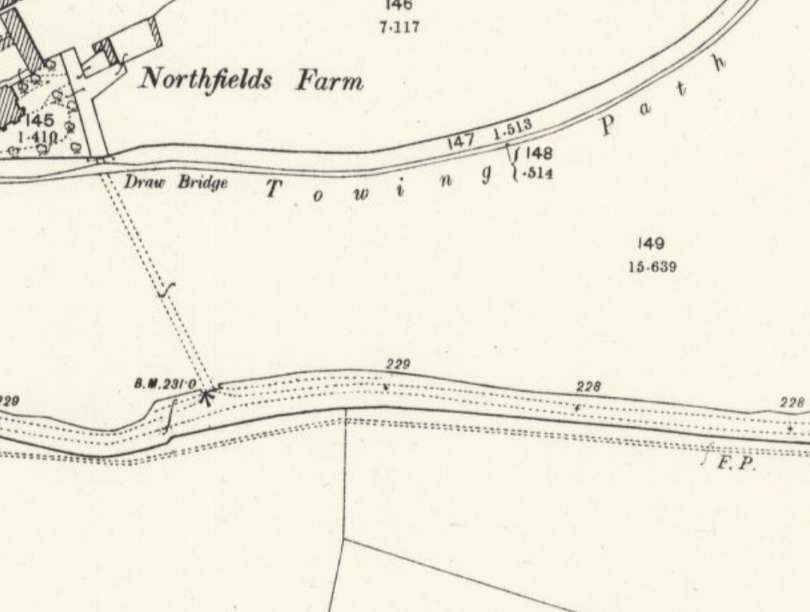
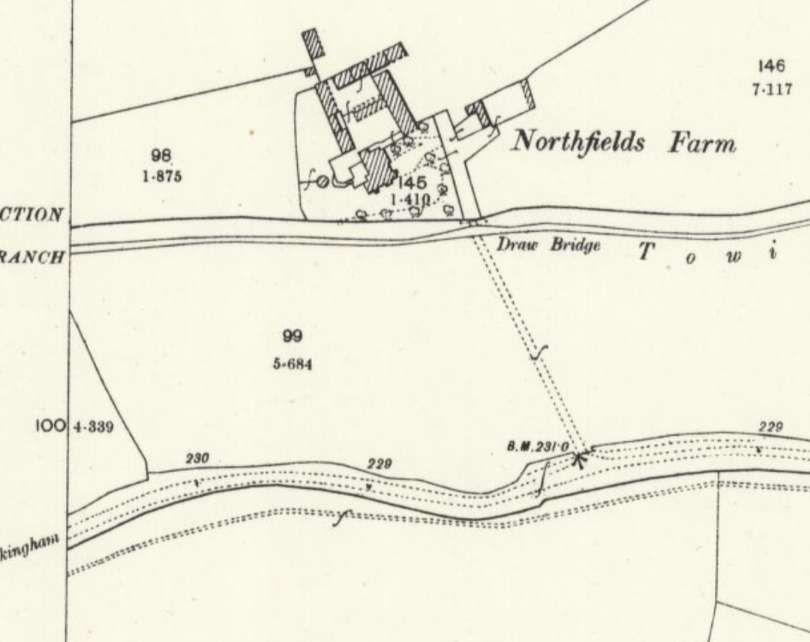
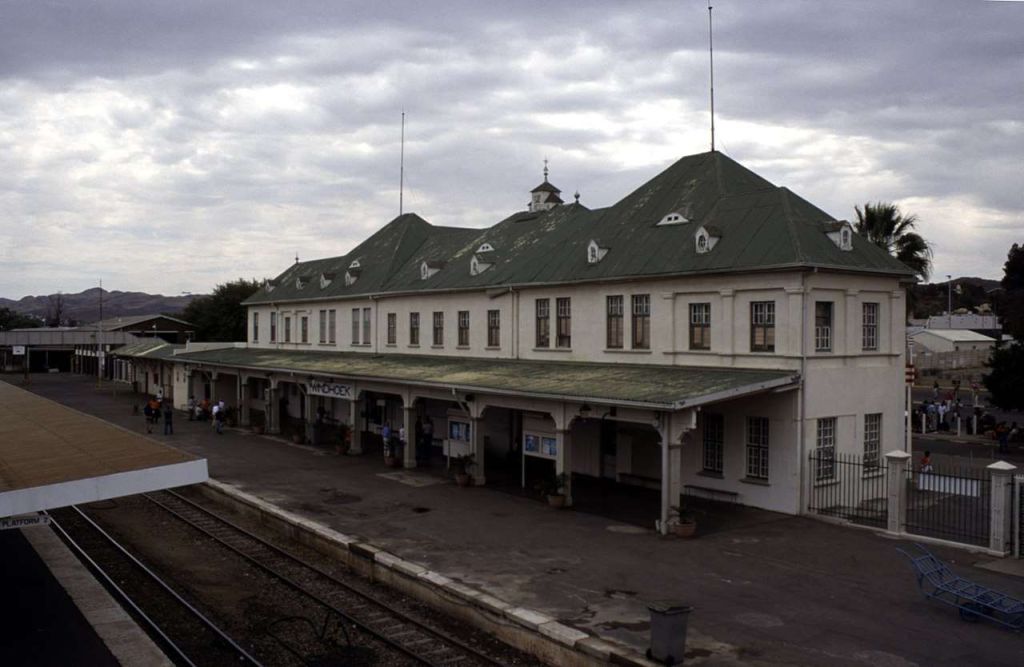
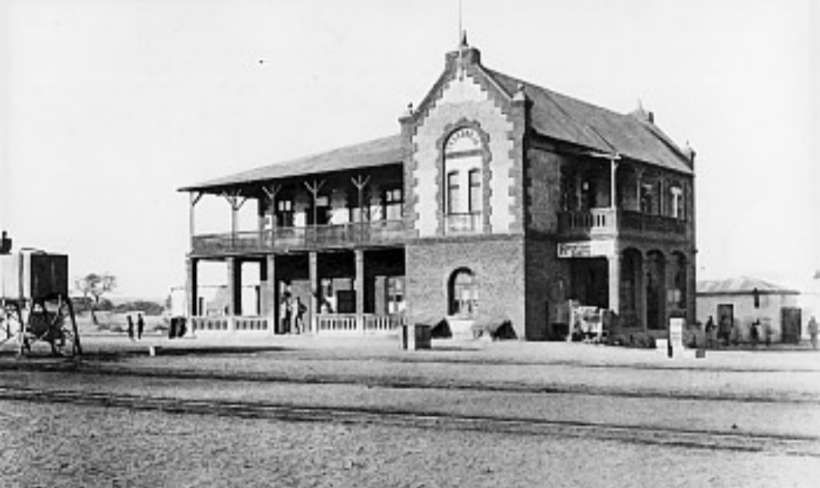
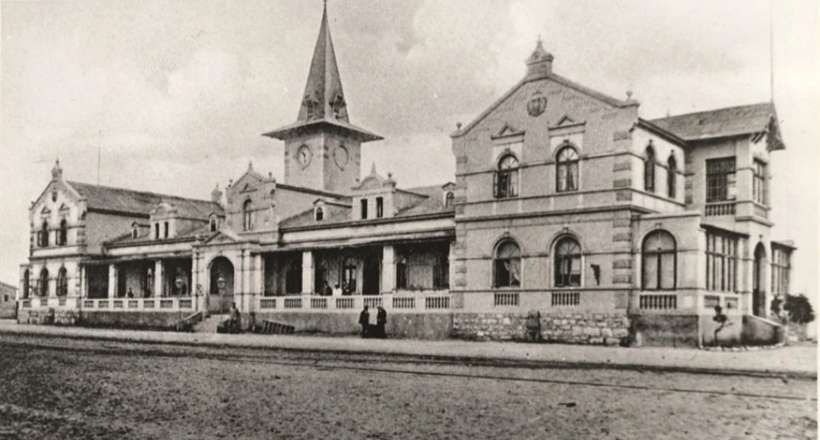
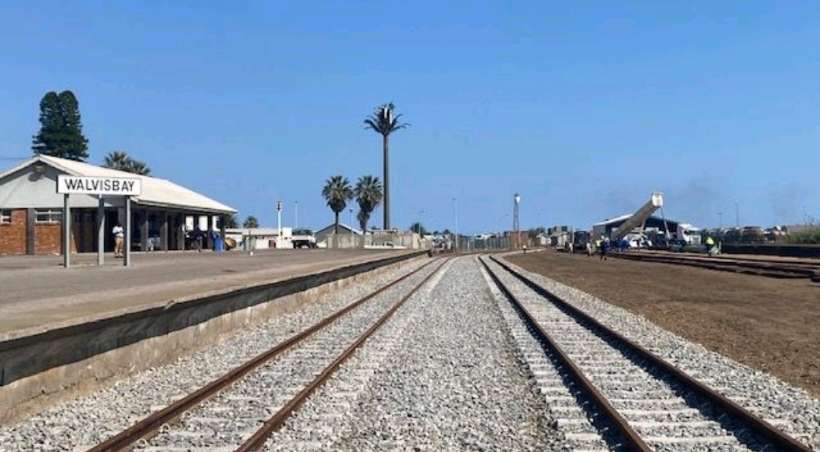
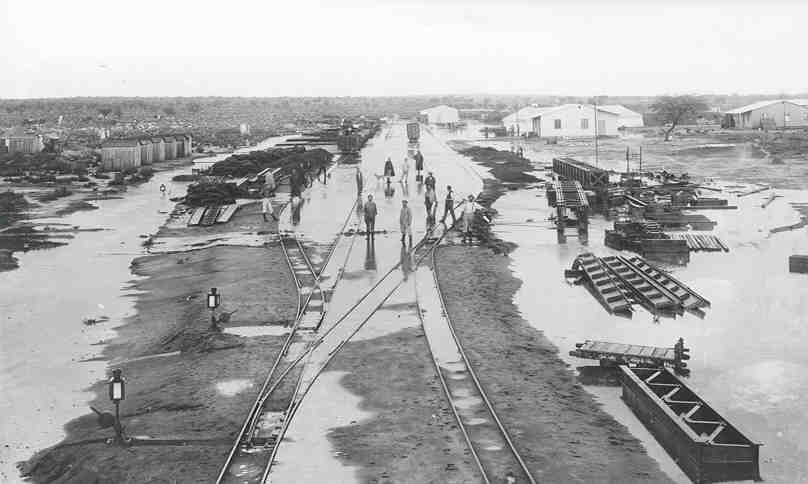
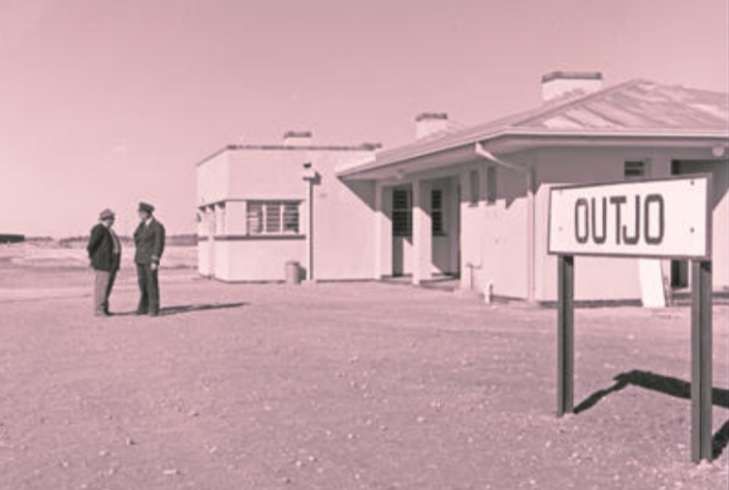
It seems that the original railway main line through Wolverton crossed land which was needed for the expansion of Wolverton Works. Two previous stations had been situated in the original route of the main line. “The first station was built for the opening of the London and Birmingham Railway on 17th September 1838, on the embankment just north of the canal above Wolverton Park. It proved to be temporary as the railway company purchased an additional 13.5 acres to the south, where they built a larger, more permanent station in 1840, at the east end of Church Street.” [8]

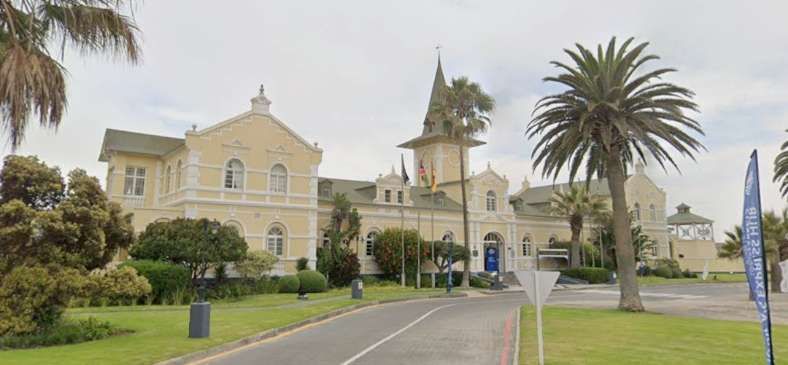
To avoid passing through the Wolverton Carriage Works, a railway main line deviation to the east was opened in August, 1881. The present Wolverton Station was built on the new line.

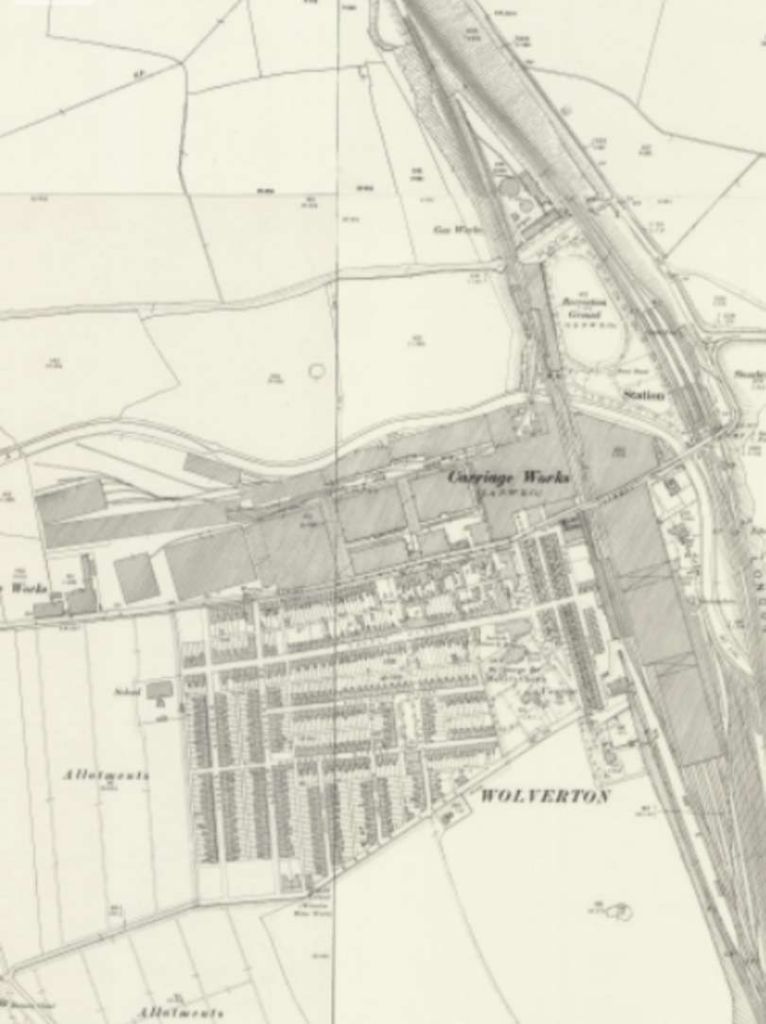
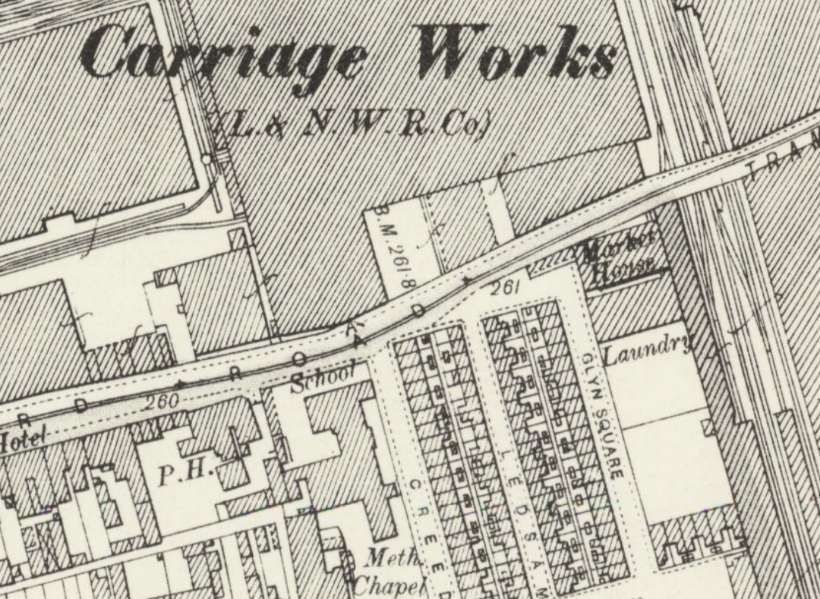
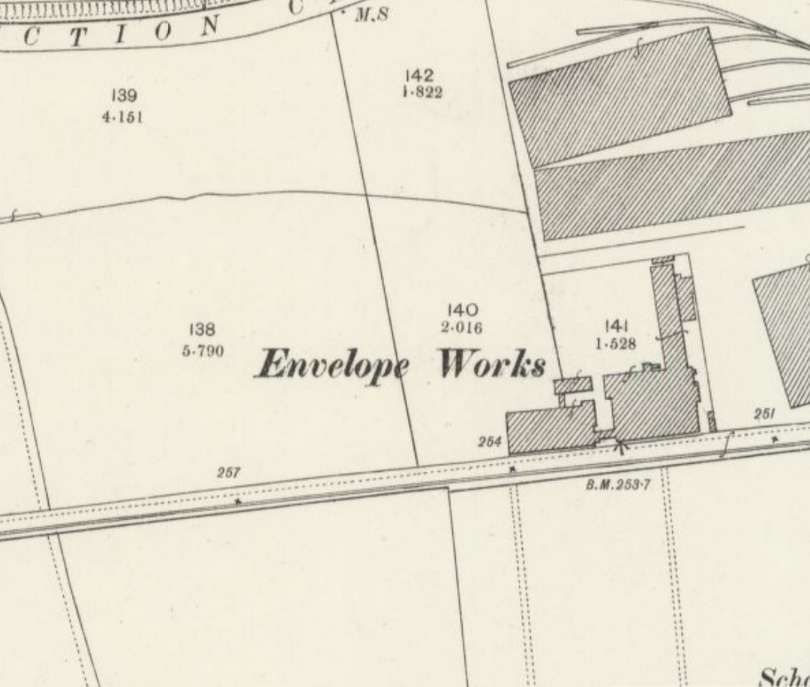
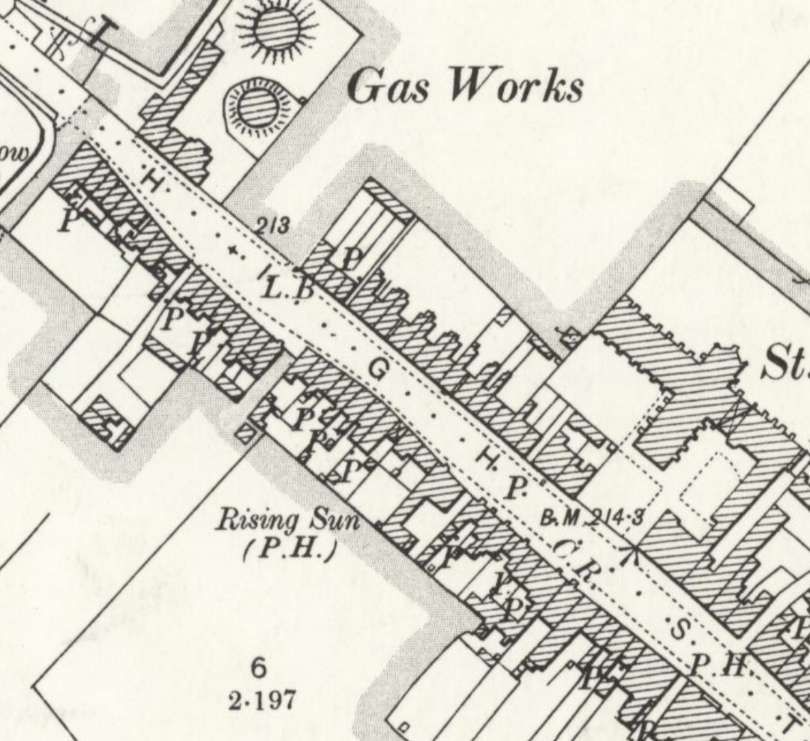
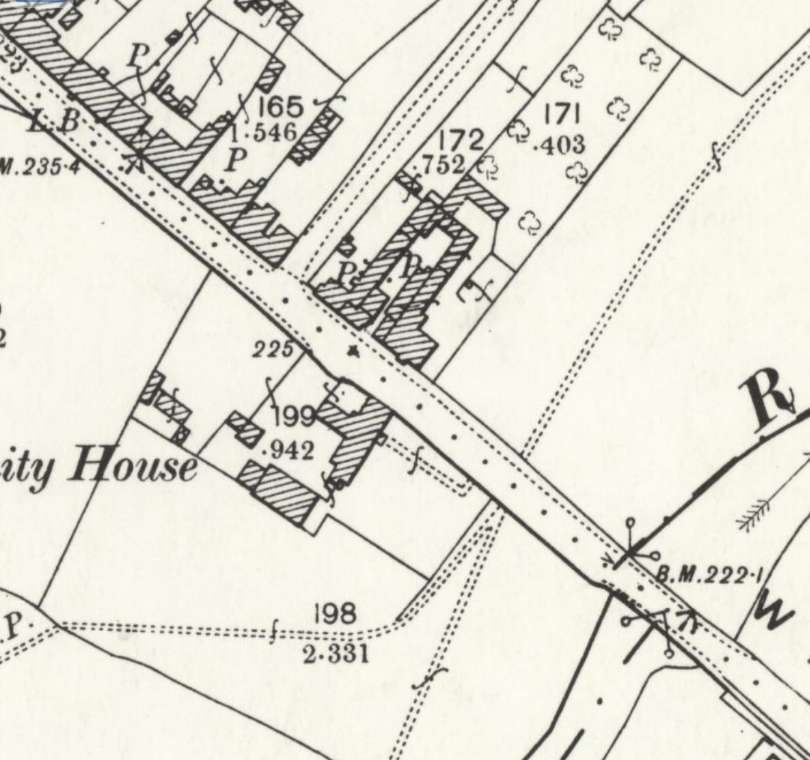
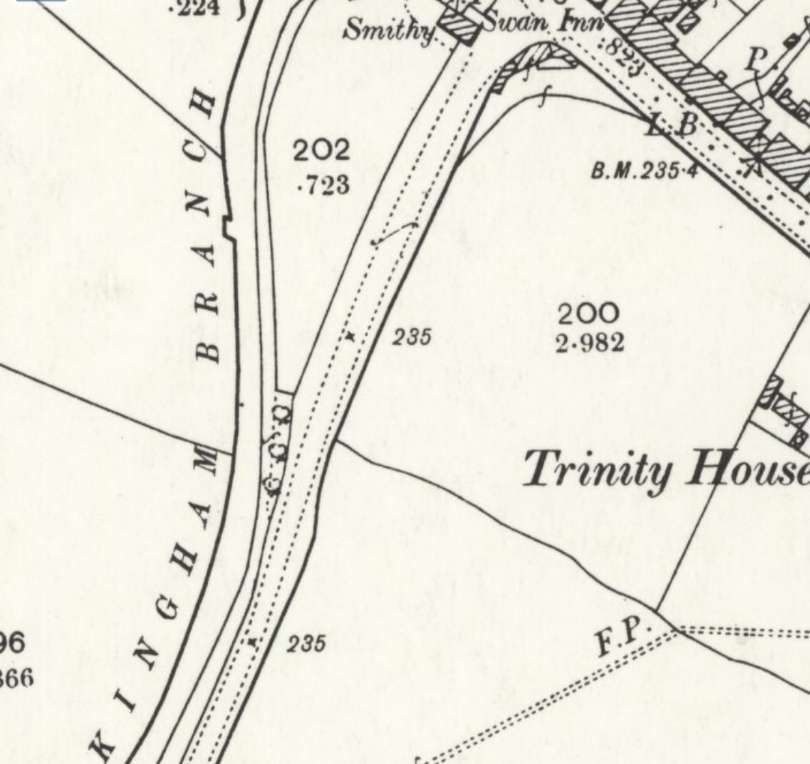
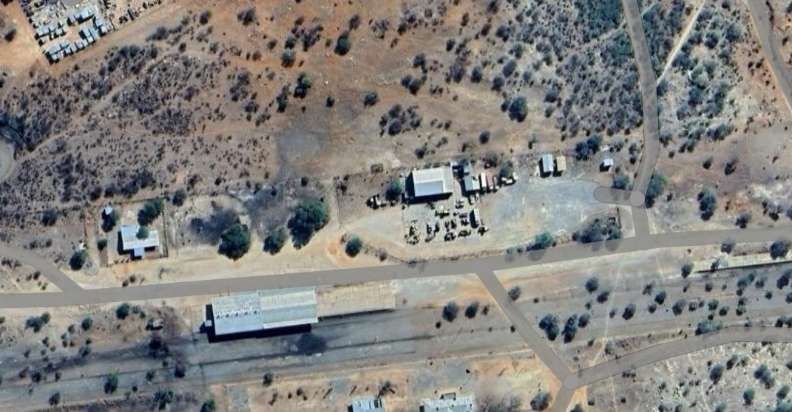
This rather fuzzy extract from the 25″ Ordnance Survey of 1898, published in 1900 shows the extent of the Railway Works at that time. To the West of the Railway Works was the site of McCorquodale’s Printing Works which can just be made out at the left edge of this map extract. The Grand Junction Canal sits between the Works and the Railway Station. [9]

McCorquodale’s Printing Works

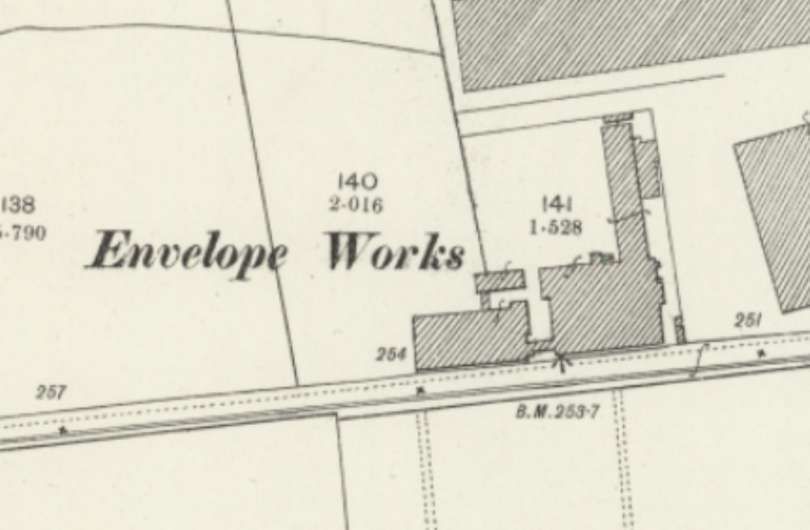
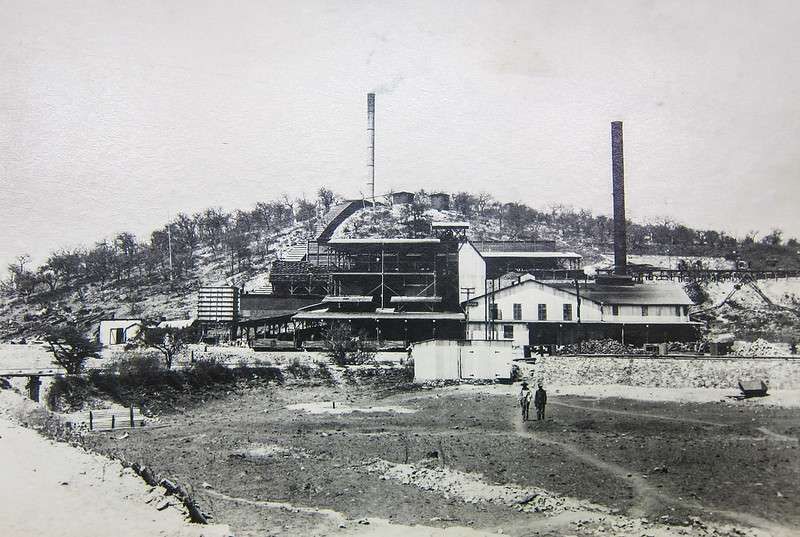
McCorquodale’s Printing Works were one of a series of such establishments.  McCorquodales built premises in Wolverton in 1878. The firm specialised in registered envelope manufacture, but undertook many other government and security printing contracts. The “history of the company commenced in 1841. George McCorquodale opened a stationers shop in Liverpool which became the Liverpool Printing and Stationery Company Ltd. The company prospered and five years later George opened the first McCorquodale printing works at Newton-le-Willows in Lancashire, specialising in providing a service to the ever expanding railway network.” [5]

Further factories were opened in Glasgow and London in the 1870s. In Wolverton, men were employed in the railway works but their daughters remained unemployed. “Sir Richard Moon, Chairman of the London & North Western Railway had an idea for solving the problem and contacted his friend George McCorquodale and suggested that he build a printing works in the town. George thought it an admirable suggestion and in 1878 he opened his registered envelope factory – success was immediate. The works rapidly increased in size and diversified into printing books, forms and commercial stationery.” [5]

By 1886, McCorquodales of Wolverton was known as one of the finest printing factories in the country and employed 120 women and 20 men. Most of the girls started work at the age 13 or 14 and were normally employed until they married. Girls were encouraged to remain in the factory as long as possible and a £10 wedding grant was given to those who had completed 10 years service. Until 1909 staff worked a 54 hour week starting at 6am with a half day on Saturday. The company were also quick to provide the best welfare and working facilities in the area, and the staff were provided with dining, reading and recreation rooms. A Good Samaritan Society was started and pension funds paid for holidays and service bonuses.” [5]

McCorquodale’s Printing Works in Wolverton, © Public Domain. [6]
McCorquodale’s Printing Works at the turn of the 20th century. [10]

The Tramway

Lee tells us that in 1882 a special meeting of Stony Stratford ratepayers considered a proposal to apply to the Board of Trade for an Order to sanction a tramway between Wolverton and Stony Stratford. “The ratepayers approved, subject to the track nowhere exceeding 6 ft. in width. A company was formed, apparently by these local interests, and was incorporated on 4th November 1882, as the Wolverton & Stony Stratford Tramways Co. Ltd. The Chairman was Abraham Culverhouse, and the Secretary John George Ventris Field Johnson. The company failed to get under way, and was placed in voluntary liquidation on 3rd September 1883. One of its few corporate acts seems to have been the granting of consent, two days after it went into liquidation, to the registration of a new company with a similar (but not the same) name.” [1: p547]

The Bagnall Saddle Tank on the Tramway, note the protective side skirts and the extended chimney. This monochrome image is an old postcard, © Public Domain. [13: p15]

Meanwhile, a Tramways Order had been promoted by Frederick Charles Winby, a civil engineer and contractor, and this was granted on 16th July 1883. It authorised [a tramway] 2 miles 54 chains [in length], mainly of single line, 4 ft. gauge, from the new Wolverton Station (opened in August, 1881) to the northern end of High Street, Stony Stratford.” [1: p547]

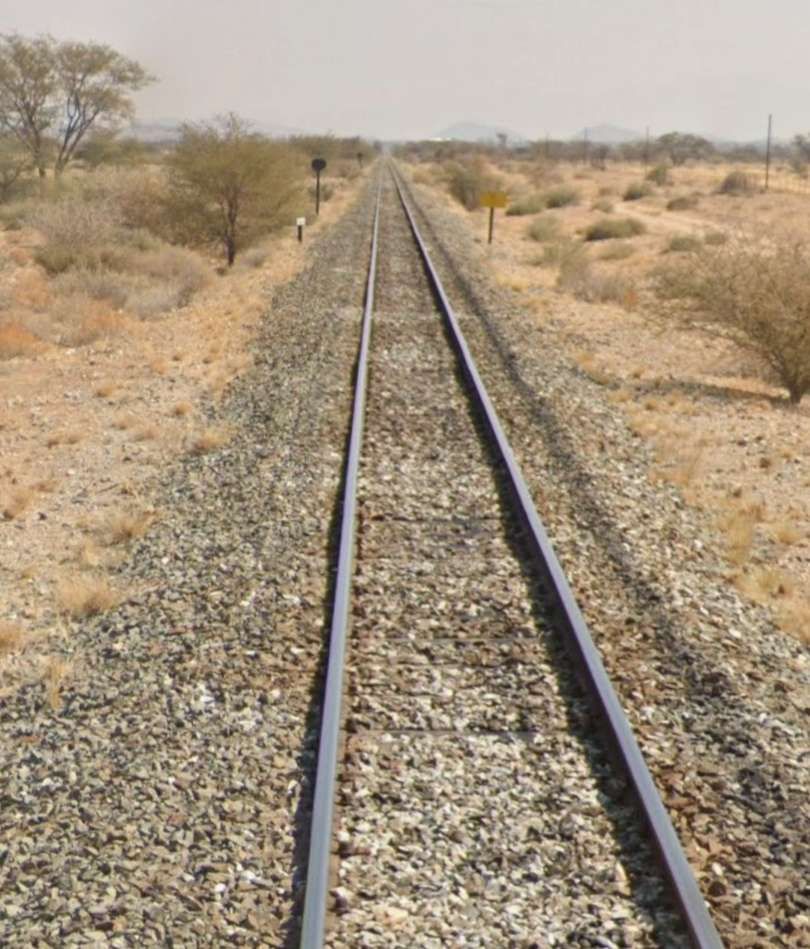
Wolverton to Stony Stratford and beyond

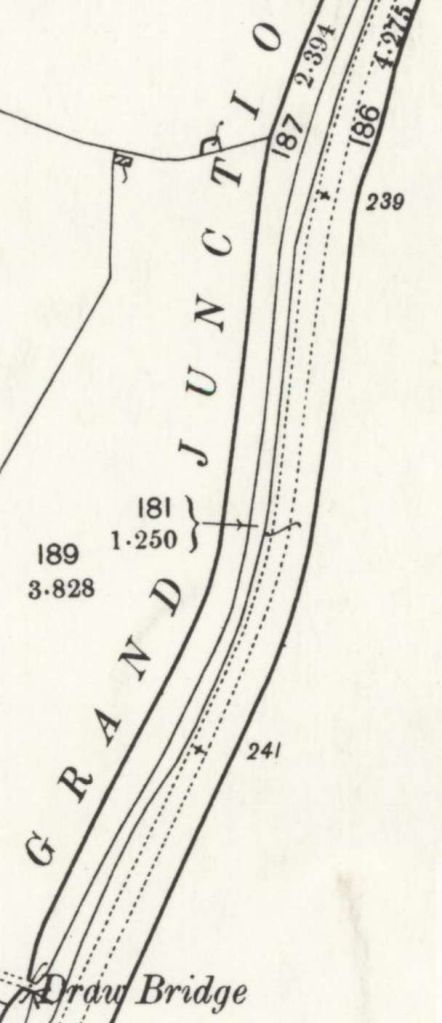
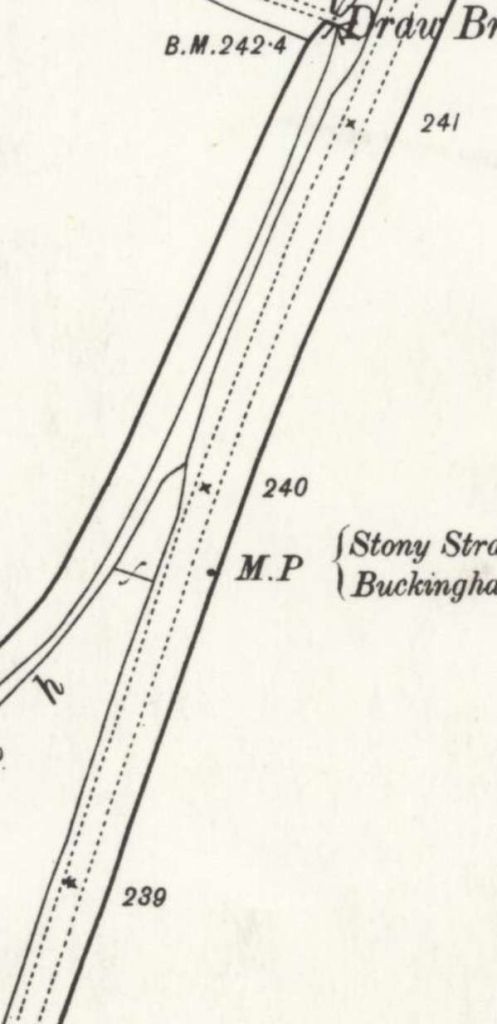
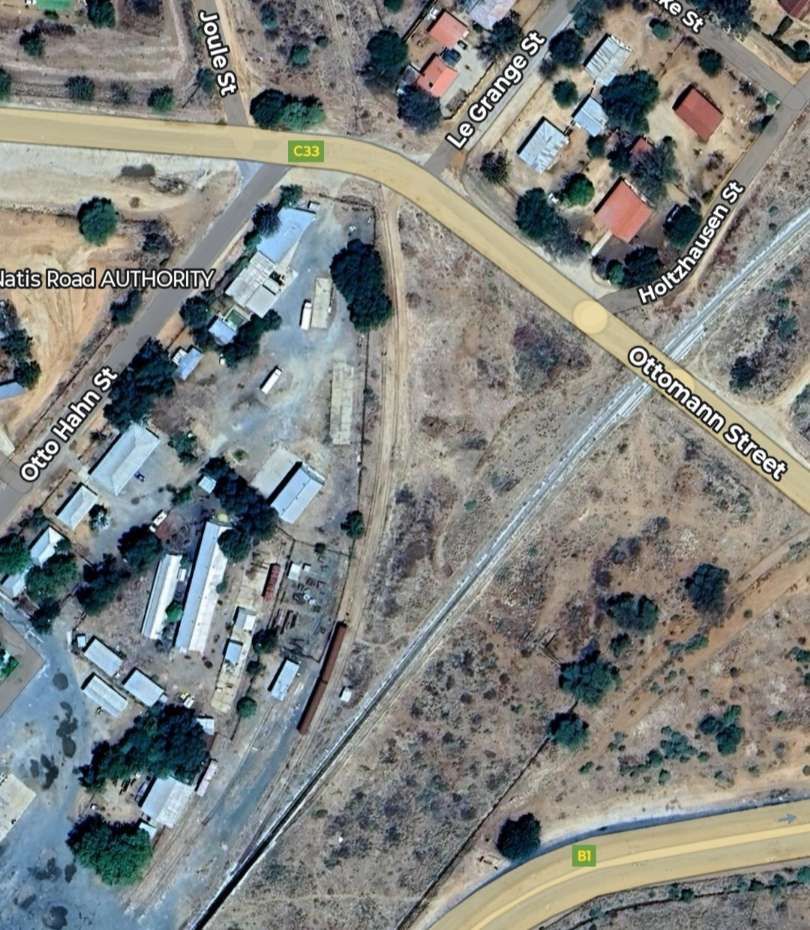
From the new station the tramway ran South along the road built to bridge the diversion line and the Canal at the South end of the site of Wolverton Railway Station. This road had once been a footpath.

The fullest extent of the tramway. [1: p549]

The company promoted by Winby took the name, ‘The Wolverton & Stony Stratford & District Tramways Co. Ltd‘. It acquired all the rights and interests of Winby in the Tramways Order of 1883. Lee tells us that “It had an authorised capital of £20,000 in £1 shares, which was increased to £30,000 on 27th October 1883. The latter fact seems to have been forgotten, although it was duly registered and the requisite stamp duty paid. Indeed, the company had very little regard for the niceties of the Companies Acts, and actually varied its corporate name on the Memorandum and Articles of Association respectively. Thereafter, it could never remember the precise title shown on the certificate of registration, which is the one used above. Winby contracted to build the line, and to take part of the price in shares, but the whole arrangement fell through. The company was dormant until 1886, and only 34 shares were issued.” [1: p548]

C.H. Wikinson, a local contractor that promoted a number of schemes in the area (such as a link between Newport Pagnell and Olney), “entered into a contract with the company on 18th August 1886, to build the line for £13,325, and on 8th September 1886. agreed under an indenture to accept £2,000 in shares. The name of the company was changed on 5th October 1886, to the Wolverton, Stony Stratford & District Light Railways Co. Ltd., and its shares were offered for sale. They were taken up by a large number of local [people], and the work proceeded rapidly.” [1: p548]

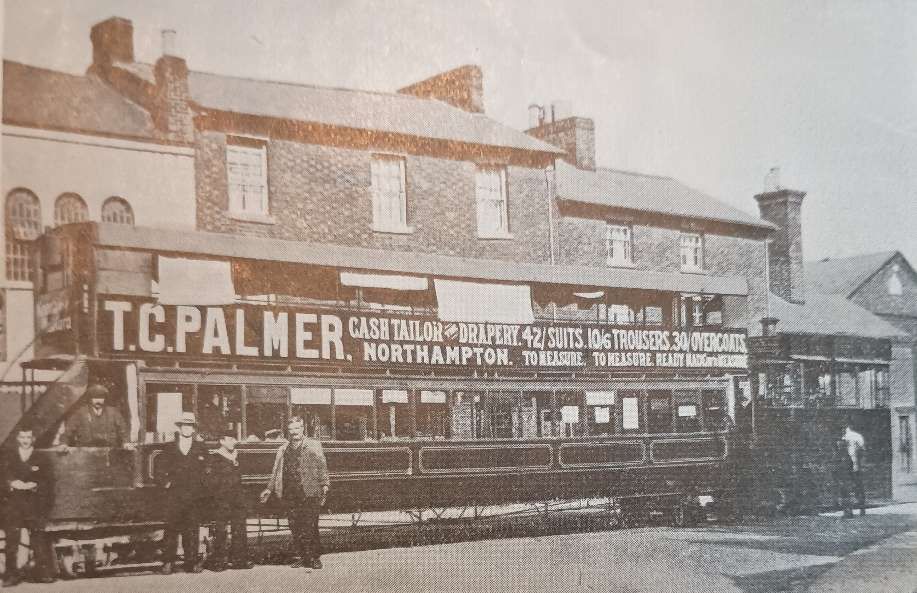
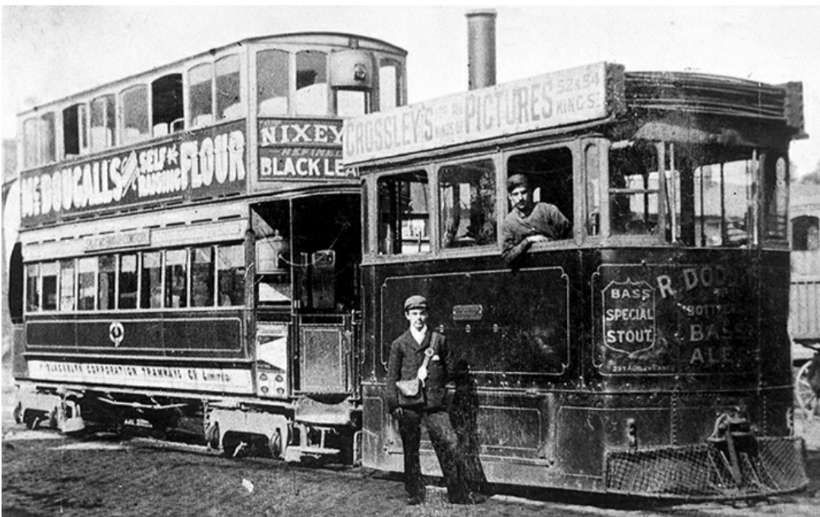
Lee continues: “The line as authorised in 1883 received Board of Trade sanction on 20th May 1887, in respect of 2 miles 15 chains single line and 40 chains double. It was built to the 3 ft. 6 in. gauge instead of the 4 ft. originally authorised. Public passenger traffic was begun on 27th May 1887, between the Barley Mow Inn, Stony Stratford, and Wolverton Station, with tramway-type steam locomotives hauling very large covered-top double-deck tramcars. The ordinary fare was 2d., with a special cheap rate for workmen, whereas the horse bus that had previously served the route charged 6d.” [1: p548]

Allan Edwards says: Wolverton “grew rapidly to an austere and symmetrical pattern, its housing owned by the railway company and leased to its employees; it seemed almost to be a northern industrial town misplaced in the agricultural heart of England. Stony Stratford meanwhile declined, becoming largely a dormitory town for its now larger neighbour. … By 1880, hundreds of workmen were walking daily to Wolverton from Stony Stratford and the surrounding villages. An alternative form of transport was a horse bus from Stony Stratford but the fare for this was 6d (22p) for a single journey, a price beyond the wage of the workmen of the now London & North Western Railway Co., or the new McCorquodale’s printing works whose average wage was only 30 shillings per week (£1.50).” [13: p15]

The old bus service did not run to a timetable, only travelling when there were sufficient passengers. “Average bus receipts were between £2 and £3 a week, but the tramway takings rapidly became £45 a week, largely by reason of the use of the line made by employees at the Wolverton carriage Works and at McCorquodale’s. Weekly tickets were issued to them at 1 shilling and entitled them to 4 journeys a day.” [1: p548]

A steam tram service sitting outside the entrance to Wolverton Railway Station. The picture has clearly been posed! © Public Domain. [1: p554]

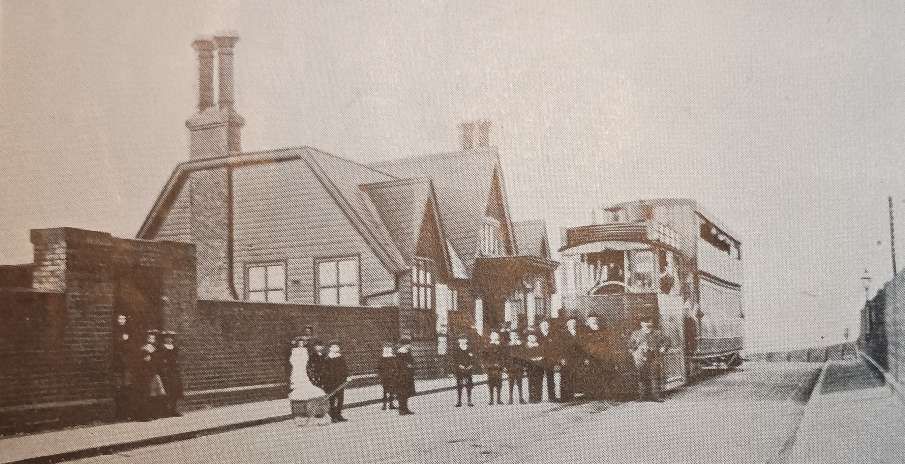
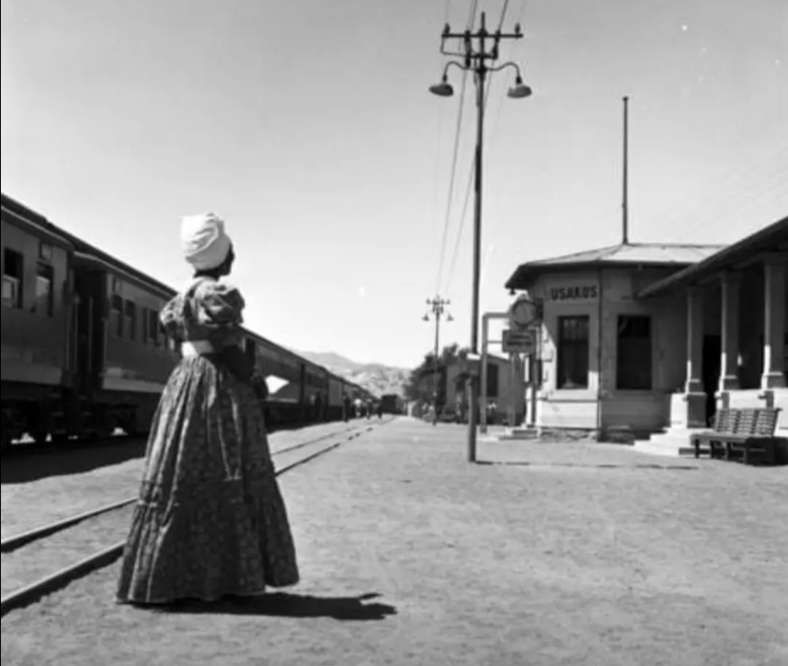
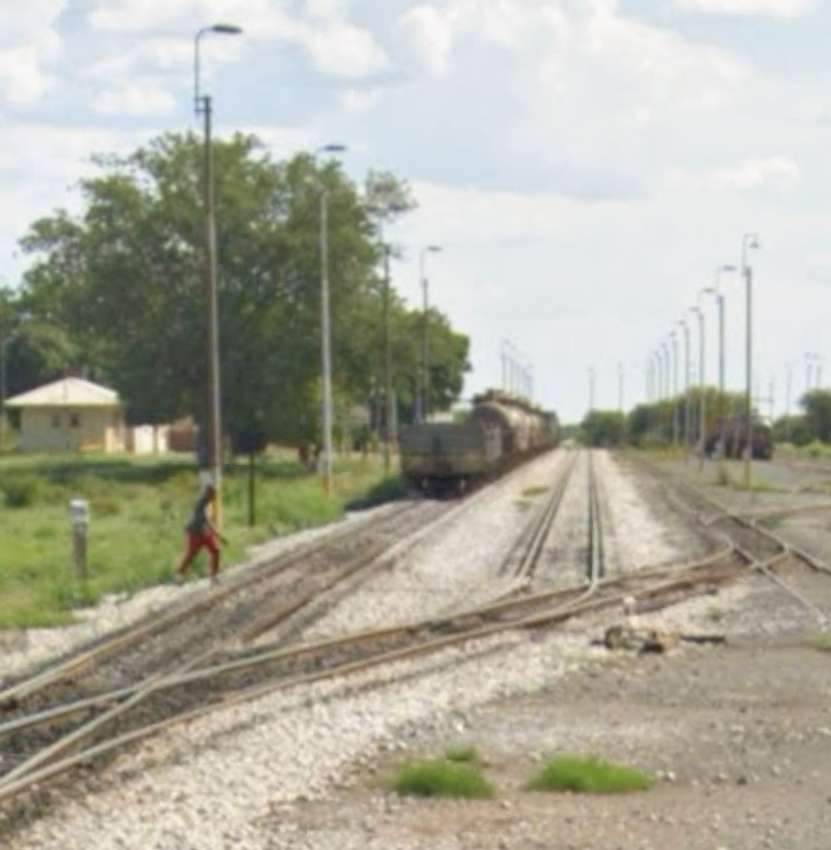
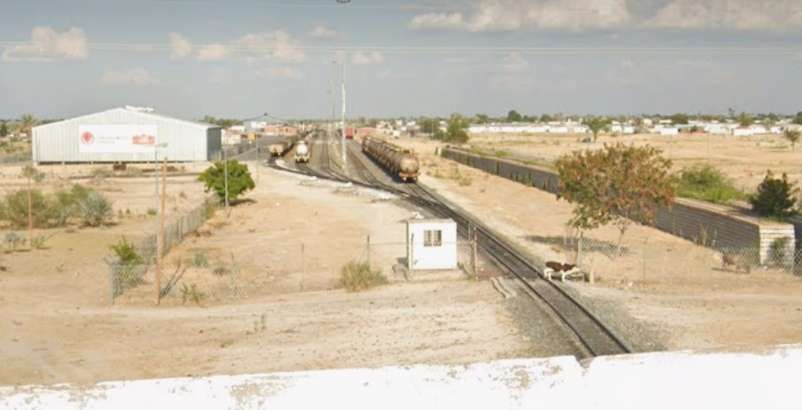
Another view of the steam tram waiting at Wolverton Railway Station. As these two images show, the passenger facilities were accessed at road level from the bridge over the main line railway, © Public Domain. [23]

Wolverton Railway Station and the terminus of the tramway. The Grand Junction Canal is just to the West of the Railway Station. Wolverton Works extended to the West side of the canal. This and subsequent extracts come from the 25″ Ordnance Survey of 1898, published in 1900. [11]
The tramway ran along the South side of Wolverton Works. [11]
The tramway continued West along Stratford Road. [11]
The same area is covered by the three map extracts immediately above. [14]
Looking South towards Stratford Road at the roundabout which sits at the same location as the Wolverton & Stony Stratford Tramway terminus. [Google Streetview, September 2023]
Looking West across the bridge over the main line. This carried the tramway over the railway. The location of the Wolverton Works is on the right side of the image. [Google Streetview, September 2023]
The view North from Stratford Road Bridge over the main line railway station. [Google Streetview, September 2023]
The view West along Stratford Road (and hence the route of the old tramway) with the boundary wall of the old Wolverton Works on the right. The building shed to the left was the Market House with a Laundry out of view behind it to the left. [Google Streetview, September 2023]
Further West on Stratford Road, this is the view West along the road from the bridge over what was once the main line. The boundary wall on the right enclosed what, in the 21st century, is the site of a Tesco Superstore but which once was the site of the Wolverton Works. [Google Streetview, September 2023]
The view North along what was the original main line. A Tesco superstore is off the left of this view. The building directly ahead of the camera with the three cream doors is one of the old works buildings which sits on the far side of the canal. [Google Streetview, September 2023]
This extract comes from the 25″ Ordnance Survey of 1898, published in 1900. At the time of the Survey Wolverton as a town did not extend to the full length of the Works. [12]
A Stony Stratford-bound service sitting outside the main works entrance which is off the image to the left, © Public Domain. [13: p18]
Another view of workmens’ trains outside the Wolverton Works. Allan Edwards says that at the time this photograph was taken, the entire rolling stock of the tramway was sitting outside the Wolverton Works. Closest to the camera is Green Engine No. 2 with two 100-seater tramcars, behind which is No. 1 with an 80-seater tramcar and a 100-seater tramcar.  [1: p551][13: p17]

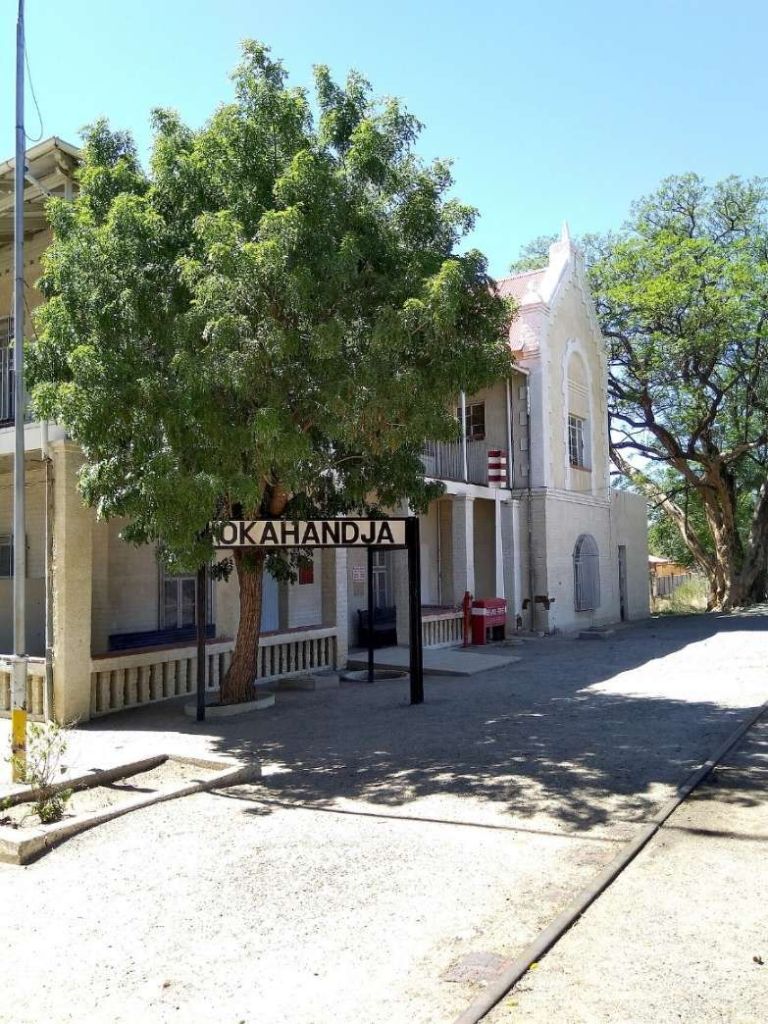
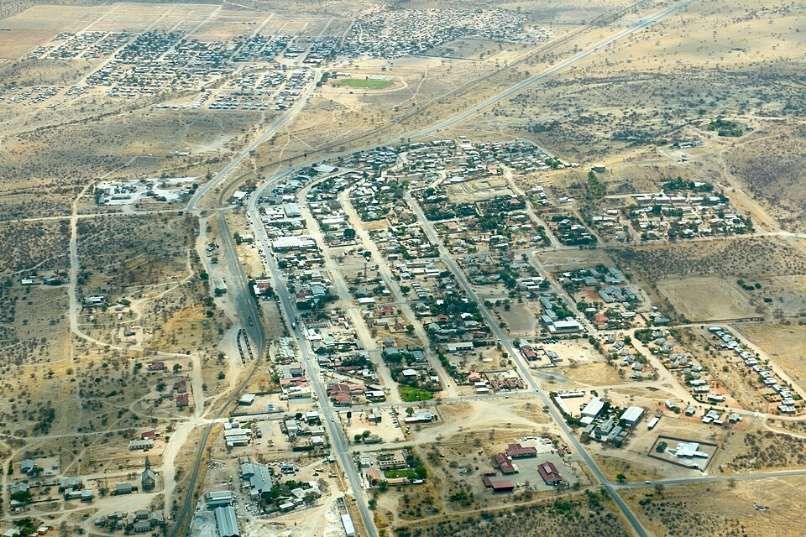
Wolverton was a railway town built to accommodate the workers. It has since expanded significantly. Much of the old Works site and the railway ‘village’ of terraced housing form a Conservation Area in the 21st century.

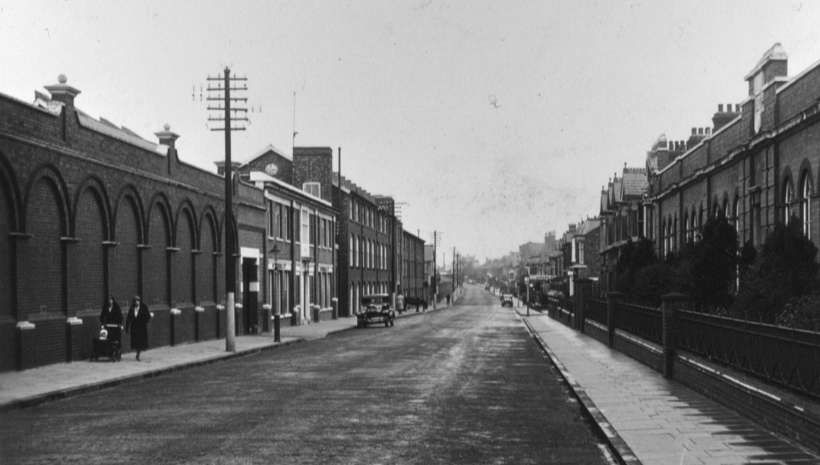
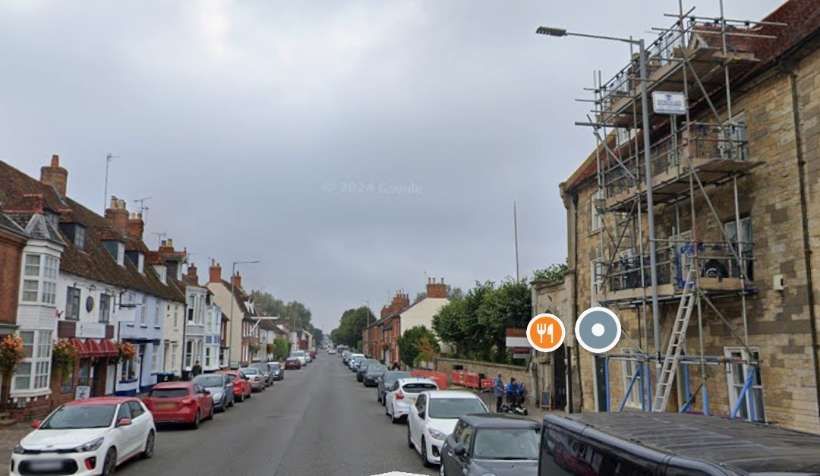
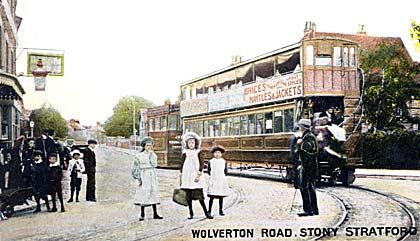
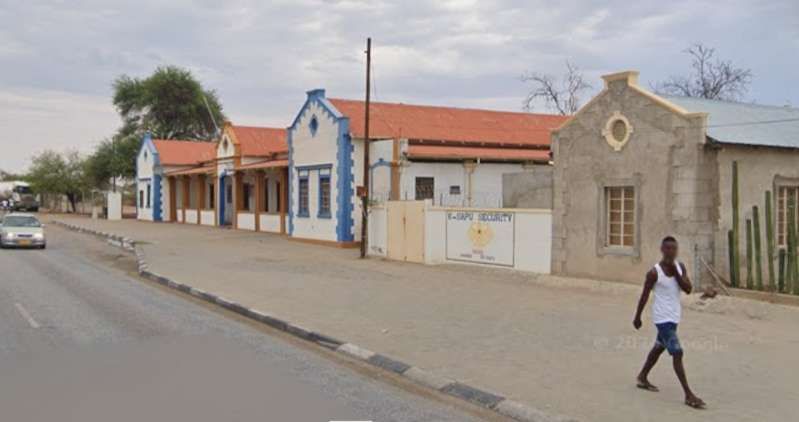
Allan Edwards describes the route of the tramway through Wolverton like this: Outside Wolverton Station goods yard there was a turning triangle on a steeply descending section of road and a link into the station goods yard. From this location, trams “climbed steeply on a right-hand curve to the road bridge over the 4-track railway line where tramway passengers could board outside the overline buildings of the LNWR station. The tramway then continued up and over the lines leading into the railway works. … With its track in the centre of the highway the tramway passed the railway workshops, the town of Wolverton being entirely on the left-hand side. Virtually continuous brick walls to the right sealed off first the LNWR works and then McCorquodale’s printing factory. It was nearly three quarters of a mile before the tramway line abruptly left the town behind, moving to the lefthand side of the road.” [13: p17]

McCorquodale’s Printing Works were beyond the western extent of Wolverton’s railway town. [12]
The tramway continued West along Stratford Road. [12]
The area today is much more developed! [14]
Continuing West along Stratford Road following the route of the old tramway. The Tesco Superstore is behind the brick built buildings on the right of this image. [Google Streetview, September 2023]
The old tramway continued along Stratford Road. [Google Streetview, September 2023]
And again, further West on Stratford Road. [Google Streetview, September 2023]

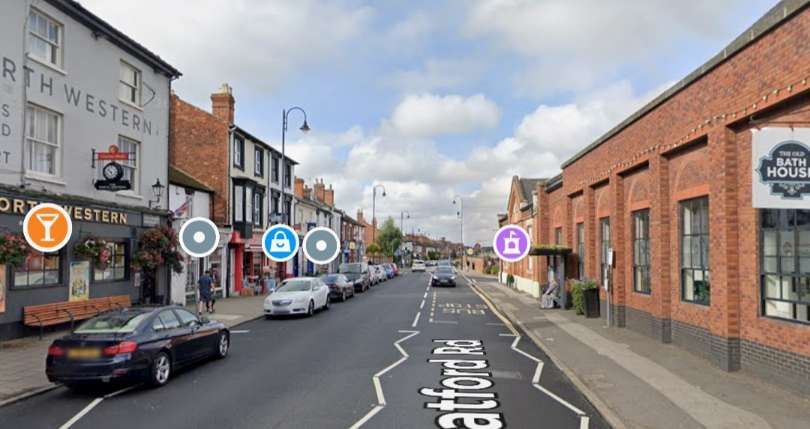
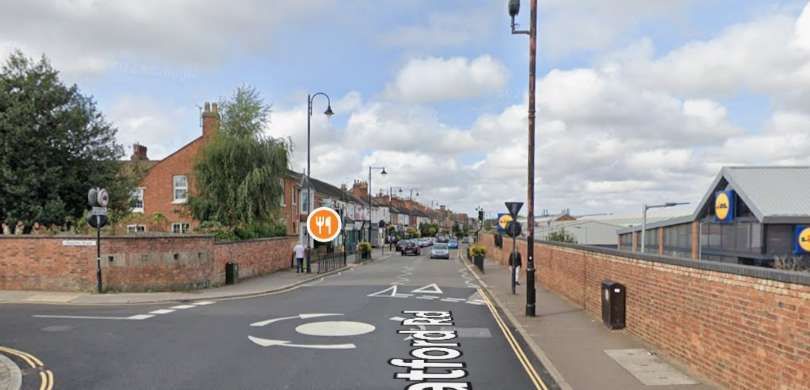
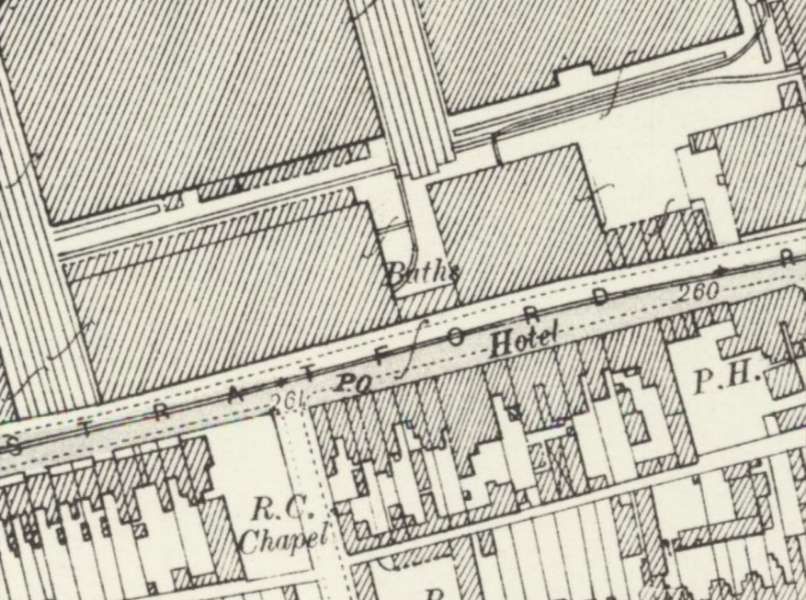
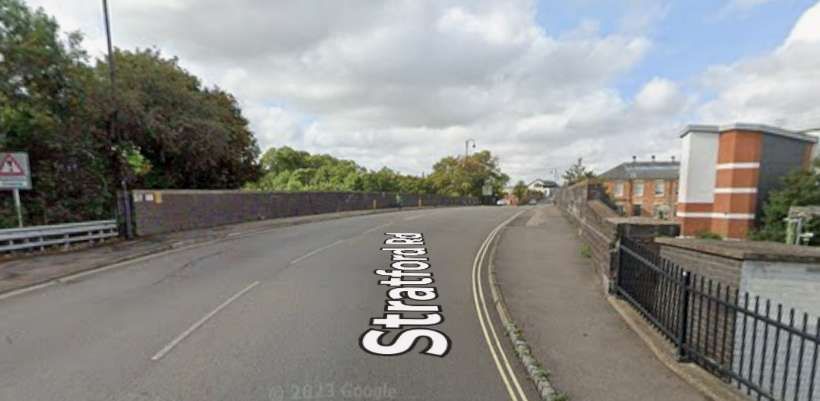
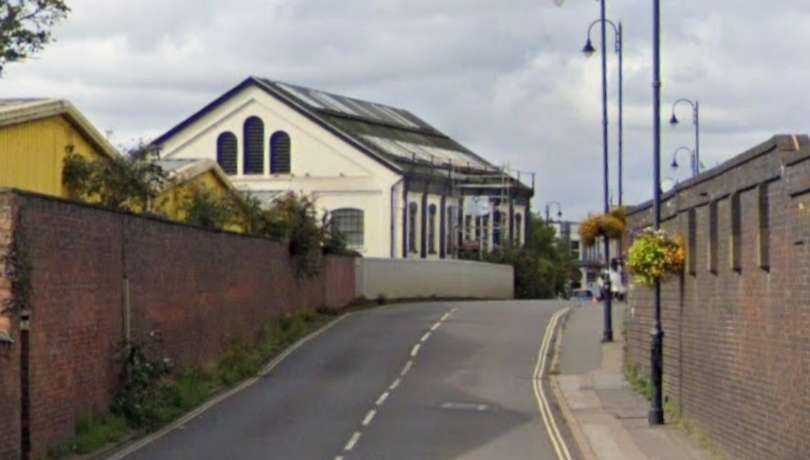
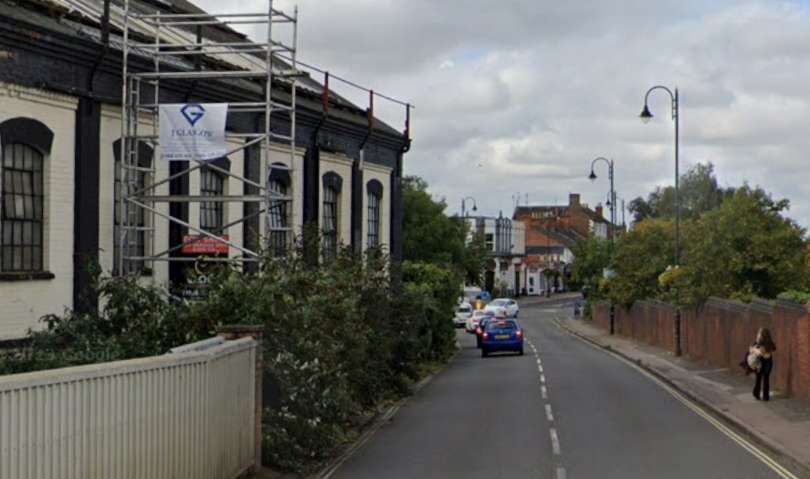
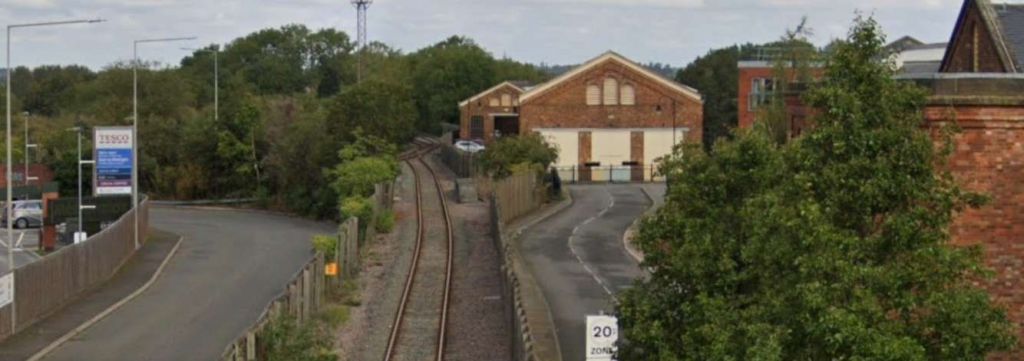
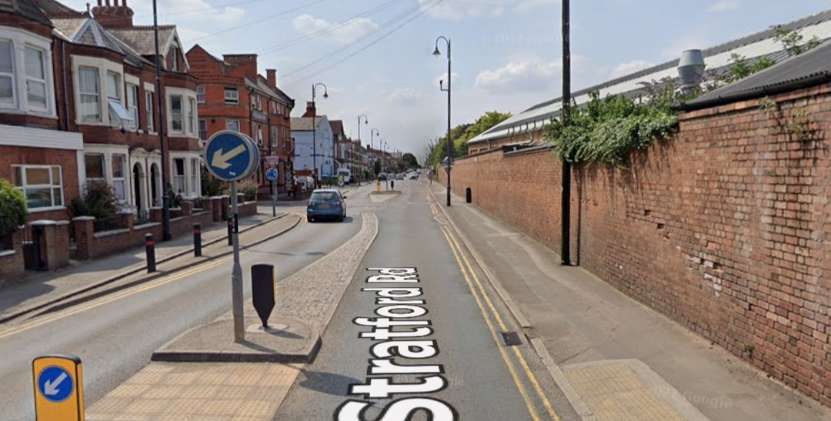
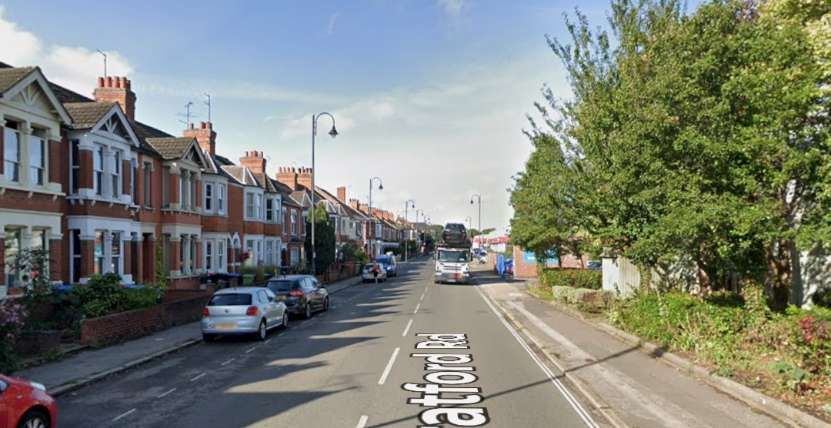
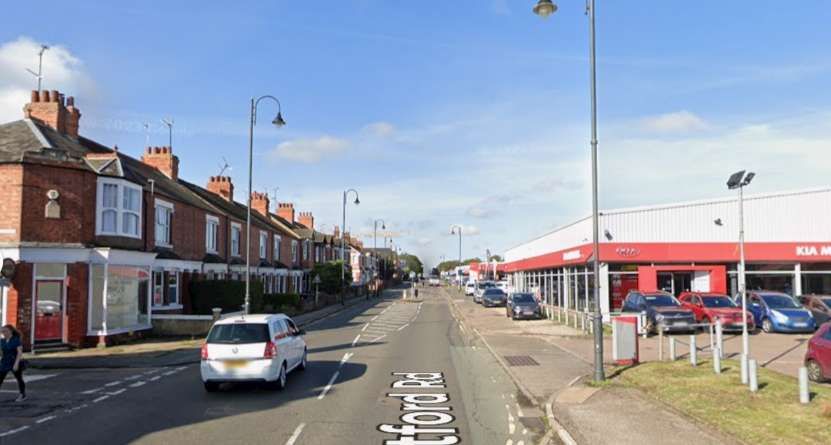
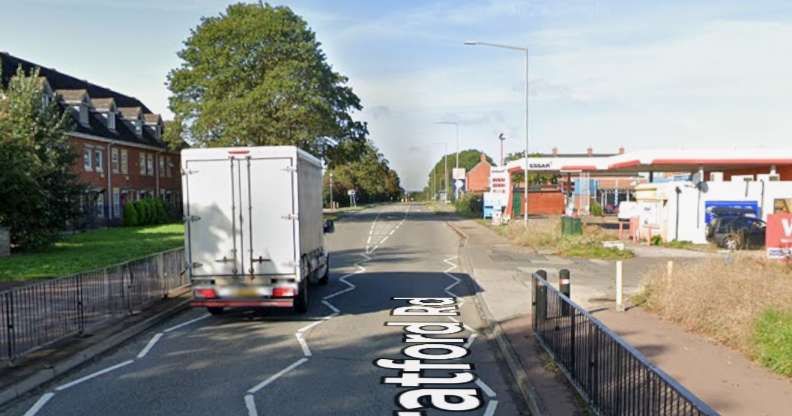
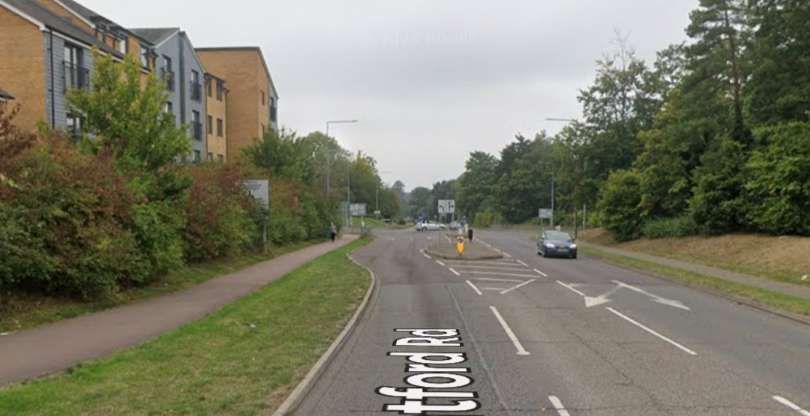
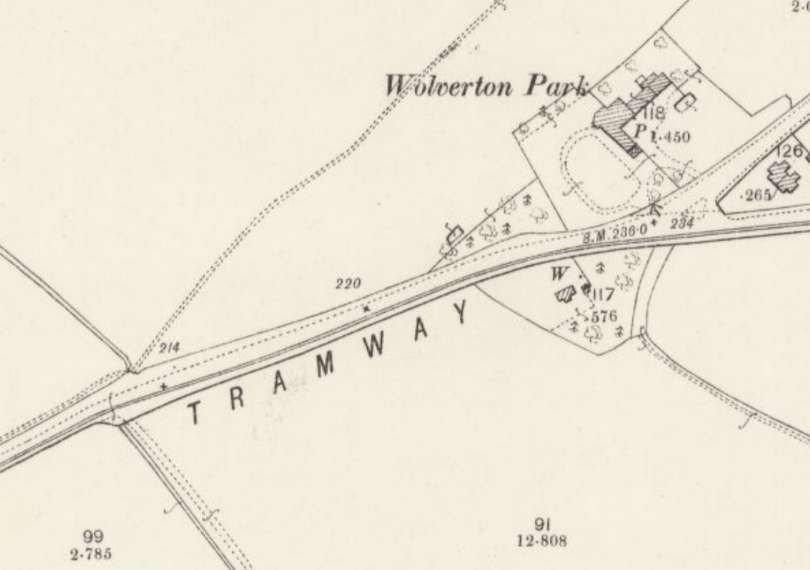
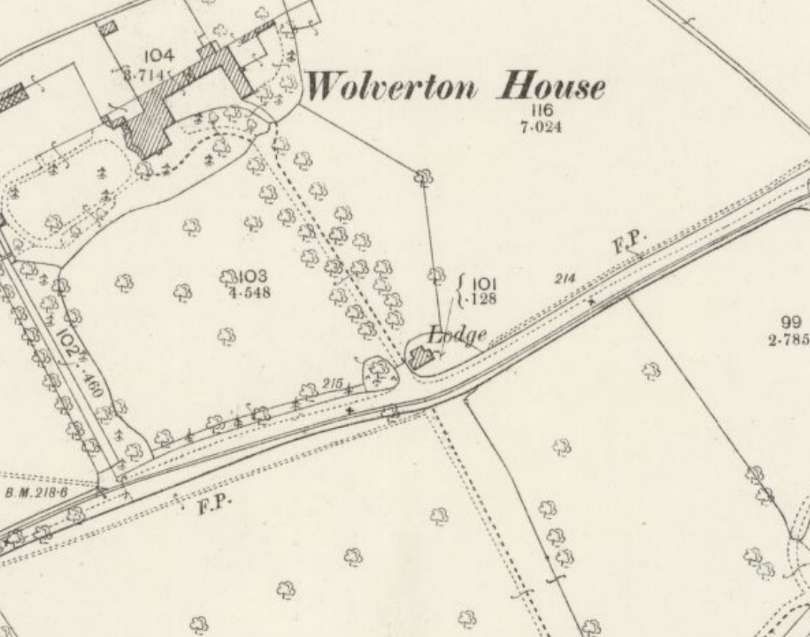
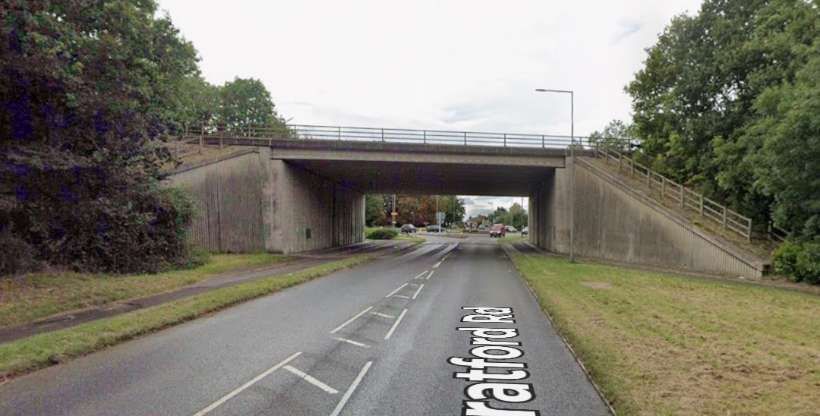
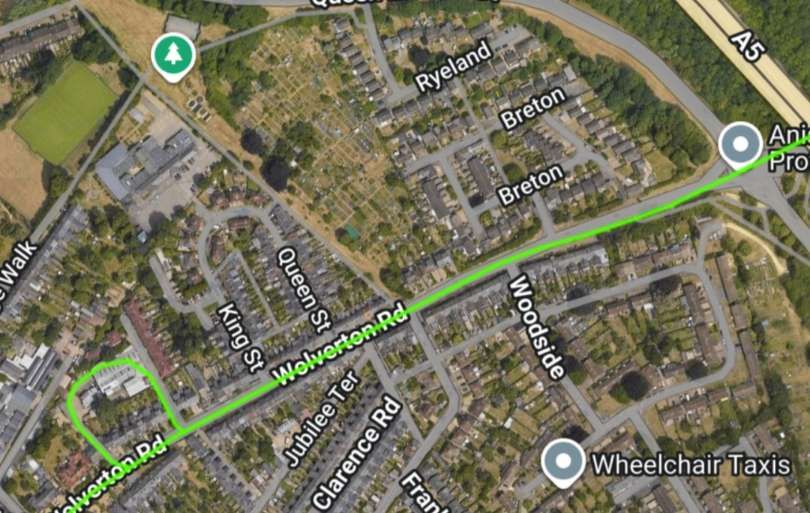
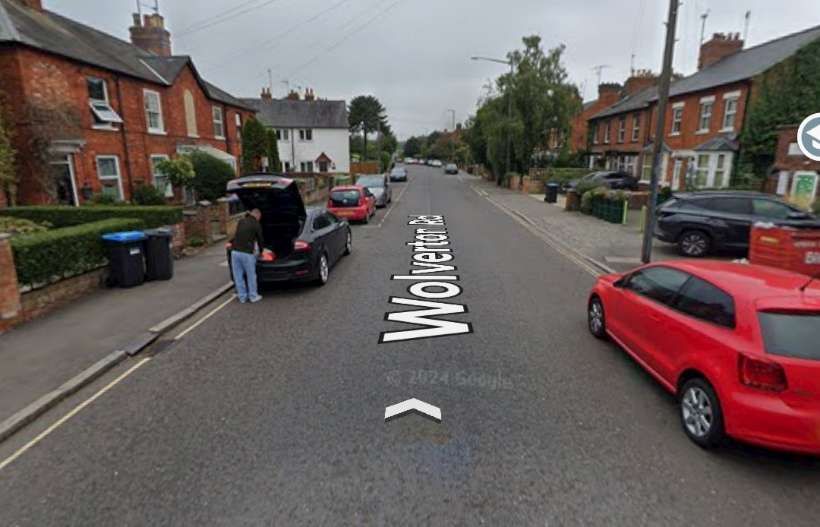
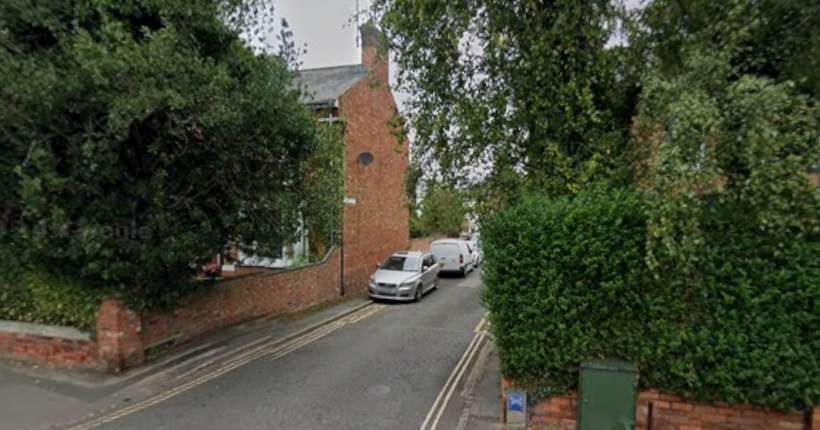
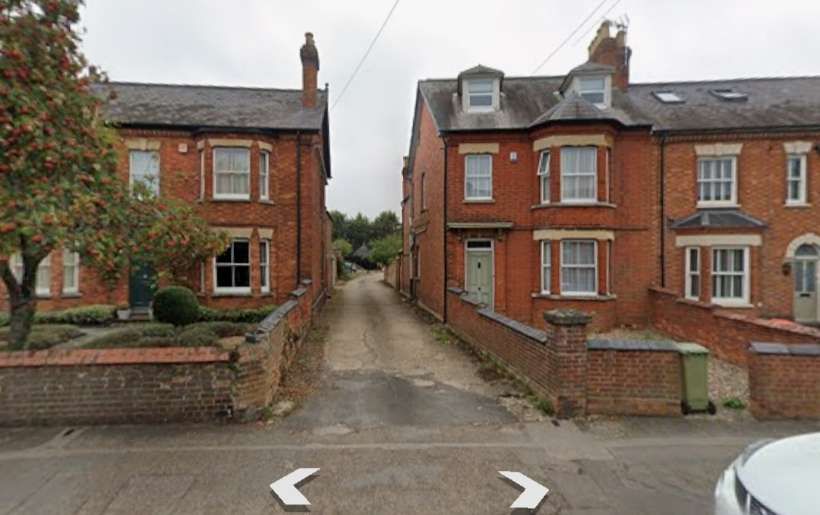
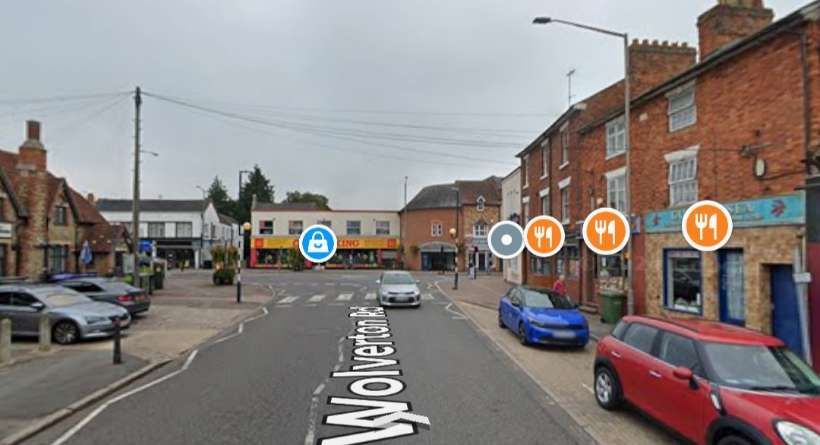
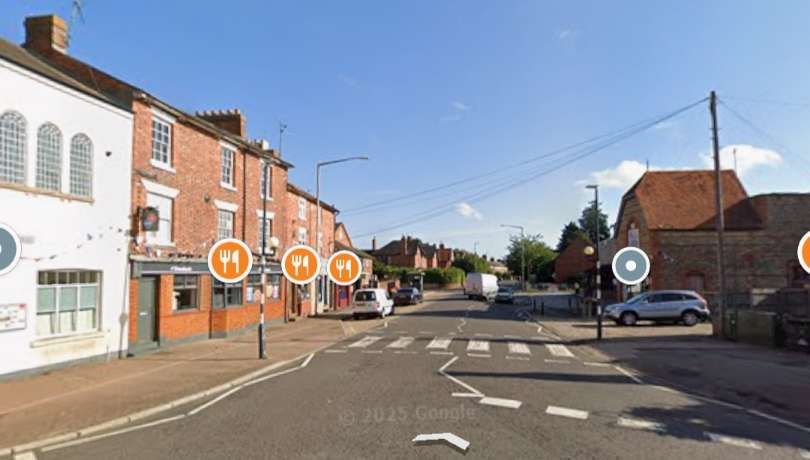
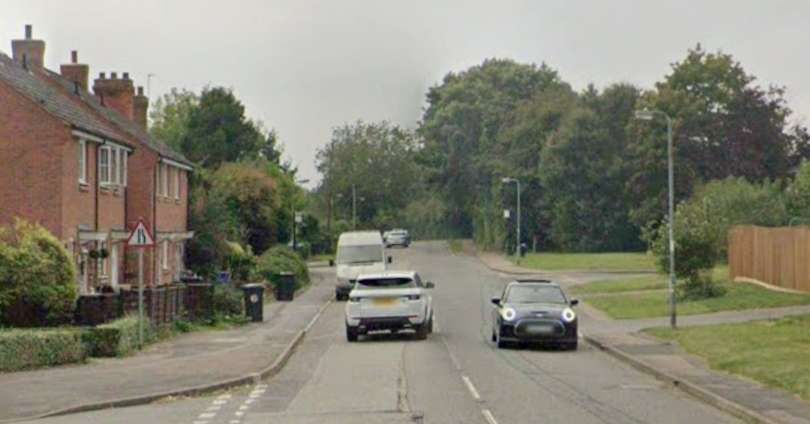
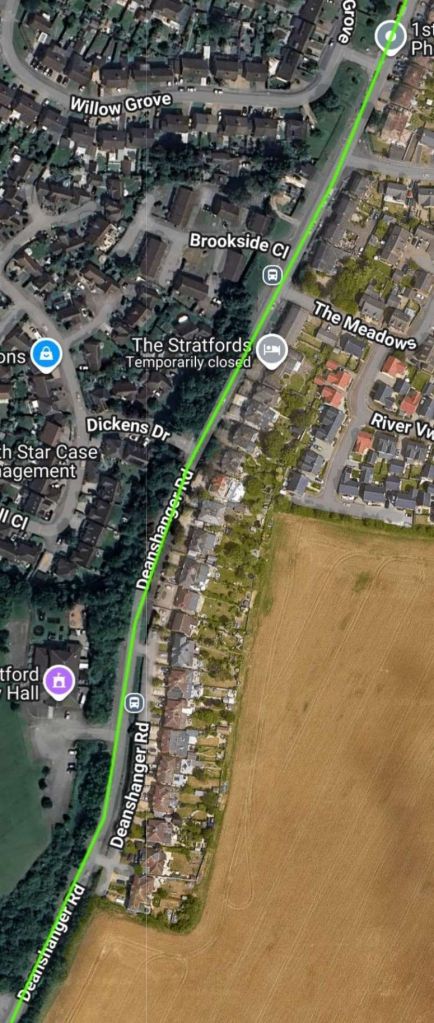
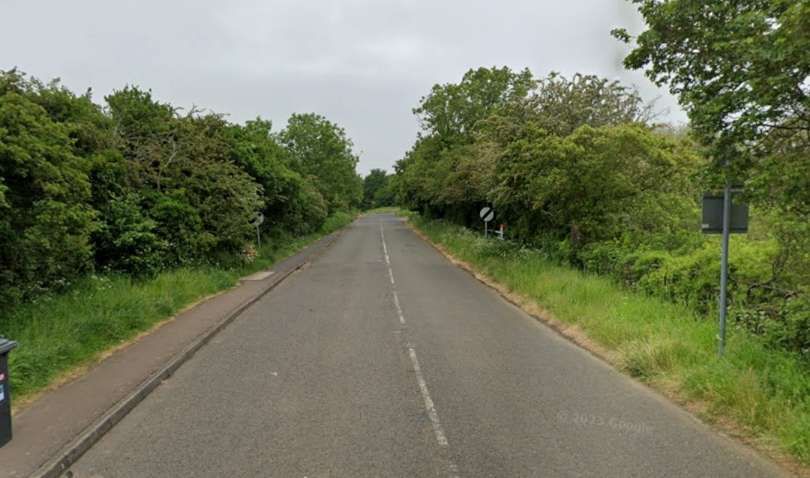
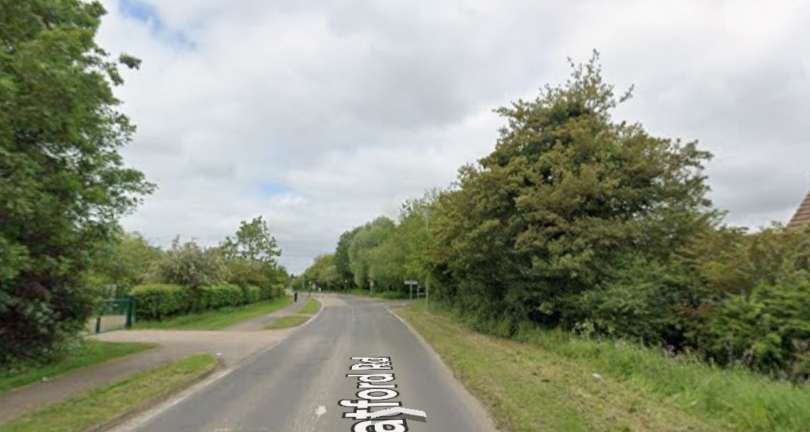
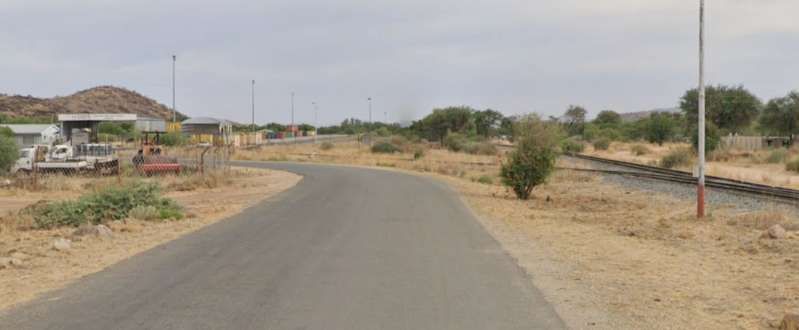
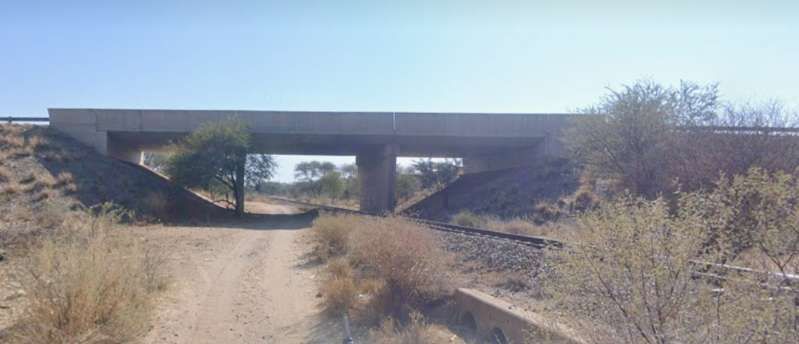
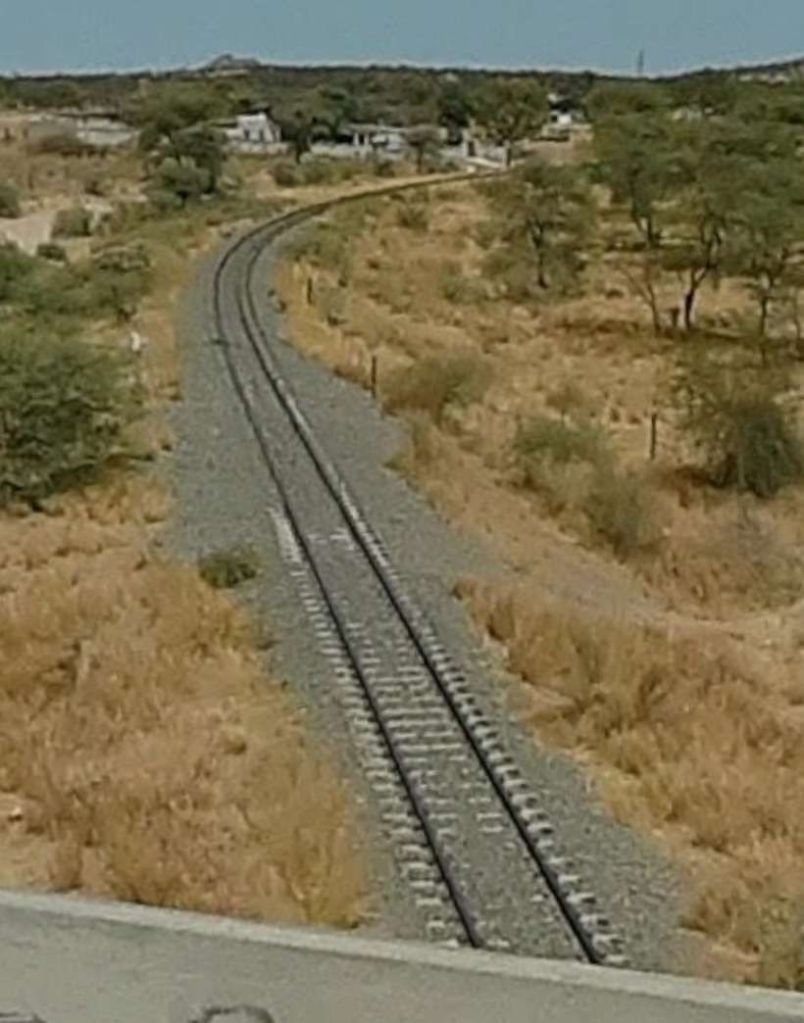
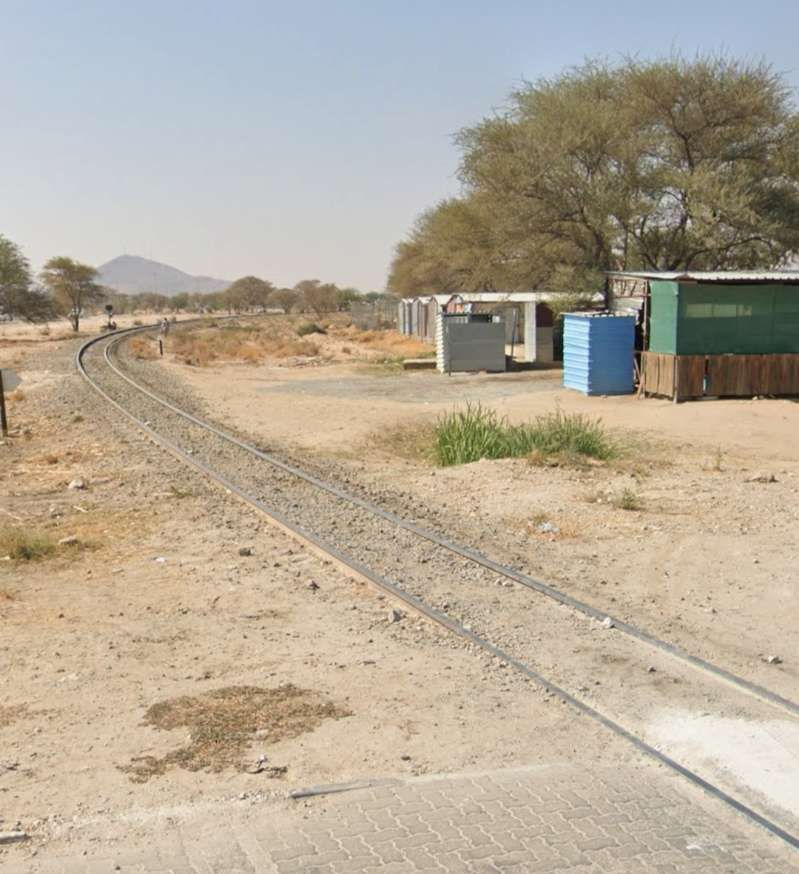
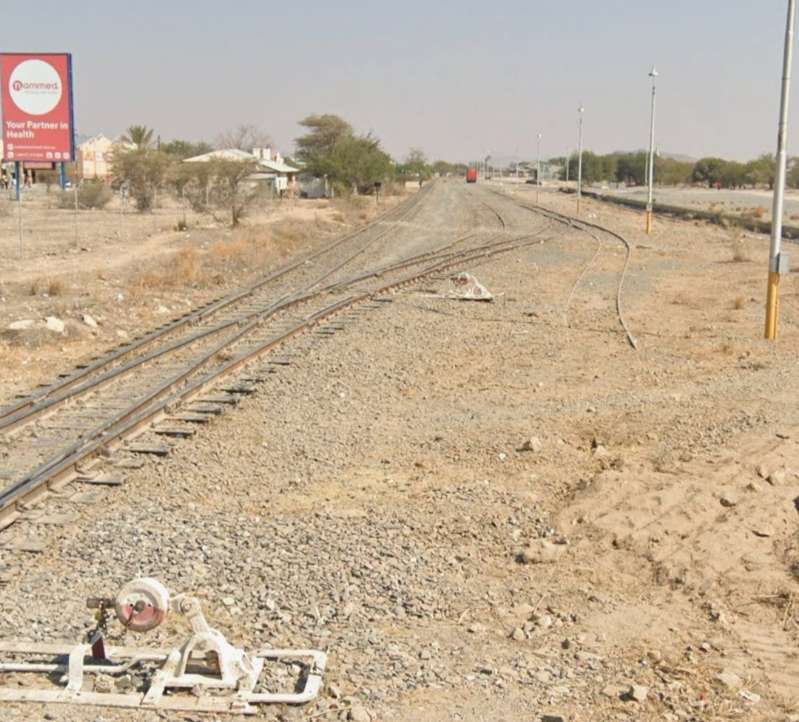
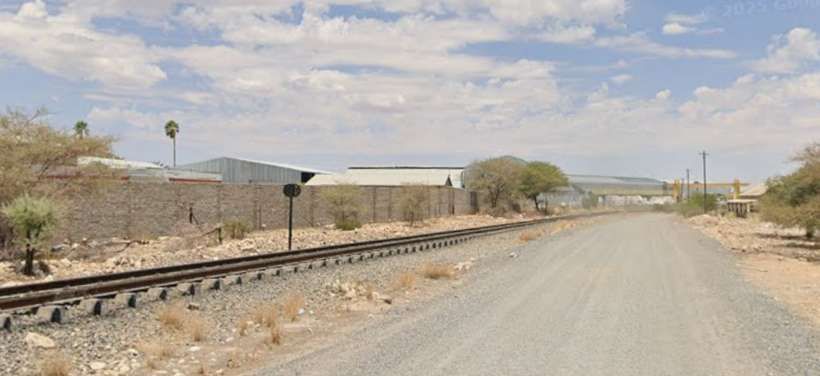
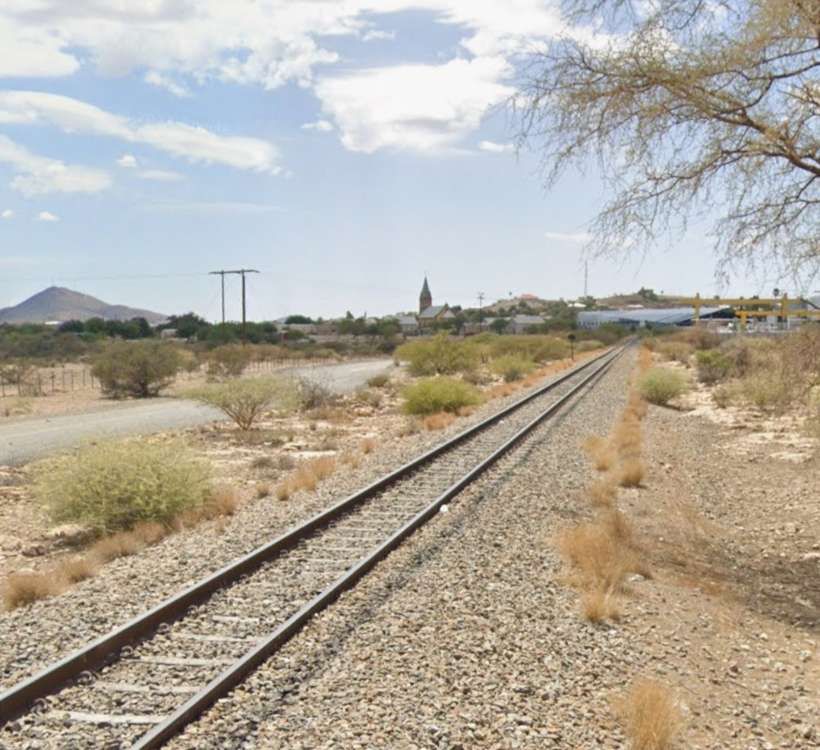
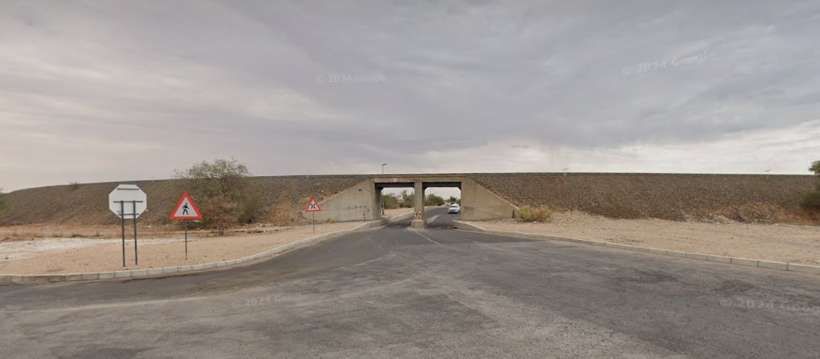
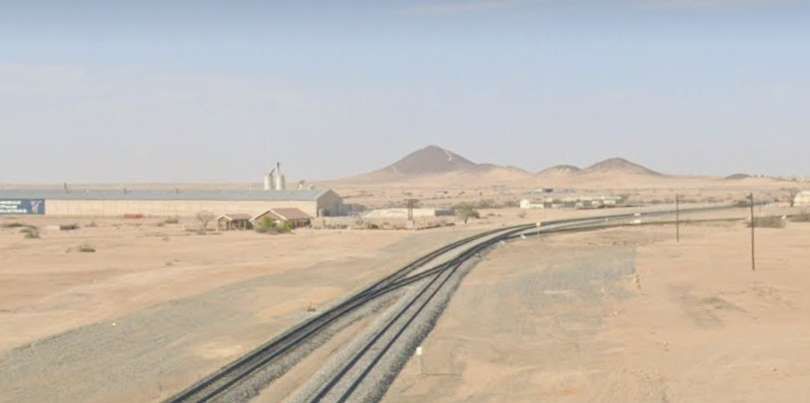
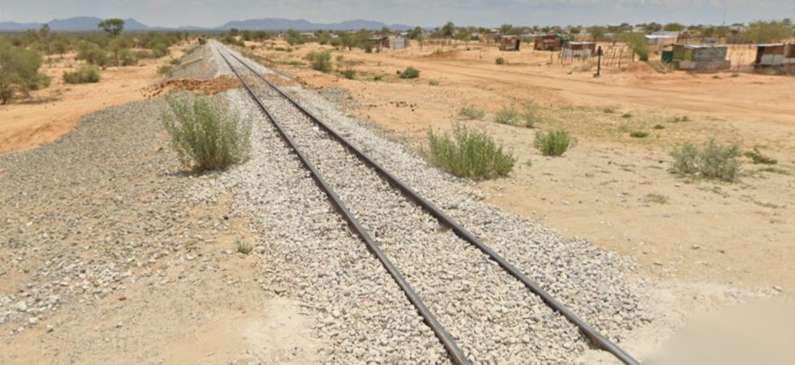
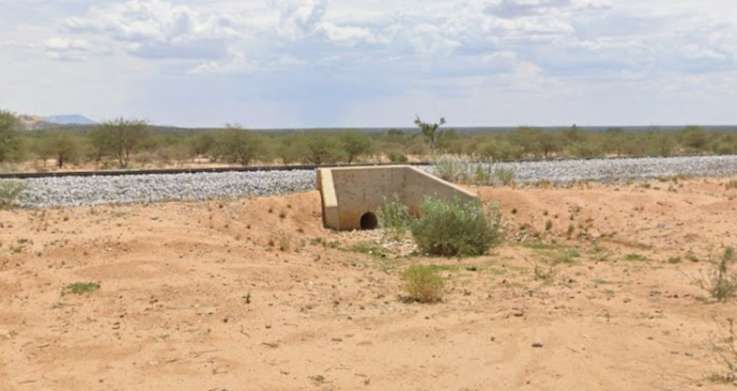
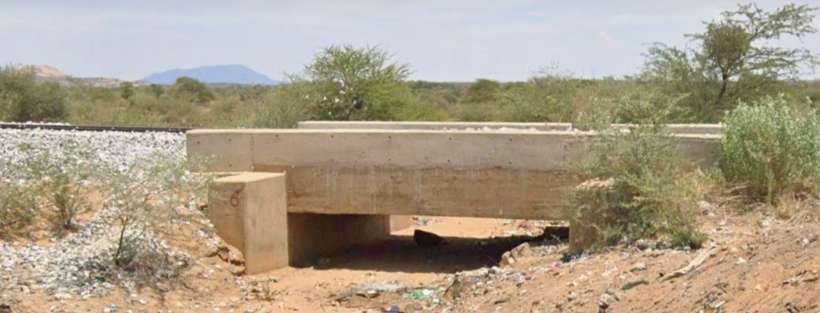
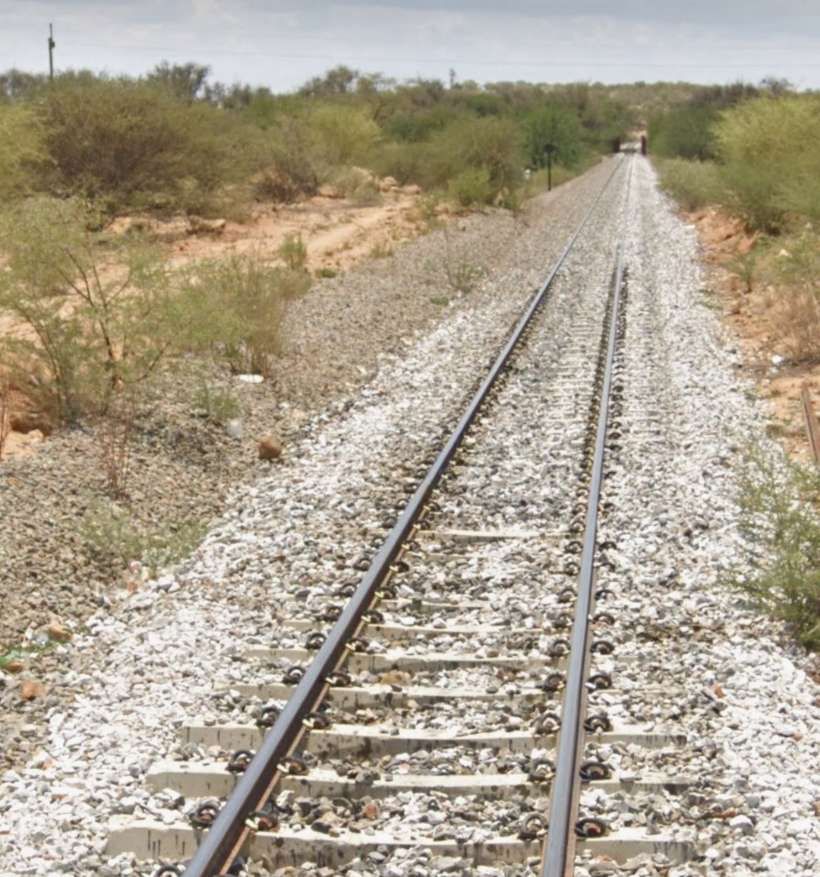
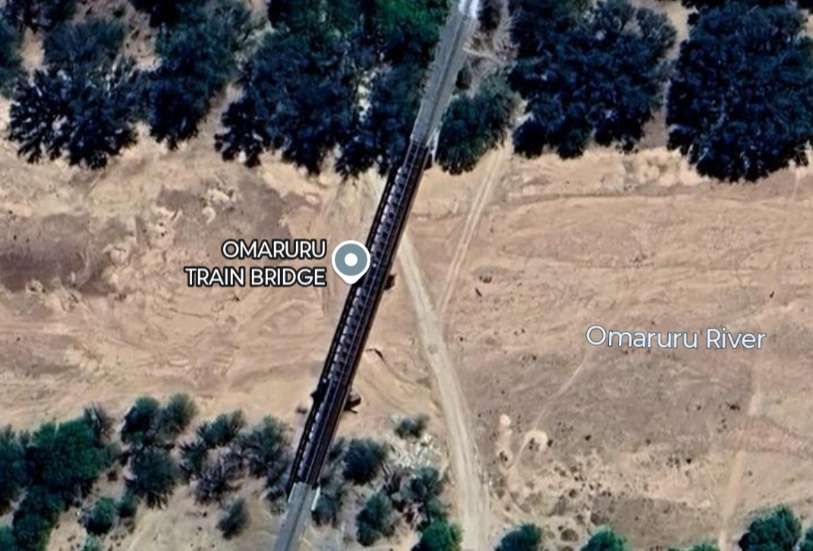
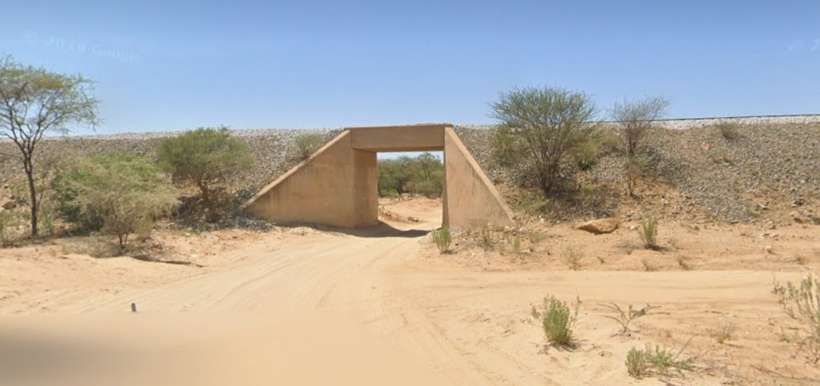
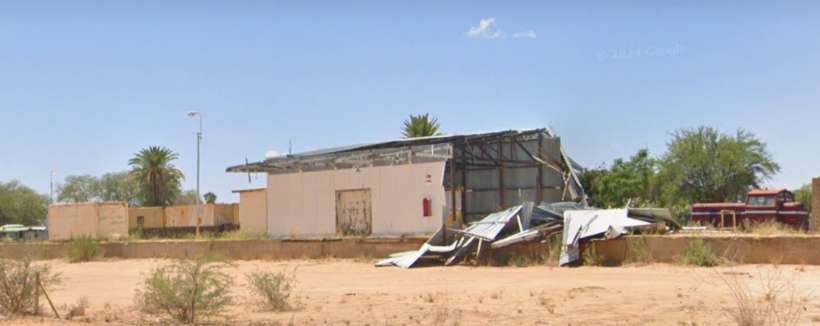
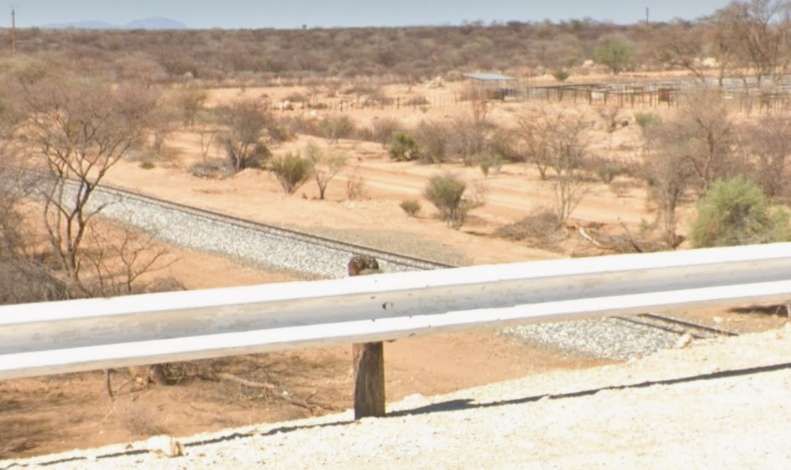
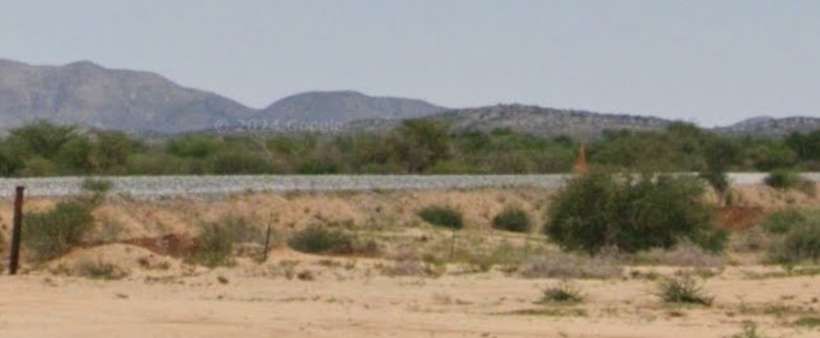
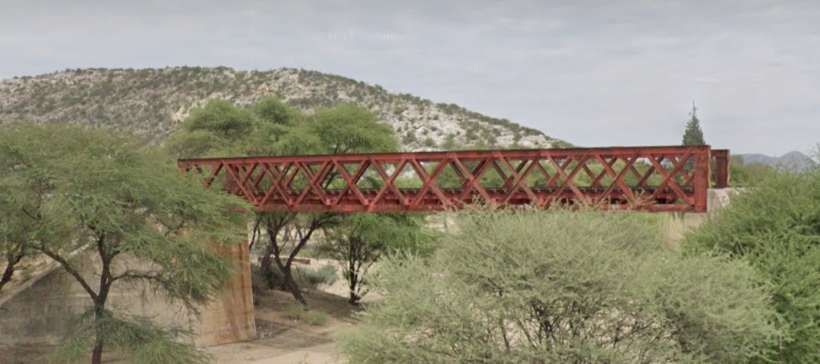
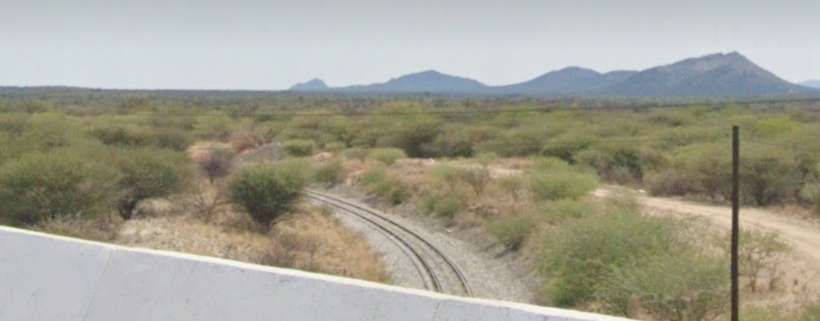
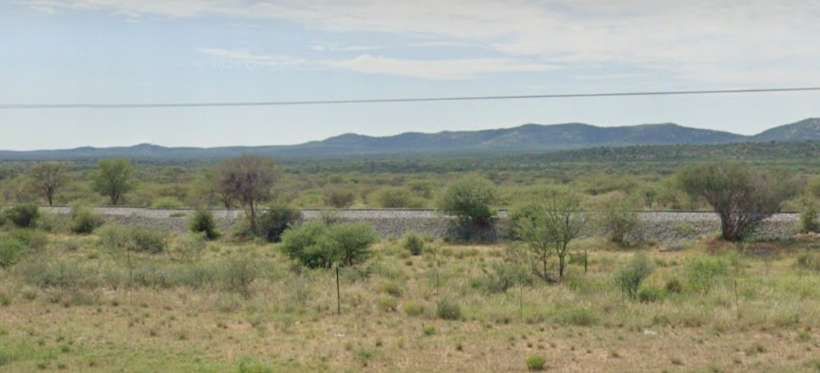
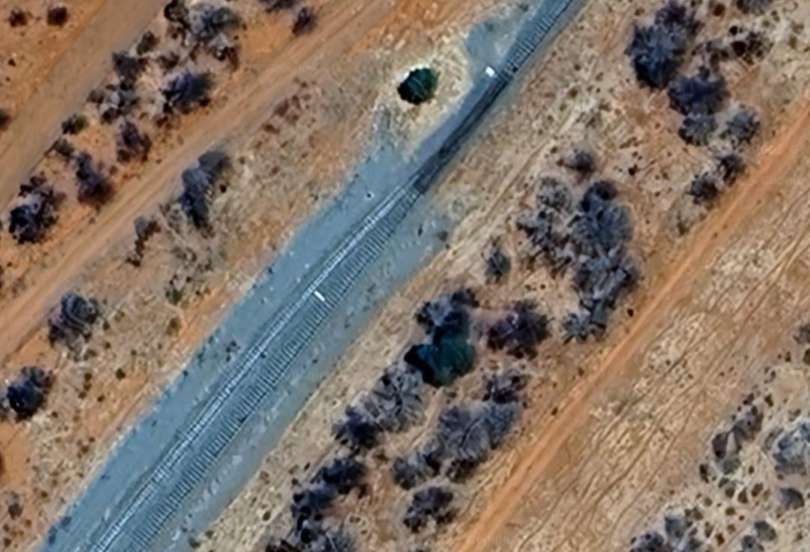
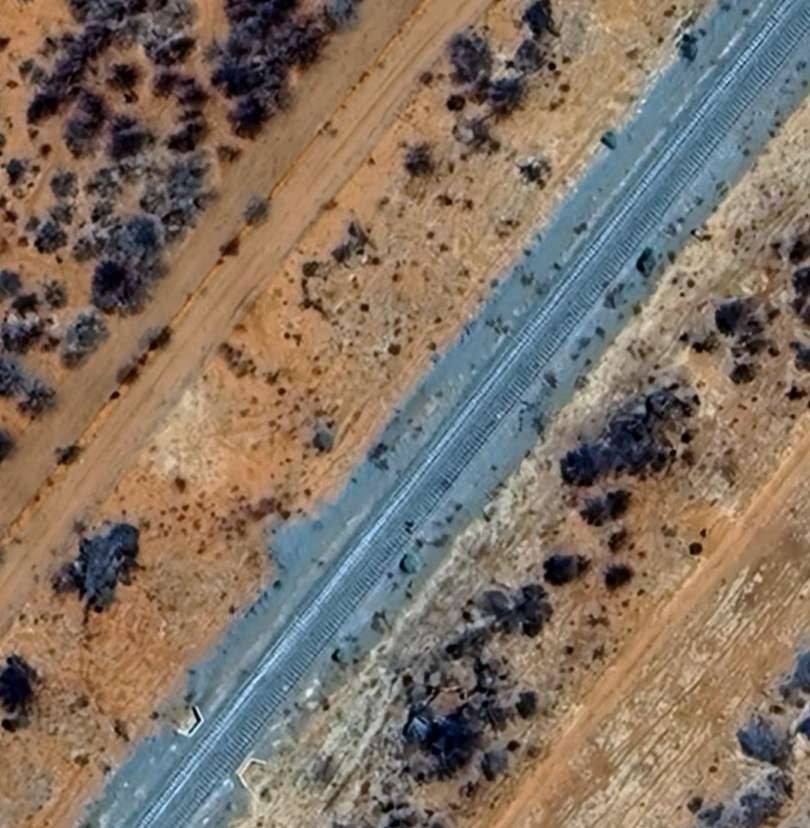
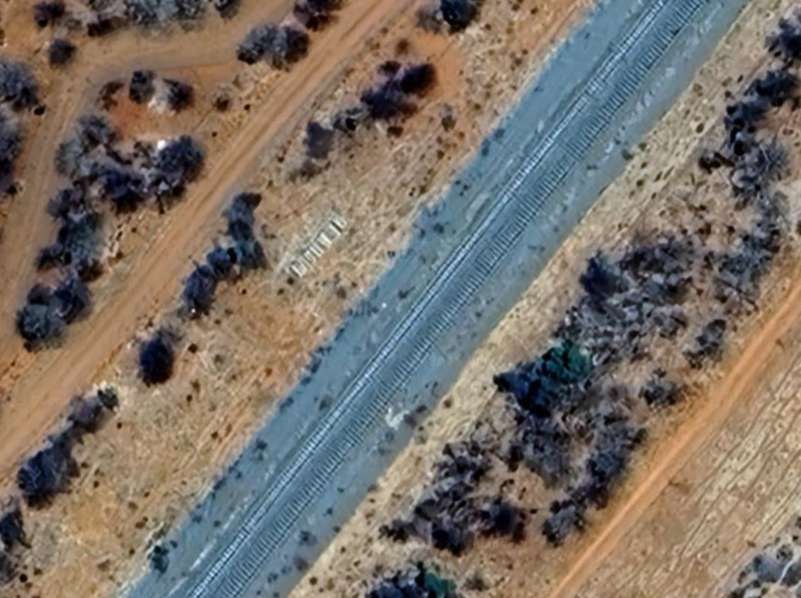
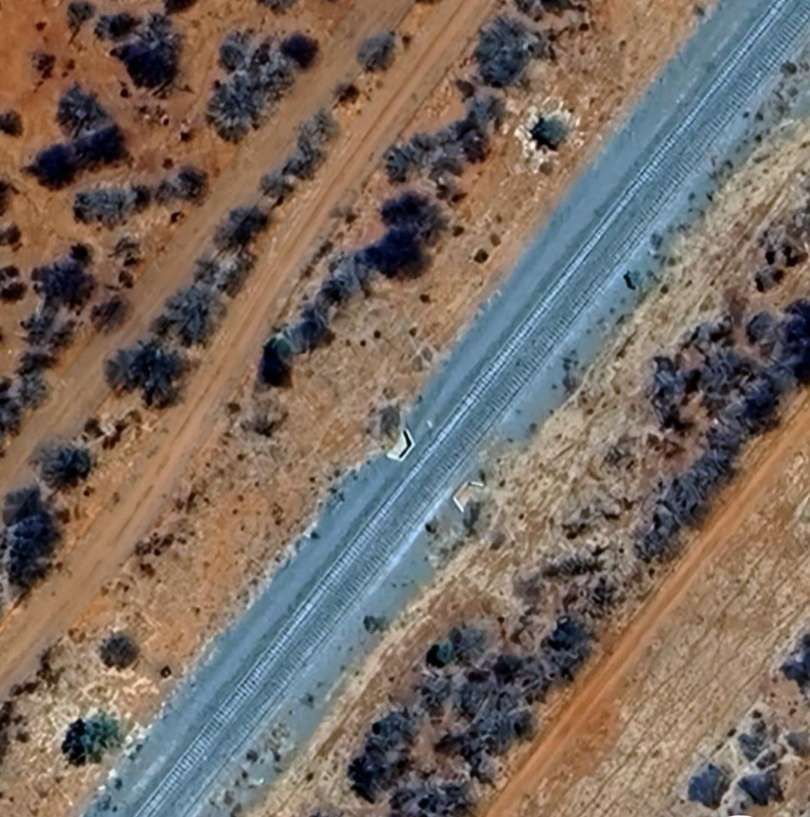
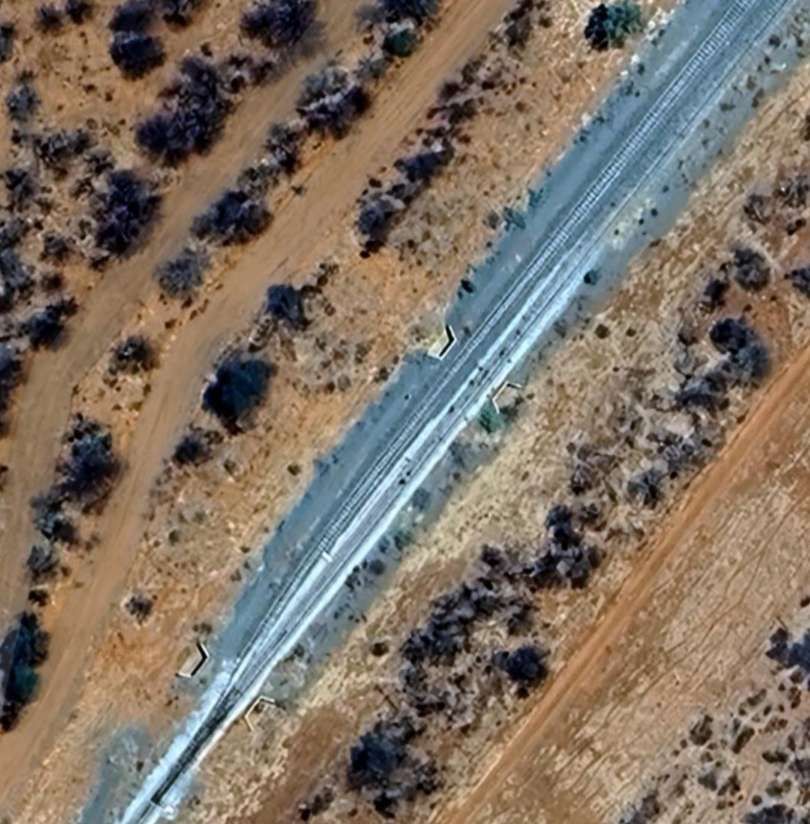
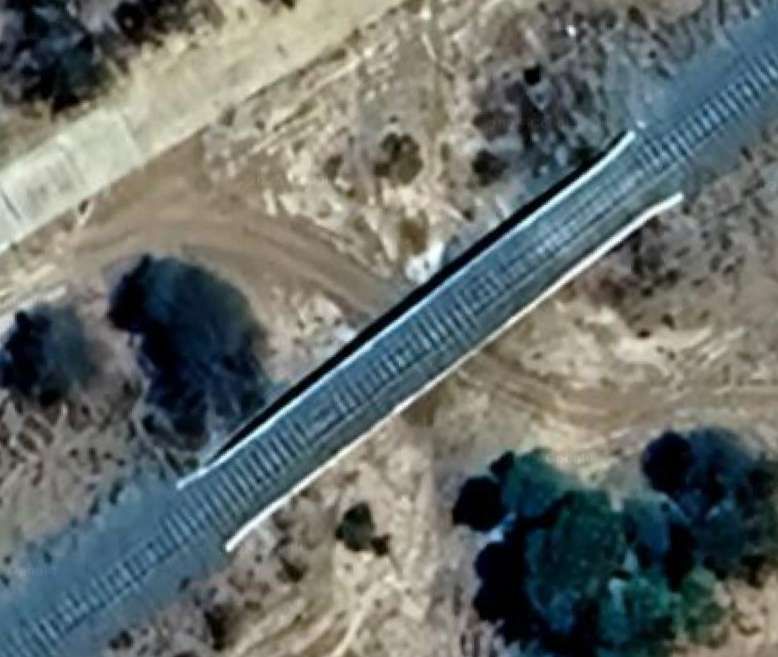
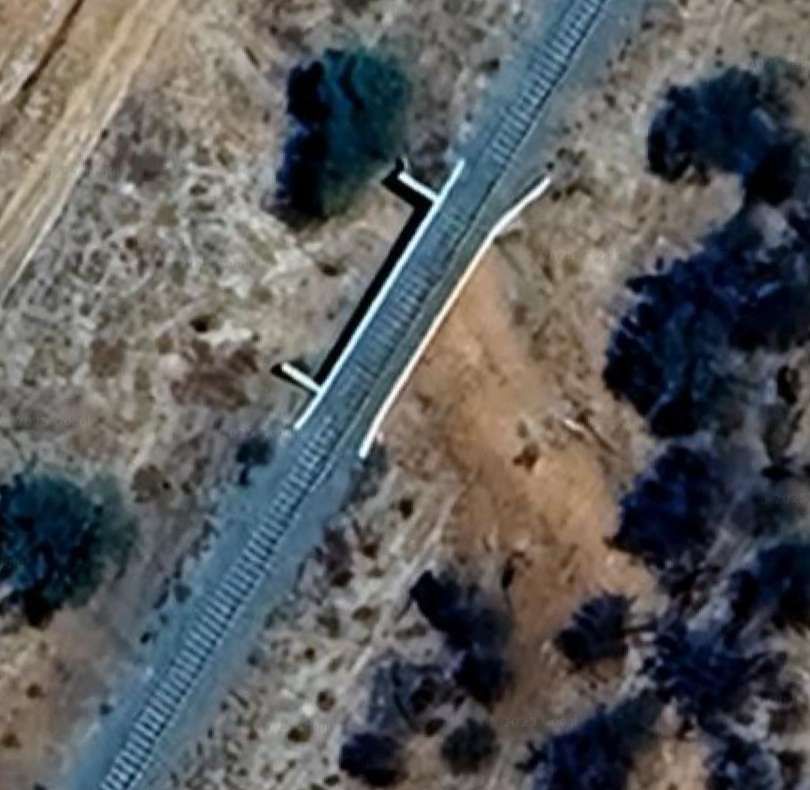
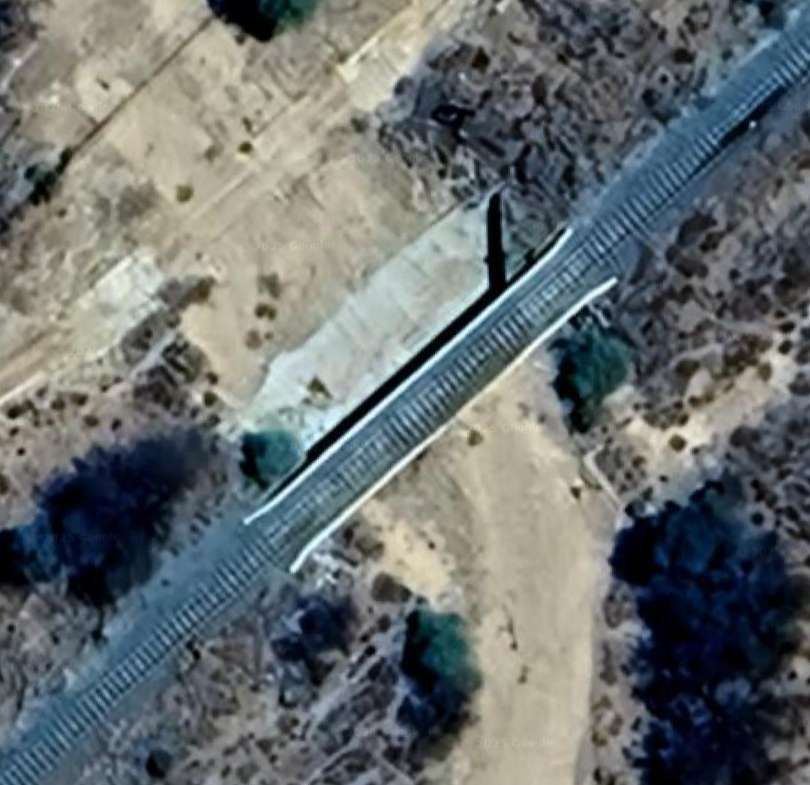
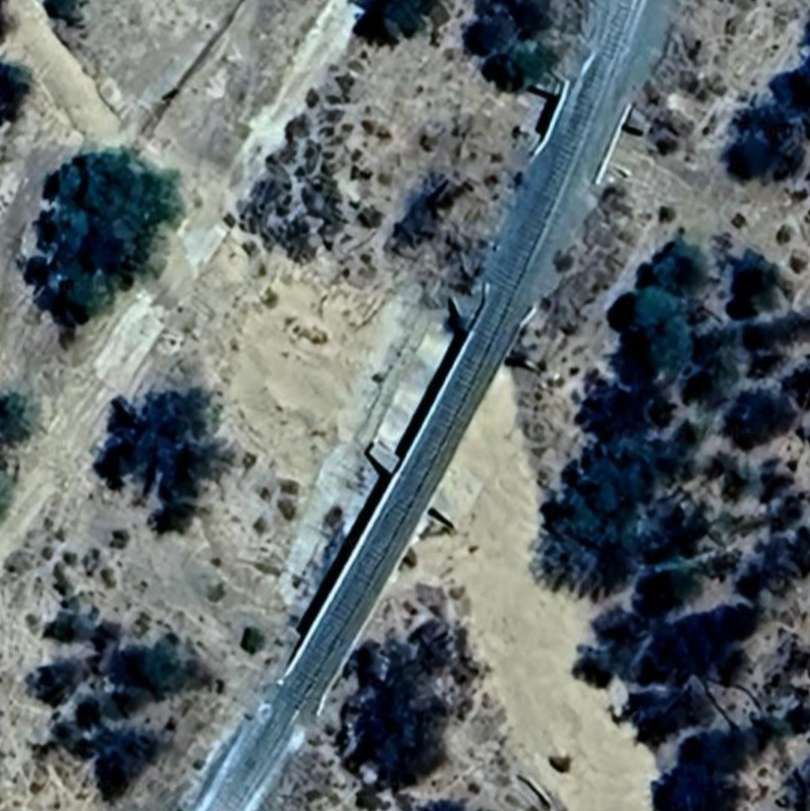
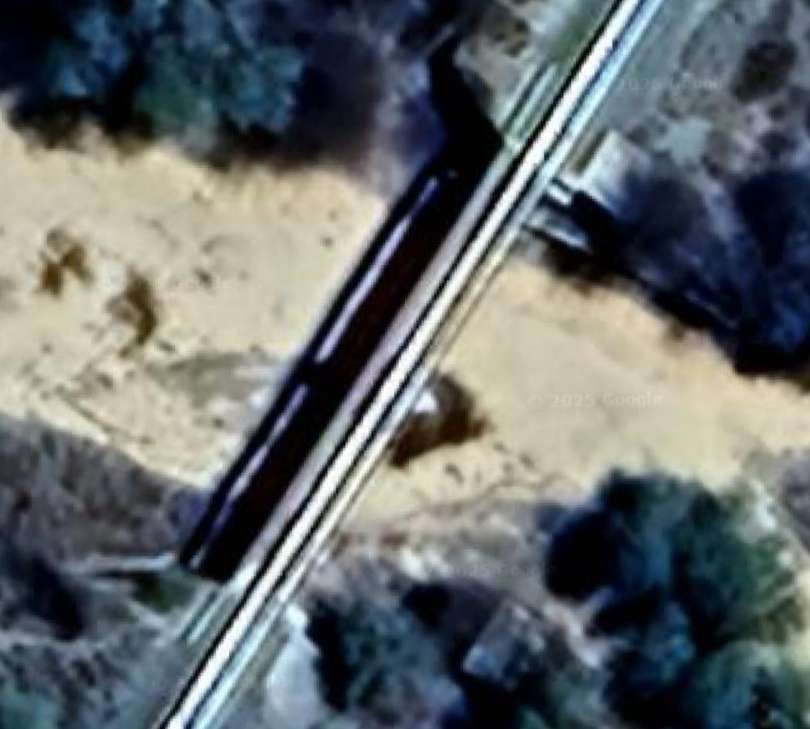
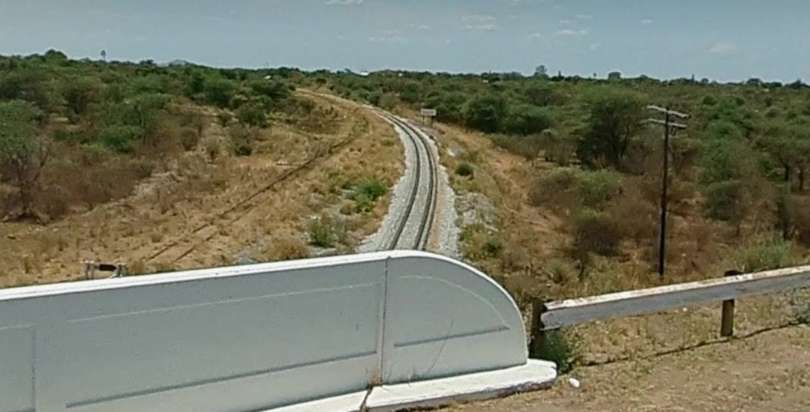
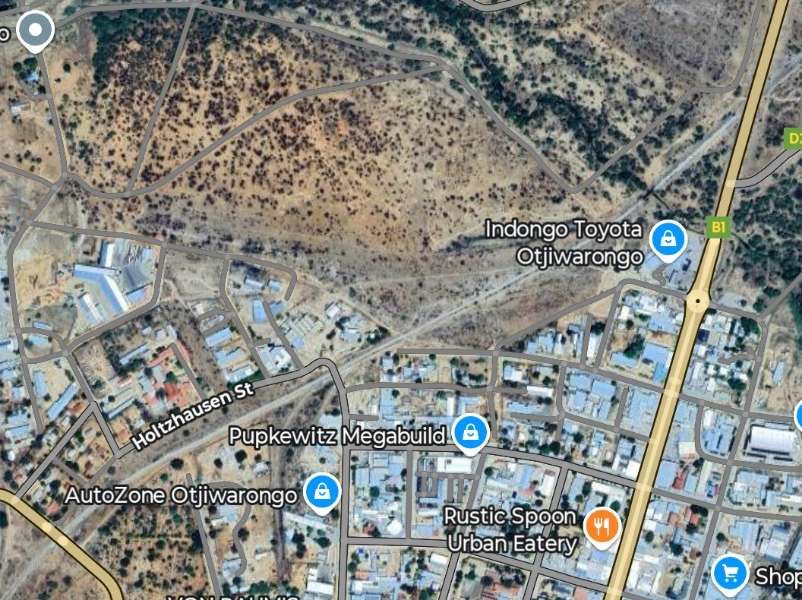
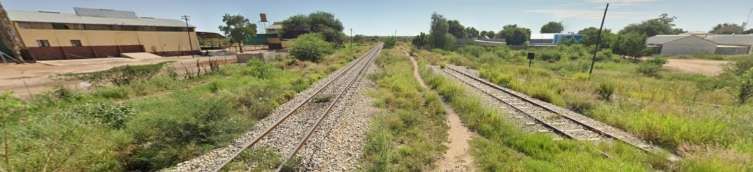
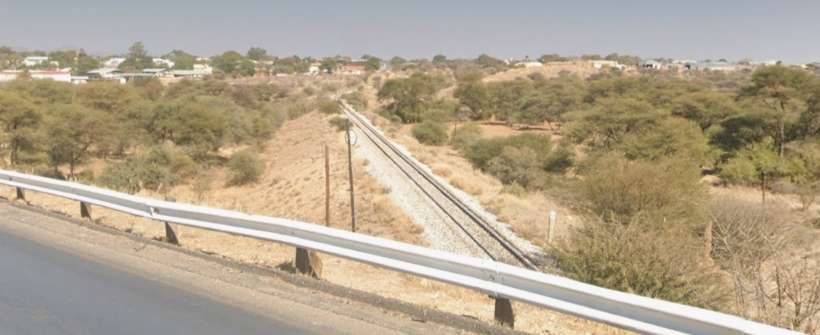
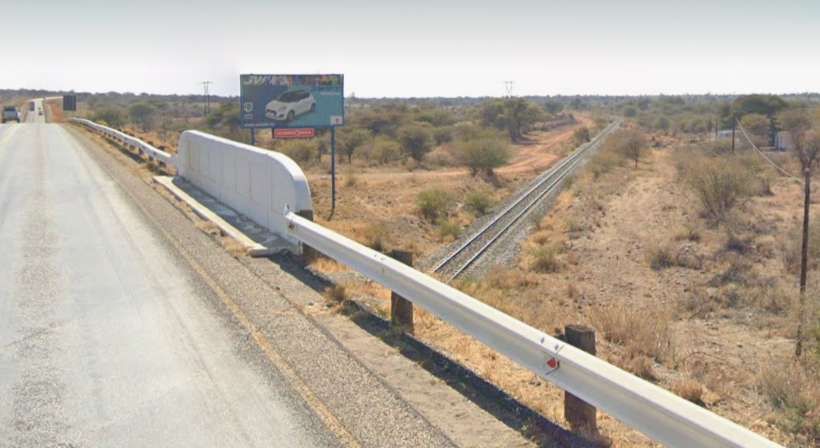
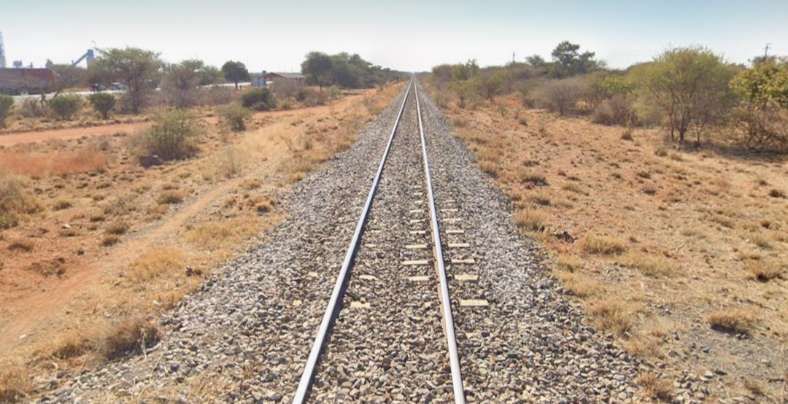
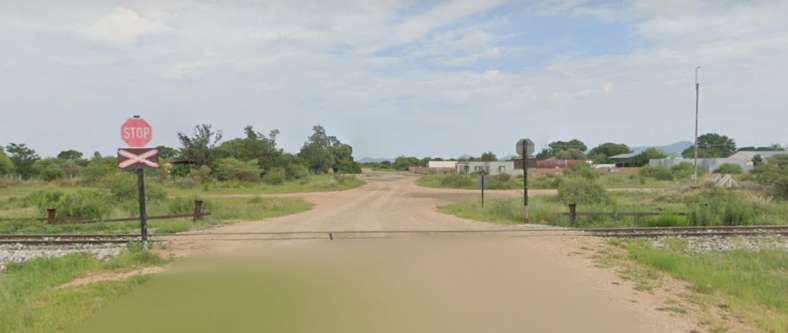
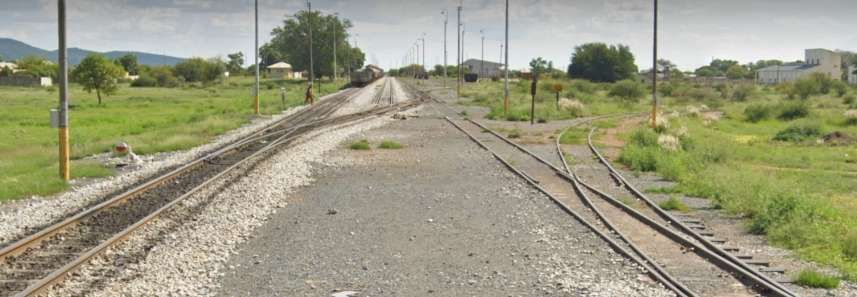
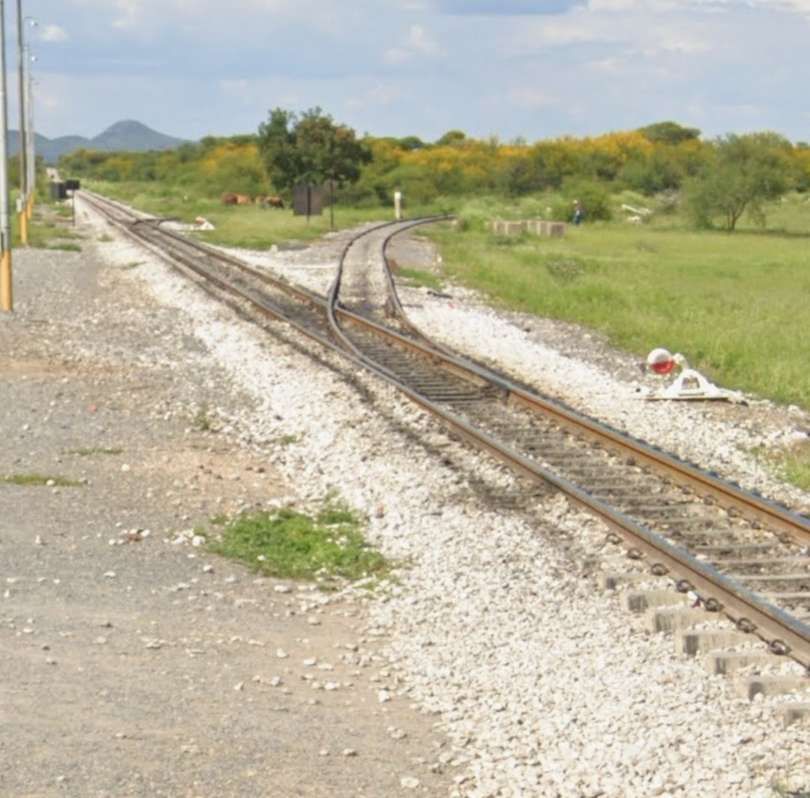
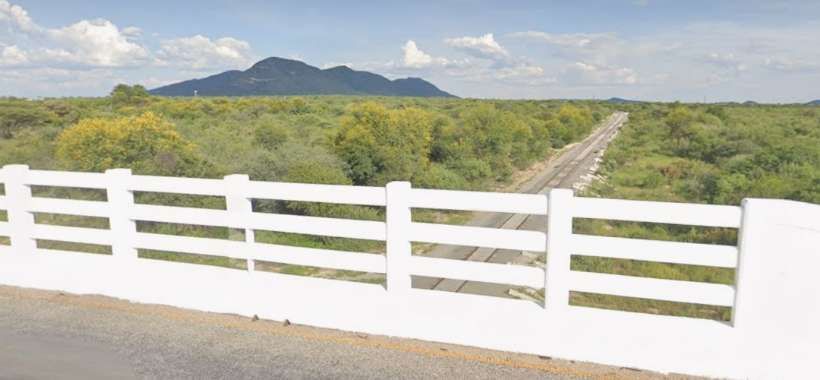
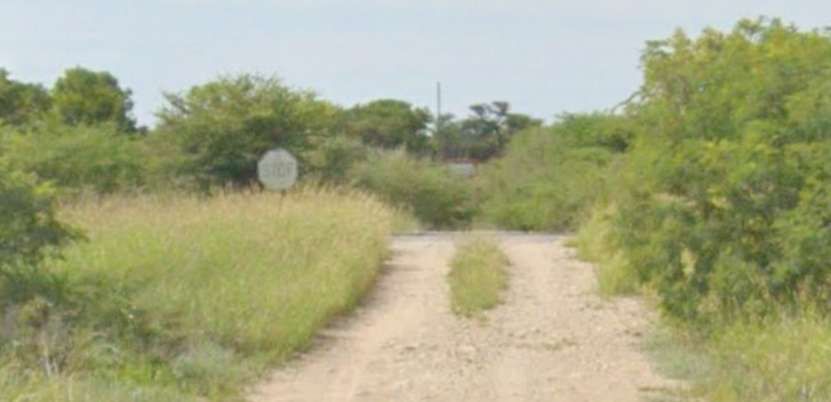
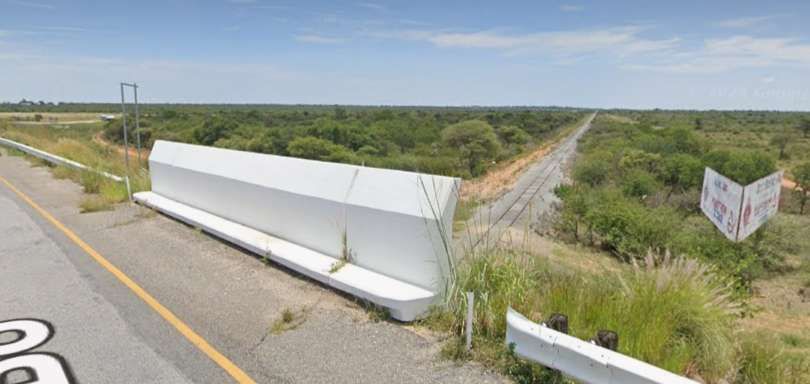
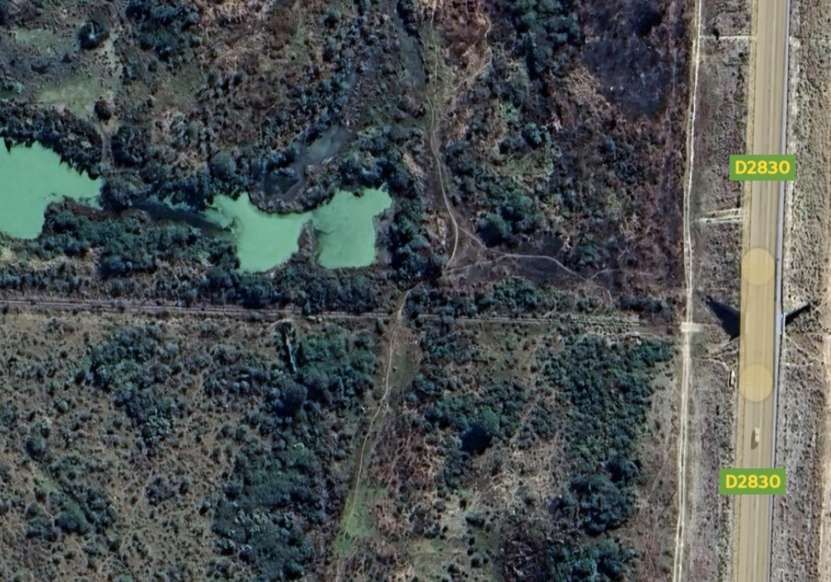
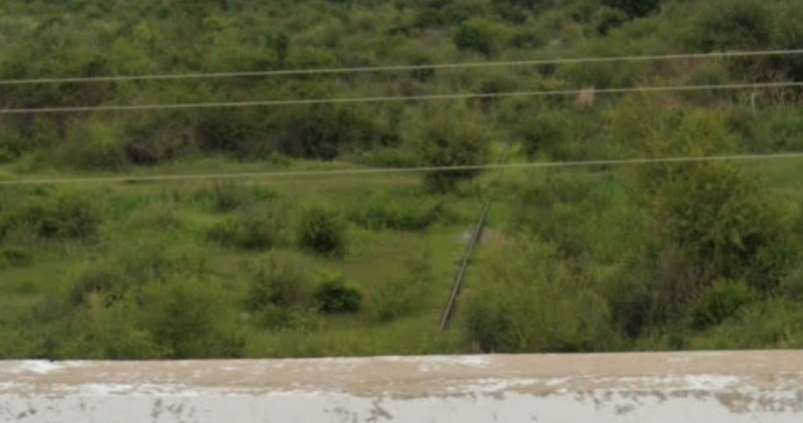
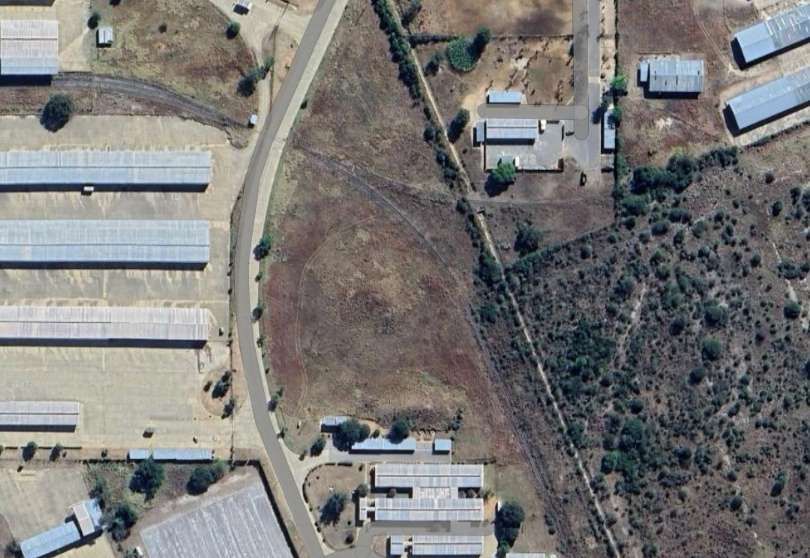
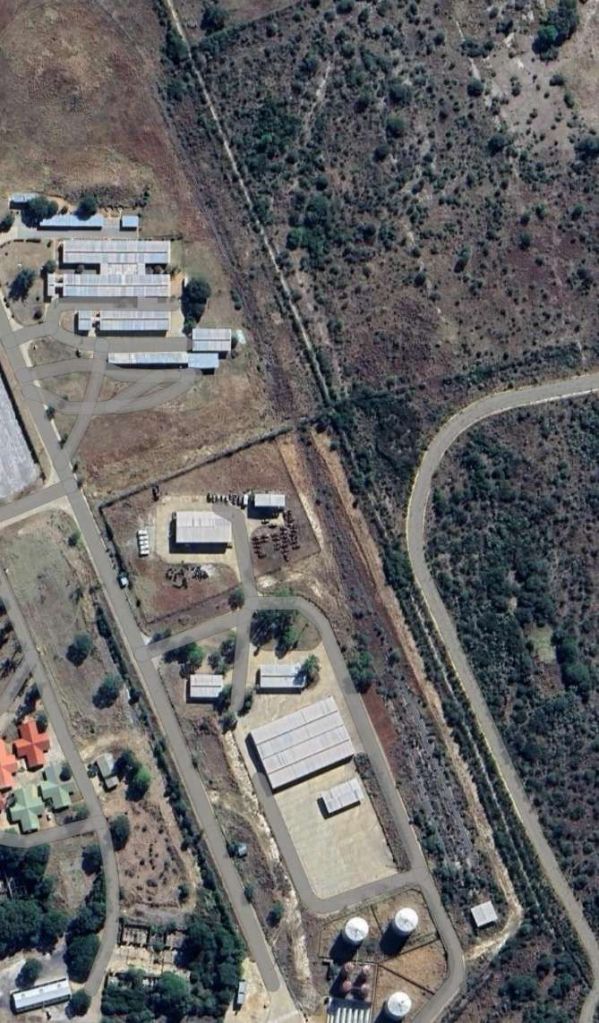
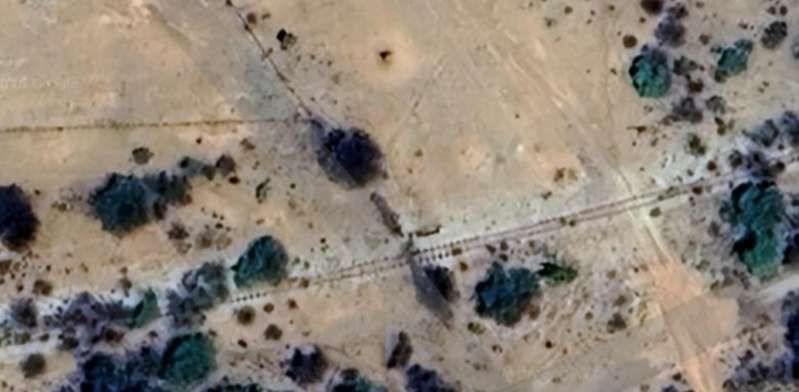
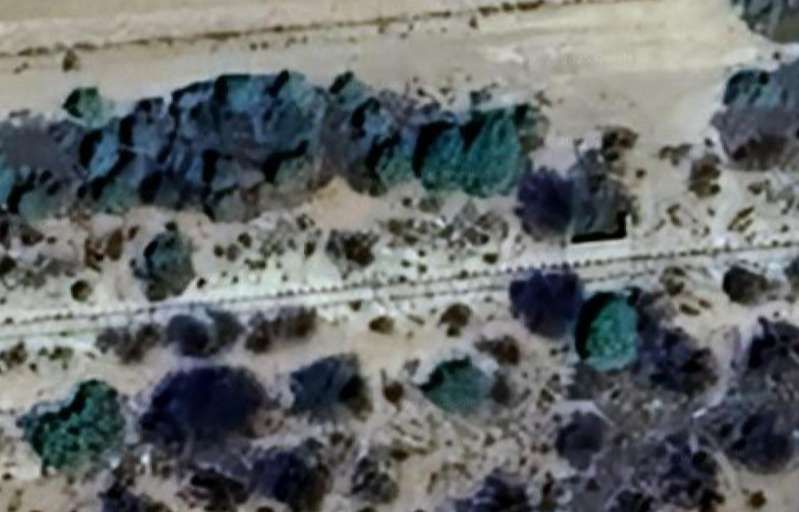
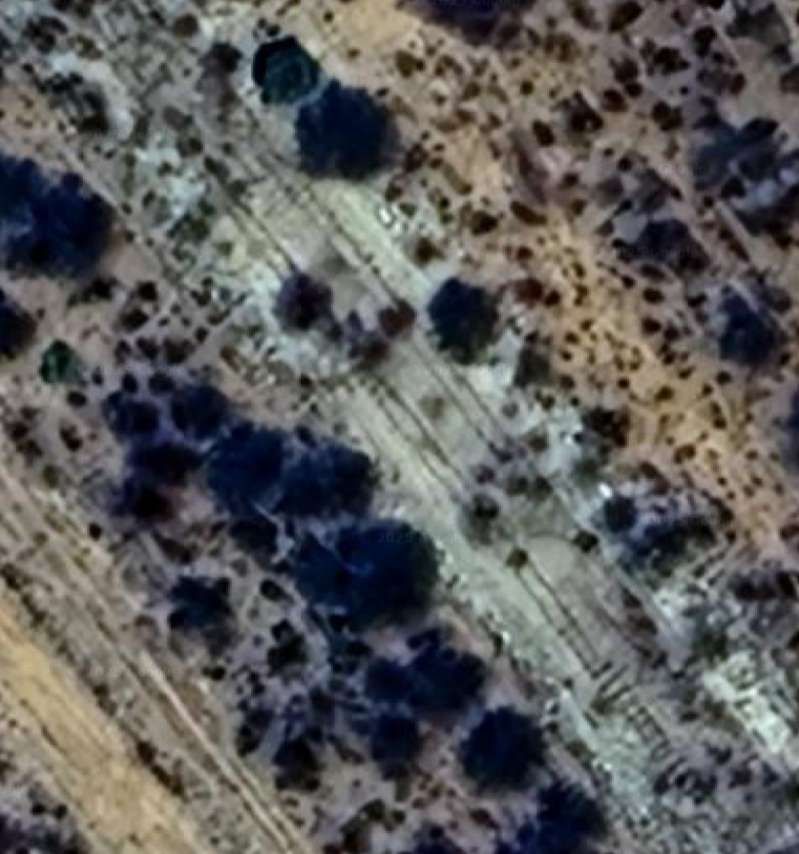
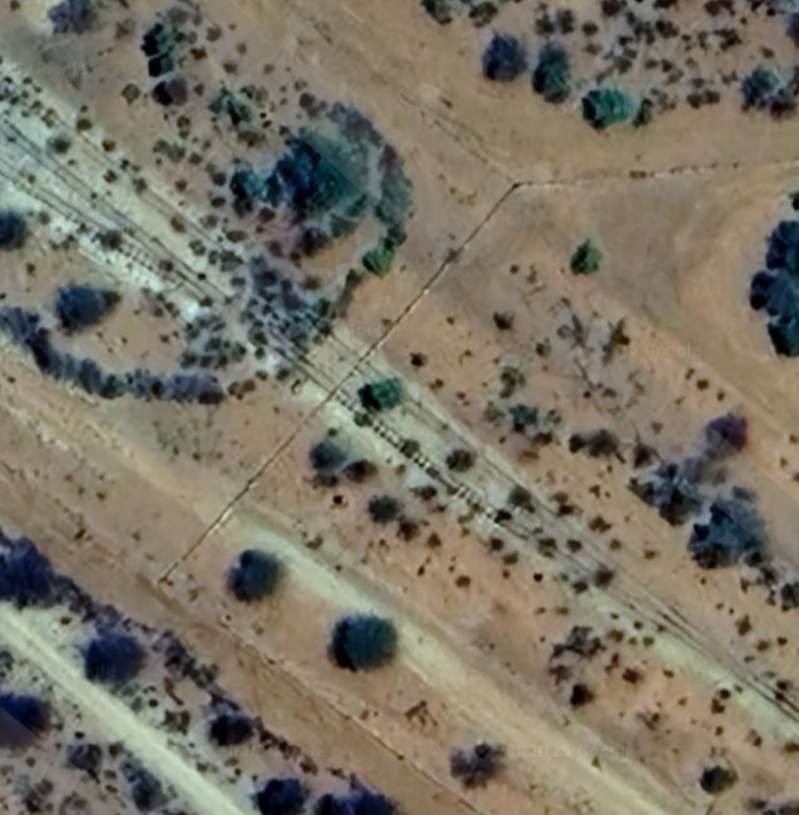
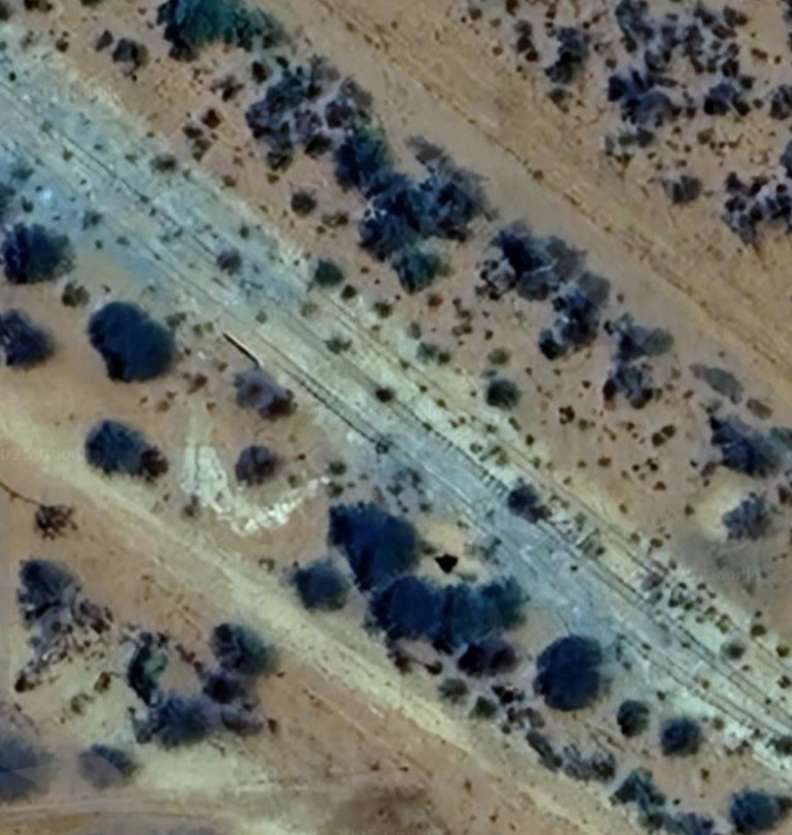
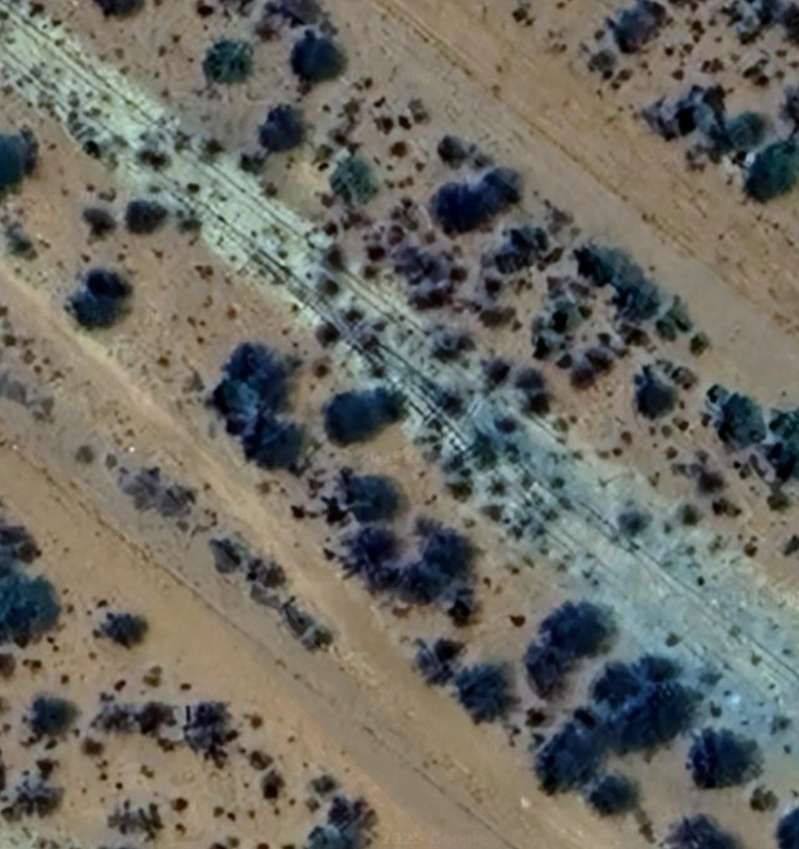
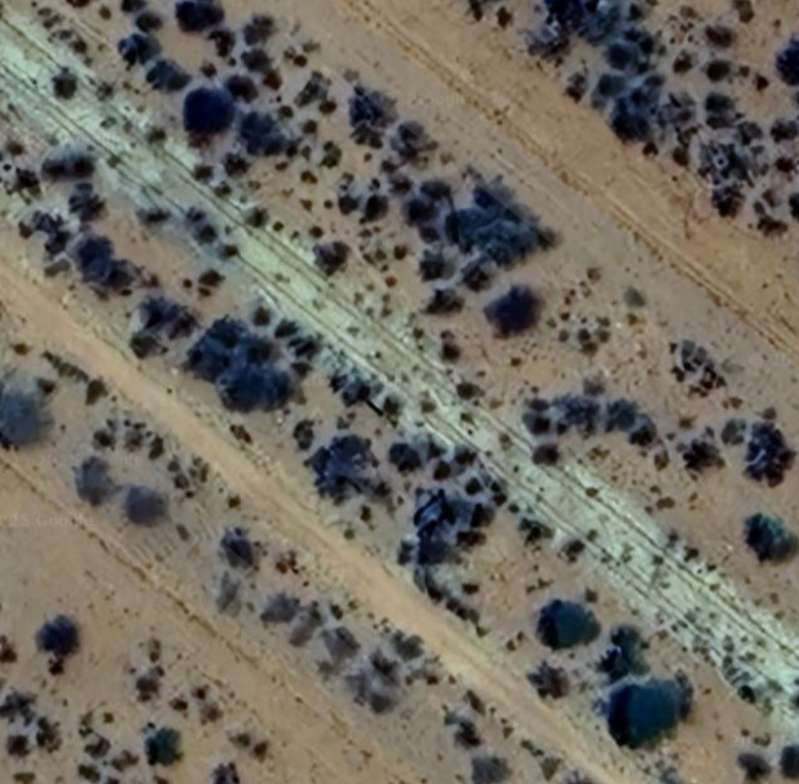
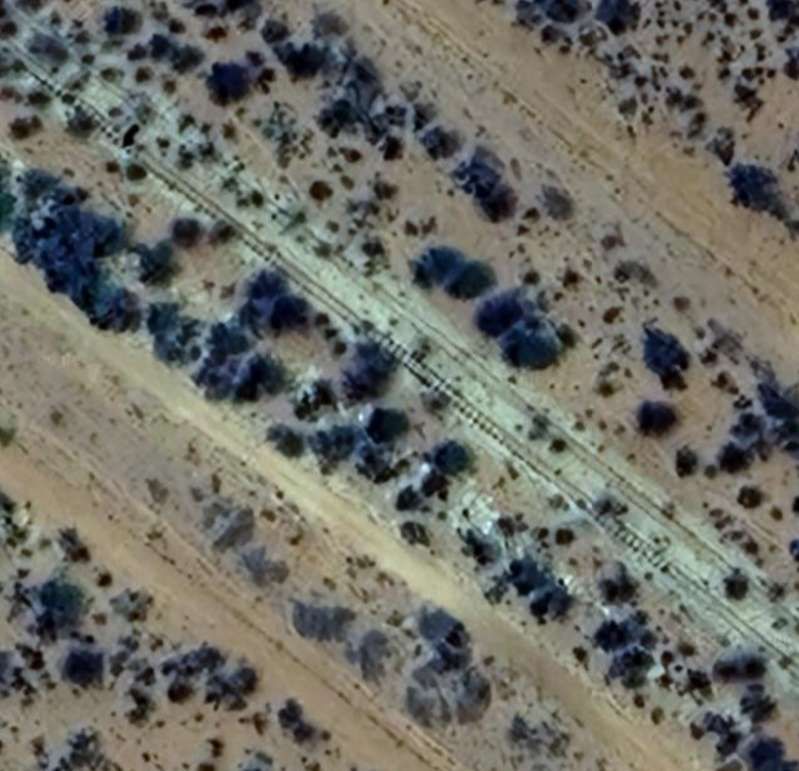
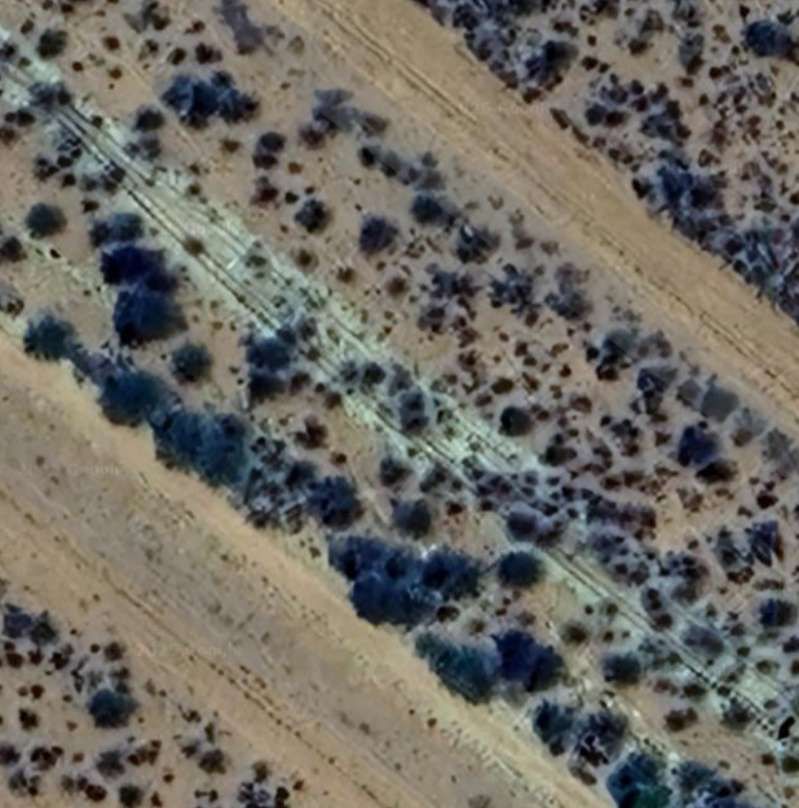
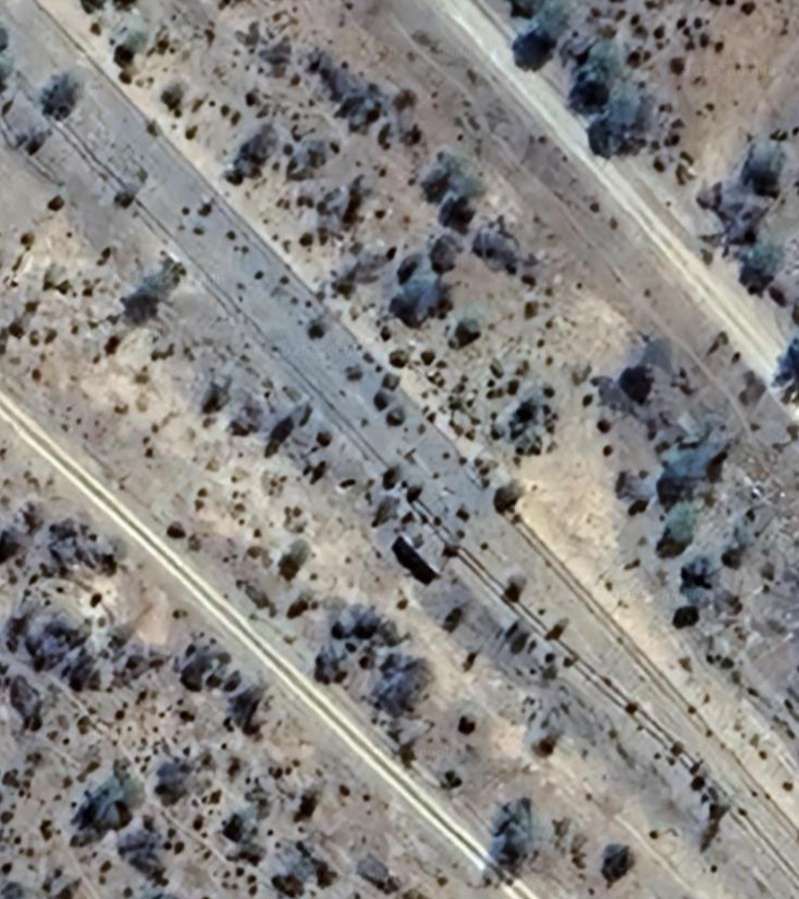
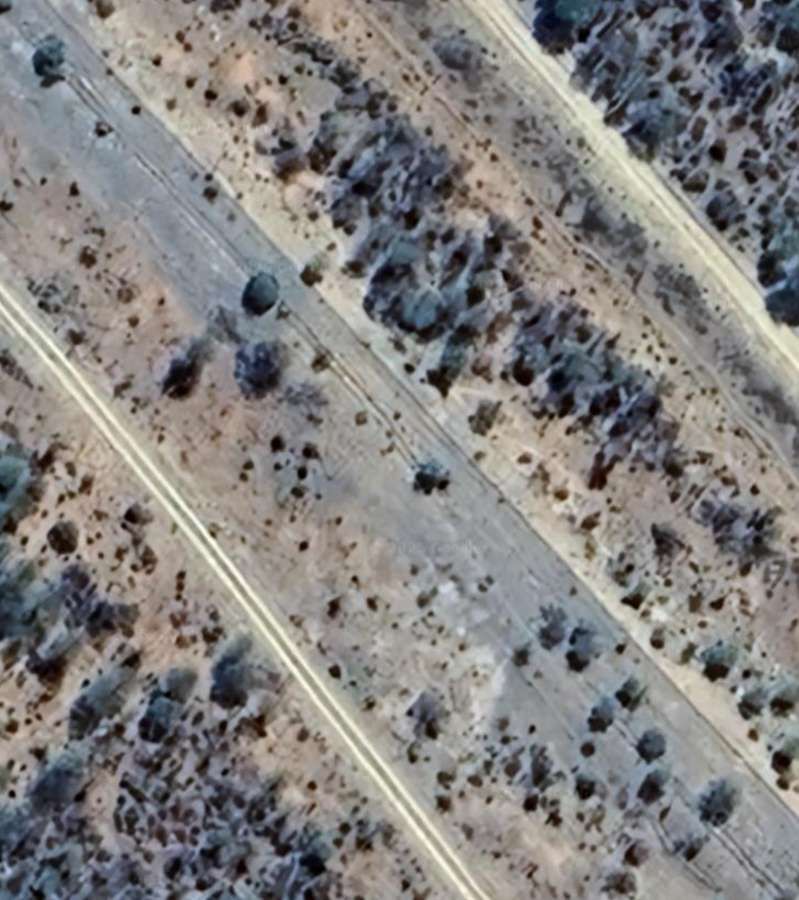
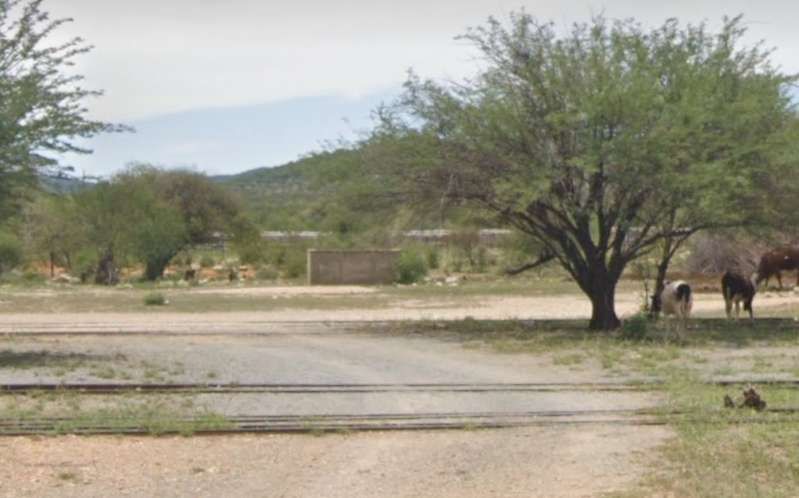
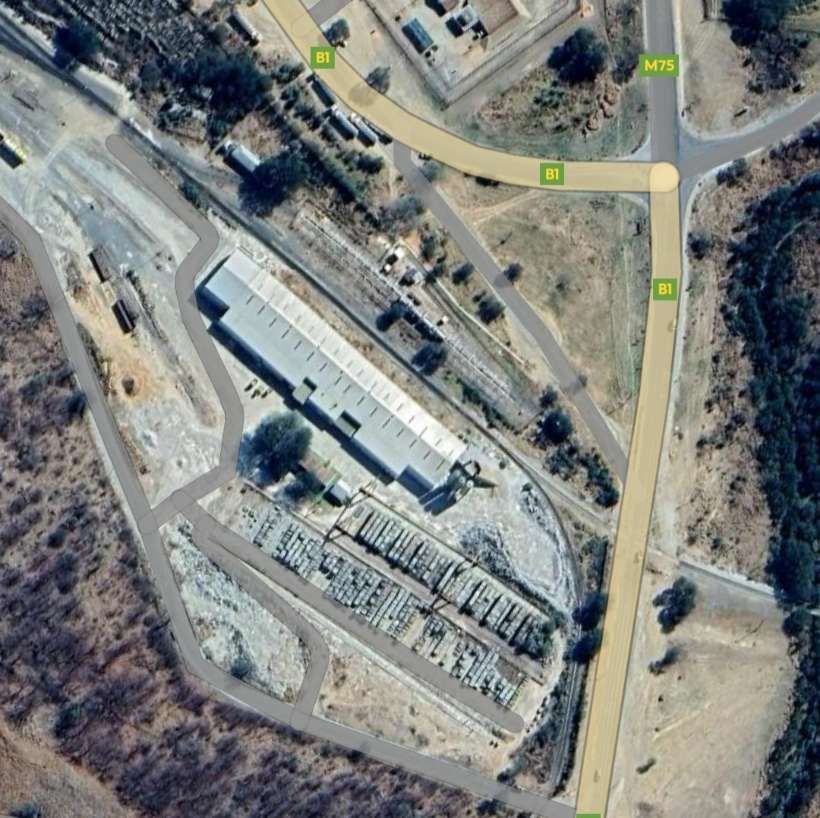
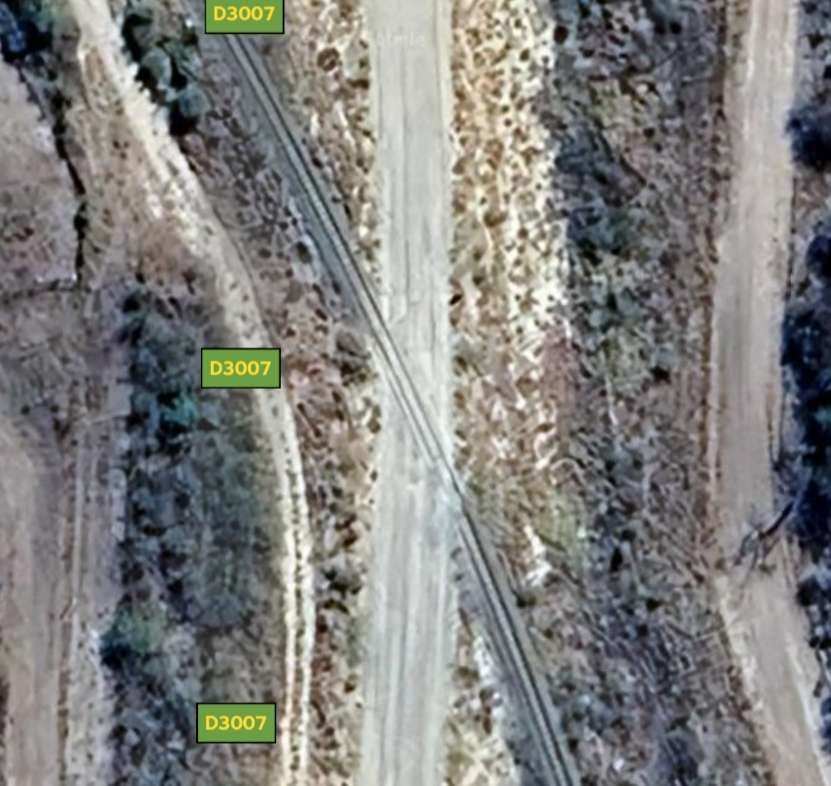
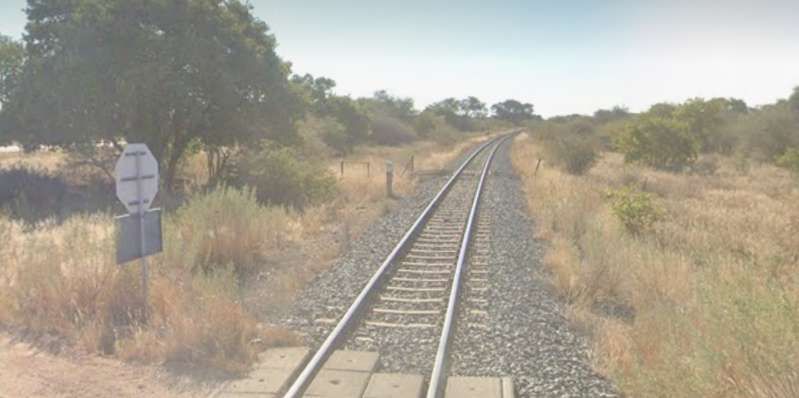
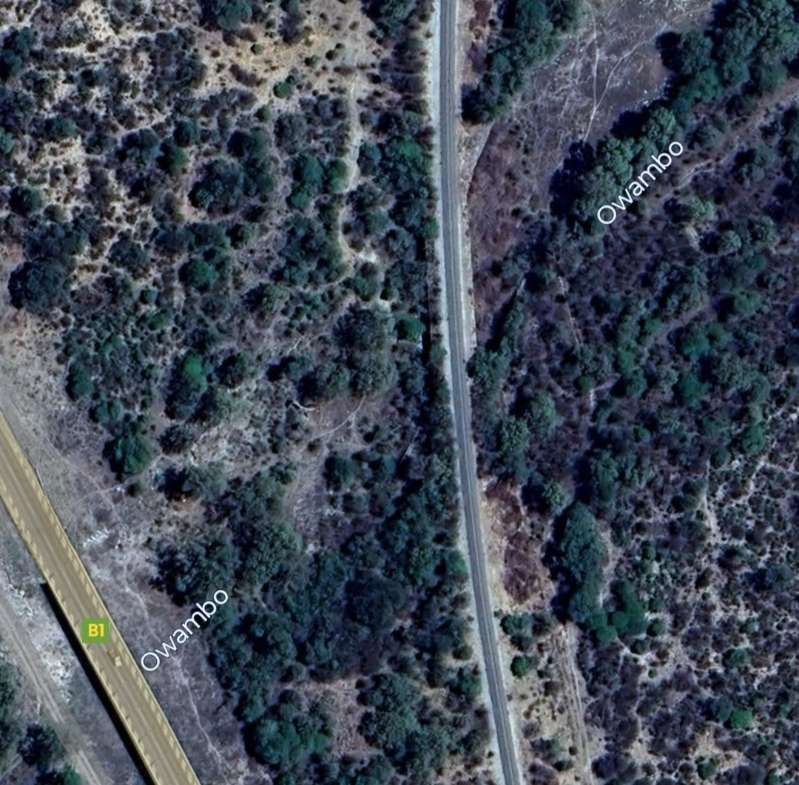
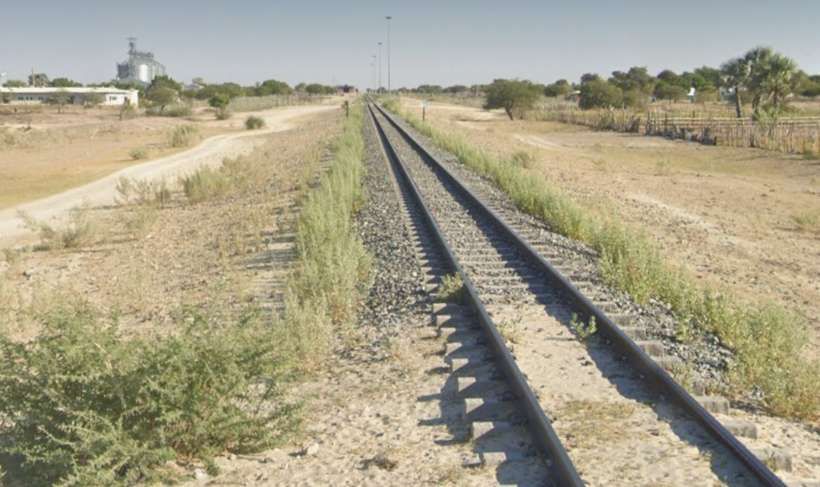
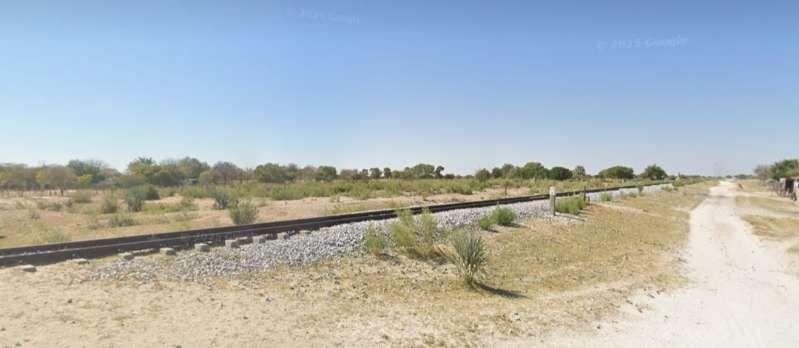
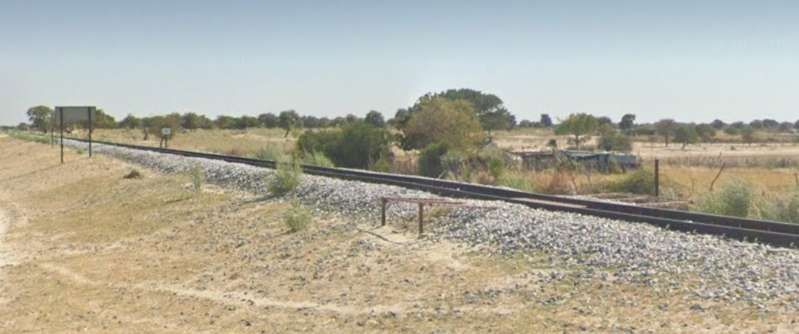
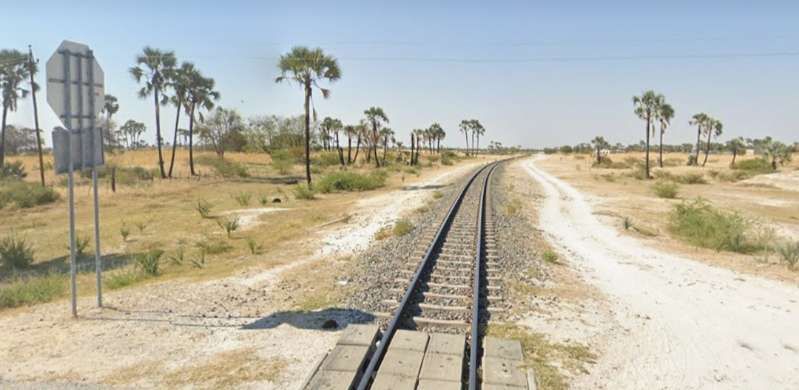
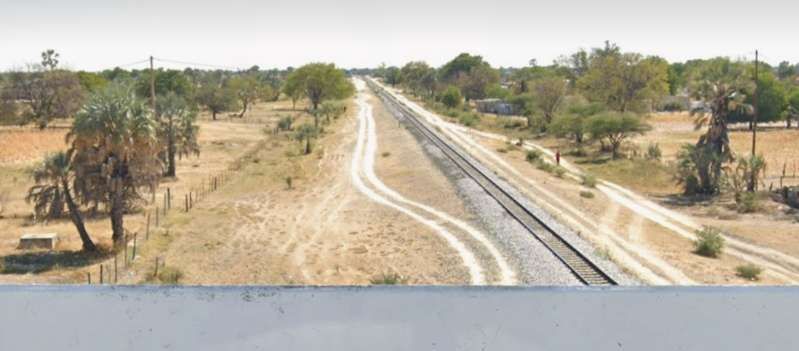
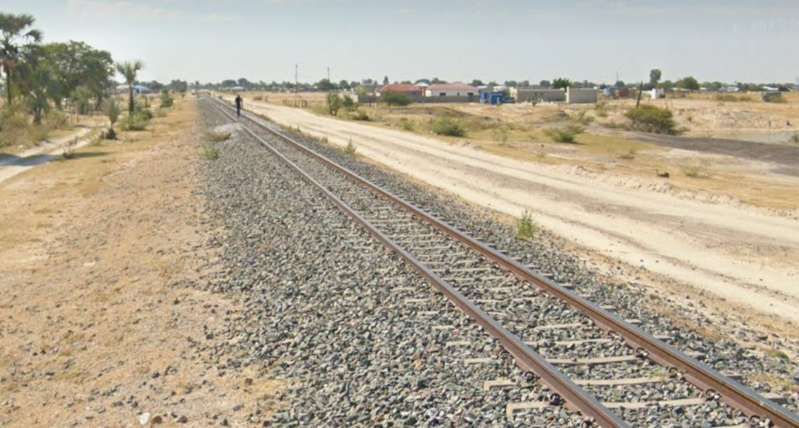
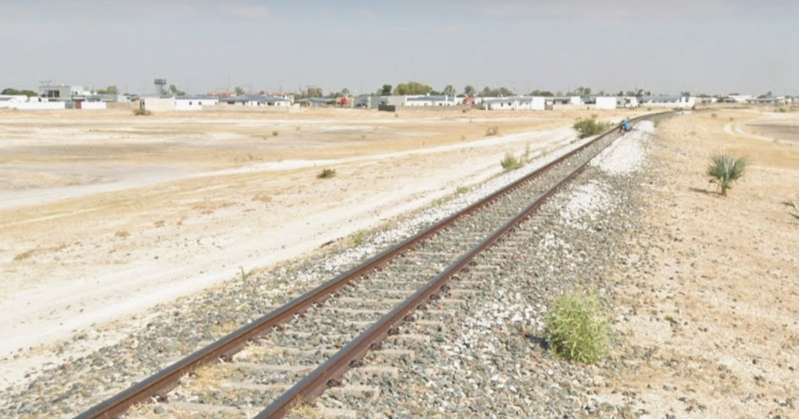
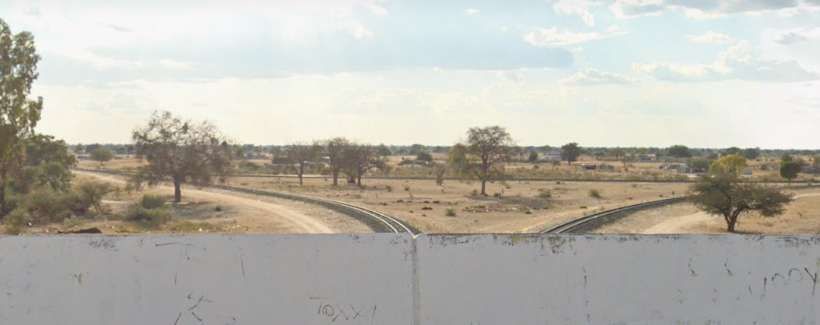
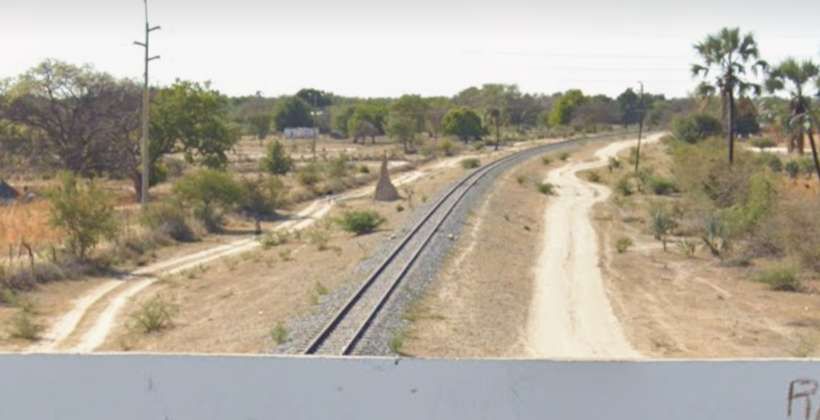
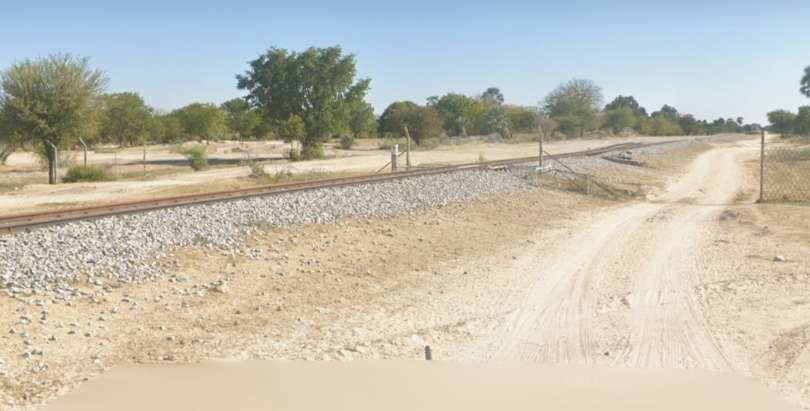
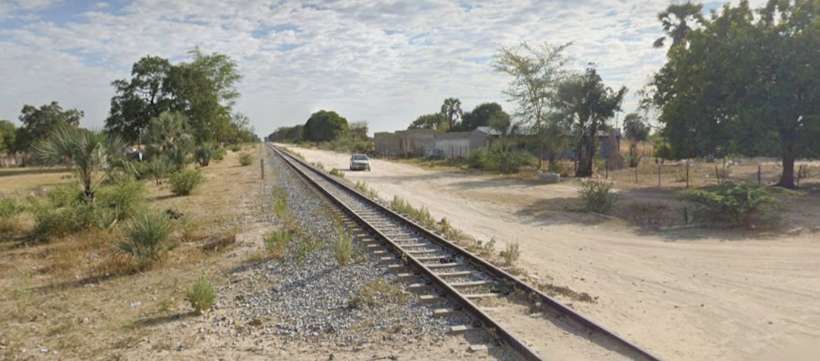
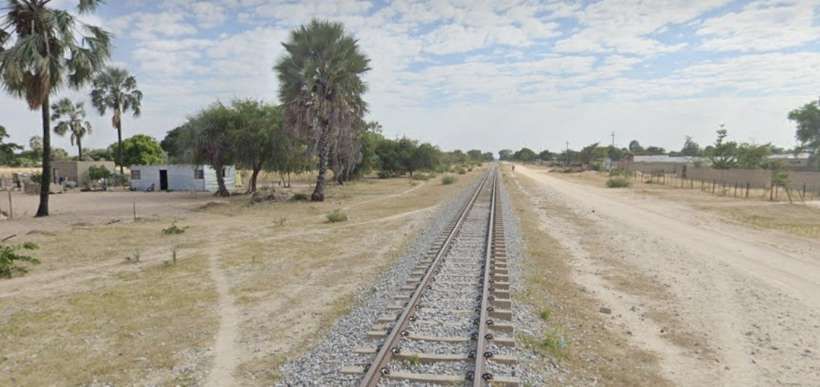
The next three images continue to show Stratford Road running along the South side of the site of Wolverton Works. …

[Google Streetview, September 2023]
[Google Streetview, September 2023]
[Google Streetview, September 2023]

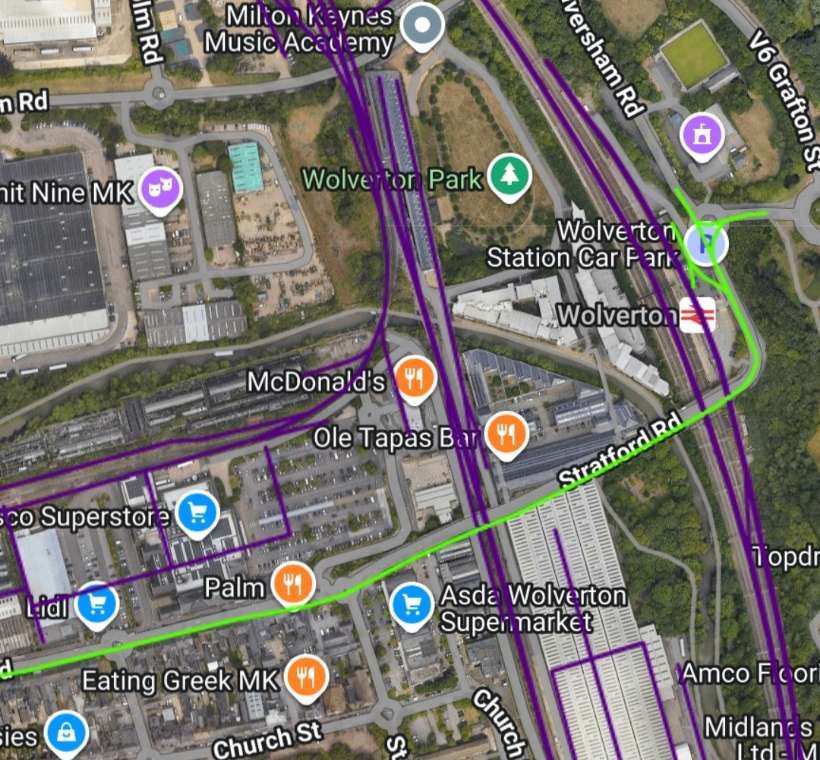
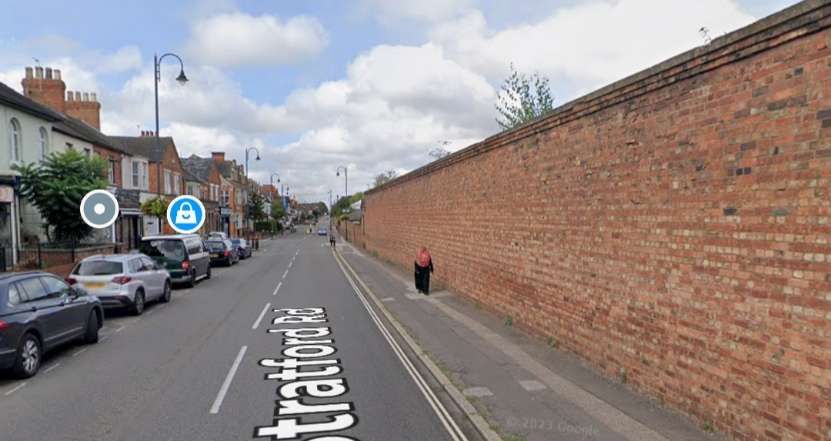
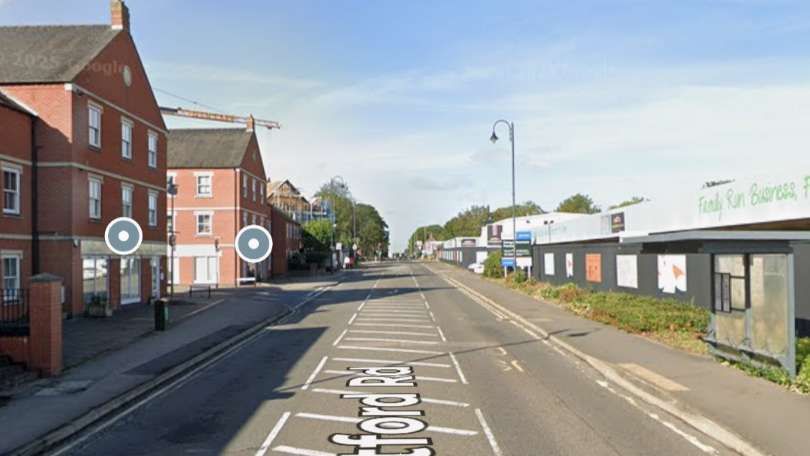
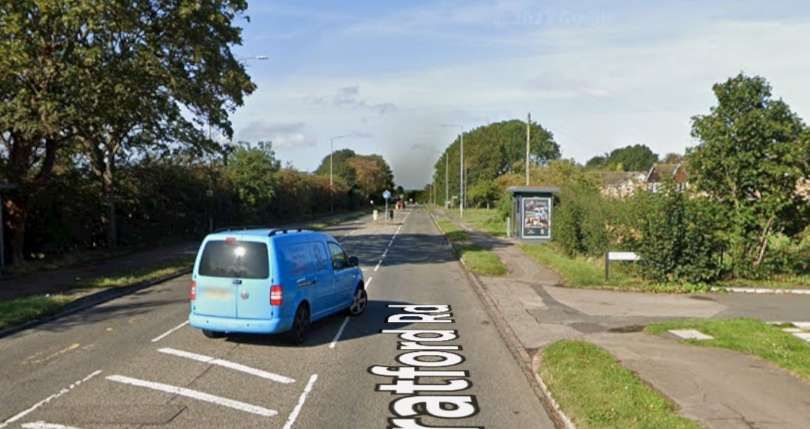
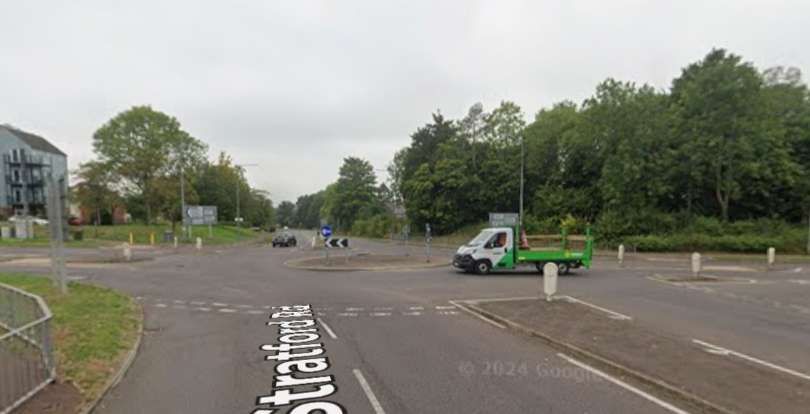
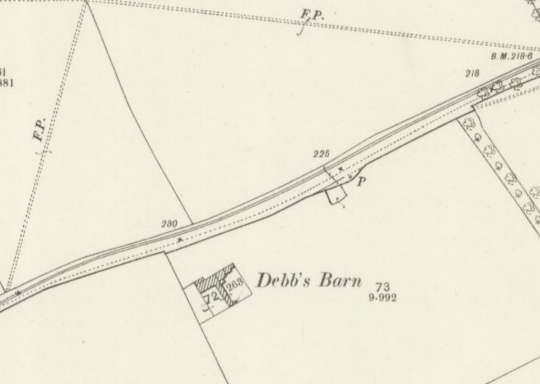
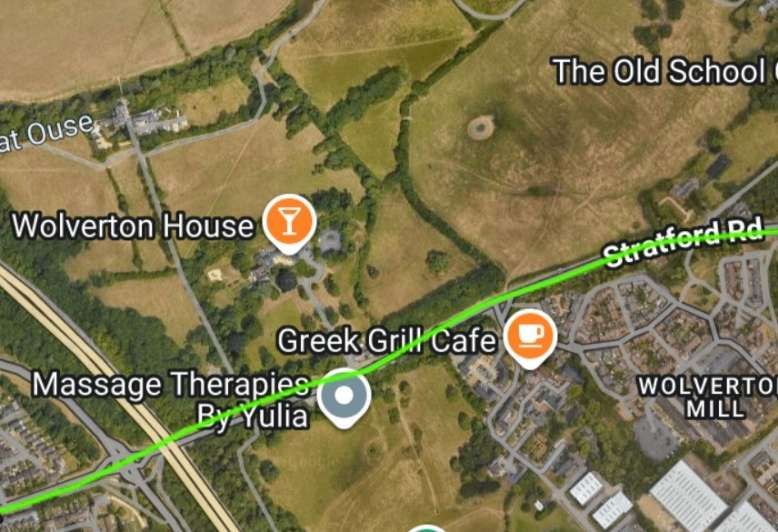
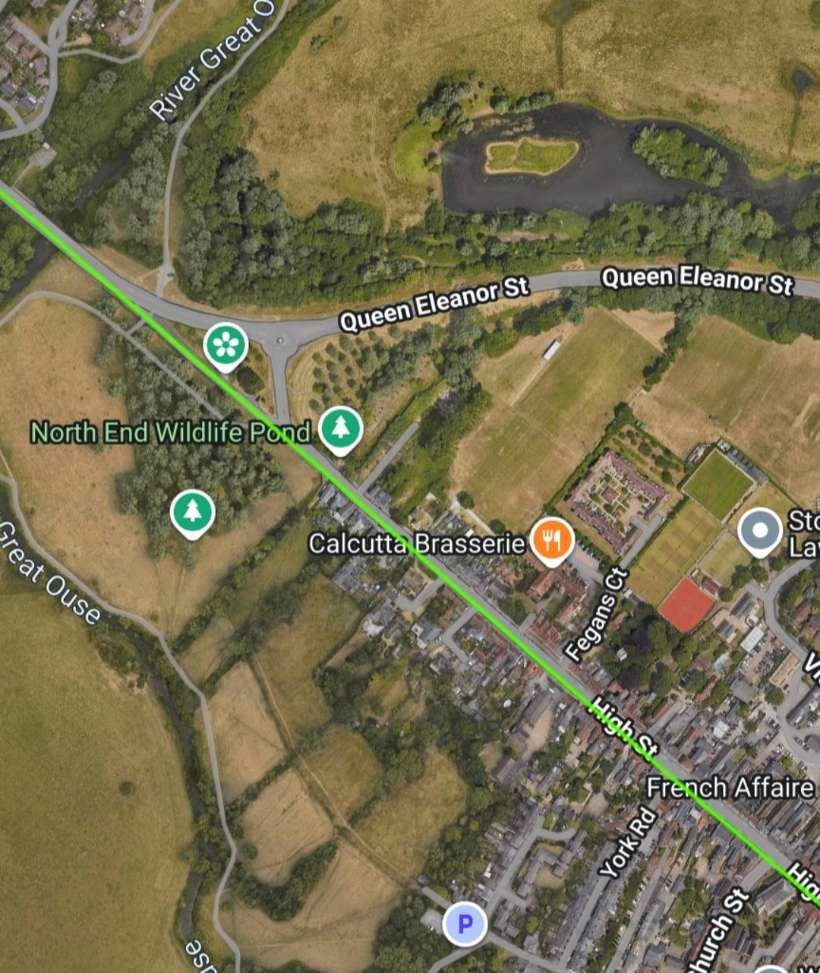
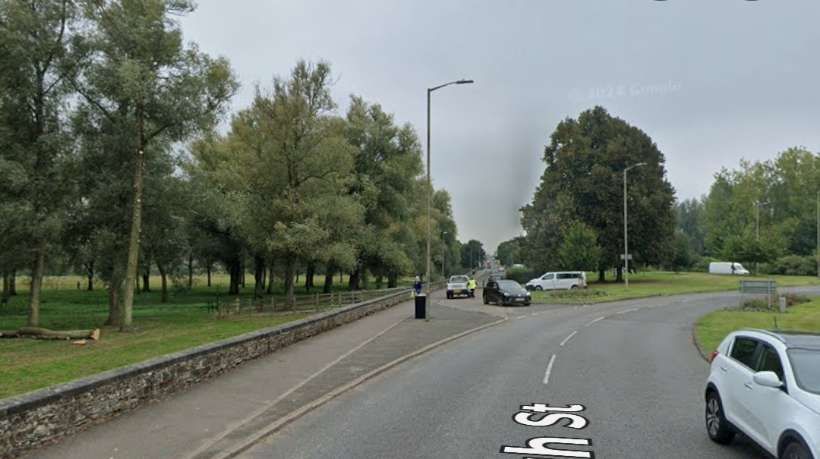
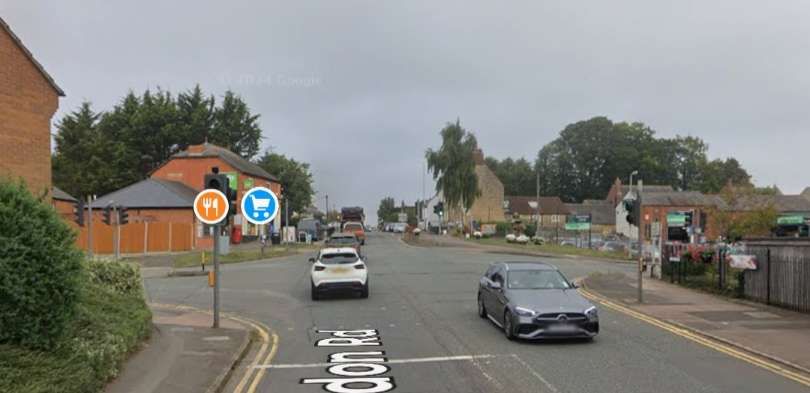
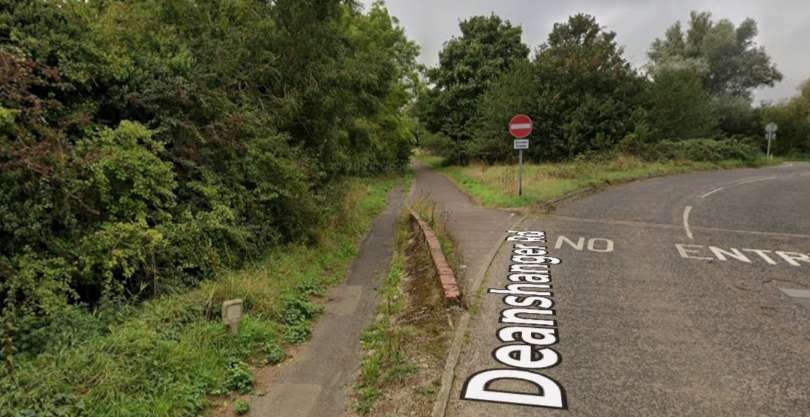
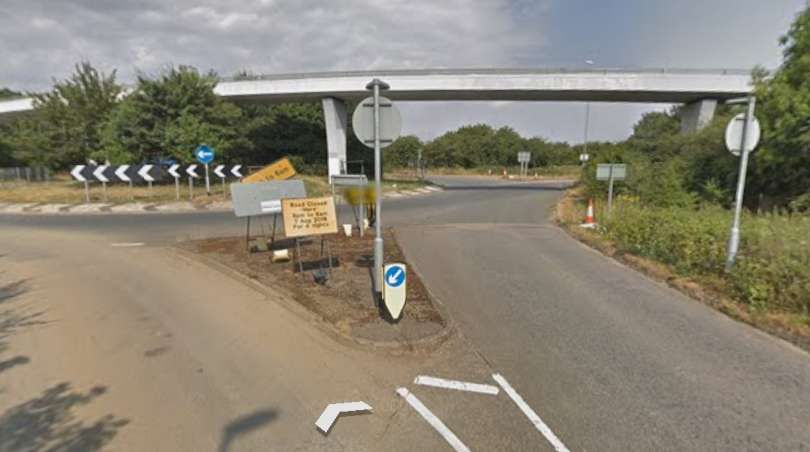
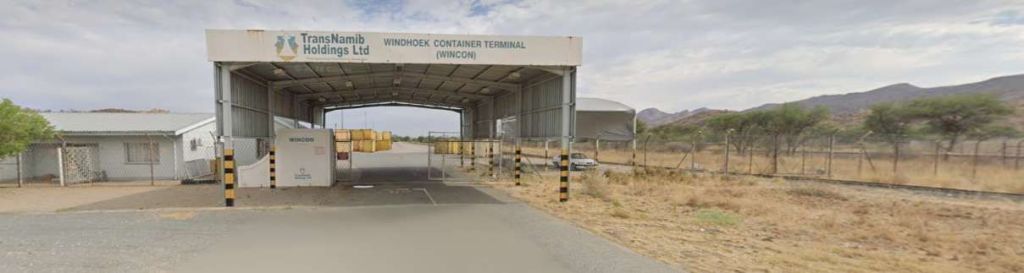
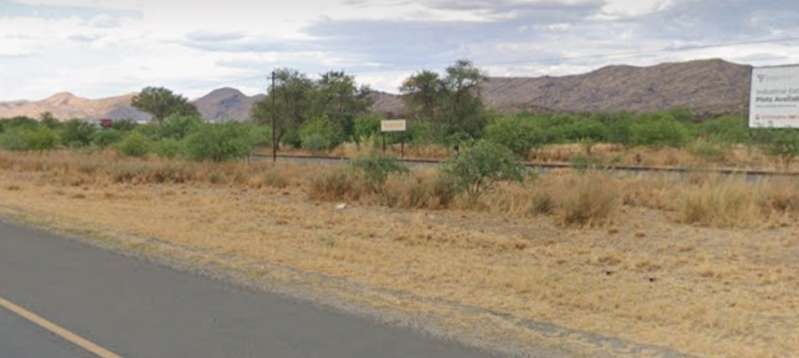
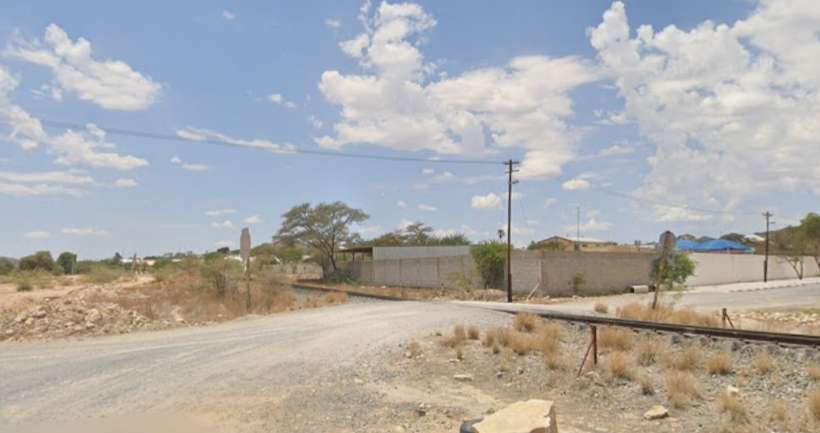
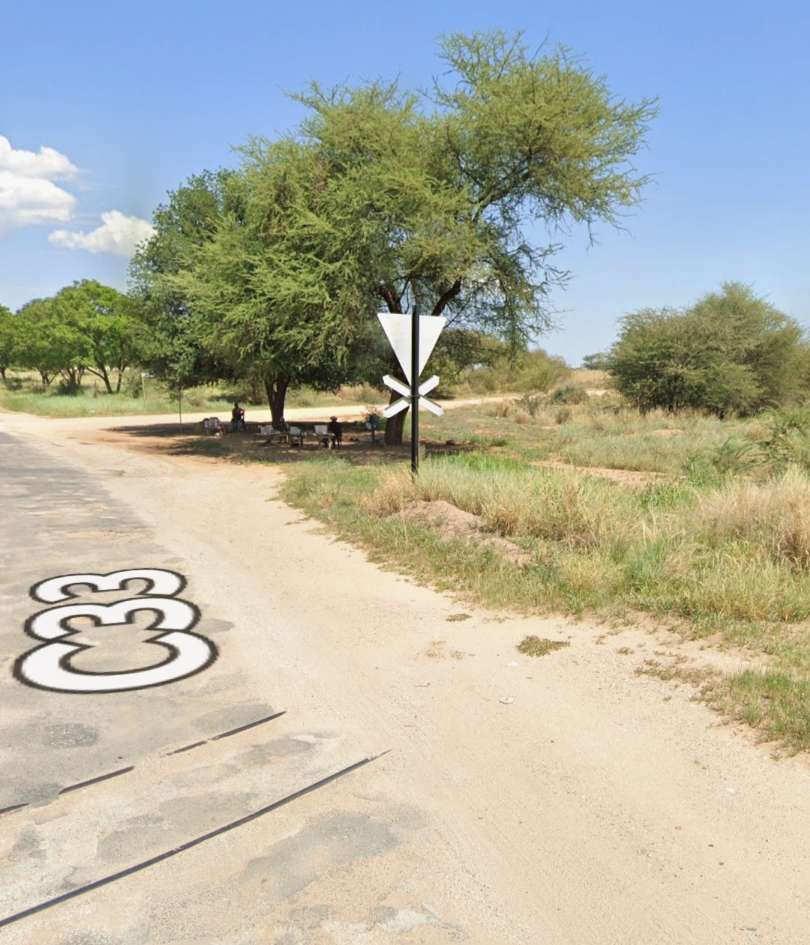
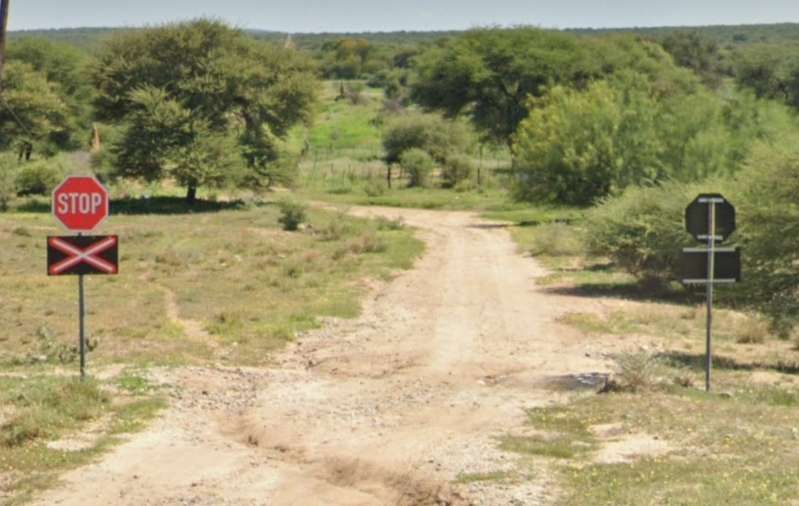
We are now beyond the West end of the Works site. The next three images show Stratford Road heading West towards a modern roundabout at Old Wolverton Road. …

[Google Streetview, September 2023]
[Google Streetview, September 2023]
[Google Streetview, September 2023]

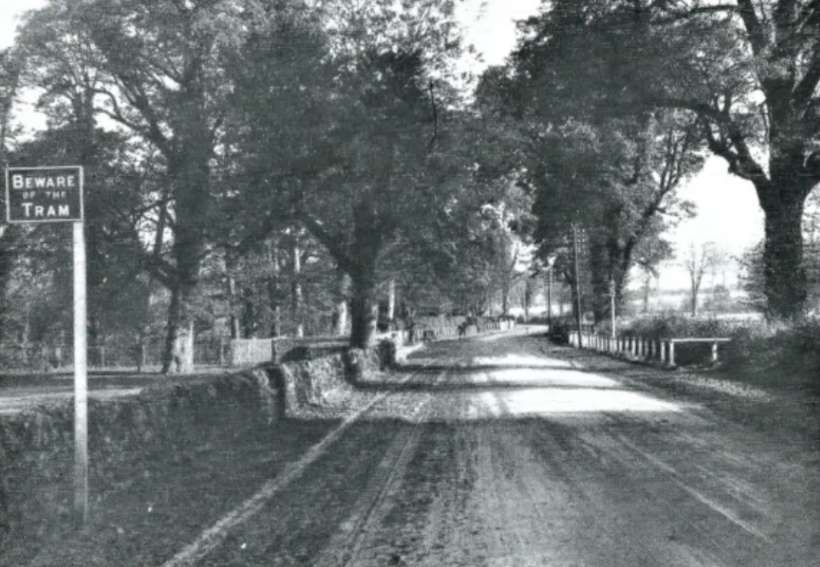
Edwards says that, “The route was almost straight but a fierce hill faced engines travelling towards Wolverton at almost the halfway point of the route where the old road to Wolverton (the remaining buildings of the original hamlet somewhat west of the new industrial town having by this time received the suffix ‘Old’) diverged from the newer, more direct course that the tramway traversed.” [13: p17]

Old Wolverton Road meets Stratford Road at an acute angle. The tramway continued West along Stratford Road. [12]
In the 21st century, Old Wolverton Road has been realigned to meet Stratford Road at a roundabout as part of a western bypass around Wolverton. [14]

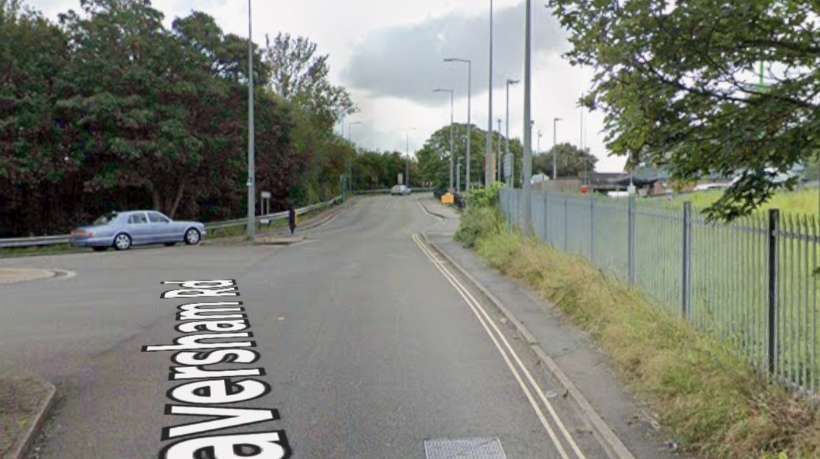
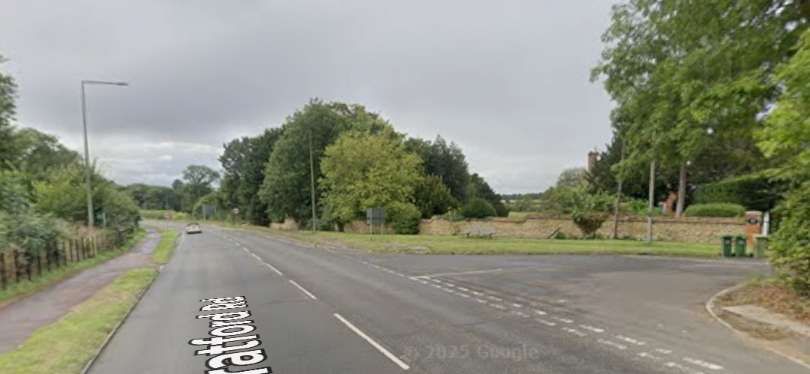
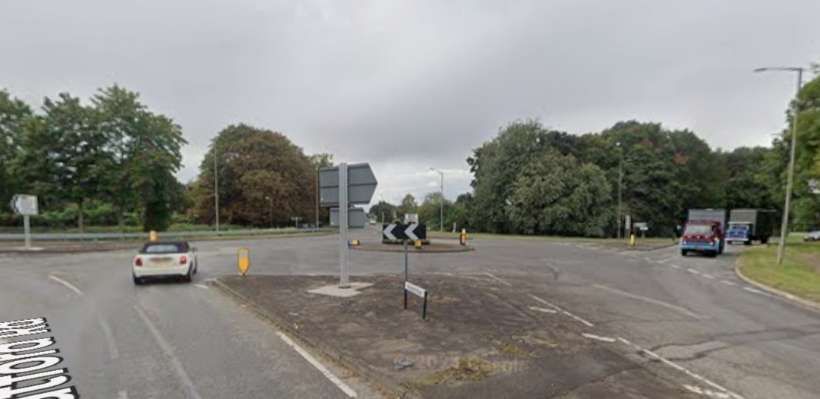
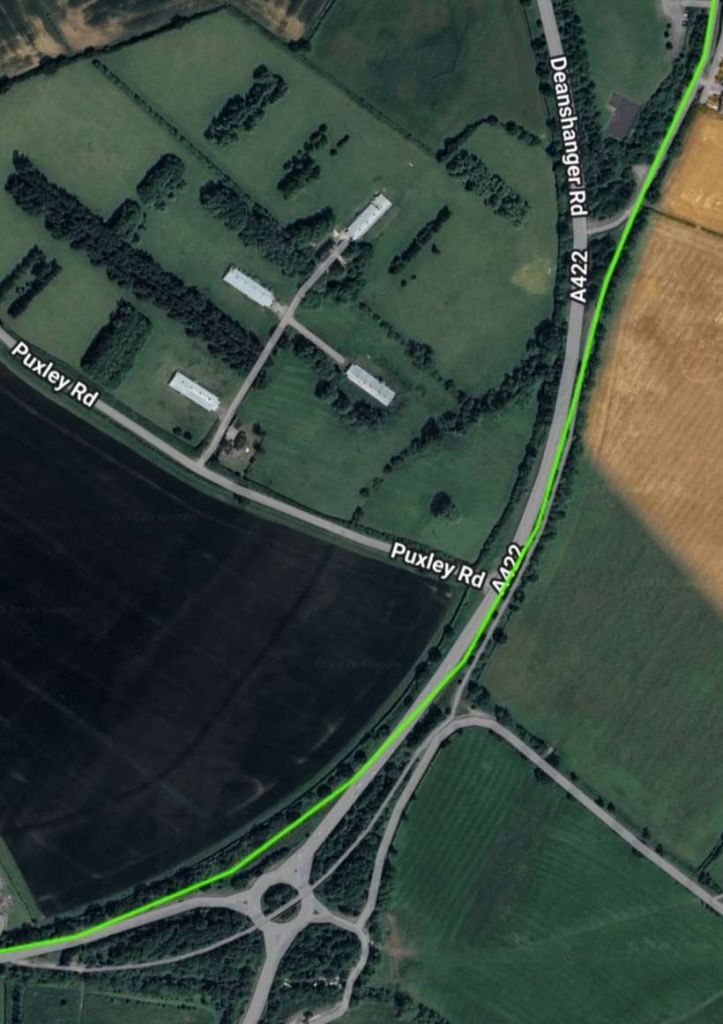
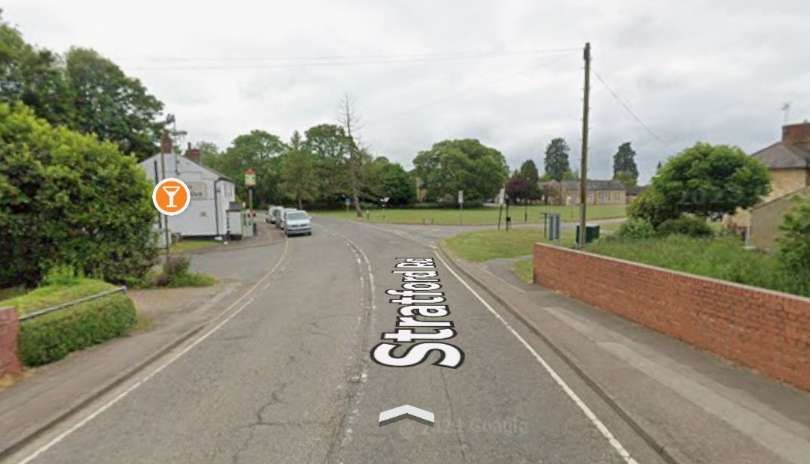
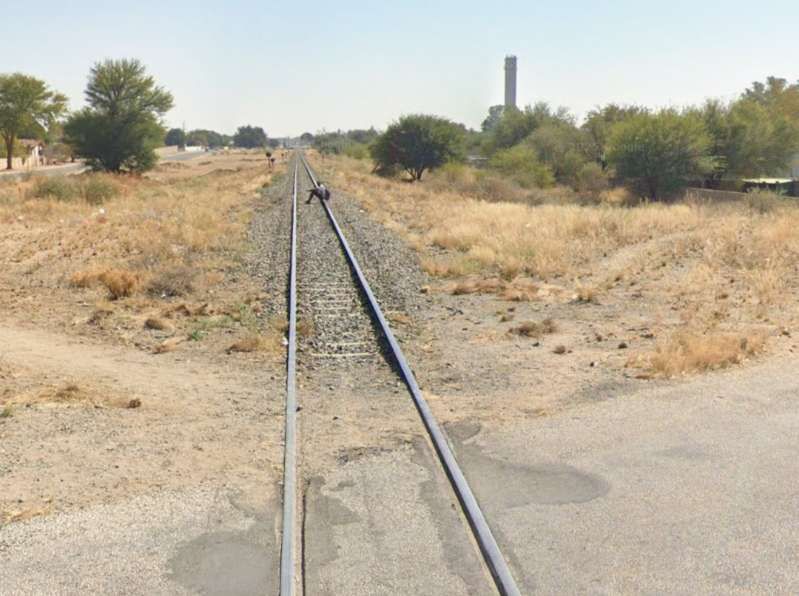
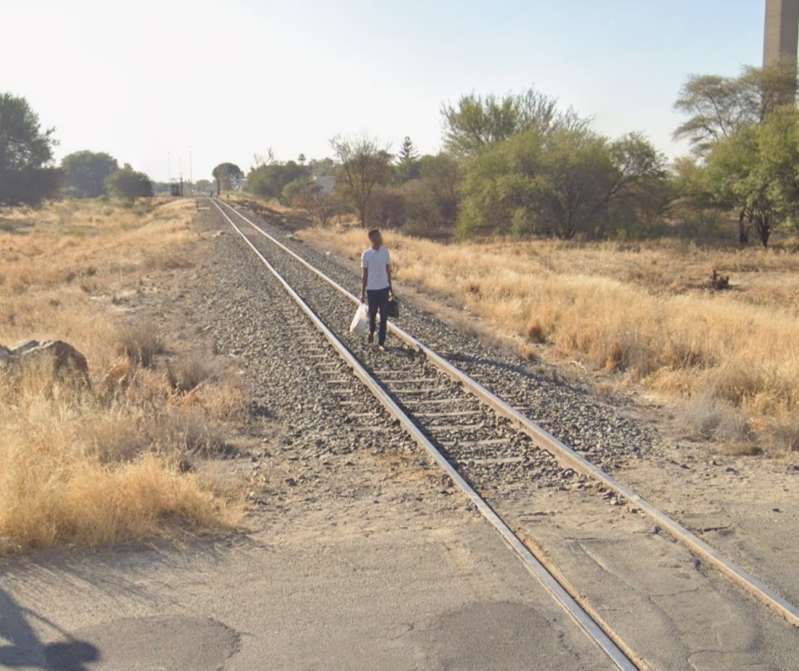
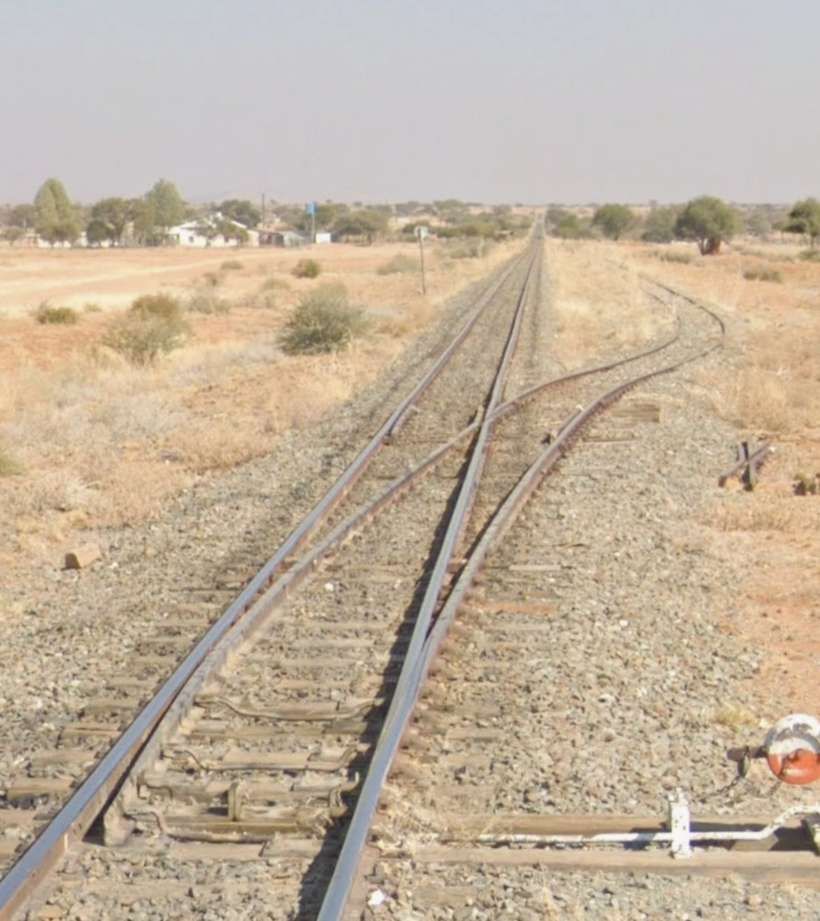
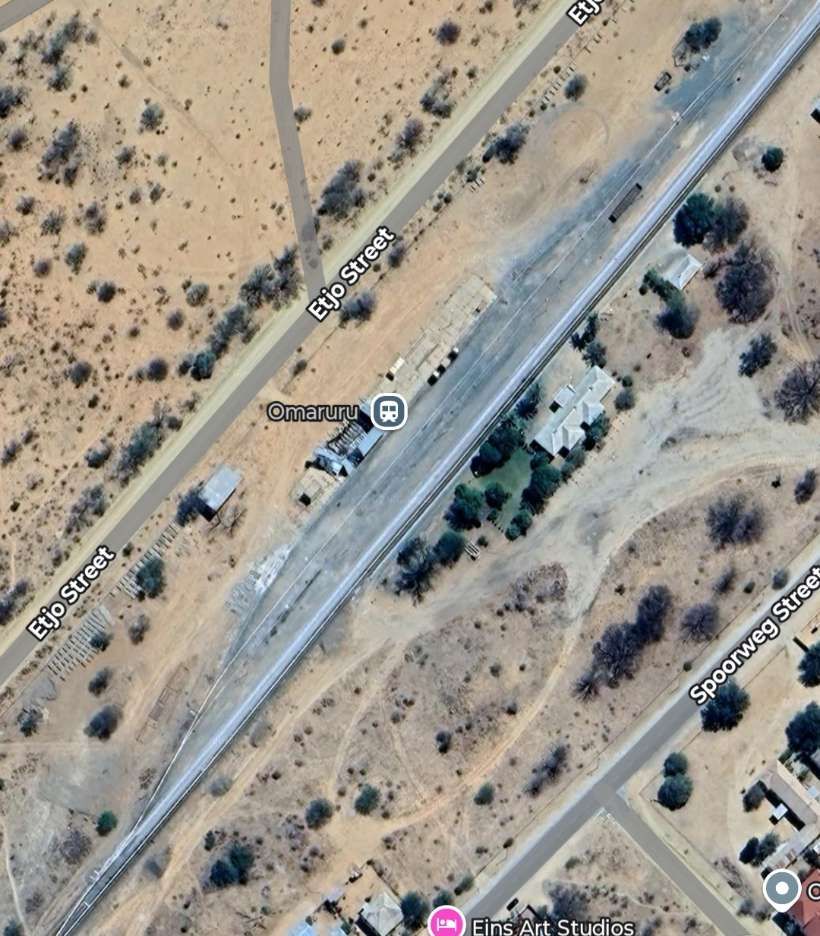
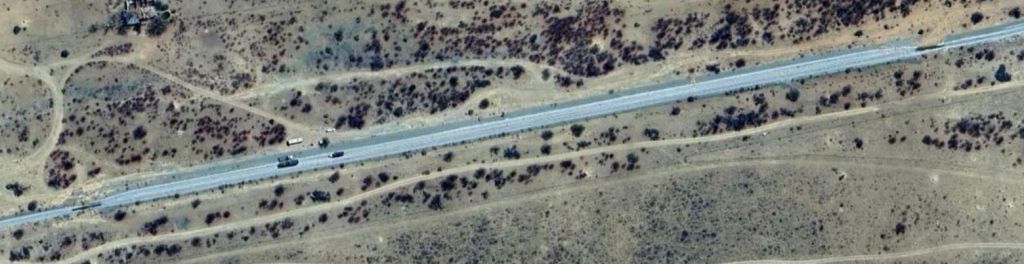
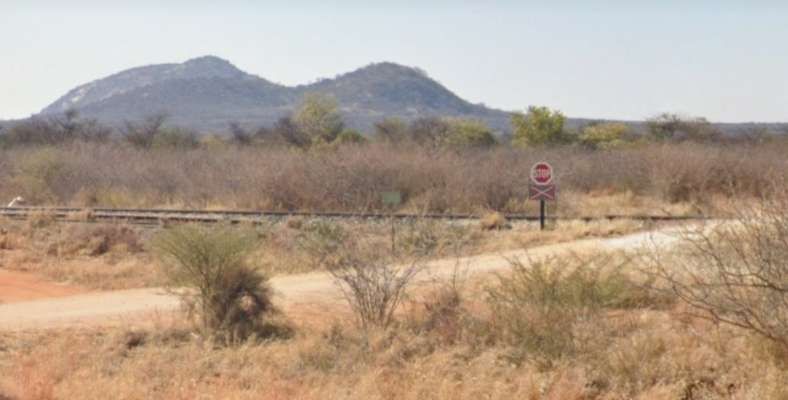
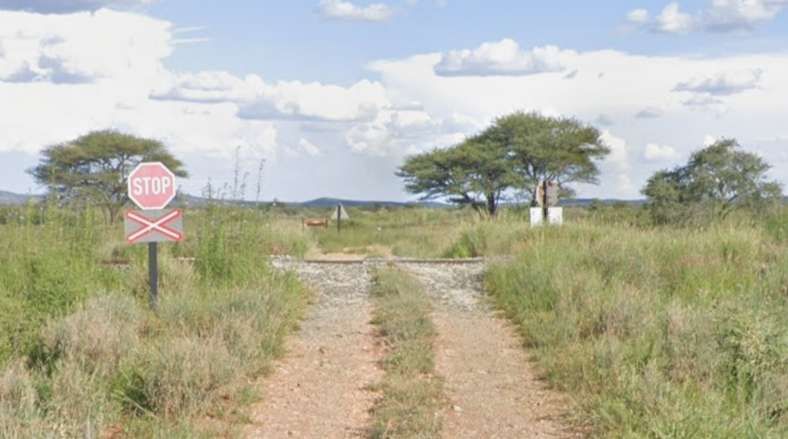
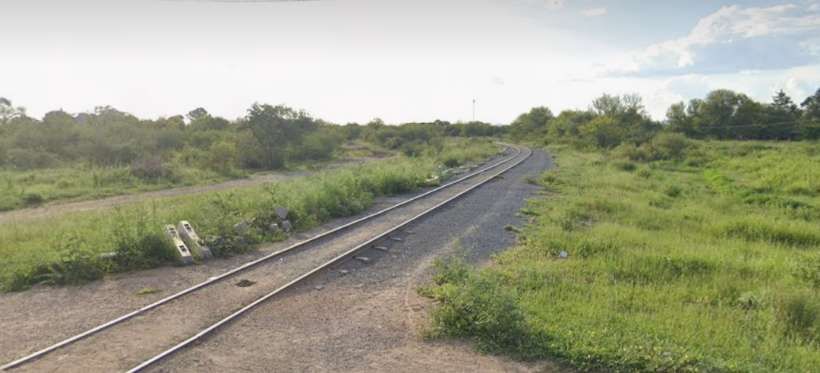
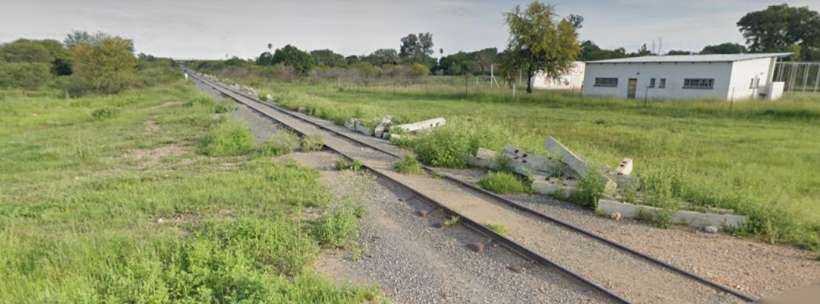
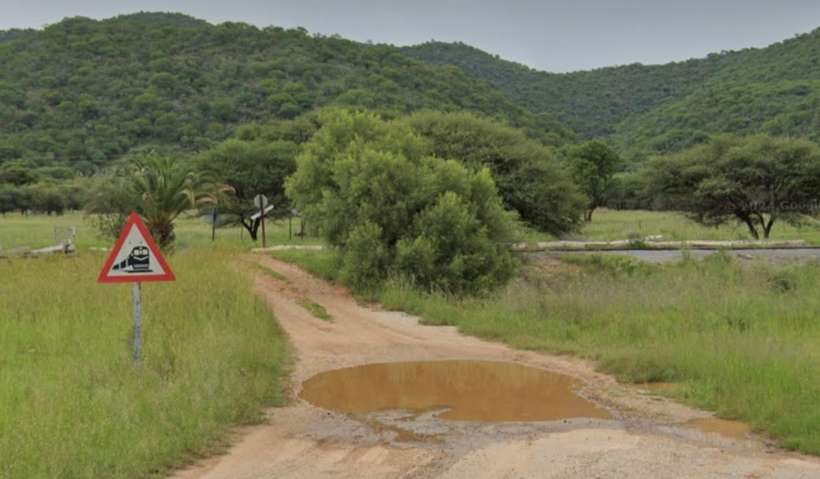
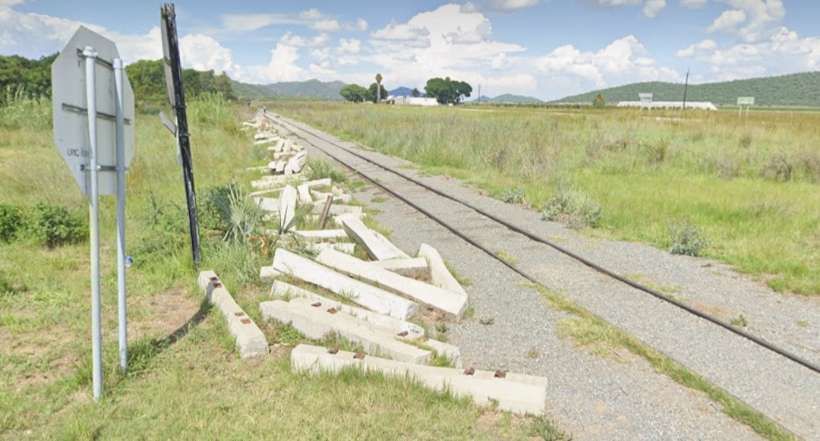
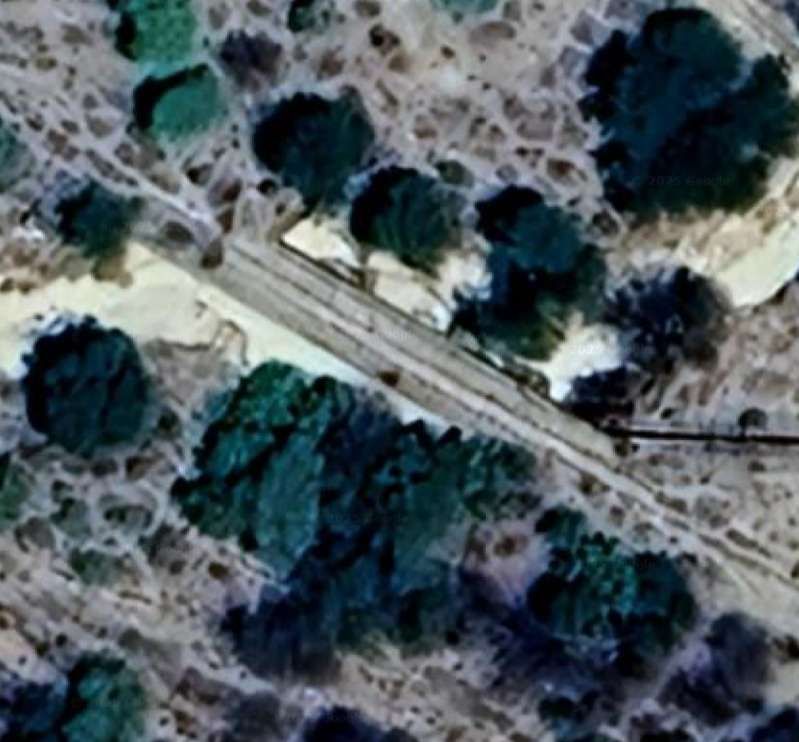
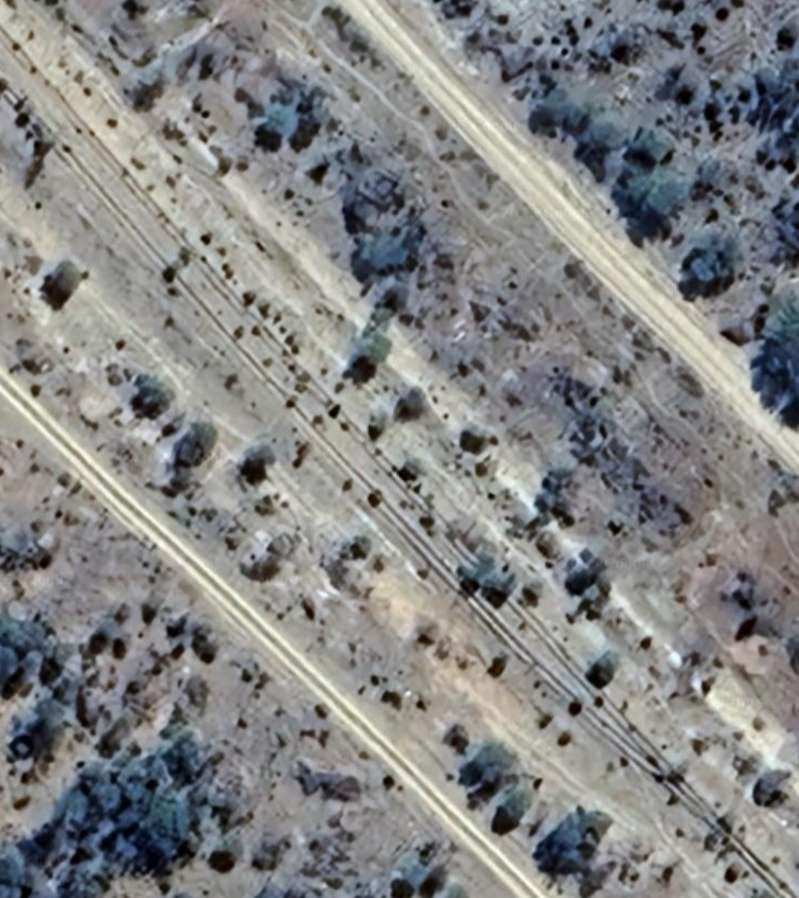
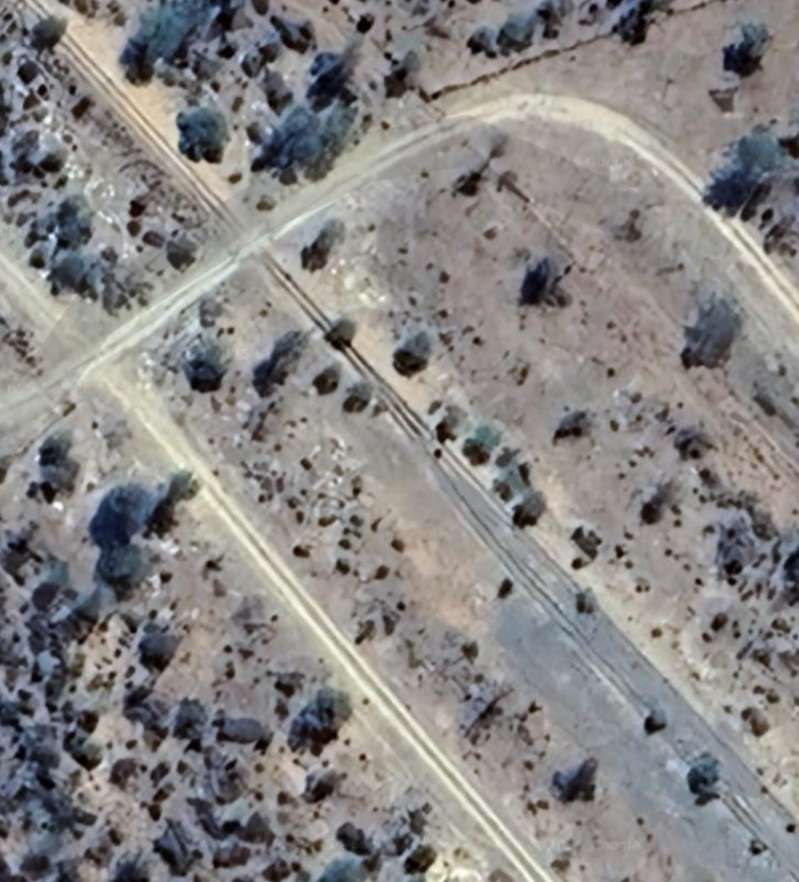
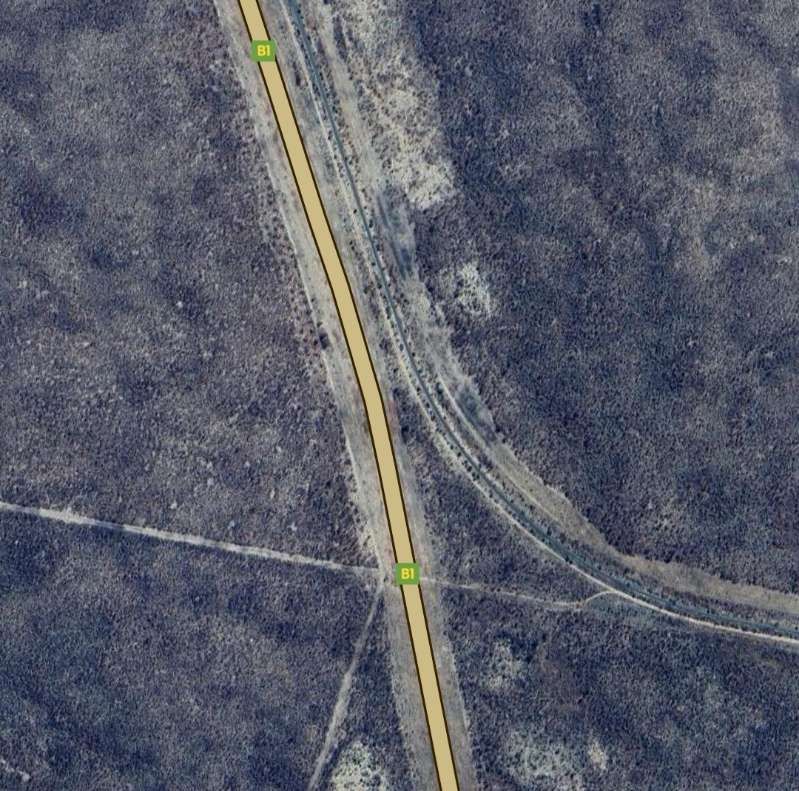
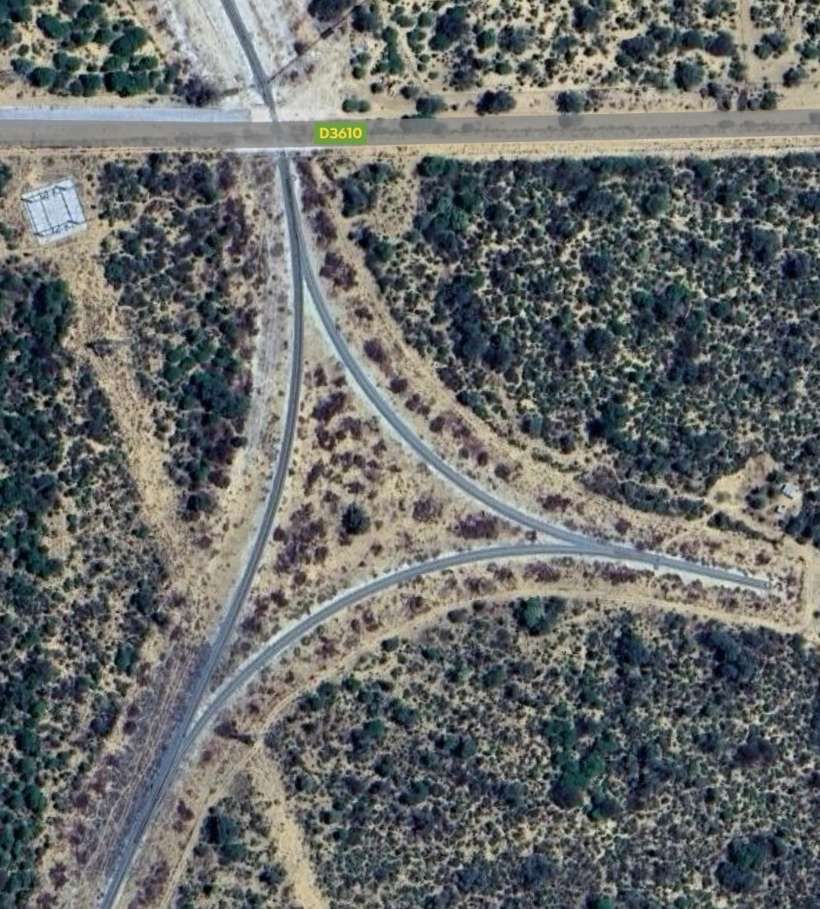
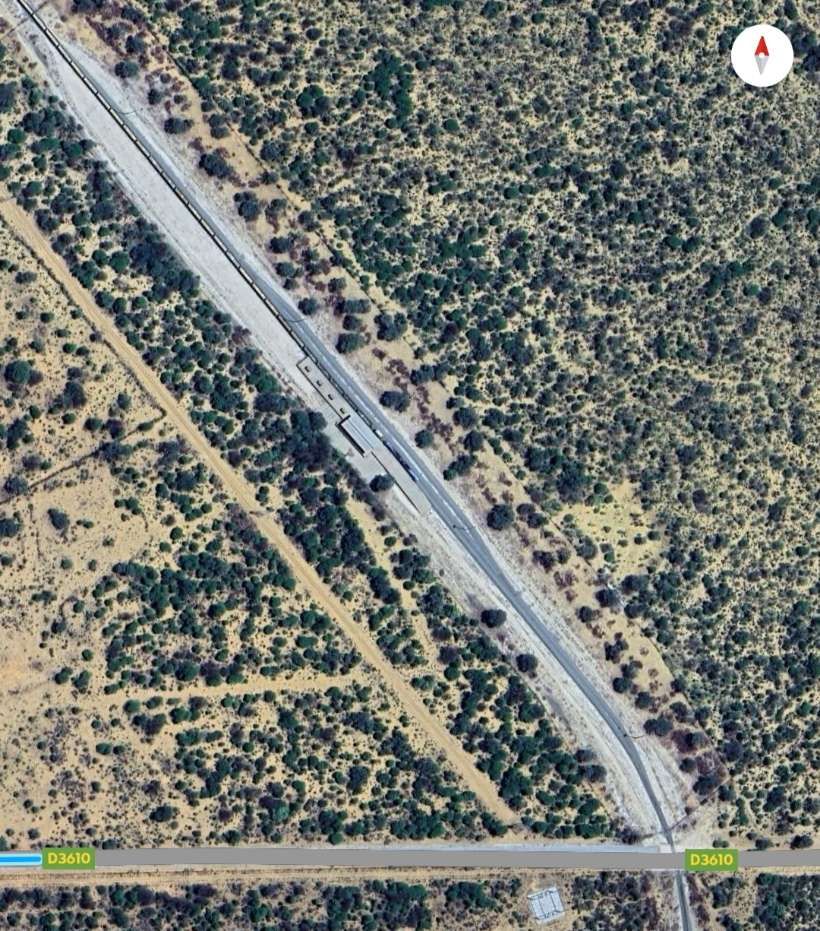
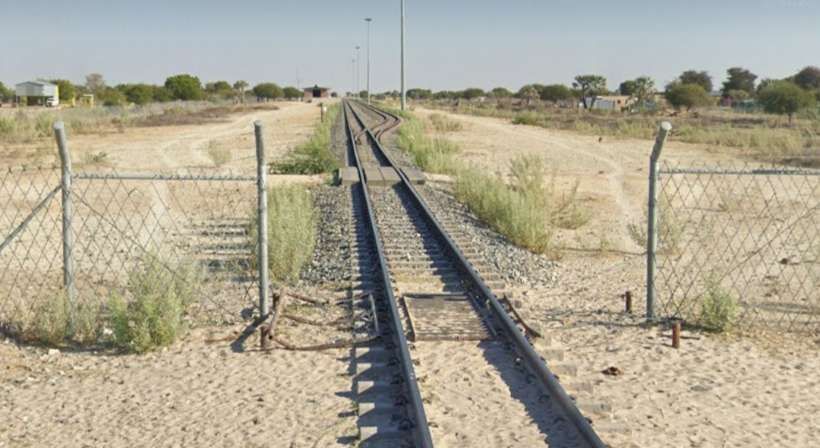
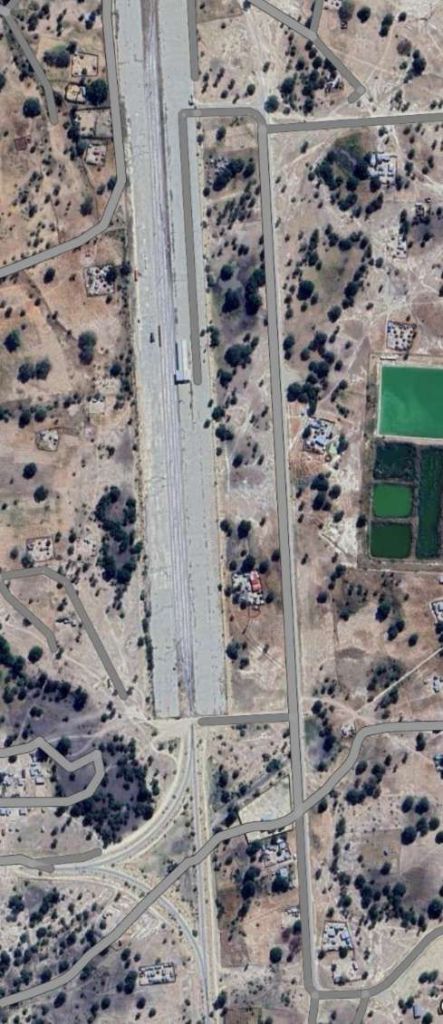
The next three Google Streetview images take the route of the tramway across the modern roundabout at the junction between Stratford Road and Old Wolverton Road to the original junction between the two roads. …

[Google Streetview, September 2024]
[Google Streetview, September 2024]
Wolverton Park is to the North of the junction in this Streetview image. [Google Streetview, September 2024]

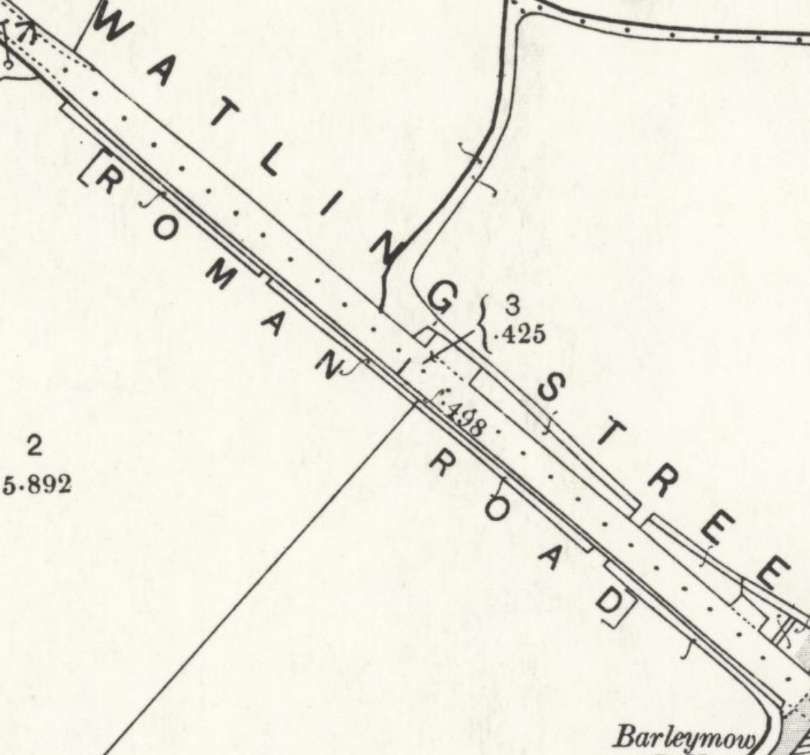
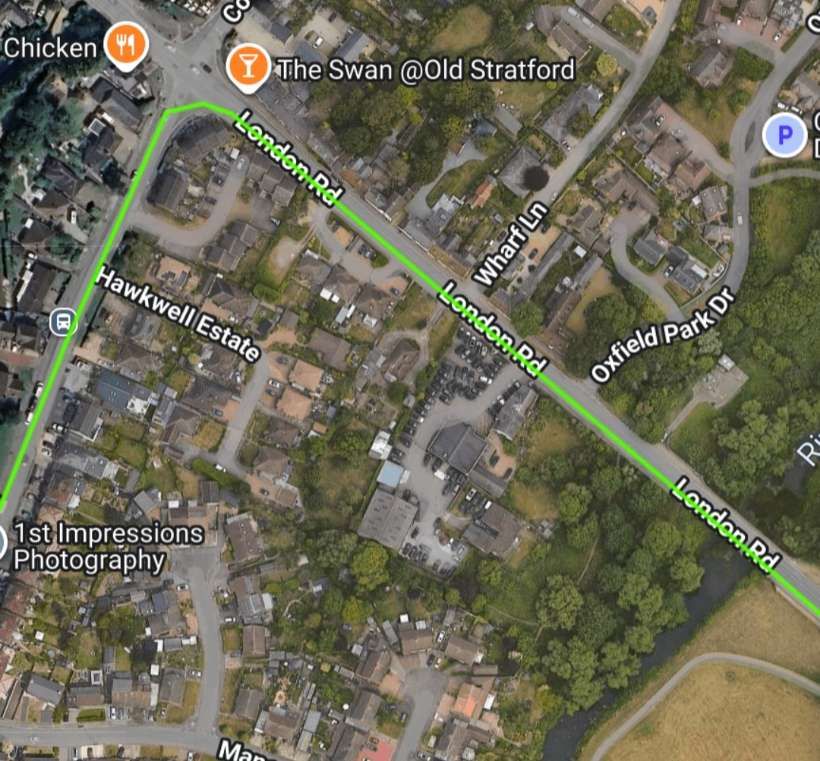
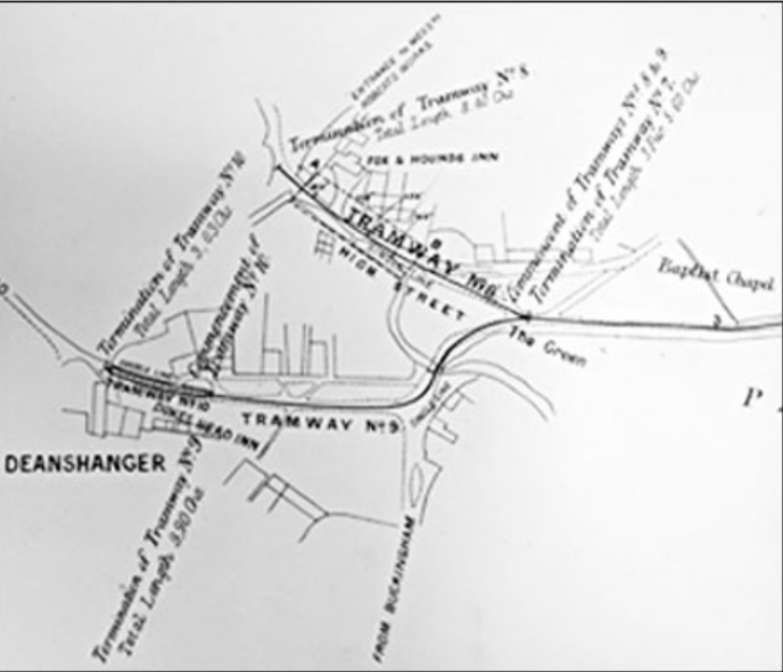
Lee provides just one paragraph which relates to the route travelled. He tells us that “In its maximum form, the undertaking began at the cattle sidings, Wolverton Station, and ran as a single line in the middle of the road through Wolverton. It then kept to its own track for about a mile, on the south side of the road to a point half a mile before the Wolverton Road joins the main Holyhead Road. The line there crossed over the Wolverton Road to its own track on the north side, but transferred once more to the middle of the public road through Stony Stratford. It thus traversed Wolverton Road to the junction, and turned sharply to the right (north west) along the Holyhead Road, here called High Street, and later Watling Street. At Old Stratford, the Deanshanger extension turned even more sharply to the left from Watling Street, and ran on its own track on the left-hand (south-east) side of the road.” [1: p549]

As we have already seen, Edwards description gives a little more detail: “Shortly before entering Stony Stratford the line abruptly cut across to the opposite side of the road. More than one pioneer motorist was apparently taken unawares by the sudden appearance of a steam tram engine and its trailers across his bows!” [13: p17]

This photograph was taken a few hundred yards from Stony Stratford. Allen Edwards says that the line crossed the road  just ahead of the camera. A sign was provided as a warning, but apparently the sudden movement of the tram across the road surprised many pioneer motorists. [13: p17]
After the junction with Old Wolverton Road Descent to Wolverton Park, the tramway continued West-southwest on Stratford Road. [12]
The road and tramway ran to the South side of Wolverton House. [12]
And continued West-southwest towards Stony Stratford. [12]
This extract from railmaponline.com’s satellite imagery covers much the same length of the Stratford Road as shown in the three OS map extracts immediately above. The A5 dual carriageway is clearly an addition to the landscape. As is the road immediately to its West. [14]
Stratford Road facing Southwest with the modern A5 spanning the route of the old tramway. [Google Streetview, September 2024]
To the West of the A5 Stratford Road crosses Queen Eleanor Street. [Google Streetview, September 2024]

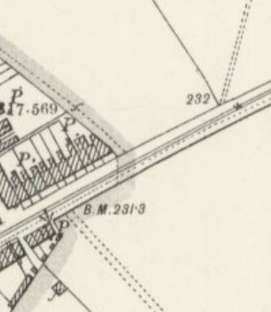
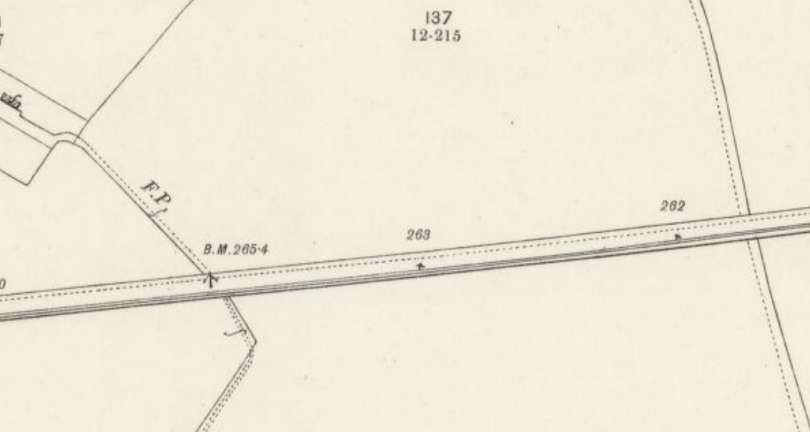
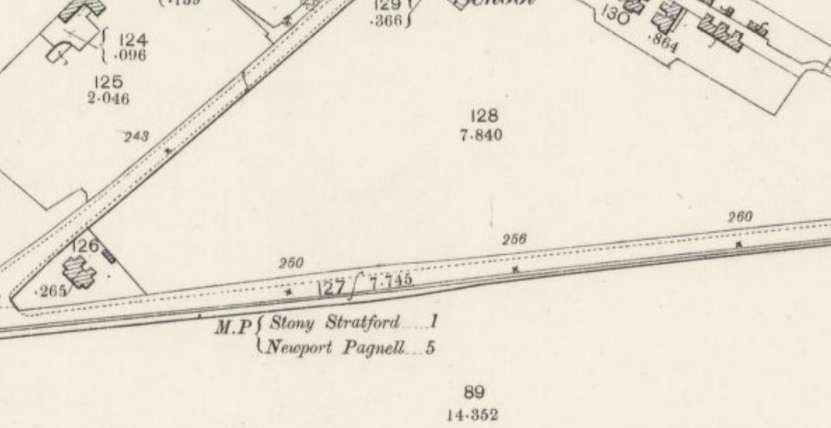
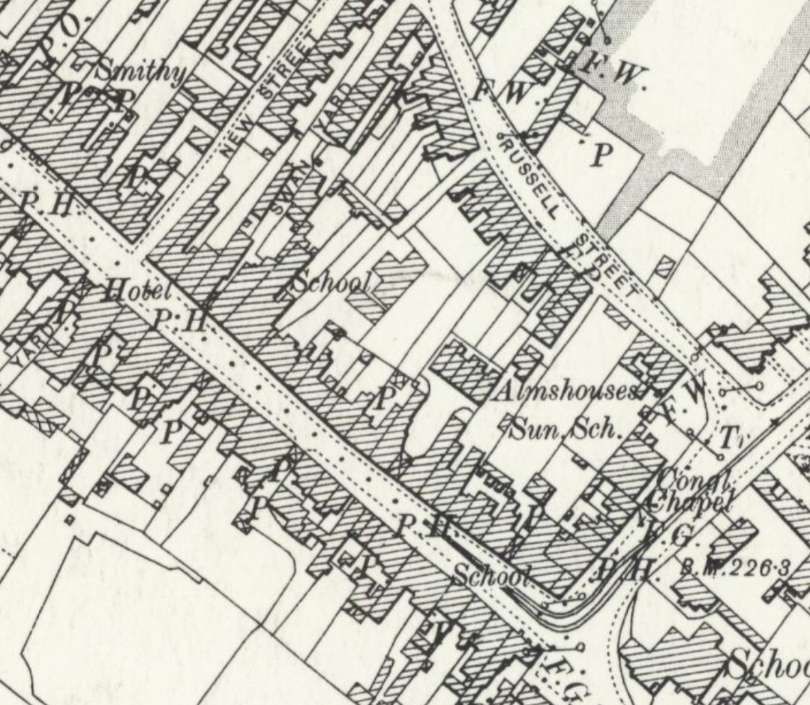
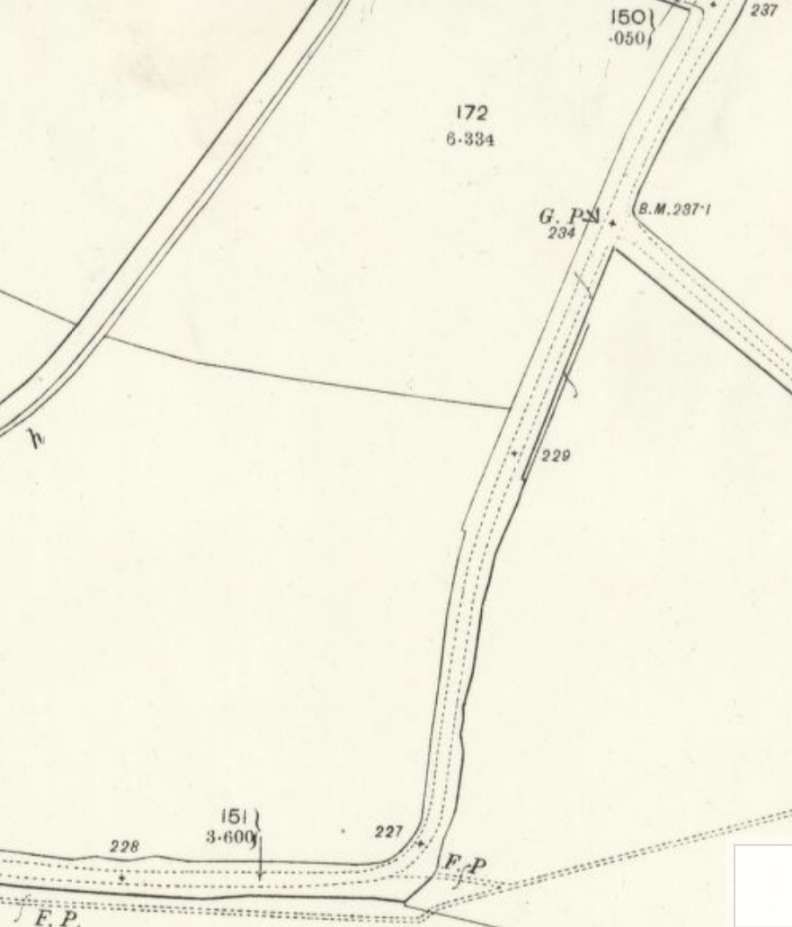
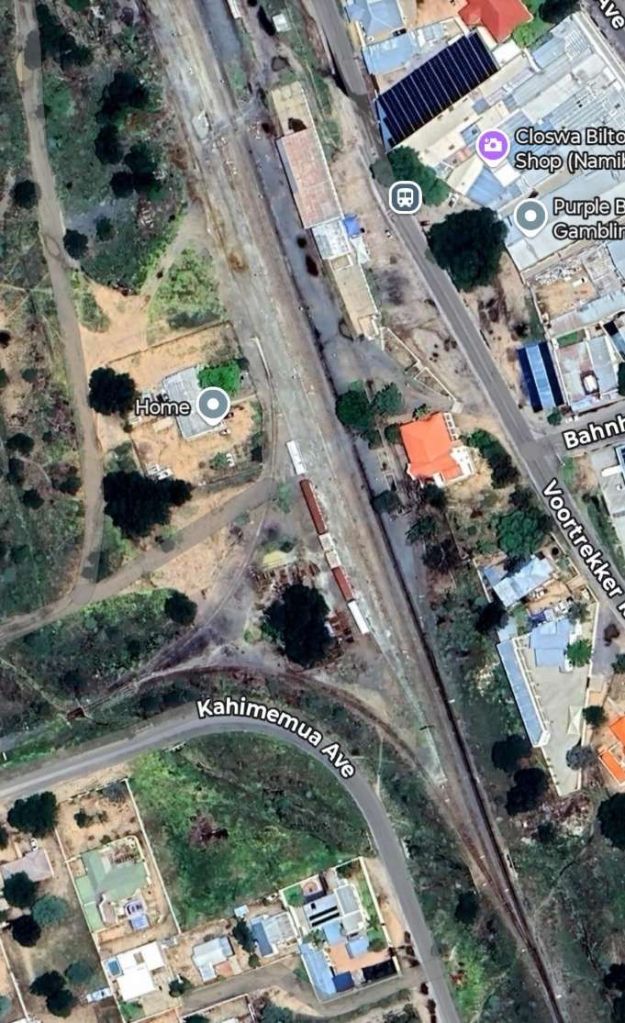
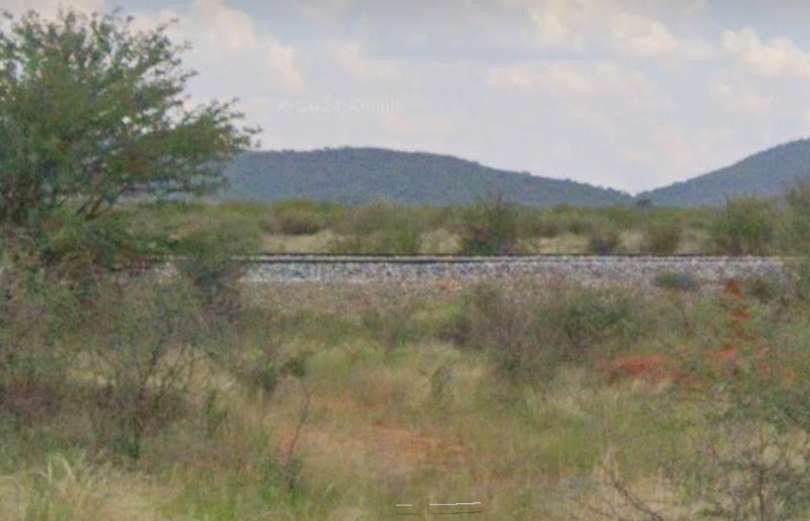
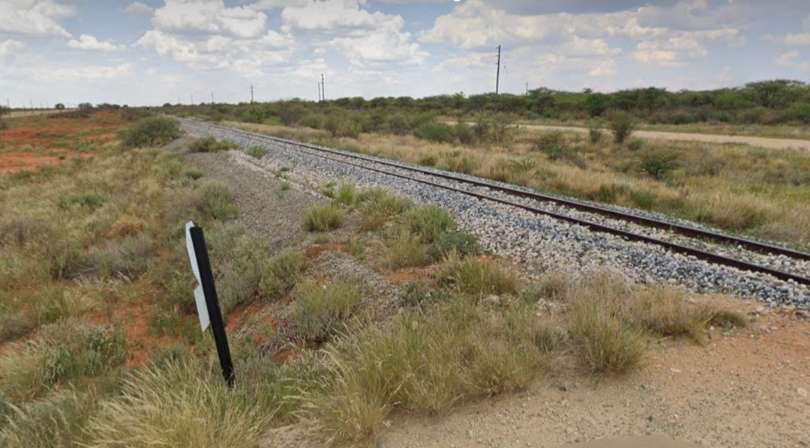
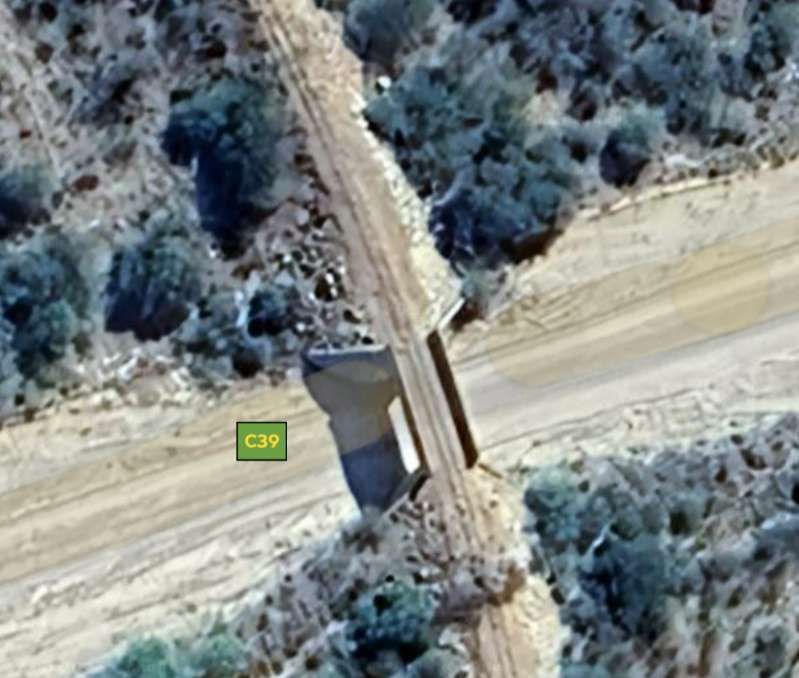
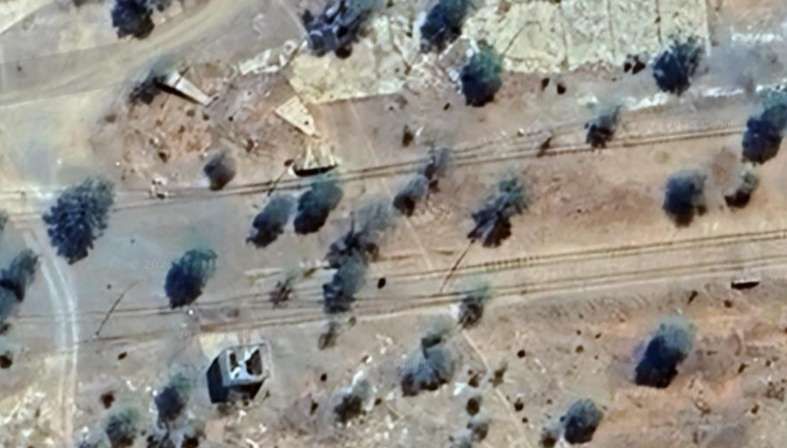
This next smaller map extract brings the line to the edge of the Ordnance Survey map sheet and  shows the beginning of the housing at the eastern edge of Stony Stratford. [12]

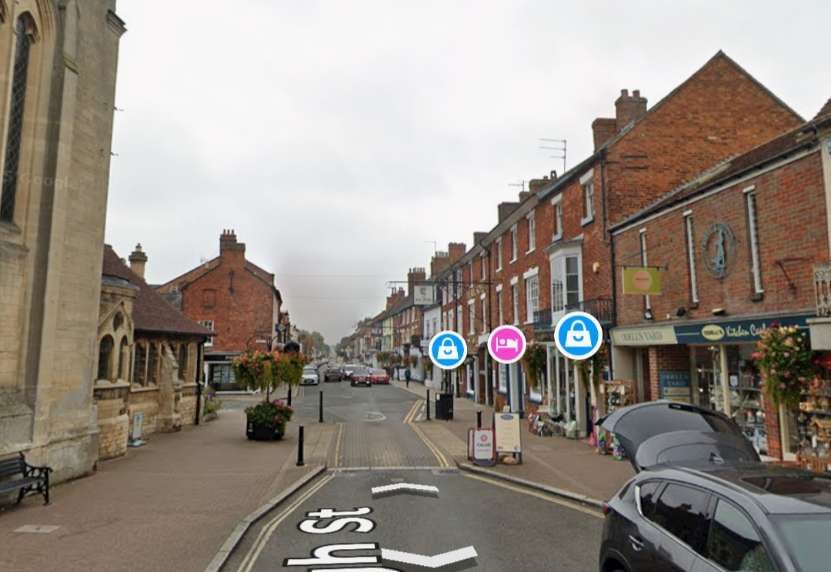
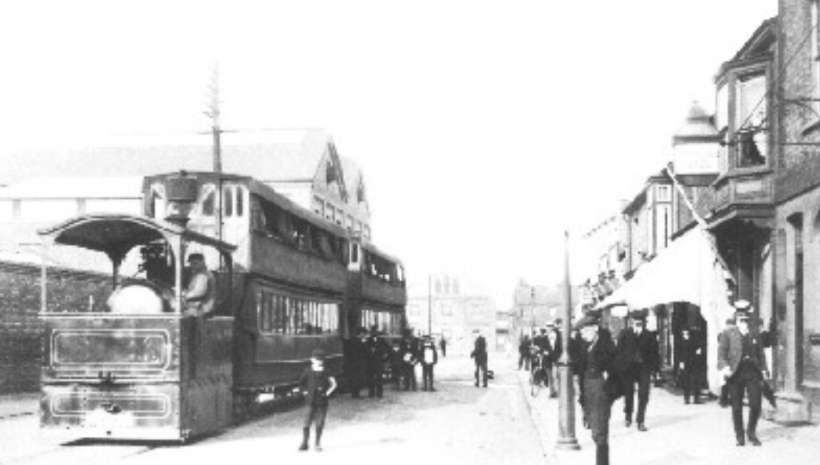
Edwards continues his description of the line: “Entering the town the line again took up position in the centre of the road. It had traversed just one mile from Wolverton. After a few hundred yards the road came to a T-junction with Watling Street outside The Forester’s Arms public house.” [13: p17]

This next extract is from the 1923 Ordnance Survey, published in 1925. It shows the tramway heading towards the road junction in Stony Stratford. The tramway depot features in the top left of the extract. [15]
The tramway depot as shown on the 1898 25″ ordnance survey. At this time, an additional access from the depot to Wolverton Road ran along what, in the 21st century, is known as St. Mary’s Avenue. There was a loop behind the depot which turned South-southeast running through the depot building and down to Wolverton Road along St. Mary’s Avenue. [21]
The old tramway runs Southwest towards the road junction in Stony Stratford. Railmaponline.com shows a loop at the location of the tramway depot, but not the detailed track layout in the depot. [14]
Facing towards Stoney Stratford just a couple of hundred yards beyond Queen Eleanor Street. [Google Streetview, September 2024]
Continuing down Wolverton Road towards the centre of Stony Stratford. [Google Streetview, September 2024]
St. Mary’s Avenue was one of the access points to the Tram Depot. [Google Streetview, September 2024]
The main access to the Tramway Depot. [Google Streetview, September 2024]
The LNWR track plan of the tram depot at Stony Stratford. It comprised a large shed for holding the tramcars, and a smaller one for the engines and the repair facilities. As far as is known all the repairs were undertaken in situ, but there were few machine tools available. Also in the depot were coaling and watering arrangements for the engines. [17]
Looking into the Tramway Depot site from the access road. After the tramway closed the building (behind the garage in the foreground, so not visible) was used as a bus depot [Google Streetview, June 2023]
The current building on the site of the tramway depot. [Google Maps, January 2026]
Continuing Southwest down Wolverton Road. [Google Streetview, September 2024]
Approaching the Junction with High Street, Stony Stratford. The Forresters Arms is on the right. [Google Streetview, September 2024]
A passing loop occupied the highway with the tramway turning to the Northwest. On this 1898 survey, the tramway is shown terminating just after the 90° turn onto the High Street in Stony  Stratford. [15]
This extract from the railmaponline.com satellite imagery includes the length of line in the extract above and extends a little to the West. St. Mary & St.Giles Church, which is just beyond the West side of the OS map extract above can be made out towards the left of this image. [14]

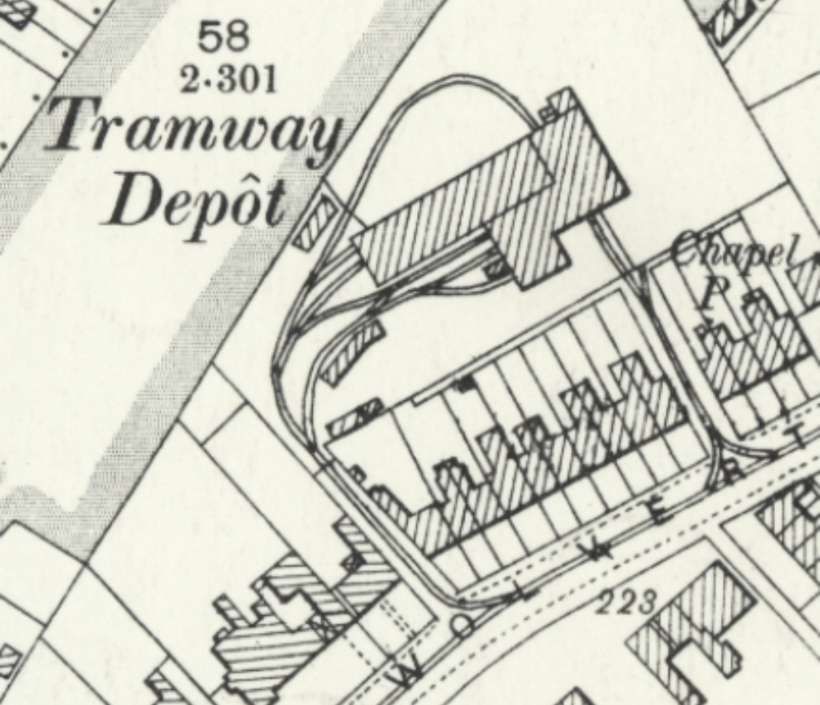
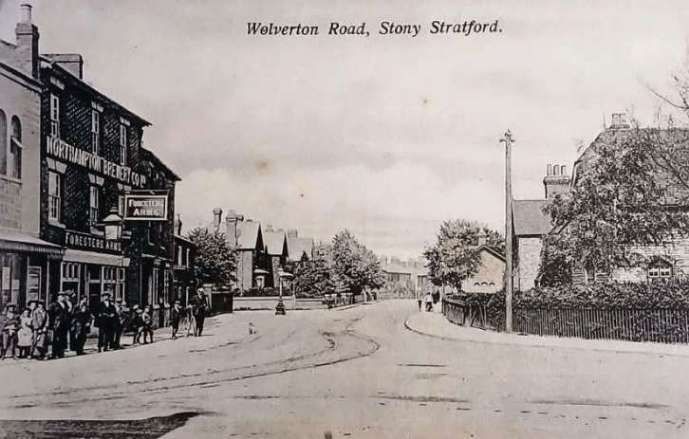
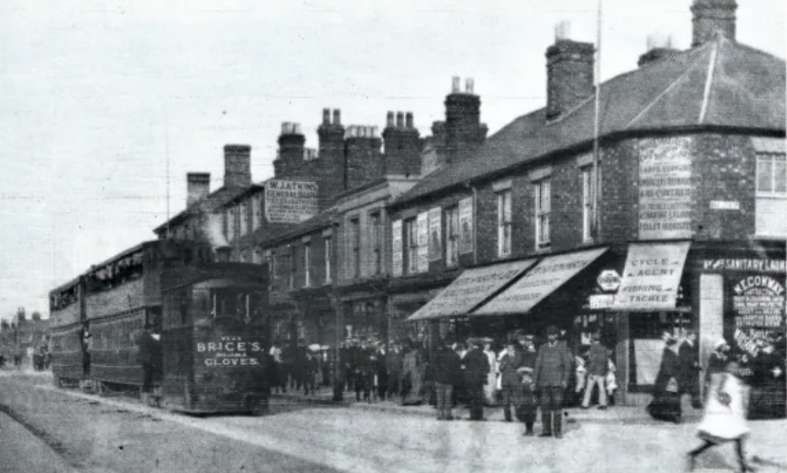
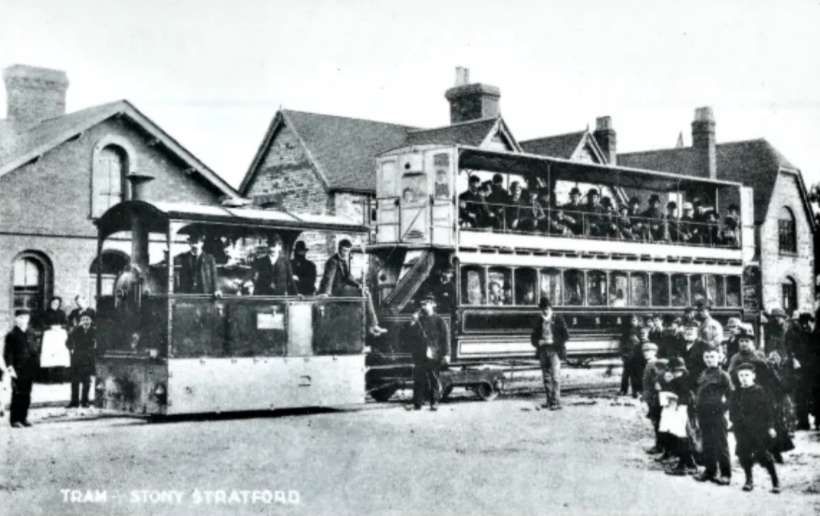
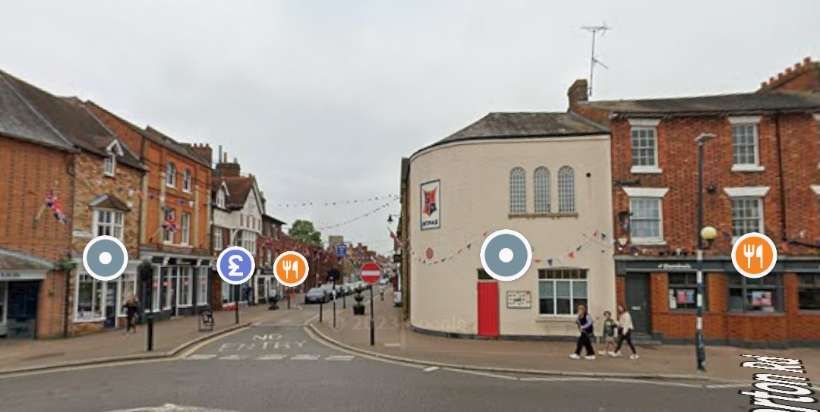
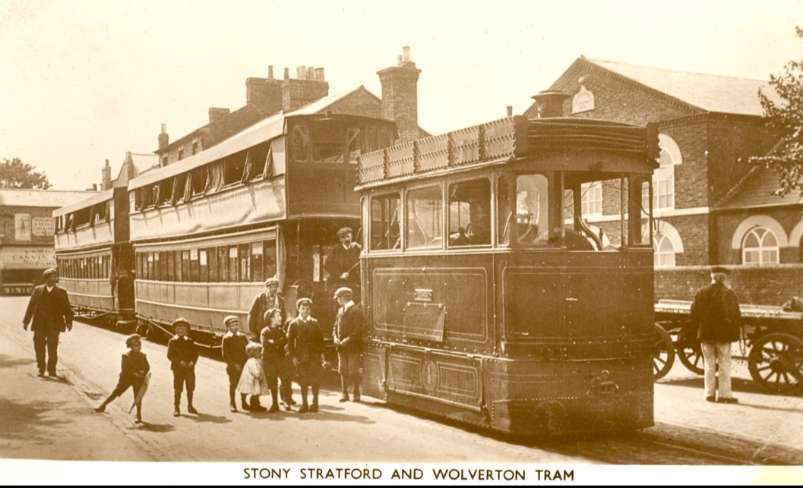
The view Northeast along Wolverton Road in Stony Stratford. The depot is behind the housing in the middle distance. To the left of the camera the tramway ran away to the Northwest. The Forresters Arms is on the left side of the photograph. This image was shared on the Stony Stratford Photos Facebook Group by Edward Corney on 20th November 2018. [22]

The same view along Wolverton Road in the 21st century. [Google Streetview, September 2023]
At the Forrester’s Arms, Stony Stratford, this photograph gives a good impression of the length of the large bogie cars. The locomotive was built by Thomas Green & Son in 1887 © Public Domain. [1: p552][25]
Green Engine No. 2 at the Forresters Arms in Stony Stratford with two 100-seater tram cars. [13: p18]
Kraus engine and 44ft., 100-seat bogie tramcar in Stony Stratford about 1888. [1: p552]
The conductor William Newton is just stepping off one of the tramcars at Stony Stratford sometimes after the line came under LMS control at the Grouping’. Note the motor car and the double-decker bus at the kerbside on the left of the image. [13: p16]

Edwards says that at the junction adjacent to the Forresters Arms, “The tramway turned right … to continue northwards beyond The Cock and The Bull hotels for another half mile to terminate outside The Barley Mow public house, the last building in the town.” [13: p17]

Looking Northwest along High Street, Stony Stratford. [Google Streetview, September 2024]
The 25″ 1898 Ordnance Survey, published in 1900 does not show the tramway running Northwest along High Street, Stony Stratford. Which suggests that it was removed by the publication date in 1900. We know that the line was active until at least 4th September 1899. [15][1: p549]
The line ran Northwest along High Street, Stony Stratford passing the Rising Sun public house and originally terminating at the Barley Mow Public House opposite the town’s Gas Works. [15]
This extract from the railmaponline.com satellite imagery shows the length of the route of the old tramway from St. Mary & St. Giles Church (bottom-right) to the River Great Ouse (top-left).  [14]
The Barley Mow Public House was the terminus of the first length of the line and the point at which the extension to Deanshanger started. The length of Watling Street shown on this OS map extract is within the length of the line shown on the last extract from the railmaponline.com satellite imagery above. [15]
St. Mary’s & St. Giles Church, High Street, Stony Stratford [Google Streetview, September 2024]
Looking Northwest along High Street from just outside the church. [Google Streetview, September 2024]
Further Northwest on High Street, looking towards the River Great Ouse. [Google Streetview, September 2024]
Heading towards the River Great Ouse along the line of the old tramway. The Stony Stratford by-pass (Queen Eleanor Street) joins the road ahead of the camera.  [Google Streetview, September 2023]

An extension, which opened fully in 1898, continued Northwest from the Barley Mow towards the River Ouse and the County border.

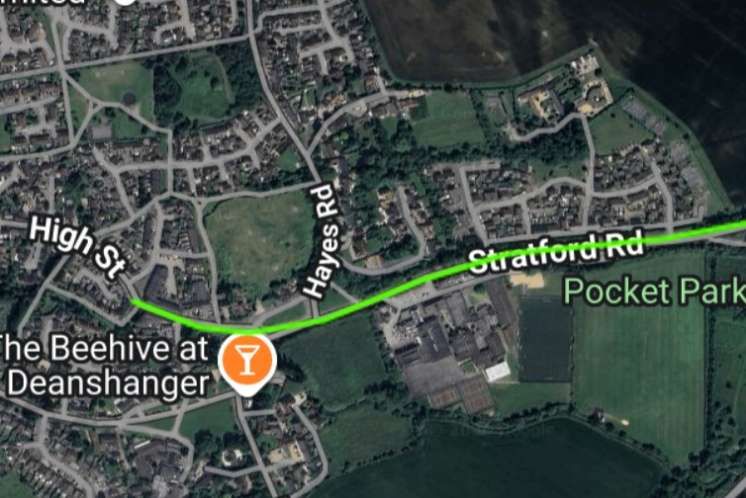
Lee tells us that from the outset, it had been intended to cater also for goods traffic: “this was not begun until March, 1888. A contract was made with the LNWR. to deliver its goods, which was stated to save the main-line railway £500 per annum. With an eye to goods traffic principally, Wilkinson promoted an extension from High Street, Stony Stratford, to Deanshanger, which was sanctioned by Order of 19th July 1887, authorising 2 miles 3 chains of 3 ft. 6 in. gauge. Deanshanger was the location of the Britannia Ironworks, the agricultural implement works of E. & H. Roberts, established in 1820.” [1: p548]

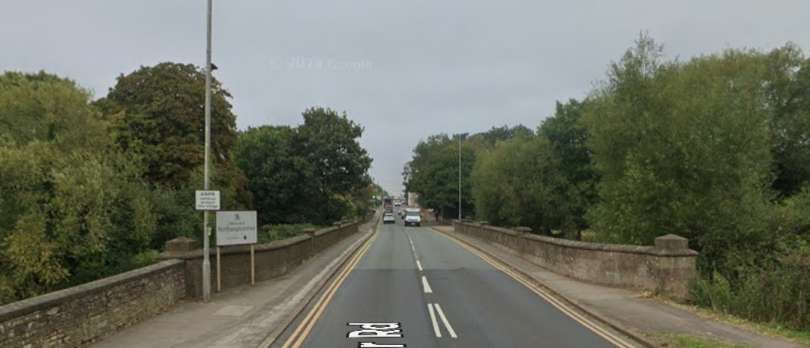
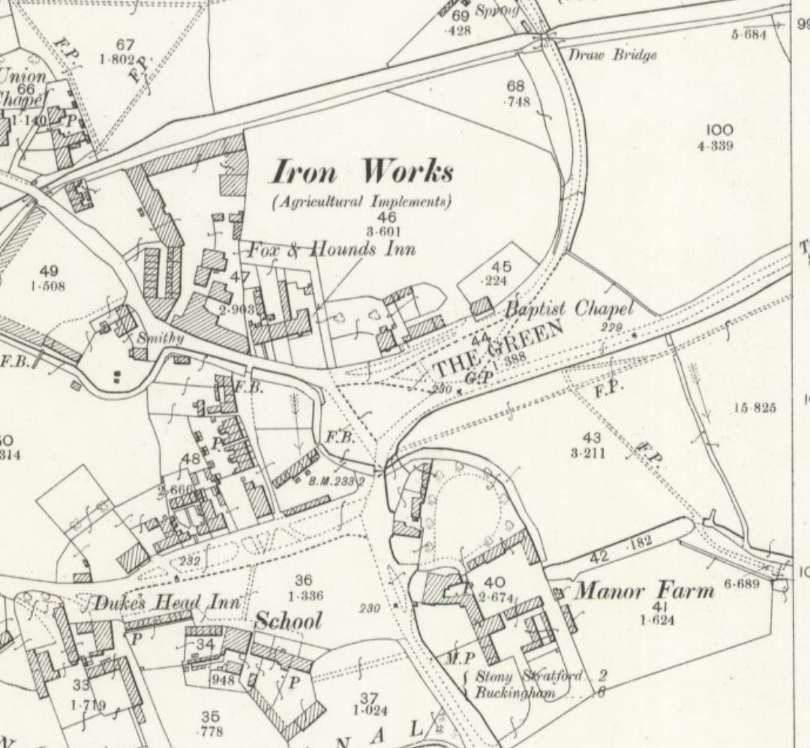
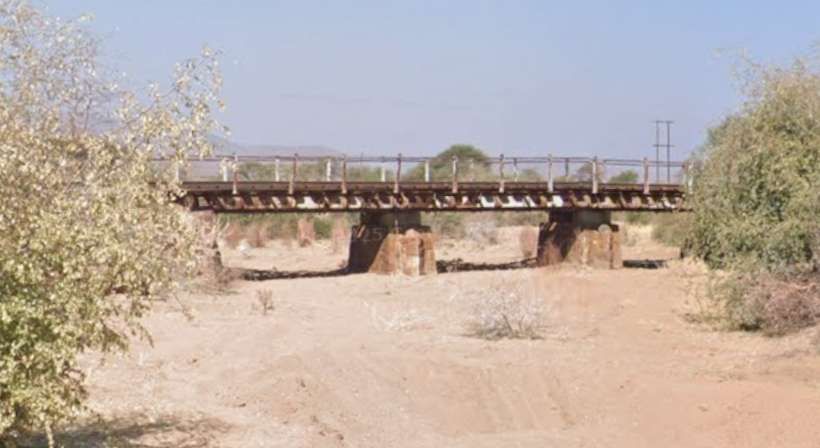
Allan Edwards tells us that, “Leaving The Barley Mow and taking its normal position in the middle of the road the extension travelled straight for almost three quarters of a mile over the embankment that carried the highway across the floodplain of the River Ouse. The river was the county border. Climbing very steeply into the Northamptonshire village of Old Stratford, the line then swung sharp left onto the Buckingham road. A separate depot and workshop for this section of line was established at this corner. … The line then ran parallel to the Buckingham arm of the Grand Junction canal to Deanshanger where it terminated on the village green outside The Fox & Hounds public house. This extension was sanctioned by the Board of Trade on 24th May 1888 and immediately came into public use.” [13: p18]

It seems that a section of 14 chains from the bottom of High Street, across the Great Ouse, to Old Stratford, was built quite quickly and opened later in 1887. “The major portion of the extension was complete at the time a visit to the undertaking was paid by the Civil & Mechanical Engineers Society on Saturday, 12th May 1888, and the party was given a run over the new line. Sanction of the Board of Trade was given on 24th May 1888, to 1 mile 56 chains single and 13 chains double of the Deanshanger extension, and this appears to have been brought into use for public passenger and goods traffic forthwith, extending from Old Stratford to The Green, Deanshanger, near the Fox & Hounds Inn. The intended extension to the Dukes Head Inn was never buiit. From Wolverton to Deanshanger, the through fare was 4d. This section seems to have remained Wilkinson’s property, and to have been leased to the company.” [1: p548]

The road bridge over the River Great Ouse can be seen in the bottom right of this next extract from the 1898 25″ Ordnance Survey. [15]
Only a short distance further Northwest at the junction adjacent to the Swan Inn and Smithy in Old Stratford, the tramway extension turned left and soon found itself following the Buckingham Branch of the Grand Junction Canal. [15]
This extract from the railmaponline.com satellite imagery covers the same length of the old line as the two extracts from the OS mapping immediately above. [14]
The Tramway route crossed the River Great Ouse on the road bridge. [Google Streetview, September 2024]
The Tramway turned left at the junction in Old Stratford onto what in the 21st century is called Deanshanger Road. [Google Streetview, September 2024]
Heading South-southwest along Deanshanger Road, along what was the route of the extension to the tramway to Deanshanger. [Google Streetview, September 2024]
The tramway continued South-southwest alongside the canal. [15]
And again the tramway route followed the Buckingham Branch of the Grand Junction Canal.  [15]
The tramway continued South-southwest as the canal turned away towards the West. [15]
This extract from the railmaponline.com satellite imagery covers the majority of the length of the line as shown on the three OS map extracts immediately above. [14]
Deanshanger Road facing South. [Google Streetview, September 2024]
A relatively tight curve appears to have taken the tramway onto the road to Deanshanger. However, the research that was done to prepare the railmaponline.com representation of the line suggests that the line left the highway and ran on its own formation for a few hundred yards.  [18]
This extract from the railmaponline.com satellite imagery takes the line as far as the OS map extract above. The route of the old line is shown in this image following the Buckingham Branch of the Grand Junction Canal. A modern public footpath/cycleway is shown taking a tighter curve. Could the alignment of the footpath/cycleway be that of the old tramway? [14]
The modern Deanshanger Road joins the A422 as it heads South. The route of the old tramway is probably followed by the tarmac footpath to the left of the no entry sign. It follows the line of the old road. [Google Streetview, September 2024]
The footpath shown on the right of this image matches the line of the old tramway. [Google Streetview, September 2024]
If the footpath/cycleway is on the line of the old tramway, then the bridge over roundabout is on the line of the old tramway. [Google Streetview, July 2018]
Running parallel to the canal but a distance to the South, the tramway/road headed towards Deanshanger. [18]
Continuing to the West on the South side of Northfield’s farm and the Buckingham Branch of the Grand Junction Canal the edge of the Ordnance Survey map sheet is reached before the road entered Deanshanger. [18]
This final extract from the Ordnance Survey mapping of the turn of the 20th century shows the settlement of Deanshanger with its Iron Works. The tramway terminated adjacent to the Fox & Hounds Inn, the intended extension to the Dukes Head Inn in the bottom-left of this map extract. [19]
The remaining length of the tramway as shown on the railmaponline.com satellite imagery. [14]
Heading West along the line of the old tramway on Stratford Road. [Google Streetview, May 2023]
Further West on Stratford Road. [Google Streetview, May 2023]
Approaching The Green, Deanshanger where the tramway terminated. [Google Streetview, May 2023]
The line beyond the Fox & Hounds was not built. It was also intended to link the Iron Works to the tramway as shown here. This short link was also never built. Britannia Iron Works was owned by E.H. Roberts. The Iron Works was always satisfied with using the canal for exporting its finished products and could not be persuaded to use the tramway. [20]
Krauss Engine and 50-seater tramcar at the Green, Deanshanger, in 1888. [1: p550]

Operation

Edwards tells us that “On Friday 17th May 1887 prior to the Whitsuntide holiday horses pulled the first tram from Wolverton station goods yard to Stony Stratford tram depot. On board were Charles Aveline (the Managing Director) and other officials of the tram company. For the return journey the horses were replaced by one of the two Krauss tram engines. Local school children were given free tickets.” [13: p17]

By 1st September 1887, Lee tells us, “the issued capital was no less than £20,000, which must be regarded as a gross over-capitalisation. Nevertheless, the nominal capital was increased on 21st June 1889, by £5,000, stated to be beyond £20,000, as the nominal increase of 1883 had been forgotten, and additional stamp duty was paid. A further change of name was also made at this period, and became effective on 26th July 1889, whereby the legal title became the ‘Wolverton, Stony Stratford & District Tramroads Co. Ltd.’ Shortly afterwards, the company declared itself insolvent, and went into voluntary liquidation on 4th September 1889. This was not acceptable to the creditors, and by Court Order of 26th October the winding up was made compulsory, and subject to the Court. The undertaking was placed in the hands of the official liquidator on 17th December, and the line was closed. Much of it was never reopened.” [1: p549]

The original portion, between Wolverton and Stony Stratford, was purchased by a syndicate of Bedford businessmen who reopened the Wolverton to Stony Stratford section in November 1891 and it was known as the ‘Wolverton, Stony Stratford District New Tramway’ and this was formally incorporated  on 15th September 1893 with a capital of £5000 in £100 shares. The nominal capital was increased by £3000 (30 shares) at the end of January 1907. It ran until liquidation in 1919. The Deanshanger extension never re-opened. [16][1: p551]

Lee continues: “For many years the Stony Stratford terminus was at the Cock Hotel, but by 1910 the line was curtailed to a few yards in High Street, and in 1919 the terminus was at the Foresters Arms. After the first world war, the line was rapidly approaching derelict condition, and the company’s financial difficulties compelled it to go into liquidation on 17th July 1919; George Henry Margrave (then Secretary and Manager) was appointed liquidator. The local authorities refused to take over the line, and it seemed that the service would be finally abandoned, despite the fact that it had been conveying some 700 workmen daily, principally employees of the Wolverton Carriage Works and of the printing works of McCorquodale & Co. Ltd.” [1: p551]

Grace’s Guide continues: “In the early 1920s the line was taken over by the London and North Western Railway (LNWR) who purchased a new W. G. Bagnall tram locomotive. After the LNWR was merged into the London, Midland and Scottish Railway (LMS) the line was soon closed, in 1926.” [16]

After purchase by the LNWR, the tramway was completely re-laid with concrete placed beneath the rails to strengthen them. Lee tells us that “under LNWR management the staff consisted of three drivers, three conductors, one fitter, one bricklayer and two labourers.” [1: p551]

Under LNWR management prior to the ‘grouping’, the surviving rolling stock “comprised three small four-wheel locomotives, five bogie double-deck cars, and two 10-ton coke trucks. The passengers continued to be principally Stony Stratford men employed at the Railway Works or at McCorquodale’s in Wolverton. They then numbered about 600 daily, of whom some 550 were weekly season-ticket holders. Although the number of men employed at the works increased as time went on, the working loss to the L.N.W.R. increased also, on account of the competition of motorbuses which gave a quicker service. In 1926, no fewer than 12 of these vehicles plied between Wolverton and Stony Stratford, and the trams, with their speed limit of 8 m.p.h. were almost deserted. Schemes of electrification were considered by the railway company (by now the L.M.S.R.), but they all proved too costly, and the climax came with the General Strike of that year, when on 4th May the service was suspended, never to be resumed. Latterly, the services (which, according to the railway company’s timetable, were run “subject to the condition of roads and other circumstances permitting”) had comprised about 14 trips each way, with one or two additional on Saturdays. There were three cars in each direction on Sundays. The journey time was 15 minutes. The official abandonment was announced on 19th May 1926, and it was stated that the company had been losing £2,000 a year on the service. Latterly the total takings were only about £30 a week. [1: p553]

The LMS negotiated with Buckinghamshire County Council (BCC) which took over the track in 1927 with the Ministry of Transport’s consent. BCC immediately began lifting the track and reconstructing the road surface. Work began in June 1927, by November 1927 the length between Watling Street and Clarence Road in Stony Stratford was completed. The section between Clarence Road and McCorquodale’s Printing Works was addressed between October 1933 and June 1934.

Rolling Stock – Locomotives

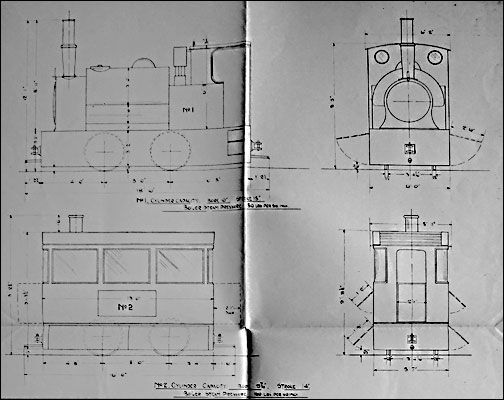
Lee tells us that, “the original locomotives consisted of two German engines supplied by Krauss & Company of Munich to a standard design then used in many continental cities for steam tramways. Some accounts of the line have stated that three, and even four, engines were provided at first, but the Board of Trade Returns to 30th June 1887, show only two, and others (if any) were presumably on loan. They had outside cylinders 8 in. in diameter by 12 in. stroke, wheels 2 ft. 6 in. in diameter, and a 5 ft. wheelbase. The working pressure was 175 lb. per sq. in. and they were non-condensing. Stephenson valve gear was used.” [1: p553]

The Krauss locomotive and a 20-seat open-sided tramcar on an inspection trip in May 1988. The location of the photograph is not known. The tramcar was not used after 1889 and remained in Stony Stratford tram depot for many years, © Public Domain. [1: p550]
One of the Krauss locomotives is posed outside Wolverton Works,© Public Domain. [29]
Another view of one of the Krauss tramway locomotives, this time in Stony Stratford close to the Forresters Arms, © Public Domain. [30]

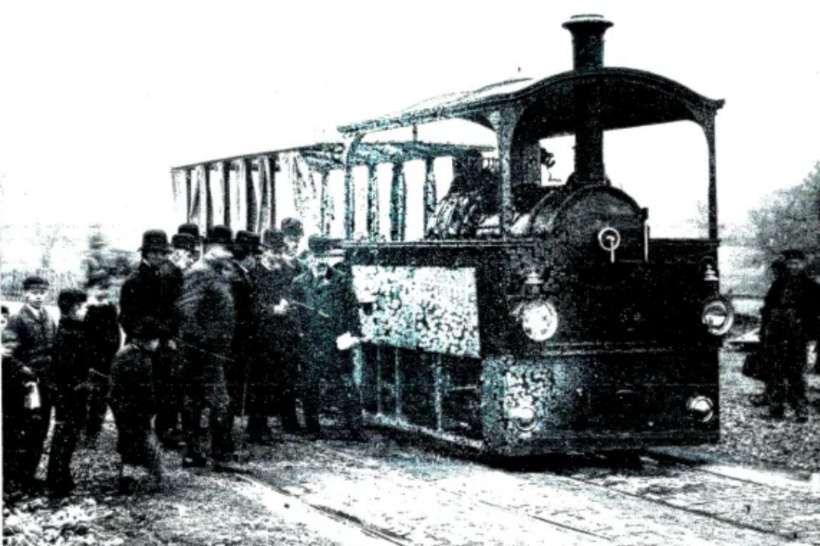
Edwards tells us that these Krauss locomotives, “with their distinctively European canopies and massive oil lights, soon earned the tramway the nickname ‘the little German‘.” [13: p17]

These Krauss locomotives were similar to tram locomotives sent to the Chiemseebahn in the same year, but smaller. They were rated at 40 hp and were governed to run no faster than 10 mph (16 km/h). Board of Trade regulations also required that the running gear had to be shrouded, steam exhaust had to be directed into condensers to avoid visible steam, smoke as well had to be invisible and had to be almost noiseless. [24]

This is one of the Krauss 0-4-0 metre-gauge tram locomotives built for the Chiemseebahn in the same year as those built for the Wolverton & Stony Stratford Tramway – this is Works No. 1813 of 1887. It is in excellent condition in the 21st century, operable and in frequent service. It is unique – in that this is the only example still working in regular commercial service on the line for which it was supplied. A diesel-powered replica now helps out. [25]

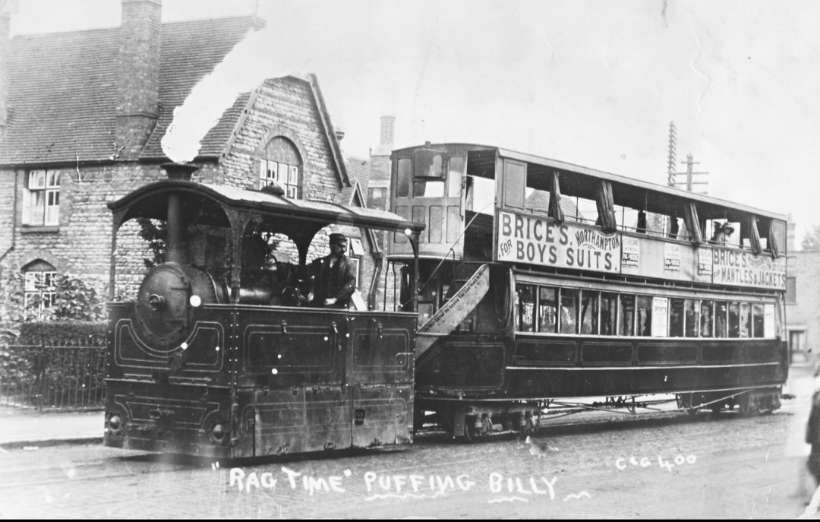
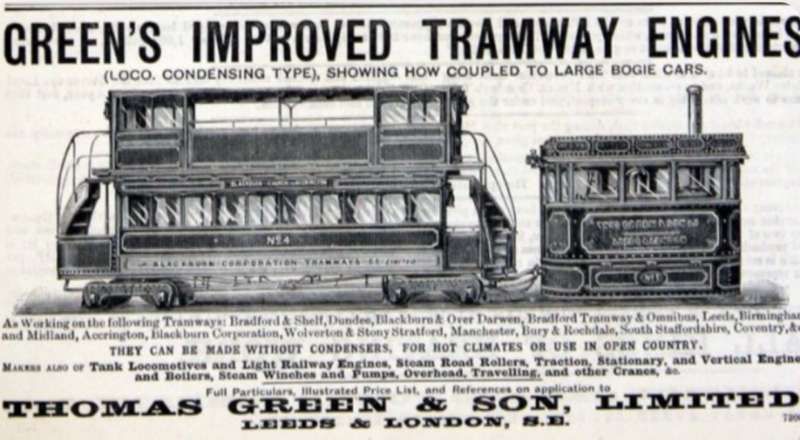
Sadly, unlike the locomotives sent to the Chiemseebahn, the Krauss locomotives supplied to the Wolverton & Stony Stratford Tramway “were found to be unable to handle the heavy passenger rolling stock, and two, more powerful, engines were supplied in 1887 by Thomas Green & Son of Leeds, designed to haul two large passenger cars fully loaded. These had 9 in. cylinders by 14 in. stroke, 2 ft. 6 in. wheels, and a 5 ft. wheelbase; the working pressure was 175 lb. These engines were of the tramway type with atmospheric condensers on the roof. The total loaded weight was 9-9.5 tons. A further locomotive was secured in 1900 from the Brush Electrical Engineering Co. Ltd., Falcon Works, Loughborough, which was generally similar to the Green engines, and had inside cylinders 7.5 in. in diameter by 12 in. stroke. This also worked at 175 lb. pressure and had an atmospheric condenser.” [1: p553]

Thomas Green commenced building tramway locomotives in 1882. [27] These locomotives were initially of the Wilkinson’s patent, built under licence. This design used a vertical boiler and a vertically mounted engine which drove one set of wheels through gears. The second pair of wheels was driven through coupling rods. The exhaust passed through a chamber in the firebox to provide reheat, which in principle would make the steam invisible. The speed governor was an “Allen” paddle type which acted on the reversing gear. [26]

Thirty-nine Wilkinson type trams were delivered before Green’s developed their own design using a horizontal boiler, inclined cylinders and Joy valve gear. These tram engines first appeared in August 1885. The machine quickly evolved such that Green’s tram engines became one of the market leaders. [26][27] It was Green’s own design of tram engine that was supplied to the Wolverton & Stony Stratford Tramway.

An advert for Thomas Green & Son Ltd. steam tramway engines, © Public Domain. [27]
A typical Thomas Green steam tram locomotive, one of 14 supplied to Blackburn Corporation Tramways Company in 1887, © Public Domain. [28]
One of the Thomas Green tramway locomotives about to set off for Wolverton from outside the Forresters Arms in Stony Stratford with two of the 44ft carriages in its train, © Public Domain. [31]

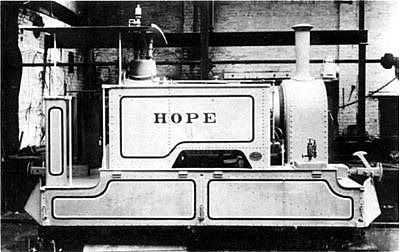
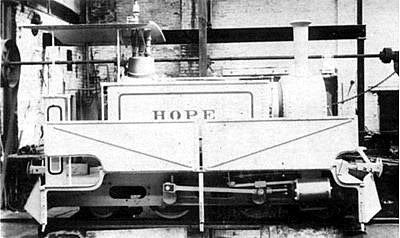
Lee continues: “After the acquisition of the line by the LNWR., a four-coupled saddle-tank engine was secured, in 1921, from W. G. Bagnall Limited of Stafford. Excepting that the motion was boxed in, this locomotive was of conventional railway design, without the tramway type casing over the upper works. Outside cylinders were 10 in. in diameter by 15 in. stroke the coupled wheels 2 ft. 9.25 in. in diameter, and the wheelbase 5 ft. The working pressure was only 150 lb. The saddle tank carried 300 gal. of water and the side bunkers had a capacity of 18 cu. ft. The total weight in working order was 16 tons. This engine was finished in standard LNWR. livery. As the standard chimney was found to be too short for the comfort of upper deck passengers, an ugly stove-pipe extension was added.” [1: p553]

Drawings of the Bagnall and the Green locomotives, © Public Domain. [34]

Other Rolling Stock – Passenger Carriages

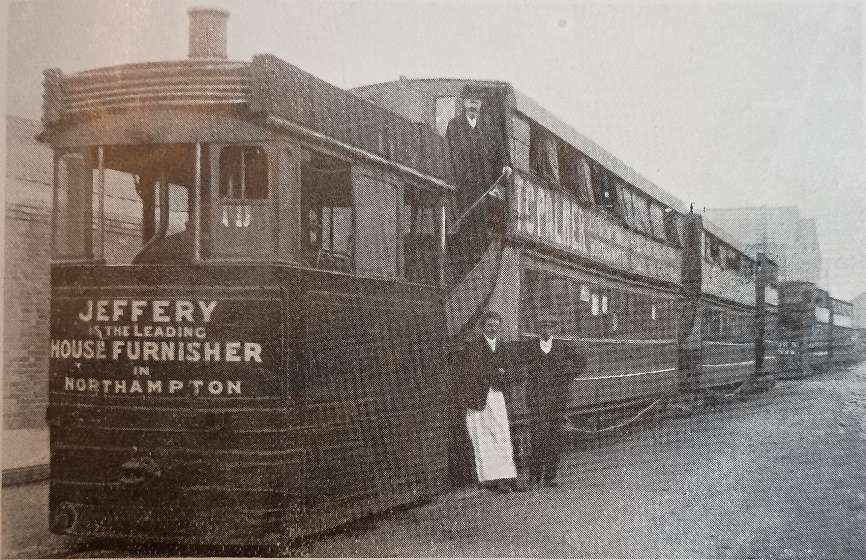
The passenger rolling stock consisted of large double-deck covered-top tramway cars which were mounted on bogies; “there were at first five in all, built by the Midland Carriage & Wagon Company, then of Shrewsbury, and these lasted throughout the life of the undertaking. The three of the largest type each seated 100 and were 44 ft. long and 5 ft. 9 in. wide; they were intended for the workmen and were said to be the largest tramway vehicles in the country. ” [1: p554]

A drawing of carriages No. 1, 2 and 3, © Public Domain. [34]
One of the 44ft long 100-seat carriages sits outside the Forresters Arms in Stony Stratford in 1903. One of the Thomas Green locomotives is about to take it to Wolverton, © Public Domain. [32]

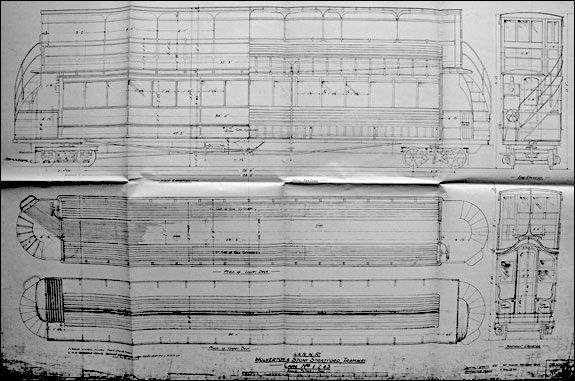
Edwards comments that the 44ft long 100-seat tramcars were the largest “to run in this country until the Swansea and Mumbles Railway built their gigantic electric cars many years later. The coaches had two inward-facing benches on the lower deck and a single continuous slatted bench on the upper deck where passengers faced outwards. The upper sides were open to the elements apart from waist-high decency boards above which were fitted canvas blinds.” [13: p18]

A colourised postcard view of one of the 44ft tramway carriages outside the Forresters Arms in Stony Stratford. The view is unusually posed as many photographs chose to focus on a locomotive rather than a carriage! © Public Domain. [32]

Edwards continues: “Capstan-operated brakes were fitted on each end platform, the locomotives also being equipped to operate the trailer braking by pull-rods and chains. The couplings of these cars were attached to the bogie centres. Originally the illumination was provided by oil lamps but acetylene lighting was later installed to be replaced again by conventional Pinsch gas lighting after the takeover of the line by the LNWR.” [13: p18]

Three carriages in this train, pulled by one of the Thomas Green locomotives. The train is somewhere between Stony Stratford and Wolverton, © Public Domain. [33]

Lees says that “Another car, upholstered, accommodated 80 passengers and was 38 ft. long and 6 ft. wide; and one [which] seated only 50 passengers, was 24 ft. 6 in. long, and 5 ft. 9 in. wide.” [1: p554]

A drawing of the shorter carriage (24 ft. 6in. long), © Public Domain. [34]

Edwards mentions that the 80-seat tramcar had “neither decency boards or blinds on the upper deck as first built and, most unusually and inconveniently, internal landings to the staircases from the platforms. Decency boards and blinds were added later.” [13: p18]

The 50-seat tramcar “was the only one to be fitted with upholstered seating. One presumes that it was intended for use at times when the workmen would not be travelling. None of the tramcars carried external numbers and all of those mentioned were to last the lifetime of the undertaking.” [13: p18]

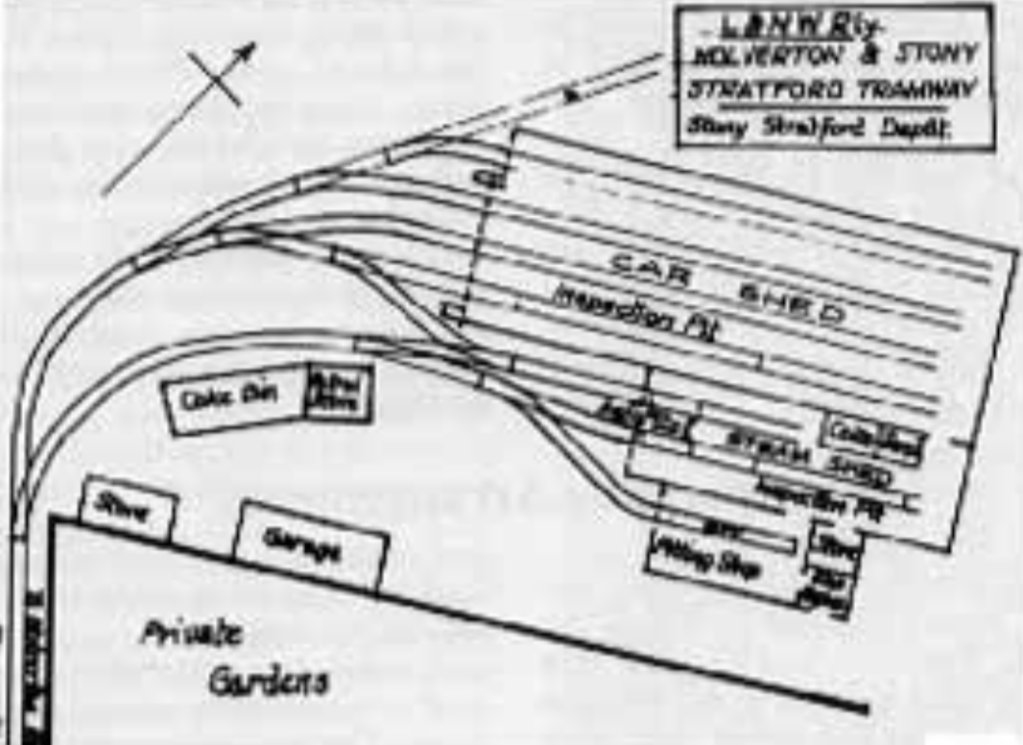
“A sixth car is shown in the Board of Trade Returns for the year ended 30th June 1888, and continued to feature until 1911. This was a small single-deck open-sided vehicle with curtains, seating 20 passengers, which does not appear to have been used after the closure of the line in 1889. For many years it remained in the depot at Stony Stratford.” [1: p554]

Other Rolling Stock – Goods

In its early years the undertaking had a number of parcel vans and small goods wagons, as well as 10-ton coal and coke trucks, 24 ft. long, also built by the Midland Carriage & Wagon Company. Eight goods trucks were shown in the return to the Board of Trade for 30th June 1888, at the time goods traffic was begun. It seems that goods traffic declined quite early in the history of the undertaking and all the parcel vans and most of the wagons were sold for scrap. Two of the wagons were of interest in having wheels with adjustable flanges so as to be capable of operating either on rail or road. The flanges were in sections and so arranged that they could be withdrawn inside the tread surface. When the train reached the Cock Hotel, they were, hauled off the line by horses to effect delivery at the door of the consignee. Two horses are shown in the company’s stock in 1888 and 1889. In its later years, the traffic was wholly passenger, apart from the carriage of mails.” [1: p554]

And finally

Grace’s Guide says that, “The line was unusual for a British street tramway being entirely worked by steam locomotives; indeed it was the last steam worked street tramway in the United Kingdom.” [16]

References

  1. Charles E. Lee; The Wolverton and Stony Stratford Tramway; in The Railway Magazine, Volume 98 No. 616; Tothill Press, London, August 1952, p547-554.
  2. https://en.wikipedia.org/wiki/Wolverton_railway_works, accessed on 17th January 2026.
  3. https://www.mkheritage.co.uk/mkm/wolvwork1.html, accessed on 17th January 2026.
  4. https://en.wikipedia.org/wiki/LNWR_Bloomer_Class, accessed on 17th January 2026.
  5. https://www.mkheritage.org.uk/archive/mkm/mccorq.html, accessed on 17th January 2026.
  6. https://wp.me/p178VP-fO, accessed on 17th January 2026.
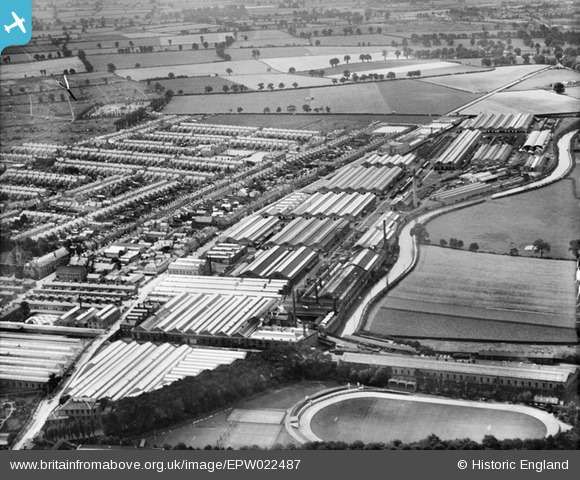
  7. https://www.britainfromabove.org.uk/en/image/EPW022487, accessed on 17th January 2026.
  8. https://en.wikipedia.org/wiki/Wolverton_railway_station, accessed on 17th January 2026.
  9. https://maps.nls.uk/geo/explore/#zoom=15.1&lat=52.06498&lon=-0.81119&layers=168&b=ESRIWorld&o=100, accessed on 17th January 2026.
  10. https://maps.nls.uk/geo/explore/#zoom=17.5&lat=52.06314&lon=-0.81803&layers=168&b=ESRIWorld&o=100, accessed on 17th January 2026.
  11. https://maps.nls.uk/view/104180609, accessed on 18th January 2026.
  12. https://maps.nls.uk/view/114481013, accessed on 20th January 2026.
  13. Allan Edwards; The Stony Stratford Tramway;  in BackTrack Magazine Volume 3 No. 1; Atlantic Publishers, Spring 1989, p,15-20; via https://quavid.wordpress.com/about/the-wolverton-stony-stratford-tranway-2, accessed on 21st January 2026.
  14. https://railmaponline.com/UKIEMap.php, accessed on 21st January 2026.
  15. https://maps.nls.uk/view/114481007, accessed on 23rd January 2026.
  16. https://www.gracesguide.co.uk/Wolverton_and_Stony_Stratford_Tramway, accessed on 23rd January 2026.
  17. https://www.mkheritage.org.uk/archive/mkm/workshop.html, accessed on 23rd January 2026.
  18. https://maps.nls.uk/view/114481031, accessed on 23rd January 2026.
  19. https://maps.nls.uk/view/114481019, accessed on 23rd January 2026.
  20. https://www.mkheritage.org.uk/os/doc/tran/tra.html, accessed on 23rd January 2026.
  21. https://maps.nls.uk/geo/explore/#zoom=18.1&lat=52.05759&lon=-0.84939&layers=168&b=ESRIWorld&o=100, accessed on 24th January 2026.
  22. https://www.facebook.com/share/p/17s7yE5aBp, accessed on 24th January 2026.
  23. https://www.livingarchive.org.uk/content/catalogue_item/the-sylvia-mead-collection/pq-views-of-new-old-bradwell/steam-tram-at-wolverton-station-with-goodmans-horse-drawn-cart-beside-it, accessed on 24th January 2026.
  24. https://www.steamlocomotive.com/locobase.php?country=Great_Britain&wheel=0-4-0&railroad=wsst, accessed on 26th January 2026.
  25. https://www.internationalsteam.co.uk/trams/steamtram05.htm#23, accessed on 26th January 2026.
  26. https://en.wikipedia.org/wiki/Thomas_Green_%26_Son, accessed on 26th January 2026.
  27. https://www.leedsengine.info/leeds/histtram.asp, accessed on 26th January 2026.
  28. https://www.lthlibrary.org.uk/library/PDF-217-2.pdf, accessed on 26th January 2026.
  29. https://www.mkheritage.org.uk/archive/mkm/rou05-works.html, accessed on 26th January 2026.
  30. https://www.mkheritage.org.uk/archive/mkm/history.html, accessed on 26th January 2026.
  31. https://ebay.us/m/dJ6aZw, accessed on 26th January 2026.
  32. https://www.mkheritage.org.uk/archive/mkm/stonystratford/docs/tram.html, accessed on 26th January 2026.
  33. https://wolvertonpast.blogspot.com/2017/03/the-wolverton-and-stony-stratford-tram.html?view=timeslide&m=1, accessed on 26th January 2026.
  34. https://www.mkheritage.org.uk/os/doc/tran/tra.html, accessed on 26th January 2026.

The Railways of Namibia (the former South West Africa) – Part 1 – Windhoek and the Northern Lines

The Railway Magazine of February 1952 carried an article by Charles E. Lee about railways in what was German South West Africa. This encouraged me to have a look at the history of Namibia’s railways and their condition and extent in the 21st century. The 1952 article also caught my attention because Manchester Diocese (I was a priest in Manchester Diocese before retirement) is linked with the Diocese of Namibia.

The territory was formally colonized by Germany between 1884-1890. It covered an area of 835,100 sq. km. It was a settler colony and had attracted around 3,000 German settlers by 1903, who primarily settled in the central high grounds. [2]

German South West Africa, now known as Namibia, was a German colony from 1884 to 1915. It was not a province within the German Empire but a separate colonial territory. From 1891, the capital was Windhoek, which also serves as the capital of modern-day Namibia. [2]

The arrival of German settlers disrupted the existing socioeconomic balance and led to conflicts, particularly with the Herero and Nama people.

In 1883 Franz Adolf Lüderitz, a merchant from Bremen, Germany, established a trading post in southwest Africa at Angra Pequena, which he renamed Lüderitzbucht. He also acquired the adjacent coastal area, which he named Lüderitzland. These areas were constituted the first German colony under German protection on April 24, 1884. The German occupation subsequently extended inland. By the latter 1880s the German Colonial Company for the South realized that it was incapable of administering the territory, and the German government immediately took over the colony’s administration. As a result of the Zanzibar Treaty (1890) between Germany and Great Britain, German South West Africa acquired the Caprivi Strip (named after the German chancellor Graf Leo von Caprivi), a tract of land 280 miles (450 km) long in the extreme northeast of the territory; the colony thus gained access to the Zambezi River.” [3]

German colonial rule was harsh, leading to insurrections and resistance. “Major Theodor Leutwein, governor of the colony in 1894–1904, suppressed insurrections of the Khoekhoe (1894) and of the Hereros (1896). In 1904, however, the Hereros fomented a far more dangerous rebellion. The German force, at first only 750 strong and supported only by one artillery battery, had to face an army of some 8,000 men equipped with modern weapons. Reinforcements increased the German force, ultimately under the command of General Lothar von Trotha, and resulted in a decisive German victory on the Waterberg River. Further Khoekhoe rebellions were put down in 1904–07.” [3]

German South West Africa was occupied by the South African Union Defence Force in 1915 during World War I, and Germany formally ceded the territory under the Treaty of Versailles in 1919. Its administration was taken over by the Union of South Africa (part of the British Empire) and the territory was administered as South West Africa under a League of Nations mandate. It became independent as Namibia on 21st March 1990. [2]

The Railways

The railways in German South West Africa played a crucial role in the colonial administration and the First World War campaign. The German colonial authorities built a railway network between 1897 and 1914 to enable colonial territorialization and facilitate the extraction of resources. [4]

Charles E. Lee tells that “under the German regime, the first railway in South West Africa was the Northern State Railway (NSR), as it was then called, built to a gauge of 60 cm. (1 ft. 11 in.) between Swakopmund and Windhoek, via Jackalswater and Karibib, a distance of 238 miles. This line was begun in 1897 and was built by a German Military Brigade from Europe. It was first intended to be worked by animal power – Argentine mules or Cape donkeys – but steam traction was soon adopted. The first section (15 miles) was opened to traffic from Swakopmund in January 1898. By the end of that year 68 miles were ballasted and 54 open. In July 1900, the line was opened to Karibib, 121 miles, and the whole railway completed to Windhoek, a further 117 miles, in June, 1902. The curves and gradients were very severe, the gradient out of the Khan River gorge, for instance, being 1 in 19 with curves of 180 ft. radius. The rails weighed about 19 lb. a yard and were laid on iron sleepers. There were iron girder bridges at Khan River, Dorst River, and Kubas. The only good and plentiful water supplies were at Swakopmund and Karibib.” [1: p121]

Wikipedia tells us that there was actually an earlier line than the one Lee talks about. It was a small mining rail line at Cape Cross in 1895. [5] “Soon afterwards, the ox-cart transport system totally collapsed, in the wake of a rinderpest epidemic in 1897. As it was necessary to react quickly to the now extremely precarious transport situation, decisions were made: to build a railway line from the German port of Swakopmund to Windhoek (the Staatsbahn); to use existing, 600 mm (1 ft 11 5⁄8 in) gauge military Feldbahn material; and to entrust a railway brigade with the construction work, which began in September 1897.” [5]

Wikipedia continues: “Construction of the railways connecting with the Staatsbahn was aimed partly at military strategic objectives following the uprising of the Herero and Nama, and partly at economic requirements. … By World War I, the following lines had been developed (listed by the first year of full operation):” [5]

  • 1902: Swakopmund–Windhoek line, 600 mm (1 ft 11 5⁄8 in) gauge, Karibib–Windhoek section re-gauged in 1911 to 3 ft 6 in (1,067 mm) gauge. [5]
  • 1906: Otavibahn, 600 mm gauge. [5]
  • 1905: Onguati–Karibib branch. [5]
  • 1908: Otavi–Grootfontein branch. [5]
  • 1907: Lüderitzbahn, 3 ft 6 in (1,067 mm). [5]
  • 1909: Seeheim–Kalkfontein branch. [5]
  • ca 1911: Kolmannskuppe–Elisabethbucht–Bogenfels, industrial railway of the diamond fields. This 600mm gauge railway was electrified from 1911 (the only electric railway in Namibia’s history).  Diamond mining in the region gradually moved south. The northern part of the line as far as Pomona was abandoned in 1931, and some of its materials were used for the extension of the railway towards Oranjemund. The southern section was operated with diesel traction. This line no longer exists. [5]
  • 1912: Windhoek–Keetmanshoop railway, 3 ft 6 in (1,067 mm) gauge. [5]
  • 1912: Rehoboth shuttle, 600 mm (1 ft 11 5⁄8 in) gauge (questionable). [6][7][2][5]
  • 1914: Otjiwarongo–Outjo–Okahakana, 600 mm gauge (project started, but not completed due to the war). [5]
The Windhoek–Keetmanshoop railway, circa 1916, © Franz Baltzer, Public Domain. [5]

Lee talks of the formation, by the Otavi Mining & Railway Company, an Anglo-German syndicate owning the copper mines at Otavi and Tsumeb, of a railway: “This company was formed in Berlin in 1900, in accordance with an arrangement between the South-West Afrika Company, the Disconto-Gesellschaft of Berlin, and the Exploration Company. The first intention was to build a 3 ft. 6 in. gauge railway from Port Alexander in Portuguese West Africa to run in a south-easterly direction up the Muende River Valley and via Etosha Pan to the Tsumeb Copper Mines, and later to extend this line to Rhodesia to form a trans-African railway. Eventually it was decided to form a 60 cm. gauge line entirely in German territory connecting Swakopmund with Tsumeb, a distance of 351 miles. Construction was undertaken by Arthur Koppel & Co. and was begun in November 1903, but was delayed by the Herero War, and the work completed on 25th August 1906. This undertaking, called the Otavi Railway, had the distinction of being the longest narrow-gauge railway in the world. Branches were laid subsequently from Otavi to Grootfontein (56 miles) and from Onguati to Karibib on the State Railway (9 miles). The cost is stated to have been about £2,400 a mile, or roundly £1,000,000 in total. The railway was bought by the German Imperial Government in 1910 for £1,250,000, but the management was left in the hands of the company under a 30-year lease, terminable after 10 years.” [1: p121]

This line was well constructed, and well ballasted. It had a ruling gradient of 1 in 66 and minimum curvature of 150 metres. The permanent way consisted of steel rails in 30-ft. lengths, 30 lb. a yard, laid on steel sleepers weighing about 26 lb. each. “From Swakopmund, for a distance of 68 miles, the line rises steadily on a grade of 1 in 66 to Ebony Station, where it reaches an altitude of 3,500 ft. (On the down journey, the last 40 miles into Swakop-mund can be run by gravity.) From Ebony there is a regular fall to Usakos, which is 2,640 ft. above sea level. From Usakos it climbs 690 ft. in 13 miles to Onguati, and continues to rise until it attains its greatest elevation near Kalk-feld, where the summit is 5,200 ft.” [1: p121]

The Otavi Railway, like the State Railway, was built to the 2 ft-gauge, though a difference of 1 centimetre in the wheel gauges is stated to have prevented the free interchange of rolling-stock. The widening to 3 ft. 6 in. of the gauge between Swakopmund and Omaruru had been voted by the German Railway Board, but the work had not been put in hand by the outbreak of the 1914 war. A new branch projected at the same period was the Ovamboland Line, the first aim of which was to provide Ovambo labour for the South. The Landesrat in November 1913, approved a line of 2 ft-gauge, but on earthworks and bridges wide enough for a 3ft. 6in. gauge track, to run from Otjiwarongo (on the Otavi Railways) to Outjo and Okahakana.” [1: p121]

Railways in South West Africa from Swakopmund, mainly German- built, included the 361 miles to Tsumeb, opened in 1906, and the longest narrow-gauge railway in the world. The gauge at the Southern end was widened in 1915. [1: p122]

A sum of £450,000 was allowed for the line from Otjiwarongo to Outjo and Okahakana “in the German Loan Estimates for 1914-15. The first section, including the 55 miles from Otjiwarongo to Amiab Poort, was to cost £250,000. Construction was begun, and the line was laid for 22 miles before the outbreak of hostilities in the first world war.” [1: p123]

Railway developments south of Windhoek, on the 3 ft. 6 in. gauge, made it desirable to convert the earlier 2ft. lines. During 1911, the section from Karibib to Windhoek was converted to 3 ft. 6 in. gauge at a cost of £550,000, with the Bechstein-Koppel Gesellschaft as contractor. The ruling gradient [was] 1 in 66 with a minimum curvature of 656 ft. This work was completed during 1913. The Swakop River at Okahandja [was] spanned by a bridge 350 ft. long, and there [was] a smaller bridge at Otjihavera. About the same time, the coastward section from Karibib to Swakopmund was practically abandoned in favour of the alternative route provided by the Otavi Railway. In fact, the settlers in the Swakop Valley, who asked for a short railway to link them with Swakopmund, were promised in November 1913, that the material from the disused 92 miles of the State line between Swakopmund and Kubas would be used for this purpose, but it was not done.” [1: p123]

An image showing an armoured train in South West Africa during World War I, 1914-1918, can be found here [29] The South African army invaded the German colony of South West Africa in March 1915 overrunning the much smaller German forces.

Wikipedia tells us that, “With the outbreak of World War I, the German Schutztruppe military unit retreated from the coast, and withdrew into the inland. In the process, the Schutztruppe destroyed the Otavibahn, and the old Staatsbahn towards Karibib, as far as Rössing.” [5]

The Staatsbahn was abandoned but this was not the case with the Otavibahn. In 1914, “British troops … moved forward from the British enclave of Walvis Bay, and by the end of 1914 they had built a 37 km (23 mi) long 3 ft 6 in (1,067 mm) railway to Swakopmund. The Otavibahn was also reconstructed in 3 ft 6 in (1,067 mm) as far as Usakos, and the section between Usakos and Karibib was realigned. The network north of Usakos remained in 600 mm (1 ft 11 5⁄8 in) gauge; the workshop for both gauges was consolidated in Usakos, and the one in Karibib was closed.” [5]

Lee tells us that by 1917 the Staatsbahn line from Karibib to the coast had ceased to exist. “the line between Karibib and Rossing (95 miles), the 10-mile branch from Jakalswater (built to carry water from the Swakop River at Riet), and the Kubas military line (4.5 miles), were lifted and removed to provide material for Tanganyika and the Union of South Africa.” [1: p123]

Lee goes on to confirm that the Union forces, in the course of their invasion of German South West Africa, “laid a 3 ft. 6 in. line for 100 miles inland from Swakopmund to Kranzberg along the original track of the Otavi line, which the Germans had wrecked in their retreat. This was completed in August, 1915. The construction of a new 12.5-mile section, of the same gauge, from Kranzberg to Karibib, was completed in July 1915, and again connected the Otavi Railway with the [NSR]. Thus, in August 1915, there was continuous communication of uniform gauge for the first time from Swakopmund to points south of Windhoek. As strategic railways had meanwhile linked the Union Railways with those of South-West Africa on 25th June 1915, a through railway of 1,635 miles was provided between Walvis Bay and Cape Town.” [1: p123]

Also during the first world war, a new railway from South Africa was constructed – “as an extension of the De Aar-Prieska Railway – to achieve a secure supply route for … South African troops. In 1916, the line was connected to the German network at Kalkfontein (now Karasburg).” [5]

With the linking of the Kranzberg-Tsumeb 2ft-gauge line to the workshops at Usakos by means of a third rail between Usakos and Kranzberg on the 3-ft. 6-in. gauge track of improved location, the 9-mile section from Karibib to Onguati was no longer of value, and it was uplifted in 1924.” [1: p123]

The former Otavi Railway system [was] therefore represented [in 1952] by about 100 miles of 3 ft. 6 in. line on the coastward section, part of the main railway system of South-West Africa, and 307 miles of 2ft-gauge farther inland. [In 1952, there were] also various private branch lines (some disused) connected with the 2ft section. [In 1952], the present main line of this gauge [was] from Kranzberg to Tsumeb, some 251 miles, on which one train in each direction [was] run two days a week.” [1: p123]

Wikipedia continues: Under South African/British occupation, the following lines were established (listed by first year of full operation): [5][10]

  • 1914: Walvis Bay–Swakopmund in 3 ft 6 in (1,067 mm). [5]
  • 1915: Swakopmund–Karibib: Reconstruction in 3 ft 6 in (1,067 mm). [5]
  • 1915/1916: (De Aar)–Nakop (border)–Kalkfontein in 3 ft 6 in (1,067 mm). [5]
  • 1921: Otjiwaronge–Outjo 600mm gauge (based on German preparations). [5]
  • 1929: Windhoek–Gobabis railway in 3 ft 6 in (1,067 mm). [5]
  • From 1958: the Otavibahn north of Usakos was gradually regauged to 3 ft 6 in (1,067 mm), with the new line being laid parallel to the existing line, but largely on new foundations; the new line was in operation from 1961. [5]

From August 1915 the Namibian railway network was operated de facto by South African Railways, and this arrangement became official in 1922. … From 1959, steam locomotives were gradually replaced by diesel locomotives, for which an engine-house was built in Windhoek. This made operations very much easier, because water is in short supply in Namibia, and the coal needed to heat the water in the steam locomotives also had to be procured from the Transvaal.” [5]

The Namibian Network in the 21st century

In the 21st century, the rail network of Namibia is operated by TransNamib. As of 2017, the Namibian rail network consisted of 2,687 km of tracks. [11]

The Namibian Rail Network, © Htonl and authorised for reuse under a Creative Commons Licence (CC BY-SA 2.0). [11]
A schematic representation of the Nambian network. [11]

Windhoek-Kranzberg

The railway line from Windhoek to Kranzberg is 210 kilometres (130 miles) long and was completed in 1902. [10]

  • Windhoek (capital – junction)
  • Okahandja
  • Karibib (proposed cement works)
  • Kranzberg (junction Tsumeb v Windhoek)

After the aerial image immediately below, the next three images form a kind of ‘tryptic’ which shows the TransNamib train yard and station at Windhoek. Taken together they show the full site. …

An aerial image showing Windhoek train yard, © Hp Baumeler and authorised for reuse under a Creative Commons Licence (CC BY-SA 4.0). [28]
These three images taken together cover the full Windhoek train yard and station. [Google Maps, June 2025]

The main station building and the TransNamib Museum are located at the Southeast corner of the whole site.

Windhoek Railway Station building with a static locomotive display sitting outside its front entrance. The locomotive was known as ‘Poor Ole Joe’. [Google Streetview, 2024]
Windhoek Railway Station building seen from the South, © Bernhard Dunst and authorised for reuse under a Creative Commons Licence (CC BY-SA 4.0). [40]

Wikipedia tells us that “the station was built in a Cape Dutch-style and is located on Bahnhof Street. An additional northern wing was constructed by South African Railways in 1929 to match the existing style of the building. … The station also houses the small Trans-Namib Railroad Museum which outlines Namibian transport history, particularly that of the railway. Opened on 1st July 1993, the exhibition consists of a wide range of railway equipment, maps and related items which date back to German colonial times. Another part of the exhibition is dedicated to Namibian Airways history and Namibian Maritime history. …  Across from the entrance [to the station] stands the German locomotive ‘Poor Ole Joe’, one half of a South West African Zwillinge, No 154A, the sole surviving specimen of this type of steam locomotive. It was originally shipped to Swakopmund in 1899 and reassembled for the run to Windhoek” [23][24]

0-6-0T locomotive ‘Poor Ole Joe’ sits outside Windhoek Railway Station, © Catatine and made available for reuse under a GNU Free Documentation Licence (GNU FDL). [26]

Namibia Scientific Society posted the following on Facebook on 9th June 2020: Poor Ole Joe is a 600mm-gauge steam locomotive “and was manufactured in 1900 by Henschel & Sohn GmbH, Kassel, Germany, under the serial number 5376. It was put into operation in 1904 and operated on the Swakopmund – Windhoek route. The steam locomotive was taken out of service in 1939 after traveling approximately 371,000 miles.” [25]

There is some uncertainty over the date of fabrication of the locomotive. Perhaps the two years mentioned relate to a date when the locomotive was shipped from the factory and the date of completion of the reassembly in Swakopmund?

Looking North from Robert Mugabe Avenue which crosses the line at the North end of the train yard, the main running line is that on the right. [Google Streetview, 2024]
The line continues North through the northern industrial corridor. In this image the line crosses an unwanted crossing with Bavaria Road to the right. [Google Streetview, 2024]
Continuing northwards, the line runs parallel to the access road to the TransNamib Container terminal. On the right of this picture the siding accessing the terminal can be seen leaving the main running line. [Google Streetview, 2024]
The entrance to the TransNamib Holdings Ltd. Windhoek Container Terminal sits adjacent to the line to Okahandja and beyond. [Google Streetview, 2024]
As the line runs out of Windhoek to the North it runs alongside the A1, from where this picture is taken. [Google Streetview, 2024]
Much of the route North is through scrubland with low growing vegetation. Google Streetview, 2024]
Some miles still from Okahandja the line is seen passing under the B1.  [Google Streetview, 2022]
It then crosses the Swakopmund River.. [Google Maps, June 2025]
And crosses the Swakopmund River channel again! [Google Maps, June 2025]
It crosses another, unnamed, road by means of an ungated crossing adjacent to a large abattoir. [Google Streetview, 2024]
Then under the B1 which is carried by this concrete bridge. [Google Streetview, July 2024]
Across Willhem Sanders Street [Google Streetview, 2024]
And across a side street of Kahimemua Avenue before arriving at Okahandja Railway Station. [Google Streetview, 2024]
Okahandja Railway Station and turning triangle. Google Maps, June 2025]
Okahandja Railway Station building in 1903, © Public Domain. [27]
Okahandja Railway Station building in the 21st century, © Louise Kapp and licenced for reuse under a Creative Commons Licence (CC BY-SA 4.0). [27]
Okahandja Railway Station, showing goods wagons opposite the station building in the 21st century, © Louise Kapp and licenced for reuse under a Creative Commons Licence (CC BY-SA 4.0). [27]
Okahandja Goods Shed seen looking West from Voortrekker Road. [Google Streetview, 2022]
Looking towards Karibib from the B1 bridge over the line. [Google Streetview, 2024]
A typical view along the line heading West. [Google Streetview, 2024]
A view Southwest from a dirt road which crosses the line just to the Northeast of a passing loop at Wilheimstal. [Google Streetview, July 2024]
A bridge over a dry riverbed close to Wilheimstal, seen from the North. [Google Streetview, July 2024]
Looking West along the line towards Karibib from the C36. [Google Streetview, October 2024]
Looking ahead along the railway towards Karibib from a minor road. [Google Streetview, 2024]
Looking ahead towards Karibib from the C33. [Google Streetview, October 2924]
Looking back from Kapapu Road, Karibib, along the railway towards Okahandja and Windhoek. [Google Streetview, July 2024]
Looking Southwest into the site of Karibib Railway Station from Kapapu Road. [Google Streetview, July 2024]
An aerial view of Karibib  in 2017, showing the railway and station on the left © Hp Baumeler and authorised for reuse under a Creative Commons Licence (CC BY-SA 4.0). [31]
Karibib Railway Station in the 1920s, © Unknown , Public Domain. [5]
Karibib Railway Station building. [Google Streetview, July 2024]
Looking back towards Karibib from Kalk Street in its Southwest suburbs. [Google Streetview, 2024]
Looking Southwest towards Kransberg from  Kalk Street. [Google Streetview, 2024]
Looking back towards Karibib from an unnamed street further to the Southwest. [Google Streetview, 2024
Looking ahead along the line towards Kransberg and Swakopmund. [Google Streetview, 2024]
The line heading on towards Kransberg. A significant length of the B2 runs on the South side of the railway. [Google Streetview, 2004]
Kranzberg Railway Station and turning loop. This is a junction station, the two lines can be seen diverging on the top-right of the image. The more northerly of the two is the line to Tsumeb. The more southerly heads towards Windhoek. [Google Maps, June 2025]
Kranzburg Railway Station, © Pgallert and licenced for reuse under a Creative Commons Licence (CC BY-SA 3.0). [32]

Kranzberg-Walvis Bay

The railway line from Kranzberg to Walvis Bay is 201 kilometres (125 miles) long. The section between Kranzberg and Swakopmund was completed in 1902. In 1914, an extension to Walvis Bay was commissioned; the rails were laid close to the shore of the Atlantic Ocean. In 1980, this extension was replaced by an alternative route behind the dunes that allowed for higher axle load. [10]

  • Kranzberg (junction Tsumeb v Windhoek)
  • Usakos
  • Arandis (crossing loop)
  • Swakopmund
  • Walvis Bay (port)
Looking back Northeast towards Kranzberg Railway Station from the B2. [Google Streetview, 2024]
Looking Southwest along the railway towards Usakos’, Arandis and Swakopmund. [Google Streetview, 2024]

Key locations along the line to Swakopmund are illustrated below: …

Close to Usakos and looking back East along the line towards Kranzberg. The line turns through 90° with Usakos’ station off the right side of this photograph. A short distance to the East of this location a locomotive turning triangle has been maintained. [Google Streetview, 2024]
Usakos railway station and associated infrastructure. [Google Maps, June 2025]
Usakos in the early 20th century. The line was originally 2ft-gauge. This image was shared on the 2ft Gauge Railways in Colonial Namibia Facebook Group by Pierre de Wet on 22nd January 2024, © Public Domain. [33]
Usakos in the early 20th century. The 2ft-gauge is more clearly evident in this image which was shared on the 2ft Gauge Railways in Colonial Namibia Facebook Group by Pierre de Wet on 22nd January 2024, © Public Domain. [34]
A plinthed steam engine with Usakos’ railway station beyond [Google Streetview, 2024]
Locomotive No. SW40 at Usakos Railway Station. This is a 2’0” gauge Class Hd/NG5 2-8-2 (Henschel works number 10720) built in 1912. The building behind, is the old railway station building which has, since the picture was taken, been demolished. Loco. No.. SW40 had 2 sisters numbered 41 & 42 – together they made up class Hd. These locos retained their numbers under SAR administration, and were withdrawn in 1960 when the narrow gauge was converted to standard Cape gauge. Sister locomotive #41 is plinthed at Otjiwarongo station further to the north. Like many other SWA locos they had dust covers to protect the motion. The carrying wheels were arranged as radial axles. As there were no separate bogie truck, the axle boxes were guided in such a way that the wheels could move radially with respect to the frame. [21][22]
Usakos’ historic railway sheds. [Google Streetview, 2024]
Usakos’ historic water towers. [Google Streetview, 2024]
Looking Northwest a short distance to the South of Usakos’ railway station. The line heading for Swakopmund sits on embankment and turns to the West after leaving the station.A modern concrete bridge carries the railway over the D1914 road. [Google Streetview, 2024]
Arandis: the marshalling yard is the darker of the two rail routes in this image and shows a number of wagons at rest in the yard. The main line is the lighter strip running from bottom-left to top-right. The line from Usakos and Kranzberg enters top-right, that from Swakopmund enters bottom-left. The line with the darker ballast is a branch line which serves Rossing Uranium Mine, one of the world’s largest open cast Uranium mines. [20][Google Maps, June 2025]

Before having a look at the Rossing Uranium Mine, it is worth a quick diversion Northwest of the station and marshalling yard shown above. The Namibia Institute of Mining & Technology is host to a plinthed display of a locomotive and carriages from the old 2ft-gauge railways of Namibia.

This image shows a complete (but short) 2ft-gauge train at the Namibia Institute of Mining and Technology. [Google Streetview, 2024],

This train was once on display in Windhoek. It was moved to the Namibia Institute of Mining Technology (NIMT) outside Arandis. and restored with the help of Wesbank Transport and AWH Engineering, Rigging and Rentals. The locomotive, is a Henschel Hb 56. The locomotive and its wagons were in use between Usakos and Tsumeb between 1906 and 1959. The South African Railways then donated it to the National Museum in Windhoek and in 1964 it was placed in front of the Alte Feste, but it was too close to the Reiterdenkmal and was moved in 1974 to the southern side. The train consists of the locomotive, a coal wagon, a closed goods wagon, a passenger coach for first and second class and a wagon in which the conductor travelled with the mailbags, milk and cream cans that were picked up along the route. The passenger coach could transport 16 passengers. The first-class passengers could sit on upholstered seats while the second-class passengers sat on plain wooden benches. The two classes were divided by a small washroom. The conductor’s wagon was destroyed in 2007 when it was set alight by a homeless person who slept in the train and made a fire. The boilermaker and carpentry students at NIMT renovated the train. [35]

The locomotive is from the class Hb 0-6-2T. Of the 15 locomotives built by Henschel for the Otavi line between 1905 and 1908, six were absorbed into the SAR. The engines had Allan valve gear and often ran with an auxiliary tender attached which contained both coal and water.” [36]

Rossing Opencast Uranium Mine. [20]
Rossing Opencast Uranium Mine. [Google Maps, June 2025]
The view Northeast towards the passing loop and marshalling yards at Arandis. The Uranium Mine is a few miles off to the right of the picture. Swakopmund is still me miles away behaving Nd the camera. [Google Streetview, 2024]
Looking ahead towards Swakopmund. [Google Streetview, 2024]
The Swakopmund Railway Station as it appeared in the early 20th century. [37]
The original Swakopmund Railway Station is now a hotel and casino with the modern railway station a short distance to the East. [Google Streetview, 2024]
Swakopmund Railway Station in the 21st century as flagged on Google Maps. It is difficult to make out any railway tracks at this location. The Desert Express was the only passenger service serving Swakopmund and that service was suspended indefinitely in 2020. Freight trains still run into Swakopmund. [Google Streetview, 2024][19]
A train on the Swakopmund-Walvis Bay route, © Diego Delso and approved for reuse under a Creative Commons Licence (CC BY-SA 4.0). [11]
Track from Swakopmund to Walvis Bay covered by sand
(22°47′17″S 014°35′20″E), © Olga Ernst & Hp.Baumeler and Iicenced for reuse under a Creative Commons Licence, (CC BY-SA 4.0). [11]
Looking Southeast towards the railway station from Railway Street, Walvis Bay. [Google Streetview, 2024]
Walvis Bay Port and Railway Station: rail lines extend out onto the container port area to the left of this satellite image; run along the quay in the centre of the image (flagged ‘Walvis Bay Port); through the area where ships are berthed. A large marshalling yard sits on the Northwest side of the station which is flagged on the right side of this image. [Google Maps, June 2025]
A closer view of Walvis Bay Passenger Station and the nearby freight marshalling area. [Google Maps, June 2025]
Walvis Bay Railway Station: track side. This image was shared on LinkedIn by Johan Stewart Laubscher in 2022. [38]
Walvis Bay Railway Station: station approach. [Google Streetview, 2024]
The static enclosed display of an old steam locomotive on the forecourt of Walvis Bay Railway Station. This locomotive is ‘Hope’, a Kerr Stuart locomotive which was built at their works in Stoke on Trent and entered service in what is now Namibia in 1899. [Google Streetview, 2024]

Walvis Bay was a British enclave in German South West Africa. The first narrow gauge railway in the British ruled Cape Colony was in Walvis Bay. Initially projected merely to connect the jetty with the town, the Walvis Bay Railway was opened in 1899 and ran for twelve miles up north to the German border at Plum. [17]

On 6th March 1899 the Agent General for the Cape of Good Hope ordered a “Sirdar” class locomotive named ‘Hope’ which was almost as long in transit to Walvis Bay – where it arrived on 22nd August 1899 on board the British barque Primera – as it had been in the building. Because of the extremely light nature of the track (12 lb. rail with sleepers spaced three feet apart) HOPE was provided with an additional pair of carrying wheels at both ends. Thus the standard 0-4-0T type was converted to a 2-4-2T type. Even so the maximum axle load of ‘Hope’ in working order would be about 1¾ tons, which is considerably more than today’s suggested figure for this category of track of 1 ton 4 cwt. Within six years the railway was virtually moribund and by 1915, ‘Hope’ had been laid aside and forgotten. That was because the Germans preferred to use their own harbour in Swakopmund.” [17][18]

Two works photographs of ‘Hope’: in the one with the valance (wheel cover) raised, one of the smaller carrying wheels can just be made out on the left of the picture. [17][18]

Kranzberg-Otavi

The railway line from Kranzberg to Otavi is 328 kilometres (204 miles) long and was completed in 1906. [10]

  • Kranzberg (junction Tsumeb v Windhoek)
  • Omaruru
  • Kalkfeld (short siding)
  • Otjiwarongo (junction for Outjo)
  • Otavi

Kranzberg Railway Station has already been featured above. The next images show the line from there to Otavi. …

Kranzberg Railway Station. [Google Streetview, June 2025]

The loop allows trains from Windhoek to access the route to Otavi without reversing. That line running towards Otavi sets off from Kranzberg in a Northeasterly direction crossing a series of dry watercourses and gradually taking a more northerly course before encountering the D2315 (a dirt road).

Looking North from the ungated crossing on the D2315. [Google Streetview, 2024]
Less than 100 metres North of the D2315, this is a typical drainage culvert on the line. [Google Streetview, 2024]
Just a little further North is an example of a culvert provided at a dry river/stream bed [Google Streetview, 2024]
And another culverted dry watercourse. Google Streetview, 2024]
A typical length of the permanent way seen looking North from an ungated crossing. [Google Streetview, 2024]
The line crosses the dry river bed of the Omaruru River by means of a multi-span truss girder bridge. [Google Maps, June 2025]
On the approach to Omaruru, a dirt road is bridged by the railway. [Google Streetview, 2024]
At Aloe Street ungated crossing, two lines are now visible heading Northeast towards Omaruru Railway Station. The line on the left is a headshunt or storage siding. [Google Streetview, 2024]
This satellite image is centred on the building at Omaruro Railway Station. [Google Maps, June 2025]
Omaruru Railway Station in its earliest incarnation in 1906. At this time the line to Otavi was 2ft-gauge. The site appears to be littered with railway construction materials, © Public Domain. [30]
The station building has seen better days! This view looks East from Etjo Street. [Google Streetview, 2024]
Leaving Omaruru, the line passes under the C36. [Google Streetview, 2024]
It runs alongside the C33 all the way to Kalkfeld. This view is taken looking North-northwest from the road. [Google Streetview, 2024]
Crossing dry river beds on the journey North. [Google Streetview, 2024]
The line passes under the C33 once on the way to Kalkfeld. [Google Streetview, 2024]
Closing in on Kalkfeld there is a passing loop. [Google Maps, June 2025]
Another view of the line from the C33. [Google Streetview, 2024]
Kalkfeld: the C33 and the railway pass North-northeast through the town. There is no passenger station here. [Google Maps, June 2025]
In Kalkfeld two roads cross the line. Here we look North along the line from the first of these ungated crossings, a minor dirt road. [Google Streetview, 2024]
The second ungated crossing takes the D2414 across the line, again we are looking North. [Google Streetview, 2024]

From Kalkfeld the line heads in a generally Northeasterly direction towards Otjiwarongo.

As on the earlier length of the line, we see it crossing a number of dry river beds. [Google Maps , June 2025]

The next five images are a sequence which shows a long passing loop, perhaps halfway towards Otjiwarongo.

A sequence of five images shows a passing loop. The sequence has the Northeast end of the loop in the first of the five images and the Southwest end of the loop in the fifth image, immediately above. [Google Maps, June 2025]

The next five images show a sequence of structures over dry river beds

Five bridges spanning dry watercourses. [Google Maps, June 2025]
This photograph is taken from the C33 which has followed the railway Northeast towards Otjiwarongo. [Google Streetview, 2024]
Approaching Otjiwarongo, this photograph faces East-northeast from alongside an ungated crossing around 50 metres Southeast of the C33. [Google Streetview, 2024]
This photograph faces East-northeast along the approach to Otjiwarongo Railway Station. The road from which it is taken is the C38. [Google Streetview, 2024]
Otjiwarongo Railway Station is a junction station with line onward to Otavi and Outjo. [Google Maps, June 2025]
Otjiwarongo Railway Station building. [Google Streetview, 2024]
Otjiwarongo Goods Shed. [Google Streetview, 2024]
In 1912, Henschel built three 2-8-2 tender engines No. 40, No. 41 and No. 42 for the Otavi line for use on the Swakopmund-Karabib section. No. 41 is plinthed outside Otjiwarongo Railway Station. Like many other SWA locos they had dust covers to protect the motion. The carrying wheels were arranged as radial axles. As there were no separate bogie truck, the axle boxes were guided in such a way that the wheels could move radially with respect to the frame. At that time the railway was a 2ft-gauge line [Google Streetview, 2024] More information can be found here. [39]

The line to Otavi continues heading Northeast. …

The line to the Northeast of Otjiwarongo Railway Station. [Google Maps, June 2025]
At the bottom-left of the image above the line crosses the C33 at an ungated crossing. [Google Streetview, 2024]
A closer satellite view of the length of the line to the Northeast of the C33. A few sidings serve industries to the South of the line. The road at the centre of the image running North-South is Industria Street. [Google Maps, June 2024]
Looking West from Industria Street. [Google Streetview, 2024]
Looking Northeast from Industria Street. [Google Streetview, 2024]
The B1 to the Northeast of Otjiwarongo bridges the line. This view looks Southwest towards the railway station. [Google Str
Looking Northeast towards Otavi from the B1. [Google Streetview, 2024]
The line runs parallel to the B1 heading Northeast. [Google Streetview, July 2024]
Looking Northeast along the line from an ungated crossing at the D2430. The B1 can just be seen on the left of this image. [Google Streetview, July 2024]
A little further Northeast this photograph, taken from the B1, shows a minor road crossing the railway at an ungated crossing. [Google Streetview, July 2024]
As we travel Northeast, the landscape becomes greener. This another view looking East from the B1 and shows another ungated crossing of a minor road. [Google Streetview, July 2024]
The line passing under the B1. The landscape has changed. The line is running through dense shrubs and small trees. [Google Streetview, 2024]
In Otavi, this is Phyllis Street. It crosses the line at the Southwest end of the station site. [Google Streetview, 2024]
Otavi Railway Station and turning triangle. [Google Maps, June 2025]
Otavi Railway Station building. [Google Streetview, 2024]

It is worth noting here that the original gauge of the line from the coast to Otavi and Tsumeb was originally built to 2ft-gauge. Later it was converted to 3ft 6in gauge. The line was built for the Otavi Mining and Railway Company (Otavi Minen- und Eisenbahn-Gesellschaft or OMEG). The company was founded was a railway and mining company in German Son 6th April 1900 in Berlin with the Disconto-Gesellschaft and the South West Africa Company as major shareholders. [41]

The first locomotives designed for regular service were fifteen 22-tonne 0-6-2T locos built by Arn. Jung. [41][42: p45] Henschel & Sohn built twelve locomotives similar to the Jung design and three 0-6-0T locos. [41][42: p45] Twenty 8-wheel auxiliary tenders carrying 8 cubic metres of water and 3.5 tonnes of coal were built to enable these tank locomotives to complete longer runs. [41][42: p45][43: p65] Henschel & Sohn built three HD class 2-8-2 in 1912 with separate 8-wheel tenders for long-distance running. [42: p47] These locomotives weighed 59 tonnes (including the 26-tonne tender) and remained in service for 50 years as the 2-8-2 type became standard for the railway. [41]

By 1913, train service included 4 express trains, 14 mixed trains, and 29 freight trains each week. [42: p39] Express and mixed trains included a baggage car, a car for African passengers, and a coach for first and second class passengers. [42: p39] The passenger coaches carried concrete ballast in a depressed center section to minimize the possibility of wind tipping a lightly loaded car off the rails. [43] Express trains stopped only at designated stations, but other trains would stop at intermediate points when transport was required. [42: p39] Equipment included: 96 low-side ore gondolas; 55 high-side gondolas; 20 limestone gondolas; 20 boxcars; 12 tank cars; 4 stock cars; 3 passenger coaches; and an executive business car with a kitchen, a bathroom, and an office convertible to a bedroom at night. [41][42: p42][43: p65]

There were also some self-powered steam rail cars with a coal bunker, a mail compartment, 2 compartments for Europeans, and 4 for Africans. [41][42: p36]

Otavi-Grootfontein

The railway line from Otavi to Grootfontein is 91 kilometres (57 miles) long and was completed in 1908. [10]

  • Otavi (junction for Grootfontein)
  • Grootfontein (branch terminus)
Otavi Railway Station, seen from the C39 at the Northeast end of the station site. [Google Streetview, 2024]
From the same location on the C39 a wider view shows the sidings at Otavi Railway Station [Google Streetview, 2024]
Turning through approximately 180° and looking Northeast, the line to Tsumeb runs towards the hills at the left of the image. The line to Grootfontein curves away to the right. [Google Streetview, 2024]
Looking back towards Otavi Railway Station from the ungated crossing on Josef Buchholz Avenue. [Google Streetview, 2024]
Turning through 180°, this is the view Sputheast from Josef Buchholz Avenue towards Grootfontein. [Google Streetview, 2024]
Heading Southeast out of Otavi the line to Grootfontein passes under the B1. This is the view along the line from the road and bridge. [Google Streetview, 2024]
Out of Otavi, the line soon starts to accompany the B8 in its journey East. This photograph is taken from the B8 and shows an ungated crossing on a minor road. [Google Streetview, 2024]
An ungated crossing provides access from the B8 into Kombat. The road is the D2863. This is the view East at the crossing. [Google Streetview, 2024]

The line turns away from the B8, to the North. As it does so it crosses the D2860 at an ungated crossing.

The line to Grootfontein crosses the D2860 at an ungated crossing. [Google Streetview, 2024]

The line follows the D2860 and then the D2905 before passing under the B8, as it heads for Grootfontein.

An ungated crossing to the South of the D2905. [Google Streetview, 2024]
The view ahead along the line towards Grootfontein from the B8. [Google Streetview, 2024]
The view towards Grootfontein from a minor road ungated crossing. [Google Streetview, 2024]
Much closer to Grootfontein, another view East along the railway. [Google Streetview, 2024]
The fuel depot at Grootfontein. [Google Maps, June 2025]
Grootfontein Railway Station. [Google Maps, June 2025]
Grootfontein Railway Station in 2007. This image was shared on the African Railway Station Stopping Places Facebook Page In 2012. [46]
Grootfontein Railway Station goods depot in 2007. This image was shared on the African Railway Station Stopping Places Facebook Page In 2012. [47]

Grootfontein railway station is being converted into a logistics hub for business with the DRC and Zambia.

At the moment, trucks from the DRC, Zambia or Namibia travel about 2,500 kilometres from Walvis Bay harbour to Lubumbashi. With the introduction of the Grootfontein hub, these trucks will travel a distance of about 1,400 kilometres. TransNamib is prepared to dedicate four trains a week for this business idea. [44] 

Immediately to the East of the railway station the line turns to the South and is clearly not well used and significantly overgrown in places. [Google Maps, June 2025]
After a few hundred metres the line turns to the East. It can clearly be made out towards the bottom of this satellite image. [Google Maps, June 2025]
The line continues East and passes under the D2830. [Google Maps, June 2025]
Looking West from the D2830, a short length of the line can be seen just to the right of the centre of this image. [Google Streetview, 2024]
To the East of the D2380 a series of sidings still exist. [Google Maps, June 2025]
It is harder to make out the sidings in this view. The photograph looks East from the D2380. [Google Streetview, 2024]
These last two satellite images show the extent of the tracks in the industrial area to the East of the D2380. [Google Maps, June 2025]

Otjiwarongo-Outjo

  • Otjiwarongo (junction for Outjo)
  • Outjo (railhead)

Otjiwarongo Railway Station is illustrated above. The railway line from Otjiwarongo to Outjo is 69 kilometres (43 mi) long. The first 26 kilometres (16 mi) were completed under the German colonial administration in 1914/1915; the railway line was named Amboland Railway in reference to the territory of the Ovambo people. The link to Outjo was completed in 1921 under South African rule. [10]

The branch line to Outjo can be seen turning away North from the line to Otavi. [Google Maps, June 2025]
The branch line crossed the C33 at an ungated crossing. This photograph looks South from the C33 towards Otjiwarongo Railway Station. [Google Streetview, 2024]
Turning through 120°, or perhaps more, standing on the C33, the rails of the line to Outjo disappear into the vegetation. The line has clearly not been used for some time. However, we will see that much of the line to Outjo remains in place and perhaps could be renovated should the need arise. [Google Streetview, 2024]
The line curves round towards the West. On the way it appears often out of the undergrowth. Here, this minor road crosses the old railway and the signs still stand proudly either side of the line, either side of the railway. [Google Streetview, 2924]
The road shown above appears bottom-right of this image. [Google Maps, June 2025]
The line then heads Southwest for a while before gradually turning through the West to the Northwest. [Google Maps, June 2025]
The line appears out of the brush quite often and sometimes for significant distances, as these two. [Google Maps, June 2025]
These two images are typical of what can be seen on satellite imagery. The line appears out of the brush quite often and sometimes for significant distances. [Google Maps, June 2025]
The line turns through West to Northwest. [Google Maps, June 2025]
It continues, Northwest. [Google Maps, June 2025]
One passing loop appears out of the undergrowth. [Google Maps, June 2025]
Here it can be seen crossing another minor road. [Google Maps, June 2025]
And then a tarmac road. All crossings are ungated. [Google Maps, June 2025]

The next series of six photographs show sidings parallel to the running line. This location is more than just a passing loop but I have not been able to establish whether a specific local industry was the reason for the sidings. The photographs run in sequence Southeast to Northwest. …

The last of six photographs of sidings adjacent to the line to Outjo. [Google Maps, June 2025]

The next sequence of four photographs shows a passing loop on the line. In sequence, these photographs run from the Southeast to the Northwest. …

The last of a series of four satellite images showing a passing loop on the Otjiwarongo to Outjo Railway. [Google Maps, June 2025]
Further to the Northwest the line crosses the Ugab River. [Google Maps, June 2025]
And then the C39 road, after which the line turns to the West and runs into Outjo. [Google Maps, June 2025]
Looking North from the C39 entering Outjo. A series of rail sidings sit to the North of the running line. [Google Streetview, 2024]
The last photograph looks North from the C39 at the left side of this satellite image. [Google Maps, June 2025]
Outjo Railway Station. [Google Maps, June 2025]
Outjo Railway Station in 1961, © SAR Publicity & Travel Department. [45]
Outjo Railway Station. [Google Streetview, 2024]
The turning triangle at the end of the line performed the

Otavi-Oshikango

In 2005, a new 89 km section of Northern Railway from Tsumeb to Oshivelo was opened by President Sam Nujoma, as part of the “Northern Extension” of the railway link from Kranzberg to Otavi. Construction on the project’s second phase, a 59 km stretch from Ondangwa to Oshikango on the Angolan border at a cost of about N$329m, was scheduled to be completed by December 2007. Ondangwa Station opened in 2006 for freight.

In phase 3, a 58 km branch from Ondangwa to Oshakati was constructed at an estimated cost of N$220m, for completion in December 2008. For the future a connection from Oshikango to a point near Cassinga is planned on Angola’s southern railway system. [11][13][14]

The Ondangwa-Oshikango line was officially opened by President Hifikepunye Pohamba in July 2012. In order to keep the system operational and safe, provincial governor Usko Nghaamwa implored local residents to stop stealing railroad ties and sections of the wire fence. [11][15]

  • Otavi (junction for Grootfontein)
  • Tsumeb
  • Ondangwa (junction)
  • Oniipa (road bridge)
  • Onjdiva [11][14]
  • Namacunde [11][16]
  • Oshakati
  • Oshikango (Angolan border)
The C39 crossed the railway immediately to the North of Otavi Railway Station. as we have already noted, this view from the ungated crossing shows the branch to Grootfontein heading away to the right and the line North-northeast to Tsumeb heading for the distant hills. [Google Streetview, 2024]

The journey towards Tsumeb runs uneventfully over flat ground surrounded by shrub and small trees, heading North-northeast, until it reaches Ohorongo Cement Works.

An aerial view of the works can be found here. [48] That view looks North across the Works and shows the railway and a dedicated branch to the Works in the background.

Ohorongo Cement Works. [Google Maps, June 2025]
The passing loop and access to the cement works’ private sidings. [Google Maps, June 2025]
The dedicated siding can be seen leaving the main line at the Southwest end of the passing loop. [Google Maps, June 2025]
The siding curves round along the Northeast side of the Works. [Google Maps, June 2025]
The siding ends towards the Northeast corner of thecsite

The railway continues Northeast over largely unremarkable flat terrain, before turning East, encountering one arm of the B1 and then a triangular junction.

Looking back West from the B1 towards Otavi. [Google Streetview, May 2024]
The view East from the B1 towards Tsumeb. [Google Streetview, May 2024]
An early photograph of a 2ft-gauge train close to Tsumeb, © Not supplied, but made available under a Creative Commons Licence (CC BY-SA 3.0). [49]
The triangular junction to the West of Tsumeb. The northern arm heads for Oshivelo, Omuthiya, Ondangwa, Oniipa, Onjdiva, Namacunde, Oshakati and Oshikango. The eastern arm to Tsumeb and beyond. [Google Maps, June 2025]
Tsumeb Railway Station. [Google Maps, June 2025]
Tsumeb freight depot, with the line serving Tsumeb’s large mine passing under the B1. [Google Maps, June 2024]
The turning triangle at Tsumeb sits immediately alongside the B1 to the South of the fright depot. [Google Maps, June 2025]
A diagrammatic representation of the rail network around Tsumeb, © Tabletop and licenced for reuse under a GNU Free Documentation Licence. [52]
Tsumeb Railway Station in 1908 in 2ft-gauge days! © Public Domain. [55]

Encyclopedia Britannica tells us that “In 1851 Sir Francis Galton, a British explorer, made note of copper ore deposits in the vicinity of what later became the town of Tsumeb. An Anglo-German company acquired mining rights for the Tsumeb area in 1903. Southwest of Tsumeb is the site of the final German troop surrender to South African forces in World War I. The town remained a small copper-mining centre until the Tsumeb mine was purchased in 1947 by a largely U.S.-based corporation. It has since been developed as a planned company town (although ownership of the mine has changed hands several times), exploiting mineral deposits that include significant amounts of lead and copper as well as zinc, cadmium, silver, and germanium (a metalloid element used as a semiconductor). An integrated copper and lead smelter treats concentrates from Tsumeb and other mines. Owambo labourers are the chief contract workers.” [50]

The mine, owned by Dundee Precious Metals sits to the East of the B1.

Tsumeb’s Mine is owned (in 2025) by Dundee Precious Metals, [51], a Canadian-based international gold mining company with operations and projects located in Bulgaria, Ecuador, Namibiaand Serbia. . [Google Maps, June 2025]
Rails and building under construction at Tsumeb Mine, © Not supplied, but made available under a Creative Commons Licence (CC BY-SA 3.0). [53]
The old smelter at Tsumeb in 1910, © Public Domain and shared by jbdodane on Flickr on 9th April 2014. [54]

The line to the North of Tsumeb left the triangular junction to the West of the town heading first to the West and then to the Northwest and then directly North alongside the D3007, before turning West-northwest again.

Looking Southeast from the B1 towards Tsumeb. [Google Streetview, 2022]
Looking Northwest from the B1 along the line towards Omuthiya. [Google Streetview, 2022]
The ungated crossing at the D3007. [Google Maps, June 2025]

After a few kilometres on a West-northwest heading, the line then turns to the North-northwest and runs parallel to the B1 for some considerable distance.

The B1 and the railway converge and head North-northwest. [Google Maps, June 2025]
The line seen from the B1. [Google Streetview, 2022]
The ungated crossing on the D3004. [Google Streetview, 2022]
The view North-northwest along the line from the ungated crossing on the D3001. [Google Streetview, 2022]
The line diverges from the B1 just to the South of the River Owambo. Both the railway and the road cross the river in this satellite image. [Google Maps, June 2025]
Triangle on the South side of the D3610 at Oshivelo. [Google Maps, June 2025]
Oshivelo Railway Station on the North side of the D3610. [Google Maps, June 2025]
Looking South East from an ungated crossing just to the Southeast of Omuthiya Railway Station. [Google Streetview, 2022]
Looking Northwest from the same ungated crossing into the site of Omuthiya Railway Station. [Google Streetview, 2022]
Omuthiya Railway Station. [Google Maps, June 2025]
The line to the Northwest of the station, seen from the South. [Google Streetview, 2024]
A short distance further up the line looking back towards Omuthiya. [Google Streetview, 2024]
A little further Northwest again, this time looking North towards Ondangwa. [Google Streetview, 2024]
Looking back towards Omuthiya from the ungated crossing on the D3603. [Google Streetview, 2024]
At the same ungated crossing, this photograph is taken looking forward towards Ondangwa. [Google Streetview, 2024]
Two culverts then take the line over the dry channel of the River Gwashigam. [Google Maps, June 2025]
Looking back Southeast from the bridge carrying the D3622 over the line on the approach to 0ndangwa. [Google Streetview, 2024]
Looking Northwest from the same bridge towards Ondangwa. [Google Streetview, June 2025]
Looking South-southeast from an ungated minor dirt road crossing closer to Ondangwa Railway Station. [Google Streetview, 2024]
Looking West-northwest towards Ondangwa. [Google Streetview, 2024]
Ondangwa Railway Station and turning triangle. [Google Maps, June 2025]
Looking South East from the B1 overbridge into the site of Ondangwa Railway Station. [Google Streetview, 2024]
The view West from the same bridge across the turning triangle, the arm on the right leads to the line heading North towards the Angolan border. [Google Maps, June 2025]
Fuel depots sit alongside the line as it heads North. [Google Maps, June 2025]
Looking North from the bridge carrying the C45 over the railway which is now closing in on the railhead on the Angolan border. [Google Streetview, 2024]

The next three images are a sequence of North-facing photogra

The last photograph on the northern line is a satellite image showing the railhead

The railhead in Oshikango at the Namibia/Angola border. [Google Maps, June 2025]

References

  1. Charles E. Lee; The Longest Narrow-Gauge Railway; in The Railway Magazine, February 1952, Tothill Press, Westminster, London, p121-123.
  2. https://en.m.wikipedia.org/wiki/German_South_West_Africa, accessed on 7th June 2025.
  3. https://www.britannica.com/place/German-South-West-Africa, accessed on 7th June 2025.
  4. https://en.m.wikipedia.org/wiki/South_West_African_Jung, accessed on 7th June 2025.
  5. https://en.m.wikipedia.org/wiki/History_of_rail_transport_in_Namibia, accessed on 8th June 2025.
  6. Helmut Schroeter; Die Eisenbahnen der ehemaligen deutschen Schutzgebiete Afrikas und ihre Fahrzeuge = Die Fahrzeuge der deutschen Eisenbahnen 7 [The Railways of the former German Protectorates in Africa and their Rolling Stock = the Rolling Stock of the German Railways 7]. (in German); Verkehrswissenschaftliche Lehrmittelgesellschaft, Frankfurt am Main, 1961.
  7. Helmut Schroeter and Roel Ramaer; Die Eisenbahnen in den einst deutschen Schutzgebieten: Ostafrika, Südwestafrika, Kamerun, Togo und die Schantung-Eisenbahn: damals und heute [German colonial railways: East Africa, Southwest Africa, Cameroon, Togo and the Shantung Railway: then and now] (in German and in English); Röhr-Verlag, Krefeld, 1993.
  8. Brenda Bravenboer and Walter Rusch; The First 100 Years of State Railways in Namibia; TransNamib Museum, Windhoek, 1997.
  9. According to Schroeter; Bravenboer does not mention this line.
  10. Klaus Dierks; The South African Period 1915–1989: The Development of the Namibia Railway Network!; via http://www.klausdierks.com/Namibia_Rail/2.htm, accessed on 8th June 2025.
  11. https://en.m.wikipedia.org/wiki/Rail_transport_in_Namibia, accessed on 8th June 2025.
  12. Not used.
  13. Ministry of Trade & Industry; Northern Railway Extension; via http://www.mti.gov.na/subpage.php?linkNo=72, this link is broken.
  14. Angola- Namibia Link; railwaysafrica.com; via https://web.archive.org/web/20141023100300/http://www.railwaysafrica.com/blog/2014/10/21/angola-namibia-link-3, accessed on 8th June 2025.
  15. Namibia: Community Vandalizes New Railway Line (9th July 2012); New Era; via http://allafrica.com/stories/201207090857.html, accessed on 8th June 2025.
  16. RailwaysAfrica No. 5, 2014, p11, via https://en.m.wikipedia.org/wiki/Railways_Africa, accessed on 8th June 2025.
  17. https://steam-locomotives-south-africa.blogspot.com/2008/07/walvis-bay-hope-steam-locomotive.html?m=1, accessed on 8th June 2025.
  18. The Industrial Railway Record Issue No. 37, June 1971, p78-85.
  19. https://www.expertafrica.com/namibia/windhoek/desert-express, accessed on 8th June 2025.
  20. https://www.rossing.com, accessed on 8th June 2025.
  21. https://en.m.wikipedia.org/wiki/Usakos_railway_station, accessed on 9th June 2025.
  22. https://steam-locomotives-south-africa.blogspot.com/2007/11/plinthed-class-hd-at-usakos-in-namibia.html?m=1, accessed on 9th June 2025.
  23. Leith Paxton & David Bourne; Locomotives of the South African Railways (1st ed.); Struik, Cape Town, 1985, p117 & 121.
  24. https://en.m.wikipedia.org/wiki/Windhoek_railway_station, accessed on 9th June 2025.
  25. https://www.facebook.com/share/p/1De1p8q5Mj/l, accessed on 9th June 2025.
  26. https://commons.m.wikimedia.org/wiki/File:LocomZwillinge_Windhoek1.JPG, accessed on 9th June 2025.
  27. https://en.m.wikipedia.org/wiki/Okahandja_railway_station, accessed on 10th June 2025.
  28. https://commons.m.wikimedia.org/wiki/File:Train_station_Windhoek_(2018).jpg, accessed on 10th June 2025.
  29. https://www.gettyimages.co.uk/detail/news-photo/trainload-of-armoured-cars-south-west-africa-world-war-i-news-photo/463970465, accessed on 10th June 2025.
  30. https://m.wikidata.org/wiki/Q7089896#/media/File%3AEisenbahnstation_Omaruru_1906.jpg, a cessed on 10th June 2025.
  31. https://commons.m.wikimedia.org/wiki/File:Karibib_aerial_view.jpg, accessed on 10th June 2025.
  32. https://commons.m.wikimedia.org/wiki/File:Kranzberg_Station.jpg, accessed on 20th June 2025.
  33. https://www.facebook.com/groups/namib2footers/permalink/6730769210360985, accessed on 10th June 2025.
  34. https://www.facebook.com/groups/namib2footers/permalink/6730826530355253, accessed on 10th June 2025.
  35. https://www.namibian.com.na/historic-train-preserved-for-posterity, accessed on 10th June 2025.
  36. https://steam-locomotives-south-africa.blogspot.com/2007/?m=1, accessed on 10th June 2025.
  37. https://www.news24.com/life/travel/go/then-now-swakopmund-railway-station-20240927, accessed on 10th June 2025.
  38. https://www.linkedin.com/posts/johan-stewart-laubscher-53342658_namibia-railinfrastructure-makinghistory-activity-6815601290438037504-swBC?utm_source=share&utm_medium=member_android&rcm=ACoAAFKPlCQBKyM6SVcRIYzuUN4W9XocTSJS0sY, accessed
  39. https://steam-locomotives-south-africa.blogspot.com/2007/11/narrow-gauge-locomotive-plinthed-at.html?m=1, accessed on 11th June 2025.
  40. https://en.m.wikipedia.org/wiki/Windhoek_railway_station, accessed on 11th June 2025.
  41. https://en.m.wikipedia.org/wiki/Otavi_Mining_and_Railway_Company, accessed on 12th June 2025.
  42. Frederic J. Shaw; Little Railways of the World; Howell-North, Berkeley, California, 1958.
  43. Dick Andrews; Extra Narrow Gauge Junction: Otavi Ry., State Northern Ry. in South Africa [sic]; in Narrow Gauge and Short Line Gazette, Volume 16 No. 1, 1991, p63–66.
  44. https://www.namport.com.na/news/428/grootfontein-train-station-new-logistics-hub-for-drc-zambia, accessed on 12th June 2025.
  45. http://atom.drisa.co.za/collections/N_Collection_lo-res/N70462.jpg, accessed on 12th June 2025.
  46. https://www.facebook.com/share/p/1CBLYcCydW, accessed on 12th June 2025.
  47. https://www.facebook.com/share/p/15abDSmZ7m, accessed on 12th June 2025.
  48. https://maps.app.goo.gl/Ta8Pcutiq8dYKQ1c8?g_st=ac, accessed on 13th June 2025.
  49. https://commons.m.wikimedia.org/wiki/File:Tsumeb_Railway.JPG, accessed on 13th June 2025.
  50. https://www.britannica.com/place/Tsumeb, accessed on 13th June 2025.
  51. https://dundeeprecious.com/about-us/overview, accessed on 13th June 2025.
  52. https://upload.wikimedia.org/wikipedia/commons/e/e6/Diagram_Tsumeb_railway_station_2007.jpg, accessed on 13th June 2025.
  53. https://commons.m.wikimedia.org/wiki/File:Tsumeb_2.JPG, accessed on 13th June 2025.
  54. https://www.flickr.com/photos/jbdodane/13848969294, accessed on 13th June 2025.
  55. https://picryl.com/media/1908-bahnhof-tsumeb-b561a6, accessed on 13th June 2025.