

The short paragraph immediately below appeared in the February 1952 edition of The Railway Magazine in reply to a question submitted by G. T. Kaye.
“The Nidd Valley branch of the former North Eastern Railway (which was closed to passengers on 31st March 1951) terminated at Pateley Bridge, 14 miles from Harrogate. In 1900, a Light Railway Order was obtained for a 2 ft. 6 in. gauge line from Pateley Bridge to Lofthouse-in-Nidderdale, six miles further up the valley, but the promoters had difficulty in finding the necessary capital. At that time, the Bradford Corporation was about to undertake the construction of reservoirs in the Nidd Valley, and a railway was required to carry materials to the sites. The Corporation took over the powers for the light railway, and extended it for a further 6 miles, from Lofthouse to Angram. The railway was laid to the standard-gauge, and was opened to passengers between Pateley Bridge and Lofthouse on 1st May 1907. The remainder of the line did not carry public traffic. The line was worked by two 4-4-0 tank engines and passenger coaches purchased from the Metropolitan Railway. The passenger services were withdrawn on 31st December 1929, and the line was closed completely some months later.” [1: p143]
It appeared close to the back of the magazine in the section called, “The Why and the Wherefore”. It seemed like a good idea to explore what further information there is available about the Nidd Valley Light Railway. …….
The Website ‘WalkingintheYorksireDales.co.uk’ has a page dedicated to the railway which can be found here. [2]
A number of images relating to the line can be found here. [13]
The Oakwood Press published a book by D. J. Croft about the line. [3: p3]
Croft wrote: “The valley of the River Nidd, in the West Riding of Yorkshire, is nearly 55 miles long, beginning at Great Whernside, and ending at Nun Monkton where the Nidd flows into the River Ouse. However, the area known as Nidderdale extends for only about a half of the length, and forms a compact geographical region of its own. Despite this length, and great scenic beauty, it remains to this day one of the forgotten valleys of the Yorkshire Dales.” [3: p3]
“The area of Nidderdale can be divided into roughly two equal sec tions, with the market town of Pateley Bridge between the two. The first substantial historical accounts of Nidderdale appeared in Domesday Book of 1086. However, some of the local lead mines were worked in the time of the Brigantes, whilst several surrounding localities suggest Roman occupation.” [3: p3]
“Nidderdale has several industries, notably quarrying and lead mining. and a small textile industry. There is also a small slate quarry, a marble quarry, and a long, thin ironstone vein stretching along the valley. Through-out the ages, however, Nidderdale has had prosperity alternating with decline. As the early mining industry began to decline, so textiles became important around the thirteenth century. This too tended to decline by the seventeenth century, and mining became important once more. Unfortunately, the prosperity of the lead mining era passed, and so too did the prosperity of Nidderdale.” [3: p3]
“This period of decline lasted until 1862, when the North Eastern Railway opened its line from Harrogate to Pateley Bridge, thus opening this remote valley to the outside world. Prior to this, the only roads out of the dale had been to Grassington, Riponand Kirkby Malzeard, and the only regular connection with the outside world had been the Nidderdale Omnibus, a double-deck horse bus, linking Pateley Bridge with trains of the Leeds & Thirsk Railway at Ripley. This operated from 1st August 1849, until the opening of the railway, and ran twice daily.” [3: p3]
The approach of the 20th century brought a new prosperity to the valley, which was to last for the next thirty years or perhaps a little longer. Thid was the period when the Nidd Valley Light Railway was active.
The story of the line is the story of the thirteen or so miles between Pateley Bridge and the head of the valley, for it was there “that the Nidd Valley Light Railway was conceived, constructed and closed. All this happened within a period of less than forty years.” [3: p3]
The Story of the Line
Wikipedia tells us that the origins of a railway in the upper Nidd Valley “can be traced back to 1887–88, when Bradford Corporation began to investigate the valley as a source for the public water supply. … Alexander Binnie, who was the Waterworks Engineer for Bradford at the time, and Professor Alexander Henry Green, a geologist from Oxford, visited the area, and Green advised Binnie that the valley was suitable for the construction of large dams. The Bradford Corporation Water Act 1890 was obtained on 14th August 1890, authorising the construction of four dams. … A second Act of Parliament was obtained on 27th June 1892, by which time the four reservoirs were Angram, Haden Carr, High Woodale and Gouthwaite. Gouthwaite Reservoir was designed as a compensation reservoir, to maintain flows in the Nidd further down the valley.” [4][5: p76-77]
The first reservoir, Haden Carr, was completed in 1899, together with a 32-mile (51 km) pipeline (the Nidd Aqueduct) to deliver water to Chellow Heights reservoir on the outskirts of Bradford. [4][5: p79] “Gouthwaite reservoir was built … between 1893 and 1901.” [5: p84-85] The activity in the valley attracted attention from outside the region and a company from London, Power & Traction Ltd applied for a Light Railway Order “to construct a line from the terminus of the Nidd Valley Railway at Pateley Bridge to Lofthouse. … Following a hearing at Harrogate on 9th October 1900, the Light Railway Commissioners awarded an order to Power & Traction for a 2 ft 6 in (762 mm) gauge railway.” [4] Negotiations with Bradford Corporation over a possible £2,000 investment in the scheme ultimately failed. [5: p86]
“In 1903, Bradford invited tenders for the construction of Angram Reservoir, and … reached provisional agreement with the Nidd Valley Light Railway Company to purchase the powers awarded to them to build the light railway. … Bradford wanted to ask the Light Railway Commissioners for permission to increase [the track gauge] to 3 ft (914 mm). … They also wanted to ensure that they bought enough land to allow a standard gauge railway to be constructed ‘at any future time’. The North Eastern Railway, owners of the Nidd Valley Railway, argued that it should be standard gauge from the outset, since they were running excursions to Pateley Bridge twice a week, and these could continue over the Nidd Valley Light Railway. It would also remove the necessity of transshipping goods.” [5: p86]
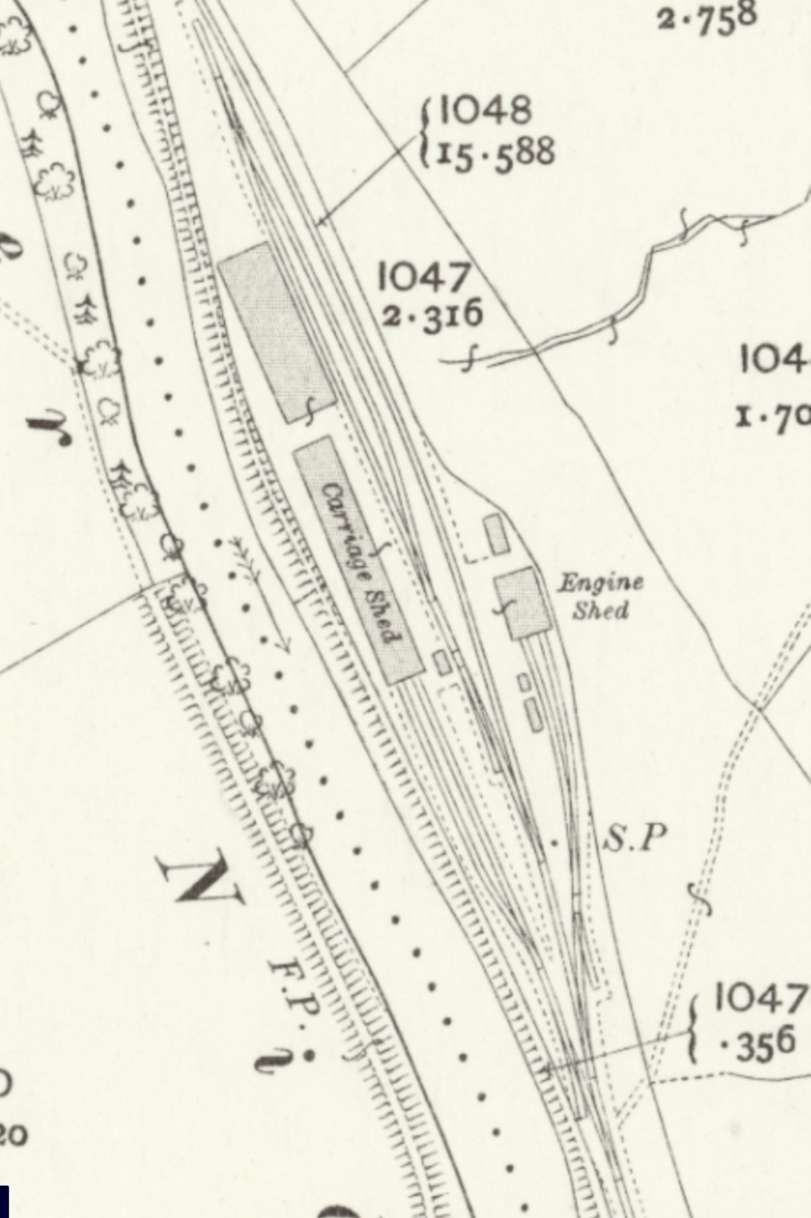
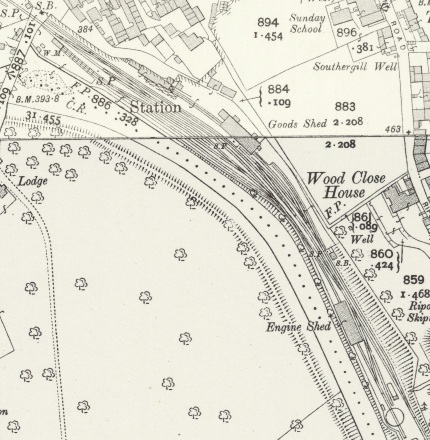
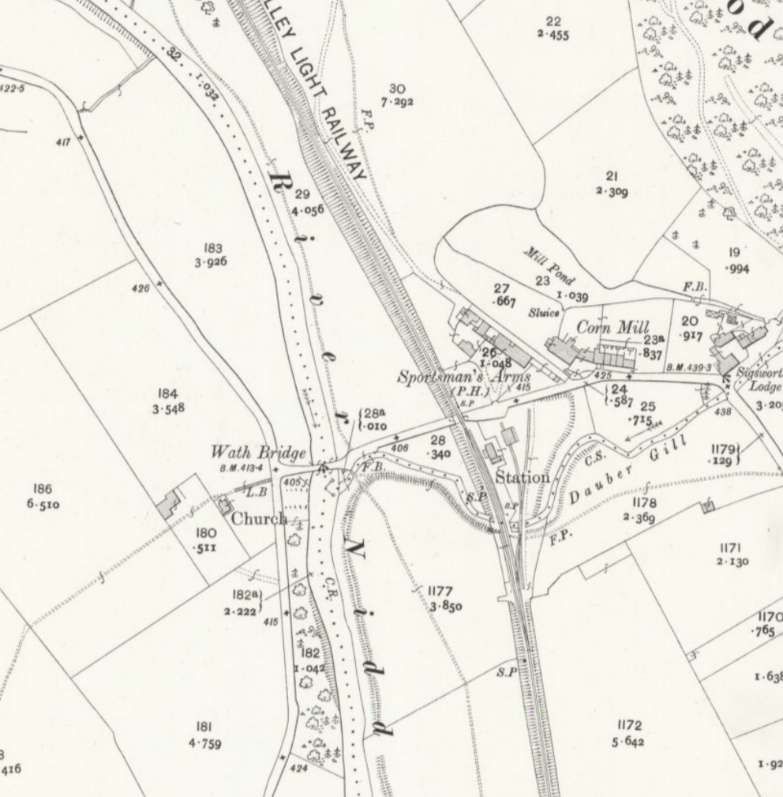
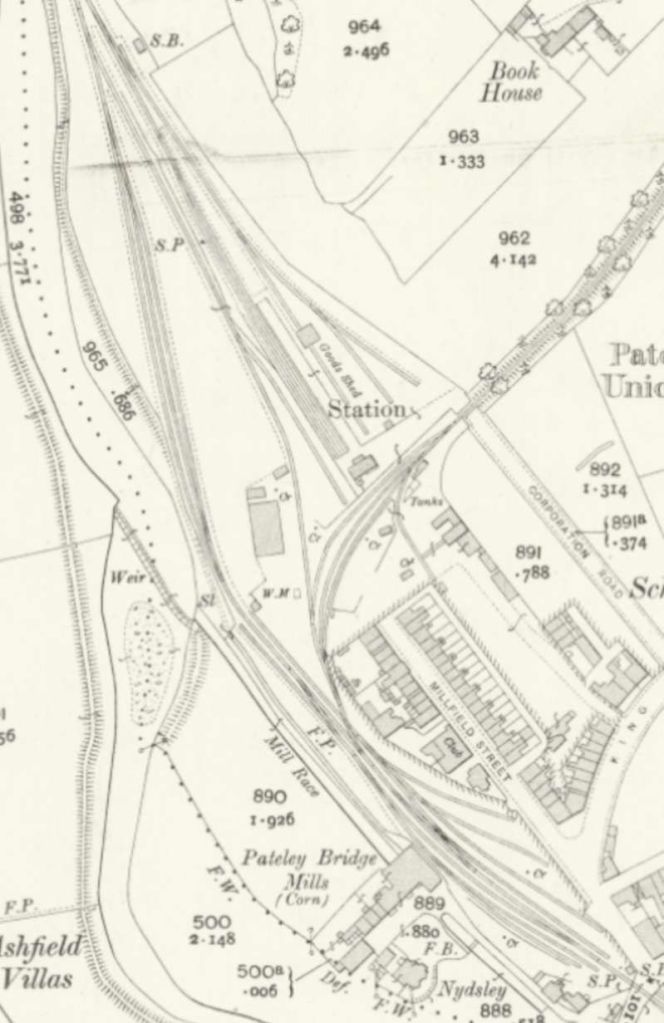
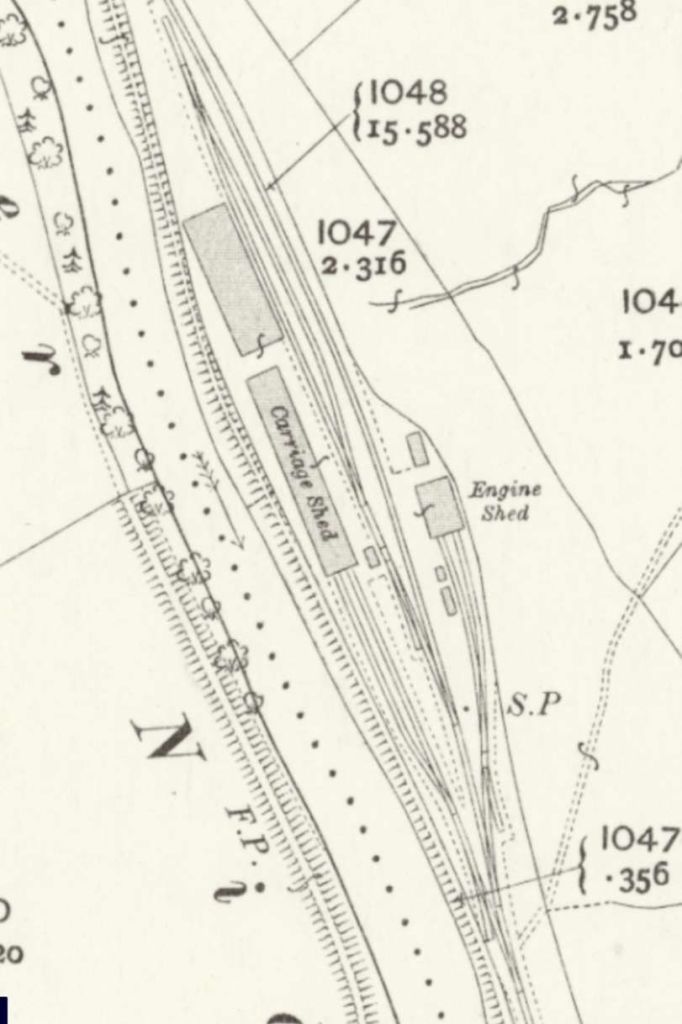
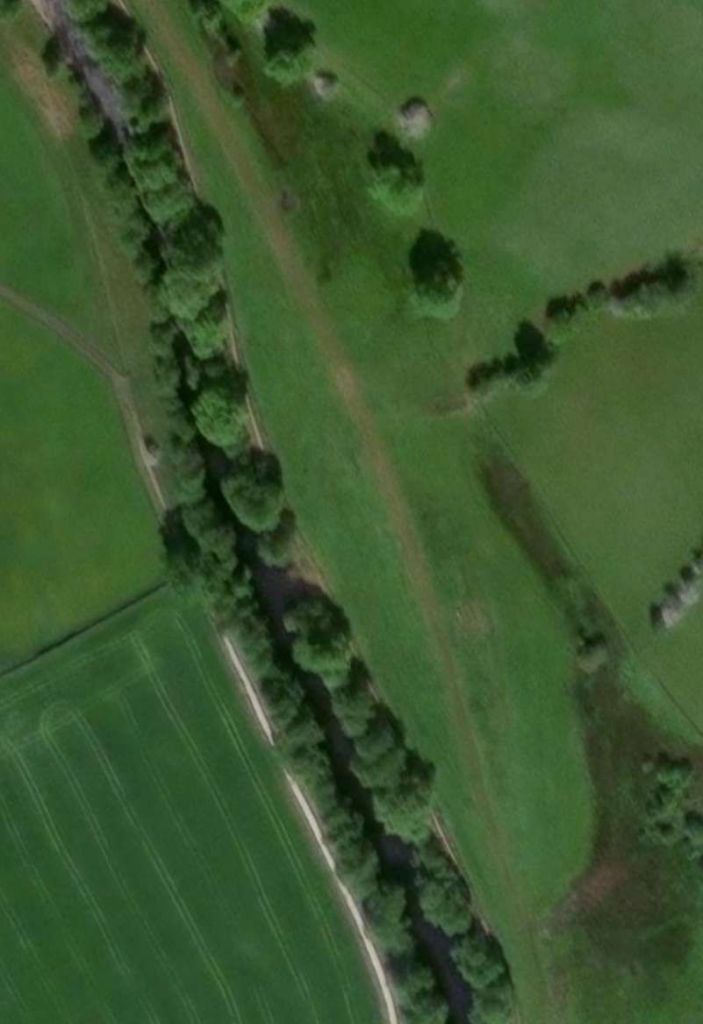
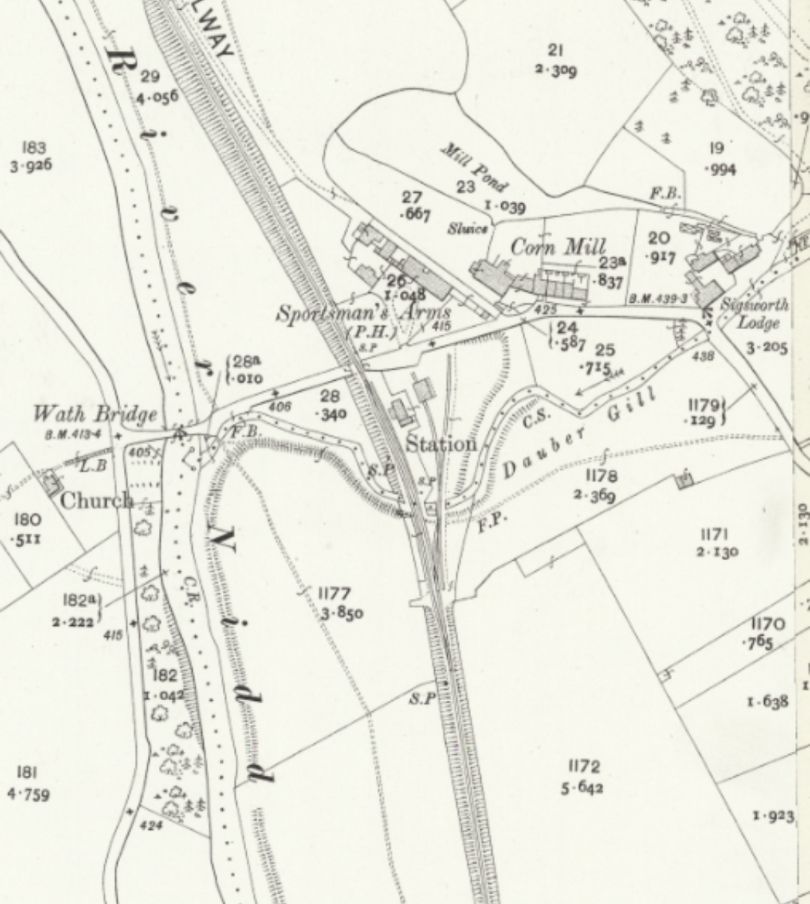
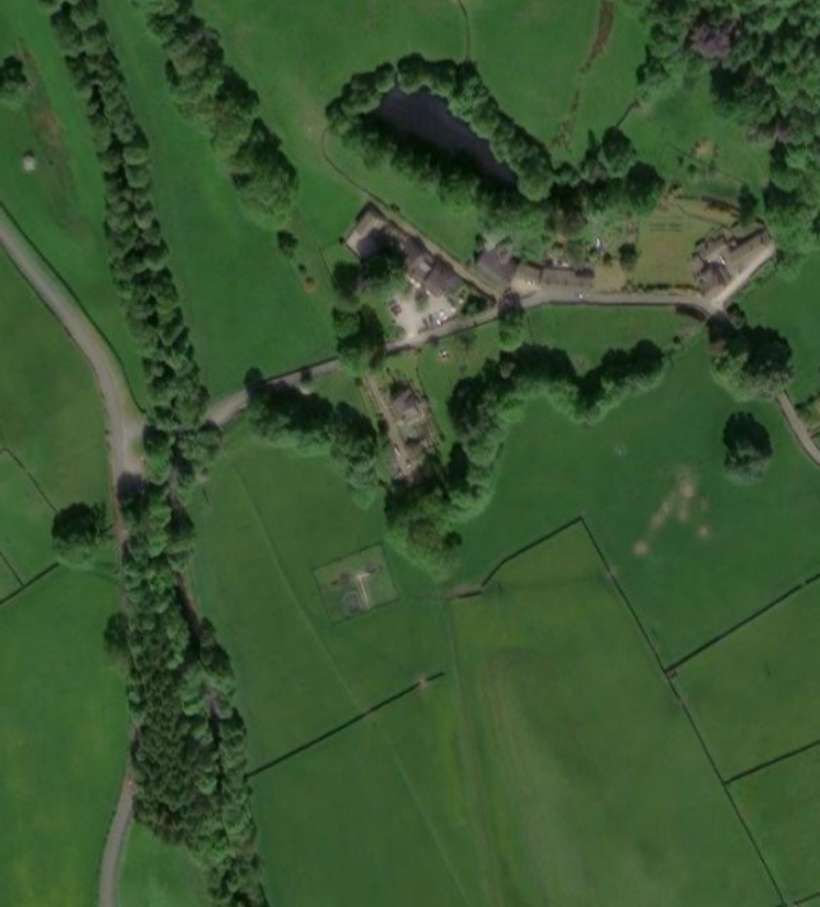
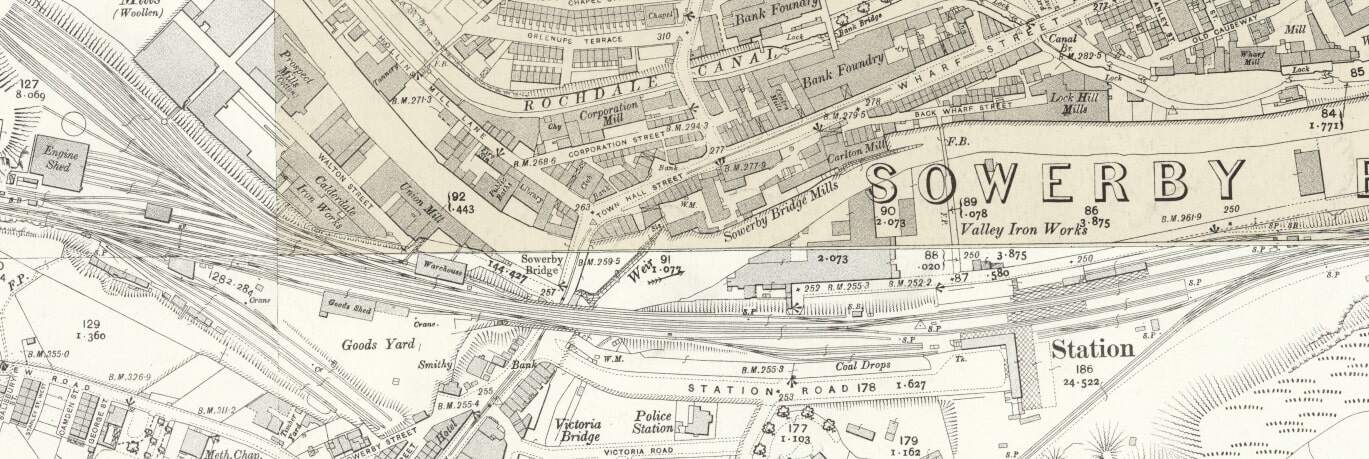
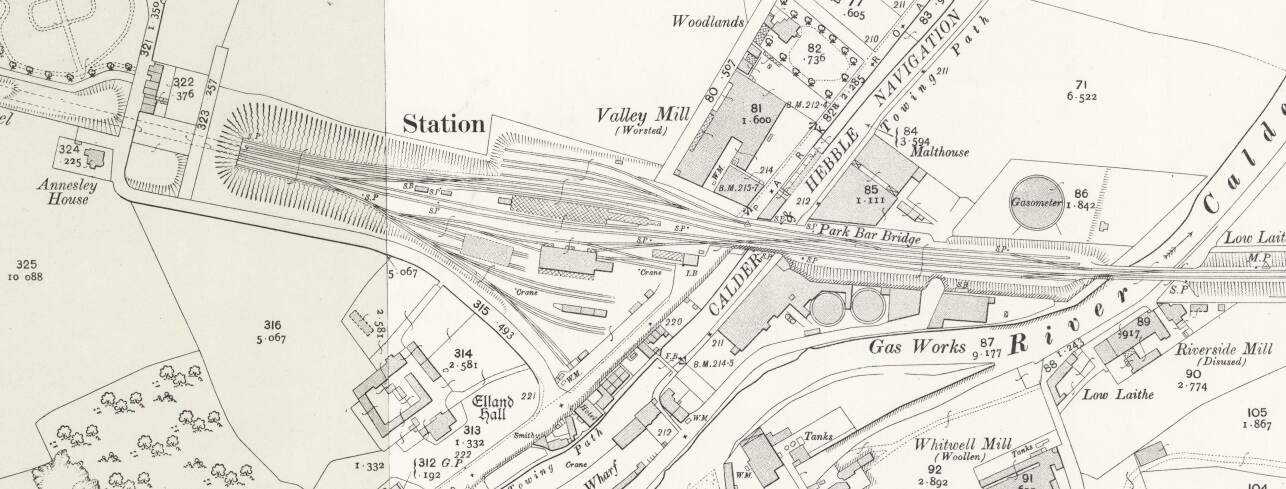
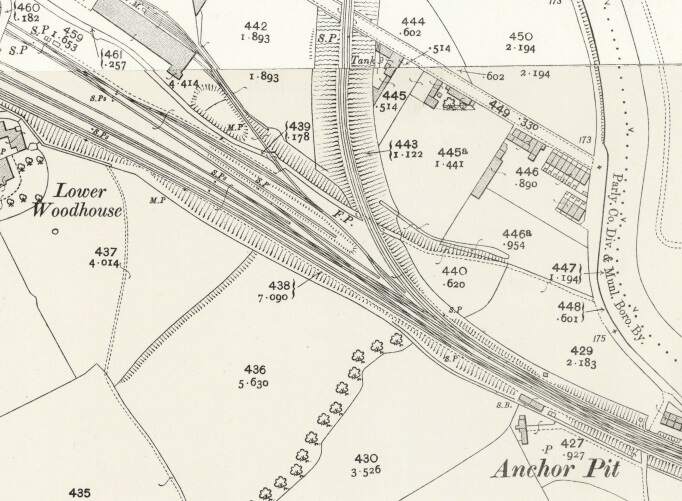
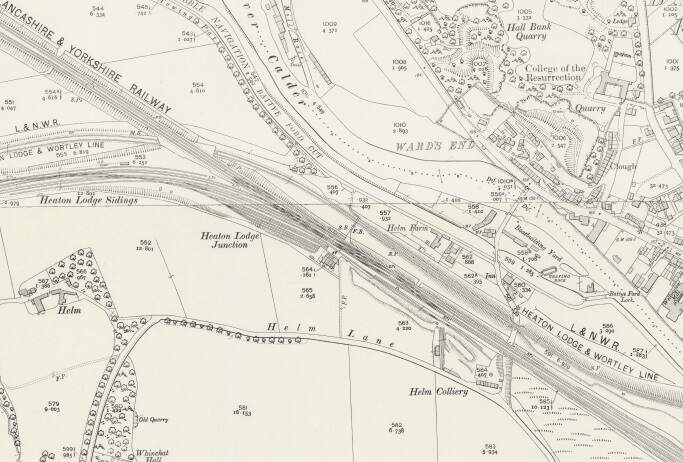
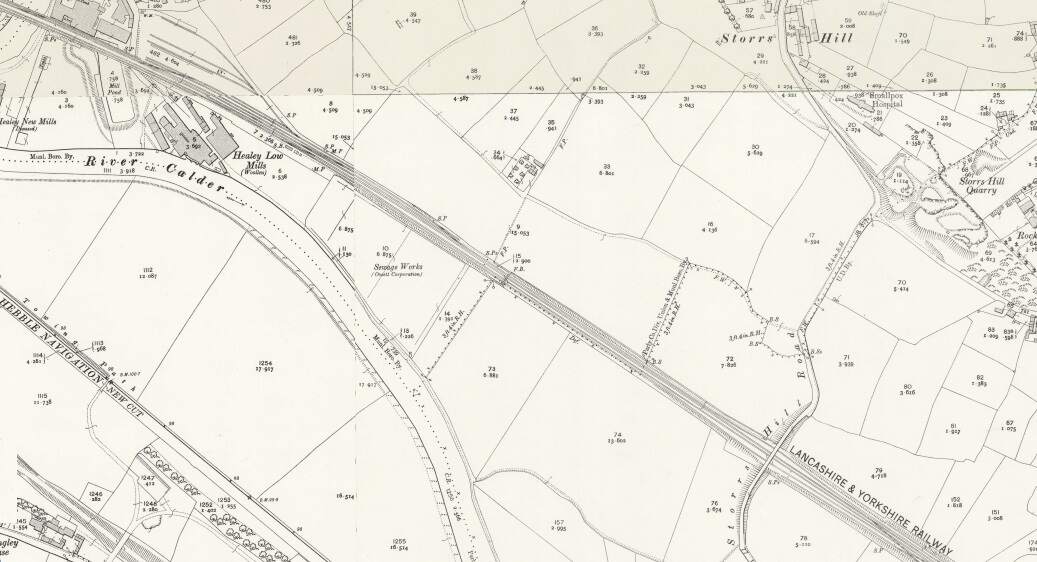
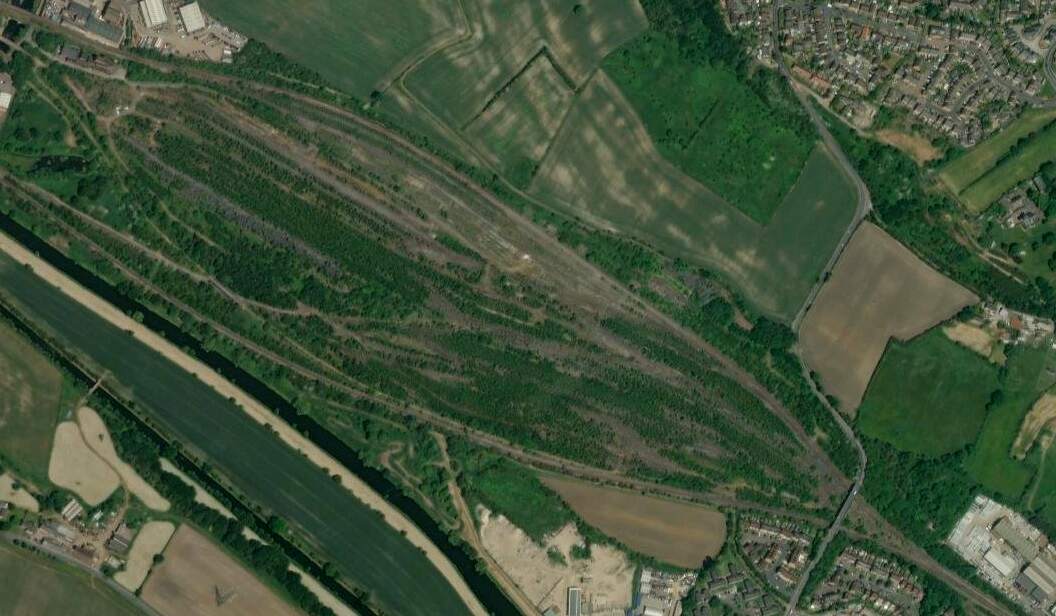
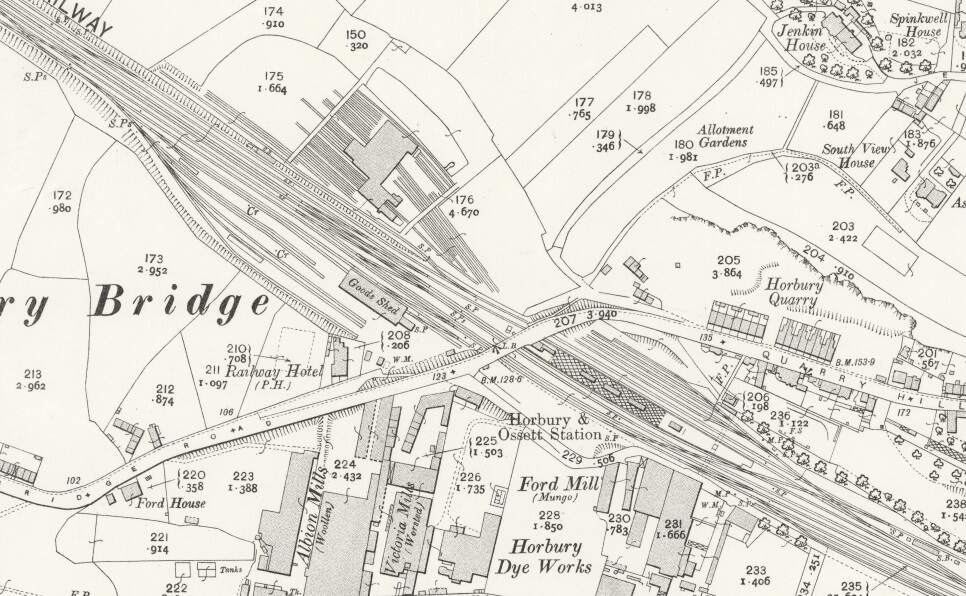
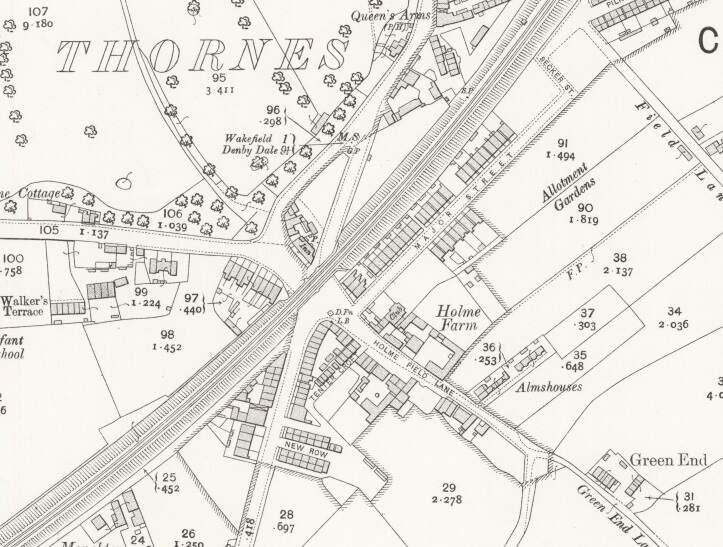
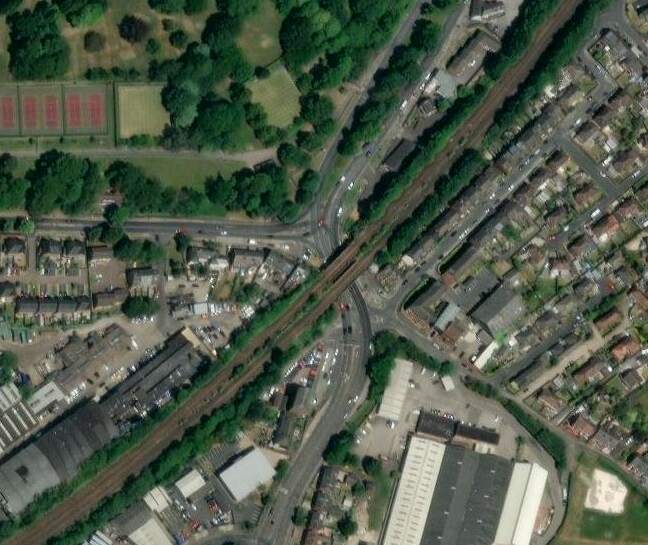
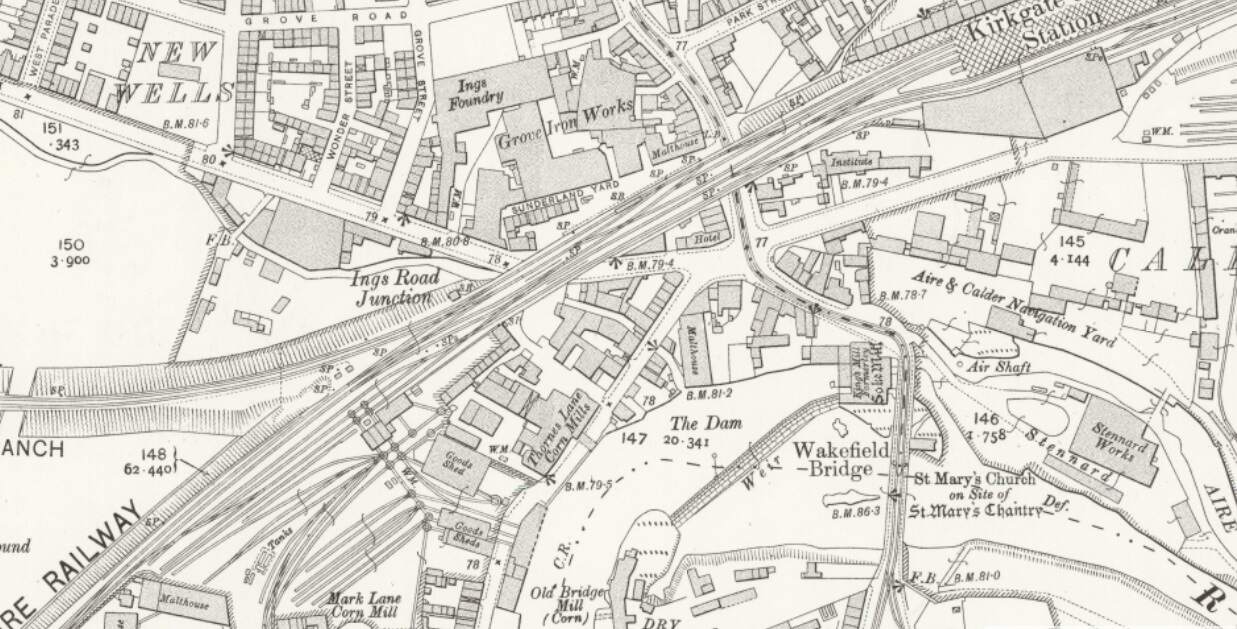
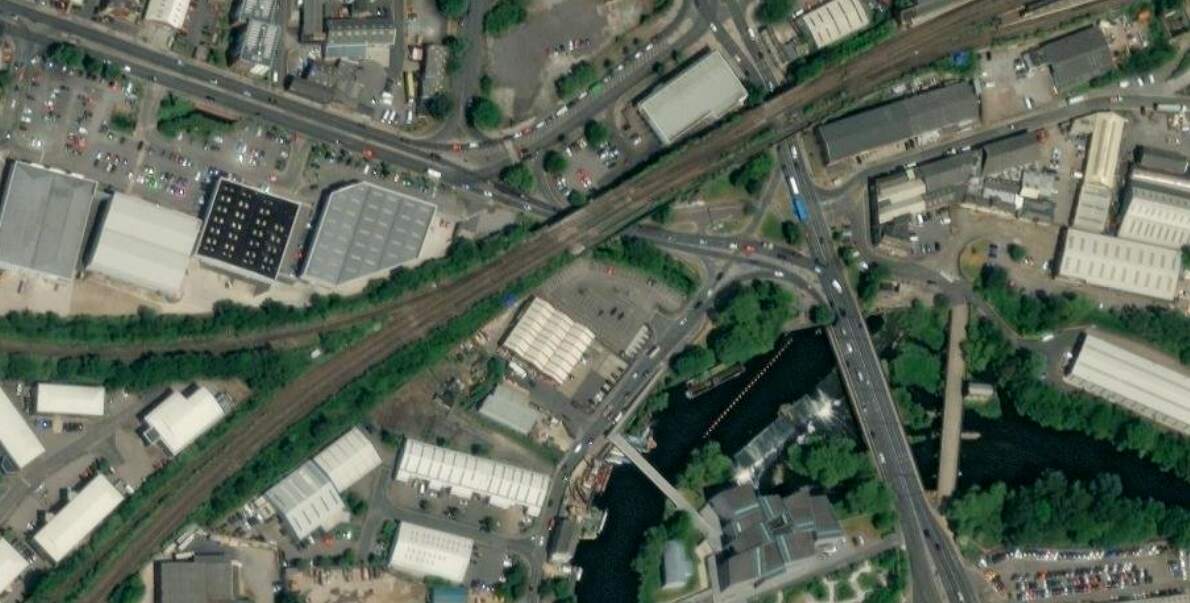
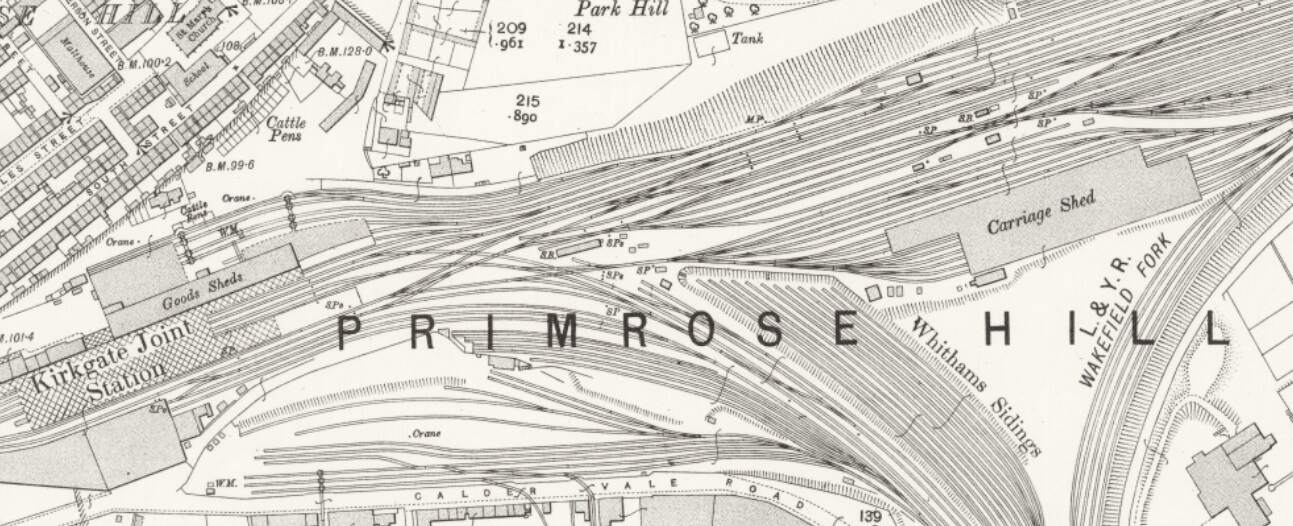
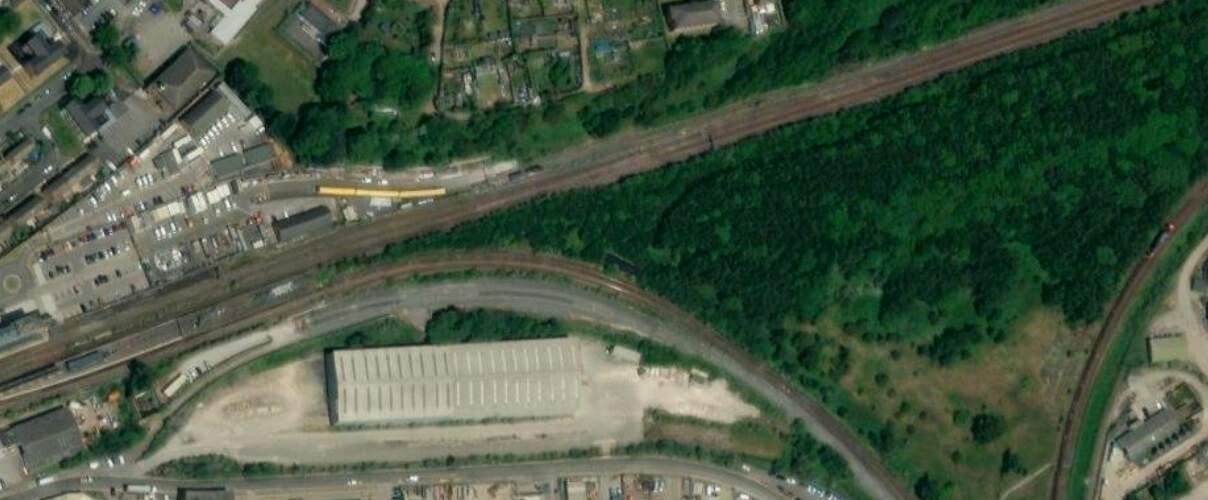
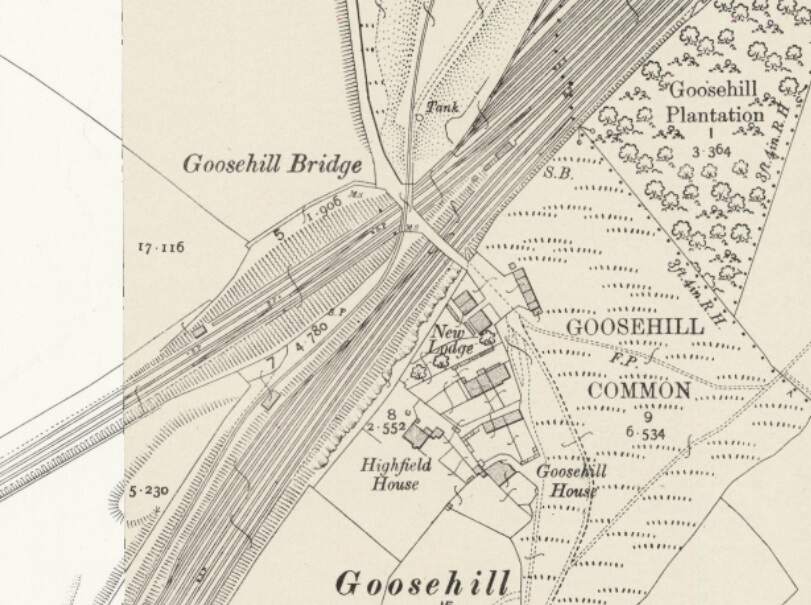
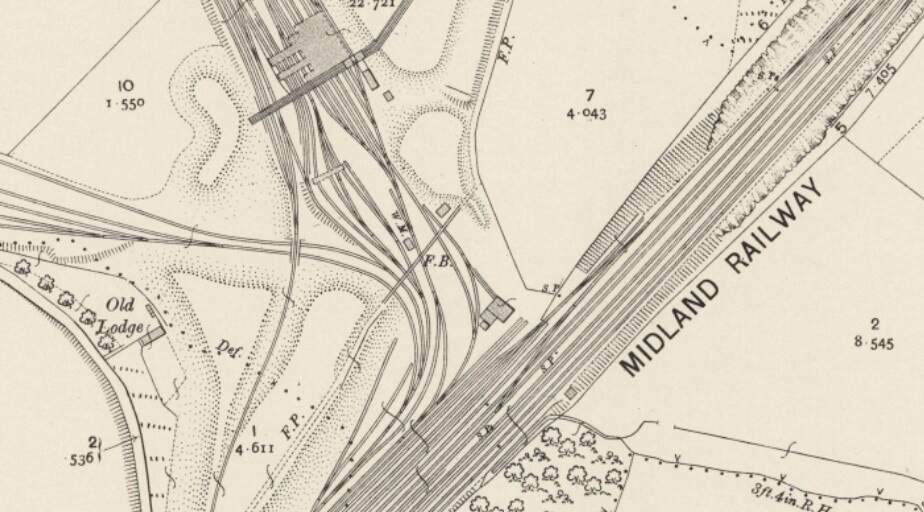
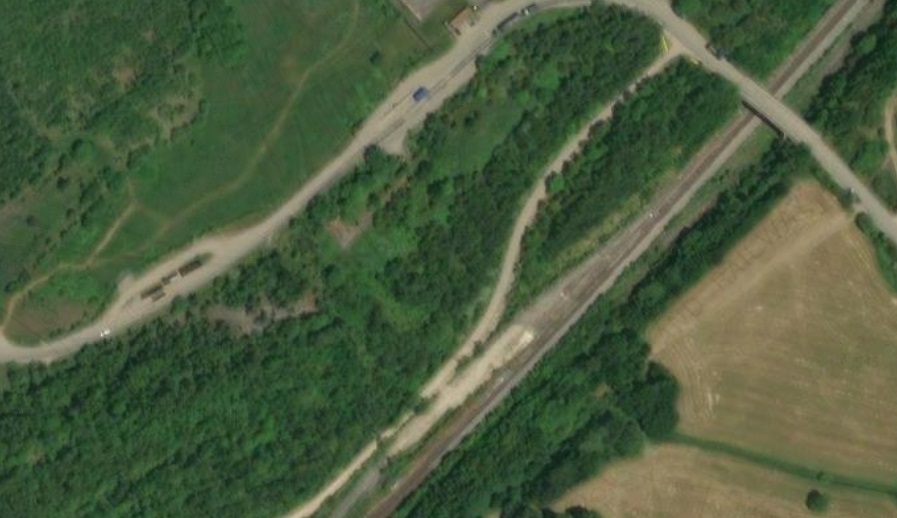
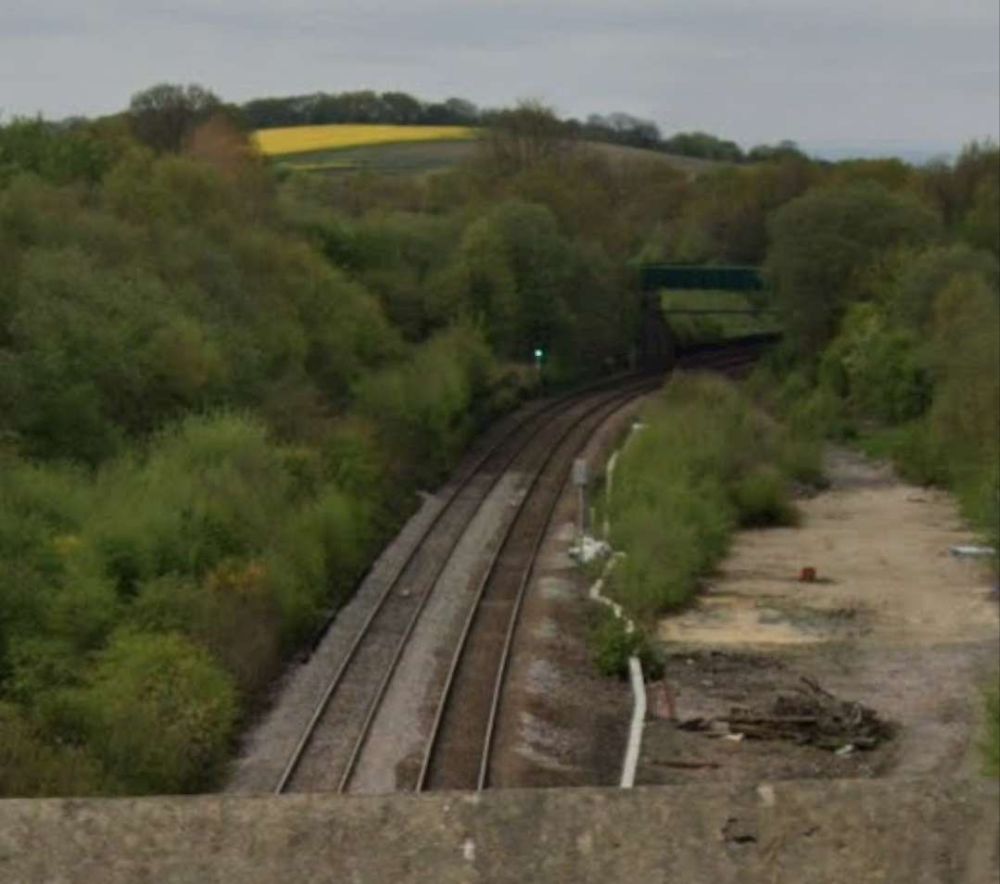
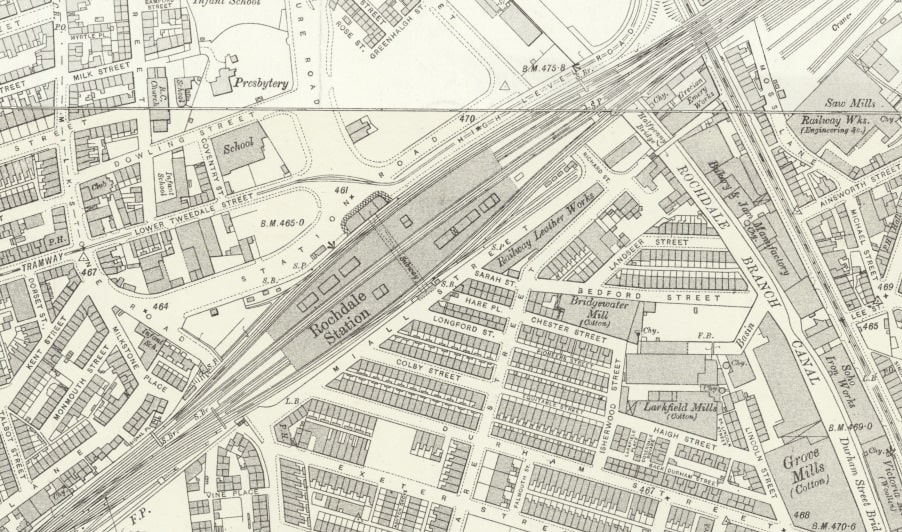
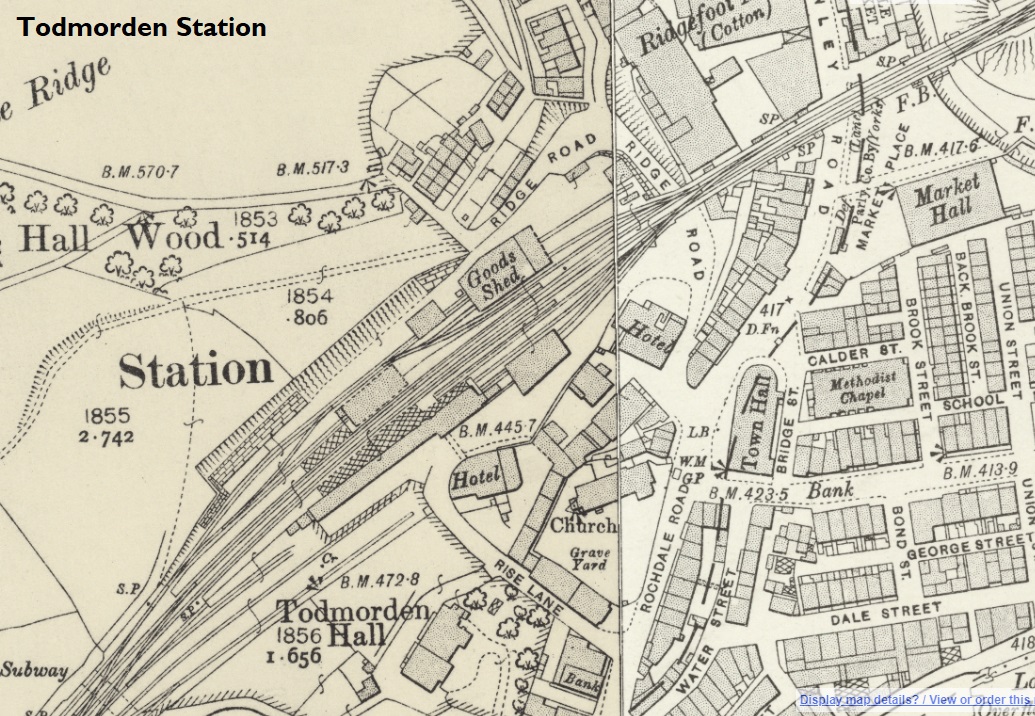
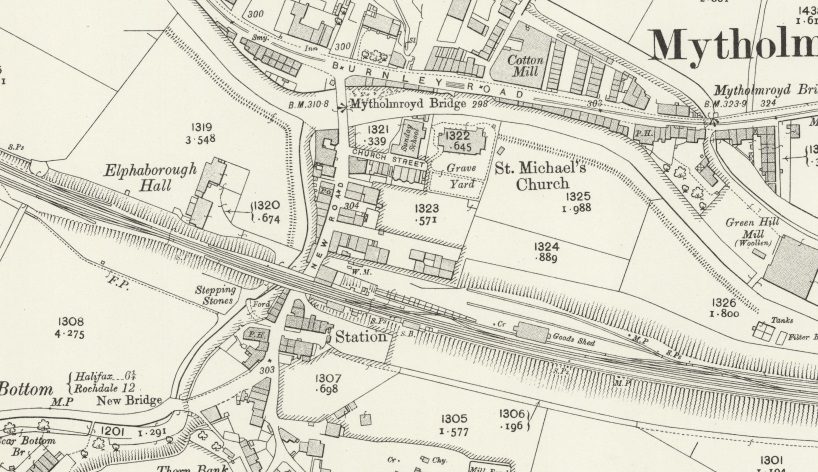
Then next three map extracts show the railway facilities in Pateley Bridge while the Nidd Valley Light Railway was active. …

A transfer order was eventually granted, “with powers to borrow up to £30,000 to fund the project. In May 1904, the Board of Trade agreed to a change to standard gauge, and borrowing powers were increased to £66,000 in 1908, because of the extra costs of building the wider formation. The document was signed by Winston Churchill, the President of the Board of Trade.” The contractor working on the Anagram reservoir, John Best, “was awarded a contract to build the light railway to Lofthouse for £23,000, and a tramway from Lofthouse to Angram for £5,385.” [5: p86-87]
Then the intrigue began! A contract had been awarded in April 1902 to Holme and King for the construction of a road from Lofthouse to Angram. Bradford Council “had purchased enough land to allow the light railway to be built beside the road, and although Best was awarded a contact for the railway in 1903, it appears that Holme and King built a 3 ft (914 mm) gauge contractor’s railway beside part or all of the road. They had two locomotives on site, both 0-4-0 saddle tanks, one bought second hand some years earlier and moved to the site in spring 1902, after working on several other projects, [5: p87] and the second bought new for delivery to Pateley Bridge. [5: p89] By mid-1904, there was a 6.5-mile (10.5 km) line from Angram, which crossed the River Nidd on a 20-foot (6.1 m) bridge just before it reached Lofthouse.” [4]
So, Best began extending the line towards Pateley Bridge from the River Nidd rather than starting the work again! Wikipedia tells us that “by 13th July 1904, it had reached a level crossing at Sykes Bank, 0.5 miles (0.8 km) below Lofthouse, and work had commenced at several other sites. On that date, a party of 150 members of Bradford City Council, with invited guests, arrived by train at Pateley Bridge, and were transported to Gouthwaite Dam in carriages. Here there was a ceremony in which the Lord Major cut the first sod for the Nidd Valley Light Railway.” [4] The party “proceeded to Sykes Bank, where a train was waiting, which consisted of 15 wagons fitted with makeshift seats, and two locomotives, one of which was Holme and King’s Xit and the other was Best’s Angram. It took about an hour to reach Angram, where there were presentations, and Alderman Holdsworth cut the first sod for the dam. Refreshments were then served and the party returned to Lofthouse by train and to Pateley Bridge by carriage.” [4][5: p90-91]
The narrow gauge had hardly reached Pateley Bridge and Angram begun its regular duties along the line when standard gauge rails began to be laid starting at Lofthouse and working both up and down the line from there. “When the first standard gauge locomotive arrived, it was towed along the road to Sykes Bank by a Foden steam lorry, its flanged wheels making a mess of the road surface. The main line and sidings became mixed gauge for a while, although the third rail was gradually removed from 1906.” [5: p91 & 93] There was a veritable network of rail lines at the Angram Dam site where, as well as a village built for the workers, “the railway terminated in several sidings, which included a locomotive shed. The sidings were at a similar level to the crest of the dam. A branch left the main line and descended to the valley floor, where there was a cement mixing plant and more sidings. This line included a winch-operated incline which descended on a gradient of 1 in 15 (6.7%). Another incline, of 3 ft (914 mm) gauge, ascended the far side of the valley, giving access to Nidd sluice and lodge. A third incline brought rock down to the main line from a quarry, some 2 miles (3.2 km) below the terminus.” [4][5: p93 & 97]
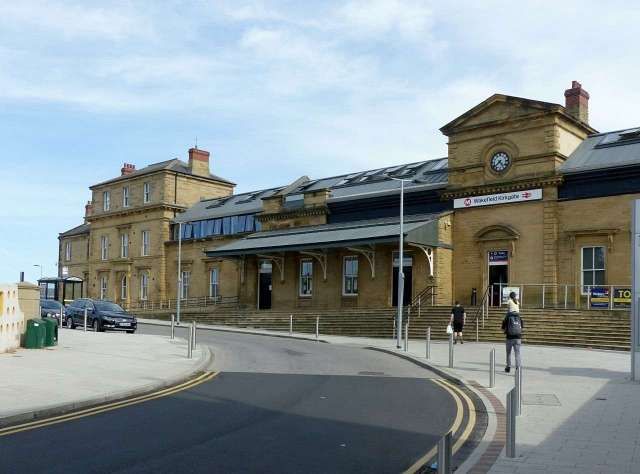
At the other end of the Light Railway, “at Pateley Bridge, the Nidd Valley Light Railway station was to the north west of the North Eastern Railway’s Pateley Bridge railway station, close to the River Nidd. The two were connected by a single track which crossed a level crossing. There were a series of sidings immediately after the level crossing, with the station and more sidings beyond that. A carriage shed and a locomotive shed were located a little further along the valley of the Nidd.” [4]
“Best built two-storey stone buildings for the stations at Pateley Bridge, Wath, Ramsgill and Lofthouse. He built a signal box at Pateley Bridge, with the other stations having ground frames and simple signalling. Operation of the line was controlled by the Tyer’s Electric Train Tablet system, and six machines were ordered at a cost of £360. [5: p101] Both intermediate stations had goods sidings on the eastern side of the main track, while Lofthouse had a passing loop and sidings to the west.” [4]
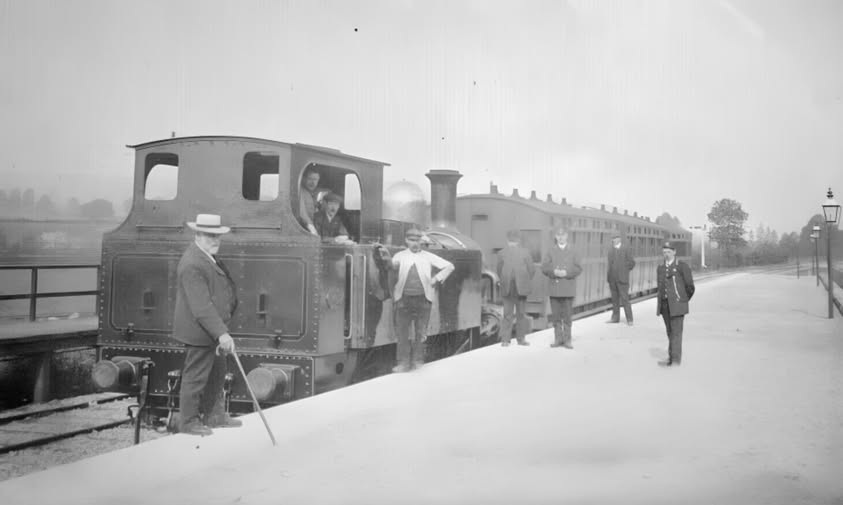
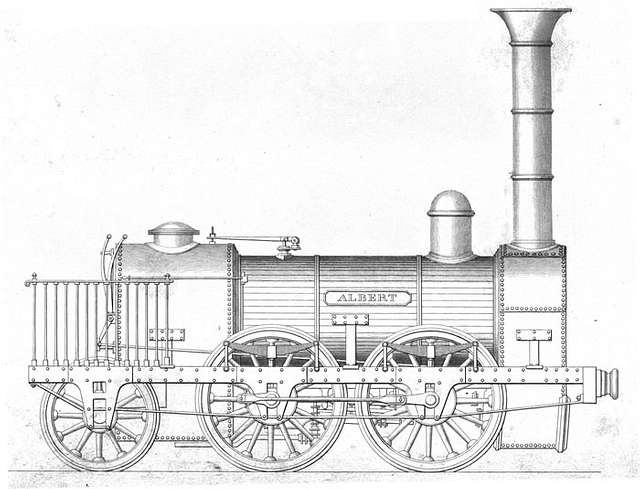
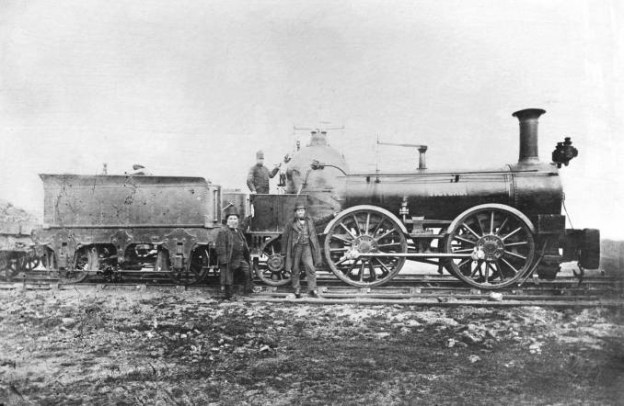
“Best had a number of locomotives, both 3 ft (914 mm) gauge and standard gauge, which operated over the entire line from Pateley Bridge to Angram during the construction phase. For the opening of the Nidd Valley Light Railway proper, the 6.5 miles (10.5 km) from Pateley Bridge to Lofthouse, Bradford Corporation ordered six open wagons and two brake vans from Hurst Nelson of Motherwell. Locomotives and carriages were obtained second-hand from the Metropolitan Railway in London. These consisted of ten 4-wheeled coaches and two 4-4-0 Beyer Peacock side tank locomotives. All had become surplus to requirements, as electrification of the line had been completed in 1905. The locomotives were fitted with condensing equipment, for working in the tunnels under London, but the price of £1,350 for the pair included removal of this, and the fitting of cabs. All twelve vehicles arrived at Pateley Bridge, with one engine in steam … The locomotives were named ‘Holdsworth’ and ‘Milner’ after two Aldermen who had served Bradford Waterworks since 1898.” [4][5: p101, 102]
“An official opening took place on 11th September 1907, when a train consisting of three carriages and the Corporation saloon were hauled by ‘Holdsworth’ from Pateley Bridge to Lofthouse, with stops at Wath and Gouthwaite reservoir. At Lofthouse the engine was replaced by one of Best’s engines, and continued to Angram where luncheon was served in the village reading room.” [4][5: p102, 105]
“The two locomotives were much too heavy to comply with the Light Railway Order, which specified a maximum axle loading of 6.5 tons. They weighed 46.6 tons in working order, with 36.7 tons carried by the two driving axles. The Corporation applied for an increase in the axle loading, specifying the weight as “over 42 tons”. Milner, the newest of the two locomotives, dating from 1879, [5: p102] did not perform well, and was replaced by a Hudswell Clarke 0-6-0 side tank, also named Milner in May 1909. The original Milner was sold to the North Wales Granite Company at Conwy in 1914. [5: p102, 111] Following discussions with the Board of Trade in 1906, the Corporation and the North Eastern Railway had obtained permission for three passenger trains per week to pass over the goods yard and sidings at Pateley Bridge, so that excursions could continue up to Lofthouse between June and September only. Despite the agreement, when the first excursion was due to make the journey on 14th September 1907, the NER decided not to allow their stock to pass onto the Nidd Valley Light Railway, nor to allow the Corporation engine and carriages to come to their station, and so the passengers had to walk between the two stations. [5: p110] In order to avoid confusion for parcels traffic, Lofthouse station became Lofthouse-in-Nidderdale on 12th December 1907, and Wath became Wath-in-Nidderdale in February 1908 for similar reasons.” [4][5: p107-108]
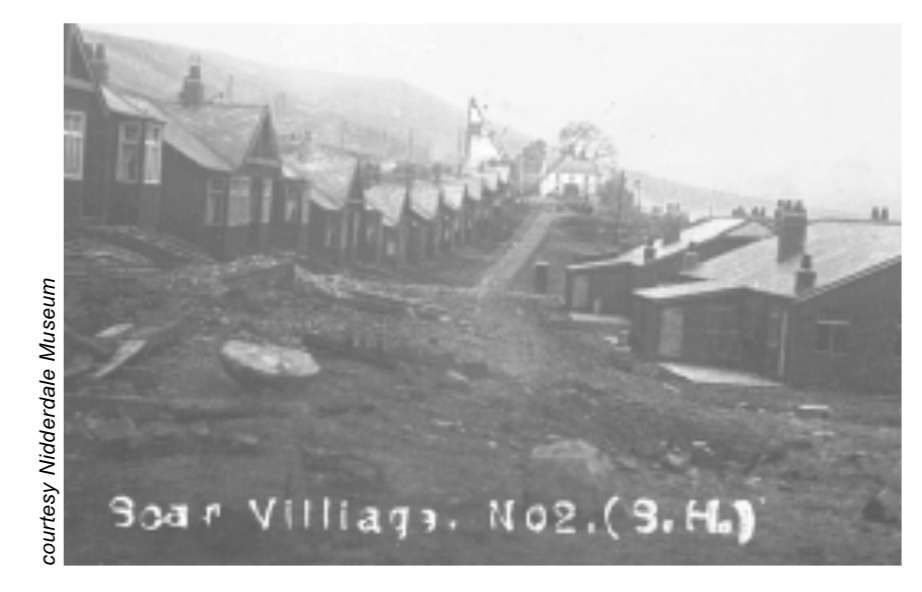
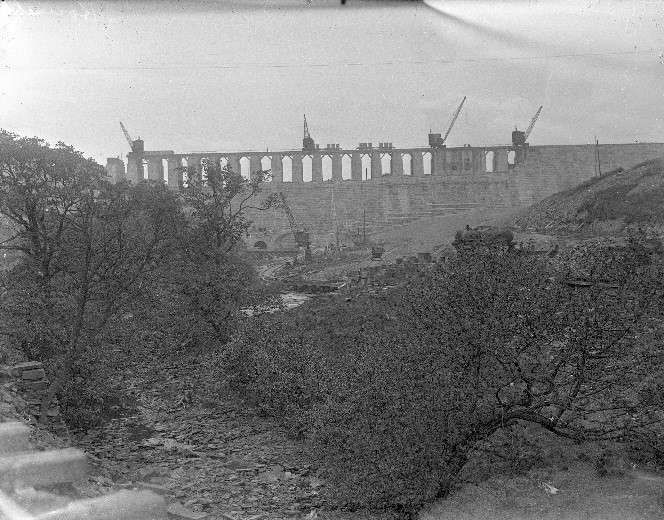
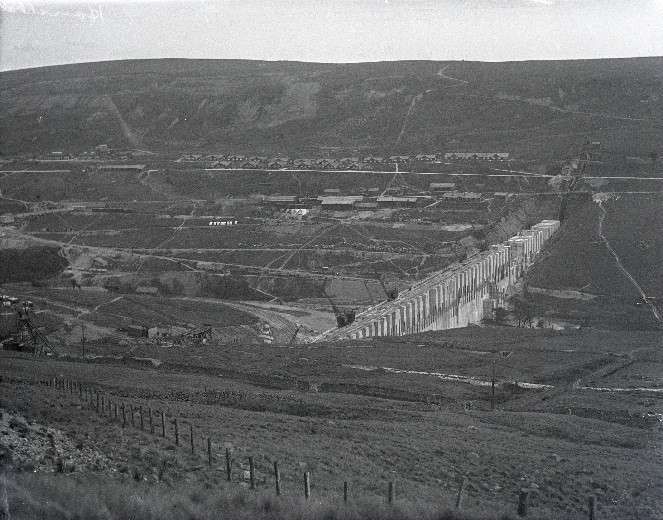
Work on Angram reservoir was finally completed in 1916. “Bradford Corporation had already obtained an Act in 1913, allowing them to abandon their plans for a reservoir at High Woodale, and instead to build a much larger one at Scar House. It would submerge the site of Haden Carr reservoir, and the Act allowed them to start construction “when appropriate”. The cost of the new works was estimated at £2,161,500, and although three tenders were received, they decided on 14th May 1920 to build it themselves, using direct labour. Scar village was built between 1920 and 1921, consisting of ten hostels for a total of 640 men, a school, canteen, recreation room, concert hall, mission church and some bungalows.” [4][5: p115]
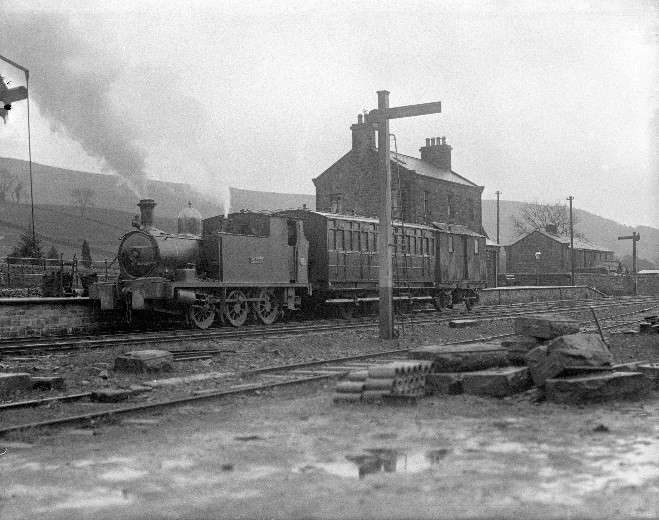
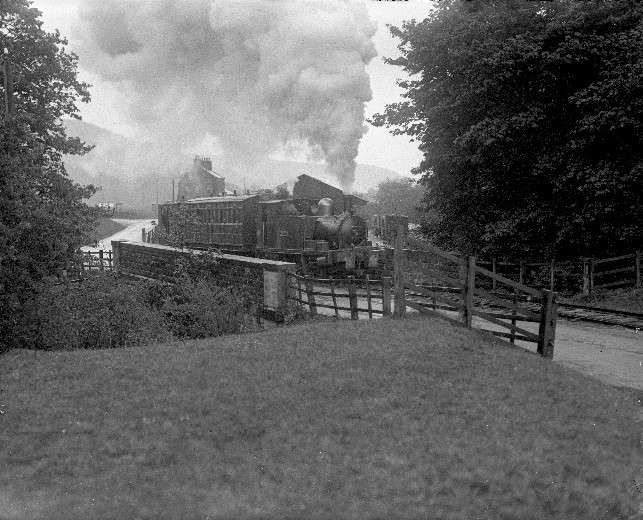
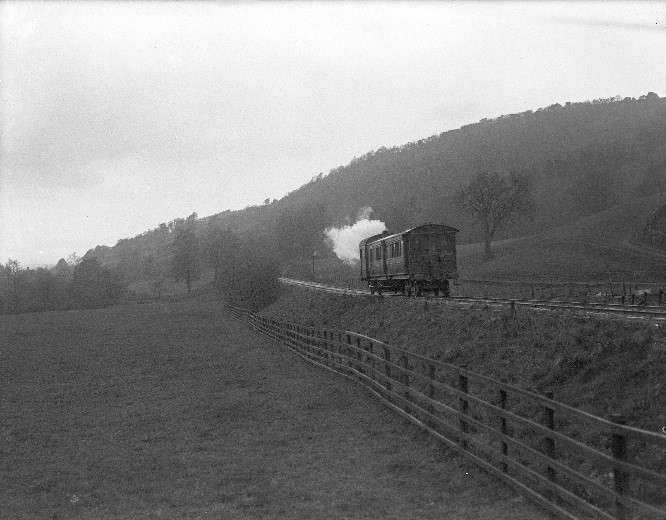
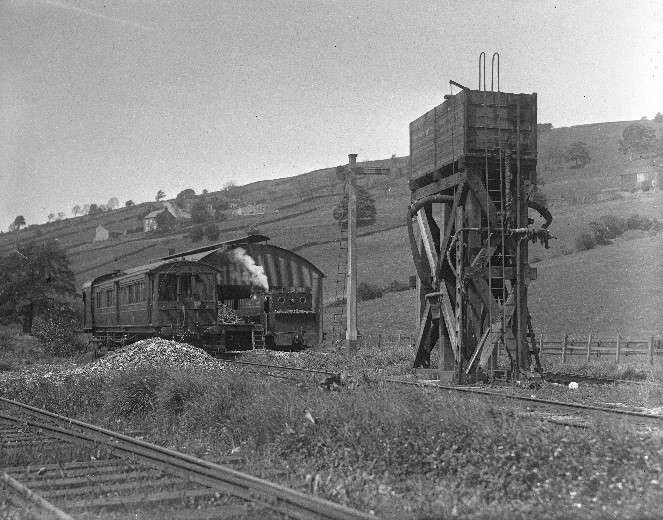
Plans to electrify the railway using hydro-electric power, were considered in March 1920, but rejected as being too expensive. uneconomic. Holdsworth, was taken out of service in 1866 because it was too heavy for the line, but when no buyers could be found, it was used as a stationary steam supply for another 14 years. There were plans to overhaul Milner, to obtain another lighter engine, and to purchase two railmotor cars. Only one railmotor (‘Hill’) was eventually purchased in 1921. It can be seen in the two images immediately below.
“From August 1920, work was carried out to improve the line between Lofthouse and Angram. This included easing the alignment on many of the curves, the addition of loops near Lofthouse and at Woodale, just below the Scar House site, and the construction of a 180-yard (160 m) tunnel near Goyden Pot, which was used by up trains only.” [4][5: p119-122]. “The line at Angram was extended to a small quarry in 1921, along the trackbed of Best’s 3 ft (914 mm) gauge line beyond the dam. Stone was extracted for remedial work, caused by wind and wave erosion of the southern bank of the reservoir near the dam.” [4][5: p123]
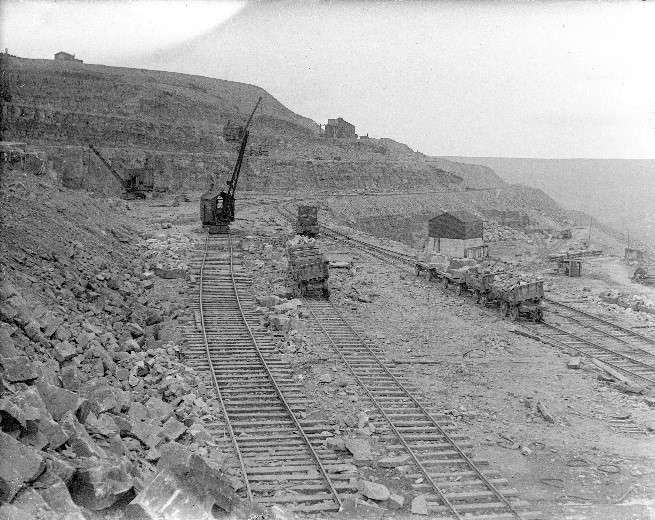
Close to the Scar House dam site, “a network of sidings were constructed, zig-zagging down to the Nidd, and back up the other side of the valley. A double track self-acting incline provided access to the Carle Fell Quarry, to the north of the reservoir, and as the quarry was worked, two further inclines were constructed. One was single track, with a winding engine at the top, and around 1930, an incline worked by locomotives was added. Above the later quarry face, a Simplex petrol locomotive worked on a 2 ft (610 mm) track, removing overburden.” [4][5: p118]
Power for the works “was generated using water from Angram reservoir, which was discharged into Haden Carr reservoir. A 4,775-foot (1,455 m) pipeline supplied the turbines. This was later supplemented by a steam generating station. [5: p123-124] Two locomotive sheds were built, one near the village and another on the north side of the River Nidd, with a further two at Carle Fell Quarry. All had two tracks. Twelve four-wheeled carriages were bought from the Maryport and Carlisle Railway, to provide transport for the workers and their families from Scar House to Lofthouse, and a two-track carriage shed was built to the east of the main complex.” [4][5: p125]
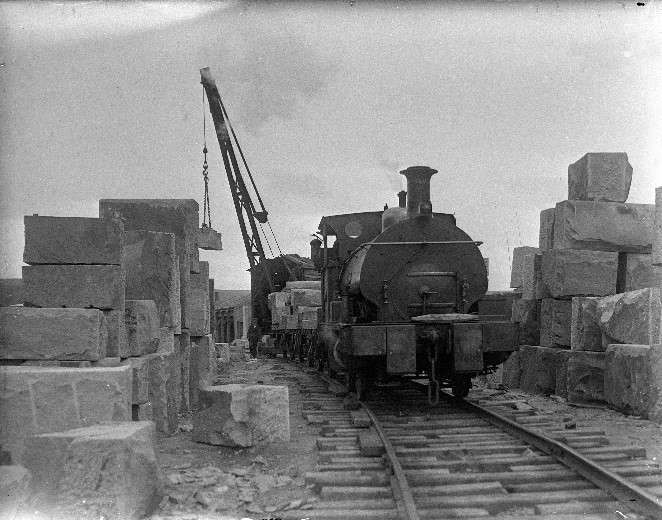
“Six locomotives worked in the quarry. Allenby, Beatty, Haig and Trotter were based at the shed at the top of the main self-acting incline, while Ian Hamilton and Stringer were based in a shed at a higher level. Three steam navvies were used to load stone into the railway wagons, and there were nineteen or twenty steam cranes, all of which were self-propelled and ran on the tracks either in the quarry or on top of the dam.” [4][5: p129]
The main engineering work at Scar House reservoir closed to completion in September 1931 but it was not until July 1935 that filling of the reservoir commenced. “The official opening was on 7th September 1936. Scar House, which gave its name to the reservoir, was demolished. A new Scar House was built, at the foot of the incline from Carle Fell Quarry, which provided a home for the reservoir keeper, and a boardroom for official visits. [5: p130-131] A project to re-route the waters from Armathwaite Gill and Howstean Beck through a tunnel and into the reservoir began in May 1929. A 2 ft (610 mm) gauge line was laid, on which two battery-electric locomotives and twelve wagons ran.” [4][5: p131]
Decline
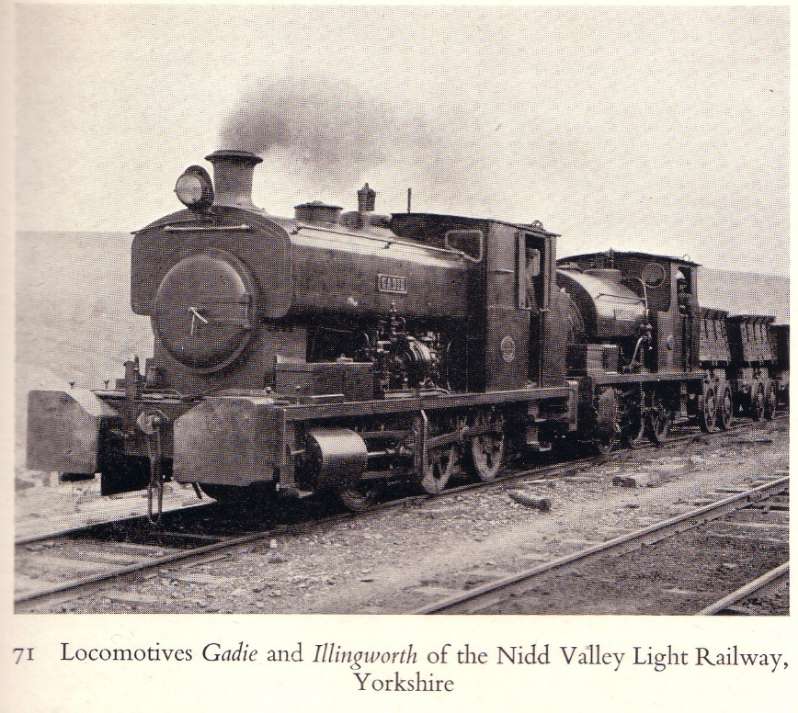
“The start of work on Scar House Reservoir led to an overhaul of existing stock. Seven of the original Metropolitan Railway coaches were upholstered and repainted, while the remaining five were used for the workmen. [The] steam railmotor [Hill] … obtained in 1921, … had previously been owned by the Great Western Railway. It … was fitted with electric lights in 1923. It worked on the public section of the railway, and never travelled beyond Lofthouse. Numerous new and secondhand locomotives were purchased, most for use on construction work, but two, Blythe and Gadie, were fitted with vacuum brakes, and so worked goods trains from Pateley Bridge to Scar House, as well as passenger trains between Scar House and Lofthouse and sometimes Pateley Bridge.” [4][5: p133]
“Passenger trains for the residents of Scar village ran on Tuesdays, Thursdays and Saturdays, the mid-week ones connecting with ‘Hill’ at Lofthouse, and the Saturday ones running through to Pateley Bridge. The 1927 printed timetable showed five trains a day between Pateley Bridge and Lofthouse, but also showed the trains onwards to Scar Village, with a note that these were for exclusive use of residents. Saturday trains were hauled by Blythe or Gadie, but were banked at the rear by another engine above Lofthouse because of the steep gradients.” [4][5: p134]

“Traffic returns showed 106,216 journeys by workmen in 1921, and 41,051 by ordinary passengers. The figure for workmen was not declared after 1922, as the accommodation at Scar Village was available. The peak year for journeys was 1923, with 63,020, after which there was a gradual decline, with 24,906 journeys for the final nine months before closure. The line made a total operating loss of £36,435 between 1908 and 1924, and then made a modest profit until 1929. Fares were cut by one third in early 1929, in the face of competition from motor buses, and a decision was taken to close the line in April 1929.” [4][5: p
“An approach to the London and North Eastern Railway to take over the railway was unsuccessful, and on 31st December 1929, the railway closed to public passenger and goods services. The sections below and above Lofthouse continued to be run as a private railway. [5: p135] The Saturday train to Pateley Bridge for the residents of Scar Village continued until 1932.” [4][5: p133]
The line to Angram was severed by the works at Scar House in 1933. “By 1936, with construction completed, the railway was lifted, and a sale was held at Pateley Bridge on 1st March 1937, where everything was sold as a single lot. … At its peak, the Scar House reservoir project had employed about 780 men, and the population of Scar Village had been 1,135. By 1936, there were just eight houses occupied, and seven pupils at the school, which closed on 31st January 1938.” [4][5: p130 & 138]
A Journey along the Line
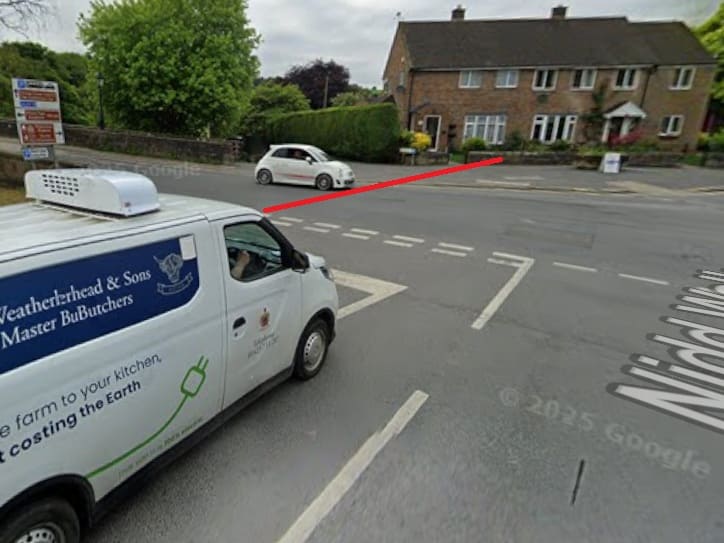
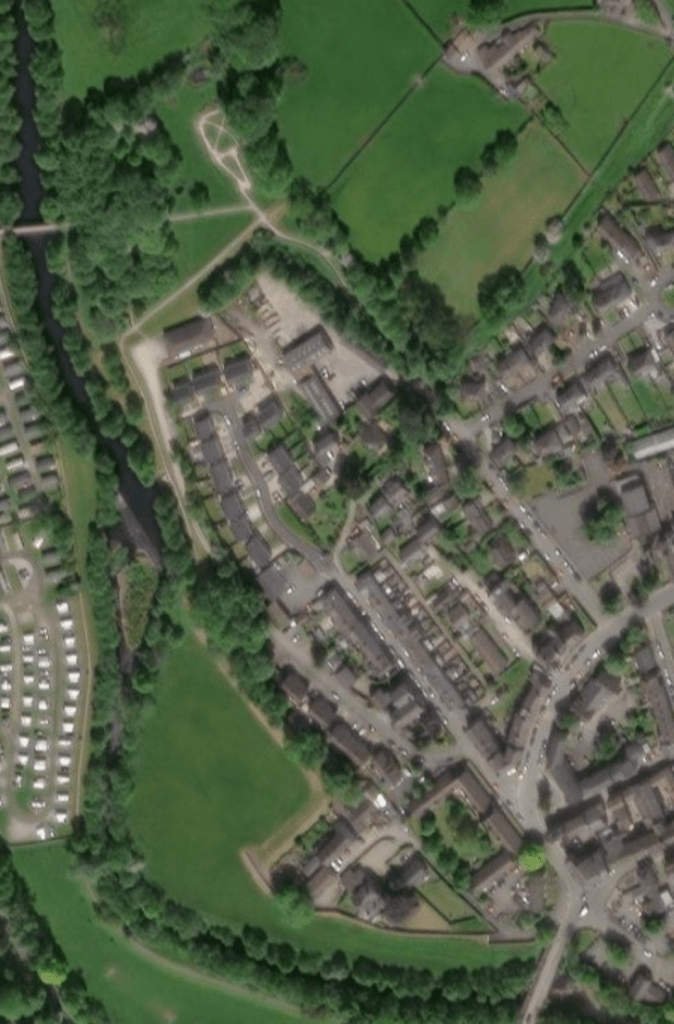
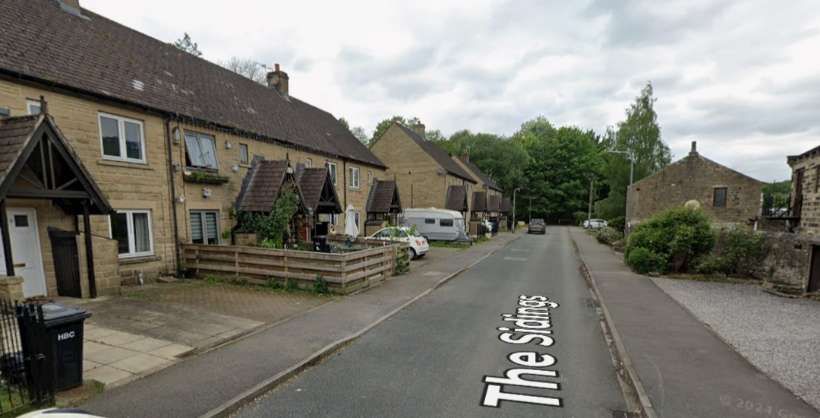
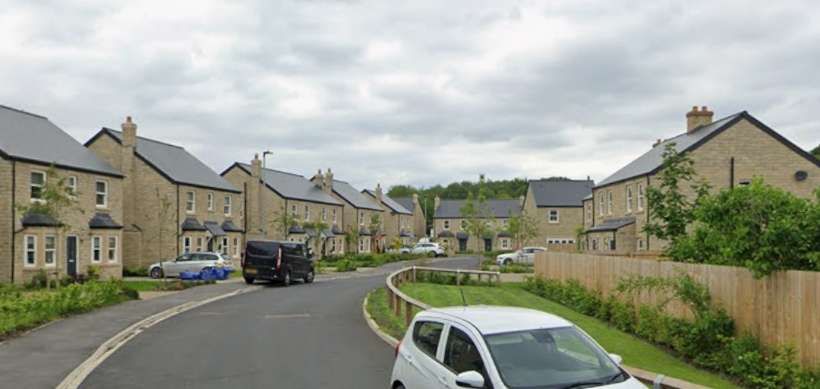
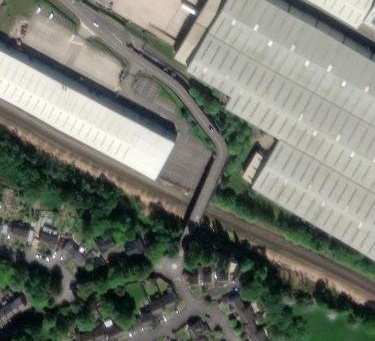
“The railway began in Pateley Bridge, close to the River Nidd, with the goods yard just to the north of the B6265 road. The passenger station was a little further north, and is now occupied by a road called ‘The Sidings’.” [4]
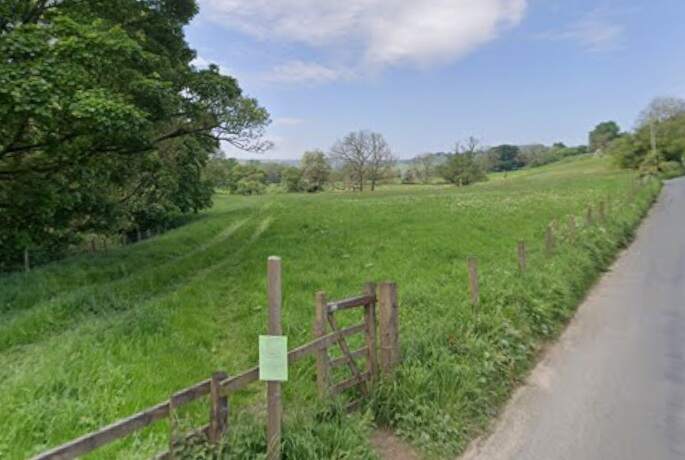
The line headed North “along the east bank of the river, and this section of it now forms part of the Nidderdale Way, a long-distance footpath. Wath station was just to the south of the minor road that crosses Wath Bridge, and had two sidings.” [4]

“The footpath leaves the course of the railway before the station, and follows the bank of the river, crossing over the railway trackbed by Gouthwaite Dam.” [4]
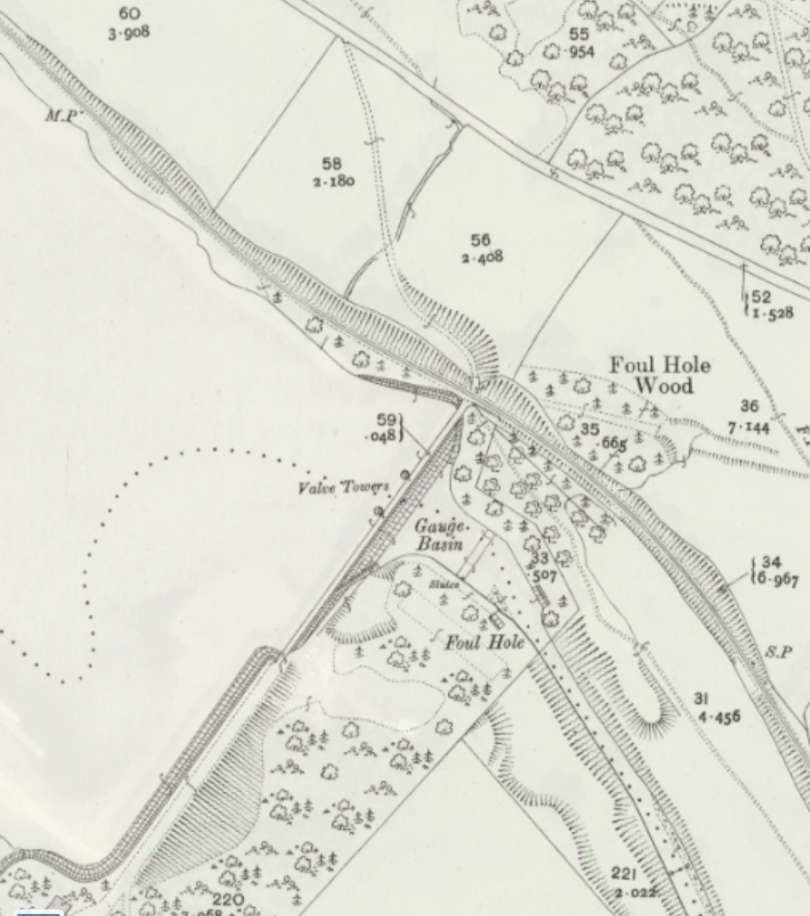
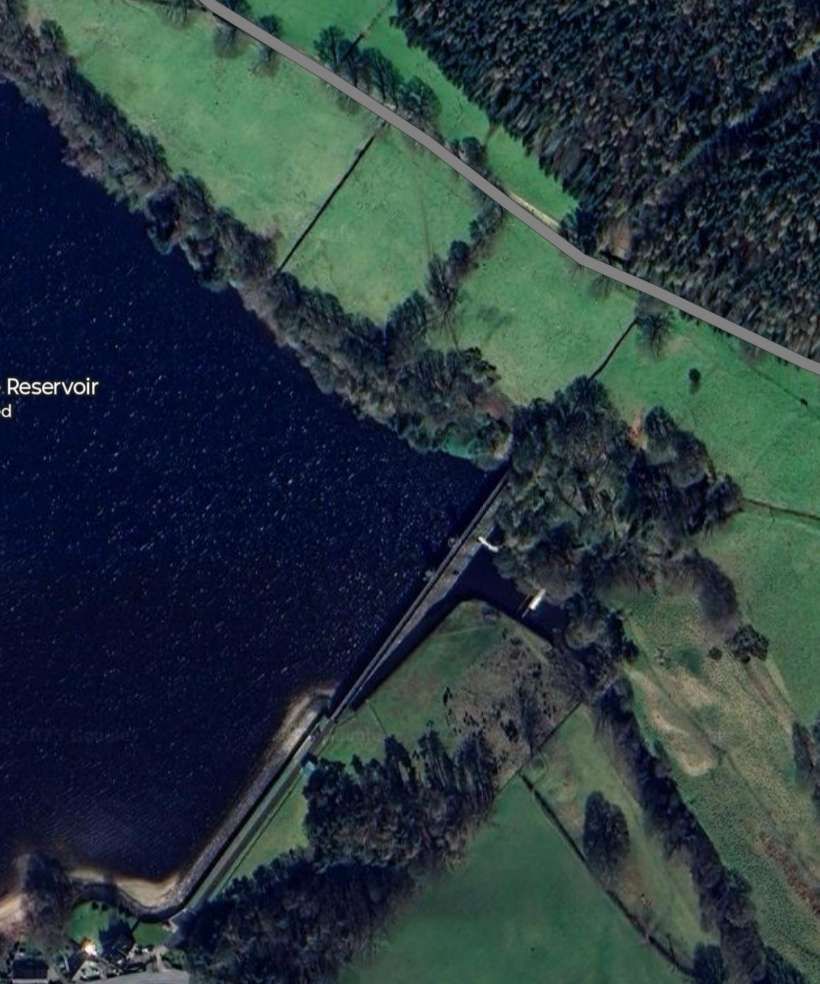
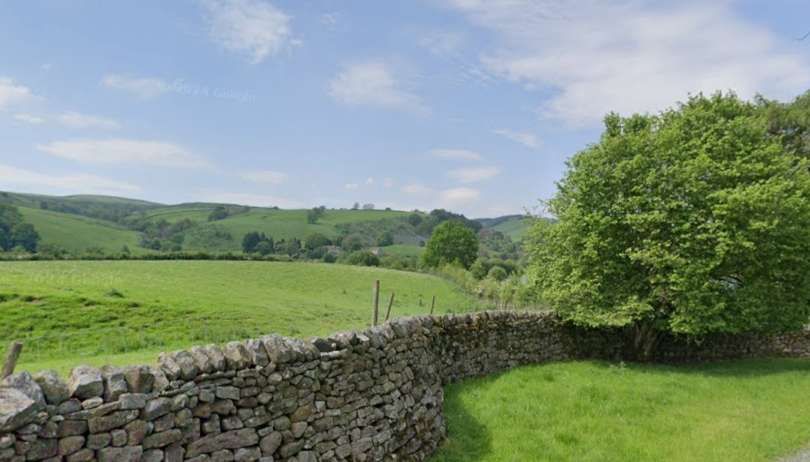
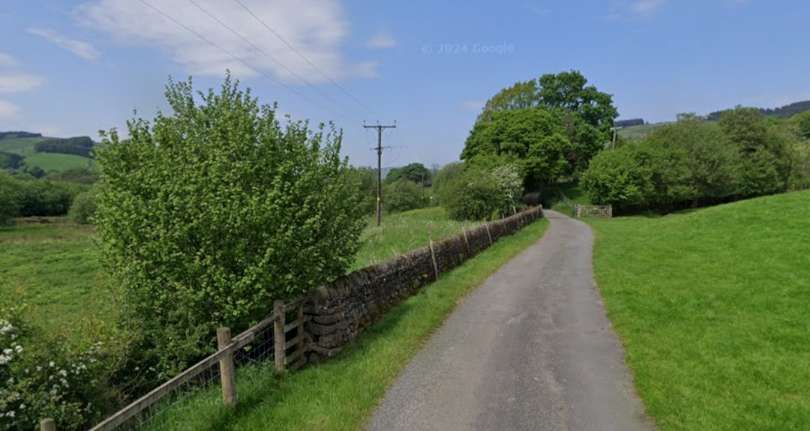
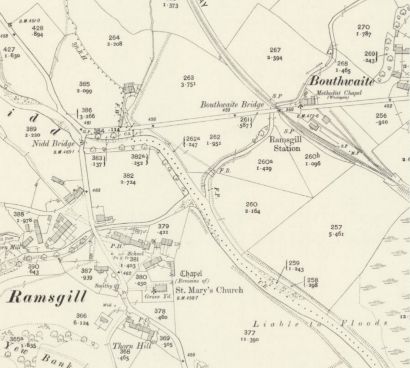
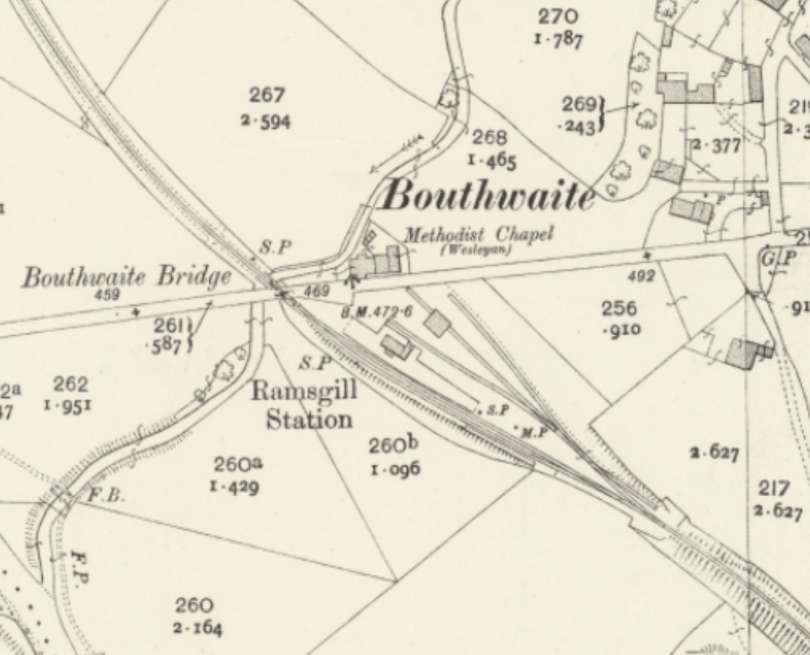
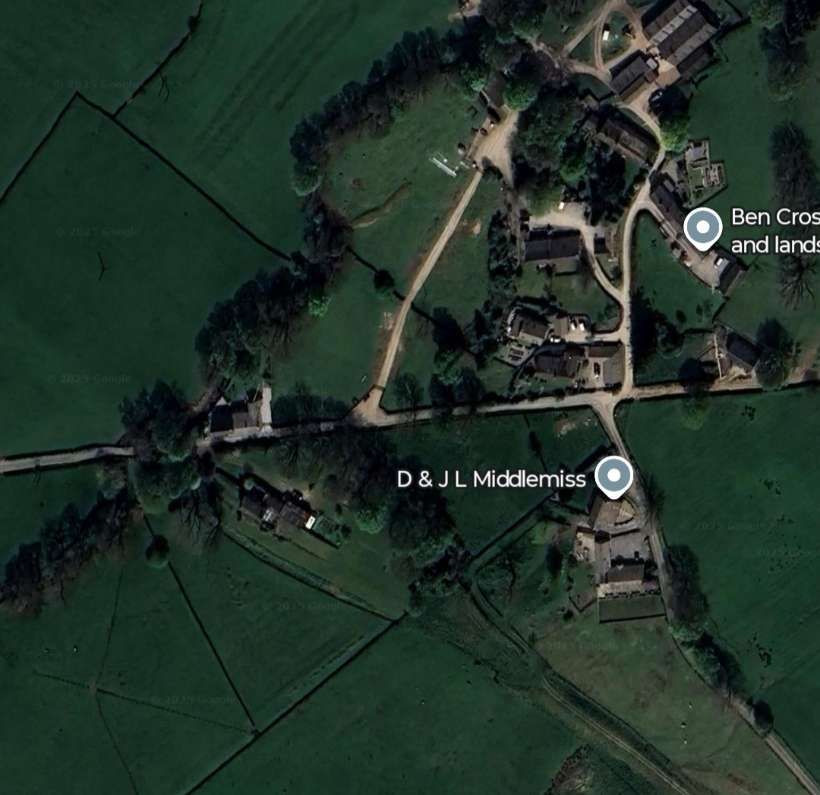
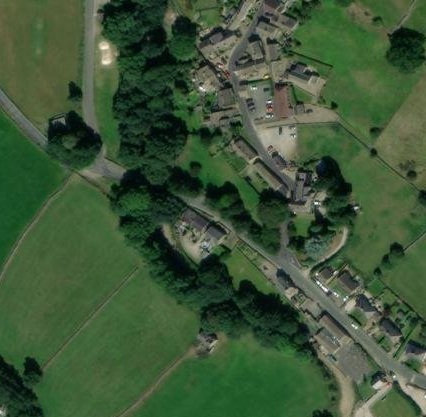
“The trackbed was close to the shore of the reservoir, and the footpath rejoins it after a deviation to the north west. Ramsgill Station was at Bouthwaite, rather than Ramsgill, just to the south of Bouthwaite Bridge, where the Ramsgill to Bouthwaite road crosses Lul Beck.” [4]
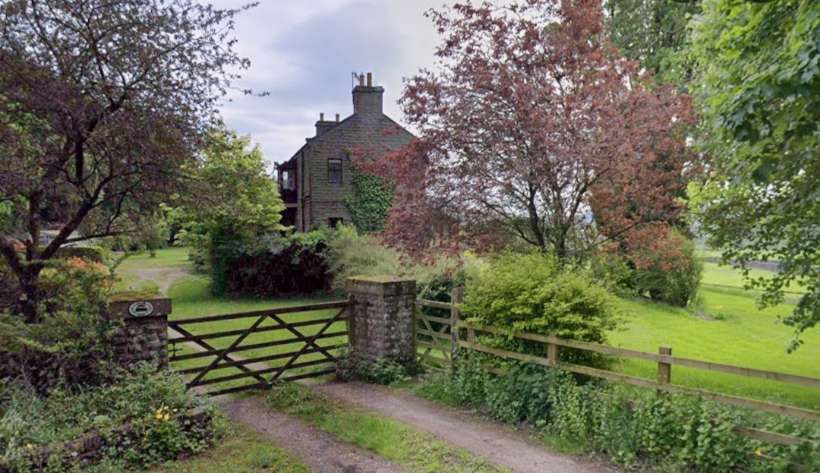
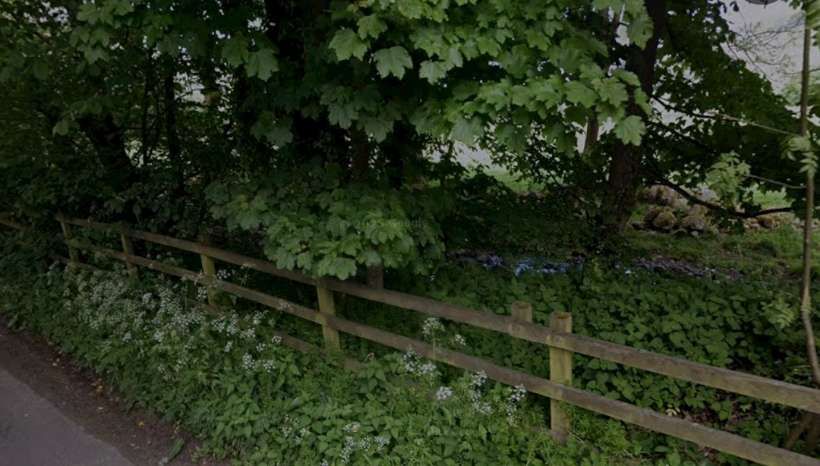
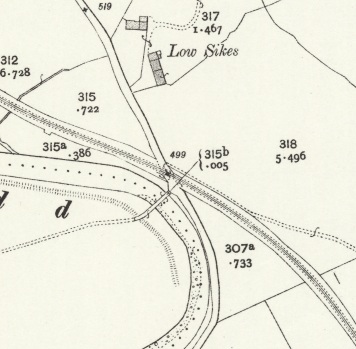
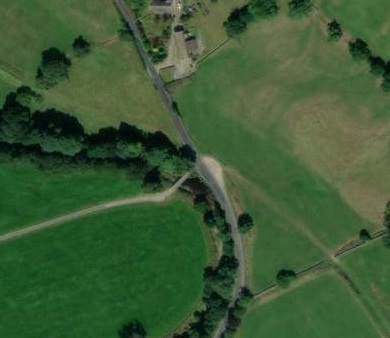
“The footpath rejoins the trackbed briefly at Low Sikes, where there was a level crossing over the Ramsgill to Lofthouse road.” [4]

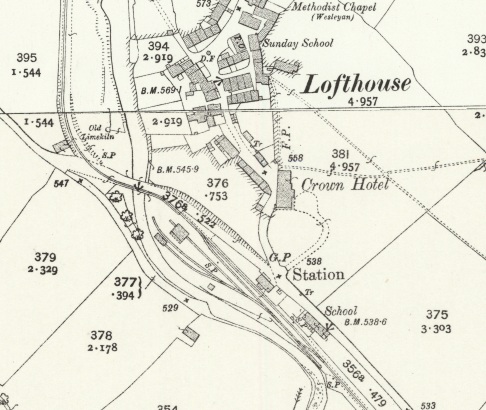
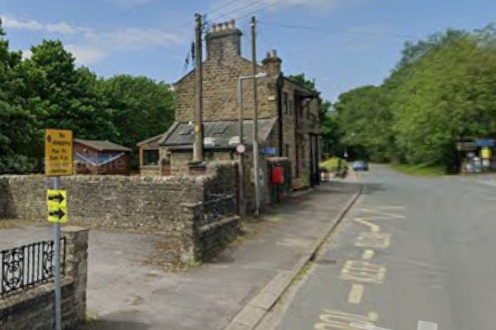
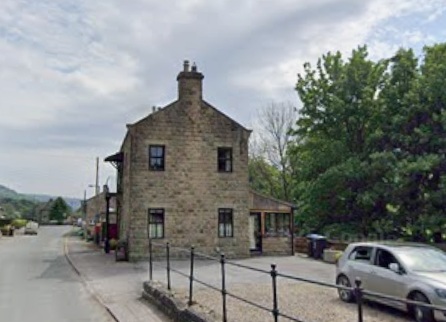
The next significant location along the line was Lofthouse Station which sat on the South side of the village of Lofthouse, between the road and the river.

The metalled road is owned by Yorkshire Water but open to the public. The line continued North remaining on the West shoulder of the road.

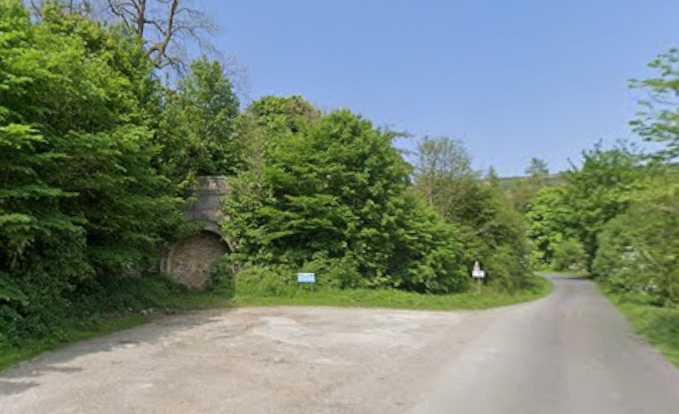
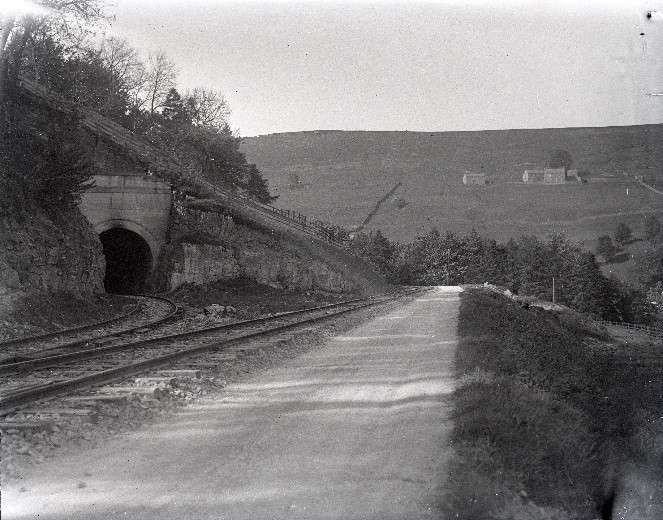
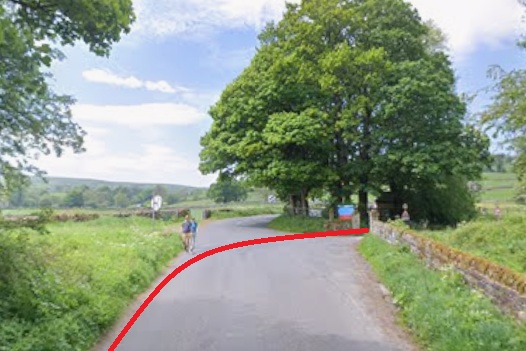
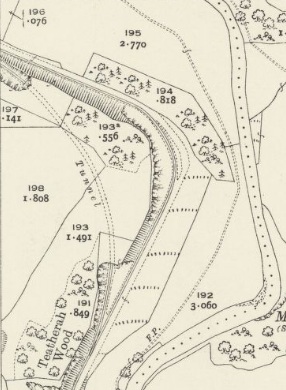
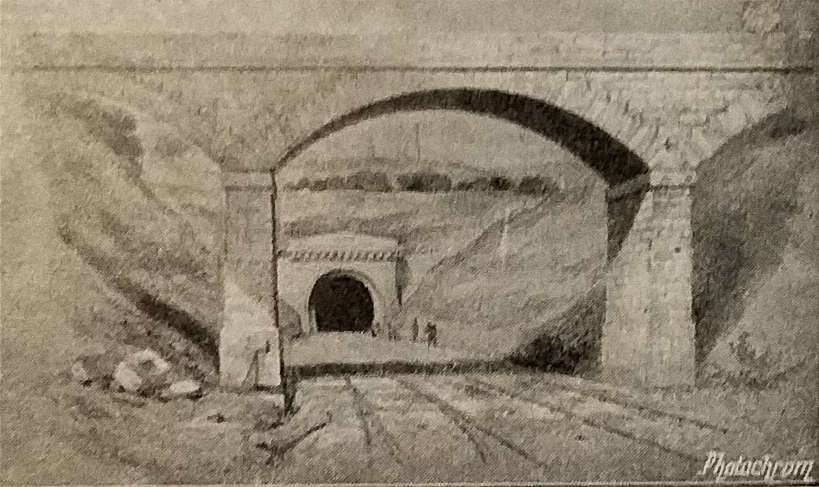
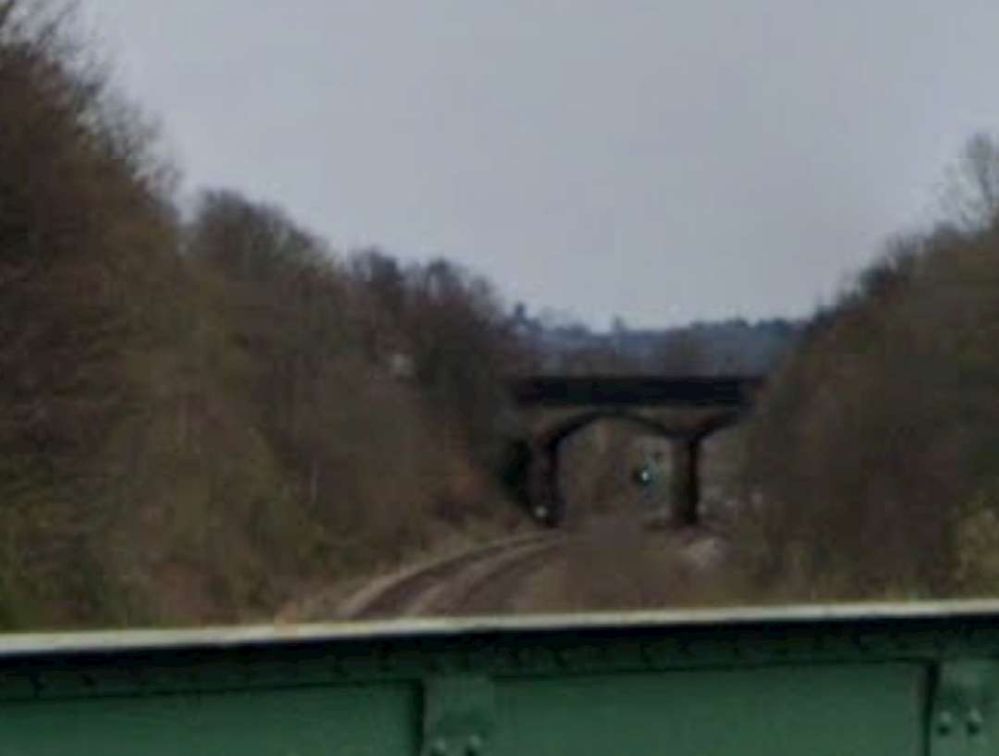
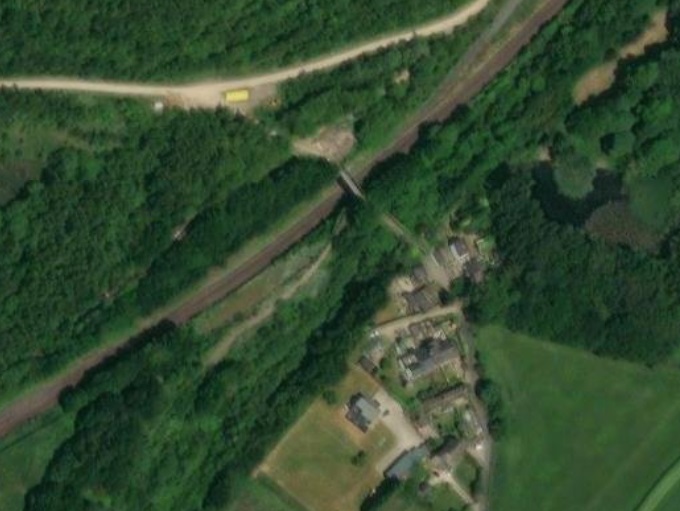
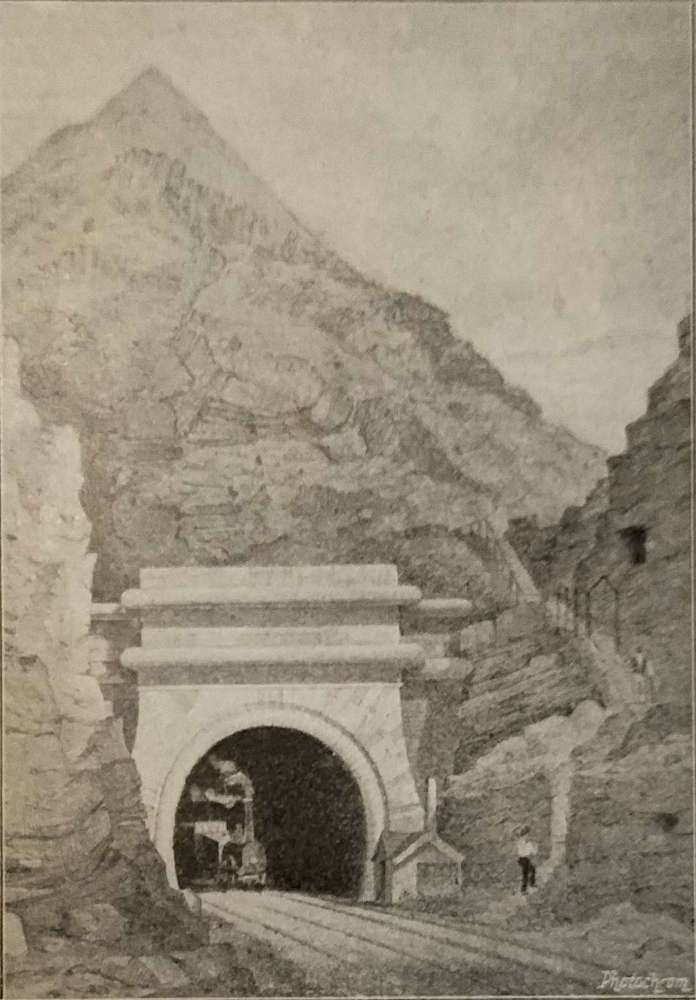
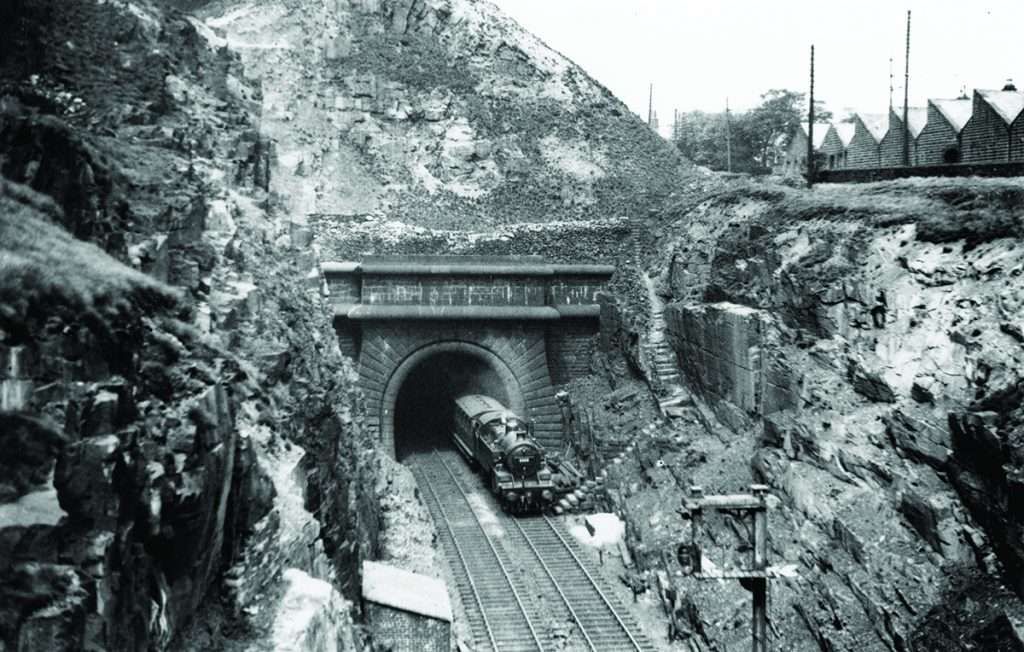
“The bricked up tunnel can be seen about 2 miles (3.2 km) from Lofthouse, where the road and river turn sharply west. There is a picnic spot near the southern portal of the tunnel.” [4]

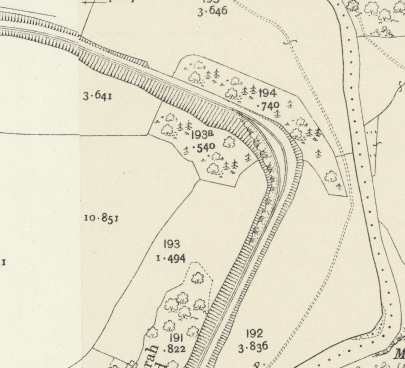
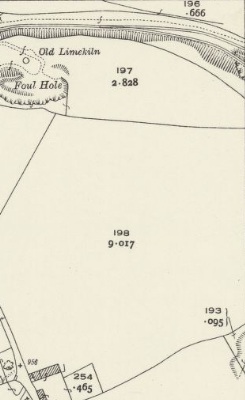
Images from two different OS sheets surveyed in the late 1920s show the tunnel noted above. [20]
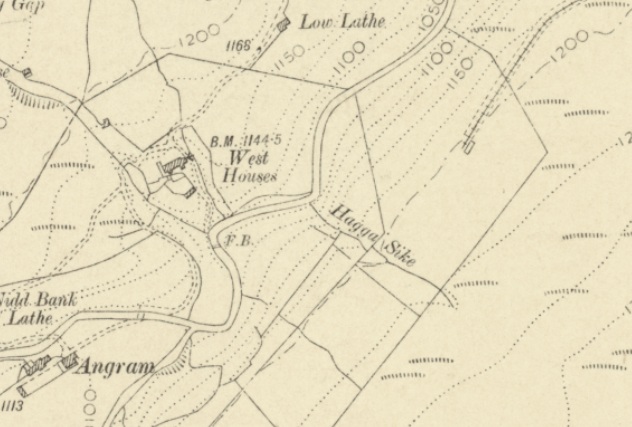
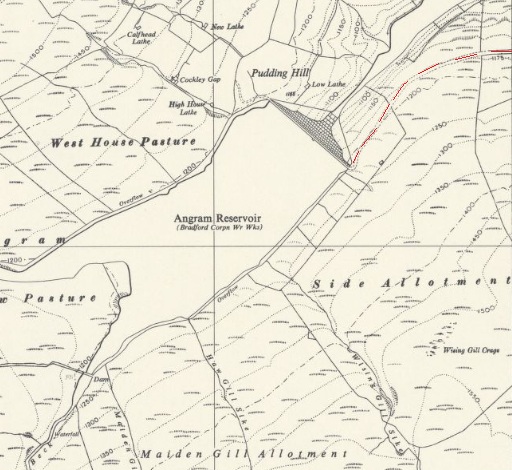
The line from this point on travelled in a westerly direction. Originally the railway ran through the site of Scar House Reservoir as far as Angram Reservoir. Travellers on the railway would have been able to look down and see a small reservoir formed to secure the intake of the pipeline which served Bradford. Its Dam was called the Nidd Intake Dam.

At Scar Village there is another picnic spot and a car park. The railway followed the most northerly of the two tracks at this point.
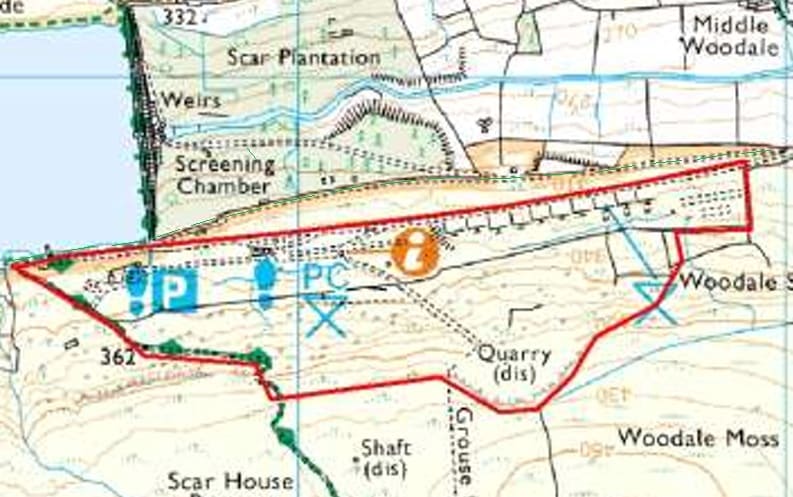
“At Scar Village there is [a] picnic spot and a car park. The railway followed the most northerly of the two tracks at this point. Another track down to the weirs follows the course of one of the zig-zag tracks across the valley. A footpath crosses the dam to the north side of the lake, where the incline to the quarry is still clearly visible. Another road, open to the public on foot, follows the trackbed along the southern edge of Scar House Reservoir, to reach Angram dam. The course of the railway is clearly visible on the modern 1:25,000 Ordnance Survey map for almost the entire length of the railway.”[4]
References
- The Why and the Wherefore; in The Railway Magazine, February 1952; Tothill Press, Westminster, London, p142-144.
- https://www.walkingintheyorkshiredales.co.uk/Nidd%20Valley%20Light%20Railway.htm, accessed on 8th October 2025.
- D. J. Croft; The Nidd Valley Railway, Locomotion Papers No. 55 (Revised); Oakwood Press, 1987.
- https://en.wikipedia.org/wiki/Nidd_Valley_Light_Railway, accessed on 8th October 2025.
- Harold Bowtell; Lesser Railways of the Yorkshire Dales; Plateway Press, Gainsborough, 1991.
- https://maps.nls.uk/geo/explore/#zoom=17.0&lat=54.15660&lon=-1.84733&layers=168&b=ESRIWorld&o=100, accessed on 9th October 2025.
- https://maps.nls.uk/view/125631997, accessed on 10th October 2025.
- https://maps.nls.uk/view/125632021, accessed on 10th October 2025.
- https://maps.nls.uk/geo/explore/#zoom=16.0&lat=54.09027&lon=-1.76397&layers=168&b=ESRIWorld&o=100, accessed on 10th October 2025.
- https://blog.railwaymuseum.org.uk/in-pictures-constructing-the-scar-house-dam, accessed on 11th October 2025.
- https://www.realyorkshireblog.com/post/the-story-of-scar-house-reservoir-the-pop-up-village-of-scar-and-the-lost-village-of-lodge, accessed on 11th October 2025.
- https://chasewaterstuff.wordpress.com/tag/pateley-bridge, accessed on 11th October 2025.
- https://transportsofdelight.smugmug.com/RAILWAYS/RALWAYS-EXCLUDED-FROM-THE-1923-GROUPING/NIDD-VALLEY-RAILWAY, accessed on 11th October 2025.
- https://maps.nls.uk/geo/explore/#zoom=16.8&lat=54.10586&lon=-1.77865&layers=168&b=ESRIWorld&o=0, accessed on 12th October 2025.
- https://maps.nls.uk/geo/explore/#zoom=16.5&lat=54.11162&lon=-1.78536&layers=168&b=ESRIWorld&o=92, accessed on 12th October 2025.
- https://maps.nls.uk/geo/explore/#zoom=17.1&lat=54.13617&lon=-1.81524&layers=168&b=ESRIWorld&o=100, accessed on 12th October 2025.
- https://www.facebook.com/photo/?fbid=7478382078862607&set=gm.1030871587986998&idorvanity=371639250576905, accessed on 13th October 2025.
- https://maps.nls.uk/geo/explore/#zoom=17.0&lat=54.14957&lon=-1.83232&layers=168&b=ESRIWorld&o=100, accessed on 13th October 2025.
- https://maps.nls.uk/geo/explore/#zoom=17.0&lat=54.18475&lon=-1.85057&layers=168&b=ESRIWorld&o=100, accessed on 13th October 2025.
- https://maps.nls.uk/view/125630530 & https://maps.nls.uk/view/125630539, accessed on 13th October 2025.
- https://youtu.be/8K0yOBaESSo, accessed on 13th October 2025.
- https://maps.nls.uk/geo/explore/#zoom=16.0&lat=54.18780&lon=-1.90902&layers=168&b=ESRIWorld&o=100, accessed on 13th October 2025.
- https://maps.nls.uk/geo/explore/#zoom=16.2&lat=54.18299&lon=-1.93299&layers=6&b=ESRIWorld&o=100, accessed on 13th October 2025.
- https://maps.nls.uk/view/189181725, accessed on 13th October 2025.
- http://uppernidderdale.org.uk/wp-content/uploads/2015/10/Scar-Village-Historic-Environment-Survey-Report.pdf, accessed on 13th October 2025.


