Between Aberporth and Tresaith the Ceredigion Coastal Path has, for the majority of its length, been upgraded as a path accessible to all. Fantastic views across Cardigan Bay are now available to us all.
Amid the great scenery there are a series of Edwardian railway carriages which have been converted to holiday homes.
Two railway carriage cottages close to Aberporth. The beach is off to the left of the image by a few hundred yards. [Google Earth]Two more of the carriages are highlighted on this Google Earth satellite image. The two highlighted in the image immediately above are identified by the circle furthest to the left of the image. The centre of Aberporth is further off to the left. Tresaith is some distance to the right of the image beyond a couple more railway carriage cottages. [Google Earth]Eryl-y-Don was once one of three railway carriage holiday homes on what was Helyg Fach Farm. [Google Earth]Another converted railway carriage which is in use as a holiday home. Tresaith is just off this picture to the right. [Google Earth]The six converted railway carriages alongside the clifftop walk between Aberporth and Tresaith. Four of these photographs are my own, taken on 16th September 2022. The first of the six is taken from the website advertising that cottage (Clifftop Carriage) for holiday rent. [2] The last of the six is Ar-Lan-y-Mor, next door to Clifftop Carriage. [9]
Early in 2022, another of the carriages which had for many years graced the clifftop near Aberporth was removed and sent to a new home. [3]
One of the longtime railway carriage holiday homes is removed from the clifftop near Aberporth in April 2022. It was moved to Llanfyrnach, near Crymych where it will be used as a holiday let. [3]
It seems that a number of railway carriages, which had reached the end of their useful life on the railways, were brought to Aberporth in the 1920s and 1930s.
The website demery.org [1] lists some as:
Eryl-y-Don – a 58-foot, seven-compartment, tri-composite brake coach (one of thirty coaches of this type) which was built on 3rd May 1902. The original number of the railway coach was 1115. (When the Great Western Railway reorganised its passenger coaching stock into a single unified numbering series in 1907, it was renumbered 7115.) … When built the carriage had: 2 no. 1st-class compartments, 2 no. 2nd-class and 2 no. 3rd-class compartments; 4 no. lavatories; and a Guard/Luggage compartment. [1]
At one time Eryl-y-Don was flanked by two other carriages. “Eryl-y-Don was in the centre of three coaches. The one on the Tresaith side was built in Swindon for Queen Victoria’s Diamond Jubilee celebrations in 1897. It was moved from Helyg Fach in 1982 for display at a Madame Tussaud’s exhibition entitled ‘Royalty and Railways’ at the Windsor and Eton Railway Station. Extensively renovated, it is now on display at the Steam Museum in Swindon. The carriage on the Aberporth side of Eryl-y-Don was destroyed by fire.” [1]
Min-y-Mor – on the clifftop side of the coastal path, was an eight-wheel family saloon built in 1892. It was used in a Royal train on at least one occasion: at Welshpool, carrying the Prince and Princess of Wales on a three-day tour of Wales in 1896. According to the Railway Heritage Register [4], it was put ‘out of service in May 1936’. [1]
Wendy – was built in 1905 as a London & South Western Railway sleeping car for the Plymouth-Waterloo boat train. When constructed, it had seven single and two double compartments, a lavatory and an attendant compartment. Taken over by the GWR in 1911, it was converted in 1919 to eight singles and only one double and was condemned in 1931. Wendy is the only known surviving example of its type [4]. According to the website[5] advertising Wendy, ‘in 1936 she was purchased from GWR Swindon and delivered by rail to the (then) Newcastle Emlyn railway station. She was then delivered by lorry and bogey to Aberporth where she has rested ever since.’[1]
A holiday-home railway carriage belonging to Alan and Joyce Bailey of Sutton Coldfield which they sold in 1983 ” to the Great Western Society at Didcot for restoration. [7]. The Tivyside Advertiser (18th March 1983) reported that the coach had been in Aberporth since the early 1920s, ‘having been brought there with others for use as offices by a Captain L. Davies who used to ship slate into Aberporth’. The article continued: ‘It has more of a history than that however having been built as only one of two such sleeping cars for the Great Western Railway in 1874.’” [1]
There are others – specifically Clifftop Carriage and Ar-Lan-y-Mor.
It seems that all the remaining coaches have had significant modifications made to them both internally and externally.
Clifftop Carriage – is internally significantly modified as a temporary home for two people. [8]
Wendy – sits alongside the coastal path on the landward side. It has featured in a number of national publications. The pictures below come from the cottage’s website. [6]
Ar-Lan-y-Mor – is placed next to Clifftop Carriage. The pictures below come from the cottage’s Facebook page. [9]
Min-y-Mor – has been delightfully restored and expanded. The pictures below are mine, taken on 16th September 2022.
Eryl -y-Don – the owners have put some effort into establishing the provenance of the railway carriage which makes up the significant part of this cottage. [1] The pictures below are mine, taken from the coastal path on 16th September 2022.
Much closer to Tresaith is one more property, right on the clifftop and placed in a significant amount of its own land. access to it is through the adjacent caravan site, Llety Caravan Park. I have not been able to find out any more about this property. My pictures below (taken in 16th September 2022) are complemented by a satellite image from Google Earth. The cottage clearly has an old railway carriage at its heart
This article gives a flavour of all these carriages and some idea of what they look like today. It would be good to learn more about their history.
It is known that a number, at least, were brought along the Carmarthen and Cardigan Railway to Newcastle Emlyn and then we’re manoeuvred down the narrow lanes of the 1920s and 1930s from Newcastle Emlyn to Aberporth by steam tractors/lorries. It is hard to imagine the effort needed to get them to Aberporth and then into position across the fields to the cliffs.
7. Apparently the coach was beyond restoration and was given to the West Somerset Railway (WSR) who had a similar sleeping car ‘which also came from Aberporth’. They broke up the Bailey’s coach for parts. [1]
A holiday in West Wales in the early Autumn of 2022 led to a little research on the railways in the area. This is the second article about Pembrokeshire’s Railways. The first focussed on the pre-railway age.
The featured image (above) is an image from “Britain From Above” of Fishguard Harbour, Goodwick and Fishguard.
The Railways
Mainline Railways of Broad Gauge
The South Wales Railway – “The main line from Swansea to Neyland, a port on Milford Haven Waterway, was opened as a broad-gauge line by the South Wales Railway from 1852, and that company merged with the Great Western Railway in 1862. The main line was converted to “narrow gauge” (later known as “standard gauge”) in 1872, and most of the original main line is in use today.” [31]
“Several independent lines were opened in West Wales, and at the “grouping” of the railways in 1923 most of them were absorbed by the Great Western Railway. Some of them were chiefly mineral railways, and many have closed as the industries they served declined. Some rural routes too have closed, but branch lines to Pembroke and Milford Haven, and a main line extension to Fishguard are still in operation.” [31] Other local lines became part of the GWR almost as soon as they were built.
Carmarthen and Cardigan Railway (C&CR) – On 7th August 1854 “the Carmarthen and Cardigan Railway obtained Parliamentary authorisation to build a line to Cardigan from a junction with the South Wales Railway at Carmarthen. It was to be a broad gauge line, and a new Carmarthen station closer to the town than the SWR station, was to be constructed. The company found it difficult to raise money for construction, and at first was only able to open from the SWR as far as its own Carmarthen station: this section was opened on 1 March 1860; the SWR Carmarthen station was renamed Carmarthen Junction.” [31]
The C&CR extended a further 6 miles to Conwil on 3rd September 1860. It was worked by GWR engines, and unprofitable, and it closed on 31st December 1860. It reopened on 12th August 1861 and opened an extension to Pencader on 28th March 1864 and to Llandyssul on 3rd June 1864. It got no further during its independent existence, and its own traffic was never busy. [31]
Please see a separate post on this blog for further details about this line. ……….. TBA ……….
Mainline Railways of Standard Gauge
The Manchester and Milford Railway was originally intended as a trunk route connecting the industrial areas of Lancashire with the developing port facilities in Milford Haven. Funding was not forthcoming for the grand scheme and a lesser option of connecting with the Llanidloes & Newtown Railway was pursued, in the hope that the wider network would give access to Manchester. At the Southern end it would connect to the C&CR at Pencader. [31]
As an afterthought, a branch to Aberystwyth was included. Eventually, during construction it became obvious that the link to Llanidloes was beyond the railway company’s resources and the branch to Aberystwyth became the mainline. [31]
Still desperately short of money, the M&MR opened its first section from Pencader to Lampeter on 1 January 1866. The C&CR had not laid the necessary third rail for through running, and for several months the break of gauge was an obstacle. The M&MR instructed its own contractor to lay the rail, and M&MR goods trains ran through to Carmarthen over the C&CR from 1 November 1866; passenger train operation commenced on 1 November 1867. [31]
Meanwhile, the M&MR had been building northwards, and opened its own line as far as Strata Florida (the railway location was known locally as Ystrad Meurig at first) for goods trains by the end of August 1866. The entire route of 41 miles to Aberystwyth was opened throughout on 12 August 1867. At first the service was operated by the contractors, using three Sharp, Stewart locomotives.[31][32][33]
The Pembroke and Tenby Railway was a locally promoted railway in Pembrokeshire, Wales. It was built by local supporters and opened in 1863. The line, now known as the Pembroke Dock branch line, remains in use at the present day. In 1866, the Pembroke and Tenby Railway was extended to Whitland on the South Wales Railway broad gauge main line but being of the narrow gauge – later known as standard gauge – it was not possible to run Pembroke and Tenby trains on the South Wales Railway lines to Carmarthen. [30]
The Narberth Road and Maenclochog Railway – In 1871 Edward Cropper and Joseph Babington Macaulay obtained a Board of Trade certificate to build a standard gauge line from a slate quarry at Rosebush, about 8 miles north of Narberth Road station on the South Wales Railway main line. The line was named the Narberth Road and Maenclochog Railway, and it opened in January 1876, and from September 1876 passengers were carried. The business was not profitable, and the railway closed at the end of 1882, but it was reopened in December 1884, closing once again in 1888. [31]
The Whitland and Taf Vale Railway is shown on the map above. On 12th July 1869 the Whitland and Taf Vale Railway obtained its authorising Act of Parliament, with capital of £37,000. The line was opened as far as Glogue to goods and minerals trains on 24th March 1873. By this time the former South Wales Railway main line had been converted to standard gauge. Early in July 1874 a short extension to Crymmych was opened to goods and then to passengers on 12th July 1875. There was a connecting road service to Cardigan and to Newport.[31][32][34]
A fuller account of this line as part of the line through to Cardigan which was completed in …… can be found elsewhere on my blog. ……..TBA…………….
The Milford Junction Railway – 1854 saw the South Wales Railway reach Haverfordwest, at which point a decision had to be made as to the terminus. New Milford at Neyland was selected, in spite of local opposition and the line was completed in April 1856. [35][36]
Robert Fulke Greville, a local landowner determined to finance a project himself which would see the railway come to Milford Haven under the Milford Junction Railway, a four-mile spur from Johnston. Construction was completed in 1863, [37] when the line was connected to the South Wales Railway at Johnston, and a station at Milford was opened. [36] The line was, and remains, single track, but sufficient room was allowed in cuttings and under bridges for doubling the track if required. [35]
The North Pembrokeshire and Fishguard Railway – was promoted in 1884 with the intention of extending the Maenclochog Railway to Goodwick on Fishguard Bay. [38]
The Fishguard Bay Railway and Pier Company – An Act of Parliament permitted Joseph Rowlands and James Cartland to incorporate this company on 29th June 1893. The Act permitted a line to be built from Fishguard Bay (at Goodwick) towards Narberth Road via Rosebush. Necessary running powers were granted. In parallel, “the Waterford and Wexford Railway was engaged in improving the harbour facilities at Rosslare … and negotiations took place to combine the activities on both sides of the ferry crossing. This culminated in the incorporation of the Fishguard and Rosslare Railways and Harbours Company by Act of 31 July 1894.” [31]
In 1894, Rowlands and Cartland purchased the derelict Maenclochog Railway for £50,000. “The line was in a very poor state of repair, and much had to be done in the way of improvements, but goods traffic started on 13 March 1895 followed by passenger trains on 11 April 1895.” [31]
The GWR turned down an opportunity to purchase the railway as the original Maenclochog line was inadequately engineered. In doing so the GWR left themselves open to Rowlands approaching the LNWR and promoting an alternative link from the Maenclochog line to Carmarthen. His Bill was passed in Parliament in 1895. “Rowlands prepared plans for further schemes including a line to Swansea, and in 1896 to Aberdare and make junctions with the LNWR, the Midland Railway and the GWR en route; sale to any of those railways was now a theoretical possibility.” [31]
I am aware of one locomotive from this line which reached preservation as a static display at Scolton Manor Museum, Bethlehem, Haverfordwest. [44][45]
The Great Western Railway had long considered revival of the original South Wales Railway’s scheme to reach Fishguard Bay securing a share of the transatlantic shipping trade. The possibility of the LNWR acquiring access to the West Wales network motivated the GWR to step in; it acquired control of the railway from Narberth Road to Fishguard Bay in February 1898. [31]
In May 1898 an agreement was concluded between the GWR, the Great Southern and Western Railway in Ireland, and the Fishguard and Rosslare Company which secured the completion of the two harbours, rail link from Rosslare to Waterford, the GS&WR’s commitment to work the necessary connecting railways on the Irish side; and the GWR’s commitment to making a new line from Clarbeston Road to Fishguard Harbour, and work the Welsh railways. [39] It appears that the GWR was also obliged to provide “an effective steamboat service” between Waterford and Milford or Fishguard, in addition to the Rosslare service. [40]
“The agreement was ratified by Parliament in 1899, and the acquisition by the GWR of the North Pembrokeshire line was included. On 1st July 1899 [41] the GWR opened the extension from Letterston to Goodwick (later named Fishguard and Goodwick) station. [42] The Fishguard and Rosslare Railways and Harbours company became a joint enterprise of the GWR and the GS&WR.” [31][43]
St. David’s Light Railway – on 9th September 1904 the Pembrokeshire Herald and General Advertiser carried an article entitled, ‘Proposed Railway to St. David’s: Details of the Promoter’s Intentions.’ The article advertised a meeting of interested parties on 10th September 1904 to consider the possibility of a light railway between Haverfordwest and St. David’s under the purview of the Light Railways Act 1896. As the express intention was to create a junction with the GWR at Haverfordwest it would have been a standard-gauge line. It would have had a total length of about 16 miles and would also serve the anthracite coalfield in the Newgale district. Two branches were proposed to Porthclais and Solva Harbours and Newgale sands. [46]
A compressed extract from an illustration of the planned route of the St. David’s Light Railway included in the Pembrokeshire Herald and General Advertiser on 9th September 1904. [46]
The project was still under consideration in the 1920s. Pembrokeshire Record Office holds a drawing showing a longitudinal section of the line dated 1924. [47] The National Archive holds a further document relating to the proposed line, dated 1929. [48] Sadly, the St. David’s Light Railway did not get built.
The next article in this series will look at the industrial railways in Pembrokeshire.
32. D S M Barrie, revised Peter Baughan; A Regional History of the Railways of Great Britain: volume 12: South Wales; David St John Thomas, Nairn, 1994.
33. J S Holden, The Manchester and Milford Railway, Oakwood Press, Usk, 1979.
34. M.R. Connop-Price; The Whitland and Cardigan Railway, Oakwood Press, Usk, 1976.
A holiday in West Wales in the early Autumn of 2022 led to a little research on the railways in the area.
Looking furthest West, we start with the industrial railways of Pembrokeshire. …. Before 2022, I was unaware of the coalfield that existed in Pembrokeshire which was served by a series of short railways and tramroads/tramways.
The featured image above shows Porthgain harbour in 2005. The pier was the terminus of the Porthgain to Abereiddi railway.
Before the Railways
Elsewhere in the UK, a usual pattern of development was for river traffic to be supplemented by tramroads and canals which then, often when traffic warranted it, were replaced by railways. It did not exactly work out like that in Pembrokeshire. … We start with a quick look at the history of industrial transport of the County before the railways. …
River and Estuary Traffic in Pembrokeshire.
Natural waterways were often used as main trade routes and various form of vessel were used sometimes with sails but usually (even then) with bow-haulers or horse-power on the river banks.
Historically, the Daugleddau Estuary was important in the early Industrial Revolution, shipping anthracite from Llangwm, Landshipping and Crescelly, and limestone from Lawrenny and West Williamston. [20]
Haverfordwest was at the tidal limit of the Western Cleddau river.It was the first bridging point and had its own port. … There is evidence of a quay in Haverfordwest as early as 1690. “Haverfordwest was the official shipping point for textiles, hides and wool from across this region. Ships departed for ports around the British Isles before the growing railway network replaced coastal shipping. In the early 1830s, Haverfordwest was dispatching £100,000 worth of goods a year – mainly butter and corn – to Liverpool and London.” [2]
It seems that the Eastern Cleddau was also used as an inland waterway. Timber was cut on the Slebech estate and formed into rafts which were then floated on the receding tide down to a point just below the confluence of the Eastern and Western Cleddau rivers. The rising tide was then used to carry these rafts upstream on the Western Cleddau to Hook or one of a number of small quays where the rafts were dismantled and the timber then used for pit props in a number of mines. [1: p121]
Milford Haven Waterway is a drowned valley which was flooded at the end of the last ice age.[3] The Daugleddau estuary winds west to the sea. As one of the deepest natural harbours in the world, it is a busy shipping channel, trafficked by ferries from Pembroke Dock to Ireland, oil tankers and pleasure craft. Admiral Horatio Nelson, visiting the haven with the Hamiltons, described it as the next best natural harbour to Trincomalee in Ceylon (today’s Sri Lanka ) and “the finest port in Christendom”. [4]
Milford Haven was at one time a staging point on sea journeys to Ireland, and was used as a shelter by Vikings. From those days on, it was a port of vital significance which provided safe shelter to many a vessel. It was seen as being if strategic importance from at least the 15th century. [5]
Roads and Tracks
“Late 18th and early 19th century travellers in South Wales … frequently commented on the appalling condition of the roads. This was at a time when the condition of roads across England and Wales was generally improving as a result of turnpike trusts creating new roads and upgrading existing roads. Prior to the creation of the turnpike road system, most roads, lanes and tracks linked villages and small towns; long distance road travel was rare, and virtually impossible for wheeled vehicles. Some improvement was carried out by large landowners, but it was not until the creation of turnpike trusts that a co-ordinated road network came into being. By 1750 about 150 trusts had been established in England and Wales, rising to almost 700 by 1800 and over a 1000 in 1825.” [21]
“Some of the early turnpike routes in south-west Wales were improvements to existing roads, but by the end of the 18th century new routes were being created and the older roads (or sections of them) either became downgraded to a local lane or track, or were abandoned.” [21]
The narrowness of local roads in Pembrokeshire meant that carts had to be long and thin making them difficult to manage. [1: p121] Hiring of horses appears to have been excessively expensive because of their scarcity. [1: p122] As in much of the rural areas of England and Wales, the condition of roads in the County of Pembrokeshire was appalling. “Outside the towns few if any had any kind of prepared surface, and the unfortunate traveller had to contend with potholes and deep mud in winter, and with bone jarring ruts and choking dust in summer.” [1: p123] Very high tolls were extracted by various turnpike trusts. Direct land routes were often not available and as a result some collieries were totally dependent on shipping. [1: p124]
Canals in Pembrokeshire?
Apparently it was as late as 1792 that the first attempt was made to build a canal to move coal in Pembrokeshire.
Canals elsewhere in Wales appeared somewhat earlier. The first, in 1769, was in the Gwendraeth Valley in Carmarthenshire. It was soon followed by others.
M.R. Connop-Price tells us, however, that in 1792, “Lord Milford endeavoured to construct a canal between his pits at Merrixton Bottom(Stepaside) and his shipping place on the beach at Wiseman’s Bridge, a distance of just over a mile.” [1: p120] It appears that the Milford canal was designed only to accommodate tub-boats and was never completed. Industrial archaeologists reached this conclusion in the 1960s as they studied what remnants of the proposed canal remained. By the 1990s most of the evidence of the proposed canal had disappeared. [1: p 121]
It seems that Pembrokeshire had no one willing to invest in a canal after the attempt was made by Lord Mitford! [1: p121]
Tramways/Tramroads (which preceded the use of railways)
It seems that the pioneer of the first canal in Wales (in the Gwendraeth Valley, East of the Pembrokeshire county boundary), Thomas Kymer, owned land to the South side of the village of Nolton. It is thought that he constructed a wooden tramway of about 0.75 mile in length from pits on his estate to Nolton Haven. As he moved from Pembrokeshire to Carmarthenshire before 1770, the tramway would have had to be built before that date. [1: p125][6]. We cannot be sure that the tramway was built. There is greater certainty over a, probably short-lived tramway connecting pits at Folkston and Simpson on the estate of R.P. Laugharne to Nolton Haven. [1: p125][7]
Thomas Kymer, may well have constructed a 0.75 mile wooden tramway from pits on his estate on the South side of Nolton to Nolton Haven. However, there is greater certainty over a, probably short-lived, tramway connecting pits at Folkston and Simpson on the estate of R.P. Laugharne to Nolton Haven. The Haven is on the left of this extract from the 6″Ordnance Survey of 1887, published in 1888. The second tramway referred to here was already lifted prior to the survey being undertaken. It ran from the hamlet of Norton Haven along what was, by the time of the Ordnance Survey, an unmetalled track immediately on the North side of the Mill Stream eastward to Simpson’s Mine in the vicinity of the point where the stream turns from a southerly flow to a westerly flow. [22]
Connop-Price tells us that “the earliest Pembrokeshire tramway which can be dated confidently was constructed at Landshipping, on the estate of the Owens of Orielton. In 1800, Colonel Colby, as a trustee of the estate, initiated fresh investment in the Landshipping colliery, the works including the building if a new embankment and bridge across Landshipping Pill and a new quay on the South side of the Pill.” [1: p125][8] “Ten years later, in 1810 and 1811, tramways were added to these structures, linking them with the main pits comprising the Landshipping colliery.” [1: p125][9]
Landshipping: showing 19th century tramroads (solid line cross-hatched) and a incomplete tramway of 1914 (dashed line cross-hatched). The dotted line shows a possible tramway route. The hatched area shows the limits of mine workings which got flooded with sea-water in 1844. It needs to be noted that the tramways shown on this plan may not all have been in use at the same time. This is an extract from a plan in M.R. Connop-Price’s PhD thesis. [1: p19 Fig. 8]
It seems that, “in its original form this tramway was a plateway, that is to say that it ran on L-shaped cast iron plates laid on stone blocks. … It is thought that these plateways went out of use either before or at the time of the Garden Pit accident at Landshipping in 1844. When the coal industry in this district received some new investment in the 1860s, it is believed that the tramway then in use had edge rails. Unfortunately this reconstructed tramway seems to have been abandoned after a halt to mining activity in 1867.” [1: p125]
An inspection of the coal works at Freystrop and Little Milford was undertaken in 1805. A recommendation in the inspection report was that a Tramroad should be built between the Cleddau at Little Milford Quay and the coal workings at Freystrop. If built when recommended it will have been a plateway but any delay may have seen it constructed in edge rails. [1: p125] By 1850, the Tramroad was an edge railway, “and it had been extended by the provision of two or three short branches to nearby pits, the most significant serving coal pits at Maddox Moor. … The last reference to it appears … in 1882.” [1: p126]
This Tramroad is recorded by Coflein. Their record notes it as “The track of a tramway shown only on the 1837 Tithe map now a straight path through the woods. The tramway connected part of the extensive Freystrop colliery to the south with the quay at Little Milford. The tramway now only survives as a kind of cutting through the woods and had gone by the time of the O.S. survey later in the 19th century. However it is a very interesting survivor in however a slight a form since it represents an early phase of mining in the area and a very early tramway.” [10]
In this extract from a plan in M. R. Connop-Price’s book, the layout of tramroads which formed the Little Milford Tramway is seen. A fan of short ‘roads’ spreads out at the top of an inclined plane which served the quay on the Western Cleddau. Connop-Price adapted a plan from Pembrokeshire Record Office (D/HR/11). [1: p127]
Dyfed Archaeology notes that “by 1839, a tramway led down from Freystrop to the quays, and an incline from Maddox Moor to Little Milford had been established by 1851. However, the decline in the coal mining industry in the early 20th century followed by the closure of the Pembrokeshire collieries in 1947, resulted in Little Milford reverting back to a minor shipping/landing place.” [11] This suggests that there was a period of about 12 years when no inclined plane was available for access from the tramroad from Freystrop to the quay at Little Milford. A sinuous old cart road is shown on Connop-Price’s drawing. This may well have been an original steep alignment of the Tramroad which was proven to be too steep for regular traffic and which was replaced by the inclined plane.
Connop-Price highlight initiatives further to the East, to develop a tramway in the Saundersfoot area in 1806 and again in 1825. The first appears to have been an abortive attempt, the second was probably short-lived as on “a map of the Hean Castle estate dated 1845, the line was then considered an ‘old tramway’, thus implying that it had a very short career.” [1: p126] Connop-Price says that “the route of the tramway between Coppet Hall and St. Issell’s church survives as a footpath known as Black Walk, and the tramway itself is sometimes described as ‘the Black Walk Tramway’.” [1: p126]
An extract from a plan provided by Connop-Price which shows a part of the Saundersfoot Railway (indicated by a thick solid line) and the probable route of the Black Walk Tramway’. [1: p135. Fig. 35]
The Black Walk Tramway is referred to in a publication on the Visit Saundersfoot Bay website. [12] The Saundersfoot Railway will be considered in a future article.
At Hook on the Western Cleddau authorisation was given, early in 1837, for the construction of a tramroad on land of no greater width than 15ft between Hook Colliery and the River which seems to have been the first part of a small network of tramways. [13] Connop-Price tells that this tramway appears initially to have been “about half-a-mile long from the Pill to the Commons Pit, sunk in 1840, with extensions onwards to the Slide Pit, Winding Pit and the Aurora Pit and the Green Pit. Before long it was extended as far as the escarpment overlooking the Western Cleddau above Hook Quay.” [1: p126,128] Connop-Price also notes that “the alignments of some of these tramways can be traced in the fields at West Hook.” [1: p143] I have been unsuccessful in identifying these old routes on Google Earth’s satellite images but one length is shown on the early Ordnance Survey of the area. This is shown in the second image below.
The tramways noted towards the end of the paragraph above appear to be the tramway shown to the left of this image and those marked [E] on the image. The length of tramway from Hook Pill (which was on the tongue of the estuary at the bottom right of this image) to Hook is not shown. Incidentally the line marked [F] in this image is an aerial ropeway which linked Hook Slope Pit to the top of the escarpment which carried coal and culm in buckets before their loads were tipped into trams for the journey down the escarpment to the Quay. [1: p128][18] The aerial ropeway is listed in the UK Gazetteer of Aerial Ropeways. [19] This image is a small extract from a plan in Connop-Price’s thesis. [1: p129 Fig. 36]This extract from the 6″ Ordnance Survey of 1863/64 published in 1869 shows the tramroad marked [E] on the image above. [17]
Hook Quay is noted as an Ancient Monument (Cadw Legacy ID: PE529). The Ancient Monuments website says that it is “an important element of the eighteenth century coal industry in Pembrokeshire … located between Hook Bight and Hook Reach in the inter-tidal zone on the S bank of the Western Cleddau. The stone built quay is mostly intact and located within the garden of a residential house. Caesar Mathias Junior of Hook constructed the quay in 1791 to serve Hook Colliery. Shallow draught barges transported anthracite from Hook Quay downstream to larger ports such as Milford Haven. The quay is visible as a substantial masonry wall with a wooden framework to the N and a raised area of made-up ground to the S. The quay measures c. 3m tall. The combined stone and wooden structure measures c. 40m N-S by 40m E-W.” [14] No mention is made on the website of the 19th century tramways associated with the Quay.
The tramways are mentioned in passing in “The Secret Waterway” published by PLANED (Pembrokeshire Local Action Network for Enterprise and Development) in 2008: “The area was once the centre of a thriving coal industry. Anthracite coal was mined from the fourteenth century and was exported as far as Spain. Legend relates that the Spanish sailors bartered daffodil bulbs for coal. The early workings were shallow shafts, four to six metres deep, but, by the 19th century, deep mines such as the Old Aurora and Amen pits had opened. A tramway was built to carry coal to Hook Quay for shipment. By 1931, 35,000 tons of coal was exported by rail and water. Thereafter production declined and following flood damage in 1948, the last of the pits closed.” [16]
Worthy of a short note here is a further tramway in the vicinity of Hook village which served a colliery erected/incorporated in 1858. The tramway was about 0.5 mile long running along the South side of Hook/Sprinkle Pill. This tramway was first used in 1858 and closed in 1866. [1: p128][27][28]
One final tramway associated with Hook Quay is worth noting. In 1888, or thereabouts, West Park Colliery, which was due South of the Quay was linked by a 770 yard tramway. Connop-Price tells us that “there were five bridges over or under this line largely built of wood, and the final 300 yards comprised a steep rope-worked incline dropping down to the quay.” [1: p128] This line appears immediately to the West of Hook village on the extract above from the plan in Connop-Price’s thesis. [1: p129 Fig. 36]
ThePorthgain To Abereiddi Tramway(1880s) was highlighted by Coflein in a report dated 18th November 2014. It connected a “quarry pit at Abereiddi (now a tidal pool) with the hoppers above the harbour at Porthgain. The section of the tramway at the West nearest the quarry pit connects with the processing works and lift (NPRN 420607) above the pit. Here there are the remains of sleeper beams each about 1.2m long. the trackway itself being about 2.5m wide. Further East the line continues to a water tank (NGR SM8115 3262) where it veers SE and splits into two branches (possibly three) to terminate above the hoppers at Porthgain. There are no surviving rails. Trucks were initially pulled by horses but later by steam locomotives.” [23] The tramway appears on the 1887 6″ Ordnance Survey published in 1888. The tramway was active from the 1880s to 1931. [26] The tramway was 3.6km (2.2 miles) long. Its rails were 91cm (3ft) apart. From 1909, steam locomotives shunted wagons at the harbour, where stone also arrived from other quarries. The Abereiddi tramway remained horse-powered. [29] There were a series of four different small engines used at the port. [26]
It’s route is shown in the series of extracts from the Ordnance Survey maps below. …
This sequence of images are extracts from the 6″Ordnance Survey of 1887, published in 1888. They show the route of the Porthgain to Abereiddi Tramway. [24][25]
Much of the alignment shown in the map extracts above can be followed on satellite images from Google Earth.
The approximate line of the tramway is shown on this extract from the Google Earth satellite imagery. Mechanical power was in use at the port. The horse-drawn trams left the port on the tramway following the verge of the highway. Its route is now a linear woodland which widens out somewhat as the route heads South. The old line gradually moved away to the West of the highway before curving relatively sharply to the West. [Google Earth]A hedge-line continues to mark the line of the abandoned tramway. [Google Earth]The old line continued in an approximately Westerly direction. [Google Earth]The line finally reached the quarry locations at Abereiddi
In the next article in this series we will survey the mainline railways of Pembrokeshire.
6. Thomas Kymer is discussed in detail in Raymond E. Bowen; The Burry Port and Gwendraeth Valley Railway and its Antecedent Canals, Volume 1 (No. 116A); Oakwood Press, Stenlake Publishing, Catrine, 2001.
7. National Library of Wales, Francis Green MS. Vol. 6, 185.
8. National Library of Wales, Owen & Colby, MS. 2052.
9. National Library of Wales, Owen & Colby, MS. 2073.
22. The image shown is a compilation from two OS maps which have been electronically spliced together. The mill stream and therefore the old tramway route appear on the more northerly of the two maps: https://maps.nls.uk/view/102188514, accessed on 10th September 2022.
28. Connop-Price states that”the year of closure may be discerned from a photocopy of private correspondence in [his] possession indicating that on closure the manager of Nash & Sprinkle applied for a similar post with a new company in Landshipping.” [1: p 143]
Over lockdown, I played a very small part in the production of a new book about the railways of Uganda. As a result, I was sent a free copy of that book, “Our Railways. Our History.”
“The book tells the story of the birth and growth of the railways, and includes terrific visual archives shared by custodians worldwide. It also includes recent oral histories celebrating the very unique people and skill-sets that worked the rails.” https://www.plantain.me/uganda-railway-history
Early in 2021, the Cross-Cultural Foundation of Uganda (CCFU) alongside a number of partners sought to capture the history of Uganda’s railways in a high quality, large format book. This book was published by Plantain (plantain.me) [1]
The Uganda Railway Museum is located in Jinja, close to the Railway Station. [7]Our Railways, Our History: details of the Uganda Railway Museum. [8]
The National Railway Museum (York)
On the 50th anniversary of the Ugandan Asian expulsion order, Sophie Vohra and William Law look into the history of South Asian communities in East Africa and Britain, and how their paths have crossed with British owned and operated railways. The article is entitled: Beyond the ‘Lunatic Line’ Ugandan Asians and British Railways. It was published on 4th August 2022: https://blog.railwaymuseum.org.uk/tag/uganda/
3.6 trillion Uganda Shillings Uganda Railways Revamp To Spur Trade
In April 2022, David Mwanga wrote of the ambitious revamping exercise which the Uganda Railways Corporation (URC) has embarked on with the intention of fast-tracking development and spurring on regional trade. [9] it is also hoped that the planned 3.6 trillion Uganda Shillings ($1 billion) will open up mineral-rich regions, agricultural production and markets to the Democratic Republic of Congo and South Sudan.
Four fully refurbished locomotives from Grindrod Rail, South Africa were received in September 2021. The locomotives have a haulage capacity of between 750 to 1500 tons and will last between 35 to 40 years if recommended maintenance practices are followed. They have an axle load of 18 tons. [10]
The proposed programme of investment includes: [9]
The 42 billion Shillings investment in September 2021 in four new locomotives which would operate on the line between the Kenyan border at Malaba and Kampala. It seems these locomotives have already contributed to a reduction in journey times from 24 hours to 11 hours. [10]
A reduction in tariffs of 50%.
A re-launch of cargo services between Dar-es-Salaam Port and Kampala following a more than decade period of dormancy.
A ferry service (MV Pamba) plying between Mwanza and Port Bell. This service has already reduced transit times between Dar-es-Salaam and Port Bell to 18 hours. By road the journey takes 3 days! It has reduced a traders costs from $35 per ton to $20 per ton. This has now been further subsidised for exports to $12 per ton. This supplements the service already provided by MV Kaawa.
Refurbishment of the rail link between Tororo and Gulu (costing 75 million Euros) which was already underway in April 2022 and should be completed by the end of 2023.
Renewal of the Gulu to Pakwach line ($100 million) and the Kampala to Kasese line ($400 million) with work expected to commence in the later half of the 2020s.
A 28 million Euro project supported by Spain to develop a passenger train service to operate between Kampala and Mukono.
Services between Kampala and Port Bell and Kampala and Kyengera funded by the African Development Bank (AfDB)
Within 10 years a Light Railway network for Kampala, the Kampala Metro (Greater Kampala Light Rail) [11] This will be a joint enterprise between Kampala City Council Authority and the URC.
An allowance of 50 billion Shillings to cover compensation to what the government and the URC term ‘encroachers’ onto railway land (thought to be around 20,000 people) with the intention of having historic railway land vacated during 2022. (Please note the item below about the human cost of railway development.)
A planned process of renewal of wagons, carriages and locomotives which have essentially been idle for 15 years
Automation of technology, development of skills and management to ensure best practice across the railway network.
The Human Cost of Revamping Uganda’s Railway Line
We have noted above that officials want to revitalize the country’s ailing railway system. But it seems that it might come at a cost for the people who live in the way.
A report from the Global Press Journal talks of the extensive repairs necessary as a result of the railways falling into a serious state of disrepair. Only 330 kilometers (205 miles) of the 1,266 kilometers (787 miles) of the network’s lines were operational as of 2019. But it seems clear that without the land next to the rail network cleared of people who have set up home, many of the planned upgrades can’t go ahead. [2]
It seems that many people paid good money to purchase land from Uganda’s railways but that the necessary paper did not follow their purchases. There are a number of people who are facing eviction from the land that they believe they own. Kichoncho Scovia is one example, she has lived on railway land in Kiswa parish for more than 14 years but now faces eviction. She says: “I bought this land from Uganda railway staff for 2 million Ugandan shillings [$565], which took me seven years to save. Since 2014, we have been told our purchases are not valid and we are not entitled to refunds.” [2]
Joel Ssenyonyi, a member of Parliament and chairperson of the Public Accounts Committee for the Parliament of Uganda, which scrutinizes the financial expenditures of the government, is heading an investigation into the land sales. He says 69.5 billion shillings ($19.6 million) worth of land belonging to the railway corporation was sold but “not a single coin has gone into the account of URC.” [2]
The government has provided equivalent support to the Uganda Railway Corporation (URC) which it believes covers the Corporation for any missing finances. [2] However, the issue of appropriate compensation for those living on what was railway land remains unresolved.
In 2021, 14,000 people living on land owned by the railway corporation were given six months’ notice to leave. After just 5,000 people left, the eviction deadline was extended to 31st March 2022, because the government didn’t have the 40 billion Ugandan shillings ($11.3 million) required to compensate those who do have the necessary documentation to prove they bought the land. [2]
Refurbishment of Metre-gauge Railways in Uganda
Work is ongoing to improve the condition of the old metre-gauge lines in Uganda. The Uganda Ministry of Works & Transport reports relatively regularly on Facebook about work which is being undertaken. [3]
On 20th August 2022, the Minister for Works and Transport, Hon.Gen. Katumba Wamala and the Director of Transport, Benon Kajuna inspected the rehabilitation works of the Tororo-Kampala Metre-gauge line being undertaken by the China Road & Bridge Corporation (CRBC) & The National Enterprise Corporation (NEC). On that date, 65% of the construction works complete. A completion date of October 2022 was re-affirmed. [4]
The Director of Transport, Benon Kajuna, explained that the metre-gauge railway rehabilitation will increase the cargo tonnage carried by rail to at least 60,000 tons/month. The government were, at that time, negotiating with the African Development Bank, for funding to procure more locomotives, wagons and coaches to move cargo from Kisumu, Mwanza to Port Bell. [5]
Inspection of the Tororo to Kampala Railway Line refurbishment on 20th August 2022. [4]
In addition to the improvement works on the Tororo-Kampala line, work is now complete on the Gulu Logistics Hub. The hub will serve as a consolidation center for cargo to be moved by rail. A crucial component for growth in Northern Uganda. [6]
The Gulu Logistics Hub which was completed in May 2022. [6]
Greater Kampala Light Rail
Greater Kampala Light Rail will be a Chinese-built light rail rapid transport system. A memorandum of agreement was signed between the Chinese and Ugandan governments in 2015 covering its planned construction. [11][12]
At a cost of 1.5 trillion Uganda Shillings ($440 million), the initial 35-kilometre stretch which shall be constructed by China Civil Engineering Construction Cooperation is aimed at de-congesting traffic in the country’s capital and surrounding areas. [12]
It is envisaged that the 35km first phase will eventually be extended to a route length of 240km including:
Kampala-Namanve via Nakawa, Kinawataka, Banda, Kireka and Bweyogerere (12 km east);
Kampala-Lubowa via Kibuye, Najjanankumbi and Zana (7 km);
Kampala-Kyengera via Katwe, Kibuye, Ndeeba, Nalukolongo and Natete (7 km);
Kampala-Kawempe via City Square, Buganda Road, Wandegeya, Mulago, Kubbiri and Bwaise (9 km north).
Ultimately the lines will extend to: Entebbe (37 km southwest); Nsangi (20 km west); Wakiso (20 km) and other surrounding towns. [11]
The Aden Port Trust was established on 1st April 1889 to take over the running of the port of Aden, which was previously carried out by the military authorities and private companies. [3][1: p184][12: IA36]
While researching the Aden State Railway, I came across a reference to the Aden Port Trust Tramway. My article about the Aden State Railway can be found on the following link:
It appears that there were a series of proposals for tramways in Aden.
A proposal to create a tramway running East-West from Crater (near to the main settlement of Aden) to Steamer Point at the western end of the peninsula, [9] ‘The Crater-Steamer Point Tramway’ was put forward in 1863. India Office Records (IOR) affirm this. [10] It seems that no action was taken at that time. However, just a few years later it seems a consignments of railway infrastructure and rolling stock/locomotives was sent to Aden from Abyssinia. [12: IA34]
Simon Darvill explains: “Following the end of the Abyssinian campaign in 1868, some of the railway equipment that had been used on the campaign was sent to Aden. It comprised of two locomotives, two carriages, two brake vans, 20 trucks, 480 rails, 3,250 chairs, 516 fishplates, 6,553 sleepers and two turntables. The equipment was unloaded in [July & August] 1868; it is thought to have been delivered on the ship Californian that left Abyssinia on 10/6/1868. A small shed and workshop was constructed in which to store the equipment. The intention was to build a railway from the pier head to the post office and possibly on to the cantonment. The line was considered to be a purely military venture and was not expected to pay its own expenses and that the main traffic would be Commissariat Stores. The 1869-70 annual report stated that it was still the intention to build the line and that the equipment was still in store in Aden. The last mention of the equipment found in the annual reports was in the 1872-73 report when the payment for a watchman for the railway plant was listed in the accounts for 1871-72. A reference appears in the Railway Stores Department records concerning correspondence on 28/2/1871 between the Bombay Government and the Military Department regarding the disposal of the equipment in Aden but unfortunately the actual correspondence appears to no longer exist. It is therefore impossible to say with certainty what happened to the equipment but it is suggested that it was either returned to India or scrapped sometime in 1871 . It is similarly impossible to say for certain which two of the six locomotives that were used in Abyssinia were sent to Aden” [12: IA34]
By 1896-97 it had been decided to lay a tramway from the head of the Maala Pier for a distance along Maala Road. “Tenders were received from a number of companies (Kerr Stuart, Dick Kerr and Boiling & Lowe [12: IA36]) for just less than one mile (1.5km) of track and wagons. The board decided that before any tender was accepted an experimental line should be laid along the length of the Pier, about 500 feet (150 metres), some old rails and sleepers were obtained from the Aden Public Works Department (PWD), this was obviously a success as the 2ft/610mm narrow gauge tramway was sanctioned in 1897-98.” [3][2] I wonder whether these old rails and sleepers were part of the consignment sent to Aden from Abyssinia in 1868? …
“In 1907-08 Maala Pier collapsed and required completely rebuilding. In 1911-12, 2,000 feet (610 metres) of 2ft./610mm. narrow gauge tramway, and other railway equipment, was purchased to link the tramway to two new sheds that were built as part of the Pier.” [3][2]
Simon Darvill records this event and notes that the work on Maala Pier was completed by December 1910. He provides greater detail about materials and rolling stock purchased at the time. He specifically mentions 8 turntables which must be the ‘other railway equipment’ mentioned above. He further notes that in early 1916, the Aden State Railway “laid a siding to Maala Pier. 24 new tramway wagons were ordered in 1919-20. The tramway was still in use when Aden became the responsibility of the Colonial Office in 1937.” [12: IA36]
Incidentally, Robert Mumford comments that “in 1910 it had been proposed to construct a 2ft. 6in. gauge steam tramway from Tawahi, a suburb of Aden close to Steamer Point where the ocean liners used to call, to Crater, the old capital, with a branch to Khormaksar and Sheikh ‘Othman.” [11] It seems likely that this is the same tramway as that referred to above and that Robert Mumford may have been misled about the gauge.
At least one locomotive was ordered for the 2ft. gauge tramway – A Kerr-Stuart ‘Wren’ series 0-4-0T locomotive (No. 1249) which bore the name ‘Sir James’ on brass nameplates. I have not been able to find a picture of the locomotive but the Industrial Railway Society provides a photograph of a sister locomotive, No. 1248. No. 1248 ‘Maipoori’ was built with tyres 5 in. wide having flanges 1½ in. deep for running on 2 ft. gauge wooden rails. The fuel racks round the bunkers are stated to have been provided for “a heavy wood fuel”. One injector and a long stroke pump driven from the right hand crosshead were provided. The illustration shows ‘Maipoori’ in its first incarnation before it was shipped to Demerara, British Guiana, on 22 November 1912. Its stay there, however, must have been short as it was back at the works in Stoke by June 1914. Alterations were made to make the locomotive suitable for normal track of 60 cm gauge, after which it was dispatched on 14 July 1914 to the City of Santos Improvements Company, Brazil. [6]
Kerr-Stuart No. 1248 ‘Maipoori’, a sister locomotive to No.1249 ‘Sir James’. [6]
The Route of the Tramway
We cannot be sure of the route. We are limited to a very few postcard images which show the tramway at specific points and it is impossible to tightly define those locations without good knowledge of the circumstances on the ground in Aden in the early to mid-20th century.
The pictures below show it present at Maala Wharf and at Post Office Bay. They show it also on Main street (Main Road) Maala and at a point on Maala Wharf where a significant wide pier extends out from the main Wharf.
Maala Wharf in the port of Aden. Two different railway gauges are visible in this postcard image. Those close to the camera are of the metre-gauge Aden State Railway. Those across the centre of the image are part of the Aden Port Trust Tramway.The notes provided alongside this image indicate that it shows Aden Post Office Bay and Tramway in 1913: What looks like a tramway can be made out running along the sea wall in this image. It is possible that there was no tramway at this location as it is out at Steamer Point. This would mean that the apparent tramway is perhaps only a series of wheel ruts in a poor road surface! I have been unable to find any other indication that the Aden Port Trust Tramway extended out to Steamer Point. The postcard is from the private collection of Steve Moore and is licensed for use under a Creative Commons Licence, (CC BY-NC-ND 3.0). [5]
This image places the buildings in the above image at Steamer Point. [14]
A colourised postcard image showing Maala Wharf. The Tramway is in evidence but there is no sign of the metre-gauge line. Interestingly, the flat wagons shown in this image appear not to have couplings which suggests that they were moved individually rather than in a train and perhaps that they were move by manpower. [7]This monochrome version of the same postcard image bears a frank on its reverse dating it to 1940. If the date of franking correlates approximately to the date of manufacture of the postcard, this would explain the absence of the metre-gauge line as this was lifted by 1930. [8]This postcard view is undated but probably shows Maala in the 1920s or 1930s. It has dual tram tracks in the highway of Main Road (or Main Street?) Maala. There is also evidence of a branch running off to the right of the image in front of the light-coloured building through or behind the road vehicles parked there. [13]
In summary, we know that the tramway existed from both photographic and written evidence. We know that one 2ft Gauge locomotive was purchased by the Port authority. Otherwise, there is little more available about the tramway.
Two further interesting pictures suggest that the 2ft gauge was in use outside of the limits of the Port of Aden.
The Salt Works
While looking for photographic evidence online for the 2ft. gauge line in the port area of Aden I came across one photograph which shows a narrow-gauge tramway in use in the Salt Works which were located at the northern end of the isthmus. This prompted a little more research.
Camel-power on the salt flats to the West of the isthmus on the mainland. [15]
That research led me to two websites. The first was Peter Pickering’s short history of the salt works/salt flats on his blog. [16] Apparently the salt works were leased rent-free to an Italian family and were often referred to as the ‘Italian Salt Works’. Pickering comments that the family from Trapani in Sicily. It seems that when they established their business in Aden, they based the set-up on that at their salt works between Marsala and Trapani, “including the use of windmills to pump the salt water into the pans. The renewal of the 240 acre lease was completed literally only a day or two before Great Britain and Italy went to war in June 1940. The 14 Italian employees were interned and after the war they did not return to Aden.” [16]
Pickering continues: “The salt pans painted a picturesque scene, the majestic windmills with their broad canvas sails spread on broad wooden lattice frames, reflected in the shimmering azure water. The windmills would later be replaced with pumps, driven by small engines, located in rather unattractive tin sheds.” [16]
The salt flats in Aden. Windmills were used, at first, to power the pumps which brought sea water to the salt pans furthest from the sea and the gradually concentrating brine from one salt pans to the next. [16]
Pickering speaks of an aqueduct carrying “sea-water from the pumping-station of the salt works to the most inland of pans where the first stage of evaporation was carried out. It was then pumped from one series of pans to another, becoming stronger brine at each stage, until the salt at last crystallized out in the pans round the salt works. When the evaporation process was complete the salt was collected in metal buckets. The metal buckets were hand-carried to the conveyor belt which raised the flow of salt to the top of the pile. The piles were next to the ‘railhead’.” [16]
The second website was that of mindat.org. [17] which provides a map showing the location of the salt flats and two postcard images, one of which shows camels in use pulling trams/wagons filled with salt.
The location of the salt works at the North end of the isthmus. [17]A postcard view of the stockpiles of salt at the Salt Works’ with a camel ready to haul a train of salt-filled trams/wagons. [17]
Elephant Bay Quarry
After asking for some assistance from the Industrial Railway Society (IRS) Email Group, I was sent a photograph which showed a 2ft-guage locomotive on a timber bridge at Elephant Bay Quarry which was taken in 1959. …
This diminutive locomotive was used by Pauling & Co. at the quarry in Elephant’s Bay. In 1956 the company are recorded in Hansard as being engaged in harbour development work in Aden. [18] The locomotive was built by Ruston & Hornsby (RH), The annotation ‘LBT’ referes to a sub-class or variant of loco type LB built by RH. The LB type was built 1952-1968, generally 31.5hp, for gauges between 1ft 6in and 3ft 6in.
R/20/E/198, Item 2; “Vol III No 5 File 206 Tramway: application for a concession to build an electric tramway connecting the Crater with Steamer Point”; Jan-Feb 1896 (Records of the British Administration in Aden)
Robert Mumford; Indian Outpost in Arabia; in The Railway Magazine, February 1976, p73-75.
Simon Darvill; The Industrial Railways and Locomotives of India and South Asia; the Industrial Railway Society, 2015.
ADEN (COMMISSION OF INQUIRY): HC Deb 18 April 1956 vol 551 cc1011-2 – Mr. Lennox-Boyd: “Early in April, after a period of comparative freedom from industrial unrest, further strikes occurred and still continue among the dock labour at Maalla, among employees of the large trading and petrol distributing concern, A. Besse and Company, among contractors’ labour on the site of the Queen Elizabeth Hospital and Pauling and Company, who are engaged on harbour development work.” … https://api.parliament.uk/historic-hansard/commons/1956/apr/18/aden-commission-of-inquiry, accessed on 25th August 2022.
The Aden State Railway operated for just 13 years or so, from 1916 and 1929 in Aden, a dependency of the Bombay, British Colony and Protectorate, in the south-west corner of Southern Arabia. The metre gauge railway was 29 miles(46km) long and was worked by the North Western Railway [3] of India under one of its officers who was designated ‘Engineer-in-Charge’. [1][2]
This was not, however, the first railway planned for Aden. As early as 1906 a light railway from Aden to Dthala (Ad Dali),120km inland had already been under consideration but nothing had materialised. [5]
There was a precursor to that line as well. Simon Darvill explains: “Following the end of the Abyssinian campaign in 1868, some of the railway equipment that had been used on the campaign was sent to Aden. It comprised of two locomotives, two carriages, two brake vans, 20 trucks, 480 rails, 3,250 chairs, 516 fishplates, 6,553 sleepers and two turntables. The equipment was unloaded in [July & August] 1868; it is thought to have been delivered on the ship Californian that left Abyssinia on 10/6/1868. A small shed and workshop was constructed in which to store the equipment. The intention was to build a railway from the pier head to the post office and possibly on to the cantonment. The line was considered to be a purely military venture and was not expected to pay its own expenses and that the main traffic would be Commissariat Stores. The 1869-70 annual report stated that it was still the intention to build the line and that the equipment was still in store in Aden. The last mention of the equipment found in the annual reports was in the 1872-73 report when the payment for a watchman for the railway plant was listed in the accounts for 1871-72. A reference appears in the Railway Stores Department records concerning correspondence on 28/2/1871 between the Bombay Government and the Military Department regarding the disposal of the equipment in Aden but unfortunately the actual correspondence appears to no longer exist. It is therefore impossible to say with certainty what happened to the equipment but it is suggested that it was either returned to India or scrapped sometime in 1871 . It is similarly impossible to say for certain which two of the six locomotives that were used in Abyssinia were sent to Aden” [20: IA34]
Area covered by the archived map of a proposed railway to be built from Aden to Nobat Dakim. Detail from the map is shown below. [Google Earth][21]
The next reference to a proposal for a railway that I have been able to find is a draft proposal put forward in November 1905 to the Sultan and the British Government by Lieut-Colonel R. Leigh, R.E., Assistant Commanding Royal Engineer who had been engaged in drawing up the line and at the time touring within Abdali limits between Dar-Al- Amir and Nobat Dakim for that purpose. [15: p126] A map was included in the submission and is probably that which is archived at the Qatar Digital Library (Ref No.: IOR/L/PS/10/89, f 114) which can be examined on-line. [21] The map shows the path for a proposed railway to be built from Aden to Nobat Dakim (Nawbatal-Dakim, Yemen; identified four miles north of Al’Anad but not corresponding to any place). The map was zincographed by the Vandyke Process at the Survey of India Offices, in Calcutta and its use here is authorised by the Qatar Digital Library. It covers the area shown below:
The complete archived hand-drawn map showing the path for a proposed railway to be built from Aden to Nobat Dakim [21]
This sequence of three plans shows the proposed railway route. Please note that the map extracts are not all to the same scale. ….
A series of three extracts from the map shows the path for a proposed railway to be built from Aden to Nobat Dakim. [21]
It is important to remind ourselves that the images above relate to a proposed railway from around 1905/1906 and that they cannot be assumed to relate directly to the line which was eventually built by the military. However, it is possible that, the survey undertaken for this proposed line would have informed decisions taken at a later date. It is unlikely that the tunnel referred to by Leigh (see the next paragraph) would have been part of the route chosen by the military as construction costs would have been minimised in times of war.
In his report, Leigh suggested:- “That the line would follow the road and that way would limit the expense of bridges, with an even slope and without valleys or hills. In Aden, it is suggested that a station should be located south-west of Maala, and a small branch line run to Maala Wharf. From Maala the best line seems to be to tunnel under the hill and run out through the Small Isthmus. Stations are also proposed at Khormaksar and Sheikh Othman. It would be a great convenience to extend the line from Maala to Steamer Point which can be done by running the line on the north side of the main road with a terminus on the newly reclaimed land at Tawahi.” [1][15: p108a-109a] However, as can be seen from the plans above, the submitted proposal did not actually take the line to Steamer Point.
Major General H. M. Mason, Political Resident at Aden, supported the proposal. Aden Chamber of Commerce urged the Government to facilitate the construction of the railway. [1][15: p104] No progress was made, however, as the British Government opposed the construction on political grounds. [1]
Some years later, on 30th May 1911, Lord Lamington asked the Secretary of State for India for information about a French syndicate railway to be constructed from Hodeida (on the West coast of Yemen) to Sana’a (the capital of Yemen), and whether all idea of railway extension in the Aden Hinterland had been abandoned. He also asked about progress in the dredging of Aden Harbour. [6]
He said, “Some eight or nine years ago, after the conclusion of certain operations in the Aden Hinterland, the Government had under consideration a project for the construction of a railway from Aden to the high ground in the Hinterland to a place called Dthala. … But the policy … was to withdraw altogether from the Hinterland. …. Therefore any consideration of a railway lapsed. At the same time the Chief of Lahej had granted one or more concessions for a railway to a company who wished to construct what would have been a portion of the bigger scheme—from our Aden frontier at Shaikh Othman to his capital—but even this railway was prohibited as coming under the grounds for withdrawal. … It was obvious that if the railway was not carried on to Aden it would be of no value at all.” [6]
Lord Lamington continued, “A few days ago I saw in the Press a statement that a railway syndicate was beginning to construct a line from Hodeida to Sana’a, which is 140 miles inland and is the capital of Yemen. If it is the fact that there is now going to be a development of the southern portion of Arabia, I would ask whether it would not be advisable to reconsider the policy which was adopted … and allow the development of the Aden Hinterland by the great civilising agency of a railway.” [6]
In reply, Earl Beauchamp commented that a concession had been considered for a line East from Hodeida to Sana’a. A survey of the line which “included the construction of a harbour at Ras-el-Ketib and a railway line from Ras-el-Ketib via Hodeida to Mefak (186 kilometres) and thence to Sana’a (85 kilometres), a branch to be added proceeding north-west to Amran (57 kilometres from Sana’a).” [6] He noted that the total cost of the scheme was estimated at £1,772,000 and the Ottoman Government decided not to grant a concession to any foreign company for the proposed line for a limited number of years, but a syndicate had taken in hand on behalf of the Ottoman Government the construction of the harbour at Ras-el-Ketib and the section of the railway to Hujjula. The line was to run via Hodeida (about 116 kilometres).
Earl Beauchamp affirmed that it was “the settled policy of His Majesty’s Government to abstain from any extension of their responsibilities in the Aden Hinterland so long as the status quo [was] strictly observed by the Turkish Government. Any scheme for railway construction would be narrowly scrutinised by them in the light of this policy.” [6]
In respect of the dredging of Aden Harbour some prolongation due to physical obstacles had occurred. Earl Beauchamp stated that, “the latest information we have is a report made by the Port Trust to the Bombay Government in 1910, in which they state that difficulties had been experienced in attempting to remove the rock in the valley mouth on the south side of the channel, and that the dredger had broken down. It was therefore decided to abandon dredging in this particular spot, and to widen the other part of the channel. This alteration in the scheme was approved by the port engineer and the Port Trust, and was sanctioned by the Bombay Government.” [6][7]
Meanwhile, on the peninsula a 2ft. 6in. gauge tramway serving the City and its port had been considered. It is possible that the construction of that tramway might have met much of the perceived local need in the area between Crater, Sheikh Othman and Tawahi (Steamer Point). Robert Mumford quotes a report to the British Resident, Aden by a Mr Affleck in which he opined that “if the Tawahi (Khormaksar-Sheikh Othman)-Crater tramway were built, Sheikh Othman should develop into a large town and the combined railway and tramway should be a sound commercial proposition. However this tramway never materialised.” [12]
Details of a later 2ft. gauge tramway serving the Port of Aden can be found on the following link:
It was not until after hostilities commenced in the First World War that permission was given for the construction of a metre-gauge line North from Aden.
Pickering tells us that “in 1915 the CRE (Commander, Royal Engineers) requested permission to lay down a light railway from Aden to Sheikh Othman to supply the British forces fighting against the Turks, with the intention of extending it to Lahej once it was back in British hands. Approval was given and a 1000mm gauge military railway was built by the Royal Engineers. By December work was completed on the new railway providing a quick and efficient way to move troops and equipment to the Sheikh Othman defences. In 1919, the Aden Government approved the extension to Lahej. The 46.3 km line was made available for public traffic in 1922.” [5]
Sheikh Othman was only a short distance from Aden, even so early in the War, British control had been allowed to lapse to allow a focus to be made on defending the main settlement of Aden itself. Once the decision to retake Sheikh Othman was made on 16th July 1915 it was only a few days before it happened. Sheikh Othman was retaken on 21st July and construction of the railway soon commenced. It was completed as far as Sheikh Othman by December. [8: p256] The railway was opened as far as Lahej by February 1919, [8: p257] and Al Khudad the following year, giving a total length of line of 29 miles (46 km). [10] Plans to extend the railway to the protectorate’s frontier never bore fruit. [13] The line eventually closed in 1929 and was lifted by 1930. [1][17]
In his article, Rainbow focusses on the years of the First World War. He talks of the significance of the railway to the prosecution of the War on the Arabian Peninsula.”On 12th January 1916, 1,138 rounds were fired in one day, being the greatest number in the campaign. This had been unthinkable before the arrival of the railway. [8: p257][9]
Steve Llanso says that the Locomotive Magazine report [11][13] focused on water supply, beginning with the general observation that “Fresh water is scarce in Aden, being obtained chiefly by condensation …Much of the water used by the locomotives is taken from a small river near Lahej.” [13] Llanso comments that the limited water available was was stored in ancient storage reservoirs as well as wells further away from Aden and “delivered through an aqueduct seven miles long.” [11][13] An aqueduct supplying Aden is shown on the map below.
A 1:500,000 map of the Aden Protectorate which shows the remains of an aqueduct supplying the city. [14]
Eljas Pölhö notes that the railway carried passengers, grass, charcoal, green vegetables, potatoes, skins and other goods from Yemen to Aden, and also large quantities of water for the army outpost at Sheikh Othman, which included a mobile force of cavalry and a camel corps. To carry water, the railway was extended to Hassaini Gardens, 13 kms north of Lahej.” [16]
Robert Mumford tells us that, “In the early twenties the railway was bedevilled by both labour and sabotage problems, the first being possibly due to the fact that it was administered by mainly Indian personnel, whereas the operational manual tasks were carried out by mainly Adenis, Yemenis and Somalis. Sabotage and pilfering reached such proportions that in August 1920 the Chief Police Commissioner wrote to the First Assistant in the British Resident’s HQ that Mr. Affleck had requested a much-increased security staff.” This enhanced security was provided in the form of 9 personnel based at Maala Depot and at Sheikh Othman Depot, but this security probably became an increasing financial burden on the railway and the State.” [12]
In August 1928, the Political Resident, Aden, advised the Railway Board at Simla (India) that the conclusion had been reached that the railway could not become a paying concern and should be closed down but not immediately, the present service to be reduced by 1st October to one train each way daily between Maala, Lahej and Al Khudad, and maintained till 31st March 1929. Mumford continues: “About the same time the Colonial office advised the Ministry of Defence that the section from [Maala] to Khormaksar was of military importance, and should remain; the section from Khormaksar to Sheikh ‘Othman had a potential military value only for the protection of water borehole supplies at Sheikh ‘Othman; and the section beyond Sheikh ‘Othman had no military importance and should closed as from 1st April 1929, but it would not be dismantled immediately.” [12]
Records relating to the construction and dismantling of the Aden State Railway are held in the India Office Records at the British Library. [15] The Families In British India Society (FIBIS) tells us that an on-line search of the IOR records relating to this railway gives a number of entries, the most significant being:-
L/PS/10/89 “File 379/1906 ‘Railways: Aden; railway construction in Aden hinterland; Aden-Lahej Railway’; 20 Aug 1904-3 Apr 1922”. The Catalogue Contents state ‘… relating to proposals for the construction of a steam railway between Aden and its hinterland from 1904…..’
R/20/A/… The search gives at least 8 Records concerning ‘Tramways and Railways in Aden and the hinterland’ dating from 1904 through to 1921
R/20/A/3232 “File 523 Proposed discontinuance of the Aden railway service; 1928”
L/PS/10/703/1 “File 3082/1917 Pt. 16 Aden: railways; 1928-1930” [1]
I have only looked at the first of these references.
As we have already noted the line was closed in 1929. The process of lifting it may have taken a while as, in 1932, “the Secretary of State for India wrote to the Chief Commissioner, Aden asking if the railway equipment was still available, as they had received an enquiry concerning its purchase. The Chief Commissioner replied the railway had been sold to George Cohen & Co Ltd, London who had cleared the site by 27th August 1932.” [20: IA35]
Rolling Stock and Motive Power
Rainbow says that, “Most of the rolling stock and equipment for the Railway came from the Bombay, Baroda and Central India (B.B.C.I) Railway.” [8: p257] Shortly after its completion, the railway was transferred into civilian control. [10] Rainbow continues: “The Aden Railway was worked by the North-Western Railway of India who supplied one of its officers as ‘Engineer-in-Charge’. The B.B.C.I supplied three class F1 0-6-0 locomotives being numbers 288 (Neilson & Co., 1879), 349 (Neilson, 1880) and 727 (Dubs, 1894). They also supplied two first/second composite carriages, four third-class carriages, all being bogie vehicles, three brake vans, 12 high-sided and 56 low-sided wagons and one oil tank wagon. In 1916 the South Indian Railway Railmotor (No. 3 of 1916) arrived.” [8: p257][2]
It seems that, in addition to the three B.B.C.I 0-6-0 locomotives, the East Bengal Railway supplied a further 3 No. 0-6-0 locomotives. [13]
In 1922, just as the line opened to its fullest extent, [13] Nasmyth Wilson supplied a 4-6-0 locomotive of a standard Indian State Railways design to the Aden State Railway. Illustrations appeared in the February 1928 edition of Locomotive Magazine. [11] There was also a short article in the Railway Magazine of February 1976 about the Aden State Railway which included a photograph of the Nasmyth Wilson locomotive at Maala. [12]
Steve Llanso provides commentary on the Nasmyth Wilson locomotive and a full set of statistics. [13] The locomotive was the only one in its class. It had Walschaert valve gear and was an oil-burning locomotive. It used Holden’s system of oil-burning in a Belpaire firebox. The engine weighed 81,312lbs, the tender 51,520lbs. Its maximum axle-weight, 21,392lbs. [13]
Locomotive No. 1 of the Aden State Railway was manufactured by Nasmyth Wilson to a standard Indian State Railways design. The image comes from the Uwe Bergmann collection. [22]Another view of Locomotive No. 1, this time photographed in Aden at work at Maala. [5]
When the line closed, the Nasmyth Wilson locomotive made its way back to India and served the Eastern Bengal as their No. 325 from 1931 on. A change of flag occurred during the 1947 Partition of India when Bengal was taken into East Pakistan. East Pakistan’s independence secured in 1971, its railway still operated No. 325 in 1973. [13][17]
Mumford provides a slightly different assessment of locomotive provision on the line: When it opened “in 1916, two 4-4-0 engines were transferred from the Eastern Bengal Railway (Nos. 561 and 563) and three of the same type from the Bombay, Baroda & Central India Railway (Nos. 228, 349 and 727) … A Simplex rail motor coach with Dorman four-cylinder petrol engine built for the South Indian Railway was also put into service, making six trips daily to Sheikh ‘Othman with seating for 70 passengers.” [12]
It seems as though there is a measure of confusion over which locomotives were provided. Mumford was corrected by Hugh Hughes in The Railway Magazine of April 1976: “May I point out that the reference to 4-4-0 engines being used there is incorrect. Mr. Mumford may well have been misled by an error in an article in the ‘Locomotive Magazine’ for February 1928. For working the line, the Bombay, Baroda & Central India Railway supplied in 1915 three of its class ‘F1’ 0-6-0 locomotives, with 3ft. 71/2in. coupled wheels and 14 in. x 20 in. cylinders; they were numbered 288 (built by Neilson & Company in 1879), 349 (Neilson 1880) and 727 (Dübs, 1894). … Three similar 0-6-0 locomotives, but emanating from the Eastern Bengal Railway, put in an appearance later on. Two of them, numbered 561 and 563, had been used by the military authorities in East Africa from 1916 onwards; no. 563 (Vulcan Foundry 1900) was transferred direct from Africa to Aden, probably in 1919, but 561 (Neilson 1898) was first of all returned to India and reached Aden in 1920. The third EBR engine was numbered 584 (not 684 as given by Mumford); it was also built by Neilson in 1898 and was transferred to Aden about 1926. As far as I can trace, none of these 0-6-0 engines worked again after the closure of the railway at the end of July 1929.” [19]
The most authoritative information about locomotives and rolling stock on the line can be found in the Industrial Railway Society’s book, “The Industrial Railways and Locomotives of India and South Asia” compiled by Simon Darvill. [20]
Darvill says that, “The BBCIR supplied the following rolling stock in 1918 for the railway in Aden: six 1st/2nd class bogie composite carriages, two 38 foot bogie 3rd class carriages, four 38 foot 6 inch bogie 3rd class carriages, three brake vans, 12 high sided wagons, 28 end open wooden low sided wagons, one MG riding trolley, a ten ton crane and runner and an engine shed. In the Railway Stores Department records it is stated that in [December] 1919 six steel top wagons (with spares) and 14 miles of track of unknown gauges was supplied to the General Officer Commanding, Aden for use in a stone crushing installation. It is assumed that this was supplied as part of the extension of the Aden Railway to El Khudad, which opened in [January] 1920. In the [April] 1918 Railway Stores Department report there is a note on the question of the supply of a Simplex motor tractor to Aden. It is assumed that this was for use with the stone crushing plant but further details are unknown.” [20: IA35]
He also provides details of the motive power on the line. There were six 0-6-0 tender locomotives:
• No. 288, F Class built in 1879 and transferred from the BBCI Railway in 1915. • No. 349, F Class built in 1880 and transferred from the BBCI Railway in 1915. • No. 727 F Class built in 1894 and transferred from the BBCI Railway in 1915. • No. 561 F Class built in 1898 and transferred from the Eastern Bengal State Railway (EBSR) in May/June 1919. • No. 563 F Class built in 1900 and transferred from East Africa in 1916. • No. 584 F Class built in 1898 and transferred from the EBSR early in 1921.
Hugh Hughes mentions Nos. 288, 349 and 727. He asserts that they were moved to Aden in 1916. Apparently, all the BBCI Railway Class F 0-6-0 locomotives had been refurbished by 1914 and were regarded as sub-class F1. He is unable to offer pictures of the locos. The first two of these locos had 13.5 in. diameter cylinders and a 10ft. 3in. wheelbase, whereas No. 727 had 14″ diameter cylinders and an 11ft wheelbase. [23: p42]
Hughes notes that No. 561, No. 563 and No. 584 had 14 in. cylinders. [23: p53]
All six were sold to George Cohen & Co Ltd, London and removed, by August 1932. [20: IA35]
Darvill also records:
• No. 1 as a 4-6-0 F Class built in 1922 supplied direct by Nasmyth Wilson and transferred in 1931 to the EBSR where it became their No. 325. (Hughes notes that the loco had 16 in. cylinders and arrived at the EBSR from Aden. [23: p53]) • No. 3 as a 4-wheel petrol-engined railcar with mechanical transmission built in 1915 which was ordered for South India Railway but requisitioned by the Indian Army for use in Aden. This was also sold to George Cohen & Co Ltd, London and removed, by August 1932. [20: IA35]
Further interesting items of rolling stock were three light railmotors for carrying officers on the line. Details of those railmotors appear in The Locomotive Magazine. [18]
“The commander of the Mechanical Transport, Capt. G.M. Eden, M.B.E., constructed three petrol rail cars in the Base workshops at Aden, and one of these is illustrated. … The body of this particular machine was an ordinary Ford car, bought from an Arab in the native bazaar. The differential was taken out and a solid axle drive substituted. On the end of the axle shaft was fitted the chain sproket for a 3.5 ton Fiat lorry, and on the rear wheel the sproket of a Halford lorry. … Flange wheels were fitted.” [18]
The Service Provided
We have already noted the kind of materials carried by the line. In his article Mumford talks of traffic on the line: “At the height of its existence there were two mixed trains a day which left [Maala] at 07.00 and 14.00, arriving at the terminus beyond Lahej at 09.00 and 16.00. These two trains each returned an hour later. The passenger section of each train was composed usually of eight carriages. The fares were [Maala] to Sheikh ‘Othman, first class eight annas, third class three annas; Sheikh ‘Othman to Lahej, first class one rupee four annas, and third class five annas.” [12]
The Route of the line
The line’s Southern extremity was at the Maala Wharf. Its presence is confirmed in the first image below.
Maala Wharf in the port of Aden. Two different railway gauges are visible in this postcard image. Those close to the camera are of the metre-gauge Aden State Railway. Those across the centre of the image are part of the Aden Port Trust Tramway.
From Maala Wharf the line ran first eastwards and then Northeast as it followed the sea wall. Its actual route cannot now easily be seen on satellite imagery. In addition to the fact that it is now (2022) about 90 years since the line was lifted, there has been land reclamation in the area of the Port of Aden which make estimating its route difficult.
The isthmus and the northside of the old Aden settlement with a possible line for the old metre-gauge railway superimposed by a faint dashed red line. It is impossible to be sure of the actual line. We do know that it serves Maala and the Port to the North side of MainStreet on the plan, we know that there was a station at Maala. WE have already commented that the line is likely not to have been tunnelled under the higher ground at the South end of the isthmus. We know that there was a station at Khormakser, although the area known as Khormakser may have been further North than shown on the Google Maps satellite image. The international airport now covers the route of the line. The one fixed point on the route will be the bridge shown towards the top of this image. I have shown the old railway crossing that bridge which was the old road North off the Isthmus. There is no evidence of any other structure visible on satellite imagery going back as far as 1985 (on Google Earth). This satellite image is dated 2022. [Google Maps]
North of the old road bridge off the isthmus it is only possible to make assumptions about the line of the old railway. My assumption, based on practice elsewhere, is that the line probably followed the route of the road North to Sheikh Othman and beyond. The faint dashed-red line on the plan below shows a possible route which primarily follows roads to the Northeast of Sheikh Othman (Shaykh Uthman on the map) and which, at the very top of the extract meets the line of the major highway to the North.
The possible line of the old railway to the North of the isthmus which follows as much as it possible the line of what may well be the old road to the North. All guesswork on my part. However, this would mean that the railway route proposed in 1905/1906 was not followed by the military builders of the later line. [Google Maps]The line continued North. The most obvious route is the route of the modern highway to Lahej as shown here. However this is not the route of the proposed 1905/1906 line. That alignment runs to the North of Lahej rather than through the centre of Lahej. [Google Maps]
Given that I am making significant assumptions about the route of the old railway it seems best not to try to show the detail of the route and to accept that it has been lost. We know that it served Lahej before travelling further North. If the route proposed in 1905/1906 was used then the line would have been some distance from Lahej at its closest point. The route of the line shown on the map at the head of this article follows the line of the major highway to Lahej rather than the route of the 1905/1906 proposal. The differing alignments are shown below.
This image shows the Aden State Railway, 1931 Map From ‘Imperial Gazetteer of India,’ v. 26, Atlas 1931 edition, Railways & Inland Navigation, p. 50 again. However, I have added the approximate line of the 1905/1906 proposal in light-blue. The image is used here under a Creative Commons Licence (CC BY-NC-ND 3.0).
In summary, we know that the old metre-gauge railway served Maala, Sheikh Othman, Lahej and continued on for a short distance to El Khudad. We do not know the detail of the route it followed.
J. Julian Rainbow; ‘Those Barren Rocks’: The Building of the Aden Railway During World War One; in Paul E. Waters & J. Julian Rainbow; British Military Railways Overseas in the Great War, the British Overseas Railways Historical Trust, Mainline & Maritime, Upper Seagry, Chippenham, 2018, p256-258.
M. Connelly; The British Campaign in Aden, 1914-1918; in the Journal of the Centre for First World War Studies, Vol. 2, No. 1, 1965.
British Library IOR L/PS/12/1462 ‘Disposal of Rolling Stock and Material of former Aden Railway’.
The Locomotive Magazine 1929, p131. My thanks to Iain Logie for pointing this out to me.
Hugh Hughes; Reader’s Letter in The Railway Magazine, April 1976, p206. Again, thanks to Iain Logie for this reference.
Simon Darvill; The Industrial Railways and Locomotives of India and South Asia; the Industrial Railway Society, 2015.
Map of the Proposed Railway from Aden to Nobat Dakim; British Library: India Office Records and Private Papers, Ref: IOR/L/PS/10/89, f 114; in Qatar Digital Library; https://www.qdl.qa/archive/81055/vdc_100026192896.0x000001, accessed on 23rd August 2022.
Locomotives International Vol. 133, p32.
Hugh Hughes; Indian Locomotives part 2 – Metre Gauge 1872-1940; the Continental Railway Circle, Harrow, 1992.
In the first two articles about tramroad routes centred around Malinslee I have looked at the tramroads which appear on the 6″ OS Map of 1881/82 (which was published in 1880) and which were located to the West of the Stirchley Ironworks. These can be read by following the links immediately below:
The map below traced by Savage & Smith in The Waggon-ways and Plateways of East Shropshire, shows how extensive the network of tramroads in the area was. [1: p164] Even so, the plan is not exhaustive. We have already encountered the tramroad which served Little Eyton Colliery. This appeared in the first part of this series centred on Malinslee for which the link is provided above.
It ran along the lane shown to the North of Langleyfield Colliery on the plan below. The slag heap from Little Eyton Colliery is shown on the sketch plan.
It is important to understand that the tramroads shown on the plan below did not necessarily all exist at the same time. Savage & Smith illustrated their routes with different symbols. The solid red lines denoted lines whose position is exactly known. The lines shown by the shorter dashes are those which appear on the 1833 1″ OS Map of Shropshire. Savage & Smith note that these lines are shown scaled up from the 1″ map but without any alteration to fit the landscape which is shown in more detail on later OS Mapping. [1: p103] The longer dashed lines are tramroad routes shown on the half-inch map of the Shropshire Railway from Shrewsbury to Wolverhampton of around 1836 and which have similarly been enlarged. Savage & Smith were confident, in 1965, with some degree of certainty, that the routes shown below were in commercial use at some time, many in the period prior to the coming of the standard-gauge railways. [1: p103]
We begin this next survey by looking at the area immediately around St. Leonard’s Church. The Church is not shown on the tracing undertaken by Savage & Smith. Their traced routes have been transposed onto the 1881/82 6″ Ordnance Survey in the image below.
Tramroad routes superimposed on the 1881/82 6″ OS Map of the area immediately around St. Leonard’s Church Malinslee. The routes have been marginally adjusted from those shown by Savage & Smith to align with features on the 1881/82 mapping as appropriate [1: p164][2]This extract from the ESRI satellite imagery provided by the National Library of Scotland (NLS) shows approximately the same area as that covered by the 1881/82 OS Map extract above. The mauve and red lines on the map extract have been transferred onto the satellite image. It is relatively easy to follow the route of the tramroad as shown on the 1833 1″ Ordnance Survey (red line). In places it is much more difficult to do so for the tramroad line shown on the marginally later railway maps (mauve line). [3]
We start looking at the mauve line on the image above, which seems to run to St. Leonard’s Church from the North. We will follow the route Northwards to Hollinswood…
Google Earth provides a higher quality of satellite image than the NLS is able to do. This extract shows the church at the bottom of the image. The carpark area to the Northwest of the Church is where the old vicarage used to be sited. The route shown by Savage & Smith is marked in mauve. It is difficult, either from old maps or from the features still evident today to establish what this tramroad was intended to serve. The church was built in 1805. [4] This may possibly have postdated the tramroad and by its construction the then disused tramroad would have been severed?
Looking Southwest along what may have been the truncated line of an old tramroad. [Google Streetview, June 2022]Lookin Northeast along the route of the tramroad from the same position. [Google Streetview, June 2022]This photograph is taken at the junction of Alma Avenue and St. Leonard’s Place looking North-northwest along the route of the tramway identified by Savage & Smith [Google Streetview, June 2022]The intersection of the two tramroad routes on Savage & Smith’s plan. Savage & Smith show the mauve route running under properties to the East side of Alma Avenue. We pick the route up again after following the red tramroad route for a short distance along Alma Road and then St. Leonard’s Road to the left. [Google Streetview, June 2022]The red route follows Alma Avenue and them St. Leonard’s Road. [Google Streetview, June 2022]The two tramroad routes coincide again close to the junction of St. Leonard’s Road with Field Close. [Google Streetview]
The next length northwards is imposed first on the 1881/82 6″ Ordnance Survey [2] and then on satellite imagery from Google Earth. [Google Earth, 4th April 2021]. There is little worthy of comment, over the majority of this length the old tramroad rout has been retained as a metalled road. Towards the top of the extracts the tramroad route is shown crossing what was a more major road (Park Road) until development of Telford New Town led to roads being realigned and replaced. Park Road as shown on the 6″ Map extract can be seen as terminating just to the East of the point where the old tramway route(s) crossed it on a relatively shallow angle. [5]
The line of the old tramroad imposed on modern satellite imagery. [Google Earth, 4th April 2021]Looking North along St. Leonard’s Road. The road follows the route of the old tramroad. [Google Streetview, June 2022]The junction of St. Leonard’s Road and Royal Way. The route of the old tramroad runs approximately through the gap between the two distribution boxes on the far side of Royal Way. Park Road runs in front of the fencing in the distance on the left side of this image. [Google Streetview, June 2022]Looking West along Park Road. The tramroad route crossed Park Road on the diagonal just to the West of the driveway shown on the left of this image. [Google Streetview, June 2022]
Both of the older maps consulted by Savage & Smith show the same route for the old tramroad. Between Park Road that the top of this extract much of the route was lost under old slag heaps associated with mine workings which postdated the tramroad. The area is now lost under Thomas Telford School and the Land Registry. The road at the top-right of this map extract is now Caledonian Way. [6]
The approximate route imposed once again on the matching area on modern satellite imagery. [Google Earth, 4th April 2021]Looking West along West centre Way. The red/mauve line indicates very approximately the line of the old tramroad. We have nothing to assist us with determining the relative levels of the modern road and the old tramway. [Google Streeview, June 2022]The view looking South West along the line of Caledonian Way. [Google Streetview, June 2022]Looking Northeast from the same point. [Google Streetview, June 2022]The 6″ Ordnance Survey again (surveyed 1901, published 1903). [7] The map extract shows the area of what was Old Park Furnaces/Ironworks and Brickworks. The red lines continue to show the route of the tramroad as shown on the 1833 1″ Ordnance Survey. The mauve line entering the extract bottom-left and leaving top-right continues to shows one of the tramroads plotted by Savage & Smith on the railway maps referred to above. [1: p164] The green line shows the approximate route of a tramroad not included on Savage & Smith’s drawing. [1: p164] That branch-line appears on the British History Online plans below. We also need to note the presence of the later mineral railway that features on this and other map extracts. Those lines need to be looked at in a different article as they postdate the tramroads we are looking at by a number of decades! However, on this map there seems to be a significant correlation between the likely alignment of the tramroad represented by the mauve line which was plotted by Savage & Smith [1: p164] running into the map extract from the bottom-right and one of the mineral lines shown on the OS map. The deviation between the two alignments in the bottom right can be explained by the presence of a significant slag heap sitting over the older tramway alignment.[9]The same area on modern satellite imagery showing development up until April 2022 with the very approximate lines of tramroads superimposed by me. [Google Earth, 4th April 2021]
“Old Park Ironworks Company was started by Thomas Botfield on land leased from Isaac Hawkins Browne’s Old Park Estate. It started with two furnaces but by 1801 it had four blast furnaces in operation as well as a forge and rolling mill. By 1806 it was the largest producer of iron in Shropshire and the second largest iron producer in Britain. The Old Park works passed to the Old Park Company in 1856. This was bought by the Wellington Iron & Coal Company in 1874 but closed in 1877 when this company failed.” [8]
It should be noted that two locations in the Telford Area were, at different times, named ‘Old Park Ironworks’
The webpage introducing the Botfield Papers [11] contains the following:
“In 1815 the Old Park works consisted of four blast furnaces, a forge and associated collieries. Thereafter the business expanded considerably, as two pairs of blast furnaces at Hinksay and Stirchley, on either side of the Shropshire Canal, were brought into operation between 1825 and 1827. By 1830 the enterprise was producing 15,300 tons of pig iron a year, only slightly less than the Lilleshall company who were then the largest producers in Shropshire. In 1830 the forge at Stirchley came into operation and within the next few years two blast furnaces at Dark Lane were also completed.
The Botfield brothers, with the exception of William, had detached themselves from the day-to-day running of the ironworks, and had invested some of their handsome profits in landed property rather than ploughing it back into the family business. Thomas Botfield died in 1843, and his brother William in 1850, and control of the family business passed to their nephew Beriah, whose father, also Beriah, had died in 1813. Beriah Botfield (1807-1863) was MP for Ludlow 1840-1847, 1857-63 and a well known bibliographer who set up a private printing press at Norton Hall, Northamptonshire. The gradual decline of the Botfield family’s business was symptomatic of the Shropshire iron trade’s failure to adapt to modern methods. In 1856 the business was divided up after Beriah Botfield failed to agree terms for the renewal of the lease covering a large part of its territory. In 1877 the Old Park ironworks ceased operations, the consequent social distress being exacerbated by an outbreak of typhoid.” [11]
The location of the Old Park Brickworks and Ironworks near Hollinswood are marked on the British History Online plan below. The later Old Park Ironworks were at the location numbered ‘3’ to the immediate South of Randlay Pool on the plan.
This plan comes from British History Online and shows the area of Dawley in the 1840s. It includes Malinslee which appears towards the top of the plan. Not noted on this plan are the later changes of use and name of some of the local industrial sites. For example the Ironworks numbered ‘3’, ‘4’ and ‘5’ were later to be known as Stirchley Ironworks and Old Park Ironworks. The next image below enlarges a section of this plan. [9]This enlarged extract from the above plan is of interest to us here because it shows waggonway routes extant in the 1840s. The line we are following features clearly at the centre of the image. It runs North from close to Withy Pool (just to the left of the ‘M’ in ‘MALINSLEE’) to the Old Park Brickworks and Ironworks which are marked by the hexagon and circle both numbered ‘1’ towards the top of this extract. Of interest is the fact that, at the junction of tramroads to the Southwest of the Ironworks and Brickworks, (marked ‘A’ above and ‘A’ on the OS Map extract above), this plan shows an additional tramroad branch to the ones shown by Savage & Smith. [1: p103] The additional branch runs Southeast from the junction at ‘A’. [9]An extract from a map drawn by Robert Dawson in 1814 showing Coalpit Bank, Old Park, the Shropshire Canal and Malinslee. Note Forge Row which appears on this map and on the 6″ OS extract above. Despite this map being almost contemporaneous with the early existence of the Ironworks, their existence is not noted by Dawson. [10]
As we continue to look at this area, it is not surprising that it is difficult to relate modern locations to older features. We are now close to the centre of Telford, an area which has been considerably re-modelled both by modern development and by opencast mining. The next plan below gives and idea of the extent of opencast mining in the 1970s. The roads shown dotted on the plan were built as the New Town developed.
This plan comes from the Journal of the Shropshire Caving & Mining Club (Autumn Issue No. 2016.3) in an article by Ivor Brown. It shows the extent of opencast activities to the West of Telford Town Centre in the mid-1970s. Apparently, the site produced around 400,000 tons of coal and 80,000 tone of fireclay. The Old Park site was worked from 1974 to 1978. The journal indicates that the site contained over 100 dwellings which were acquired either by agreement or by Compulsory Purchase Order. Two specially built estates of bungalows were constructed by the Corporation to house many of the older residents, all having modern conveniences and amenities that their previous homes had lacked. The site also saw the closure of 0.8km of highway. The site was of 72 ha. and included 76 recorded shafts! [12]
The Shropshire Caving & Mining Club’s Winter Issue of 2016 [13] included another article by Ivor Brown which contained details of archeological activity in advance of the opencast mining and during its operation. Old workings were found in almost every seam, but mainly in clay and coal, although it was obvious that ironstone had been worked where available. That journal includes a few photos of the Old Park Ironworks as exposed by the mining activity in 1976.
Photos from the Ivor Brown Collection of remains of the Old Park Ironworks uncovered by opencast mining in 1976, (c) Ivor Brown. [13]
Before continuing, it is worth stating clearly that the lines drawn on maps in this and other articles are very definitely approximate and represent the best estimates of Savage & Smith and my own interpretation of what they described in the 1960s before so much of the landscape was altered by opencast mining and subsequent development.
On the 1901/2 6″ OS Map again, a little further to the Northeast from Forge Row, we find the hamlet of Hollinswood. We can see both the Coalport Branch and the GWR mainline to the top-right of the map extract. The Ochre lines approximate to the lines which Savage & Smith indicate as being securely documented. The mauve lines continue to represent the tramroad line which Savage & Smith drew based on the 1836 railway maps. [14][1:p103][1:p164]This satellite image shows the same area as that on the 6″ OS Map above. It perhaps serves to demonstrate as effectively as any other image the dramatically different landscape and transport patterns of the 21st century. While it was possible to relate features on the 6″ OS Map back to the tramroads in the area. There is very little on this image that bears any relation to the 6″ OS Map of the turn of the 20th century. In one sense the lines drawn over the image are relatively meaningless in the world of the 21st century. The deep-red line is the route of the Coalport Branch which was a LNWR railway line. The A442 now follows the route of the railway here. The ochre lines approximate to those which Savage & Smith were certain of. The mauve line is tramroad they have drawn in their thesis which matches that on the 1836 railway map. One feature which remains in the 21st century is the line of the old GWR mainline which is tight in the top-right corner of both the map and the satellite image. The hamlet of Hollinswood has disappeared under the M54 and the A442. The general area has been re-wilded and given over to woodland. [14][1:p103][1:p164]
Having followed a tramroad route Northwards from St. Leonard’s to Hollinswood, we now turn our attention to what Savage & Smith have shown to the Southeast of St. Leonard’s and then to the East side of their traced map of the Malinslee area. …
First, we need to pick up on the tramroad indicated by the red-dashed line on the earlier images of the area close to St. Leonard’s.
The tramroad is indicated by the red-dashed line on this plan which appeared earlier in this article. The red-dashed line runs on the Northeast side of Little Eyton Colliery and appears to run under the slag heap. The length of this line shown at the top of this extract can be followed easily on the ground in the 21st century. This is not possible the further South along the line that we travel. [2]
This extract from the circa. 1840 plan of Dawley shows that tramroad running from Withy Pool adjacent to the word ‘MALINSLEE’ down to the Canal at Hinkshay Pools and running to the Northeast side of Little Eyton Colliery slag heap. There is a short canal arm shown as well. which would have provided for transshipment of loads from waggons to canal tub-boats. [9]
These next few images are my attempt to follow the line of the tramroad from near Withy Pool down towards Hinkshay.
The old tramroad followed the route of St. Leonard’s Road. This view looks South towards St. Leonard’s Church. [Google Streetview, June 2022]St Leonard’s Road turns slightly towards the Southeast and becomes Alma Avenue. {Google Streetview, June 2022]As Alma Road turns back to the South, the old tramroad route is now a footpath. [Google Streetview, June 2022]The red line shows the route we are following. [Google Earth, 4th April 2021]Looking back to the Northwest along the line of the old tramroad from the end of Rhodes Avenue towards Alma Avenue. [Google Streetview, June 2022]Looking Southeast along the line of the old tramroad from the end of the northerly arm of Rhodes Avenue. [Google Streetview, June 2022]Continuing Southeast along the line of the old tramroad. [Google Streetview, March 2011]Looking Southeast again, from the end of the more southerly arm of Rhodes Avenue. [Google Streetview, March 2011]Having looked carefully at the OS Maps, my belief is that the line we are following, shown red at the top of this extract from the 1901/2 6″ OS map, continues along the track which would have run all the way between points A, B, C and D shown. The earlier 1840 map suggests that the slag heap of the colliery was of much smaller extent in the early 1800s. I think this is the interpretation which makes the most sense when comparing the different drawn lines on various plans and maps. We have already followed the green line shown in the bottom half of this map in the first post about tramroads in the Malinslee area (https://rogerfarnworth.com/2022/06/15/ancient-tramroads-near-telford-part-4-malinslee-part-1) [16]The same area shown on the ESRI satellite image provided by the National Library of Scotland. [16]
The next few pictures follow the line from A to C on the map/satellite image above.
Continuing Southeast along the footpath which follows the old tramway route. [My photograph, 6th August 2022]The route continues across the modern ‘Stone Row’. [My photograph, 6th August 2022]And on towards Brunel Road. [My photograph, 6th August 2022]There is a pelican crossing at the point where the old tramroad crossed the line of the modern Brunel Road. [My photograph, 6th August 2022]Looking back Northwest along the line of the old tramroad. [My picture, 6th August 2022]Looking Southeast from the same location. [My photograph, 6th August 2022]At point ‘C’ on the map and satellite image above, the modern path turns to the left between the fence and the streetlight. The old tramway continued straight ahead and was eventually covered by the slag heap from Little Eyton Colliery. The slag heap has been on our right as we have walked along the path from Brunel Road, it now expands out across what was the line of the tramroad. [My photograph, 6th August 2022]The view Northwest alone Matlock Avenue. The tramroad serving the main buildings of LittleEyton Colliery bends away to the left (green line), the route we have been following ran under the slag heap which is directly ahead (red line). [Google Streetview, June 2022]
The first map extract below is taken from the 1881/82 6″ OS Map. It picks up the red-dashed line entering top-left. The line as drawn on this extract is that shown by Savage & Smith on their traced plan [1: p164] and it curves round to the Northeast on the Northeast side of Hinkshay Row. There seems, as the tramroad shown above approaches the canal, to be either a conflation of two tramroad routes Solid green/red and red-dashed on the map extract below) on the1840 plan of Dawley or a minor problem with the tracings undertaken by Savage & Smith which could easily be explained by the relative scales of the different plans that they refer to. As the notes below the first map extract below suggest there is a possibility that the red-dashed line shown by Savage & Smith which comes from the 1″ Ordnance Survey of 1833 is marginally out of position and when drawn on the larger scale 6″ mapping gives the discrepancy represented by the solid green/red line (my preferred route for the tramroad) as compared to the red-dashed line. On the extract below, this is further complicated by the mauve-dashed line which is that traced by Savage & Smith from the half-inch map of 1836.
Tramroad routes from various sources superimposed on the 1881/82 6″ OS Map of the area close to Stirchley and Old Park Ironworks. Where appropriate, the routes have been marginally adjusted from those shown by Savage and Smith to align with features on the 1881/82 mapping as appropriate. The density of lines is very apparent! The two dashed lines, one in red (1833) and one in mauve (1836) came from different maps at different scales. It is possible that they represent the same tramroad, and that both, in my opinion, represent the actual route shown by green/red solid lines on the extract.
A curving pathway to the East of Hinkshay Row calls into question my opinion and supports the red-dashed alignment which represents the 1833 1″ OS Map tramway alignment. Both red-dashed and mauve-dashed lines run under the spoil heap for the abandoned colliery Northeast of Hinkshay Row and so, if they are correct, must pre-date that colliery’s slag heap. There is a similarity between the various changes in alignment on the red-dashed line and the solid-red line a little to the South. I guess it has to be asked whether, given the differences in scale between different maps, these are in fact the same tramroad. We have already established that the solid-red line is an accurate representation of a tramroad. The question at stake here is whether the dashed-red line is a different route or not. The curving pathway to the Northeast of Hinkshay Row is probably the only feature on the map extract that would suggest that it is a separate route.
The light-brown tramroad line(s) are definitive, according to Savage and Smith. However the light-brown route which seems to end at Hinkshay Road/Dark Lane may well have extended across to the South of Stone Row and on beyond Wood Colliery, passing under what in 1881/2 is the extent of the Wood Colliery spoil heap. That extension can be presumed from the Savage and Smith drawn 1836 alignment which is shown here, marginally moved, from the Savage and Smith map above. We have noted elsewhere the existence of the GWR Stirchley Branch and the LNWR Coalport branch which will be the subject of other articles. We should also note the presence on the 1881/82 6″ maps of a Mineral Railway which enters this extract from the North and which was part of a network across this extract and beyond that replaced older tramroads.
On the 1881/82 6″ OS Map a tramroad is shown serving Wood Colliery. It is highlighted in light blue in the top-left of this extract. It is possible that the tramway route shown light-brown on this extract crossed or connected with this line prior to the spoil heap from the Colliery growing in size.
Note also the Old Park Ironworks which appear in the bottom-right of the extract and which were part of the Botfield empire featured in the notes earlier in this article. [1: p164][2]
The same tramroad lines approximately translated onto the ESRI satellite imagery provided by the National Library of Scotland. No annotations are provided in this case as they can bee seen on the map extract above. It is sufficient to remark that the details of tramroad alignments are difficult to relate to the Town Park in 21st century. But correlations there are and they are quite significant! [15]
In previous posts, we have considered many of the tramroads in this area. The comments made under the OS Map extract immediately above should be sufficient to highlight any details/issues. My judgement, for what it is worth, is that the solid green/red line should be given precedence over both of the lines traced by Savage & Smith. If I am correct, the tramroads which existed in this are become those shown below. …..
The 6″ OS map of 1881/82 again. This time we see only the lines which in my opinion exited in the immediate are of the White Hart Inn and the Stirchley Ironworks. [2]
Walking the area, a number of the features on the map extract can be seen to still be present in 21st century in some form or other. Exploring Telford Town Park is highly recommended!
The next map extract shows the area to the North and Northeast of the extract above. …..
The 1881/82 6″ OS Map again. On this extract, two of the lines drawn by Savage & Smith (red-dashed and mauve-dashed) have also been removed to leave those over which there is some certainty that they existed. The orang lines are those which Savage & Smith were able to confirm. The light-blue-dashed line in the top-left appears on the map and served Wood Colliery. The mauve-dashed line is a tramroad which predated the enlarged slag heap of Wood Colliery and which appears on Savage & Smith’s traced drawing of the area. The two black lines on the plan are the Coalport Branch (LNWR) and the Stirchley Branch (GWR). [1: p164] [2]
The same area on Google Maps. Some of the features shown on the 6″ OS map have been lost. The slag heaps remain and have been encouraged to become woodland. The Mauve and light-blue lines can still be picked out with care on the ground in the 21st century. [Google Maps]
Looking North along Dark Lane, Telford. The large car park for Telford Town Park is ahead to the right. The old tramroad crossed the line of the lane at approximately this point before heading Northwest across the adjacent fields. {My photograph, 9th August 2022]Telford Rugby Club grounds: the old tramroad crossed the playing field on the diagonal (in a northwesterly direction). [My photograph, 9th August 2022]The line continues generally in a northwesterly direction but does deflect to the West for a short distance. I have found it very difficult to give a good approximation to the points at which the direction changed. Please see the mauve line as very approximate. [My photograph, 9th August 2022]The land rises as the landscaped waste heap of Wood Colliery is reached. Both footpaths visible in this image climb steeply. The old tramroad is buried under the waste heap. It horizontal alignment approximates to a later footpath across the waste heap
Before looking at the area immediately around Randlay Pool (which appears on the right side of the map extract above we need to trace the route of the two tramroads shown light-blue (not on the Savage & Smith drawing [1: p164]) and mauve on the extract OS map extract above. This next extract from the 1901/2 6″ OS map shows the line of the tramway marked light-blue as still in existence alongside Wood Colliery.
An enlarge extract from the 1881/82 6″ Ordnance Survey. The tramroad indicated by the light-blue-dashed line on the extract next above can easily be seen to serve Wood Colliery which appears to still be active at the time of the survey. The 1840 map of Dawley shows this tramroad. [9] The line of embankment South of the end of this tramroad suggests that at one time it extended down towards the disused colliery to the South. The mauve-dashed line is repeated on this extract. It is Savage & Smith’s line from the 1836 Shropshire Railway map. The tramroad shown by this line will have predated the growth of the slag heap of Wood Colliery. [1: p164][2]
The same area as shown on the OS map extract above, with the tramroad routes transferred. It can be seen that the tramroad on the West side of the image follows the route of a path in Telford Town Park. The orange line being that which served Hinkshay Colliery. Wood Colliery was perhaps 100 metres North of the last ‘l’ in ‘Campbell’. The Reservoir shown on the OS Map is now called ‘Withy Pool’. Earler mapping shows a Withy Pool much closer to St. Leonard’s Church. [Google Maps]
The following photographs show the approximate alignment of the two tramroads illustrated on the OS map extract and satellite image above. The first route begins bottom-left of the map/satellite image above. The first picture is taken a little south of the end of the orange-dashed line. …
Looking North on the slag heap of what was Hinkshay Colliery. The modern footpath has been laid over the line of the old tramroad. [My photograph, 9th August 2022]Looking back to the South, from a point a couple of hundred metres to the North, along the tramroad line. [My photograph, 9th August 2022]Turning through 180 degrees to look North at the same point. The modern footpath follows the horizontal alignment of the tramroad. [My photograph, 9th August 2022]Looking North again, the modern footpath deviates from the line of the tramroad for a short length as it makes a connection with another path approaching from the East. [My photograph, 9th August 2022]
The two old tramroad routes run immediately next to each other as they converge a little to the North. We are immediately adjacent to the location of Wood Colliery.
The ‘orange’ line continues Northward but now its alignment matches a tarmac-paved footpath. The footpath that we were following is now a few metres to the right of the ‘orange’ line. It follows the short stub-end of tramroad which meets our route at the horizon in this picture. [My photograph, 9th August 2022]Further North the tramroad the modern footpath continues to follow the old tramroad alignment. [My photograph, 9th August 2022]Another 200 metres or so and the two tramroad routes converge. [My photograph, 9th August 2022]Looking back to the South along the routes of the two tramroads. [My picture, 9th August 2022]
Having followed the orange and light-blue routes to their junction with the mauve route, we now need to return to the mauve route as it crosses the area of Wood Colliery slag-heap. It is important to bear in mind that the tramroad pre-dated the full extent of the slag-heap from Wood Colliery and although there is a 21st century footpath that seems to follow its alignment, the levels are likely to have been much different.
We have already note the extent of the colliery slag-heap on its Southeastern flank. This next photograph looks Southeast through the trees from the top of the slag-heap along the line of the ‘mauve’ tramroad.
The trees in the distance camouflage Dark Lane which runs behind them. The Rugby field is in front of them at the lower level. The tramroad route is shown by the mauve line. [My photograph, 9th August 2022]We need to continue to bear in mind that the route shown in these pictures is approximate and that it is probably at a significantly higher level than the original tramroad. None-the-less, the tramroad alignment runs North-northwest across the slag-heap. [My photograph, 9th August 2022]In one sense this picture shows very little, the old tramroad will be somewhat below this landscape and even it route cannot be shown as it runs, in all probability directly beneath the line of undergrowth and trees in this picture. The line of trees almost exactly mirrors the tramroad route on the 6″ OS maps. [My photograph, 9th August 2022]
One lovely touch on Wood Colliery waste-heap is the use that has been made of old carriage/wagon buffers as seats. They appear like mushrooms in the grass areas which surround the old tramroad routes.
The next [photo is not the best, by a long chalk as it is taken directly into the Sun
Looking back to the Southeast, the tramroad alignment takes it through the linear stand of tree of trees. The footpath at the extreme left of this picture gives access to the meadow which appears in the previous three or four shots. the path to the left of the mauve line follows the highest ridge of the colliery site and heads South towards the bottom of Telford Town Park. [My photograph, 9th August 2022]Turning through 180 degrees, this path follows the old tramroad’s alignment. [My photograph, 9th August 2022]And on, North to a junction with the light-blue route we followed. By this point, modern levels are much closer to those of the past! [My photograph, 9th August 2022]
The adjacent image is an extract from a larger plan on the Dawley Heritage website [17] which shows the location of collieries in the Dawley area. St. Leonard’s Church and Little Eyton Colliery feature at the centre of the image. Comparing this with the extracts from the OS map above, it appears that the location of Wood Colliery has been confused with the colliery shown as ‘Old Colliery’ and adjacent to The White Hart Inn on the OS mapping. That marked Holywell Colliery seems to be named Spout Colliery on OS maps and collieries to the East do not appear on this extract (Wharf Colliery, Lodge Colliery and Little Dark Lance Colliery all appear on the 6″ OS map of 1881/82).
That shown as ‘Old Colliery’ on the OS Mapping close to The White Hart Inn may well have been known as ‘Hinkshay Colliery’ which is referred to in the online introduction to the ‘Botfield Papers’ held at Manchester University. [18]
Returning to the tramroad theme, it is worth noting a possible additional tramroad route which was not picked up by Savage & Smith and which also does not appear as a tramroad on the OS mapping. The extract below shows that possible route which ran between the area immediately adjacent to St. Leonard’s Church and Wood Colliery. It is suggested by the embankments at the possible junction with the tramroad shown at Wood Colliery and the straight alignment of the residual track/highway on the OS map.
The tramroads that we have already discussed are shown, green, red and light-blue on this extract from the 1881/82 6″ OS map. The deep-red-dashed line indicates the possible additional route. It appears that this may have made a triangular junction with the line running North-South adjacent to Wood Colliery. It appears to have crossed the ‘red’ line at a ‘diamond’ crossing and headed West towards the Church Wickets public house. Please note that this is a route which is unsupported by any direct evidence. [2]The same area in the 21st Century, the possible tramroad route heads from the location of Wood Colliery in a westerly direct through a gap in the modern housing to then meet Brunel Road which meanders around while the tramroad route runs due West. [Google Maps]Please this an the immediately following pictures with a dose of skepticism, they show the postulated additional tramroad route as it appears in the 21st century.
The batch of photos above first follow the line to the West before turning back round to look East towards the Town Park. [My photographs, 9th August 2022]
The batch of photographs above take us along Brunel Road following our possible tramroad alignment! [My photographs, 9th August 2022]
The next map extract shows the area between Wood and Spout Collieries. The tramroad alignment which passed under the later slag heap and that shown running North-South on the West side of Wood Colliery join just to the South of Spout Colliery.
The tramroad linking Spout and Wood Collieries is joined by the abandoned route which by 1881/82 was covered by the Wood Colliery waste heap at point ‘A’. There may also have been a tramroad linking Wood Colliery with Wharf Colliery to the East. This is shown by the deep-red-dashed line on this extract from the 1881/82 OS map. The next extract from the OS Map shows what may have been the route of a tram road between the two collieries. [2]
Approximately the same area as shown above but this time with the tramroads and mineral railway highlighted in light-blue, mauve and brown respectively. {Google Maps]
The tarmac path continues to follow the old tramroad route northwards. [My photograph, 9th August 2022]And still further North. Spout Colliery was on the right at this point. [My photograph, 9th August 2022]Another possible tramroad route which is suggested by the embankment arrangement close to Wharf Colliery and the two straight lengths of lane. It is shown by the deep-red-dashed line. It must be stressed, once again, that this is a line which I imagine may well have been present between two local collieries. [2]A similar area to the 6″ map extract above with the possible tramroad imposed on the satellite image, Virtually everything along the line has been completely remodeled/landscaped. Note Telford Norman Chapel – this is not its original location. When Telford Development Corporation altered the whole area to create the town centre and the Town Park, the Chapel was moved from its original location where redevelopment would have destroyed it. The buildings in the very top-right of the picture are part of Telford International Exhibition Centre. [Google Maps]
Wharf Colliery was owned in 1900 by the Hopley brothers. [19] According to mindat.org, Wood Colliery was owned in 1890 by the Haybridge Iron Co.; in 1895-1896 by the Stirchley Coal & Iron Co.; in 1900, again by the Haybridge Iron Co.; and in 1920 by W.T. Jo. [20] To complete the picture, Spout Colliery was owned in 1890 by the Haybridge Iron Co.; in 1895-1896 by the Stirchley Coal & Iron Co.; in 1900, again by the Haybridge Iron Co. [21]
The next map extract shows the area Northwest of Spout Colliery. …
Again from the 6″ 1881/82 OS map, this extract shows two lines which were present in 1881/82. The Mineral Railway which was standard-gauge and the earlier narrow gauge tramroad. it is possible that, by 1881, The older tramroad had been replaced by a standard gauge line which made a junction with the Mineral Railway which ran on the Northeast side of Spout Colliery. Further North Savage & Smith show the tramroad continuing northwards as shown on this plan by the mauve-dashed line. They say that they took this information from the 1836 Shropshire Railway plans. [2]
Savage & Smith show the tramroad crossing the lane/road to the Northwest of Spout Colliery. Their tracing shows a break in the tramroad at the lane which is illustrated in the adjacent extract from their plan. [1: 164] This seems to be unlikely as their tracing to the North of the lane follows the line shown on the OS map above. A tracing error or a discrepancy in scaling would make the most logical explanation for the step in their alignment. The OS map shows a continuous alignment.
This is approximately the same area as covered by the OS map extract above. Major redevelopment has occurred.
In the top half of this image there are no features which fix the line of the tramroad and the mineral railway. The routes are traced from the mapping onto the satellite image using overlay software. From here North the lines drawn must be seen as careful estimates!
The tramroad alignment to the North of Spout Lane (or the footpath it is in the 21st century. [My photograph, 9th August 2022]It is difficult to provide a meaningful line on this picture which shows that the old tramroad alignment and the public footpath of the 21st century drift gradually further apart as they head for the horizon. The satellite image above shows this most effectively. [My photograph, 9th August 2022]
We pick up the tramroad route further North in the next extract from the 1881/82 OS map
The mauve-dashed line on this next extract from the 6″ OS map of 1881/82 is the line we are currently following the combined red and mauve route is one we have already followed. The green line shows the approximate route of a tramroad not included on Savage & Smith’s drawing. [1: p164] but which appears on the British History Online plans of Dawley in the 1840s [9] earlier in this article. [2]The same area as on the map extract directly above. The locations marked ‘A’, ‘B’ and ‘C’ are the same geographical location.Looking back along the line of the old tramroad at point ‘A’ above [Google Streetview, June 2022]Looking forward along the line of the old tramroad at point ‘A’ above [Google Streetview, June 2022]Looking back along the line of the old tramroad across the modern roundabout towards point ‘A’ above [Google Streetview, June 2022]Looking from the roundabout towards point ‘B’. In the trees the ground rises significantly to meet an open area of grass which surrounds Telford Land Registry. [Google Streetview]
The remainder of this old tramroad route crosses the grounds of Telford’s Land Registry and then runs underneath the West side of Telford Bridge retail park. This first extract from the satellite images shows its approximate route across the grounds of the Land Registry. The buildings of the Registry are on the bottom-left of the image, its carpark are also on the left side of this image.
Looking Southwest across the access road to the Land Registry. The red line continues to show the North-South alignment of the old tramroad which crossed the line of the modern road approximately at the pedestrian crossing. {Google Streetview, June 2022]The line of the tramroad dissappears into the retail park and under Argos and Hobbycraft! [Google Streetview, June 2022]Looking West-Northwest along the face of buildings in Telford Bridge retail park. The alignment of the old tramroad runs from the face of Hobbycraft, close to its shared wall with Argos and runs through the brick wall of Poundstretcher/Pet Hut close to its shared wall with Oakfurniture. [Google Streetview, June 2022]The redline again shows the old tramroad’s approximate geographical position at the roundabout at the junction of Collier’s Way and Caledonian Way. Off to the left of this image it joined the route of the tramroad that we looked at first in this article. [Google Streetview, June 2022]
In my next post I plan to look at what is discernable of the historic tramroads along the line of and in the vicinity of the later Coalport (LNWR) and Stirchley (GWR) branches
References
R.F. Savage & L.D.W. Smith; The Waggon-ways and Plateways of East Shropshire; Birmingham School of Architecture, 1965. Original document is held by the Archive Office of the Ironbridge Gorge Museum Trust.
The featured image above is of a painting by Eric Bottomley. The artist comments: “Nearing the end of BR operations in 1956, Beyer Peacock 0-6-0T No. 823 (The Countess) crosses Church Street, Welshpool with a cattle train.”A print can be purchased here. [7]
This satellite Image shows the W&LLR as it exists in the 21st century and the BR mainline. [Google Earth]
The Welshpool & Llanfair Light Railway (W&LLR) [1] is a 2 ft 6 in (762 mm) narrow gauge heritage railway in Powys, Wales. The line is about 8.5 miles (13.7 km) long and runs eastwards from the village of Llanfair Caereinion via Castle Caereinion to the town of Welshpool. The headquarters of the line are at Llanfair Caereinion. [2]
The heritage line is a very significant part of the former/original light railway. The original line entered the town of Welshpool running through the streets of the town to meet the Cambrian Railway mainline linking Whitchurch to Aberystwyth at the old Welshpool Railway Station. [4] This post focusses on that abandoned length of railway.
Church Street, Welshpool as it appeared on an old monochrome postcard. This image is embedded from flickr where it features on the feed of Glen F. [8]
The W&LLR opened in 1903 (4th April 1903) it was worked by the Cambrian. A platform was provided to the north of the original station on the west side of the line at the south-east end of the goods yard. Transhipment facilities were also built in the goods yard so that goods could be exchanged between standard and narrow gauge trains. [4]
Interestingly, that station was originally built by the Oswestry & Newtown Railway, its original station opened on 14th August 1860. [3] The line was initially operated by the London & North Western Railway before being absorbed by the Cambrian Railways, which became part of the Great Western Railway at the grouping on 1st January 1923. [4]
The 1949 revision of the 6″ Ordnance Survey which was published in 1953 shows the site of the Welshpool Railway Station. The W&LLR enters the map extract at the top-left and is shown curving southwards and crossing Smithfield Road to enter the station site. [5]This ESRI Image from the National Library of Scotland shows that the old mainline is now closely followed by a major road (A483). The old station building still exists but is in use as a shopping venue. A replacement station can be seen on the East side of the A483. A short length of Smithfield Road (B4381) runs to the Northwest of the old Station building and now links in with the modern roundabout. As in the past it curves round to cross the railway, only now being carried over the A483 as well. Severn Road still leads from the town-centre to the old railway station. The old cattle market is now the site of a Tesco Superstore. [23] Welshpool Railway Station in the 21st century, on its site to the East of the A483 and the old railway station. [24]Welshpool mainline railway station in the 1920s. The photograph is taken from the road bridge which carried the B4381 9modern numbering system0 over the railway to the South of the station. The W&LLR facilities were to the left on the other side of the station building and separated from it by Smithfield Road, (c) John Alsop. [25]The front face of the mainline station at Welshpool. This image was shared on the Facebook Page of the W&LLR [34] as a comment on another shared image. [40]This photograph was taken from the North of the station site in 2011. The station building was still is use but the railway had been realigned to accommodate the new route of the A483. The new station platforms were separated from the station building by the A483 in the early 1990s. the photographer is standing on what were once the W&LLR facilities. (c) M.J. Richardson, 4th March 2011, it is licensed for reuse under the Creative Commons Attribution-ShareAlike 2.0 licence. [26]The old railway station buildings at Welshpool, viewed from the North. The footbridge provides pedestrian access to the replacement station on the East side of the A483. [Google Streetview, September 2021]This view is from the South and shows the old railway station and the A483 the standard gauge line runs to the right of the fenceline at the right side of the image. The modern station is just beyond the footbridge, also on the right of the image. [Google Streetview, September 2021]This view is what can be seen from the road-overbridge to the South of the old station in the 21st century. As above, the old station building is on the left of the image, the A483 dominates the centre of the photo and the railway is on the right with the station just beyond the footbridge. [Google Streetview, September 2018]The curved facilities of the W&LLR can be seen on this extract from an aerial image held by Historic England and made available on the Britain from Above website (WPW061717). The W&LLR is shown separated from Smithfield Road and the standard-gauge by hedging and a white 5-bar gate. Perhaps it is worth noting the large number of horse-boxes on the standard-gauge siding which runs perpendicular to the standard-gauge mainline. It provided access to the town’s cattle market and was known as Smithfield Siding. [6]This image was taken from a point close to the bottom left of the image immediately above. The road sign somewhat obscures the view of a grassed area which once was the site of the W&LLR yard. [Google Streetview, September 2021]
The next three images are embedded from the Science Museum Picture Library, they all focus on the W&LLR facilities adjacent to the mainline railway station in Welshpool.
When the train shown in the image above set off for Llanfair Caereinion it crossed Smithfield Road in the foreground and traversed the W&LLR goods yard before heading just North of West towards the town centre. It ran jut to the North of the Lledan Brook which threaded its way through the town. On its journey the train would have crossed the Shropshire Union Canal on a girder bridge which is still in existence in the 21st century. The location is shown centre-left of the map extract immediately below.
Much of Welshpool town centre has been redeveloped and roads have been significantly realigned and a gyratory added for traffic on the A458, Salop Road. The bottom arm of the gyratory can be seen entering the image above from the right and heading away from the camera at the centre of the image. This location appears on the next 6″ OS Map extract below.
The route of the W&LLR crossing Church Street as drawn on the 1949 6″ Ordnance Survey. [5]The gyratory on the A458 as it appears in the 21st century on Google Earth satellite imagery. The red line shows the route of the old railway as drawn on the 6″ OS Map of 1949 (published 1953). [Google Earth, March 2022]This view shows the modern gyratory. The blue line shows the route of the W&LLR as shown on the 1949 map extract. But this does not appear to be correct. The route as shown in pictures while it was still active, shows the line running to the right side of the white fronted block near the centre of the image. Which means that the red line is the more likely route of the railway! [Google Streetview, June 2021]
It is worth pausing for a moment. I am not usually one for calling to question OS Mapping, but it appears that in this case the cartographers have followed the route of the brook, rather than the route of the railway when they drew the railway onto the 6″ OS Maps of 1949. Interestingly the line does not appear on earlier versions of the 6″ OS Maps. I have reproduced the 1938 revision below. It seems as though the brook was culverted from point ‘A’ to point ‘B’ as marked on the plan.
The railway followed a slightly more northerly line than the brook reaching Church Street halfway between the old alignment of Union Street and the brook.
Lledan Brook can be seen culverted between points ‘A’ and ‘B’ on this 1938 6″ OS Map extract. It is easy to understand why the cartographers may have made a mistake. The actual route of the line was along the ‘path’ through the Vicarage garden which is shown dotted as a track and then as a footpath reaching Church Street between the ‘H’ at the end of ‘Church’ and the ‘S’ of ‘St’. [5]
The red line drawn on the Google Streetview image above is supported by a number of things. The first being the building to the left of the line in the monochrome image immediately below.
Embedded from flickr, this image shows the route of the railway where it crossed Church Street. Compare this with the modern Google Streetview image below, (c) Ron Fisher. [9]Looking West across the line of Church Street. [Google Streetview, June 2021]
It seems reasonable to assert that the building shown is the same one in each image. This is further supported by the W&LLR Town Trail which has a display board and mural on the end wall of this building. This is shown below.
A mural and Town Trail Board at the location mentioned above. [Google Streetview, June 2021]
Further support for this can be seen in the next two images. The first of which is taken from a locomotive travelling along the line towards the railway station in Welshpool in the mid-20th century. The second is a Google Streetview image which includes both the mural and in the background the Queens Hotel.
Since the gyratory has been built the immediate area has changed considerably. At this location trains crossed Church Street and disappeared into a narrow ginnel.
One of the line’s two steam loco’s awaits clearance to cross Church Street on its way to the transshipment sidings at Welshpool Station. This picture was shared on the W&LLR’s Facebook Page [34] on 14th December 2021. [35]
One of the W&LLR’s two steam locomotives brings a train through the narrow ginnel onto Church Street on its way down to Welshpool Station.The shop front that we noticed above appears again on this photograph from the mid-20th century. [15]
No. 822, The Earl brings its train across Church Street on its way to Welshpool railway station. [43]
This video shows a W&LLR train leaving the ginnel and crossing Church Street. It picks up the various features of the line and its surroundings that we have already mentioned. [27]
The last three or four seconds of this video see an enthusiasts’ train running up towards Church Street through a grassed area. [28]
A counter-argument about the alignment is recorded in Peter Johnson’s book about the W&LLR. He says that the application to the Light Railway Commissioners on 17th April 1897 described the route as follows, the route would “commence near the Welshpool railway station, at the junction of Smithfield and Severn Roads. … It would run along the easterly side of Smithfield Road for 200ft and the proceed in a Westerly direction, crossing the Shropshire Union Canal at the northern end if the aqueduct before following the course of the Lledan brook at the side of the vicarage grounds to Church Street, which it would cross, continuing to follow the brook before crossing Union Street and the Back Road near their junctions with Hall Street, taking in the property known as the ‘Seven Stars’. It would then run at the back of the houses on Back Road and behind the Armoury to Raven Square.” [30, p51]
The passage in bold italics suggests that the proposed railway would follow the edge of the vicarage garden and remain close to the Lledan Brook. This was the route chosen for the much earlier tramroad which connected Standard Quarry with the Shropshire Union Canal to the East of the town centre. The red route shown above runs through what was the vicarage garden and does not remain close to the brook.
The old tramroad route is illustrated by Cartwright & Russell on a plan of routes through the town centre which is shown immediately below. [41: p21]
Of incidental interest is Cartwright & Russell’s assertion that the tramway through the centre of Welshpool was the first railway anywhere to use chaired track. [41: p16] It was one of a series of tramroads owned by the Earl of Powys. There were five such tramroads which were built under the provisions of the Ellesmere and Montgomeryshire Canal Acts of 1793/94. Those Acts granted the building of rail feeders up to three miles in length to connect with the new waterway. Cartwright & Russell tell us that five such lines were laid in the area between Welshpool and Llynclys (south of Oswestry). [41: p14] The shirt tramroad through the centre of Welshpool was constructed in 1817 to carry granite quarried from the Standard Quarry and survived for just over thirty years. [41: p16]
Plan entitled ‘Routes through Welshpool’ as included in Cartwright & Russell’s book. Immediately to the right of ‘ST’ in UNION ST’ the tramroad can be seen to dogleg away from the future tramroad route. That deviation approximates to the line of the Lledan Brook. [41: p21]
The route finally chosen for the railway was varied to run through the vicarage garden but remained within the Limit of Deviation allowed for in the Order for the scheme. The extremely tight turns shown on the 1949 survey and suggested on Cartwright & Russel’s plan of the tramroad route seem impractical for steam-powered transport and photo evidence suggests the line ran closer to Union Street.
Johnson includes a plan drafted by A.J. Collin in 1901 showing the route of the line from Church Street through buildings and along the line of the brook but which shows it avoiding the sharp s-bend in the brook by cutting through existing properties on Church Street to the North of the brook and seemingly necessitating the demolition of frontages on Church Street and some ancillary buildings behind them. [30: p84]
It appears from the photographic evidence that demolition of only one frontage to Church Street was ultimately required, although Cartwright & Russell show three being demolished and a single property being built to fill the void left by the demolition. [41: p33]
Johnson notes [30: p88] that the vicarage boundary wall was realigned to accommodate the railway which suggests that the actual route was not as shown on the 1949 6″ Ordnance Survey.
Johnson also comments that there were “three viaducts over the Lledon brook, the line being carried directly along the course of the brook for some little distance by means of longitudinal rail beams supported by cross girders (rolled joists) which in turn rested on the masonry sides of the stream. There were about forty-five of these joists of varying span, the longest being 17ft 3in. There were two culverts, of 3ft and 4ft diameter.” [30: p99]
To bring this discussion to a conclusion, the line shown in red on the plan below is most probably the line taken by the W&LLR. The block of properties to the West of Church Street clearly should have been shown as two separate blocks with an alley (or ginnel) between.
‘The Earl’ on the First Day Cover for stamps produced in 2014.
The first day cover for the series of stamps to which the stamp shown above belongs. The stamps were listed as ‘Classic Locos of Wales’. [31]
This modern image is taken from approximately the same location as the older image above. The red line is the approximate route of the W&LLR. [Google Streetview, June 2021]Looking North along the line of the Lledan Brook from Union Street. The route continues to be culverted. The photograph is taken from Union Bridge which was crossed by the light railway. [Google Streetview, June 2021]Turning around, this is the scene that confronts the photographer. The route of the old line is again shown by the redline. Back before the construction of the line the Seven Stars Public House would have stood over the line ahead beyond the buildings fronting the road to the right. [Google Streetview, June 2021]Locomotive No822, The Earl again, immediately in front of H. Ballard & Son’s premises at almost exactly the same location at the white van on the Google Streetview image above. This image appeared as part of the discussion on the Facebook Page of the Welshpool & Llanfair Light Railway. It was posted by Anthony Turton on 22nd March 2020. [33].The 1949 survey again. [5] The Seven Stars Pub. is the building at the top end of Hall Street and it is not accurately drawn as by 1880 the corner had been removed to give a reasonable road alignment on Brook Street as shown on the 1:500 plan below. However, the building was demolished to make was for the railway and should not appear on this 1949 6″ Map. The plan taken from the book by Cartwright & Russell [41: p33] confirms the demolition of the pub and the alignment of the railway.The Seven Stars Pub was demolished to make was for the W&LLR. The line of the railway is again marked approximately by the red line superimposed on the OS Map. The photograph below was taken from further West along Brook Street and shows the line running through what would have been the Seven Stars Pub. [29]The view along Brook Street through the site of the Seven Stars Pub towards Union Bridge(c) Geoff Charles, 21st April 1950. The image is included here under the Creative Commons CC0 1.0 Universal Public Domain Dedication by the National Library of Wales. [10]
A 1960s colour photograph of The Earl and Countess at the above location. This was shared on The W&LLR Facebook Page on 5th April 2020. [46]A modern photograph of the location of the three pictures above. The building in the centre of this photograph can be seen easily on the upper of the two images above. The buildings to the right of this picture can be seen on both the monochrome pictures above. As usual the approximate line of the W&LLR is shown in red. [Google Streetview, June 2021]The Earl brings its train down towards the centre of Welshpool. It hs just passed along the backs of the properties on the North side of Brook Street and is heading down towards Seven Stars and Union Bridge. This image appeared on the W&LLR’s Facebook Page [34] on 22nd March 2020. [37]The same location in the 21st century, as it appears on Google Streetview [June 2021]. The cottage on the right remains, as does the sloping shed roof which on the monochrome image is just above the brake van.Turning to the left, the photographer picks up the line of the old railway as it leaves Brook Street to run behind the properties which can be seen to the left of this image. [Google Streetview, June 2021]
The line curved northwards away from Brook Street and then turned back westwards to run along the backs of houses fronting onto the North side of Brook Street. The 1949 6″ OS Map has the alignment correct along this length. The photograph below looks back East along the old railway.
Cartwright & Russell describe the route that we have followed like this: “There now existed a 2ft 6in gauge railway starting from a point in Welshpool’s Road and close to the Cambrian Railways’ goods and passenger station (240ft above sea level). It was 9 miles 5 chains long, station to station; later spurs at Welshpool added another 7 chains of track. At this terminus, there was a gravel ‘platform’ and a waiting room with a booking office complete with awning. A short siding swung away into the Cambrian Railways’ yard to the tranship shed, while the main line of the new narrow gauge construction curved off from Smithfield Road. Entering enclosed property, it passed the run round loop on the left and the three sidings on the right which formed single roads into the goods shed, the engine shed and the longer carriage shed adjoining. The Shropshire Union canal was crossed by a steel plate girder bridge with a single span of 33ft 4in. A siding to the canal suggested earlier but rejected in 1899 had eventually been agreed in July 1902, but was never constructed.” [41: p51]
They continue: “Crossing Church Street (later A483) on the level, the track dived through the newly opened gap between the buildings to reach the Lledan Brook. Above the watercourse, the rails were borne on longitudinal bearers supported by steel cross girders to enable the railway to reach and cross Union Street, where the Seven Stars Public House and adjoining Malthouse had had to be demolished and where trains would make a stop for passengers. Disappearing behind the cottages with two more stretches of viaduct, the route lay behind the Armoury to pass by the Standard granite quarry, where a siding was soon to be connected, and so to Raven Square. On the town side of the intersection, a line-side gravelled area marked the third station.” [41: p52]
The intention behind this article was to follow the route of the now closed town-section of the W&LLR. The remainder of the line is preserved can be followed on modern maps and can be travelled behind one of the original locomotives bought to serve the line.
To finish this article, here is a modern aerial view of Welshpool looking Southeast along the line of Broad Street/Severn Road. The old station buildings are at the top-right of the image. The approximate line of the W&LLR through the town is shown by the thin black line which has been imposed on the image. When seen in this light the line seems to take a relatively straightforward route through the town! [44]
References
The Welsh name is: Rheilffordd y Trallwng a Llanfair Caereinion.
The featured image, from 1957, was shared by Metsa Vaim EdOrg on the Telford Memories Facebook Group on 8th November 2020 with the following comments: “Coalbrookdale in 1957 with the 12.48pm Ketley – Much Wenlock ‘mixed’ train. … I watched this train at Lawley station or from our garden a few times when I was a child.”
Introduction – An introduction to the W&SJR was provided in the first article about the line which covered the length from Wellington to Horsehay & Dawley Station:
Lightmoor Press have produced an excellent book about the line from Wellington through Much Wenlock to Craven Arms, “The Wellington, Much Wenlock and Craven Arms Railway.” The author is Adrian Knowles. [1]
Before continuing our journey along the line, we note that it was built between 1857 and 1861 and in the section we are looking at, passed through the following stations: Lightmoor Platform (Junction), Green Bank Halt and Coalbrookdale, before arriving at Buildwas.
For completeness, the images below, which were included in the first two posts about the line, show the developing standard-gauge rail network around the River Severn. By 1957 the W&SJR linked Ketley Junction to Lightmoor. It was a little longer before the line made a connection with the Severn Valley Railway and eventually the route through to Craven Arms opened.
Ketley Junction to Lightmoor was open by 1857. [2]The Severn Valley line was open by the time covered by this map. [2]The complete route of the Wellington, Much Wenlock & Craven Arms Railway was in use by 1867. [2]The railways in the area around what was the Wellington & Severn Junction Railway (W&SJR) as shown on the OpeRailwayMap. OpenRailwayMap (previously called “Bahnkarte”) is a detailed online map of the world’s railway infrastructure, built on OpenStreetMap data. It has been available since mid-2013 at OpenRailwayMap.org [17]
For the sake of completeness, it is worth noting (as was the case in part 2 of this short series), that there was a very significant network of plateways/tramroads in the immediate area of the line. These were essentially a private system belonging to the Coalbrookdale Company. The network from 1881 onwards is discussed in an earlier article about the East Staffordshire Tramroads owned by the Coalbrookdale Company:
It is also worth noting again the 21st century plans of Telford Steam Railway to extend its preservation line to the site of what was Ironbridge Power Station at Buildwas. Their plans and progress can be followed here. They have called their plans ‘Steaming to Ironbridge‘.
In essence this will be a phased process and one which will have been significantly affected by the Covid19 pandemic. The first phase was to reach Doseley Halt through renewing exiting sub-standard trackwork. The next step will be to receive planning permission for a new bridge to cross the A4169 and to construct the line to Lightmoor. It will require two level crossings as well as the bridge. The bridge deck has already been supplied by Network Rail and is stored at Horsehay Yard.
Telford Steam Railway already leases the signal box at Lightmoor Junction from the rail authorities for future use, when operating the extended railway.
The main goal of ‘Steaming to Ironbridge’ is to create a Park and Ride steam service to serve the Ironbridge Gorge.
The Route– Lightmoor Junction Station to Buildwas
Lightmoor Platform as it is referred to in some sources, Lightmoor Station in others is shown on the first OS Map extract below:
This 25″ OS Map extract was included in the second article about the W&SJR. It is from the 25″ 1925 edition which was published in 1927. The double track provision from the junction towards the West is clear. The station (above the word ‘Branch’) and the first signal Box on the south side of the line opposite the goods yard can easily be picked out. The later replacement signal box was sited just to the east of the road-bridge at the east end of the station and was on the North side of the line [18]
Two images shared on the last post about the W&SJR are worth sharing again here as they show the Lightmoor Brick and Tileworks site in the early 20th century.
The next series of photographs are all taken in or around the site of Coalbrookdale Railway Station. In sequence, the camera location generally runs from Northeast to Southwest.
The Small Woods Association is based on the site of the old Coalbrookdale Railway Station. The Association are the UK organisation for woodland owners, workers, supporters, and social foresters. They “stand for living, sustainable woodlands alive with wildlife, people and work. Managed and used well, small woodlands are vital to thriving local economies, wildlife, and the health and wellbeing of local communities, as well as hugely valuable in the fight against climate change.” [43]
Alongside the Association offices on the station site is the Green Wood Centre. It promotes “sustainable living through a wood-based economy by running courses and events in sustainable woodland management, coppicing, crafts and related activities. … Activities at the Centre include woodland volunteering projects, fun family sessions and woody events for the whole community.” [44]
There is also an independently run café on the site, the Green Wood Café. The café is associated with Coffee With Soul and Gorge Grub. It is part of J Grant Catering Ltd; a family-run business in Shropshire. [45]
The old station site at Coalbrookdale which has been significantly repurposed by the Small Woods Association. [My photograph, 18th July 2022]A wider view of the station site showing the various buildings on the site in the 21st century. The old station building is visible on the right side of this image. [My photograph, 18th July 2022]Southwest of the railway station, the line turns to the West, crossing Station Road by means of a four-ring brick arch bridge. Almost immediately, it crosses, at level, a lane which led to an old Gravel Pit. These locations are pictured below. This is another extract from the 1901/2 OS Map. [15]This satellite image shows the immediate vicinity of Station Road, Buildwas Road and Strethill Road. It shows the railway line crossing both Station Road and Strethill Road as shown in the photos below. [Google Maps]Station Road Bridge from the Northeast on Station Road. [My photograph, 18th June 2022]Station Road Bridge from the South on Station Road. [My photograph, 18th June 2022]The level-crossing on Strethill Road, just to the North of Buildwas Road. [Google Streetview, 2011]
Apart from the location of the level-crossing on Strethill Road the railway remains on a relatively high embankment after leaving Coalbrookdale Railway Station. It turns first to the West as shown on the map extract above and then back towards the Sothwest as it heads for the River Severn.
Another OS Map extract from the 1901/2 6″ survey shows the railway crossing the River Severn on the Albert Edward Bridge. Immediately to the Northeast of the Albert Edward Bridge, the line crosses the Buildwas Road on a skew-span girder bridge as pictured below. Immediately to the Southwest of the Severn the line turned relatively sharply to the right crossing an accommodation bridge before joining the GWR Severn Valley Railway at Buildwas Junction. [15]The skew span girder bridge which carries the railway over the Buildwas Road, looking West towards Buidlwas. [My photograph, 18th July 2022]The same bridge viewed, this time, from the West, looking back towards Coalbrookdale and Ironbridge. [My photograph, 18th July 2022]The Albert Edward Bridge, viewed from the Northwest. It was opened on 1st November 1864 and named after the Prince of Wales (later Edward VII), its design is almost identical to Victoria Bridge which carries the Severn Valley Railway over the Severn between Upper Arley and Bewdley in Worcestershire.
It was designed by John Fowler, its 200 feet (61 m) span cast-iron arch has four ribs, each of nine parts bolted together. The patterns for the radiused beam castings for the bridge were prepared by Thomas Parker at the Coalbrookdale Iron Company. Originally it was built to carry the Wenlock, Craven Arms and Lightmoor Extension Railway of the Wellington and Severn Junction Railway across the river.
Until the closure of Ironbridge power station it carried coal traffic as part of the line between Lightmoor Junction and Ironbridge Power Station. The bridge’s timber and wrought iron deck was replaced by a structural steel deck in 1933. It may be one of the last large cast iron railway bridges to have been built. Due to its age and the condition of the ironwork, traffic over the bridge is restricted to a 5 miles per hour (8.0 km/h) speed limit to minimise stress. Although it carries two tracks only the one on the downstream side was still in use to supply the Ironbridge Power Station site. The line was mothballed in 2016 after the closure of the power station.
The featured image shows large Prairie Class 2-6-2T No. 4178 on the final passenger service along the W&SJR on 21st June 1962 heading North across Holly Road into Doseley Halt. This picture was shared by Marcus Keane on the Telford Memories Facebook Group on 29th April 2014.
Introduction – An introduction to the W&SJR was provided in the first article about the line:
Lightmoor Press have produced an excellent book about the line from Wellington through Much Wenlock to Craven Arms, “The Wellington, Much Wenlock and Craven Arms Railway.” The author is Adrian Knowles. [1]
Before continuing our journey along the line, we note that it was built between 1857 and 1861 and in the section we are looking at, passed through the following stations: Horsehay and Dawley, Doseley Halt, and Lightmoor Platform (Lightmoor Station or Halt).
For completeness, the images below show the developing standard-gauge rail network around the River Severn. By 1857 the W&SJR linked Ketley Junction to Lightmoor. It was a little longer before the line made a connection with the Severn Valley Railway and eventually the route through to Craven Arms opened.
Ketley Junction to Lightmoor was open by 1857. [2]The Severn Valley line was open by the time covered by this map. [2]The complete route of the Wellington, Much Wenlock & Craven Arms Railway was in use by 1867. [2]The railways in the area around what was the Wellington & Severn Junction Railway (W&SJR) as shown on the OpeRailwayMap. OpenRailwayMap (previously called “Bahnkarte”) is a detailed online map of the world’s railway infrastructure, built on OpenStreetMap data. It has been available since mid-2013 at OpenRailwayMap.org [17]
It is worth noting as a significant aside, that there was a very significant network of plateways/tramroads in the immediate area of the line. These were essentially a private system belonging to the Coalbrookdale Company. The network from 1881 onwards is discussed in an earlier article about the East Staffordshire Tramways Owned by the Coalbrookdale Company:
Searching on line, I found the following image which shows two forms of horsepower at work in the Horsehay Works in the early part of the 20th century. It also illustrates three different trams/waggons in use before the site was converted to standard-gauge!
Tramways/plateways at Horsehay Works in the early part of the 20th century. Shared on the Telford Memories Facebook Group by Lin Keska on 23rd February 2017, courtesy of the Ironbridge Gorge Museum Trust Archives. [20]
It is also worth noting the 21st century plans of Telford Steam Railway to extend its preservation line to Ironbridge Power Station at Buildwas. Their plans and progress can be followed here. They have called their plans ‘Steaming to Ironbridge‘.
In essence this will be a phased process and one which will have been significantly affected by the Covid19 pandemic. The first phase was to reach Doseley Halt through renewing exiting sub-standard trackwork. The next step will be to receive planning permission for a new bridge to cross the A4169 and to construct the line to Lightmoor. It will require two level crossings as well as the bridge. The bridge deck has already been supplied by Network Rail and is stored at Horsehay Yard.
Telford Steam Railway already leases the signal box at Lightmoor Junction from the rail authorities for future use, when operating the extended railway.
The main goal of ‘Steaming to Ironbridge’ is to create a Park and Ride steam service to serve the Ironbridge Gorge.
The Route– Horsehay & Dawley Railway Station to Buildwas
The line currently has been taken back to a point between the two curves South of Horsehay & Dawley Station. Work on the extension has, as of mid-July 2022, still to start.
Searching online I have located 4 images of Doseley Halt which are copyright protected by Lens of Sutton. Two of which are included in the book about the line by Knowles. [1: p166] … Lens of Sutton’s reference numbers for these images are:
57060 GWR Doseley Halt General view, circa 1960s, showing the single platform and level crossing. 57071 GWR Doseley Halt General view, circa 1960s, showing the single platform and level crossing. 57072 GWR Doseley Halt General view, circa 1960s, showing the single platform and ground frame. 57180 GWR Doseley Halt General view showing the single platform, circa 1960s.
On 11th July 2022, I walked down the line from the end of the preservation section , over Doseley Bridge and down to a point about 200 metres South of what was Doseley Halt and the level-crossing on Holly Road. I was delighted to find one small remnant of the railway at the level-crossing in the tarmac of Holly Road.
A length of the old rails remains within the carriageway of Holly Road. The view ahead is impeded by vegetation and the route of the line cannot be followed immediately. [My photograph, 11th July 2022]Looking back to the North, the line curves very gently through the station site. [My photograph, 11th July 2022]
For perhaps 150 to 200 metres, the line South threads a narrow space between Holly Road and Gravel Leasowes. It initially at on a low embankment, but very soon, as the lane levels rise, the route is in cutting. Following Gravel Leasowes, I was able to find a footpath connection between the two roads at the point that Gravel Leasowes turned away from the line. That point is at the very top of the first map extract below.
This was the point at which my wander on 11th July 2022 ceased as I recognised the location from an earlier walk on 21st April 2022.
Another extract from the 6″ OS Map of 1901/2 which is centred on the level-crossing at Lightmoor Road. [15]The next length of the line from the level-crossing at Holly Road as it appears on modern satellite imagery. Holly Road is to the East of the Line, Gravel Leasowes to the West. The short footpath mentioned in the text can be seen in the bottom right of this image. [Google Earth, 4th April 2021]The approximate line of the old railway is shown again by the red-line on this satellite image. [Google Earth, 4th April 2021]Large Prairie No. 4178 again, this time on the climb towards Doseley Halt from Lightmoor. The gradient along this length was approximately 1 in 40. The image was shared by Metsa Vaim EdOrg on the Telford Memories Facebook Group on 8th October 2019. [40]Looking back to the North at the point where embankment turns to cutting. [My photograph, 21st April 2022]The Lightmoor Road Level-crossing appears on this next satellite image. There was at one time a tramroad on the East side of Lightmoor Road which linked The Lightmoor Ironworks with Dawley Parva Colliery and the old canal which were both to the North of the W&SJR. That tramway appears on the extract from the 6″ OS Map of 1881/82 below. [Google Earth, 4th April 2021]Looking North once agin not long before the location of the Lightmoor Road Level-crossing is encountered. [My photograph, 21st April 2022]Looking North across Lightmoor Road at the location of the level-crossing. [My photograph, 21st April 2022]Looking ahead down the line to the Southeast at Lightmoor Road Level-crossing. [Google Streetview, May 2019]An extract from the 6″ OS Map of 1881/82 shows Lightmoor Road running from the centre-top of the image to the Bottom-left. A tramroad runs on the East side of the road and crosses under the railway. It has a branch to Lightmoor Colliery and continues to serve Lightmoor Ironworks which were still operational in 1881. Interestingly, a short standard-gauge branch is shown leaving the W&SJR just to the Southeast of the point that it crossed Lightmoor Road. That short branch served Lightmoor Ironworks which are just off the bottom edge of the extract. The branch had been lifted by the time of the 1901/2 survey. [30]
Lightmoor Colliery
Lightmoor Colliery appears on the Hudson Institute of Mineralogy Mindat.org register as owned by the Coalbrookdale Company and as being active between 1855 and 1885. [33] It should, incidentally, not be confused with the colliery of the same name in the Forest of Dean!
Lightmoor Iron Works
The information about the Lightmoor Iron Worksis distilled from the Discovering Shropshire’s History website. [34] Little is known about the the Iron Works, but there were a number of structures (which appear on the 1901 Ordnance Survey extract above) to the east of the location of the furnaces. These were thought to initially be part of the industrial complex of the ironworks, later converted to domestic use. ln 1984 the lronbridge Gorge Museum Archaeology Unit excavated parts of the Lightmoor Ironworks site in advance of its destruction by the Ironbridge By Pass. Trenches were dug to examine the wall footings of that group of buildings to the east of the furnaces. These buildings had been constructed directly onto coarse pit waste, and stood until recently. The area was badly disturbed after their destruction, which obliterated all traces of floor levels. Nothing was found which would have enabled the different usages thought to have applied to be confirmed.
After the level-crossing at Lightmoor Road, the line began to swing round to the South. [Google Earth, 4th April 2021]There was a significant network of tramroads in the immediate vicinity of Lightmoor Junction. This 6″ Map extract from 1901/02 shows the situation at the turn of the 20th century. There was a goods transshipment facility at the Junction which connected the Coalbrookdale Co. Tramroads to the wider world! The large factory complex to the North of the Junction is the Lightmoor Brick and Tile Works. [15]
Lightmoor Brick & Tile Works
The information about the Lightmoor Brick & Tile Works below comes from the Discovering Shropshire’s History website. [35] Lightmoor Brickworks was first mentioned in 1779, when it was owned by John Davies … Its initial base of production was bricks, made by the semi-dry process. This was followed by other basic wares of the early 19th century, including flooring bricks, draining pipes, chimney pots, and lightweight roofing tile During the 1860s the diversity of products began to escalate. The next decade heralded a phase of moulded decorative terracotta… Which continued until the turn of the century, and the works turned back to brick manufactures. From the 1900s to the closure of the Coalbrookdale Co in 1933, Lightmoor Brickworks supplied them with all the firebrick shapes for their solid fuel appliances. In the fifty years from 1933 to the late 1980s Lightmoor continued to survive on brick manufacture.
The site of the Brick and Tile Works is now a housing estate on the South side of the A4169 (Queensway) as shown on one of the satellite images below.
This earlier 6″ Map extract from 1881/2 is probably a little clearer than the 1901/2 extract above. [30]This extract from the 6″ Map series on 1925 which was published in 1928 clearly shows the location of the Railway Station. [31]Greater clarity is provided by the 25″ Map Series from Ordnance Survey. This extract is from the 25″ 1925 edition which was published in 1927. The double track provision from the junction towards the West is clear. The station (above the word ‘Branch’) and Signal Box on the south side of the line opposite the goods yard can easily be picked out. [32]This satellite image shows the relative locations of the W&SJR, the old Coalbrookdale Co. Tramroad and the Lightmoor Ironworks as well as the modern A4169. Telford Steam Rail;way will, if their planned extension is to be built, need to cross this road on a bridge. [Google Earth, 4th April 2021]The old railway now turned relatively sharply to the Southwest and was joined by what was once the Shrewsbury & Birmingham Railway Madeley Branch. That line remained open throughout the 20th century as was used to supply coal to Ironbridge Power Station. It closed, eventually, in around 2015 with the closure of the power station. [Google Earth, 4th April 2021]This picture shows part of Lightmoor Brick and Tile Works in around 1910. As we have noted the Works sat on the North side of the W&SJR very close to Lightmoor Station. There is a works tramroad evident in the image. The picture was shared on the Telford Memories Facebook Group by Paul Mower on 2nd April 2018. [41]This image also shows the Brick and Tile Works and gives a much better indication of the preponderance of tramroad rails around the site. It was shared by Thomas Cooper on 17th March 2017 on the Telford Memories Facebook Group. [42]Looking East along Queensway (A4169). The red line shows the route f the old railway which, South of the road follows a gated track. [Google Streetview, June 2022]Looking North across the A4169, from the Northwest the W&SJR curves round onto the line of this access road. [My photo, 12th July 2022]Looking South across the A4169 – this track follows what was the route of the W&SJR. [My photo, 12th July 2022]We follow the curve of the track on the line of the old W&SJR [My photograph, 12th July 2022]The location of Lightmoor Junction. The line entering from the left is the old Madeley branch of the Shrewsbury & Birmingham Railway which continued in use as a goods line until 2015 or thereabouts. The Junction is shown on OS Map extracts and satellite images above. [My photograph, 12th July 2022]The junction at Lightmoor brought together the Madeley Branch, on which we see a coal train serving Ironbridge Power Station, and the W&SJR. The lvel difference which can be seen on this photograph is marked and can be explained by the 1:40 gradient falling from Doseley Halt to Lightmoor Junction. [4]The view East along the line towards Coalbrookdale. [My photo, 12th July 2022]The modern signal box which replaced that shown on the OS Map extracts above. The photo looks Northwest. [My photo, 12th July 2022]The signal box again, this time looking Northeast. [My photo, 12th July 2022]
It appears that the signal box shown on the OS Map extracts above was positioned to control both the goods yard and the junction. Once the goods yard was closed, the replacement box could be positioned to have the best visibility along running lines. Ultimately it only controlled the change between the single track Madeley branch and the double track line through Coalbrookdale. When the line through Coalbrookdale was singled in 2006, the signal box became surplus to requirements. It is now leased from the railway authorities by the Telford Steam Railway, evidence of their serious intent to extend their line through this location. [37]
My pictures above show a significant amount of graffiti on the signal box. This has appeared since refurbishment after vandalism in 2008. When that refurbishment was completed the box was as shown below.
The line is currently mothballed keeping alive hopes that it might one day be reopened.
Lightmoor Junction signal box on 17th May 2009. the photographer wrote in 2009: “Lightmoor Junction The left fork here has been taken up. Further north, along its line, is the Horsehay Steam Trust. The right fork leads to Madeley Junction, a real junction this time, on the Wolverhampton to Shrewsbury line. Only goods trains; long lines of coal trucks heading to & from the Ironbridge Gorge Power Station; pass along this line now.” (c) Mike White, authorised for reuse under a Creative Commons Licence CC BY-SA 2.0 [3]
Wikipedia tells us that the line to Wellington via Ketley was only finally fully closed in 1981, although passenger services halted much earlier. “Lightmoor Junction Signal Box was retained to control the connection between the double-track section towards Ironbridge Power Station and the single-track section towards Madeley Junction. The signal box closed on 23 October 2006, when the line towards Ironbridge Power Station was singled, with new signalling controlled from Madeley Junction Signal Box [36] (since 2011 transferred to West Midlands Signalling Centre).” [38]
Knowles tells us that from 1875 the junction was controlled by a timber McKenzie & Holland signal box on the south side of the line, but this was replaced in 1951 with a new box on the north side. This was a modern design, classified by the Signalling Record Society as ‘Type 15’, which was the Western Region’s first attempt at a ‘modern image’ box. Similar in some ways to the ARP wartime signal boxes, this had an overhanging flat roof in an ineffective attempt to keep the sun off the large windows. The design was current between 1949 and 1954, although relatively few were built.” [1: p166]
Immediately West of the Signal Box above, the line crossed a single lane road. Pictures at the location are shown below. Sadly, to date, I have not been able to find out full details of the original bridge. As can be seen from the pictures a modern bridge now sits on the older abutments which used to support a double-track structure.
The location of the under-bridge taken at track level looking East towards what was Lightmoor Junction. Its location is marked by the deviation in the track alignment. [My photograph, 12th July 2022]The view West across the road-under-bridge and through the old Station towards Coalbrookdale. [My photograph, 12th July 2022]The view from the South through the railway bridge which spans Brick Kiln Bank. [My photograph, 12th July 2022]The view from the North through the railway bridge spanning Brick Kiln Bank. [My photograph, 12th July 2022]
The road bridge was immediately followed by Lightmoor Station (or Lightmoor Platform (its earlier name)) which is shown below. The station was opened in 1907 and closed in 1962. It was of timber construction with a GWR Pagoda style waiting shelter on each platform. A search online led to a video about the Madeley branch on YouTube which included this image of the station. … [5]
This photograph from the 1920s shows Lightmoor Station, also known as Lightmoor Platform or Lightmoor Halt. [4] A very similar photograph can be seen on PicClick as well. [8]This image is embedded from the Transport Treasury Website. It shows a view from a train looking East through Lightmoor Halt on 23rd May 1960. The modern signal box can be seen in the middle distance. The photographer was James Harrold [7]Another view, this time facing East, was shared by Metsa Vaim EdOrg on the Telford Memories Facebook Group on 3rd November 2018. It was part of a short pamphlet found in an Oxfam Shop. [9]
The next two pictures are separated by 67 years, the first was taken in 1900, the second in 1967. …
This and the next picture were taken from approximately the same location on the South side of the line and focus on the site of Lightmoor Station. This image is from 1900. (c) The Ironbridge Gorge Museum Trust and included here by kind permission of the Archivist. [39]This image is dated 1967. Both were shared on the Telford Memories Facebook Group by Metsa Vaim EdOrg on 28th February 2020, (c) G.F. Bannister. [39]The immediate site of the Station as shown on the 25 ” OS Map of the mid-1920s. Pedestrian access to the station was via ramps and steps from Brick Kiln Bank. I was unable to find these on my short visit on 12th July 2022. [16]The location of Lightmoor Station shown on the modern satellite images provided by the National Library of Scotland. [6]The view looking West through the site of the Station towards Coalbrookdale which will make up the third part of this story! [My photograph, 12th July 2022]
References
Adrian Knowles; The Wellington, Much Wenlock and Craven Arms Railway; Lightmoor Press, Lydney, Gloucestershire, 2022.


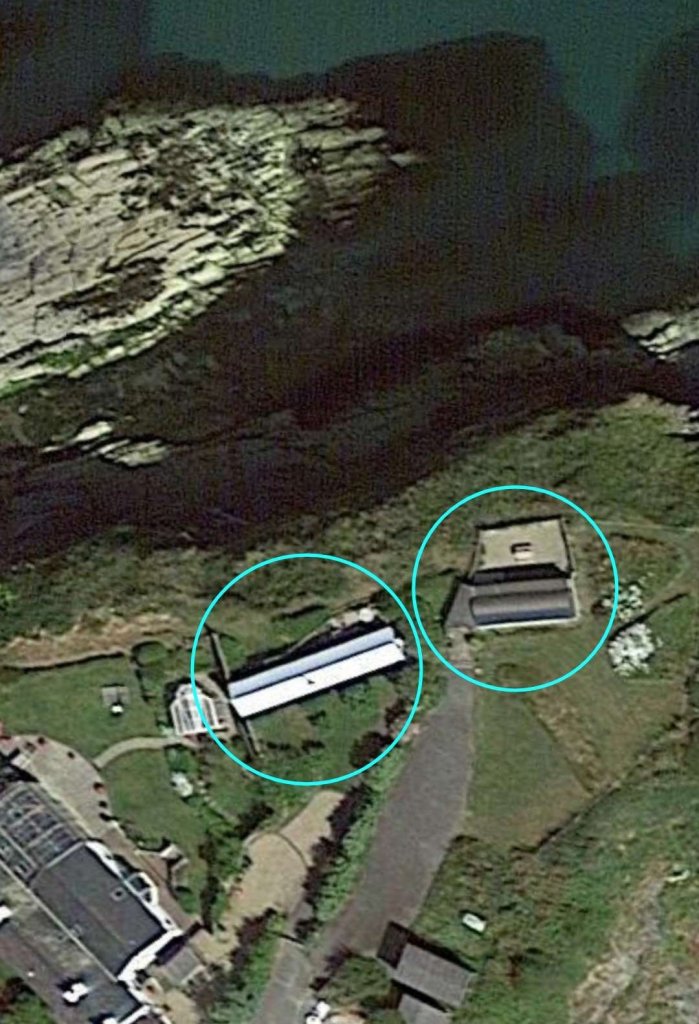
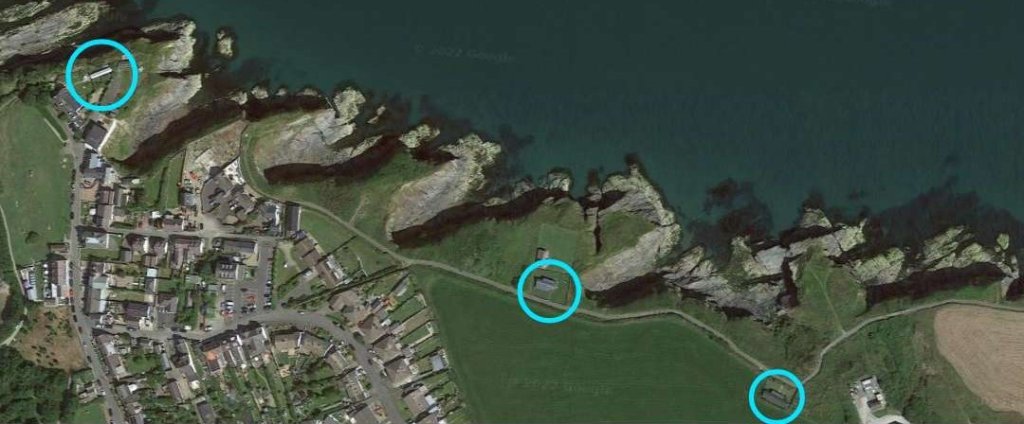
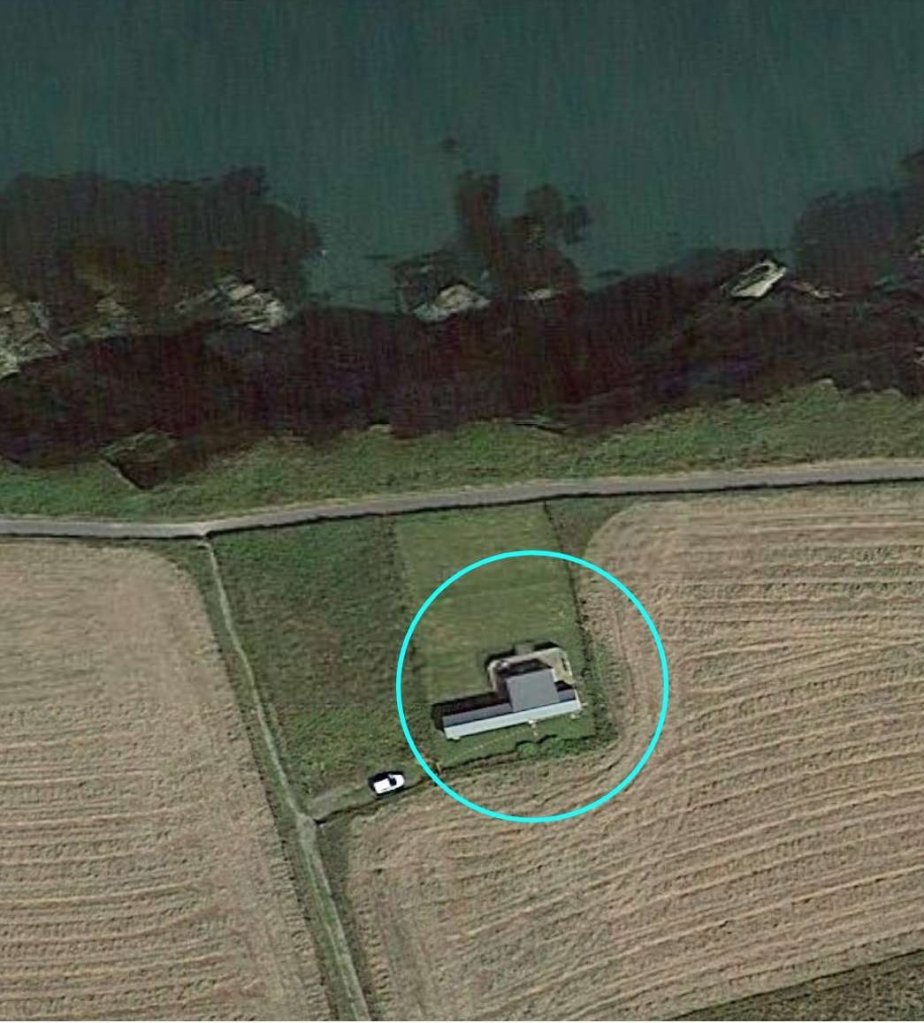


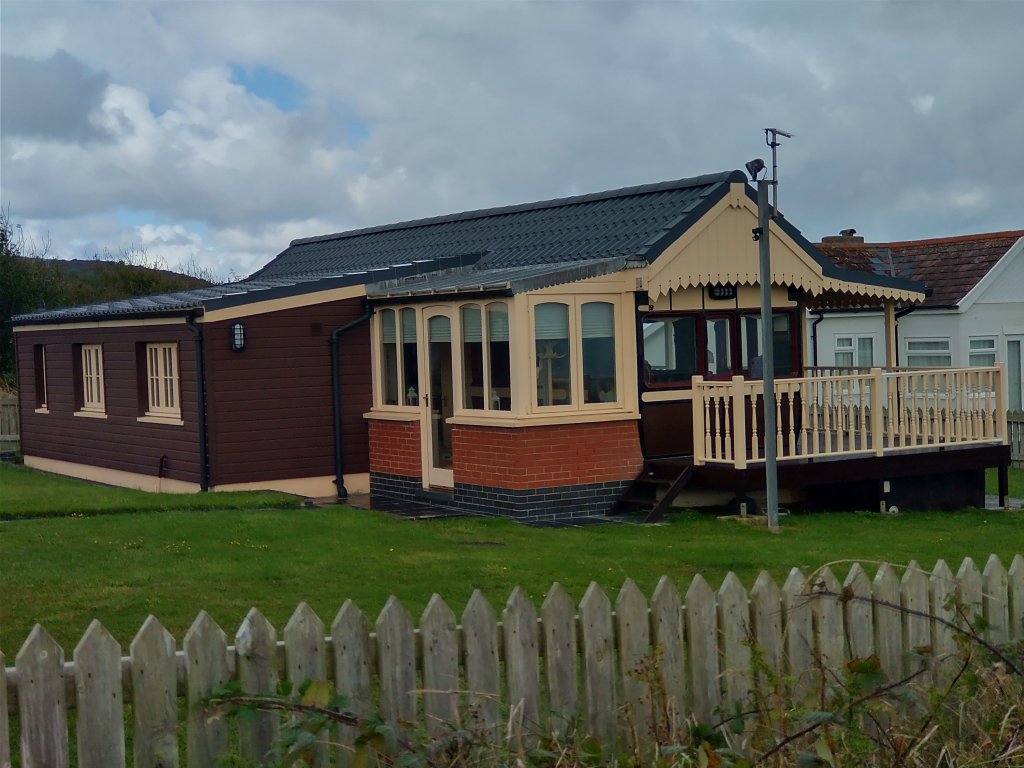

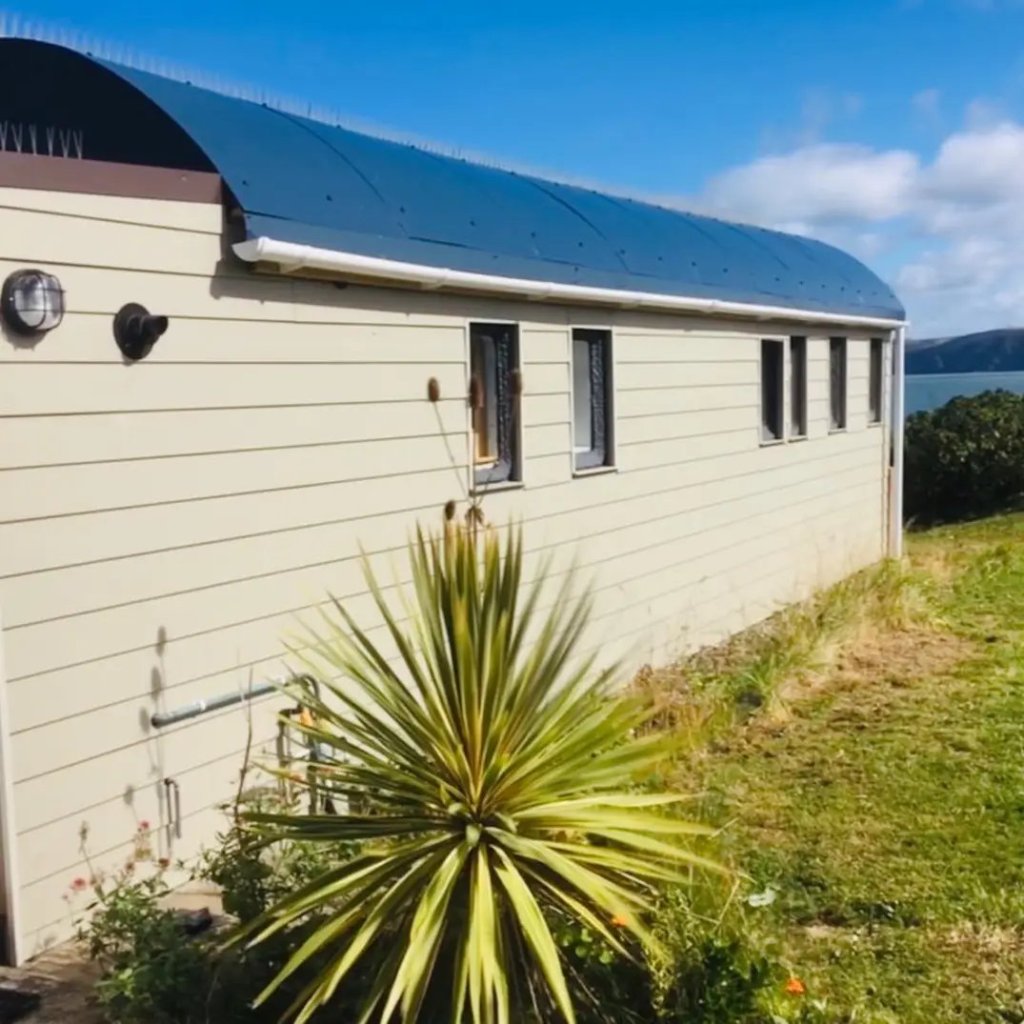
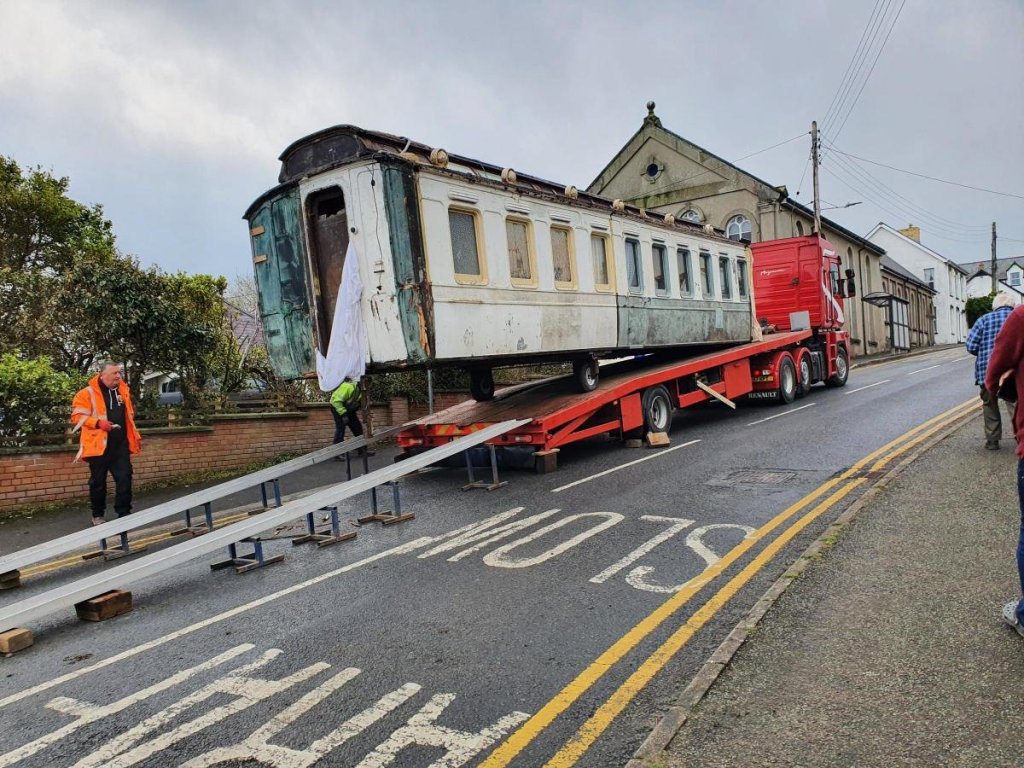
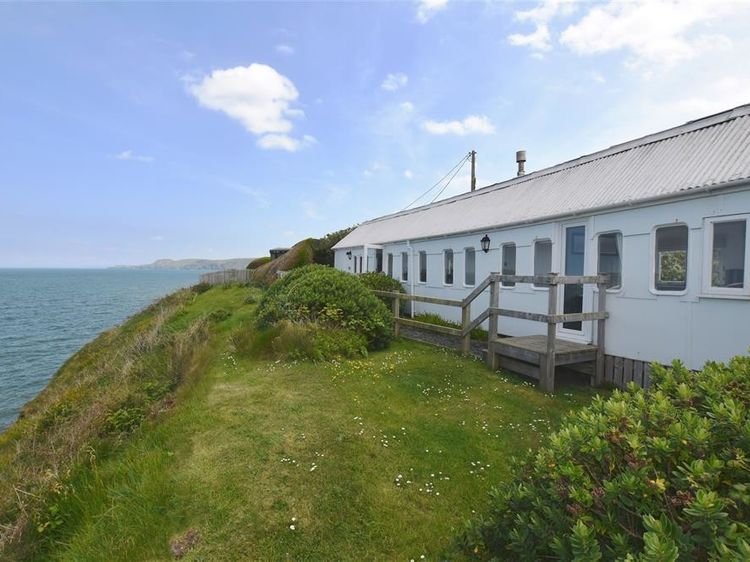
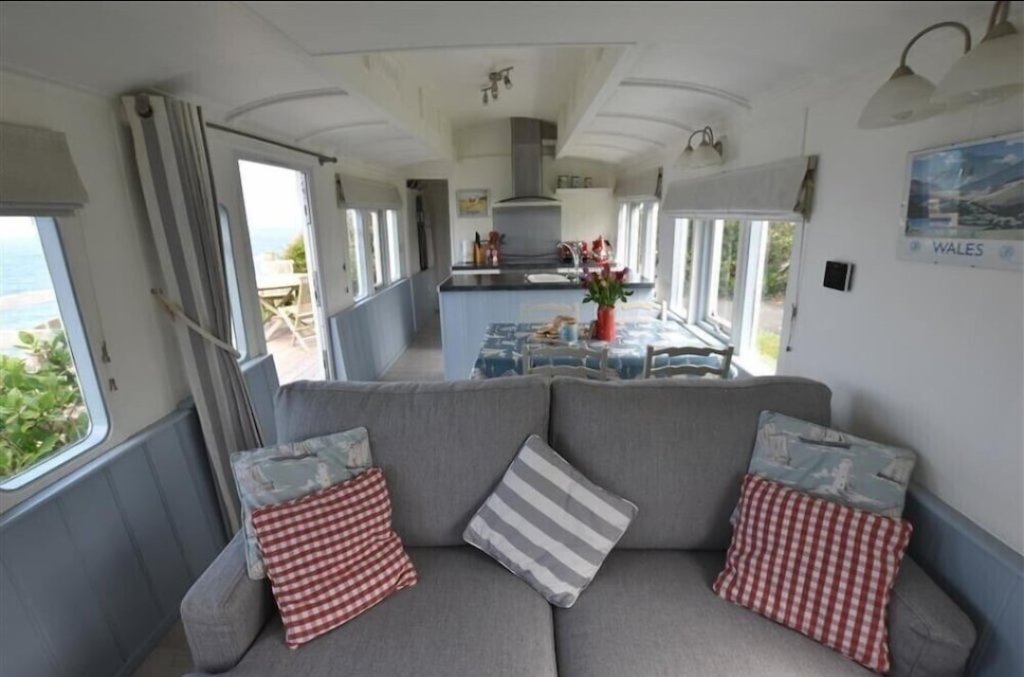

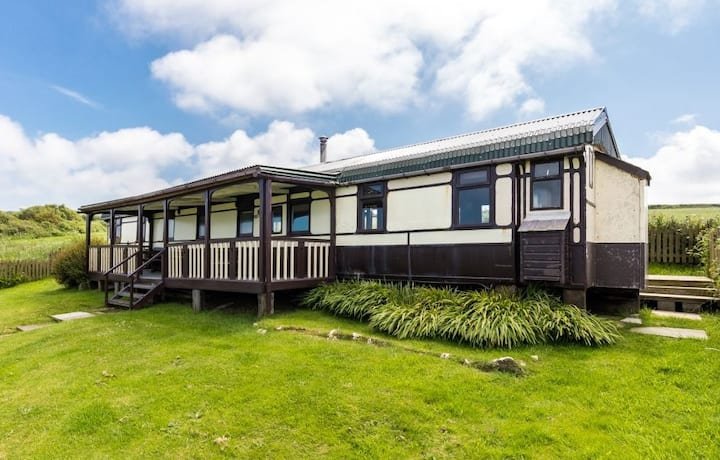
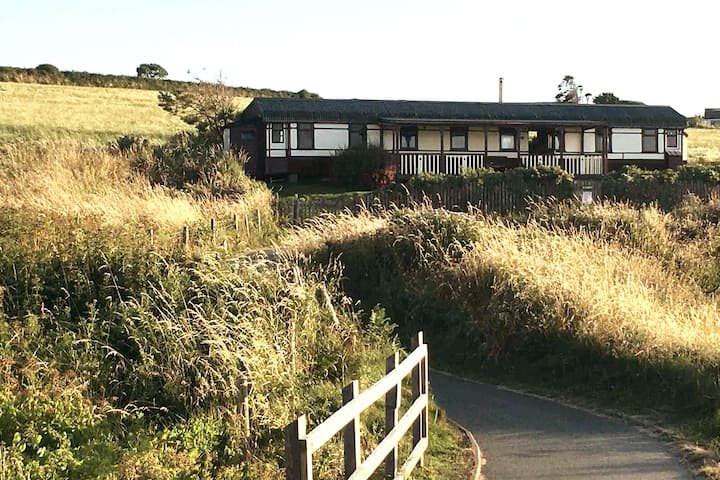


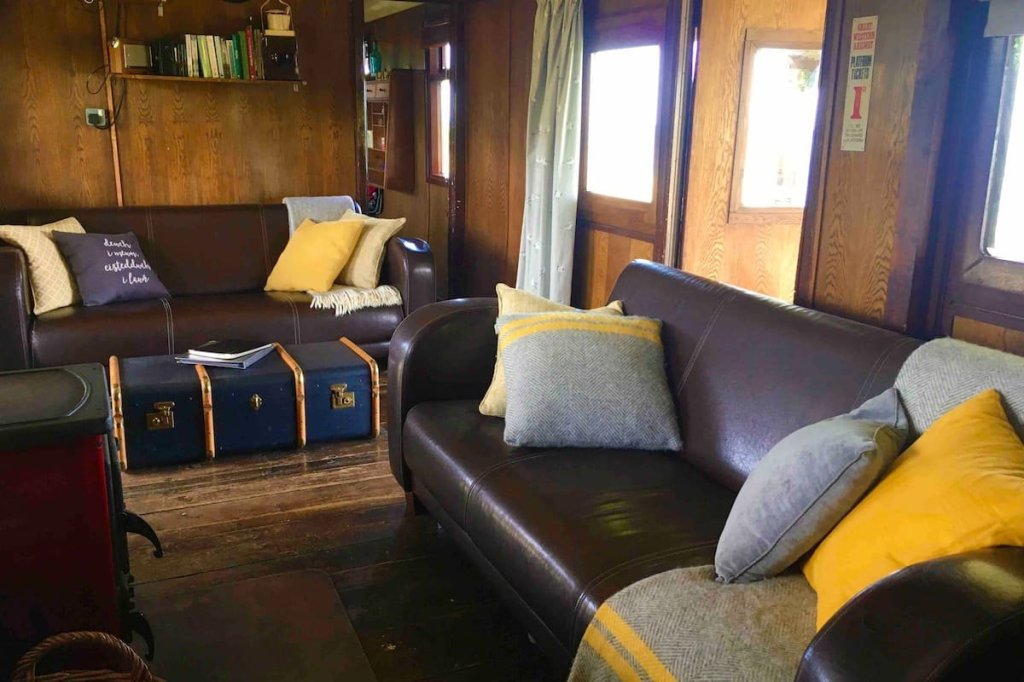
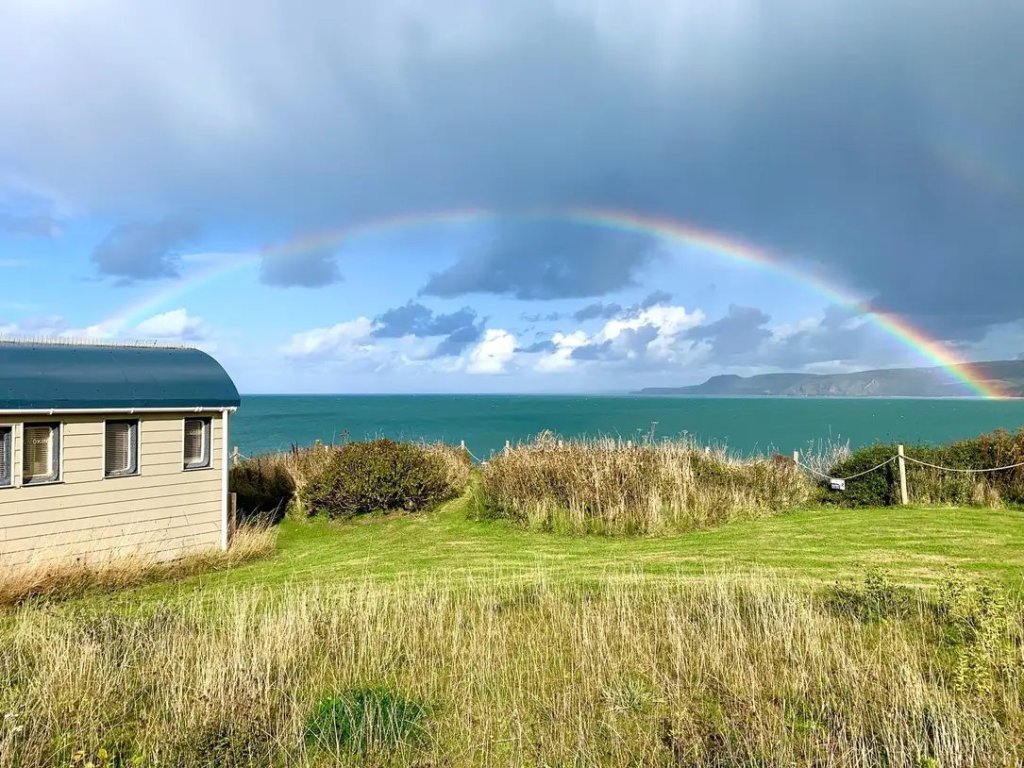
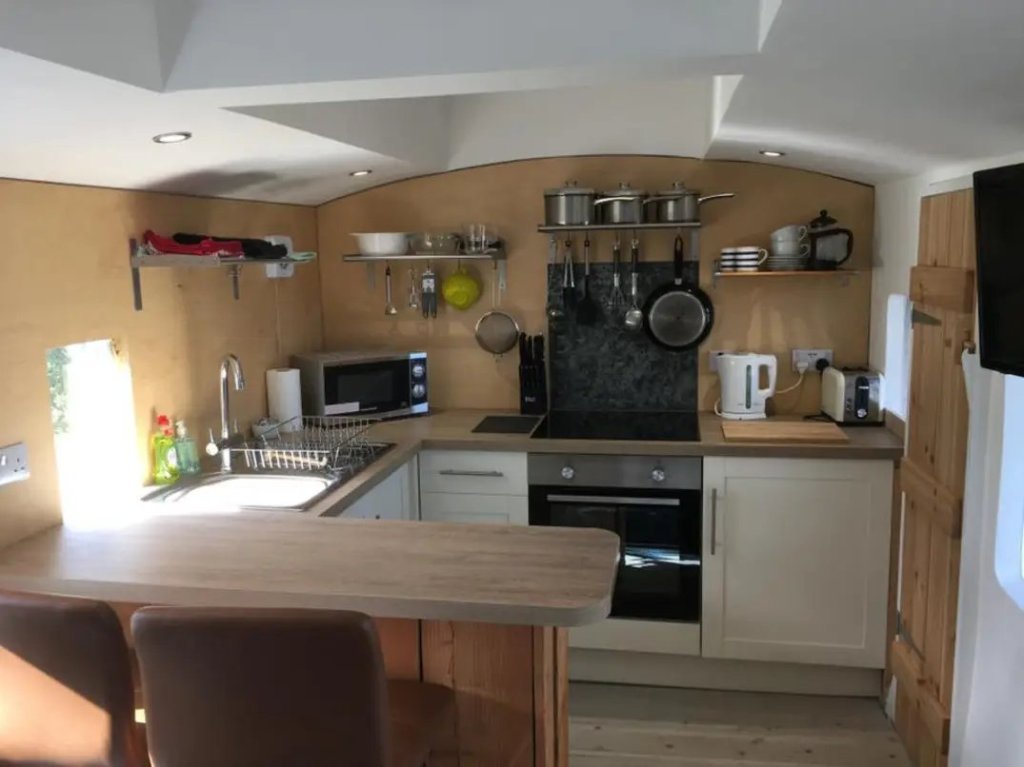

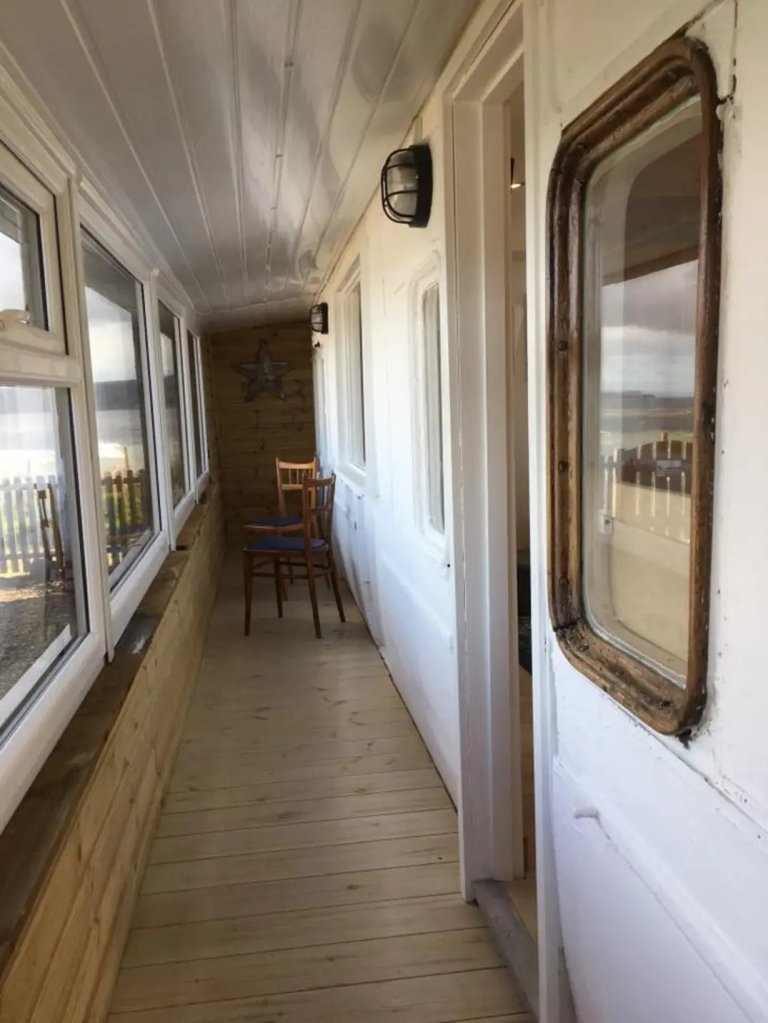


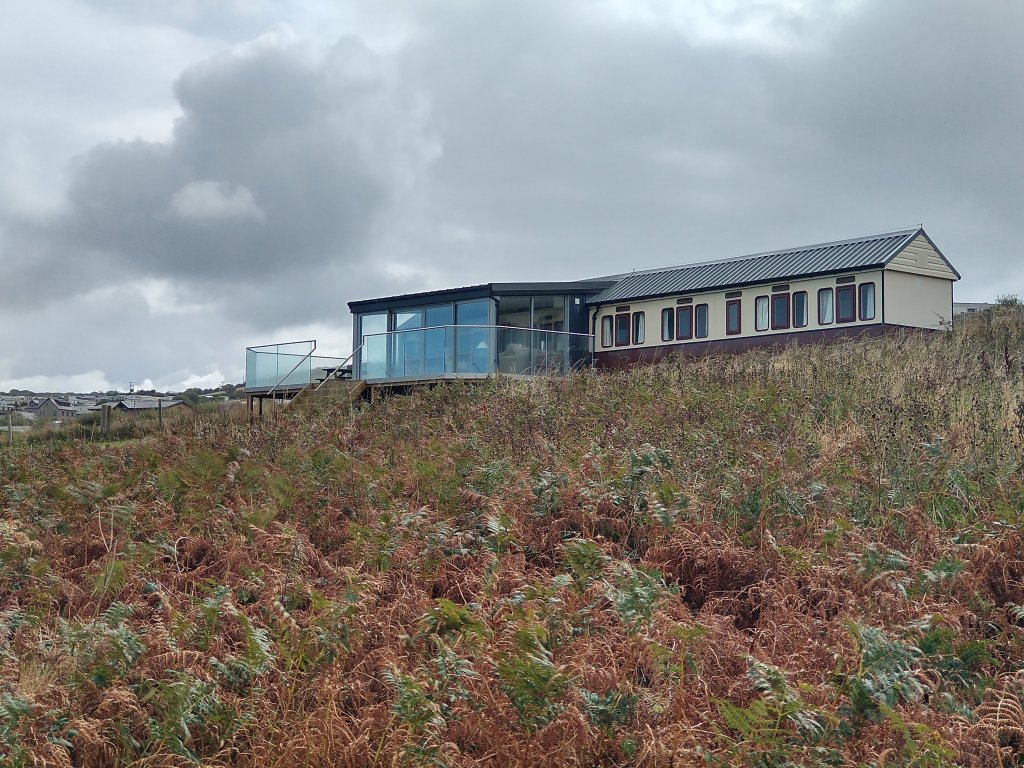


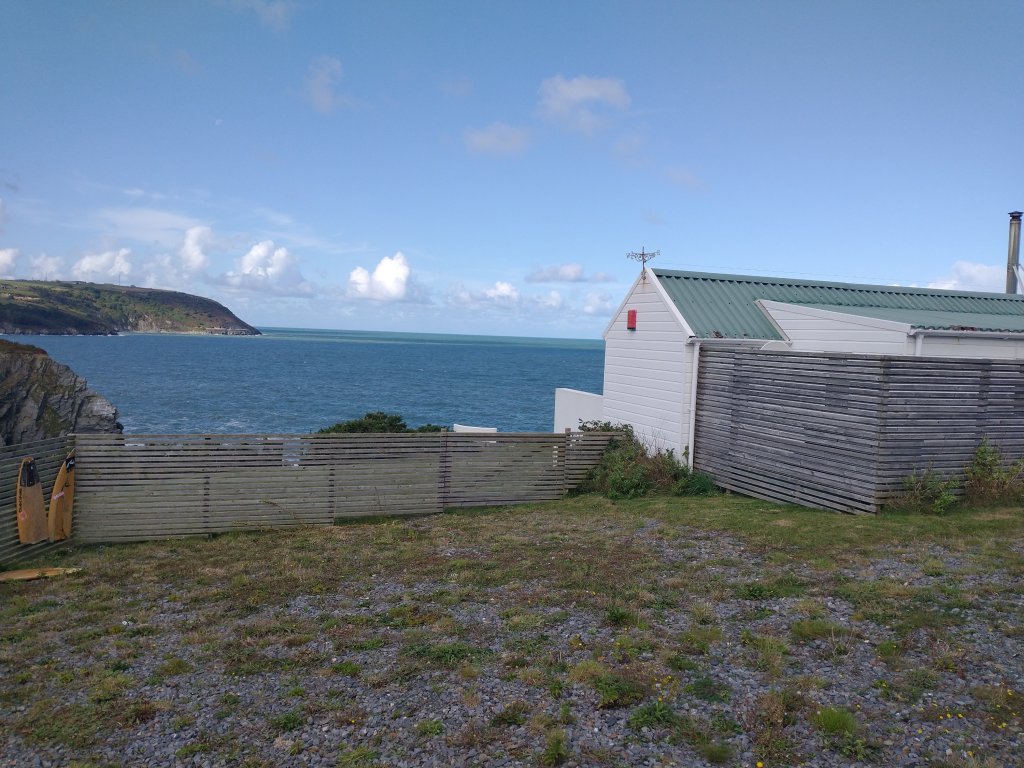
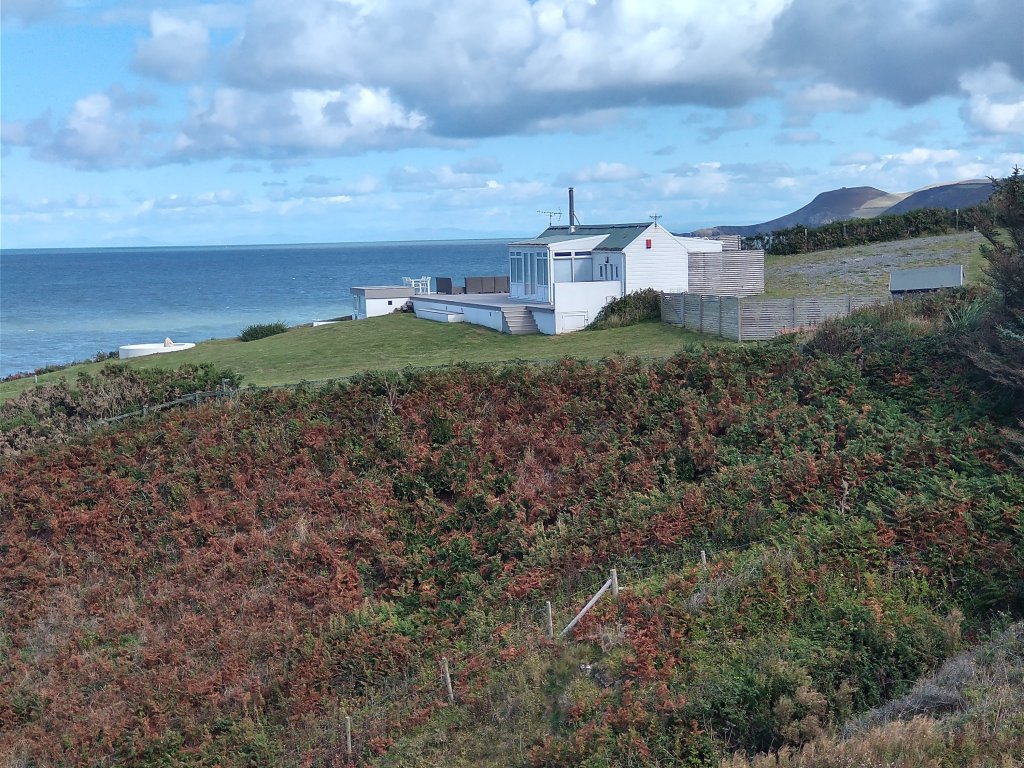
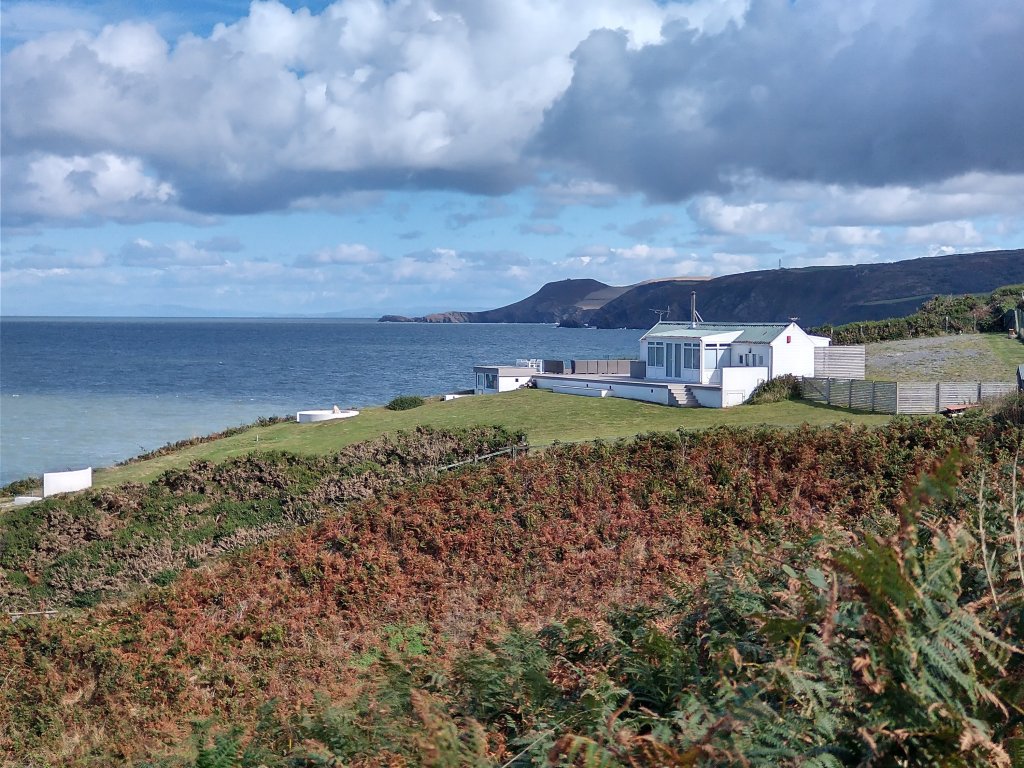
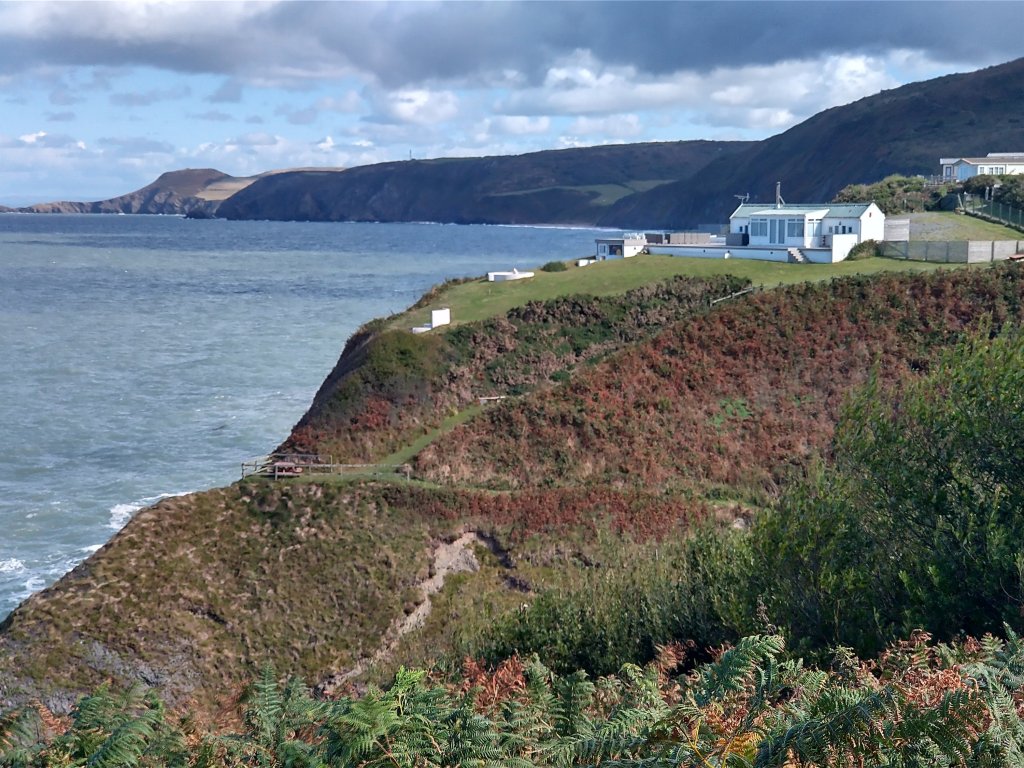
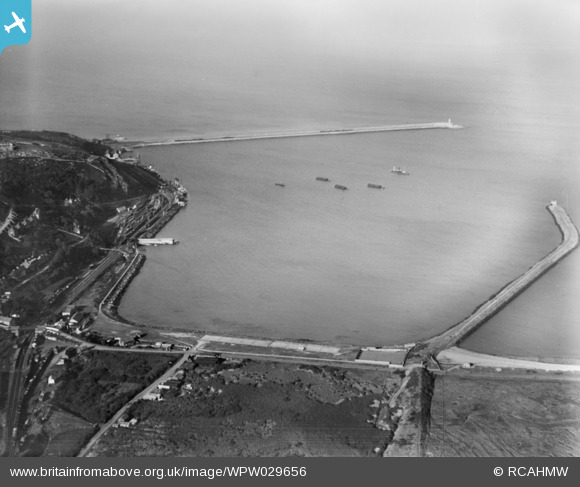
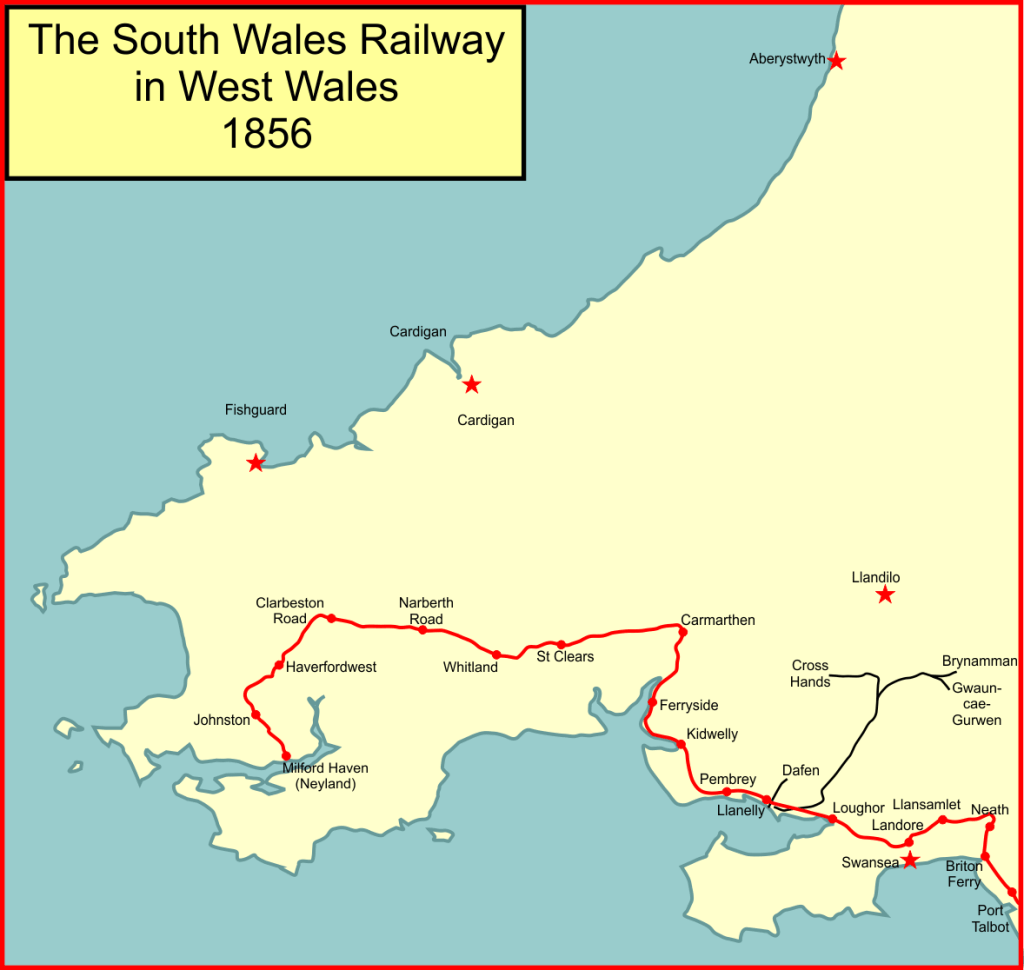
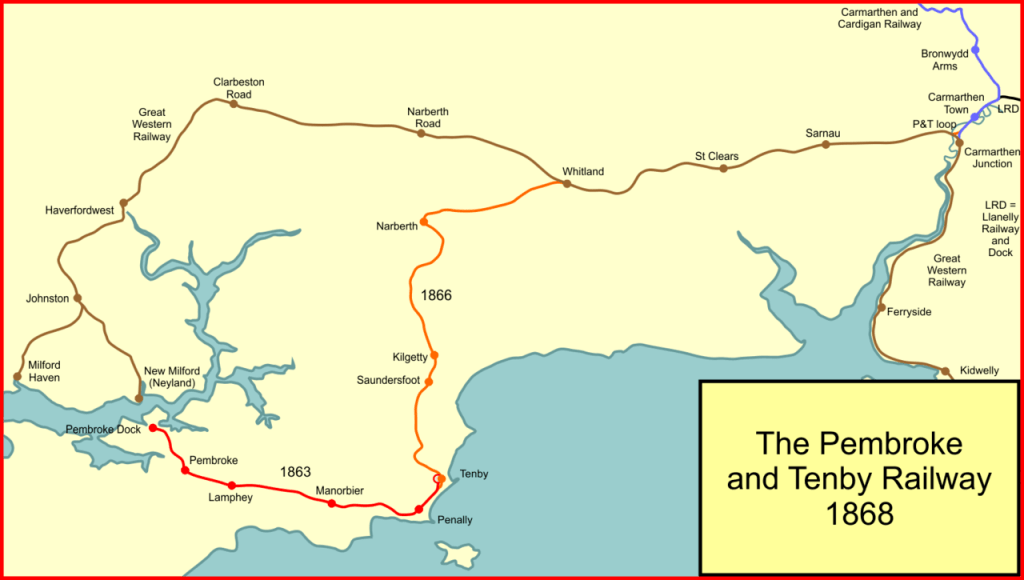
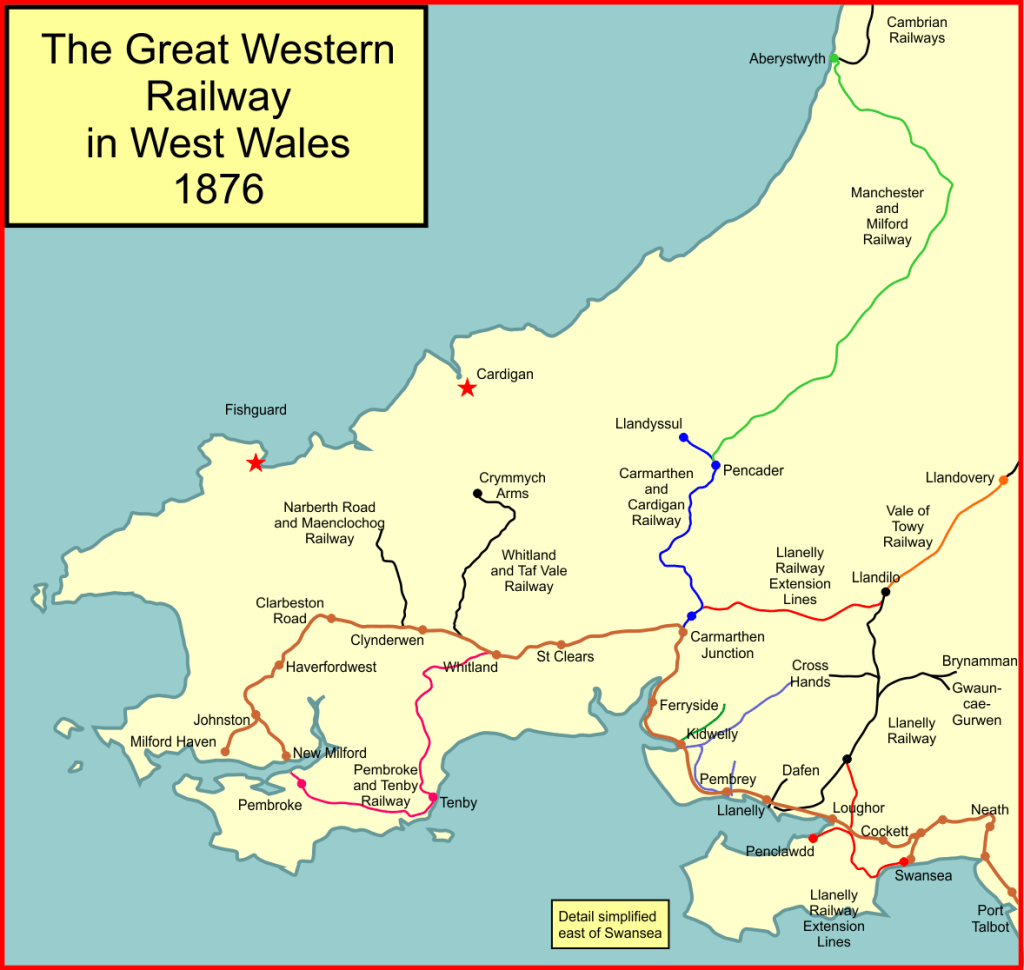
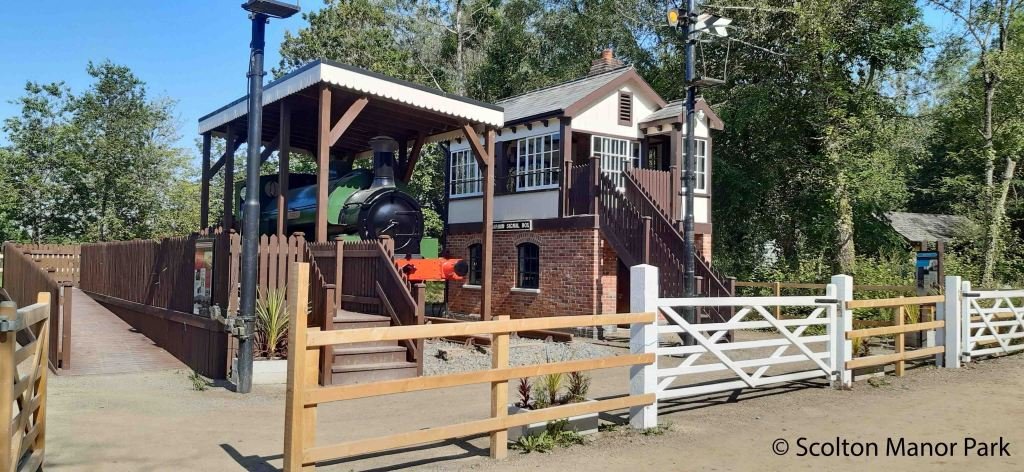
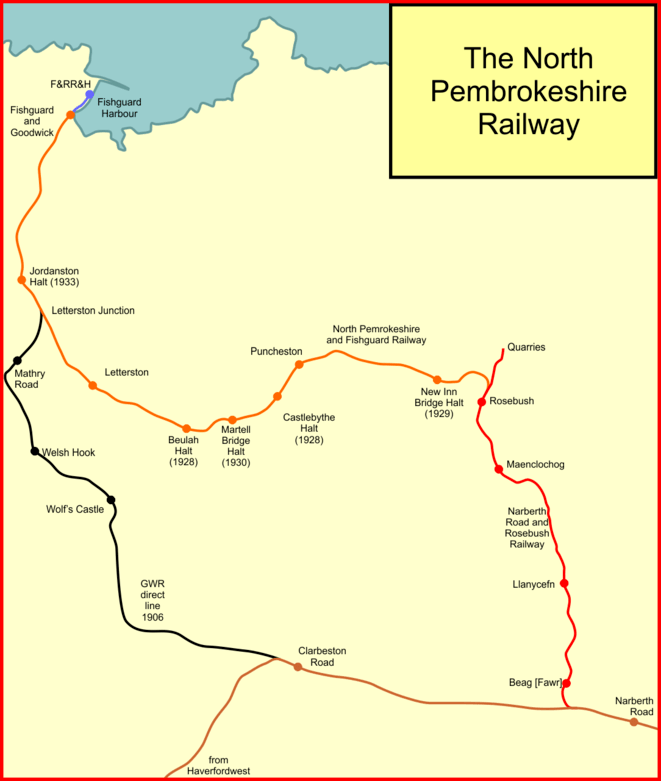

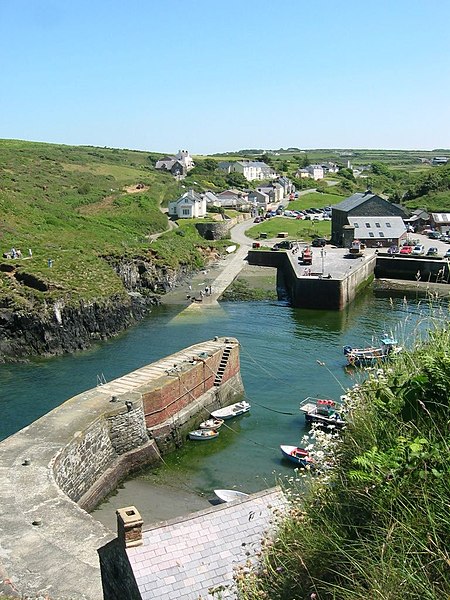

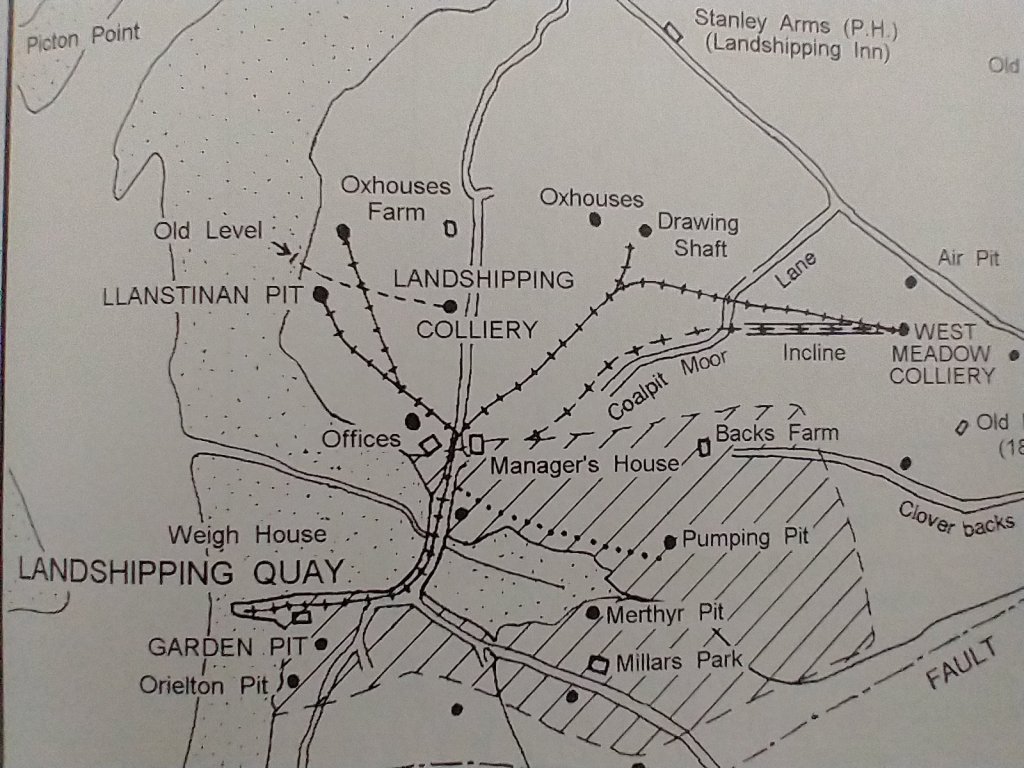


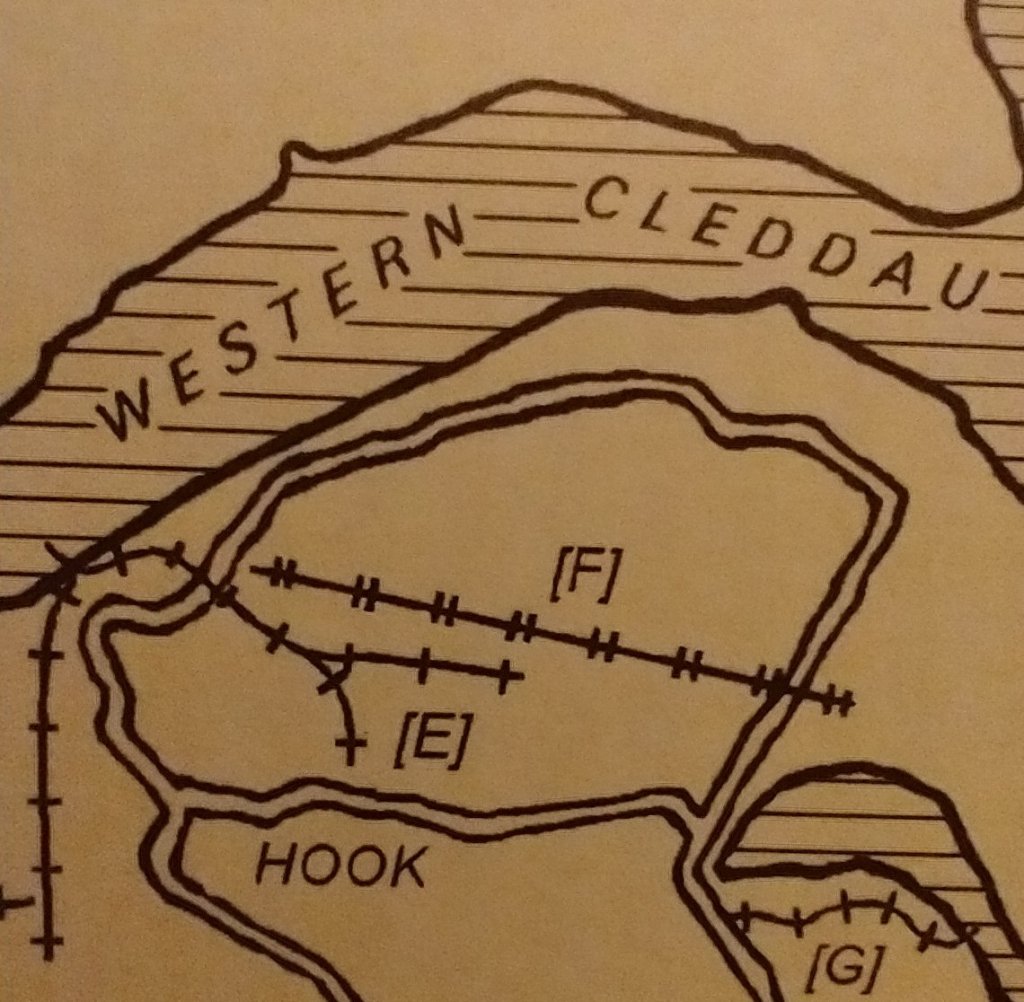
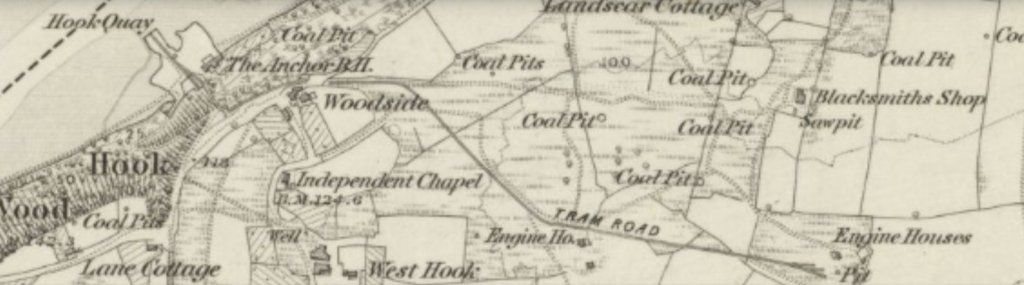
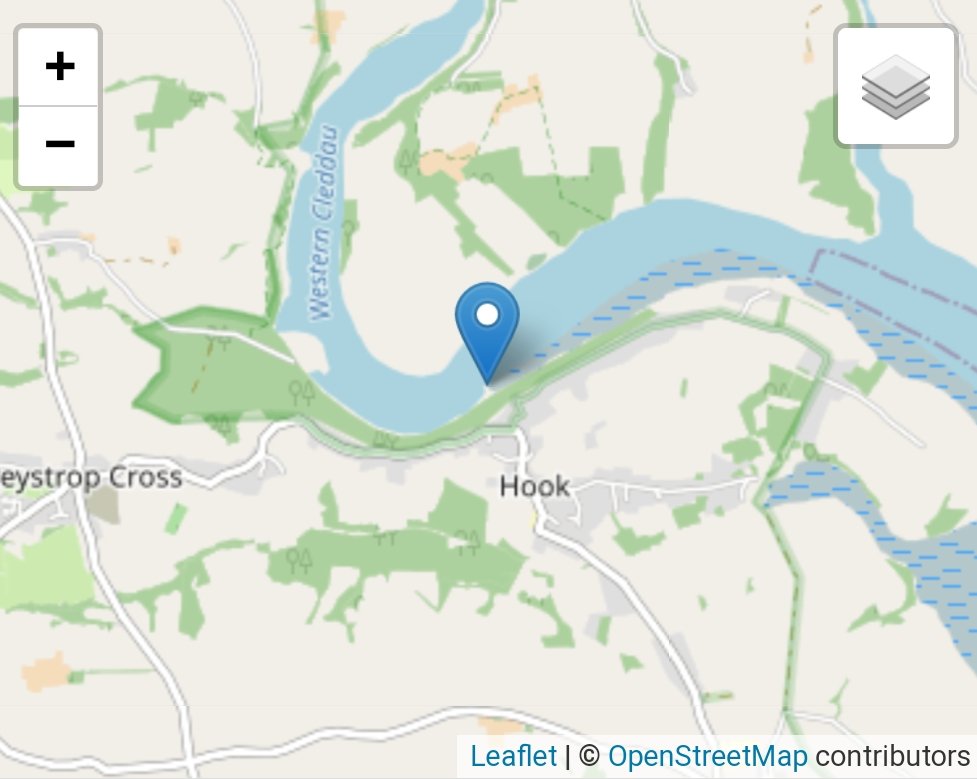


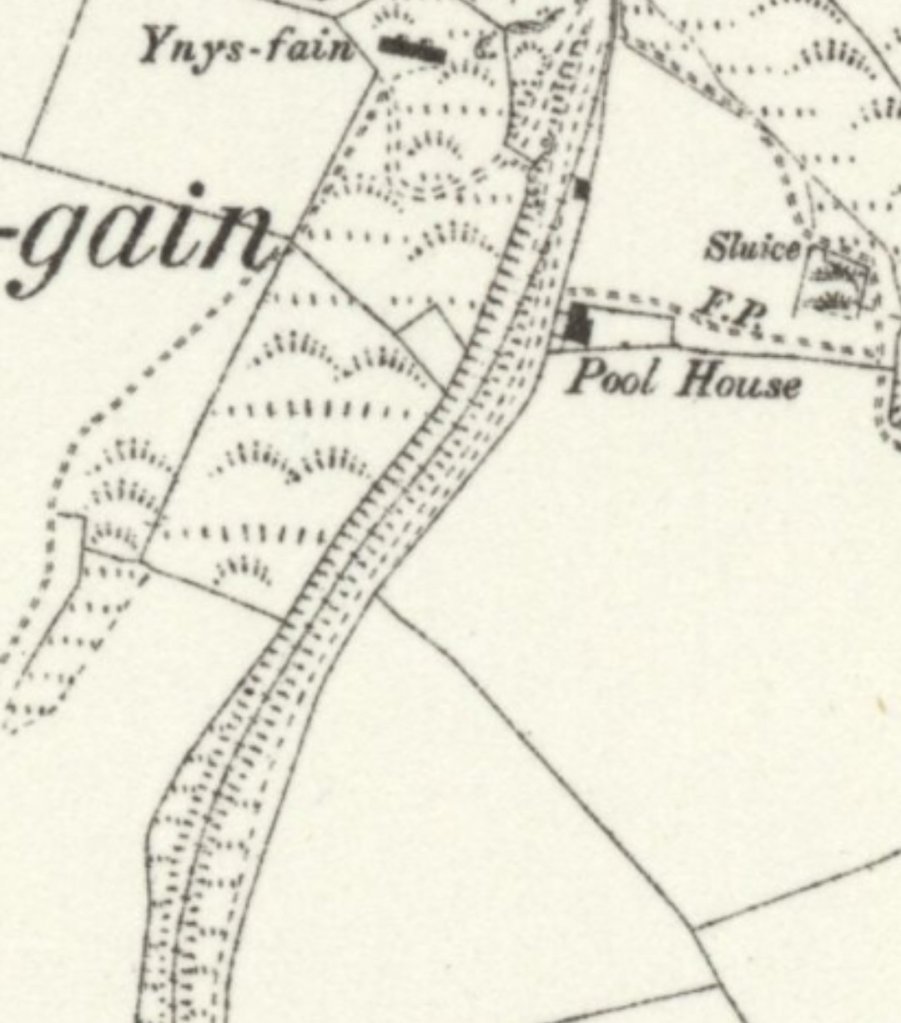

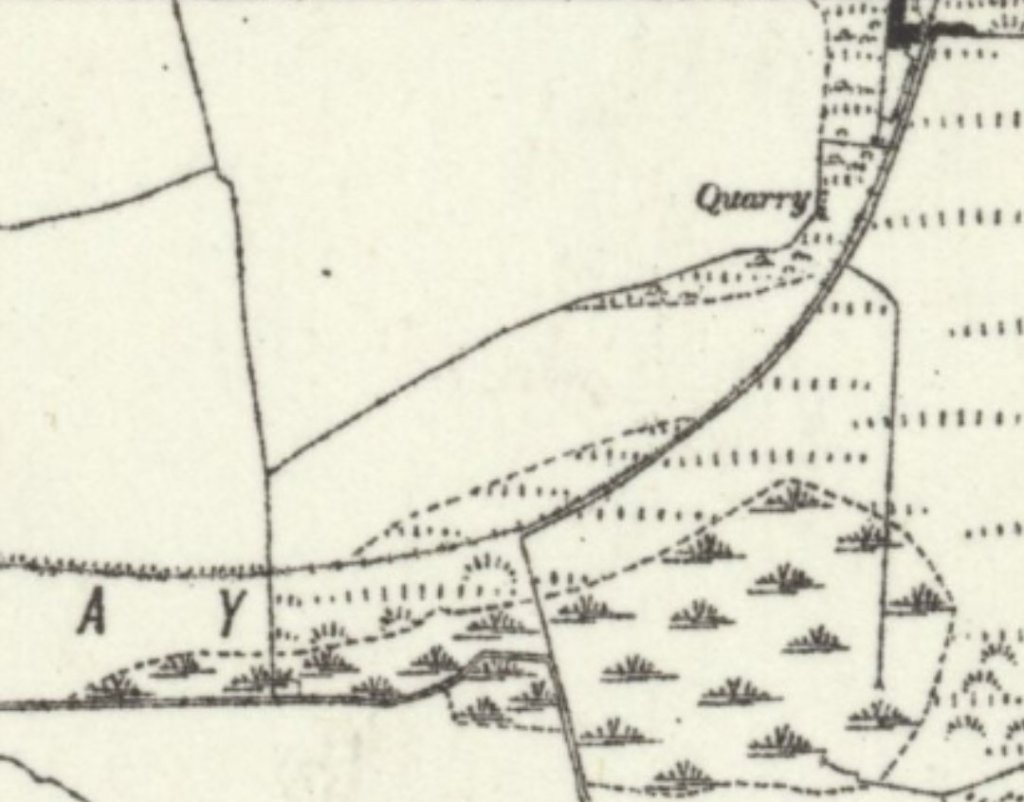


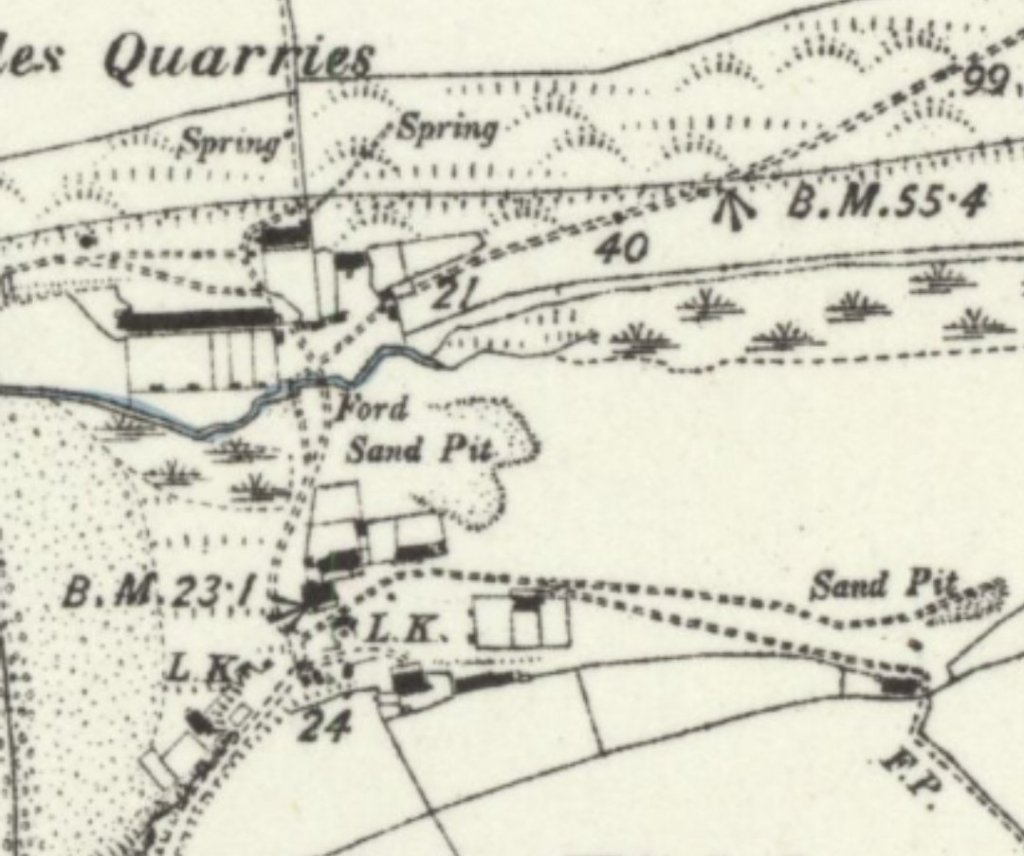
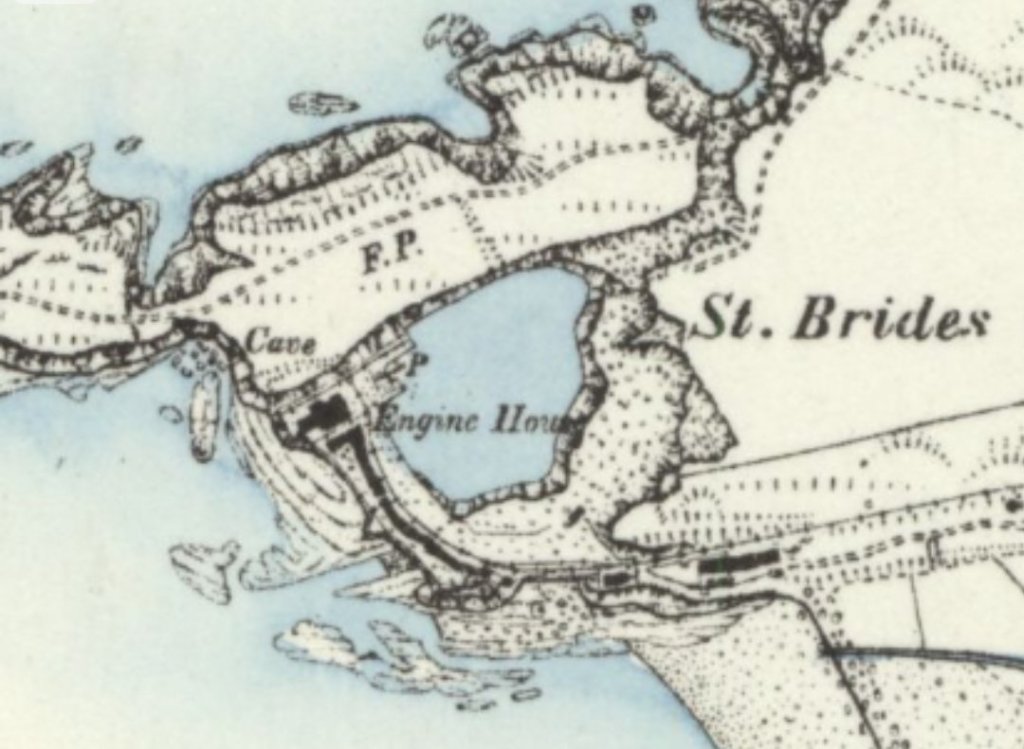

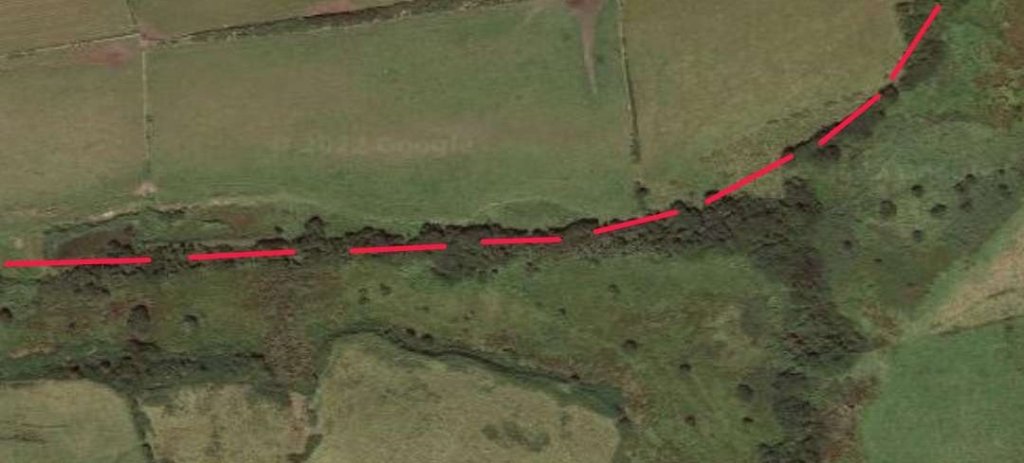
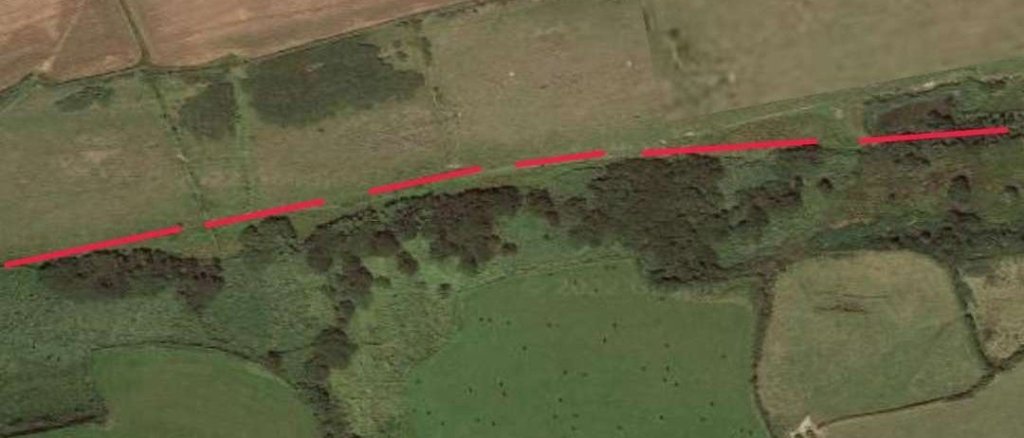
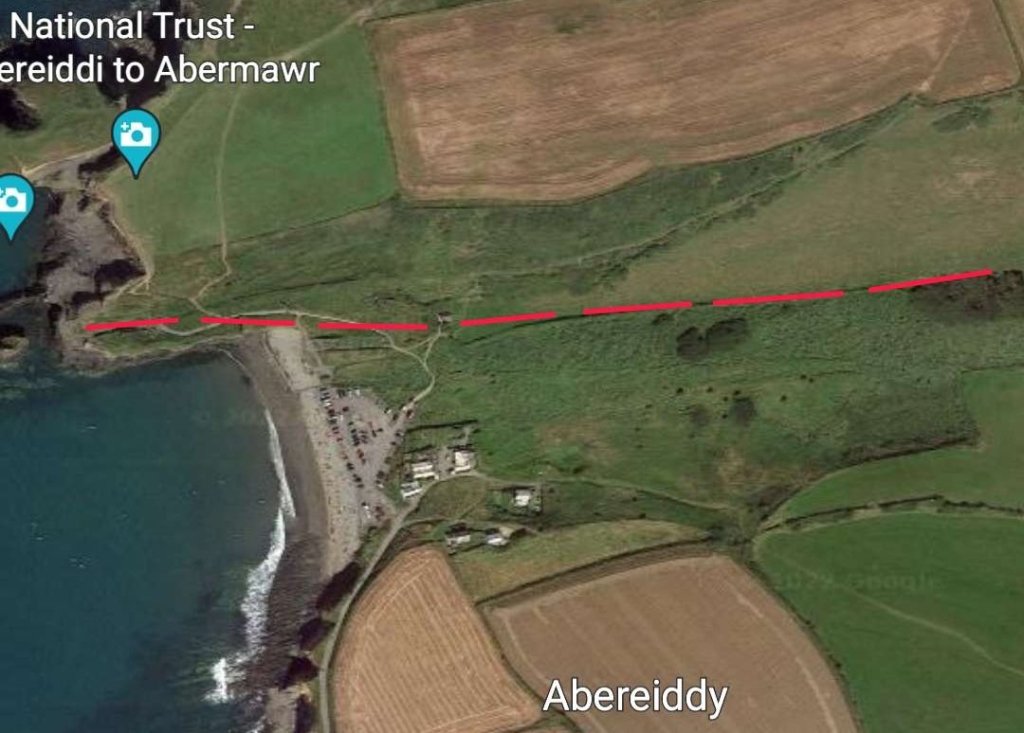
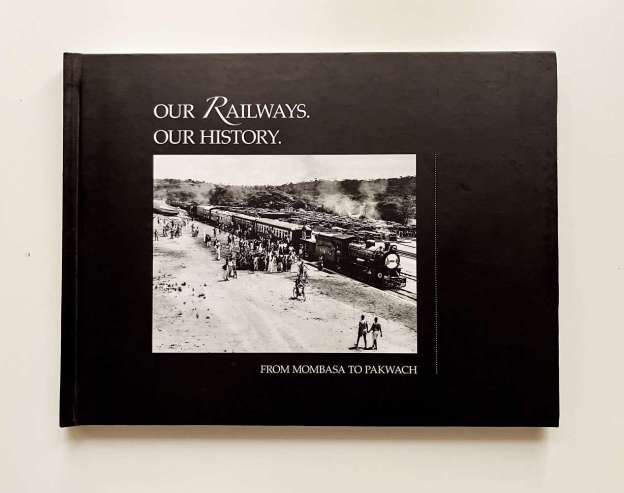
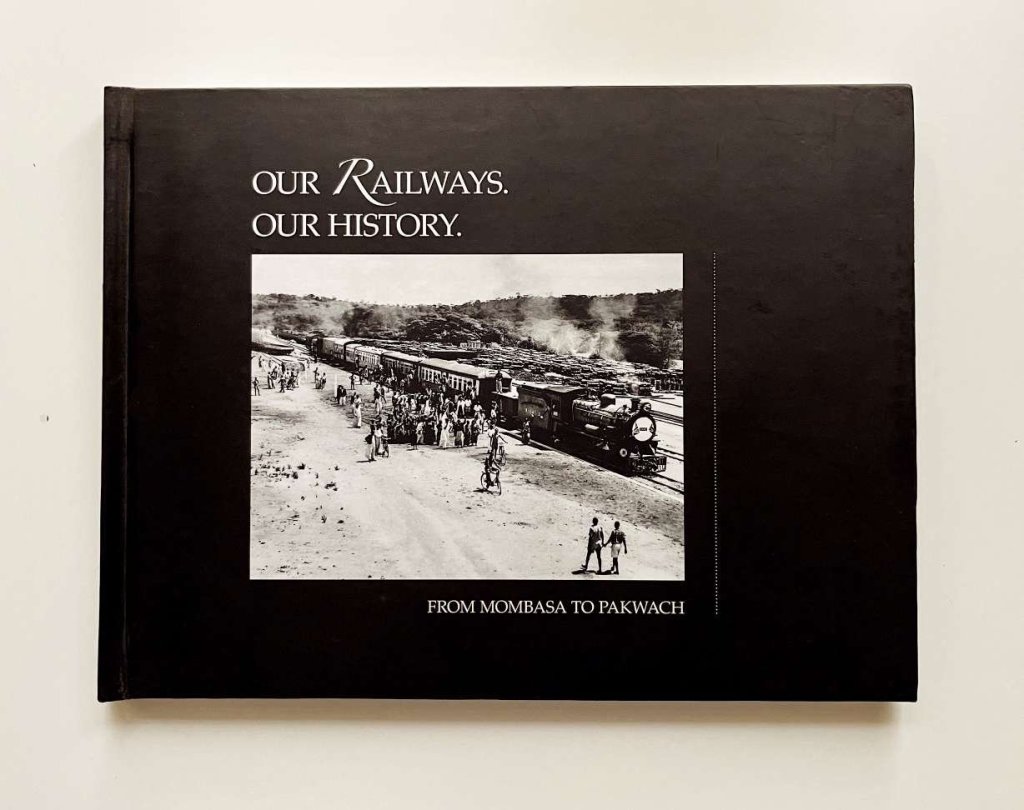


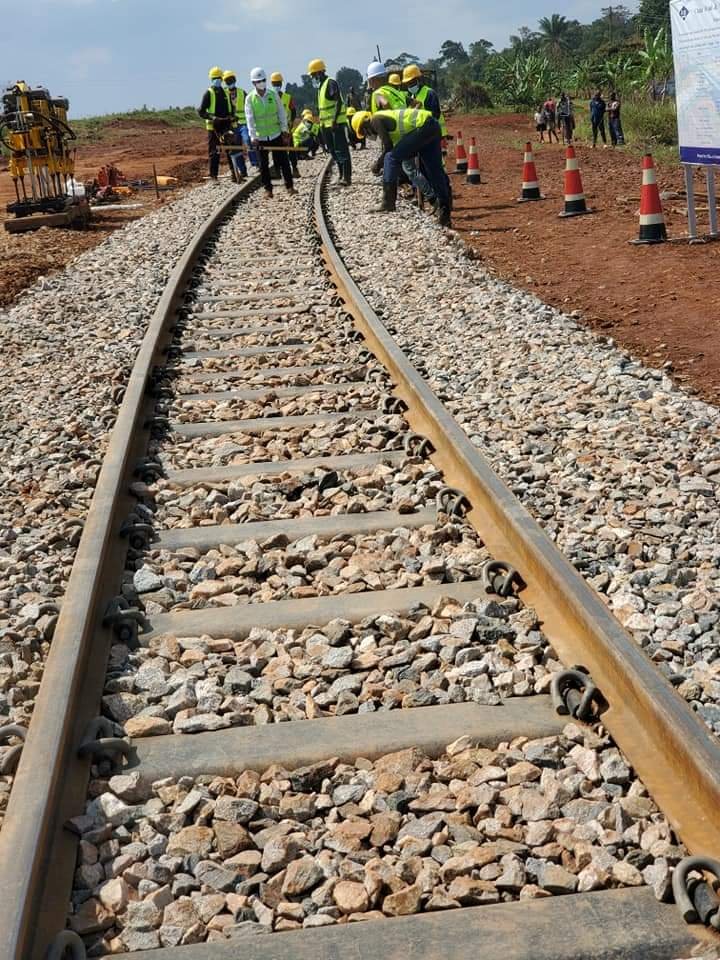

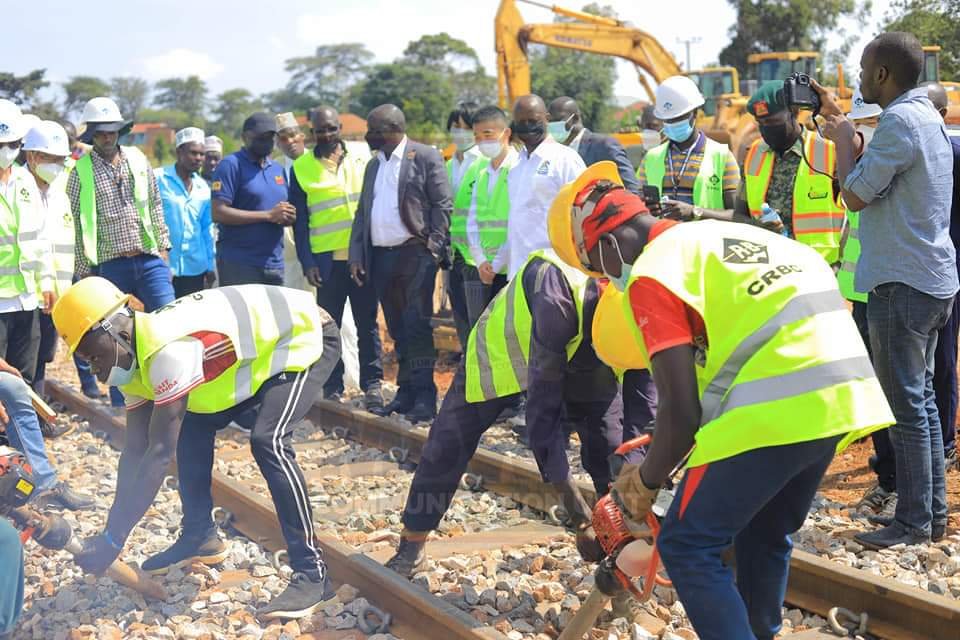
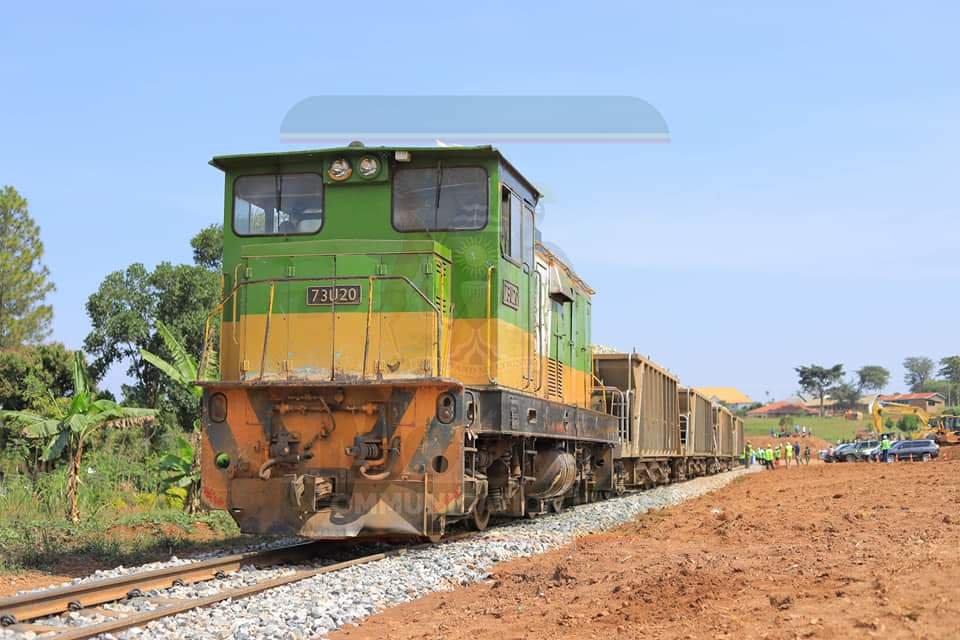
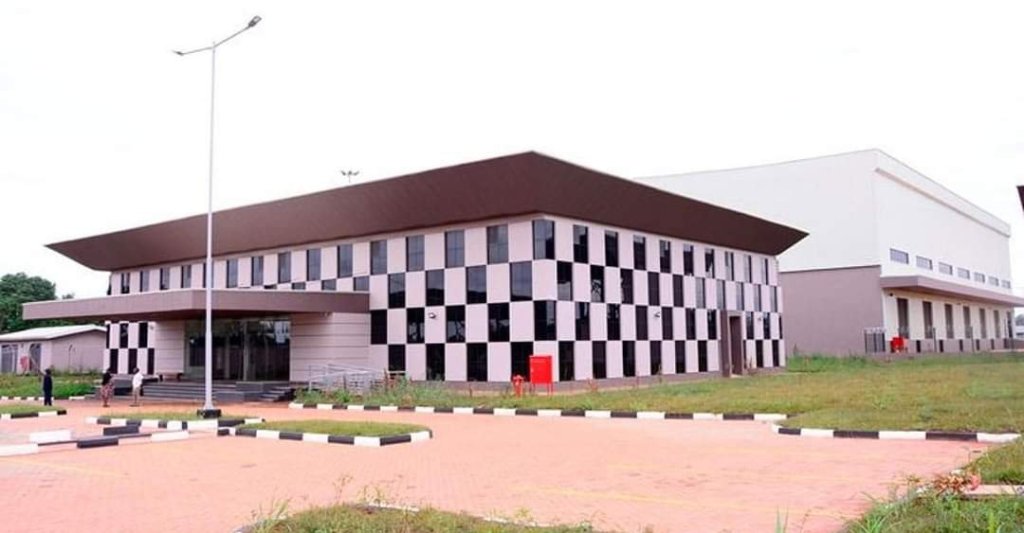


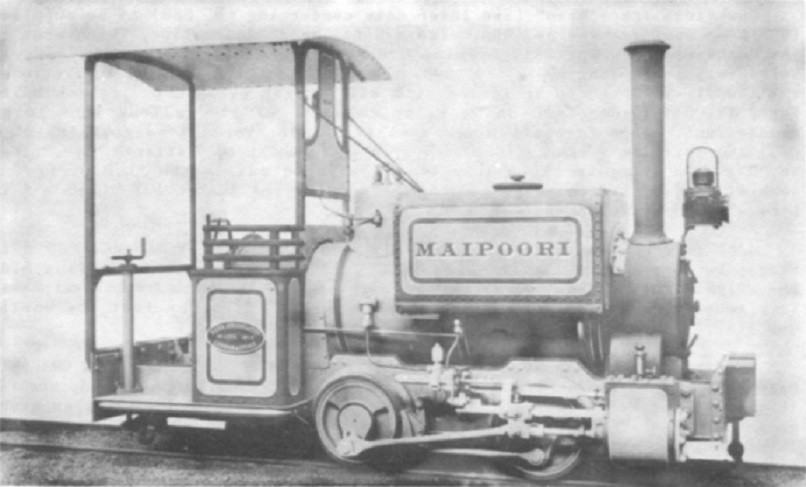


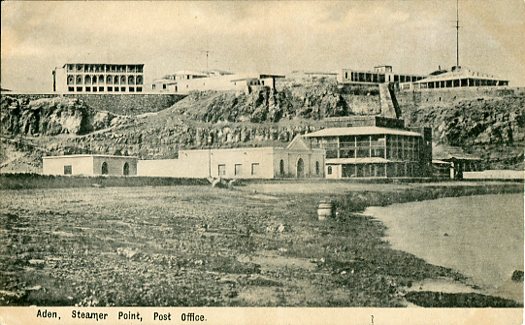
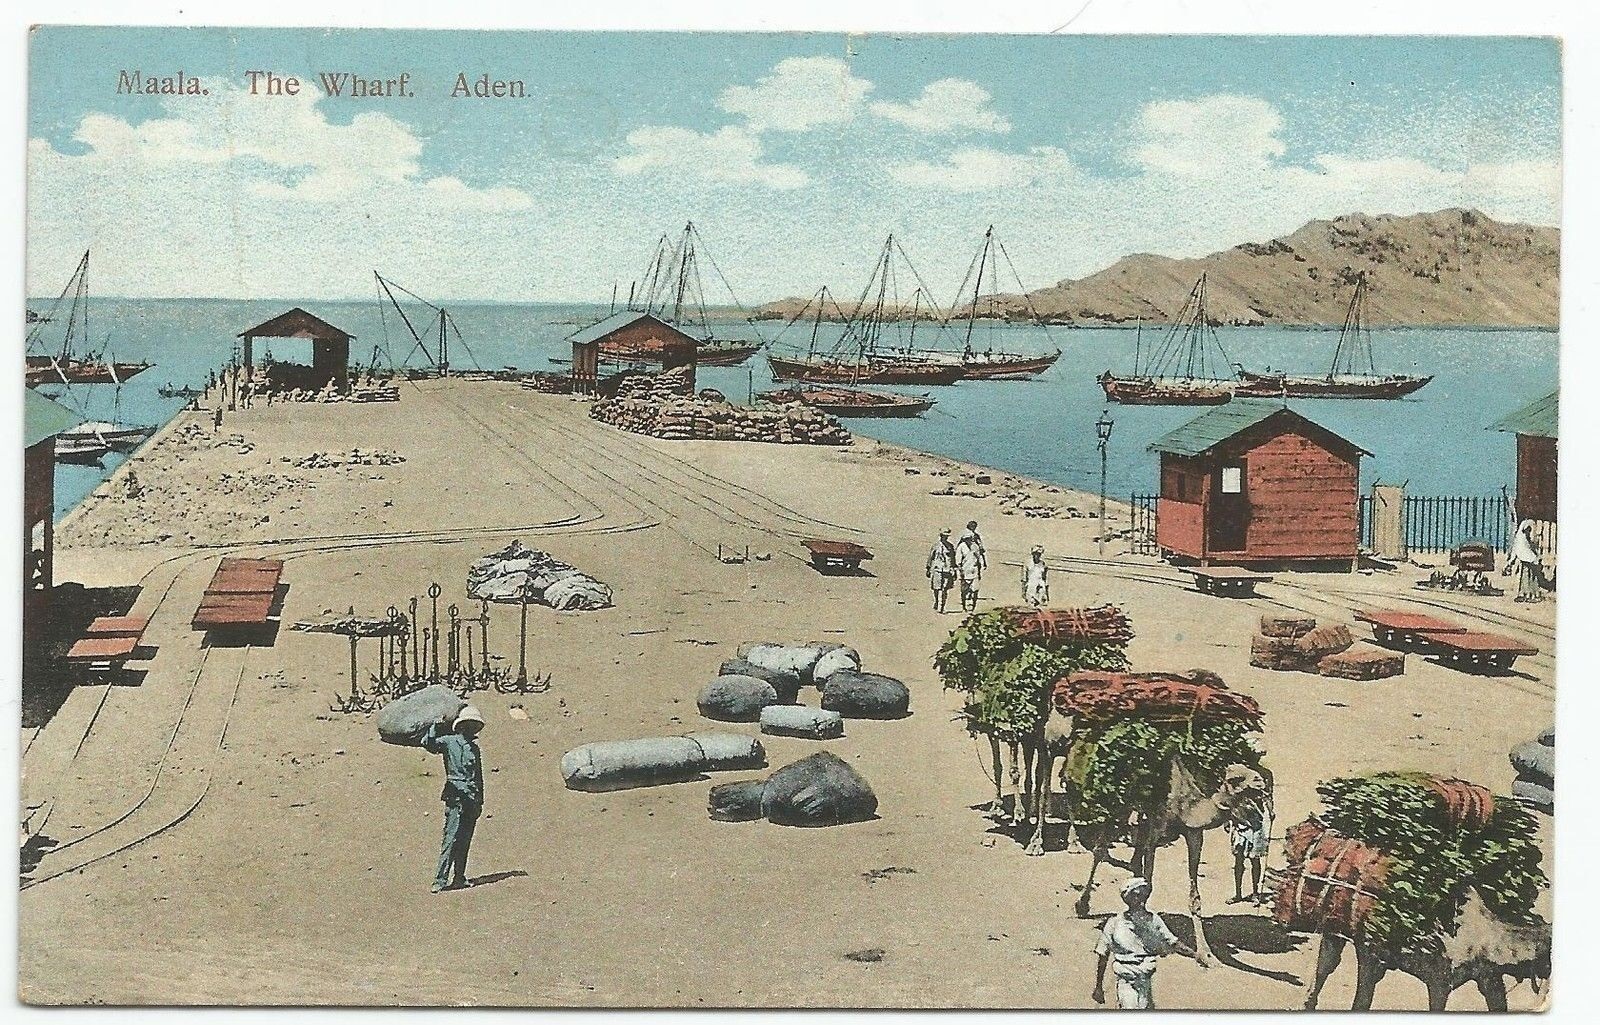
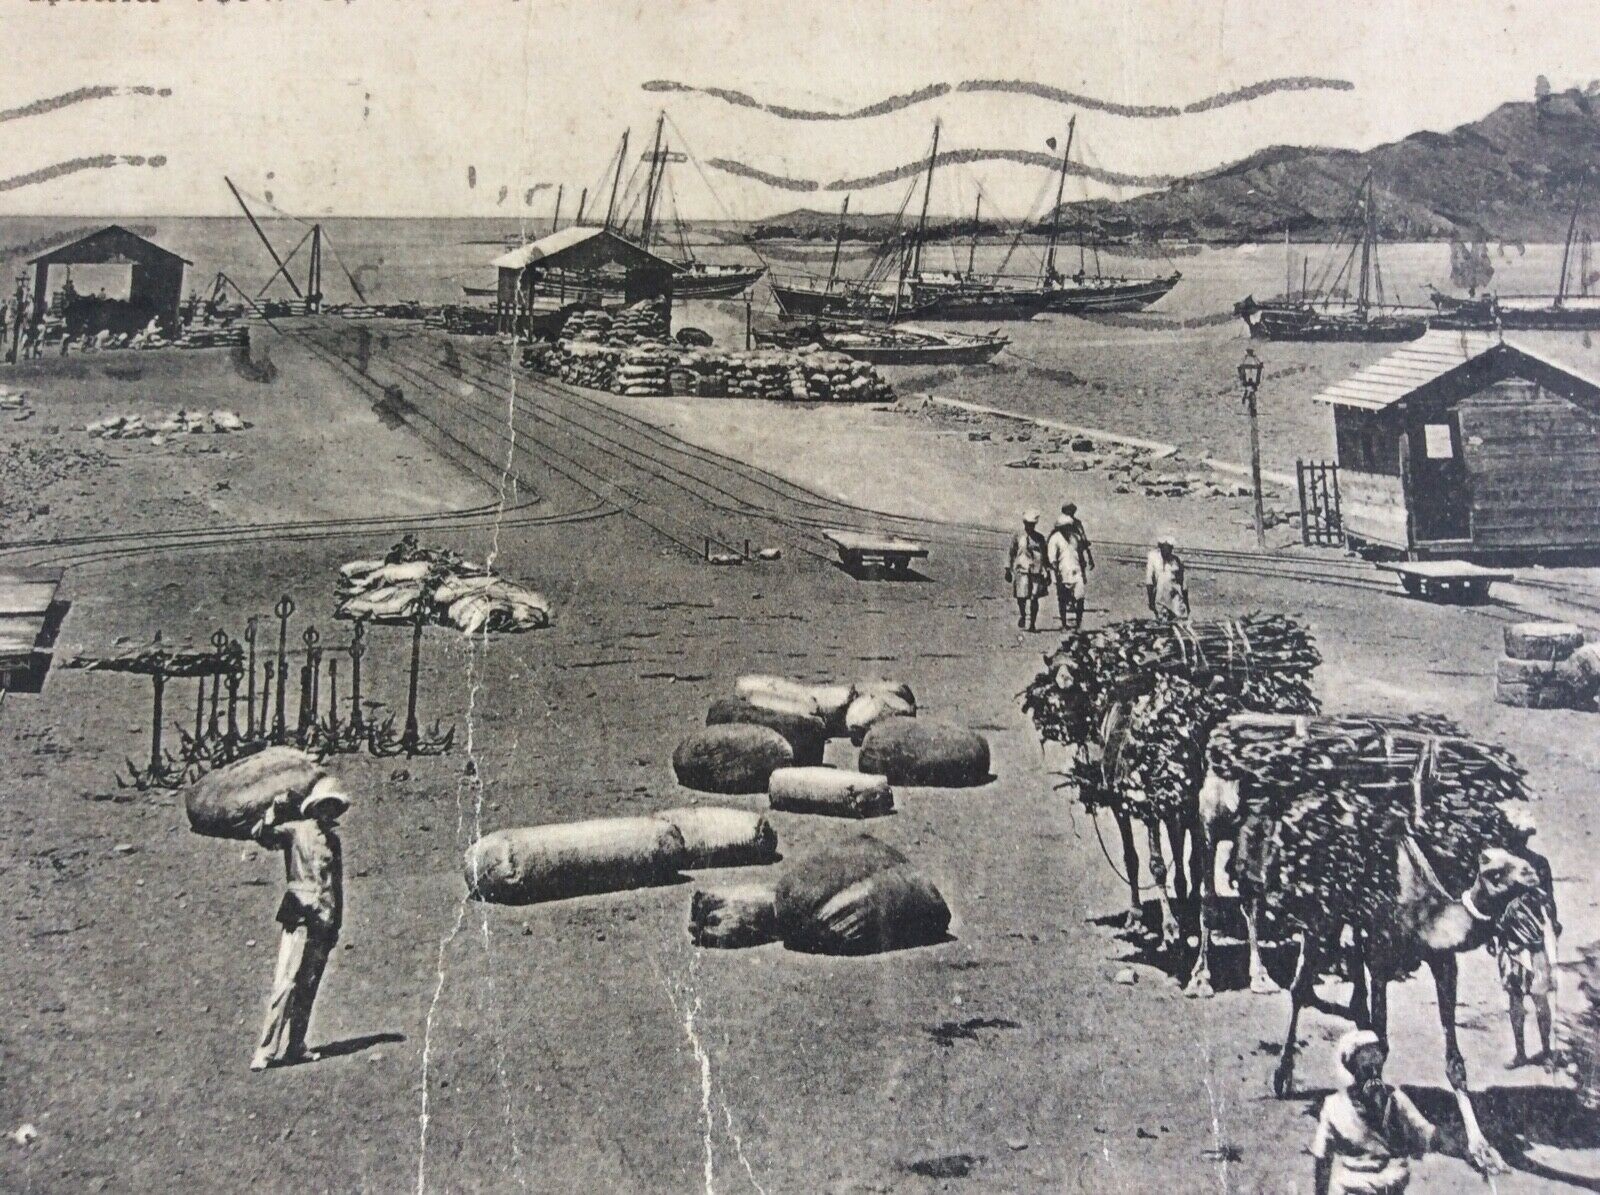
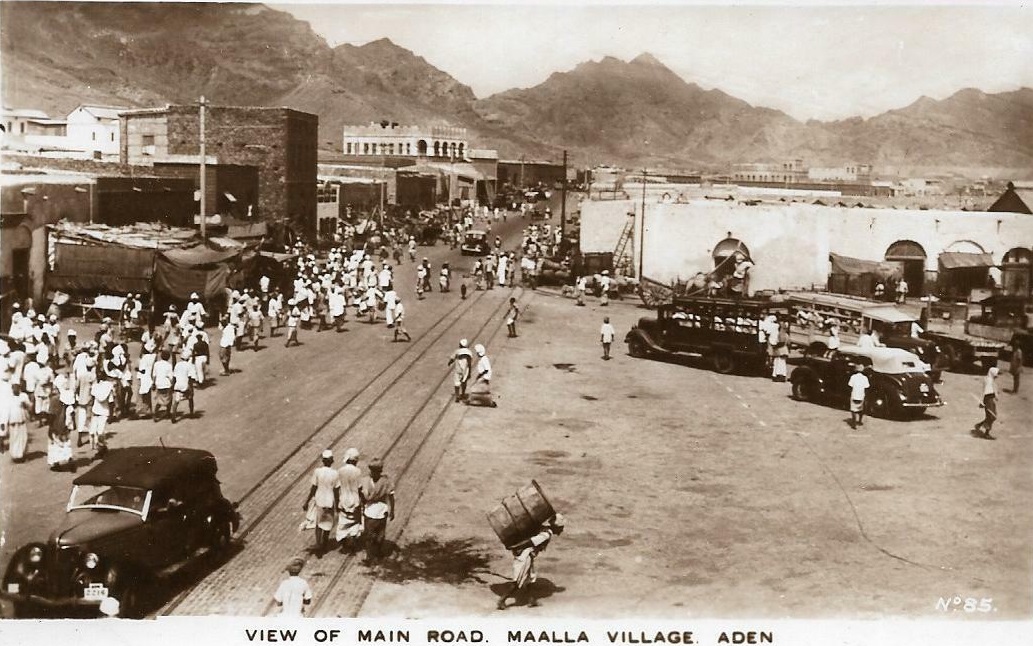
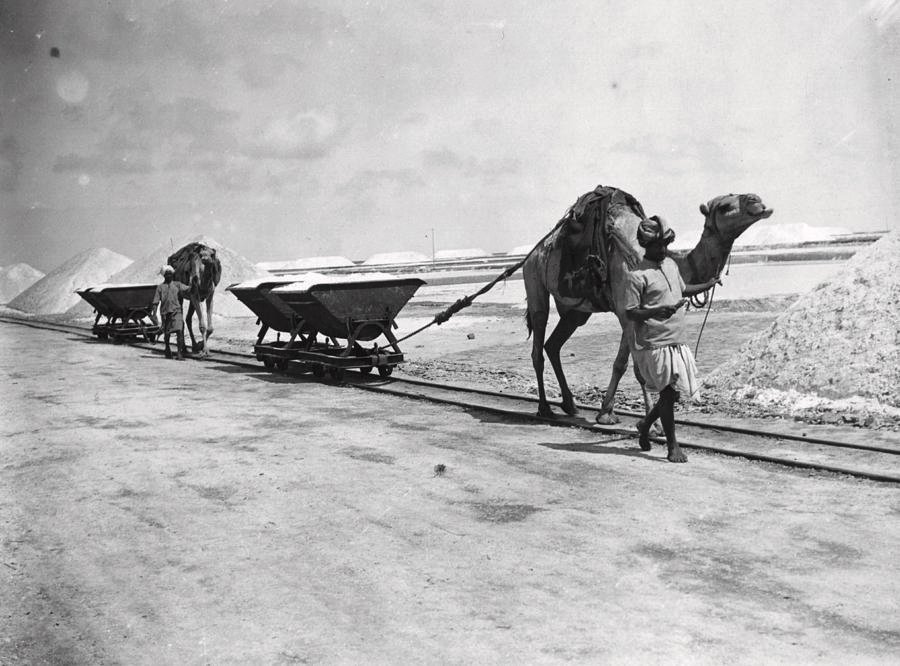
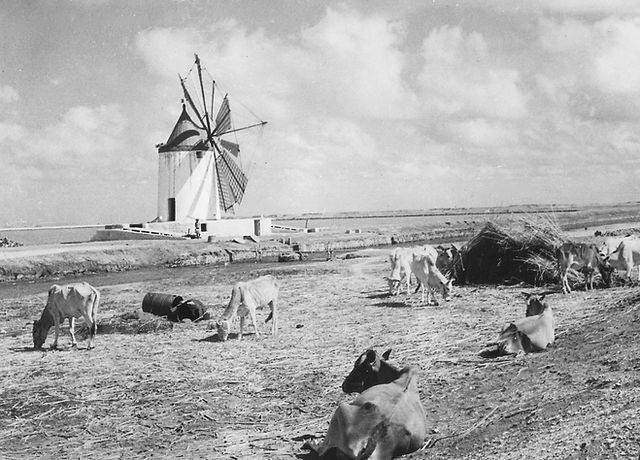
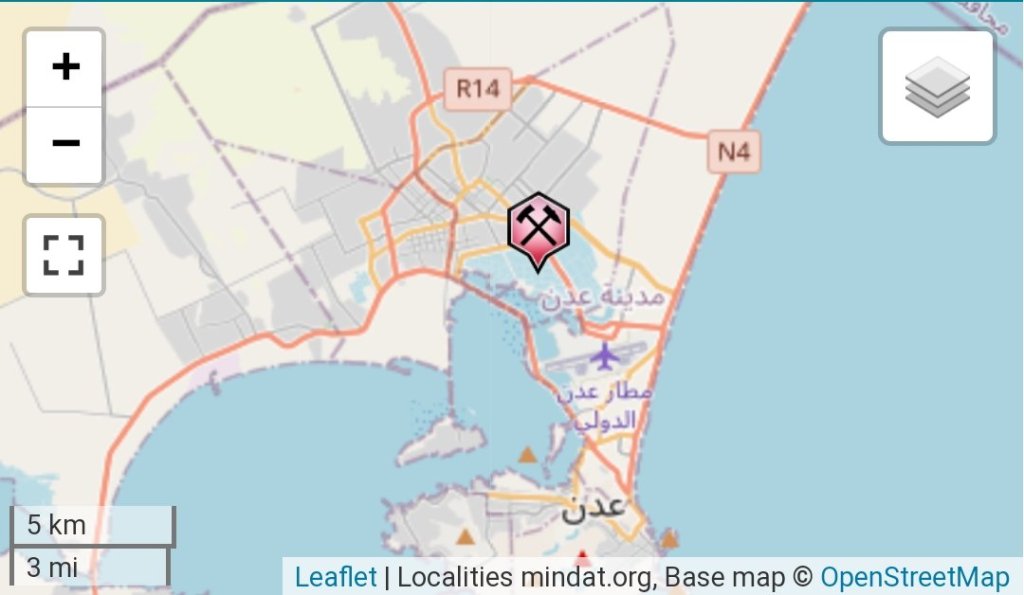
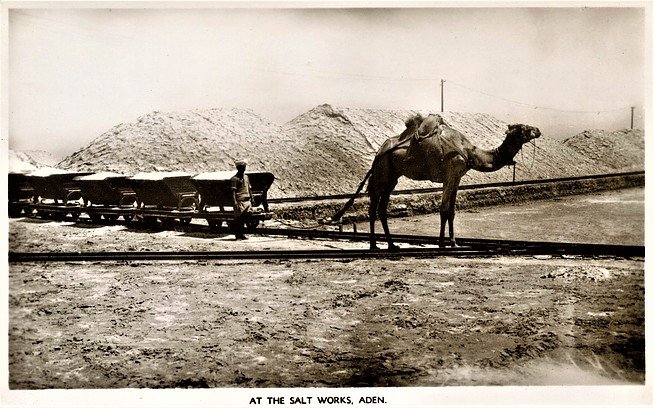
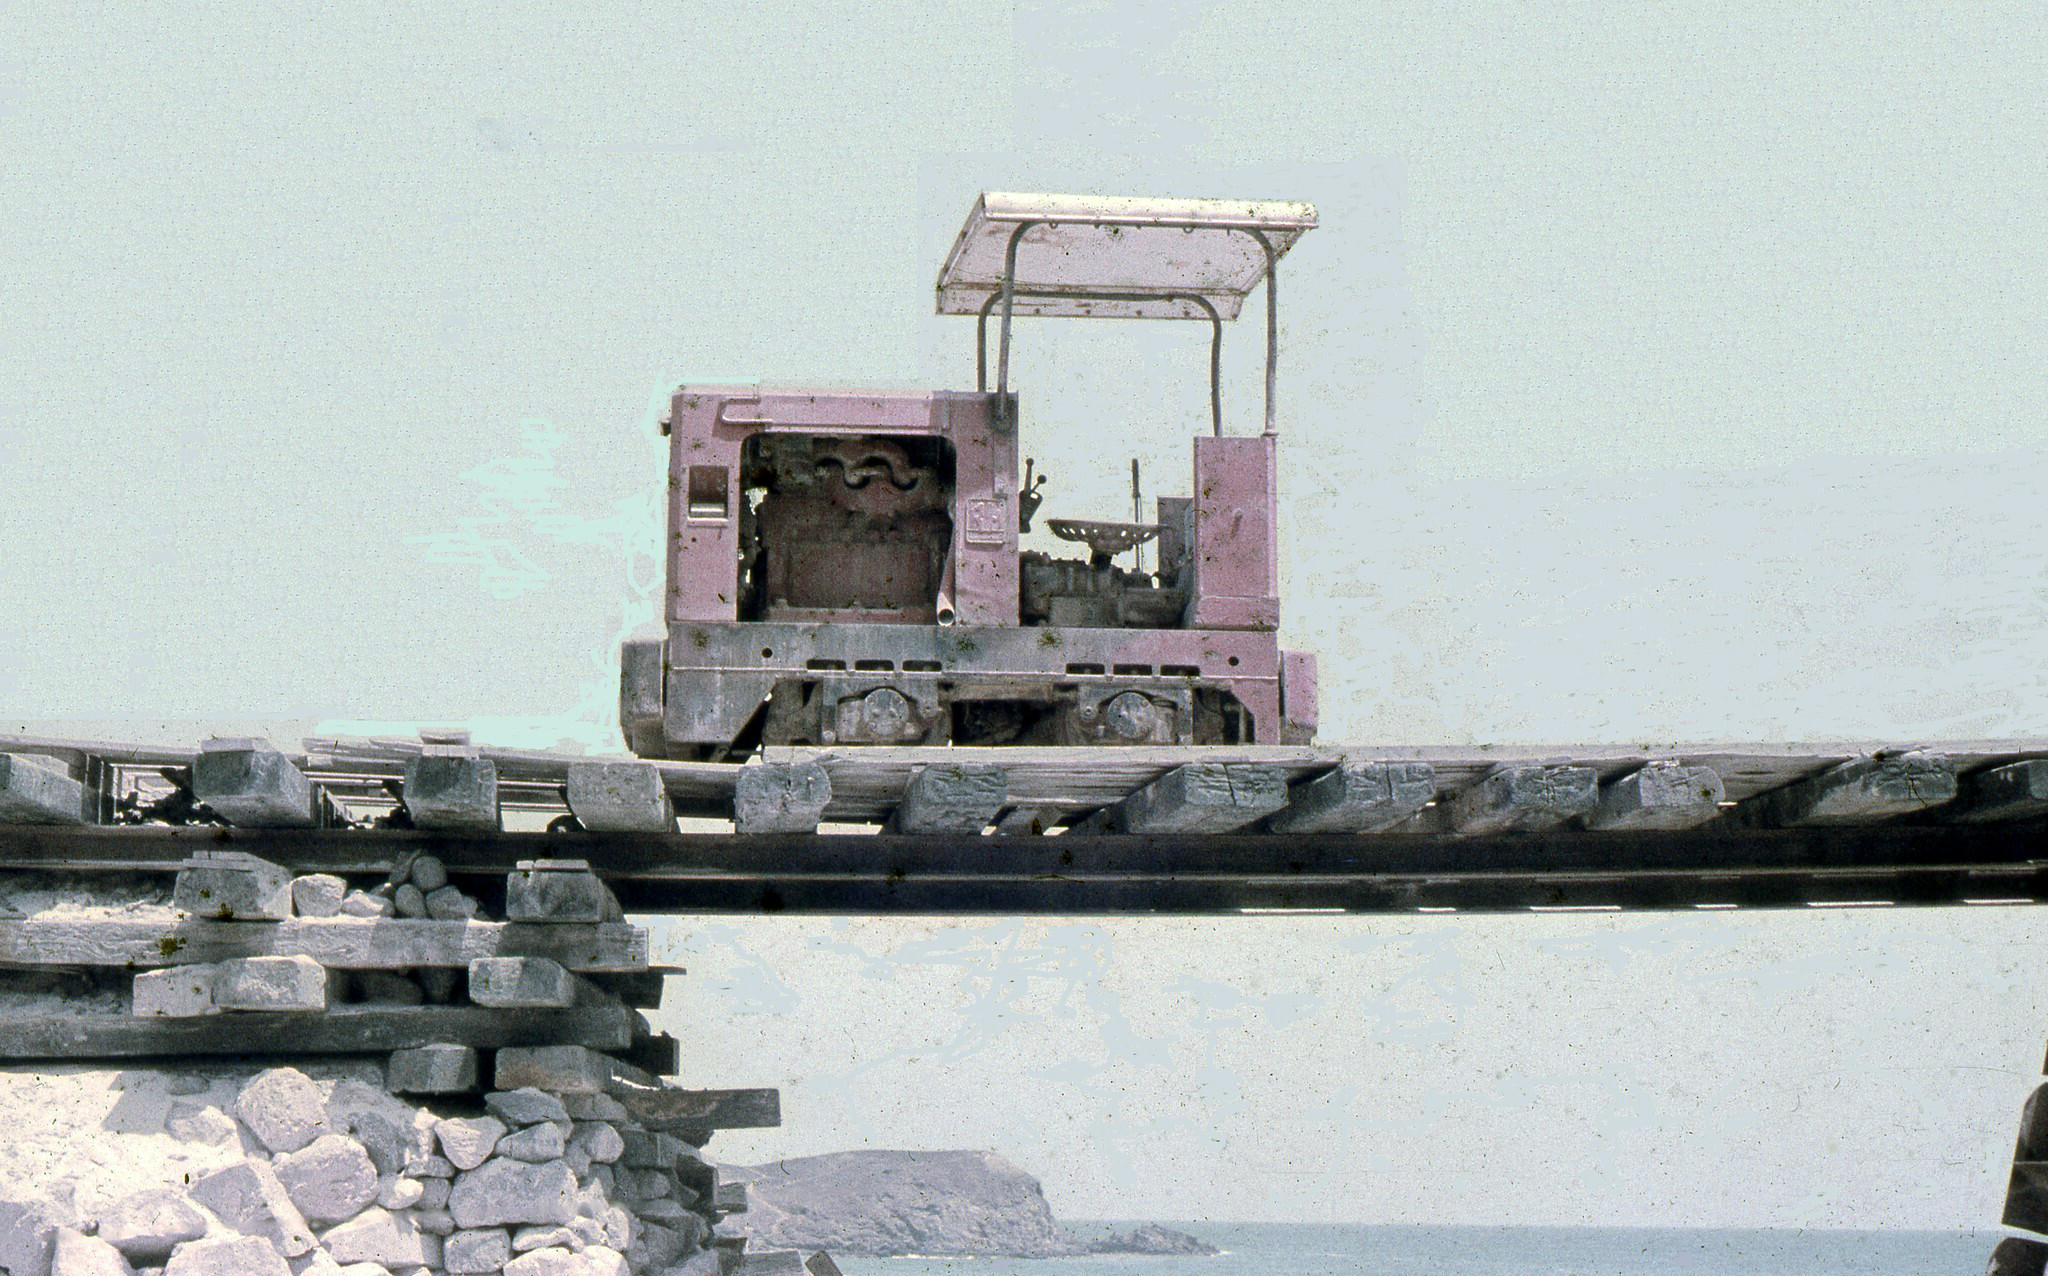
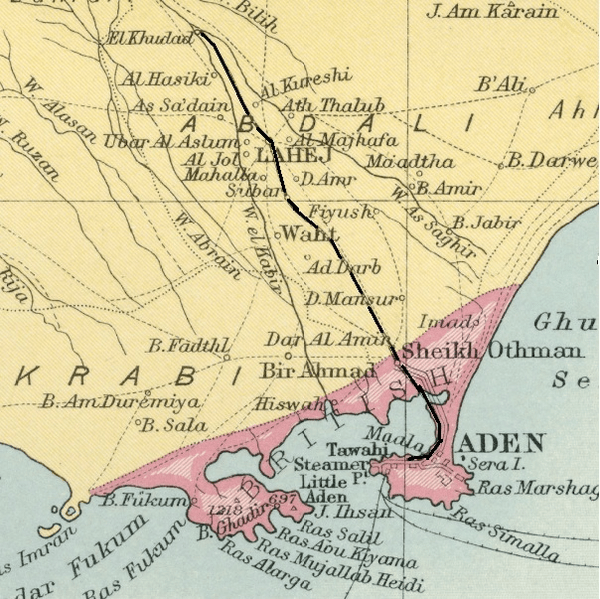
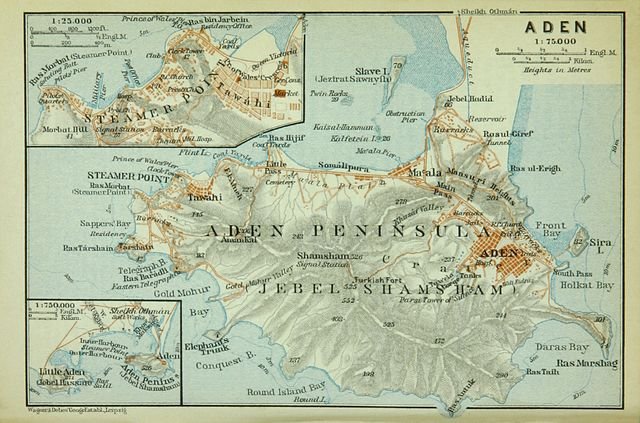
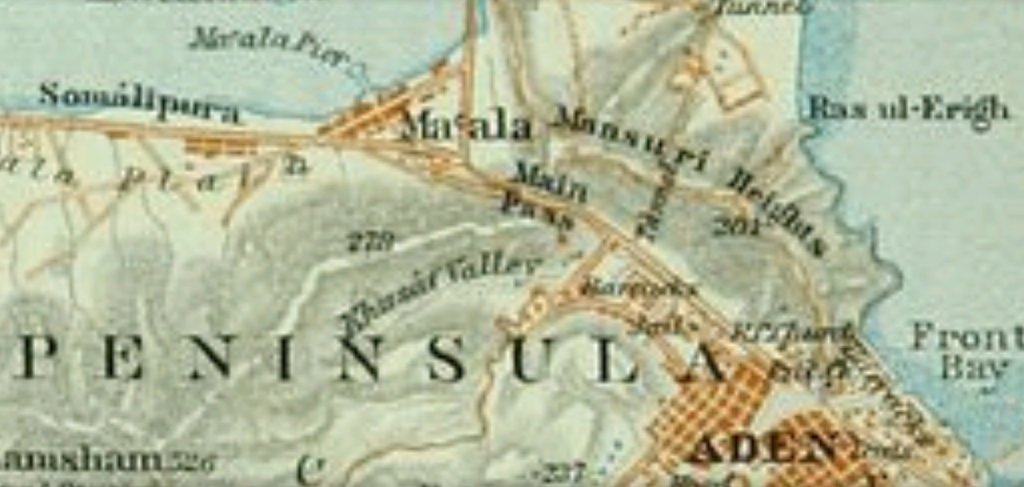
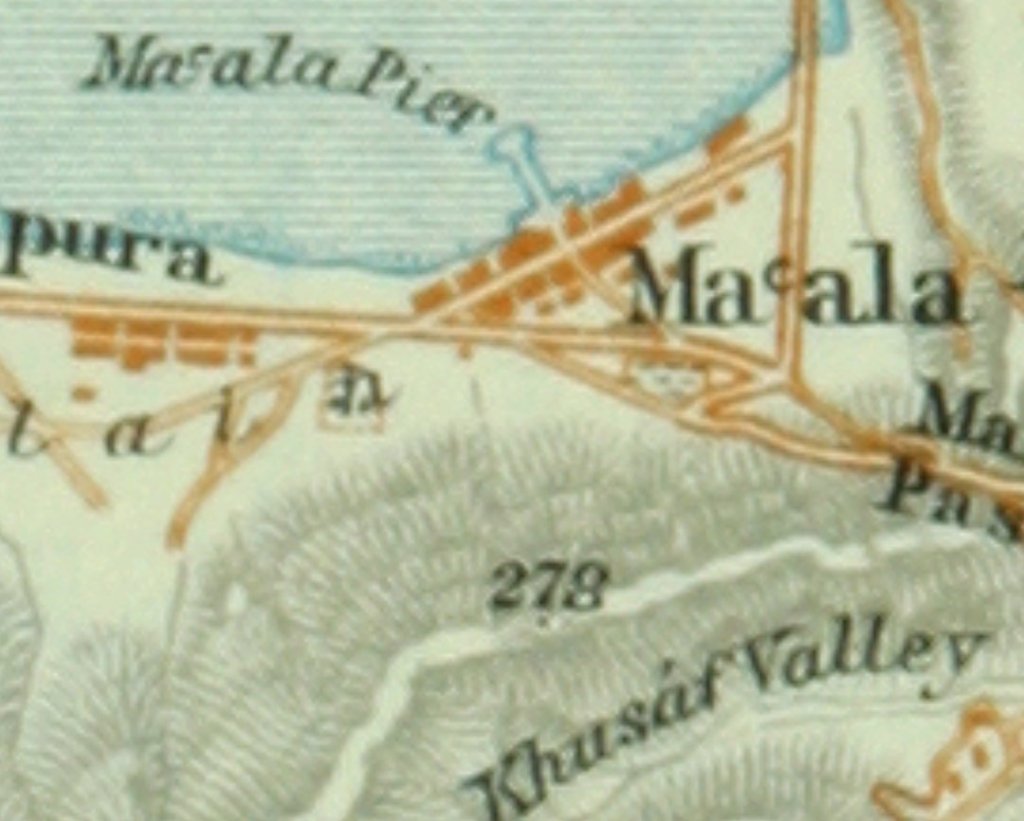
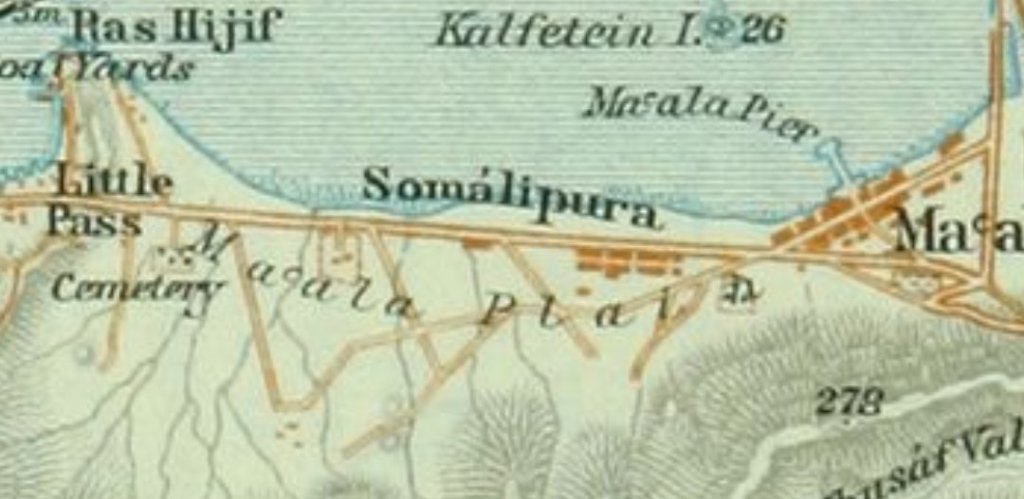
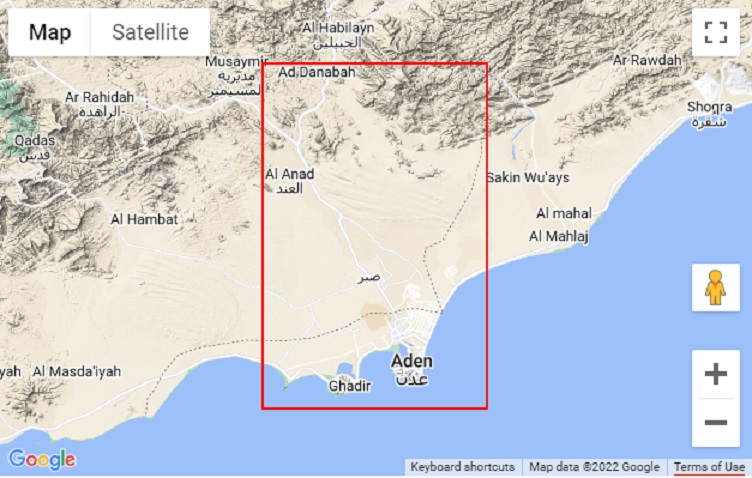
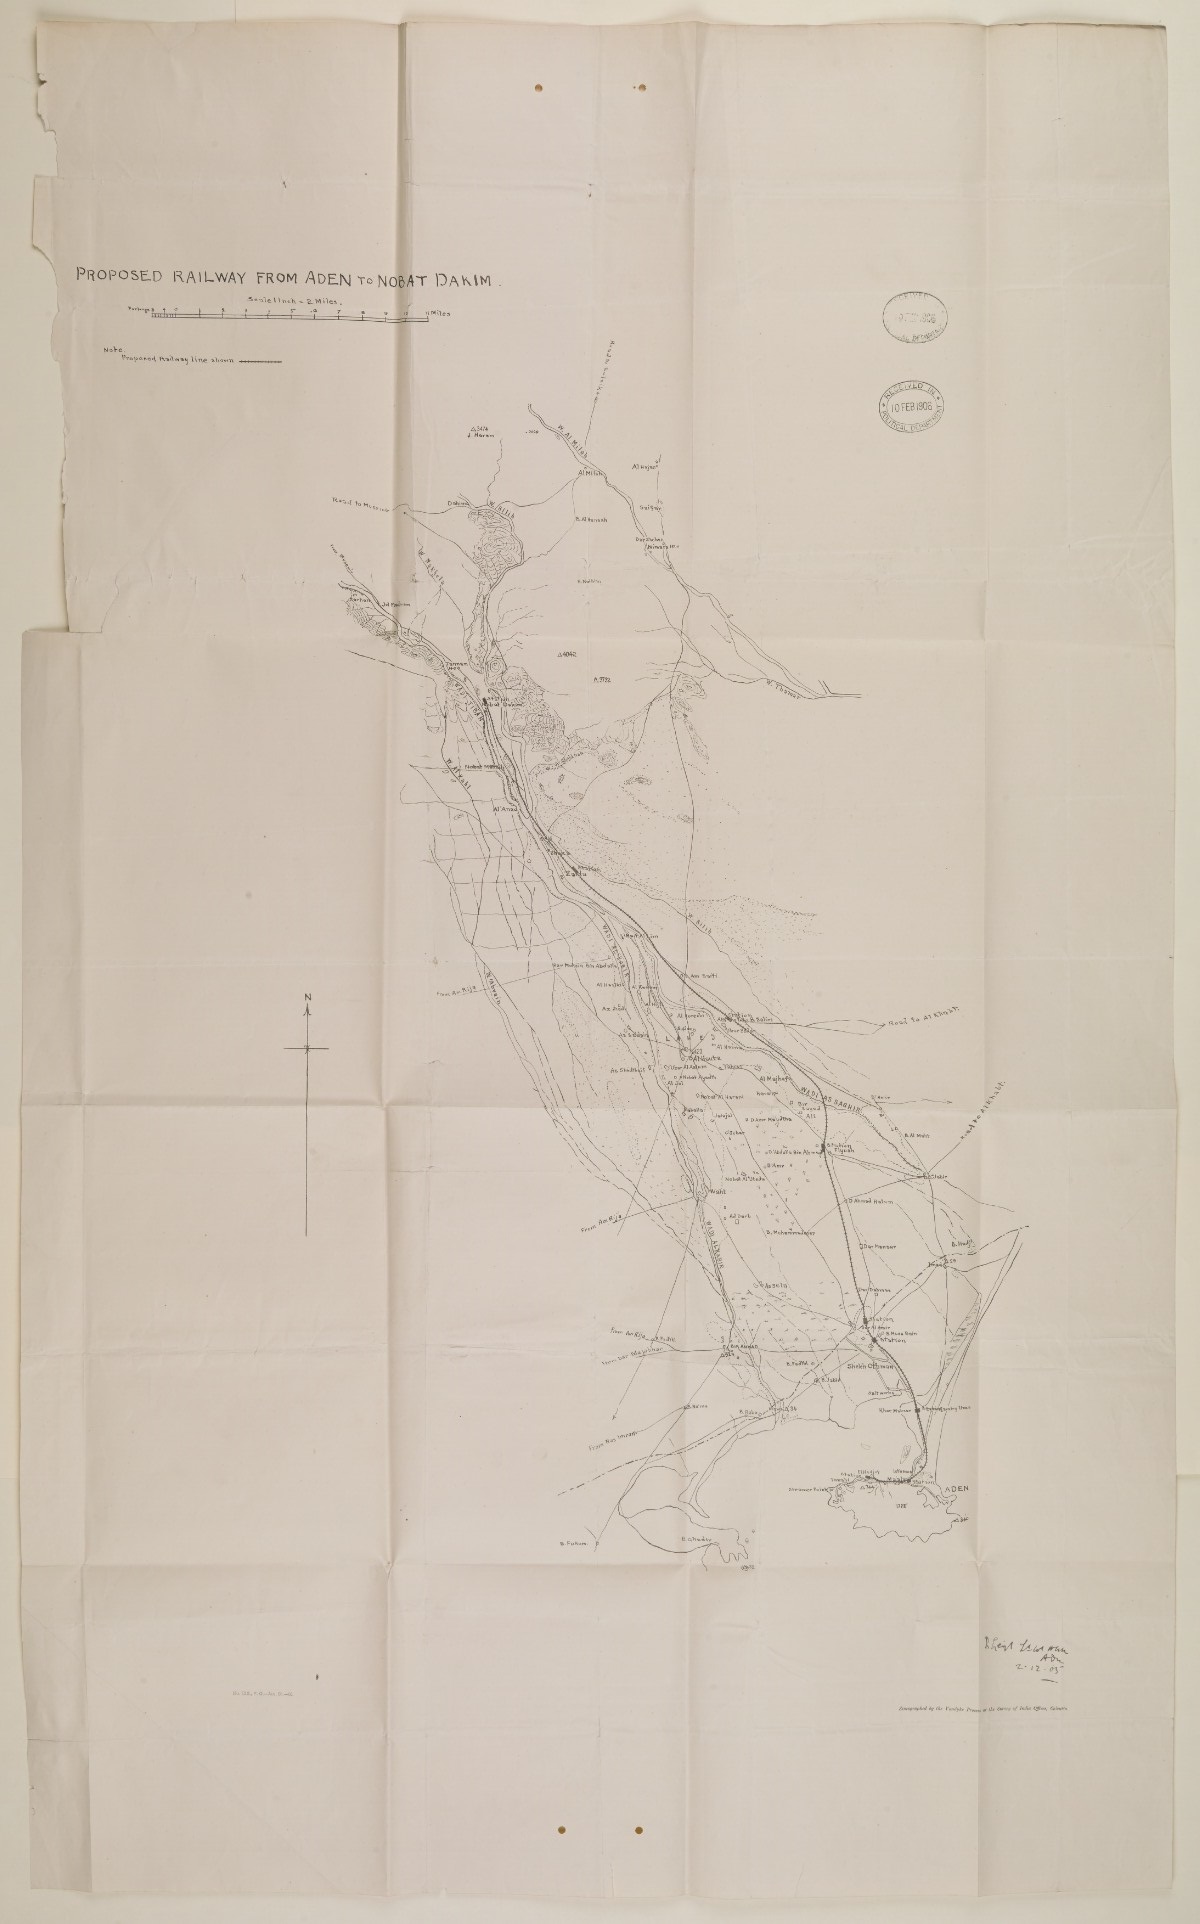
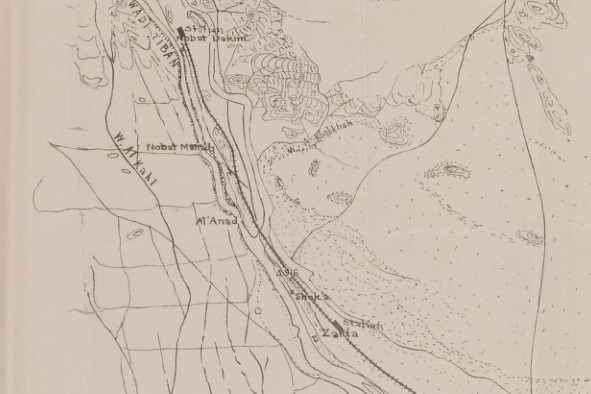
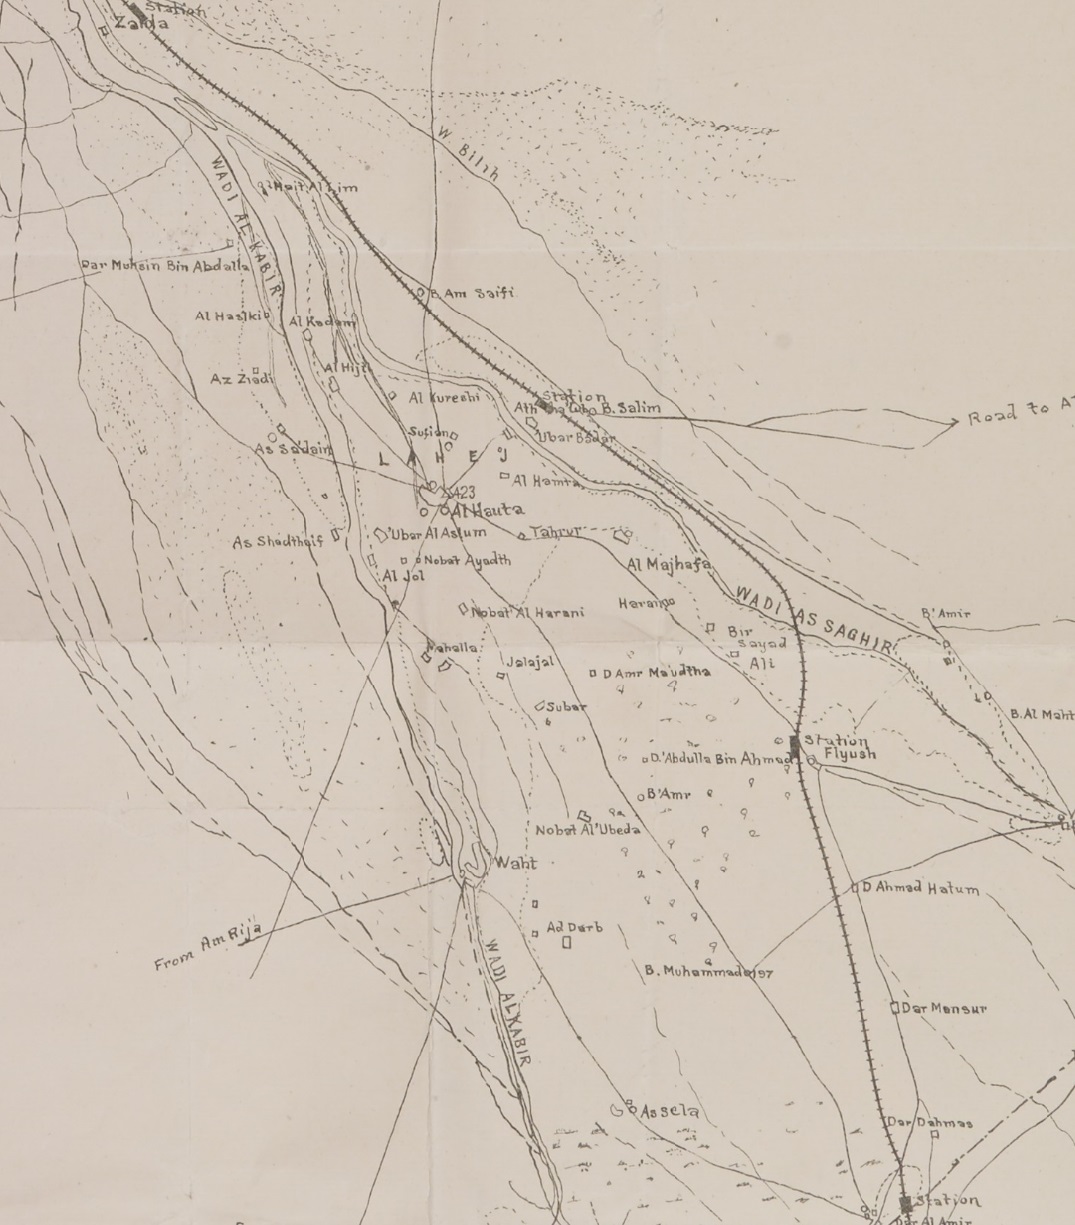
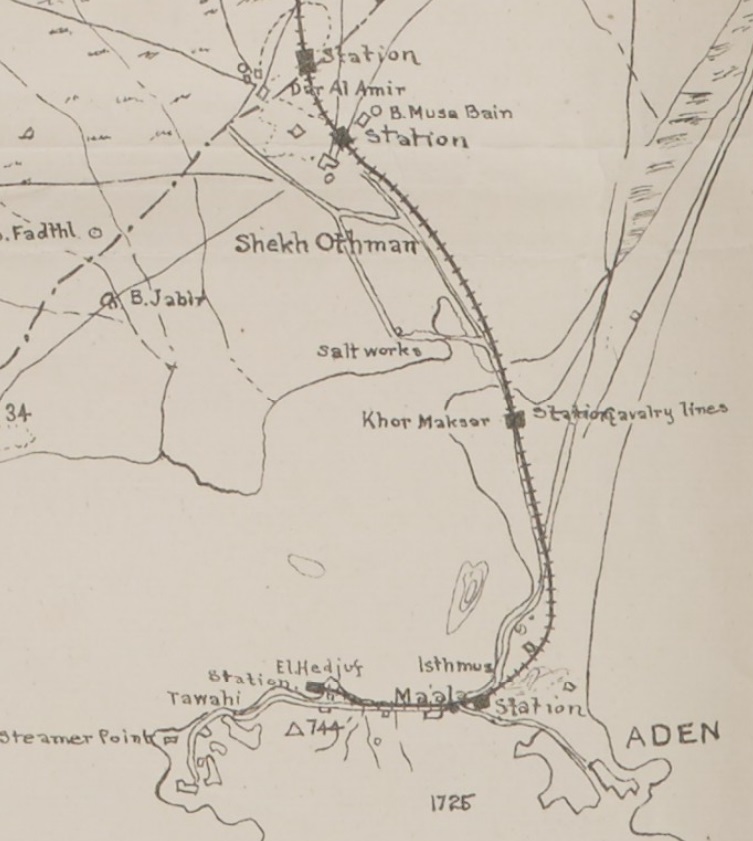
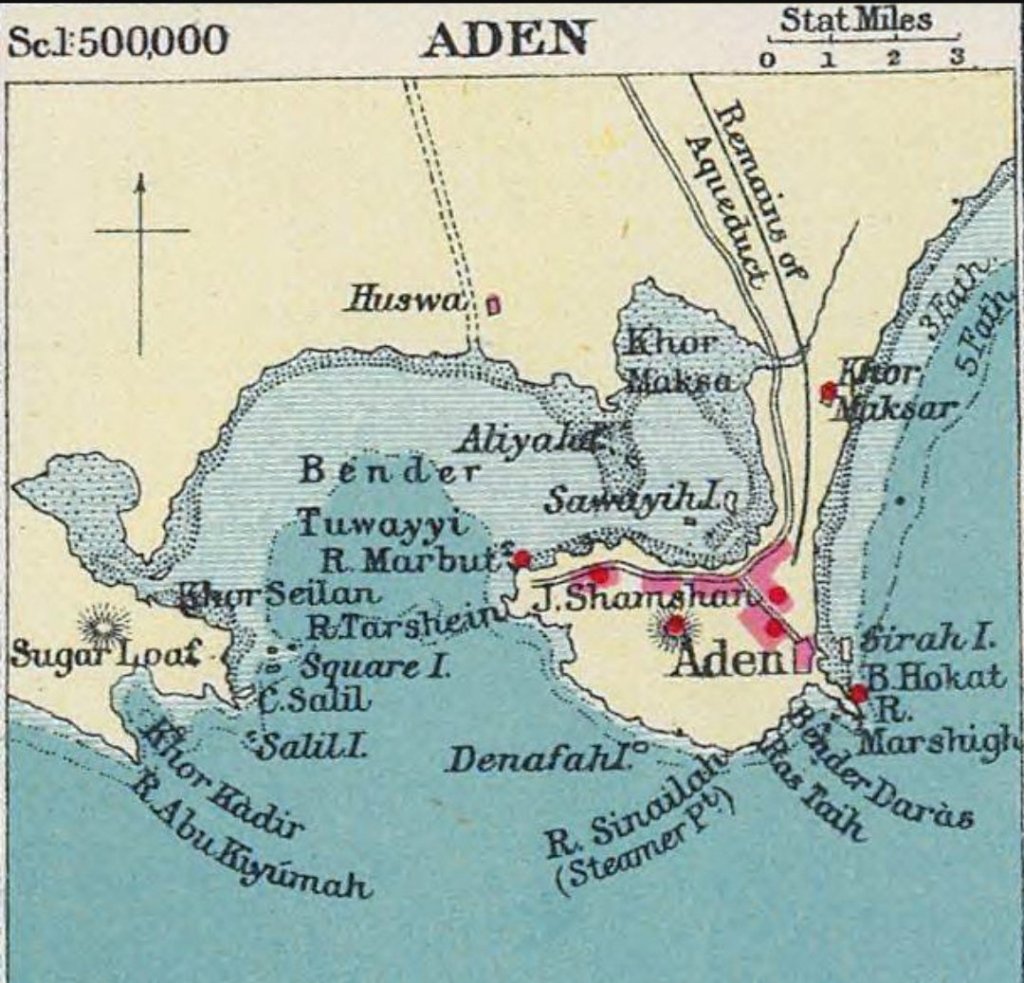
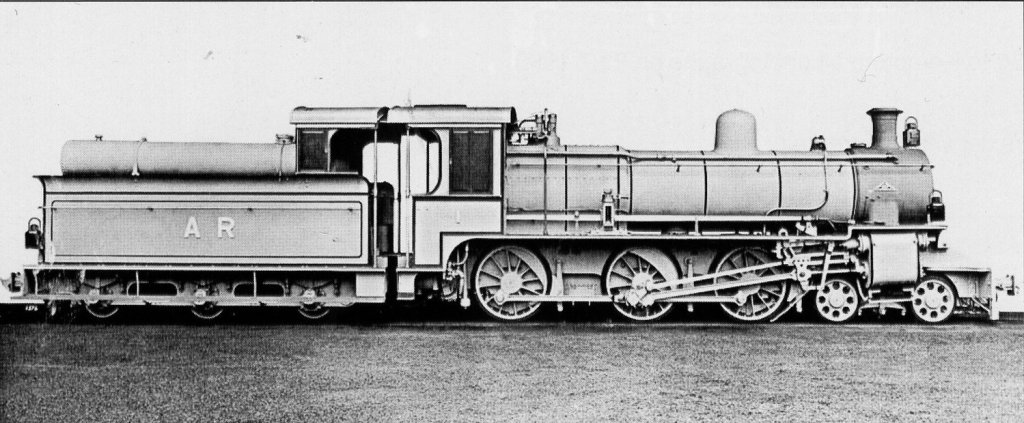


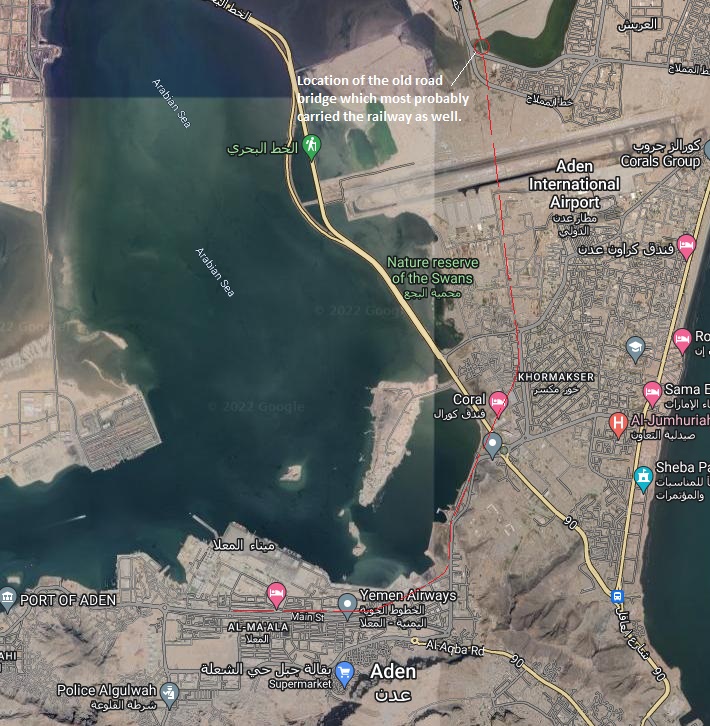
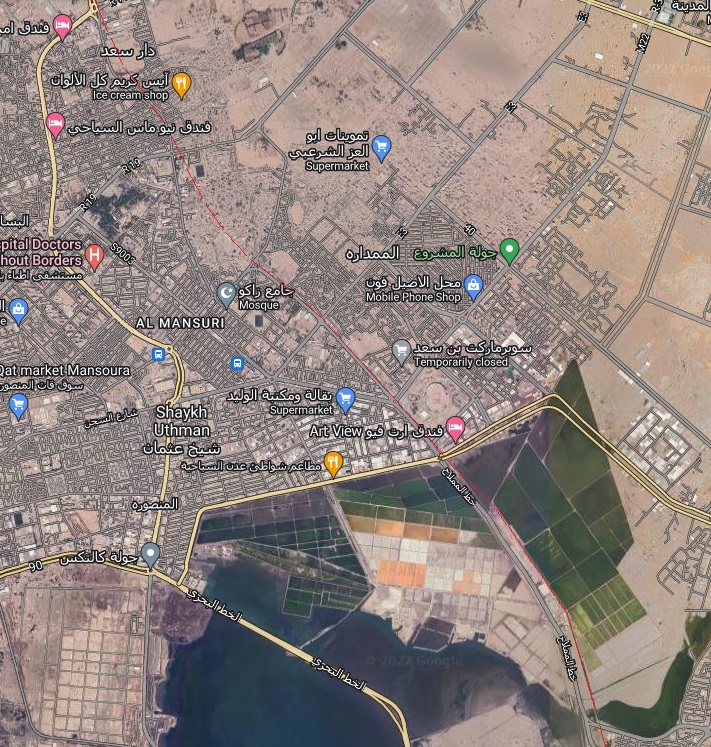
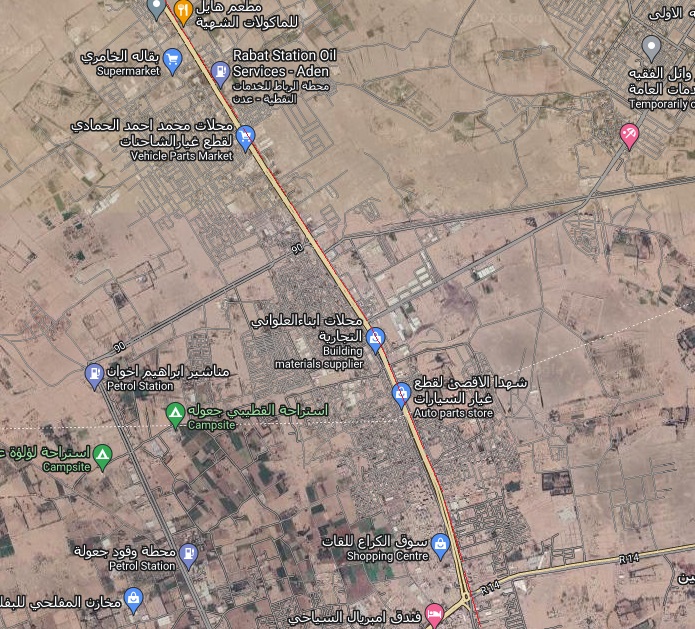
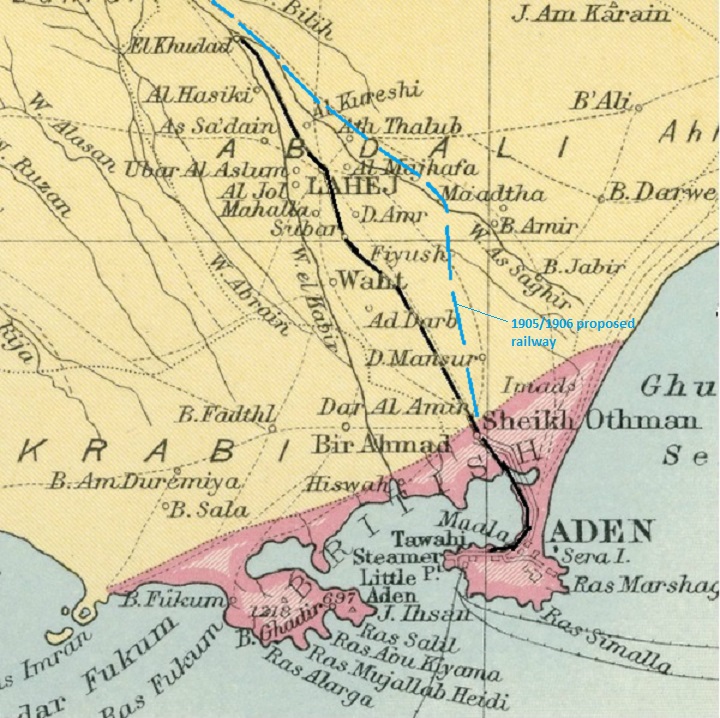
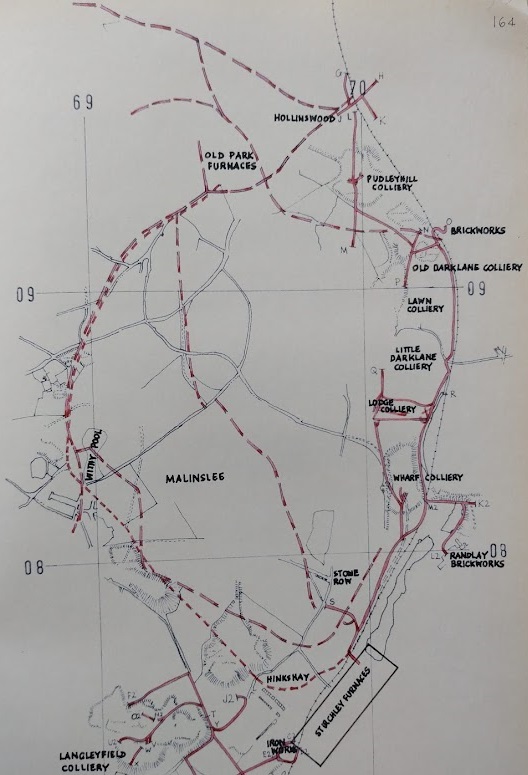
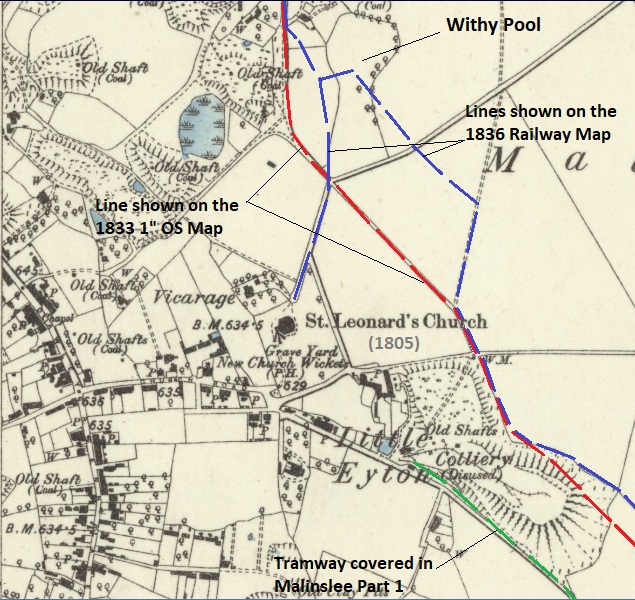
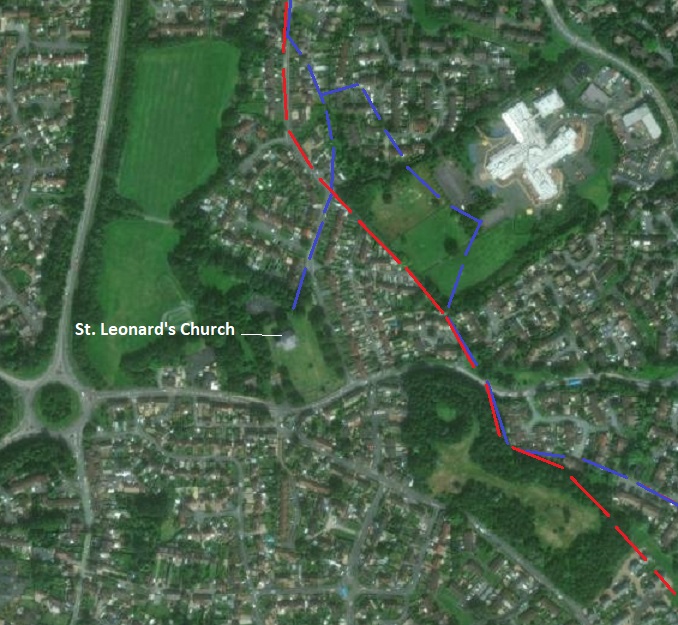
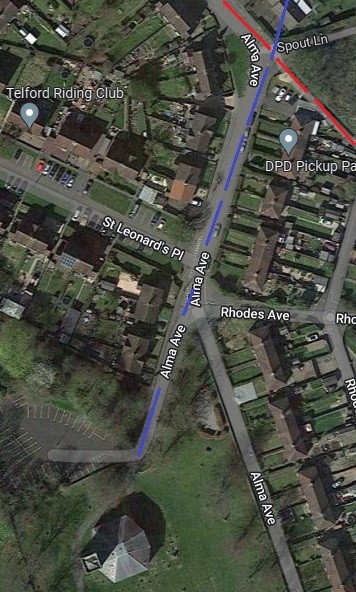
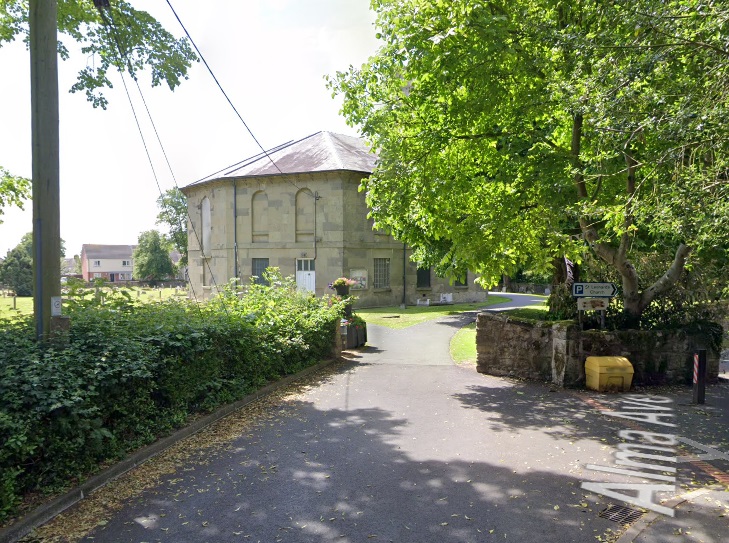
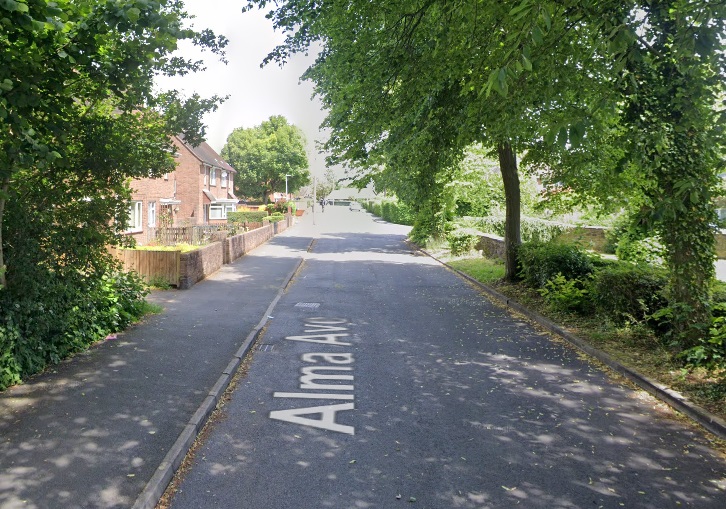
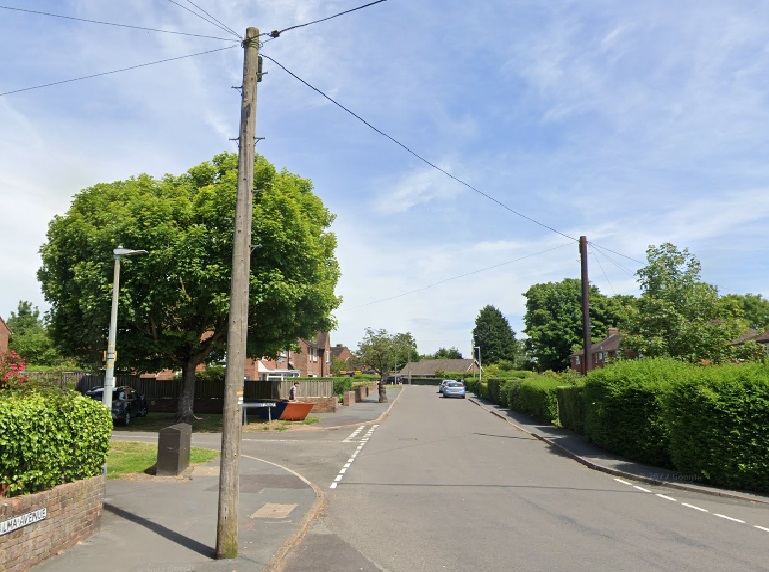

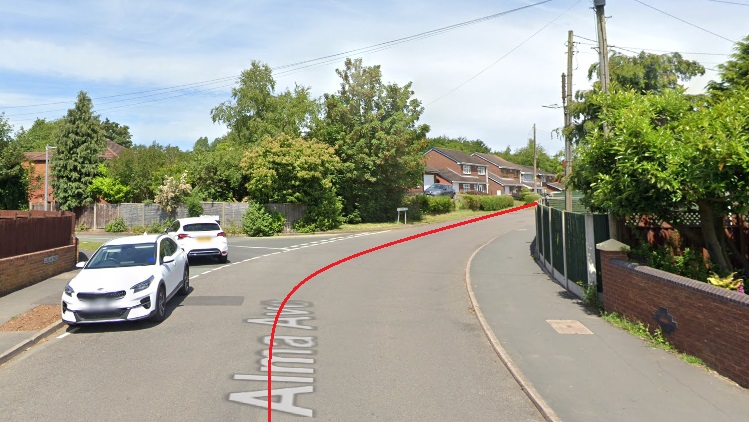
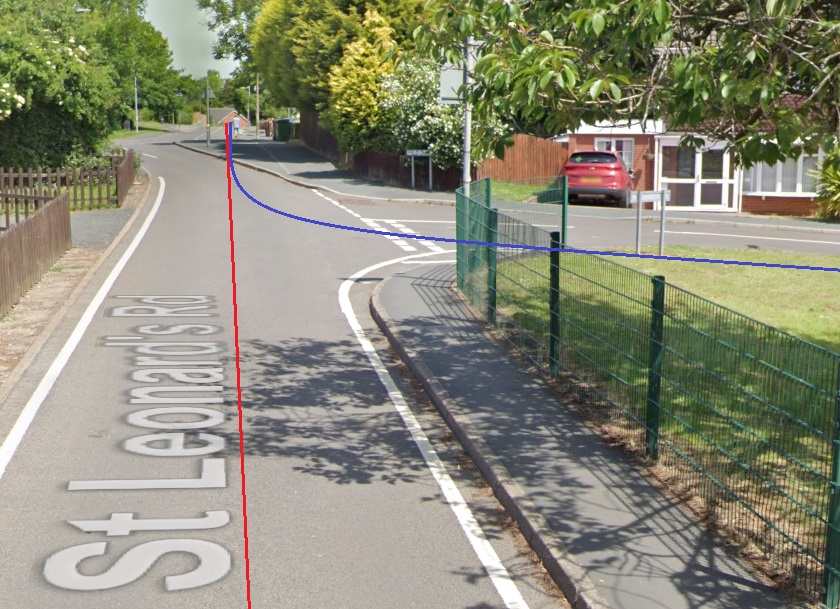
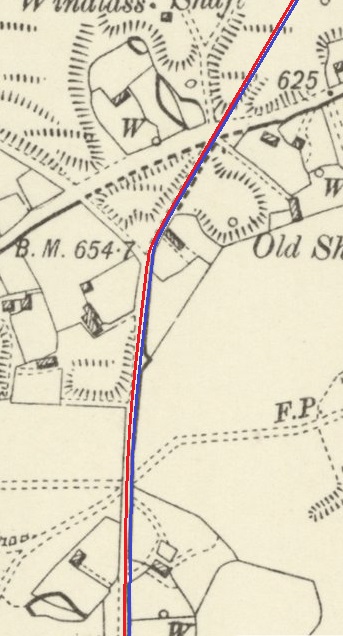
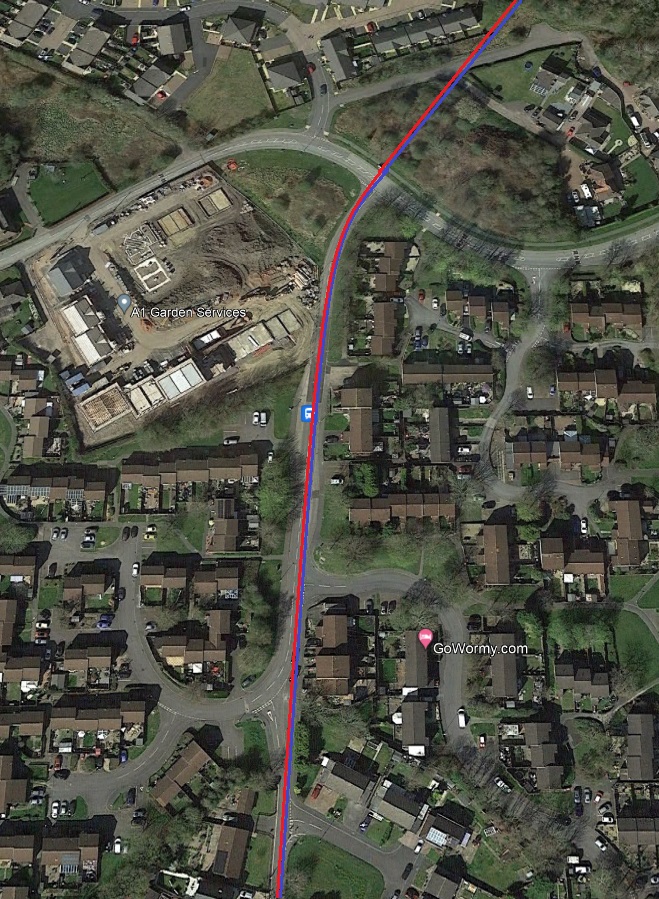
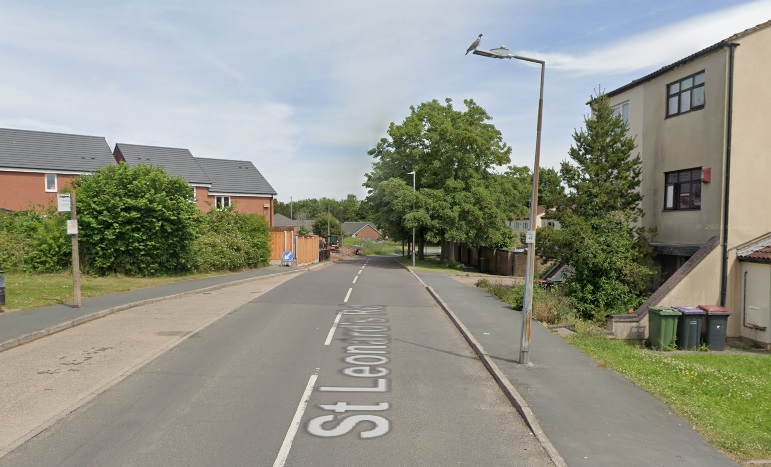
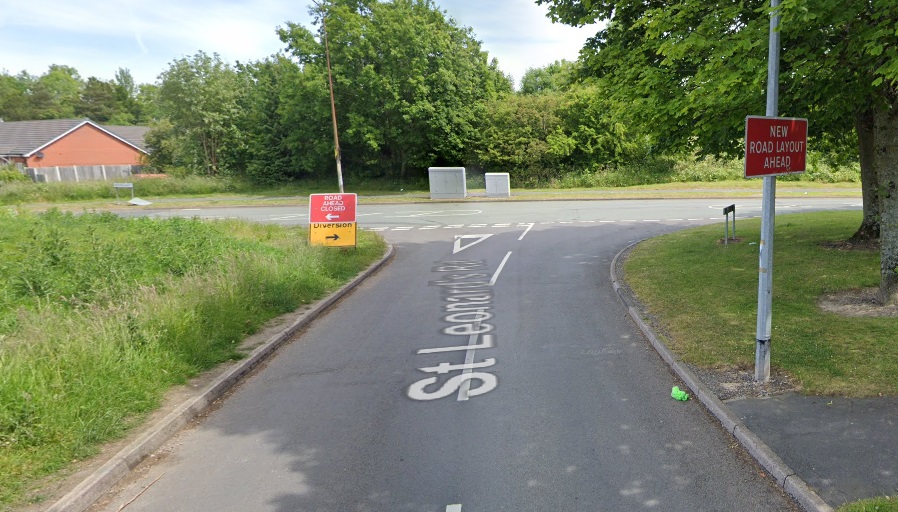
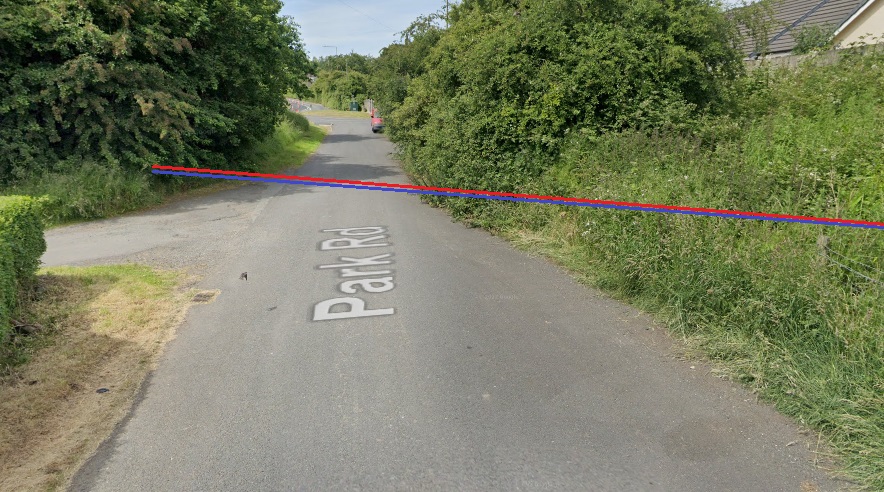
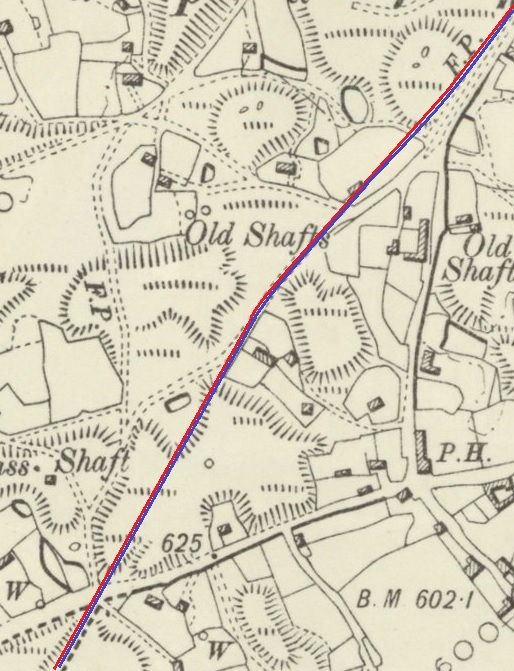
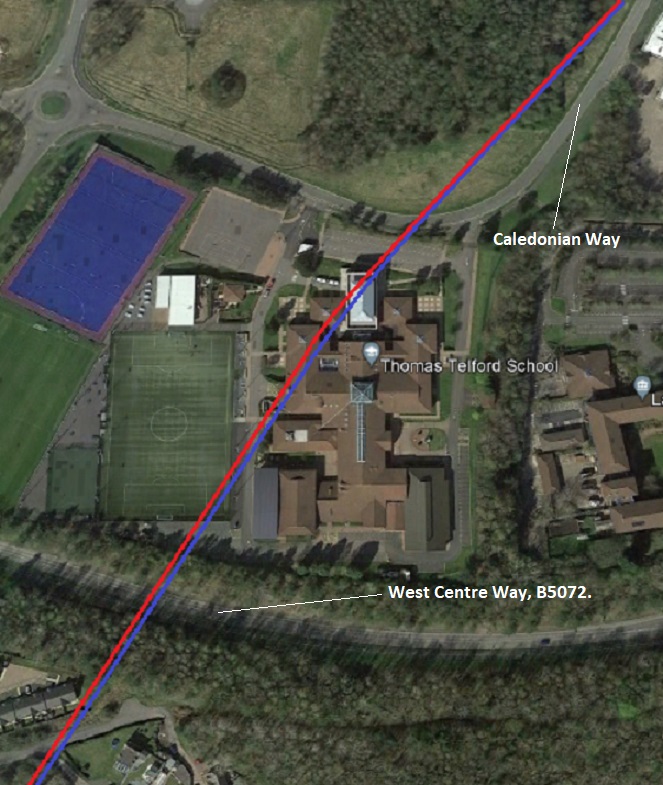

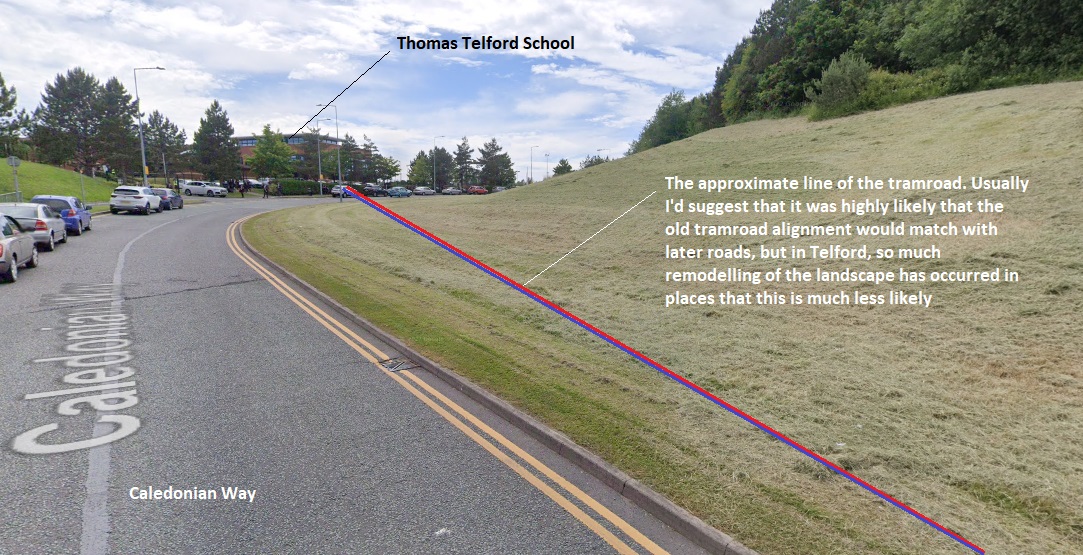

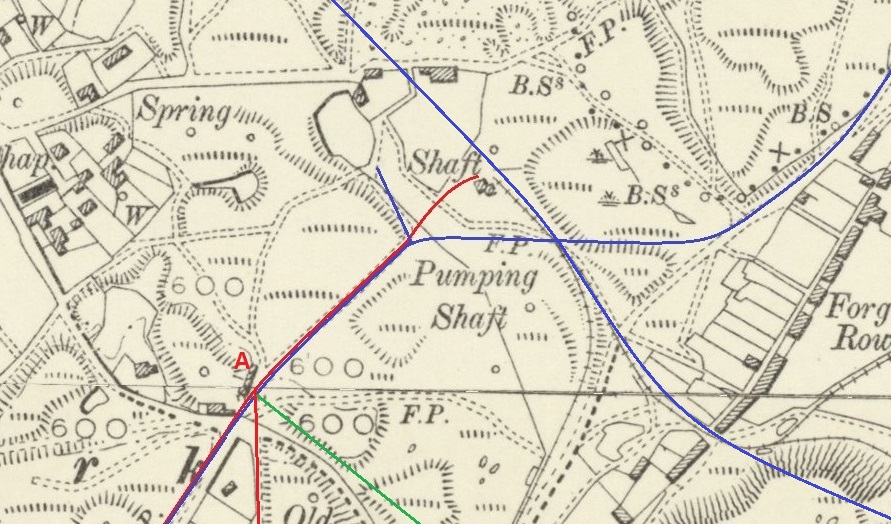
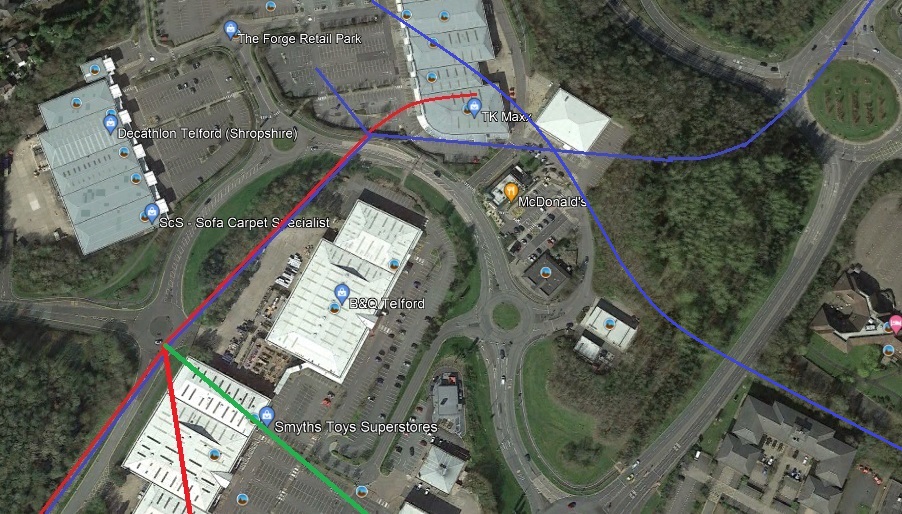

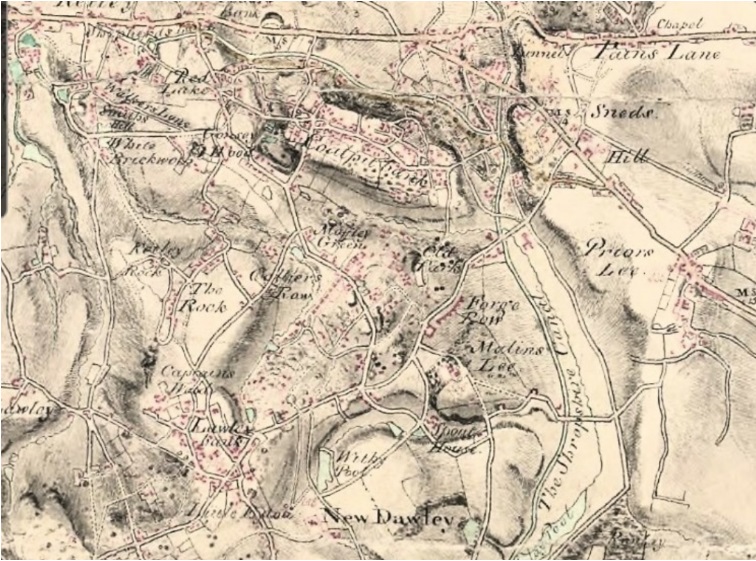
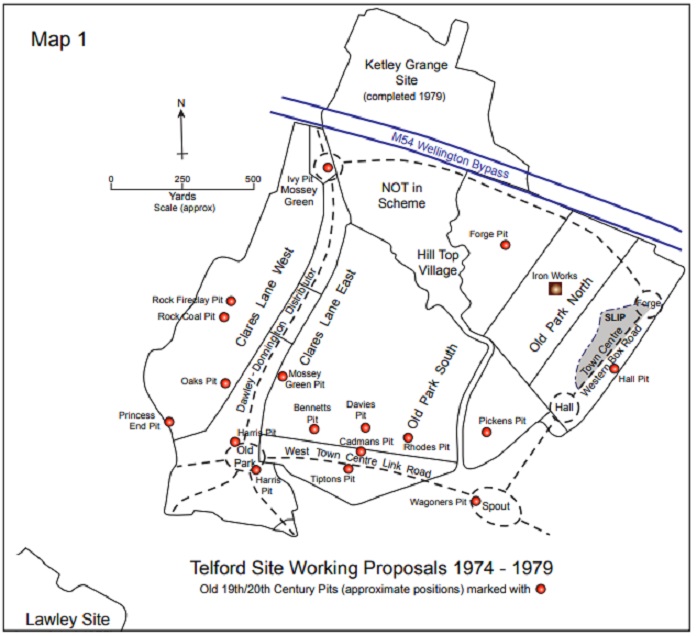
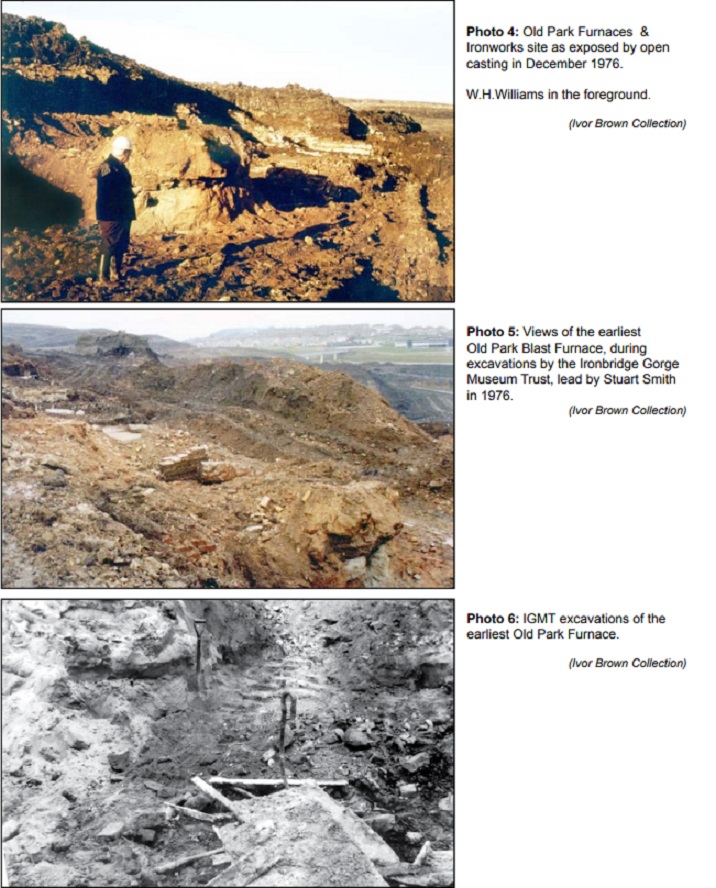
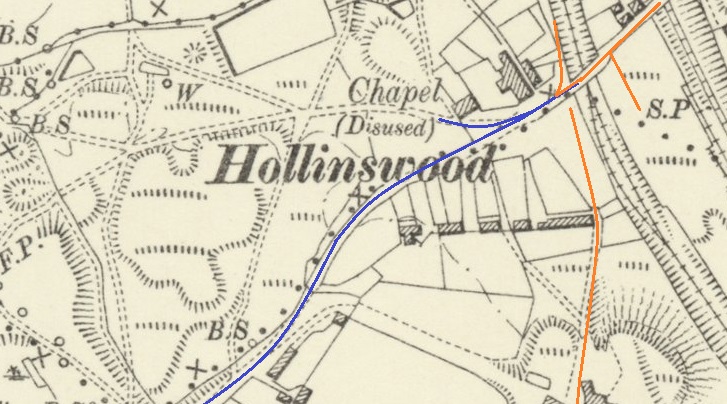
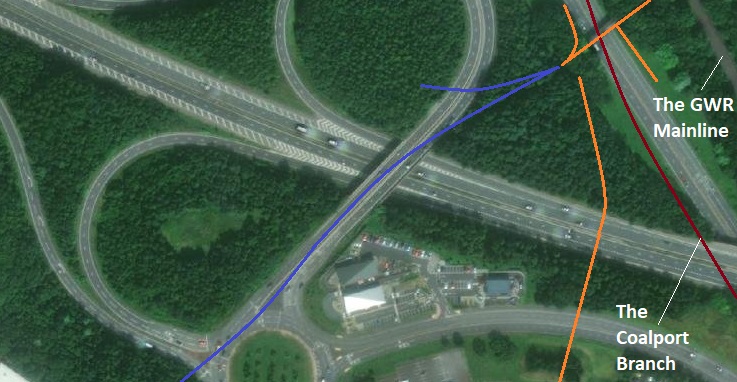
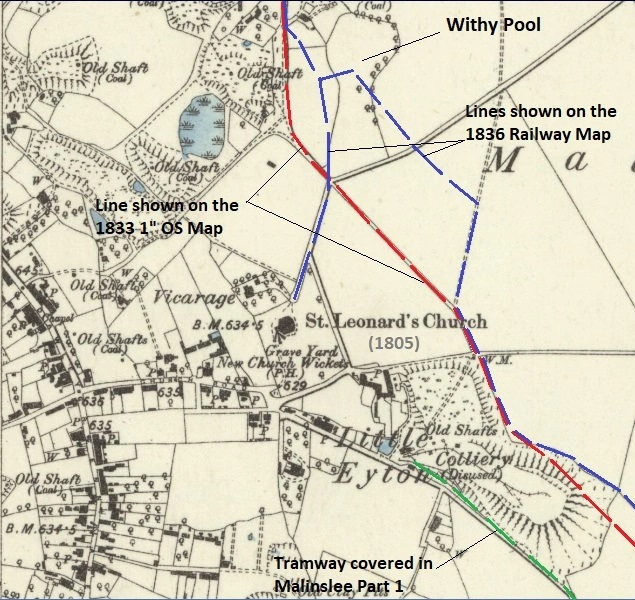
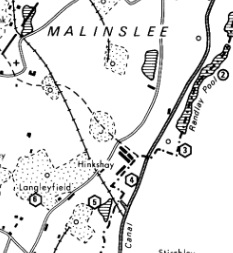
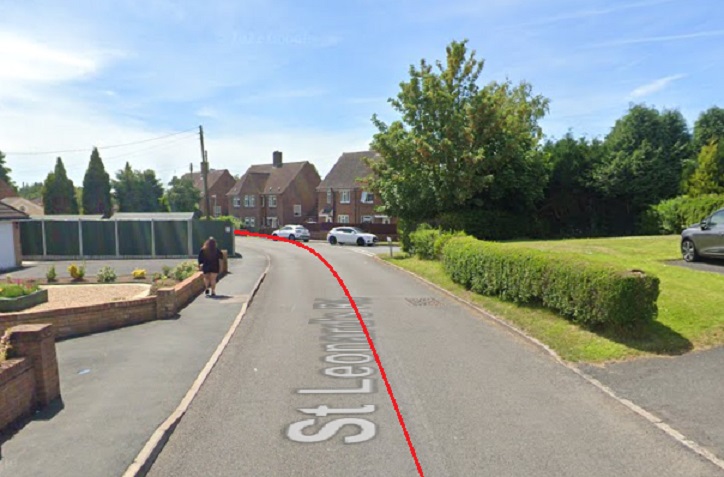
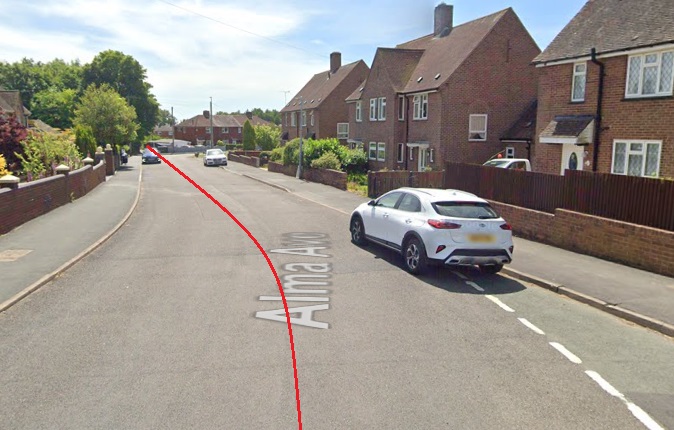

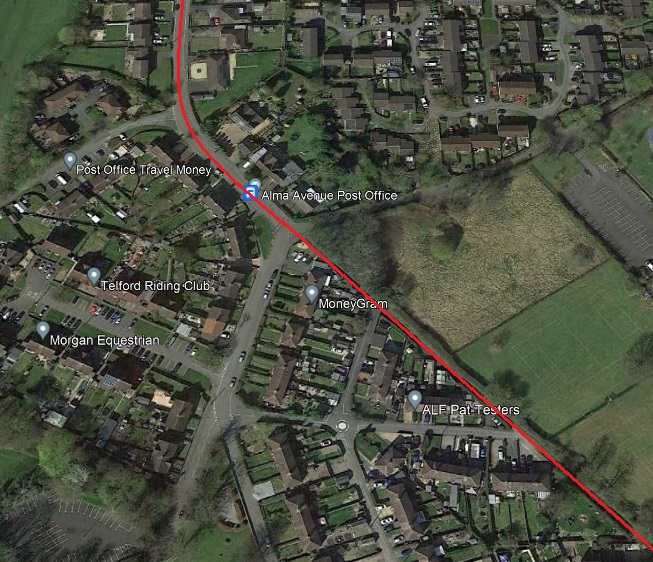
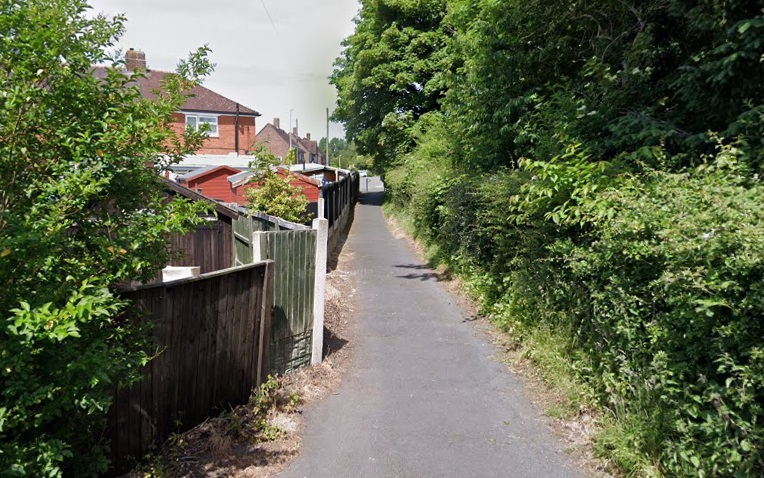
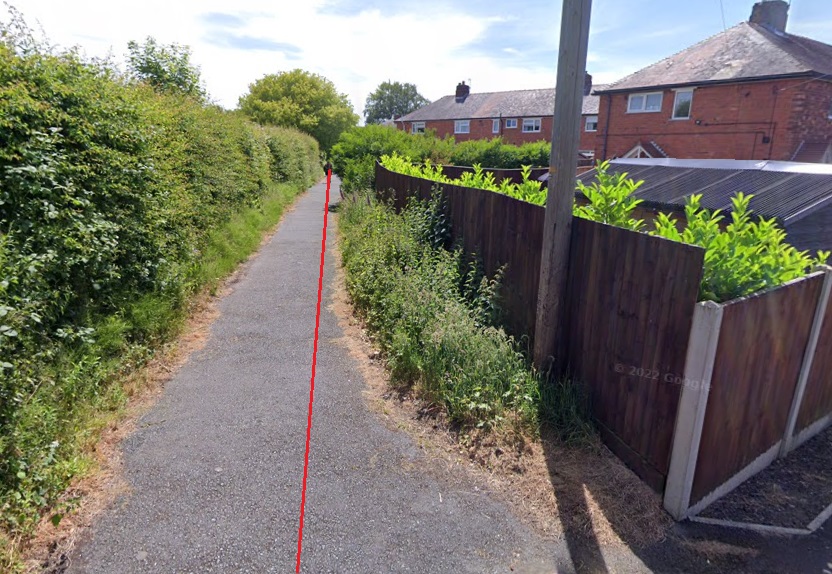
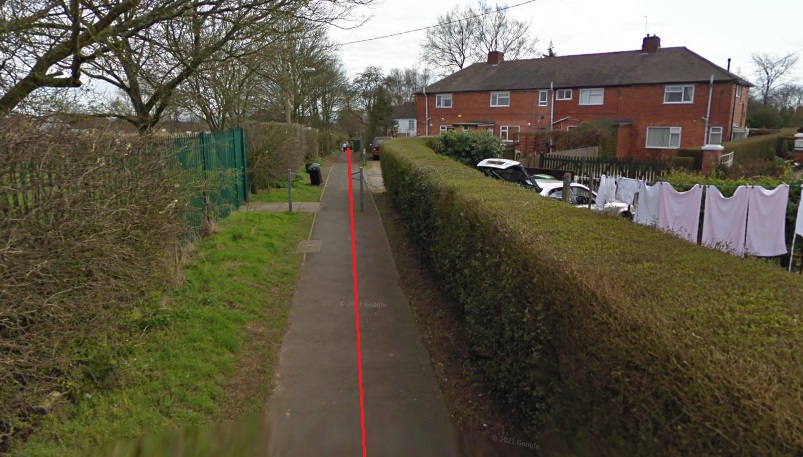
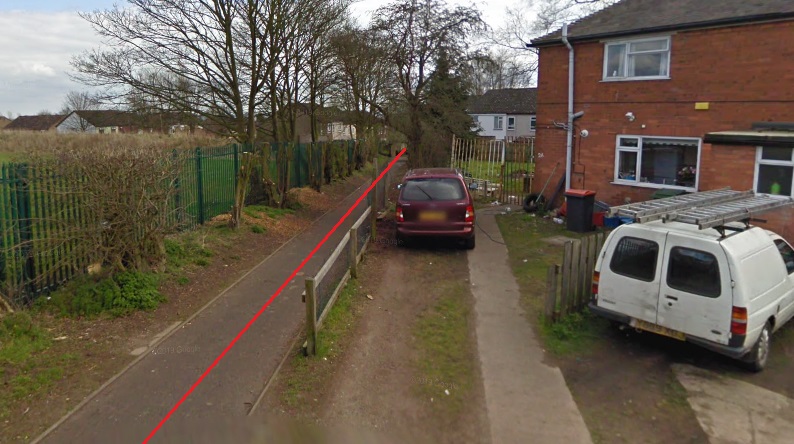
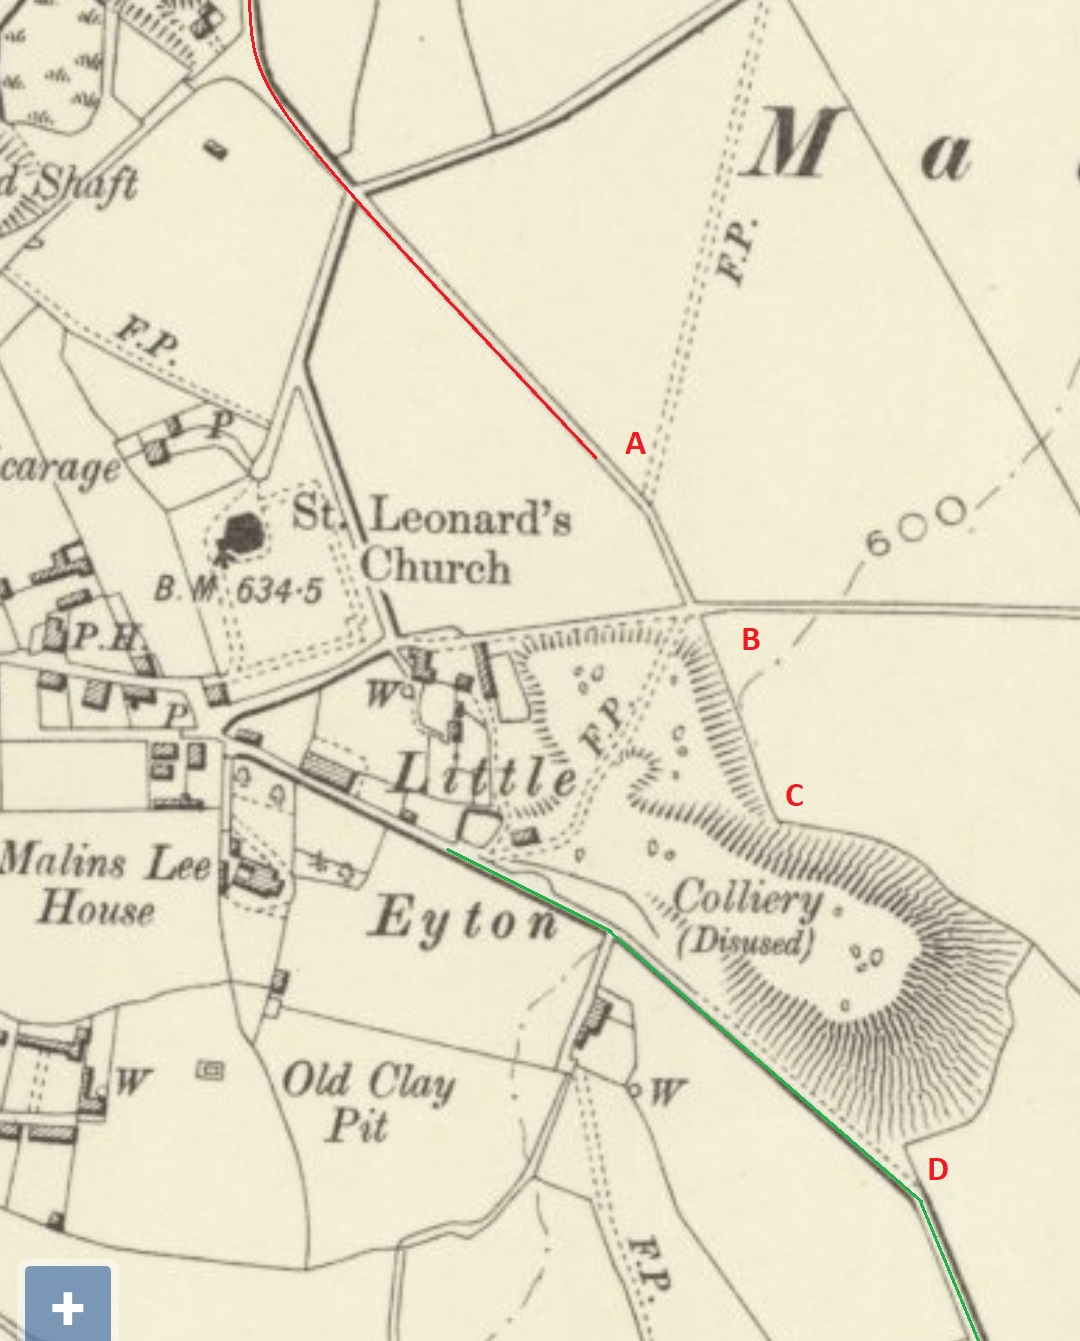
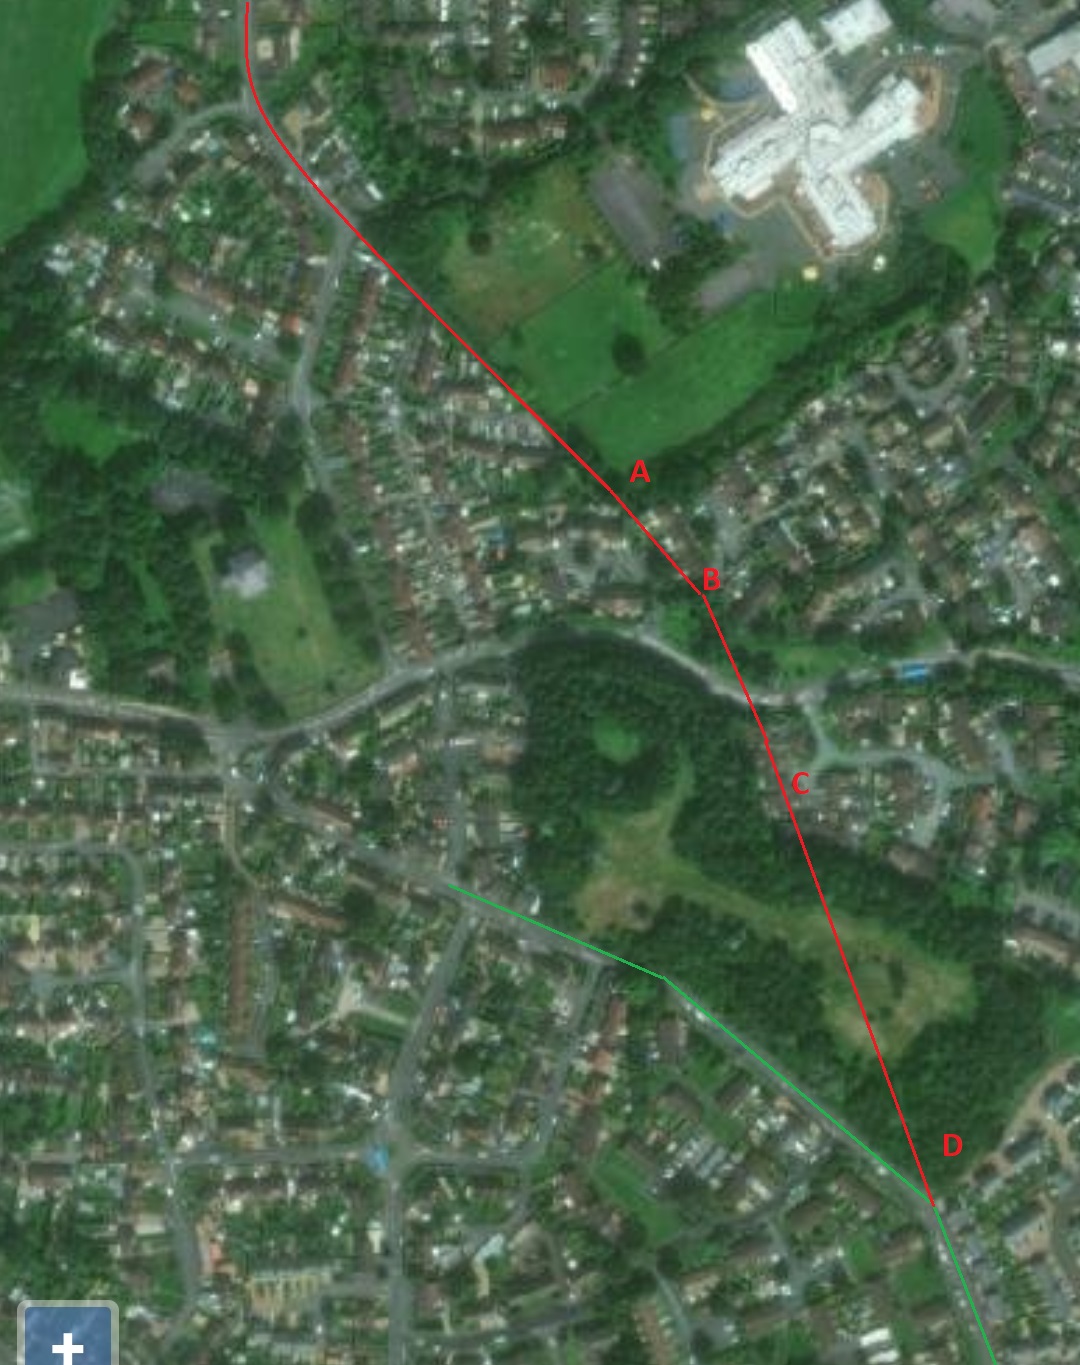
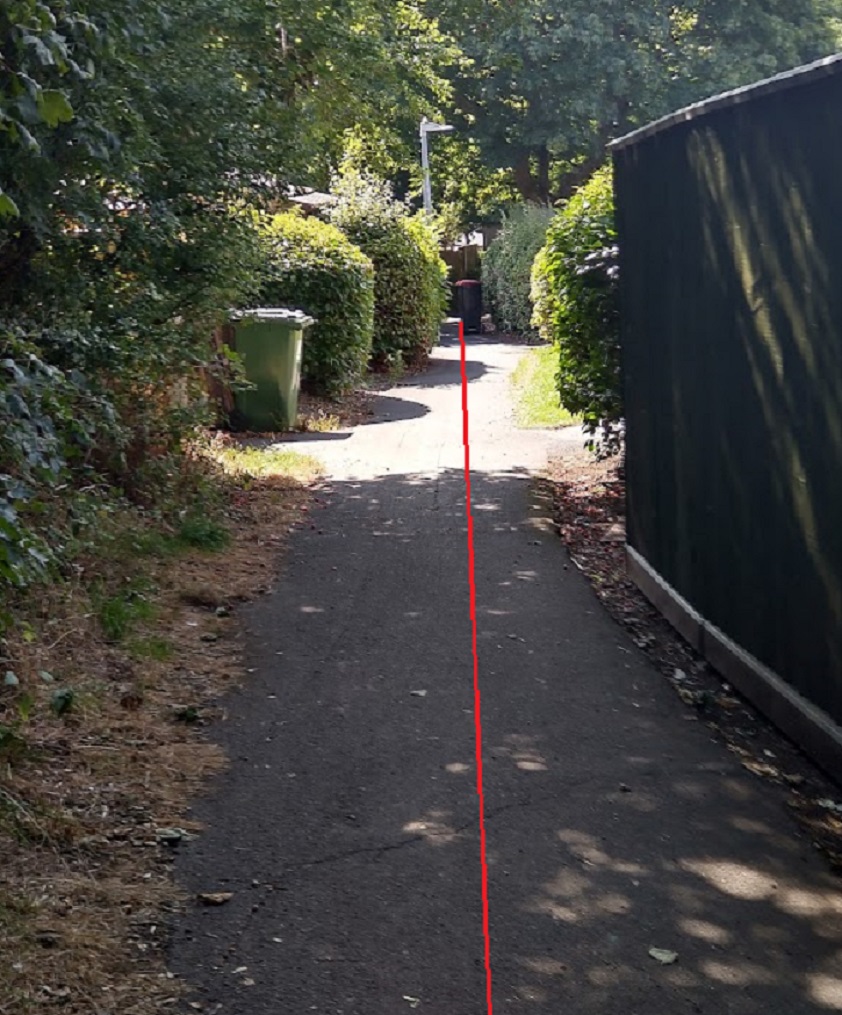
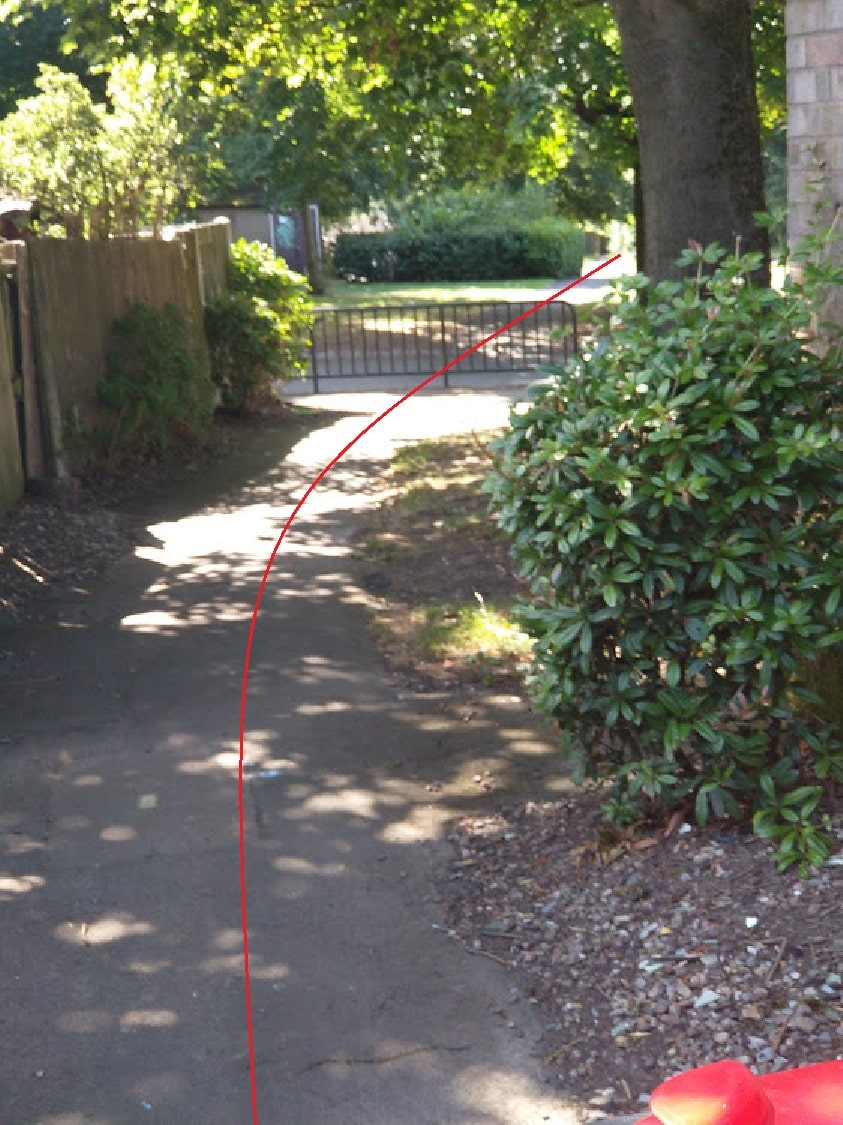
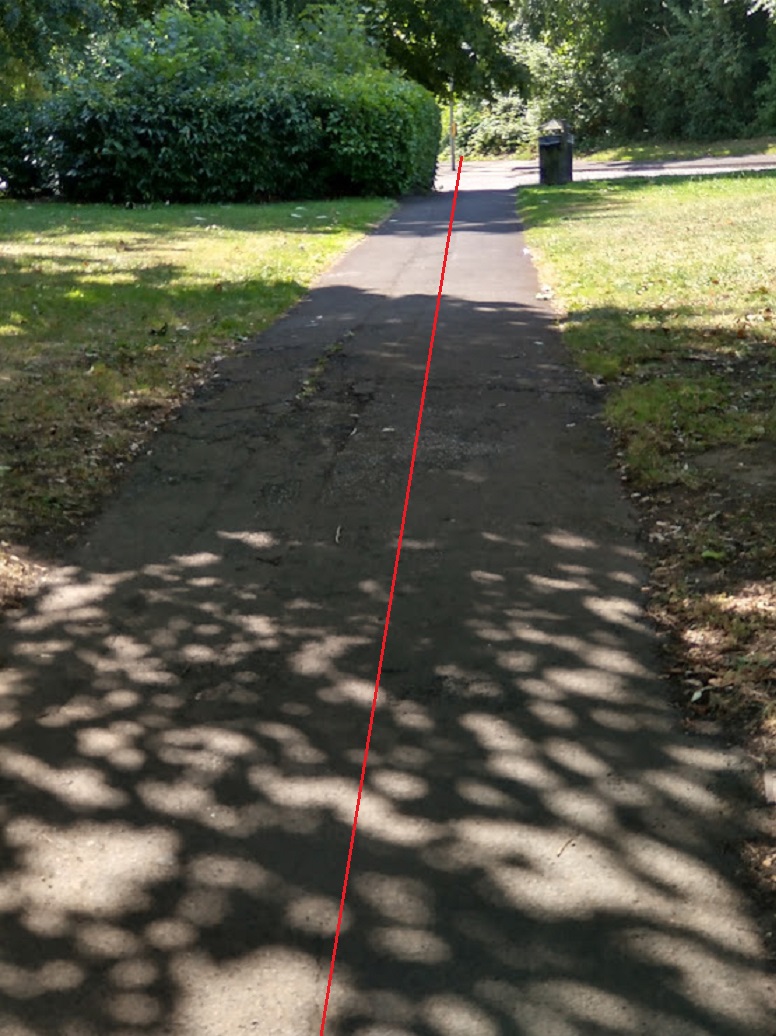
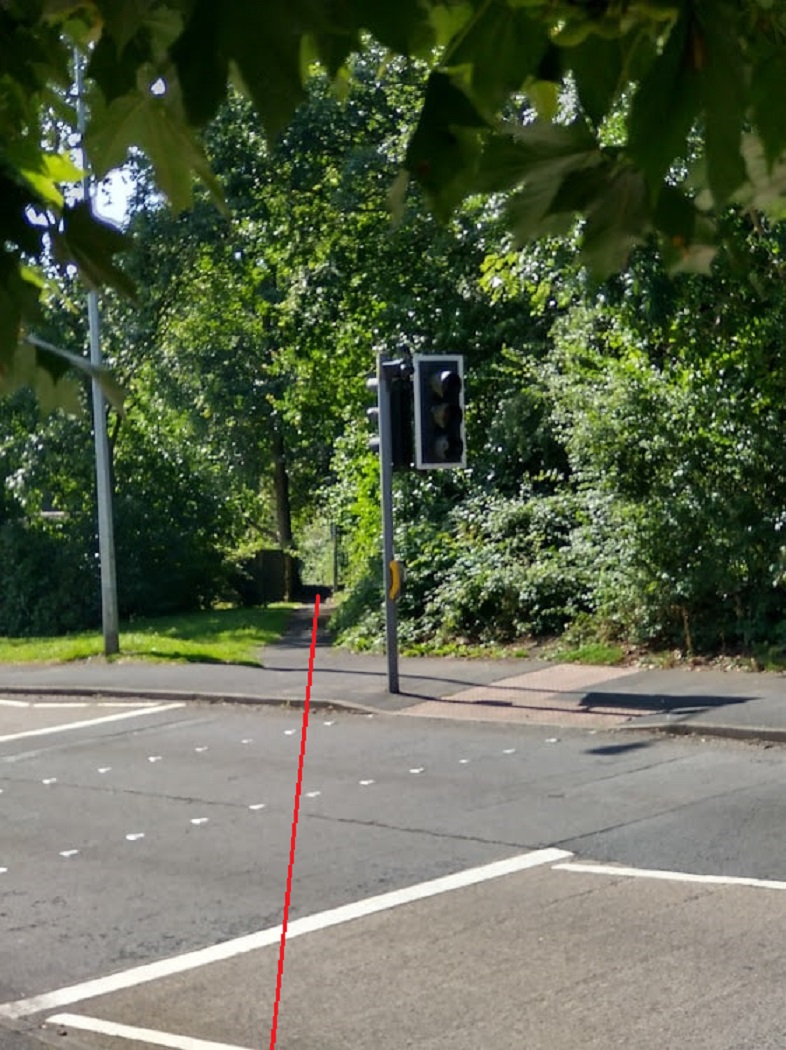
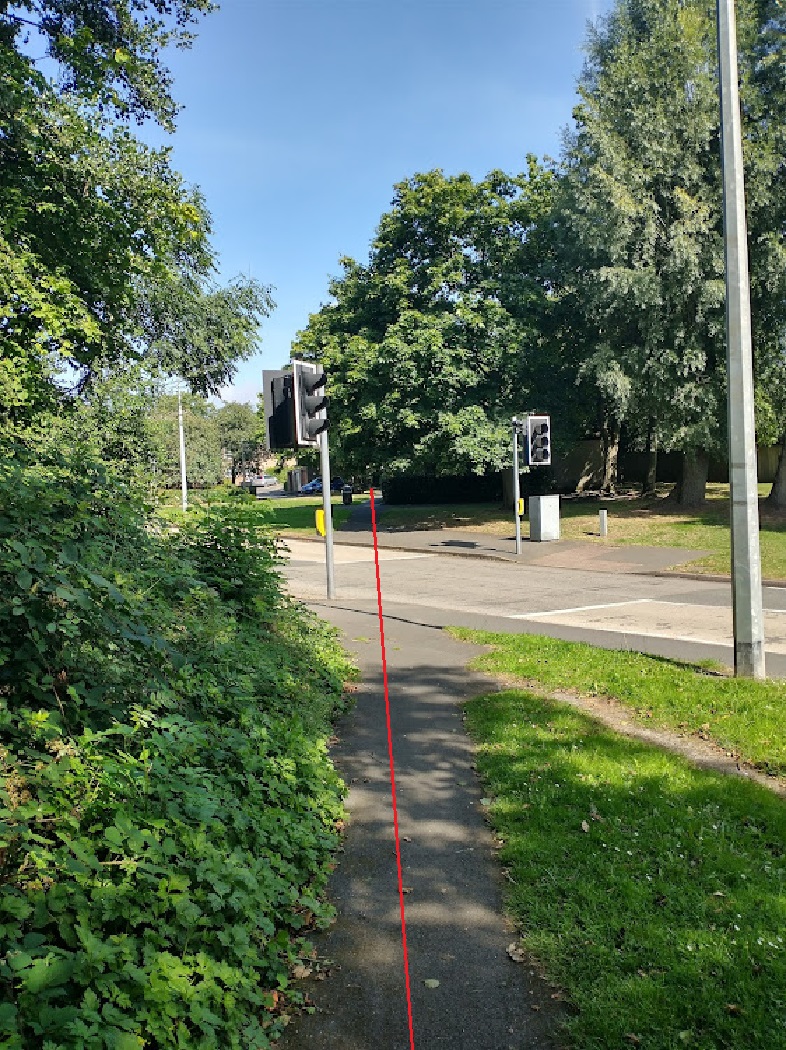
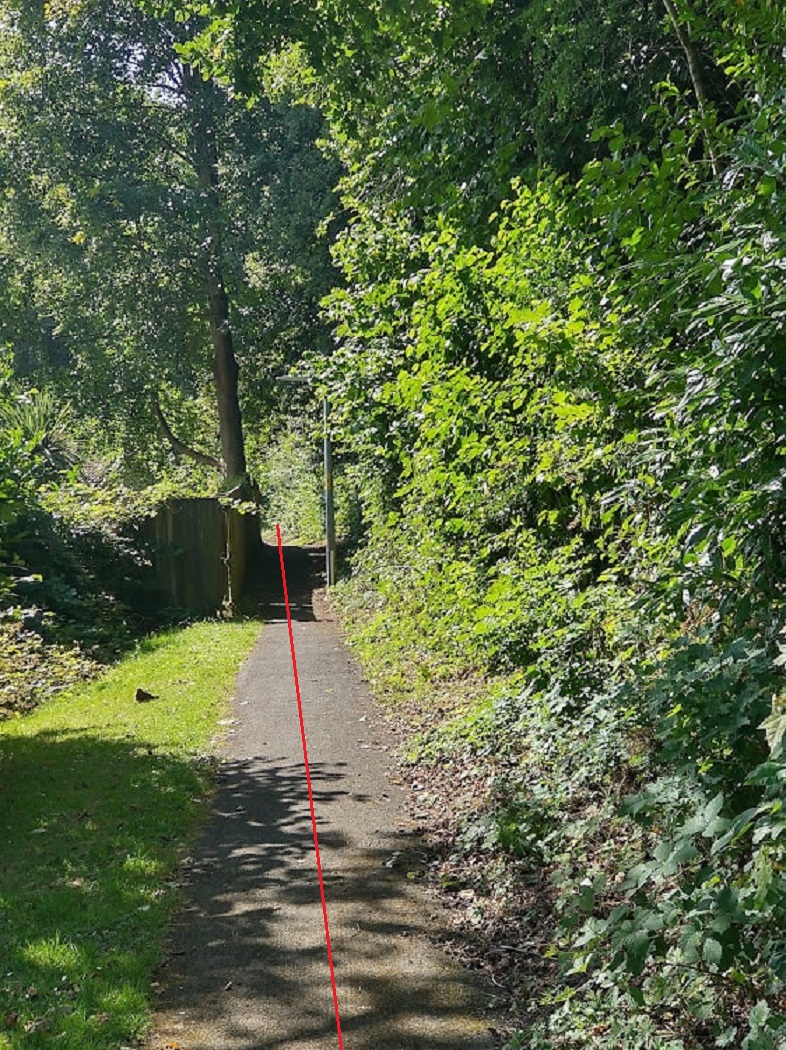
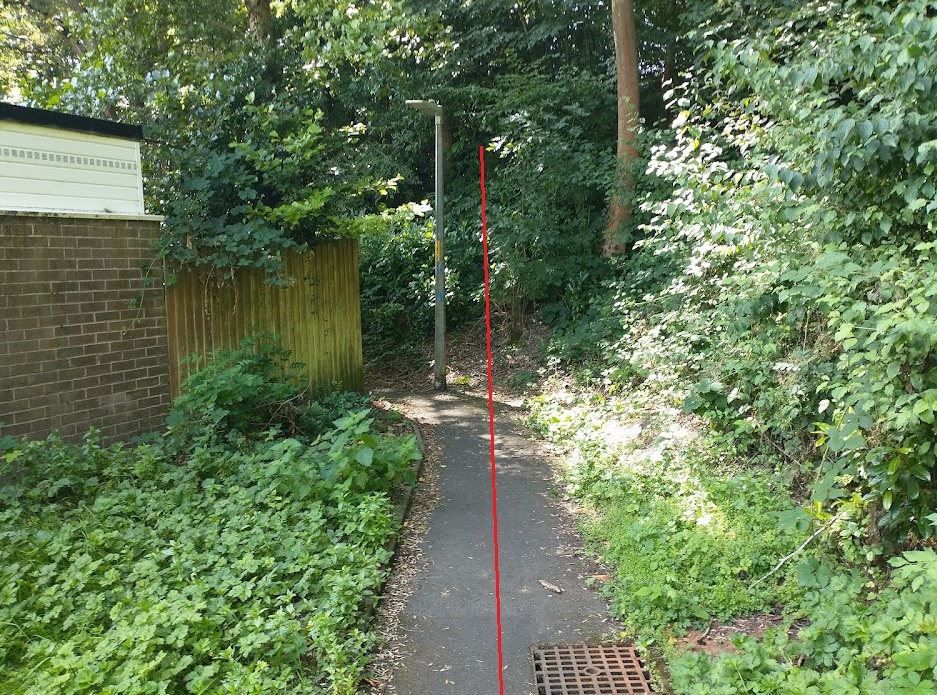
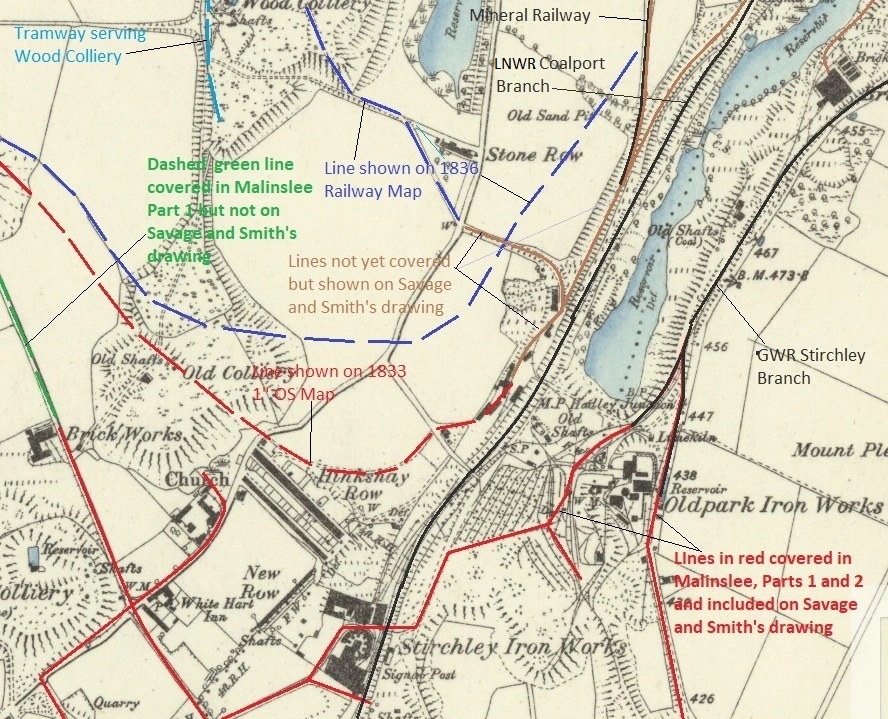
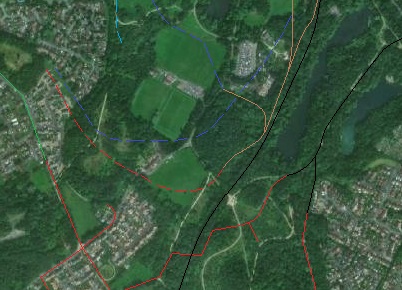


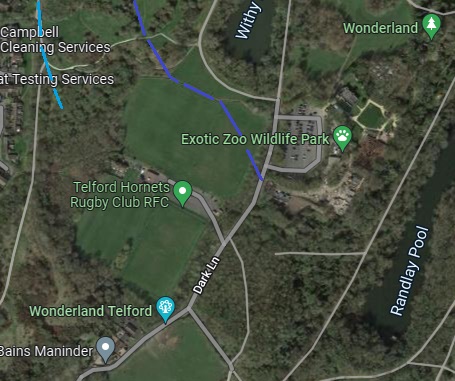
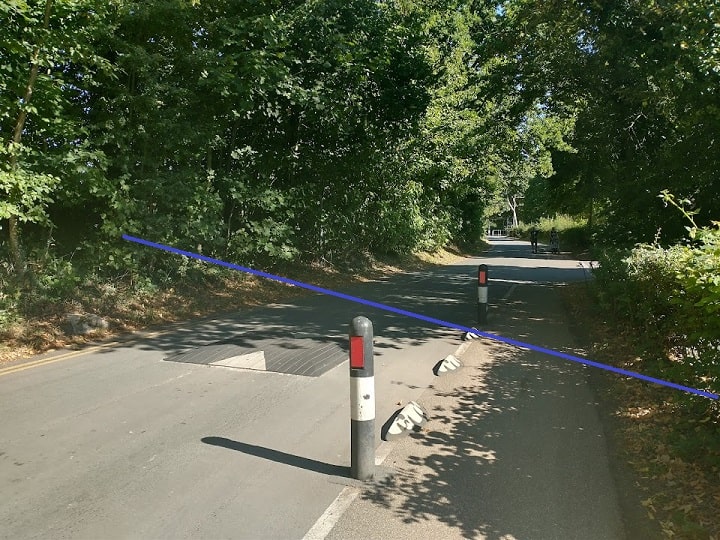
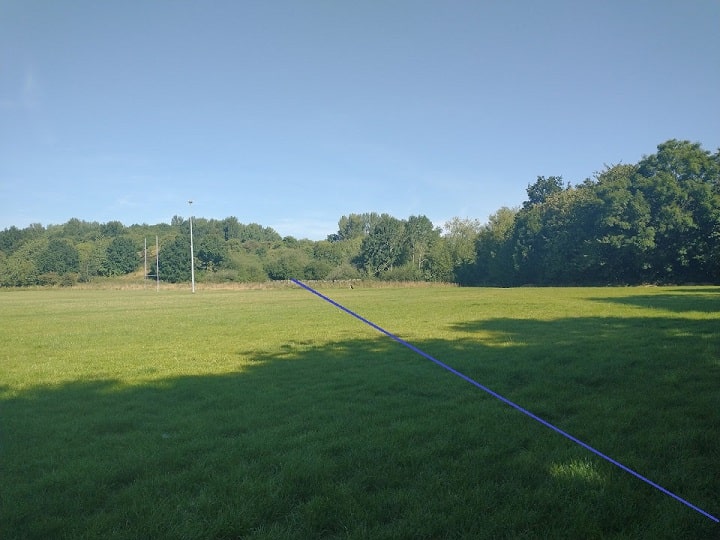
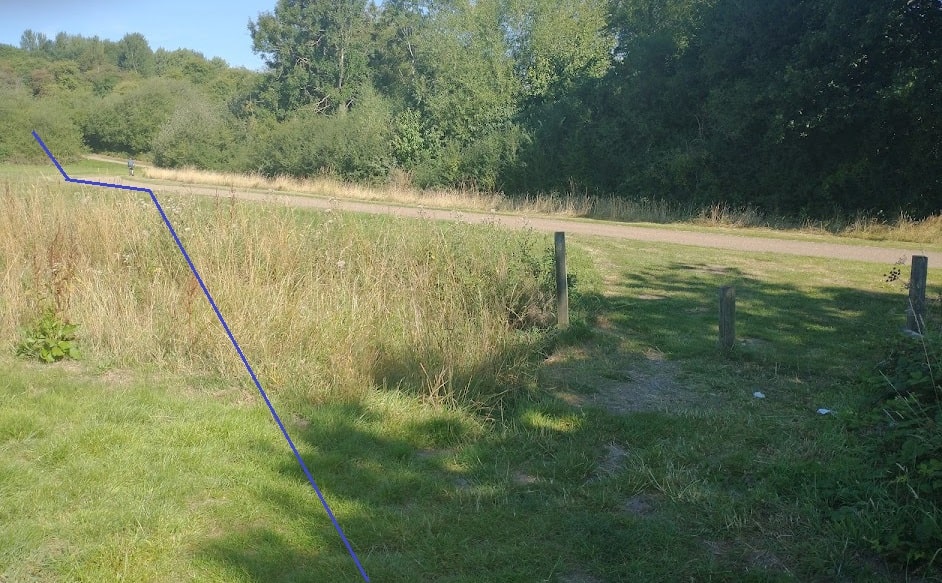
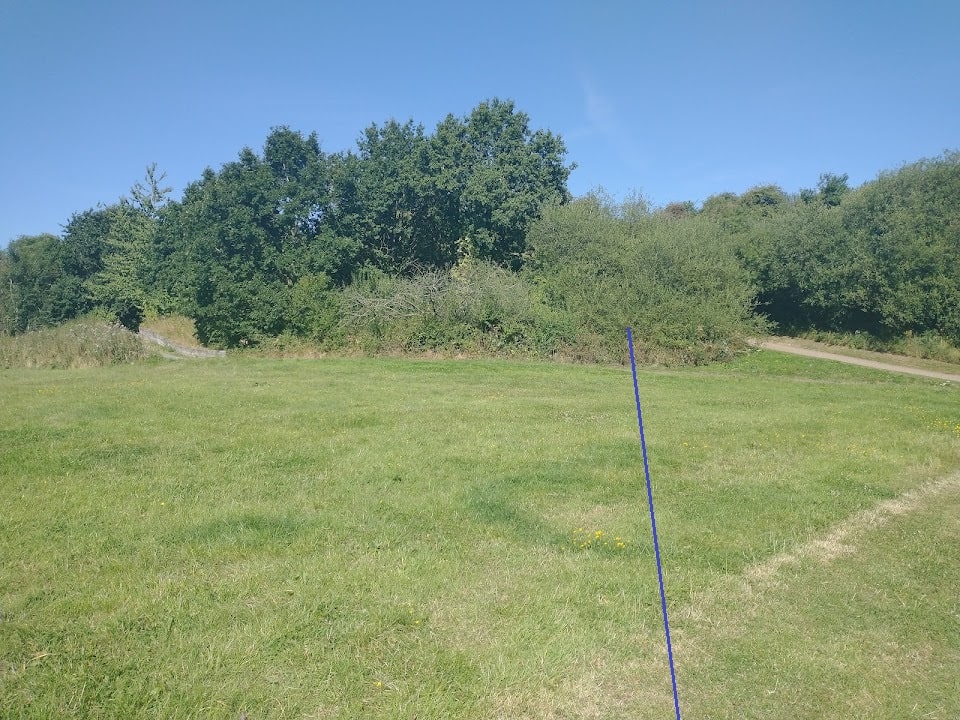
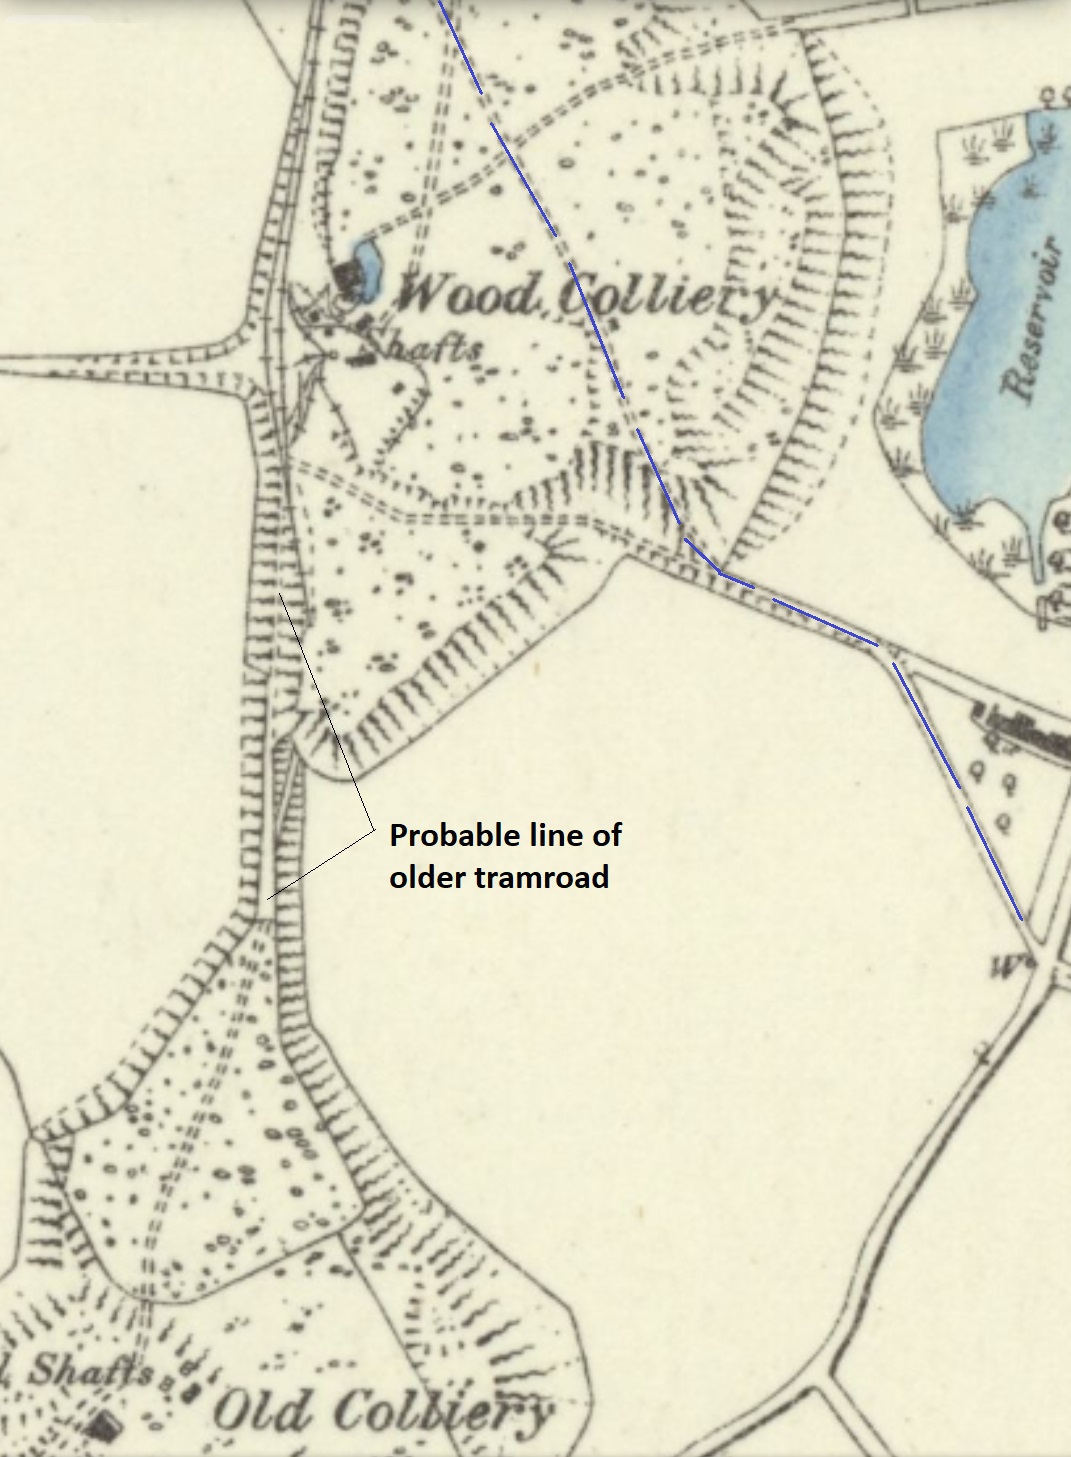
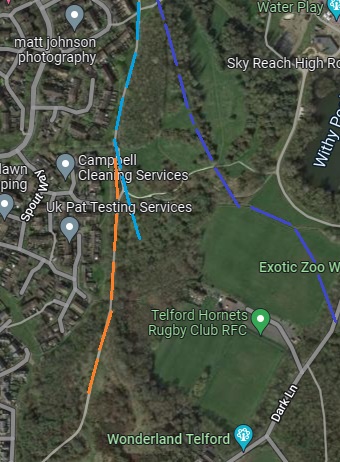
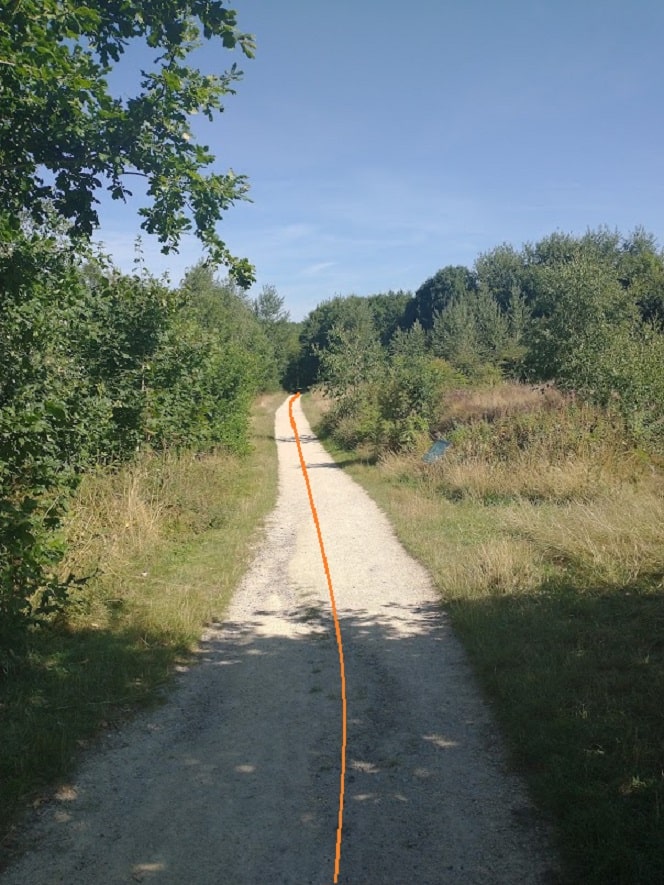
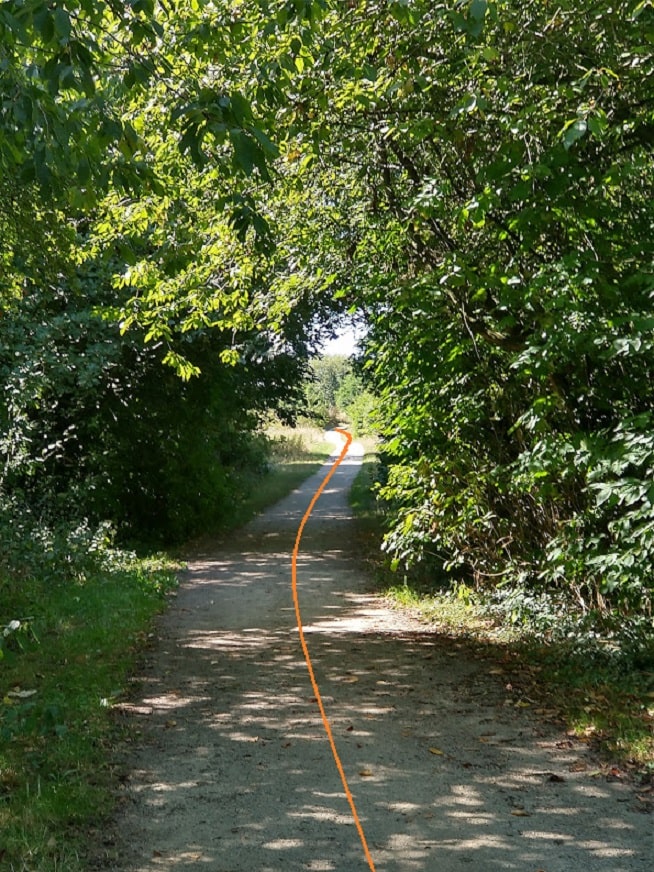
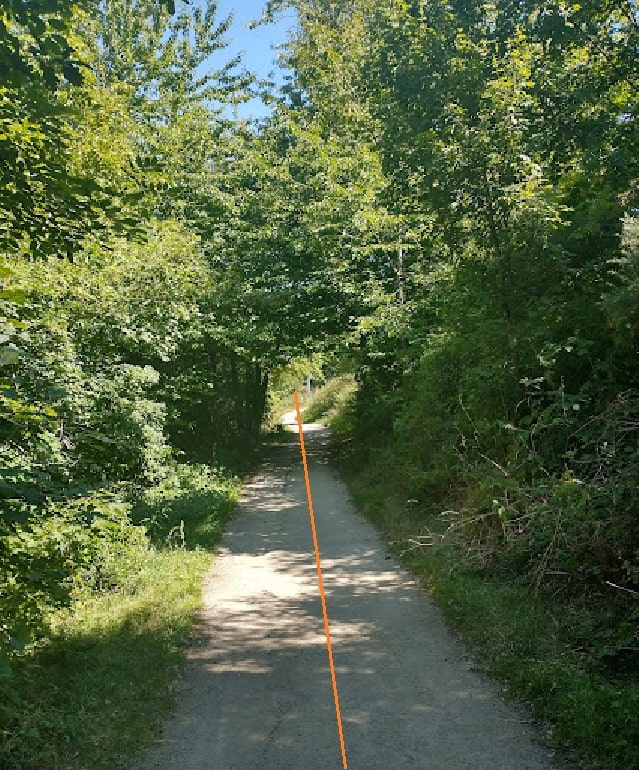
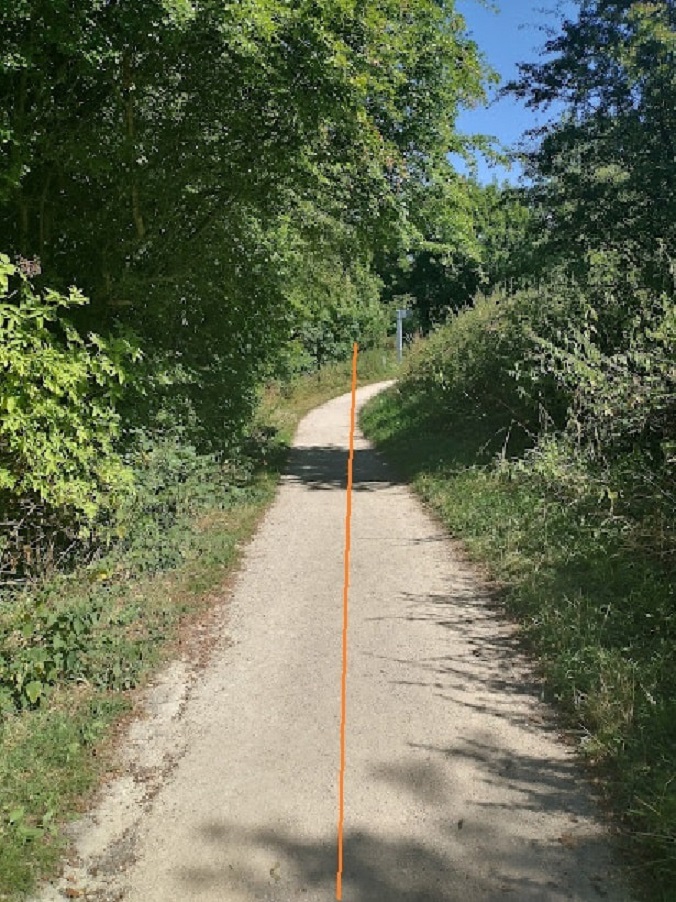
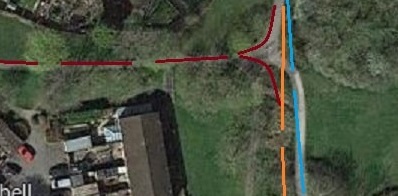
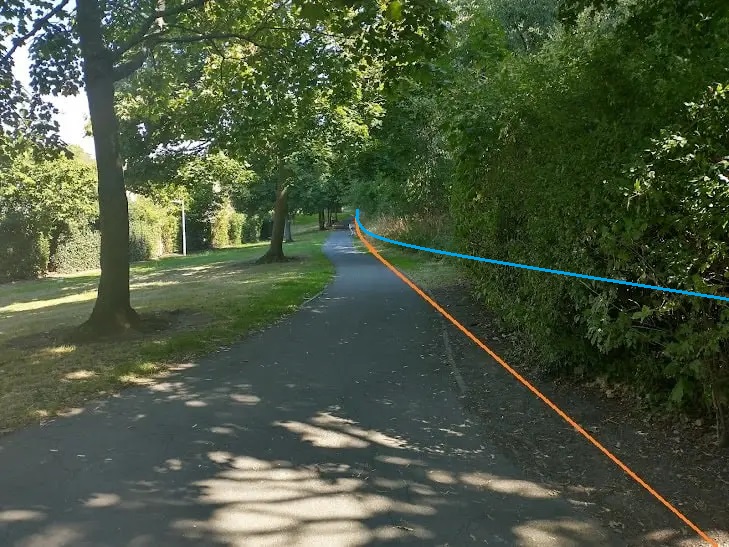
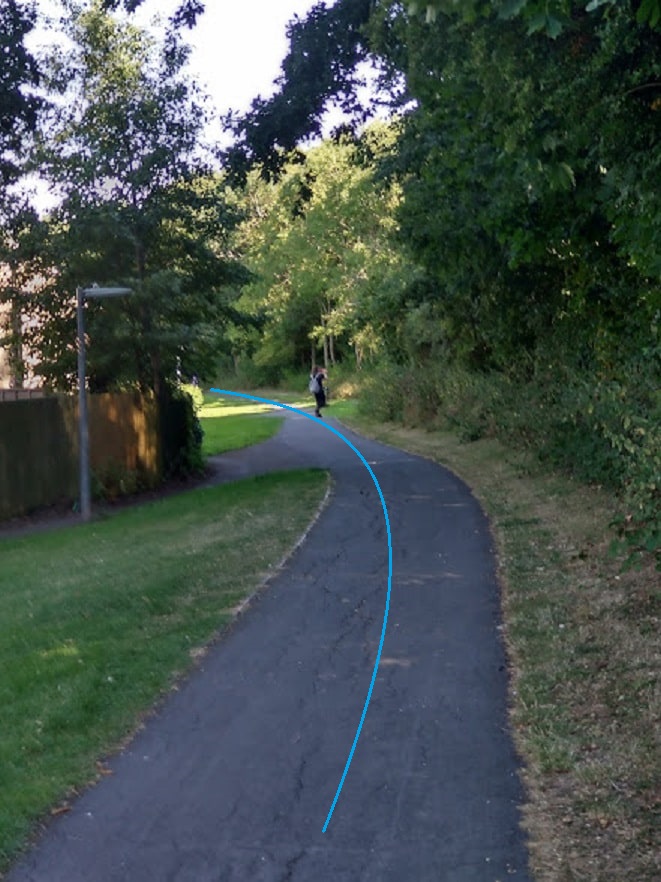
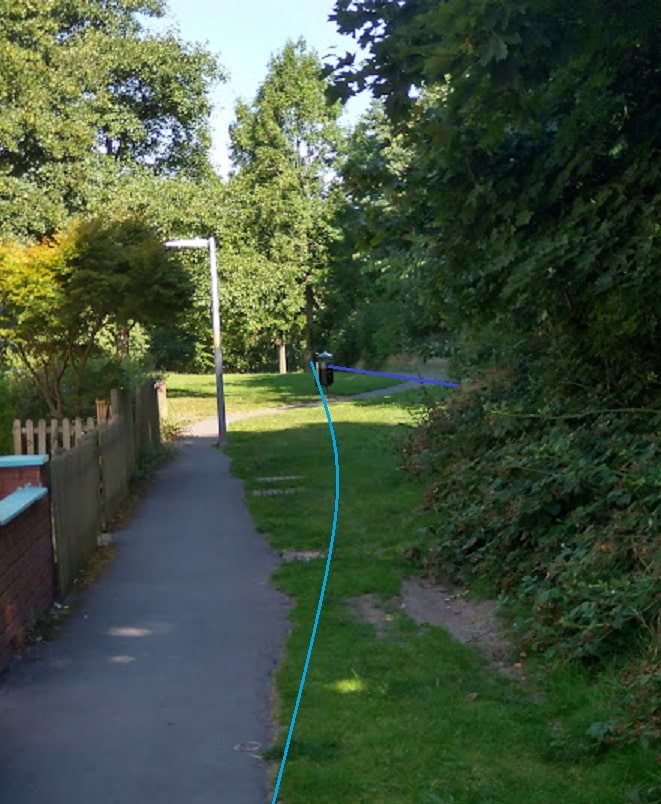
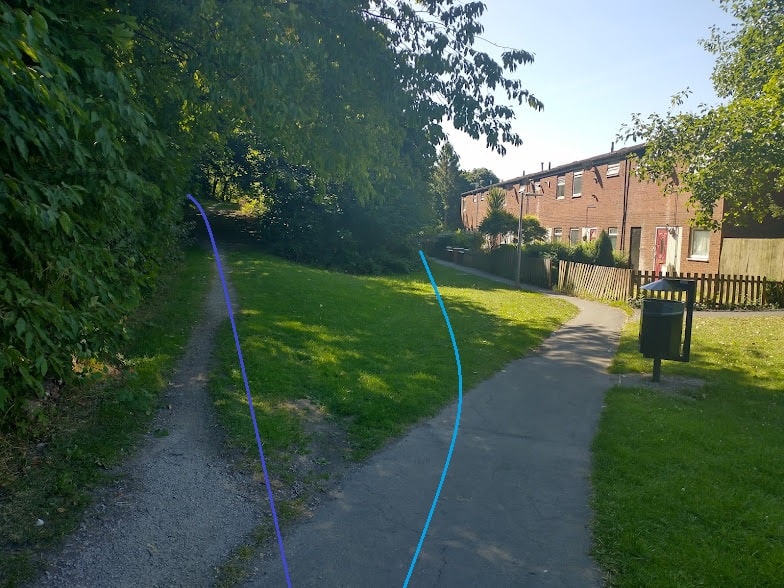

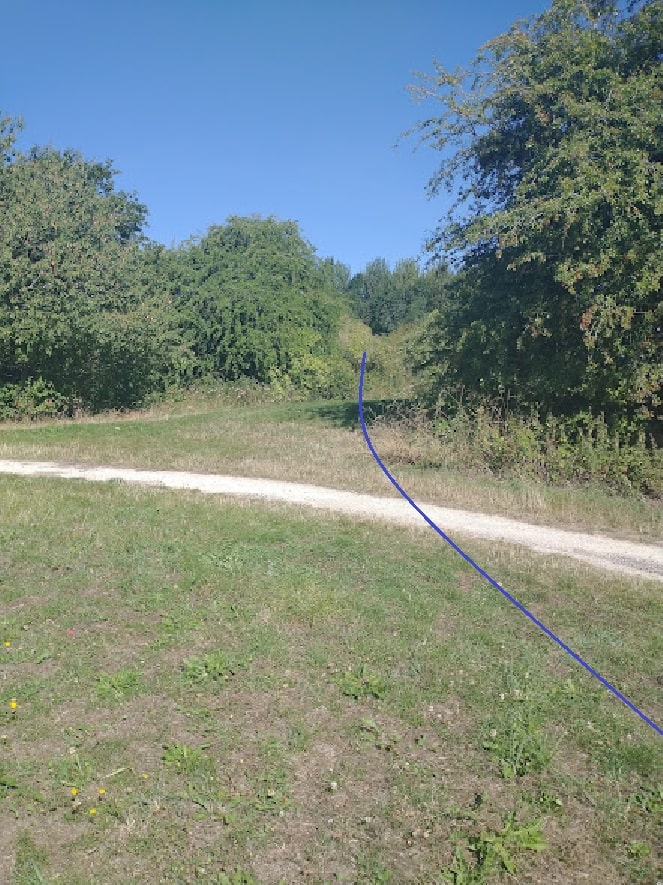
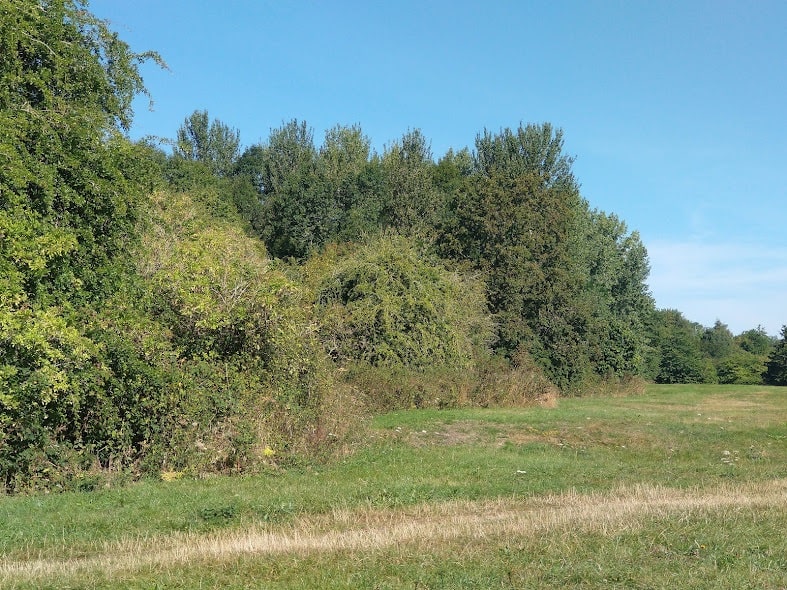
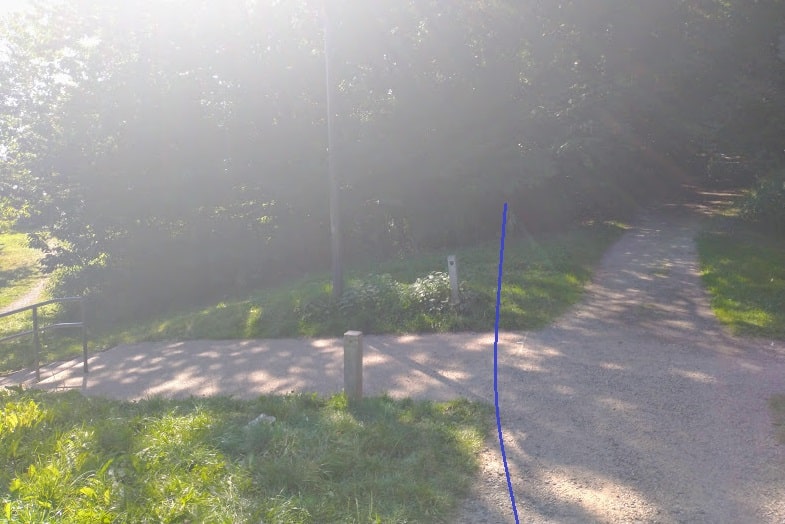
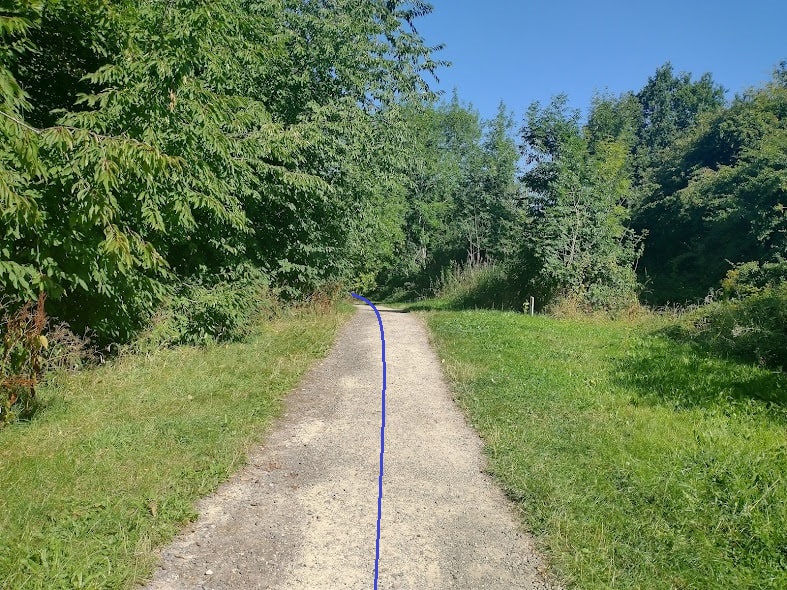
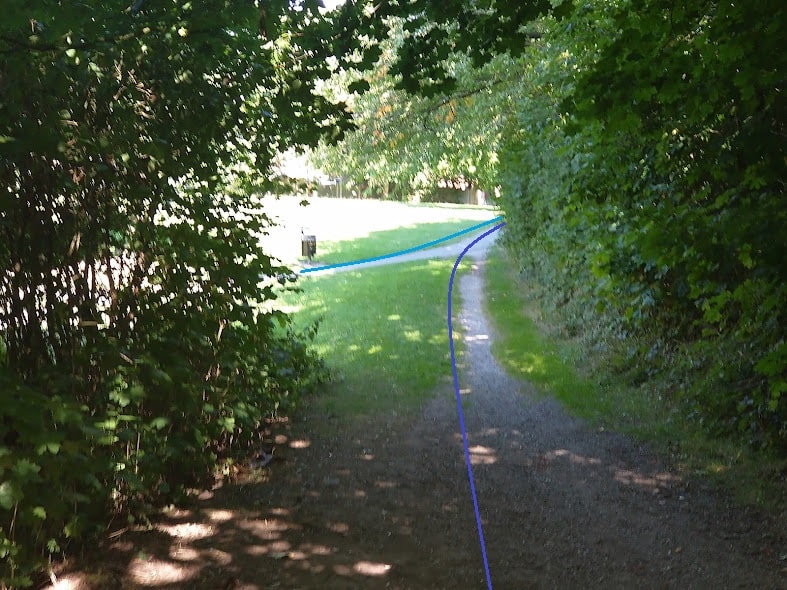
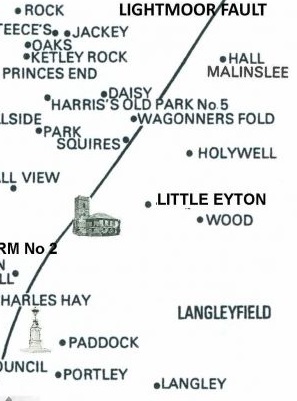
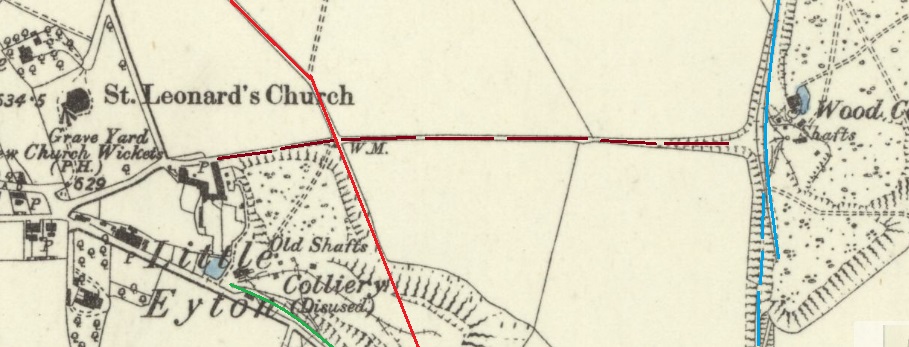
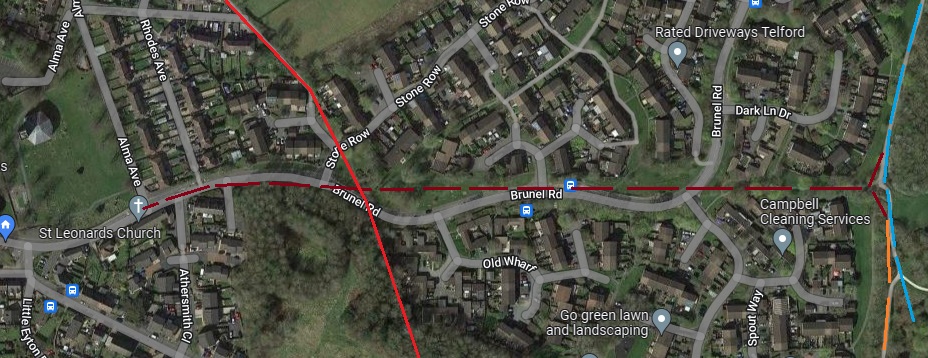
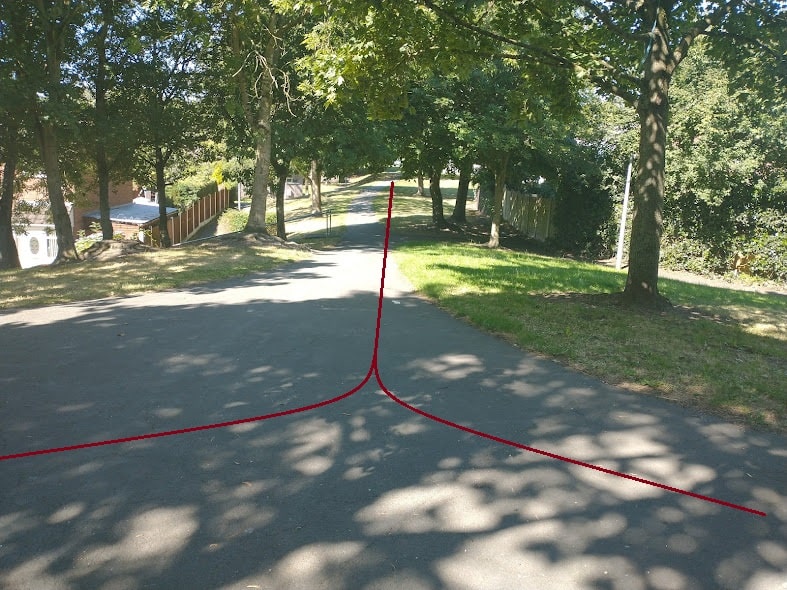
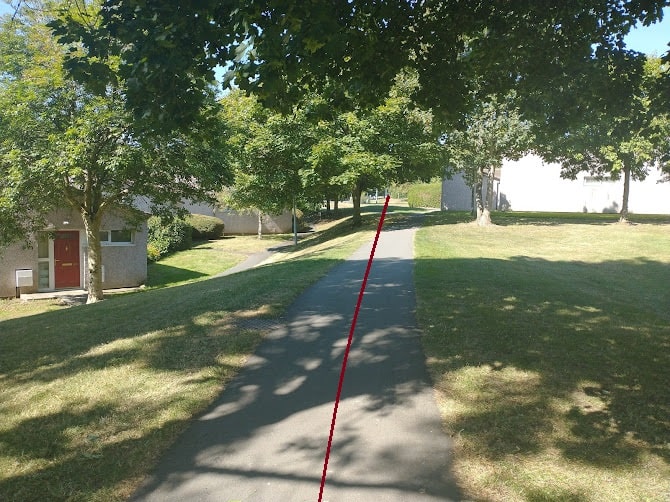
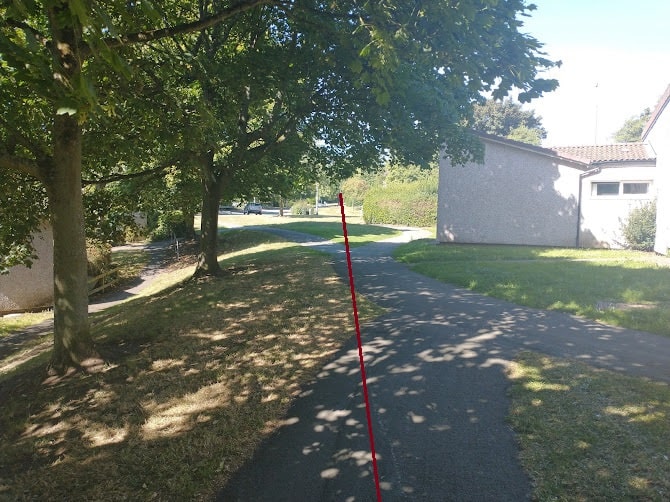
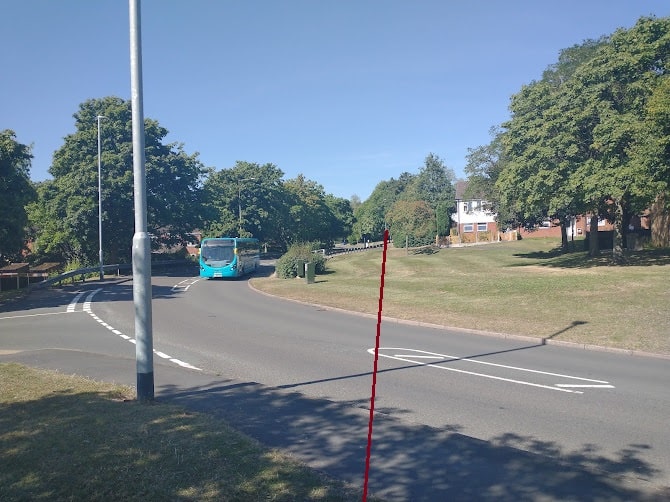

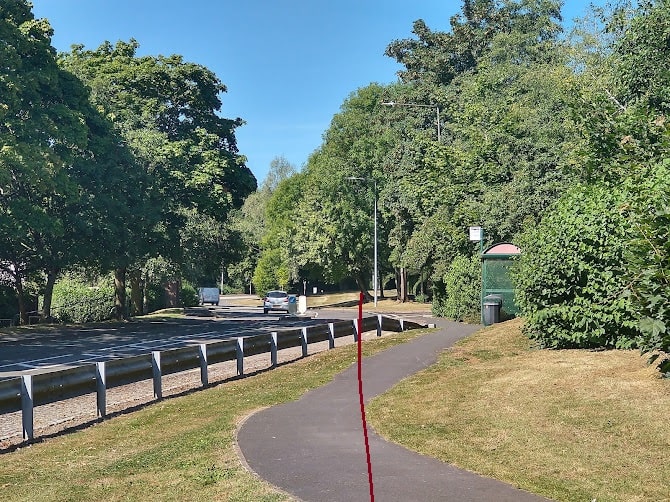
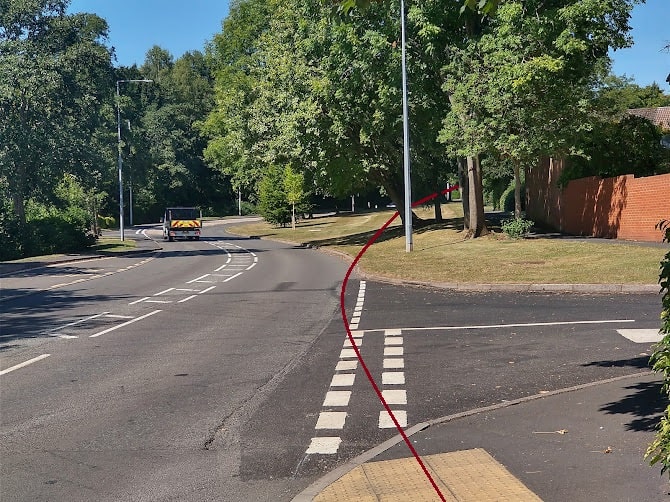
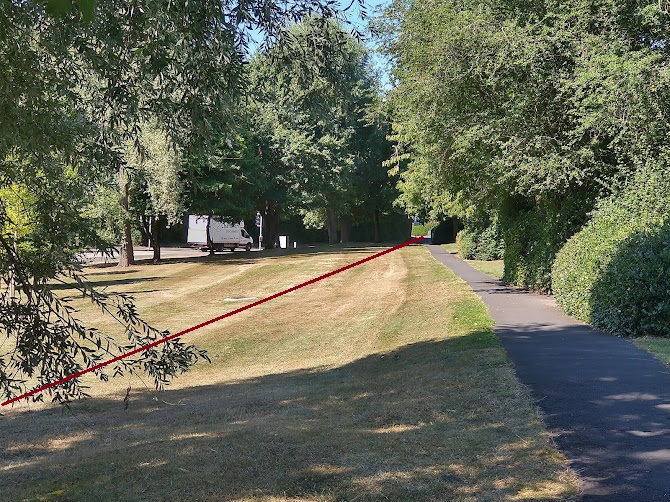
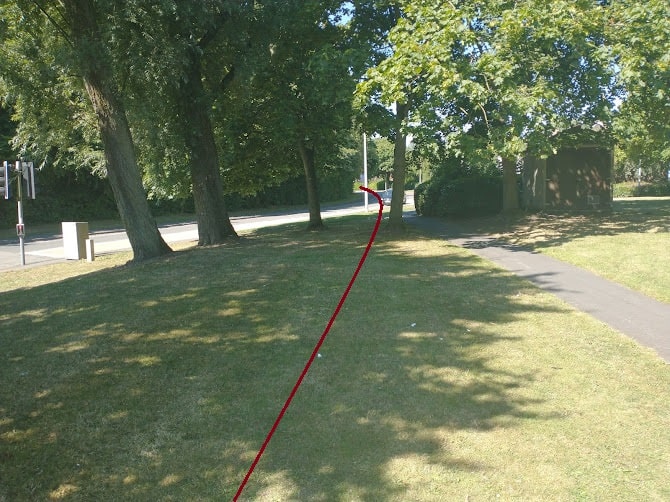
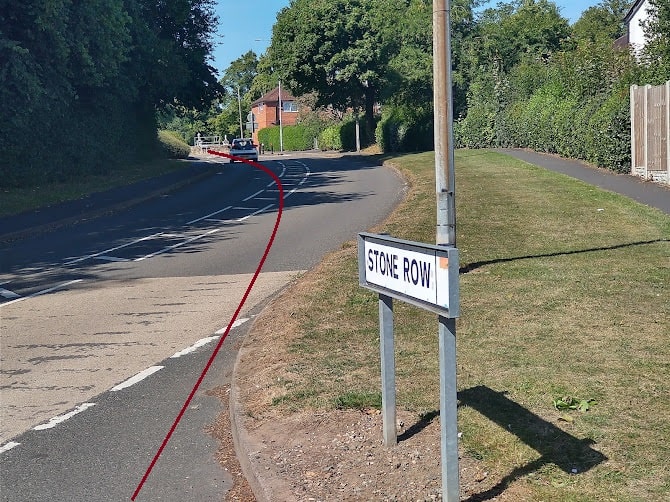
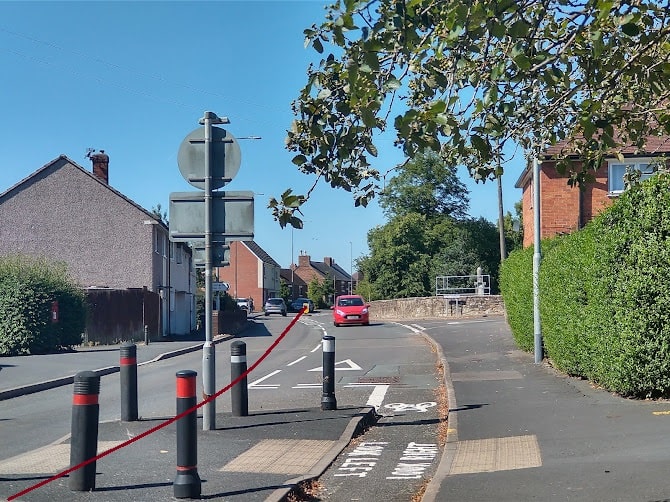
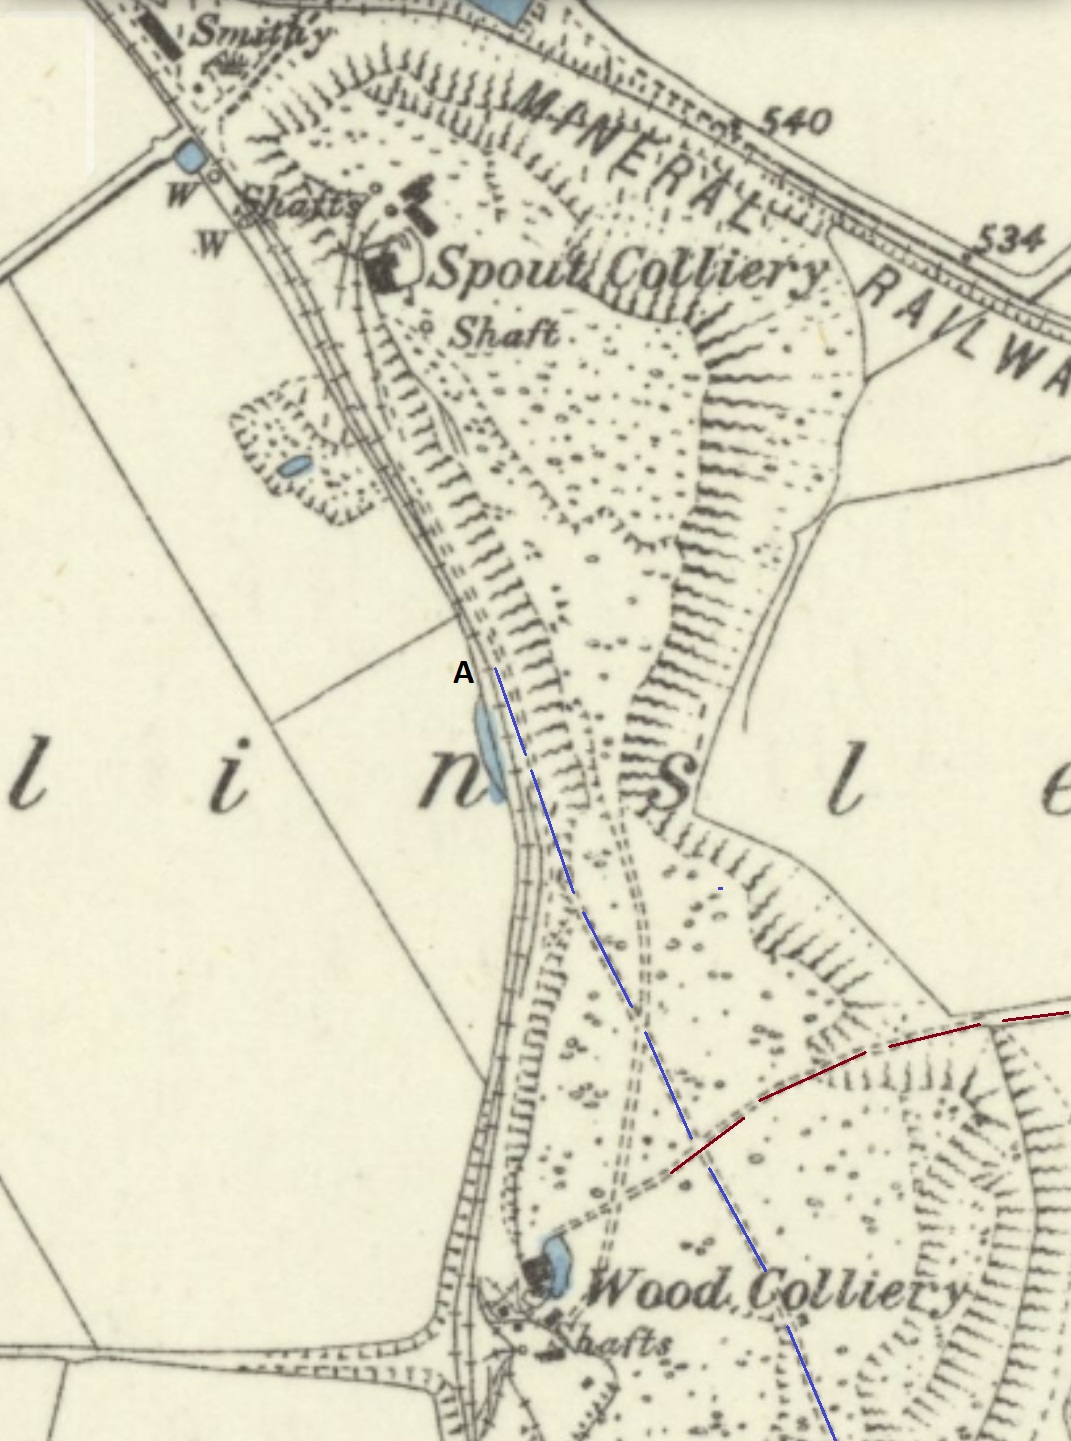
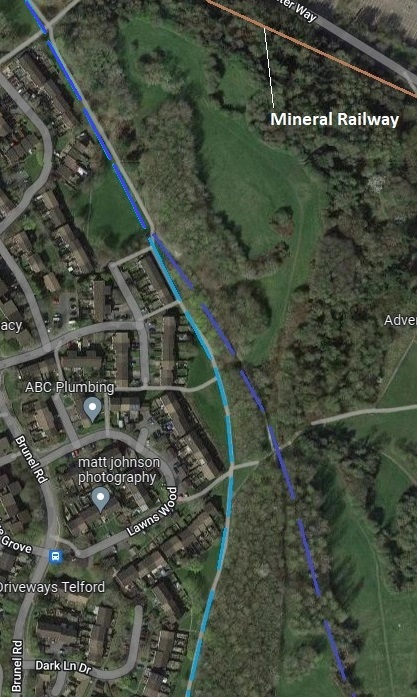
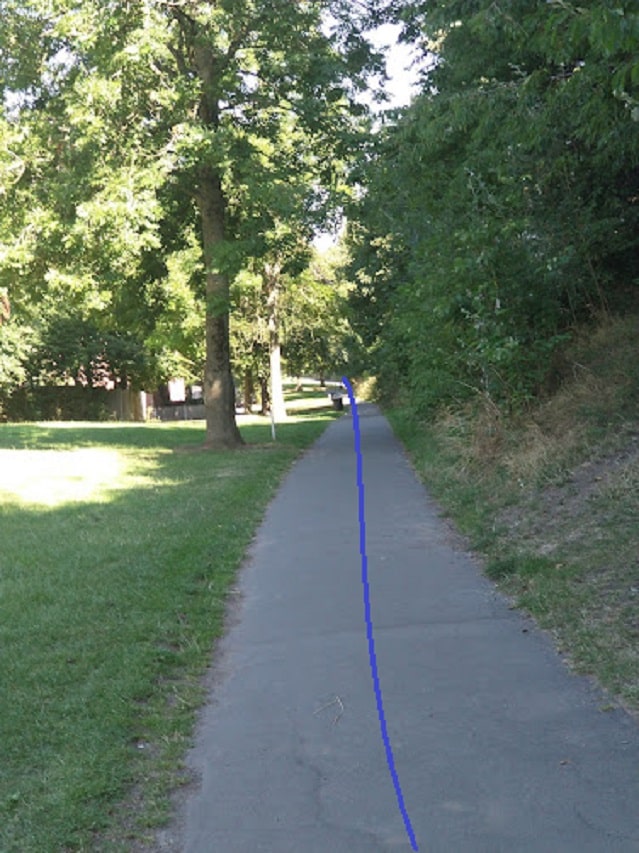


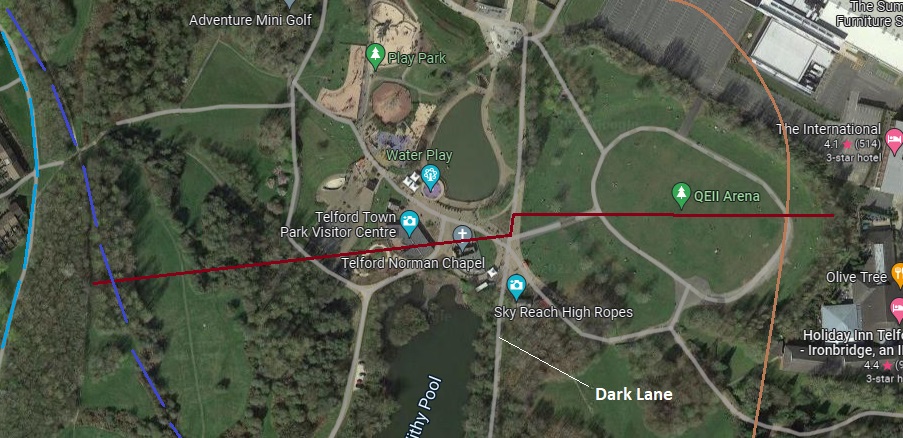
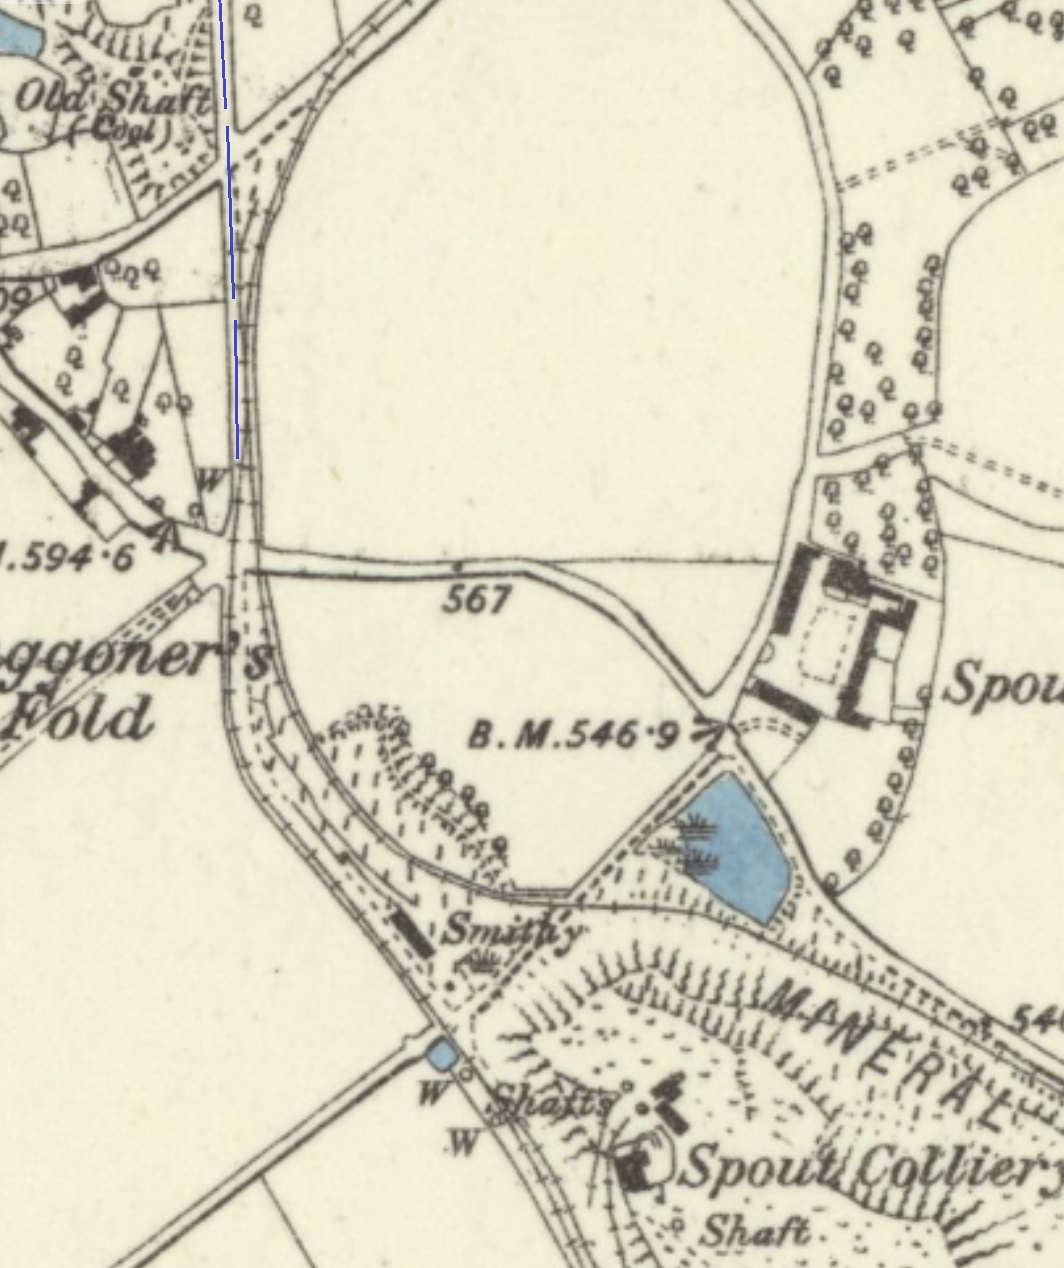
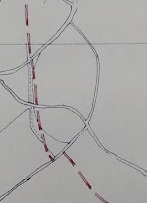
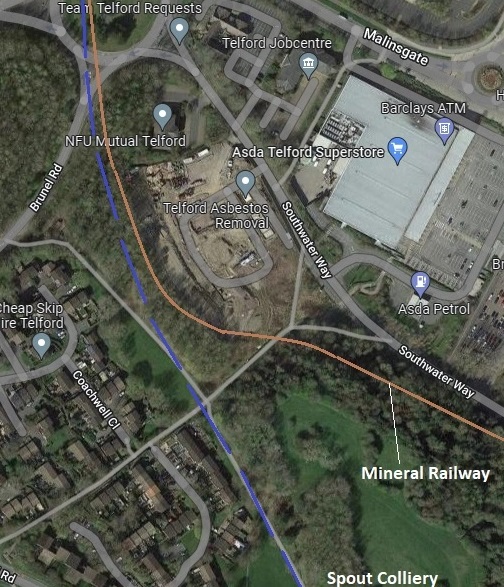
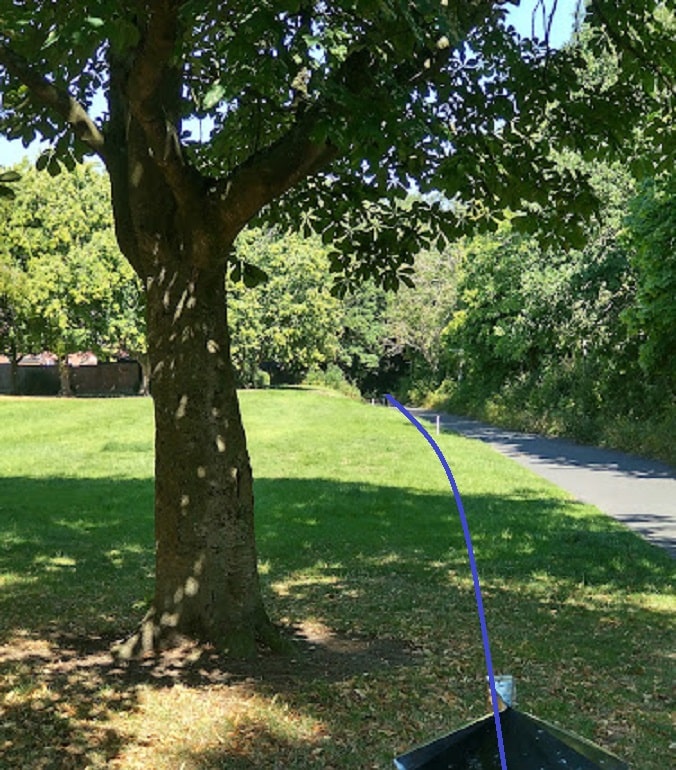
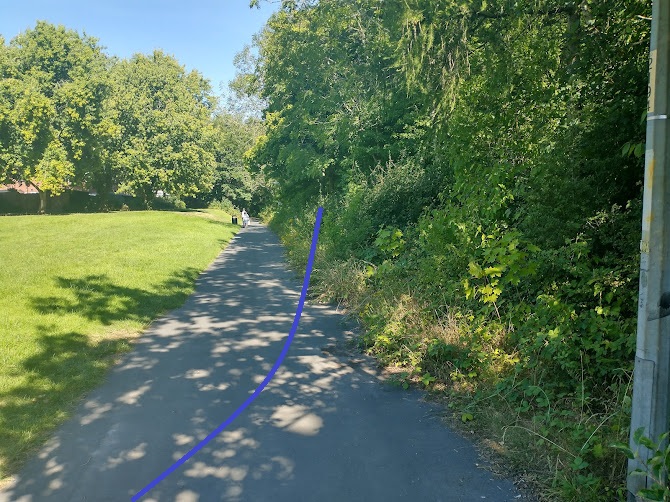
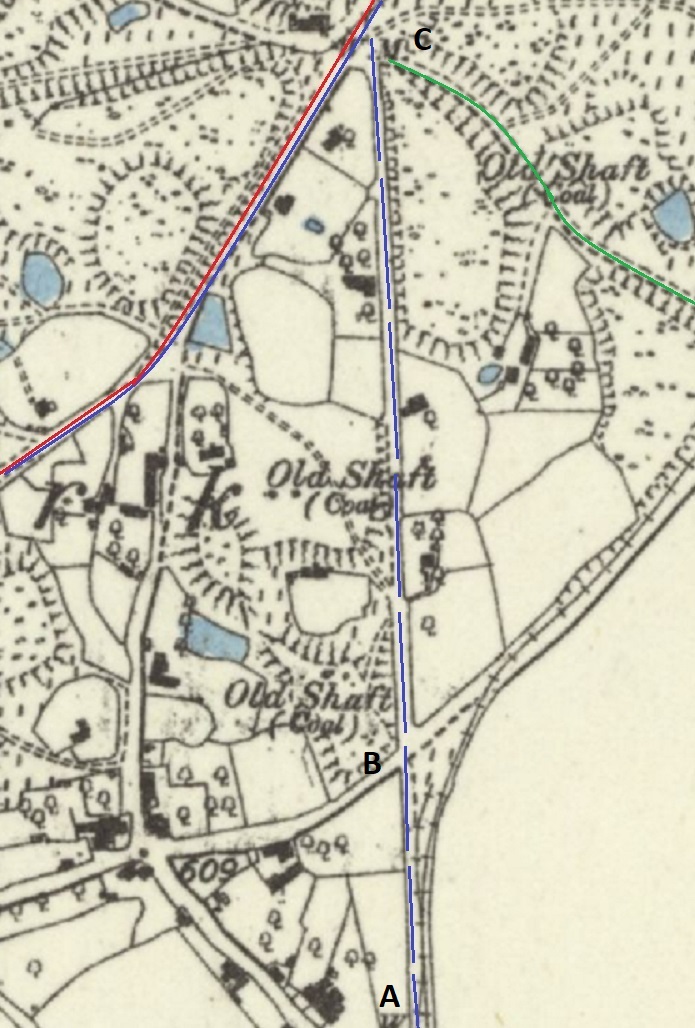
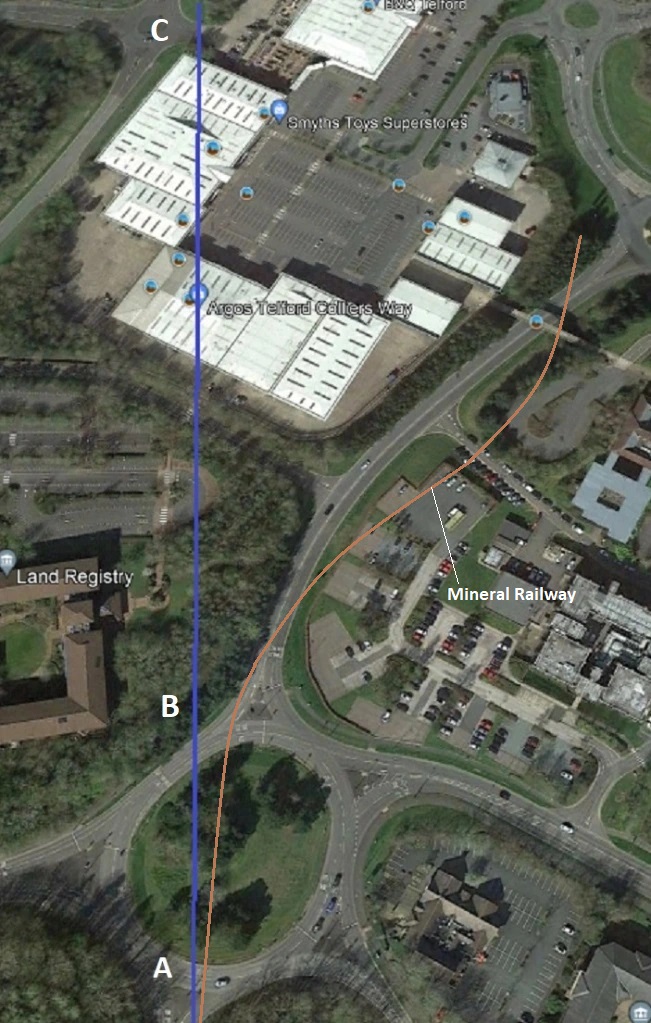
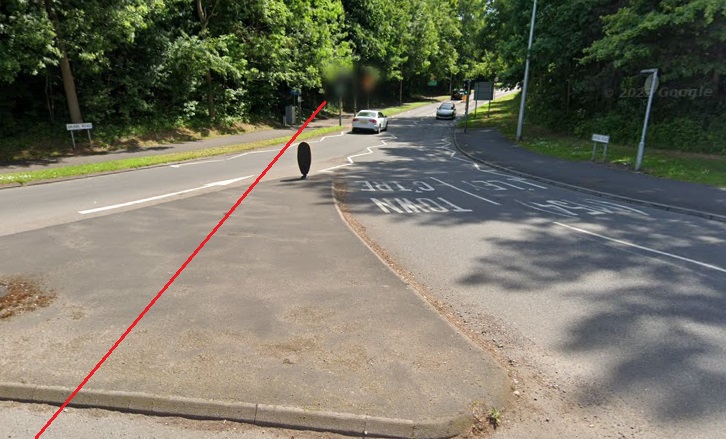
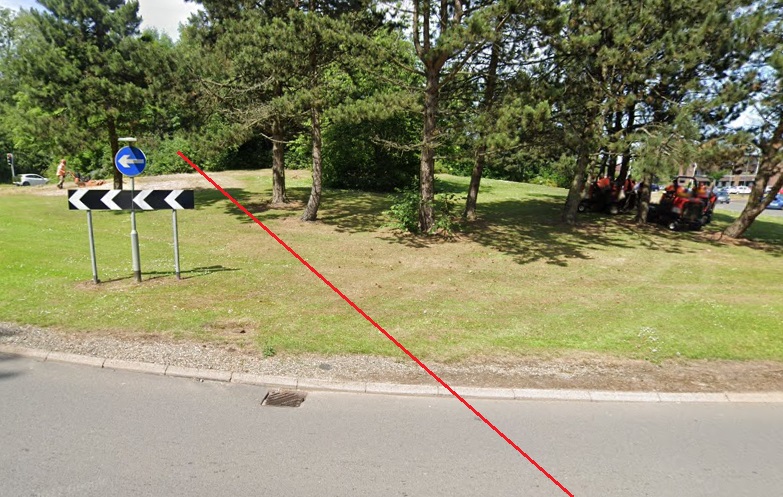

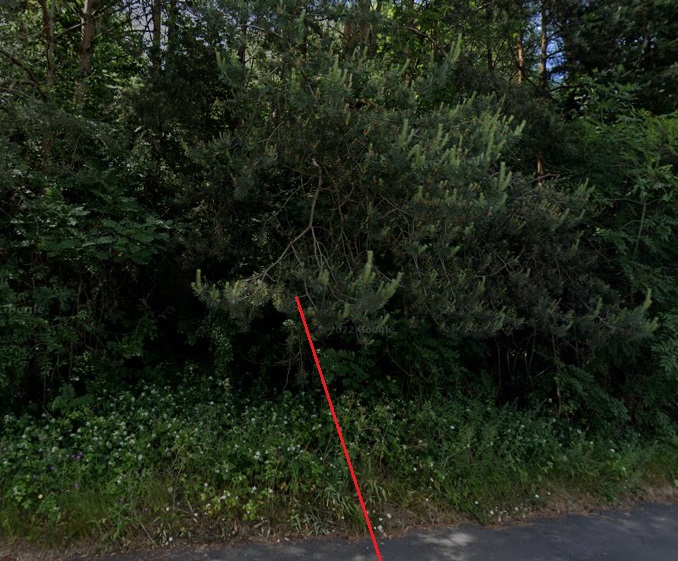
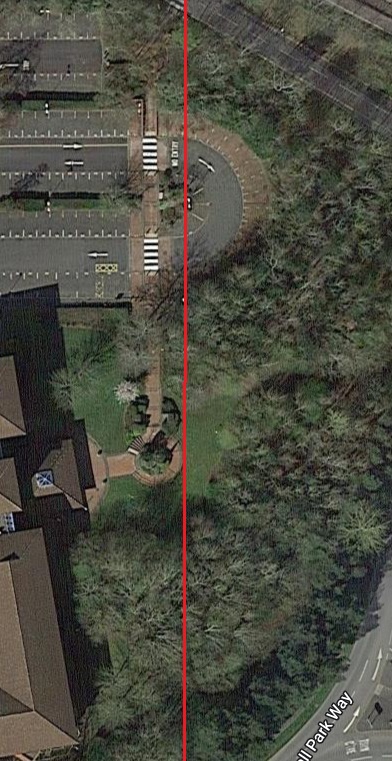
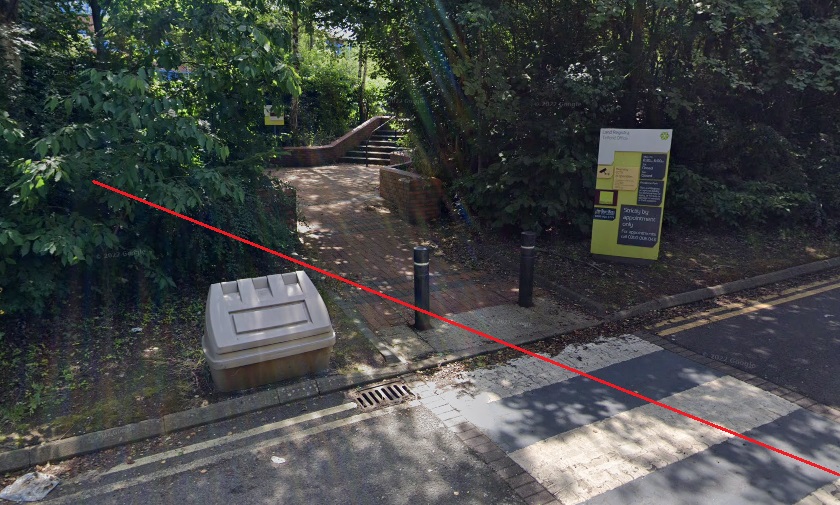
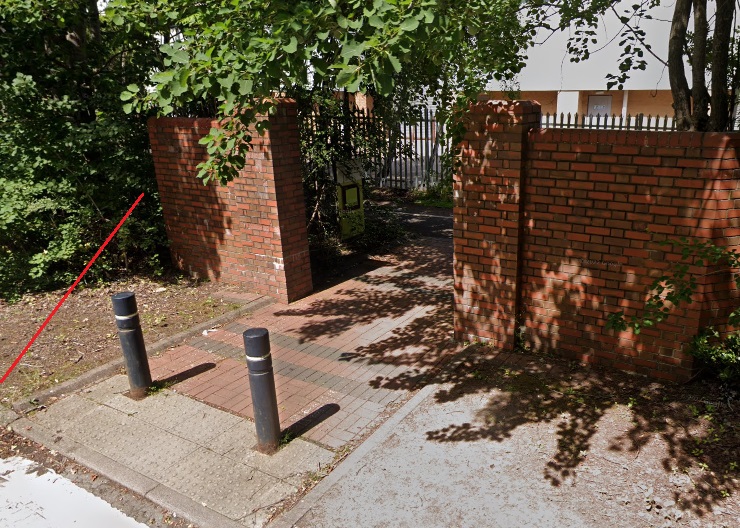
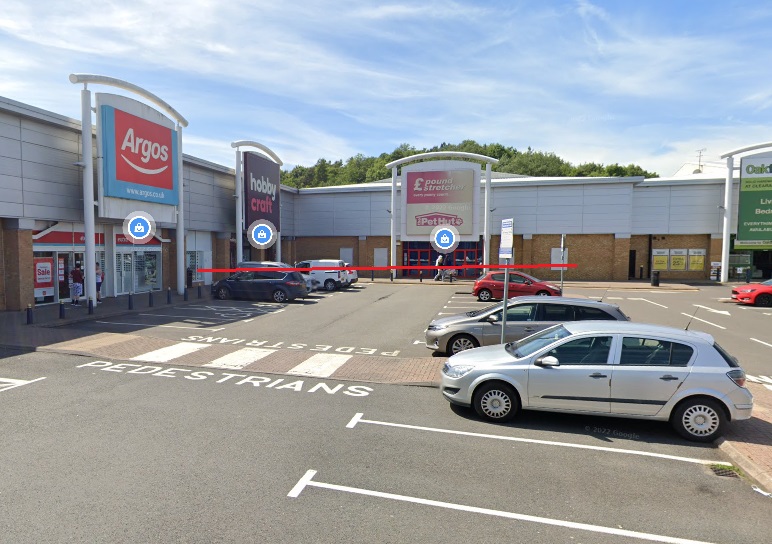
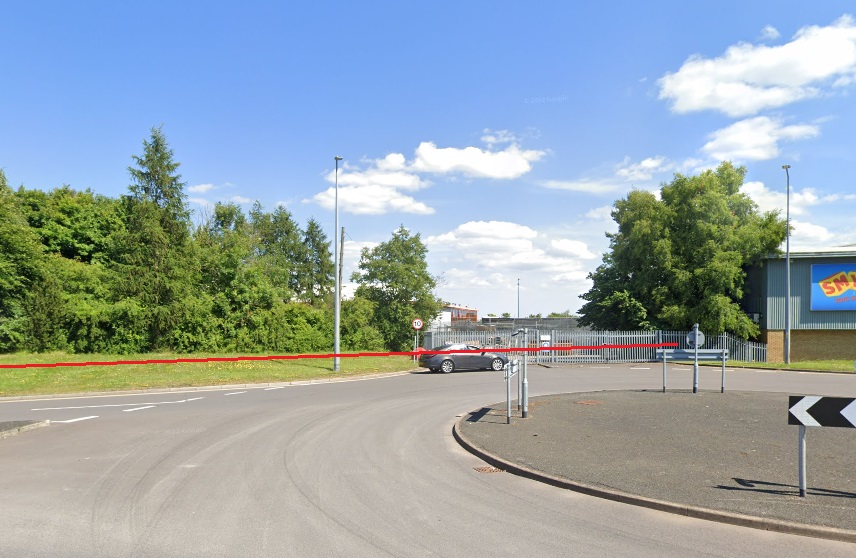
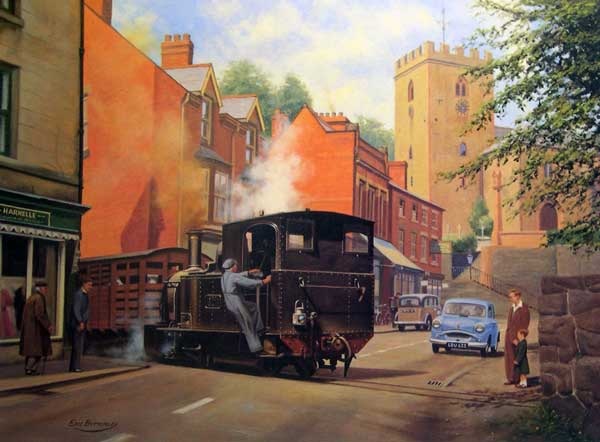
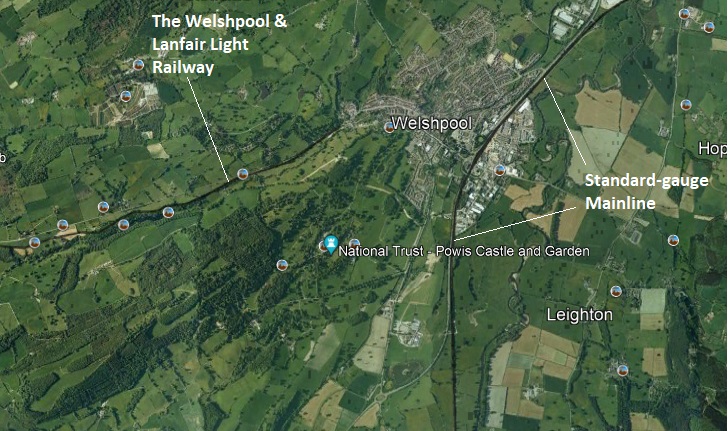

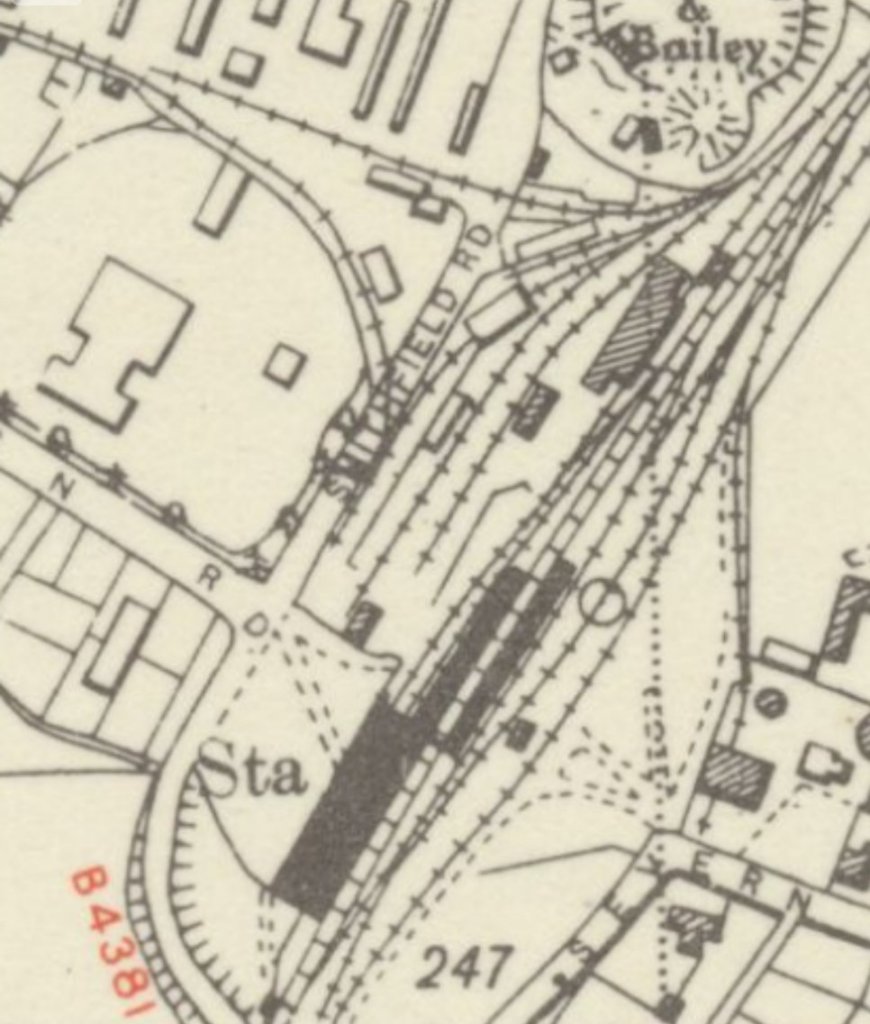
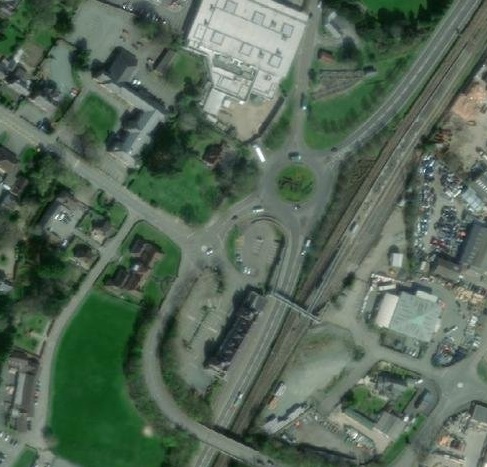
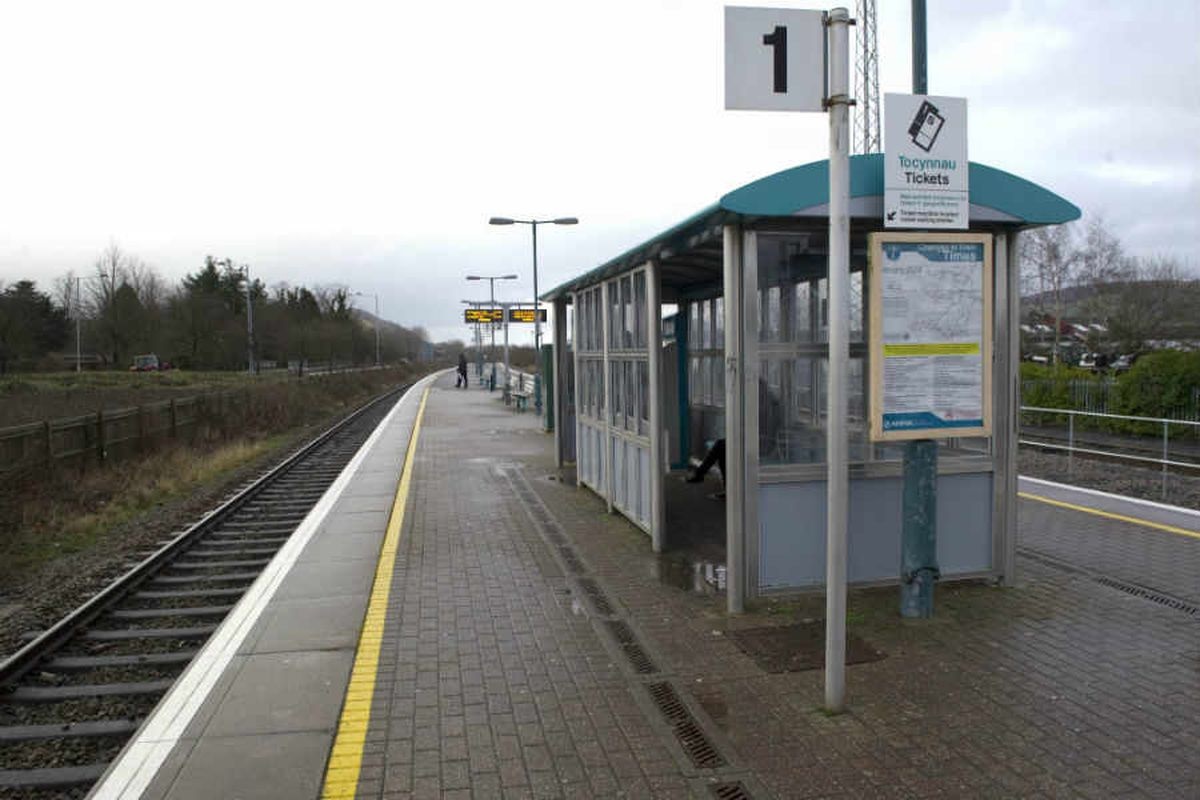
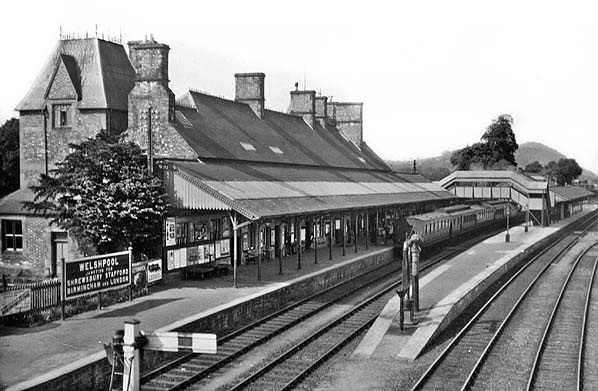
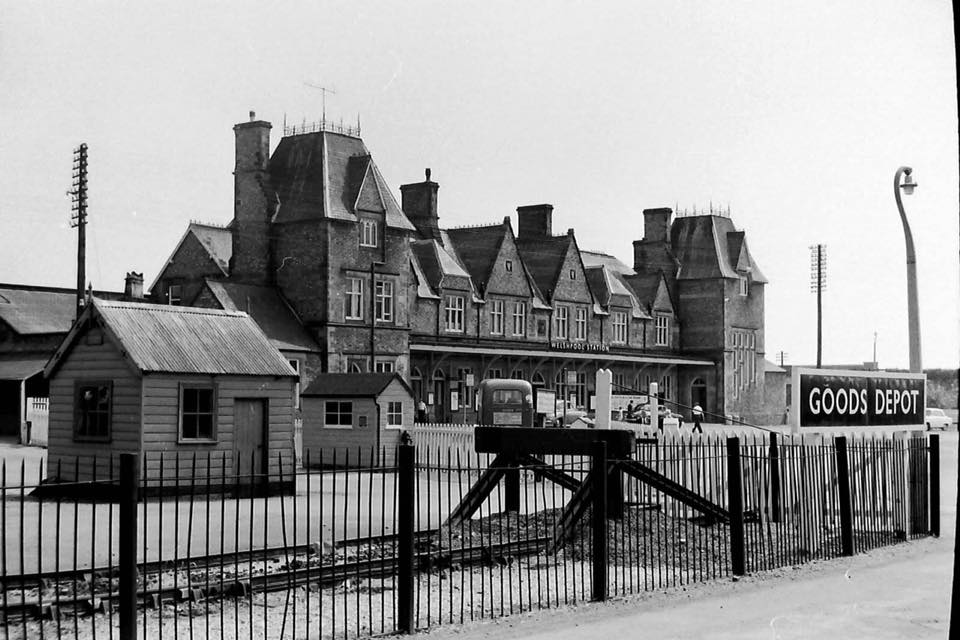
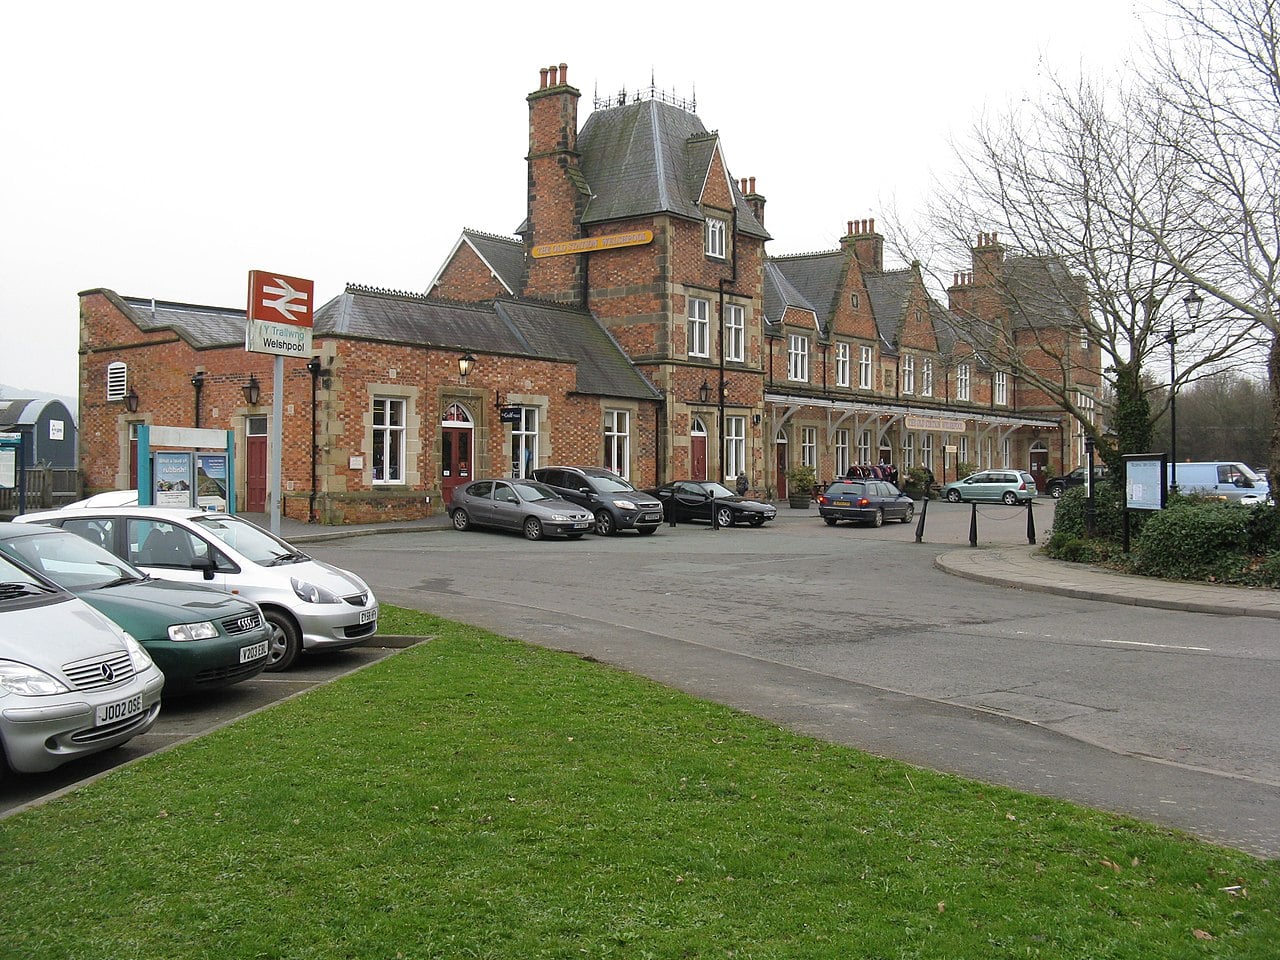
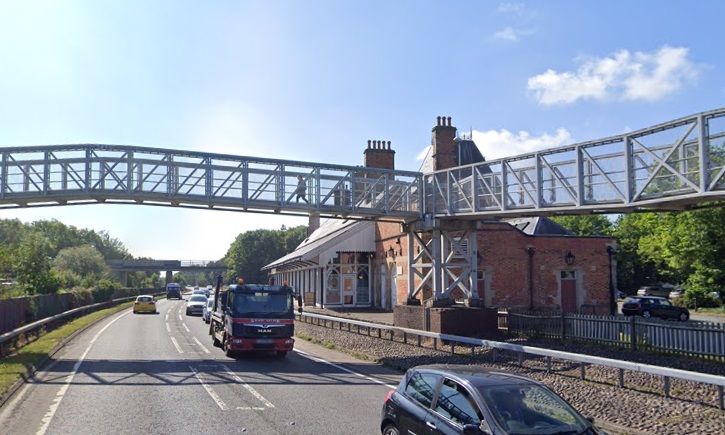
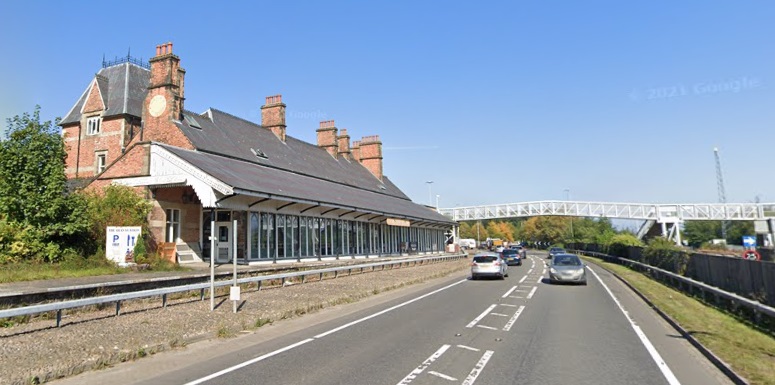
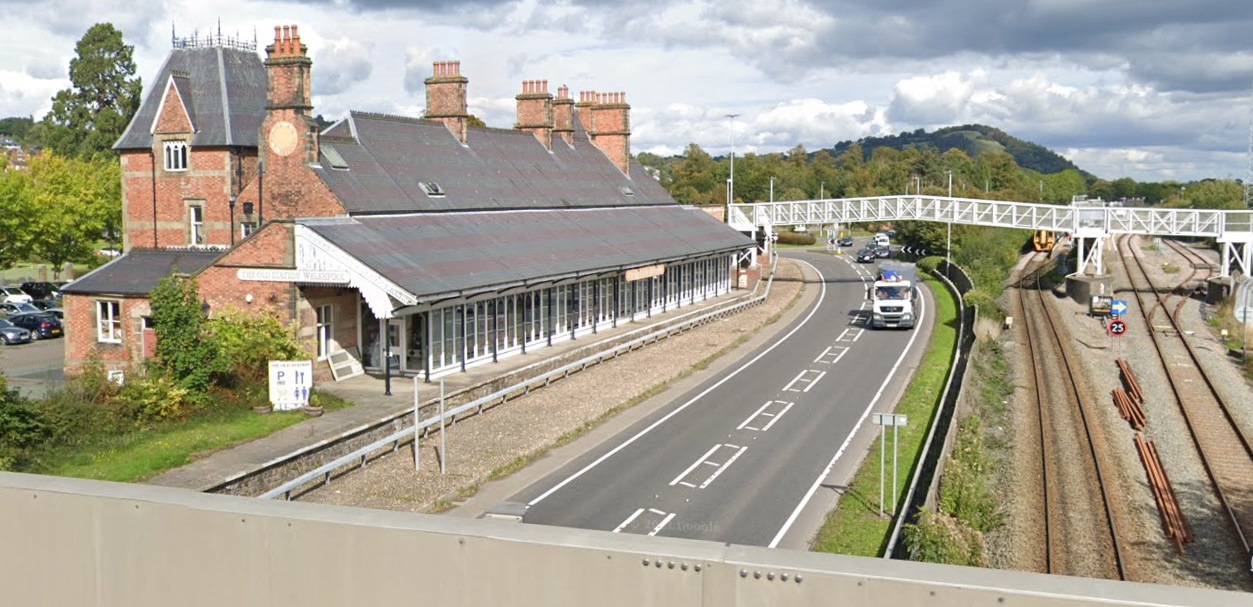
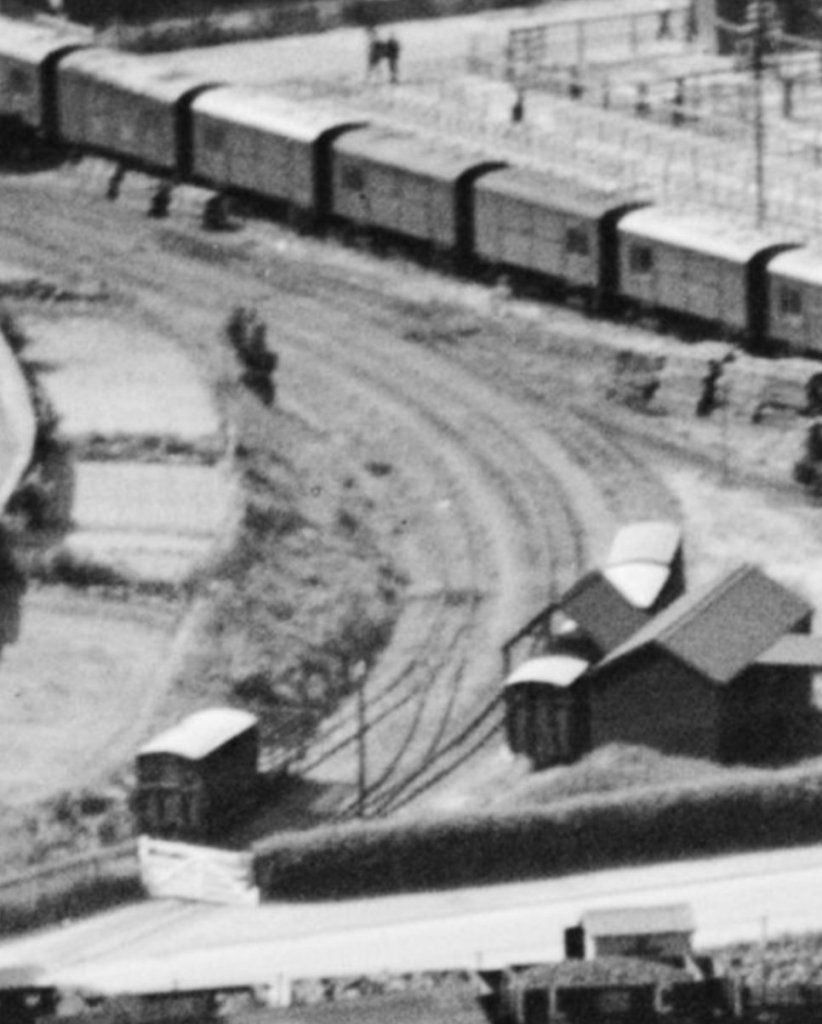
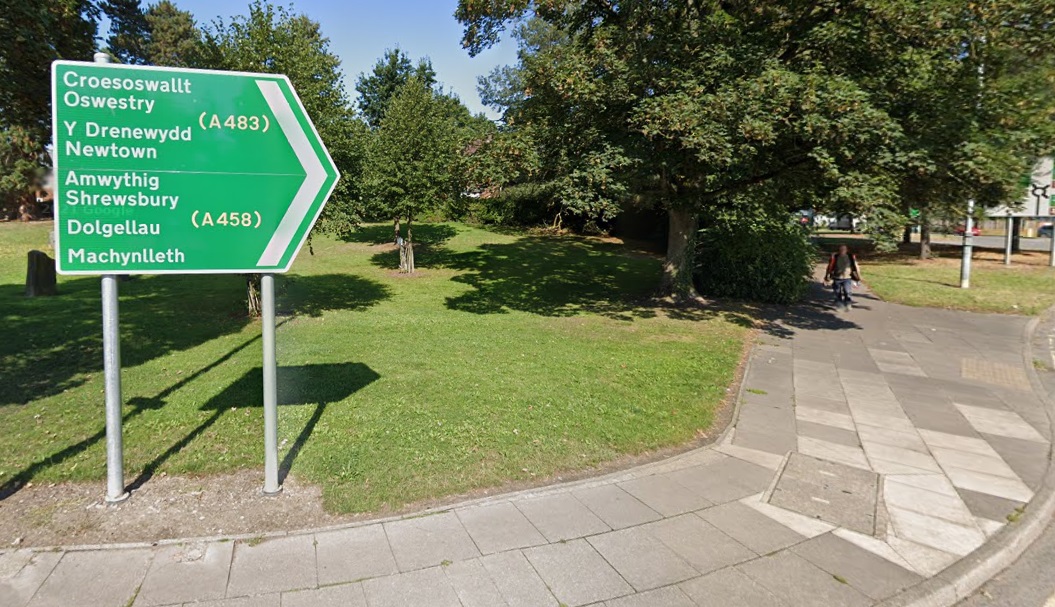

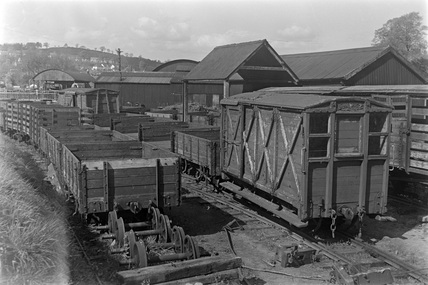
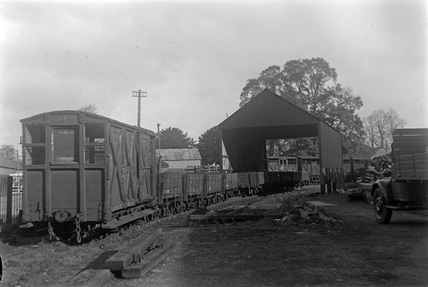
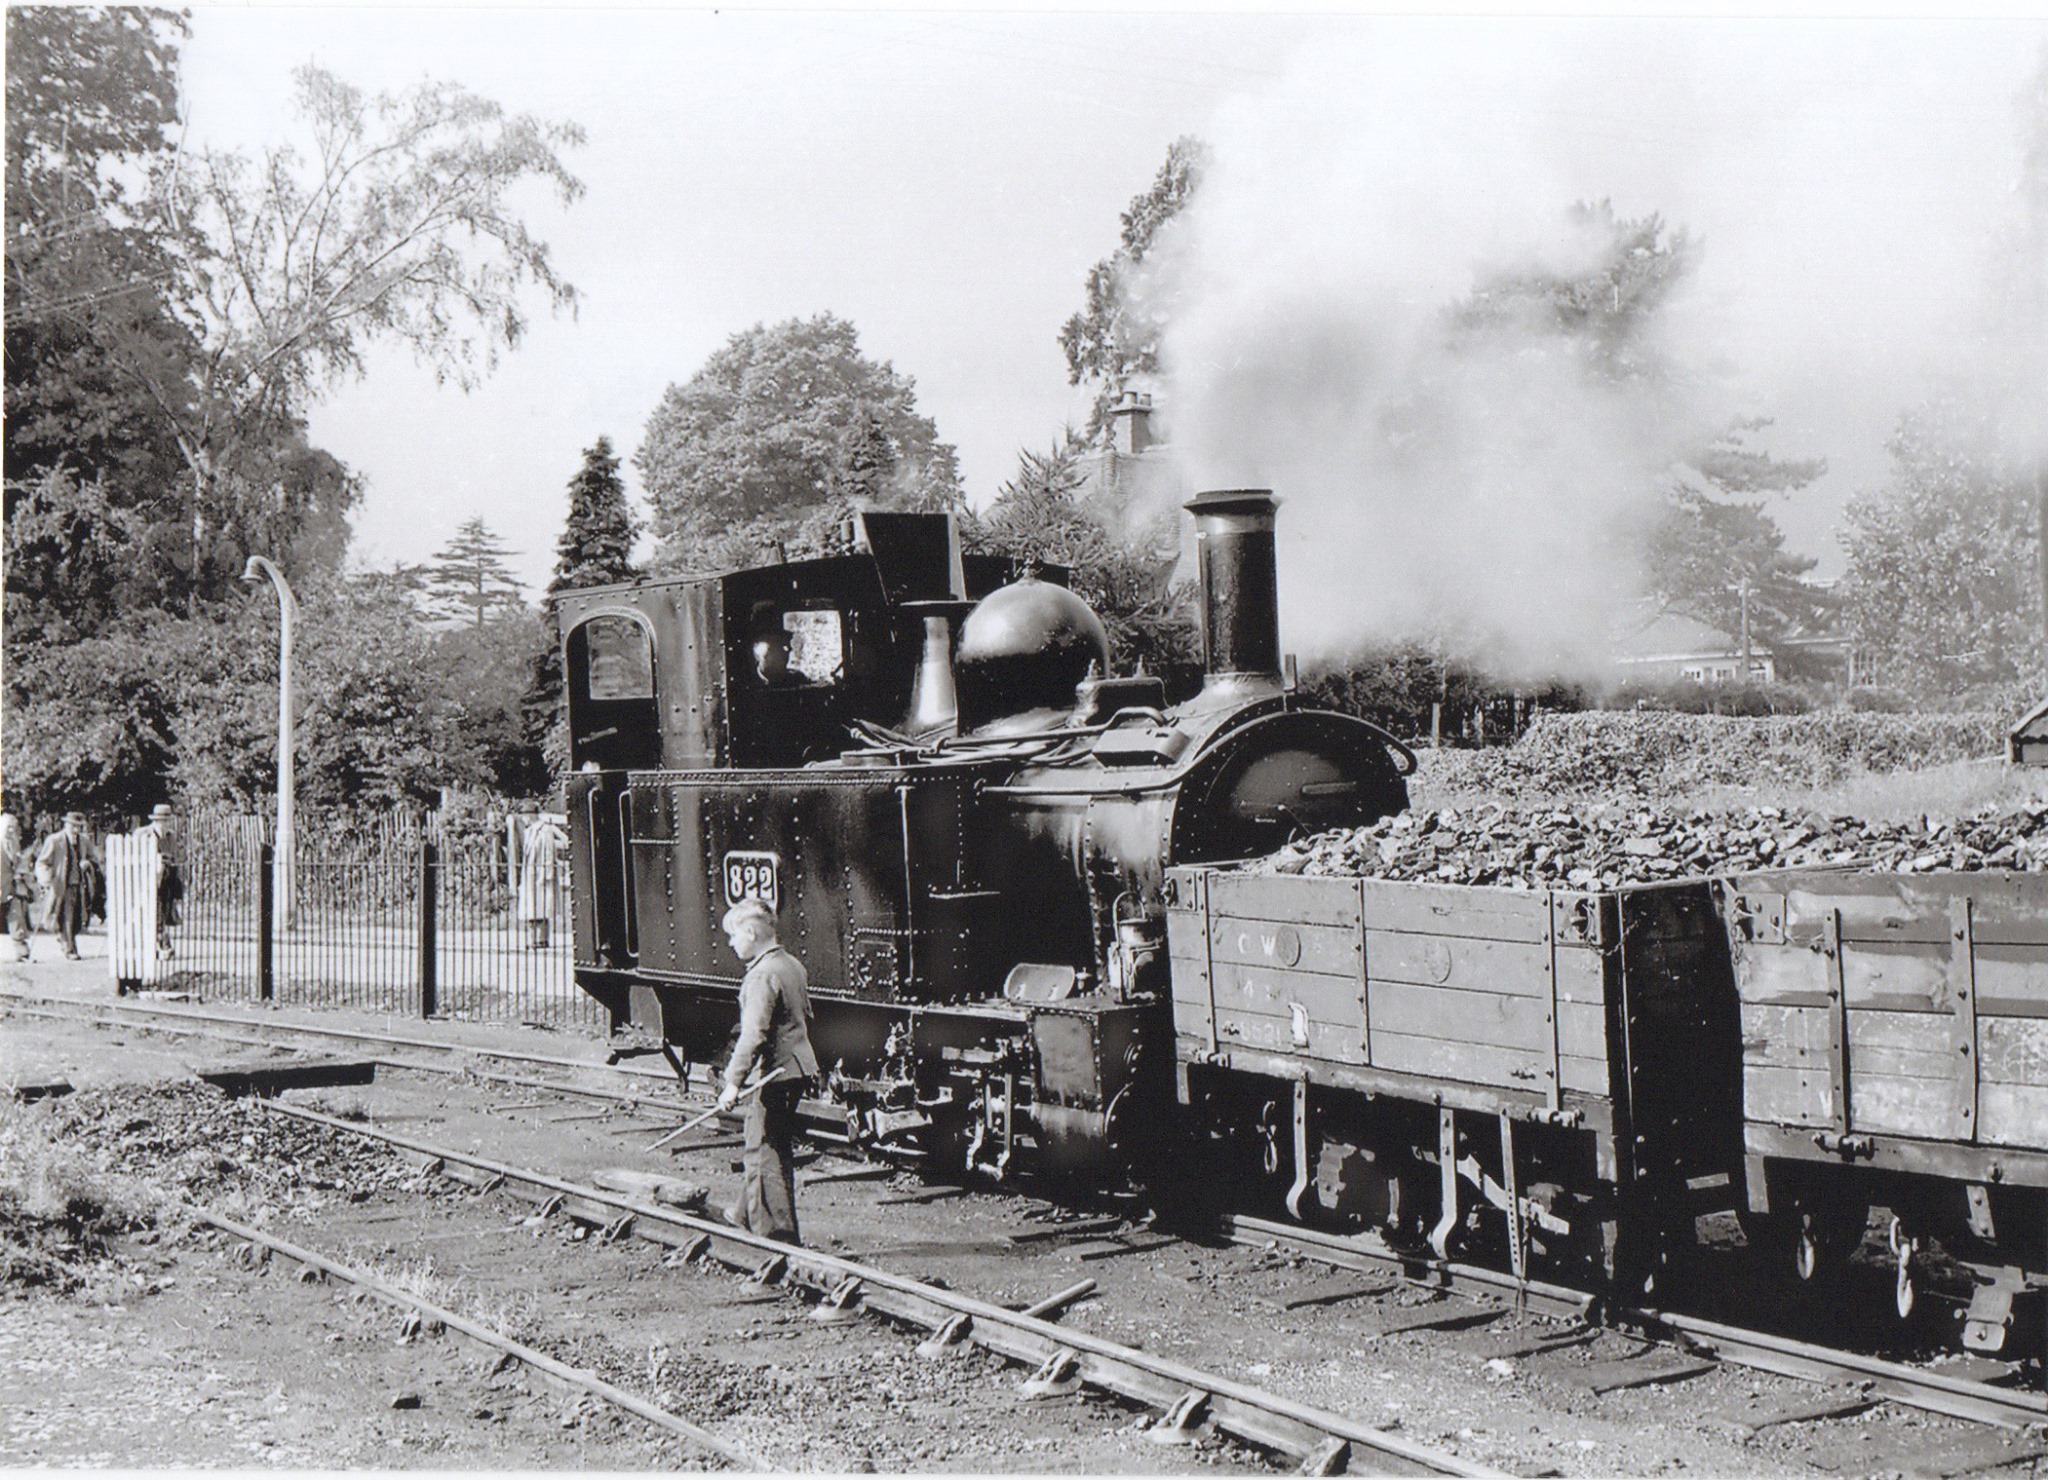
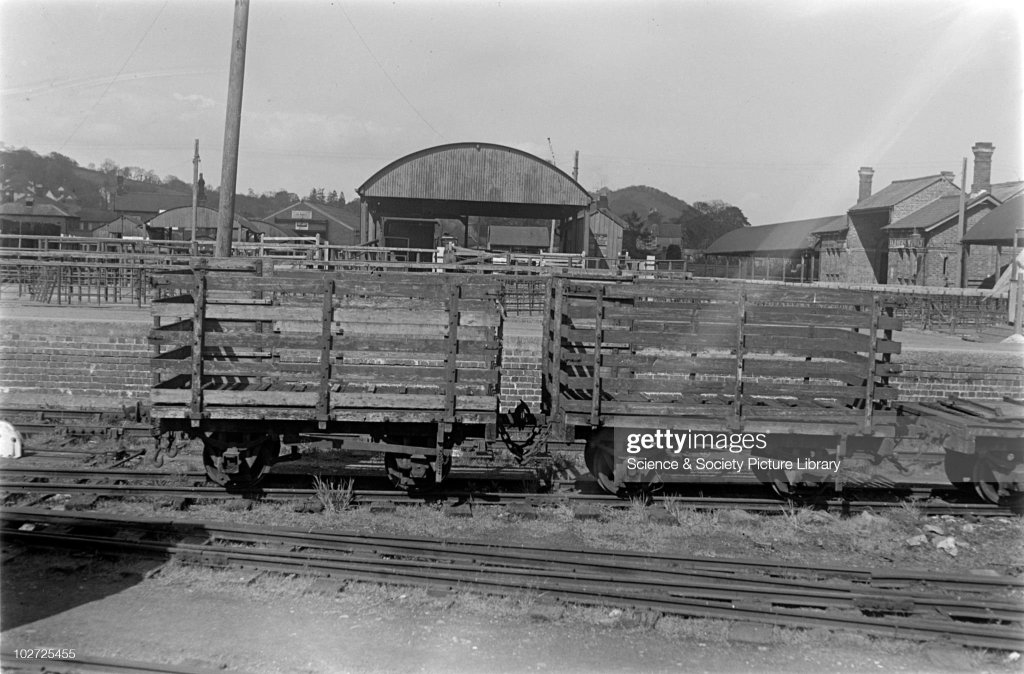
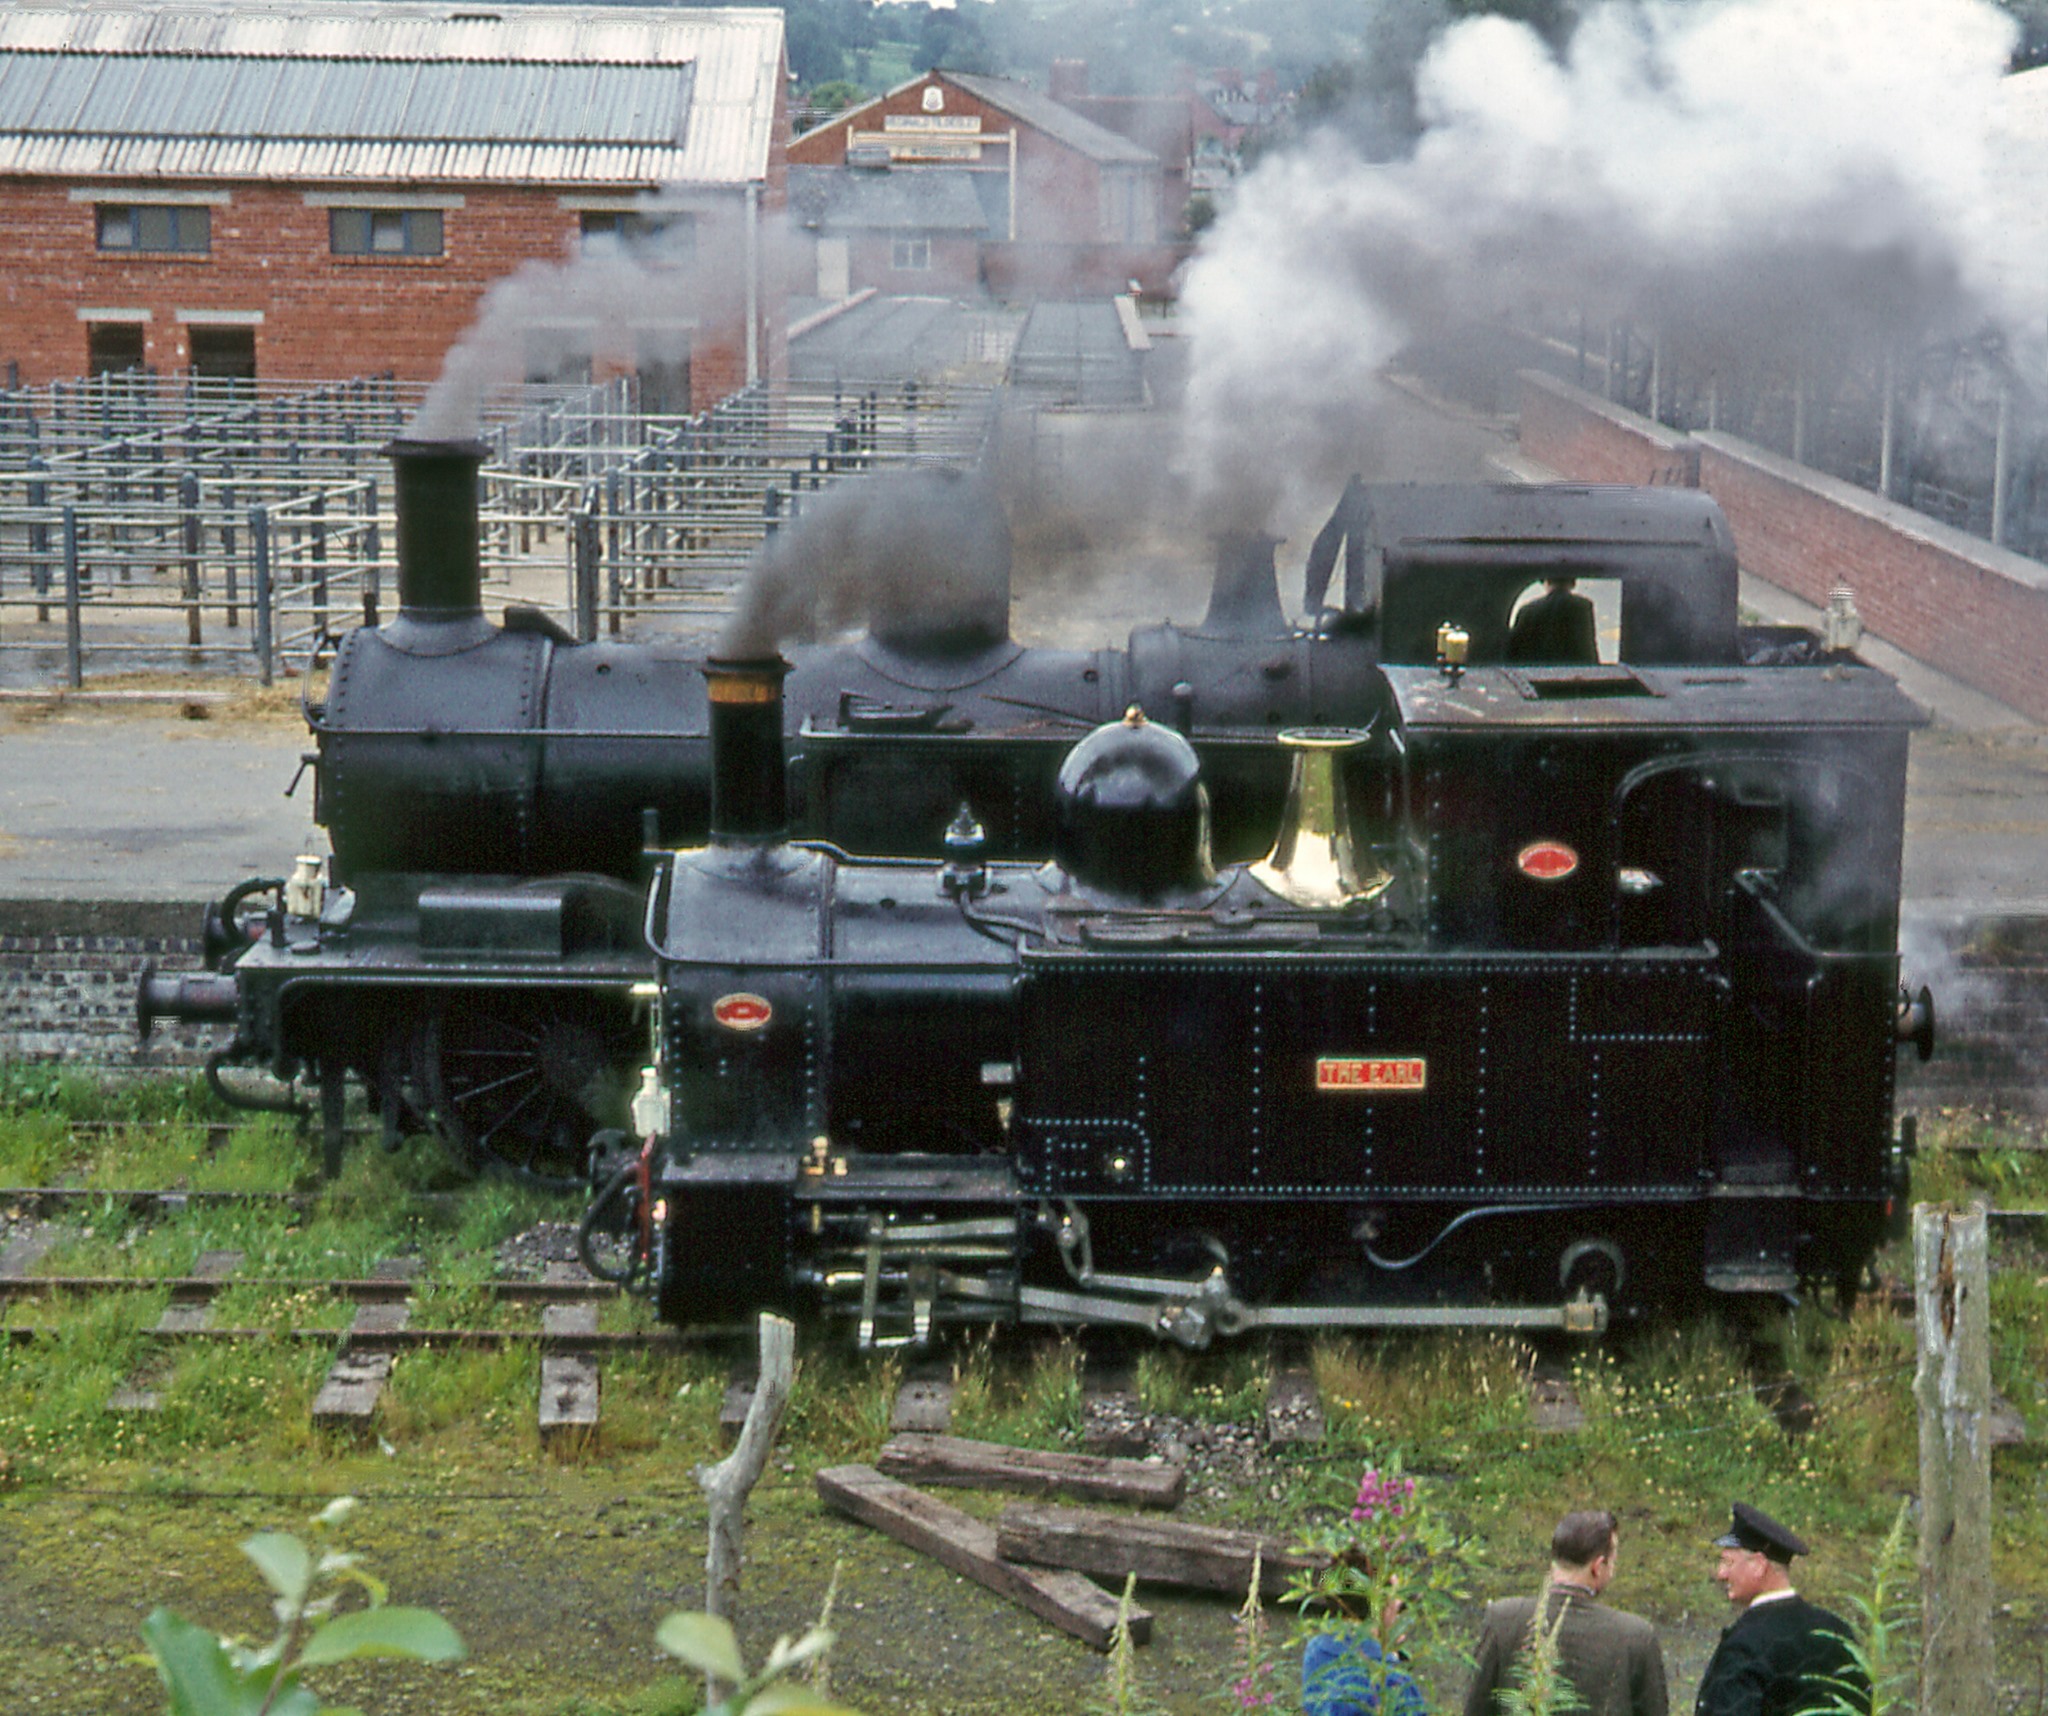
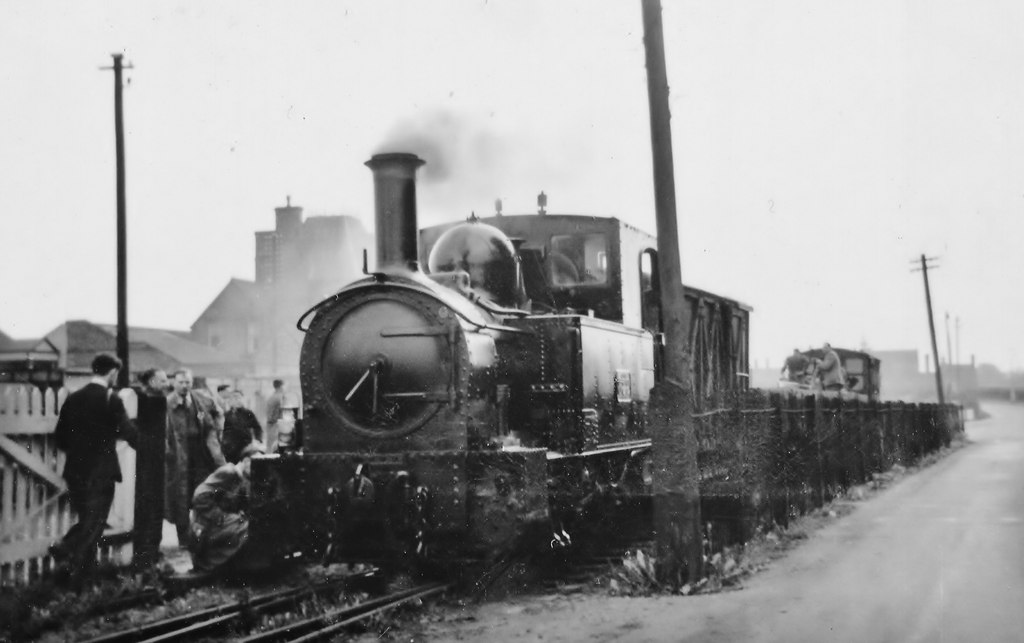

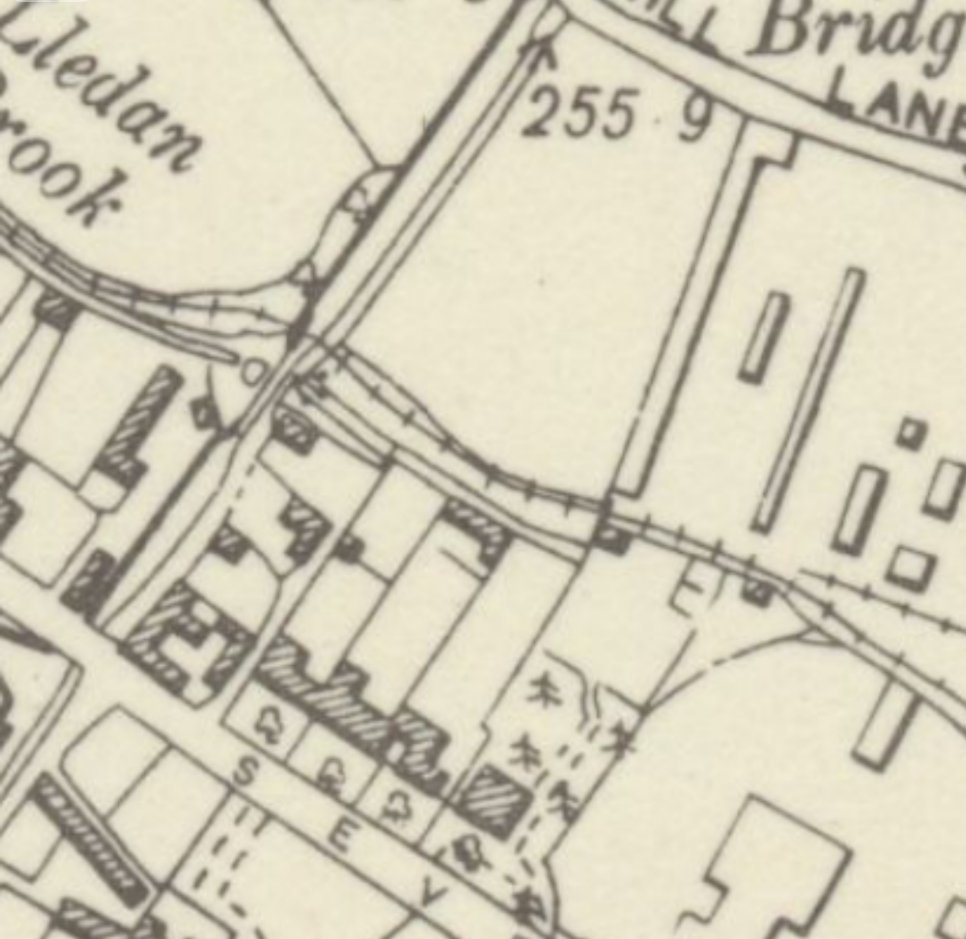
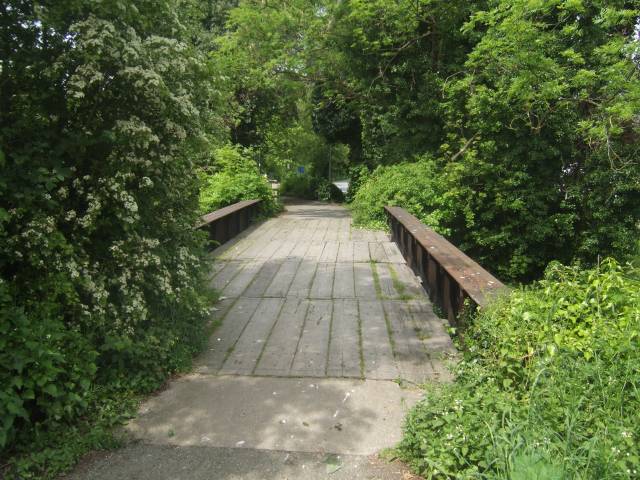
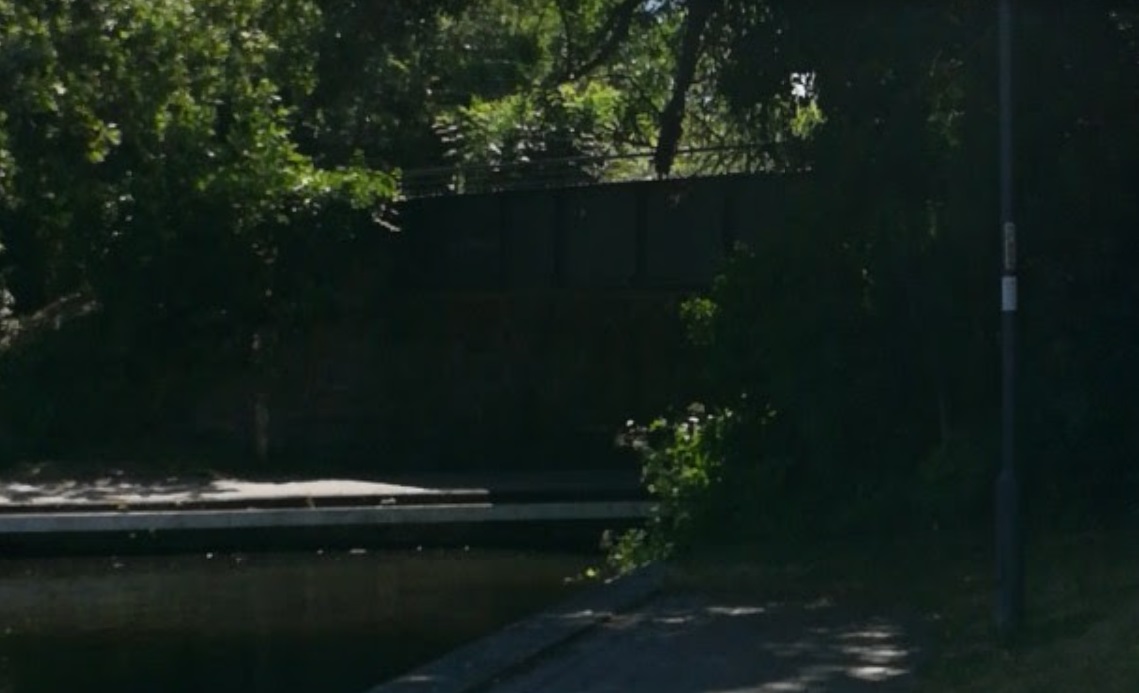
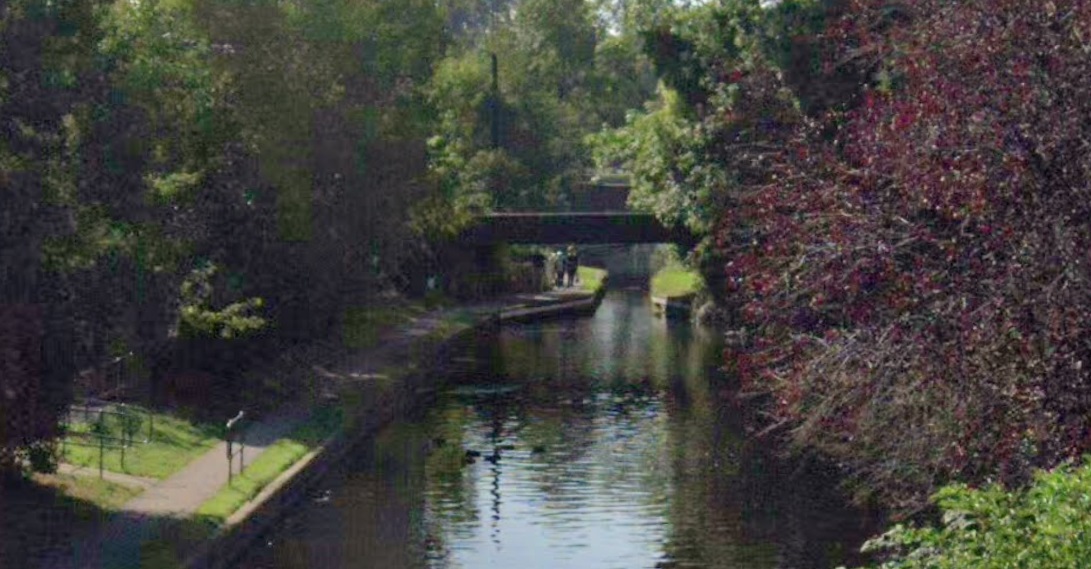
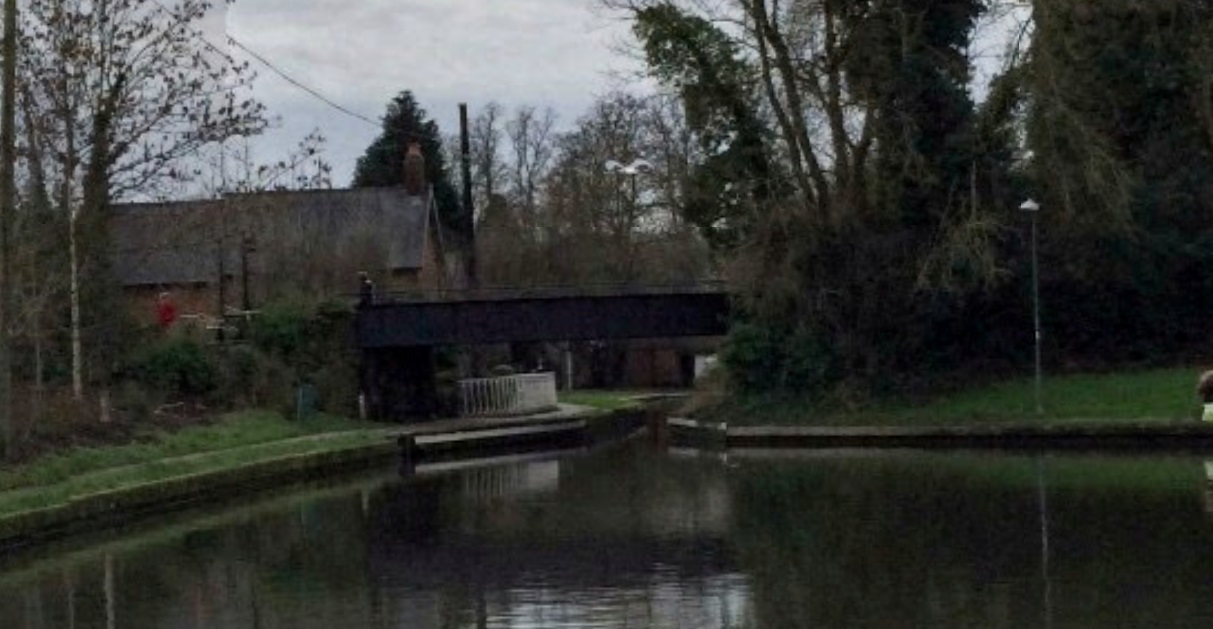
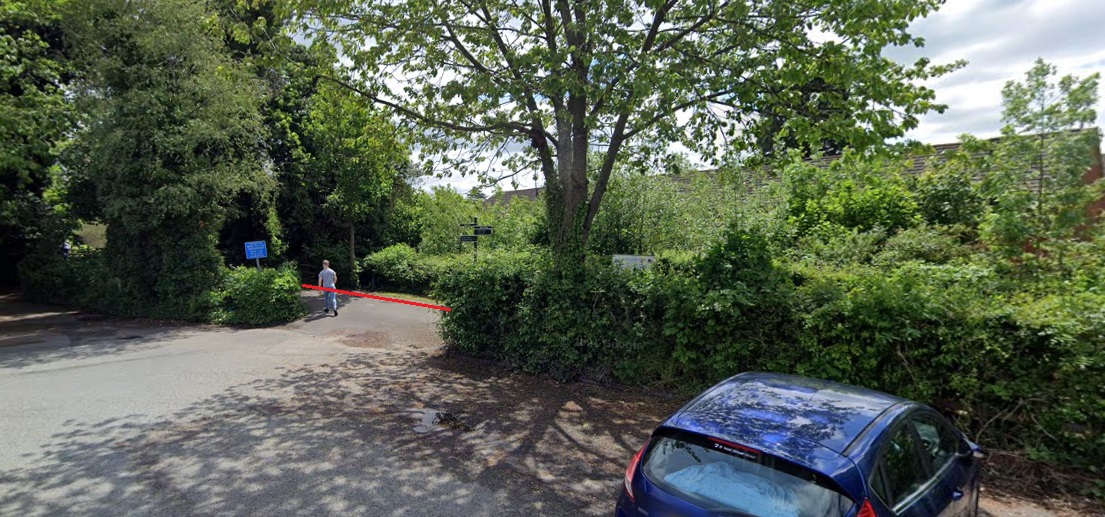
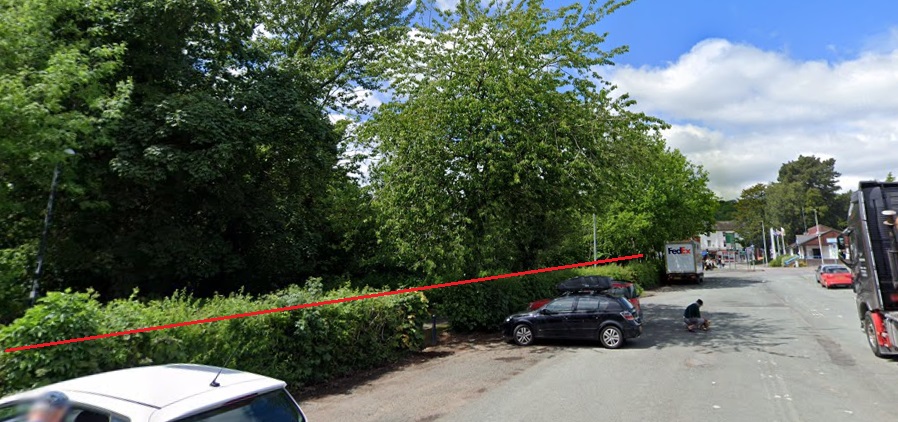
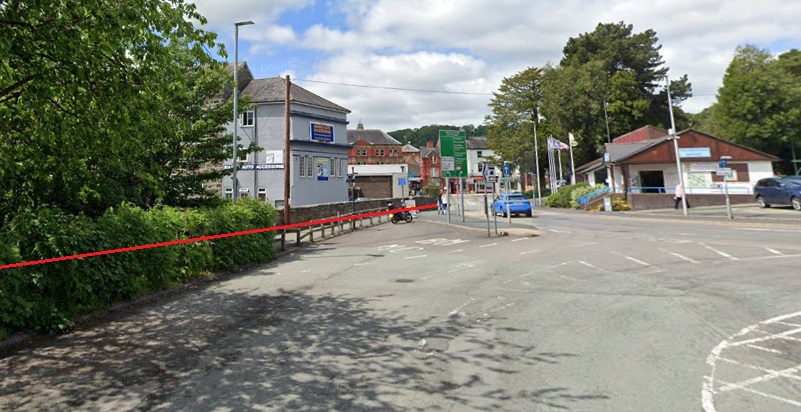
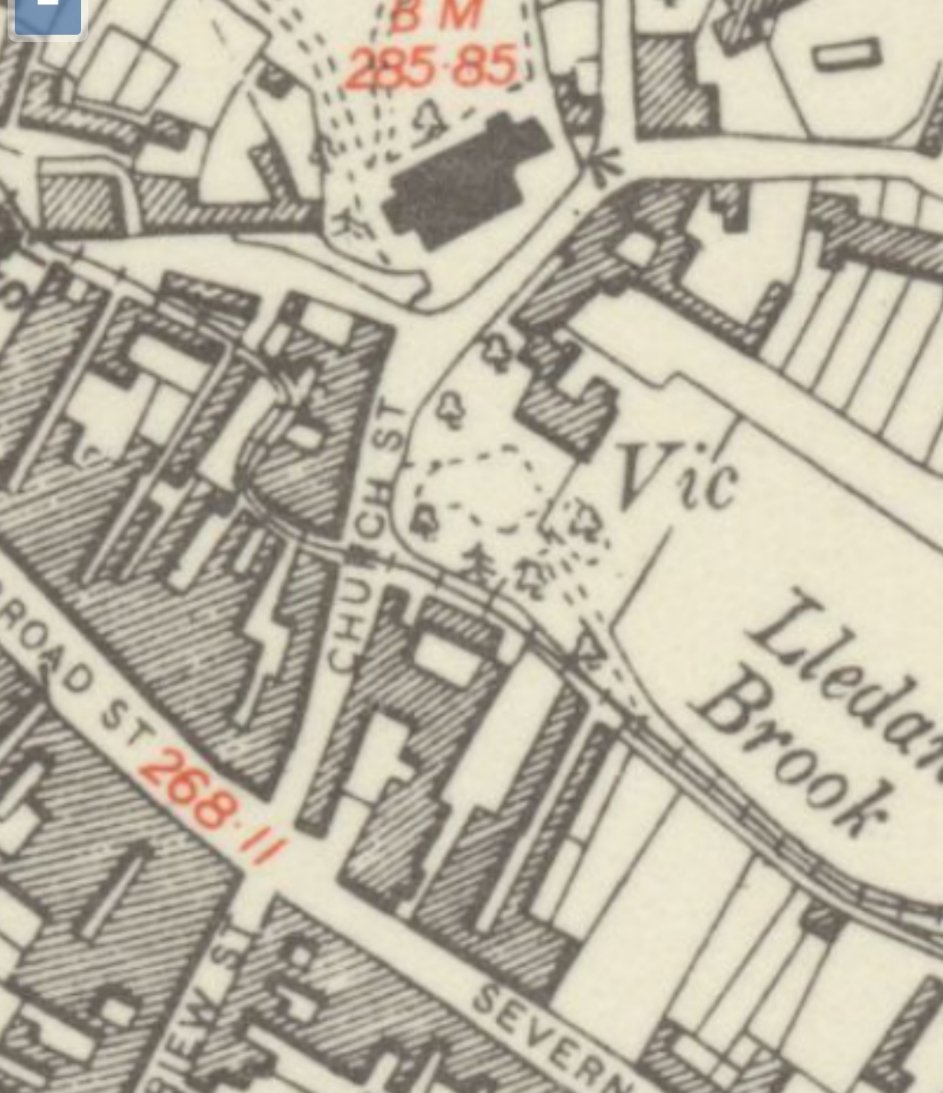
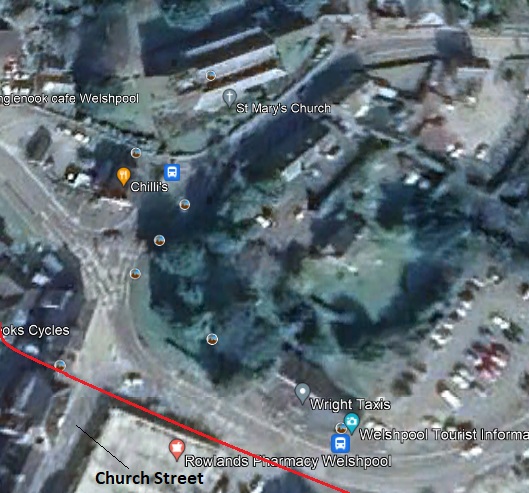


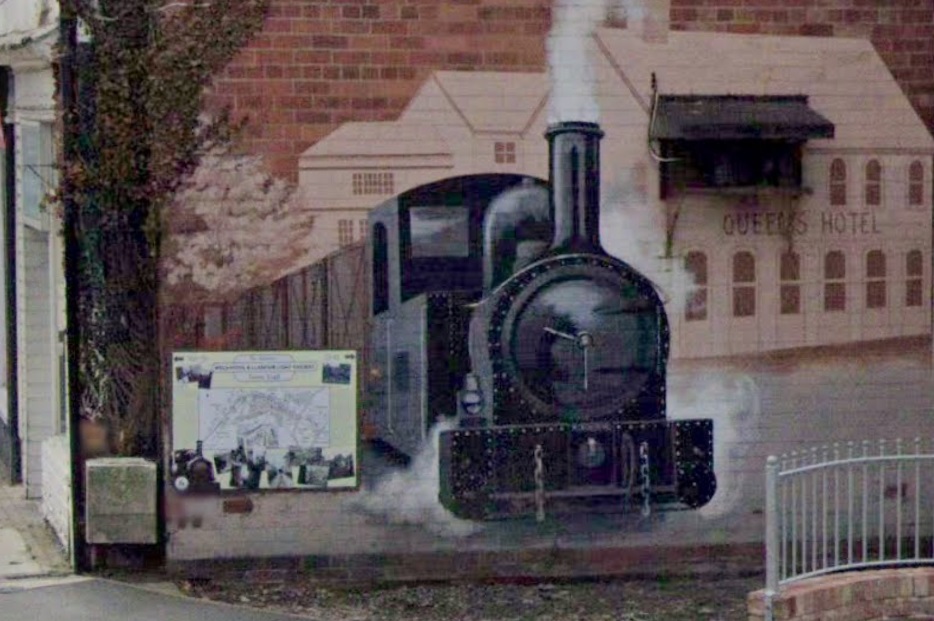
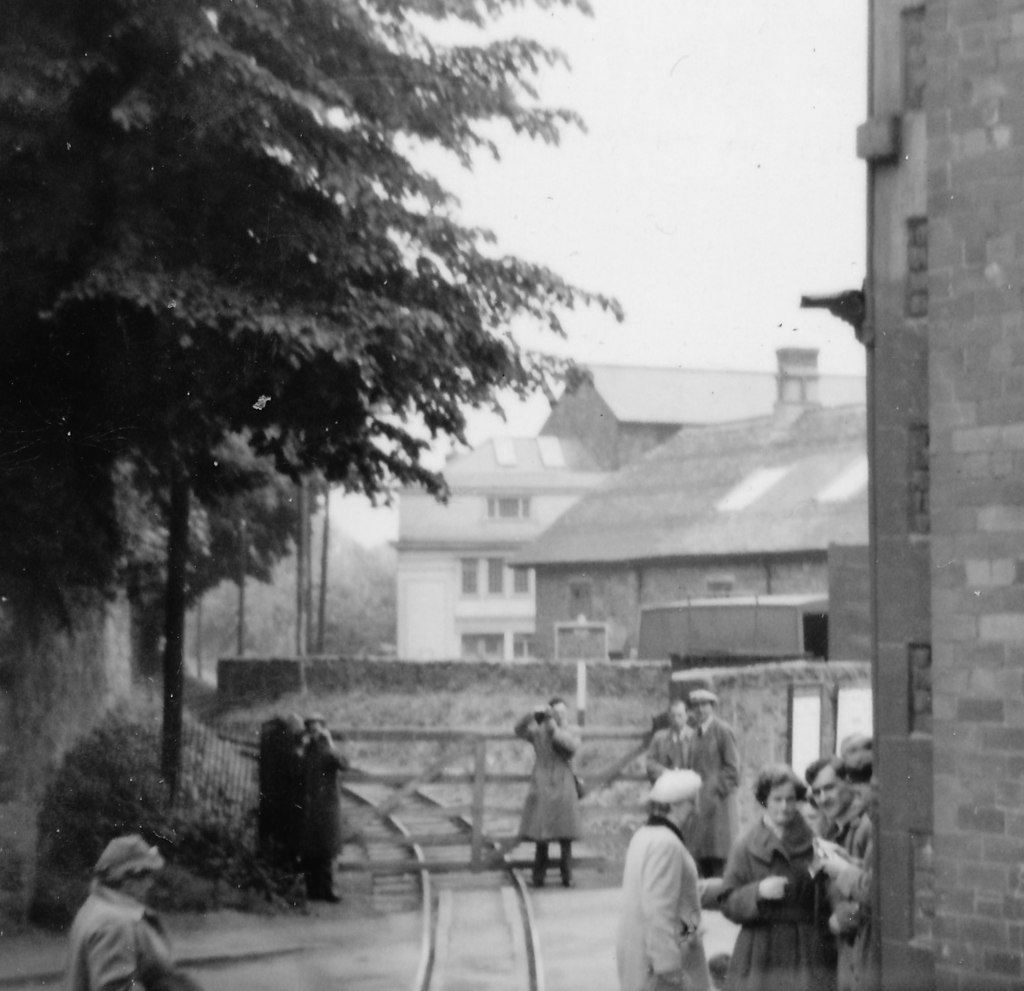
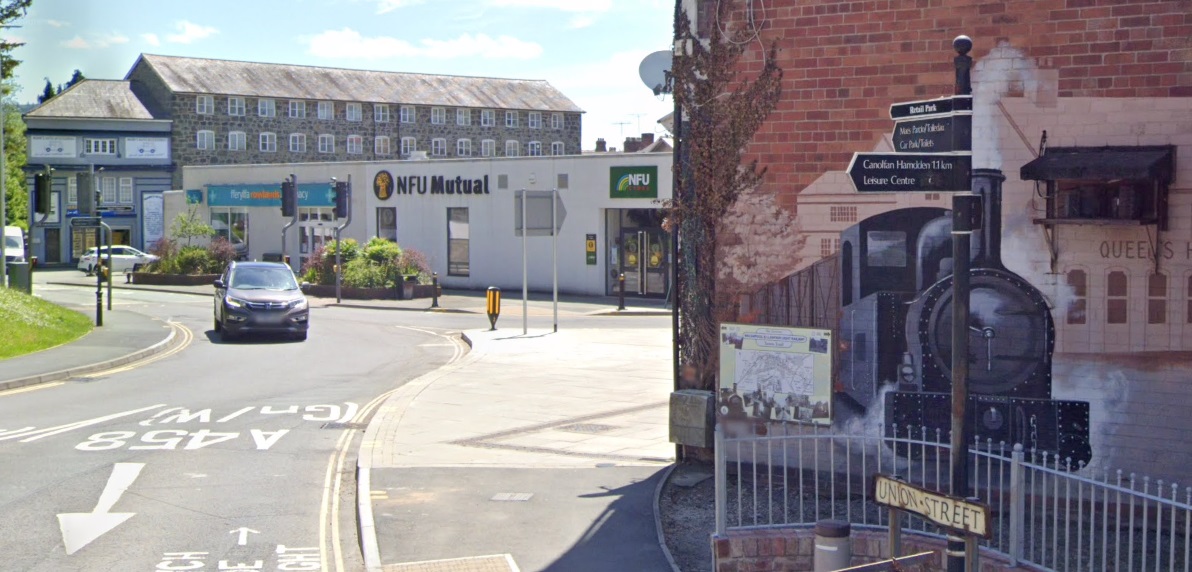
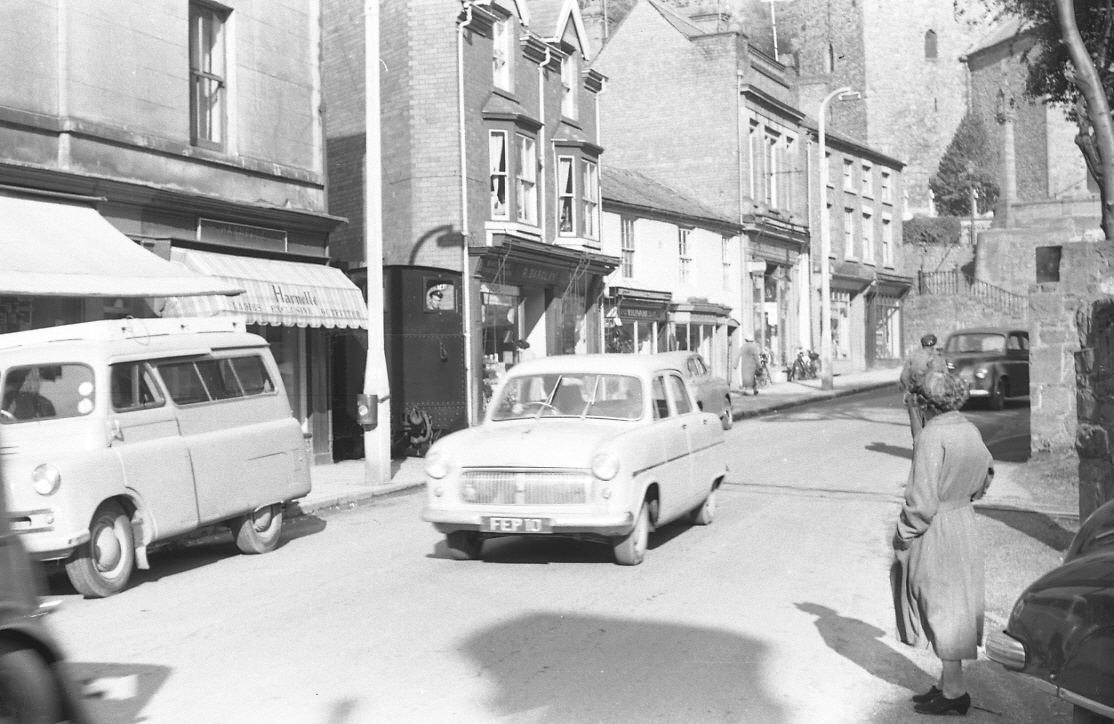
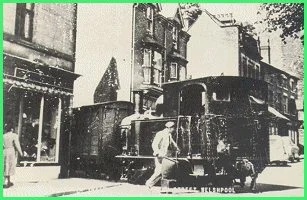
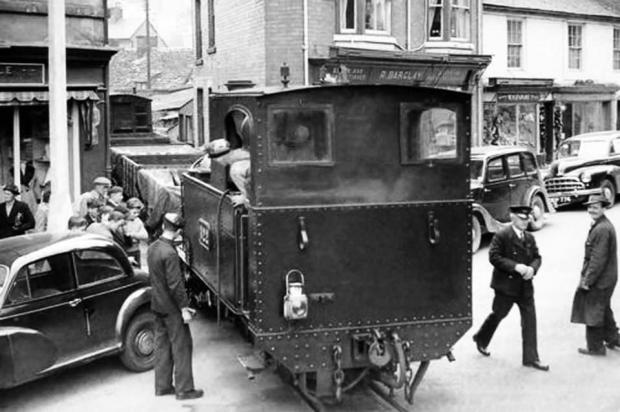
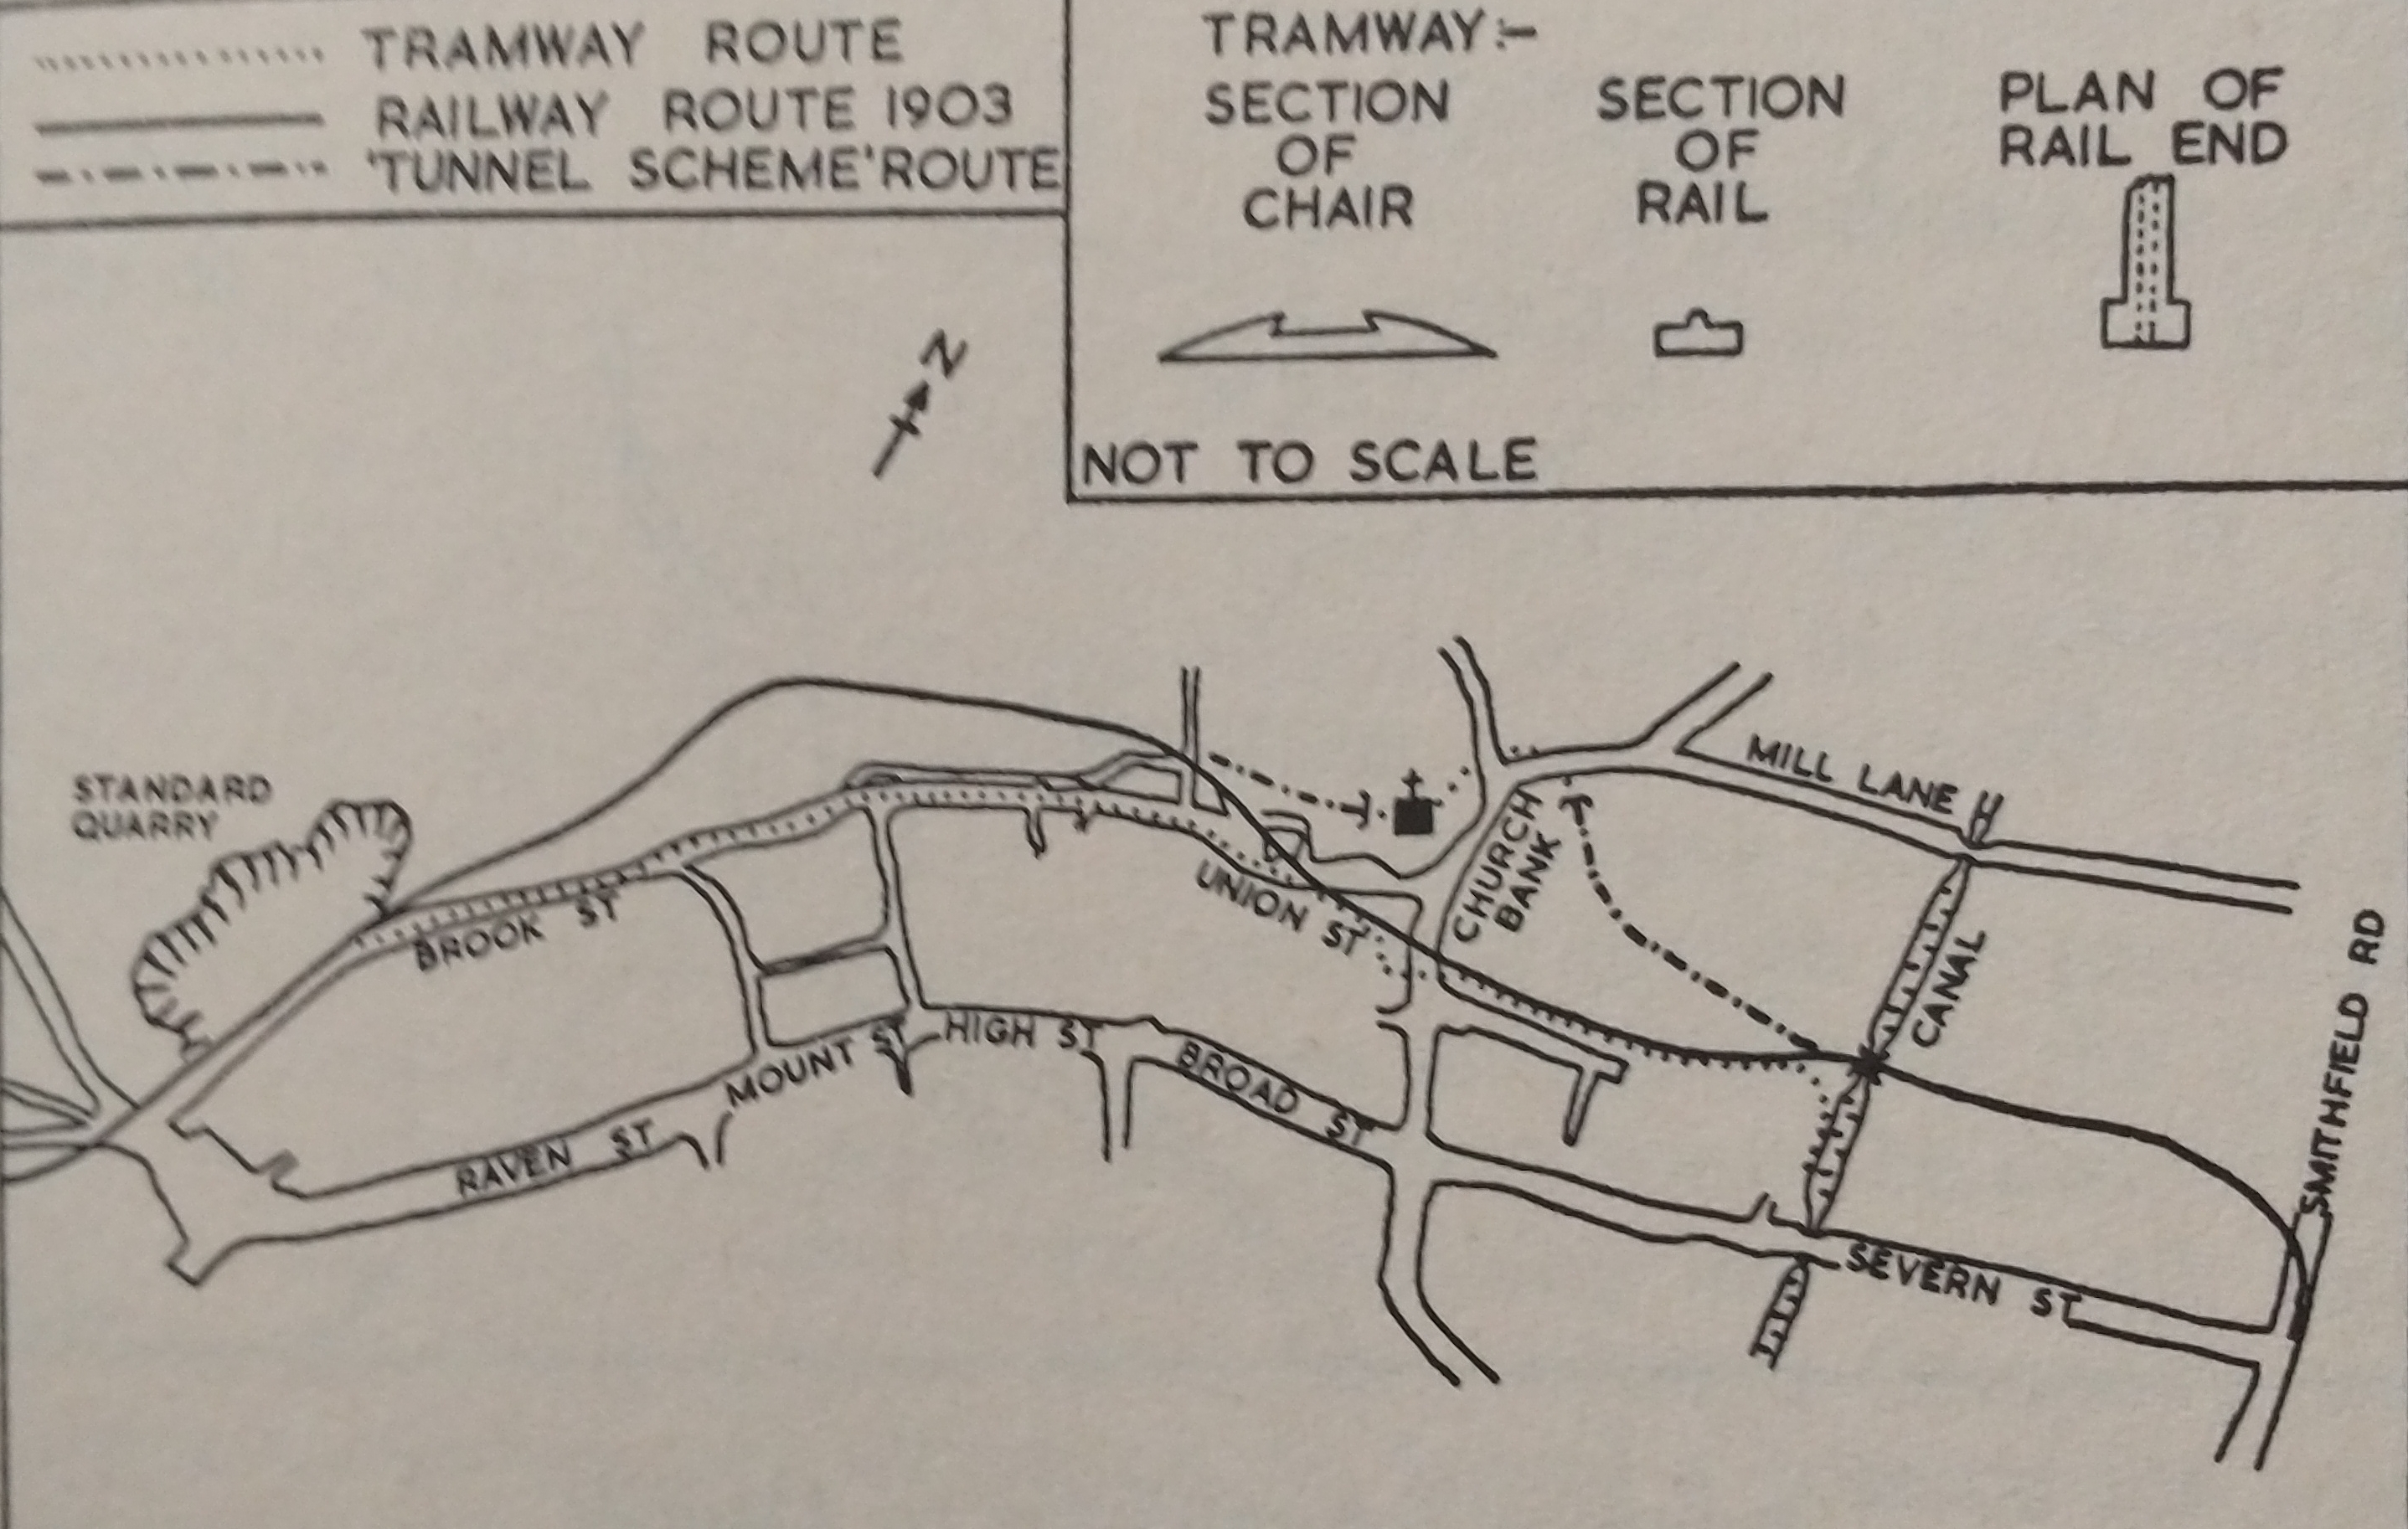
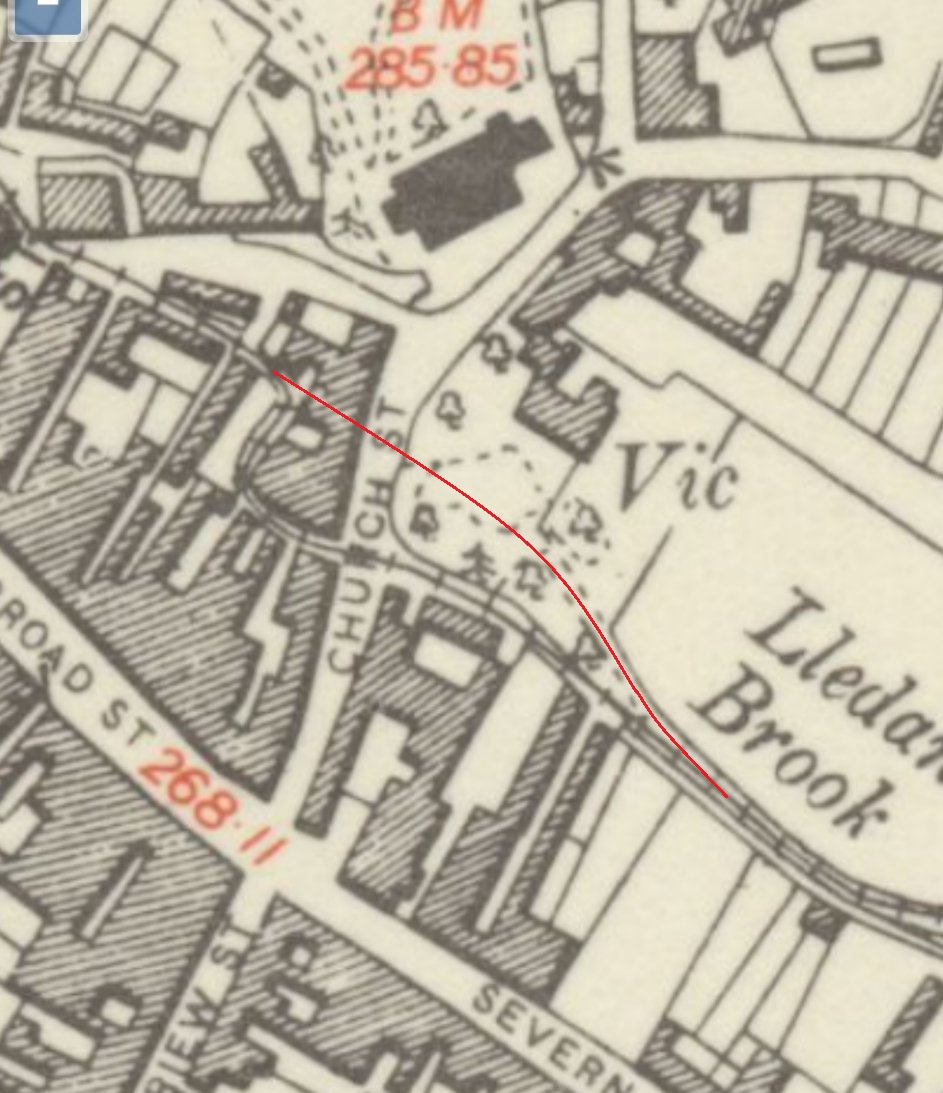
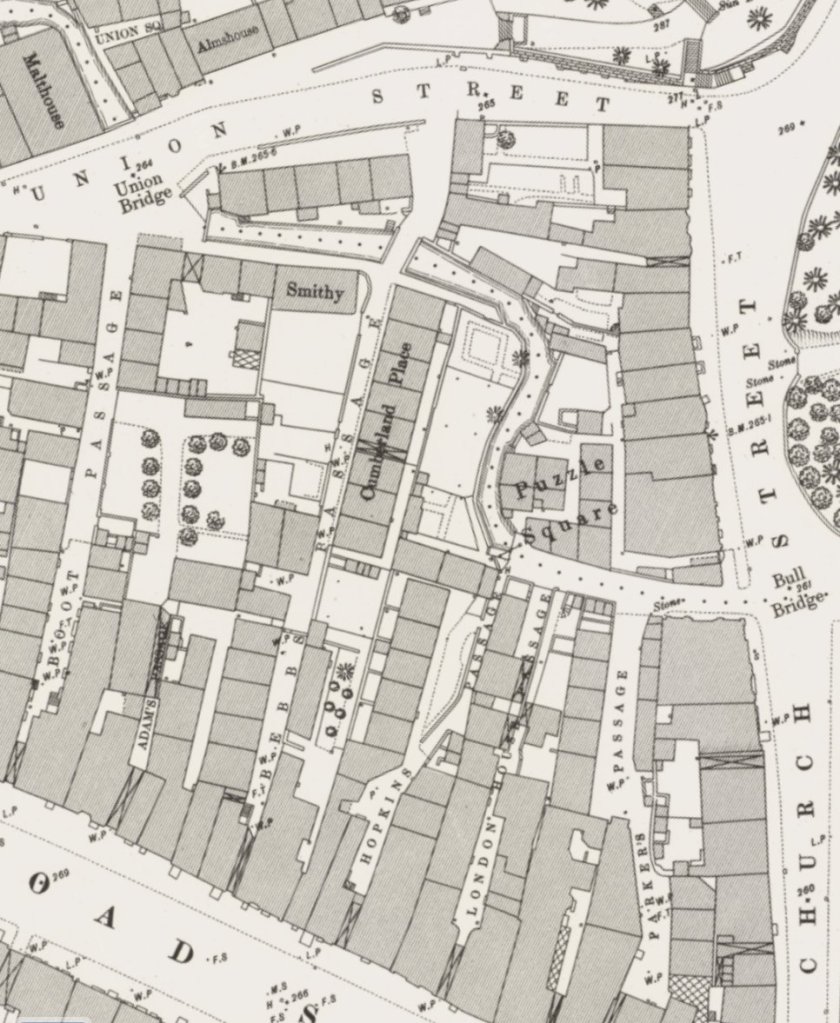
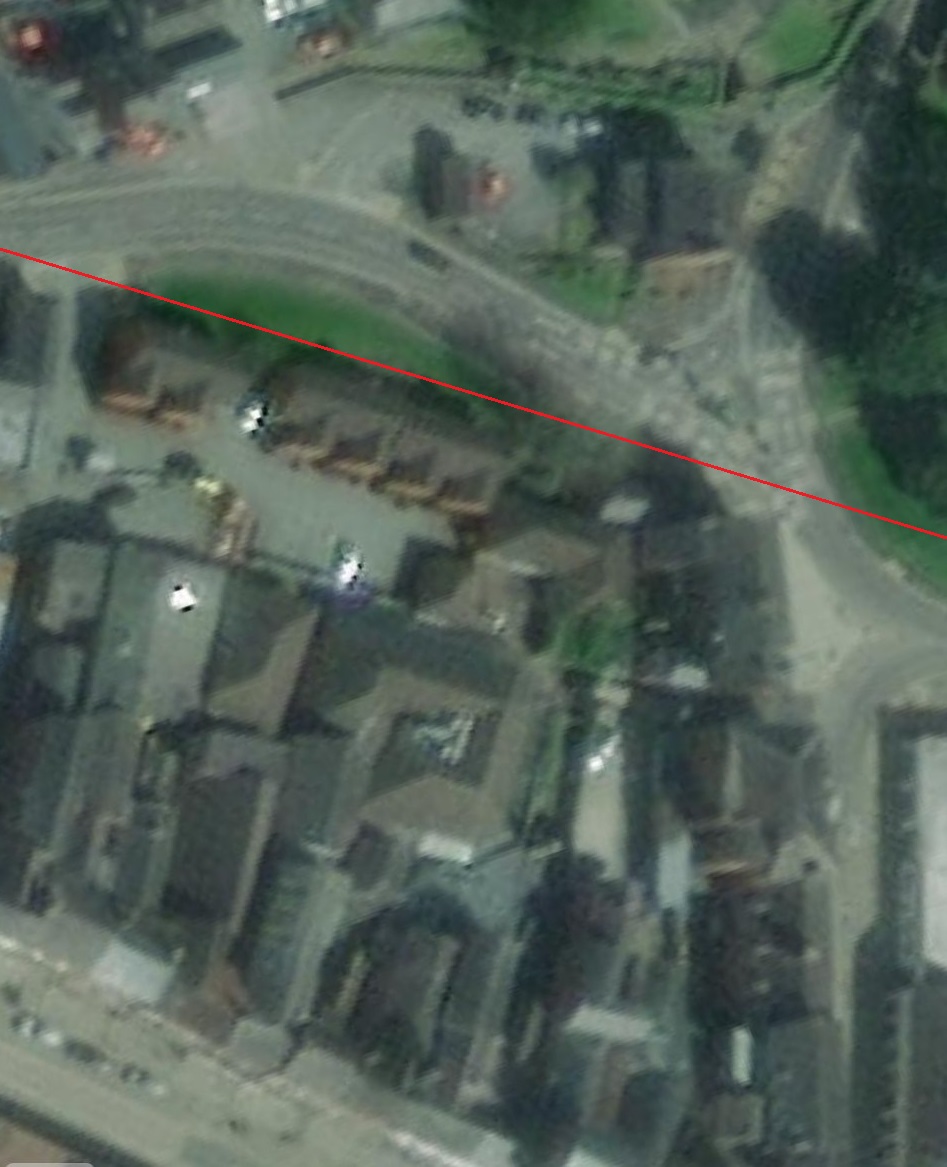
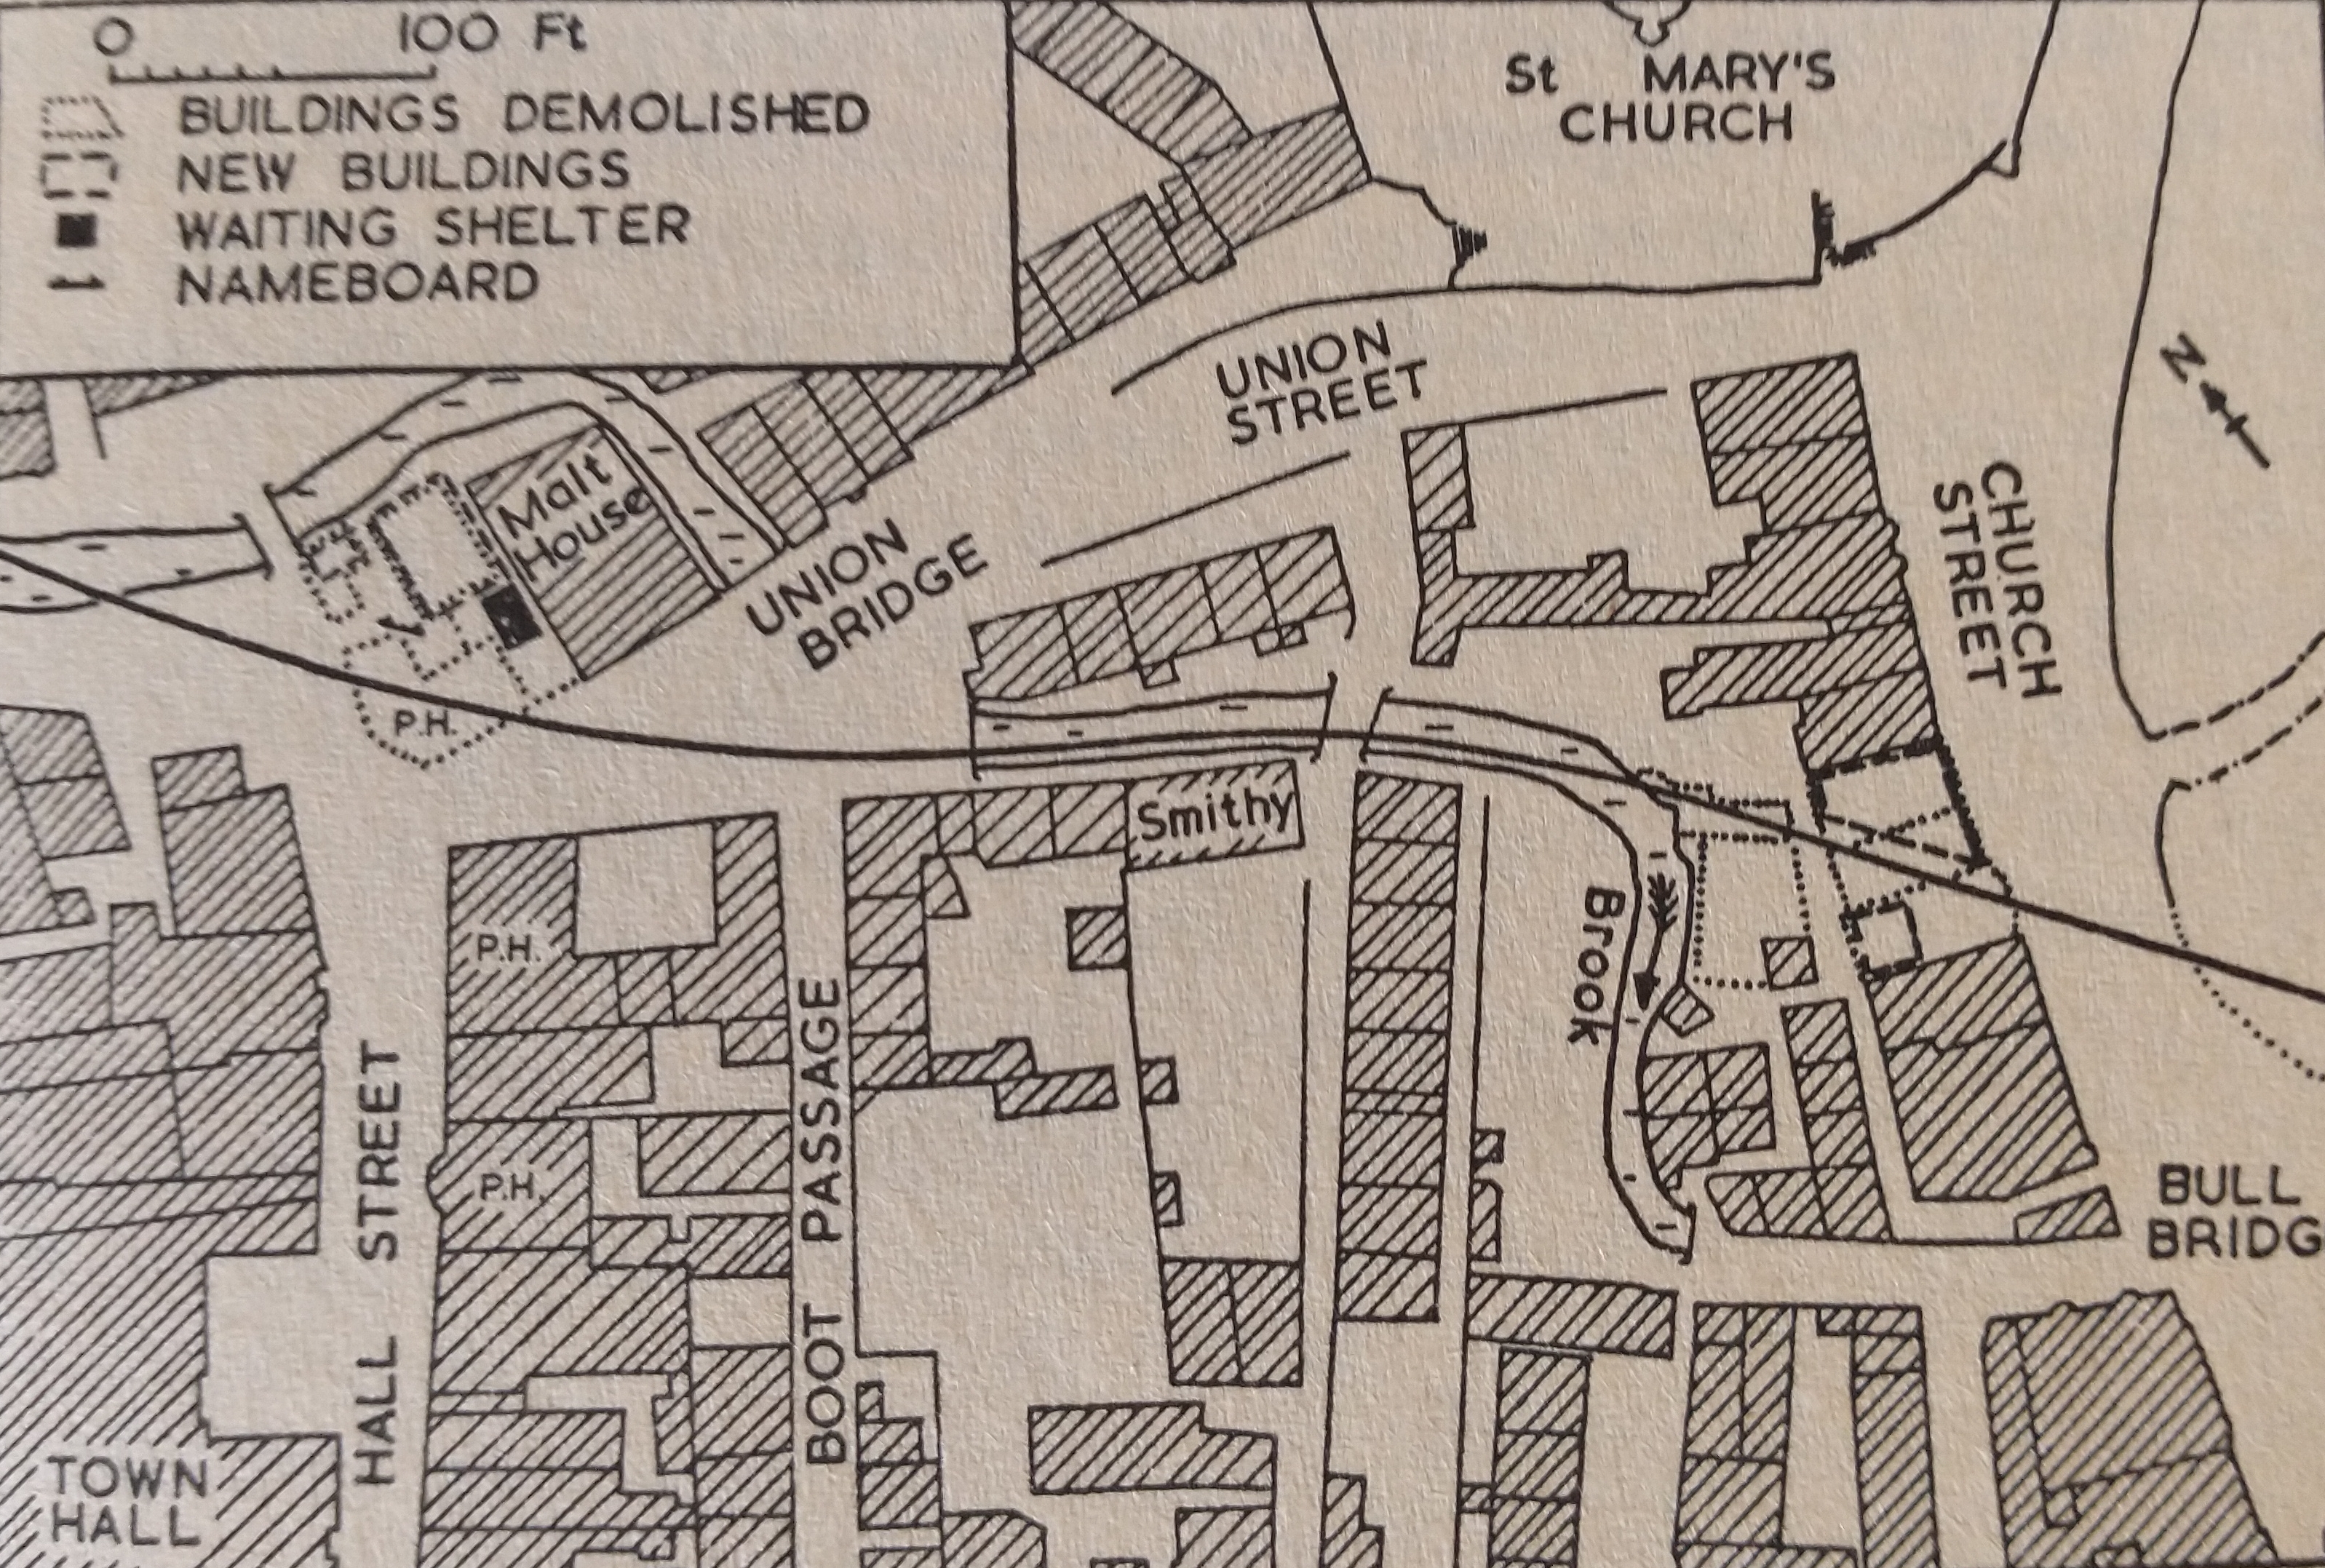
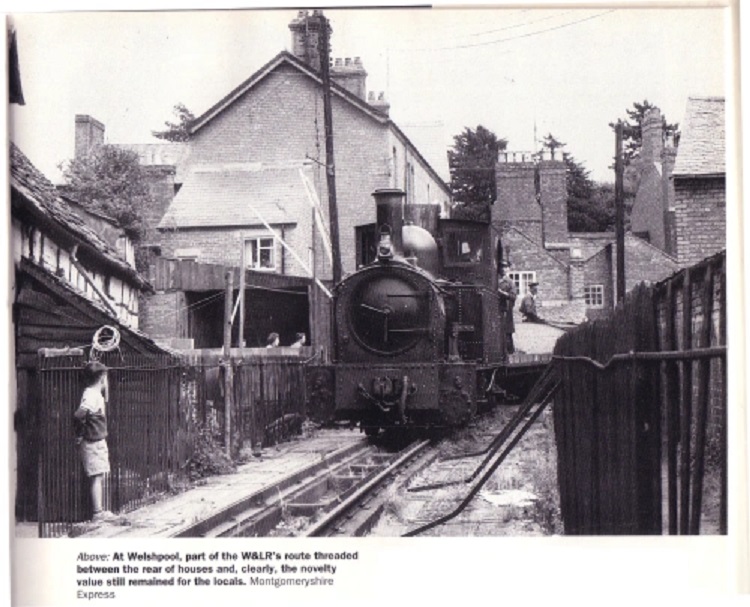
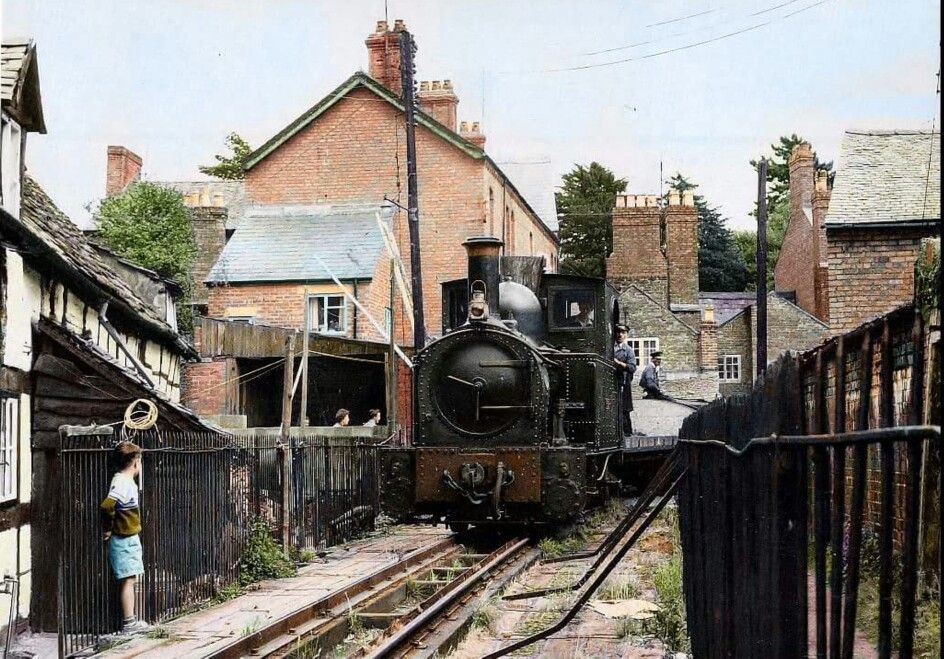
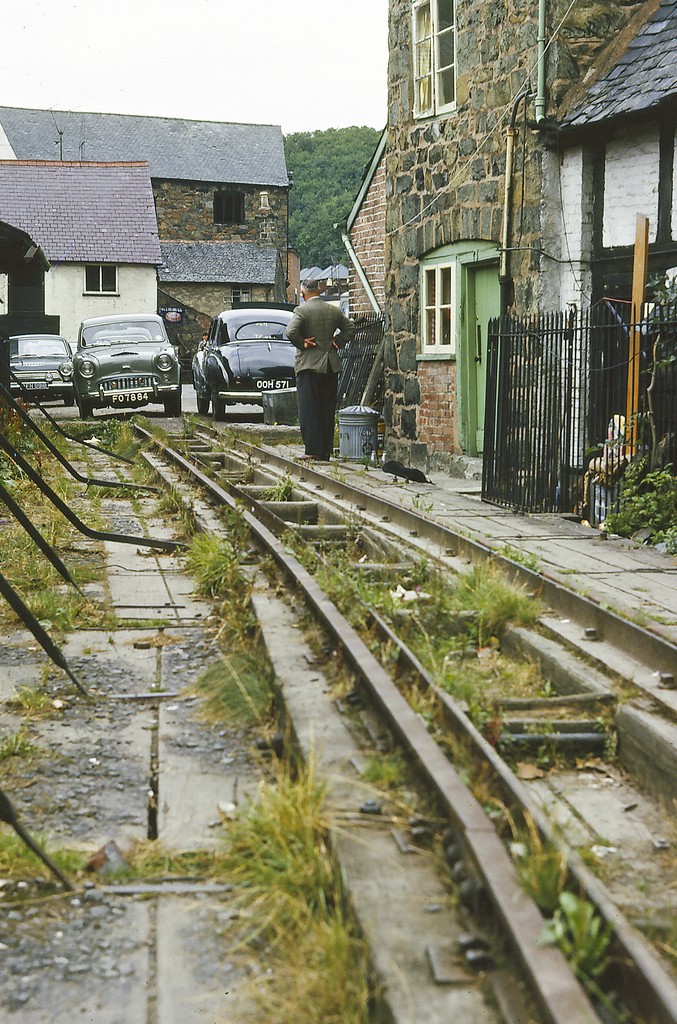


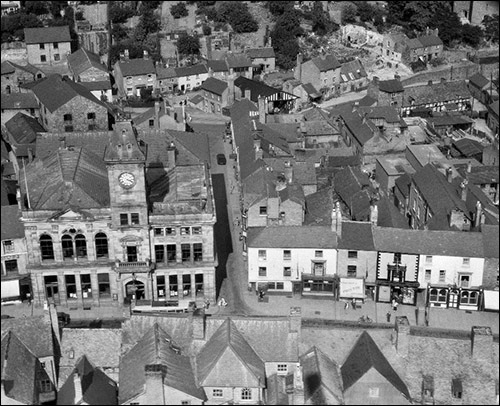

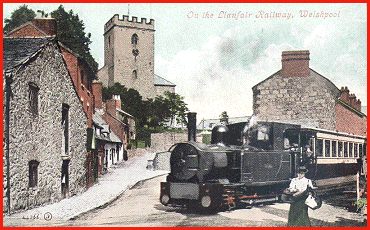

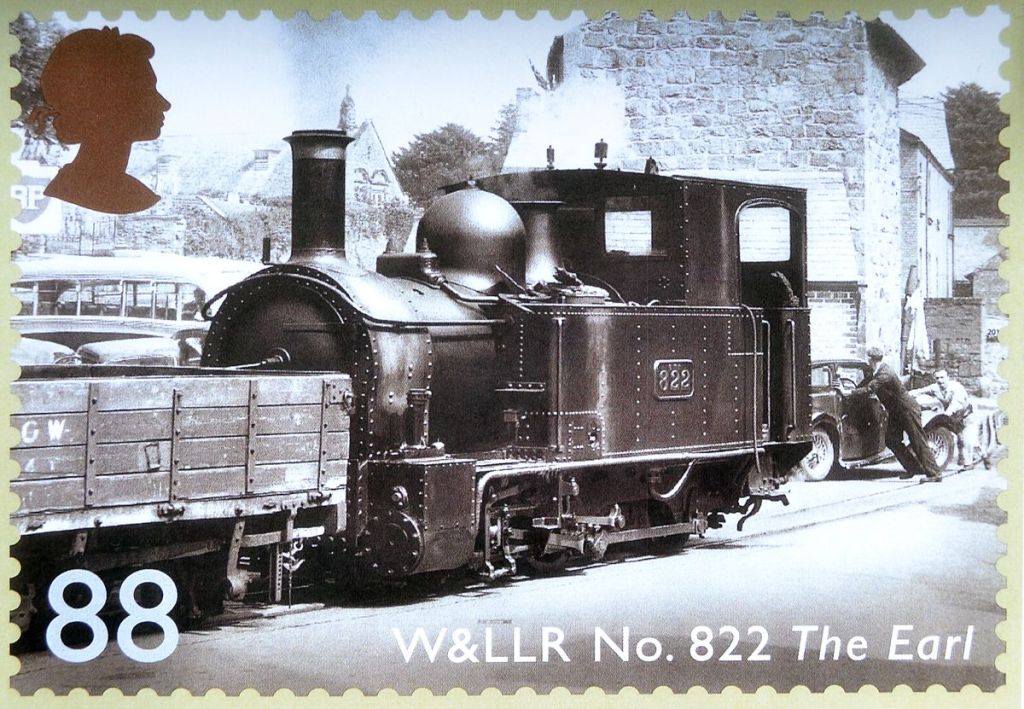
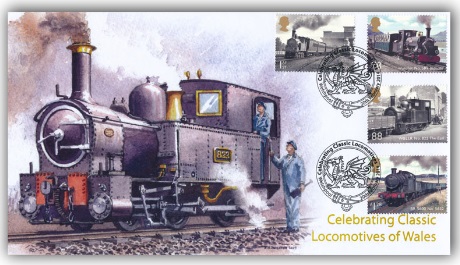
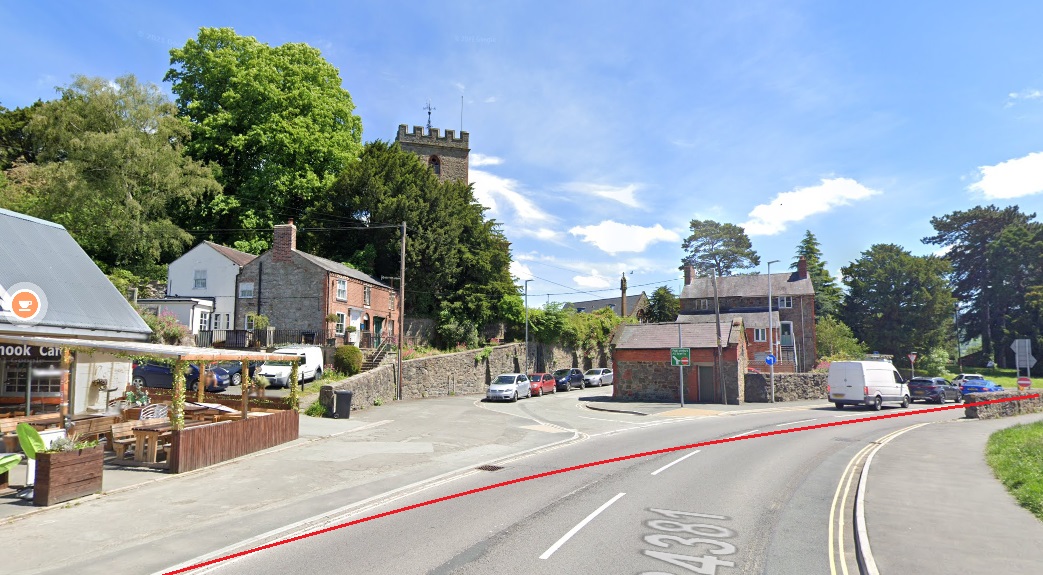
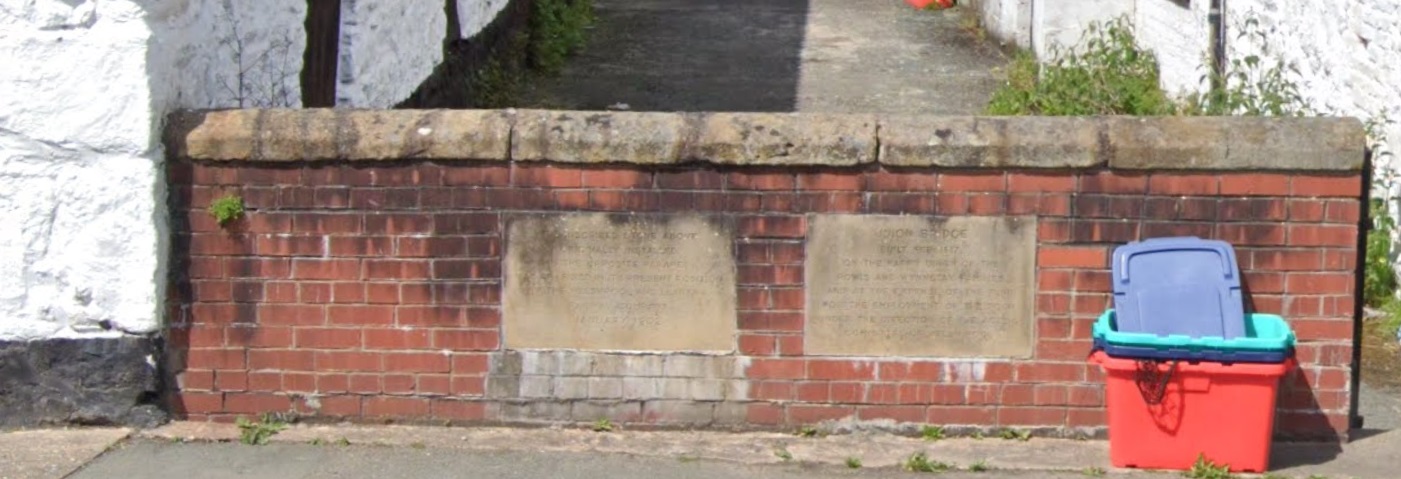
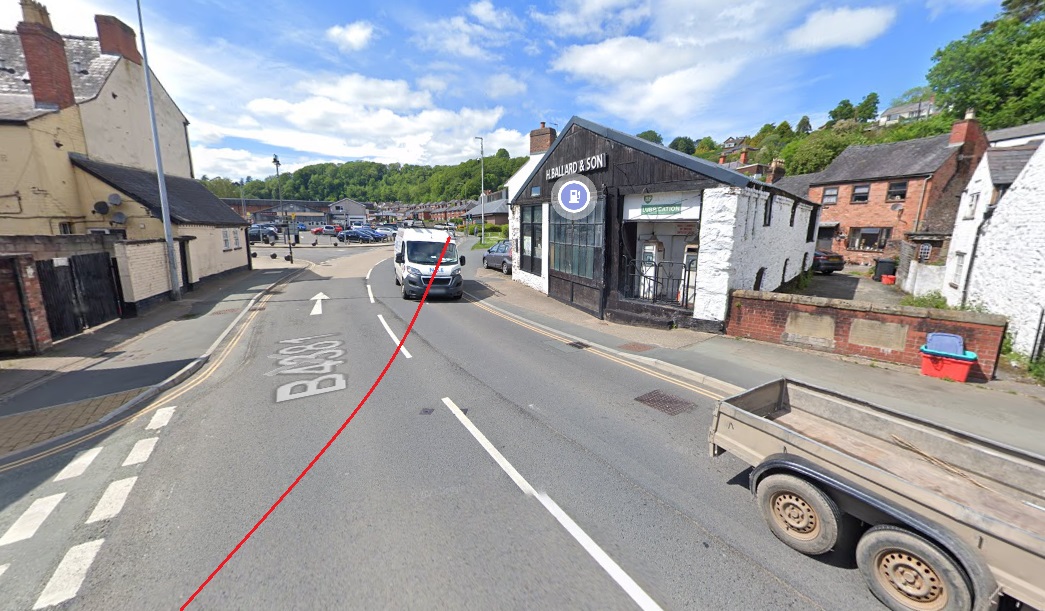
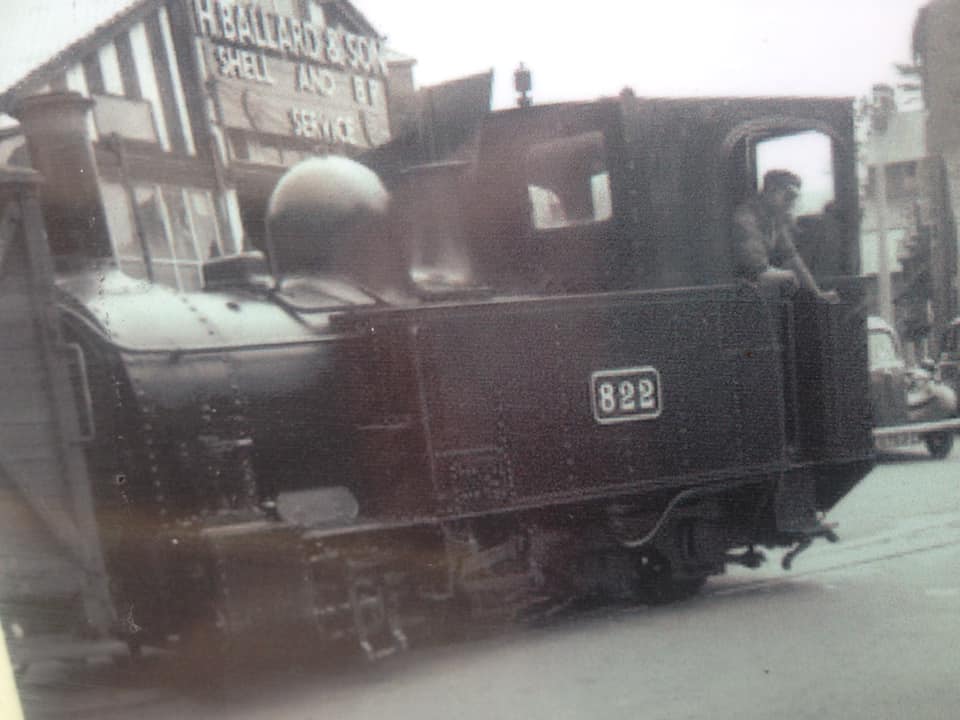

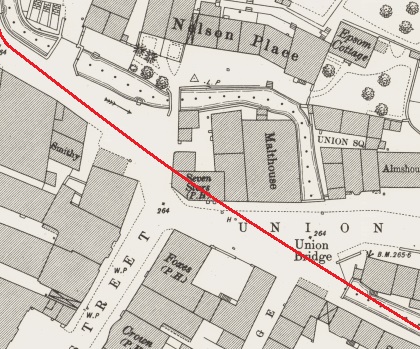
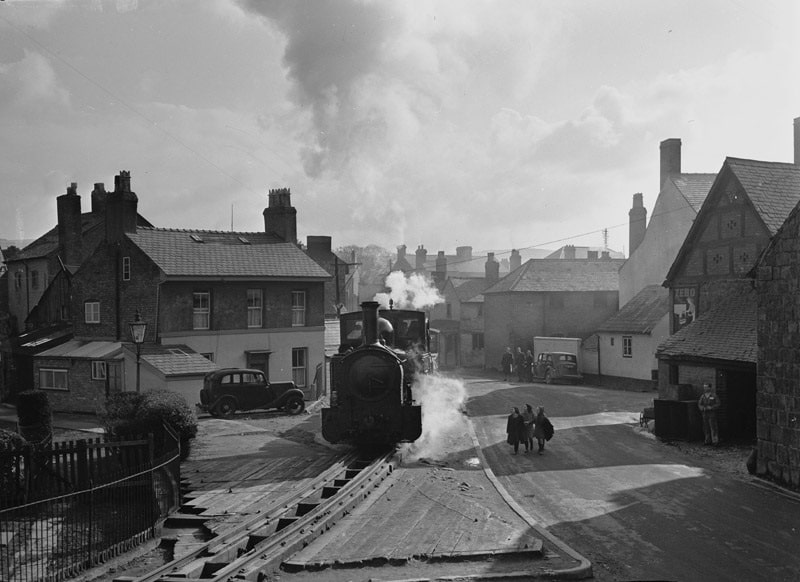
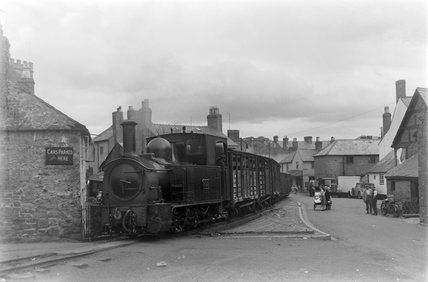
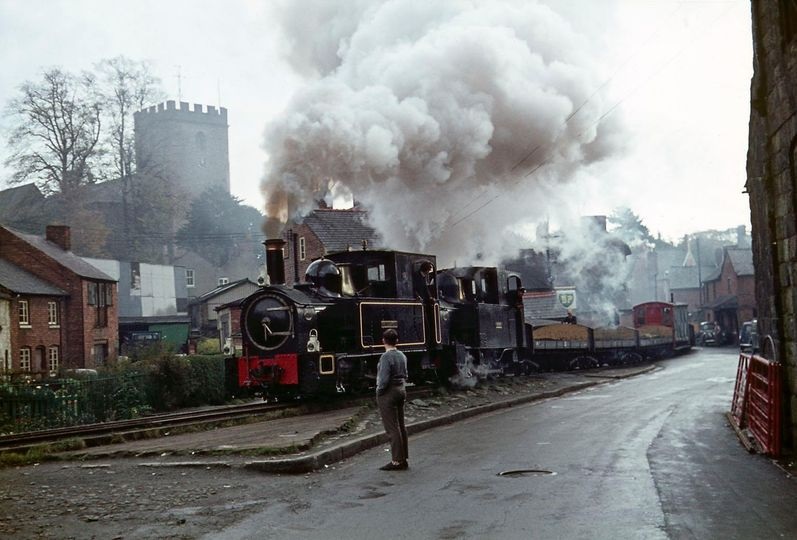
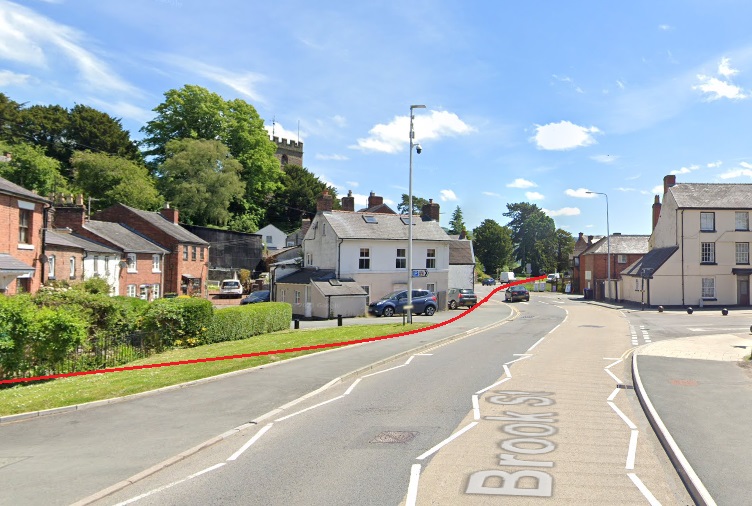

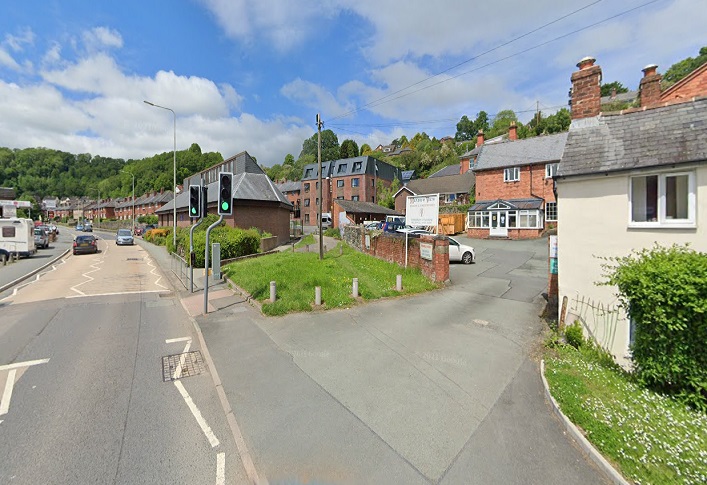

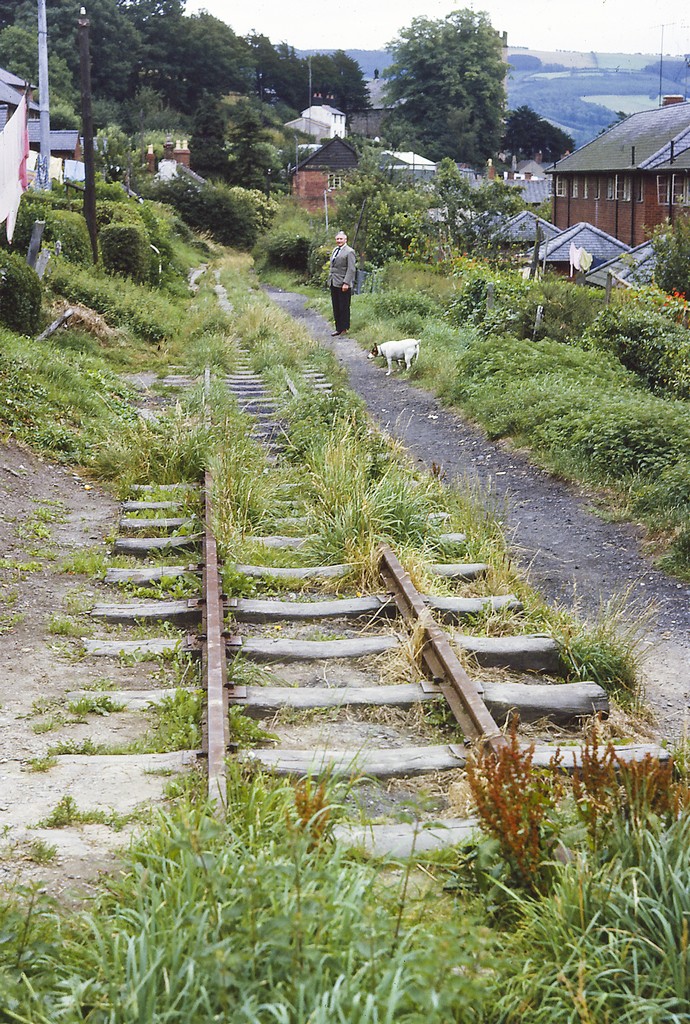
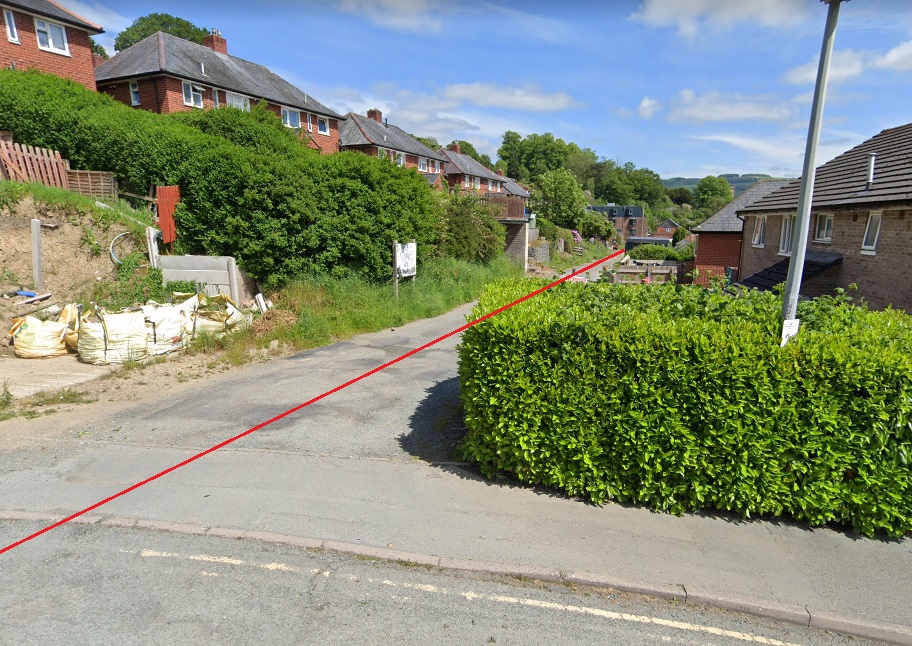
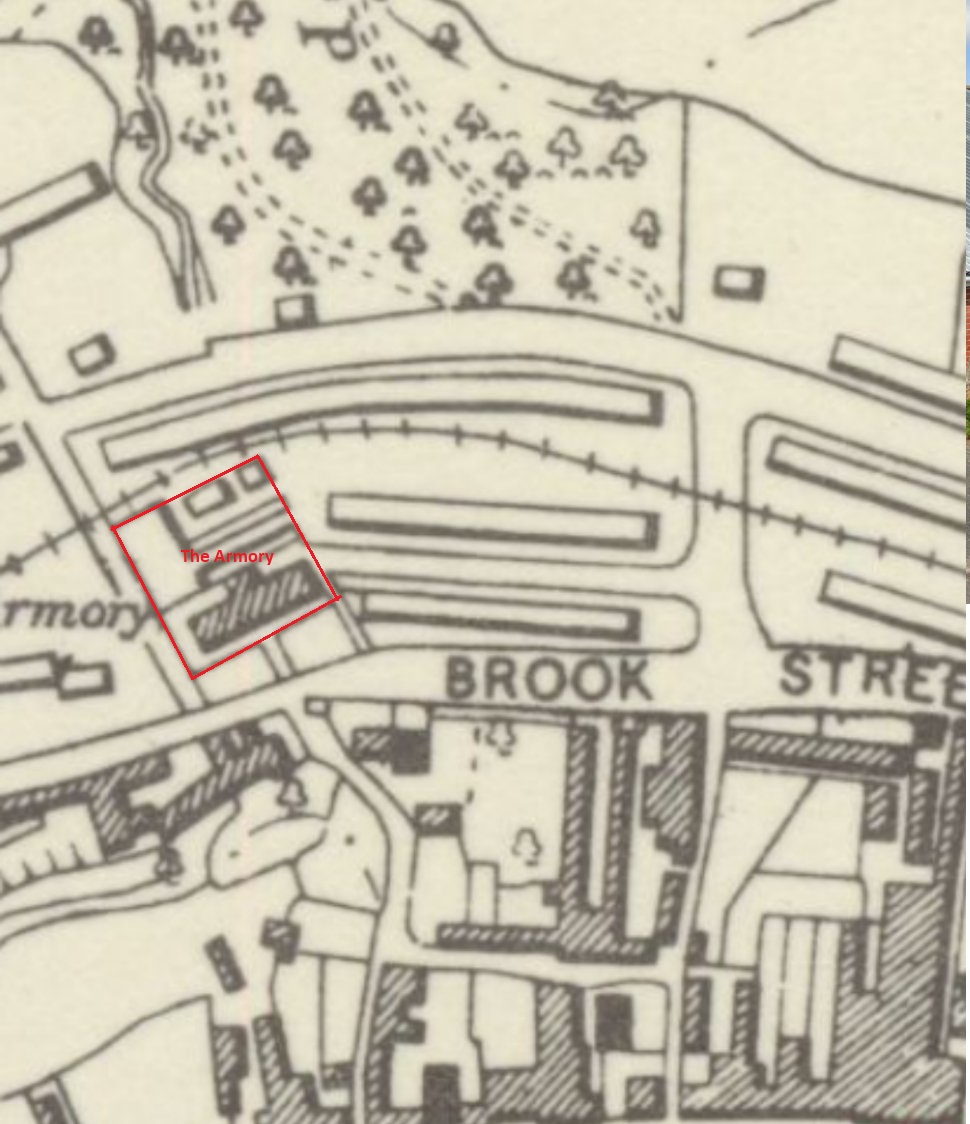
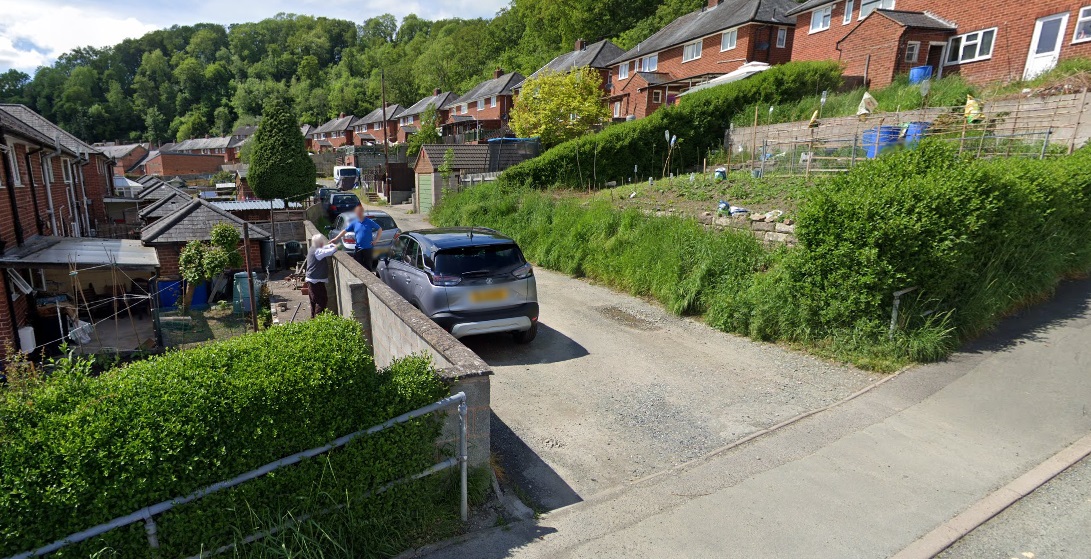
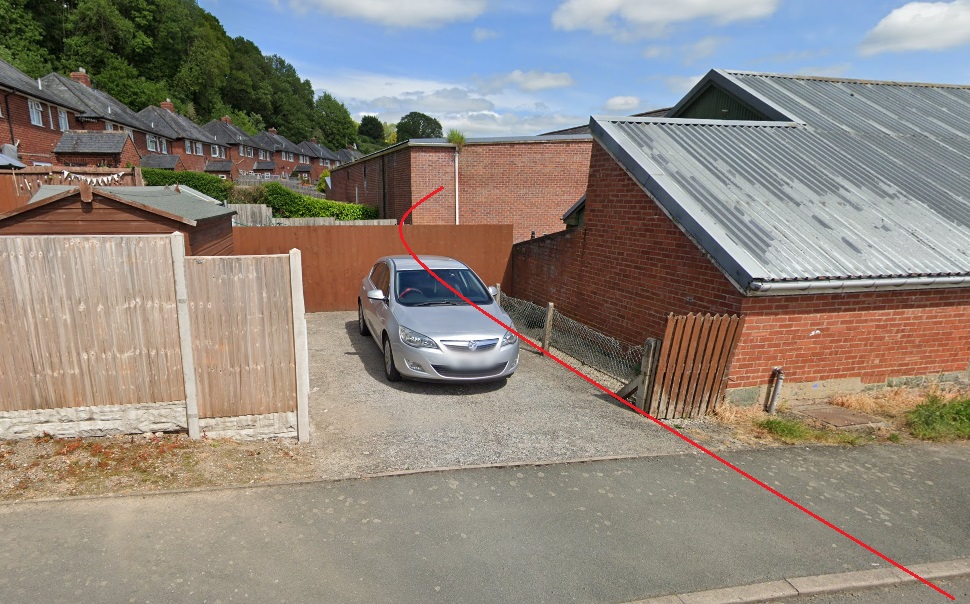
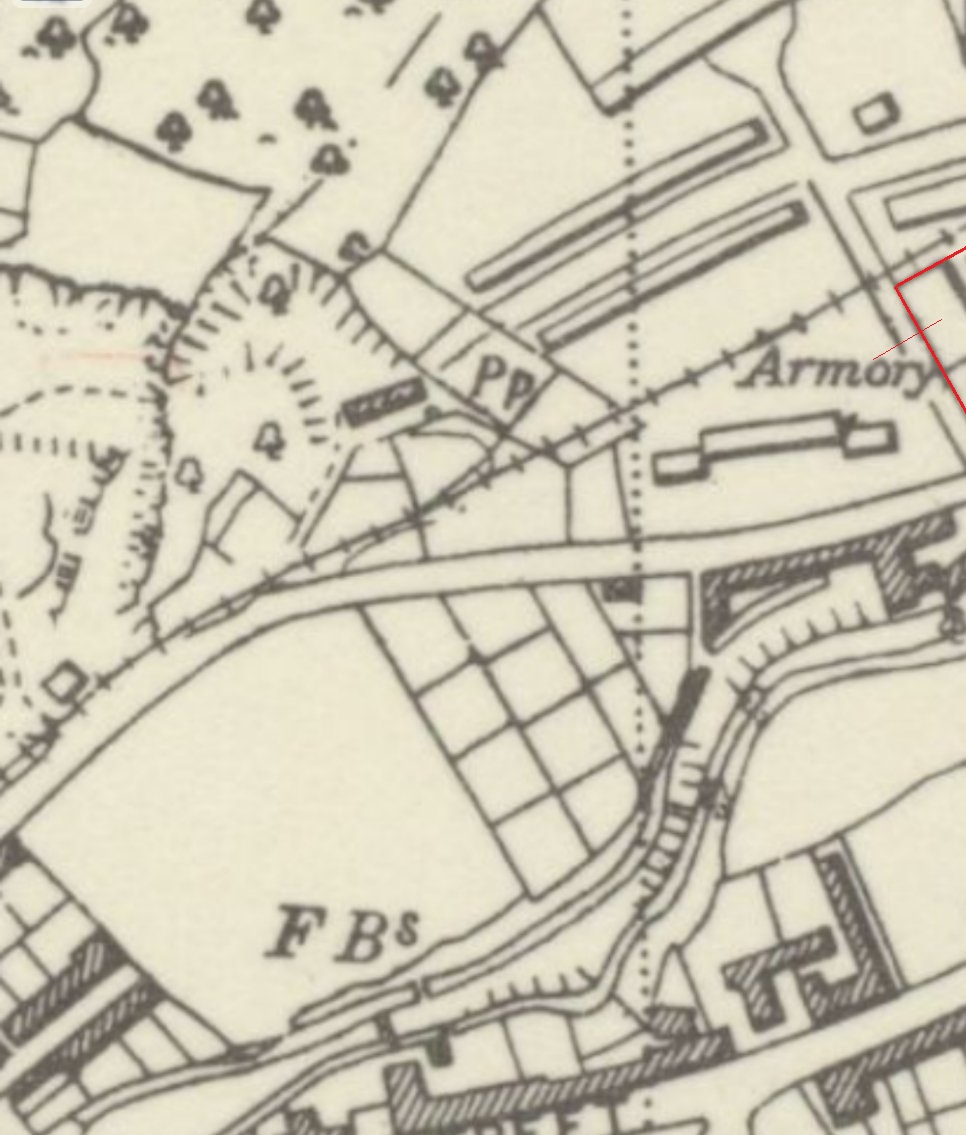

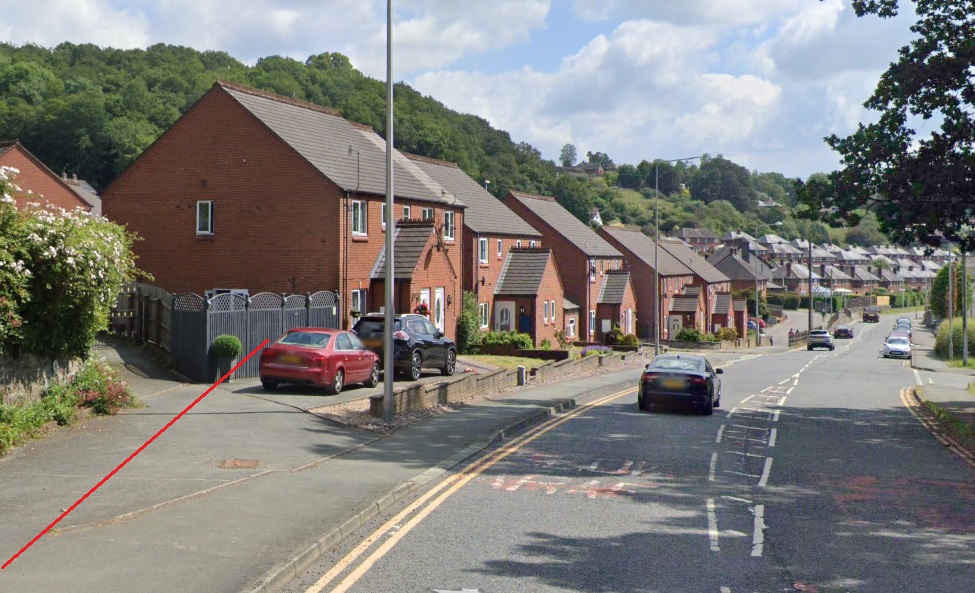
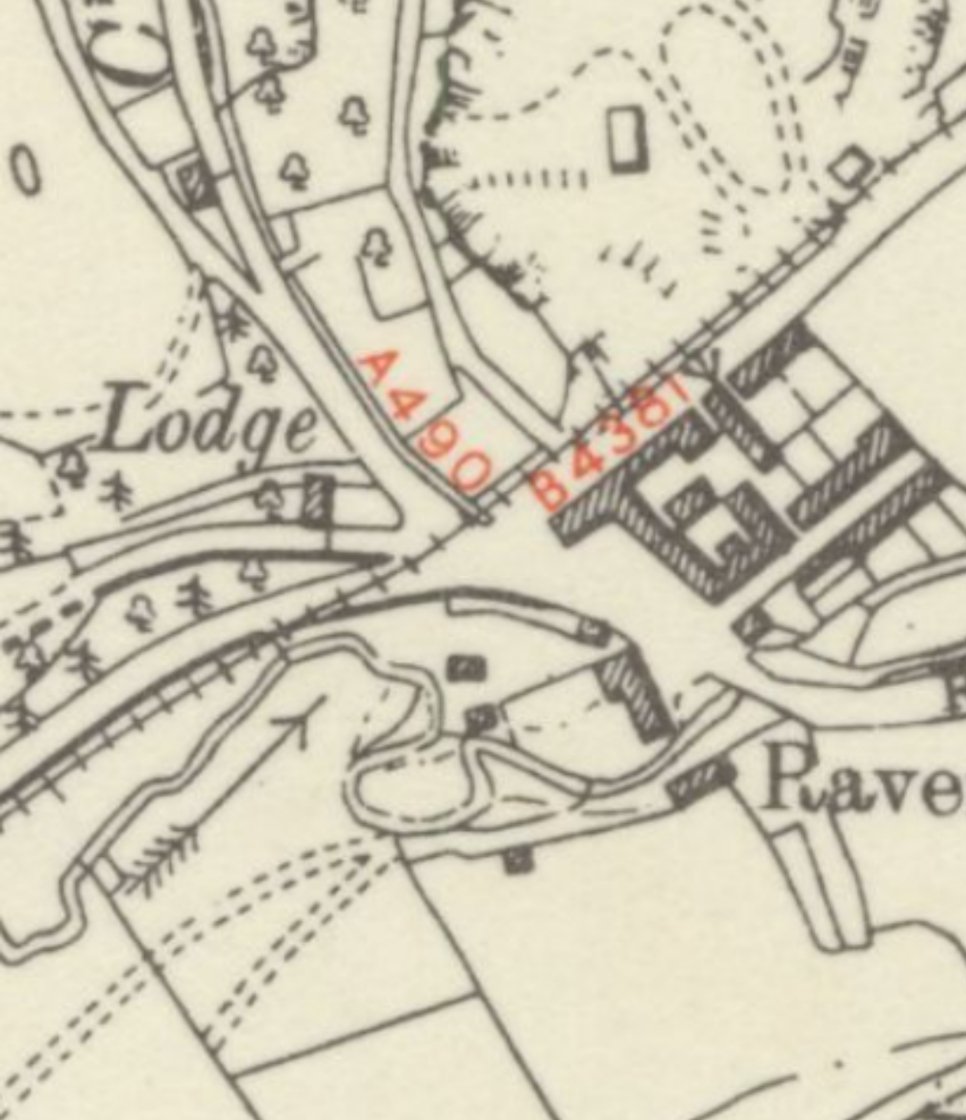
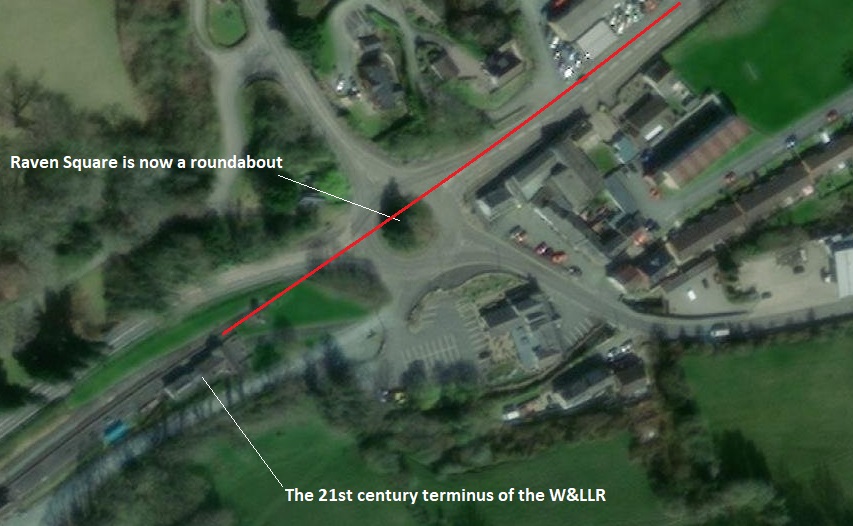
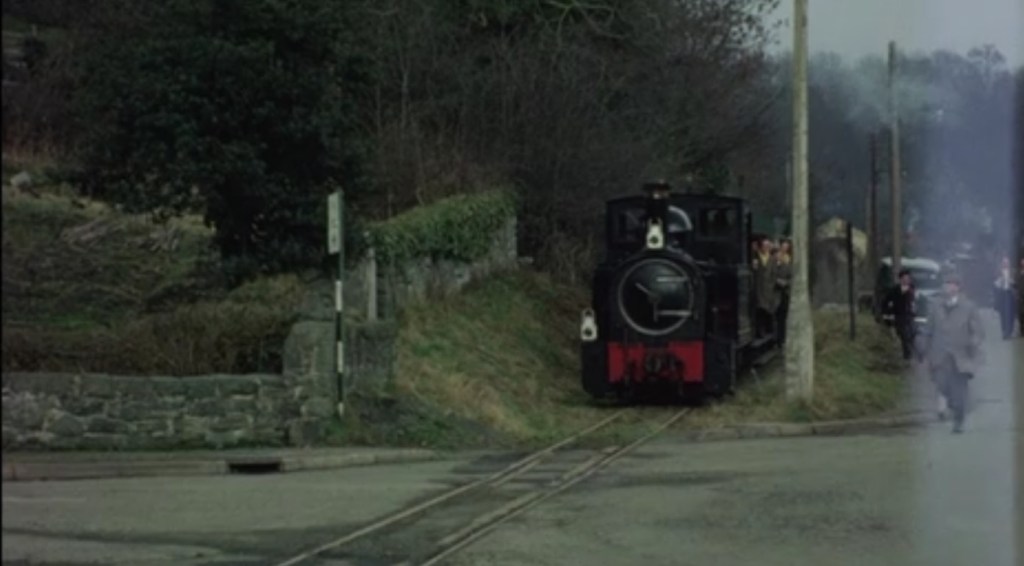

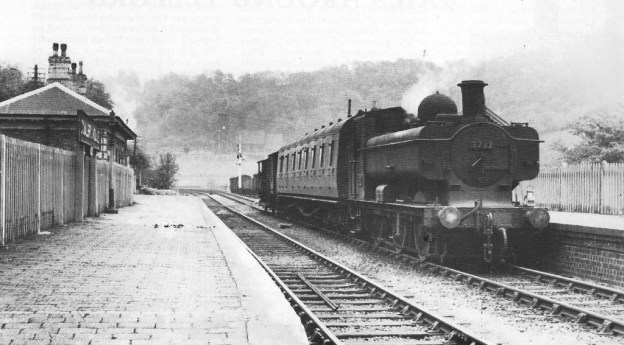
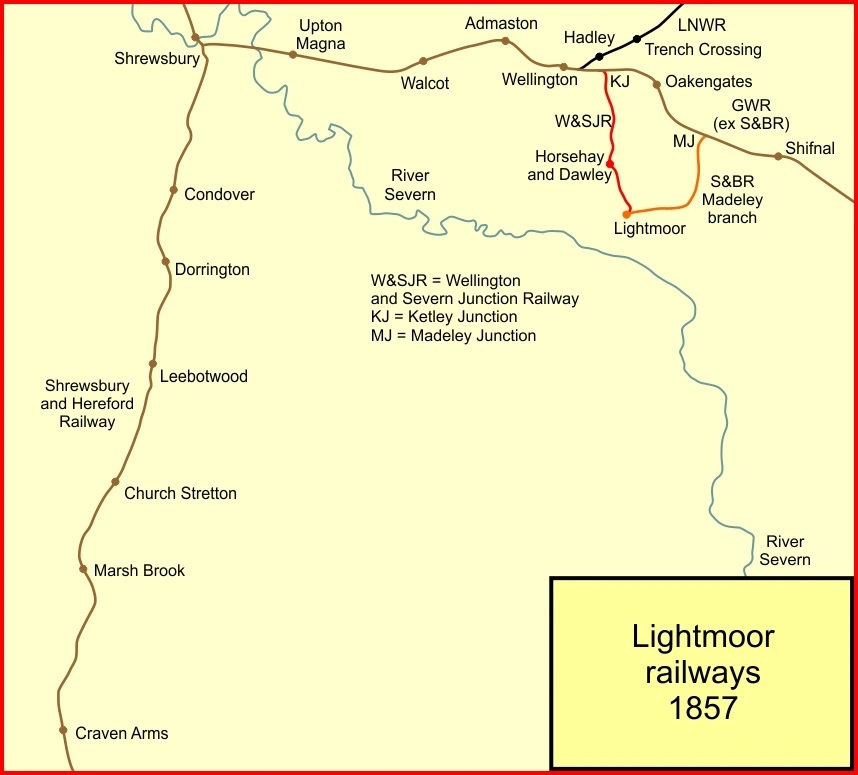
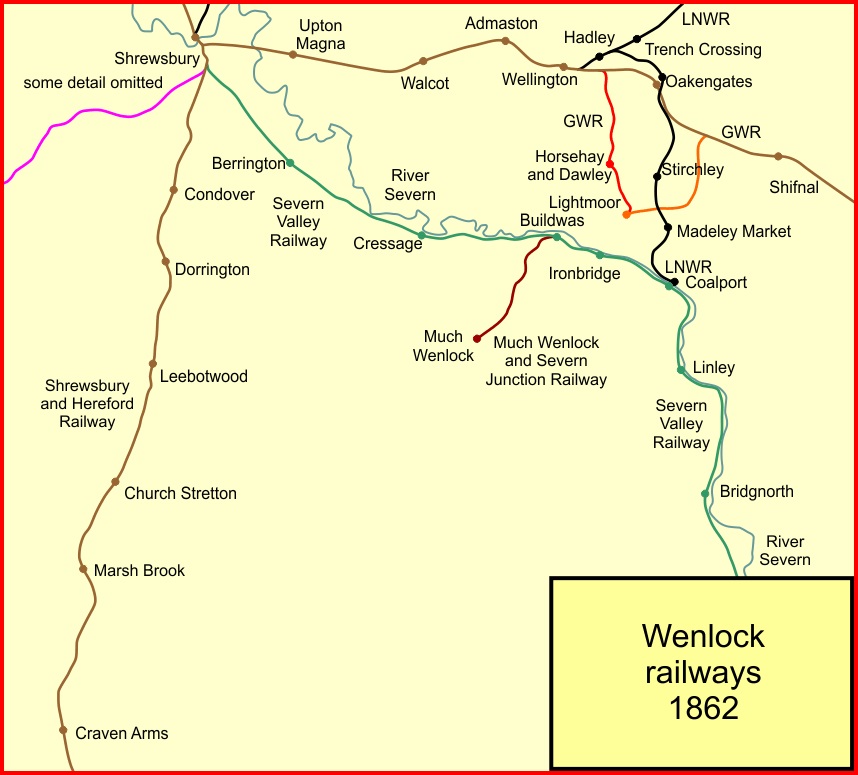

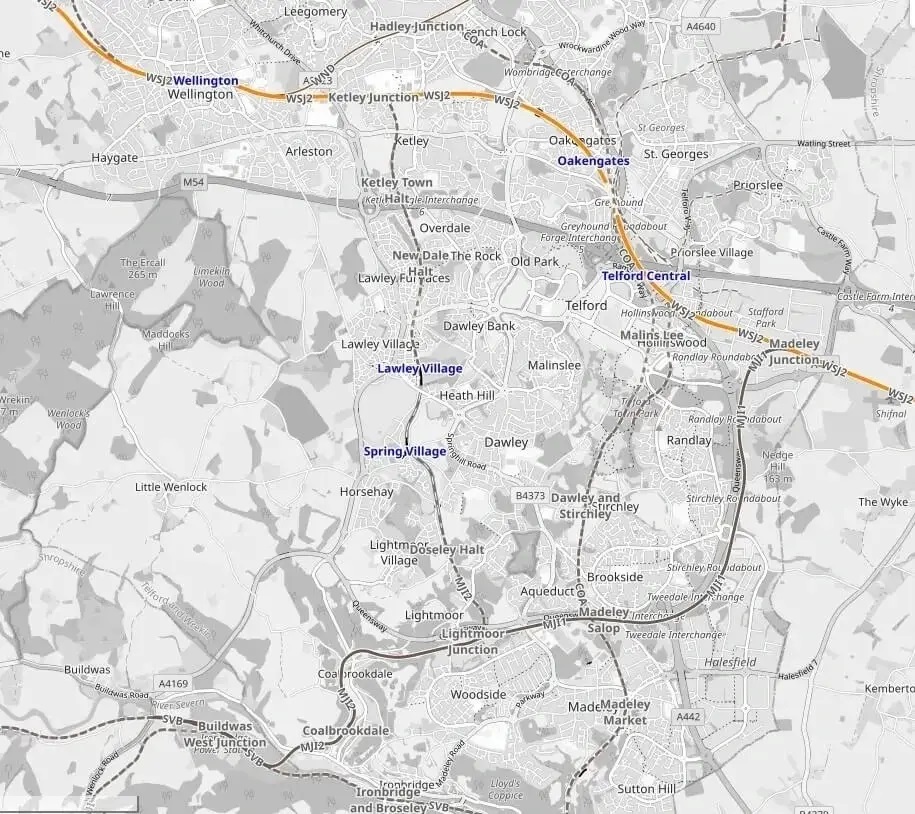


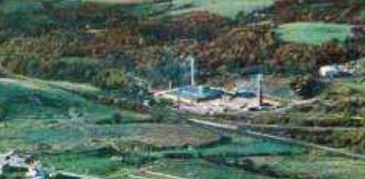
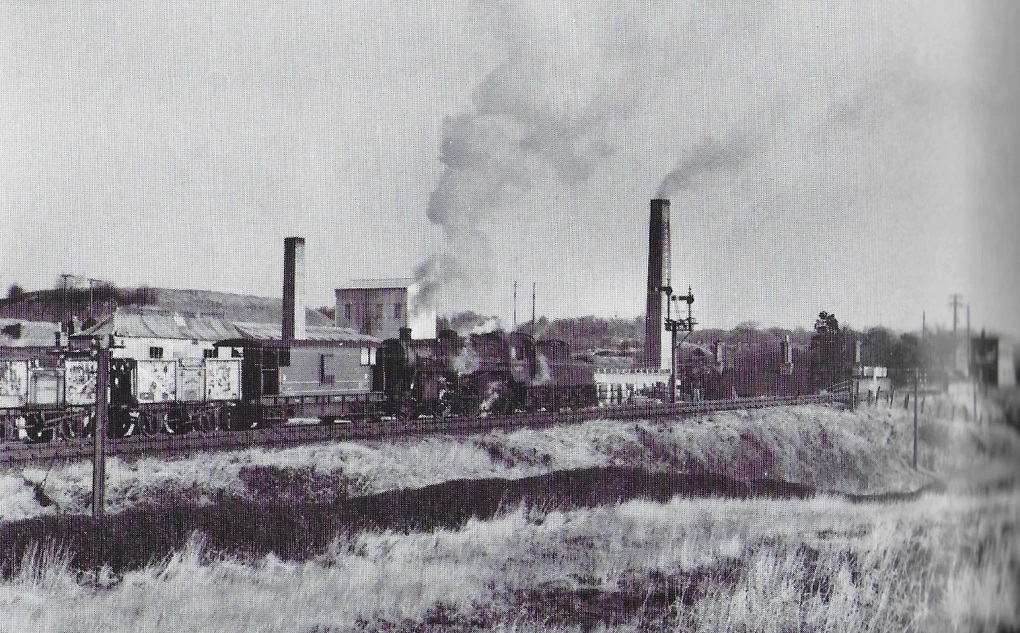
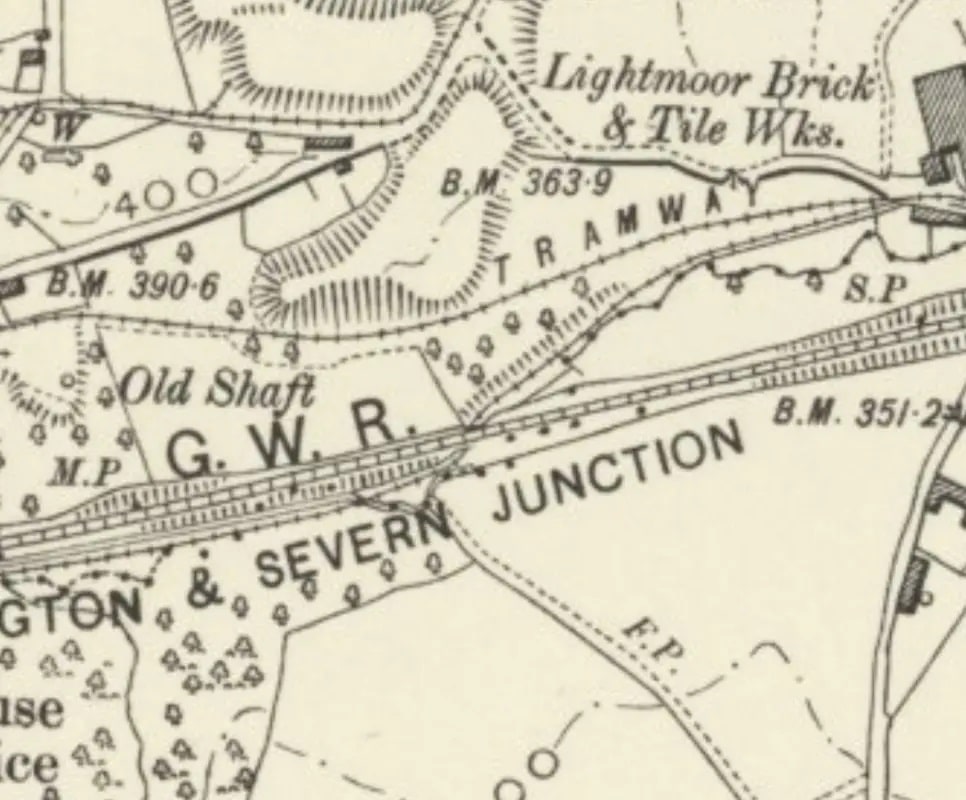
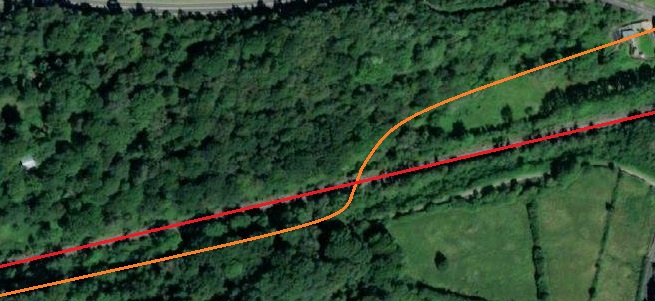
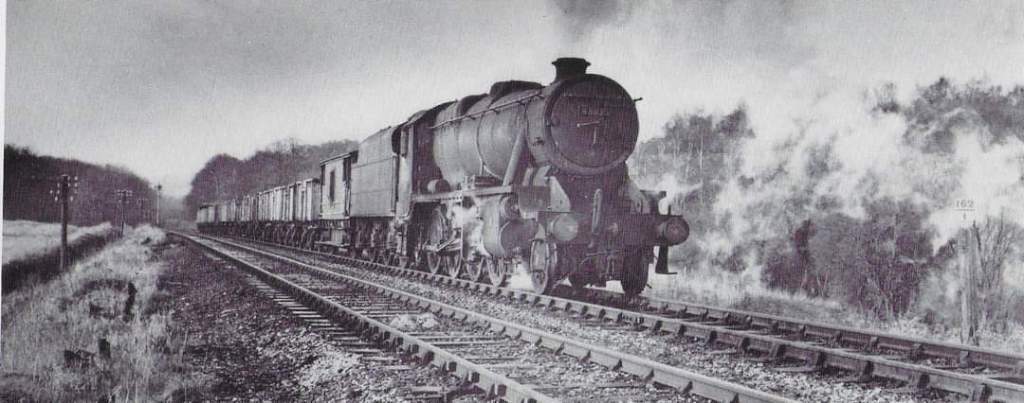
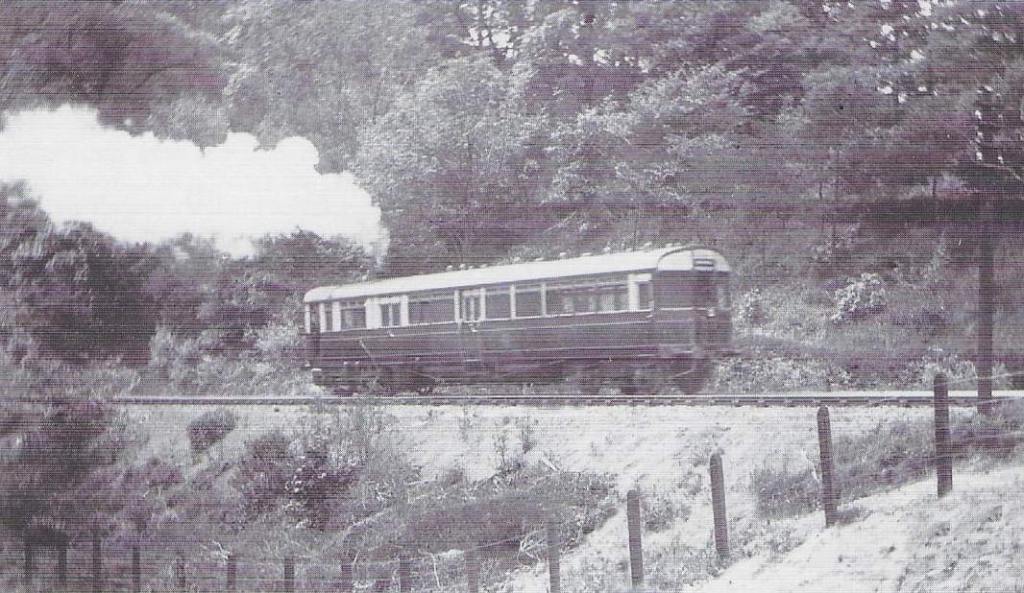
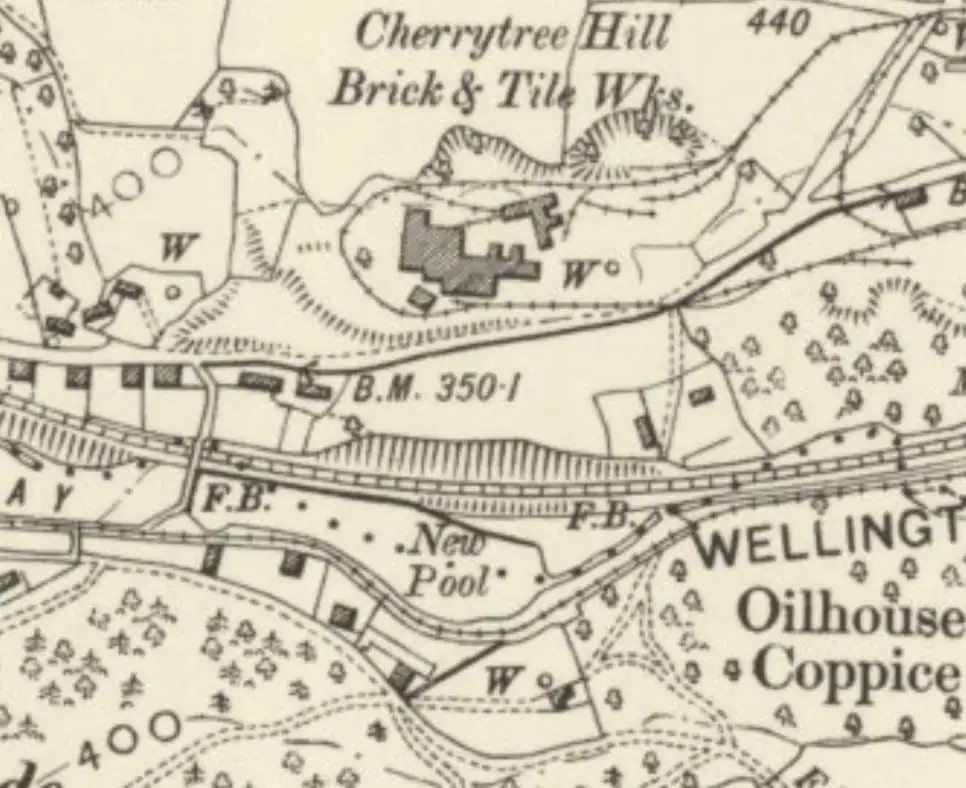
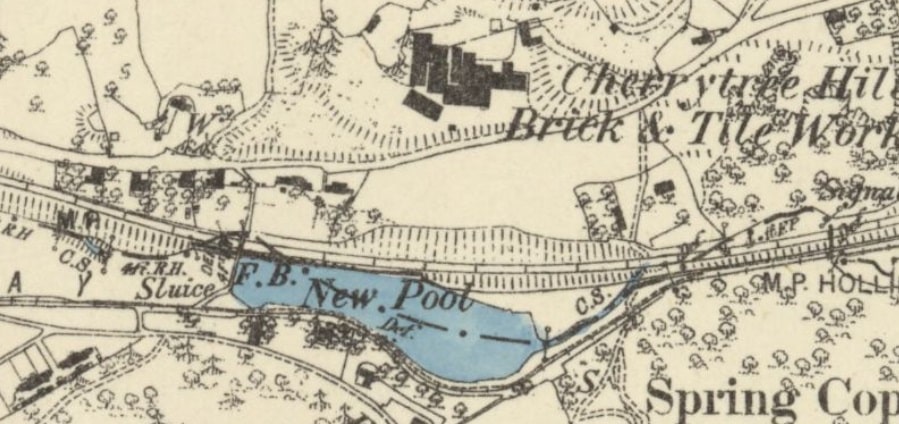
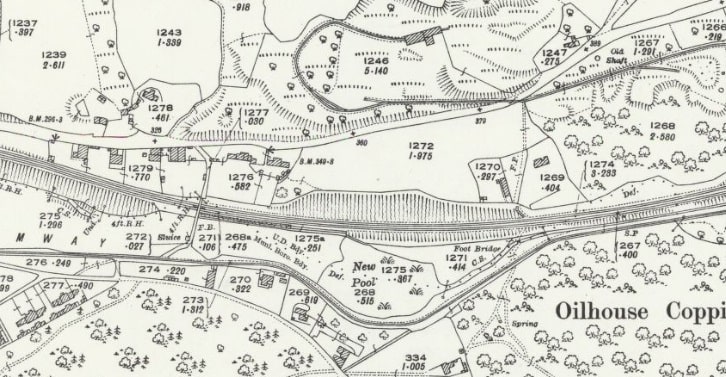
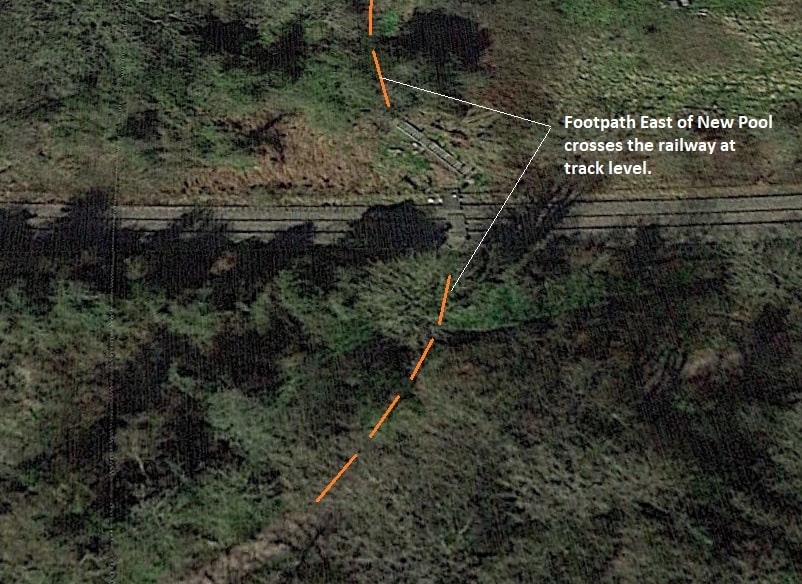
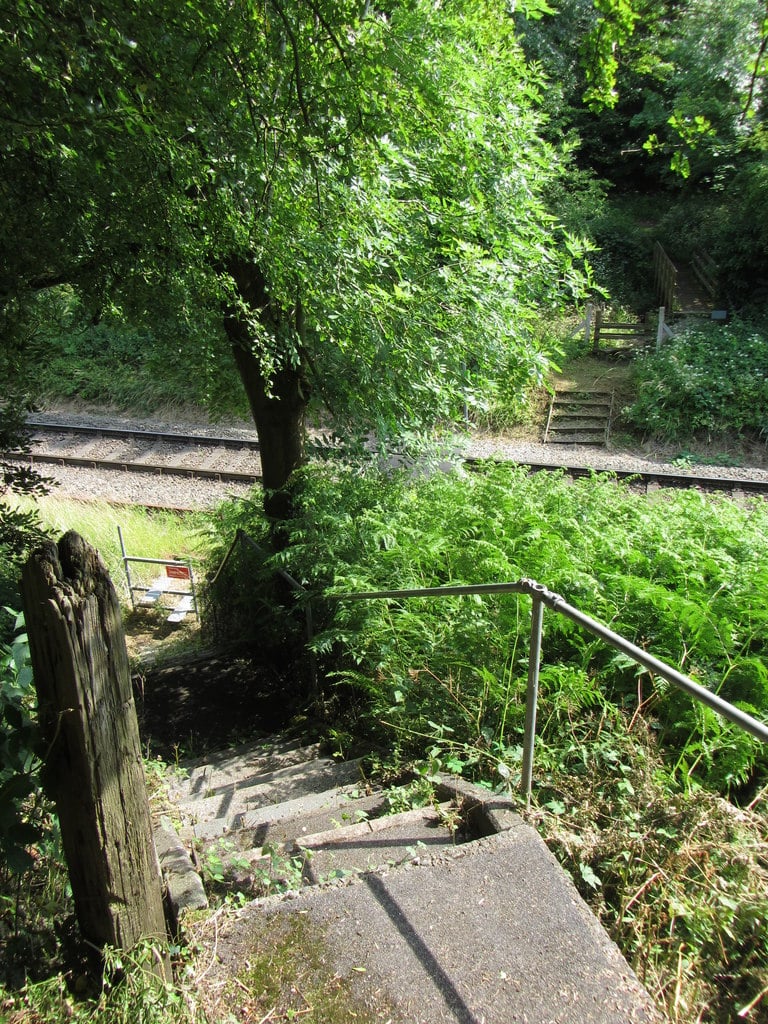
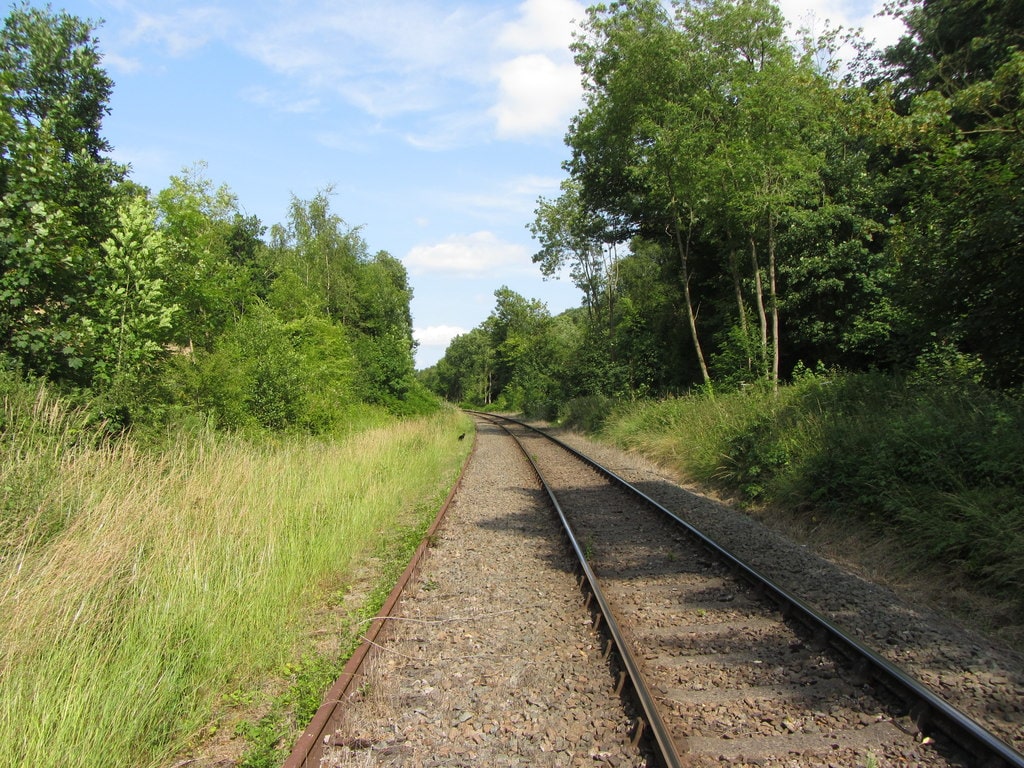
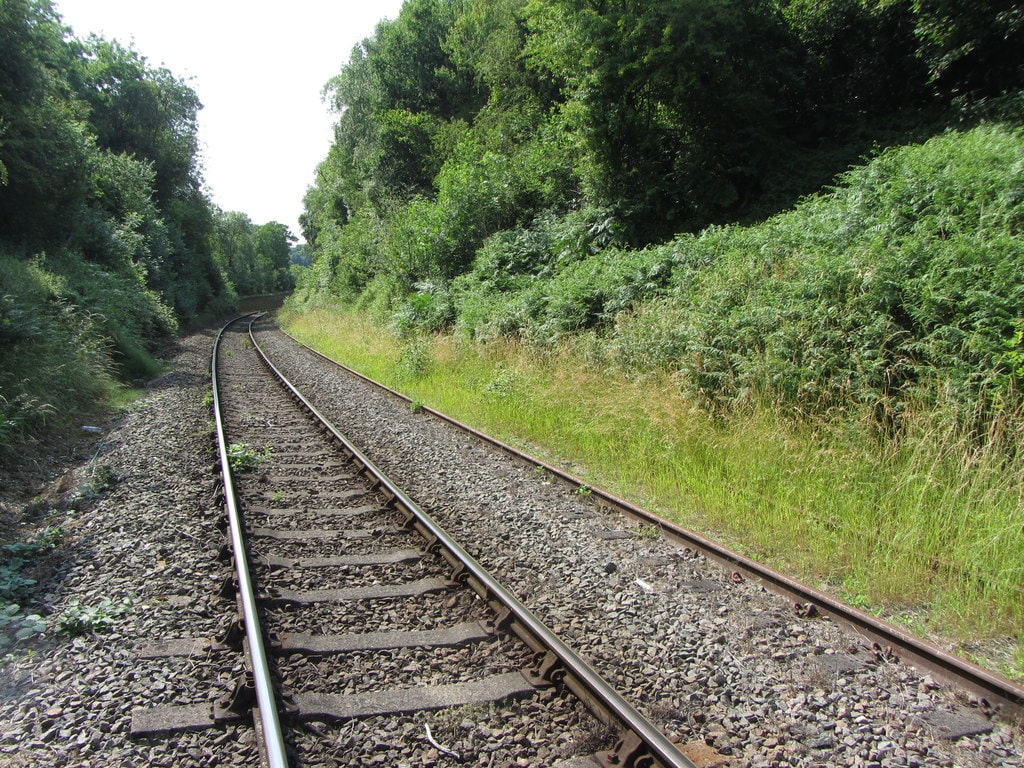
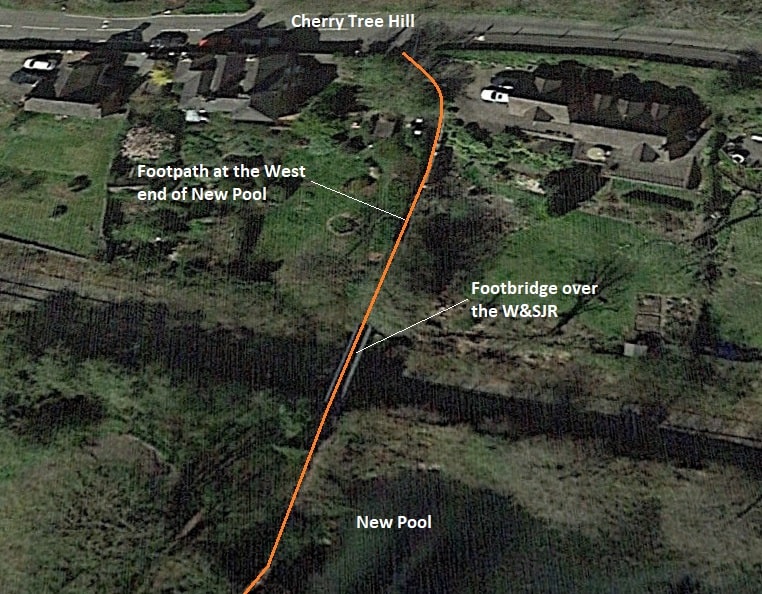
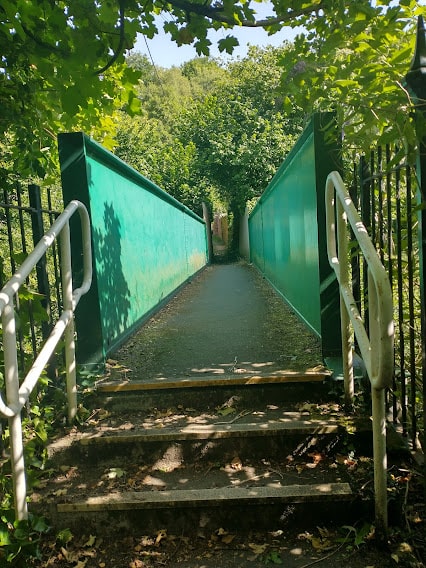
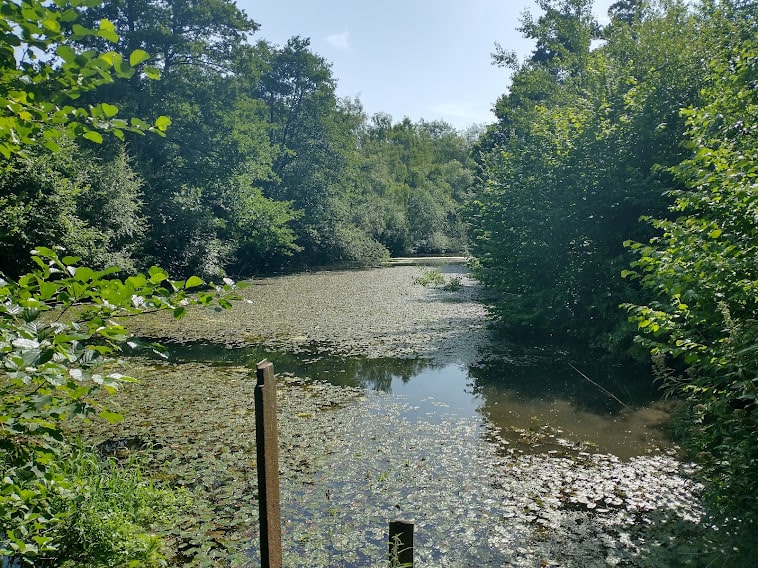
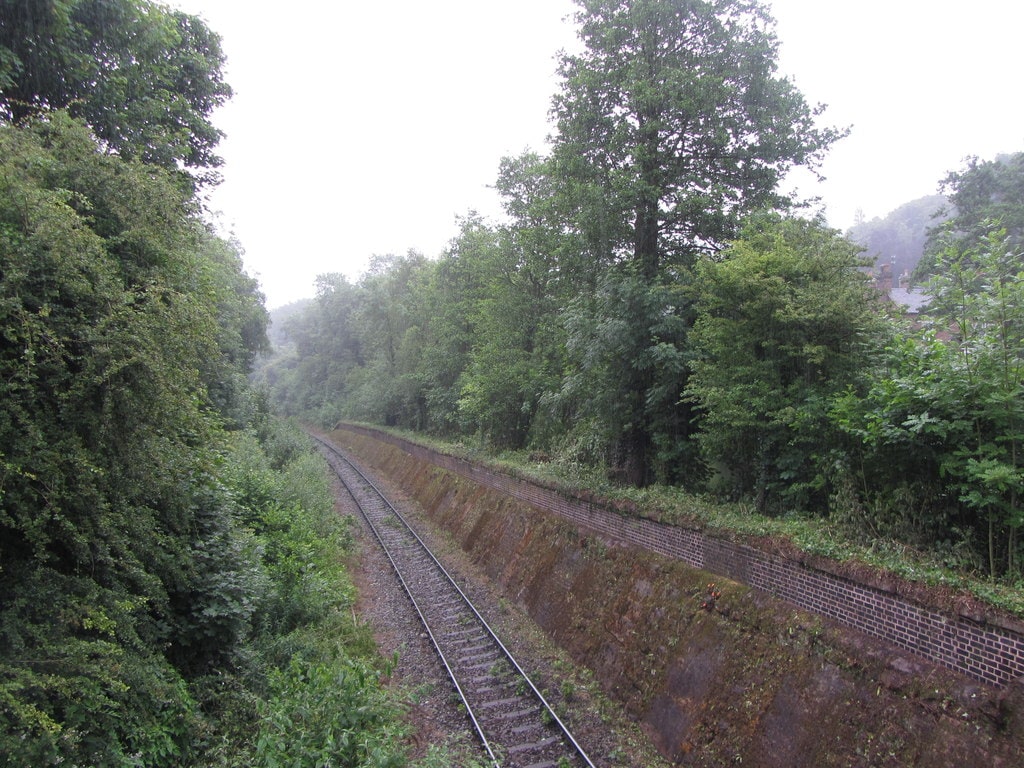
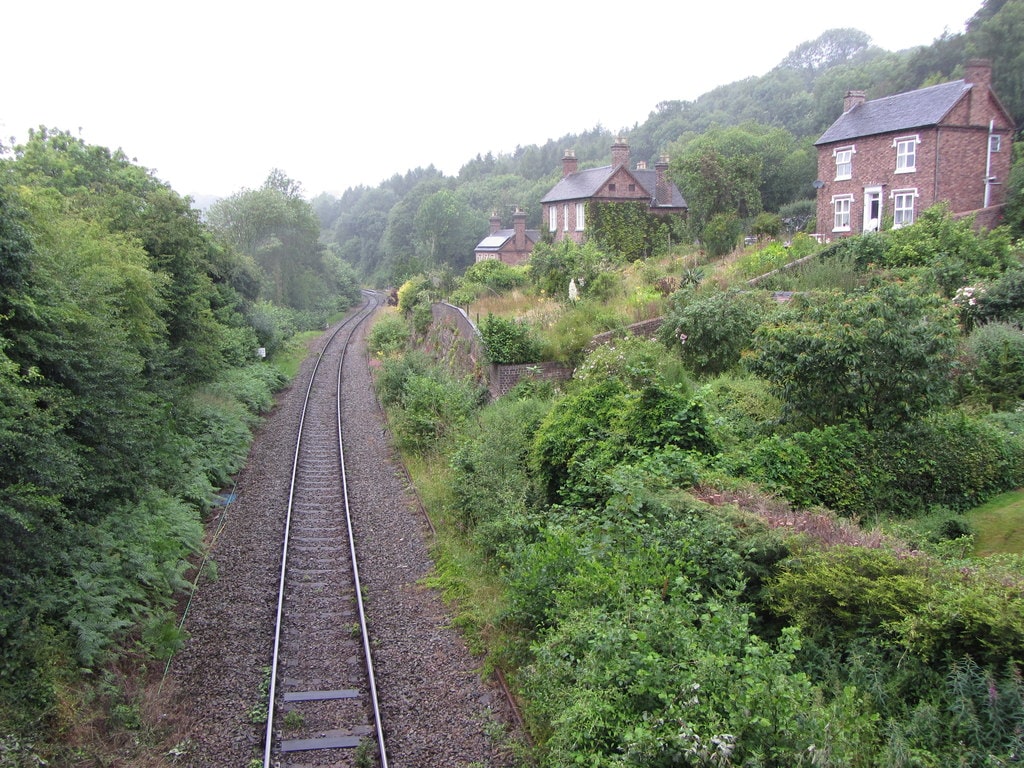
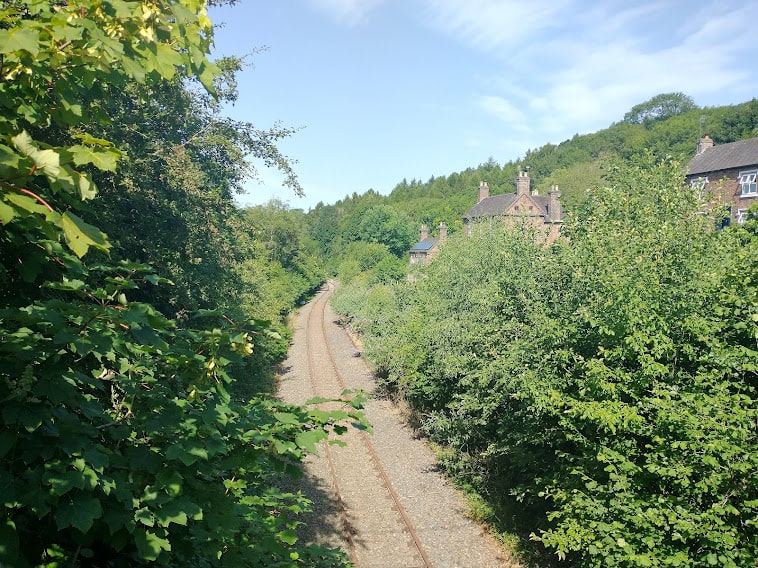
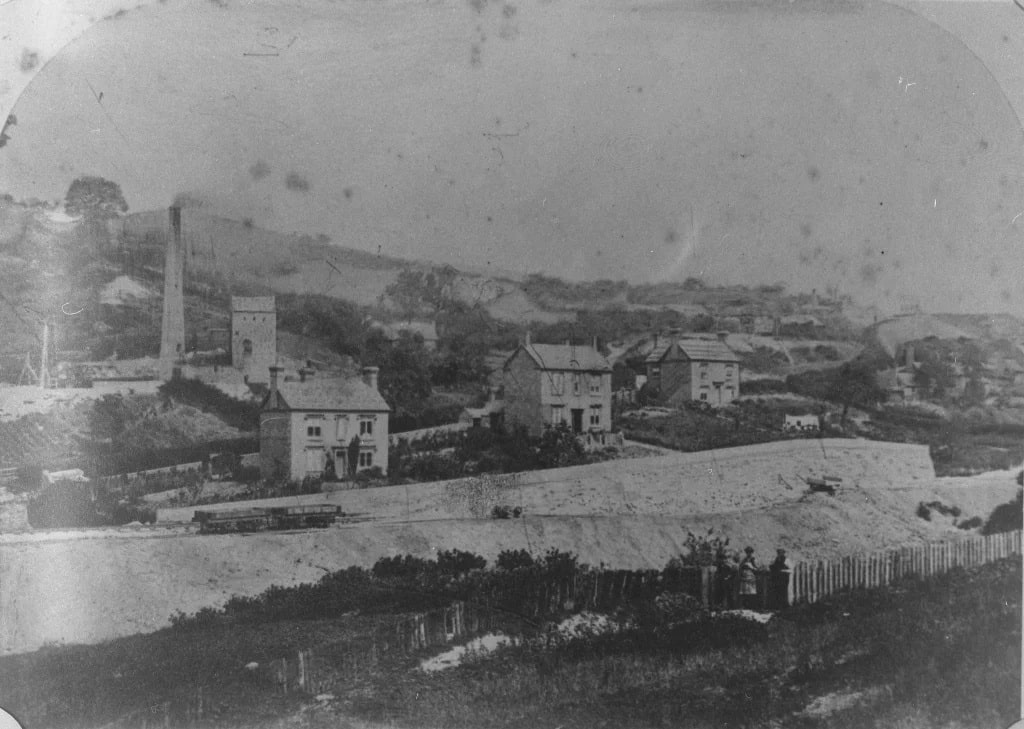

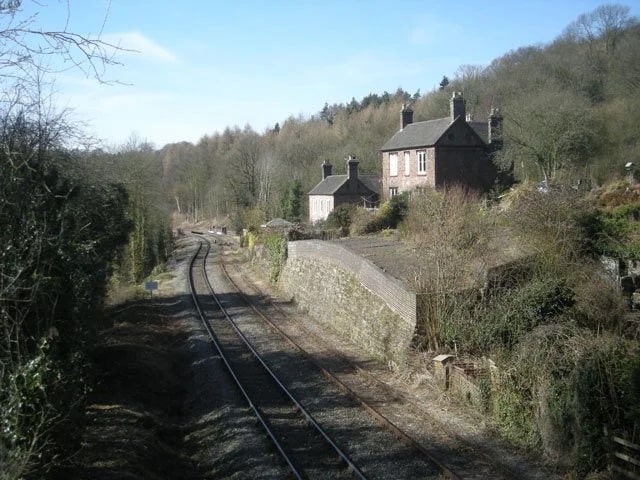
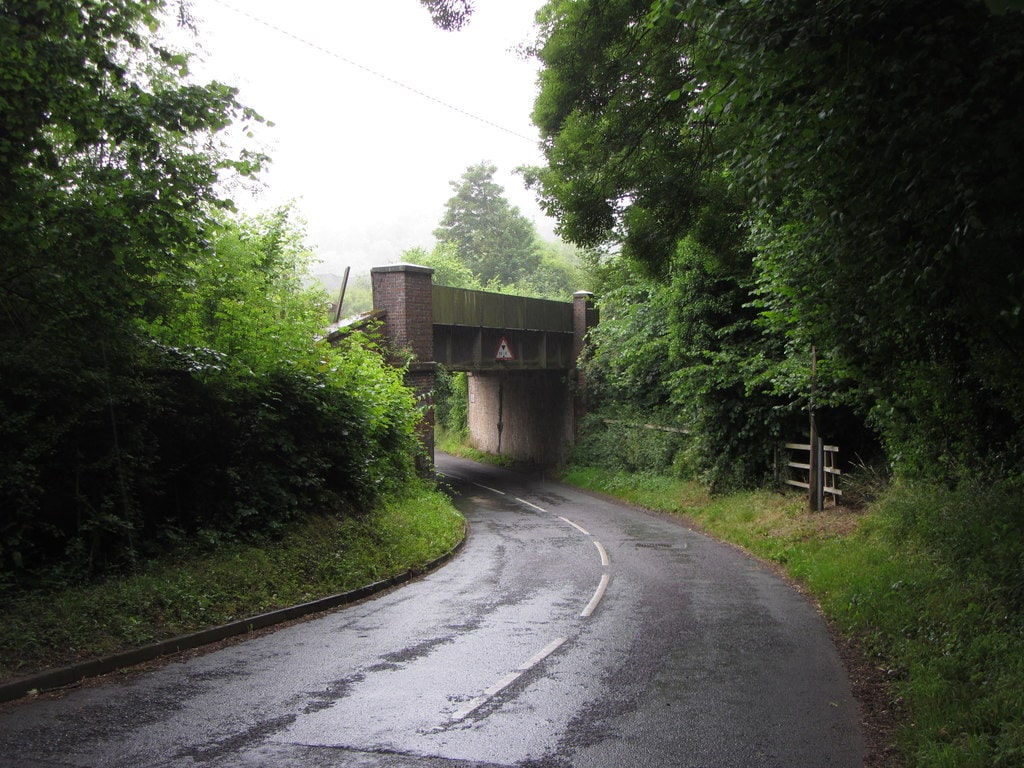
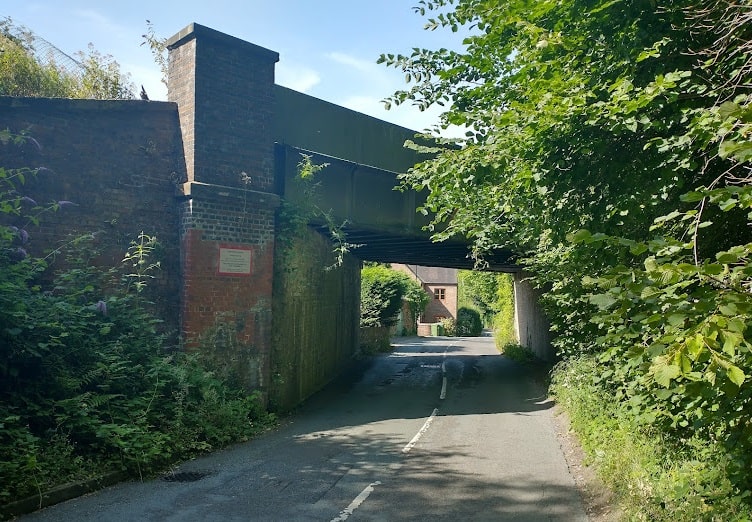
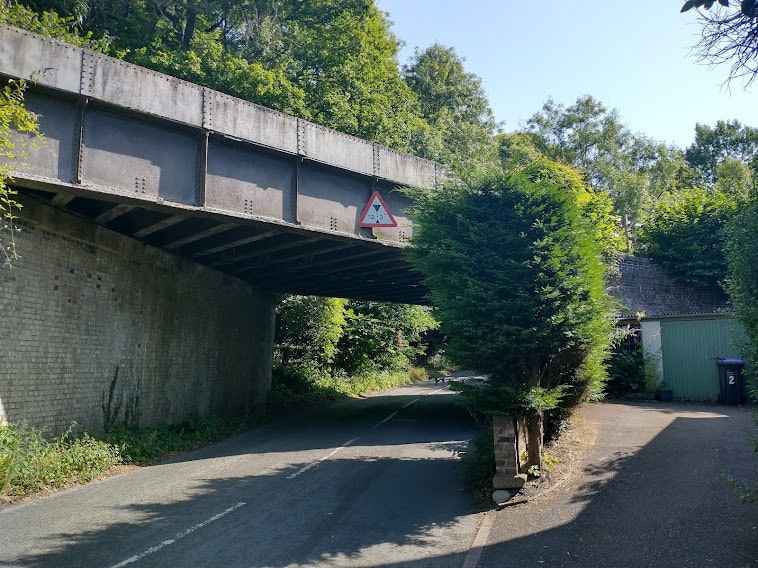
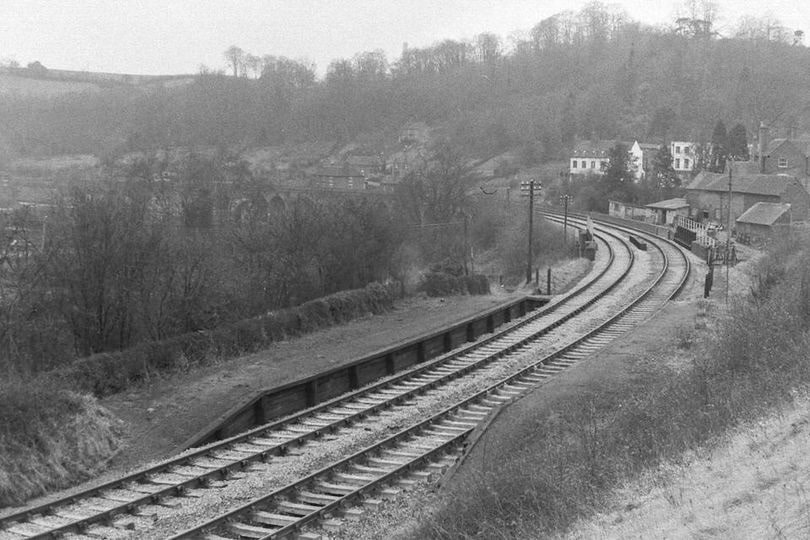
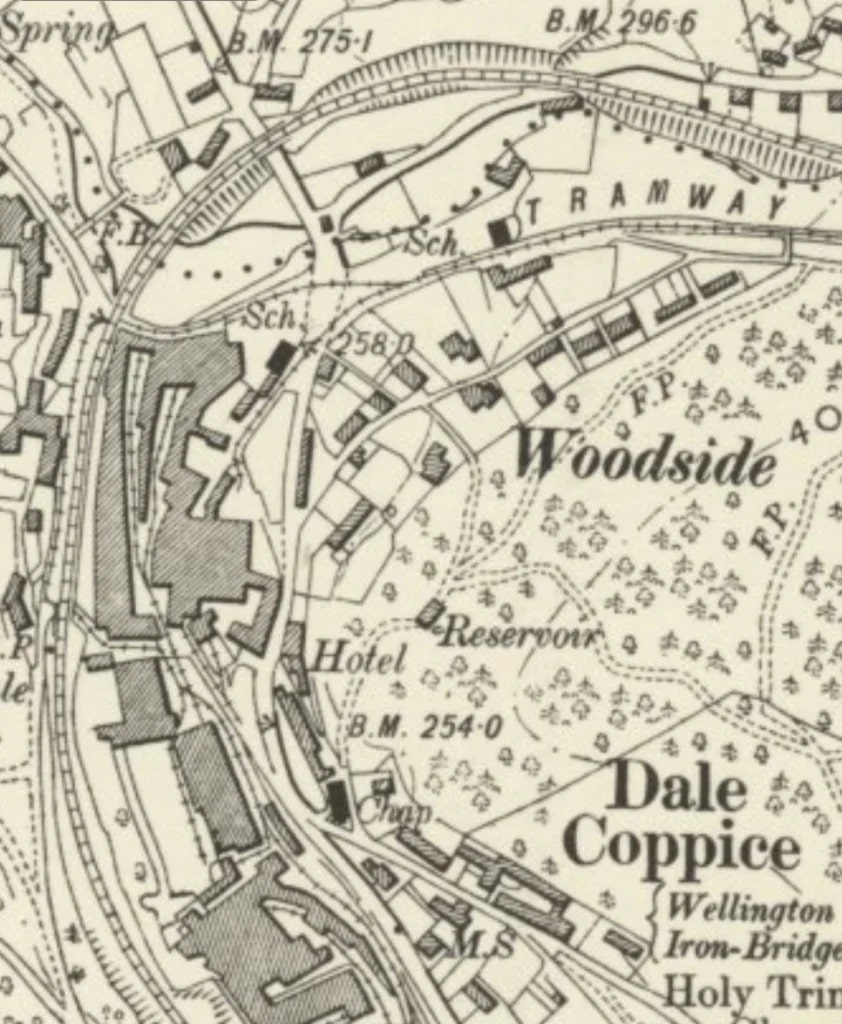

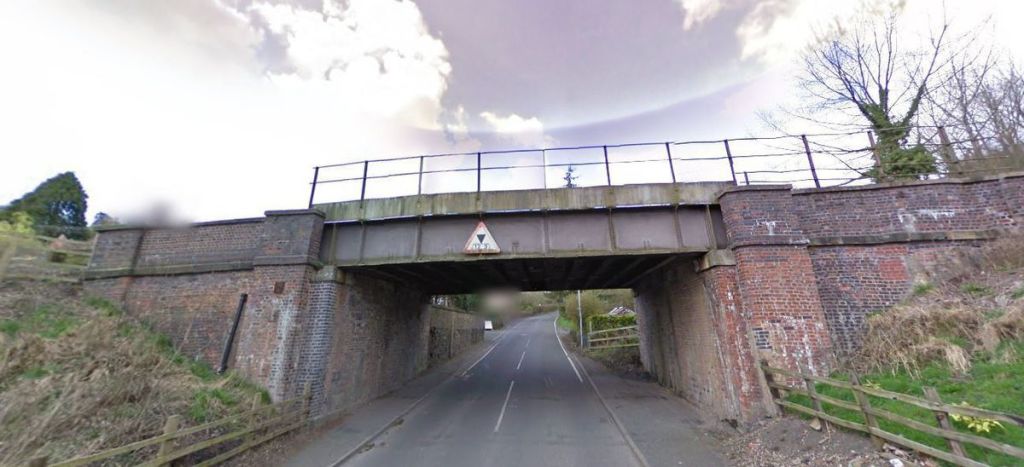
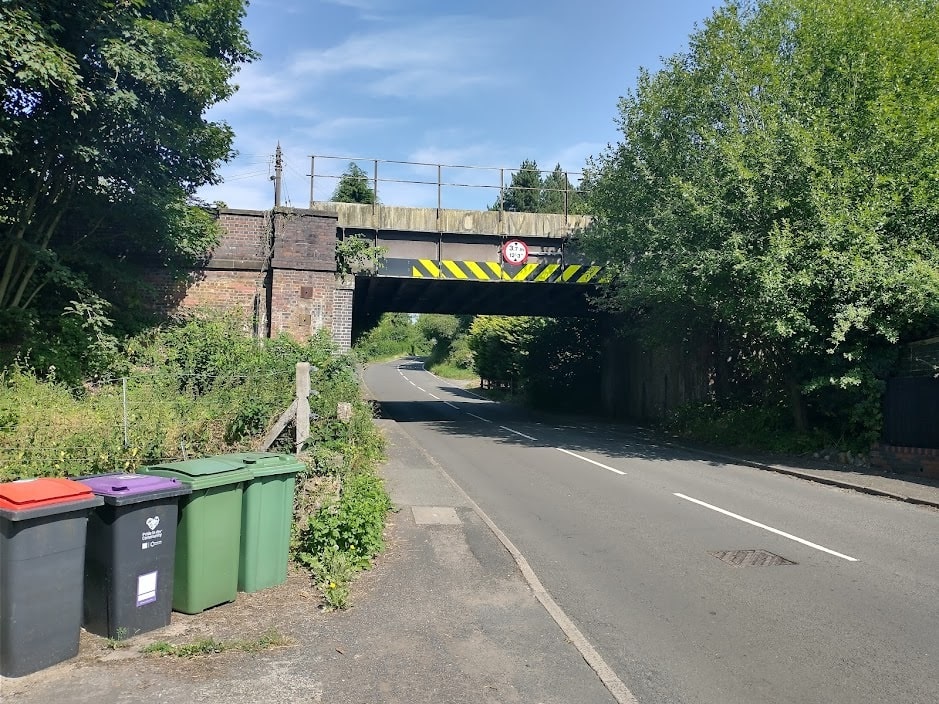
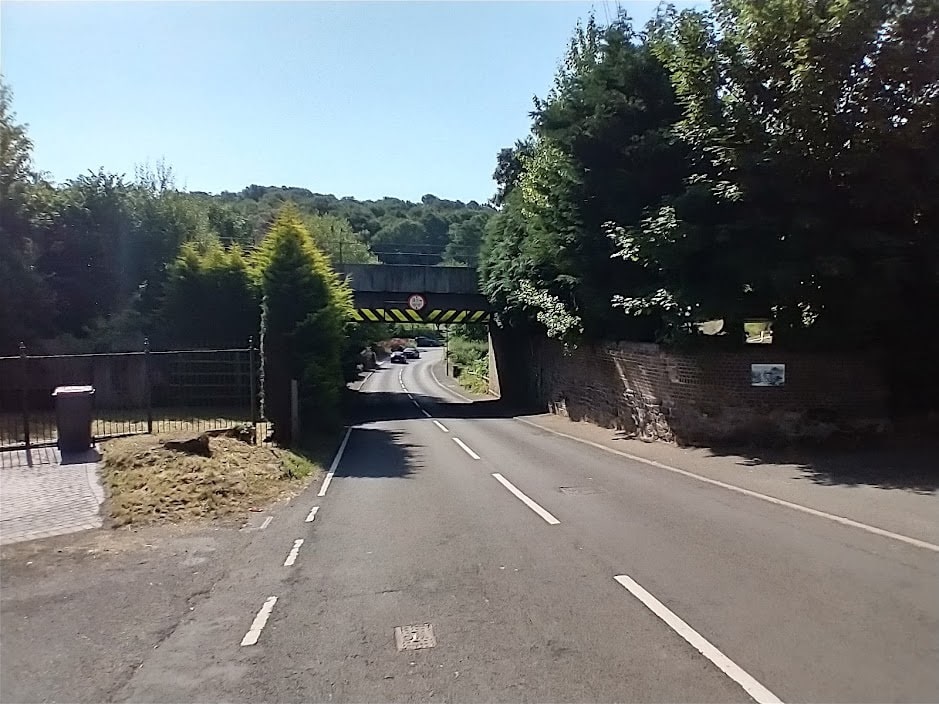
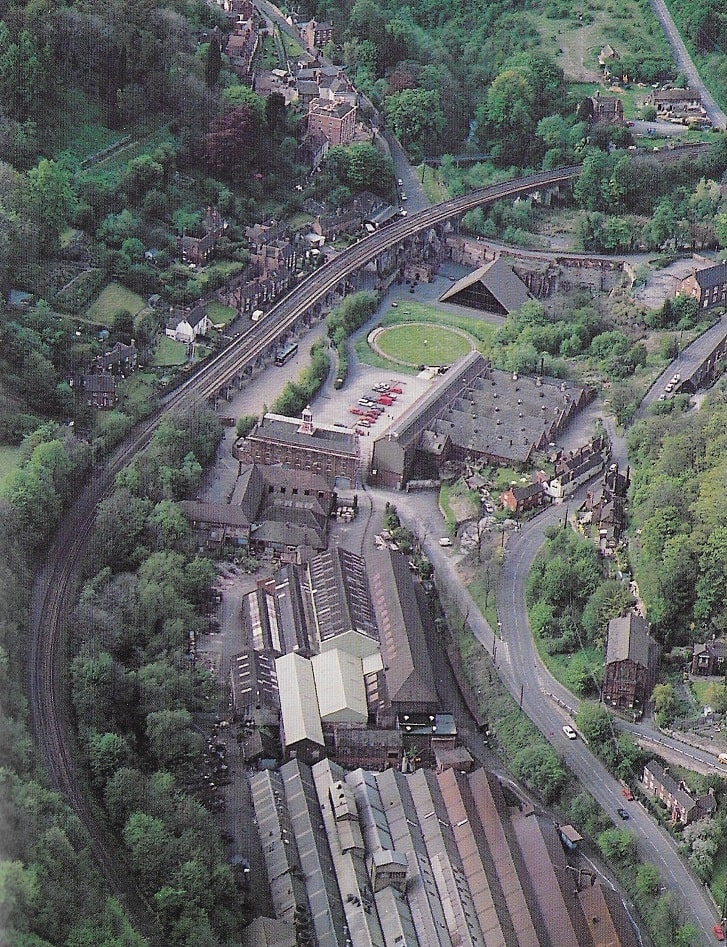
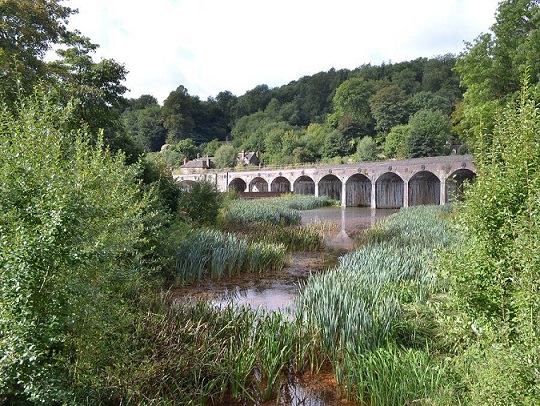
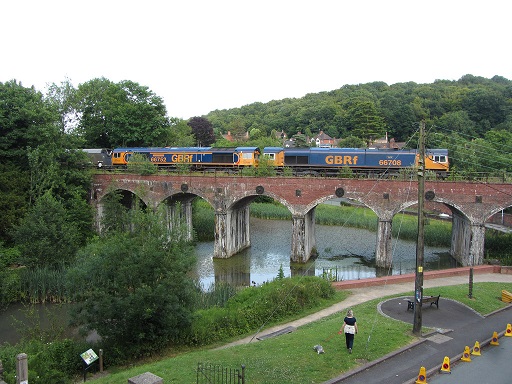
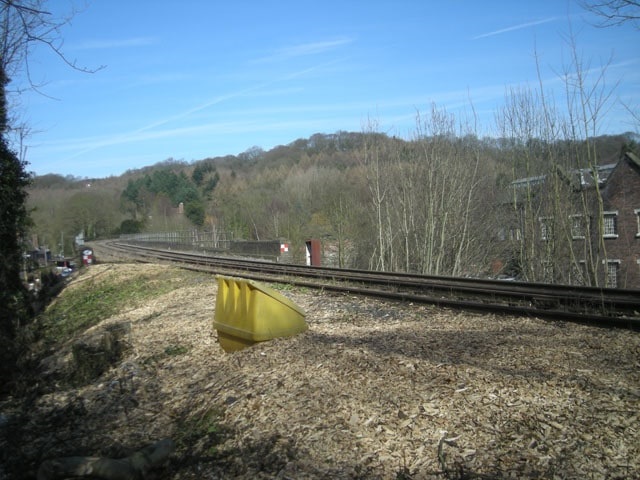
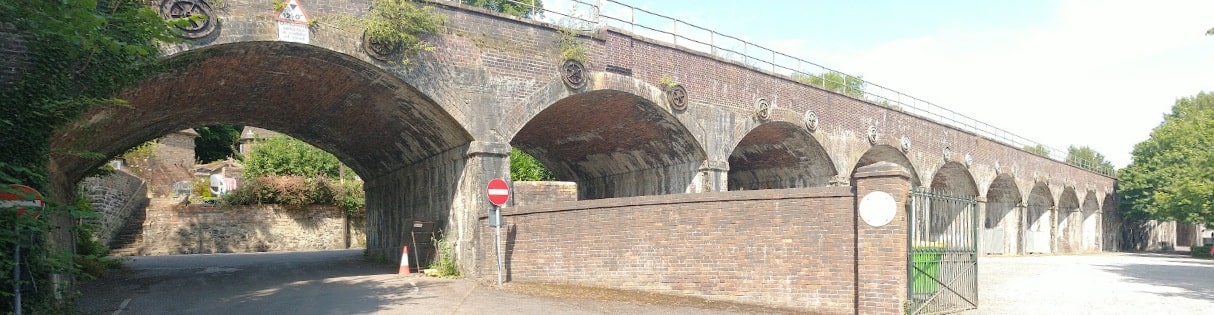

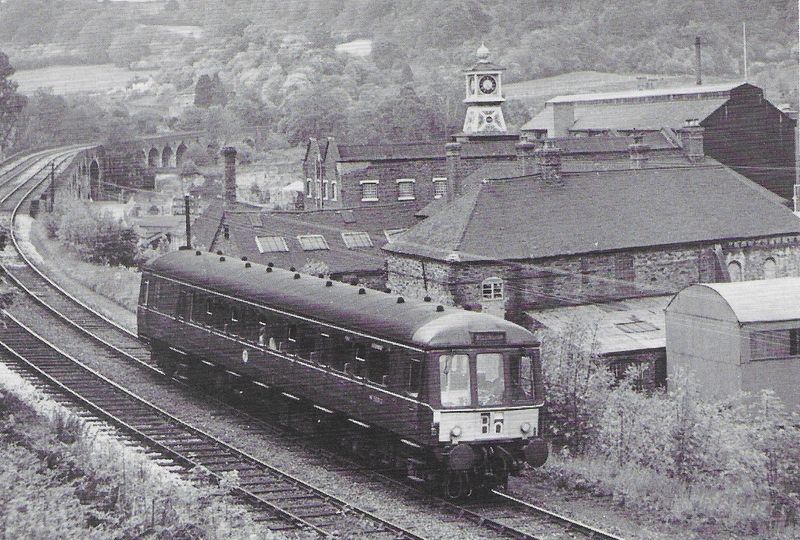
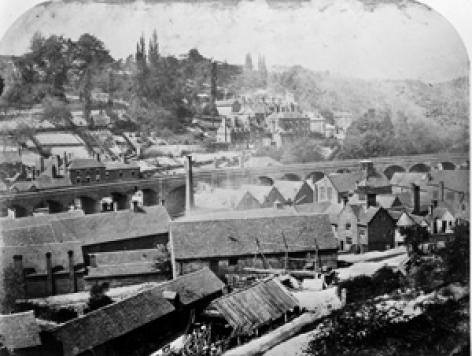
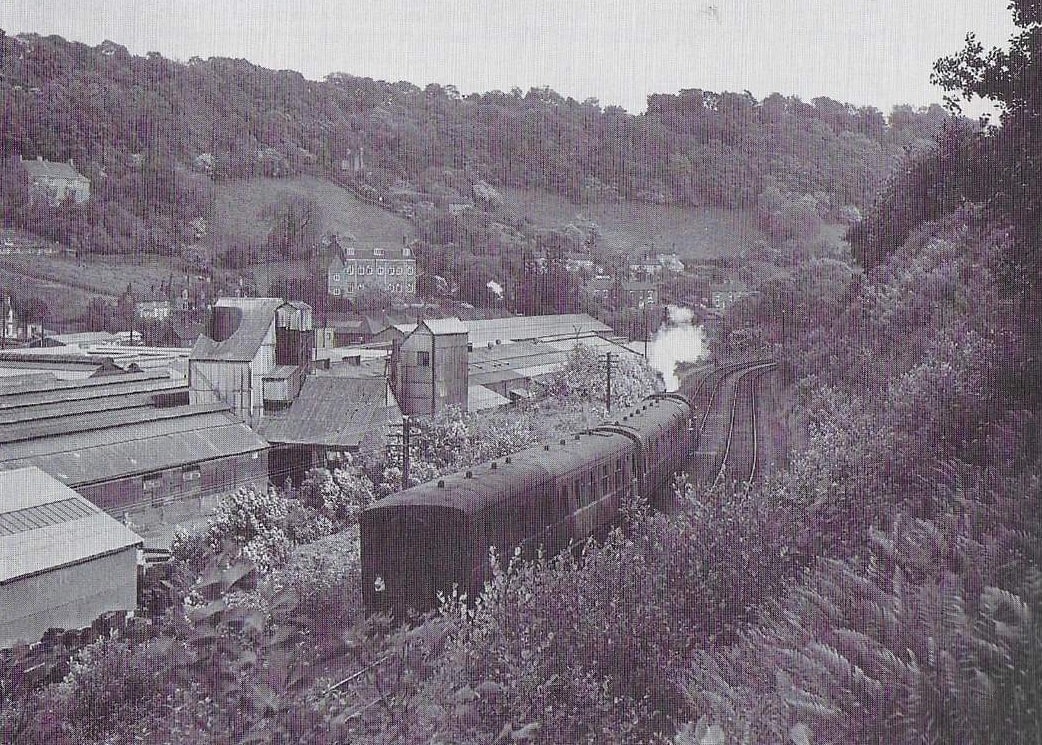
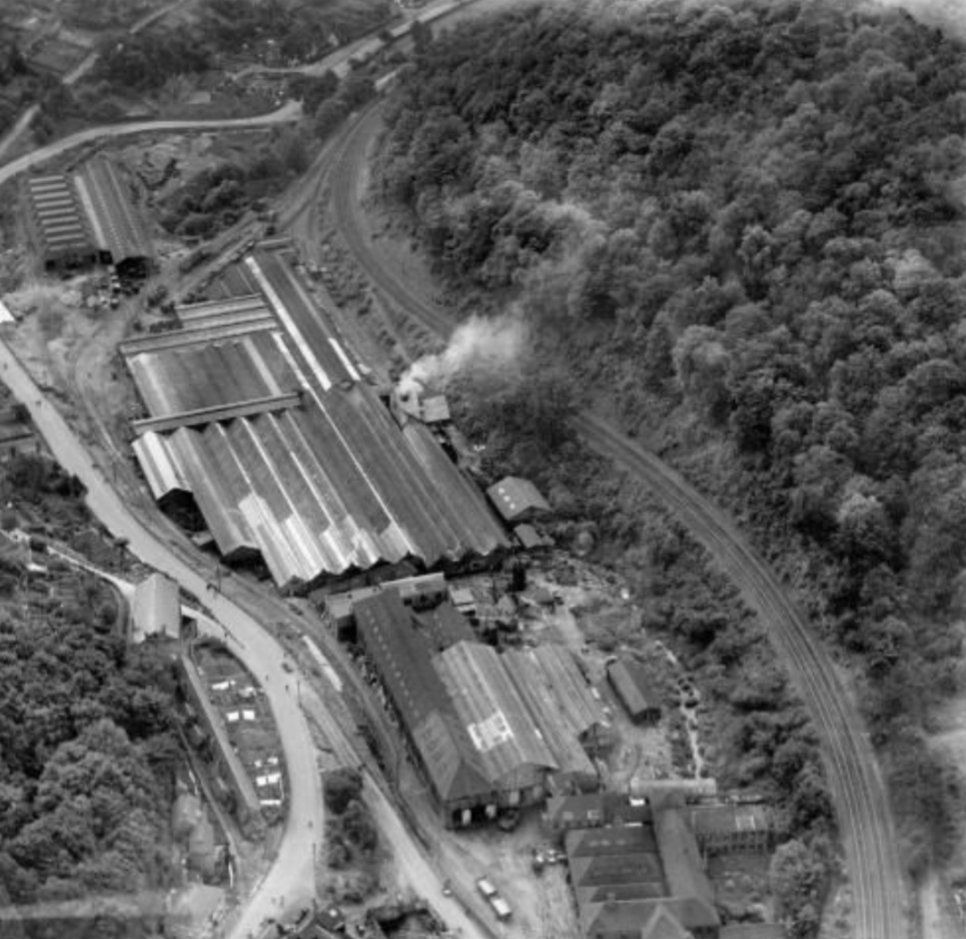
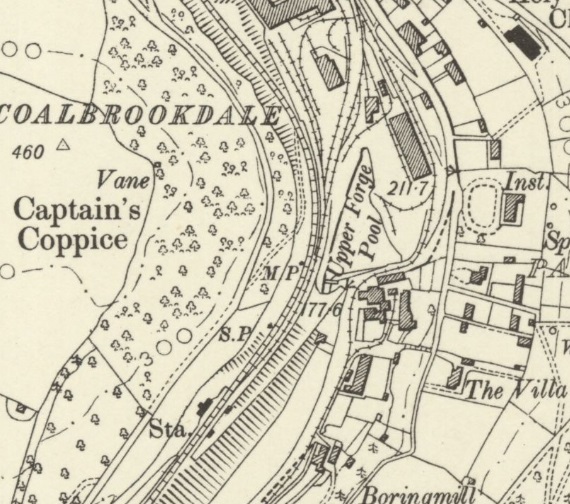
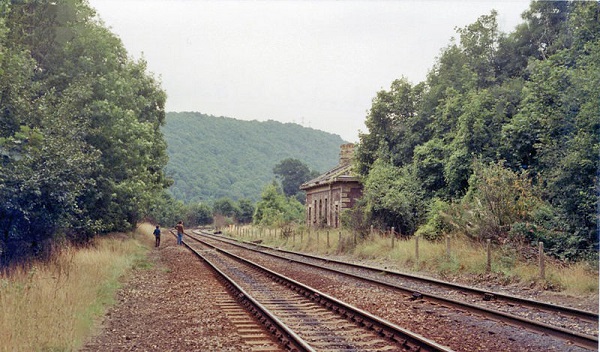
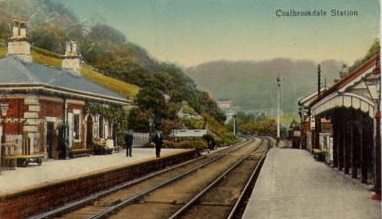
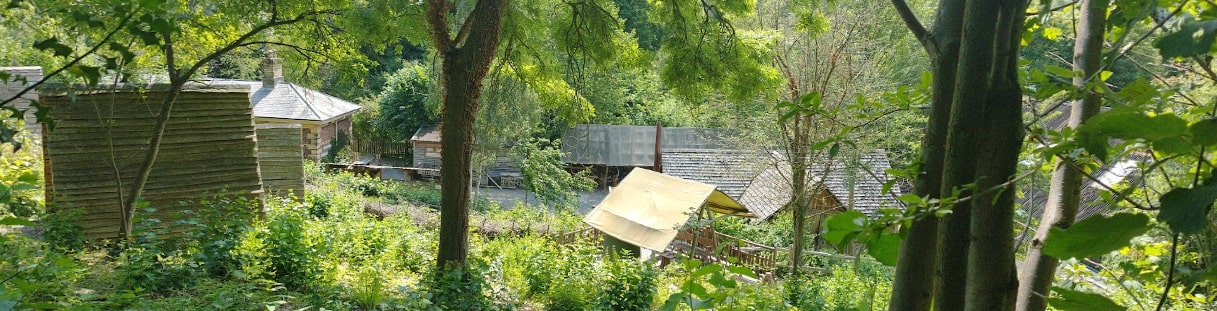
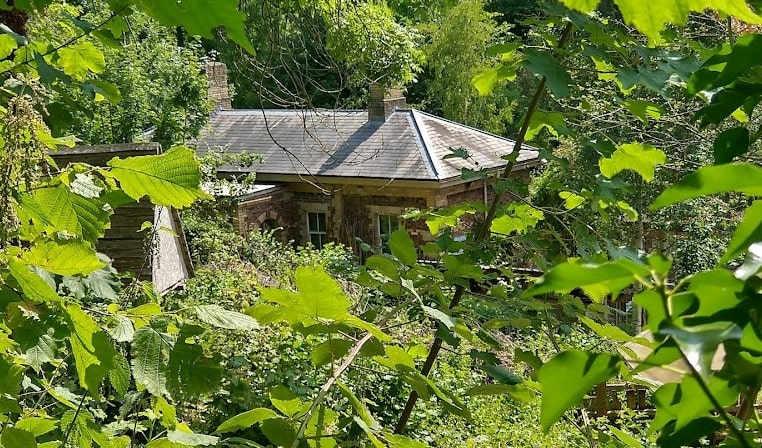
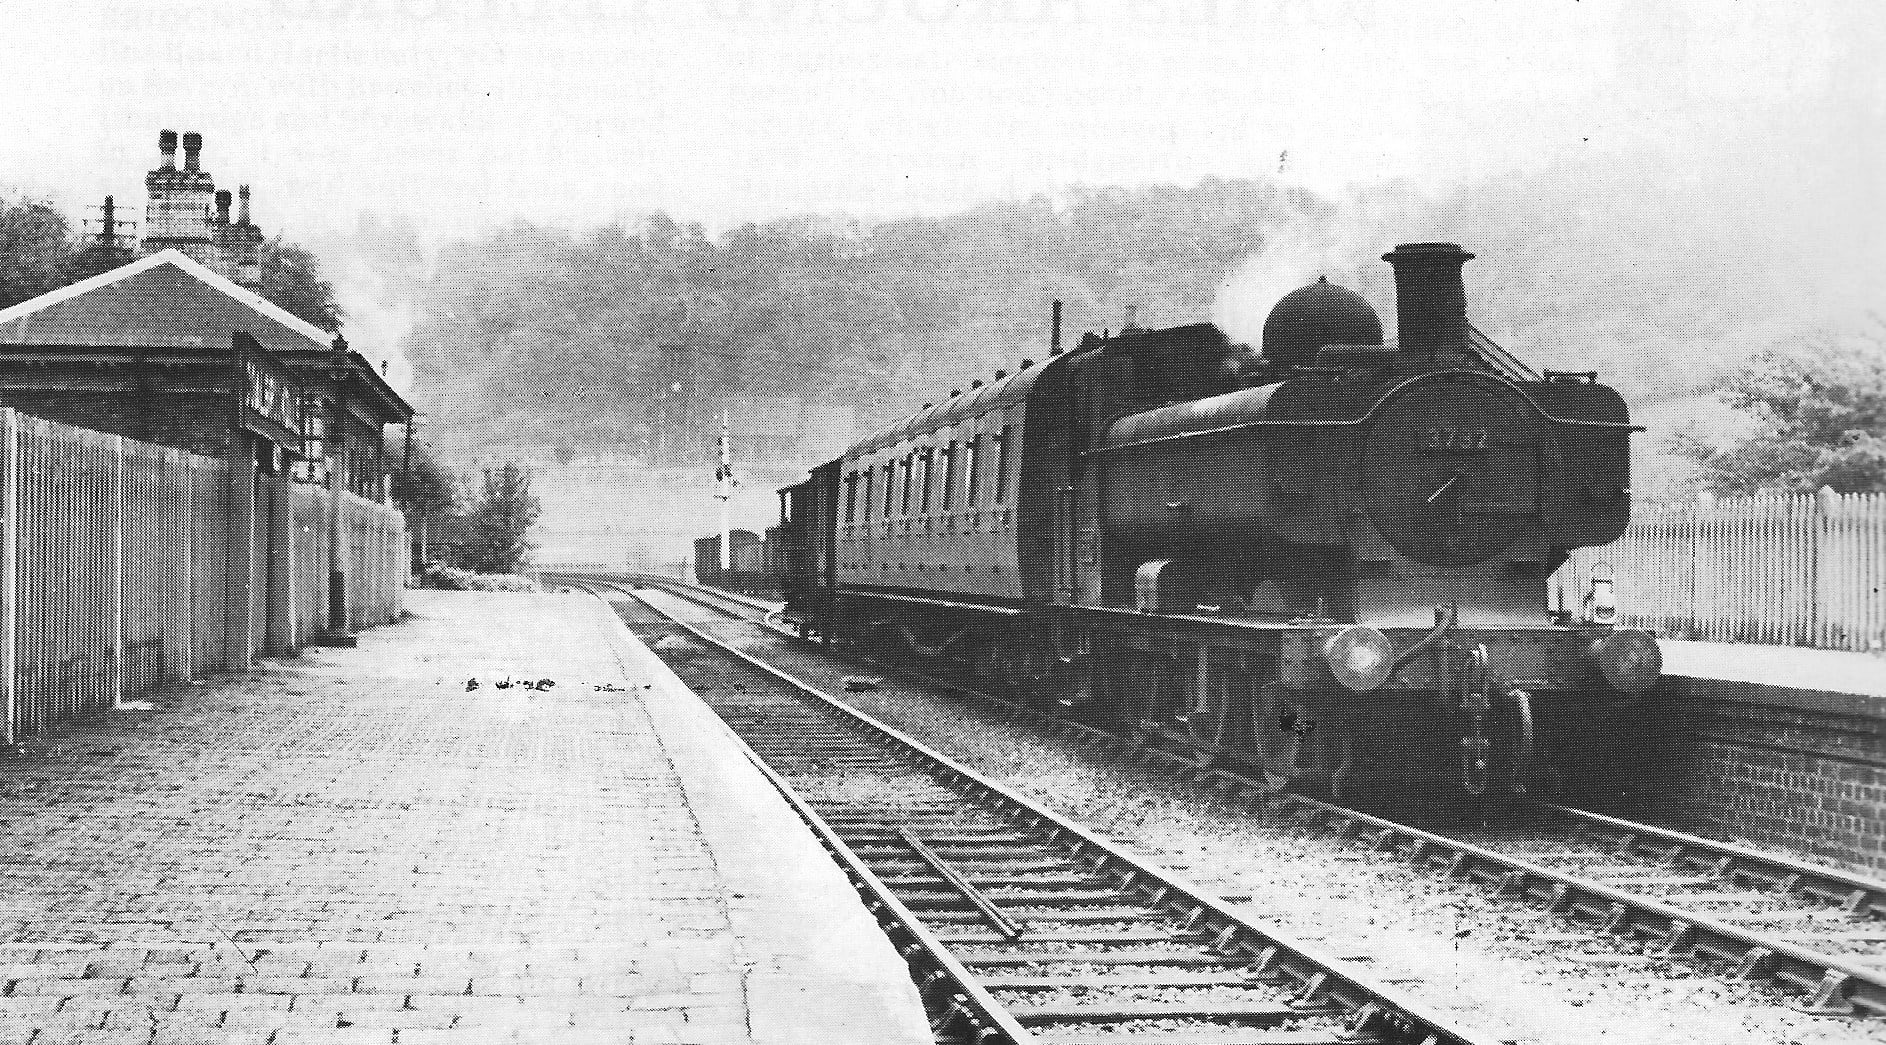
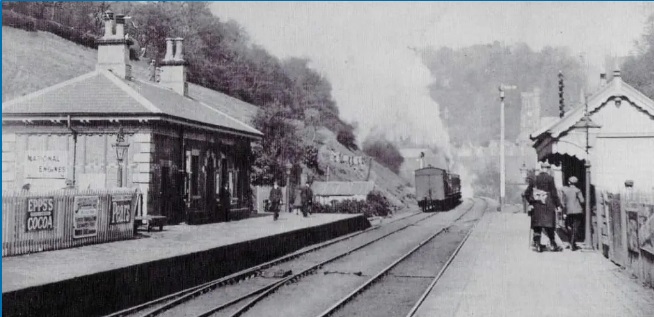
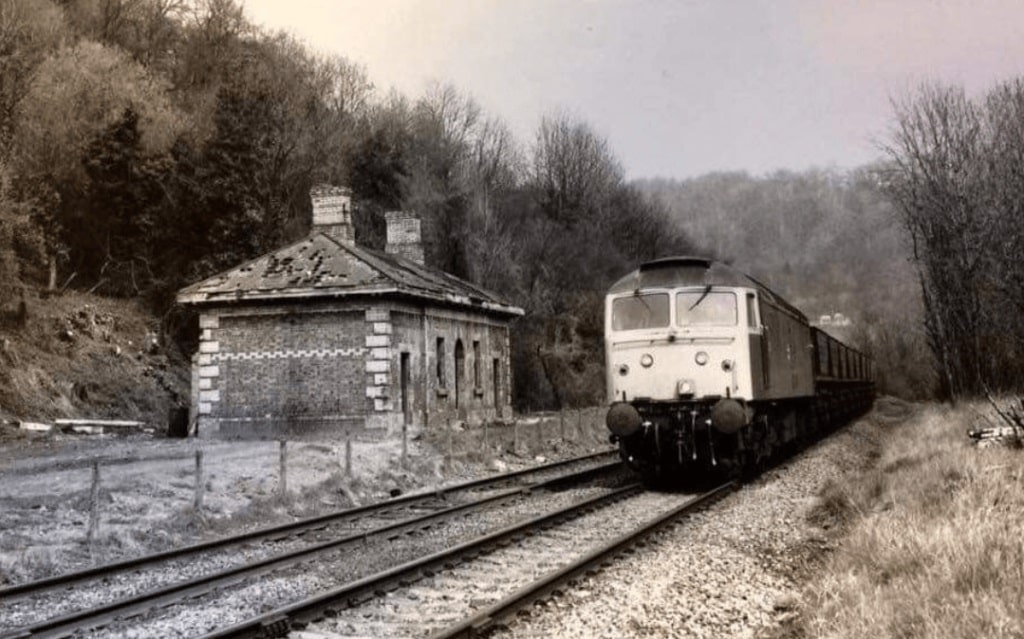
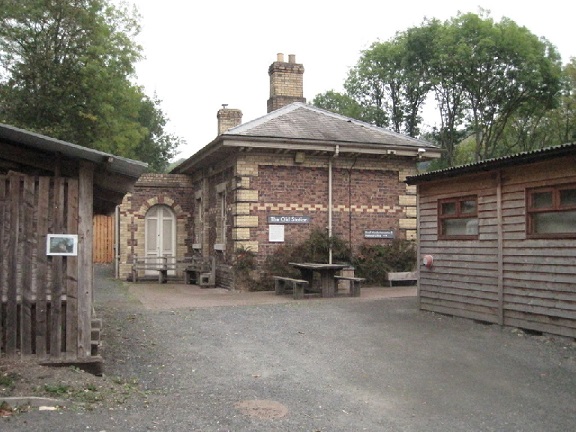

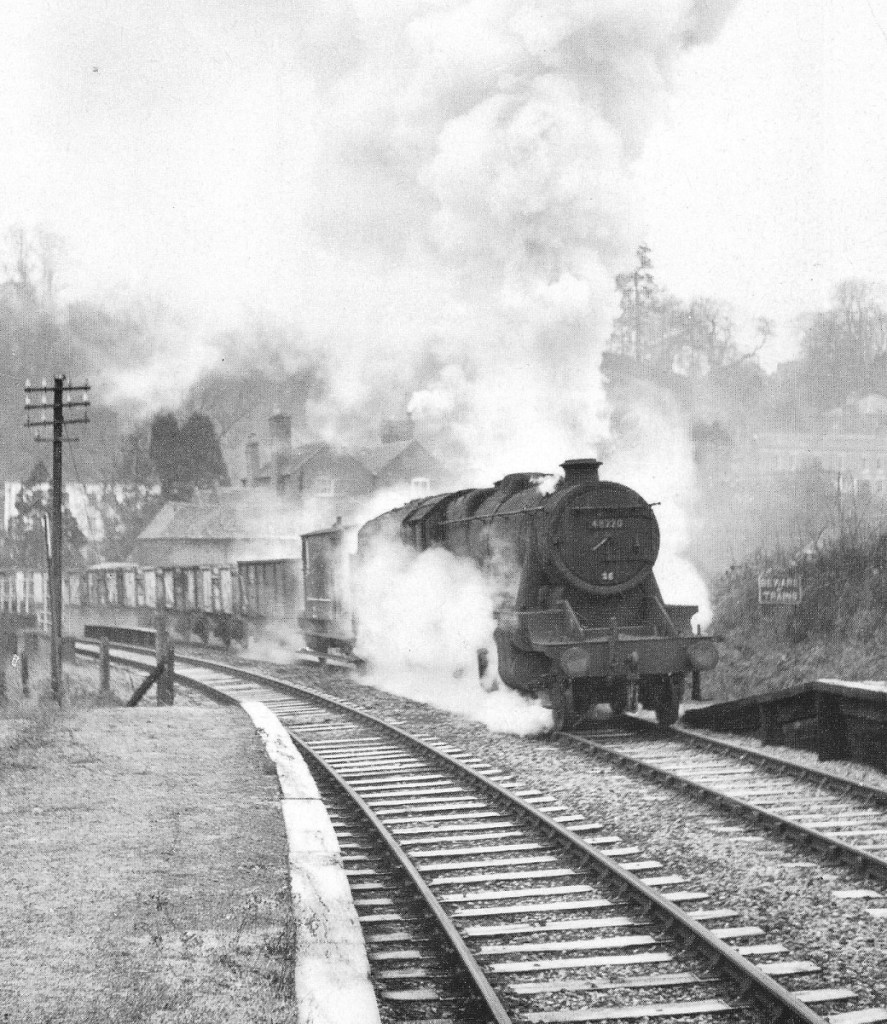
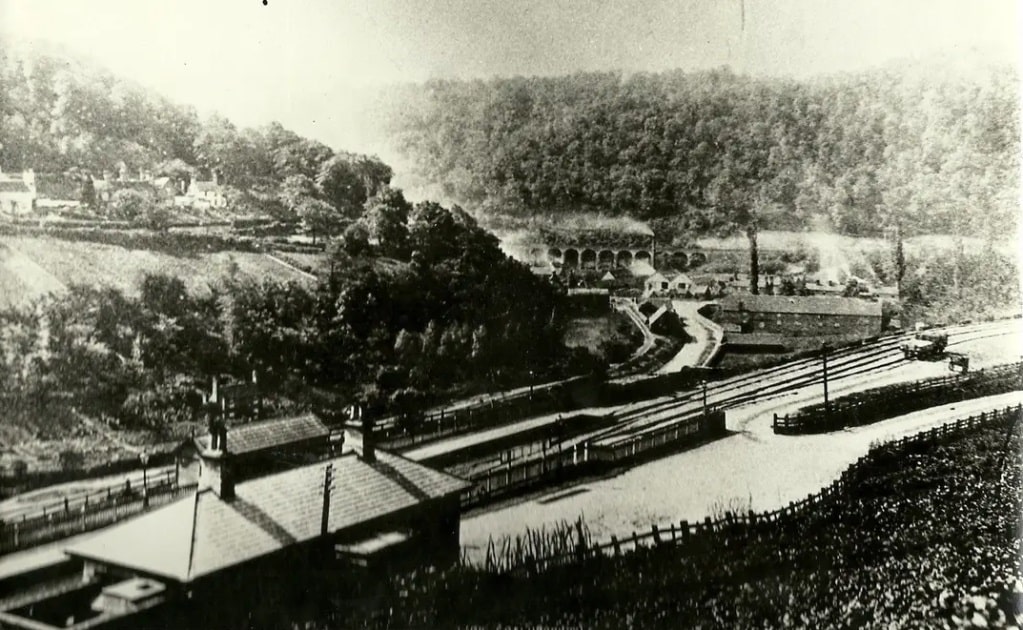
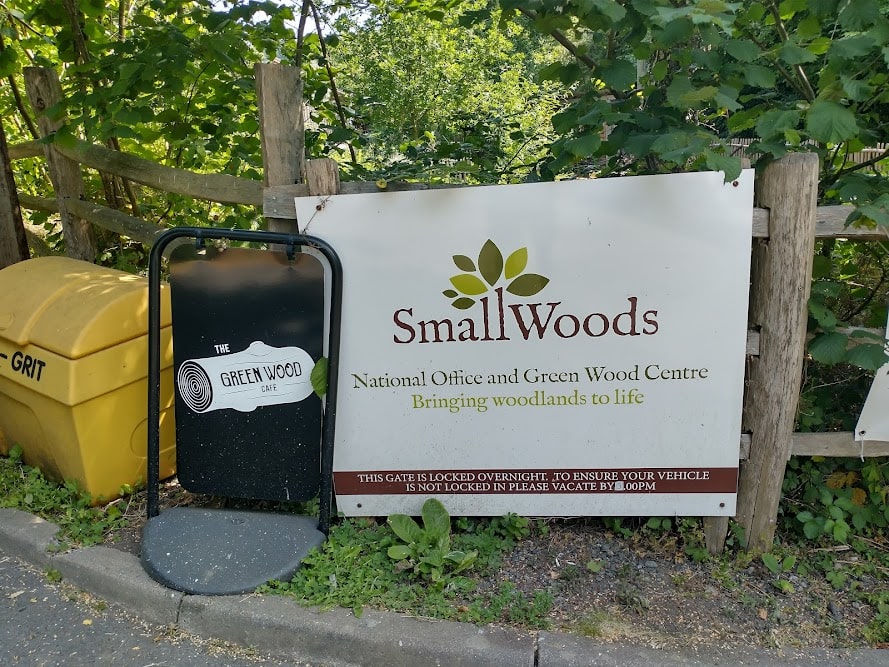
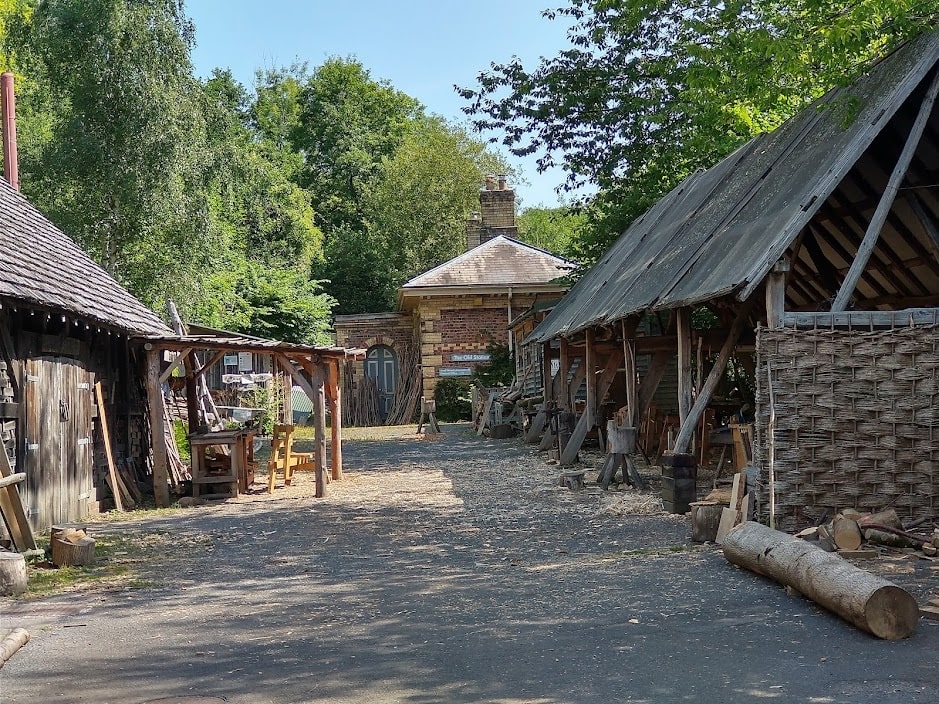
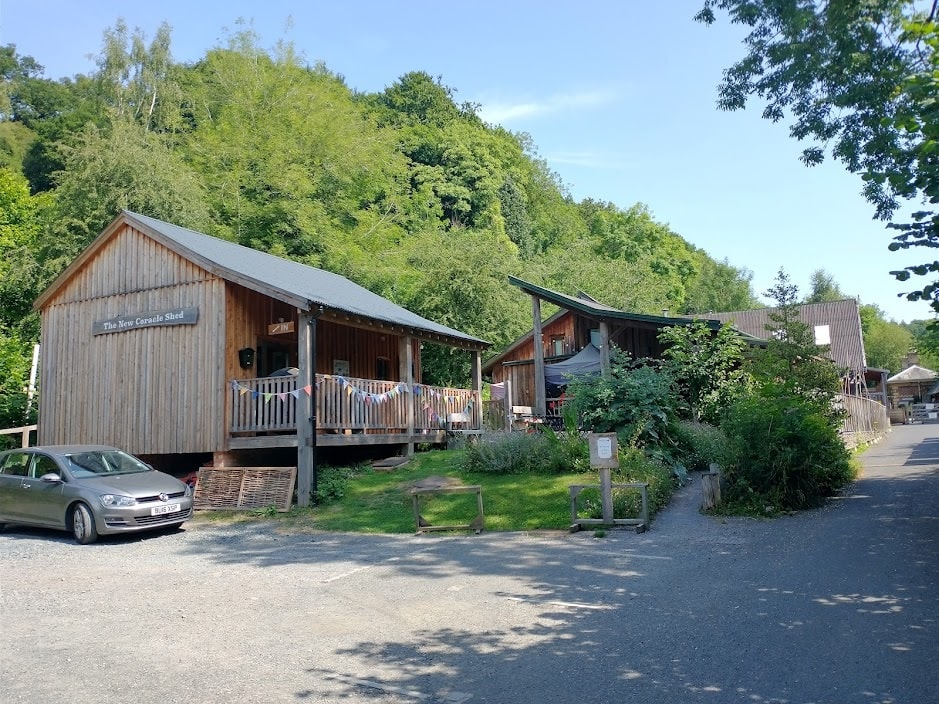
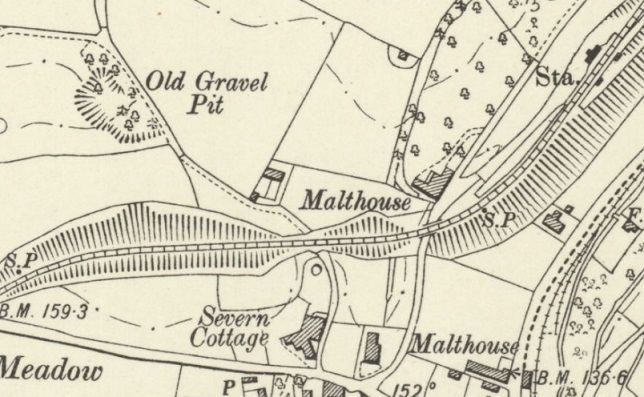
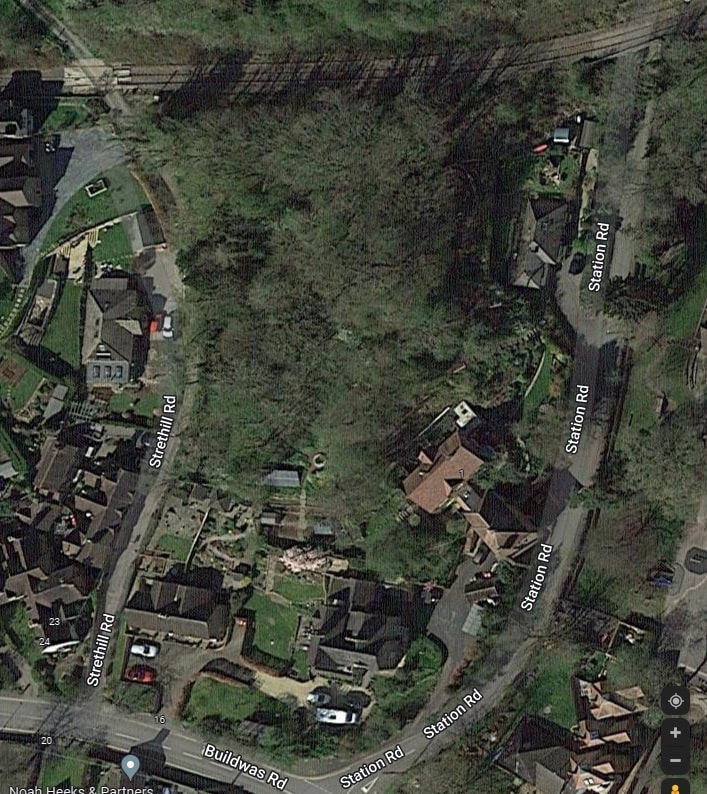
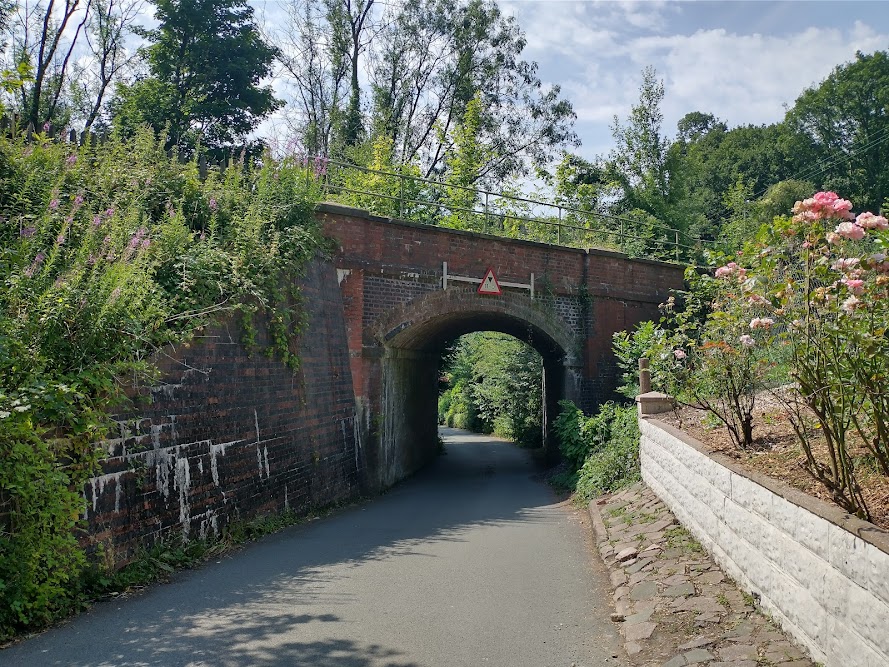
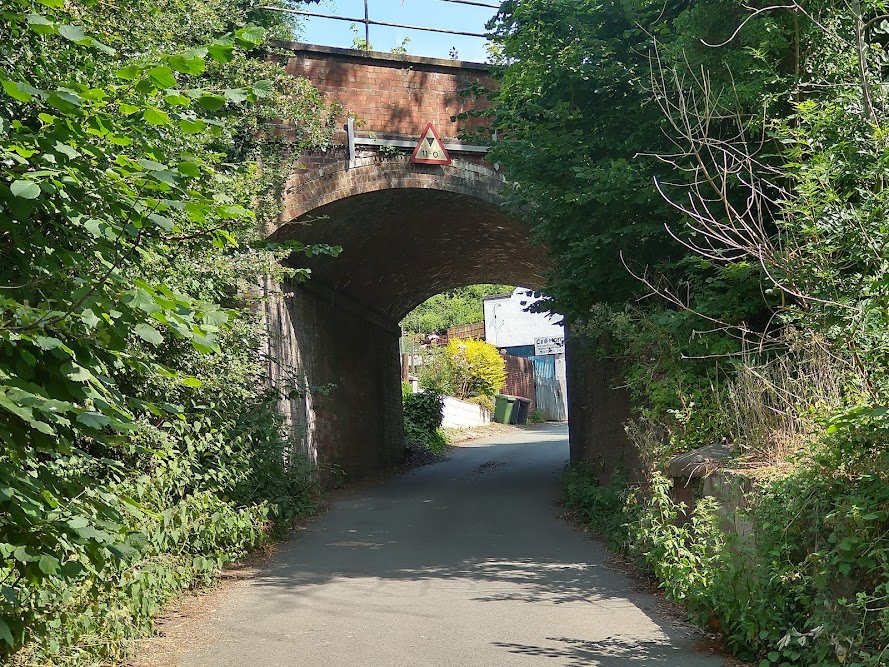

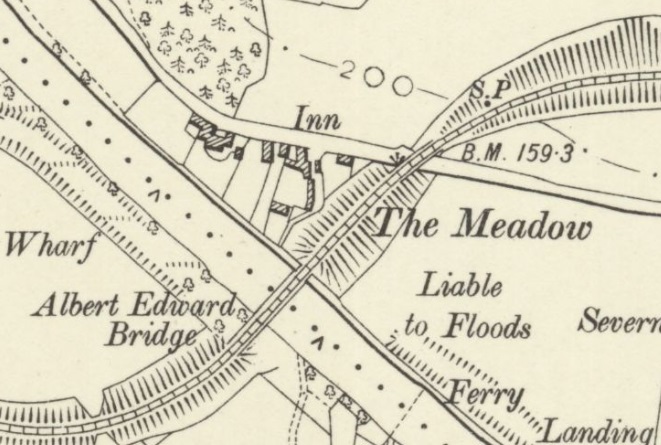
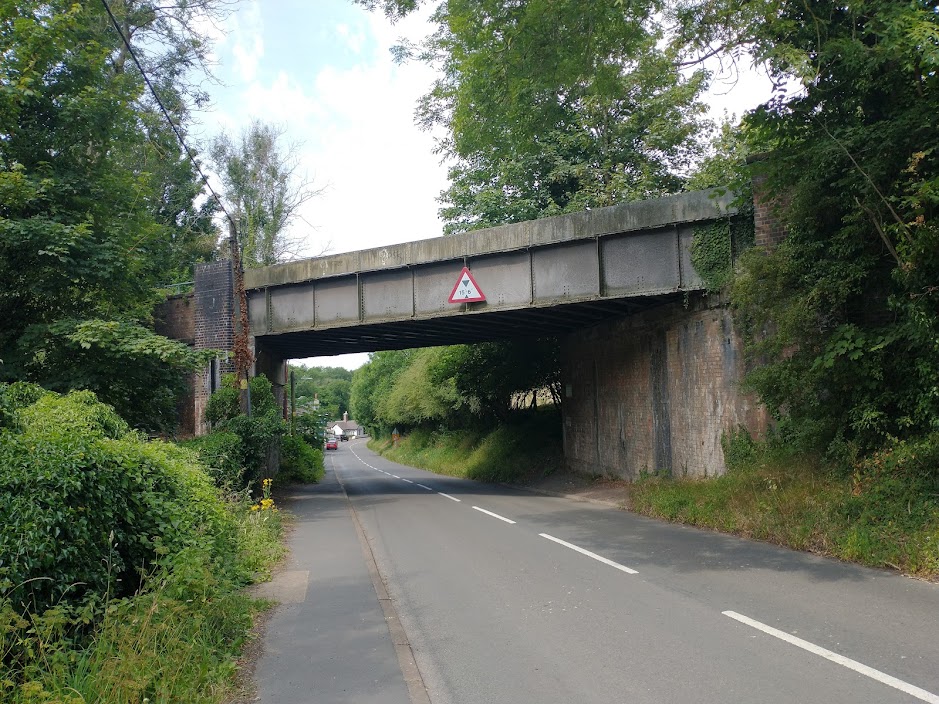
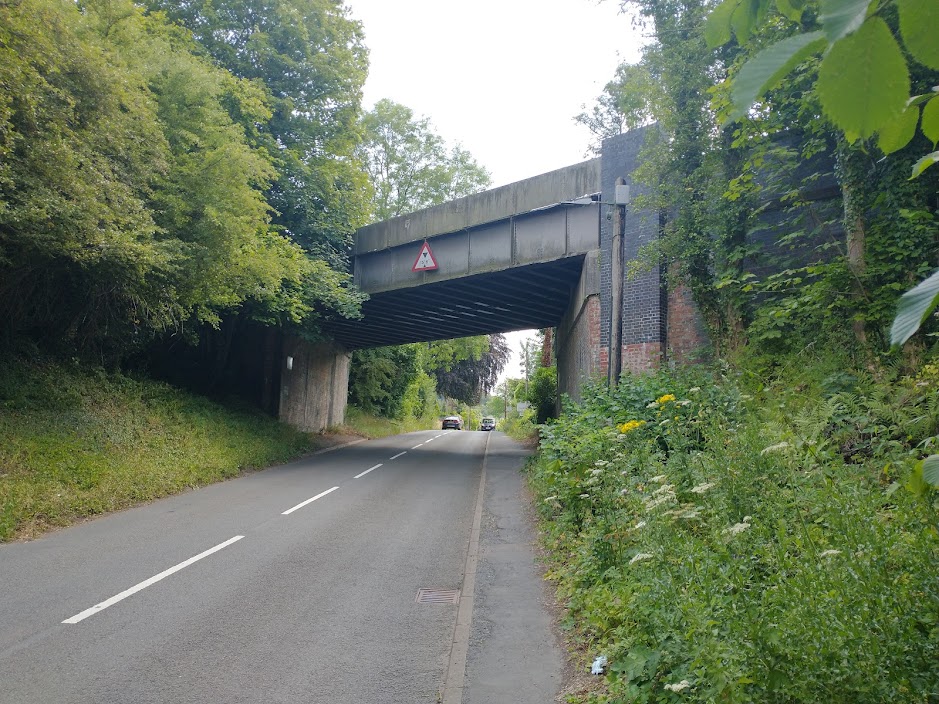

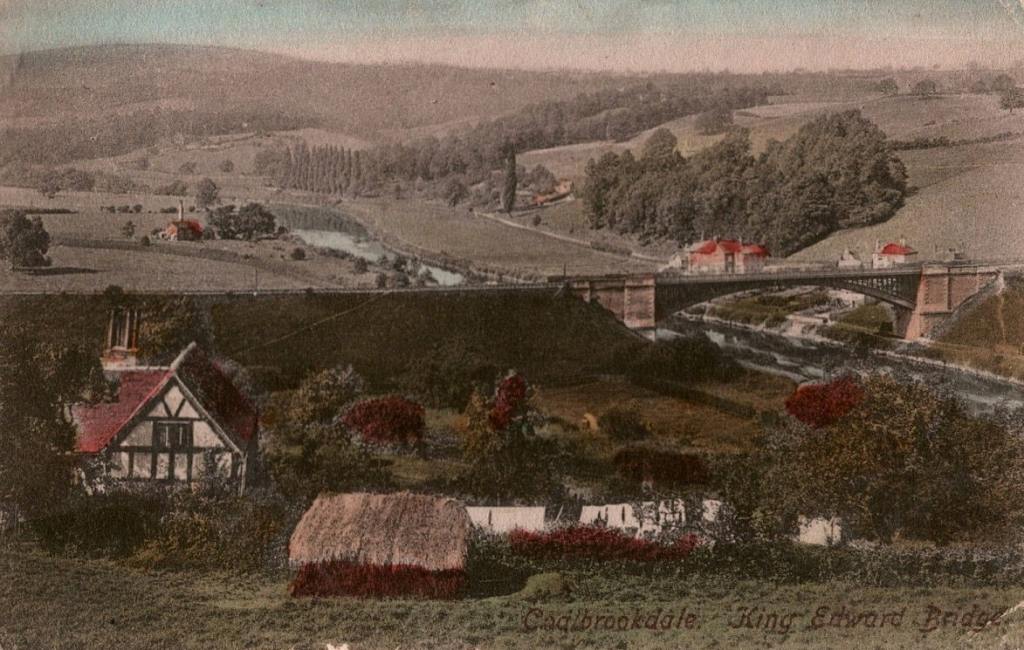
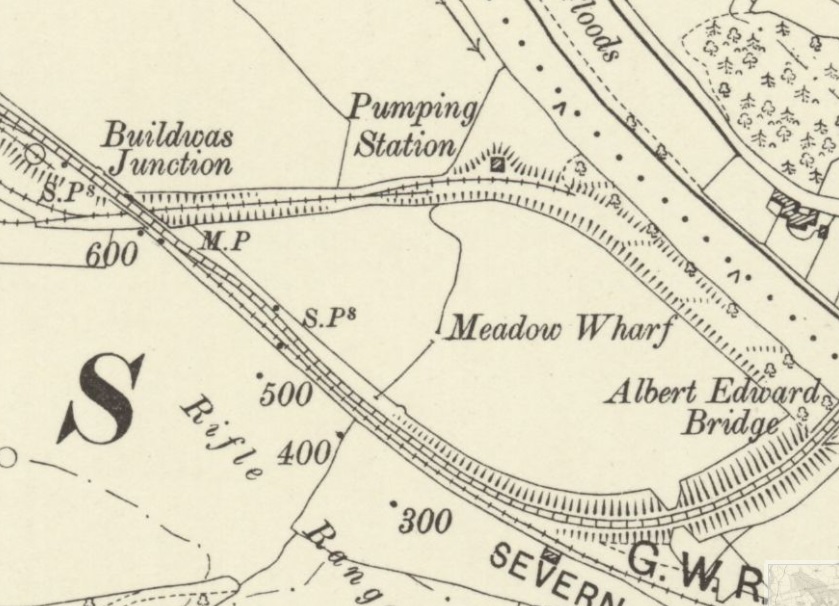
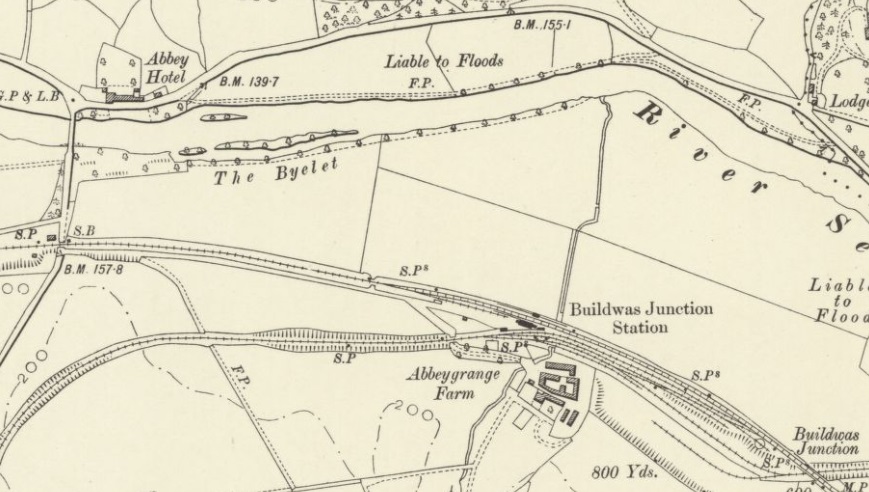
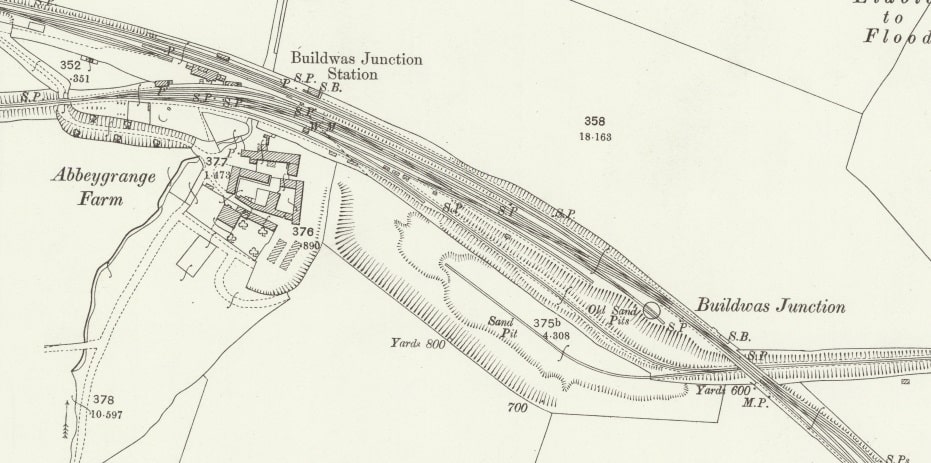
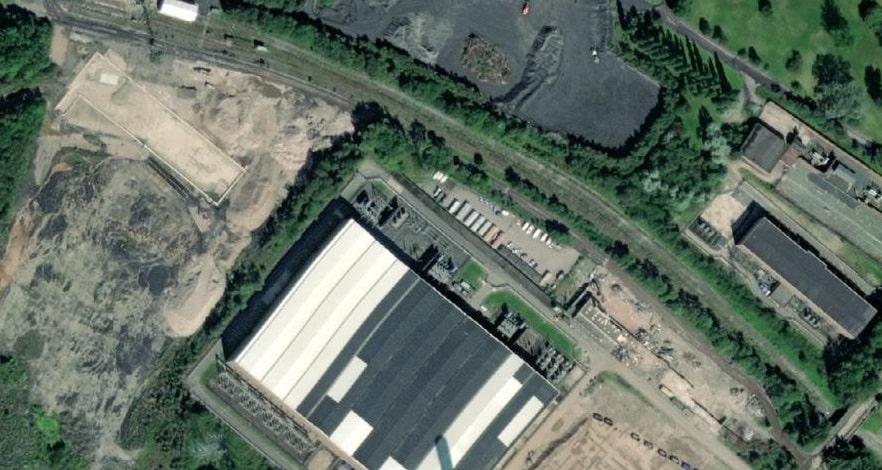
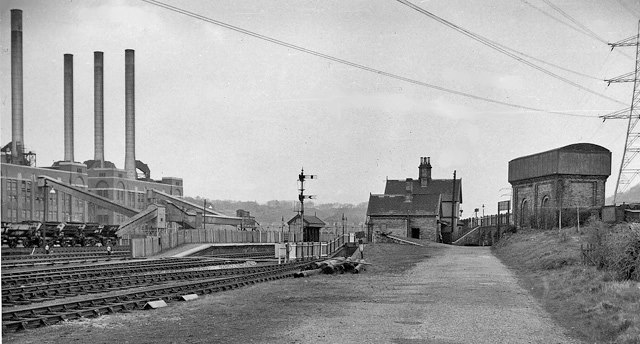
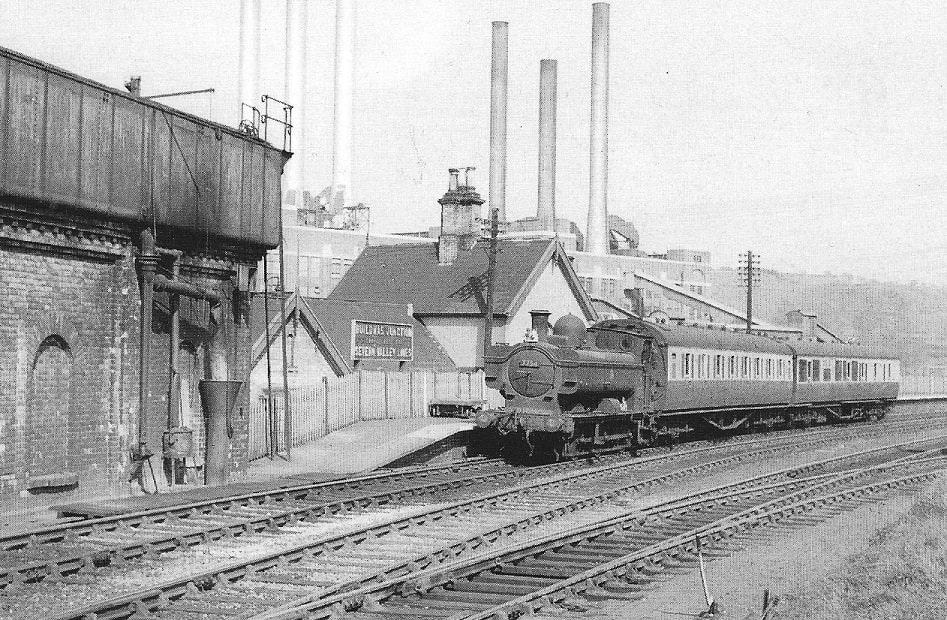
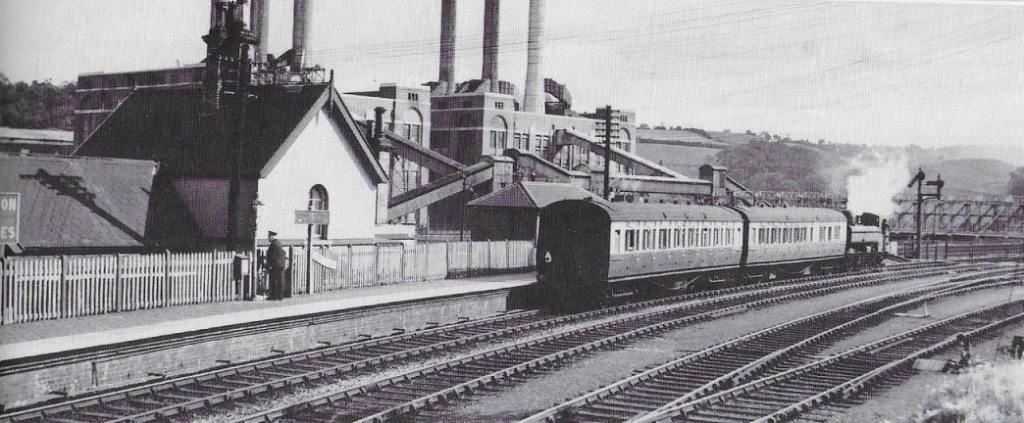
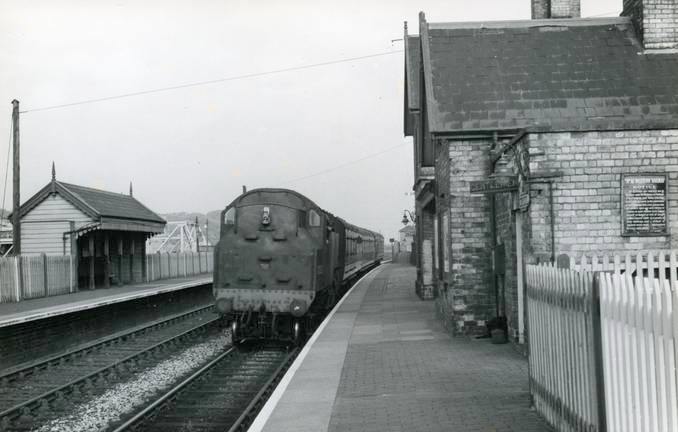
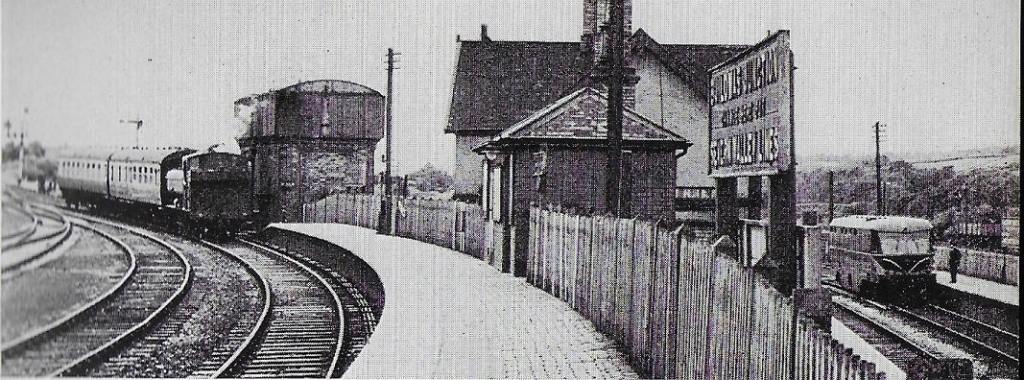
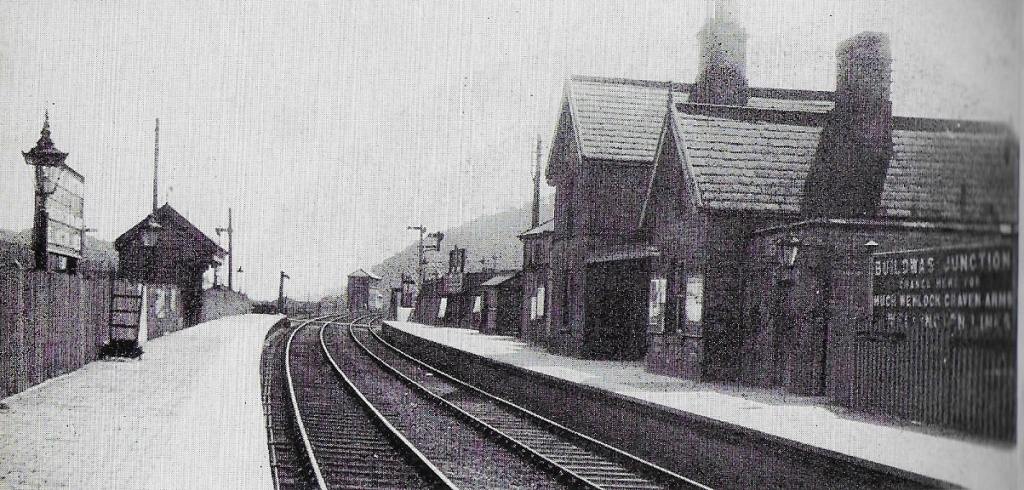
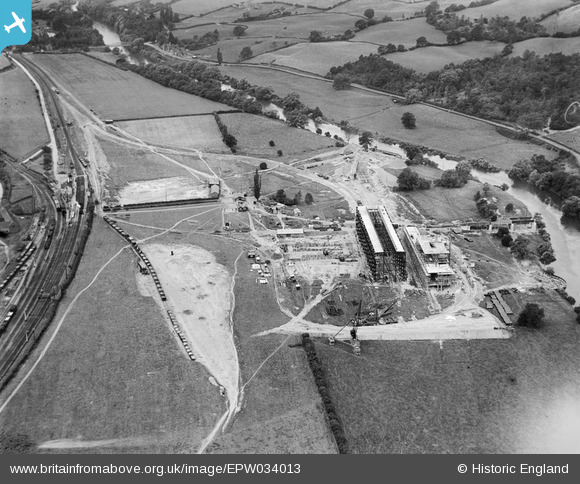

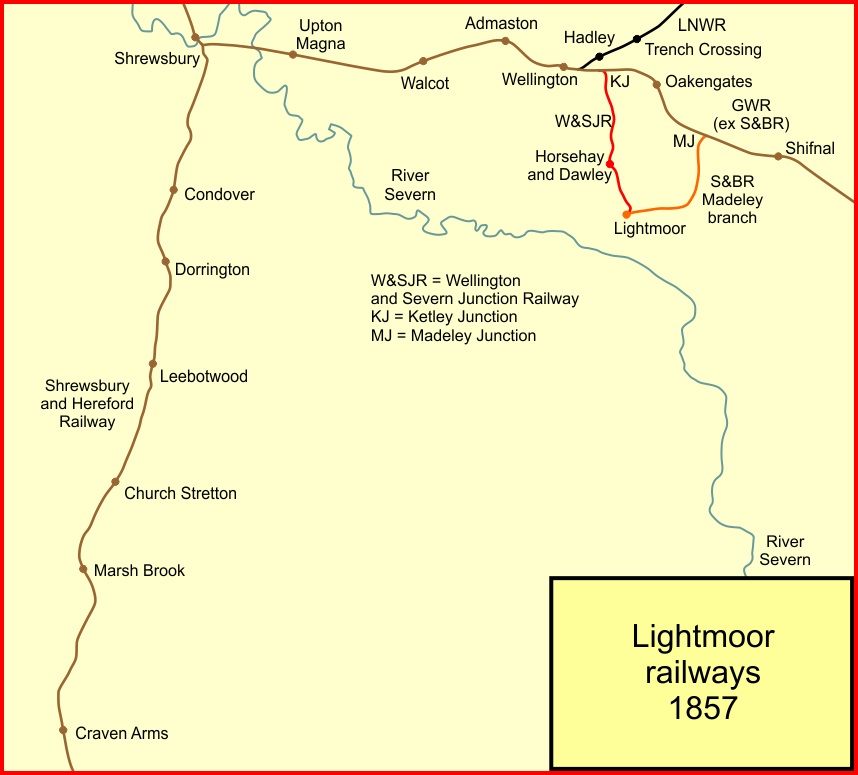

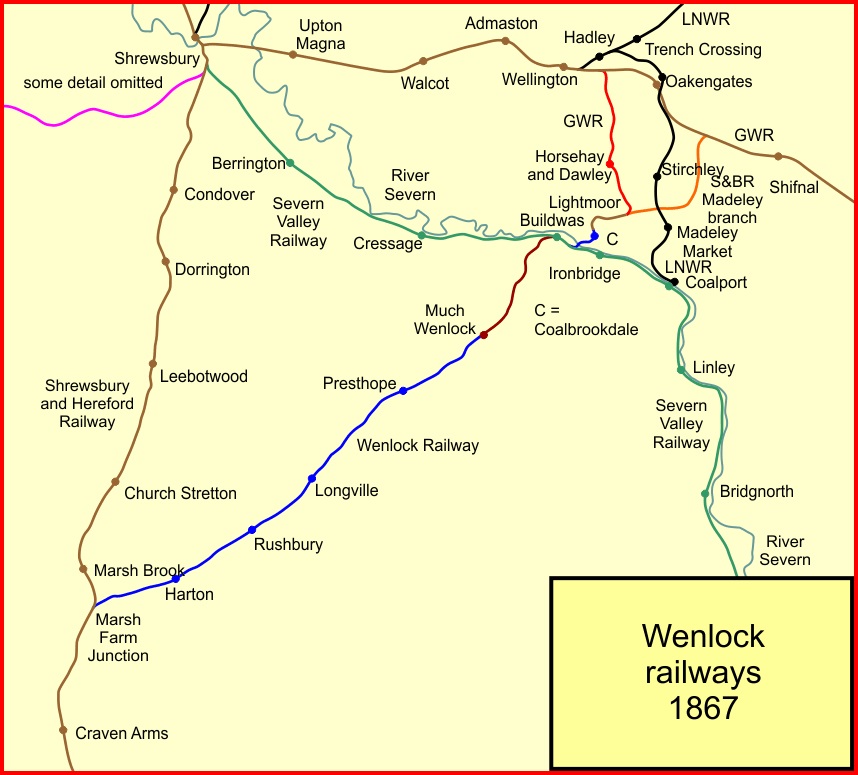


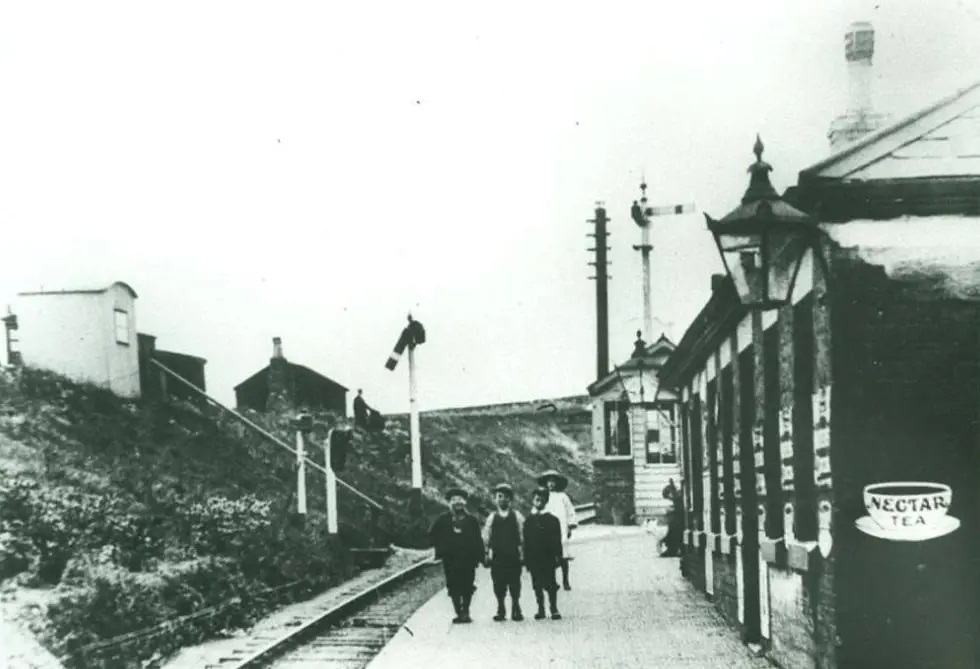
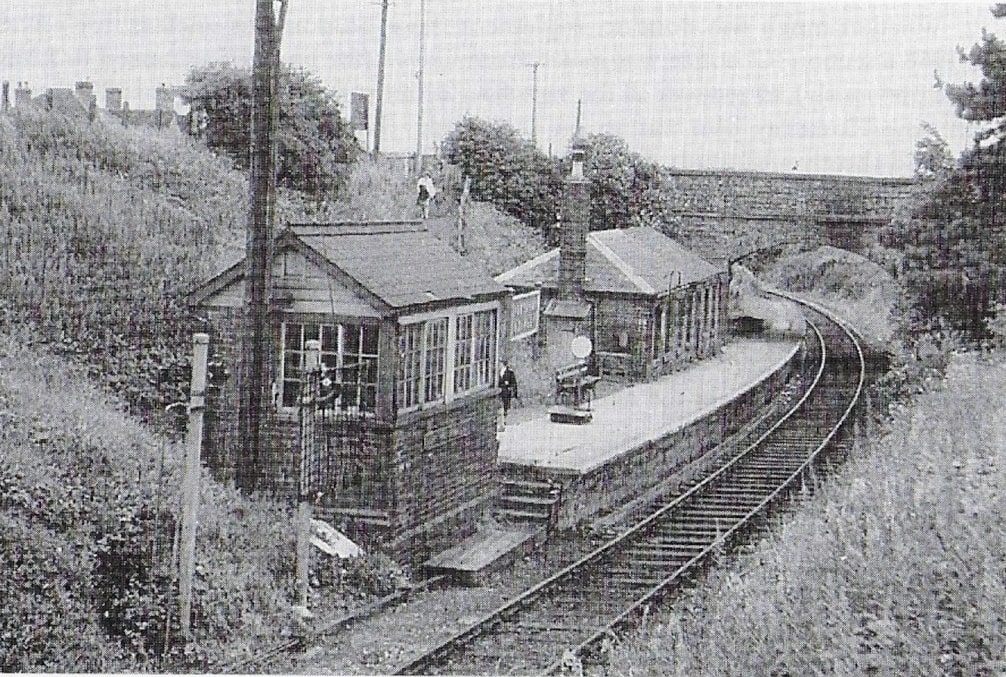
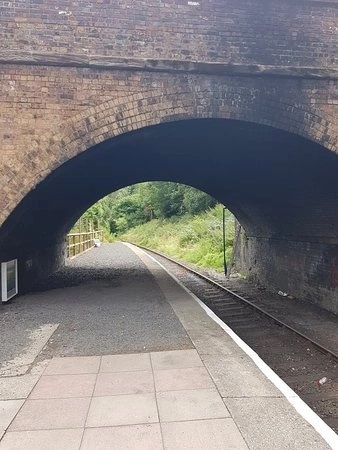
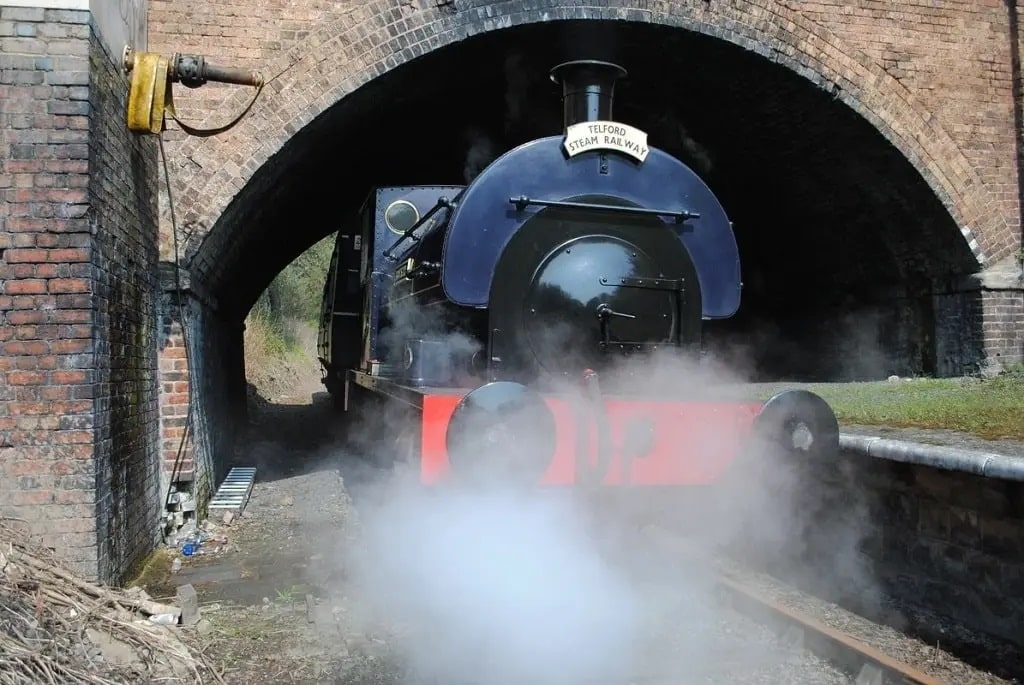
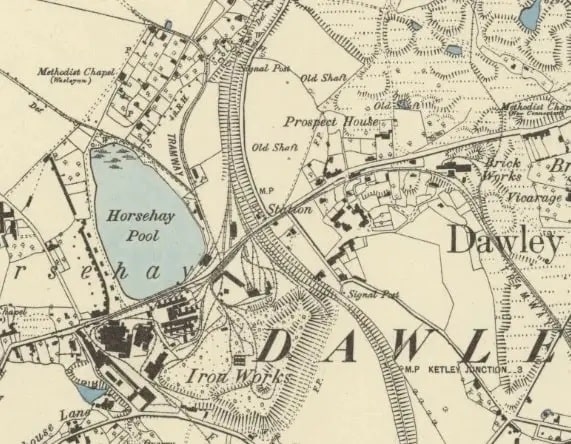
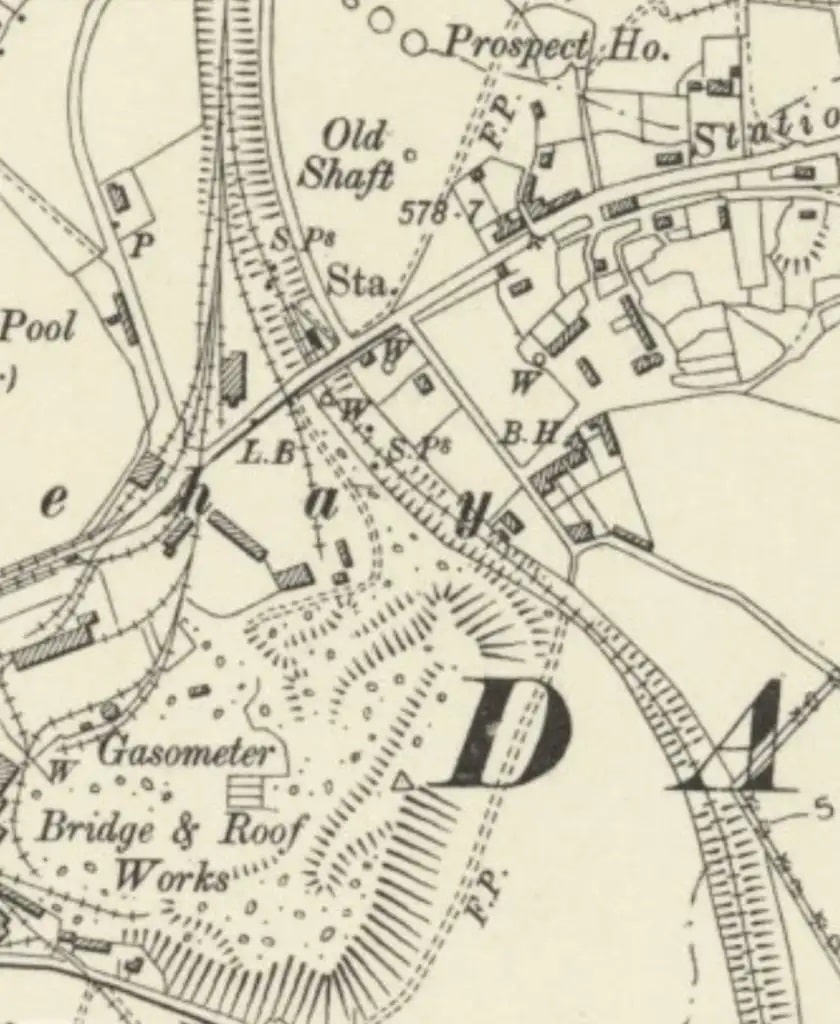
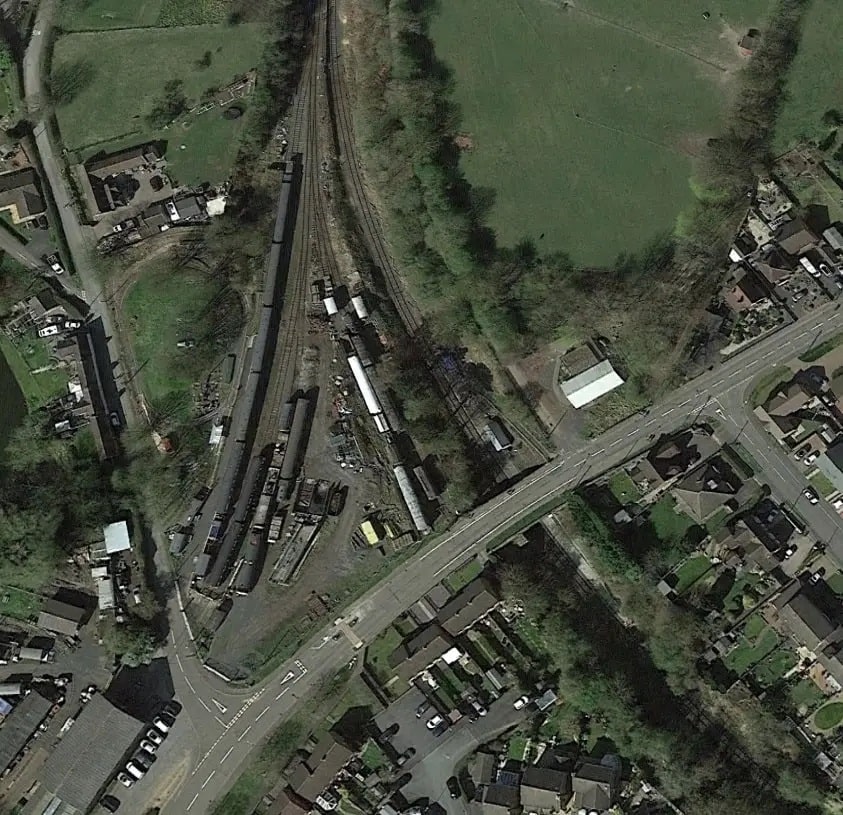
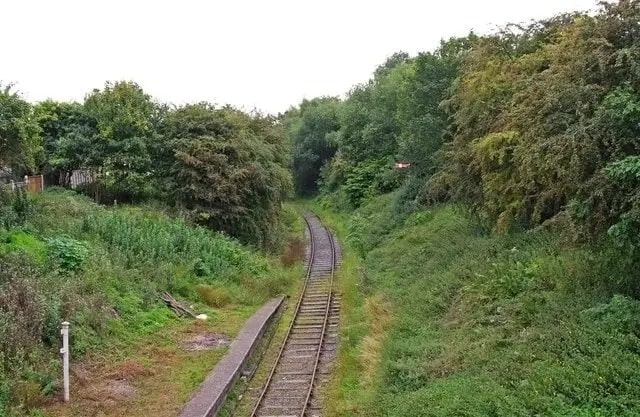
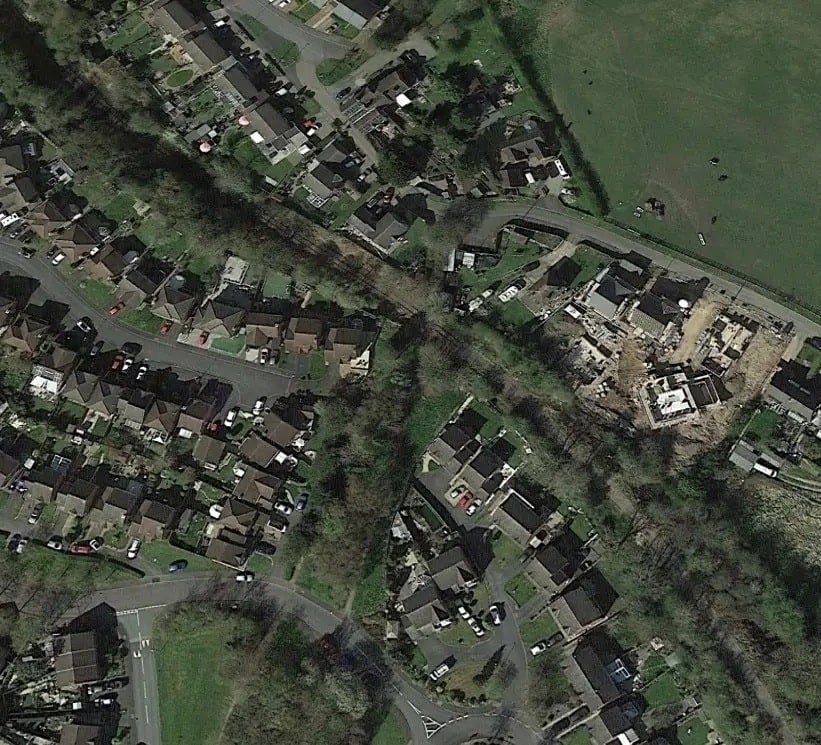

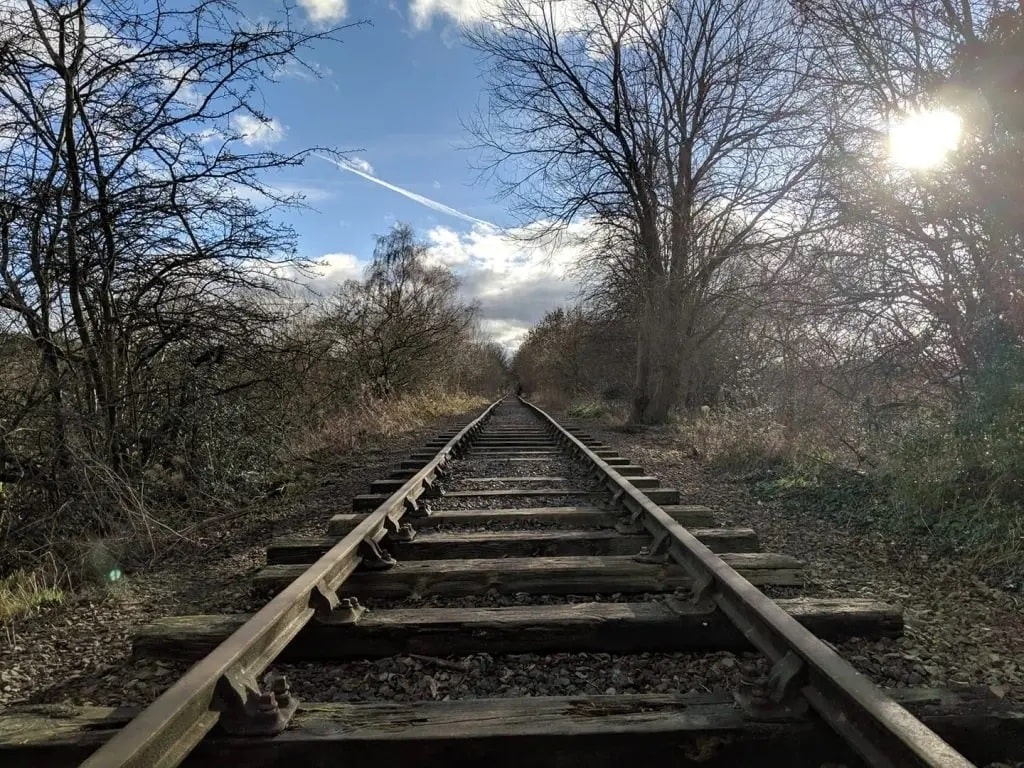
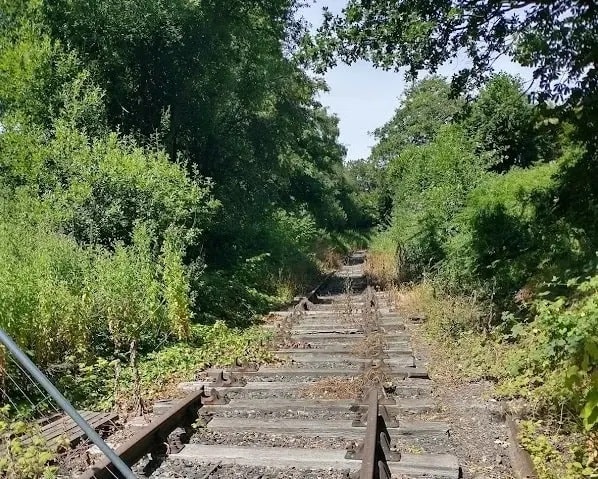
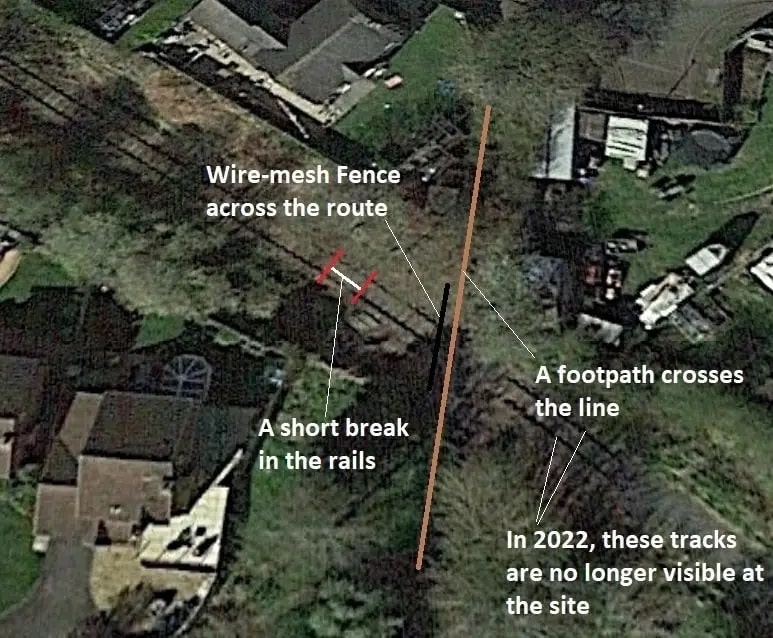


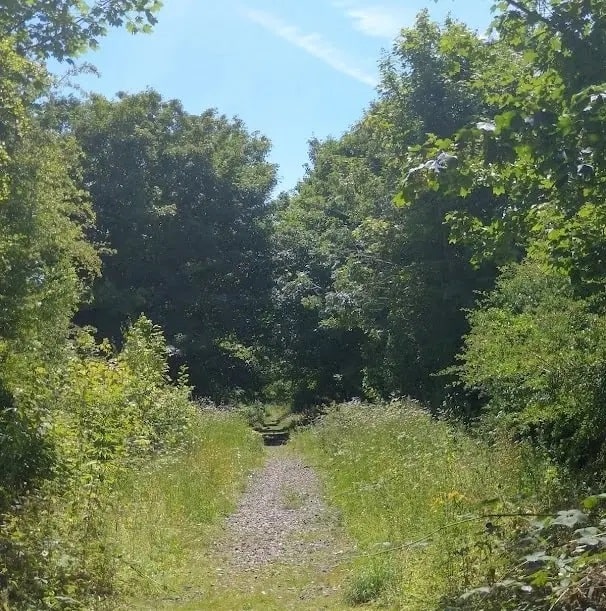
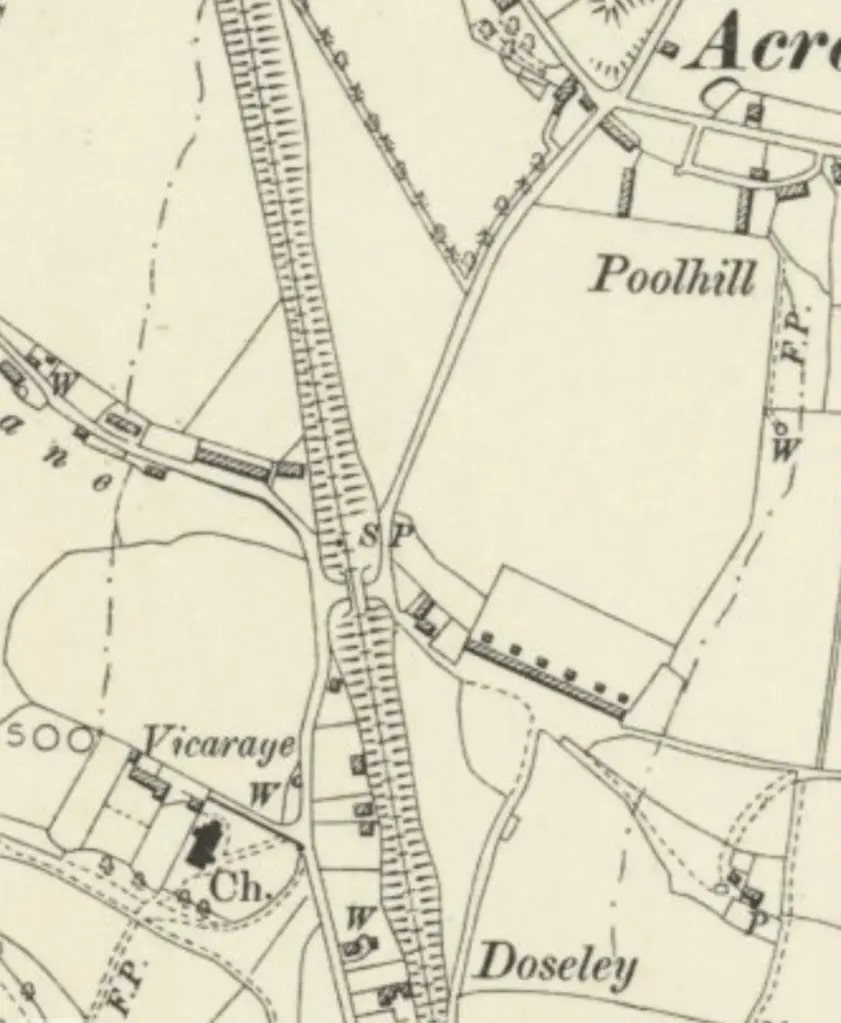
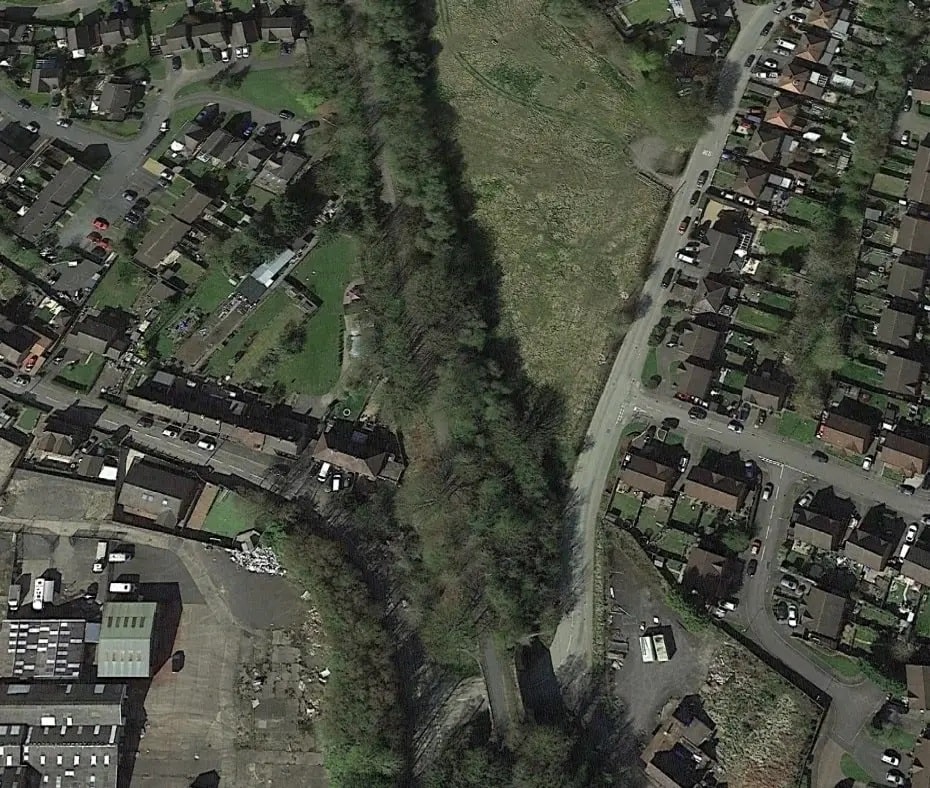
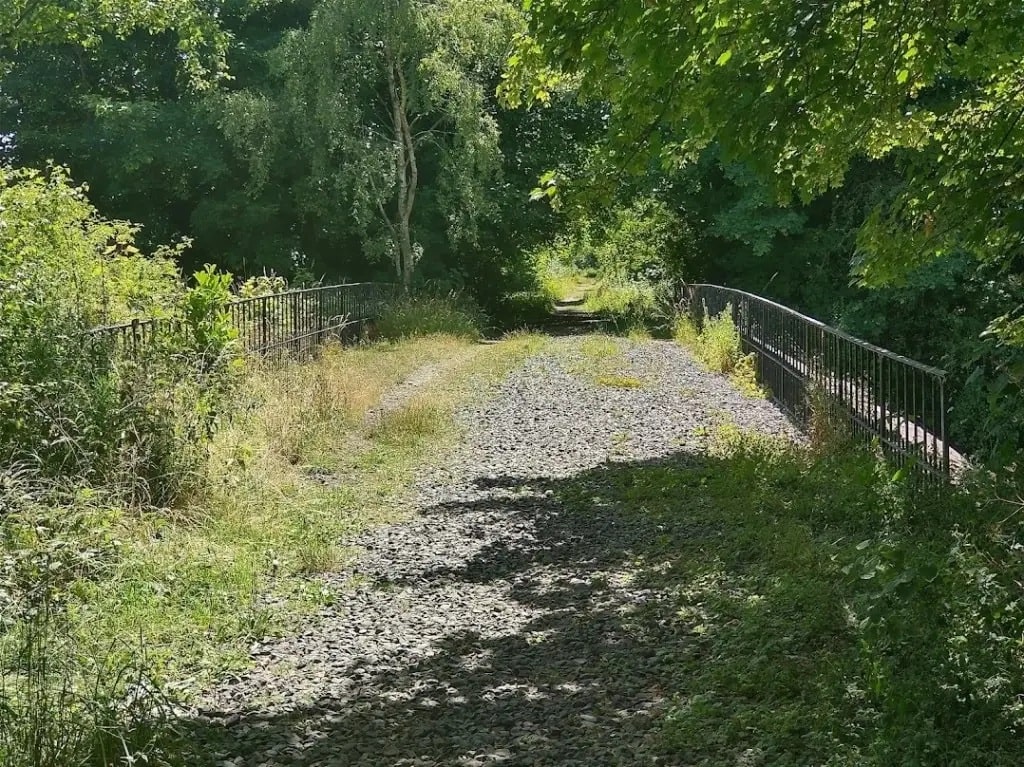
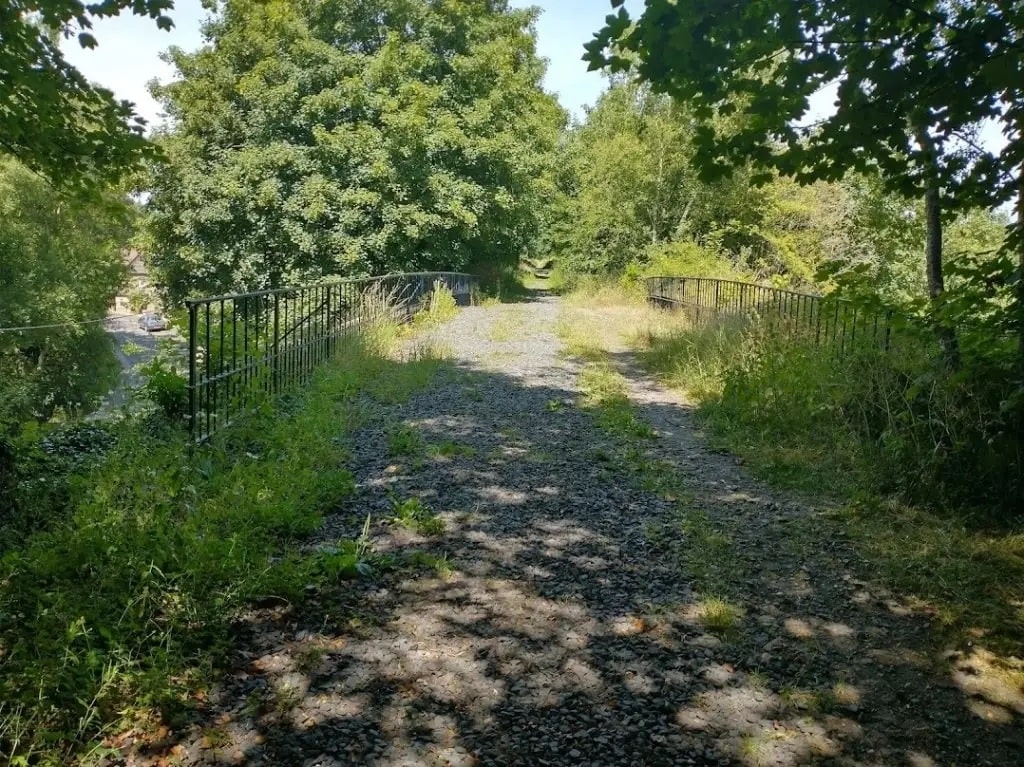
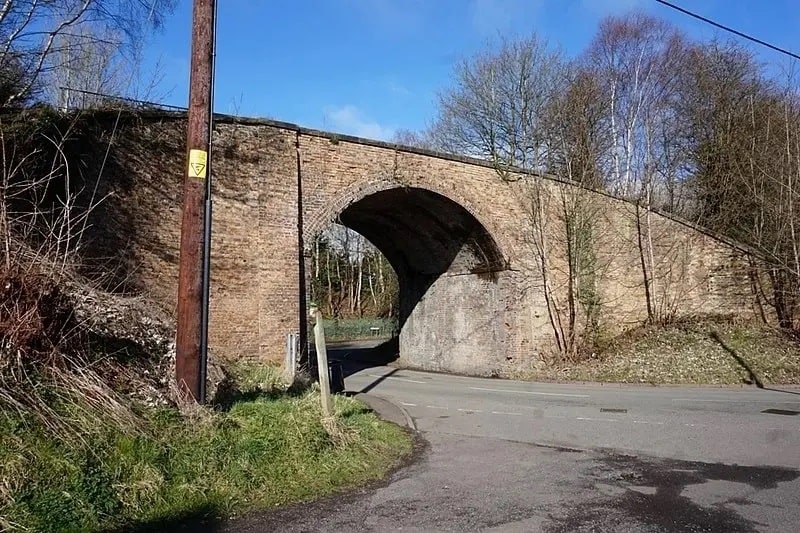
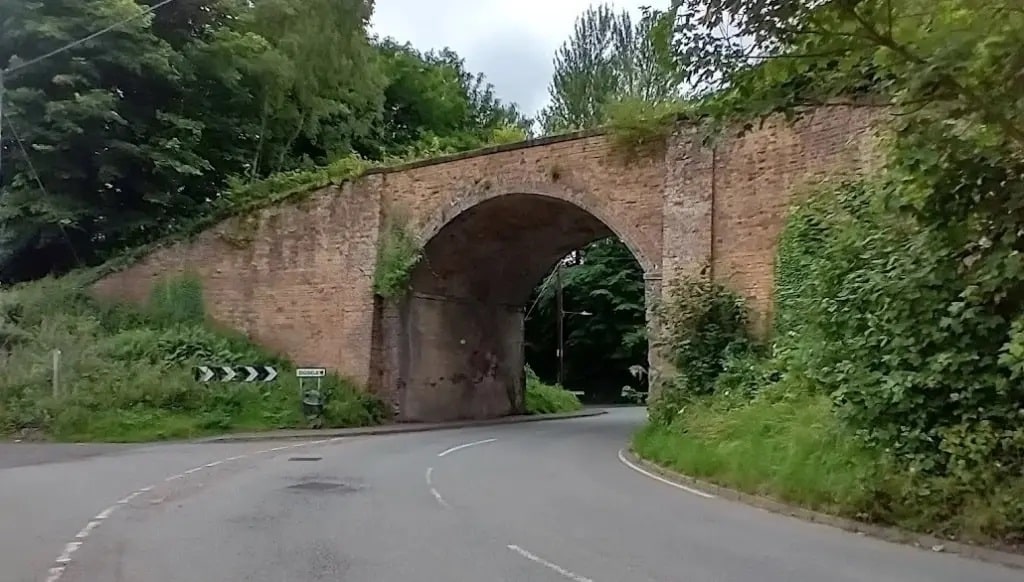
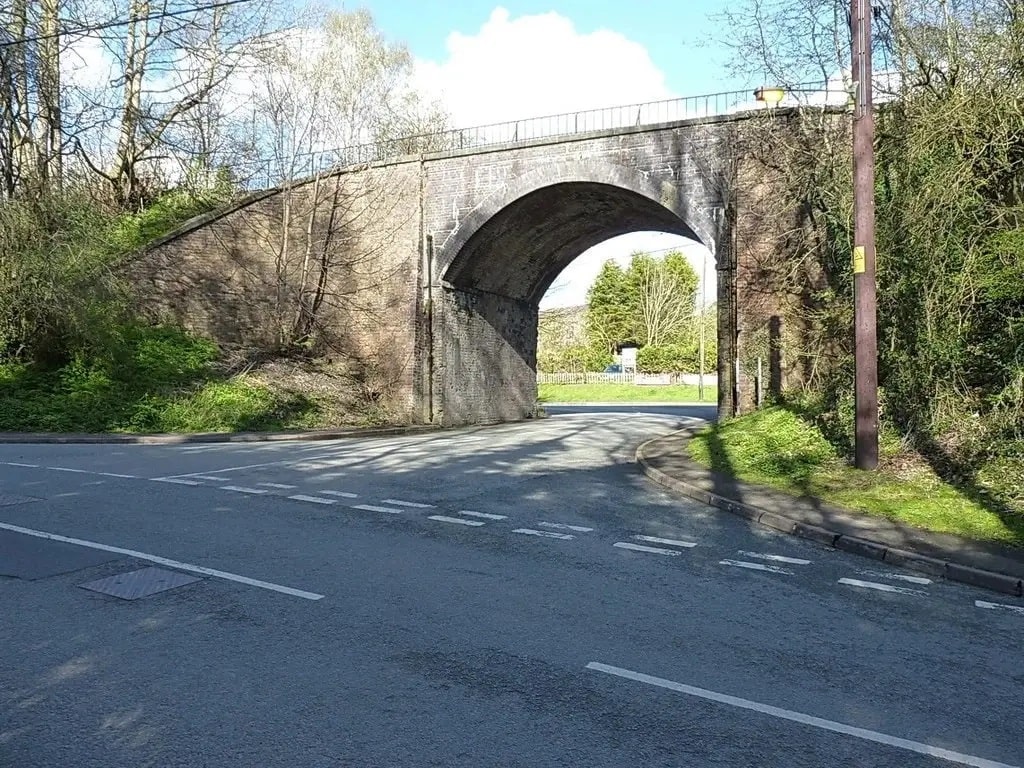
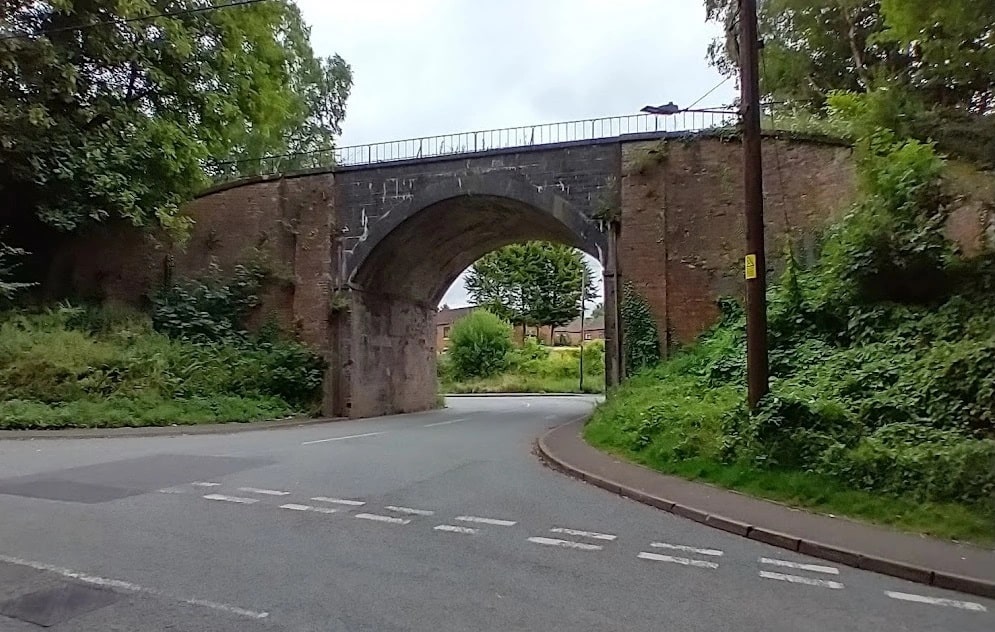
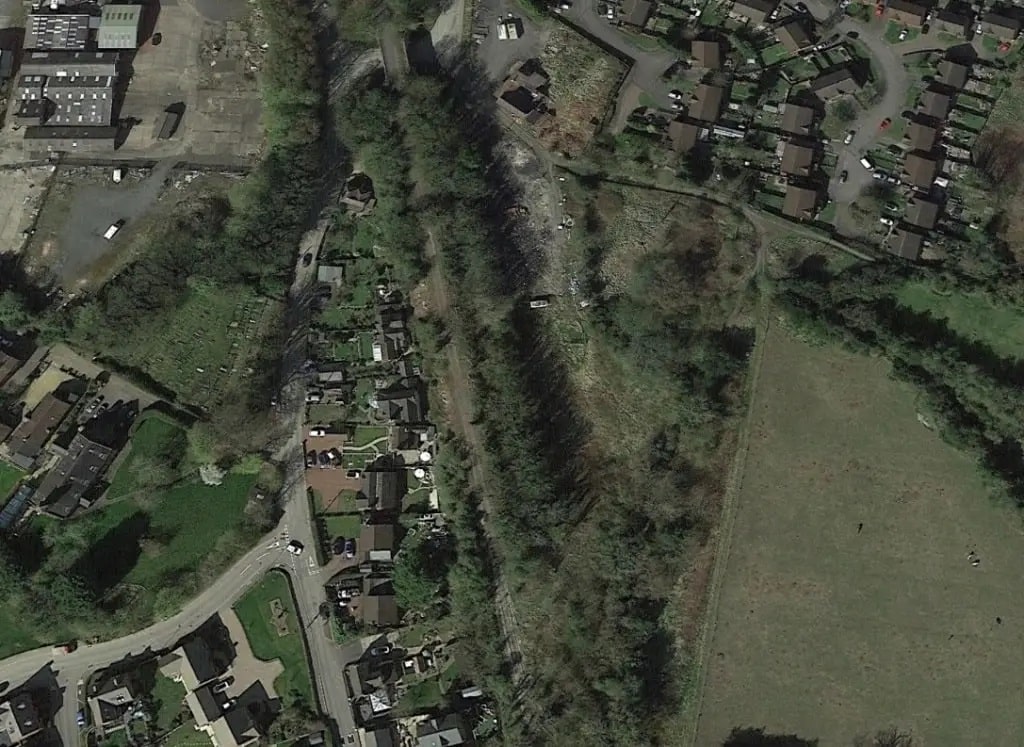
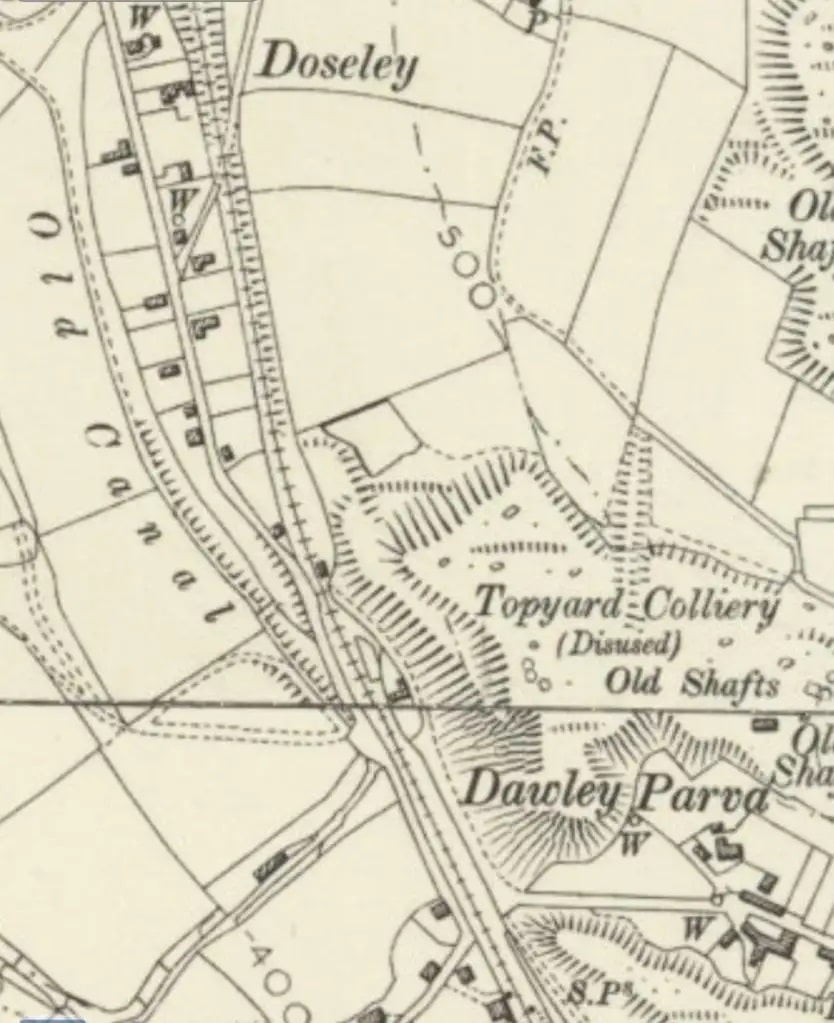


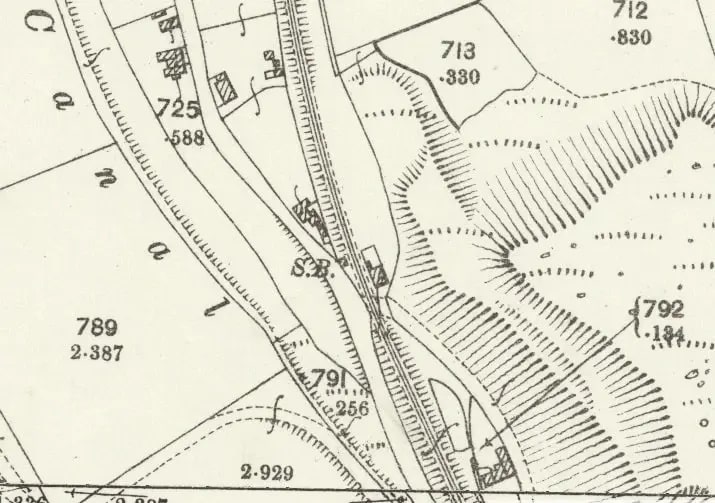
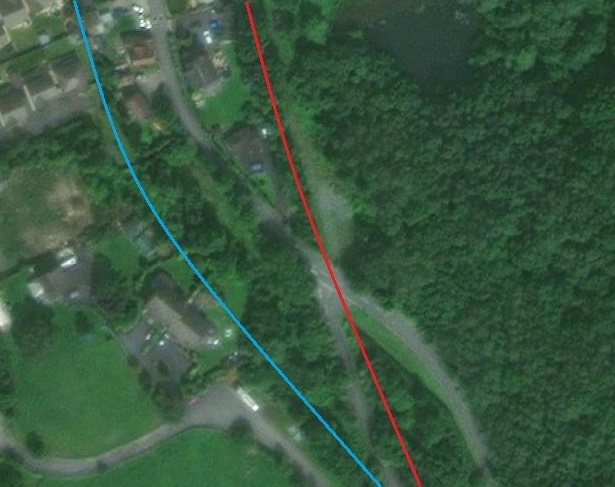
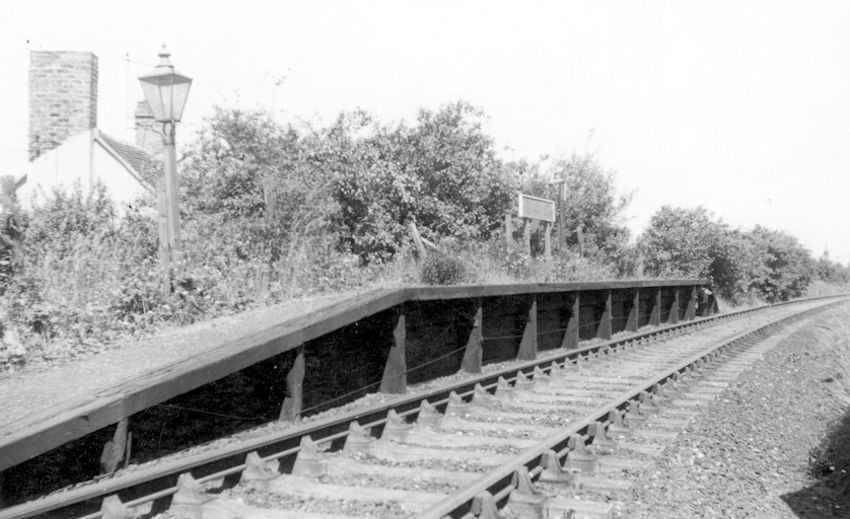
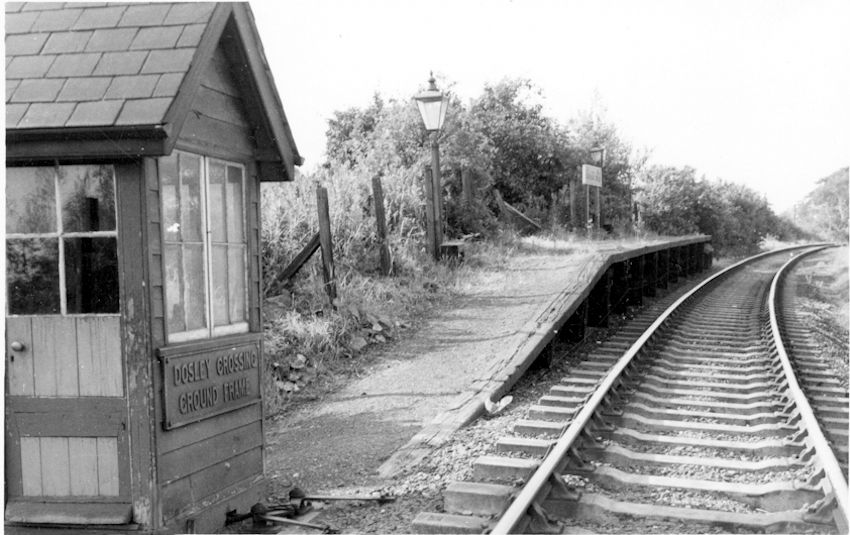

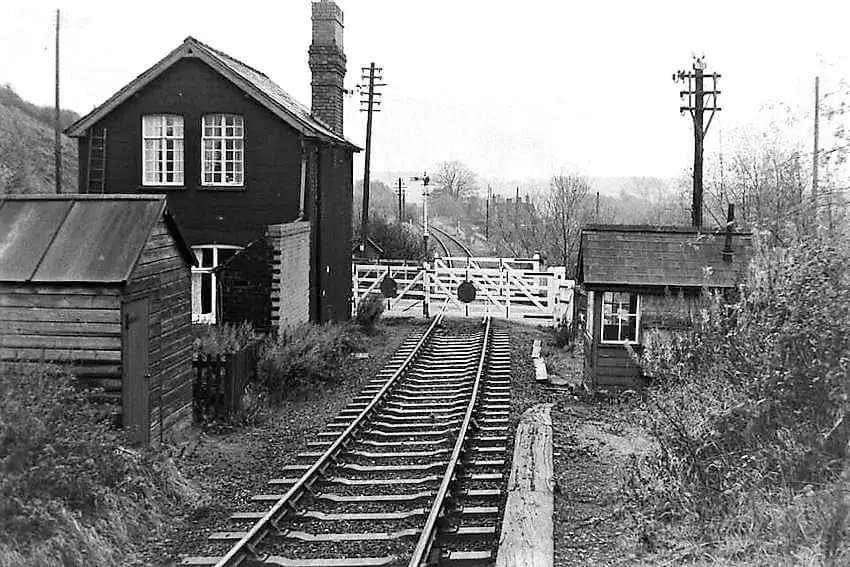
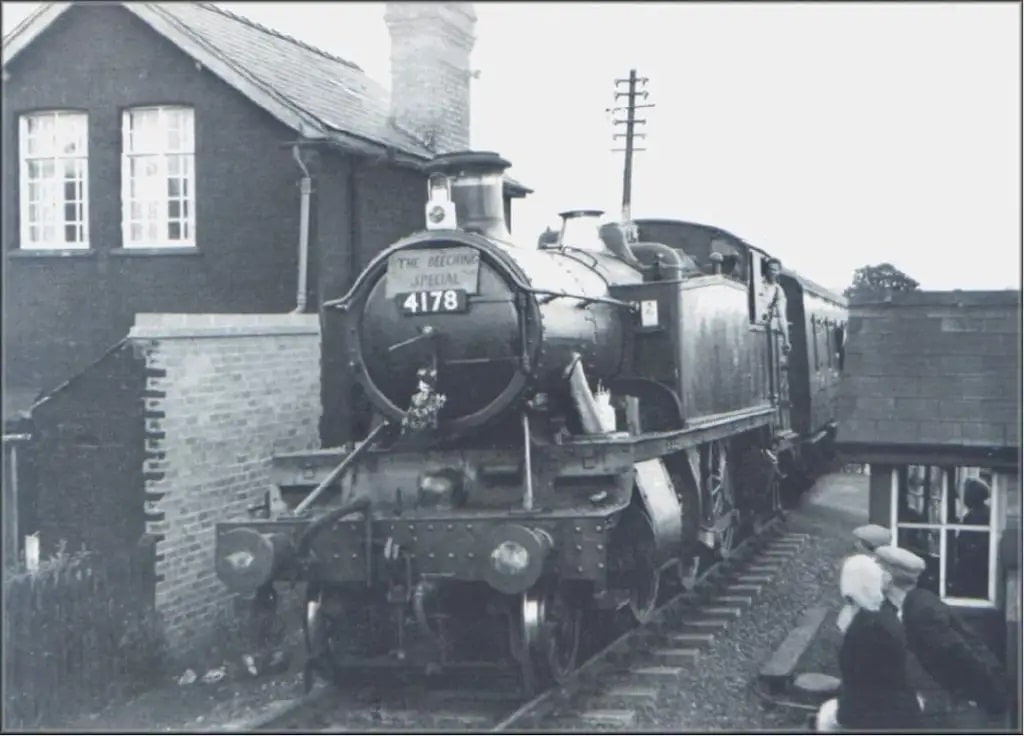
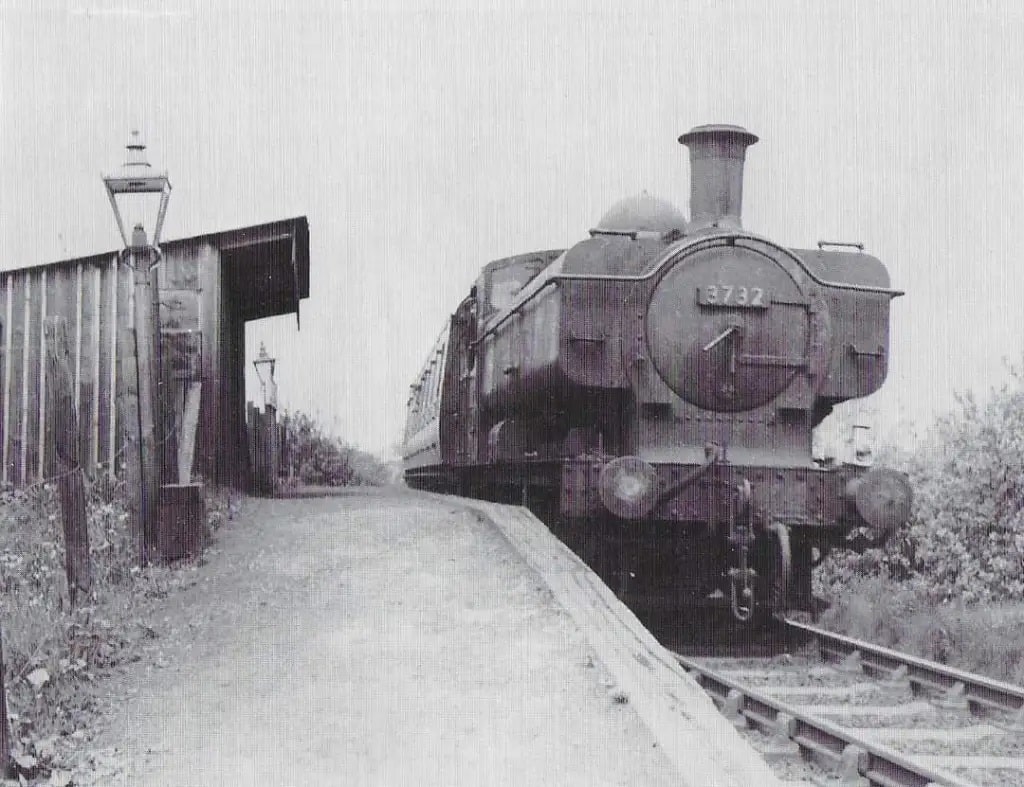
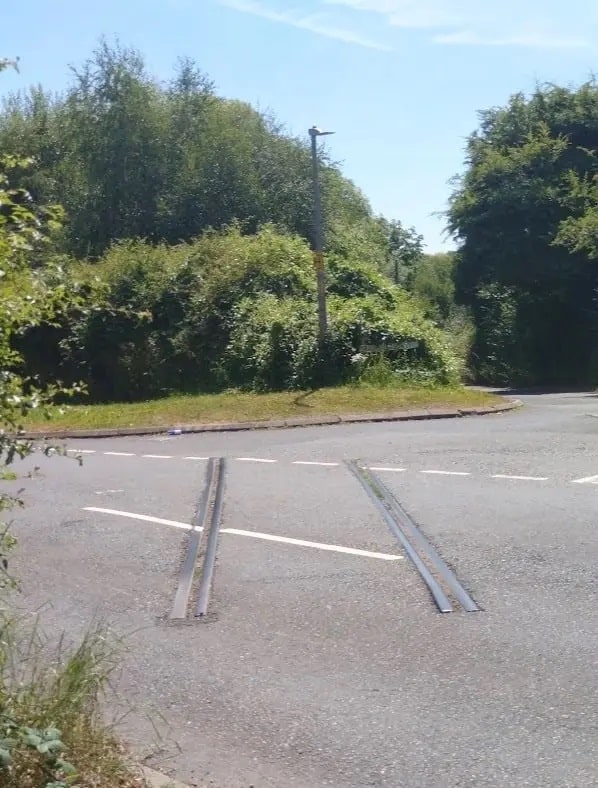
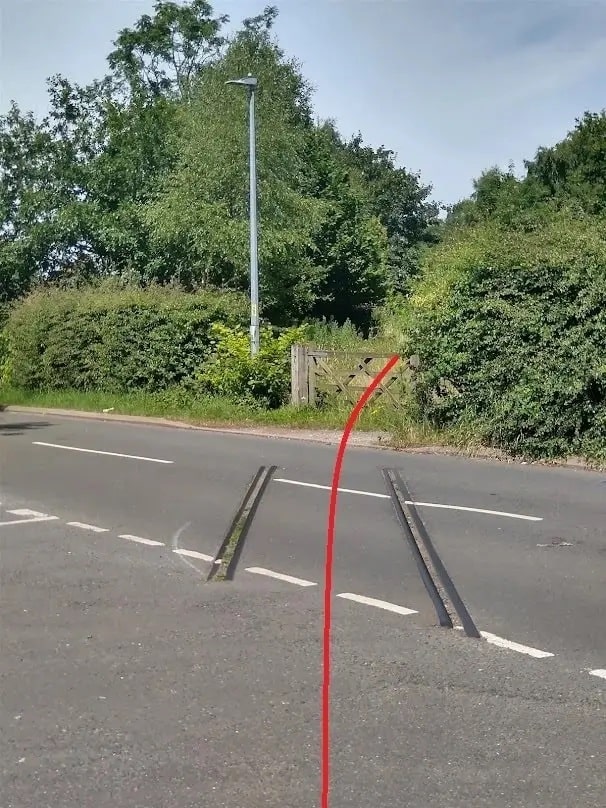
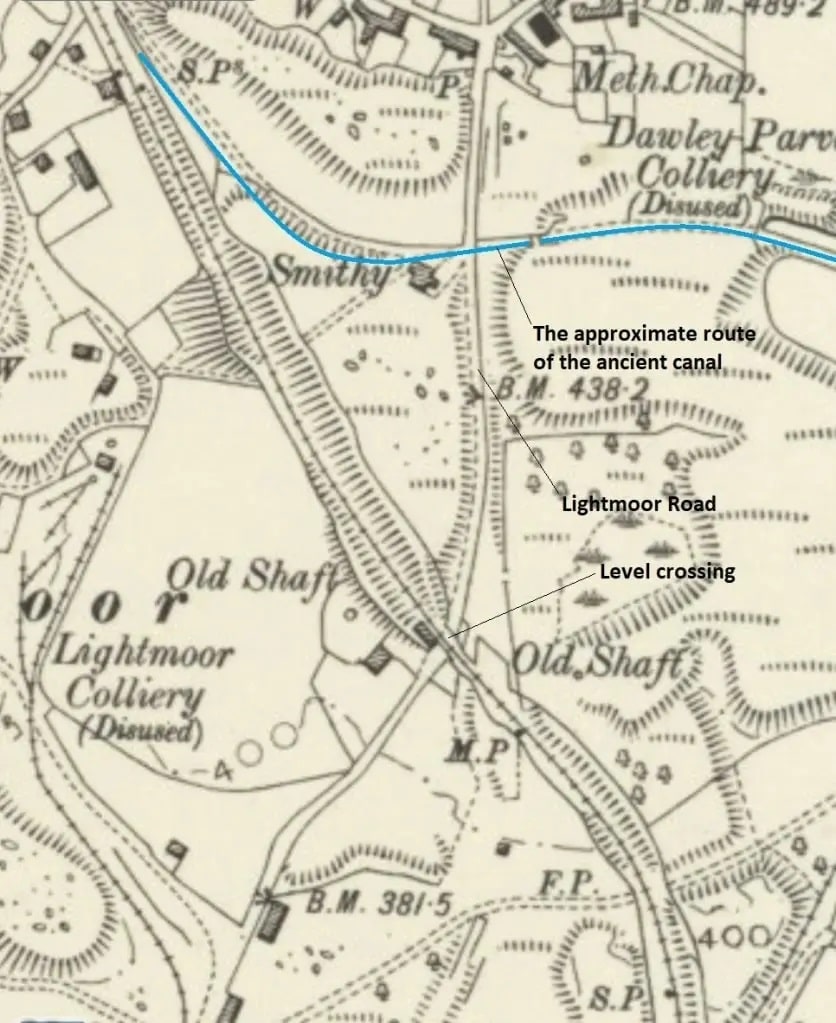
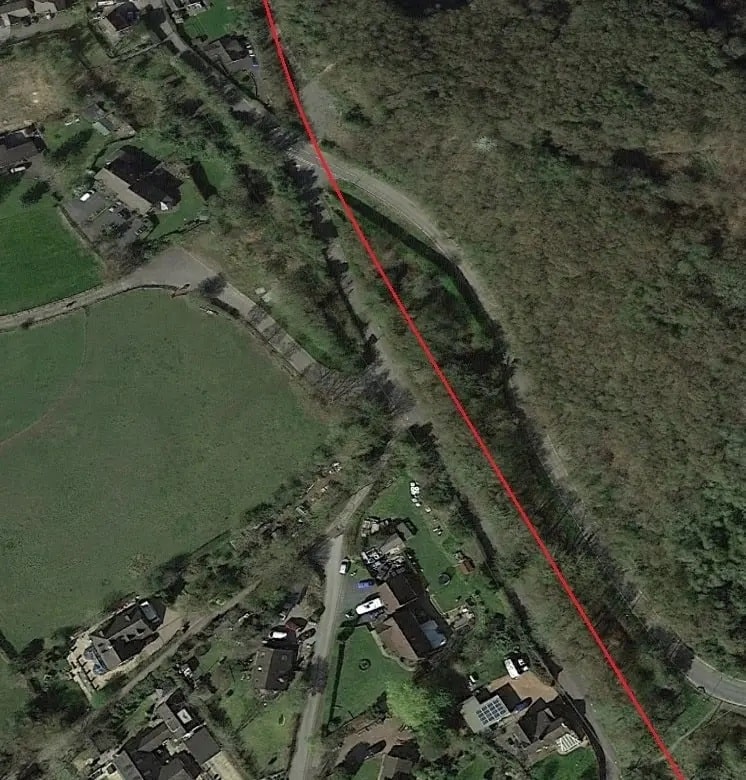
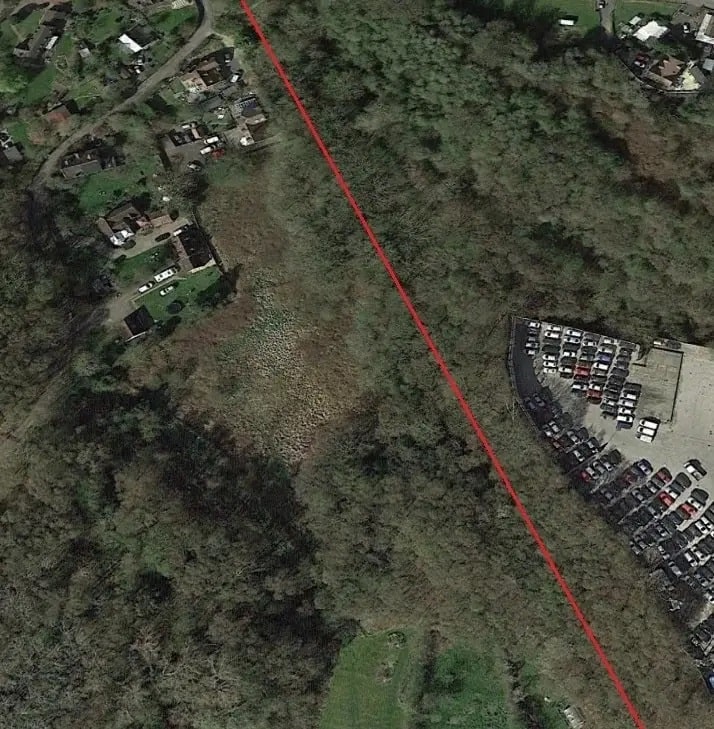
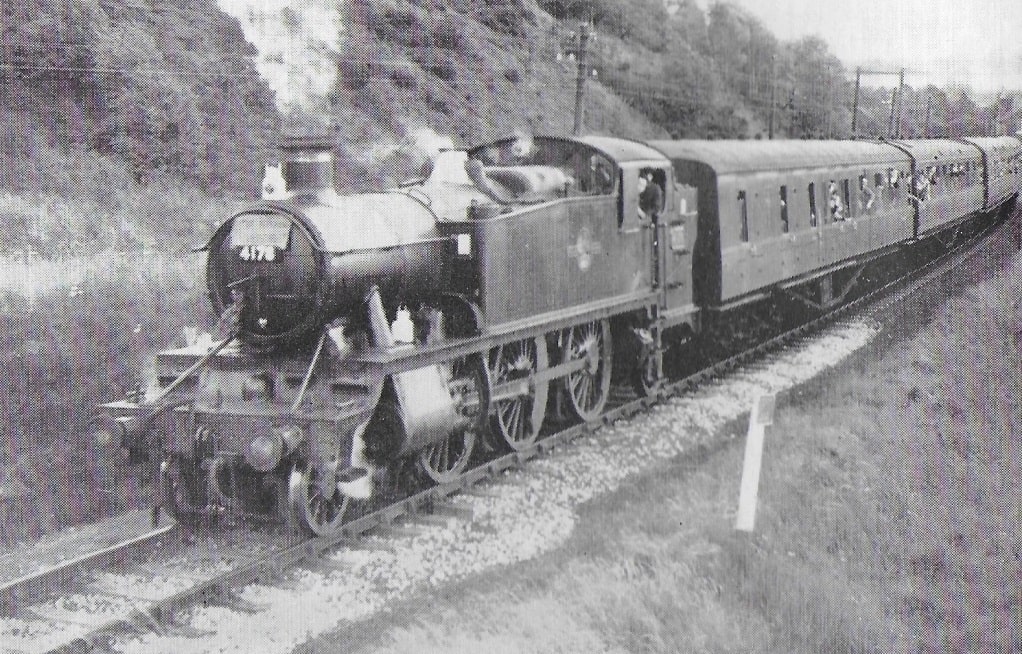

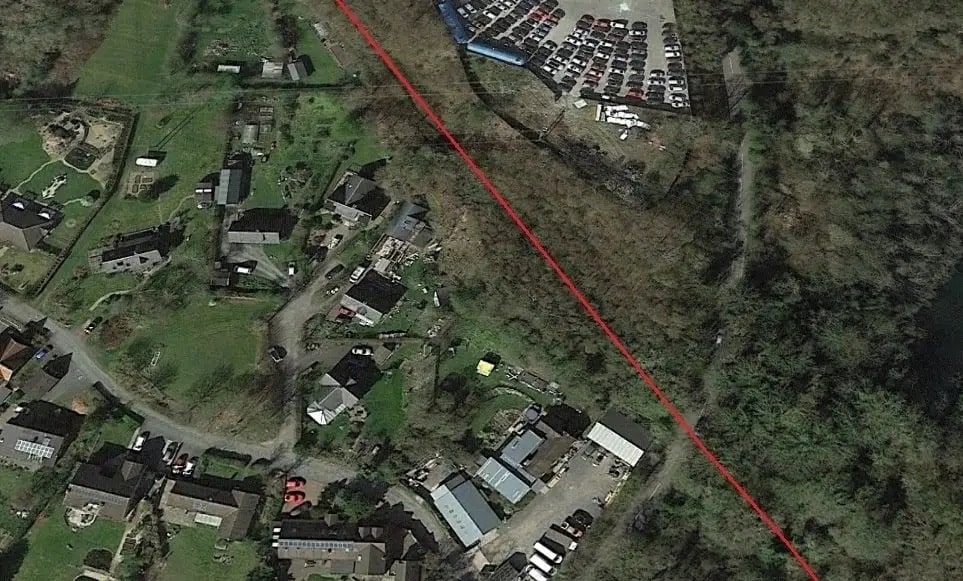
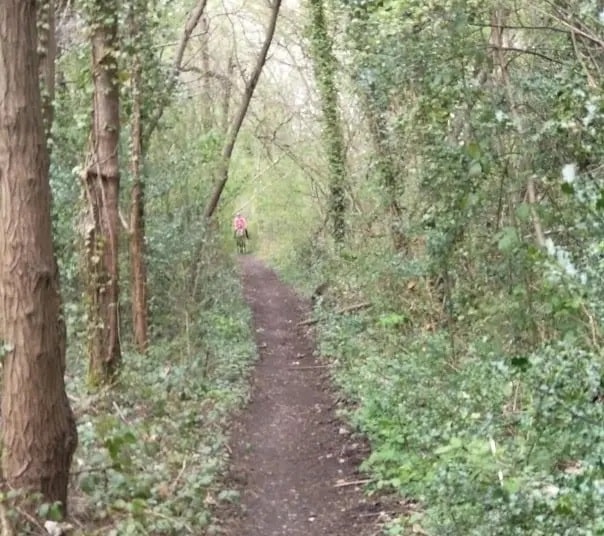
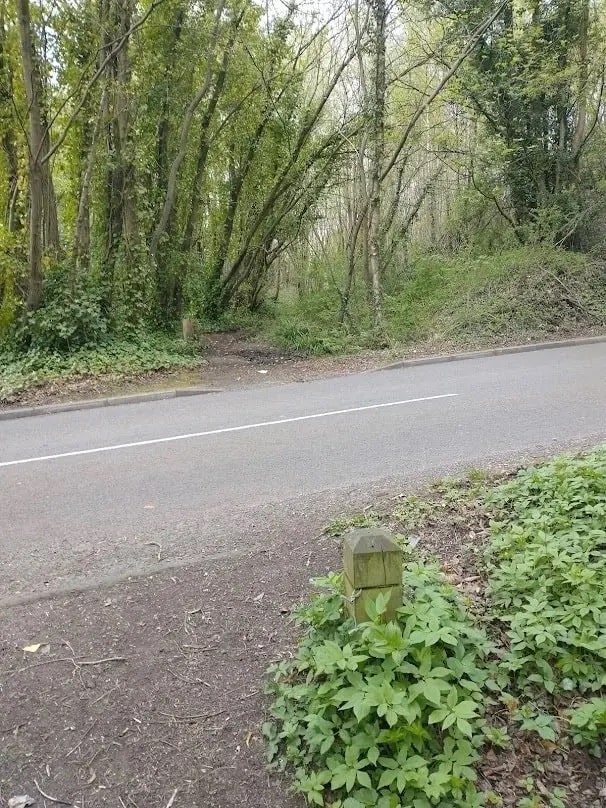
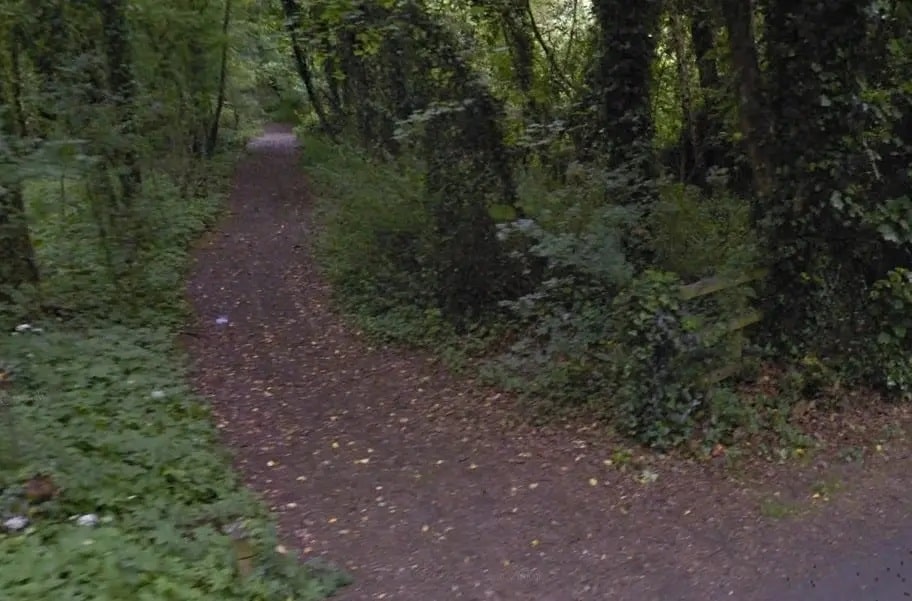

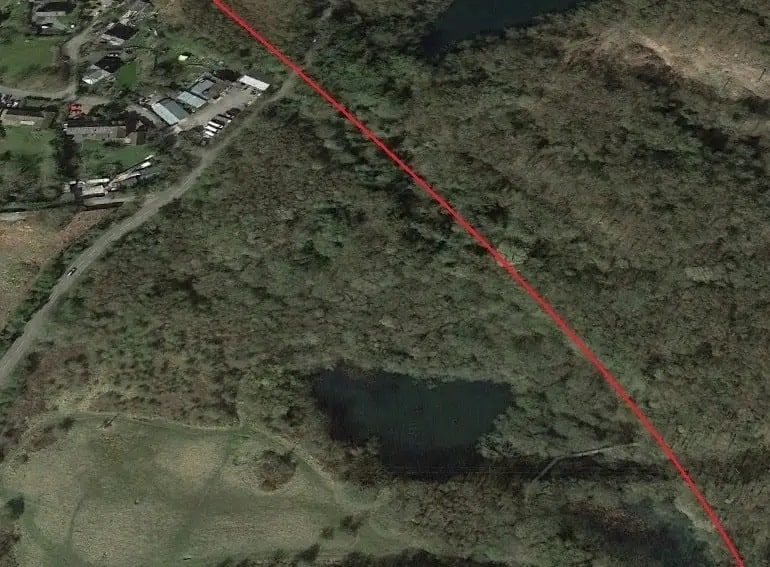
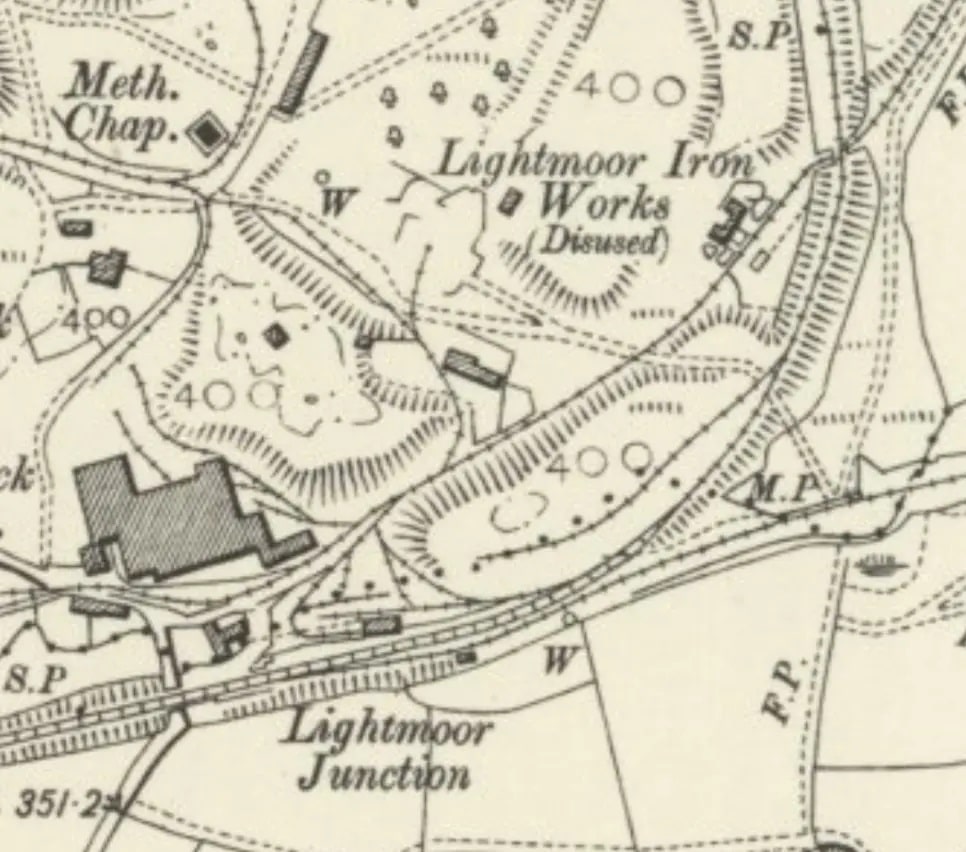
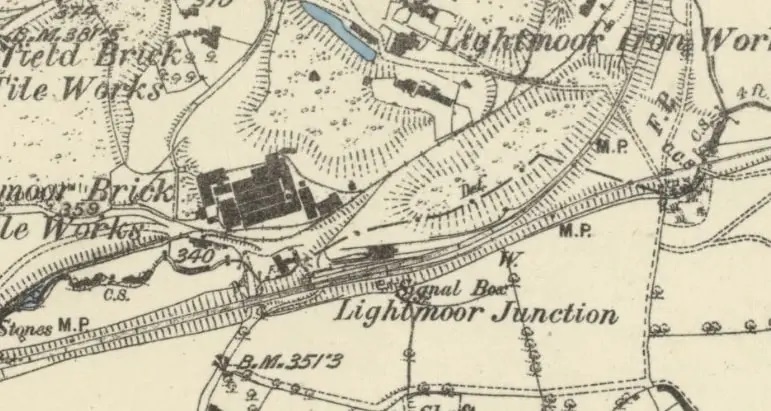
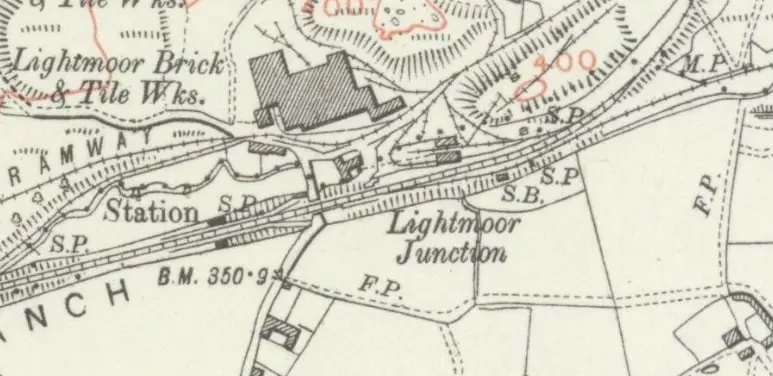
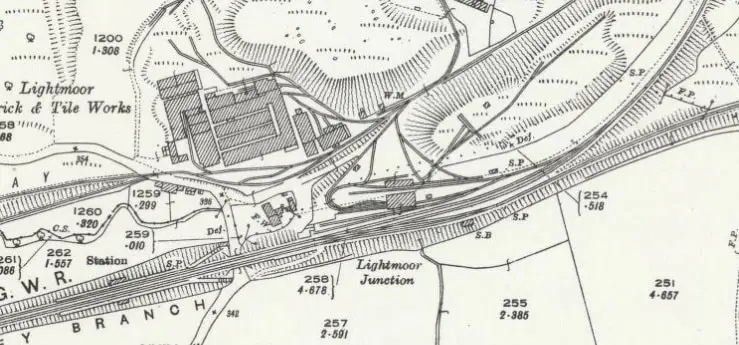
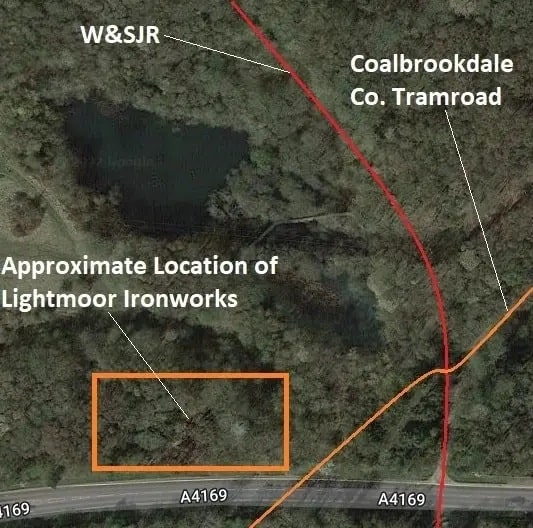
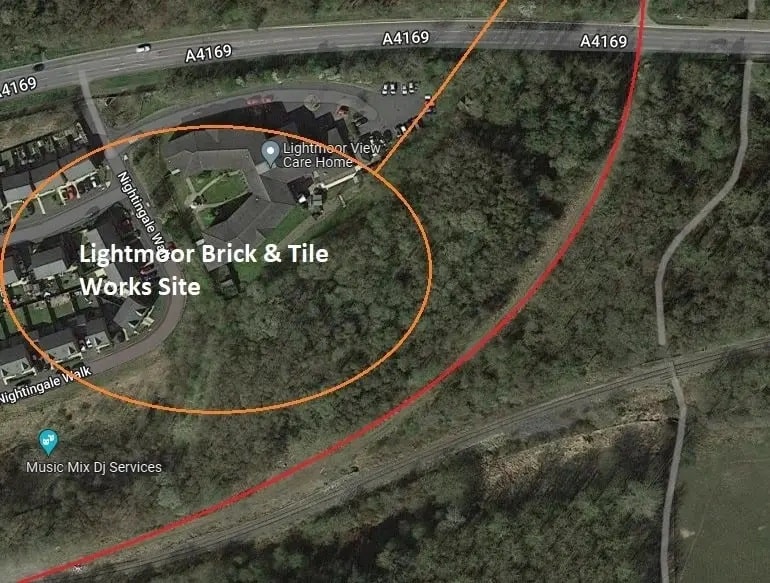
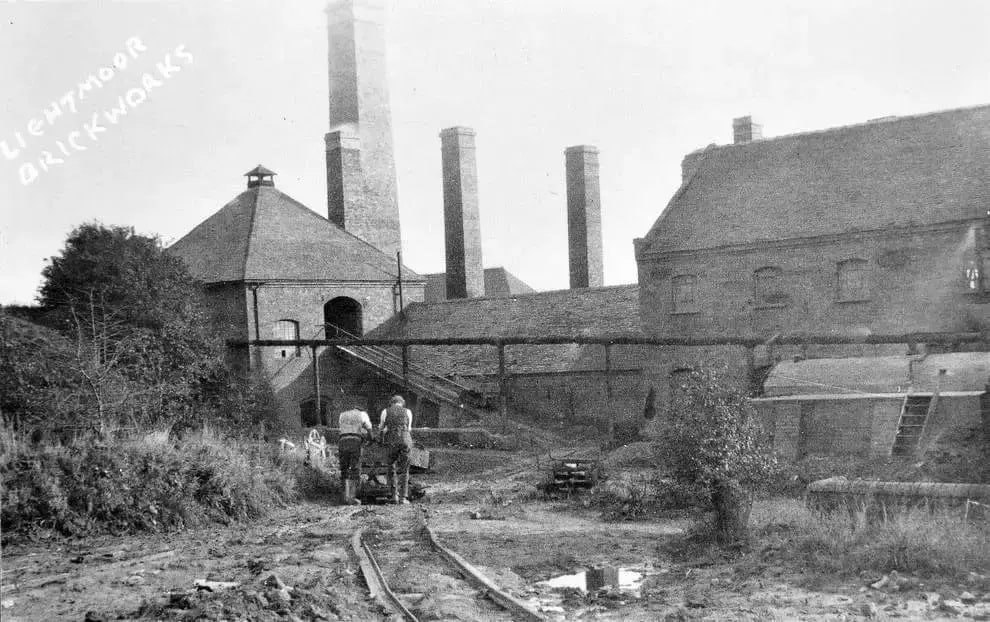
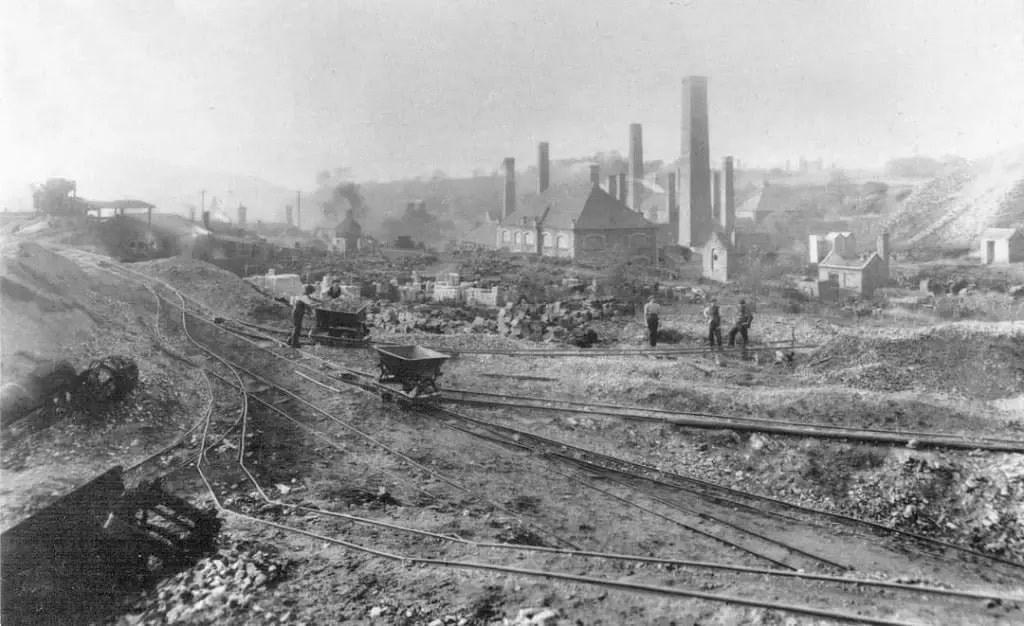
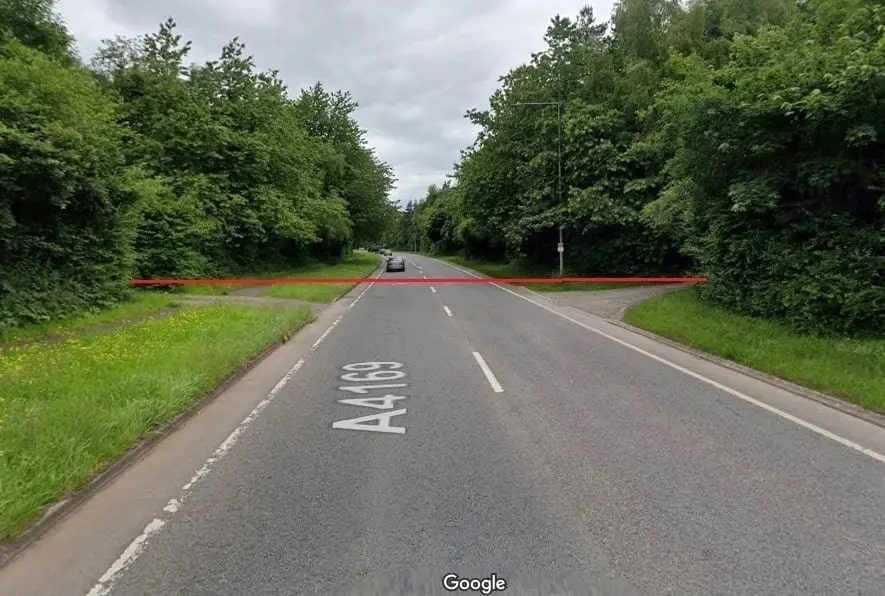
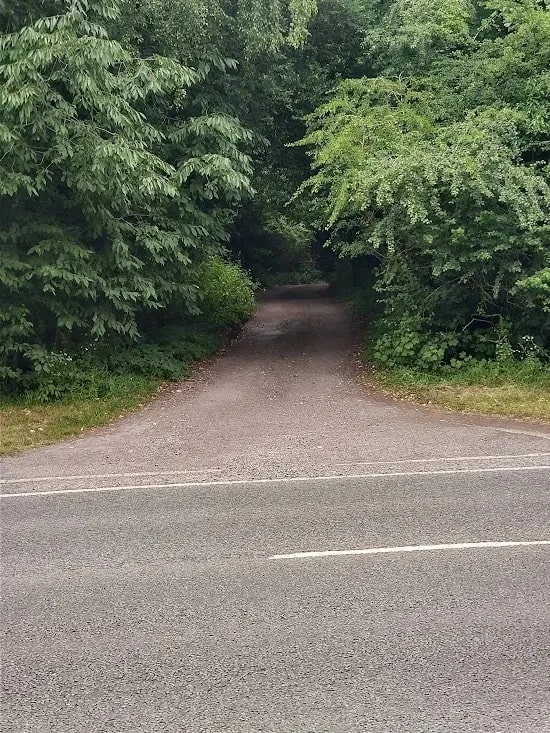
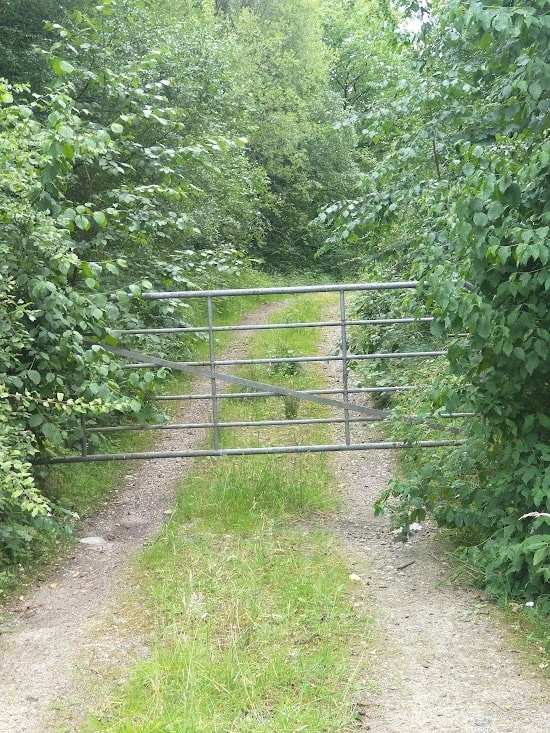
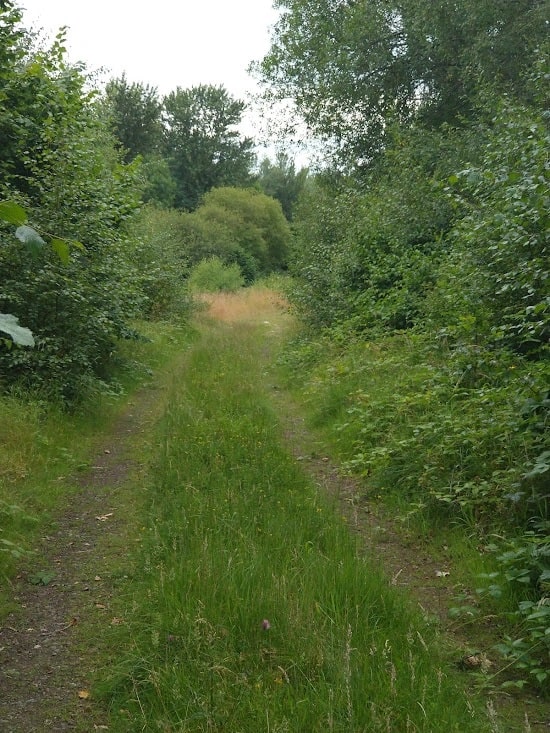
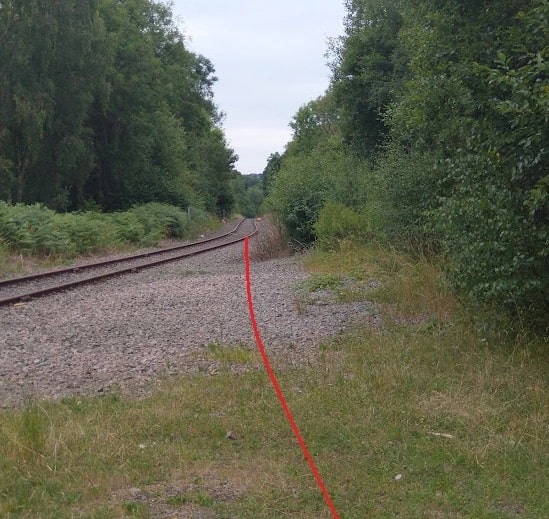
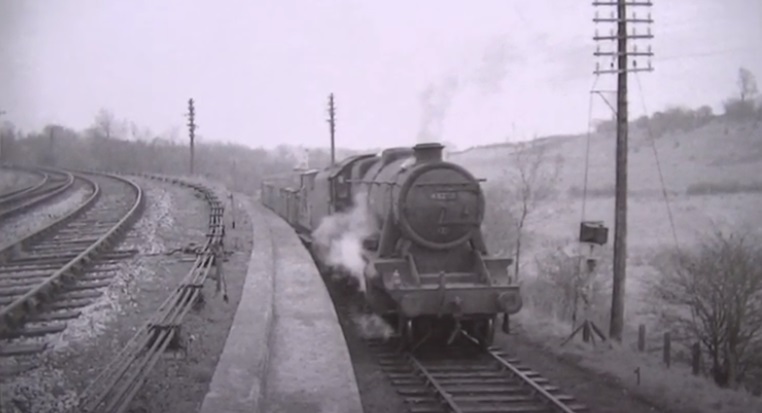
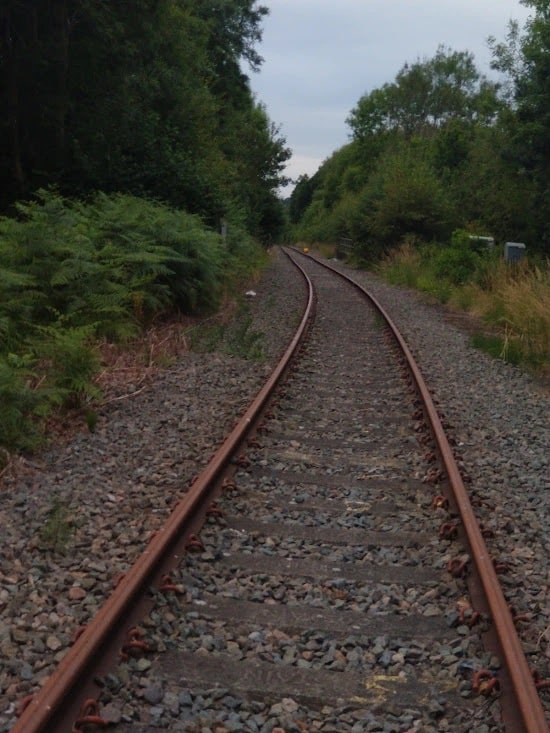
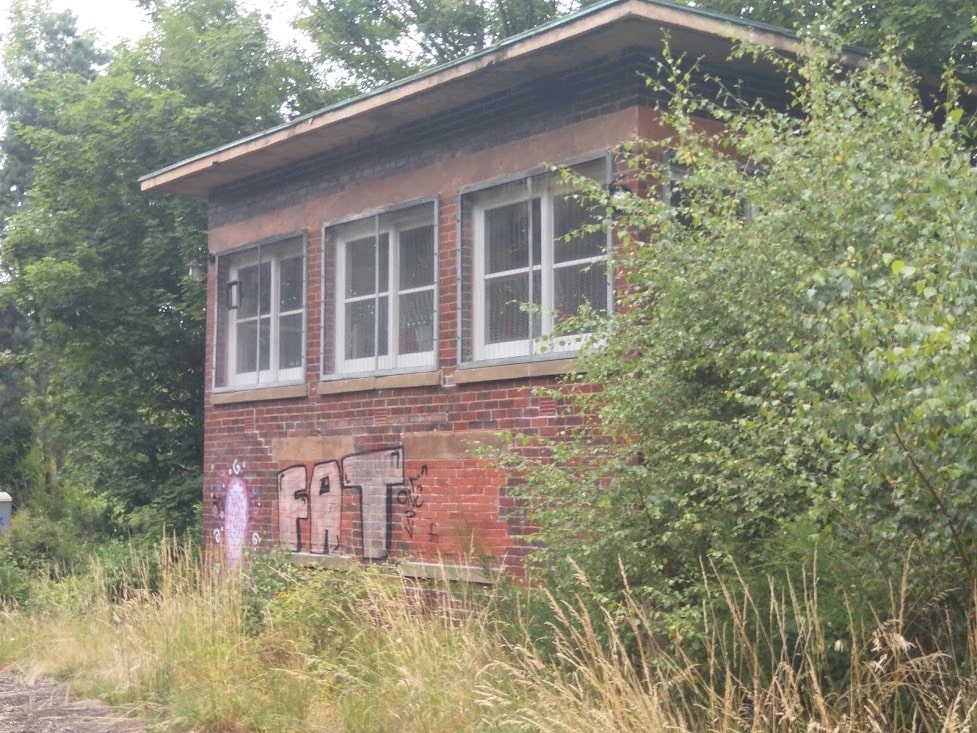
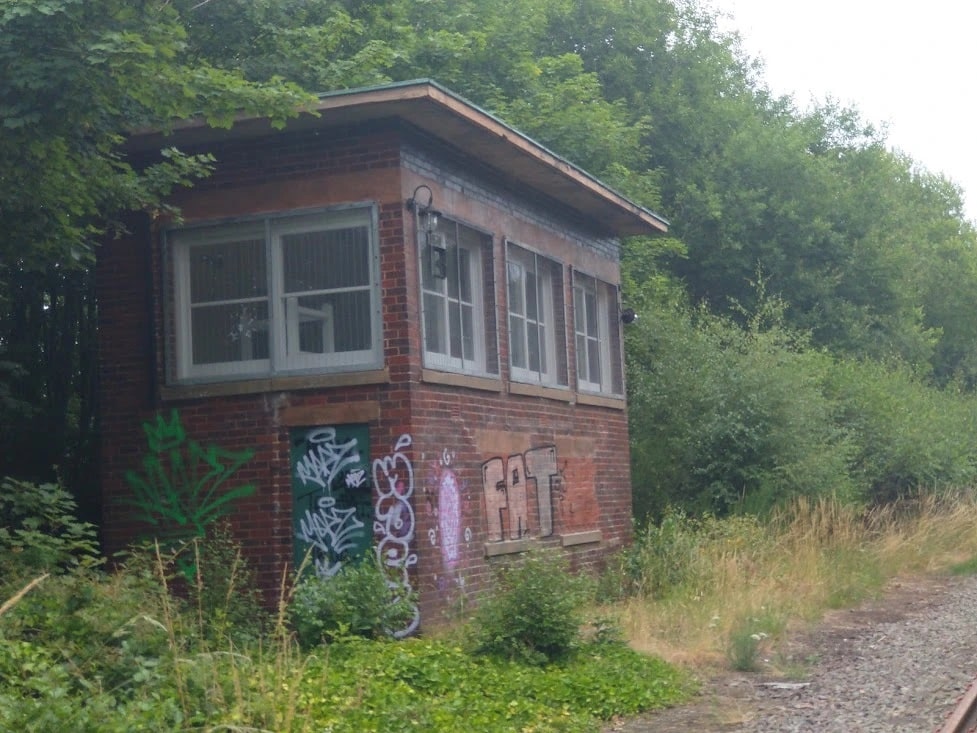

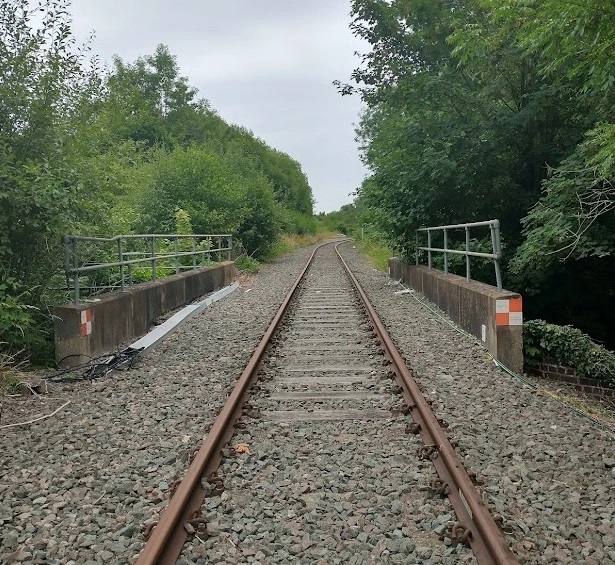
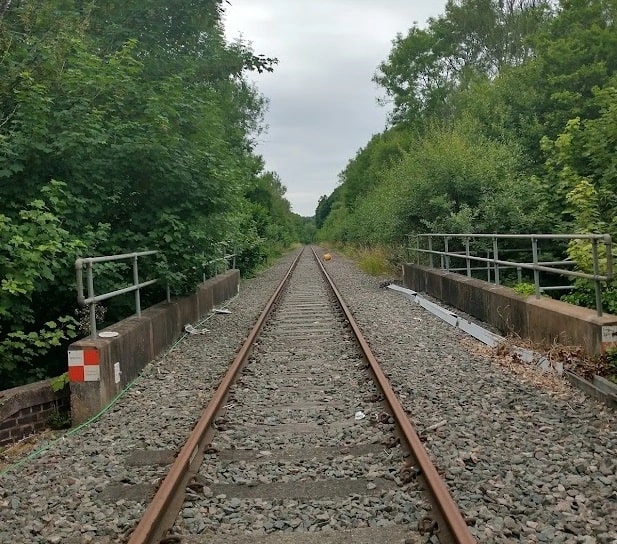
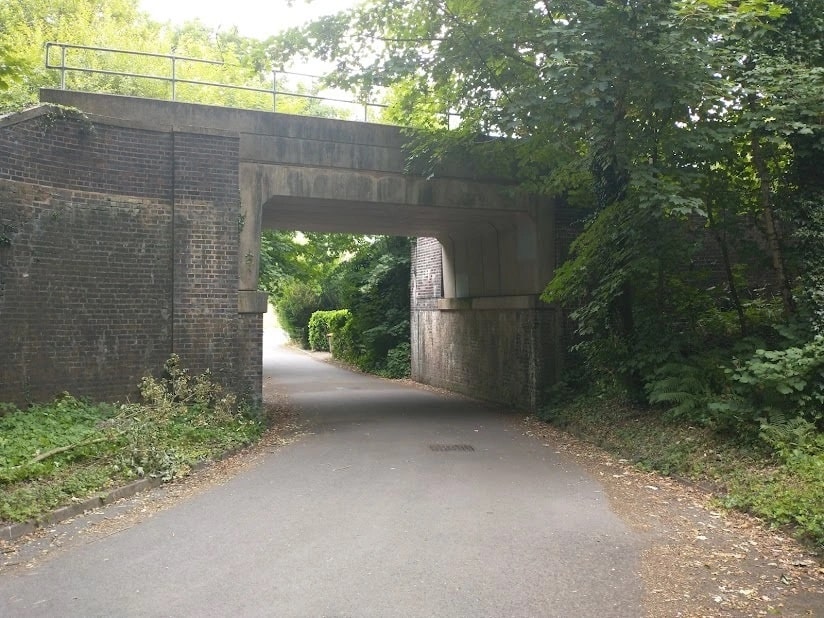
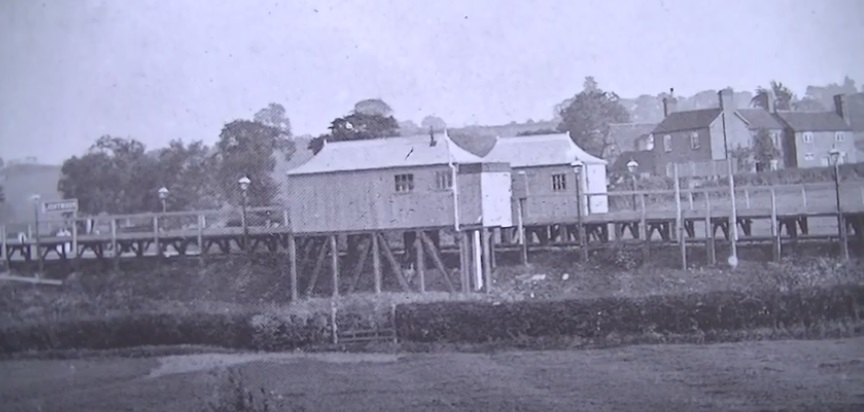
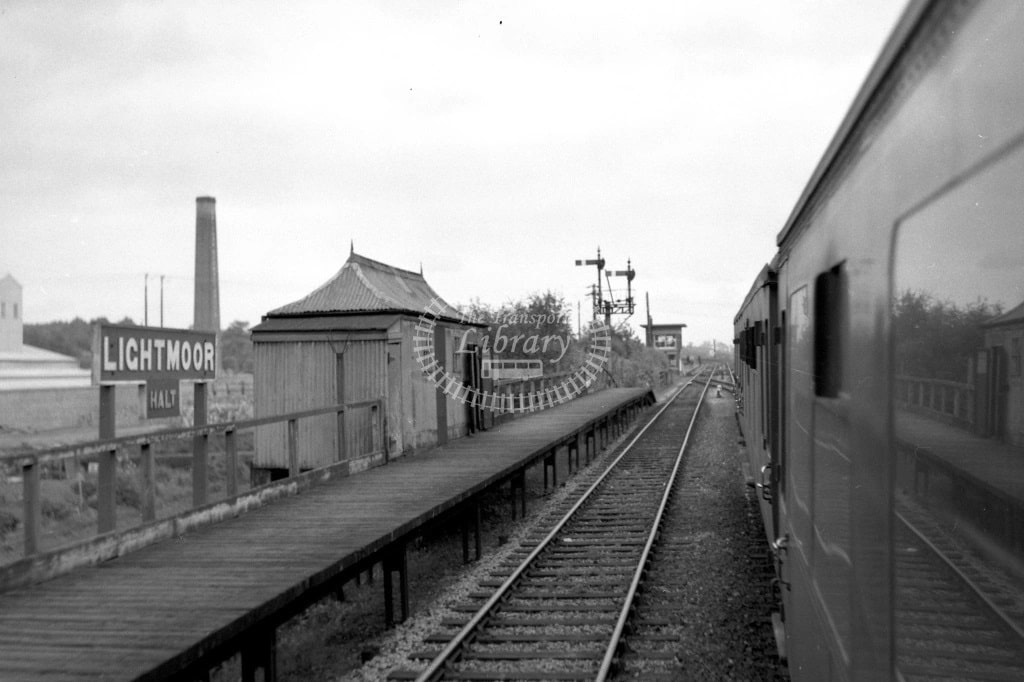

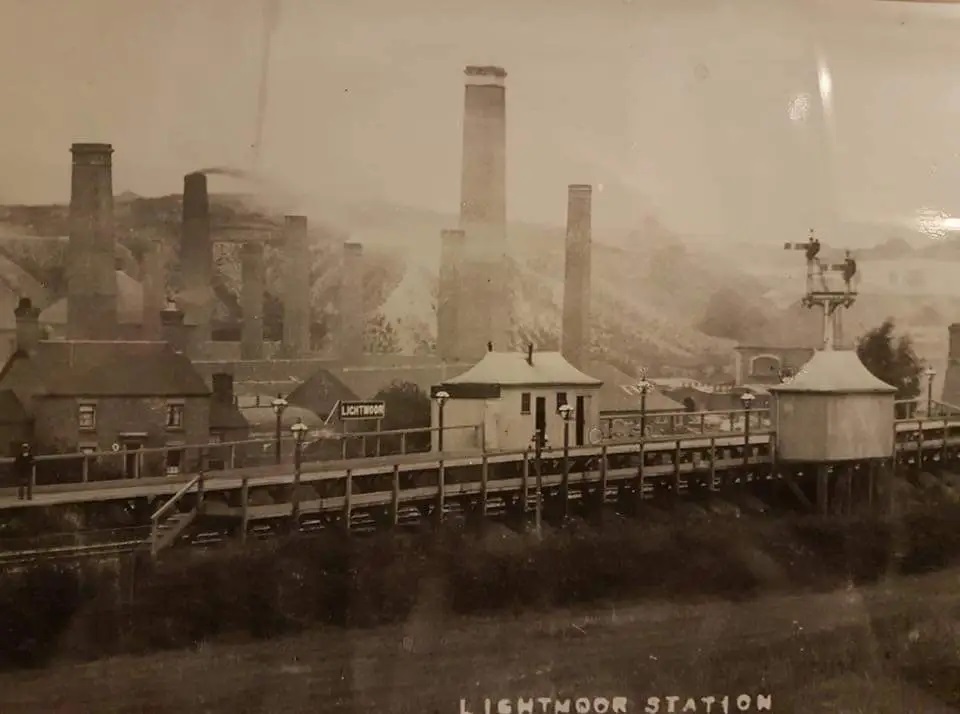
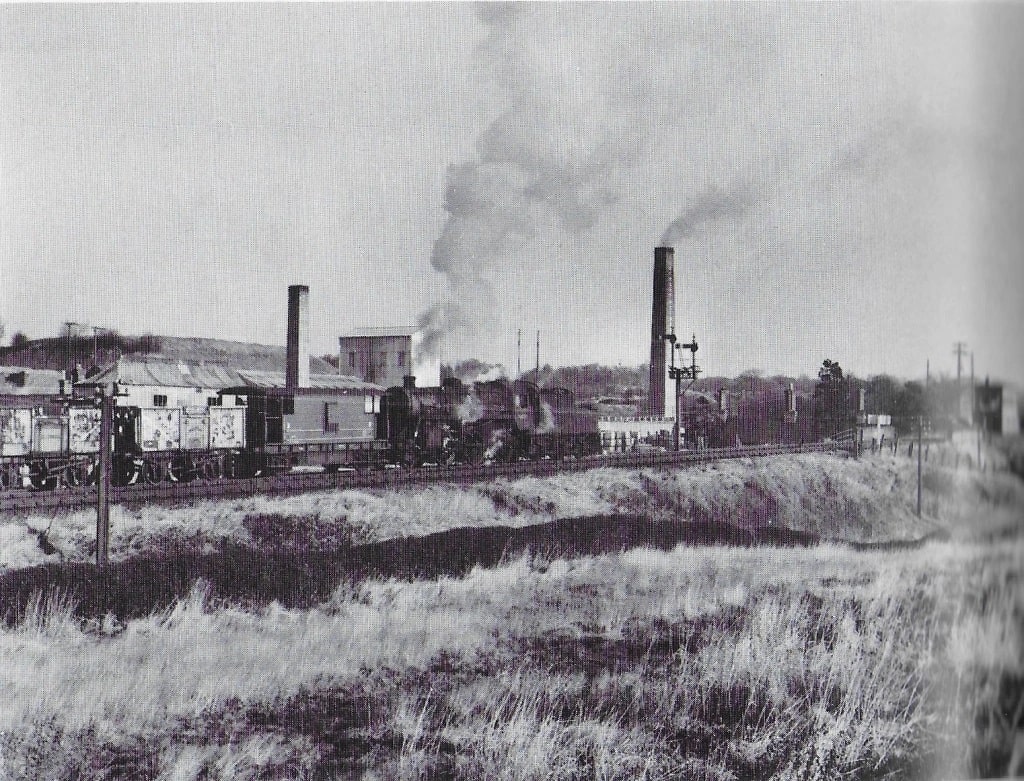
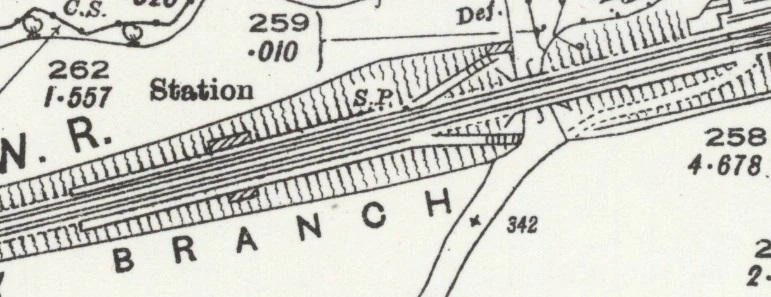
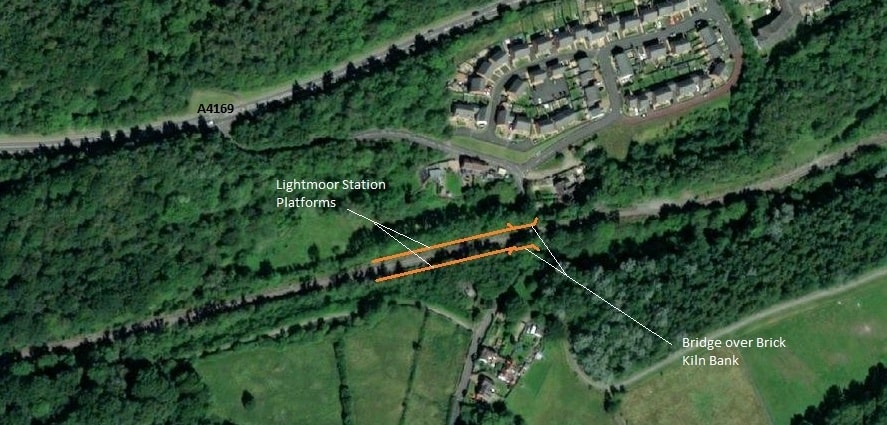
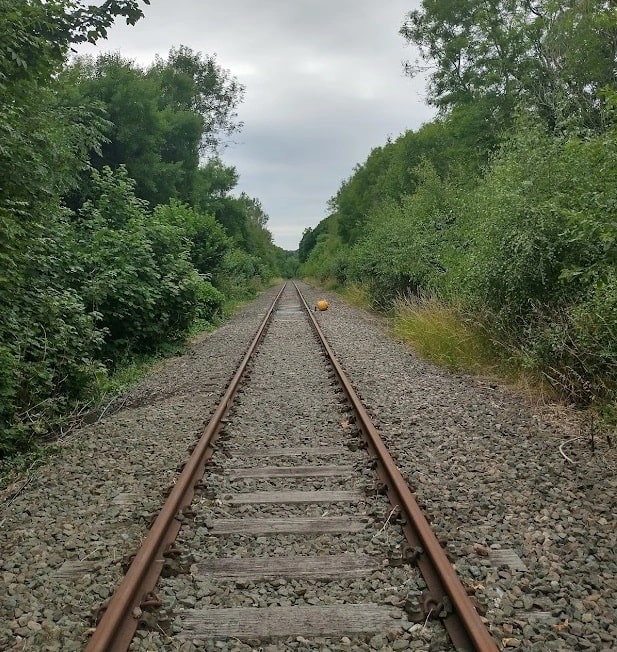

.jpg)
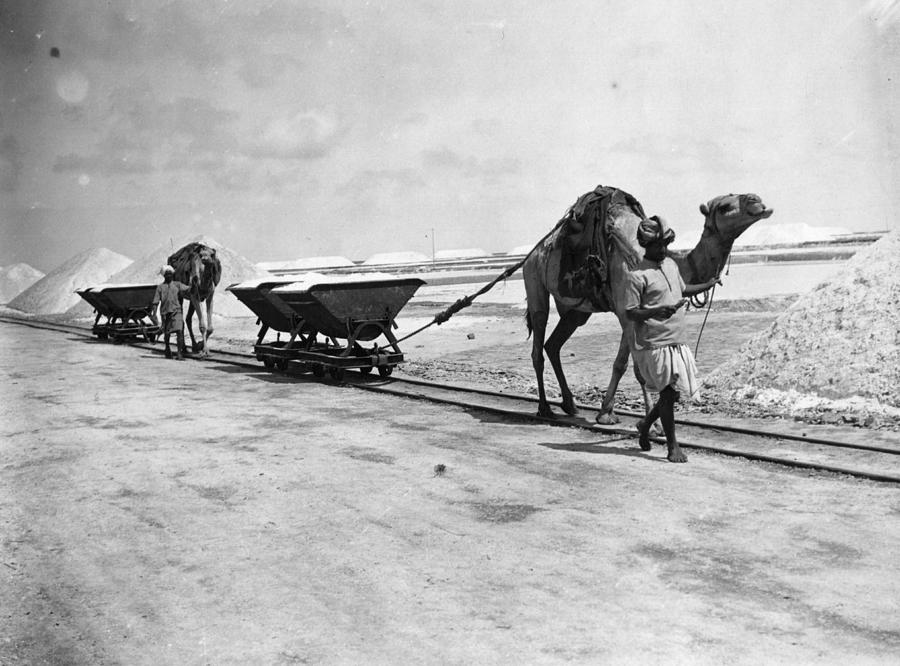
.jpg)
.jpg)