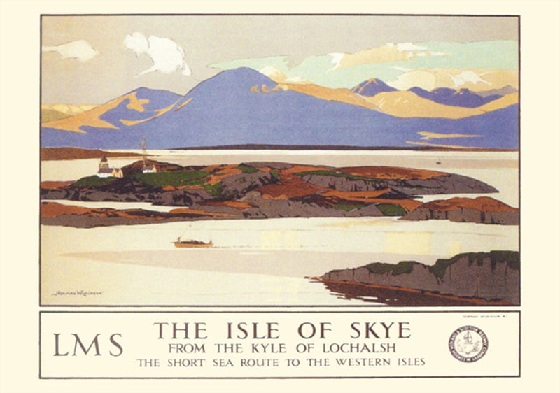
There was a 19th century proposal for a public railway to Dunvegan and Portree which never came to fruition. A later proposal was the Hebridean Light Railway which was promulgated by the Hebridean Light Railway Company. It intended to operate on the Scottish islands of Skye and Lewis. [8] The Skye line was to have connected the port of Isleornsay (for ferries from Mallaig on the Scottish mainland) and the port of Uig on the north-west coast of the island, from where ferries would have sailed to Stornoway on Lewis. Another line was then proposed to link Stornoway to Carloway, the second settlement of Lewis. Branch lines were also proposed to Breasclete [9] and Dunvegan. [10]
The line was proposed in 1898, but was never completed. Records of the proposals are held in the National Archives at Kew. [11]
Although these schemes never came to fruition, at least six industrial railways have existed on Skye and adjacent islands at one time or another. These include:
TheLoch Cuithir to LealtDiatomite Railway – Details of this line can be found here. [5]
The Talisker Distillery Tramway – This short 23″-gauge tramway opened in 1900 and closed in 1948. Details can be found here. [6]
The Skye Marble Railway – Soon after the turn of the 20th century a line was opened between the Kichrist Quarries in Strath Suardal and Broadford Pier/Quay. Different sources say that this was initially either and aerial ropeway or a horse-worked tramway. Whatever form the initial arrangements took, by the end of the first decade of the 20th century, it was operating as a steam-hauled 3ft-gauge railway which for a short while (certainly no more than 4 years) employed a Hunslet 0-4-0ST, originally built in 1892 and previously used on the construction of the County Donegal Railway and various other contractors projects. This line is covered in more detail in the article which can be found here. [7]
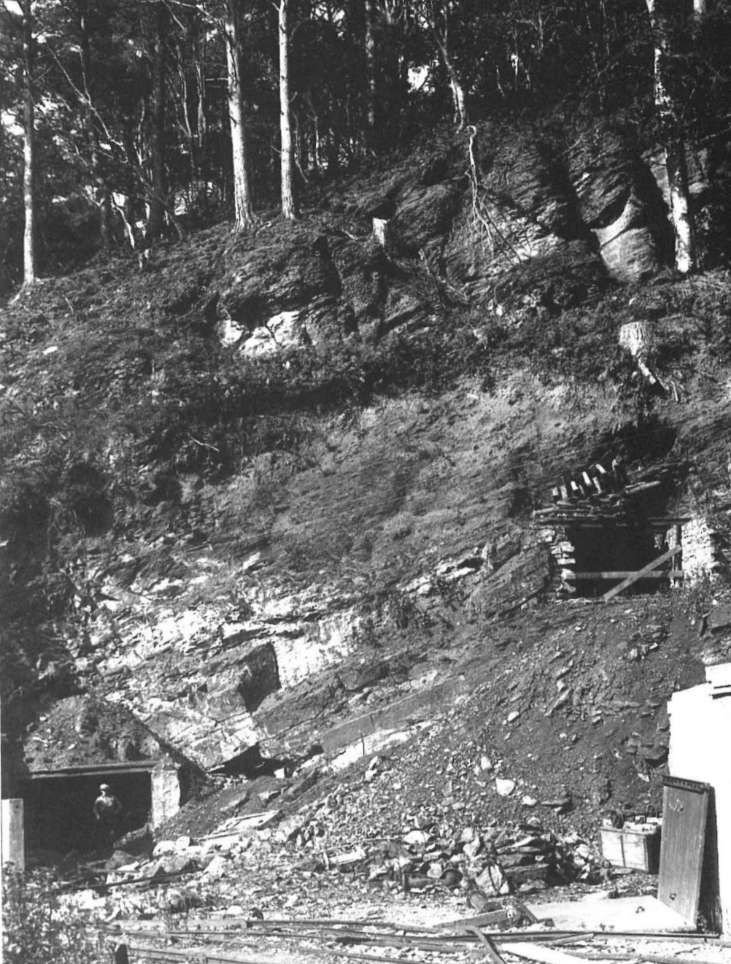
The Raasay Iron Ore Mines and Their Railway – the railway operated from 1913 to 1919. [1][2]
More can be discovered about Raasay’s railway here. [12]
The Quartzite Quarry at Ord (opened in 1945) was equipped with a 3ft-gauge railway along which wagons were pushed by hand to a loading embankment. A short article can be found here. [13]
Storr Lochs Hydroelectric Power Station (opened in 1952) which included a standard gauge electric cable railway which still routinely carries spares and supplies down a 1 in 2 gradient. Another short article can be found here. [14]
Other railways on Skye or on adjacent islands? One source commented that Skye had thirteen different railways/tramways open at one time or another. I have only been able, so far, to identify the ones listed here. Should others be aware of more historic rail sites on Skye, I would be interested to hear. Maybe that source intended their list to include the abortive schemes mentioned at the head of this article? One particular proposal, which never came to fruition, has imaginatively been taken as the basis for the story of the fictitious Highland Light Railway Company. [15]
There is an excellent book by Laurence & Pamela Draper, which they self-published in 1990, entitled “The Raasay Iron Mine: Where Enemies Became Friends.” I picked up a copy second-hand from an online sales site. That book covers the operation on Raasay in some detail. This article looks at the railways involved.
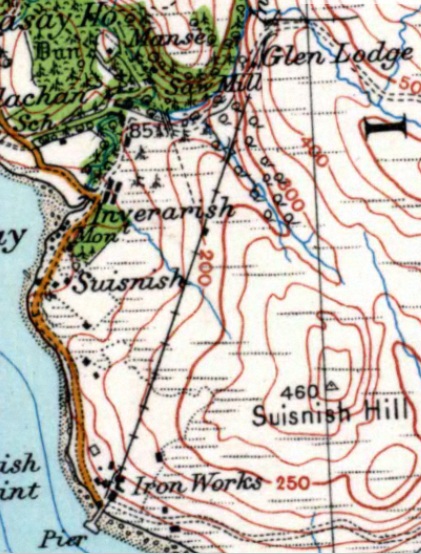
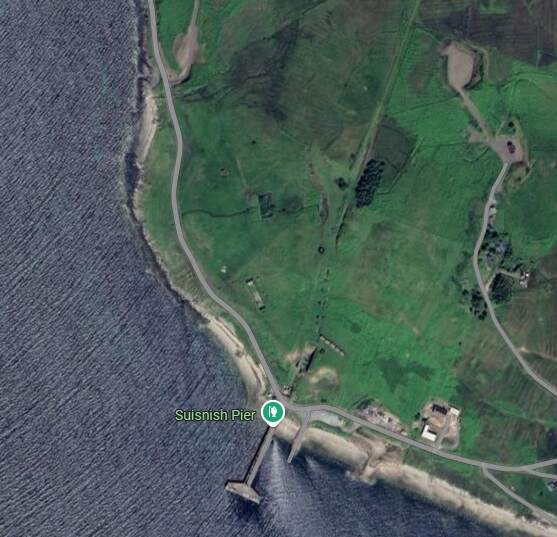
An extract from the Ordnance Survey 1″ Mapping of 1930 (Sheet 25) shows the line of the railway running North-northeast from the pier at Suisnish to Mine No. 1. A dotted line represents the line to Mine No. 2. [8]
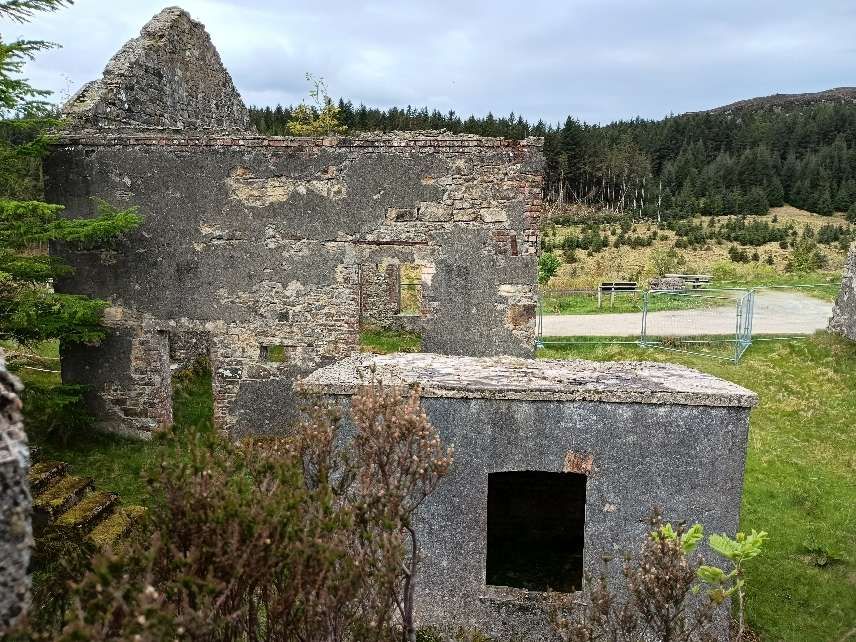
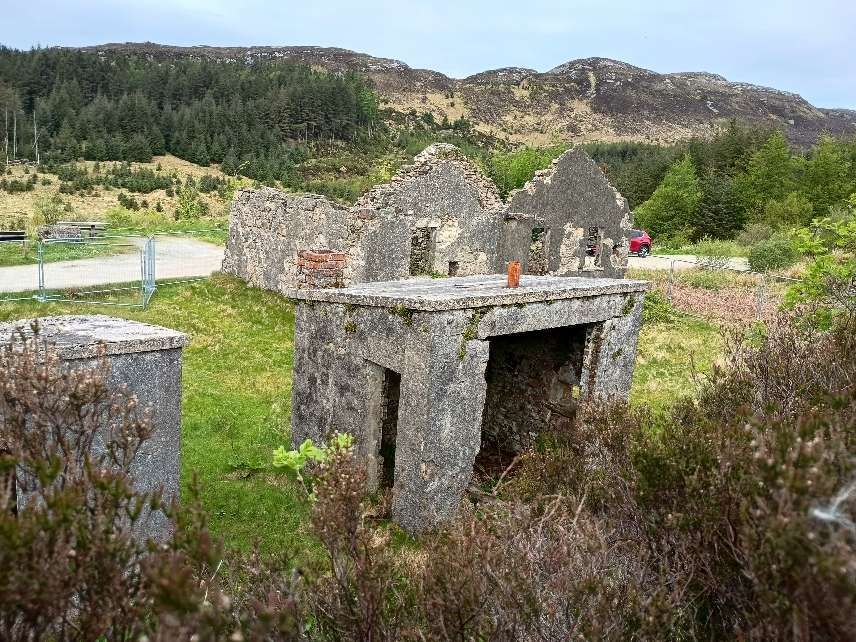
Raasay Iron Mine
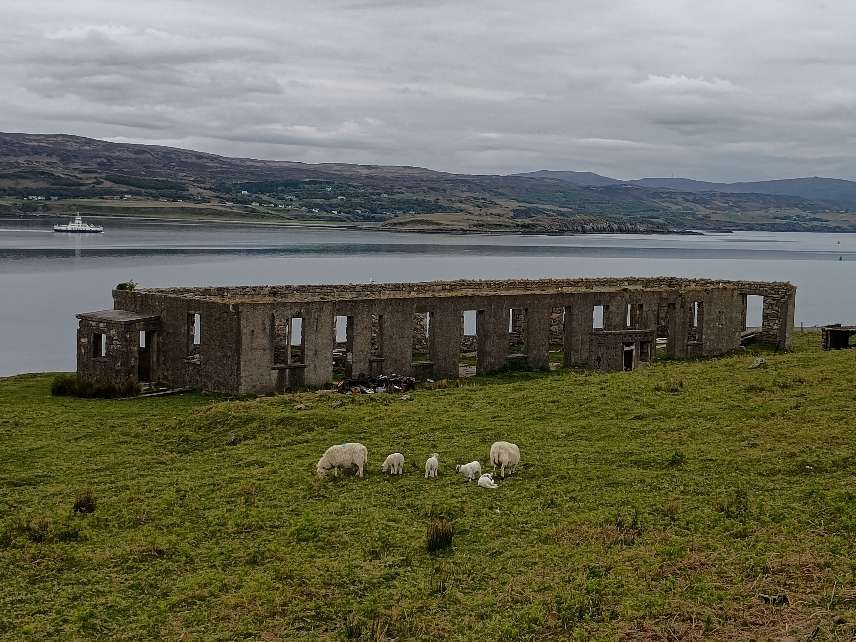
L. & P. Draper tell us that “Just before the First World War the Scottish coal and iron-ore mining, and iron-smelting, firm of William Baird and Company opened up an iron-ore mine on the Island of Raasay in the Inner Hebrides. … In association with the mine, Baird’s built several kilometres of narrow-gauge railway, a crusher, five calcining kilns, a huge ore hopper and a reinforced concrete pier. Many aspects of the installation, such as this pier, diesel-electric power generation and the provision of powerful external electric lighting, were very advanced for their time.” [1: pV][3: p146]
The BBC tells us that “William Baird and Co. Ltd … owned the Raasay estate and initiated the mine’s operations. The mine was developed just before the war and was crucial in providing iron ore for the British war effort, with the ore being transported to Ravenscraig for smelting.” [2]
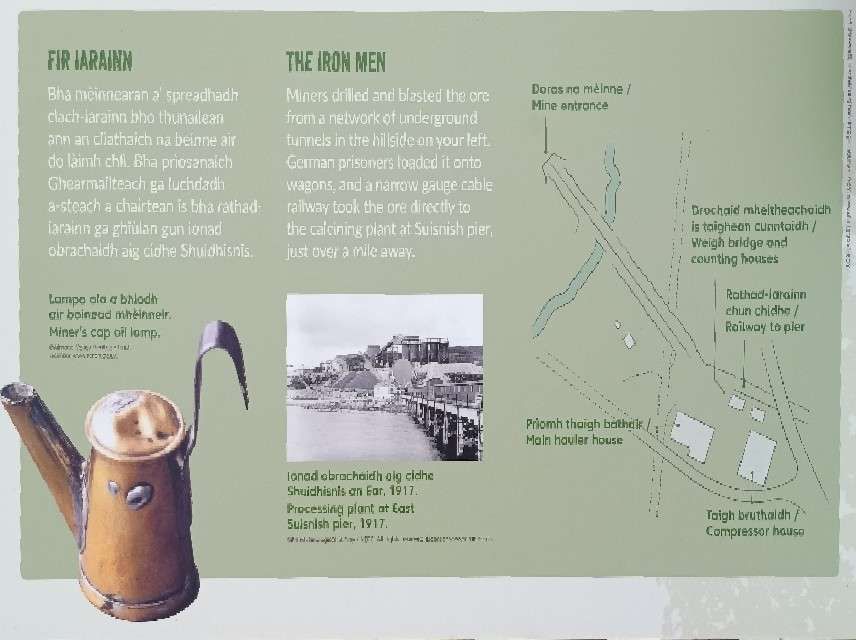
Because most of the local men had been called up, Baird’s arranged for German Prisoners of War to work the installation from 1916 onwards. In permitting this, the British Government probably “contravened the Hague Convention which specifically banned the employment of Prisoners of War on munitions production; in 1920 the British Government attempted to destroy all relevant records, and was largely, but not entirely, successful. To enable prisoners to be used, the project was effectively nationalised (although that word was not actually used), with Baird’s operating it as agents for the Government; this was a standard system of management in the First World War. … Prisoners and local people worked in harmony together as colleagues, but relationships between Baird’s and the Ministry of Munitions were at times hostile. At the end of 1917 the local men, who were badly paid compared with men doing similar work elsewhere, went on strike, and there were allegations in Parliament that German Prisoners of War were being used as strike breakers, with a result that Winston Churchill himself made statements in response; these allegations were at best only half truths.” [1: pV][3: p146]
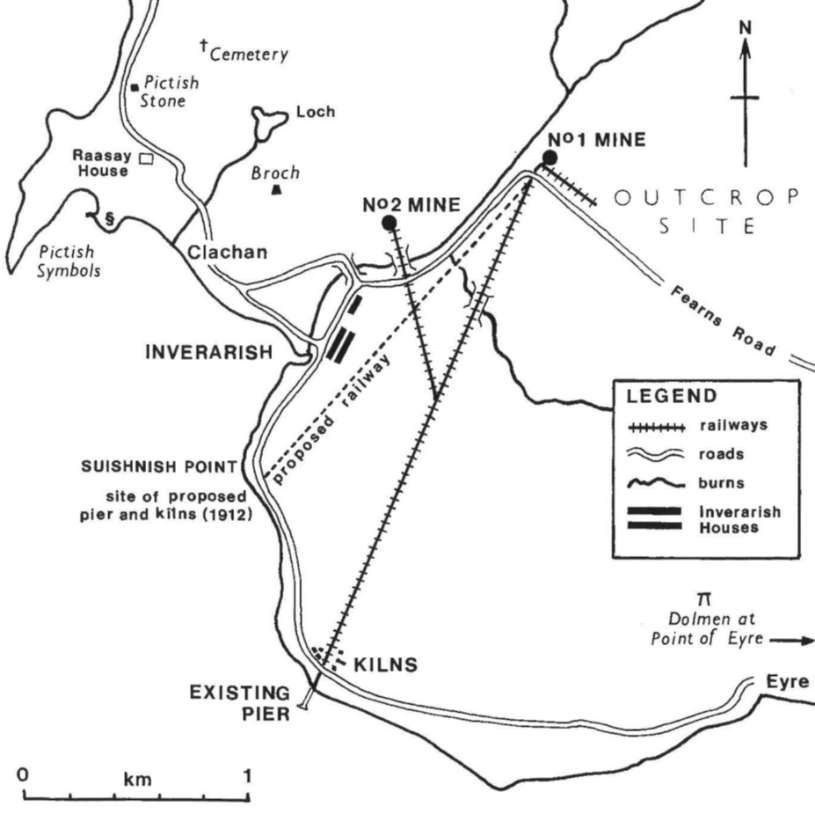
This map was reproduced in an article written by the Drapers for Der Anschnitt in 1999. It shows Baird’s initial plans for a railway were altered to move the kilns away from Suishnish House (modern spelling Suishnish). [1: p2]]3: p150]
A probable total of almost 200,000 tons of raw iron ore was produced over the life of the mines, which in the first instance ran until six months after the end of the First World War. “Everything was maintained in full working order, [but] almost the only further iron to be yielded, in the Second World War, came out as scrap from the dismantled installation itself.” [1: pV][3: p146]
L. & P. Draper tell us that, “After hostilities ceased on 11th November 1918 there was a rapid fall in demand for iron, and on 21st December 1918 the Government stated that it wished to terminate its agreement with Baird’s, asking: … do you want the prisoners after about the end of January 1919? … Baird’s said that it did, for a while, if the Ministry could take the output; otherwise the prisoners were not needed. … The Ministry was anxious that the whole installation should be shut down by 31st March 1919.” [1: p30]
It appears that there was probably no resolution between Baird’s and the government over ownership of remaining stocks of iron ore at the mine when it closed but L. & P. Draper note that in the years after the war, whenever a full load of coal was delivered to Raasay, the steamers involved left Raasay with a full hold of iron ore. [1: p31-32]
“Soon after the war ended there was unrest on the island, partly because the fisheries had failed and partly because many of the veterans returned expecting that their interpretation of promises which had been made to them, that they would be re-located on more fertile ground, would be honoured. Following the example of many other Hebridean islanders since the latter years of the nineteenth century, they forcibly took over the south end of the island and some men served terms of imprisonment as a consequence. However, Baird’s sold the estate to the Scottish Board of Agriculture during the 1921-22 post-war crisis and many islanders were re-settled on land which they had coveted.” [3: p155-156]
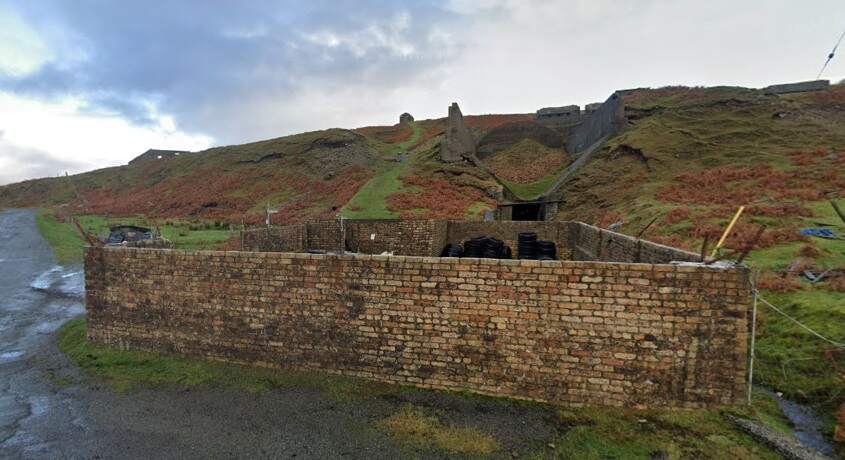
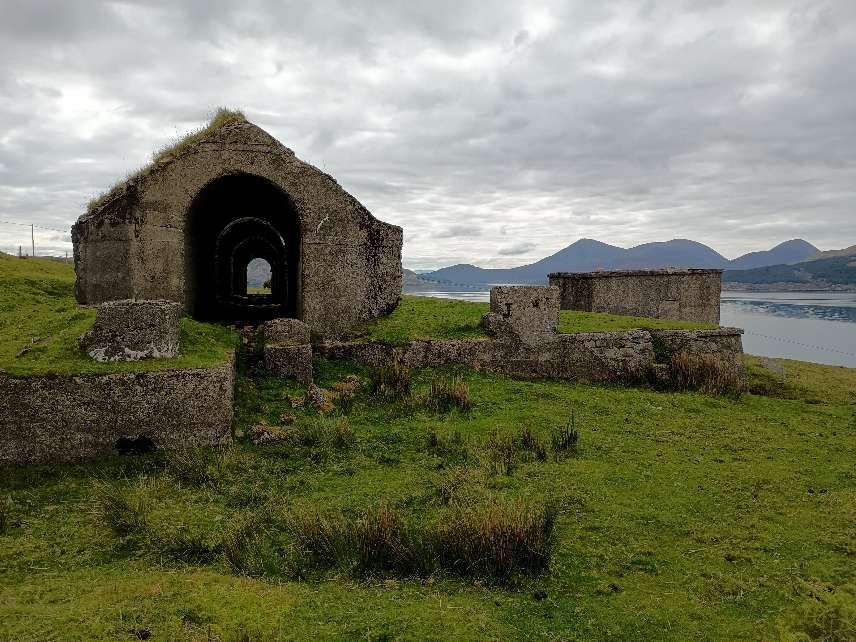
“ln the mid nineteen thirties, twenty years after its heyday, the installation was still in good working order as Baird’s had placed the works on a care and maintenance basis and employed a full-time 3-to-5 man crew … who kept the machinery in perfect working order. They painted the ironwork, including the large expanse of the end of the calcined-ore hopper, with red Iead, and ran the installation once each week. lt was capable of being started at relatively short notice at a time of national emergency. However, this was not to be, probably because of the cost of winning the relatively low grade ore, and after the onset of the Second World War the only iron to come from the site was the installation itself as scrap. lt is not clear whether the formal abandonment on 15th May 1941 was the beginning of dismantling, or just the date on which the plan was drawn. … Three, if not all, of the kilns were taken to Lingdale, in Cleveland, Yorkshire where three were re-erected . They continued in intermittent production until about 1962. lt is not known which ones were rebuilt, but it seems likely that they were Nos 3, 4 and 5 which had been unused on Raasay.” [3: p156]
Raasay Iron Ore Mines Railways
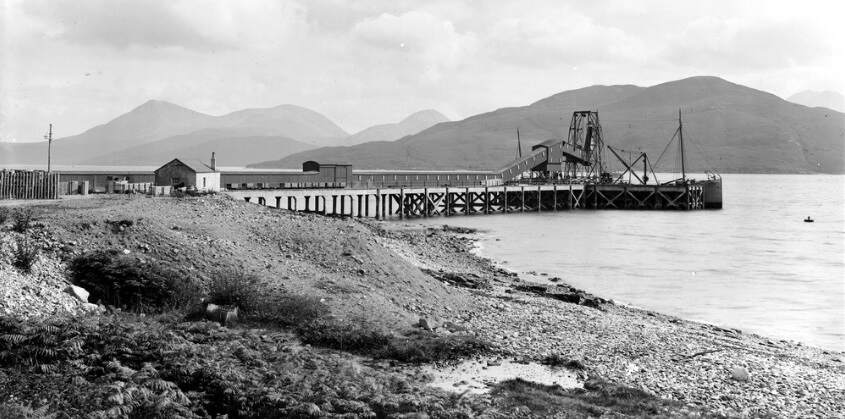
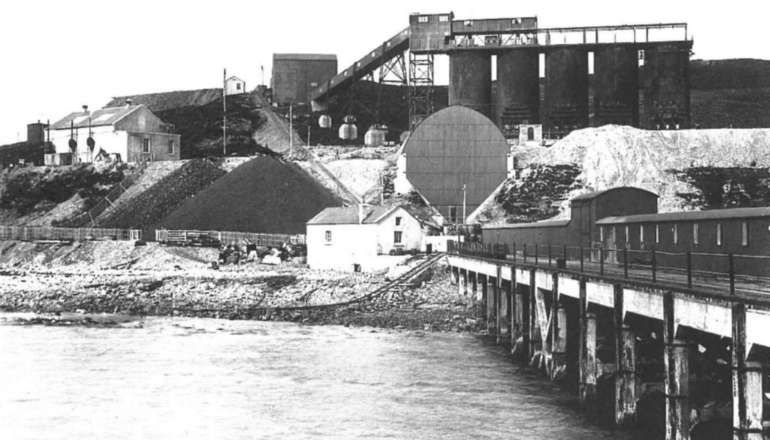
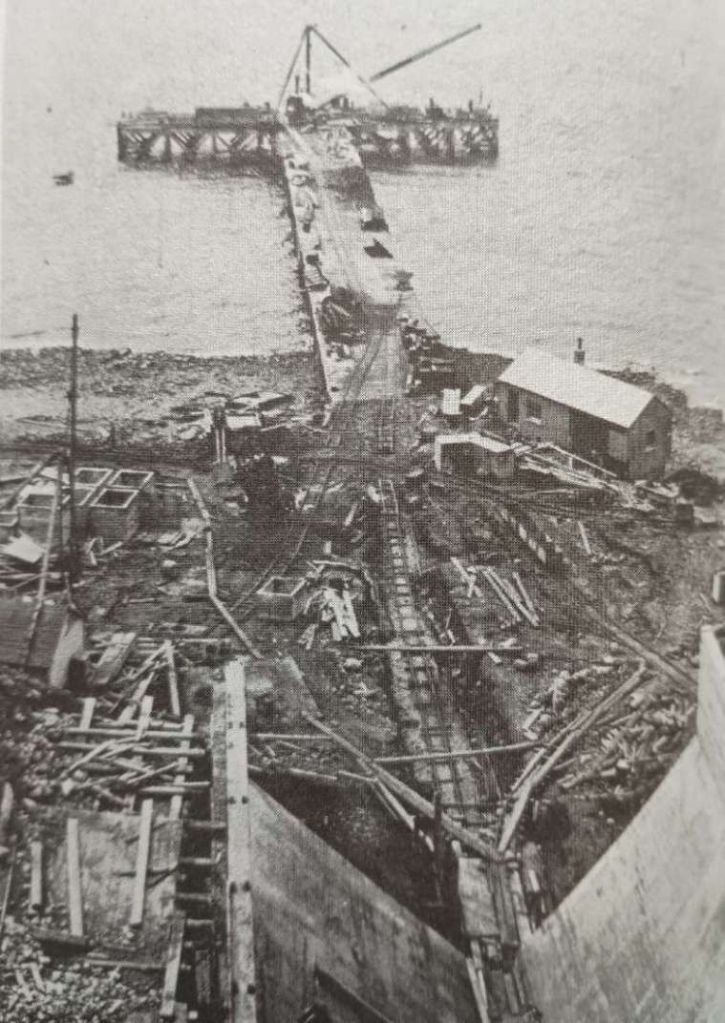
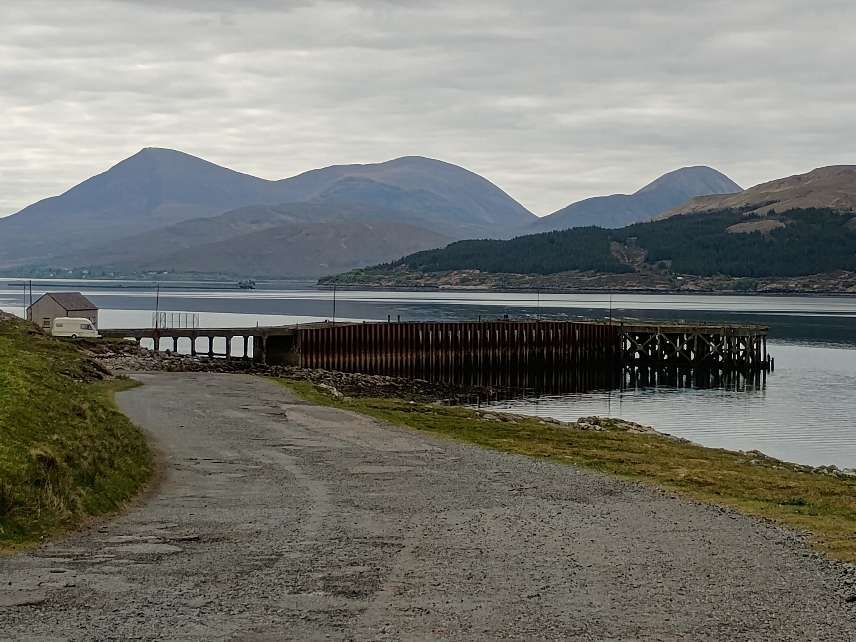
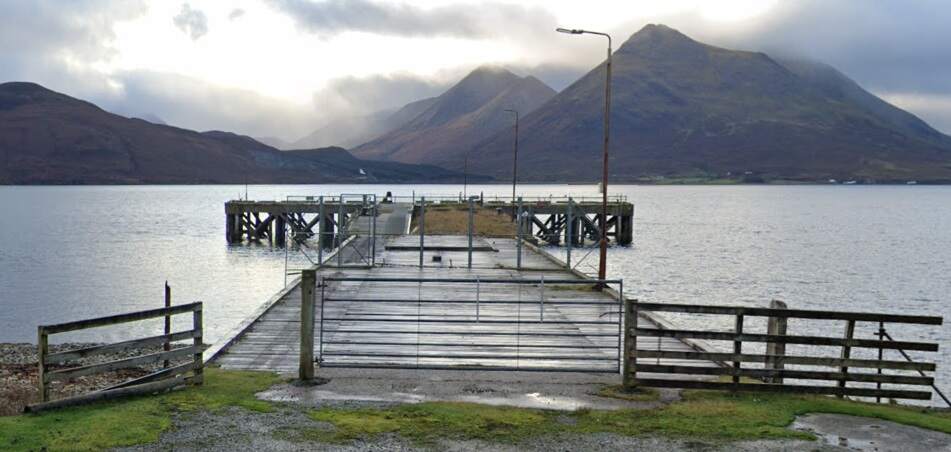
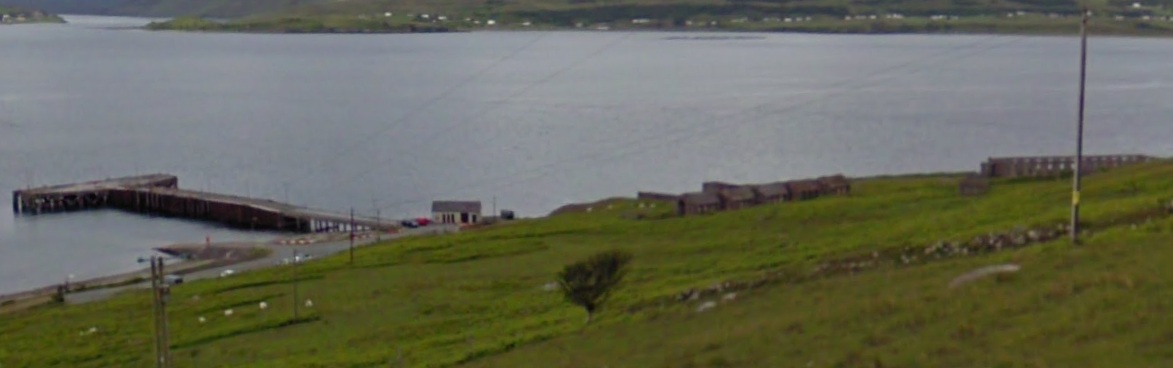
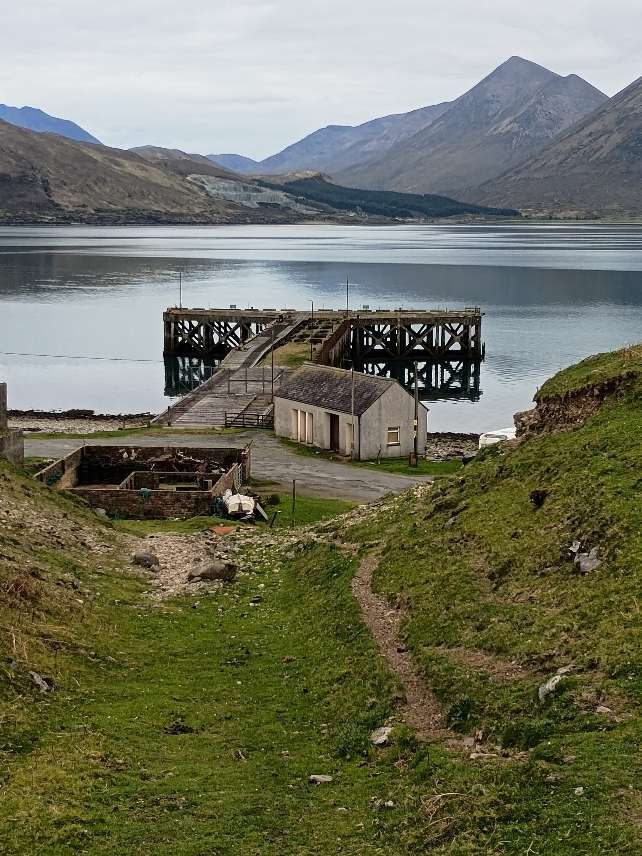
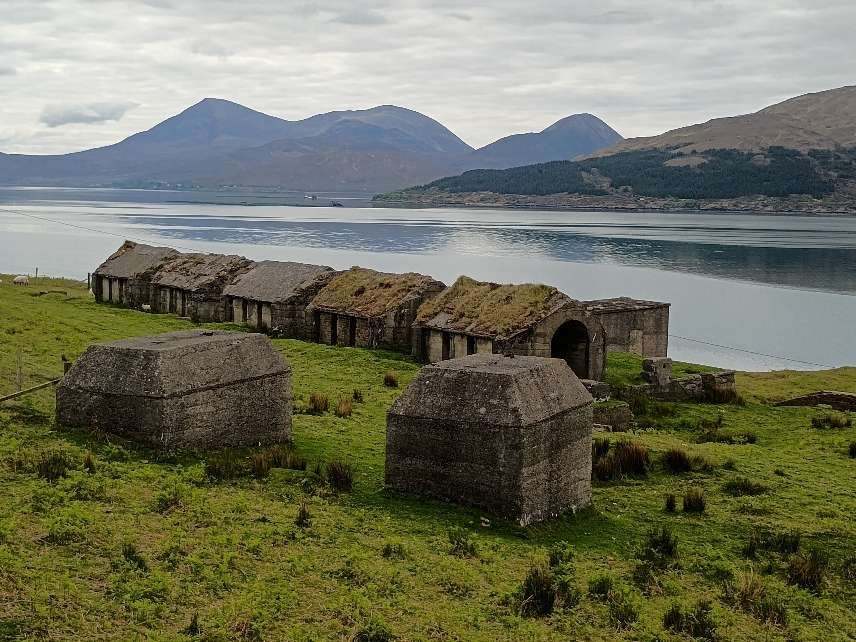
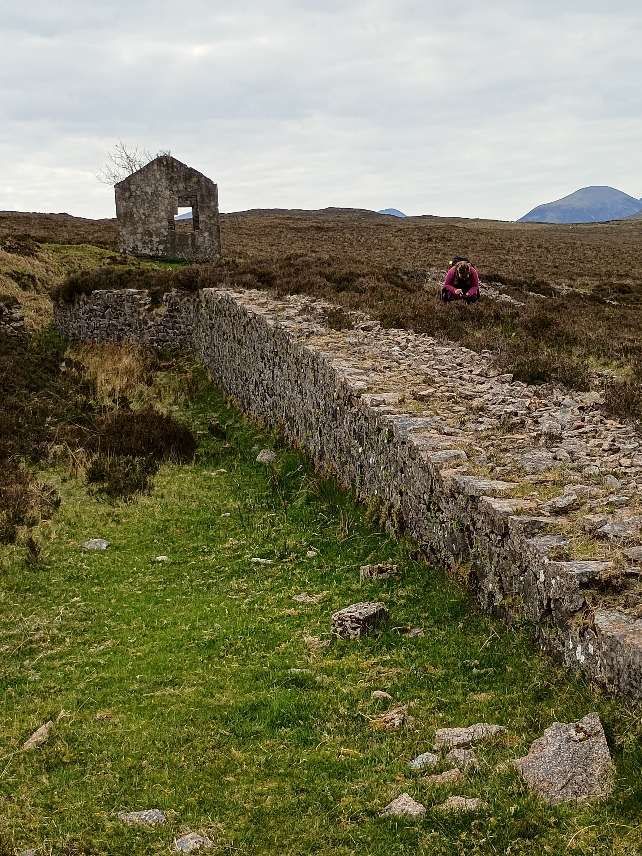
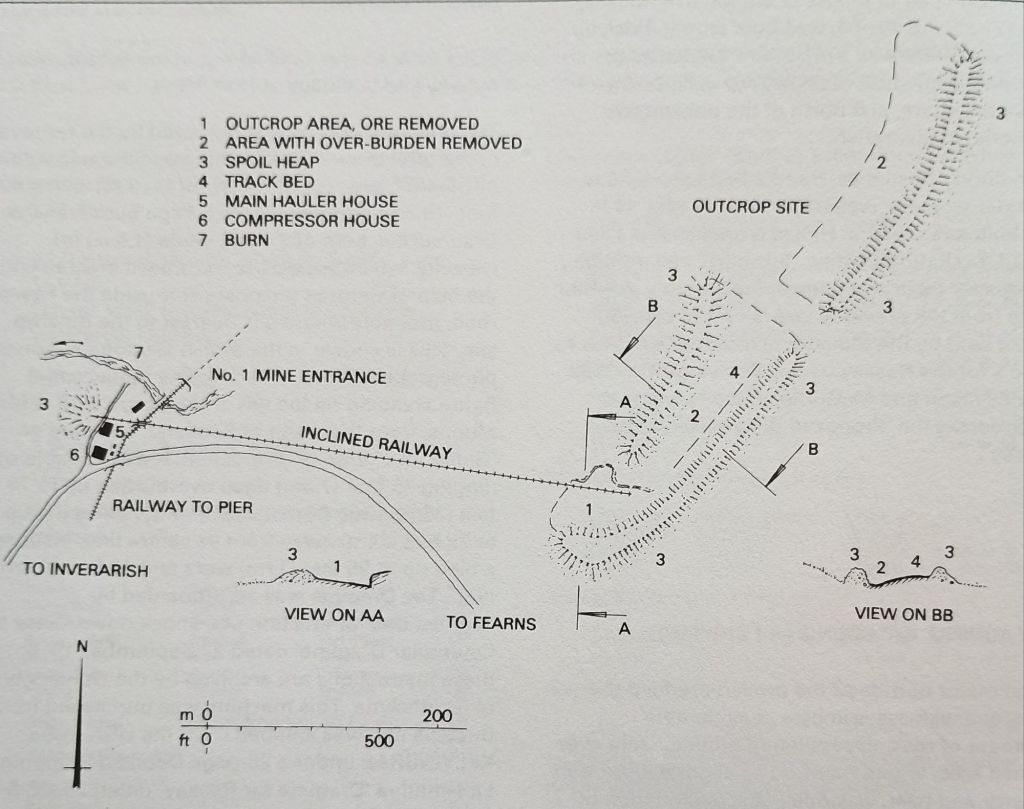
“No 1 Mine was connected to the pier at Suishnish by a virtually straight railway. A short steeply-inclined spur to the outcrop site left the main line at the entrance to No 1 Mine; No 2 Mine was connected by a spur from the main line. The railway led directly from the mines to the top of the crusher, on the hill overlooking the pier. Just below the crusher stood the kilns. An inclined railway connected the area just above the crusher down to the pier; this is also the route by which the coal was taken from the pier up to the crusher. Coal and iron ore were mixed in the crusher and taken by conveyor belt to charge the kilns. Below the kilns, more belts took the calcined ore to a hopper, from whence it was ultimately loaded onto ships at the seaward end of the pier.” [1: p33][3: p151]
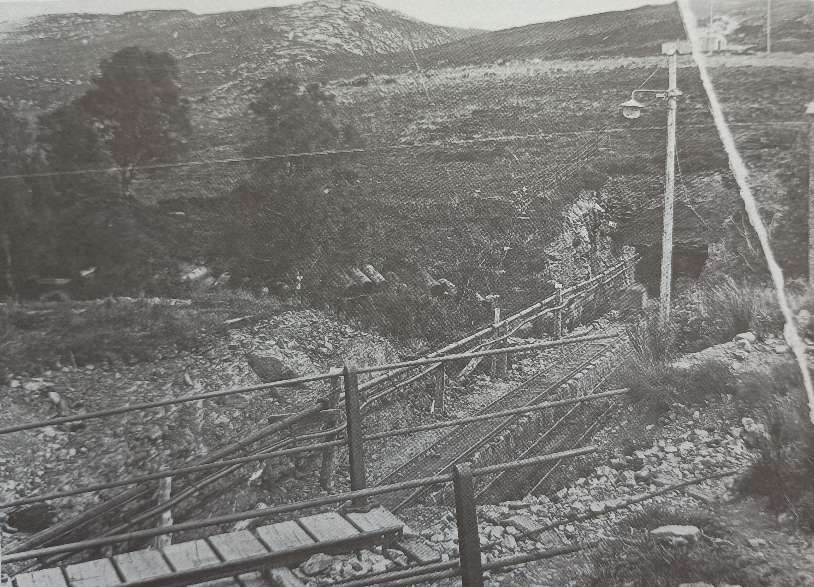
Prior to the construction of the 4 ft. 6 in. railway the first output from the iron ore mine was transported by horse and cart down the narrow lane through Inverarish. [5: p78] But before the completion of the facilities near East Suishnish Pier, the incline was already bringing iron ore down from Mine No. 1 and the Outcrop Site.
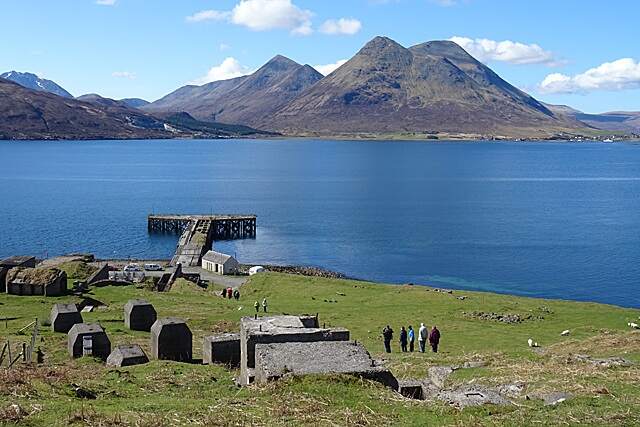
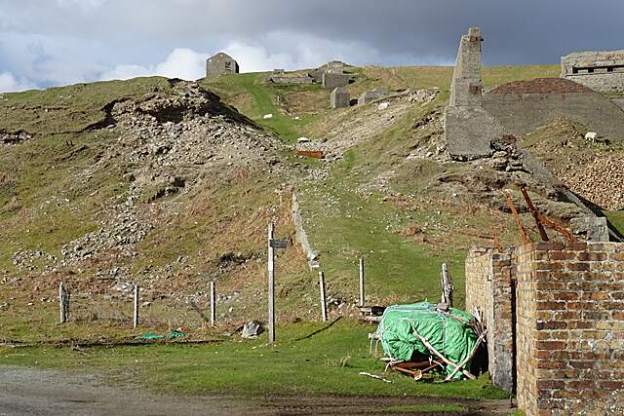
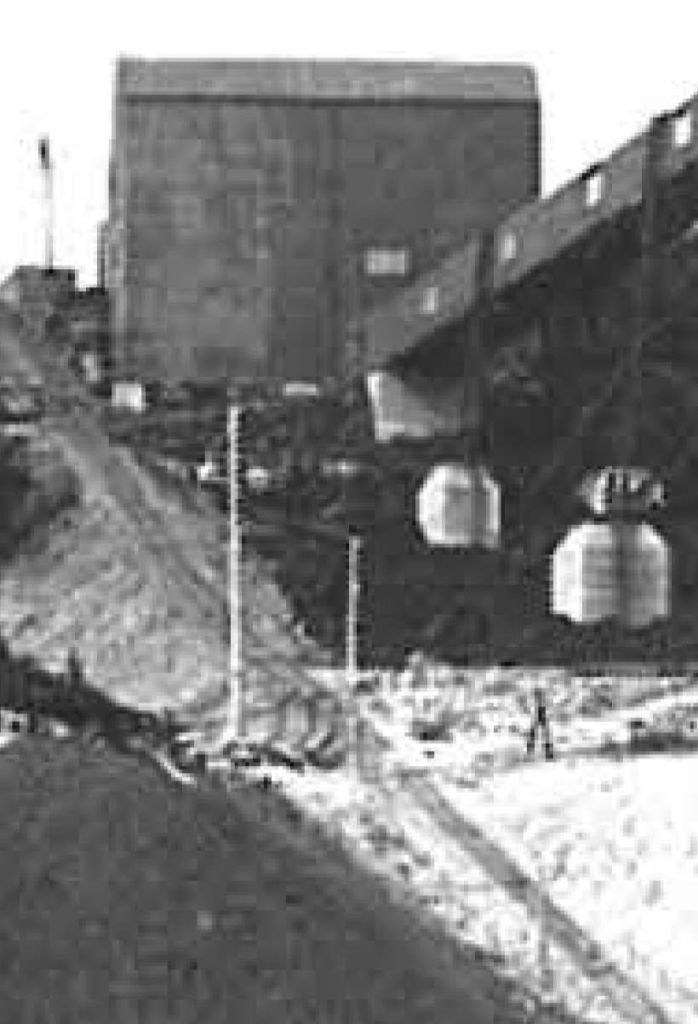
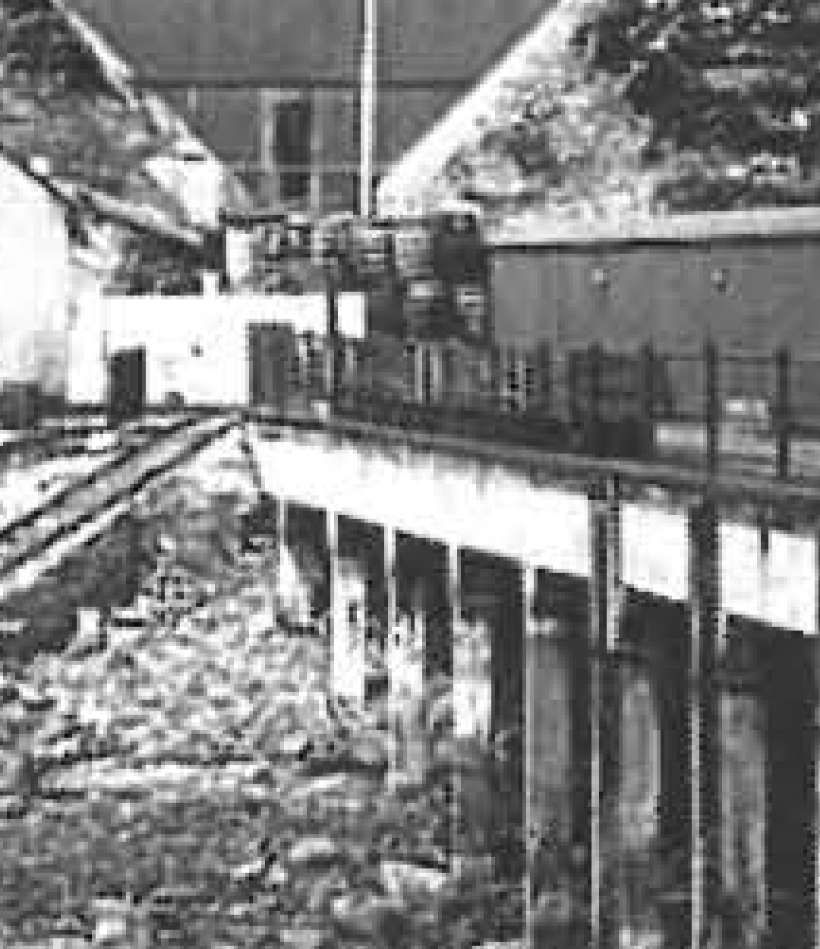
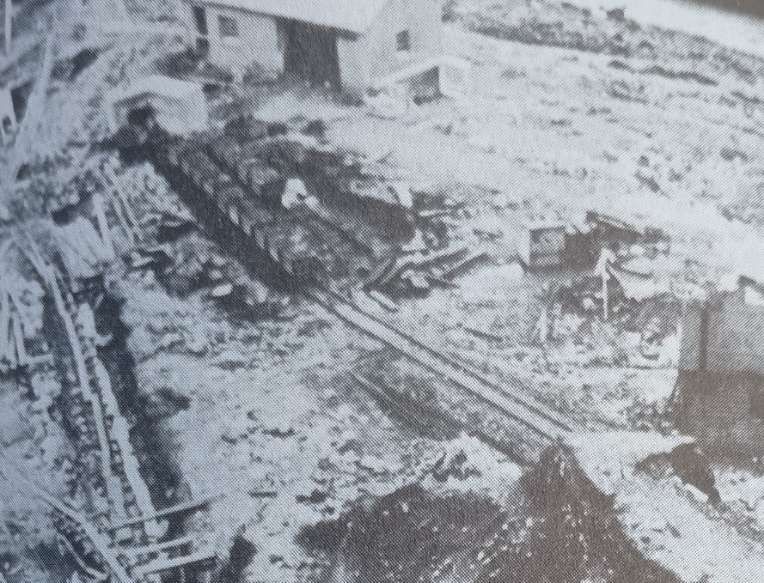
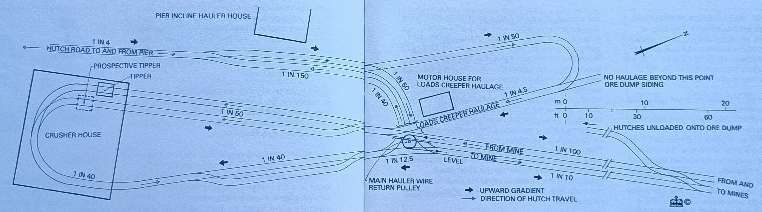
We focus first on the railway infrastructure at the southern end of the line where the processing plant and pier were sited. The drawing below shows the layout of the site.
Two enlarged details from the image immediately above, show parts of the rail infrastructure on the site.
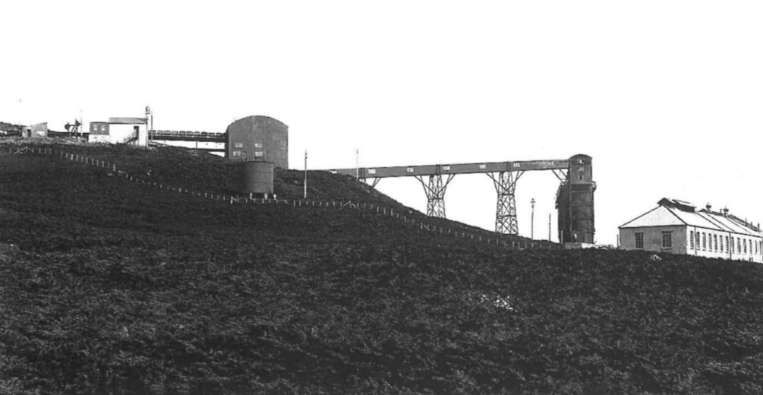
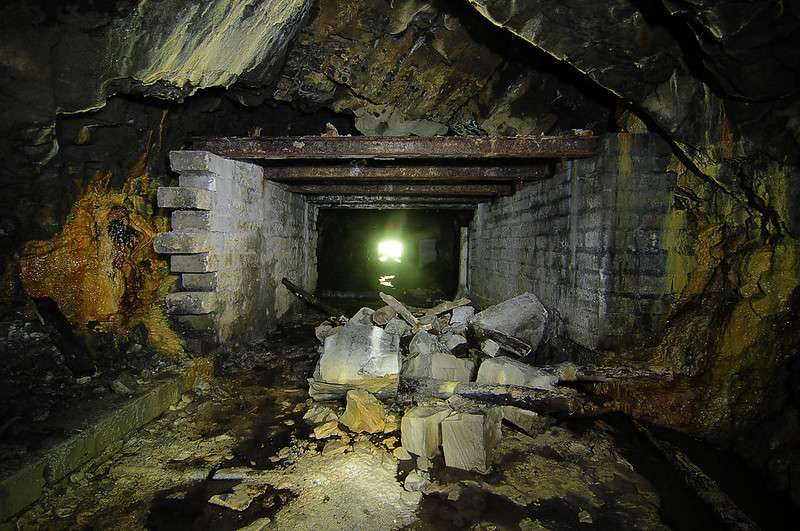
This first enlargement shows the steeply inclined line which ran down the side of the crusher to the pier. [3: p151][British Geological Survey: BGS C 2183]This second enlarged extract shows the rail line running out onto the reinforced concrete pier. A short train of open wagons appears to be sitting on the rail line. [3: p151][British Geological Survey: BGS C 2183]
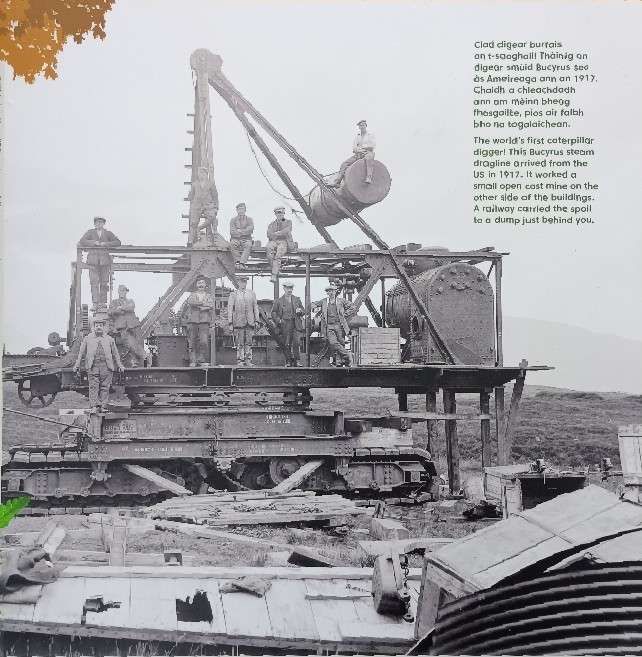
A third and a fourth extract, this time from photographs provided by the Munro Daughters for L. & P. Draper’s book, show the incline in use while the calcined-ore storage hopper was being constructed. …
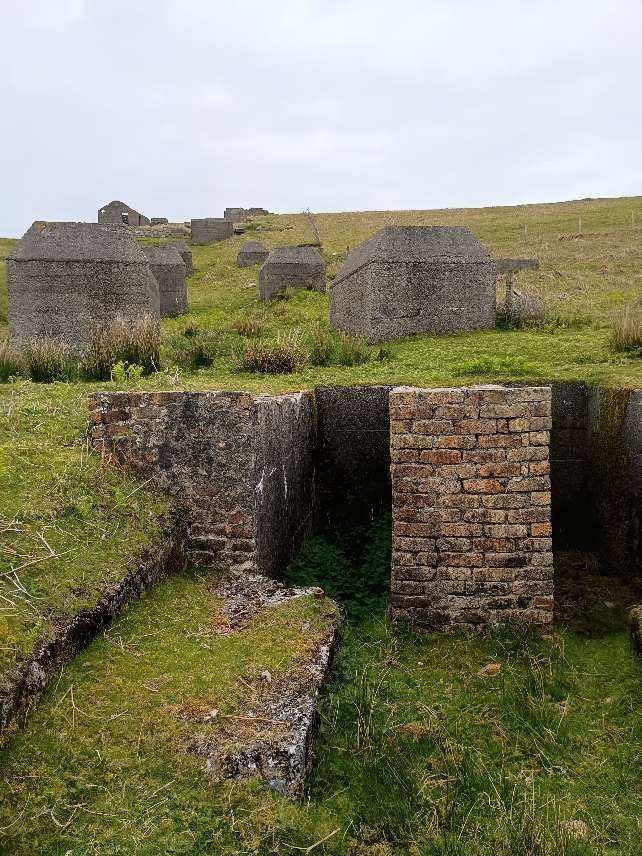
Perhaps it is worth noting here that the wagons used on the network were known as ‘hutches’. They were 5ft long overall, the body being 4ft long x 3ft wide and 2ft in height. Wheels were 1ft in diameter (1ft 2in over the flanges) and the axles were centred 1ft 6in apart. The overall height was 3ft 7in above rail height. [1: p65]
The hutches “were assembled from kits in the top of the crusher. They were pushed by hand initially, and were stiff until they were greased. … 4 wheels and 2 axles weighed 1 hundredweight 1 quarter 14 pounds (70kg). 200 sets were ordered on 28.4.13 and a further 100 on 5.6.14, so the mine must have had at least 300 hutches.” [1: p66]
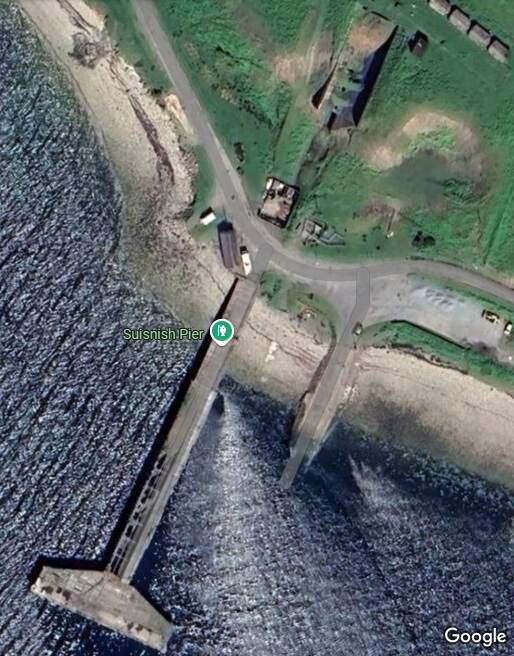
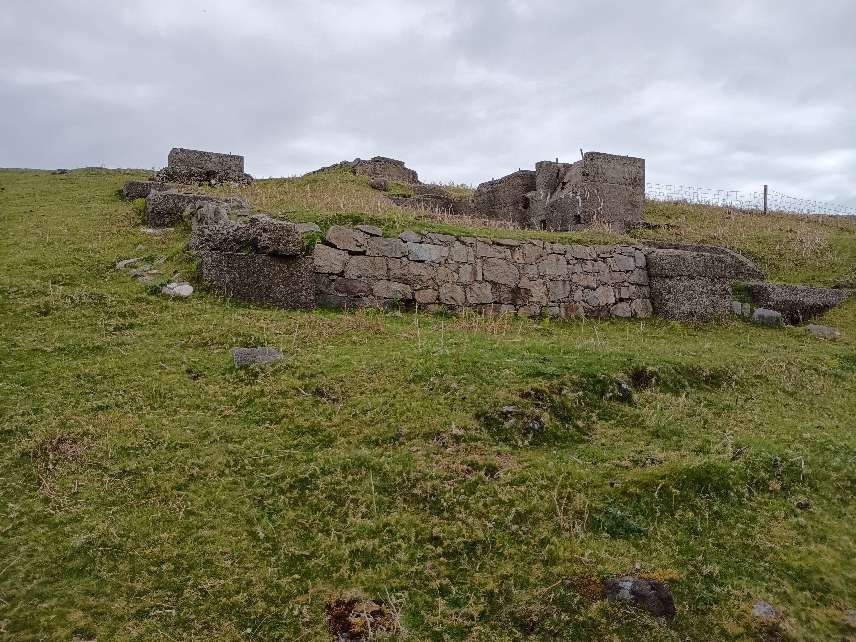
“The Pier Haulage Road was in 3 sections. The lower one, at a gradient of about 1 in 4.5, extended for 67 metres, the middle one at about 1 in 10 for 25 metres, and the upper one at about 1 in 4 for 83 metres. At the bottom of this incline the track was diverted around a huge L-shaped concrete block designed to catch runaways. … The hauler house … was used solely for haulage on the incline above the pier.” [1: p63]
The railway was, apart from the lower section, the Pier Haulage Road, largely double track. It was multi-level in the vicinity of the processing plant and the incline to the Outcrop Site was single track. Rails were 30lbs/yard, spiked into sleepers. Where there was traffic across the rails an inverted U-shaped bridging rail was used. [1: p65]
The track plan of the rails around the processing plant provided by the Drapers shows a complex arrangement with some very tight radius curves. It is not surprising that the ‘hutches’ needed to have a short wheelbase.
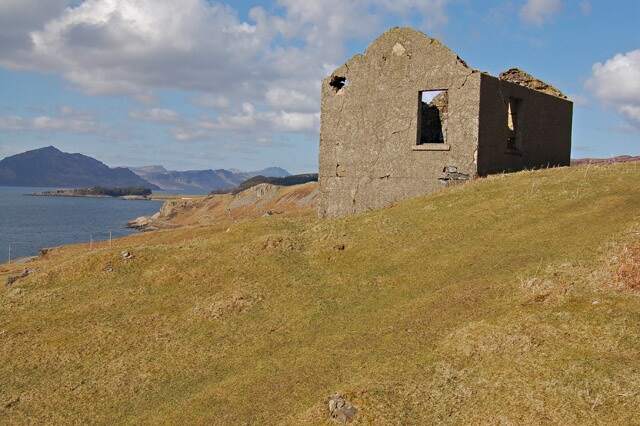
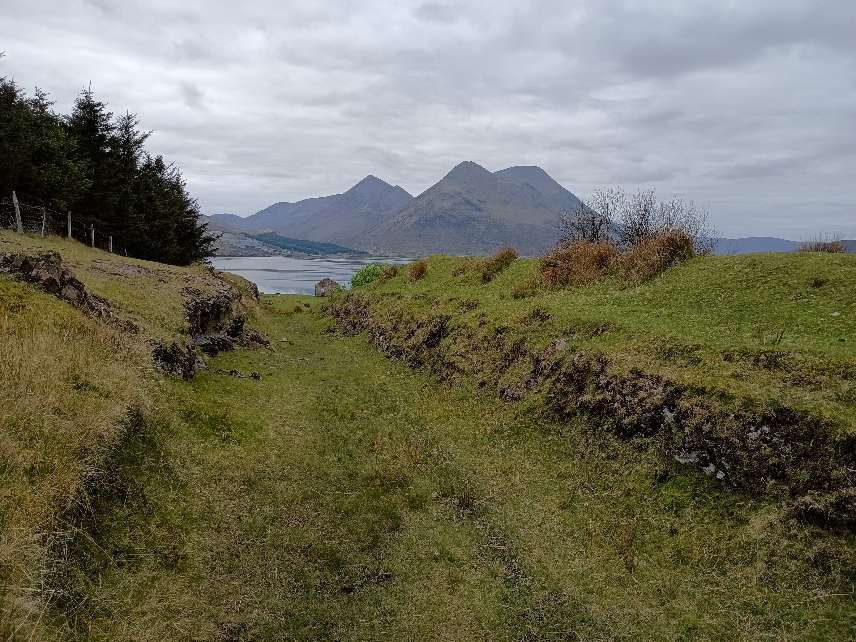
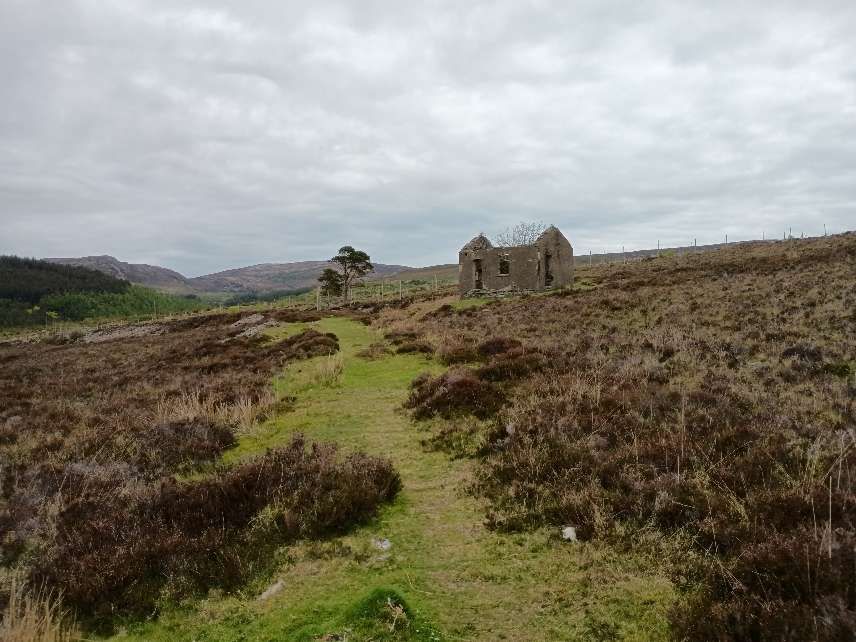
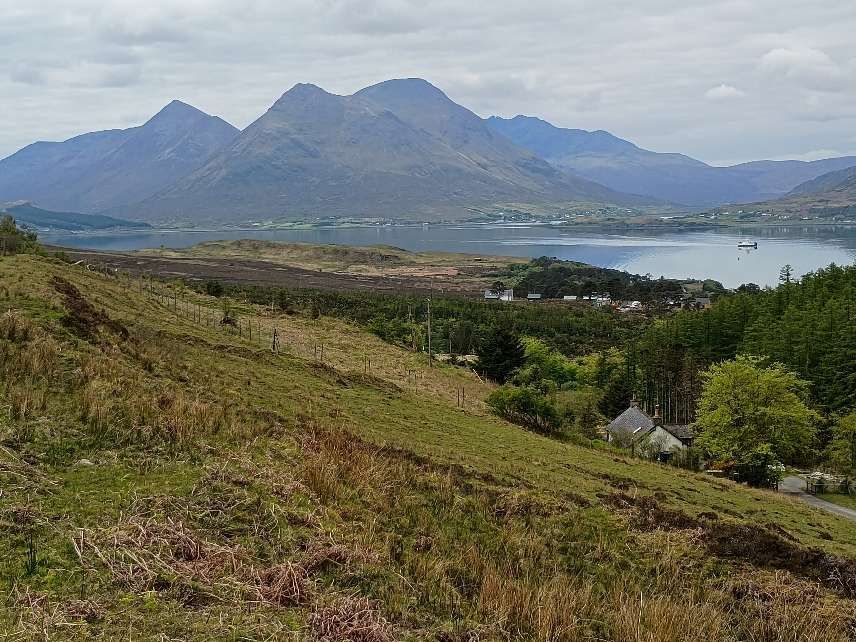
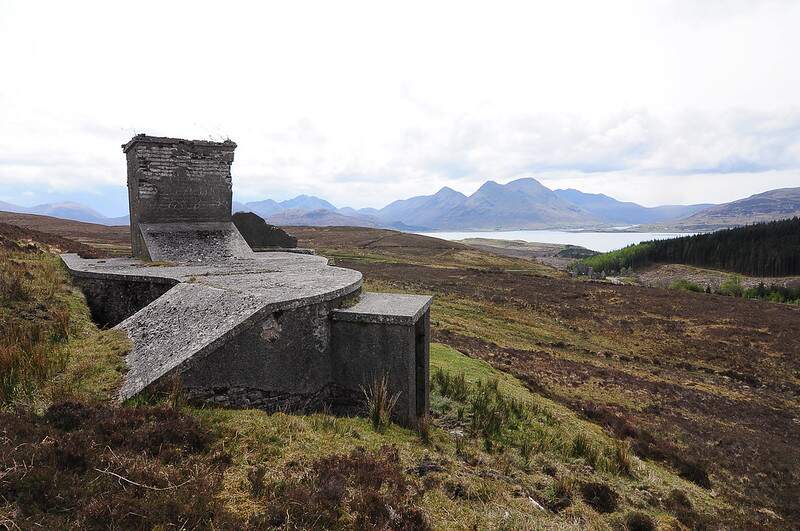
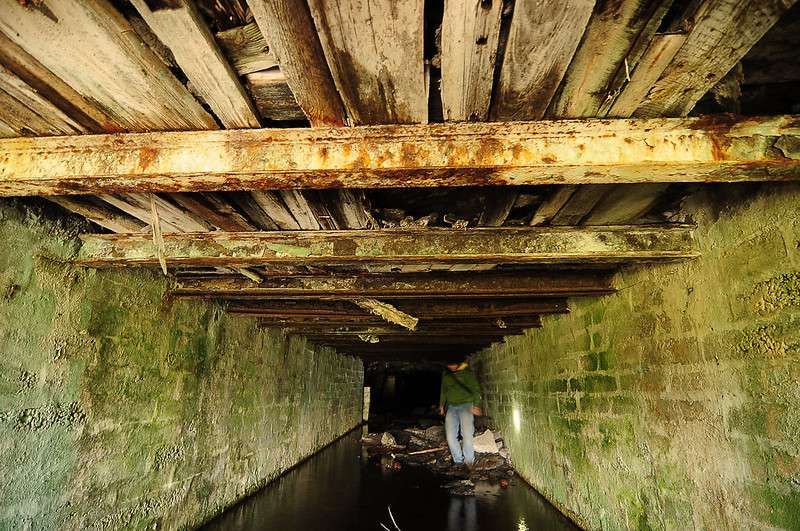
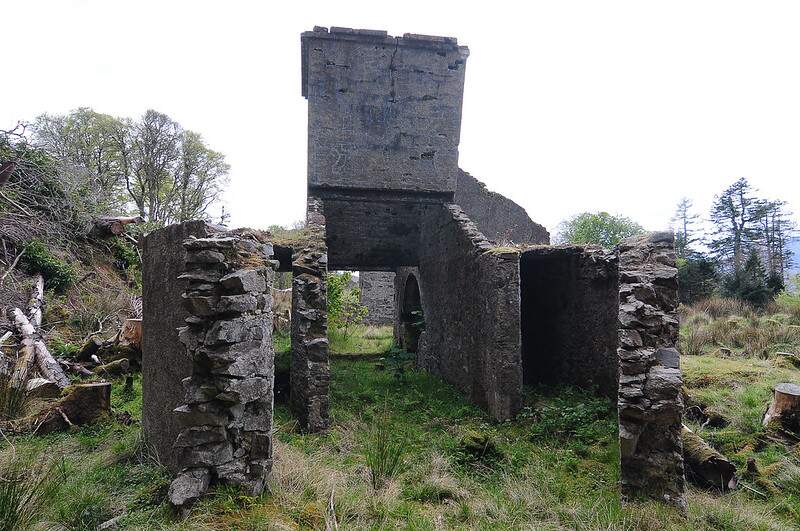
Track layout in the vicinity of the Crusher House. [1: p66-67]The same building, the Hauler House, seen from further North on the second incline. The mountains of Skye sit beyond the Sound of Raasay. [My photograph, 7th May 2025]
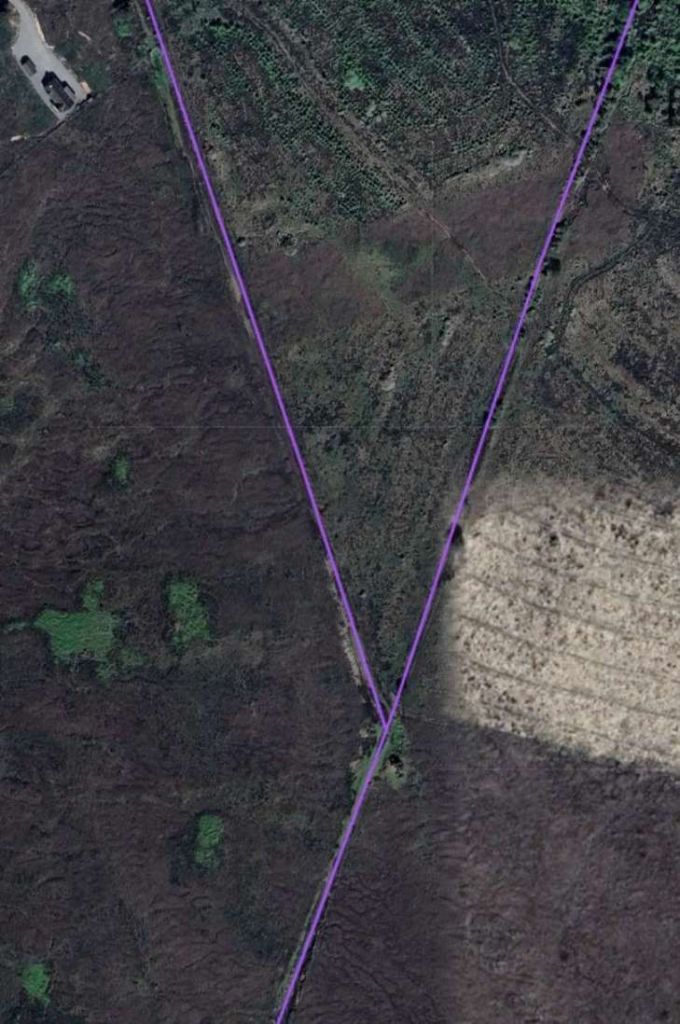
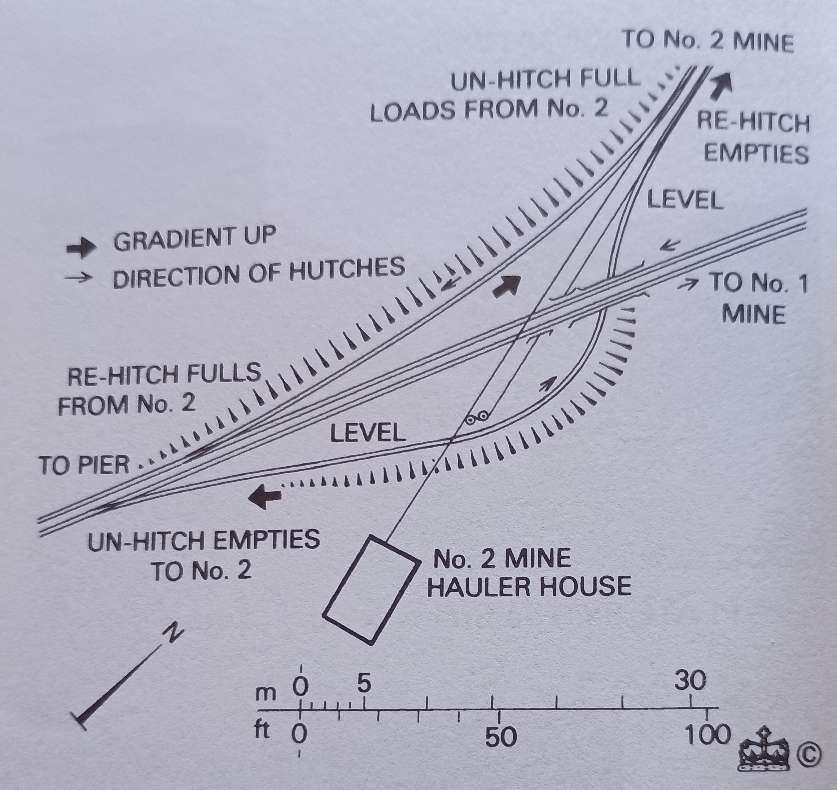
L. & P. Draper tell us that the extensive system of narrow gauge lines were 2ft 3in gauge. The main line “extended in a straight line … from the pier root up an incline, the ‘Pier Haulage Road’, to a level ore storage area above the crusher and on to the No 1 Mine entrance at a distance of 2.6 kilometres. … At a distance of 1.4 kilometres from the pier a straight spur, 0.9 kilometre in length, left the main line … to No 2 Mine. … The junction layout is shown [below].” [1: p63]
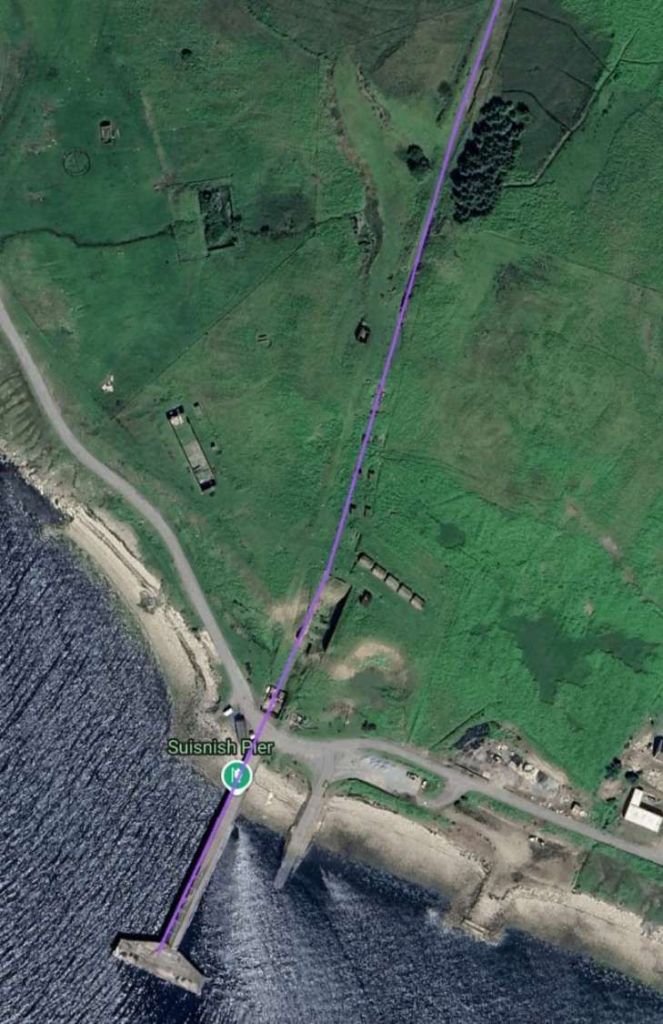
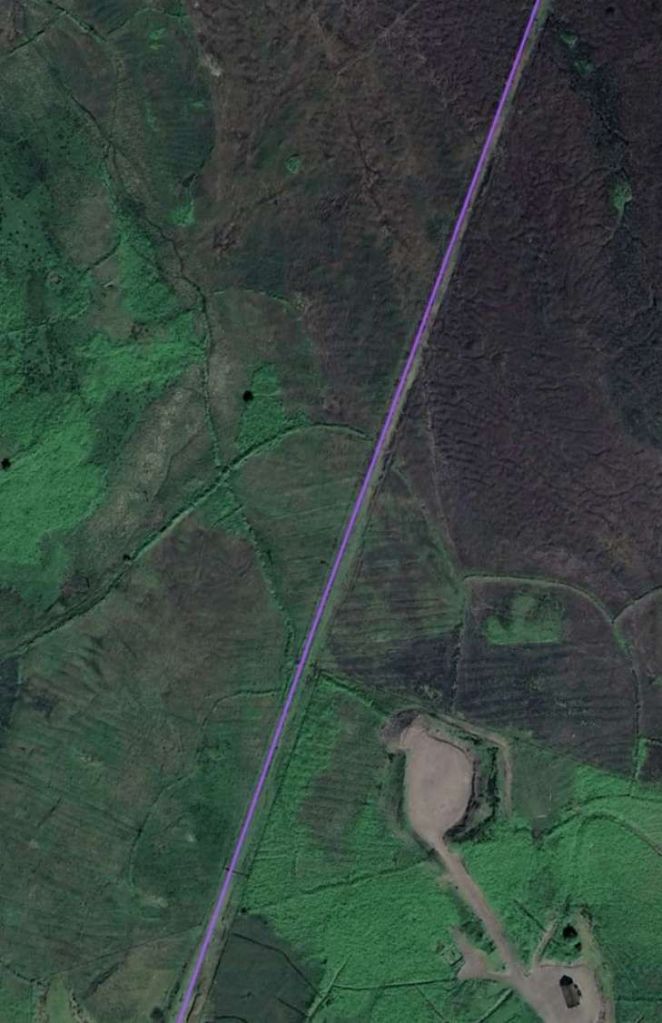
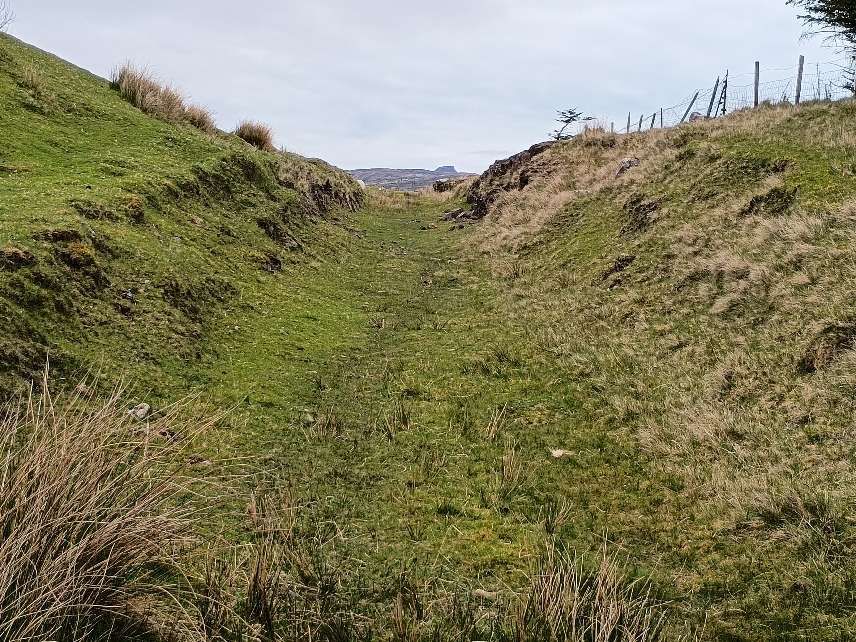
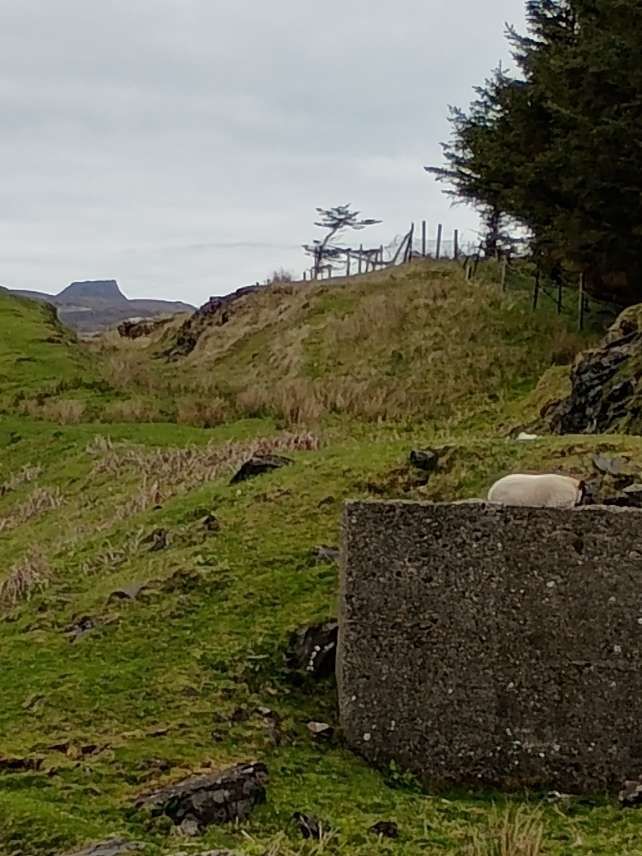
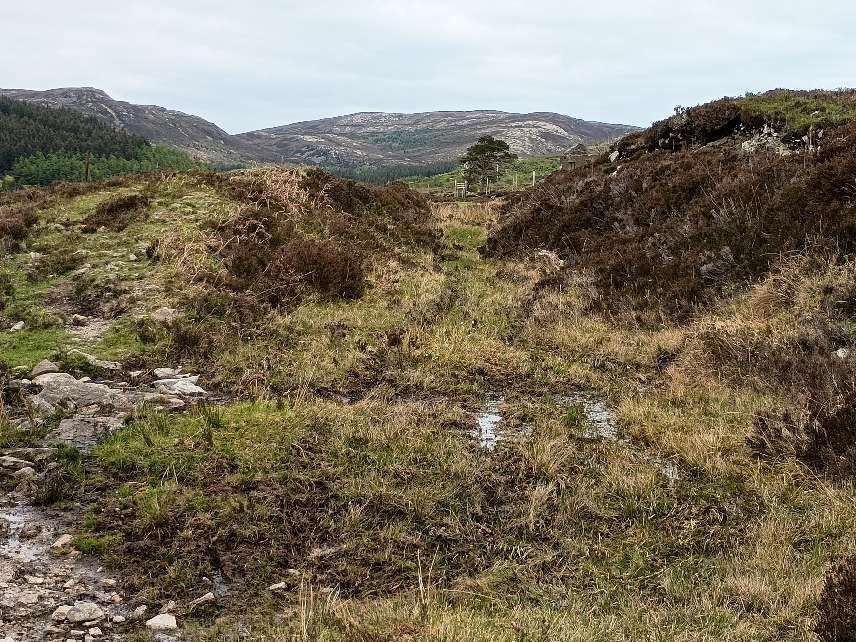
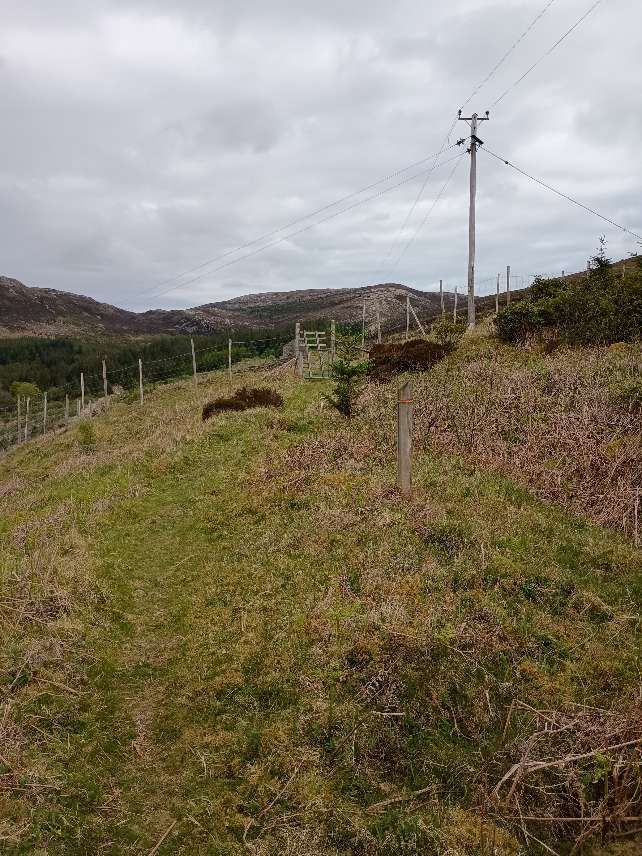
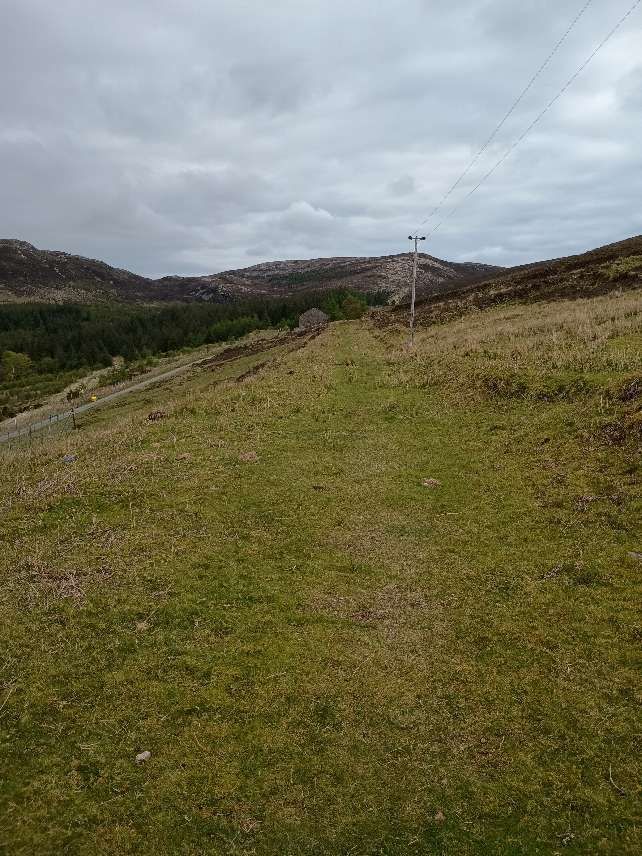
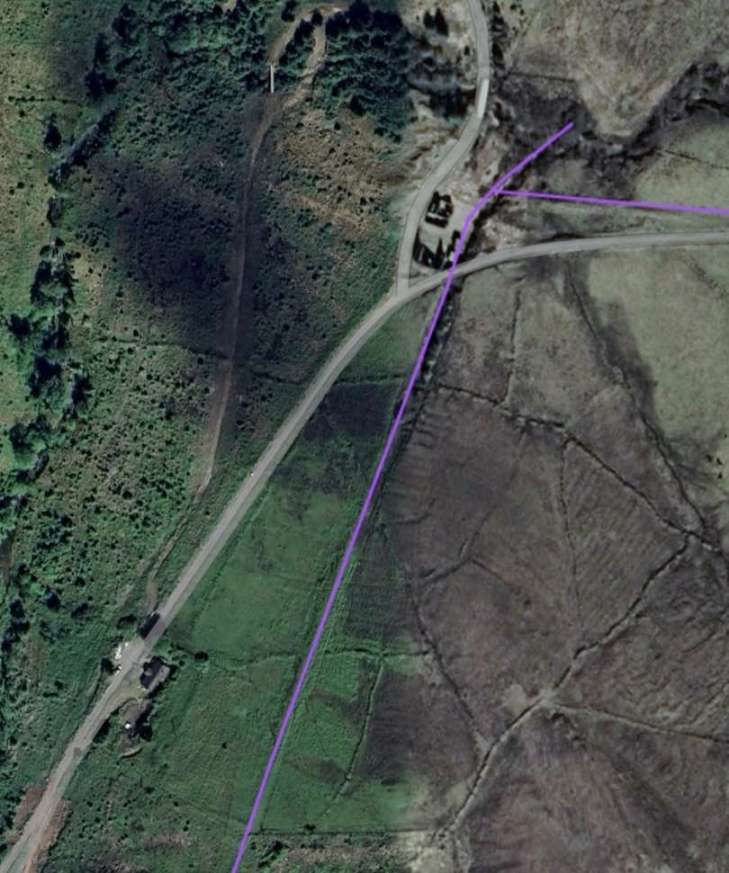
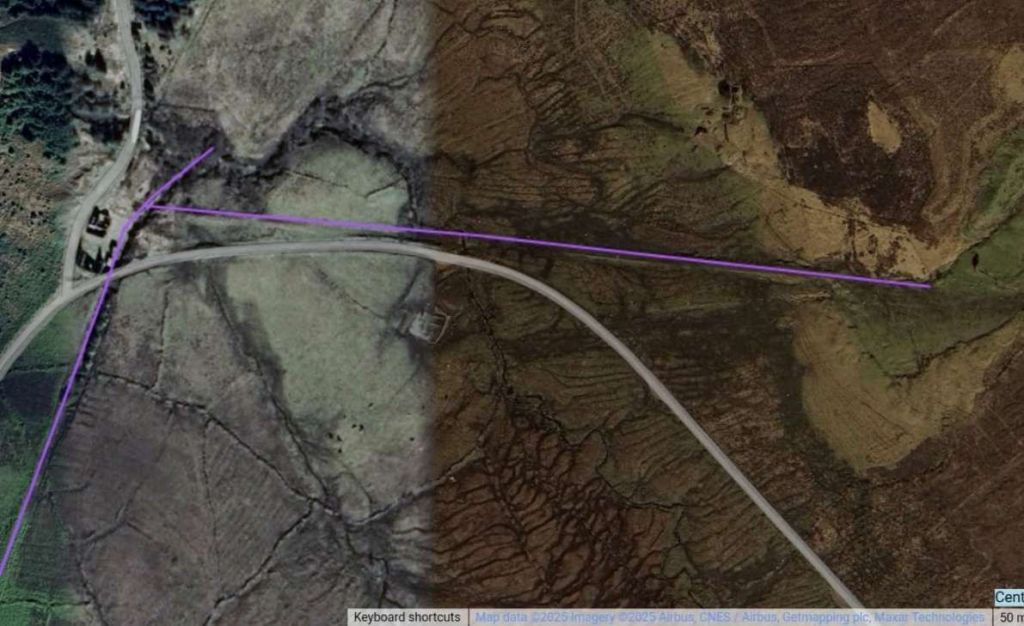
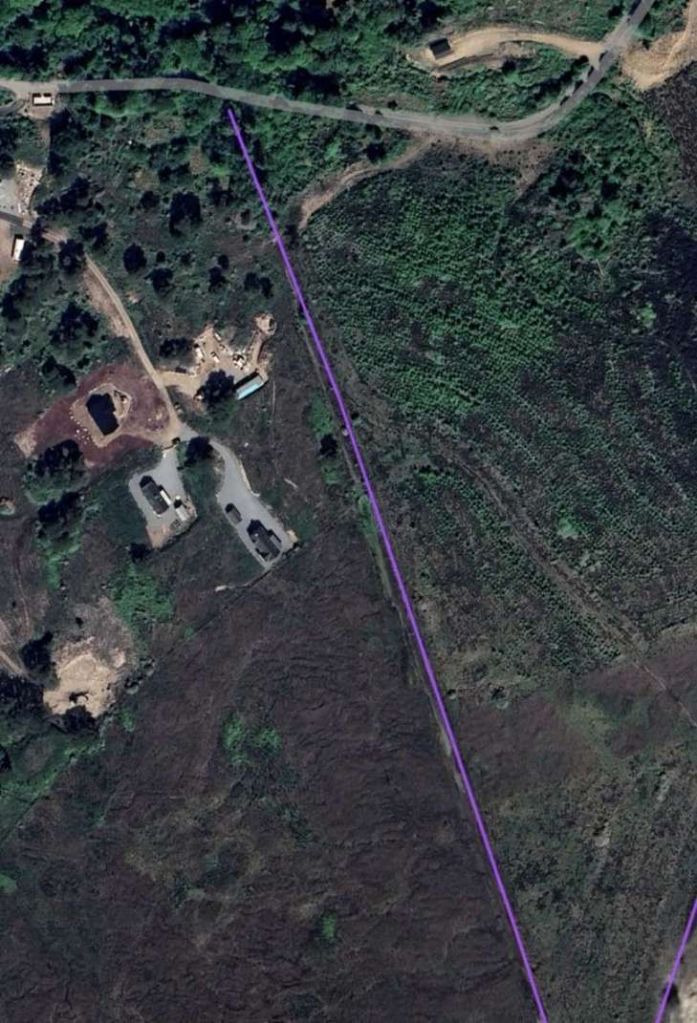
The incline climbs to the North. [My photograph, 7th May 2025]This telephoto shot shows the incline continuing to the North and shortens the distance to the mountain in the distance, which is Dunn Cana (Caan). [My photograph, 7th May 2025]Looking back towards Skye from within the shallow cutting in the previous pictures. [My photograph, 7th May 2025]Further North and looking North, the incline remains relatively clear of vegetation. [My photograph, 7th May 2025]Railmaponline.com shows the line continuing North. [10]Continuing North. [My photograph, 7th May 2025]And again, further North and looking North. Dun Caan has dropped below the horizon as we continue the climb. [My photograph, 7th May 2025]Railmaponline.com shows the location of the junction between the lines toMine No.1 to the North and Mine No. 2 to the Northwest. Just to the South of the junction, the remains of the Hauler House for the line to Mine No. 2 can be seen. [10]Approaching the location of the junction from the South: the remains of the Hauler House sit close to the centre of the image. [My photograph, 7th May 2025]The railway junction between the line to/from Mine No. 2 and the main line which ran between the pier and Mine No. 1. [1: p40]Looking Southeast along the line of the railway built to serve Mine No. 2. The line passed under that serving Mine No. 1. The bridge was between the camera and the Hauler House. [My photograph, 7th May 2025]
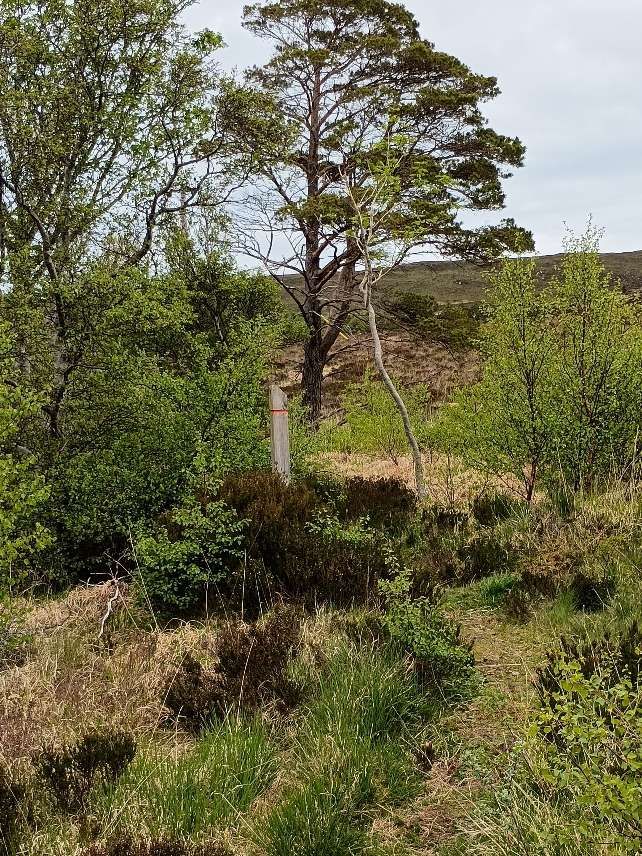
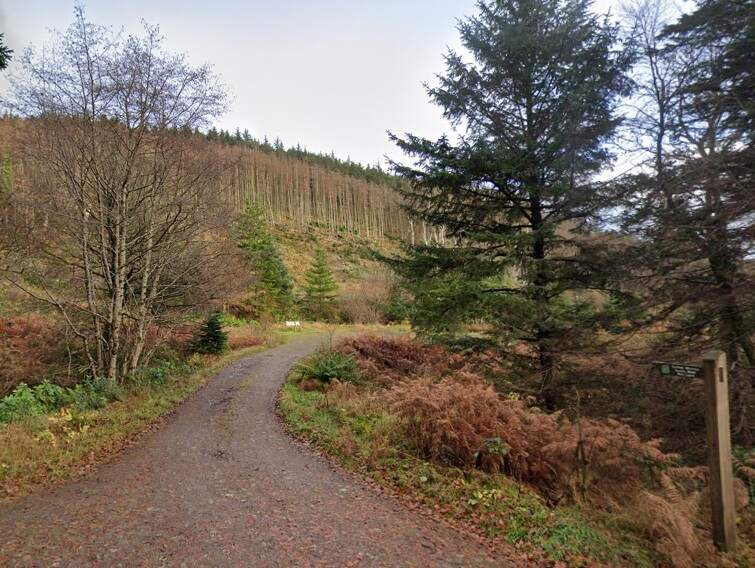
Heading North from the junction, the route of line to Mine No. 1 now runs through a protected area where deciduous native trees have been planted among sparce examples of older trees.
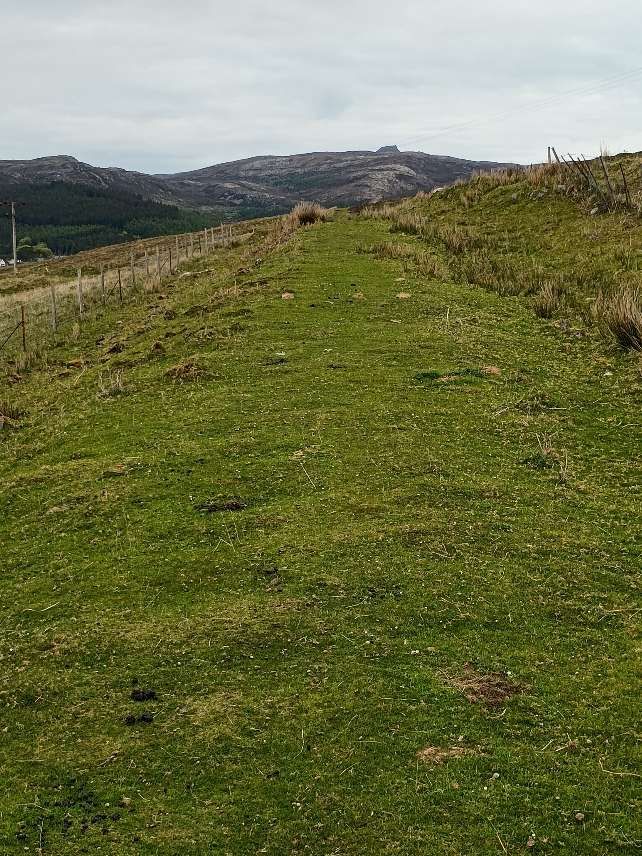
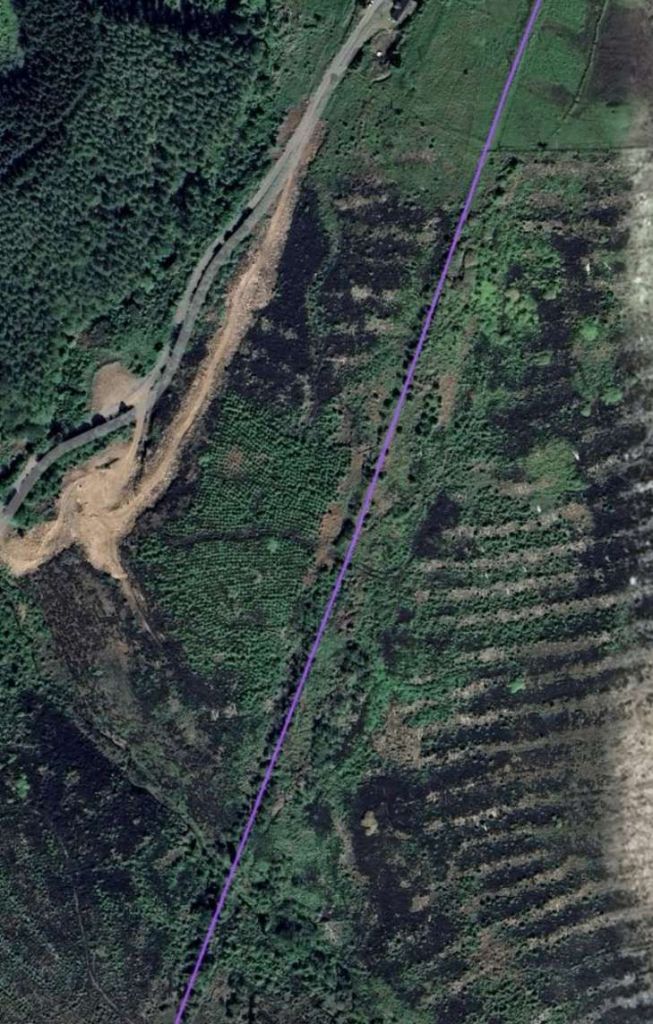
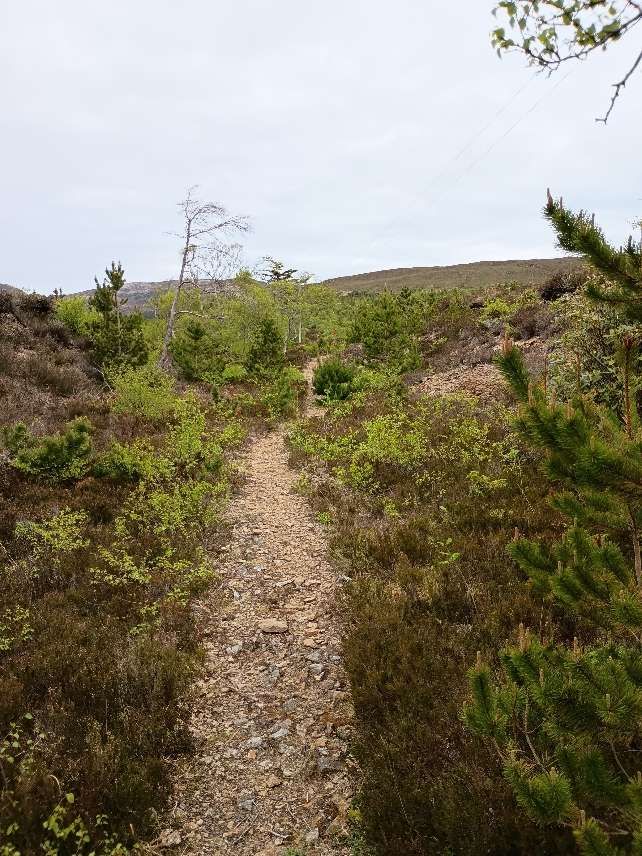
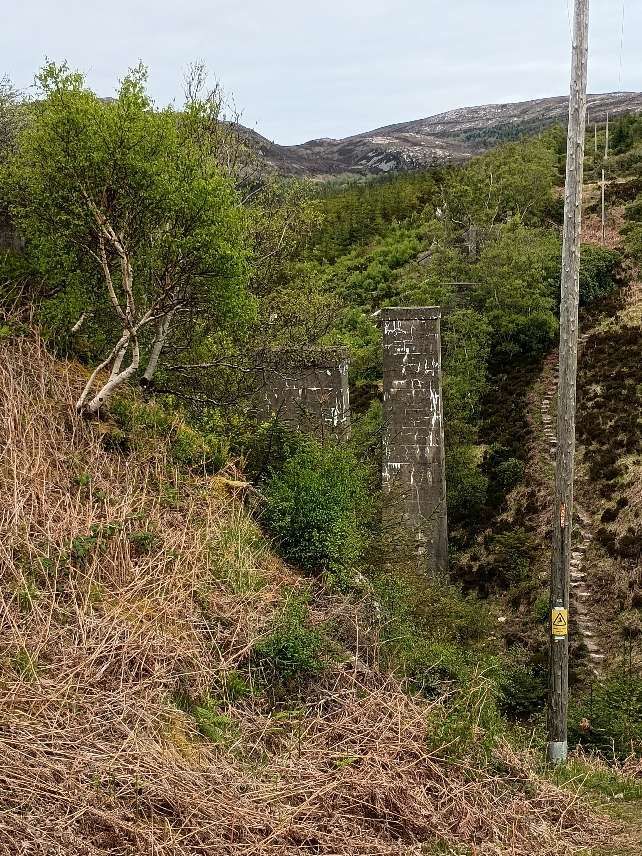
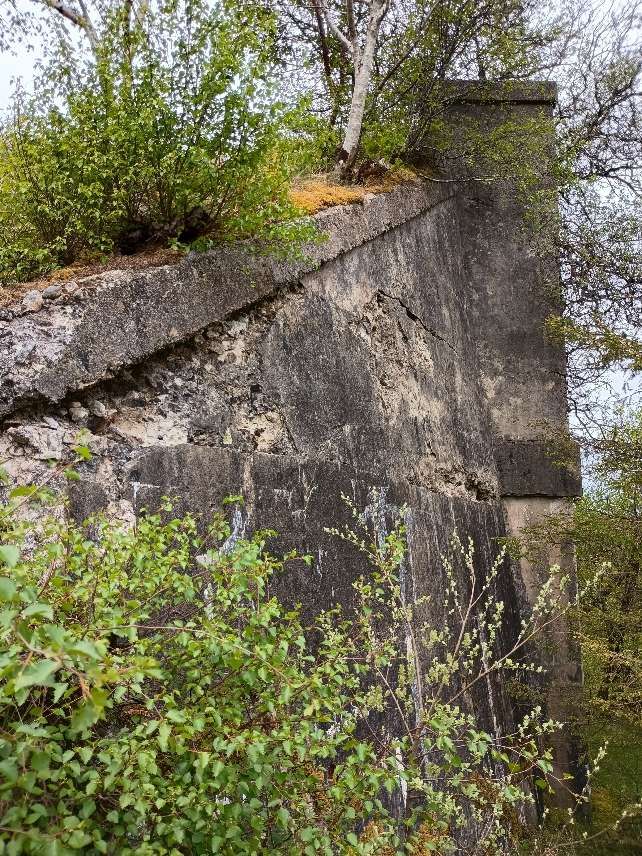
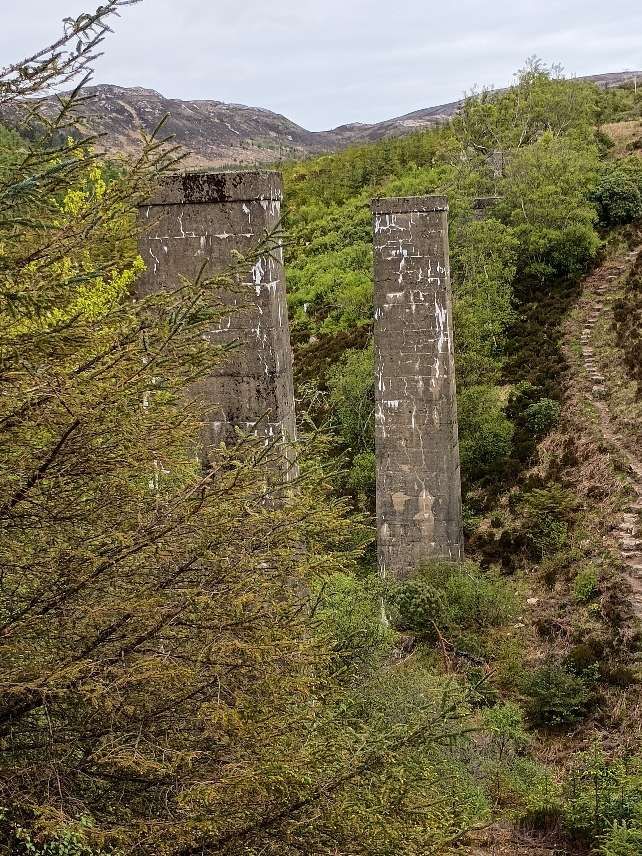
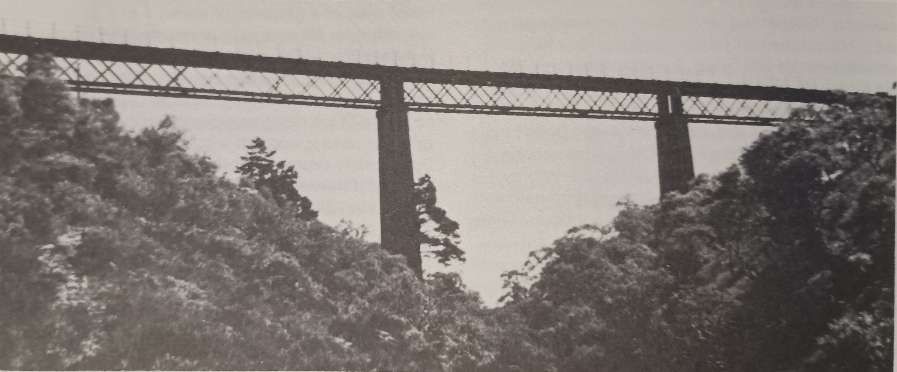
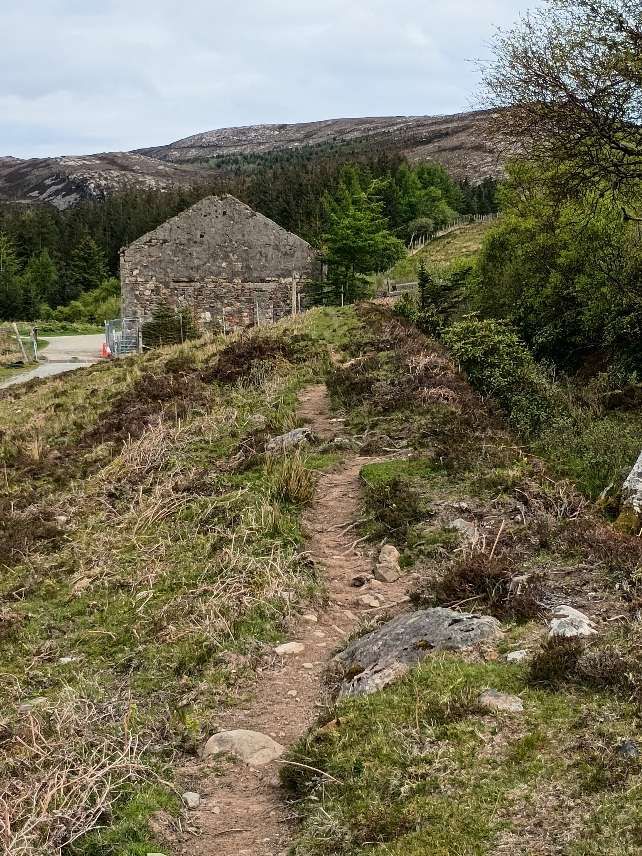
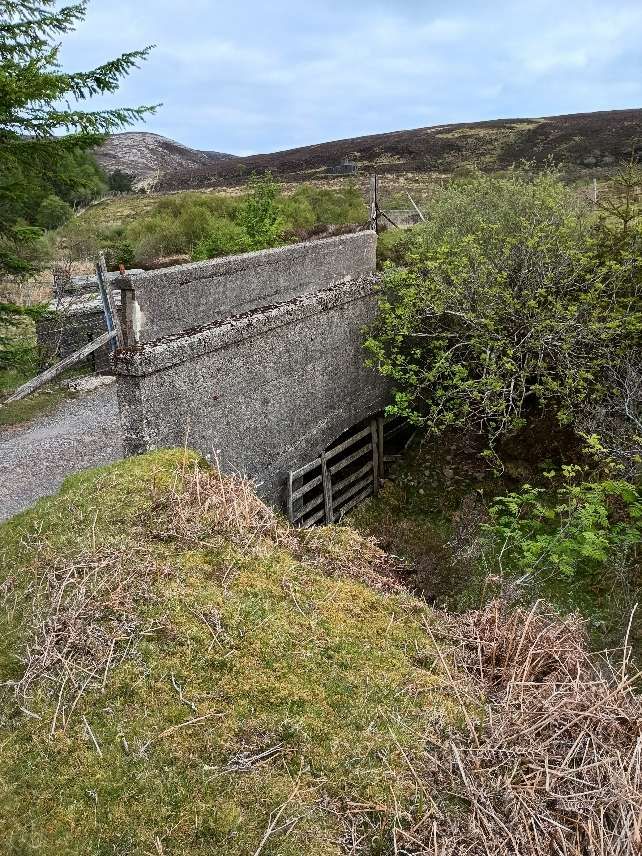
The route of the incline is a waymarked path. For the most part it is a relatively easy walk. A section of the line crosses what is now a plantation protected from deer to allow newly planted native trees to mature. [My photograph, 7th May 2025]The route of the old railway continues North through the plantation. [My photograph, 7th May 2025]Railmaponline.com’s satellite imagery shows the line serving Mine No. 1 continuing North-northeast on the same alignment as the line South of the junction. The planted area can be made out at the bottom of this image. It is also possible to make out the line of the stream valley that the line had to cross. It runs diagonally from the bottom-centre of the image to the left side of the picture. [10]The line continued North towards the location of the viaduct. [My photograph, 7th May 2025]The remains of the viaduct come into view as the land begins to drop away. [My photograph, 7th May 2025]The Southern abutment of the three span viaduct which carried the line to Mine No. 1 over the valley of a tributary of the Inverarish Burn.A view North from the top of the Southern side of the valley. The two tall concrete columns remain in place but the bridge deck is long gone. Note the steep, stepped path on the North side of the valley. [My photograph, 7th May 2025]The Northern abutment of the viaduct remains in place but it has lost the westernmost pilaster. [My photograph, 7th May 2025]
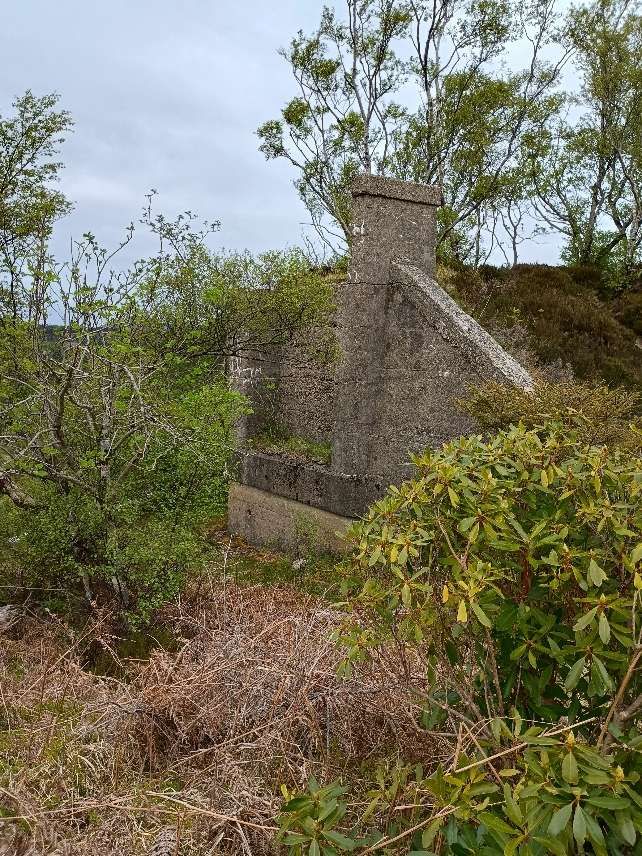
Apart from minor cuttings and embankments to maintain the design gradient on the incline and the structures immediately around the junction, there were only two significant structures. Both were viaducts: that on the main line carried it over a ravine formed by a tributary of Inverarish Burn, that on the line to Mine No. 2 carried it over Inverarish Burn and Fearns Road. The Drapers tell us that these viaducts were “of iron girders with a decking of timbers measuring 12in x 6in in section. They had iron railings on each side, and the one to No. 2 Mine had steel-plate sides to prevent ore accidentally falling onto the road below.” [1: p65]
This photograph of the viaduct carrying the line to Mine No. 1 appears in L&P Draper’s book courtesy of John MacLeod. [1: p64]
North of the viaduct on the line serving Mine No. 1, the railway continued in a North-northwest direction towards the mine, continuing to climb towards the mine buildings.
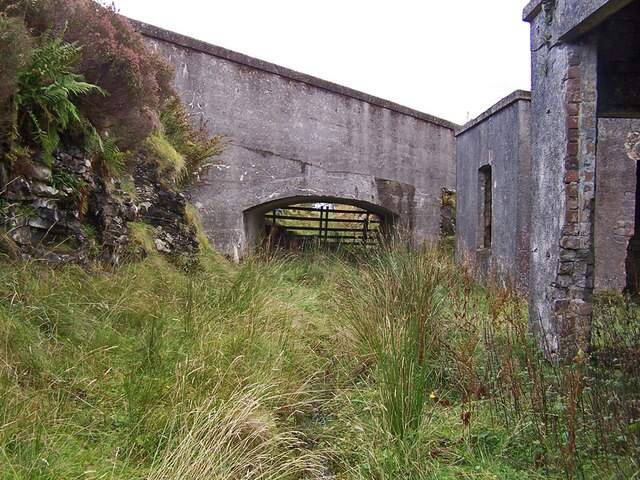
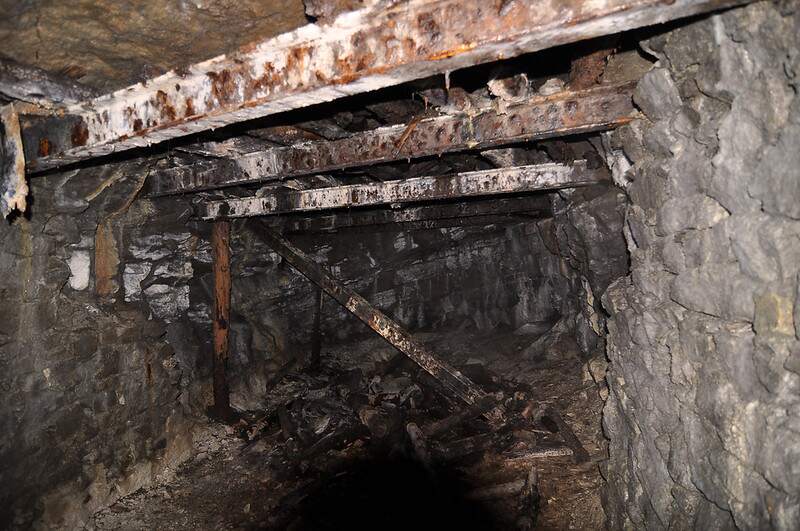
At the northern end of the railway incline, the line from the pier extended into the mine entrance of No. 1 Mine. It first passed under the road to Fearns before also passing under a separate incline which connected the facilities at the mine entrance to the surface workings where the iron bearing strata was exposed at ground level – the outcrop site. L. & P. Draper produced the drawing below which is based on the historic Ordnance Survey mapping.
Mine No. 1 and the Outcrop Site. [1: p46]This extract from the railmaponline.com satellite imagery shows the full length of the single track incline notes above. [10]
The arrangement of the two rail lines is illustrated in the photograph below. …
Having covered the full length of the main line to Mine No. 1, we turn to the branch line serving Mine No. 2.
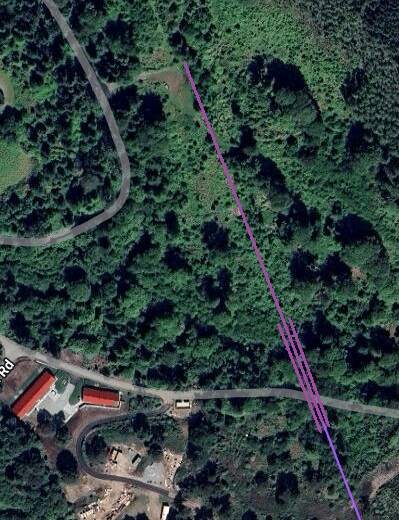
We did not walk the route of the line which served Mine No. 2: the first part of. its route is shown on this extract from railmaponline.com’s satellite imagery. The purple line on this map extract stops short of Fearns Road and Inverarish Burn. The line continued North-northwest across the road and the burn on a three span viaduct. The abutment of the viaduct remains but the bridge decking was removed for scrap some decades back. The viaduct was of the same design as that on the line to Mine No. 1 with additional steel panels attached to the deck parapets over Fearns Road to prevent accidental spillage onto people using the road. [10]This extract from railmaponline.com’s satellite imagery extends the lilac line across the valley of the Inverarish Burn to a terminus at the location of Mine No. 2. Fearns Road is shown running across the image with the Burn at its North. The Valley was crossed by a three-span viaduct to a very similar design to the viaduct on the line to Mine No. 1. Its location is marked by the three parallel lilac line. [10]
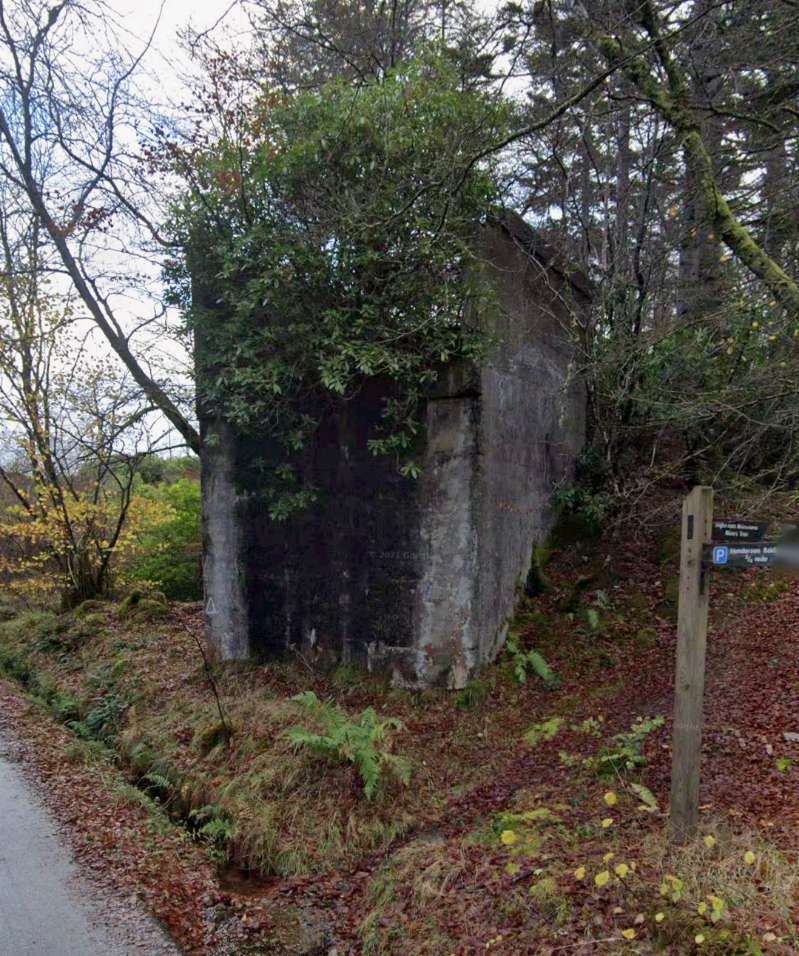
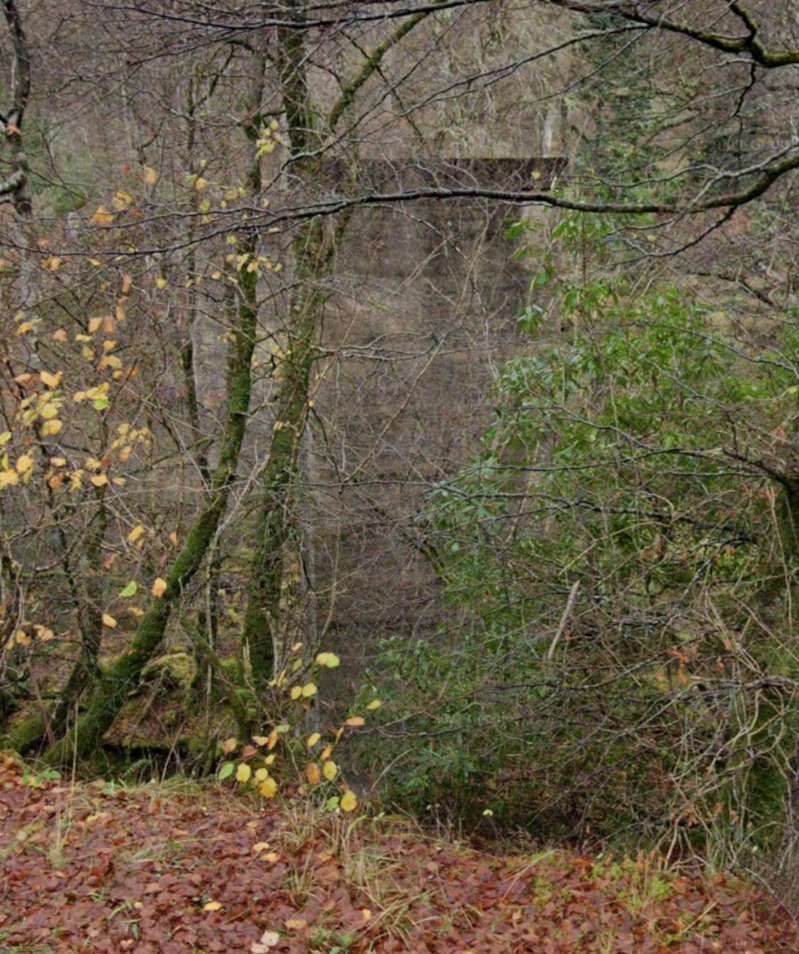
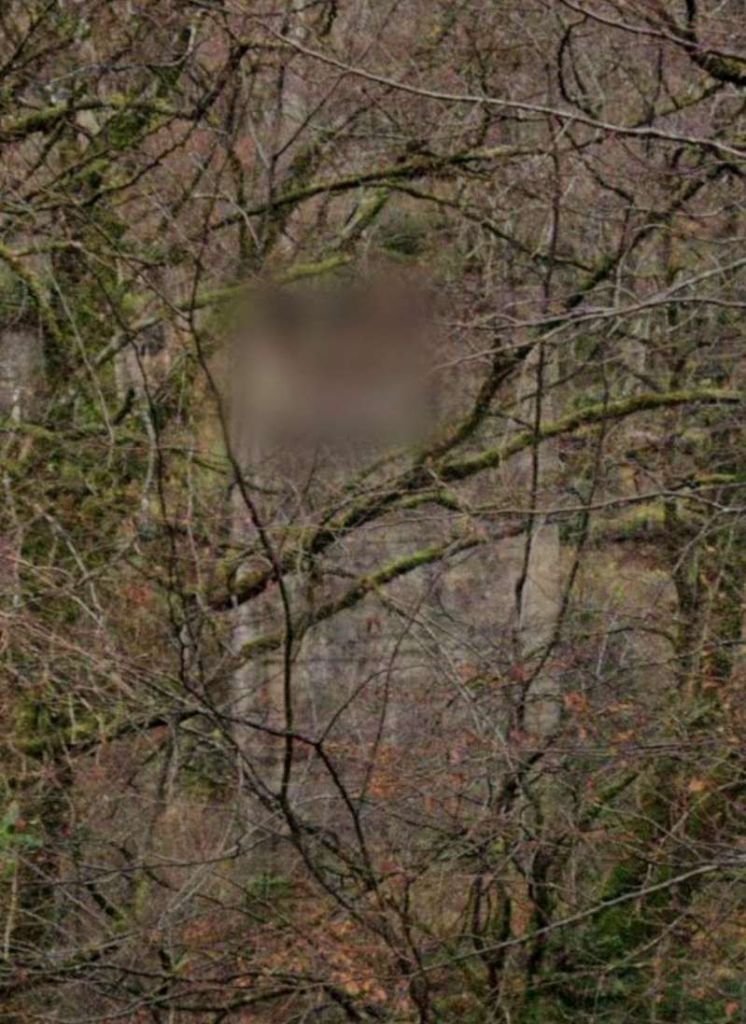
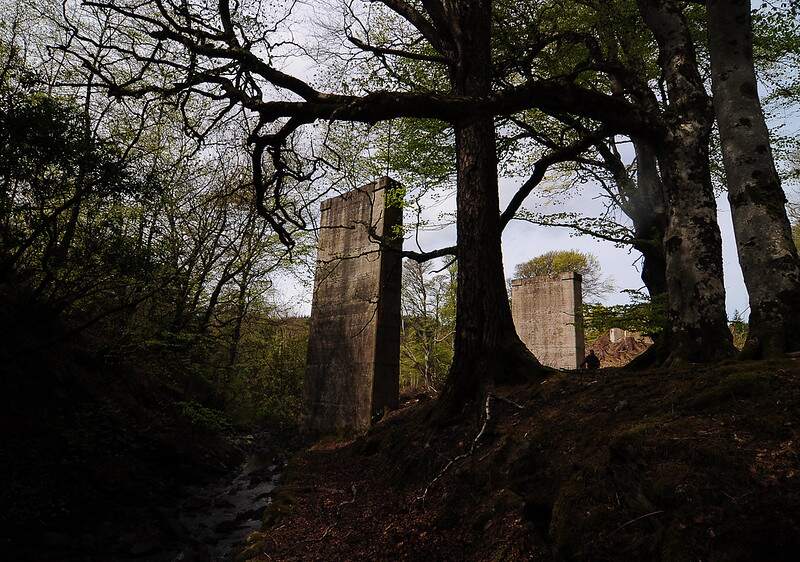
Only the abutments and piers of the viaduct carrying the line serving Mine No. 2 remain. The four images below show this remains.
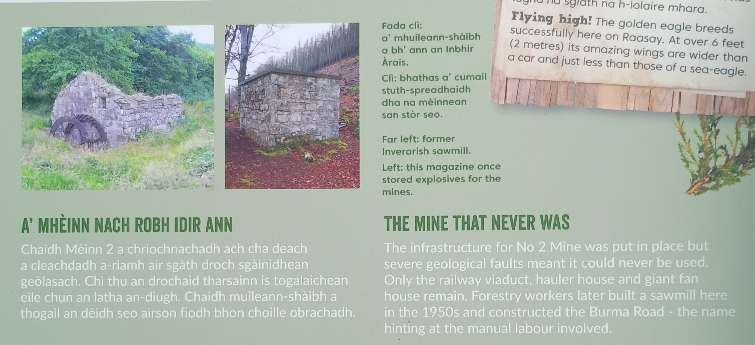
Mine No. 2 only saw very limited use and closed relatively quickly after it opened. L. & P. Draper are of the opinion that, “because of severefaulting there was virtually no production from No 2 Mine, which must have been an expensive white elephant considering the cost of constructing the high viaduct, hauler house and other mine-head buildings. However, it was not entirely unused, as Baird’s built a sawmill by No 2 Mine, and all timbers used in the mine, for pit props, railway sleepers, power poles and other purposes were sawn there and transported by rail.” [3: p153]
Calcination is a process which involves a controlled burn of crushed ore mixed with imported coal. It is specifically designed to draw off water and unwanted minerals from the iron ore but without heating it to a temperature which would result in the production of metallic iron.
Alexander Nicolson; Handbook to the Isle of Skye andAdjacent Islands; Archibald Sinclair, Celtic Press, Glasgow, 1936.