A contemporary account of the completion of the additional rail bridge over the River Tyne.
This is the Bridge that became known as the King Edward VII Bridge. It is a Grade II listed structure and has been described as “Britain’s last great railway bridge”. [4]
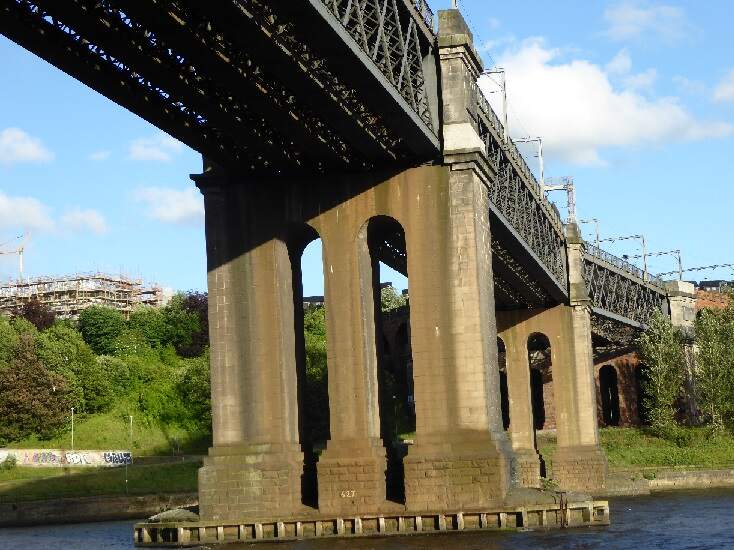
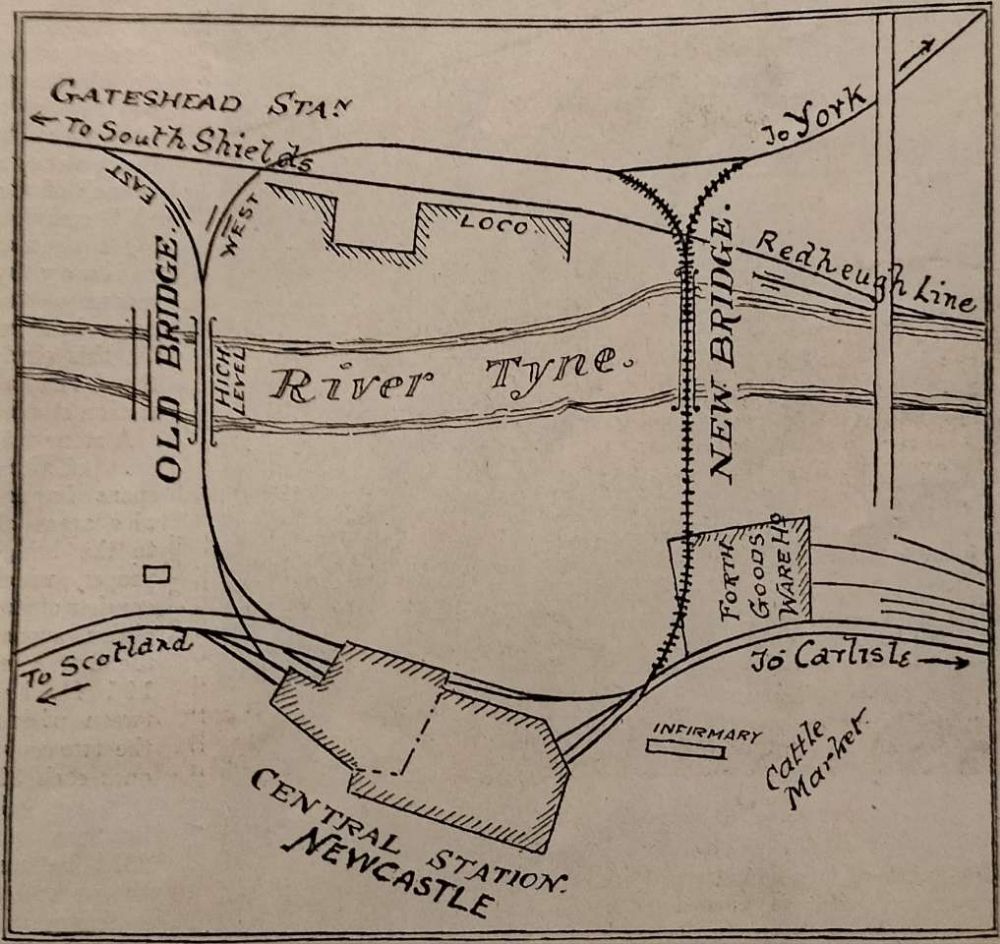
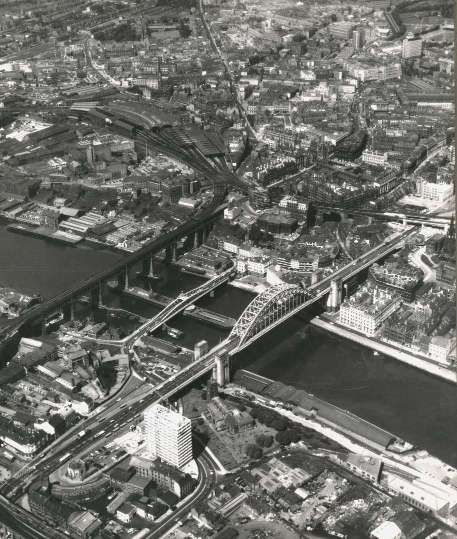
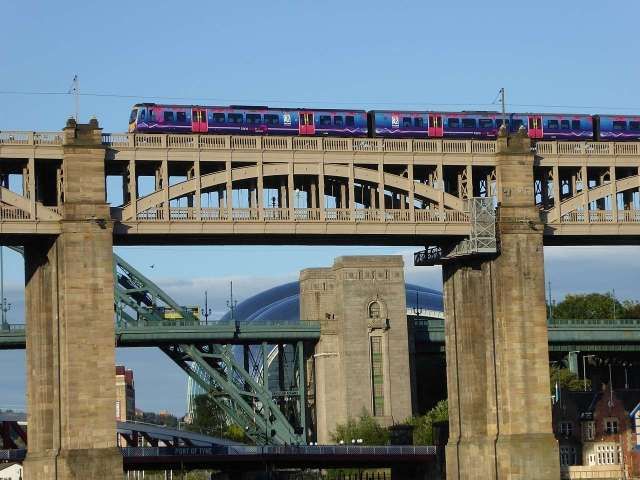
The King Edward VII Bridge, Newcastle, (c) Ardfern and licenced for reuse under a Creative Commons Licence (CC BY-SA 3.0). [5]A map of the North-Eastern Railway at Newcastle -on-Tyne. This sketch comes from the article in The Railway Magazine and suffers from a minor problem that left me struggling, for a short while, to make sense of it. Surely Central Station, Newcastle is on the North bank of the Tyne? It was the lack of a North point on the map that left me confused! [1: p9]
The introduction to the article in the Railway Magazine says:
“Travellers journeying by the East Coast route to and from places north of Newcastle-on- Tyne, have always commented on an anachronism of the twentieth century, that hitherto has required trains to run into a ‘dead end’ station, thus compelling a stop, with consequent delay, whatever might be the stress of competition between the rival routes. Now however, all this is to be altered. Readers of The Railway Magazine are acquainted with the fact that for some years past the North-Eastern Railway has had under construction a duplicate high-level bridge across the Tyne, by means of which trains north to south, and vice versa, will be enabled to pass through the Central Station, without stopping, if necessary, but, at all events, without having the direction in which the train is travelling altered. The plan [above shows] how this improvement is effected by means of the new bridge and connecting lines. His Majesty the King has consented to open the new bridge, and thus inaugurate the improvement, on Tuesday, 10th July, after which date it will be possible to work the North-Eastern Railway trains that pass through Newcastle-on-Tyne in a manner showing a considerable improvement in the system now [pertaining]” [1: p9-10]
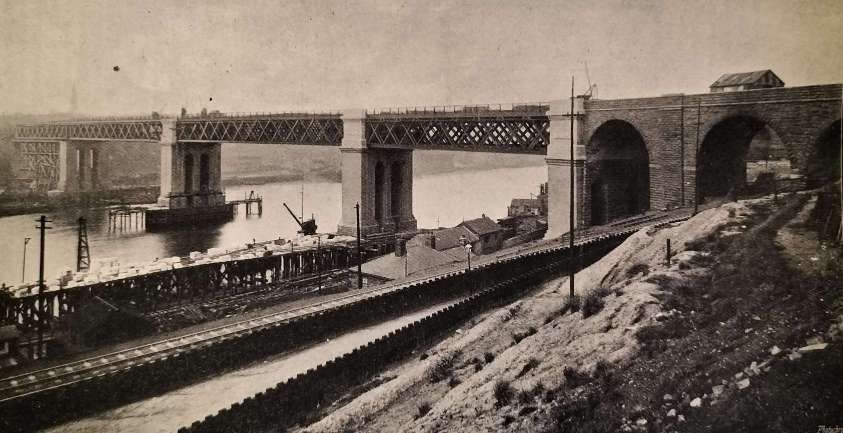
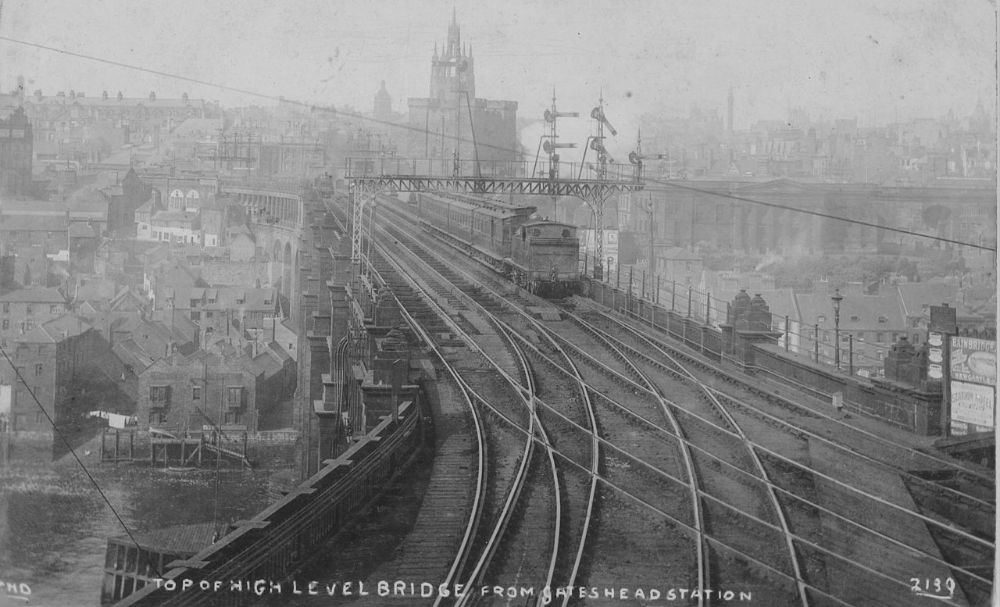
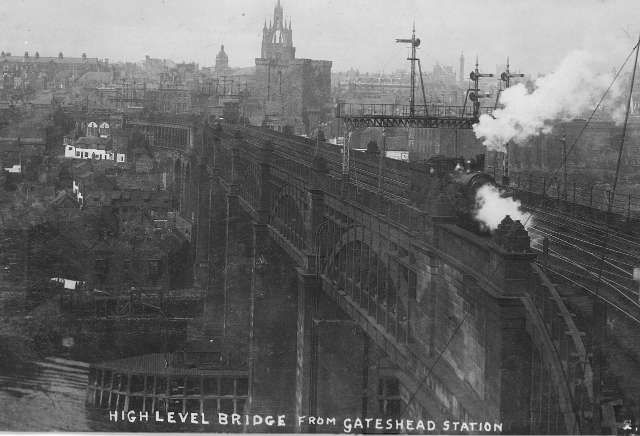
The New High Level Bridge Carrying the North Eastern Railway across the Tyne at Newcastle. [1: p10]
From the South side of the River Tyne a triangular junction gives access to the bridge, which is described by The Railway Magazine::
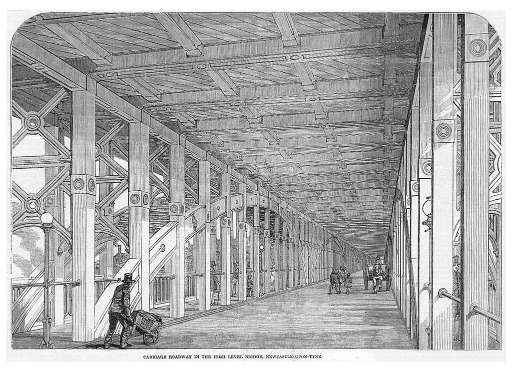
“A stone viaduct of three spans forms the approach to the bridge proper, which consists of four girder spans; the first being 191 ft. between piers, the two centre ones each 300 ft., and the northern span 231 ft. between the piers; this is followed by a stone viaduct of 10 spans each 25 ft. wide. The height of the ten piers of this viaduct, from road level to the spring of the arch, is 18 ft., and the arches are semi-circular, the arch stones being 18 in. in depth. The distance from road level to rail level is 33 ft., the foundations being on clay and averaging about 7 ft. in depth. This arching rests on ashlar piers 4 ft. thick and 51 ft. transversely, each pier being relieved by three 7 ft. arches.
The new line is next carried by a bridge across Pottery Lane, and then enters the well-known Forth goods warehouse of the North-Eastern Railway at the first storey level by steel girders resting on brick piers. The spans through the warehouse are 40 ft., and the foundations for the piers are taken down to good clay beneath the cellar floor. The distance from rail to the bottom of the foundation is 40 ft. The roof of the warehouse is held up by a wind screen, resting on the piers outside the parapet girders, and the corner of the building, cut off by the railway, is now being used as offices for the goods staff.
Beyond the goods warehouse the new line continues to a junction with the Newcastle and Carlisle Railway, a short distance west of the Central station at Newcastle.
The new bridge carries four pairs of metals.
The total length of the main bridge, measuring from the first abutment on the north side to the abutment on the south side is 1,150 ft. The girders measure 48 ft. 6 in. from centre to centre of parapets, and the breadth of steel work overall is 50 ft., so that there is thus provided a space of 6 ft. between the tracks, and room for a pathway for the use of platelayers on either side. The girders are built of double lattice work, with top and bottom booms 3 ft. deep, and are braced together at the top and bottom by transoms, of which the lower are of lattice work and the upper of plate work 164 in. deep, the latter carrying the timberway on which the rails run. Each girder has panels of 23 ft., of which the struts or ties are lattice girders 4 ft. 1 1/2 in. wide.
The girders for the centre spans have a camber of 7 1/2 in. and the north span of 6 in. The parapets, which are 5 ft. high are bracketed to the outside of the girders and are of lattice work, and, in order to carry the railway over the piers, the opposite top booms are bracketed out towards each other leaving a space of 6 in. between the ends of the top booms of the girders. To provide for expansion these girders rest on roller bearings at one end of cast steel, with a base of 38 sq. ft. each. The total weight of steel for each of the spans is: North span, 950 tons; two central spans, 3,482 tons; southern span, 1,350 tons. As the rails begin to diverge on the pier in the southern side of the river they are some distance apart at the next pier, there being then 132 ft. between the parapets. For this span of 191 ft. there are also five girders, but they spread out towards the south like a fan instead of being parallel.
The river piers are of Norway granite, and the foundations have all been taken down to the same depth, namely, 69 ft. below high water, and they have been built in caissons. The adoption of the caisson method of constructing the foundations marks a difference between the new high-level and the old bridge, as the latter was built on piled foundations. It should, however, be remembered that in 1845, when Stephenson’s great work was undertaken, the Tyne could almost be forded at low water, whilst there is now a deep-water channel beneath both bridges.
The total length of the new railway is 4 furlongs 2 chains, whilst the loop to the south-east is 1 furlong 2 chains in length. Of this length of railway 19 chains is straight, including the crossing of the river, but the rails are on a 10-chain curve on leaving the west end of the Central station, and again, on a similar curve on reaching the south side of the river, the south-east curve having a radius of 7 chains. The line is level from the commencement on the north side as far as the pier on the south side of the river, when the main curve falls to the south-west on a gradient of 1 in 132, and the loop falls at 1 in 226. The new high-level bridge has been constructed from the designs of Mr. C. A. Harrison, the chief engineer of the Northern Division of the North-Eastern Railway, and this gentleman laid the foundation stone on 29th July 1902, so that less than four years have been occupied in constructing the bridge and new approach railway to Newcastle Central station.” [1: p10-11]
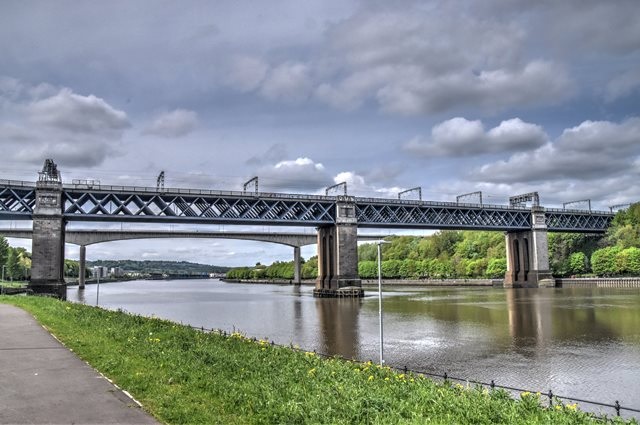
Another view of the King Edward VII Bridge, Newcastle, (c) Nathan Holth, 13th May 2018. [6]
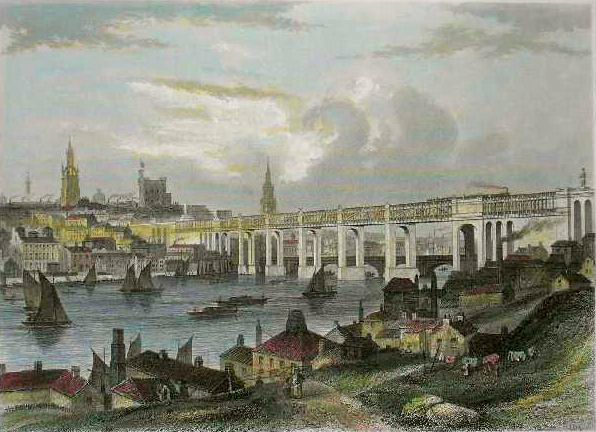
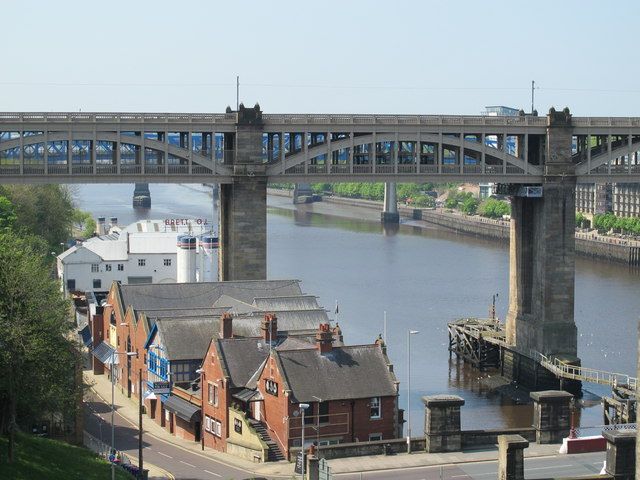
The original ‘High Level Bridge’ – designed by Robert Stephenson
The first High Level Bridge across the Tyne at Newcastle was opened in 1849. It was designed by Robert Stephenson, that bridge carried rail and road traffic and was the first in the world to do so.
Network Rail tells us that “the Newcastle & Berwick Railway secured the Act to build its line in 1845. It stipulated that the company should construct a combined road and rail bridge across the River Tyne between Newcastle and Gateshead, to be completed within four years. … The bridge was designed by Robert Stephenson and detailed drawings were made under the supervision of Thomas E Harrison. To avoid excessive width, and thereby expense, it was decided to carry the railway above, rather than beside, the roadway. The roadway itself was designed to be 20ft (6m) wide with a 6 1/2ft (2m) footway on either side. The combined width allowed three standard gauge tracks to run across the top rail level of the bridge. The overall length of the bridge was to be 1338ft (408m).” [2]
An extract from the contract drawings for Stephenson’s bridge. [2]
Network Rail goes on to describe the construction of the bridge:
“The bridge was a tied arch (or bow-string) bridge with the main structural elements made of either cast or wrought iron. It had in total six spans each 125ft (38m) in length, the cast iron bows supporting the railway while wrought iron ties supported the road deck below. To enable a level line for the railway across the deep and wide Tyne valley, the roadway was built at 96ft (29m) and the railway 120ft (37m) above high water on the river. Contracts for the production of the ironwork were let to local firm Hawkes, Crawshay & Co. of Newcastle.
The bridge sits on five masonry piers, 50ft (15m) thick and 16ft (5m) wide. Although the River Tyne at the point the bridge is constructed was no more than 3ft (1m) deep at low water, its bed consisted of some 30ft (9m) of silt before underlying bedrock could be reached.
A recent invention, the ‘Nasmyth Steam Pile Driver’, was used for the first time in bridge building, enabling the piles for the bridge foundations to be driven down to the bedrock quickly and efficiently. Rush & Lawton of York were contracted to build the five main masonry piers and the land arches on each side carrying the approaches; 50,000 tons of stone was quarried near Newcastle, mainly at Heddon on the Wall.
To assist in the construction work a wooden viaduct was built immediately to the east of the permanent one. This temporary structure was opened to railway traffic on 29 August 1848, just a year before the High Level Bridge itself was opened by Queen Victoria on 28 September 1849. The public roadway over the bridge was not completed and opened until some six months later.” [2]
A Gallery of photos, drawings and engravings of Stephenson’s High Level Bridge. …..
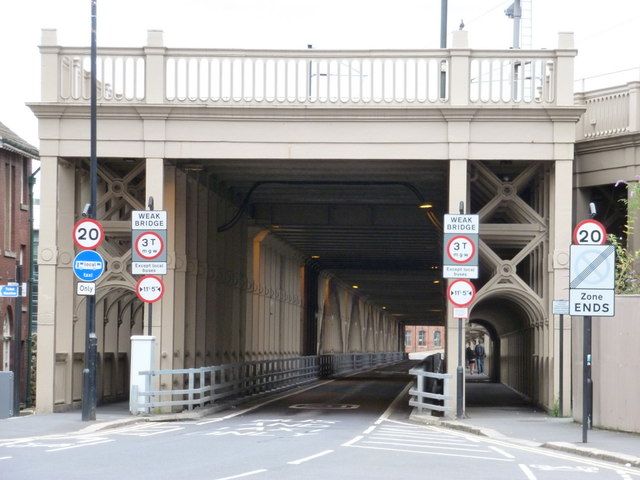
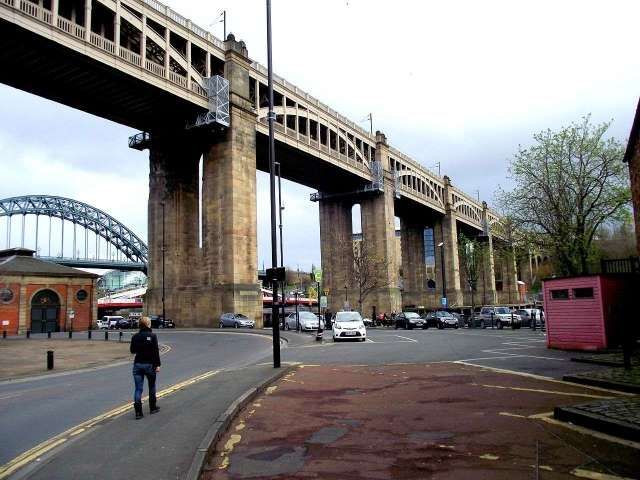
A coloured early engraving looking downstream (1863). [3]An engraving showing the roadway under the rail bridge in early days. [3]Three lines crossed the bridge. This is a view from the South side of the Tyne at high level. [3]A similar image but this time showing more of the West face of the structure. [3]An aerial view of the High Level Bridge in 1967. [3]The entrance to the road bridge in more modern times, after weight and width restrictions were imposed. [3]A view of the High Level Bridge from the Southeast in 2012, looking upstream. [3]A view of the High Level Bridge in 2014 from the Northwest. [3]A modern DMU (A Class 185 diesel multiple unit) crossing the High Level Bridge in 2015. [3]
References
The New High Level Bridge at Newcastle-on-Tyne; in The Railway Magazine, London, July 1906, p9-11.
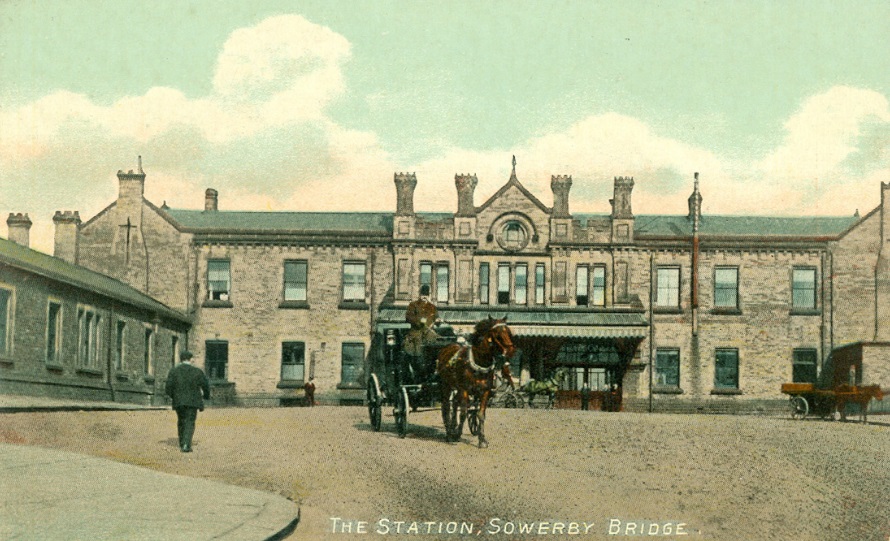
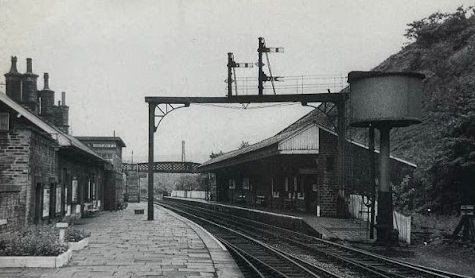
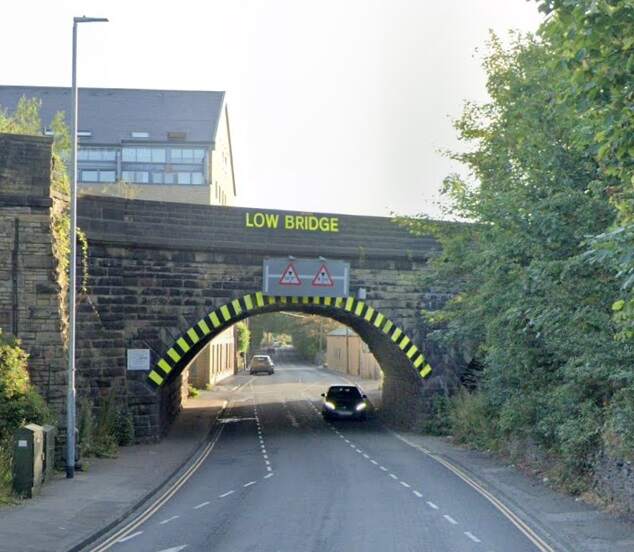
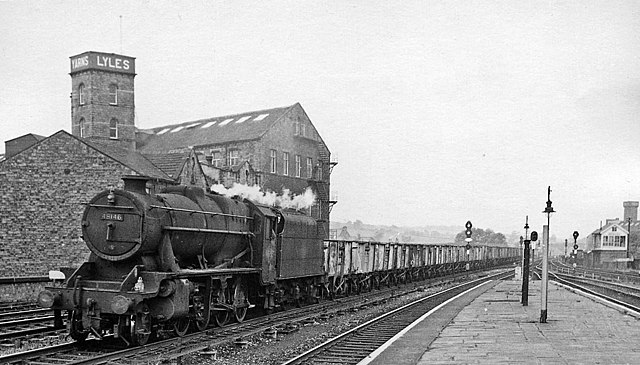
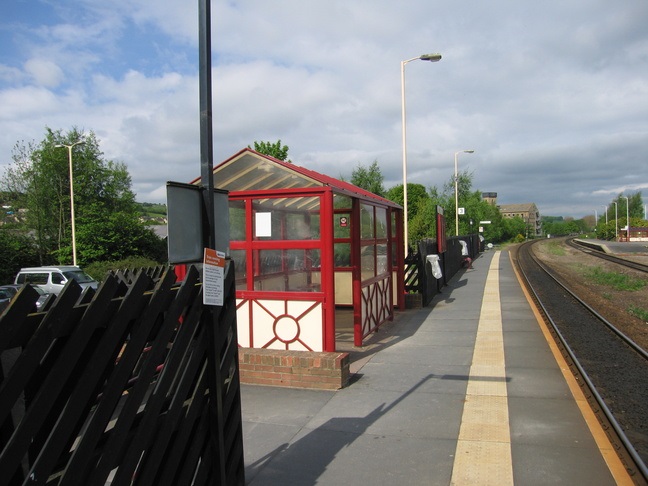
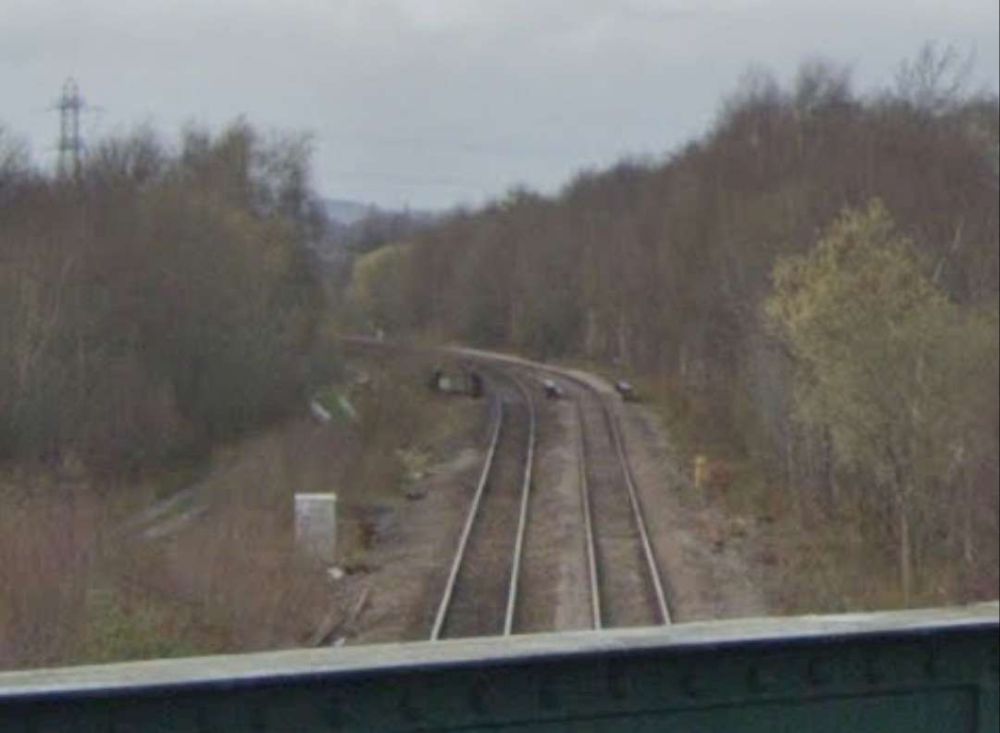
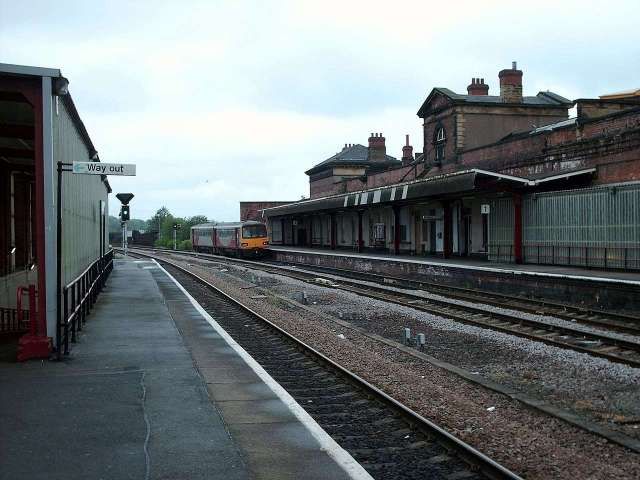
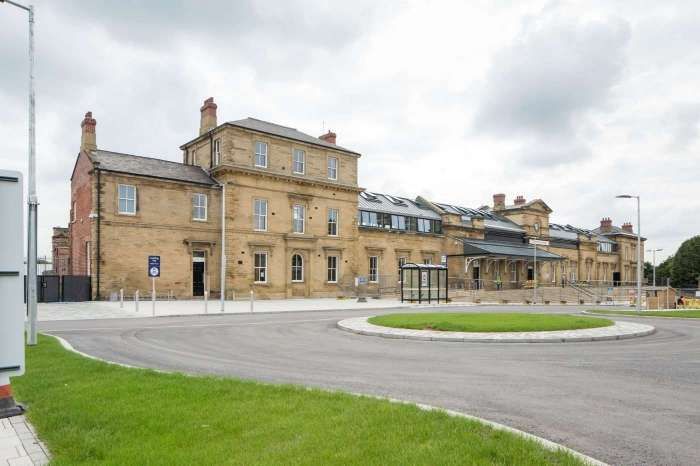
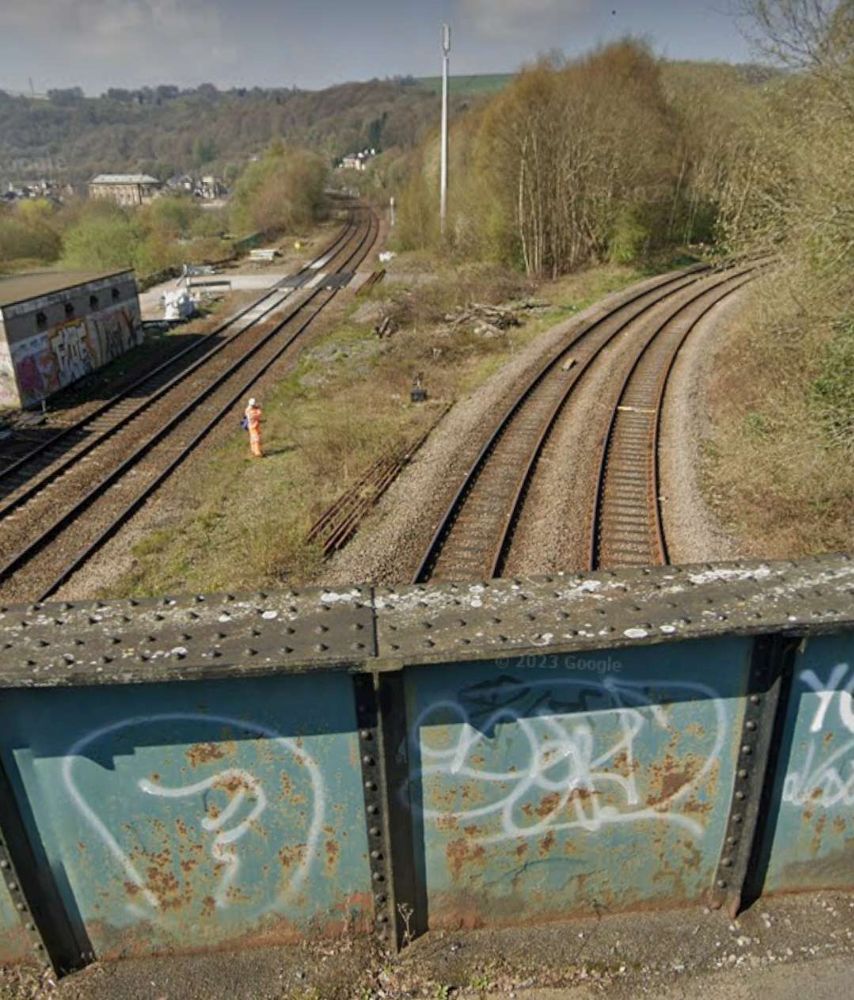
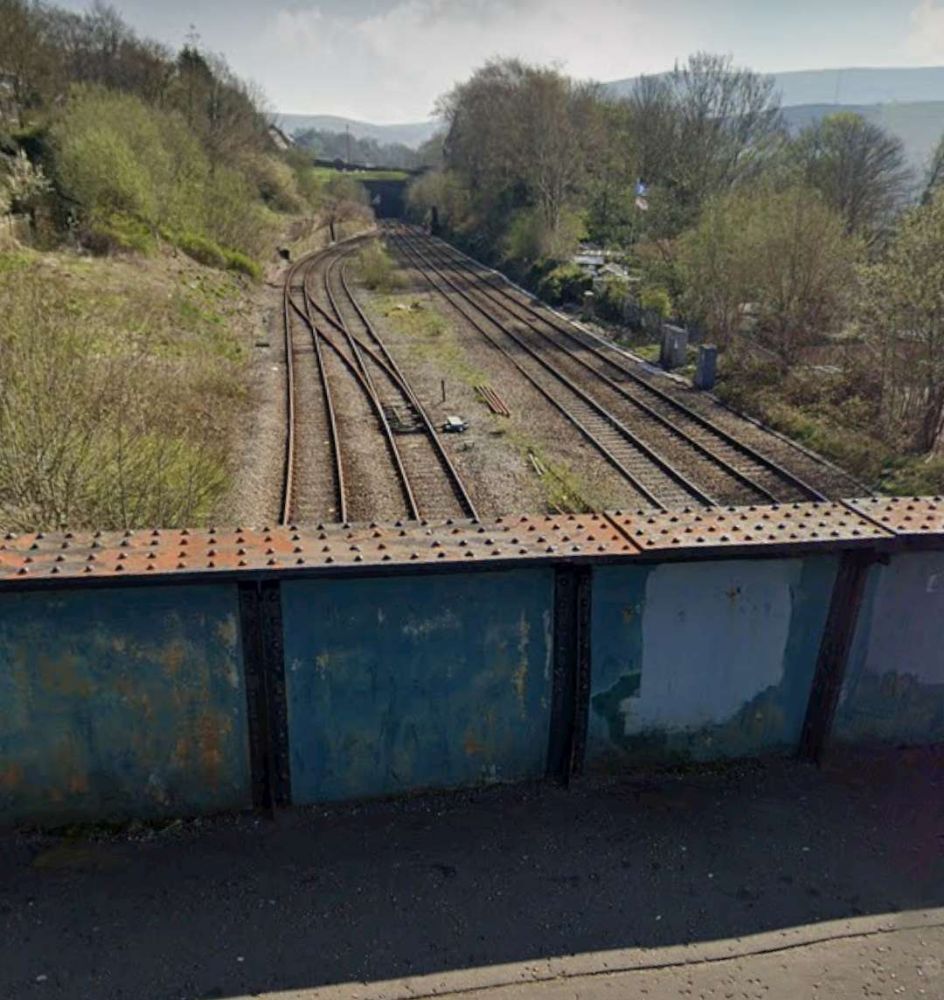
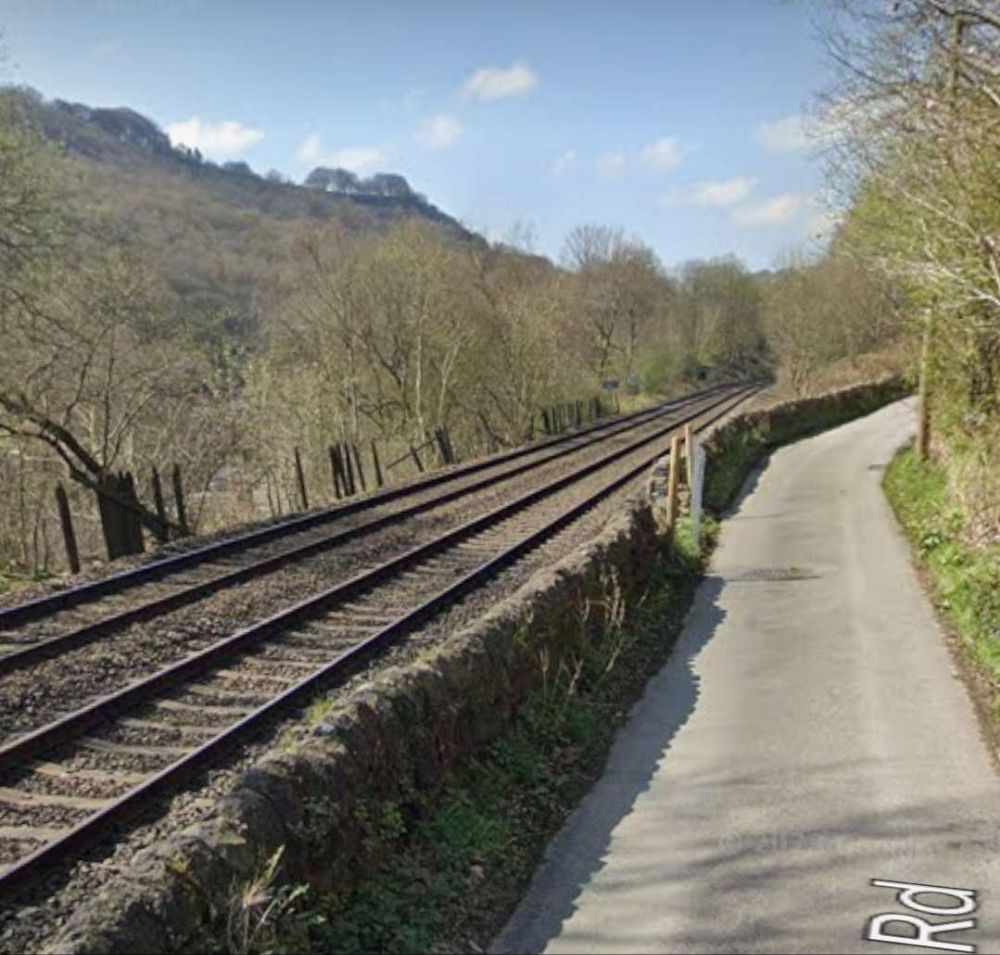
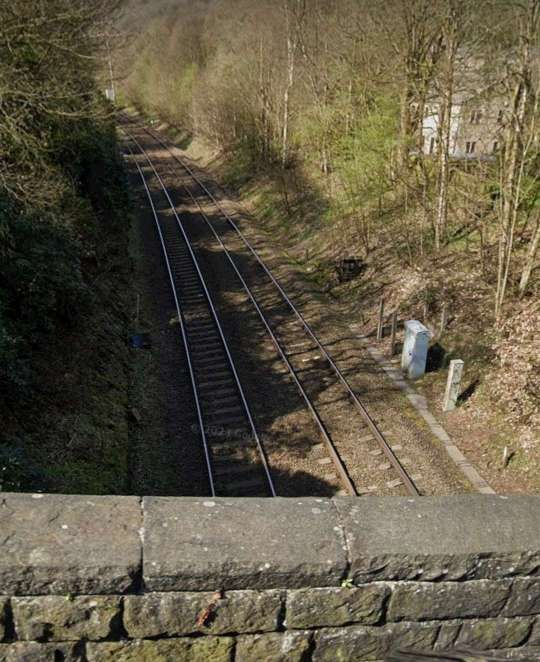
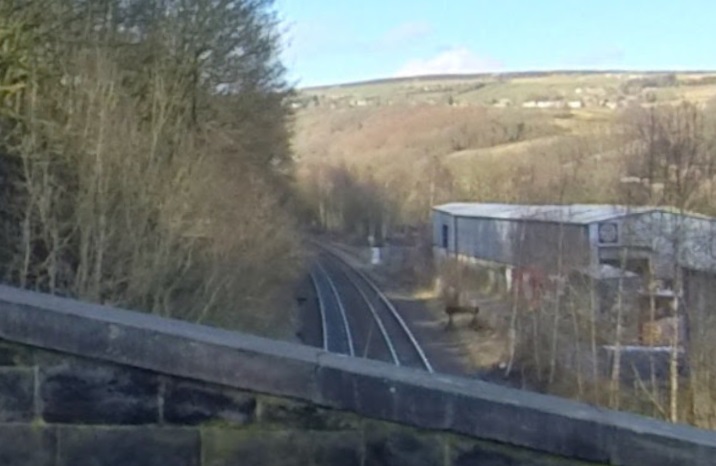
More images of Sowerby Bridge Railway Station can be found here [67] and here. [68]
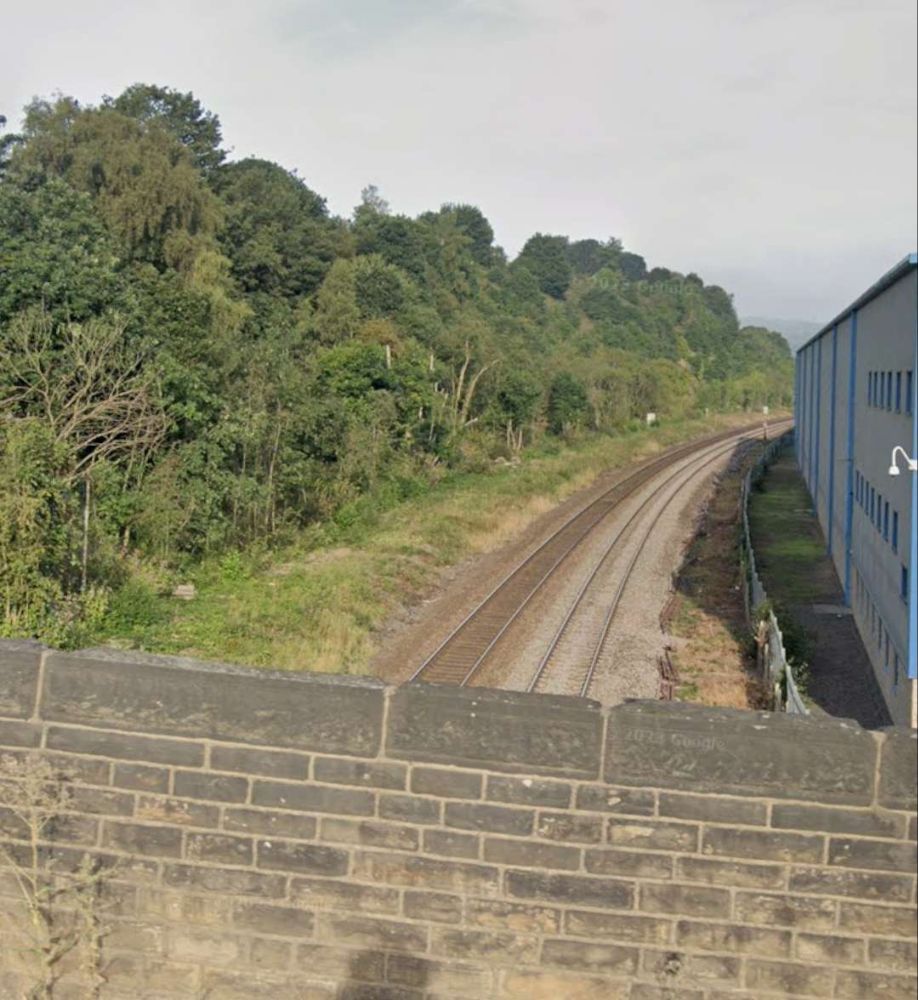
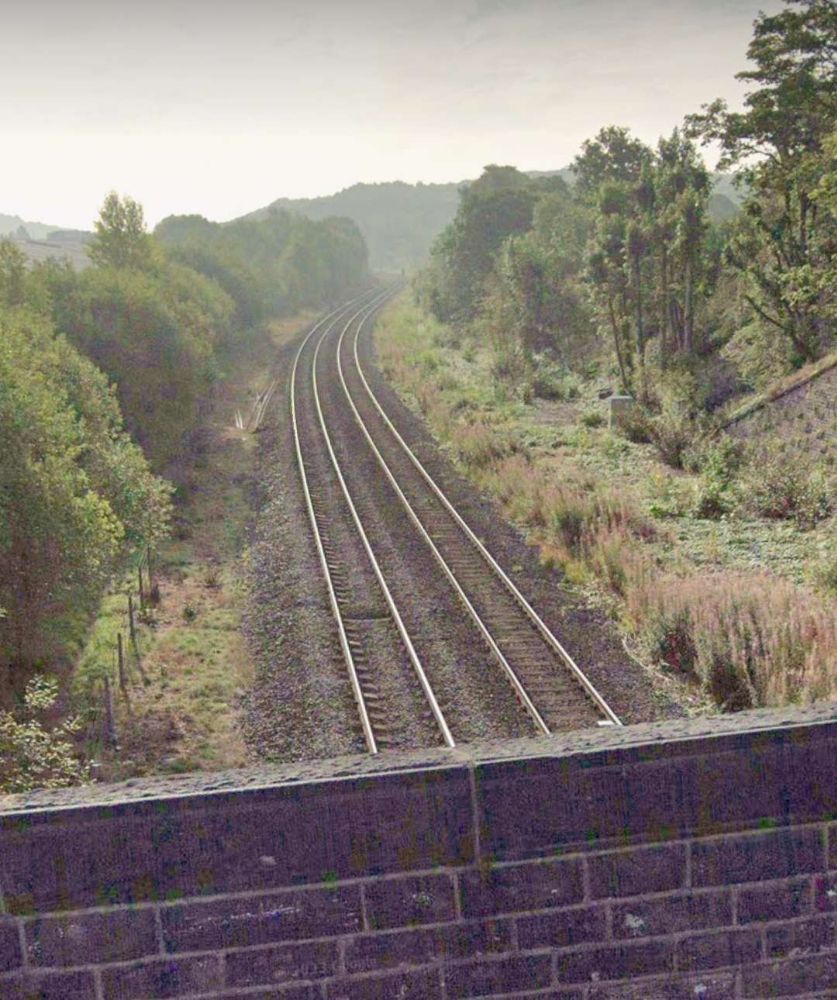
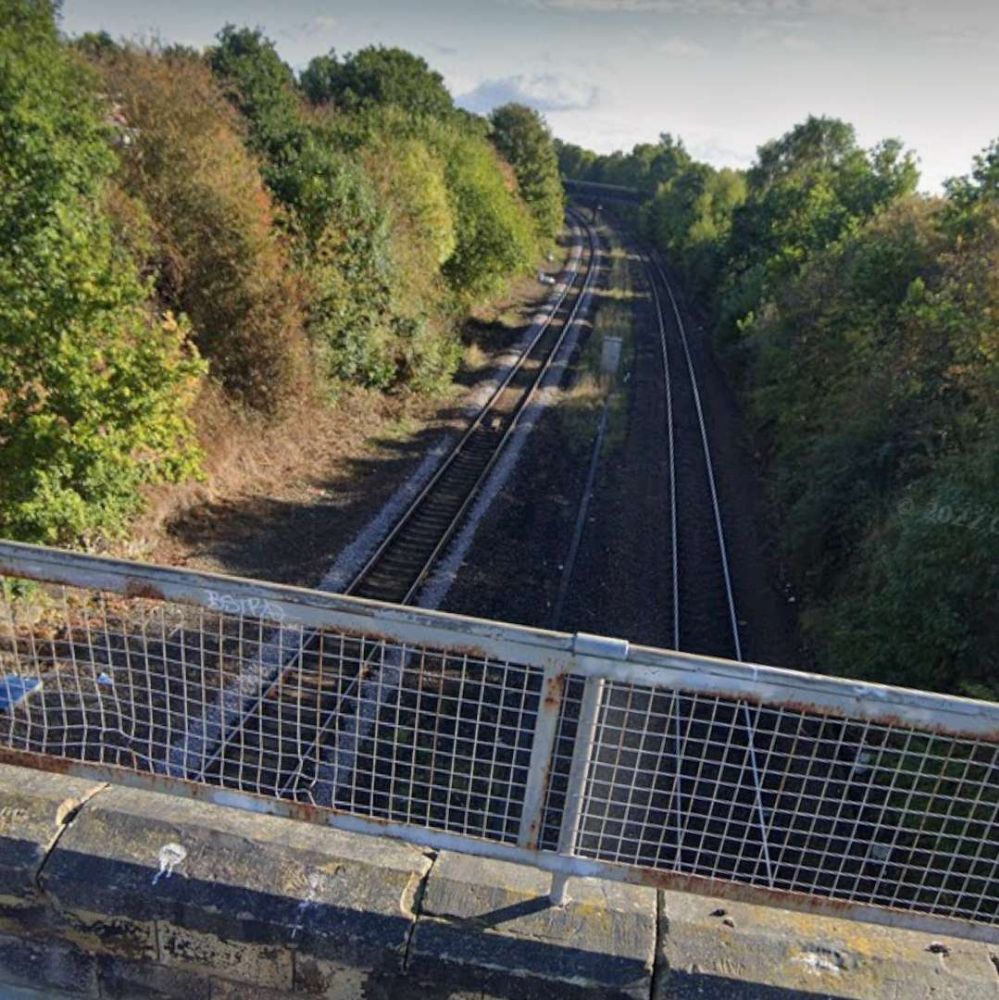
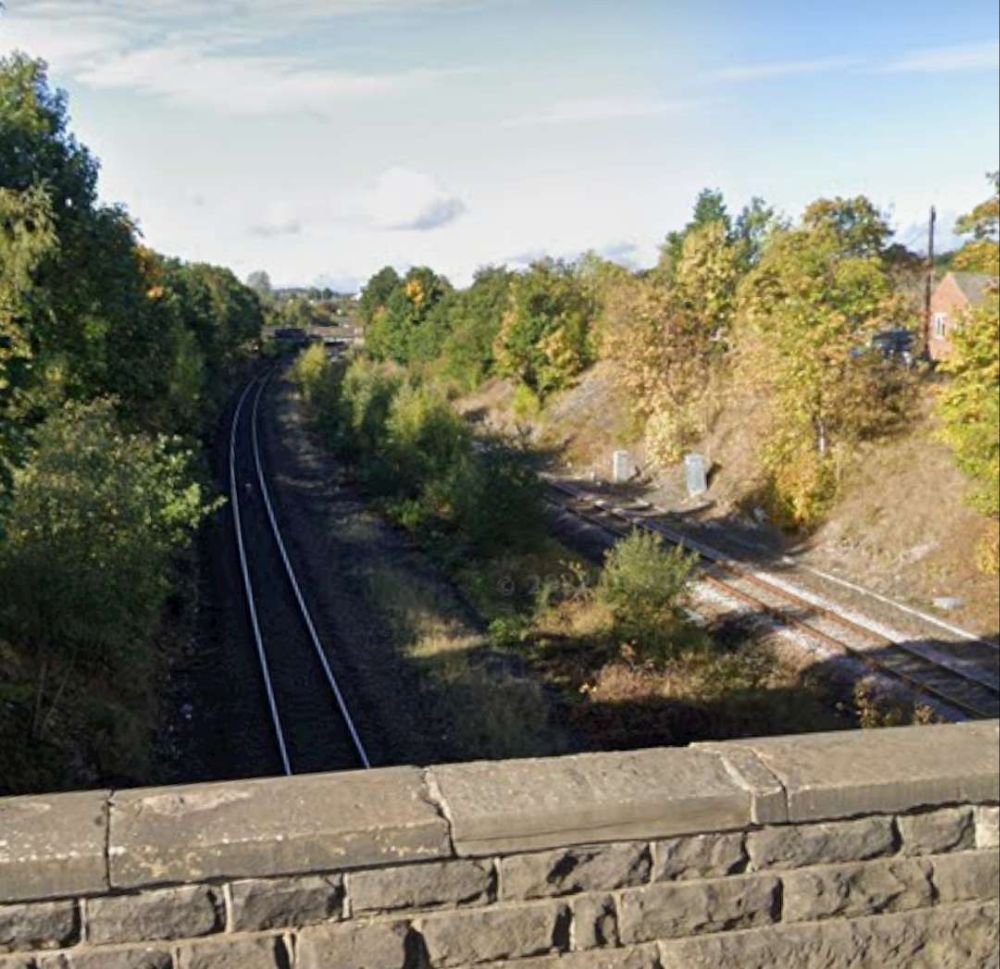
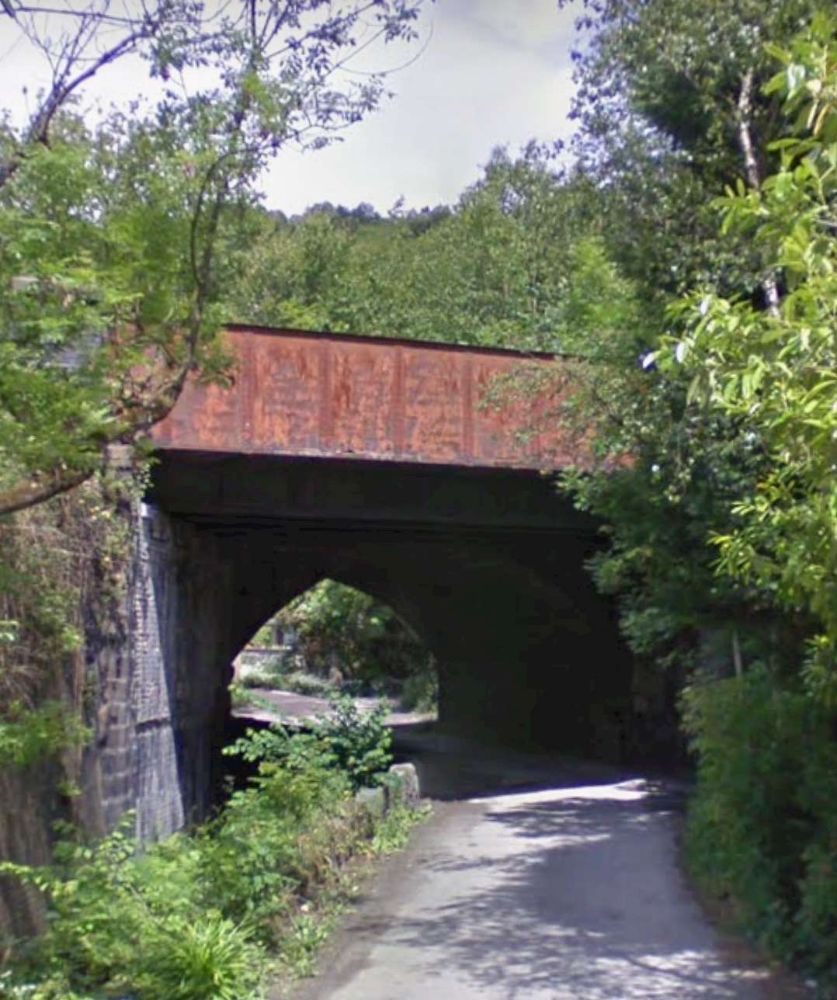
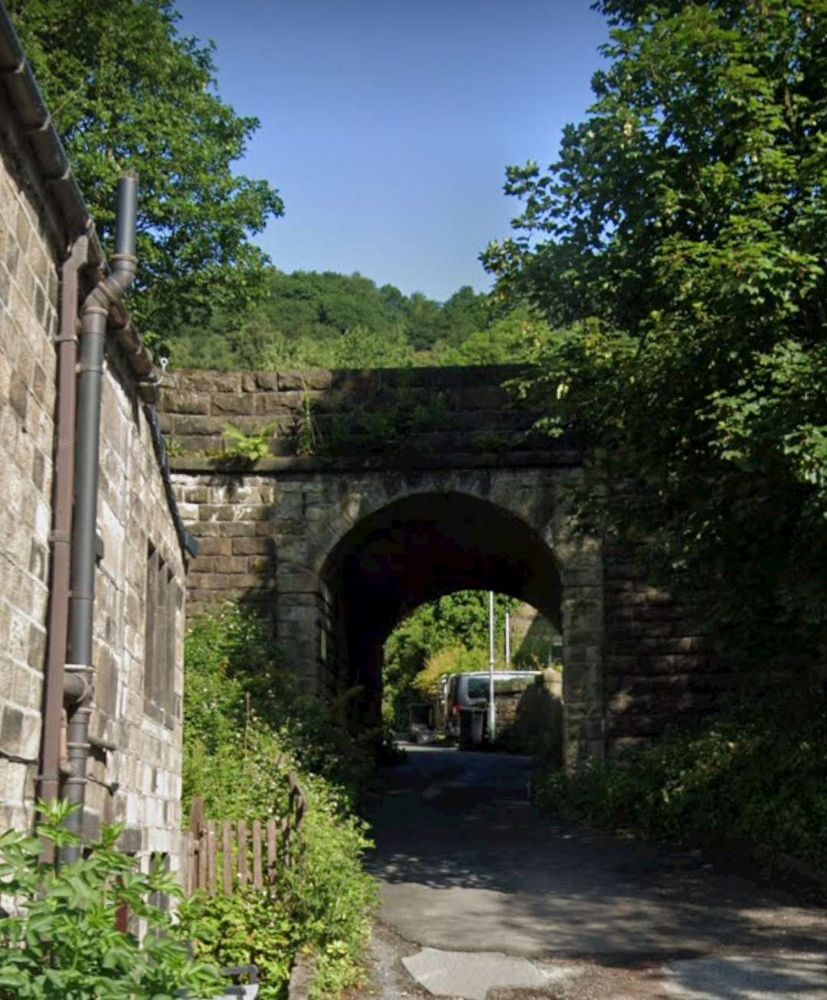
Just beyond the eastern station limits Fall Lane bridges the line – two views from the bridge follow.
The view East from Fall LaneThe view West from Fall Lane
To the East of Sowerby Bridge the line crosses the River Calder again.
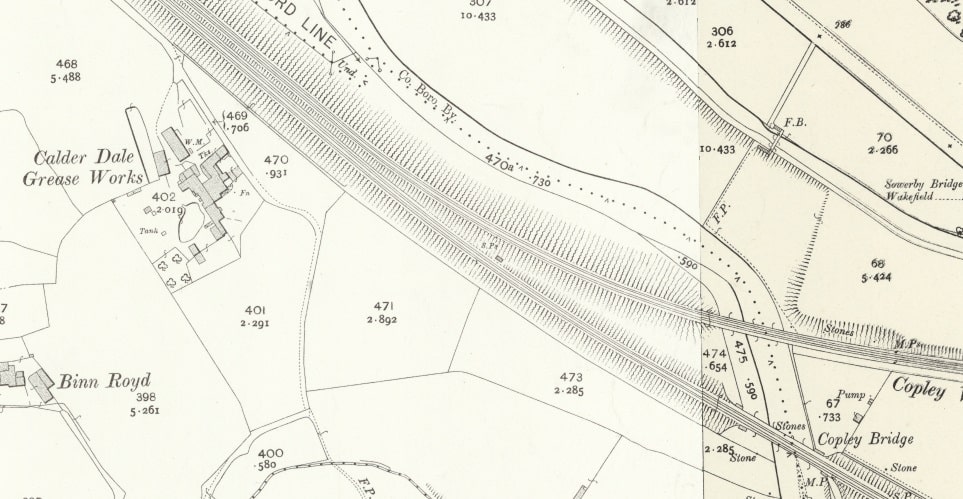
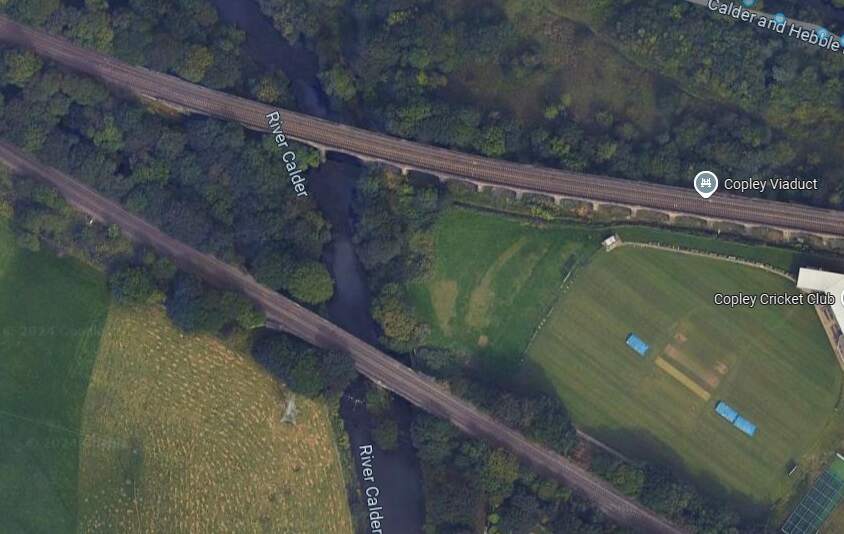
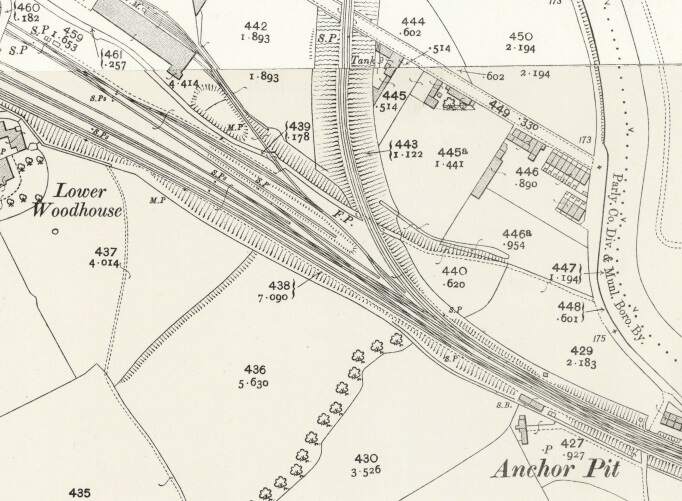
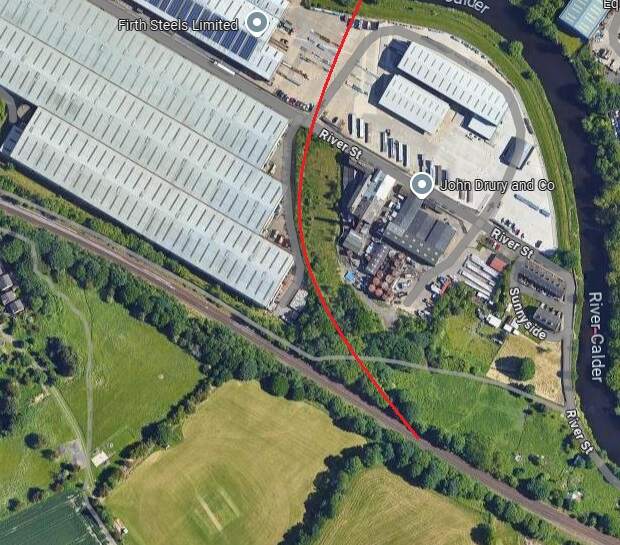
Another extract from the 25″ Ordnance Survey of 1905, published in 1907 shows Calder Dale Grease Works, Copley Bridge and Copley Viaduct. The Sowerby Bridge, Halifax and Bradford line leaves the main line at this point. [25]The bridge and Viaduct as they appear on Google Maps satellite imagery in 2024. [Google Maps, October 2024]
An image of Copley Viaduct can be seen here. Just beneath the viaduct, at the left of the linked photograph, a train is crossing Copley Bridge on the line we are following. [61]
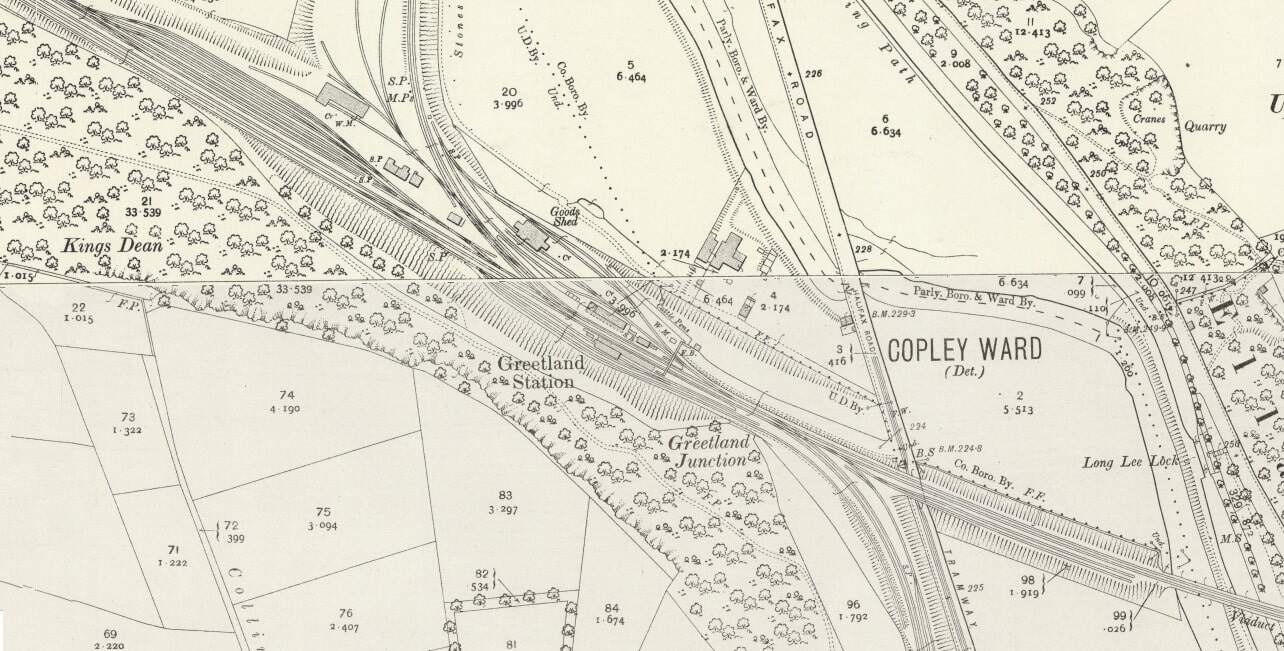
The Manchester and Leeds Railway then crosses the Calder once again and enters Greetland Station. The second arm of the Sowerby Bridge, Halifax and Bradford line joins the mainline just before (to the Northwest of) Greetland Station.
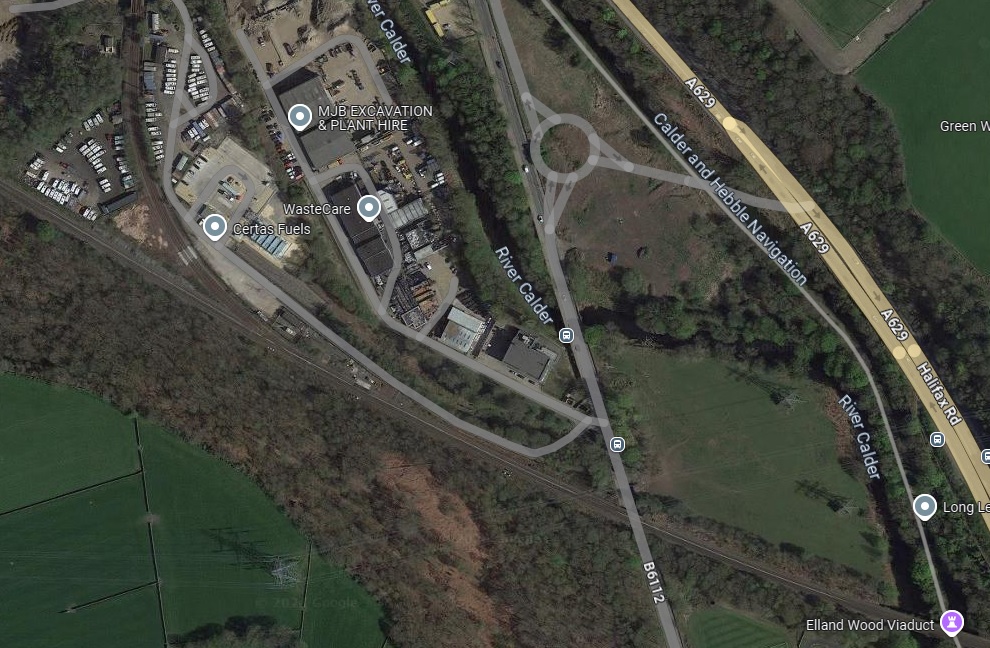
Greetland Station shown on the 25″ Ordnance Survey of 1905. Top-left the second arm of the triangular junction with the Sowerby Bridge, Halifax and Bradford line can be seen joining the Manchester and Leeds Railway. Bottom-right, the Stainland Branch leaves the main line just before the main line bridges the River Calder once again. [26]The same location in the 21st century. Greetland Station is long gone and the branch South (the Stainland Branch has also been lifted. [Google Maps, October 2024]Greetland Railway Station in 1962, just before closure. The camera is positioned at the Northwest end of the station. [28]
Greetland Railway Station “was originally opened as North Dean in July 1844. It was subsequently changed to North Dean and Greetland and then to Greetland in 1897. Situated near the junction of the main Calder Valley line and the steeply-graded branch towards Halifax (which opened at the same time as the station), it also served as the junction station for the Stainland Branch from its opening in 1875 until 1929. It was closed to passenger traffic on 8th September 1962.” [27]
Looking West from the A629, Halifax Road which sits over the line adjacent to the West Portal of Elland Tunnel. [Google Streetview, July 2024]
Rake says that the line then approaches “Elland Tunnel, 424 yards, in length, and, after leaving Elland Station, pass[es] through a deep cutting, from which a large quantity of stone for the building of the bridges was obtained.” [1: p471]
To the East of Elland Railway Station the railway is carried above the River Calder, passing Calder Fire Clay Works. Further East again, “the railway is carried across a steep and rugged acclivity, rising almost perpendicularly from the river. … The viaduct consists of six arches of 45ft span each, and leads directly to Brighouse, originally the nearest station to Bradford.” [1: 472]
The view from the South of the bridge which carries the railway over Park Road (A6025), Elland. Elland Station stood above this location and to the left. [Google Streetview, July 2024]
From Elland, the line runs on through Brighouse
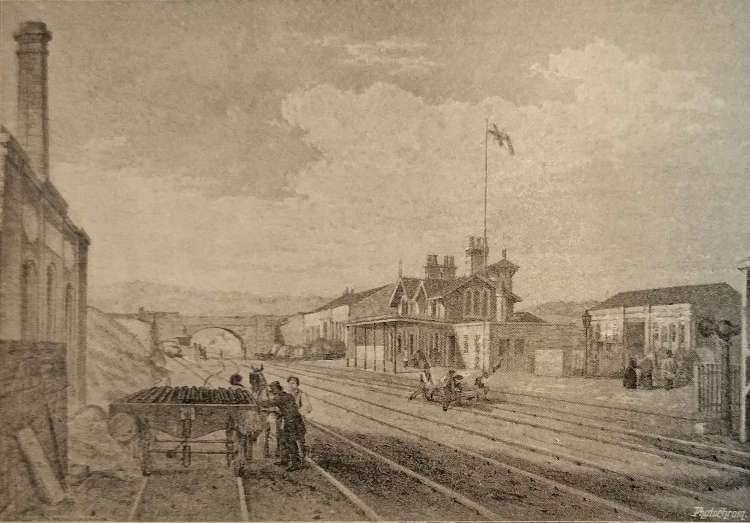
Brighouse Station and Goods Yard as shown on the 25″ Ordnance Survey of 1905. [31]The view West from Gooder Lane Bridge towards Cliff Road Bridge Elland. [Google Streetview, May 2023]The view East across Brighouse Railway Station from Gooder Lane. [Google Streetview, May 2023]Brighouse Railway Station (originally called ‘Brighouse for Bradford’). [1: p472]
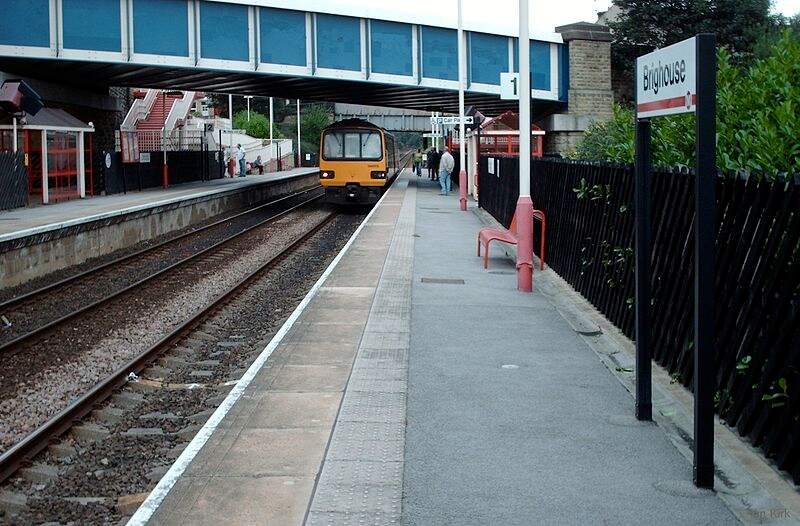
Embedded link to Flickr. The image shows B1 No. 61034 Chiru at Brighouse Station on 2nd April 1964. The locomotive is arriving at the station from the East with a local passenger train. The locomotive had only recently been transferred to Wakefield from Ardseley. It was withdrawn at the end of 1964. The photograph looks Southeast through the station. [32]A much later photograph of Brighouse Railway Station (2006) which looks Northwest through the station from platform 1, (c) Ian Kirk and authorised for reuse under a Creative Commons Licence (CC BY 2.5). [33]
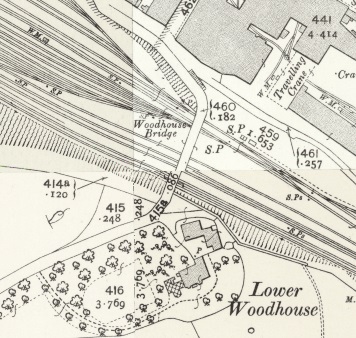
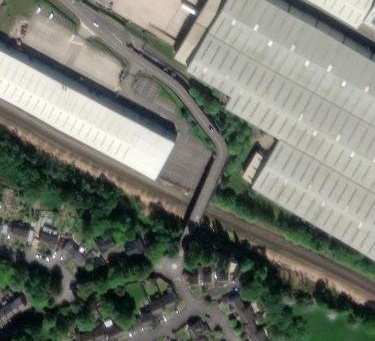
To the East of the passenger facilities at Brighouse there were a significant array of sidings. The first length of these can be seen on the OS Map above. Around 75% of the way along these sidings Woodhouse Bridge spanned the lines. Much of the area has been redeveloped by modern industry. The next four images relate to that bridge.
Woodhouse Bridge in 1905. [69]Woodhouse Bridge in 2024. [69]Looking West from Woodhouse Bridge in 2023. [Google Streetview, August 2023]Looking East from Woodhouse Bridge in 2023. [Google Streetview, August 2023]
Leaving Brighouse Station, the railway is joined, from the North, by the Bailiff Bridge Branch (long gone in the 21st century).
Immediately to the East of Brighouse Station Goods Yards, the Bailiff Bridge Branch joined the Manchester and Leeds Railway. [62]Approximately the same area in the 21st century as shown on the OS map extract above. The line of the old Bailiff Bridge Branch is superimposed on the satellite image. [Google Maps, October 2024]
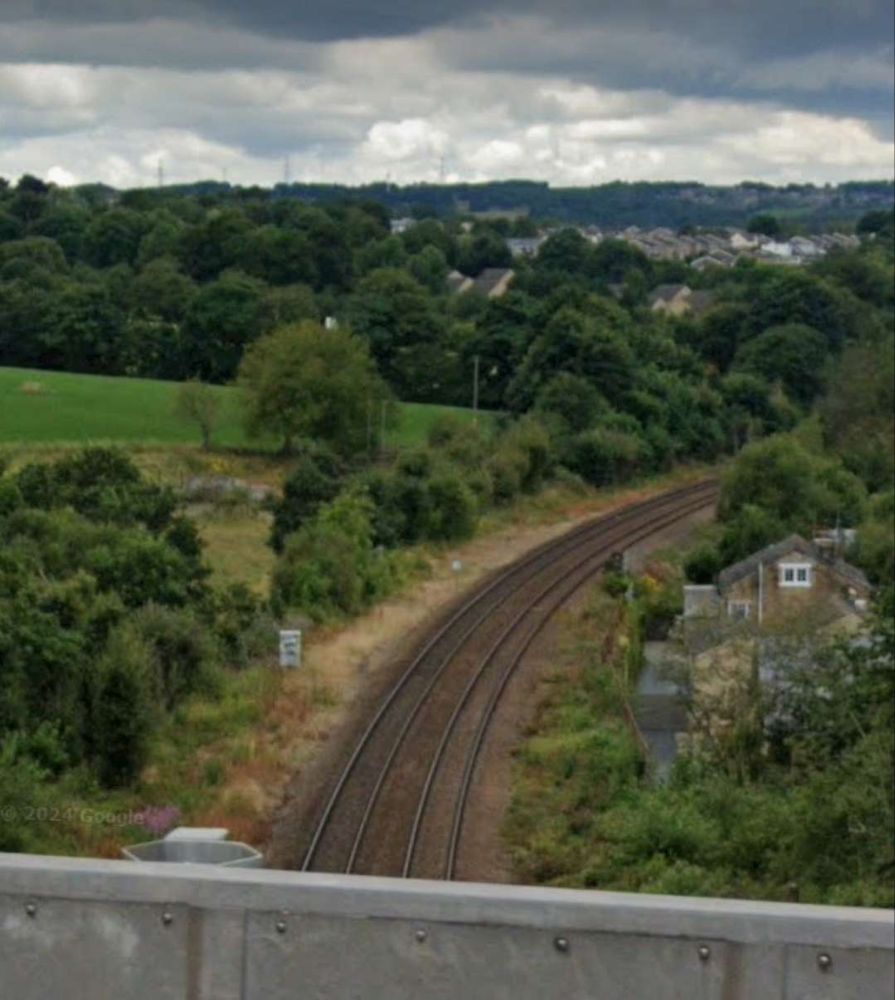
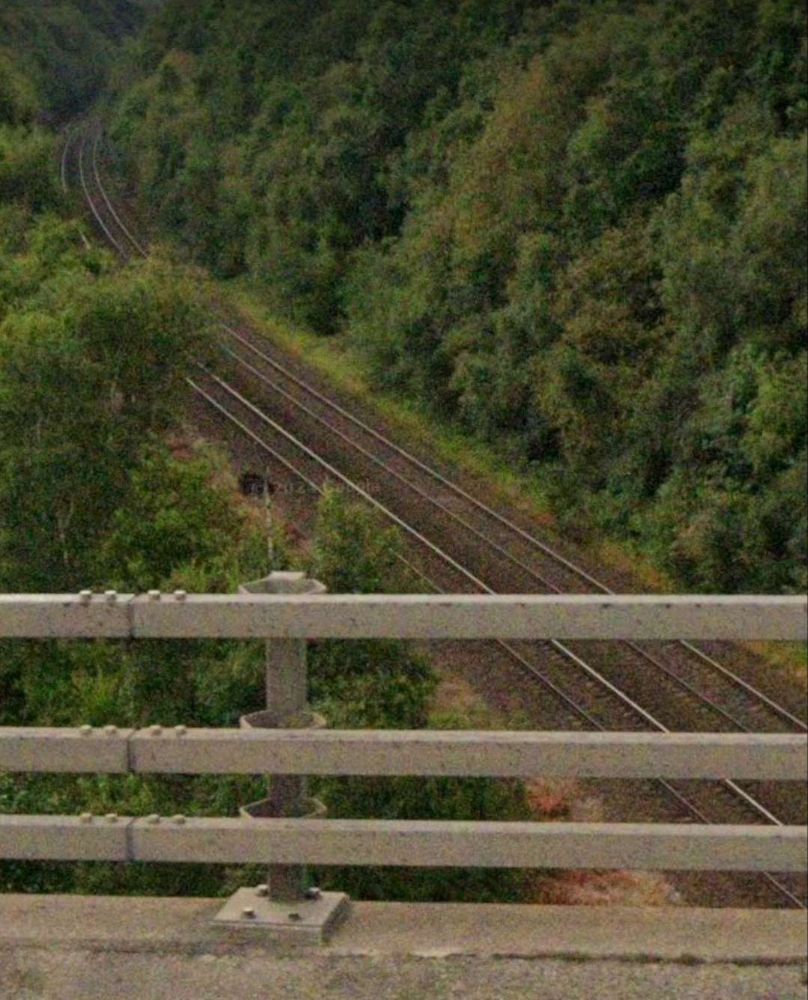
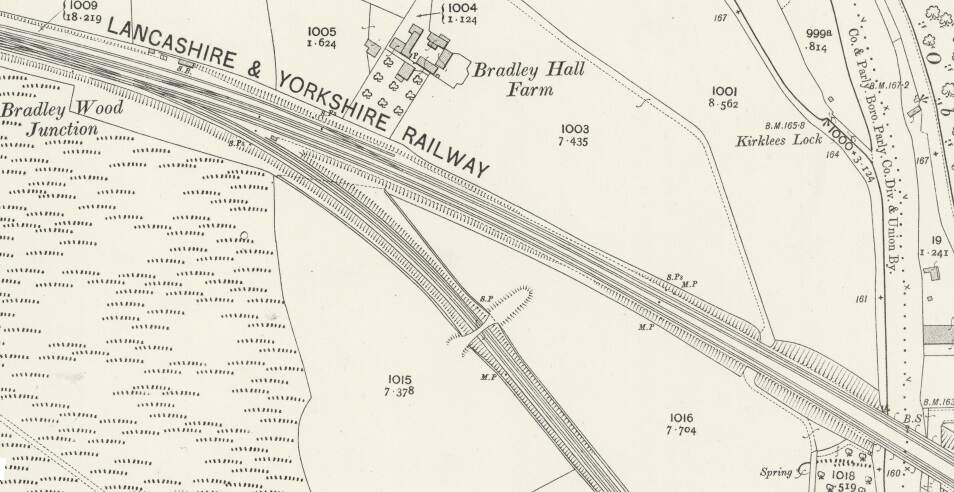
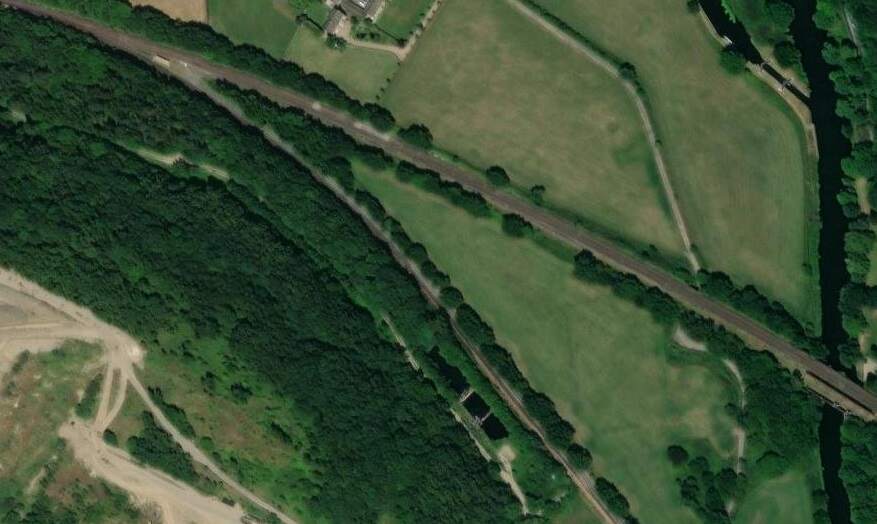
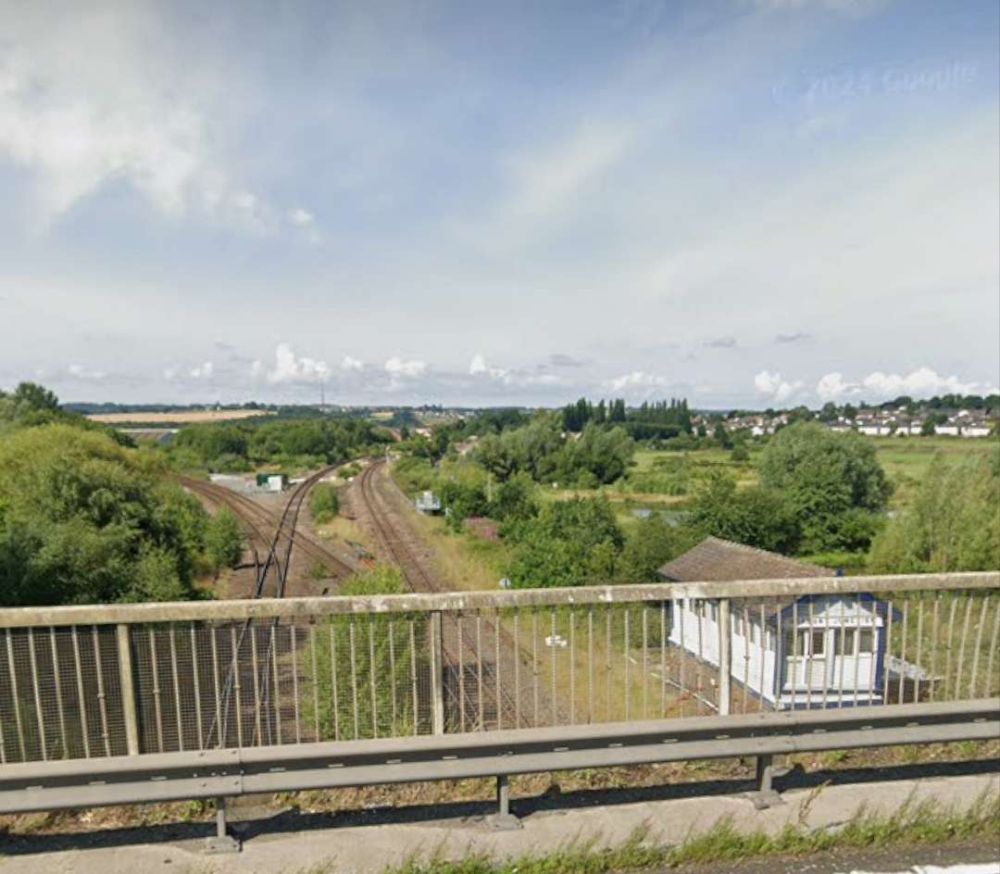
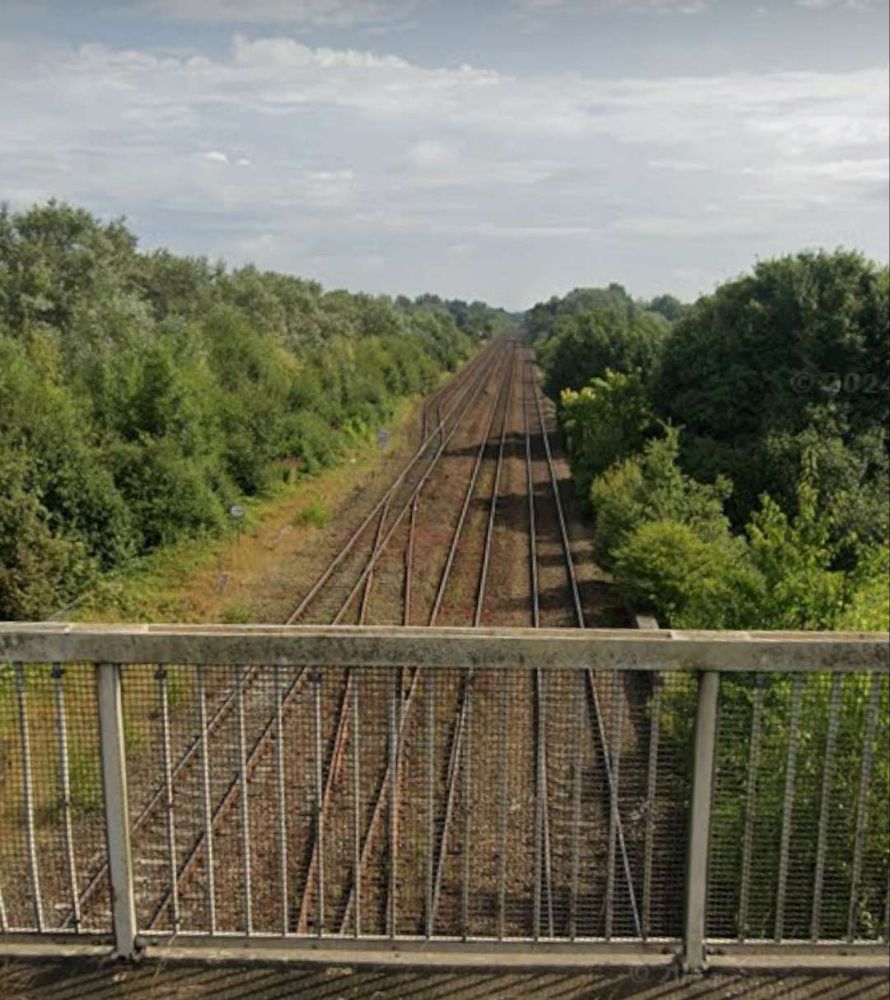
A little further to the East, in the 21st century, the line passes under the M62 and enters a deep cutting before, at Bradley Wood Junction, the Bradley Wood Branch leaves the line to the South (still present in the 21st century).
Looking West from the M62 in July 2024Looking East from the M62 in July 2024Bradley Wood Junction as shown on the 25″ Ordnance Survey of 1905. [70]Much the same area in the 21st century. [70]
“Beyond [Bradley Wood Junction] the Calder is crossed by a viaduct of two arches of 76 ft. span each. this is succeeded by an embankment, along which the line continues down the valley. [It] again cross[es] the Calder by a viaduct similar to that just referred to.” [1: p472] The line was widened to the South side to create a four-track main line and single span girder bridges were positioned alongside the original structures.
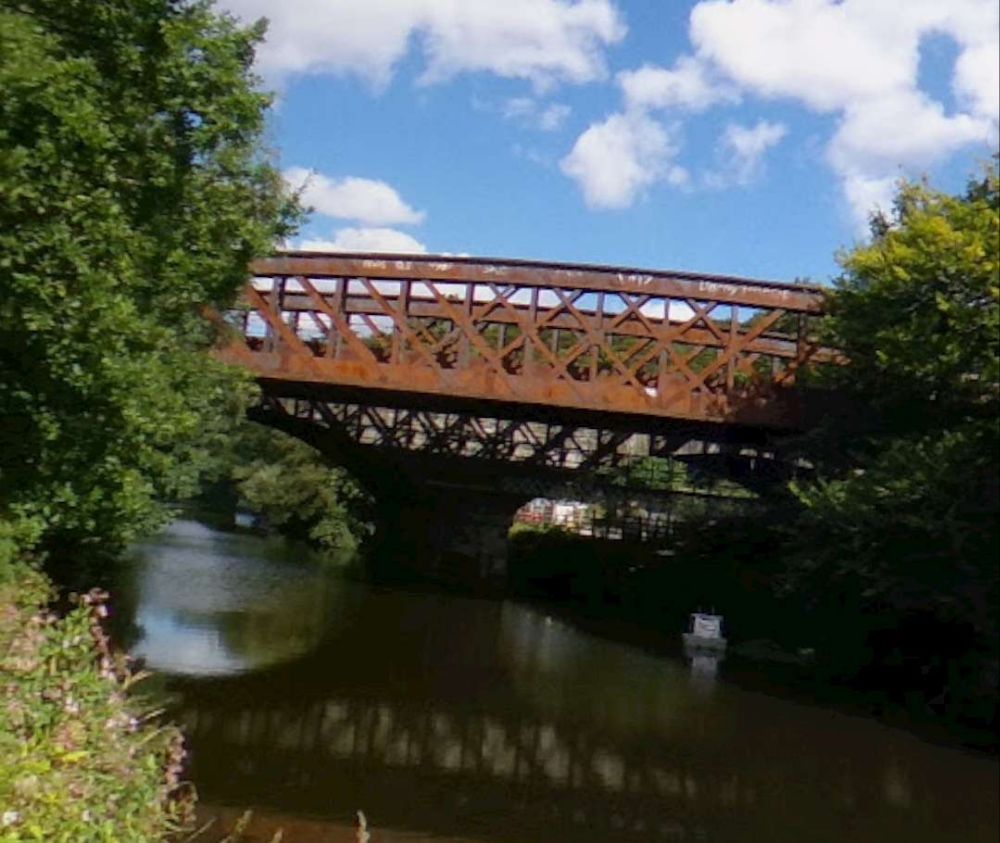
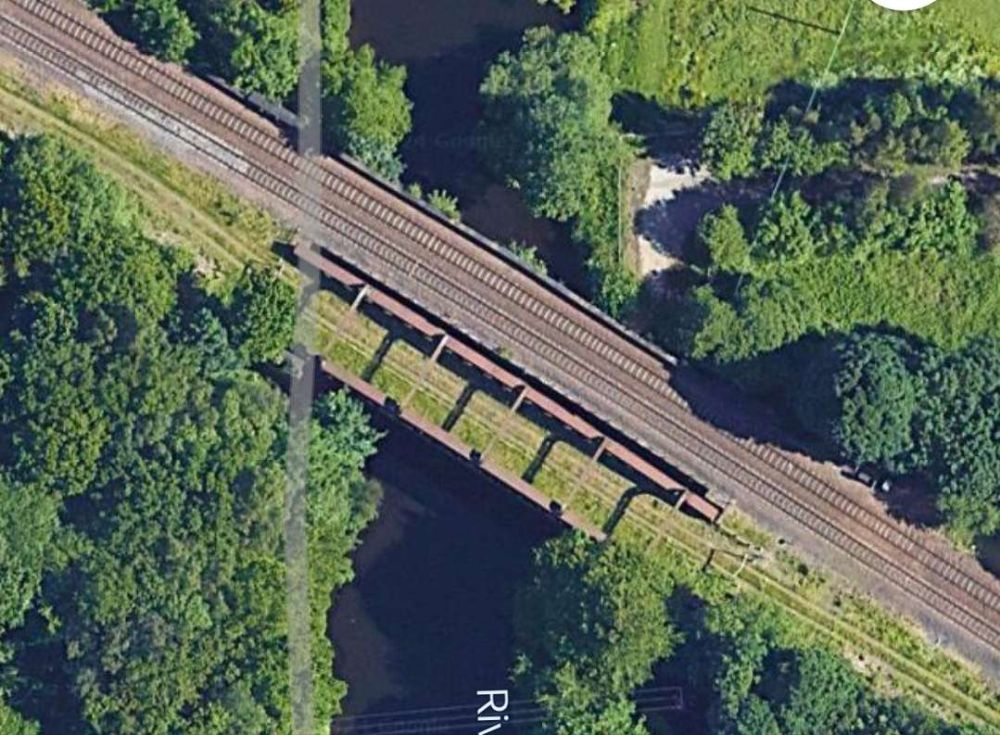
At the first crossing of the River Calder mentioned immediately above, the original two arches of the stone viaduct can be seen beyond the more modern girder bridge in this photograph, (c) Uy Hoang. [Google Streetview, September 2022]The same bridges as they appear on Google Maps satellite imagery in 2024. [Google Maps, October 2024]
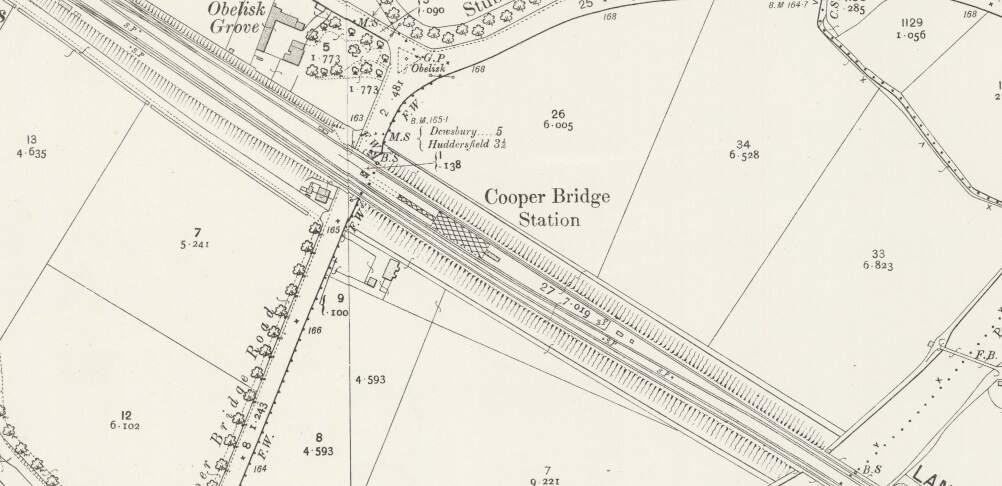
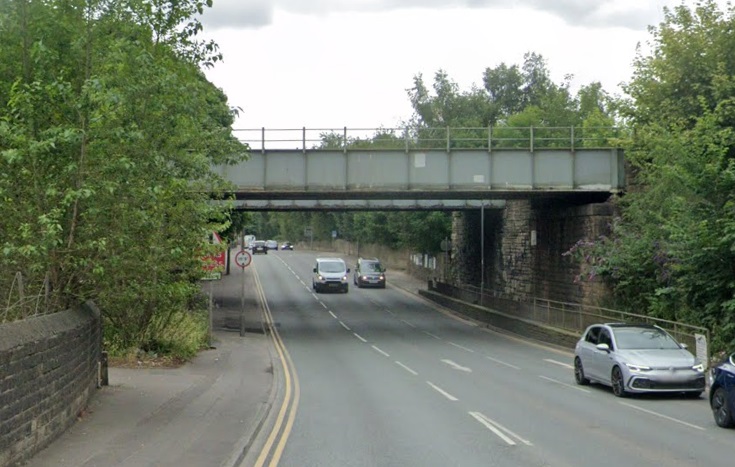
In between the two bridges across the River Calder, was Cooper Bridge Station.
Cooper Bridge Station as it appears on the 1905 25″ Ordnance Survey. [34]The Station at Cooper Bridge is long gone in the 2st century, but the bridges remain. The station sat over the road at this location with platform buildings between the rails of the left edge of this image. This photograph is taken from the North on Cooper Bridge Road. [Google Streetview, July 2024]The second of the two crossings of the River Calder mentioned above. This photograph, taken from the Southwest, shows the girder bridge with the stone-arched 2-span bridge beyond, (c) Uy Hoang. [Google Streetview, September 2022]This view from the North East and from under an adjacent footbridge shows the stone-arched 2-span structure, (c) Uy Hoang. [Google Streetview, September 2022]
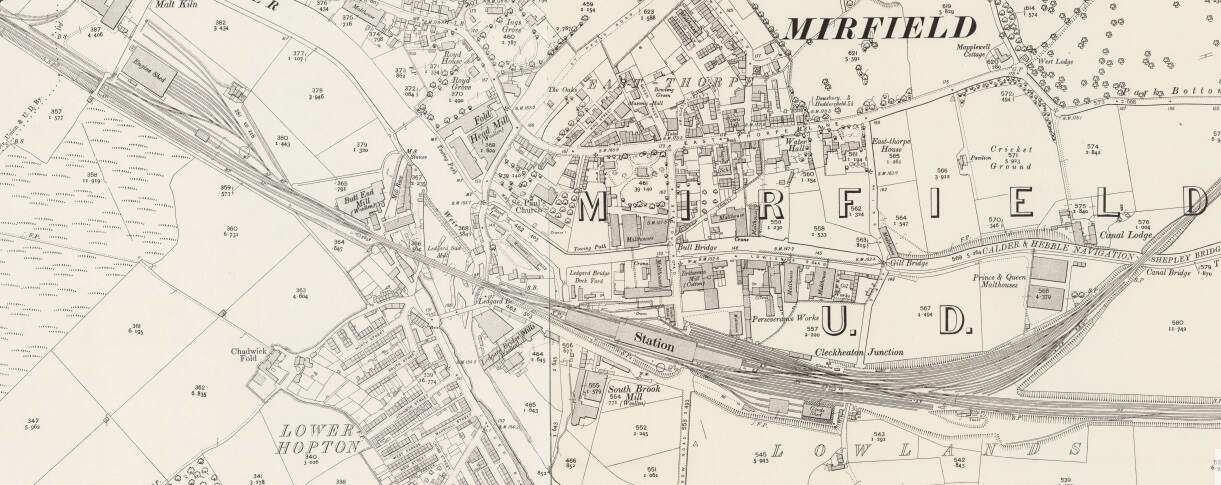
Rake’s journey along the line seems not to focus so closely on the remaining length of the line. Various features and a number of stations seem to have been missed (particularly Cooper Bridge, Mirfield, Ravensthorpe, Thornhill, Horbury & Ossett). It also seems to suggest that the line goes through Dewsbury Station. Rather than rely on Rake’s commentary about the line, from this point on we will provide our own notes on the route.
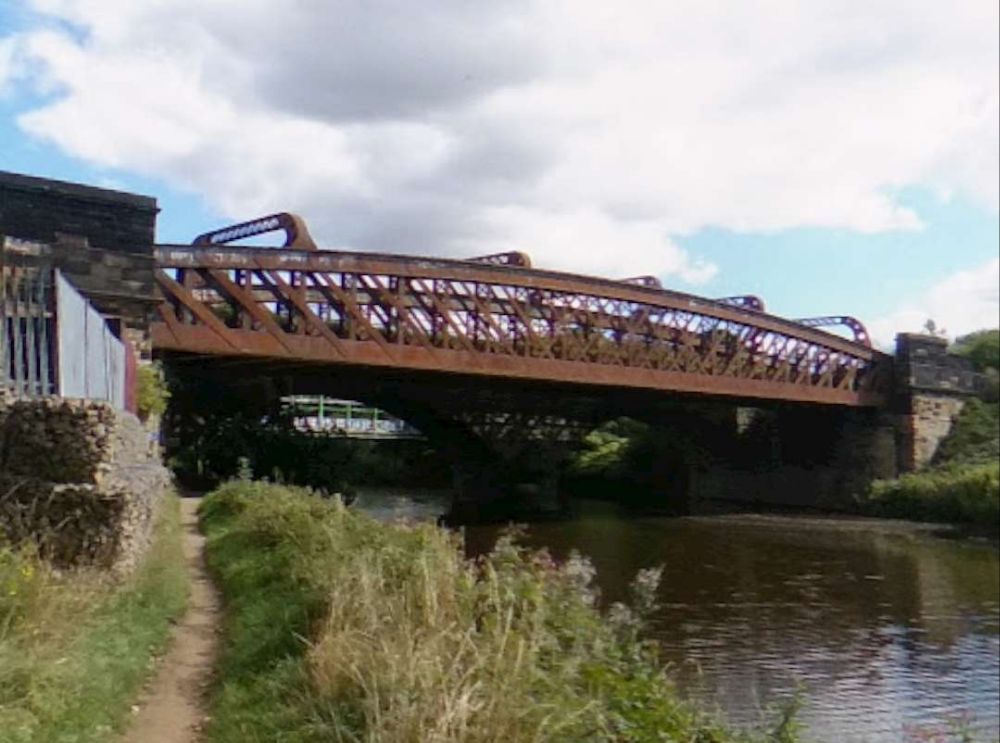
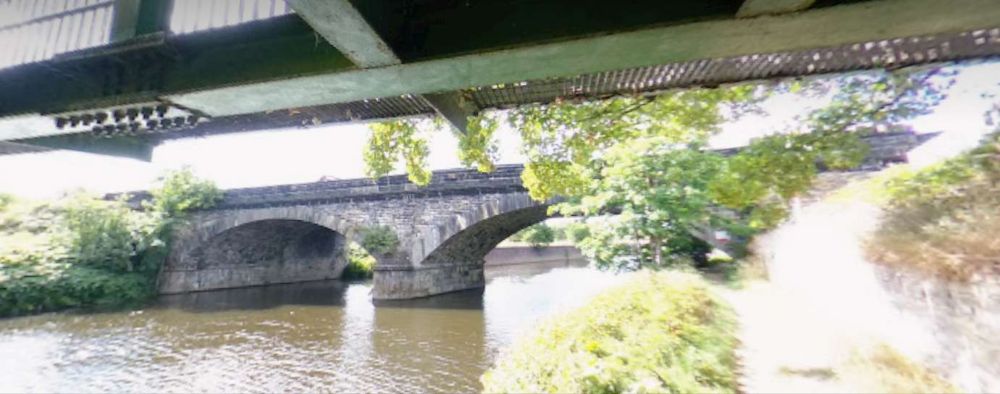
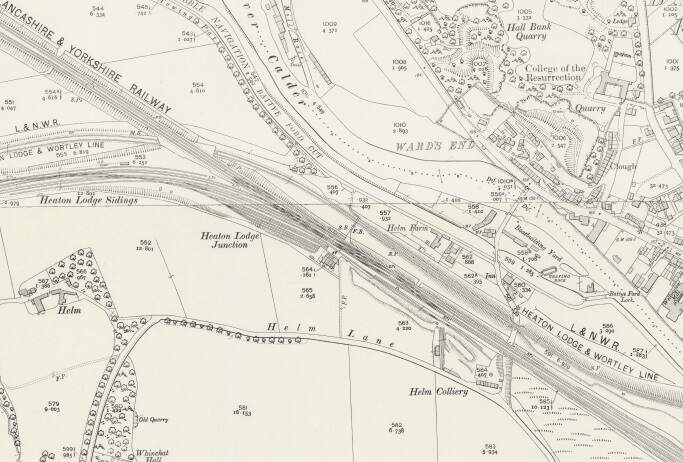
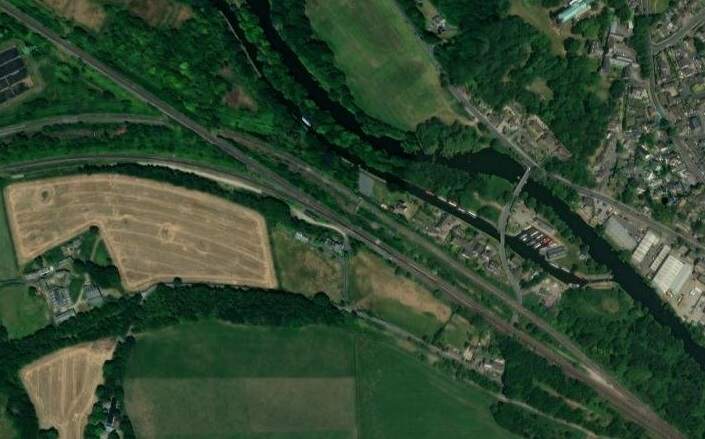
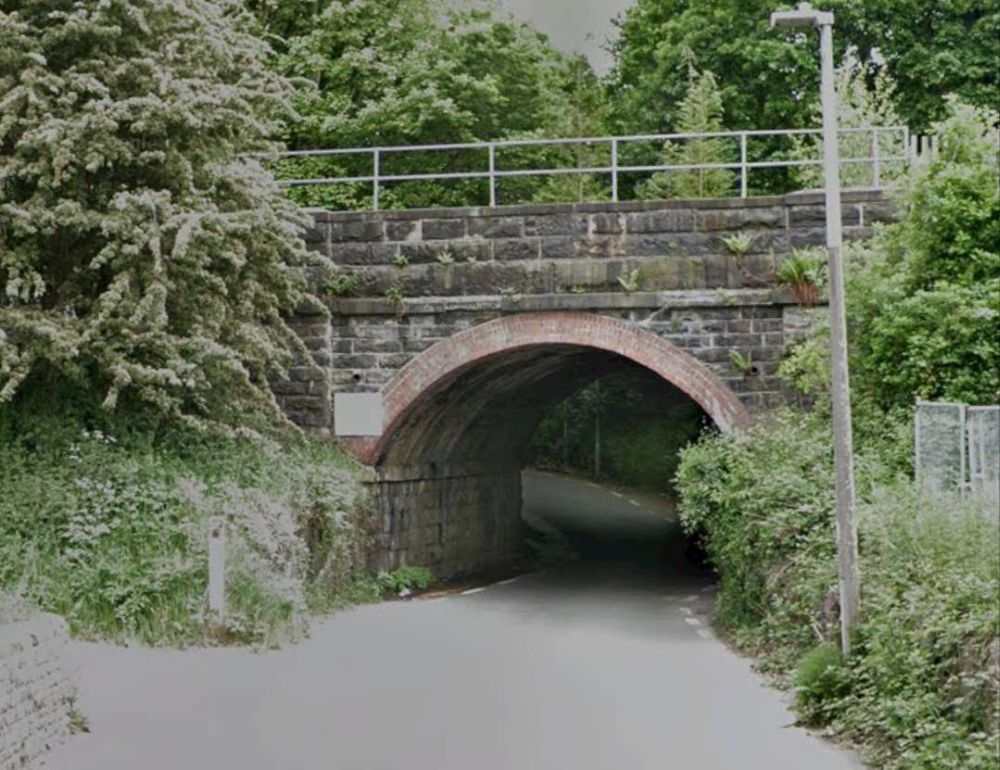
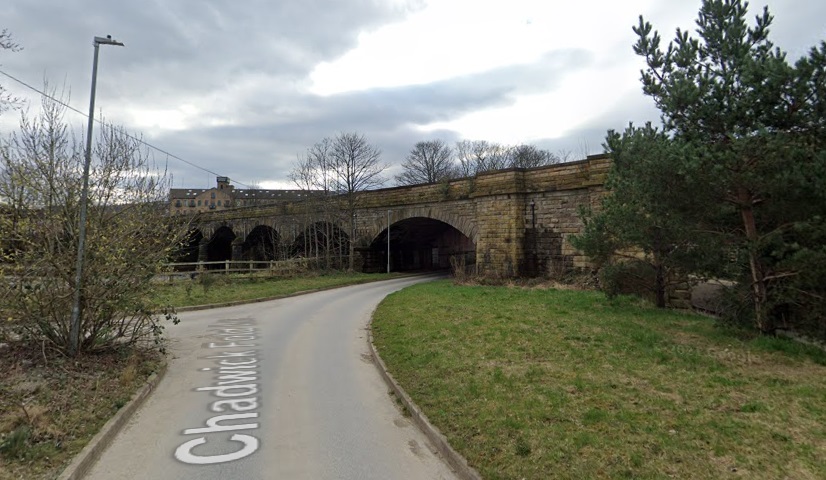
At Heaton Lodge Junction, the LNWR Huddersfield & Manchester line joined the Manchester & Leeds line with the LNWR Heaton & Wortley line passing beneath. The Manchester & Leeds line ran on towards Mirfield Station passing the large engine shed before entering the station over a long viaduct which once again crossed the River Calder.
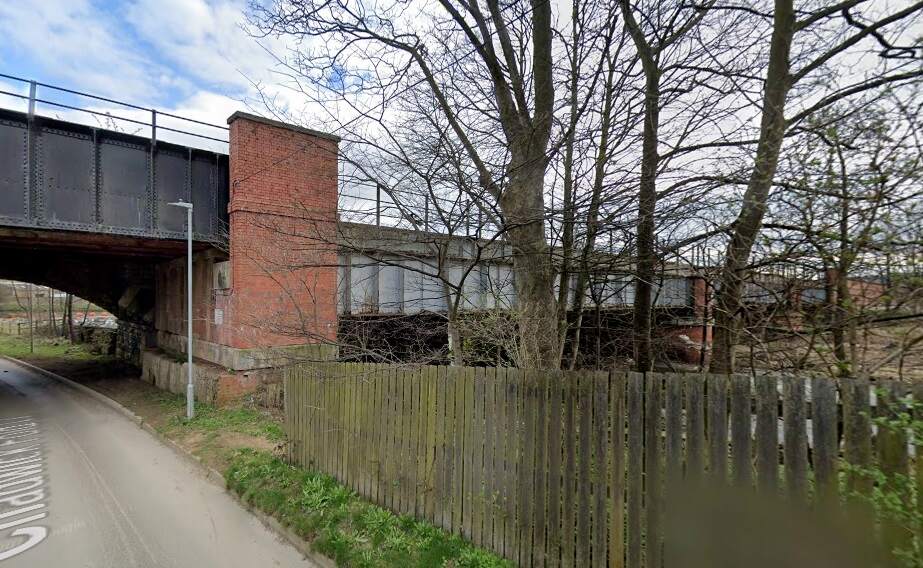
Just to the East of Mirfield Station was Cleckheaton Junction and then Wheatley’s Bridge over the River Calder. A bridge then carries Sand Lane over the railway.
Looking West from Sands Lane Bridge back towards Mirfield. [Google Streetview, May 2023]Looking East from Sands Lane Bridge. [Google Streetview, May 2023]
Soon after this the line encountered Dewsbury Junction which hosted Ravensthorpe (Ravensthorpe and Thornhill) Station.
Dewsbury Junction and Ravensthorpe Station. [39]Looking West from Calder Road towards Mirfield. [Google Streetview, May 2023]The view East from Calder Road showing Ravensthorpe Station with the Manchester & Leeds line heading away to the right of the picture. [Google Streetview, May 2023]
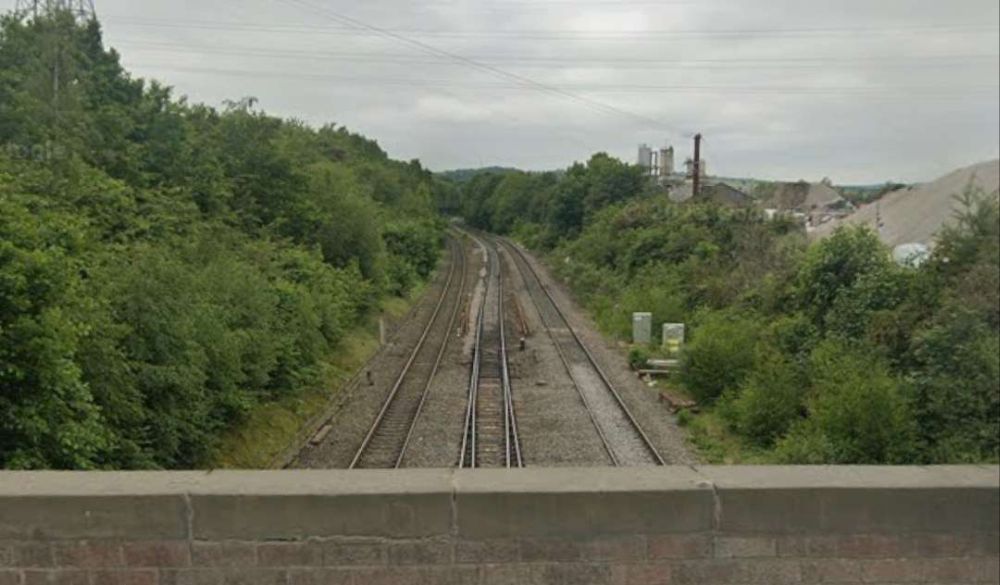
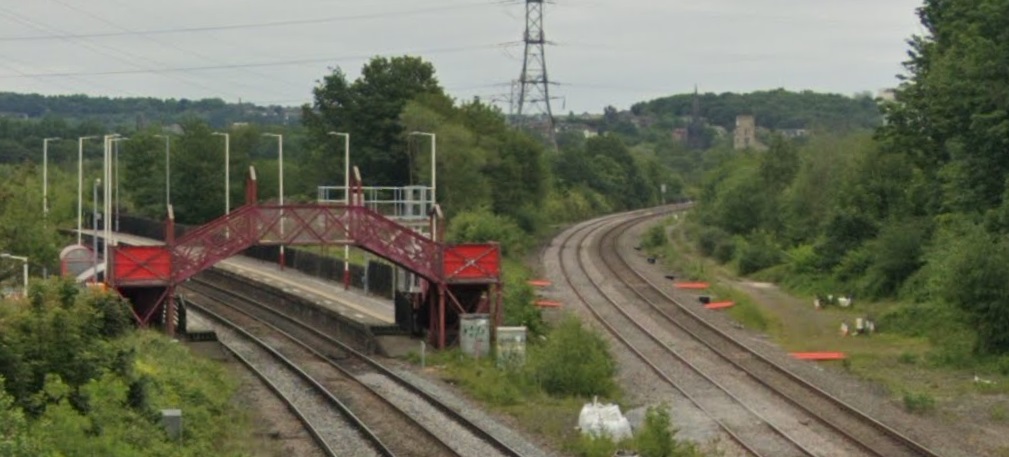
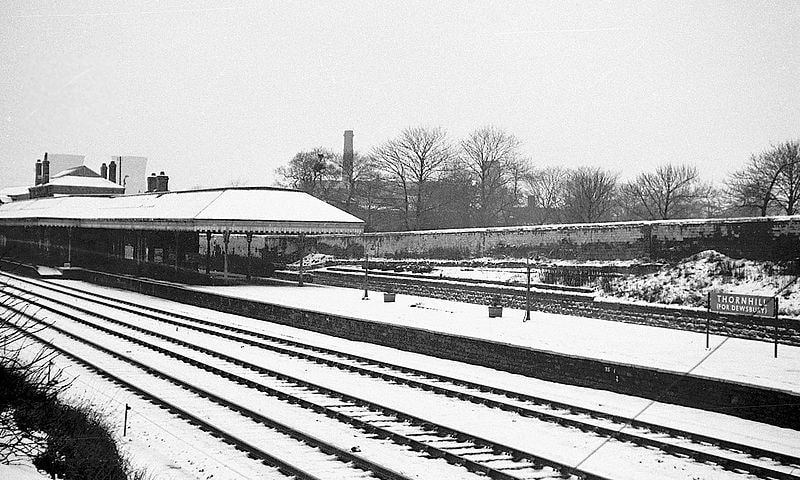
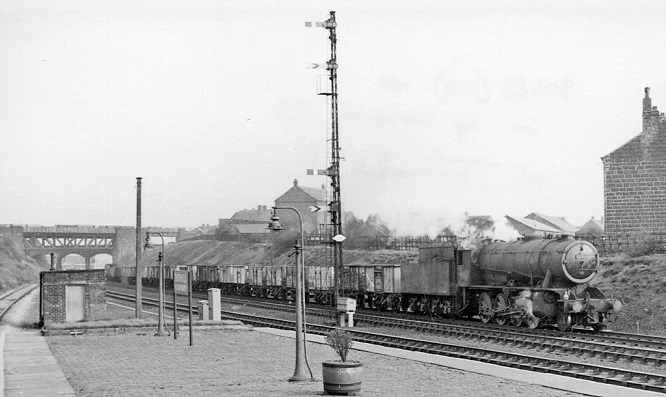
Thornhill Railway Station was a short distance further East just beyond the junction where the Ravensthorpe Branch met the main line at Thornfield Junction.
Thornfield Junction, Goods Yard and Station as shown on the 25″ Ordnance Survey of 1905. [40]Thornhill Station opened with the Manchester & Leeds Railway and only closed on the last day of 1961, a short time before Beeching’s closure of of Dewsbury Central. [37]The same station looking East towards Wakefield, Normanton etc. In the background is the bridge of the ex-Midland branch from Royston to Dewsbury (Savile Town), closed 18/12/50, (c) Ben Brooksbank and licenced for reuse under a Creative Commons Licence (CC BY-SA 2.0). [38]The view West from Station Road in the 21st century, through what was Thornhill Railway Station. {Google Streetview, March 2023]The view East from Station Road in the 21st century. The bridge ahead carries Headfield Road over the railway. [Google Streetview, March 2023]The view West from Headfield Road Bridge towards the site of the erstwhile Thornhill Railway Station and Station Road. [Google Streetview, October 2022]The view East from Headfield Road Bridge. [Google Streetview, October 2022]
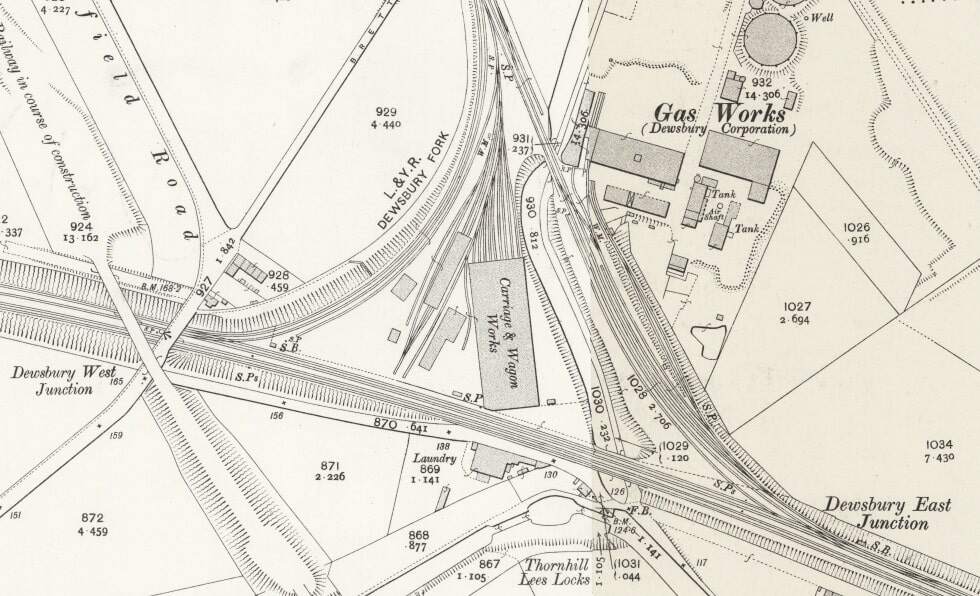
East of Thornhill Station were Dewsbury West and Dewsbury East junctions which together with Headfield Junction formed a triangular access to Didsbury Market Place Station. This was a busy location which sat close to Dewsbury Gas Works, Thornhill Carriage and Wagon Works and Thornhill Lees Canal Locks and a canal branch. Just off the North of the map extract below was a further junction giving access to the GNR’s Headfield Junction Branch, before the line crossed the River Calder and entered Dewsbury Market Place Station and Yard and terminated there.
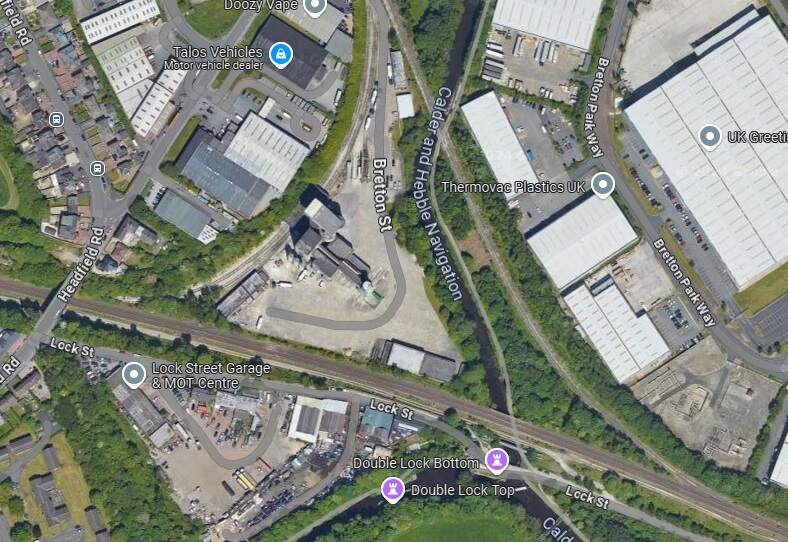
This extract from the 25″ Ordnance Survey of 1905 shows the triangular junction which provided access to Dewsbury Market Place Station and a series of Goods Yards and Sheds. Headfield Road is on the left side of this image. [41]A similar area in the 2st century as it appears on Google Maps satellite imagery. [Google Maps, October 2024]
Dewsbury was very well provided for by both passenger and freight facilities. In its railway heyday the Midland Railway, the London & North Western Railway, the Lancashire & Yorkshire Railway and the Great Northern Railway all had access to the town. A computer drawn map showing the different lines can be found here. [42]
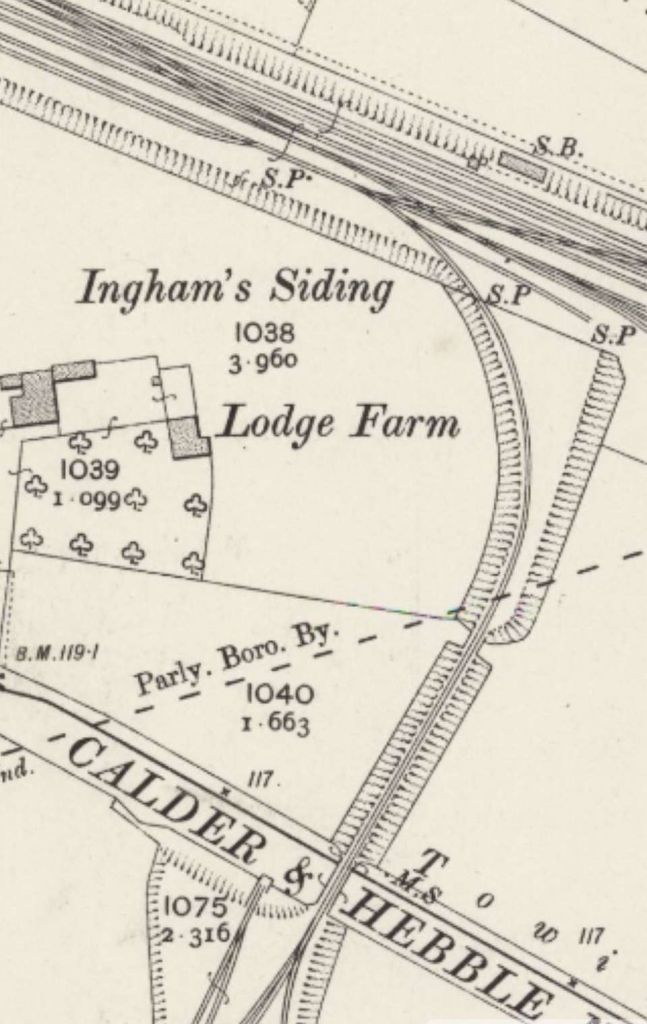
Continuing along the line towards Wakefield and Normanton, the next feature of note is the junction for Combs Colliery’s Mineral Railway at Ingham’s Sidings. Nothing remains of this short branch line.
Ingham’s Siding ran South, crossing the Calder & Hebble Navigation to reach Comb’s Colliery. [43]
Further East the line continues in a straight line East-southeast to cross the River Calder once again. It then passes the Calder Vale and Healey Low Mills at Healey and runs Southeast to Horbury and Ossett Station.
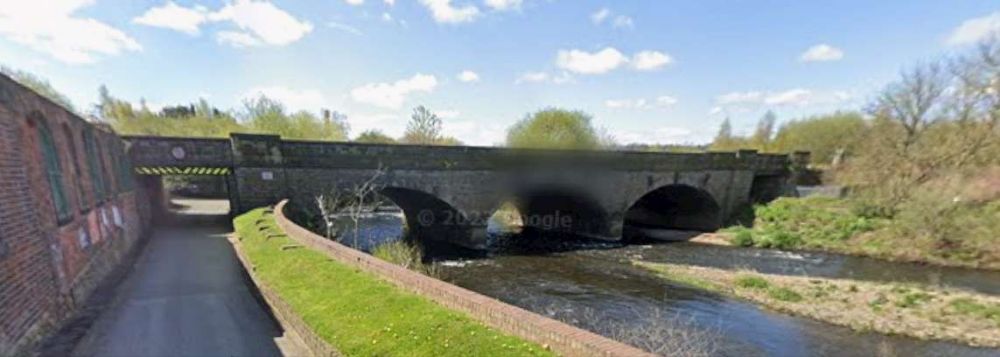
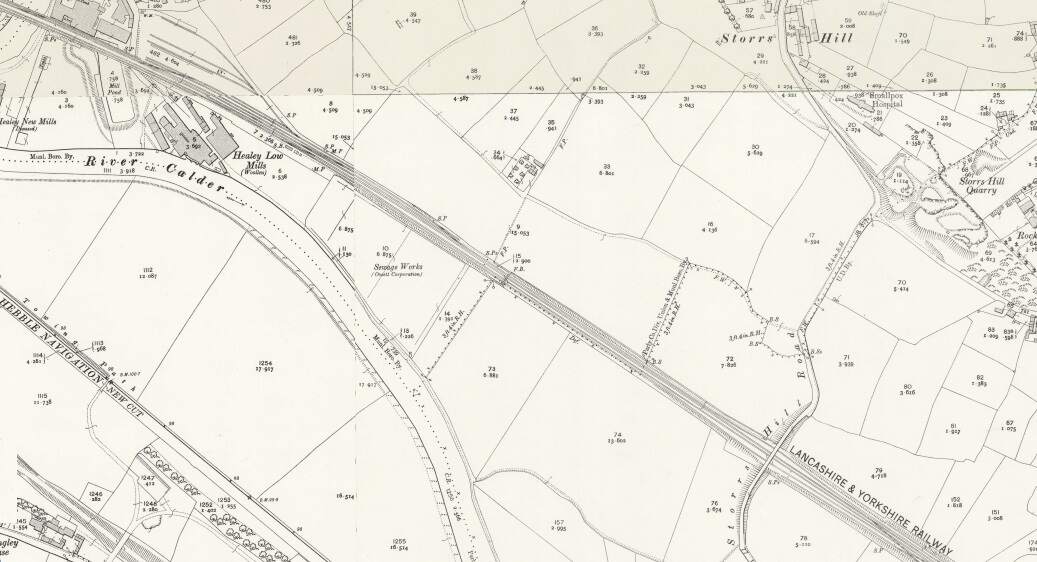
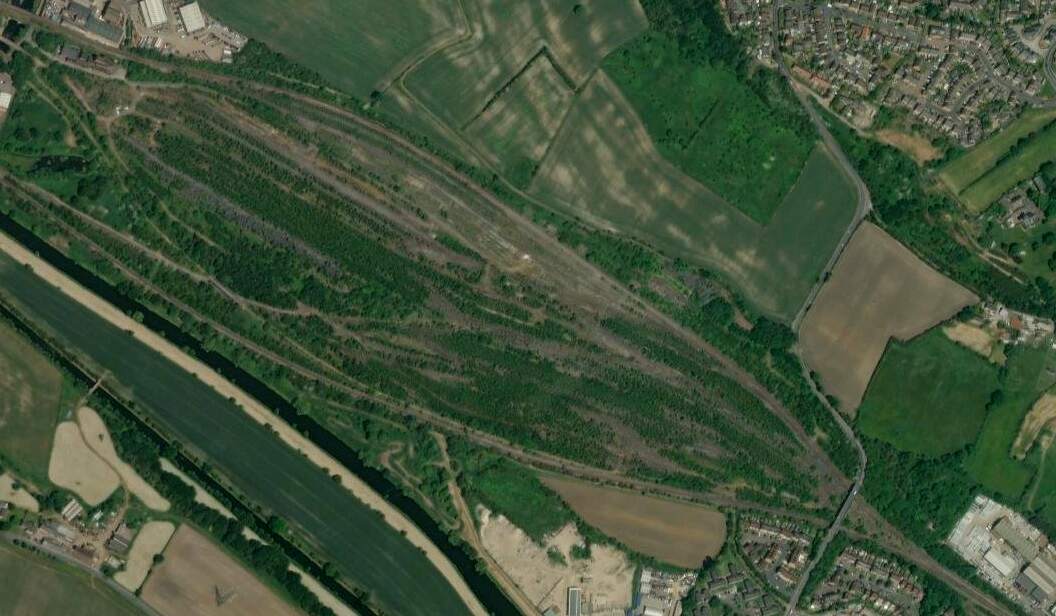
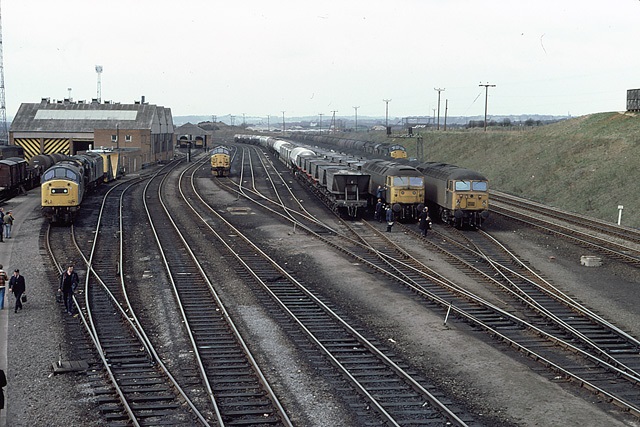
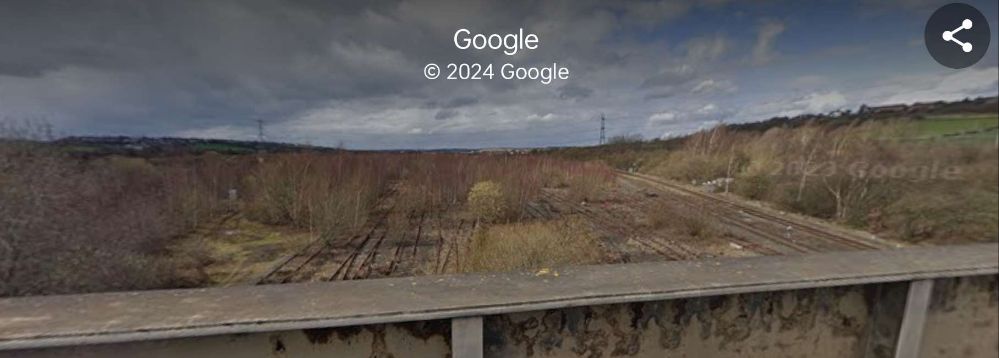
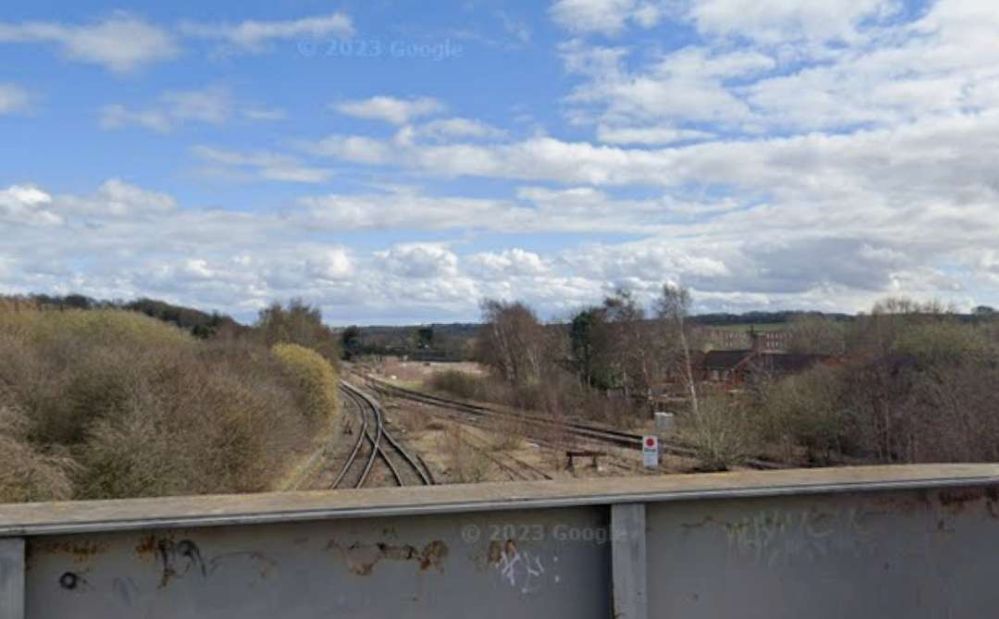
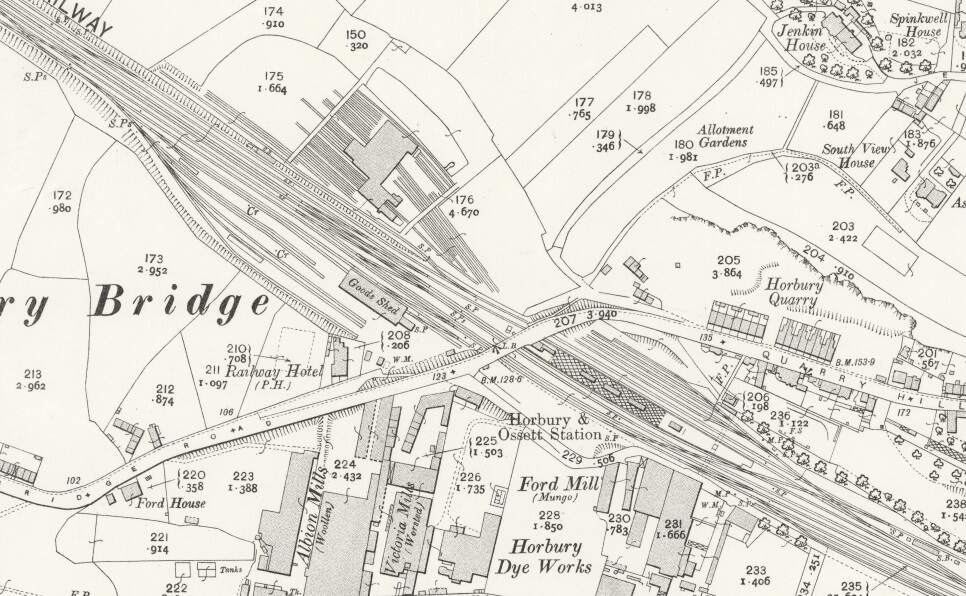
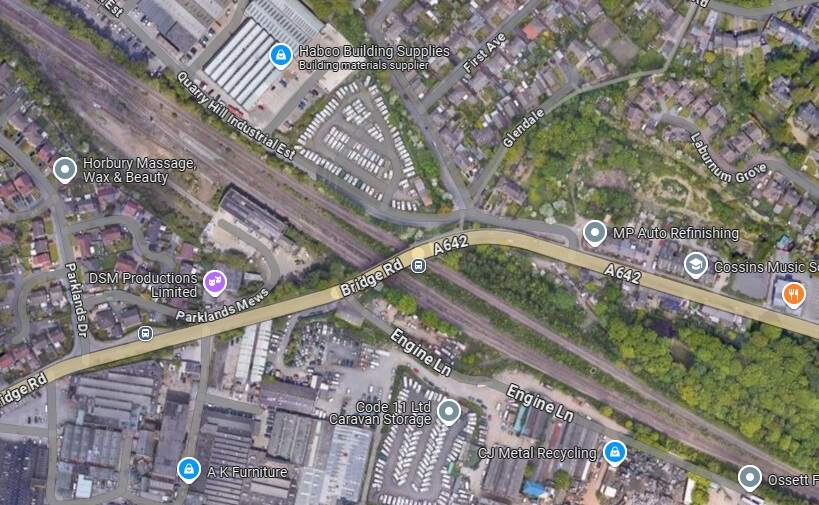
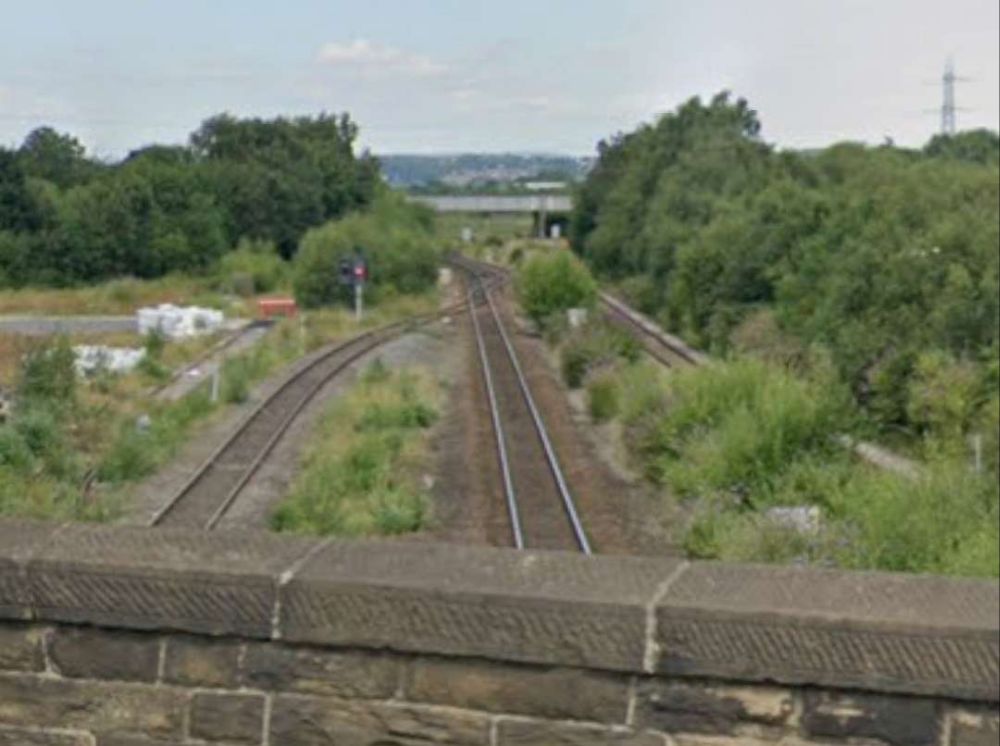
The bridge over the River Calder adjacent to Calder Vale and Healey Low Mills. [Google Streetview, April 2023]The bridge over the River Calder at Calder Vale and Healey Low Mills is in the top-left of this map extract from the 1905 25″ Ordnance Survey. This area was chosen by British Rail in the 1960s for a large marshalling yard. [46]British Railways developed a large marshalling yard in the 1960s at Healey Mills. The yard was opened in 1963 and replaced several smaller yards in the area. It was part of the British Transport Commission’s Modernisation plan, and so was equipped with a hump to enable the efficient shunting and re-ordering of goods wagons. The yard lost its main reason for existence through the 1970s and 1980s when more trains on the British Rail system became block trains where their wagons required less, or more commonly, no shunting. Facilities at the site were progressively run down until it closed completely in 2012. [46][47]Healey Mills Marshalling Yard in April 1982, (c) Martin Addison and licensed for reuse under a Creative Commons Licence (CC BY-SA 2.0). [48]Looking Northwest from Storrs Hill Road Bridge in the 21st century. [Google Streetview, March 2023]Looking Southeast from Storrs Hill Road Bridge in the 21st century through the throat of the old marshalling yard. [Google Streetview, March 2023]Horbury & Ossett Railway Station. [44]The site of Horbury & Ossett Railway Station in the 21st century. [Google Maps, October 2024]Looking Northwest from Bridge Road, A642 towards Storrs Road Bridge. Horbury and Ossett Railway Station goods facilities were on the left. [Google Streetview, July 2024]looking Southeast from Bridge Road. the passenger facilities were on the Southeast side of Bridge Road with the platform sat between the running lines. [Google Streetview, July 2024]
“Horbury and Ossett railway station formerly served the town of Horbury. … The station was opened with the inauguration of the line in 1840, on the west of the Horbury Bridge Road, to the south-west of the town. Later a new, more substantial structure was built just to the east. … British Railways developed a large marshalling yard in the 1960s at Healey Mills immediately to the west of the original station. … [The station] closed in 1970. Almost all that remains is the old subway which ran under the tracks. Ossett is now the largest town in Yorkshire without a railway station. Proposals to open a new one are periodically canvassed, perhaps on part of the Healey Mills site.” [45]
A little further East is Horbury Fork Line Junction where a mineral railway runs South to Harley Bank Colliery and the Horbury & Crigglestone Loop leaves the Manchester to Leeds line.
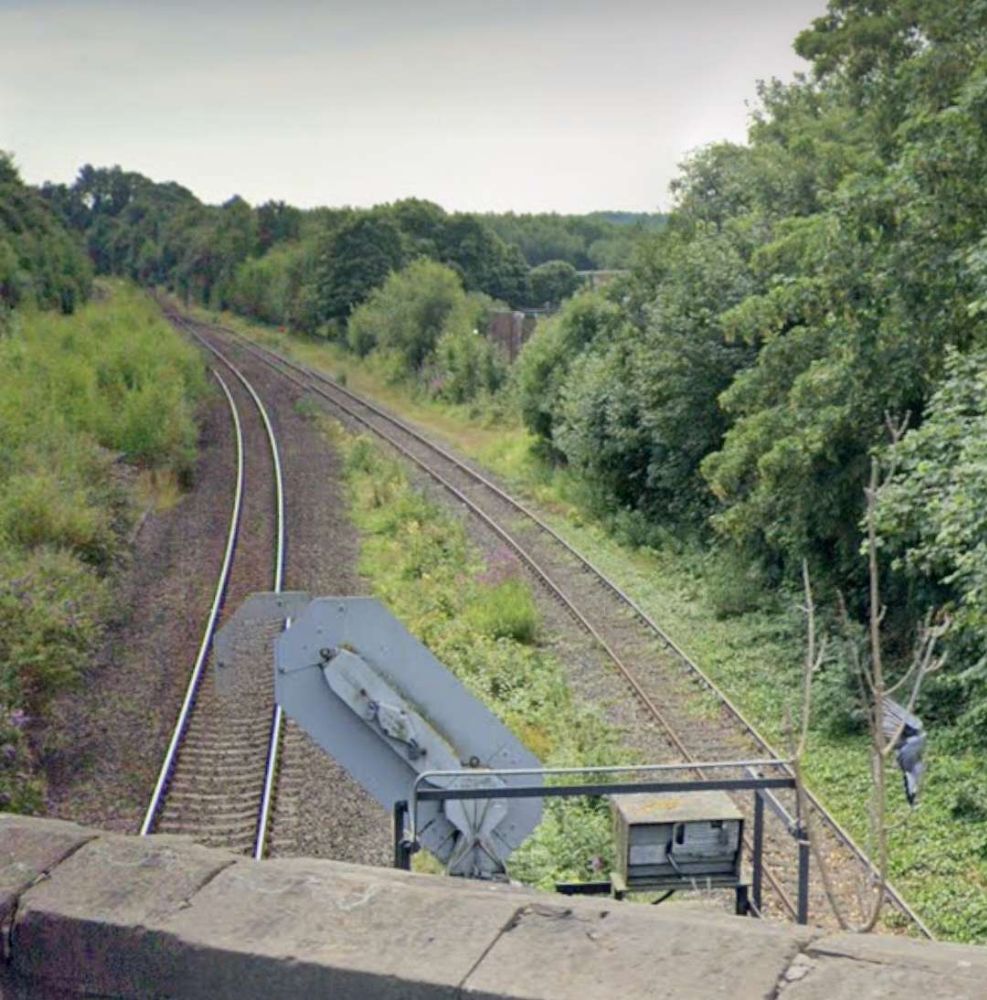
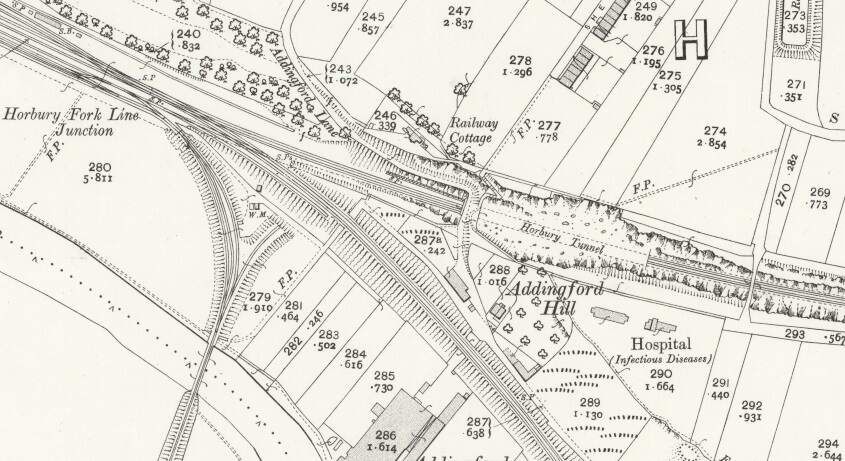
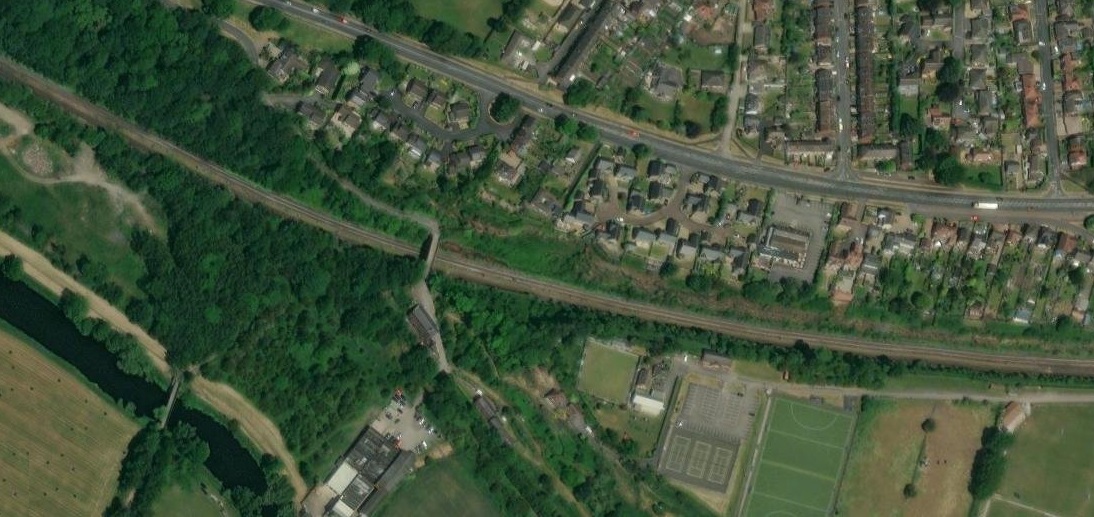
Horbury Fork Line Junction on the 1905 25″ordnance Survey. The junction sat just to the West of Horbury Tunnel. That tunnel has since been removed. [49]The same location in the 21st century. The tunnel sat to on the East side of the present footbridge which is just to the left of the centre of this image. This image is an extract from the NLS’ ESRI satellite imagery. [49]
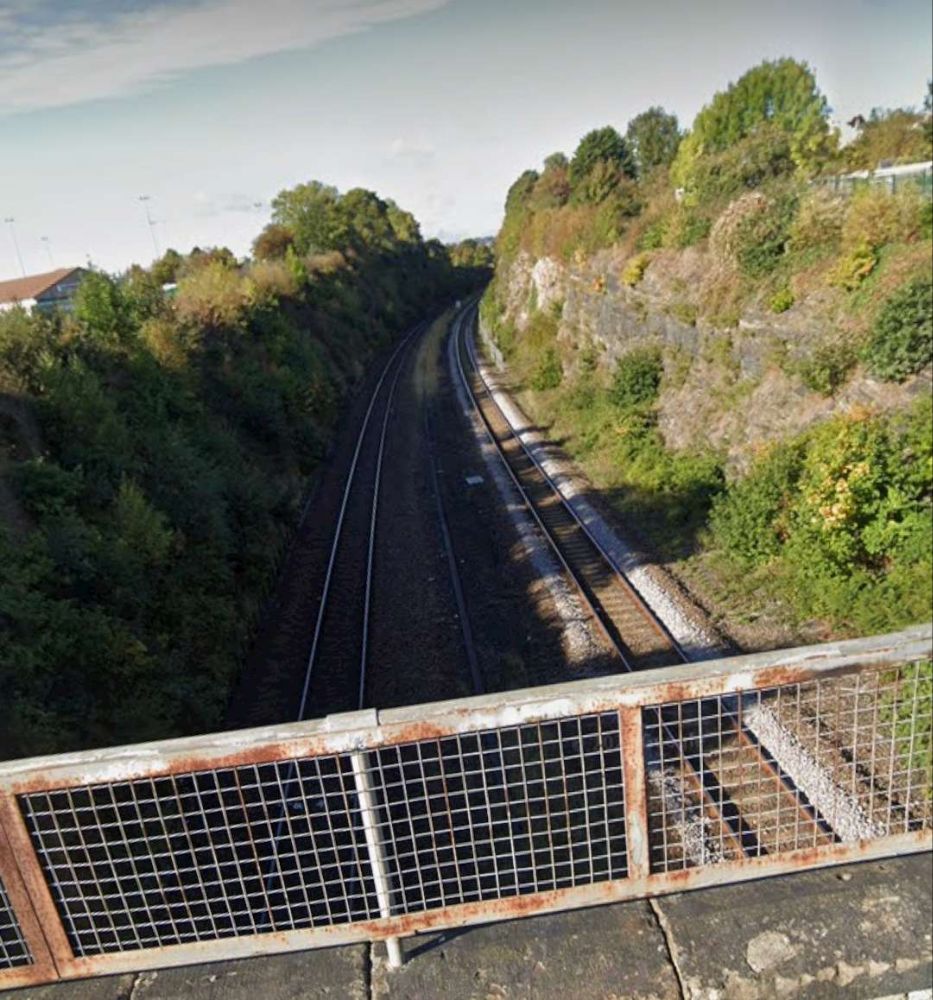
These next few photographs show views of the line from a series of three overbridges to the East of Horbury Fork Line Junction.
The view West from Southfield Lane Bridge. [Google Streetview, October 2022]The view East from Southfield Lane Bridge. [Google Streetview, October 2022]The view West from Dudfleet Lane Bridge towards Southfield Lane Bridge. [Google Streetview, October 2022]The view East from Dudfleet Lane Bridge towards Millfield Road Bridge. [Google Streetview, October 2022]The view West from Millfield Road Bridge towards Dudfleet Lane Bridge. [Google Streetview, October 2022]The view East from Millfield Road Bridge. [Google Streetview, October 2022]
The next significant location on the line is Horbury Junction.
Horbury Junction on the 1905 25″ordnance Survey. Horbury Junction Ironworks sat in-between the Manchester and Leeds Railway and the. There was a Wagon Works just off the South edge of this image. The line heading South from Horbury Junction was the L&YR line to Flockton Junction and beyond. [50]The same location in the 21st century as shown on the ESRI satellite imagery provided by the NLS.. [50]
Industrialisation in the immediate area of Horbury Junction began “in the early 1870s with the construction of Millfield Mill, followed by the Horbury Ironworks Co. In 1873, Charles Roberts bought a site for a new factory at Horbury Junction and moved his wagon building business from Ings Road, Wakefield to Horbury Junction. Before that, the area of Horbury Junction was a quiet backwater with a corn mill and a ford across the Calder for farm traffic.” In reality, a beautiful pastoral area of countryside was changed forever with the coming of the Railway, Millfield Mill, the Wagon Works and the Ironworks.” [51]
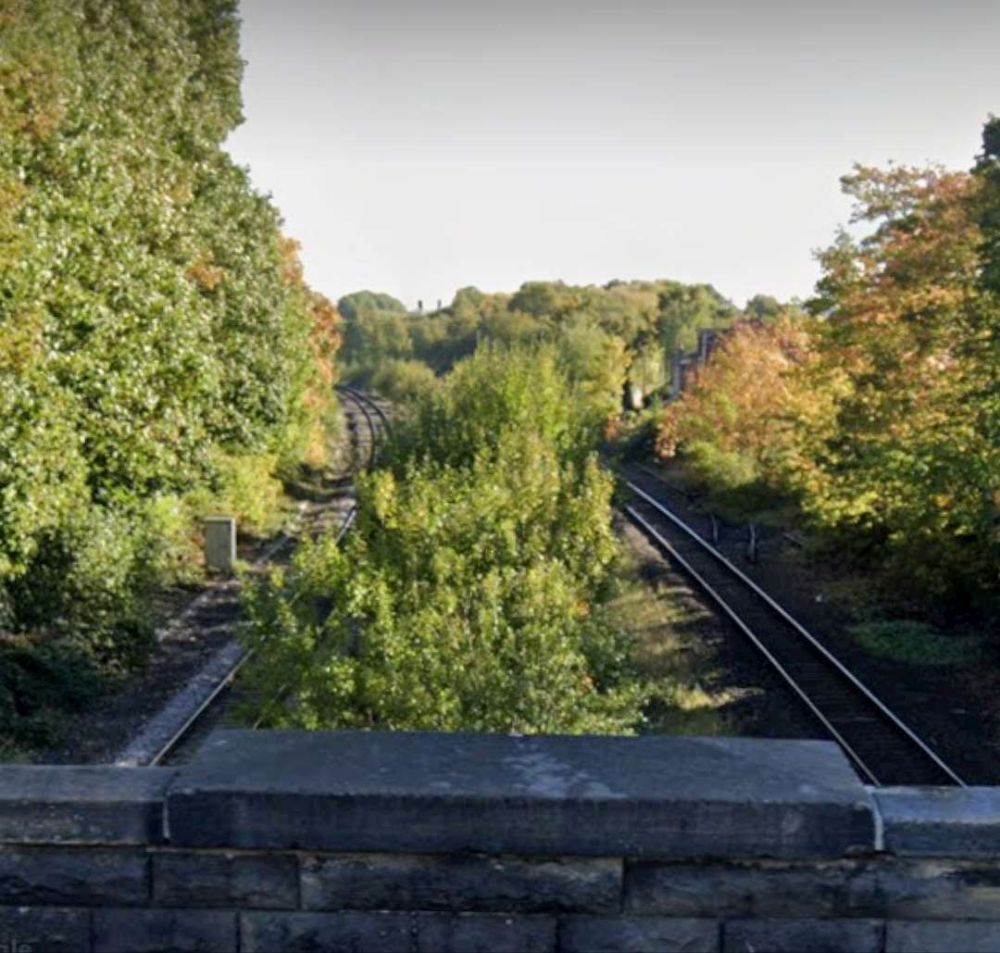
In the 21st century, just beyond Horbury Junction, the line is crossed by the M1.
In the 21st century, just beyond Horbury Junction (on the left of this extract from Google Maps), the line is crossed by the M1. [Google Maps, October 2024.
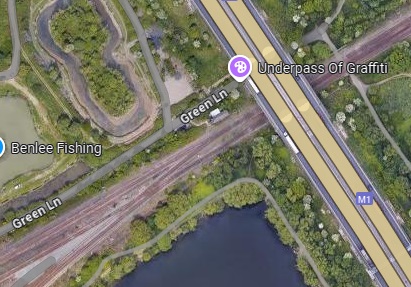
Horbury Junction seen, looking Southwest from the M1. [Google Streetview, July 2024]Looking Northeast from the M1. [Google Streetview, August 2024]Green Lane Underpass seen from the North. This underpass sits just to the East of the modern M1. [Google Streetview, October 2008]
Following the line on to the Northeast, it next passes through Thornes.
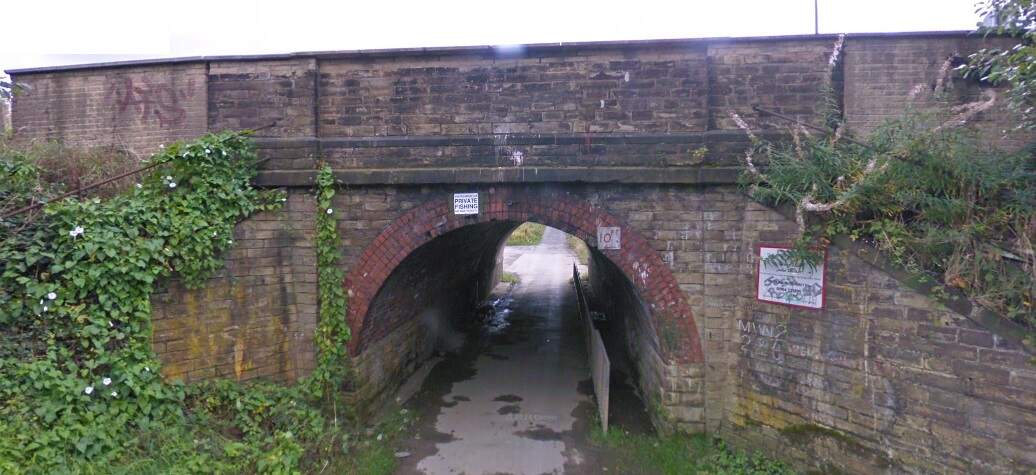
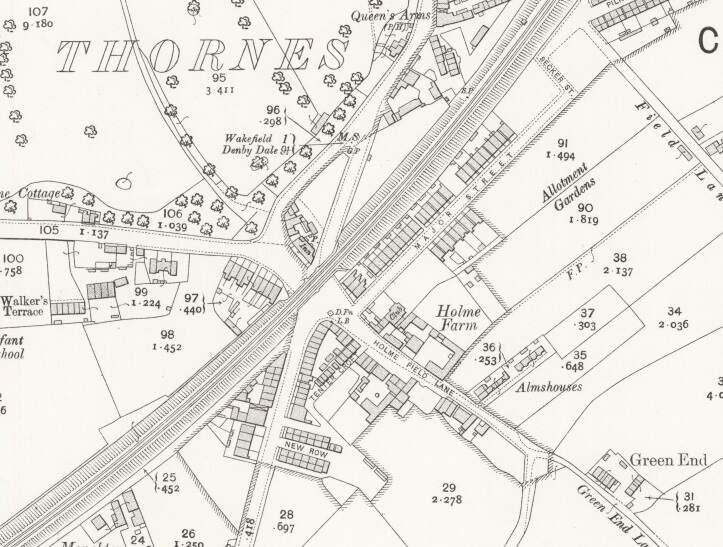
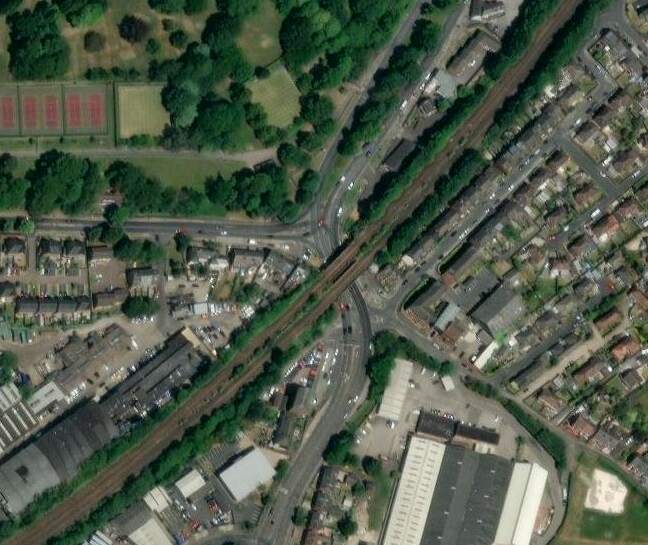
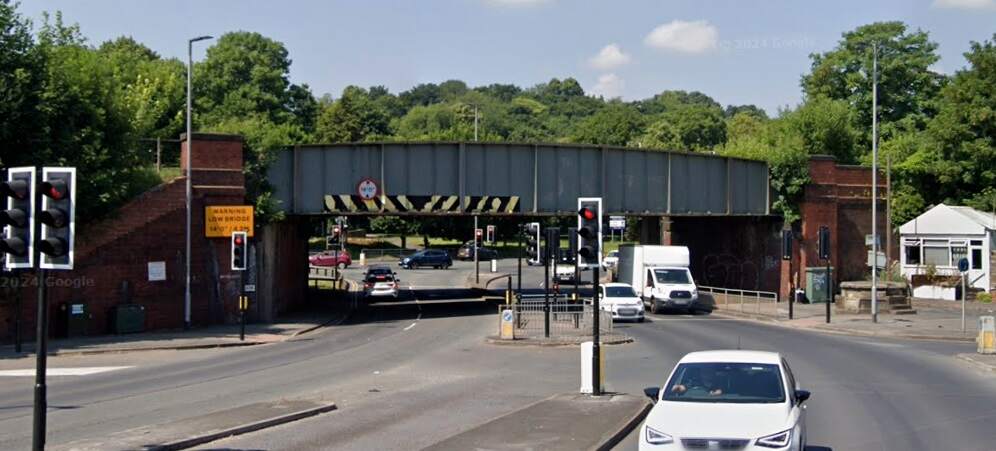
The railway bridge at the centre of Thornes in 1905. [52]The same location in the 21st century. The now quadruple line is carried by two separate bridges. [52]Thorne Bridge seen from the South in June 2024. [Google Streetview, June 2024]
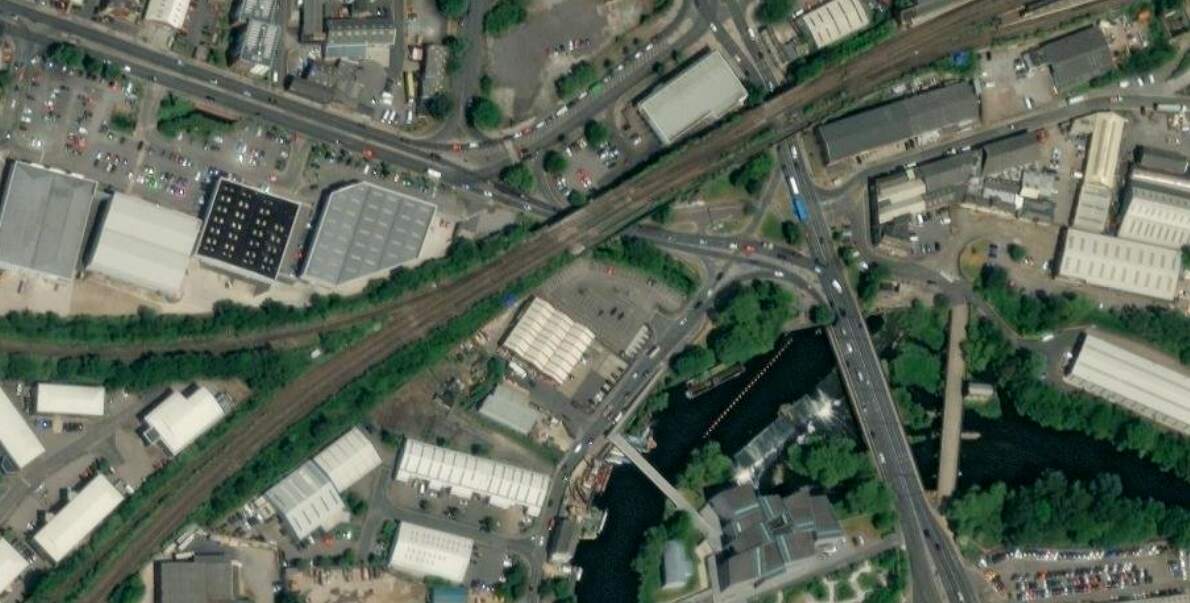
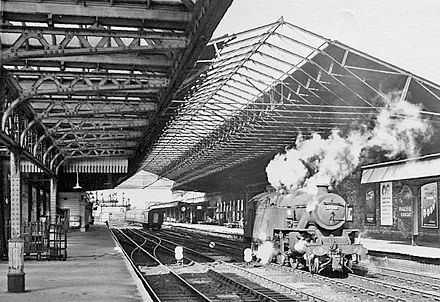
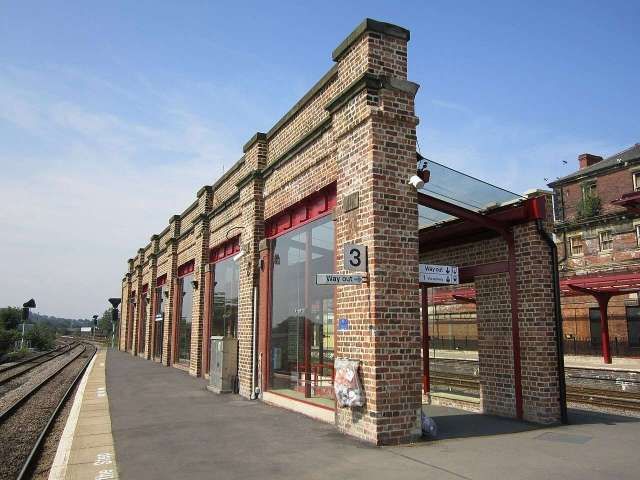
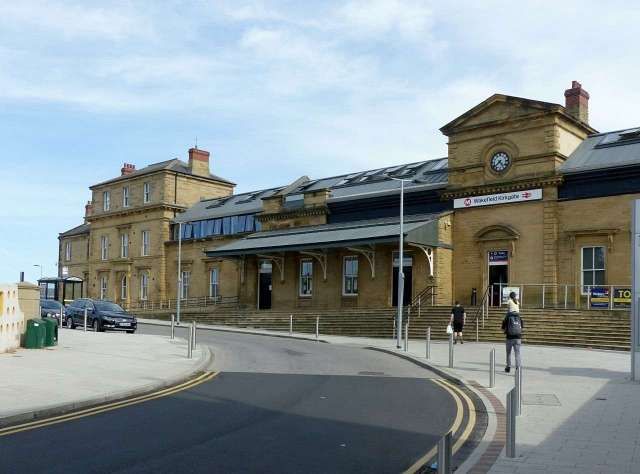
Northeast of Thornes, the Manchester and Leeds Railway ran at high level into Kirkgate Joint Station in Wakefield.
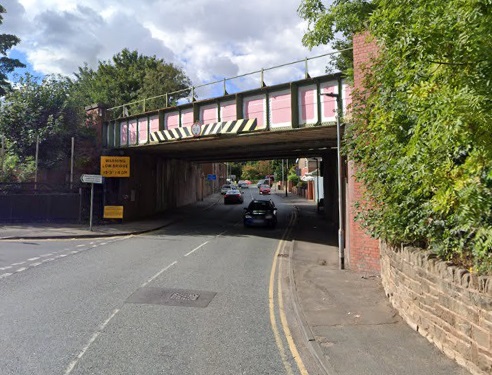
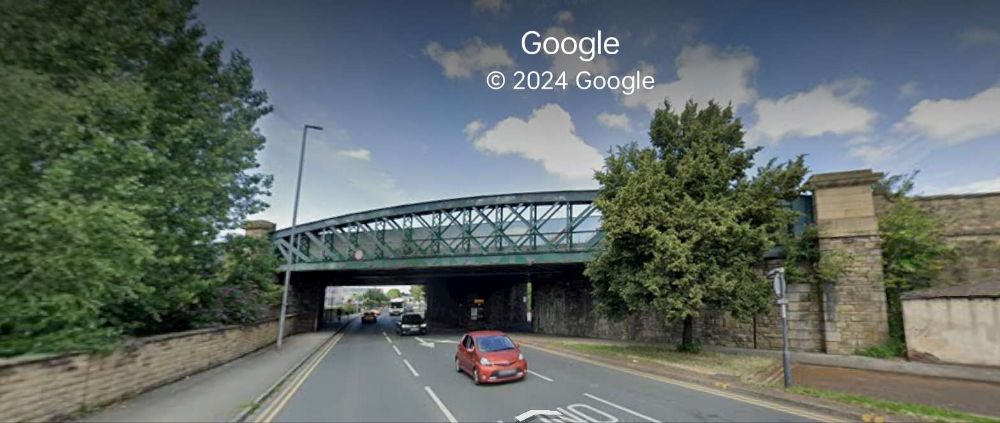
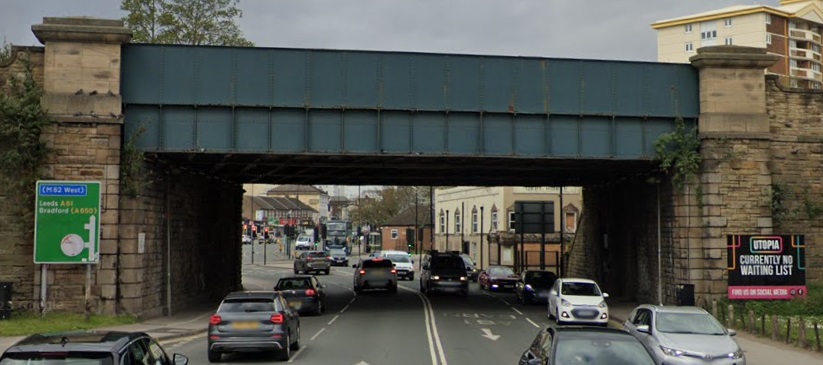
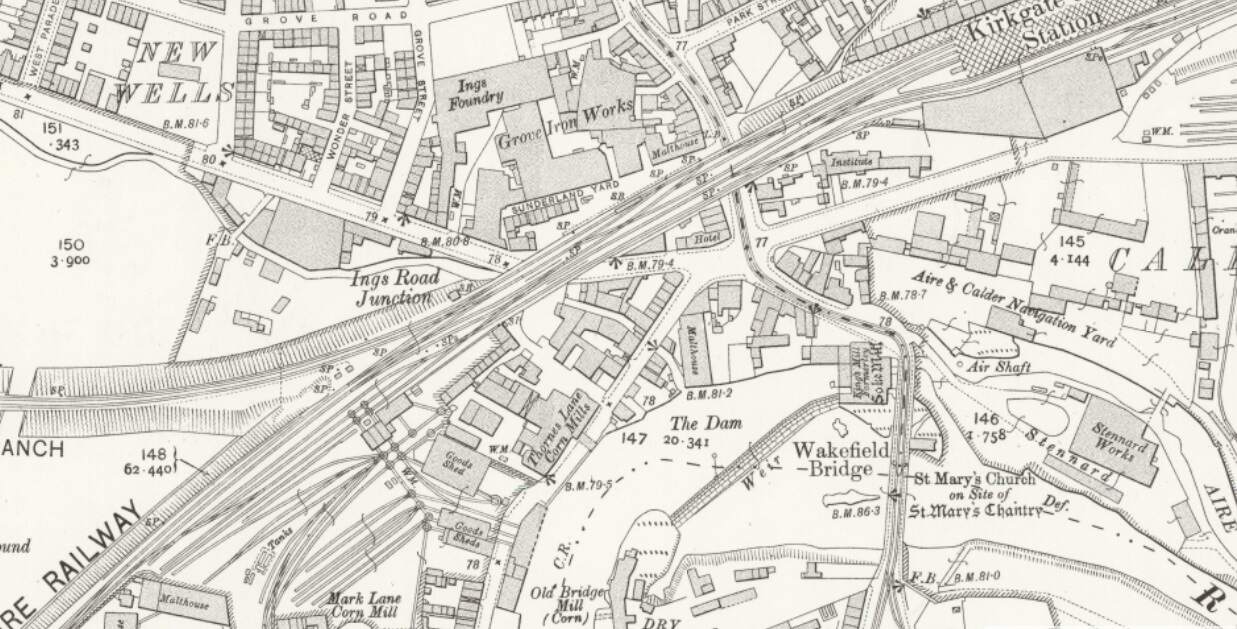
Thornes Lane BridgeA638, Ings Road BridgeThe bridge carrying the line over Kirkgate. [All three images from Google Streetview April 2023]The Manchester and Leeds Railway enters this extract from the 1905 25″ Ordnance Survey bottom-left, To the North of it id the GNR Ings Road Branch. To the South of it is a Goods Yard with access to Wakefield’s Malthouses and Mark Lane Corn Mill. [53]The same area in the 21st century. The rail lines remain approximately as on the map extract above. Wakefield Kirkgate Station (top-right) is somewhat reduced in size. Much of the built environment is different to that shown on the map above. This image is another extract from the ESRI satellite imagery. [53]
Wikipedia tells us that once it was opened by the Manchester and Leeds Railway in 1840, Kirkgate station was “the only station in Wakefield until Westgate was opened in 1867. The railway station building dates from 1854. … Some demolition work took place in 1972, removing buildings on the island platform and the roof with its original ironwork canopy which covered the whole station. A wall remains as evidence of these buildings. After this, Kirkgate was listed in 1979.” [72]
Kirkgate Station was refurbished in two phases between 2013 and 2015. [72]
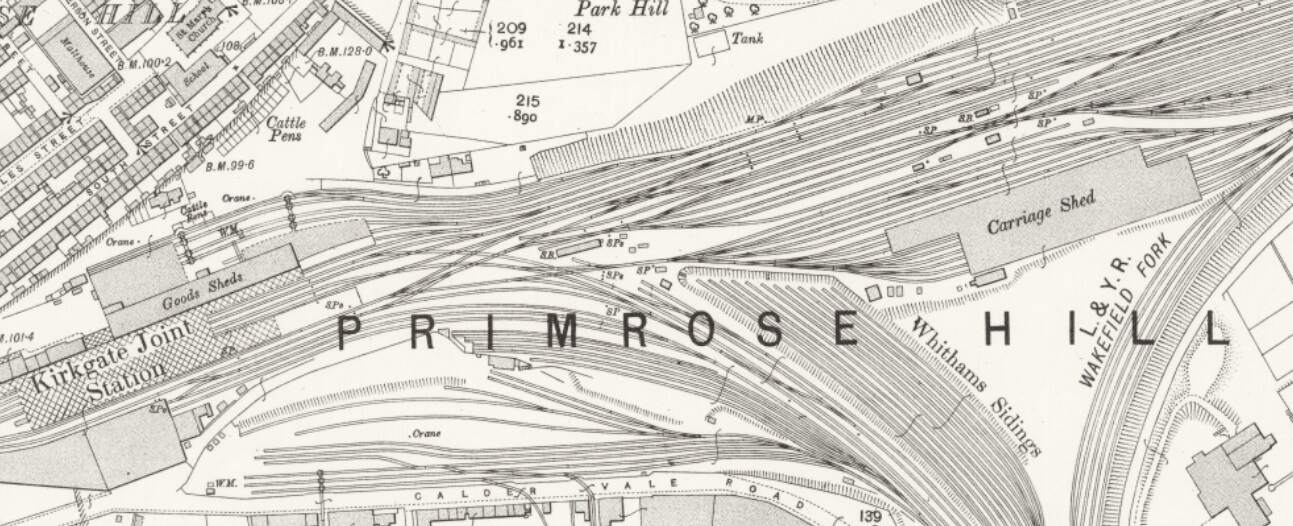
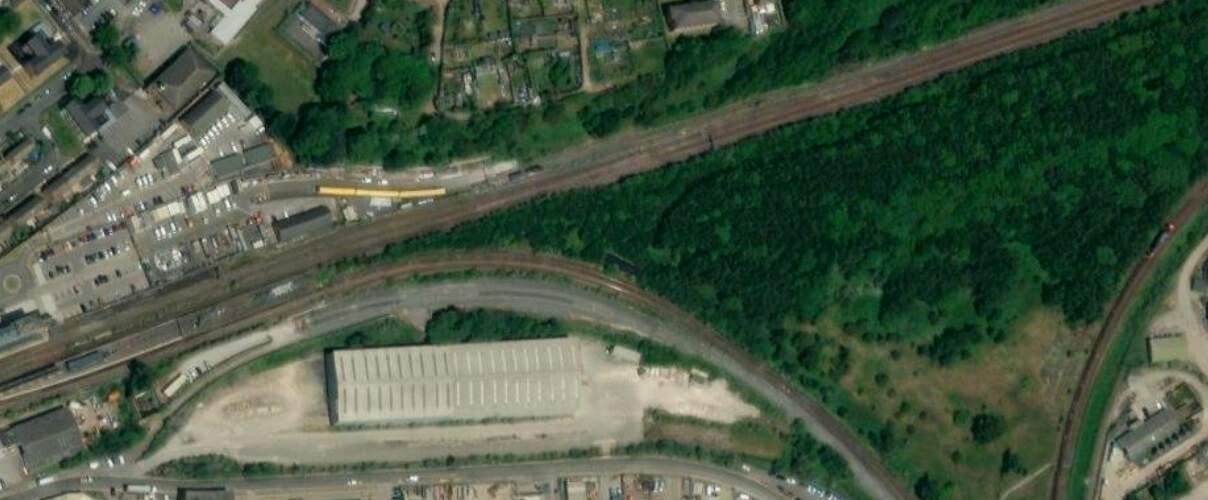
East of Kirkgate Joint Station in 1905. The landscape in Primrose Hill is dominated by the railway. The line exiting to the South of this extract is the L&YR Oakenshaw Branch which crosses the River Calder and runs past the station’s Engine Sheds. [54]the same area in the 21st century, much of the railway infrastructure has disappeared and is beginning to be taken over by nature. [54]
Just to the East of Wakefield Kirkgate Station were Park Hill Colliery Sidings.
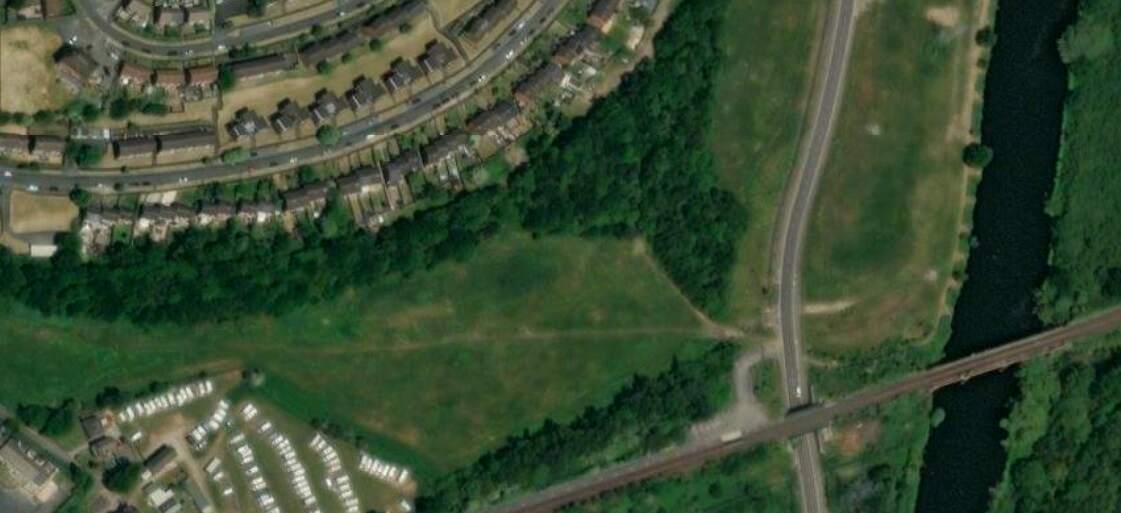
Much the same area in the 21st century. The Midland’s lines South of Goosehill have gone, the footbridge remains but the large area of sidings to the Northeast of the Junction have also gone. [56]Park Hill Colliery Sidings and the River Calder in 1913. [55]The same location in the 21st century. [55]
And beyond those sidings a further crossing of the River Calder.
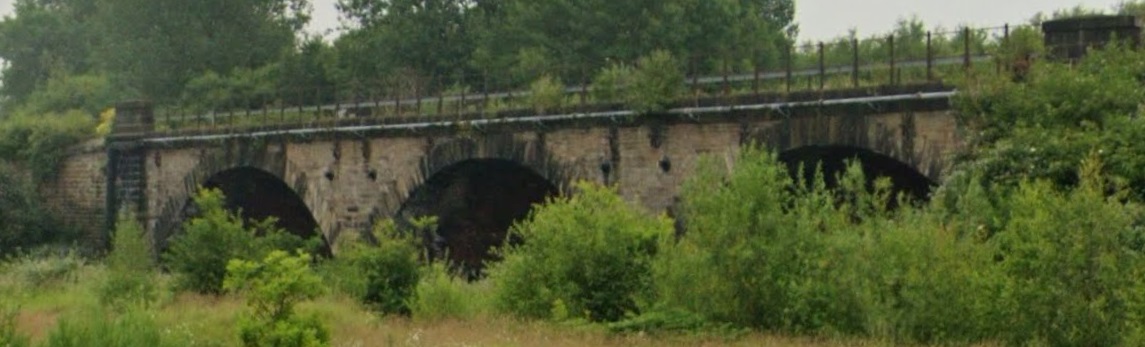
The three arched stone viaduct across the River Calder. This photograph is taken from Neil Fox Way and looks Southeast towards the bridge. [Google Streetview, June 2024]
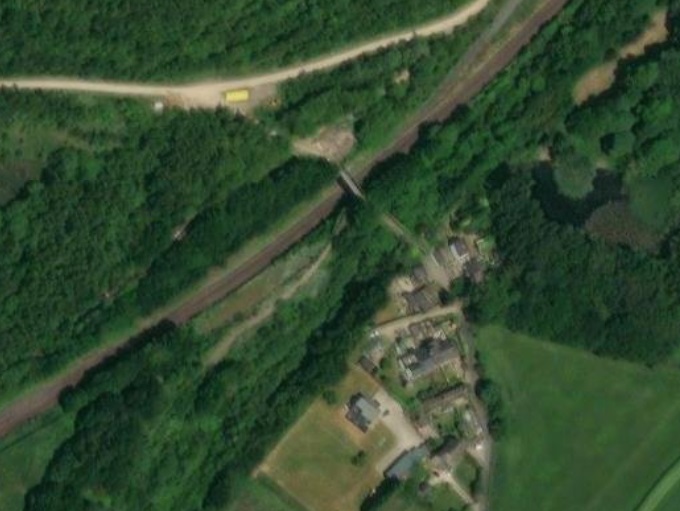
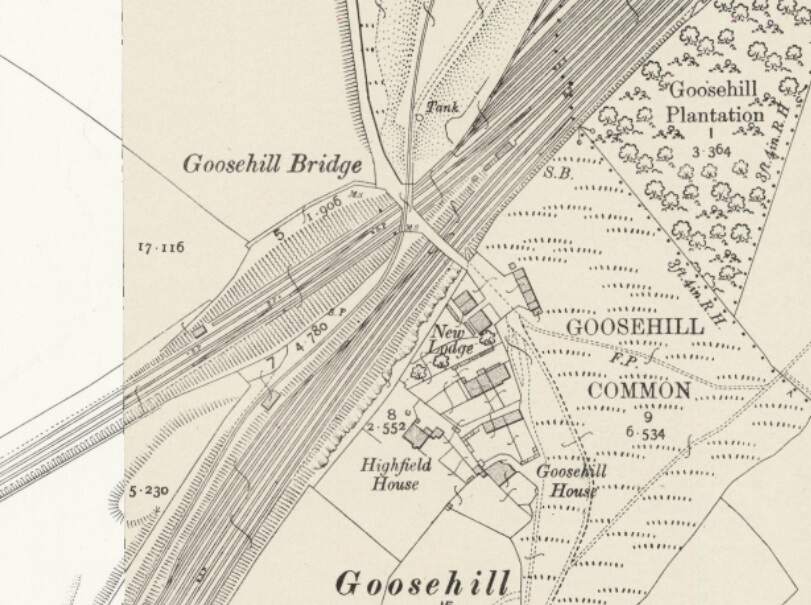
Just a short distance further along the line, at Goosehill, the Manchester and Leeds Railway (by 1905, The Lancashire and Yorkshire Railway) joined the North Midland Railway (by 1905, The Midland Railway)
Goosehill Bridge and Junction witht he Midland Railway entering from the bottom of the extract and the Manchester 7 Leeds entering from the bottom-left. [56]Immediately to the Northeast of the last extract from the 1905 25″ Ordnance Survey, the Midland’s lines can be seen heading Northeast with branches off to the North and West. The branch heading away to the West is the St. John’s Colliery line running to wharves at Stanley Ferry. That to the North runs through the screens and serves St. John’s Colliery itself. [57]The same area in the 21st century. The roadway crossing the railway and heading off the satellite image to the West runs to a large opencast site. [57]Looking Southwest from the bridge carrying the access road to the opencast site. [Google Streetview, May 2023]Looking Northeast from the bridge carrying the access road to the opencast site. [Google Streetview, May 2023]Looking Southwest from the Newlands Lane Bridge. [Google Streetview, May 2023]Looking Northeast from Newlands Lane Bridge. [Google Streetview, May 2023]
From this point on the traffic from the Manchester and Leeds Railway ran on North Midland (later Midland) Railway metals, via Normanton Railway Station and then passing Silkstone and West Riding Collieries, and on towards Leeds, approaching Leeds from the Southeast. Normanton Station appears on the map extract below.
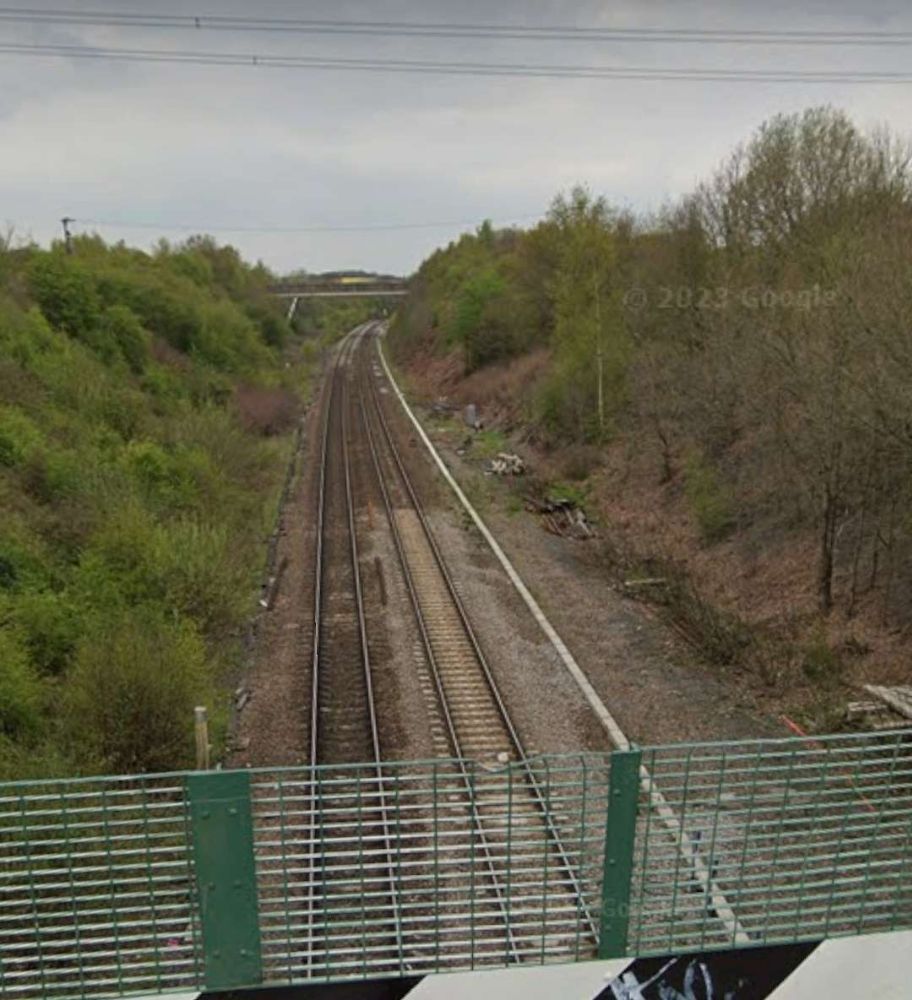
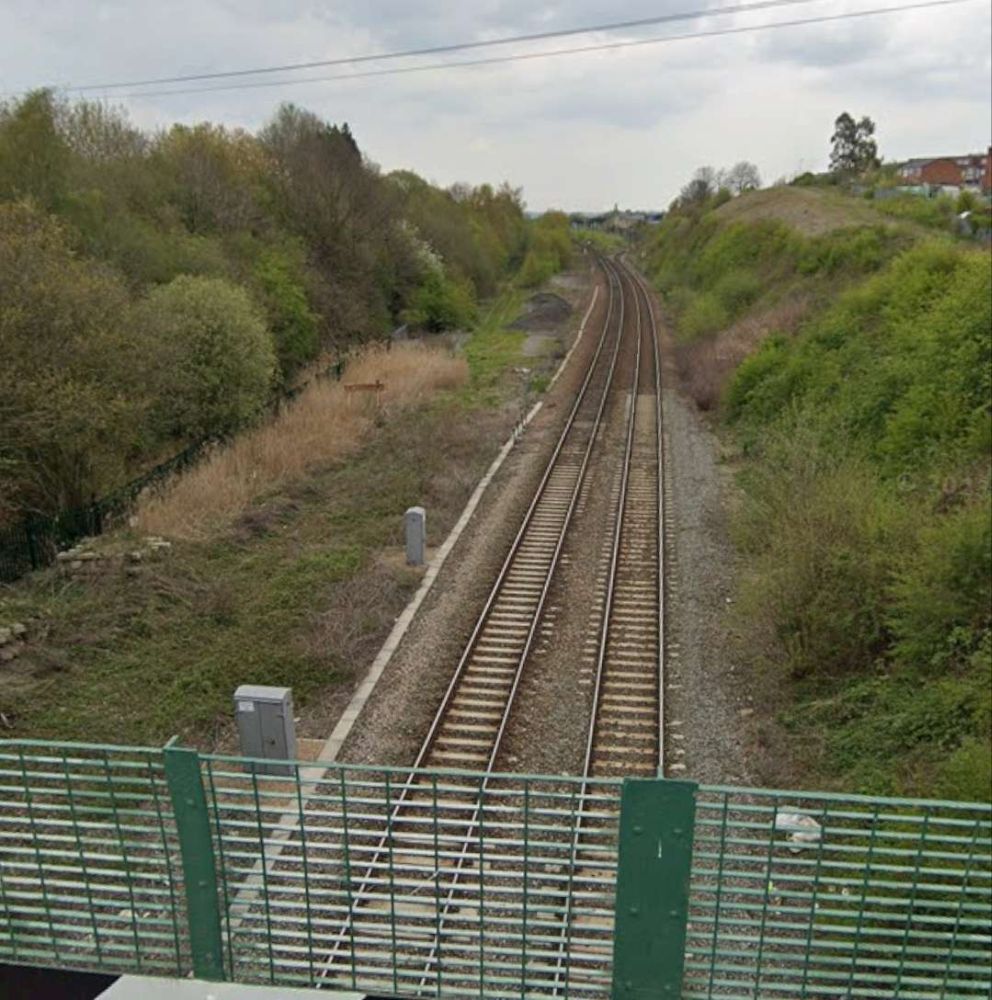
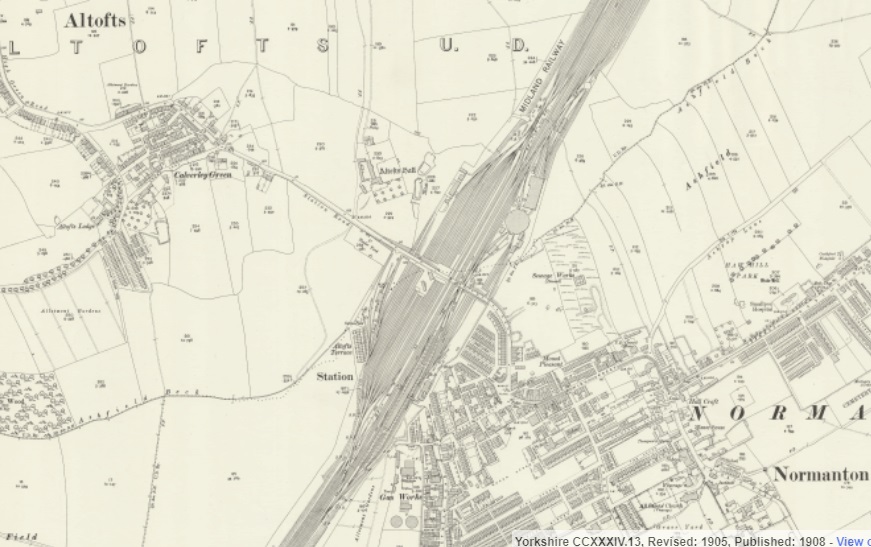
An smaller scale extract from the 25″ Ordnance Survey of 1905 which shows Normanton and its railway station. St. John’s Colliery and Gooshill Junction are just of the extract on the bottom left. [58]Looking Southwest from Altofts Road Bridge through the site of Normanton Railway Station. [Google Streetview, April 2023]
Rake’s last words on a journey along the railway are these: “Just previous to reaching Wakefield, the railway is carried over a viaduct of 16 arches, and, quitting that station it enters a deep cutting, and crosses the Vale of Calder for the last time, a little to the east of Kirkthorpe. Here was the most important diversion of the Calder, by which the cost of building two bridges was saved. … The line terminated by a junction with the North Midland Railway, a mile to the north of which point was situated the Normanton Station, where the York and North Midland, and by its means, the Leeds and Selby and Hull and Selby Railways united with the former lines. The remainder of the journey to Leeds, 9 miles, was traversed on the North Midland Railway.” [1: p472]
Rake goes on to talk about the gradients of the railway which “were considered somewhat severe. Starting from Manchester, the line ascends to Rochdale, 10 miles, over a series of inclinations averaging about 1 in 155; from Rochdale to the summit level, 6½ miles, the ascent is 1 in 300; the total rise from Manchester being 351 ft. From the summit level plane, which extends for 1 mile 55 chains, to Wakefield, a distance of 30 miles, the line descends for the first six miles on a gradient of 1 in 182, after which it is continued by easy grades of an average inclination of 1 in 350. Below Wakefield a comparatively level course is maintained to the junction with the North Midland Railway, the total fall from the summit being 440 ft. The curves were laid out so as not to be of a less radius than 60 chains. The gauge adopted on the Manchester and Leeds Railway was 4 ft. 9 in., to allow a in. play on each side for the wheels. … The rails were of the single parallel form, in 15 ft. lengths, with 3 ft. bearings, and were set in chairs, to which they were secured by a ball and key, as on the North Midland Railway. The balls, (3/4 in. diameter), were of cast iron, and fitted into a socket formed in one side of the stem of the rail; the key, which was of wrought iron, was 8 in. long (and 5/8 in. wide at one end, from which it tapered to 3/8 in. at the other end). … Stone blocks were used where they could be obtained from the cuttings, and were placed diagonally, but sleepers of kyanised larch were used on the embankments, the ballasting being of burnt and broken stone.” [1: p472-473]
It is interesting to note that the tramway/tramroad practice of using stone blocks as sleepers was in use when this railway was first built!
Rake continues: “The Manchester terminal station was located between Lees Street and St. George’s Road, and was entirely elevated on arches. The passenger shed was covered with a wooden roof, in two spans, and the whole length of the station was 528 ft. The passenger platform was approached by a flight of 45 steps from the booking-office on the ground floor. [1: p473]
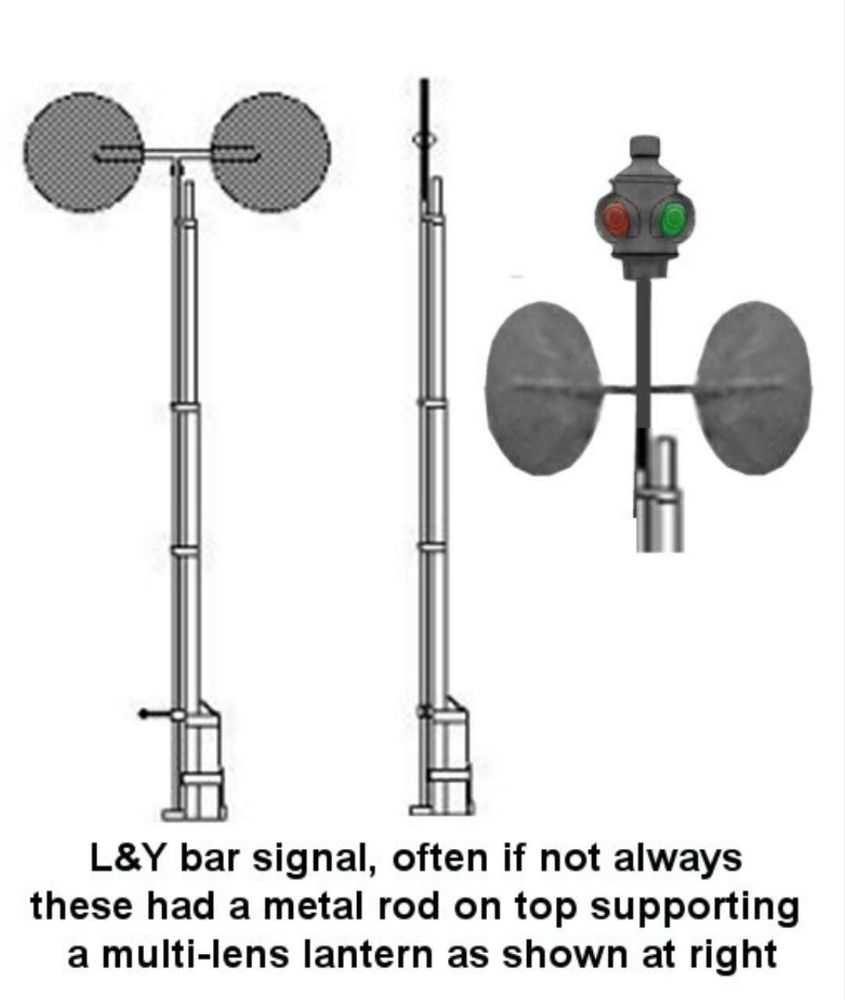
Early signals on the Manchester and Leeds.Railway which became part of the Lancashire & Yorkshire Railway network. [64]
“The signals were of the horizontal double disc or spectacle form which, when revolved to the extent of a half circle, caused both discs to be invisible to the driver and indicated all right, the lamp above showing, when illuminated, green; the colour shown by the lamp when both discs were crosswise to the line being red.” [1: p473]
Rolling Stock
“The carriages consisted of three classes, The first class, in three compartments, upholstered, and fitted with sash windows painted blue; second-class, in three compartments, but open at the sides and furnished with wooden sliding shutters painted yellow; and carriages termed ‘mixed’, in which the middle compartment was for first-class, and each of the ends was for second-class passengers. There was also a carriage of novel construction, built according to the plan of the chairman of the company and used at the opening of the line. The under-framing was of the usual construction, but the body was unique. The floor was considerably wider than ordinary, and the sides curved outwards until they joined a semicircular roof, the greater part of which was fitted with wire gauze to give air, but capable of being instantaneously covered with waterproof material, by the action of an inside handle, so that sun and rain could be shaded out at pleasure. The sides were fitted throughout with plate glass, and ranges of seats occupied the floor, having passages on either side. Tents were also contrived in the sides which closed at will by spring action. The effect of the interior was said to resemble the interior of a conservatory! These carriages were in each case mounted on four wheels, with a perforated footboard of iron running the whole length of the body, in substitution for the lower tier of steps in use on other railways at the time.” [1: p473-474]
I have produced Rake’s description of this ‘unusual carriage’ as I have found it impossible to imagine what it looked like from Rake’s word-picture.
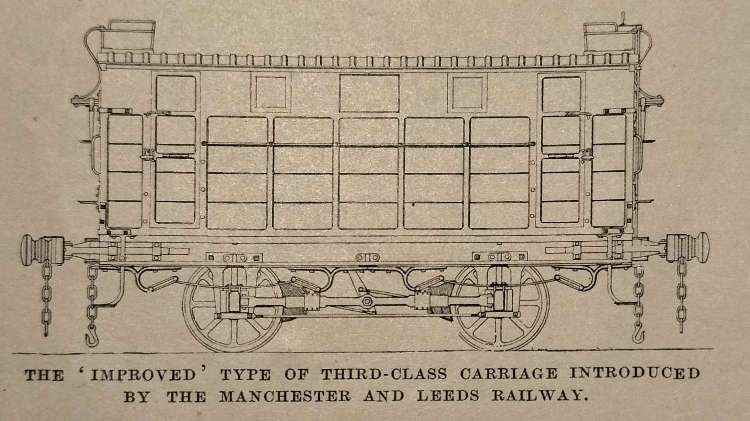
At the end of 1840, “an improved form of third-class carriage was constructed, in which each wheel was braked; the brake levers were attached to the axle-boxes and, consequently, when applied by the guard. who sat on the roof, did not bring the body of the carriage down on to the springs, The buffing springs were placed in front of the headstocks, and a flat iron bar attached to the buffer worked in brackets on the sole bar. The doors were fitted with latches on the outside, which were fastened by the guard when the passengers were inside.” [1: p474]
An improved third class carriage. Looking back from a 21st century perspective, these carriages seem to be not much better than the wagons used to carry livestock. This is borne out by Rake’s notes below. It was, however, a significant improvement on the open wagons, having a roof, glass windows and brakes. Contrary to what Rake appears to say below, Wells suggests that these covered third class wagons did have seating. [1: p474][75: p85]
“The windows and the doors being fixed, no passenger could open the door until the guard had released the catch. Roof lamps were not provided in these coaches, which were painted green. … The third-class carriages. or rather, wagons, were provided with four entrances, to correspond with the “pens” into which they were sub-divided by means of a wooden bar down the centre, crossed by another bar intersecting the former at right angles in the middle of its length. There were no seats, and the number of passengers for which standing room could be found was limited solely to the to the bulk Stanhope or ‘Stan’ups’, as they were derisively termed. The contrivance of pens was said to be due to a determination to prevent respectably dressed individuals from availing themselves of the cheaper mode of conveyance, in which there was little to distinguish them, it was complained, ‘from the arrangements for the conveyance of brute beasts which perish’. The company’s servants were strictly enjoined “not to porter for wagon passengers‘!” [1: p474]
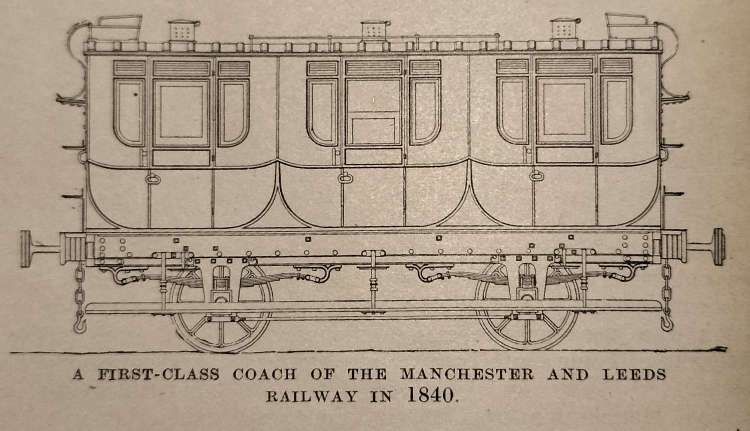
Rake’s illustration of an early Manchester and Leeds Railway first class coach. [1: p474]
Further details of Rolling Stock on the Railway can be found in Jeffrey Wells book about the line. [75: p81-85]
Locomotives
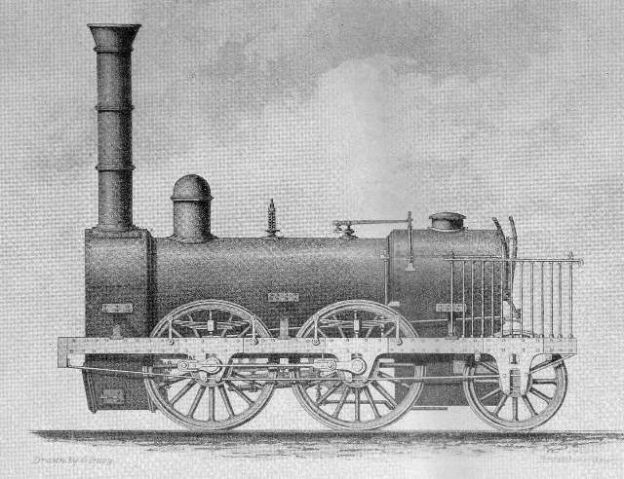
Rake tells us that the locomotives were all mounted on 6 wheels and purchased from Sharp, Roberts & Co., Robert Stephenson & Co., and Taylor & Co. They all had 14 in. diameter, 18 in. stroke cylinders and 5 ft. 6 in. diameter driving wheels. Jeffrey Wells provides a more comprehensive, tabulated, list of those early locomotives. [75: p79-80]
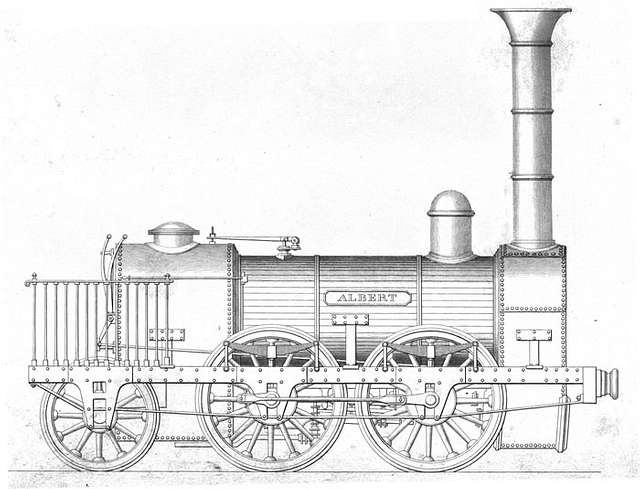
A typical 0-4-2 Locomotive of 1839/1840. [76]An early (1834) R. Stephenson & Co. 0-4-2 locomotive of very similar design to those supplied to the Manchester and Leeds Railway 9c0 Public Domain. [77]
The first three 0-4-2s were made by Robert Stephenson & Co., and that company supplied plans and specifications for its locomotives which meant that The Manchester and Leeds Railway could have the same design manufactured by other firms of the Company’s choice. The first 12 locomotives built for the Manchester and Leeds in 1839 were all to Stephenson’s 0-4-2 design. Wells tells us that of these locomotives, the first three (Nos. 1 -3) were called Stanley, Kenyon and Stephenson and were built by R. Stephenson & Co. They were supplied to the Railway in April and May 1839. [75: p79]
The next three locomotives (Nos. 4-6) were supplied by Sharp Bros., Manchester. Lancashire and Junction were supplied in May 1839 and York in July 1839. Nos. 7, 9 and 10, named respectively, Rochdale (16th July), Bradford (6th September) and Hull (7th September)came from Naysmith & Co., Patricroft. Nos. 8, 11, 12 (Leeds, Scarborough and Harrogate) were supplied by Shepherd & Todd by September 1839. [75: p79]
Wells comments that No. 1, ‘Stanley’ “was named after Lord Stanley, Chairman of the House of Commons Committee who supported the Manchester and Leeds Railway Bill in 1836. … Other Stephenson designs followed: 19 engines, numbered 15 to 40, of the 2-2-2 wheel arrangement were delivered between October 1840 and April 1842. These were recommended by Stephenson to work the eastern section of the line, between Sowerby Bridge and Wakefield, thus gradually removing the [Manchester and Leeds Railway’s] reliance on North Midland Railway motive power which had at first prevailed from late in 1840.” [75: p80]
R. Stephenson patented 2-2-2 locomotive No. 123 ‘Harvey Combe’ built 1835, from Simm’s ‘Public Works of Great Britain’, 1838. This locomotive is of a very similar design to those supplied by various manufacturers to the Manchester and Leeds Railway in 1840-1842. These were given the Nos. 15-40 and were supplied by Charles Tayleur & Co., Rothwell & Co., Laird Kitson & Co., Sharp Bros., Naysmith & Co., and W. Fairburn & Co., (c) C. F. Cheffins, Public Domain. [78]
He continues: “Once again several manufacturers were involved in the supply of these locomotives. Goods engines were represented by a further batch of 0-4-2s; 13 were delivered (Nos 33 to 46) between April 1841 and June 1843, the three manufacturers involved being R. Stephenson & Co., Haigh Foundry, Wigan, and William Fairbairn & Co. of Manchester. … Three standard Bury-type 0-4-0s were the last engines to be delivered (Nos 47 to 49) the first two bearing the names West Riding Union and Cleckheaton respectively. All three were completed between November 1845 and January 1846 by the firm of Edward Bury of Liverpool.”
And finally. …
Rake concludes his article, the first to two about the line in The Railway Magazine (I currently only have access to this first article) with two short paragraphs. The first reflects on policing: “There were no police on the railway, the whole of the platelayers being constituted as constables on the completion of the first section of the line; and, we are afterwards told, that ‘the vigilance resulting from the pride these men take, in being thus placed in authority, had been found to supersede the necessity of any more expensive system of surveillance.'” [1: p474]
The second notes that: “The directors [were] very anxious to complete the railway as far as Rochdale, at the earliest possible time, and on the 4th July, 1839, it was opened through that town to Littleborough, a distance of about 14 miles, the event ‘exciting a most extraordinary degree of local interest and wonder’ we are told.” [1: p474]
References
Herbert Rake; The Manchester and Leeds Railway: The Origin of the Lancashire and Yorkshire Railway; in The Railway Magazine, London, December 1905, p468-474
Jeffrey Wells; The Eleven Towns Railway: The Story of the Manchester and Leeds Main Line; Railway & Canal Historical Society, Keighley, West Yorkshire, 2000.
An article in the Railway Magazine in December 1905 prompted a look at the Manchester and Leeds Railway. For a number of years my parents lived in sheltered housing in Mirfield which is on the line. Looking at the line as it appeared in 1905 and again in the 21st century seemed a worthwhile exercise! Part 1 of this short series provides a short history of the line and takes us from Manchester to Sowerby Bridge.
The featured image at the head of this article shows the Manchester & Leeds Railway locomotive ‘Victoria’, in about 1878-80. This locomotive was designed by Edward Bury and built at his works in Liverpool. It was one of a batch of 0-4-0 engines ordered in 1845, and later converted to an 0-4-2 wheel arrangement (c) Public Domain. [65]
In his first article in 1905, about the Manchester and Leeds Railway which was accompanied by a series of engravings included here, Herbert Rake wrote that on 11th September 1830 a committee tasked with improving communications between Leeds and Manchester, emboldened by the success of the Liverpool and Manchester Railway, decided to hold a meeting to form a new railway company.
On 18th October 1930, the decision was taken. A board of directors was appointed, a survey was authorised and work was undertaken to prepare for an application to Parliament. It was based on a junction with the Liverpool and Manchester Railway at Oldfield Lane, Salford and at St. George’s Road, Manchester.
The route from Manchester to Sowerby Bridge was easily agreed, that from Sowerby Bridge to Leeds was more difficult to agree. The Bill prepared for Parliament focused on the Manchester to Sowerby Bridge length of the planned line and was presented on 10th March 1831. Opposition from the Rochdale Canal Company and others and then the dissolution of Parliament halted the progress of the Bill.
Resubmission was agreed on 8th June 1830 but once again failed in its progress through Parliament. In the end, the project was revised, the company was reorganised, and the capital fixed at £800,000 in £100 shares in a meeting in October 1935.
Rake tells us that this “new project abandoned the Salford junction line, but embraced a deviated extension beyond Sowerby Bridge, along the lower portion of the Vale of Calder, past Dewsbury and Wakefield, to Normanton, thence to Leeds, in conjunction with the North Midland Railway. … [The line was] intended to form a central portion of a great main line running east and west between Liverpool and Hull.” [1: p469-470]
The prospectus noted a few important facts, particularly:
The population density with three miles either side of the proposed line was 1,847 persons per square mile. The average for England was 260 persons per square mile.
Within 10 miles of the line there were 29 market towns, twelve with a population greater than 20,000.
Within 20 miles of the line there were 48 market towns with more than 10,000 inhabitants.
Rake tells us that “The Act of Incorporation received the Royal Assent on the 4th July 1836, and authorised a joint stock capital to be raised of £1,000,000, with an additional amount by loan of £433,000.” [1: p470]
Construction commenced on 18th August 1837. On 14th February 1838 it was decided to apply to Parliament for an Act authorising branch lines to Oldham and Halifax.
Late in 1838, “a modification of the original plan for effecting a junction of the Manchester and Leeds Railway with the Liverpool and Manchester Railway was proposed, by an extension of both to a joint terminus within 500 yards of the Manchester Exchange. … The Act of Parliament for this and other purposes received the Royal Assent on the 31st July 1839, authorising the sum of £866,000 to be raised for the purpose of constructing the Oldham and Halifax branches, for making a diversion in the railway at Kirkthorpe, for enlarging the station in Lees Street, and for constructing the line to join the Liverpool and Manchester extension.” [1: p470]
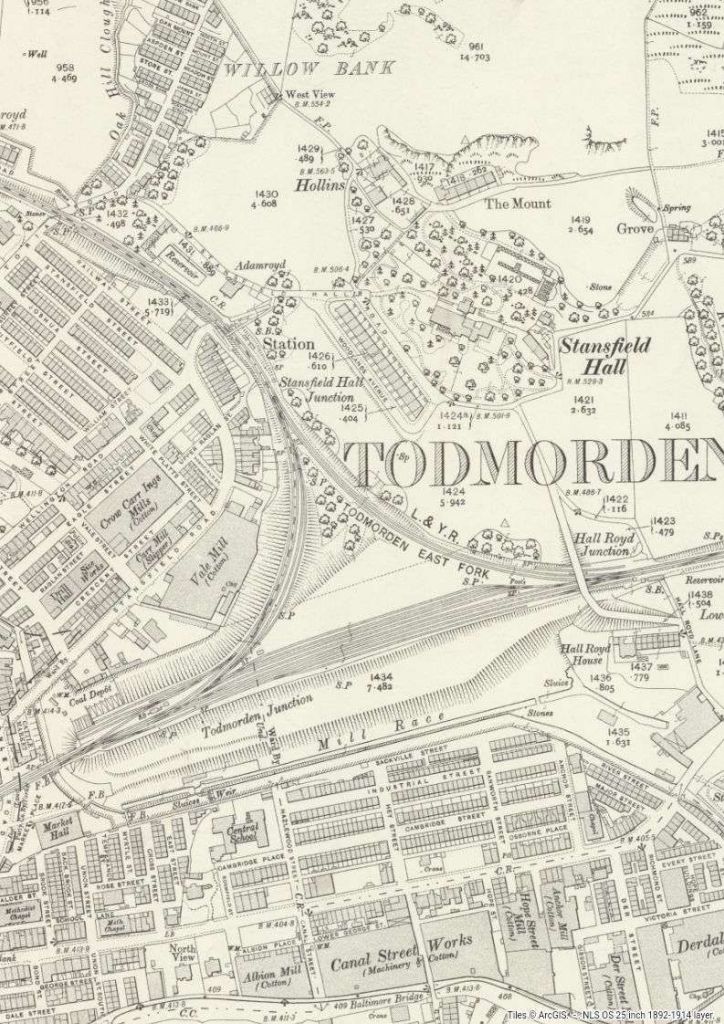
Rake explains that the railway ran through Miles Platting where the Ashton and Stalybridge branch diverges. At Middleton the Oldham branch connected to the main line. Mill Hills embankment (maximum height 75 feet) carries the line towards Blue Pits Station where the Heywood line joins the main line. The line runs on through Rochdale, Littleborough and Todmorden Vale before running in cutting (maximum depth 100 feet) to Summit Tunnel.
During construction, “Six contracts were awarded between the Manchester terminus and the Summit Tunnel and were progressing satisfactorily by August 1838.” [6]
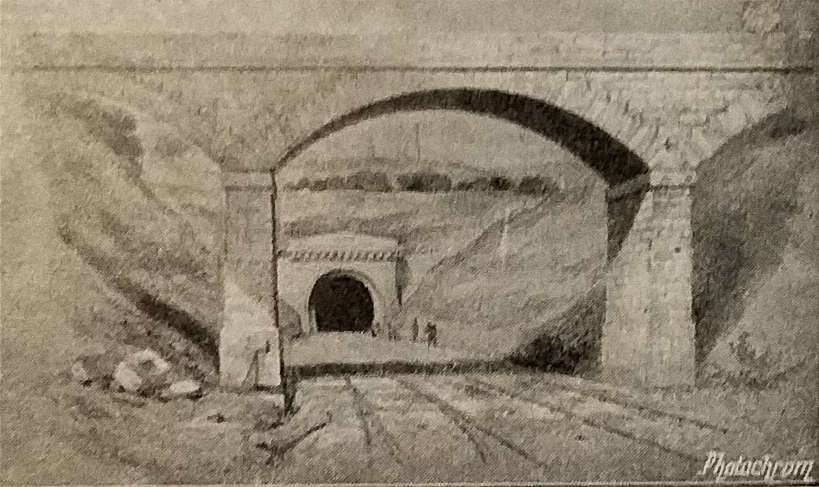
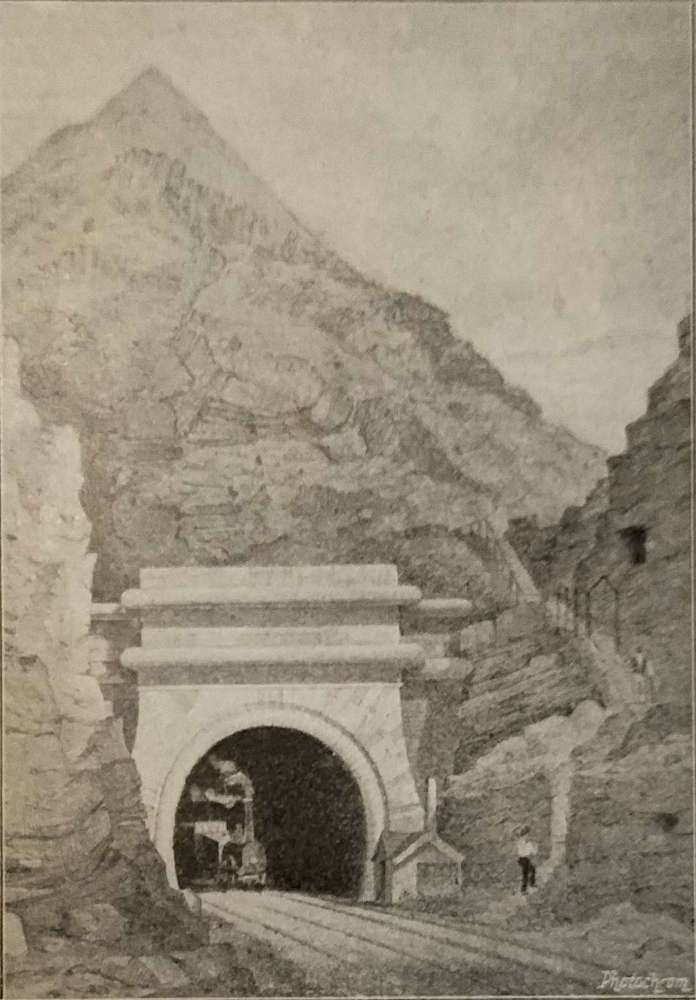
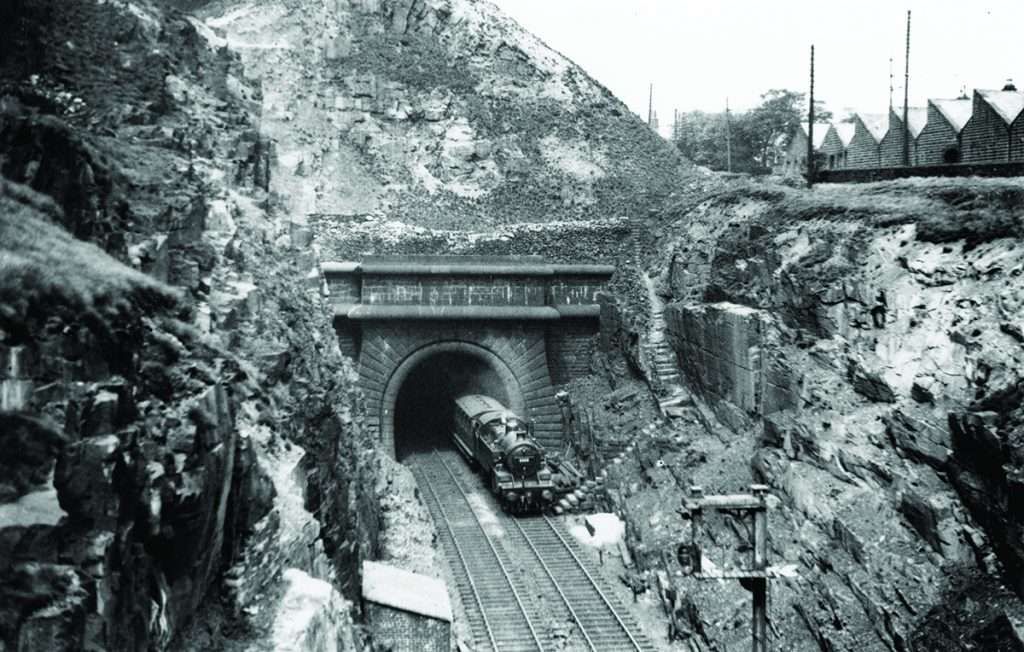
The West Portal of Summit Tunnel is approached from Manchester through a deep cutting. [1: p469]The same portal of Summit Tunnel in 20th century steam days. [3]
When built, Summit Tunnel was the longest in the world. It opened on 1st March 1841 by Sir John F. Sigismund-Smith.
“The tunnel is just over 1.6 miles (2.6 km) long and carries two standard-gauge tracks in a single horseshoe-shaped tube, approximately 24 feet (7.2 m) wide and 22 feet (6.6 m) high. Summit Tunnel was designed by Thomas Longridge Gooch, assisted by Barnard Dickinson. Progress on its construction was slower than anticipated, largely because excavation was more difficult than anticipated. … It … cost £251,000 and 41 workers had died.” [4]
Rake noted that the tunnel is “14 shafts were necessary, and the strata of rock shale and clay was of so treacherous a character that the brick lining of the roof, which is semi circular, consists in places of no less than 10 concentric rings.” [1: p471] He also comments that: the tunnel entrance is if an imposing Moorish design; 1,000 men were employed with work continuing day and night.
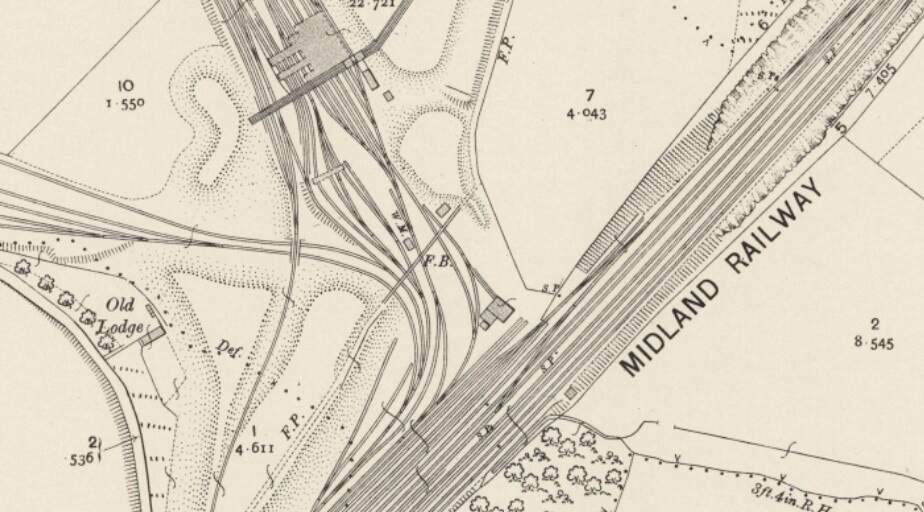
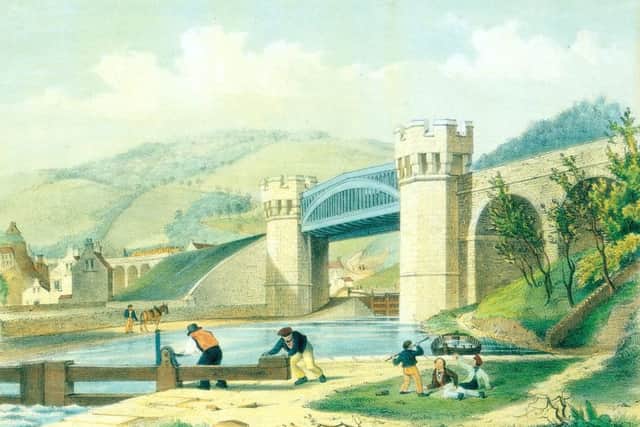
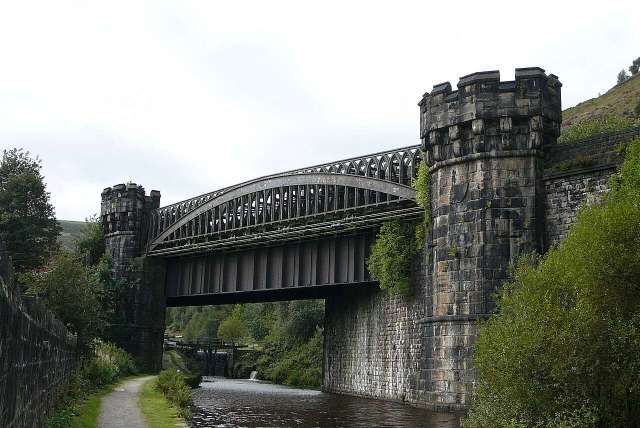
Beyond the tunnel, the railway “entered a cutting in silt, which required piling to secure a foundation. Continuing onwards, we pass through the Winterbut Lee Tunnel, 420 yds. in length, and across a viaduct of 18 arches, one of which is of 60 ft. span we then proceed over the Rochdale Canal, on a cast iron skew bridge 102 ft. in span, at a height of 40 ft. above the surface of the water.” [1: p471]
“Tenders for work on the eastern section were advertised in 1838. … Contractors then worked fastidiously under the threat of heavy penalties should they over-run the set time limits. They were also forbidden to work on Sundays.” [6]
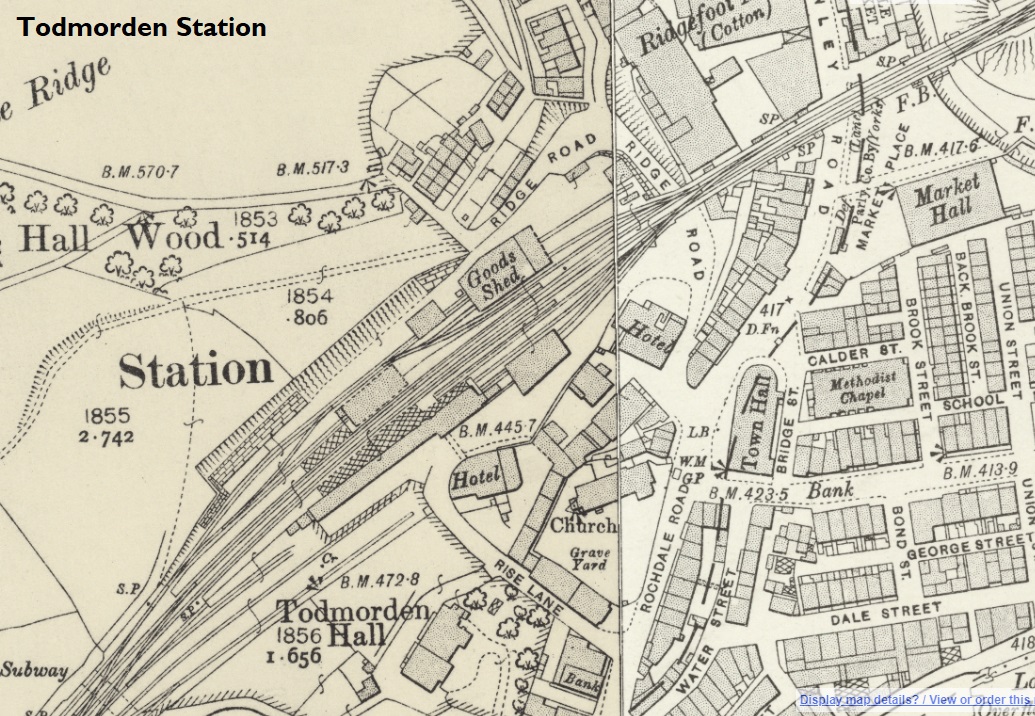
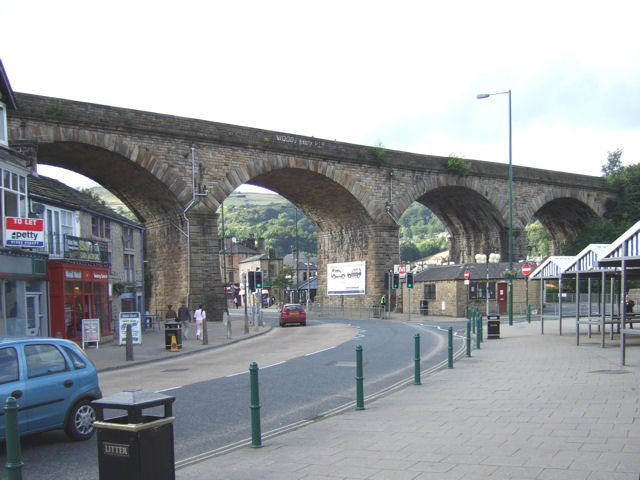
At Todmorden, “the railway is carried over almost the entire breadth of the valley by a noble viaduct of nine arches, seven of which are each of 60 ft. span, and two of 30 ft., at a height of 54 ft. above the level of the turnpike road.” [1: p471]
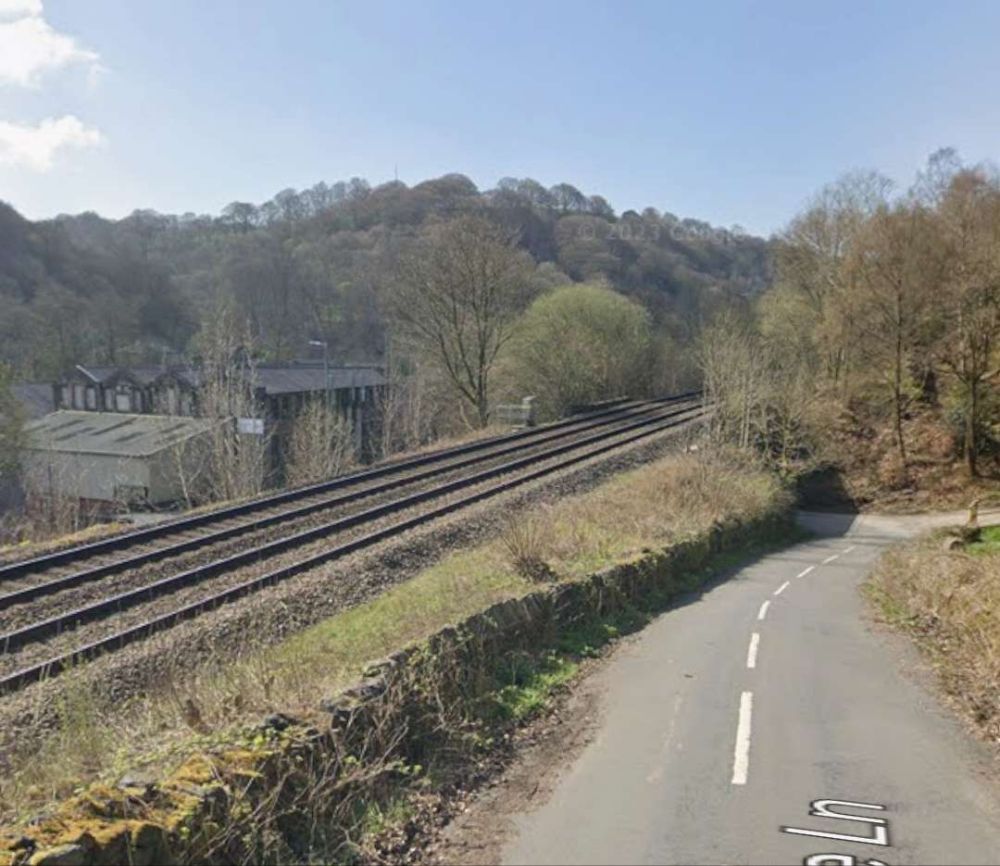
Quitting Todmorden, where the Burnley branch diverges, the line enters Yorkshire, passes through Millwood Tunnel (225 yards), Castle Hill Tunnel (193 yards), and Horsefall Tunnel (424 yards) and then arrives at Eastwood Station. Some distance further on is Charlestown. Afterwards the railway “crosses river, road, and canal, by a skew bridge of three arches, the canal being separately spanned by an iron bridge.” [1: p471]
Looking back West from Cross Stone Road across the western portal of Millwood Tunnel. [Google Streetview, April 2023]Looking East from the corner of Phoenix Street and Broadstone Street, above the eastern portal of Millwood Tunnel. [Google Streetview, April 2023]
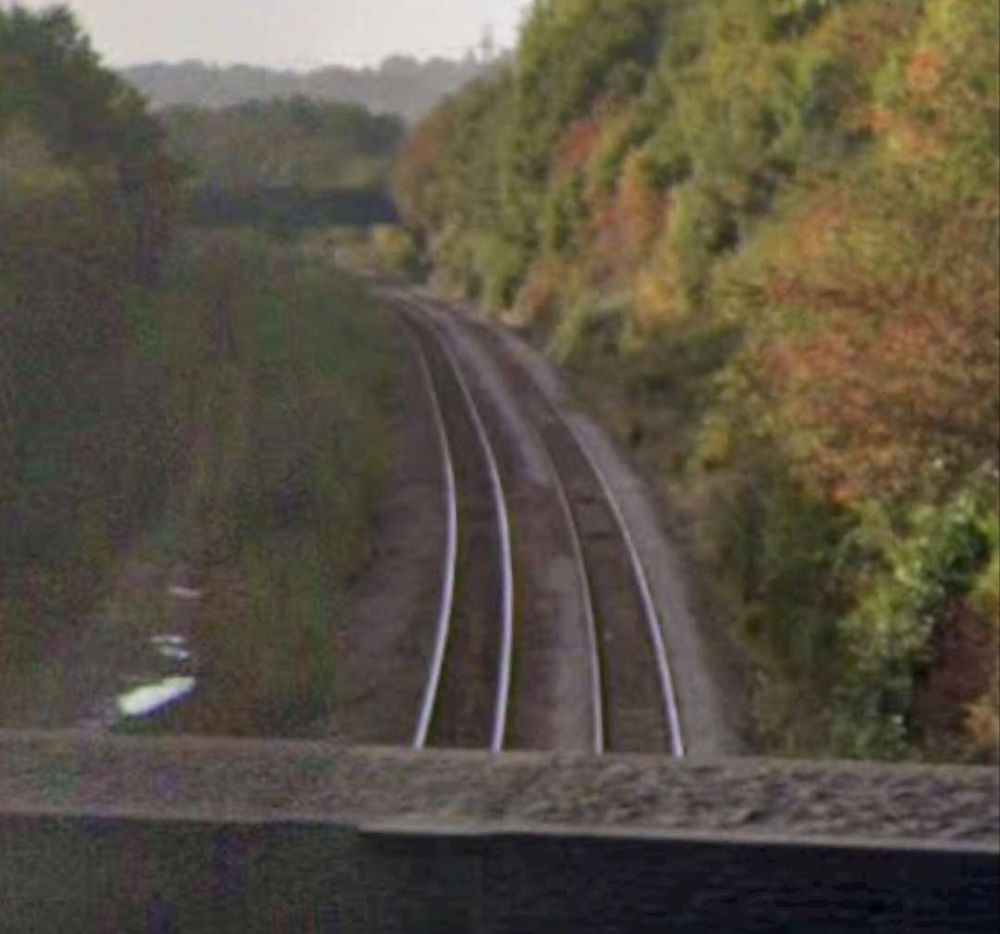
These next few images give a flavour of the line as it travels towards Hebden Bridge.
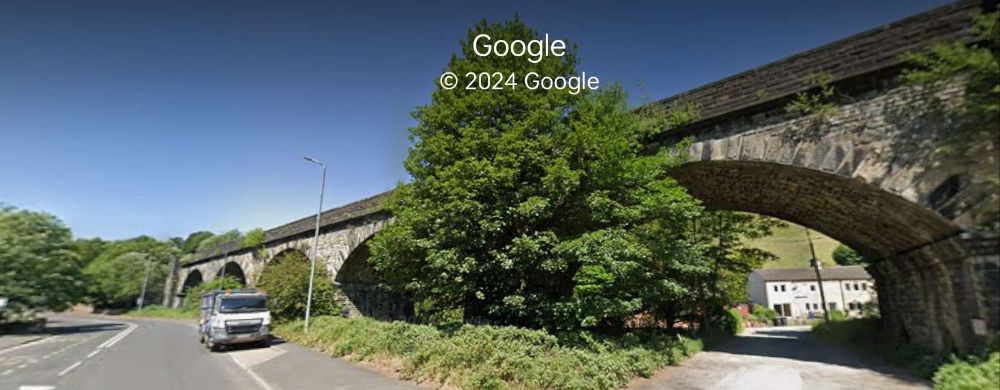
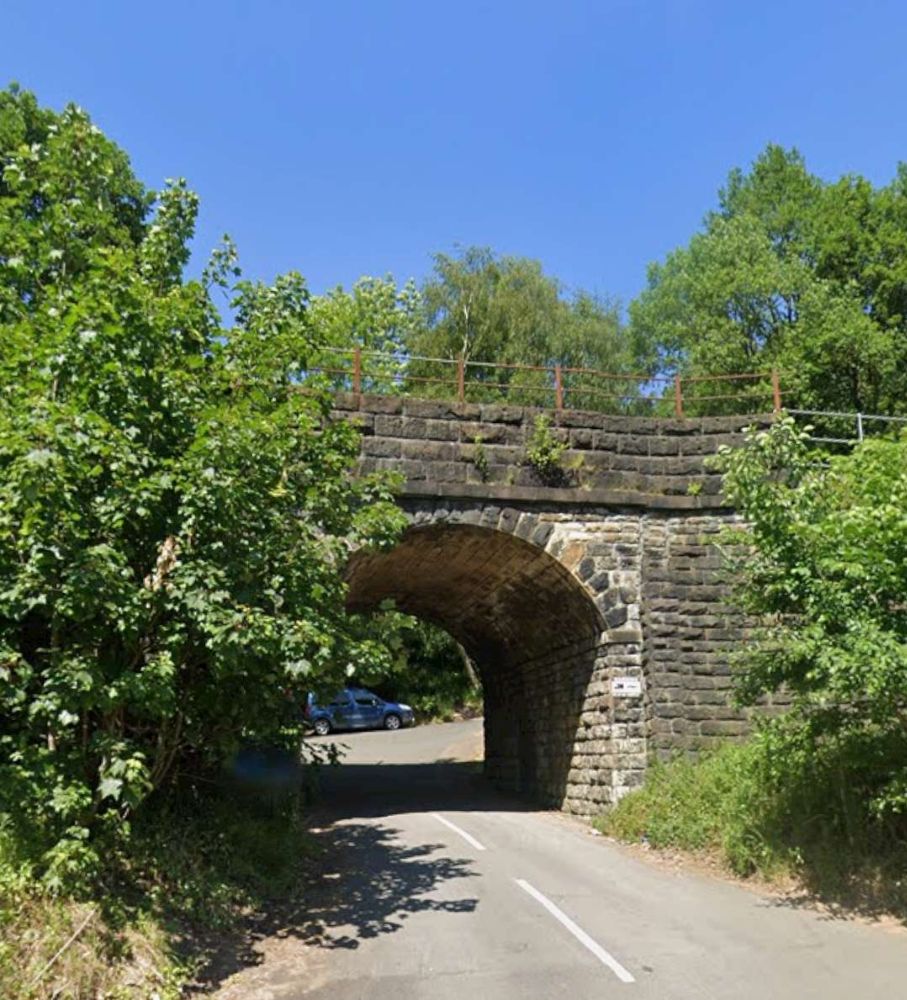
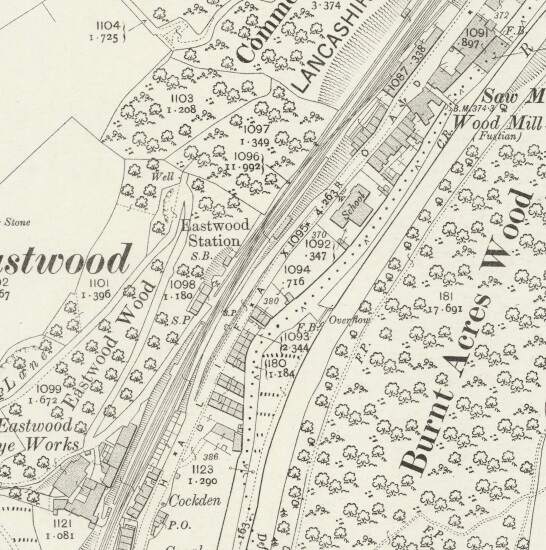
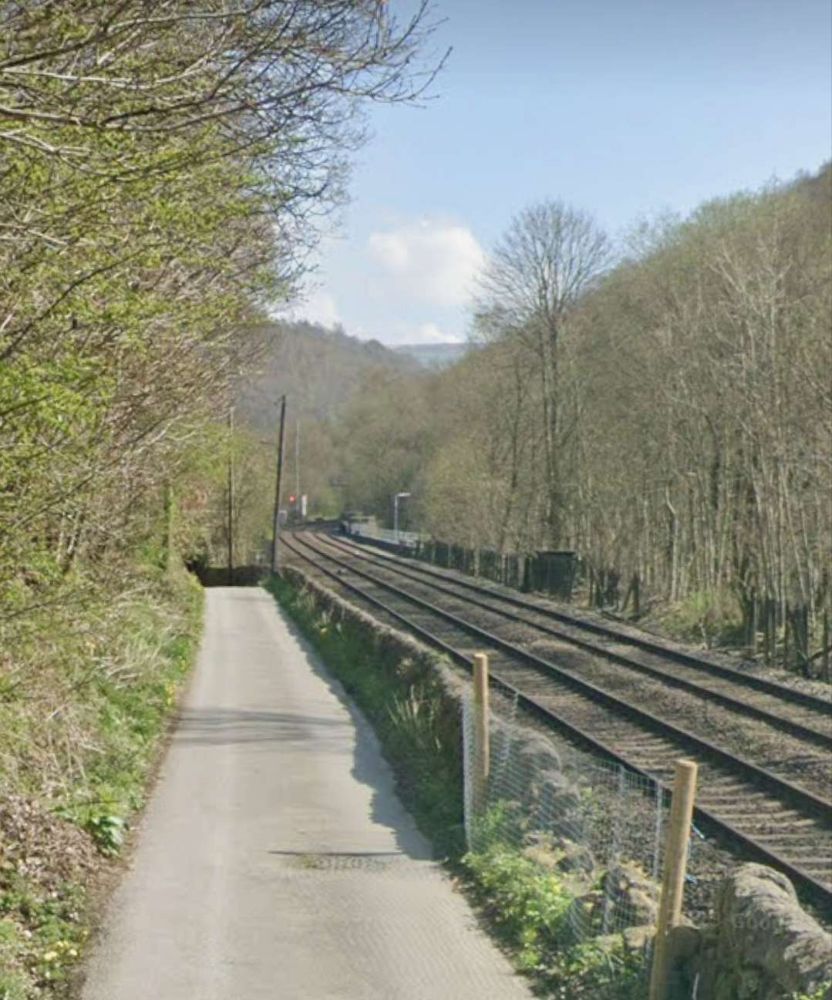
Lobb Mill Viaduct sits alongside the A646, Halifax Road between Castle Hill Tunnel and Horsefall Tunnel. [Google Streetview, June 2023]Looking Southwest along the line towards Todmorden from E. Lee Lane. [Google Streetview, April 2023]A little to the Northeast, Duke Street passes under the railway. This view looks West from Halifax Road [Google Streetview, June 2023]Eastwood Railway Station as it appears on the 1905 25″ Ordnance Survey. [63]Thye approximate location of Eastwood Station as it appears on Google Maps satellite imagery in 2024. [Google Maps, October 2024]A little further Northeast, this is the view Northwest along Jumble Hole Road under the railway. [Google Streetview, June 2011]The view Northwest from he A646, Halifax Road along the Pennine Way Footpath which passes under the railway at this location. [Google Streetview, June 2023]Again, looking Northwest from Halifax Road along Stony Lane which runs under the railway. [Google Streetview, June 2023]The view Southwest along Oakville Road which runs next to the railway. [Google Streetview, April 2023]The view Northeast from the same location on Oakville Road. [Google Streetview, April 2023]
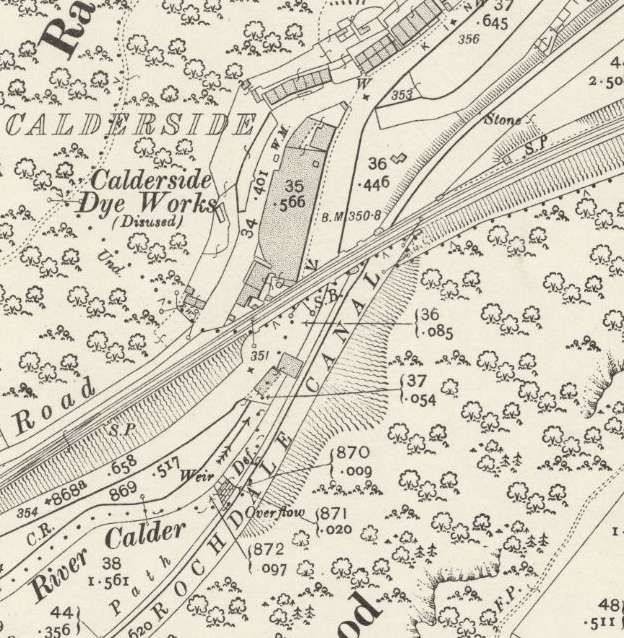
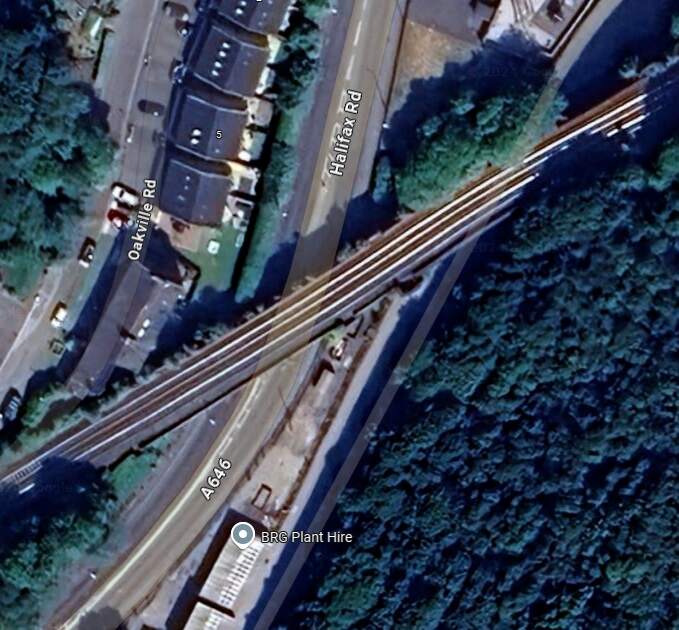
A short distance Northeast, the railway “crosses river, road, and canal, by a skew bridge of three arches, the canal being separately spanned by an iron bridge.” [1: p471] The location is shown on the 25″ Ordnance Survey of 1905 below.
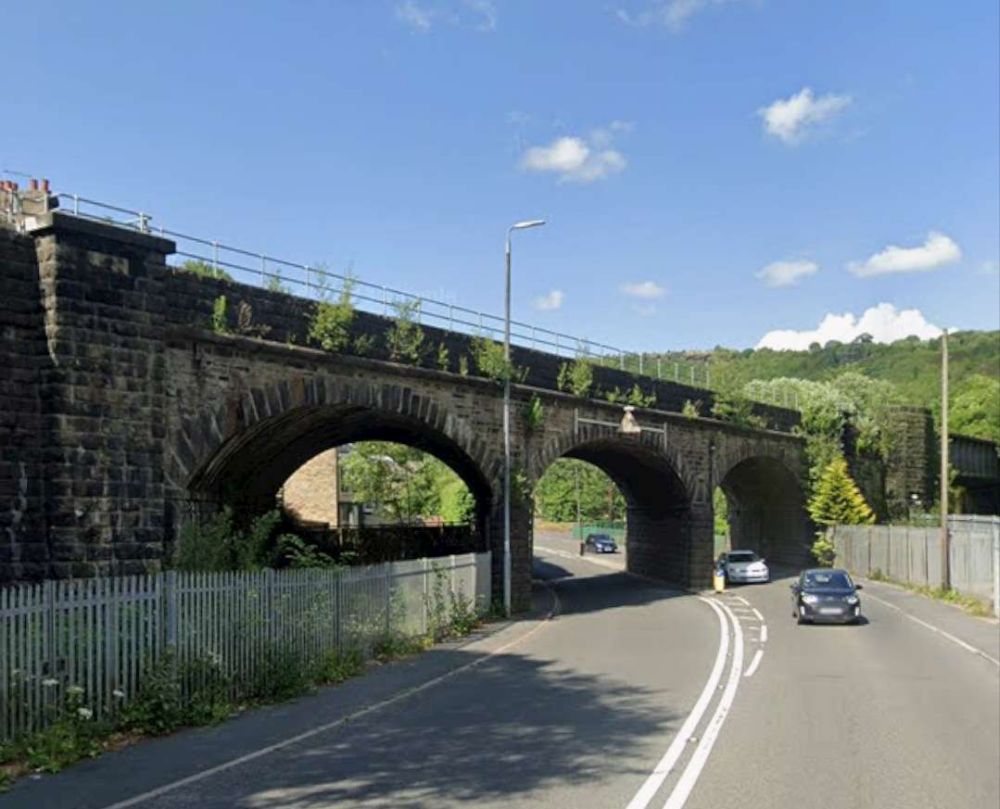
The bridge mentioned above, as it appears on the 25″ Ordnance Survey of 1905. [11]The same location shown on Google Maps satellite imagery in 2024. [Google Maps, October 2024]Looking Northeast along Halifax Road, the three arches of the viaduct are easily visible. Beyond it there is a girder bridge which Rake does not mention. [Google Streetview, June 2023]
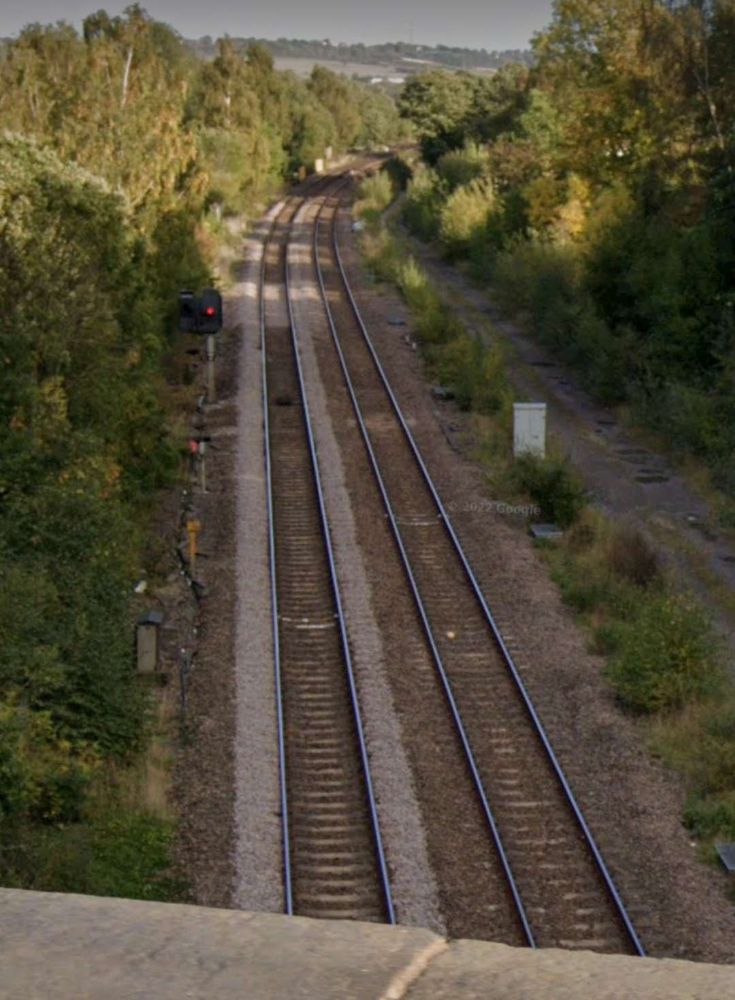
A little further East Stubbing Brink crosses the railway.
Looking West along the railway from Stubbing Brink Bridge. [Google Streetview, April 2023]The view East along the line from Stubbing Brink. [Google Streetview, April 2023]
The line next passes through a short short tunnel (Weasel Hall Tunnel (124 yards)) and arrives at Hebden Bridge Station.
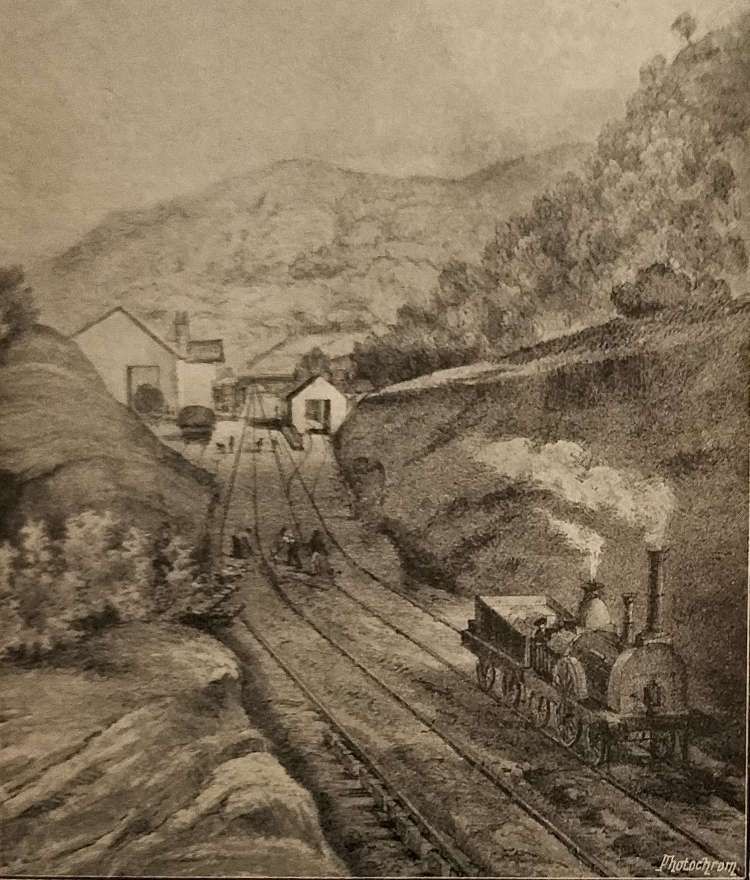
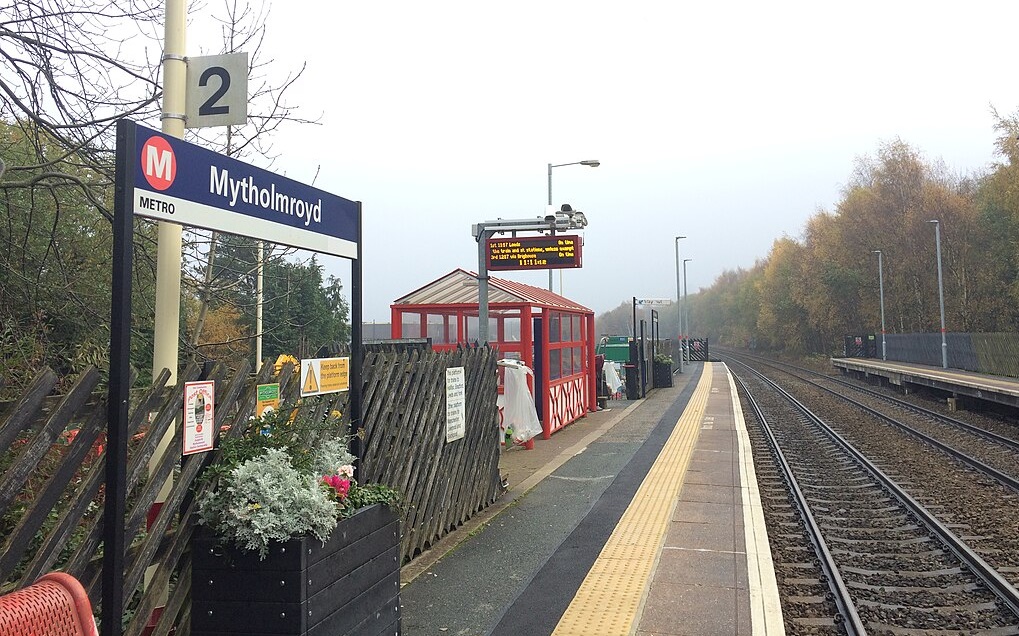
After Hebden Bridge Station, the line proceeds along the South bank of the River Calder, through two small stations (Mytholmroyd and Luddenden Foot) and by a number of riverside mills.
East along the line towards Luddendenfoot, Brearley Lane bridges the line.
Looking West from Brearley Lane Bridge towards Mytholmroyd Station. [Google Streetview, July 2009]Ahead to the East, the line curves round towards the location of Luddendenfoot Railway Station. [Google Streetview, July 2009]Luddenden Foot Railway Station. The station closed on 10th September 1962. The site has been developed since 2007 and the northern half is now occupied by the Station Industrial Park, which is accessible via Old Station Road. Two gate pillars from the original station flank the entrance to the road. [14][17]The location of the erstwhile Luddendenfoot Railway Station as seen from Willow Bank, (c) Matt Thornton. [Google Streetview, February 2021]Looking Southeast from Willow Bank. The arch bridge visible ahead carries Jerry Fields Road over the line, (c) Matt Thornton. [Google Streetview, February 2021]
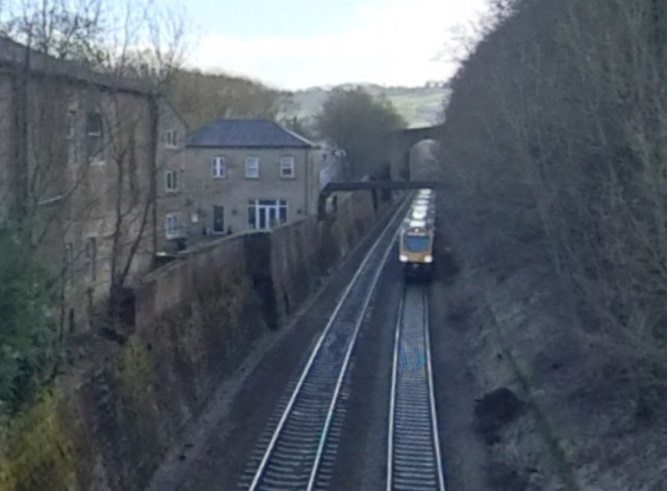
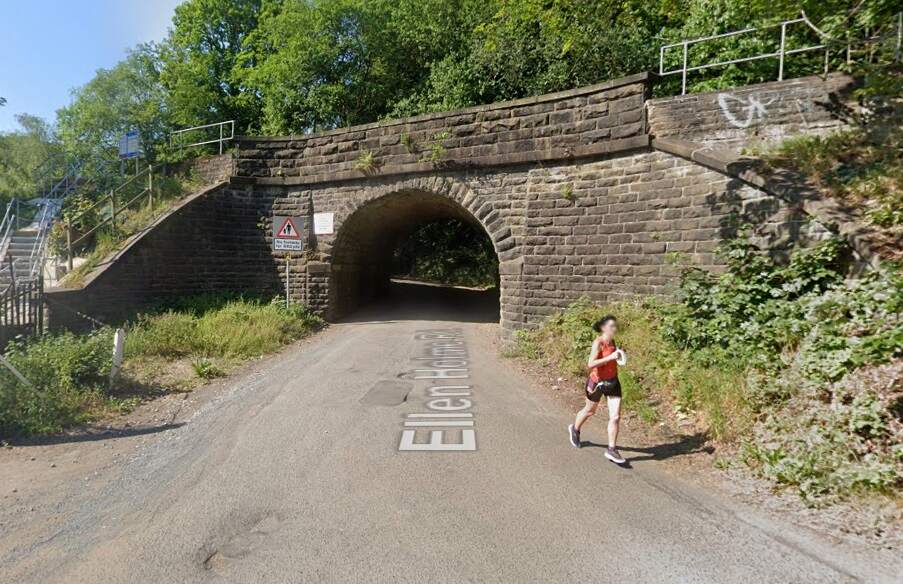
To the Southeast, Ellen Holme Road passes under the line.
Ellen Holme Road passess under the railway to the Southeast of the old Luddendenfoot Railway Station. [Google Streetview, June 2023]
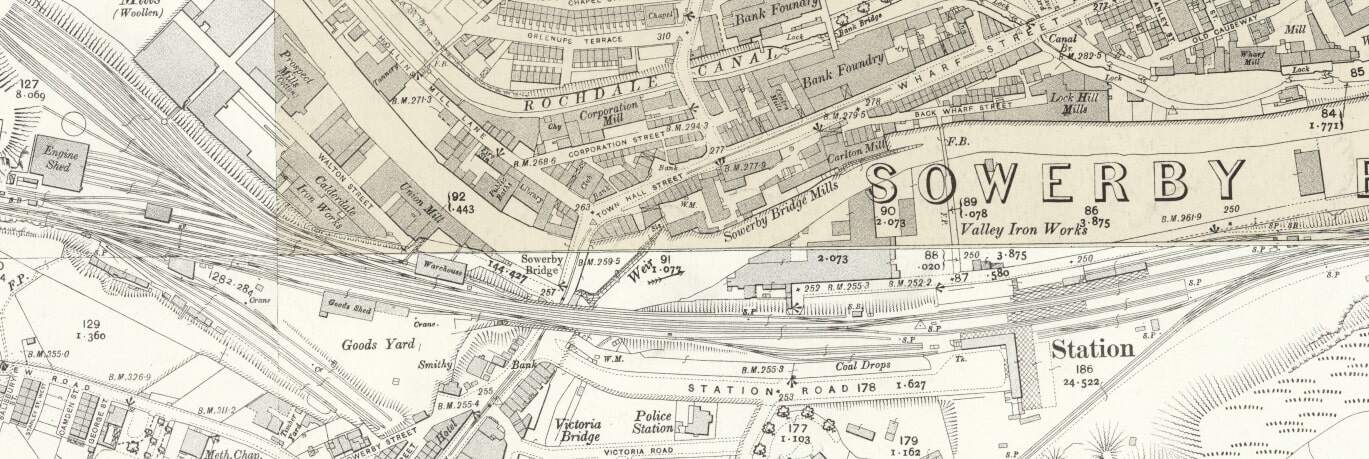
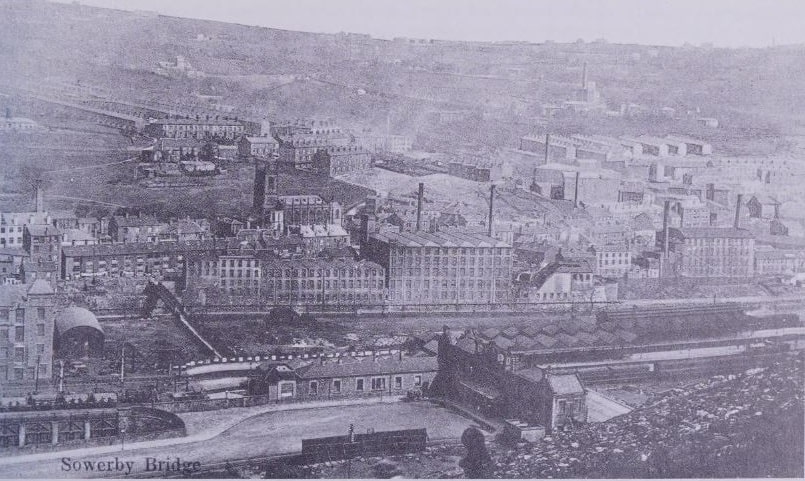
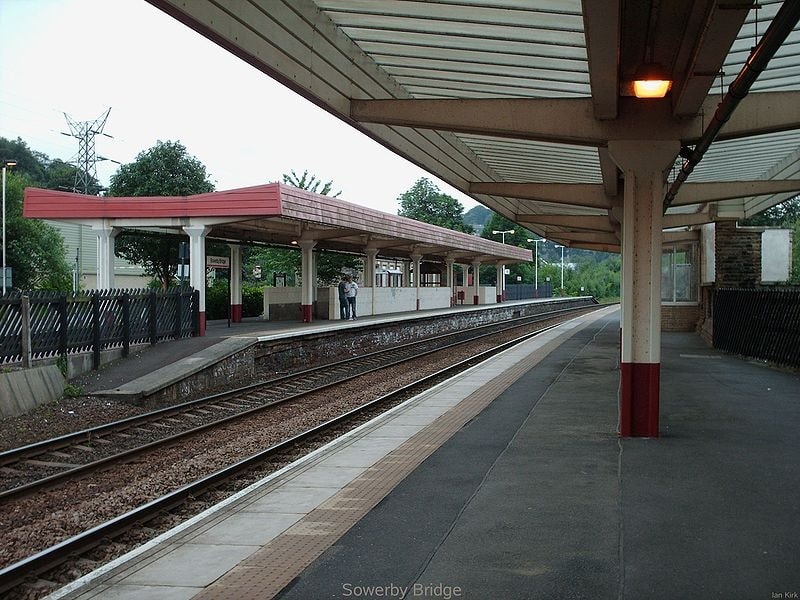
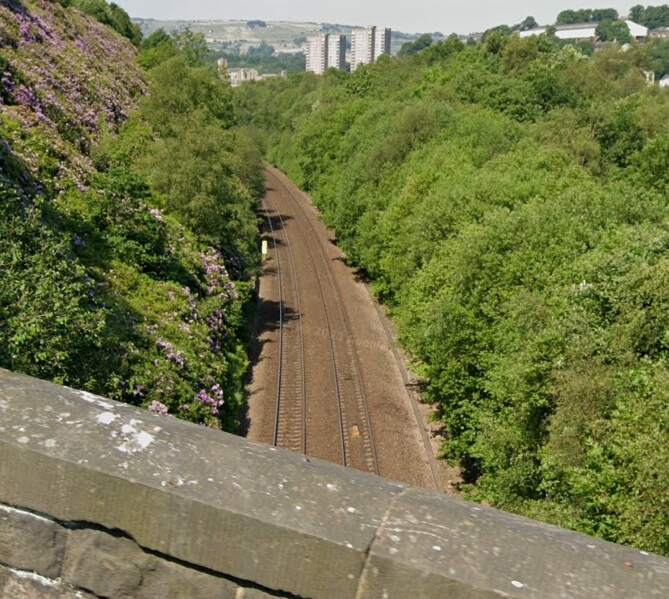
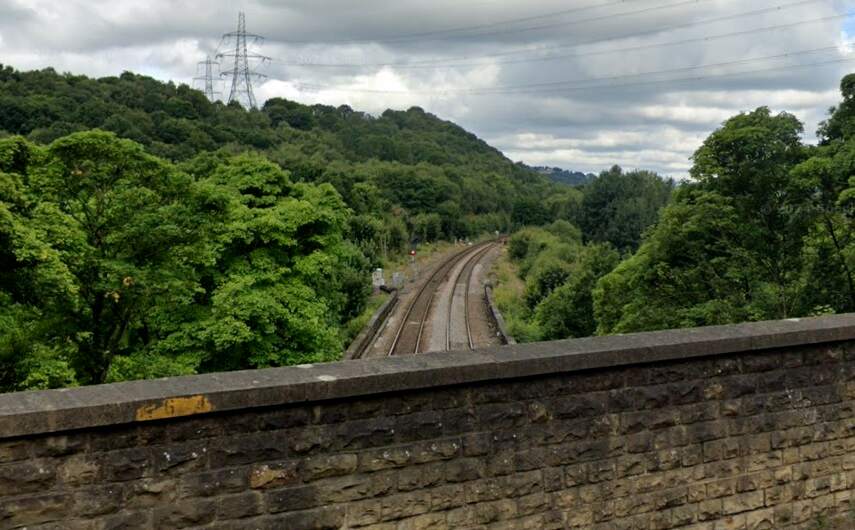
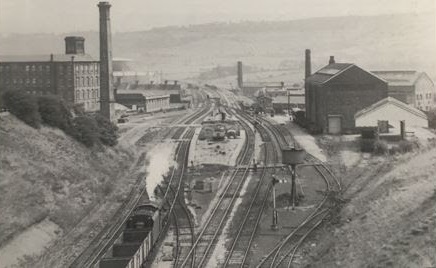
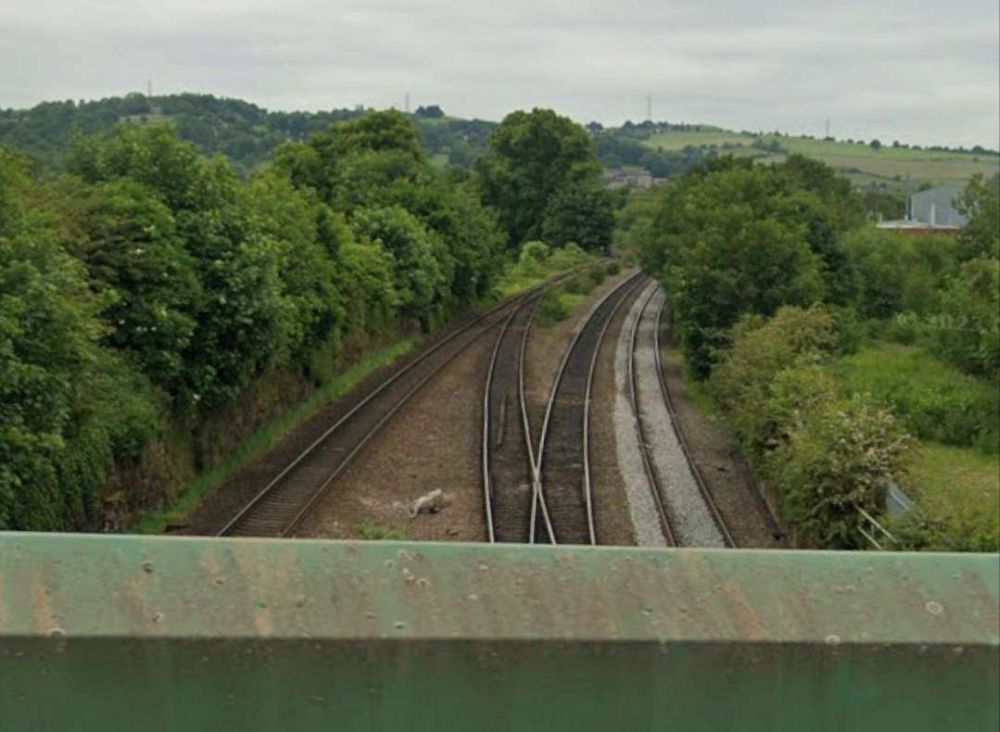
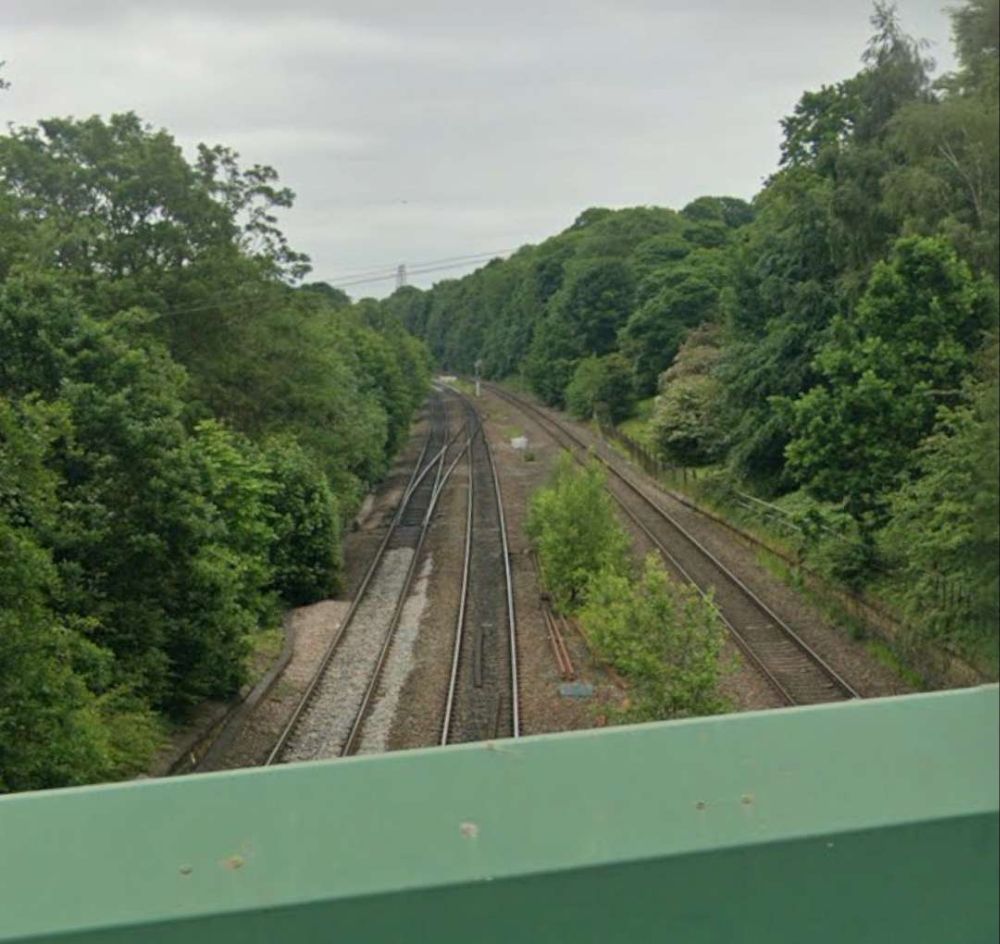
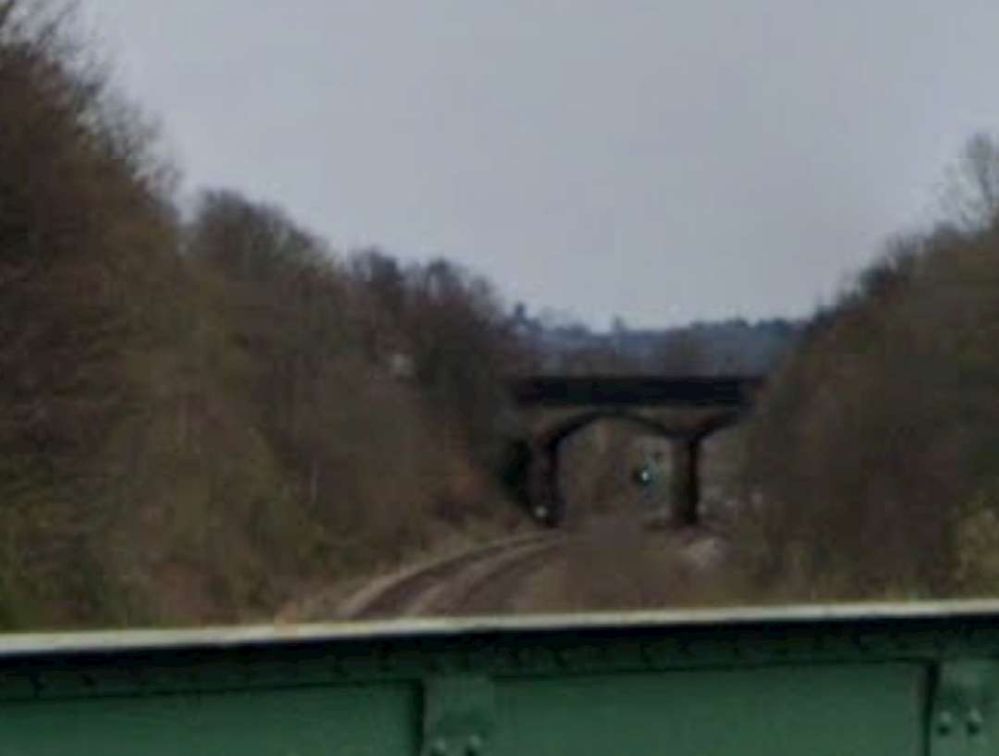
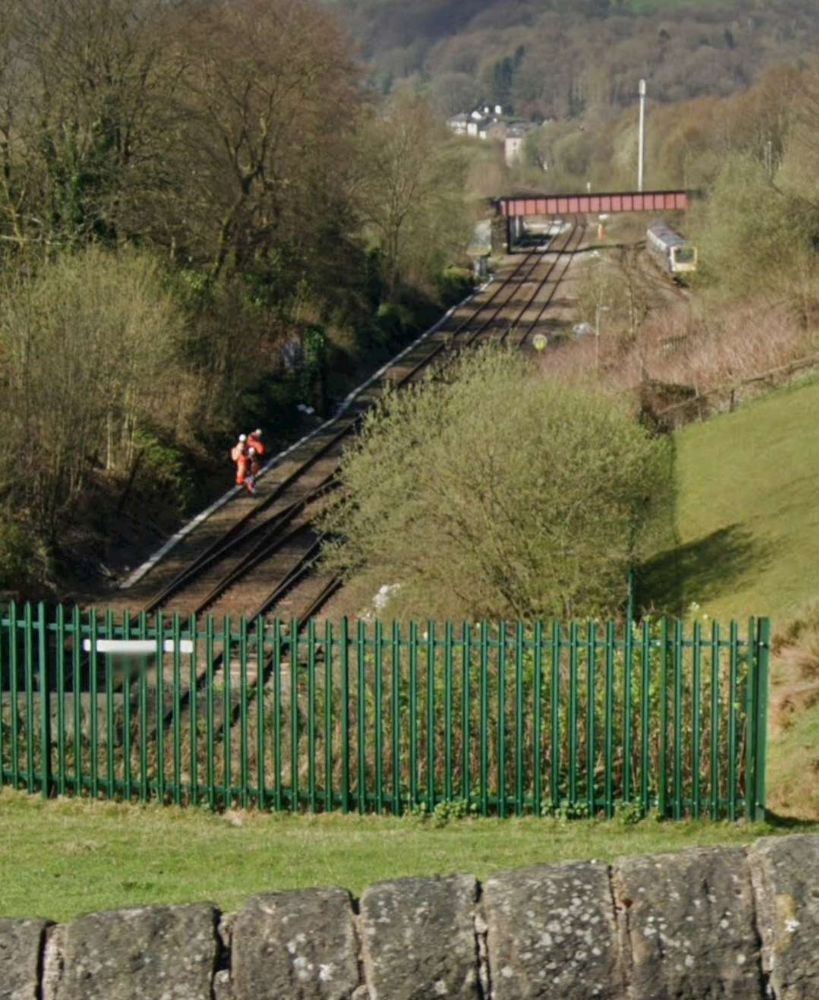
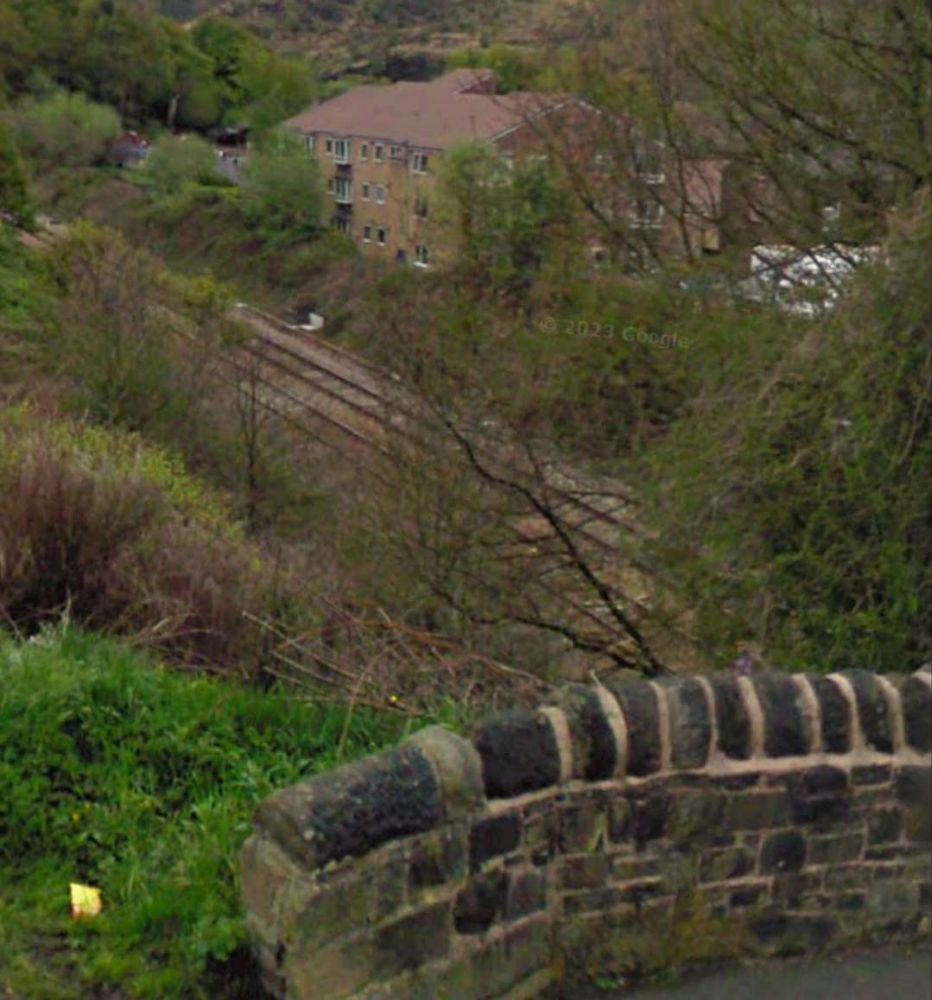
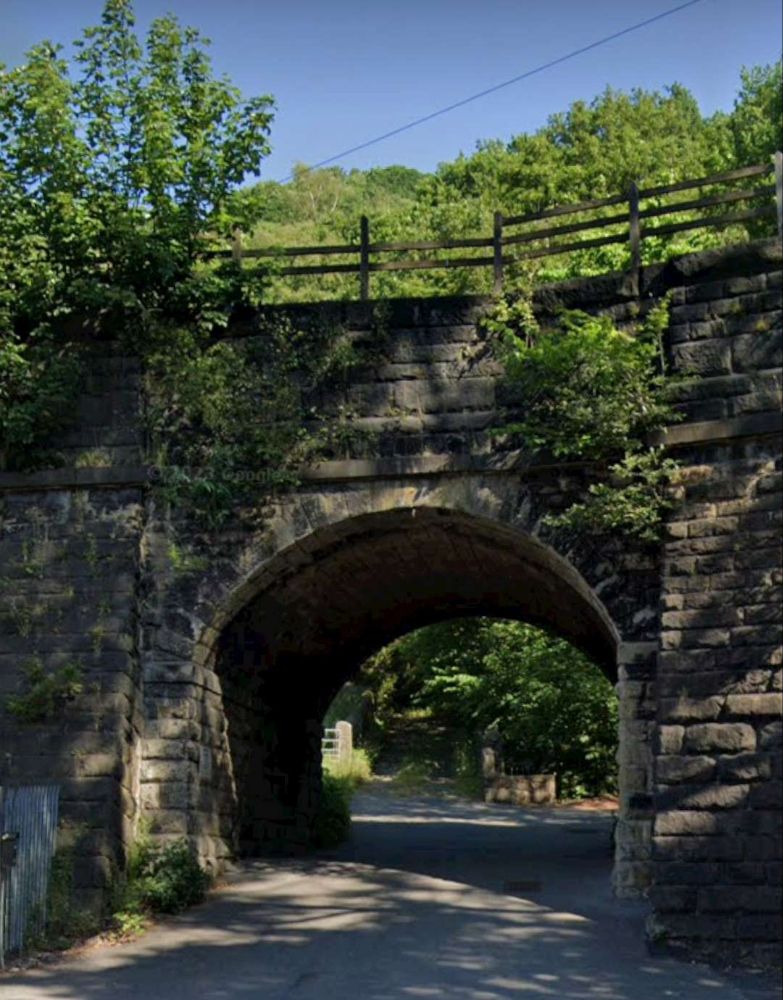
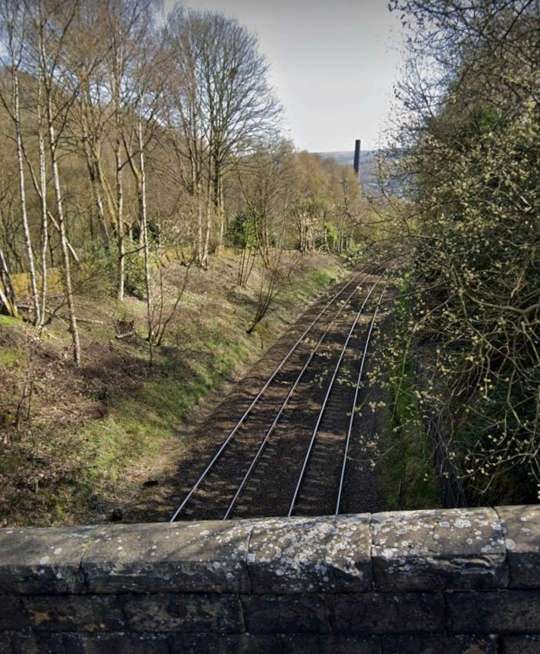
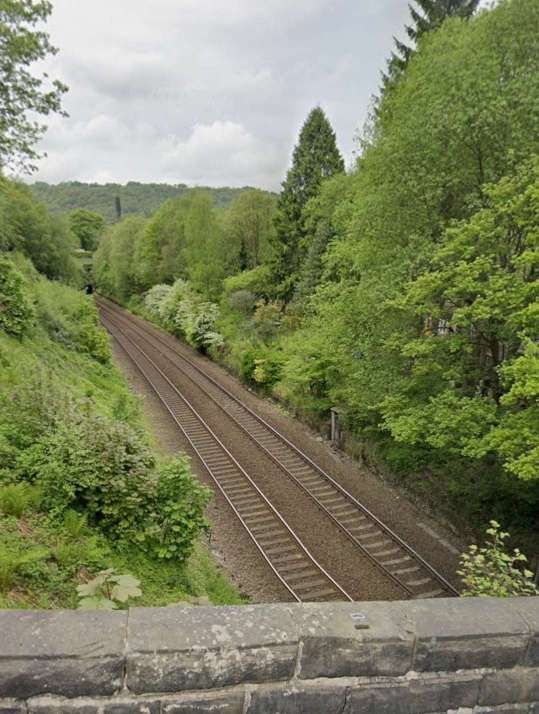
Passing other mills and traversing a deep cutting the line enters Sowerby Tunnel, (645 yards) and reaches Sowerby Bridge Station.
We complete this first part of the journey along the Manchester and Leeds Railway here at Sowerby Bridge Railway Station.
References
NB: These references relate to all the articles about the Manchester and Leeds Railway.
Herbert Rake; The Manchester and Leeds Railway: The Origin of the Lancashire and Yorkshire Railway; in The Railway Magazine, London, December 1905, p468-474


.JPG)